HOLIDAY DONATION DRIVE - SUPPORT MSW - DO YOUR PART TO KEEP THIS GREAT FORUM GOING! (Only 13 donations so far - C'mon guys!)
×

.jpg.1f80adf1a9b14a937cfcf2ca6af0f0d4.jpg)
WalrusGuy
-
Posts
1,007 -
Joined
-
Last visited
Content Type
Profiles
Forums
Gallery
Events
Everything posted by WalrusGuy
-
.thumb.jpg.62d1d69fed1f32364417cb1f9cdeb009.jpg) Thanks Robin! I may have lightly sanded the tops before reading this 😅 but nothing major. The lintel shape looks unchanged from my last post.
Thanks Robin! I may have lightly sanded the tops before reading this 😅 but nothing major. The lintel shape looks unchanged from my last post.- 950 replies
-
- 2
-

-
- syren
- model shipways
- (and 1 more)
-
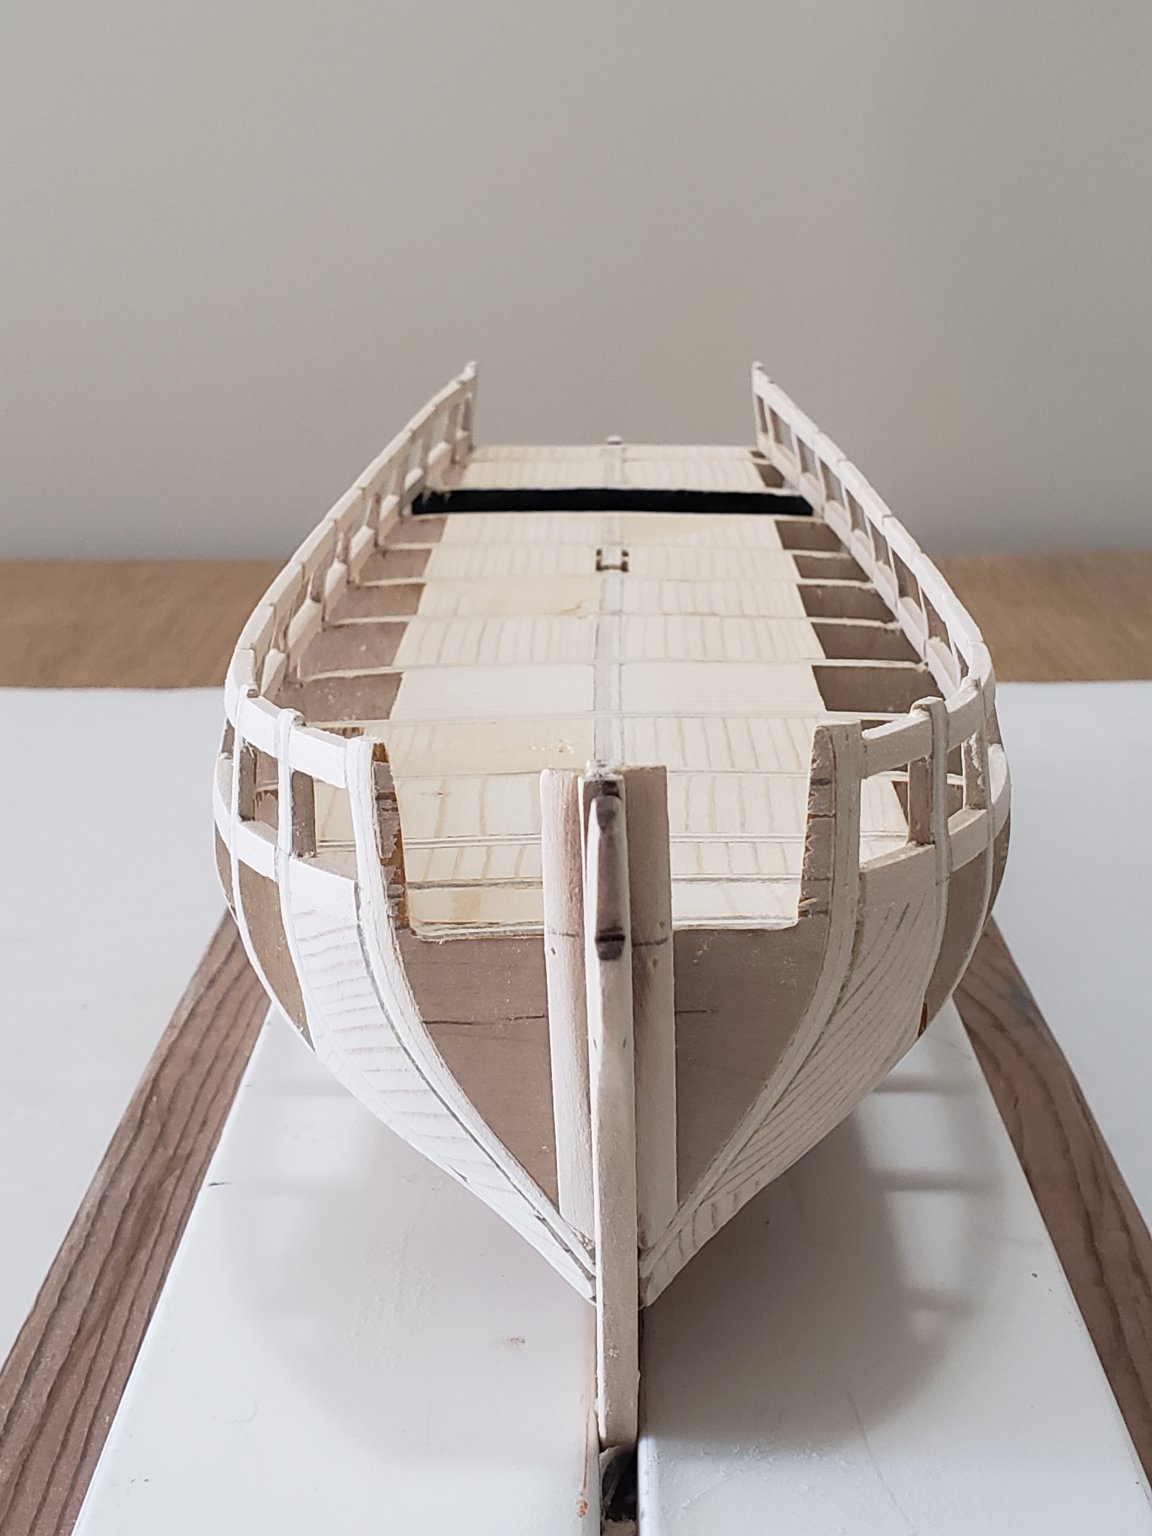
The lintels were sanded today. I used a dremel to make things a bit easier and then finished by hand. I am not 100% sure on how to sand the top side of the lintels since some bulkheads are very slightly angled causing the bulwark heights to be a bit different on each side. So I will leave this until later and will instead continue onto the green framing.

- 950 replies
-
- 11
-
-
- syren
- model shipways
- (and 1 more)
-
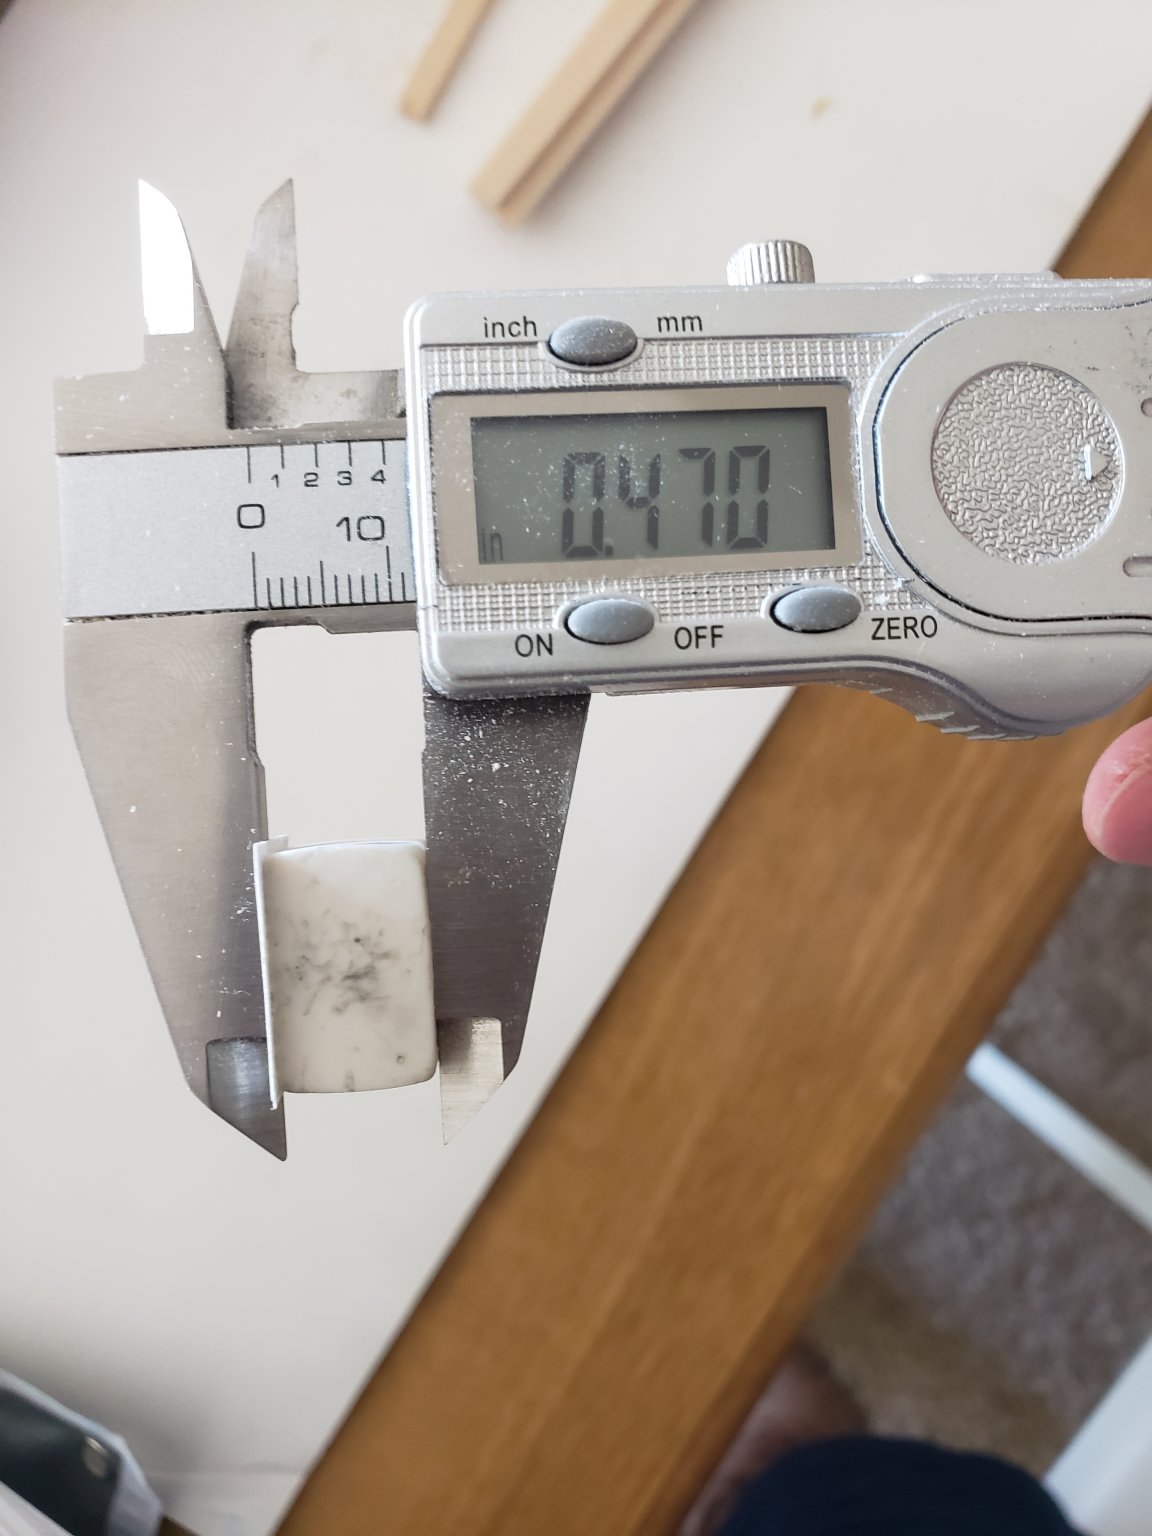
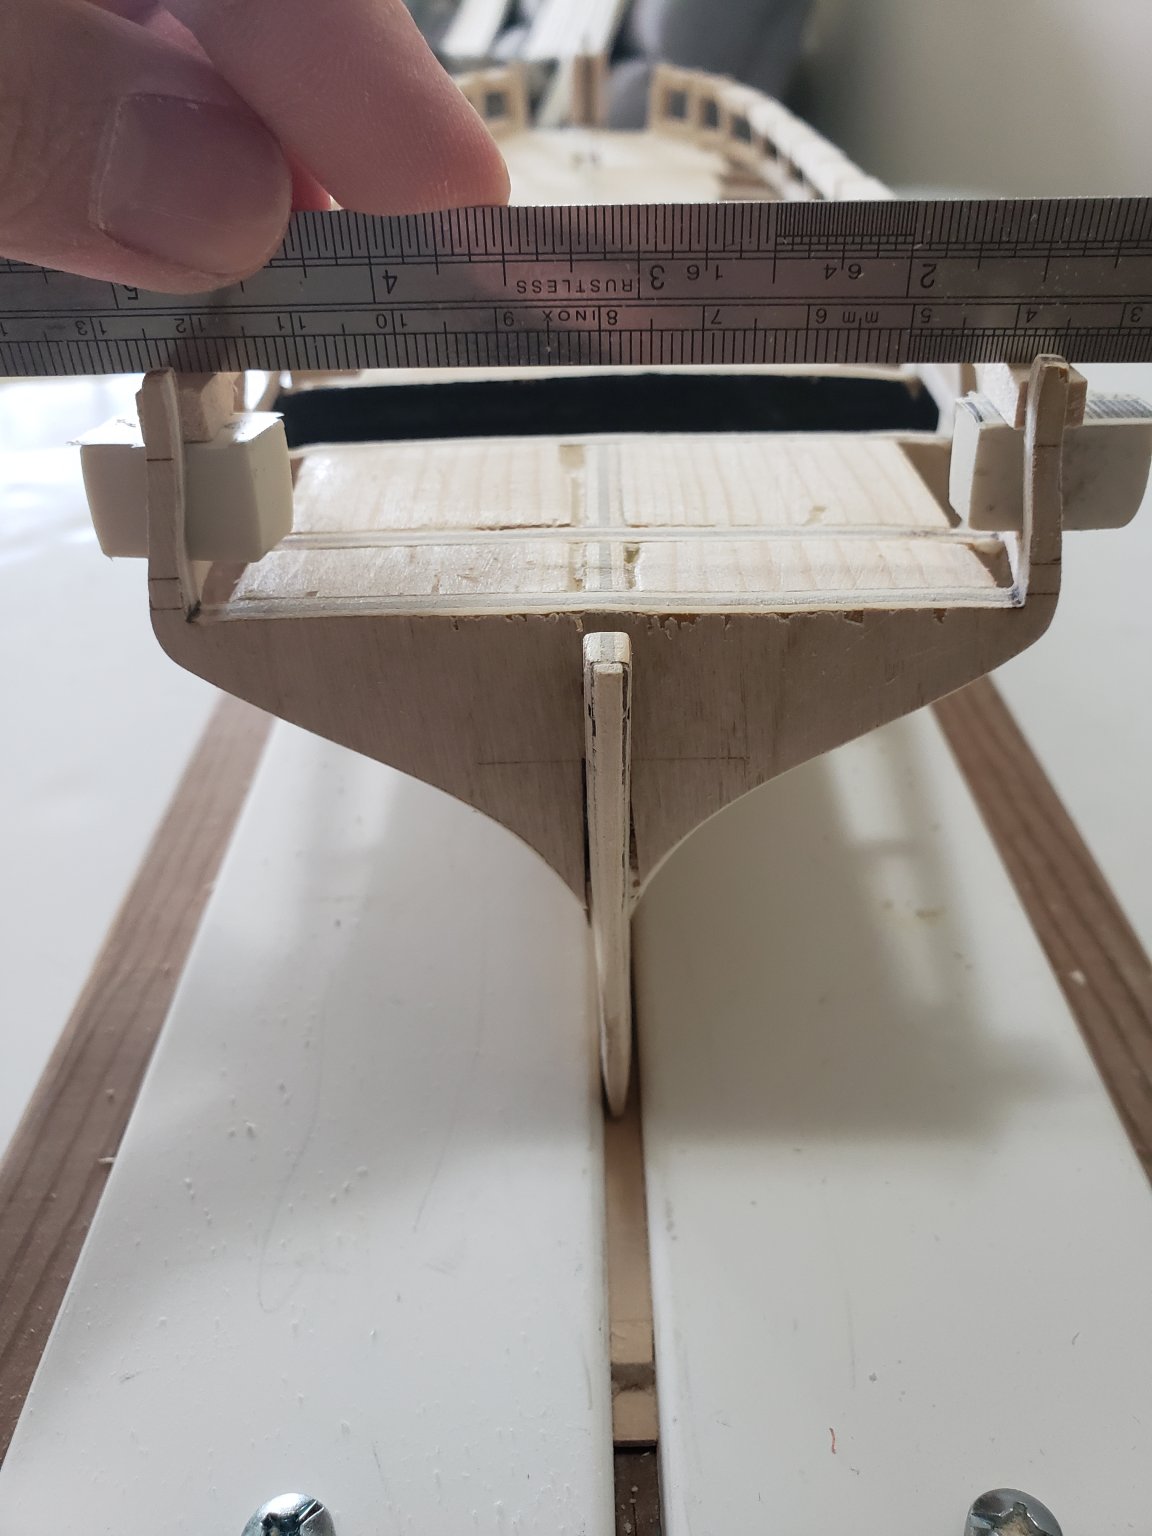
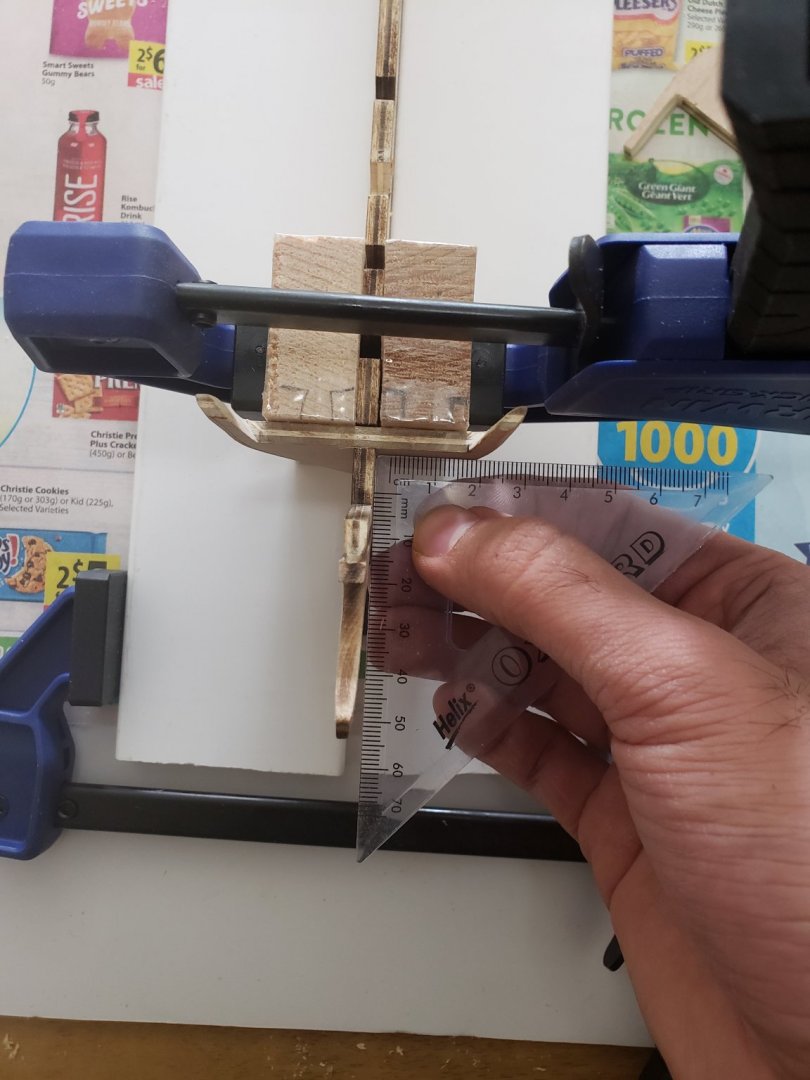
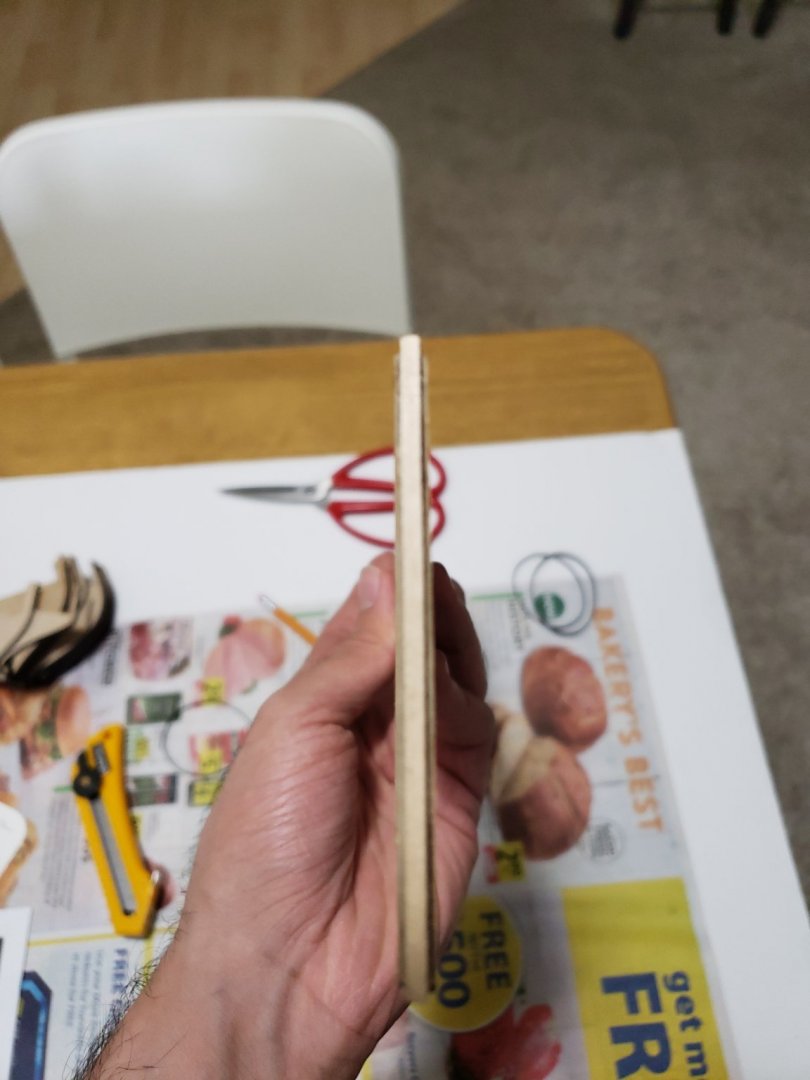
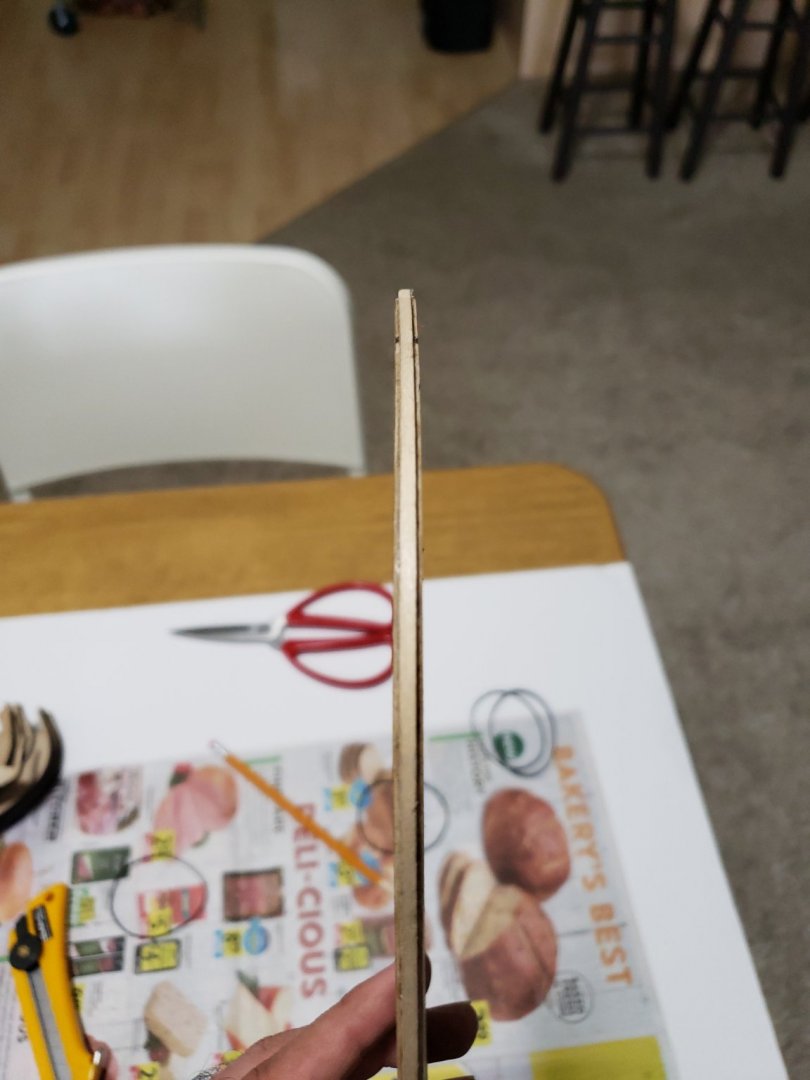
The gun port lintels were installed today. To do this I first looked around the house for any objects that were 15/32" (0.469") high. To my surprise I found an eraser with very close dimensions (just a bit thinner than what I needed), so I glued a piece of its wrapping onto it and got myself a spacer. If I were not to have found this I would have cut a piece of one of the strips provided in the kit. After making two of these spacers, I cut the 1/4 x 3/16" strips and dry fitted them before gluing them. While gluing each piece, I used the same technique with the ruler (from my previous post) to make sure they were completely horizontal: All the lintels were glued using this method and will be ready for sanding tomorrow:


- 950 replies
-
- 9
-
-
- syren
- model shipways
- (and 1 more)
-
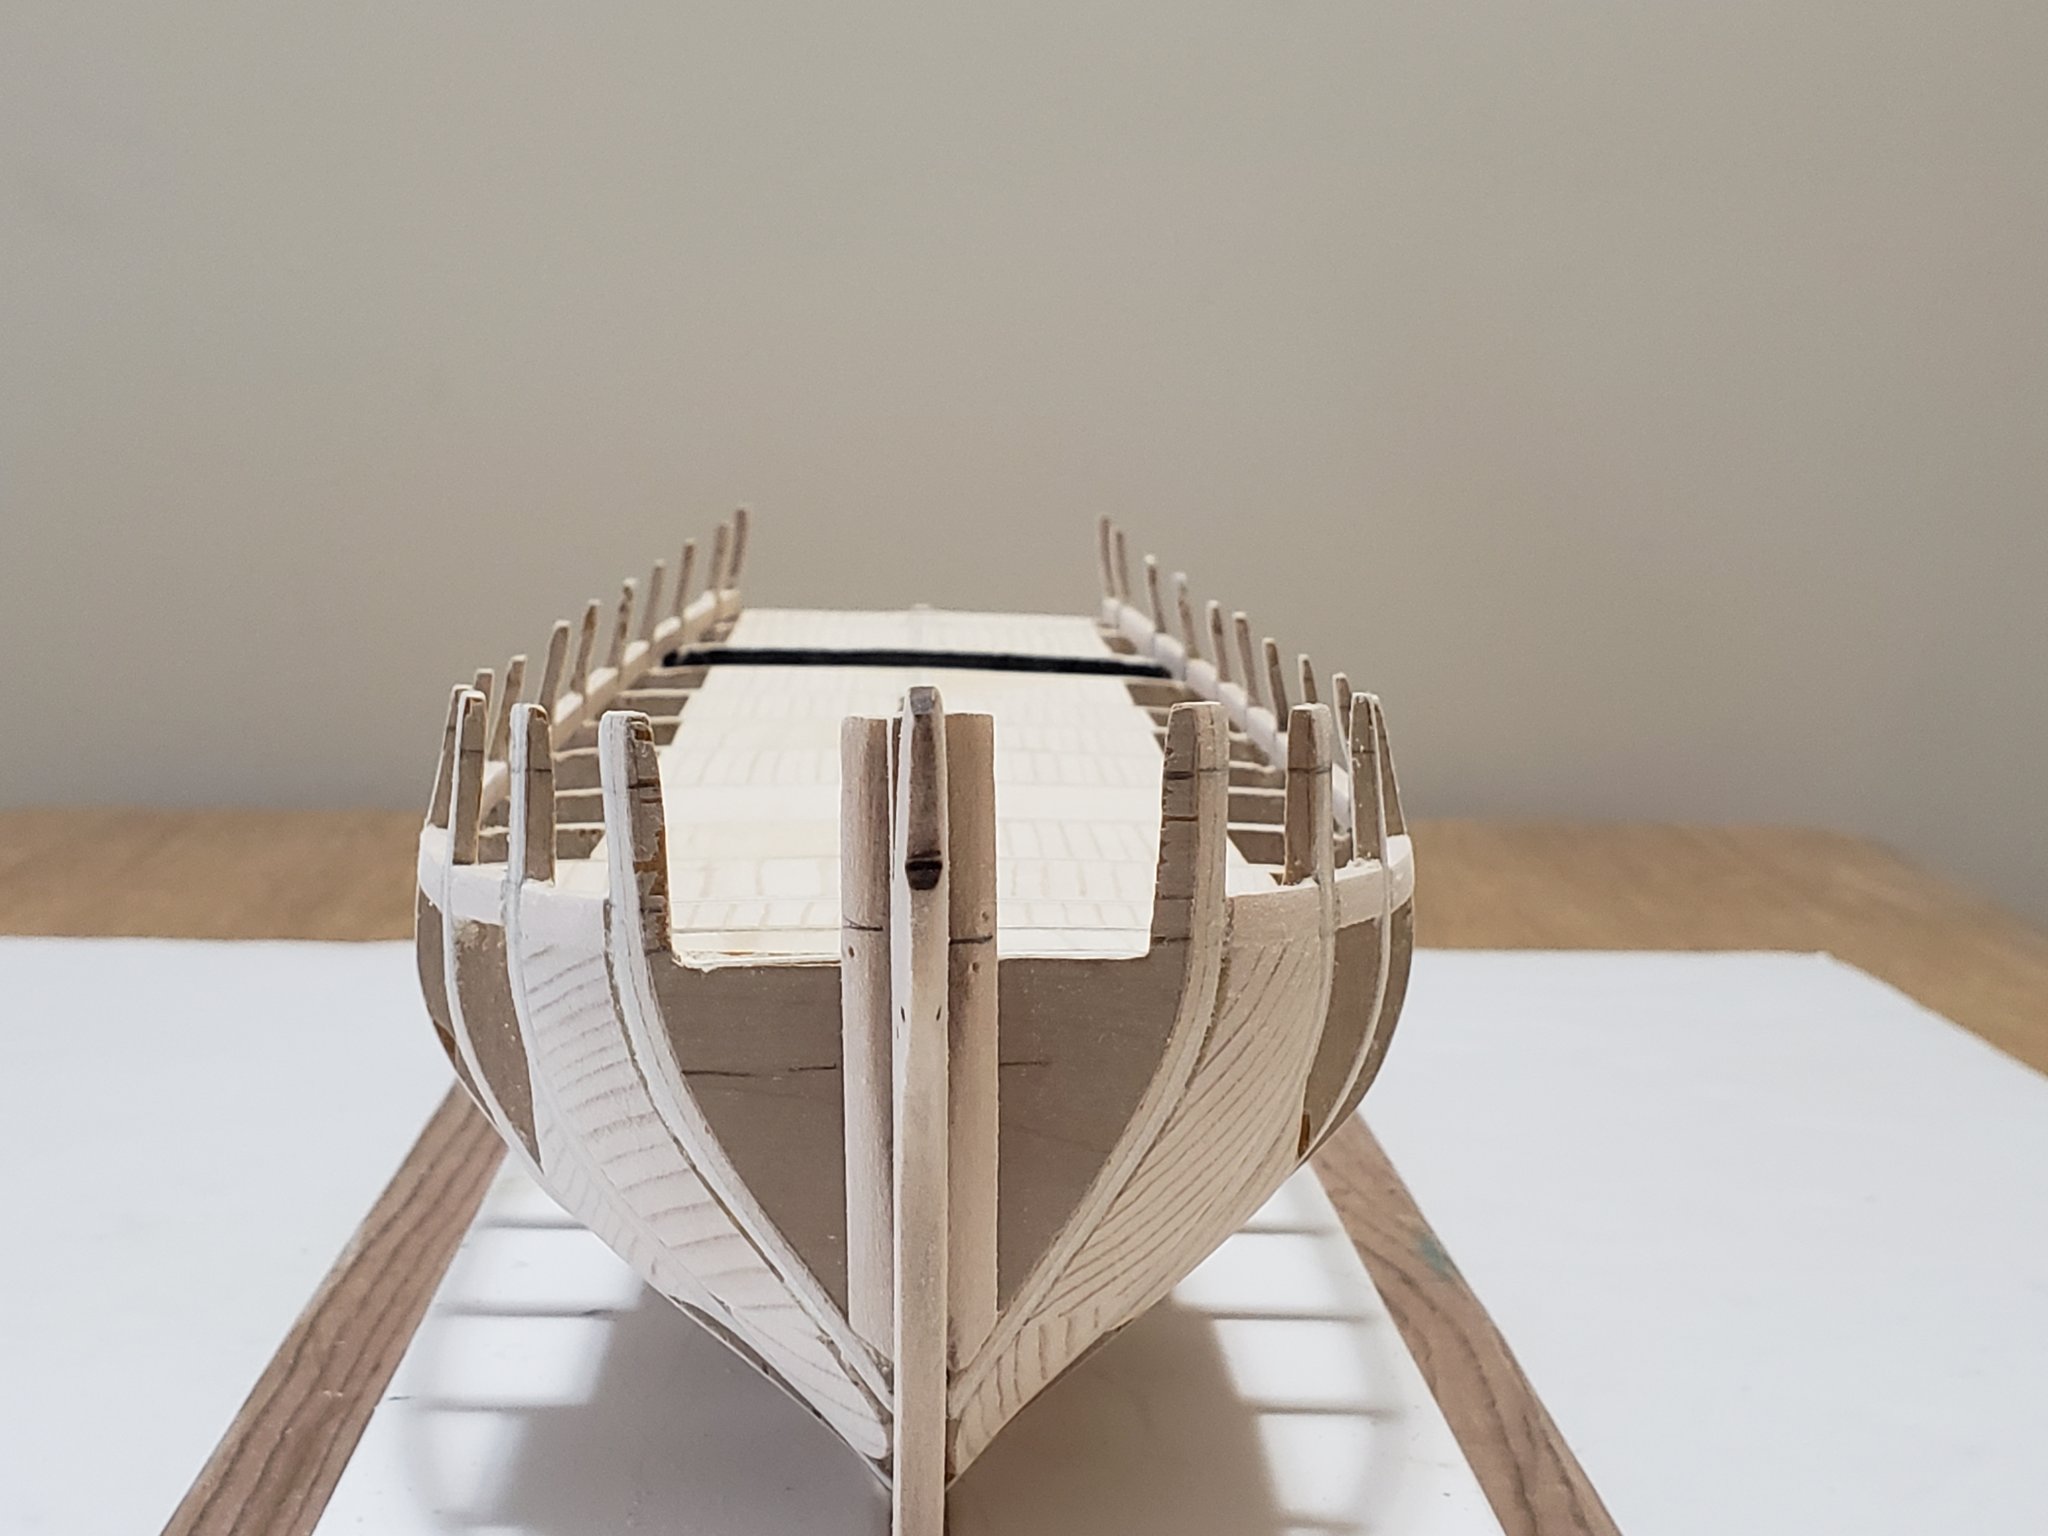
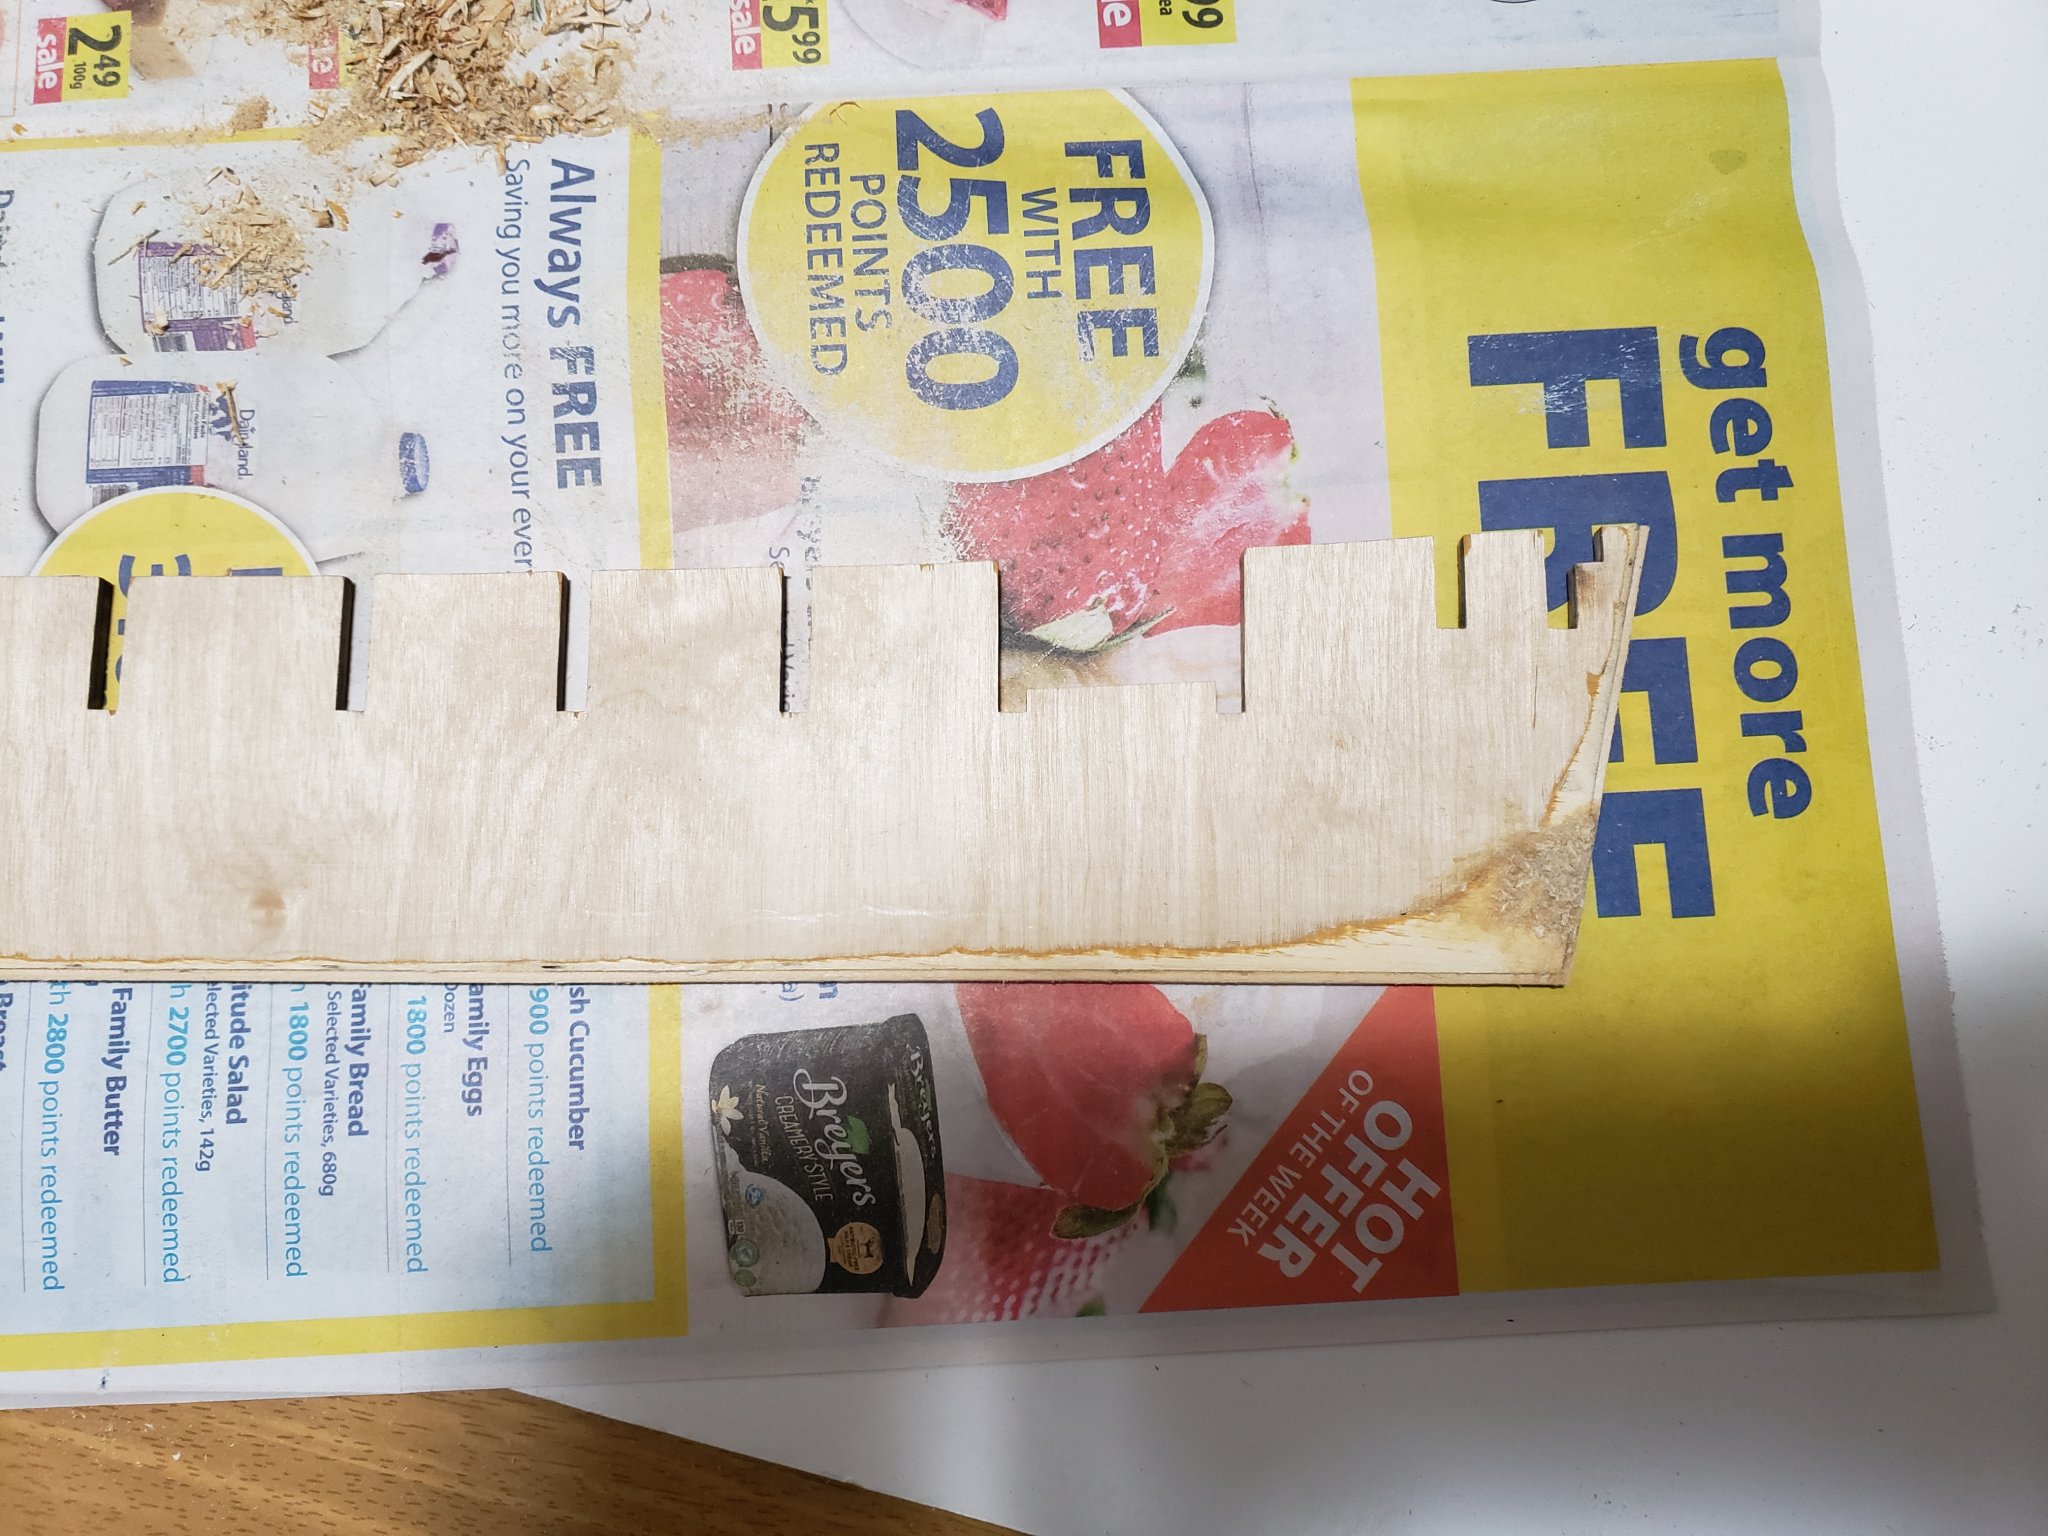
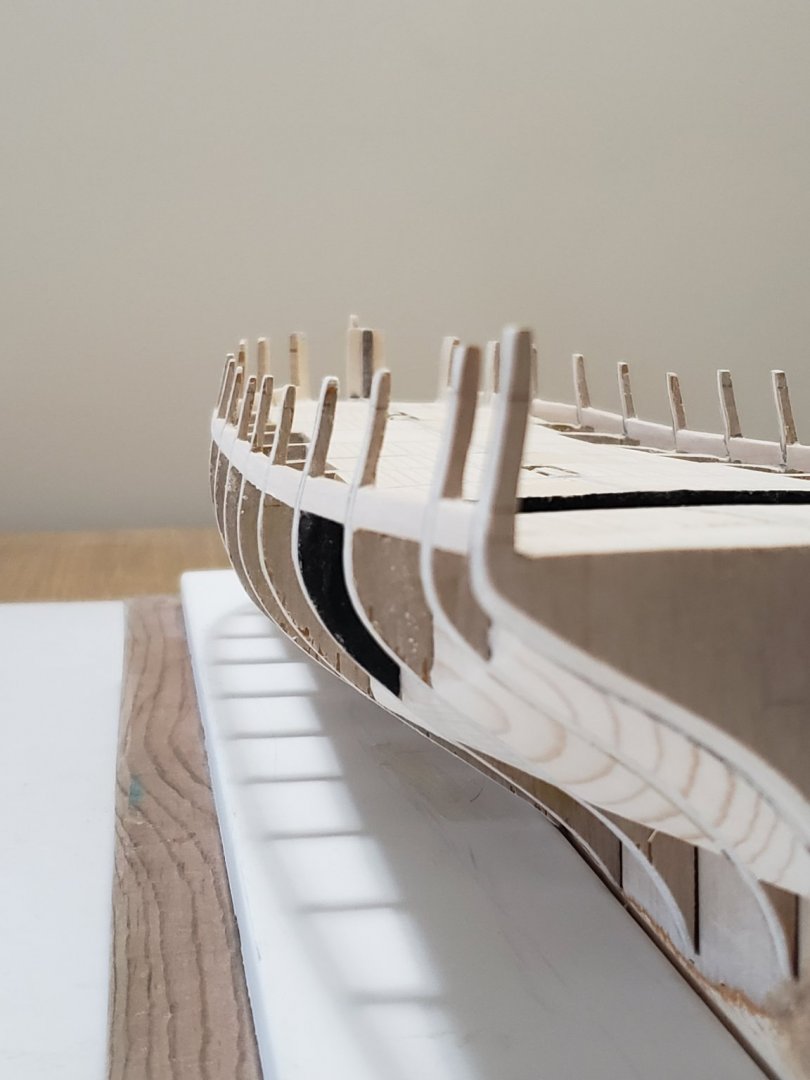
Thanks Hamilton! And thank you all for the likes! It is much appreciated! Sanding of the lower port sills has been completed. This was all done by hand which was not easy to say the least, especially the inner section. Here is the result so far:


- 950 replies
-
- 10
-
-
- syren
- model shipways
- (and 1 more)
-
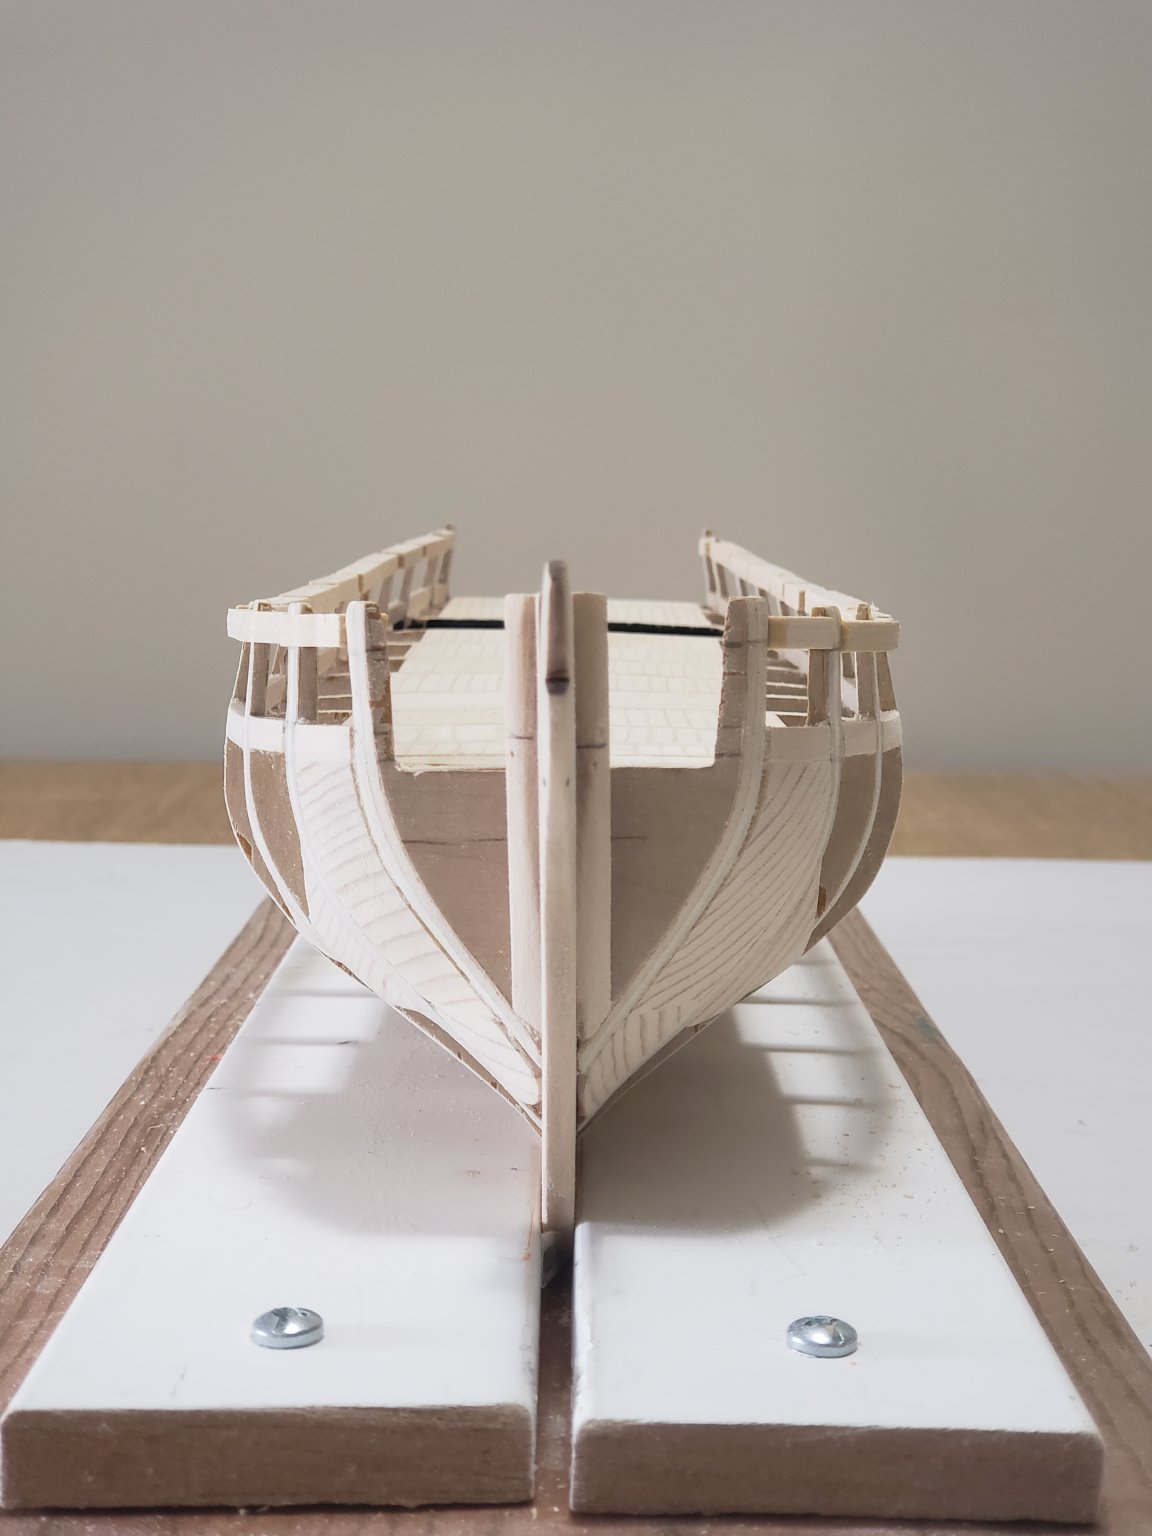
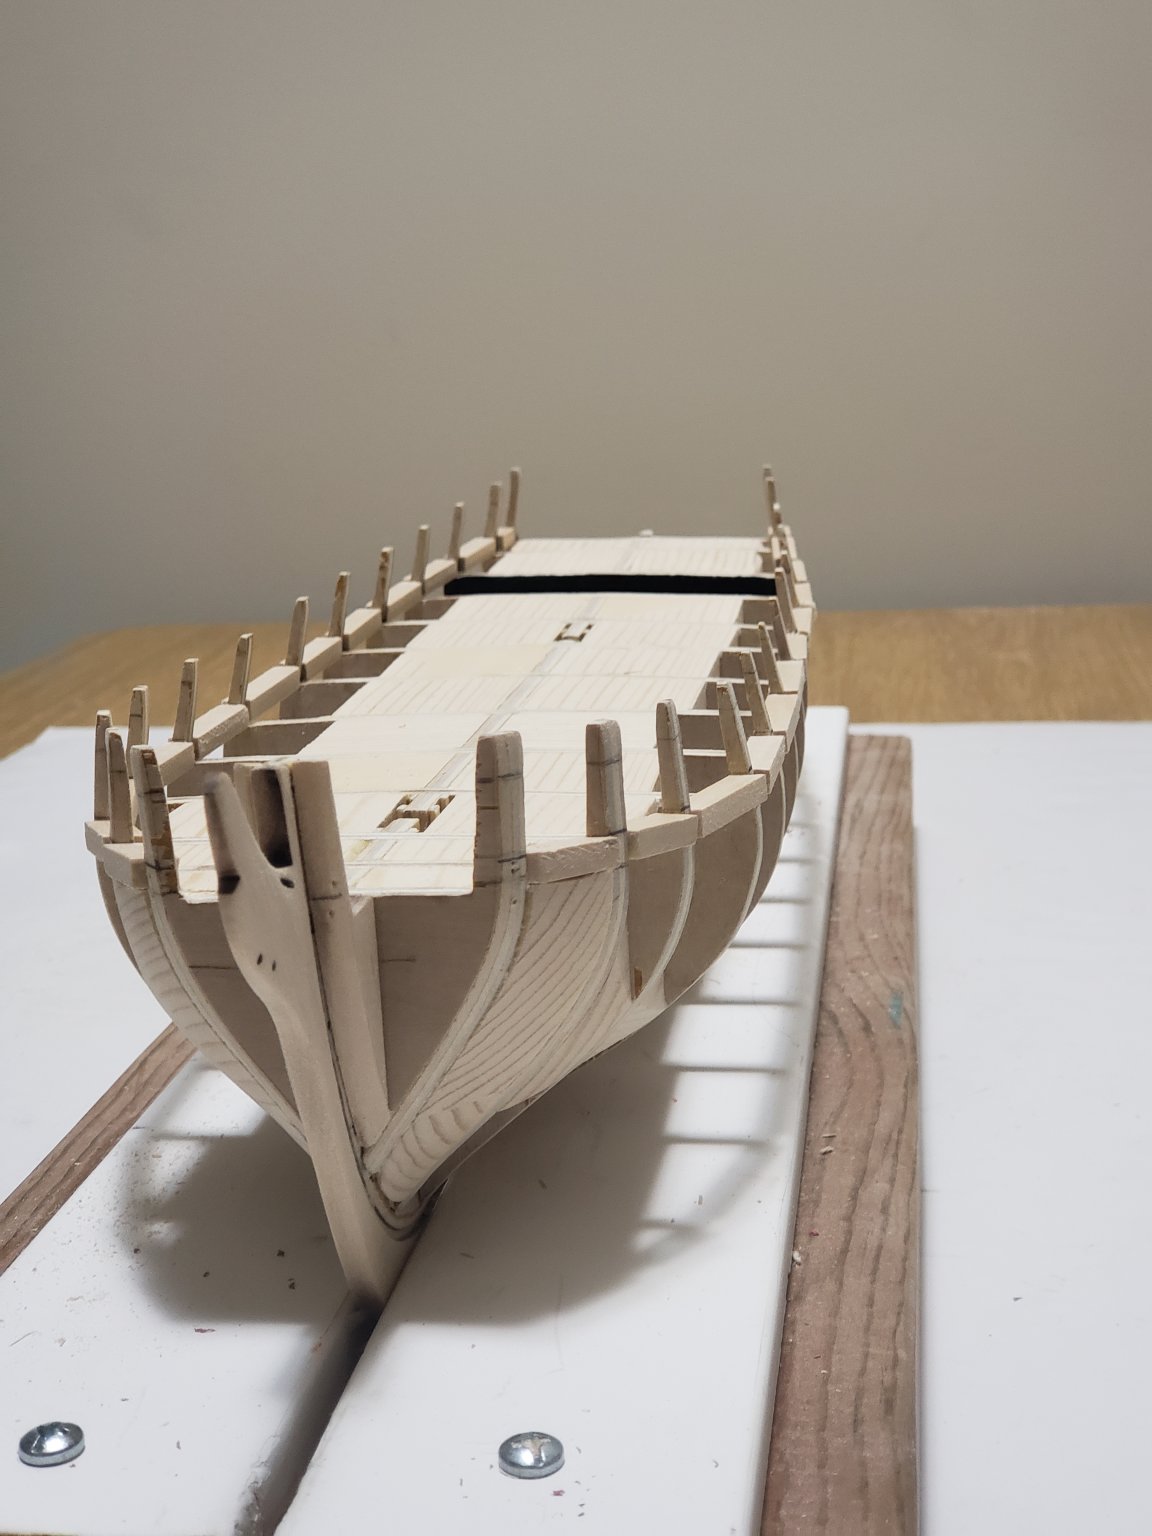
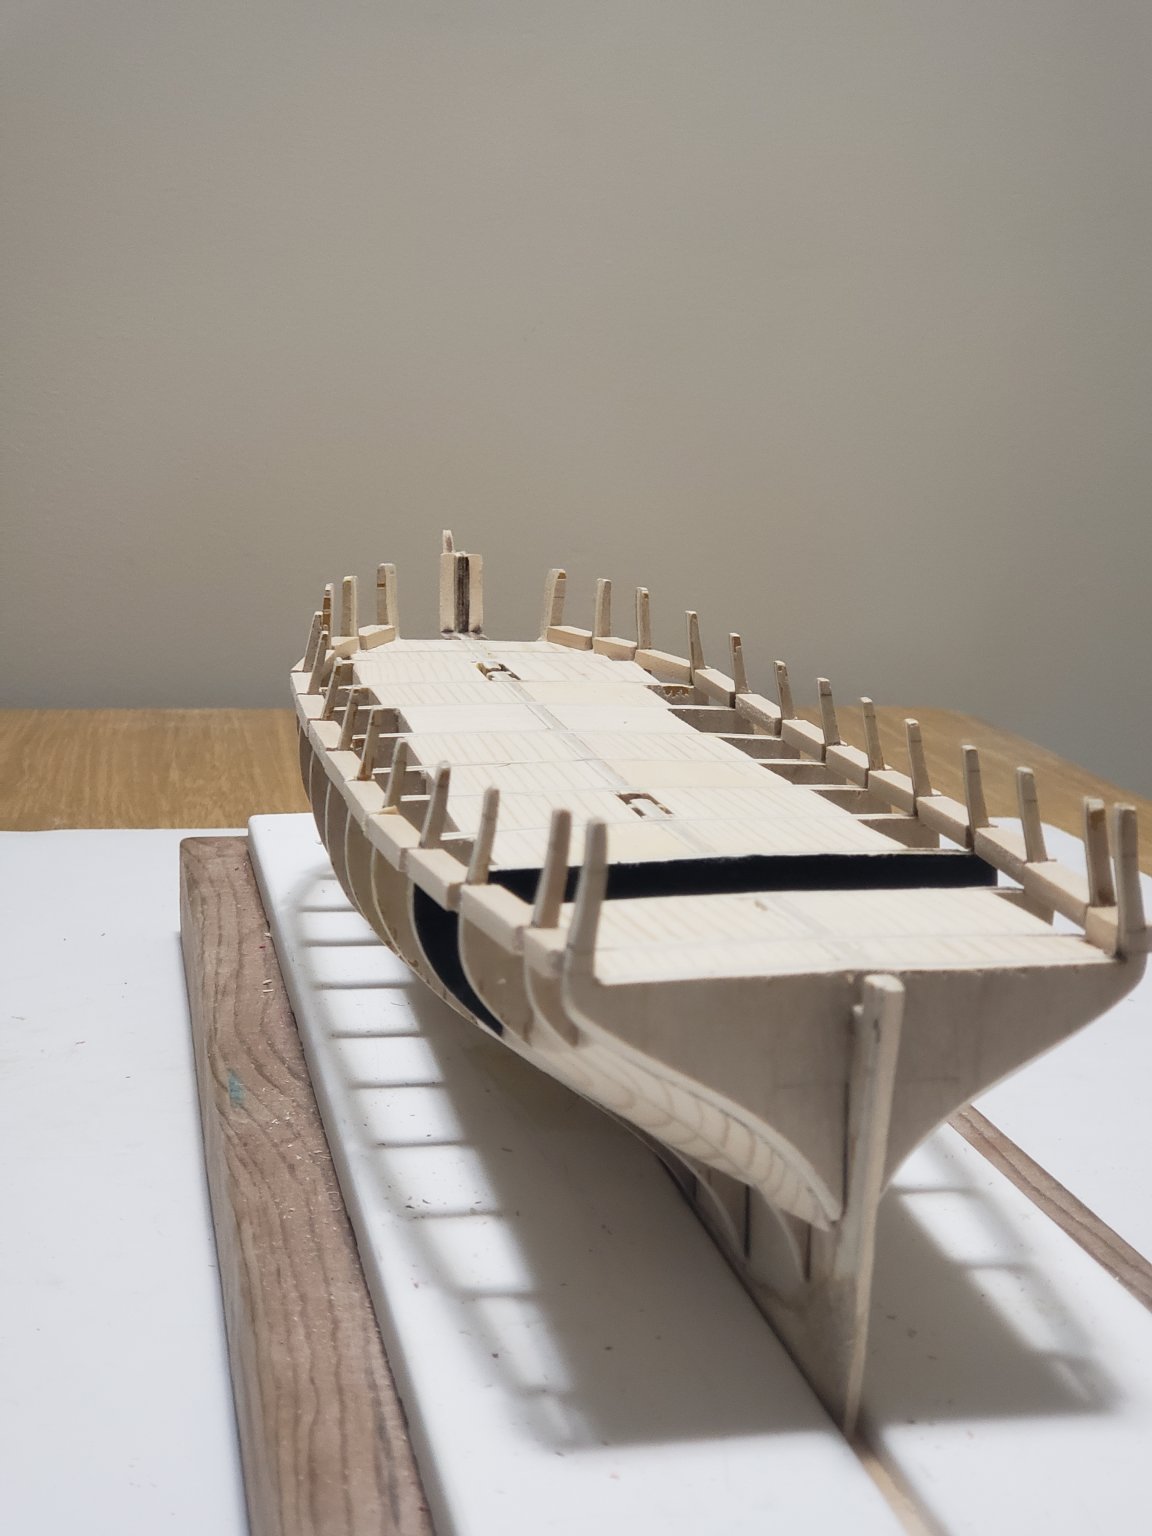
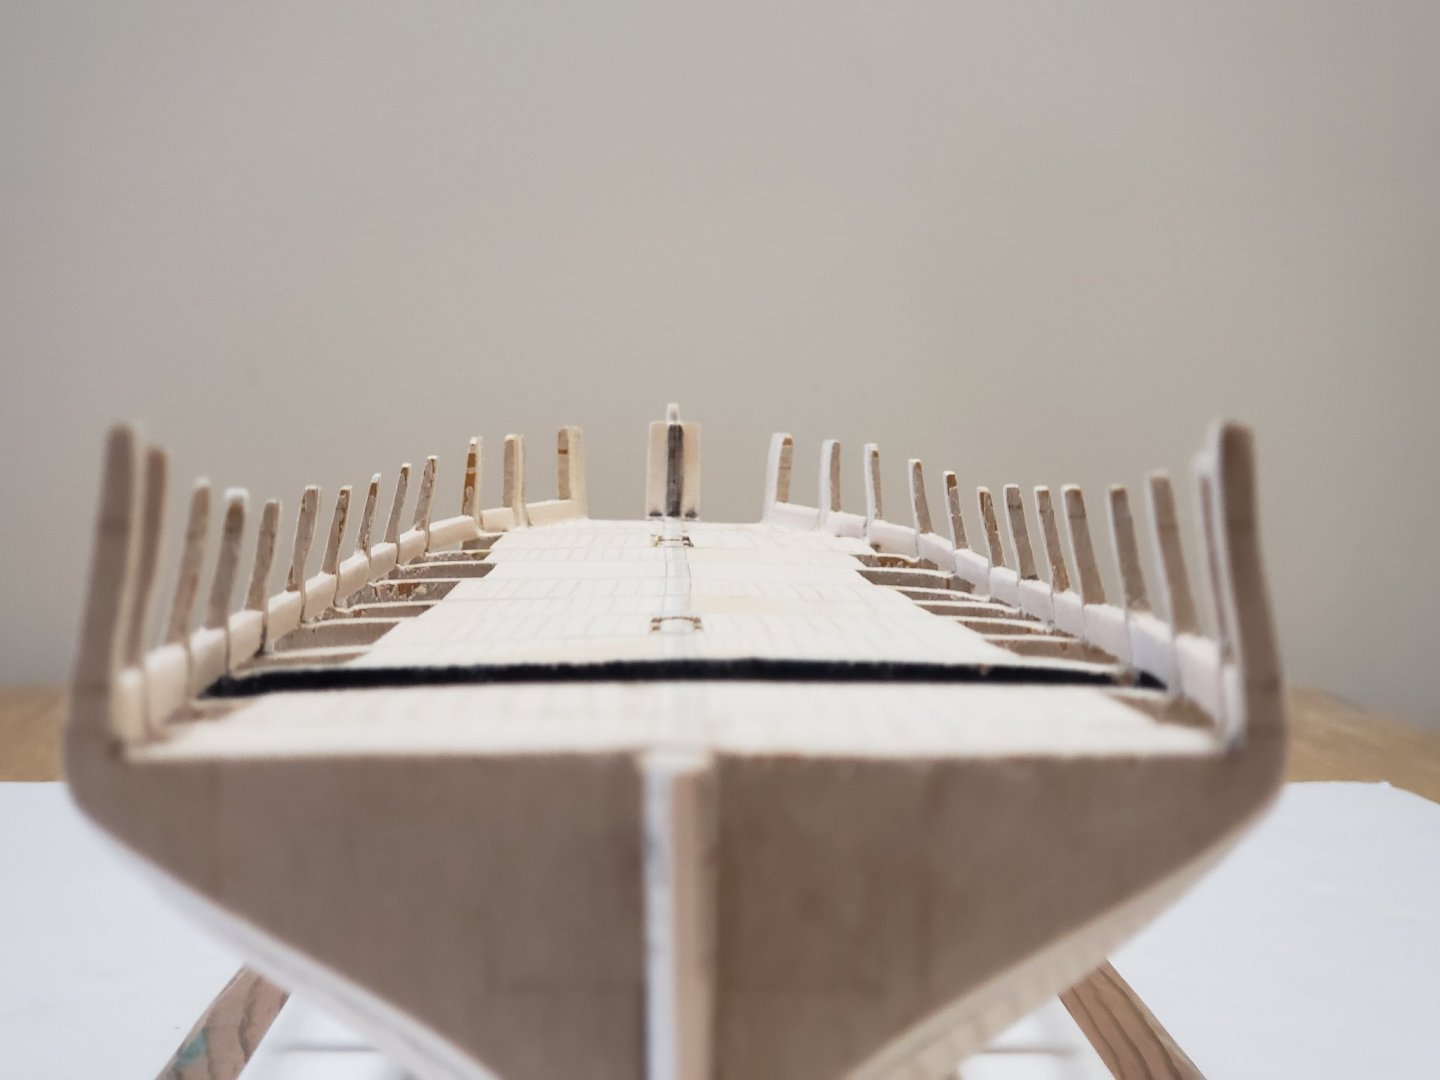
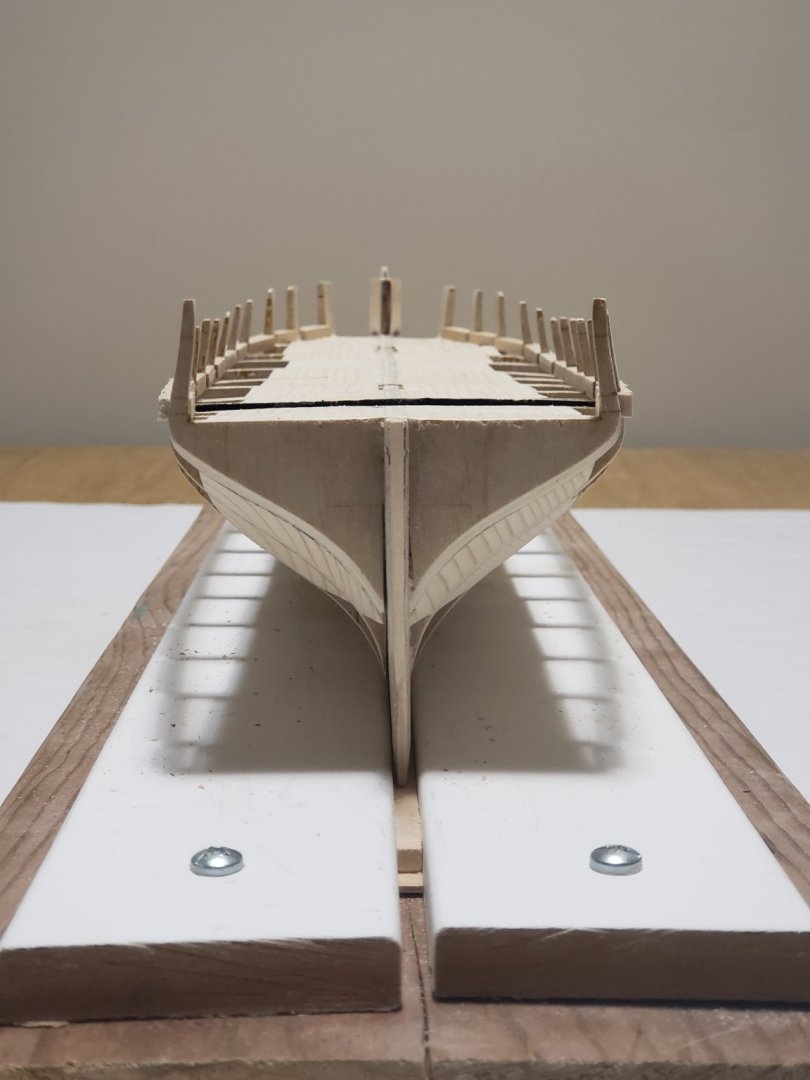
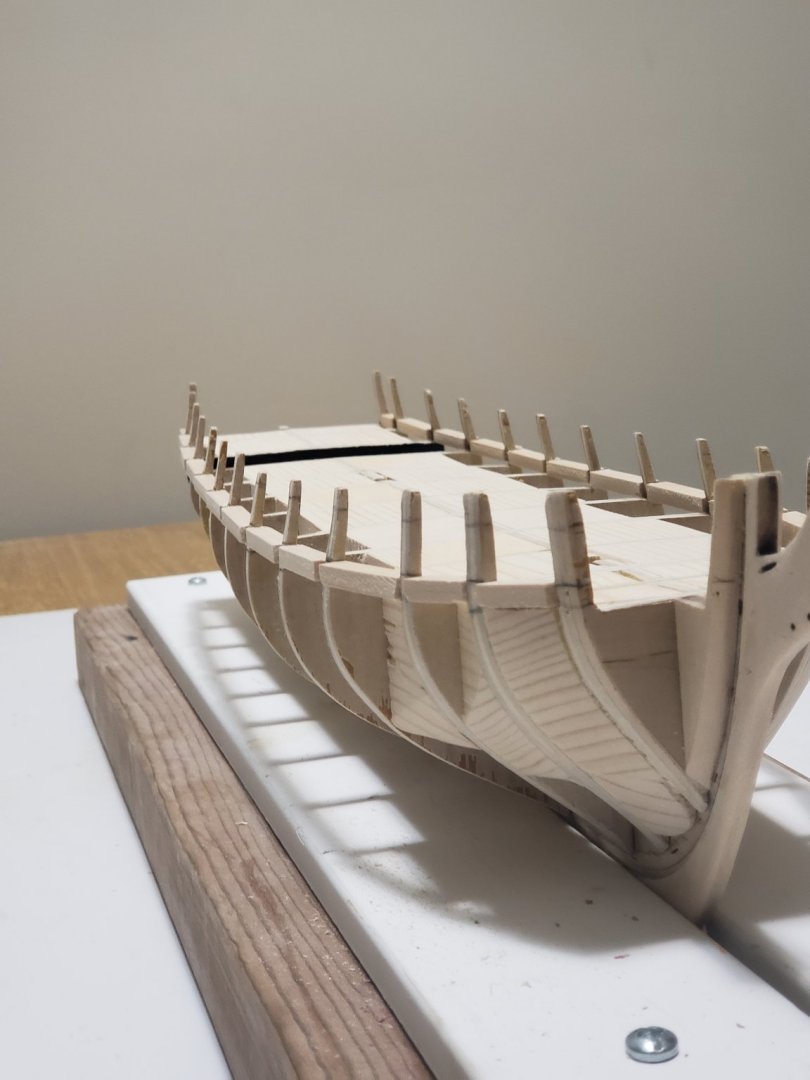
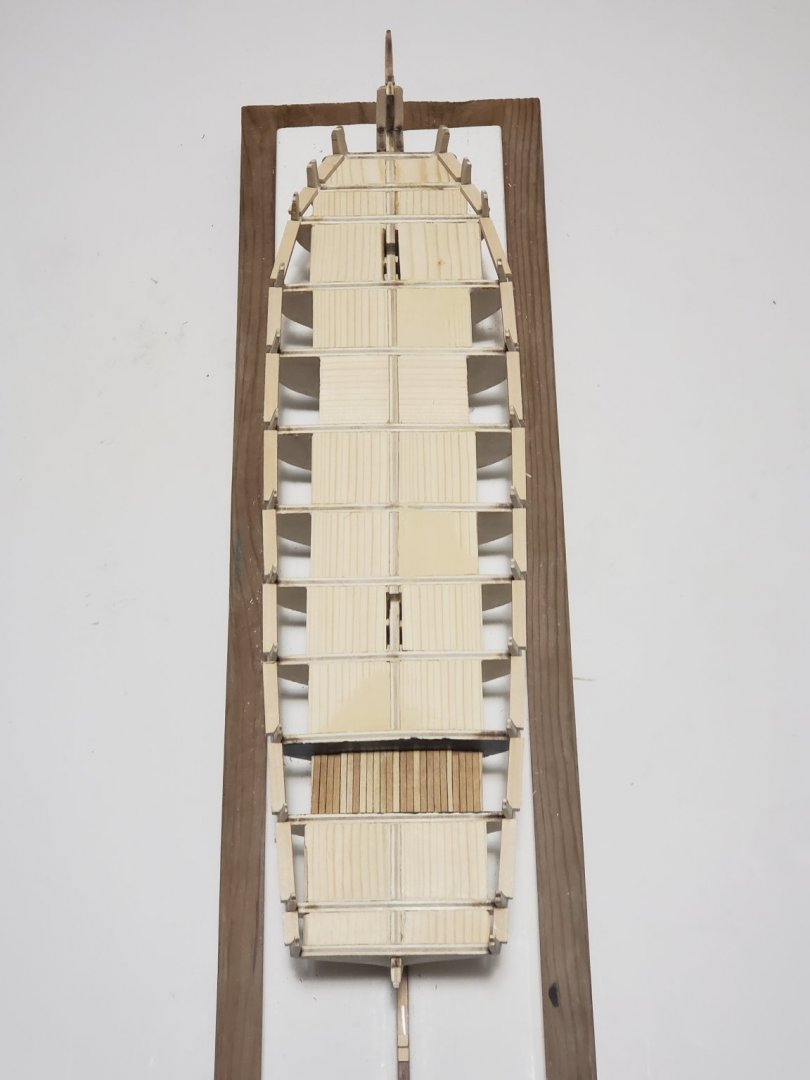
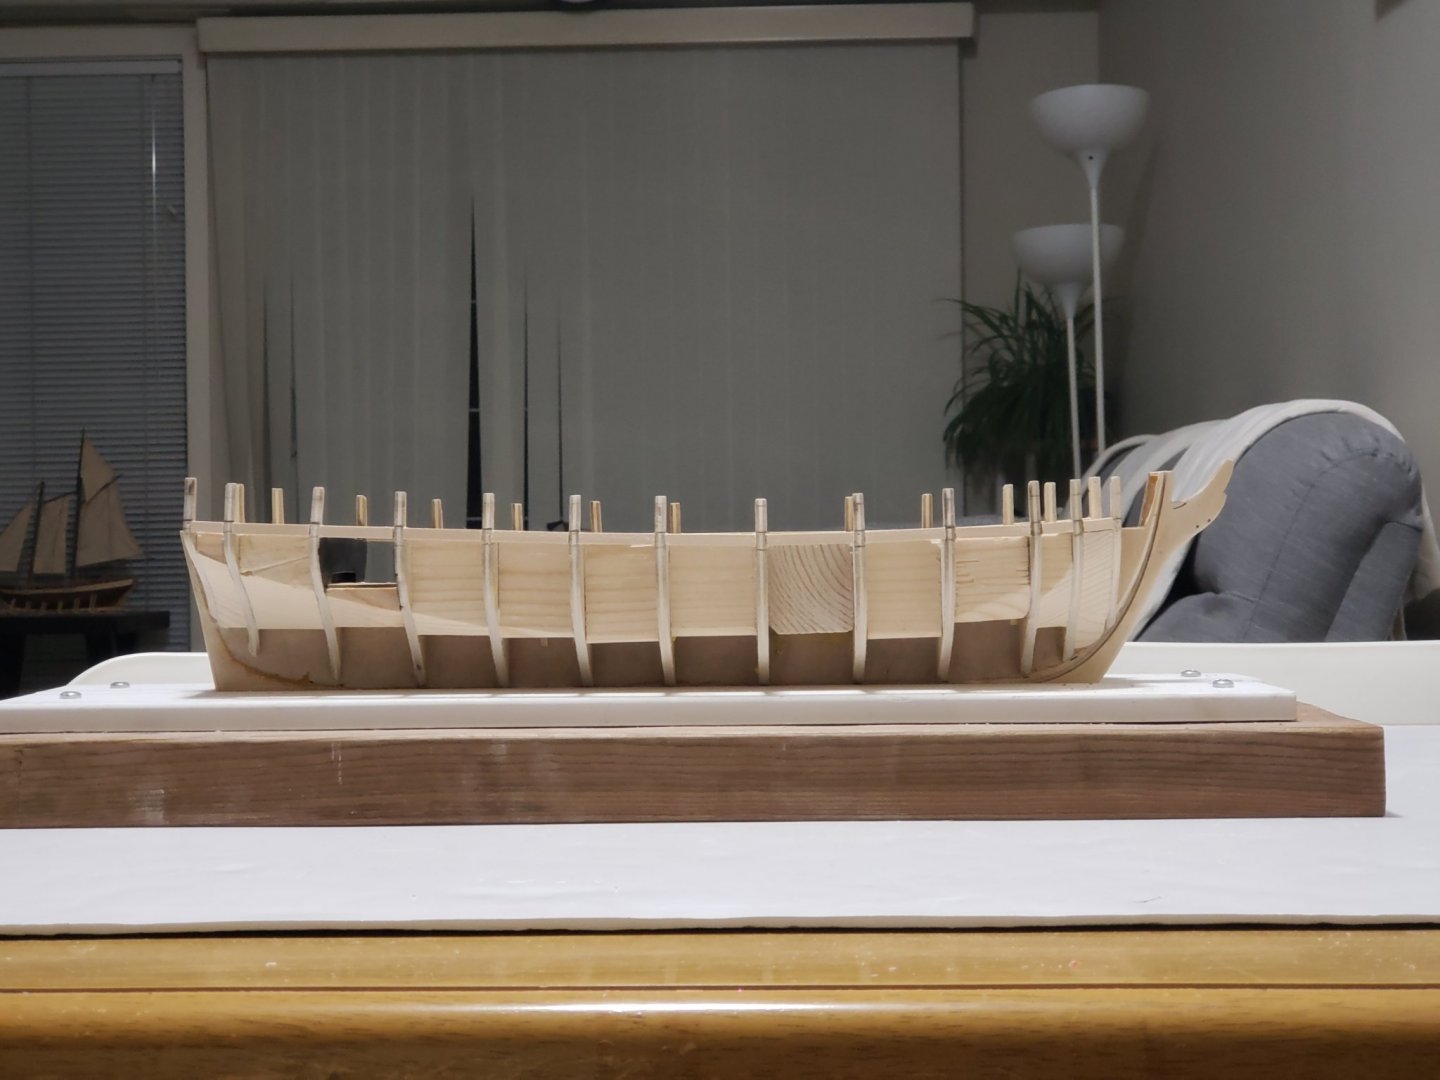
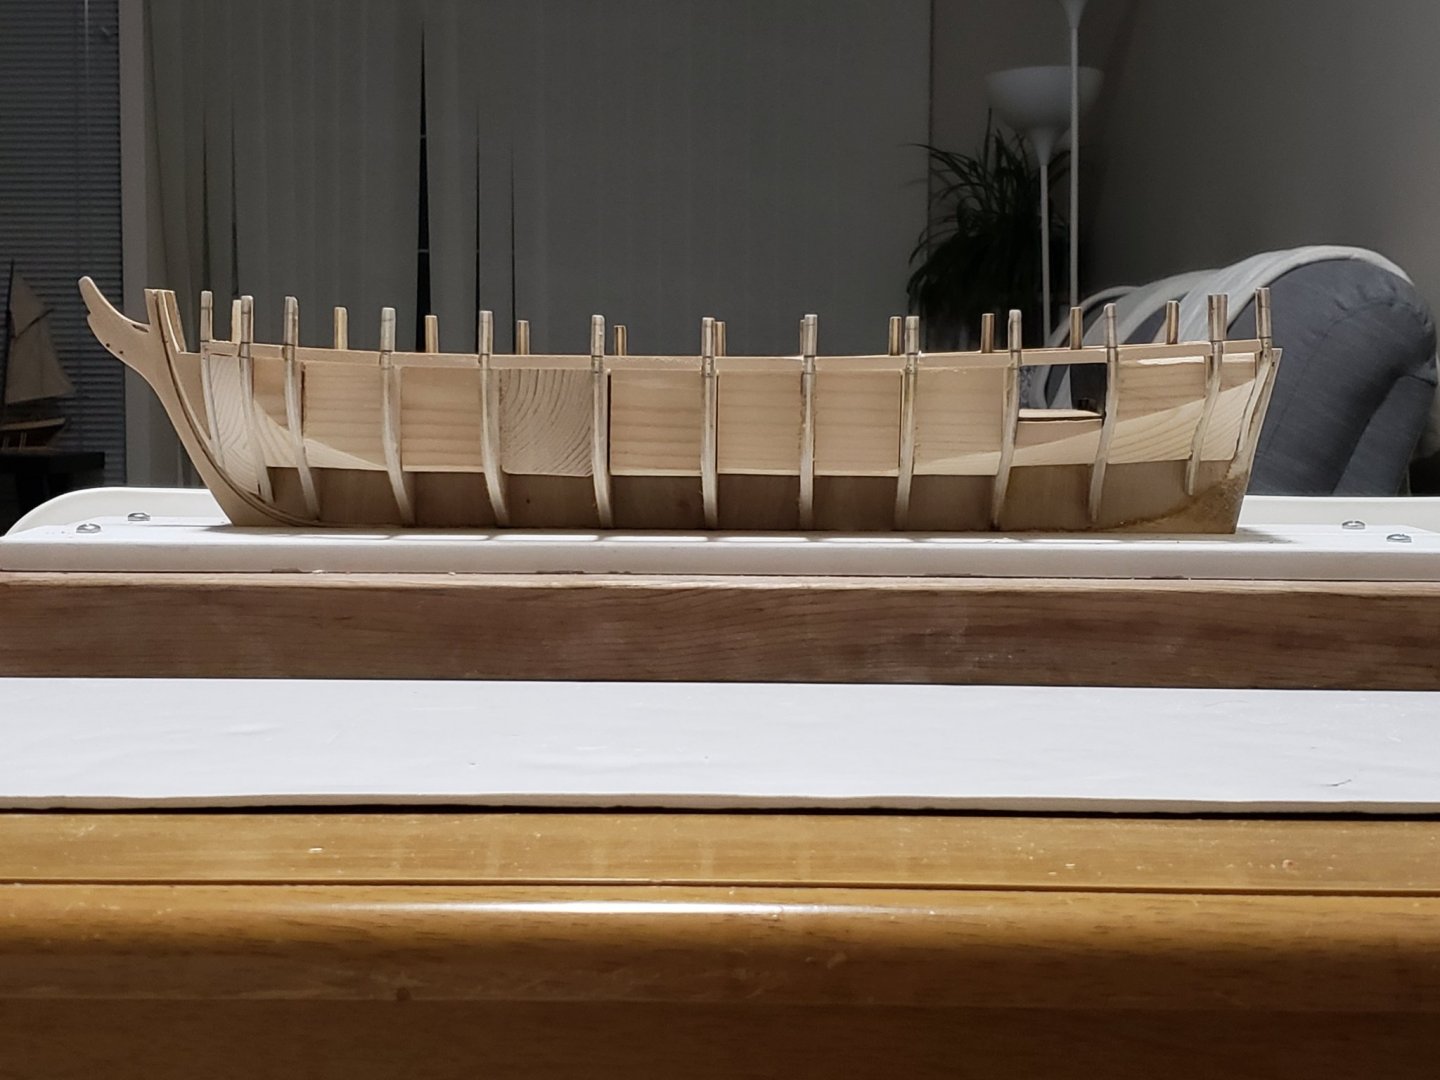
I finished gluing the port sills today. To do this, I shifted the batten slightly down so that the top of the sills match the lines I drew on the bulwarks. There was a tonne of adjustments and triple checking to make sure everything is lined up smoothly. I used a metal ruler laying on both the portside and starboard sills to make sure they are completely horizontal. If the sills were not horizontal, I would be able to see it clearly as the ruler would make an angle with the wood. After gluing the port sills, I removed the batten. Here are the corresponding photos from different angles: I have a feeling there is going to be a lot of sanding tomorrow... I read everything is extremely fragile at this point so I'll be extra careful.


- 950 replies
-
- 12
-
-
- syren
- model shipways
- (and 1 more)
-
Ohh haha thanks for the correction, I edited my post 😄 As for nailing them I used pliers and gently pushed the nails in (wouldn't dare use a hammer 😬) but yeah you are right, I should've pre-bent them. I'll be sure to use a bending rig next time. Thanks again for all the tips!
-
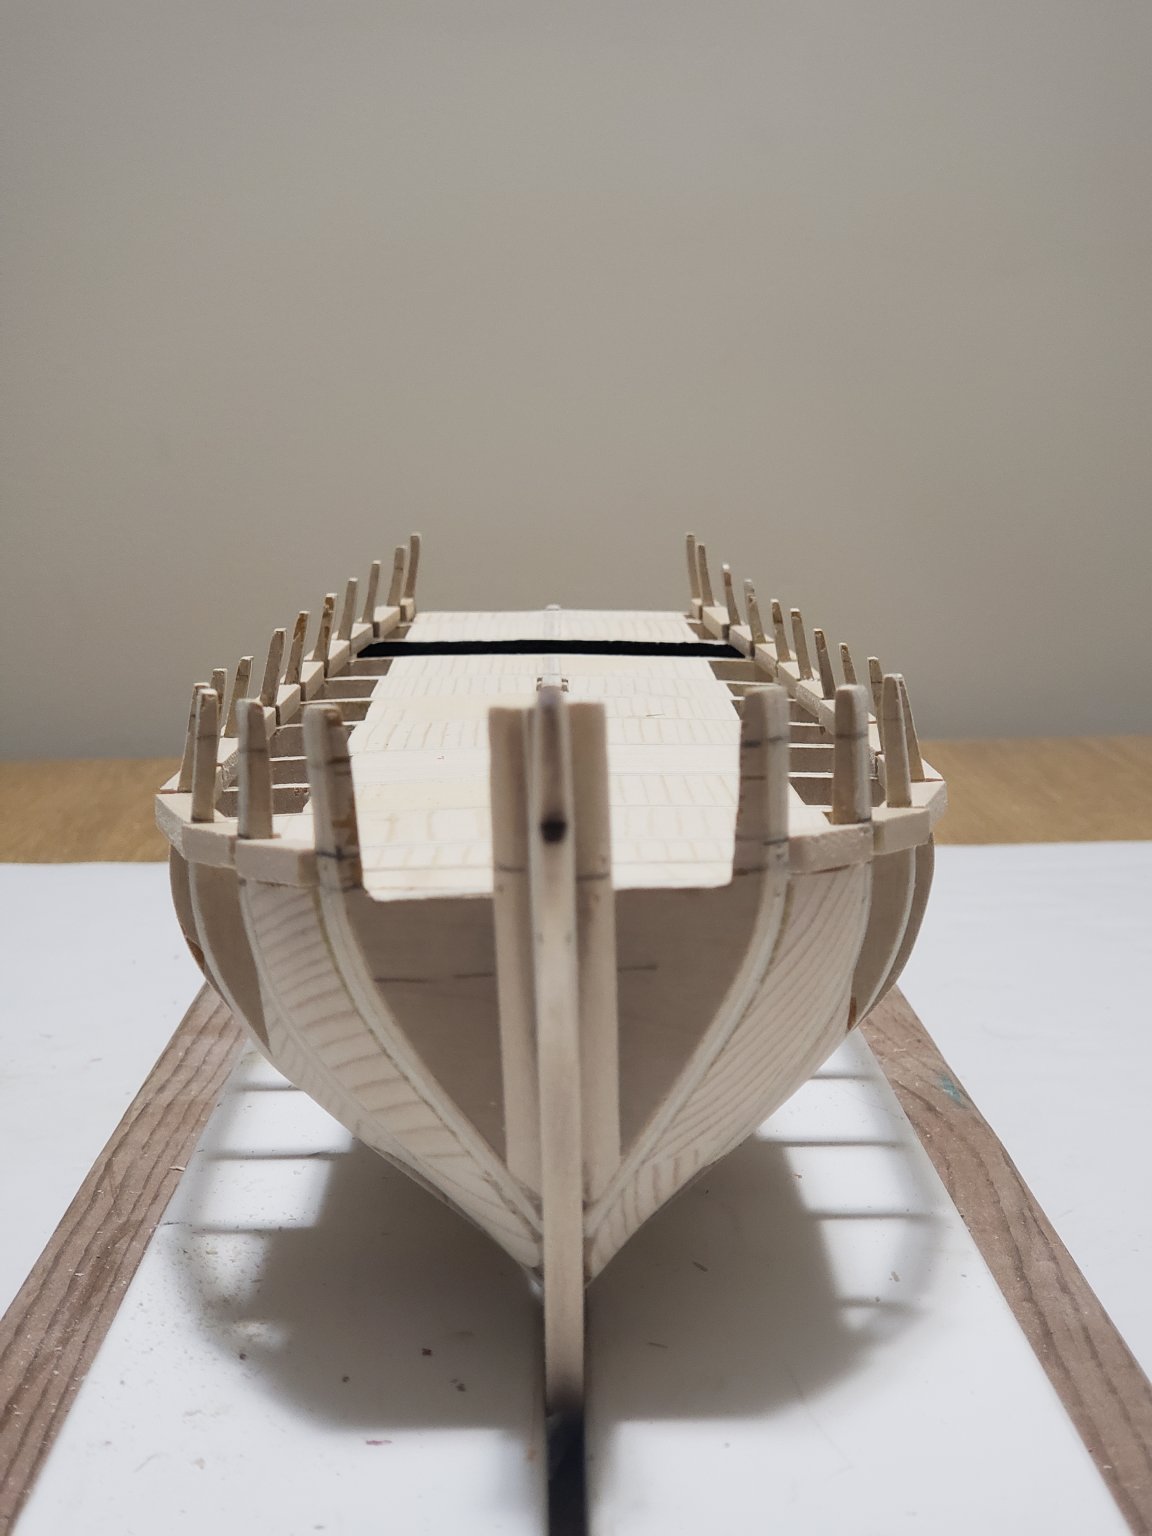
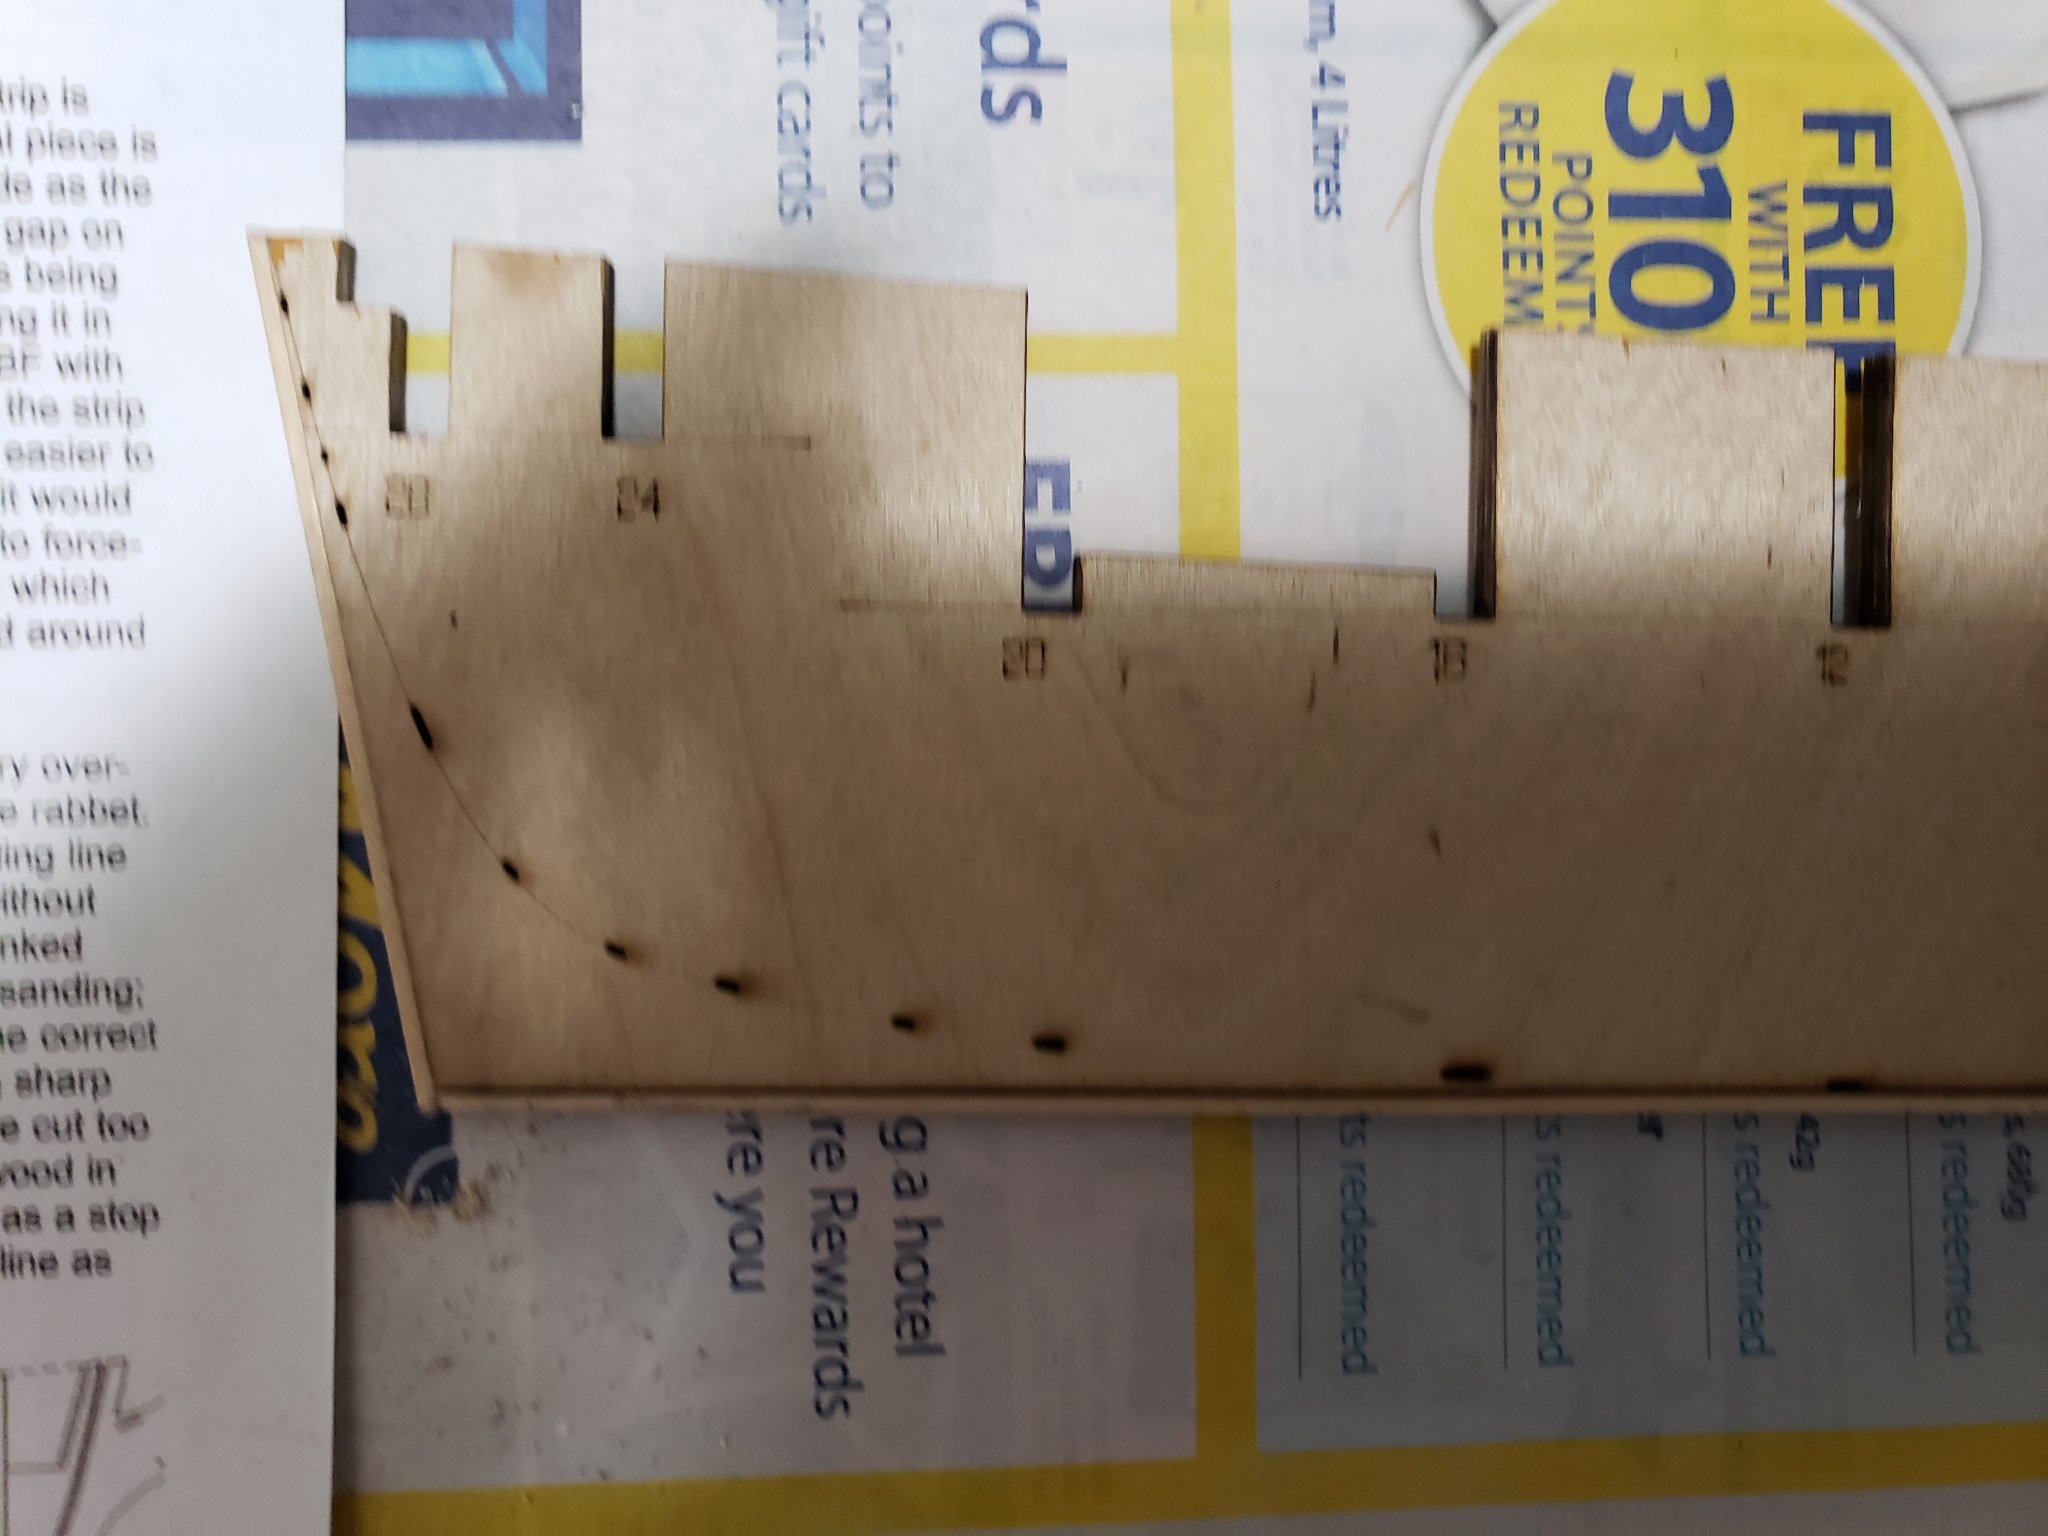
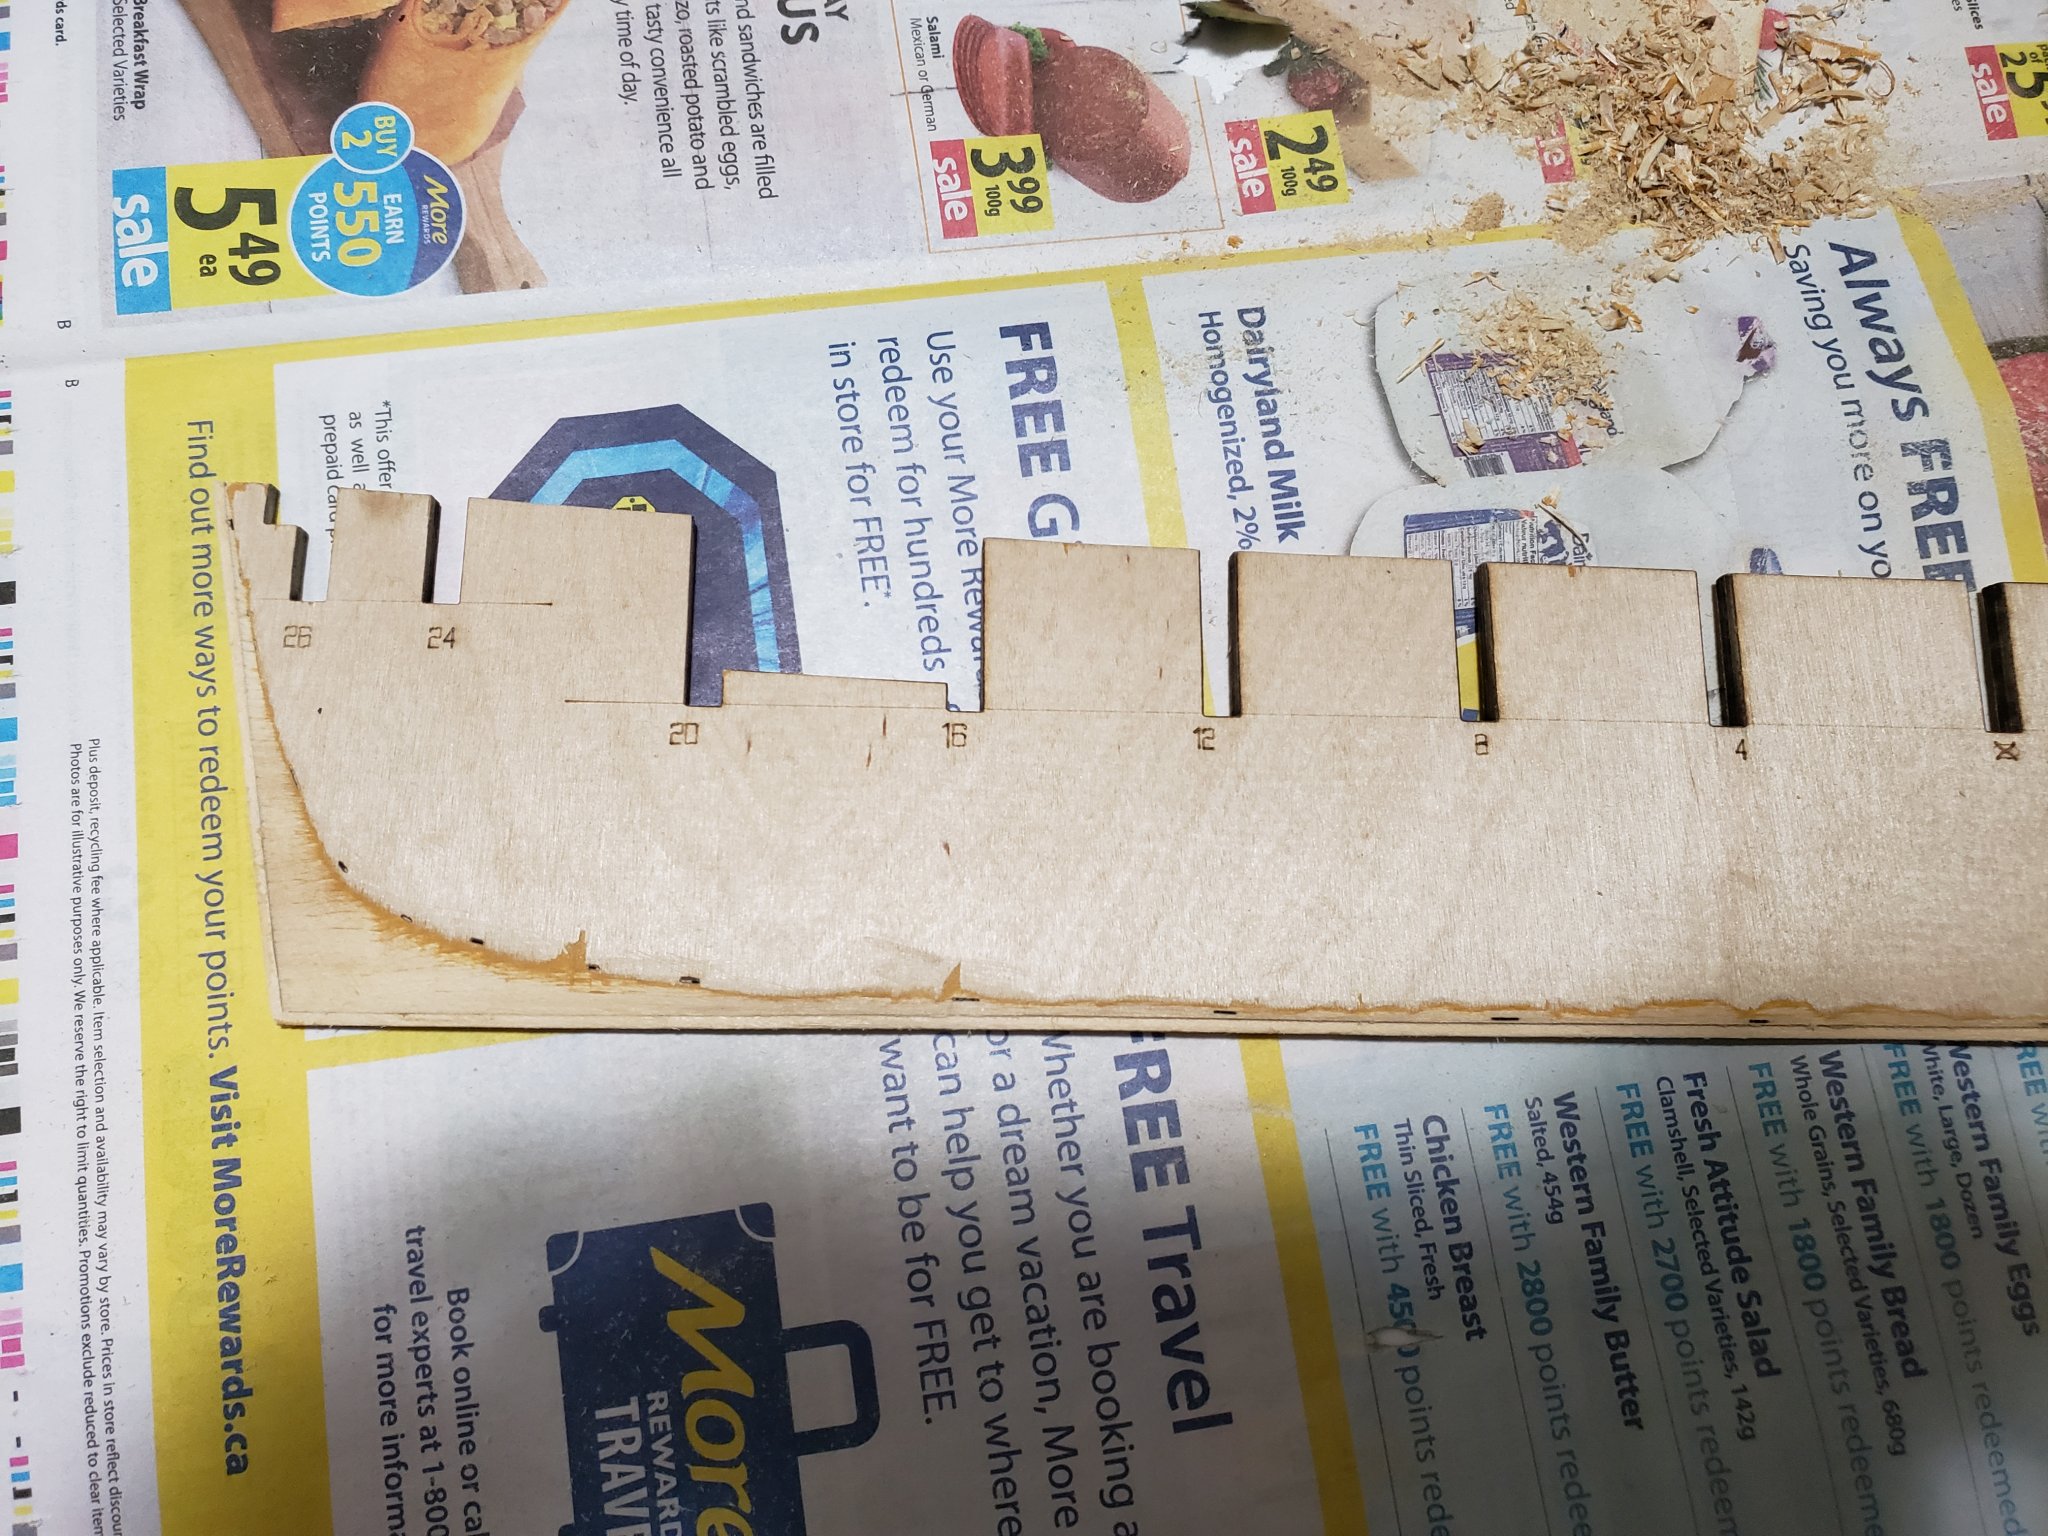
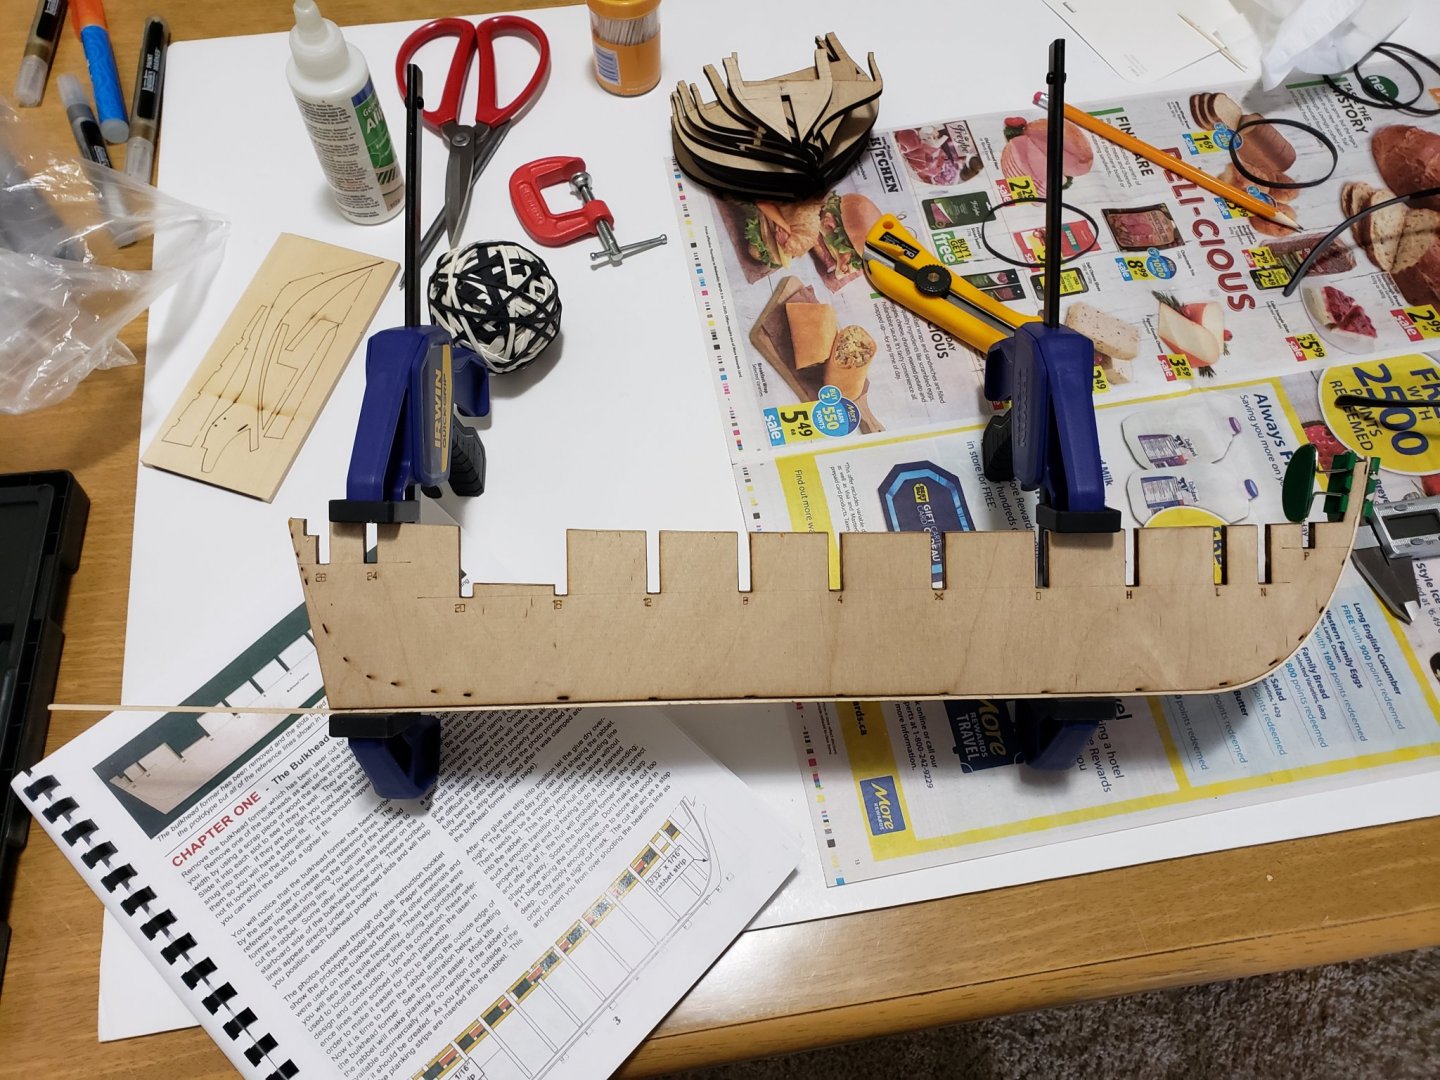
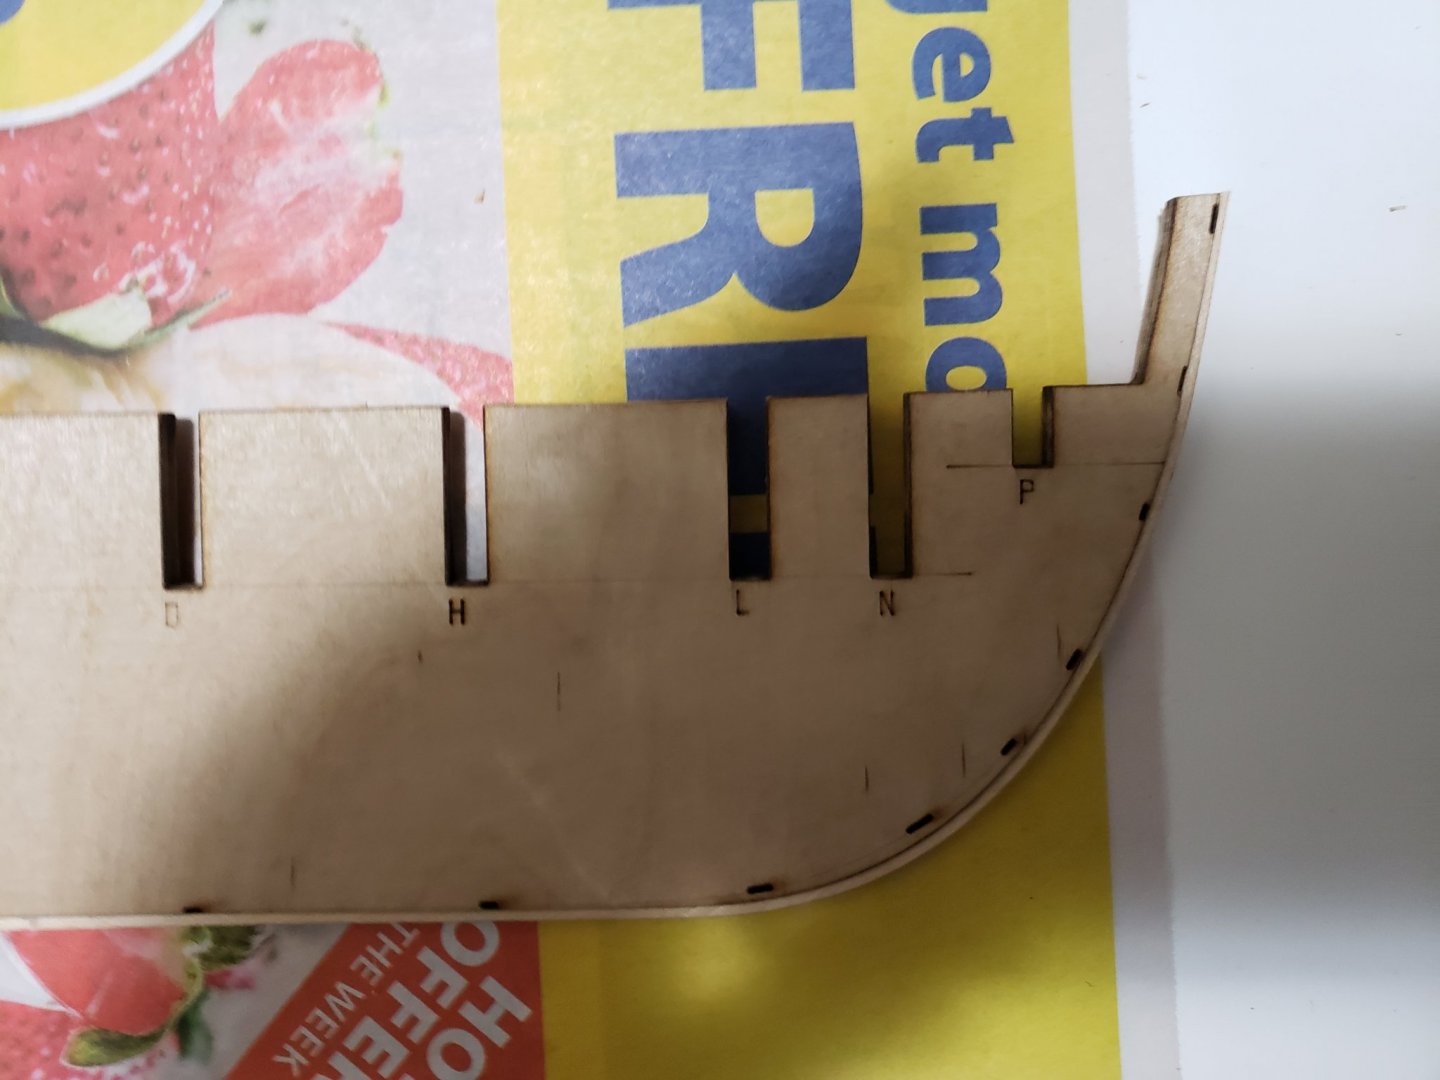
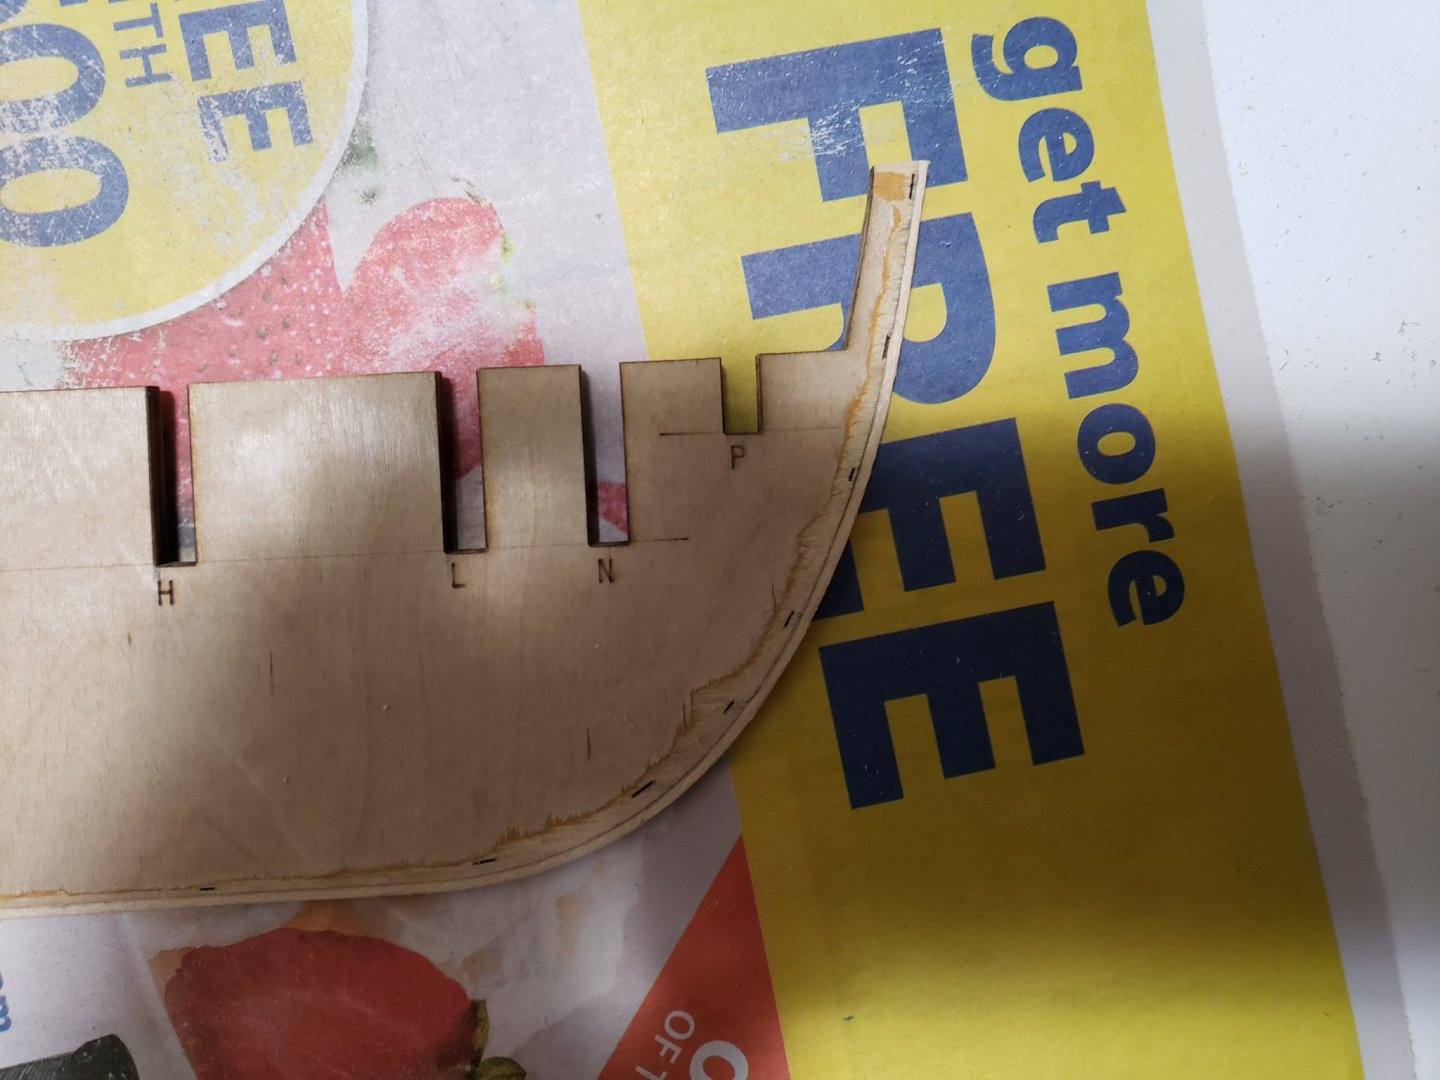
I took your advice Nova, and marked the the laser marks on the bulkheads. Some of them were already sanded/chipped away so I had to guess their location. Not much progress today, I fitted the temporary batten strip to mark the locations of the top of the gun port sill. For the batten strip I used two of the 100 1/16 x 1/8 in basswood strips since I expect some to be leftover after planking. I was a bit hesitant about this since the strip is only temporary, but did not have any similar (or thinner) sized wood strips laying around. Also another one of the bulwark framing snapped, those things are so fragile! The batten strips were soaked in hot water for 10 minutes before nailing them on the bulwarks so that they are easy to bend without them breaking. After a lot of adjusting to make sure the batten strip was smooth, I drew a reference pencil line on the edges of the bulkhead. Here are some photos: I think I am now ready to start port framing. A bit nervous though!


- 950 replies
-
- 10
-
-
- syren
- model shipways
- (and 1 more)
-
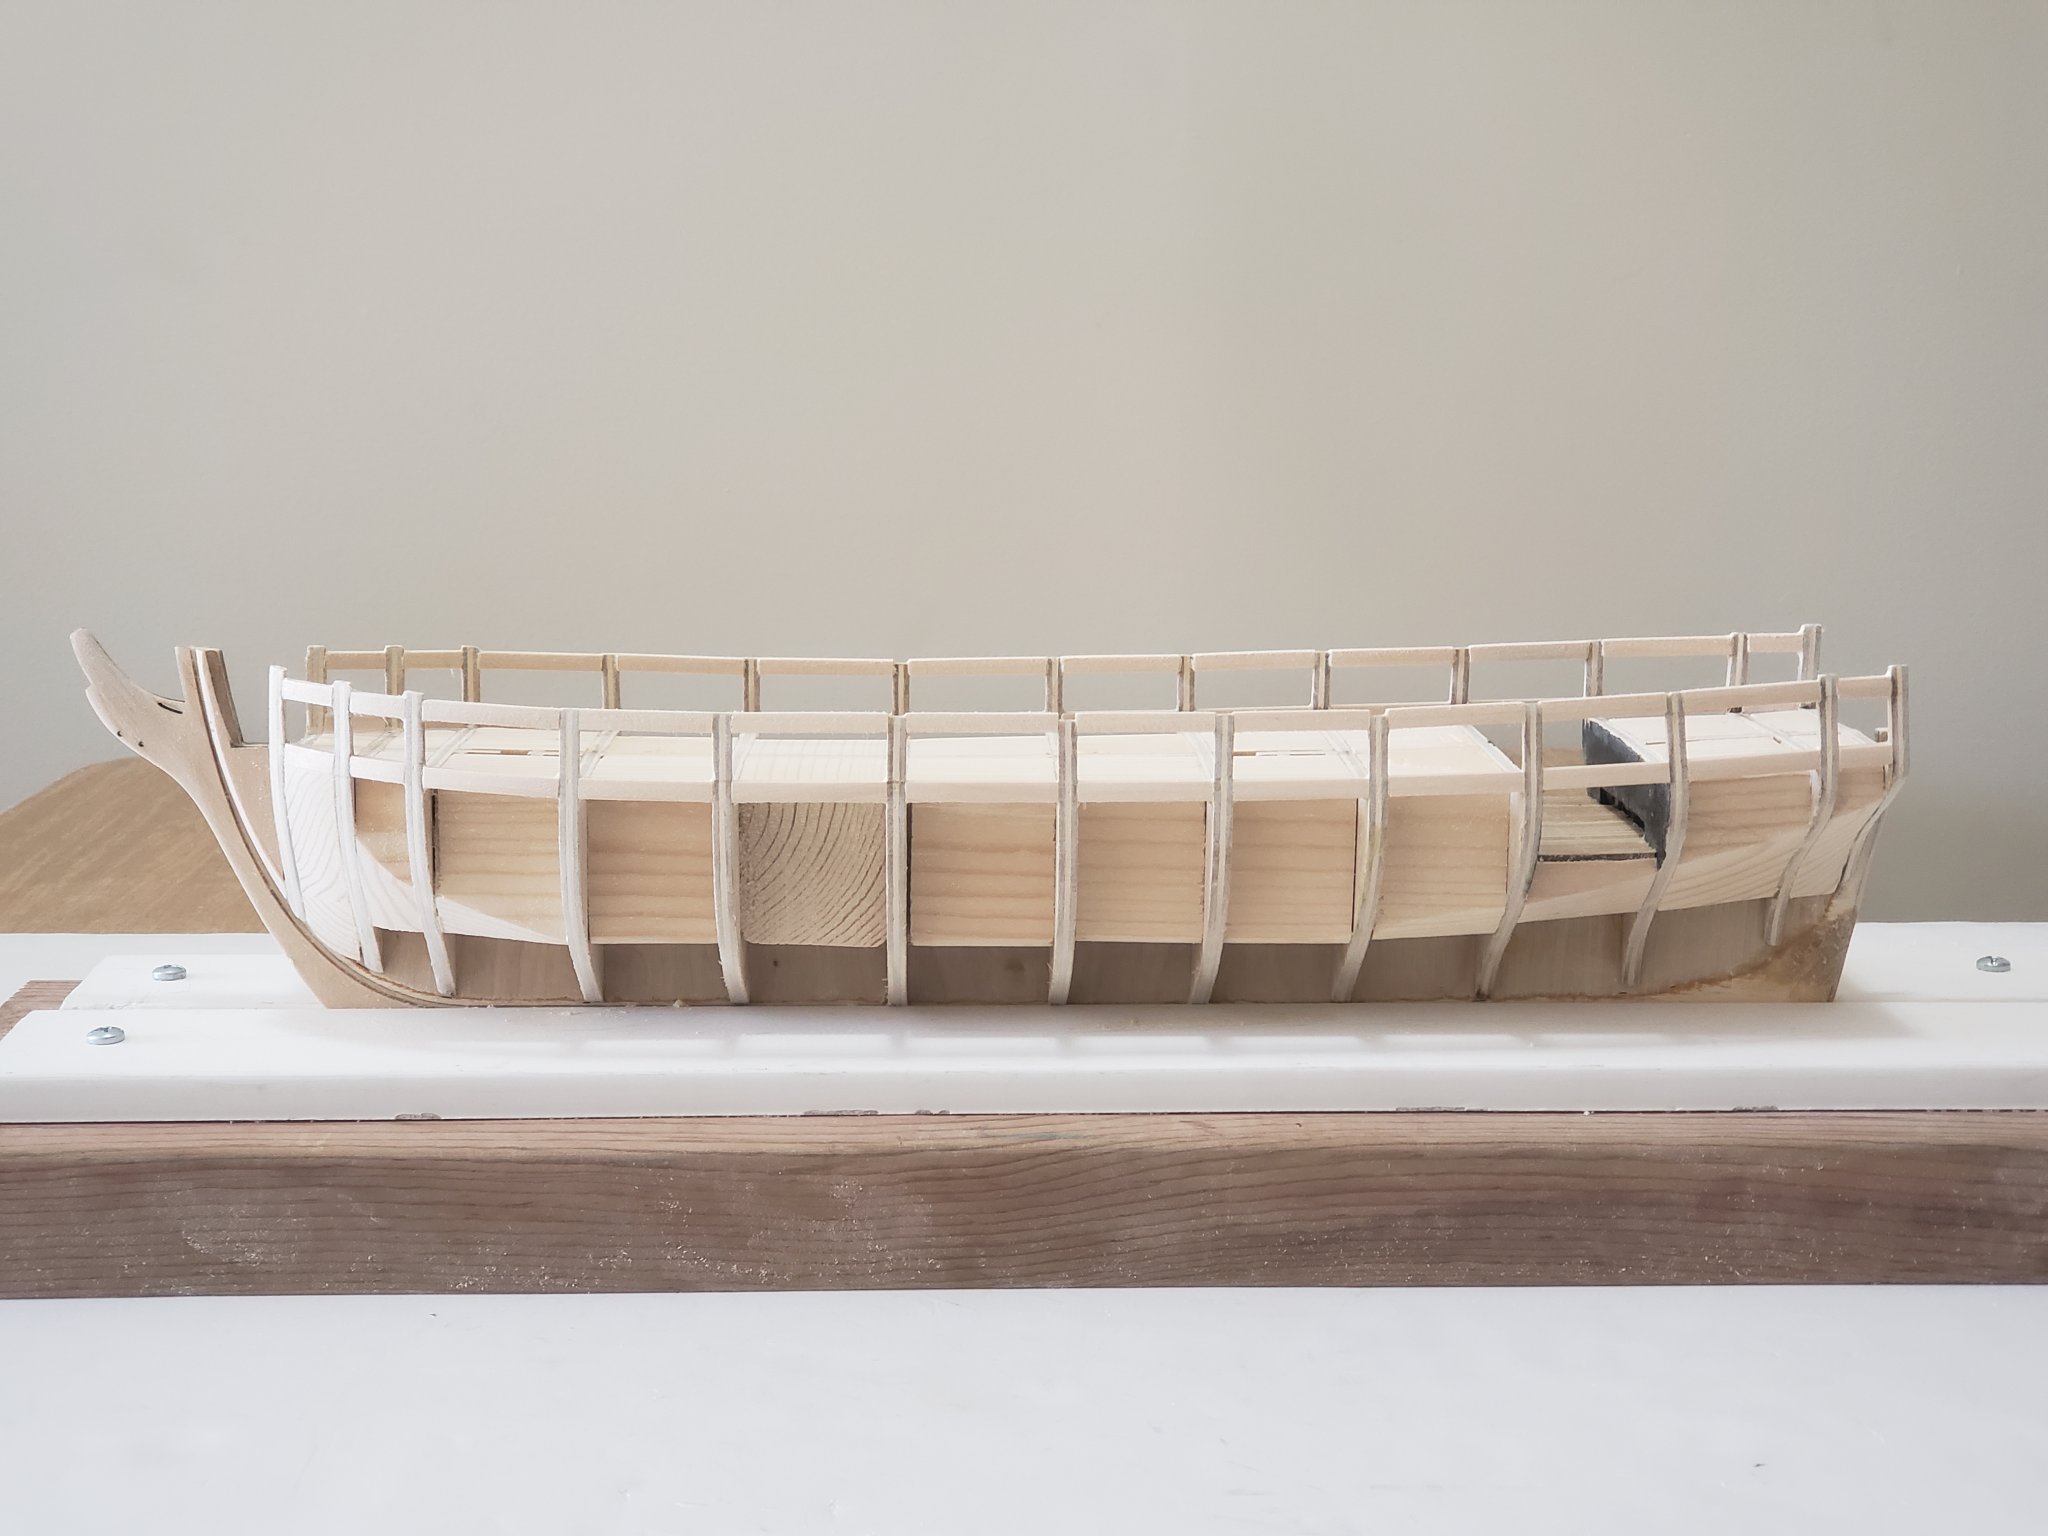
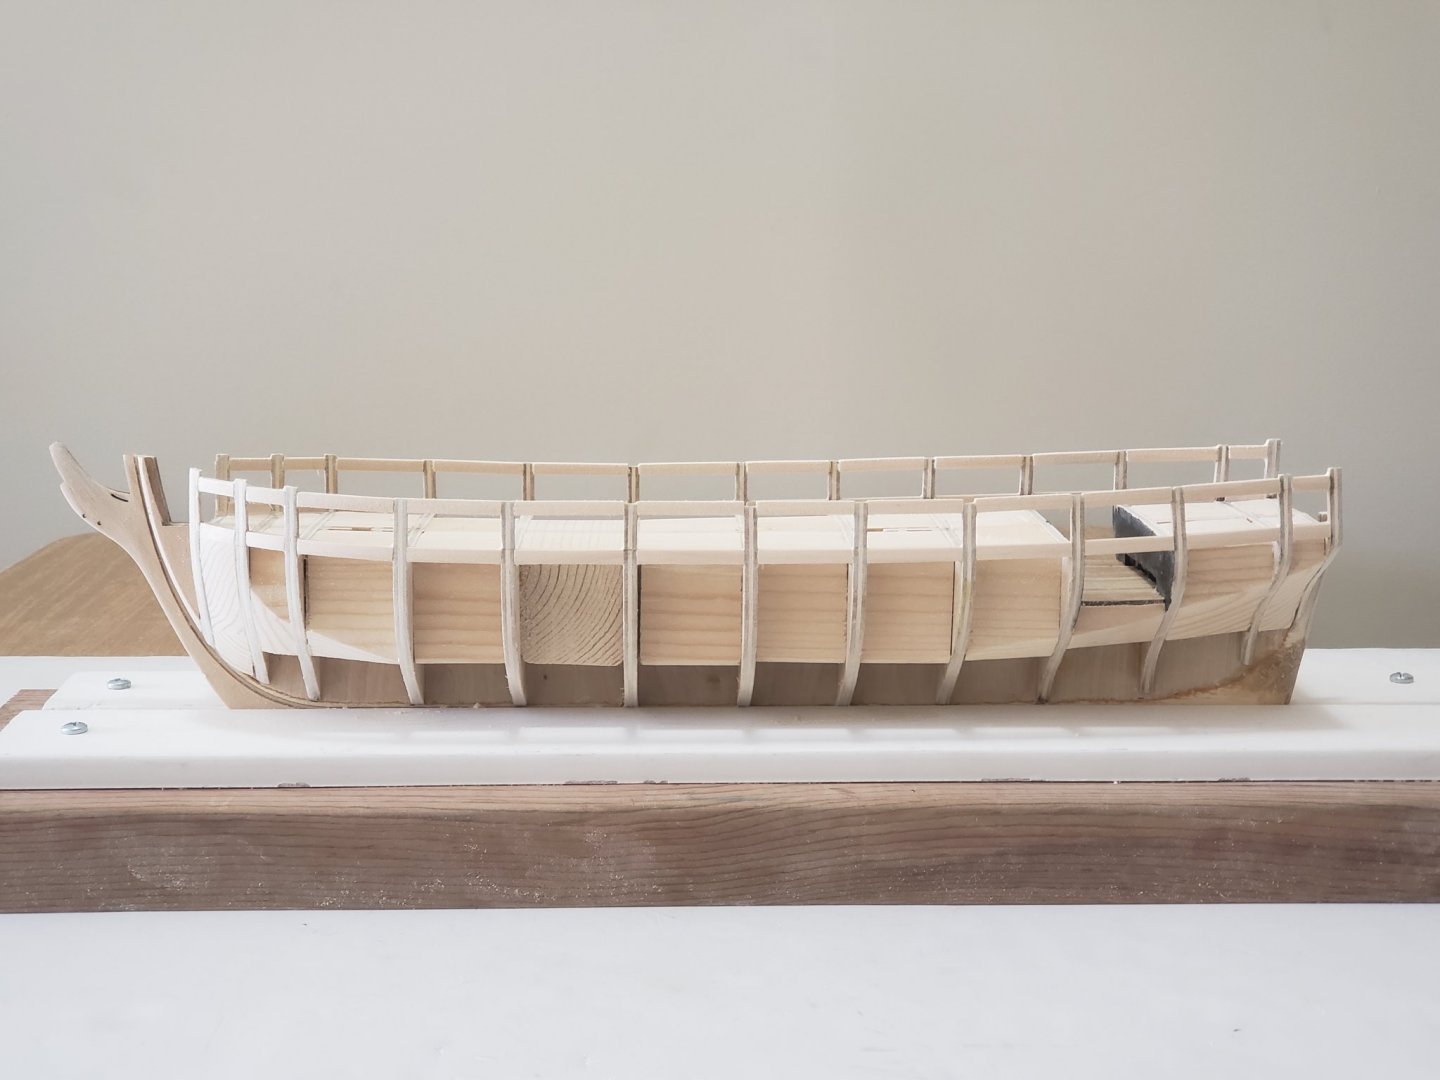
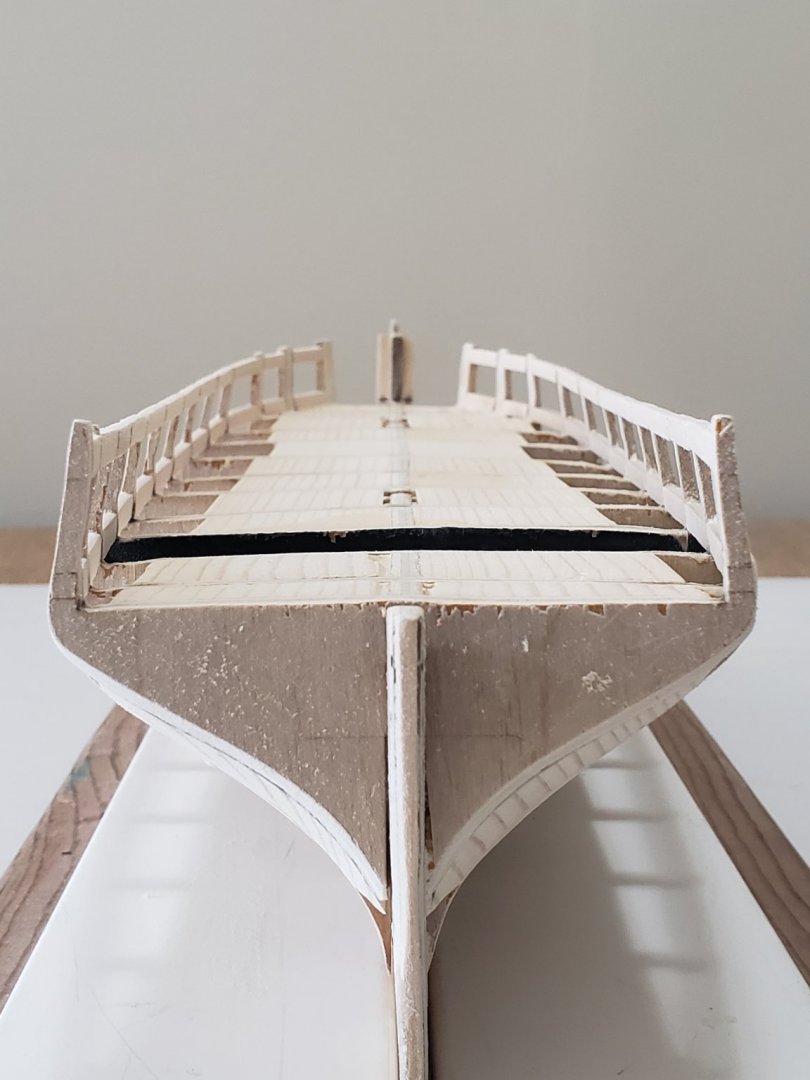
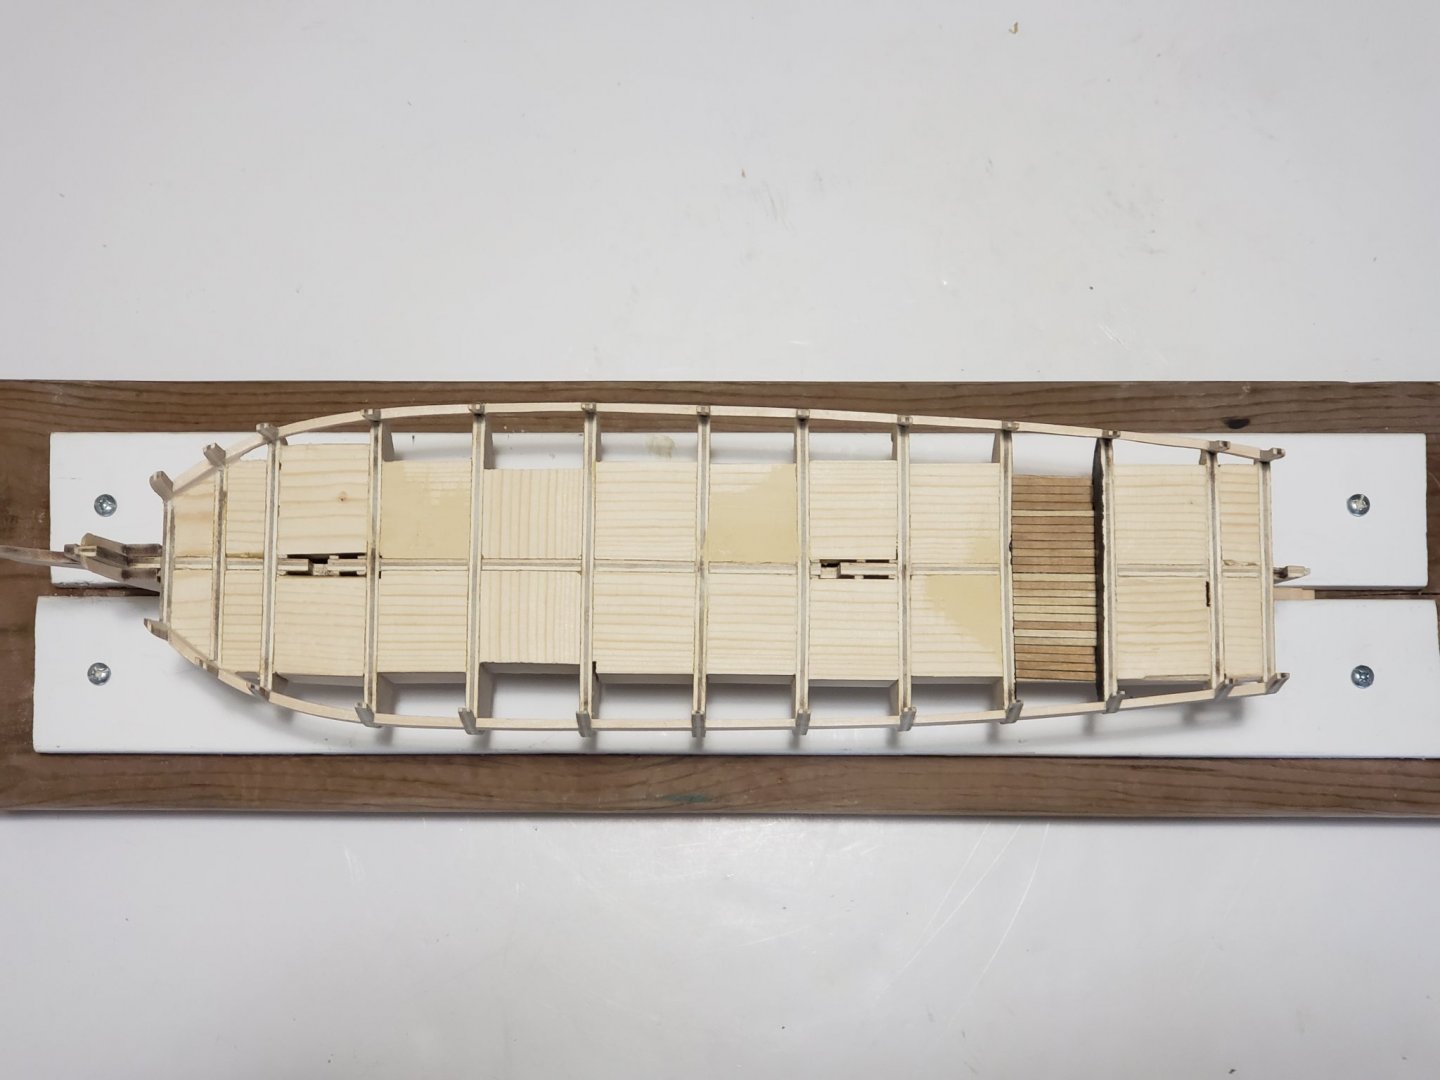
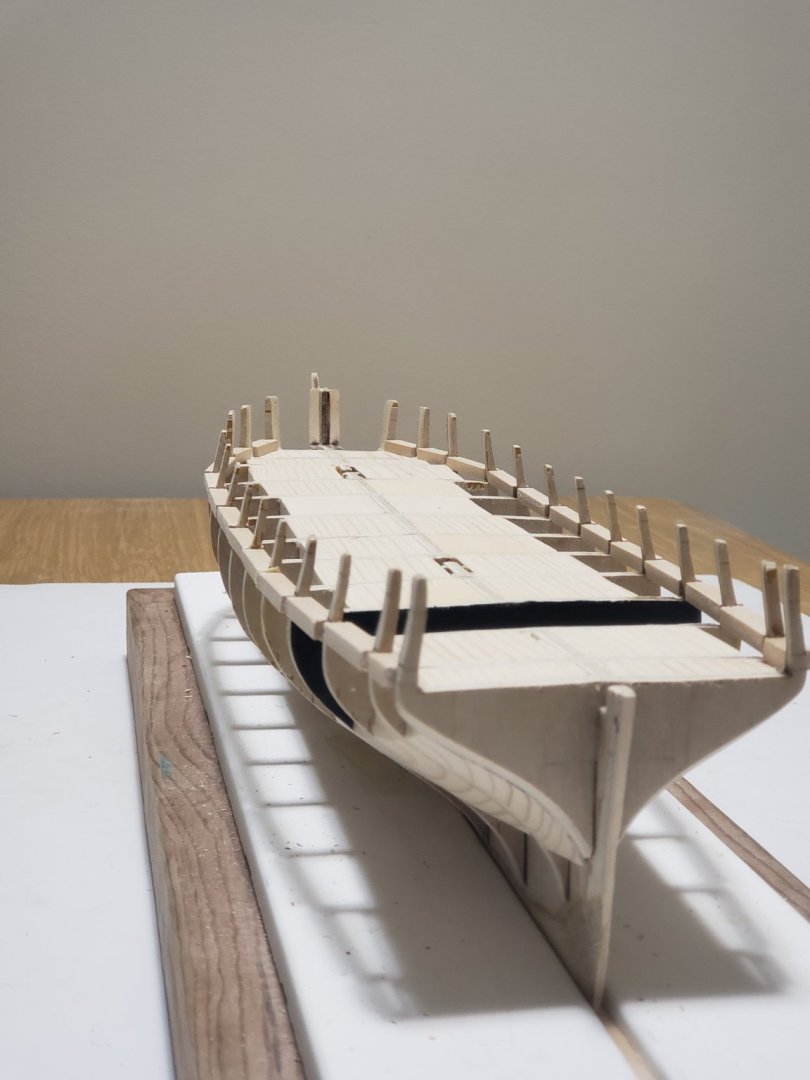
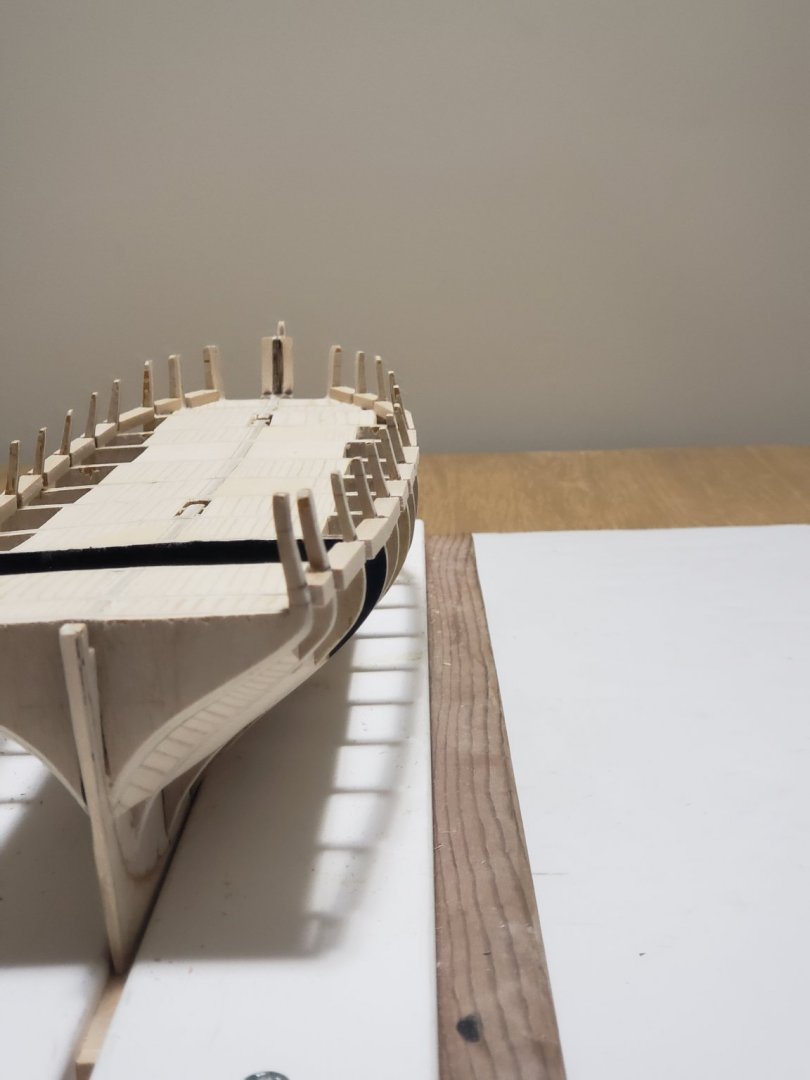
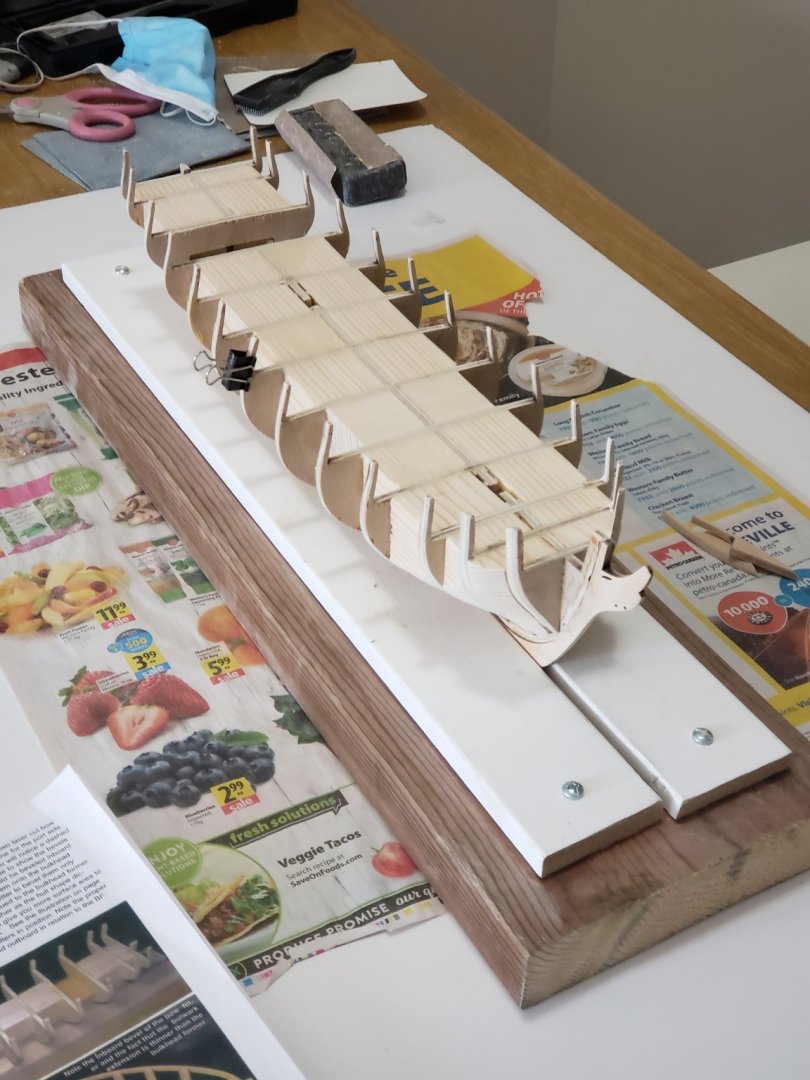
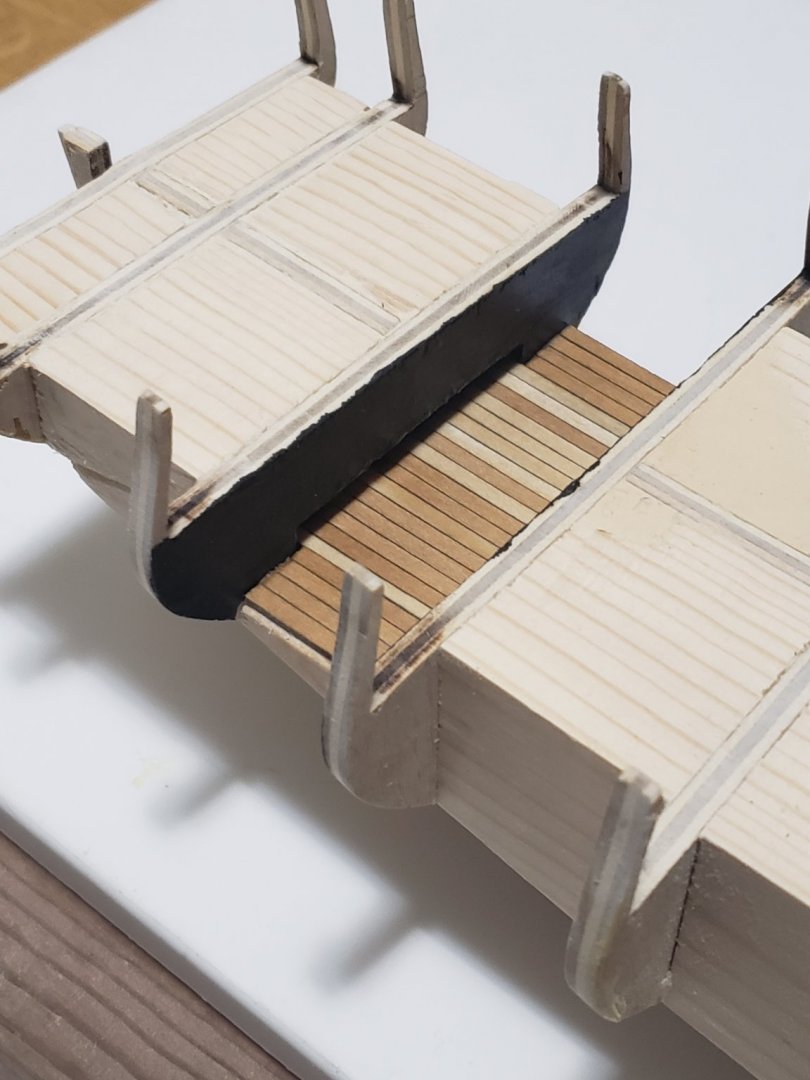
Thanks Nova, I'm exhausted from all the manual sanding so I'm thinking of skipping installing the filler blocks at the those locations. Let's see though, I might change my mind before planking... And thanks again for the advice for the masts, gives me something to ponder over until I reach that stage. Speaking of sanding, the filler blocks at the deck level are now all sanded. During sanding, another one of the bulwark frames snapped off so it was glued again in place: I painted bulkheads 16 and 20 black, I got this idea from Nova's build log. Basswood strips have been installed on the lower deck after some caulking using the pencil method. Lastly, the bow filler was glued into place. There was a slight gap between the area right before the rabbet strip at the bow and the bow filler, so I placed in a small wedge. The gap without the wedge is shown below: This marks the end of chapter 2. Onto the gun ports.


- 950 replies
-
- 10
-
-
- syren
- model shipways
- (and 1 more)
-
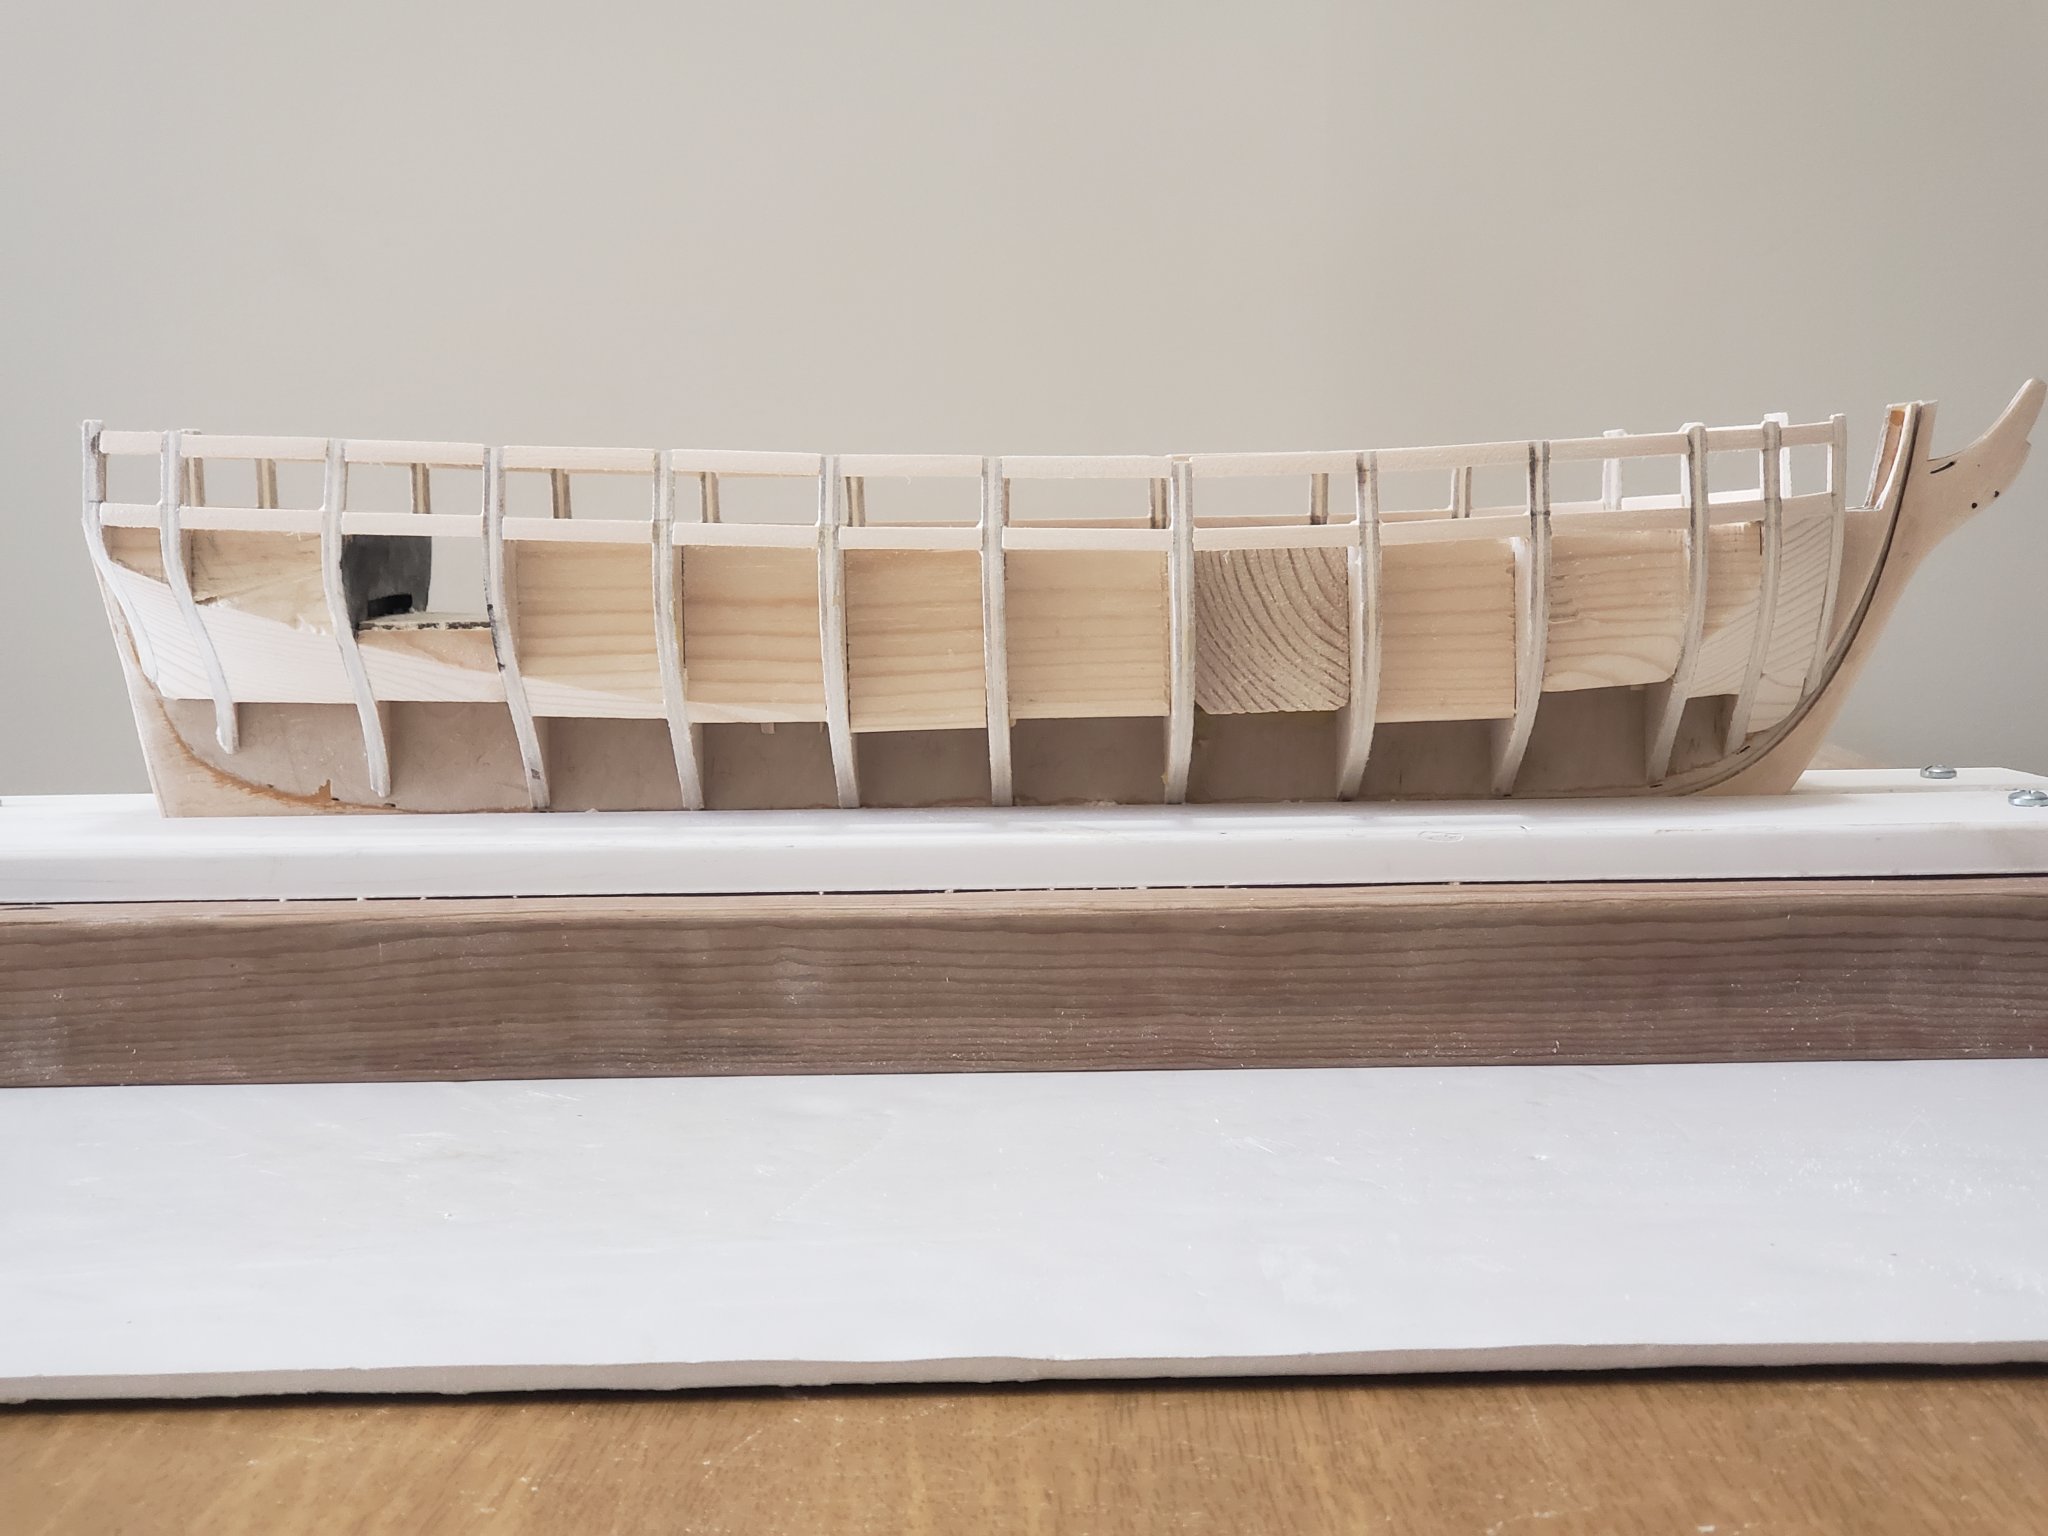
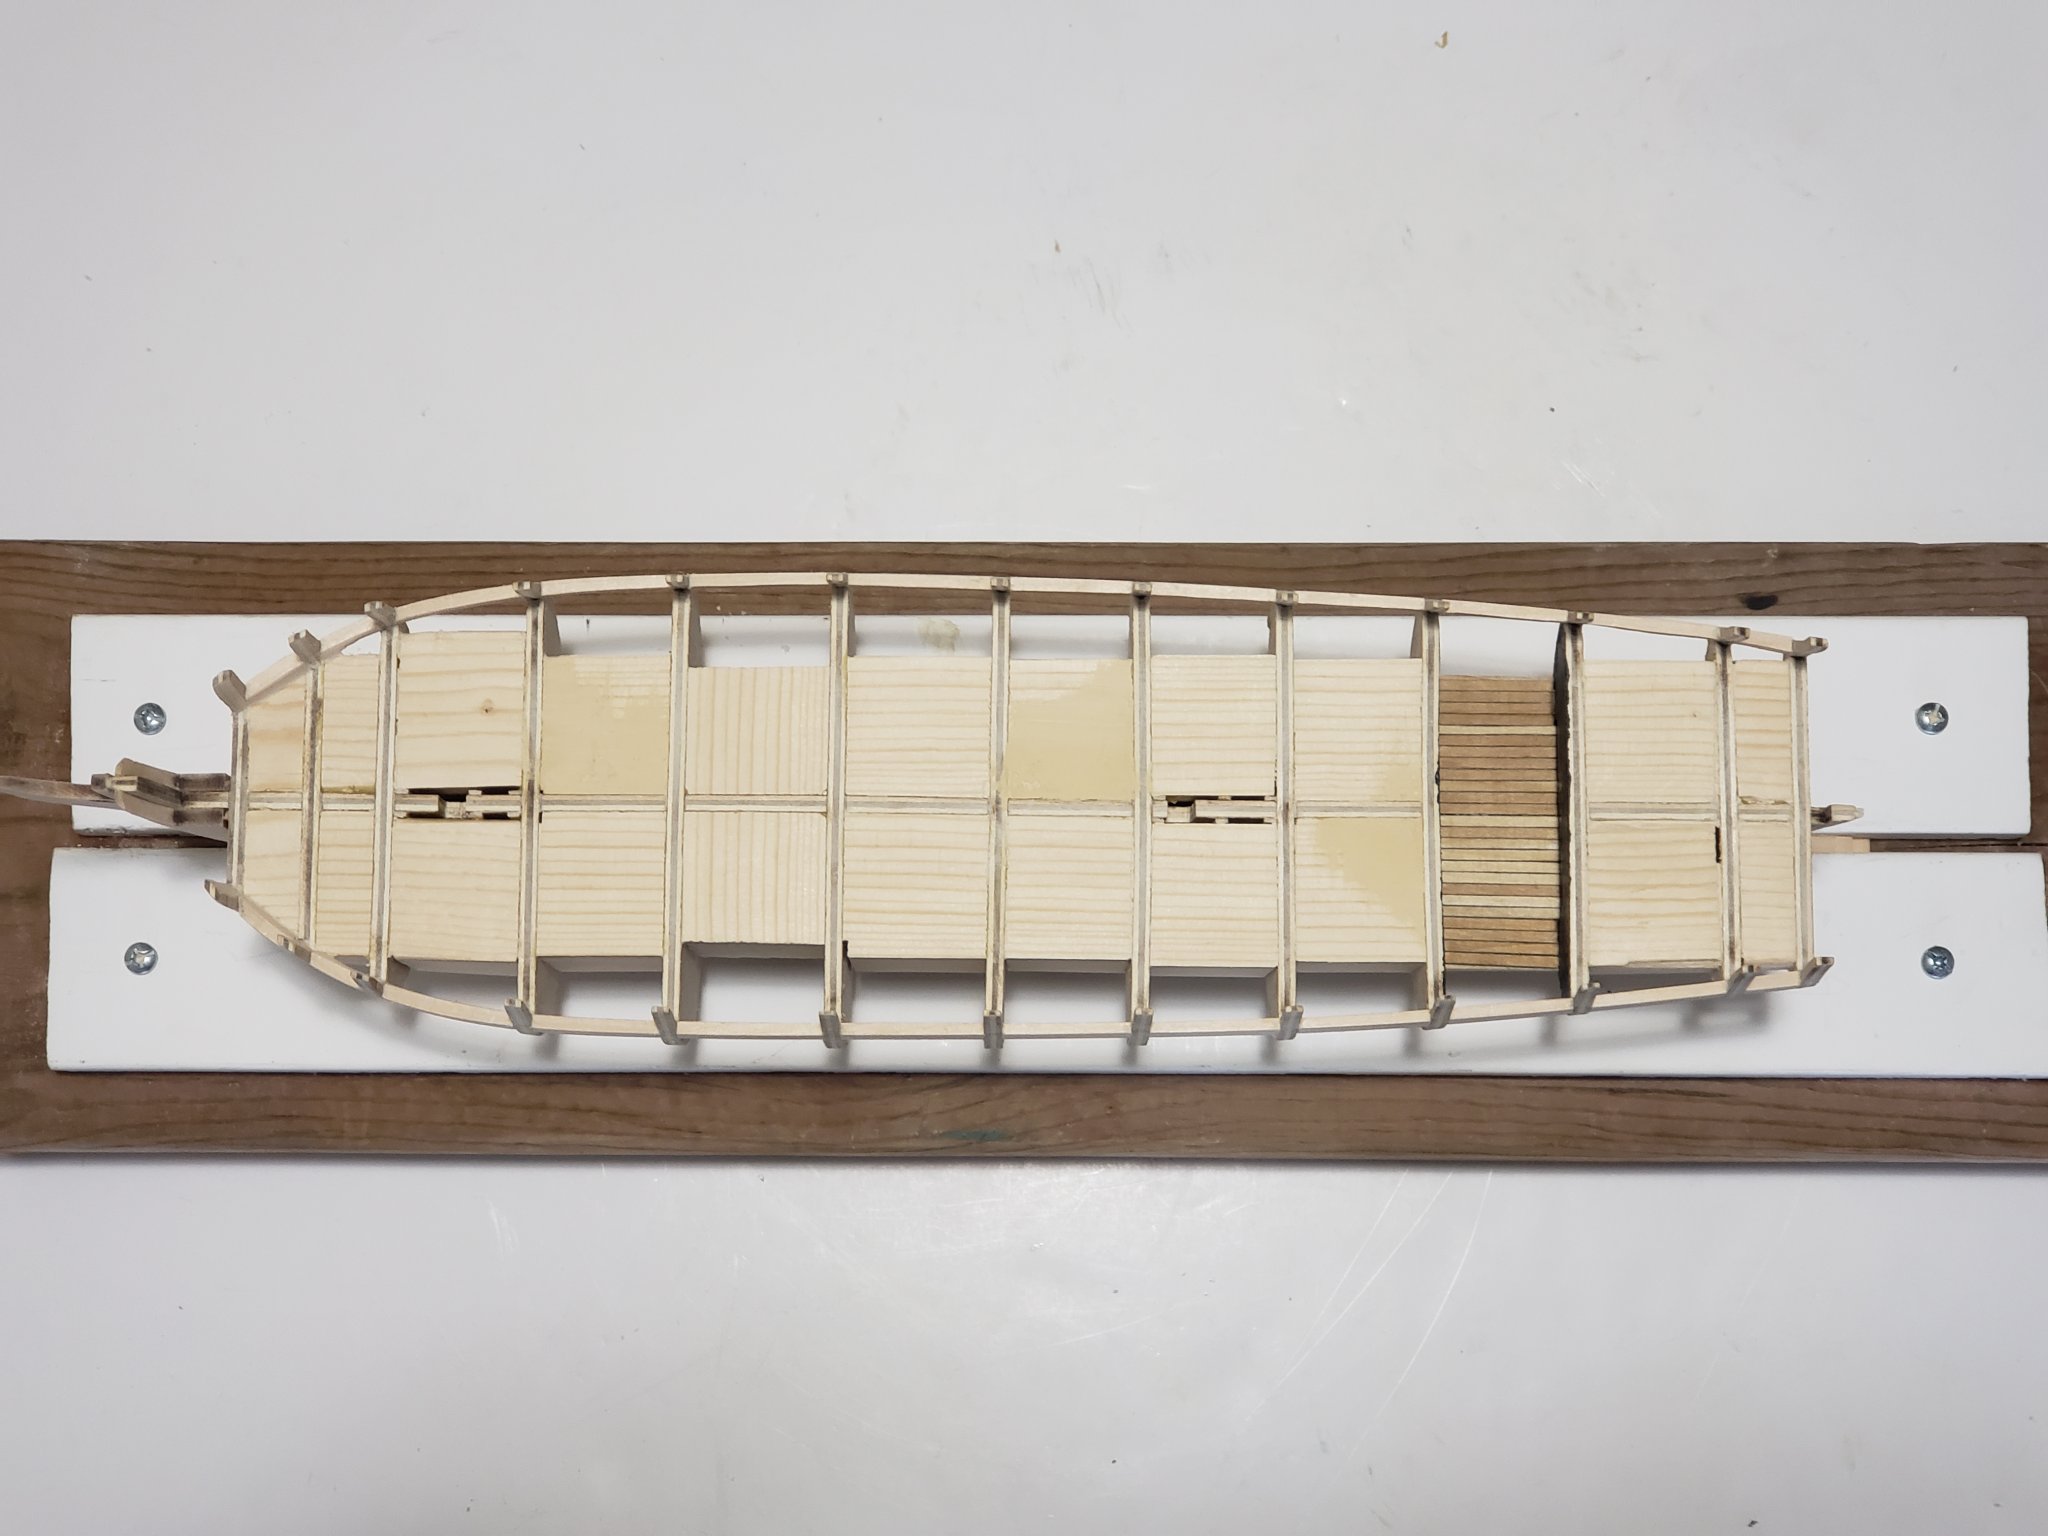
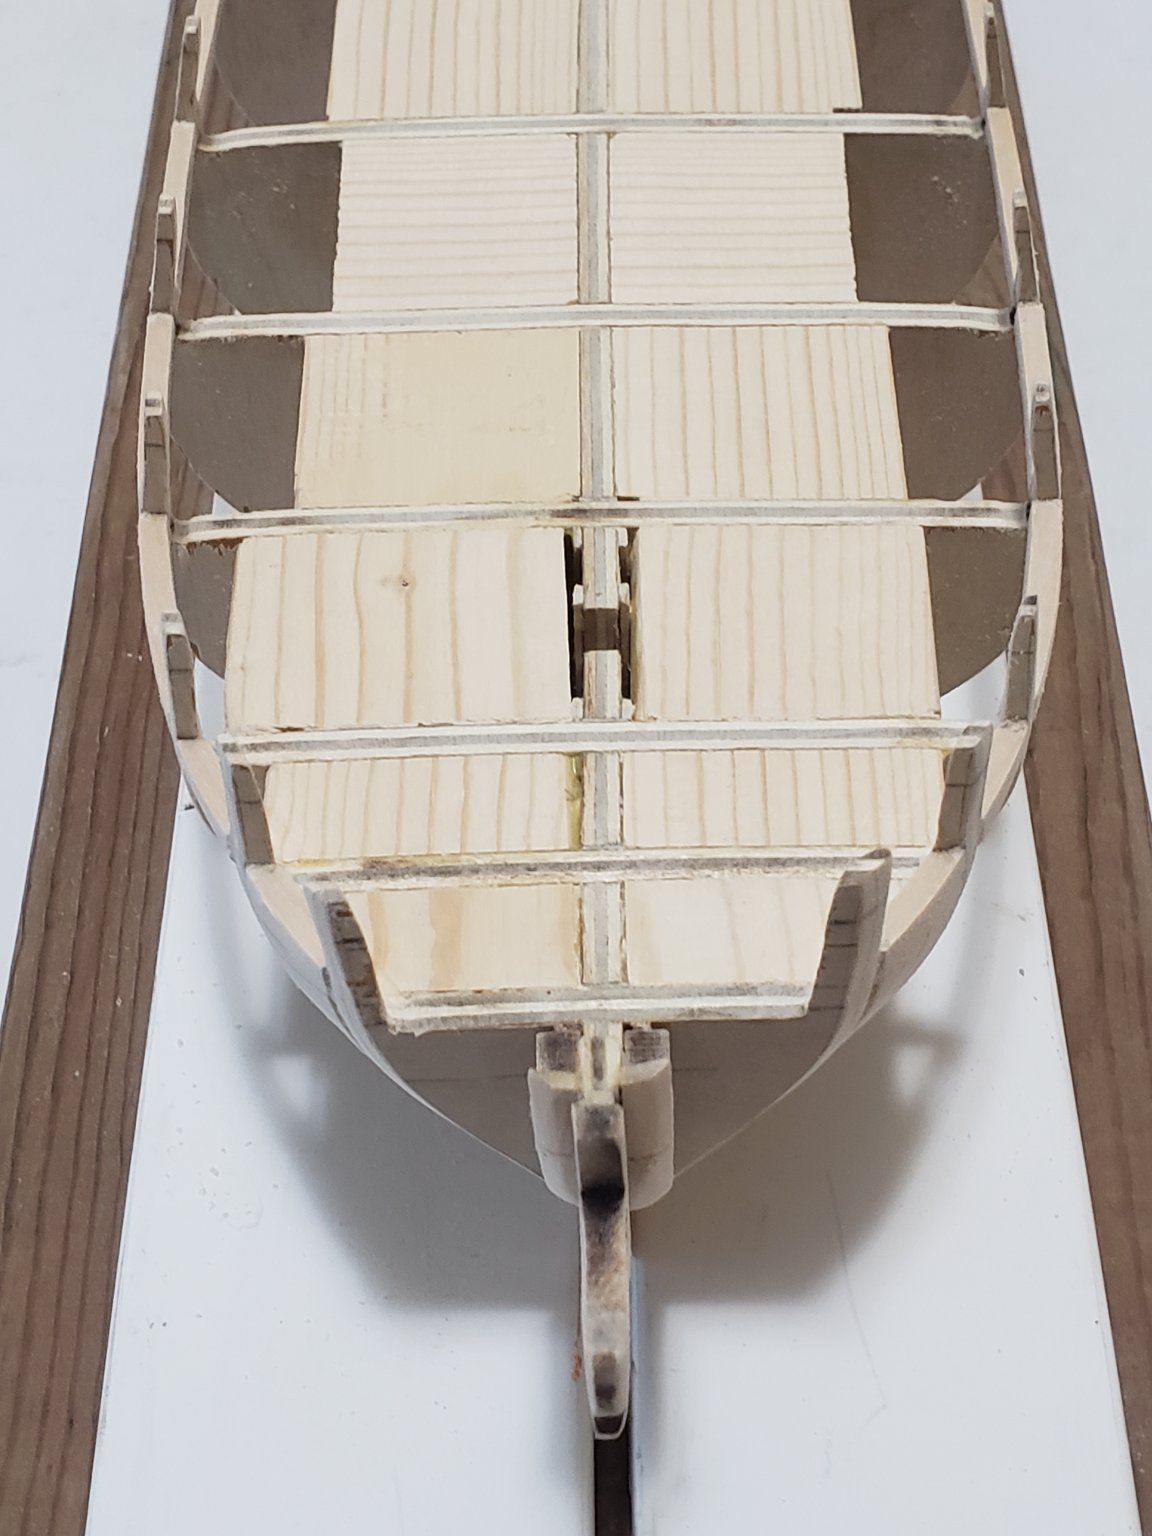
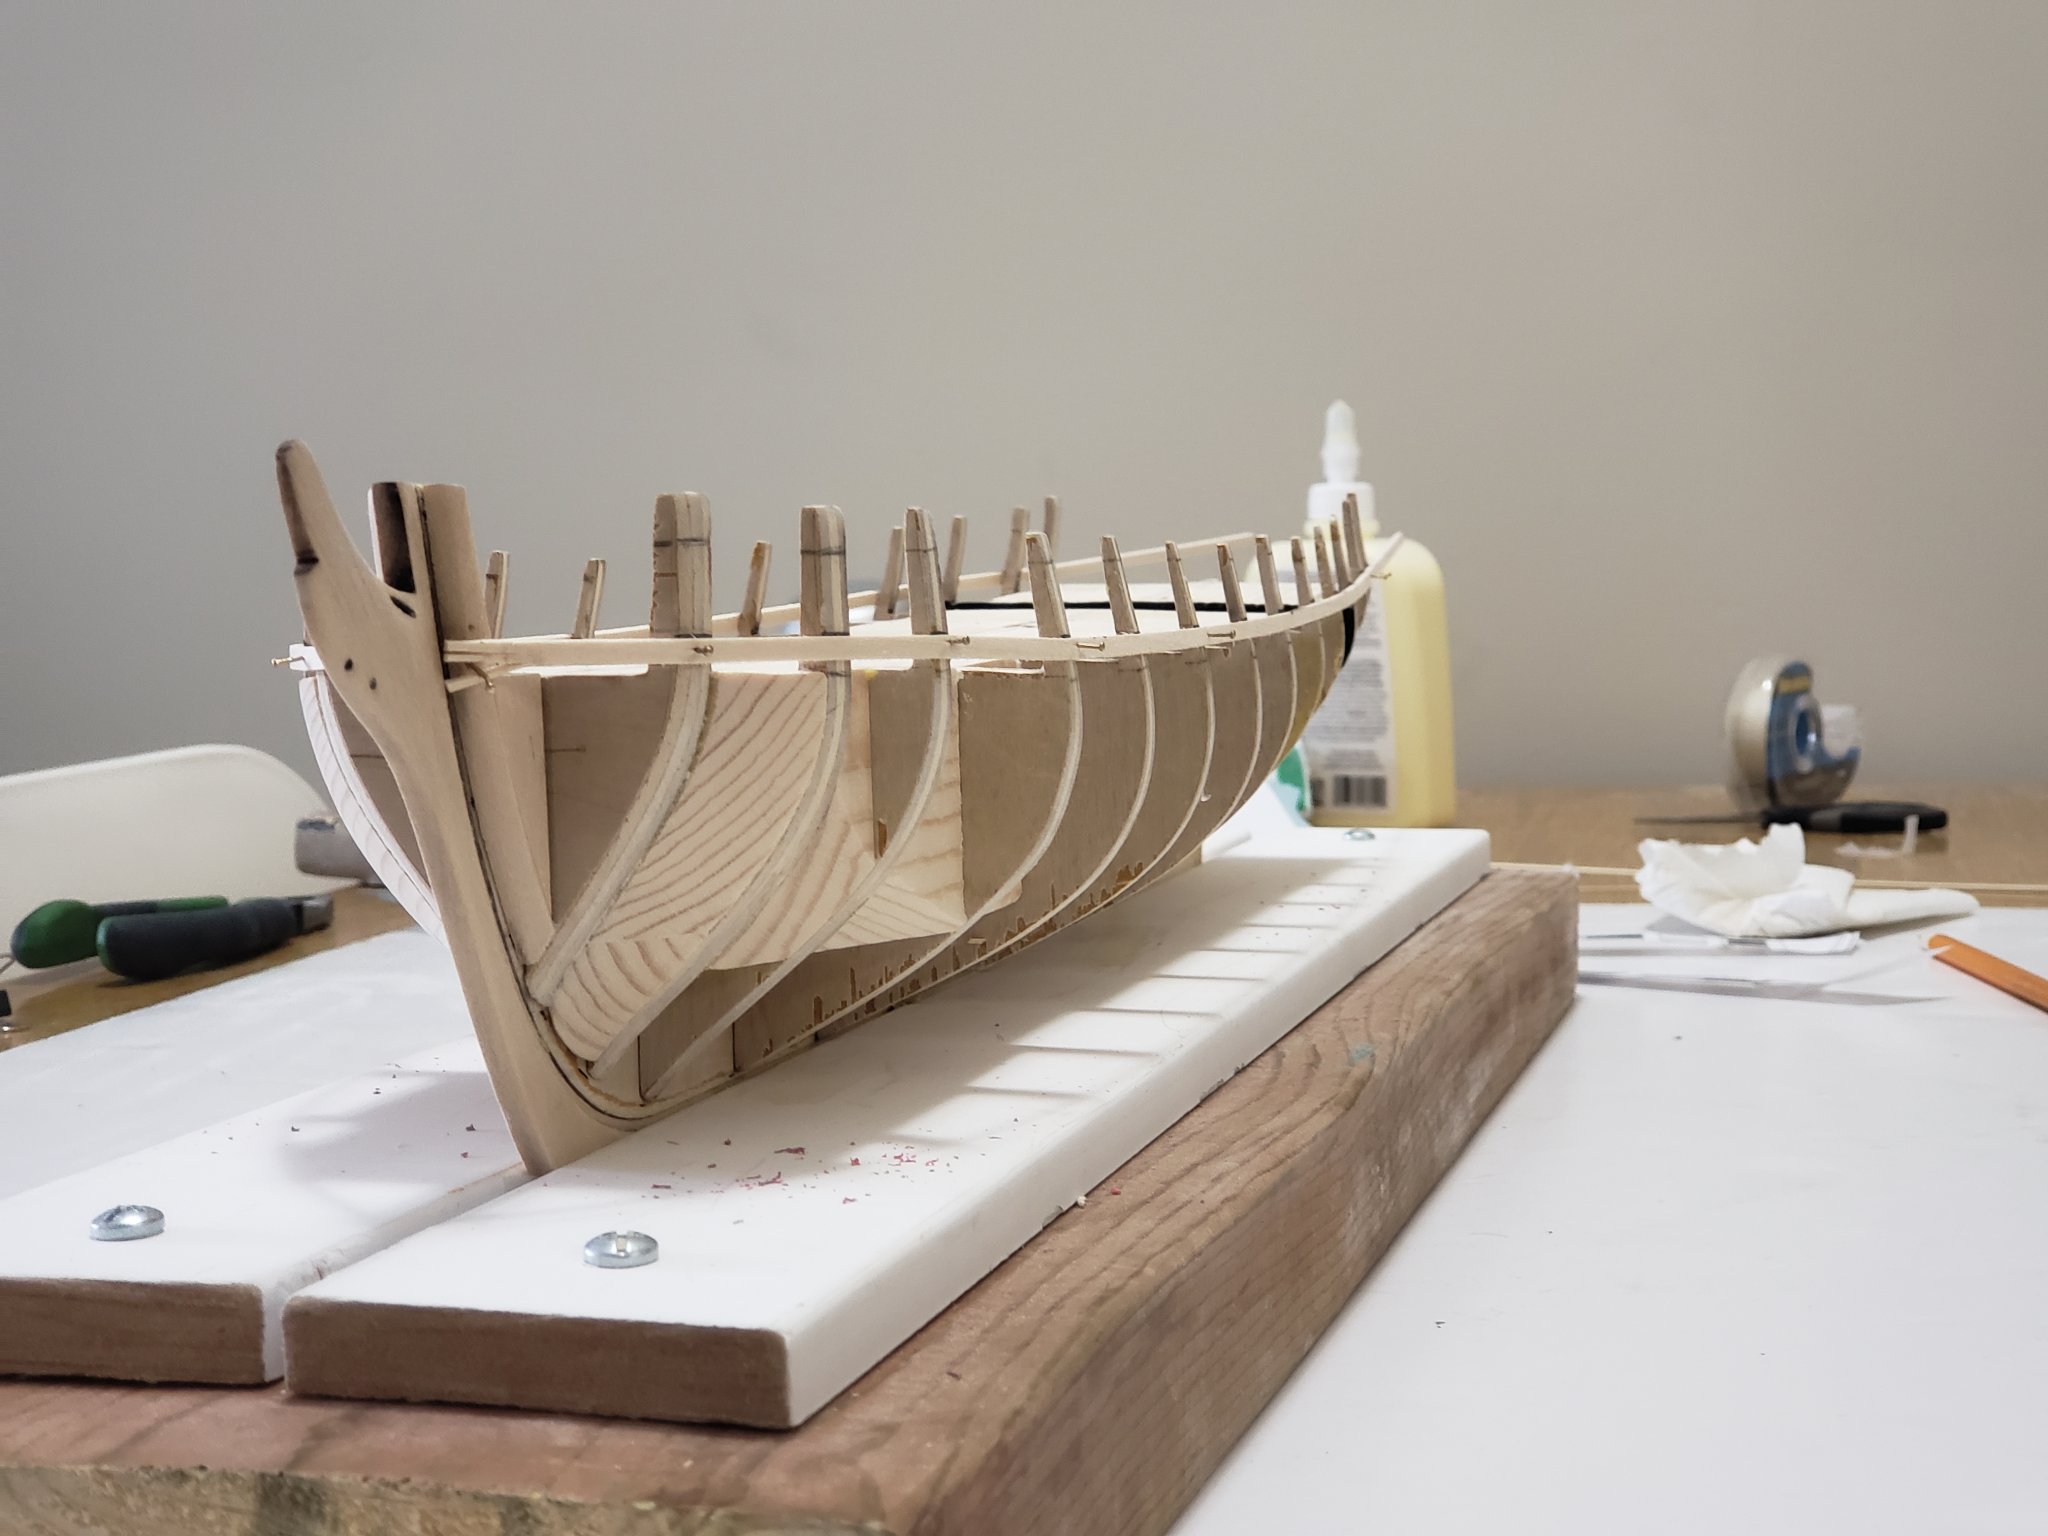
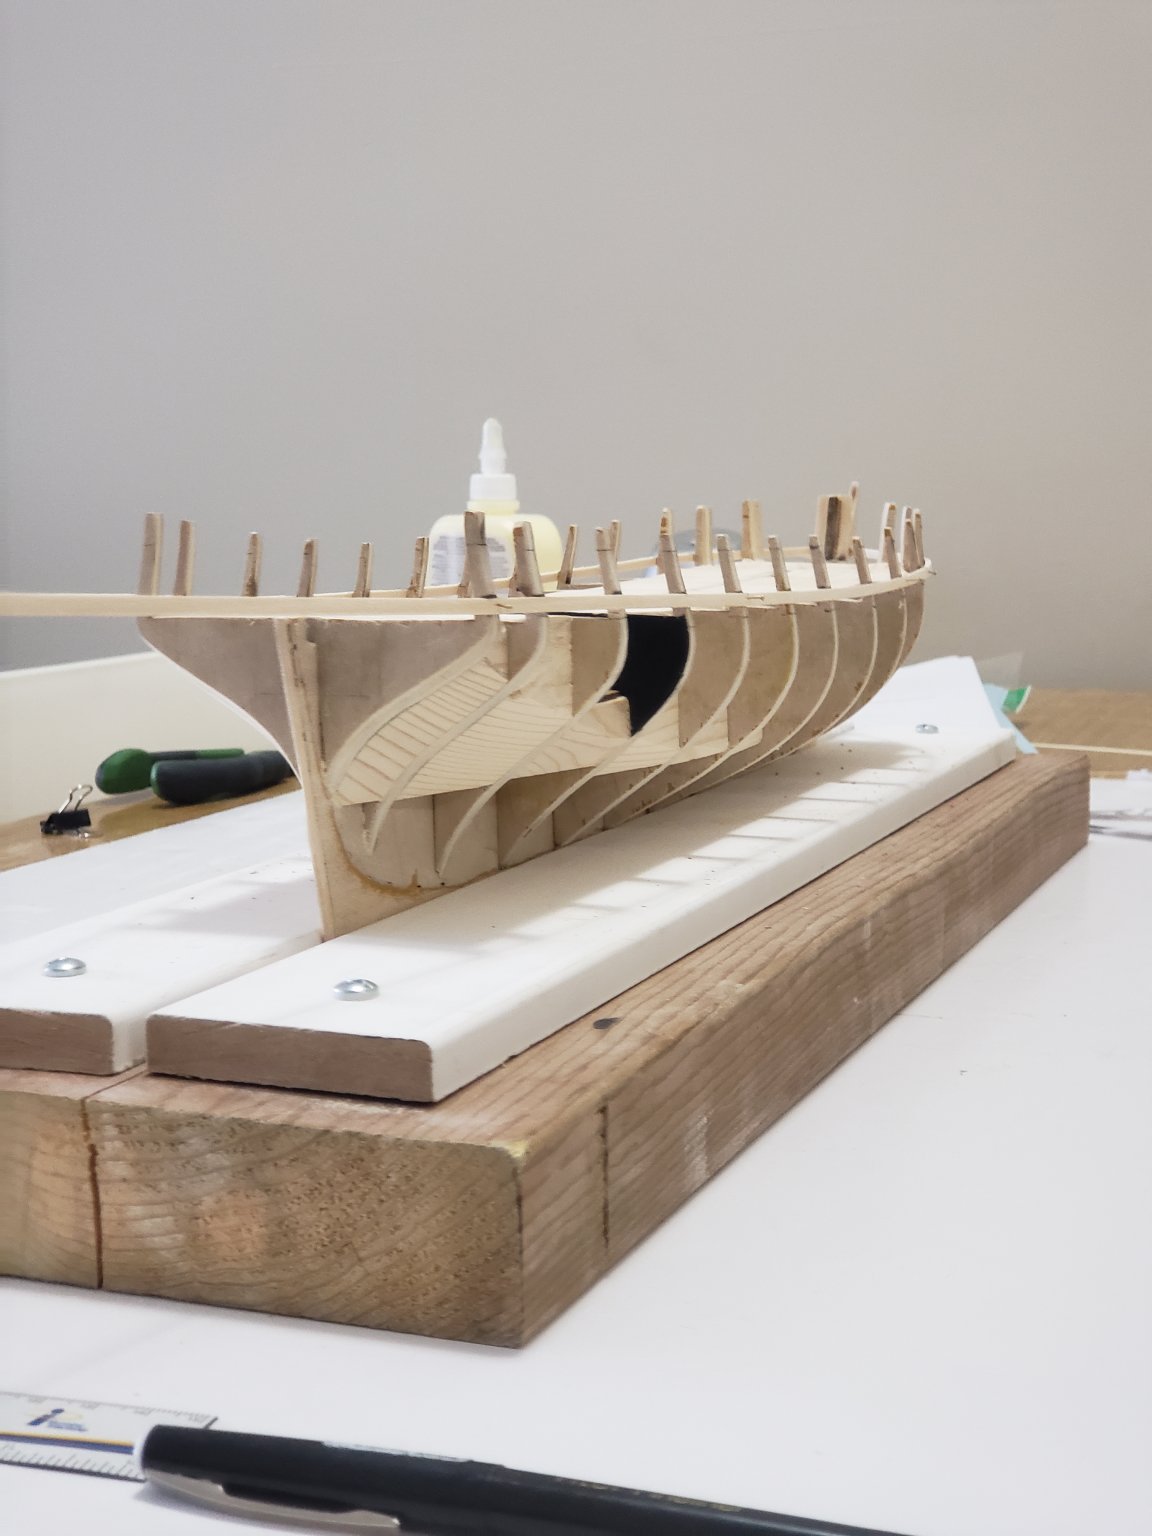
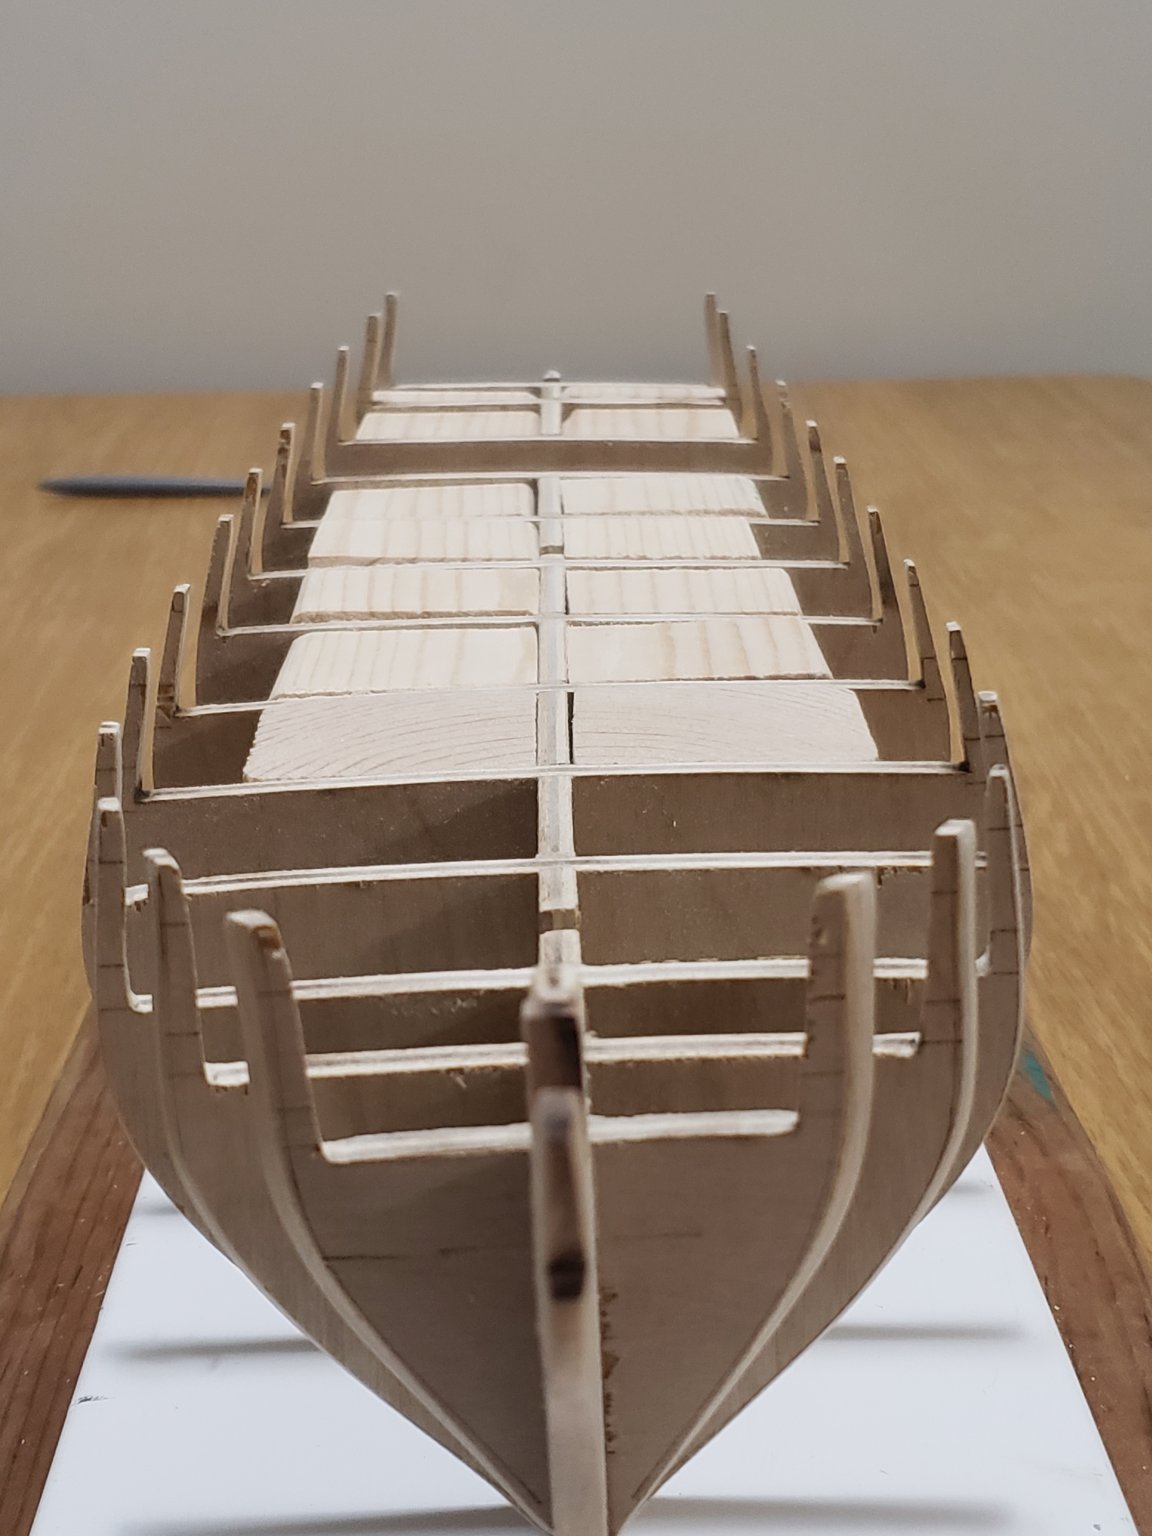
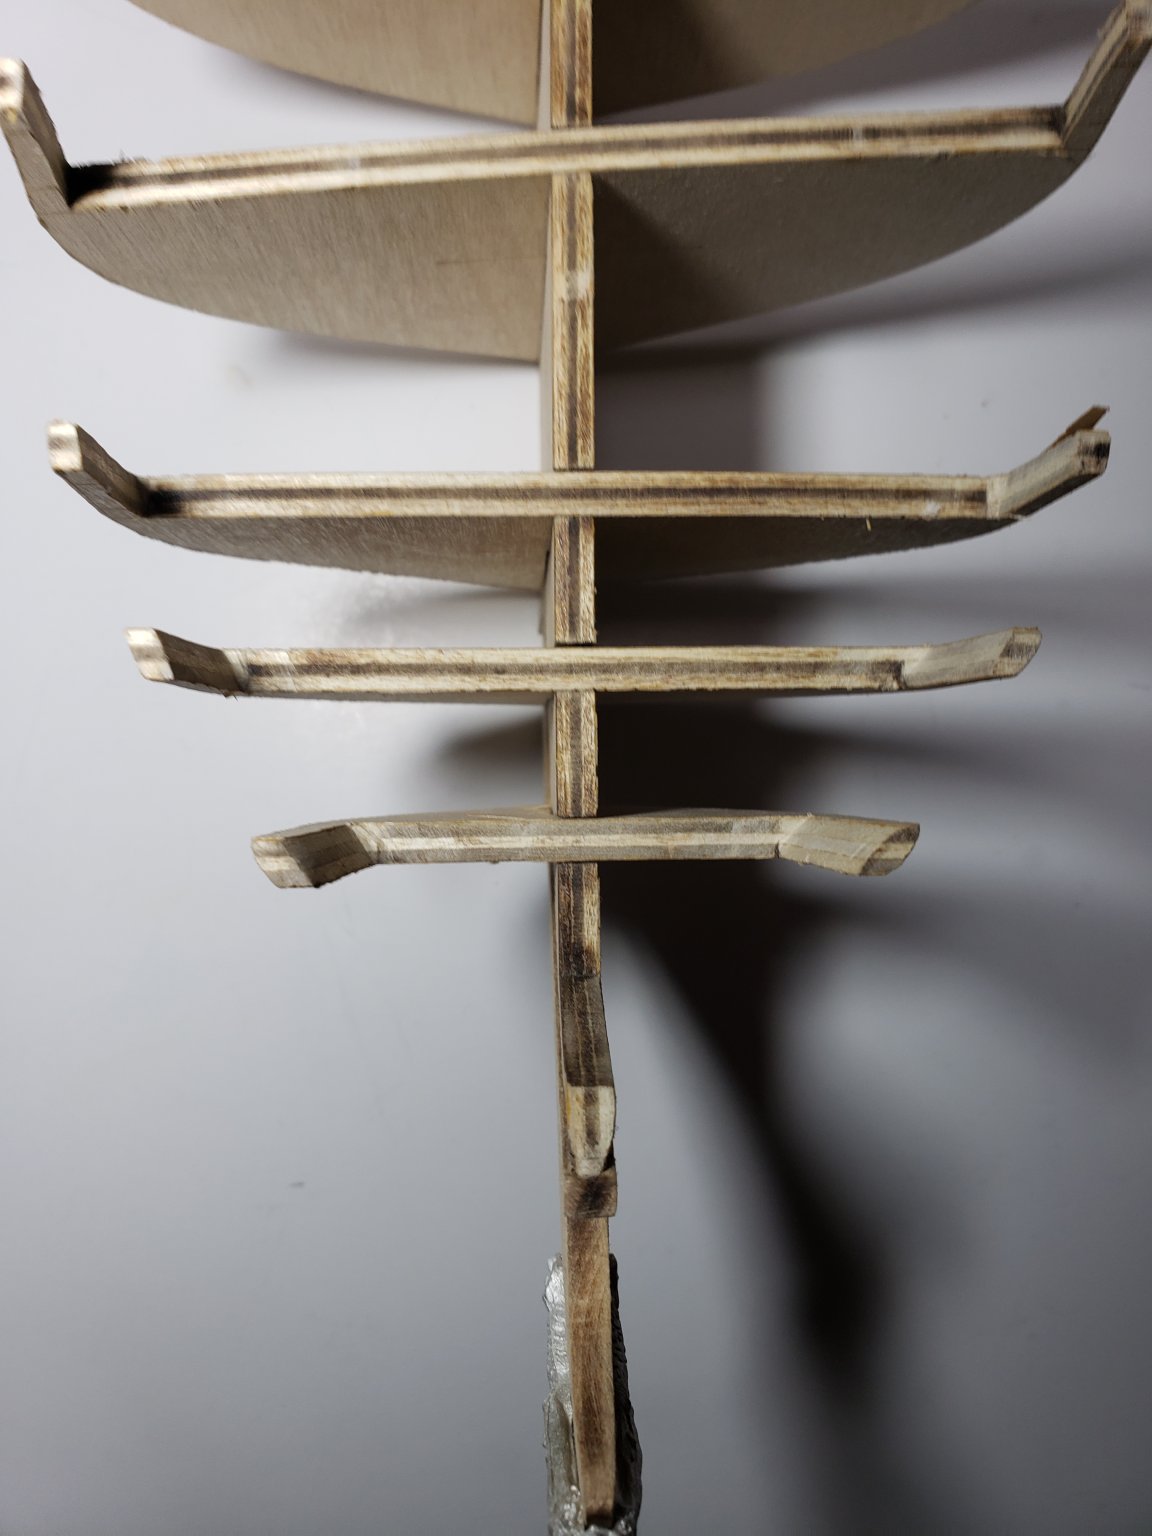
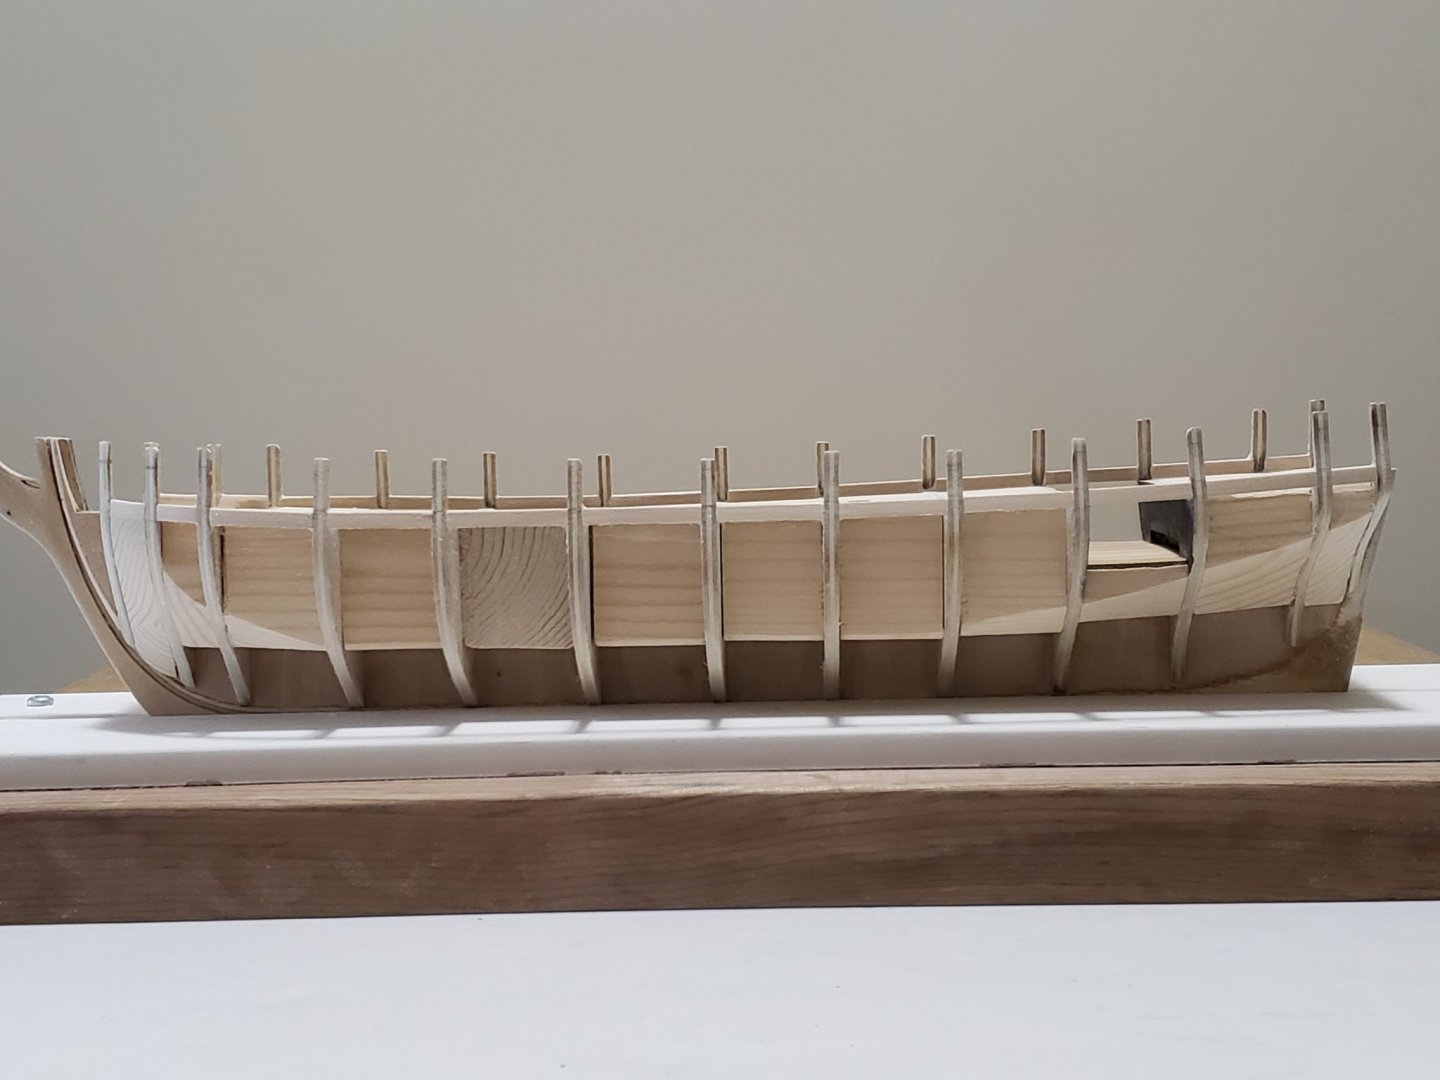
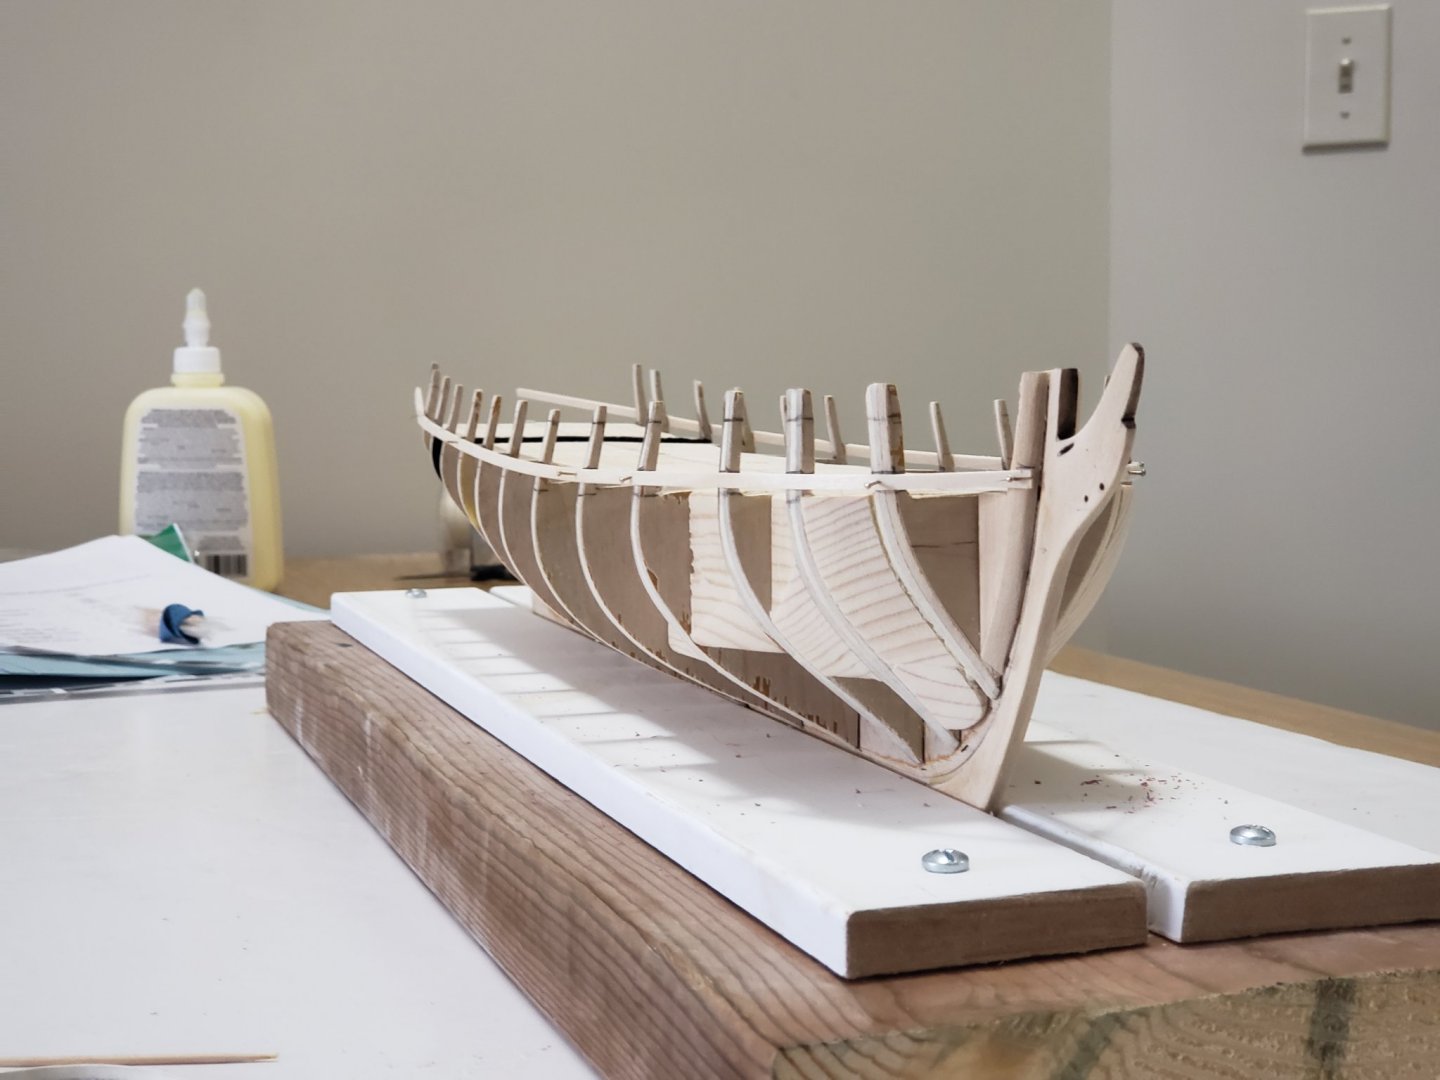
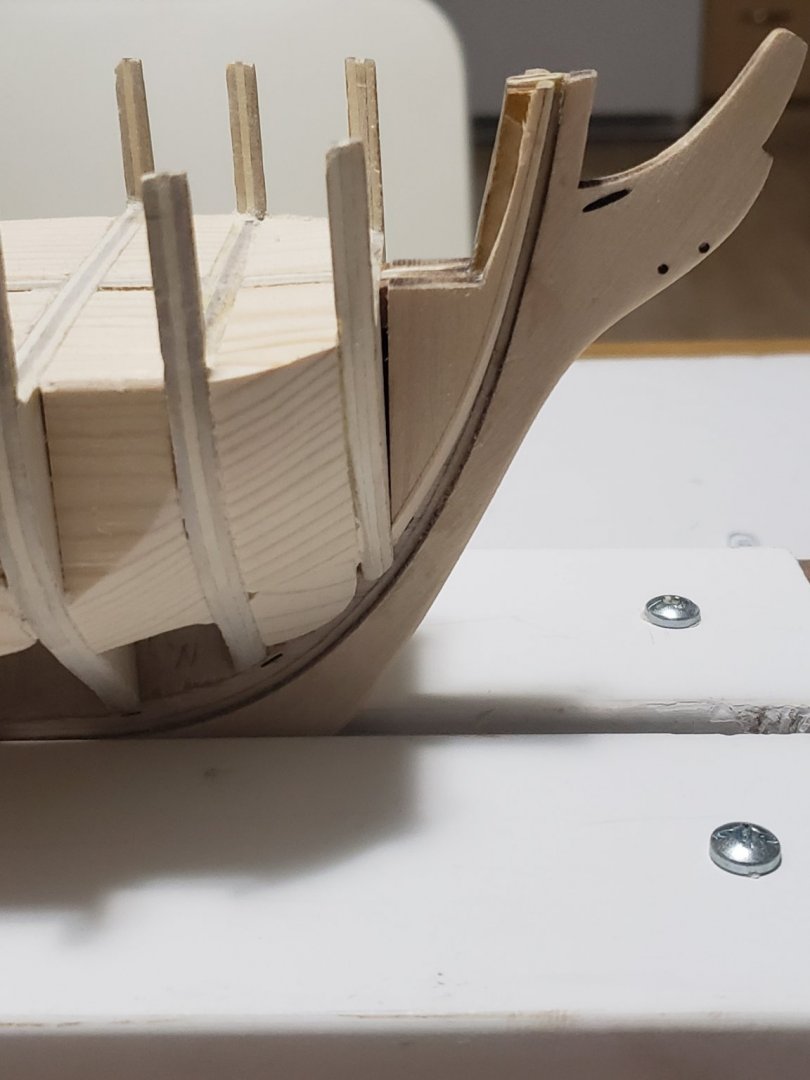
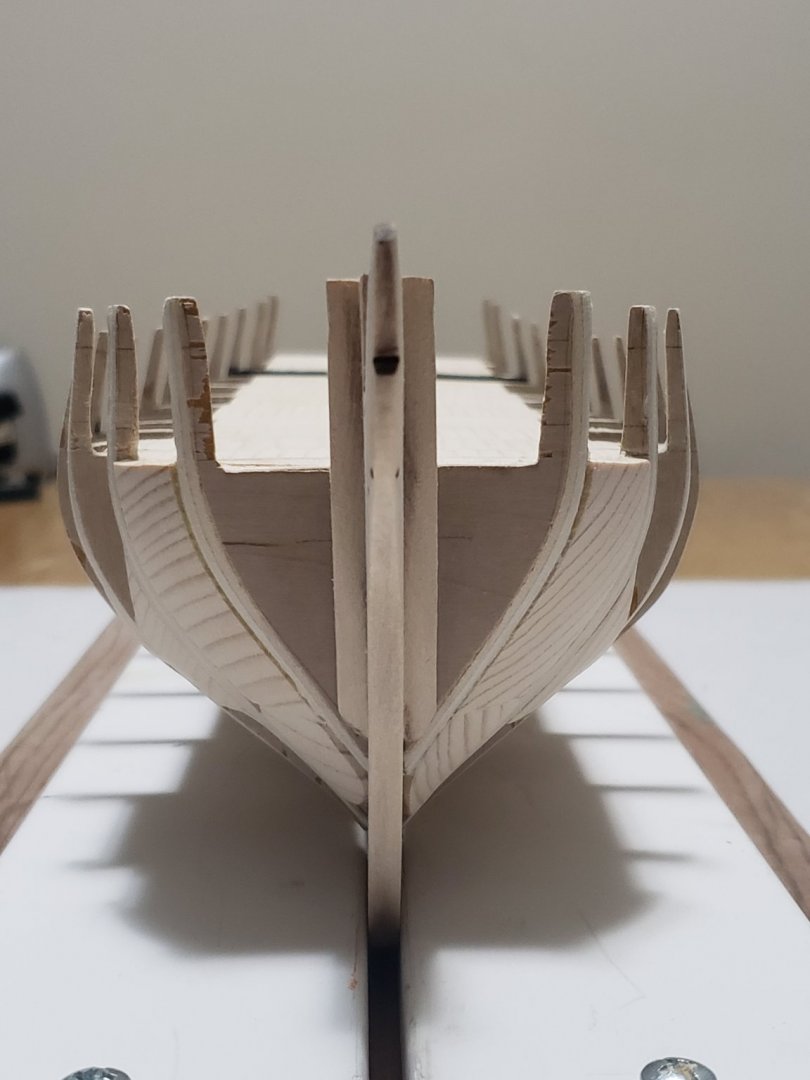
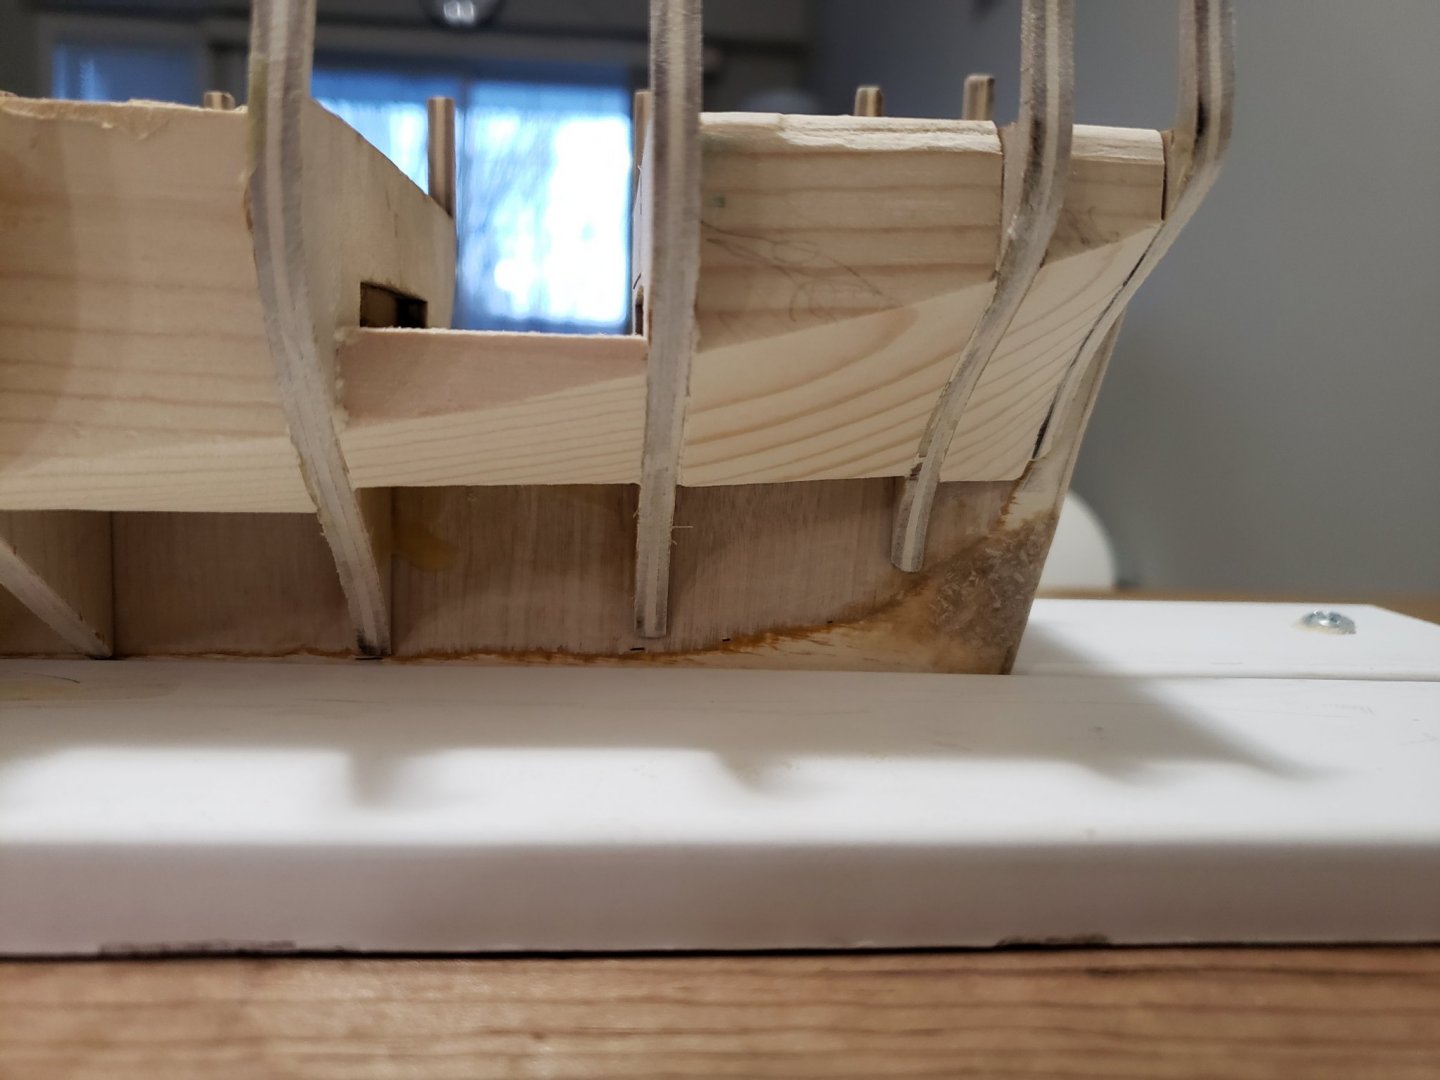
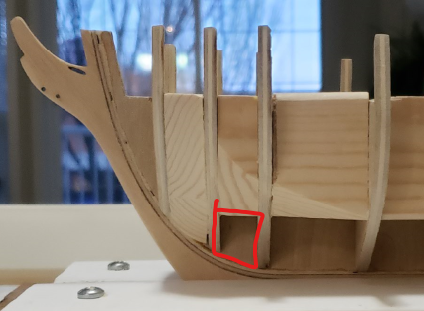
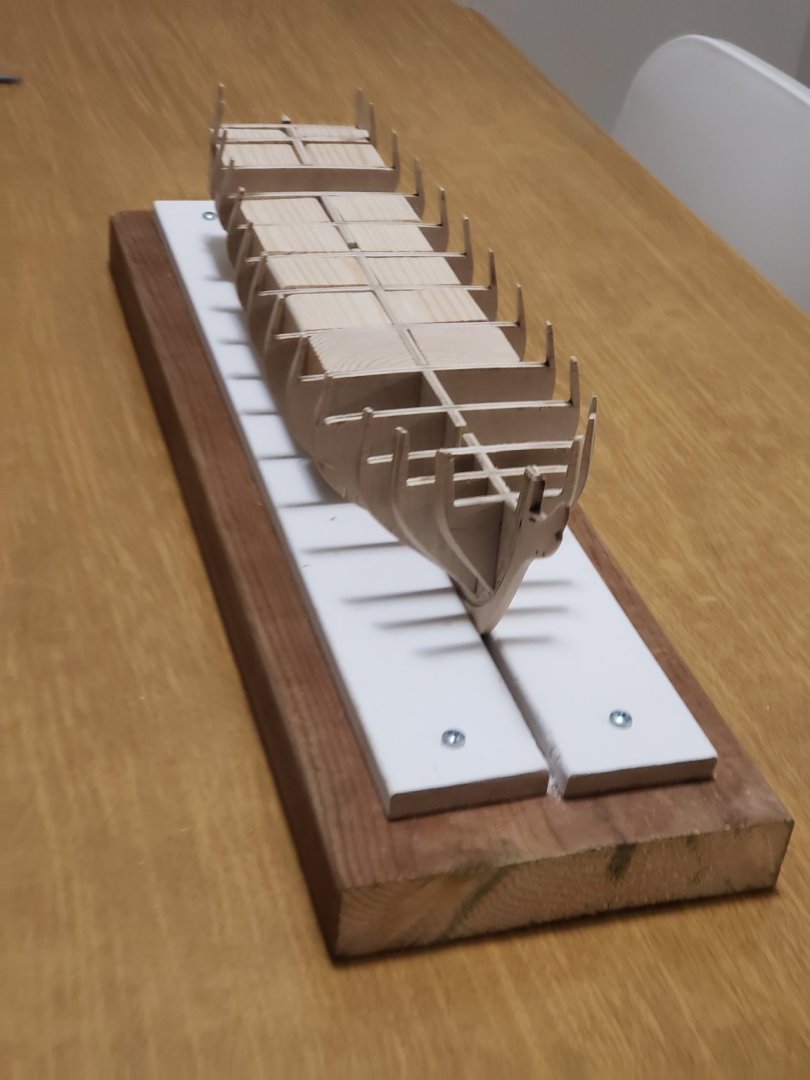
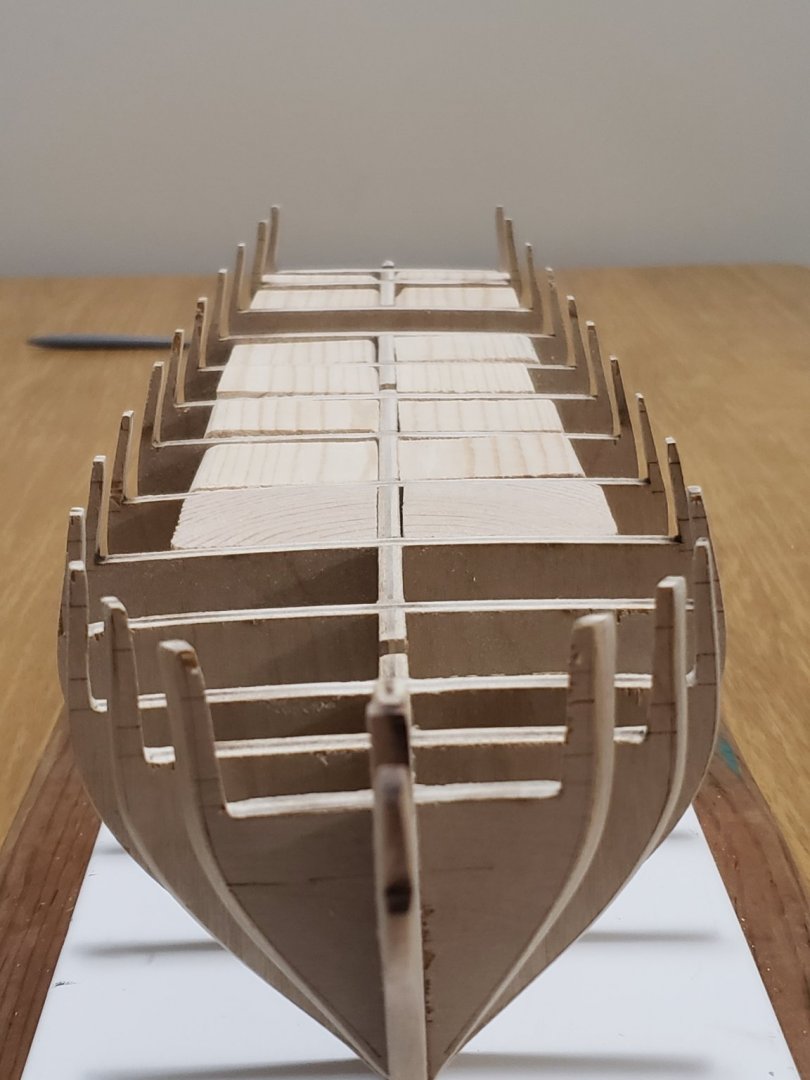
The filler blocks have been sanded into shape of the hull. Here are some photos: Do I also need to install some rough filler blocks in these areas of the stern and bow? I didn't put them since the planking angle wasn't as severe in those areas but just wondering if this is the case. I am next going to be sanding the fillers at the deck level and completing the last steps of Chapter 2.

- 950 replies
-
- 8
-
-
- syren
- model shipways
- (and 1 more)
-
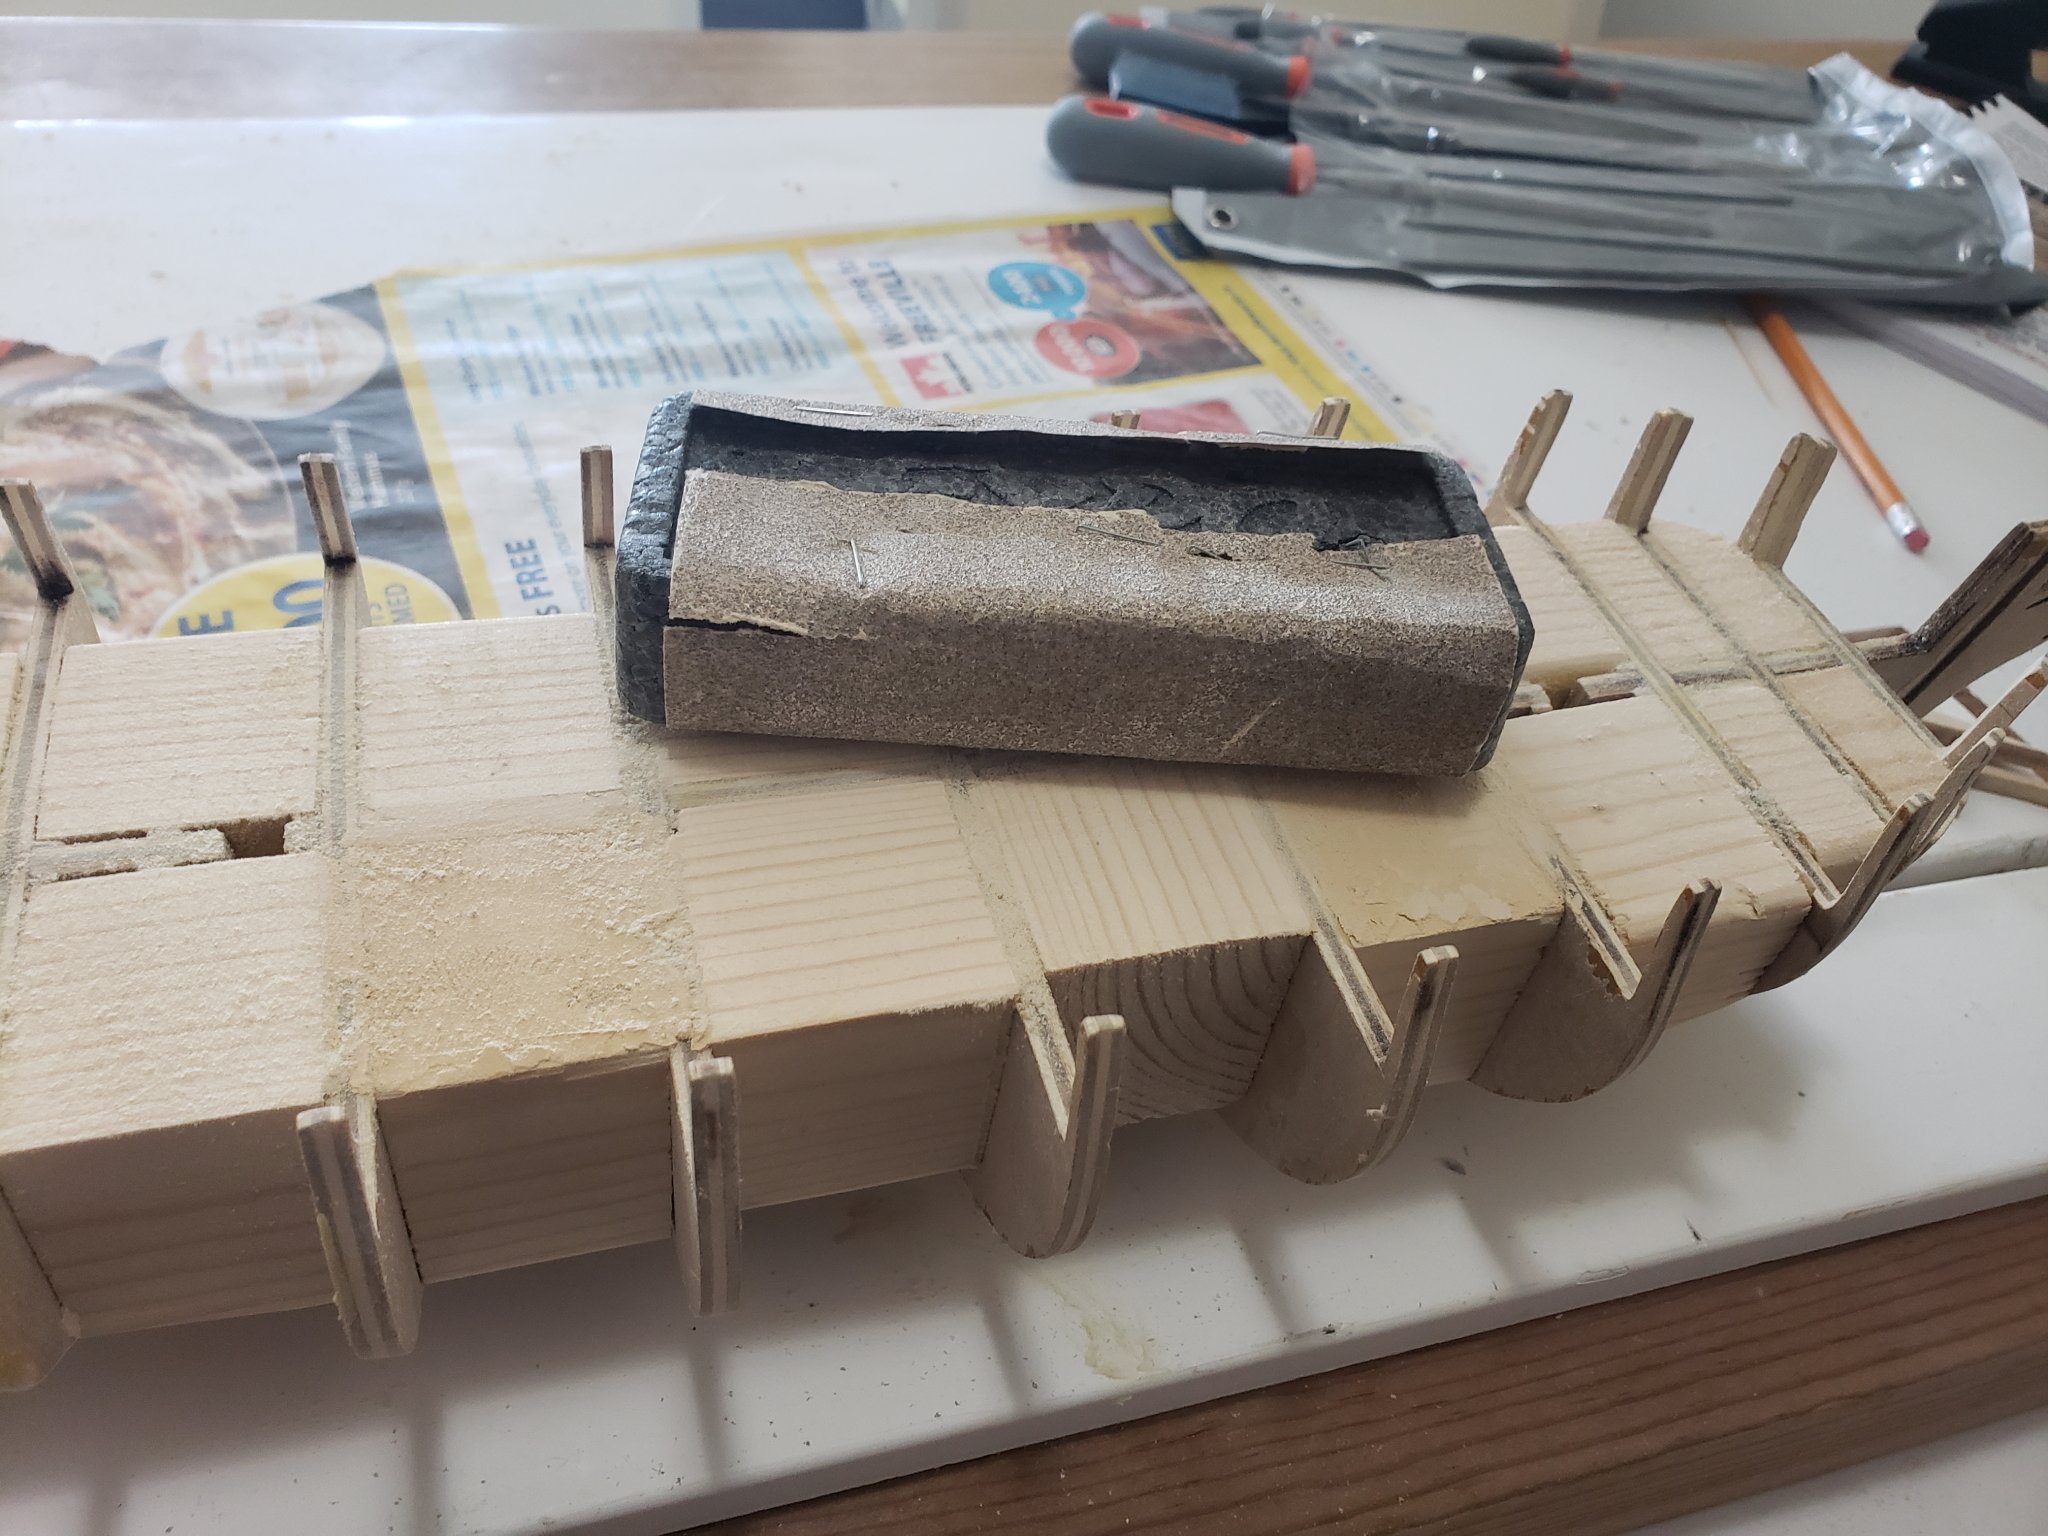
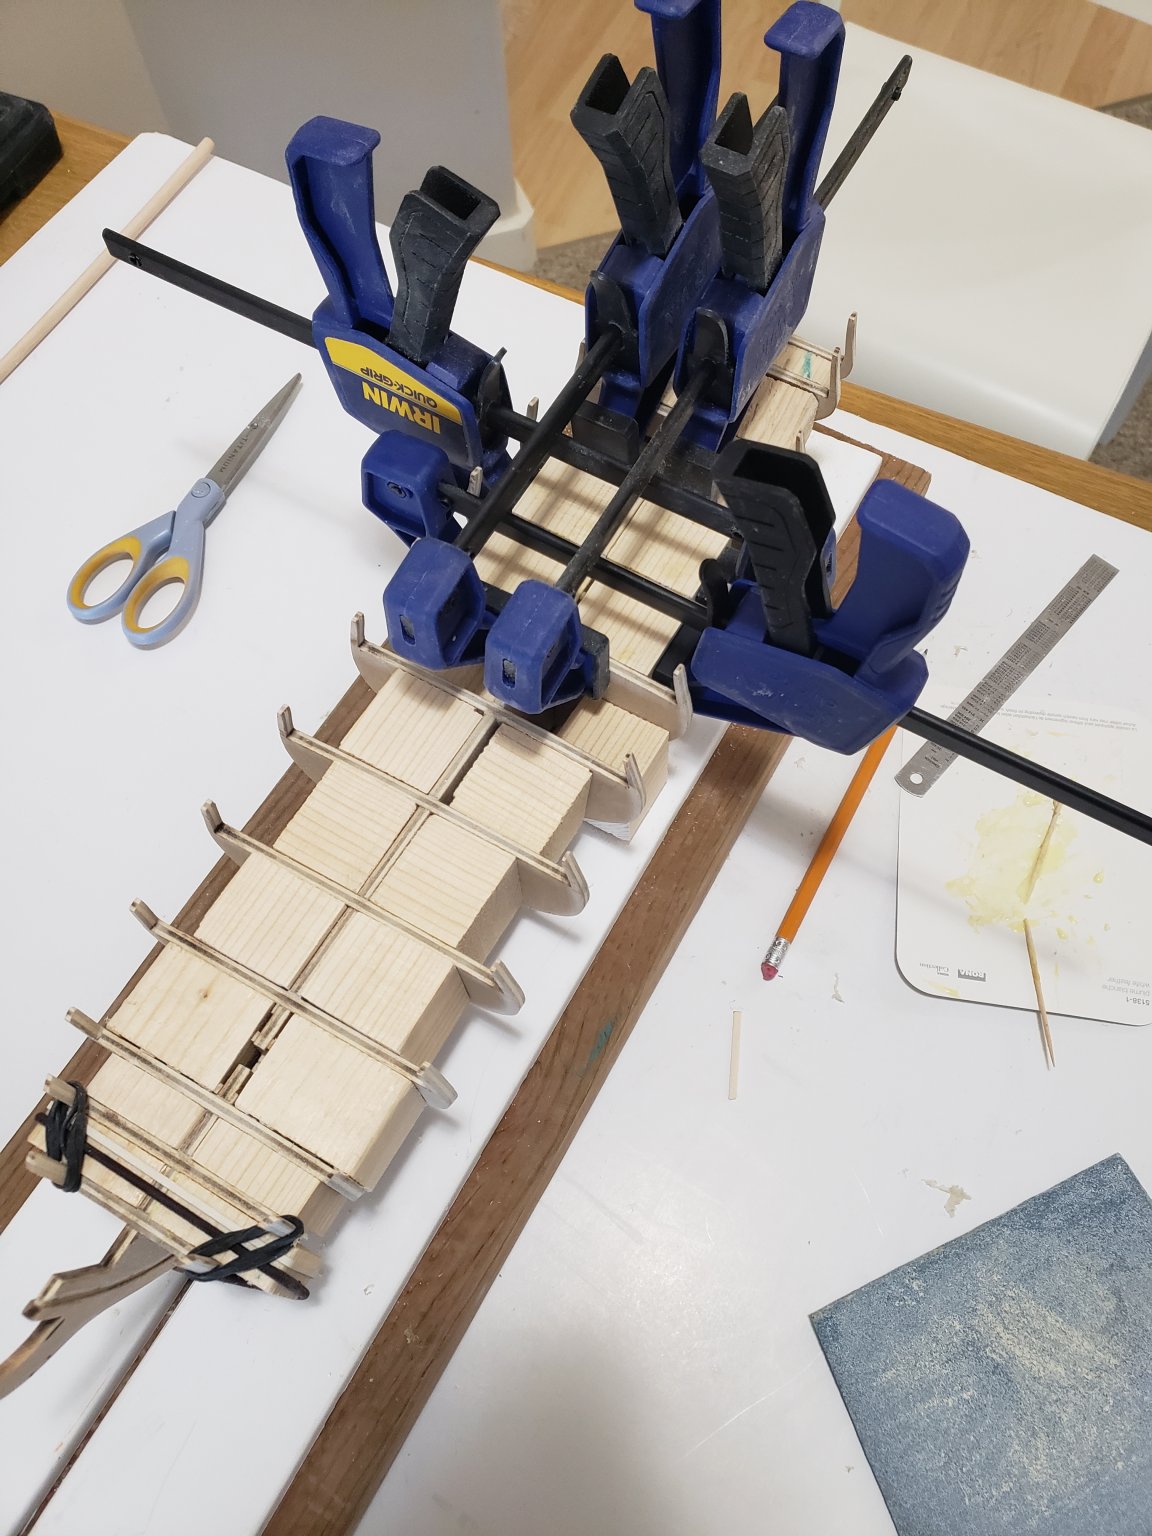
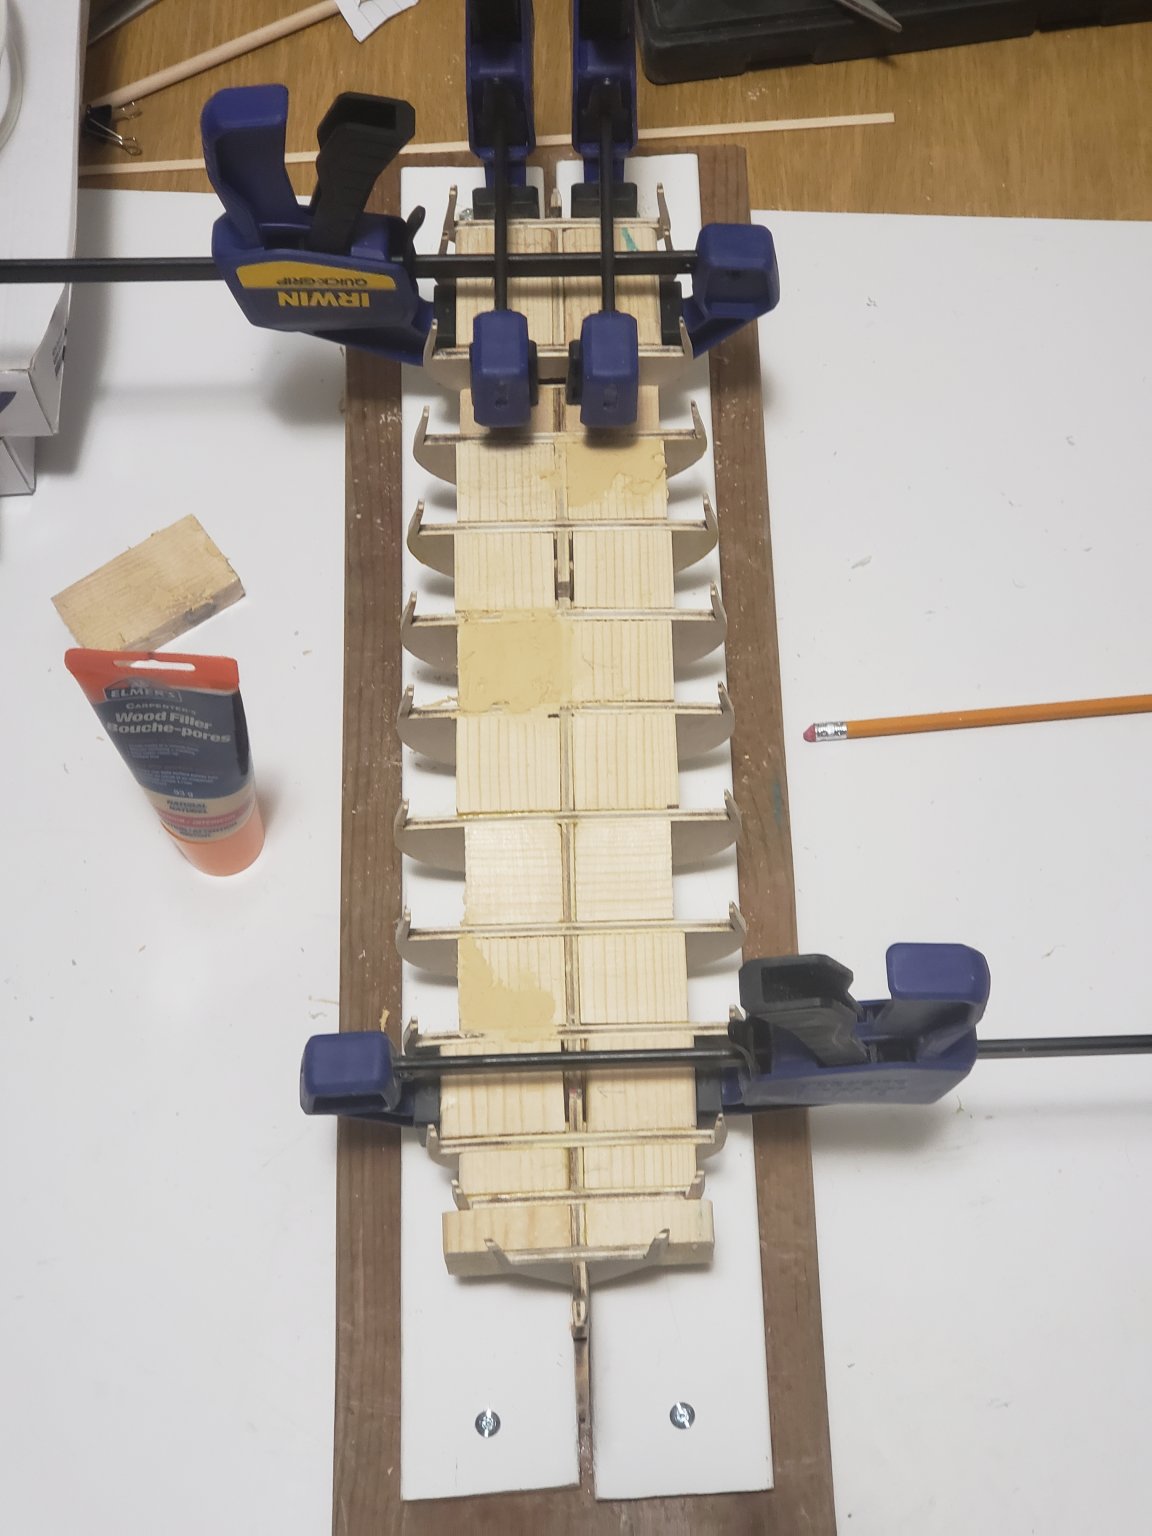
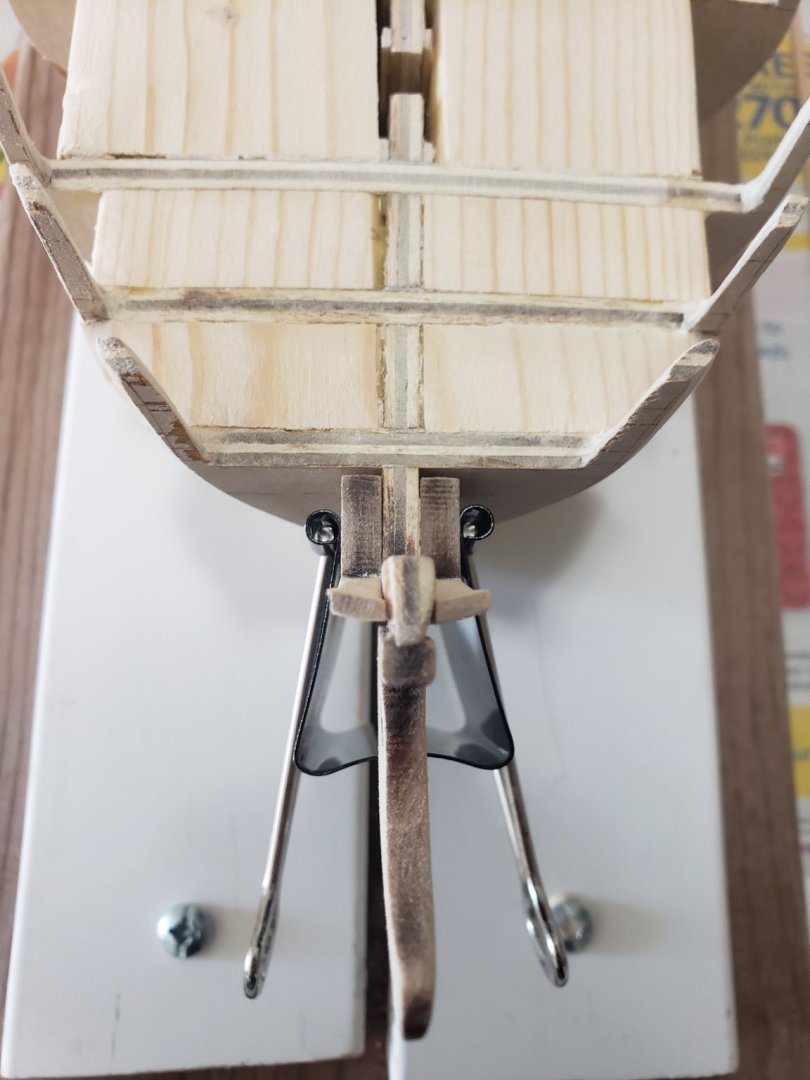
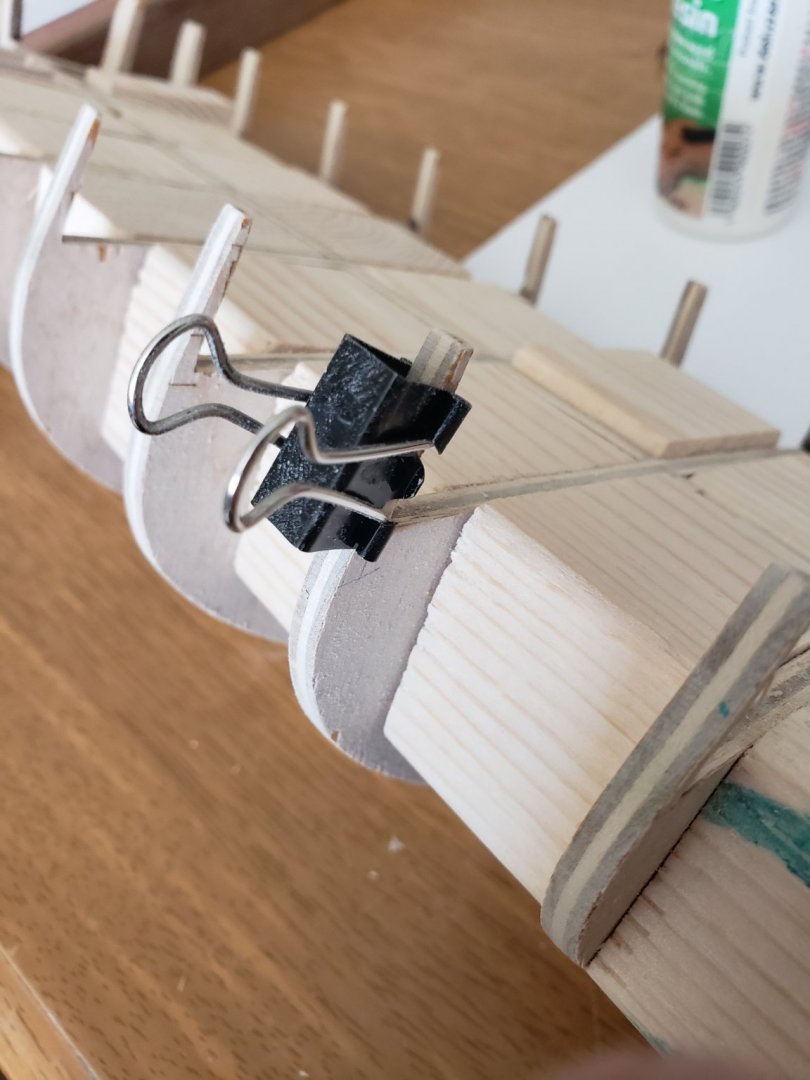
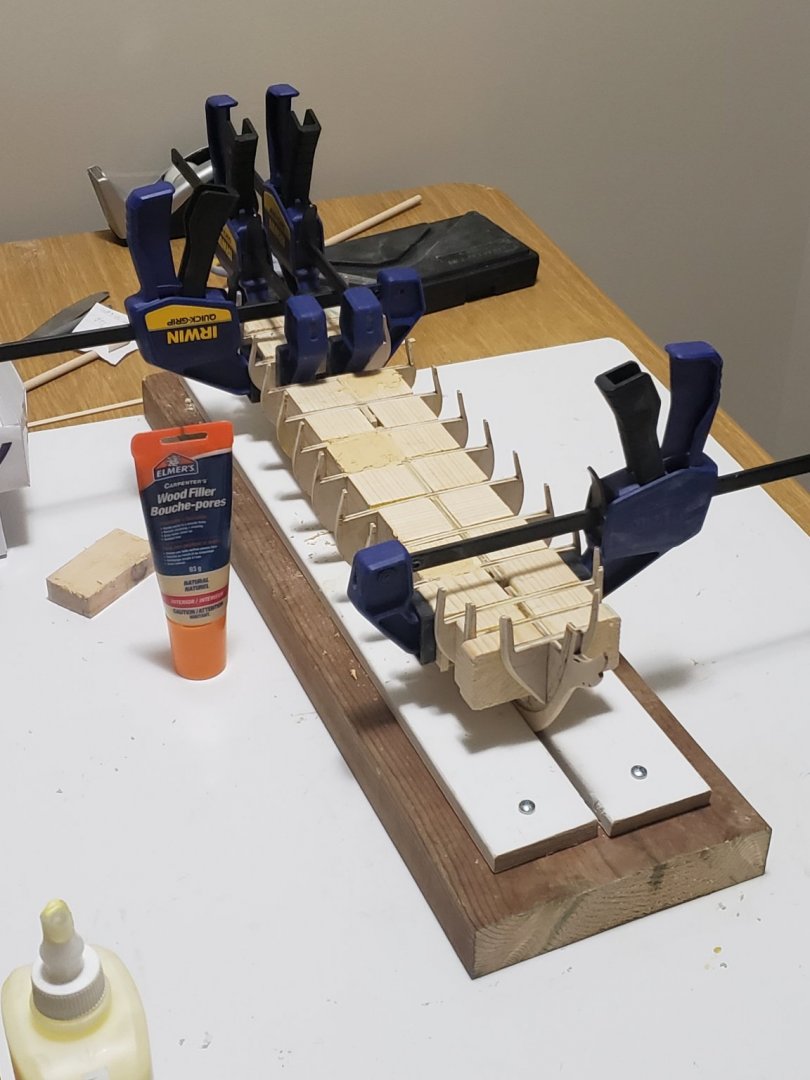
With all the filler blocks cut early today, I dry fitted them and unintentionally applied the most minuscule amount of pressure imaginable on one of the bulwark frames and it snapped right off: I guess breaking at least one of the bulwark frames is the price of admission to being part of the Syren club 😄. I quickly glued it back: Now it looks like nothing happened 🤫: I used Patrick's method (detailed here) to create a square for mast to sit using one of the planking strips provided. I sanded it down to about 1.25 mm so that the mast would sit snugly. Here is the result: Finally to end the day off I finished gluing the filler blocks in place by clamping each section as shown here: After all filler blocks glued in place, I applied some wood filler to some blocks which were glued a bit lower than the deck level. I was not able to move the blocks up right after moving them in position as the glue already started to set and the filler blocks were fitted very snugly, so applied wood filler instead. Here is a photo of the warp almost gone. There is a very slight curve which I think is manageable now, and will barely be noticeable. It can only be seen in very certain angles and lighting. Tomorrows plan is to sand the filler blocks that protrude out of the hull. I will also add in some rough filler blocks at the bow and the stern.


- 950 replies
-
- 10
-
-
- syren
- model shipways
- (and 1 more)
-
Thanks Robin, and thank you all for the likes! Are there any benefits from having the masts sit freely or is all personal preference? I really like the wedge idea, I was wondering how I'll set the masts since they are not really a secure fit into the slots.
- 950 replies
-
- 1
-
-
- syren
- model shipways
- (and 1 more)
-
Hey Patrick, how deep did you cut the slots to? I was looking over Chapter 12 of the instructions and Chuck mentioned to drill them to 1/2 inch so that is what I did on mine. Looking at it now, it might be a bit shallow, so I am thinking of increasing the depth.
-
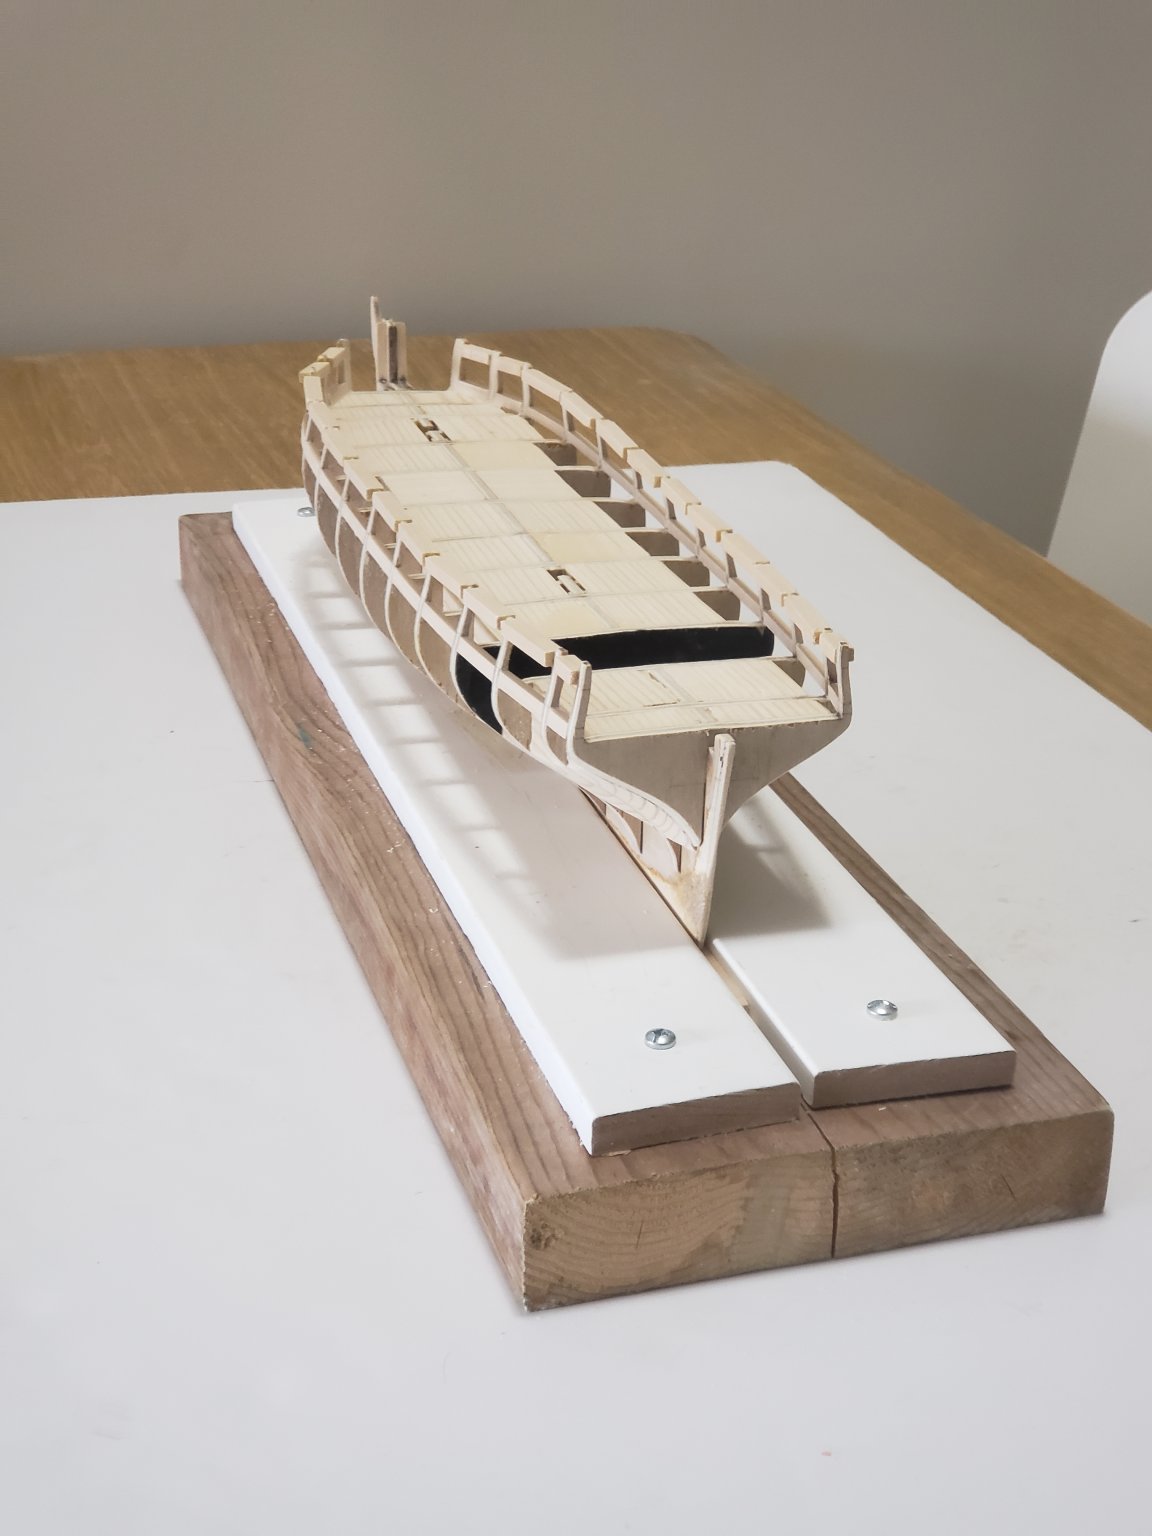
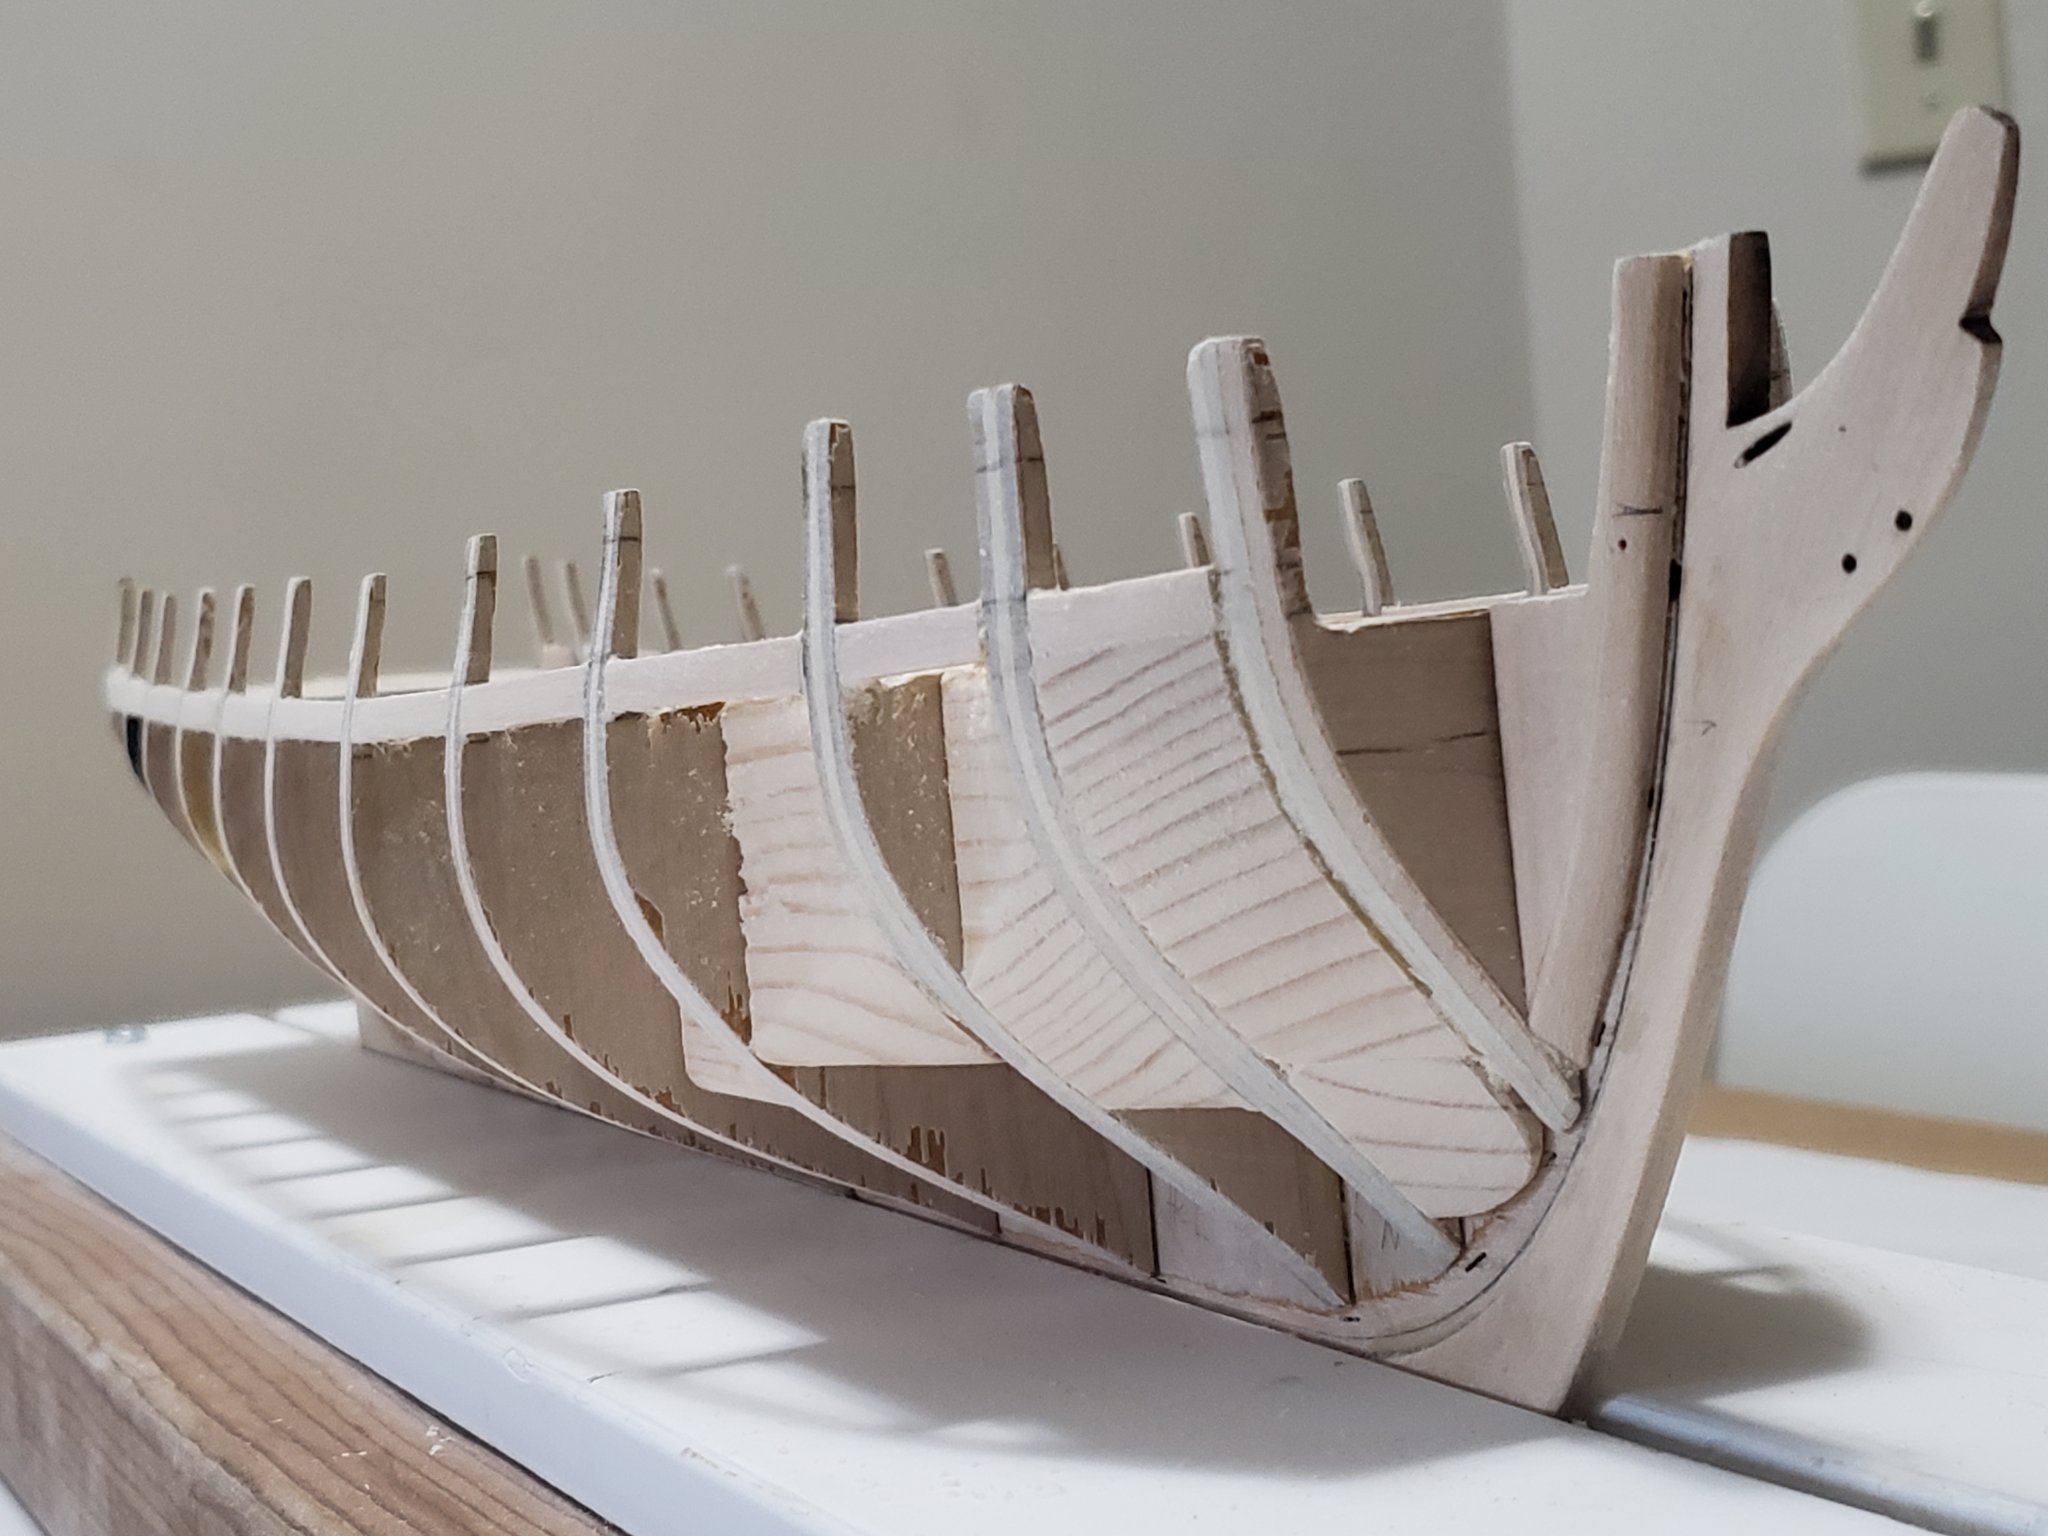
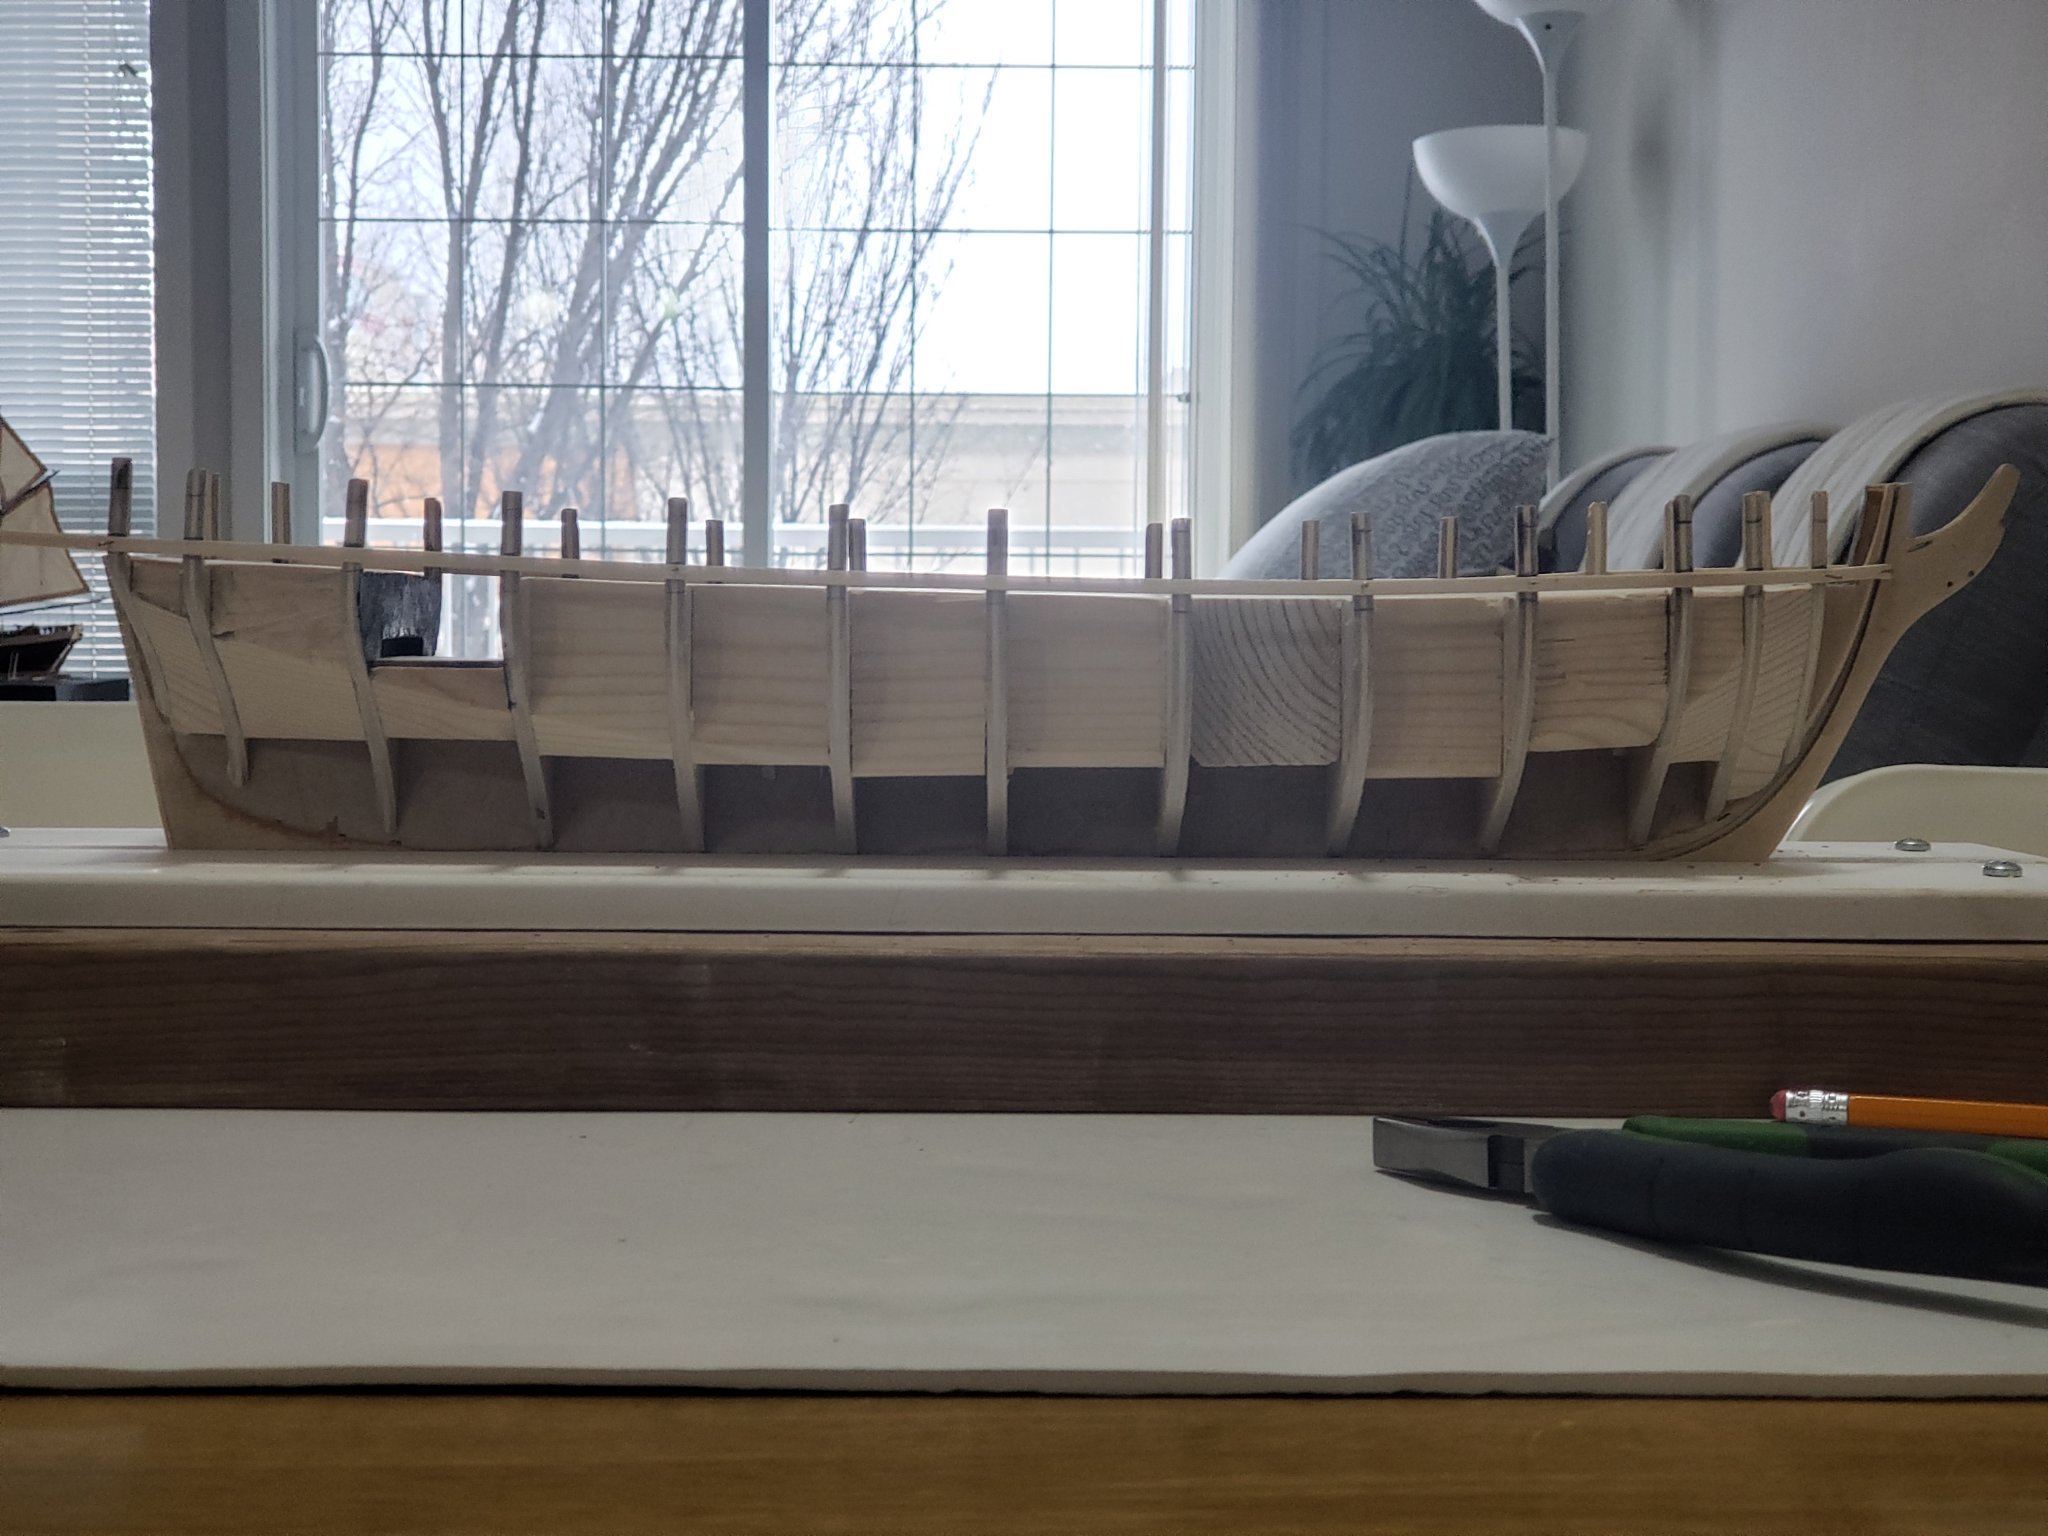
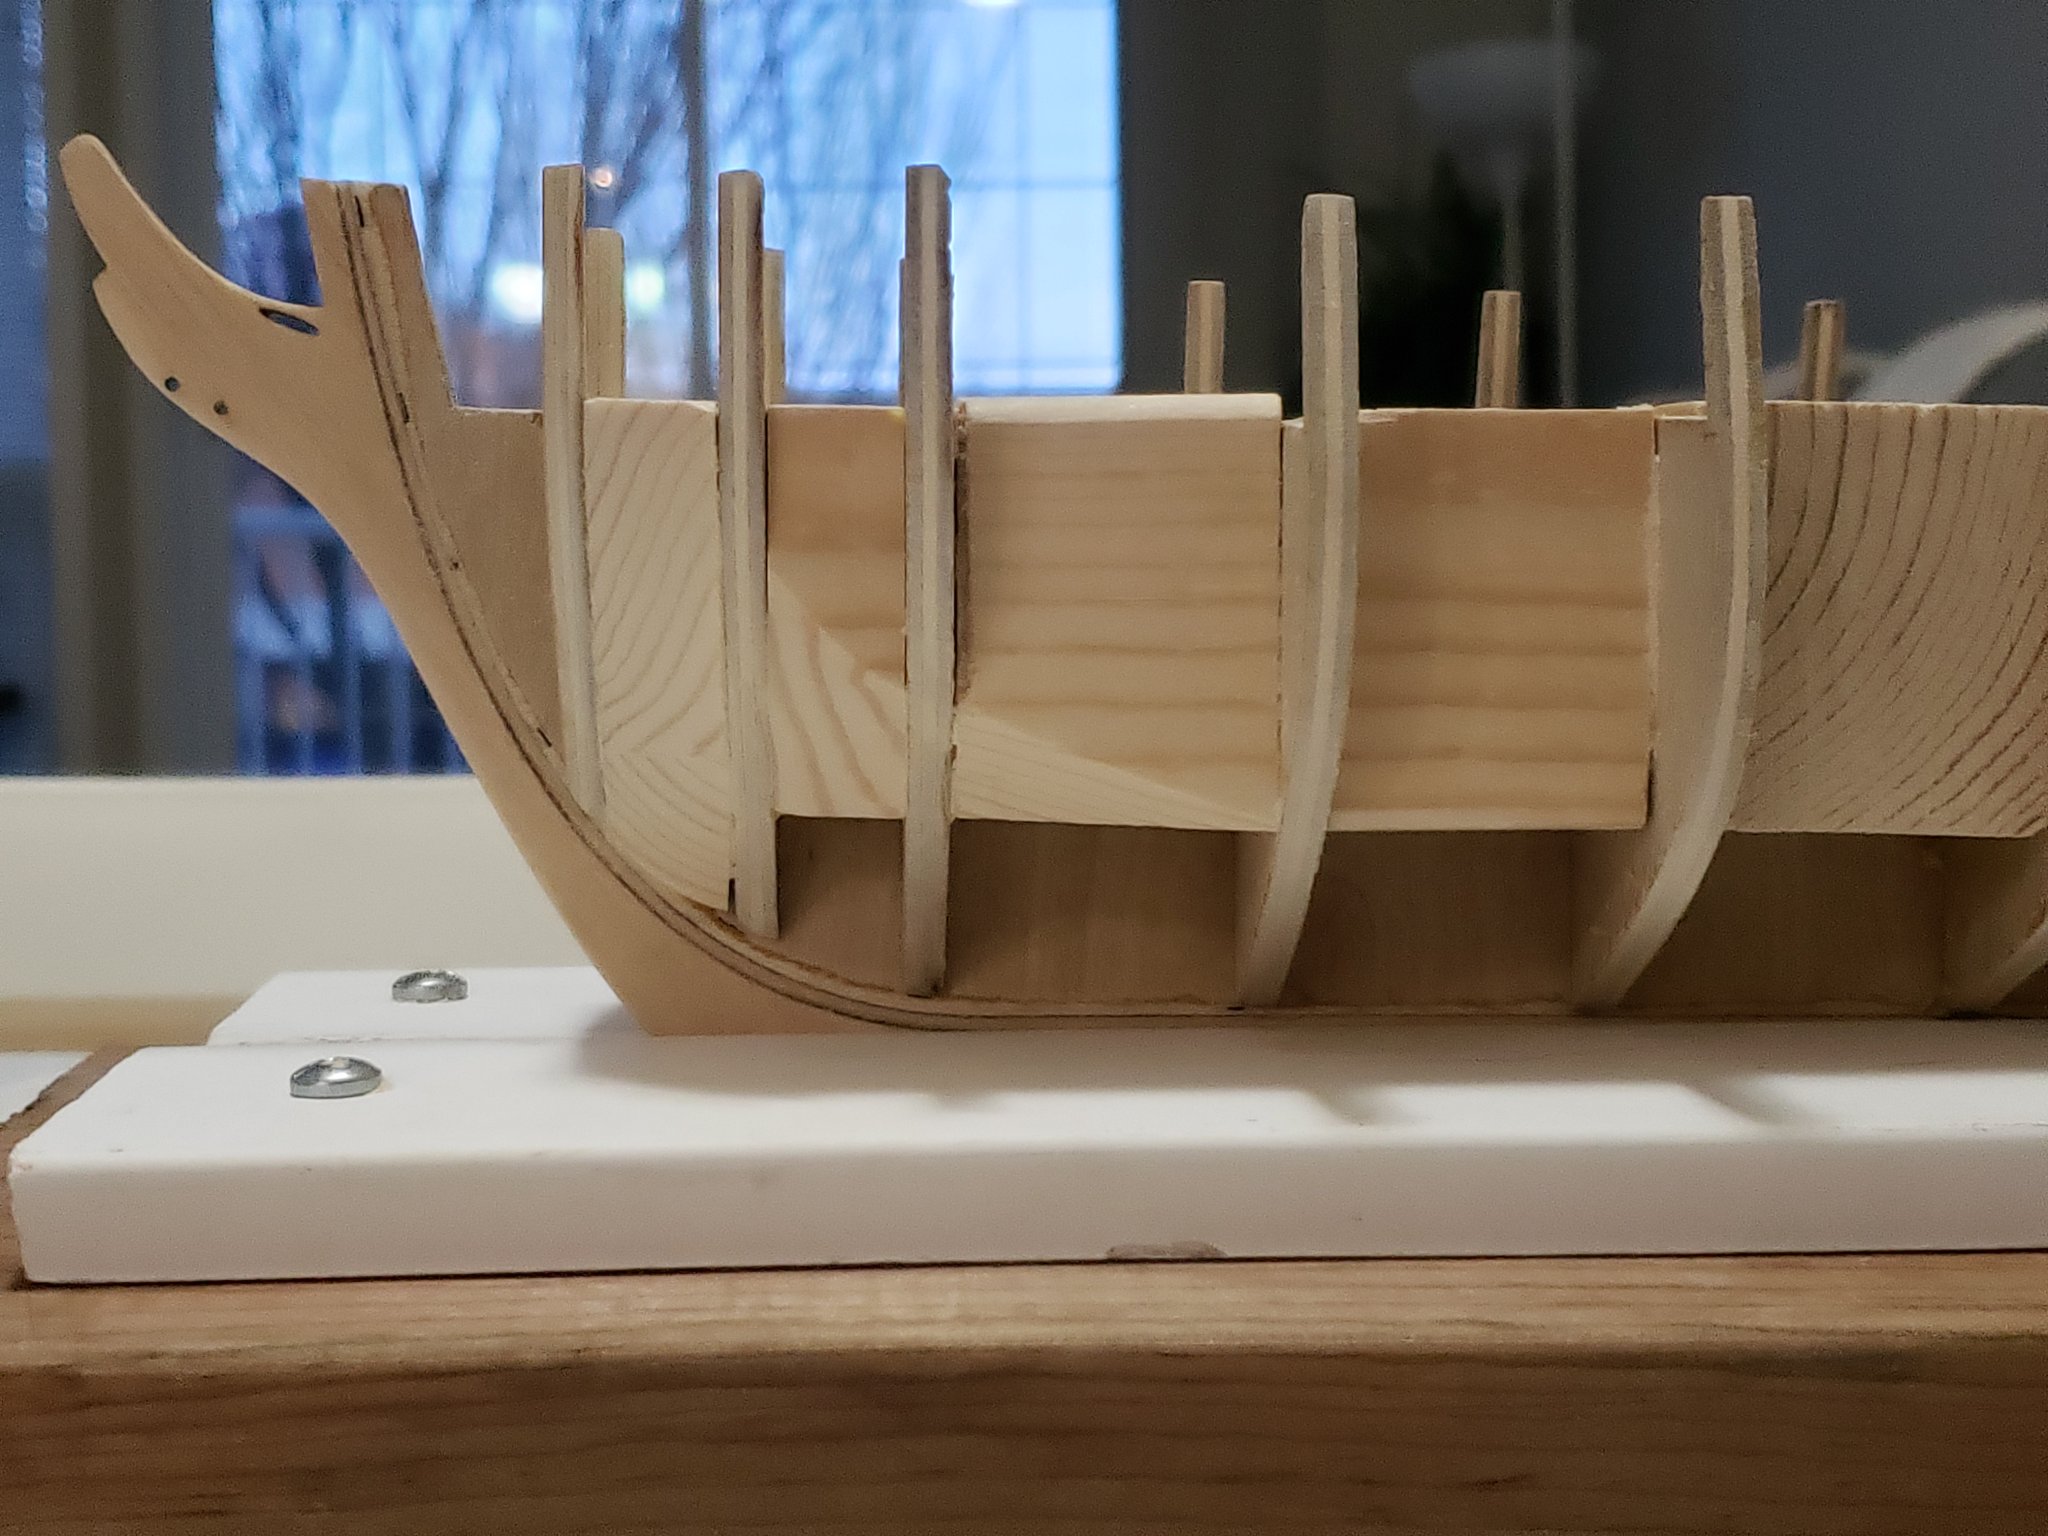
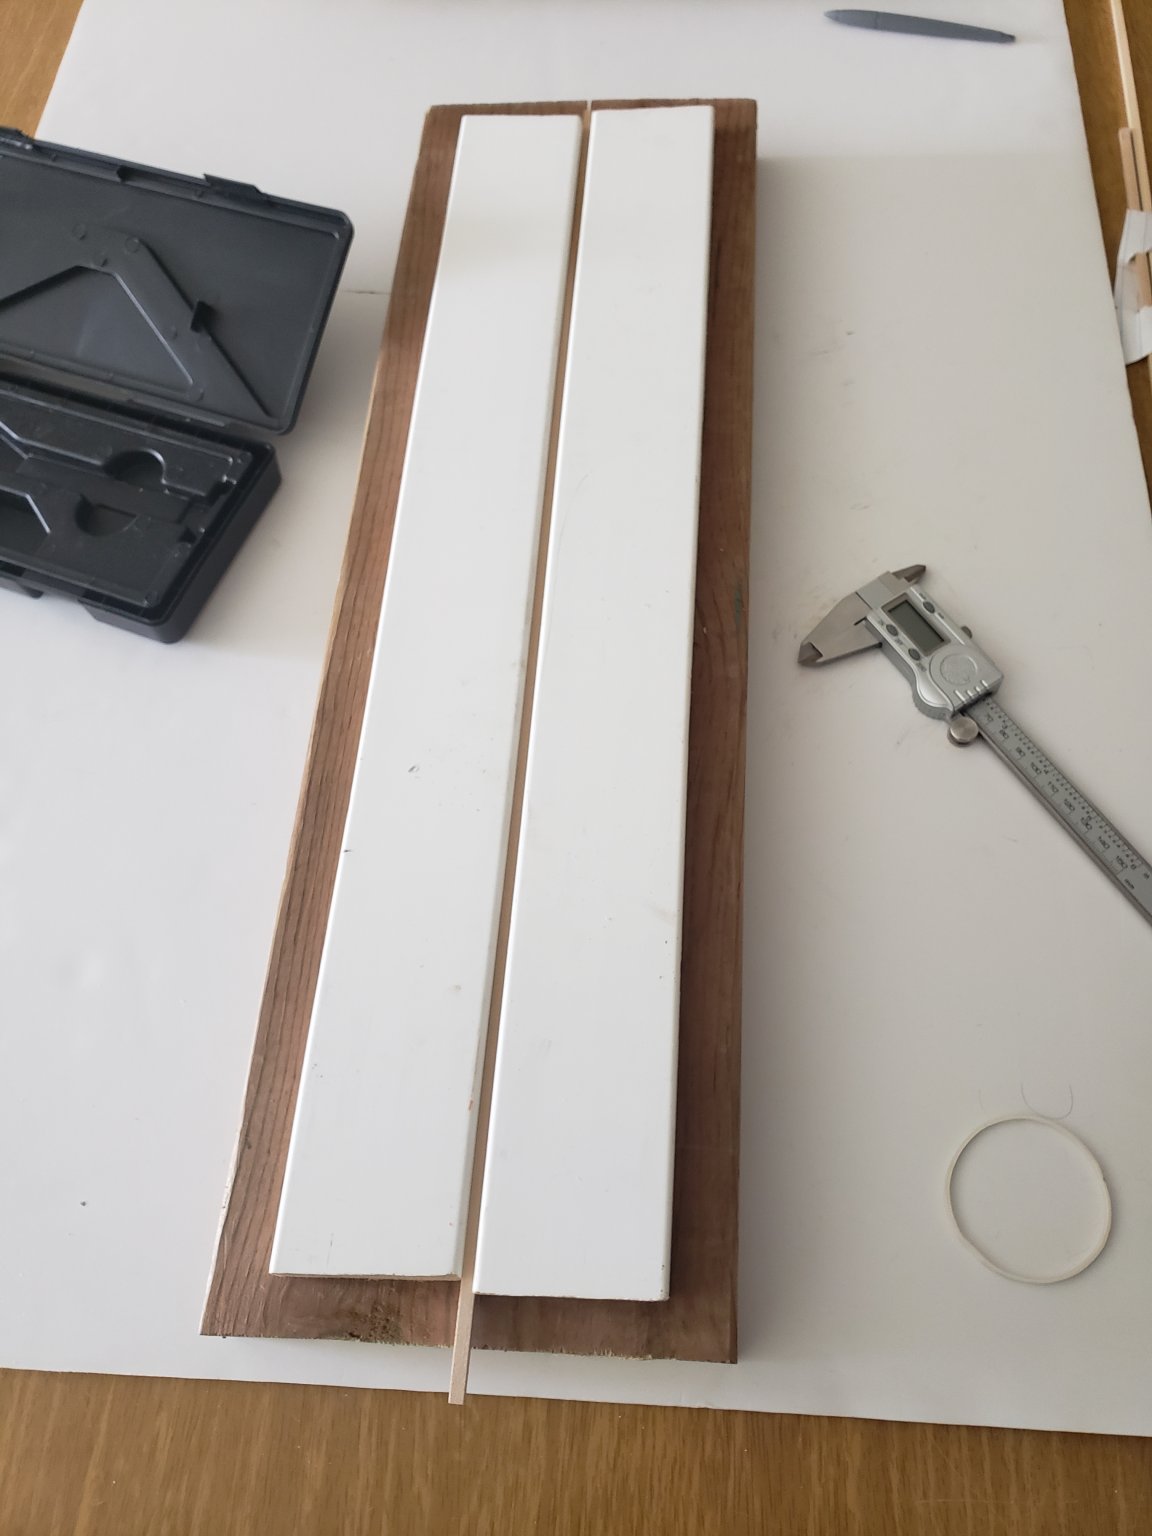
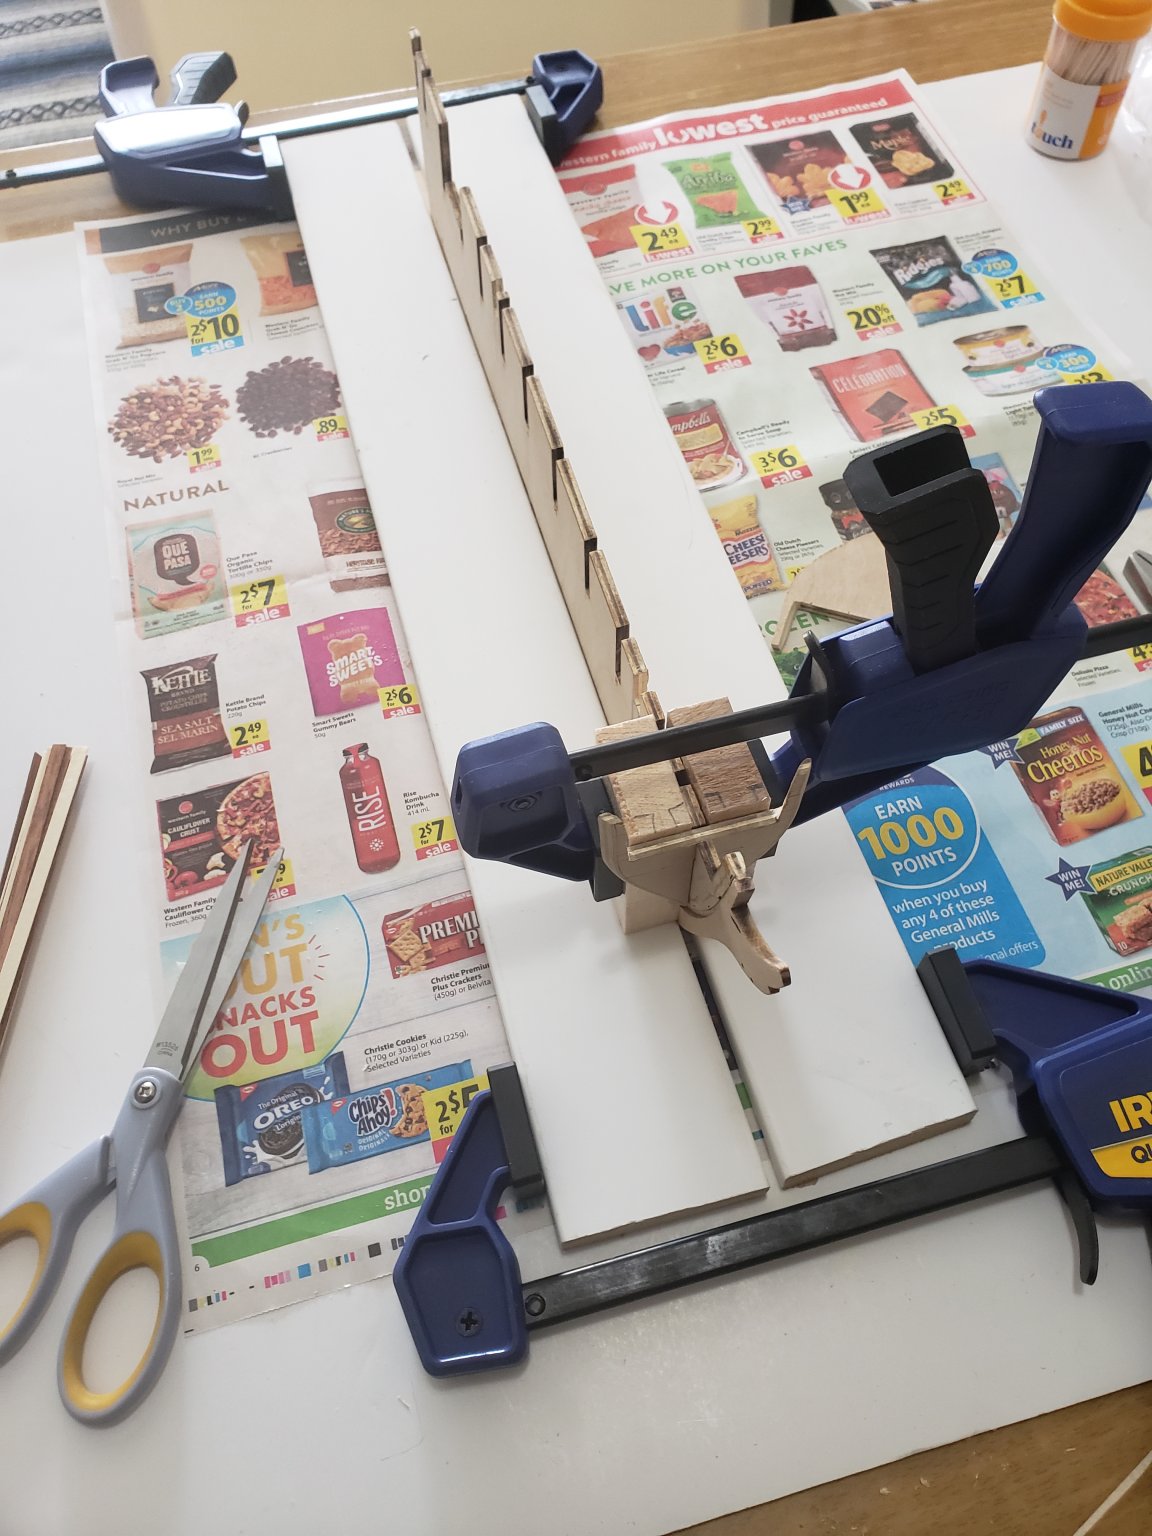
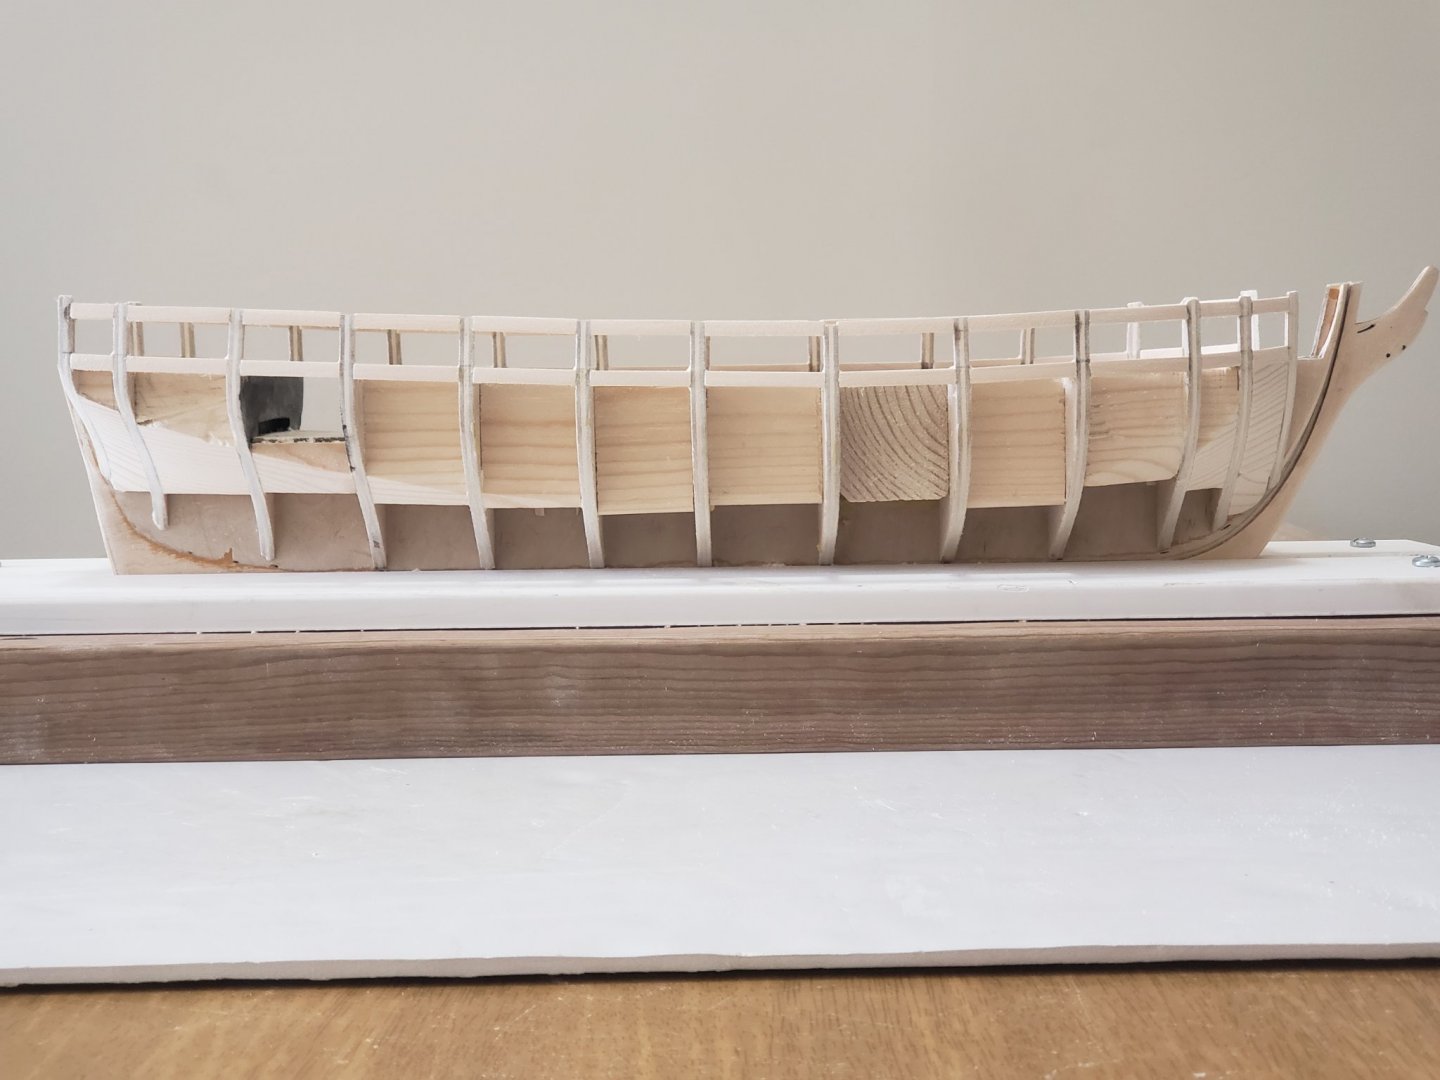
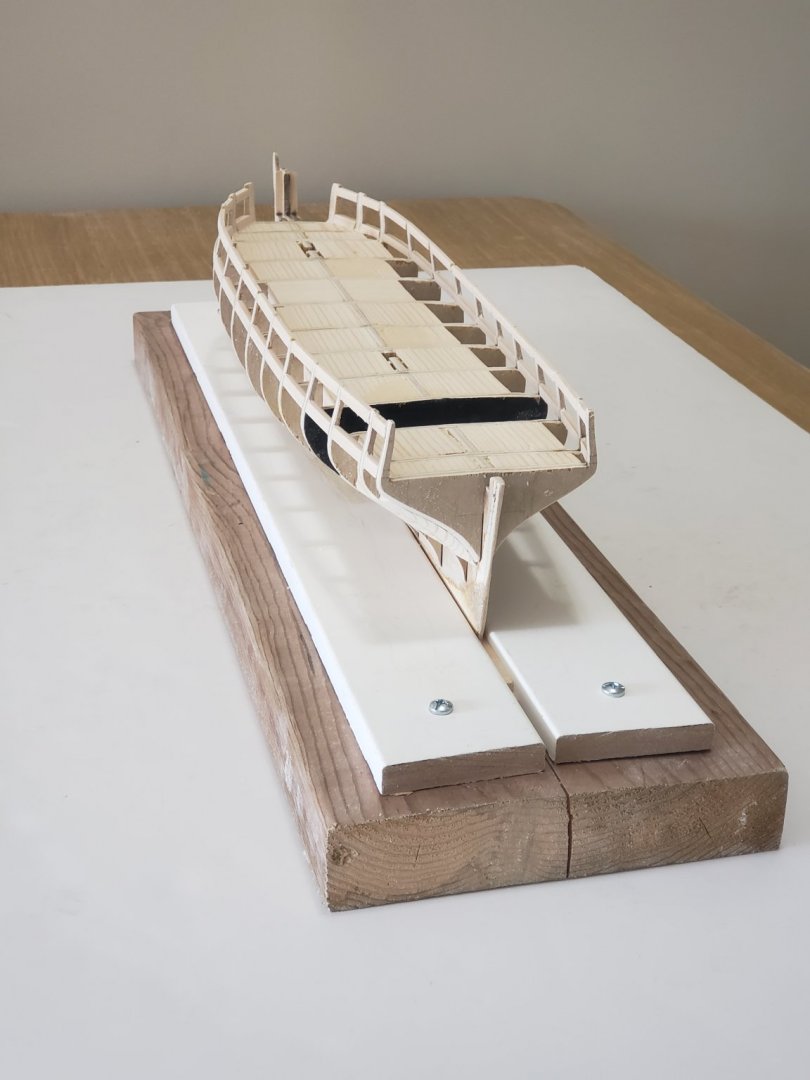
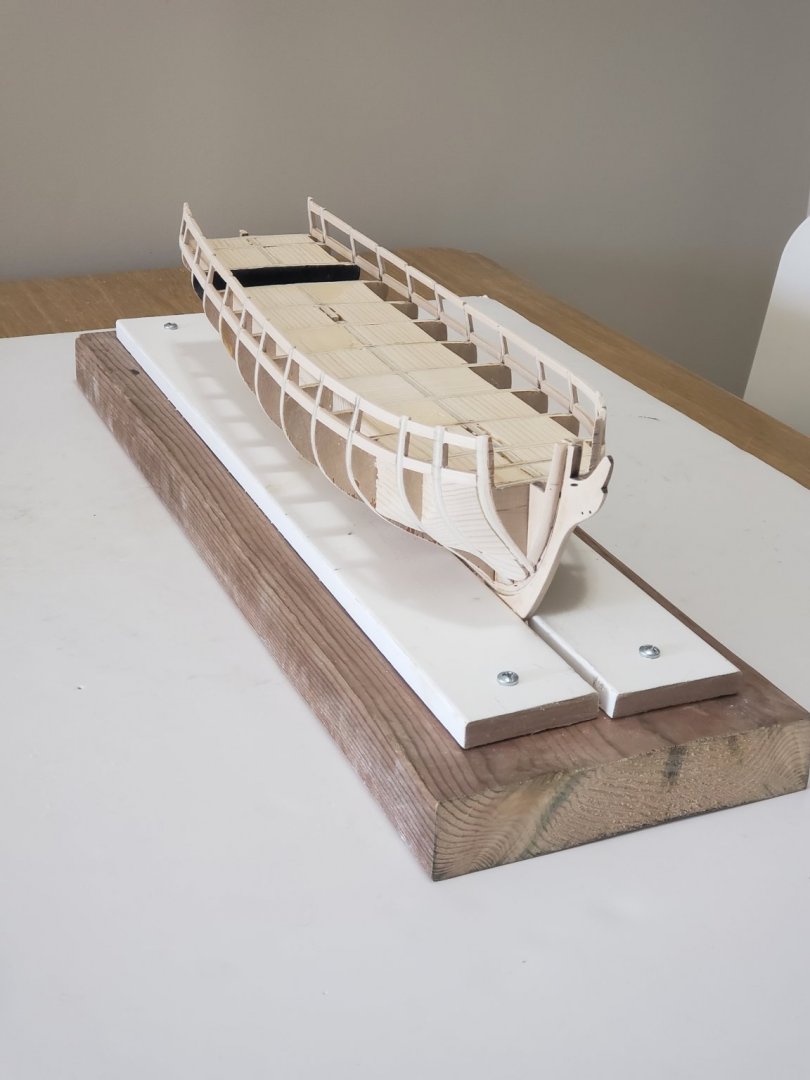
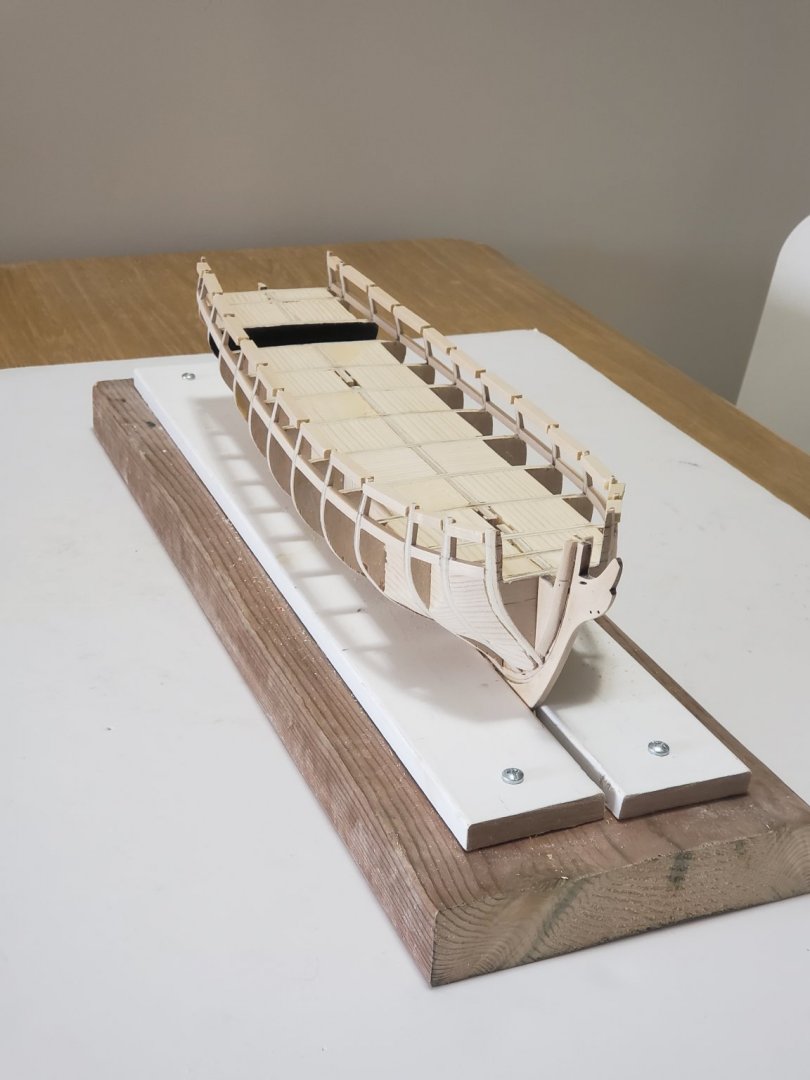
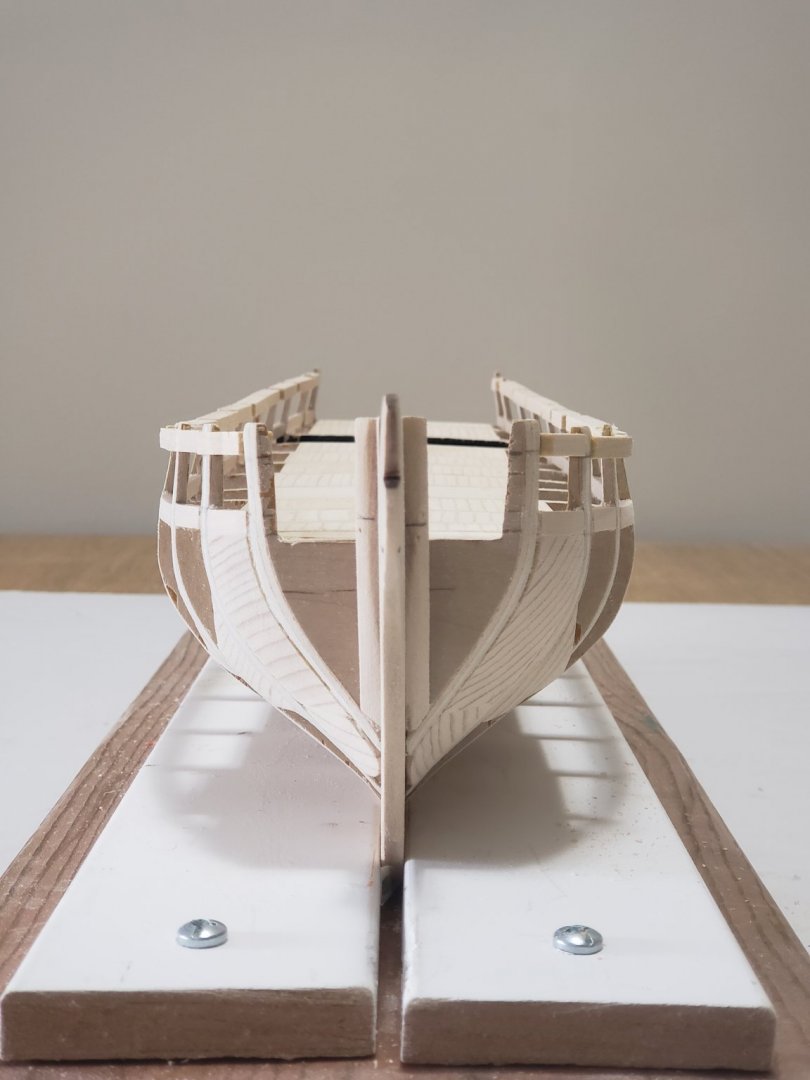
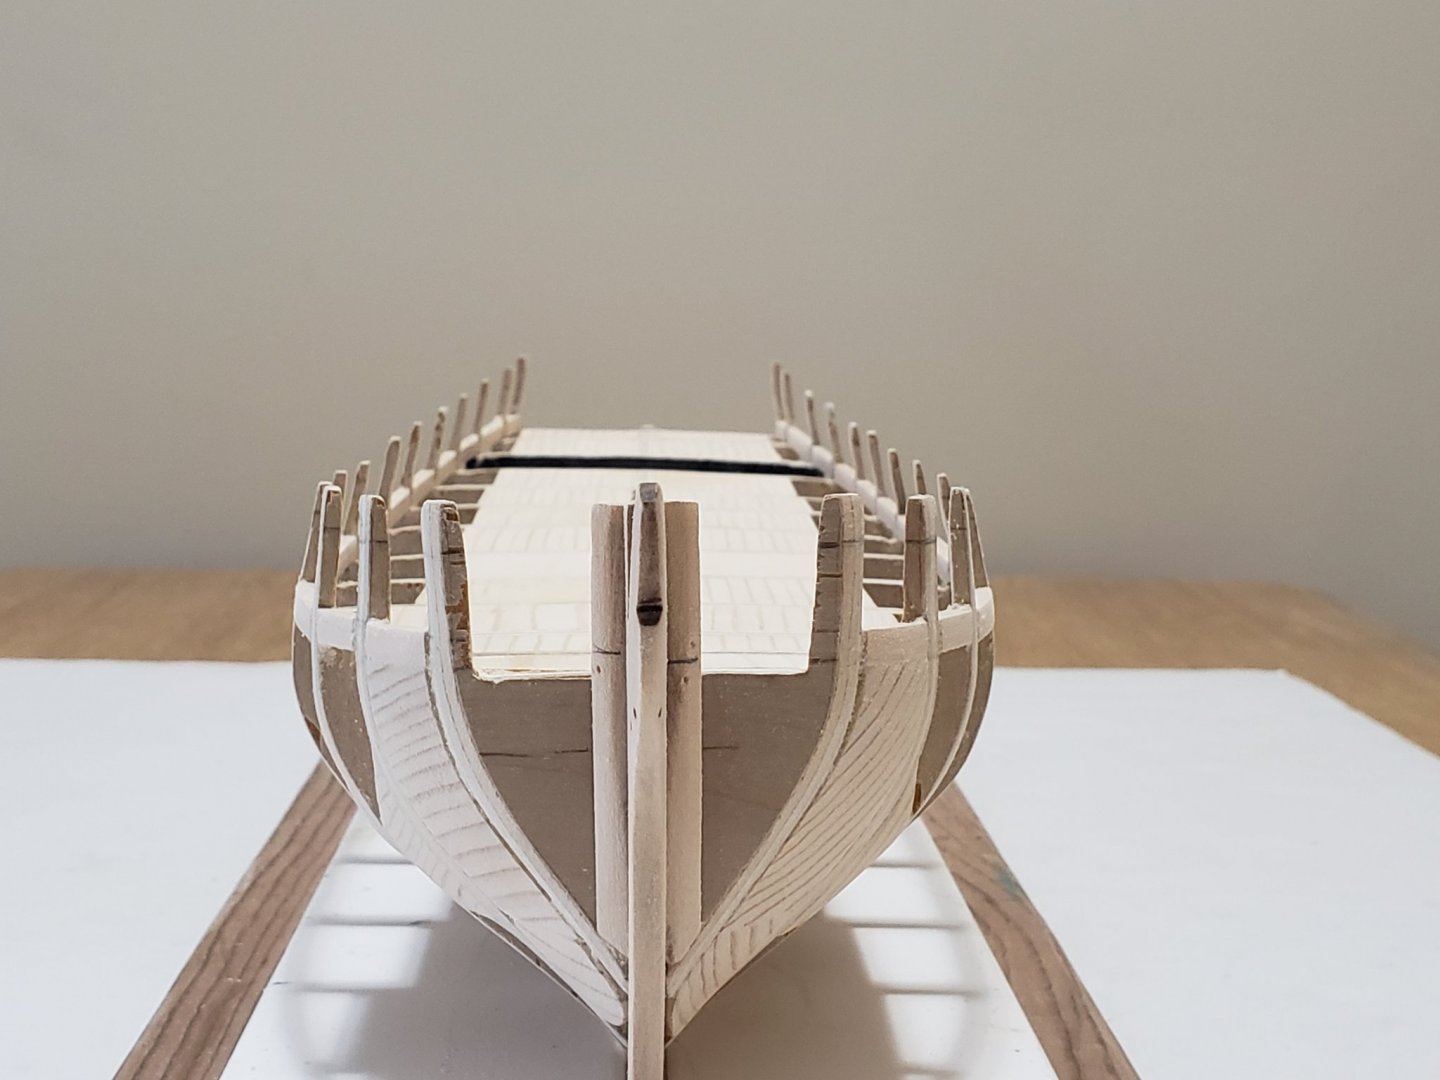
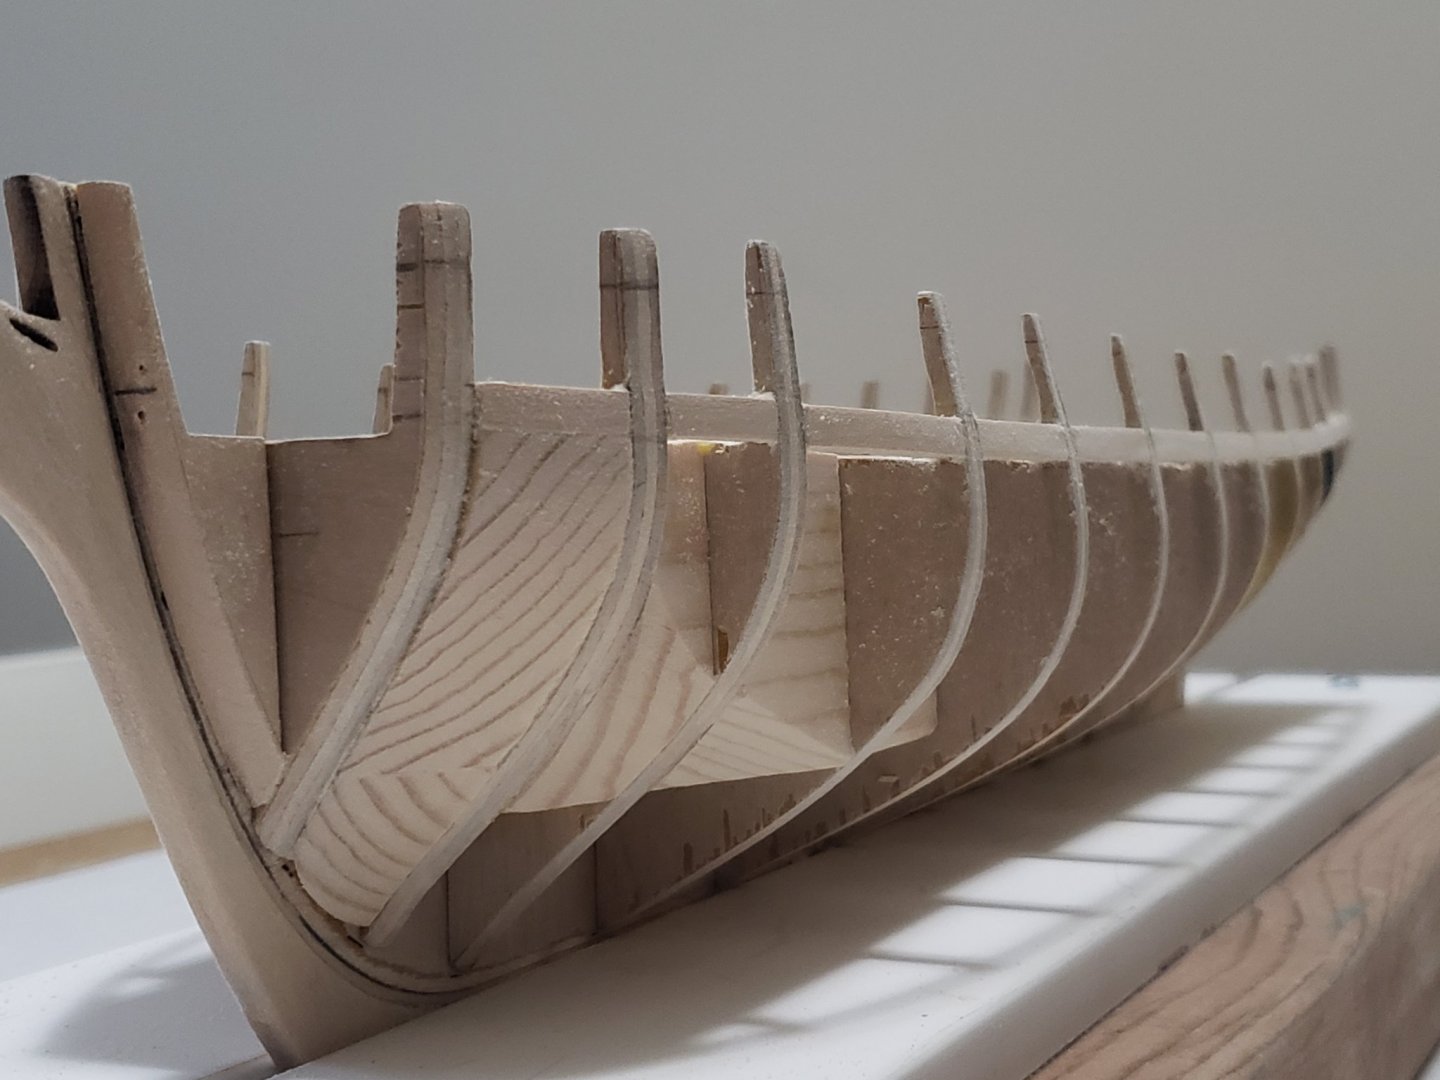
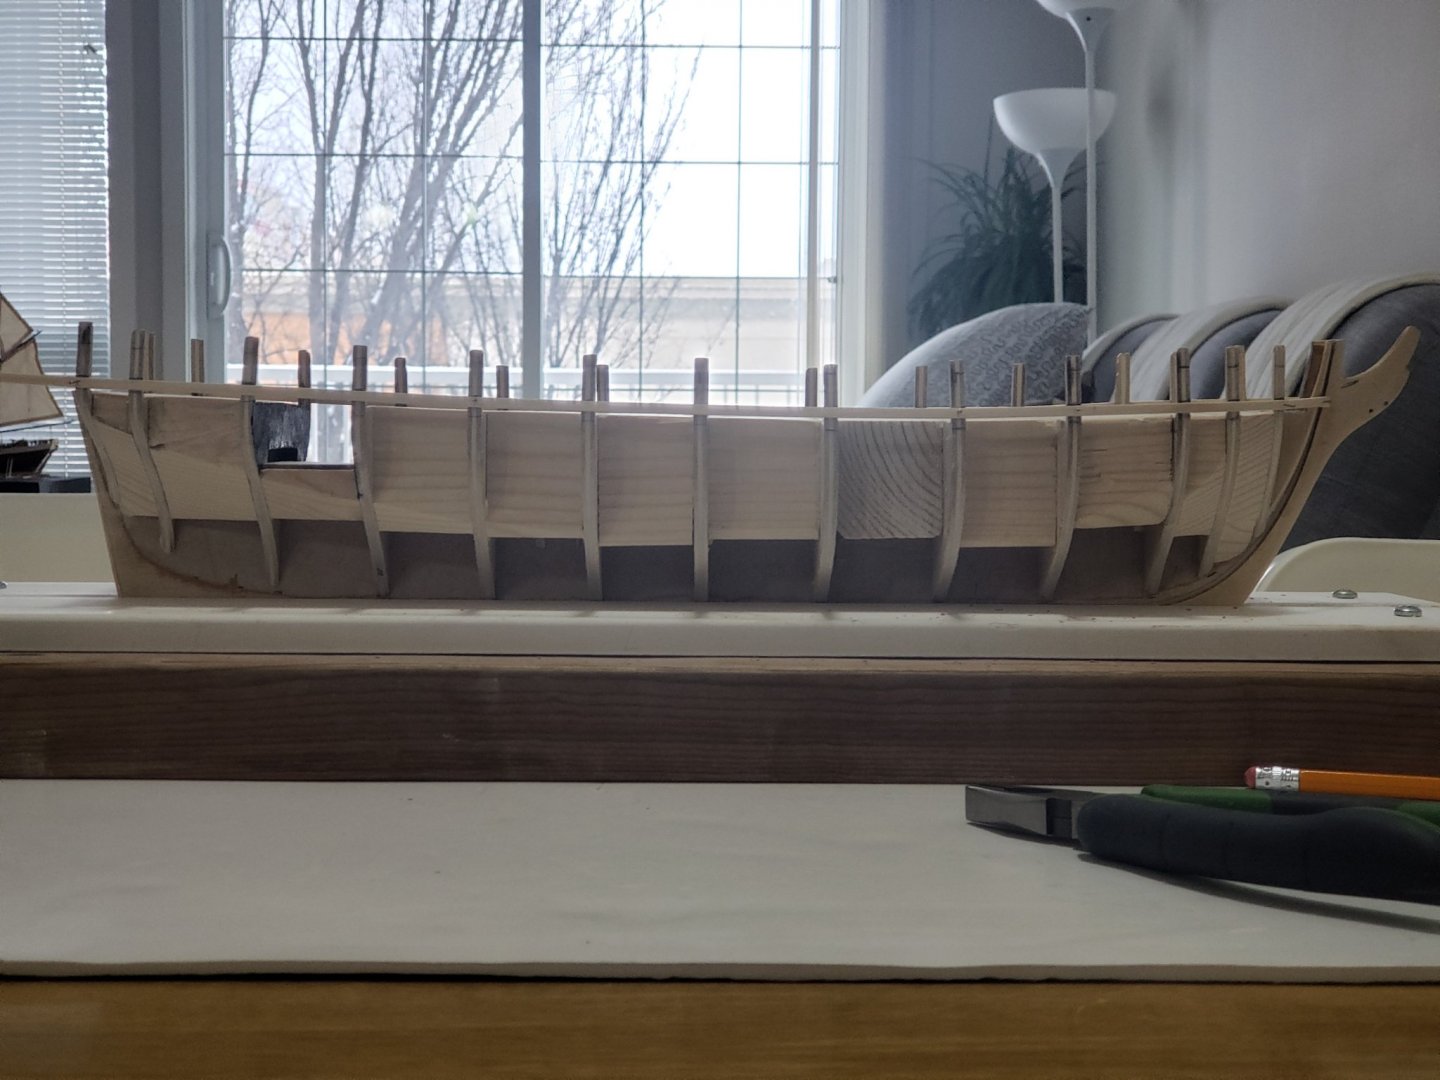
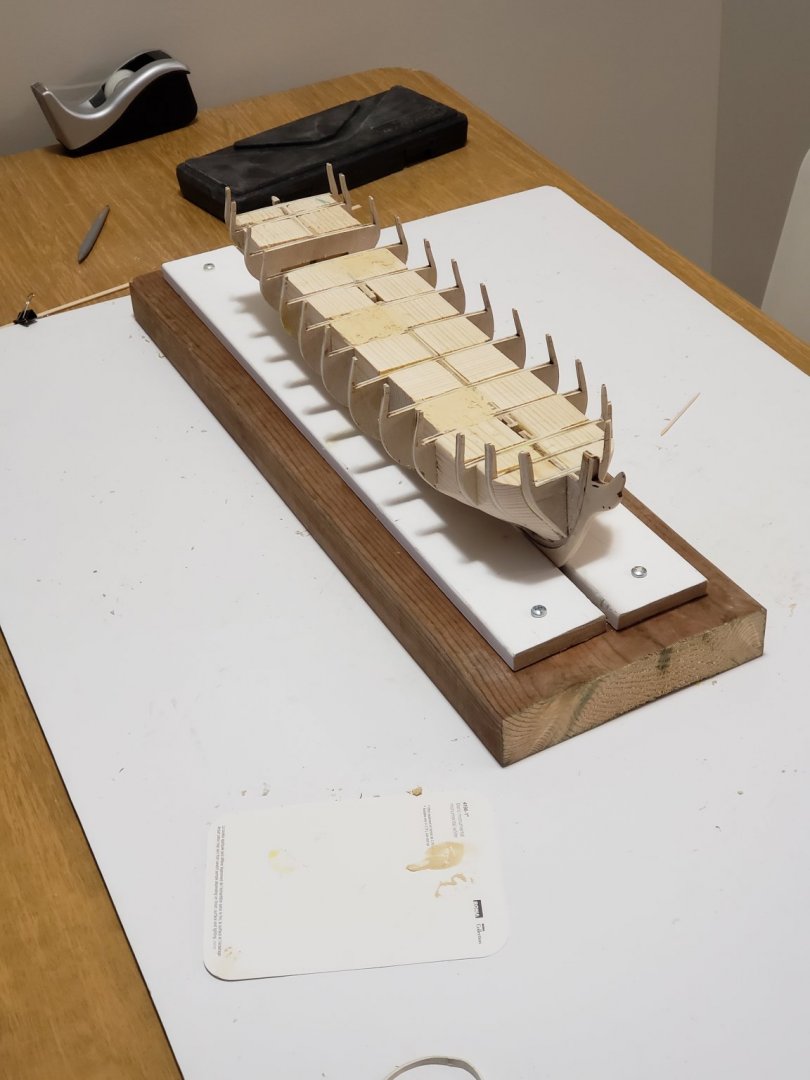
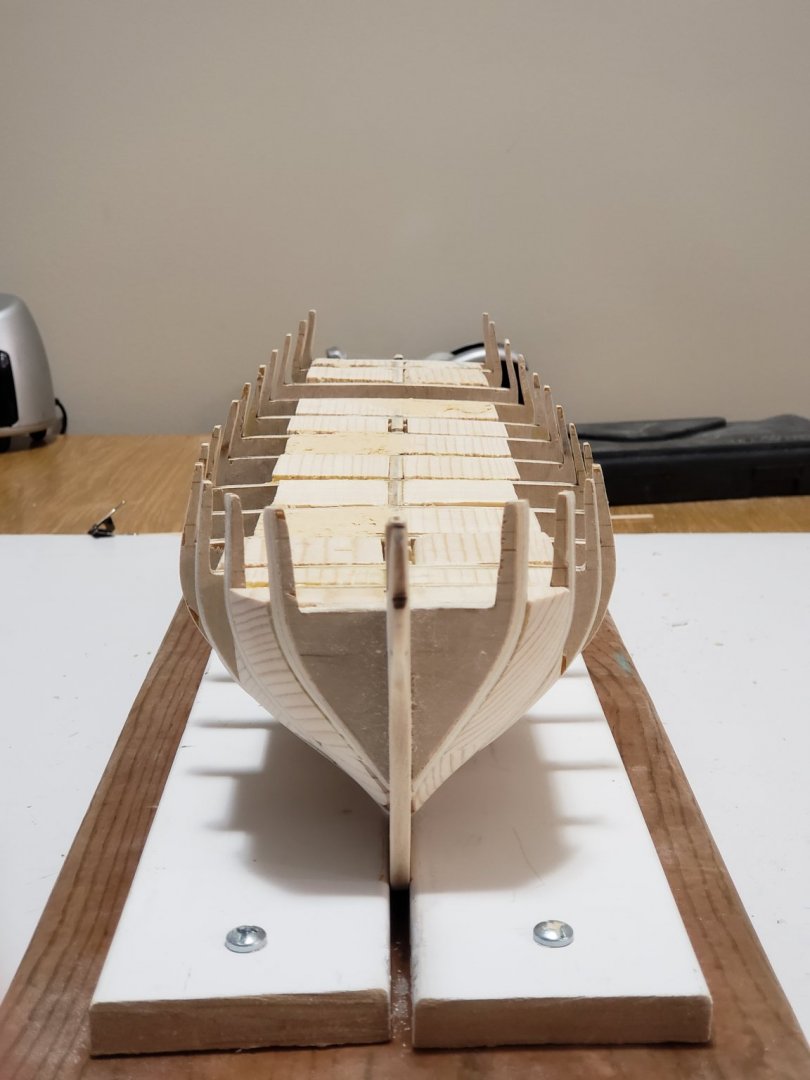
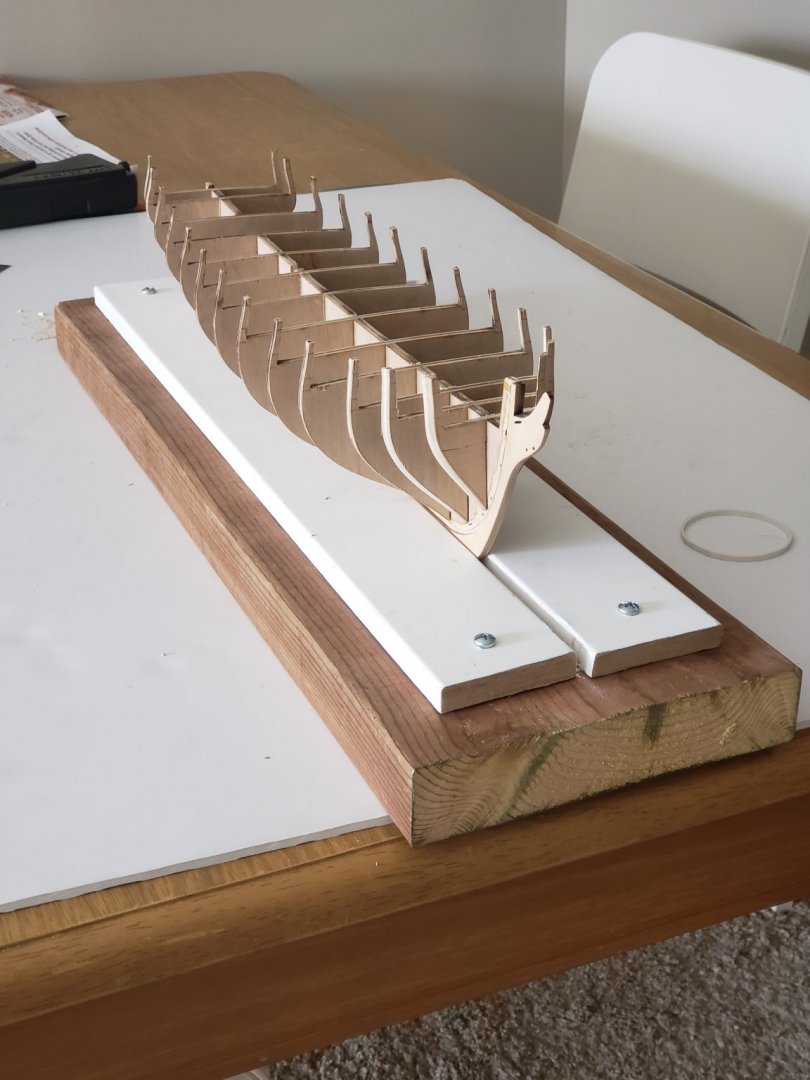
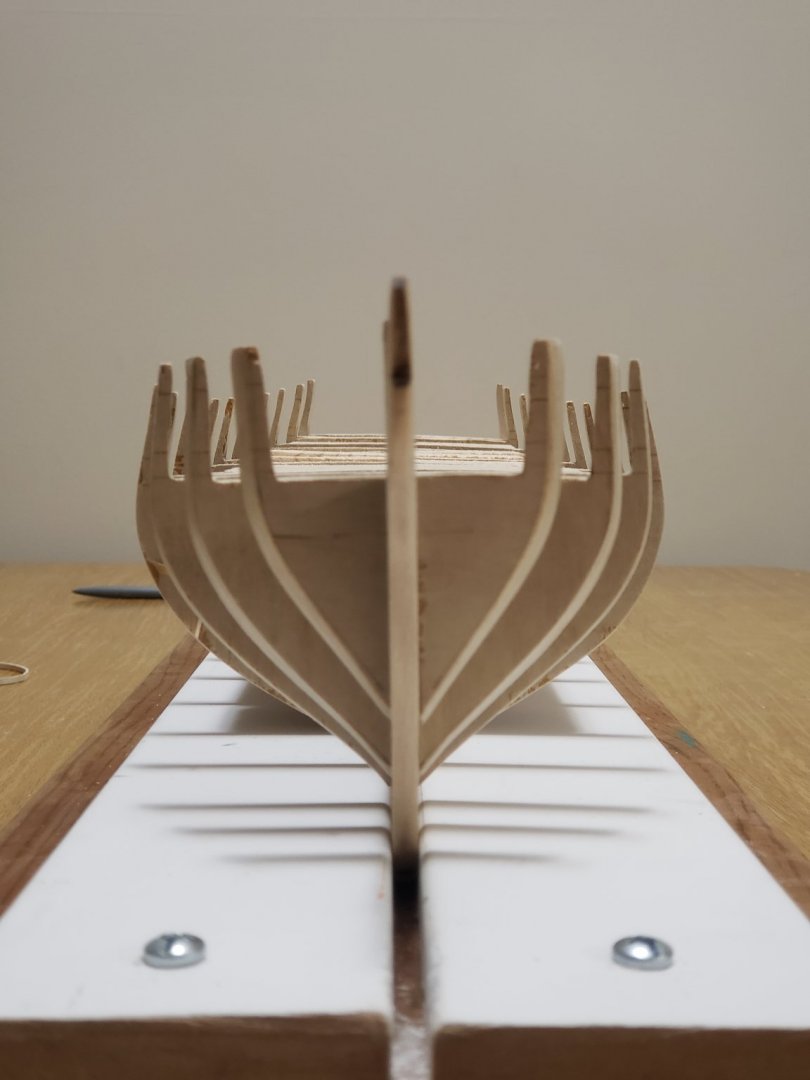
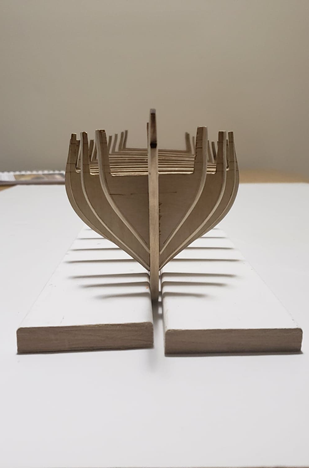
Today I finished building a temporary stand for the Syren to sit on until the copper plates are installed (still a long way till then). I placed a 3/16" strip between two scrap skirting boards which were then screwed onto a plank of hard wood: After this I spent most of the day fairing the hull and cutting filler blocks to place between the bulkheads. I was covered in sawdust by the end of this 😄 So far about 2/3 of the filler blocks have been cut, and by only dry fitting the blocks, the warp in the bulkhead former has decreased significantly. This gives me hope to see no warping when they are all glued after being clamped into position. Since I do not own power tools, it was a struggle to get the precise length of filler block, a lot of trial and error was needed + some sanding when I overestimated a dimension. Here is a photo I took before installing the filler block. Notice how the last bulkhead (at the stern) is tilted: After filler blocks have been dry fitted, the tilt has decreased by a large margin: The rest of the filler blocks will hopefully be all cut tomorrow and glued into place.

- 950 replies
-
- 13
-
-
- syren
- model shipways
- (and 1 more)
-
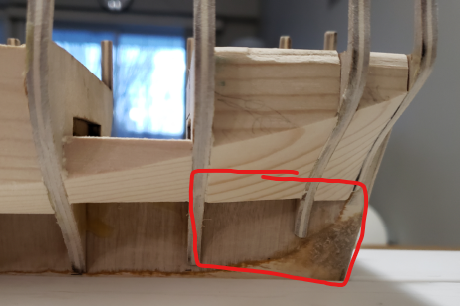
Hey Pat, yes I am thinking it is better to do this now than later on when drilling the holes at the right angle would be tricky. I am still deciding on whether to drill holes that follow the slots I made after I glue in the filler blocks or use Robin's method to sandwich the slots with plywood. Also just typing this I had a look through your log and saw you boxed in the gaps with a square. I might also follow suit 😄.
- 950 replies
-
- 1
-
-
- syren
- model shipways
- (and 1 more)
-
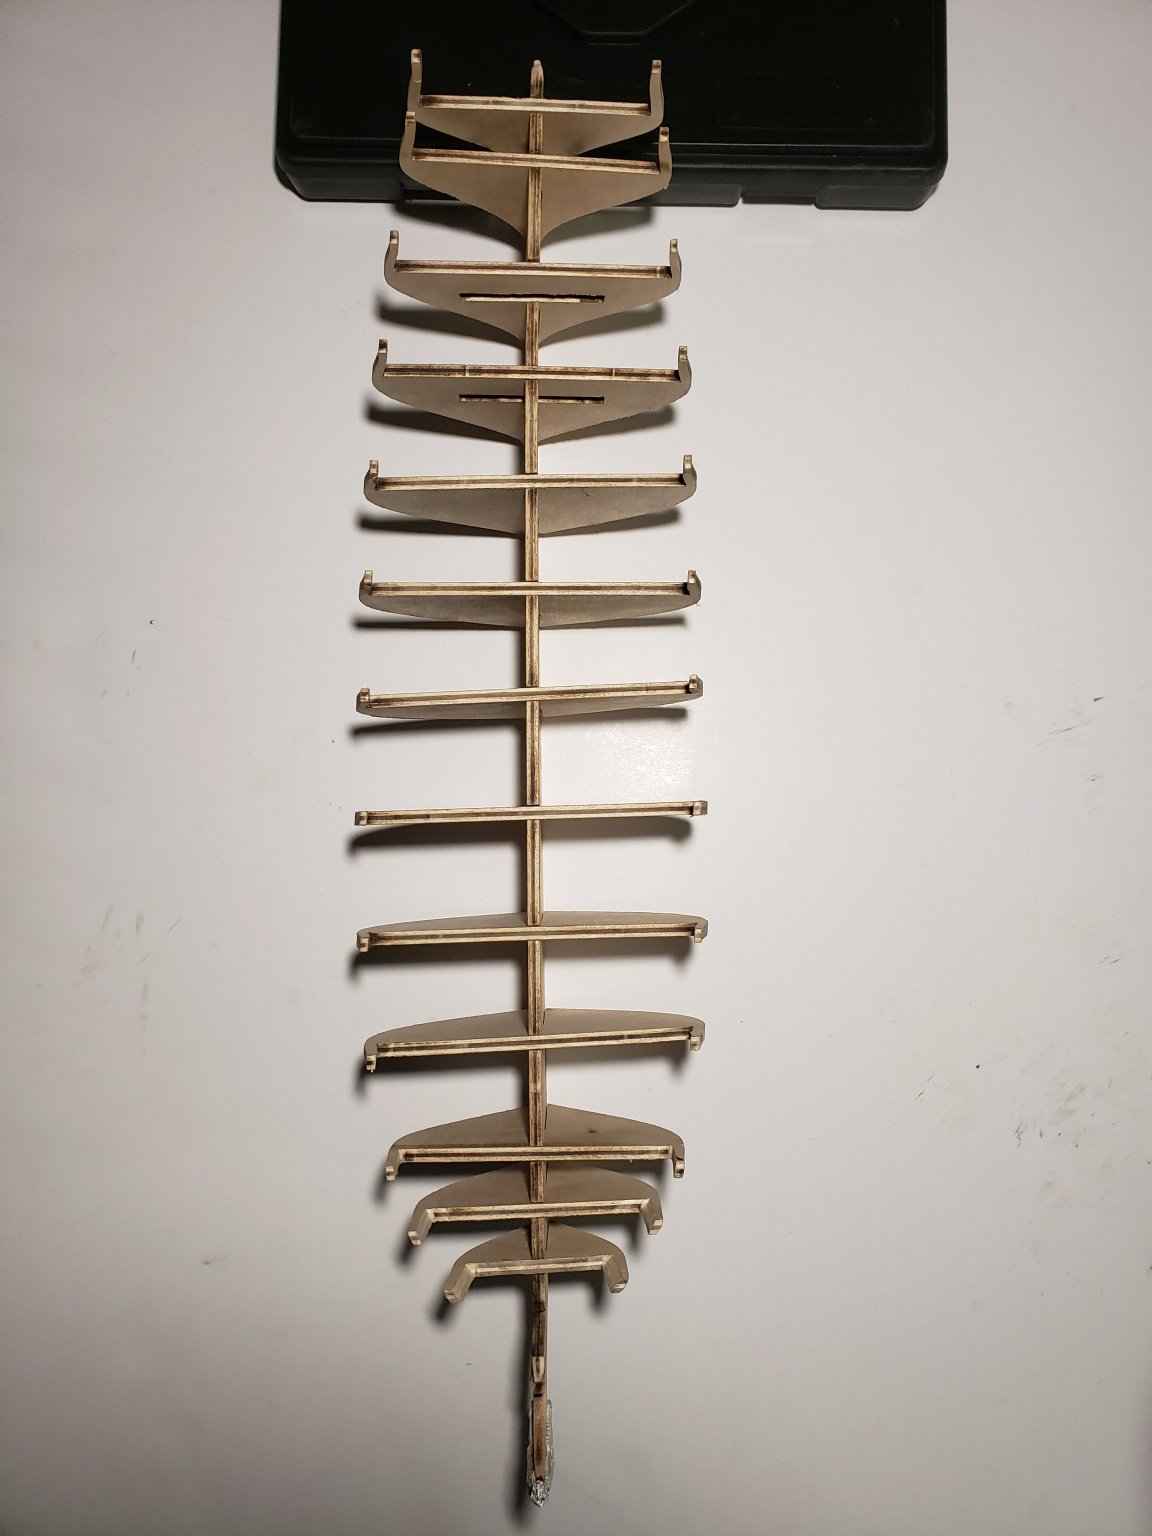
Wow second post on the same day! Thought I'd be finishing gluing the bulkheads tomorrow but here we are. I almost got a heart attack when placing one of the more tighter bulkheads (with the shim strips) and heard a crack. It turned out that the rabbet strip cracked in the middle and the keel popped off. Fortunately nothing else broke. This serves as a reminder to be more gentle. I glued everything back together and its like nothing ever happened. Anyways, here are some photos: Here is the cracked rabbet strip. It is barely visible: The glued bulkheads: Here you can see the bulkhead former is slightly warped (the stern side is not fully horizontal and the bulkhead former is curved in the middle). I hope the fillers resolve this issue:
- 950 replies
-
- 11
-
-
- syren
- model shipways
- (and 1 more)
-
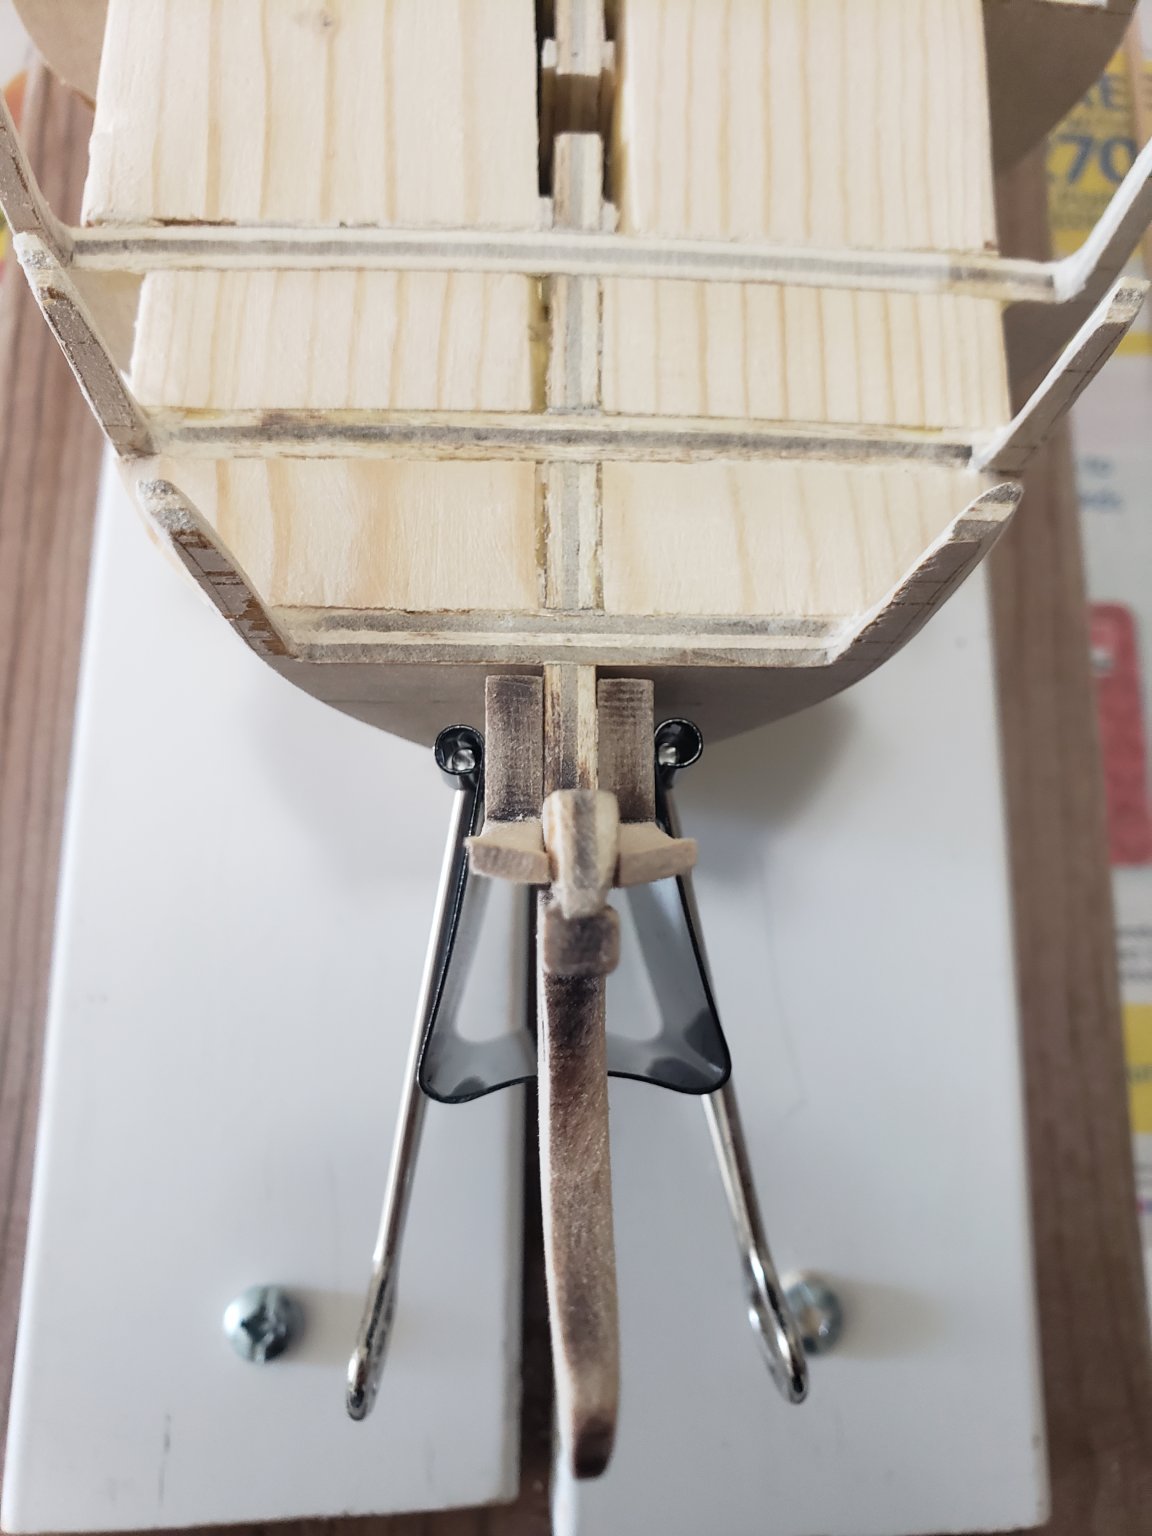
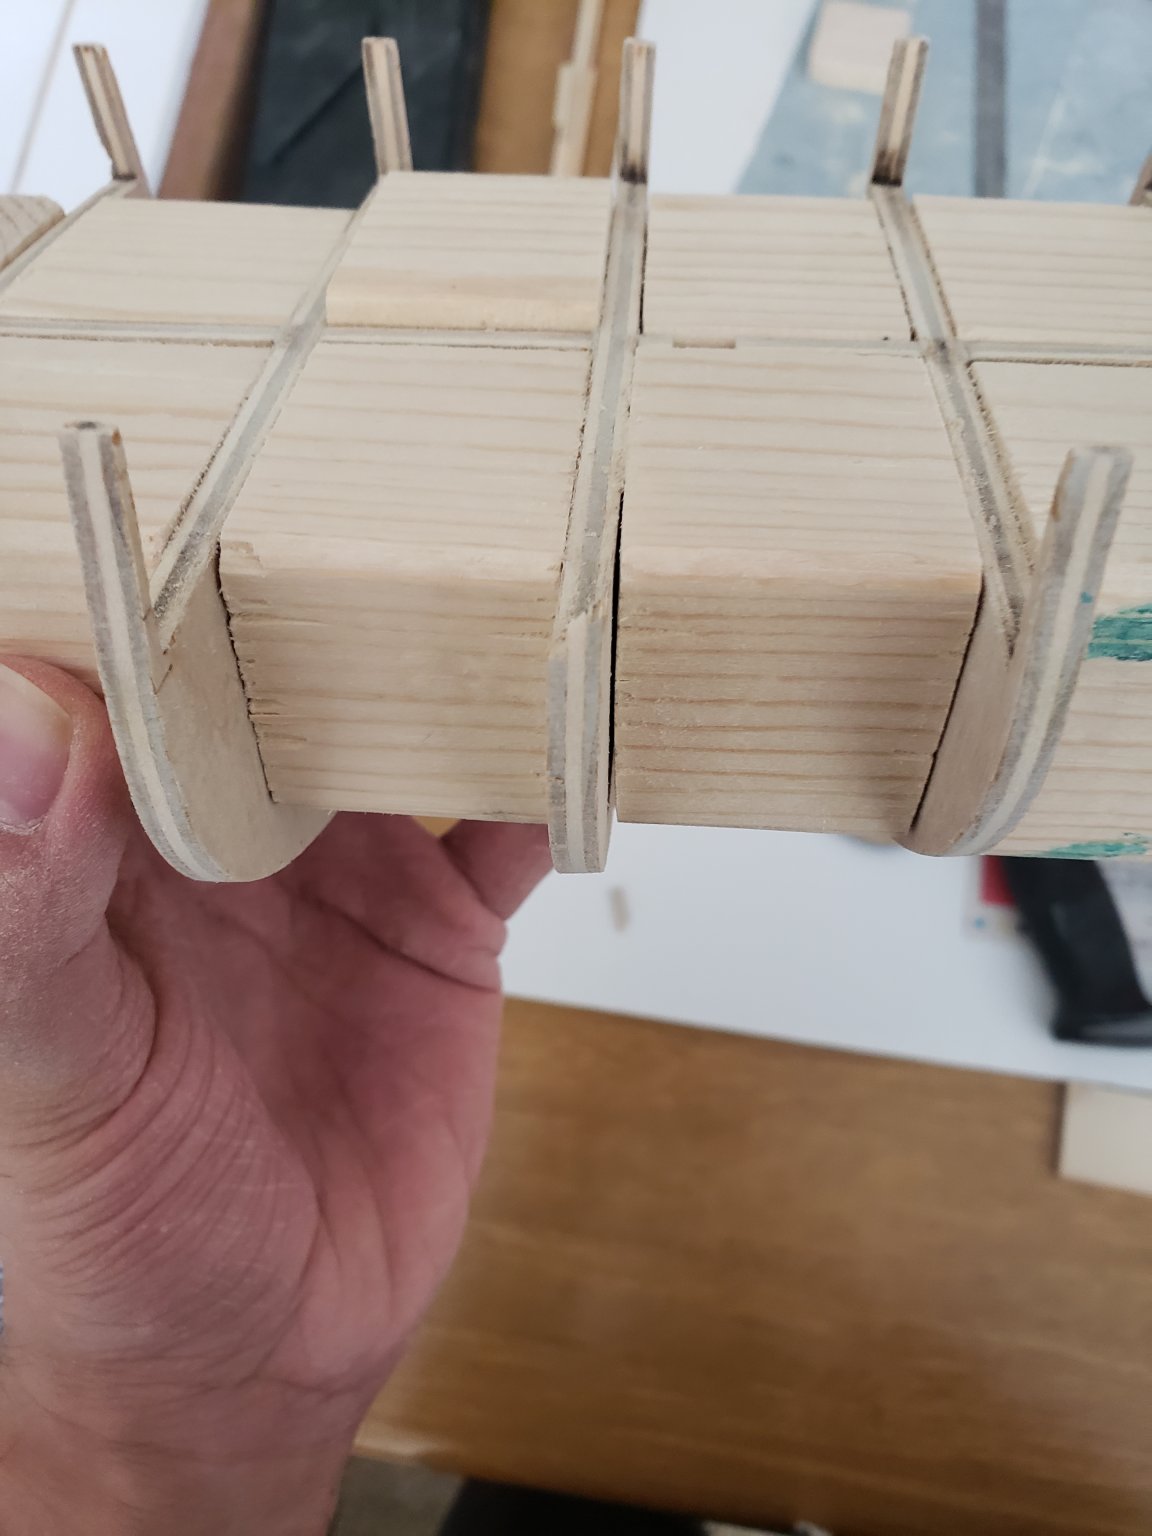
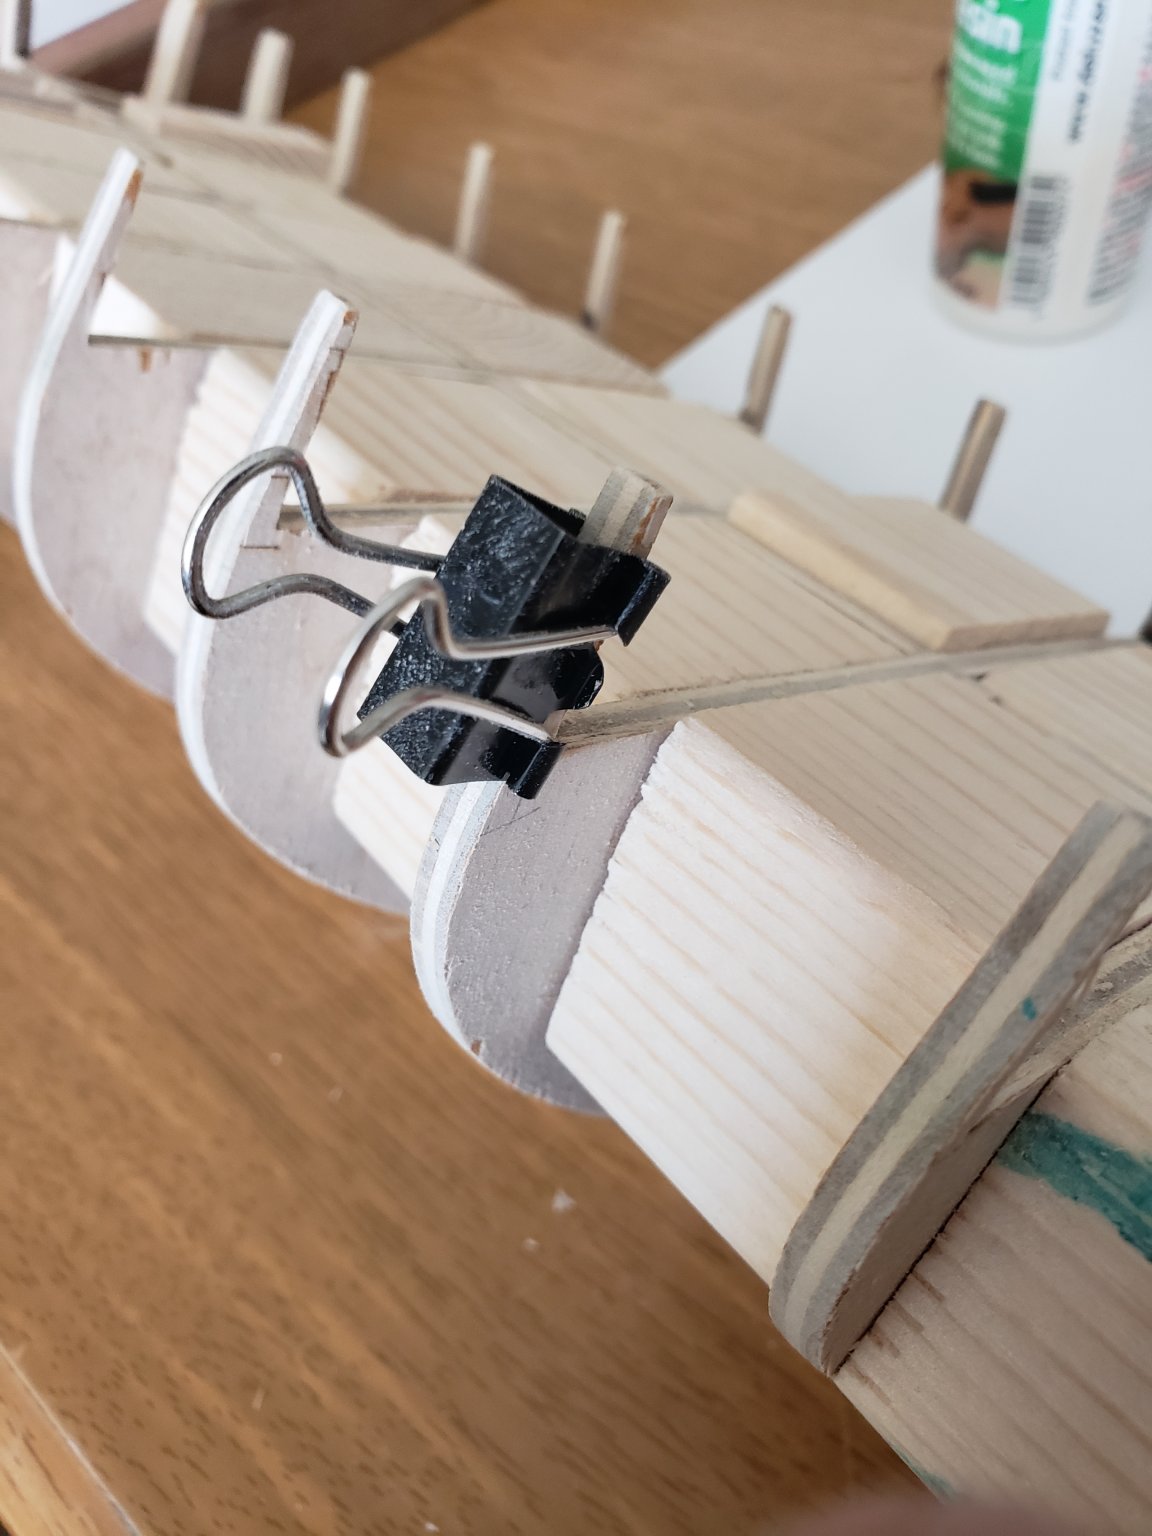
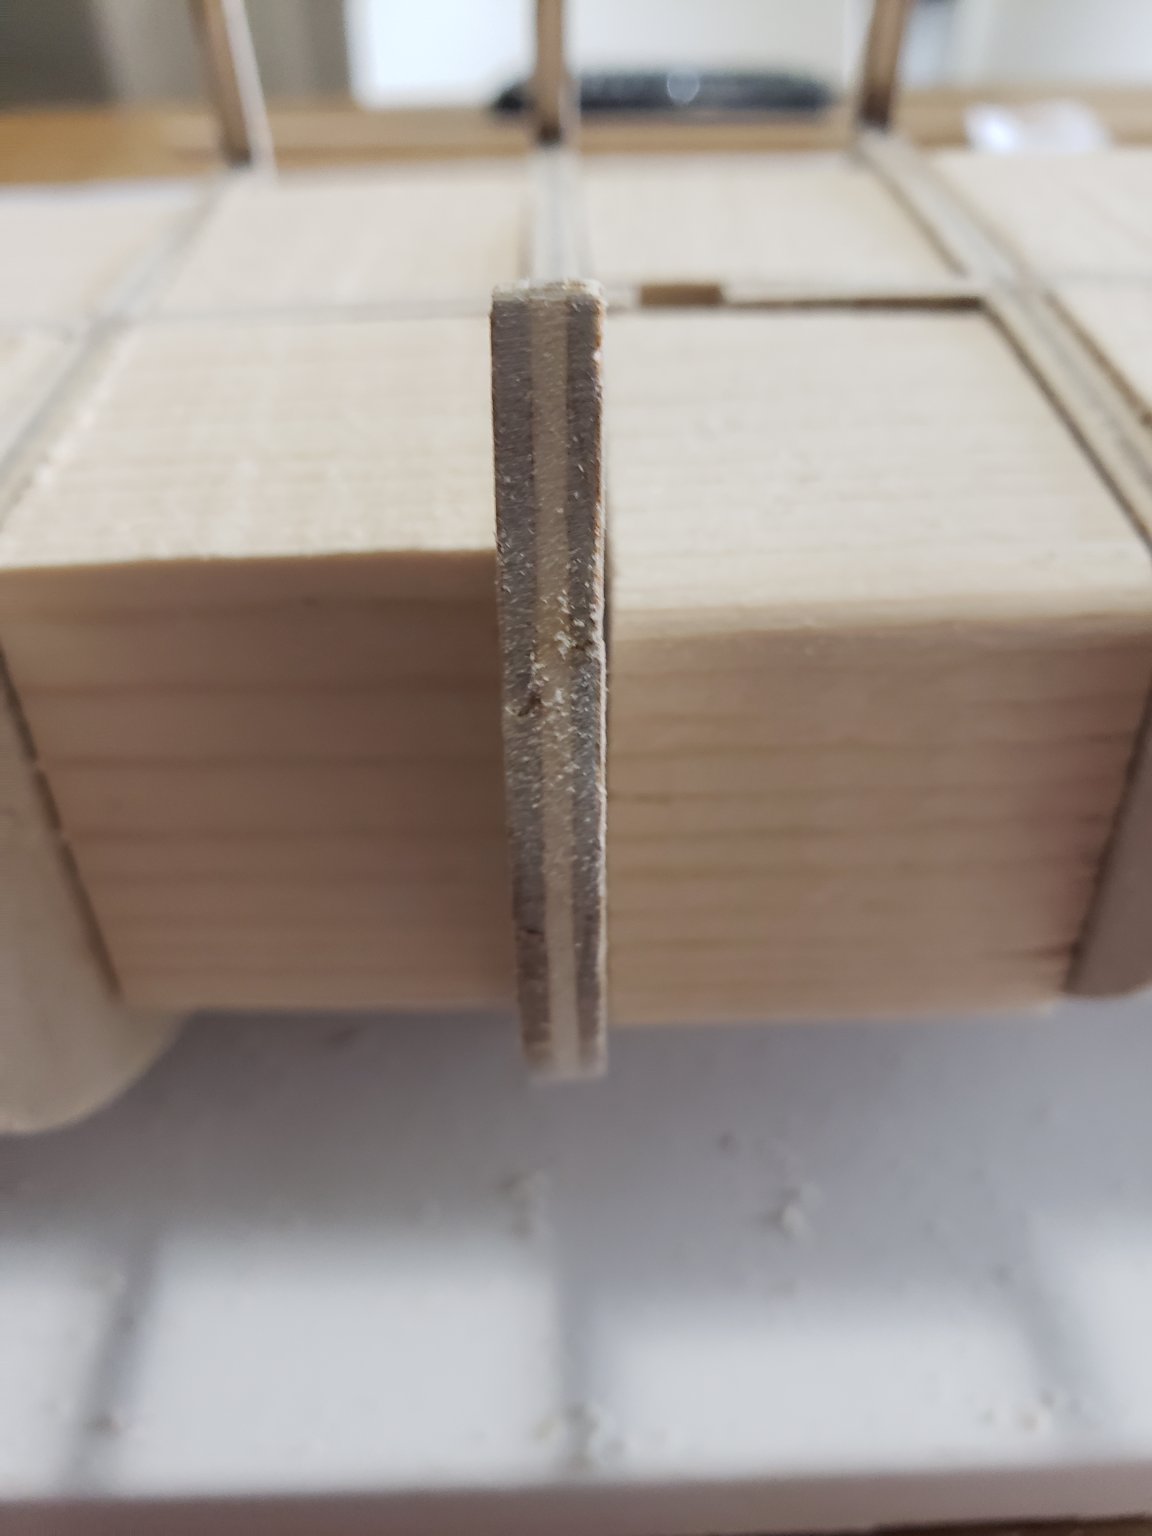
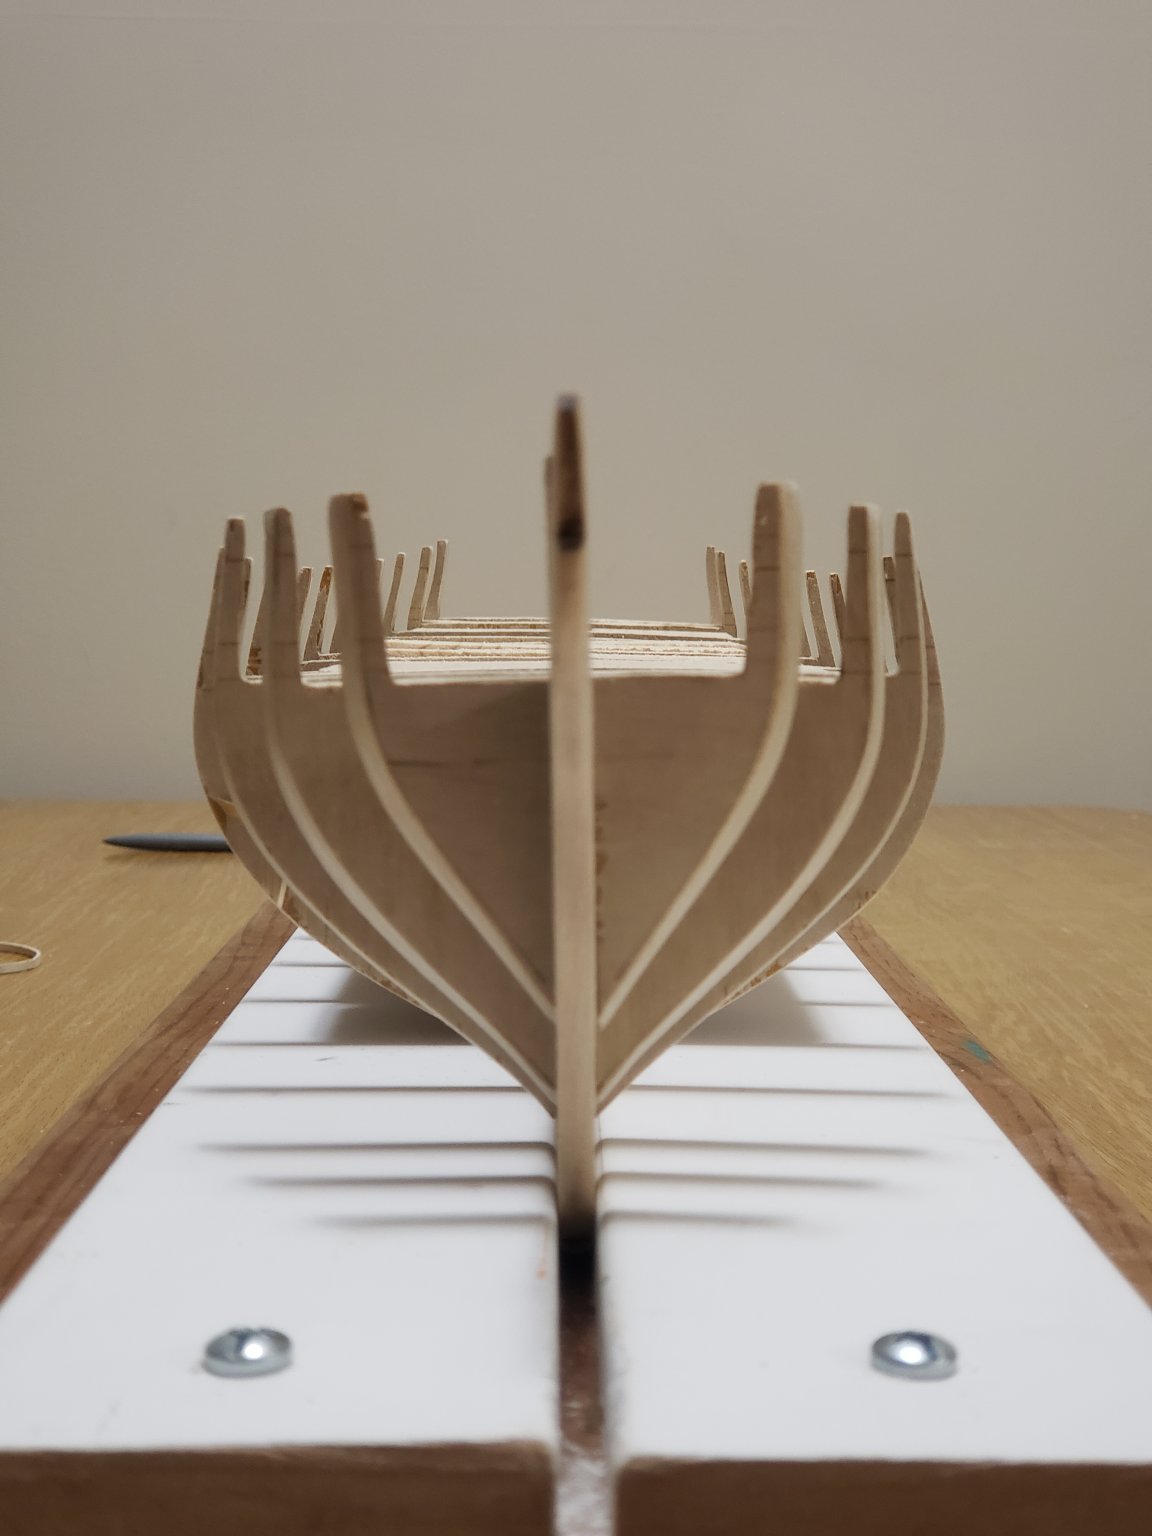
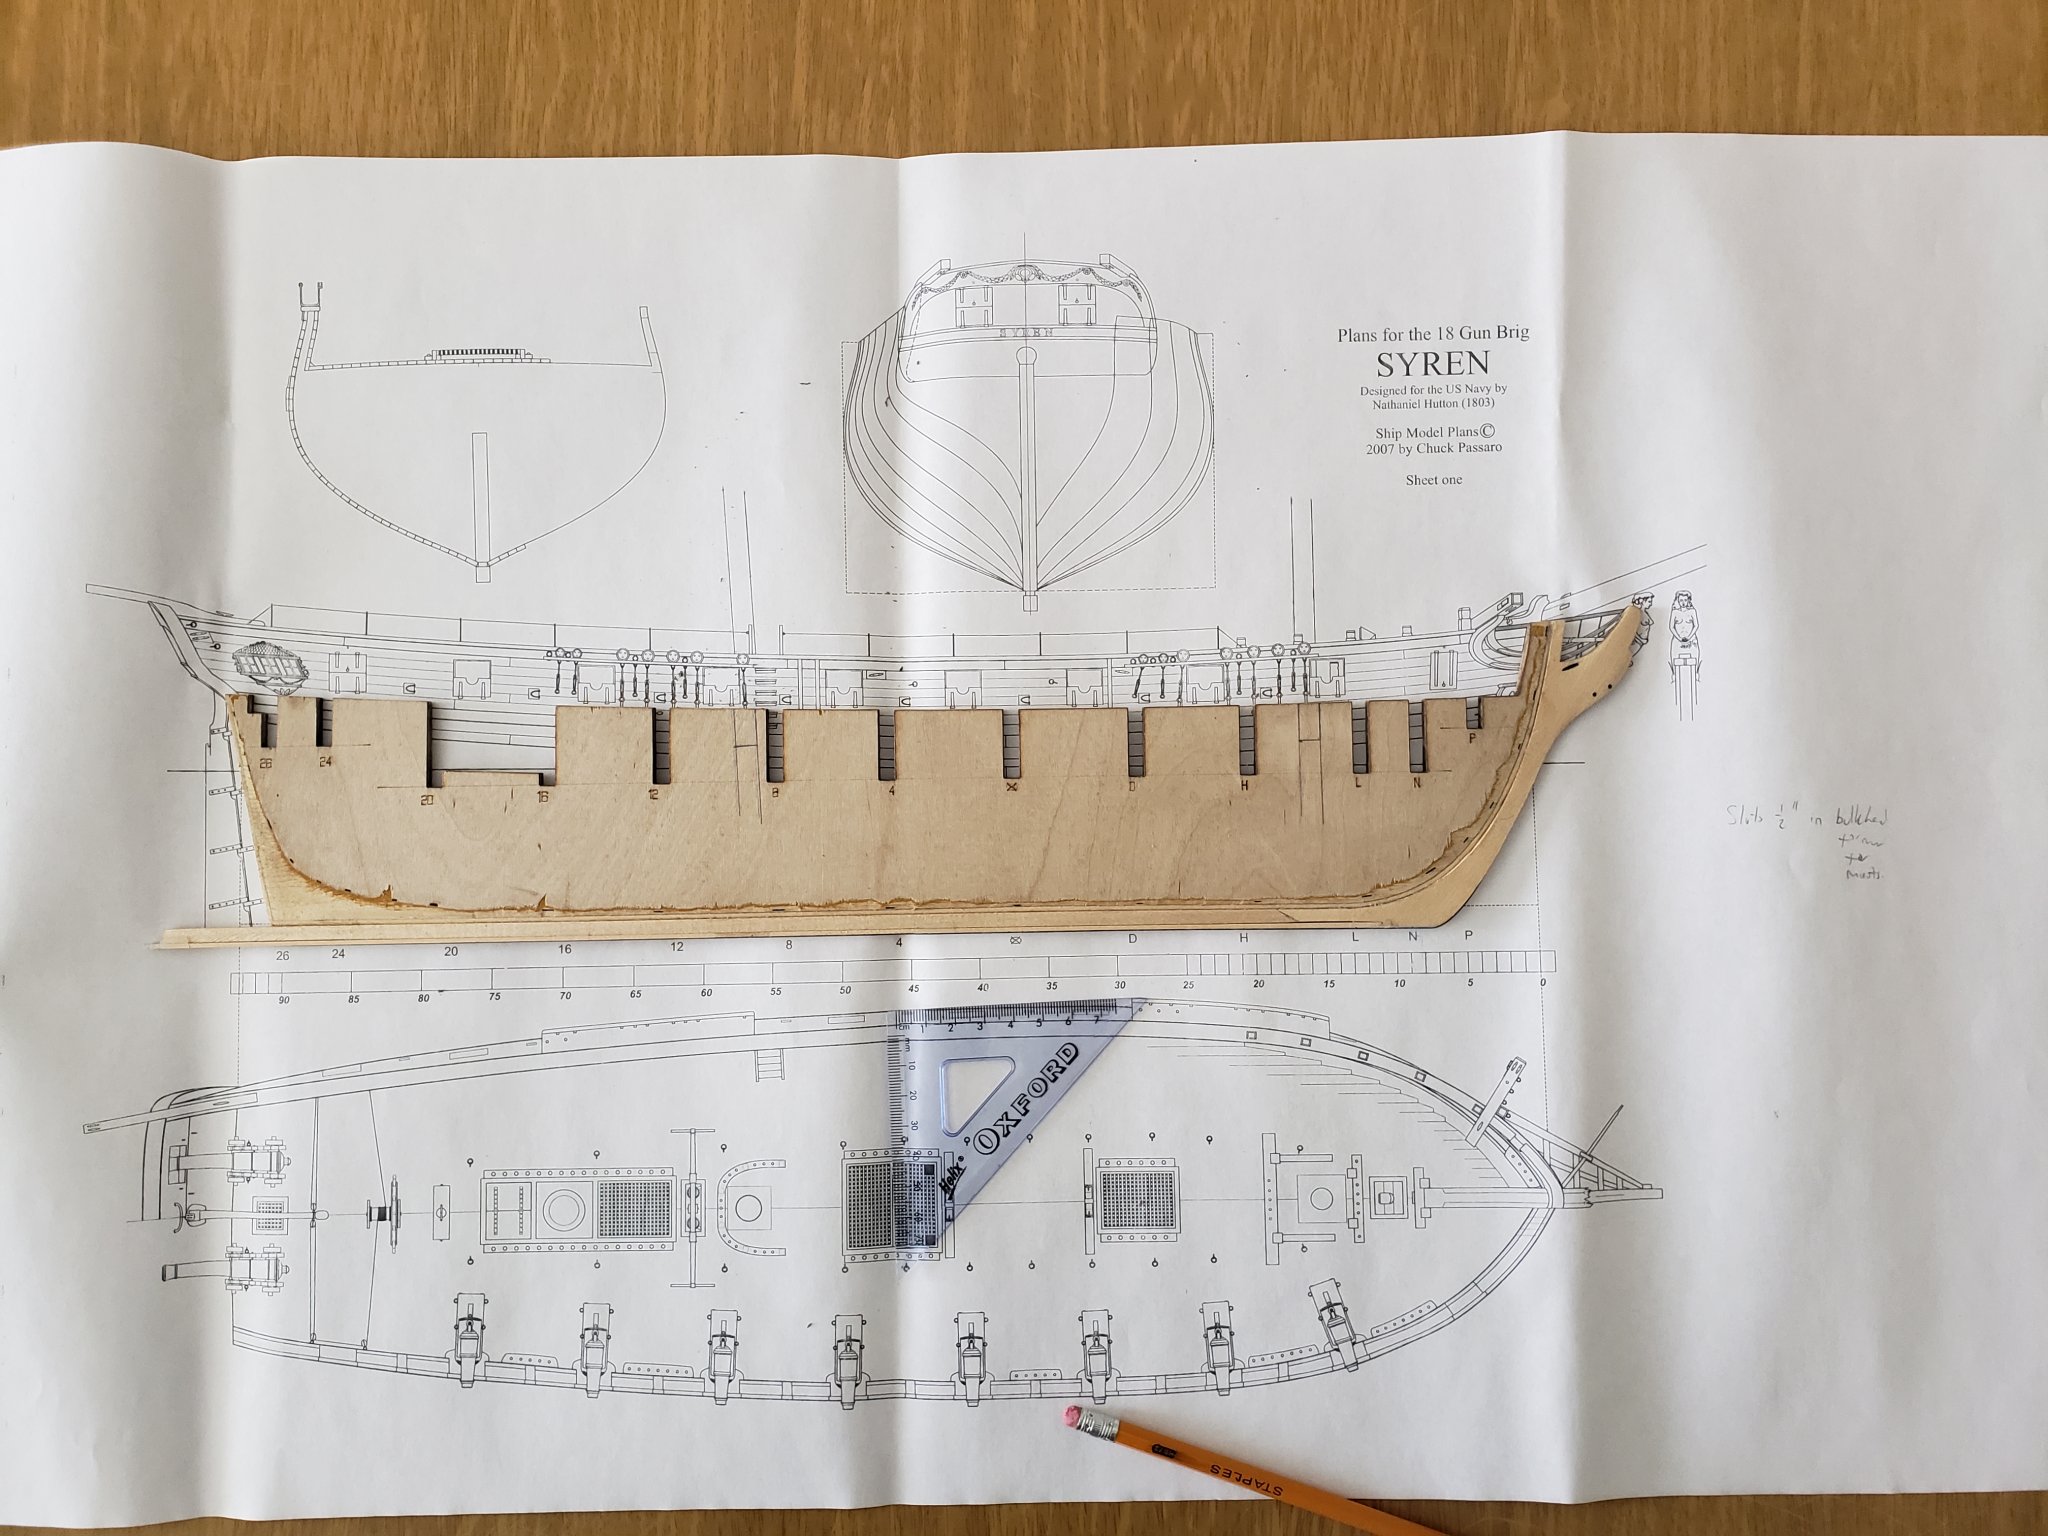
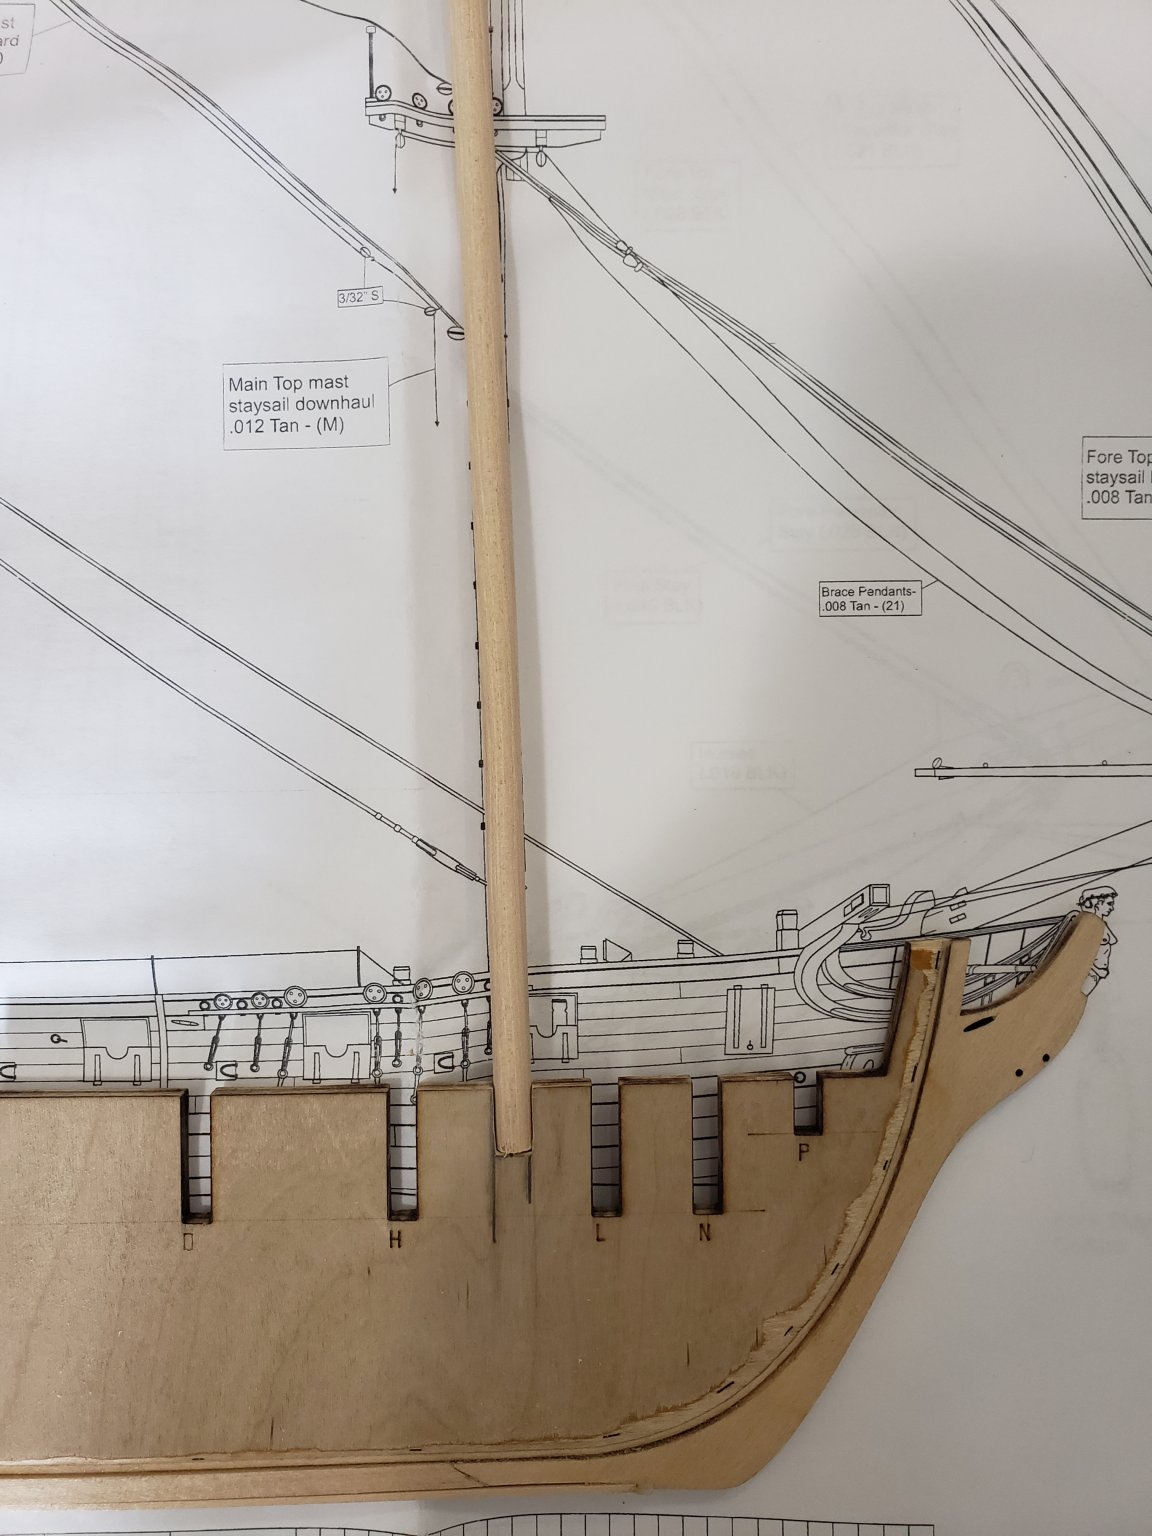
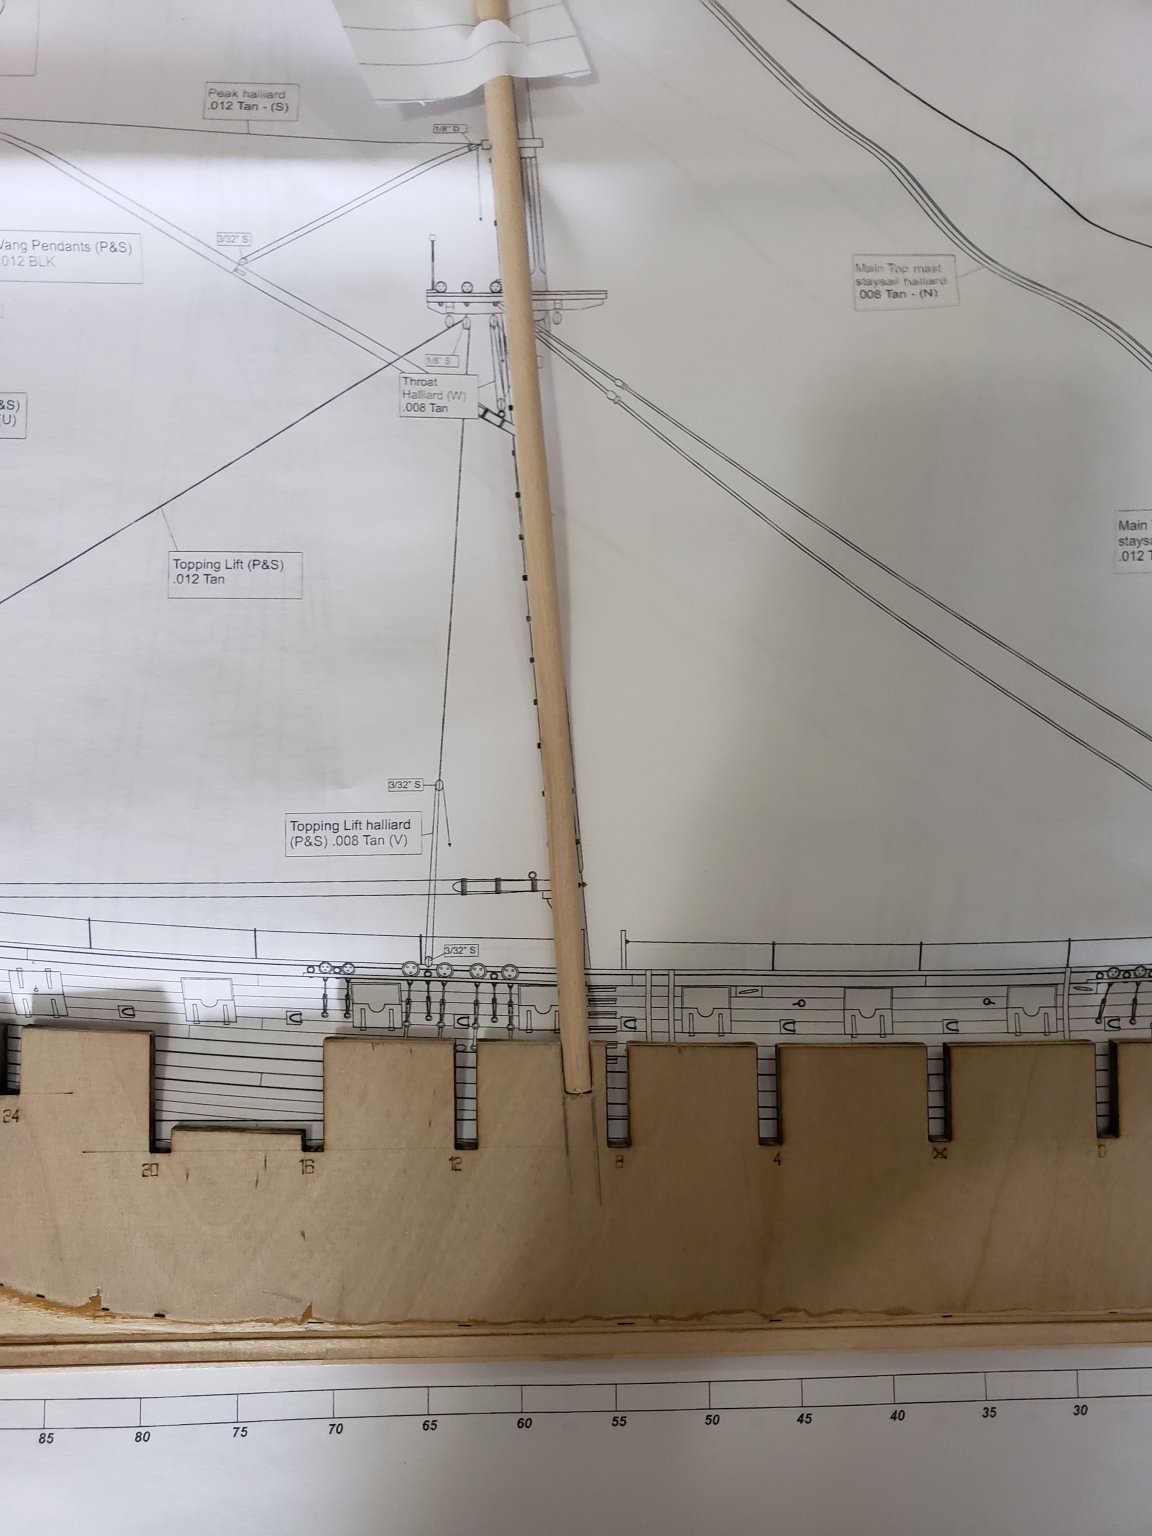
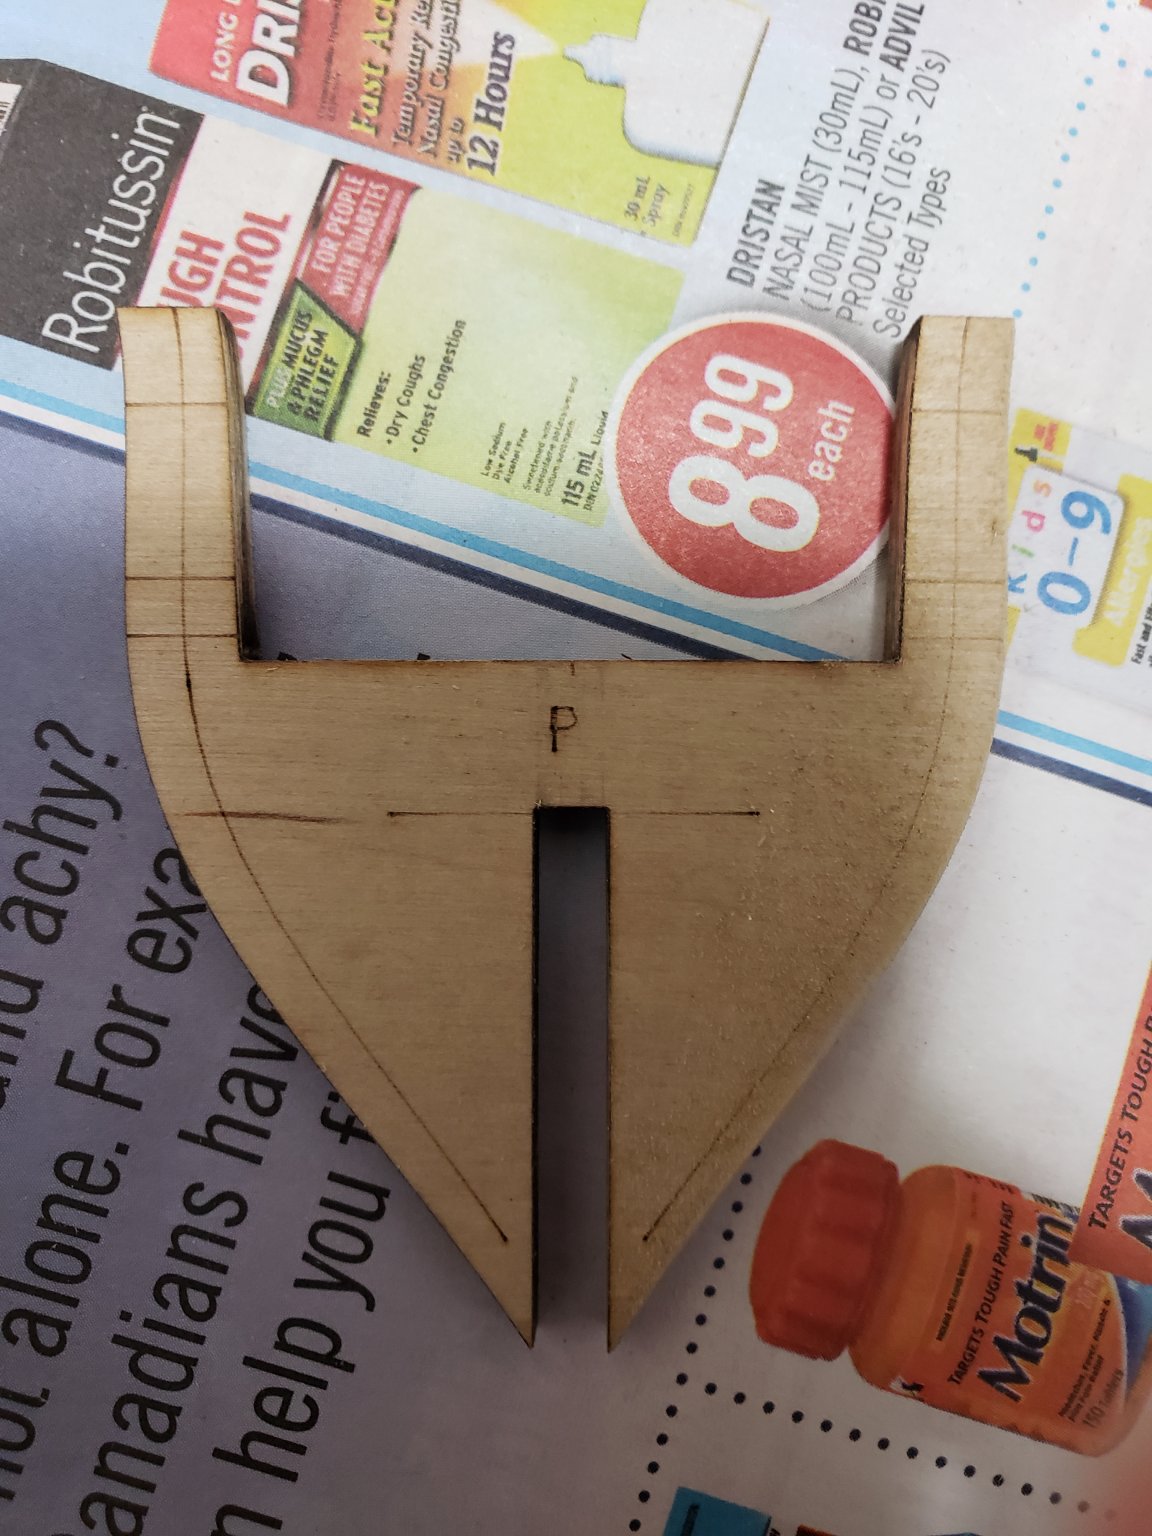
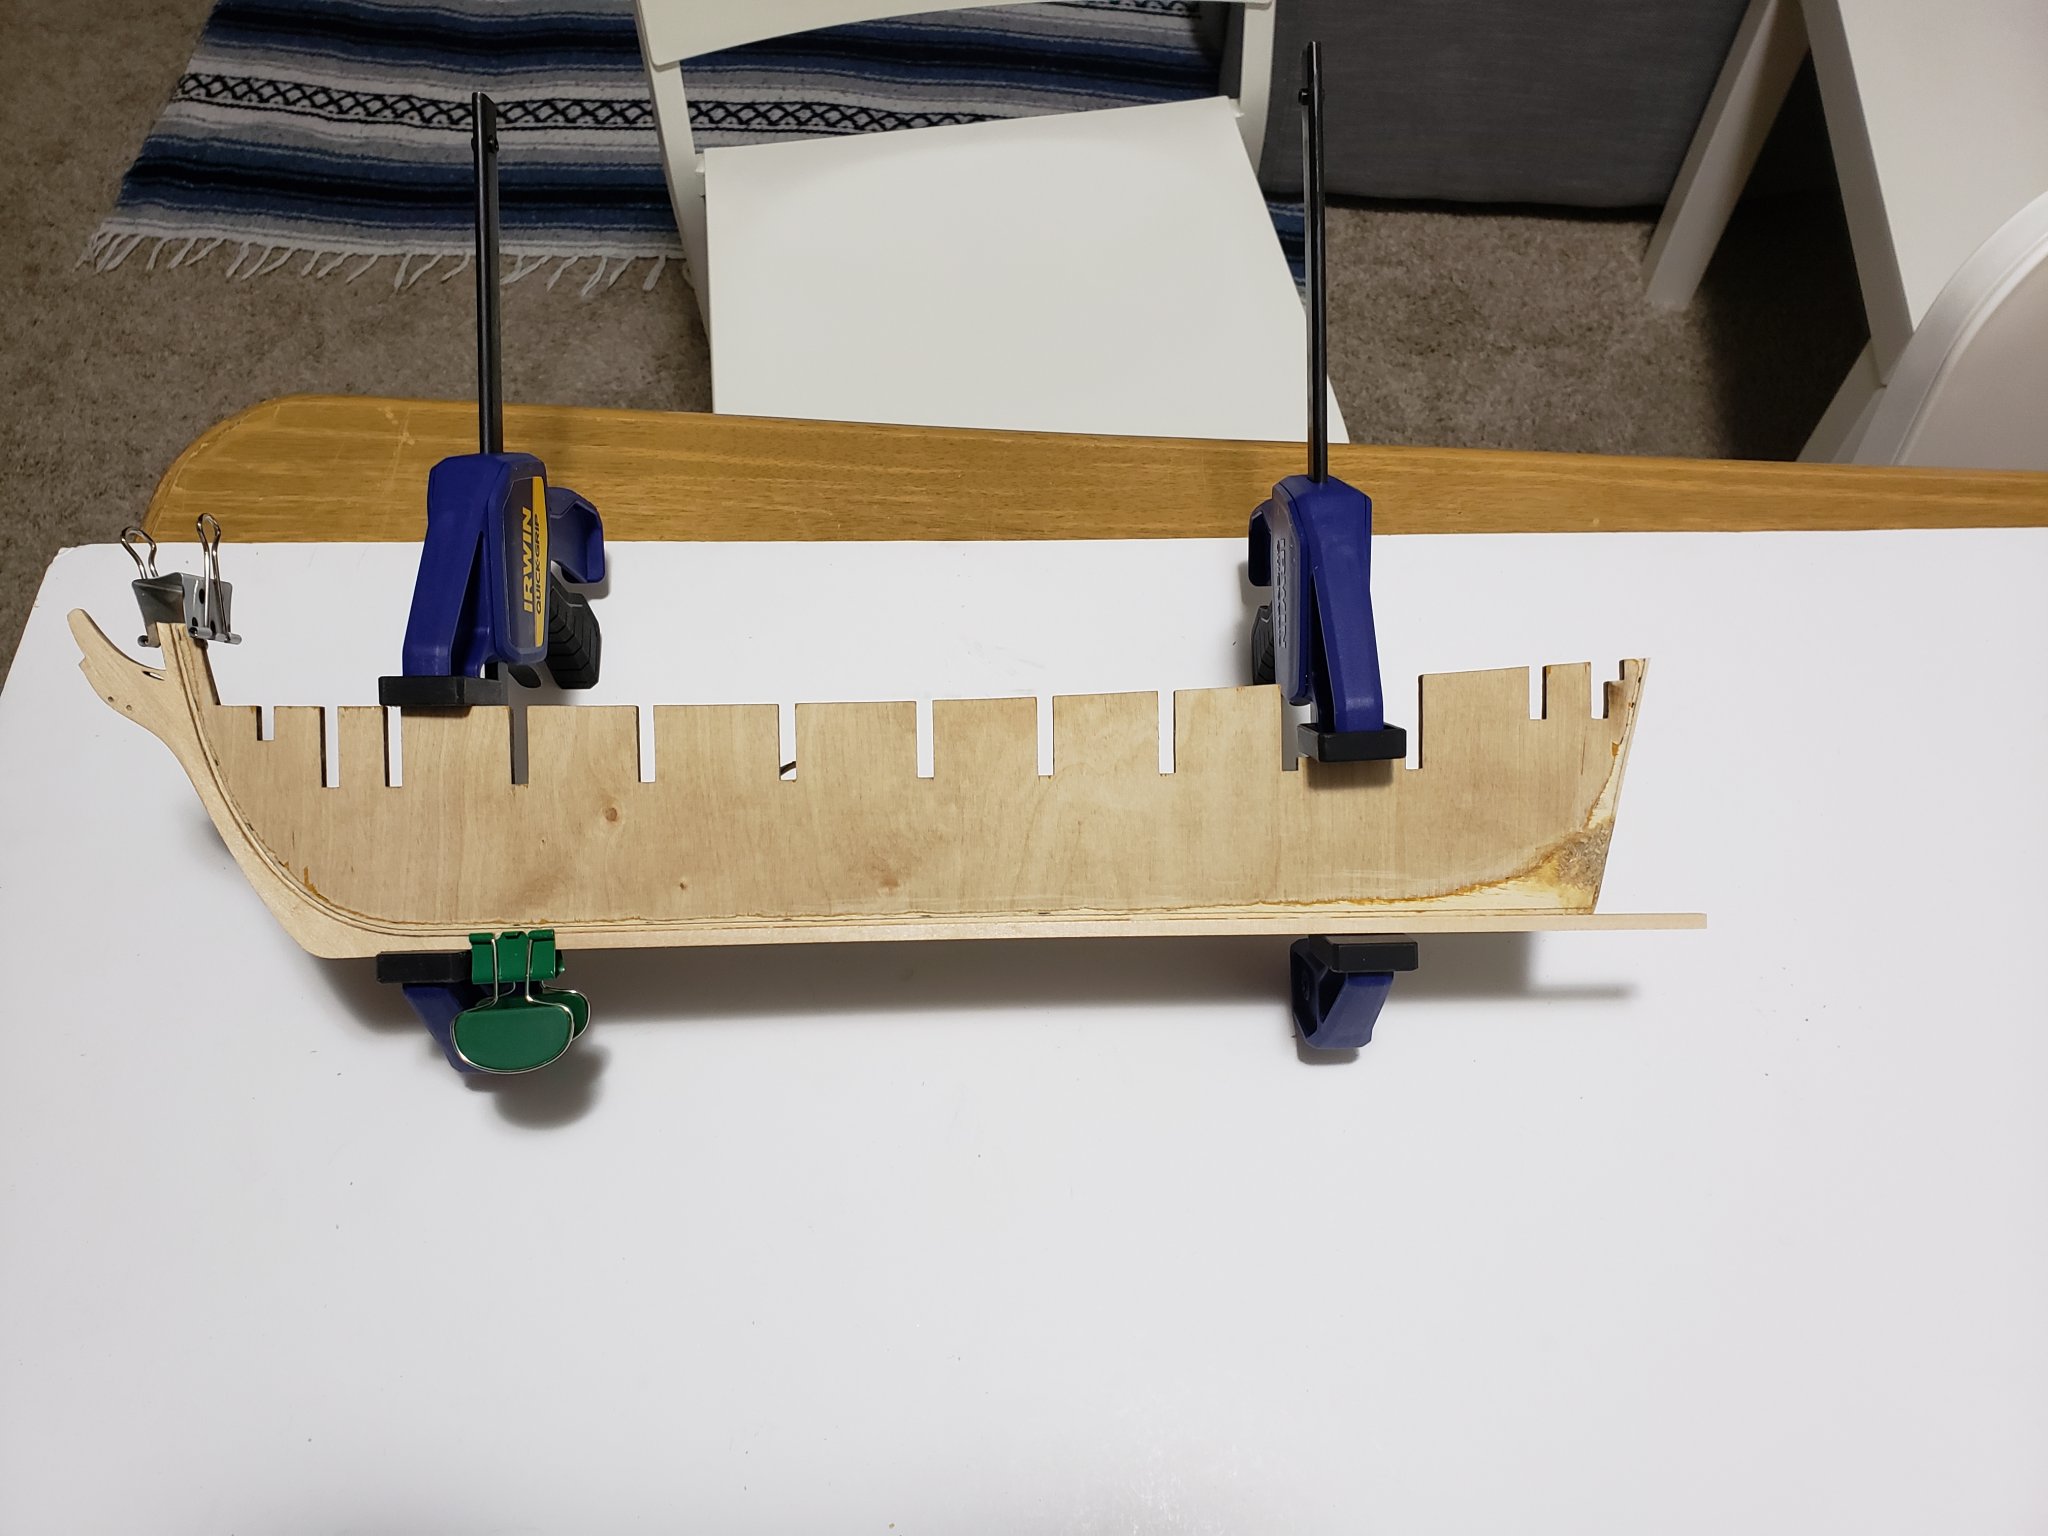
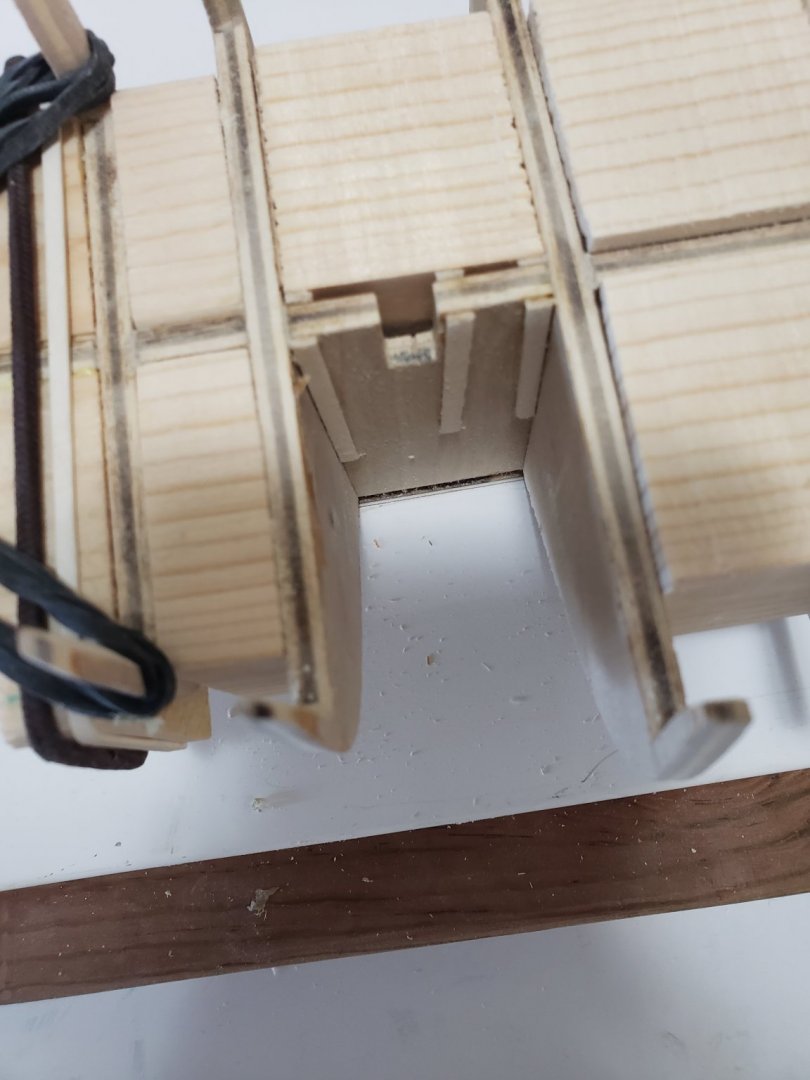
I started gluing the bulkheads. Before this, however, I saw a post by Robin (as shown here) to create notches in the bulkhead former to account for the masts. I followed the steps as shown in the images below: First I extrapolated the lines of the masts from Sheet 1 drawing onto the bulkhead former. This was a bit tricky but ultimately managed to do it with a flexible ruler. Next I cut the notches out with a coping saw and filed it smooth to 1/2 inch deep. The 5/16 inch dowel fitted snugly and the angles were correct. I used one of the rigging sheets to check for this as shown below: As for gluing the bulkheads, it took a bit of playing around to see which setup was best to keep the bulkheads square. I ultimately settled for the setup shown here: I cut the two blocks with some scrap wood I found and taped it up so that it does not stick to any glue that might seep out. I used some leftover decking wood from the AL kit to make a shim. Here is a close up of the rig: Now just 12 more to go. Until next time!


- 950 replies
-
- 10
-
-
- syren
- model shipways
- (and 1 more)
-
Hello! I'm also building the Syren and have reached this stage of the build. Any reason you used the plywood to sandwich the notches? Is it because the filler wood is softer than the plywood?
-
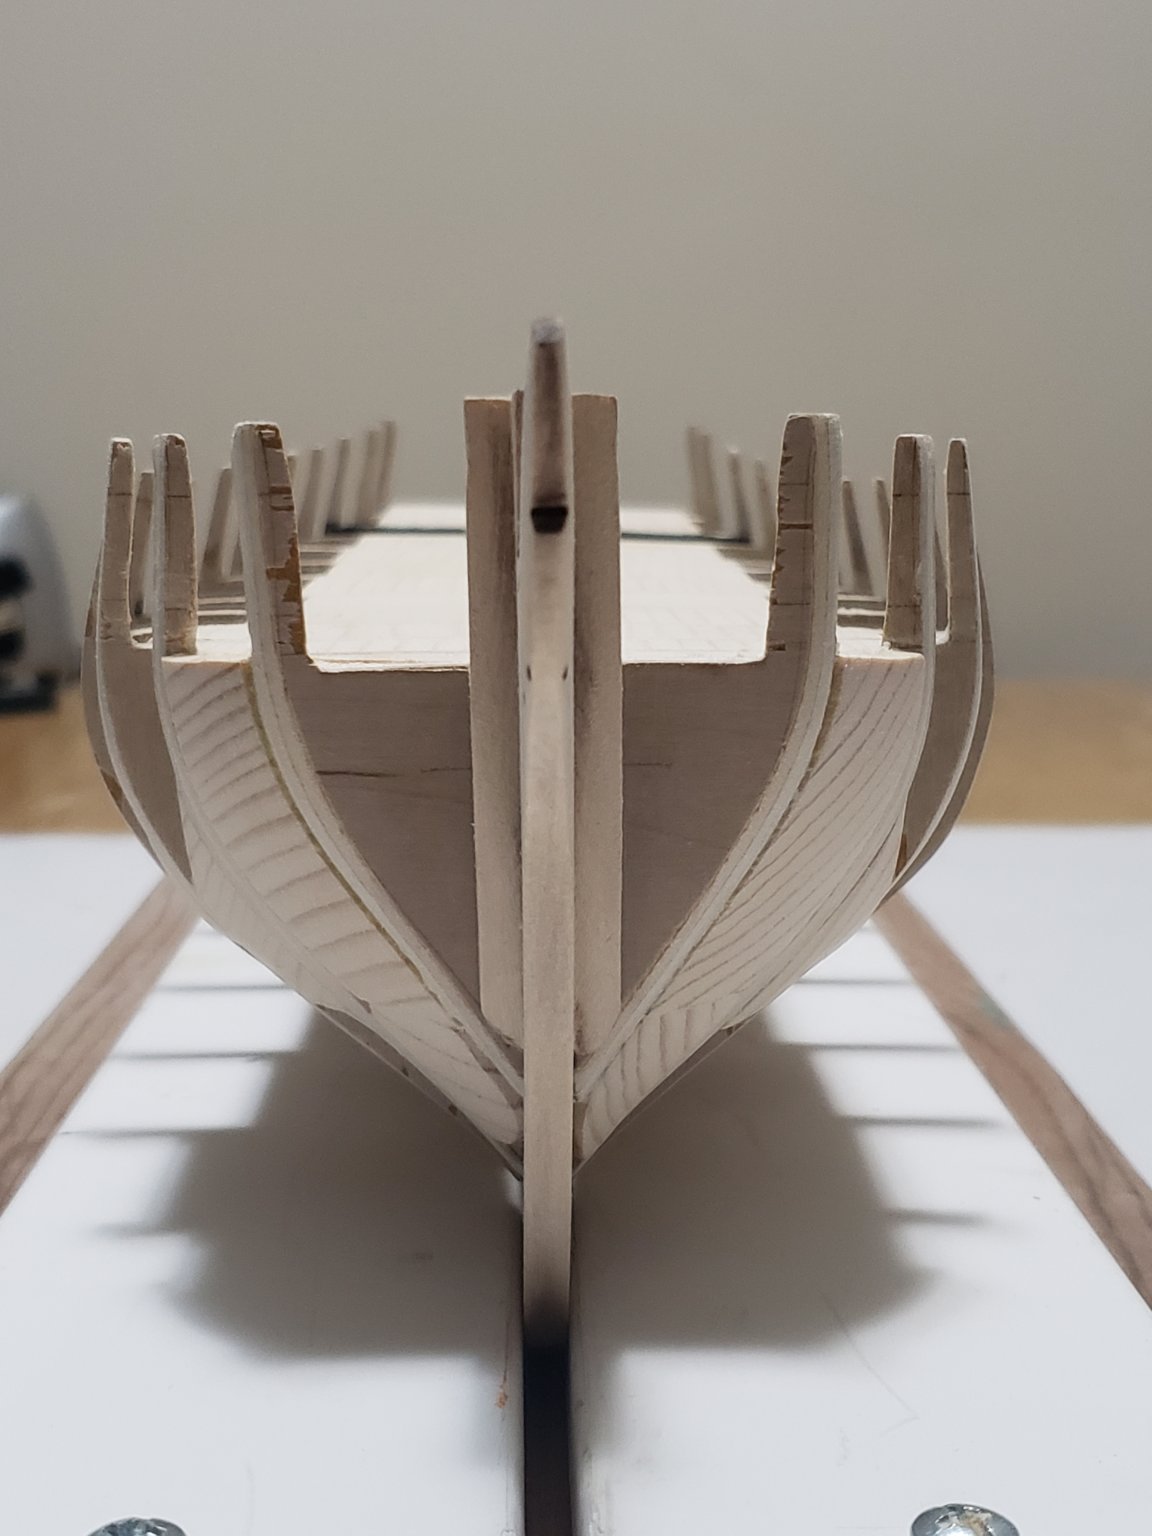
Just found out how to size images in this website, so no more overly large photos hehe . Please let me know if this is a good size for the photos. Anyways, I started working on Chapter 2 of the build. I finished beveling the bulkheads that needed the steepest slope. Here are some photos: Before (bulkhead P - nearest to the bow): After: I also dry fitted all the bulkheads after sanding their edges to smooth out rough spots and remove burn marks. The fittings for all bulkheads were a bit loose, so I will probably slide in a shim of scrap wood strips left over from the AL's Virginia kit, but I am open to any suggestions! I was also thinking of just gluing the bulkheads without the shims making sure they are all square since all faces of the bulkhead slots touch the bulkhead former. The bulwark frames were tougher to bevel, especially the first three due to their thickness. Below is a photo of them. I made sure the thicknesses between them are consistent. Tomorrow I will be gluing in the bulkheads and finalizing the fairing process once the glue is dry. I will also start on making a temporary stand.


- 950 replies
-
- 11
-
-
- syren
- model shipways
- (and 1 more)
-
Thanks for the suggestion Eric, I'll definitely consider getting them. Would you be knowing how much they cost? I can't seem to find any prices on the site. Many thanks Rich! And thank you all for the likes!
-
Thanks Patrick! Just noticed your build too. Looking forward to seeing how she progresses. Cheers
- 950 replies
-
- 1
-
-
- syren
- model shipways
- (and 1 more)
-
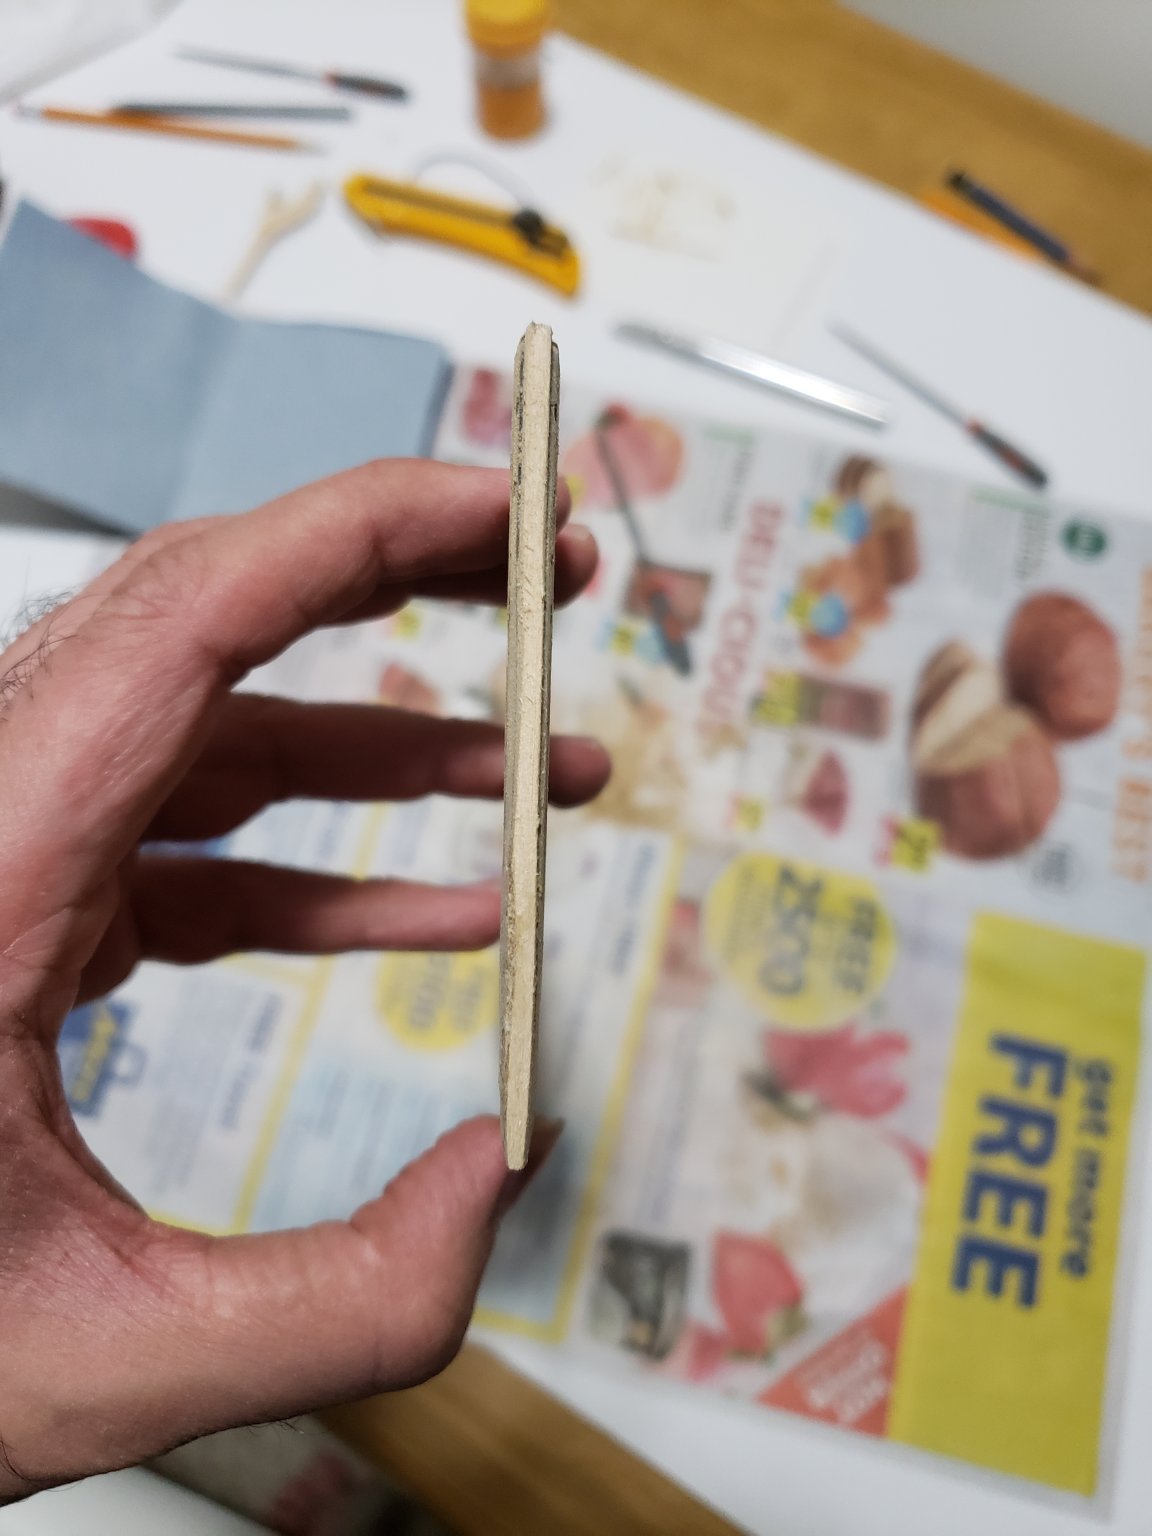
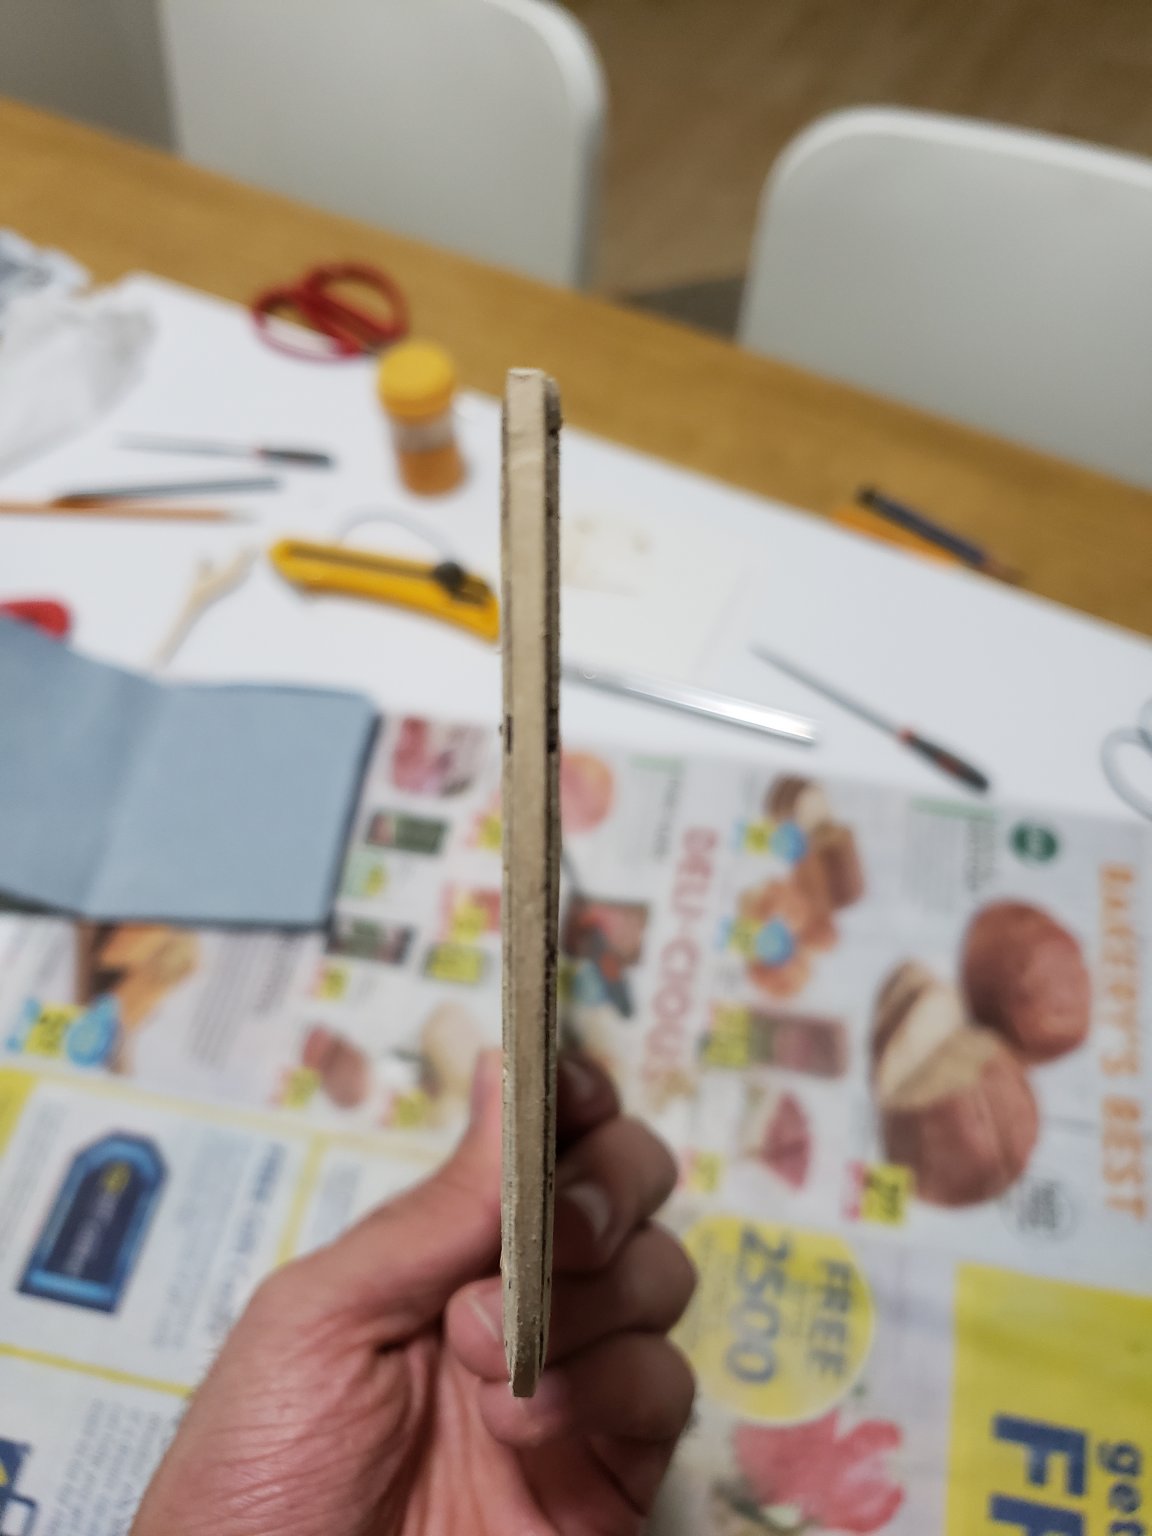
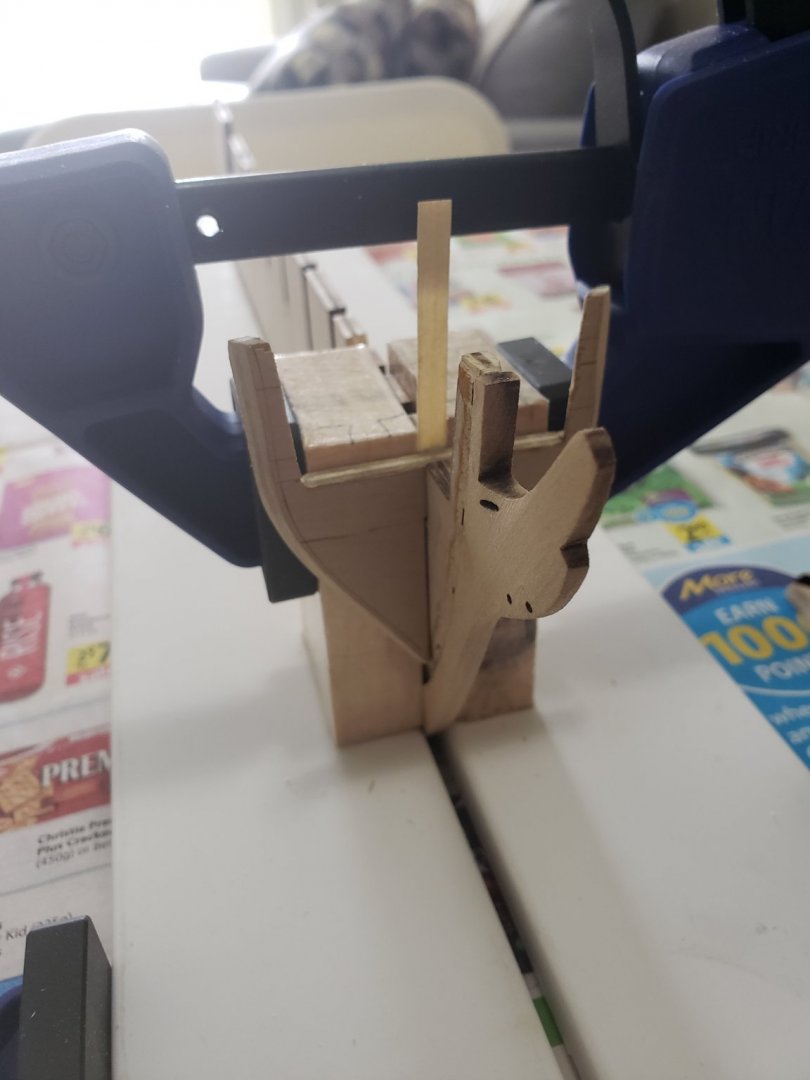
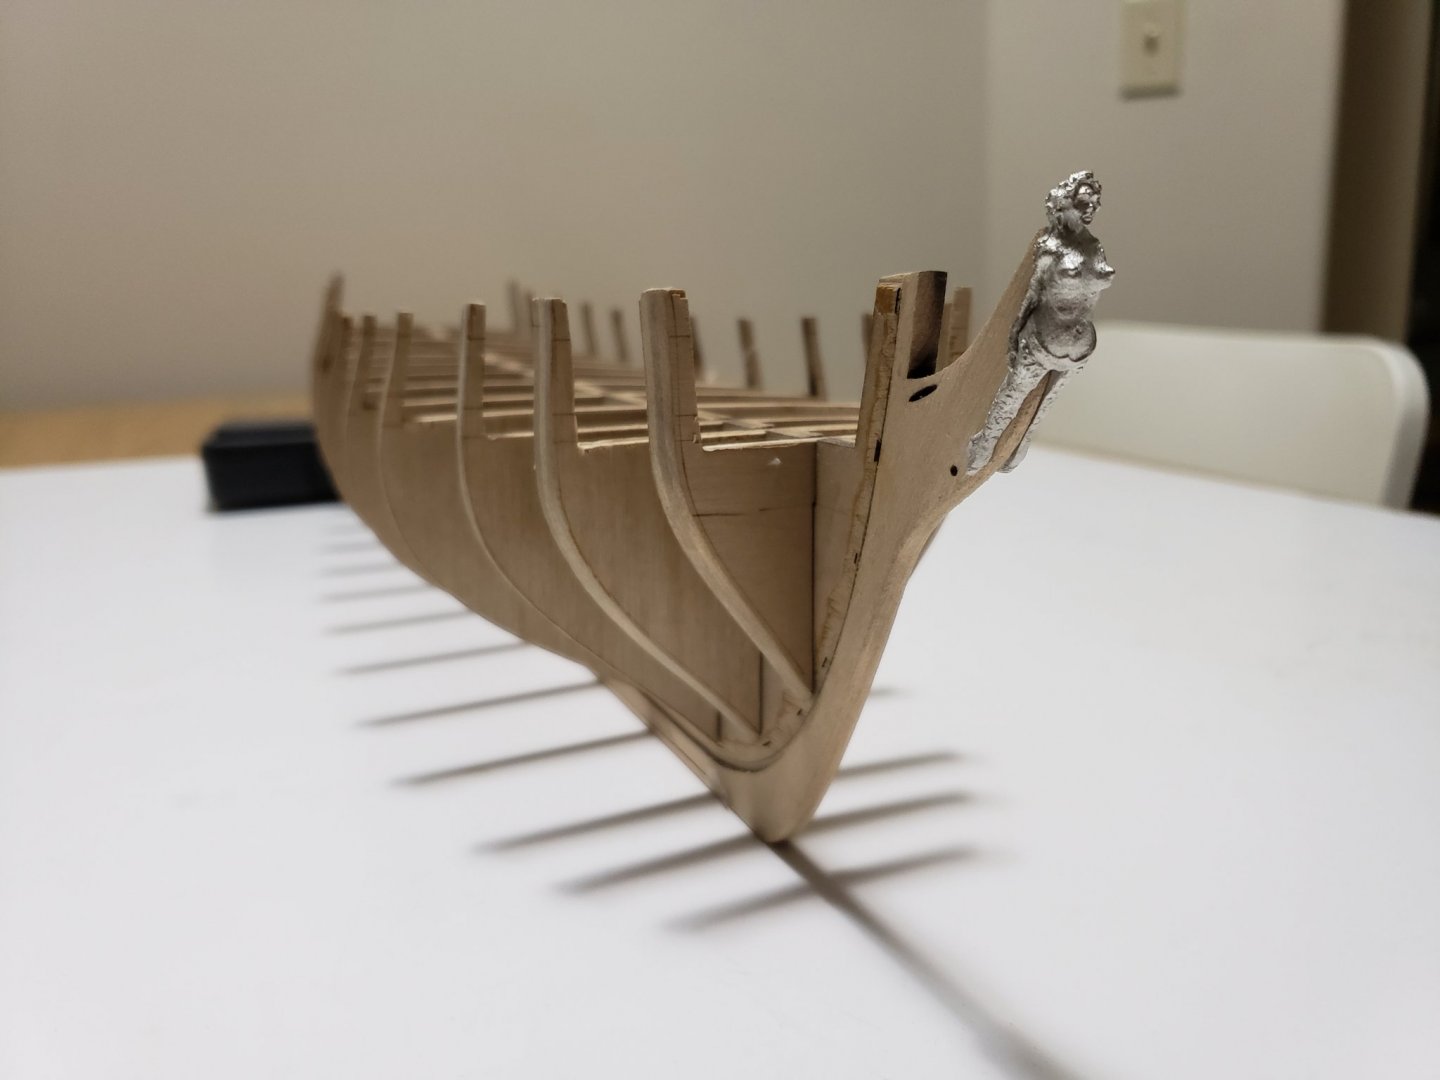
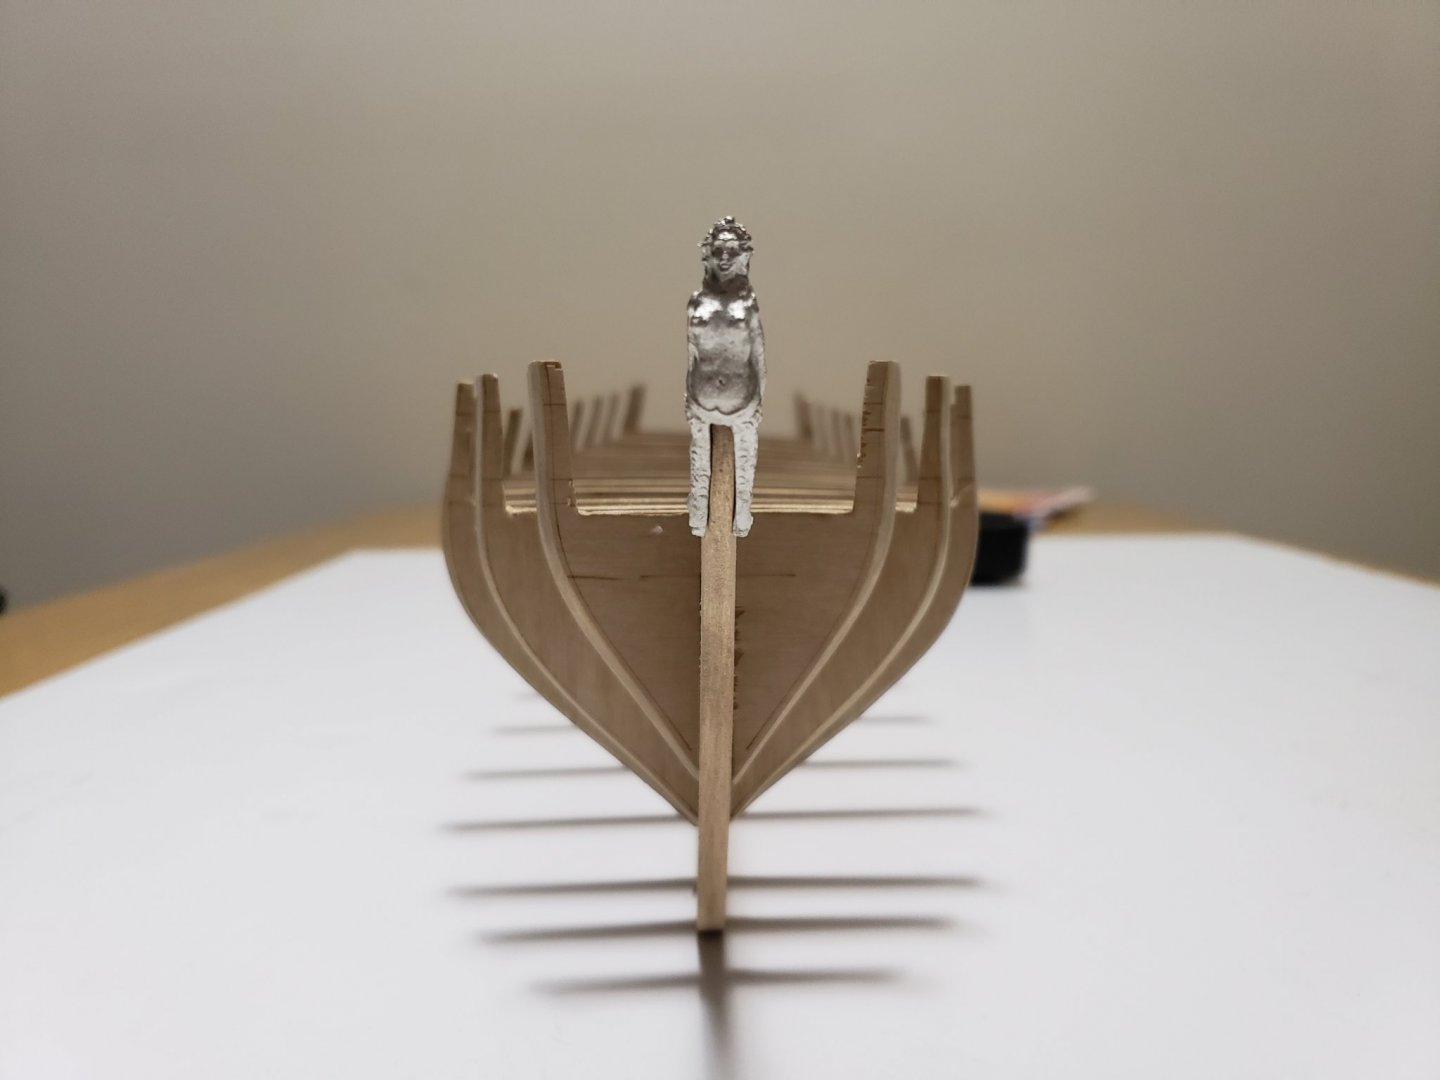
I managed to complete Chapter 1 today. Below is the progress I made: Next I glued the rabbet strip in place using the brand new set of clamps! Now here is where things did not go so well 😅. I did not do a pretty job in scoring the bulkhead former with my not so sharp blade. When trying to keep even pressure in the blade more material got cut off leading to bearding line being overshot. Here are some photos of the mess... When sanding the stern, one side got slighly thinner than the other so I rectified it by using some makeshift wood filler (just glue and sawdust) Here is the finished bow and stern: Finally I tapered the stern knee so the mermaid can fit snugly and glued it on the bulkhead former together with the keel: One thing I should point out, the bulkhead former is ever so slightly warped causing the keel to sit slightly off center at the middle of the bulkhead former. I hope this does not cause any detriment in the near future. I will tape the temporary false keel tomorrow once the glue fully dries and then move on to Chapter 2. Anyways, that is all for now. Hopefully I will make good progress in Chapter 2 without too many hiccups.


- 950 replies
-
- 14
-
-
- syren
- model shipways
- (and 1 more)
-
Thanks very much Voyageur. Glad to have you onboard!
-
Thanks Chris! I'll be contacting ModelExpo for both the replacement brass parts and the single blocks.
-
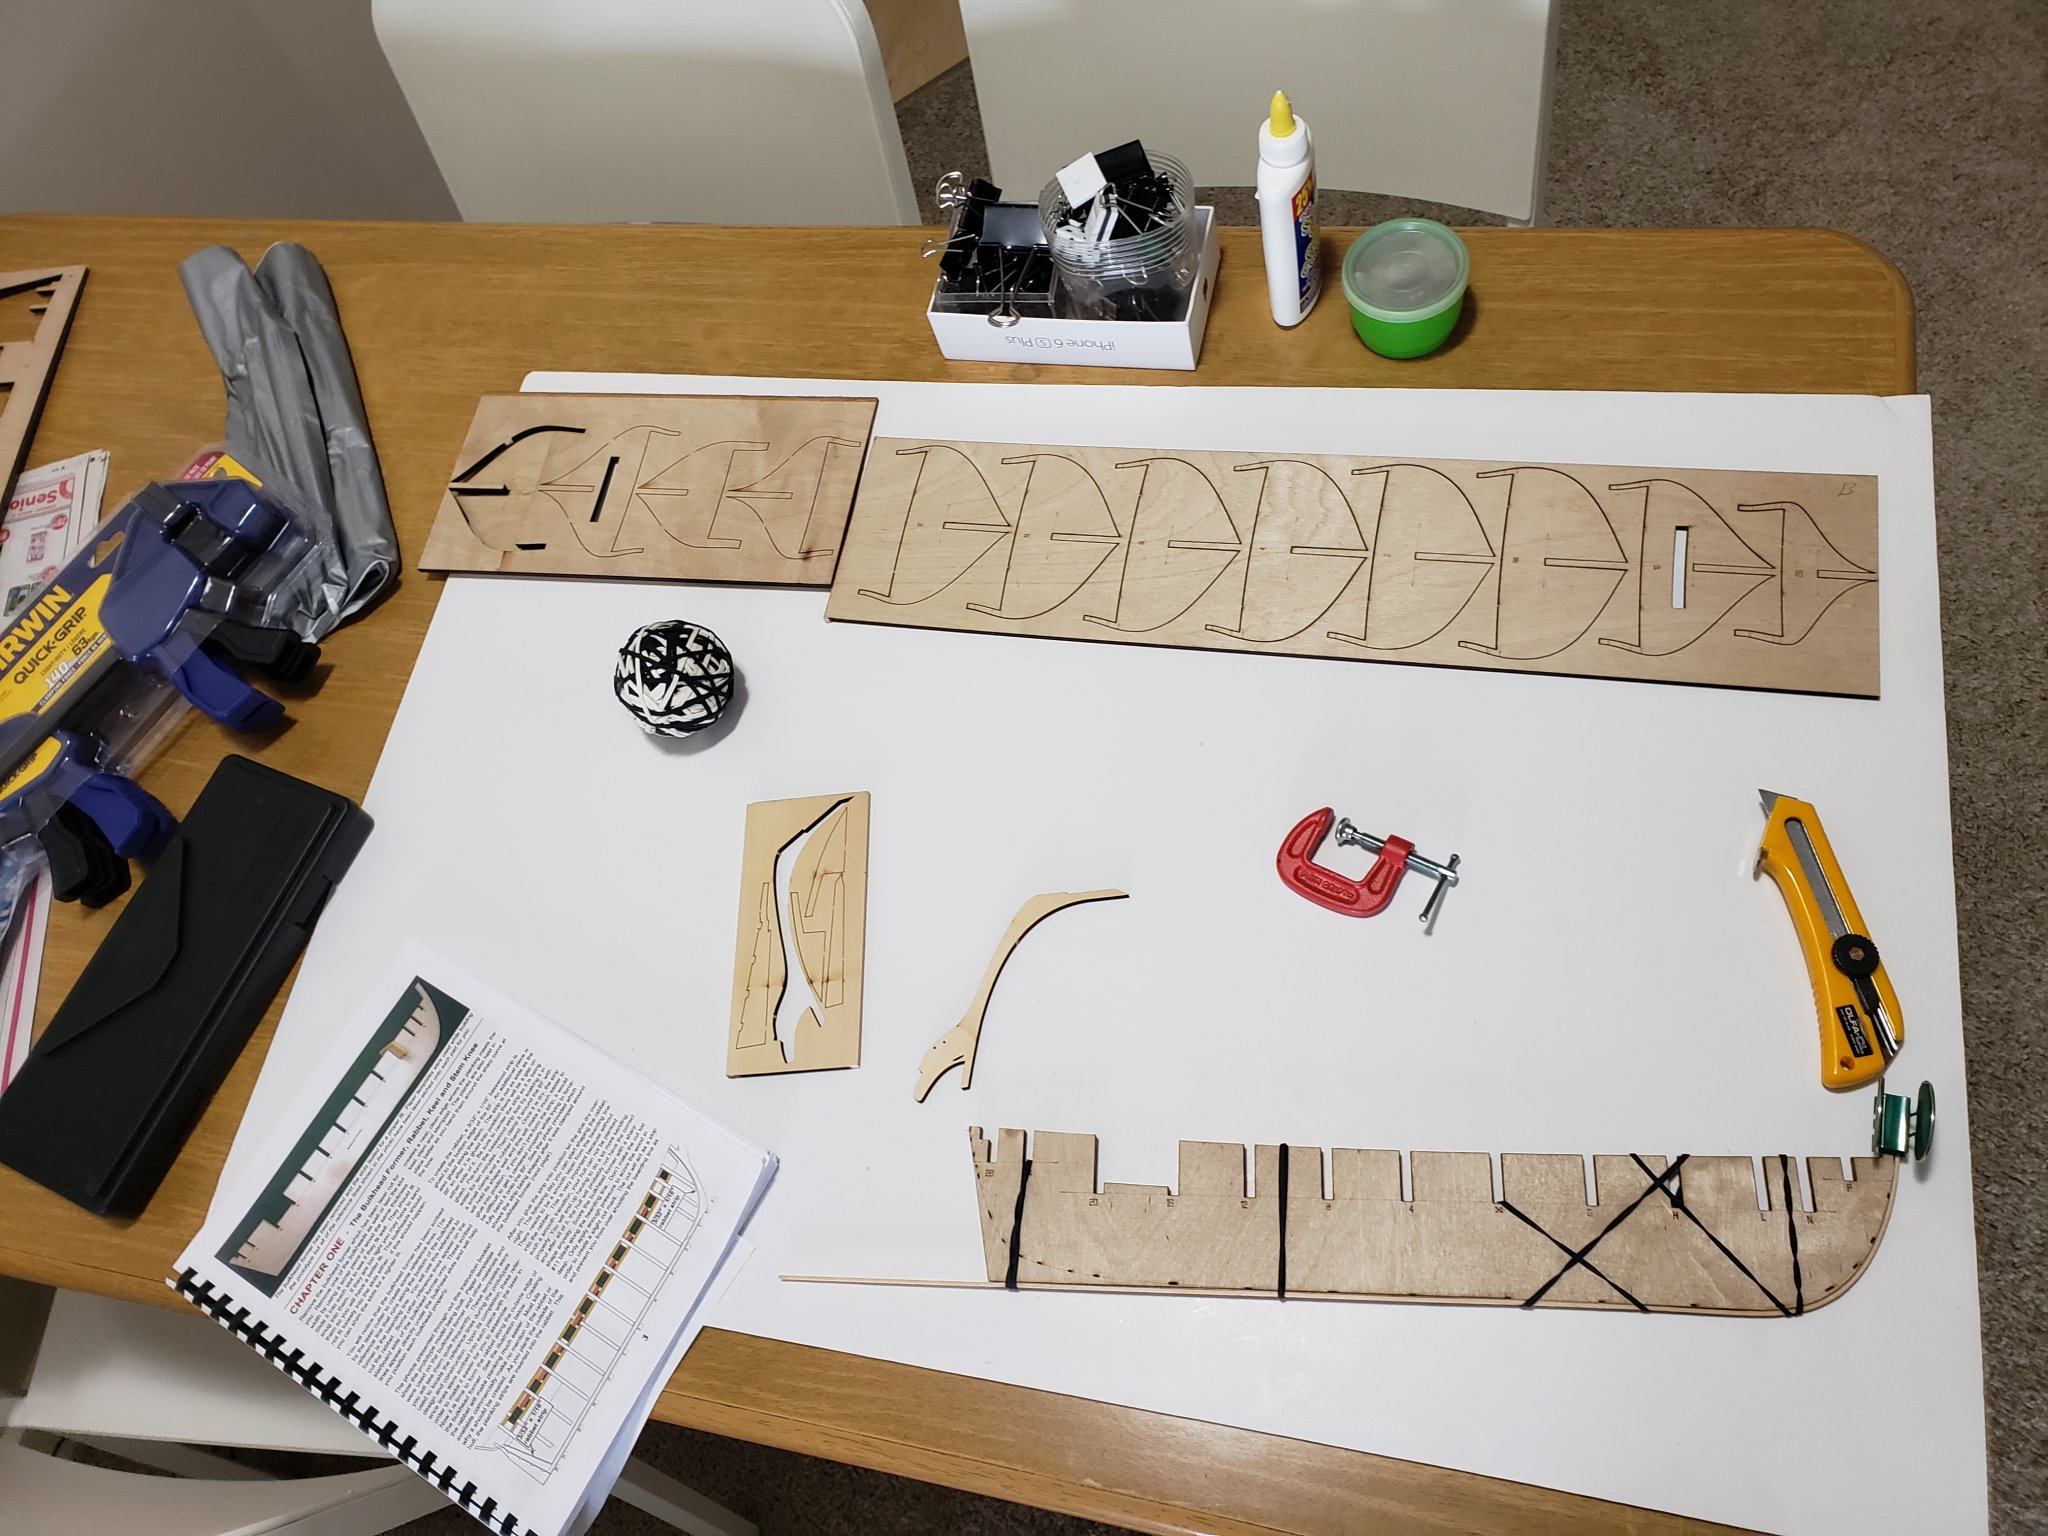
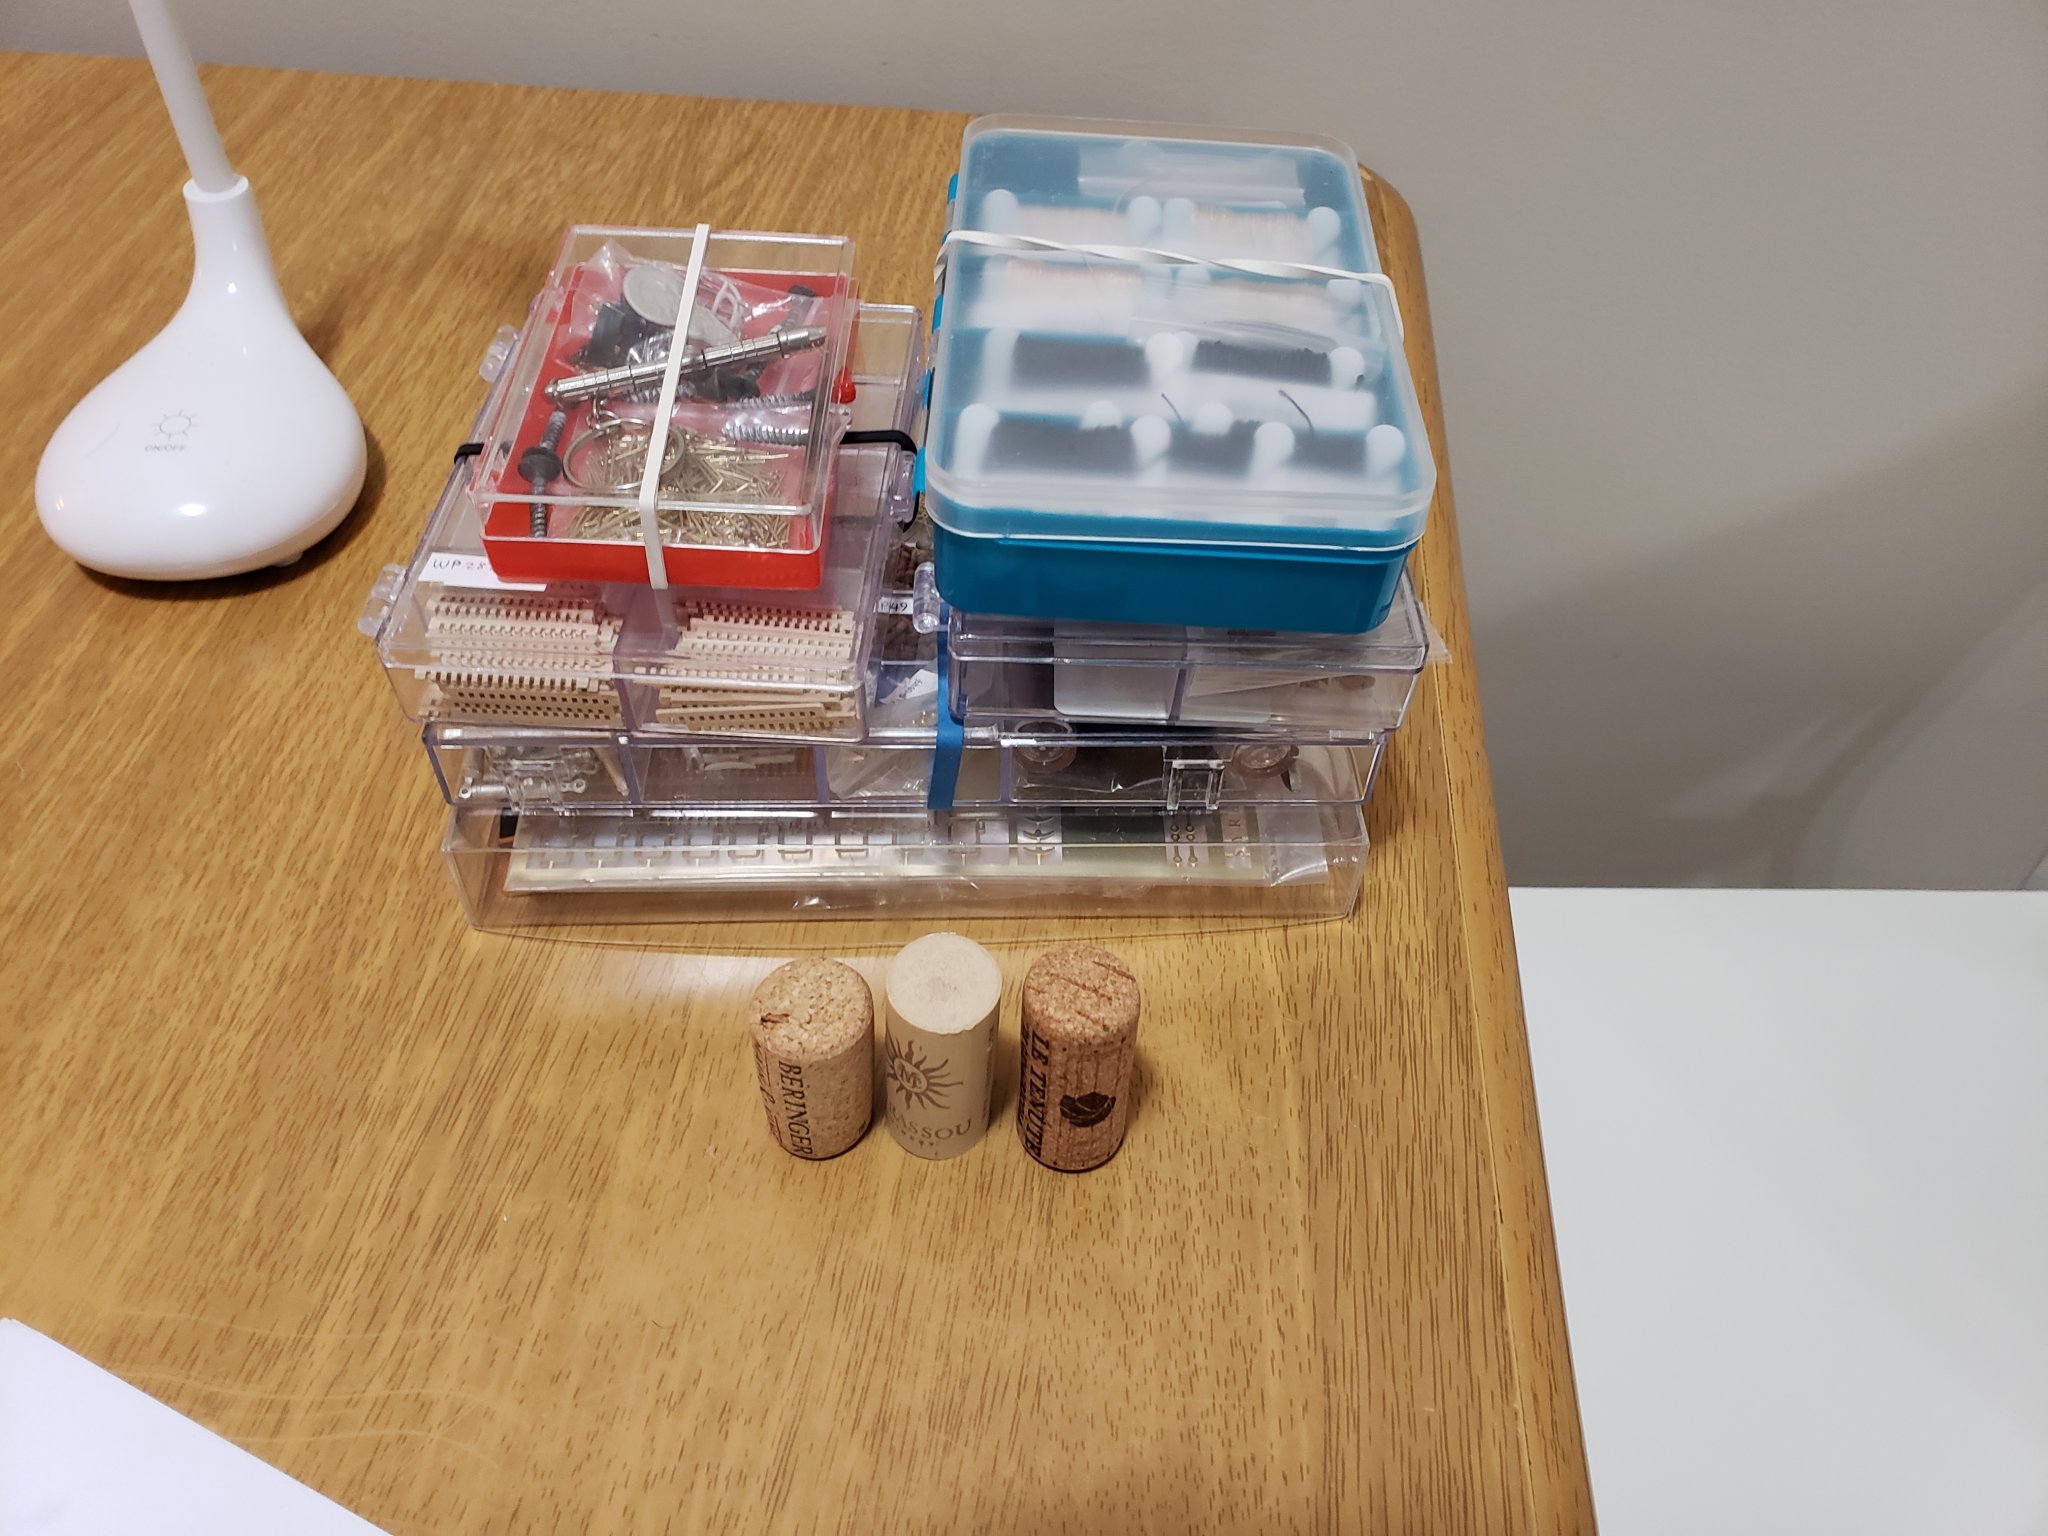
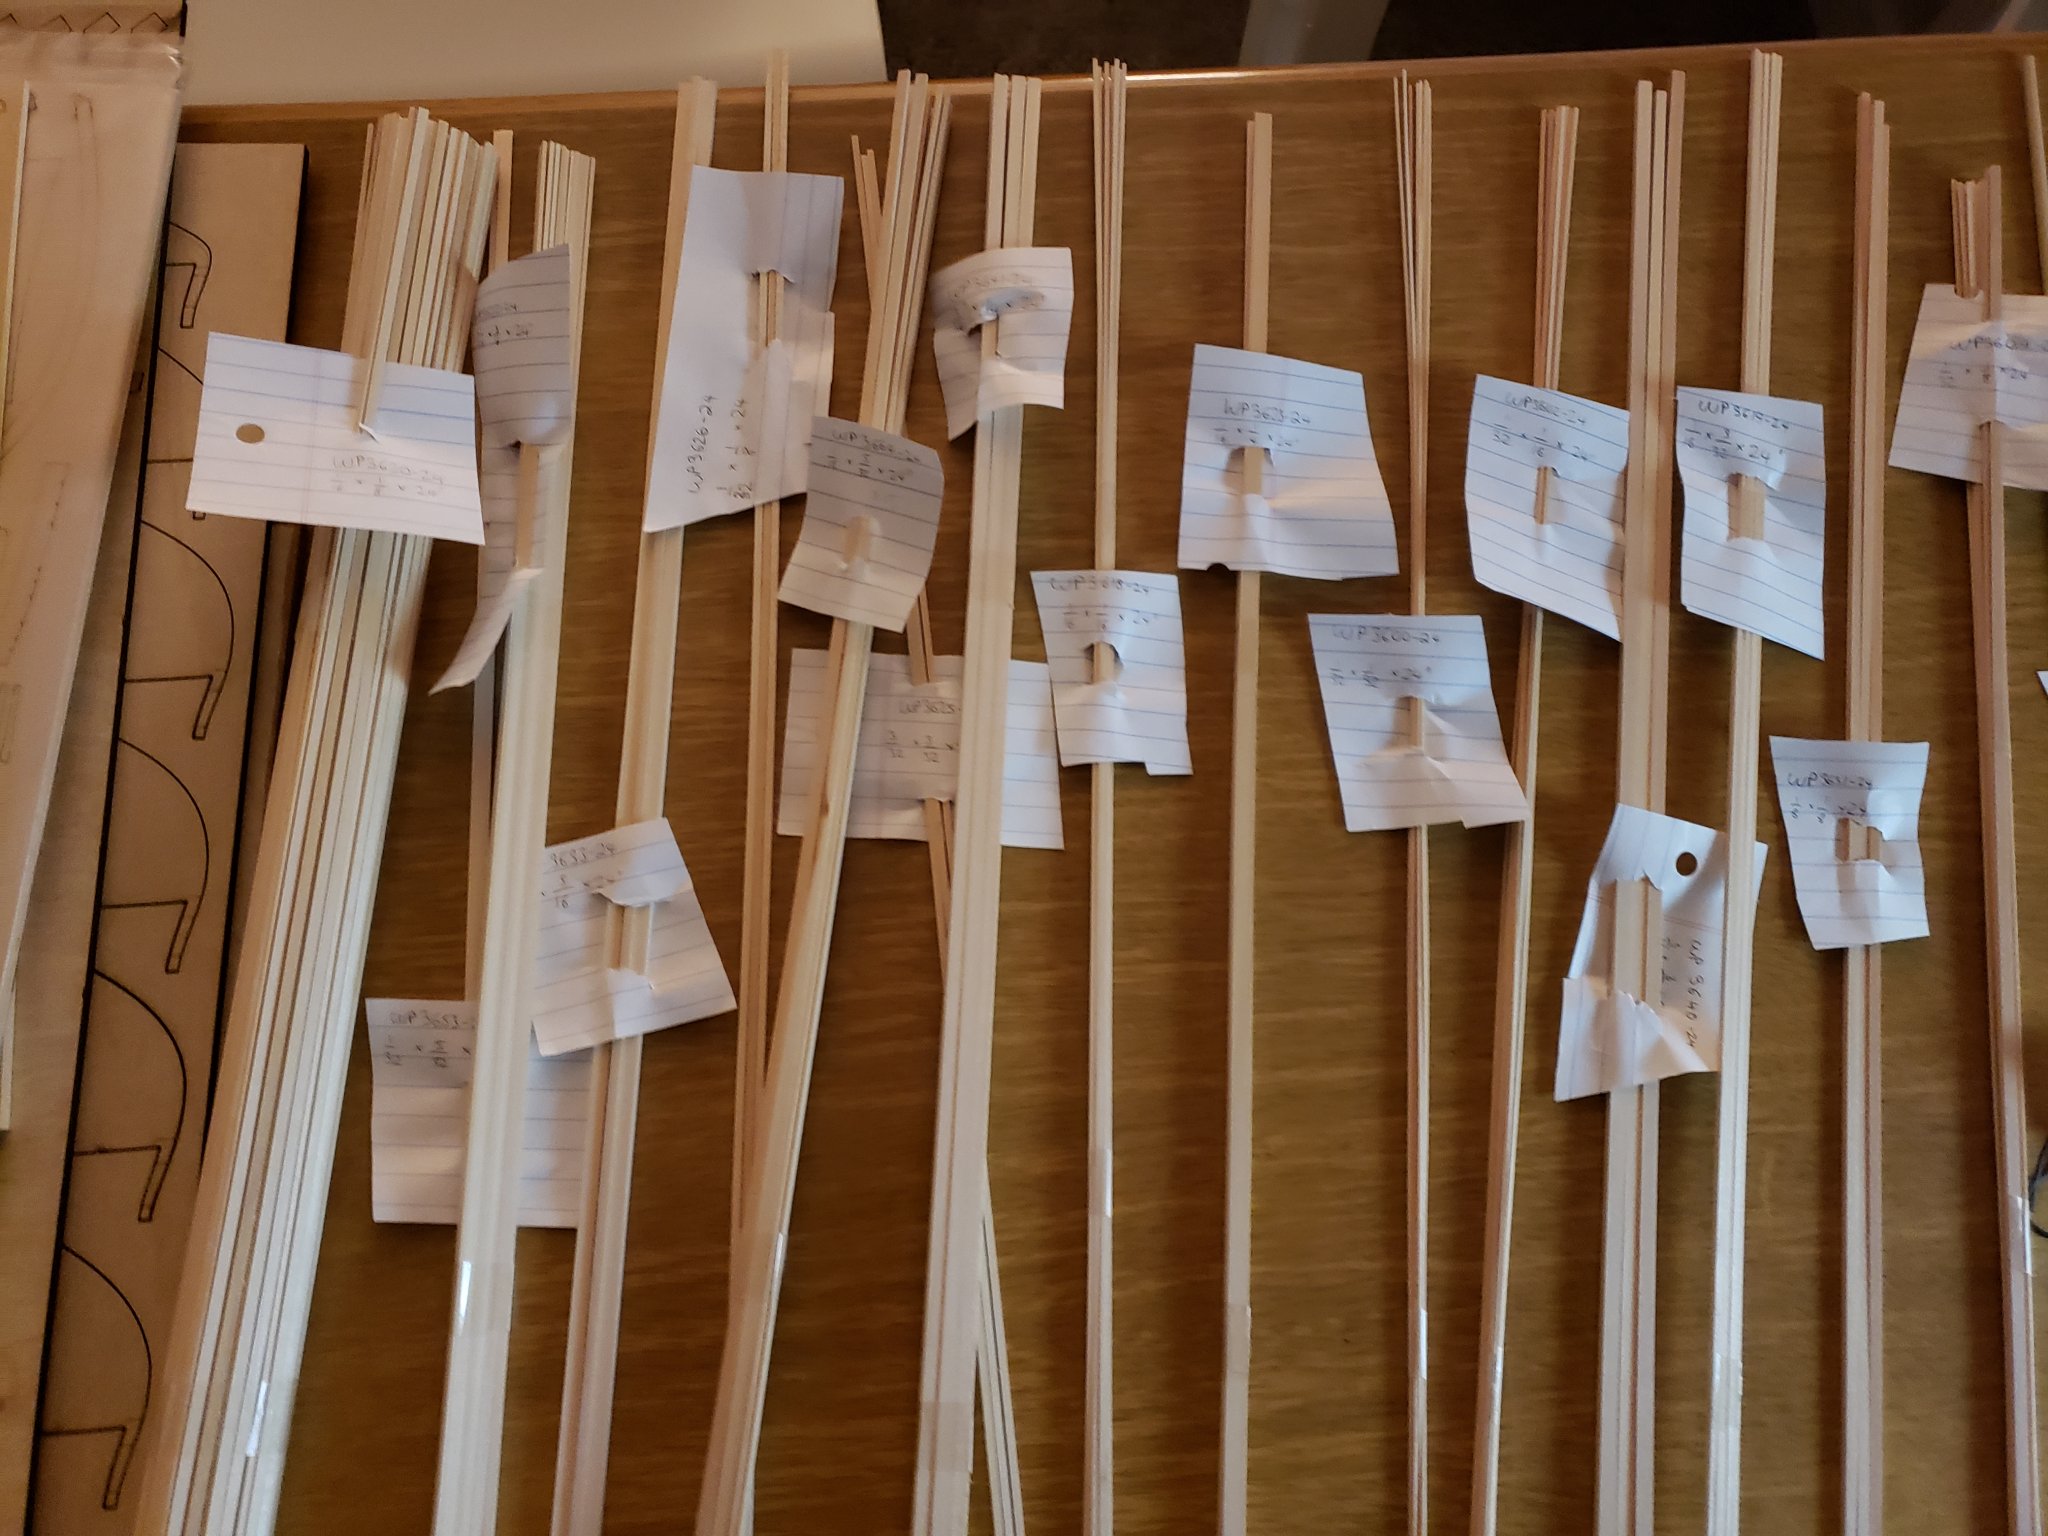
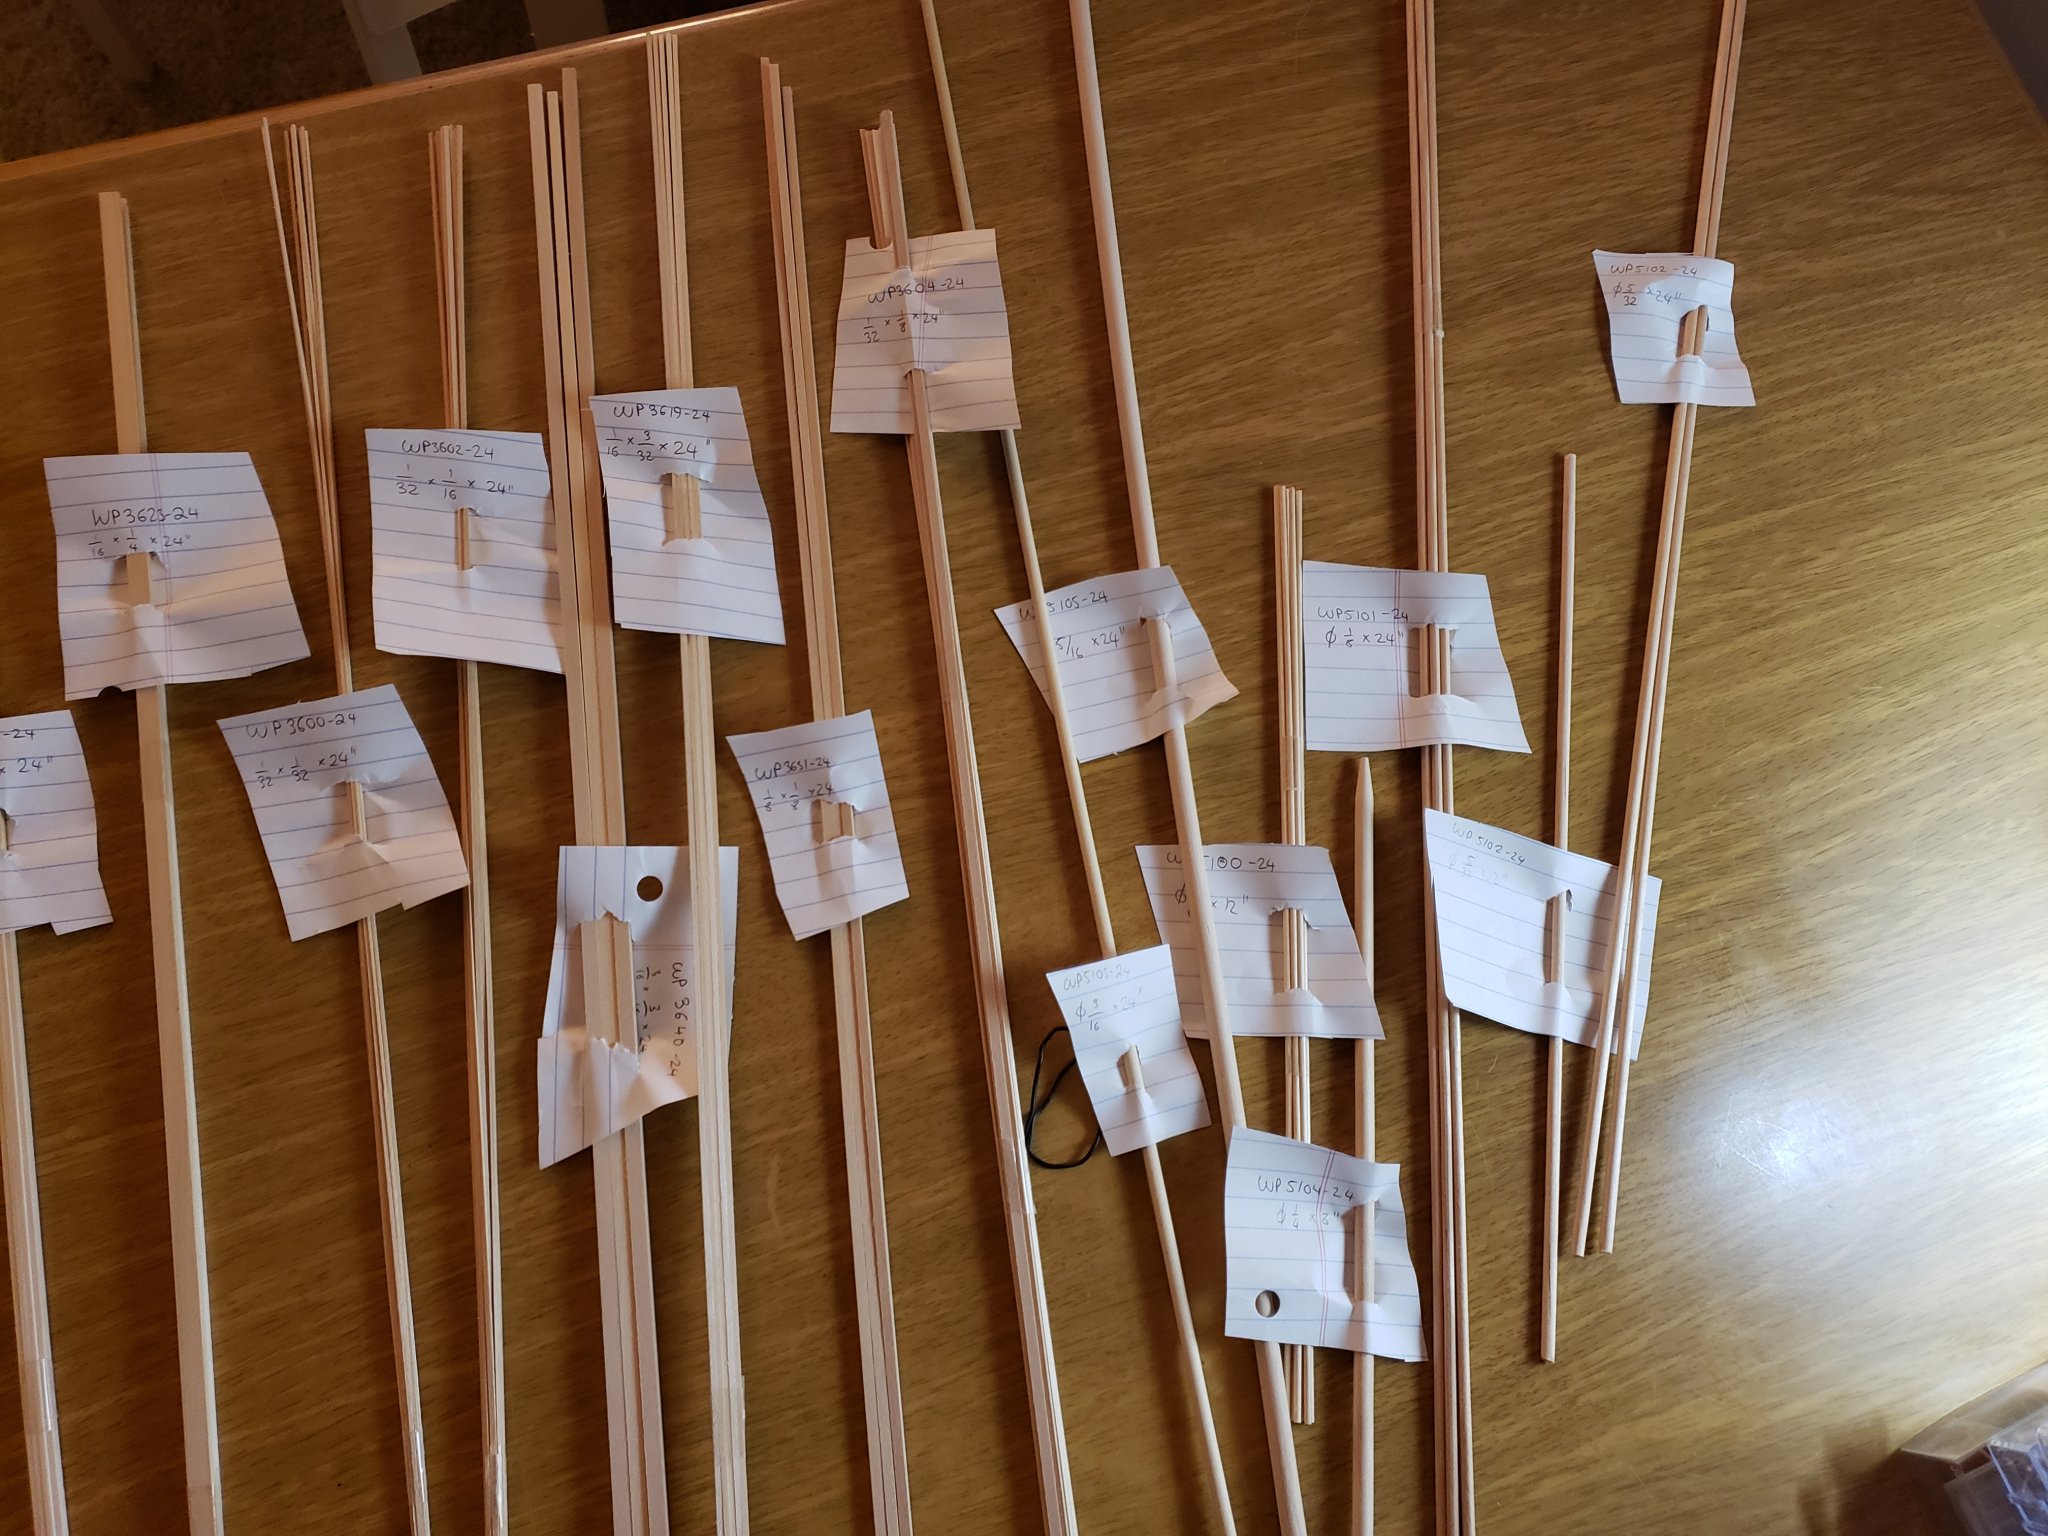
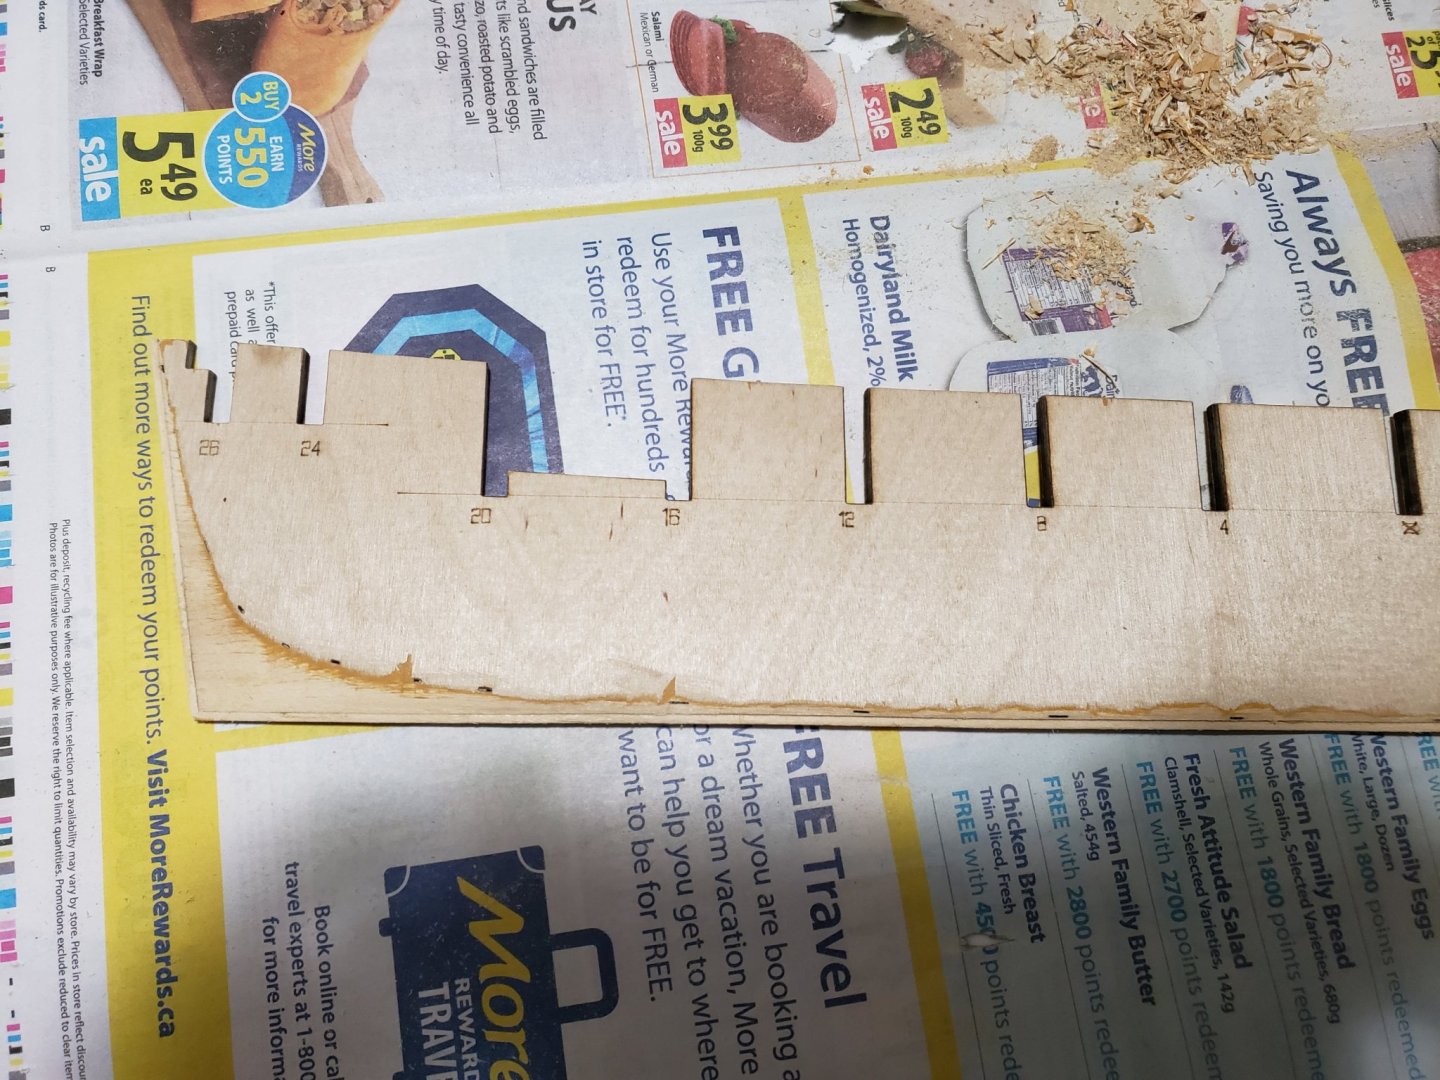
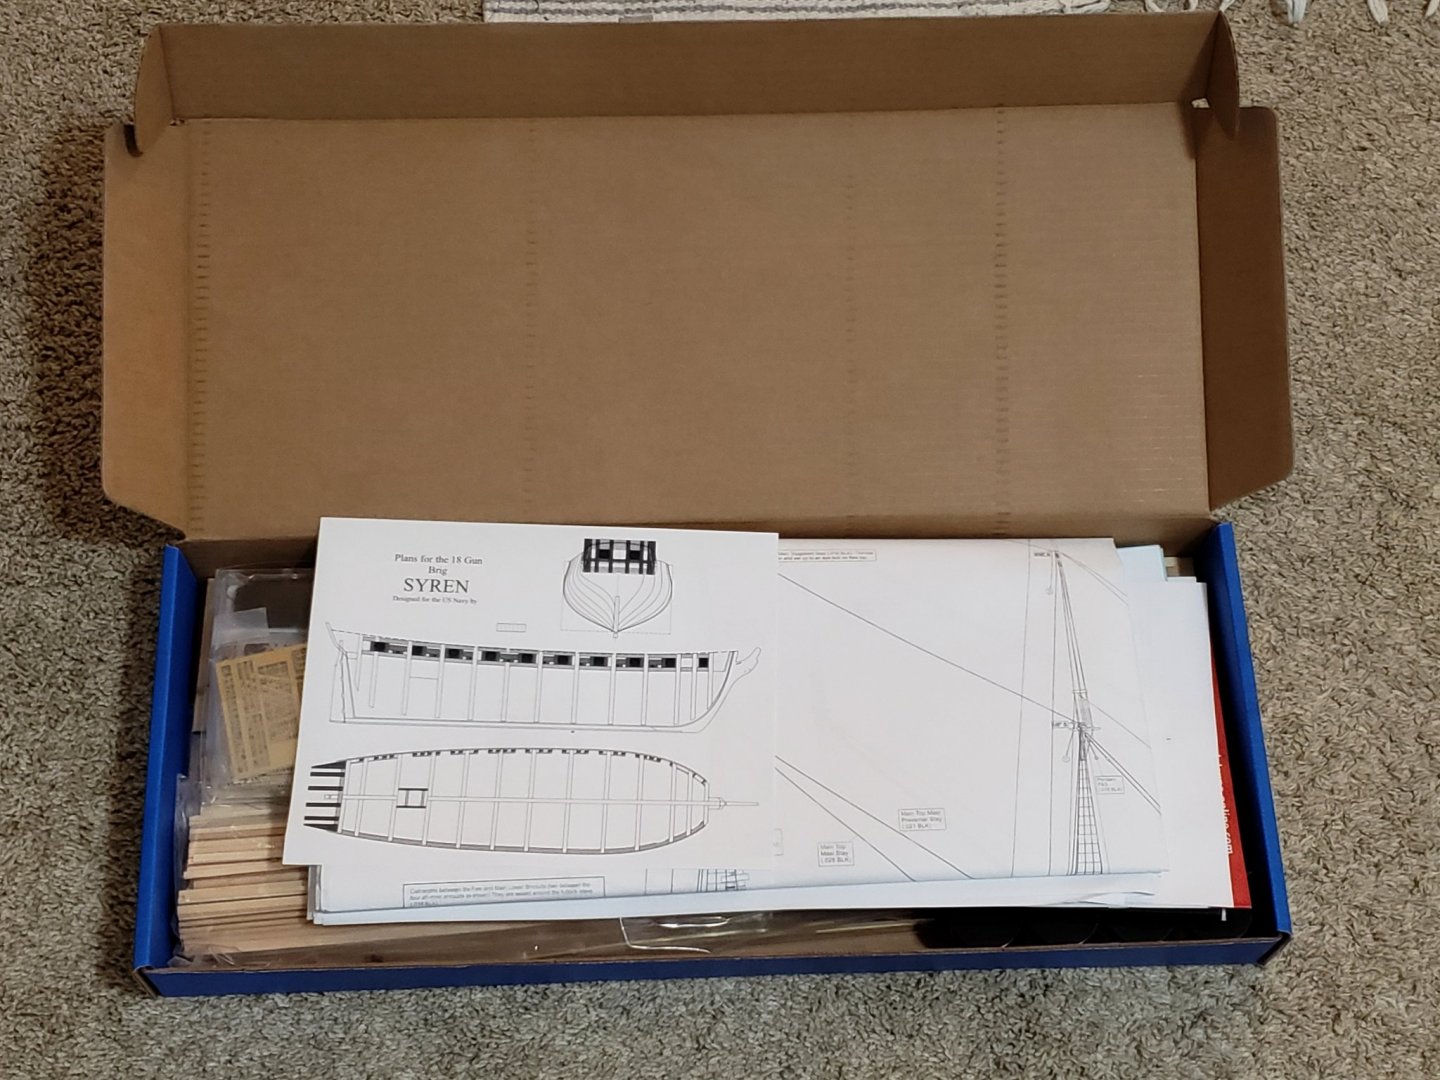
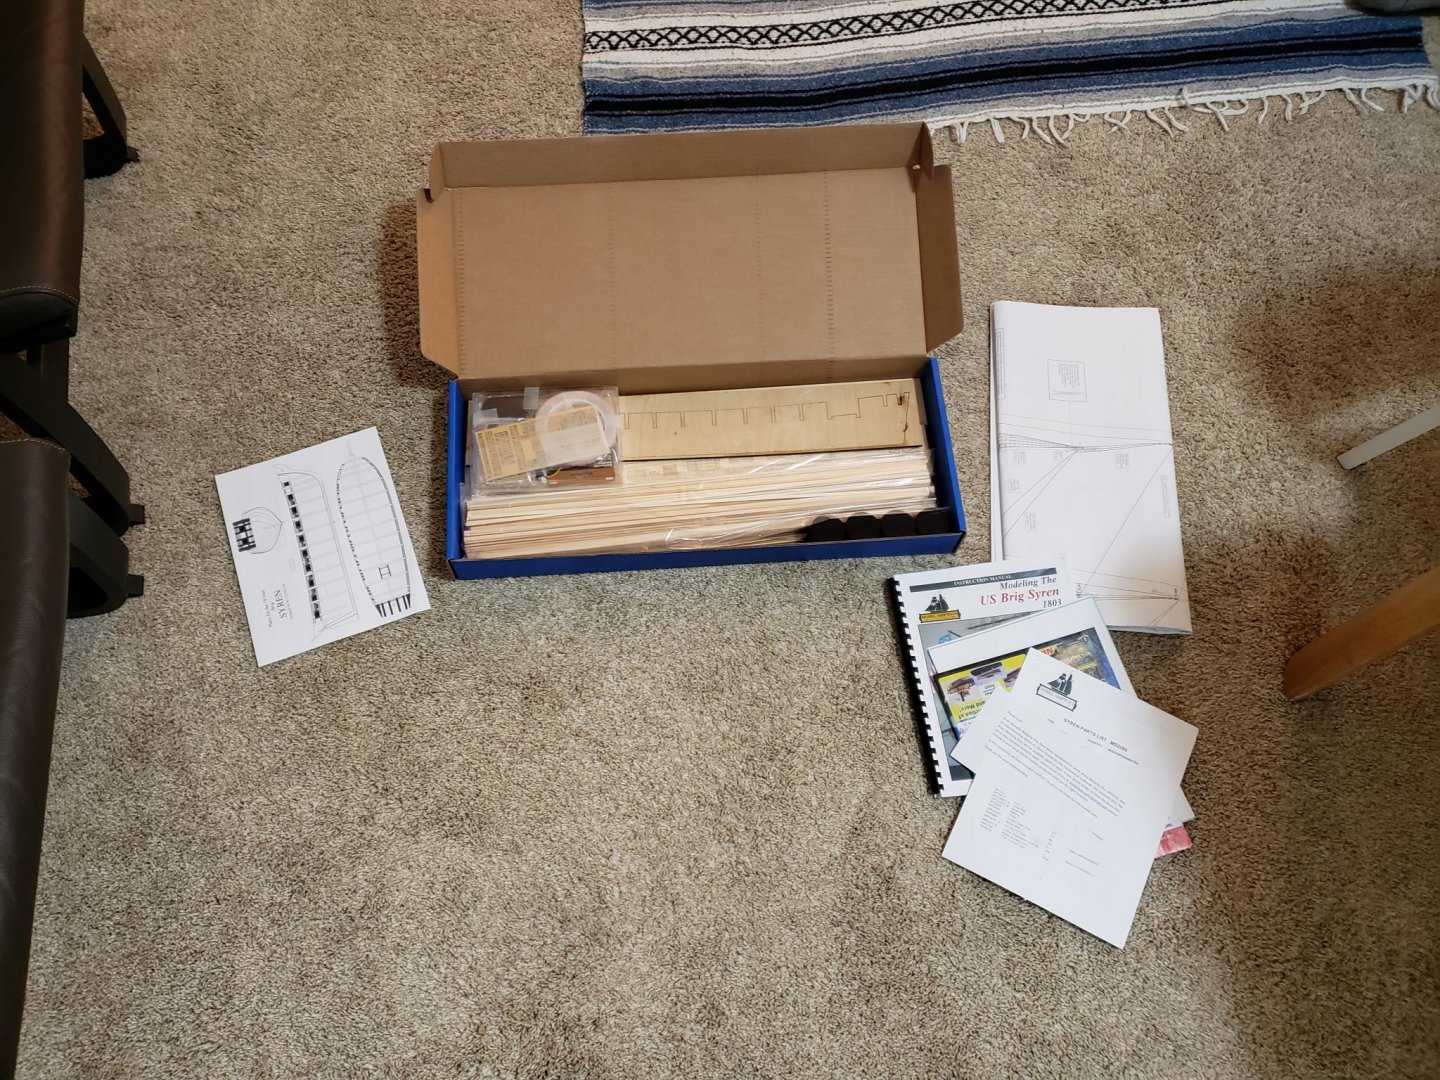
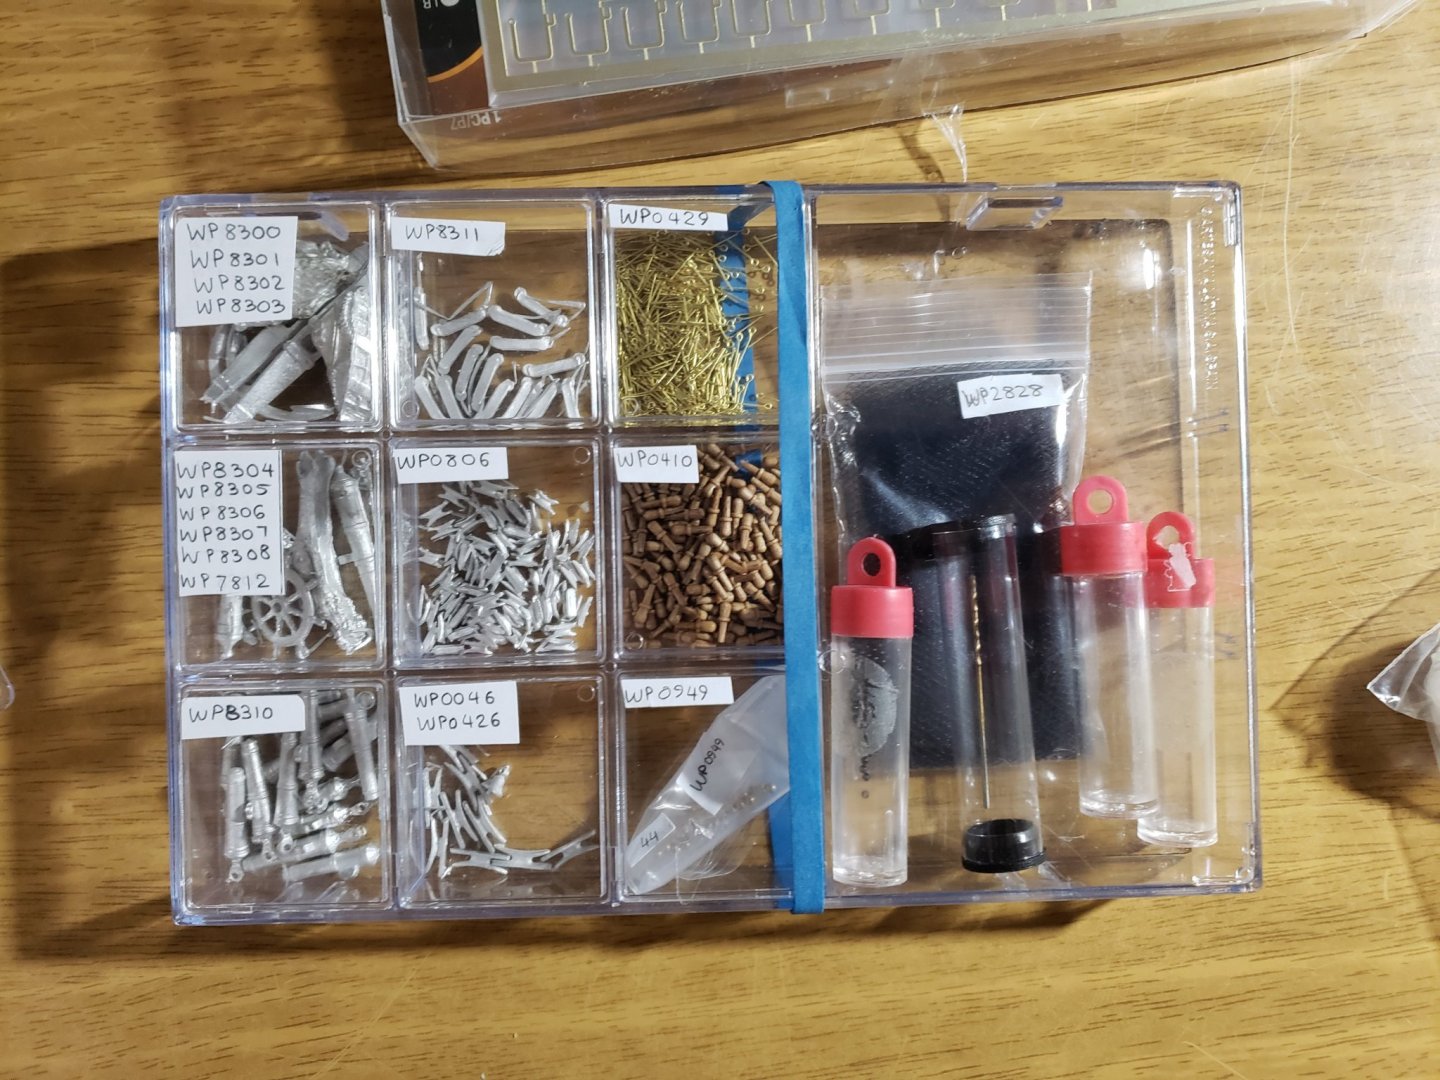
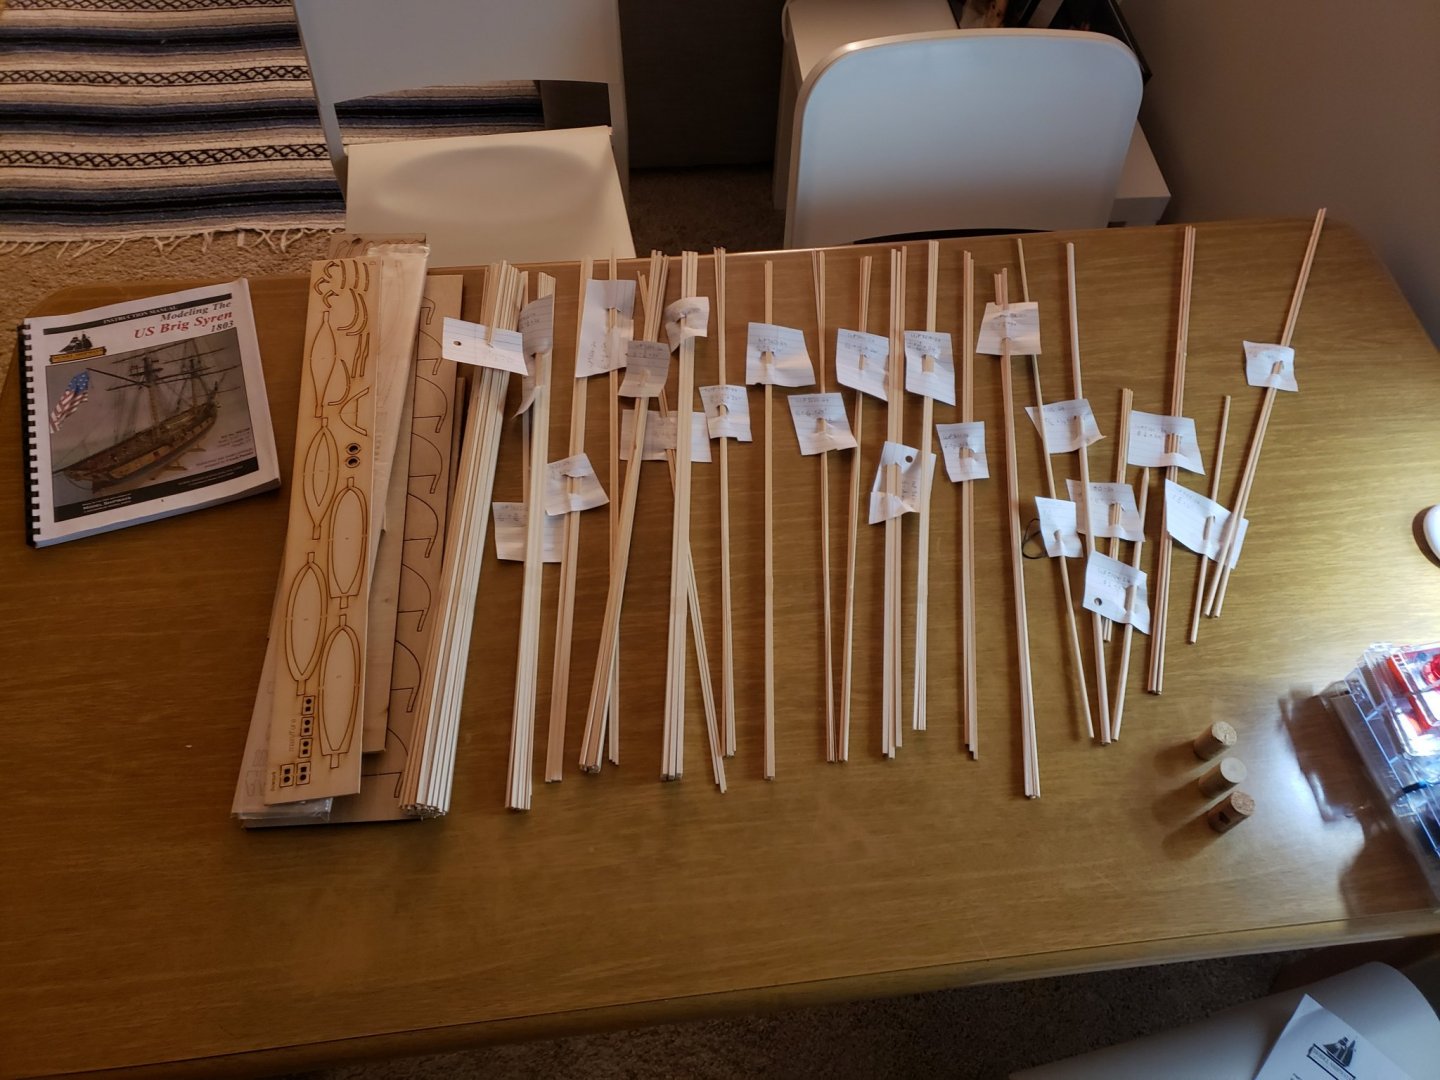
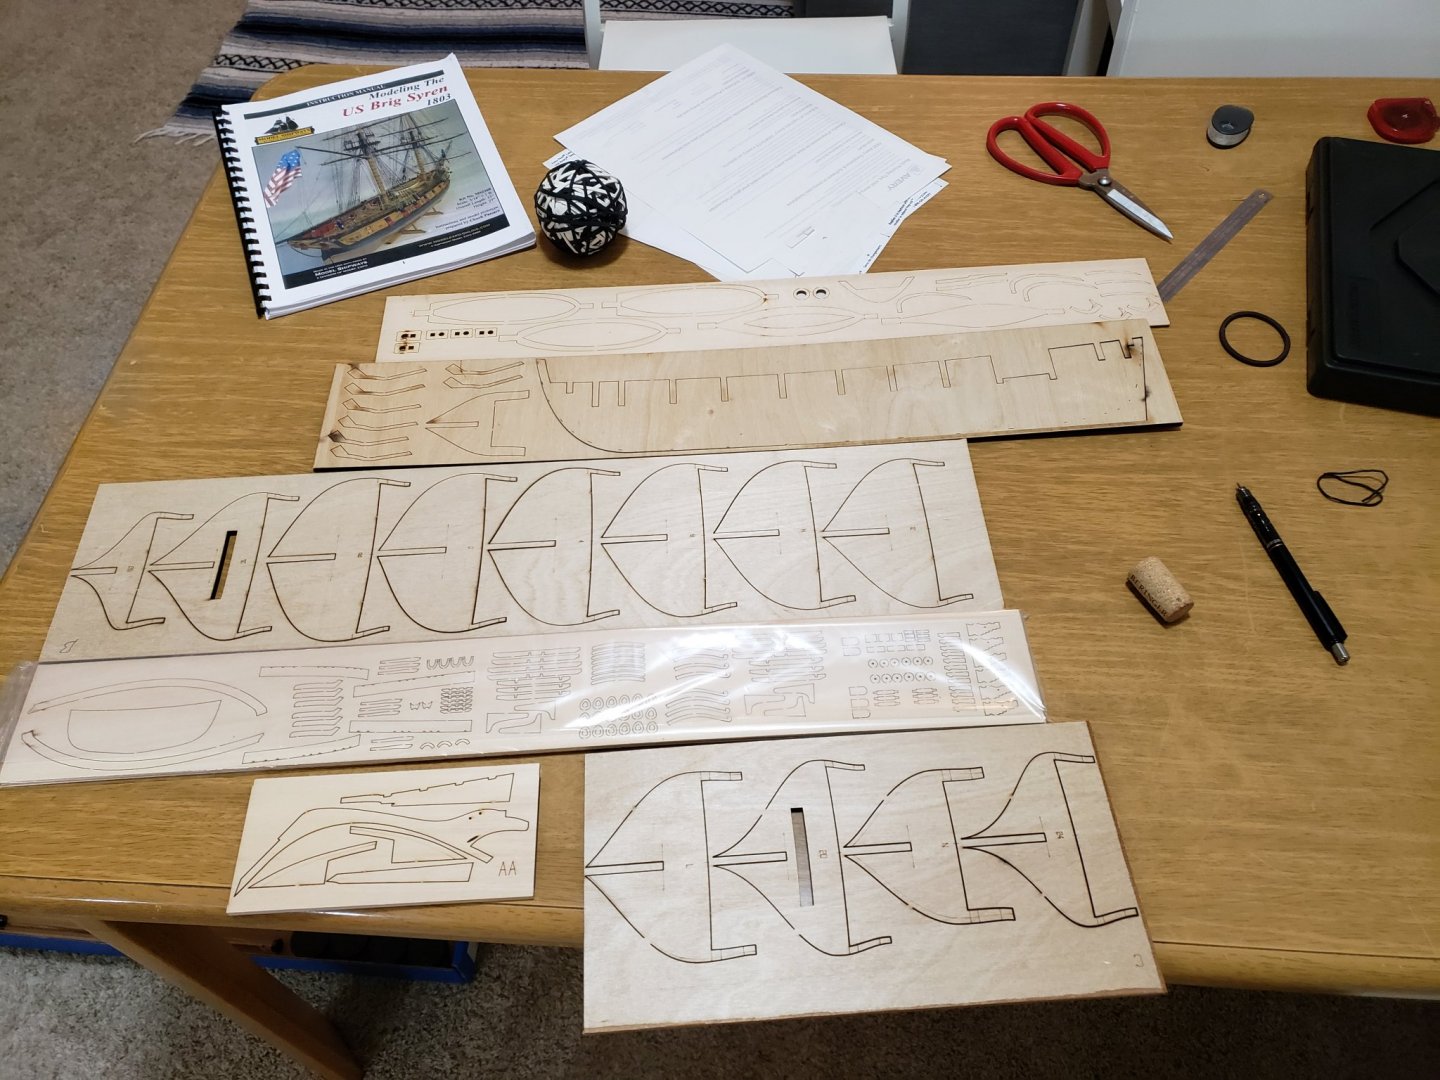
I hope there is room for yet another Syren build log. I don't own any power tools apart from a dremel and a drill, so I'm curious to see how I progress on this build. I also hope I can keep up with the great builds I have seen on this forum. This is my second kit and first build log. First was an Artesania Latina's Virginia 1819 which I completed a few months ago. I'm sure everyone here has seen it but here are some photos of the Syren kit (please let me know if have not selected the right resolution, I took these on my phone and uploaded them here without any size modifications): I started organizing the parts by checking the parts list and labeling everything: I already have a few questions before starting the build 😅: 1) I got wood belaying pins instead of brass due to shipment issues from China. What's the general consensus on which is the better material? 2) Are the number of parts in the part list more than what is required in the build? The reason I ask is because I am missing a few 3/32” Single Blocks out of the 310 total which is mentioned on the list.


- 950 replies
-
- 12
-
-
- syren
- model shipways
- (and 1 more)
-
Thanks Jaager! Would you be knowing where to buy or look for NRJ and SIS CDs?