HOLIDAY DONATION DRIVE - SUPPORT MSW - DO YOUR PART TO KEEP THIS GREAT FORUM GOING! (Only 13 donations so far - C'mon guys!)
×

.jpg.1f80adf1a9b14a937cfcf2ca6af0f0d4.jpg)
WalrusGuy
-
Posts
1,007 -
Joined
-
Last visited
Content Type
Profiles
Forums
Gallery
Events
Everything posted by WalrusGuy
-
.thumb.jpg.62d1d69fed1f32364417cb1f9cdeb009.jpg) Just came across your build log. Will take a seat and watch the progress unfold. It's looking great so far!!
Just came across your build log. Will take a seat and watch the progress unfold. It's looking great so far!!- 60 replies
-
- 1
-

-
- victory
- billing boats
- (and 1 more)
-
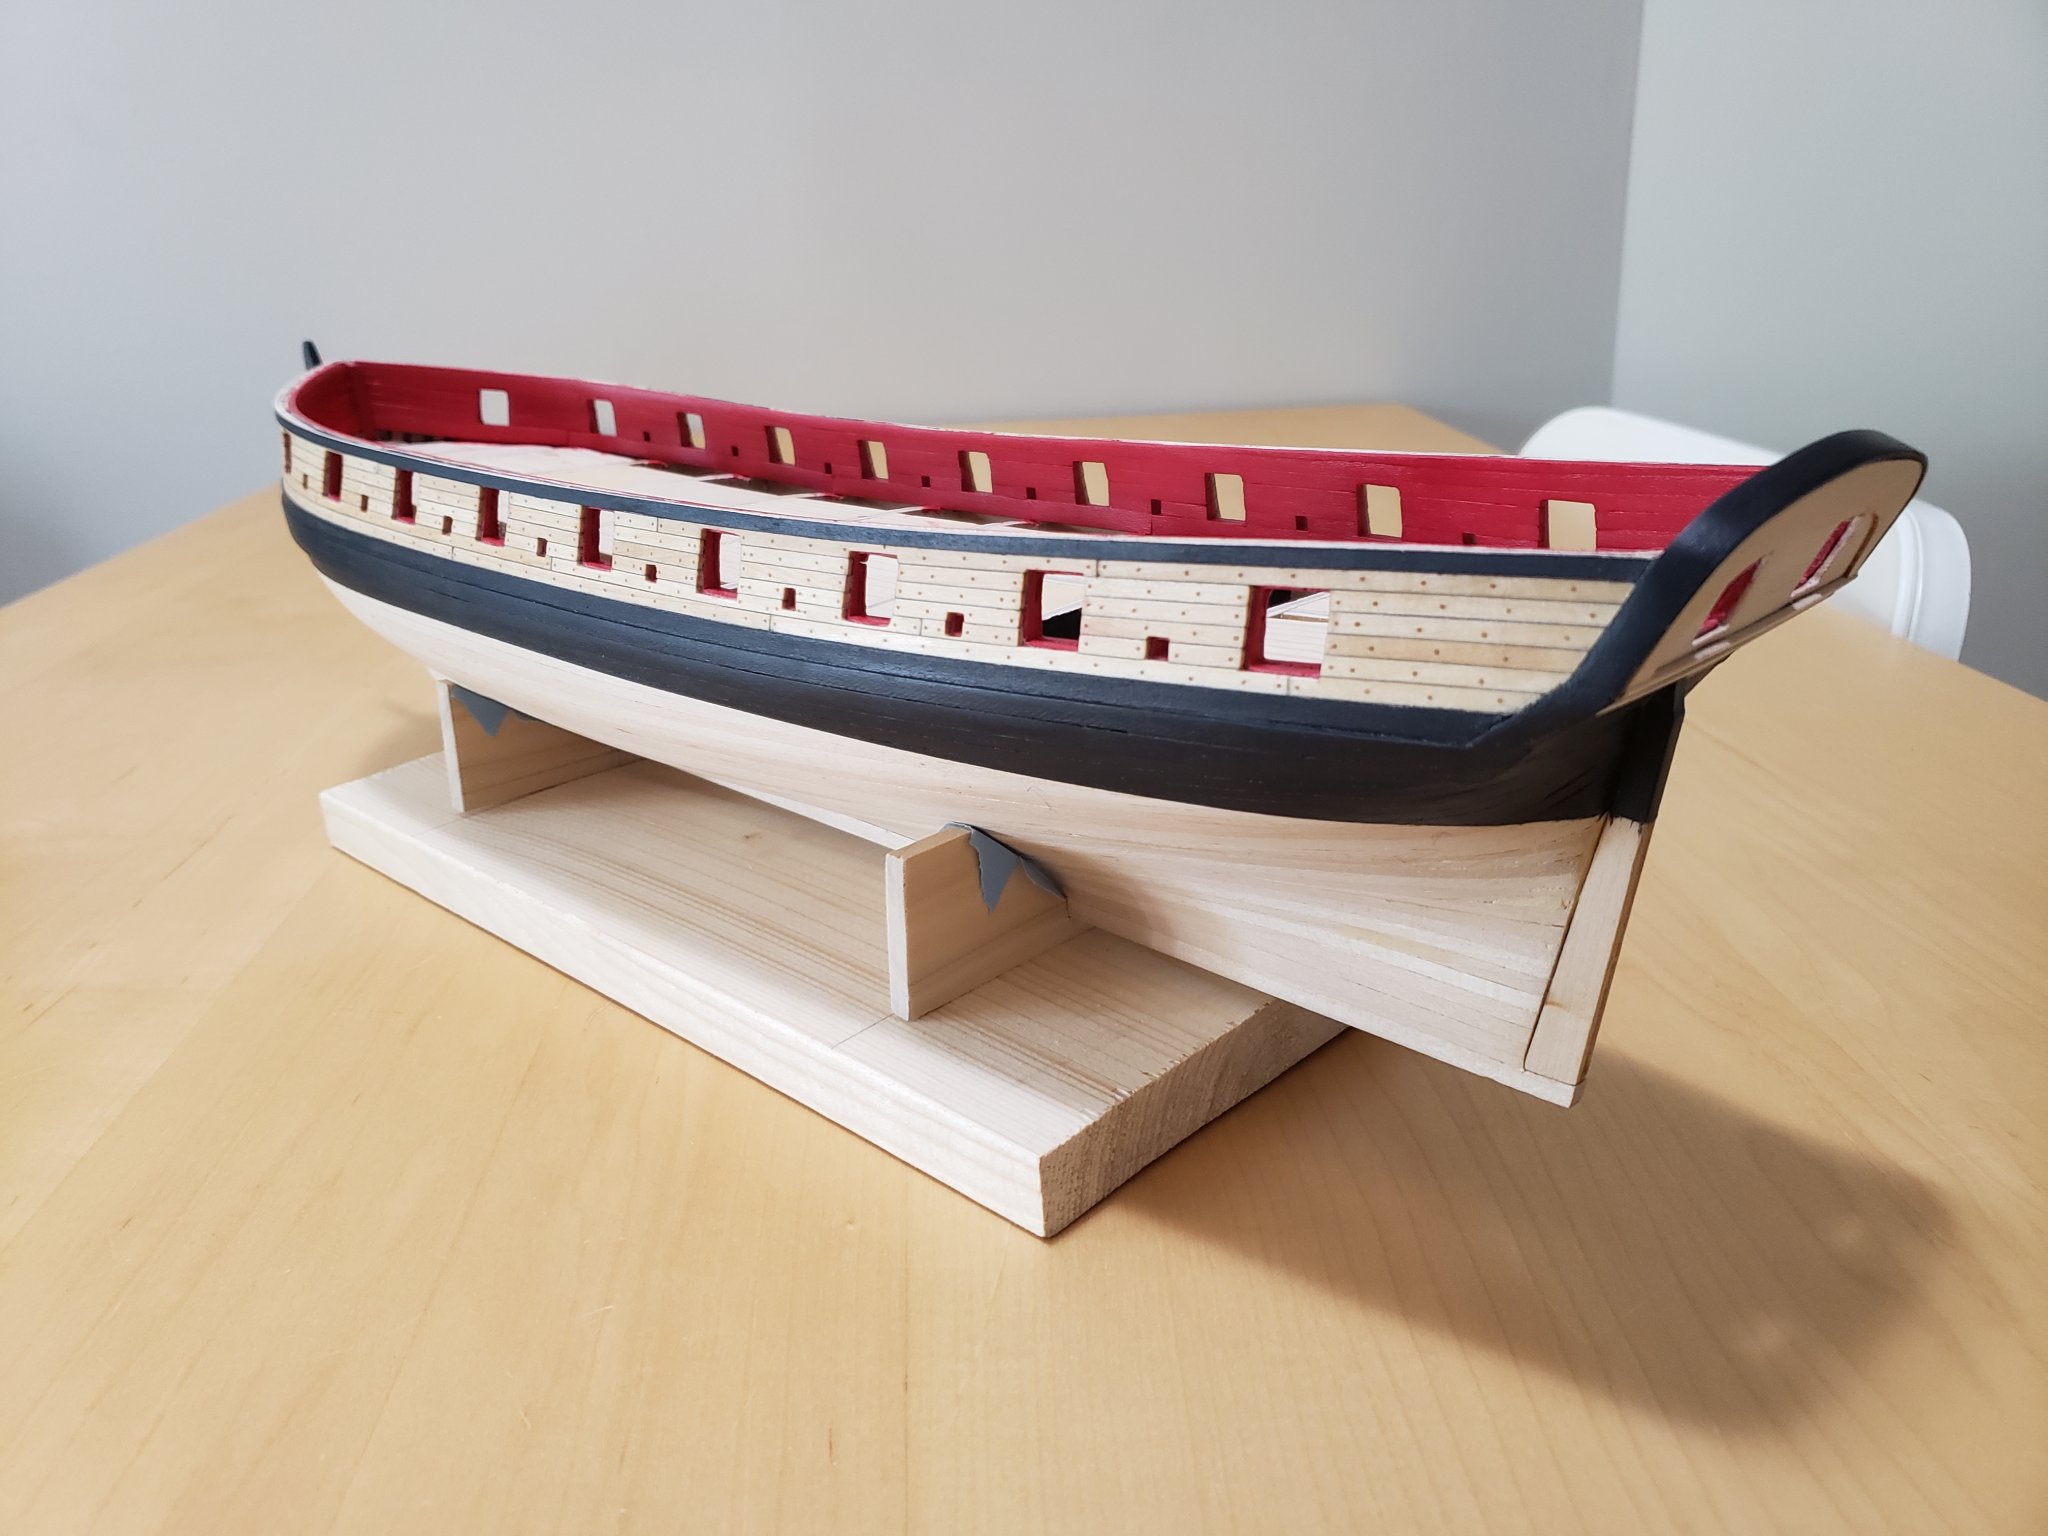
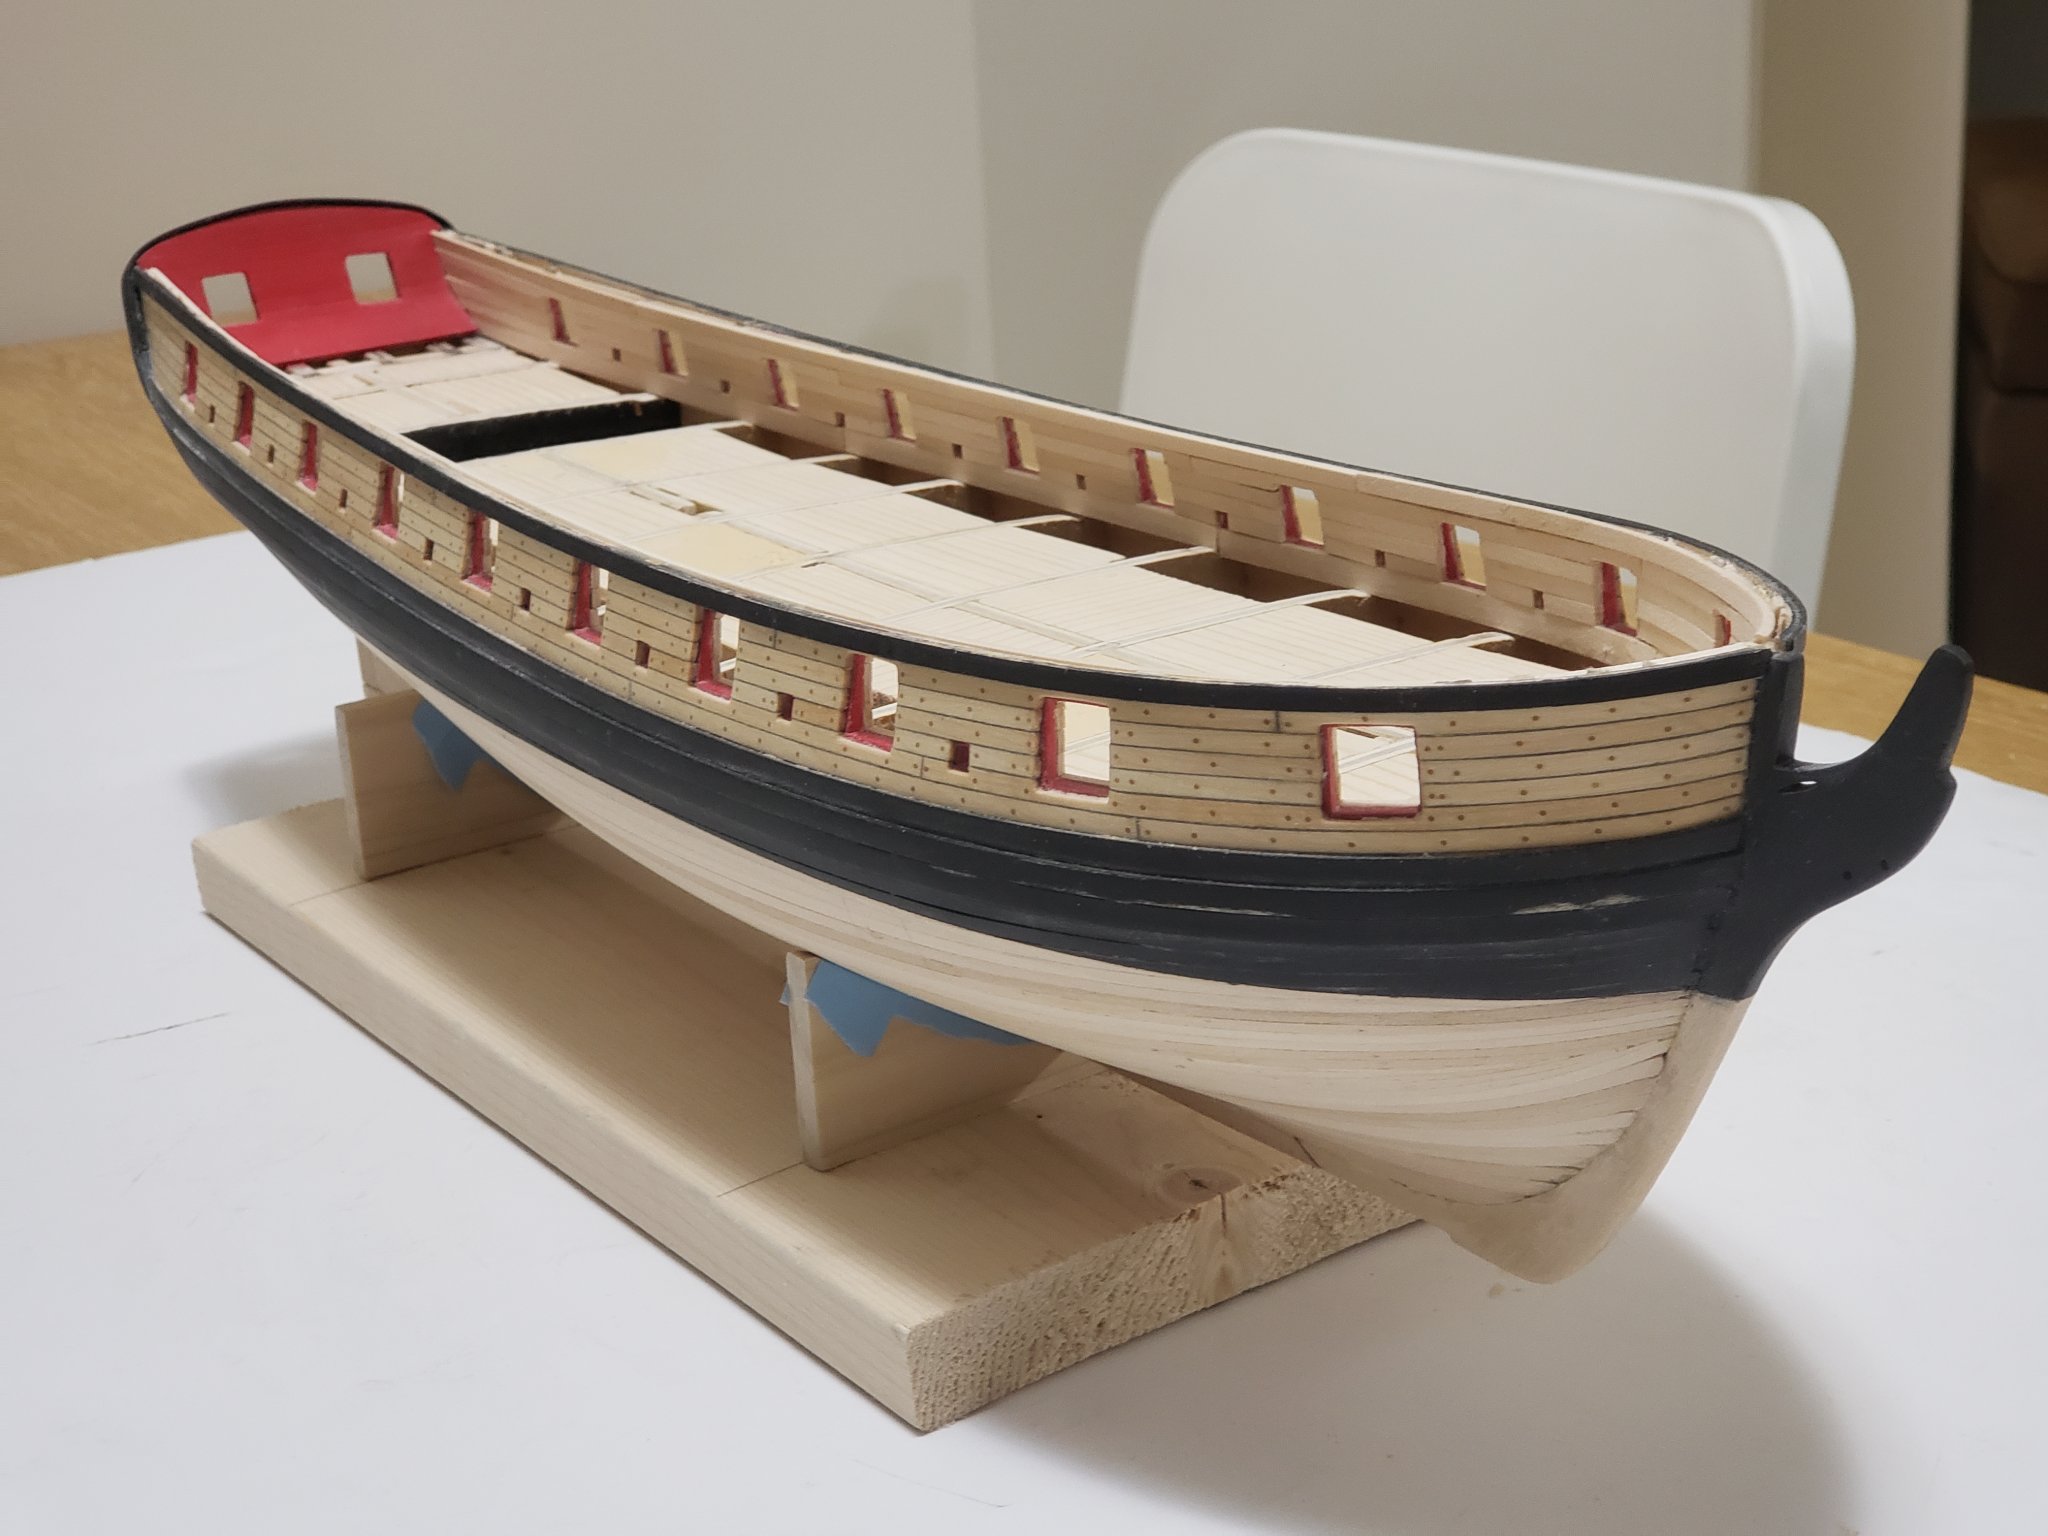
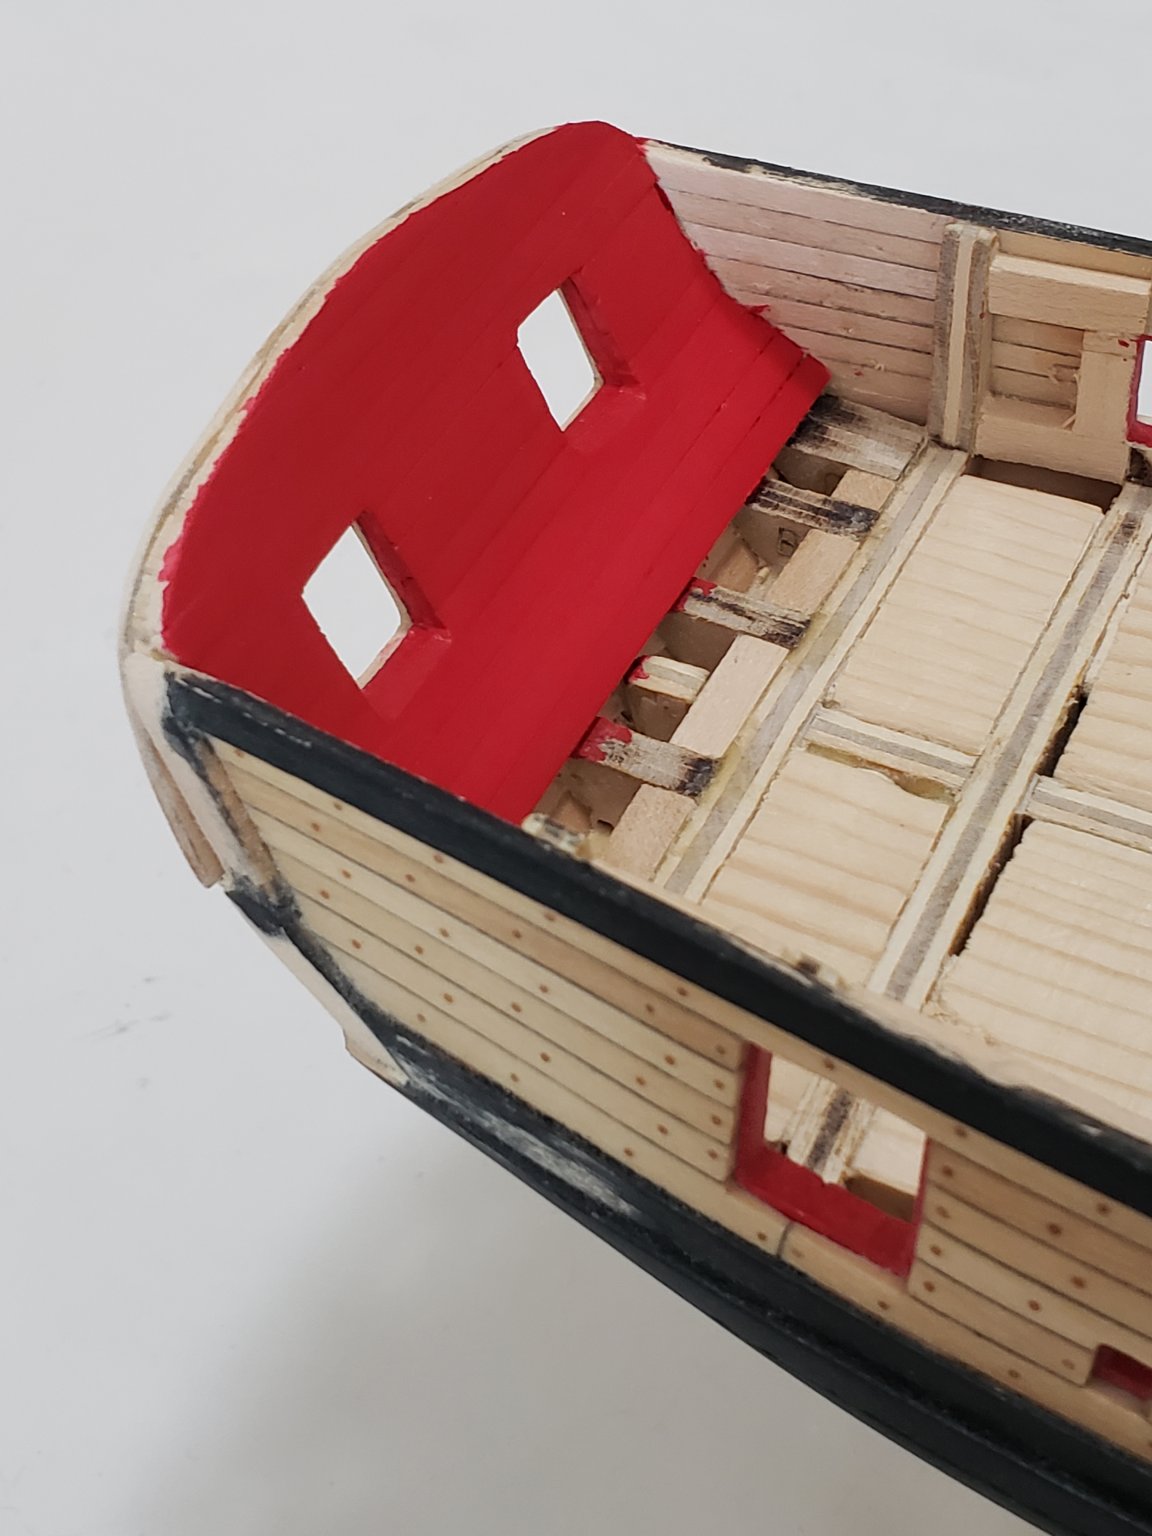
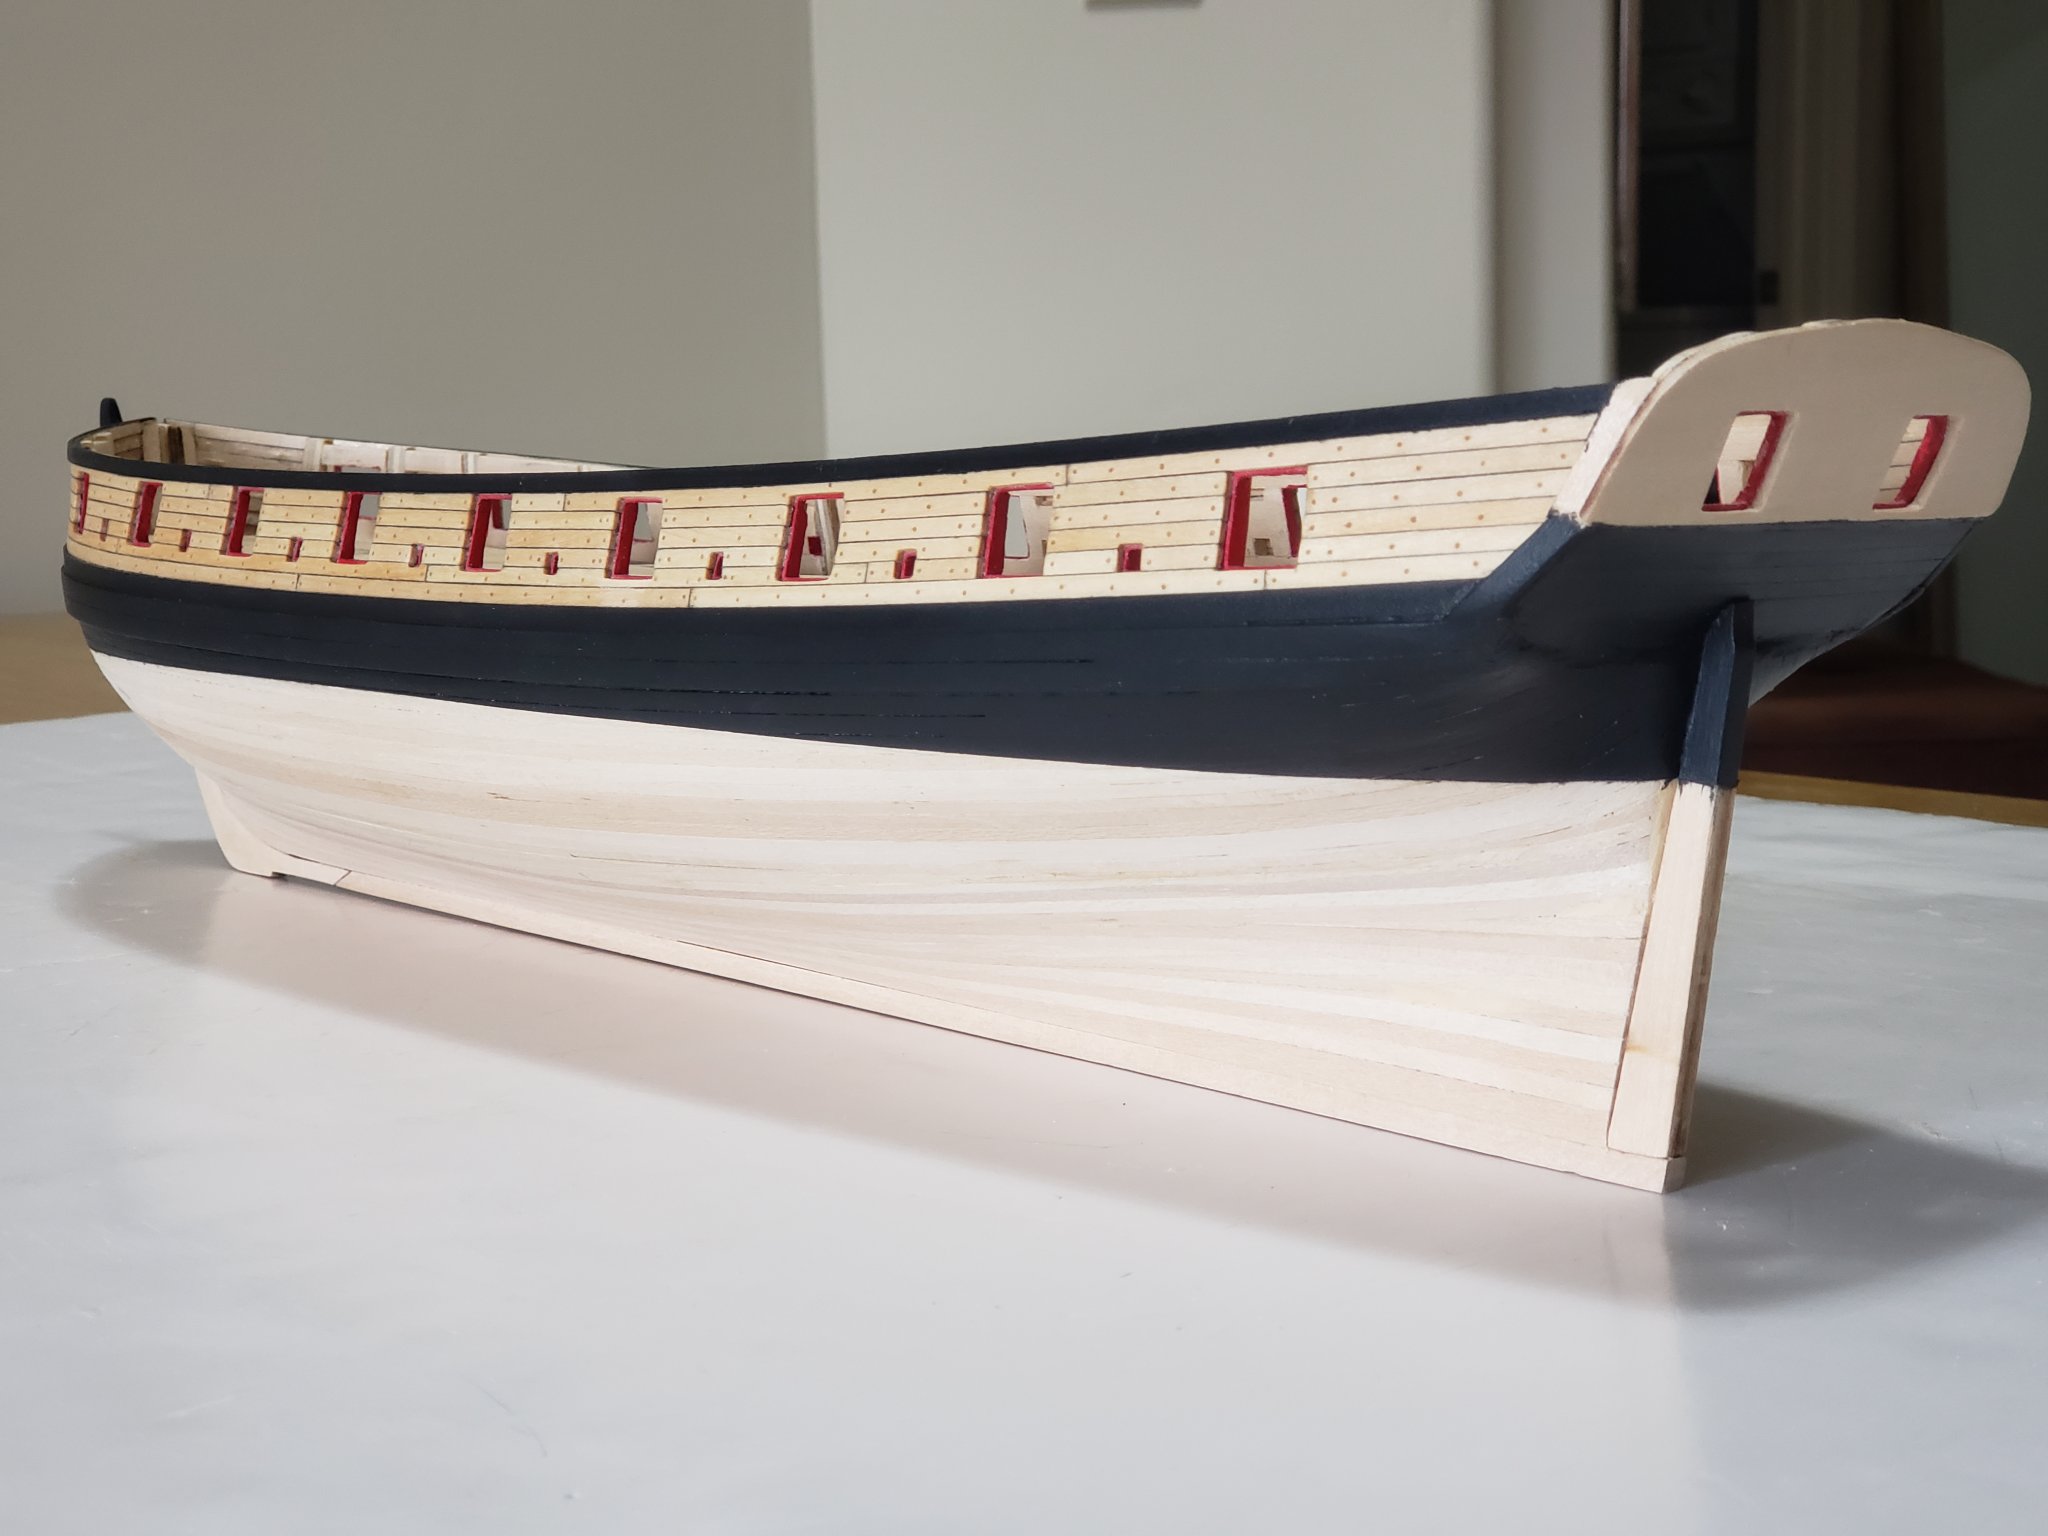
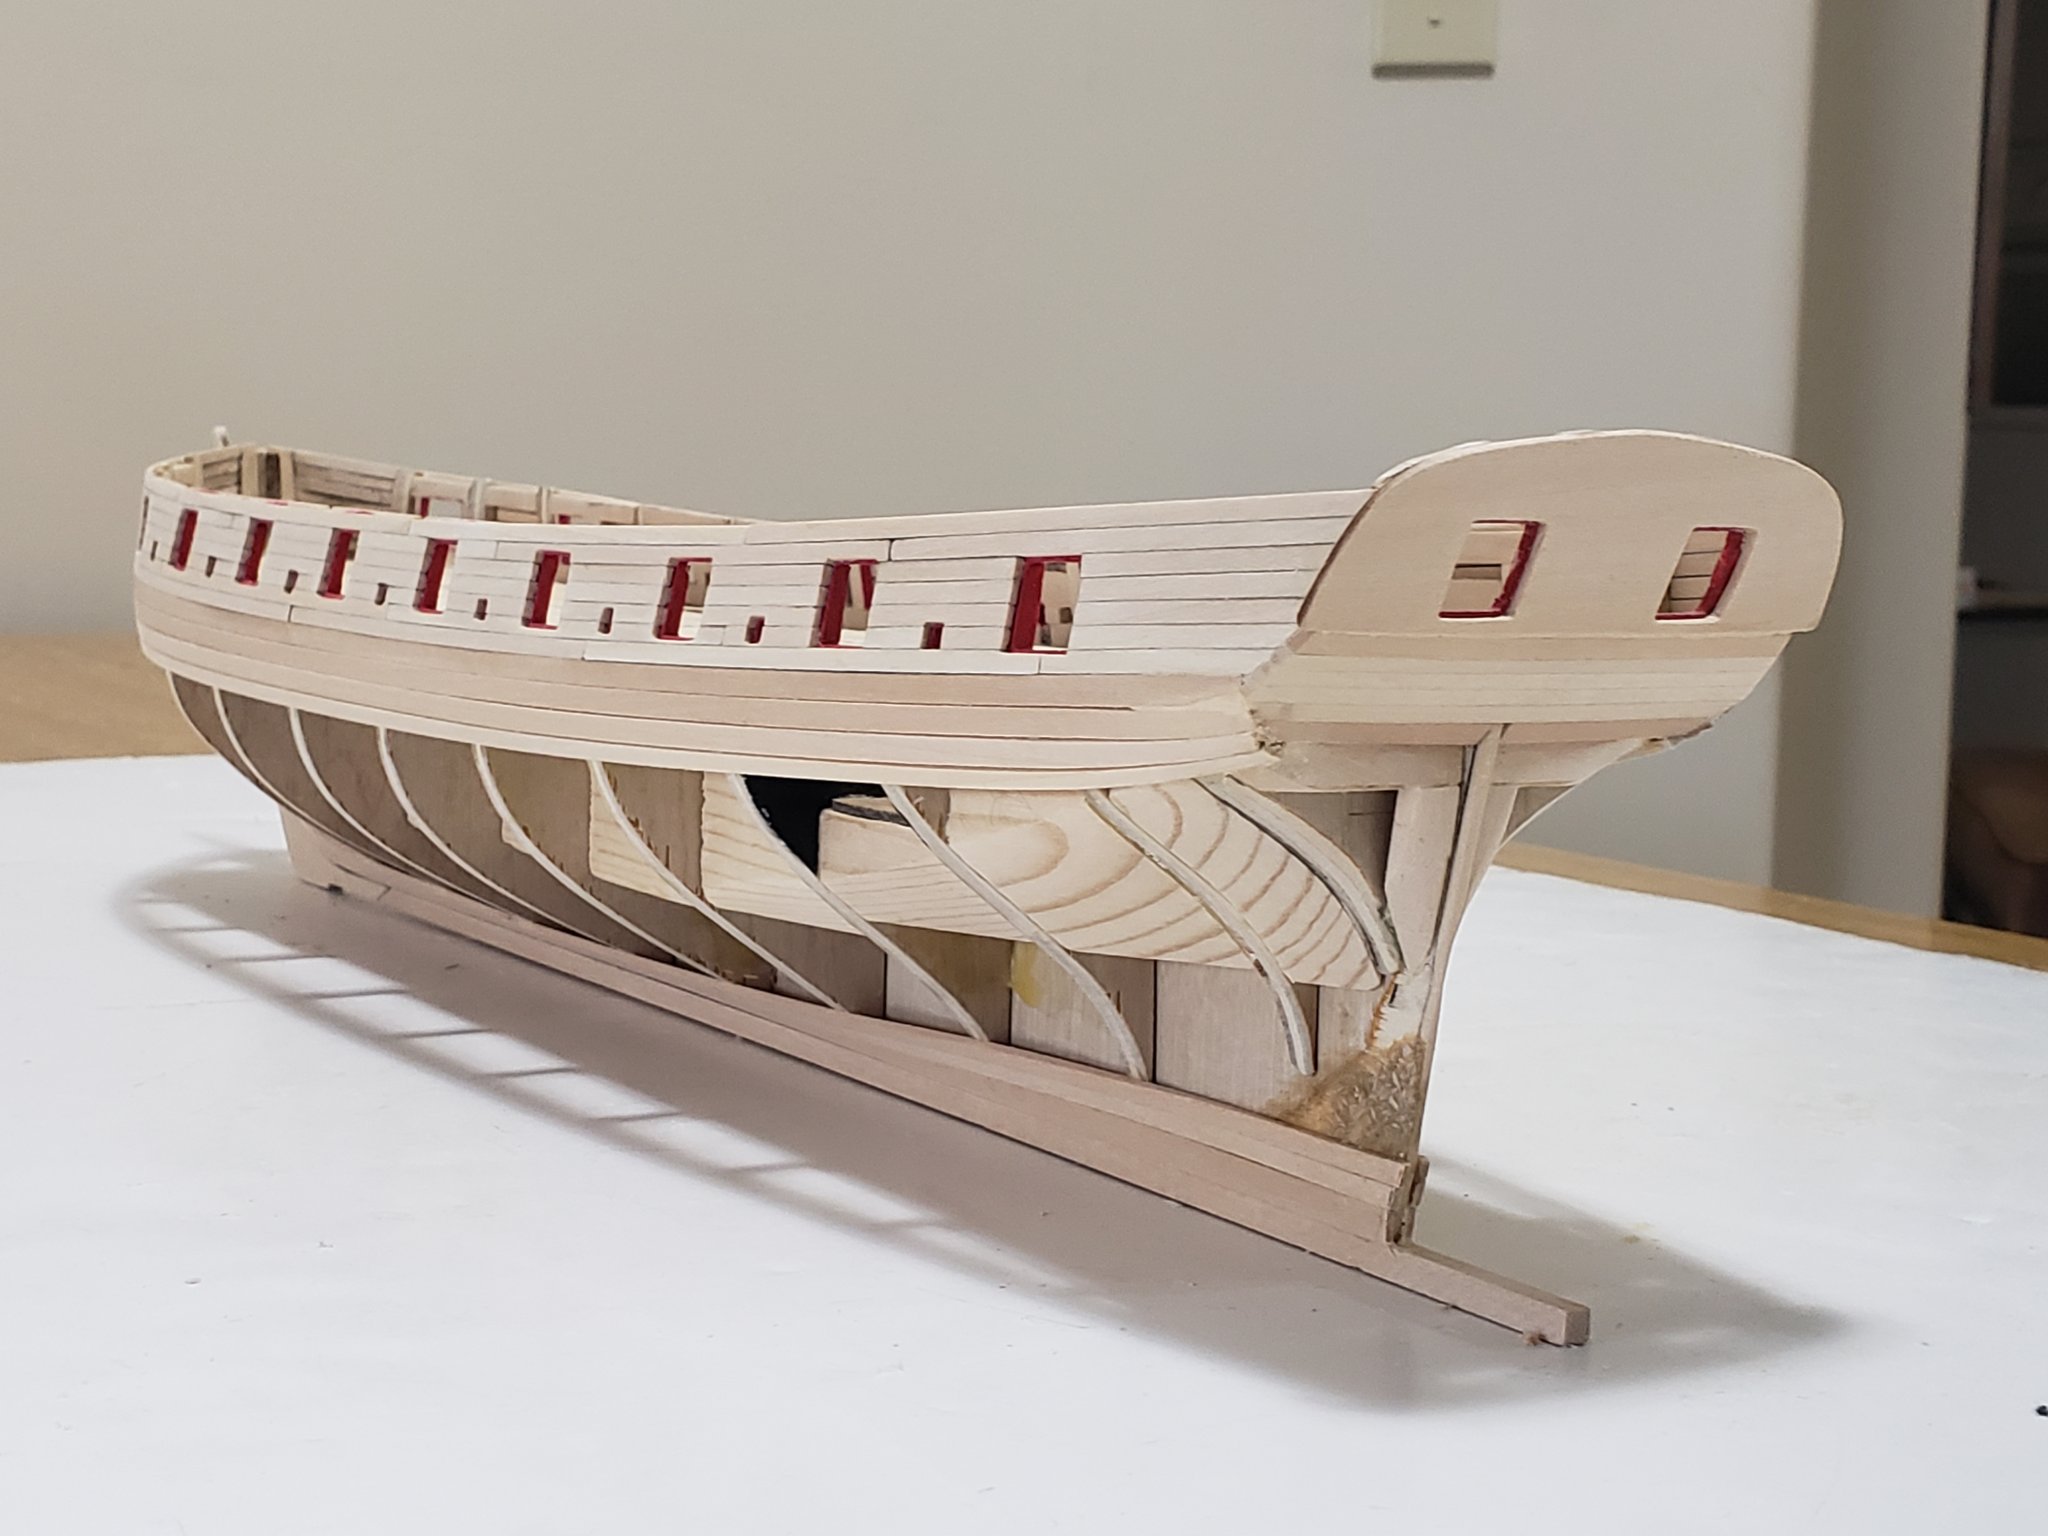
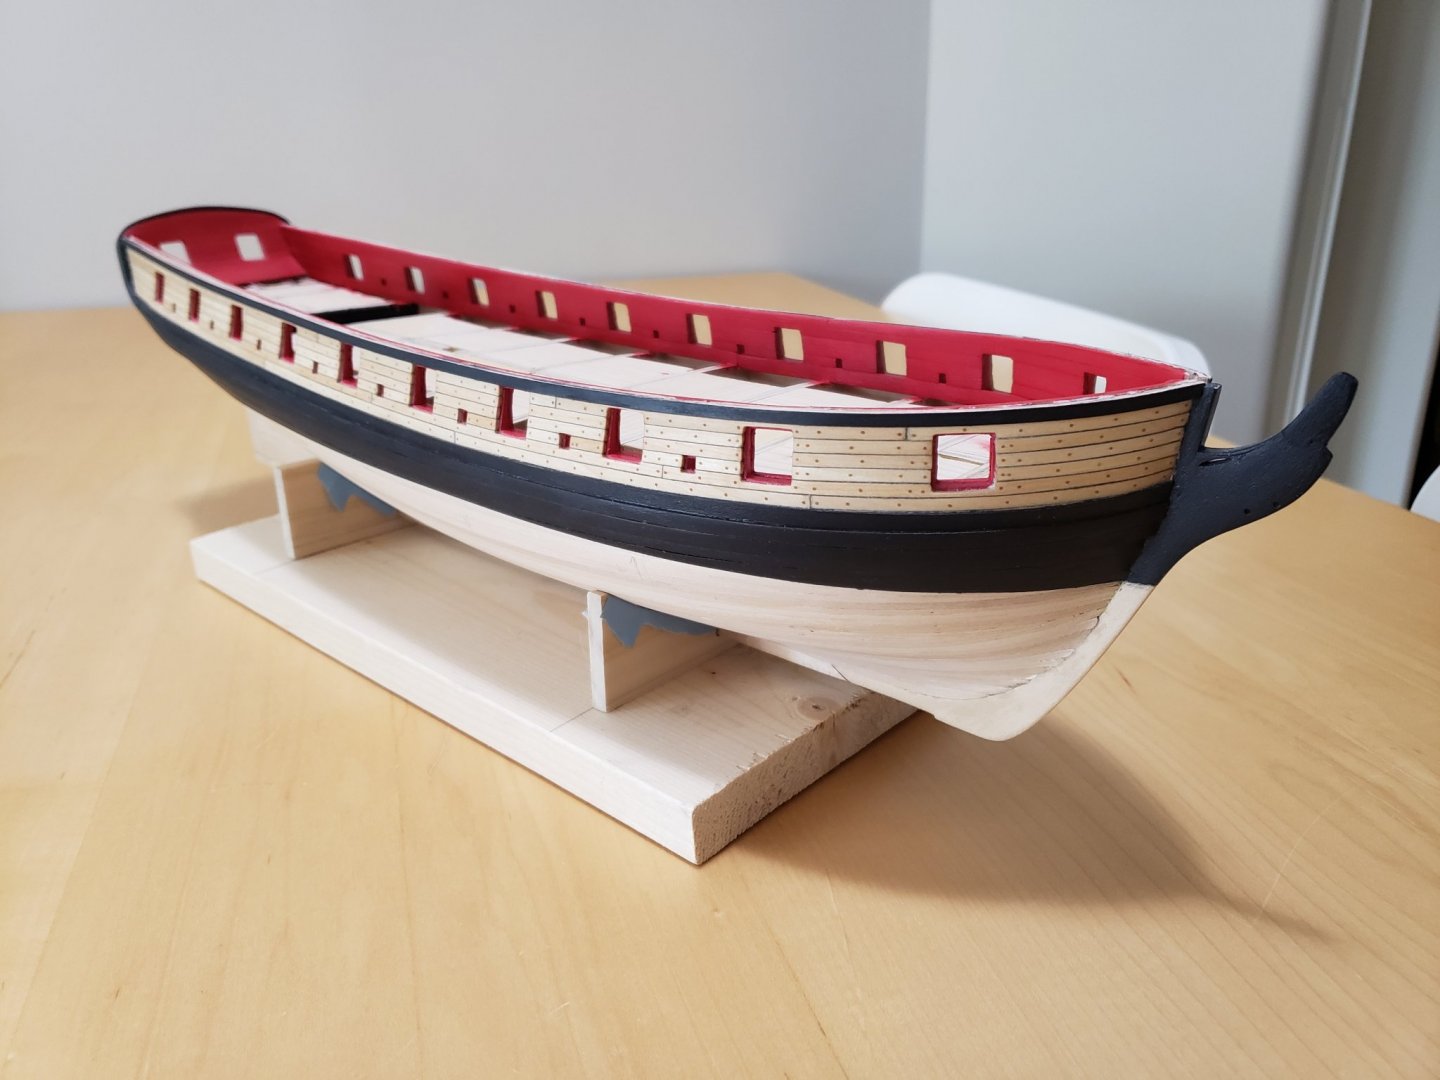
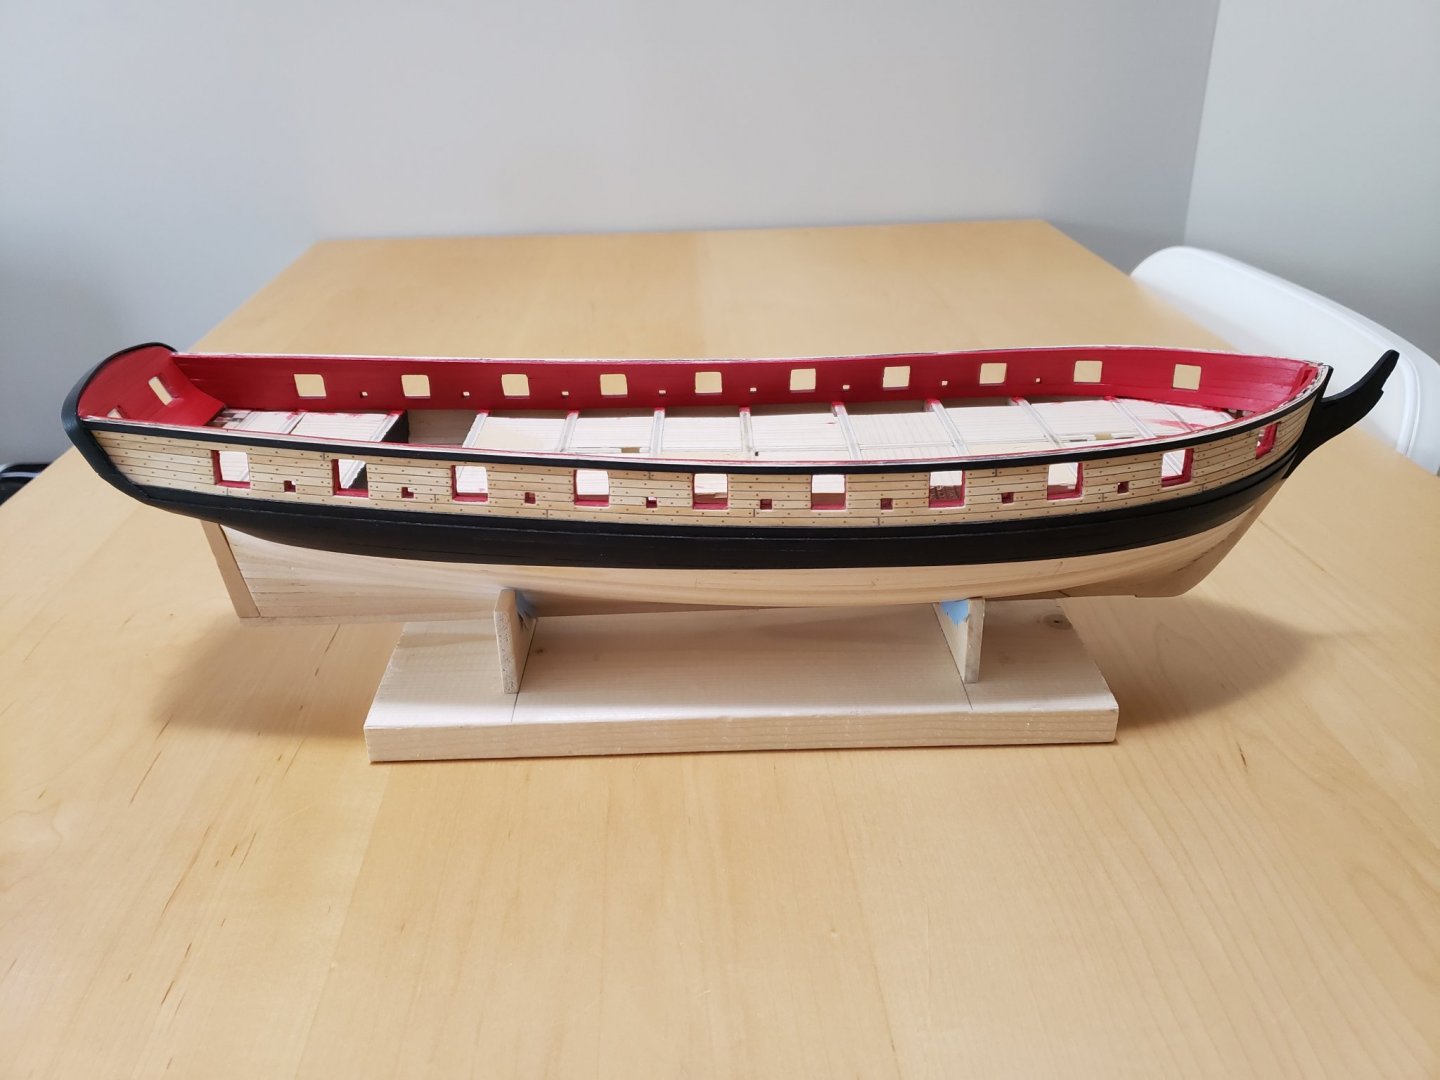
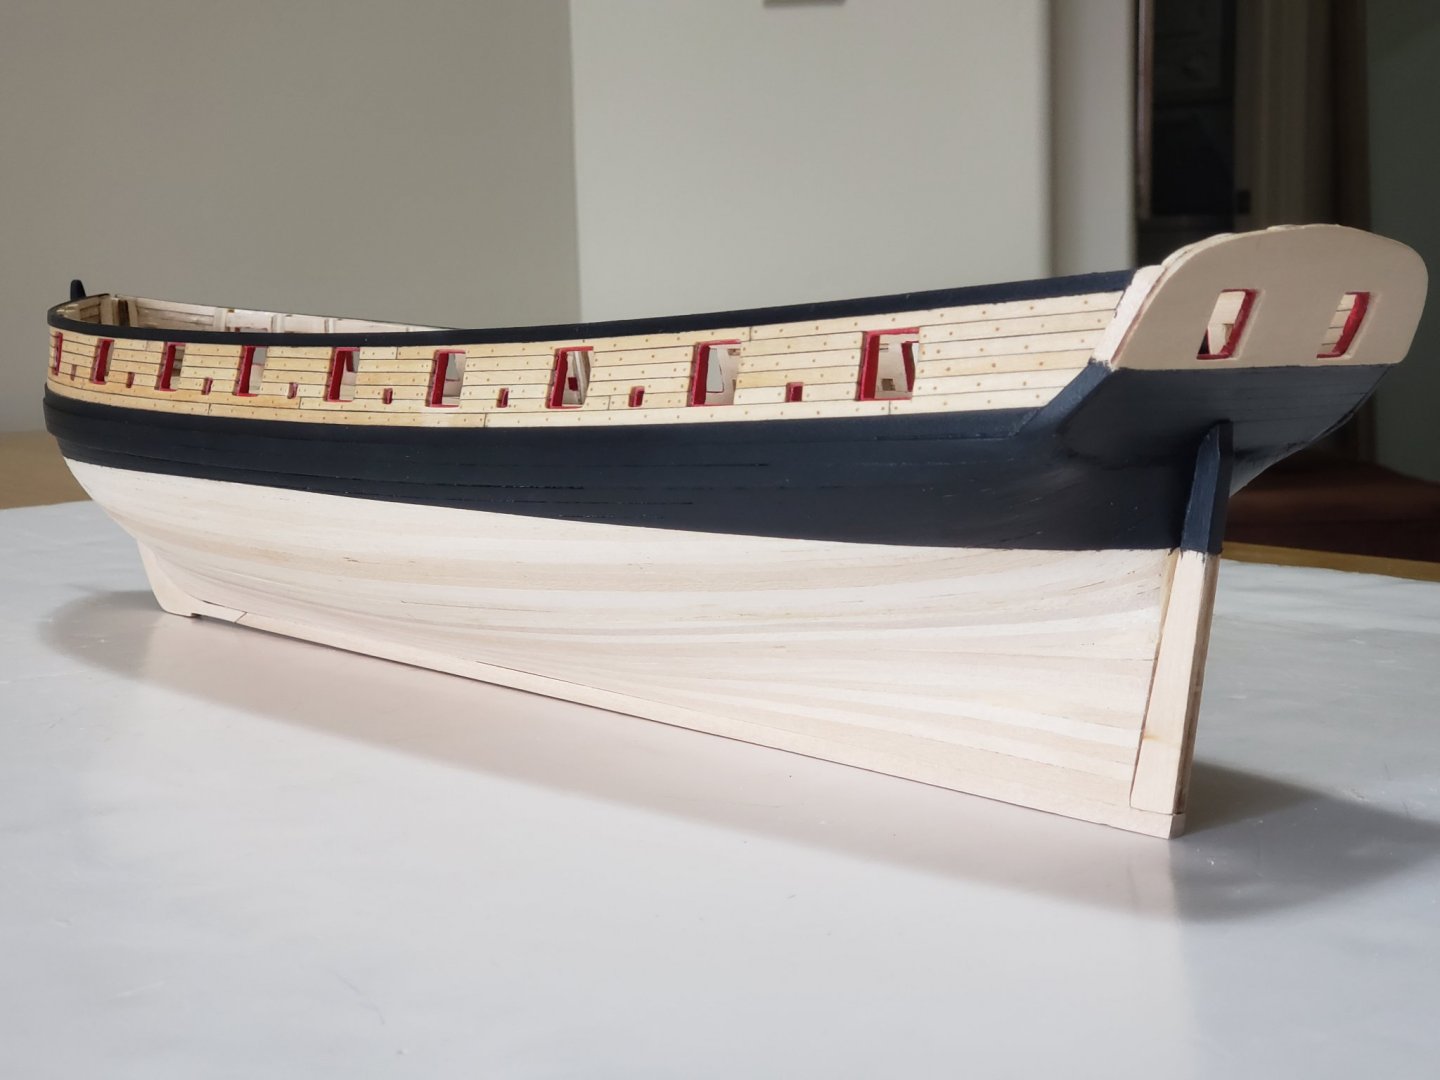
The planks have been painted red, here are some photos: Next step will be working on the cap rails.

- 950 replies
-
- 13
-
-
- syren
- model shipways
- (and 1 more)
-
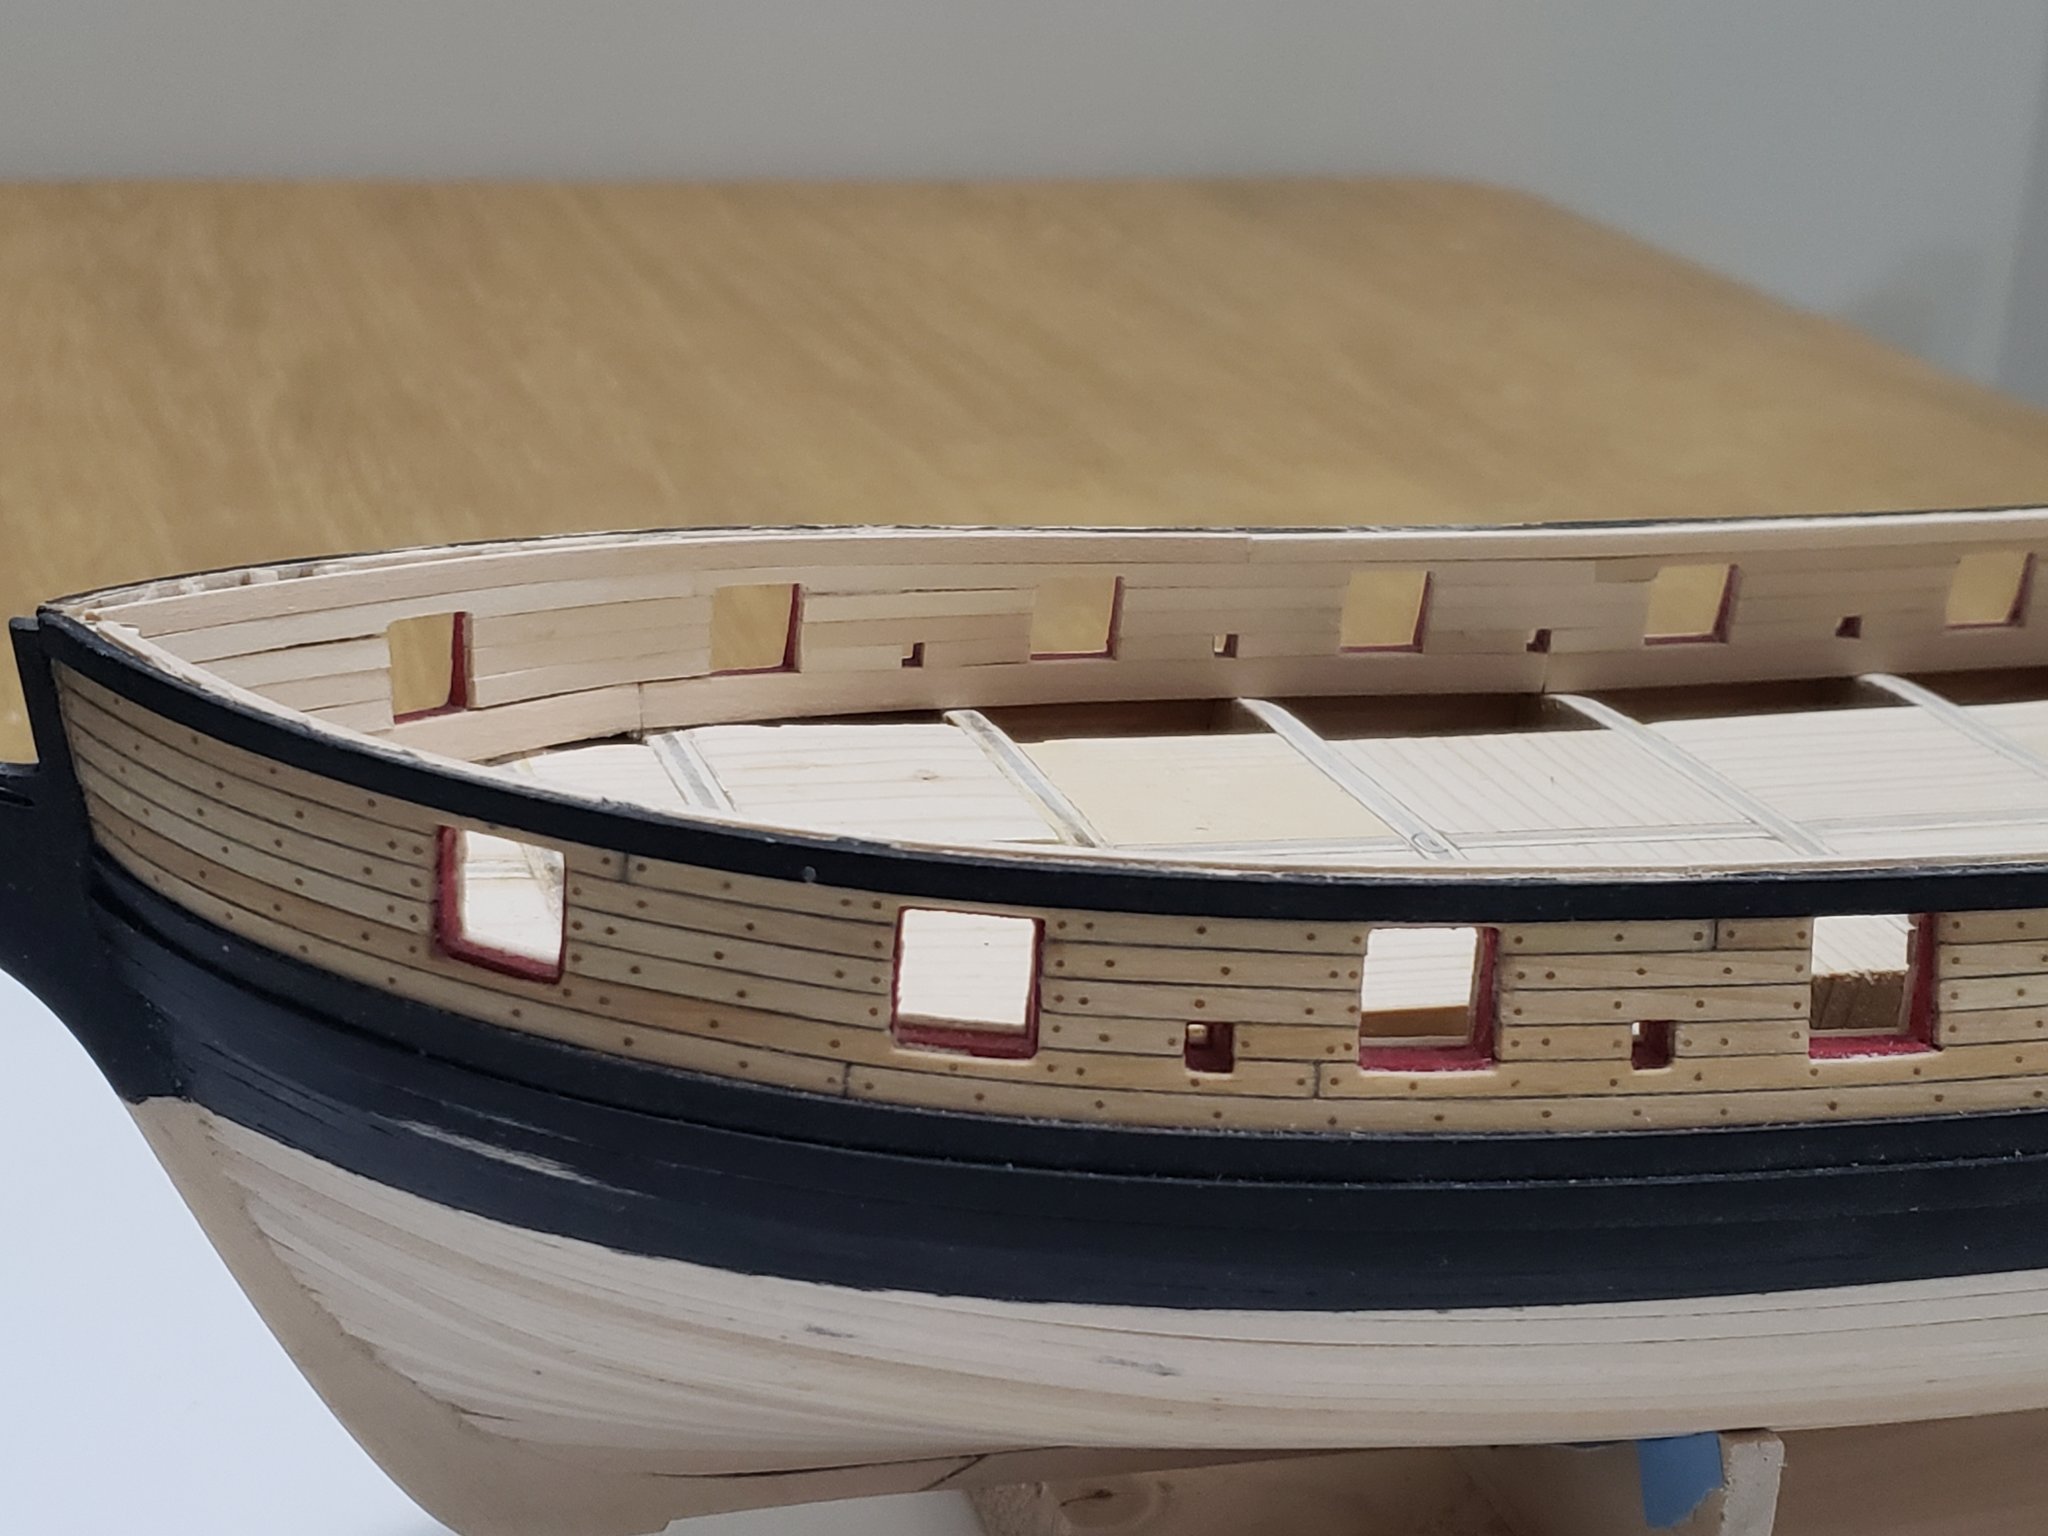
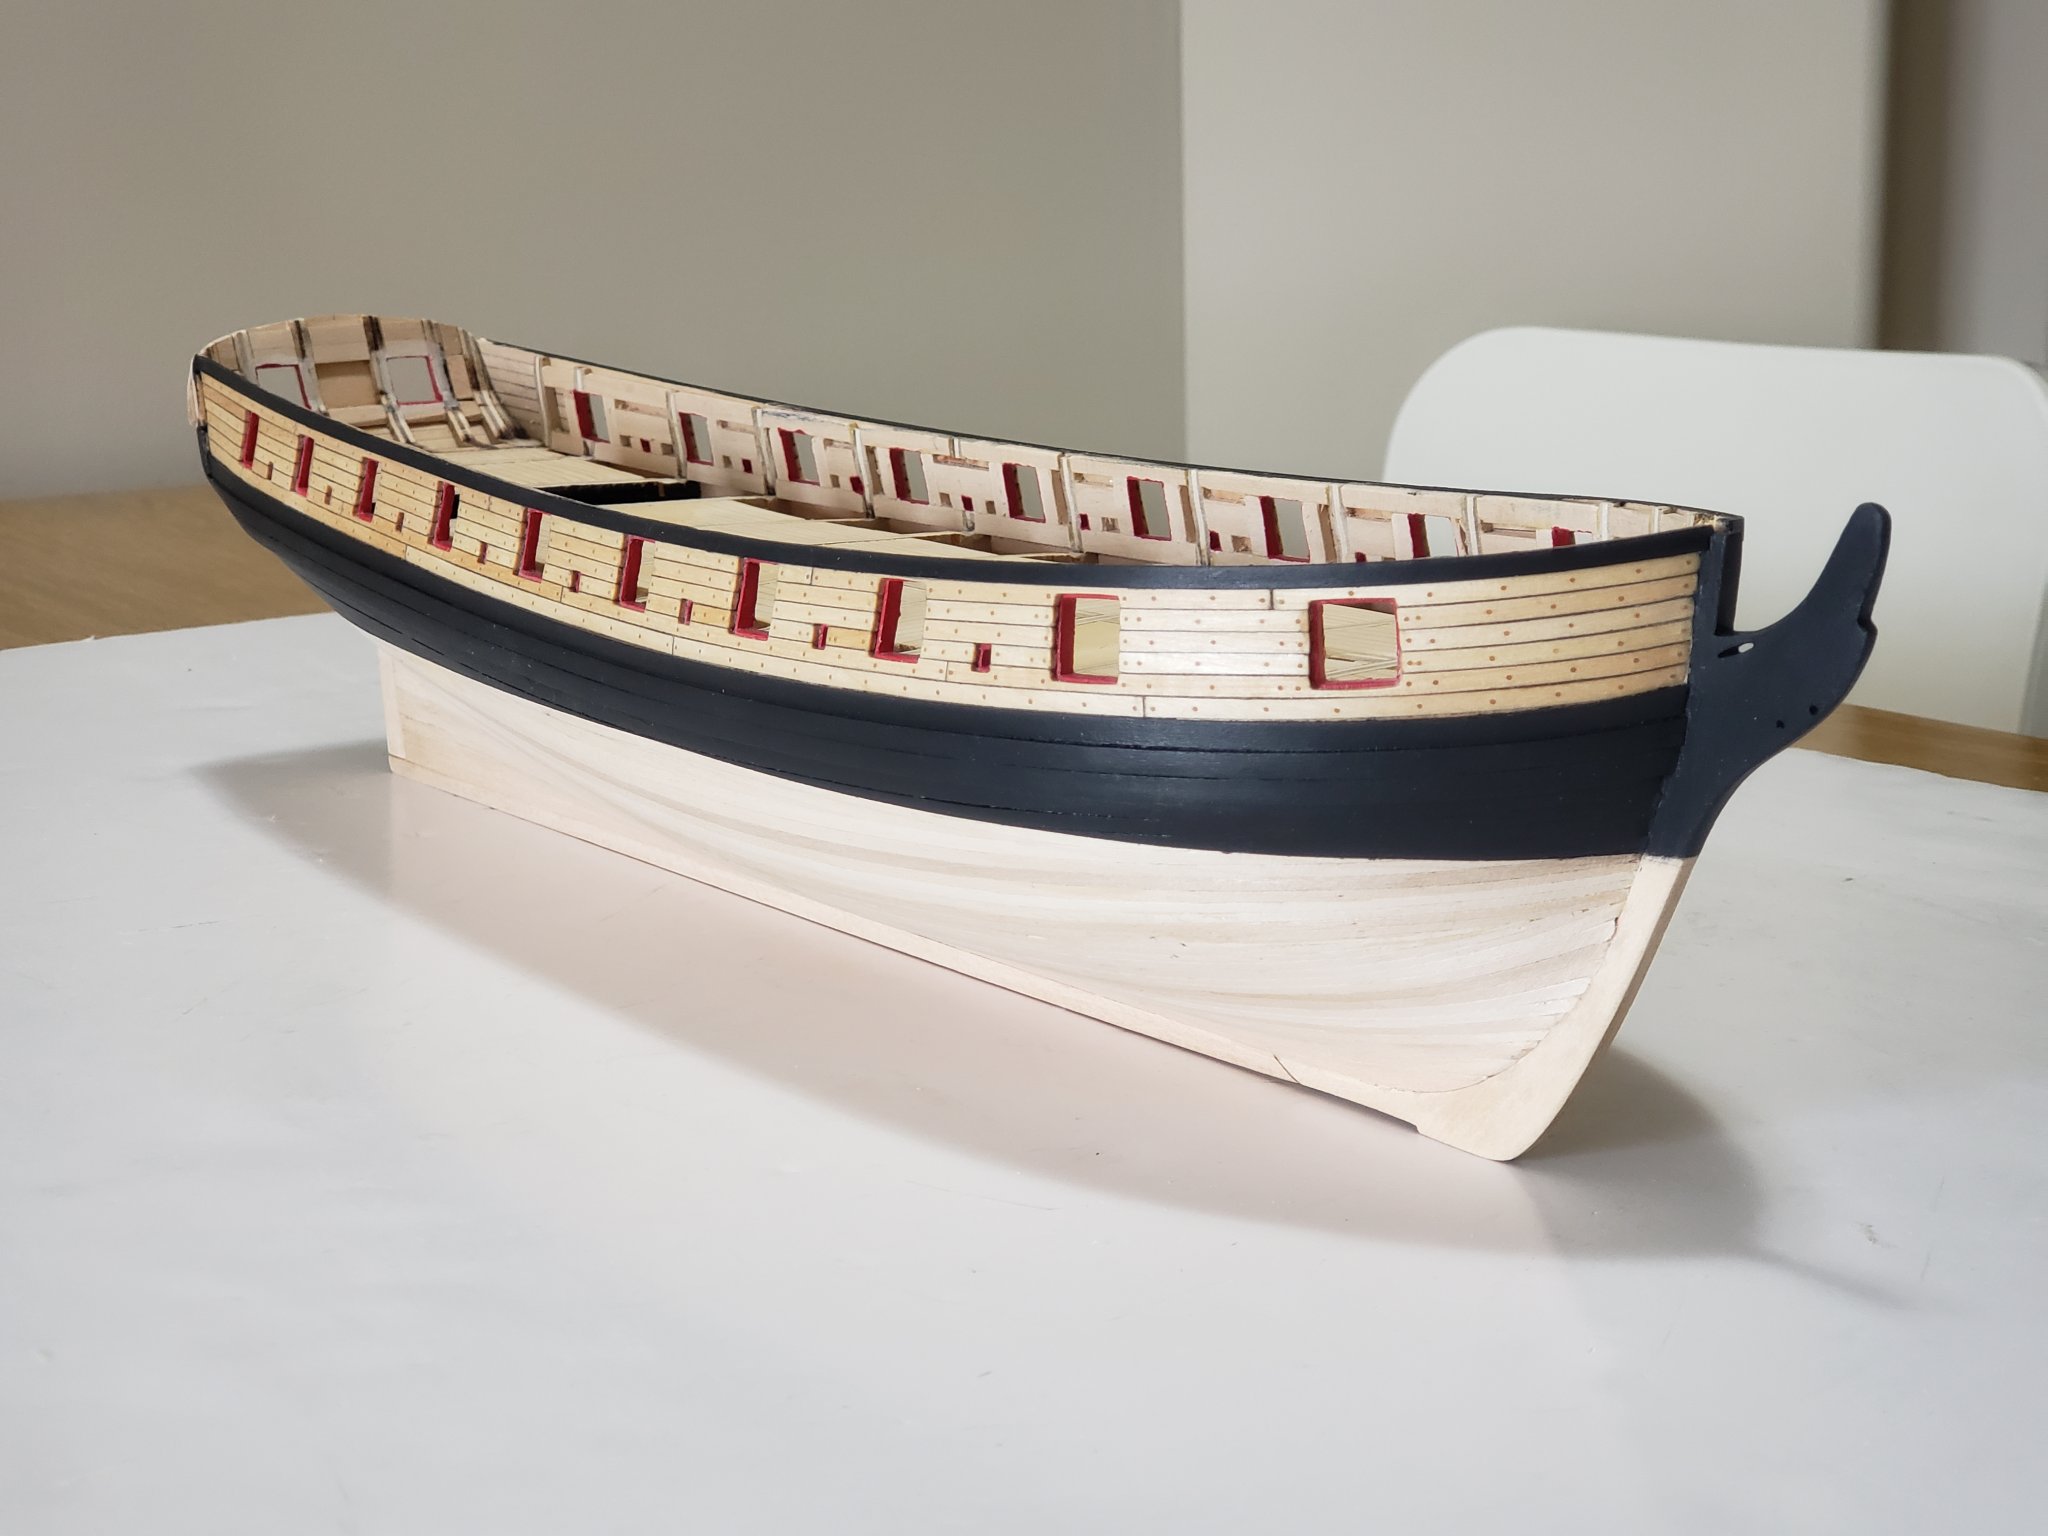
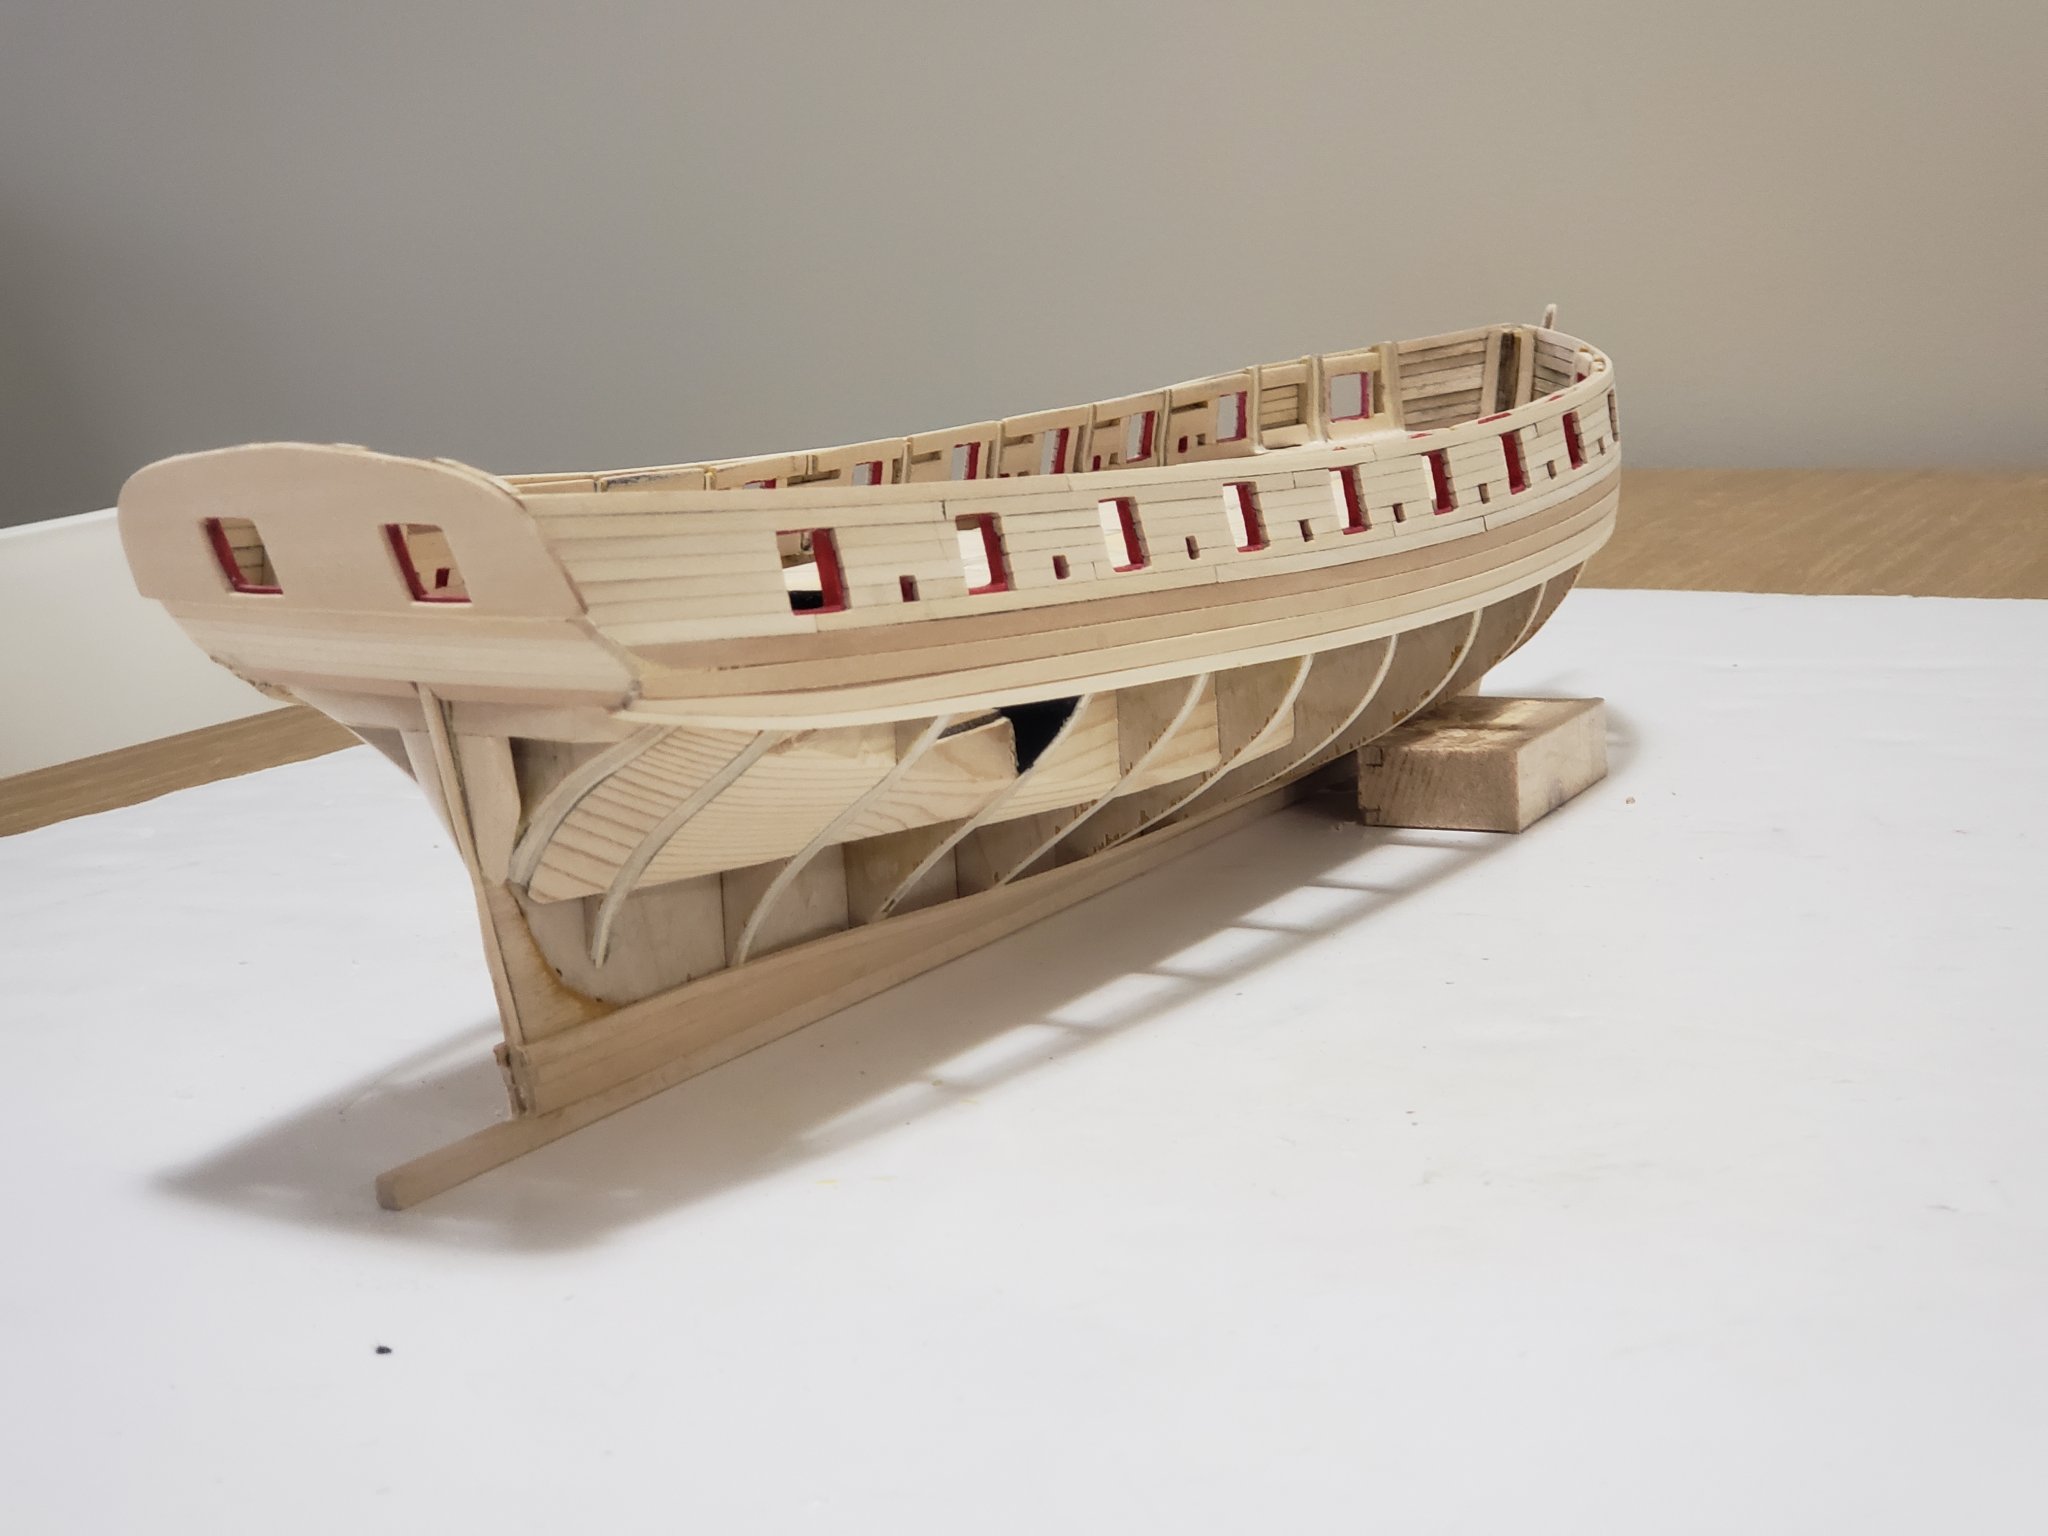
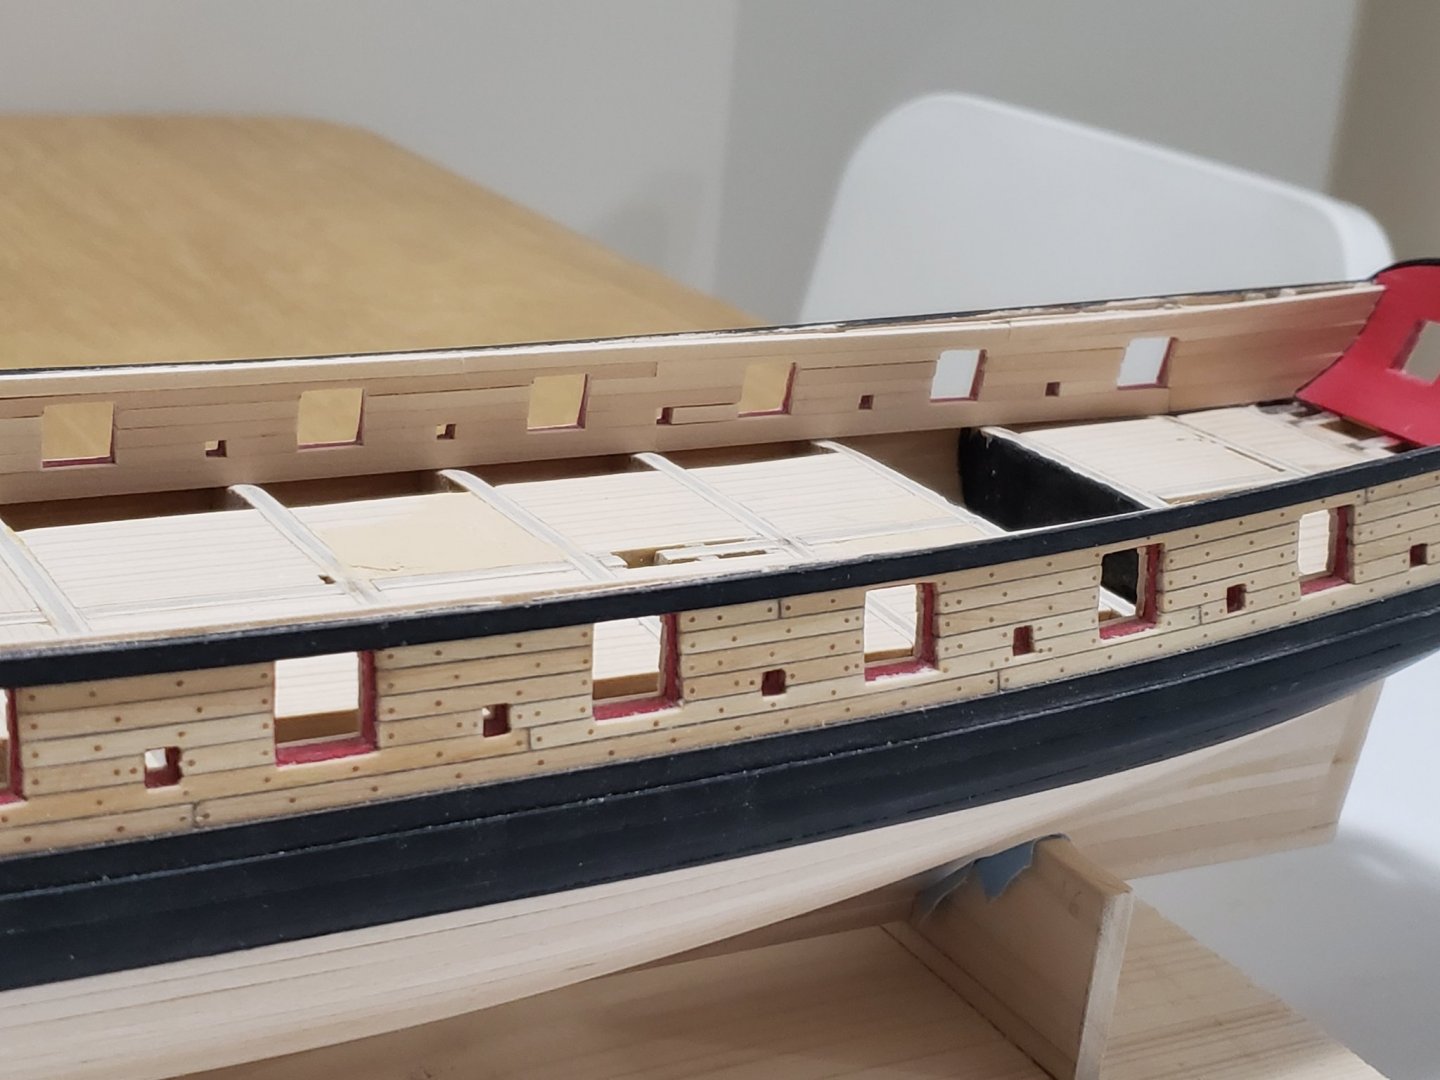
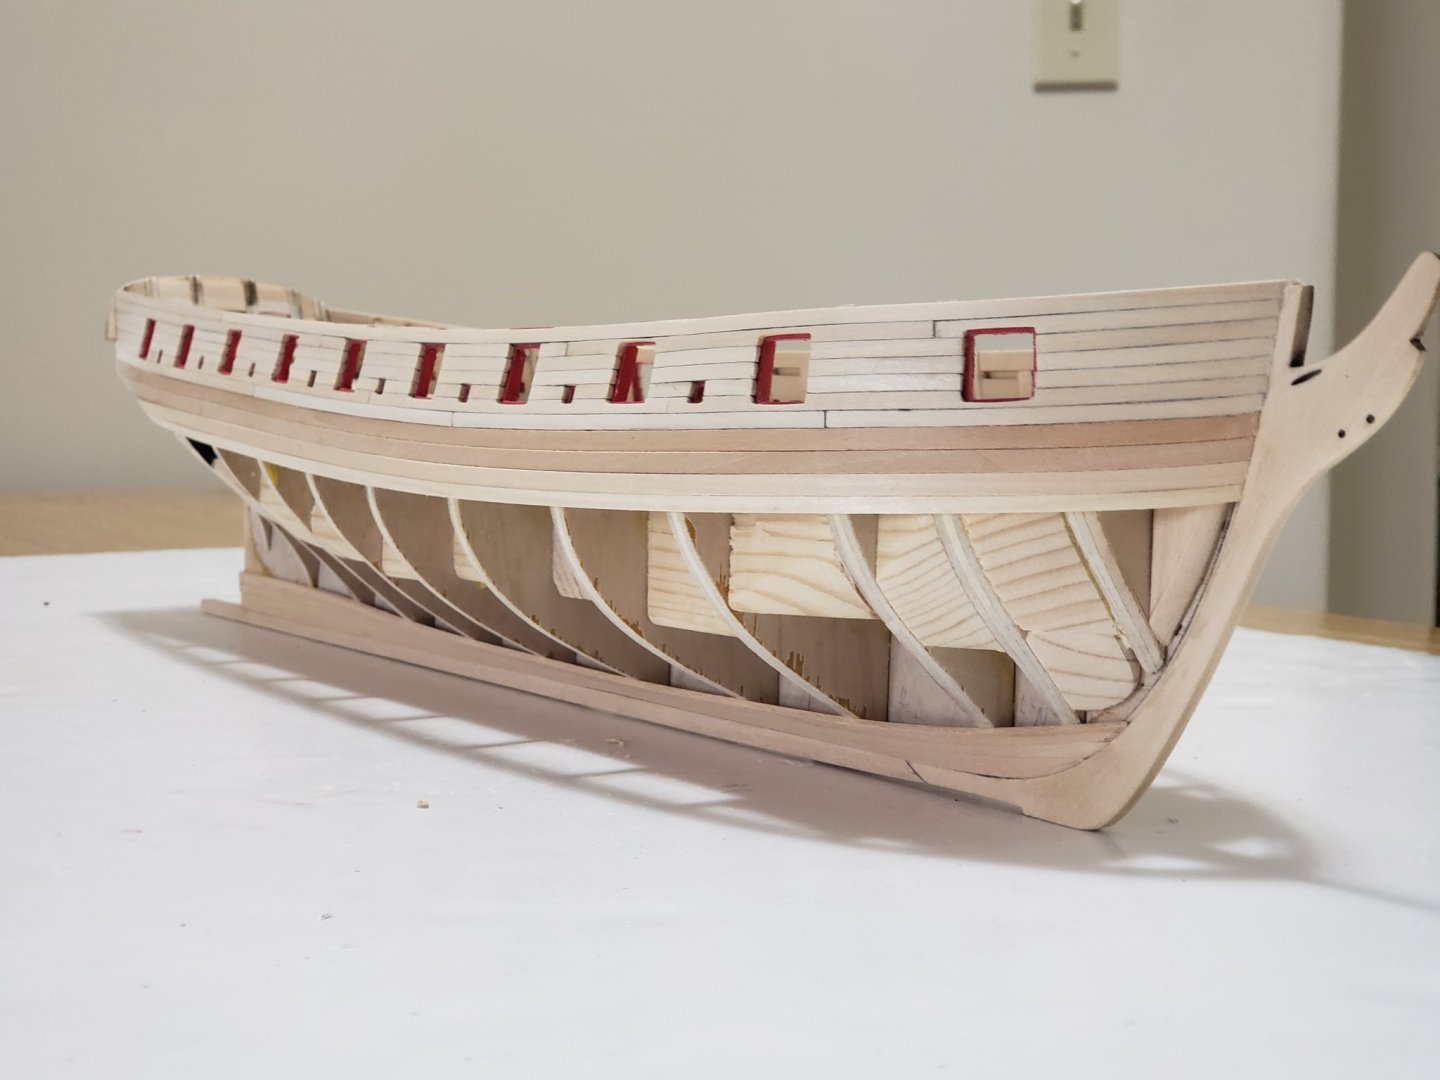
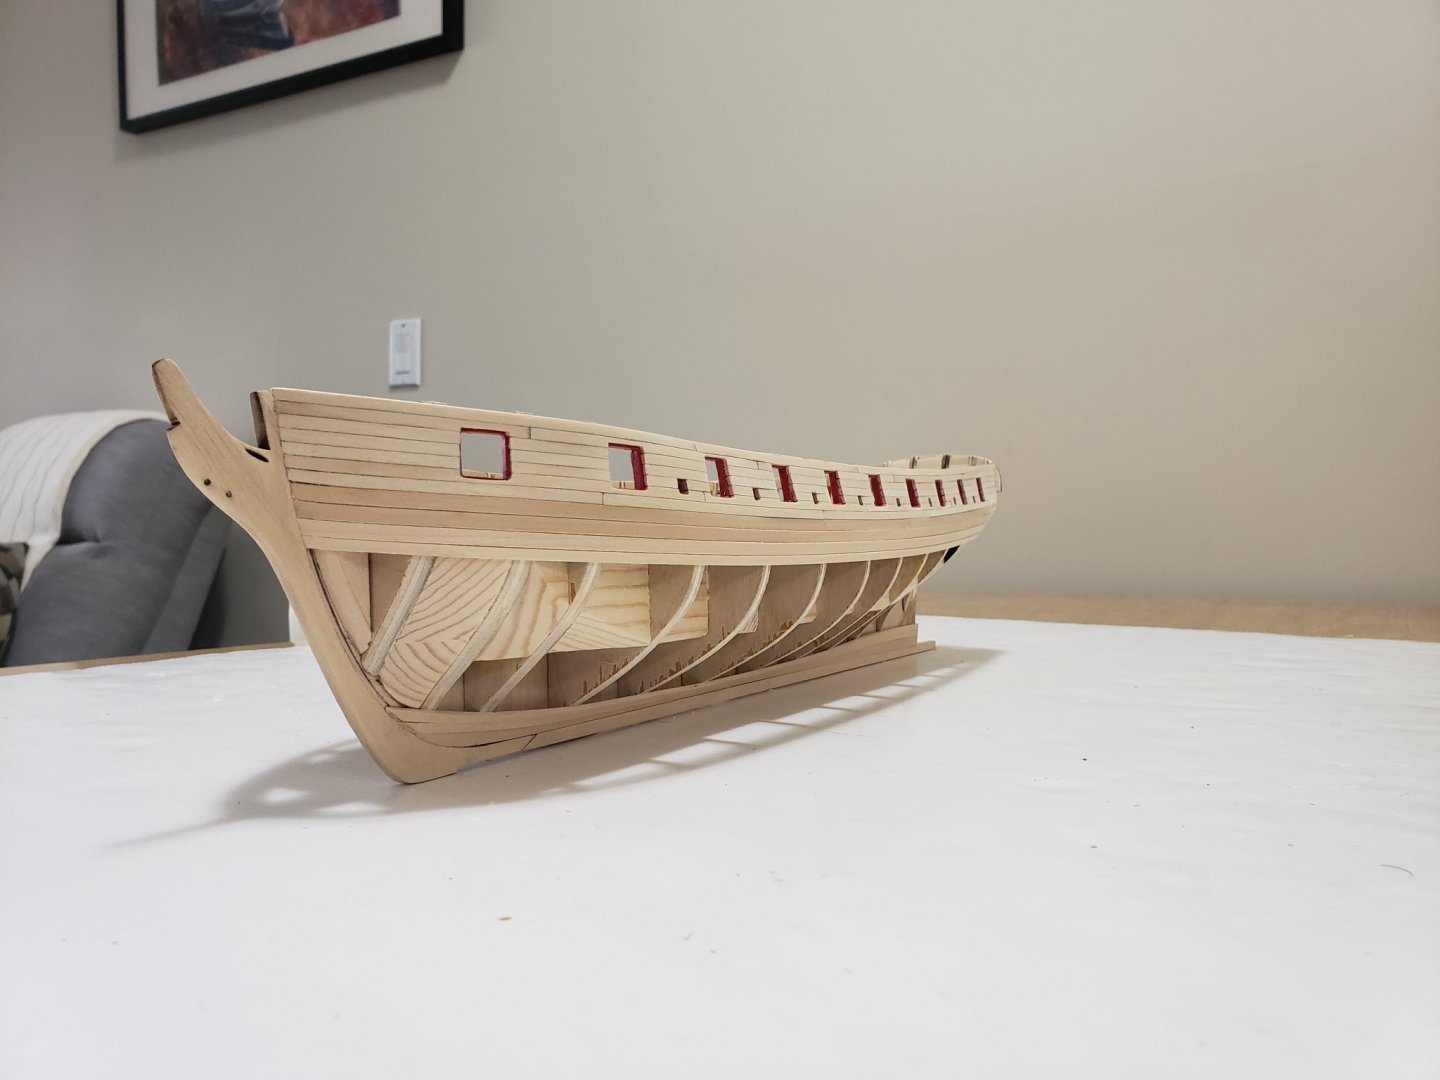
Finished planking the bulwarks. Did not turn out as bad as I had thought it would from the installation of the first plank from my last post. Here are some photos: I'll be doing some finishing touches tomorrow including sanding it smooth and applying filler in any gaps before painting it red. I also need to retouch some areas with black paint where I had to lightly sand some glue residue off.


- 950 replies
-
- 10
-
-
- syren
- model shipways
- (and 1 more)
-
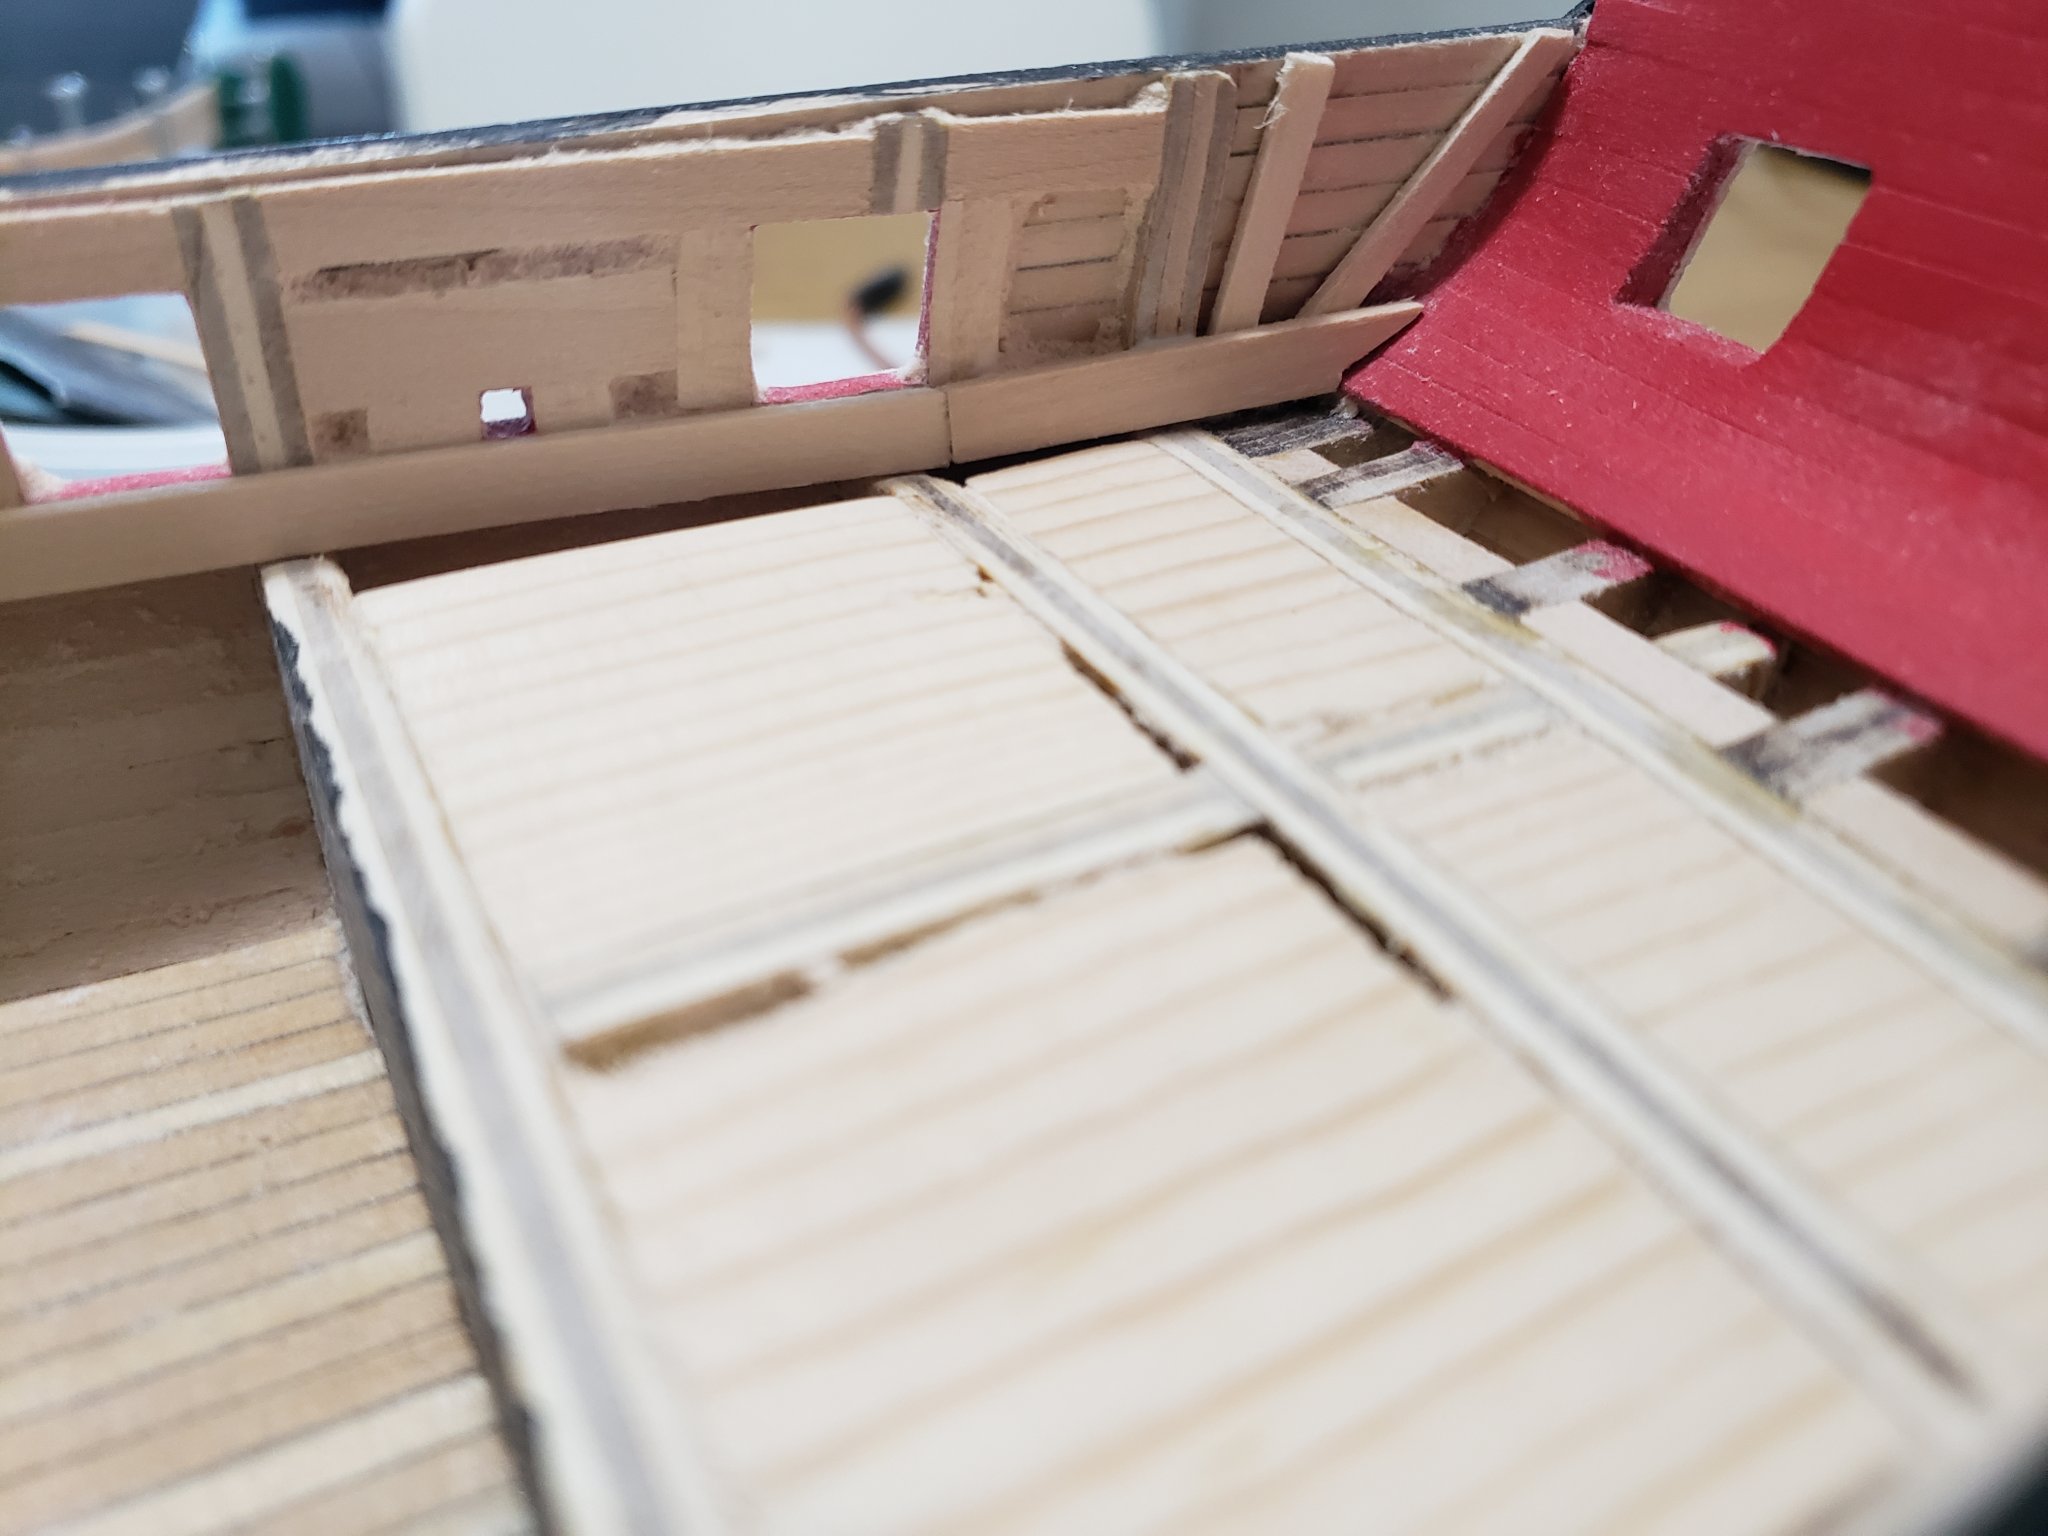
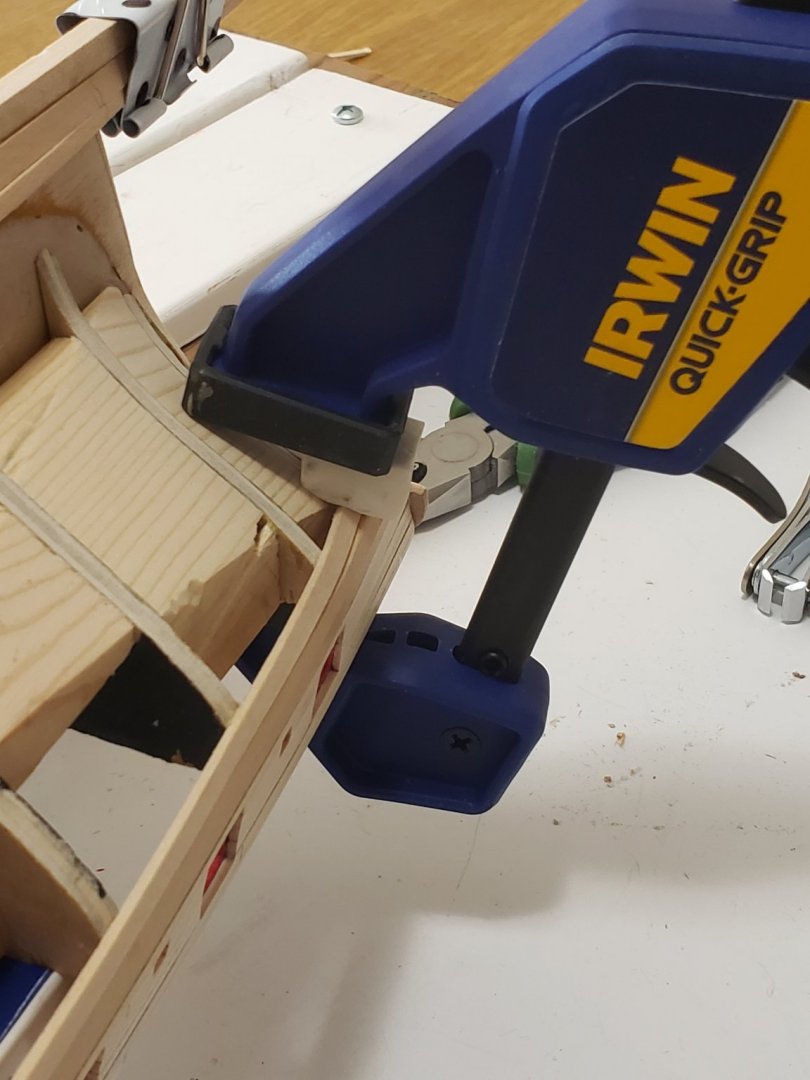
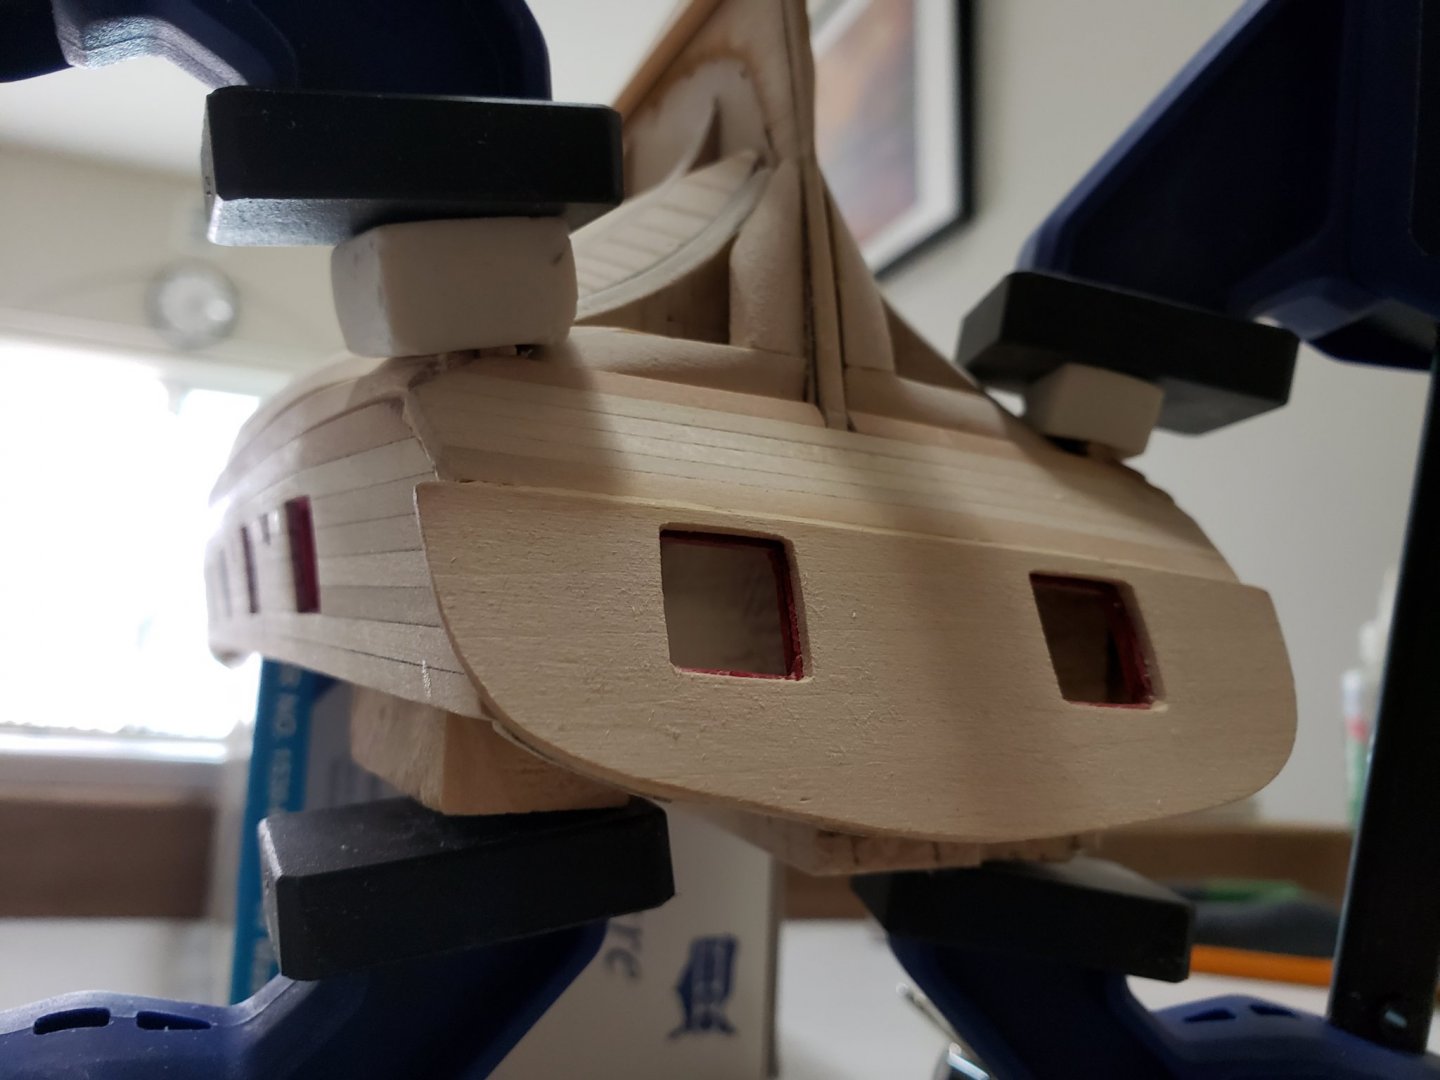
Thanks all for the comments and the likes I took a few days break but am back again! I started planking the bulwarks. Not too happy with the how the first wide plank was installed, especially at the bow and stern. It was very tricky getting it to stick since I had to hold it by hand as I did not have clamps or pegs to reach that far low. Also I needed to cut and stick small sections of this plank since I could not get the correct curve with a long strip. I might redo this plank at the stern, but lets see... It might turn out not as bad as I imagine and I may be overthinking things. Here are some progress pics:

- 950 replies
-
- 8
-
-
- syren
- model shipways
- (and 1 more)
-
Really like this idea for the stanchions! Going to remember it for when the time comes.
-
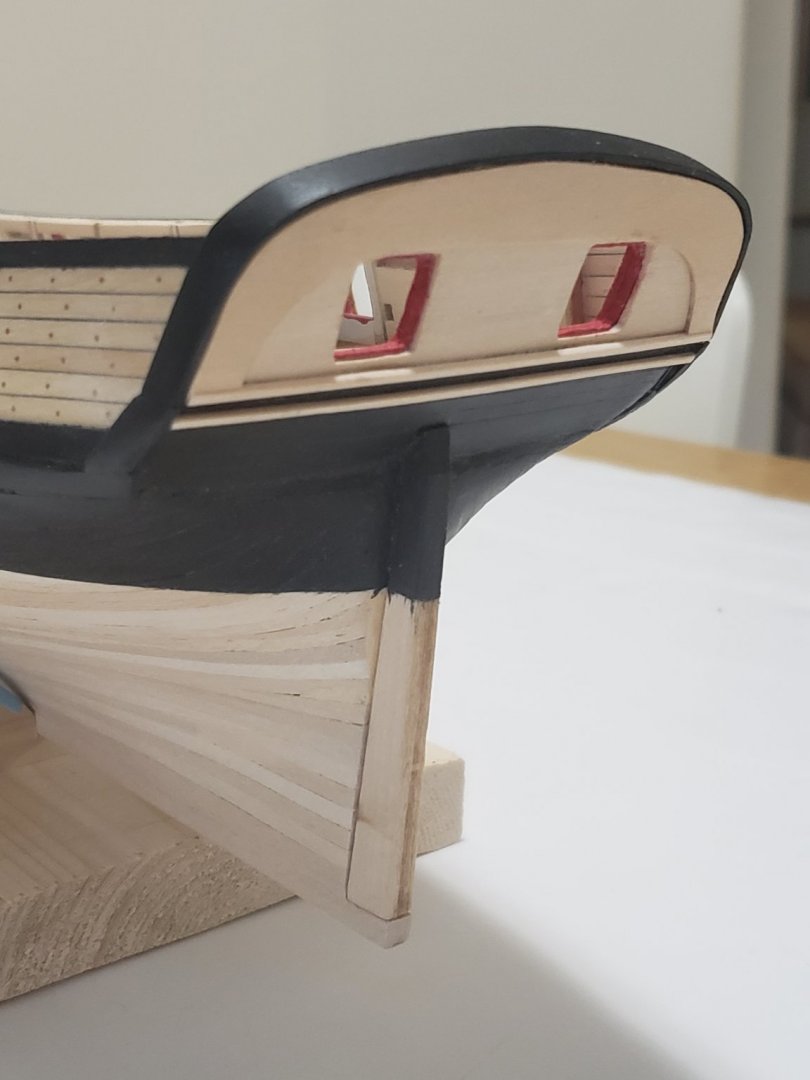
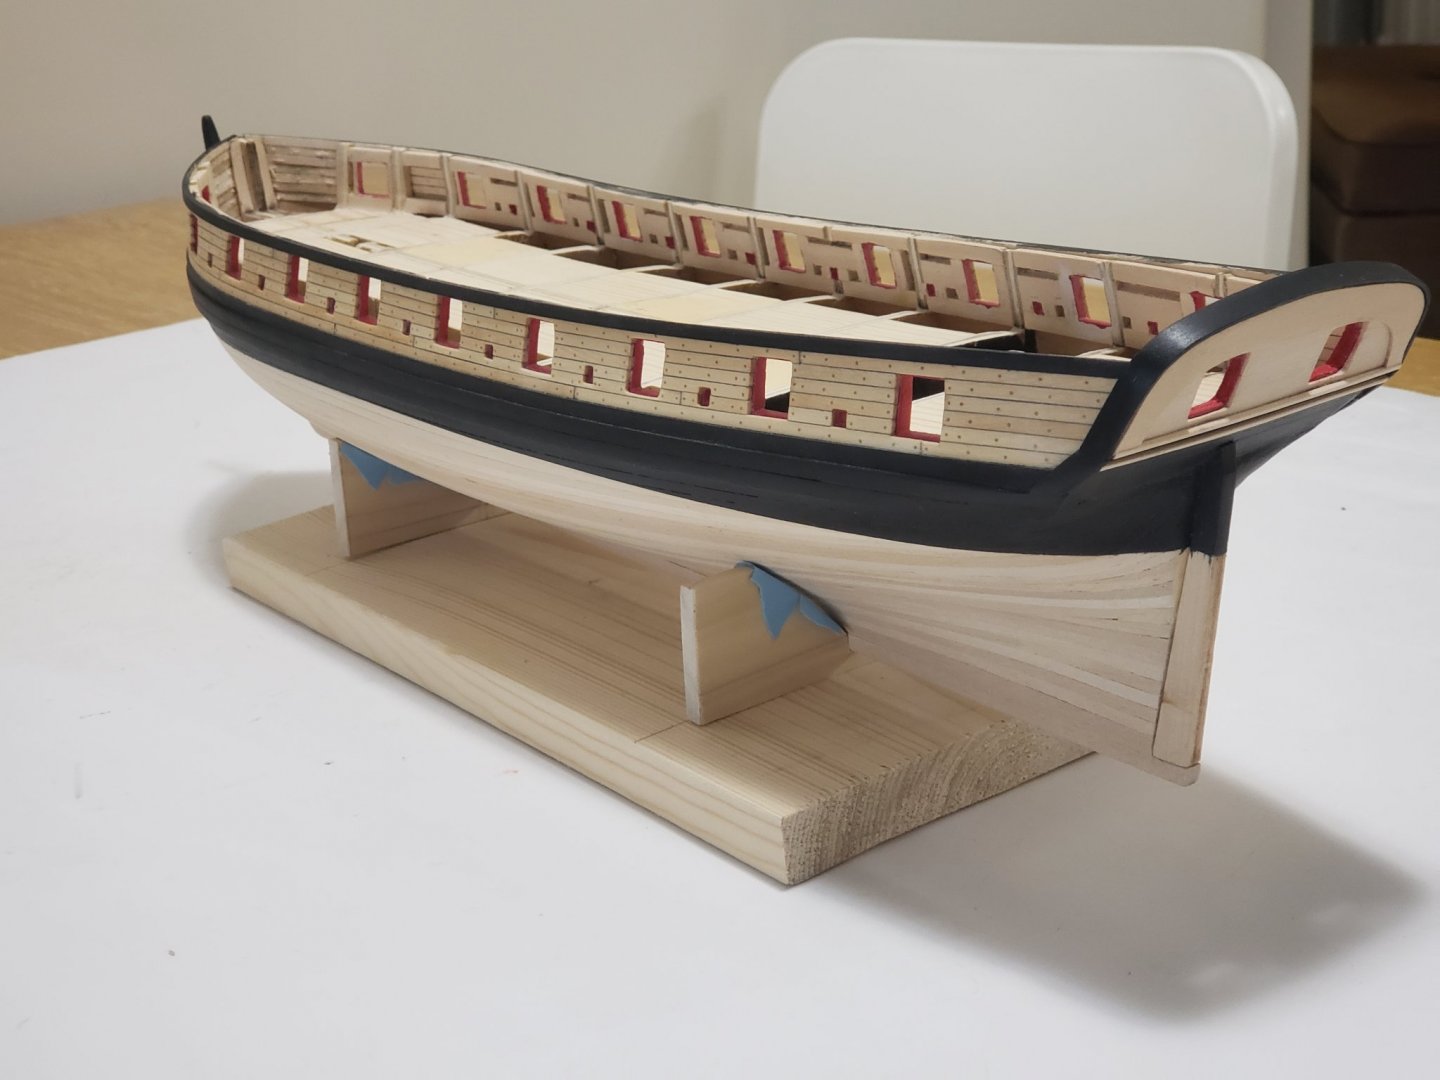
Chapter 6 is now completed. Here are some photos of the stern transform complete and painted. Also, I put masking tape on the cradle to prevent scratches, and to be ready to accept copper plates in the coming few weeks.

- 950 replies
-
- 15
-
-
- syren
- model shipways
- (and 1 more)
-
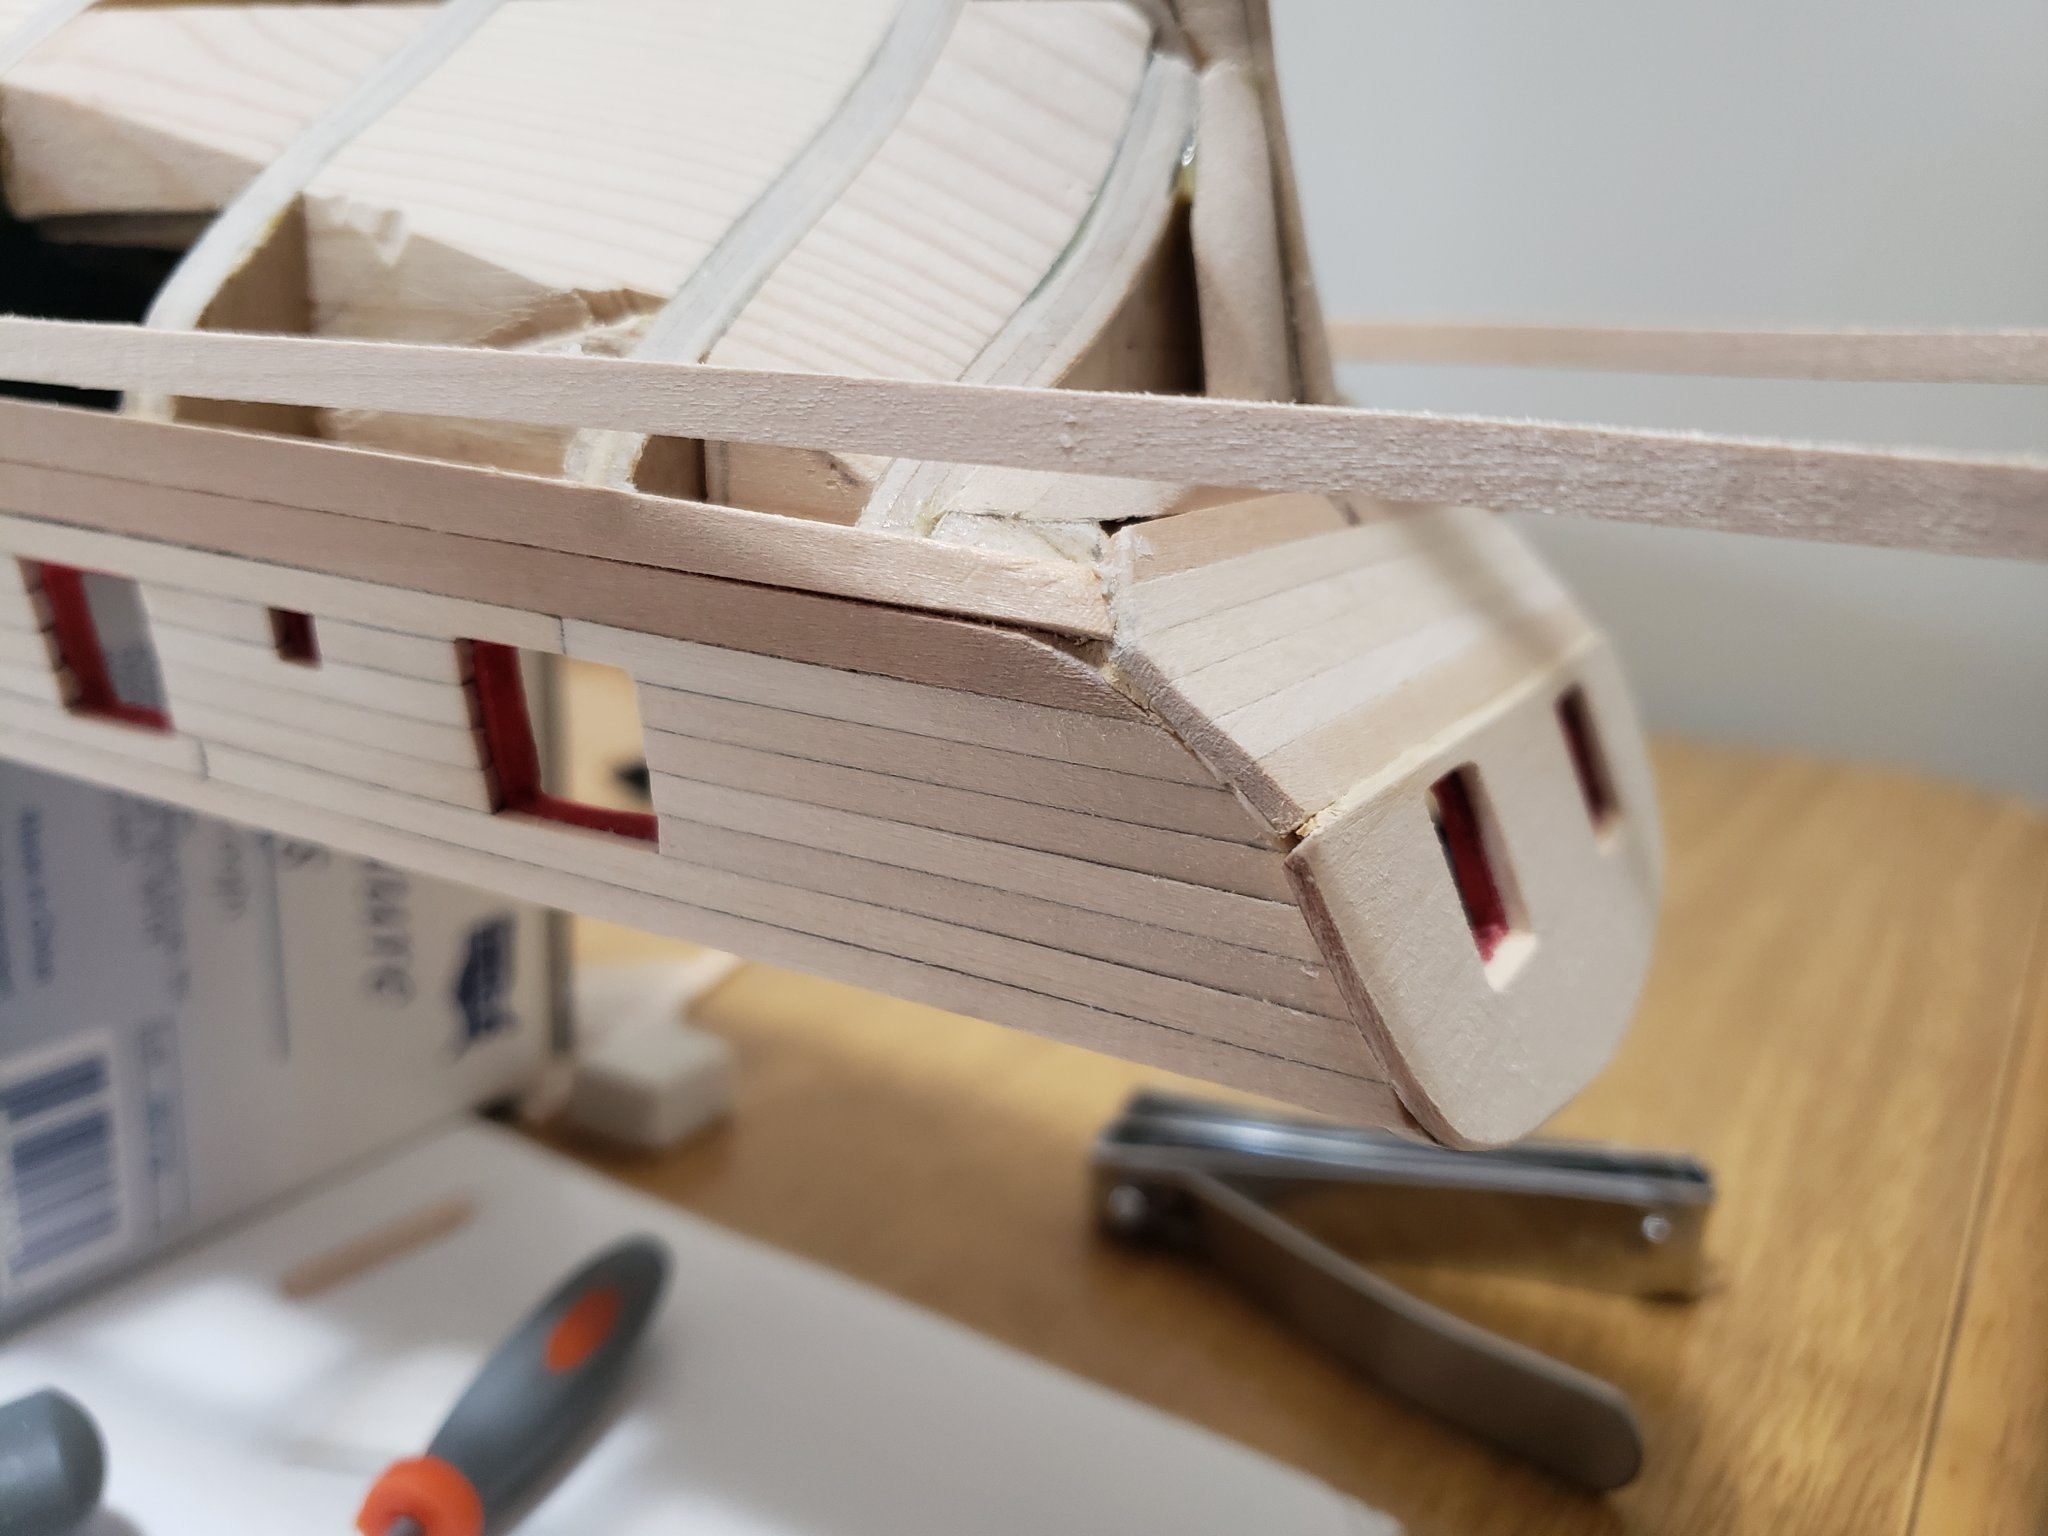
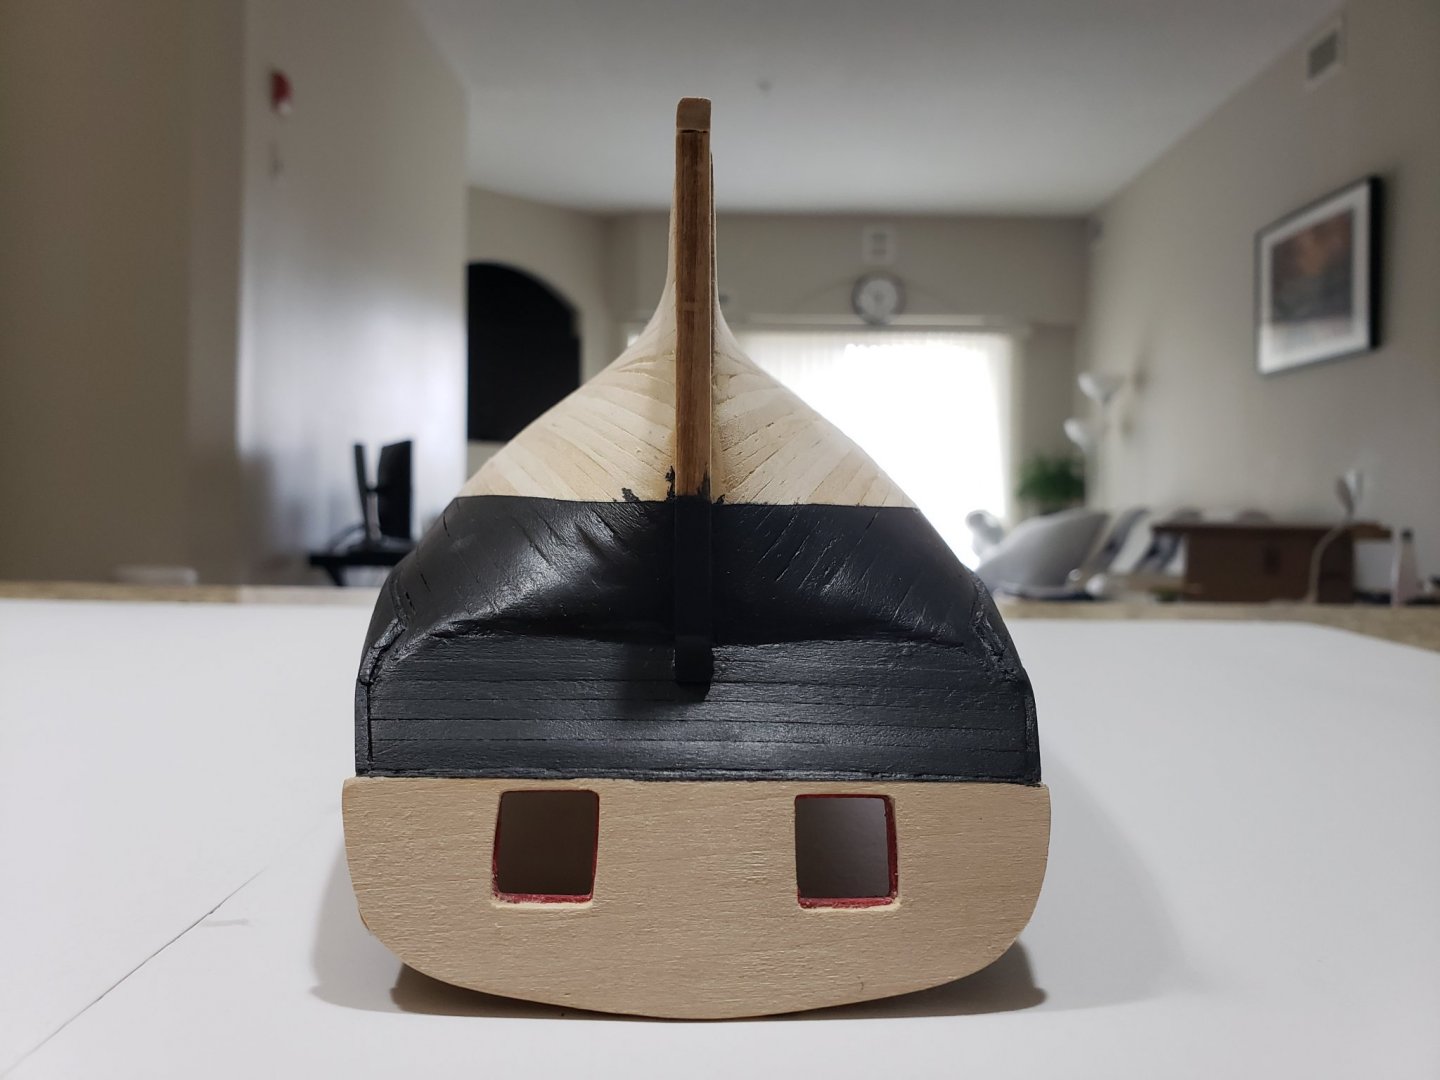
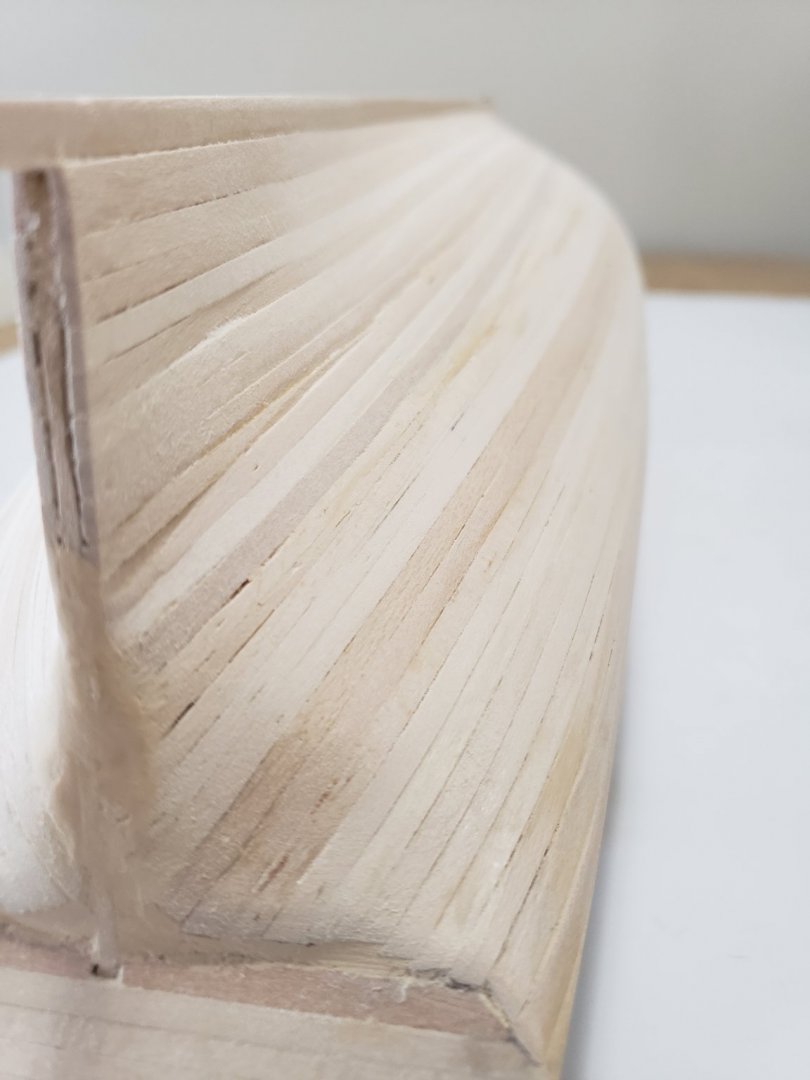
I managed to bend the cap rail. I tried using the iron trick but was not sure the best way to go about it, and due to inexperience using this technique, the strip cracked again. So I contacted Chuck for some advice and he mentioned that the strip I was using might be too thick and should sand it to 3/64" from 1/16". Also, I watched some YouTube videos on plank bending (for furniture) and someone mentioned to soak planks in fabric softener to soften the wood, which I also followed. Here it is tied around the transform to preform its shape.

- 950 replies
-
- 13
-
-
- syren
- model shipways
- (and 1 more)
-
Thanks all for the suggestions! I don't have any wood of similar dimensions I can use, so will have to try something else. The strip I had soaked overnight cracked again when bending it slowly, so I will try the iron method next. Hopefully this works, otherwise I will need to shop around for easy to bend strips or look for an alternative method.
- 950 replies
-
- 1
-
-
- syren
- model shipways
- (and 1 more)
-
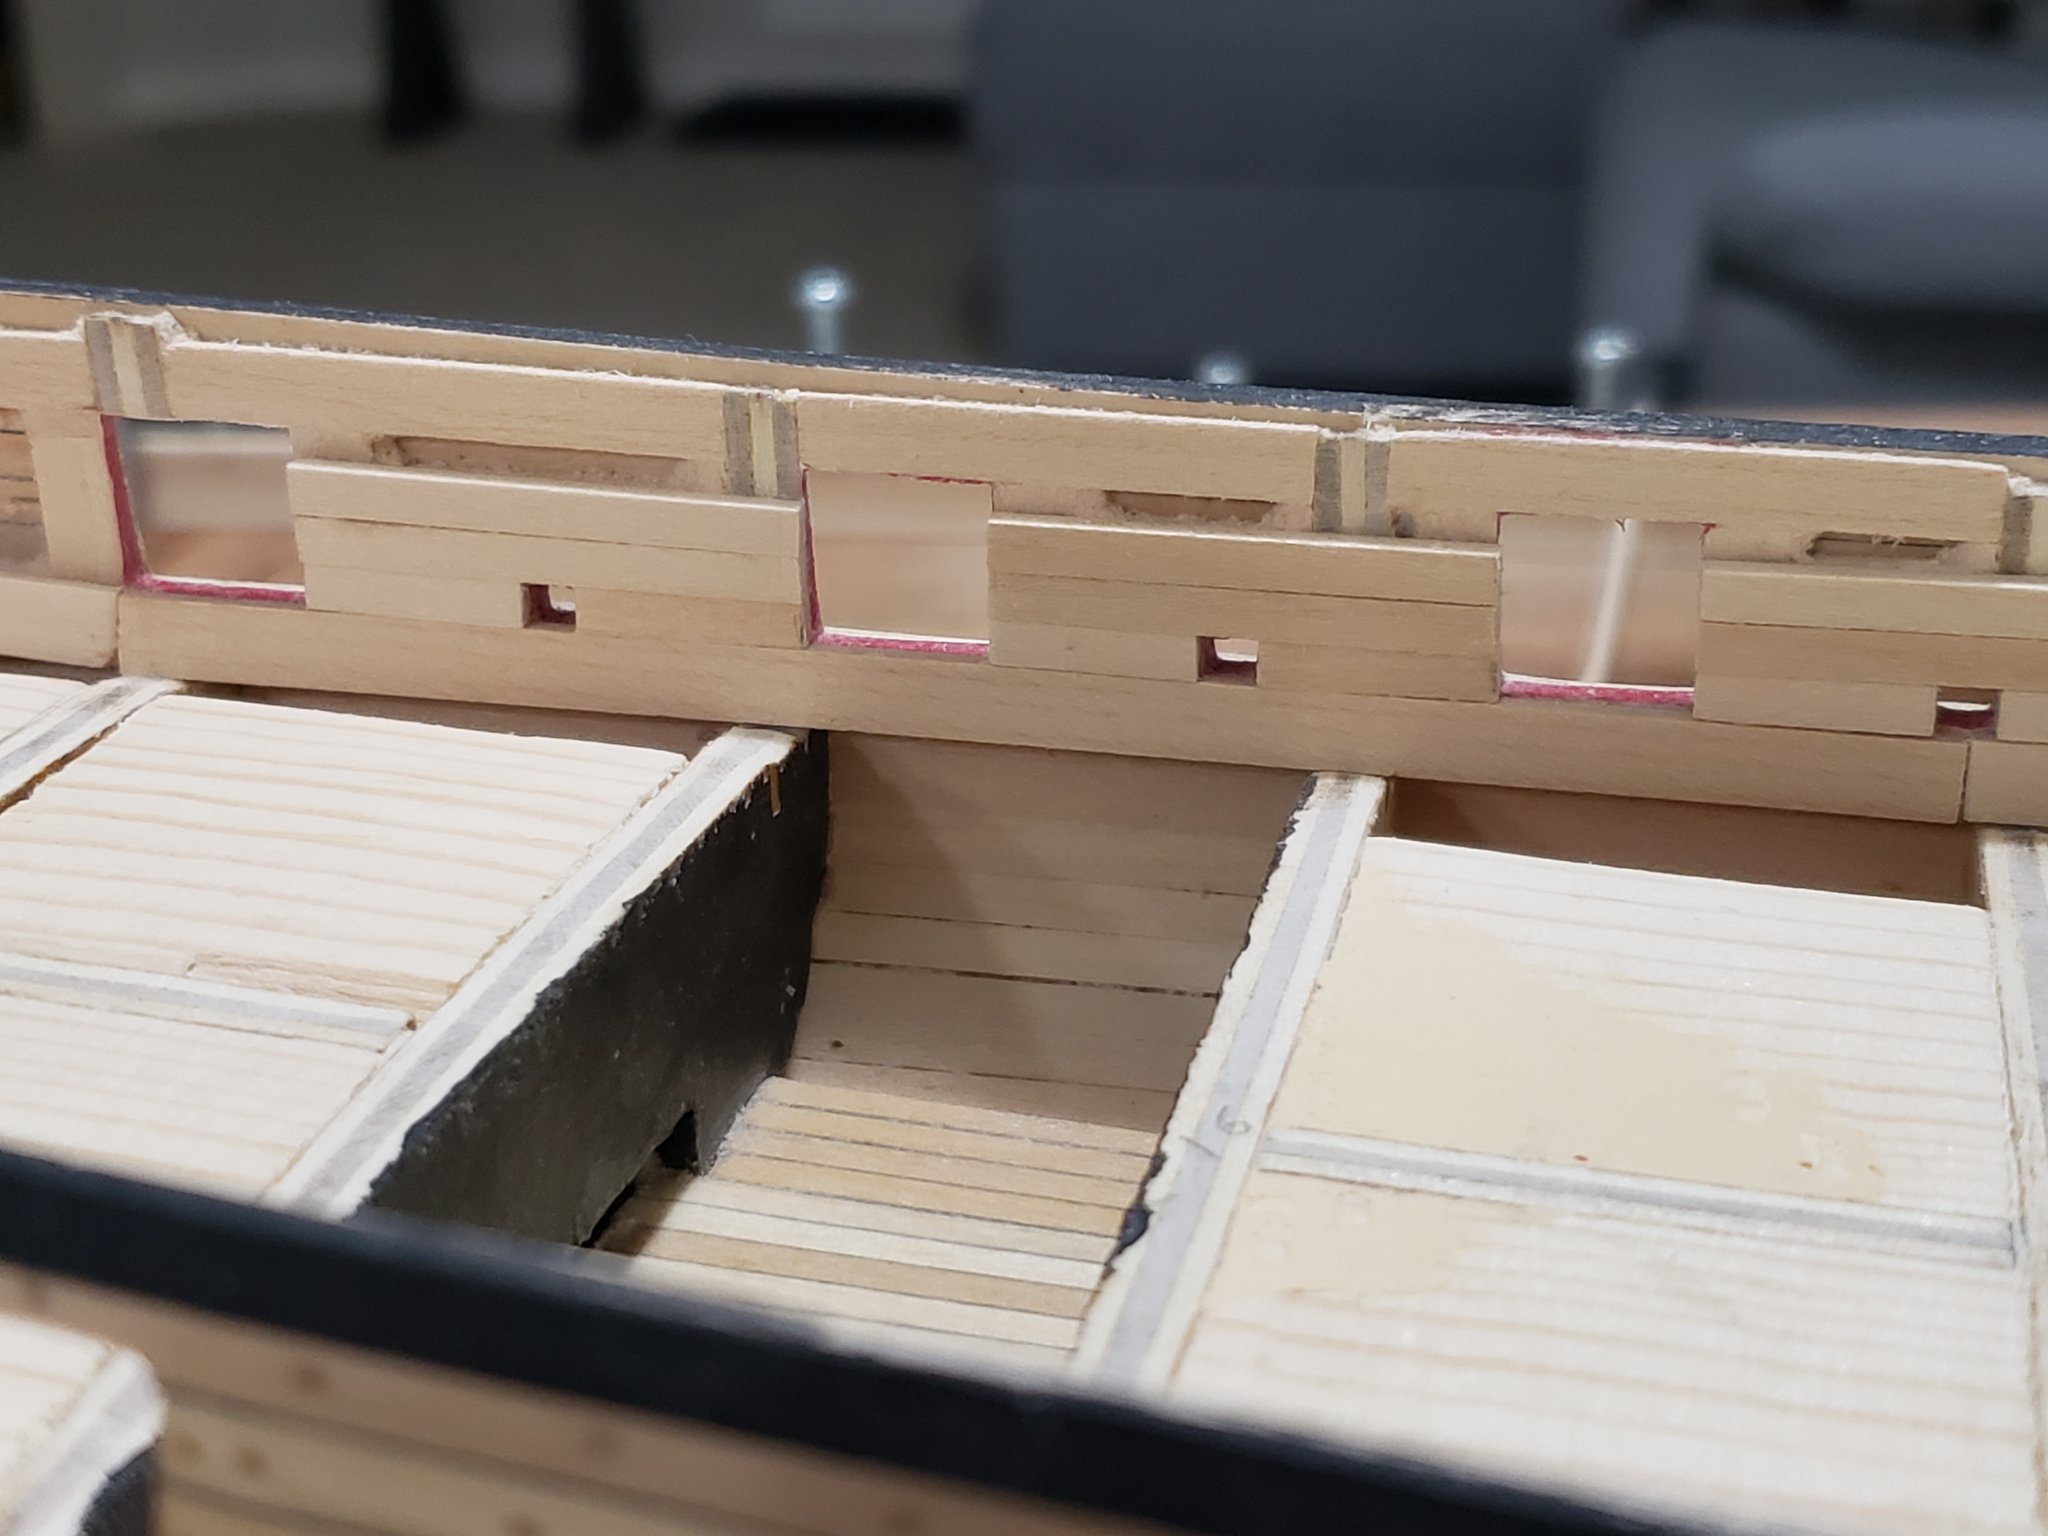
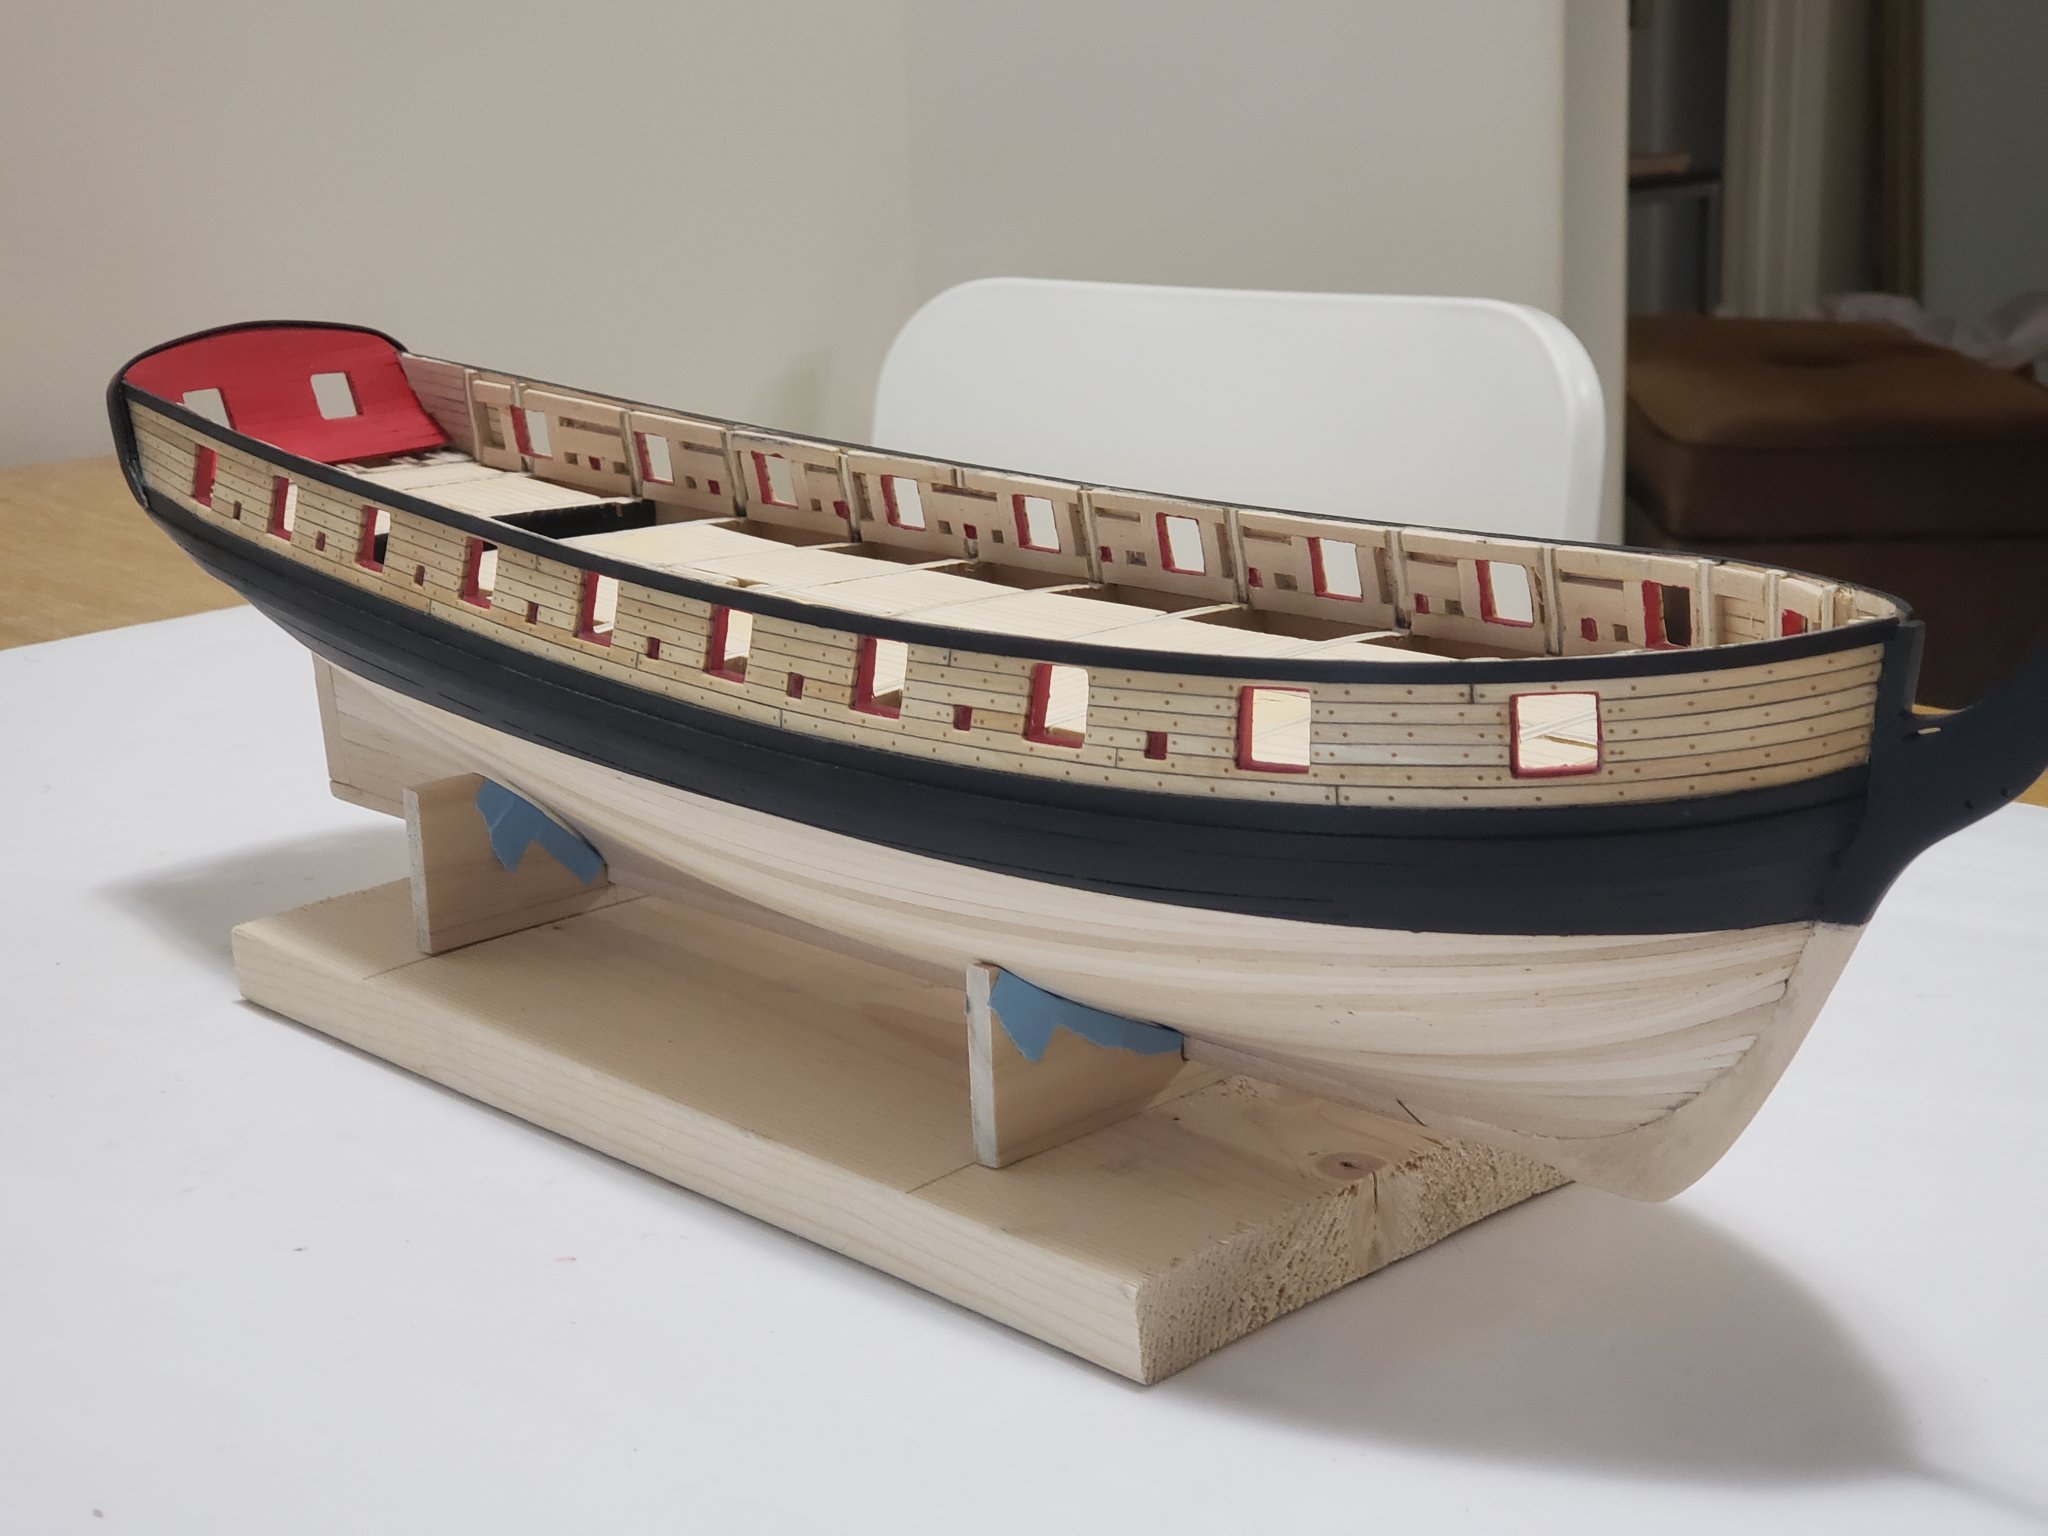
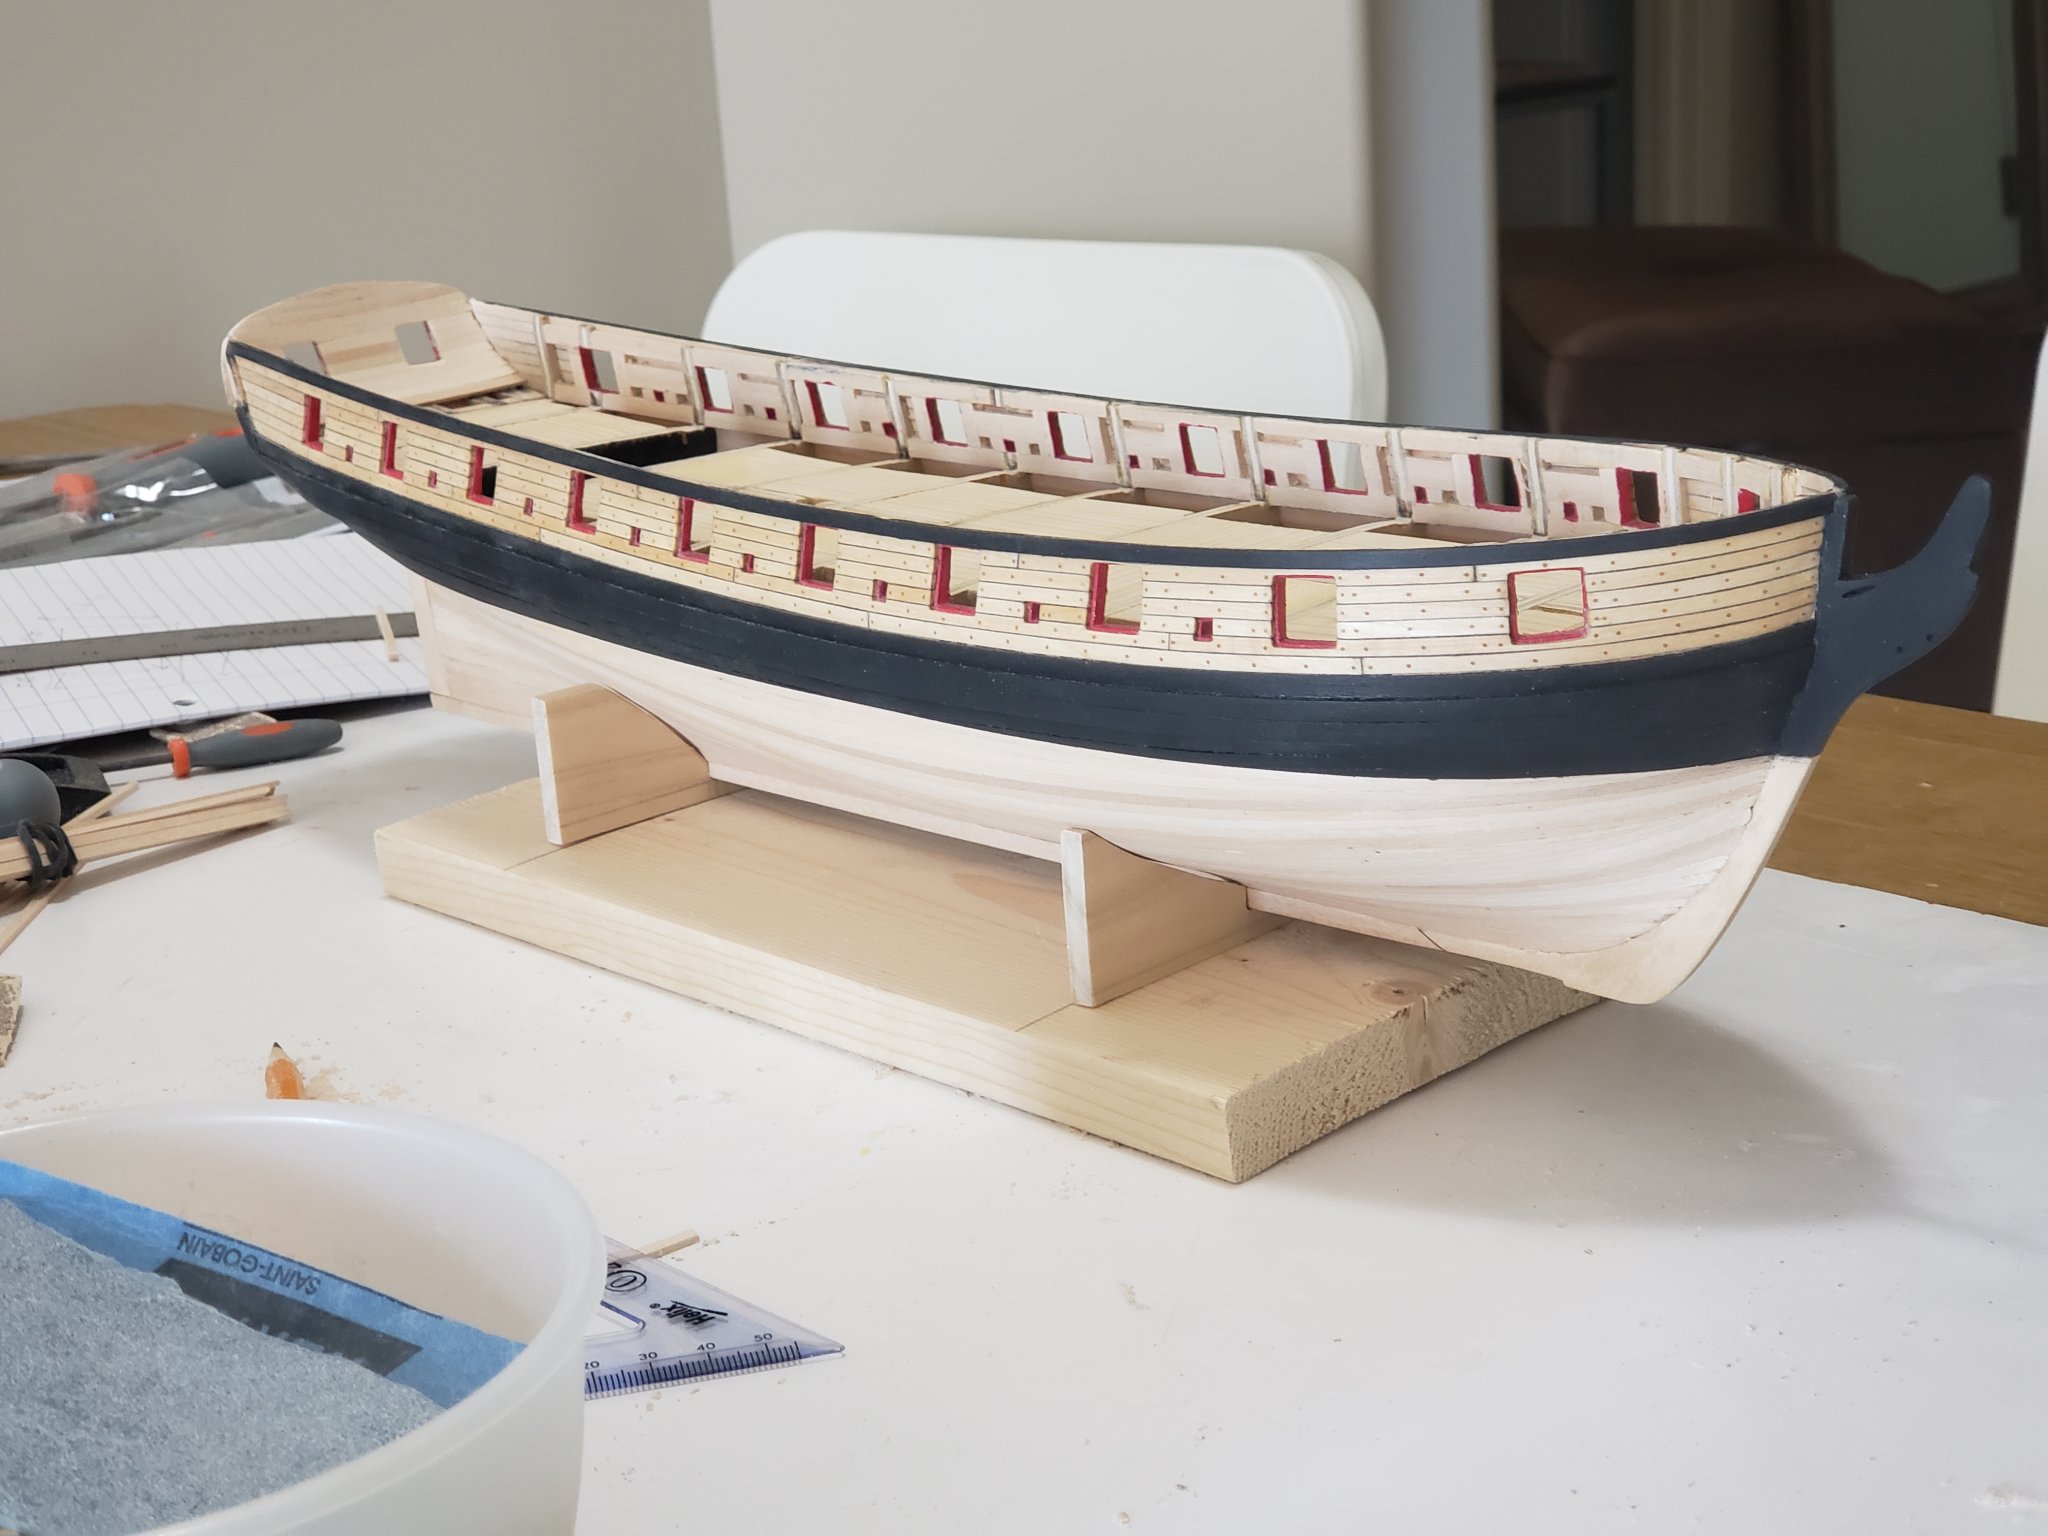
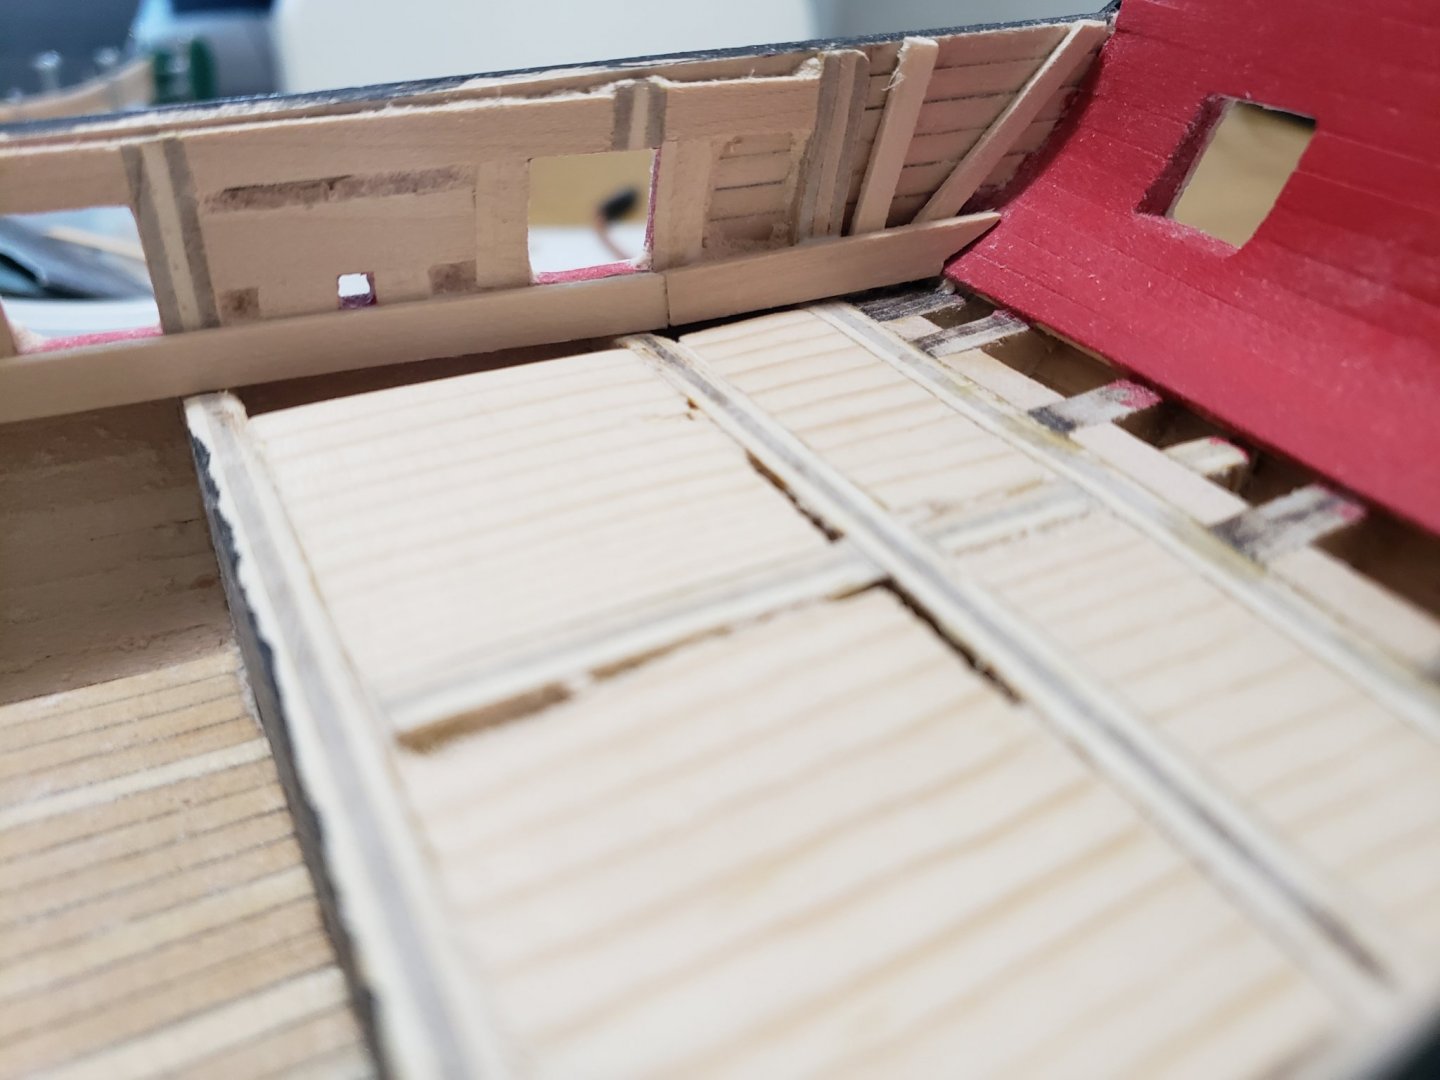
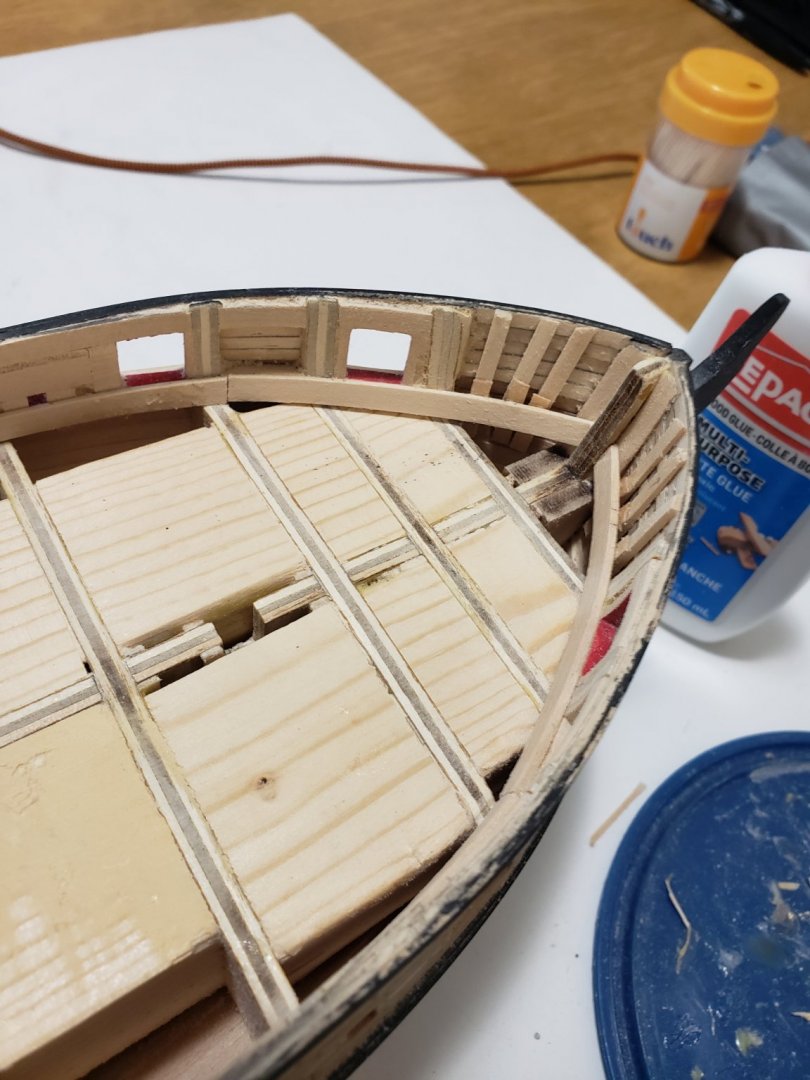
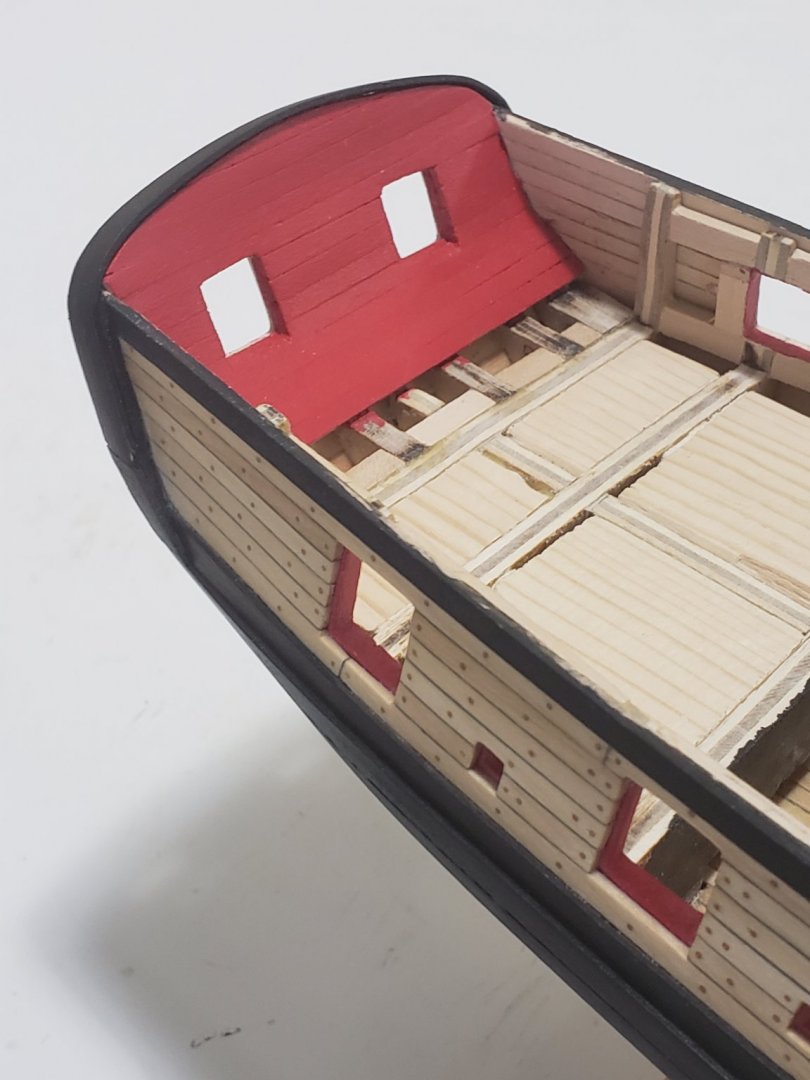
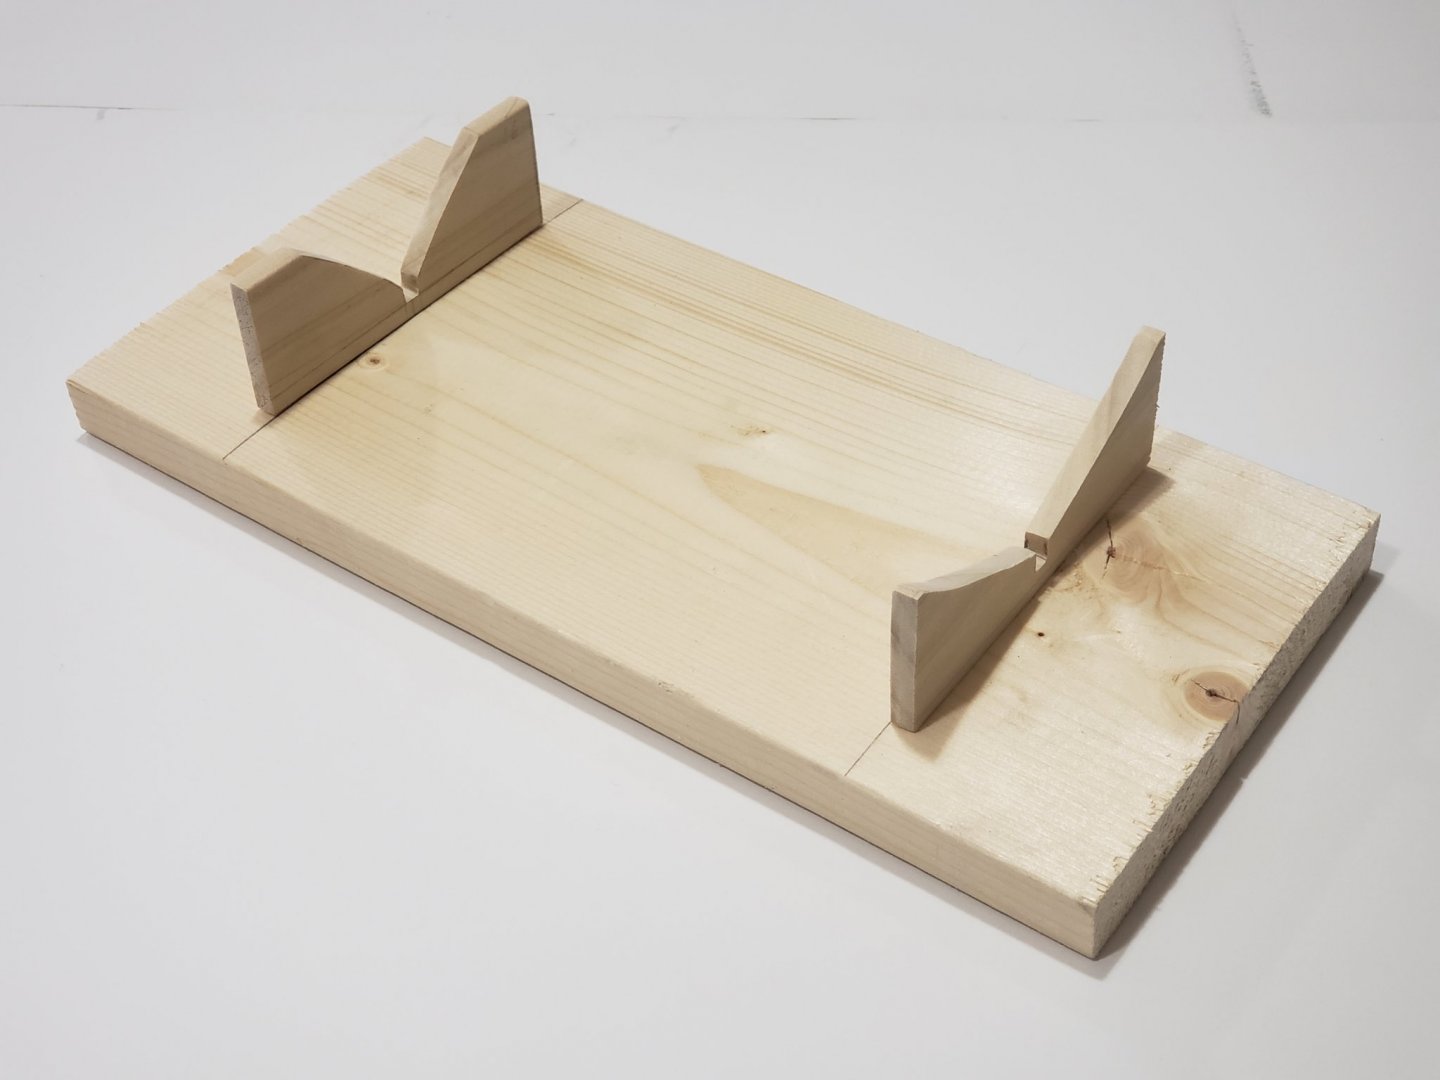
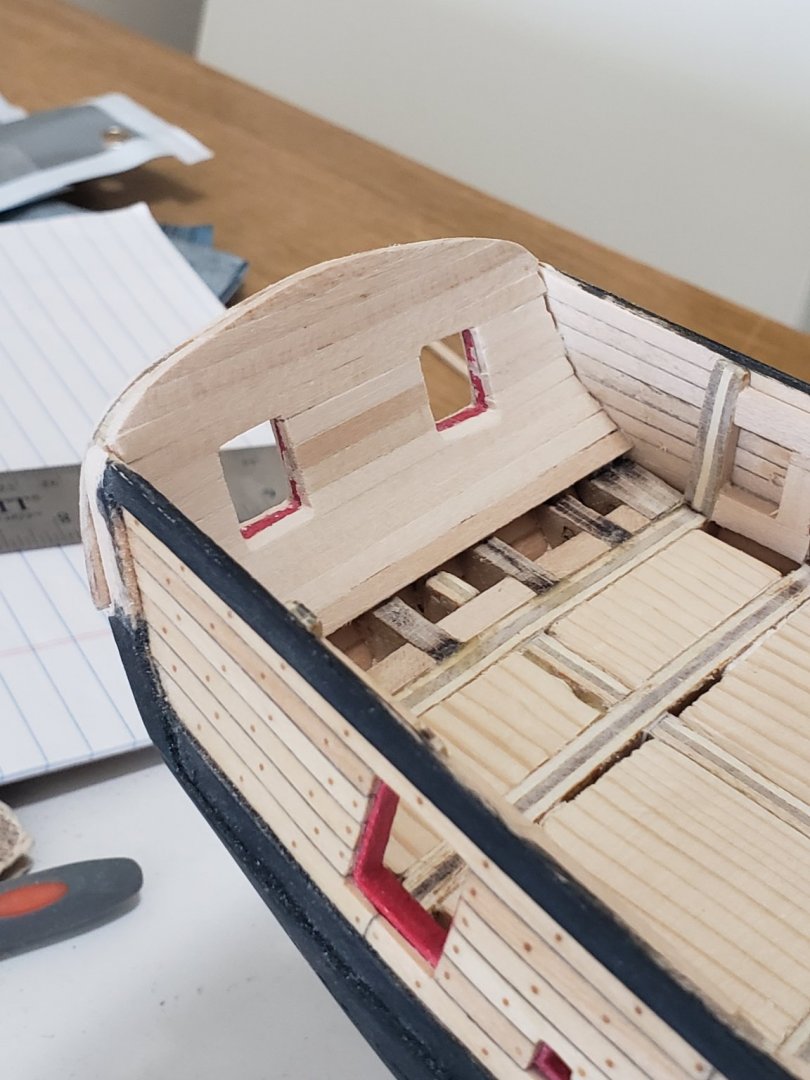
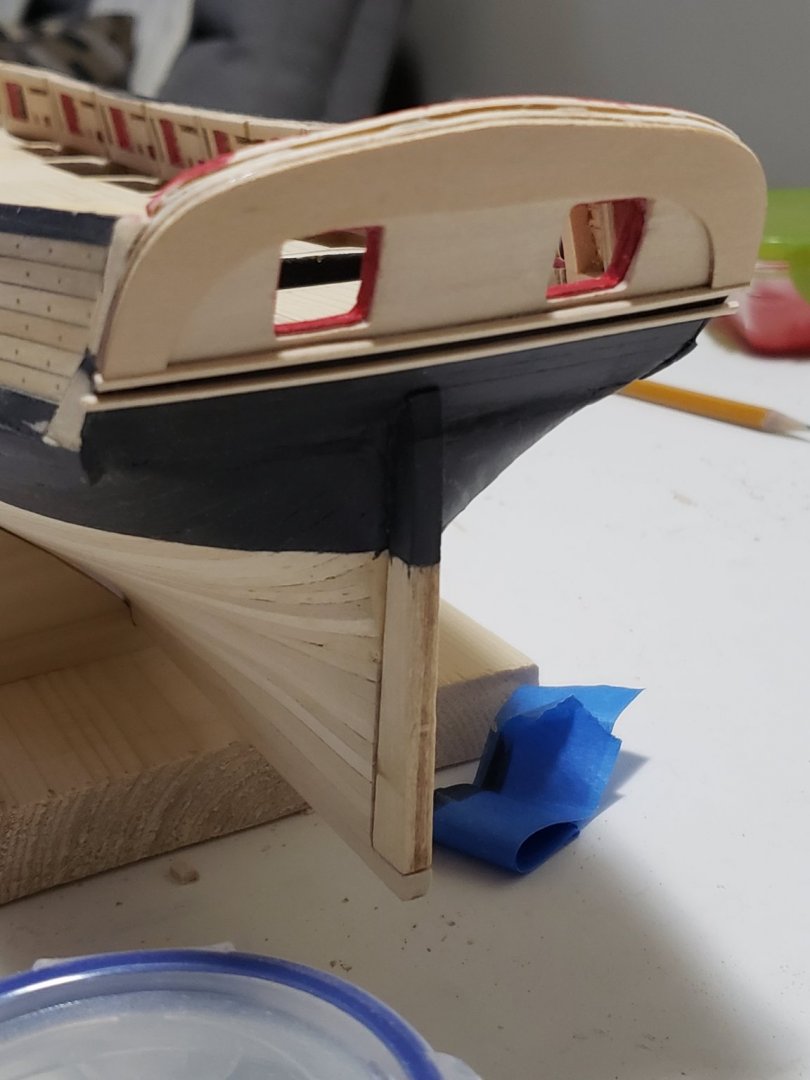
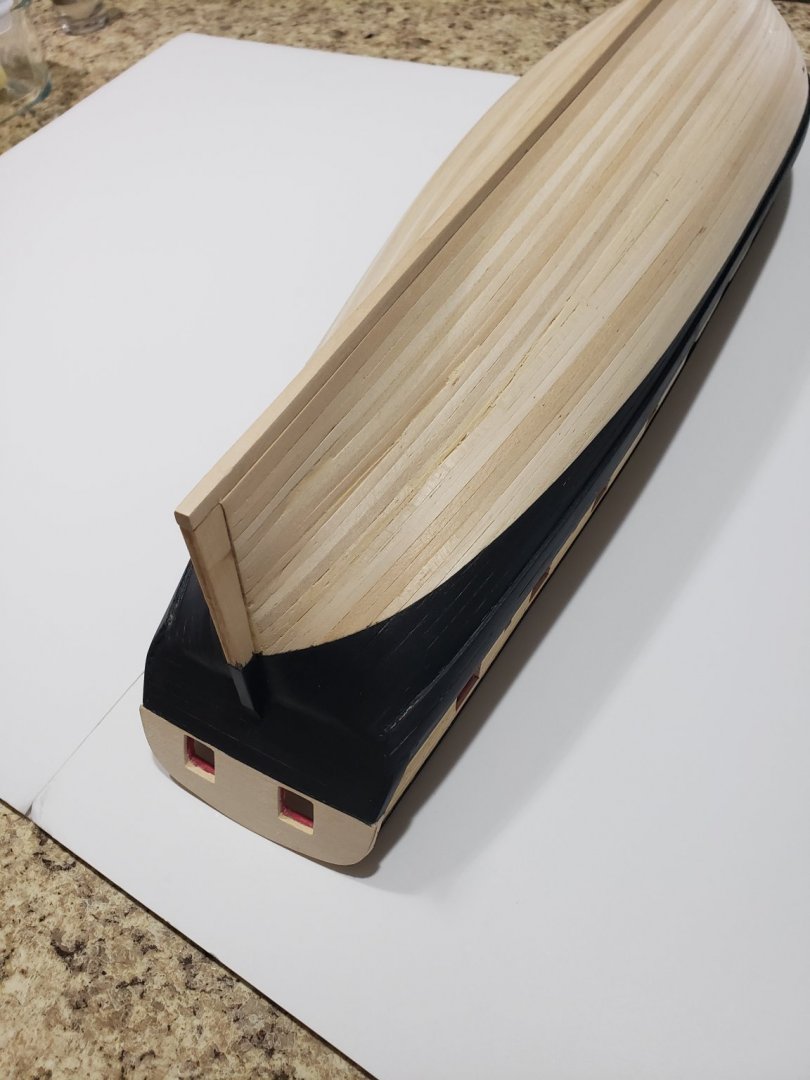
I made a temporary stand so the model can be upright when I work on it. To make this stand, I traced the outline from one of the sheets for bulkheads D and 16 onto a poplar hardwood (all I had available at the time). The outline was then cut using a rotary tool and sanded. These planks of wood were stuck onto a scrap wood: From the above photo, it can be seen that the stern was planked. Here is a close up: I also sanded down the fashion pieces to taper into the upper wale: The stern planks were then painted red. The red in the photo appears much brighter than it does in person. I used the same technique from my previous post to paint this part: Molding strips were sanded and installed using superglue. They were separated using multiple small 1/8" planks to ensure they are parallel while maintaining the slight curve. And lastly, the second transform layer was added: I tried to bend the cap rail onto the top of the transform, but it snapped in half due to the extremely steep curve. I think it was not soaked for long enough. So the strip is going to be soaked overnight, and tomorrow I will soak it in hot water. I hope this helps making it more malleable and resistant to cracking. We'll see. Any tips/suggestions on this part of the build would be more than welcome!


- 950 replies
-
- 10
-
-
- syren
- model shipways
- (and 1 more)
-
Thanks all for the likes and the encouraging words. It really does mean a lot and motivates me to move forward.
- 950 replies
-
- 2
-
-
- syren
- model shipways
- (and 1 more)
-
Finished removing the paint in the unwanted areas by sanding it, and also applied one more coat of tung oil on planks between the upper wale and sheer strake. Good thing I applied the first coat of tung oil before painting. If I did not, sanding down the paint from the wood would be a total nightmare. The tung oil prevented the paint from being soaked deep into the wood and the paint was able to come off very easily. Anyways, here are some photos before I continue with Chapter 6:


- 950 replies
-
- 18
-
-
- syren
- model shipways
- (and 1 more)
-
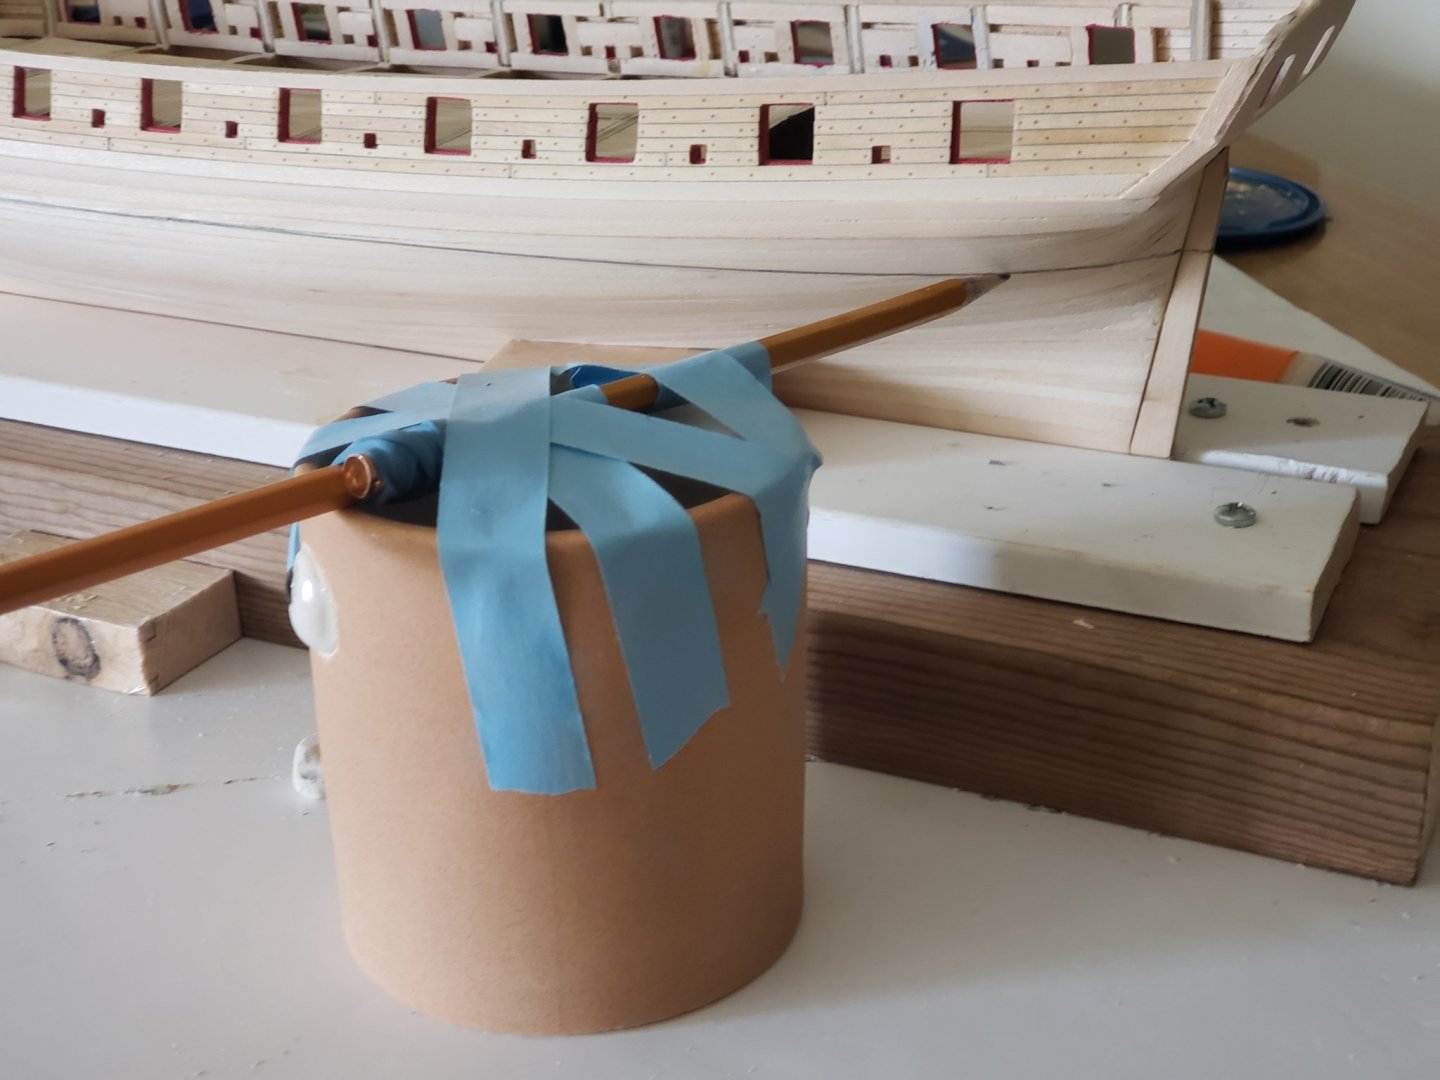
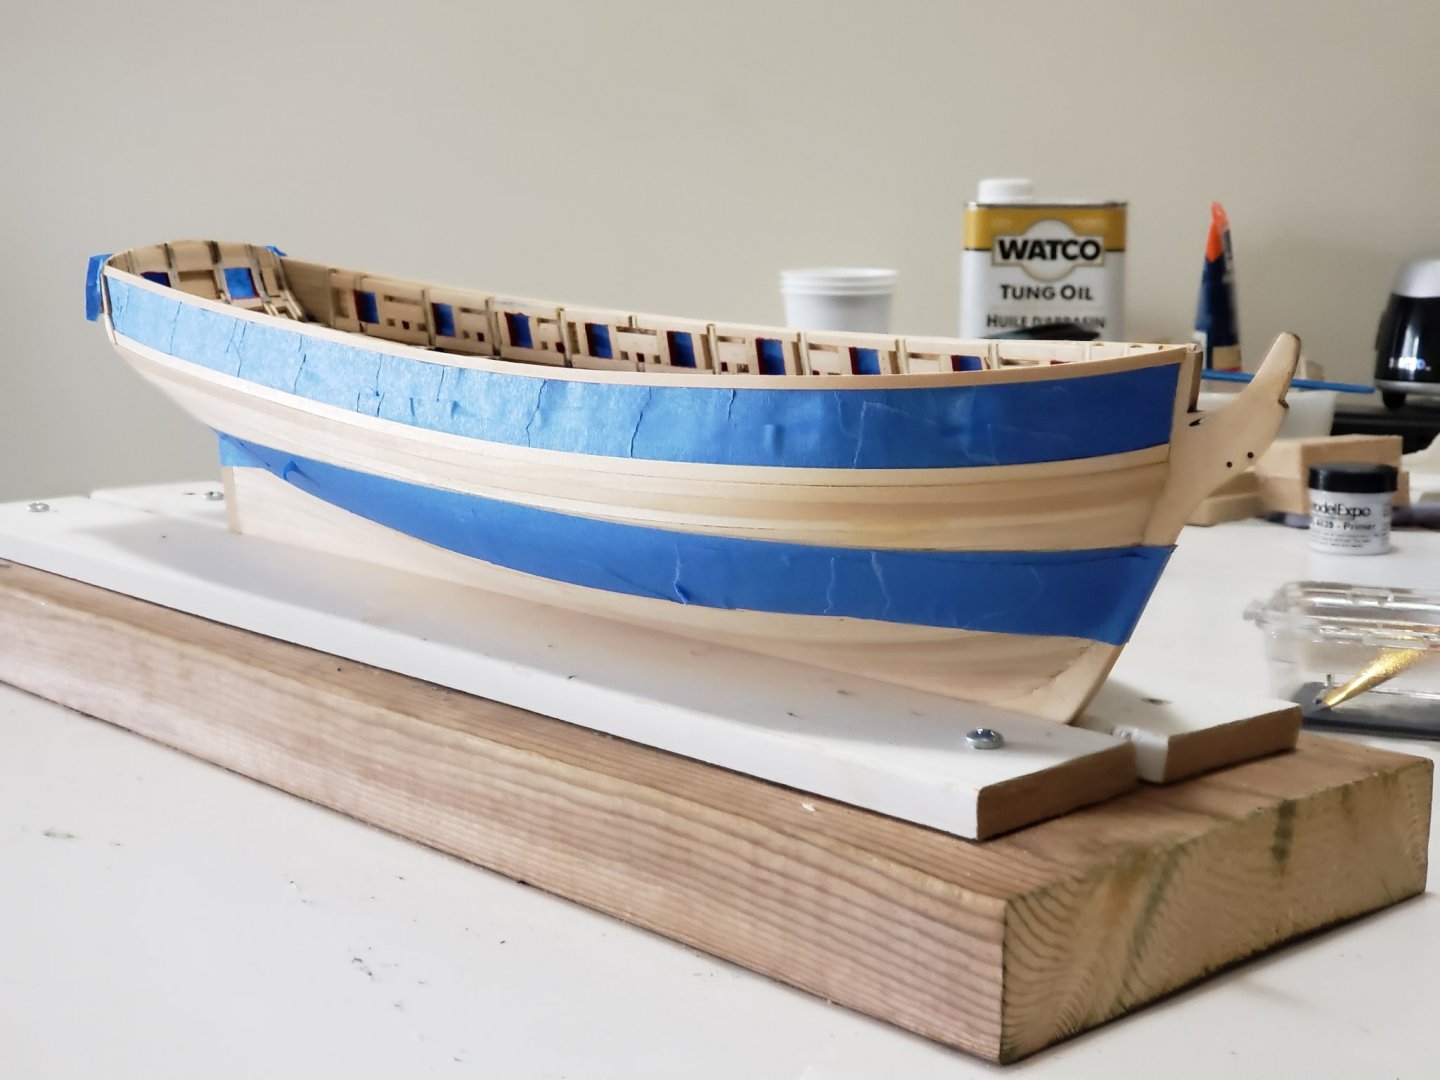
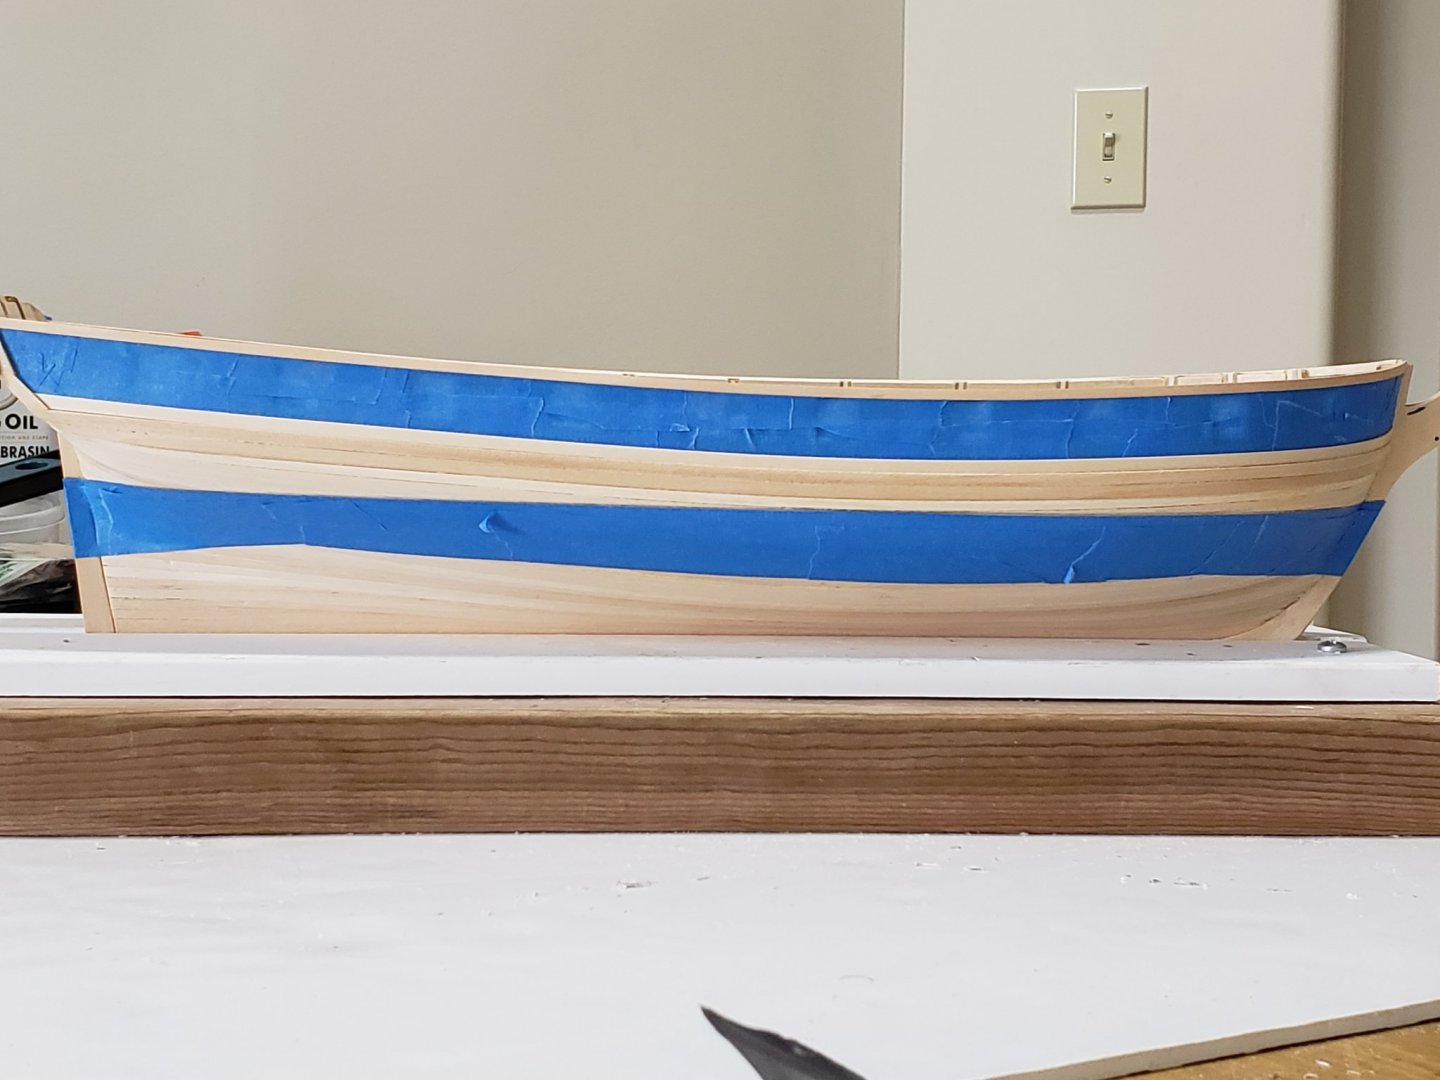
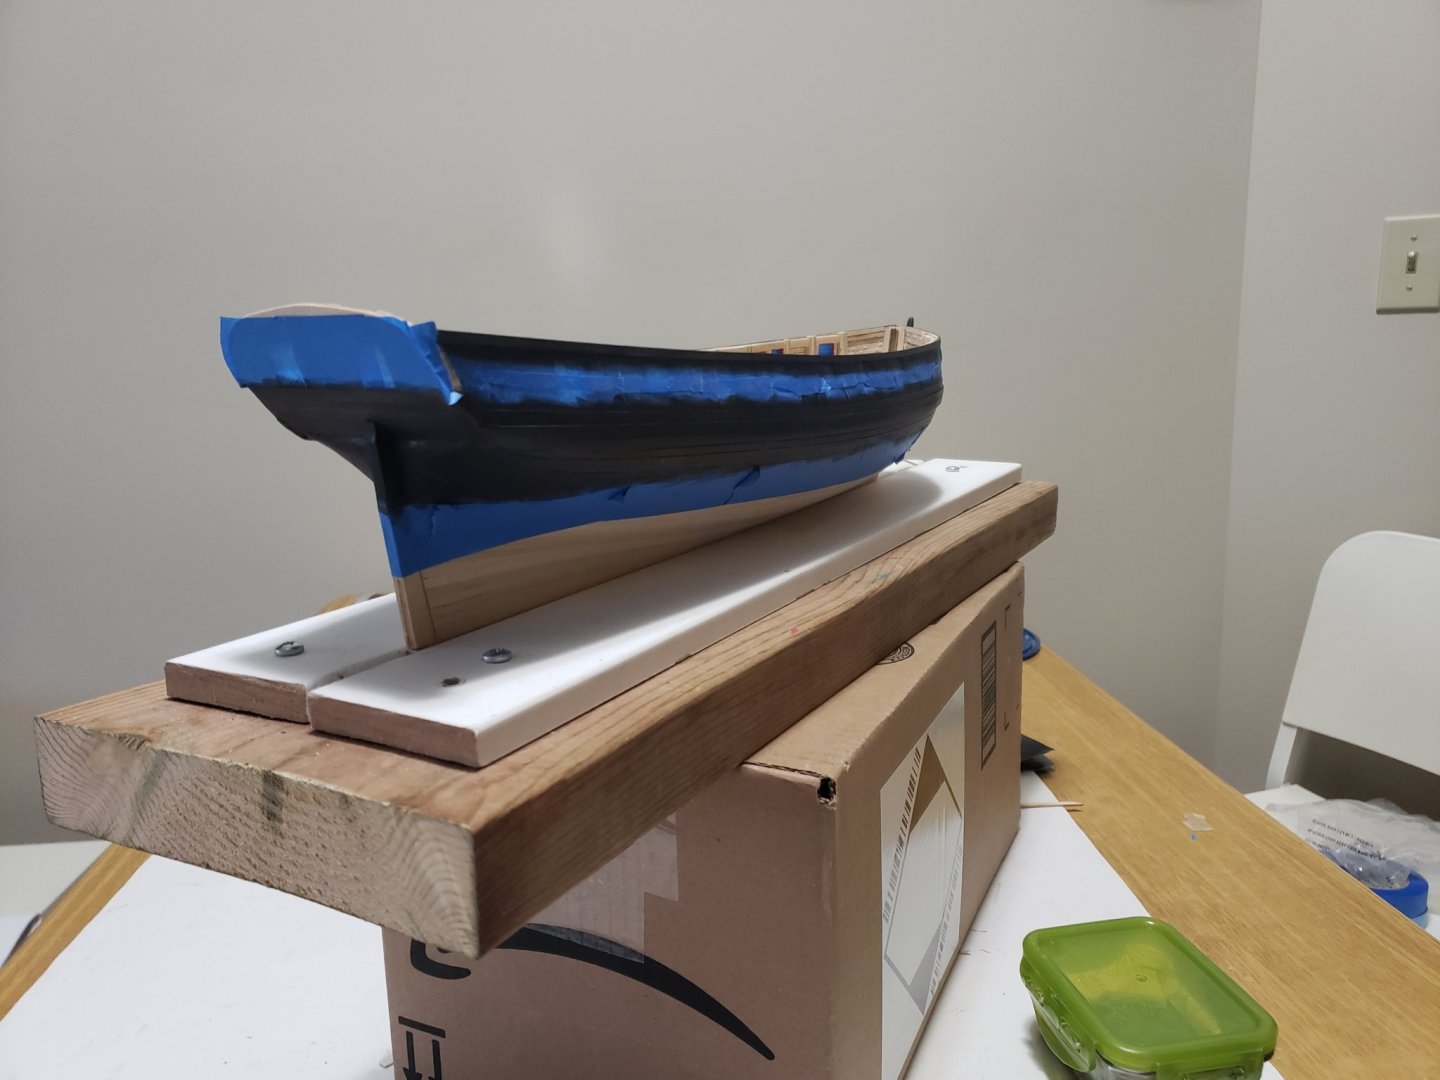
Very close to finishing Chapter 5. Almost finished painting (just need a few minor touchups). First a waterline was marked (making sure the hull was horizontal with a level). I used a pencil strapped to a mug. Notice how two pencils were tied together. This helped me fine tune the level in which the pencil can mark the hull by rotating it. Also, the bow was lifted ever so slightly using some wooded shims. Painters tape was then applied. For the waterline I cut a thin long strip of painters tape to extend throughout the entire side of the hull. Larger pieces were then applied below this thin strip. The hull was then painted above the waterline. For the application, I followed these steps pointed out by MSW user Alistair. For the paint I used ModelExpo's acrylic paints. I first started by diluting with water for the first coat, enough that the bare wood can be seen after the application. The paint was almost as runny as water at this stage. Two more coats of the same consistency paint were applied after waiting for the previous coat to dry. In between these two coats I lightly sanded the paint with 600 grit sandpaper (1200 was not available in my local hardware store). The next coats of paint were slightly thicker, but were still thinned with water to avoid any brush marks. This time, instead of sanding with 600 sandpaper, I polished the paint with some cotton cloths. Next was the most nerve-wrecking part, removing the tape, hoping crisp lines are the outcome. I was pleasantly surprised on how it turned out for my first attempt ever at painting a hull. As can be seen, there are a few spots in which the paint seeped through the painters tape, and some areas where the brush was not able to reach. These should be easy to sort out. Once I finish sanding/removing the seeped paint, and paint some other small areas with a toothpick where the brush was not able to reach, I will reapply one more coat of tung oil onto the planks between the upper wale and sheer strake, and can move onward to chapter 6.


- 950 replies
-
- 14
-
-
- syren
- model shipways
- (and 1 more)
-
Hi Bob, many thanks for the advice. I unfortunately have already started to apply coats of paint on the model. I'll definitely try to use shellac on my next model. In fact, my next model (Pickle by Caldercraft) will be sort of an experiment model where I am going to try different things. For example, I'll try making a pedestal stand, bending planks using an iron (ie. Chuck's method), and of course, applying shellac before painting the model. Thanks again for taking your time to assist me on this, it is much appreciated!
-
Thanks so much Paul and Jaager. I'm using the kit's basswood which isn't an open pore wood species. Therefore I'll be skipping the shellac and instead will paint directly on it with thinned acrylic paint. As for the copper plating, they have an adhesive back so I'm thinking of skipping applying sealer to the hull. Thanks again for the tips and advice!
-
I'm relatively new to wooden ship modelling and had a few questions on sealing the hull before proceeding to paint and copper plating my US Syren build: 1) is shellac a good sealer before both copper plating and painting the hull? 2) how does shellac compare to primer? Is it ok to skip sealing the hull and paint on bare wood instead? 3) after painting, is tung oil a good finish to go over the last coat of paint? Would I need to do this step if I seal the wood before painting? 4) can i use tung oil to seal the wood before copper plating? 5) why would one need to seal the hull prior to copper plating? Apologies if these questions seem too trivial. I haven't painted or copper plated wooden models before so wanted to get some clarification before attempting.
-
Thanks Robin! Much appreciated!
-
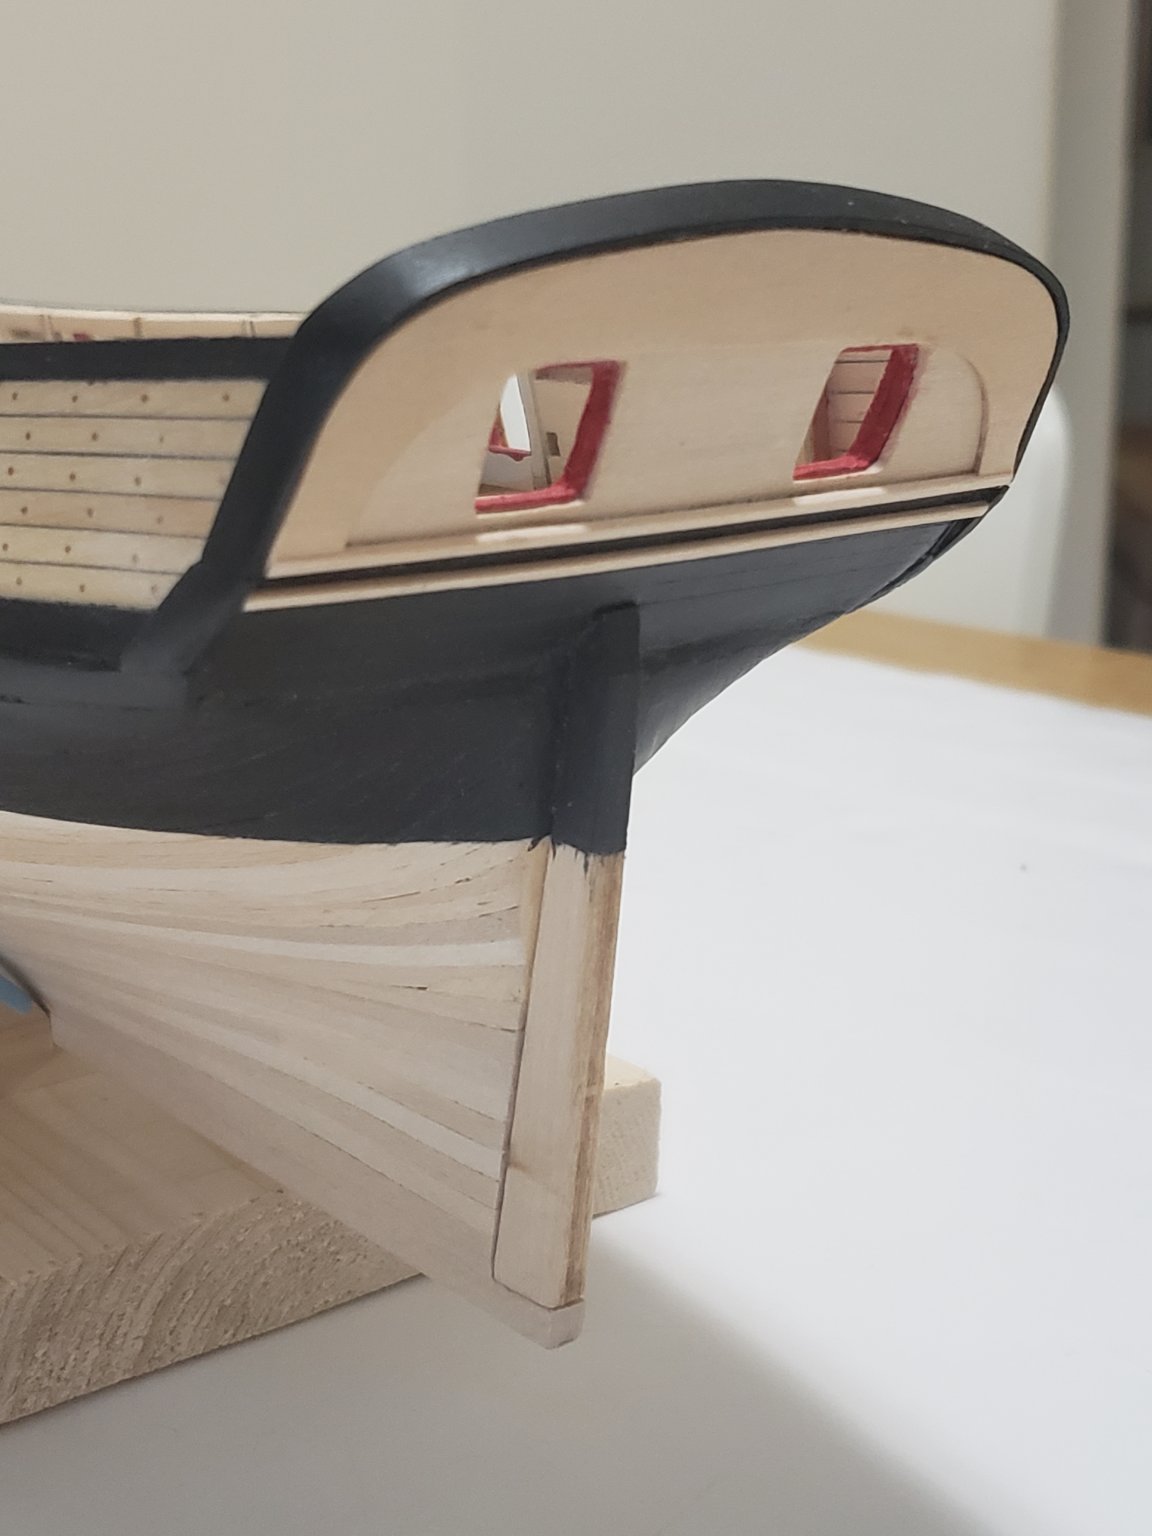
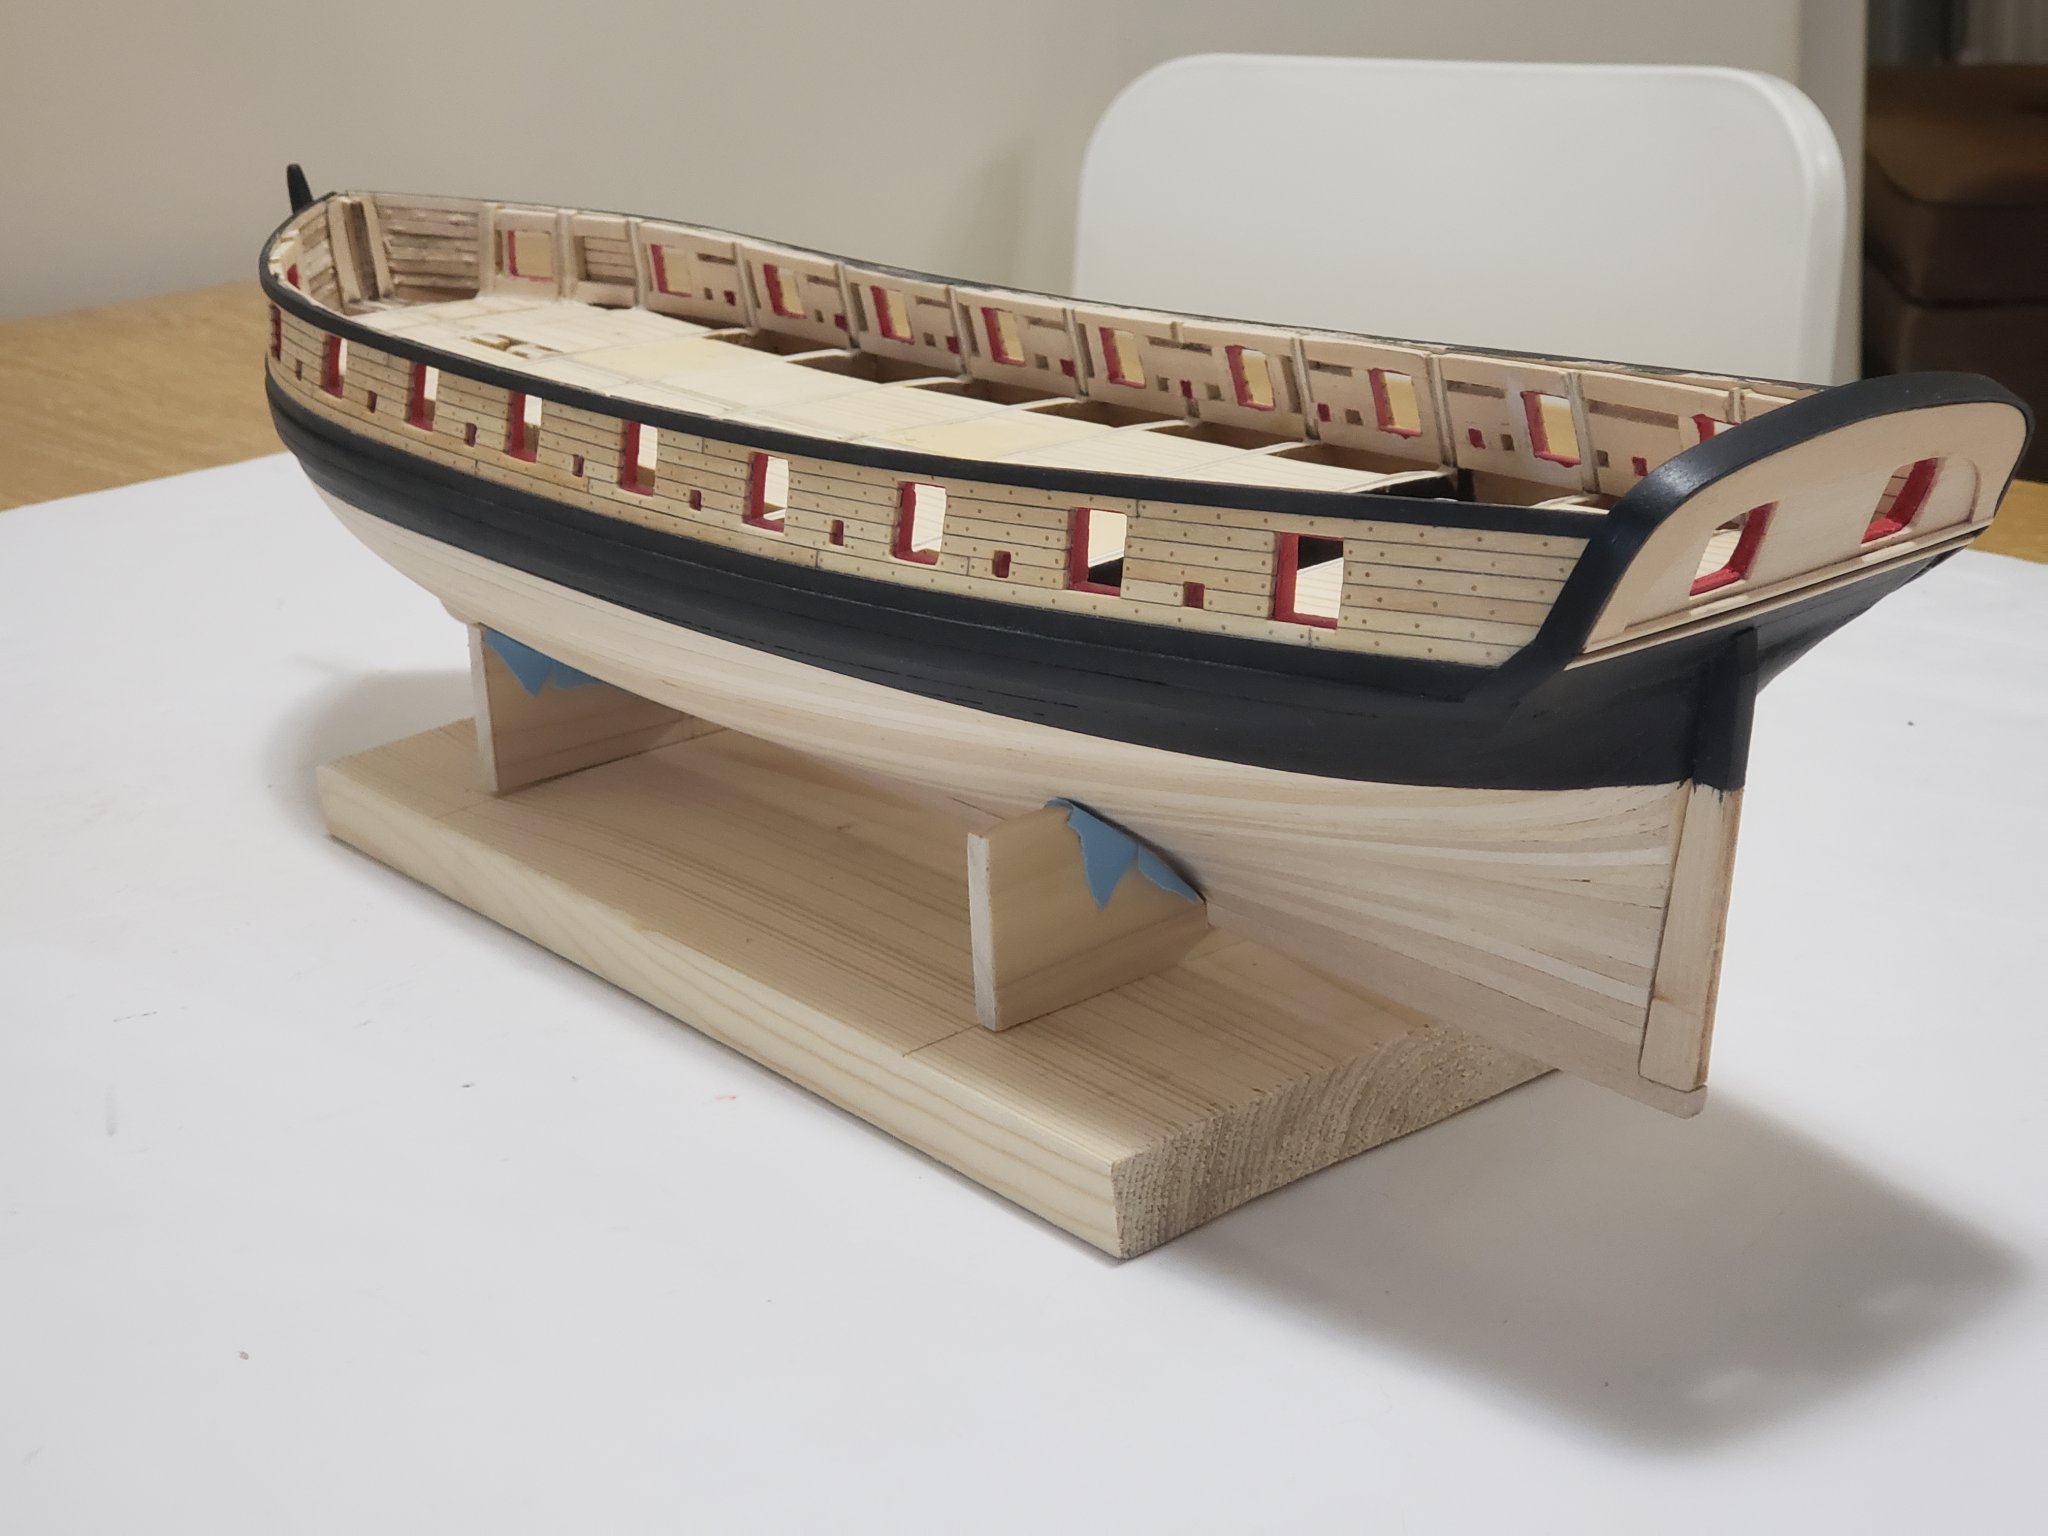
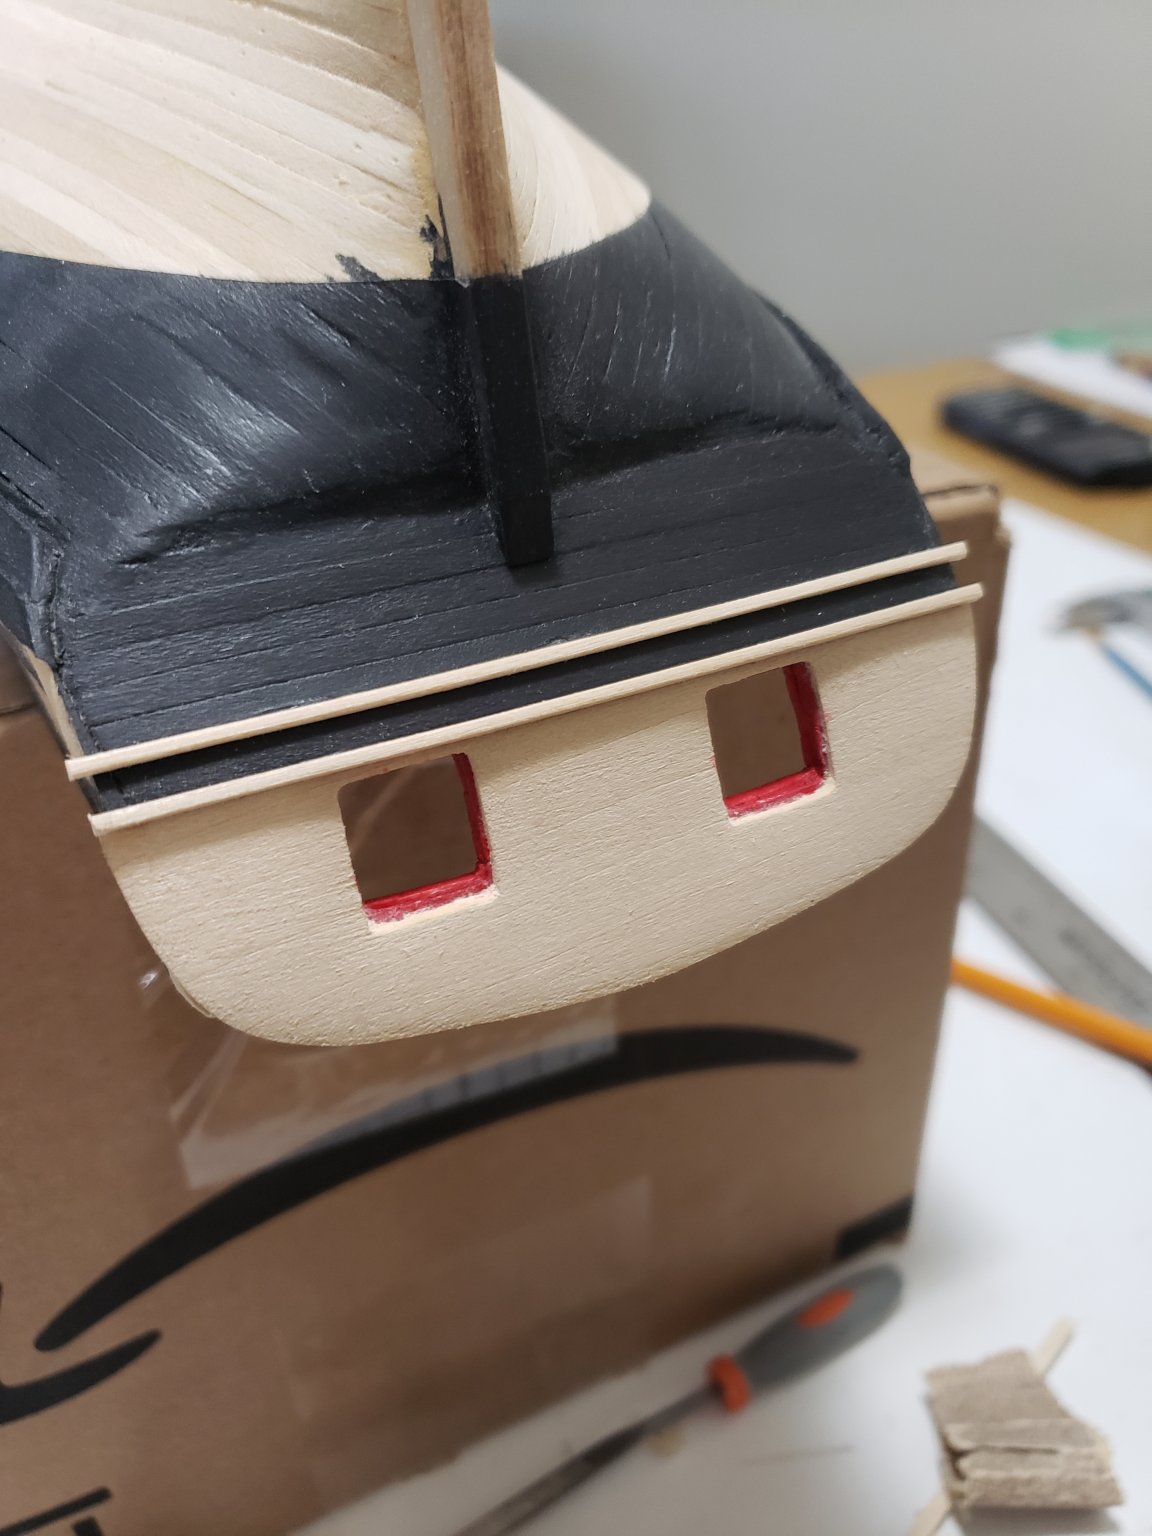
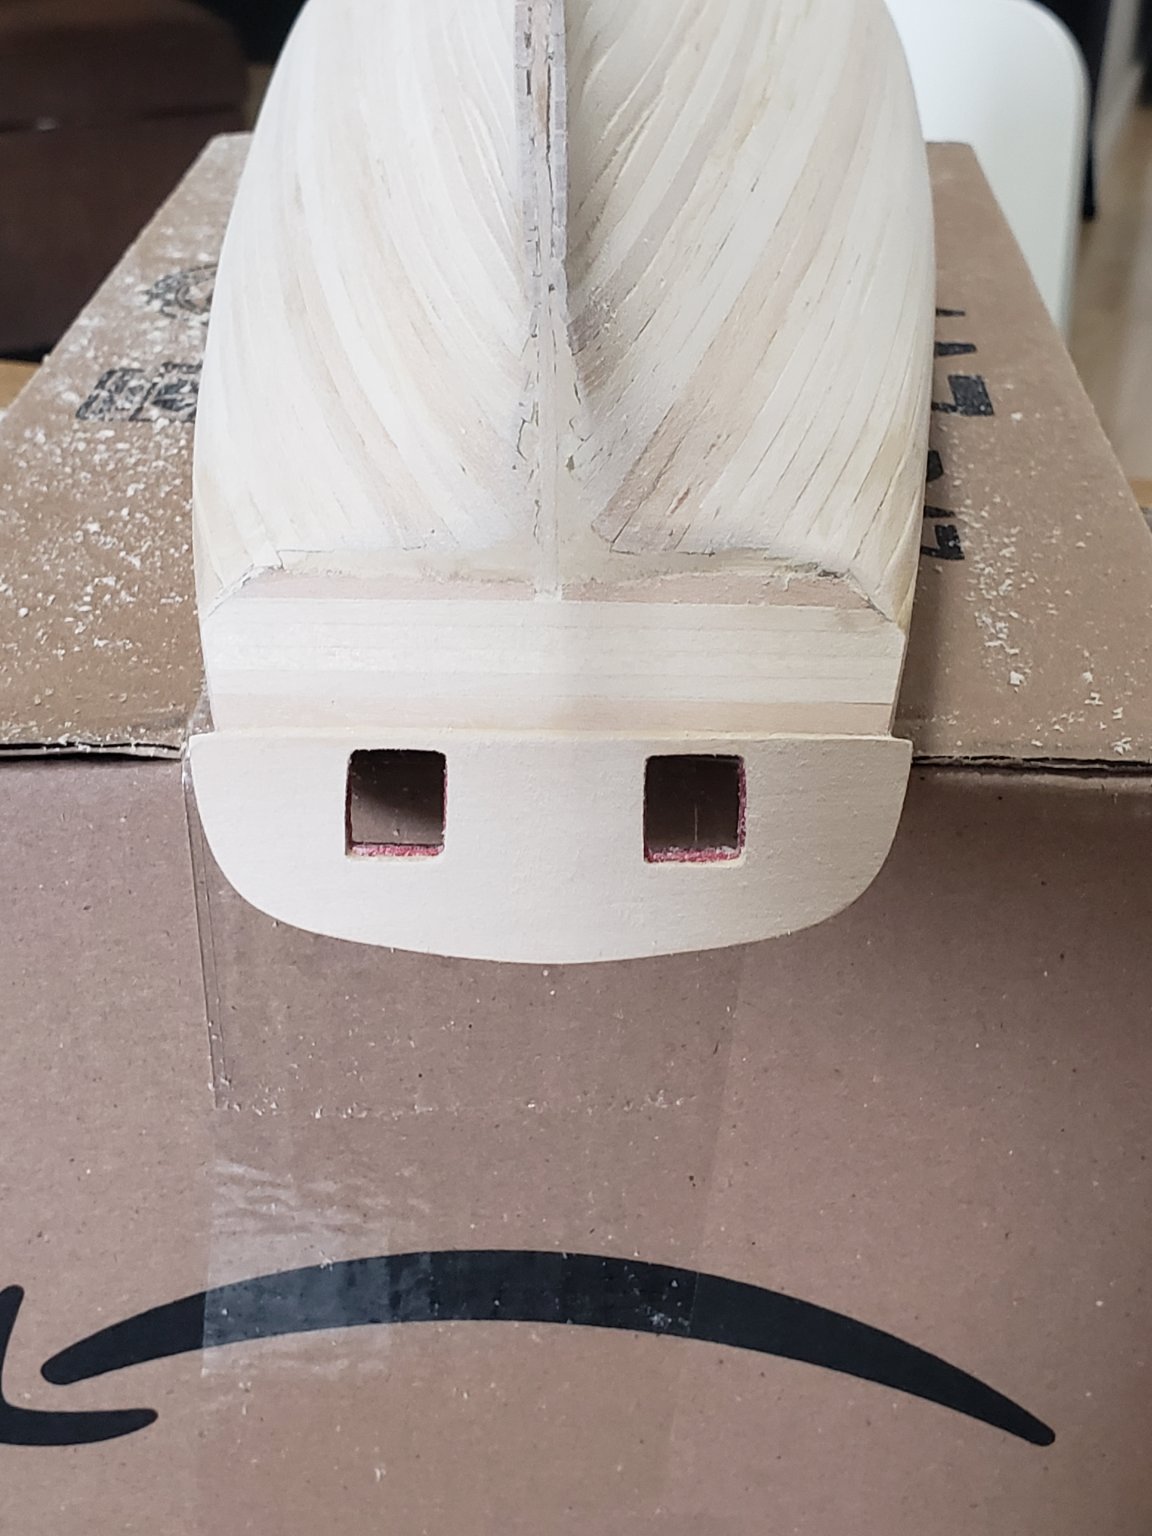
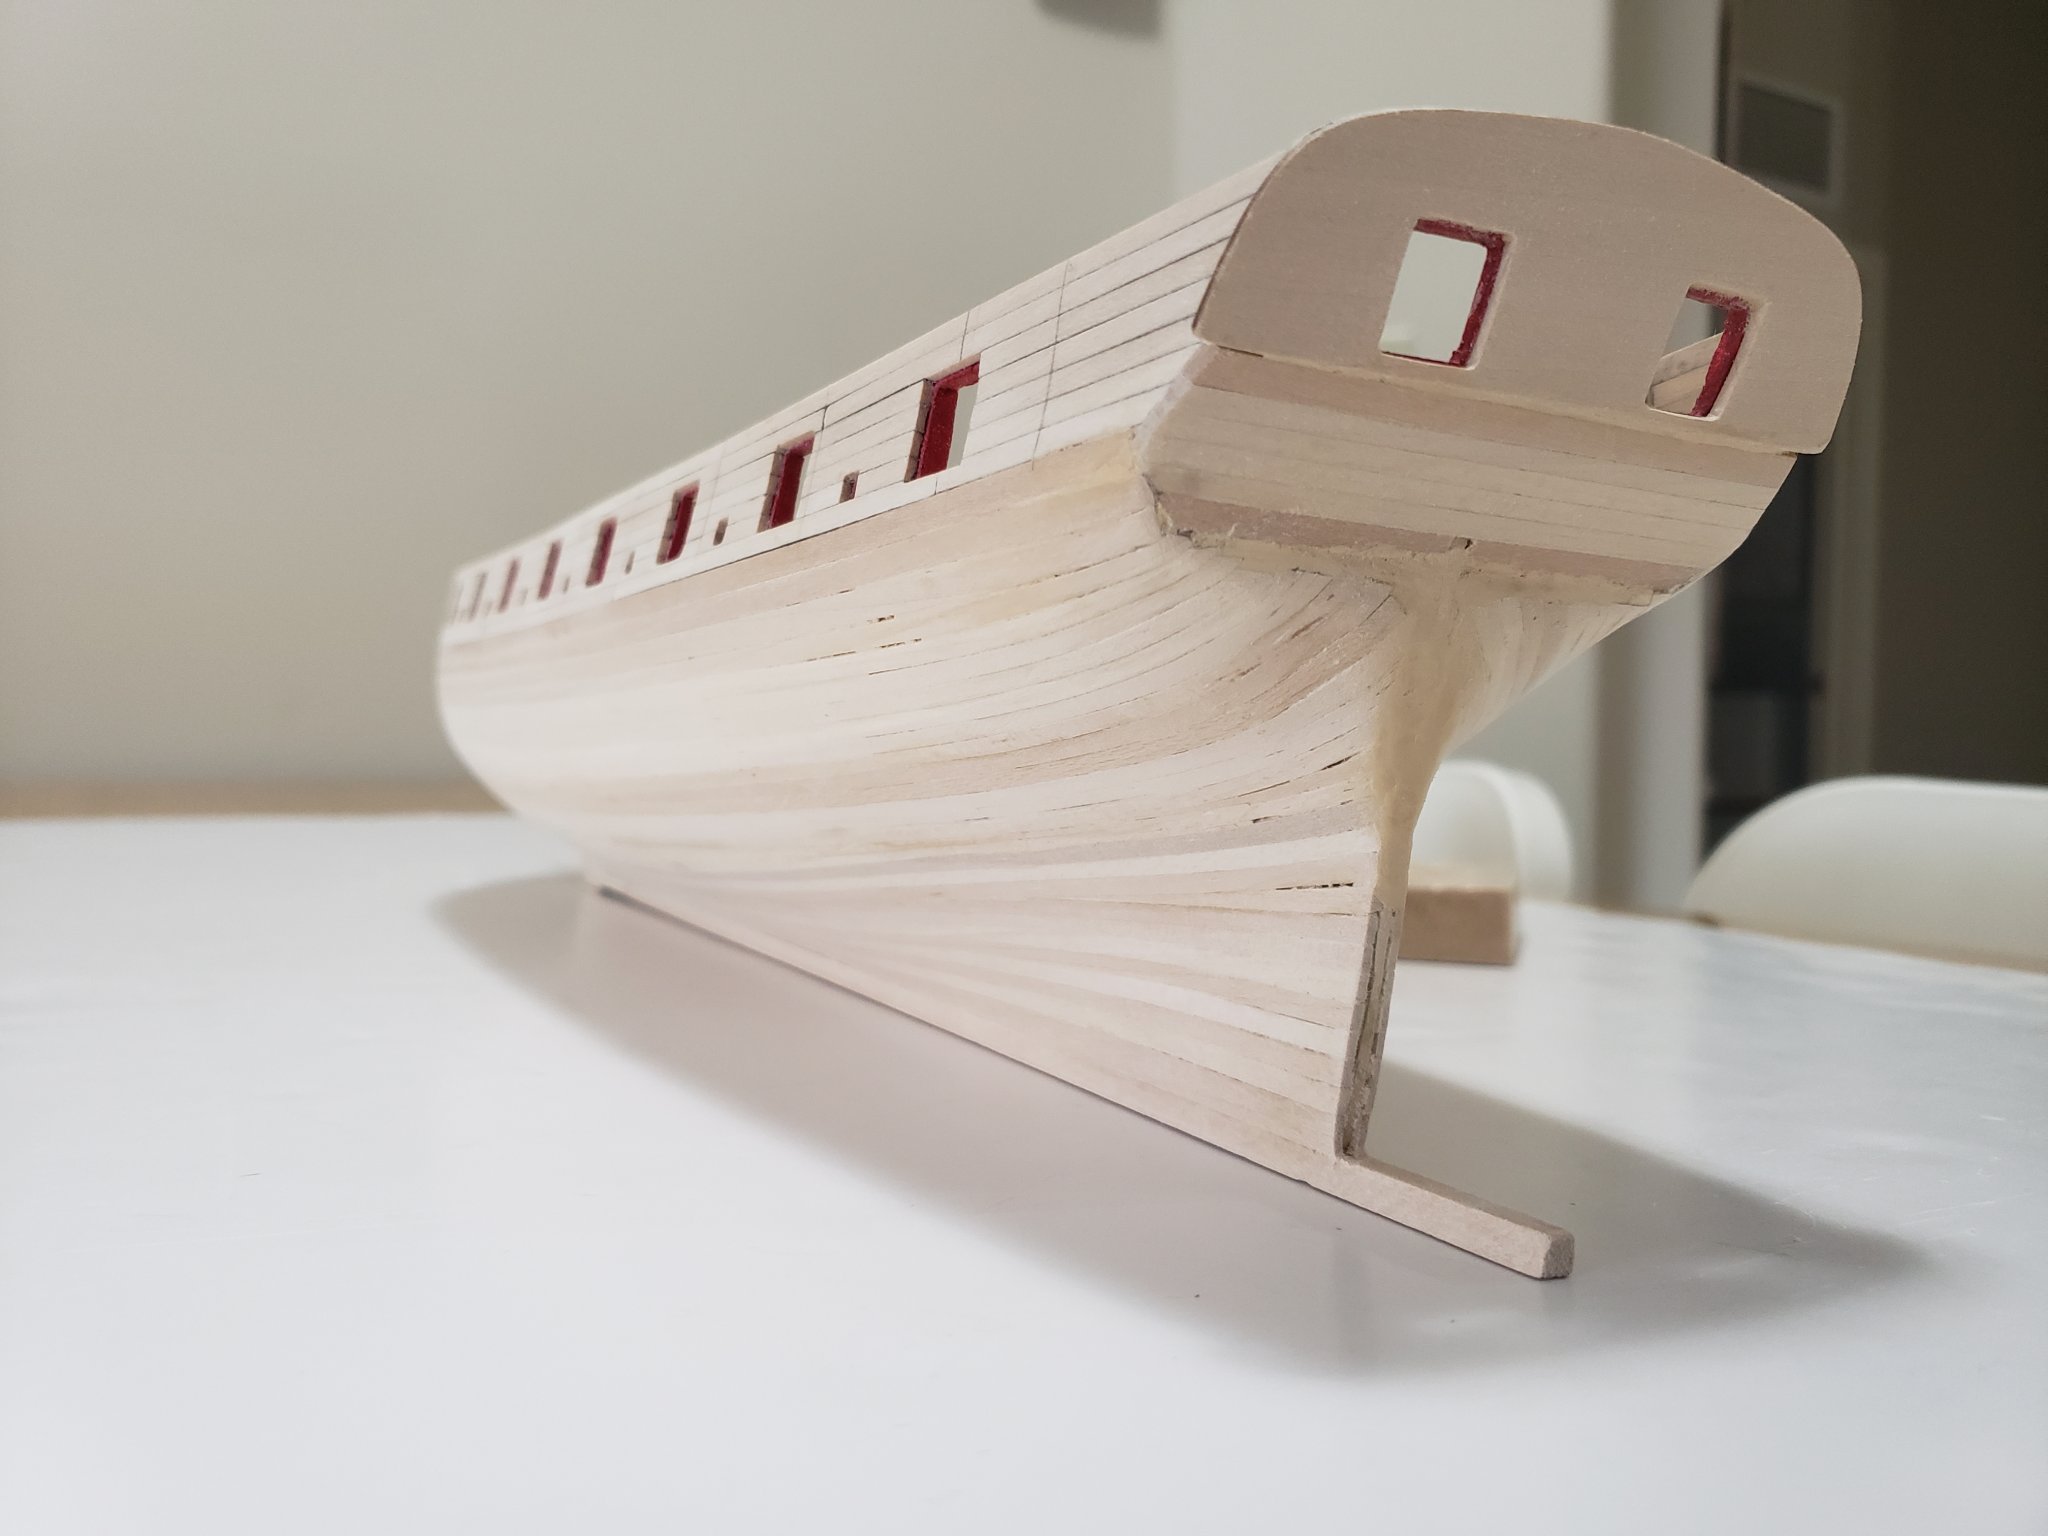
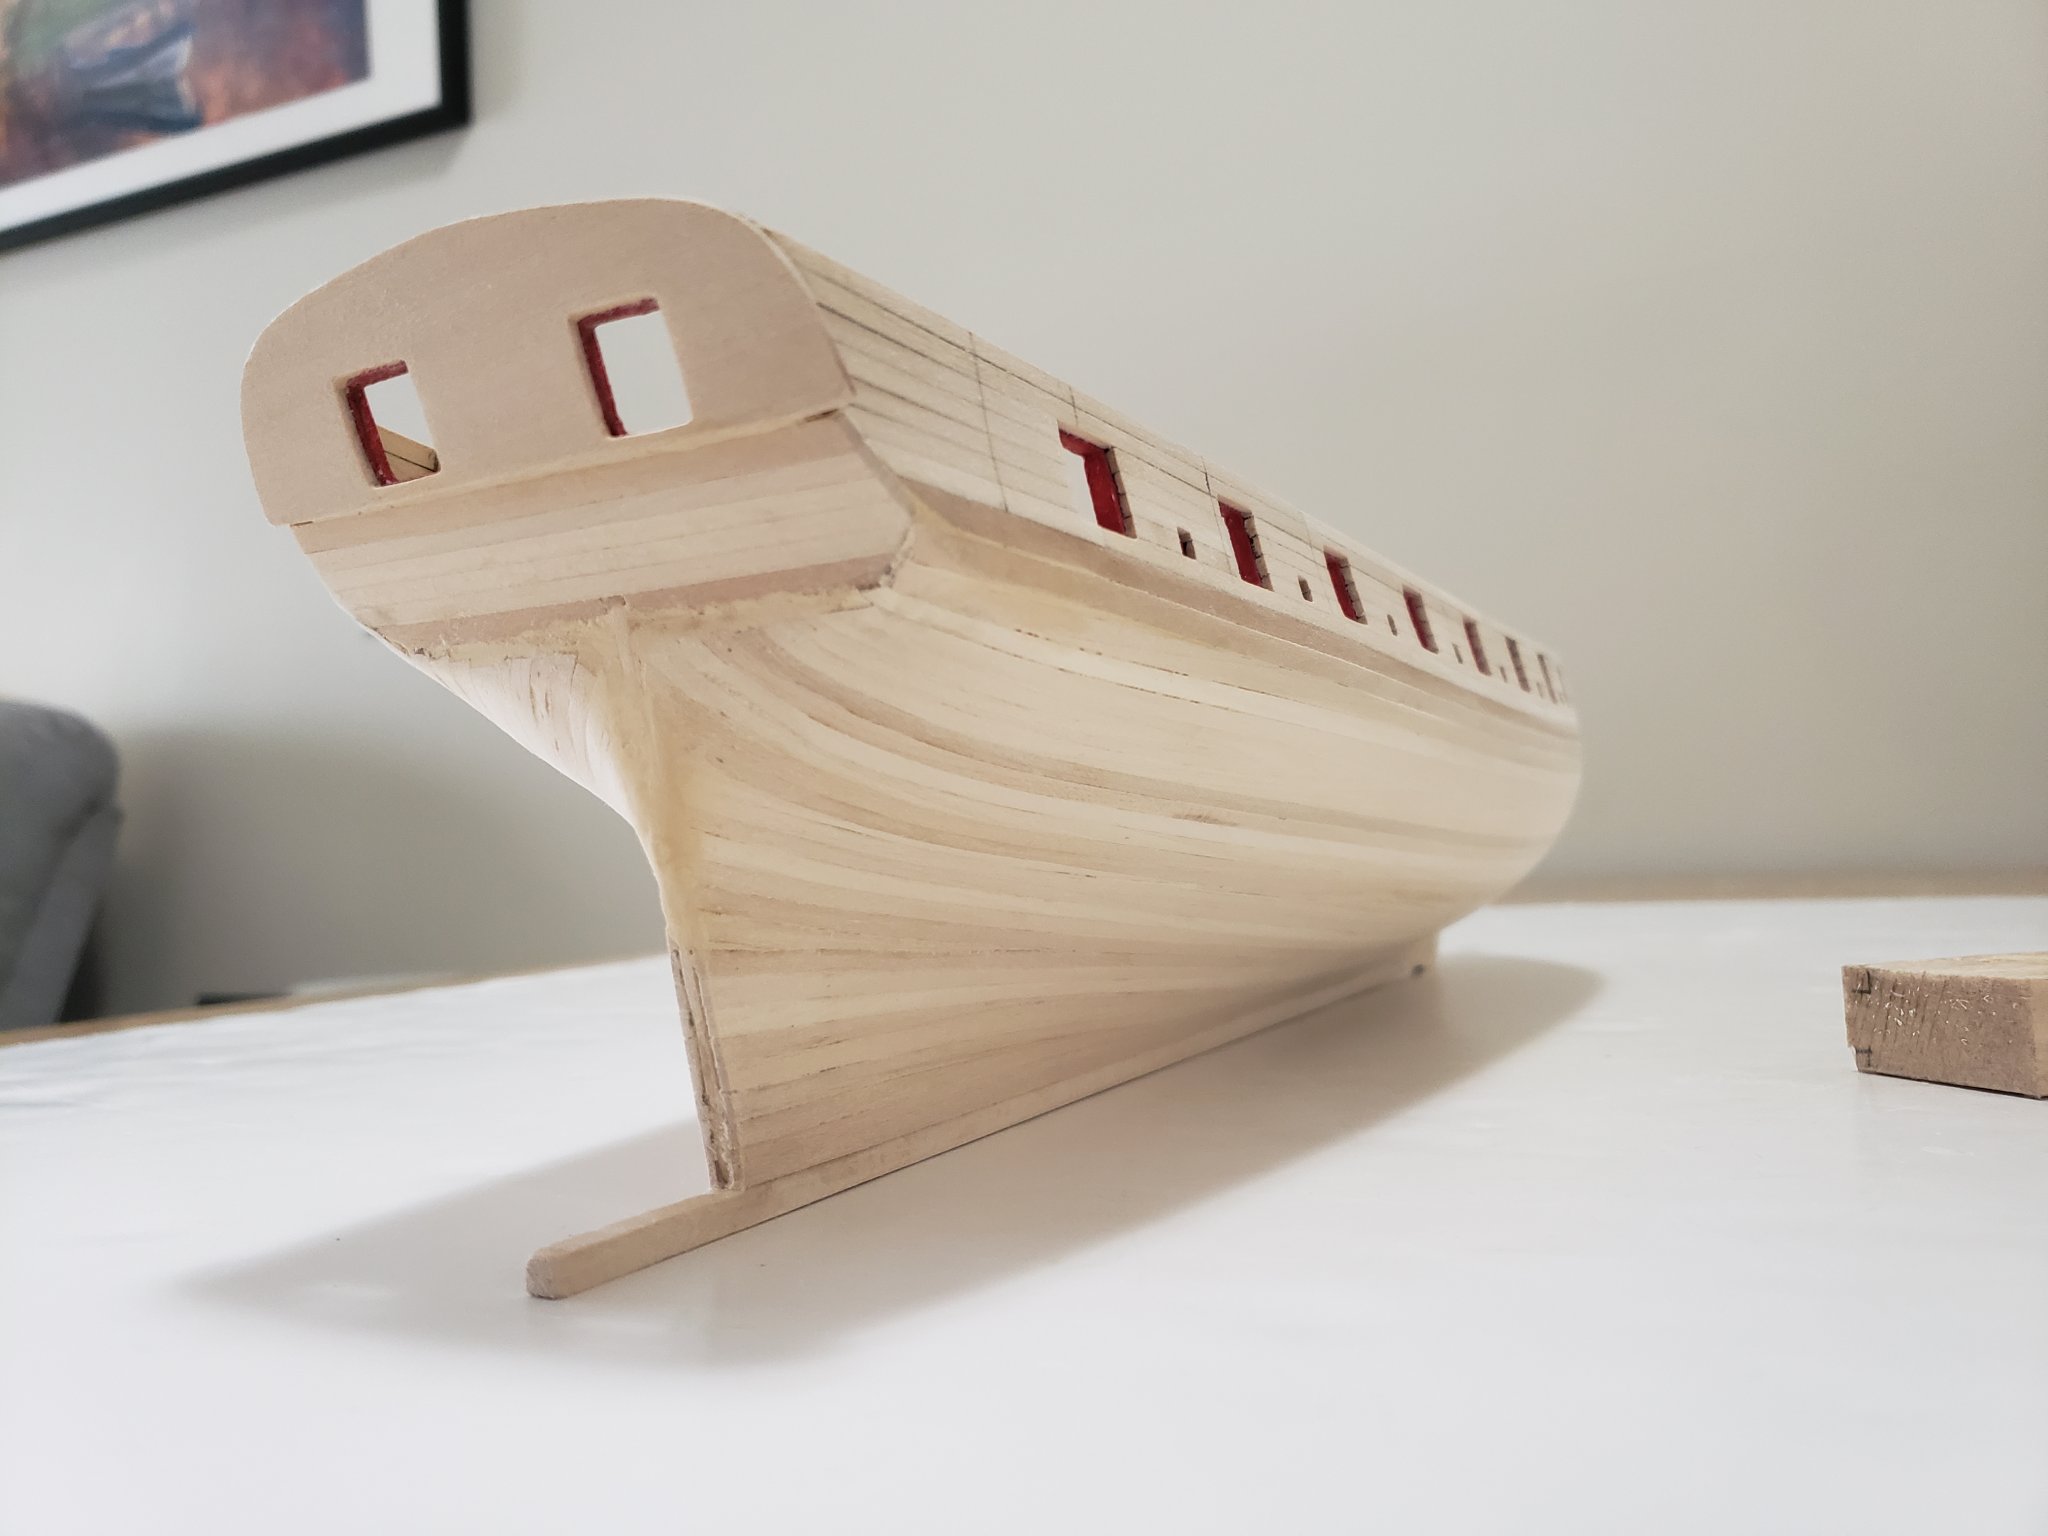
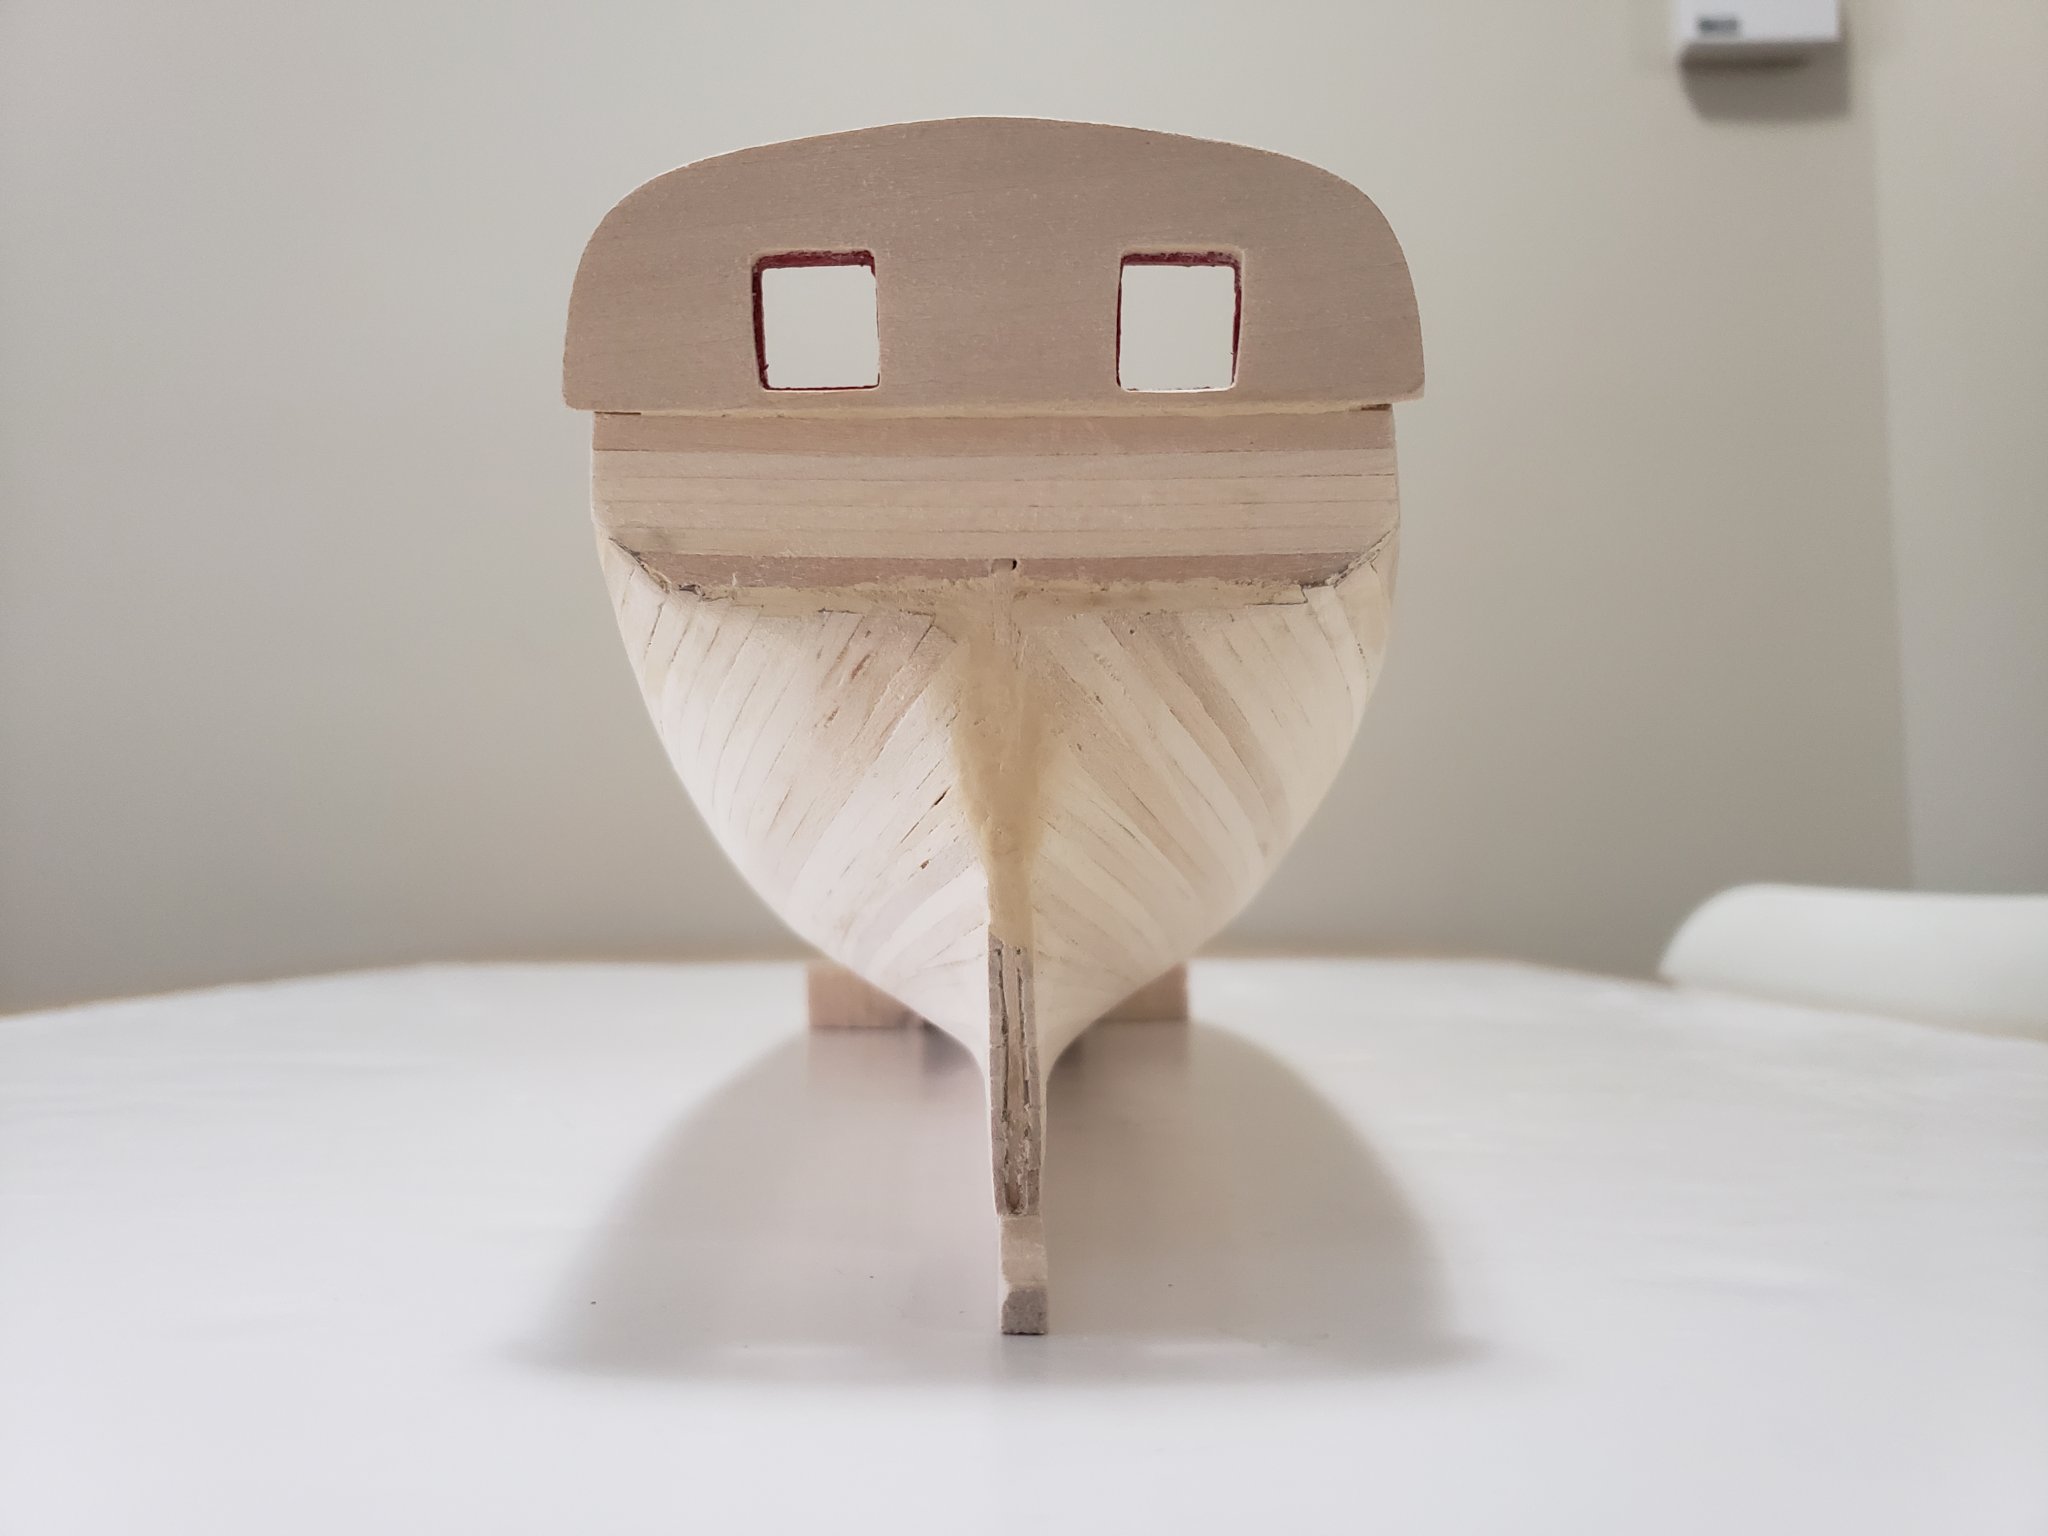
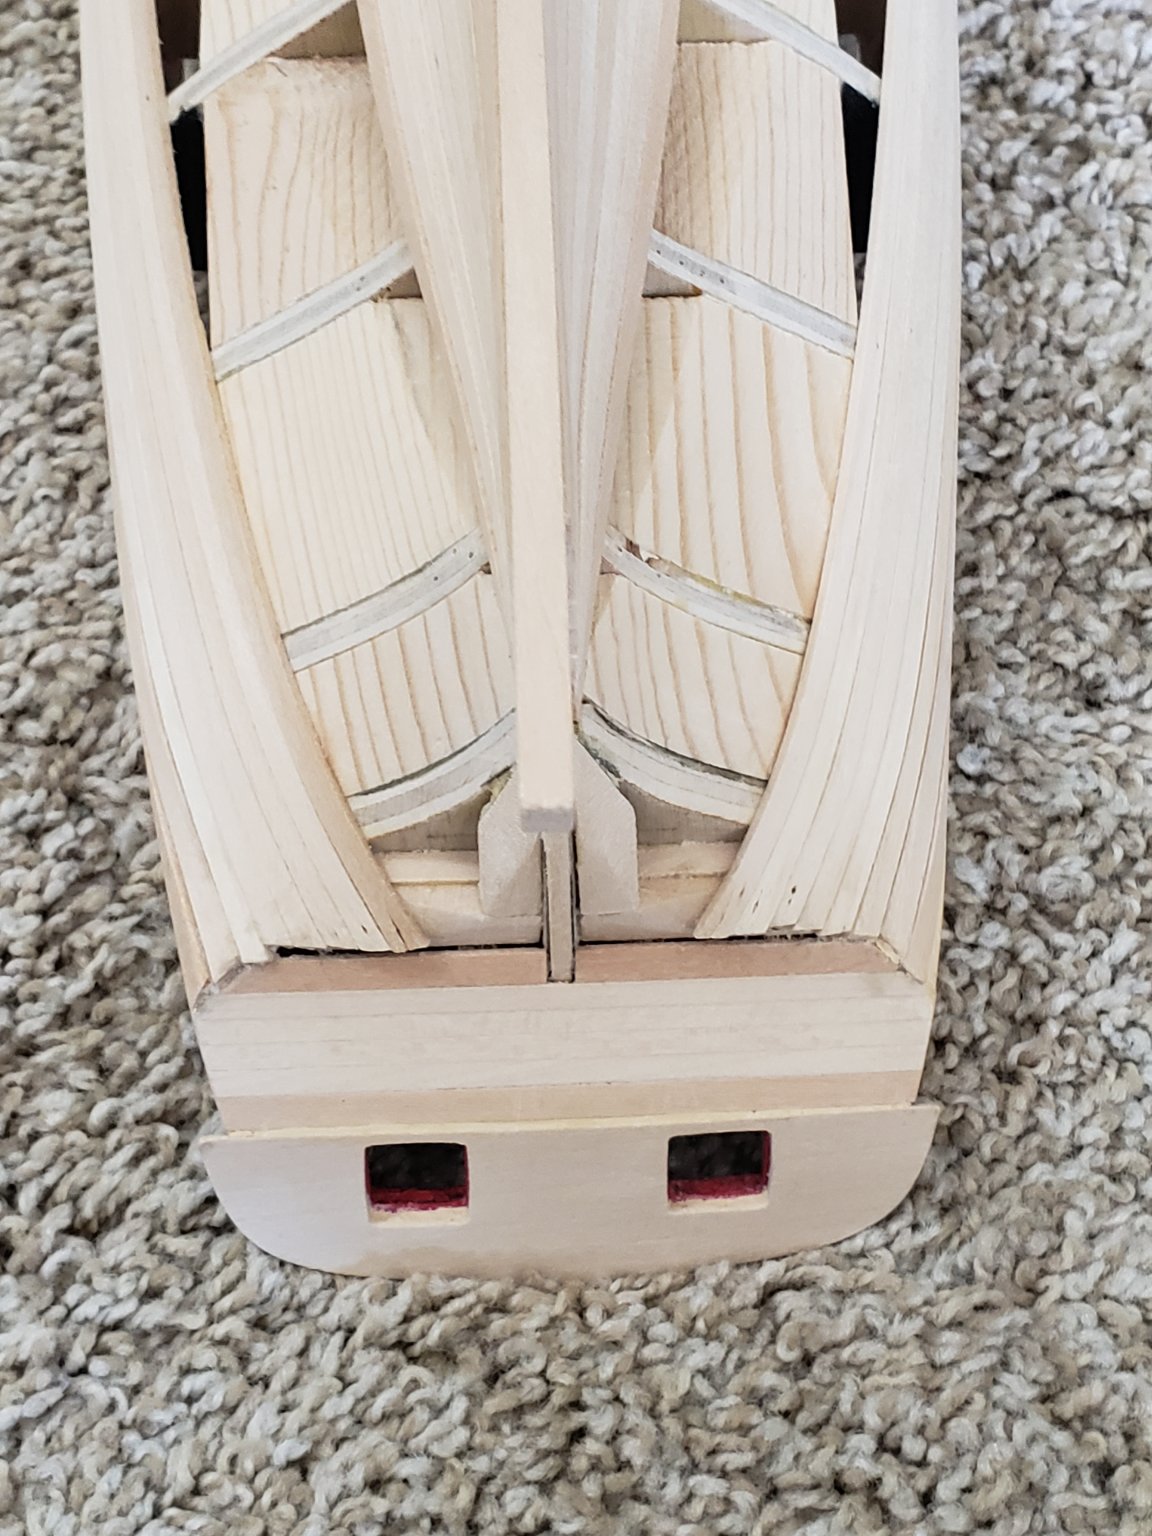
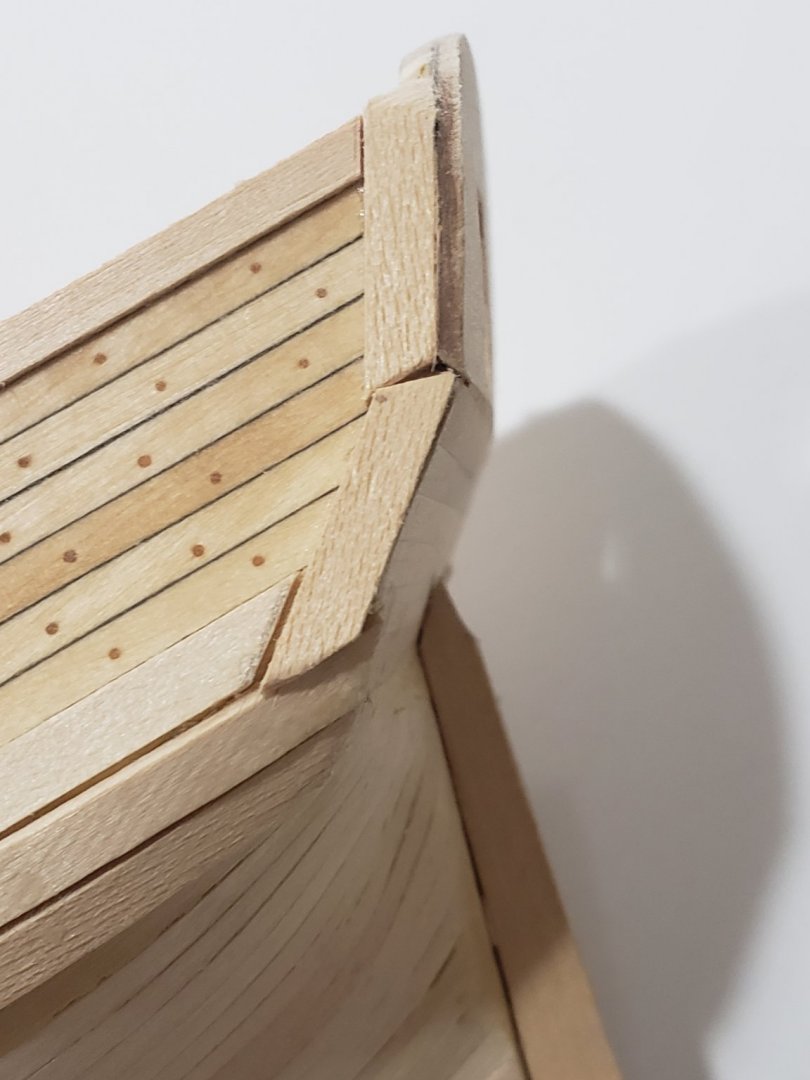
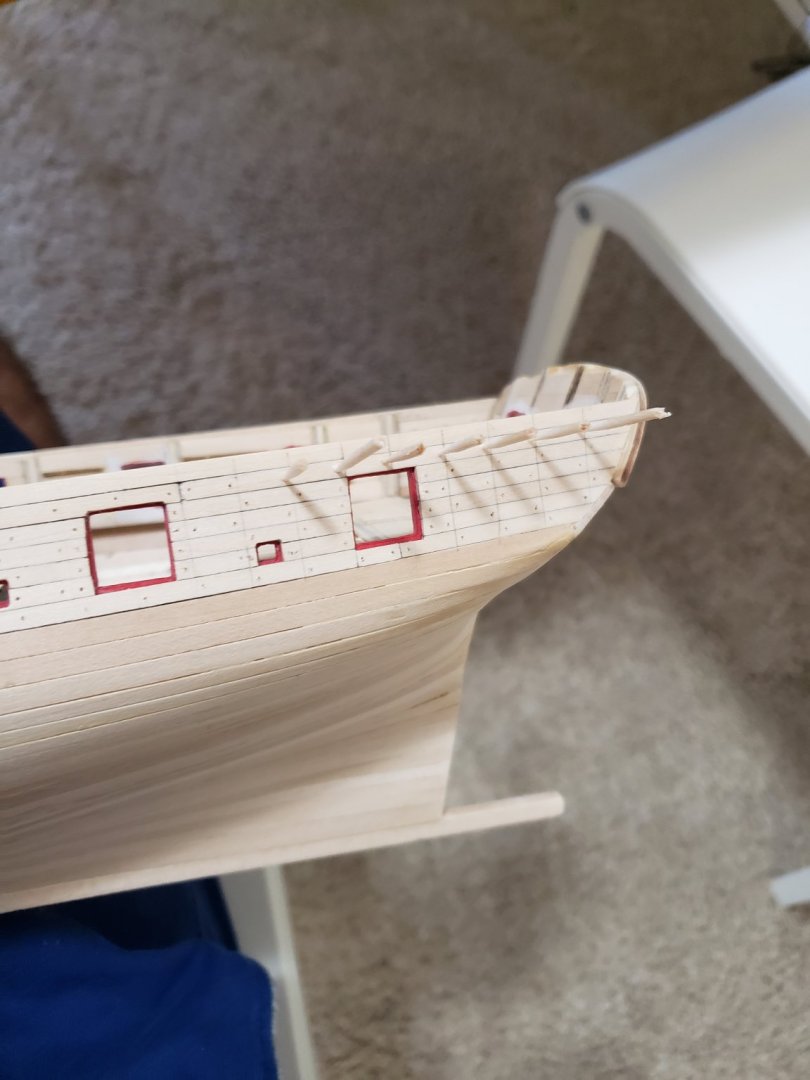
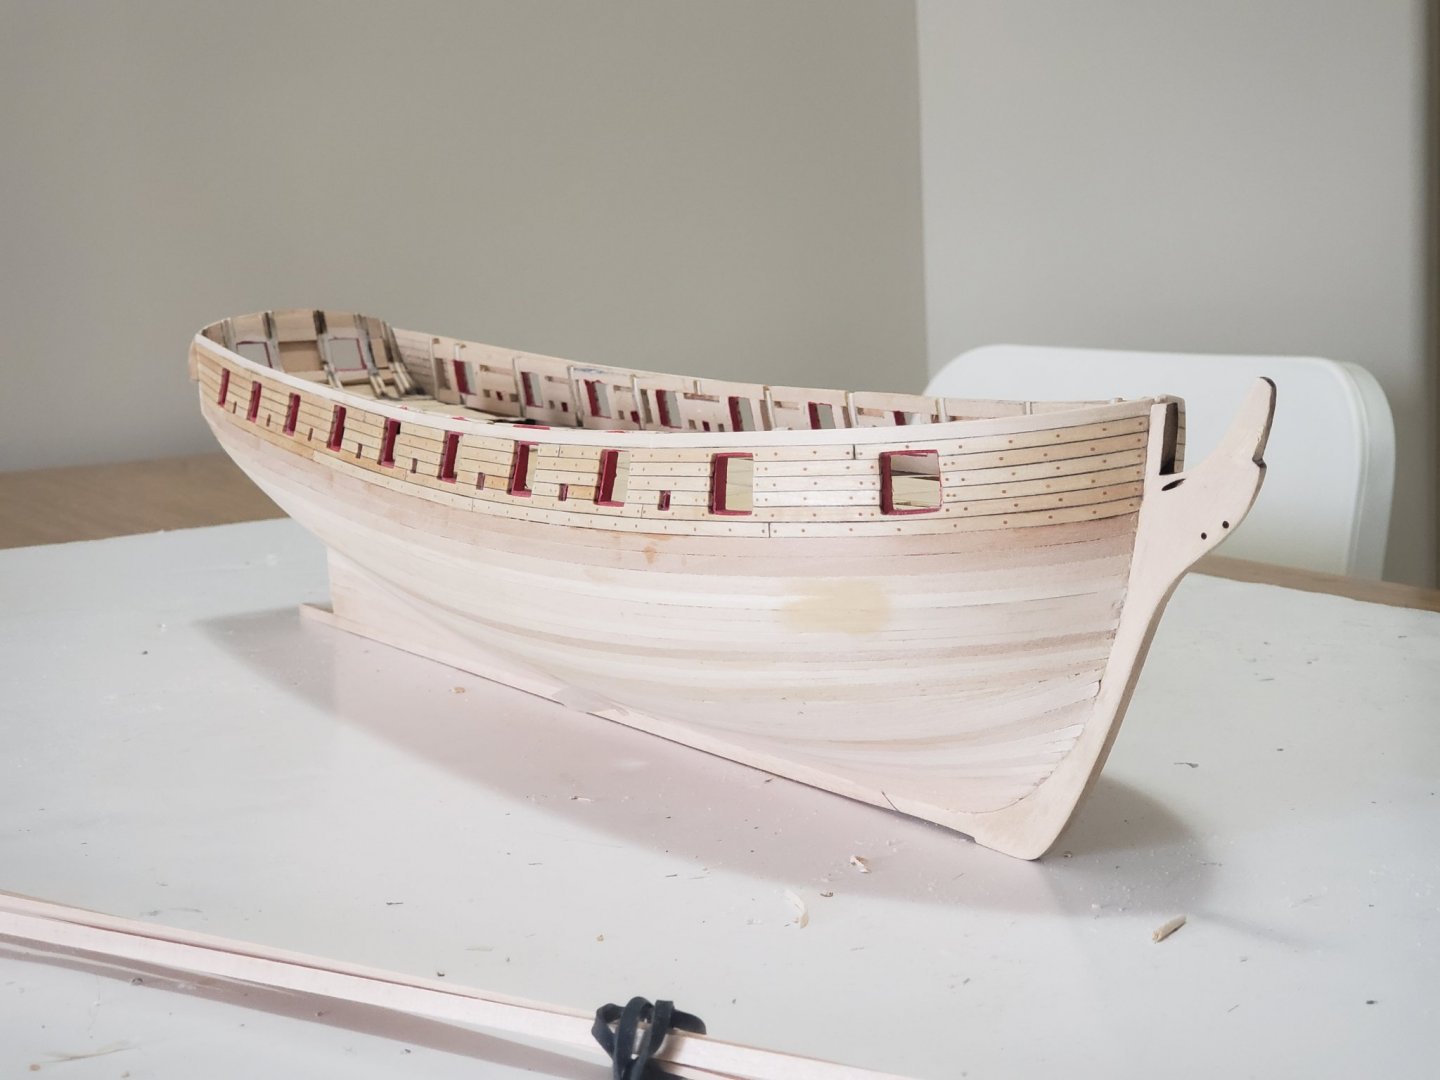
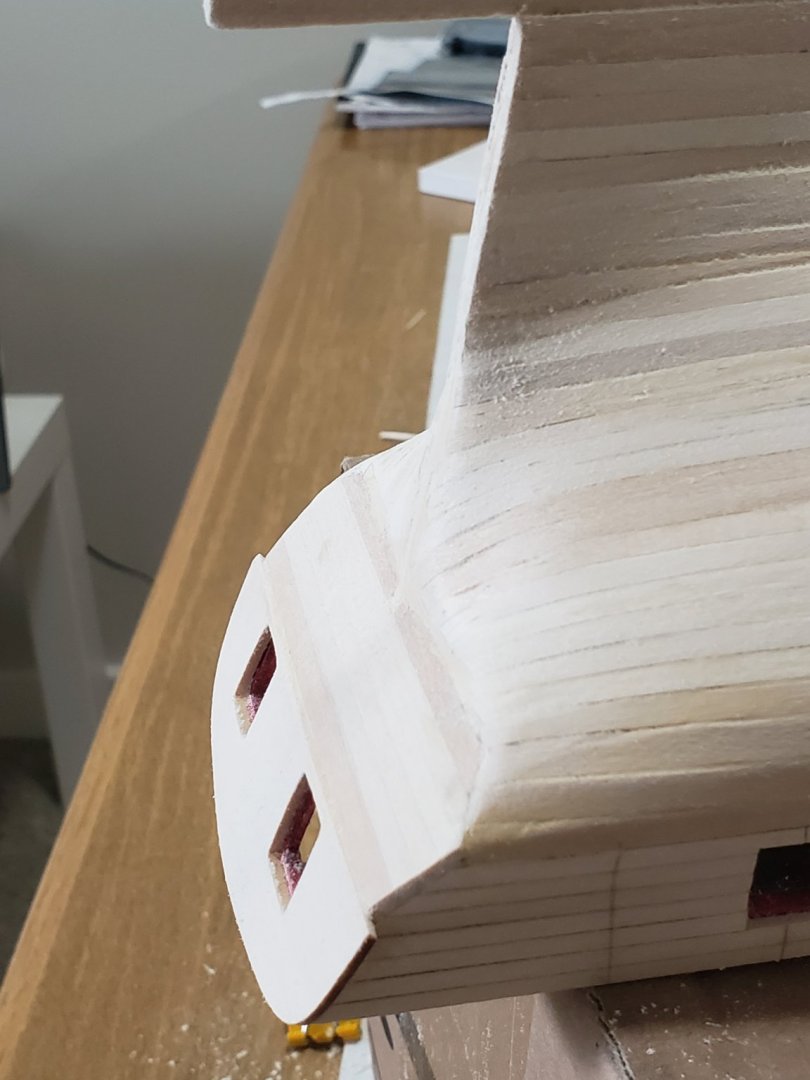
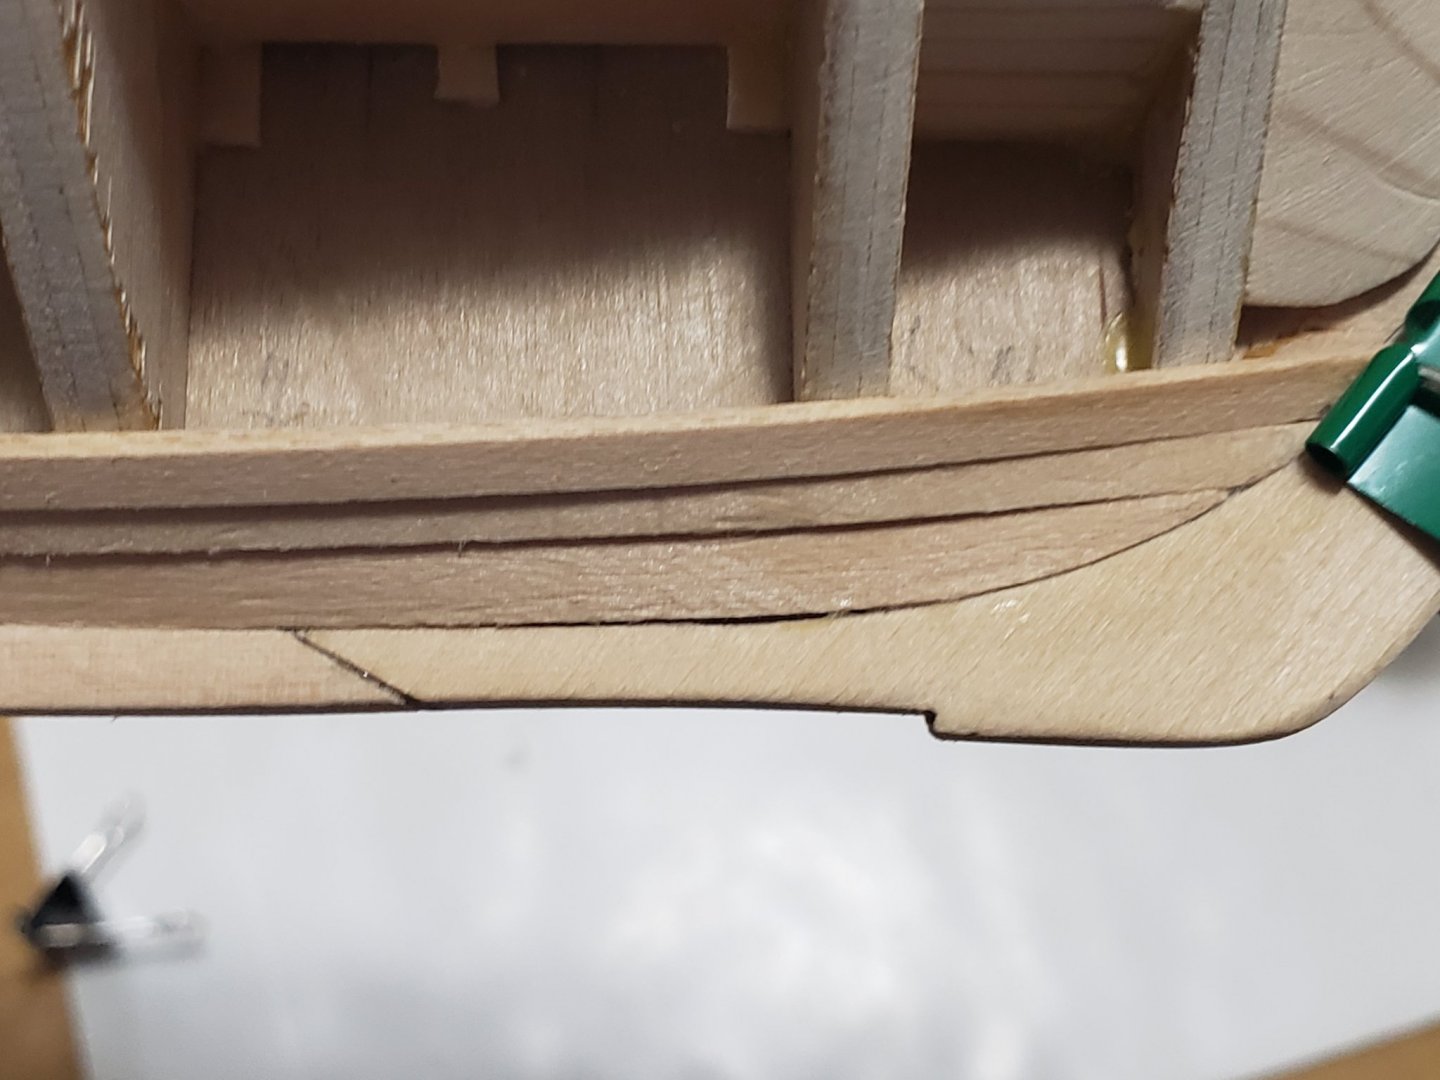
The sheer strake, wales and stern post are now installed. I deferred a bit from the instructions in two ways: - after installing the wales and sheer strake I skipped ahead to glue in the pieces at the stern. I did not want to notch out the wales and sheer strake once they were painted as there is a possibility of some mishap. - I glued in one fashion piece instead of two as the instructions suggested since the counter of my model was not curved and was straight instead. Here is a photo of what I mean: Also from the above photo there are some slight gaps between the wales at the stern. I am still deciding on whether to put in filler in this space or not. Once I make my decision I will get back to finishing Chapter 5 by painting the model. Very nervous about this since I can be clumsy at times 😅
- 950 replies
-
- 11
-
-
- syren
- model shipways
- (and 1 more)
-
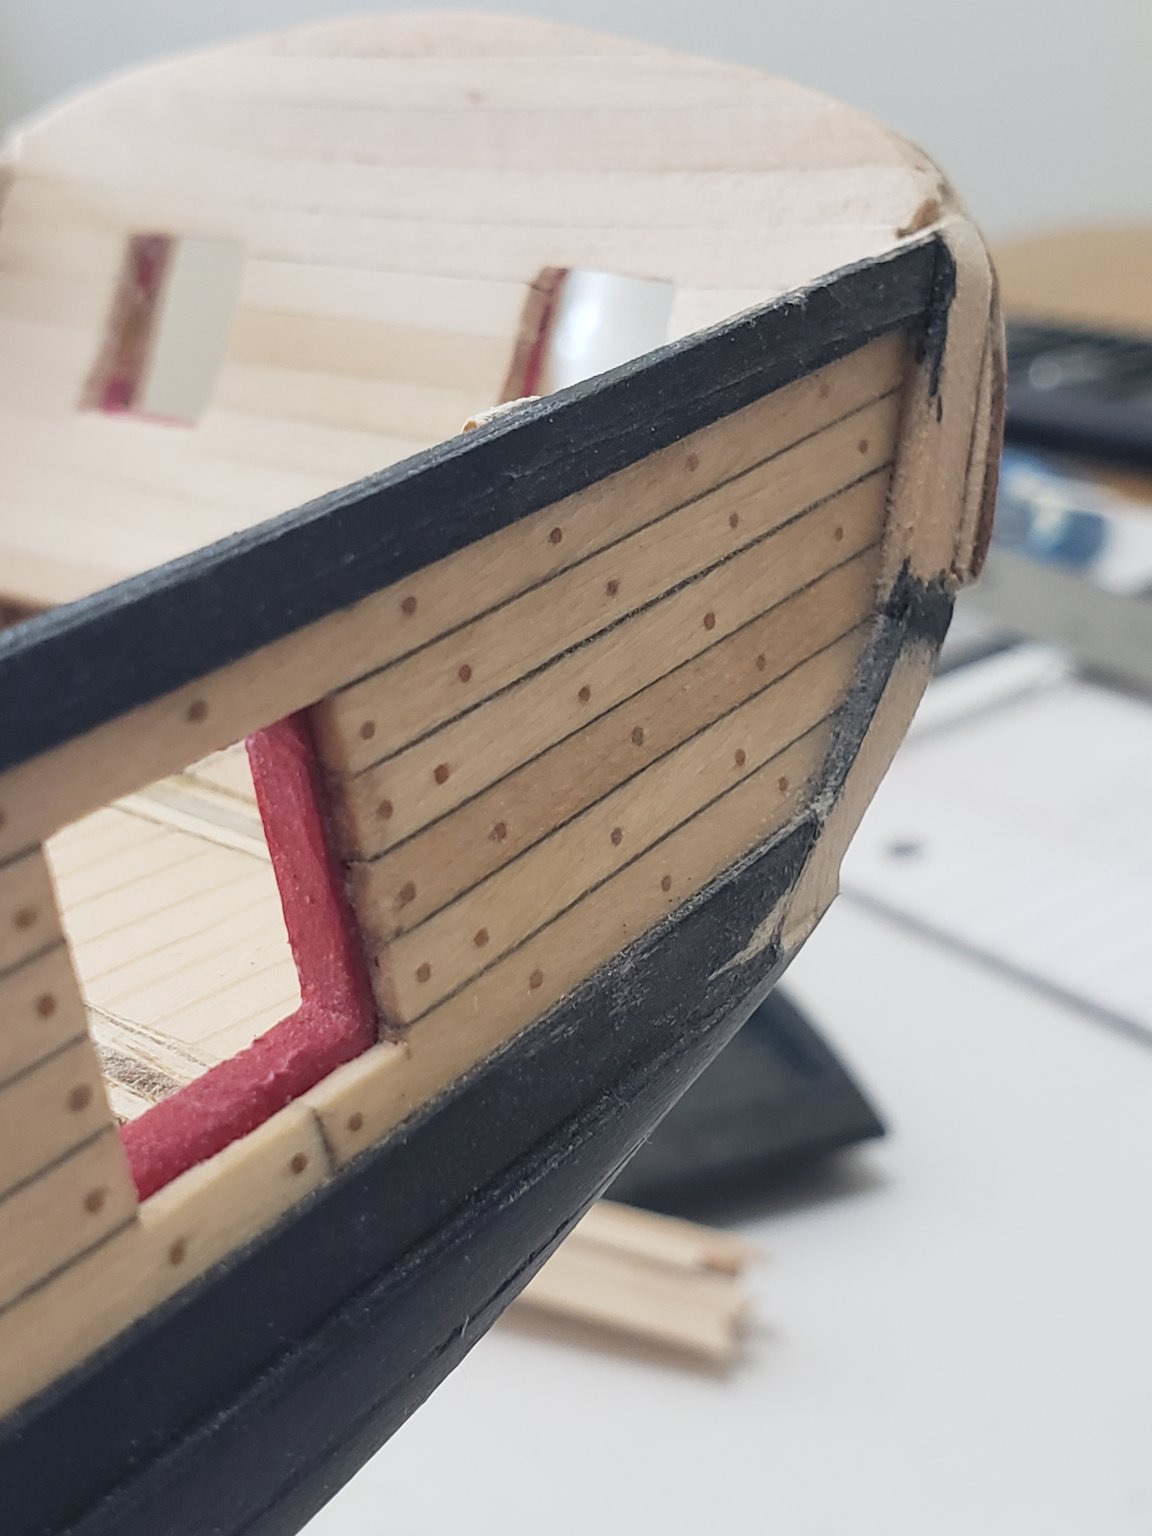
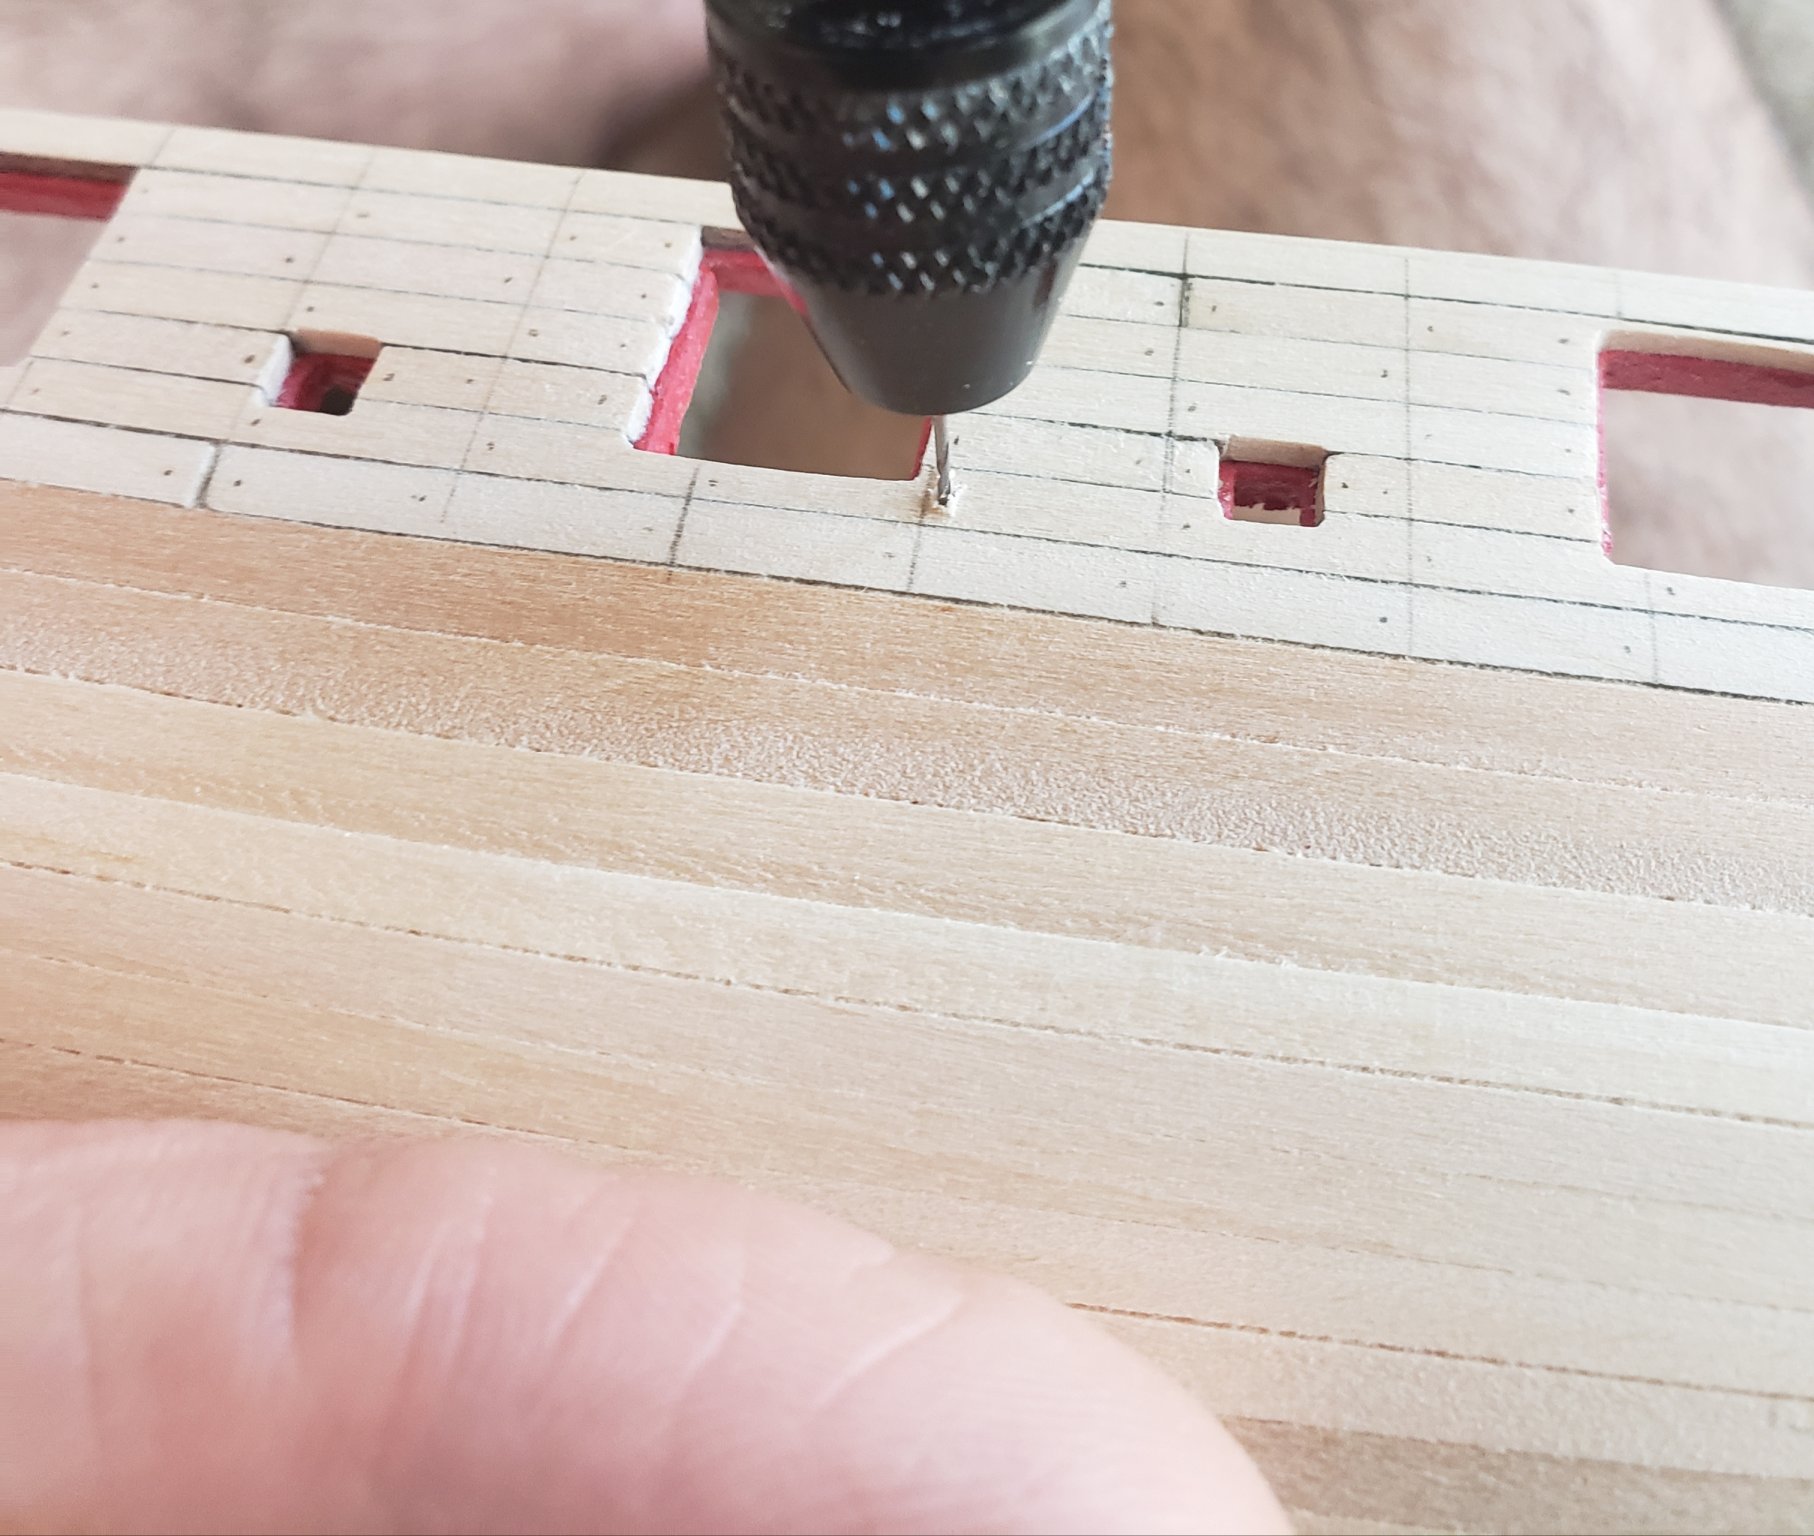
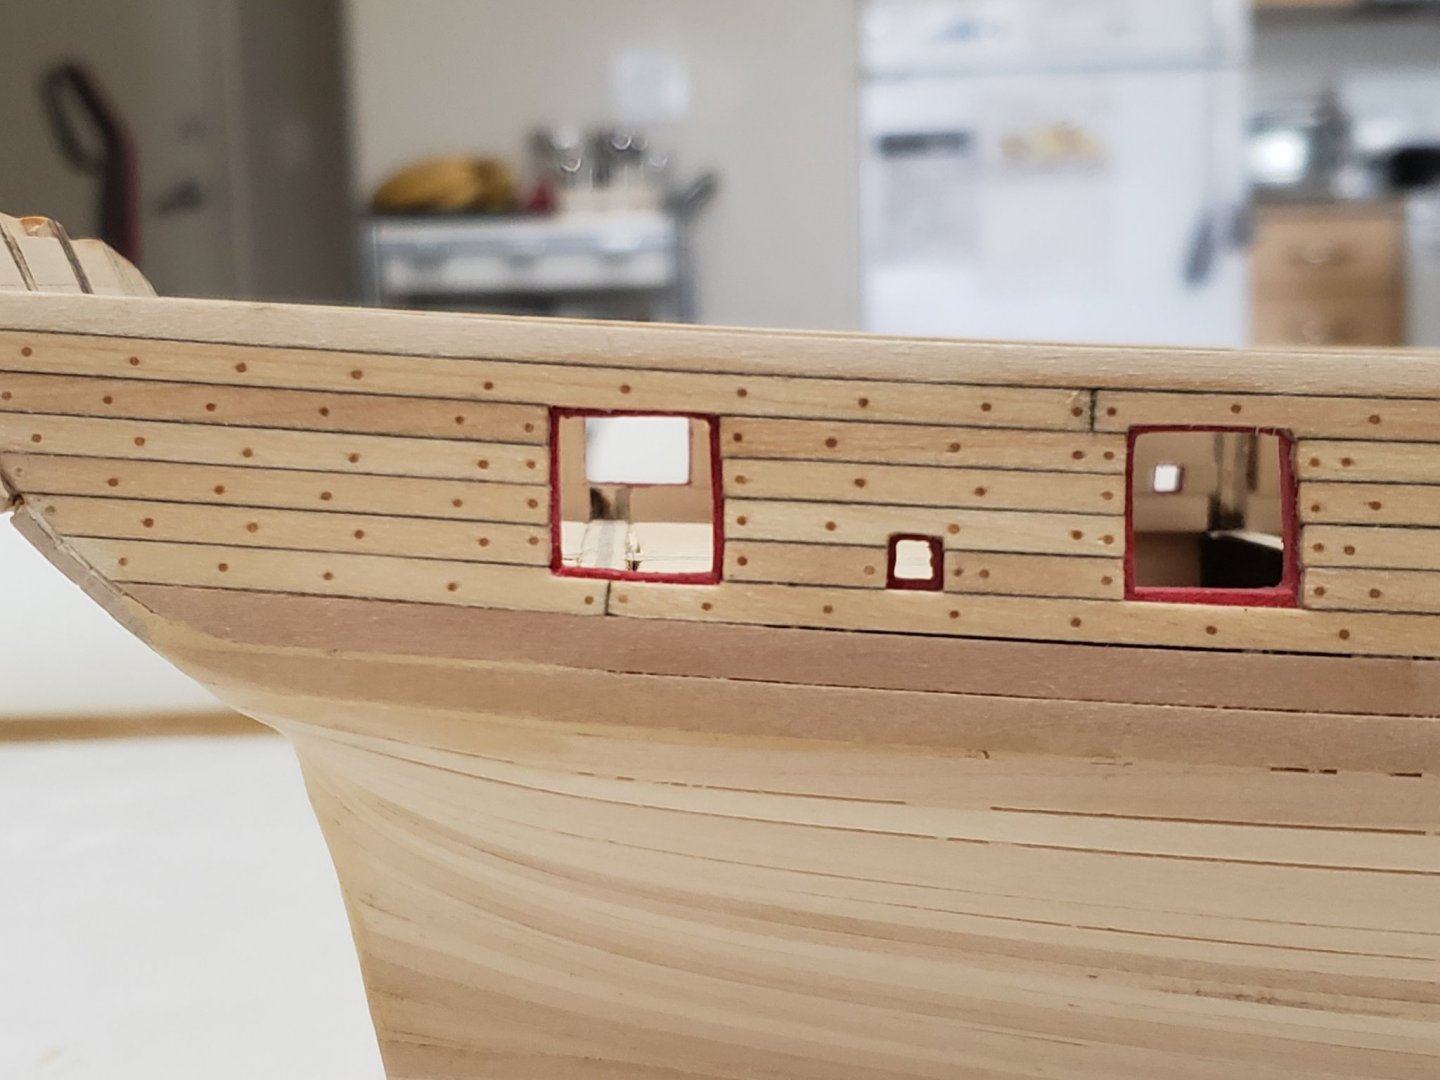
Slowly progressing through Chapter 5. The treenails have been completed using toothpicks. I tried using filler in a sample test block but since the color was natural and not stained, the results were not as good. First, each hole was marked and was drilled using a 0.55mm drillbit: Toothpicks were inserted in each hole and were cut using nail clippers. In this part of the stage the ship slipped from my hand and the head of the stem knee broke off 😣. Thankfully I was able to glue it back on without much issues. The leftover toothpicks were then sanded smooth: Finally, tung oil was applied. This darkened the toothpicks. I applied tung oil before installing the wales and sheer strake since I did not want to risk any tung oil being in contact with those strips. I am not sure how the oil would react with paint.


- 950 replies
-
- 14
-
-
- syren
- model shipways
- (and 1 more)
-
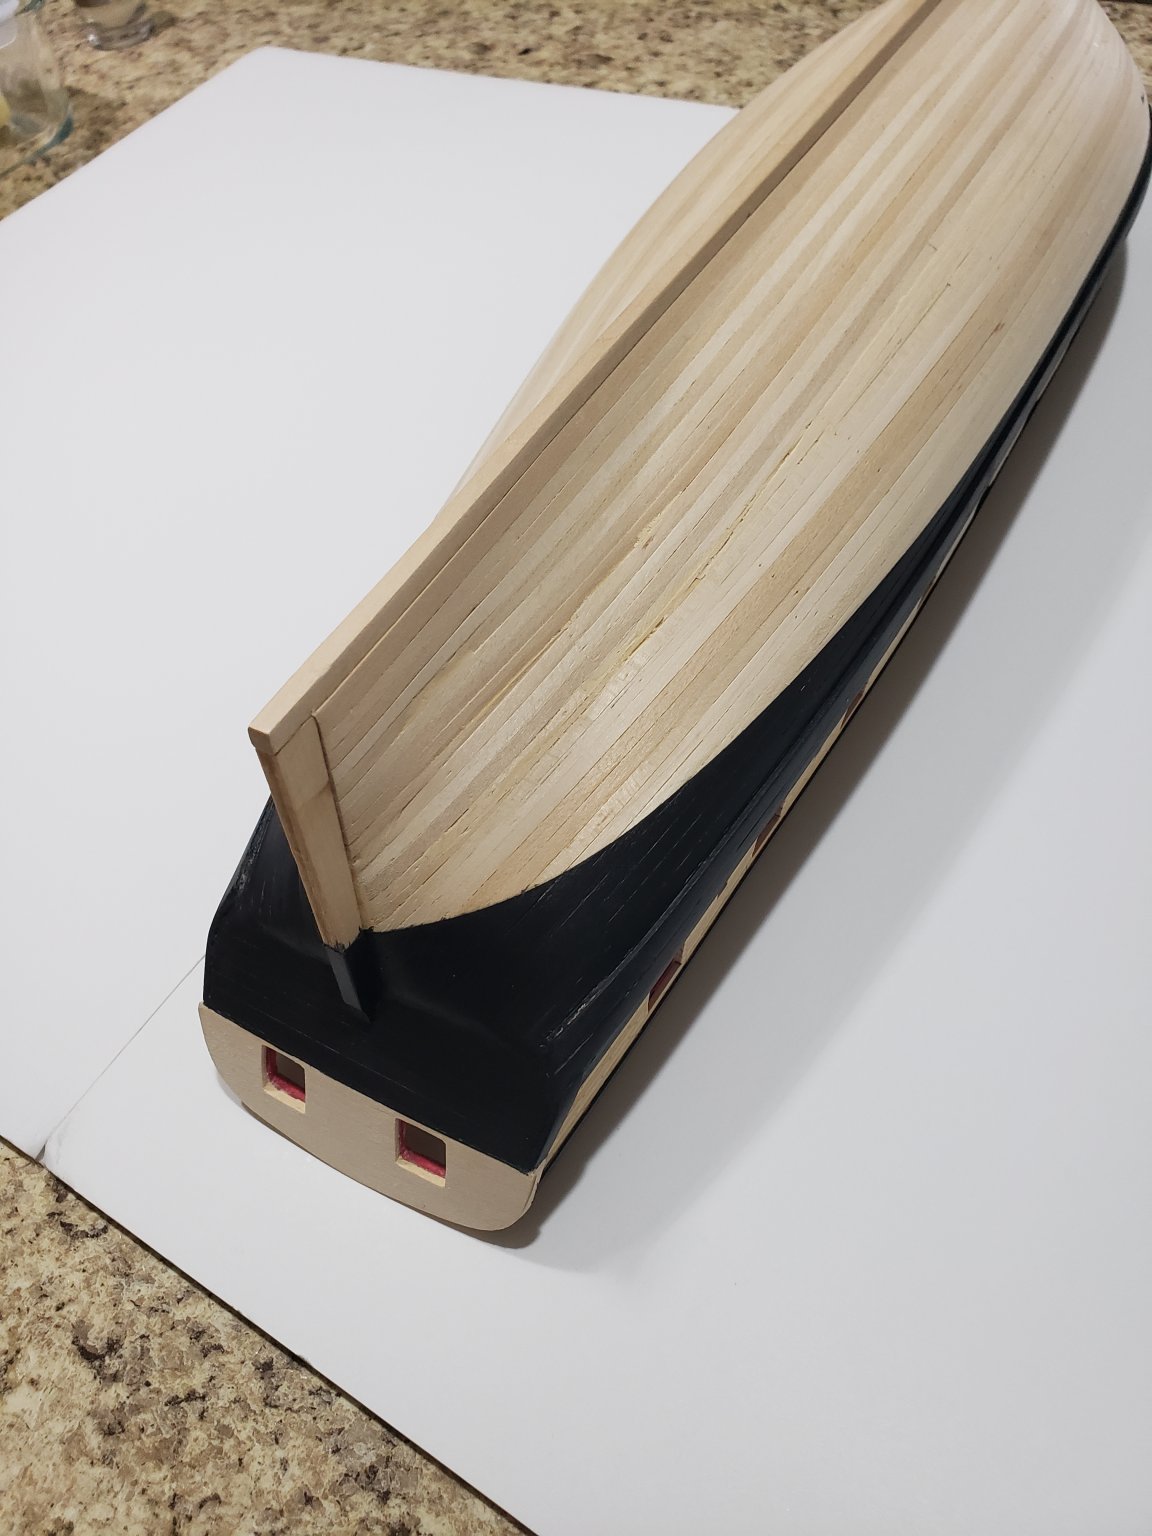
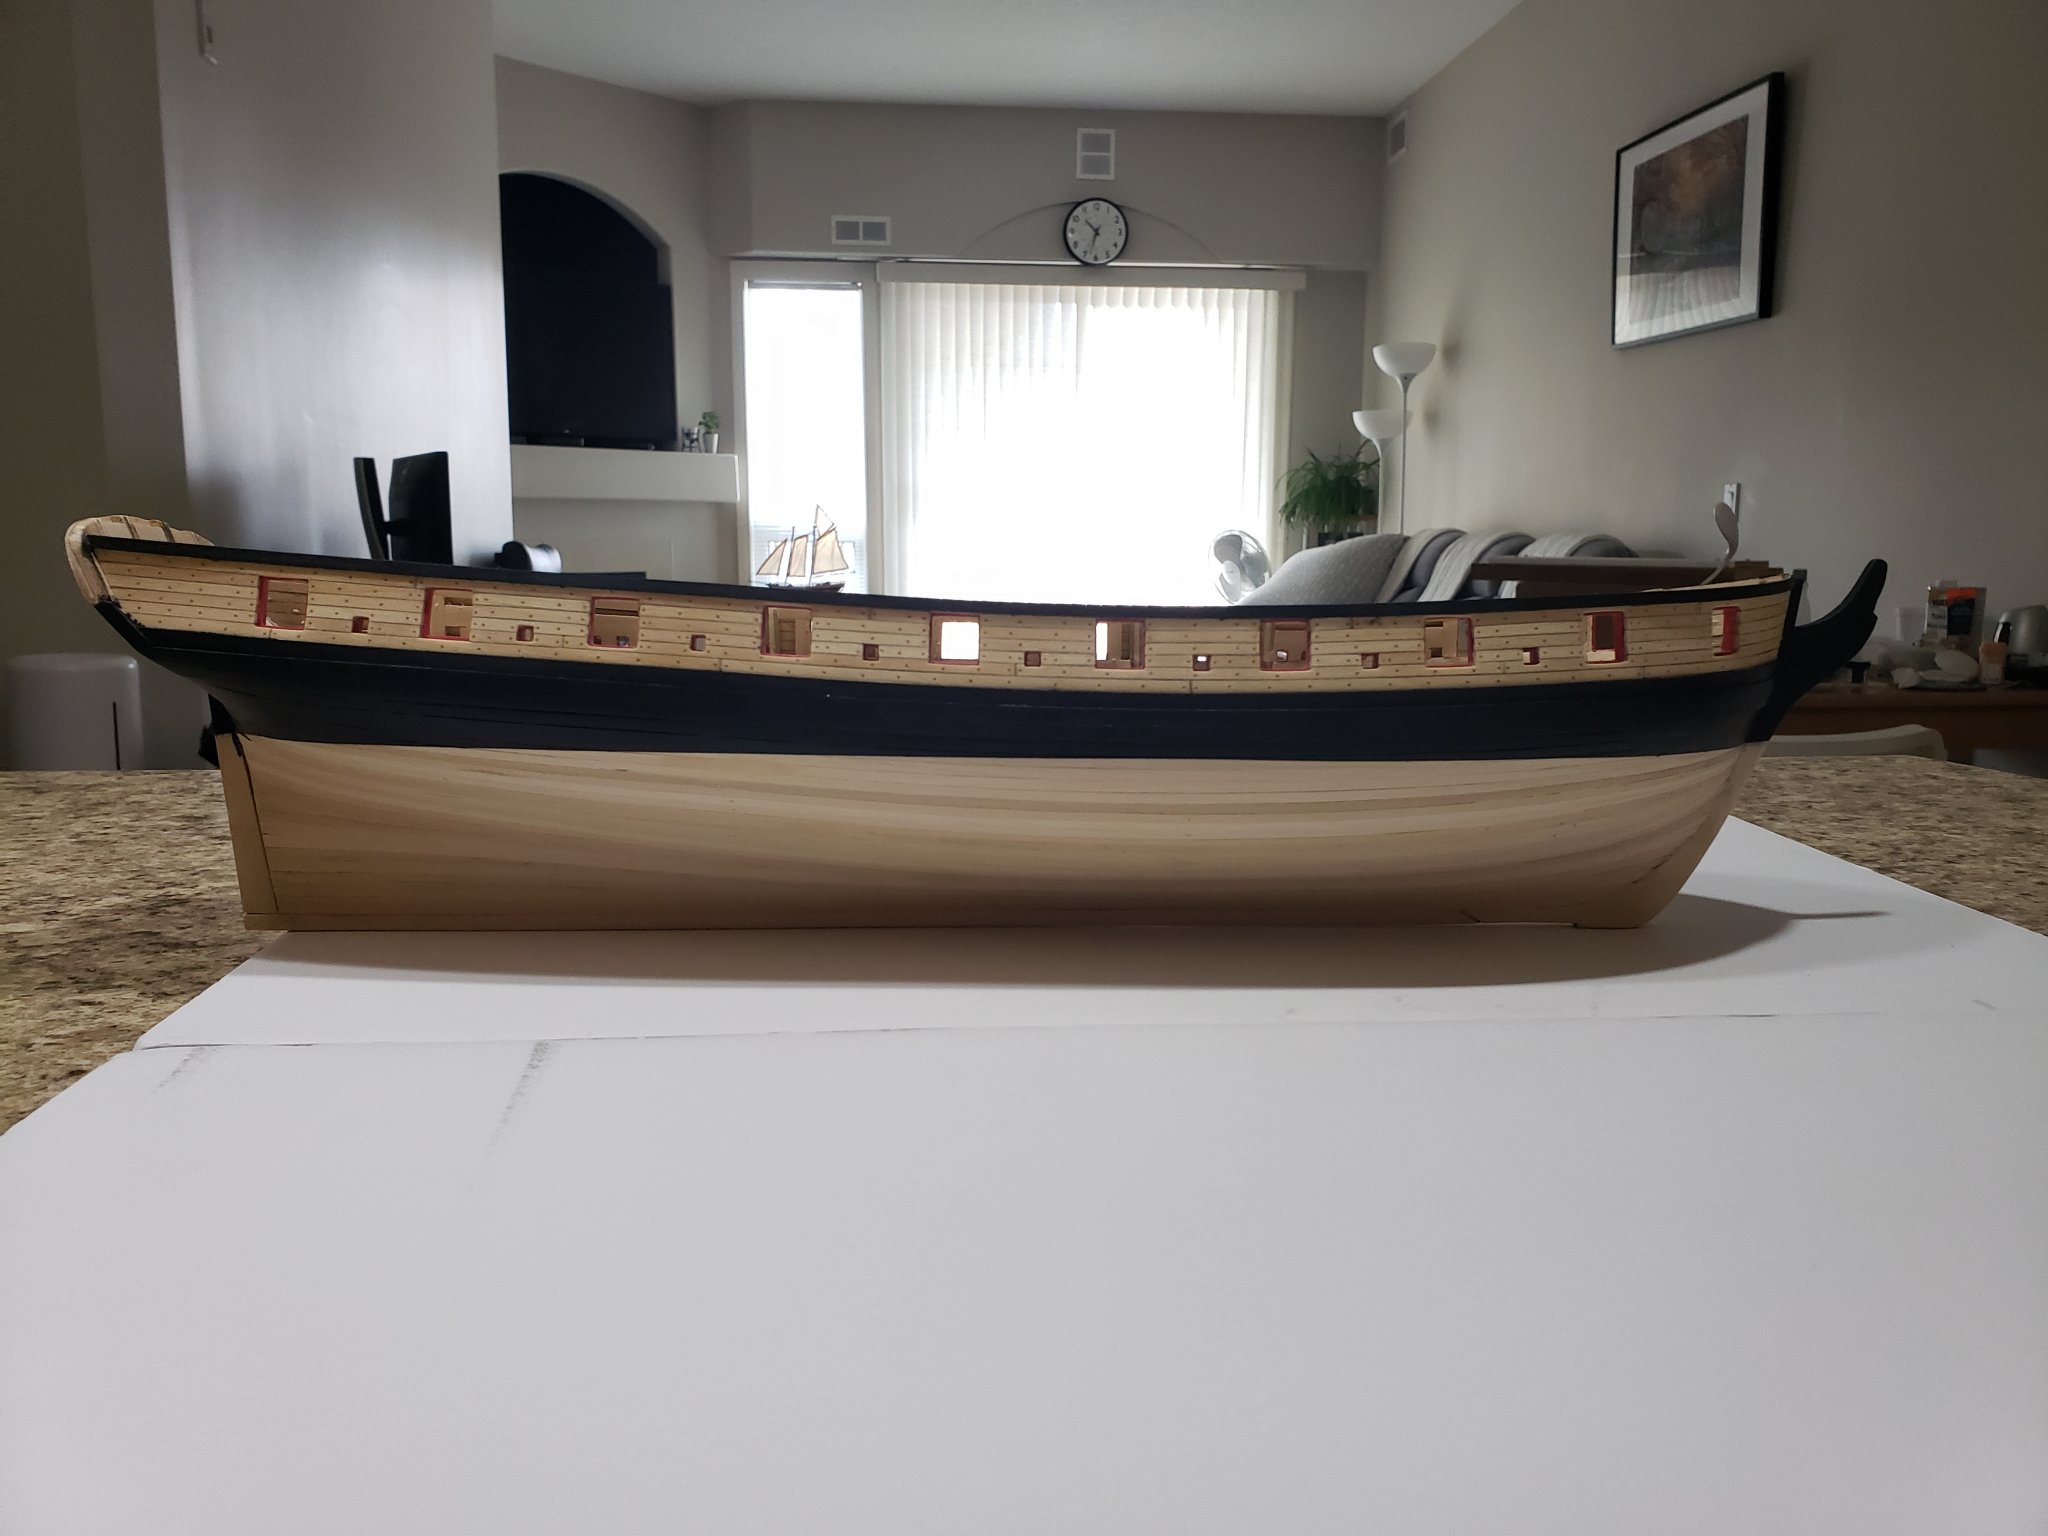
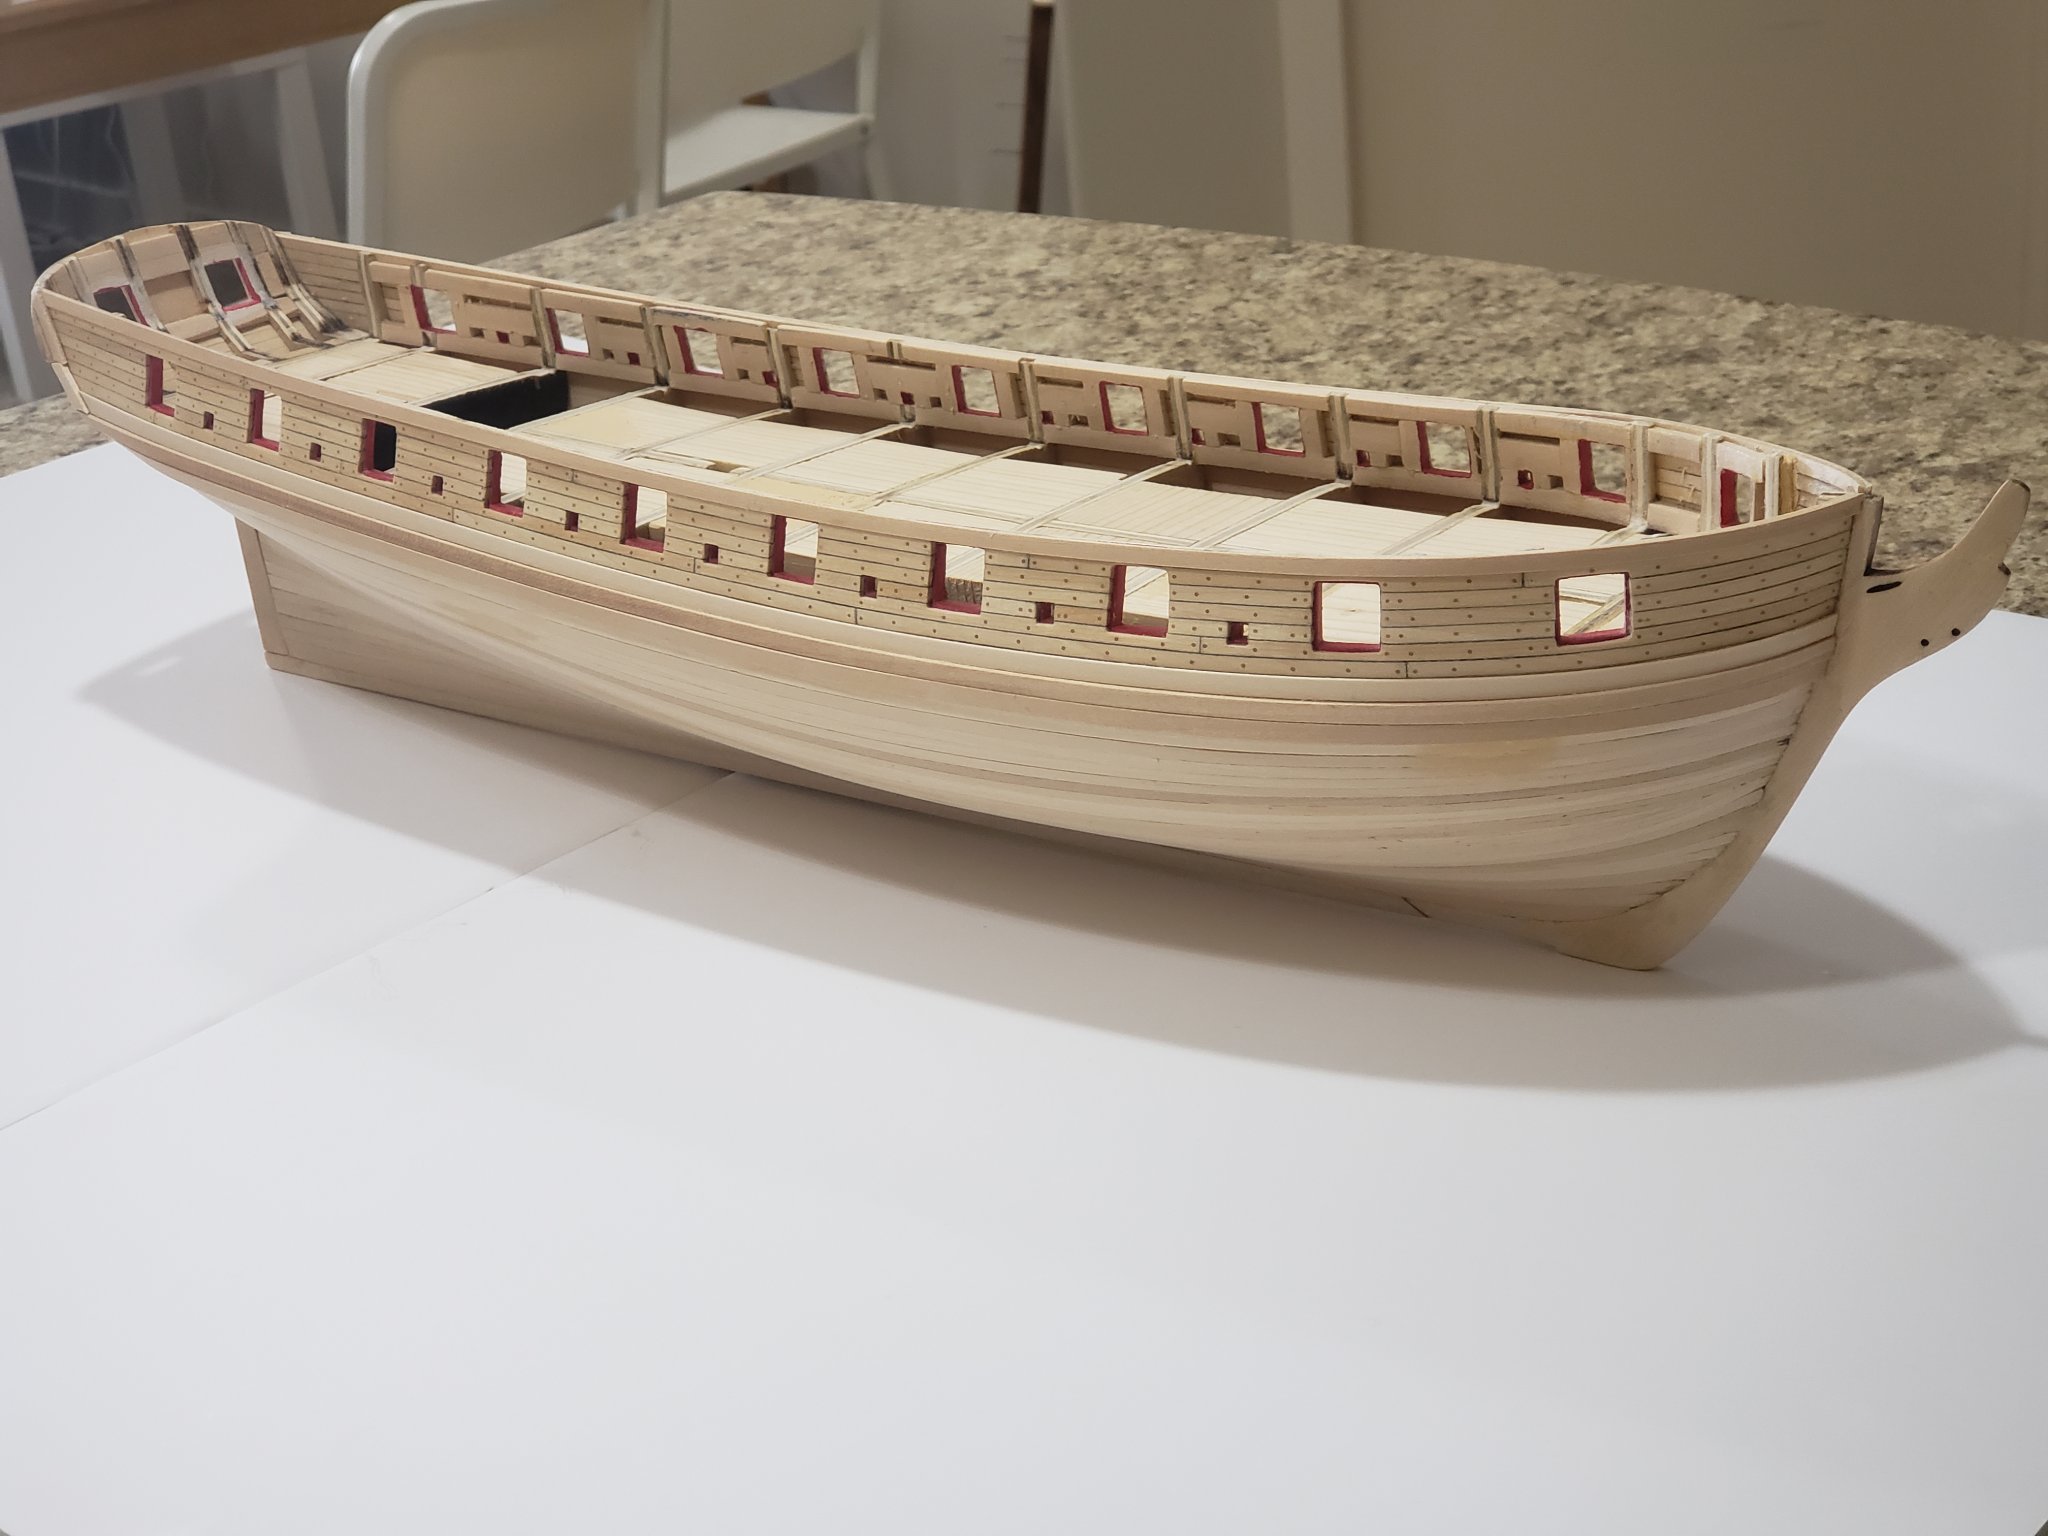
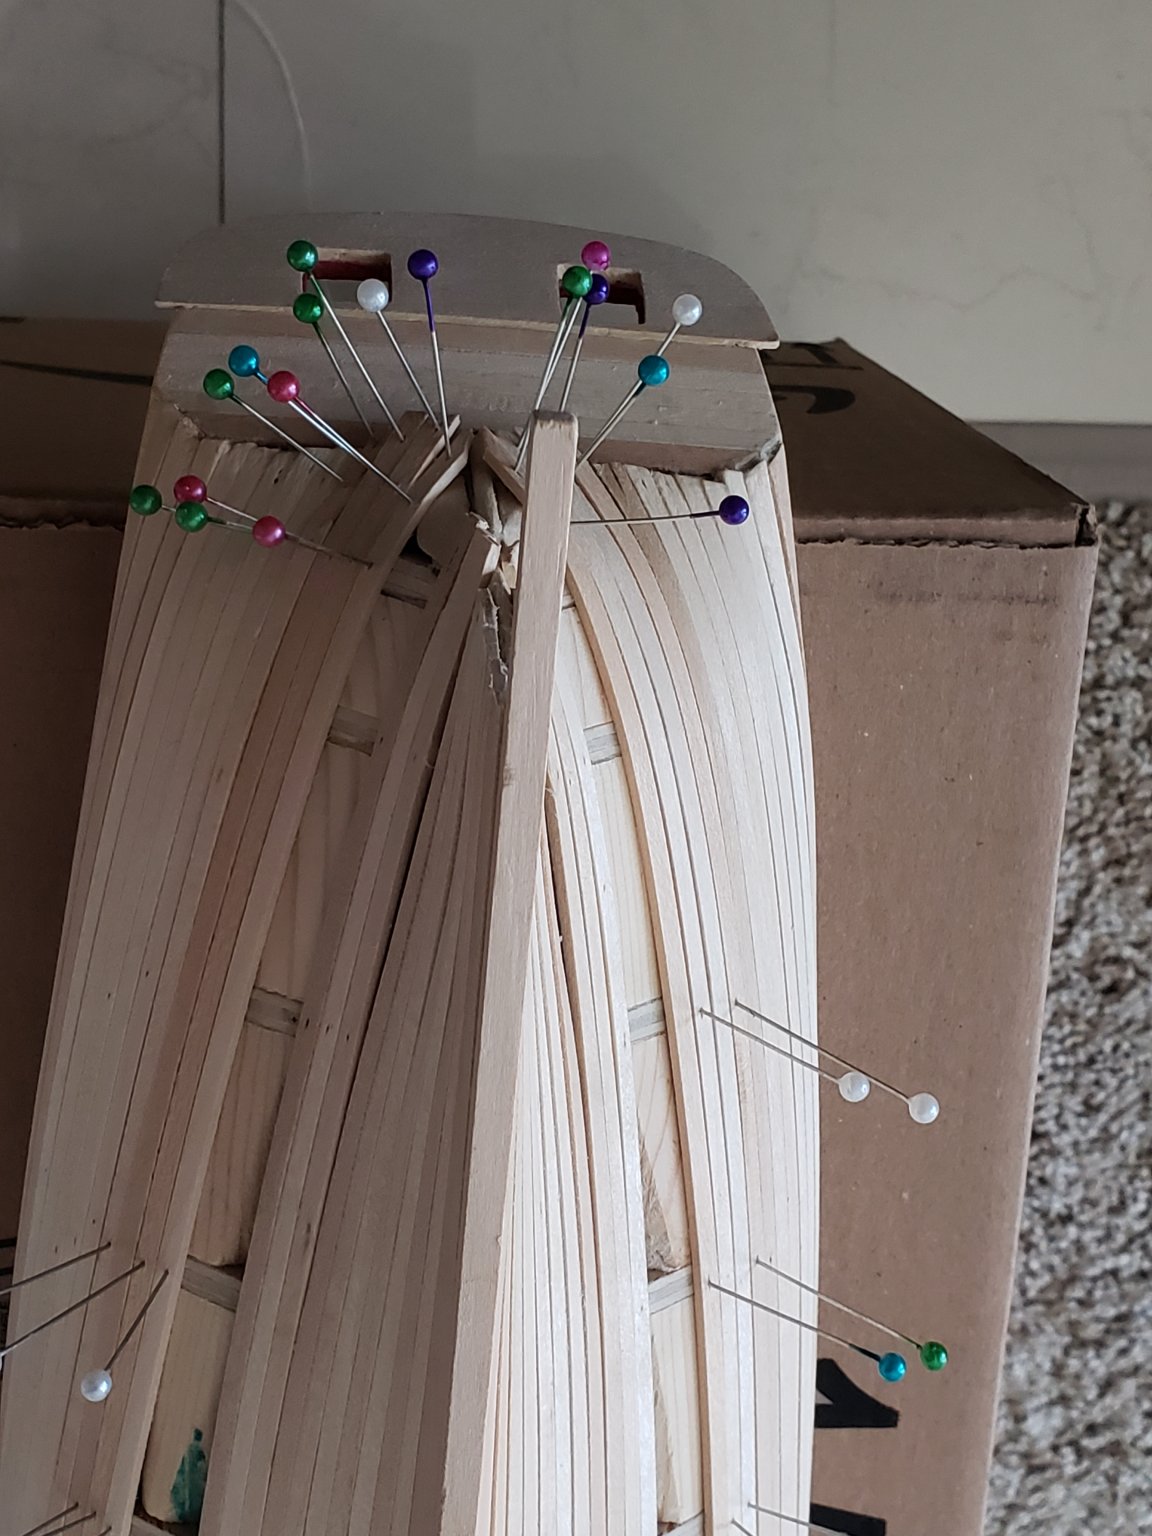
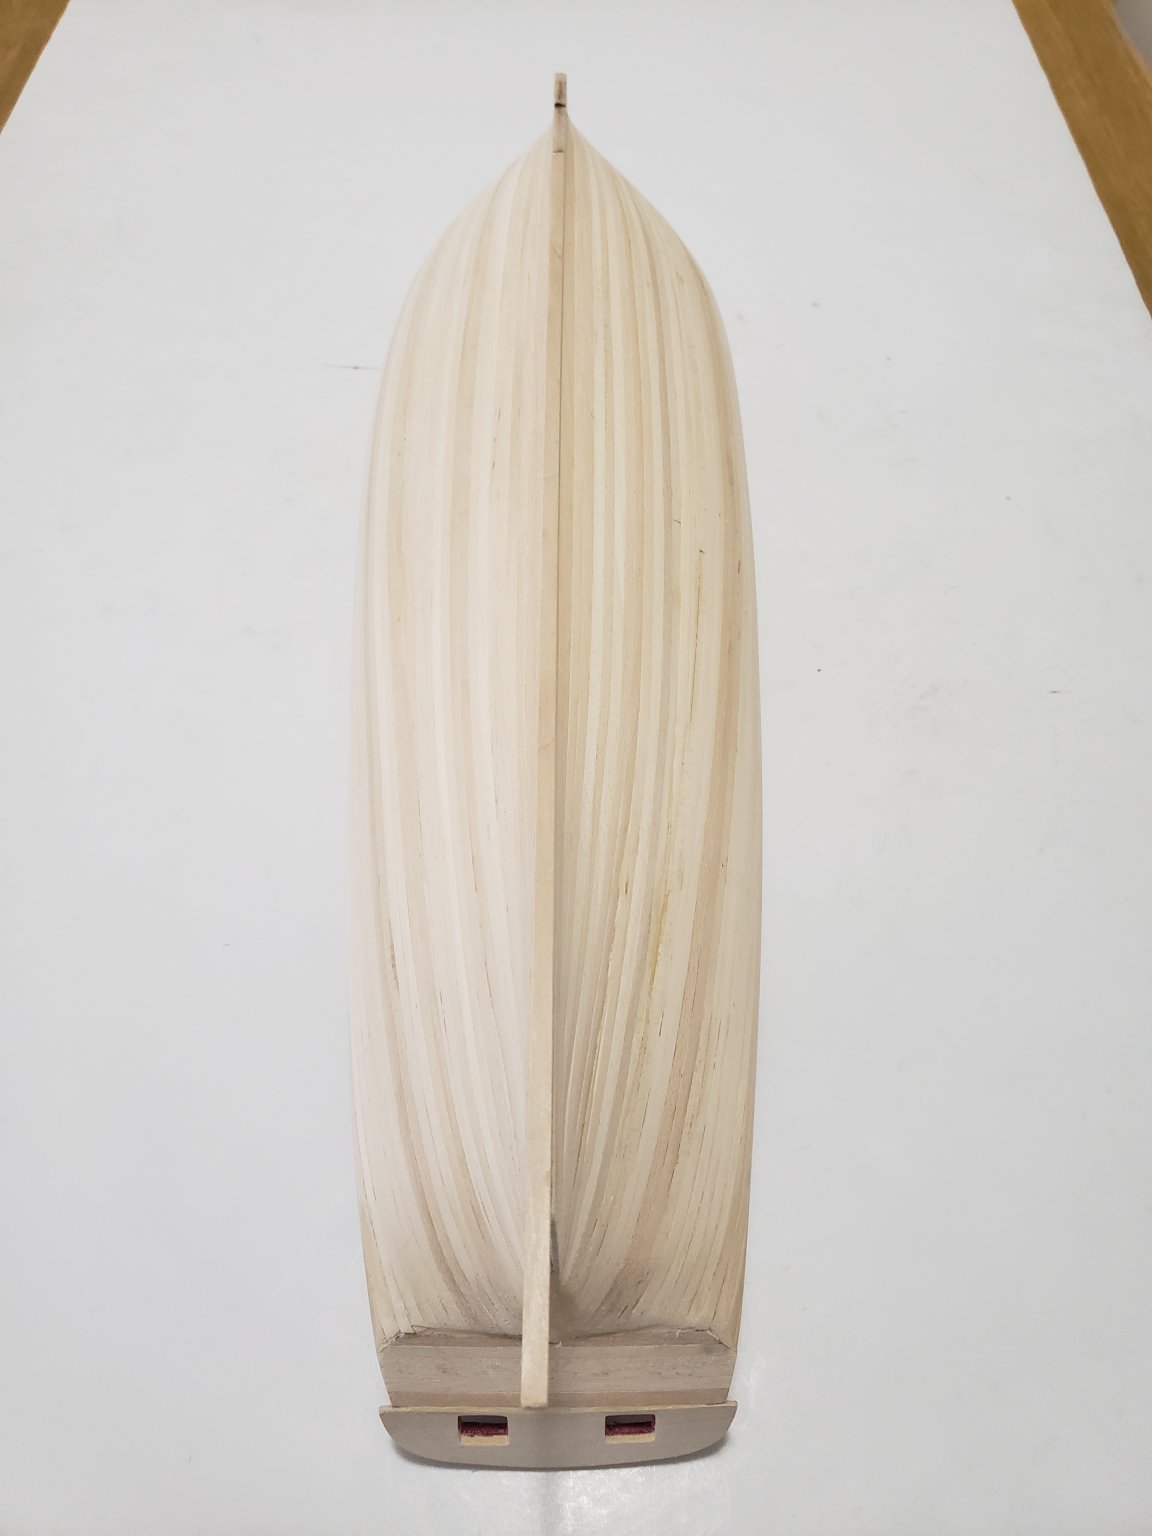
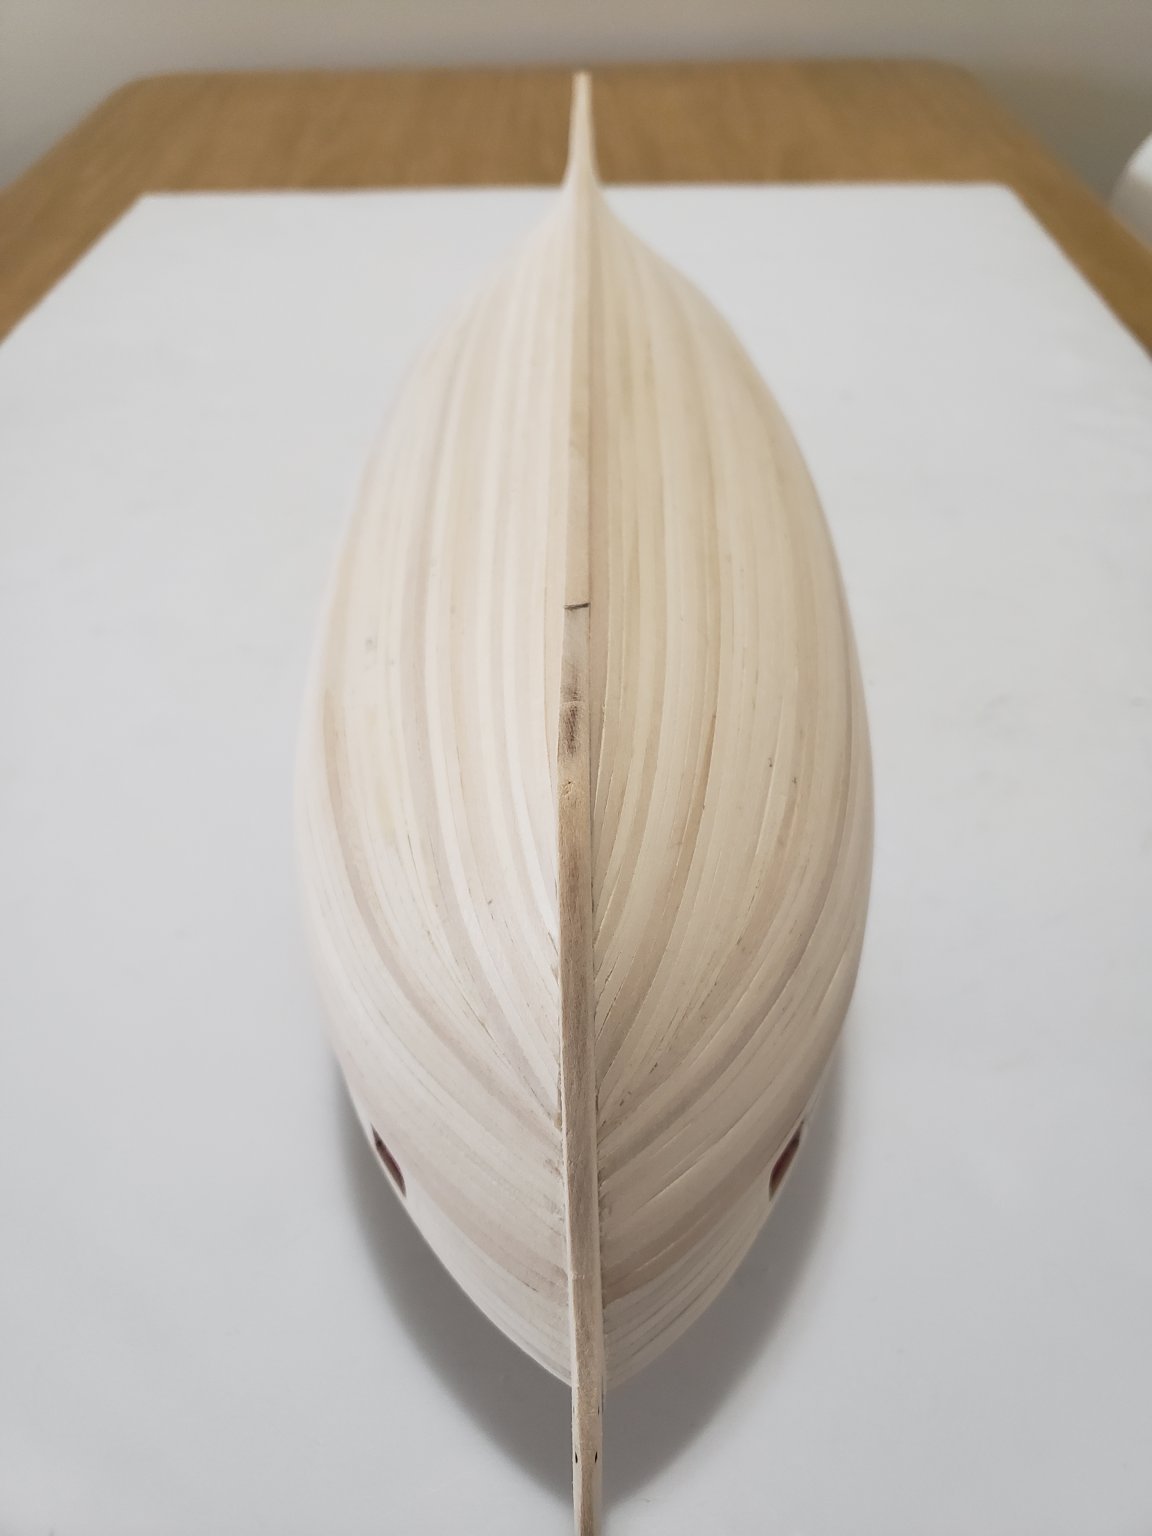
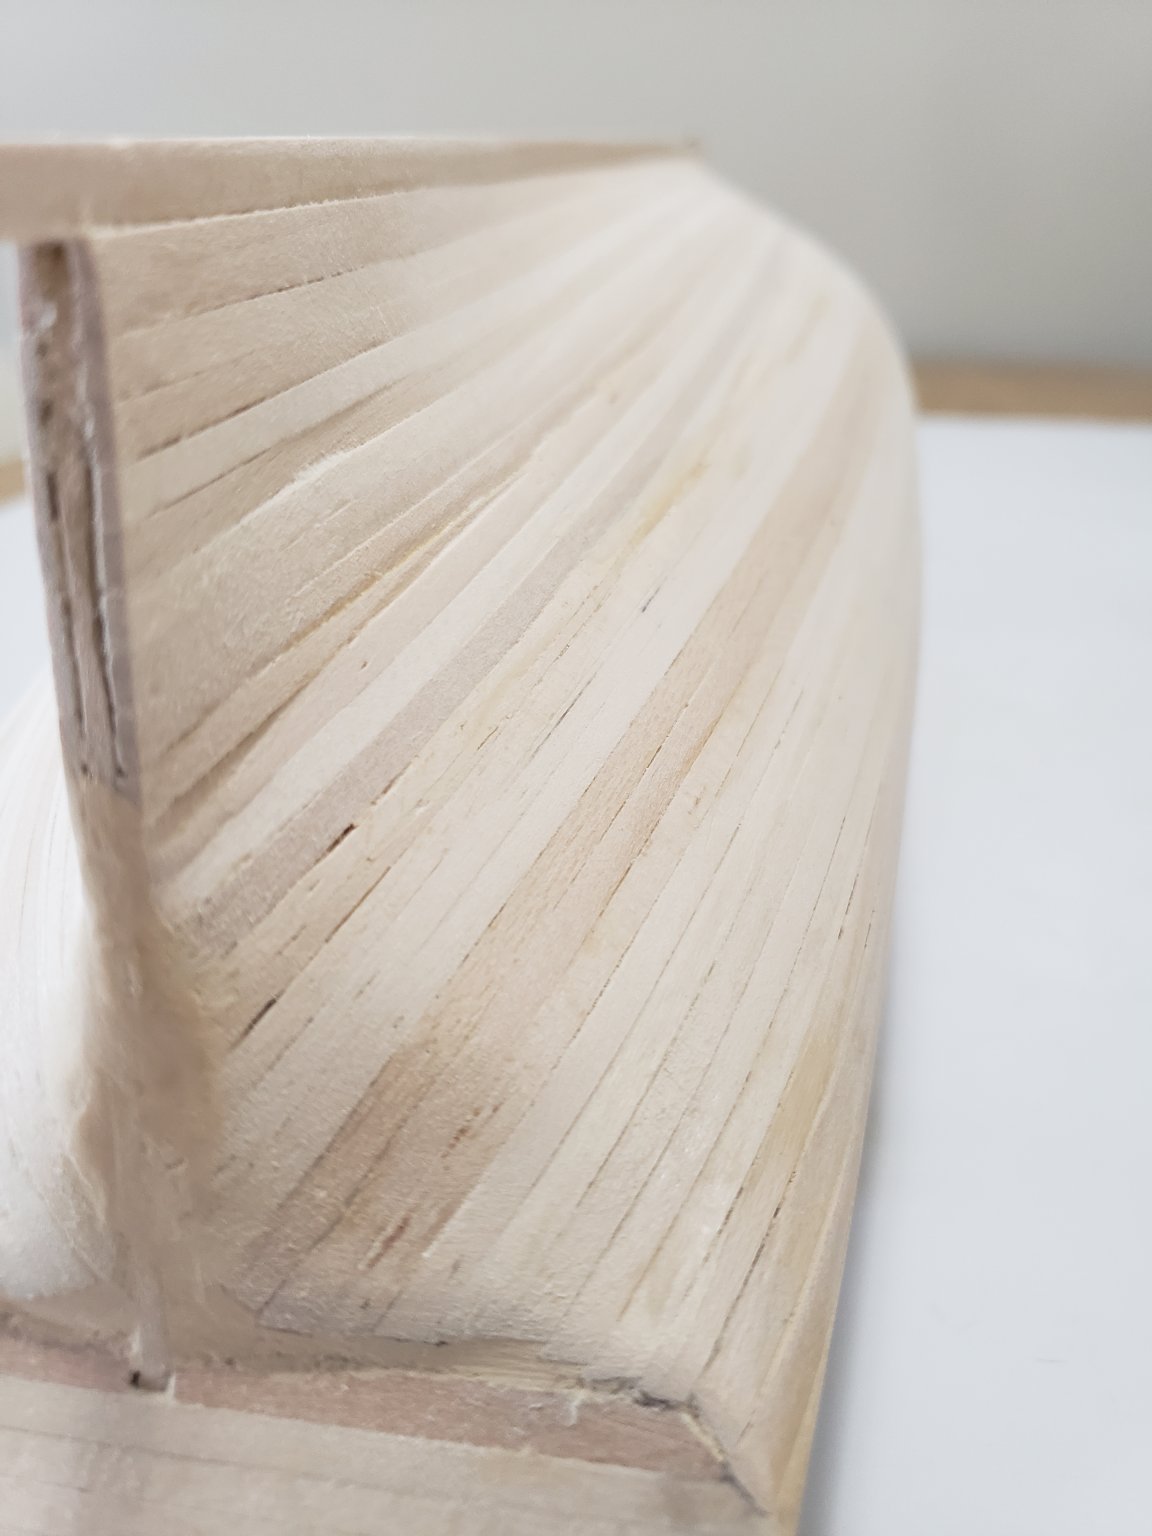
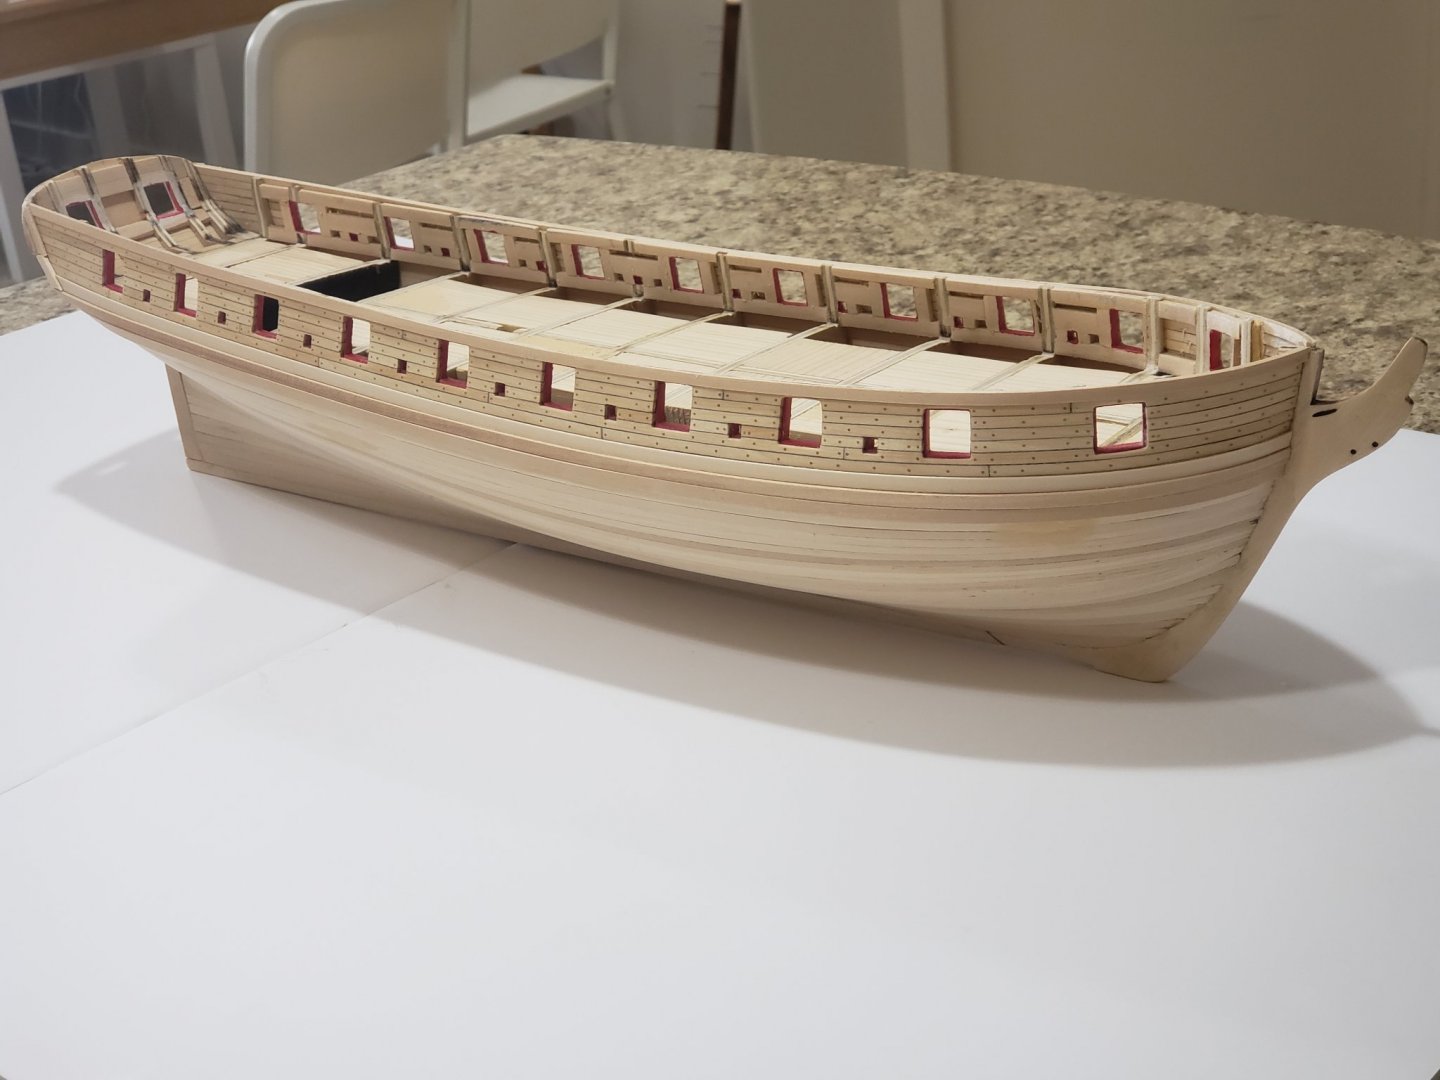
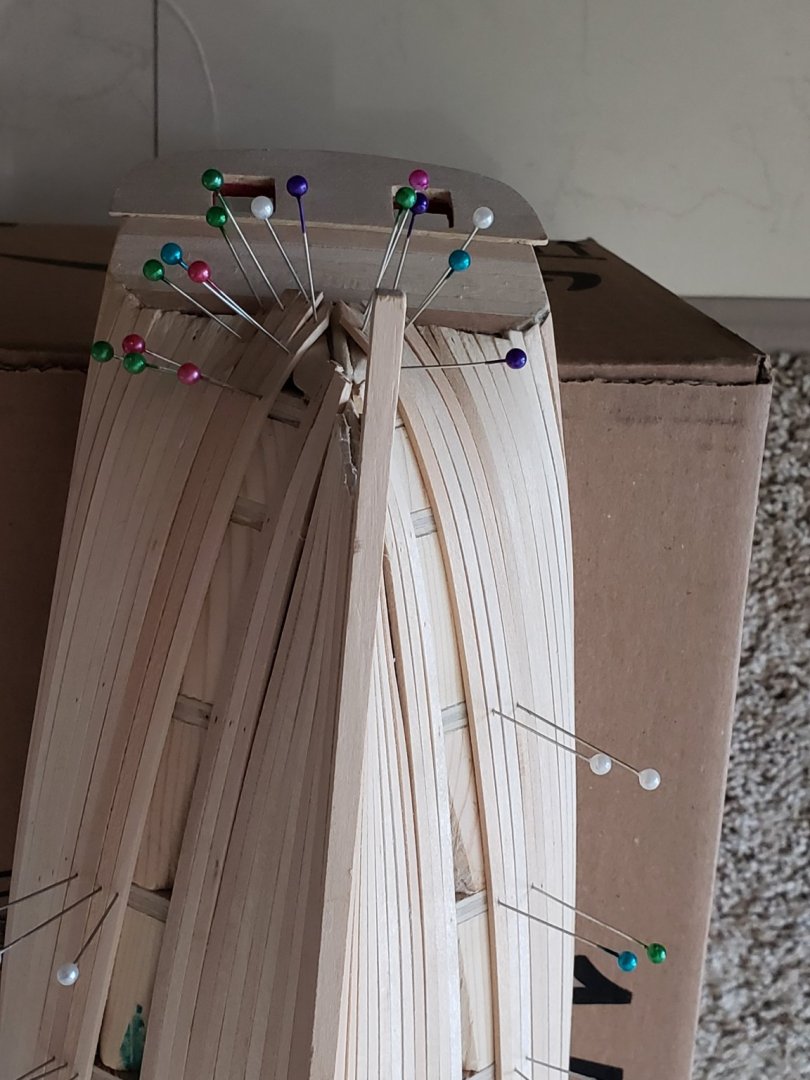
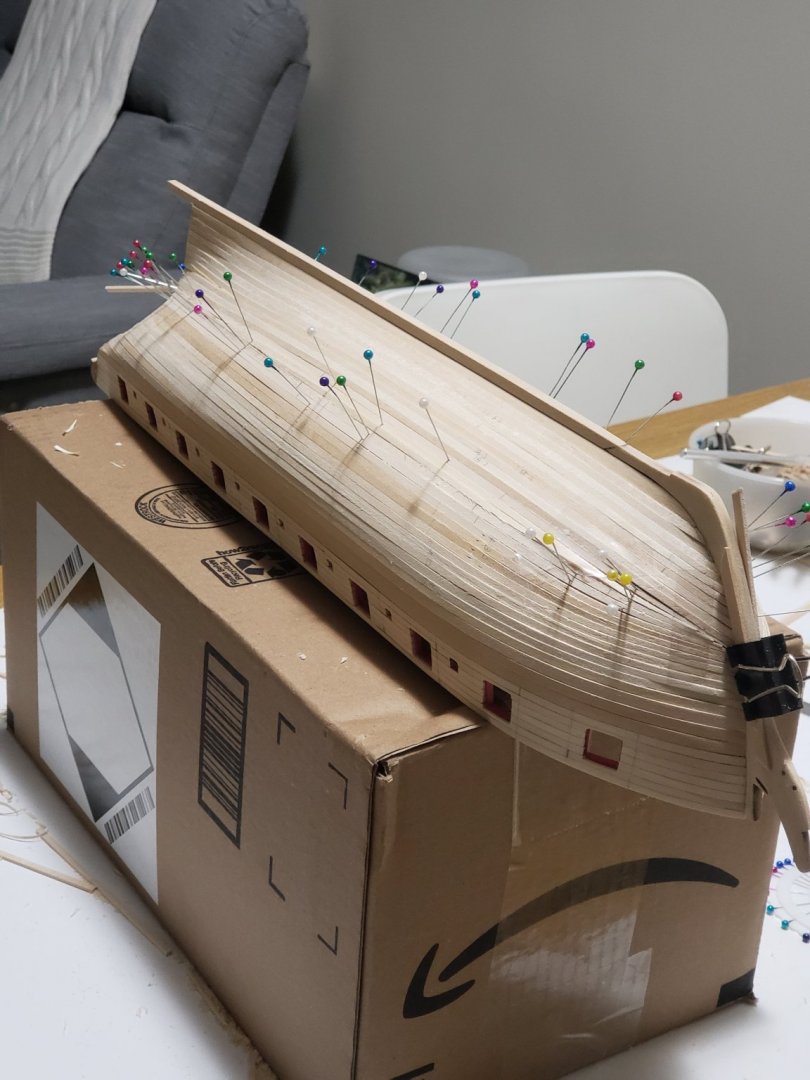
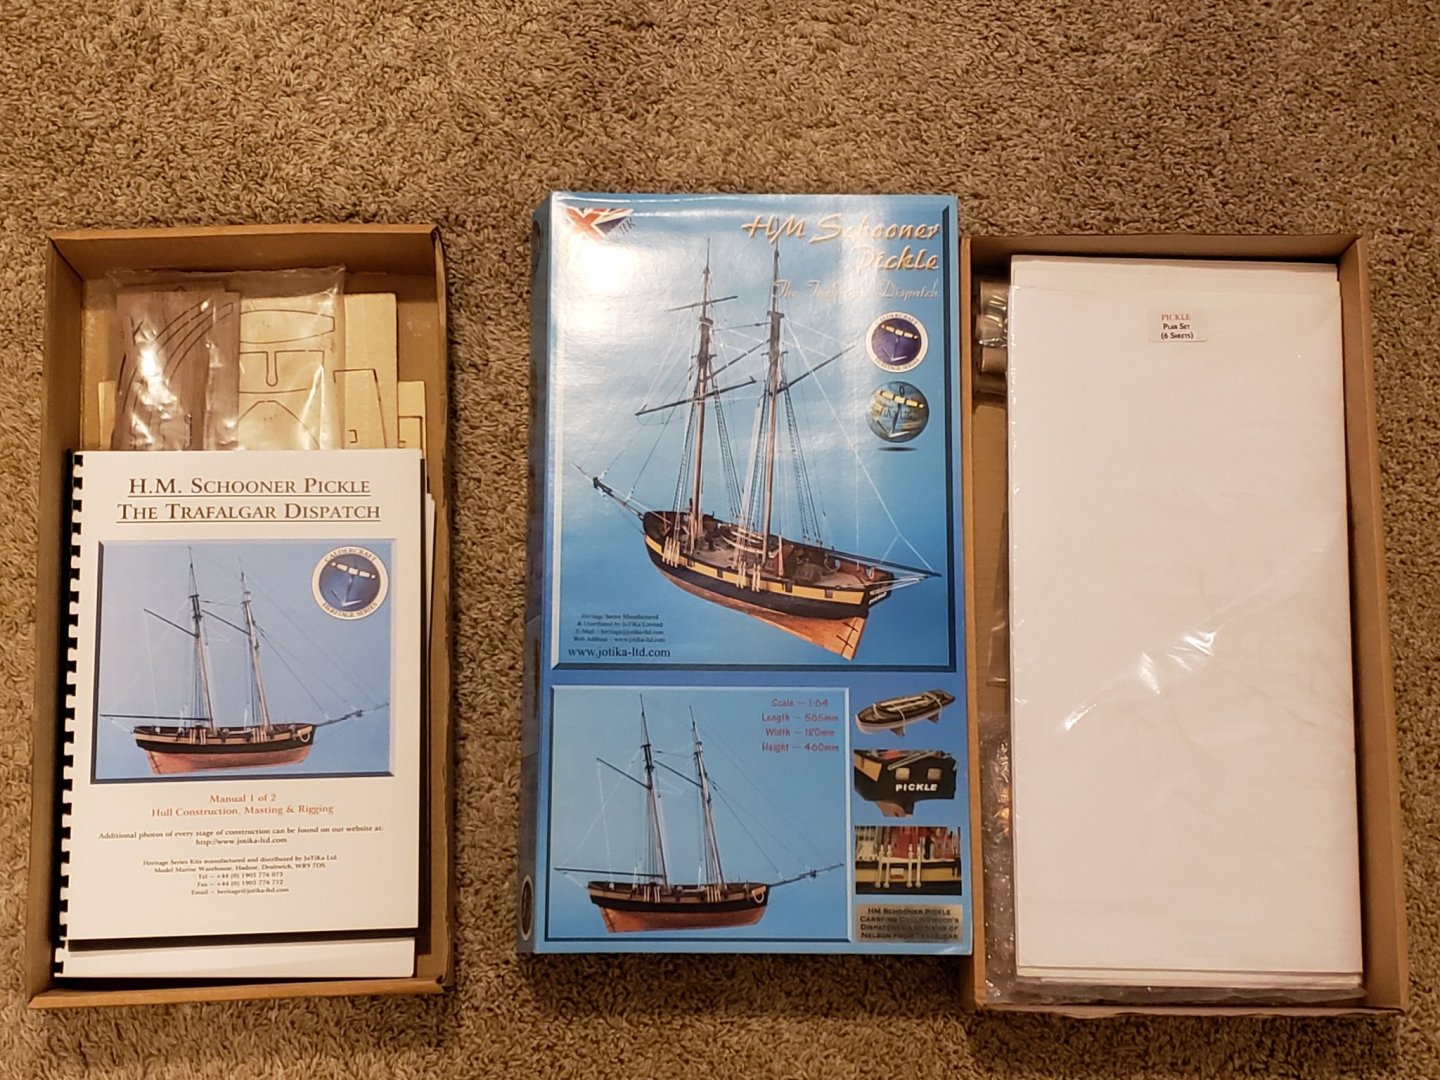
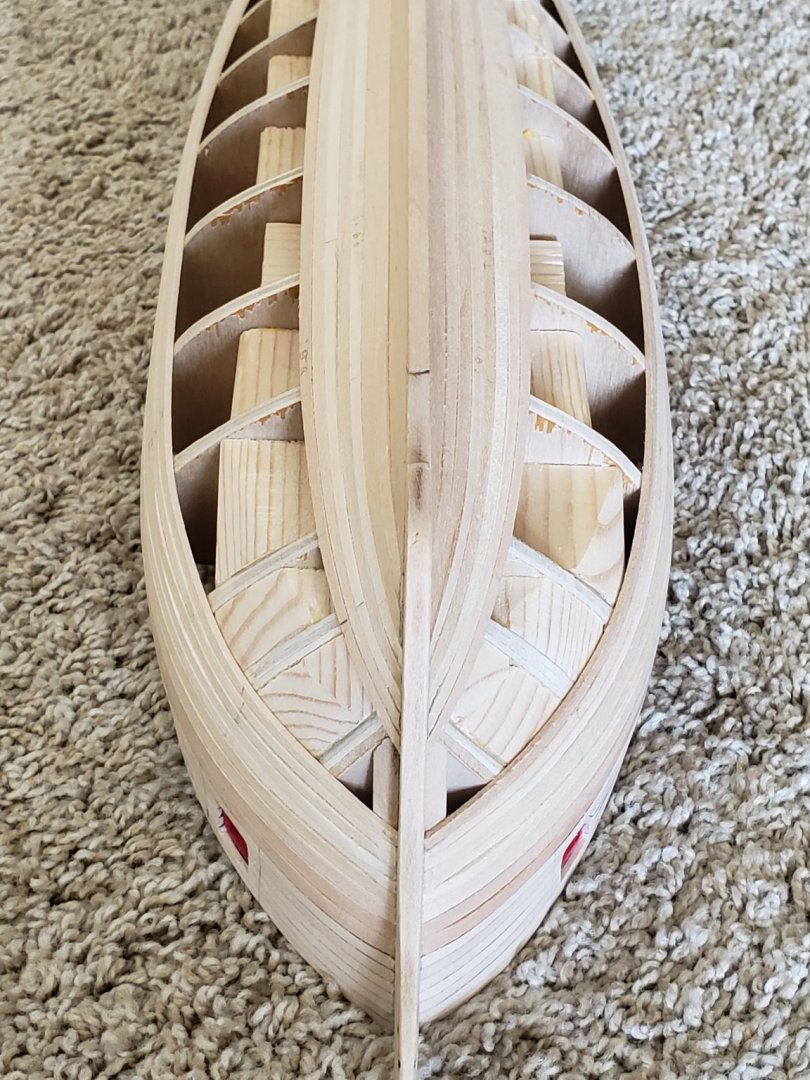
The planking is finally finished. It was very enjoyable. I consider this as the first major milestone. One thing I learnt is that I should have measured the gap at the bow after every 4 strips or so to taper the other planks to correct for creep. I did not do this and therefore needed to thinly tapered some strip. This will all be hidden under copper plates but for next time I have learnt the correct technique. Here are some progress photos (pardon the messy pinning situation at the stern, all the gaps were fixed with filler and a lot of sanding): Applying filler at the stern and sanded: Photos of the completed planking: Also, I got gifted this kit which I will start working on soon alongside the Syren! Still deciding if I should carry out a build log for it or not.

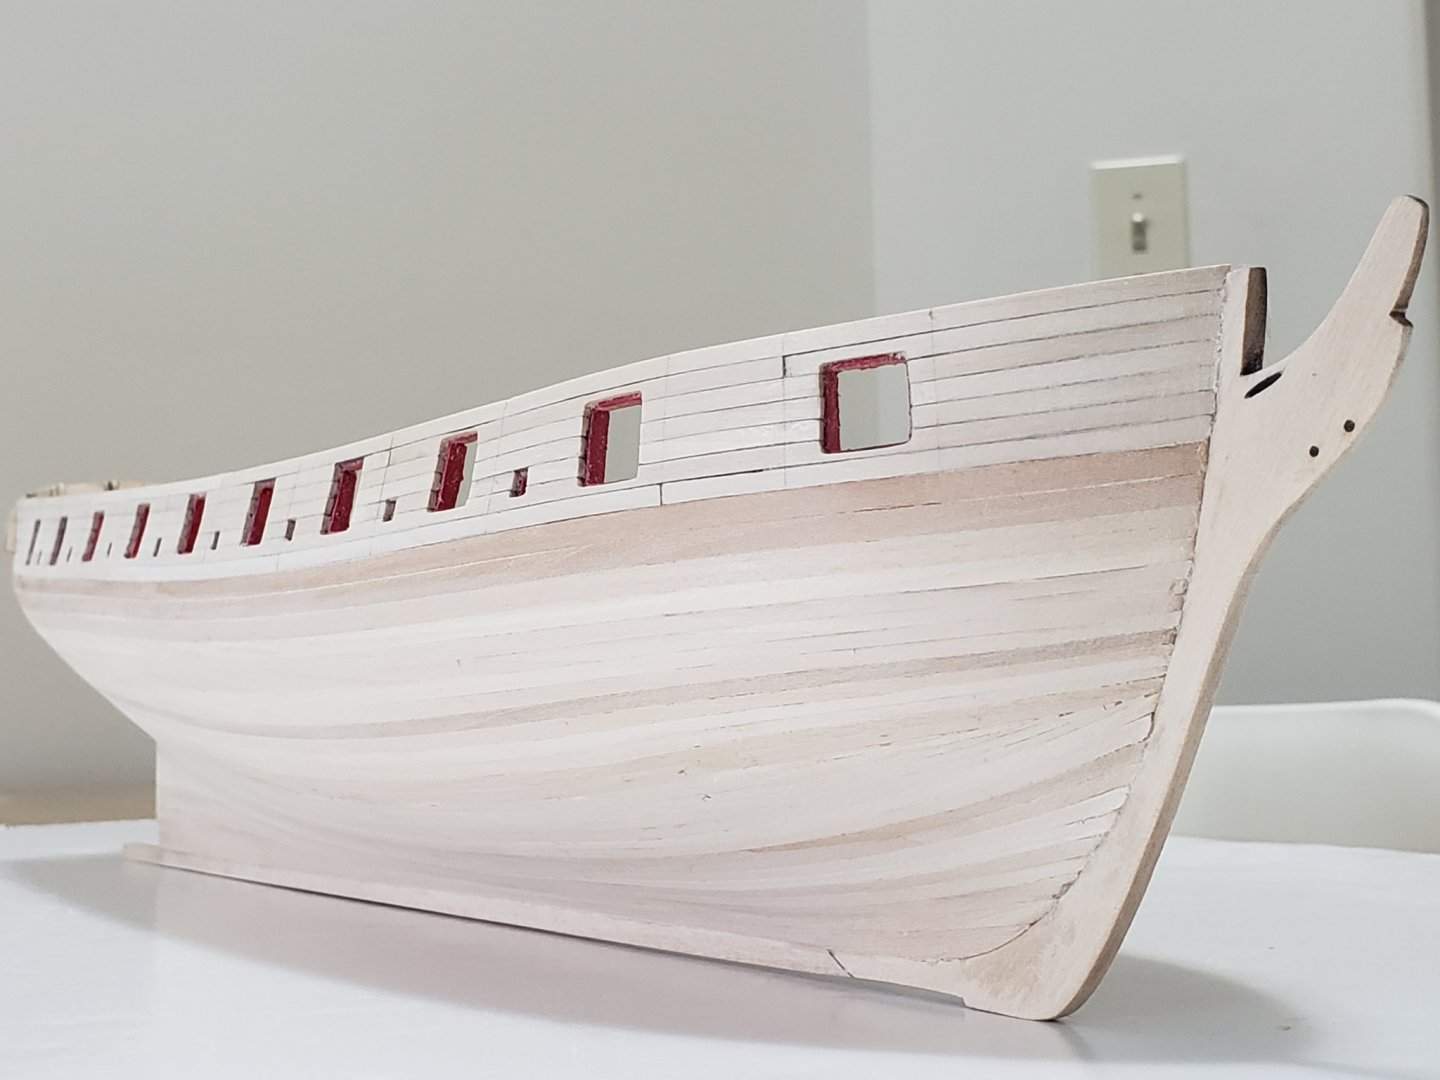


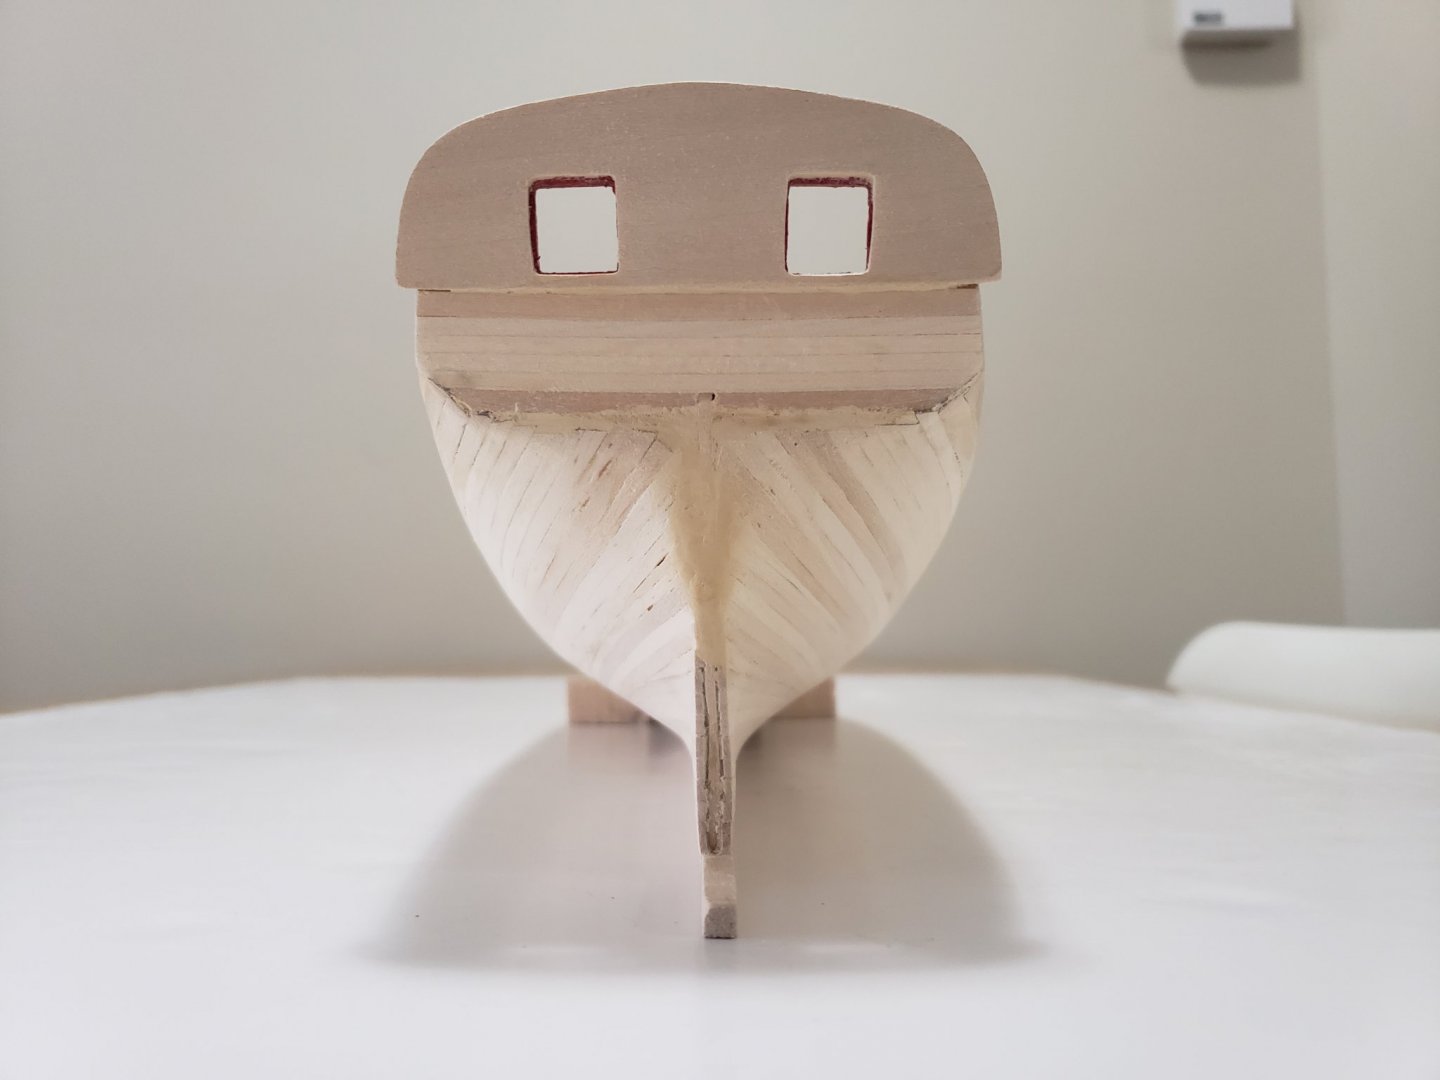
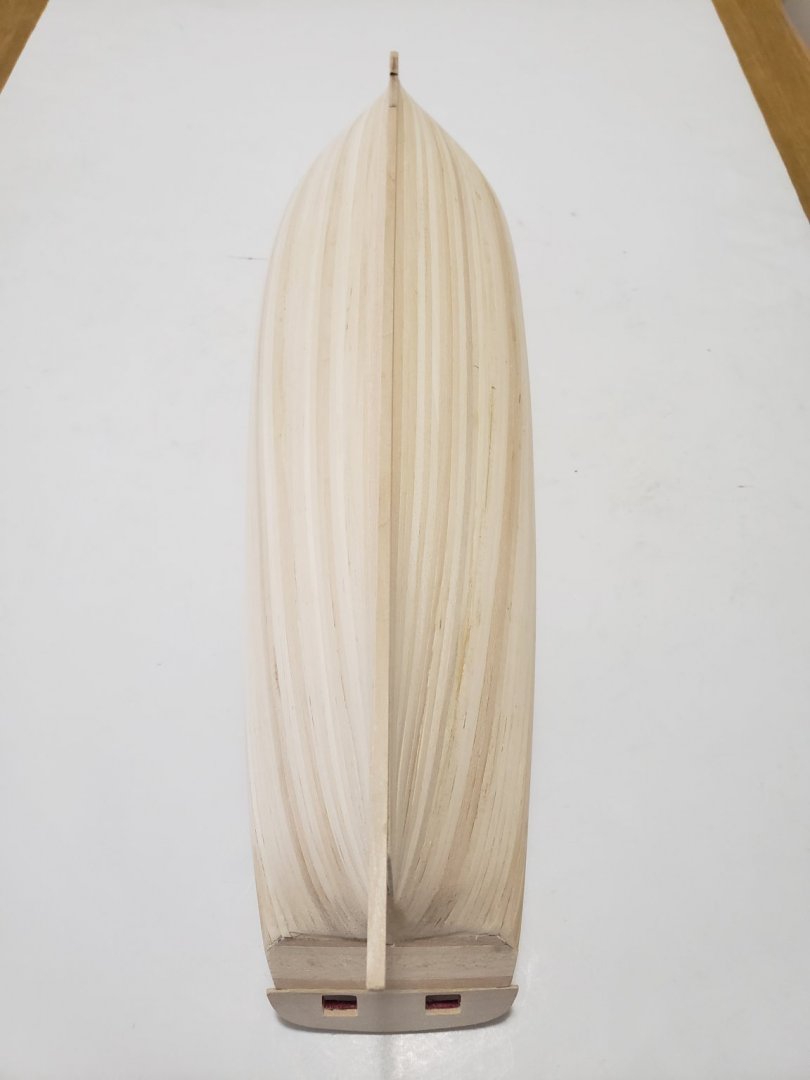

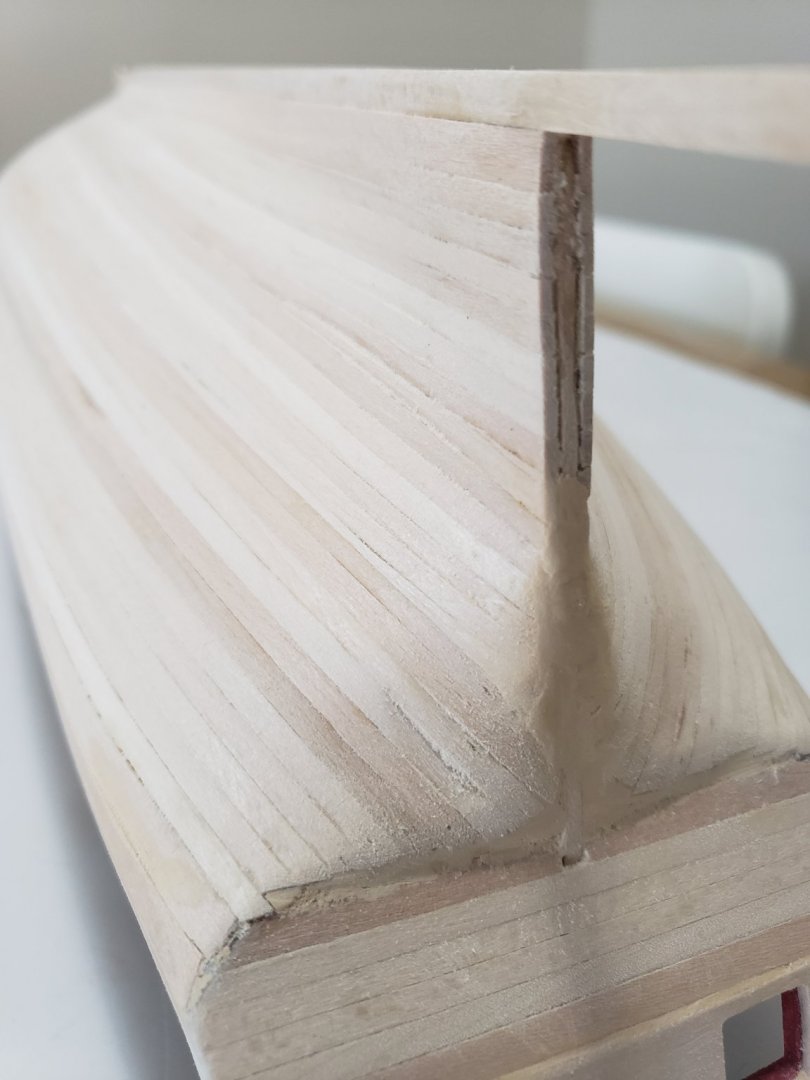
- 950 replies
-
- 7
-
-
- syren
- model shipways
- (and 1 more)
-
Thanks Richard. The stern was definitely the toughest spot since it was hard to get the planks to curve. I found the planking at bow surprisingly easier with little to no struggle.
- 950 replies
-
- 1
-
-
- syren
- model shipways
- (and 1 more)
-
Your gears are a massive improvement from the kits parts. Looking forward to your next bit of progress!
-
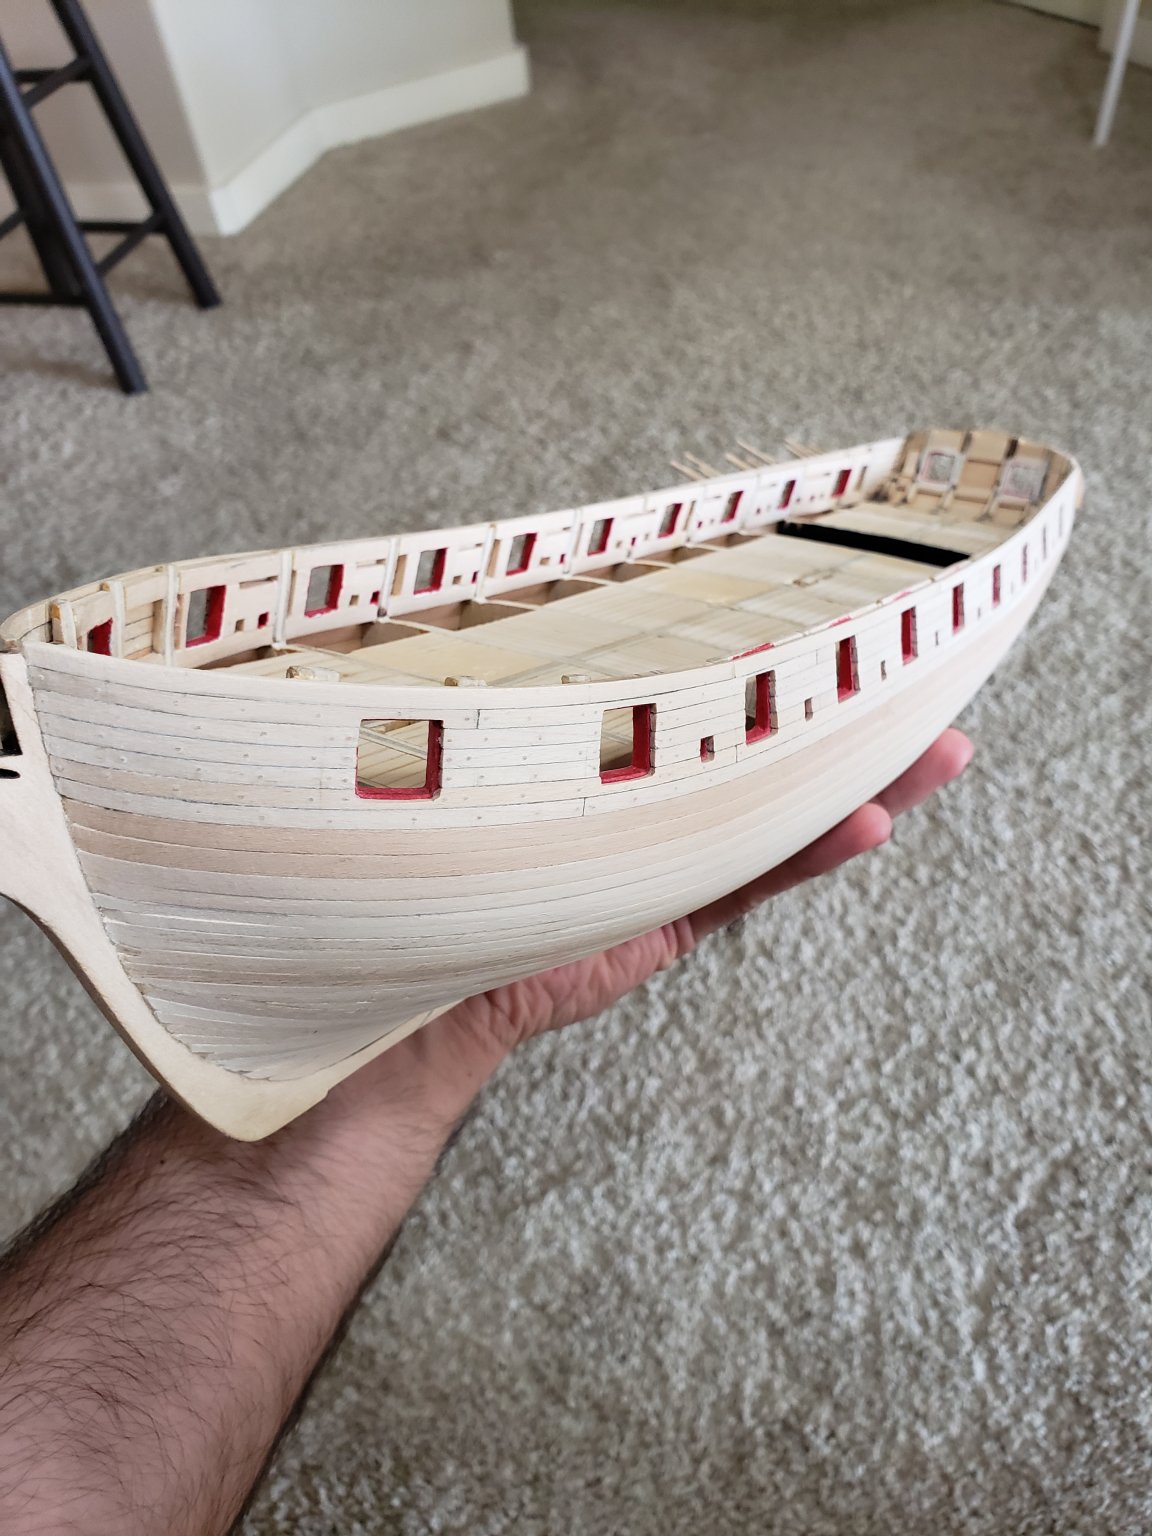
Planking is going well. I am however not very satisfied of how the planking turned out at the stern. Thankfully this will be painted black, so applying filler will hide the gaps. Also had to use some pins at stern location to hold the planks in place since the clamp method stated above did not work too well in these areas due to the very steep curves. Overall I'm enjoying the planking process.


- 950 replies
-
- 7
-
-
- syren
- model shipways
- (and 1 more)
-
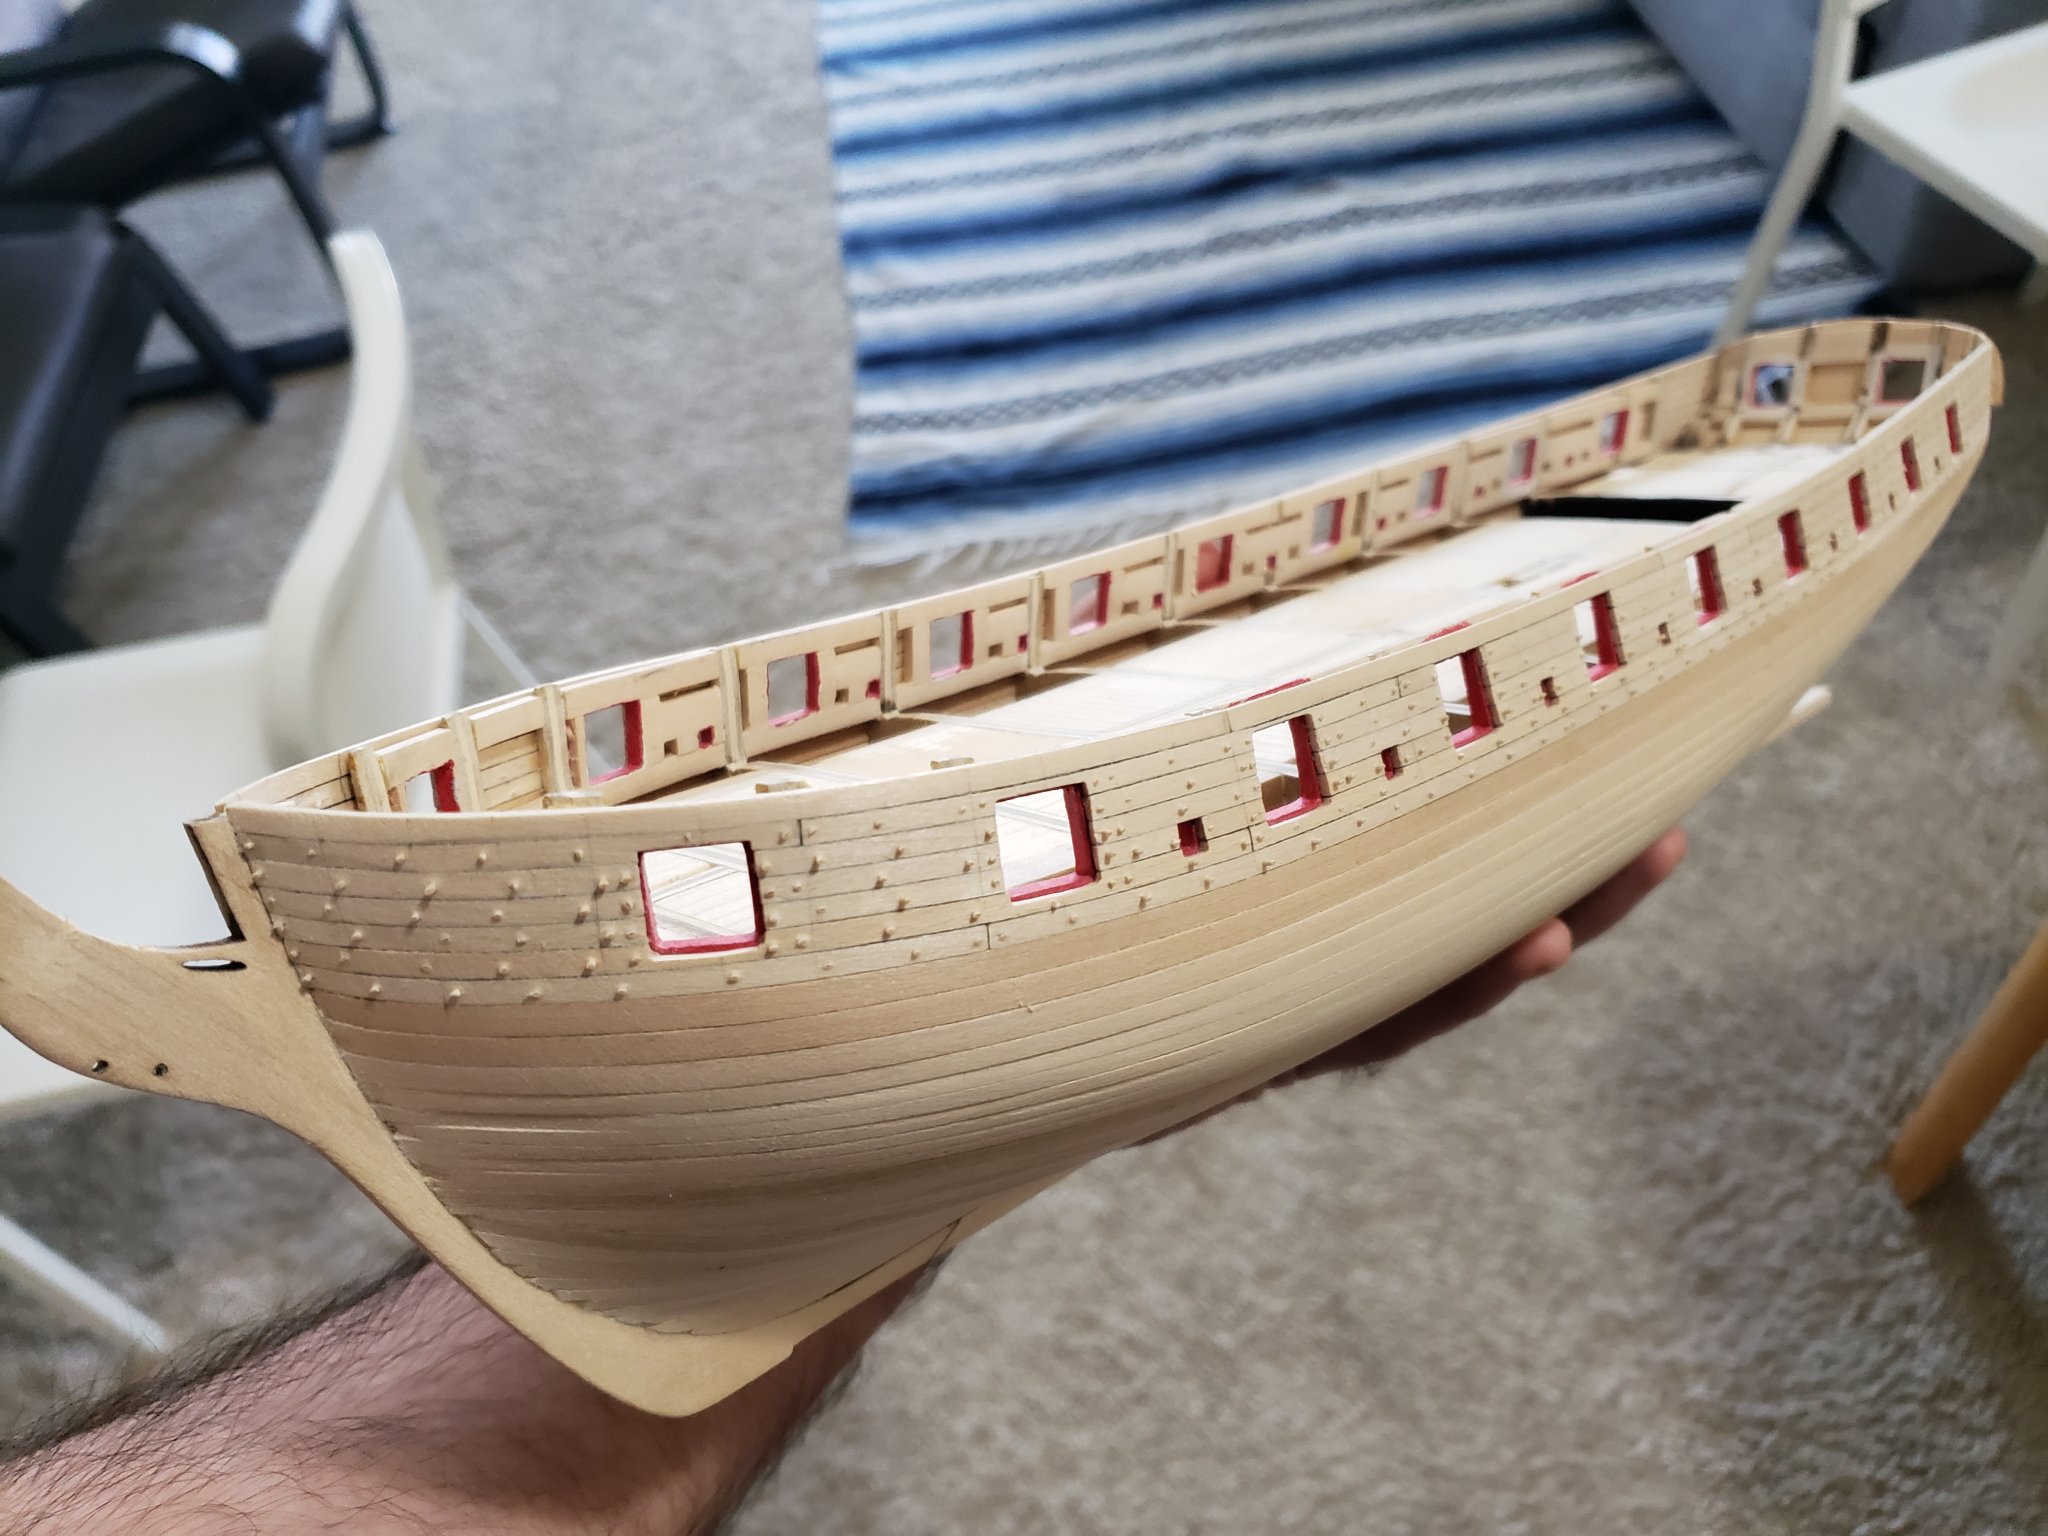
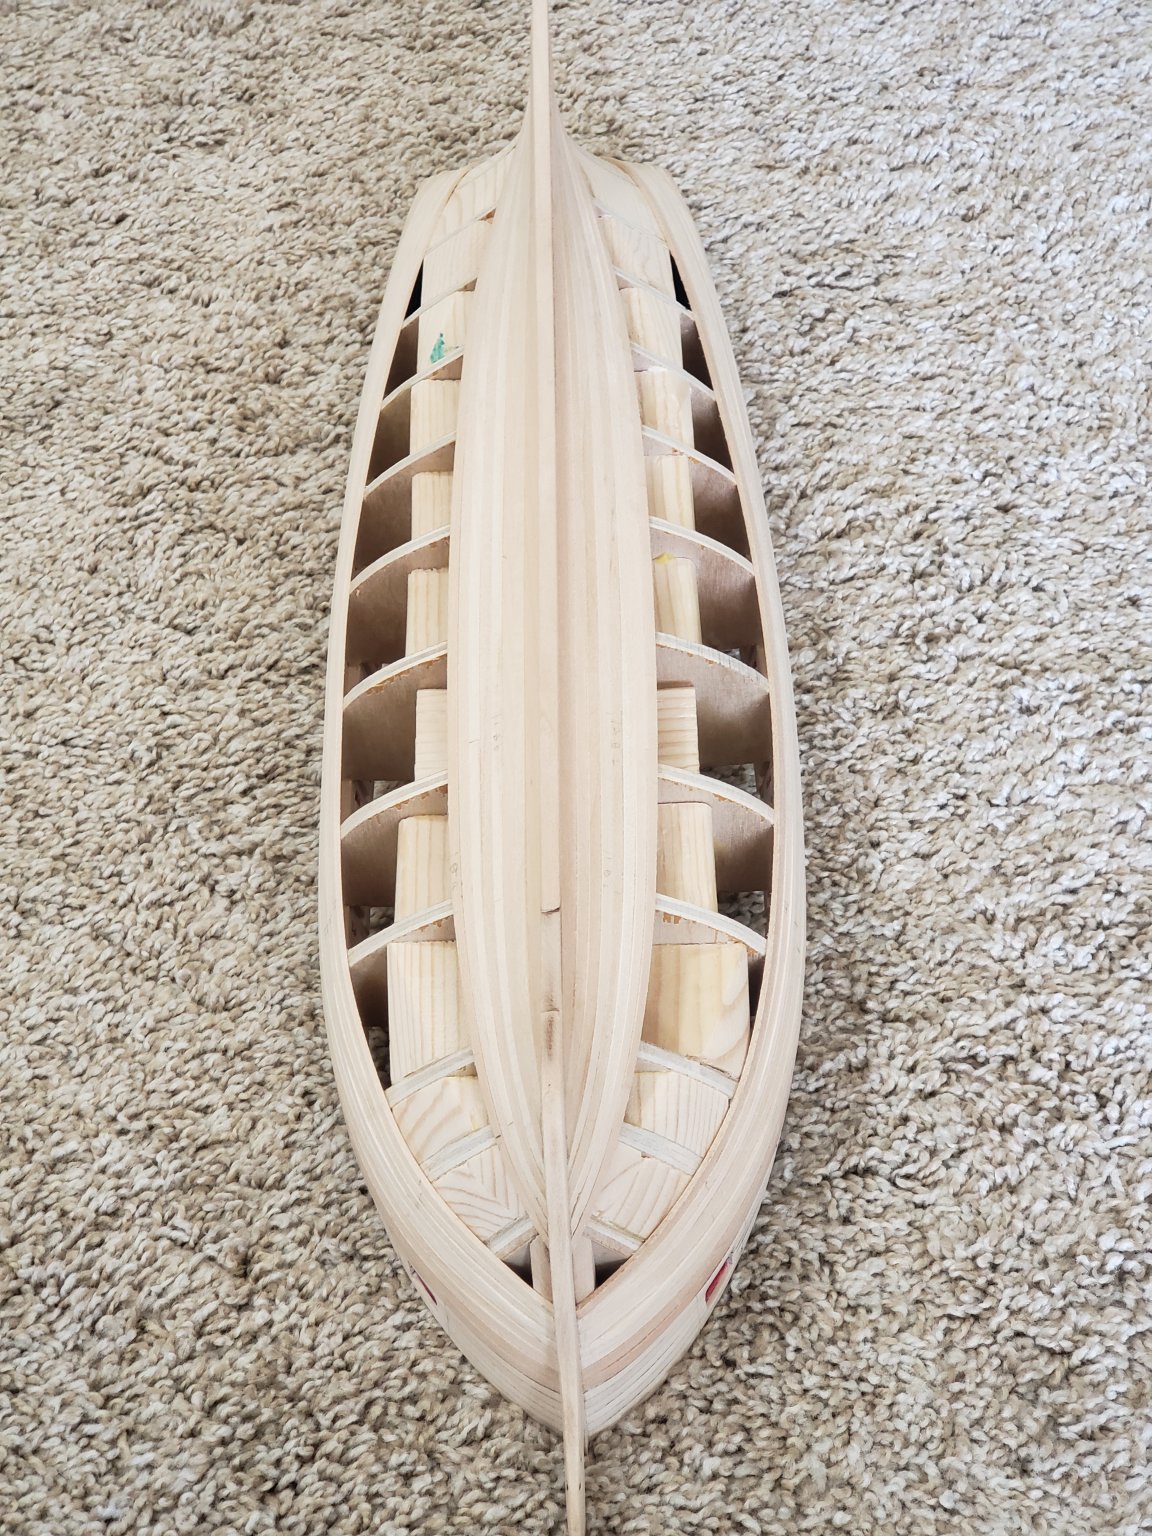
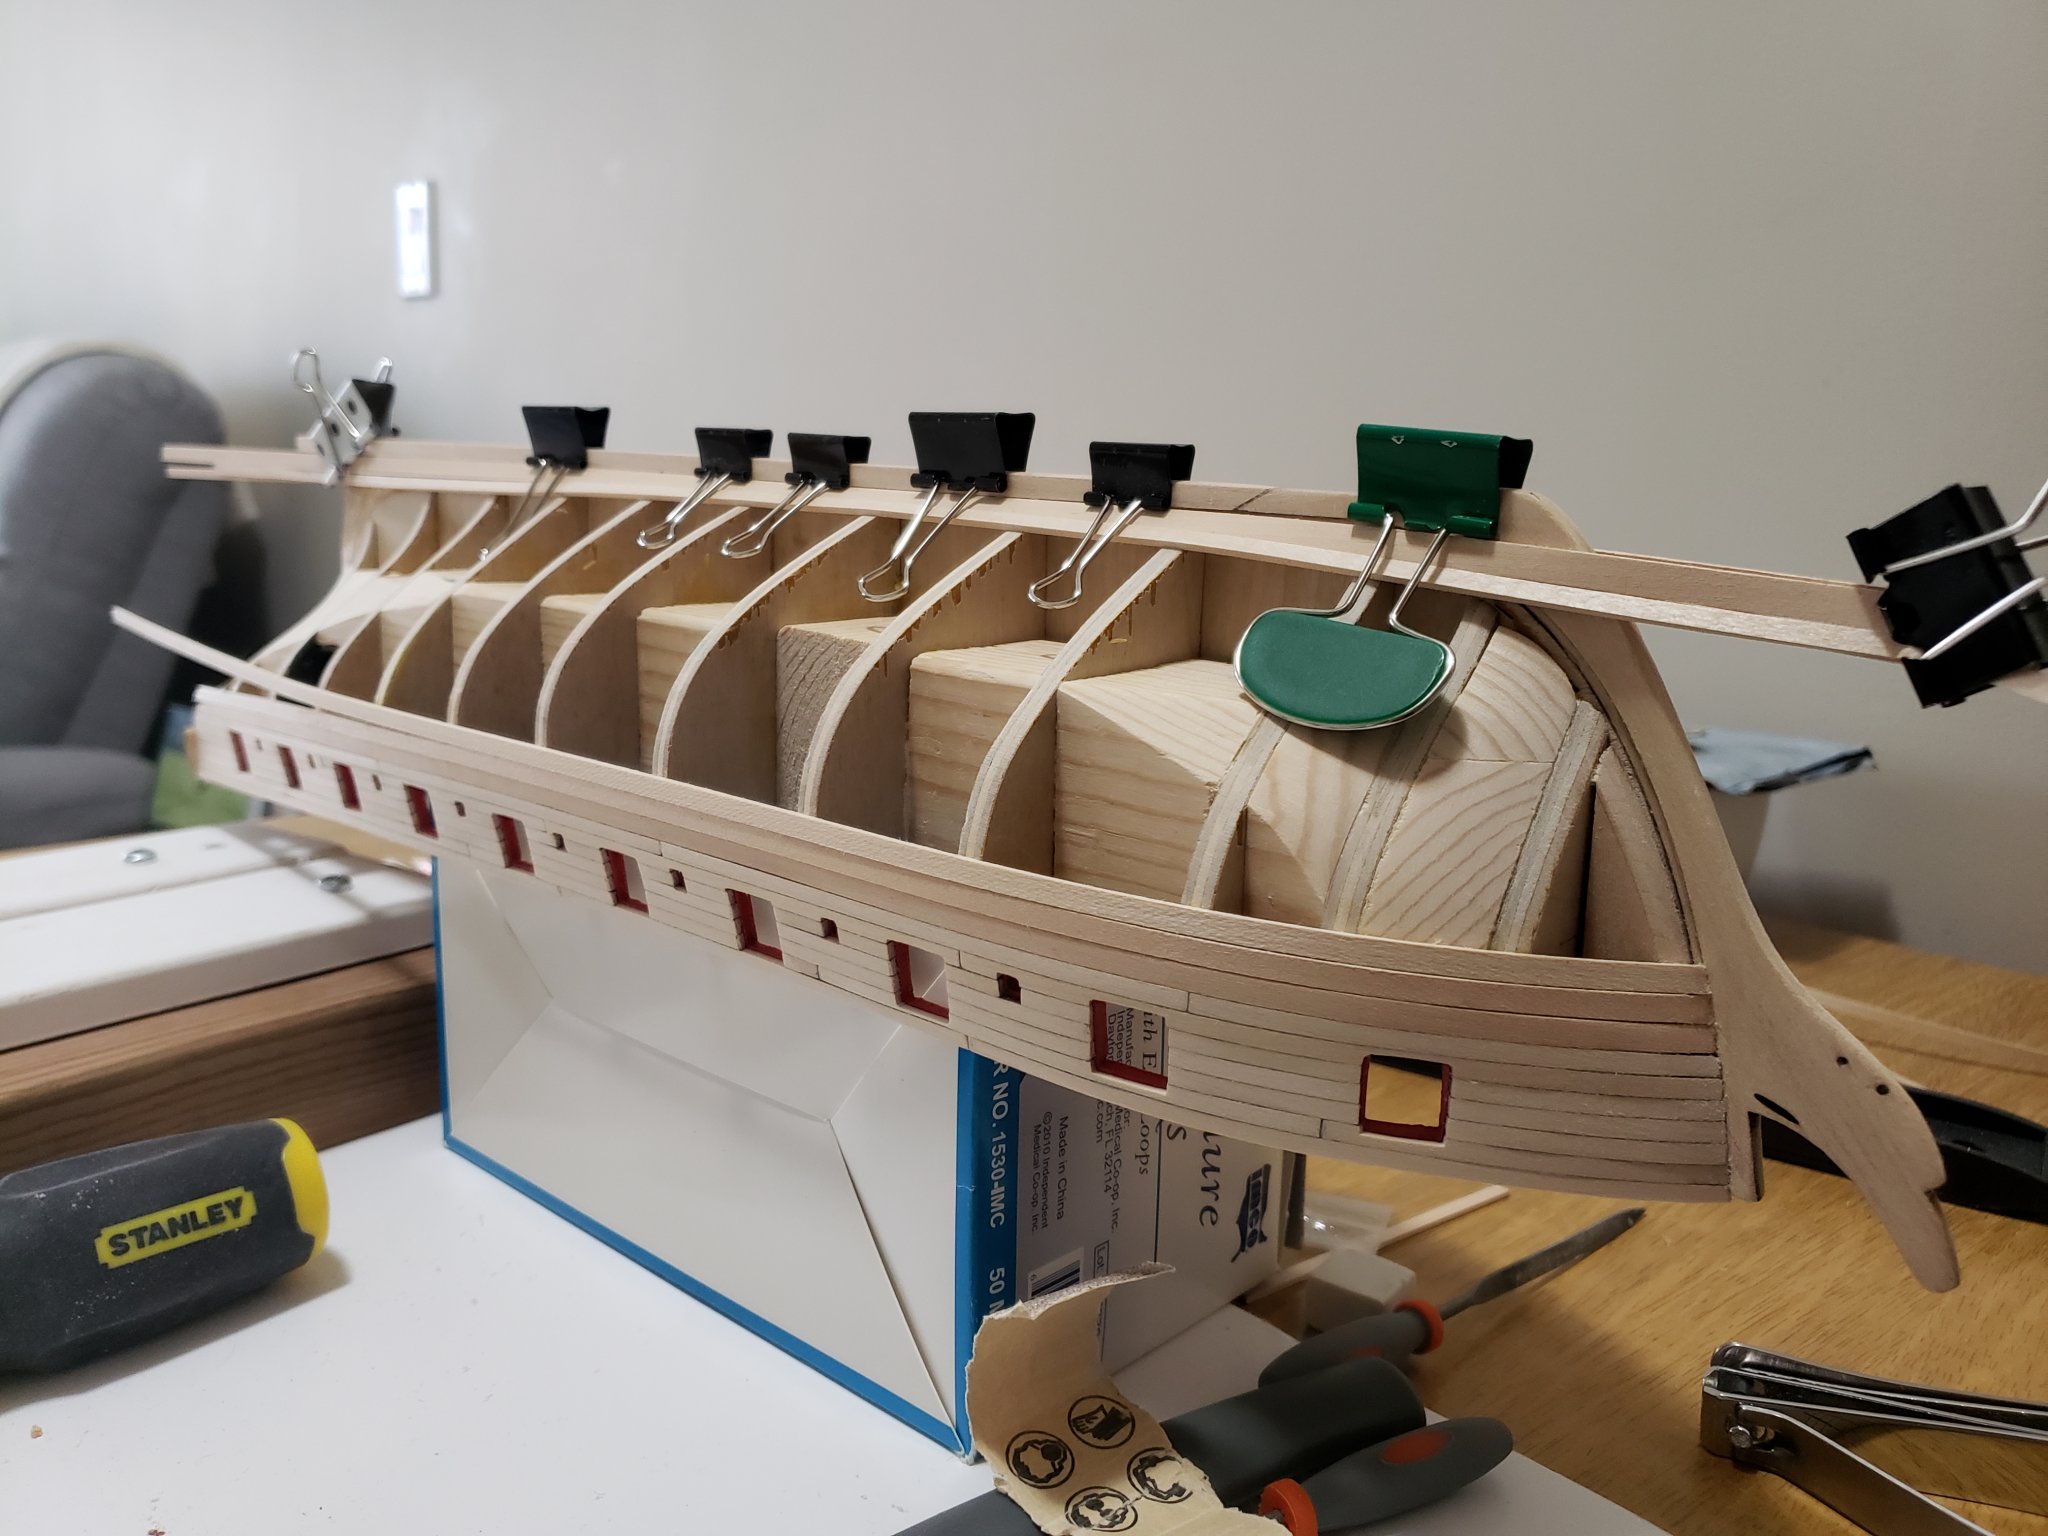
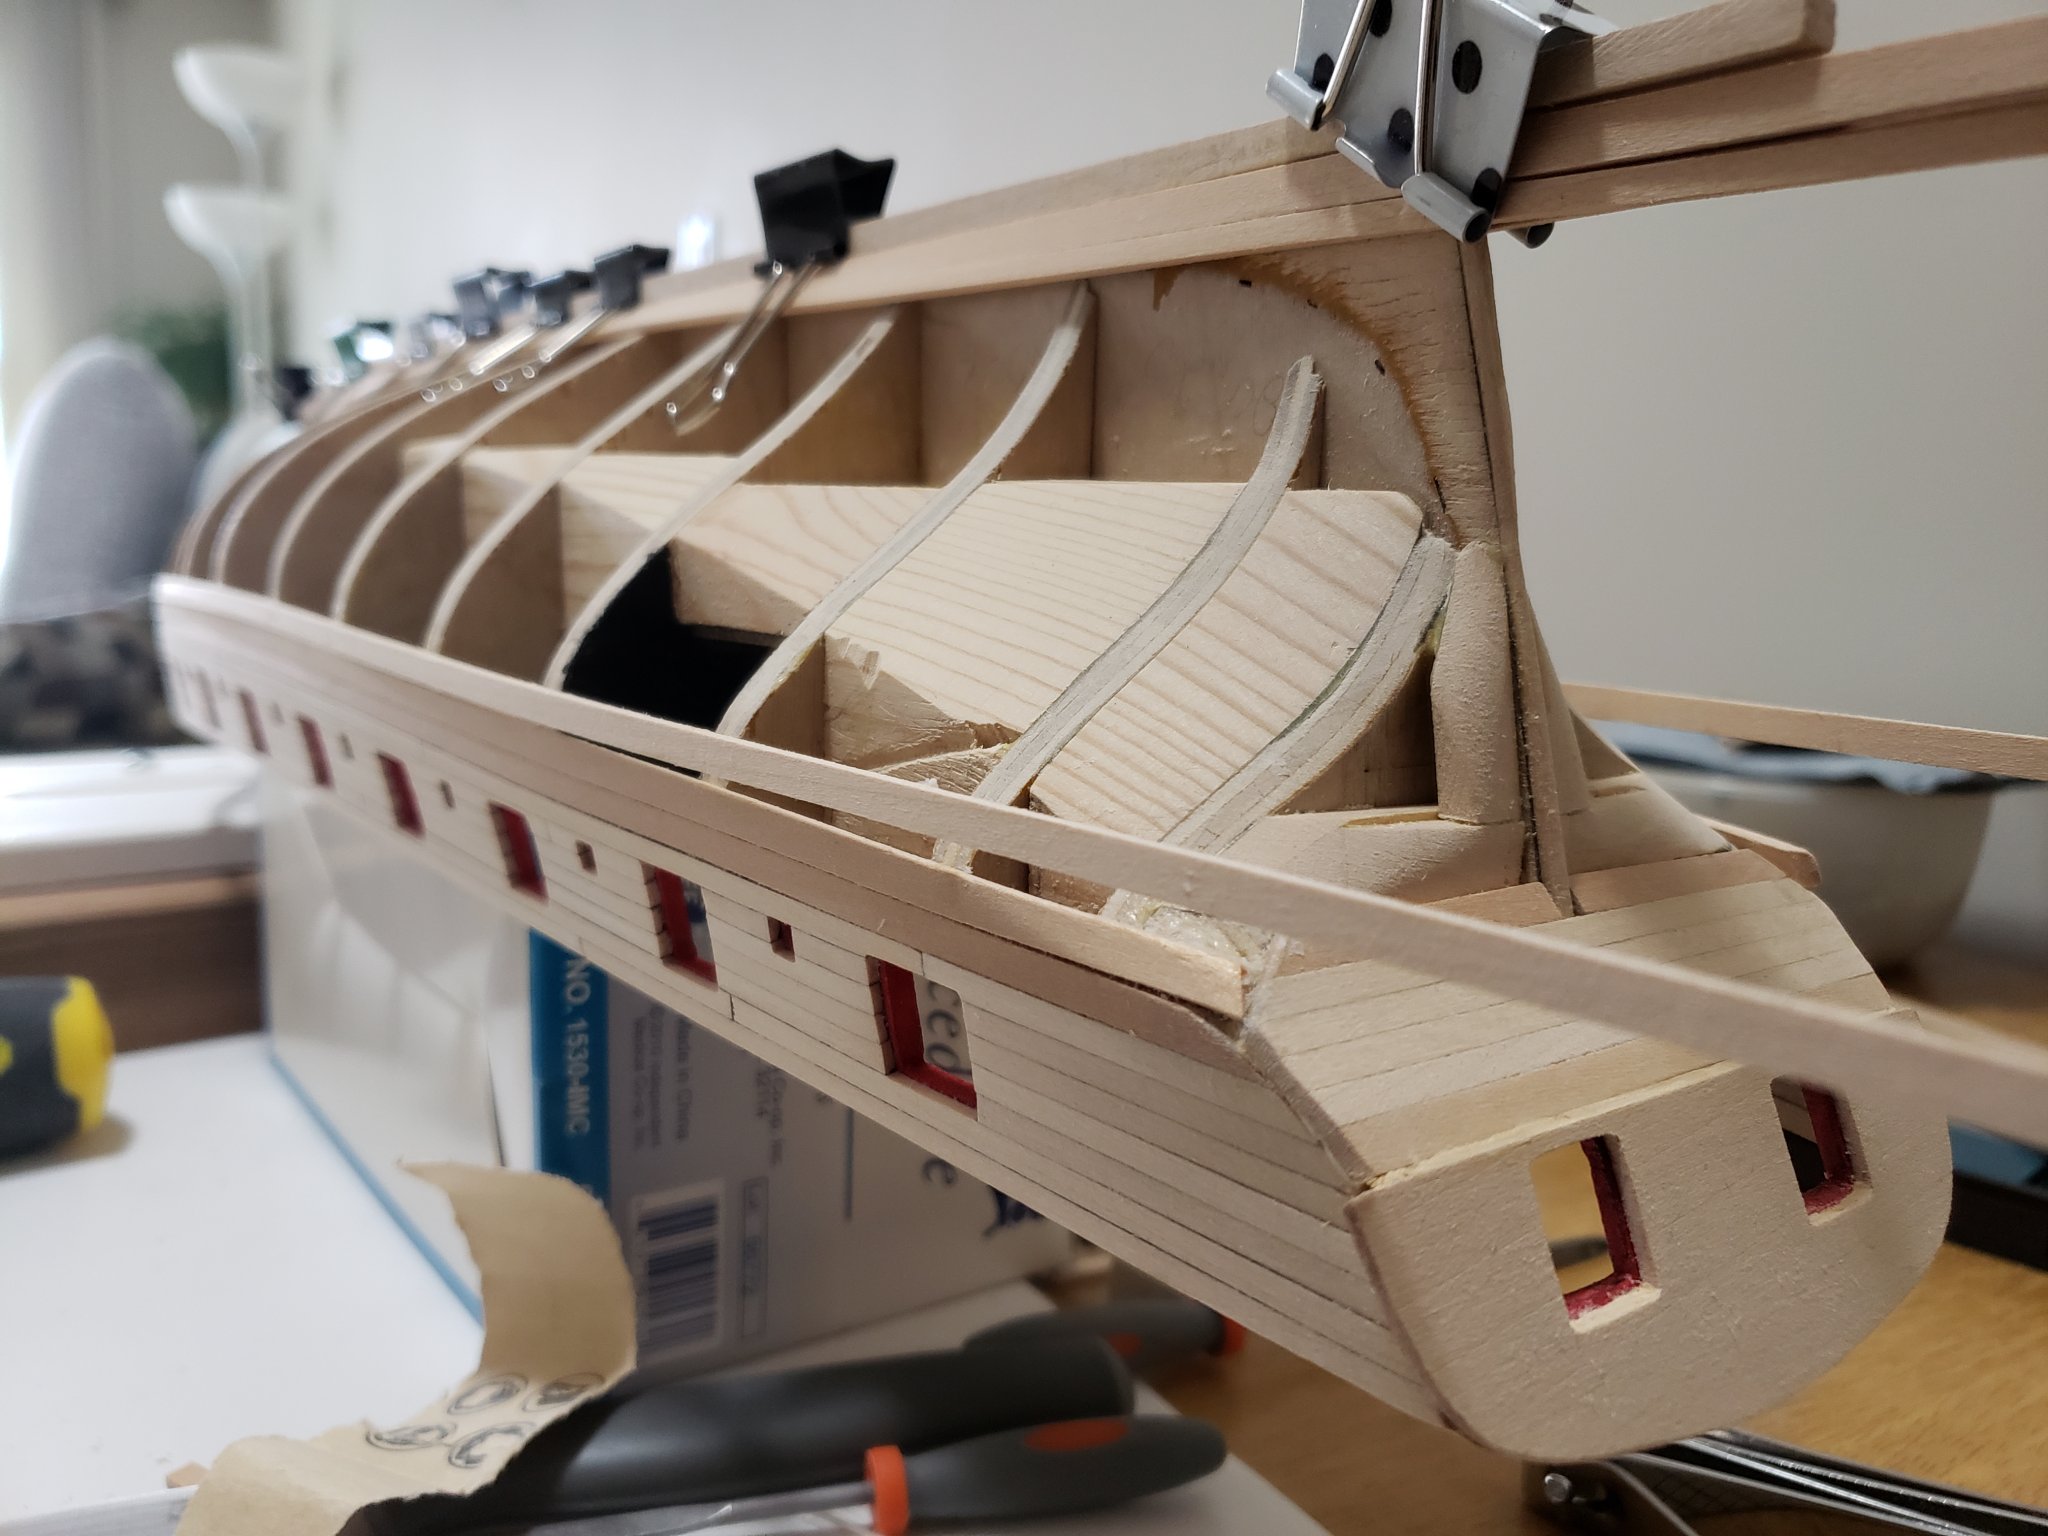
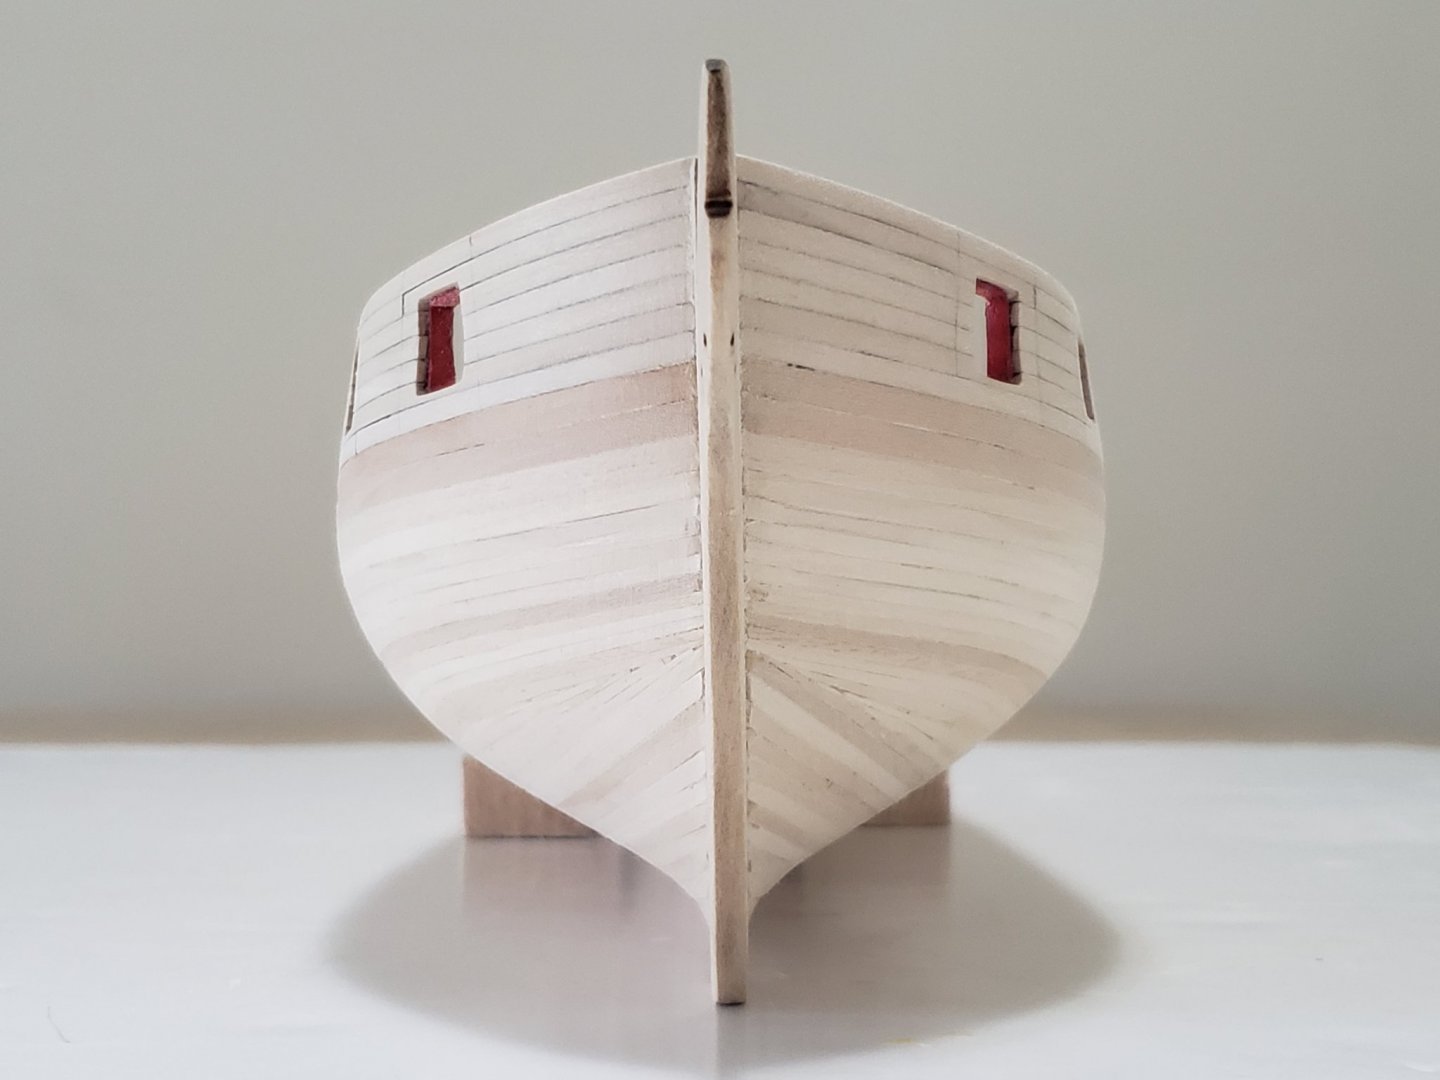
Made some more progress on the planking. The garboard plank was shaped and installed: Here is how she looks right now. It will be fun and equally as challenging to plank the rest of the hull since I have not tried tapering the planks before. I am planning to make a sample test planking rig to practice different ways to simulate treenails (mainly filler vs toothpicks), and practice painting the sheer strake and wales using masking tape to separate areas of wood and paint.


- 950 replies
-
- 8
-
-
- syren
- model shipways
- (and 1 more)
-
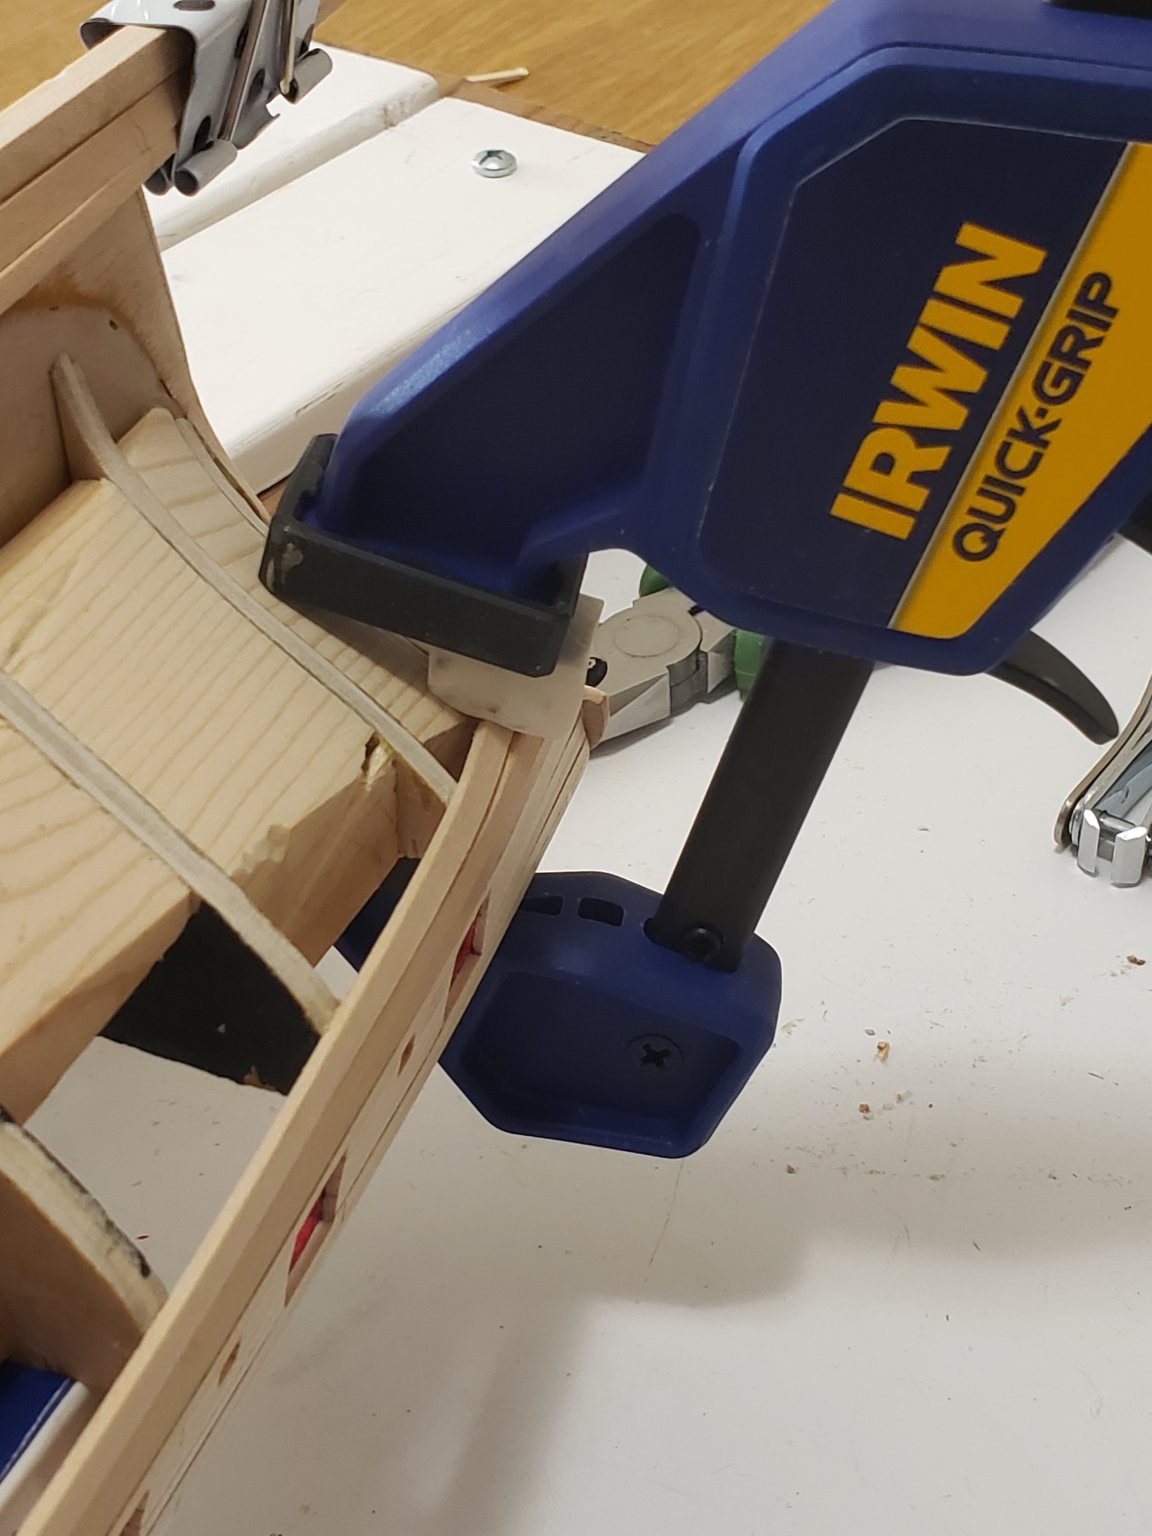
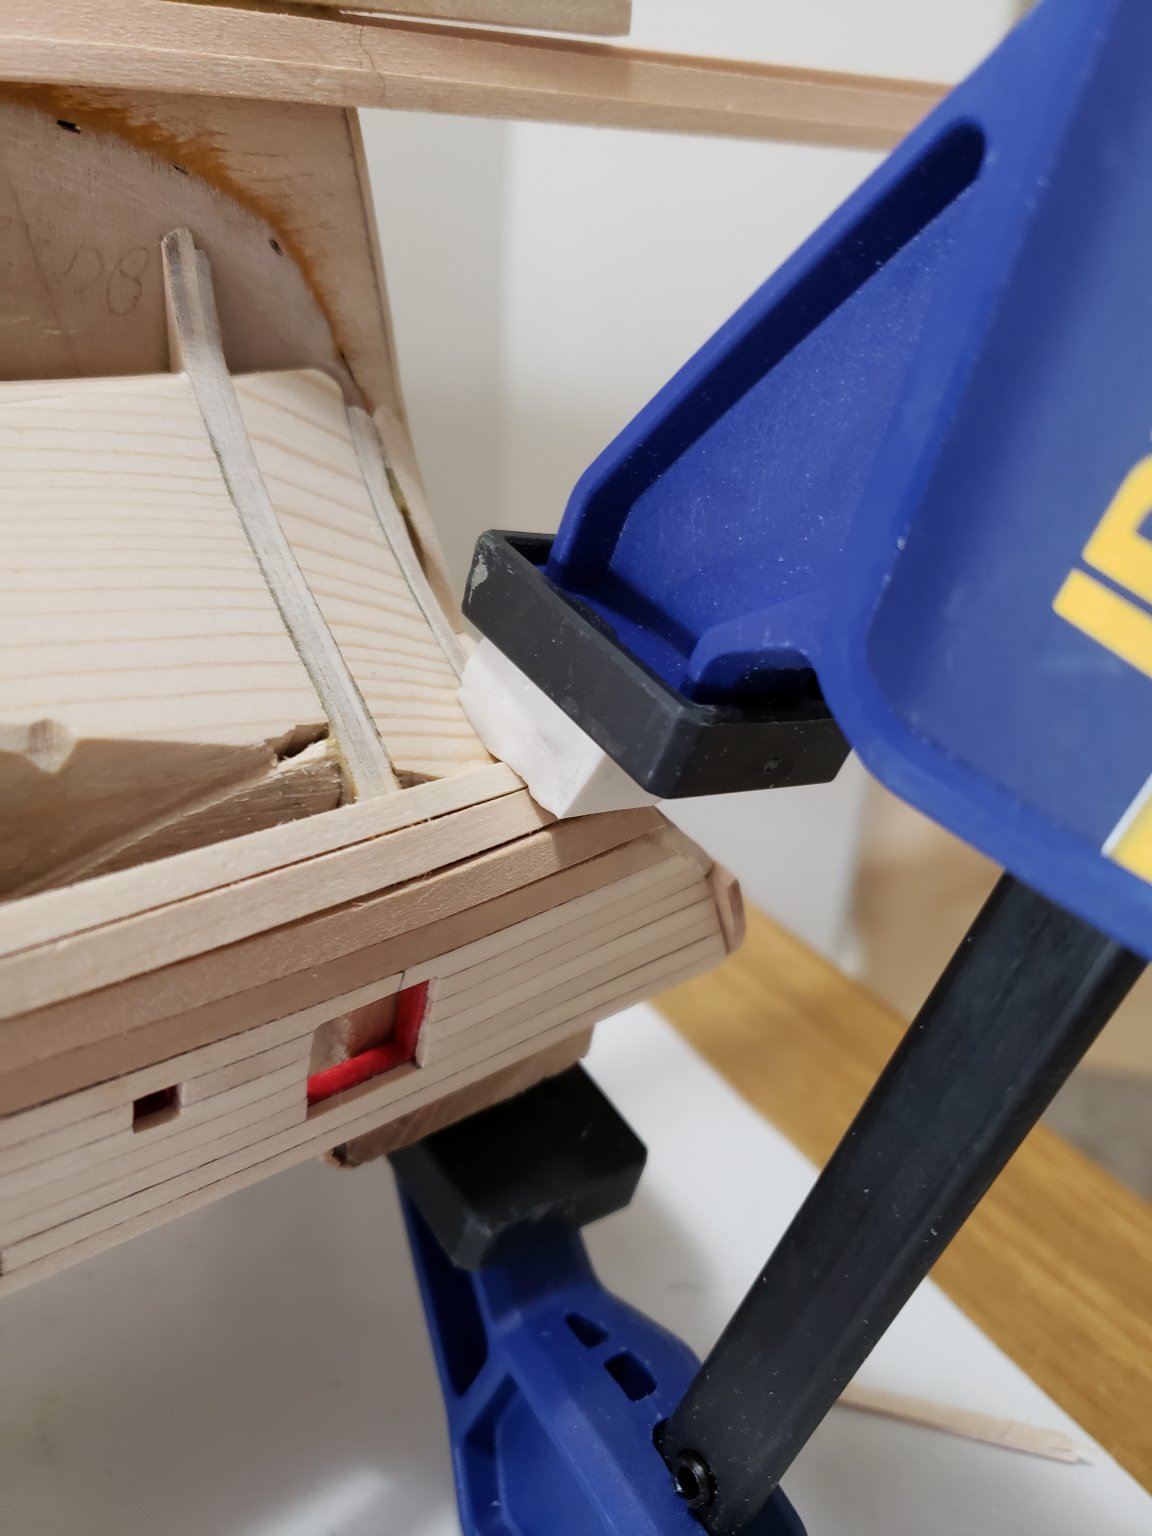
Thanks for the tip Robin! Since I don't have a C clamp, I used the following setup where erasers are at the top and scrap blocks of wood are at the bottom. Seems so work well so far! Thanks Justin!

- 950 replies
-
- 4
-
-
- syren
- model shipways
- (and 1 more)
-
Started working on planking of the hull. The two planks at the keel have been soaked and clamped so that they retain their shape once they are dried. Having a bit of trouble planking at the stern because of the steep curves. Very tricky to hold the planks in this part of the hull to wait for the glue to dry.


- 950 replies
-
- 9
-
-
- syren
- model shipways
- (and 1 more)