HOLIDAY DONATION DRIVE - SUPPORT MSW - DO YOUR PART TO KEEP THIS GREAT FORUM GOING! (Only 13 donations so far - C'mon guys!)
×

.jpg.1f80adf1a9b14a937cfcf2ca6af0f0d4.jpg)
WalrusGuy
-
Posts
1,007 -
Joined
-
Last visited
Content Type
Profiles
Forums
Gallery
Events
Everything posted by WalrusGuy
-
.thumb.jpg.62d1d69fed1f32364417cb1f9cdeb009.jpg) Ohh that makes sense. Should've reread the instructions. Hopefully this doesn't bring any issues as I progress the build. In hindsight I should've also planked it. Would've avoided all these mistakes haha 😅. So true Richard. I'm treating this as a learning experience for future builds.
Ohh that makes sense. Should've reread the instructions. Hopefully this doesn't bring any issues as I progress the build. In hindsight I should've also planked it. Would've avoided all these mistakes haha 😅. So true Richard. I'm treating this as a learning experience for future builds.- 950 replies
-
- 1
-

-
- syren
- model shipways
- (and 1 more)
-
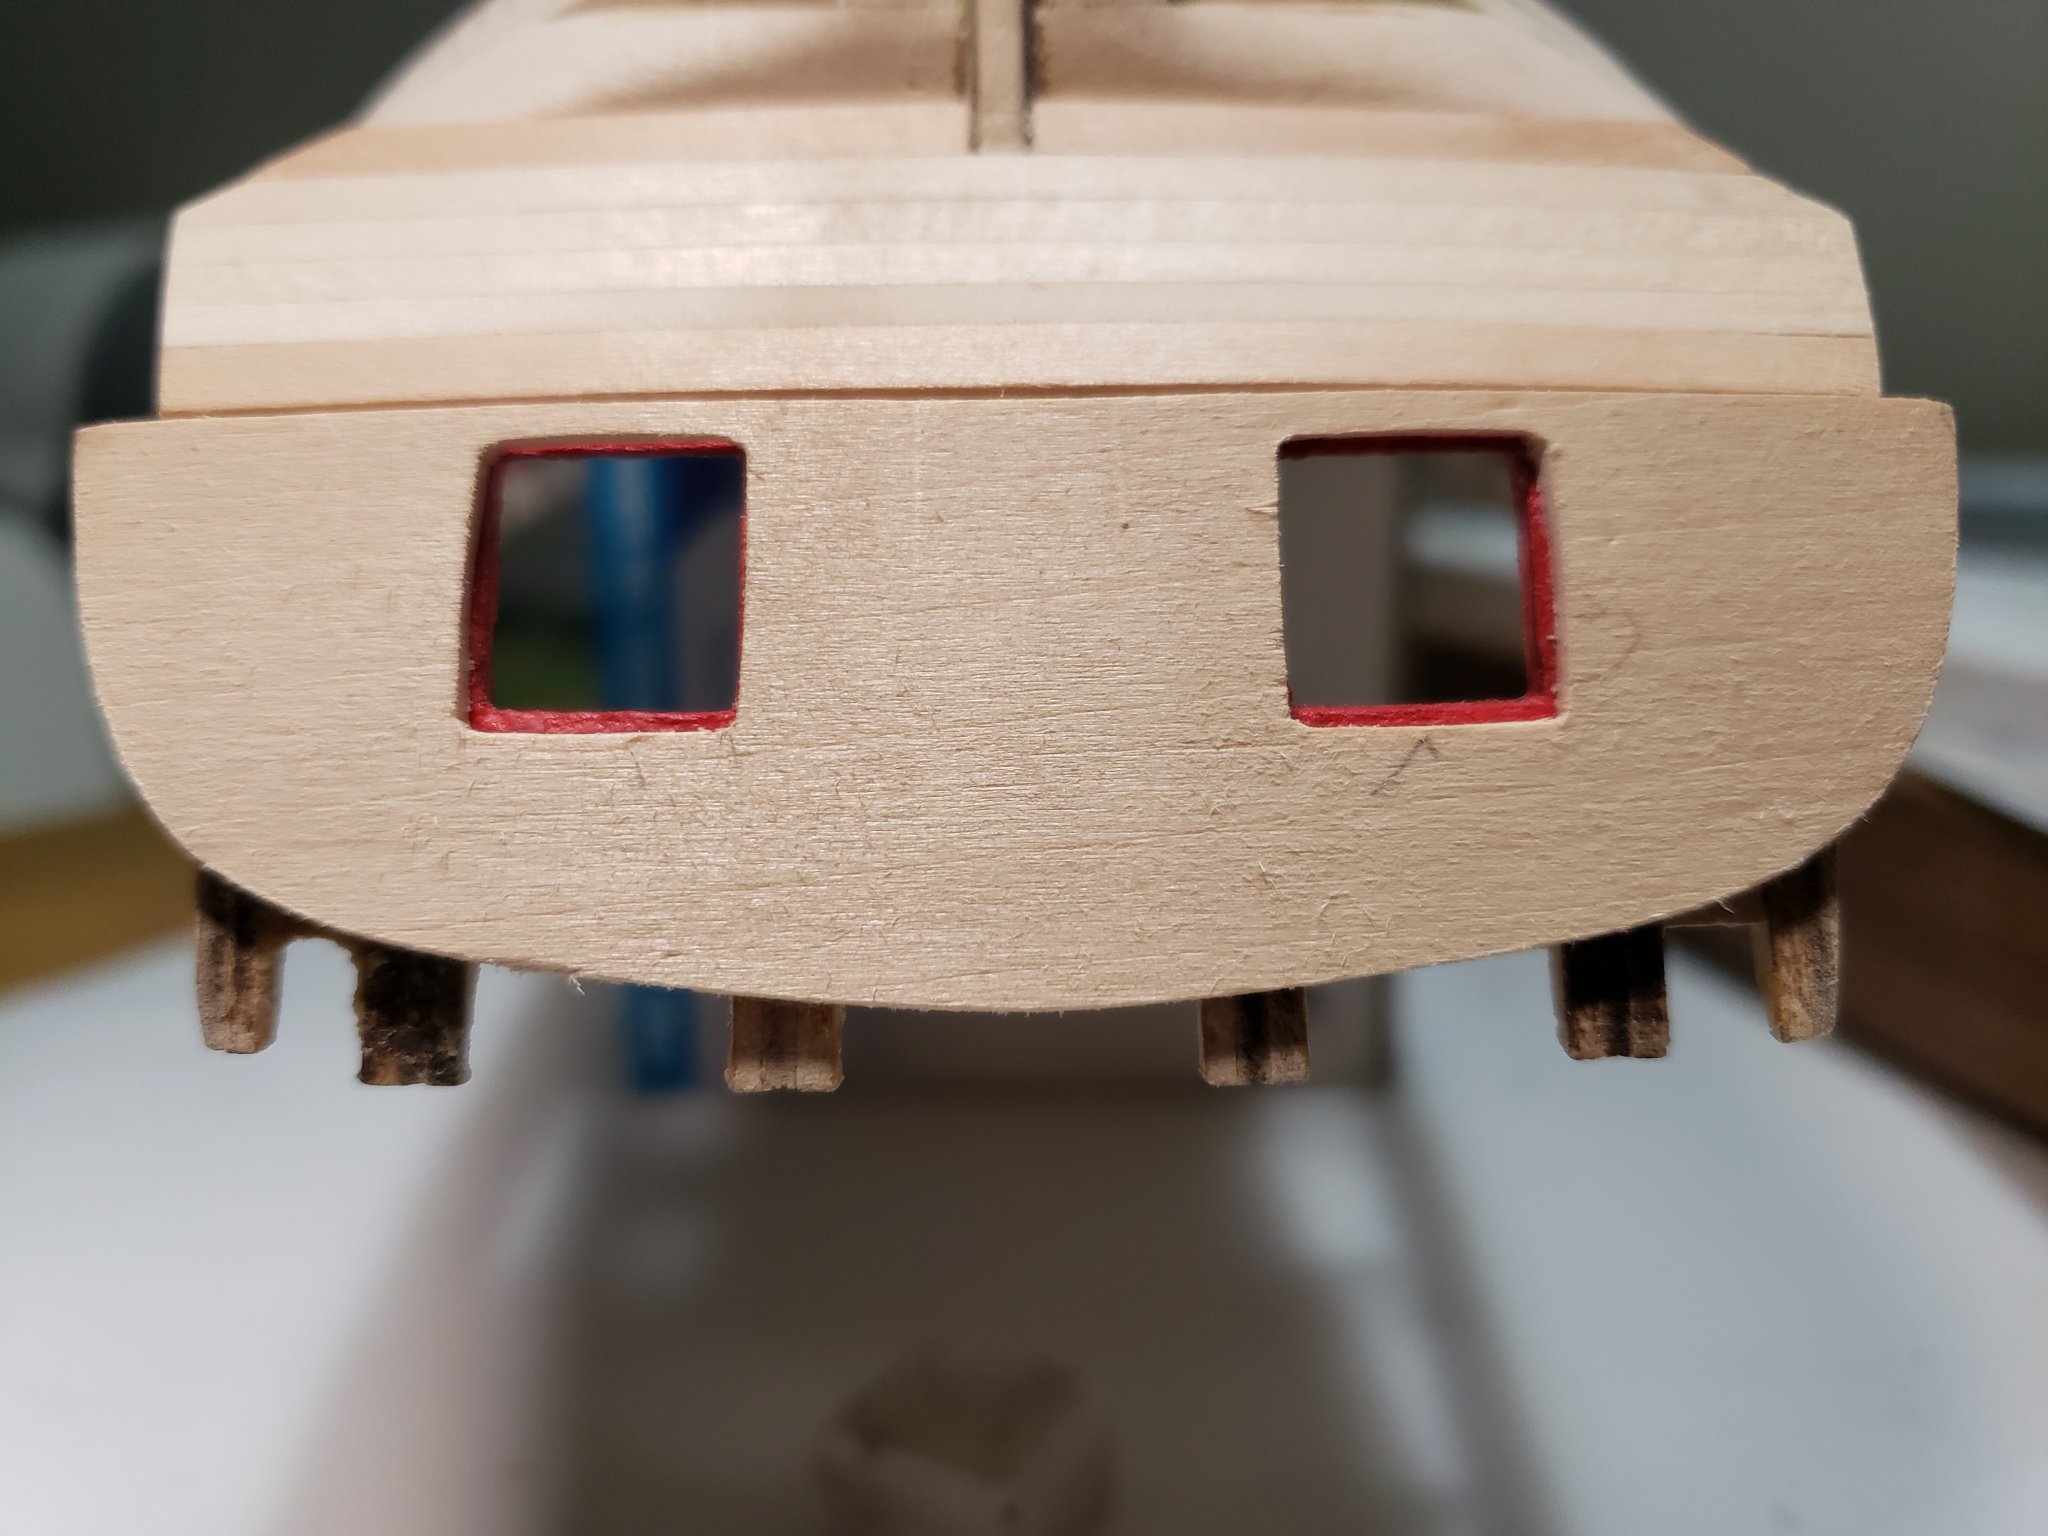
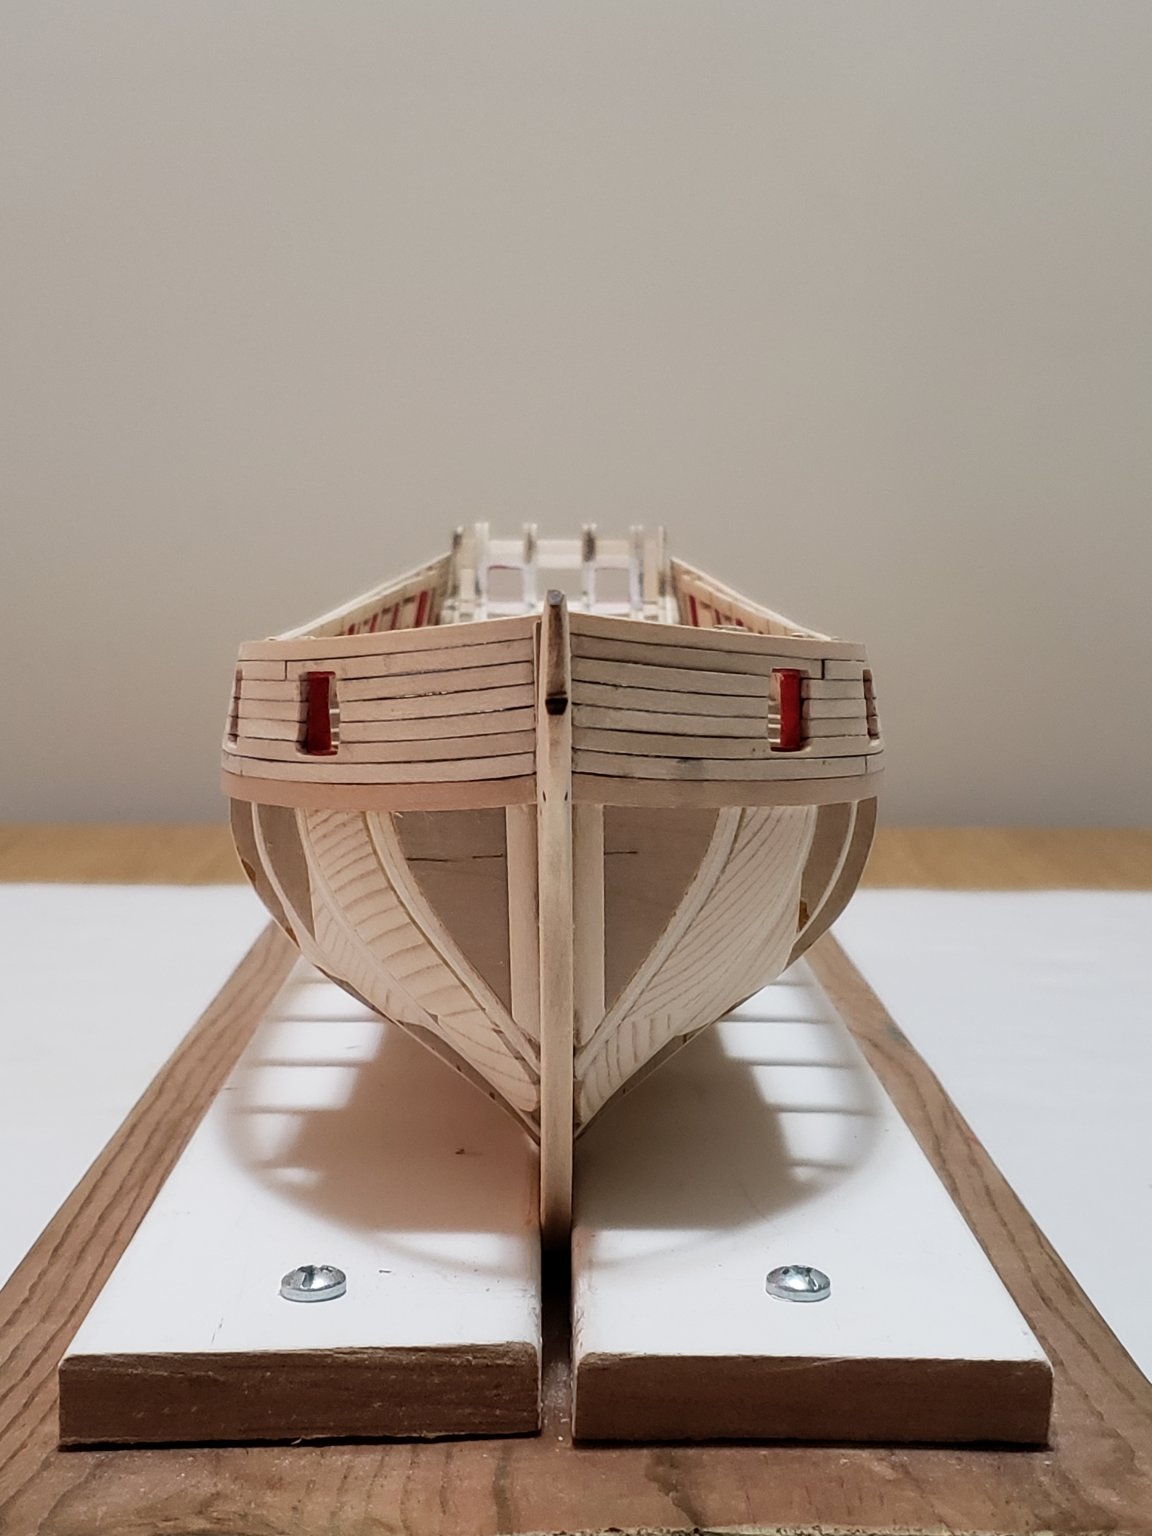
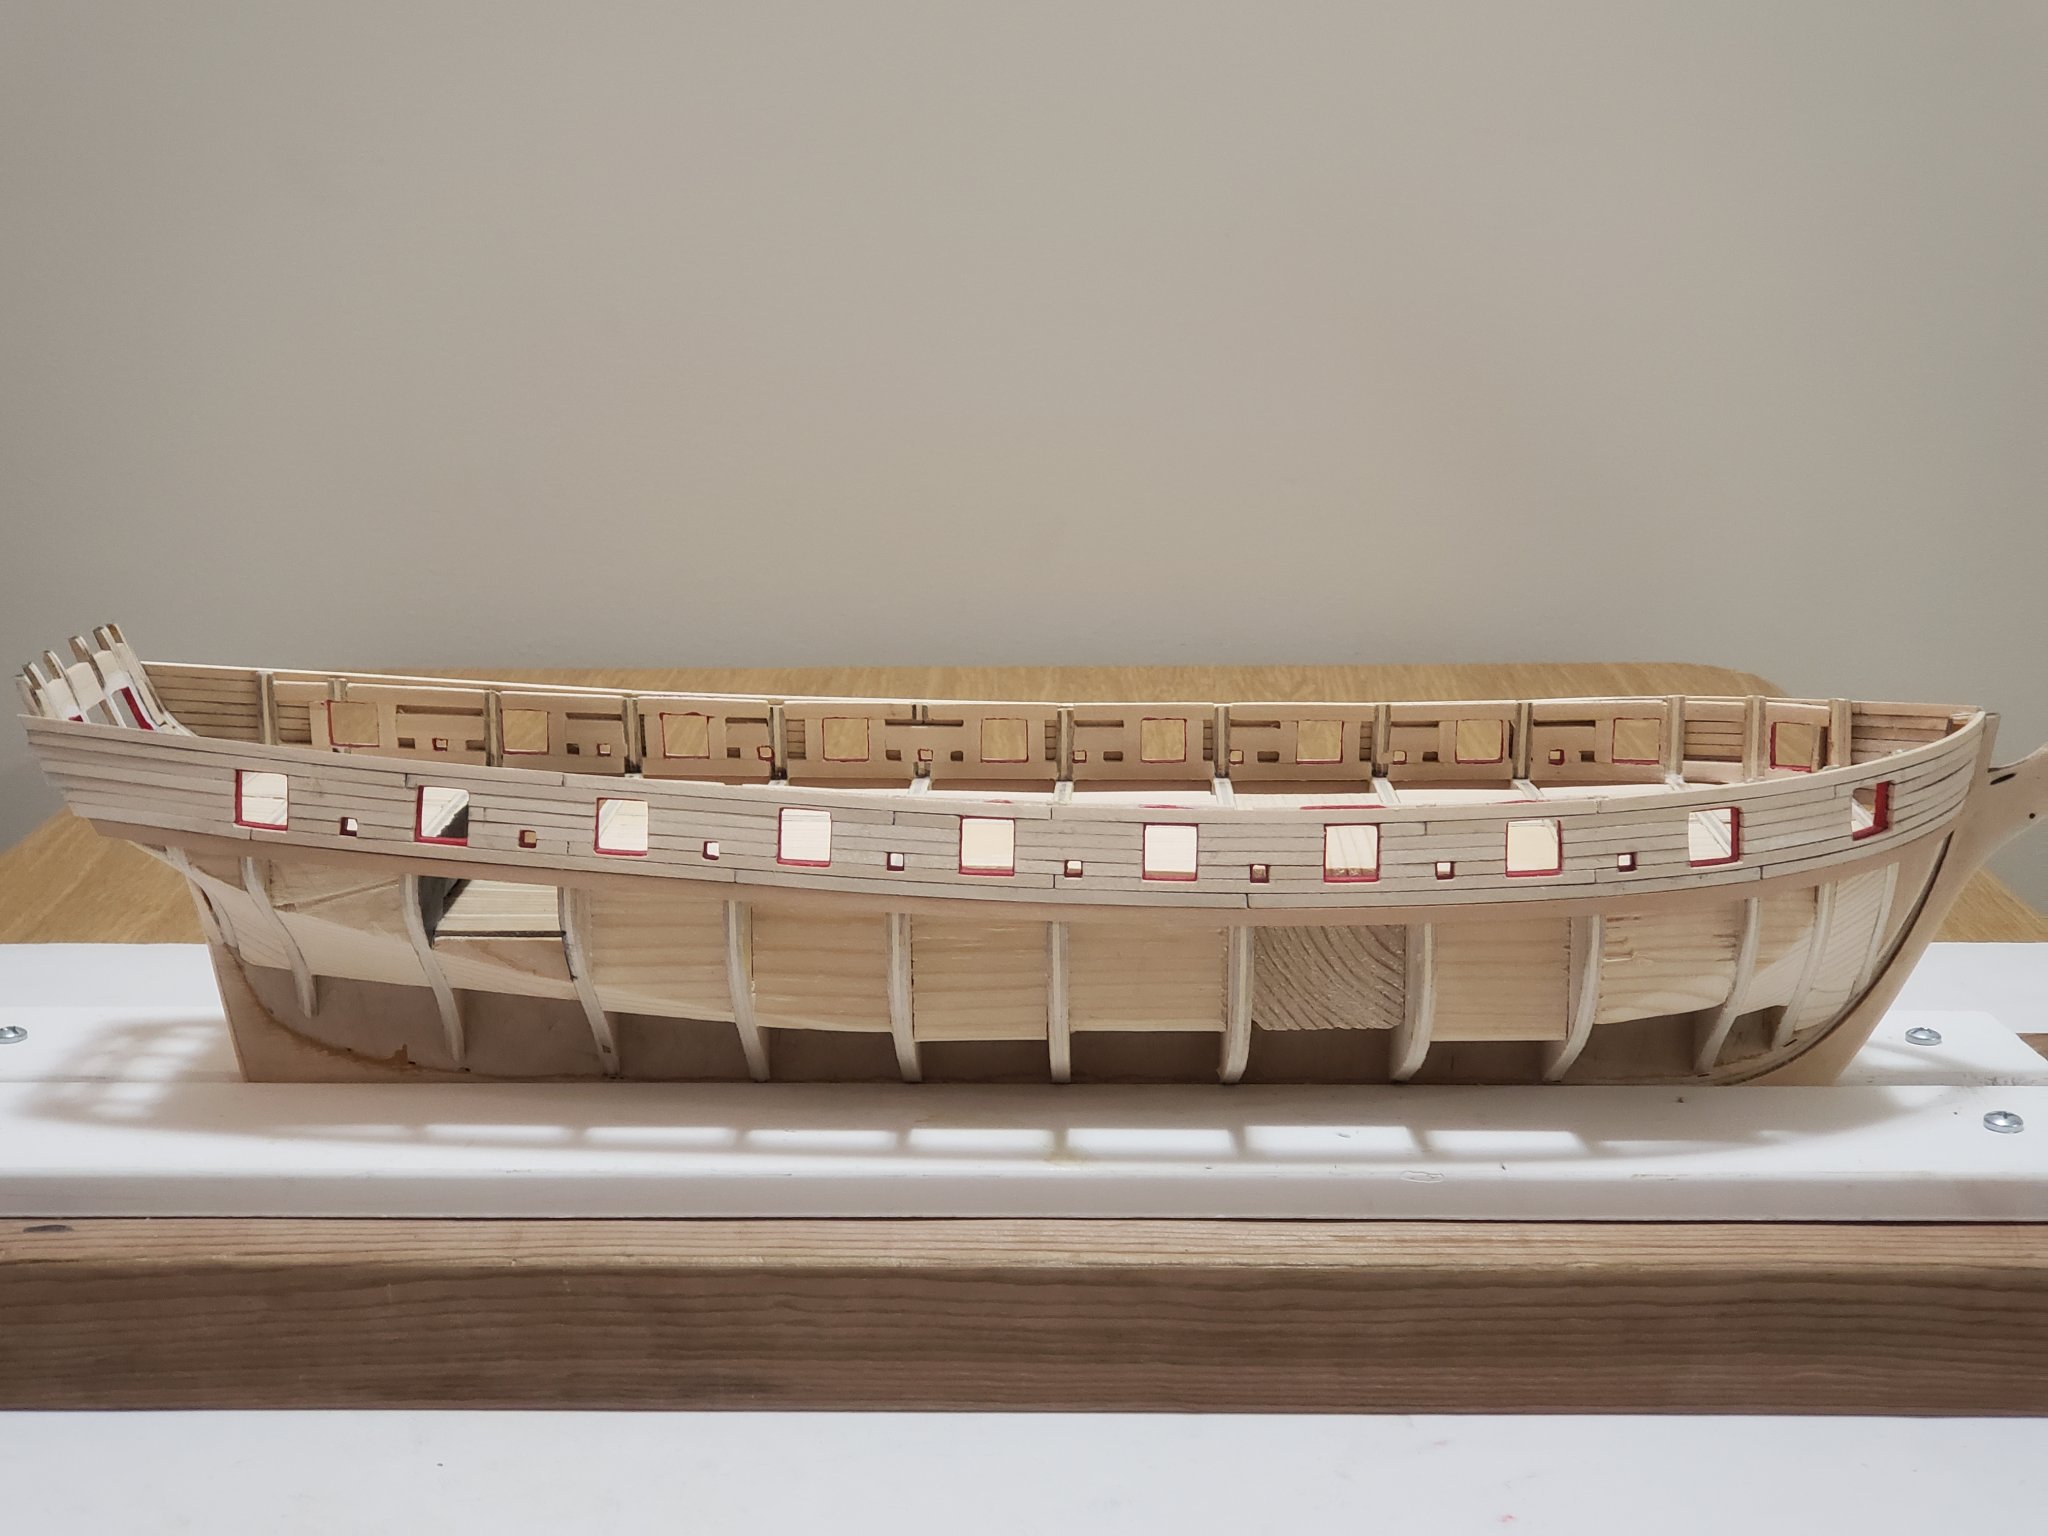
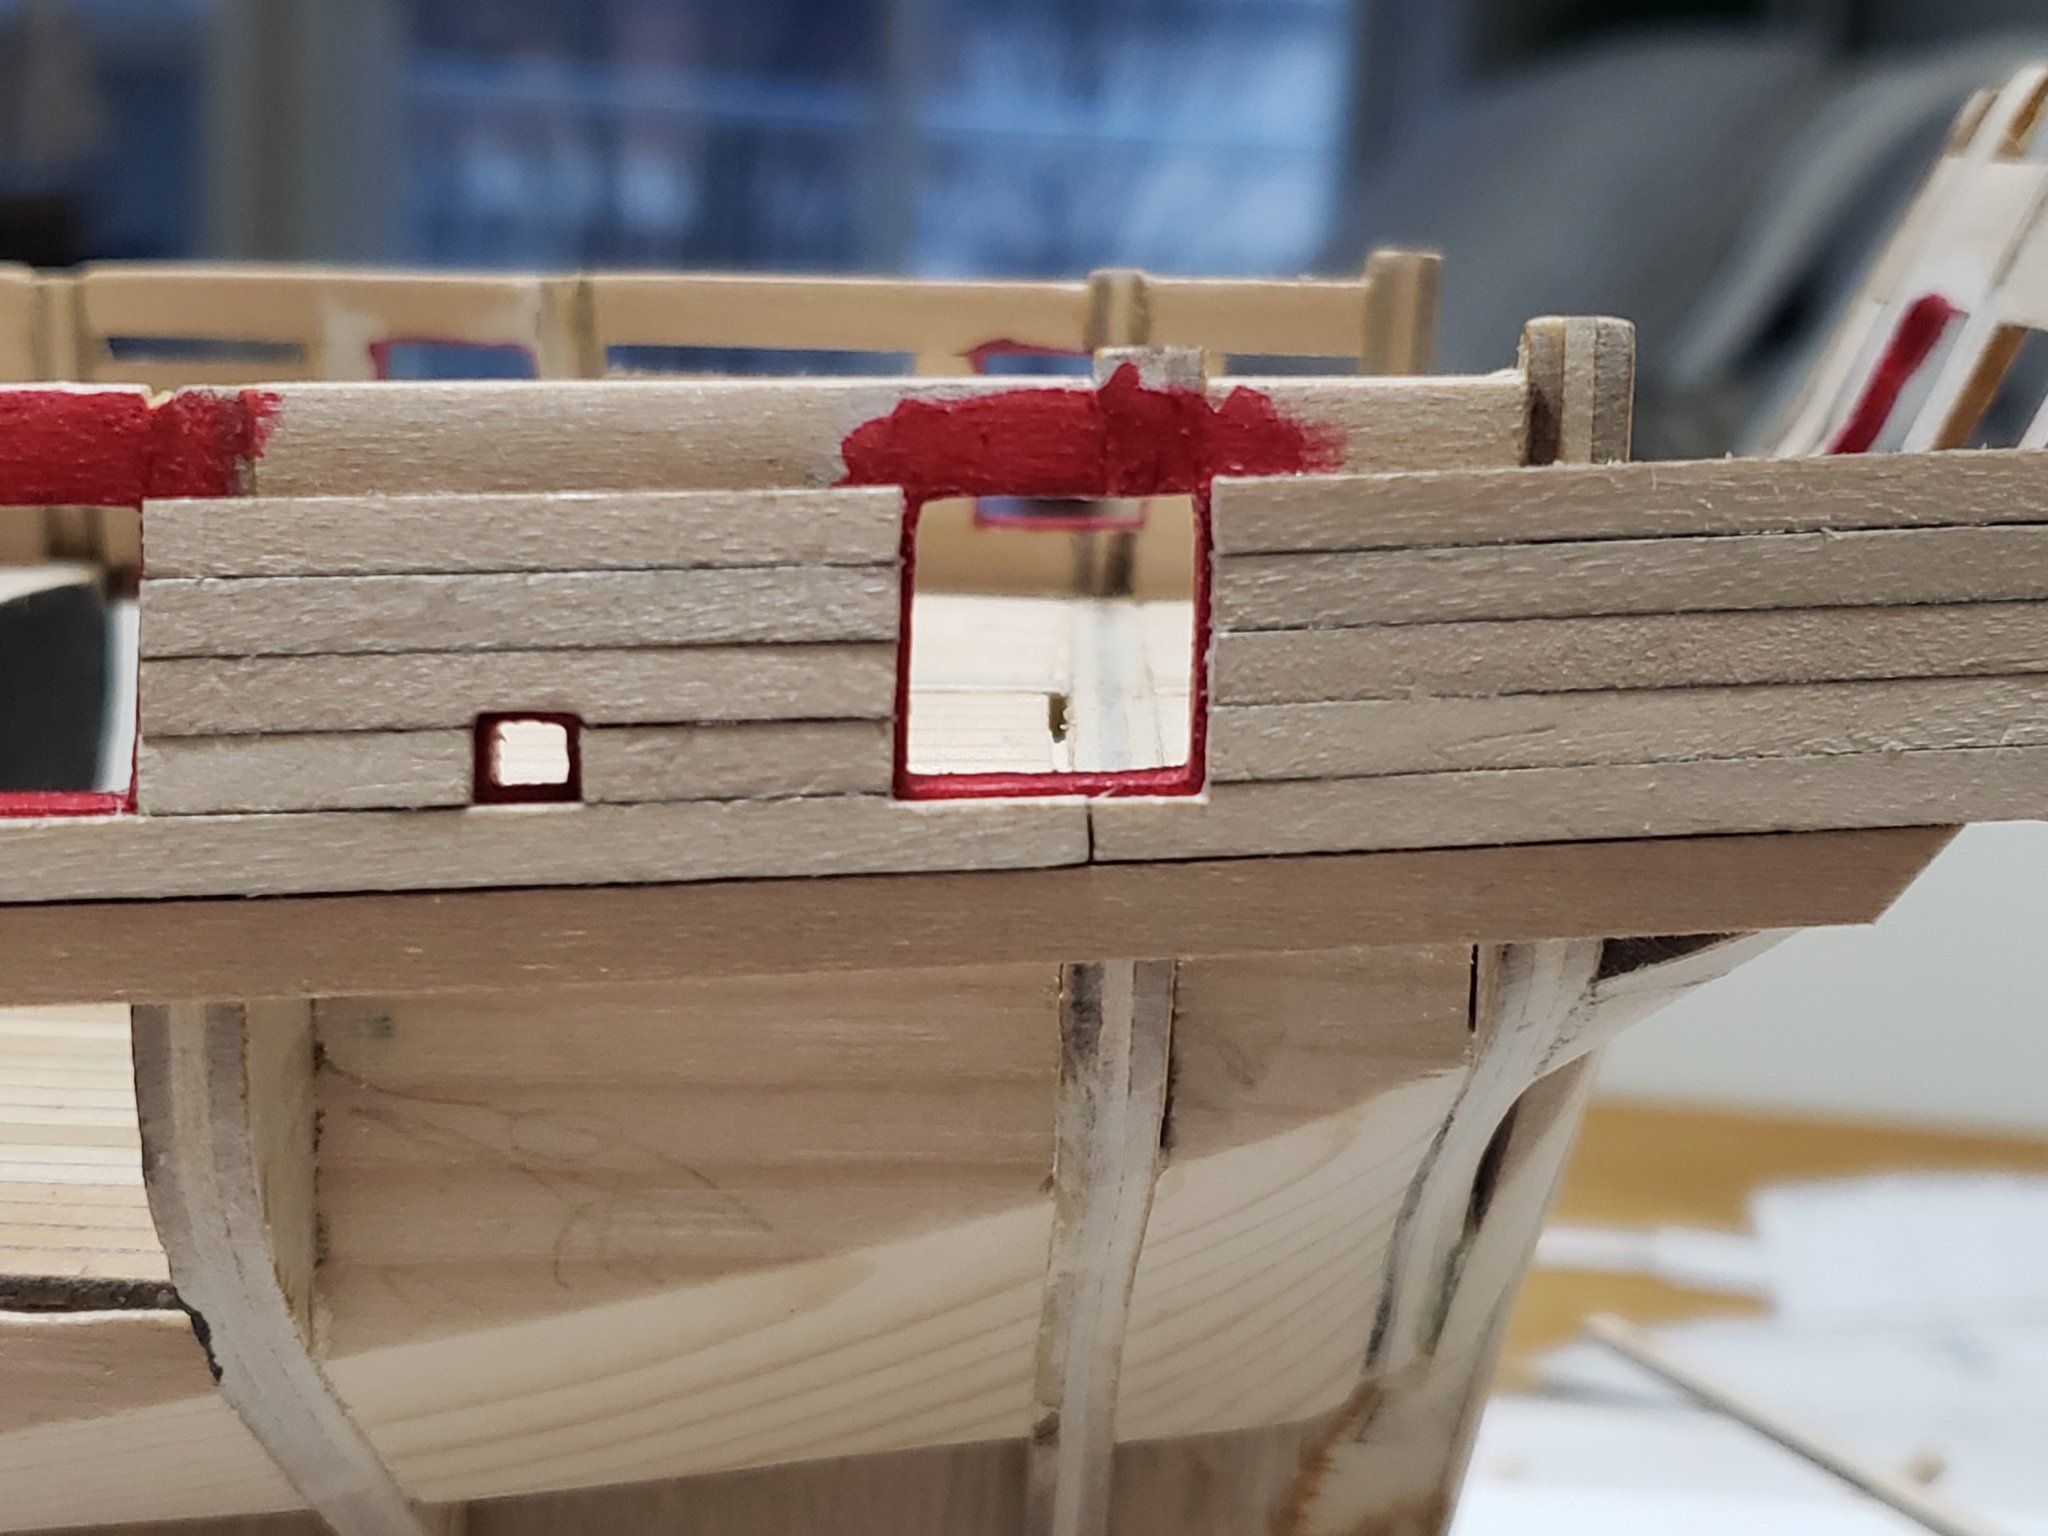
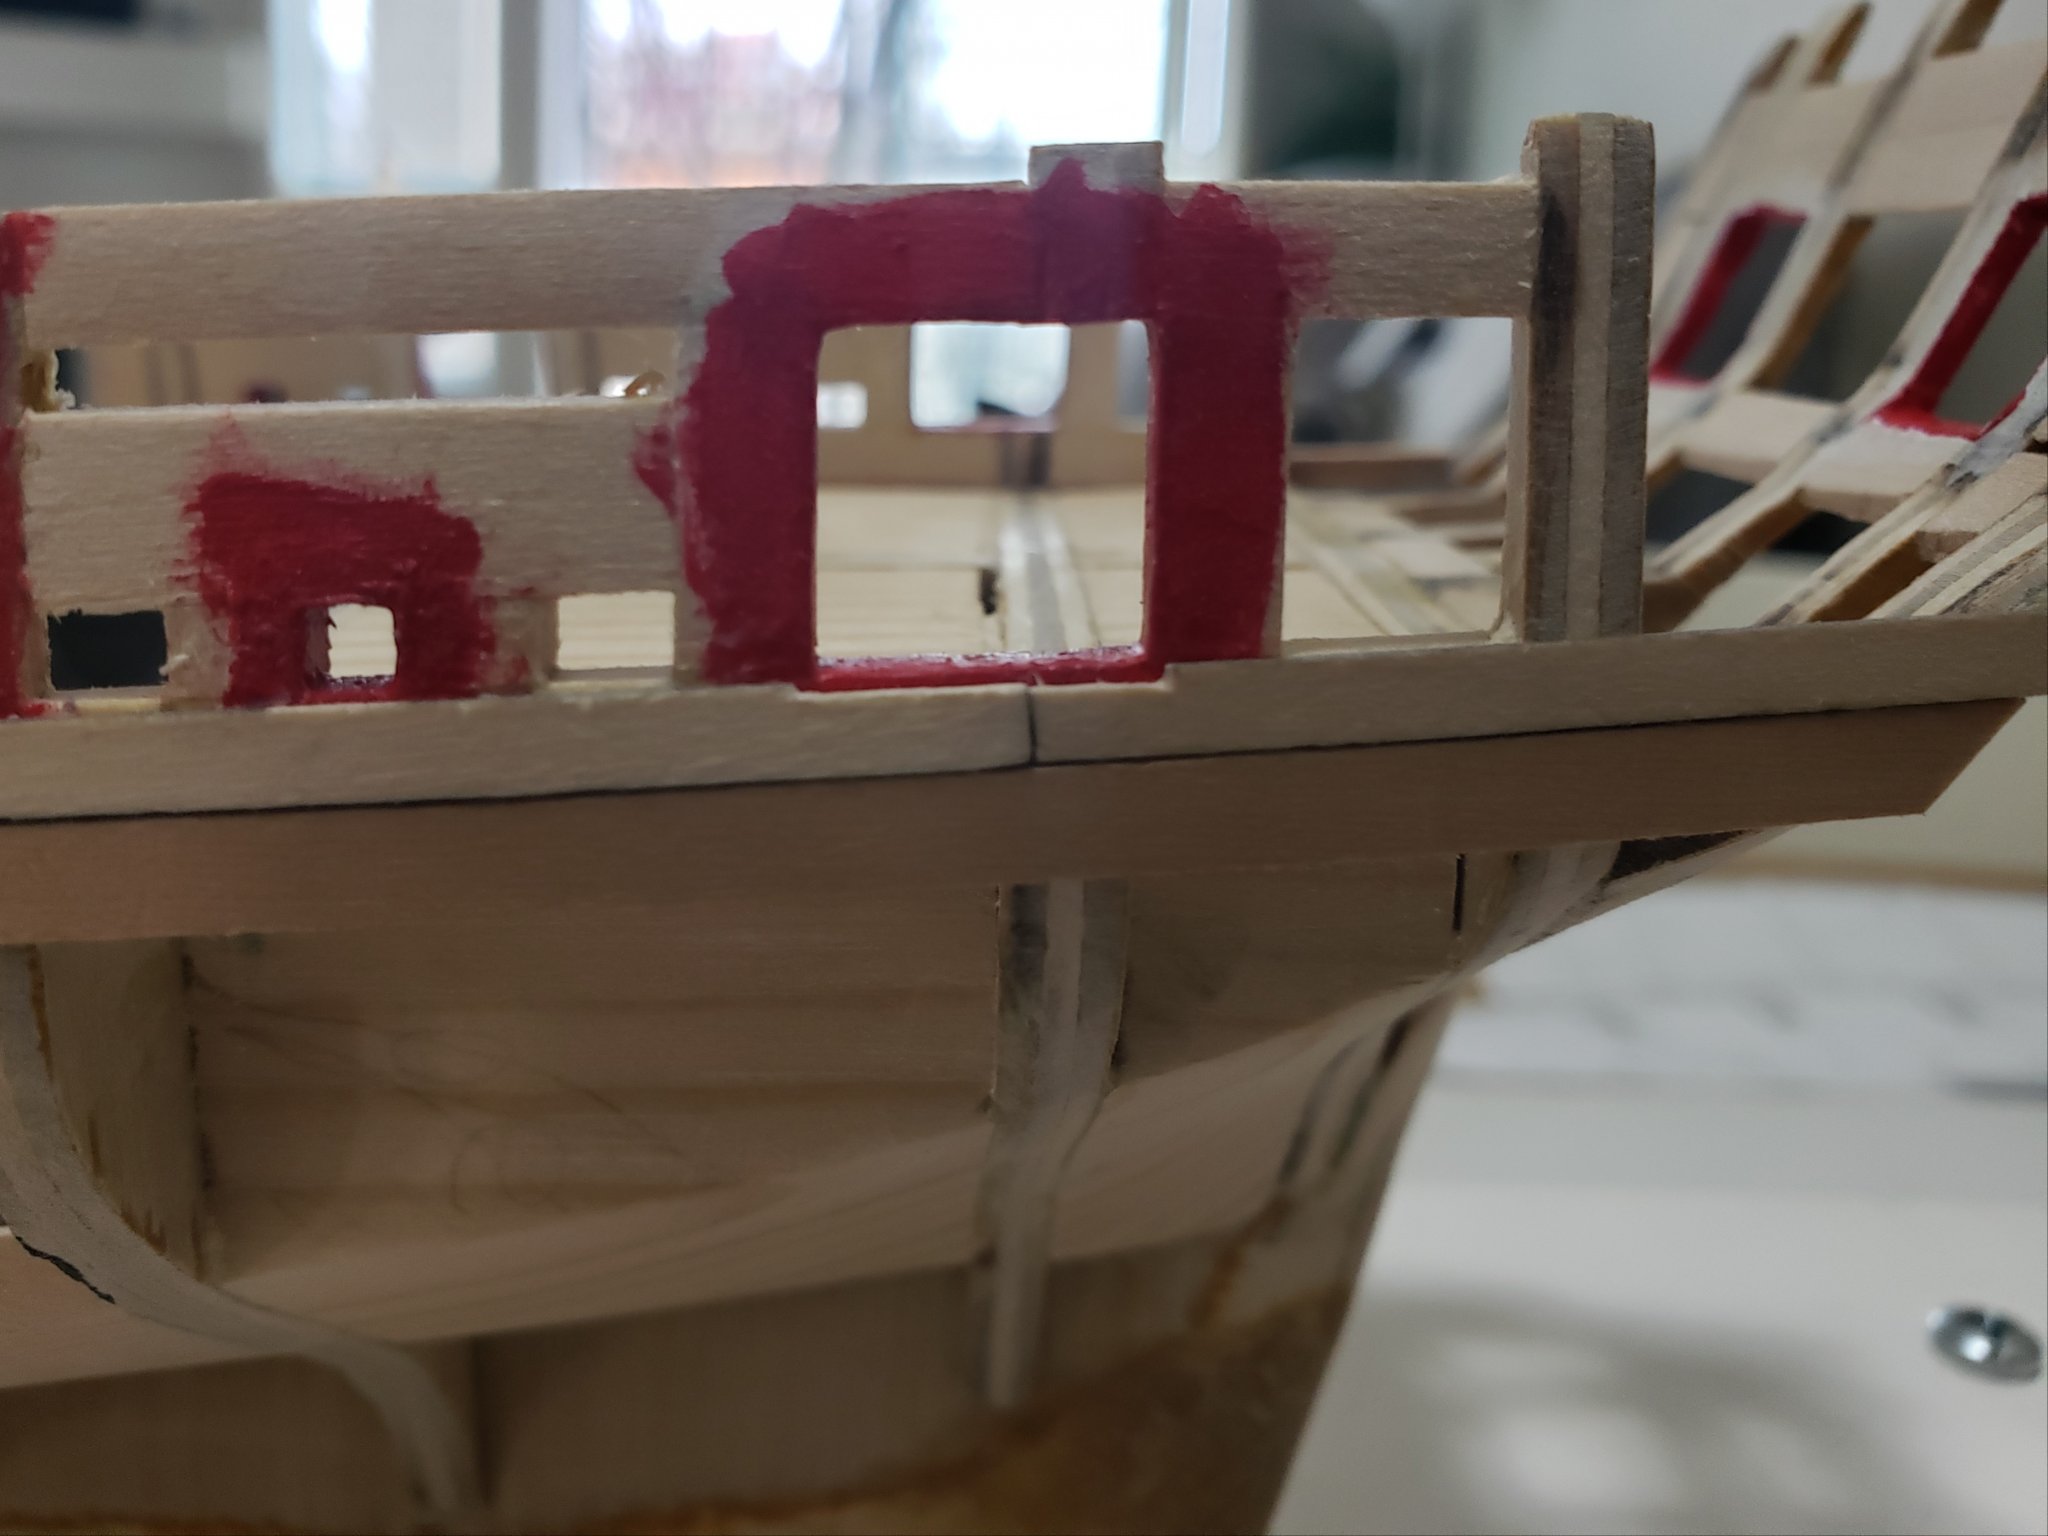
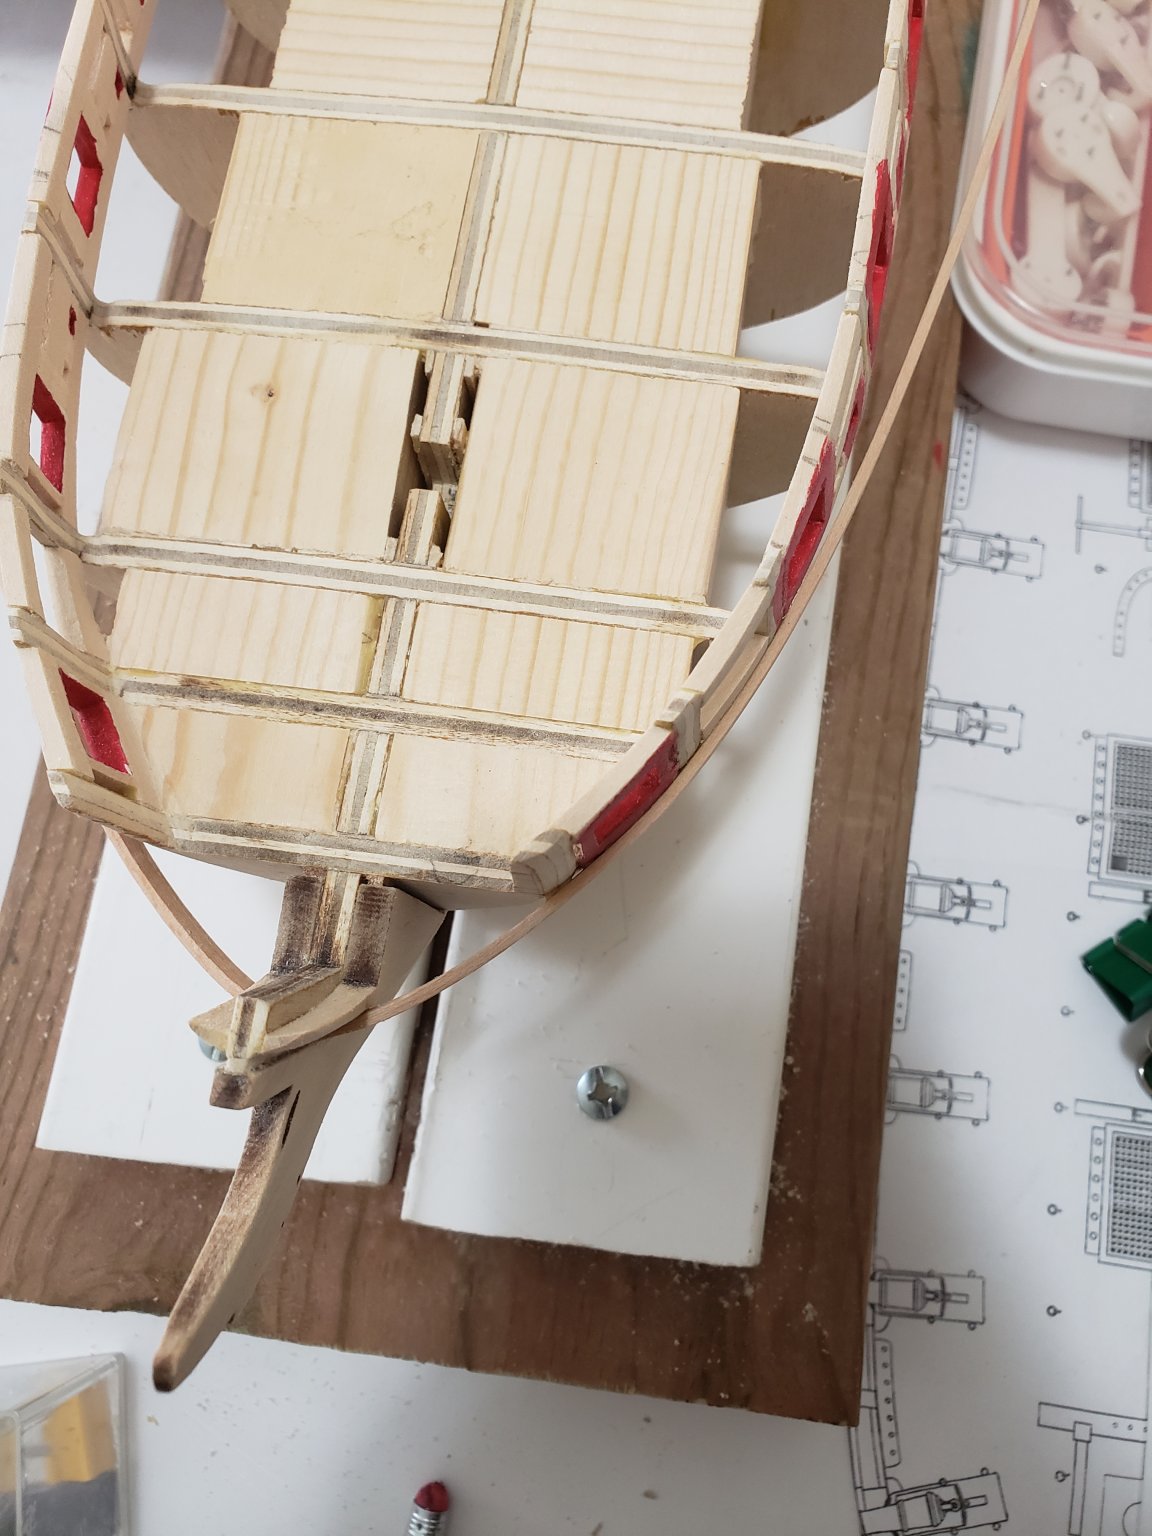
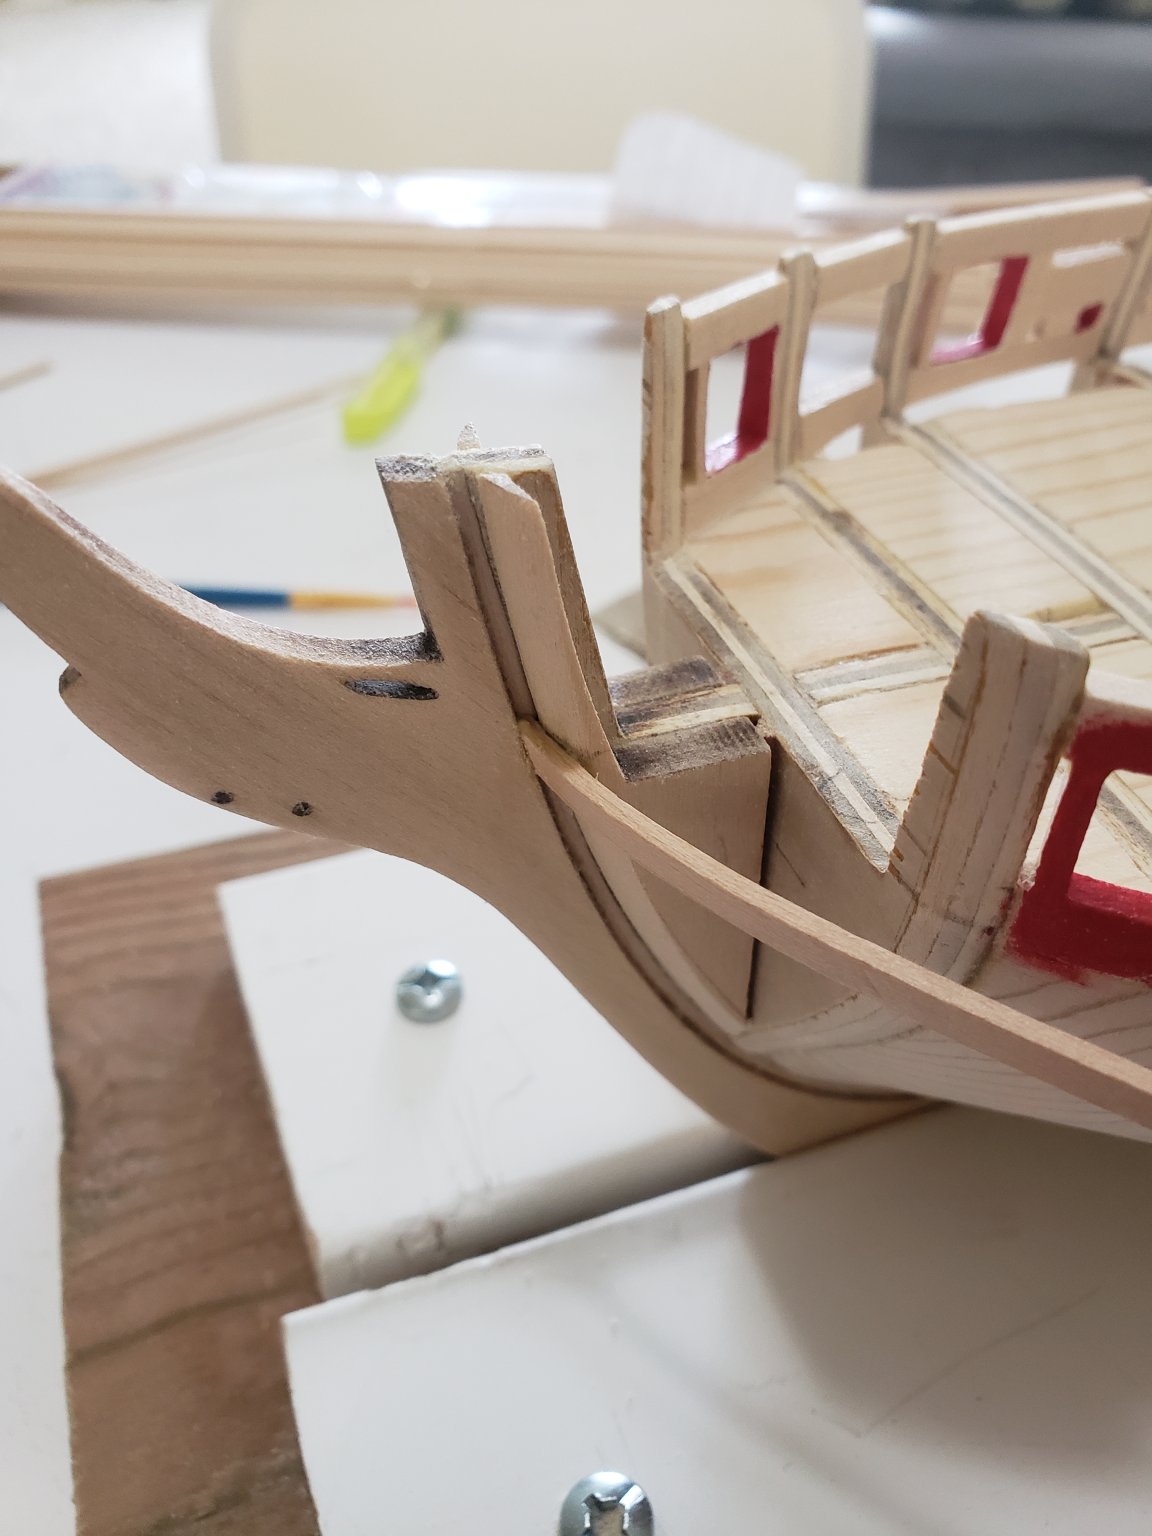
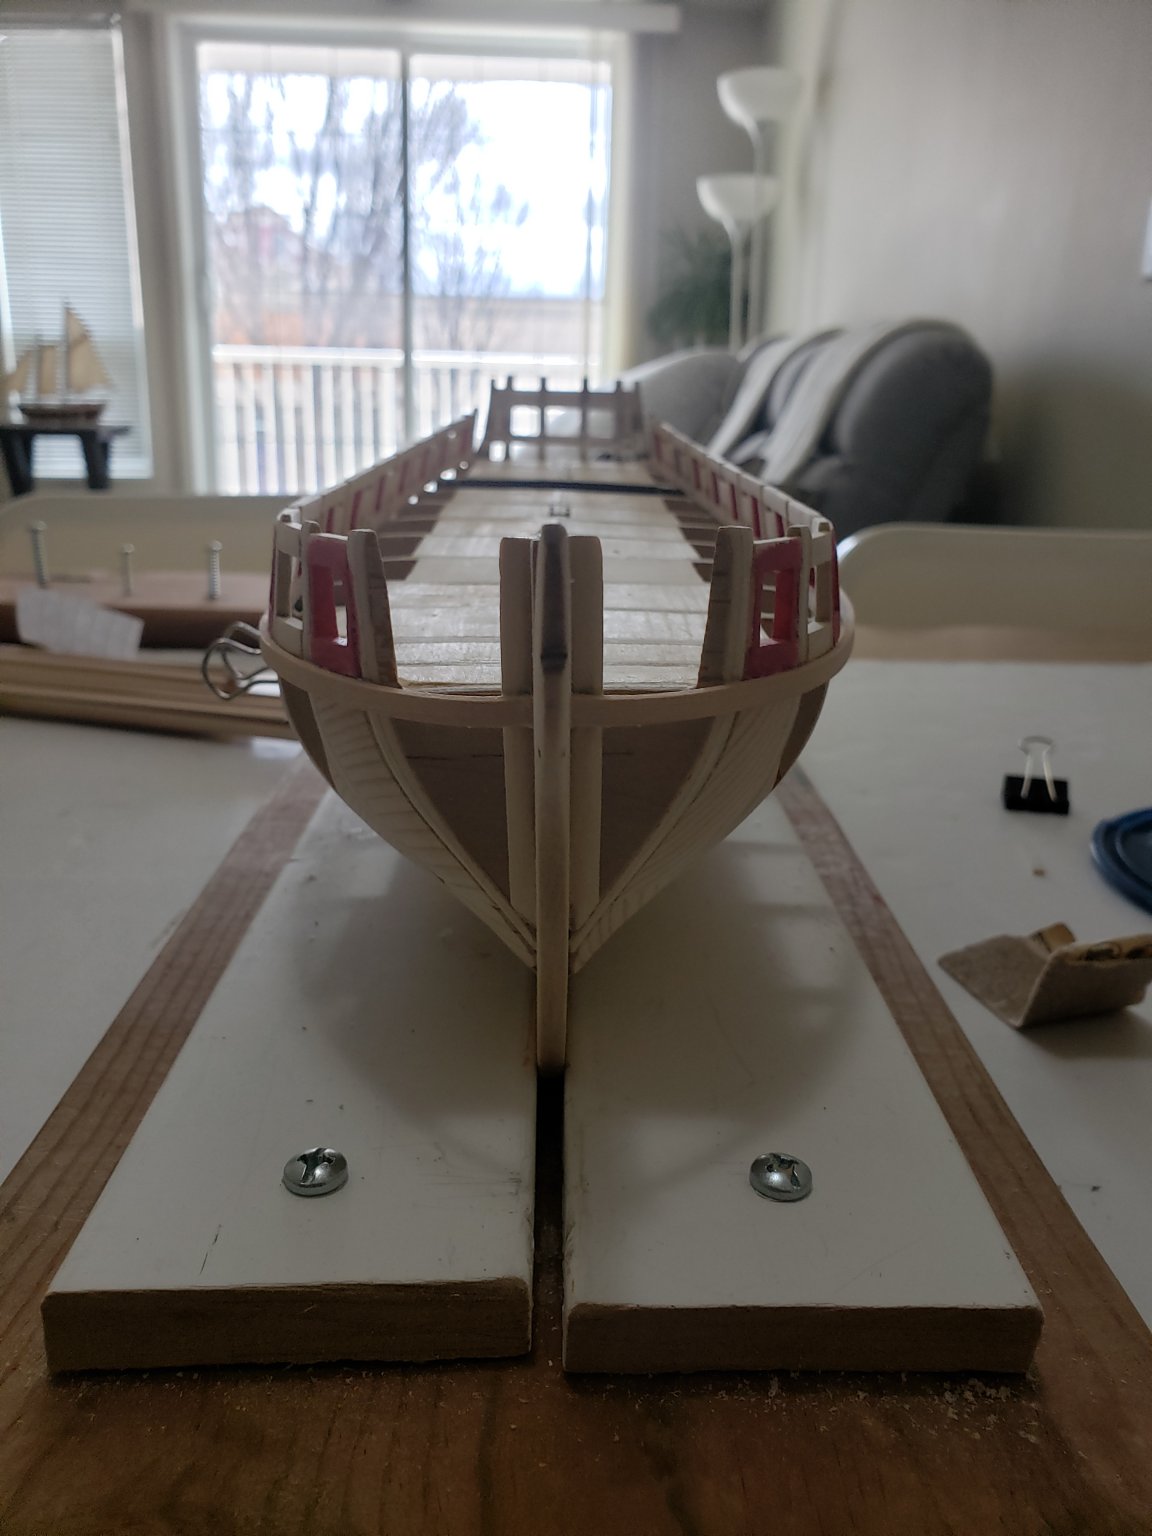
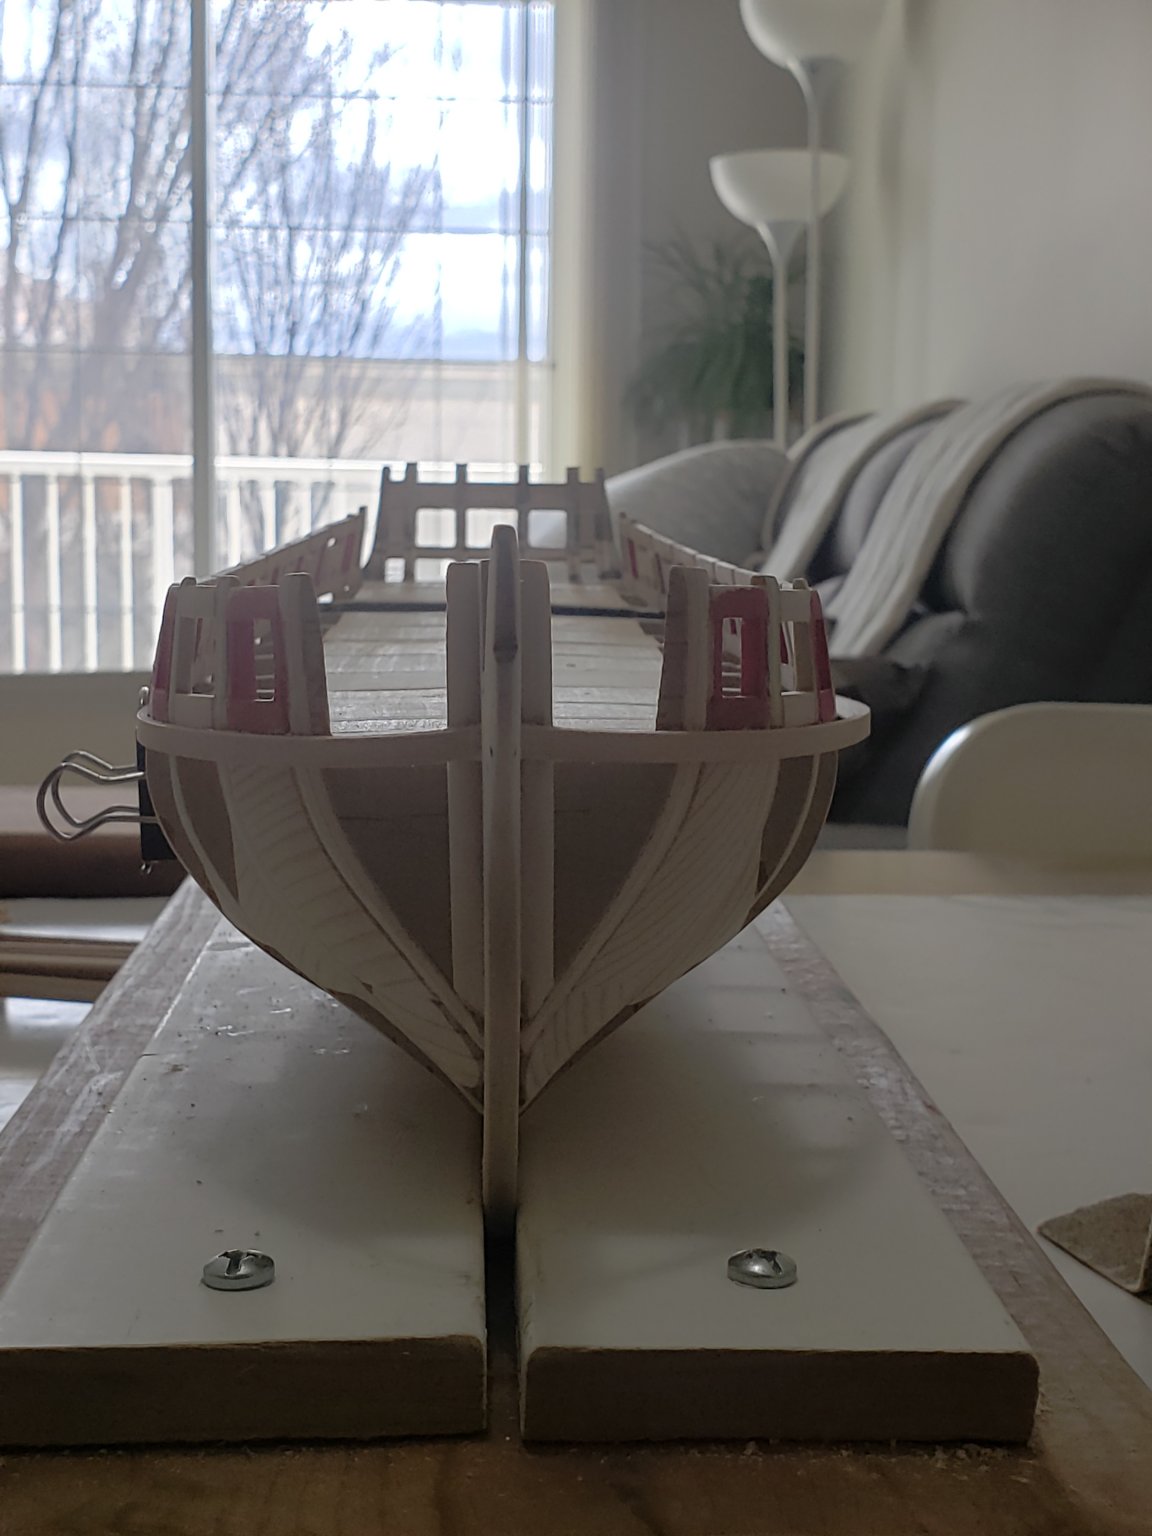
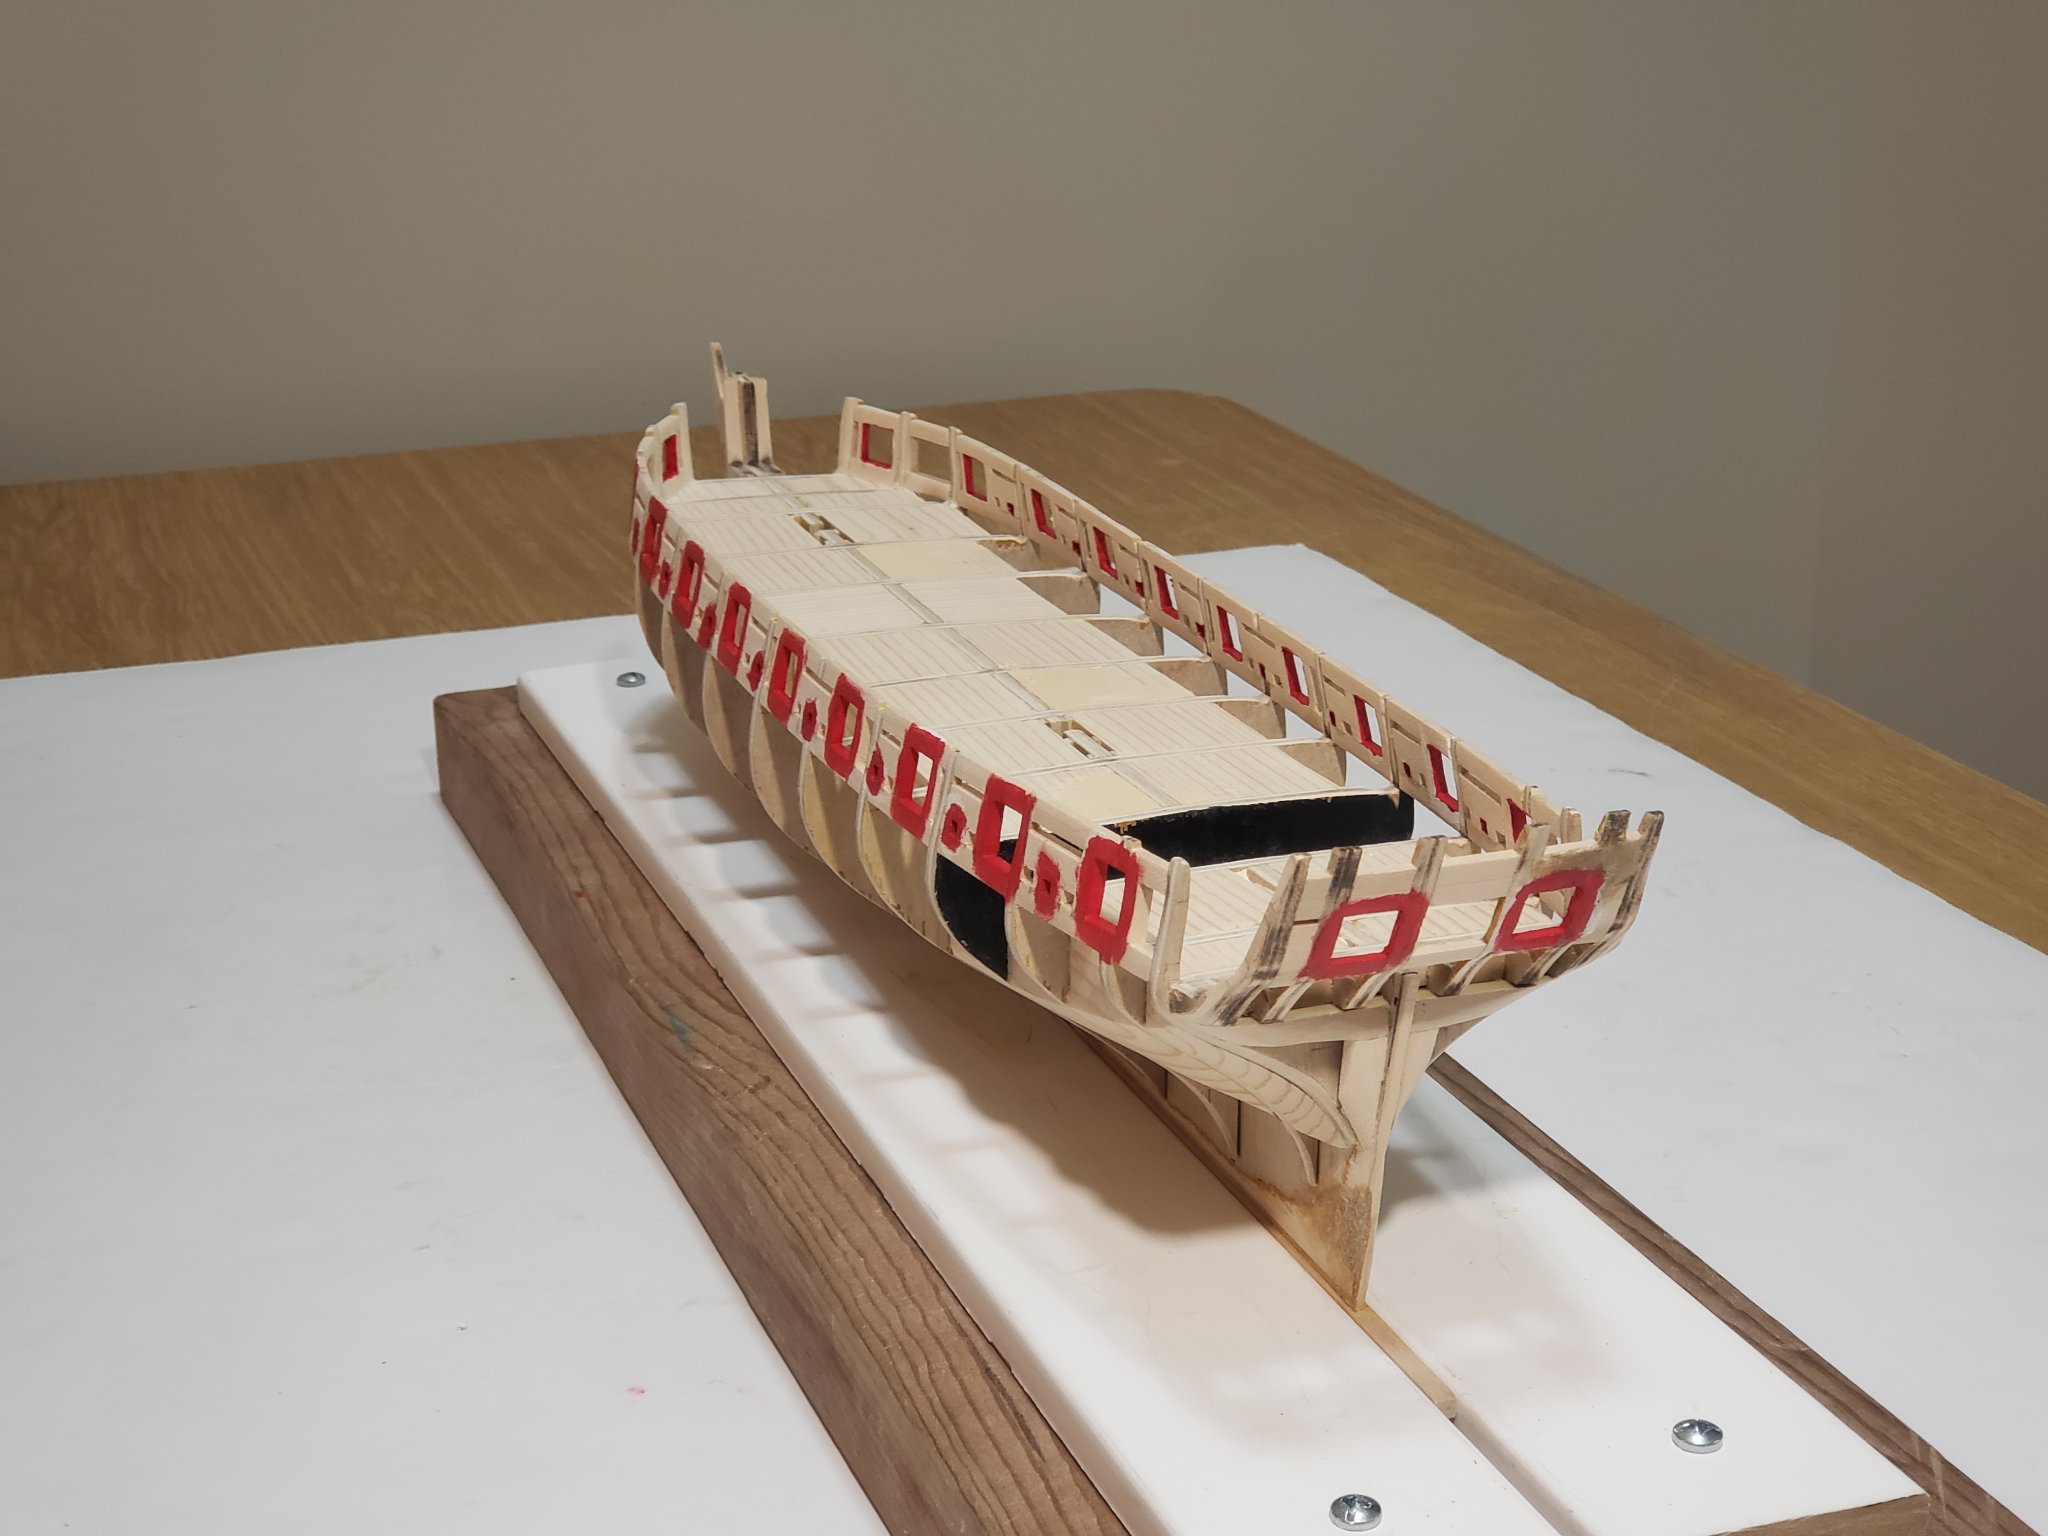
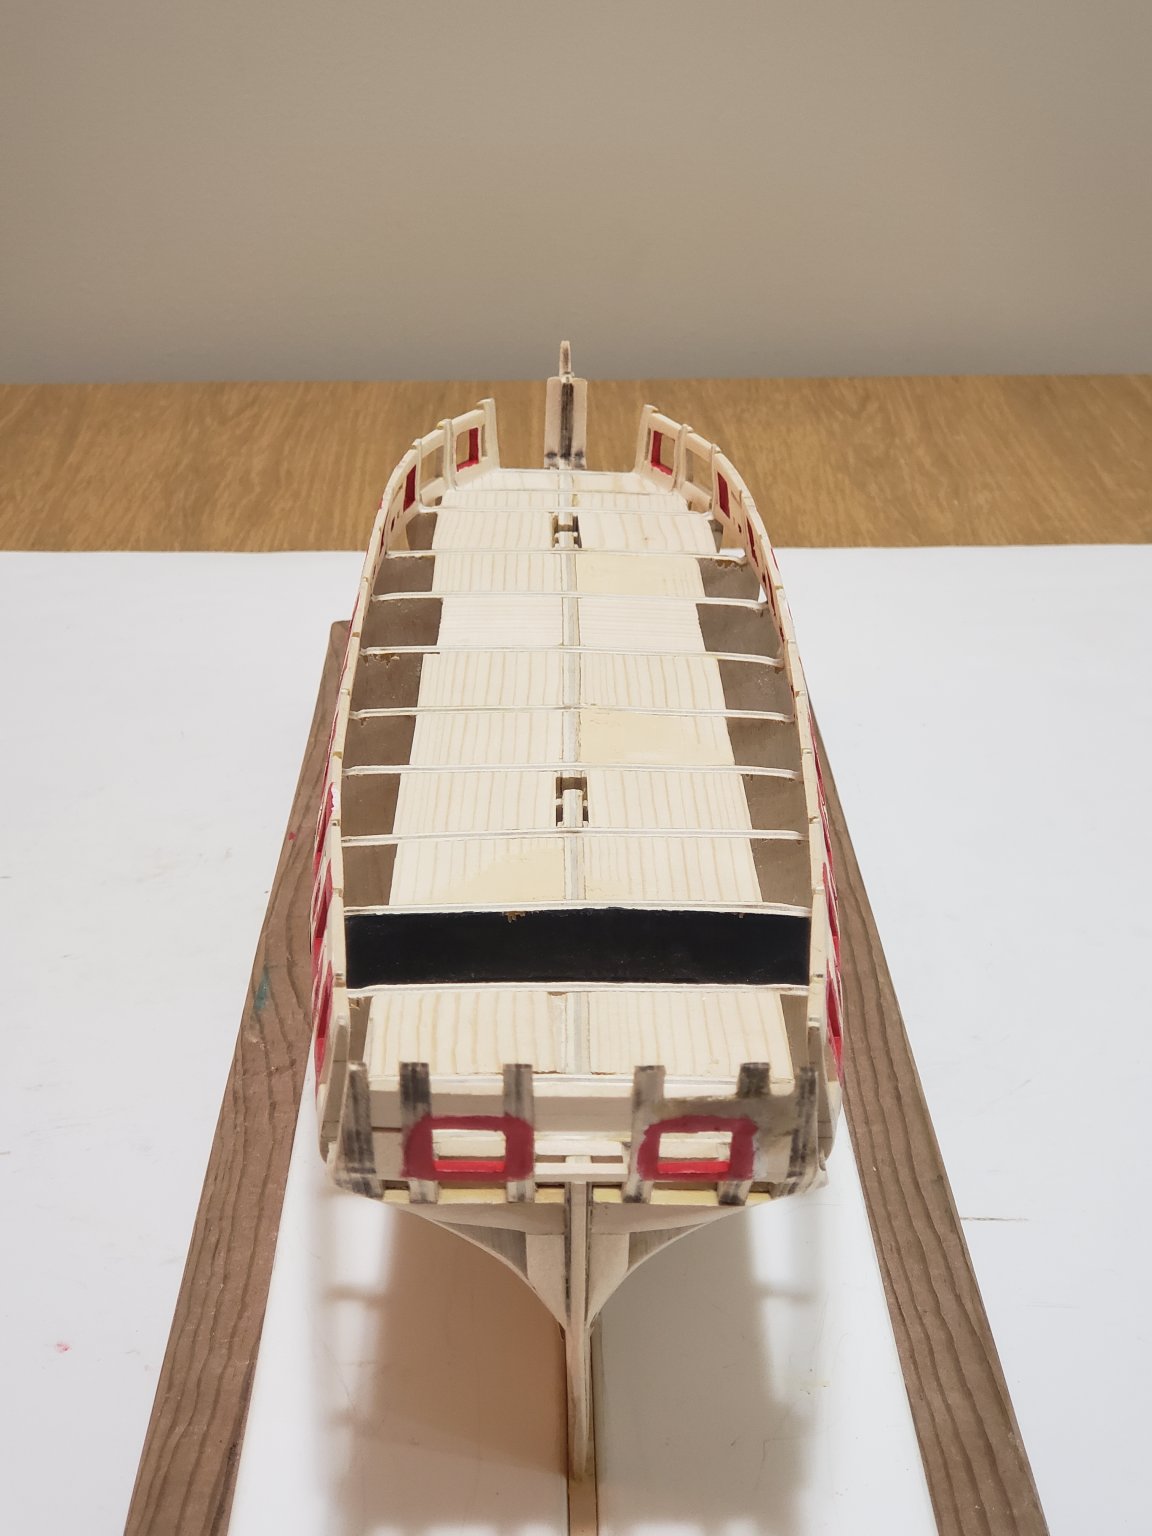
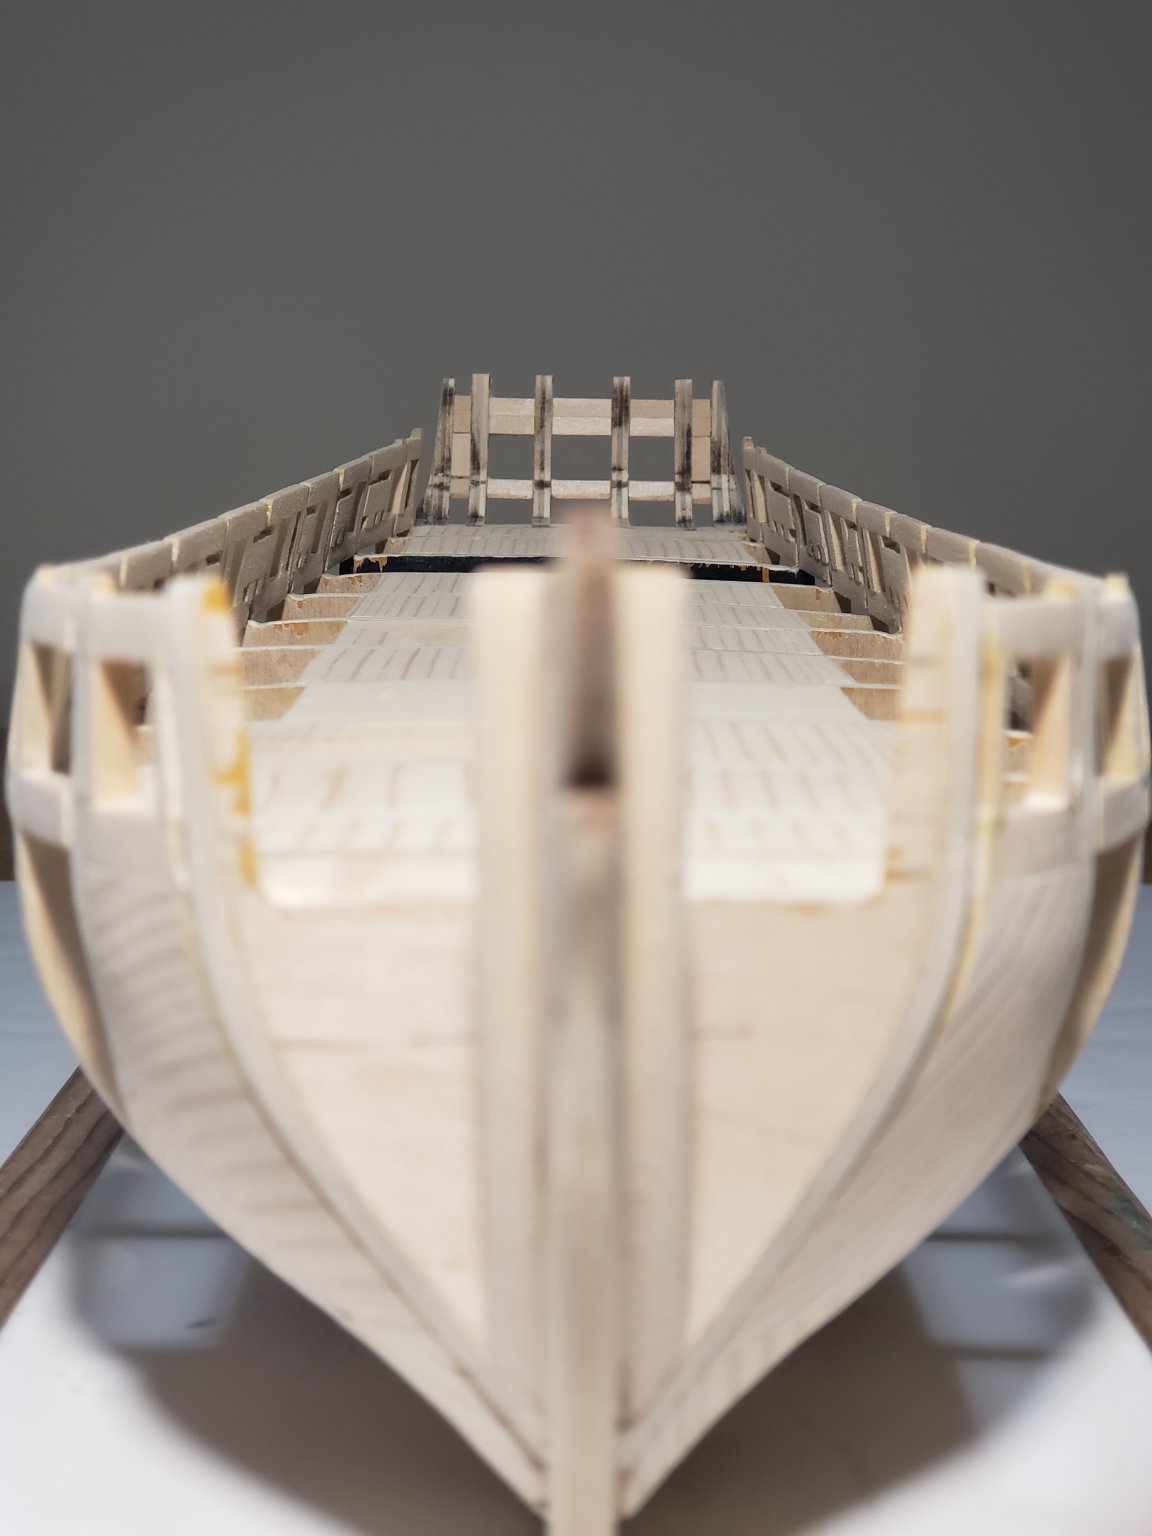
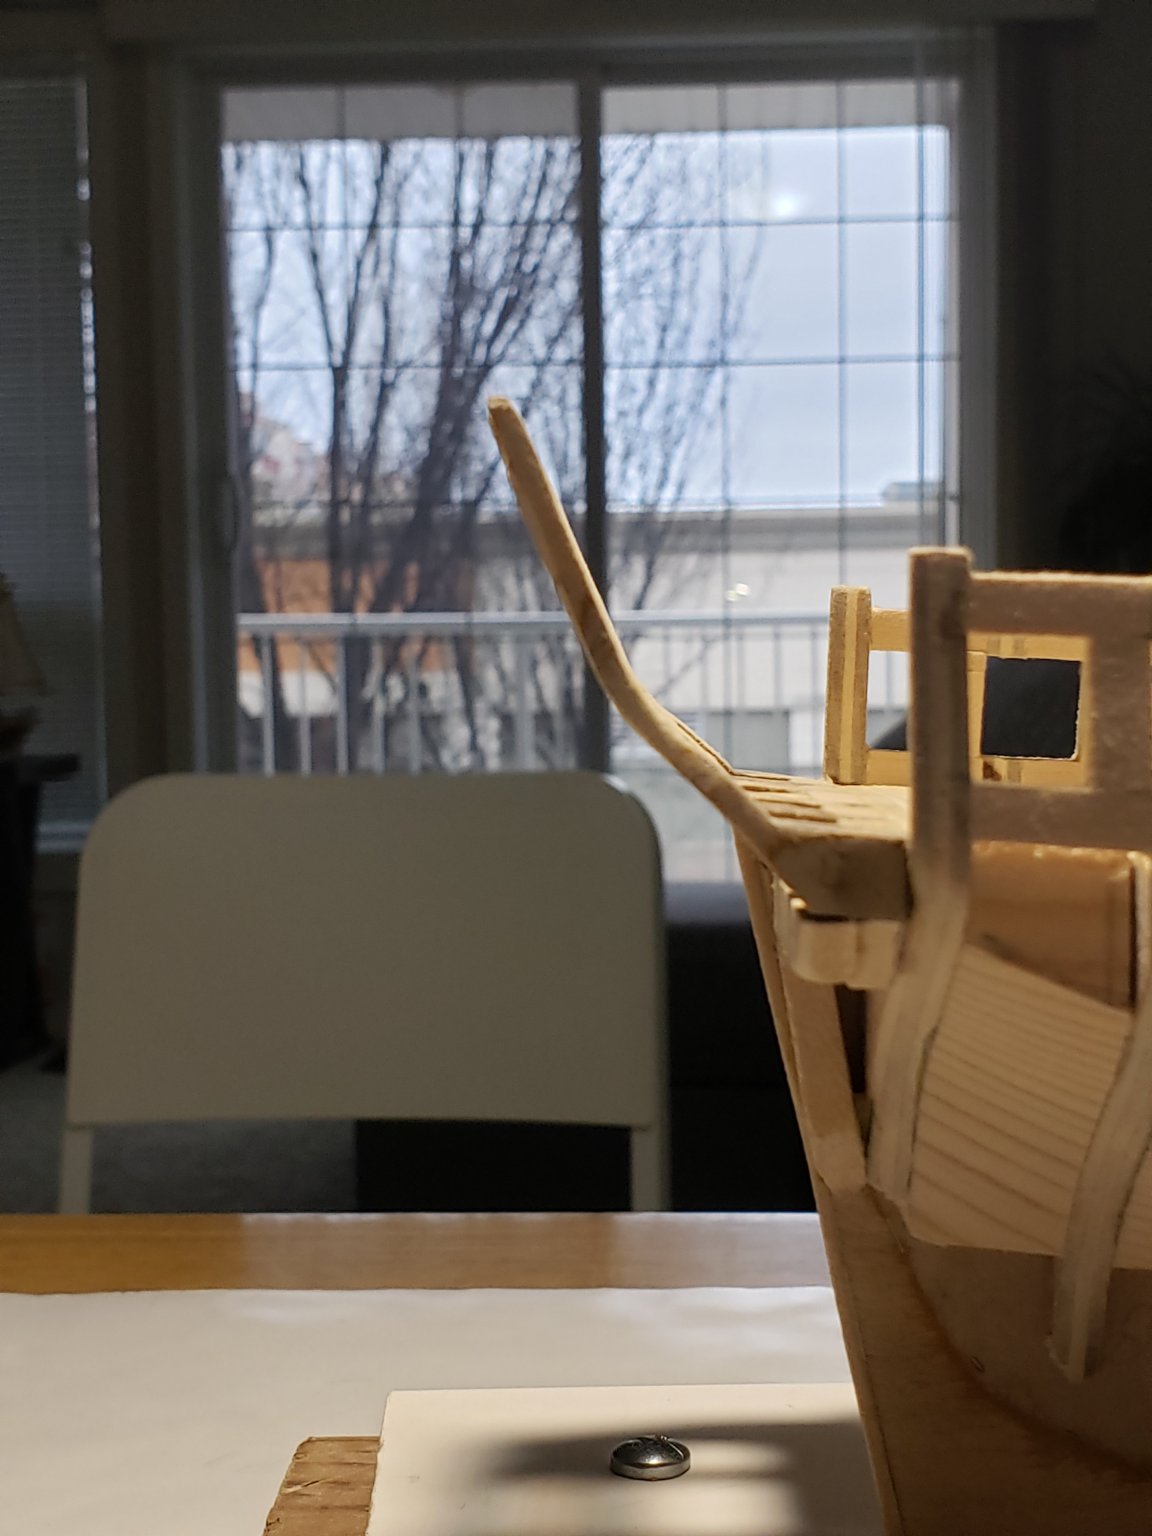
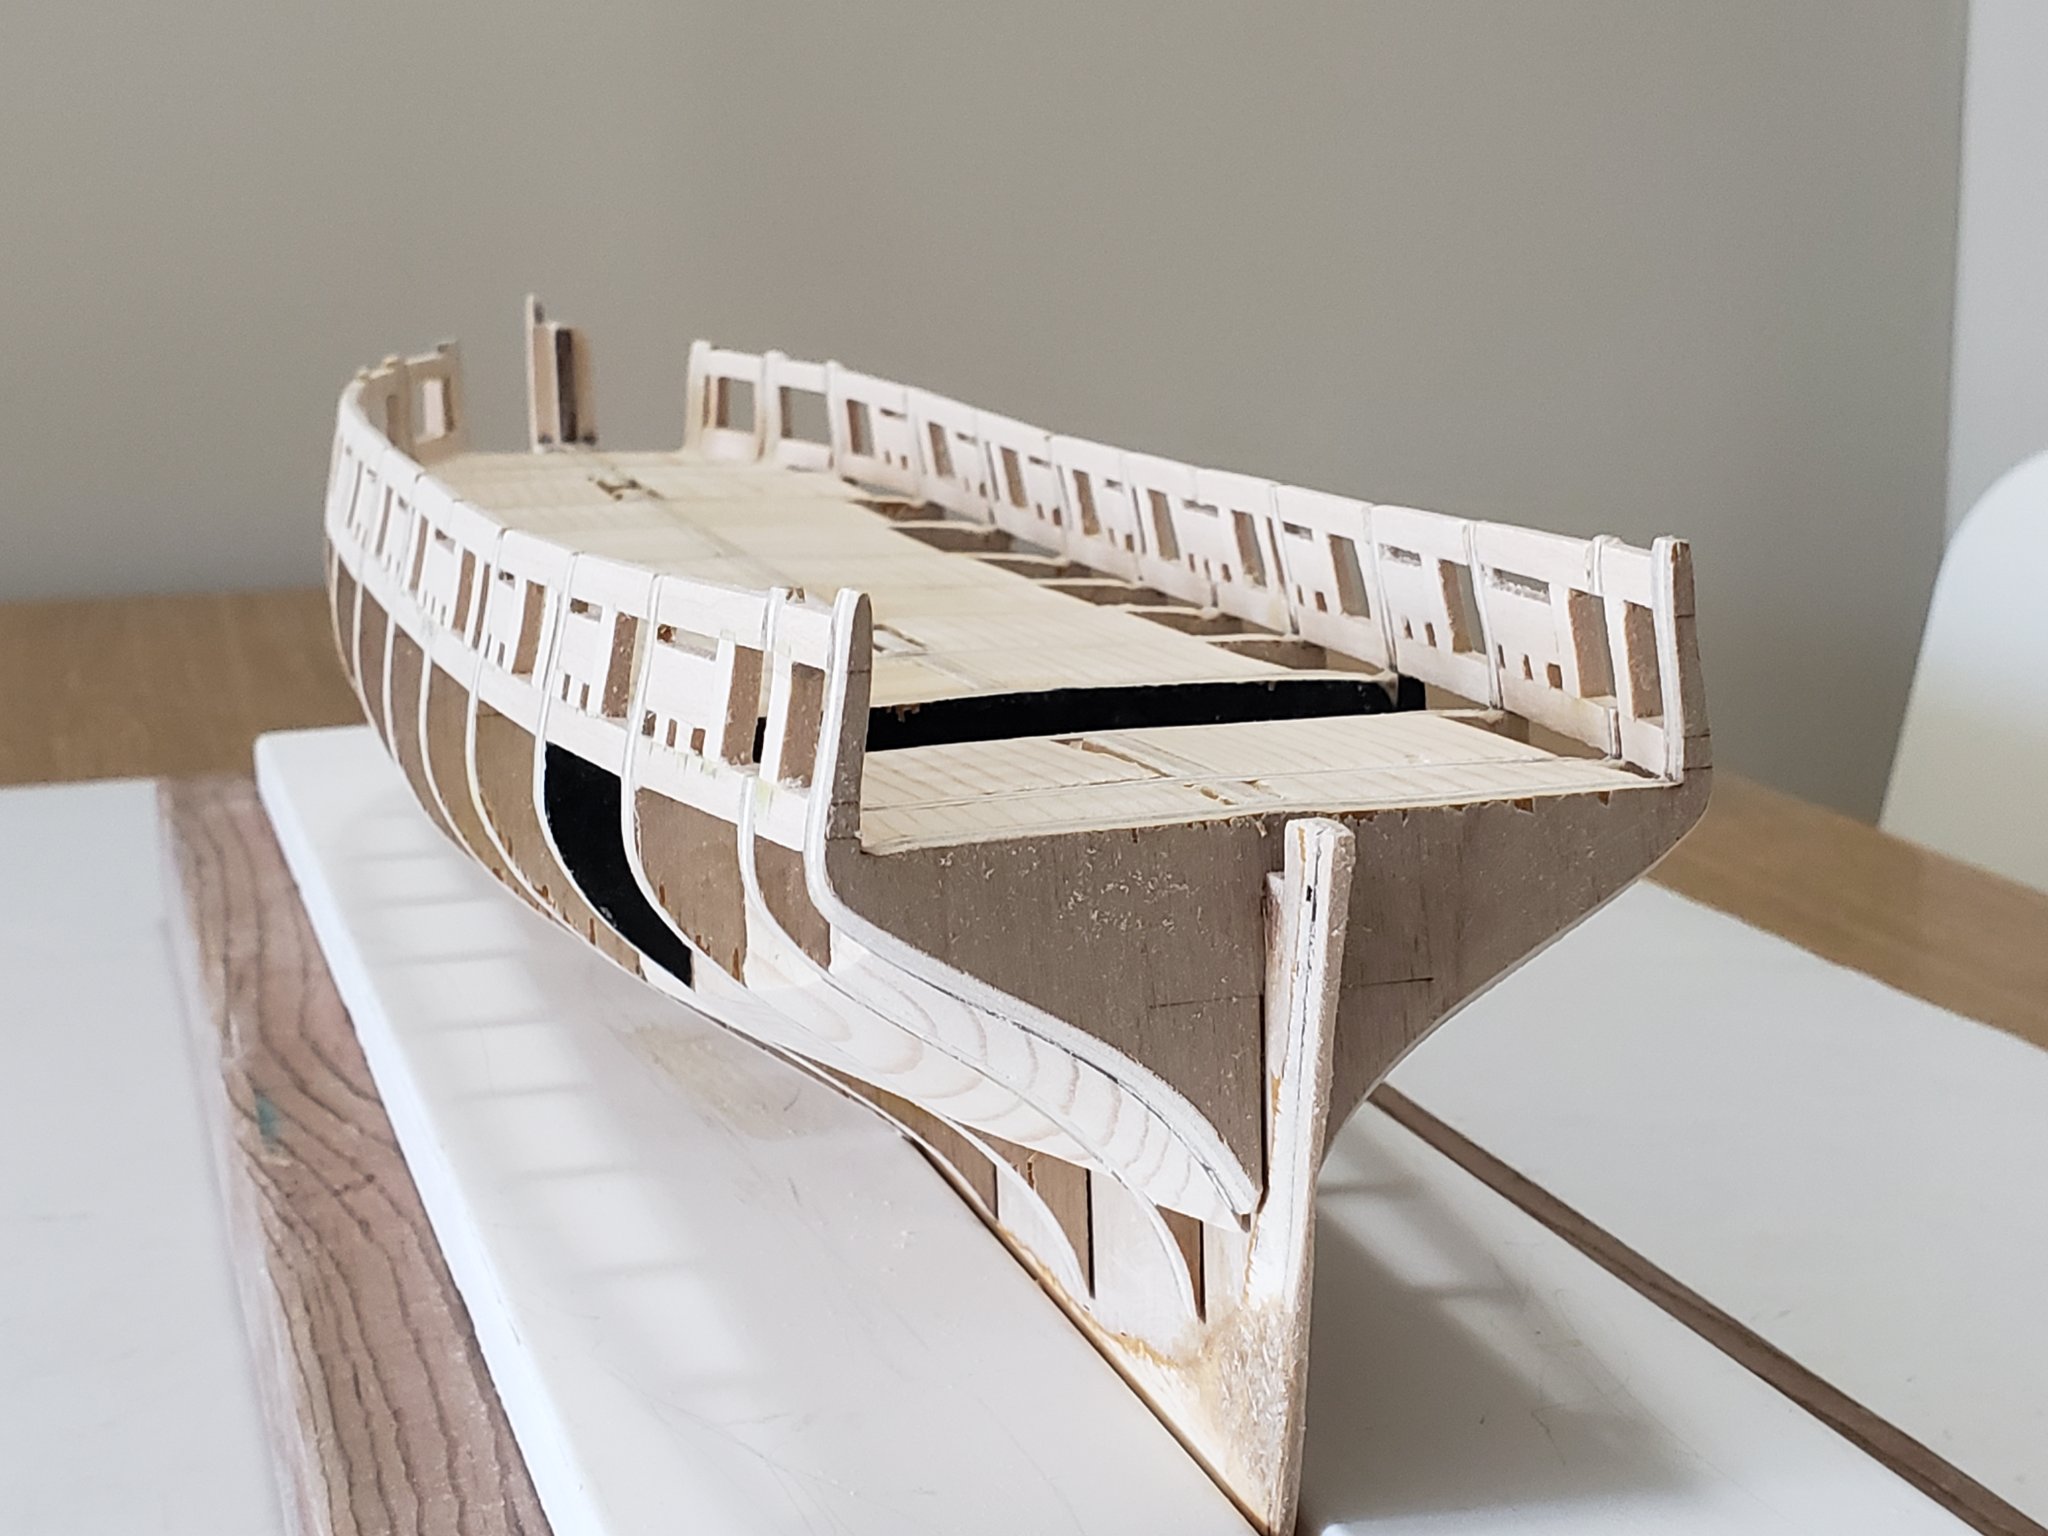
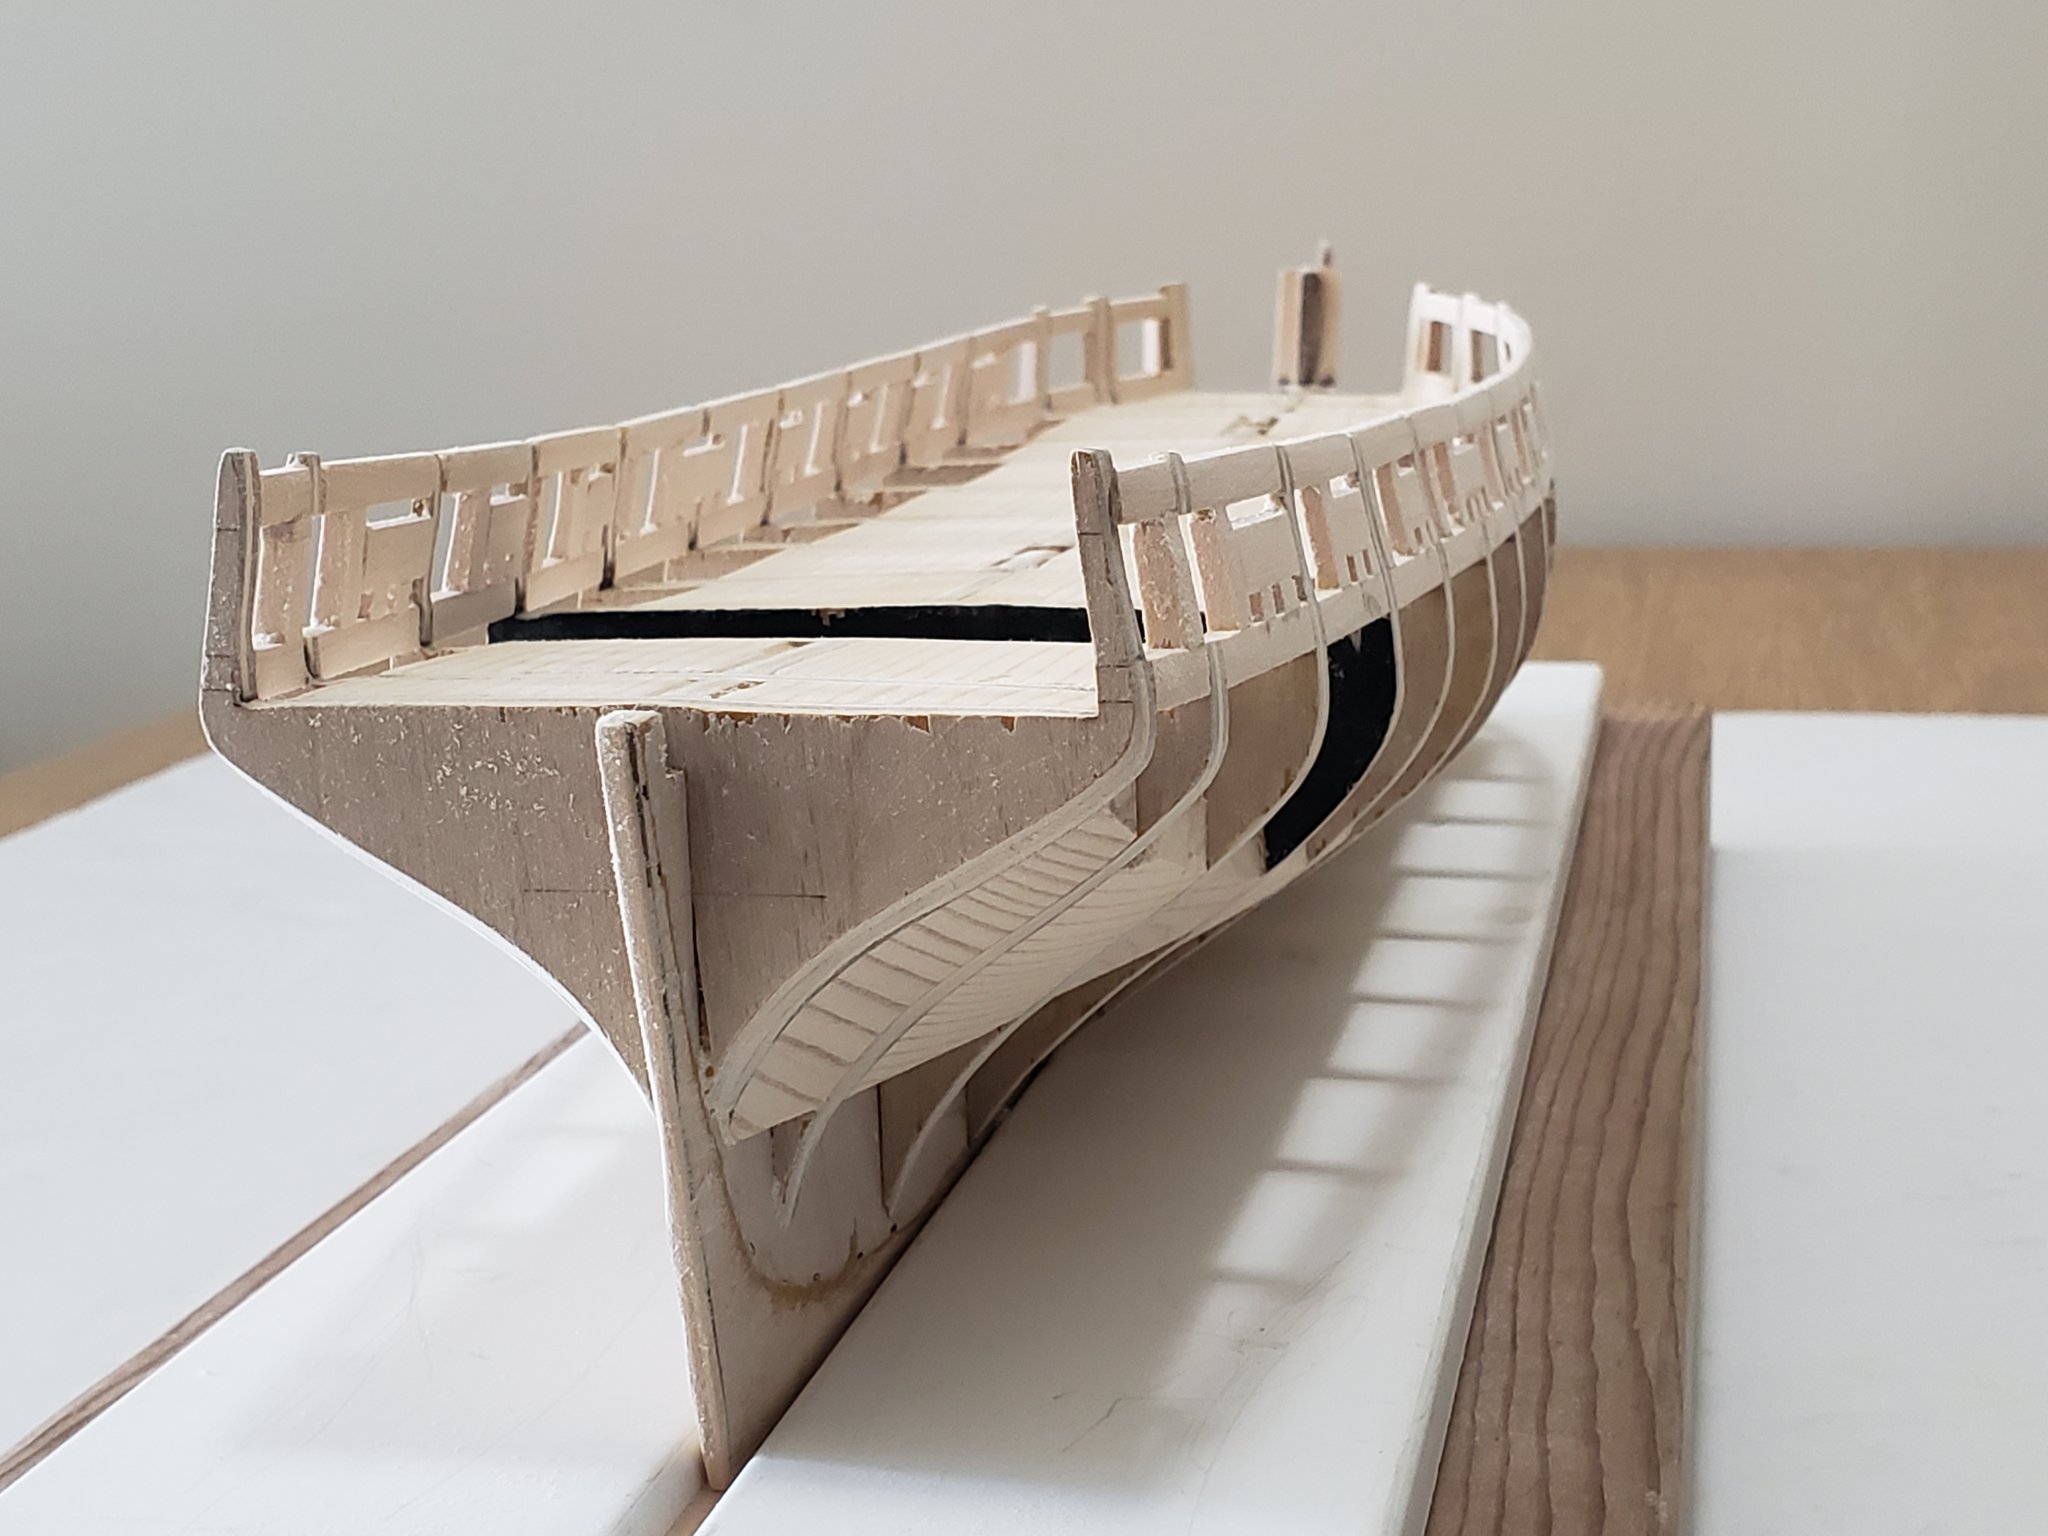
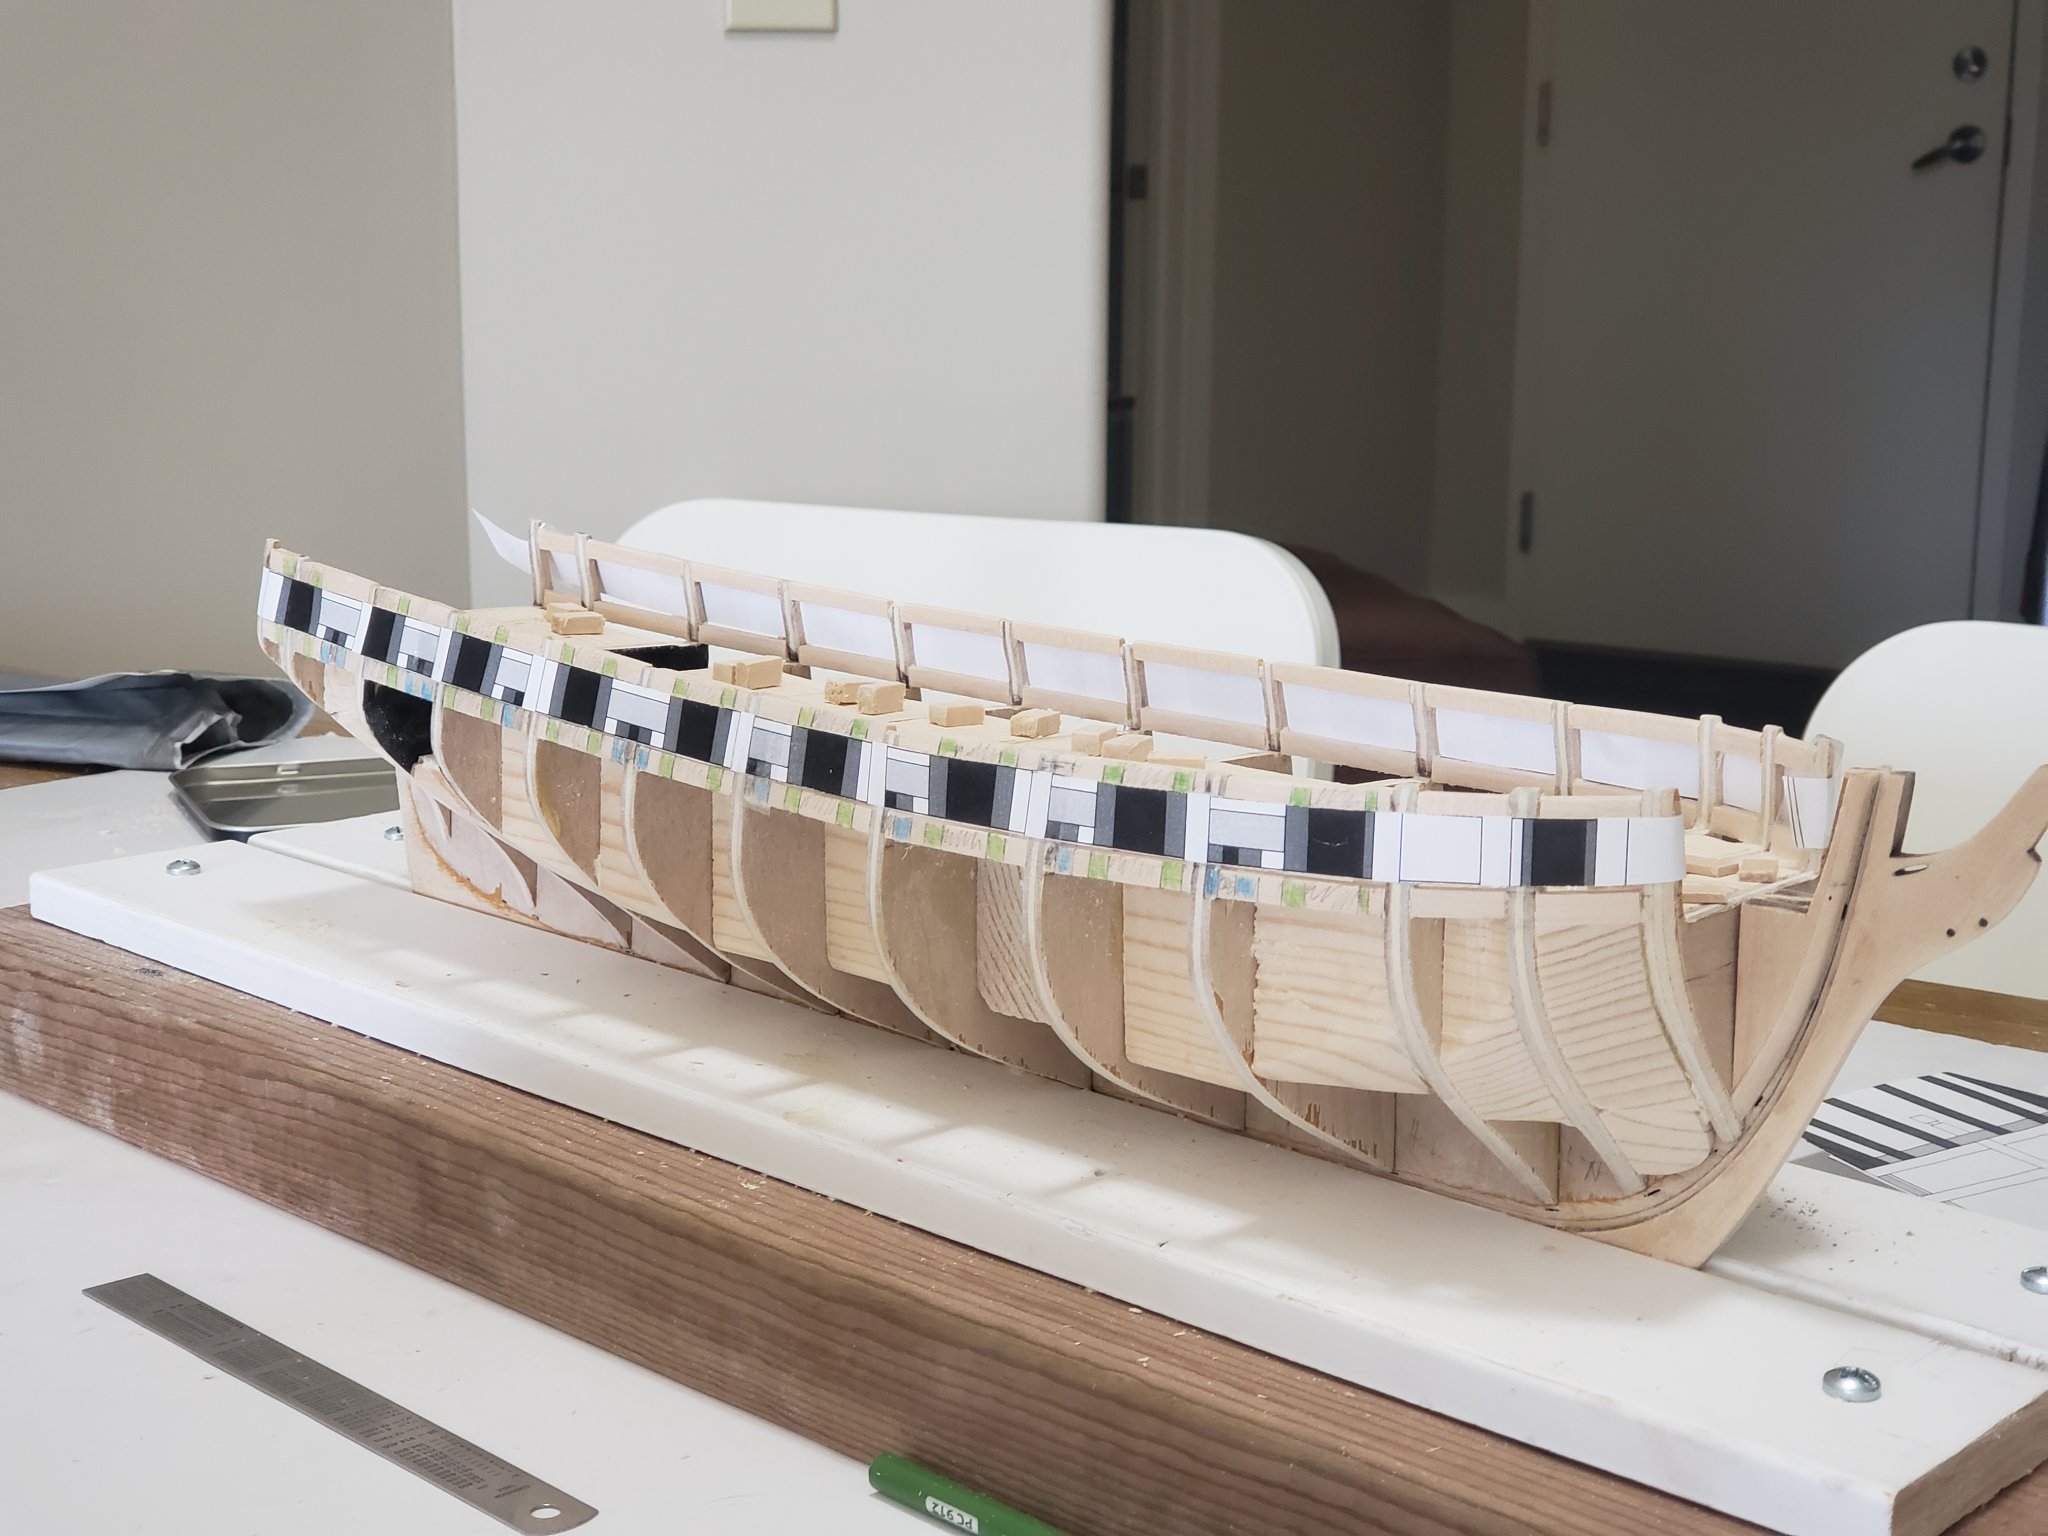
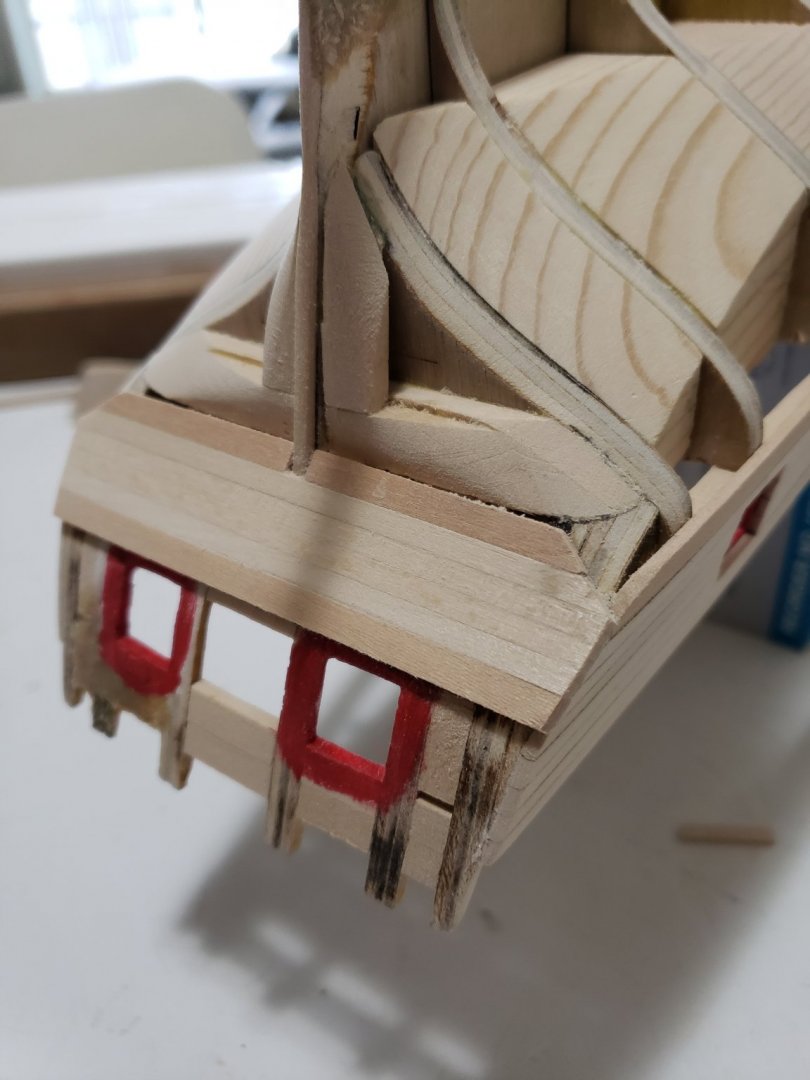
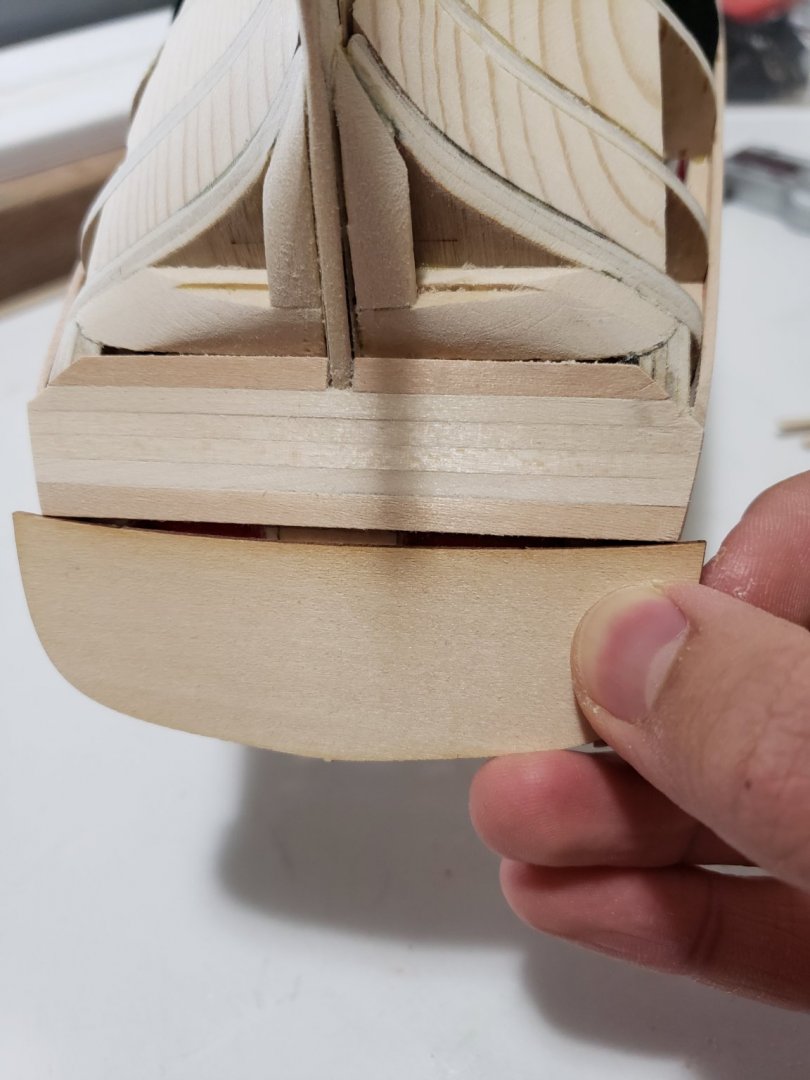
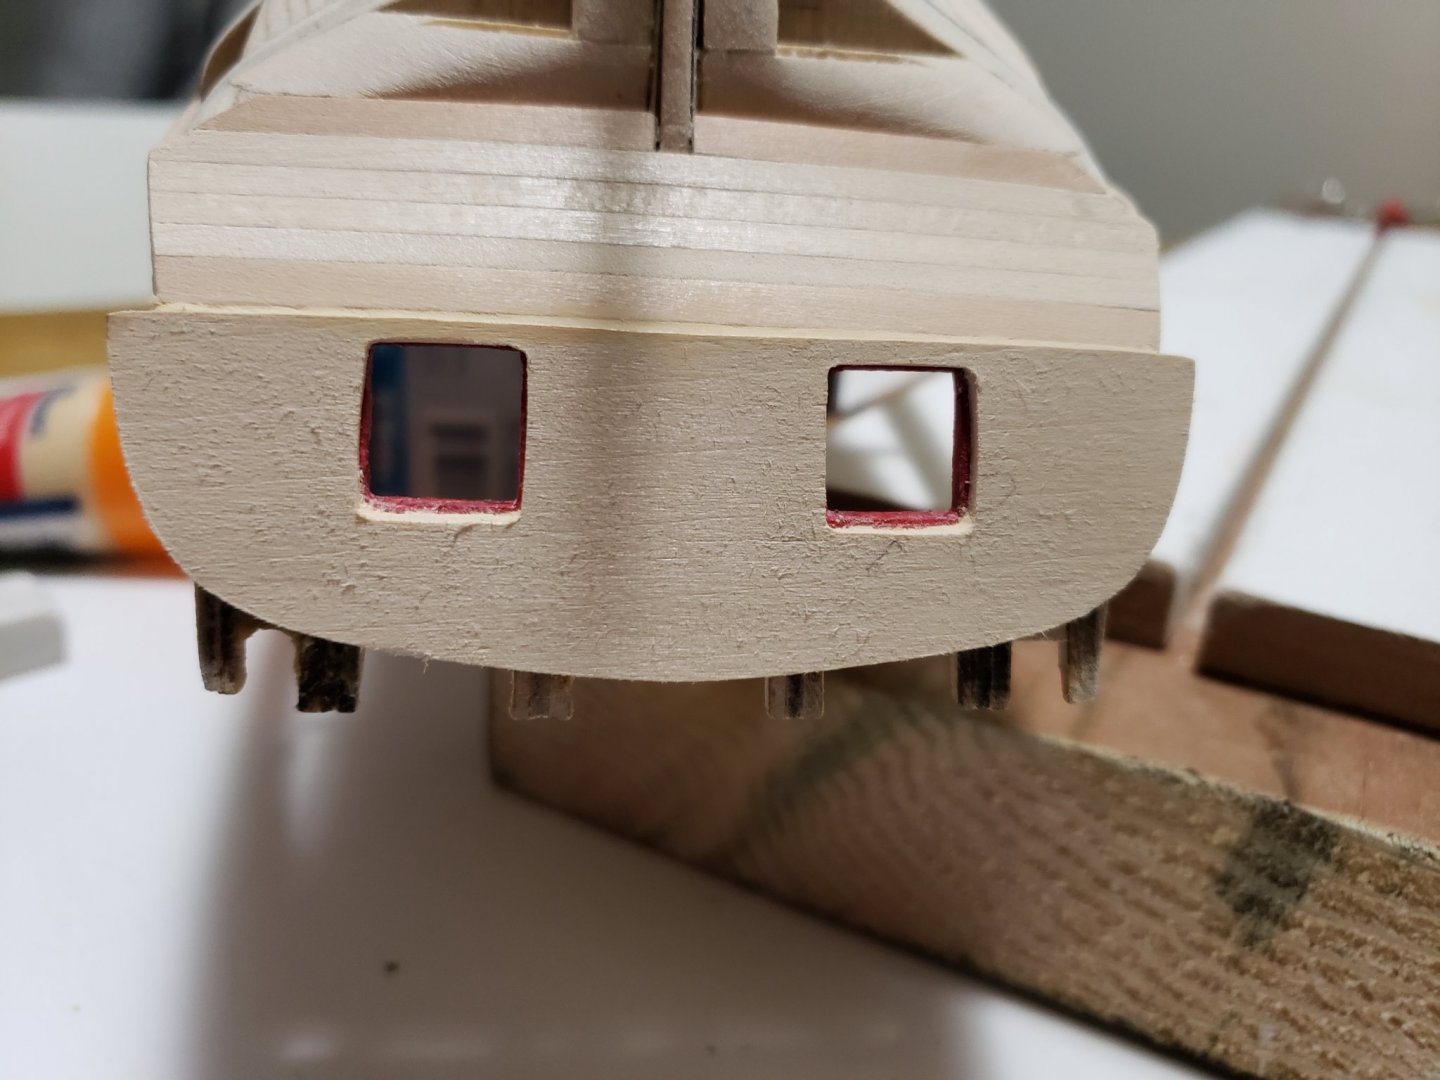
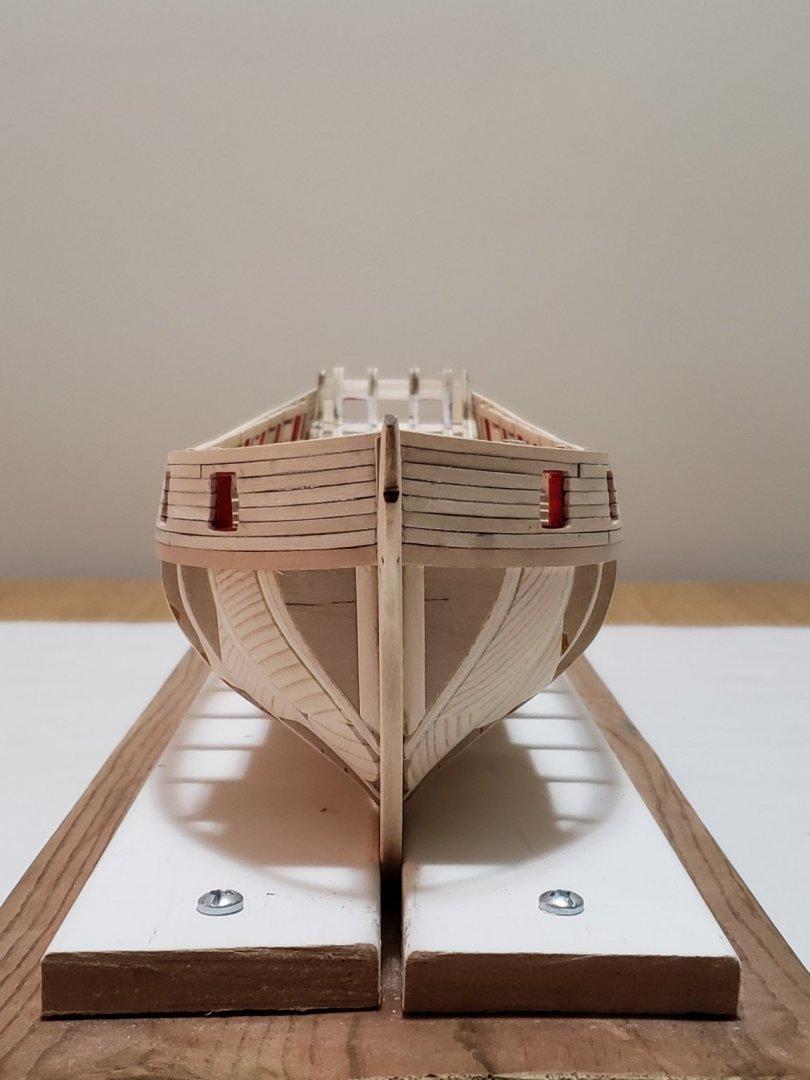
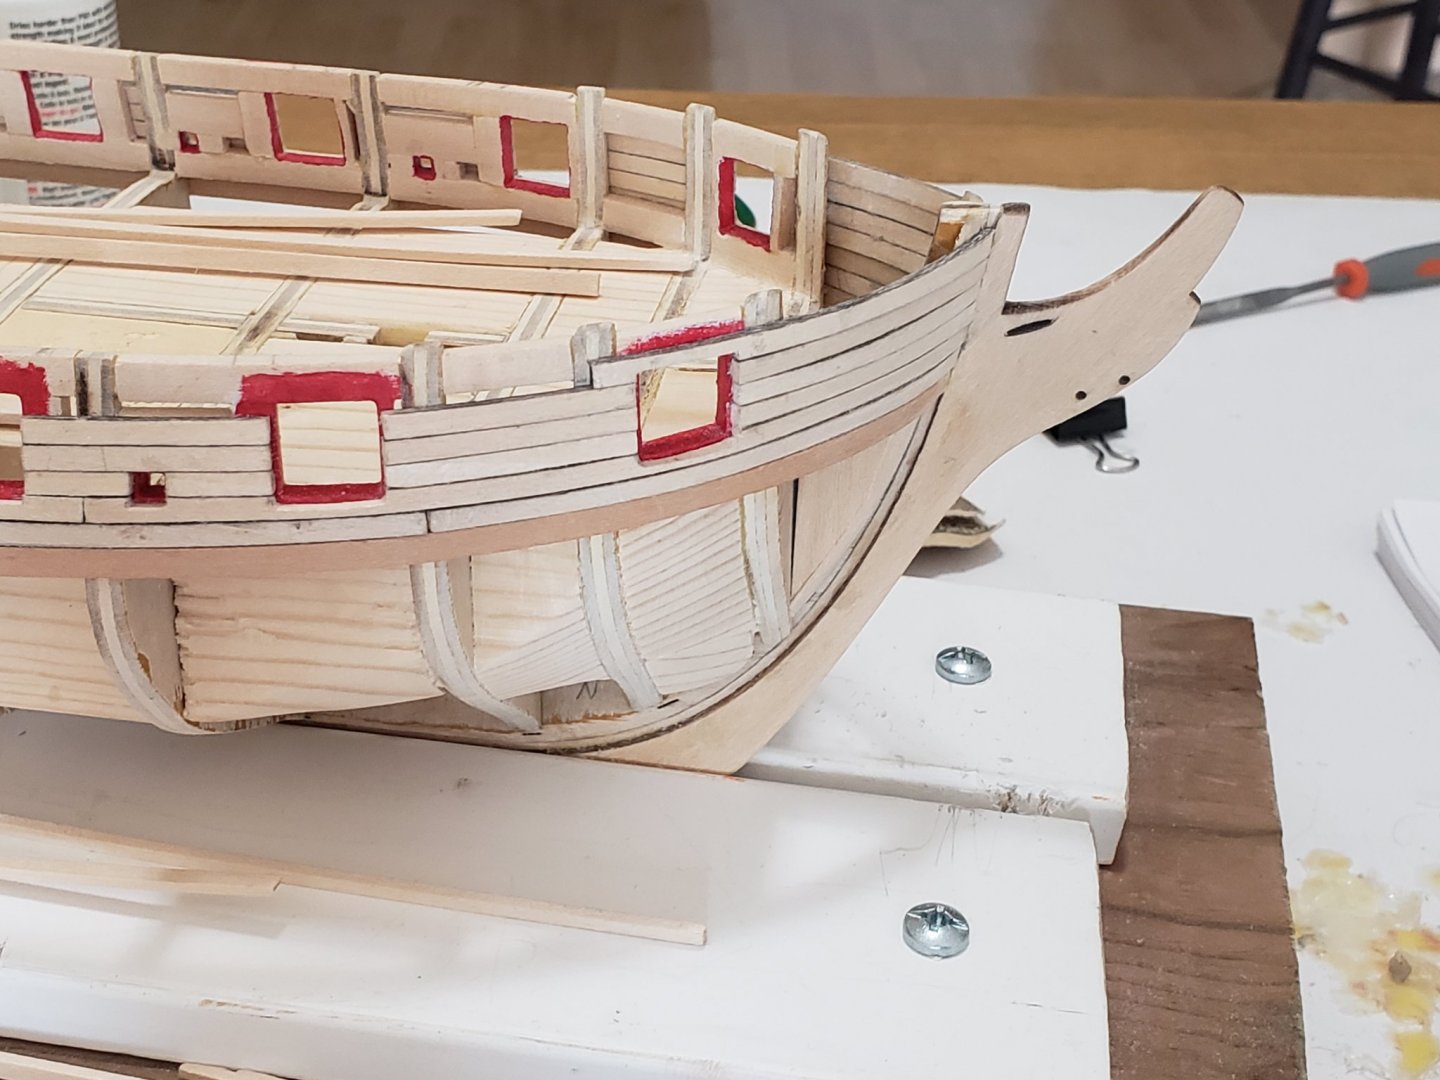
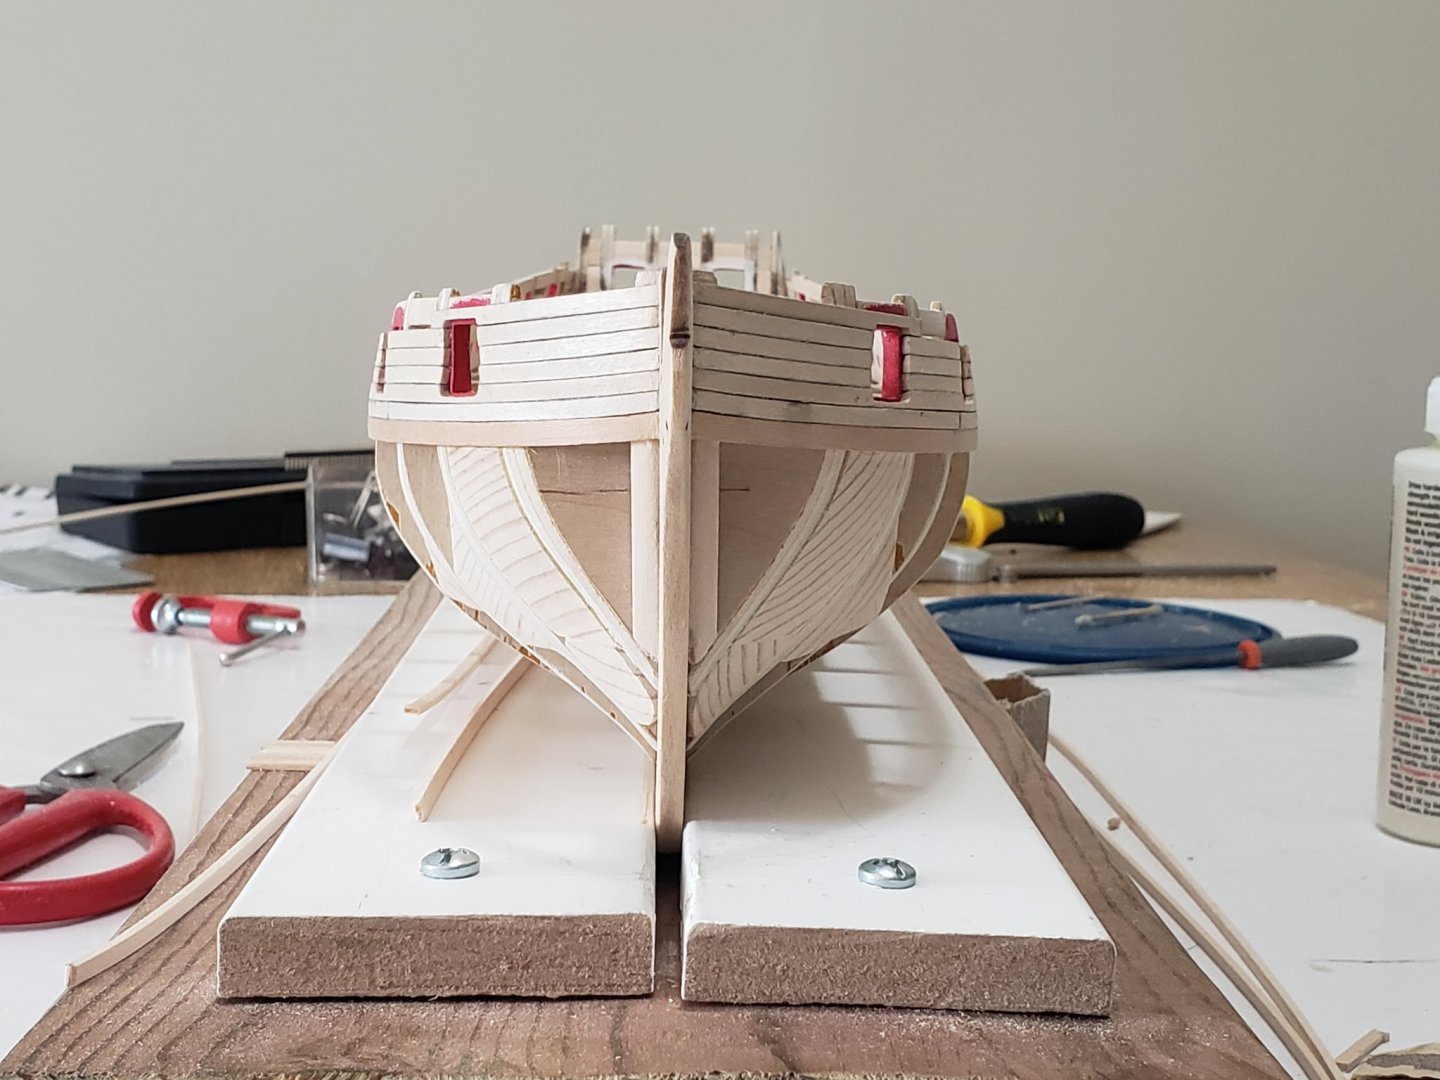
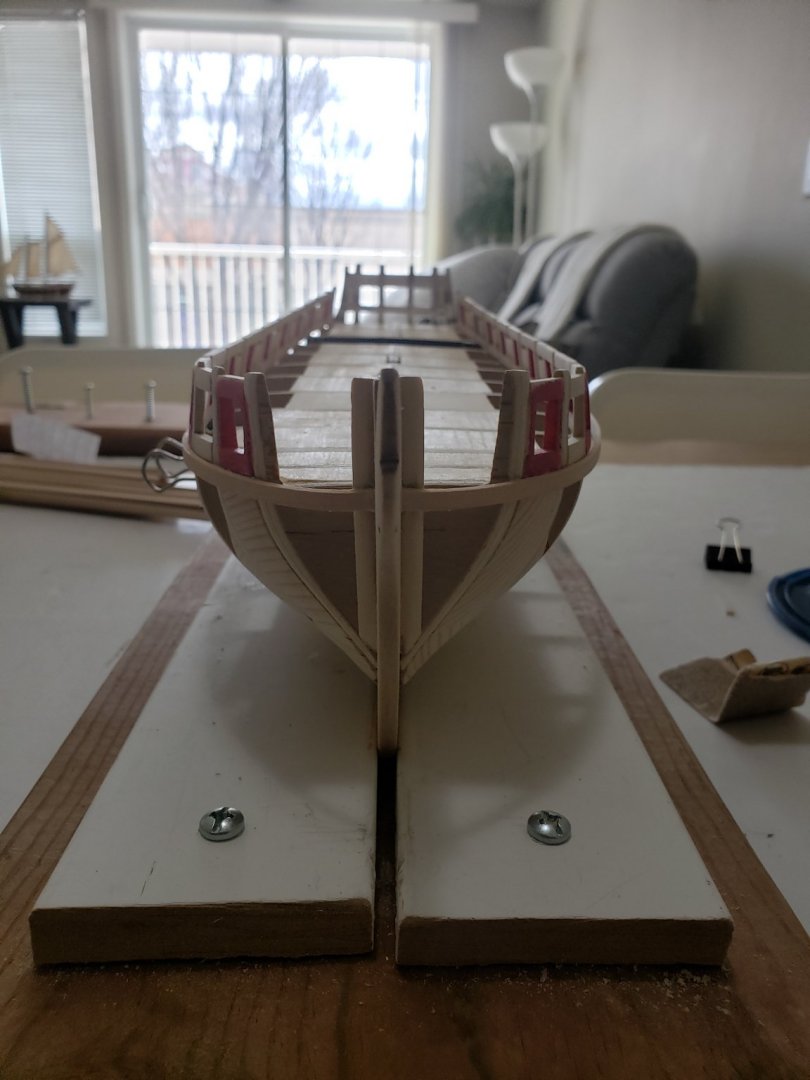
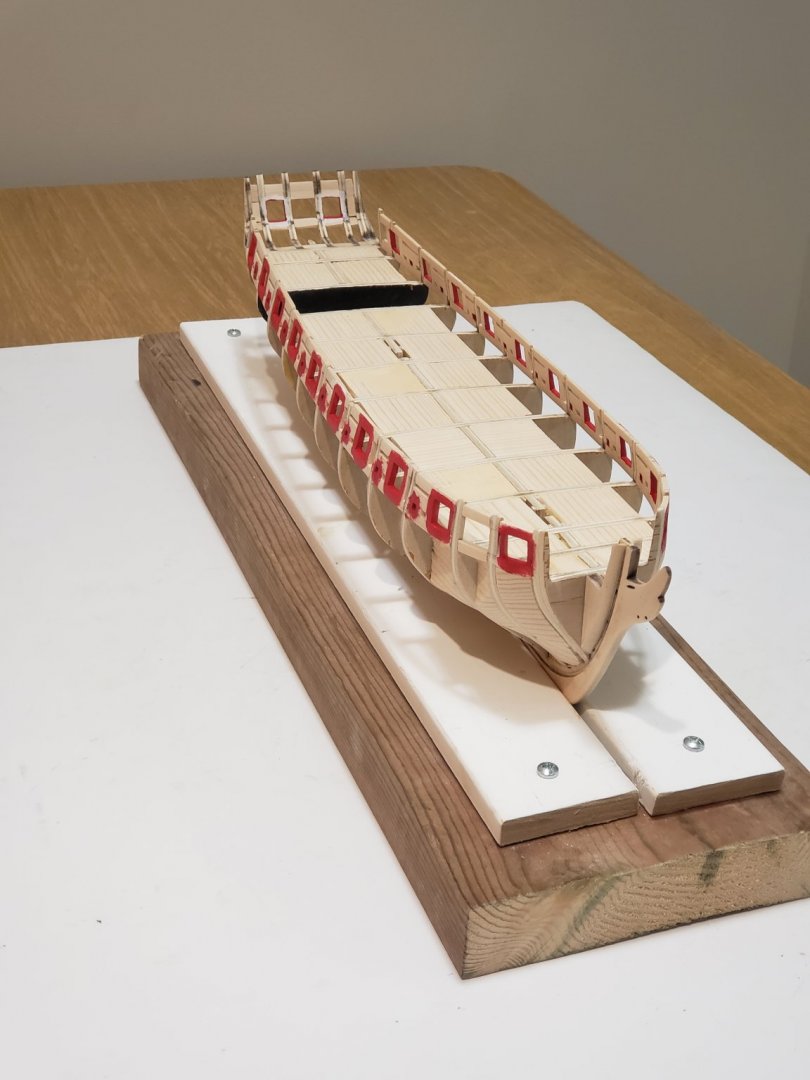
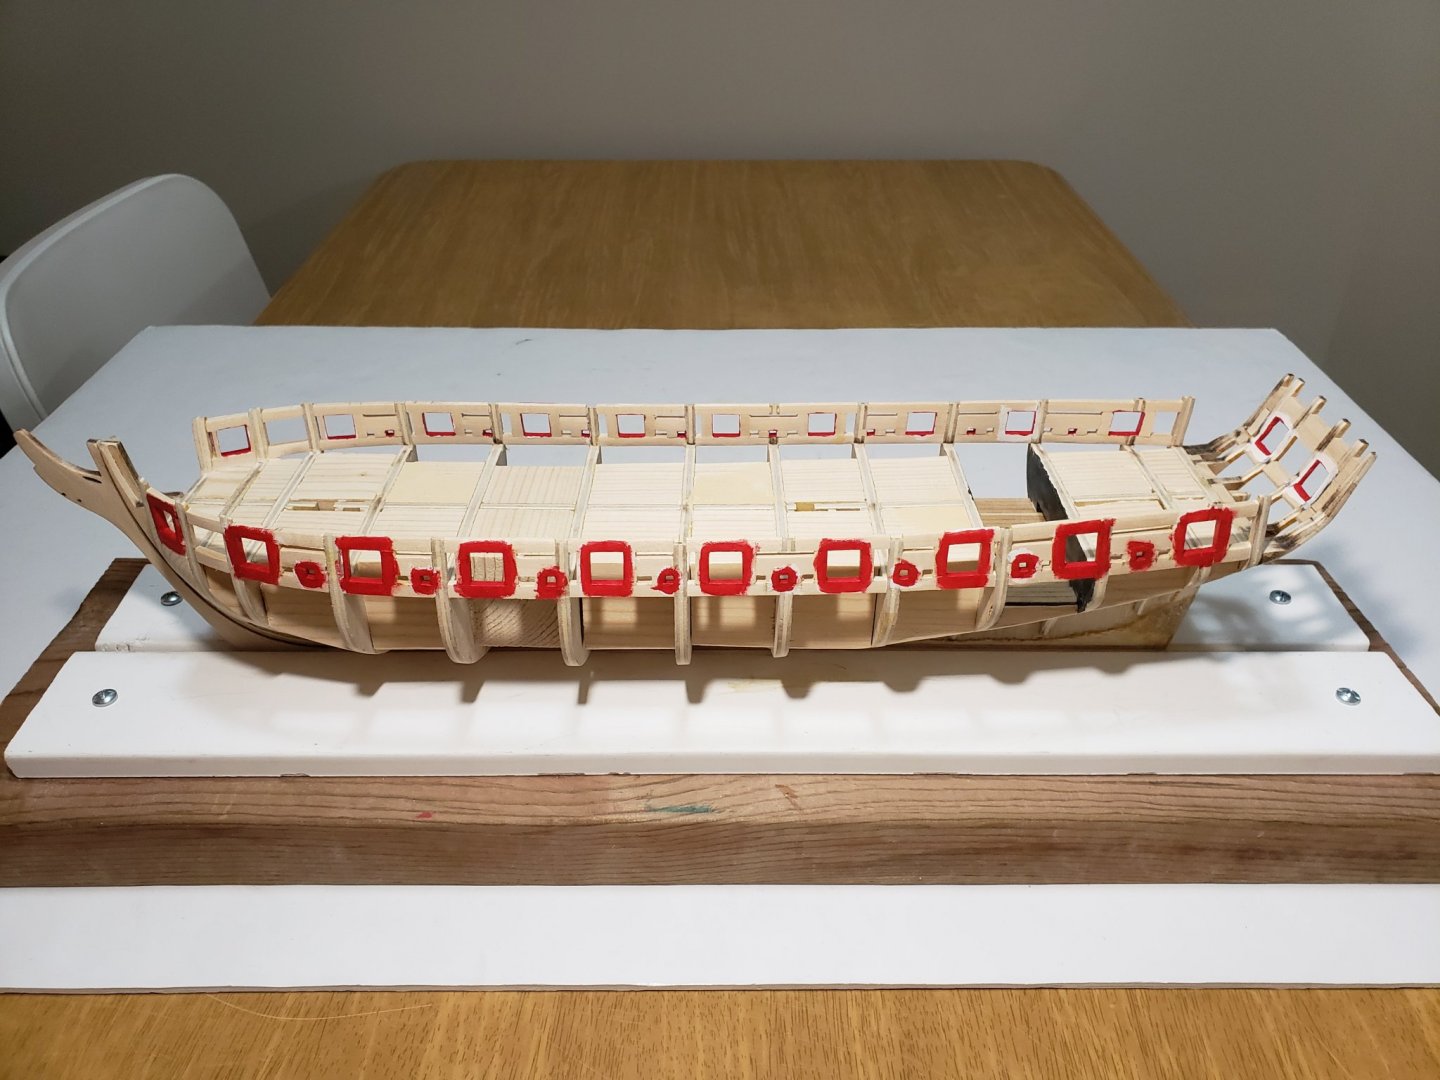
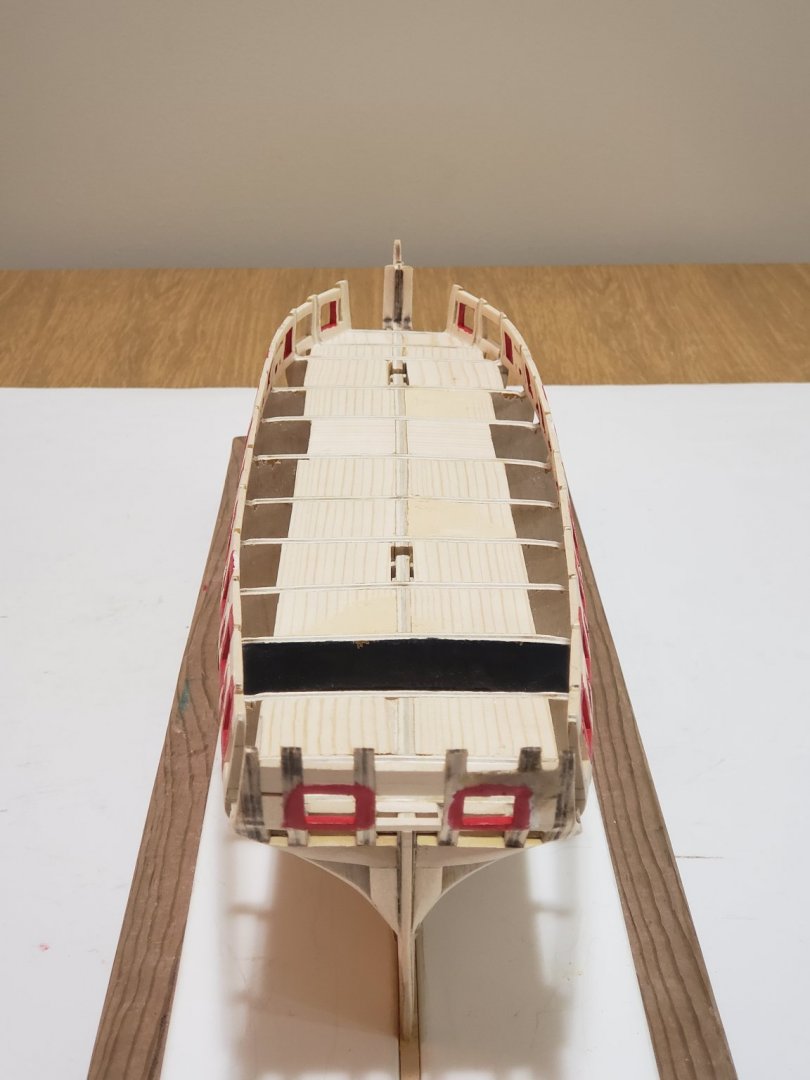
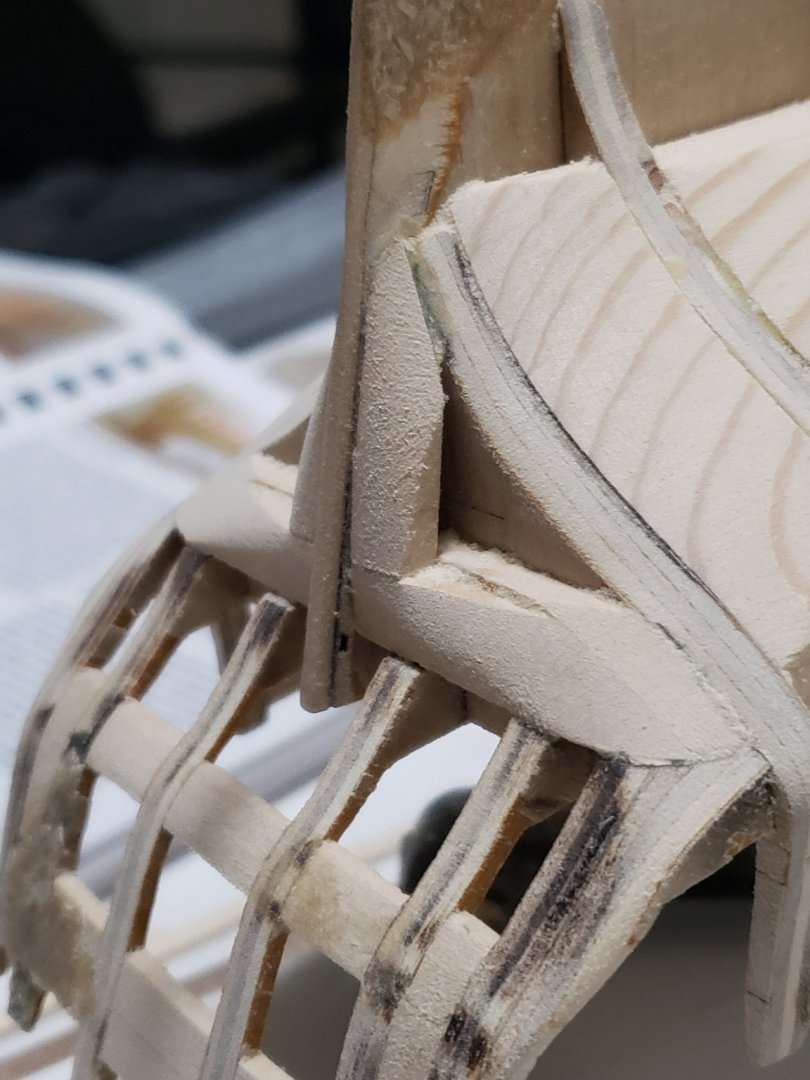
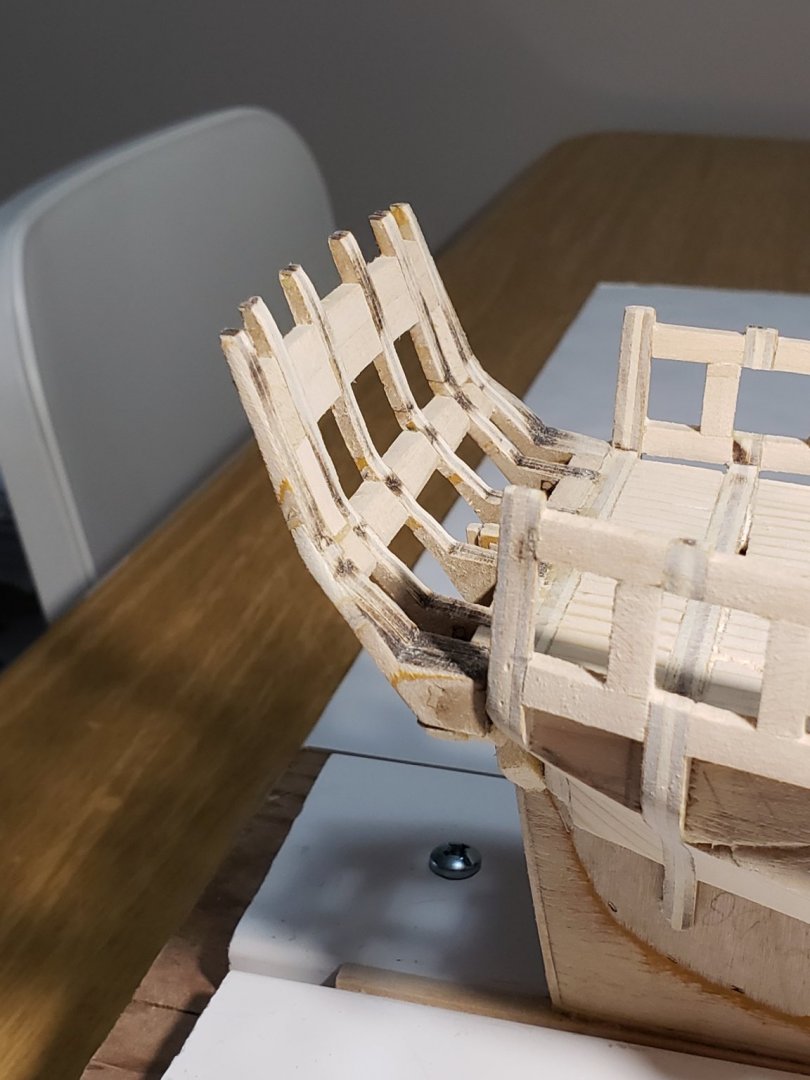
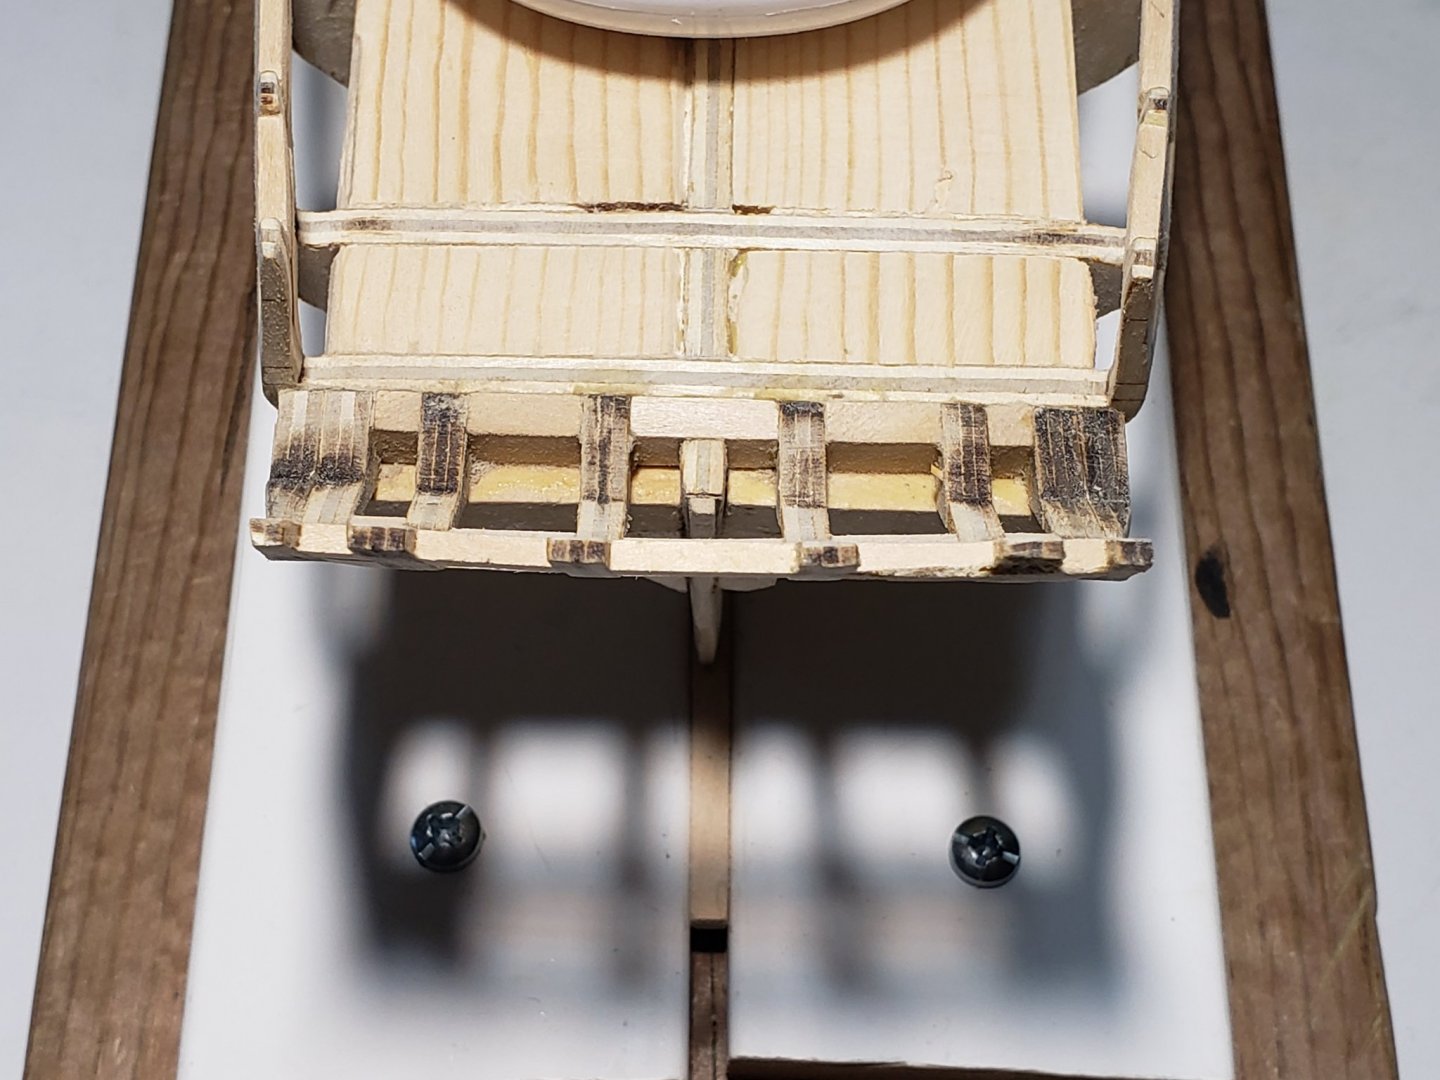
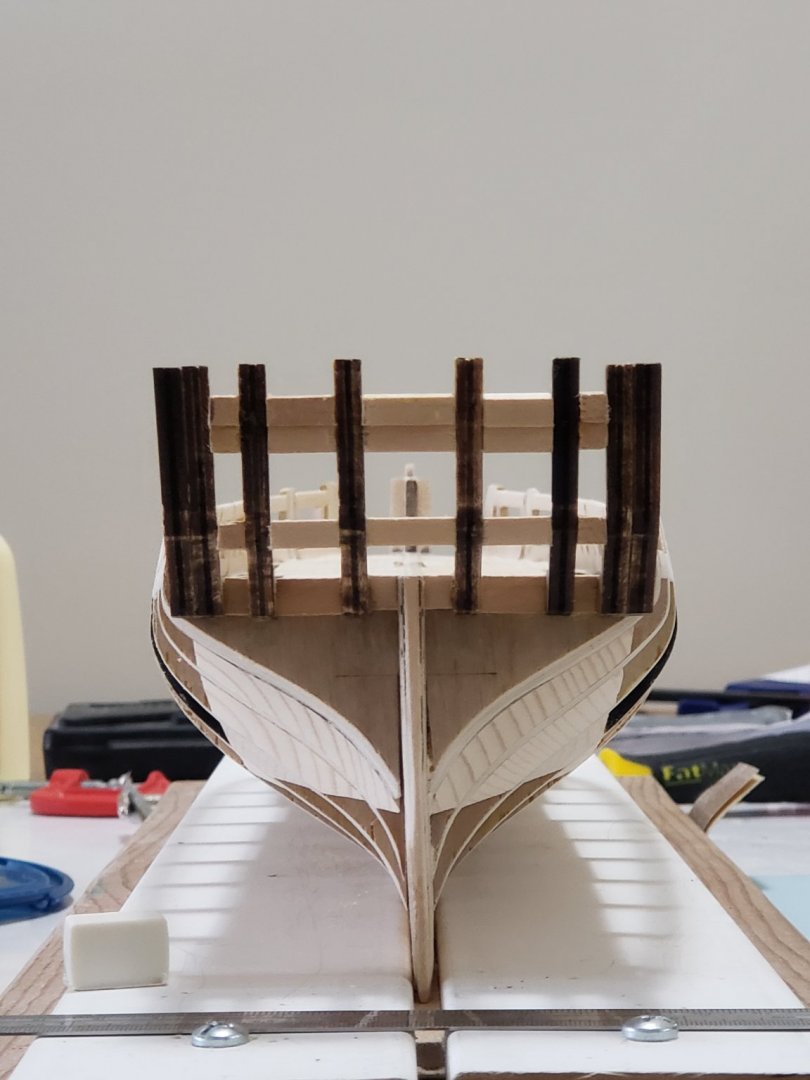
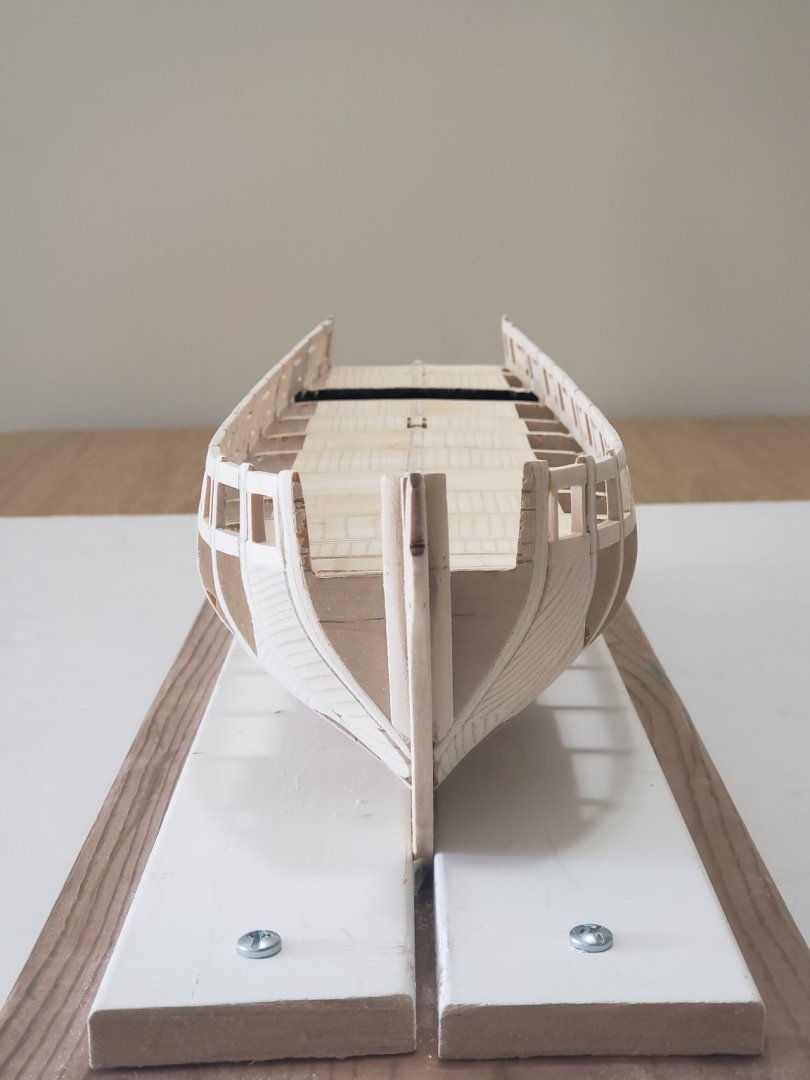
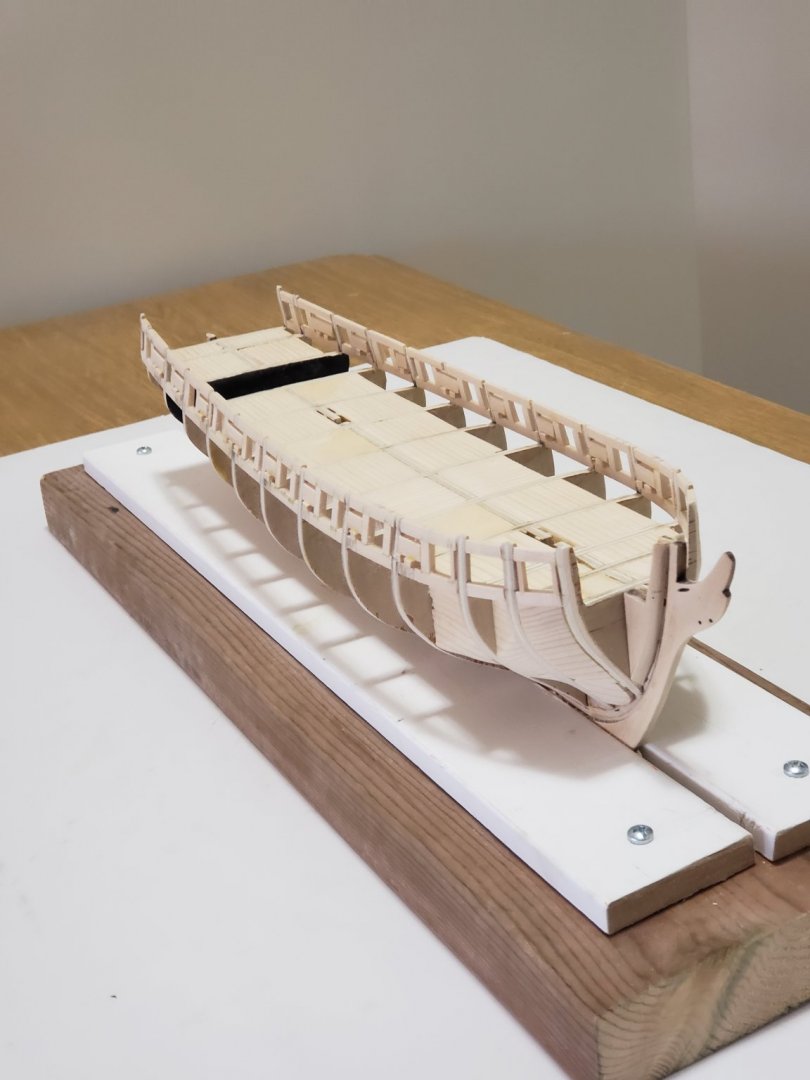
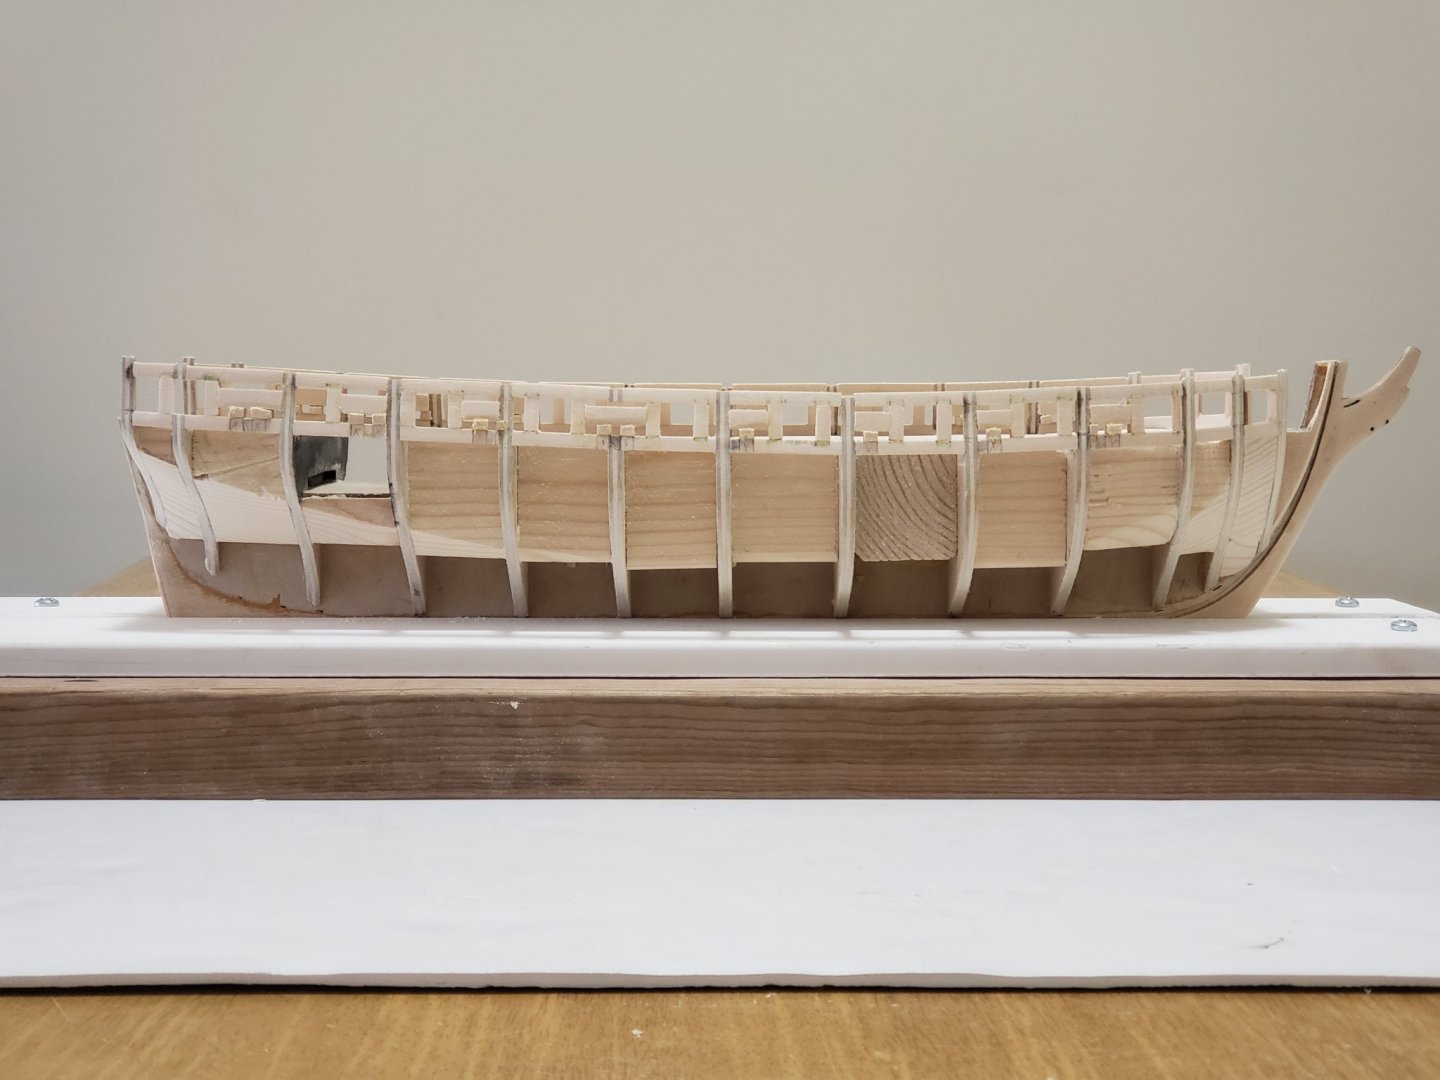
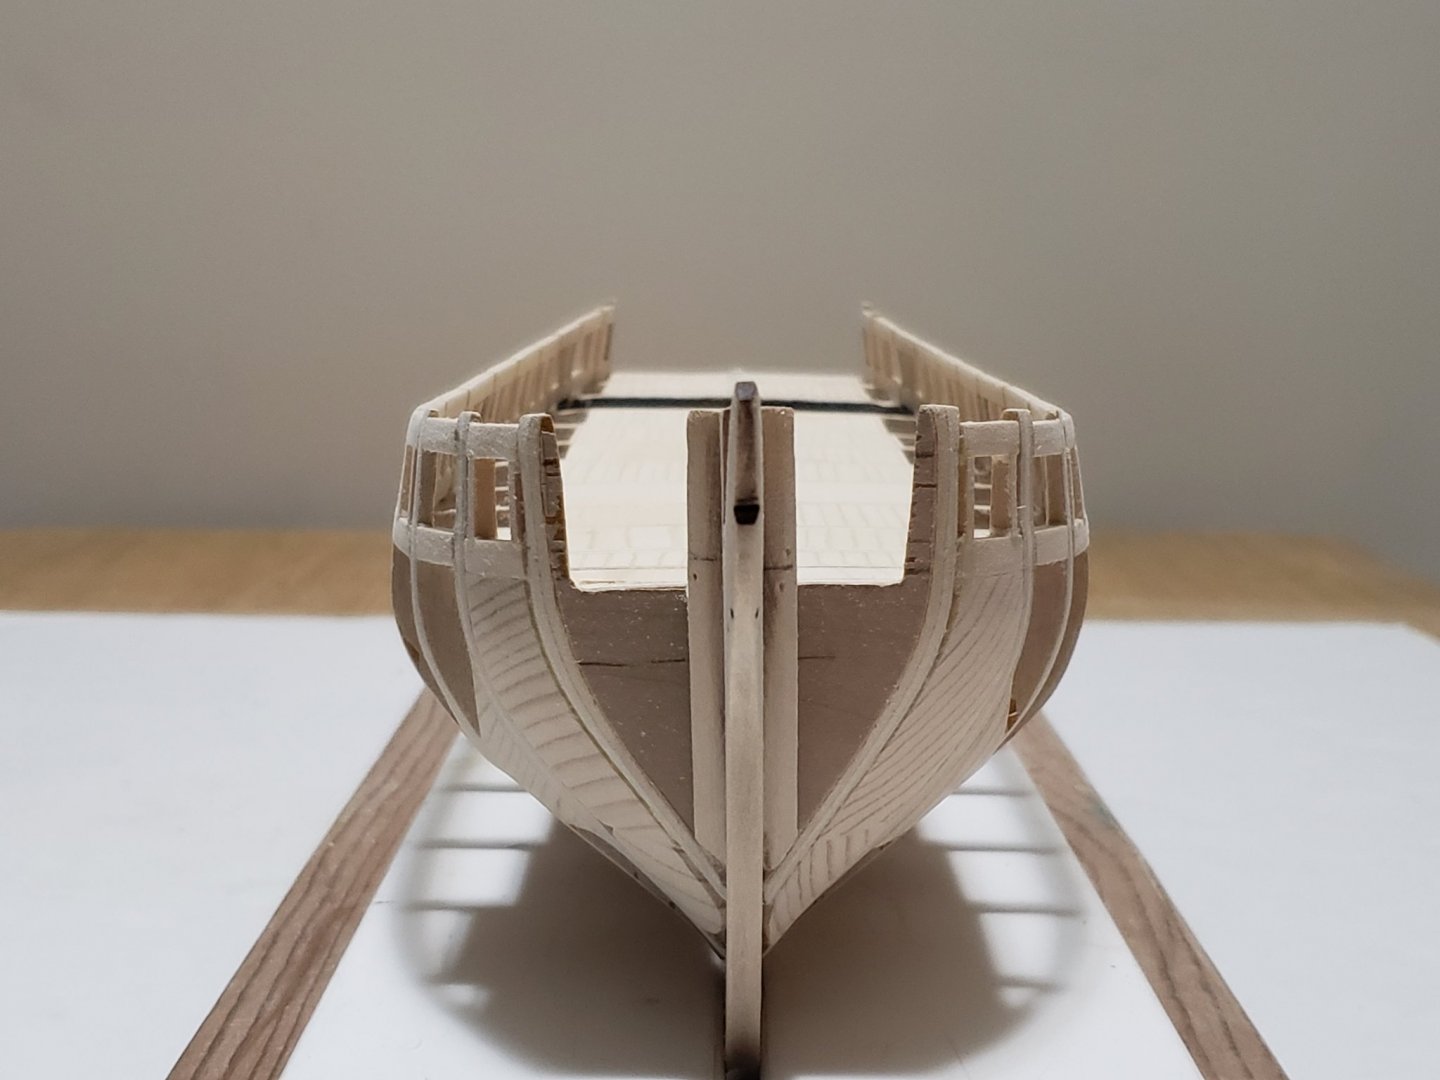
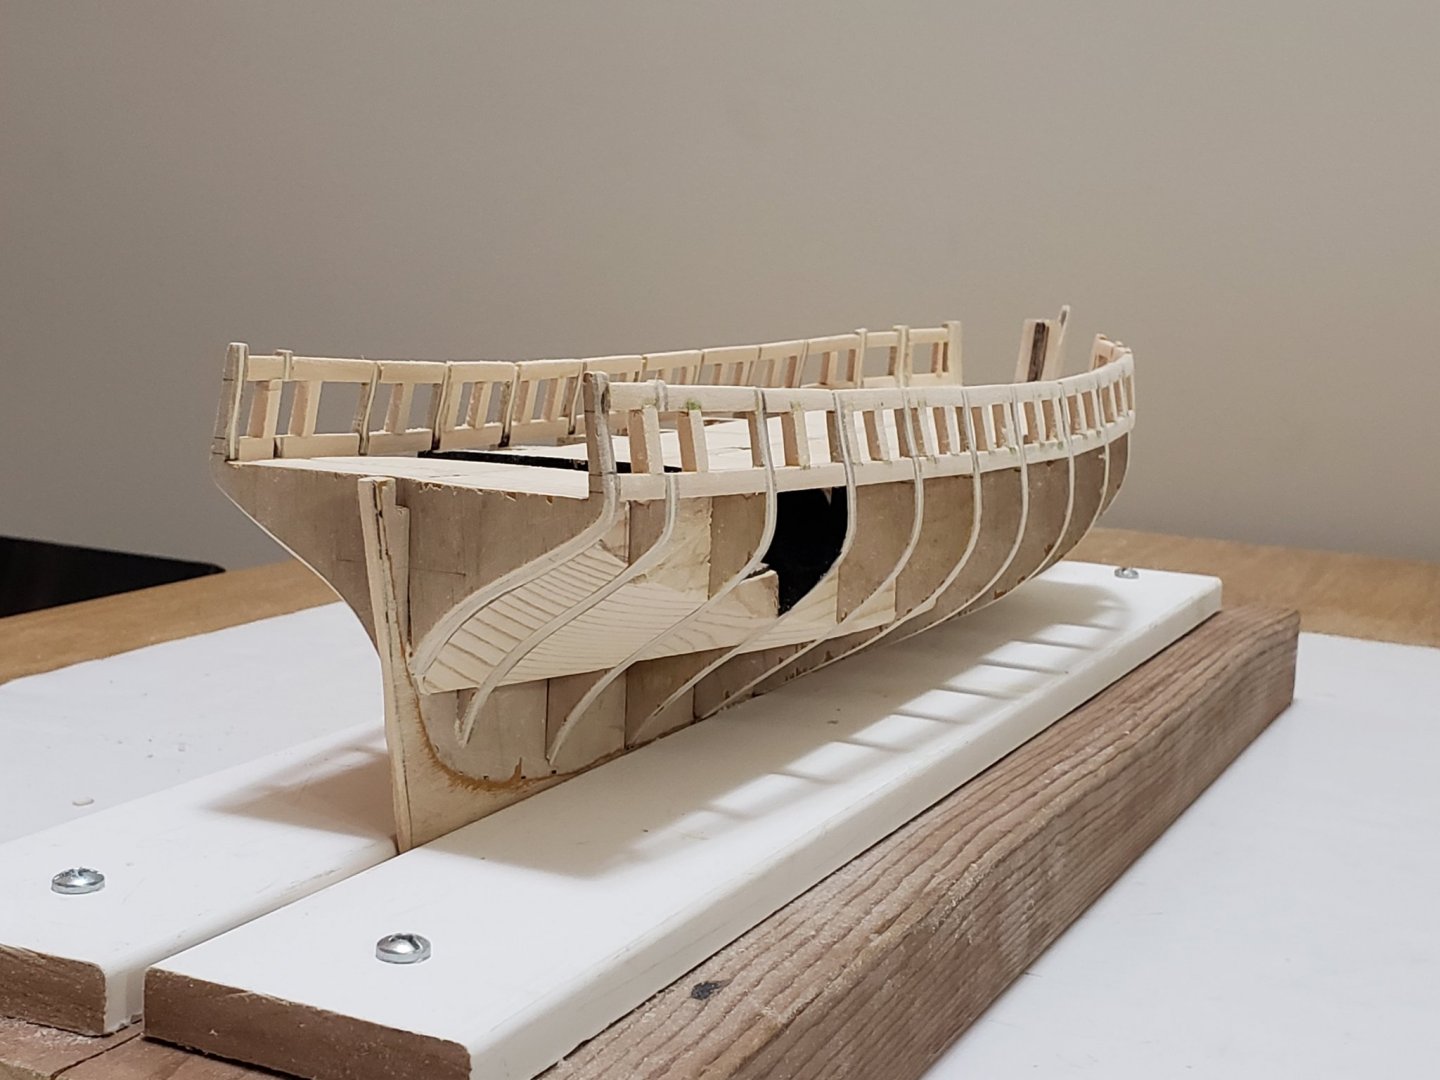
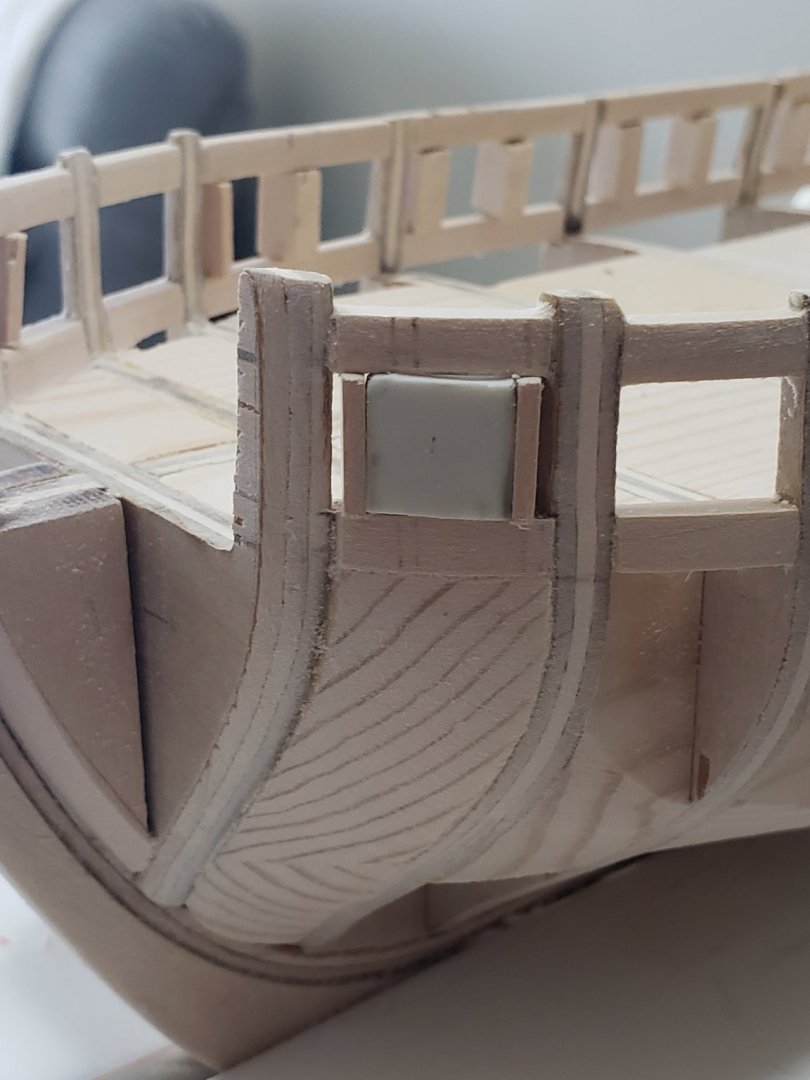
Finished planking the stern. Was not completely happy with results... First problem (very minor): planking below the transform. Since my port sills were lower than that shown in the manual, I could not fit 6 1/8 in planks, and instead went for 4 1/8 in planks and one 5/32 in plank. This should not be much of an issue since I will paint it black. The transform's edge was curved as shown here so had to sand it flat. Second problem: when sanding the ports on the transform. I sanded both of the ports 1 mm lower and thus had to shift the entire transform a notch up. This caused a gap as shown here: This gap was soon filled with filler. Third problem: not shown in the image was the canon port lintel was sanded at a wrong angle which caused it to look very deep when looking at it from below (or from above when the ship was flipped over) . So had to use filler again to make it flat. Here is how it looks right now: I definitely learnt from my mistakes and should have worked through it slower. I think a part of it was getting the transform to sit right when taking measurements for the ports (the transform was very wobbly due to the slight roundness of the stern).

- 950 replies
-
- 8
-
-
- syren
- model shipways
- (and 1 more)
-
Many thanks Richard!
-
Thanks Voyageur! Was really nervous about that part but it didn't turn out bad! I finished planking the strips above the upper wale without much trouble: I'll next be sanding the strips then working on the stern.


- 950 replies
-
- 13
-
-
- syren
- model shipways
- (and 1 more)
-
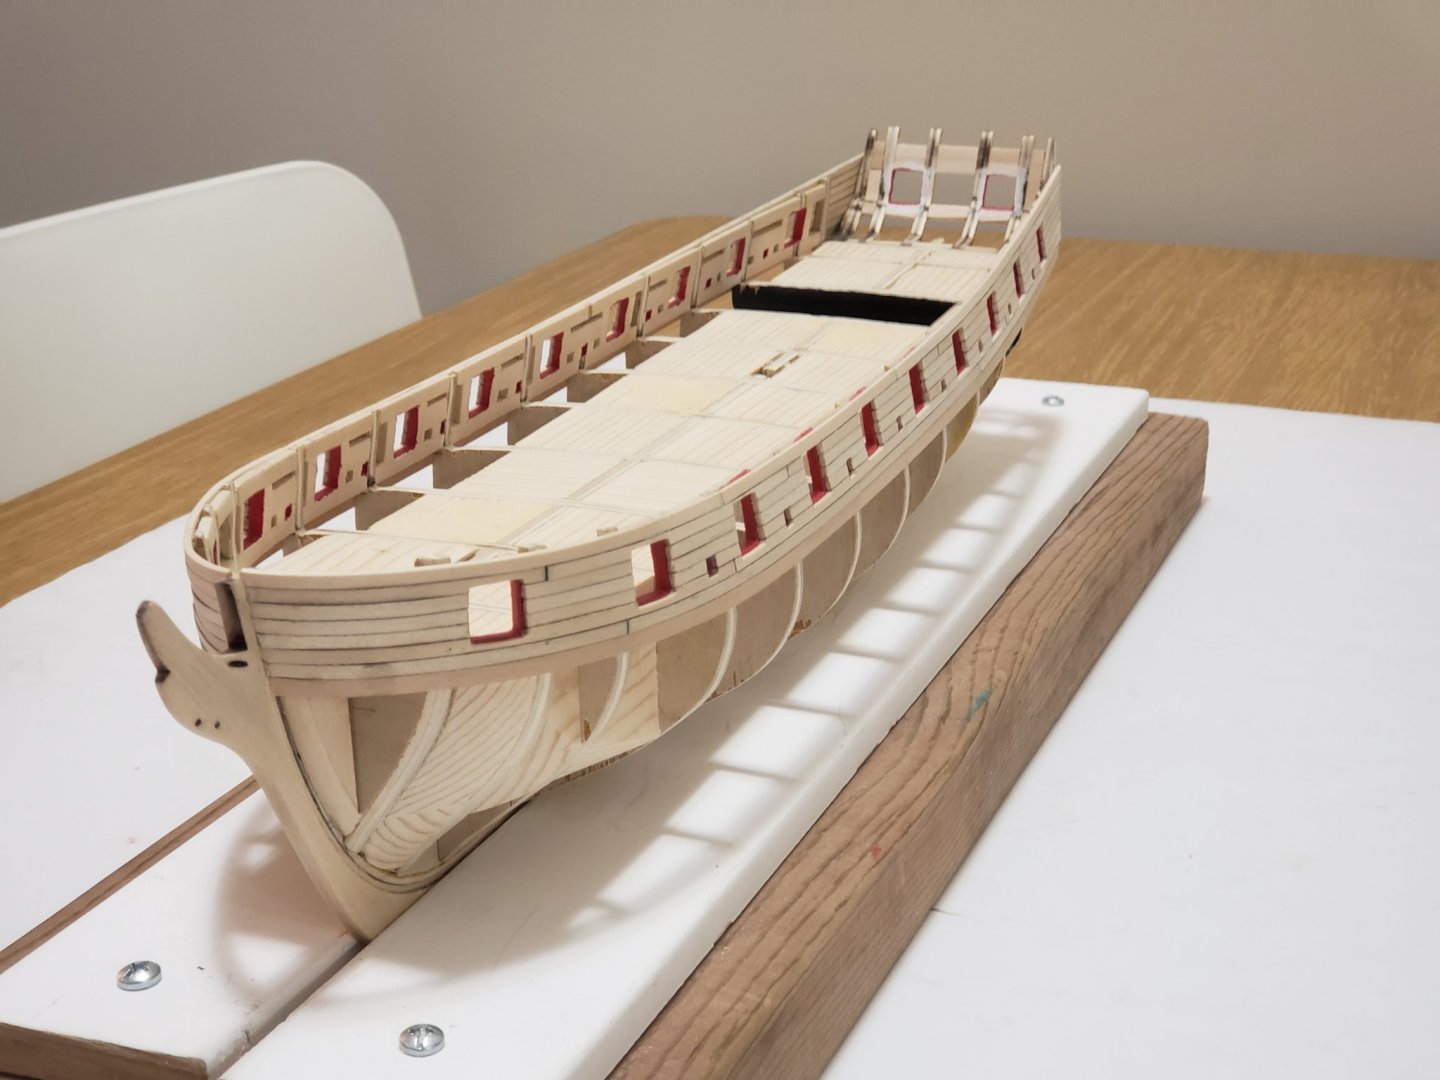
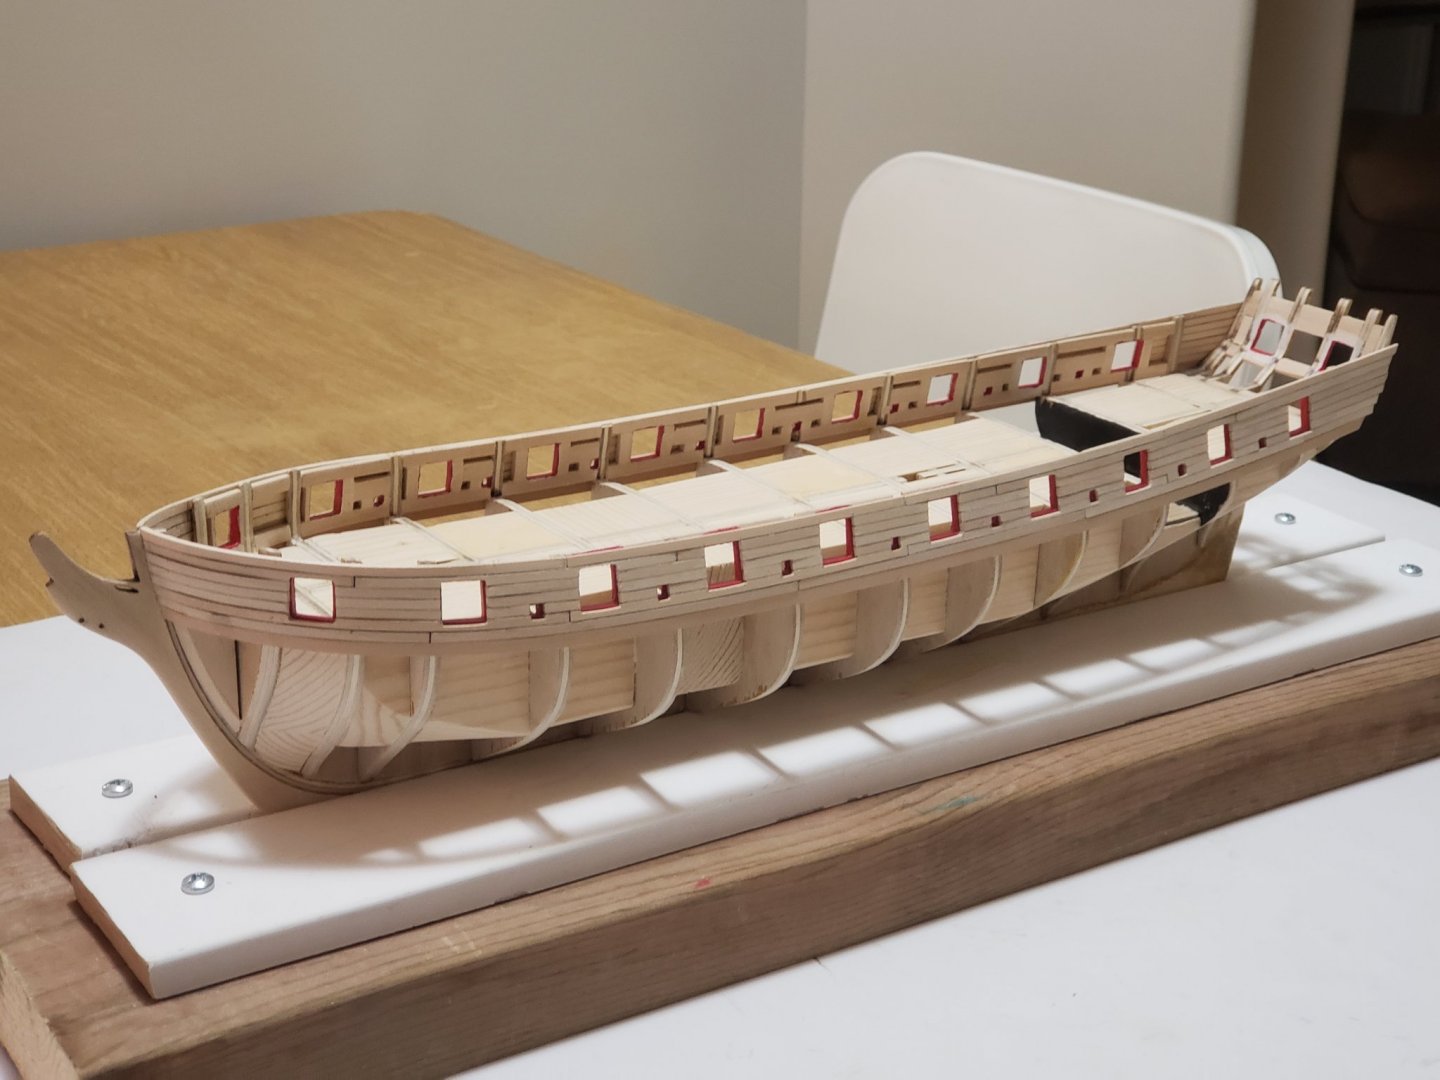
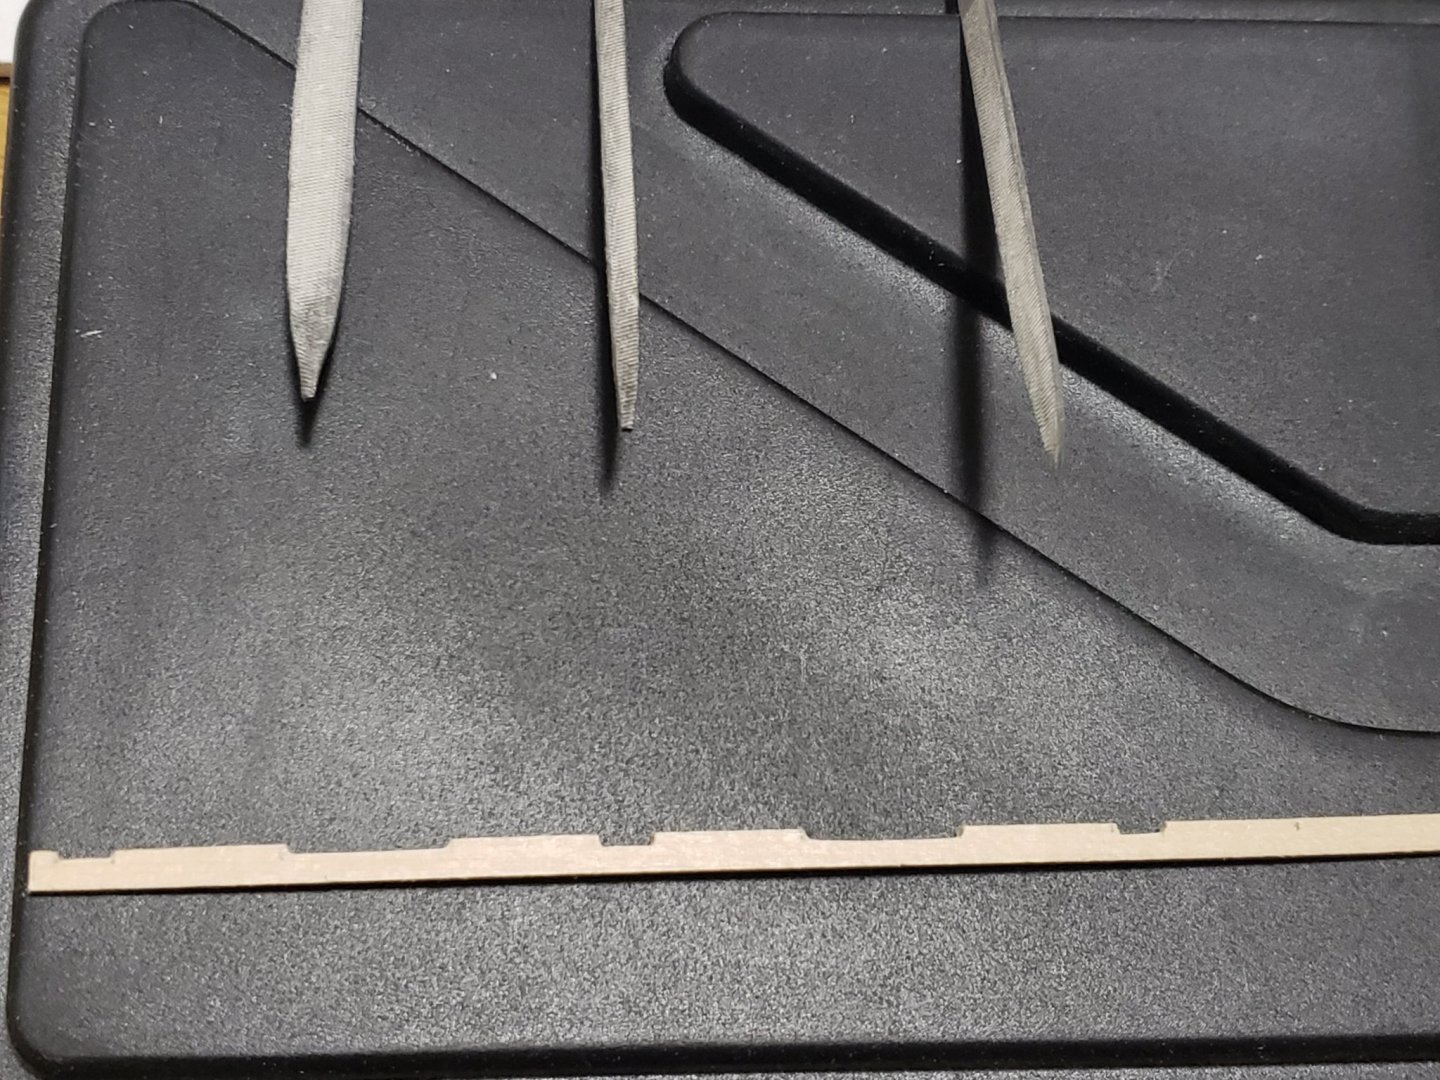
Thanks Richard! Had some final exams so I did not work on the ship as often, which explains the lack of posts for the past few days. But I'm finally done so can get back to building! Carving out the notches were very difficult (due to the wood splitting as mentioned in my previous post), so I tried using needle files instead. I used the triangular file to make the corners sharp, and the square and flat one for the sweep and canon ports, respectively. I managed to complete the majority of tricky planking at the bow: For the planking I used used different strips of wood for each layer of planking to make it look more realistic due to the slight color variation of each strip.

- 950 replies
-
- 11
-
-
- syren
- model shipways
- (and 1 more)
-
Hahaha everything needs to be triple checked before proceeding 😄 Thanks Robin! Don't know what you mean, your gun ports look fantastic! I hope the rest of my gun ports follow suit to the one I posted. Lots of precision required for this part. I'm glad I chose the larger unit 😂
-
Smart thinking for the transform! Looks very good!
-
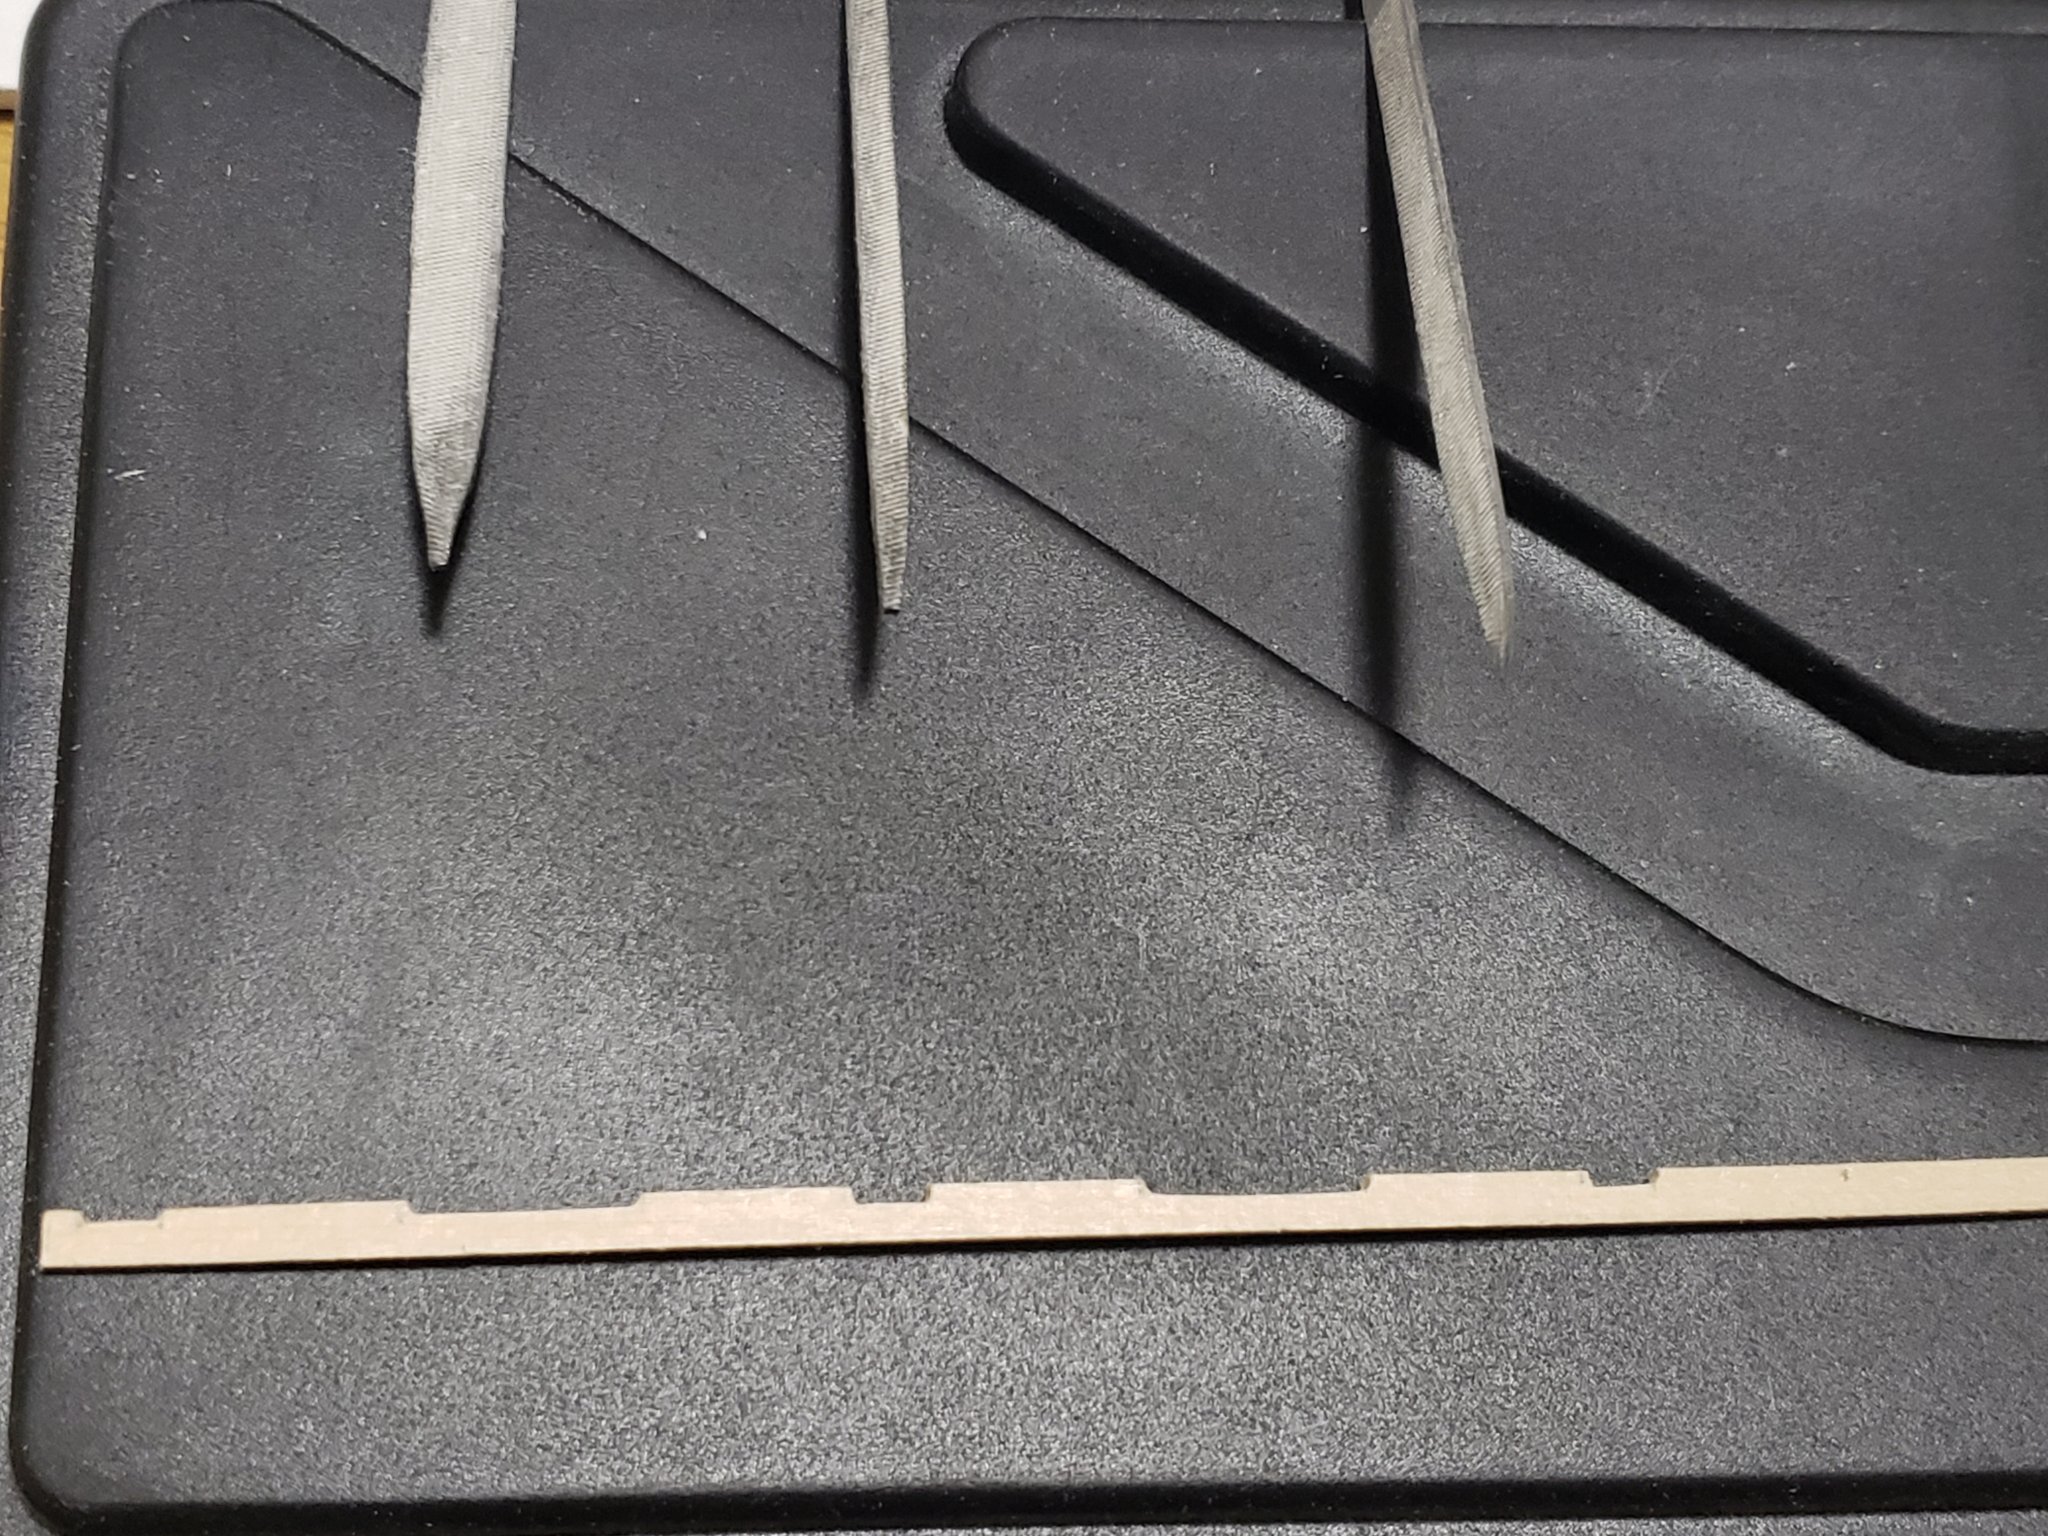
Thanks so much Voyageur! A little bit of progress today. Started working on some notches for the ports. Did a tonne of practice on scrap wood before attempting the real thing. Here's how they turned out. Some strips are slightly thinner/thicker than others. So this will likely be sorted out when it's all sanded. The notches are extremely tricky to carve out due to the wood cracking/splitting because of the direction of its grain. Thus, progress will be very slow.


- 950 replies
-
- 7
-
-
- syren
- model shipways
- (and 1 more)
-
Thanks for the tip! I'll scout around to see if I have anything similar, if not I'll see if a book or something does the job.
-
Thanks Robin! I know it would bug me in the future so I took apart the starboard strip at the bow and adjusted. Here is the result. I think this look much better and more symmetrical: I'll now start to work on the planks above the upper wale, ie. the scary bit...

- 950 replies
-
- 7
-
-
- syren
- model shipways
- (and 1 more)
-
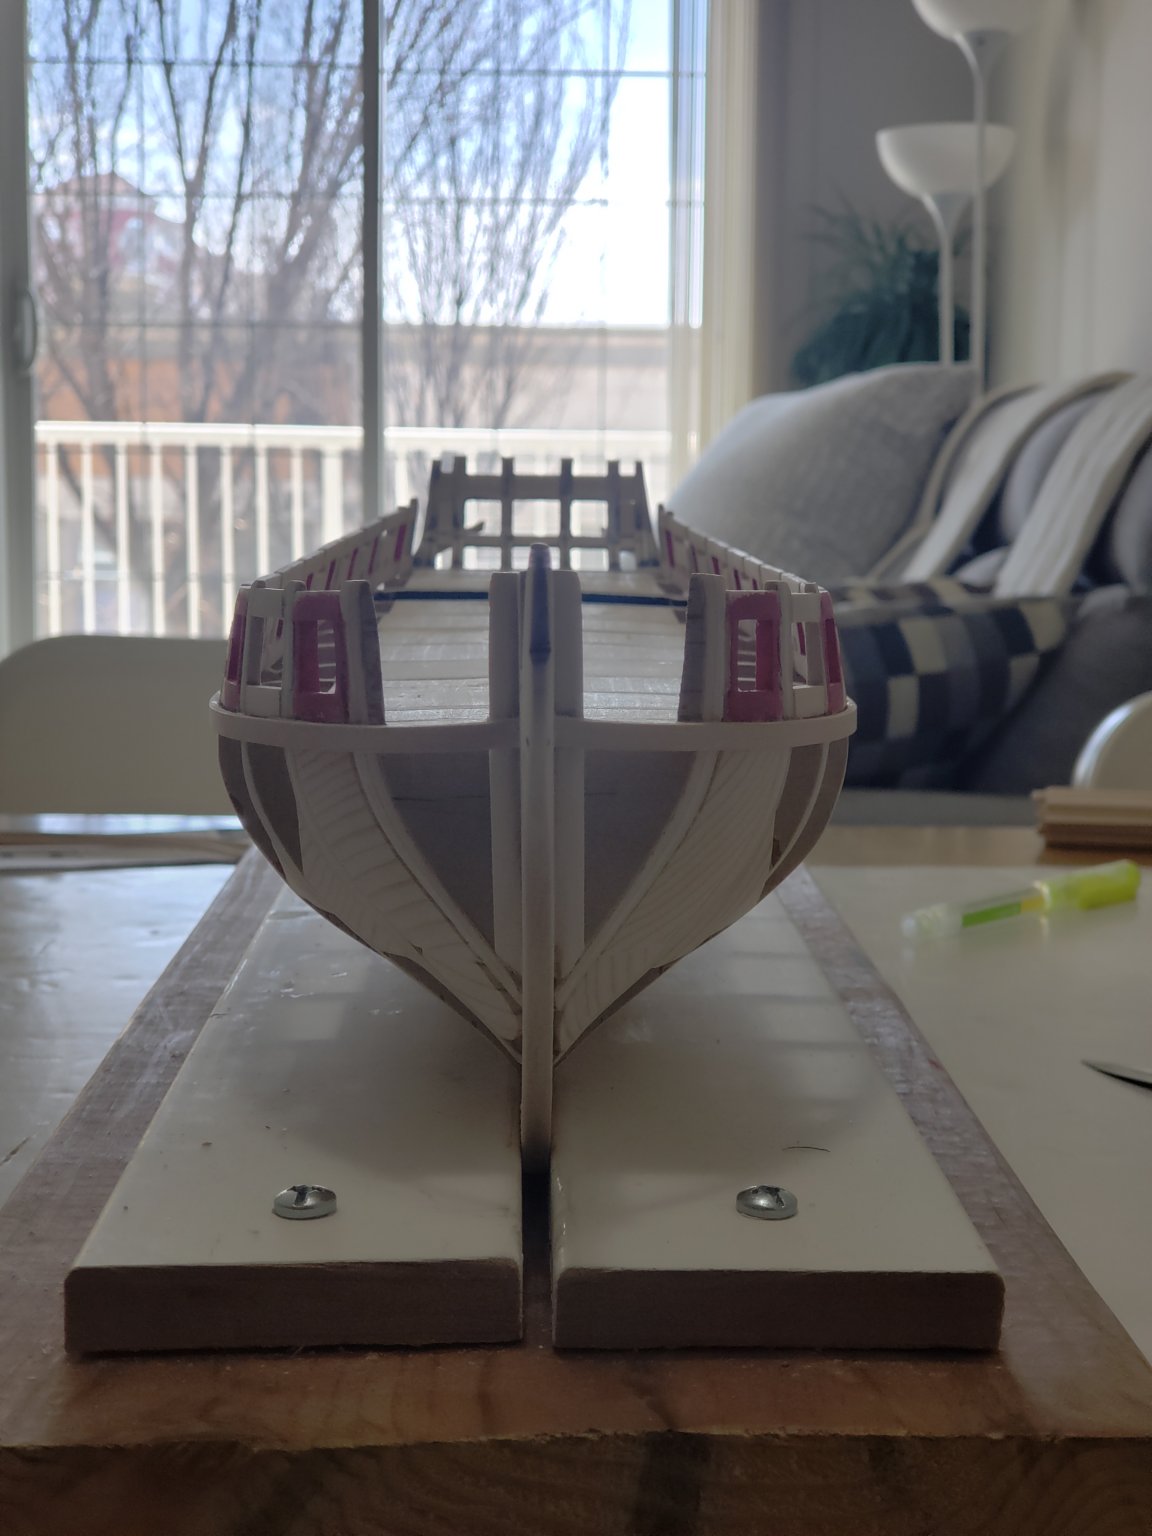
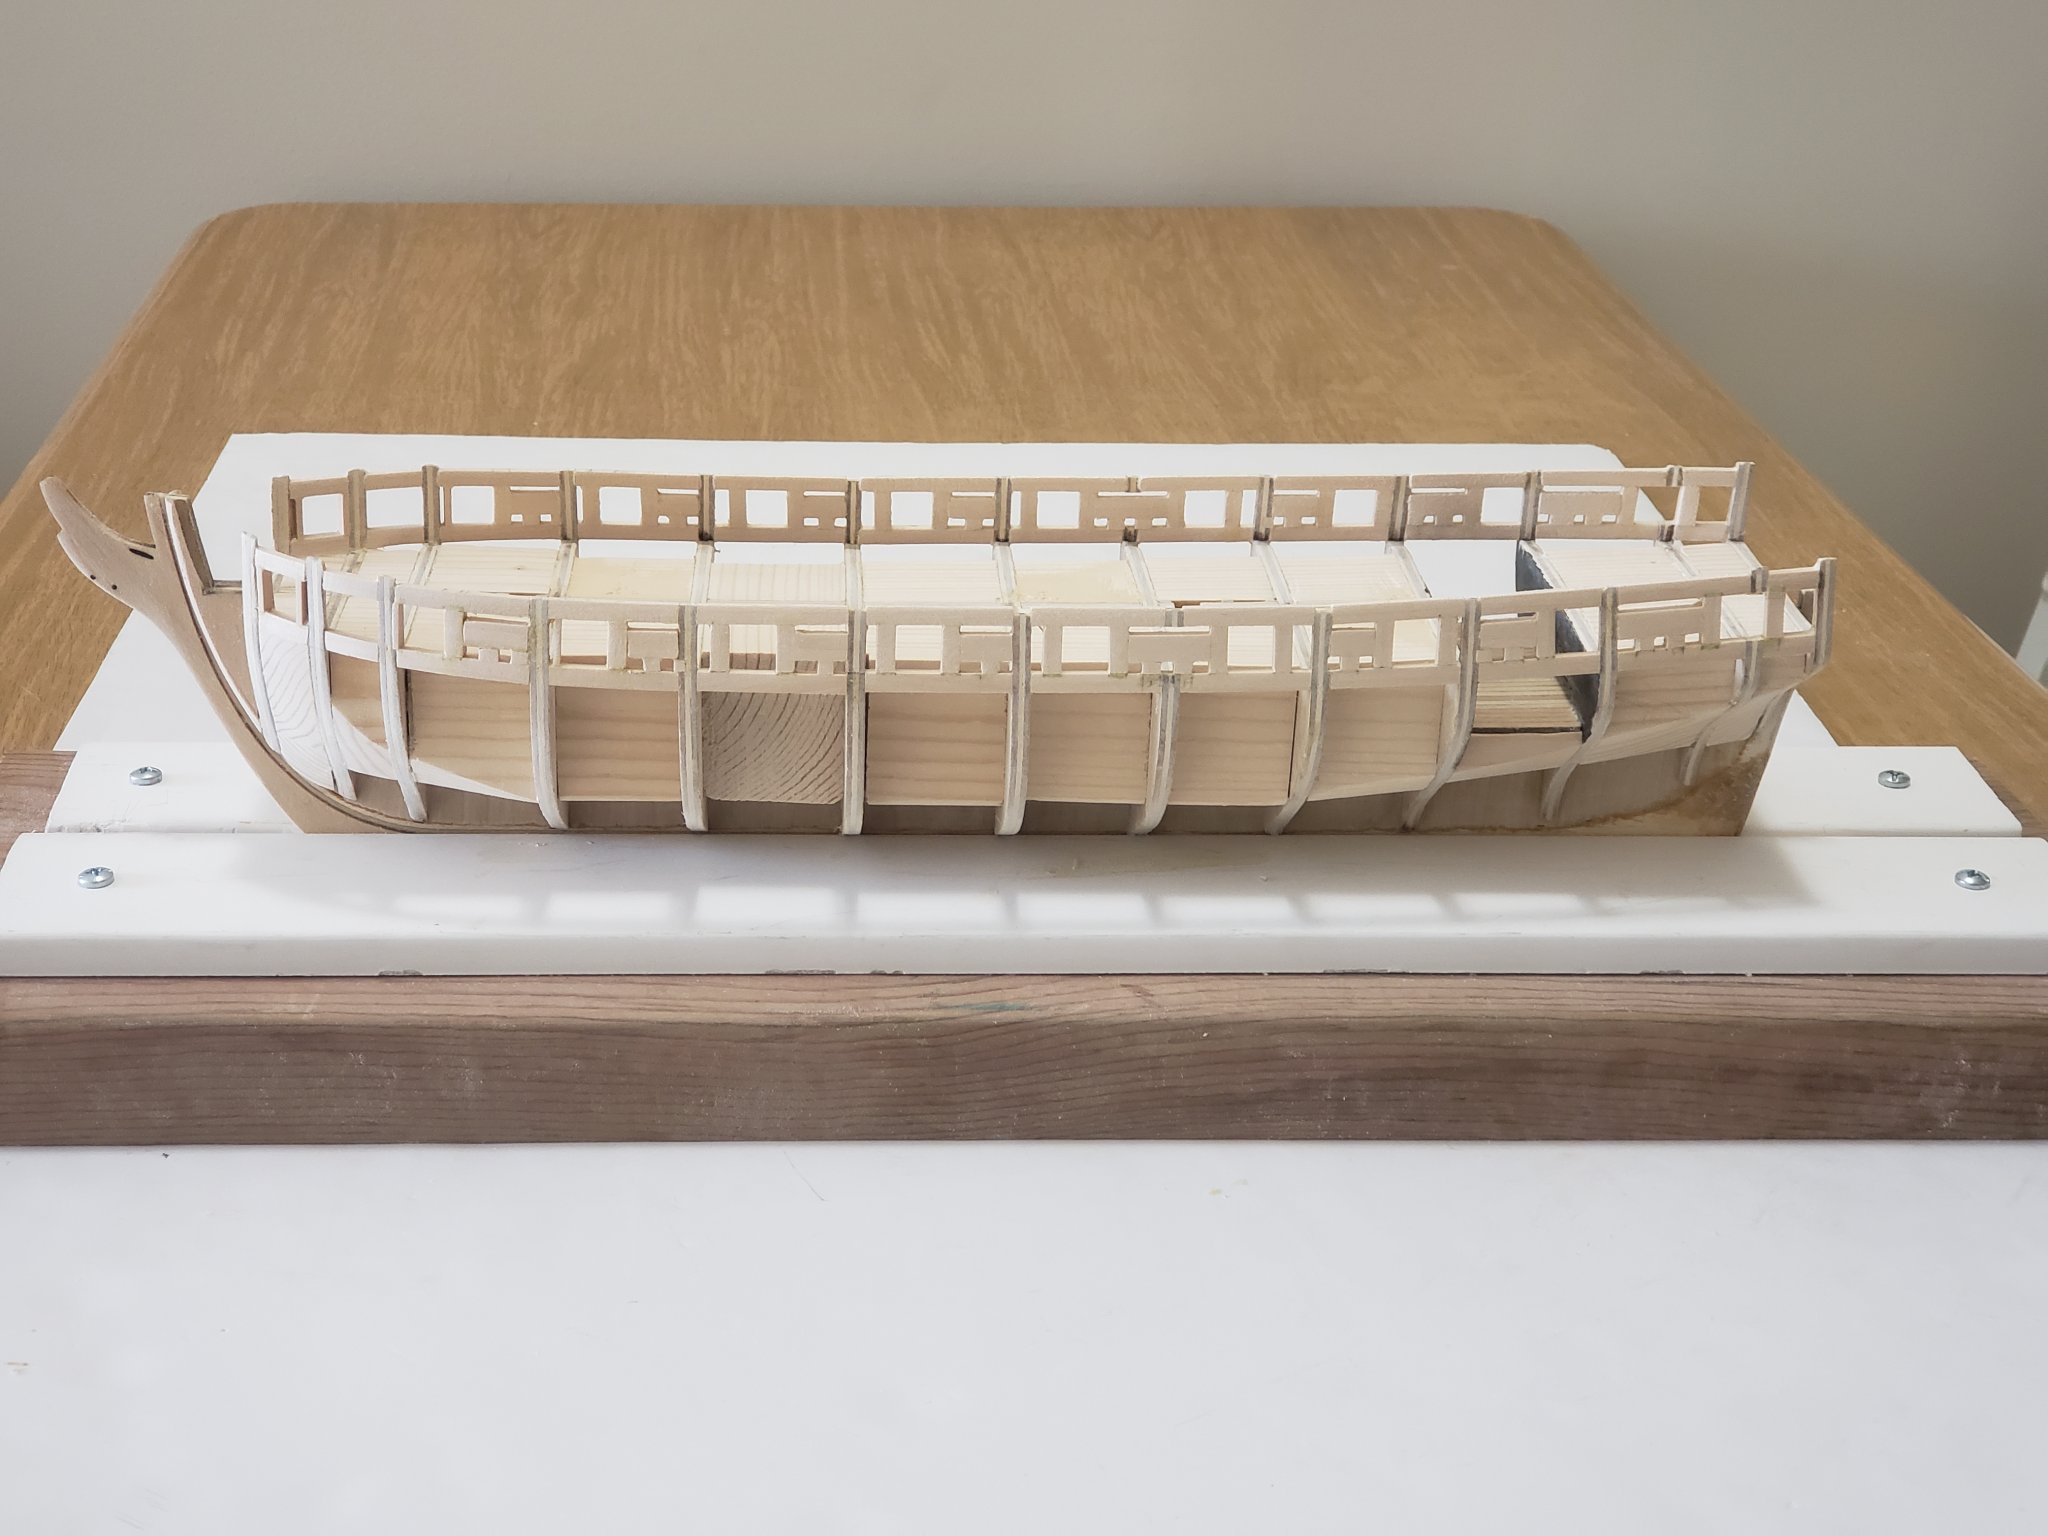
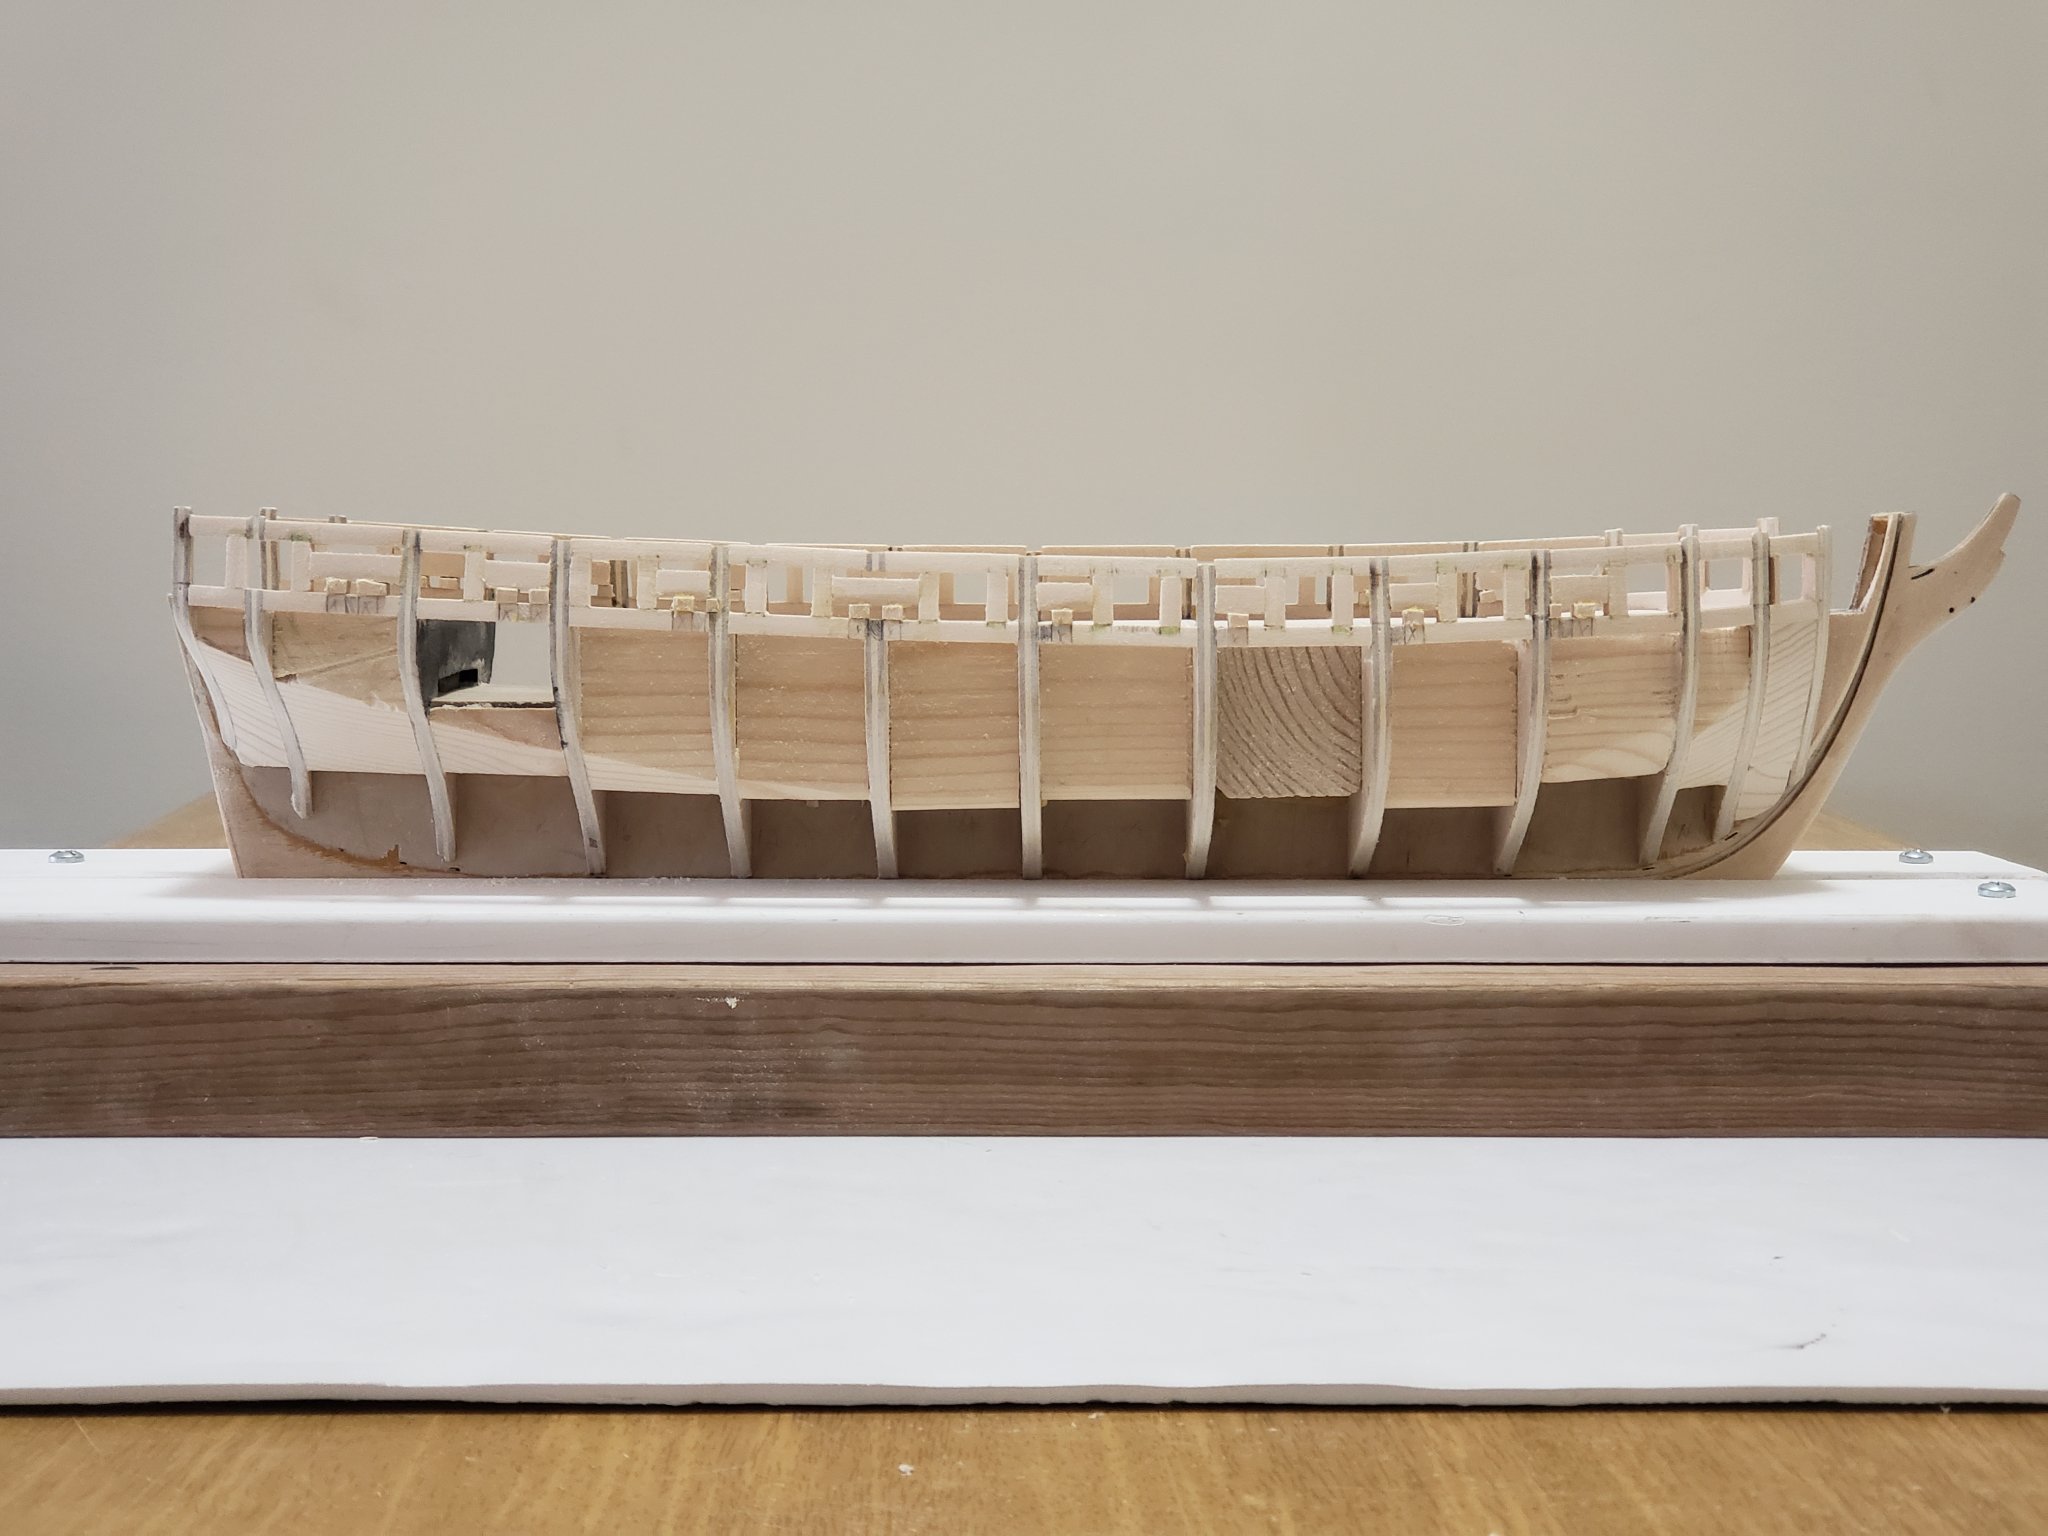
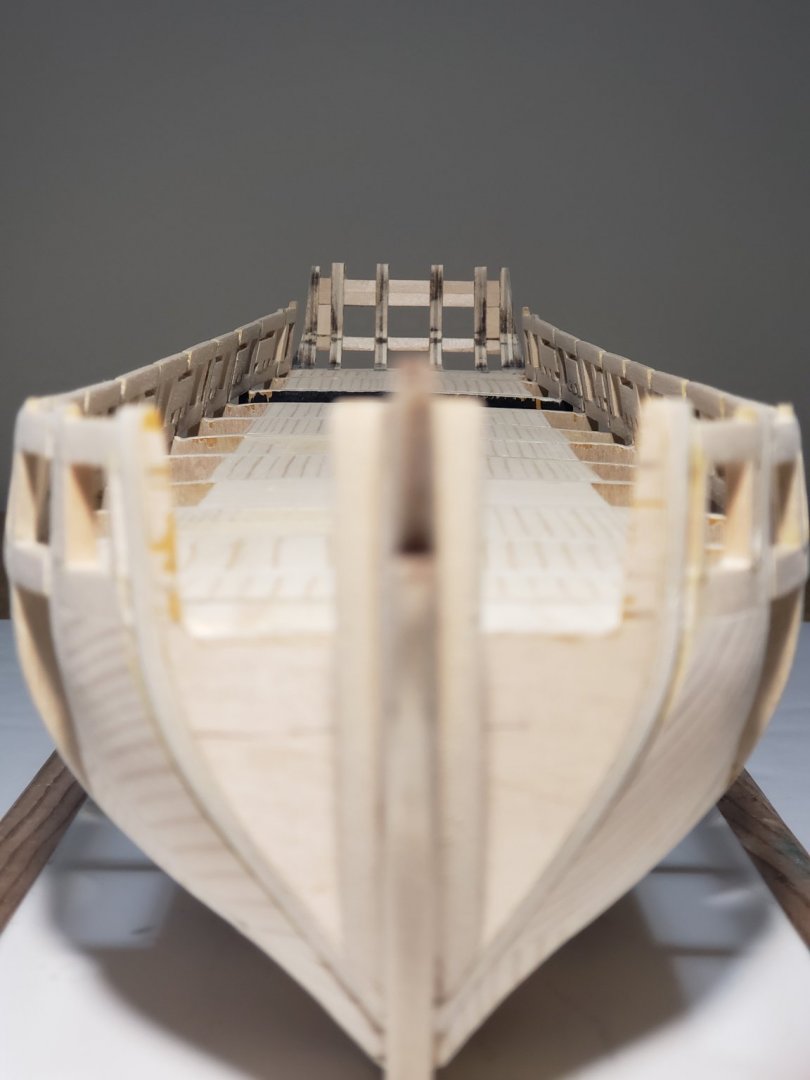
The upper wale was installed today. I started by first gluing the plank at the bow then working towards the stern as shown: From most angles, both sides of the hull look completely symmetrical as shown here: But when looking a lower angle, the plank in the starboard side looks every so slightly lower than the port side plank as shown below. Maybe I am nitpicking about this but really not sure if this would affect the planking above the upper wale. I am now confused on whether I should fix this or leave it and see how the planking progresses. I should note, the distances from the top of each gun port lintel to the plank on both sides were measured and were consistent in both sides with differences less than 1 mm. So it is probably just the natural curvature of the wood causing the discrepancy. Any advice on how I should proceed with this is very much welcomed! Anyhow, here are more photos of the completed install of the upper wale:


- 950 replies
-
- 11
-
-
- syren
- model shipways
- (and 1 more)
-
Thanks so much Pat! Your build is also coming along very nicely. Looking forward to see how she progresses!
- 950 replies
-
- 1
-
-
- syren
- model shipways
- (and 1 more)
-
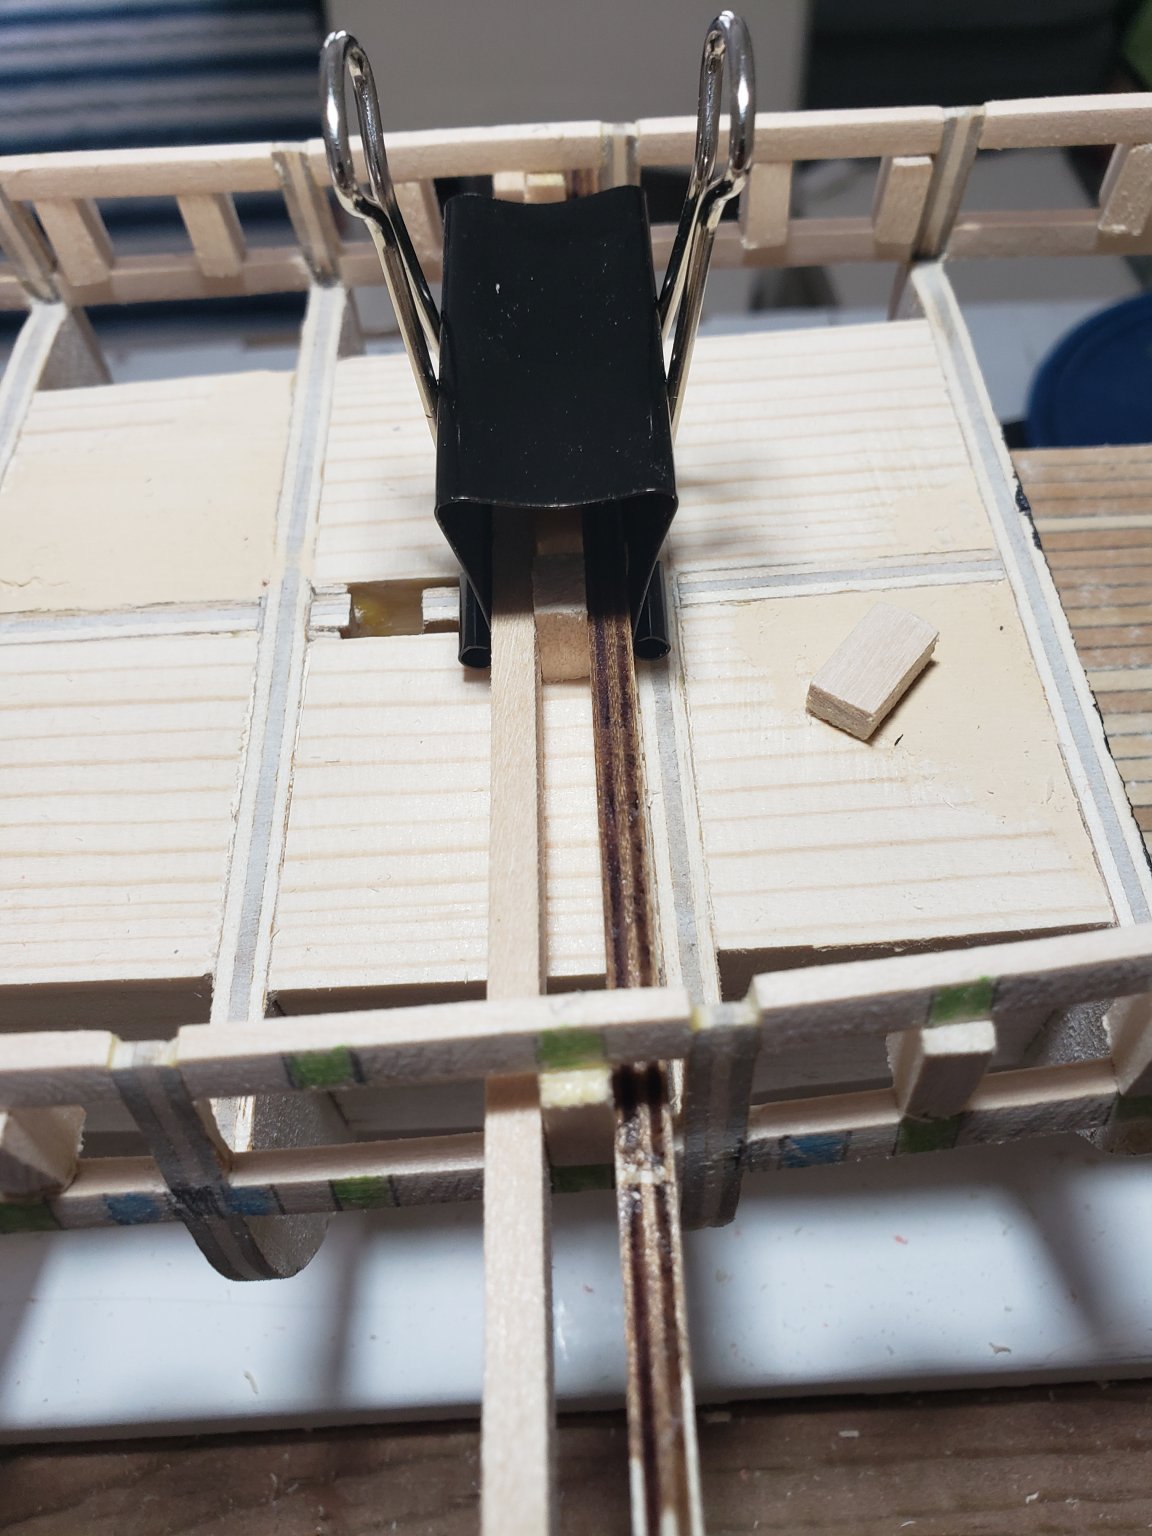
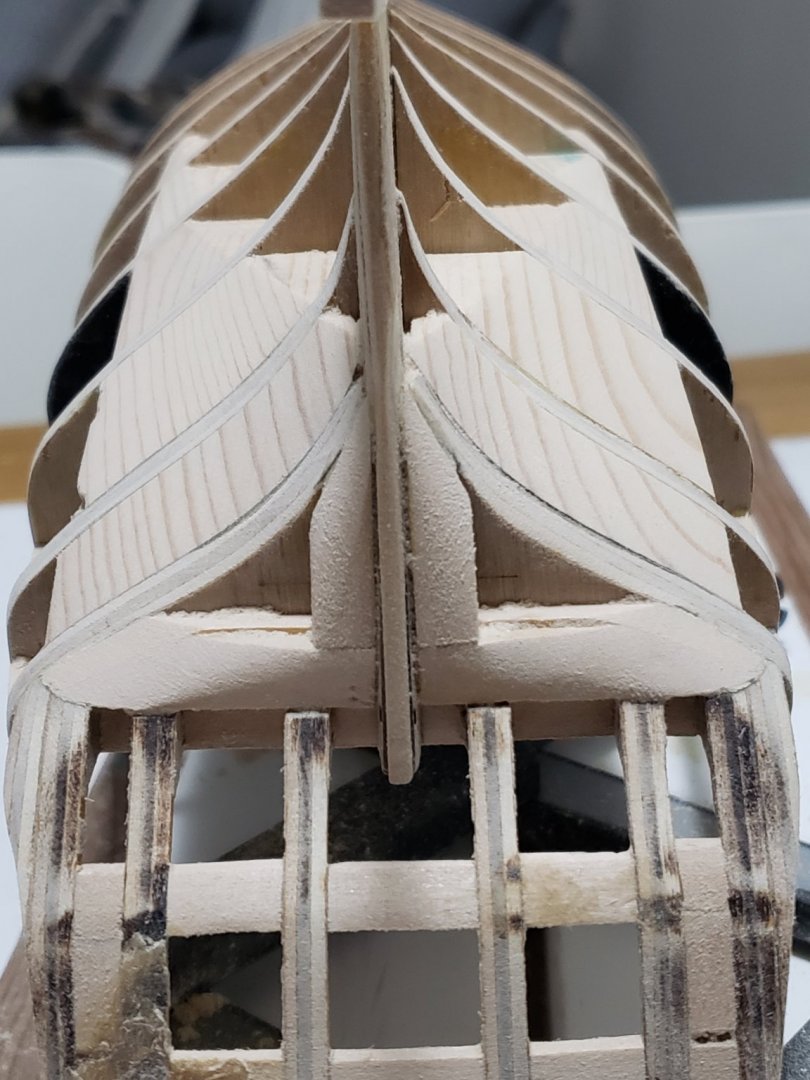
After seeing JesseLee's build log, I realized the sheaves can be added just prior to the last plank being installed but I am still not sure what exactly they will be used for. Again a bit of progress today, the battens were installed to mark the location of the first wale. A relatively simple jig was also constructed for plank bending. I had to change a bit of the curve at the bow so that one the end of the plank can be inserted easily into the rabbet at the stem. The test plank from the above photo kept slipping out from the slot due to its angle.


- 950 replies
-
- 11
-
-
- syren
- model shipways
- (and 1 more)
-
Looks gorgeous Robin!
-
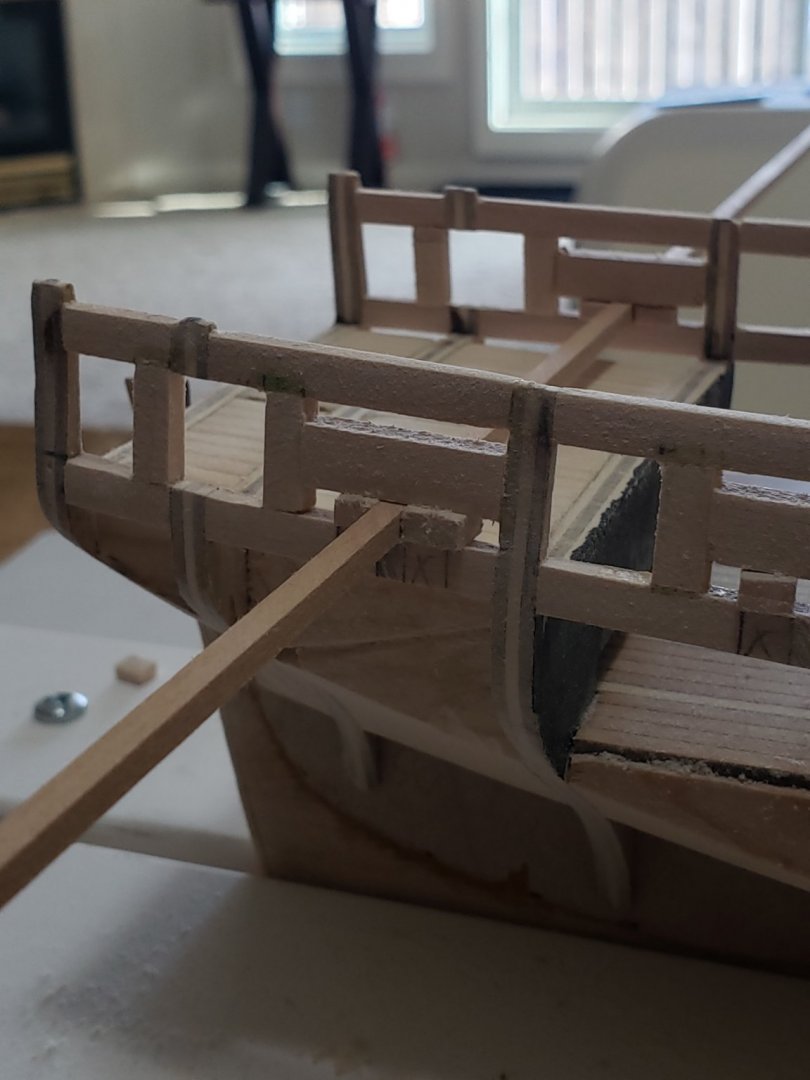
Wow thanks for this! Will definitely be using this tip. Also I have a question before proceeding. I noticed some other modellers who installed sheaves in their models. Is this purely for aesthetic reasons? In the sheet eight plans they don't have any belaying notes corresponding to them.
-
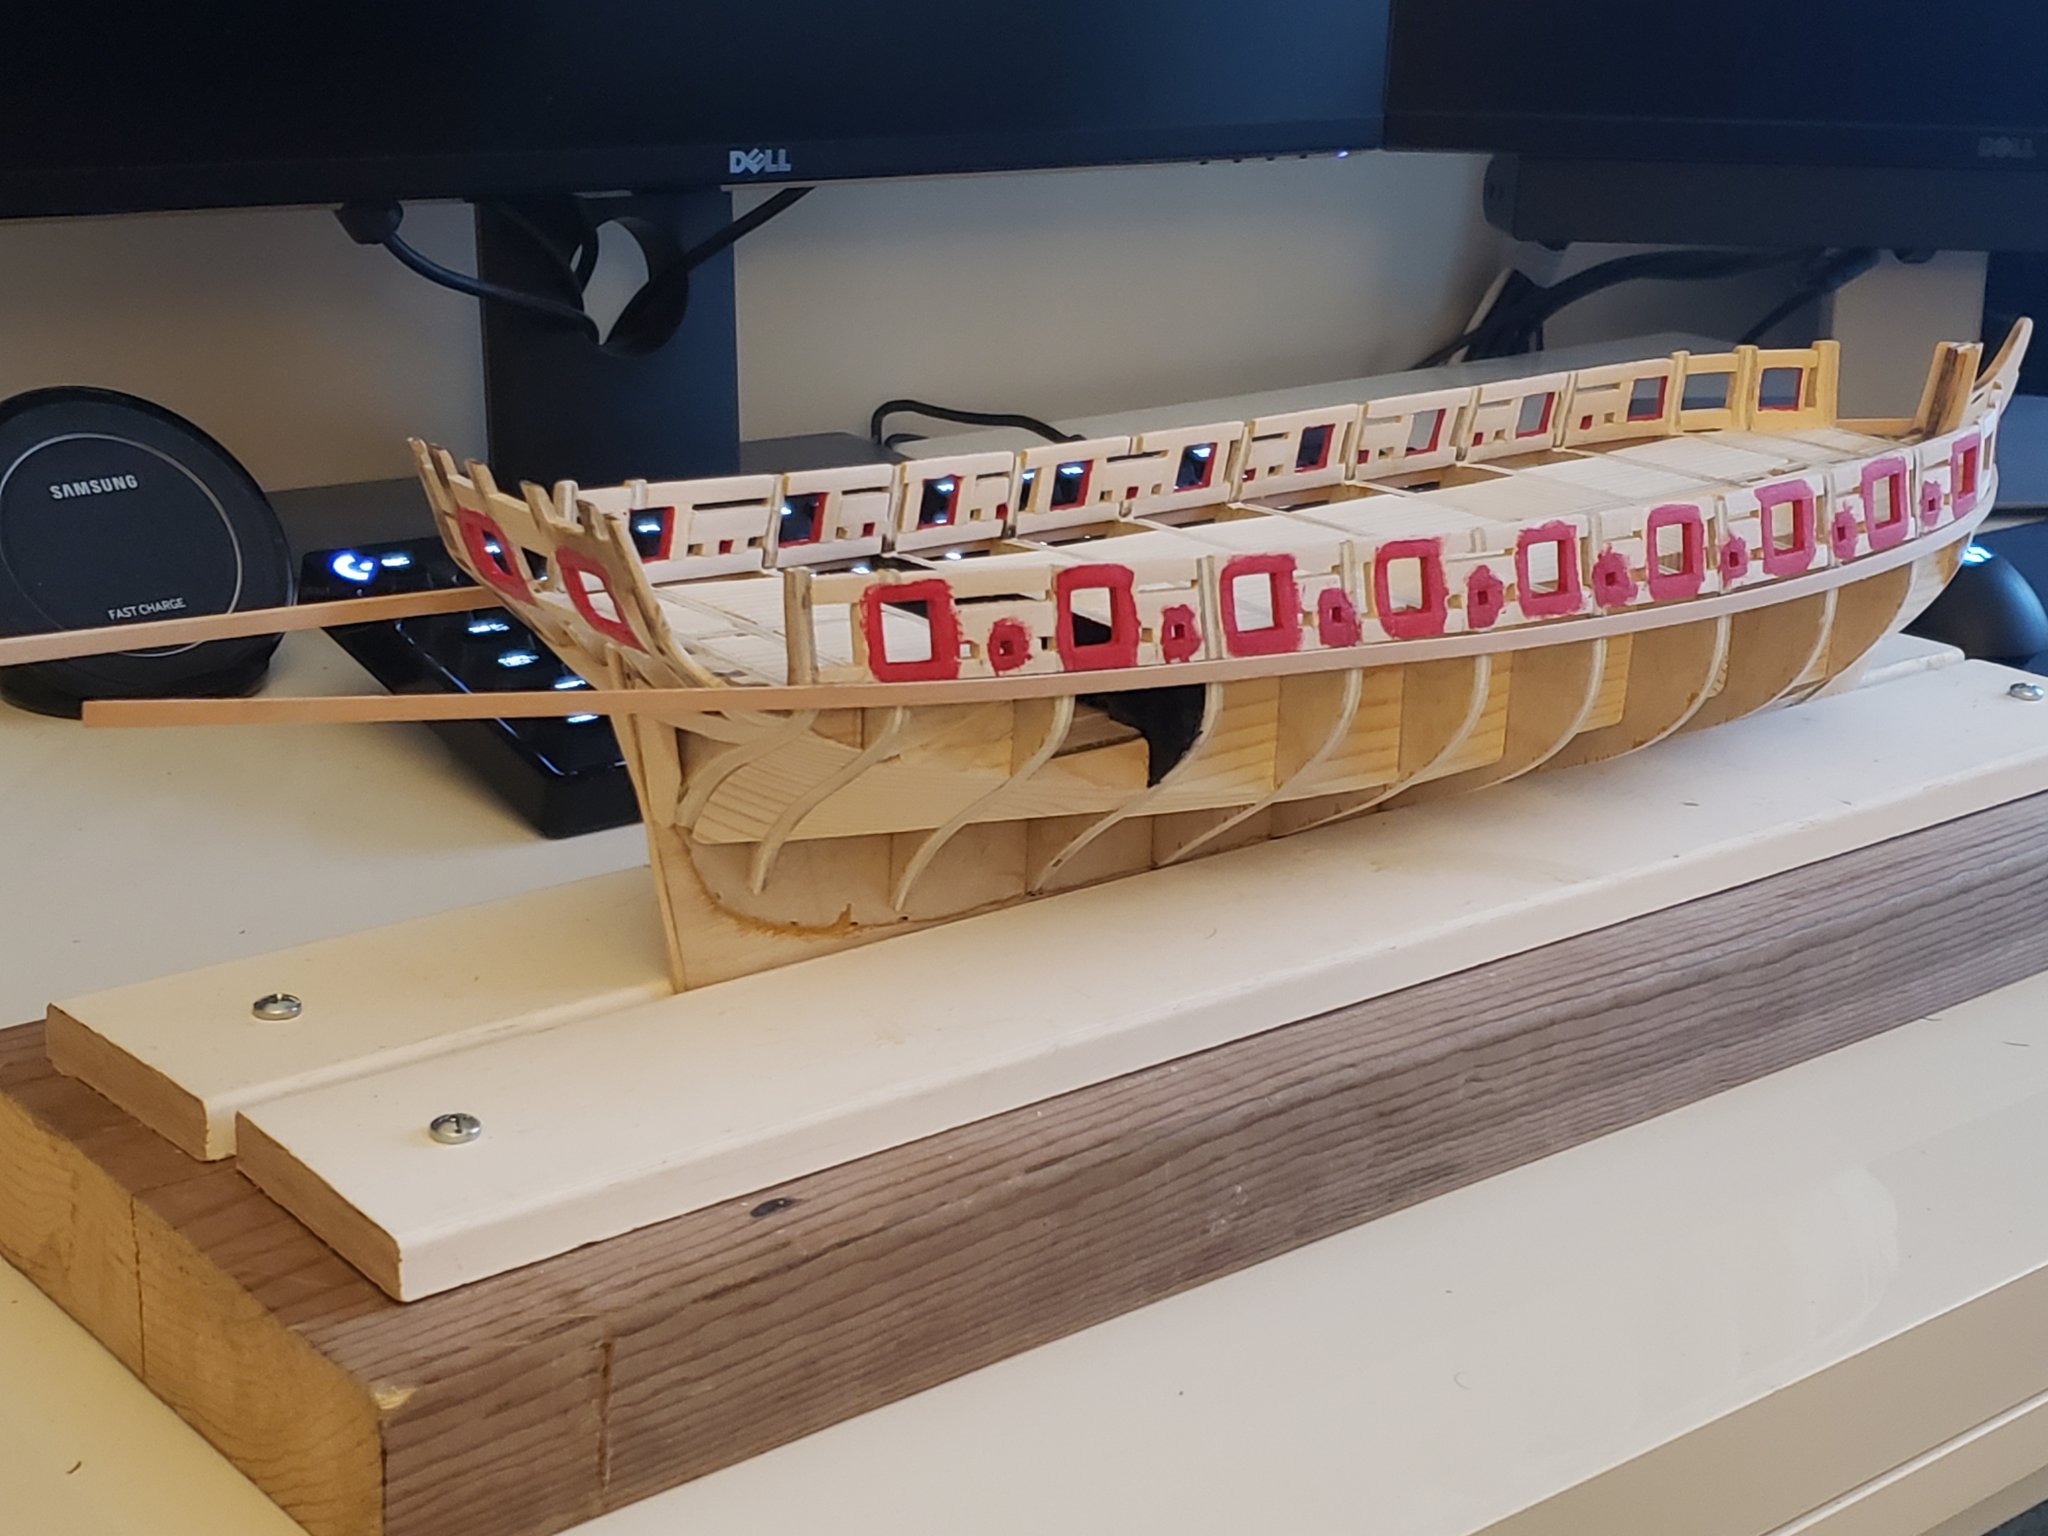
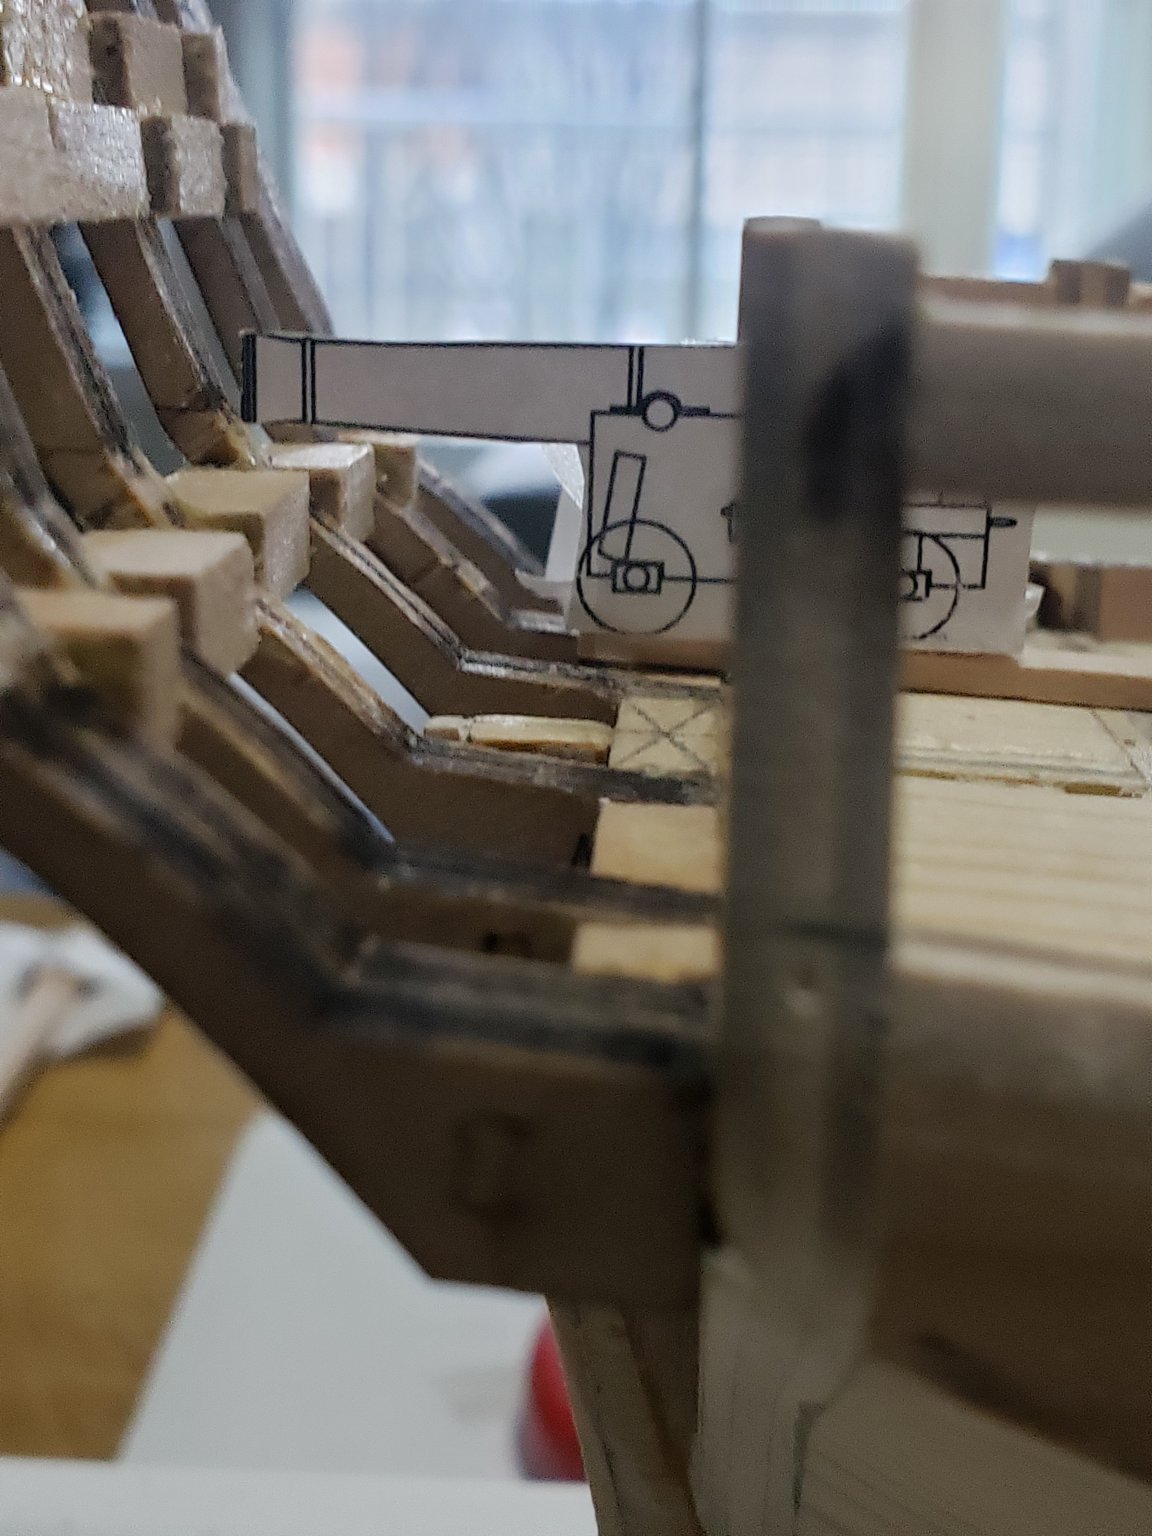
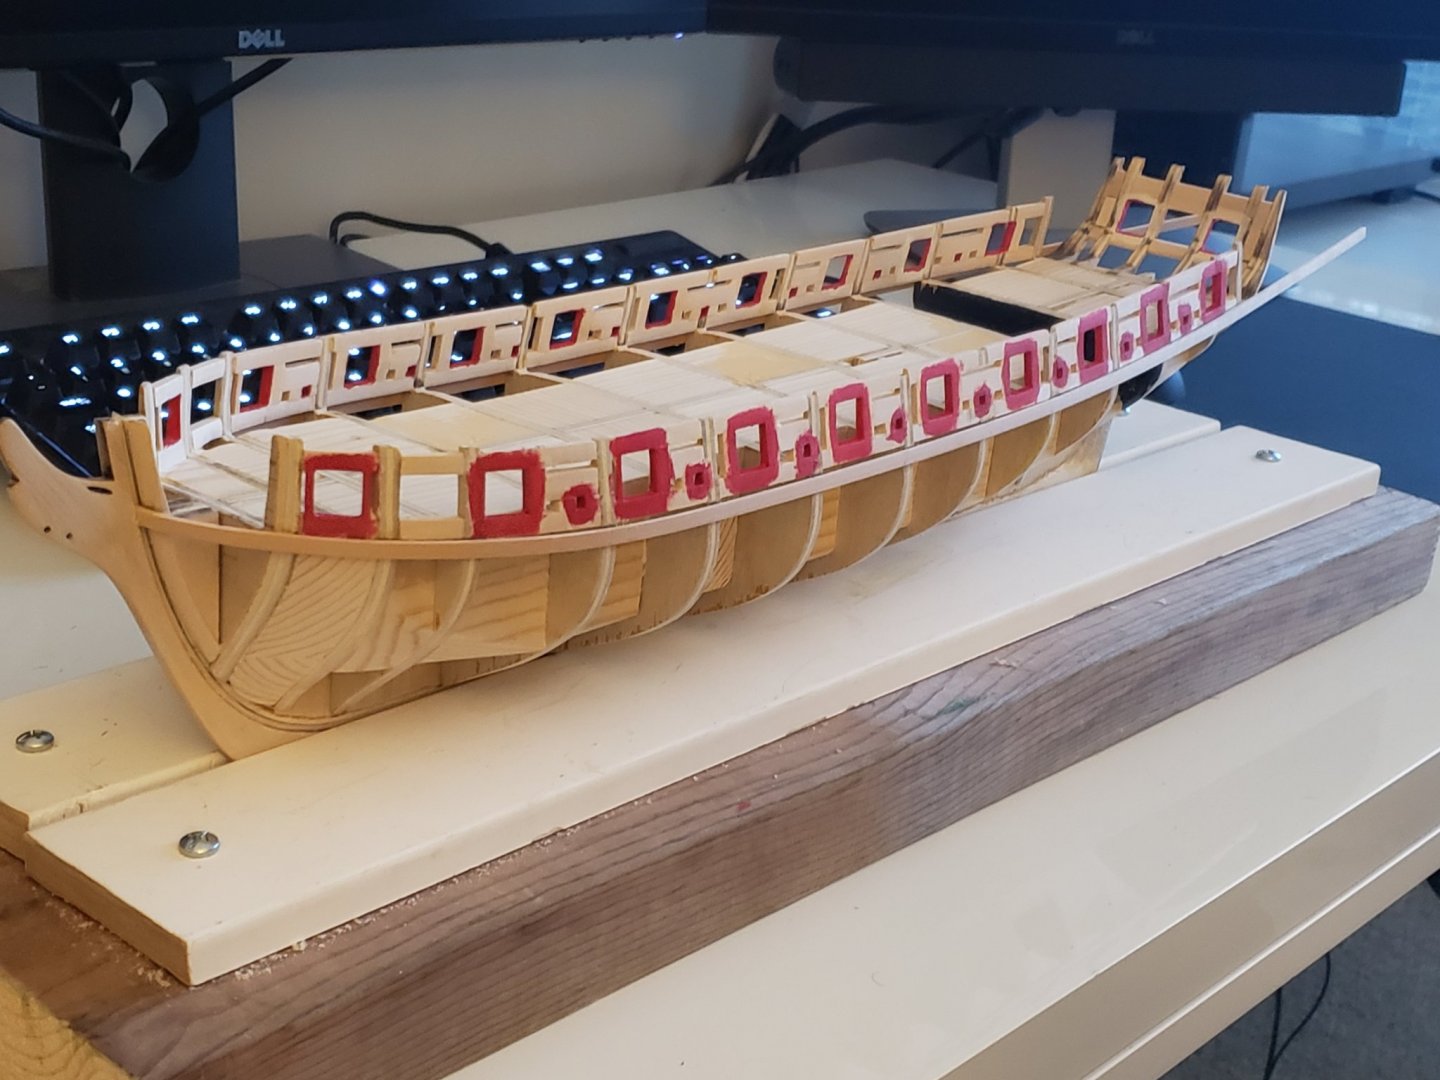
Made a bit of progress today. The gun ports and sweep ports were painted. First a layer of primer was applied before two coats of red paint. The paint was purchased together with the kit from ModelExpo. Getting more nervous about planking as I progress towards it...

- 950 replies
-
- 9
-
-
- syren
- model shipways
- (and 1 more)
-
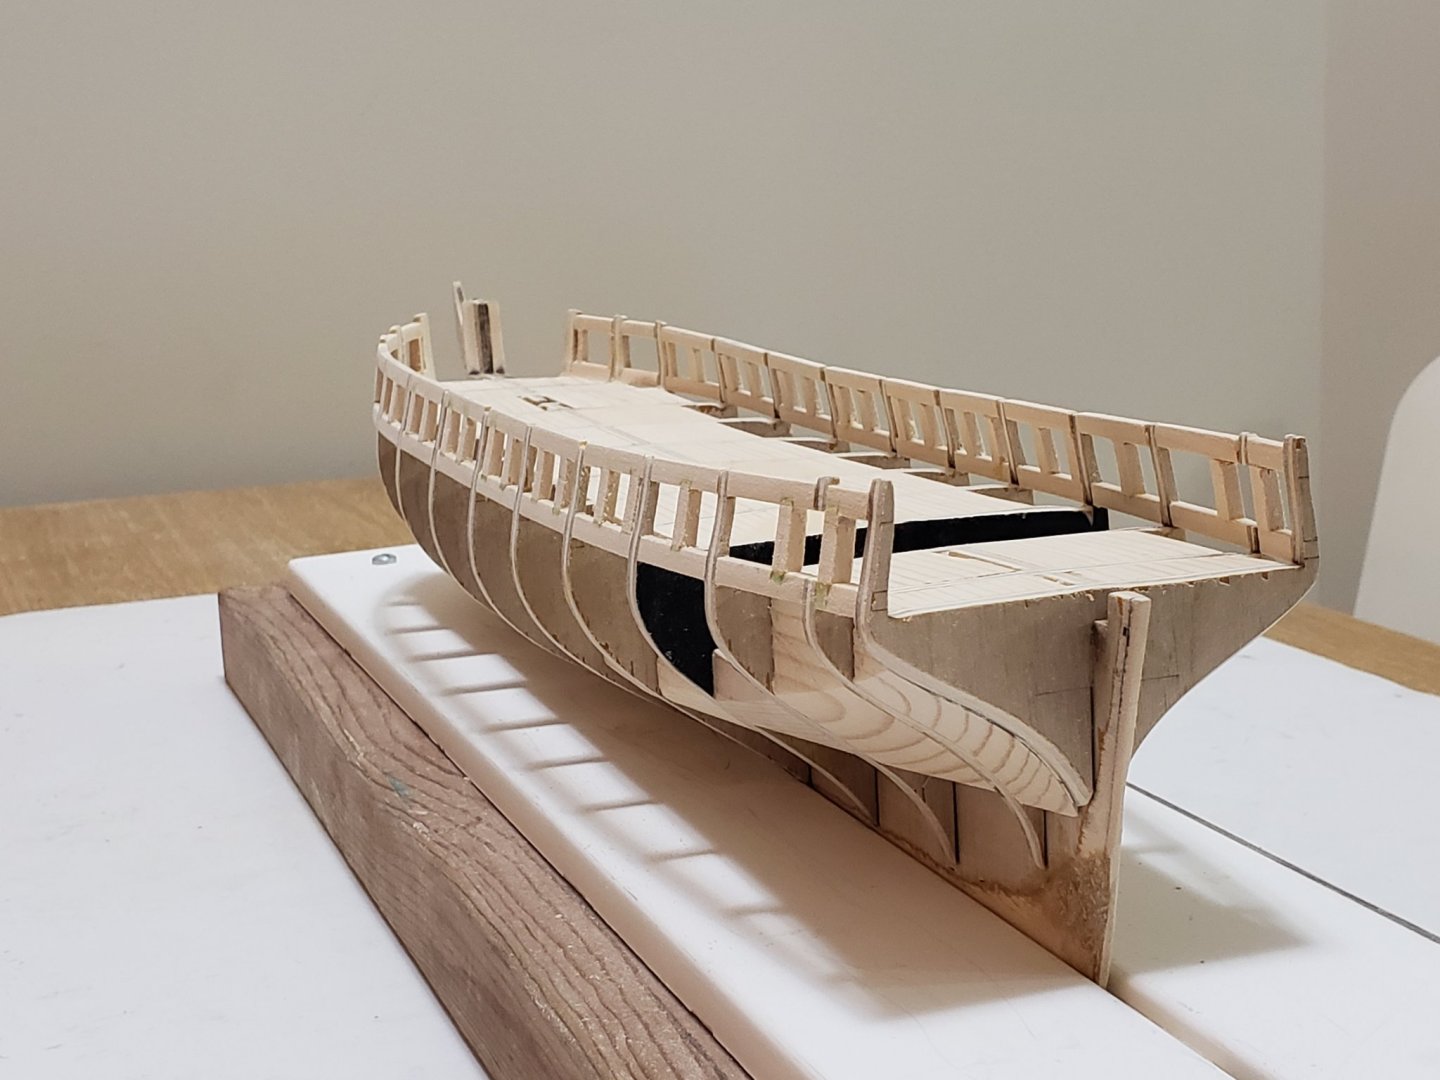
Thank you all for the encouraging words and the likes! I managed to also finish sanding the filler strips today. Wasn't as bad as I thought. I just needed to rest the hull upside down on a steady surface and sand away. I am thinking majority of sanding is finally done *phew* and can finally start the planking (seems very daunting...) Still deciding whether or not to use wood filler in the small space between the filler strips. I am leaning on skipping it. Also, the dark patch on the stern is just filler to correct the stern shape from a slightly off positioning of one of the frames. Forgot to mention this in my previous post.
- 950 replies
-
- 10
-
-
- syren
- model shipways
- (and 1 more)
-
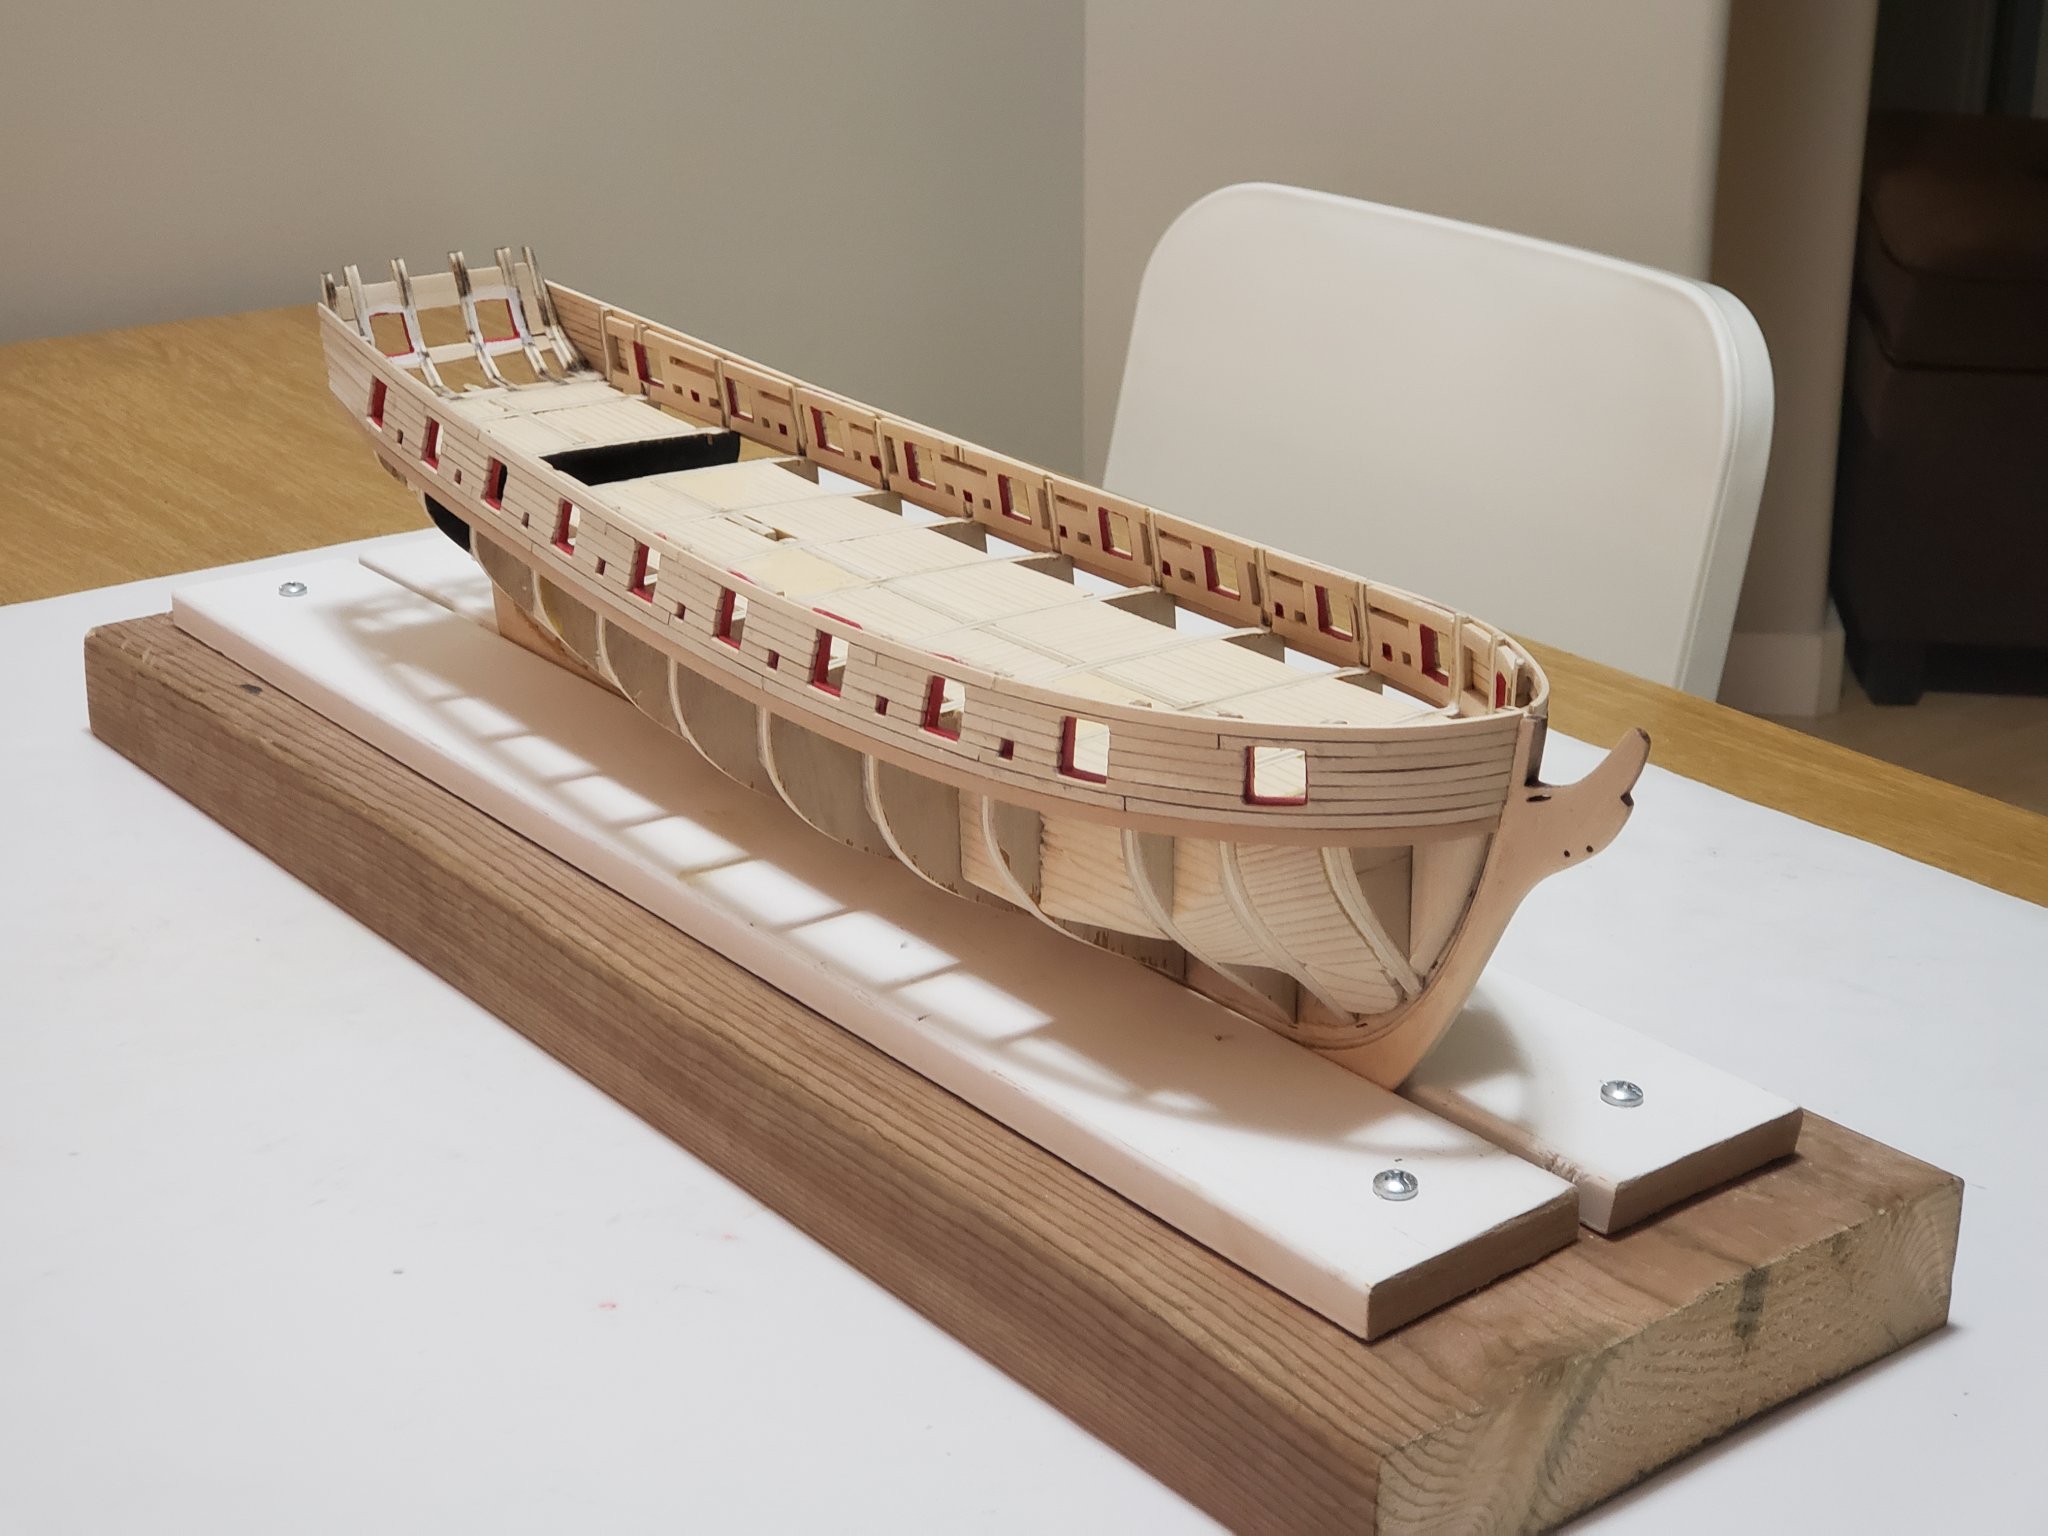
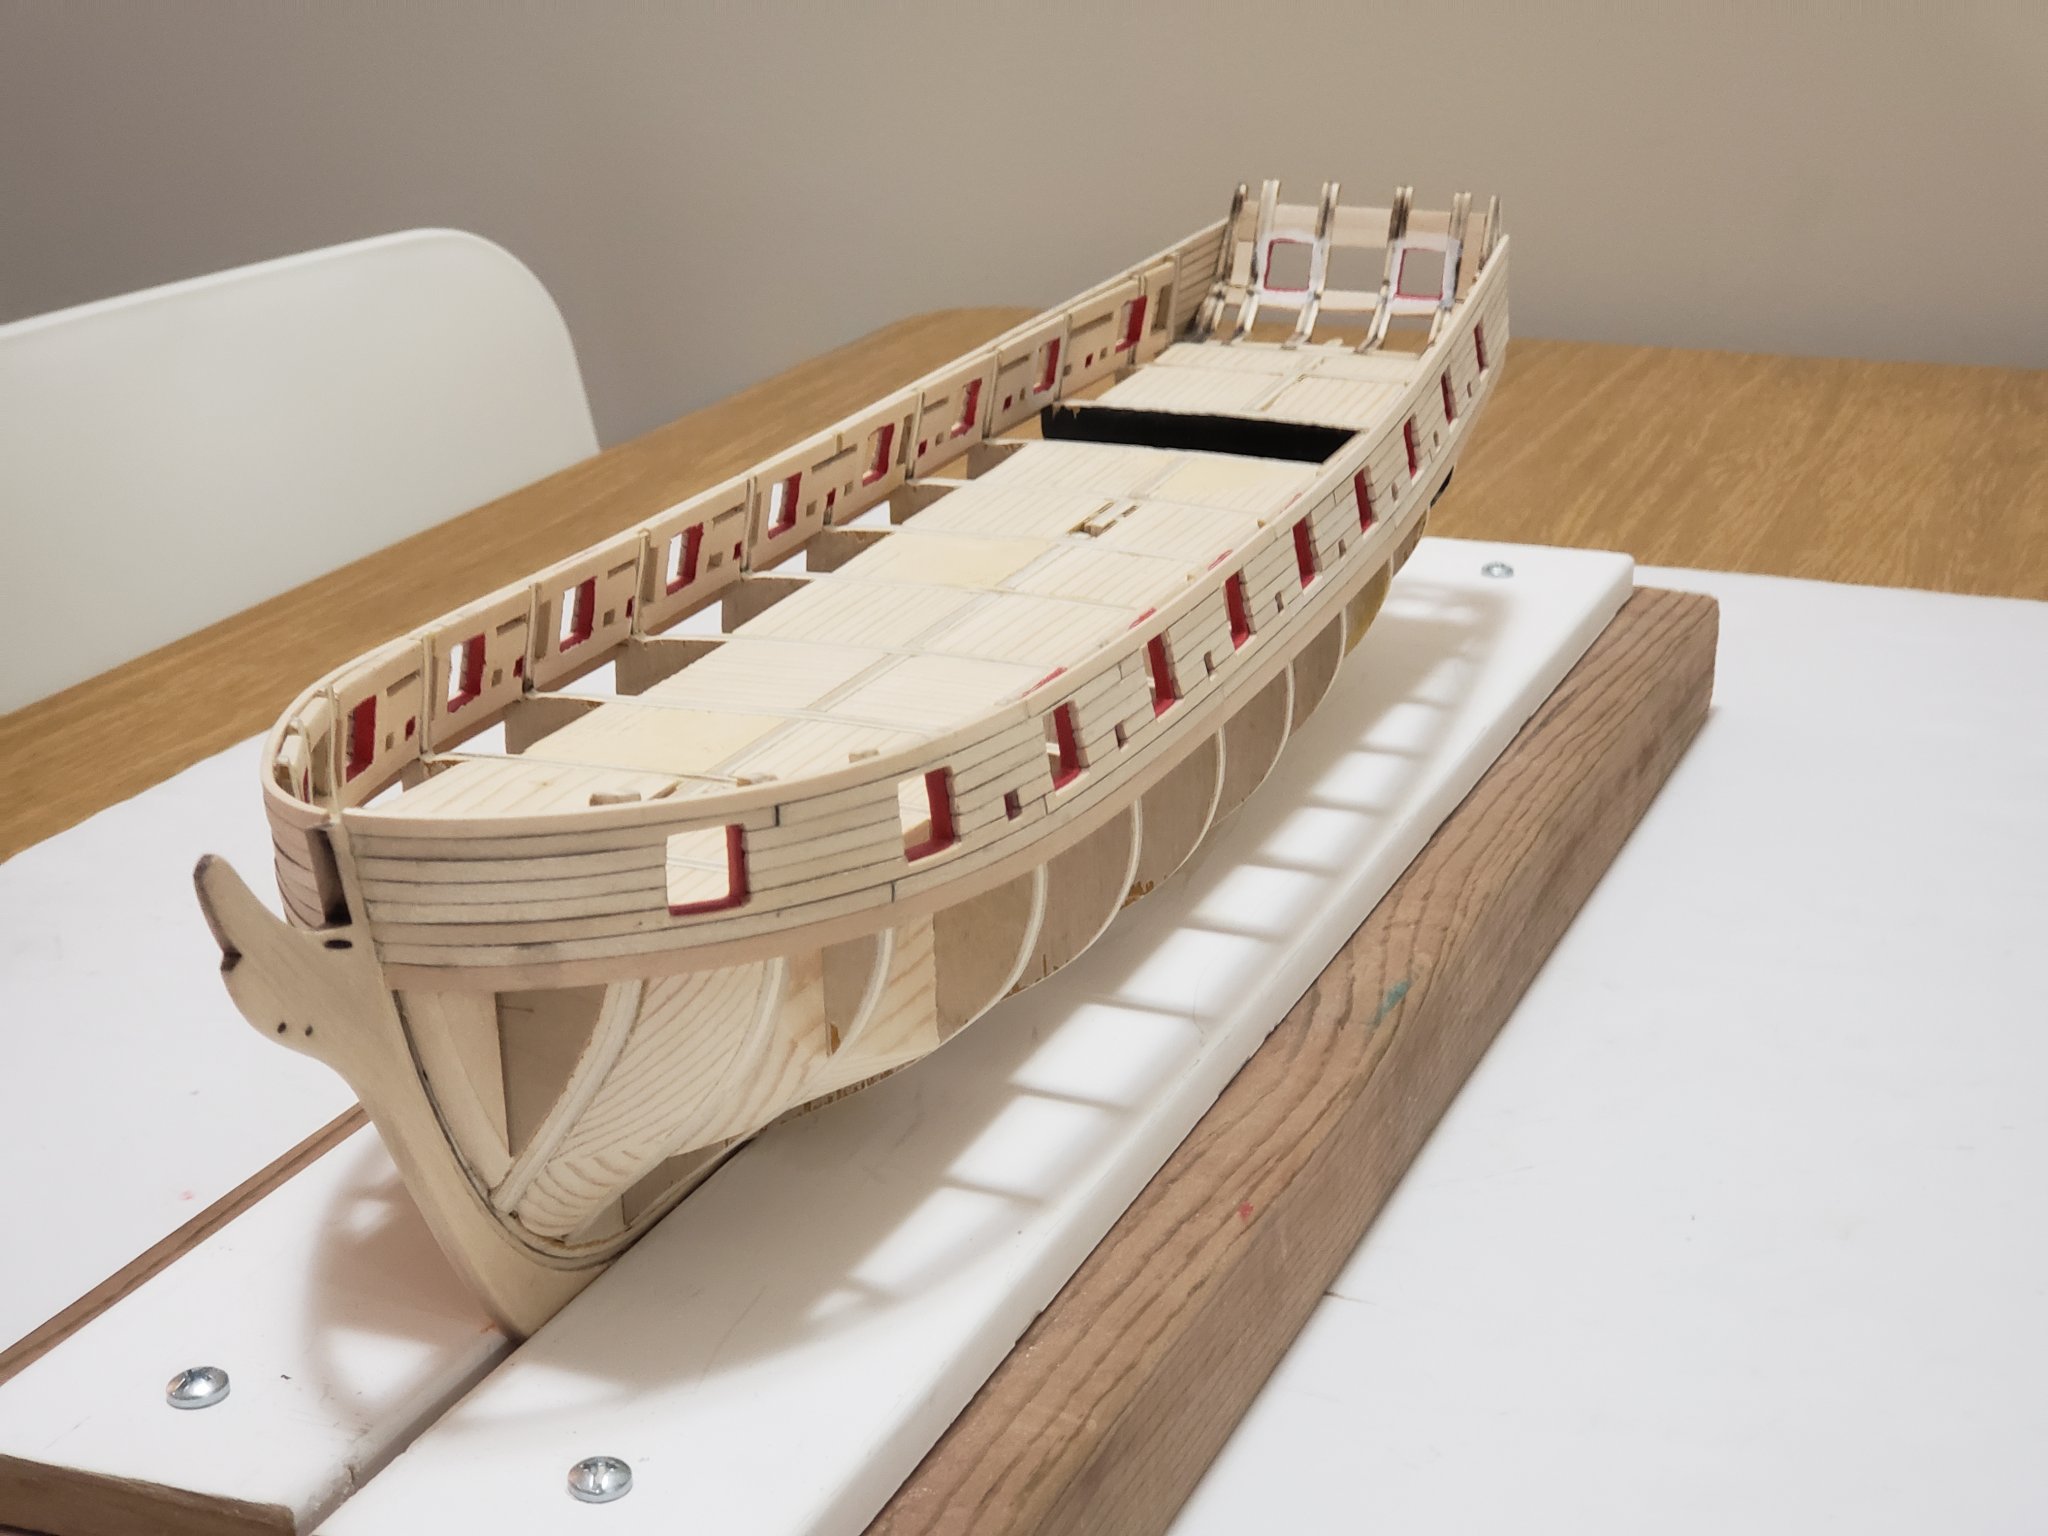
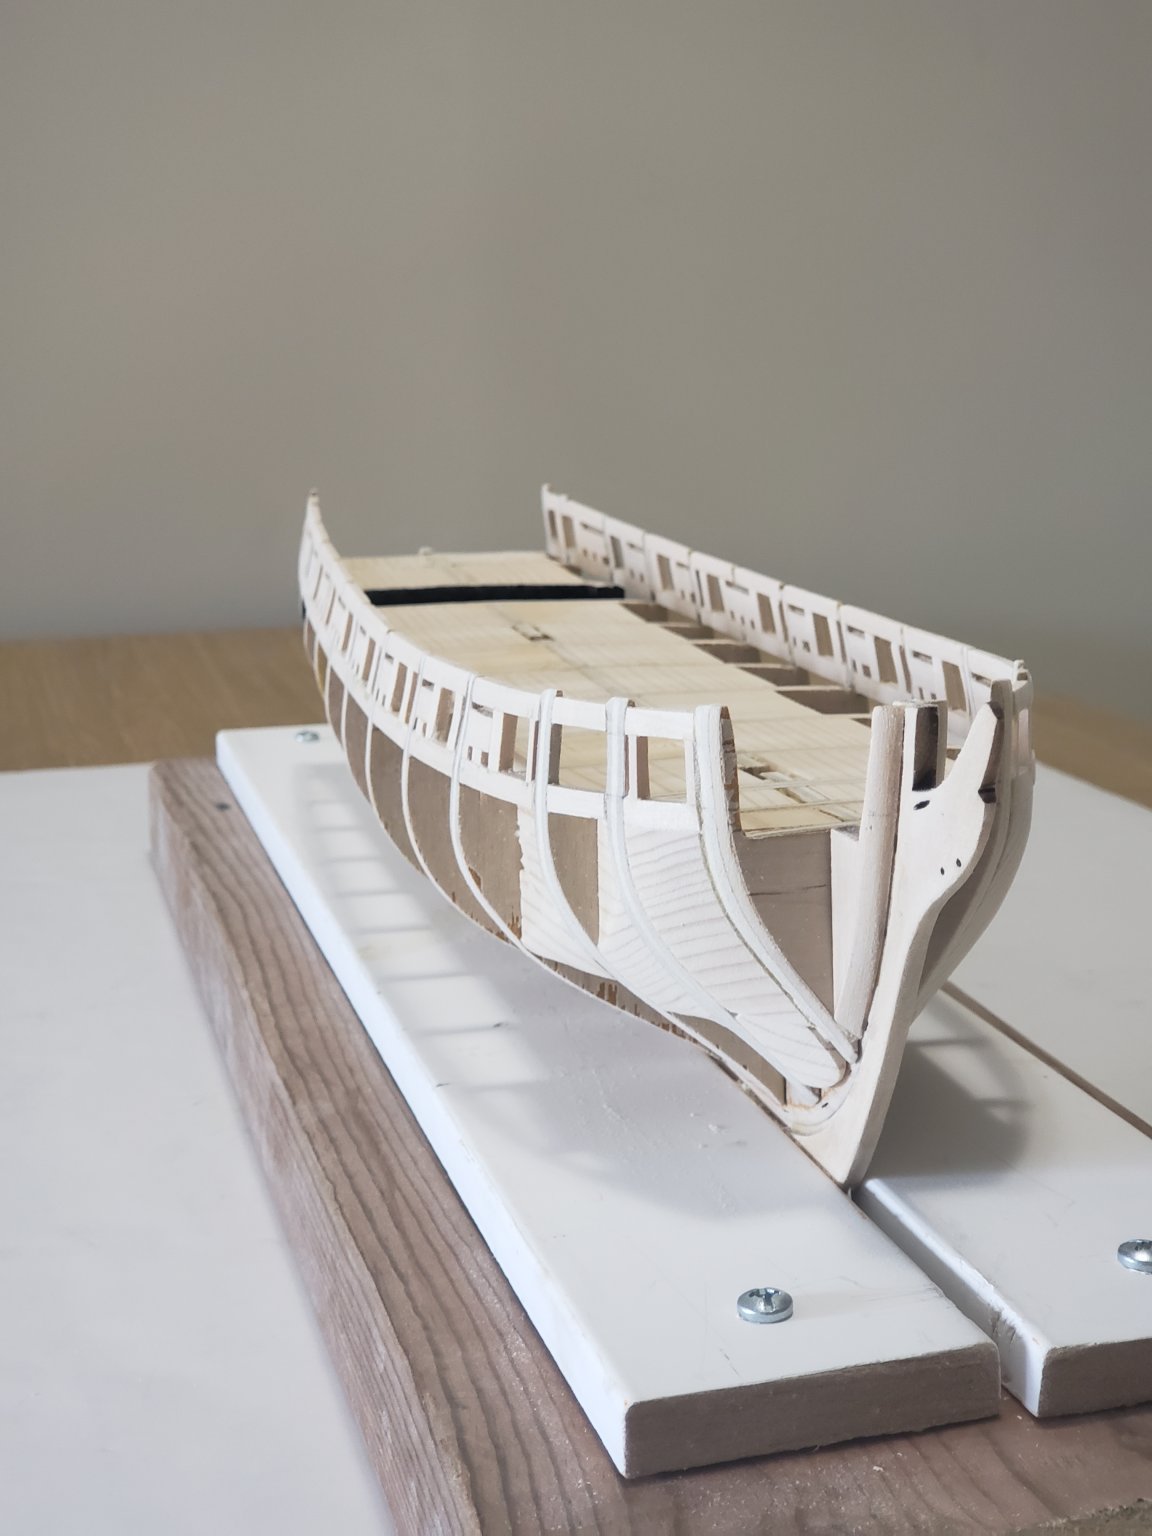
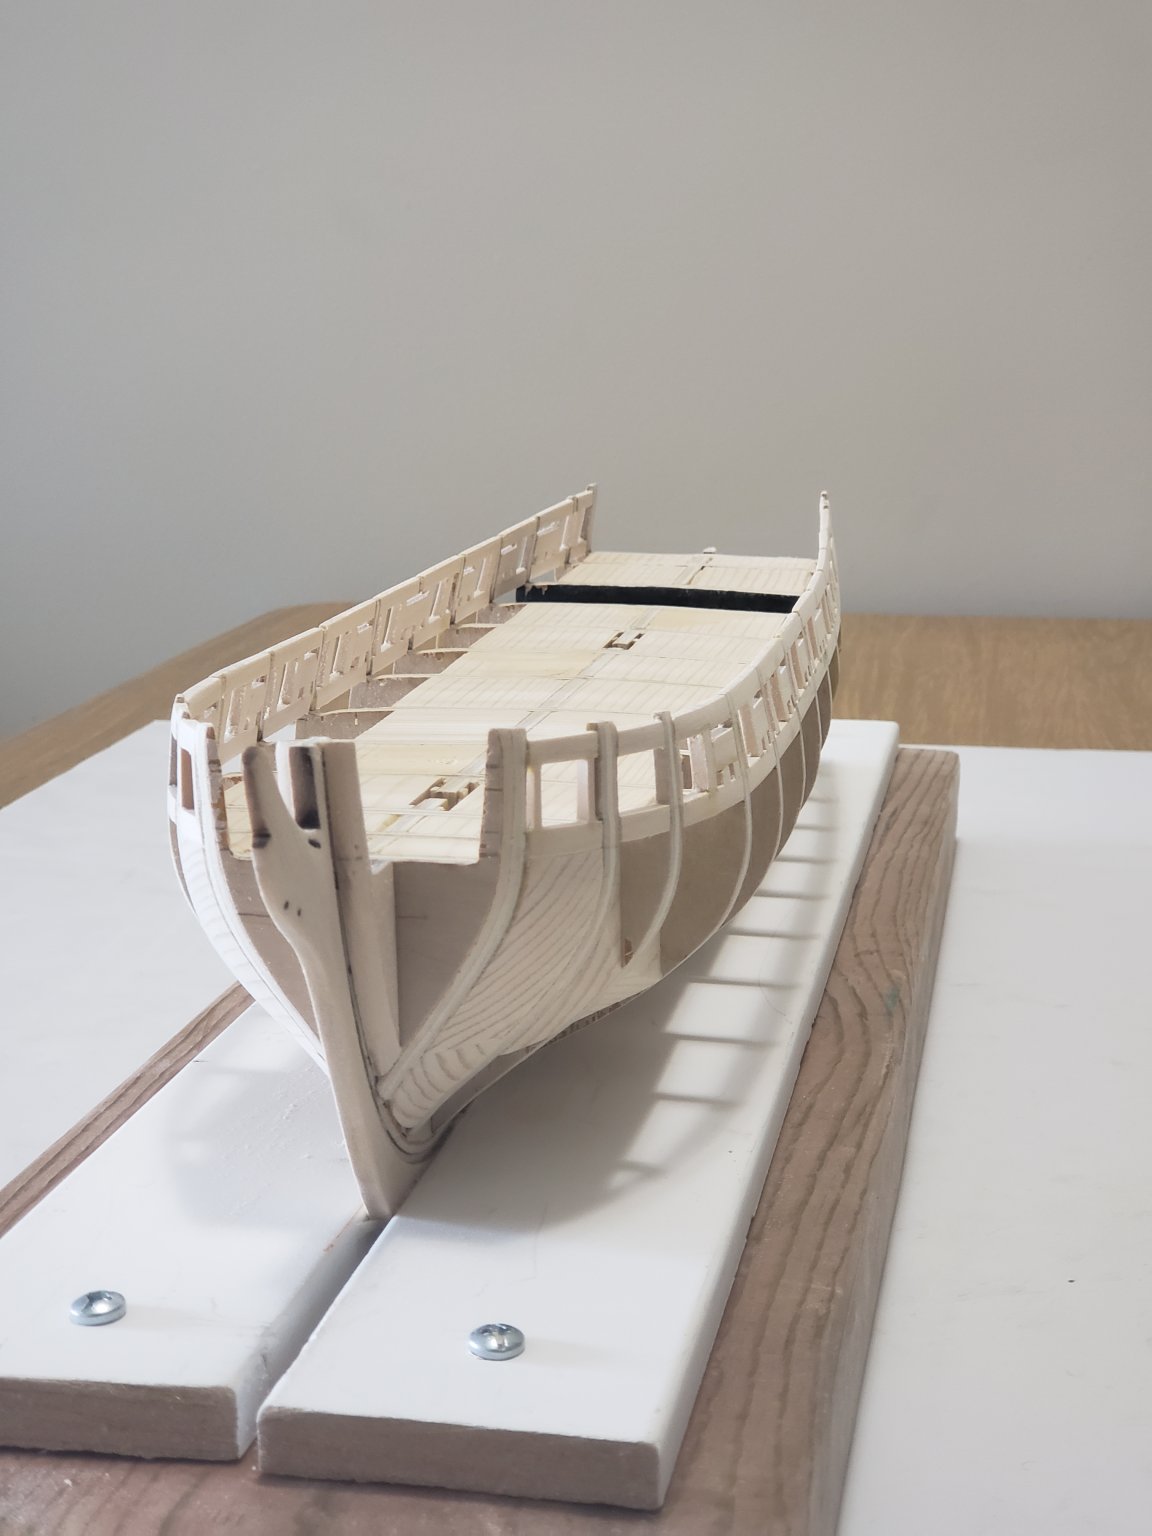
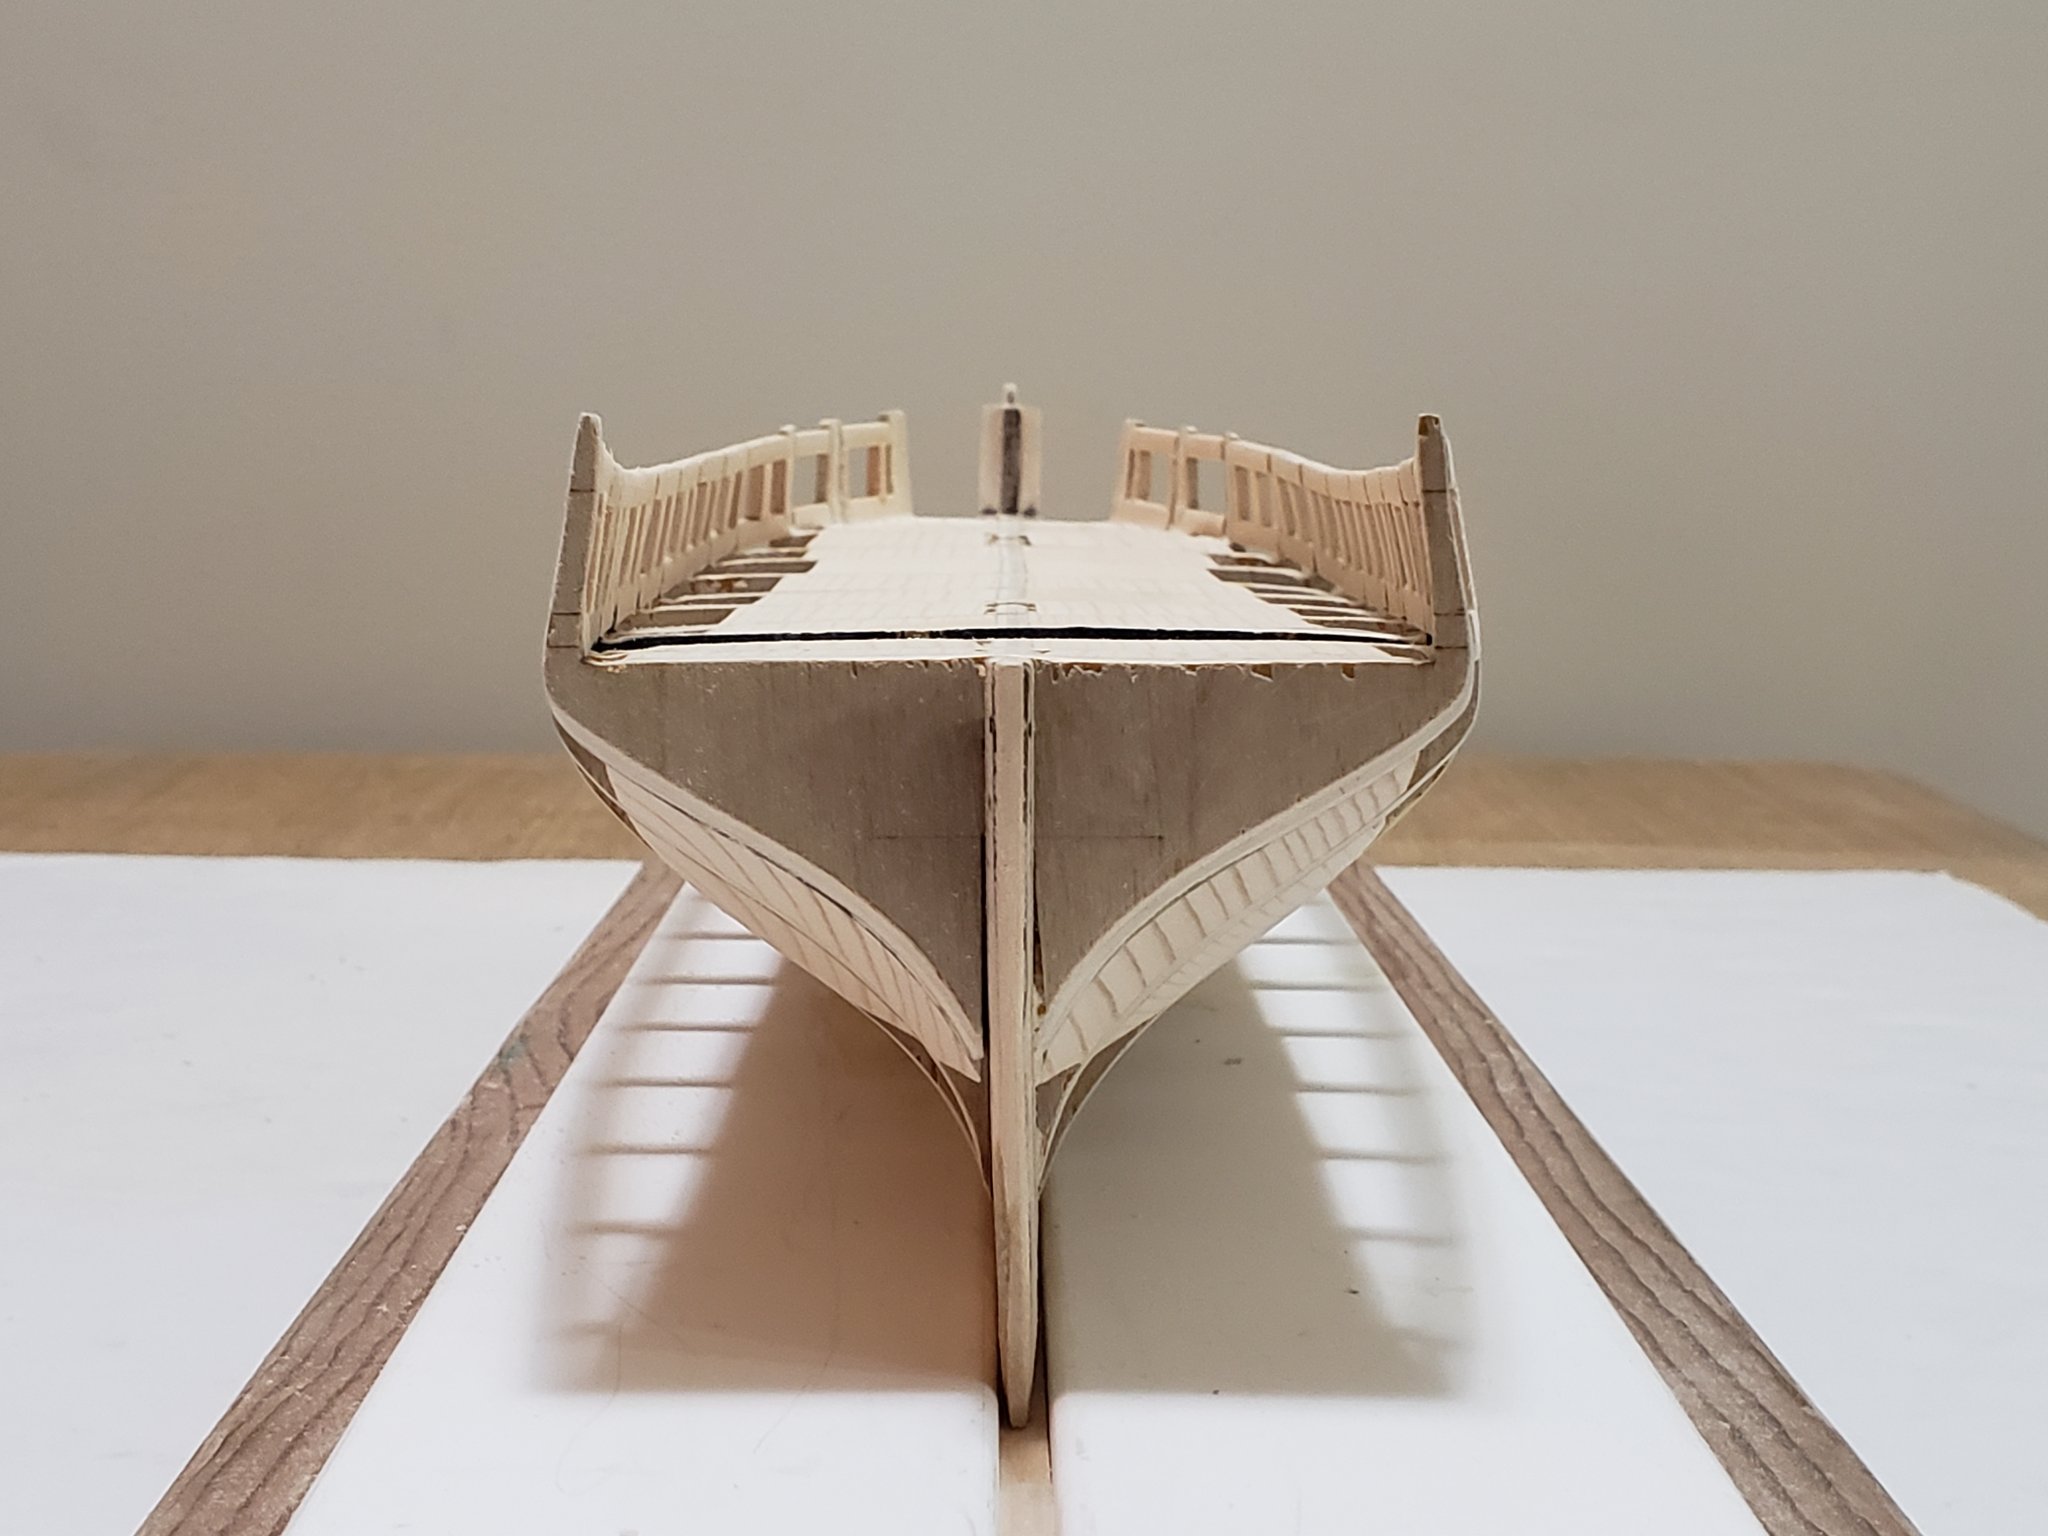
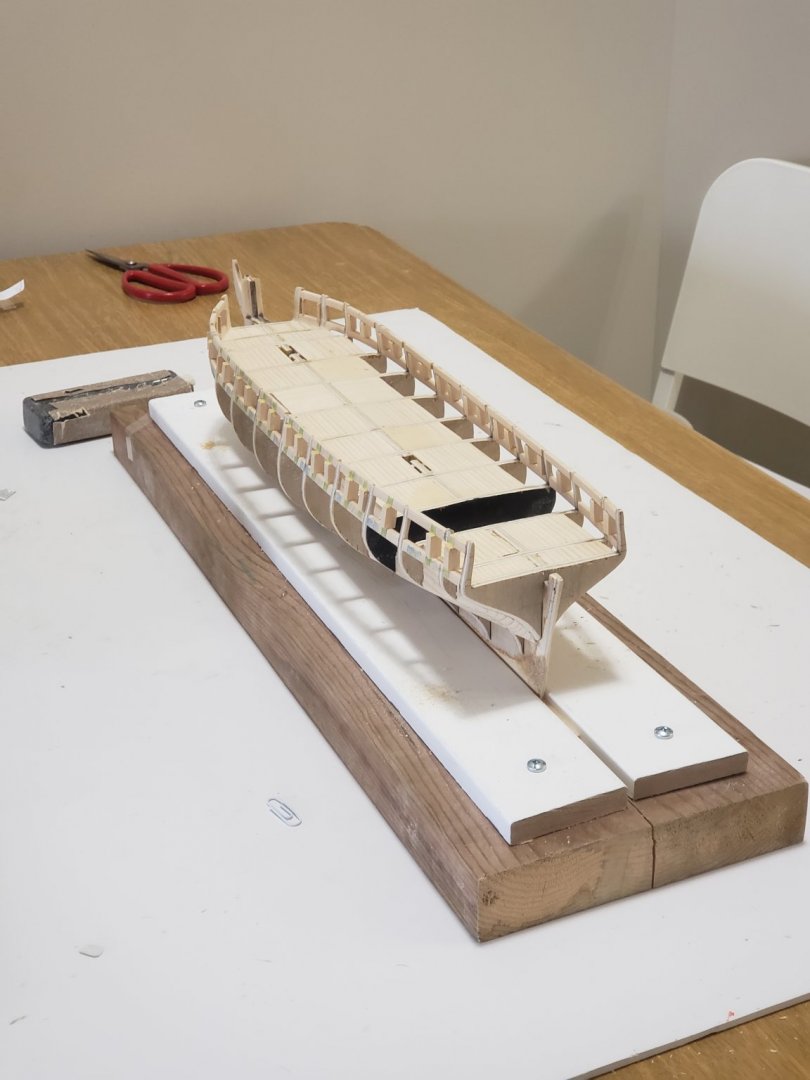
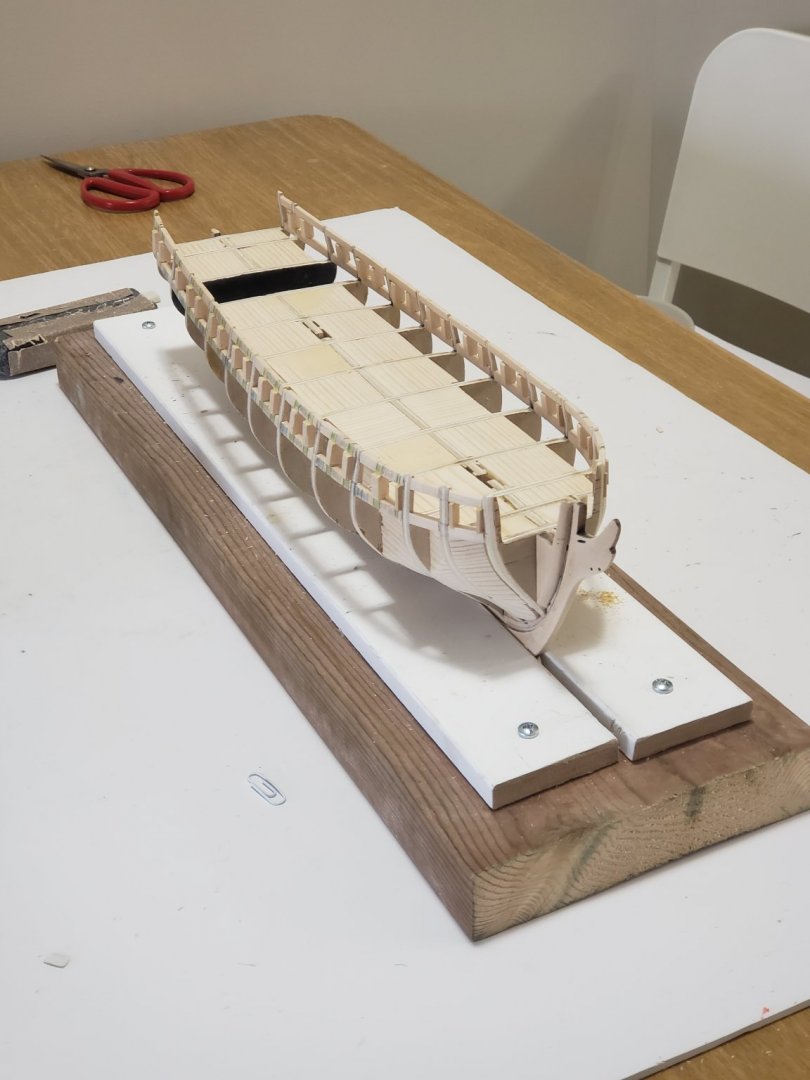
Chapter 4 is almost completed. Today the stern was sanded and faired. Only the tricky part left, sanding the filler strips at the bottom.

- 950 replies
-
- 11
-
-
- syren
- model shipways
- (and 1 more)
-
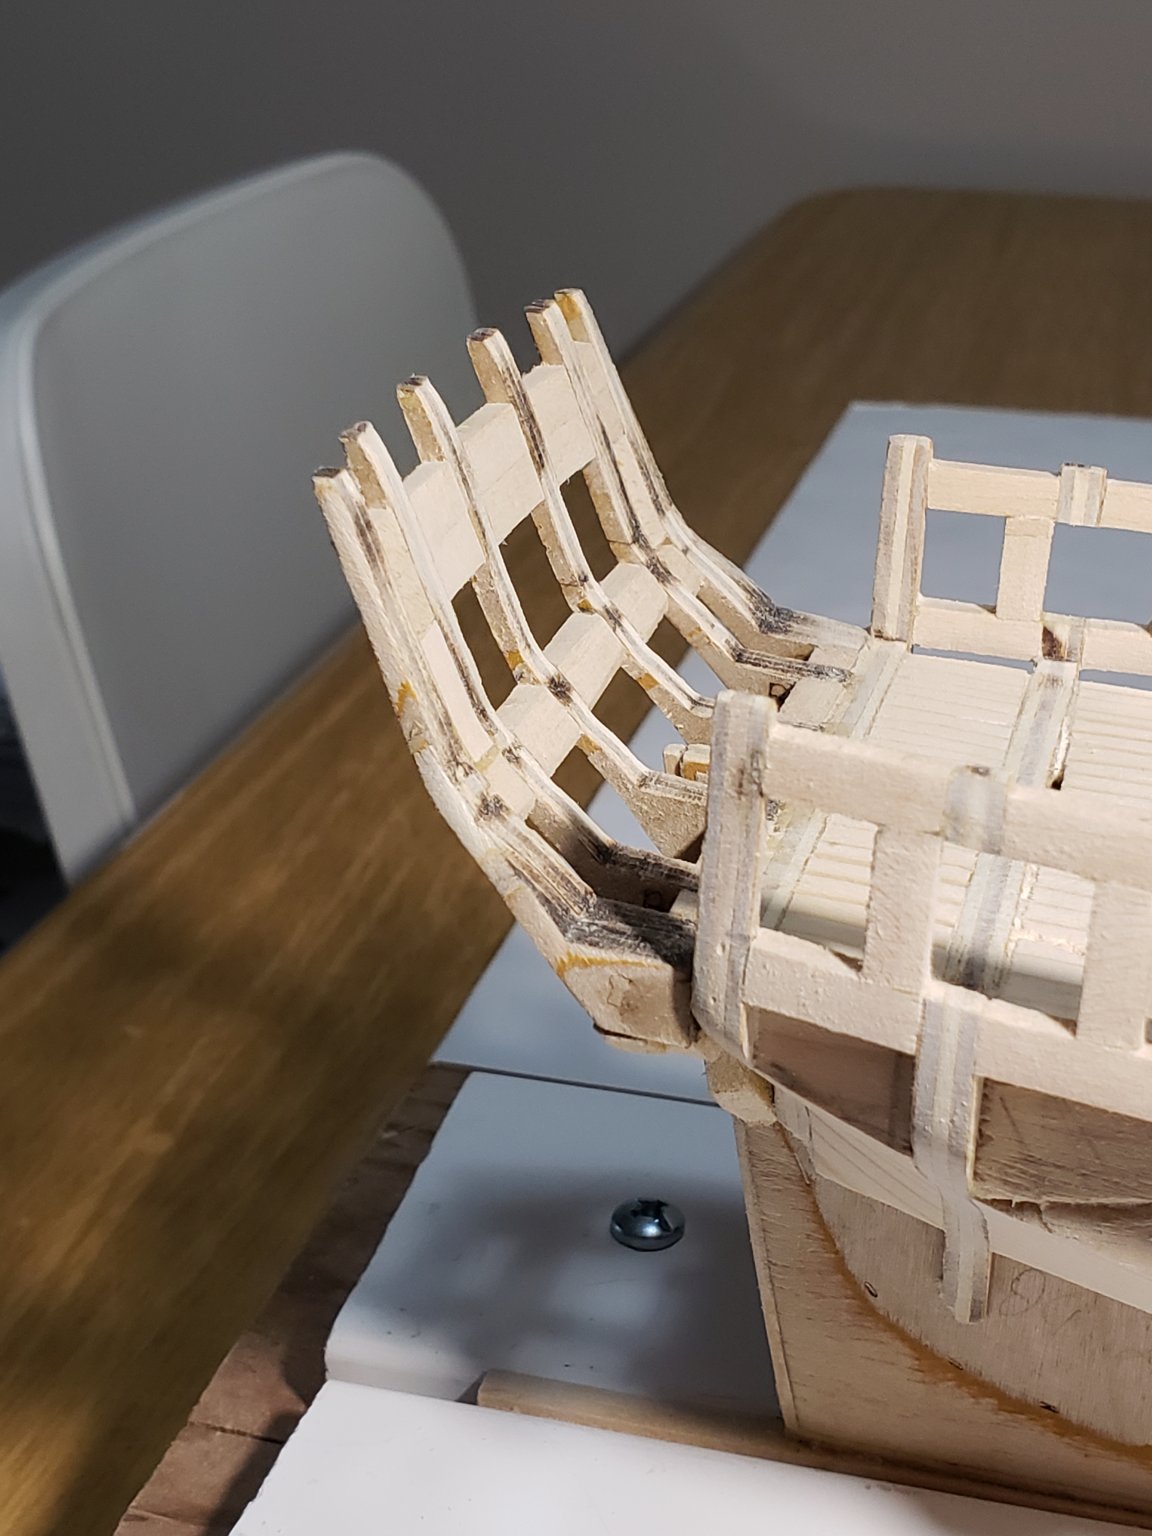
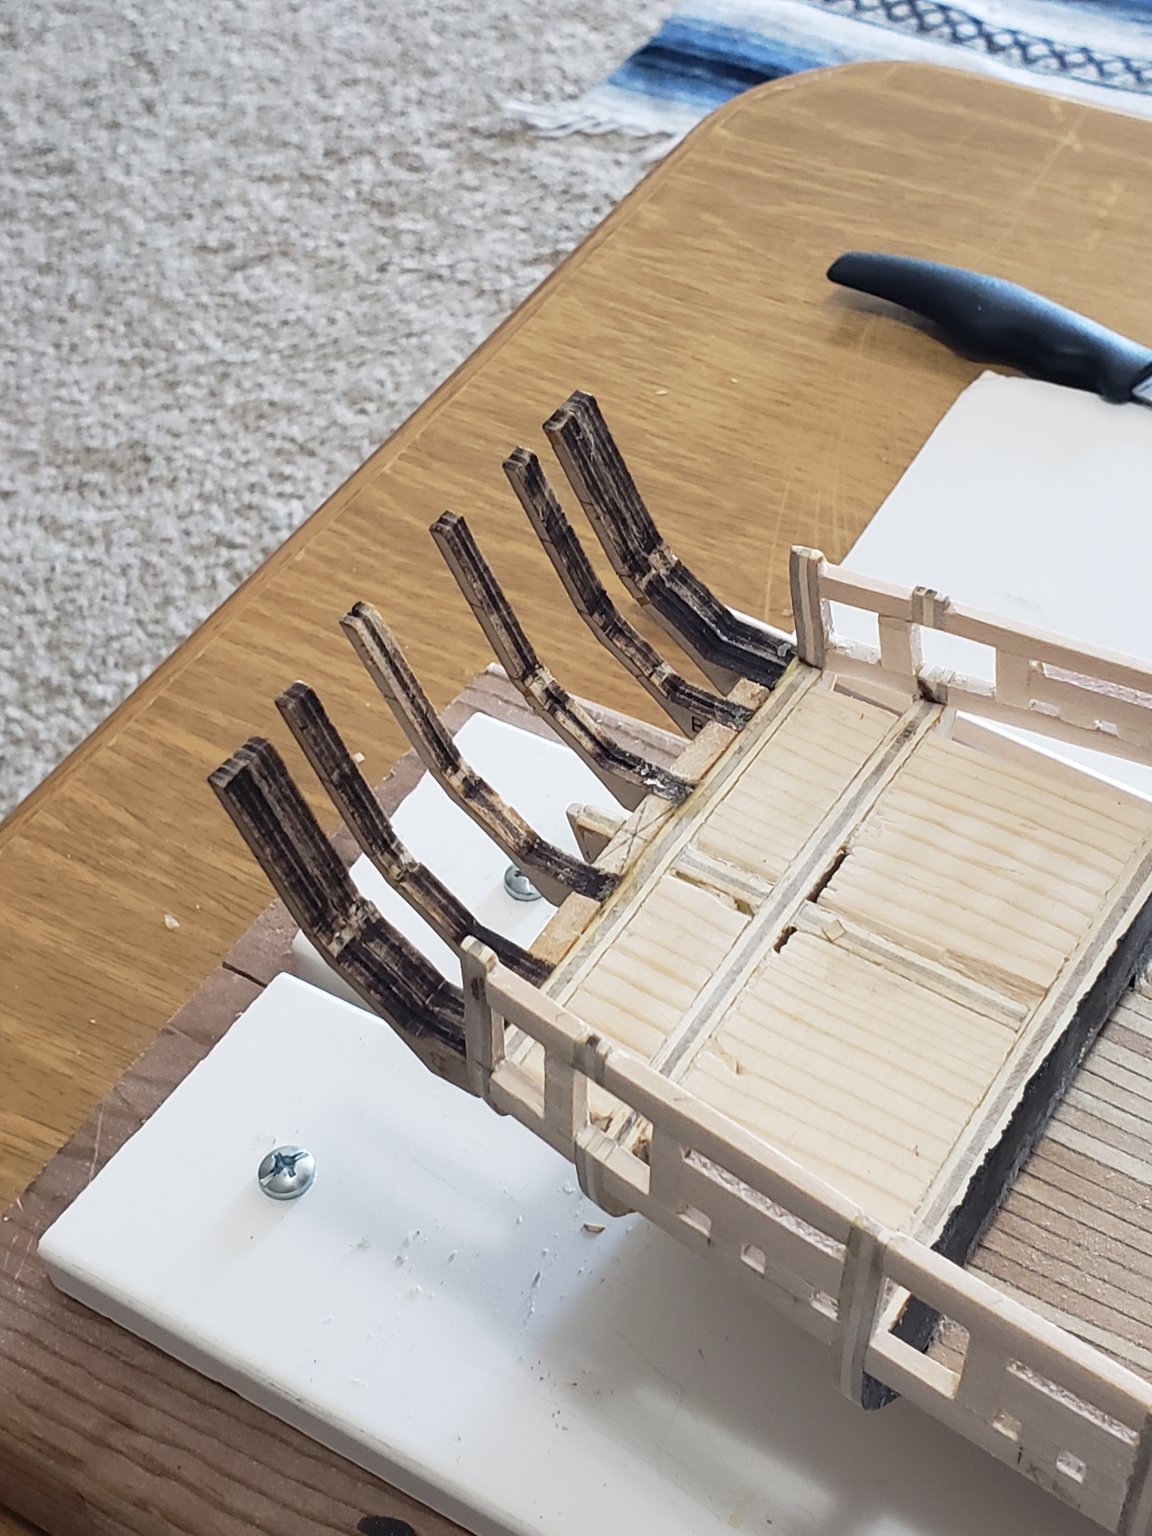
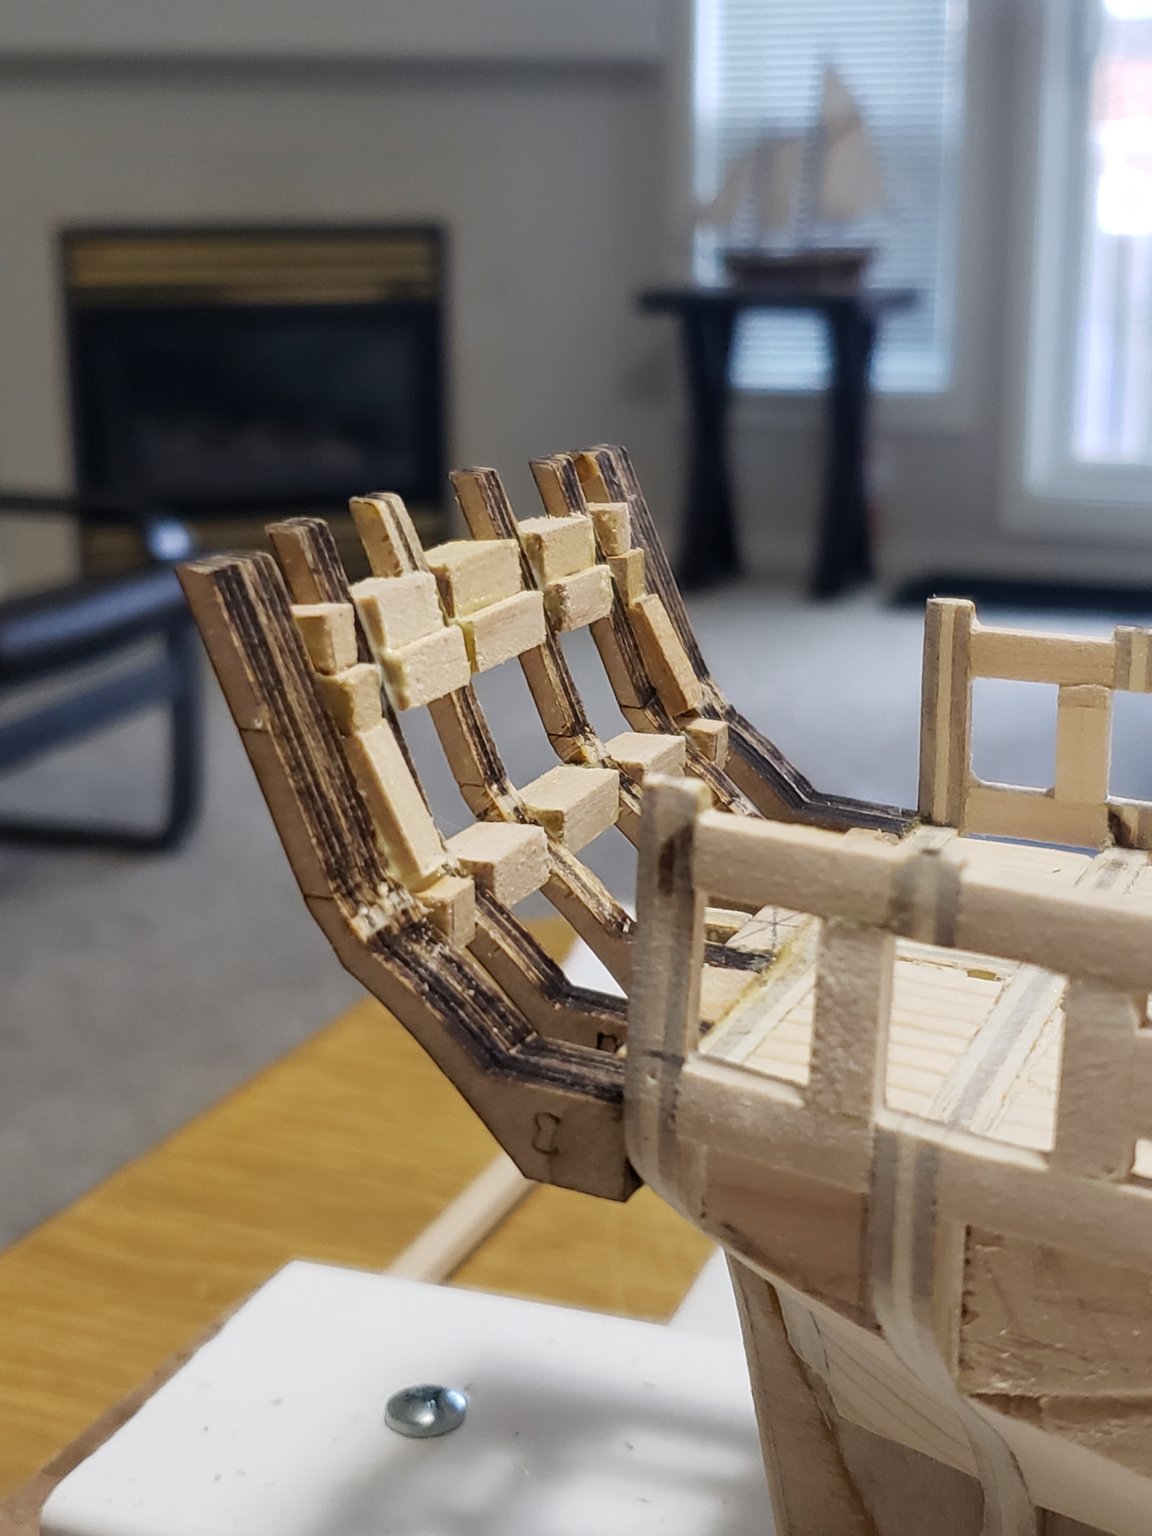
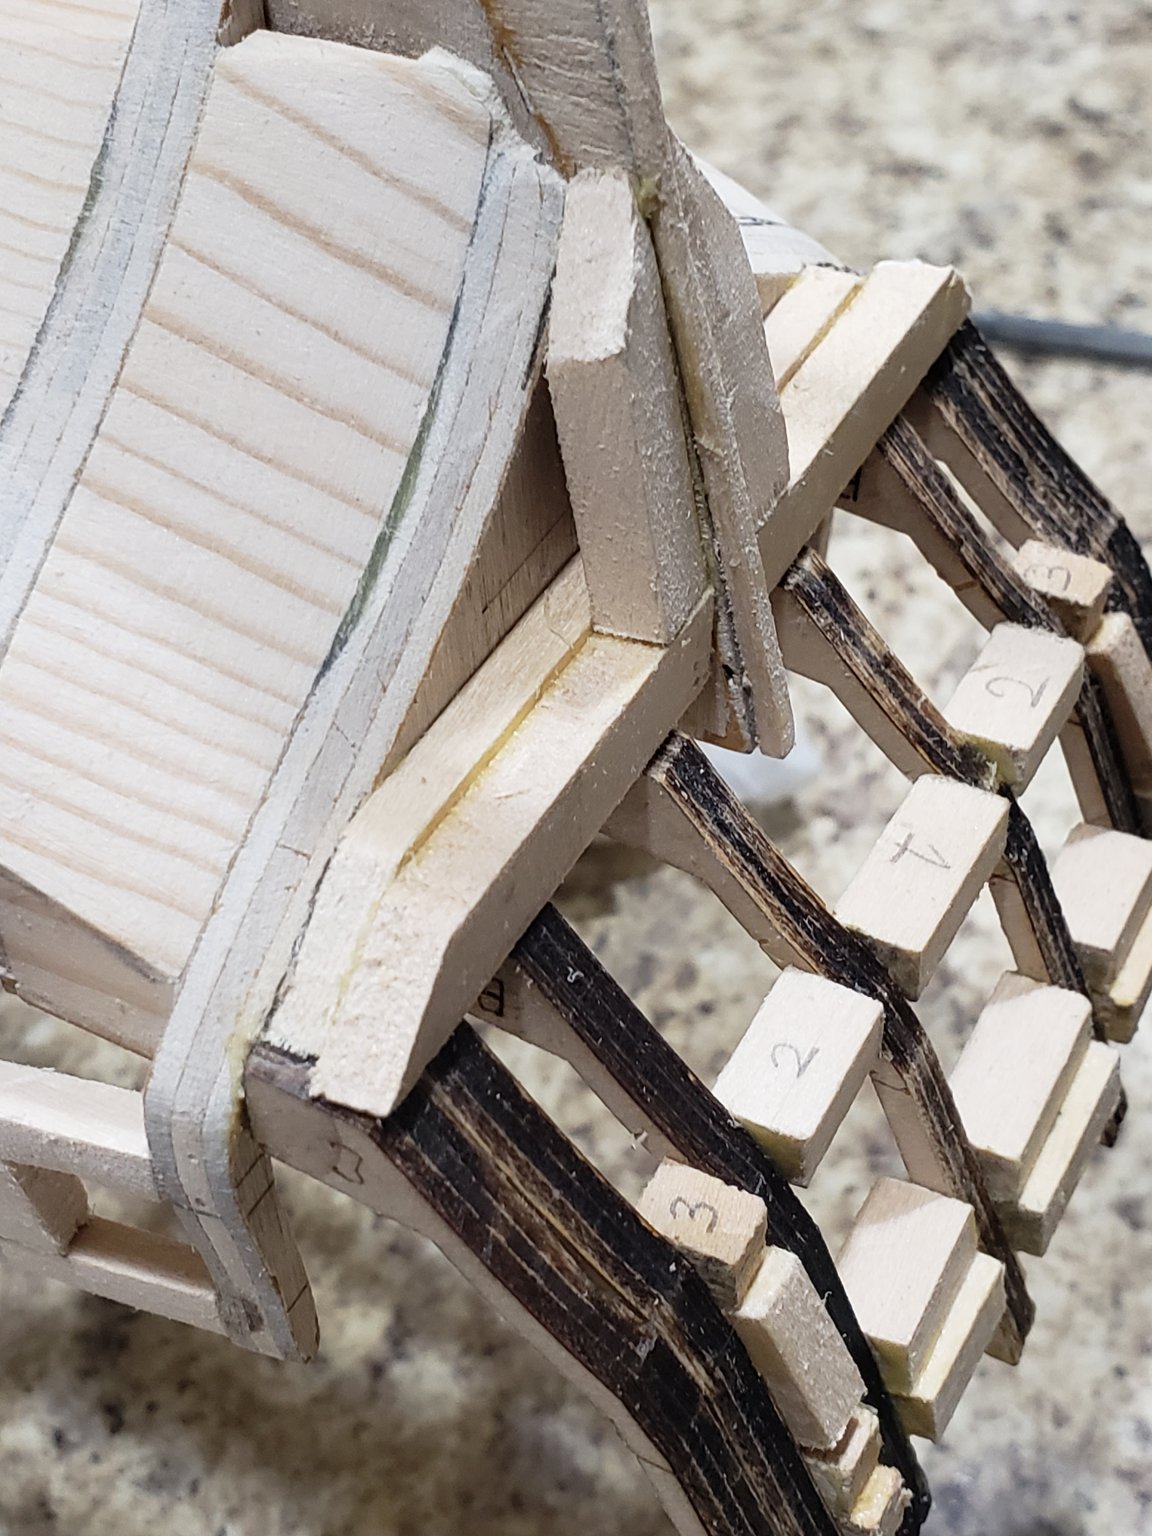
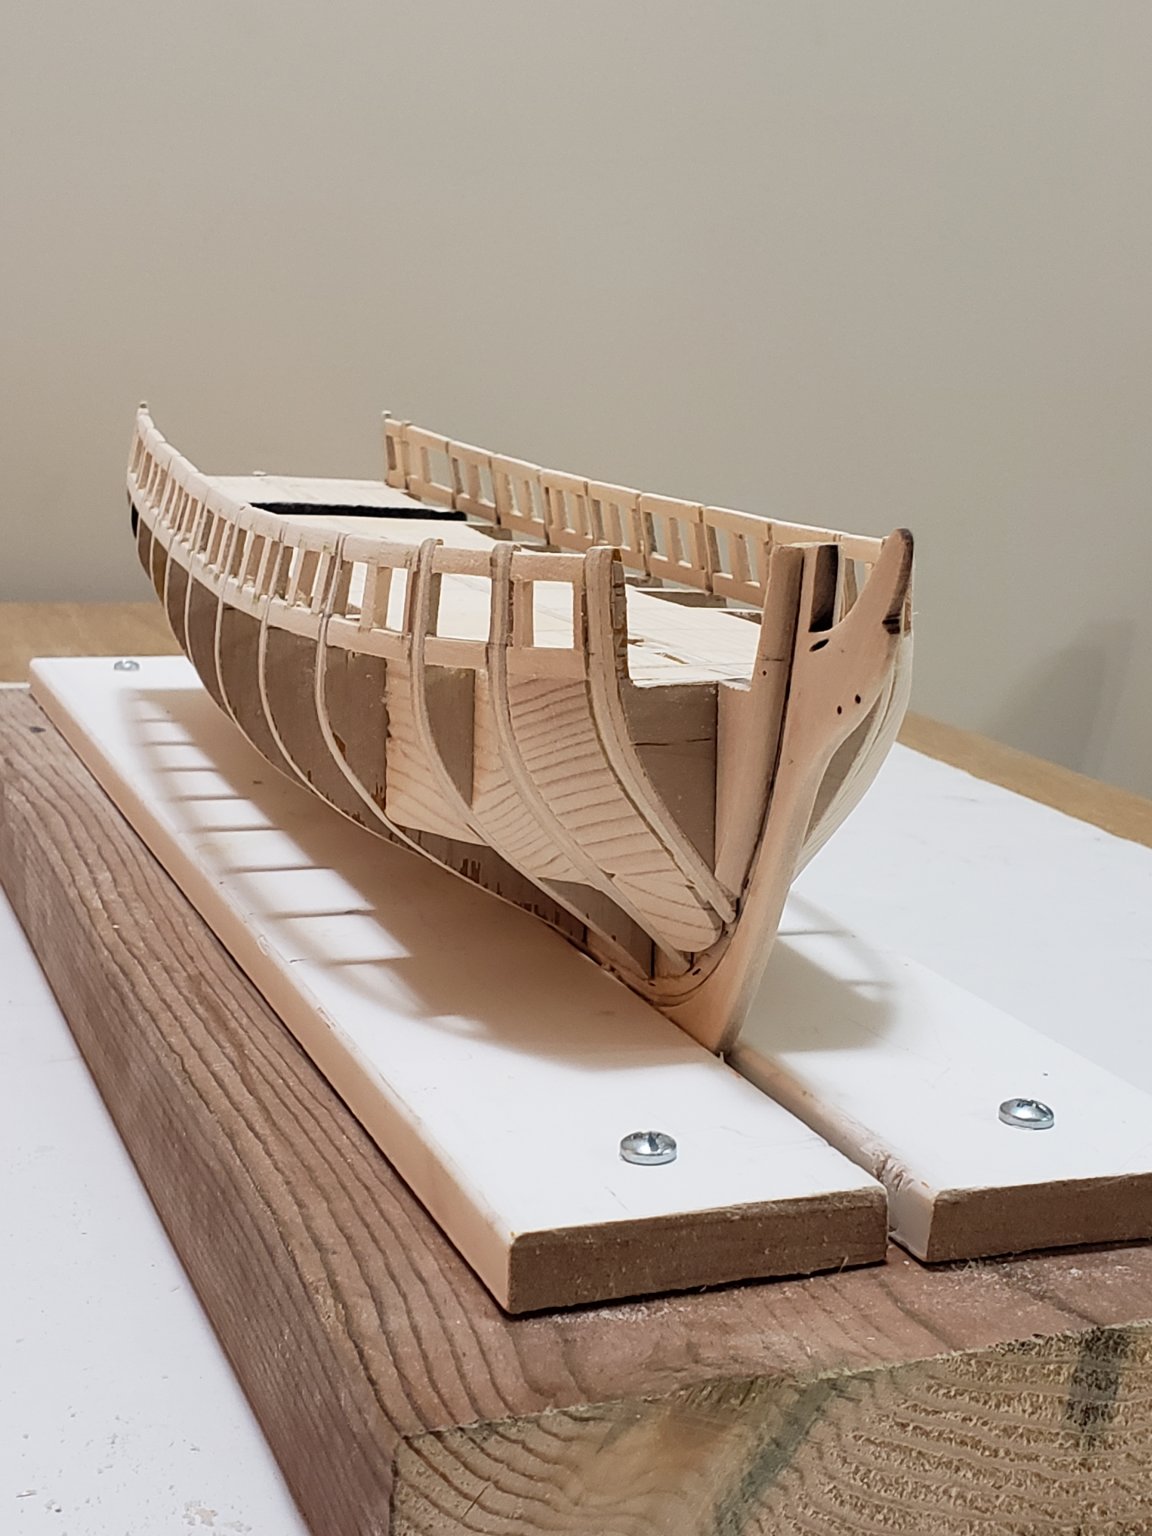
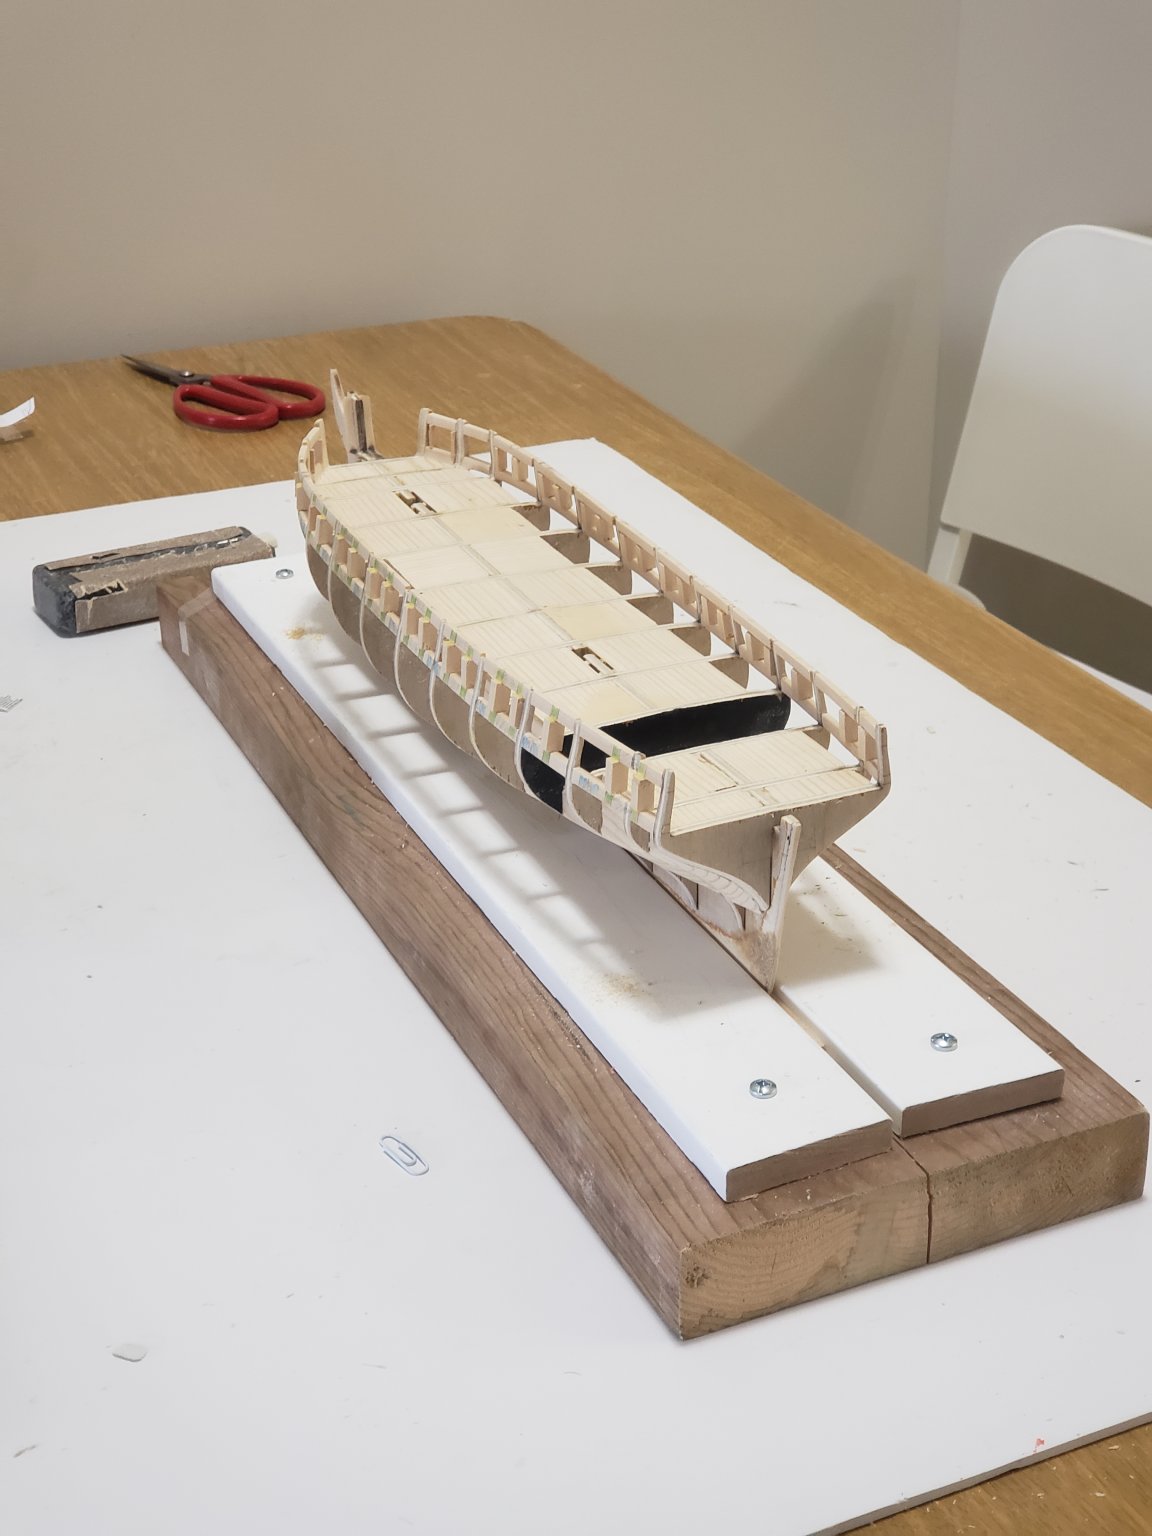
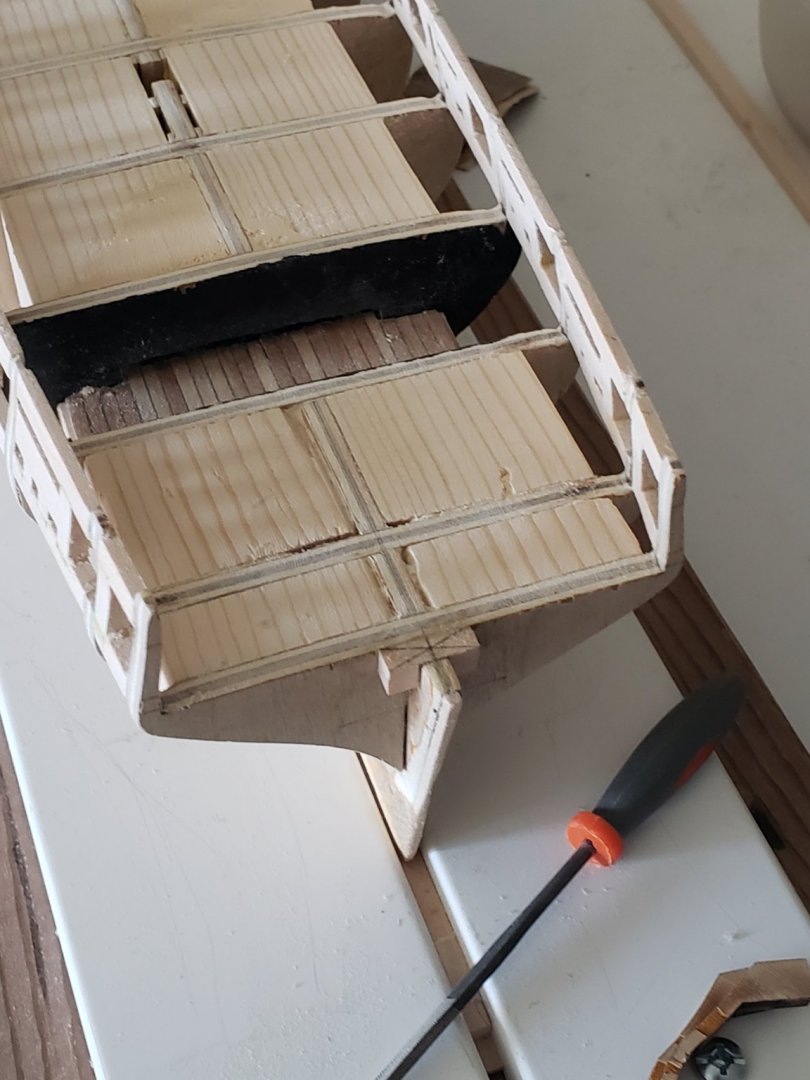
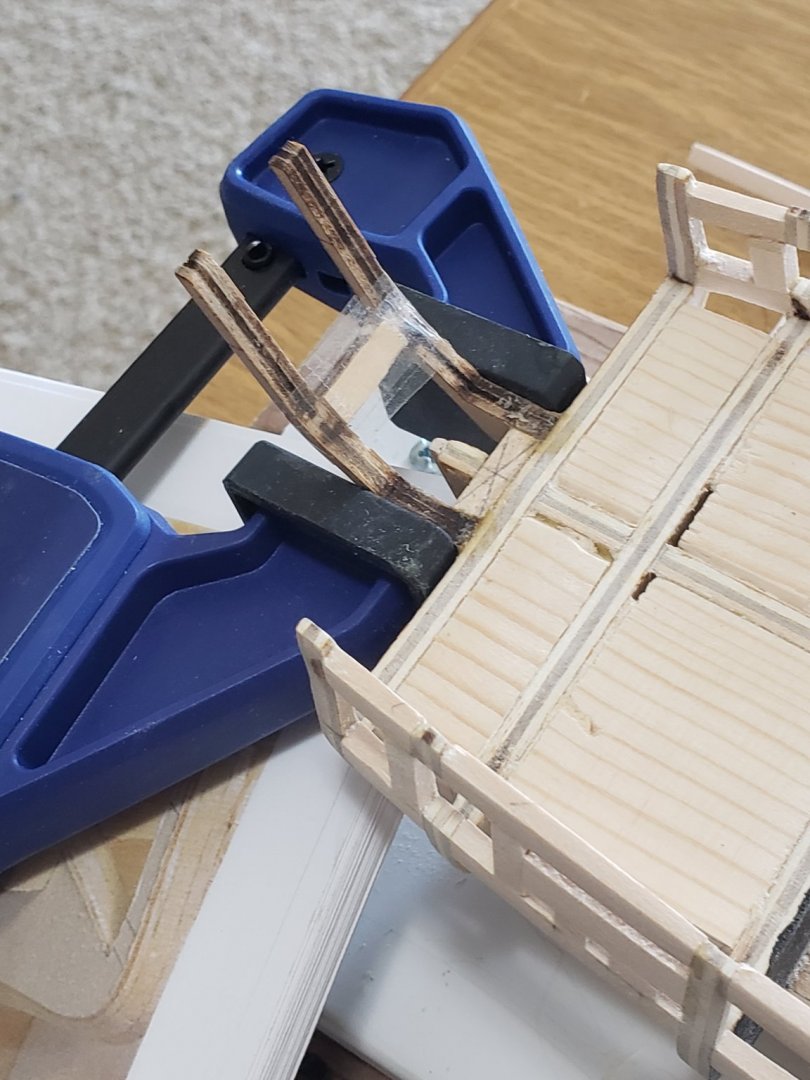
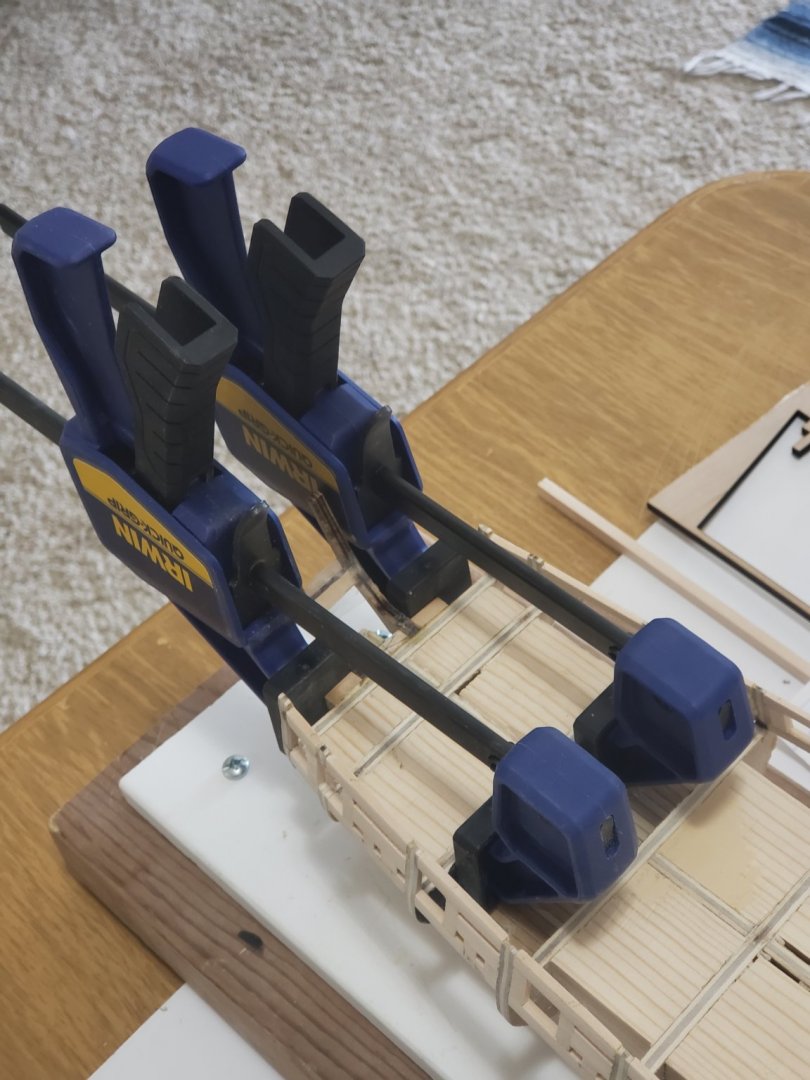
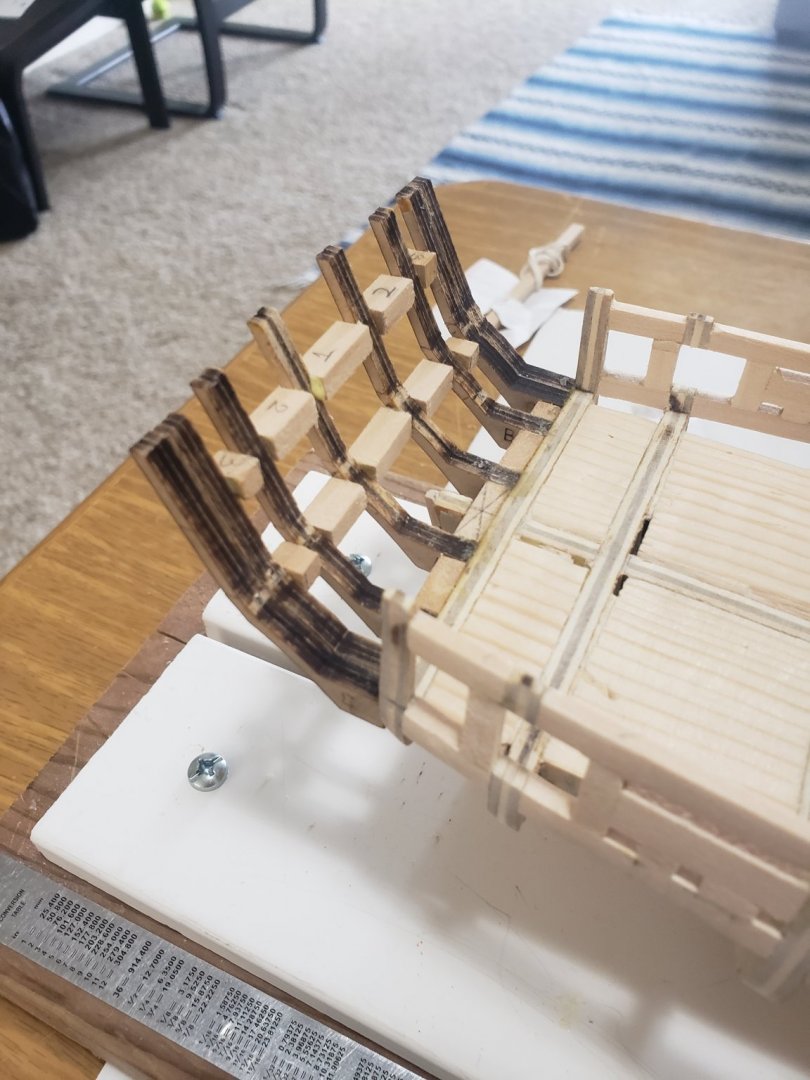
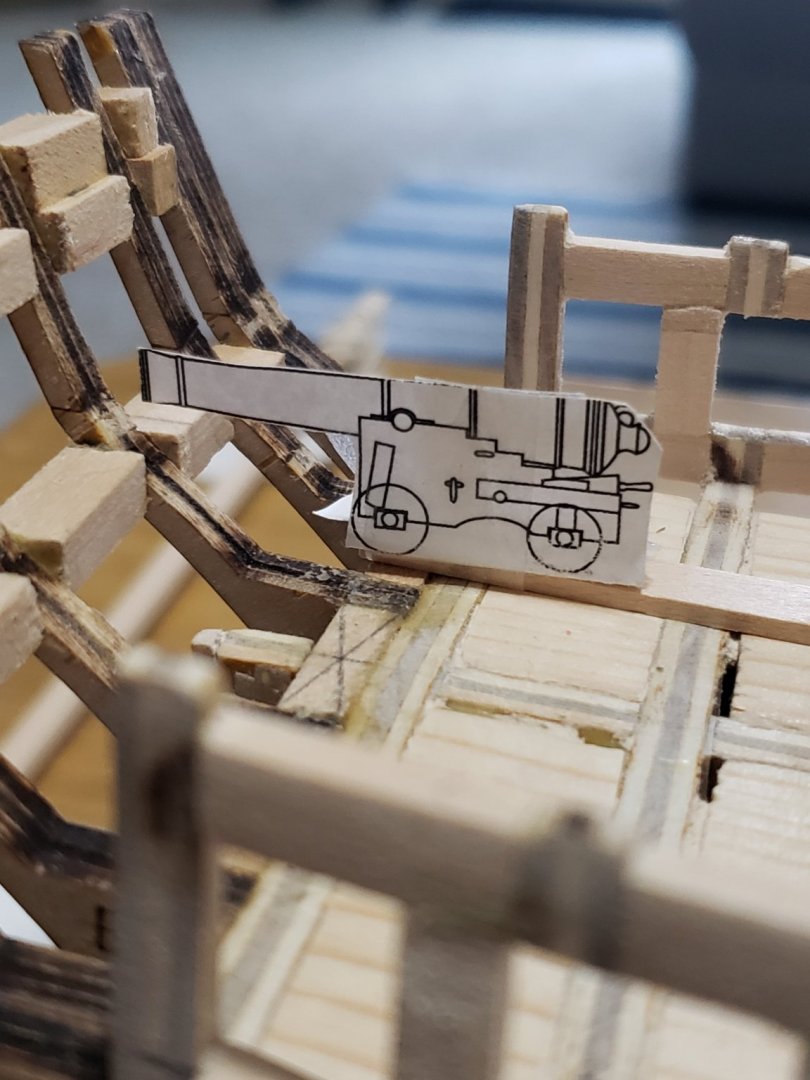
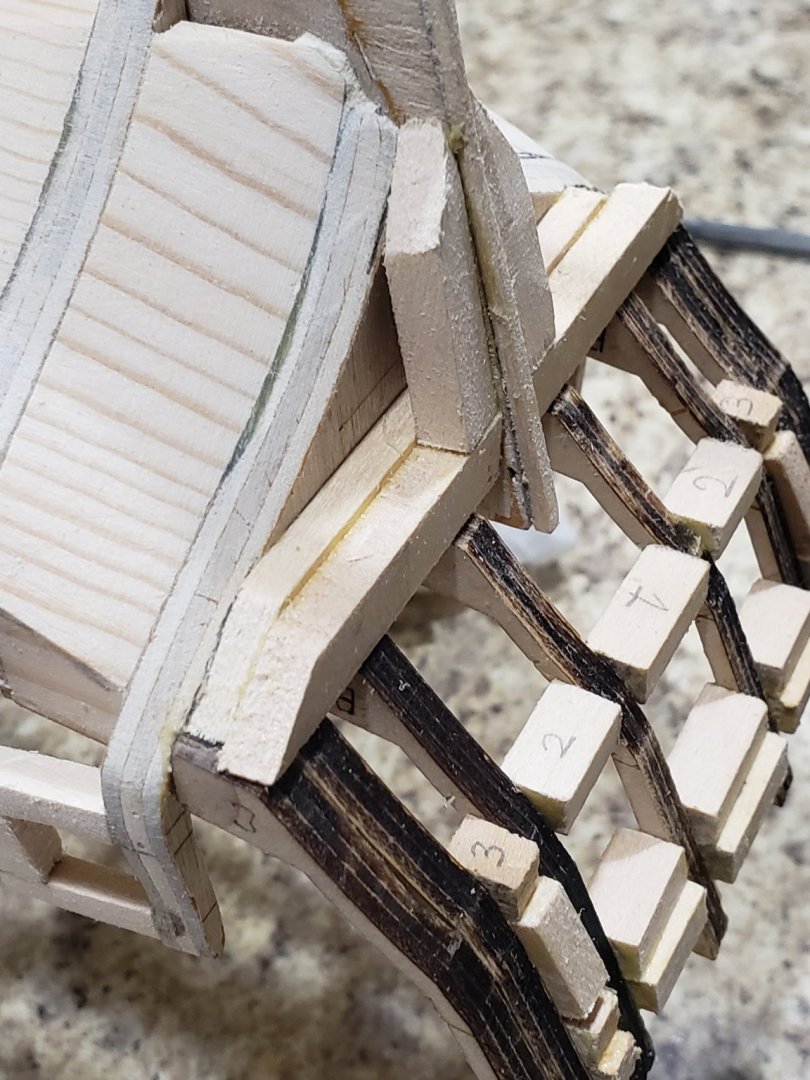
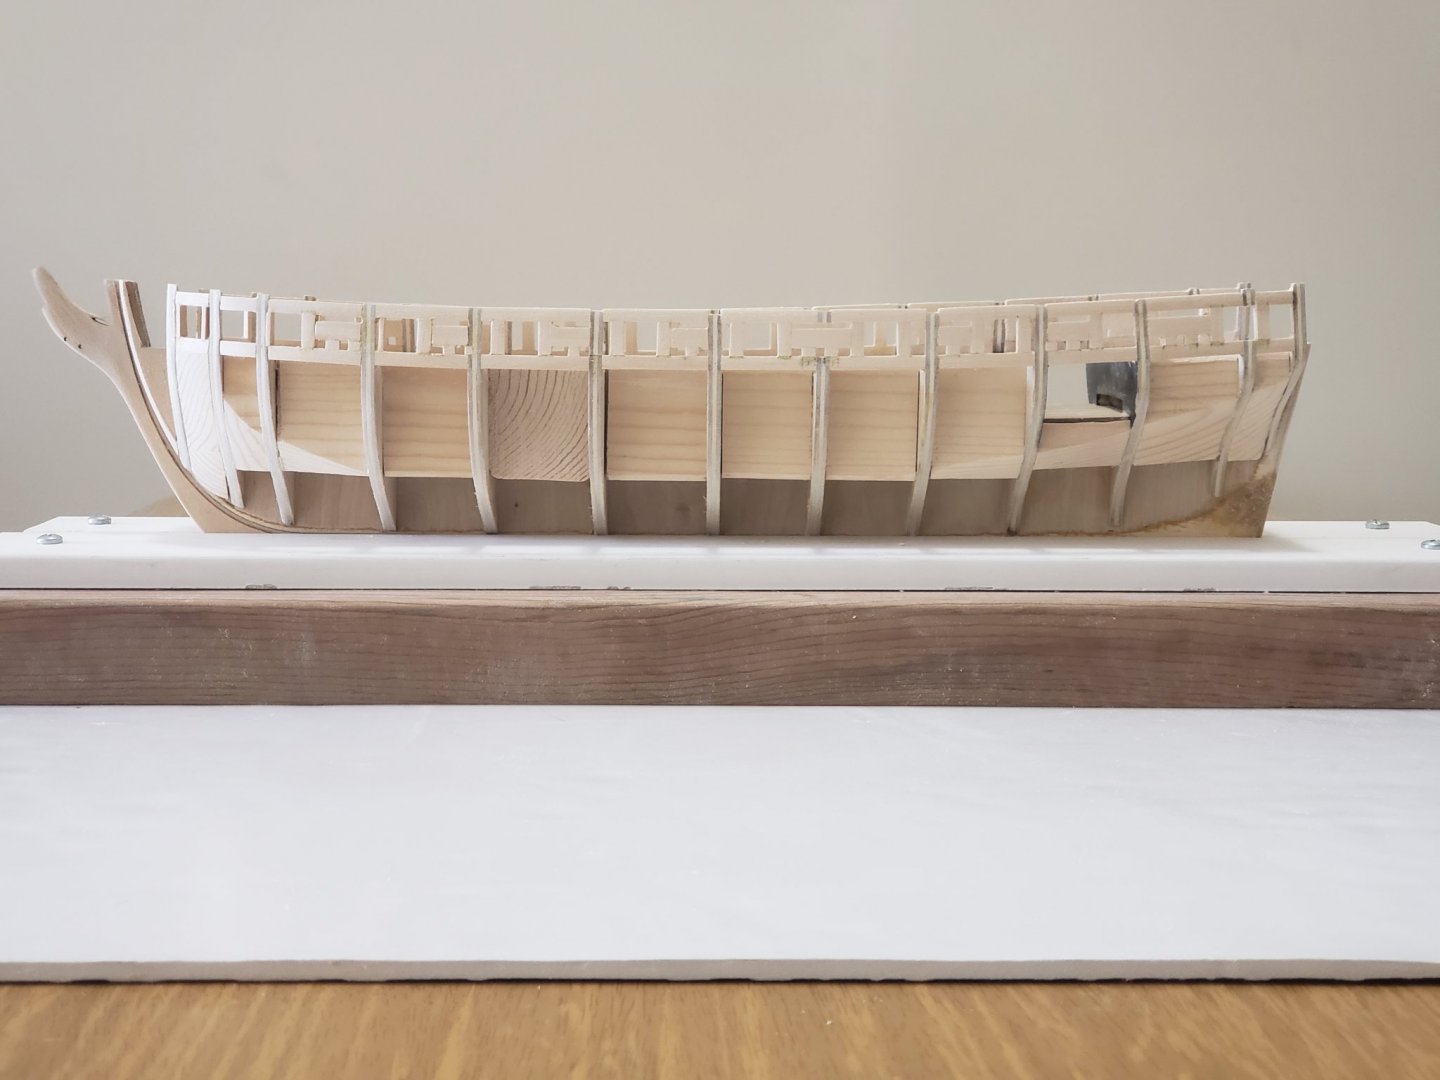
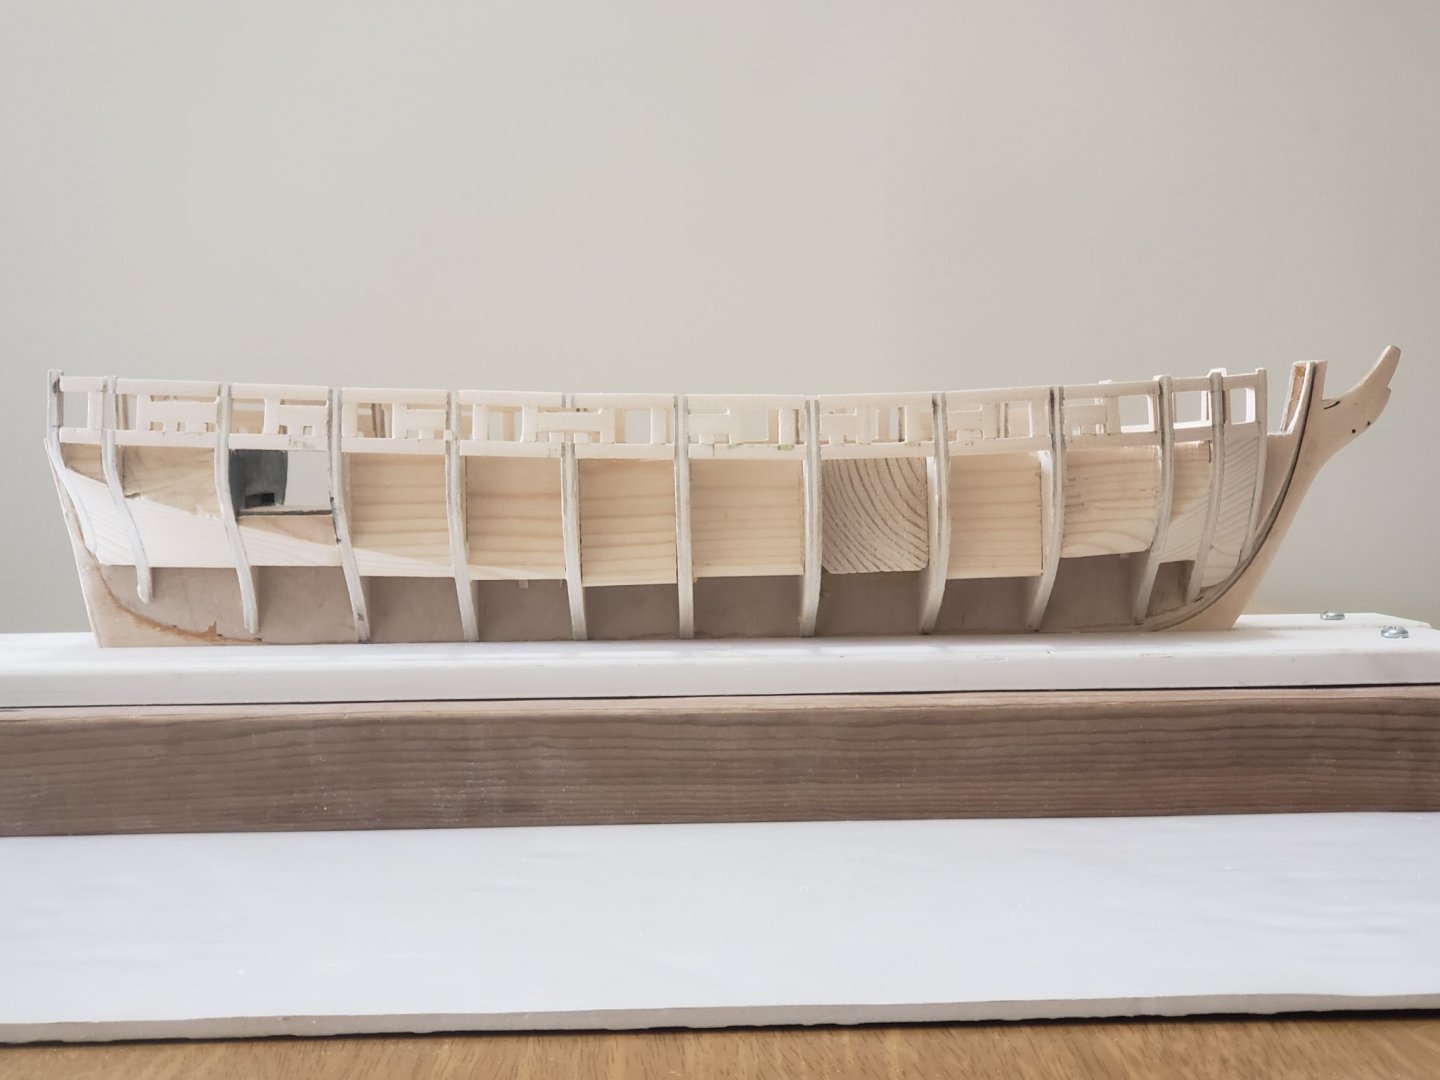
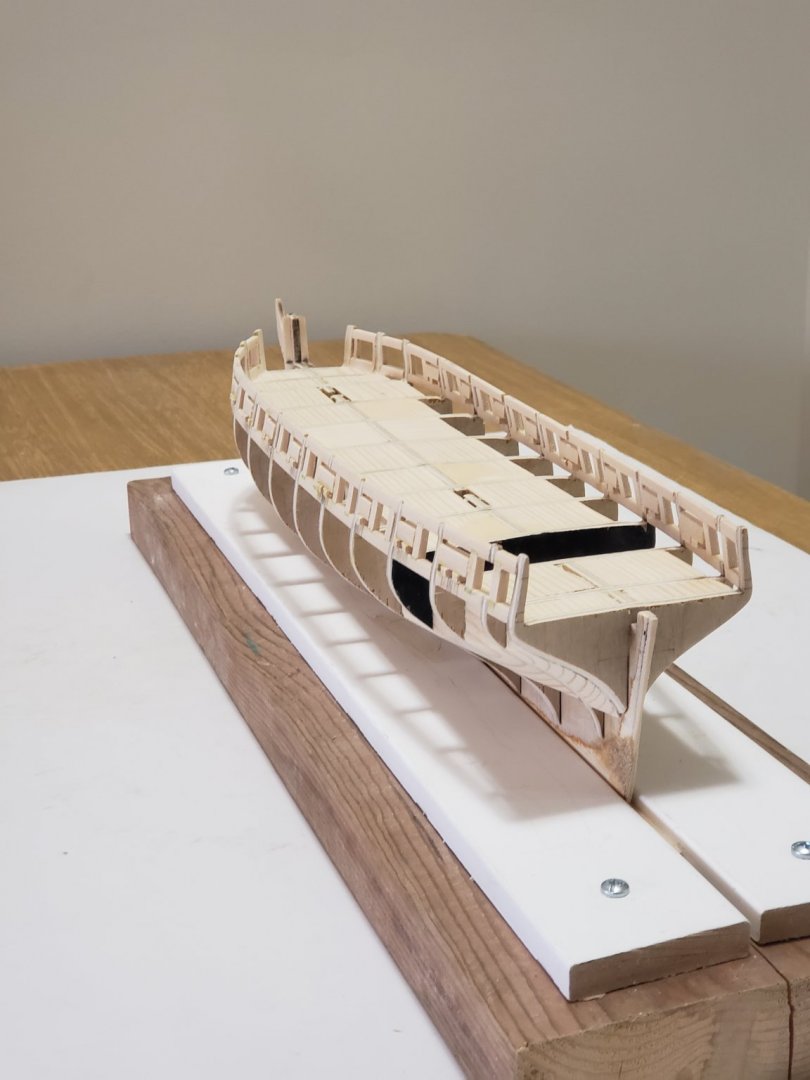
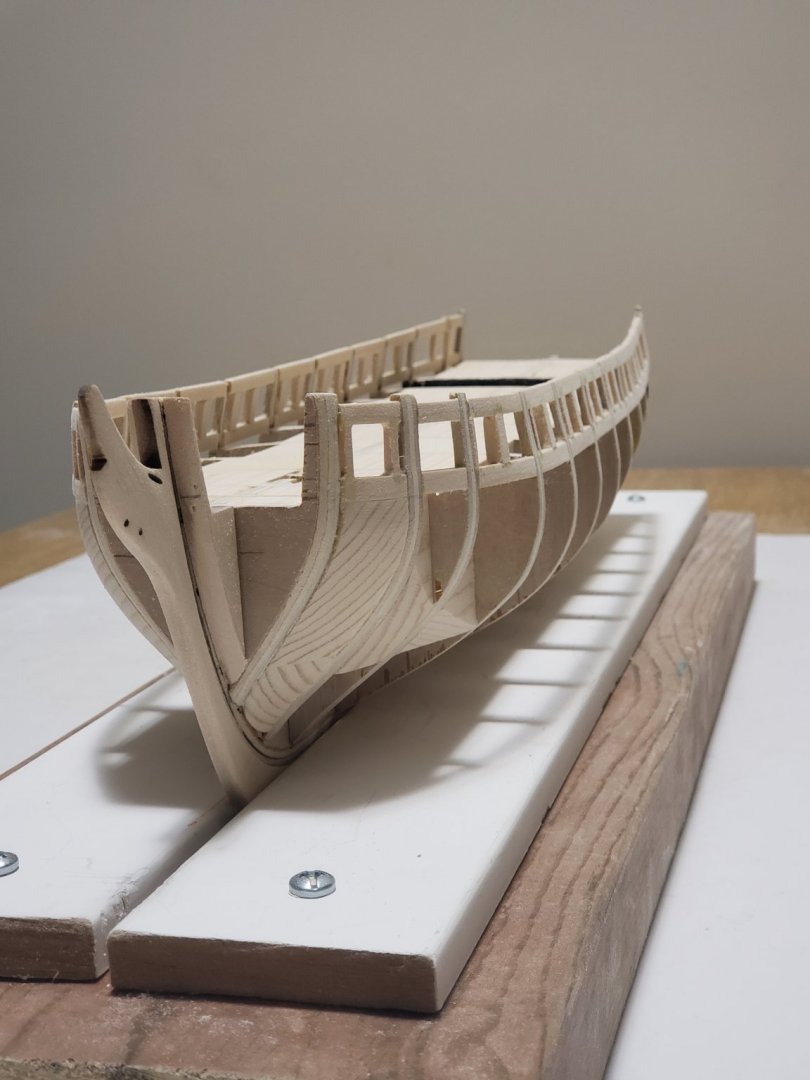
Started working on the stern framing today. I installed all the frames and will start sanding tomorrow. Here are some progress photos: I taped a spacer between the first two frames to ensure they are parallel: After the glue dried, I dropped one of the clamps on the framing and the starboard side frame cracked due to my clumsiness 😣 Fortunately nothing else was touched and was able to glue it back. Didn't want to take photos of the disaster but the rest of the photos were taken after I glued everything back. I had to install the port sills lower than the laser scribed lines on the bulkhead due to the positioning of the canon on a 1/16" decking strip. Some filler pieces were also installed:


- 950 replies
-
- 7
-
-
- syren
- model shipways
- (and 1 more)
-
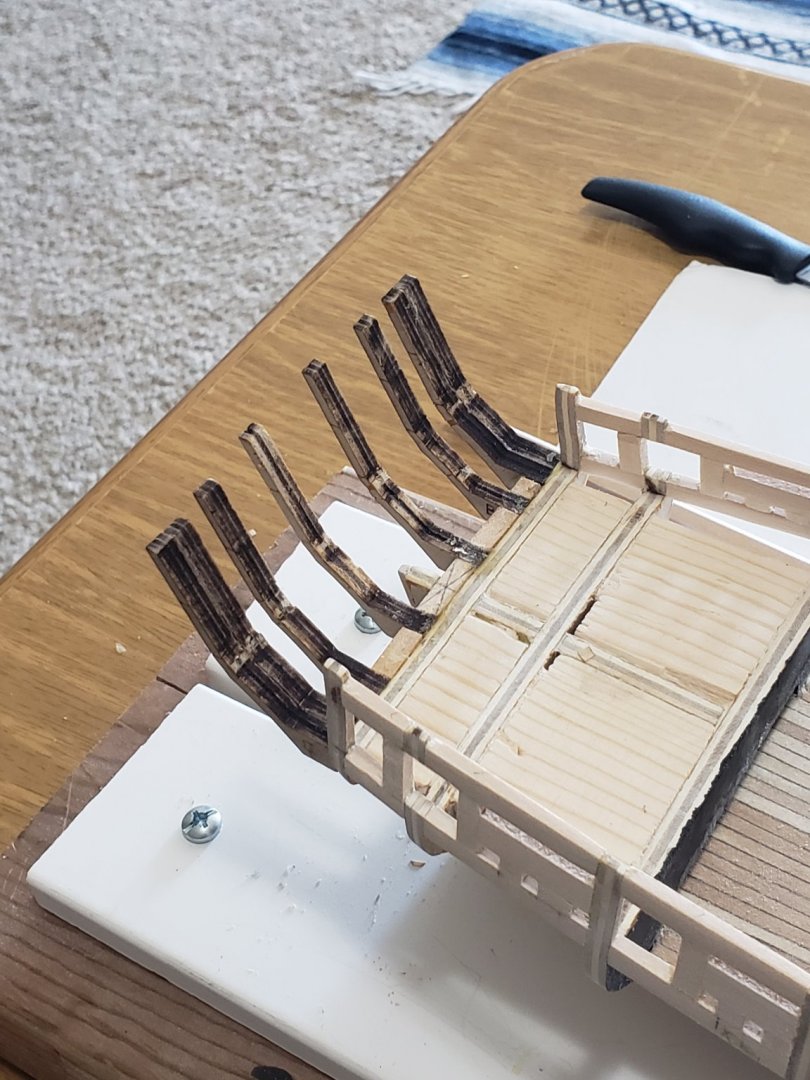
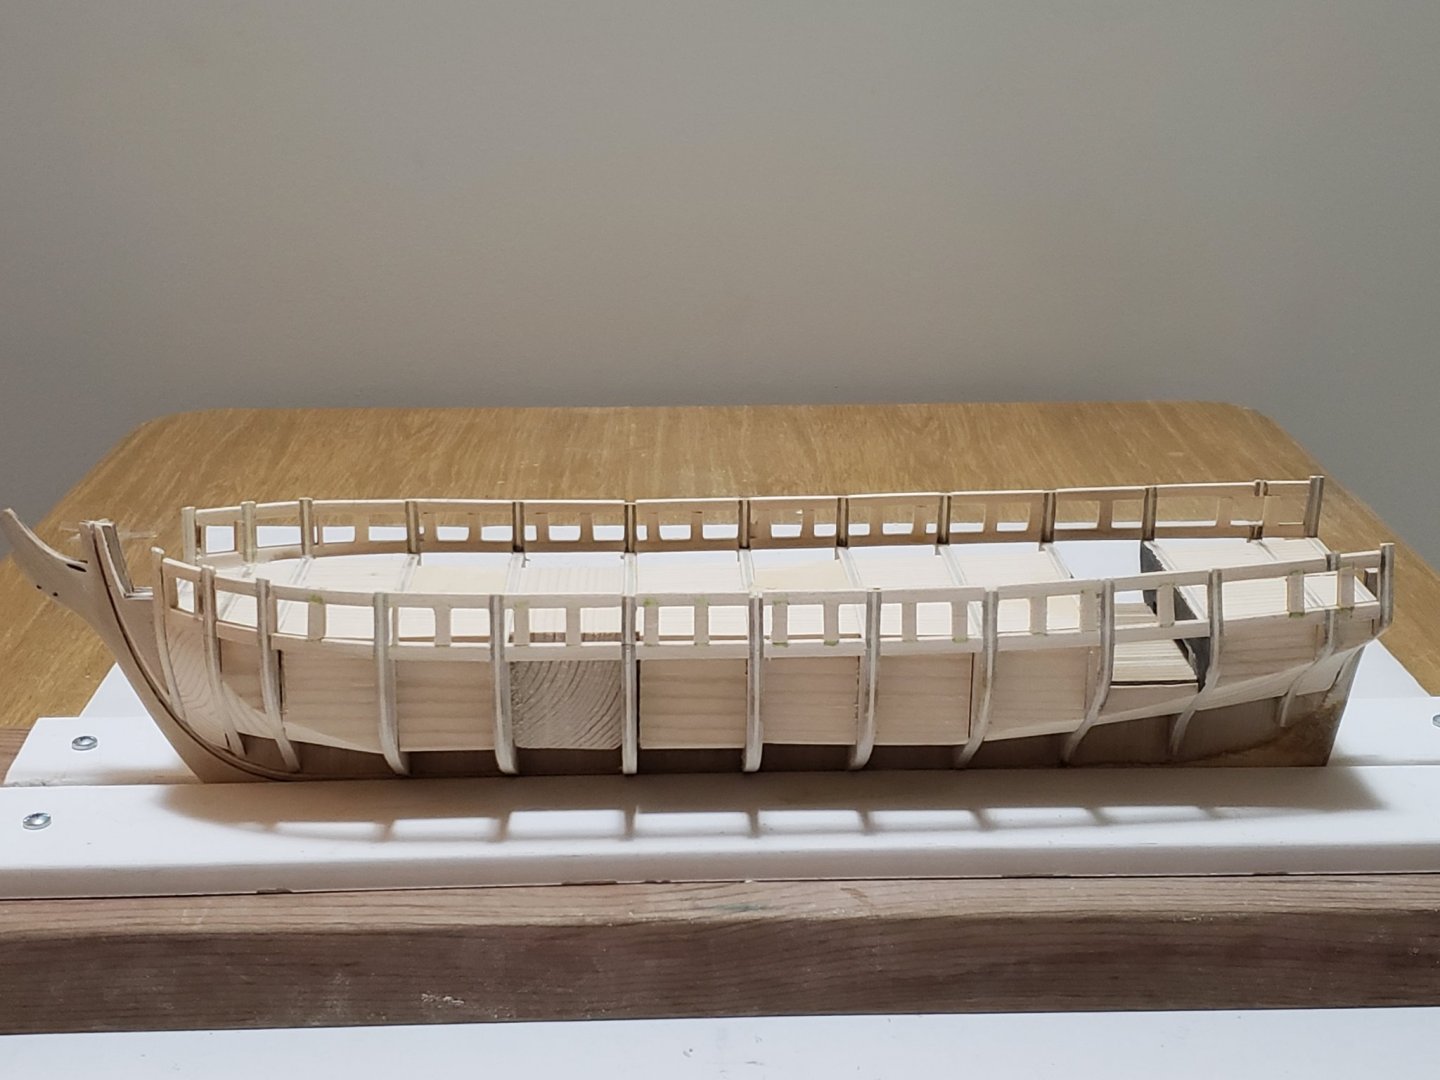
Many thanks Mugje and thank you all for the likes. Hope everyone is having a wonderful Easter break! I finished sanding of the sweep port frames, and with that, Chapter 3 is completed. Here are some photos:


- 950 replies
-
- 11
-
-
- syren
- model shipways
- (and 1 more)
-
The framing for the sweep ports have been installed and awaiting sanding which will then mark the end of Chapter 3. I used one of the supplied 1/8 x 1/8 inch strips to act as spacers between the frames:
- 950 replies
-
- 12
-
-
- syren
- model shipways
- (and 1 more)
-
Pat, I was too worried about the warping but the fillers mostly solved the issue. I wish I had also solved the warping issue fully before installing the bulkheads but I think it's manageable in my case.
-
Sanding finished quicker than I had expected. I just hope I have not gone too far and made the bulwarks too thin...


- 950 replies
-
- 8
-
-
- syren
- model shipways
- (and 1 more)
-
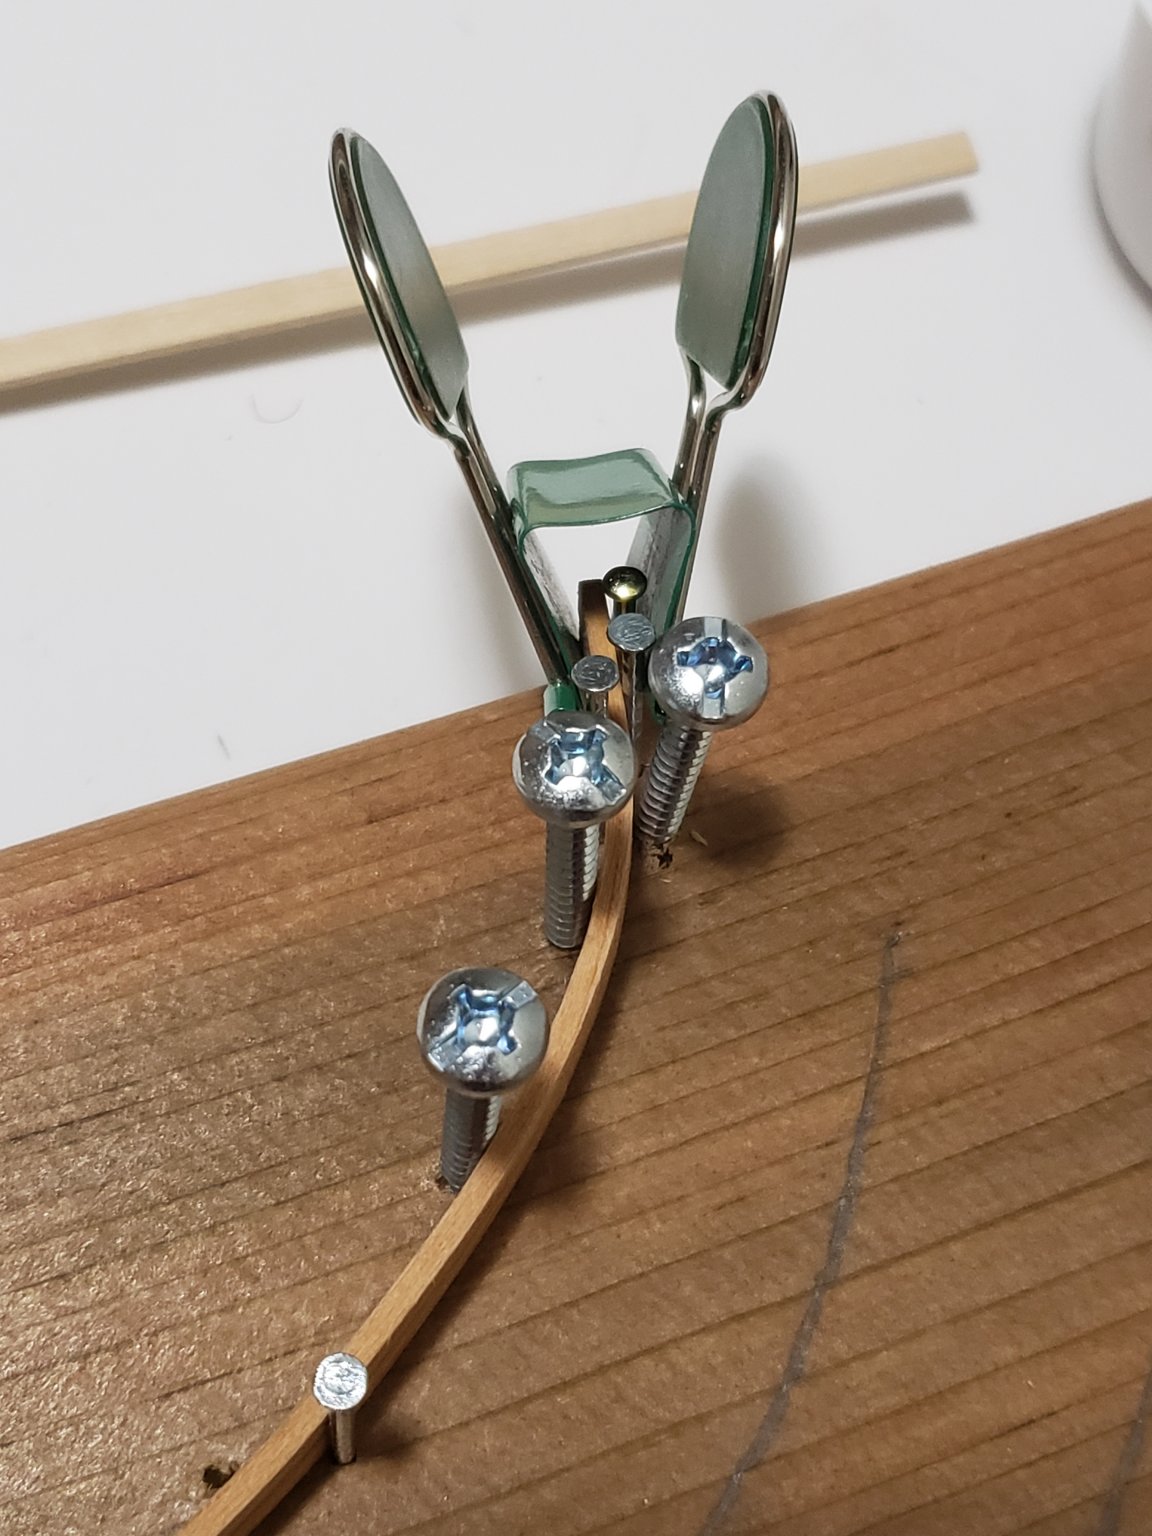
Almost finished Chapter 3. The green frames have been installed and are ready for sanding. To make sure the gunports are square to the bulkheads, two strips of wood were clamped as shown: To line up the first two gunports with their respective angle, this eraser spacer was used which was approximately 15/32" wide: Here is the result so far: I'll post more photos once I finish sanding.


- 950 replies
-
- 6
-
-
- syren
- model shipways
- (and 1 more)