realworkingsailor
-
Posts
3,271 -
Joined
-
Last visited
Content Type
Profiles
Forums
Gallery
Events
Everything posted by realworkingsailor
-
 A not uncommon practice. Most of what we know today as the large automobile manufacturers were behind many other consumer products. Off the top of my head, the appliance brand “Frigidaire” (in North America, was developed and eventually spun off from General Motors. Kubota (known for farm tractors and light industrial equipment) got their start as a manufacturer of steel pipes. Closer to home (for me) CCM is known now more for their sporting goods (especially hockey equipment), but CCM actually stands for “Canadian Cycle and Motor company…. They made cars! Andy
 -
If I’m not mistaken the “Casey” who posted the colour mixes on Britmodeller worked with Alex Mann (Mann’s Model Moments on YouTube), to create a whole plethora of (relatively) simple mixes using ICMs Acrylic paints for WW2 subjects. The videos Alex made are worth checking out as he covers everything in detail: https://m.youtube.com/@MannsModelMoments Andy
-
Roadless supplied the crawler kit as,(what we would call now, an aftermarket kit for a standard Fordson N tractor. While some may have been used in farming, I believe the intention was more for industrial applications such as roadwork, logging and the like. Andy
-
5. All of the above 😁
-
Geez…. Even in the print ad they didn’t bother to try to make the Gannet look any less fugly… 🤪 (Don’t get me wrong the Gannet is not without its interesting quirkiness, but….😏) Andy
-
If you don’t mind a casual observer’s opinion, I like the version with the top masts lowered, it gives a sense of impending activity, and goes well with your setup for the gaff and driver boom.. But I also like the cutter raised up, as it makes viewing the deck easier, or, at least, less cluttered. Perhaps instead of the top masts, it could be resting on the main and fore yards instead? Maybe a little more work but it would give you the best of both options. Andy
- 332 replies
-
- 5
-

-
- Harpy
- Vanguard Models
- (and 1 more)
-
Maybe it might be worthwhile making up part of the kit engine. Just enough to get a rudimentary idea of any size/scale differences. The centre crank case section along with three or four cylinders should work well enough. Andy
-
Yeah…. Eduard apparently: https://www.eduard.com/eduard/photo-etched-parts/photo-etched-set/aircraft/1-48/gannet-as-1-1-48.html Looks great so far! Andy
-
Thanks Dan! I guess I wasn’t about to let a little thing like a wet cellar hold me up. To be honest if I hadn’t moved my painting setup, I would still be waiting! From the looks of things, yours shouldn’t be too far behind (?). Thanks to everyone else for your kind remarks! Andy
-
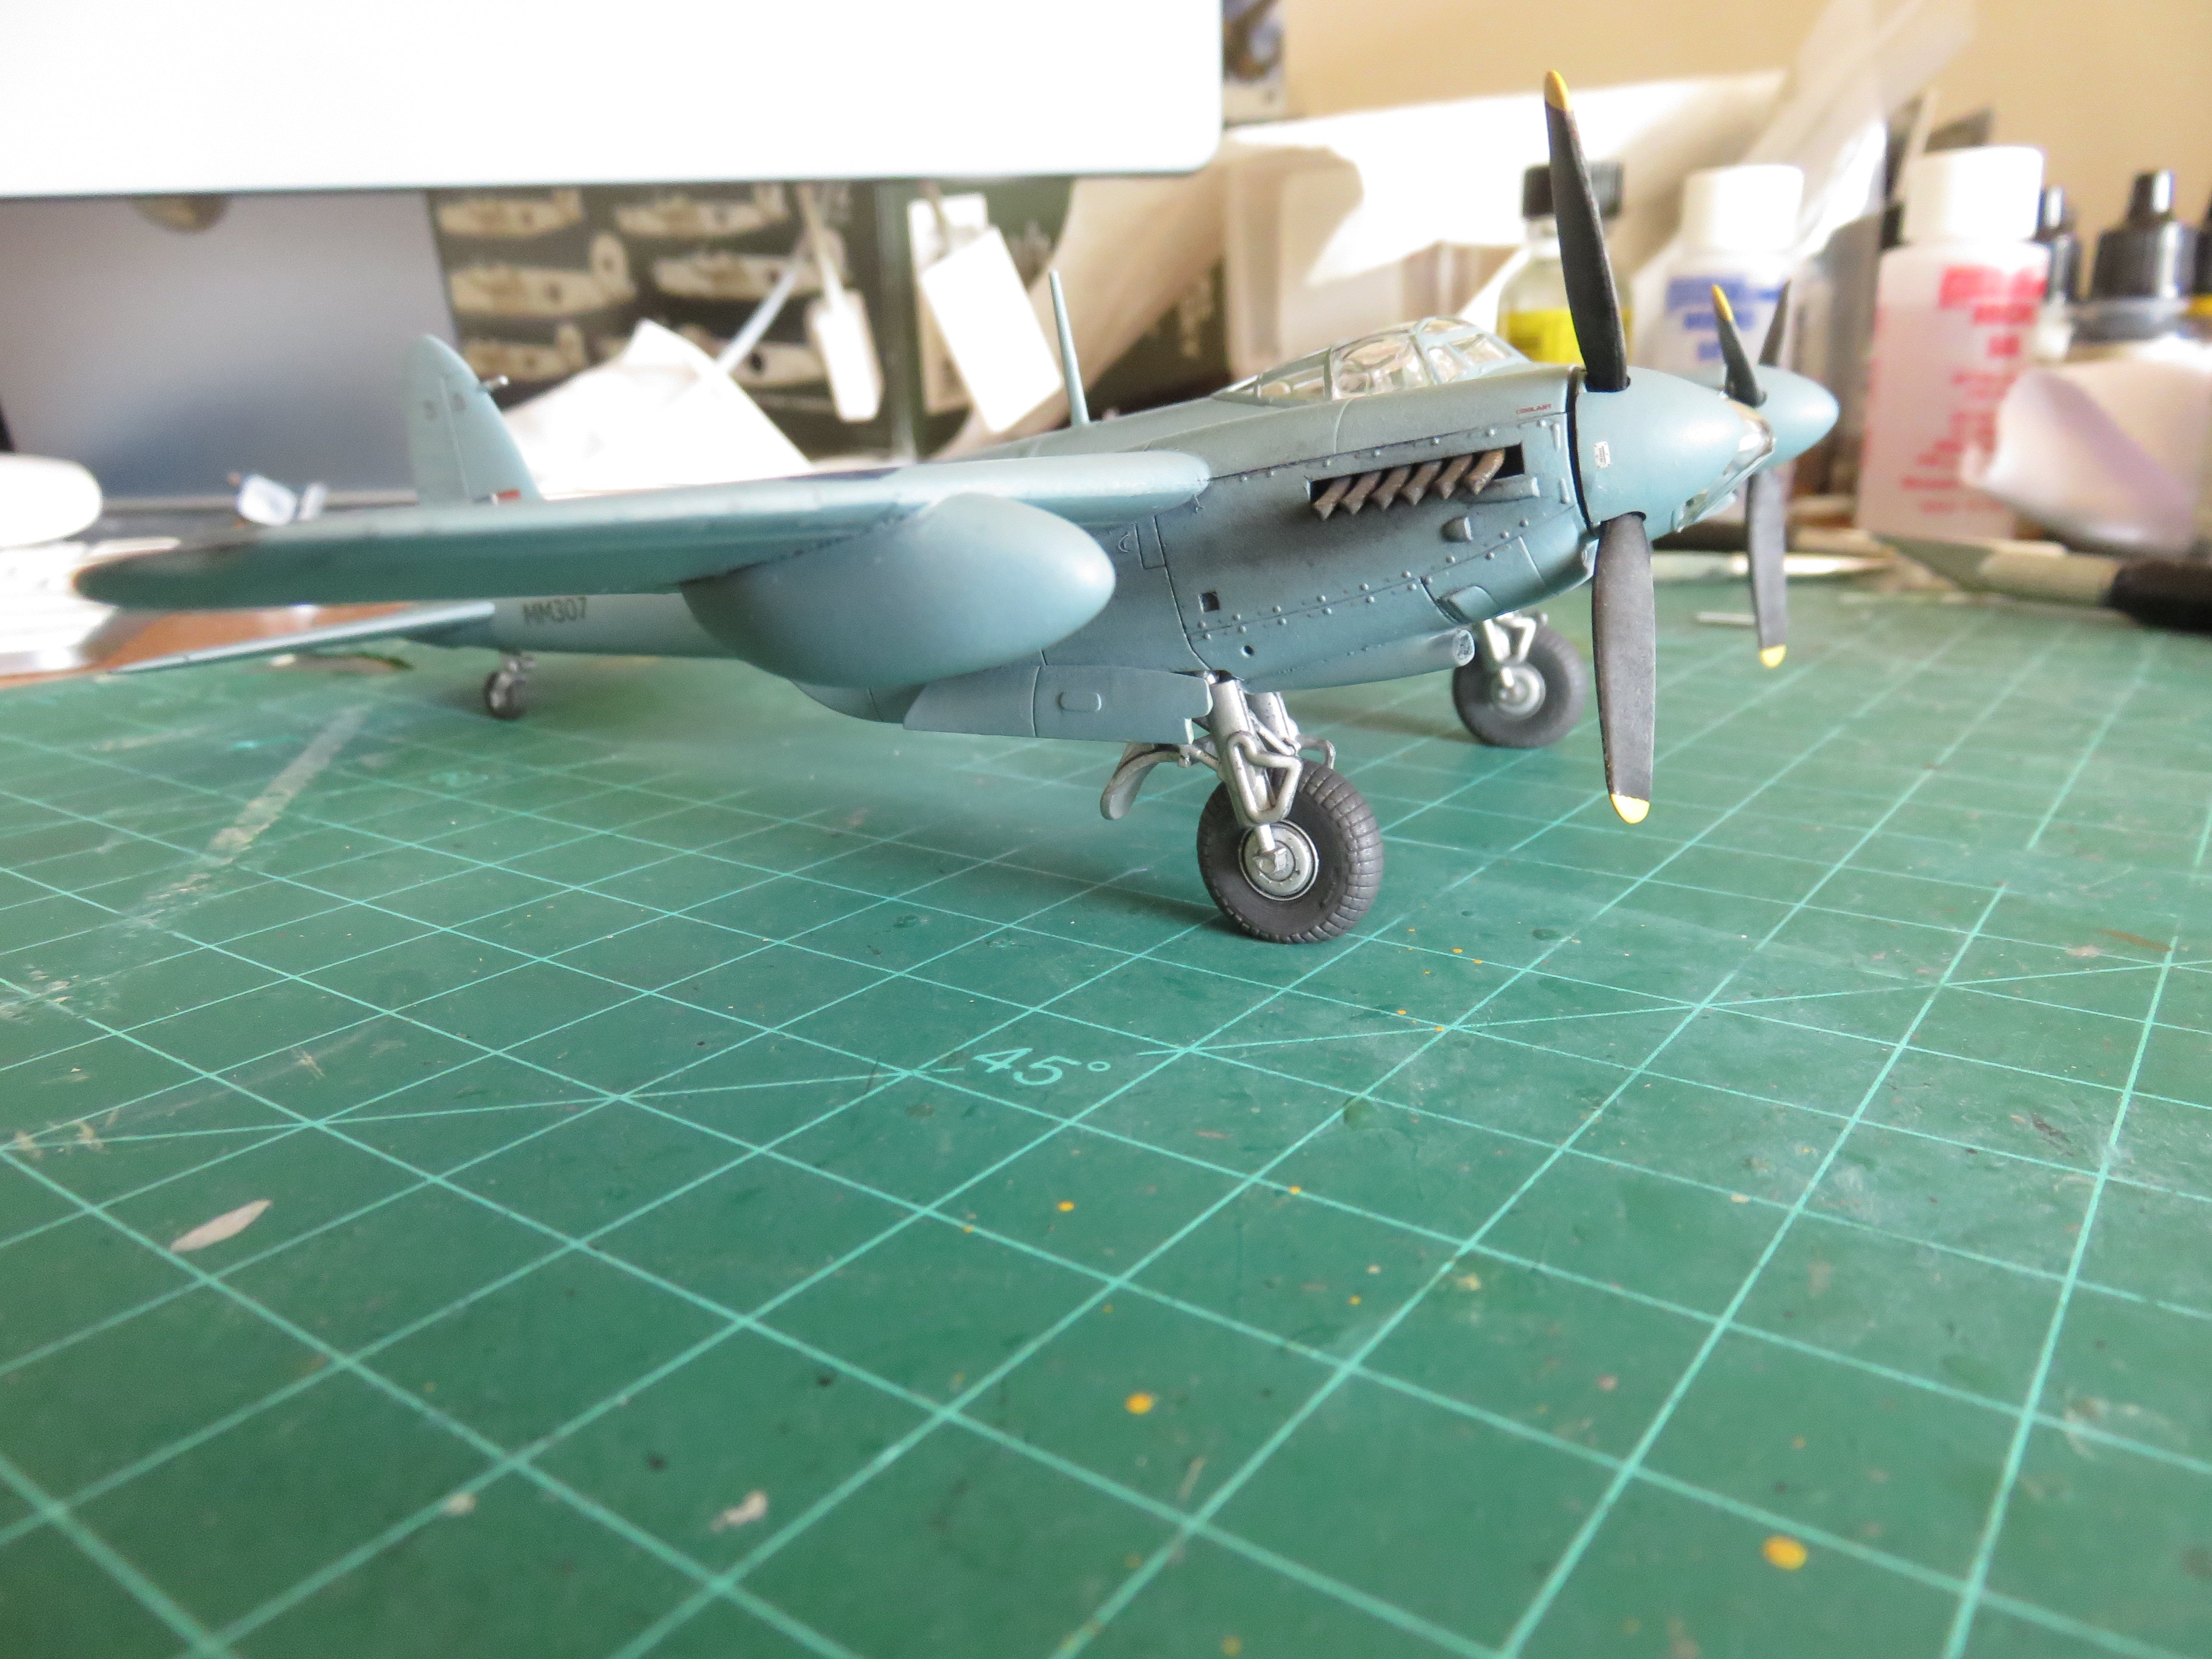
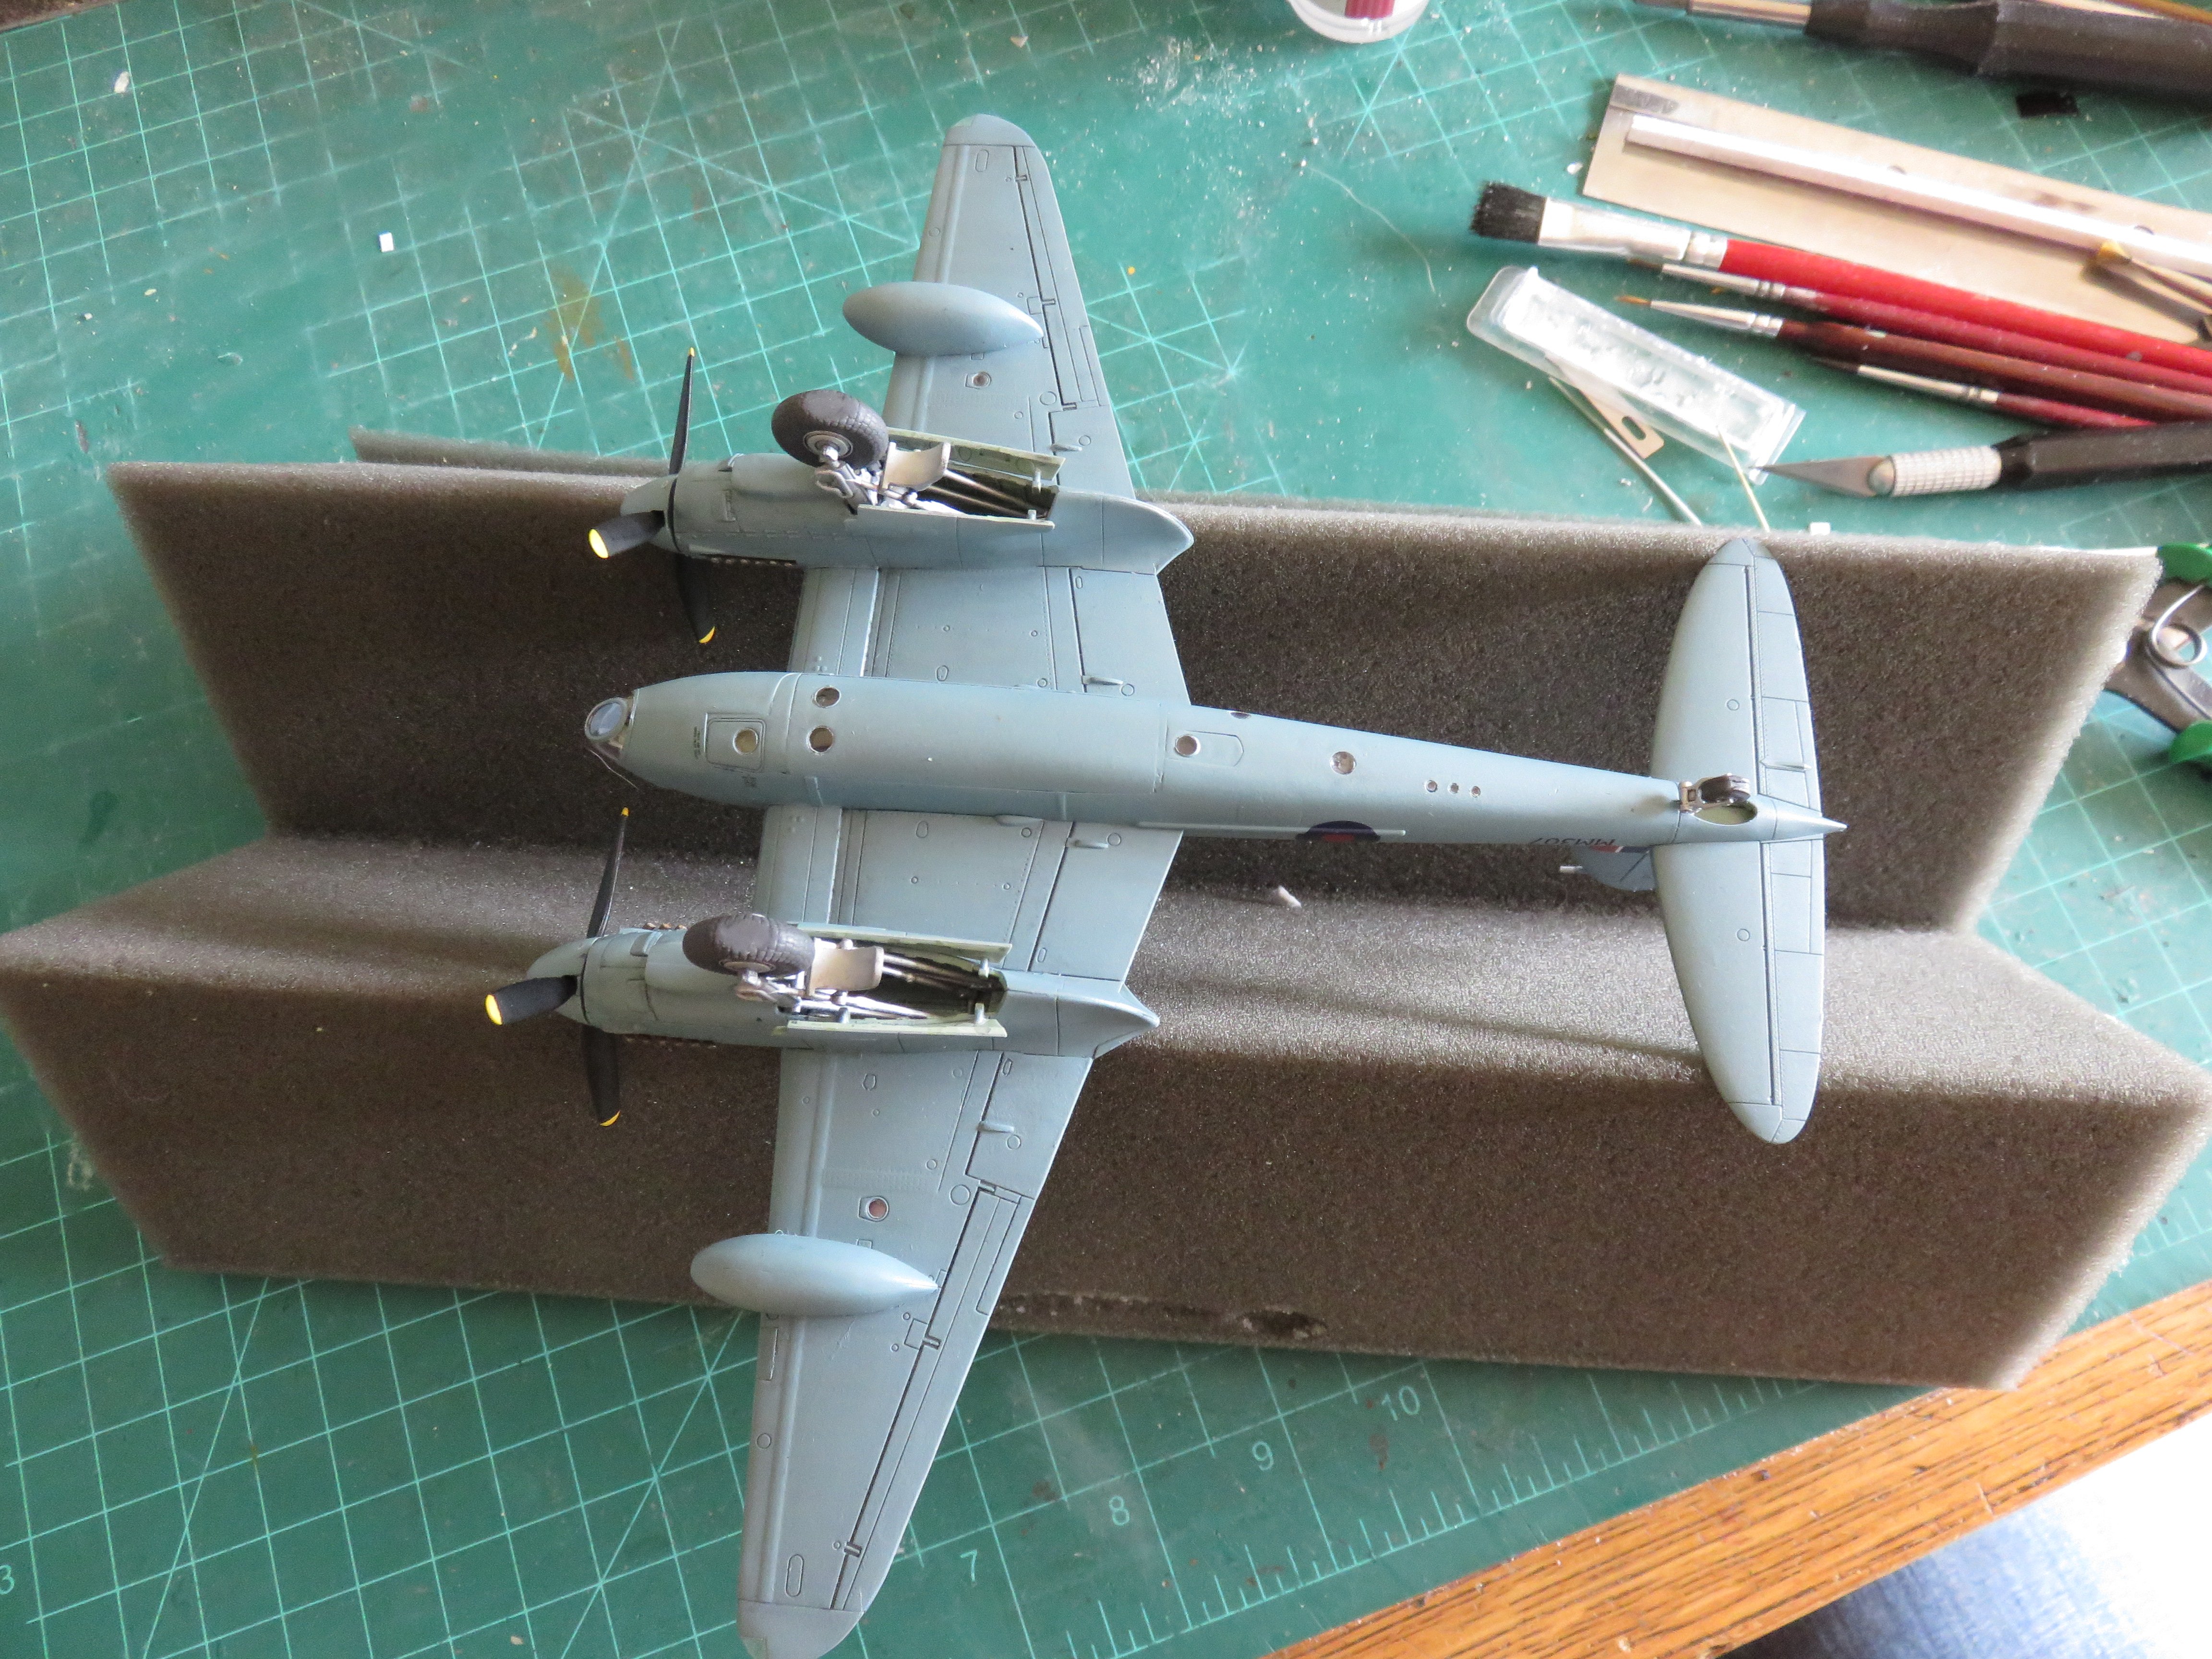
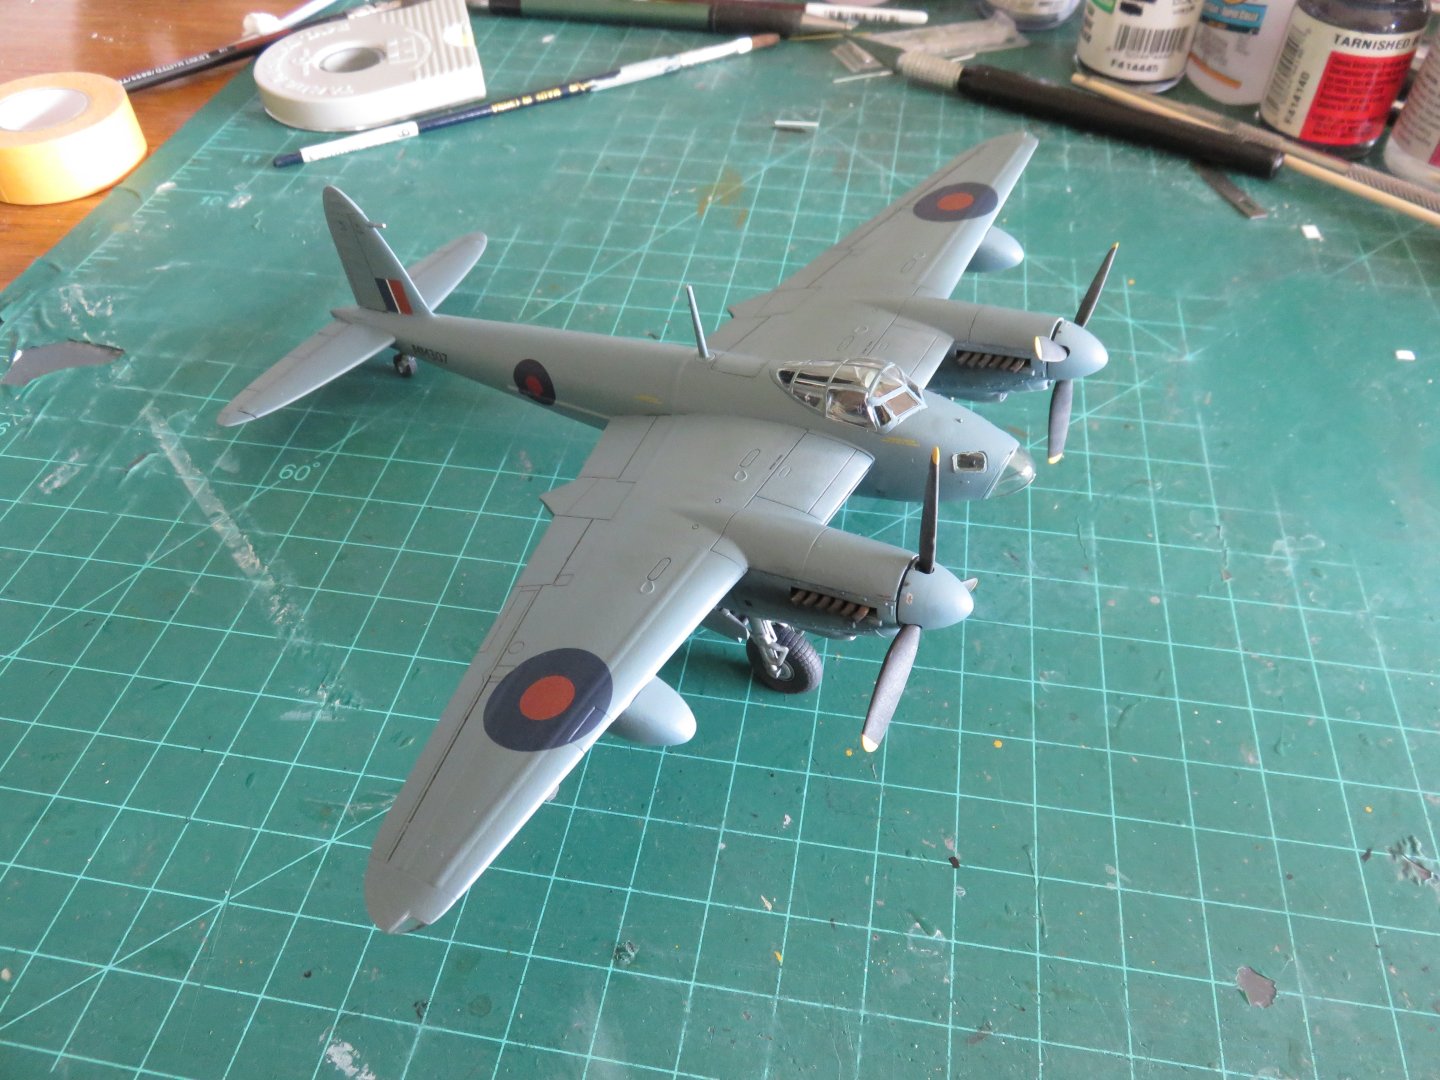
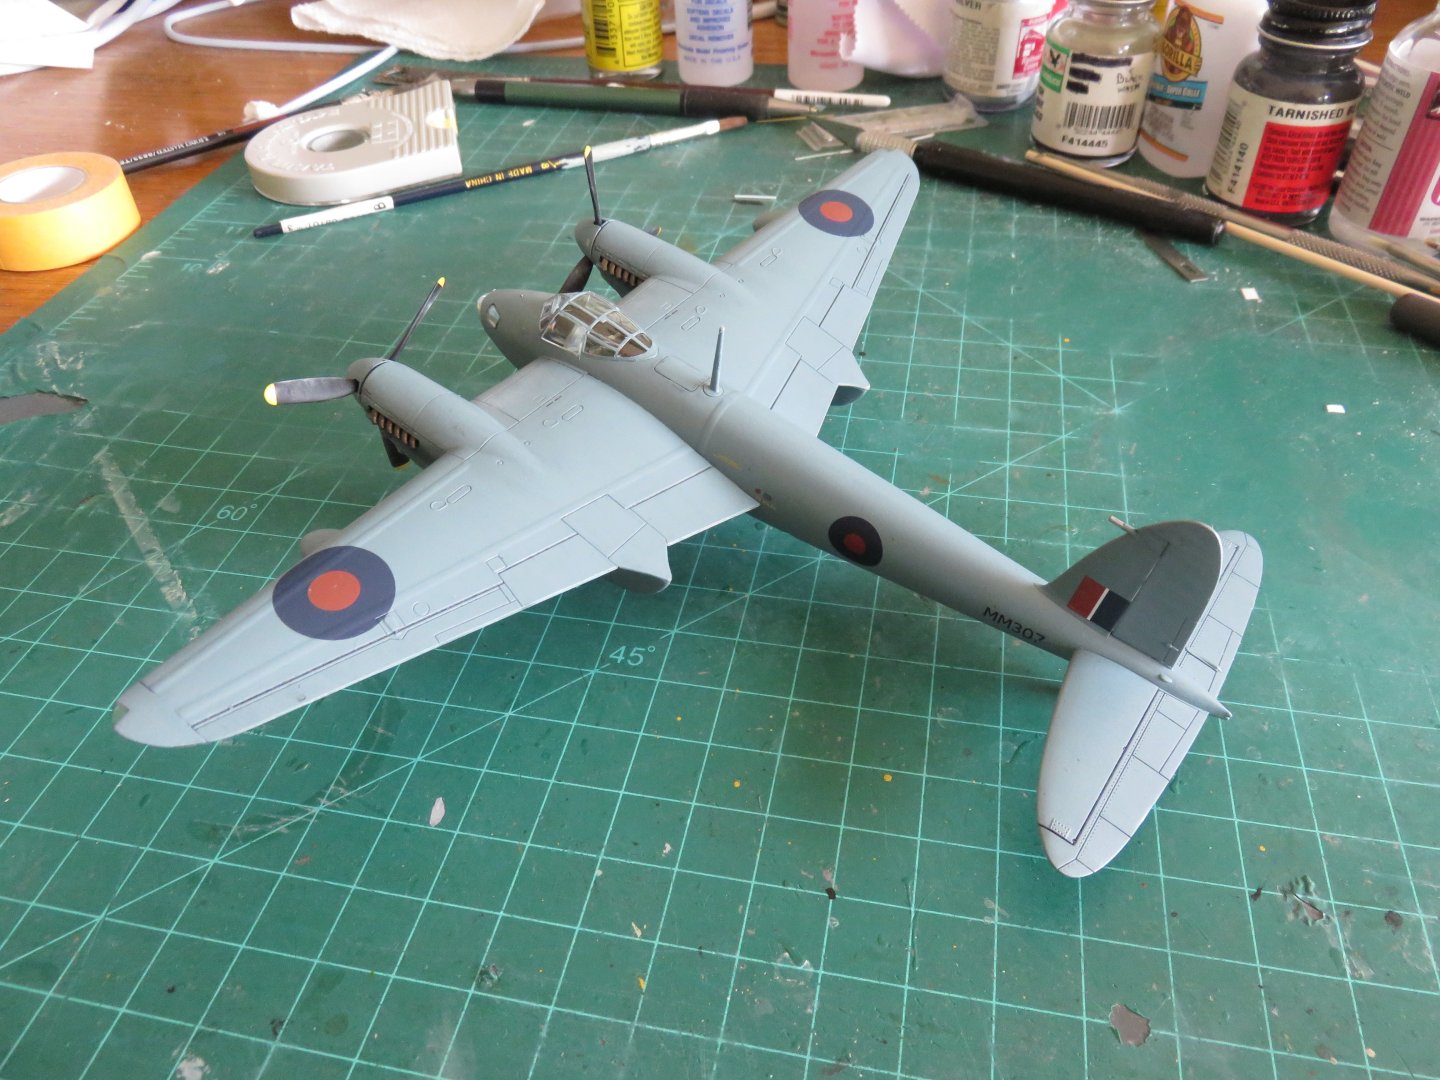
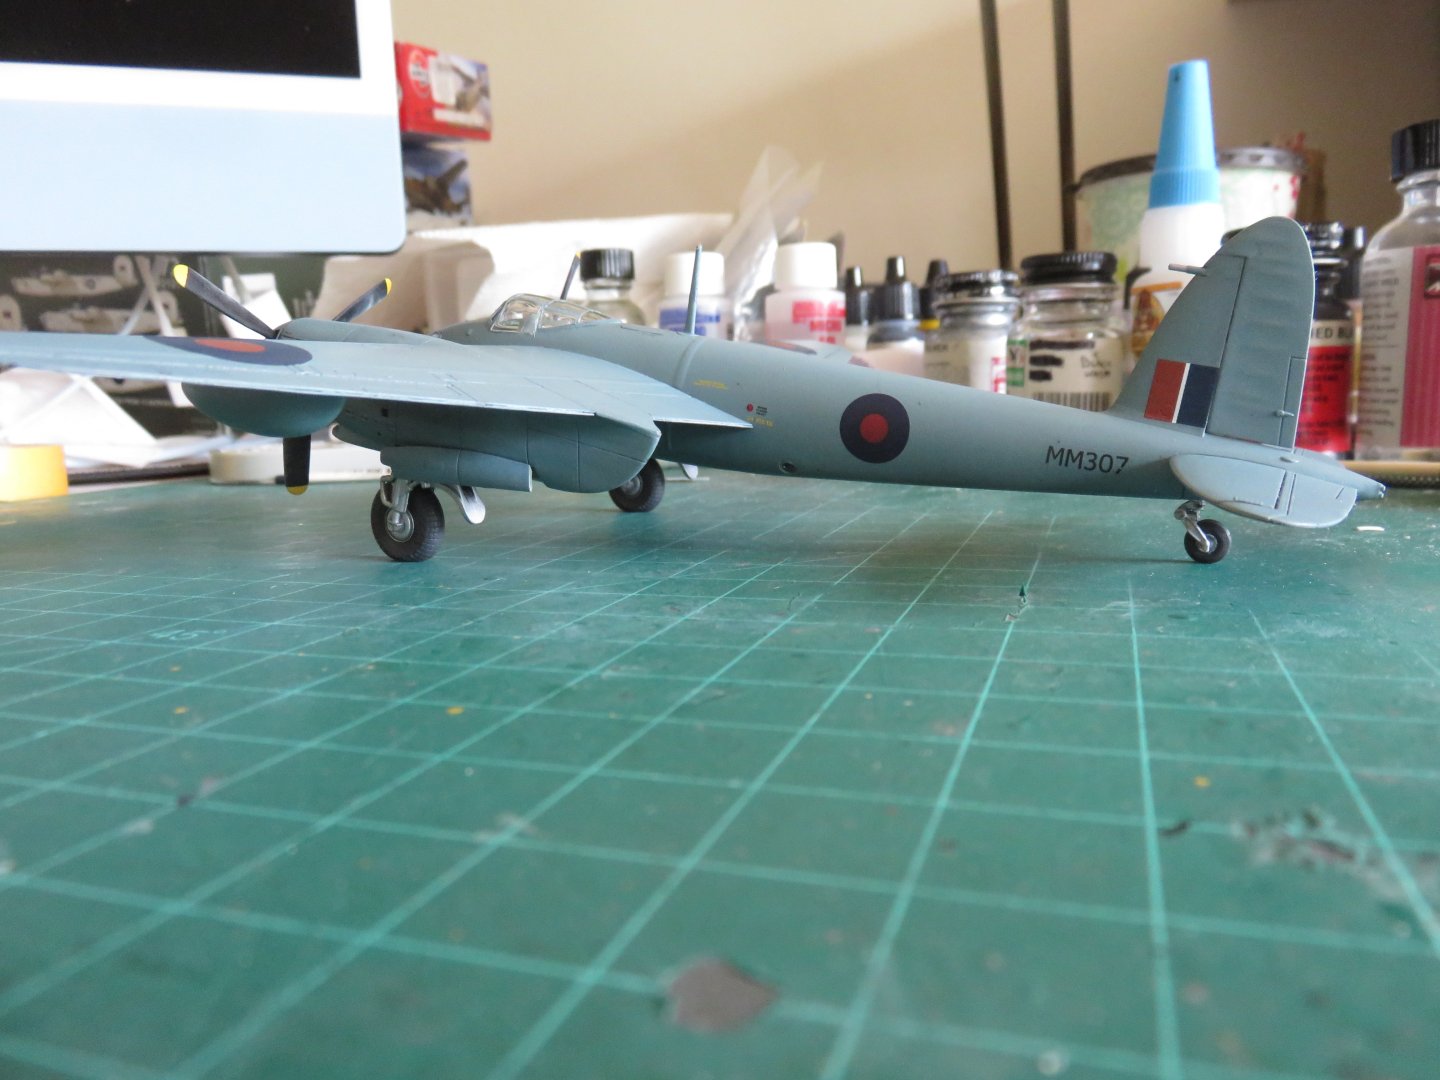
Thanks for the likes! Well, it didn't take too long, but I'm ready to call this one finished! The pastel weathering went quickly enough and I'm happy with the results. Not much to see from overhead. A little bit underneath from the radiator outlets. A little bit from the engine exhausts. 400 Squadron only used Mosquitos from December '43 until May '44, flying only 43 operational sorties between the beginning of March and May 2nd 1944. There likely wasn't too much weathering, as evidenced by this prototype photo of MM307 (top photo): https://boxartden.com/reference/gallery/var/albums/Aircam-Aviation-Series/De-Havilland-Mosquito/28 De Havilland Mosquito_Page_24-960.jpg?m=1608648871 I think my model captures it fairly well when viewed from the same (similar) angle: Thanks again to everyone who has been following along and providing kind comments, feedback and "likes"! I have yet to decide what I'm going to build next, I have a few options in the stash to consider! Andy
-
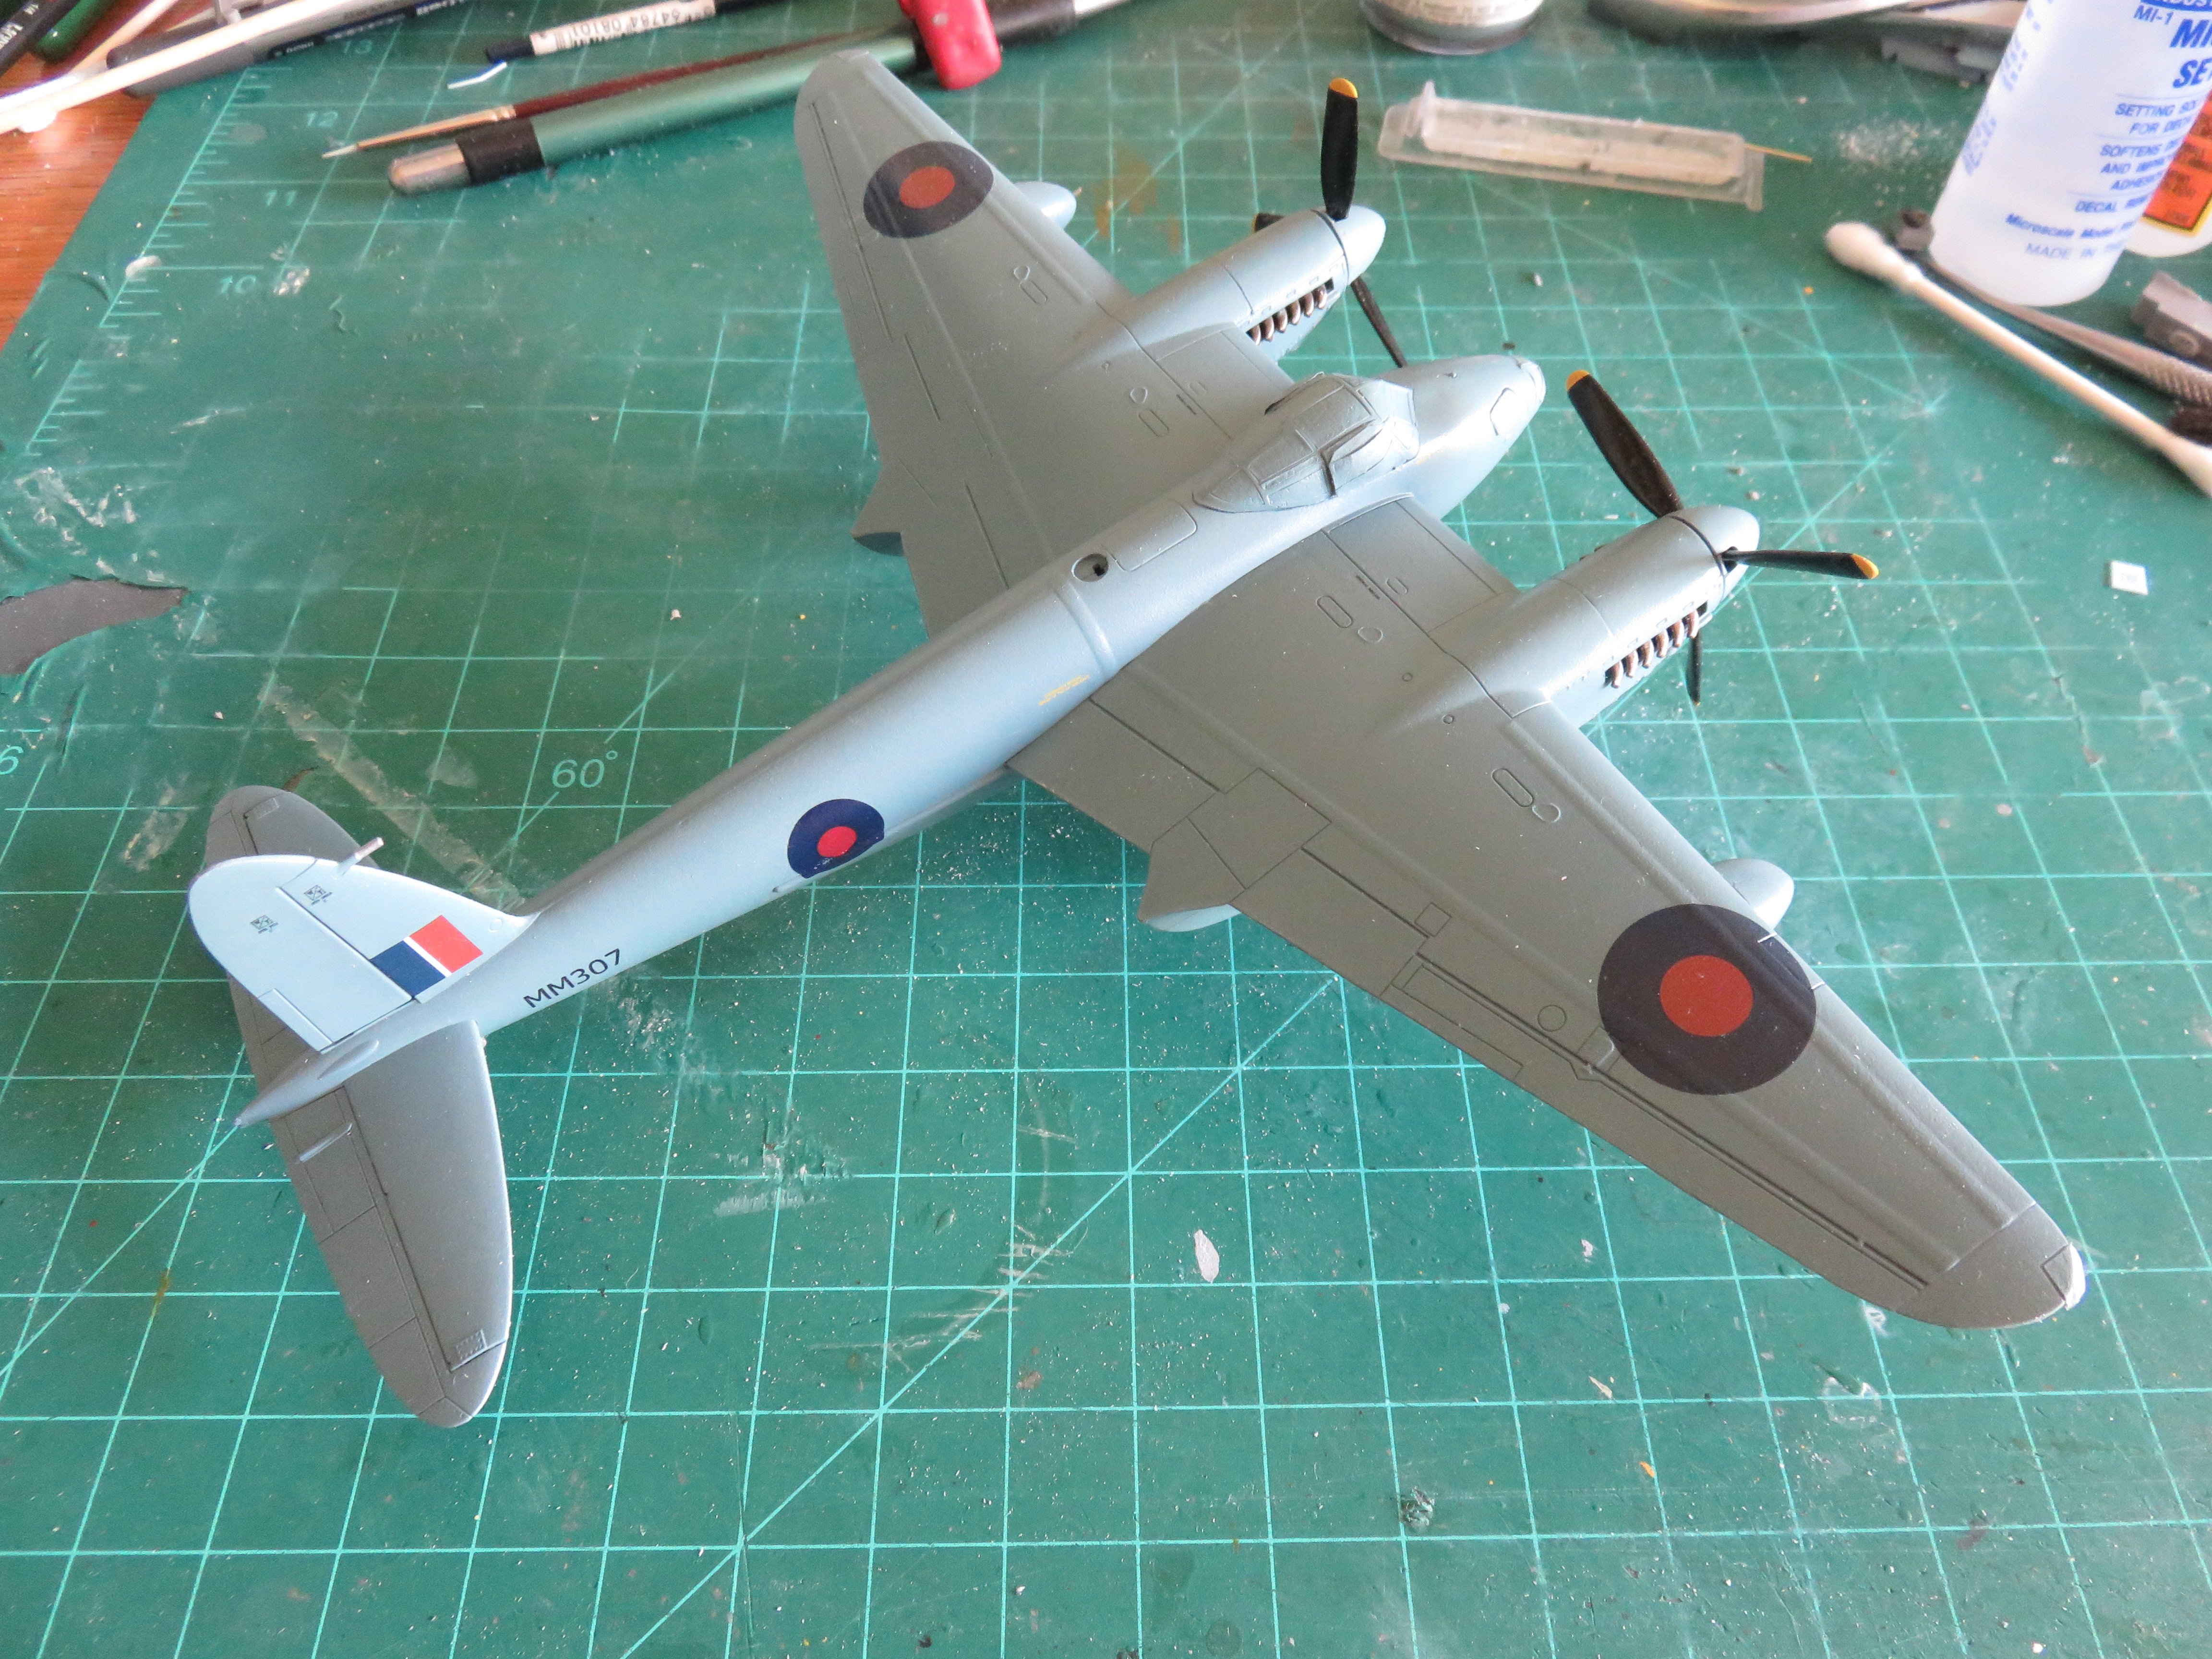
Thanks, everyone, for your kind comments and "likes". Although the build log has been quiet, I have been busy over the last couple of weeks, in between all the other spring chores that need attending to. A sign that my hobby season is drawing close to its seasonal hiatus! Anyway, after my usual gloss coat, the decals were added. I cobbled together what I needed from the kit decals, as well as some leftover roundels from an Xtradecal set I had on hand. The registration numbers I made myself using some decal paper and my laser printer. After 400 Squadron was reassigned as a photo recce unit, they no longer sported unit identification letters on their airplanes. This definitely simplified the decal process. I also decided to forgo a larger number of the stencils that Airfix provided with the kit. I kept the larger, more obvious ones, but omitted the smaller, less visible ones. I find at this scale, they begin to look more like specifically placed (forgotten?) specks of dirt, rather than any kind of warning or marking. Landing gear was next. Fairly straight forward using the CMK wheel sets. Following this, I decided to try a panel wash, since there really weren't too many panel lines.I used a home made wash of black acrylic paint diluted heavily with acrylic thinner. Once dry, a layer of Dullcote was sprayed on to seal everything in place and the window masks have come off: Overall, I'm happy with the results so far. Up next some pastel weathering to add some more wear and tear, exhaust stains and the like. Thanks again, everyone! Andy


-
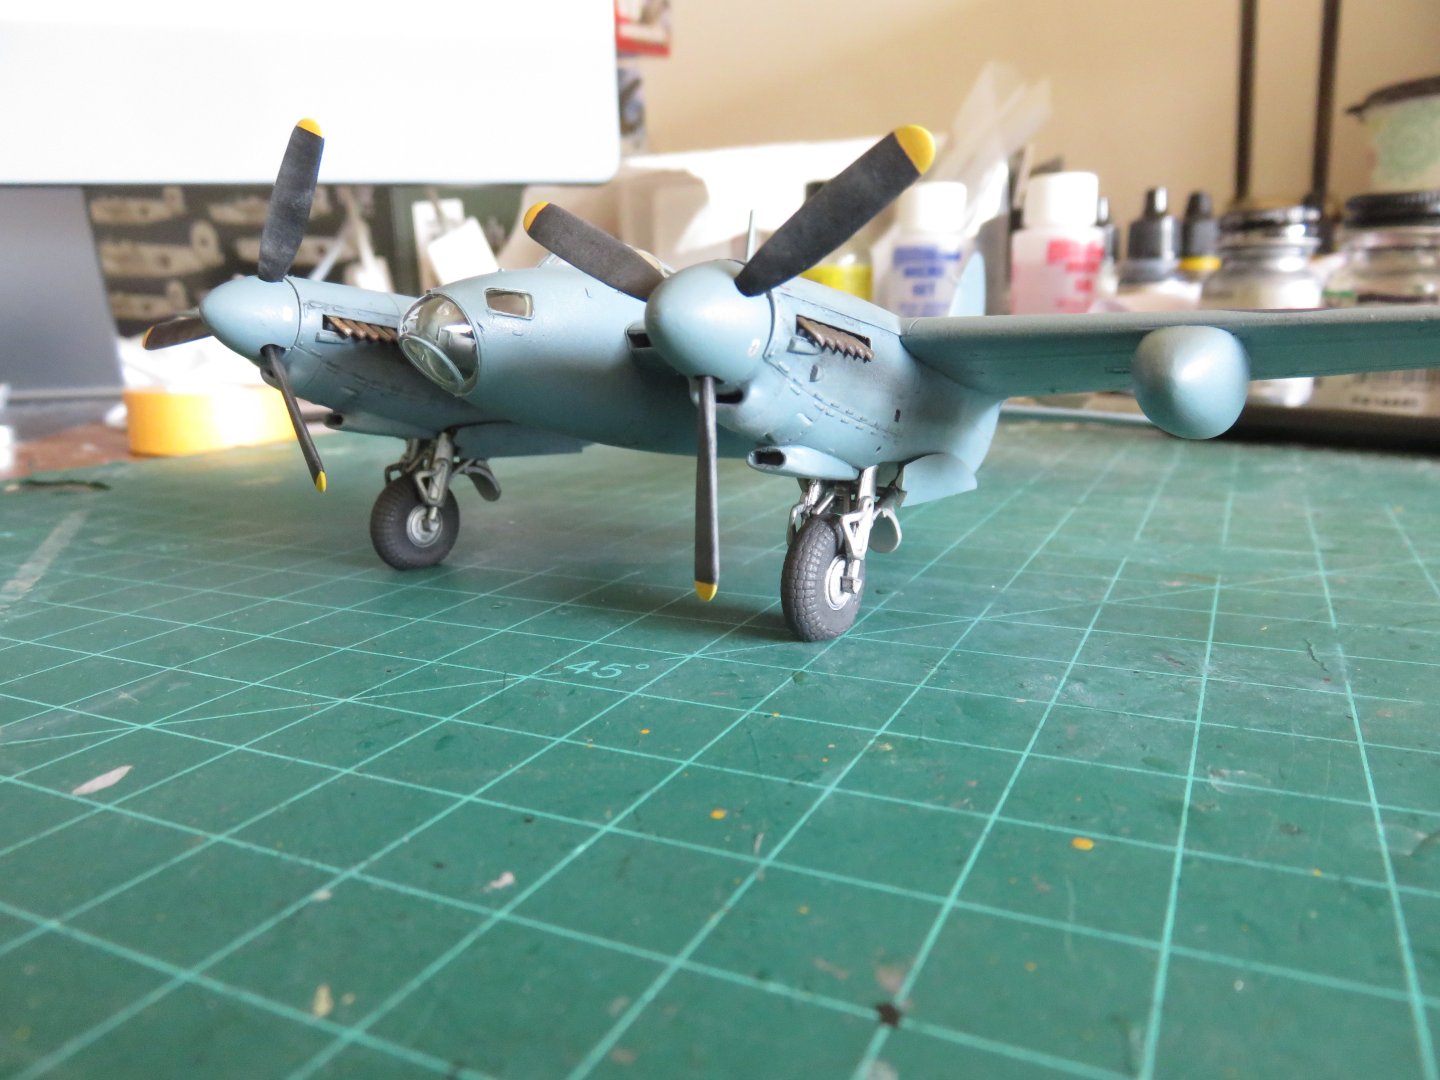
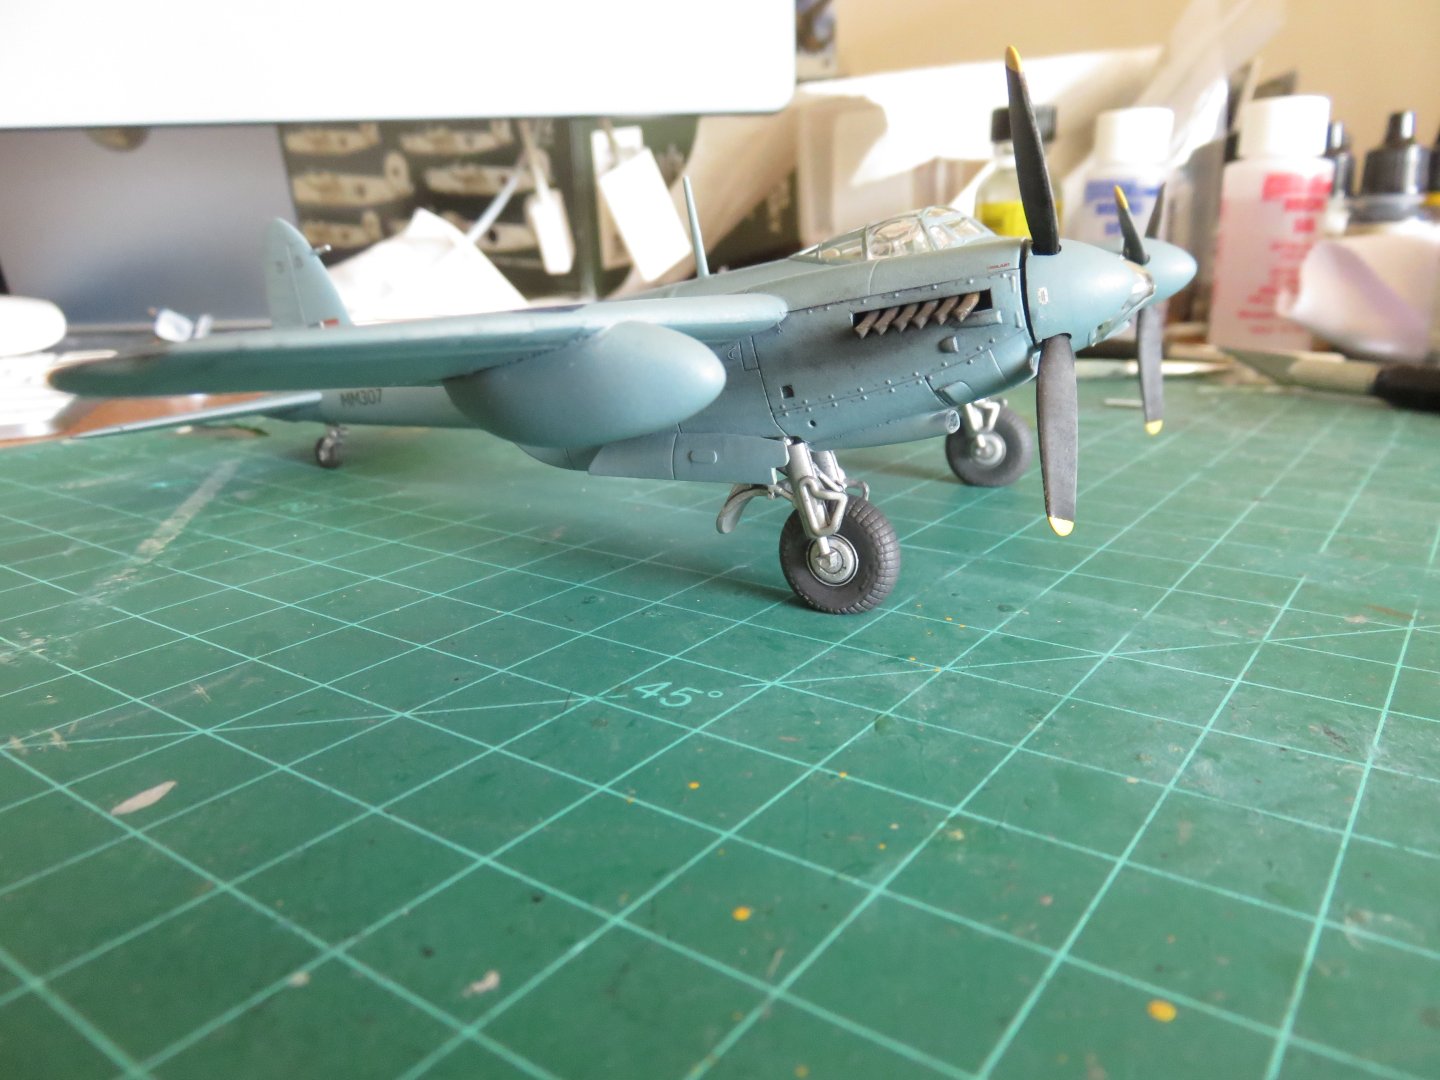
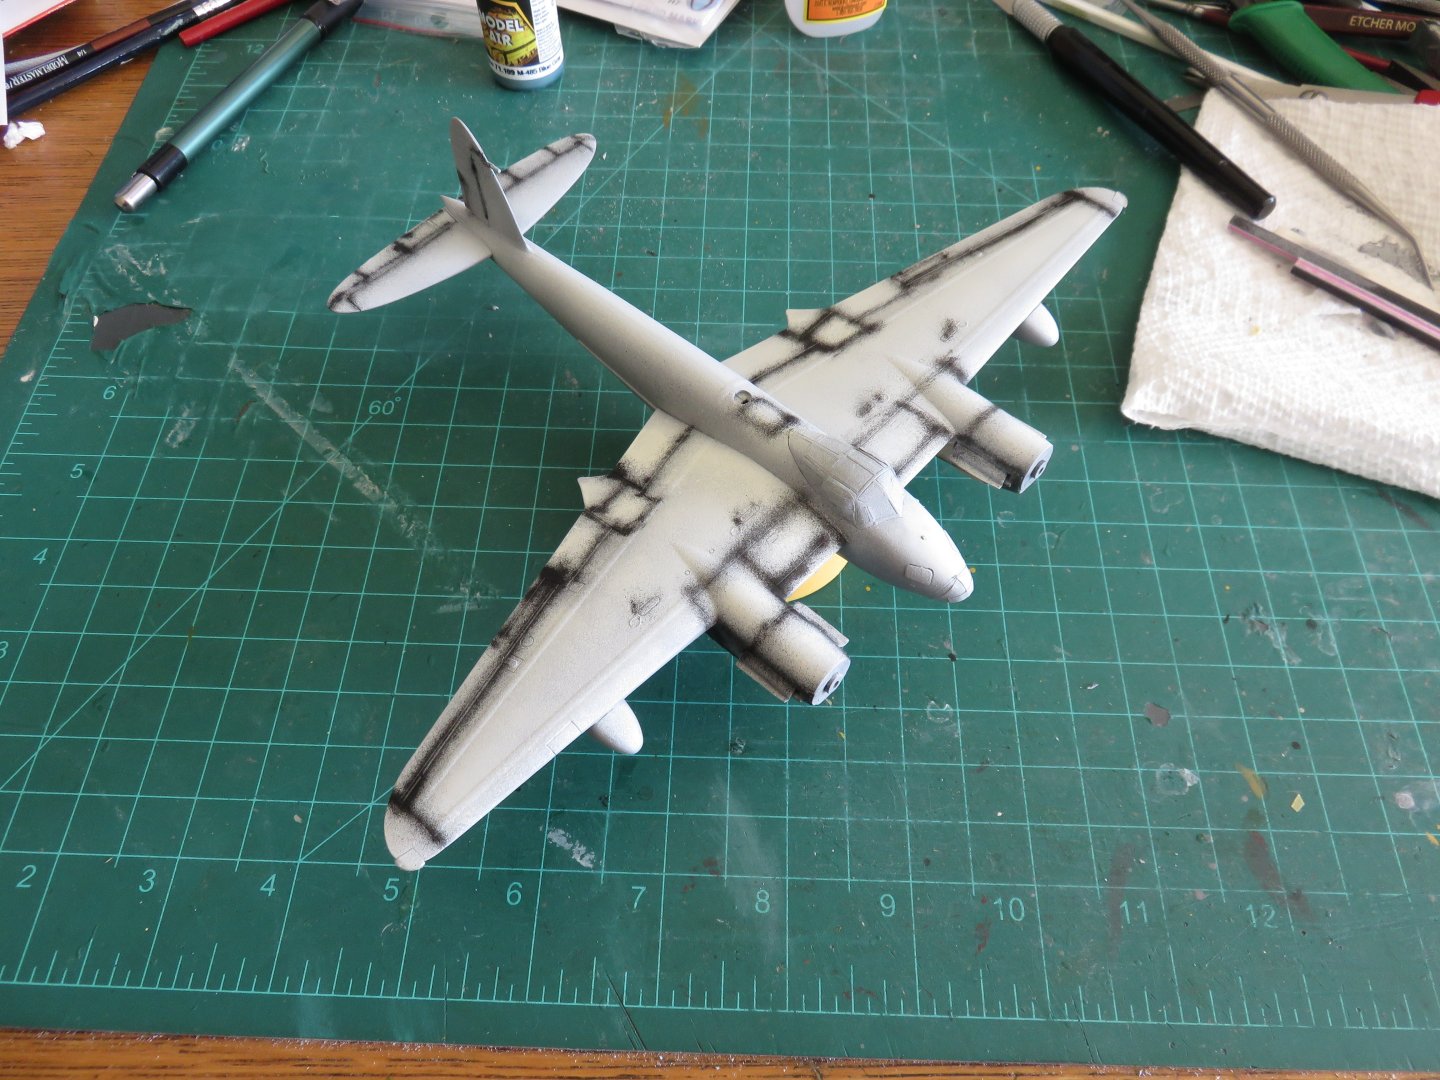
Thanks, everyone, for the likes! Well, it's now a blue airplane! The presiding worked only in a couple of places, obviously my technique needs some practice, but I'm still happy that I tried. I applied a second thin coat on the upper surfaces only, but for this coat I added a few drops of white to lighten the Faded PRU blu even further. The camera doesn't pick it up very well, but there is a subtle difference in the upper and lower surfaces. Overall I'm happy with the results. Andy


-
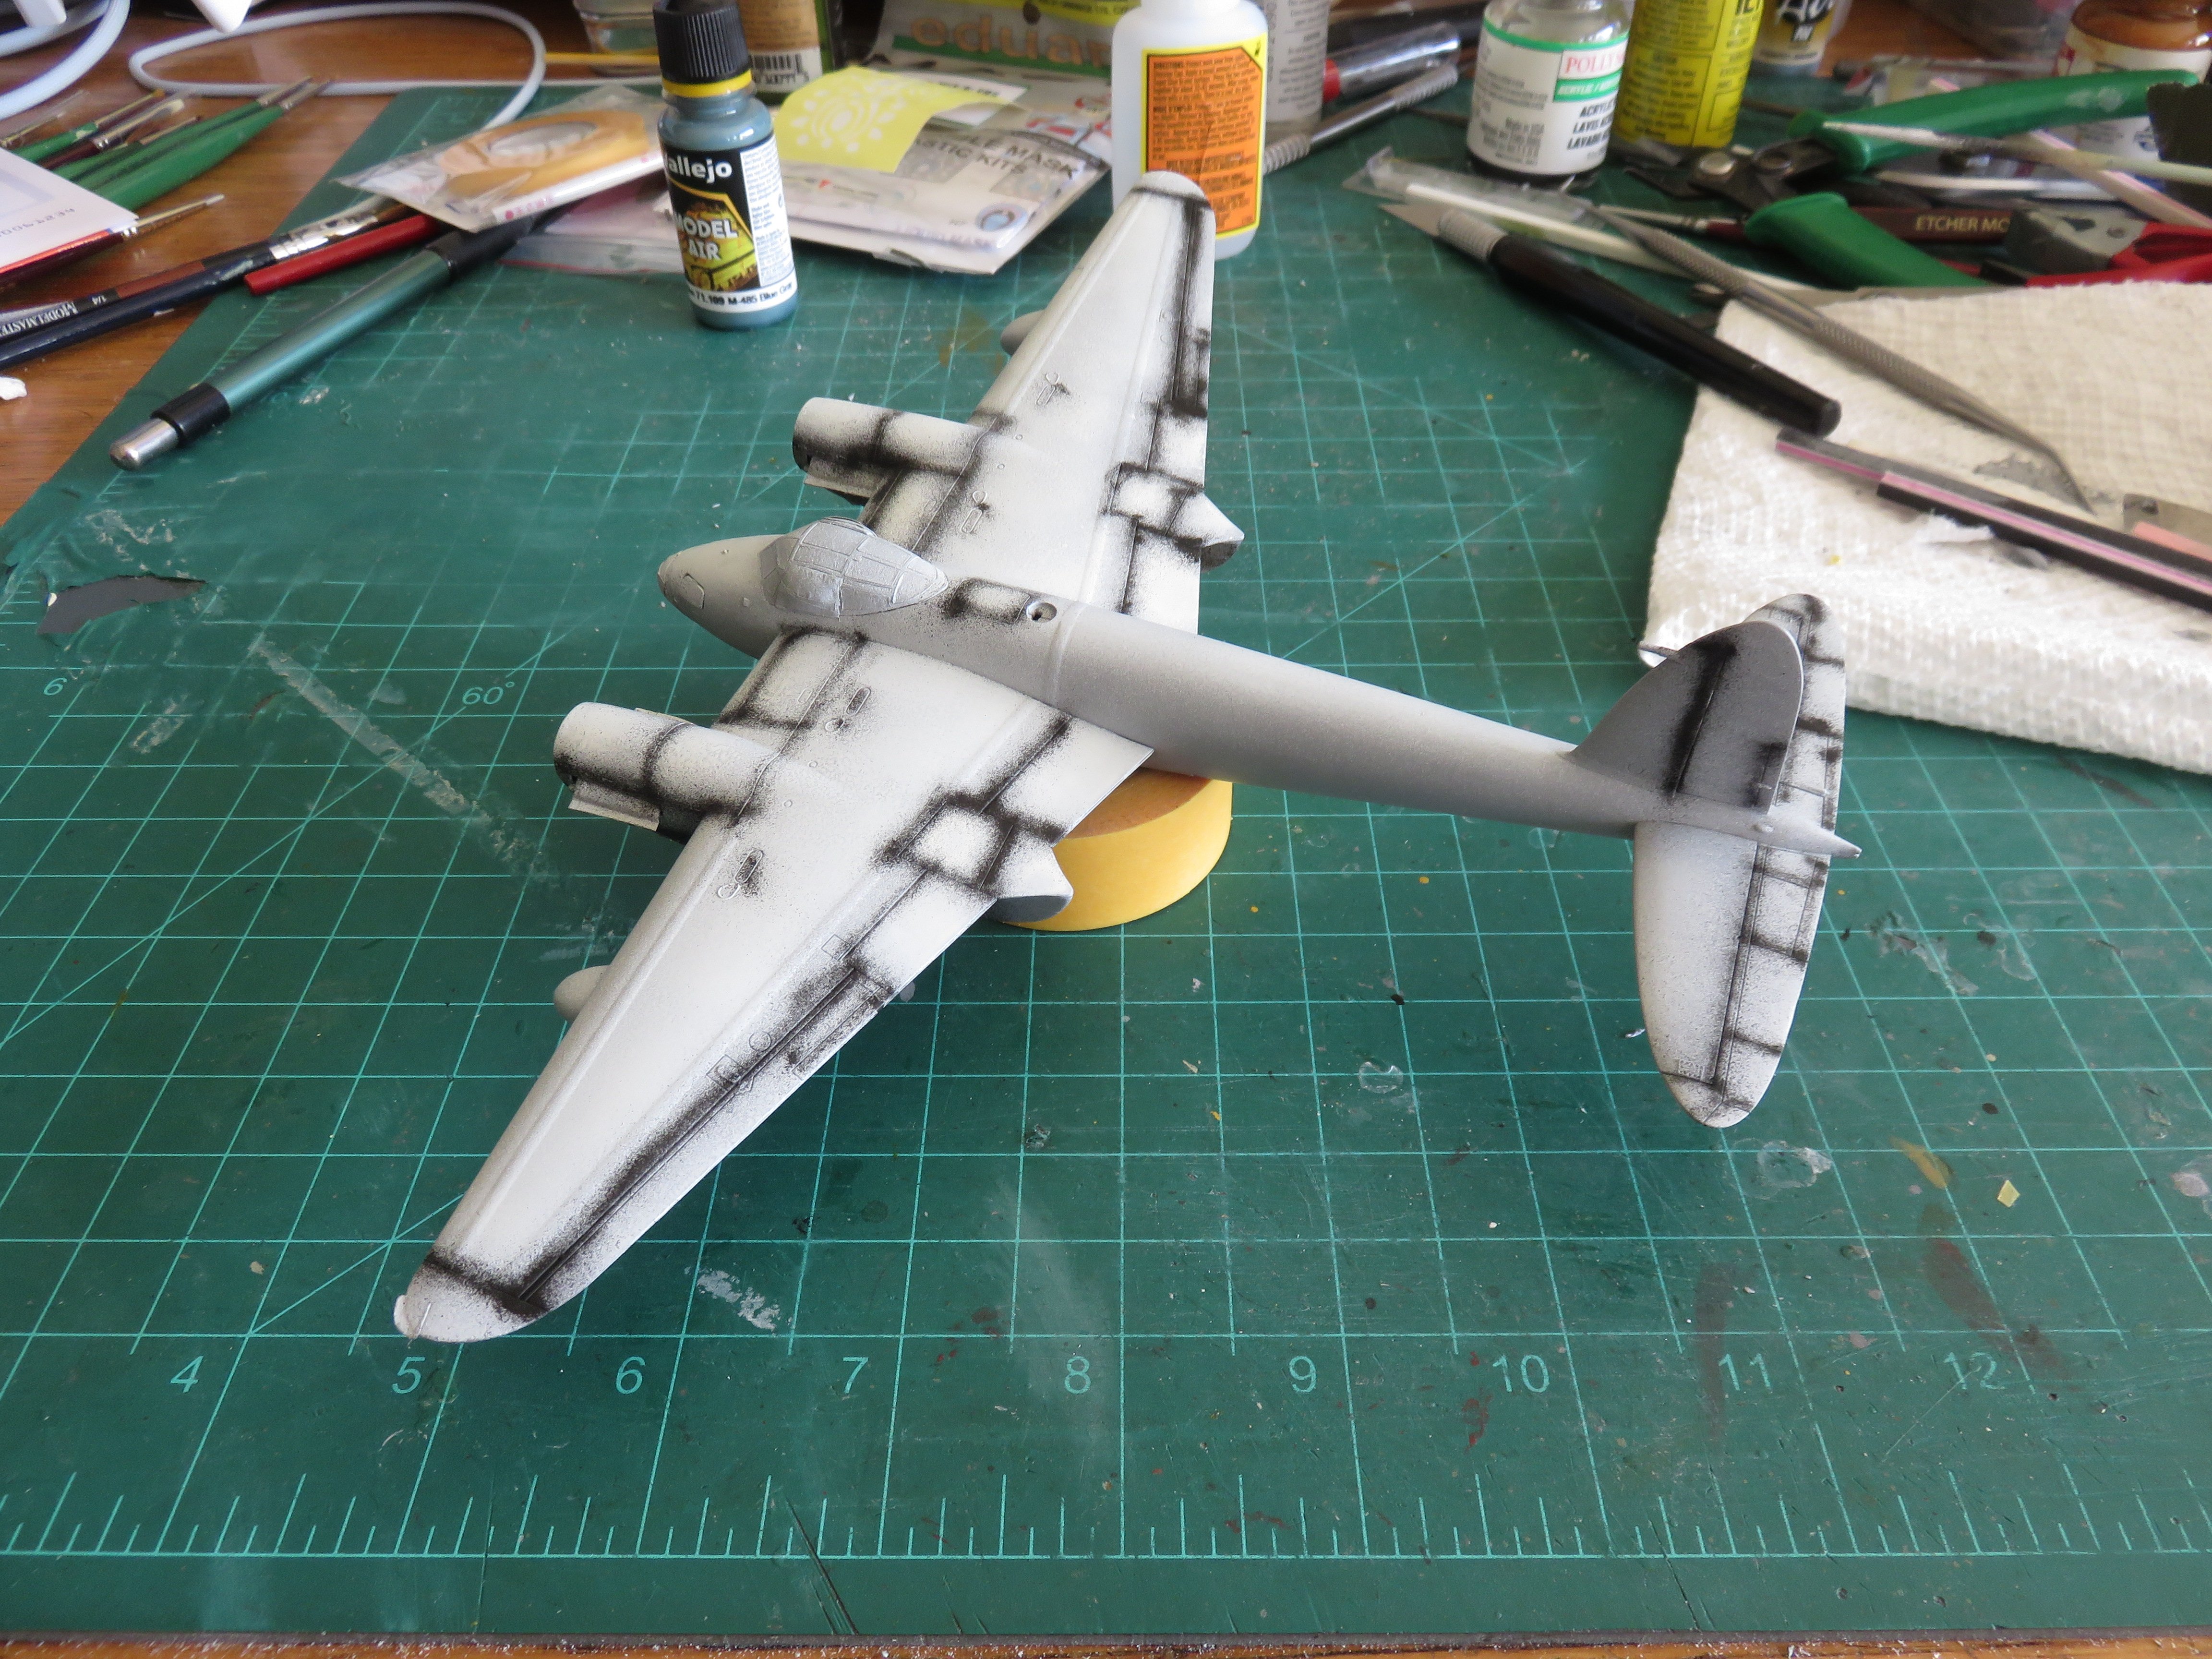
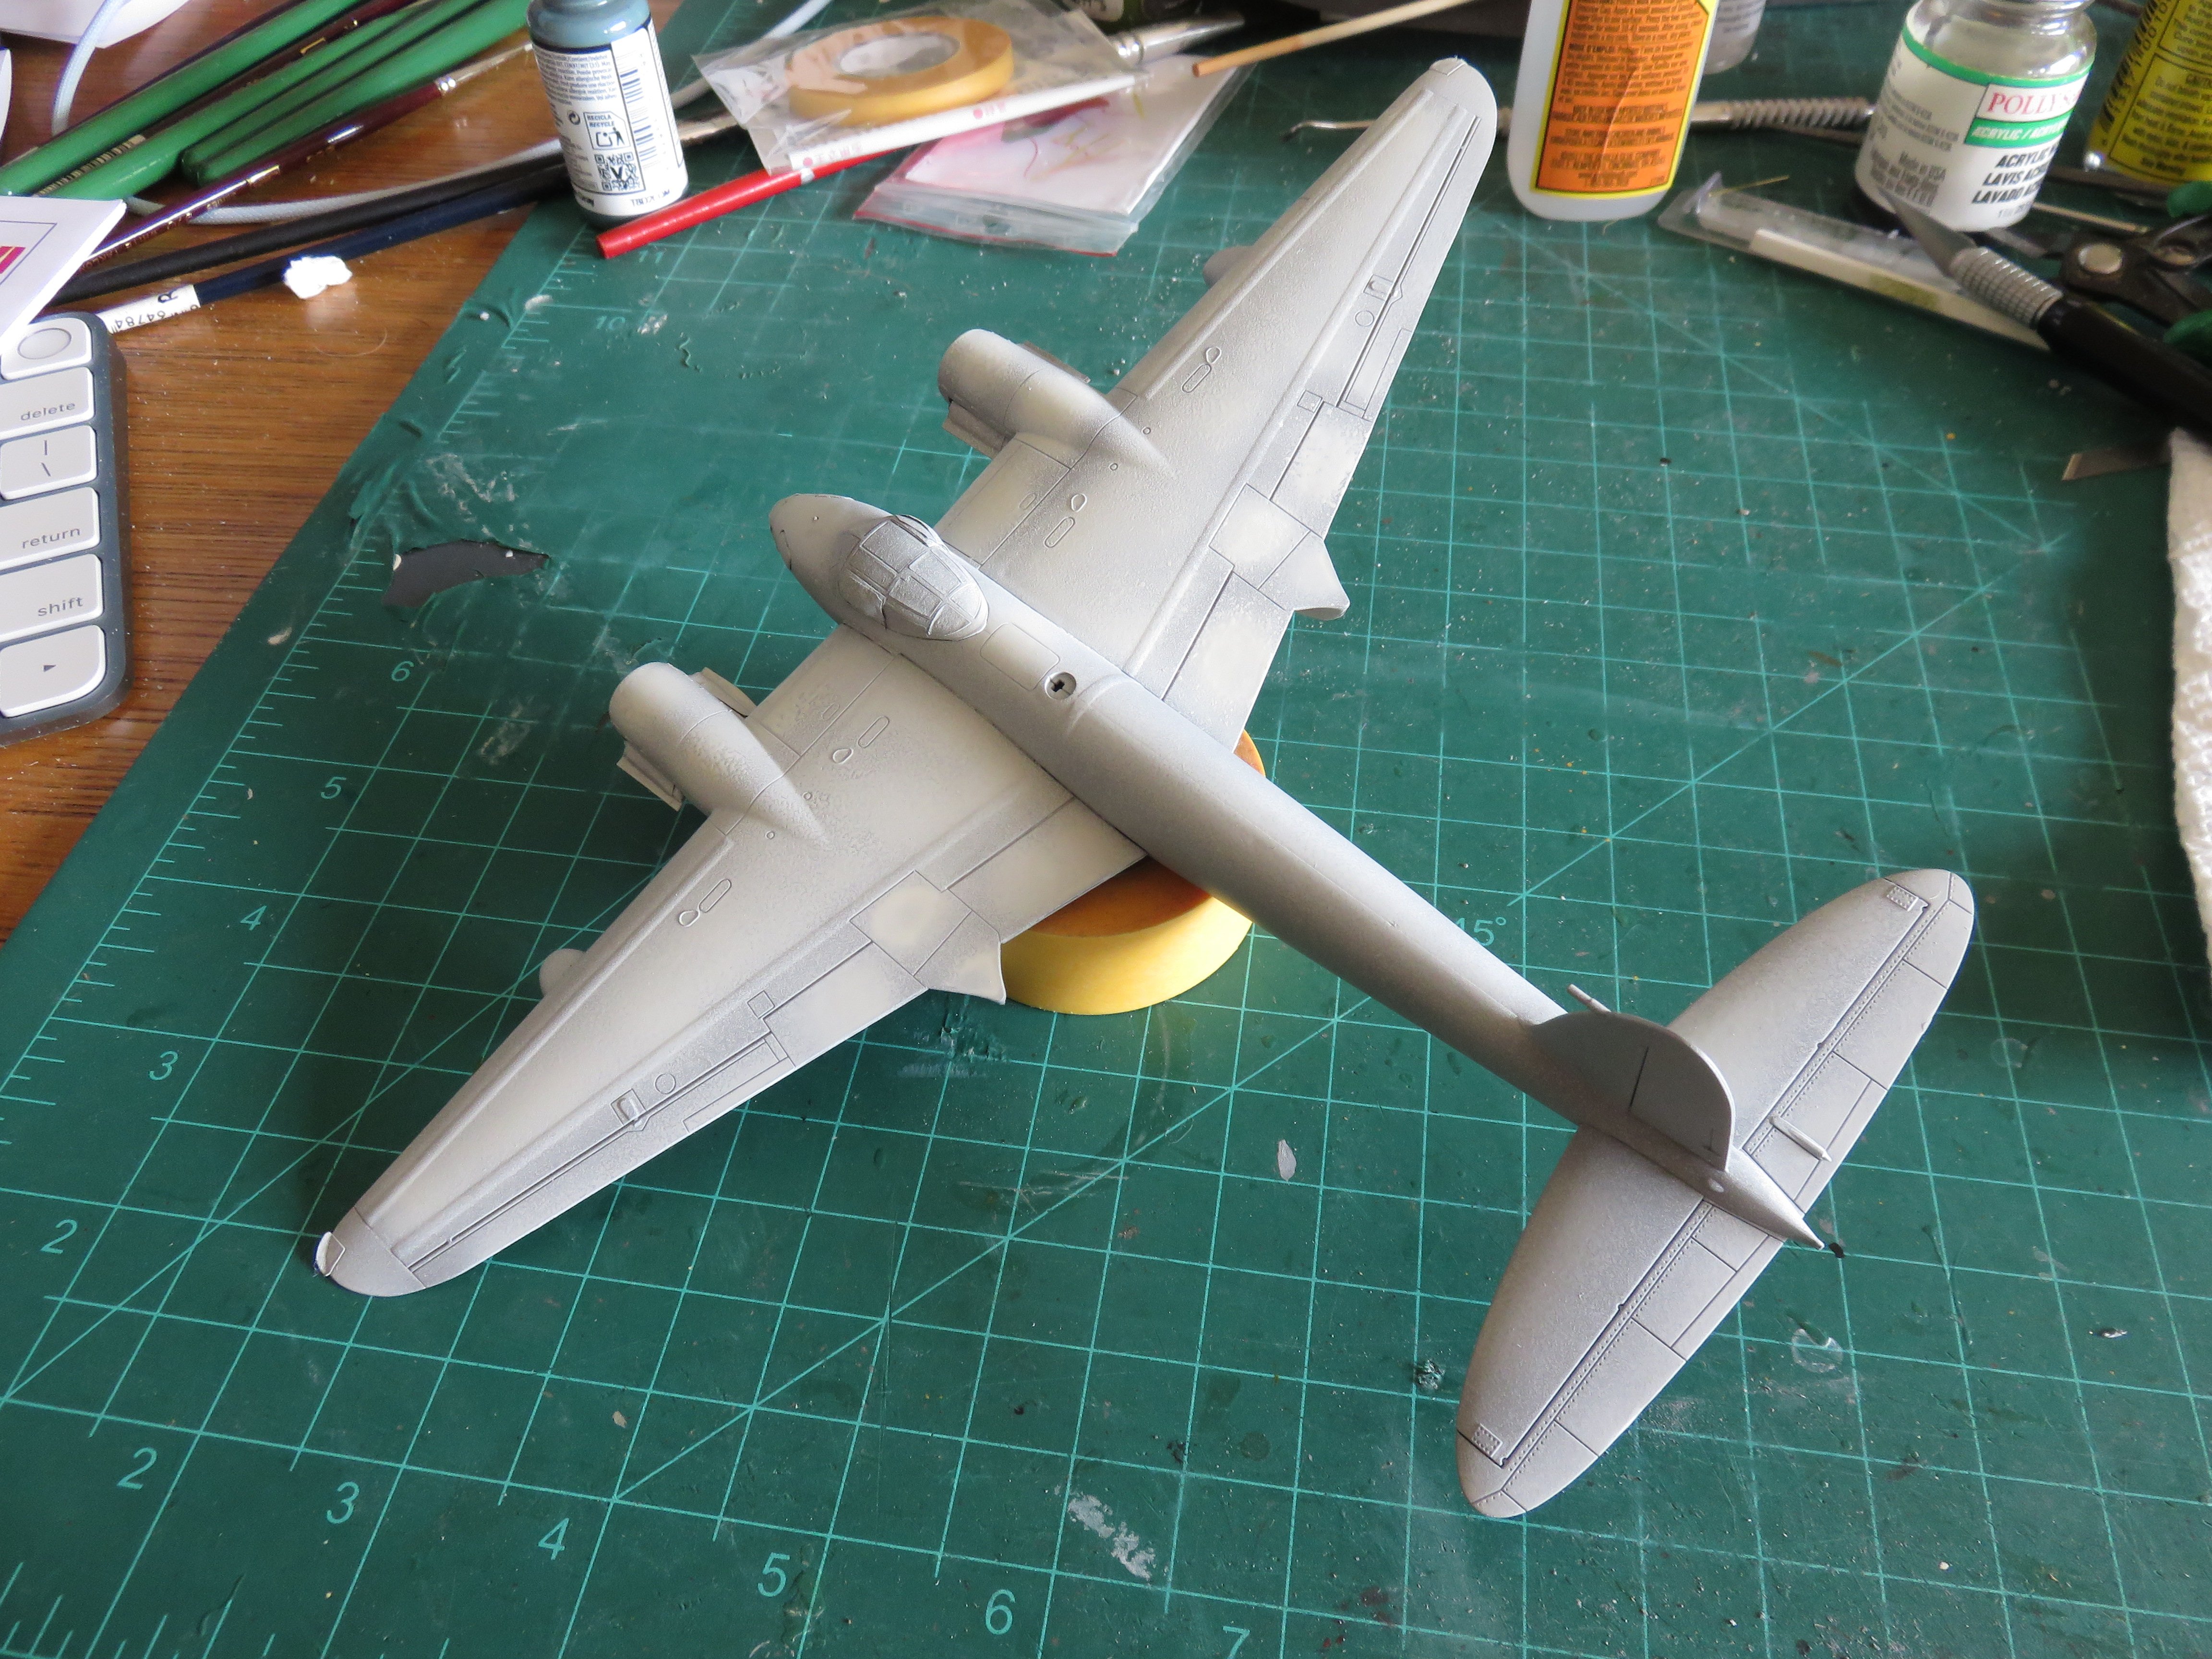
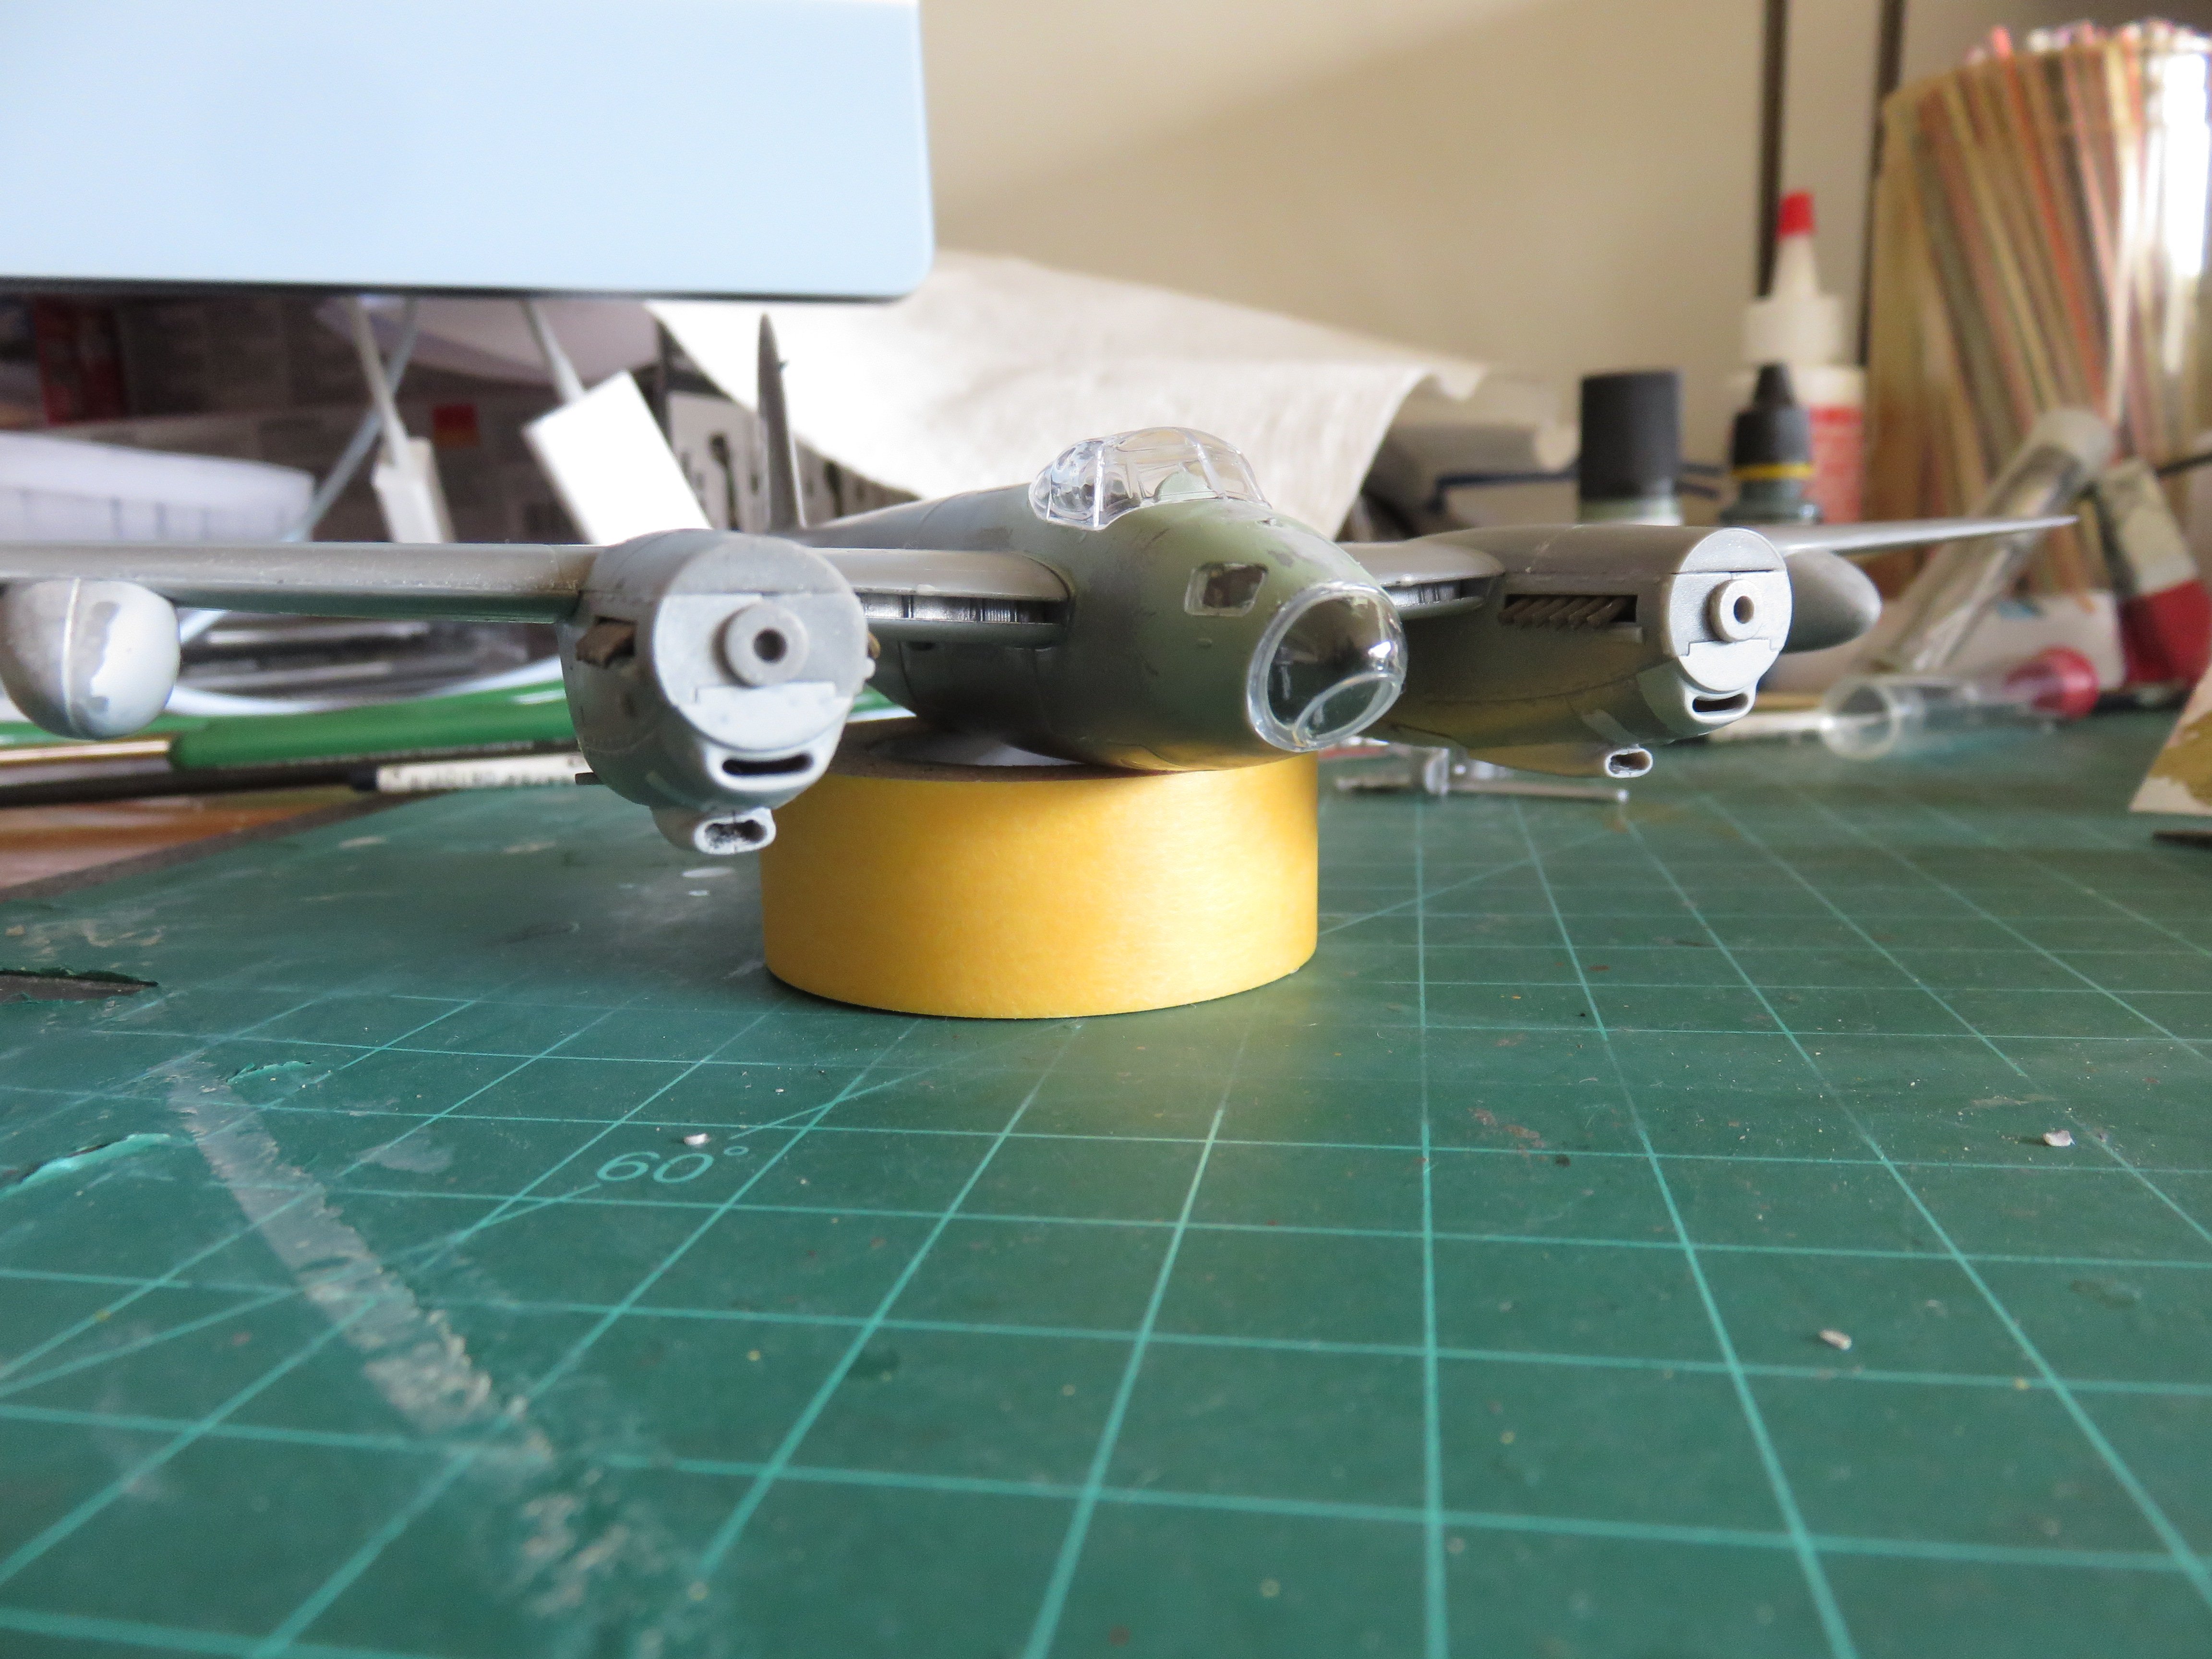
Finally some actual progress to report! The mask set did the trick. For what it's worth, it does save a lot of hassle when dealing with more complicated windows, plus all of the camera windows on the fuselage! The Eduard mask set recommends using liquid mask for the blister windows and the infill around the nose glass, but I managed well enough with bits of Tamiya tape. Time for paint! After a coat of Tamiya grey primer, I hit the upper surfaces with a deliberately blotchy coat of white: This will be my first full attempt at pre-shading, so bear with me as I figure things out! I'm pretty sure even the "Faded PRU blue" that I have from Vallejo isn't nearly "faded" enough, hopefully this will help with the mottling/fading yet to come! Next up I gave a go at hitting the panel lines on both the top and bottom. The bottom didn't turn out quite as well as the top, so I;'m only going to show that after I've added the PRU blue! A bit of learning curve with my own airbrush, as I've never tried this technique before. I think the mosquito is a good one to try as there aren't that many panel lines to begin with. Overall, once I figured things out, I'm pleased with the results so far. Next up, it will be time for the PRU Blue. Thanks for all the "likes"! Andy


-
The current list of items can be found here: https://www.canada.ca/en/department-finance/news/2025/03/list-of-products-from-the-united-states-subject-to-25-per-cent-tariffs-effective-march-4-2025.html A quick skim through the list and I found the following goods pertinent to model ship building are currently subject to 25% tariffs: •Wood strip, various species exceeding 6mm in thickness •MDF •Plywood •Various tools, hand and power, knives, blades etc. (consult list linked above for specifics) All other goods would be subject to the usual basic personal exemption in place prior to tariffs going into effect. Since most of Chuck’s wares could be considered as “Toys or Toy Parts” they are not yet subject to any tariffs, as far as I can see from the list. Keep in mind, as well, that the list applies only to goods originating from the US. Goods manufactured elsewhere, but subsequently sold from a US retailer would also not be subject to tariffs. As Chuck said, more tariffs could be coming, but the Canadian government should publish any updates. Andy
-
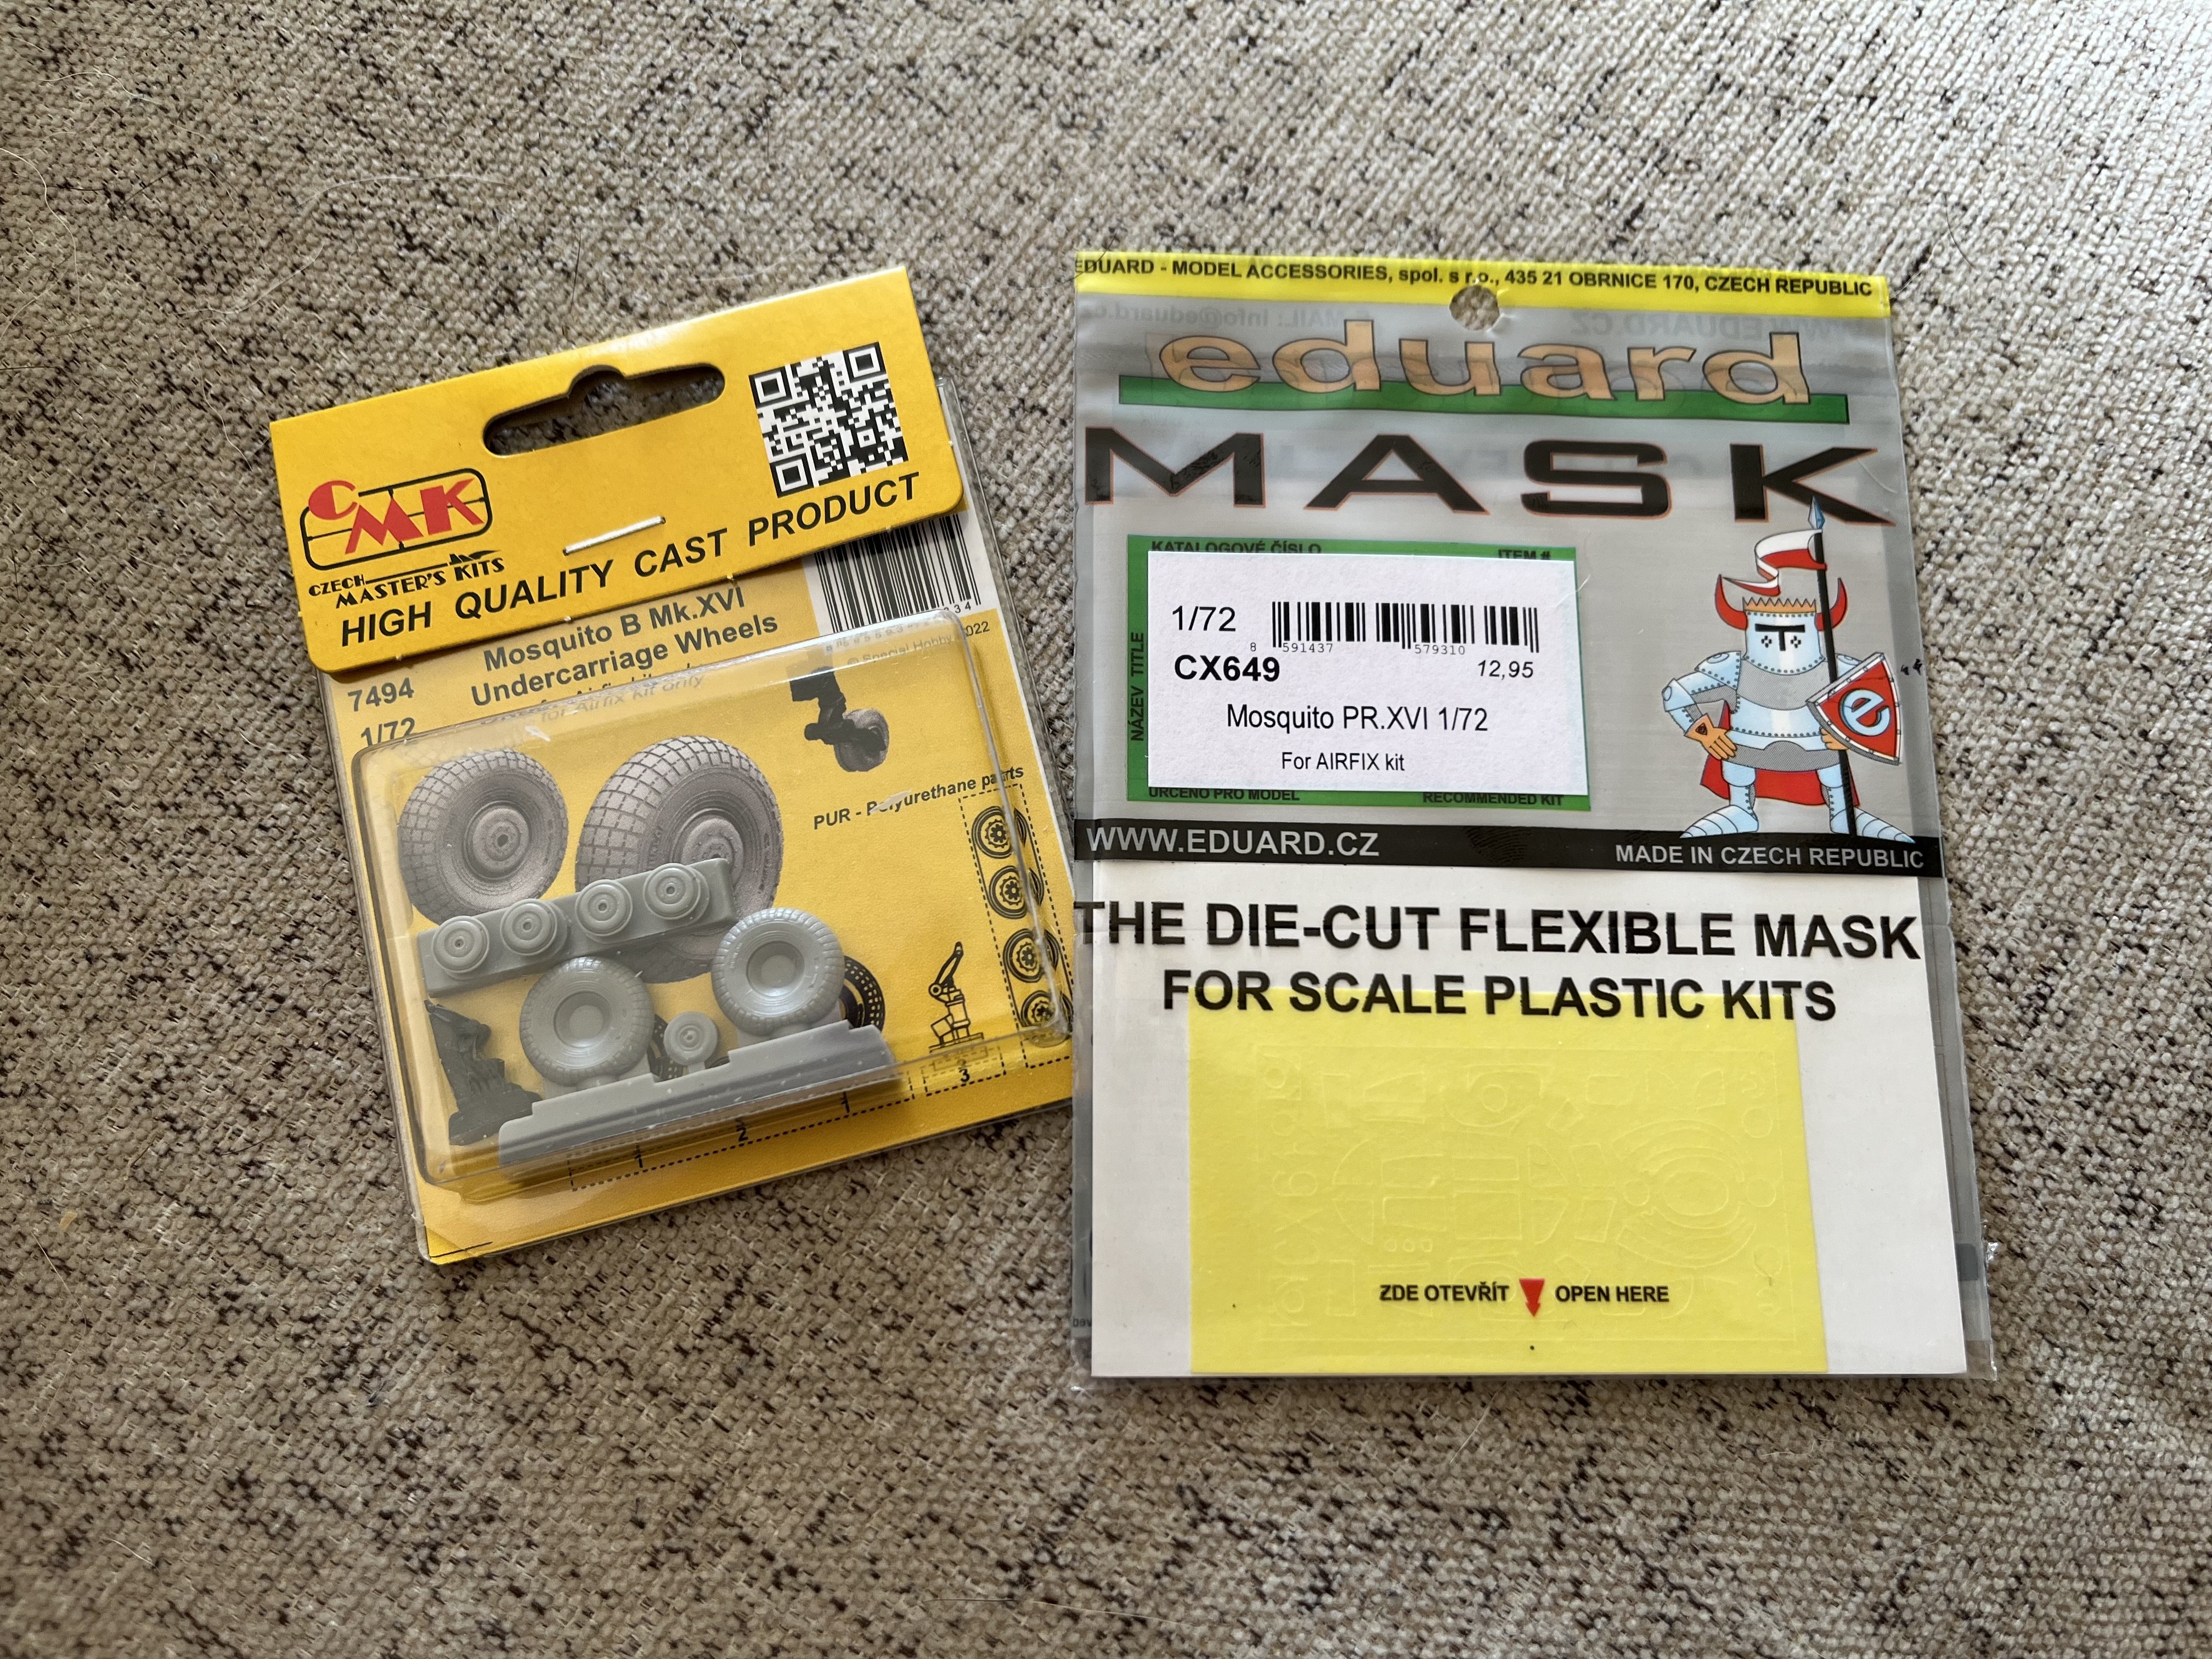
A few goodies arrived in the mail today! Among other things for other projects, a masking set and some resin wheels for my Mosquito. Work will be able to resume soon (but not today, the weather is too hot and muggy). Thanks for all your patience! Andy

-
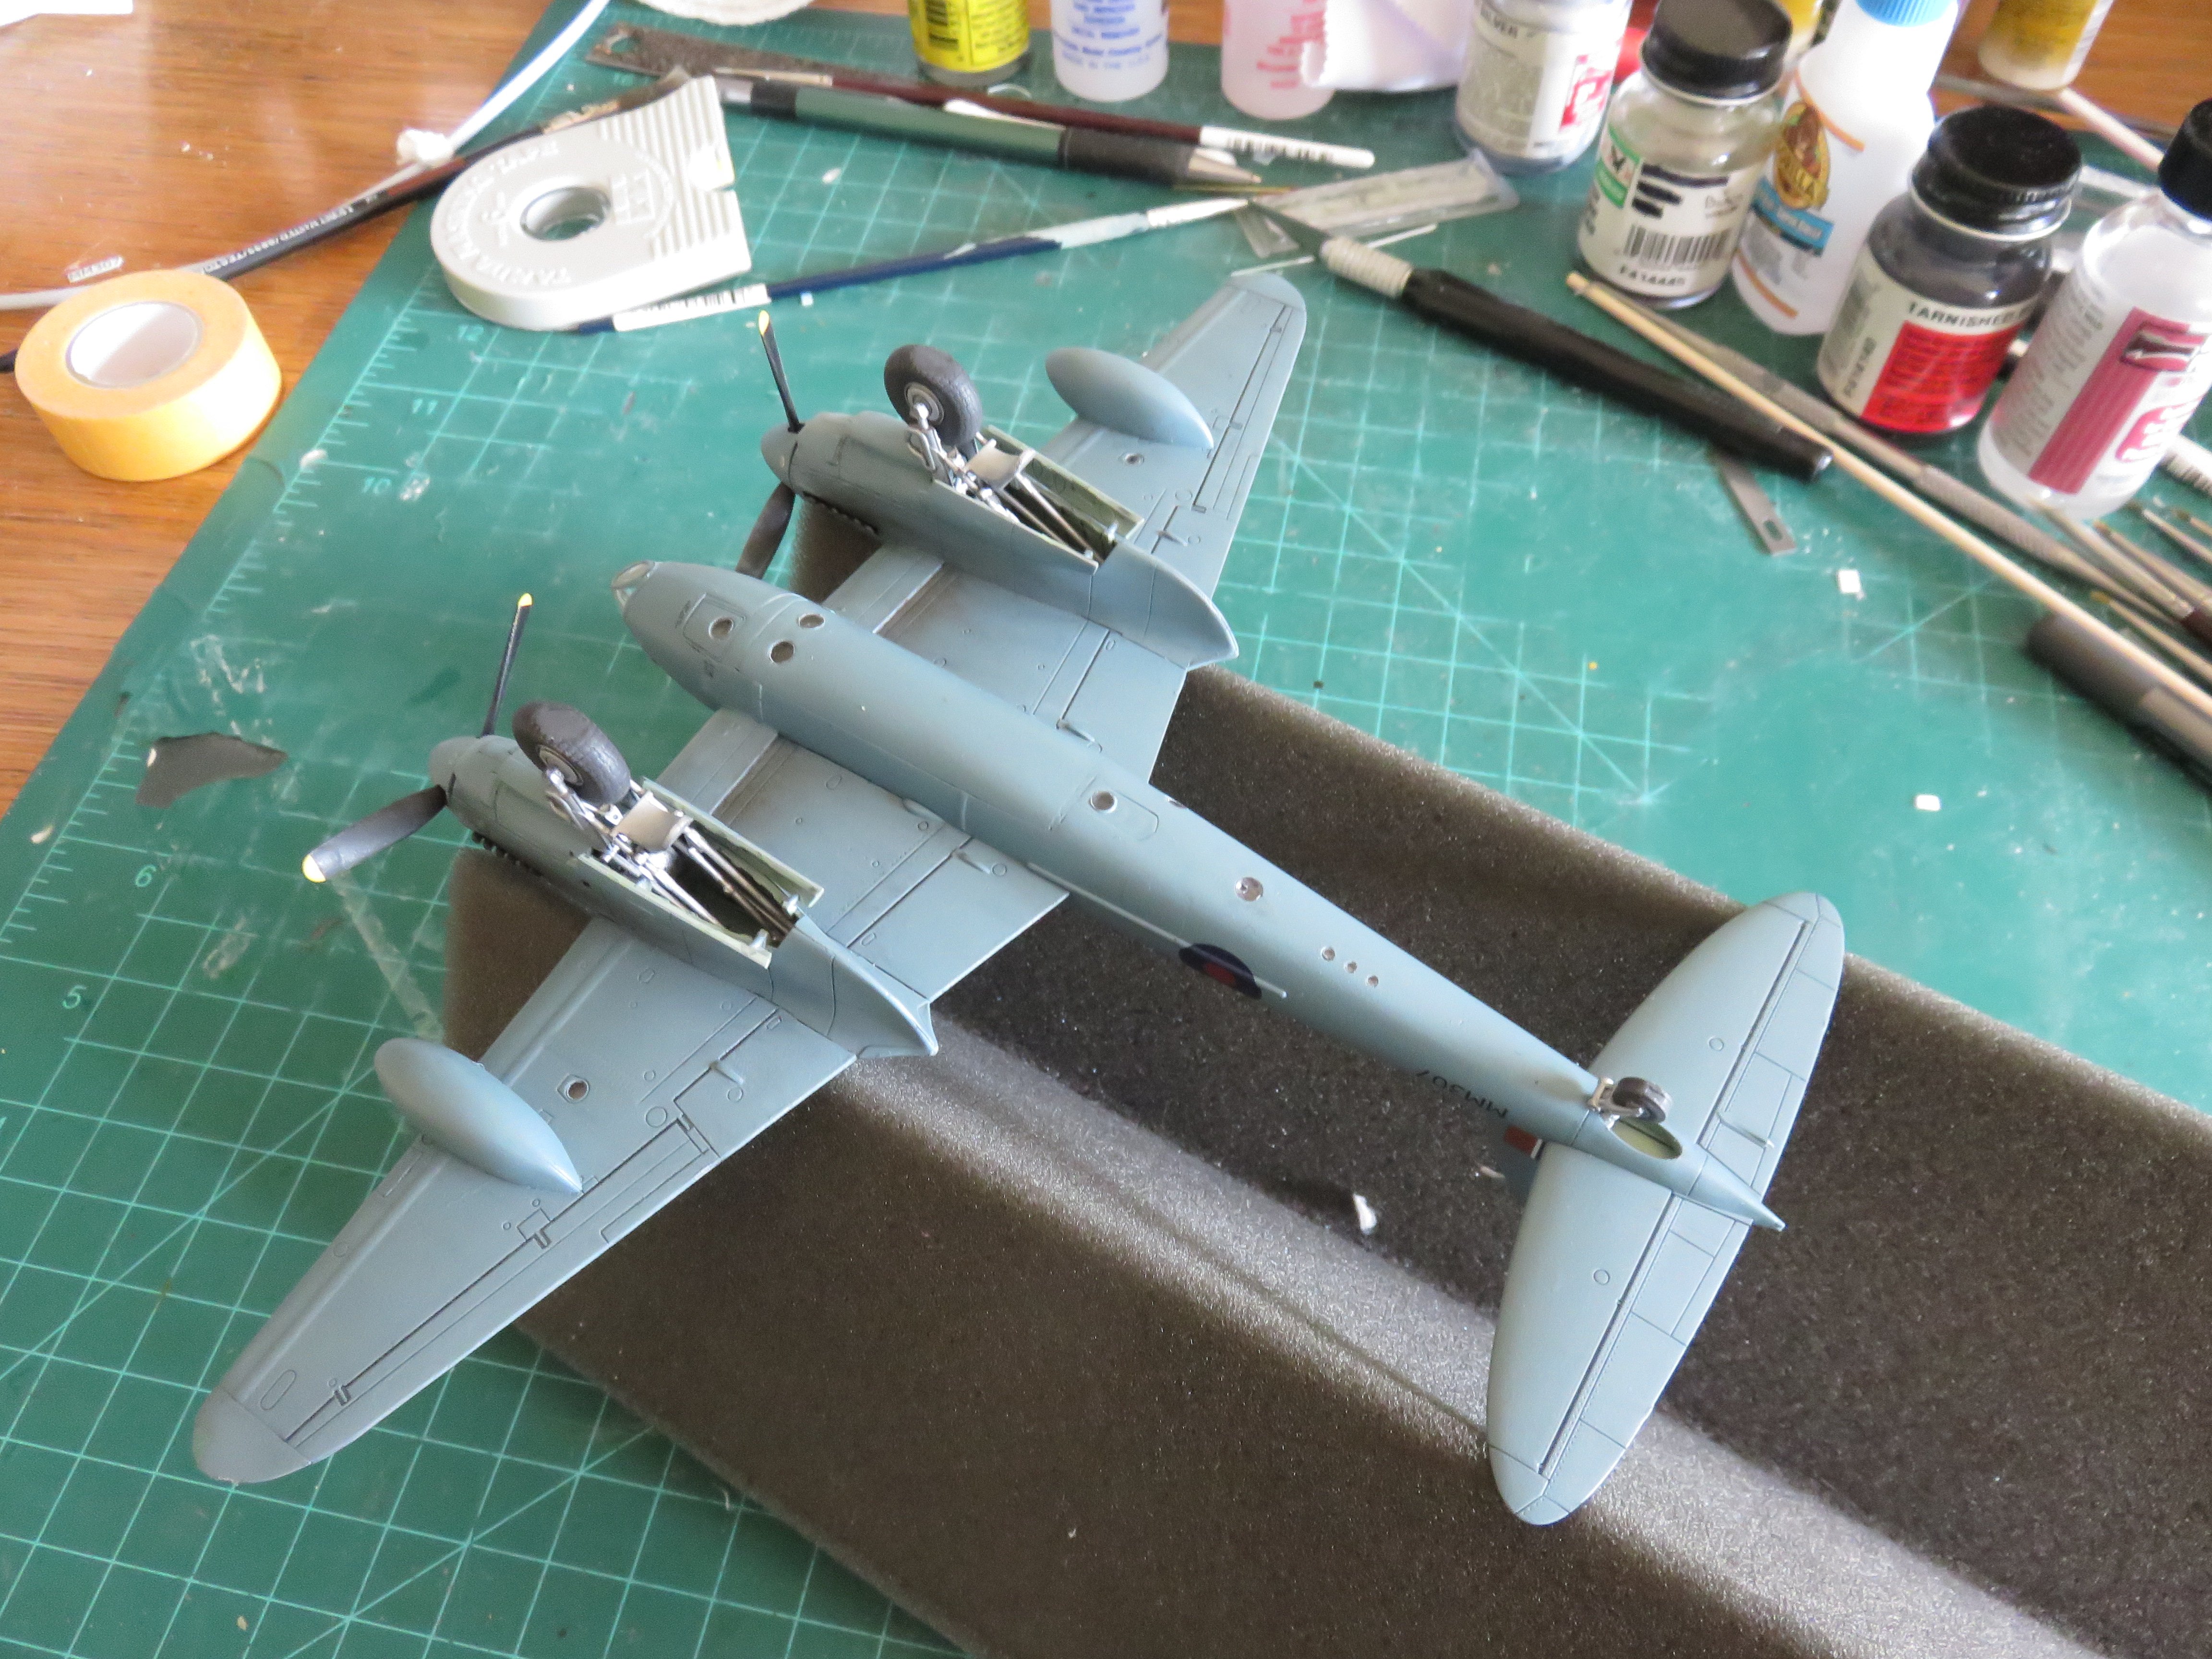
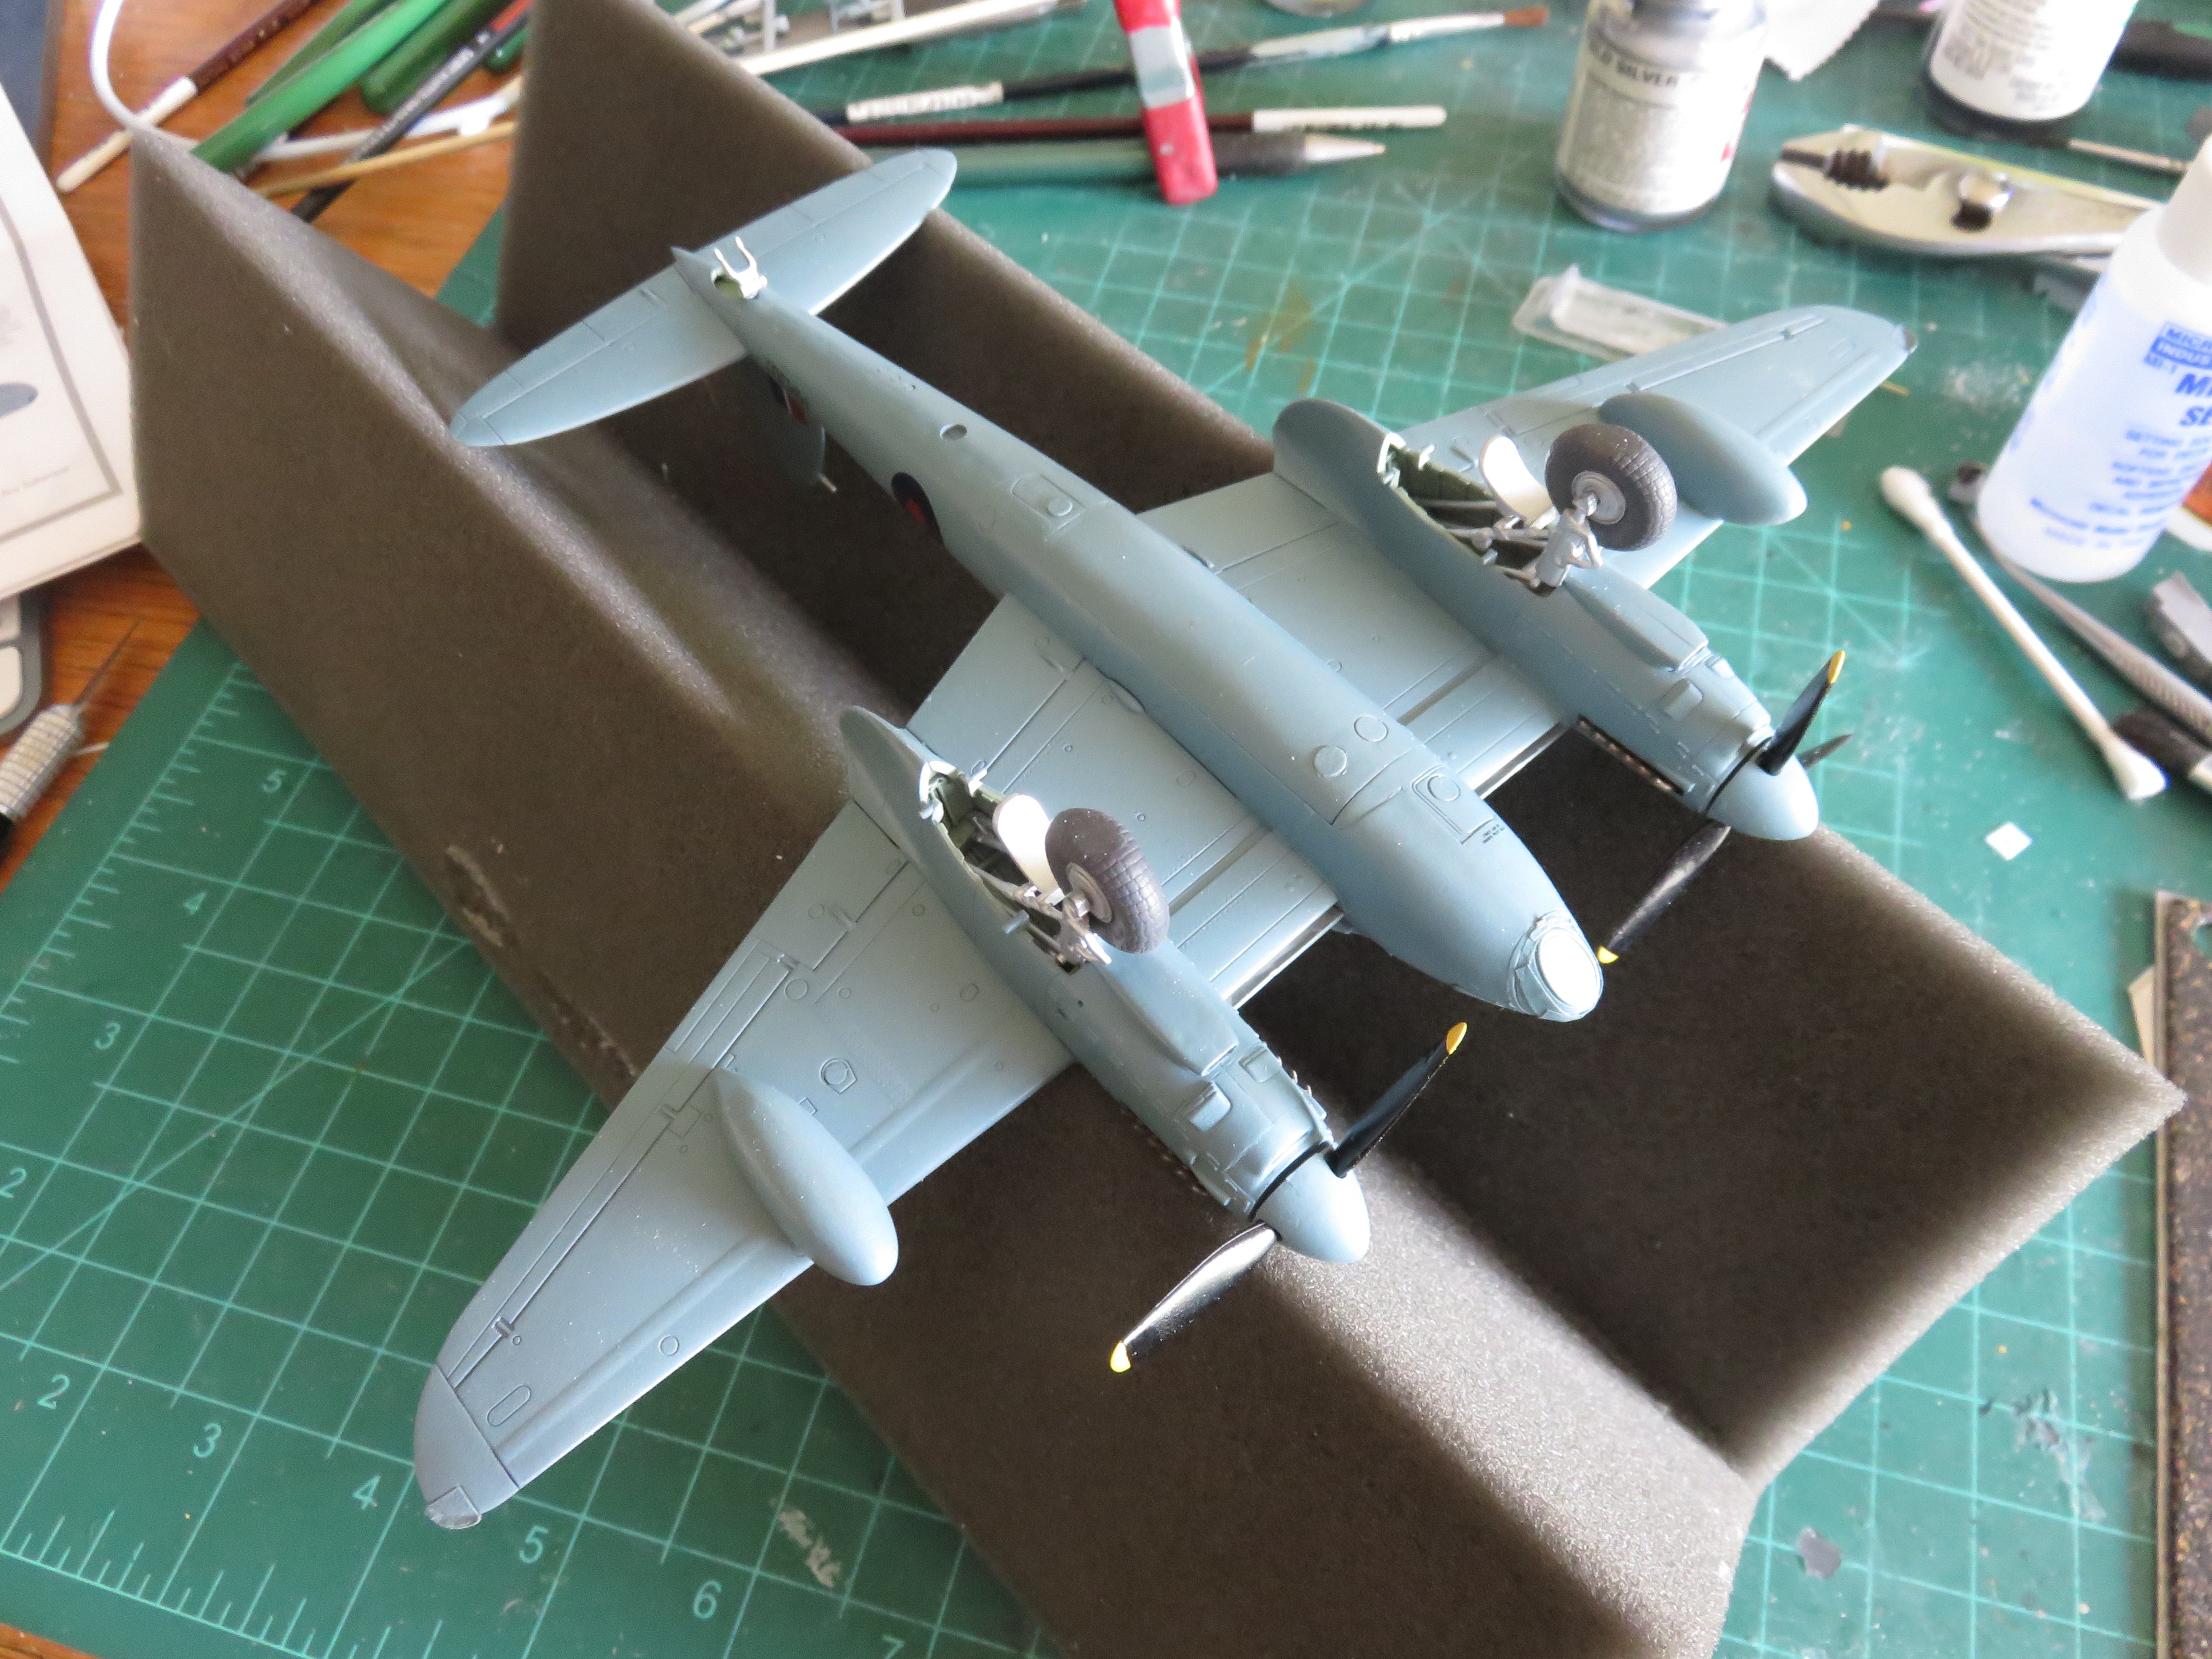
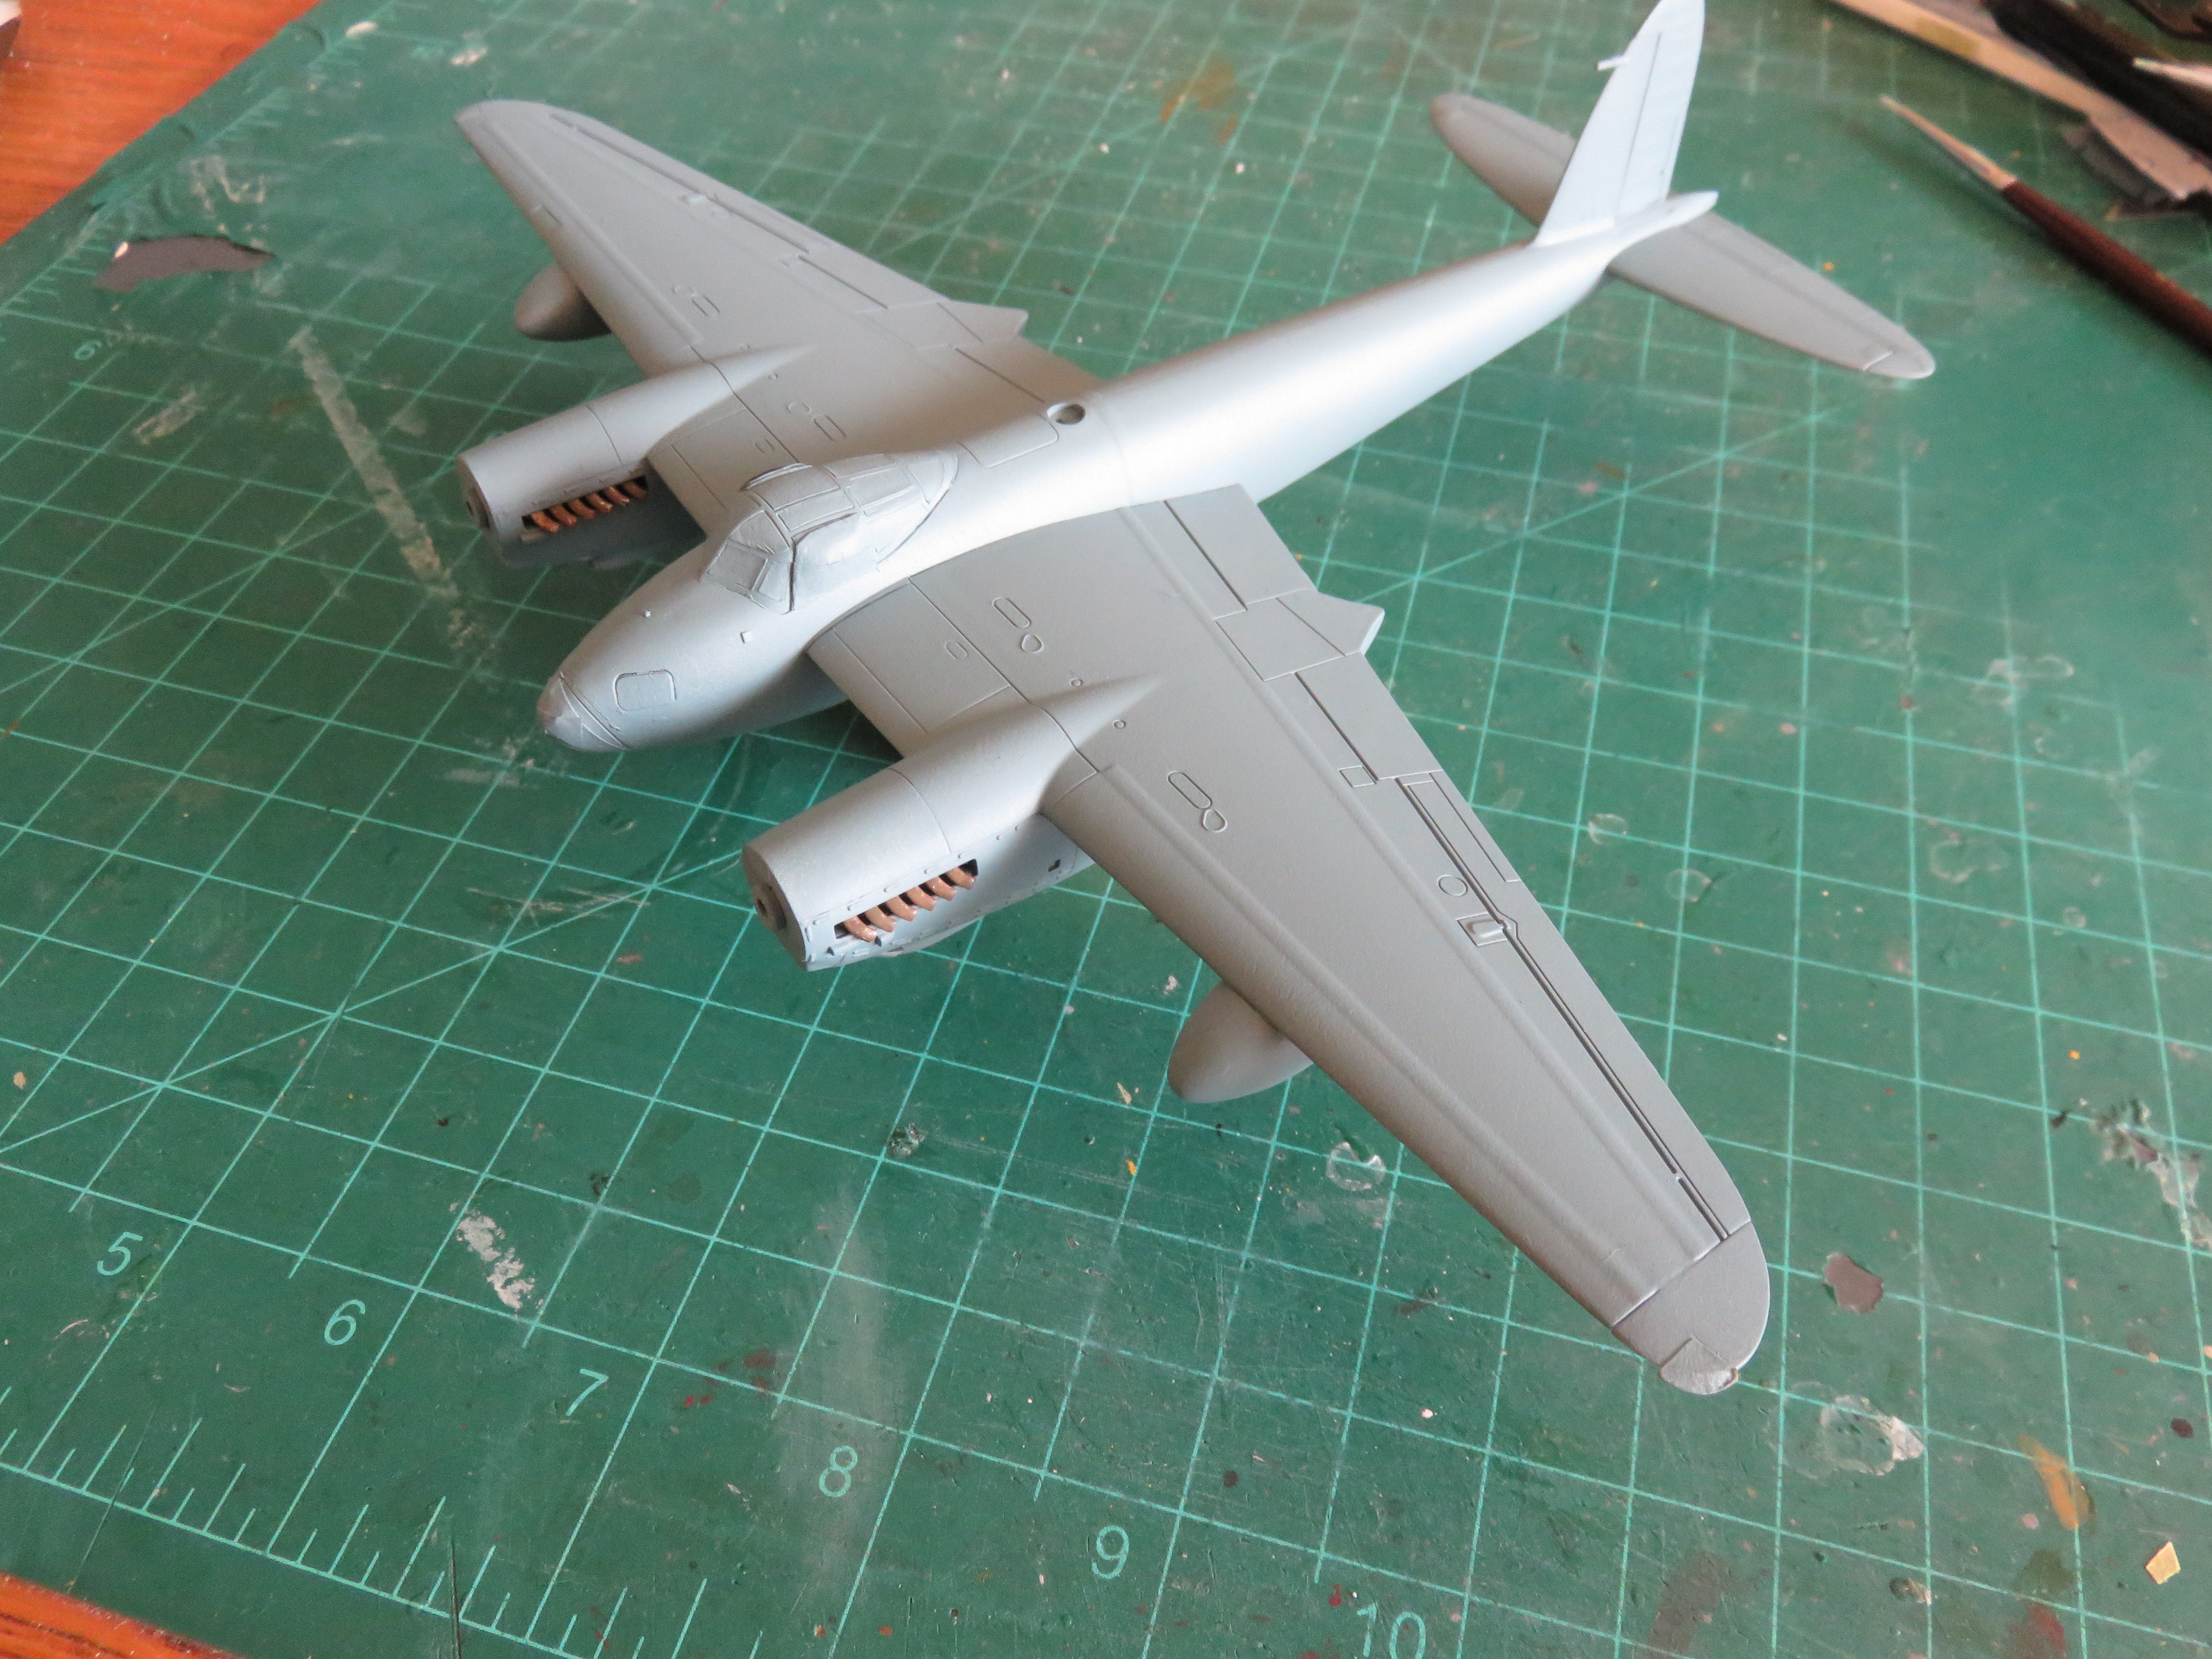
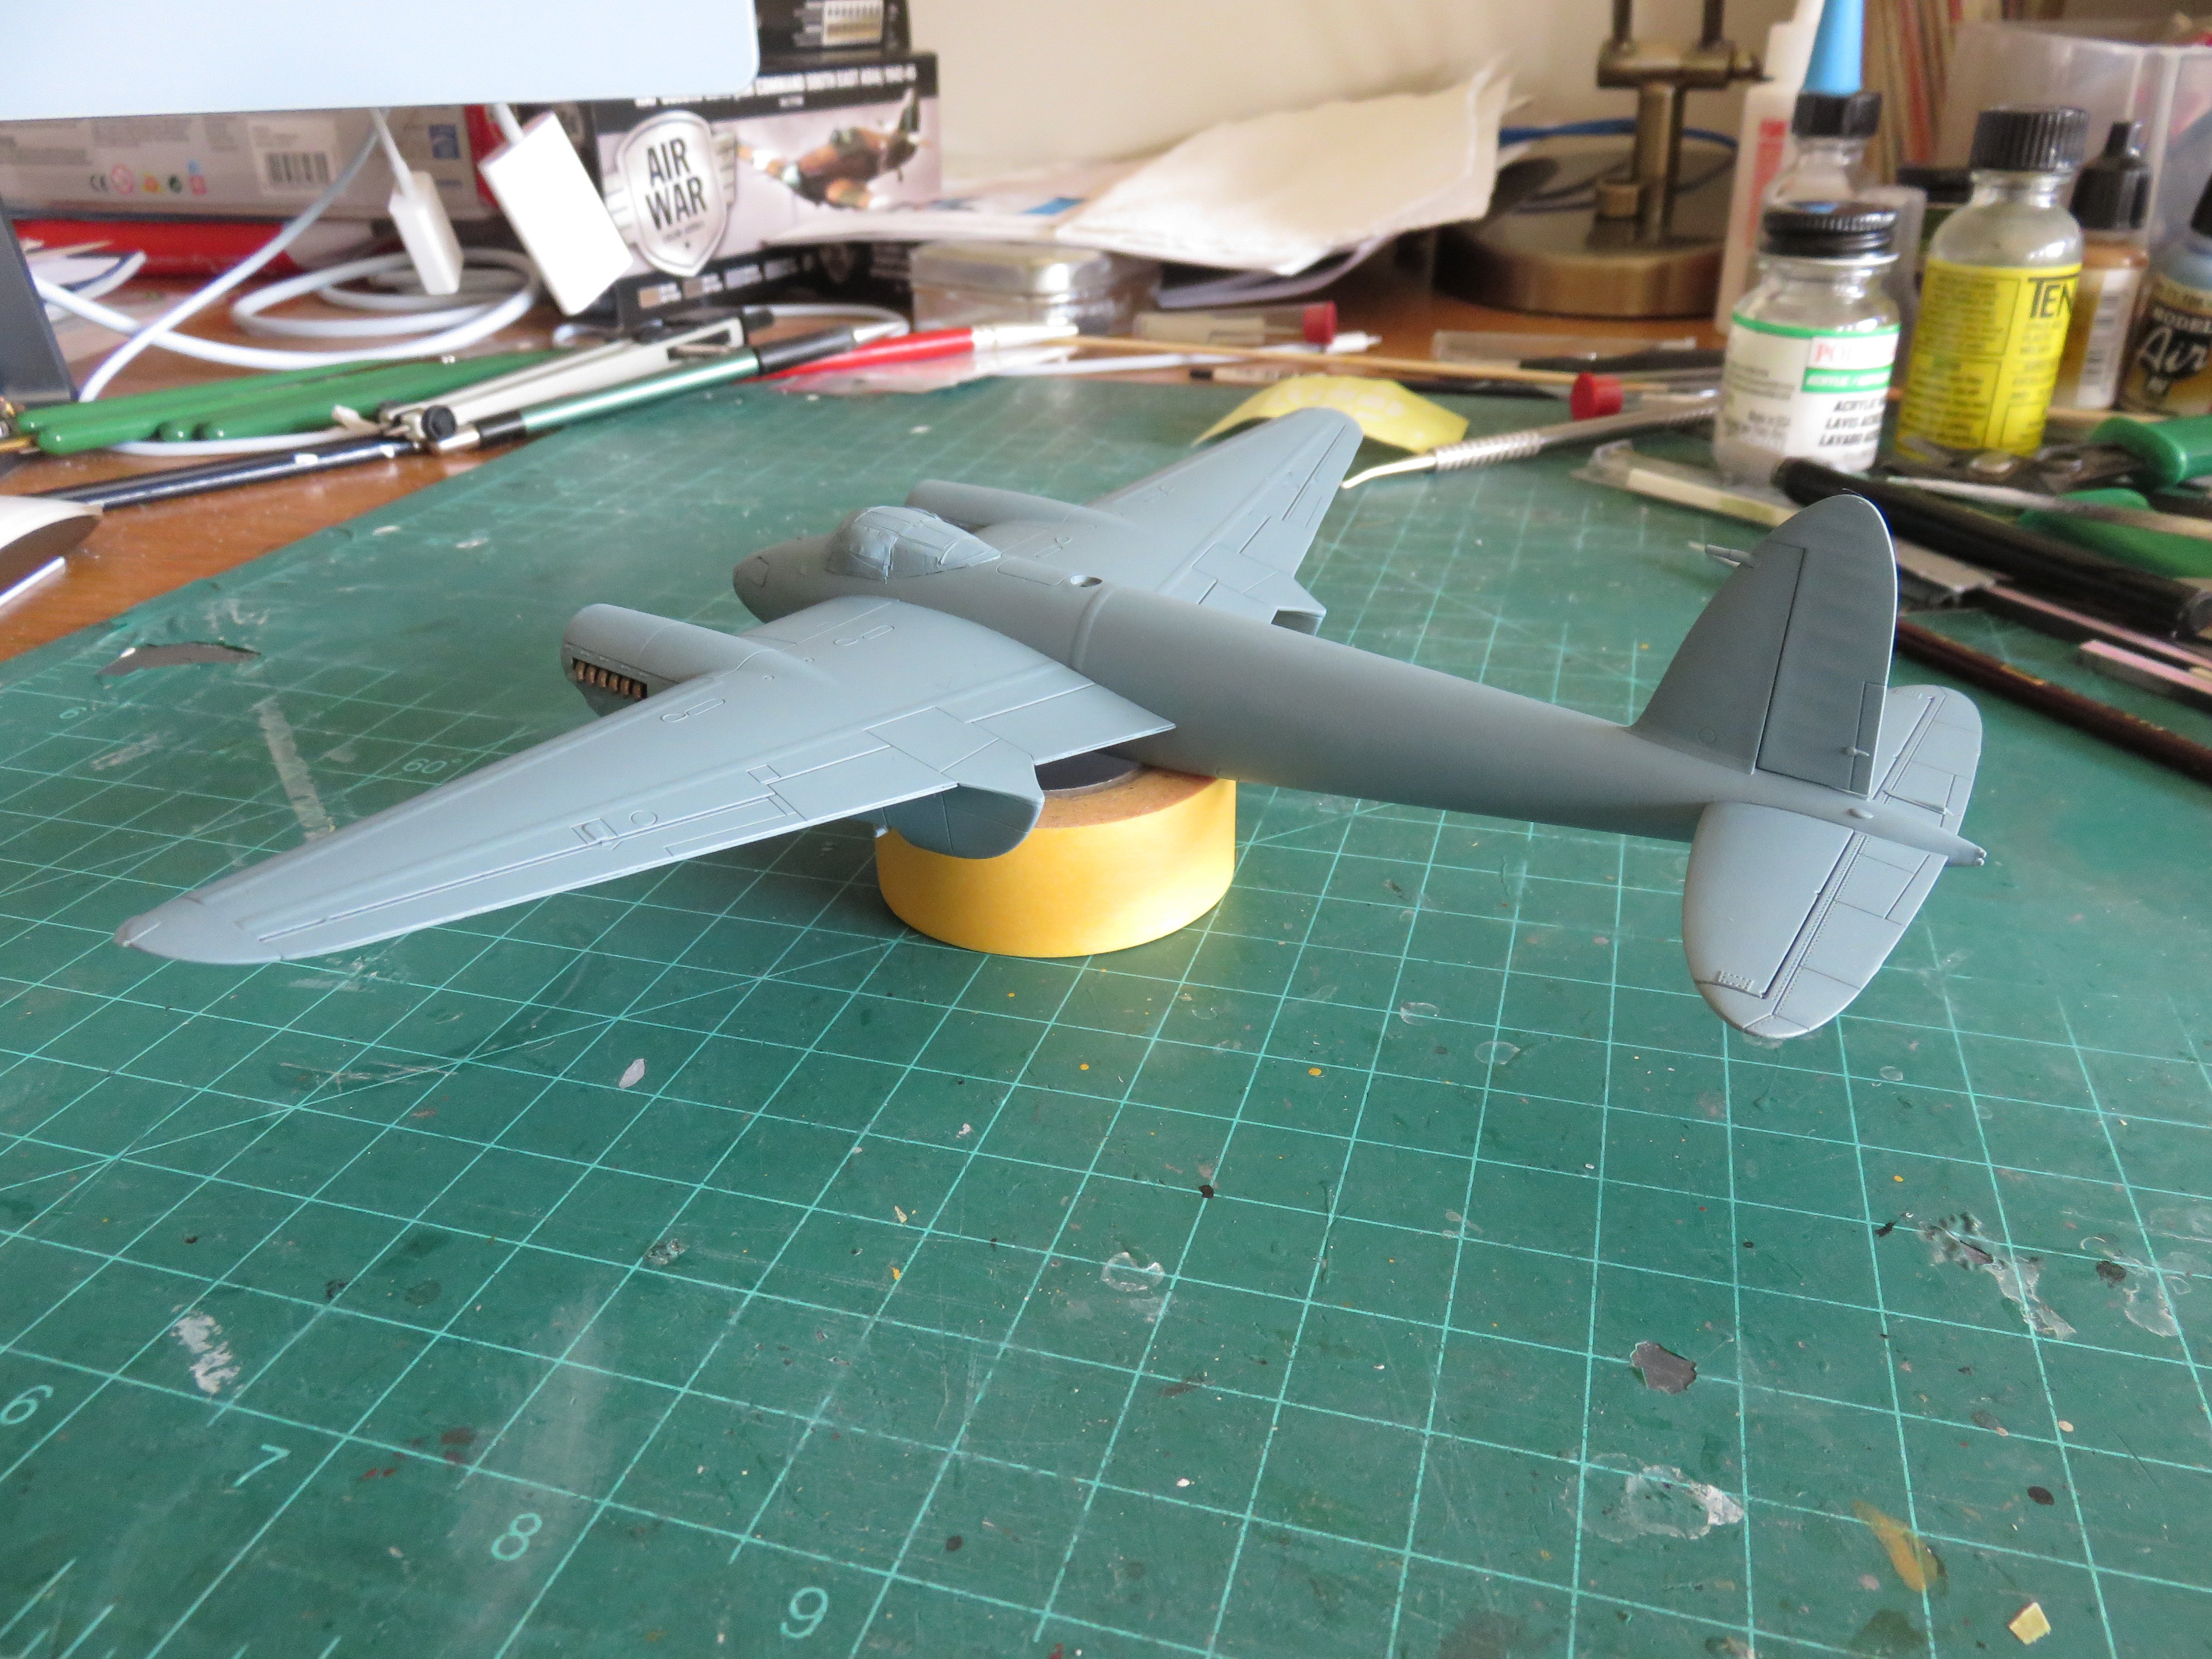
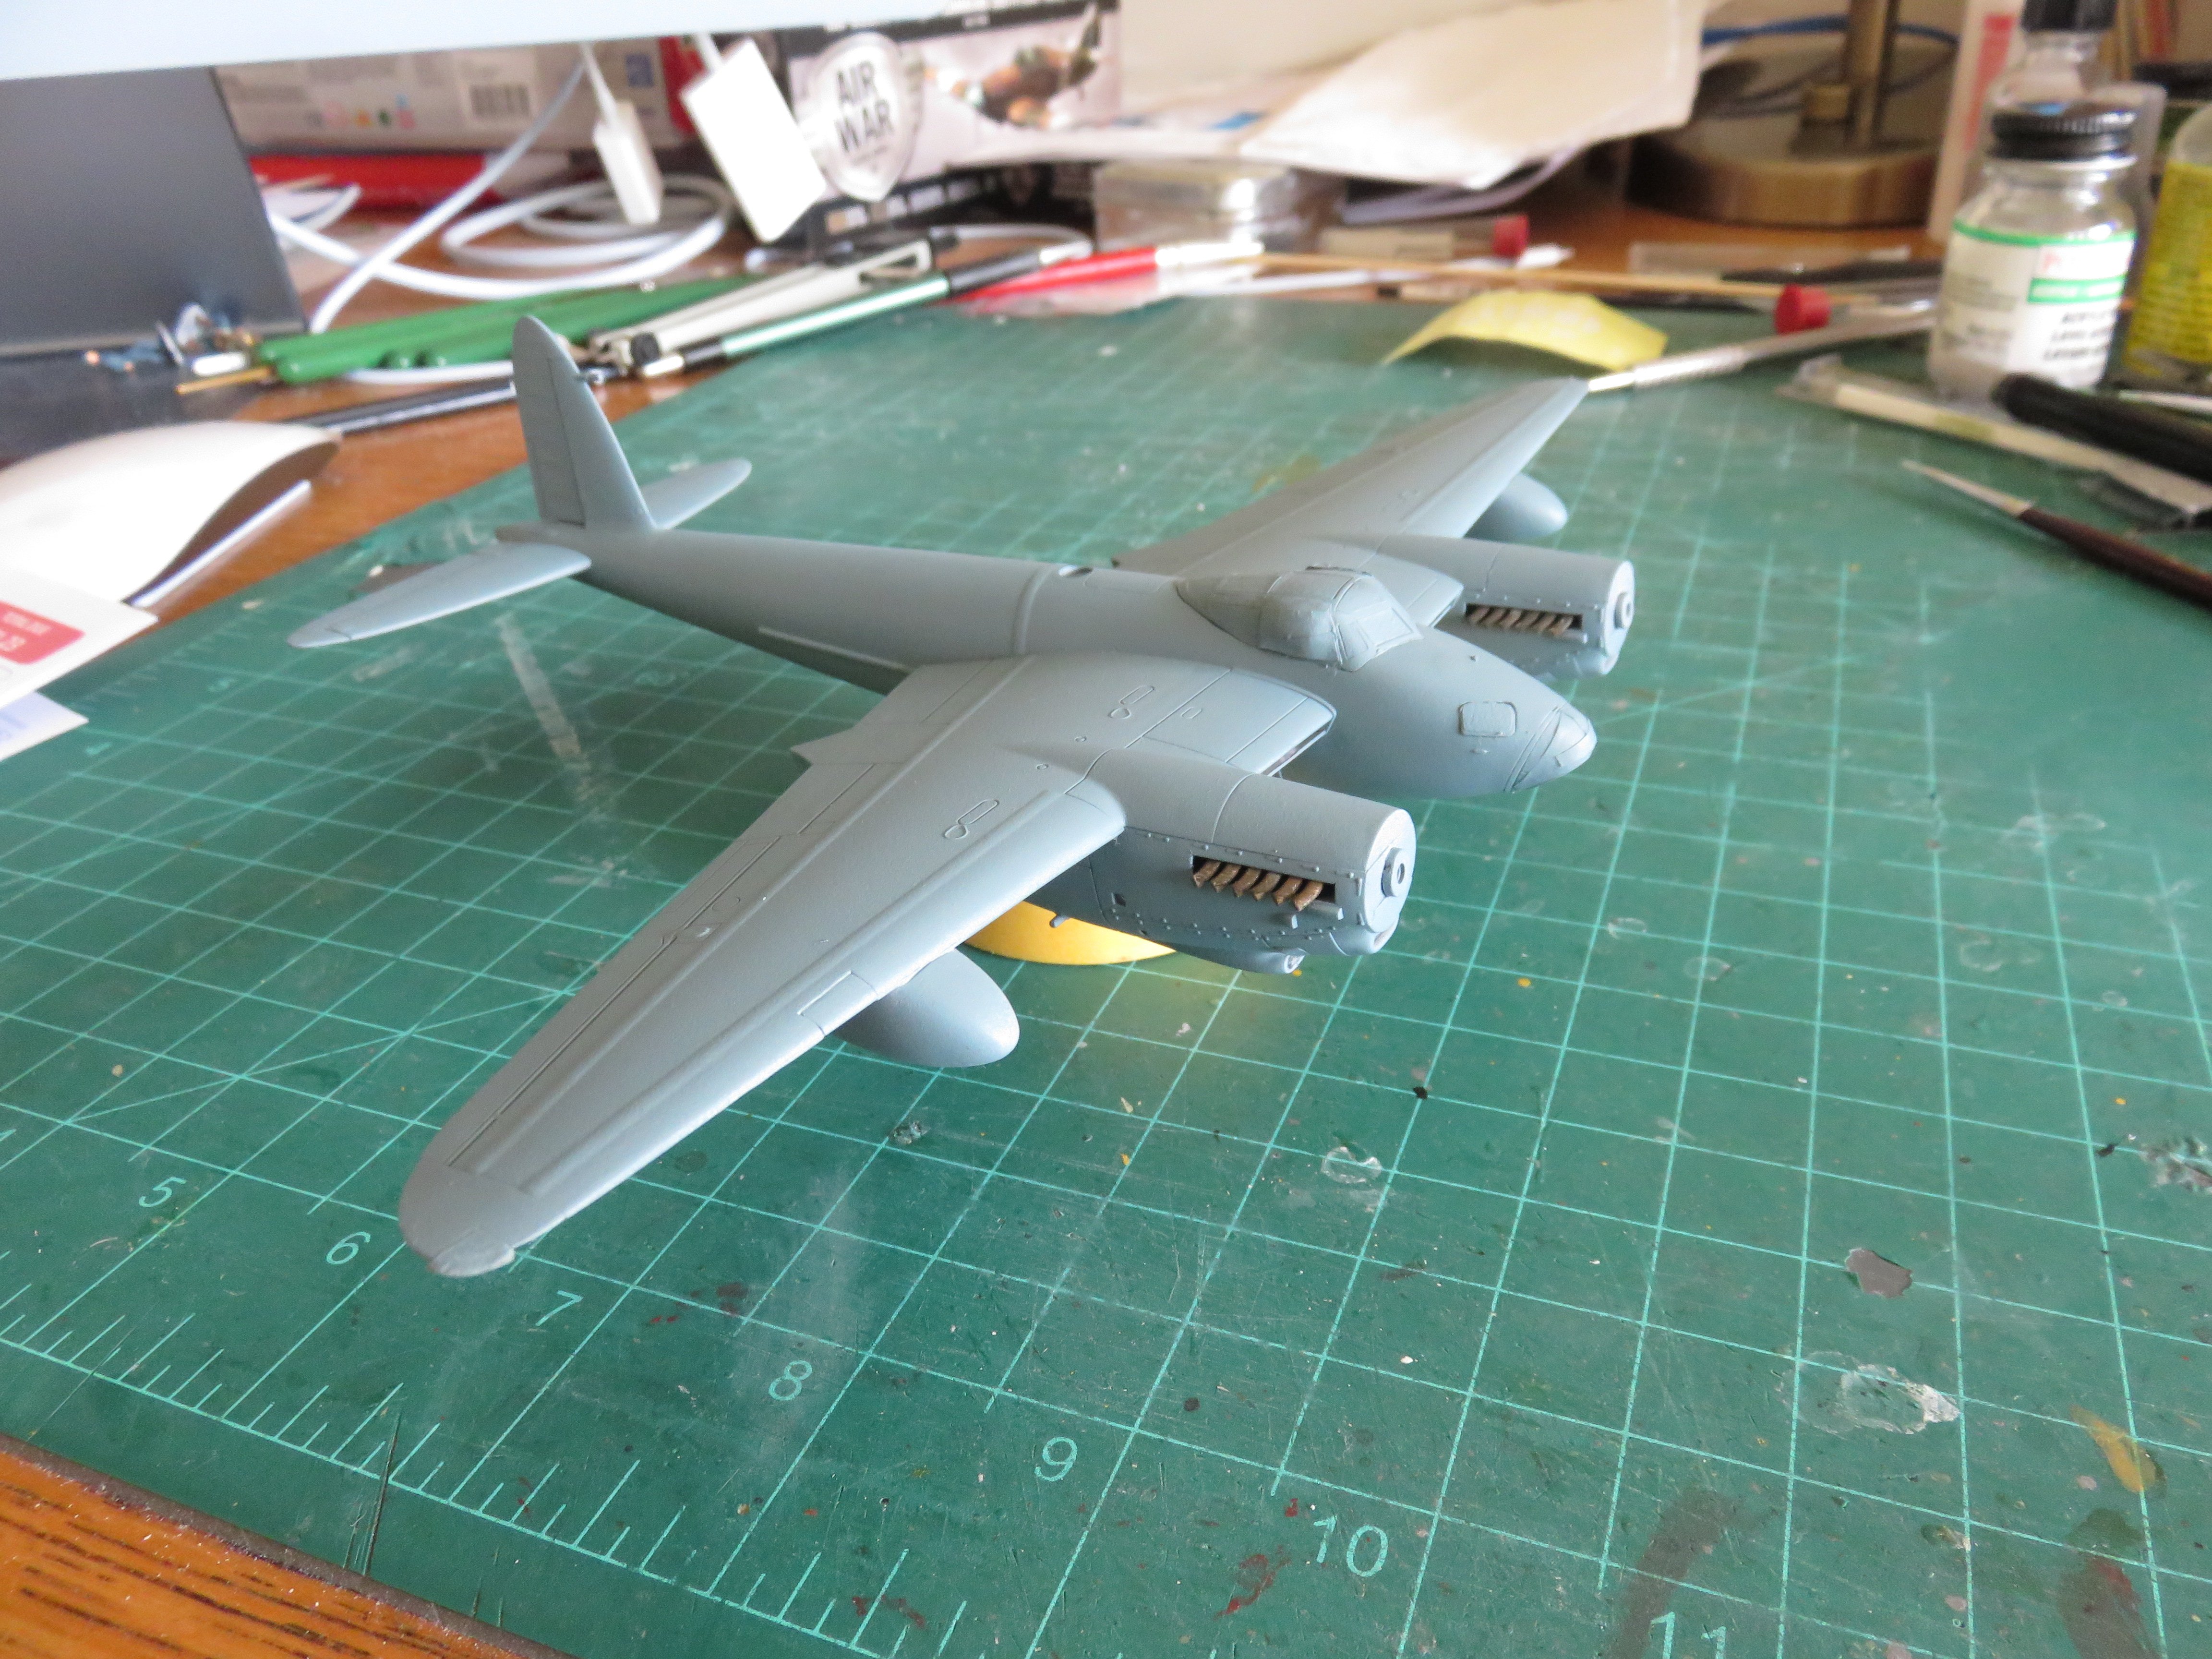
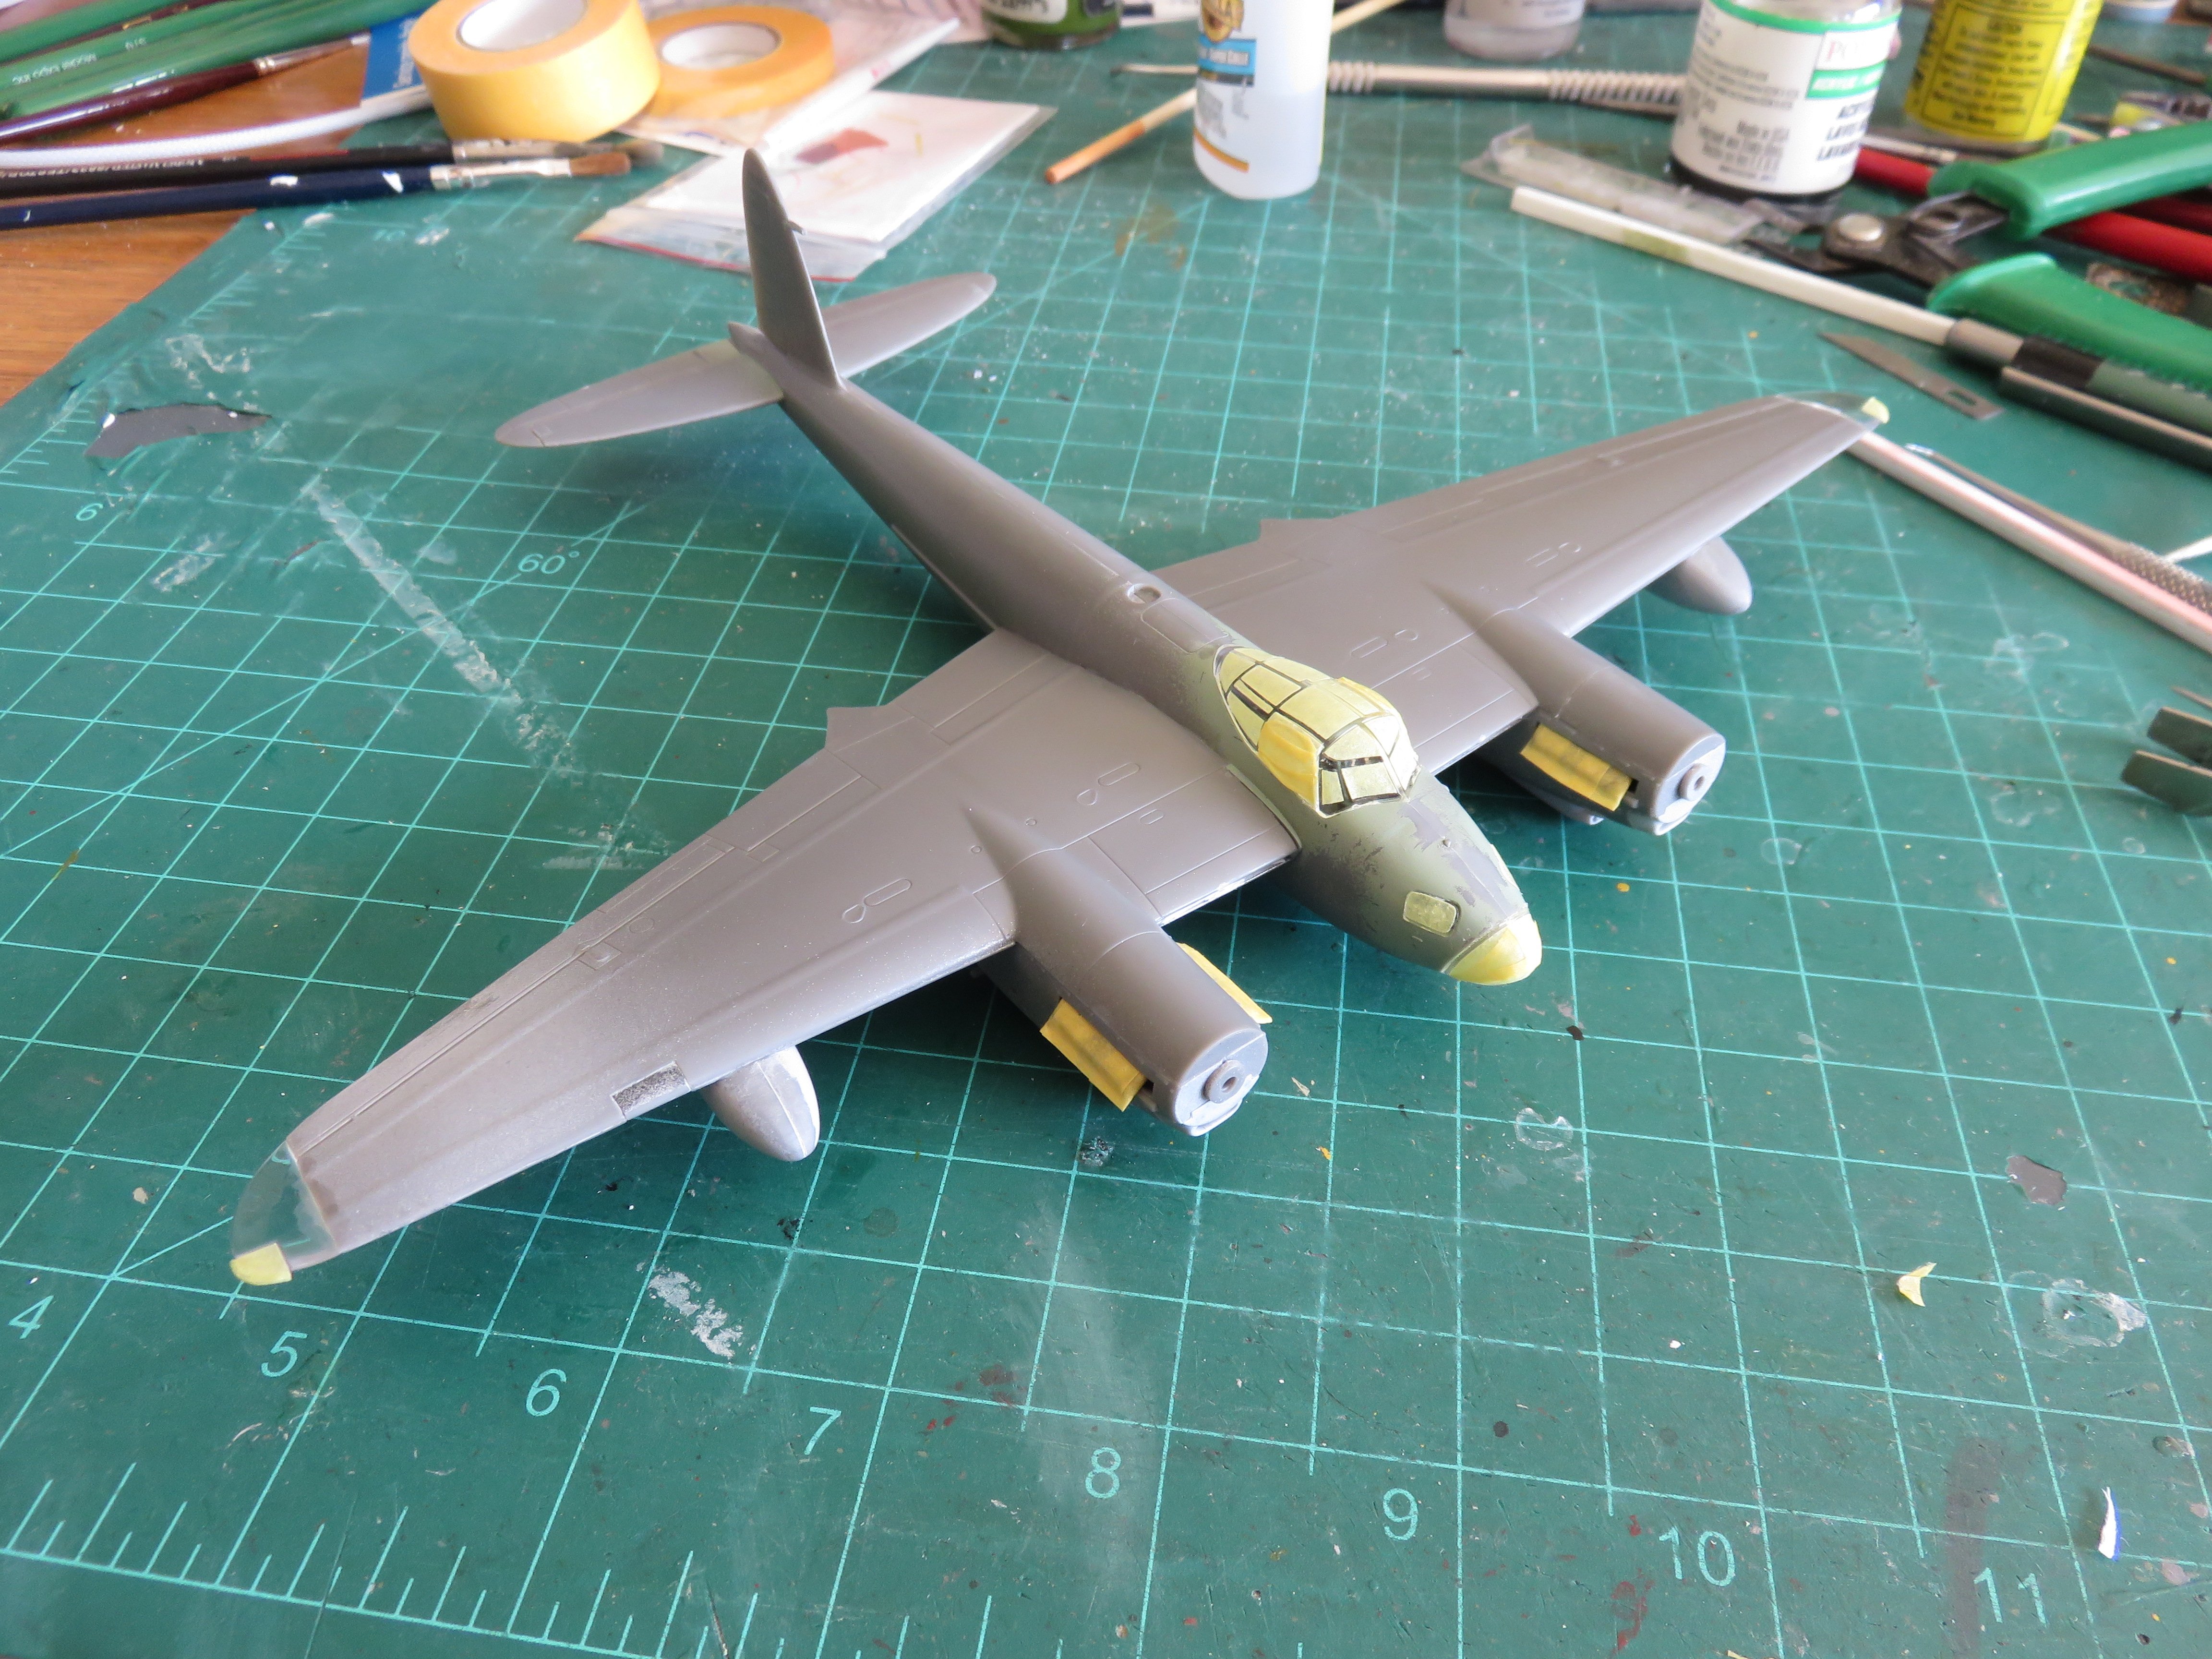
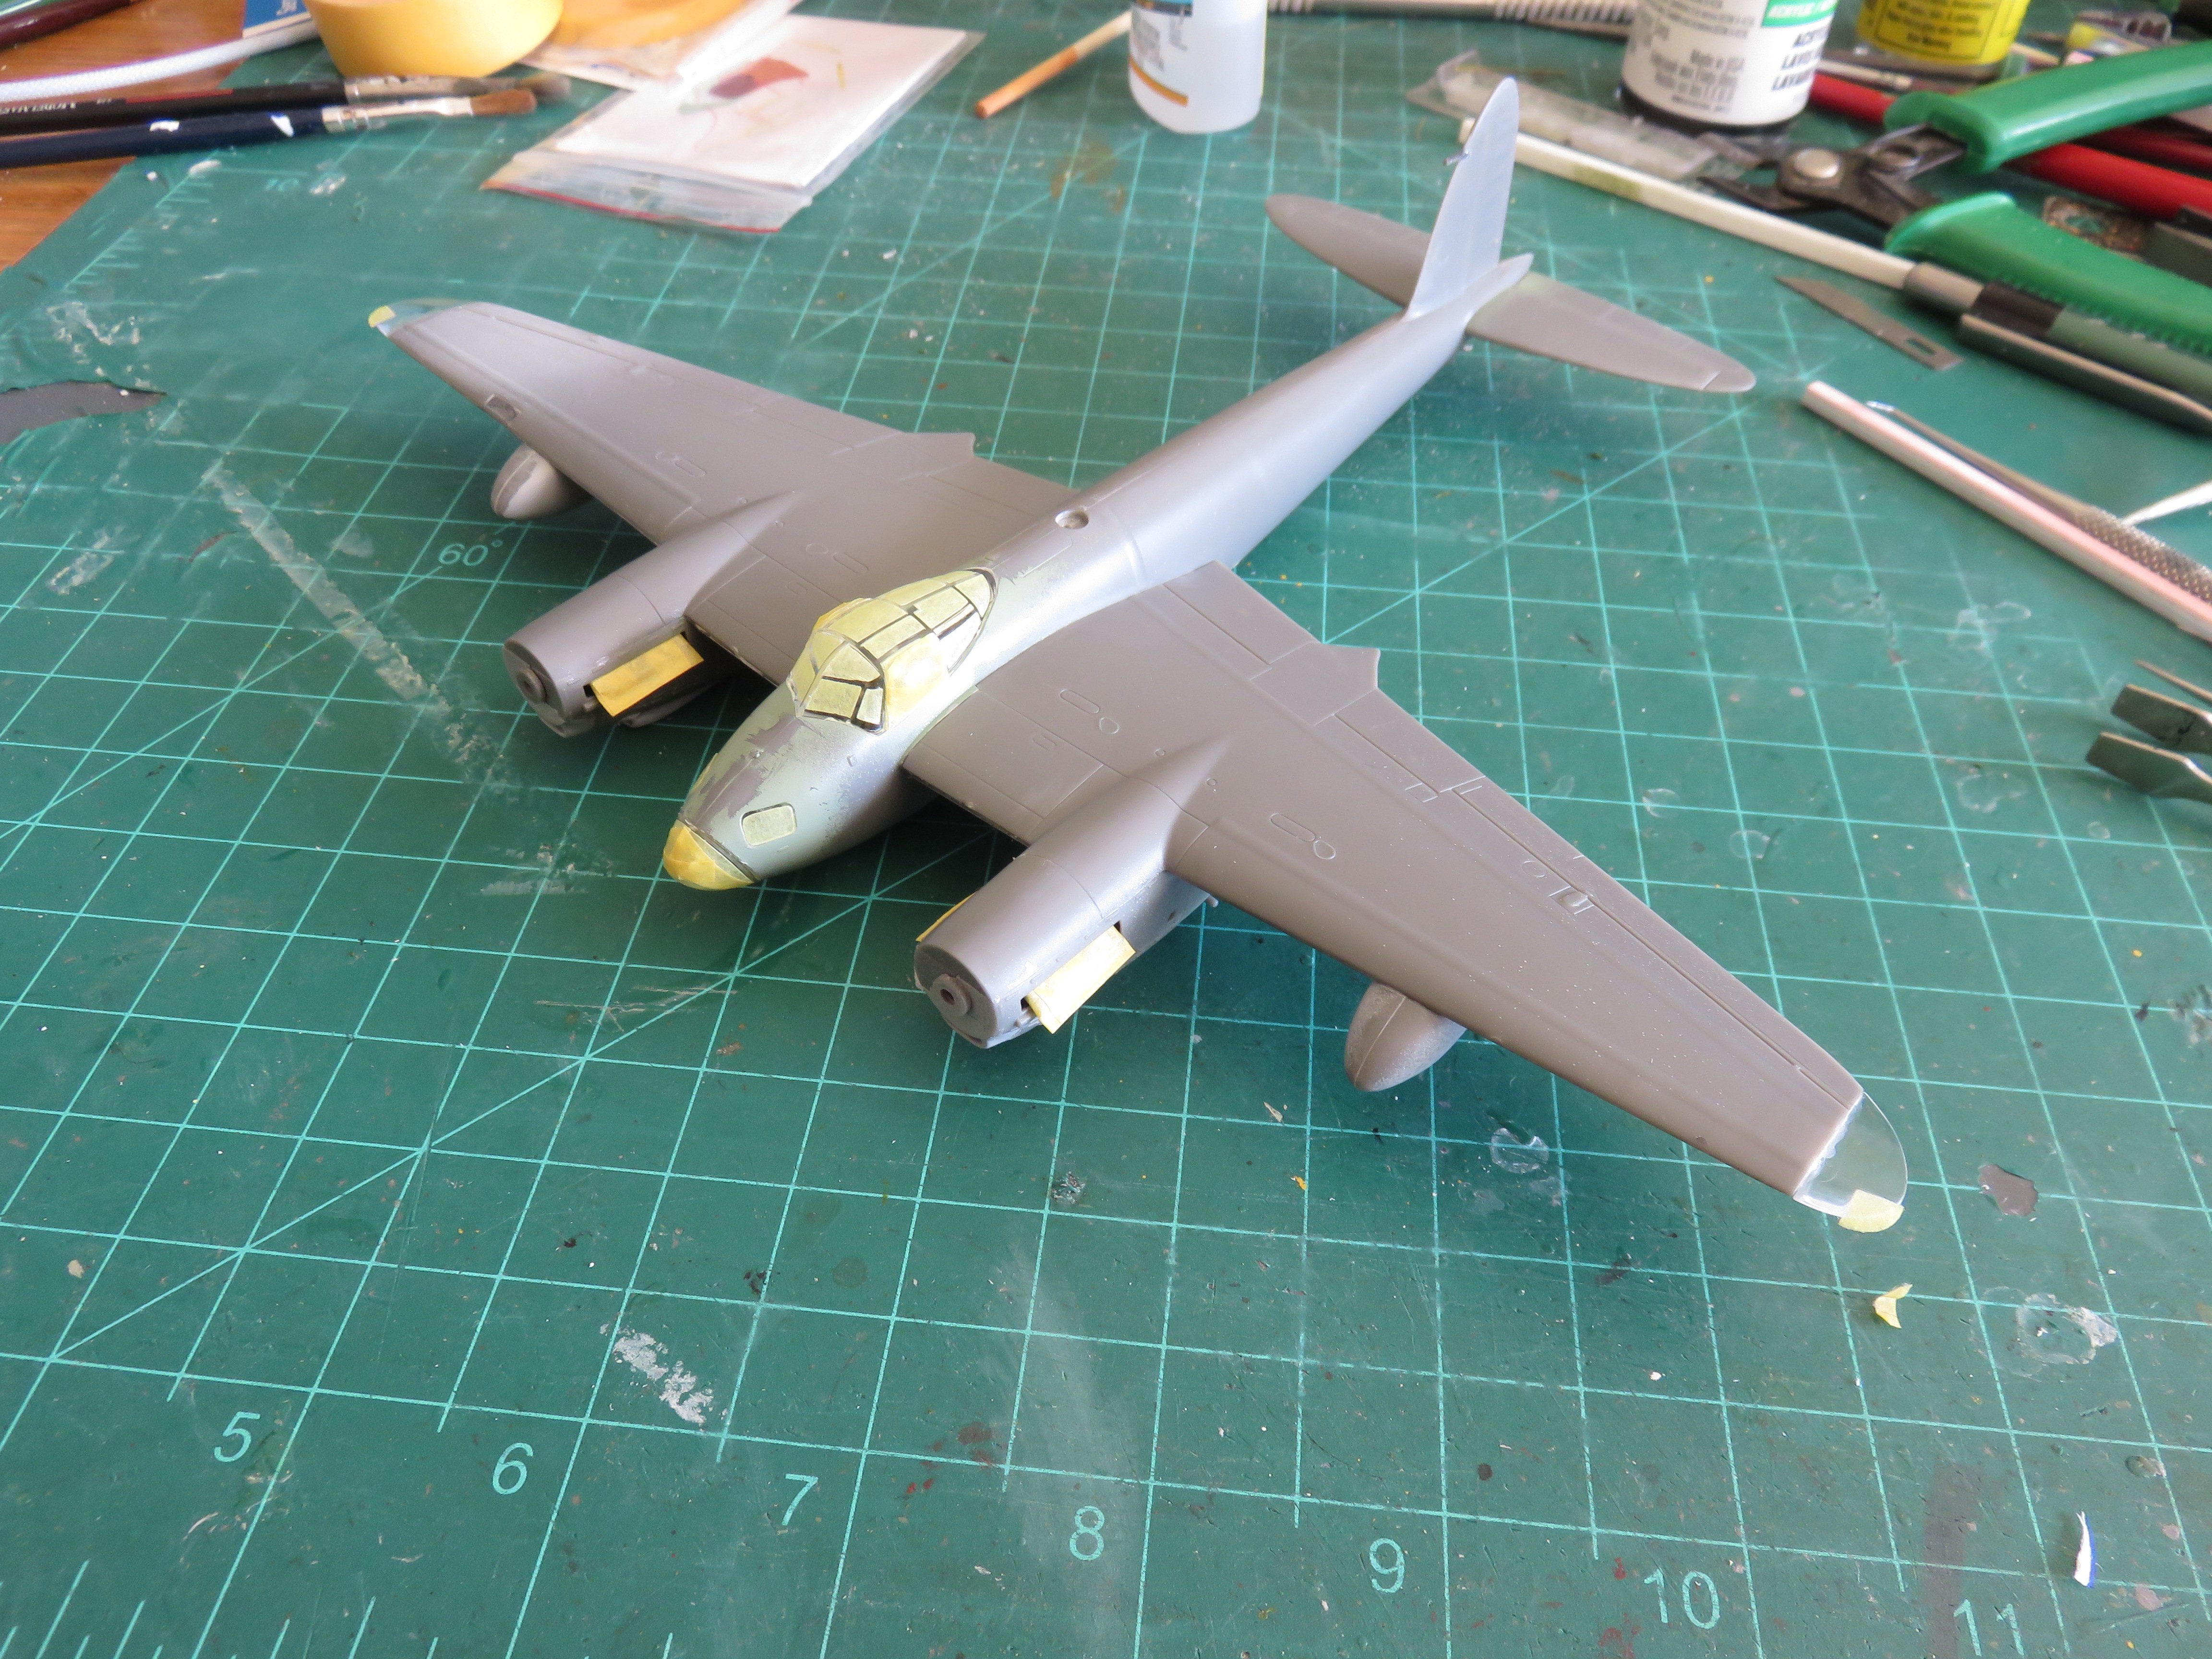
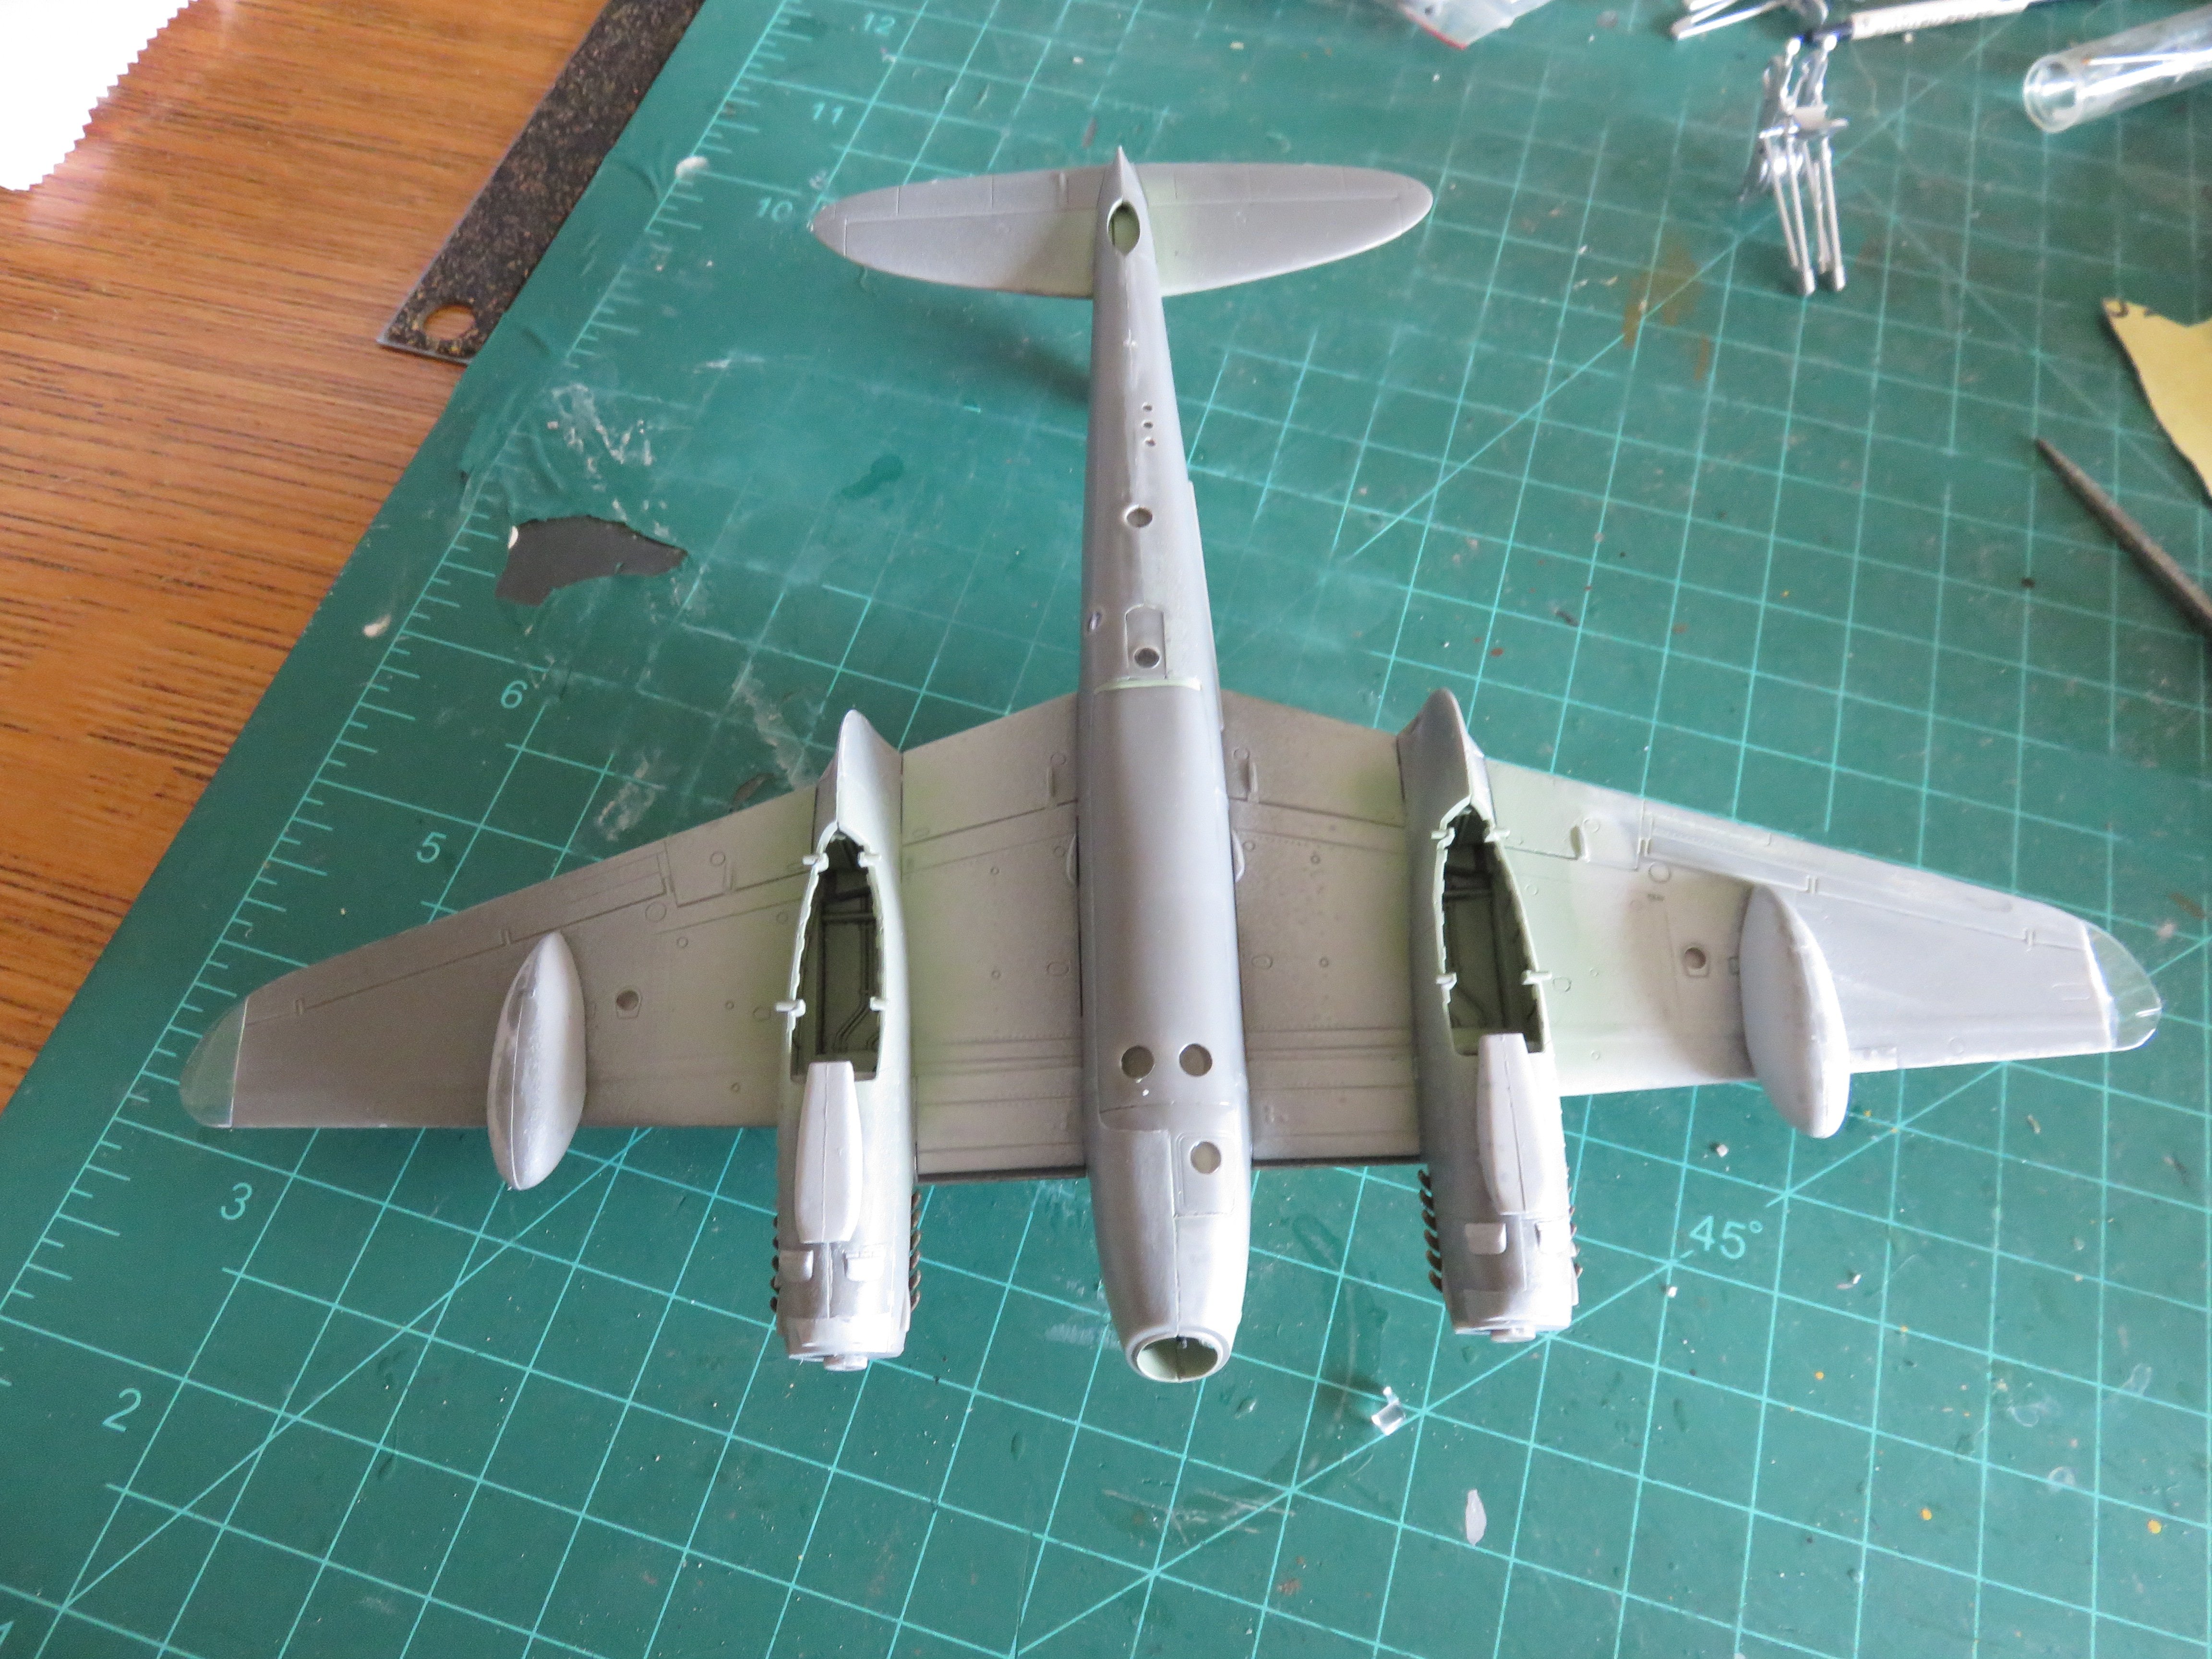
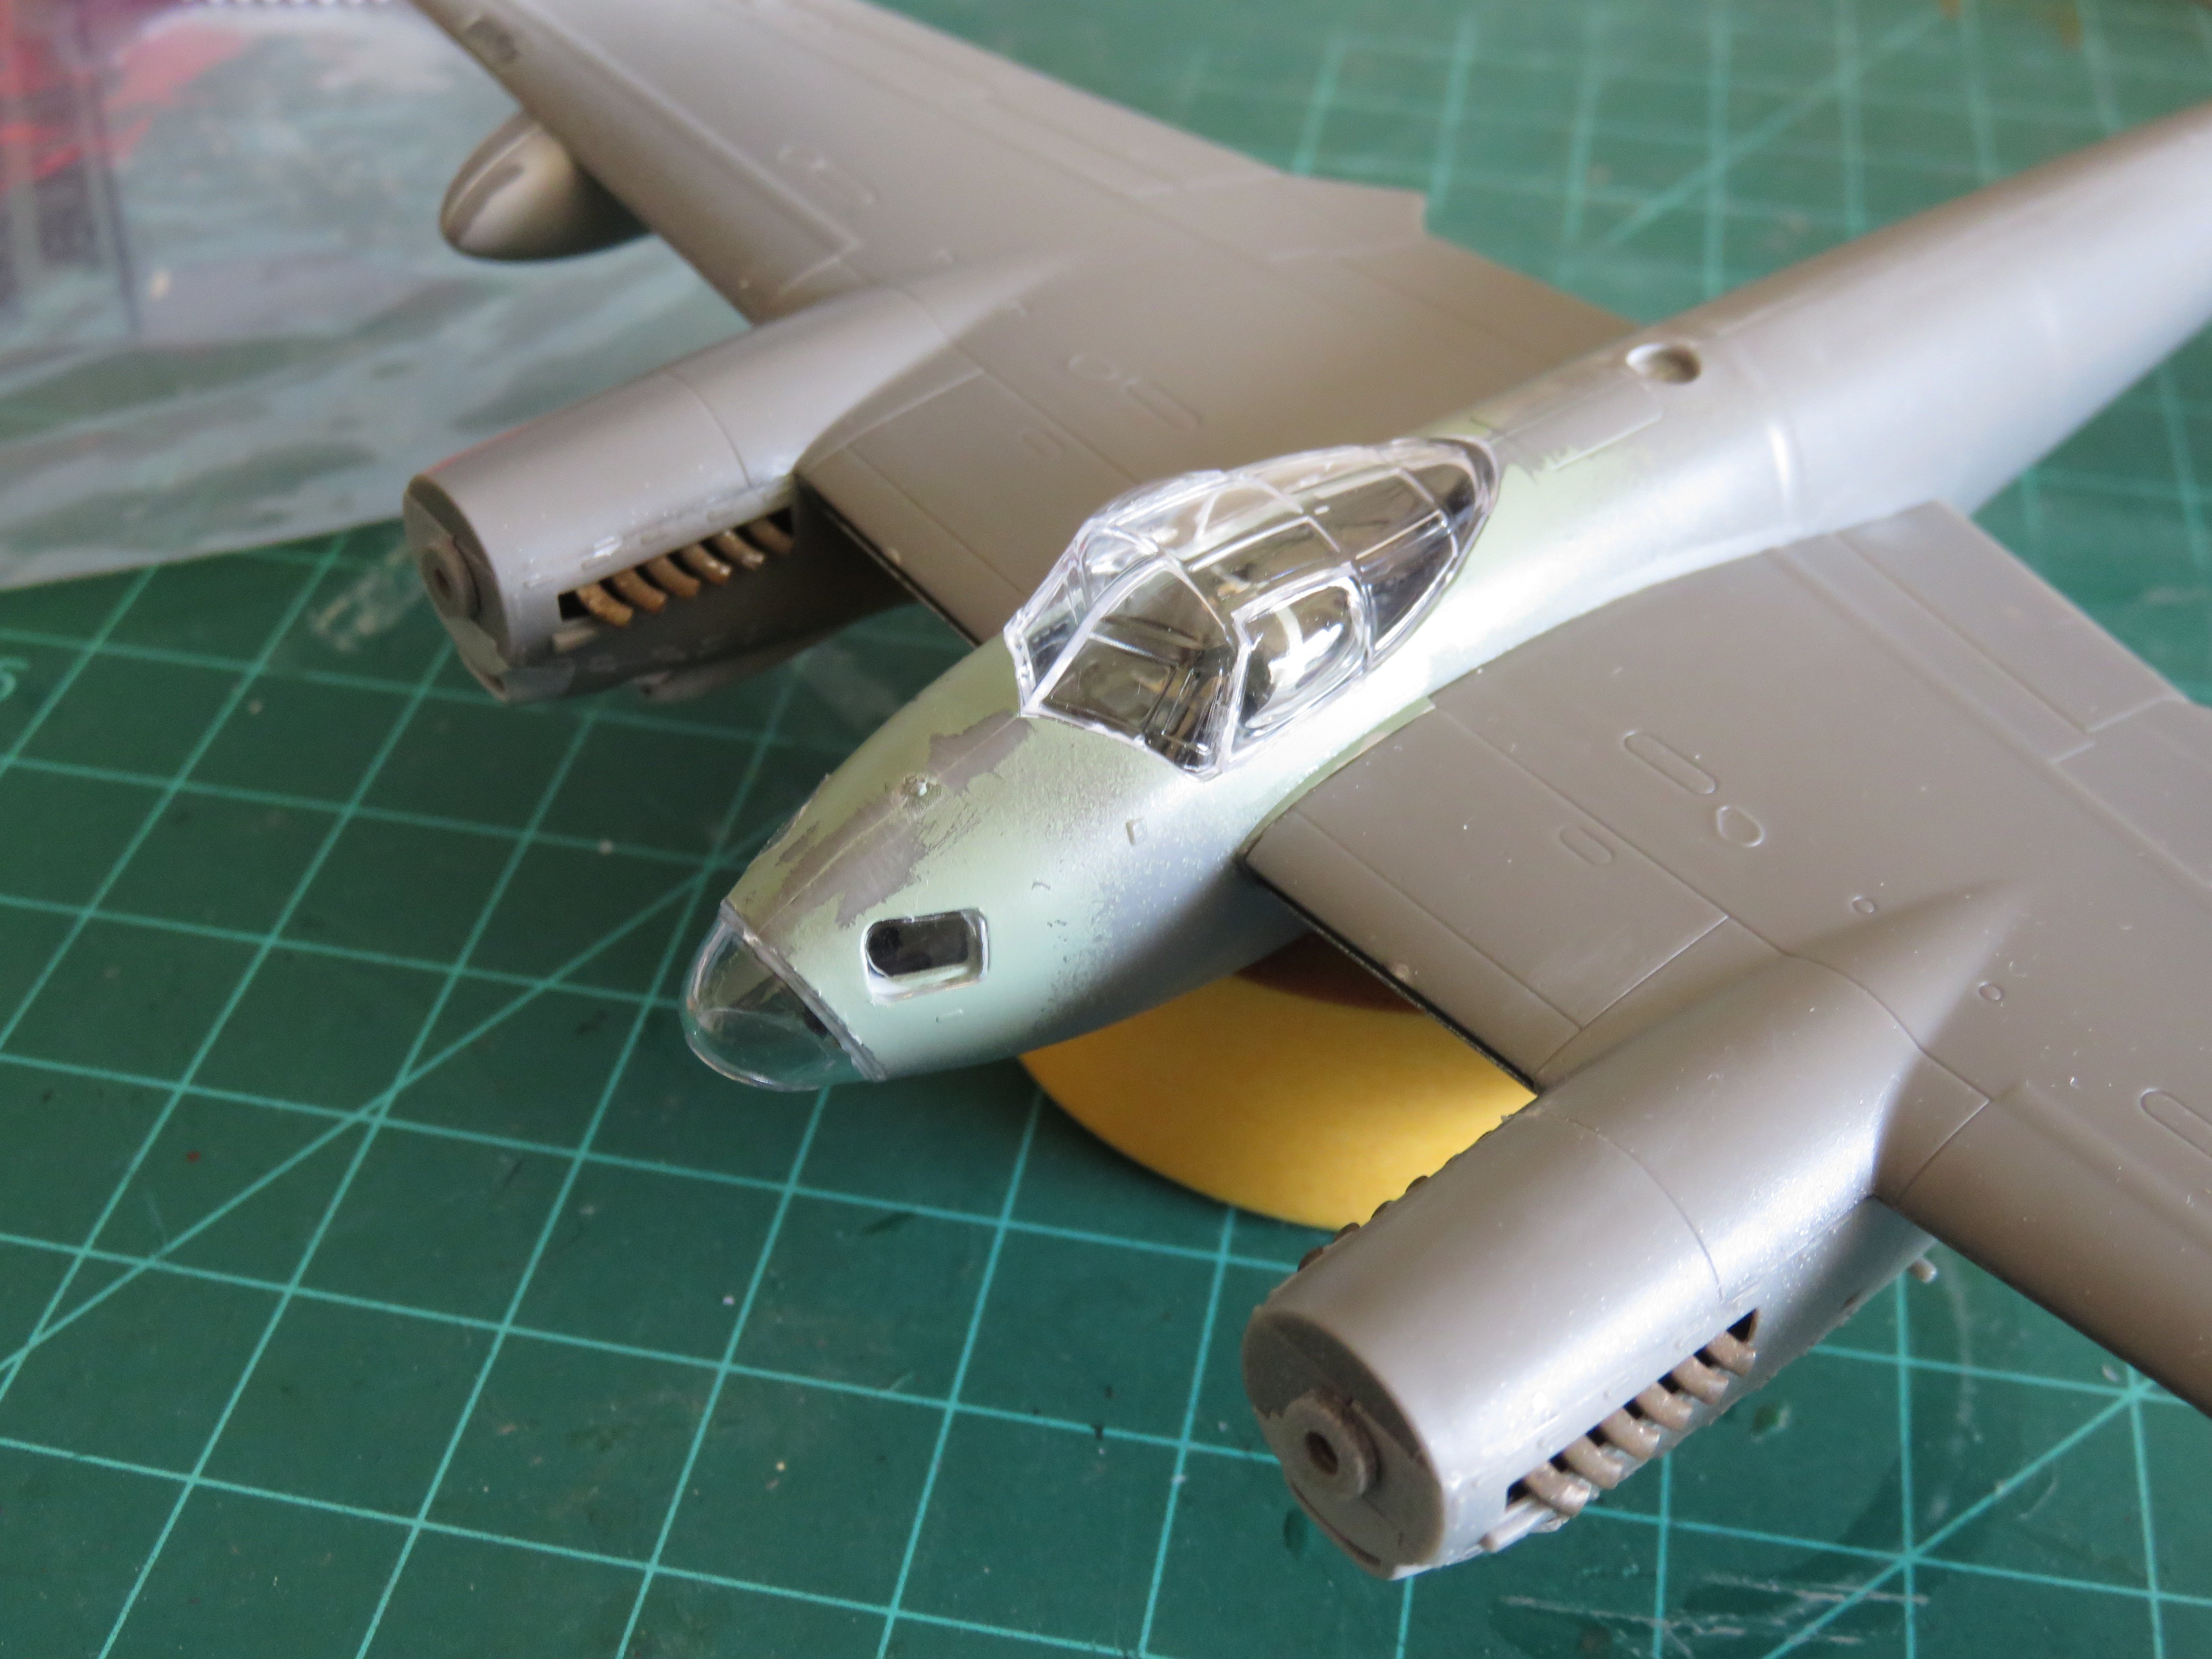
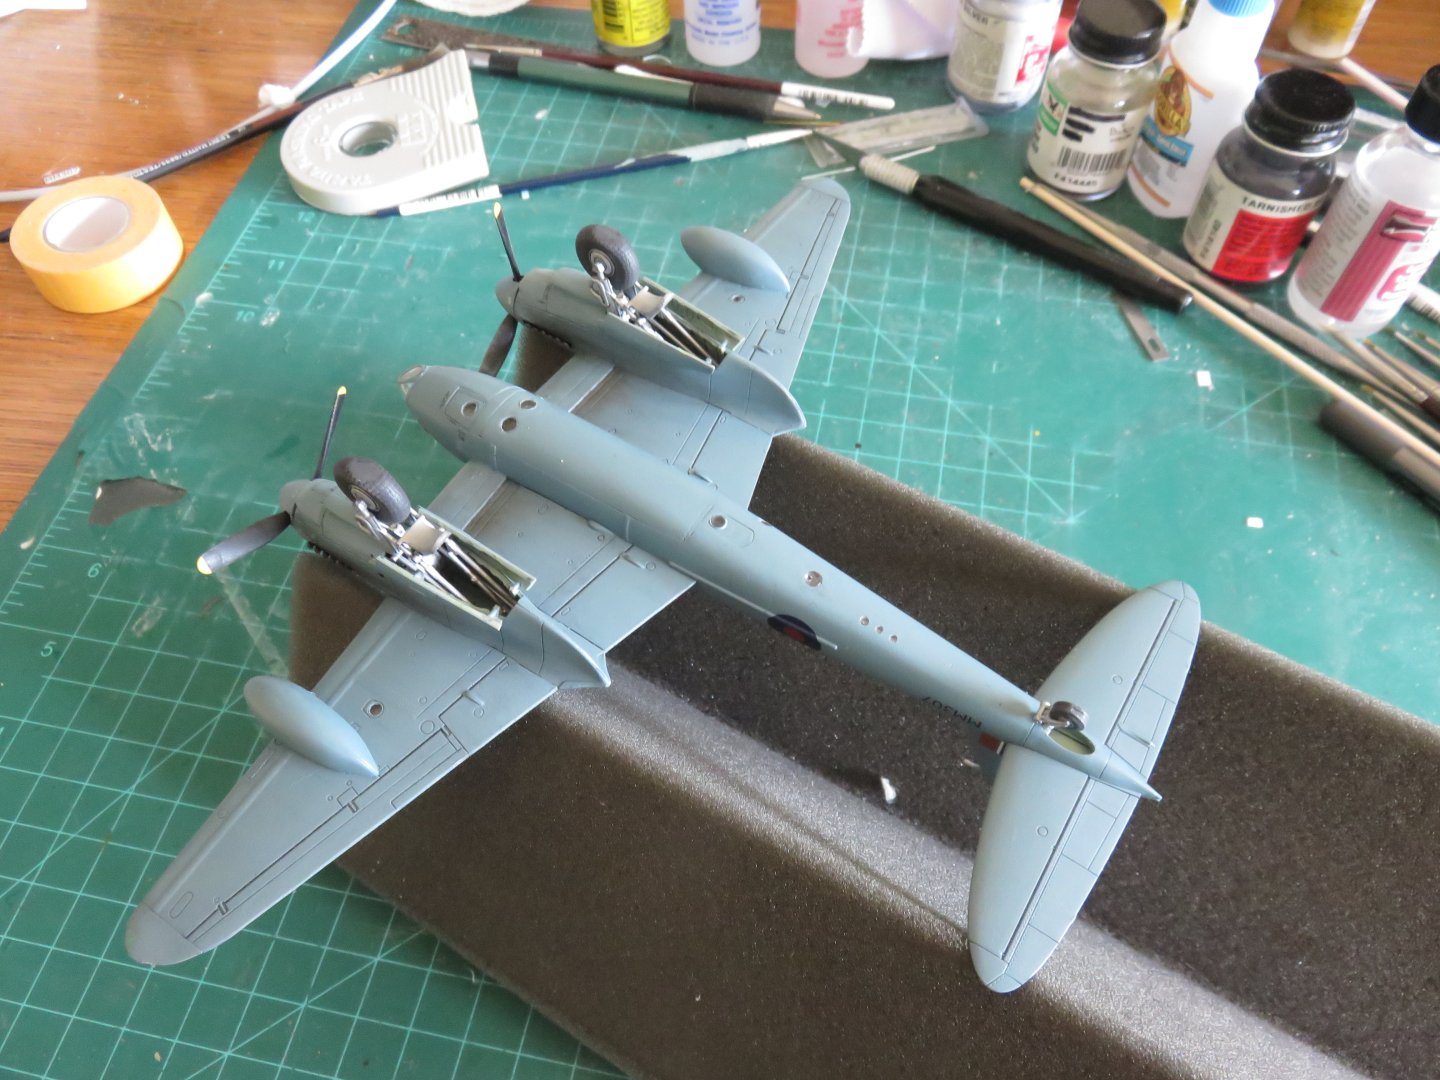
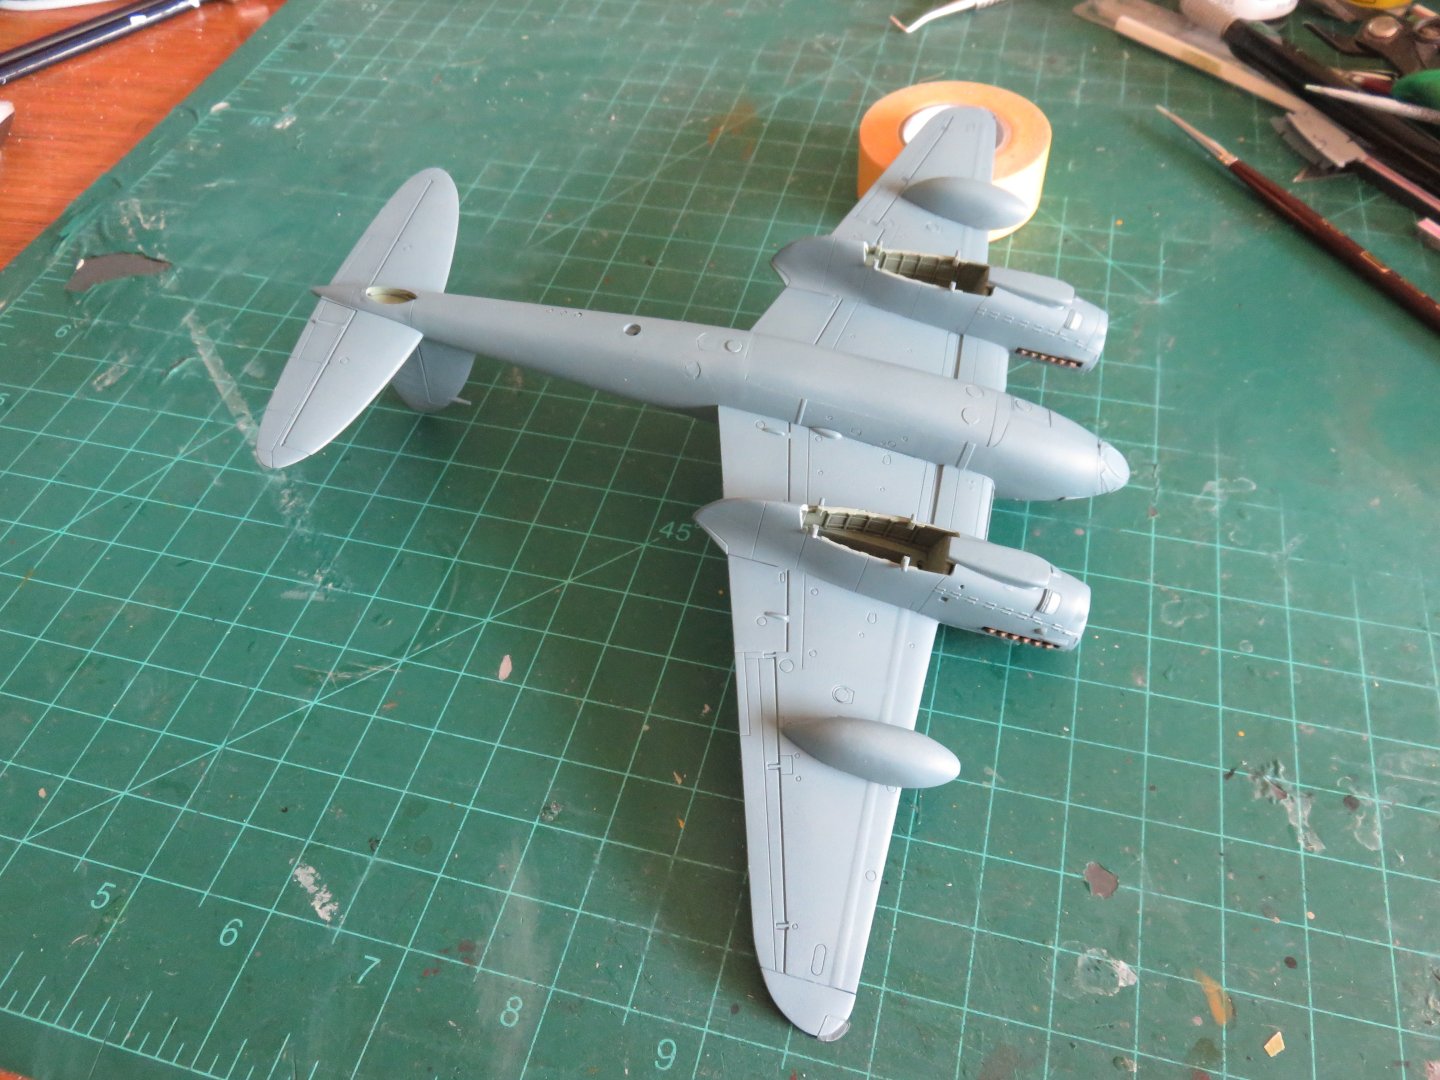
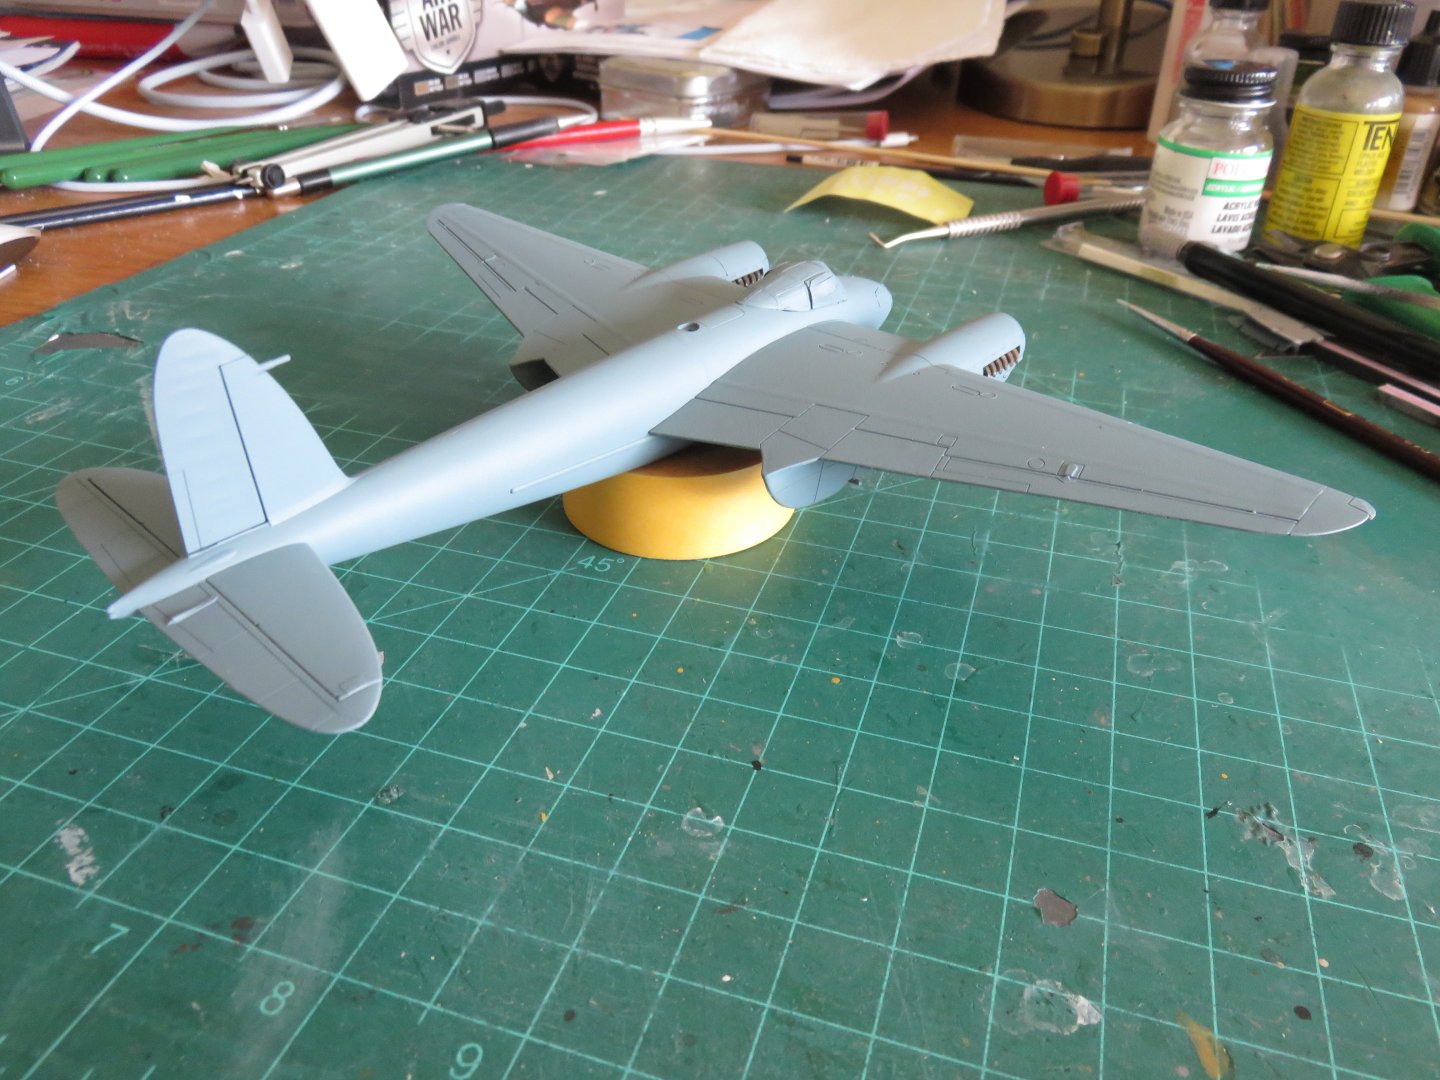
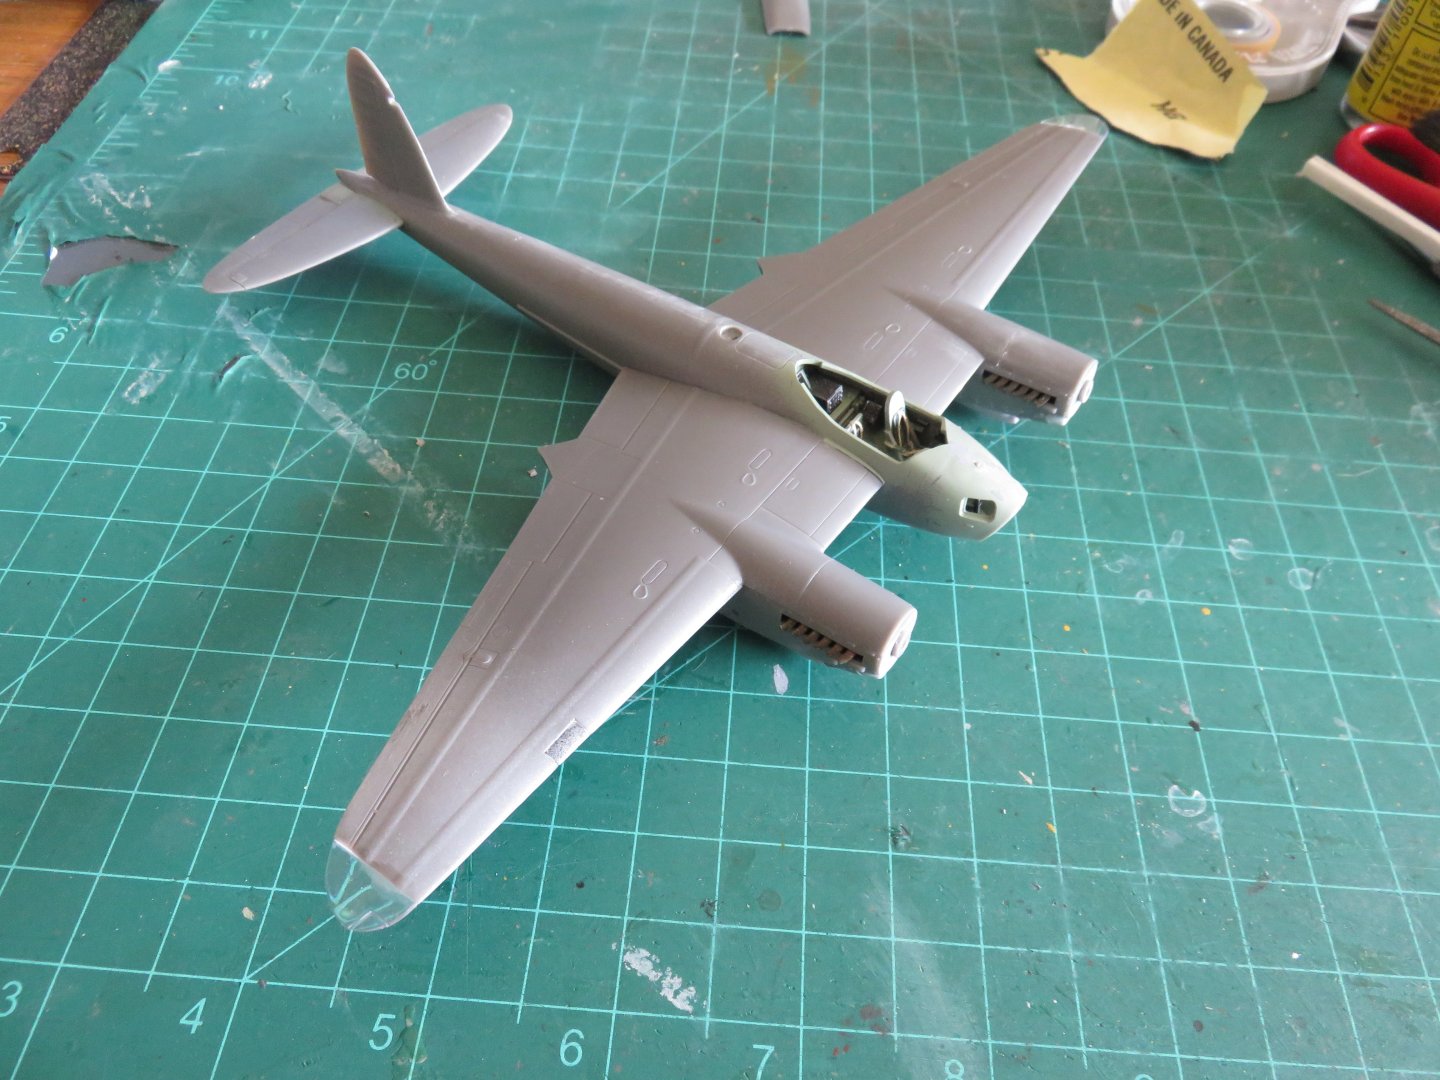
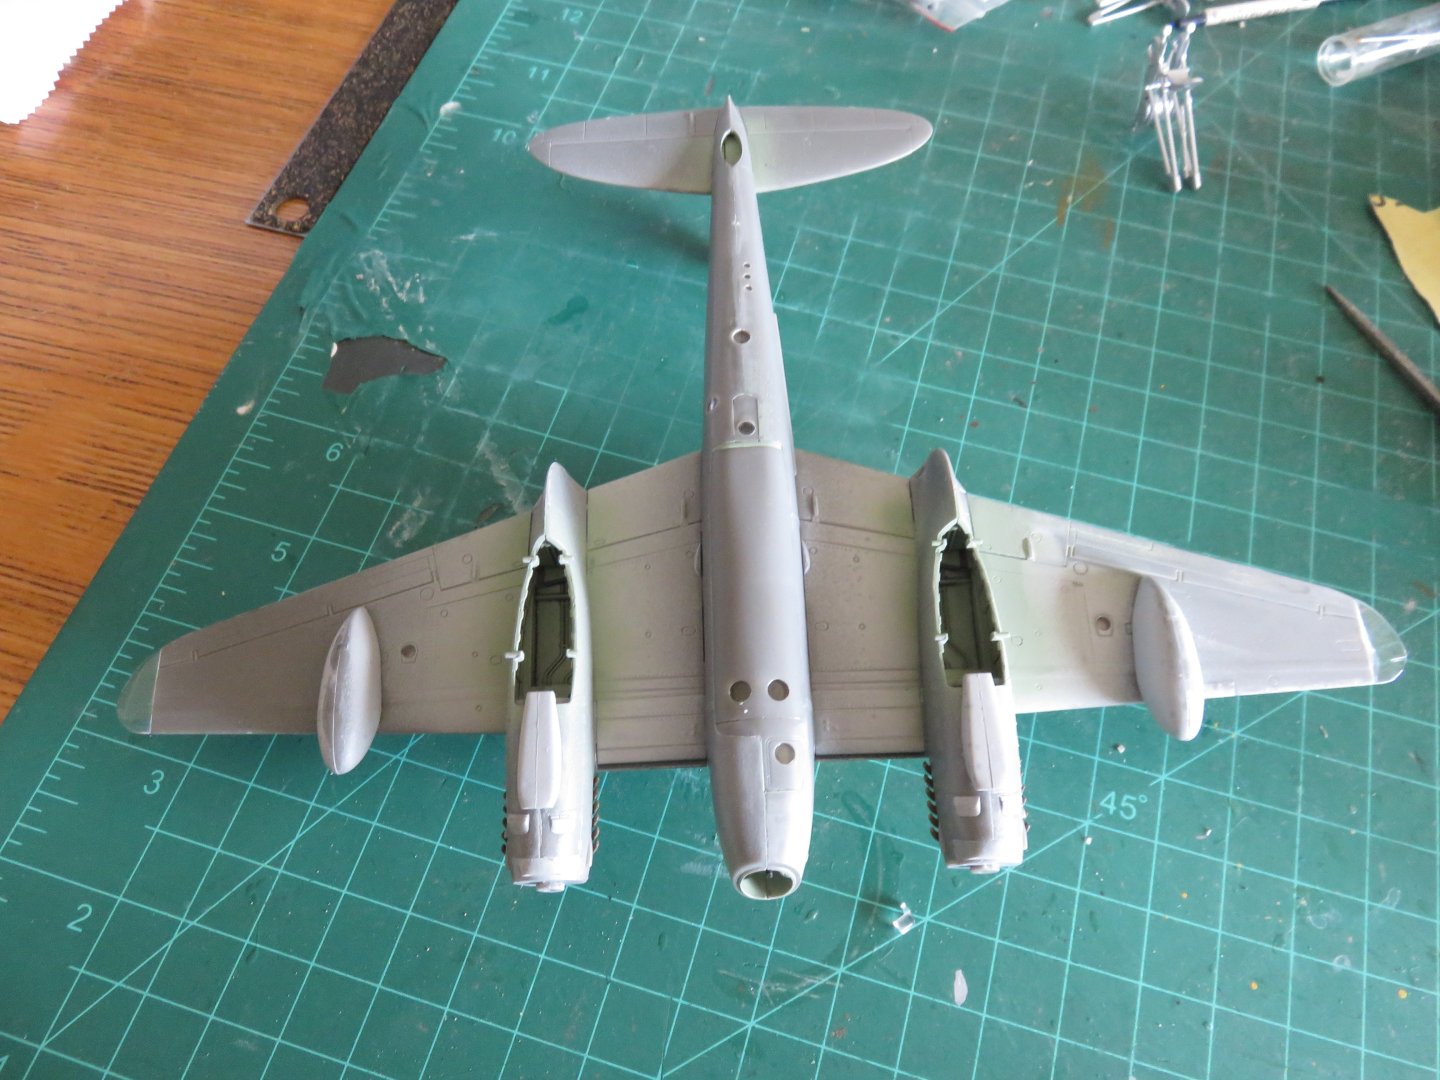
Thanks for the "likes" everyone! The next phase when rather quickly. Wing assembly was reasonably straight forward, as was the assembly of the engine nacelles. I usually leave the exhaust pipes off until after painting, but Airfix has to make things more complicated, don't they! Following the wings, the external fuel tanks are added, as well as the bomb, er, camera bay cover. I've held off adding the lease for the aftermost camera (if i'm not mistaken it was for the second lens of a stereoscopic camera setup). After this it was time to tackle the glasswork. Airfix includes two different canopy options, one with a flat panel above the observer's seat, the other with a rather wart like looking bubble. I managed to track down a prototype photo of MM307 to figure out which option I should be using. Unfortunately the photo isn't clear enough to determine which canopy to use. Looking at photos of other Mosquitos (and lots of pictures of mosquito repellant systems, thanks google), it's still 50/50 whether or not MM307 had a bubble top. What clinched it for me was on inspecting the Airfix casting, there were noticeable, I want to say, stress fractures (?) in the casting. Probably due to uneven heating or cooling of the plastic or the mould. They looked like fine little scratches in the interior of the plastic. The flat canopy was fine, so I opted to use that one. Easier to mask without the bubble anyway. The side window inserts were "fun" to do! Finally the last thing I did was to drill out the carburetor intakes on the lower engine nacelles. I think this gives a much better look from the front. It better matches with the open intercooler intakes just below where the prop spinners will be. I will be ordering a masking set for the Mosquito soon, so it will be a bit before I get on to painting and finishing. But I think it's overall a testament to the quality of the kit that it does assemble as easily as it does. Not perfect by any means, but nothing felt like it had to be forced or excessively sanded in order to be fitted to the model. Andy


- 33 replies
-
- 10
-
-
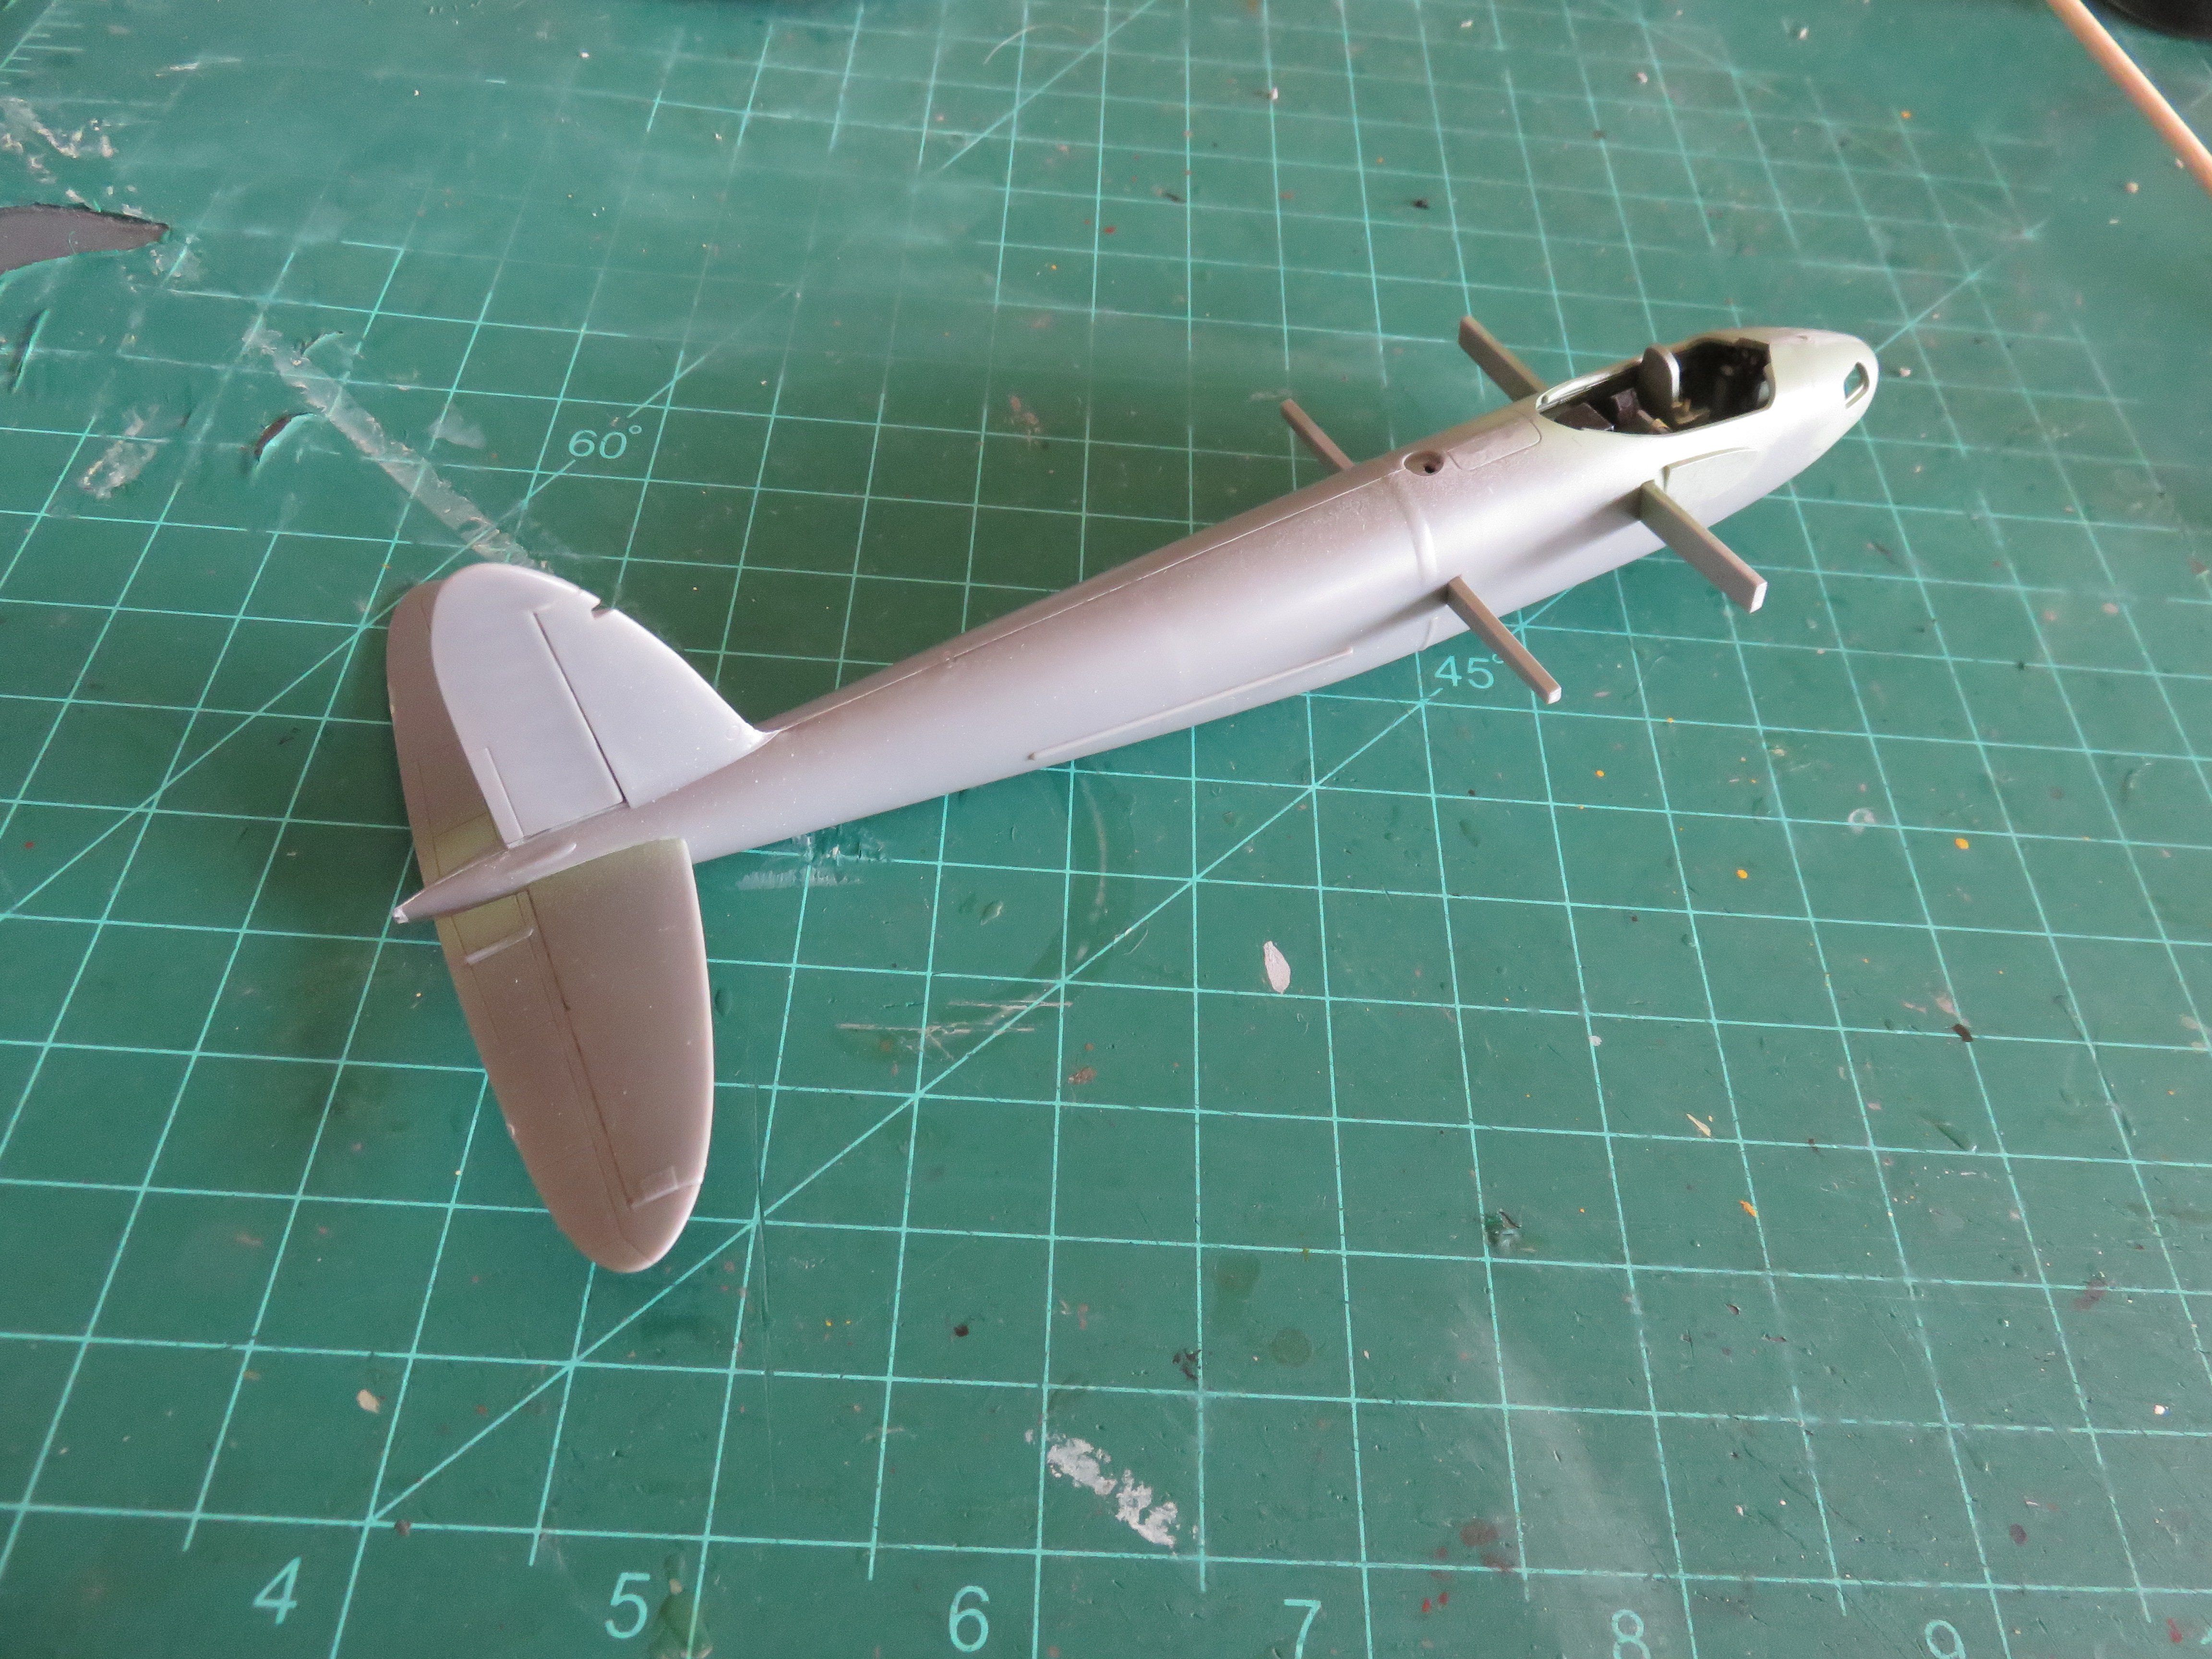
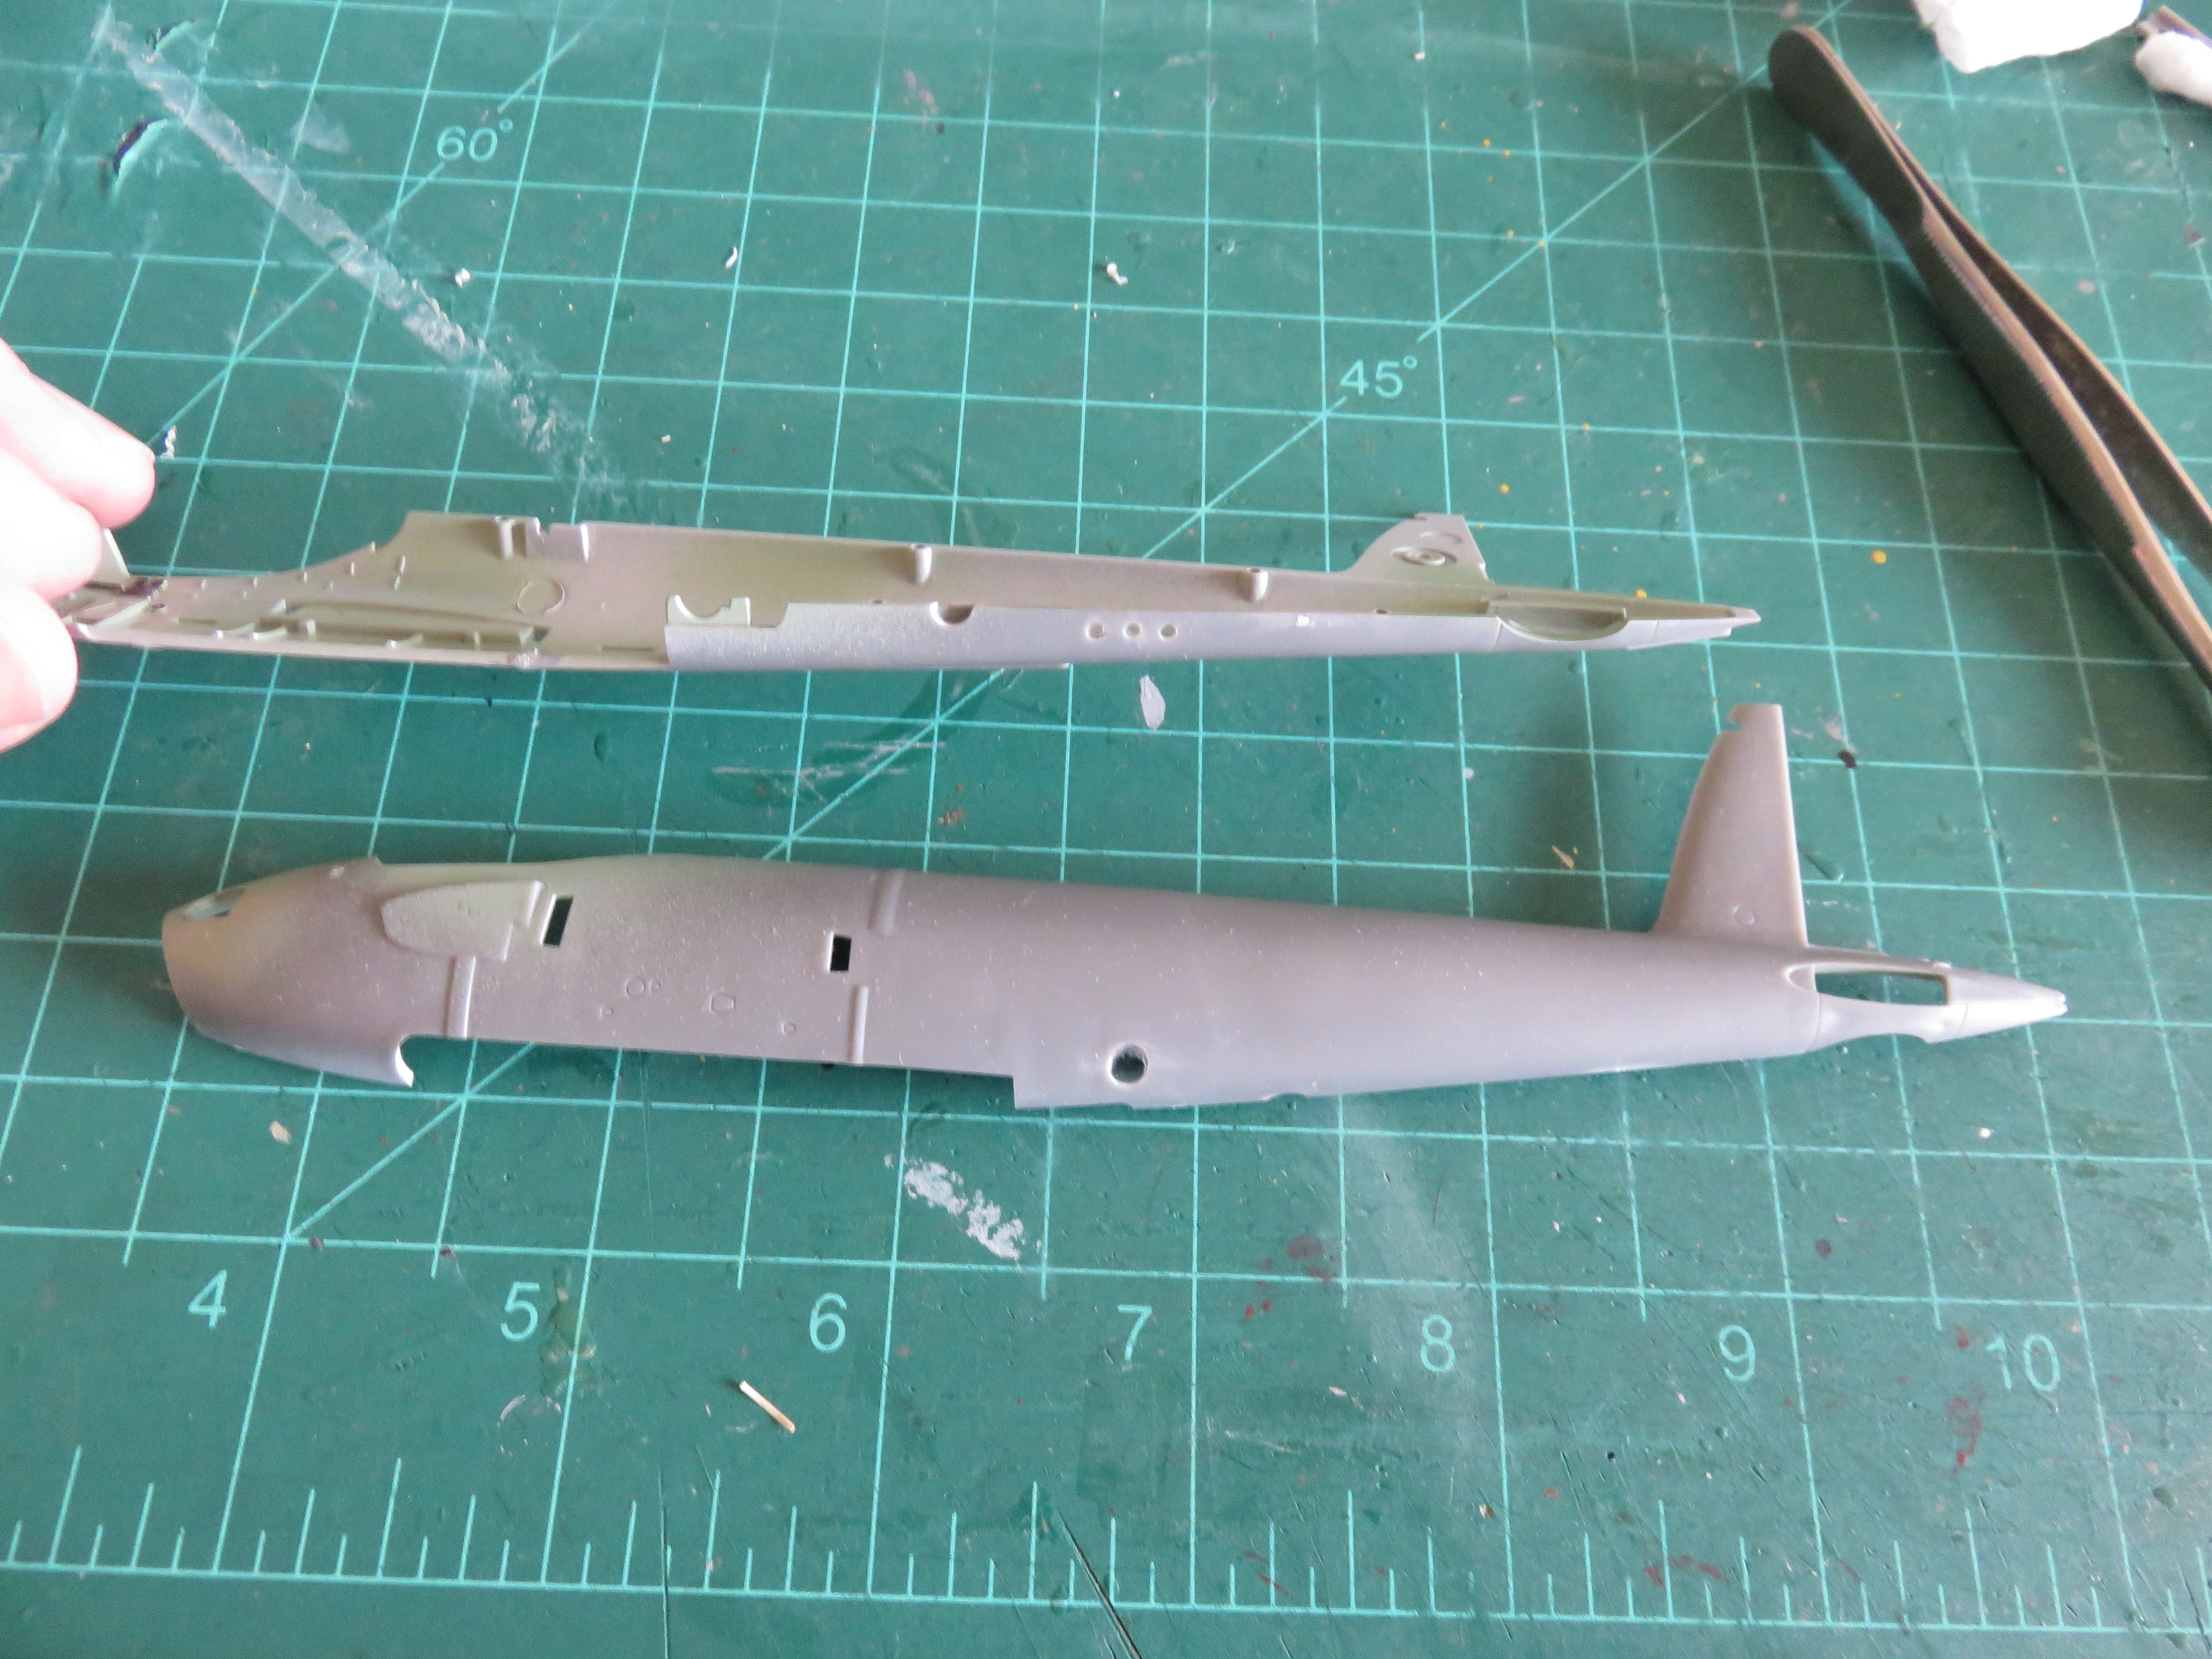
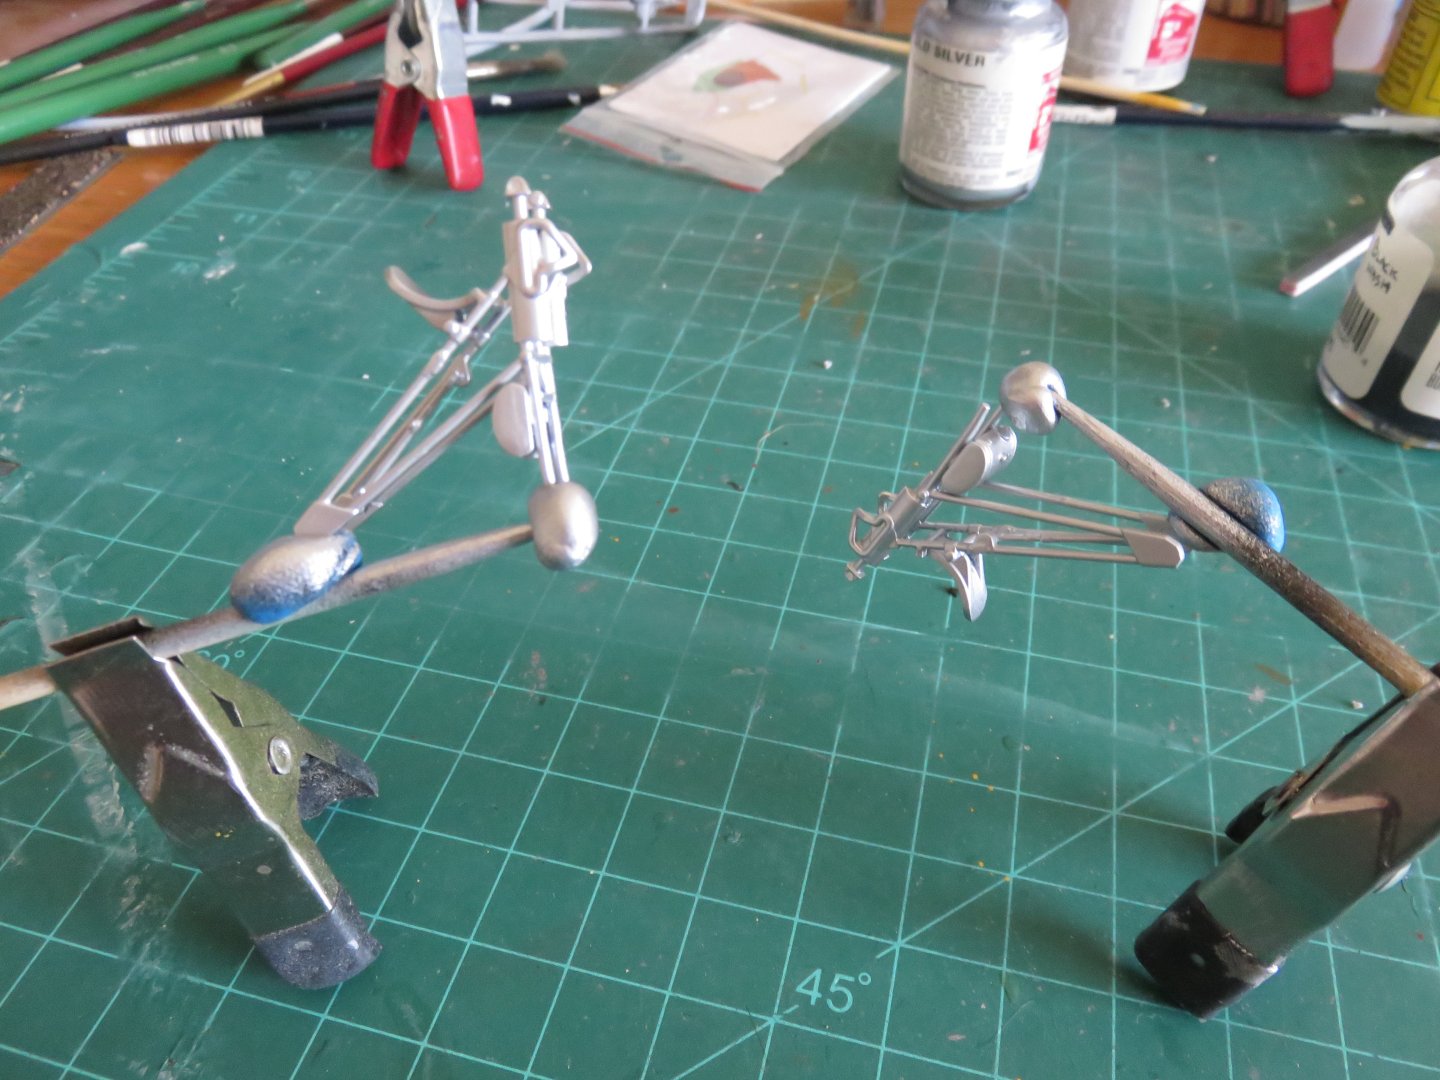
Thanks to everyone for all the "likes" and kind comments! I've been making some progress over the last week or so. I've had the odd interruption here and there. Starting off with finishing off the cockpit, after dry brushing some silver to add some wear to the moulded details, I then added a black acrylic wash of my own to bring out the details. It worked really well on the cabling and other small recessed areas, I'm very happy with the overall effect. When the wash was finally dry, it was time to get assembling! Overall the fit was excellent! A far cry from the effort I needed to get that Bolingbroke/Blenheim to co-operate! One thing I've found is that things happen in a slightly different order with this kit, than I'm used to. After assembling the fuselage, it was on to the tail fittings and rudder. No issues here. Next, on to the landing gear! (?) I guess in order to get everything assembled correctly, the landing gear has to be assembled now, using the underside of the wings as a jig to keep everything in alignment. Must be that when the engine nacelle is assembled that leaves too small of an area to work in. Anyway, after assembly, I painted the landing gear legs in black, followed by a coat of aluminium. Once finally assembled, I'll give them a coating of the black wash to grime things up a bit. That brings everything up to date for the time being, wings, I think, are next. I should have this airplane looking like a proper Mosquito soon! Thanks again, everyone, Andy


- 33 replies
-
- 10
-
-
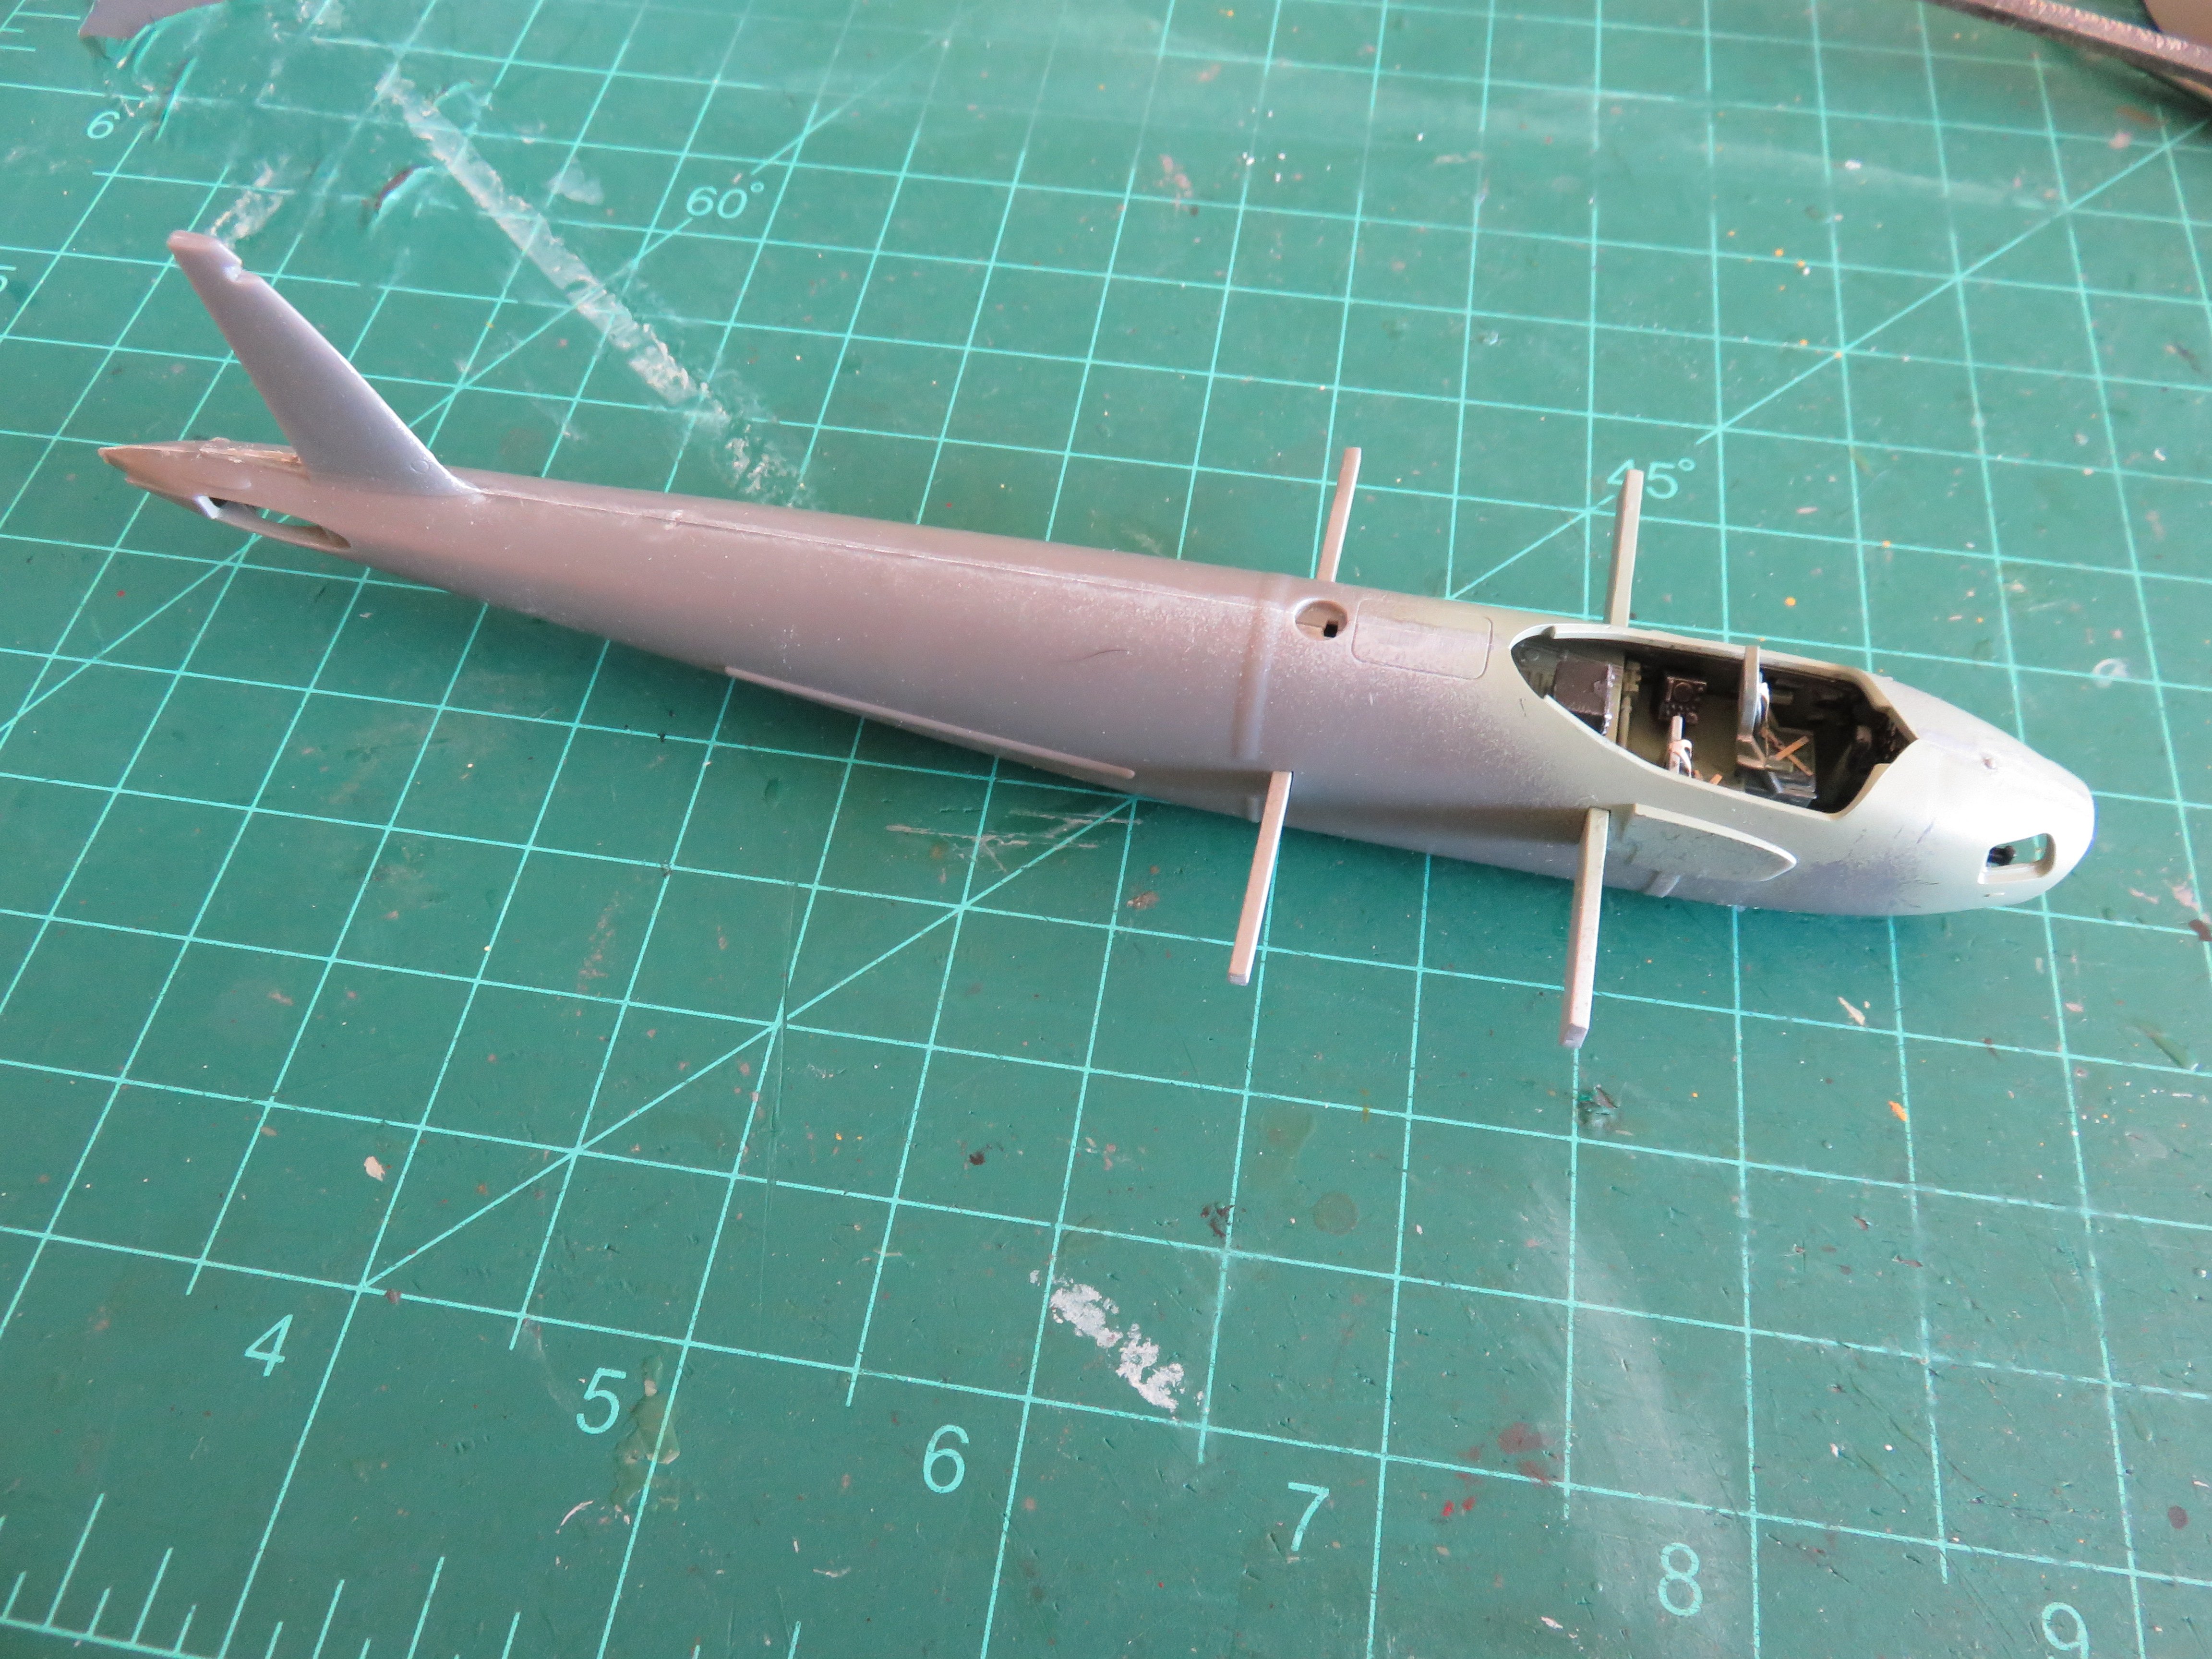
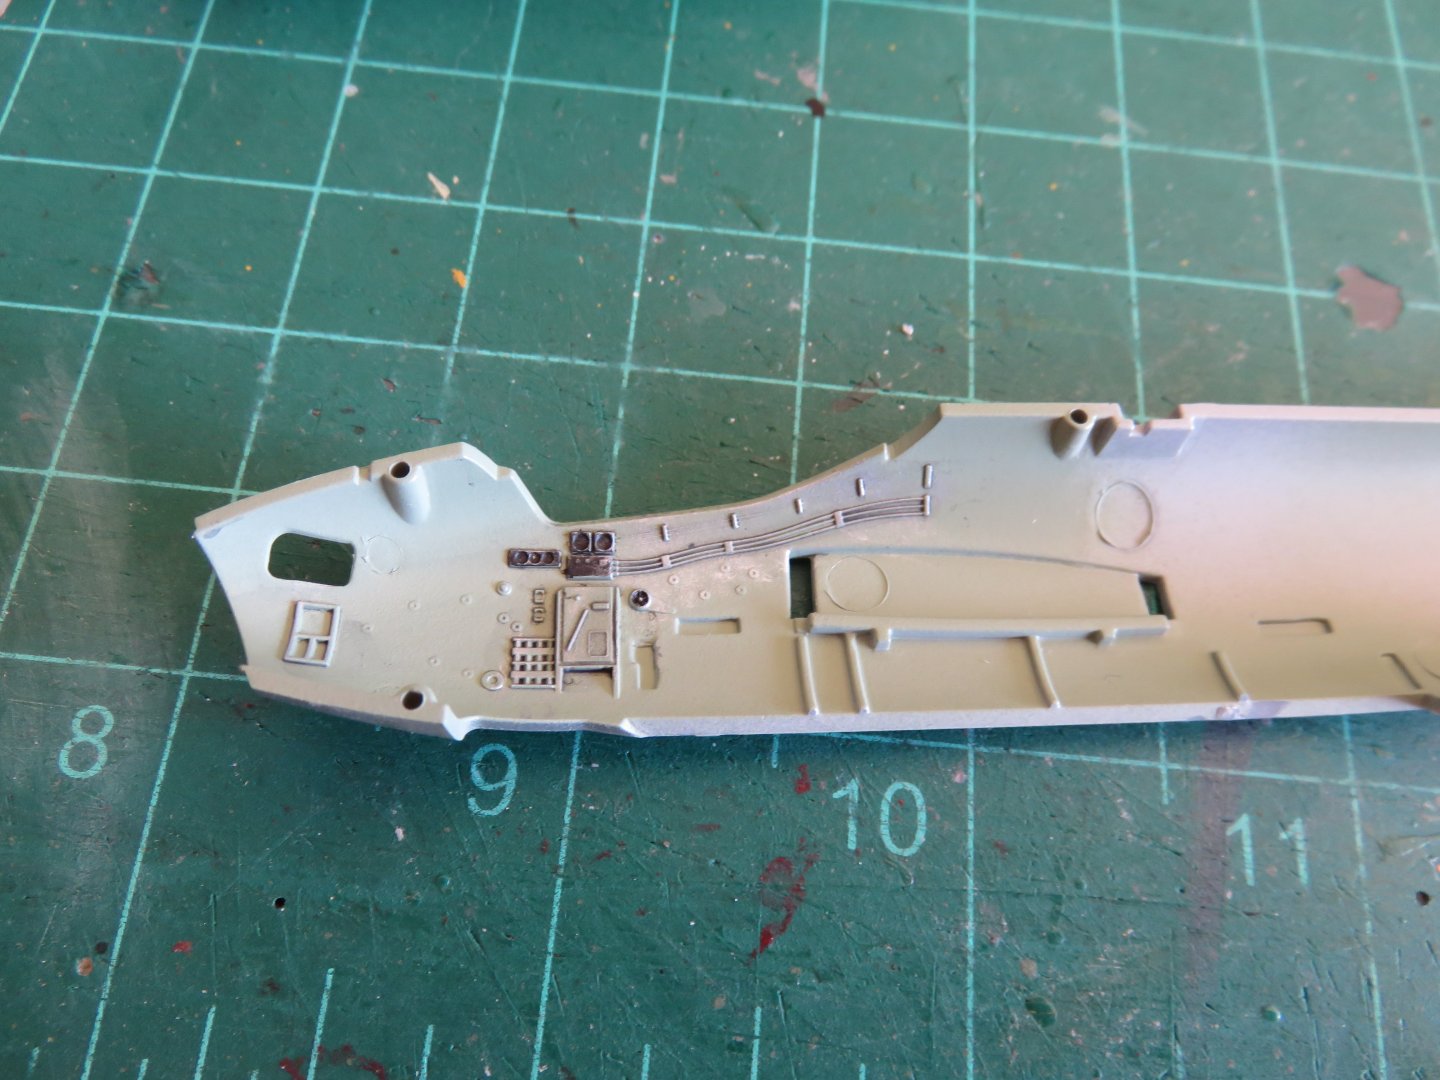
That’s an easy one, those are simply handrails! 😀 Andy
-
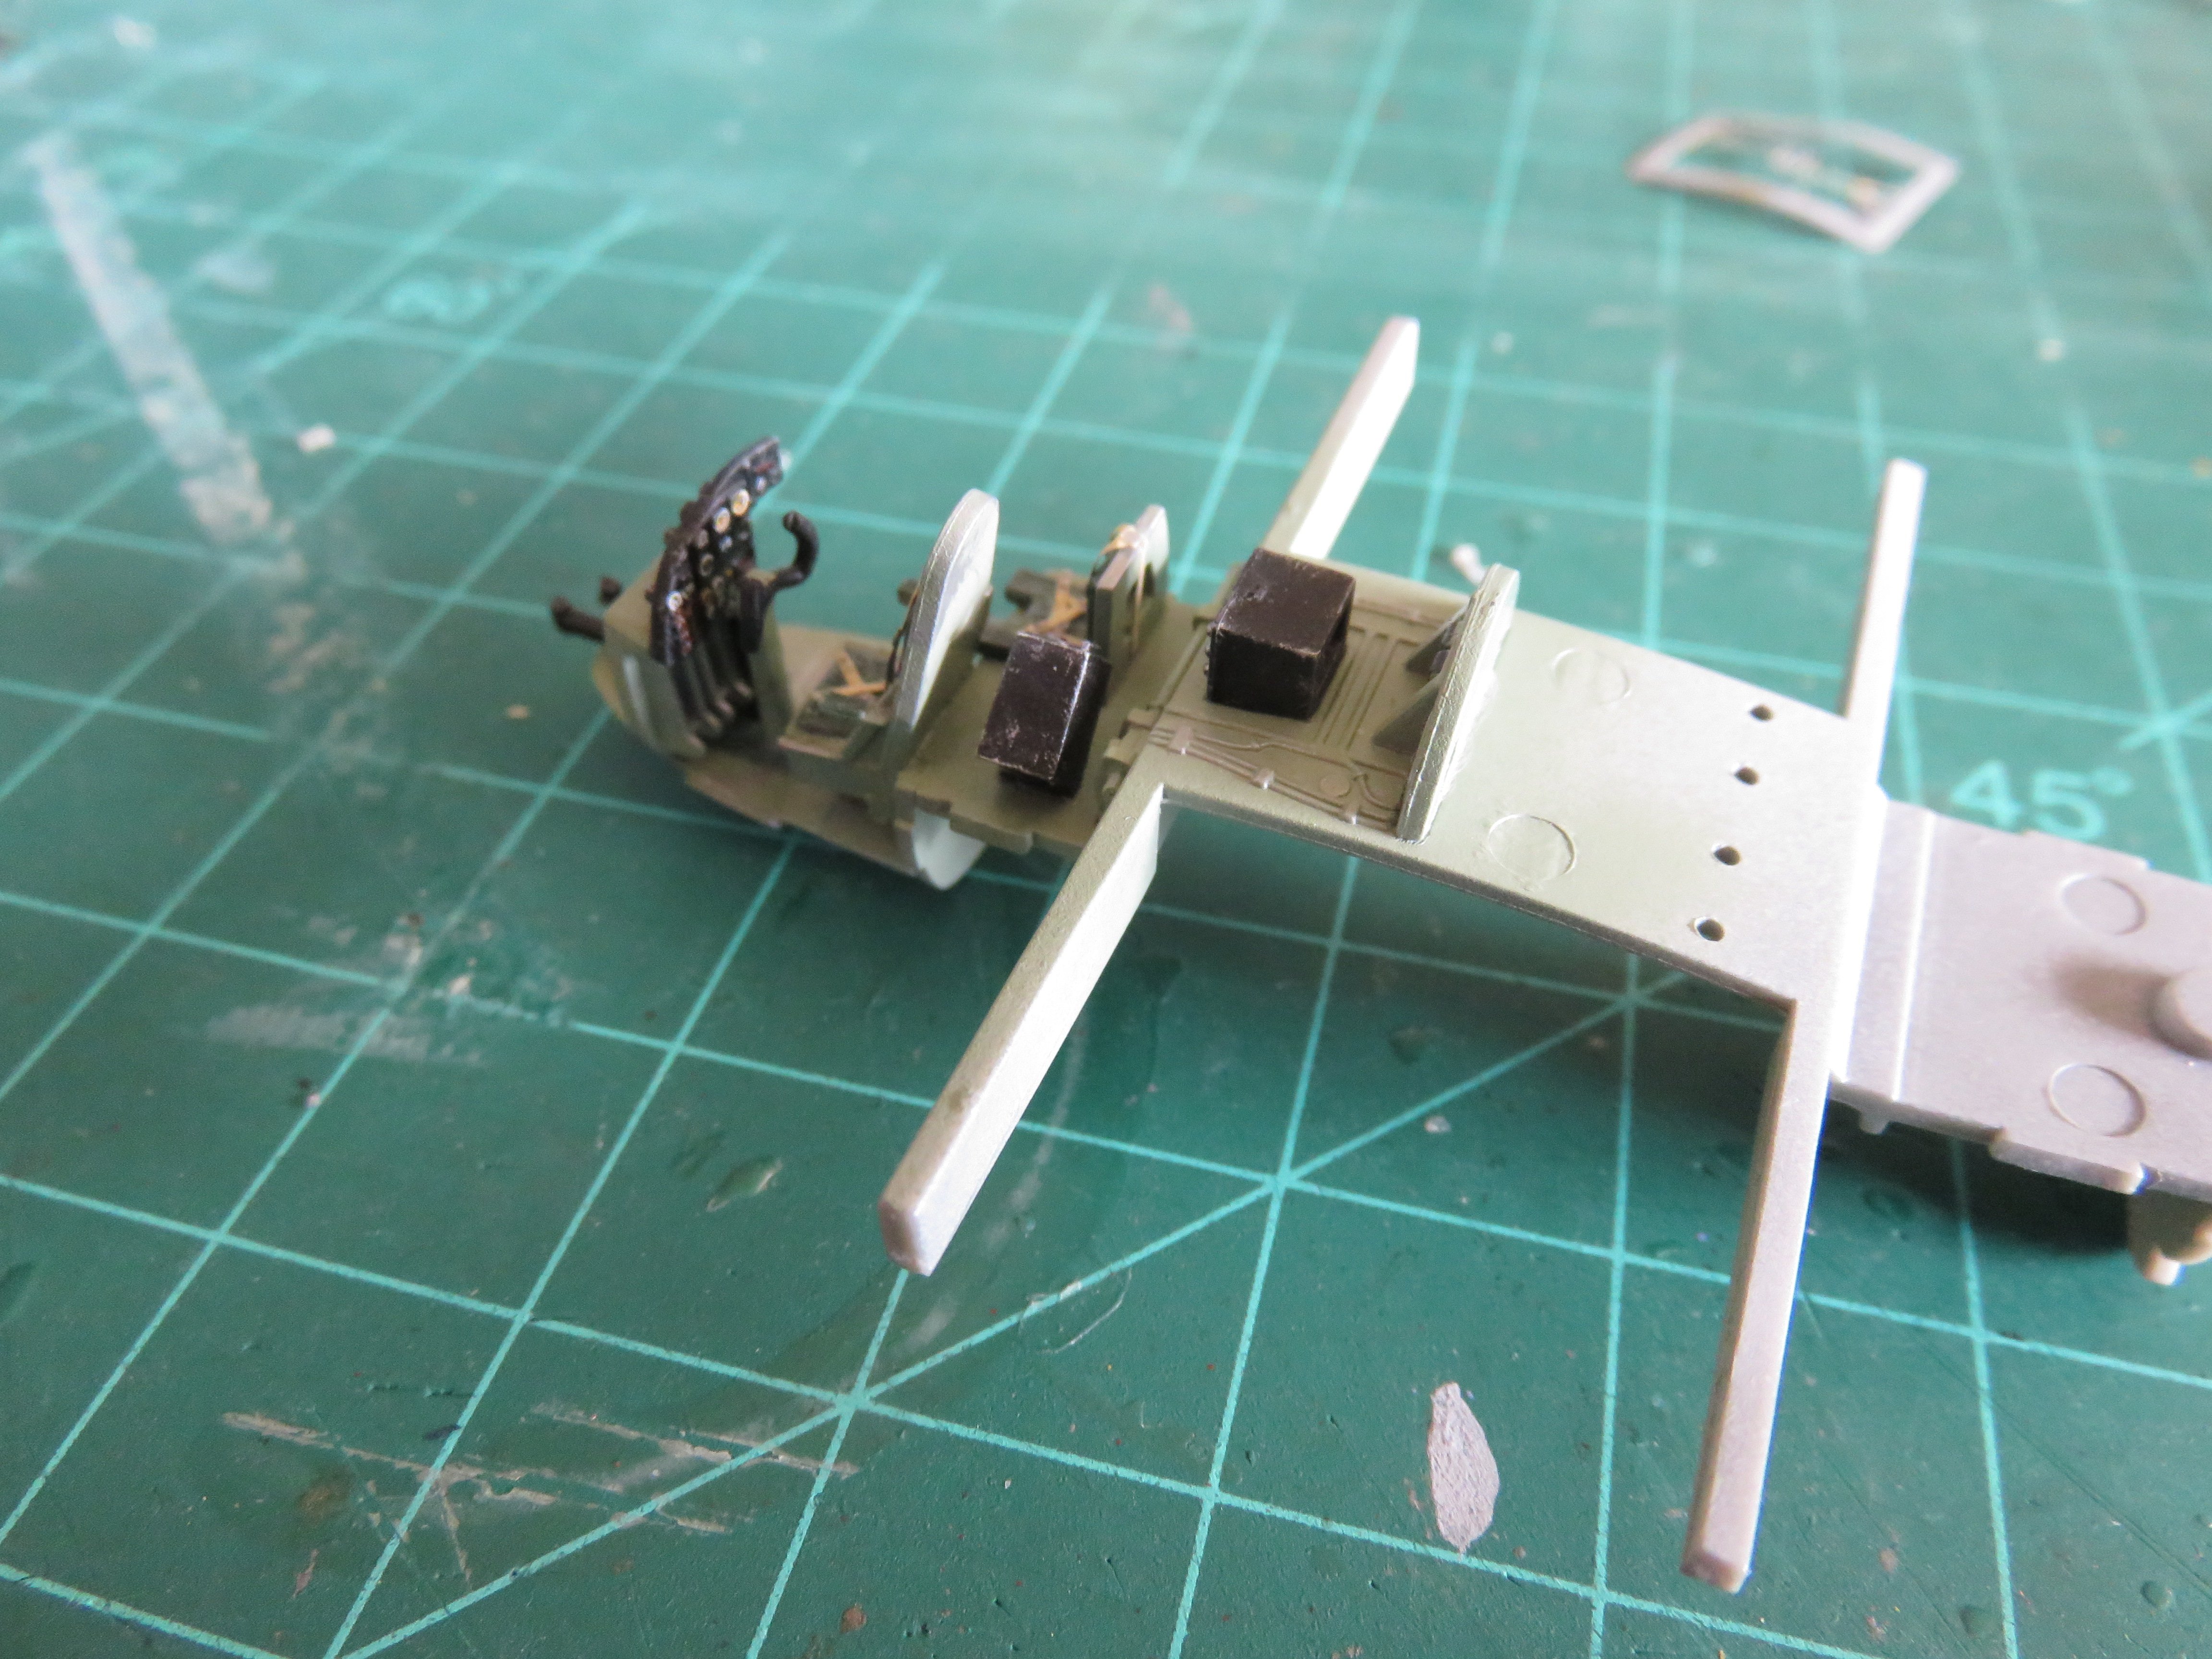
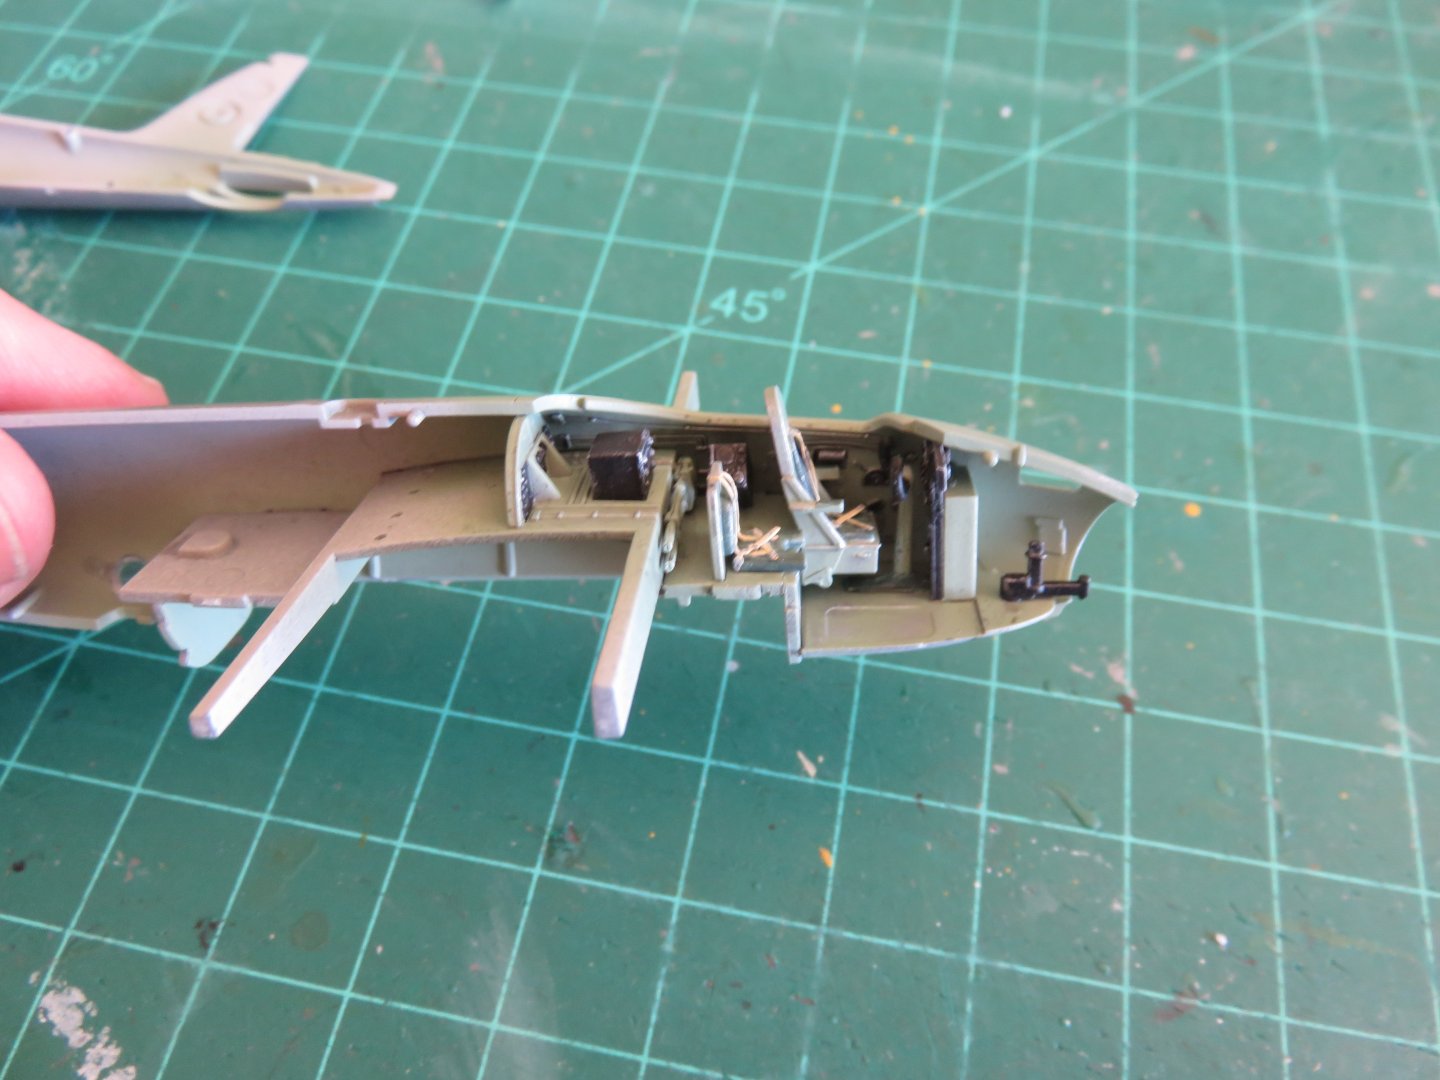
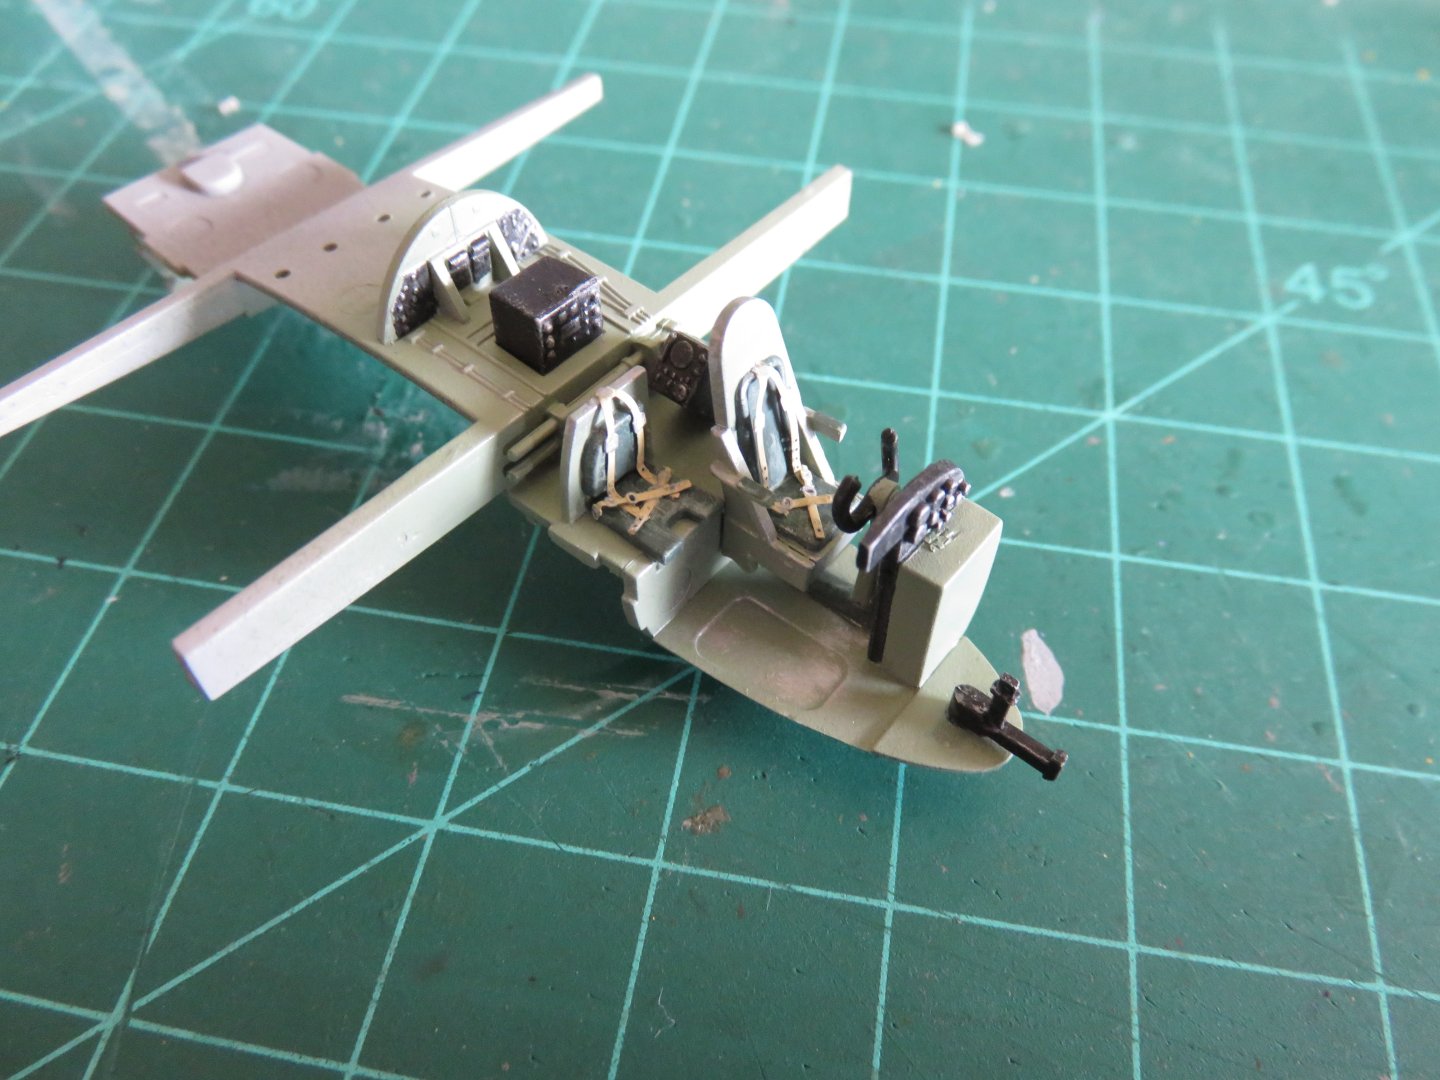
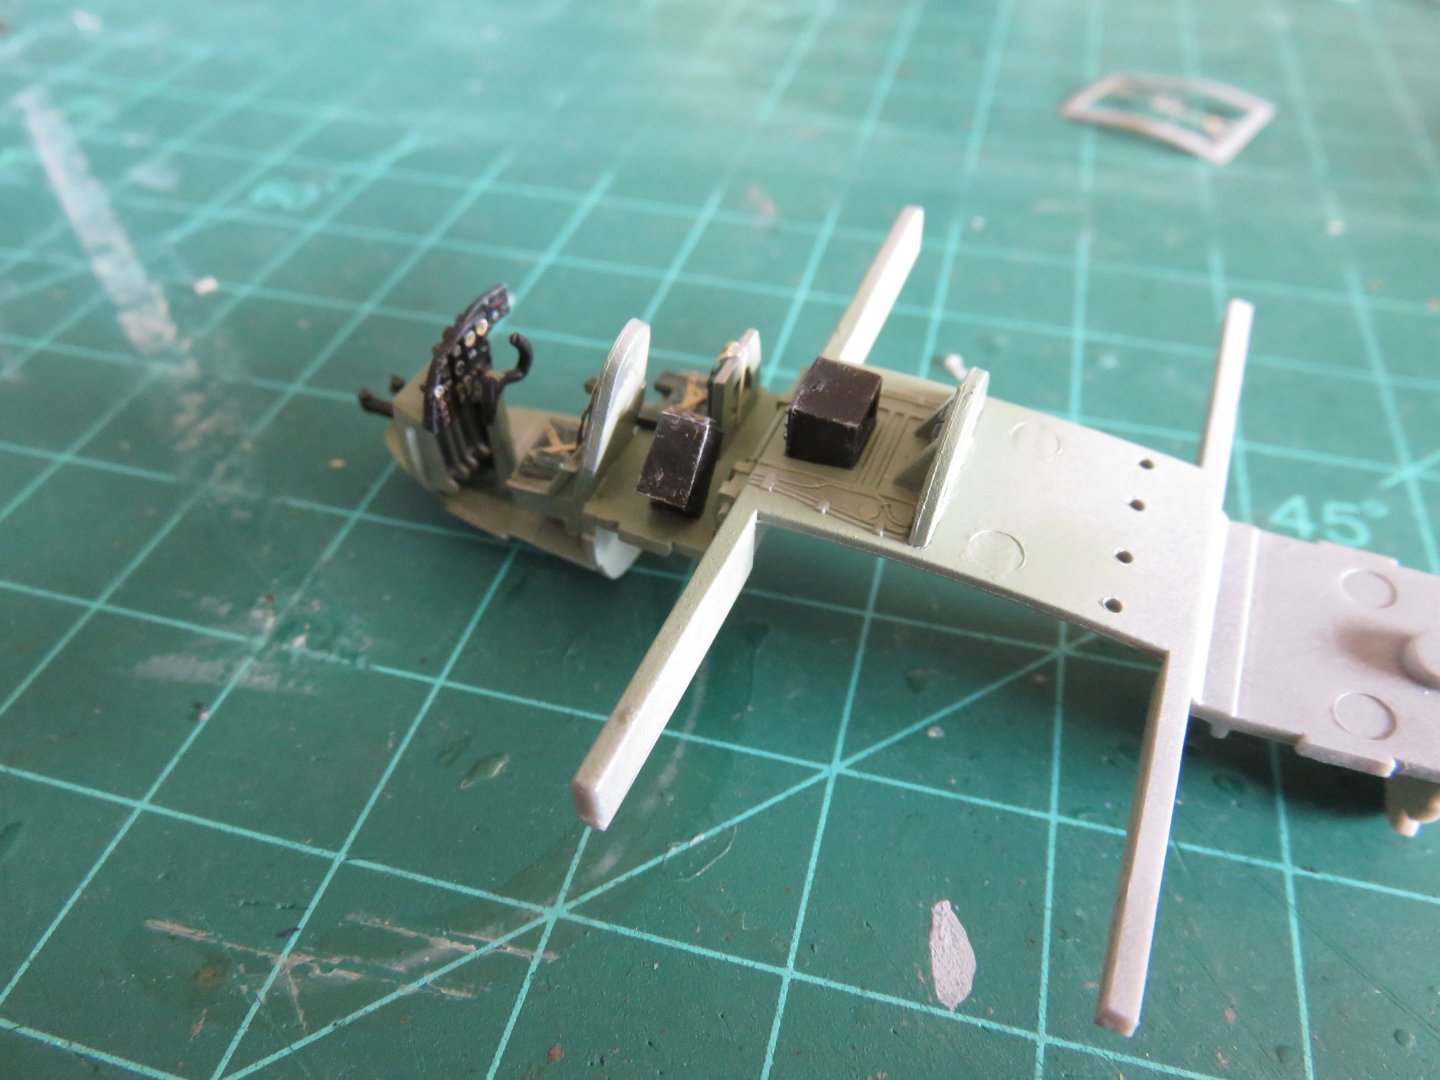
Thanks everyone, for all your patience! Finally, some progress worth reporting! Construction, of course, begins in the cockpit. Assembly was pretty straight forward, for the most part this build will be OOB, with one or two little enhancements here or there. I used AK Real Colour RAF cockpit grey green for the interior colour, and Vallejo USAF dark green for the "leather" seats. I dry brushed some Floquil Aged Silver to simulate a little wear and tear, and returned to the AK cockpit green to add some scuff marks to the seats. I think Airfix is on the right track by moulding the gauges and switches into the instrument panels supplying the instruments as a clear decal, rather than the old, and very cartoonish black and white decals from before. I'd seen this before on the Spitfire Mk Vc kit and it looks fairly well (considering how little is actually seen in the end). The seatbelts came from the Yahu models PE seatbelt set, about the only aftermarket so far. I may get some resin wheels for this bird. Airfix used the same fuselage mould for this kit as on the previously released bomber version, however a few holes had to be drilled in place to accommodate lights and the opening for the oblique camera. The position lights on the starboard fuselage half are drilled out using a jig, so no problem there. I did run into a slight difficulty with the camera opening as the angle of the hole isn't defined until you try to fit the clear lens piece. I'd filed the hole slightly too horizontal. I've been slowly filling up the slight gap with thin layers of canopy glue so as not to craze or mar the clear part. Hopefully things won't be too visible when it's all said and done. Once everything has had a chance to cure, I will give the interior a shot of Dullcote to seal everything, and then I may add a bit of a dark wash to enhance some of the finer details in the cockpit. Andy

- 33 replies
-
- 11
-
-
Apparently! Looking at the Airfix instructions (via Scalemates), the last landing of a biplane on a British aircraft carrier occurred July 1st 1965, on HMS Eagle. Andy
-
https://en.m.wikipedia.org/wiki/Jupiter_(locomotive)#/media/File%3ACP_steam_loco.jpg Quite confident. I know the structure that you are referring to, but I’m fairly certain that was introduced later as a method of keeping the steam from circulating in front of the cab. And no doubt the “can” on top of the dome is the whistle. Very standard practice for the day. Jupiter was built at the height of the brass age when railways wanted to show off their industrial advances in the finest style of the times. Lots of excessive and highly polished metal. Very different from locomotives that would be built less than twenty years later. Andy
-
You’re too kind! 😀 Most of my knowledge has been acquired through years of self-study. I’ve been fascinated with steam locomotives for as long as I can remember, and I’ve been driven to understand every facet of how they and all their various components work. Andy
-
The fitting on the boiler is a check valve. The device in front of the wheels is actually an early form of injector pump. As a steam locomotive builds pressure, water needs to be introduced at a greater pressure, otherwise it would blow out backwards into the tender. Before the development of more modern Venturi type injectors, injection water pressure was increased by the use of a pump. These pumps were usually driven via a linkage from the valve gear, (hence its location in front of the first driver wheel), so would only operate when the locomotive was moving. Andy
-
For a somewhat complicated looking model aircraft, that sure went together well. Fantastic job! Andy
-
42:06 Rgds, Andy