-
Posts
3,271 -
Joined
-
Last visited
Content Type
Profiles
Forums
Gallery
Events
Everything posted by realworkingsailor
-
I think, too, it’s worth looking briefly at Curtiss’ production order book. Not only did they have the USAAF’s purchase orders to satisfy, but they were sending planes to the French (before mid 1940), the British, including Canadians, Australians, New Zealanders and South Africans, the Russians, and even Brazil got a few as well (among others I may have missed). Delaying production to retool for a new plane could have been disastrous. NAA was not as burdened with orders (sure they were making T6s, but their loss rate was significantly less than a frontline fighter), so they could take the time needed to tool up without risking critical output. Oh, and aside from the P40D, P40L, and some of the early P40Ns, the rest of the latter P40s had six .50 cals too. But yes, the P51 was just that half-generational step ahead of the P40, so a much more worthwhile investment in the long term. Andy
-
When you look at the basic engine specs, the Allison and the Merlin/Packard-Merlin are more or less equal. As you said, the Merlin was better as it had a fully developed two stage/two speed supercharger. While I fully agree that the F and L P40 variants had the best performance, I have to wonder if it was the best performance for that airplane when viewed in the context of the role it found itself. For a good part of the desert campaign, and most of the Italian campaign, the P40 fell into a similar role that the Hawker Typhoon, and P-47 found themselves in NW Europe. Low altitude, close air support, where its ability to carry a reasonable amount of ordnance, and drop it with a reasonable amount of accuracy on ground targets was used to good effect. Which engenders the question, what good is high(er) altitude if you’re not going to need it? When it comes to comparing the P-40 and P-51, I think it really comes down to timing. When the P-51 was introduced, the P-40 was a relatively mature design. Even the later versions had only incremental improvements over earlier variants. The P-51 was only at the beginning stages of development. So its full potential was yet to be realized, and it took full advantage of the new technologies that Curtiss may not have been able to. Andy
-
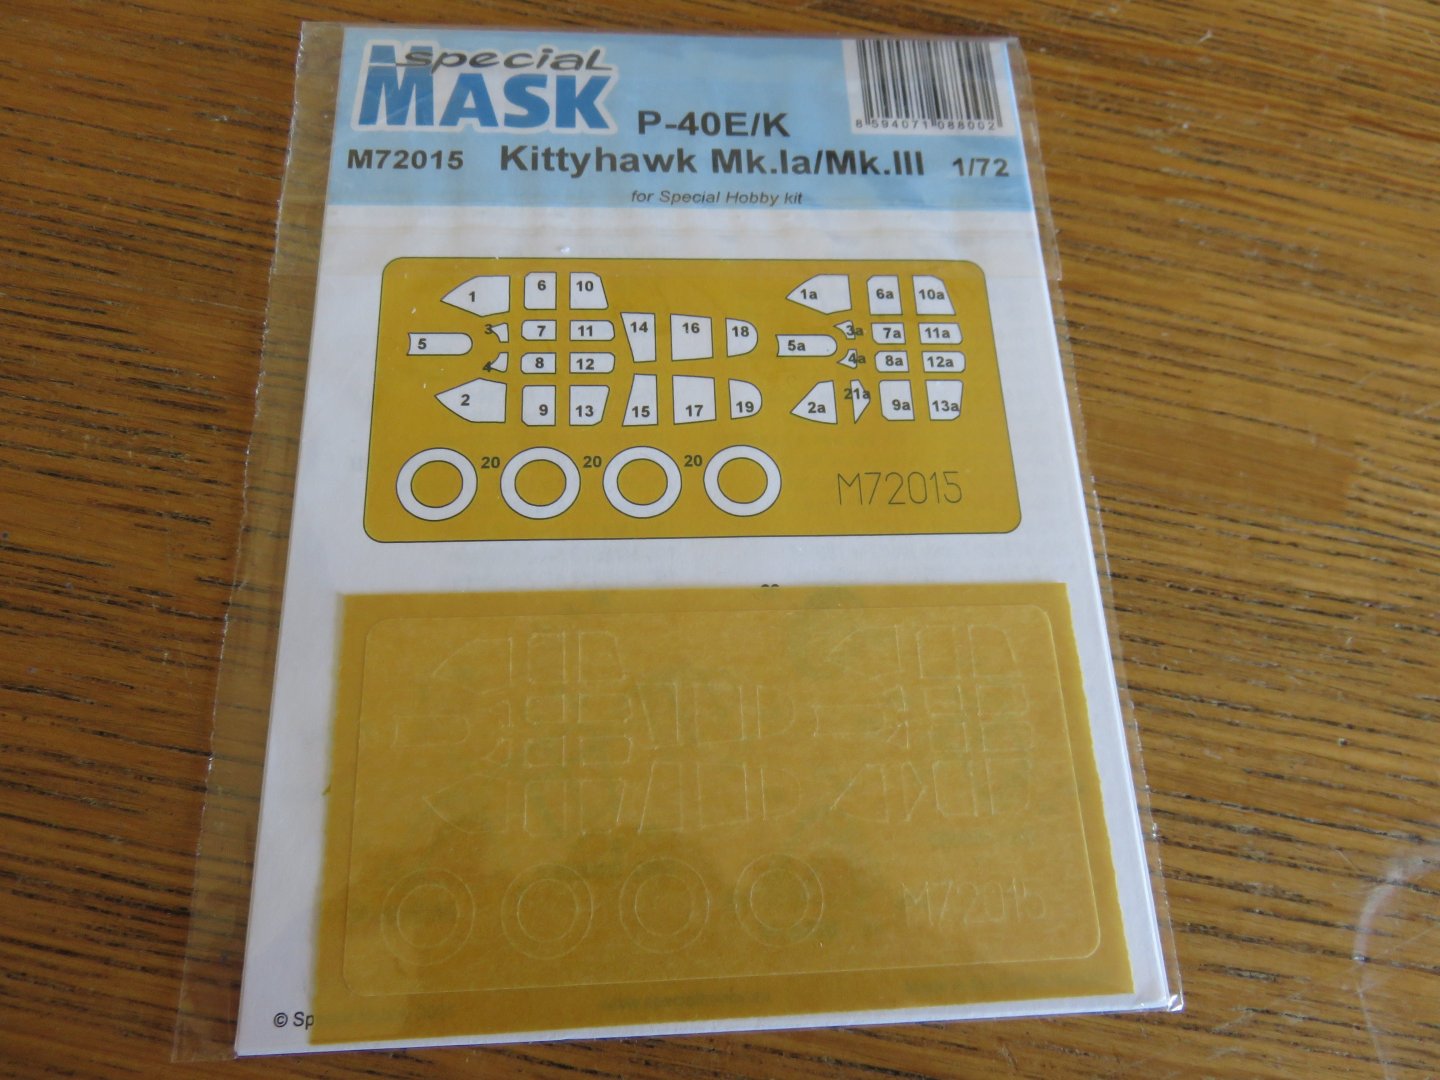
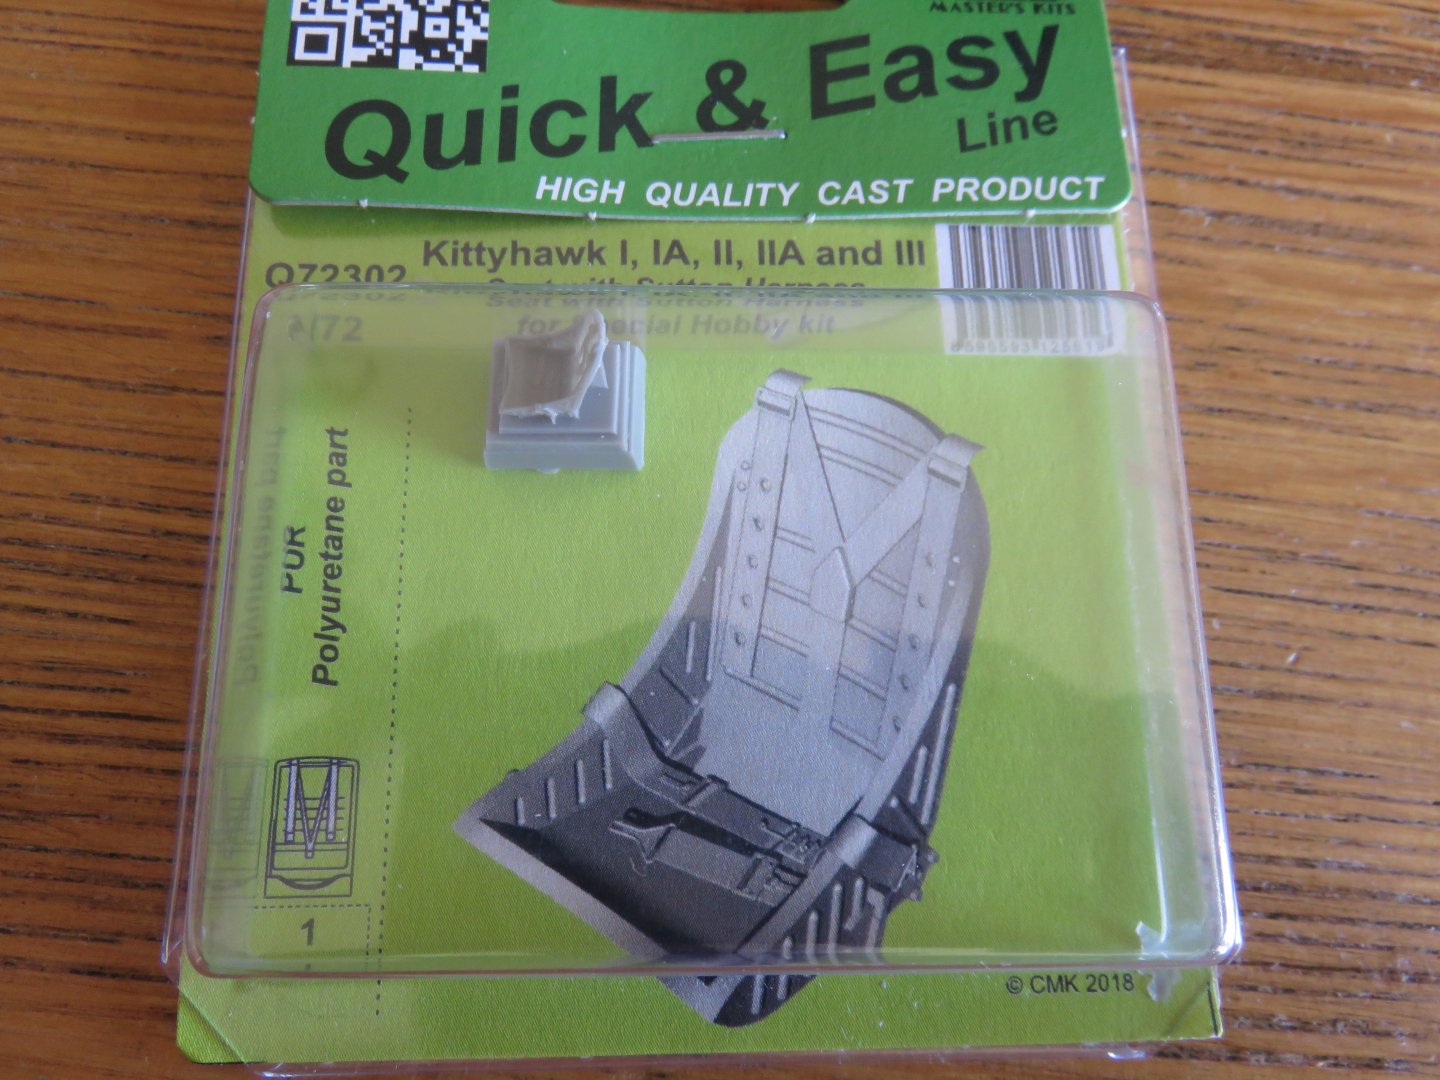
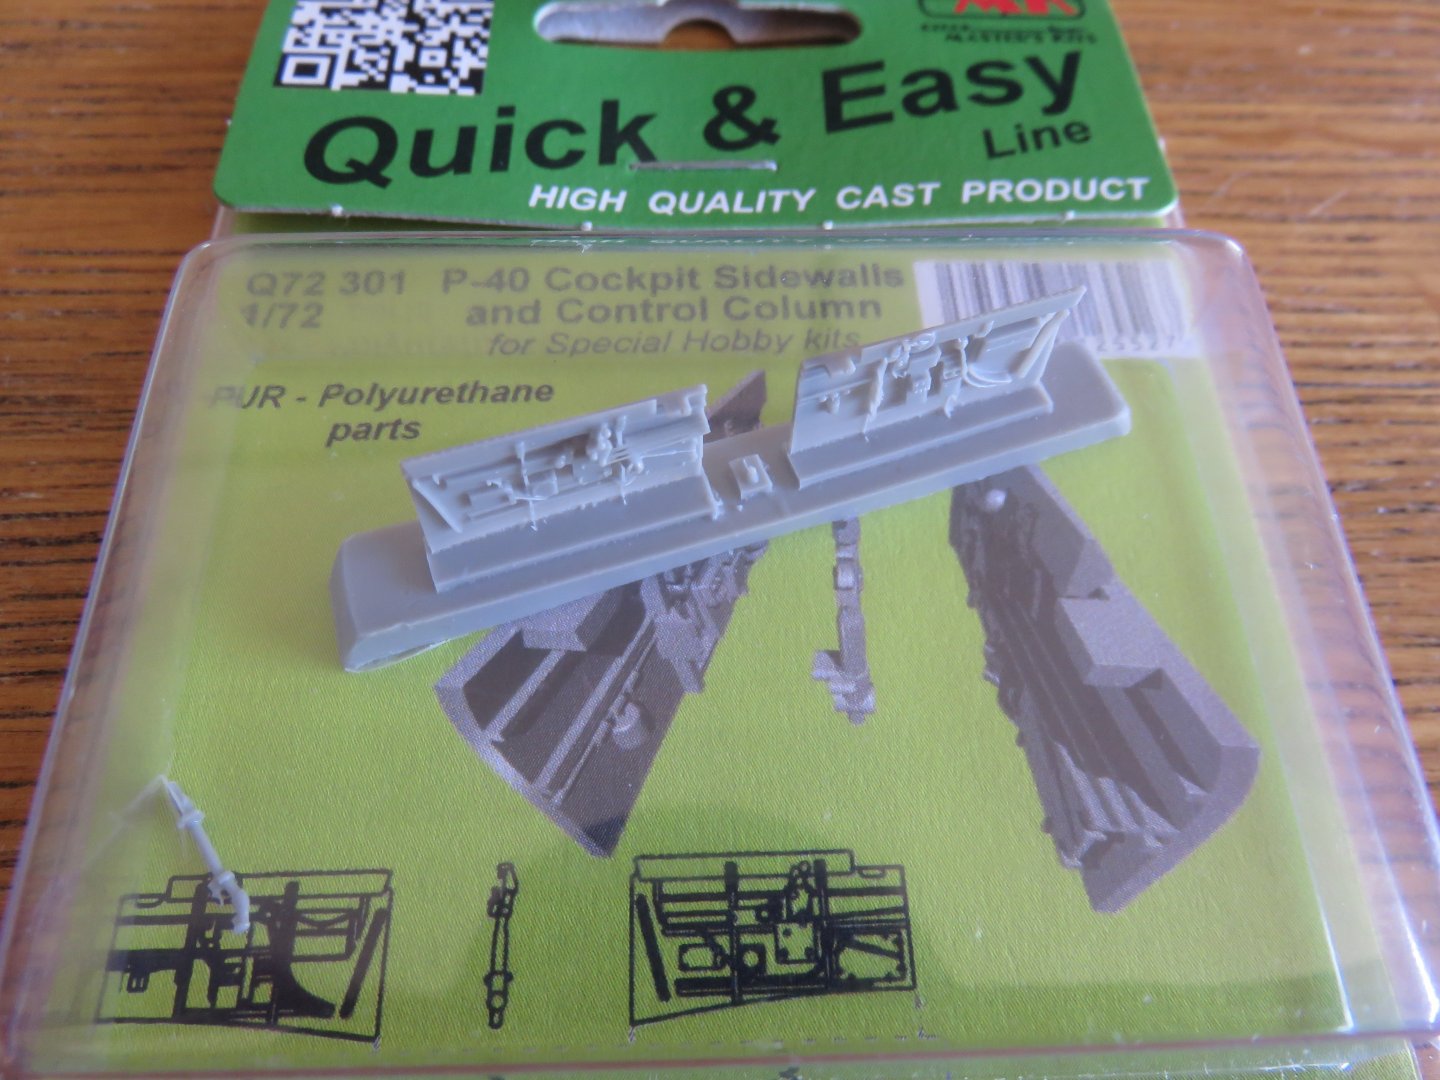
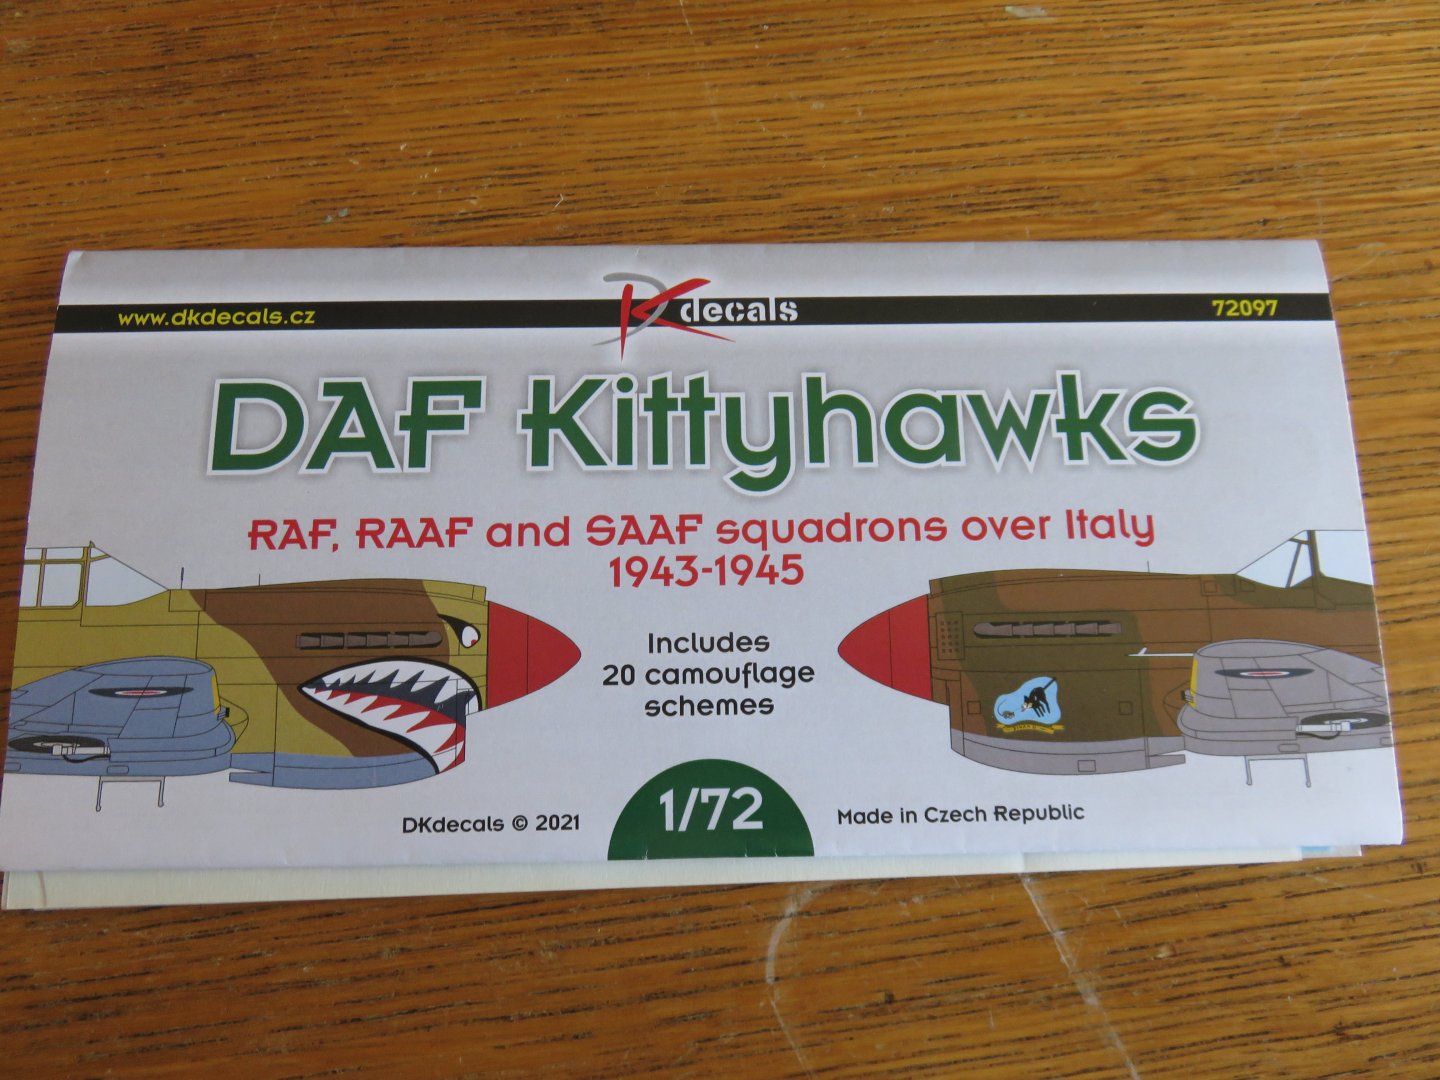
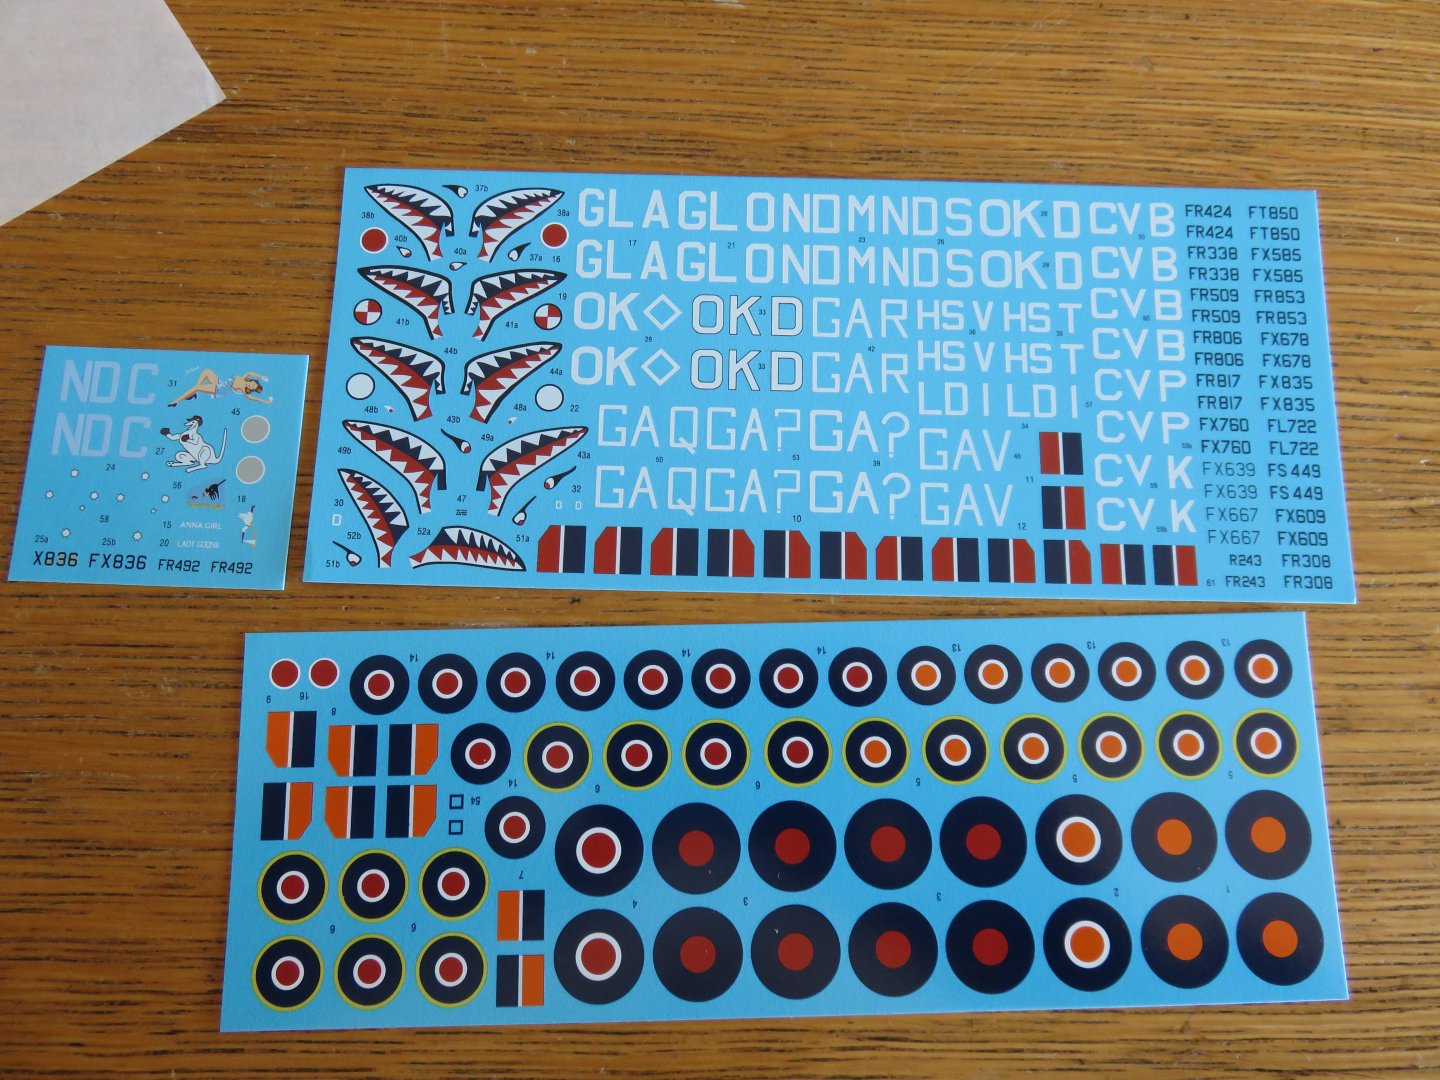
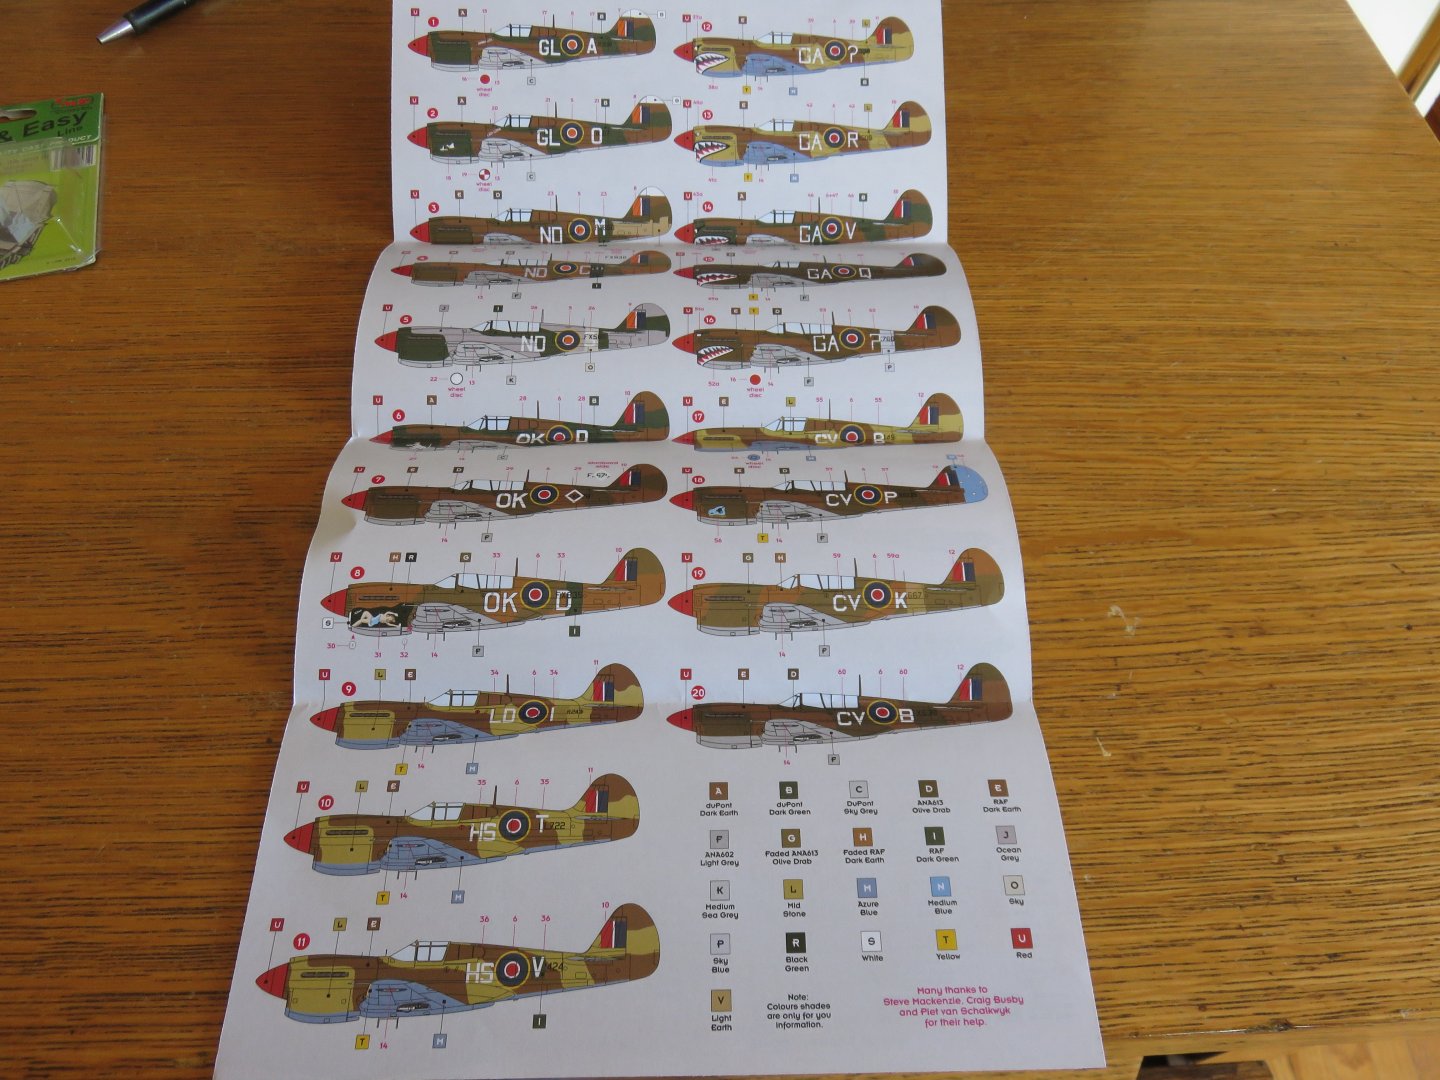
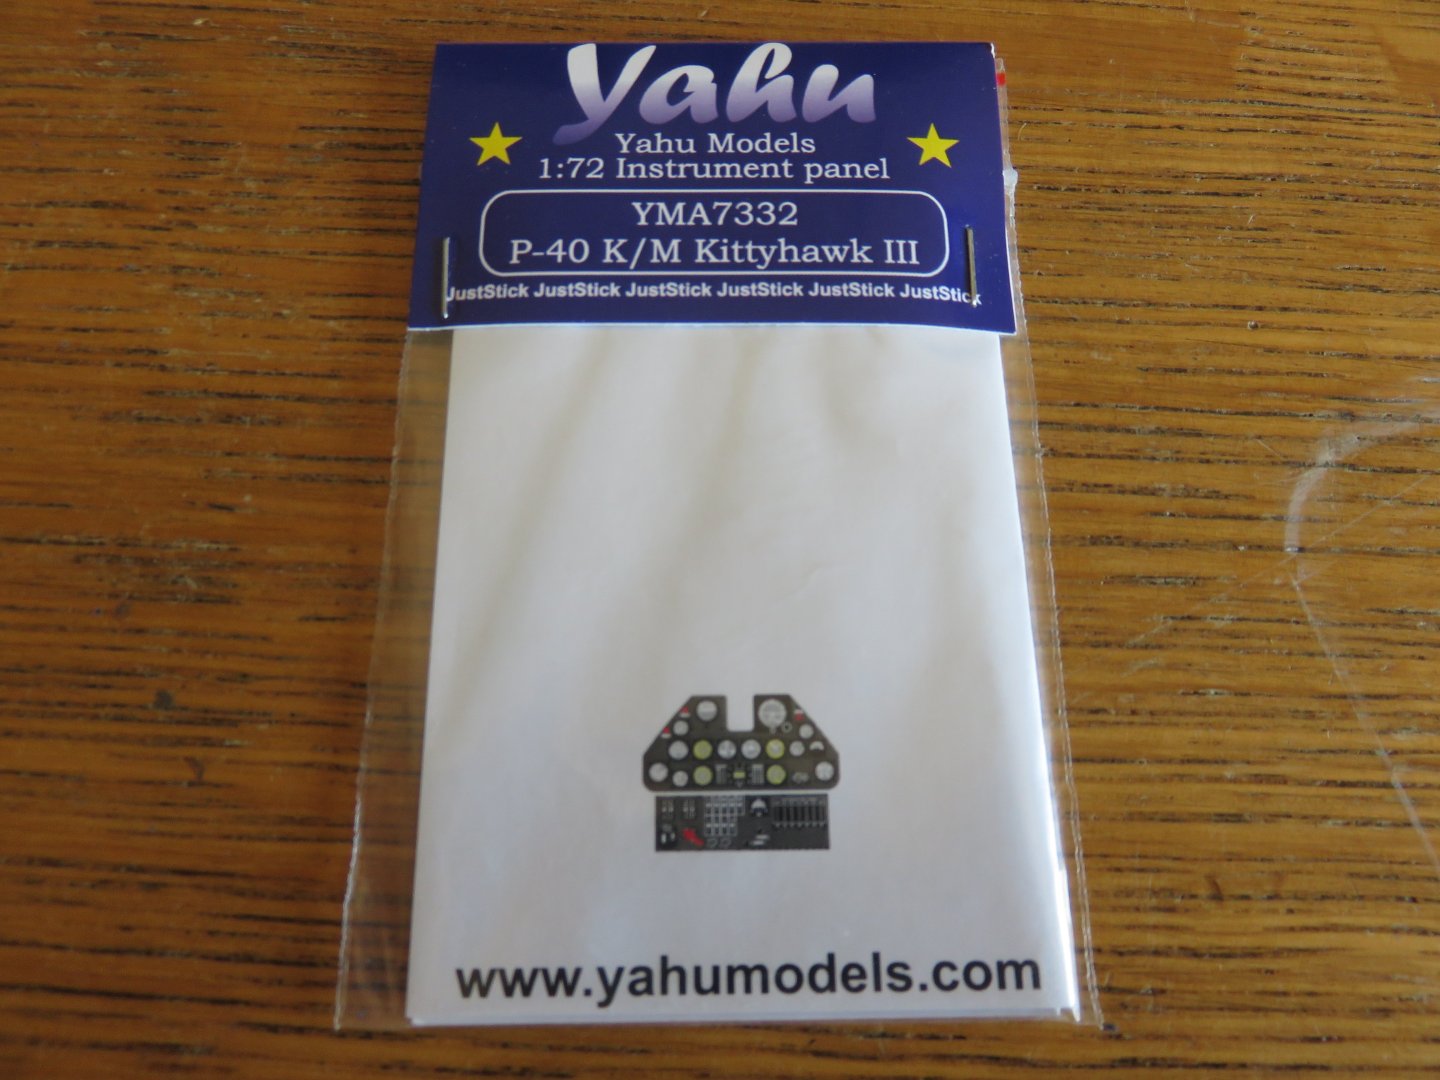
@Egilman Your insights and knowledge are most welcome! @Dave_E @Canute Welcome! I knew there were P-40 fans around here somewhere! Welcome aboard everyone! I'm glad to see such interest in this build. For the next part, I thought we'd have a quick look at some of the extras I picked up to help with my build. First up are a couple of CMK resin bits to add a little more detail to the cockpit. Starting with the cockpit sidewalls (and control stick): While the kit supplied parts are very good, the resin parts are just that little bit better. The moulded details are crisper and clearer. This is likely due to the inherent limitations of injection moulded styrene. CMK and Special Hobby being the same company, these parts should be a drop in fit, no hacking or sanding needed. The next bit of resin is a replacement seat: In this case it is representative of the seats used in the RAF Kittyhawks. Again, the kit supplies an appropriately shaped seat, but the resin one just features some finely moulded details not found on the basic part. The kit seat lacks the ridges and grooves on the seat sides and back, and the resin seat is just that much thiner and more "metal" like. It also includes the RAF style "Sutton" seatbelt harness moulded in (the kit only has decals for the American style seatbelts) To finish of the cockpit, I've bought a Yahu Models pre-painted PE instrument panel: I've used their instrument panels on my Beaufighter and Typhoon builds last year, and they're a great (and fairly inexpensive) addition to any cockpit. If you couldn't tell by now, I'm planning on displaying my model with the canopy open to show off all this great detail. Hopefully some of it will be seen! Moving on to the outside, I'm not planning on doing any reworking of the exterior details, although it's worth noting, if you have a bit of a masochistic streak, CMK offers a litany of resin detail upgrades. Everything from the armament to the correct type of wheels can be found. Even a detailed engine bay complete with the correct Allison V1710 engine. For my model I picked up a set of decals from DKDecals. This was a pricey set (it cost as much as the SH kit!), but there are over 20 different marking options, and unlike Xtradecal, the set should be good for supplying the markings for more than just one! The decal set includes markings for a wide array of Kittyhawks used by the RAF, RAAF, and SAAF (as noted clearly on the instruction sheet above). Options for most, if not all, the later P40 variants used are covered. It's a long list! In my case, the set includes both squadron code options (GA Q and GA ?) for the plane I wish to build, but doesn't include the correct serial number. From what I understand the GA ? code moved to whatever airplane Billy Drake was flying, and it's possible that FR213 was carrying different code letters at the time of its crash in late 1943. As I have done in the past, I can easily re-create the correct serial number with some blank decal paper and my laser printer, so there's no problem there. I am planning on painting the plane as it would have appeared earlier in '43, in the RAF desert scheme. Getting back to the decals themselves, they appear to be of a very high quality. The registration looks spot on, and the colour separation is sharp and well defined. The decal film looks fairly thin, so with any luck the markings should settle easily onto the surface of the model. My only qualm about the DK set, is they only show the left side of the airplane, along with a smaller view of the upper side to guide decal placement. It would be nice to see both left and right along with another small view of the underside, in order to confirm accurate decal placement (this is particularly important when dealing with nose art, which, for obvious reasons, didn't follow "official" doctrine!). I should also add, they've done a great job with the "shark mouth" decals! If you look closely, each of the five versions differs slightly from the other, so there's no do-overs! Hopefully I don't mess that part up! Finally, the last little extra is a set of masks from SH: Not much to note about the mask set, other than it was slightly cheaper than the Eduard set. So this brings the introduction to its conclusion. I am looking forward to starting this build, although when that time comes depends on the weather, and how productive I am with the outdoor chores! Thanks to everyone who's joining me on this build and thanks for all the kind comments, likes, and insightful information! Andy
-
I think the P-40s reputation took its biggest hit in the immediate postwar era. Looking back now, while it didn’t have the high altitude performance (which only mattered in NW Europe, one theatre out of how many..), it was at least equal to its contemporaries when played to its strengths, and in some cases better. With the A6M2, it was a matter of keeping the speed up. At high speed, the P40 could out turn the Zero due to the structural strength of the P40, but if the pilot let the speed drop, the Zero regained the advantage. Rex’s Hangar did a great pair of videos about the P40. As he puts it, a high speed, low altitude sledgehammer of a plane!
-
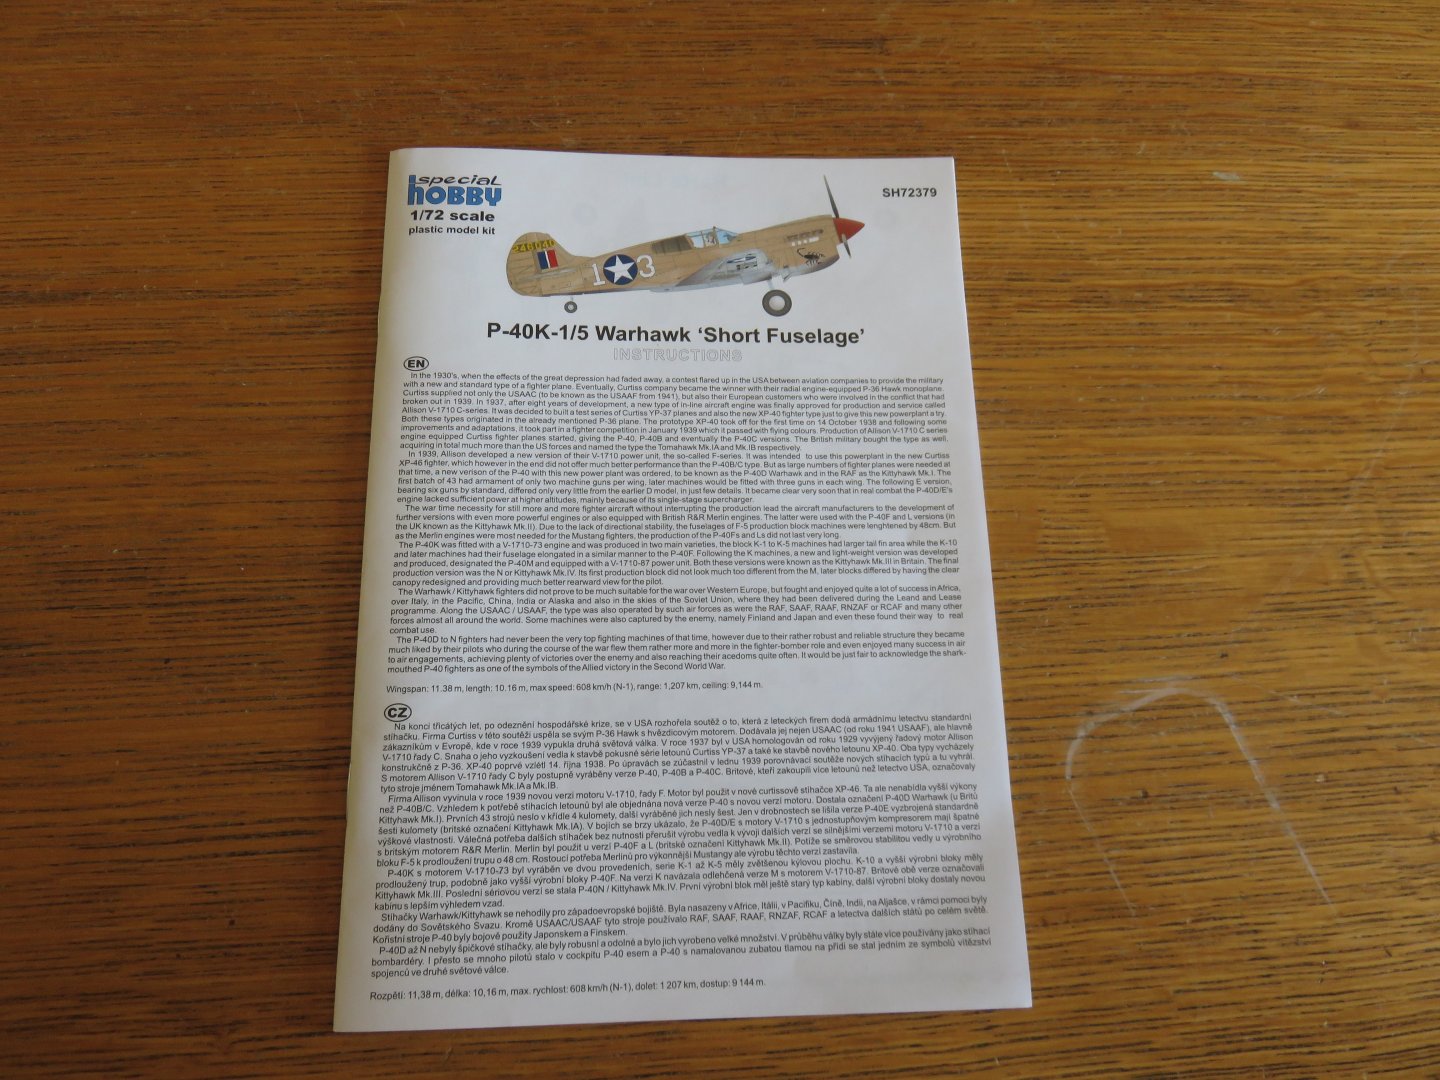
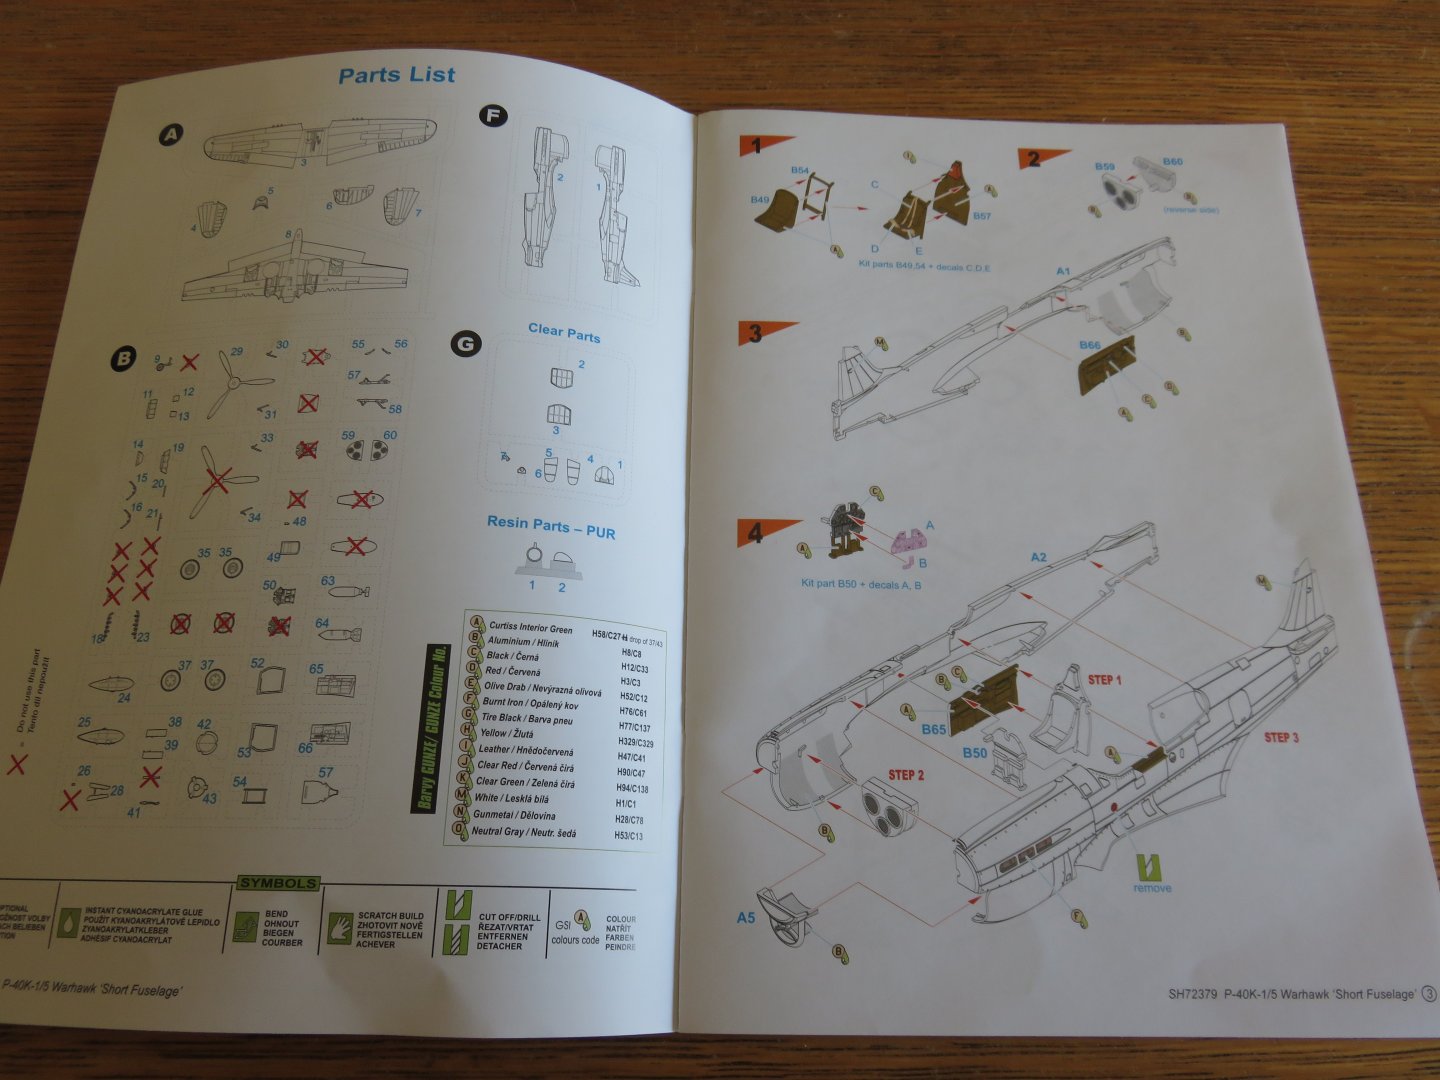
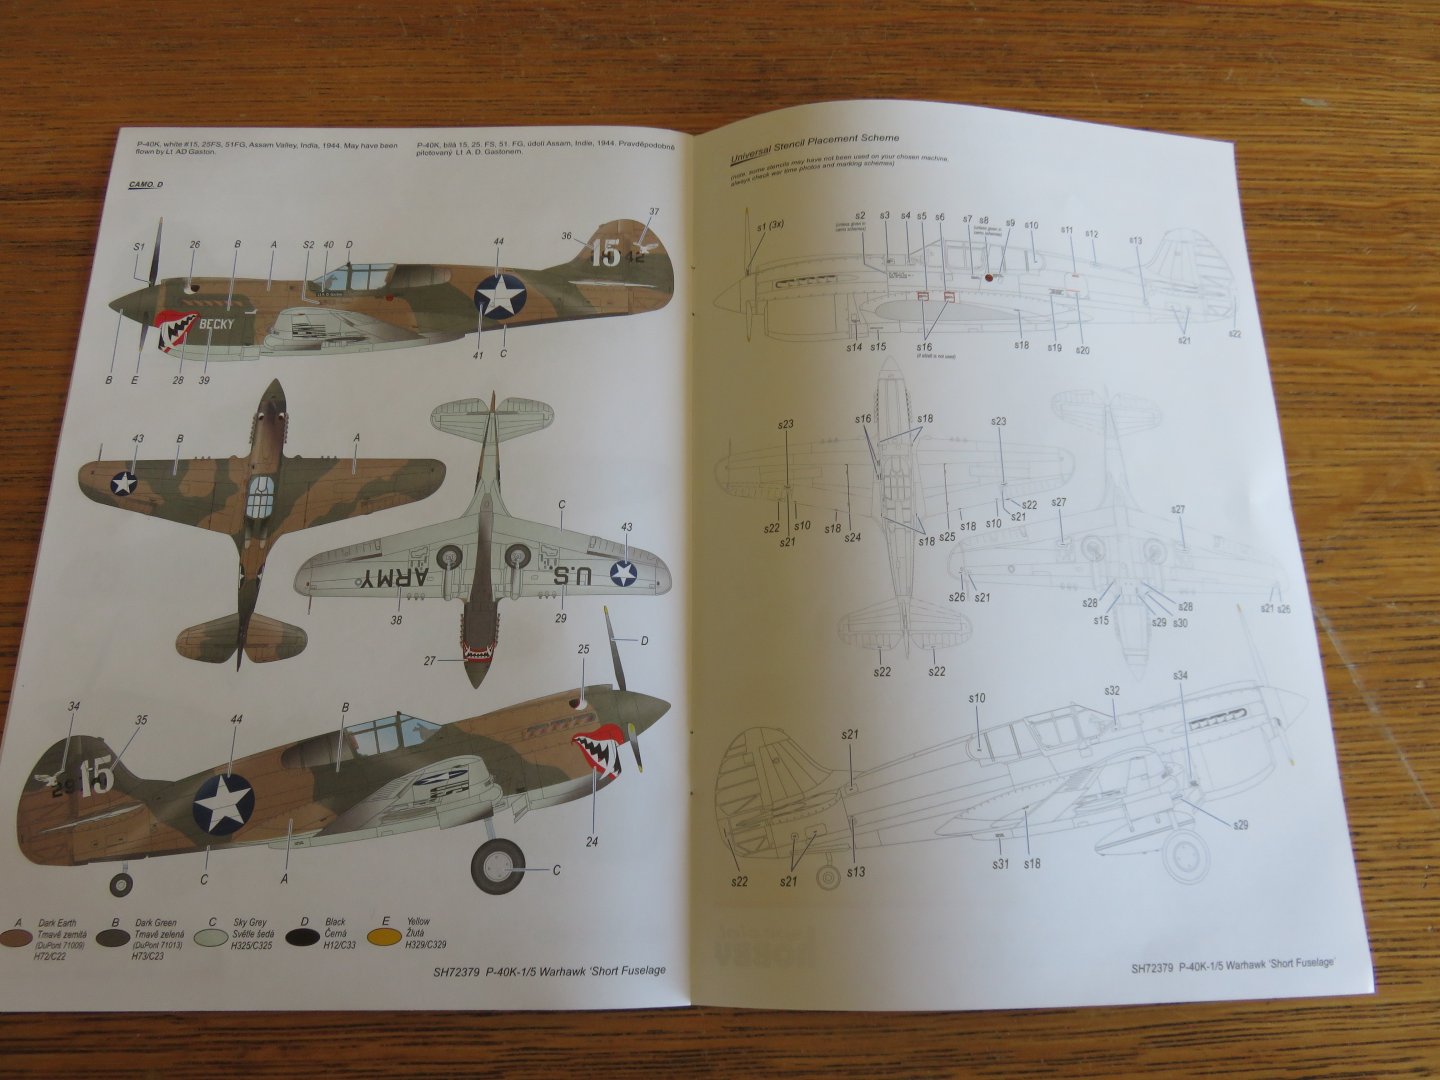
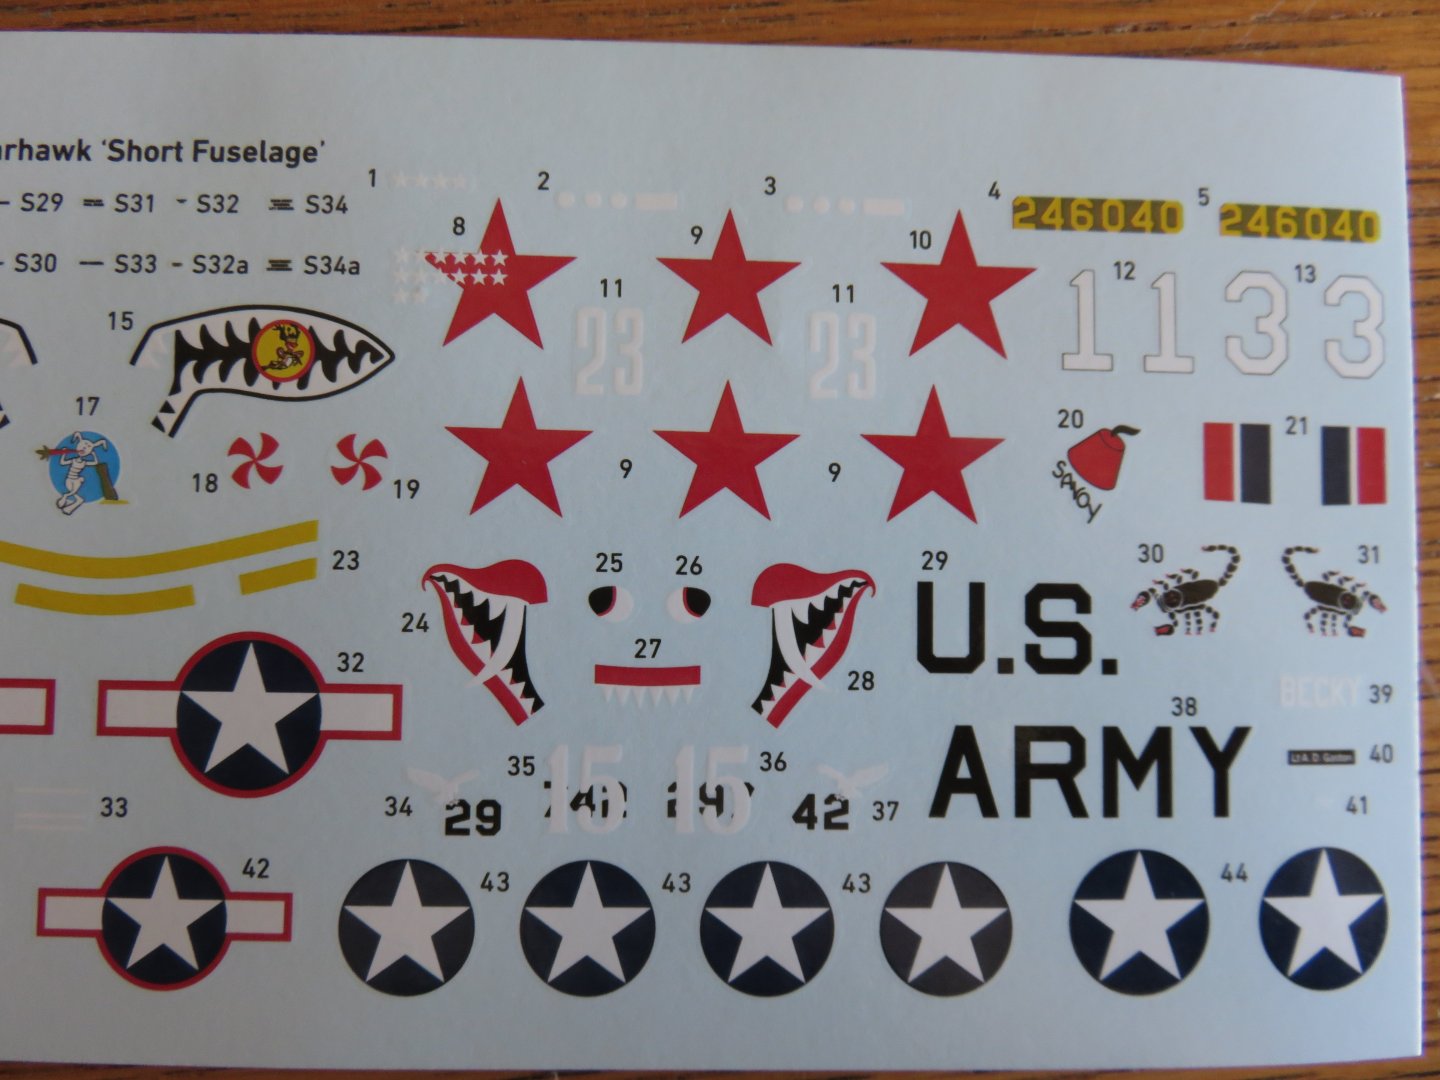
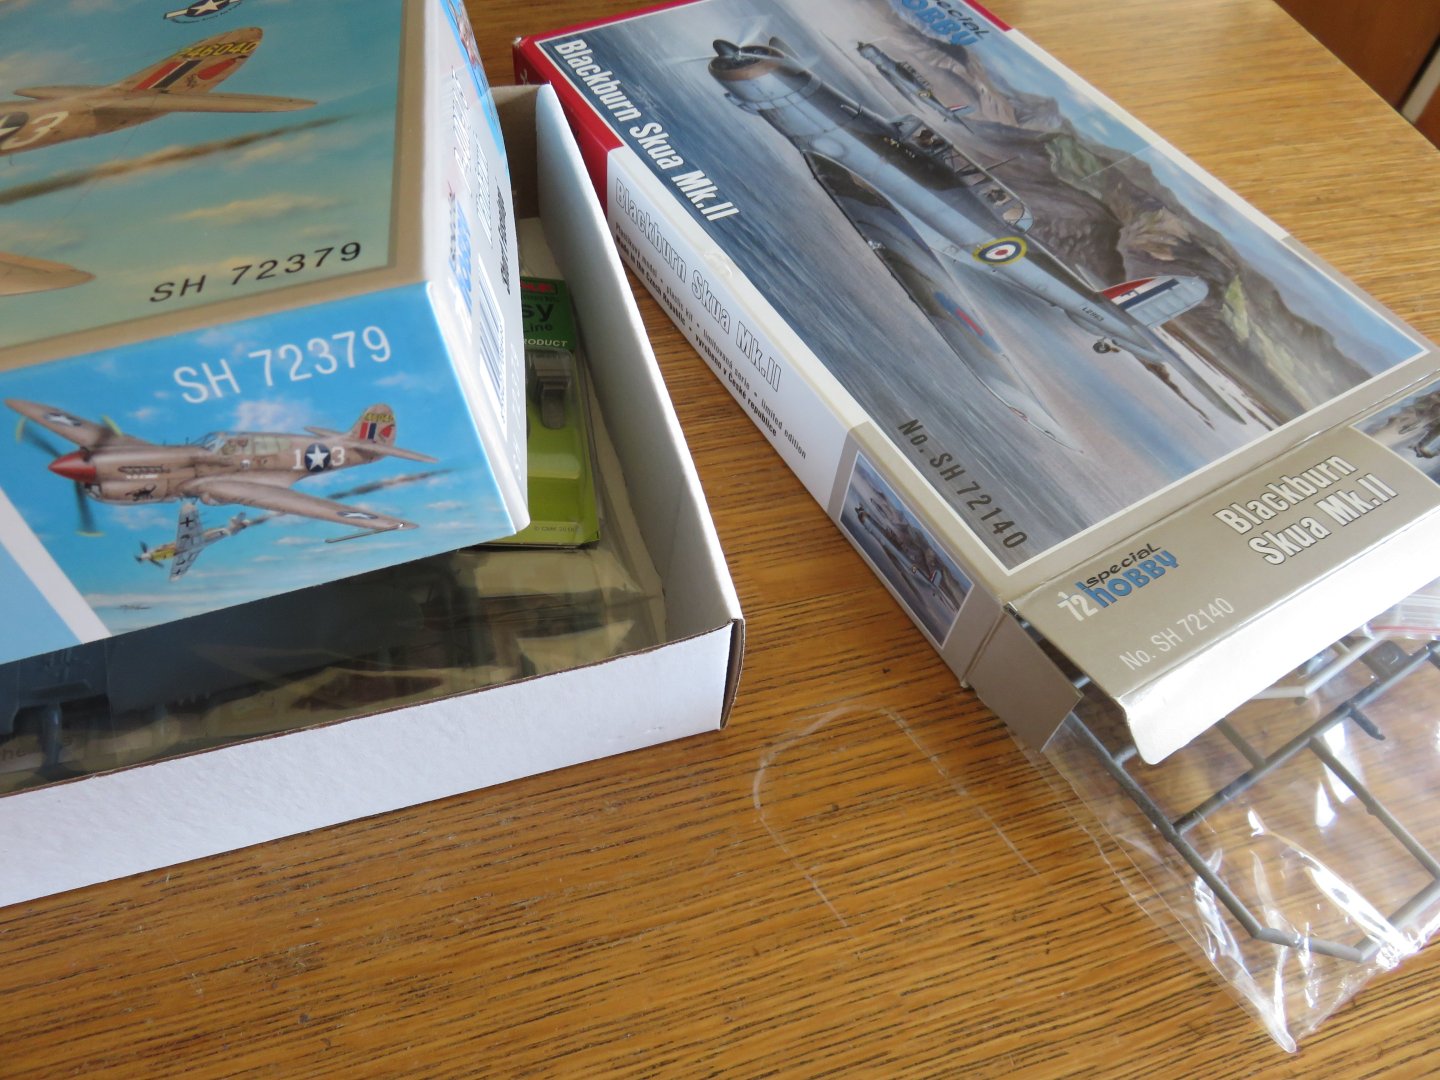
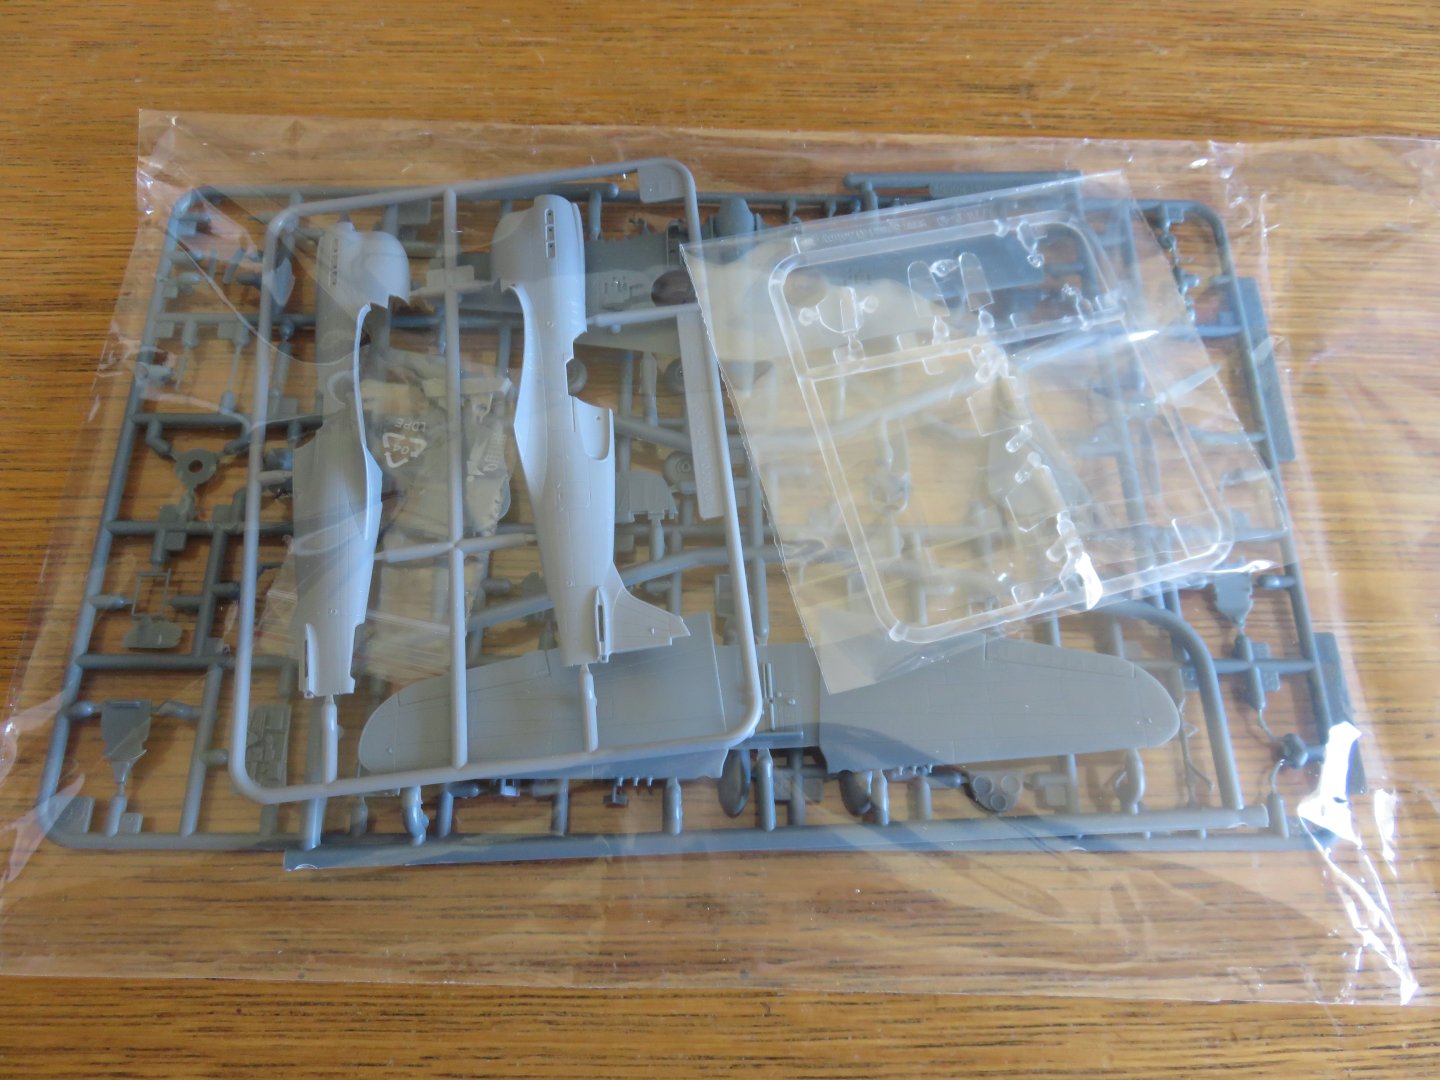
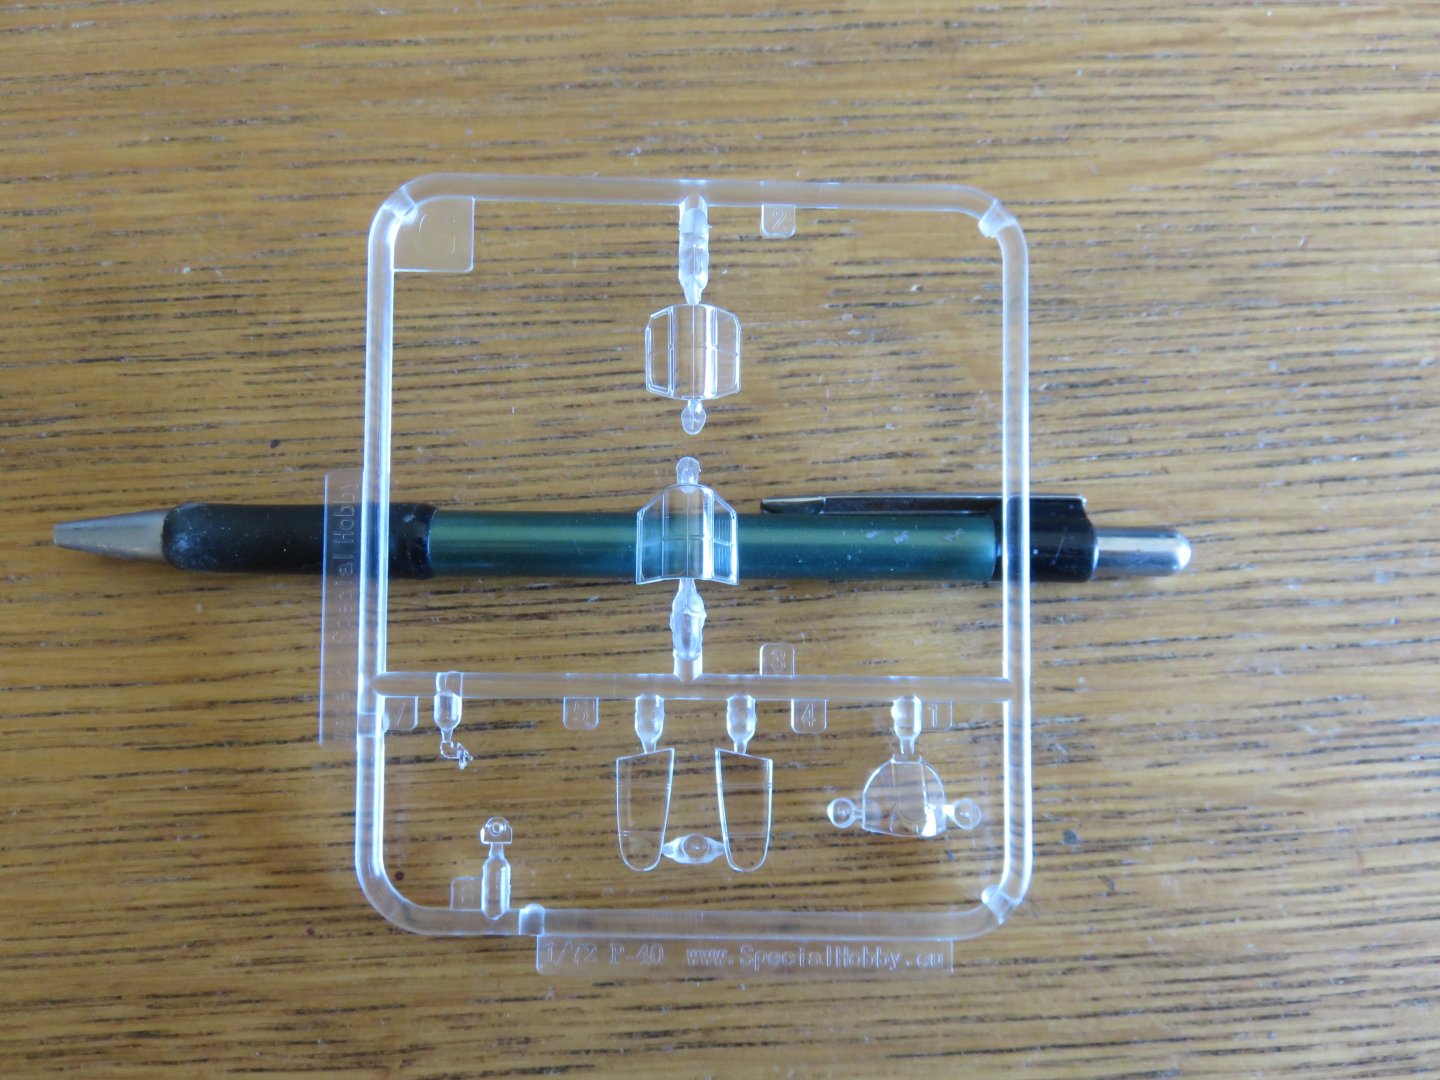
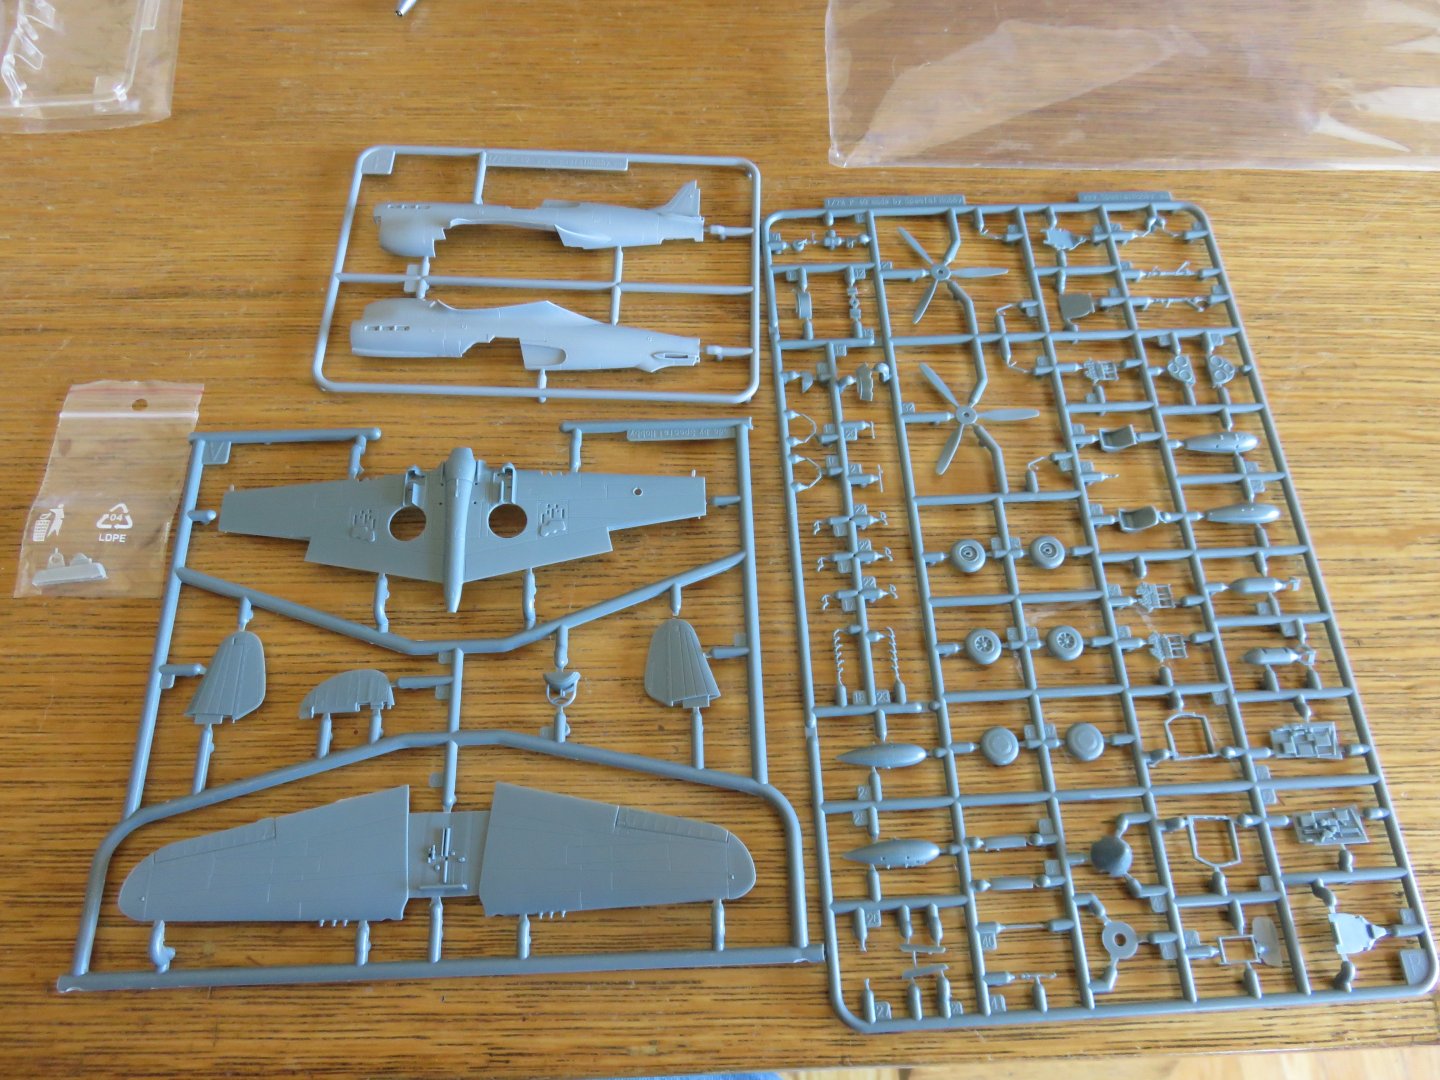
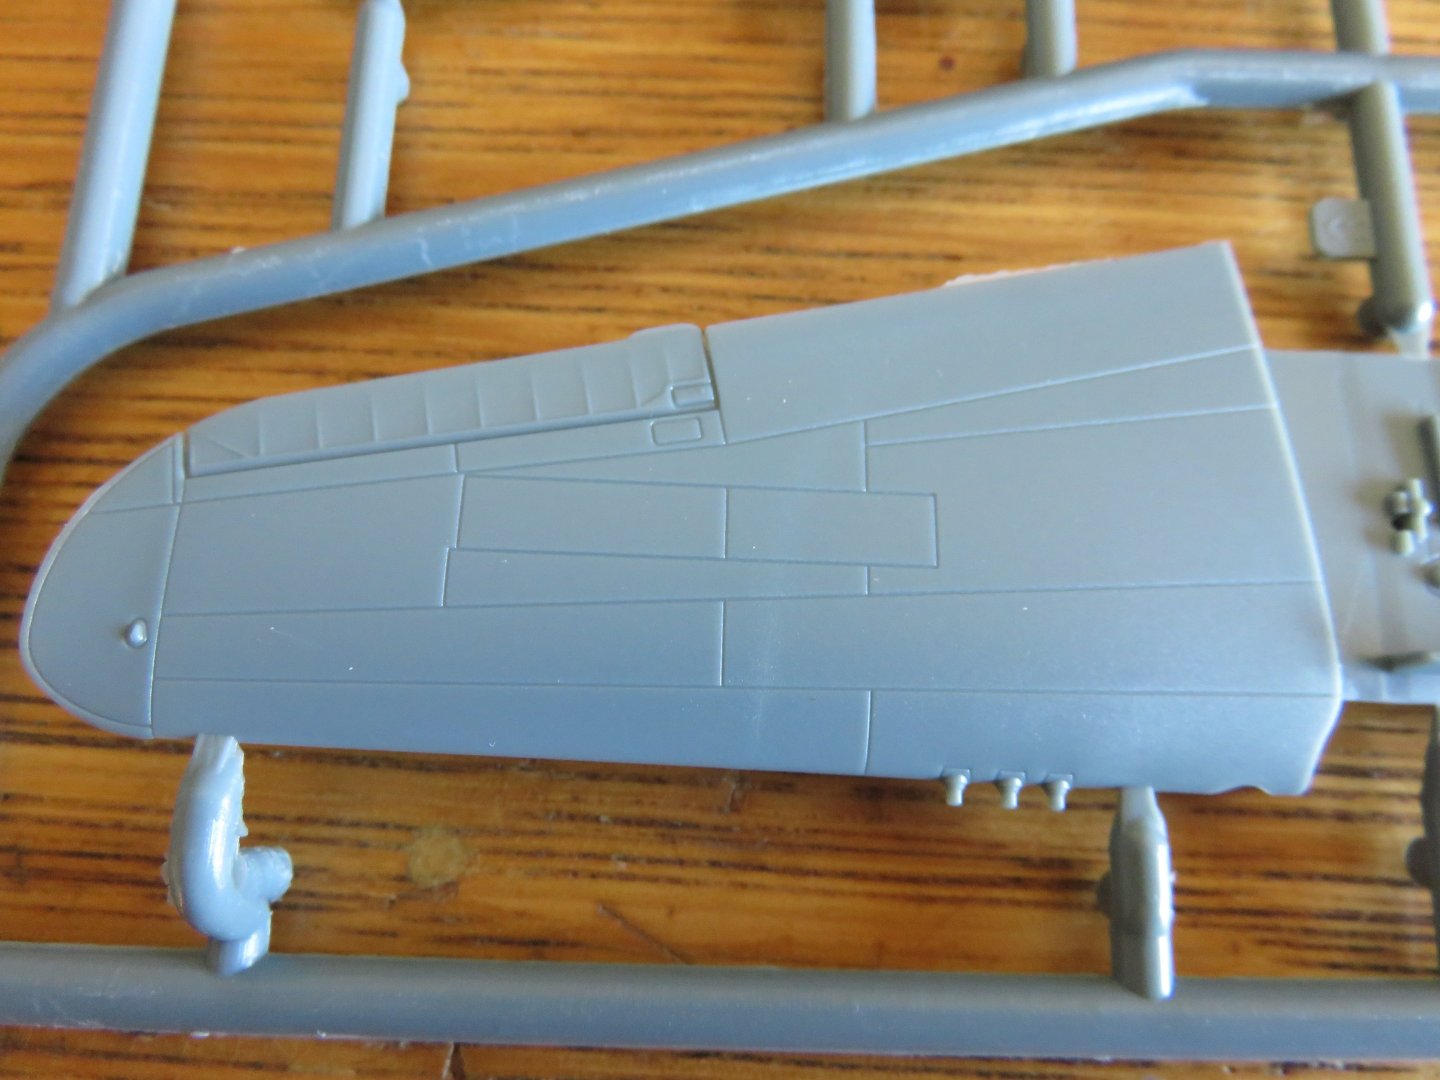
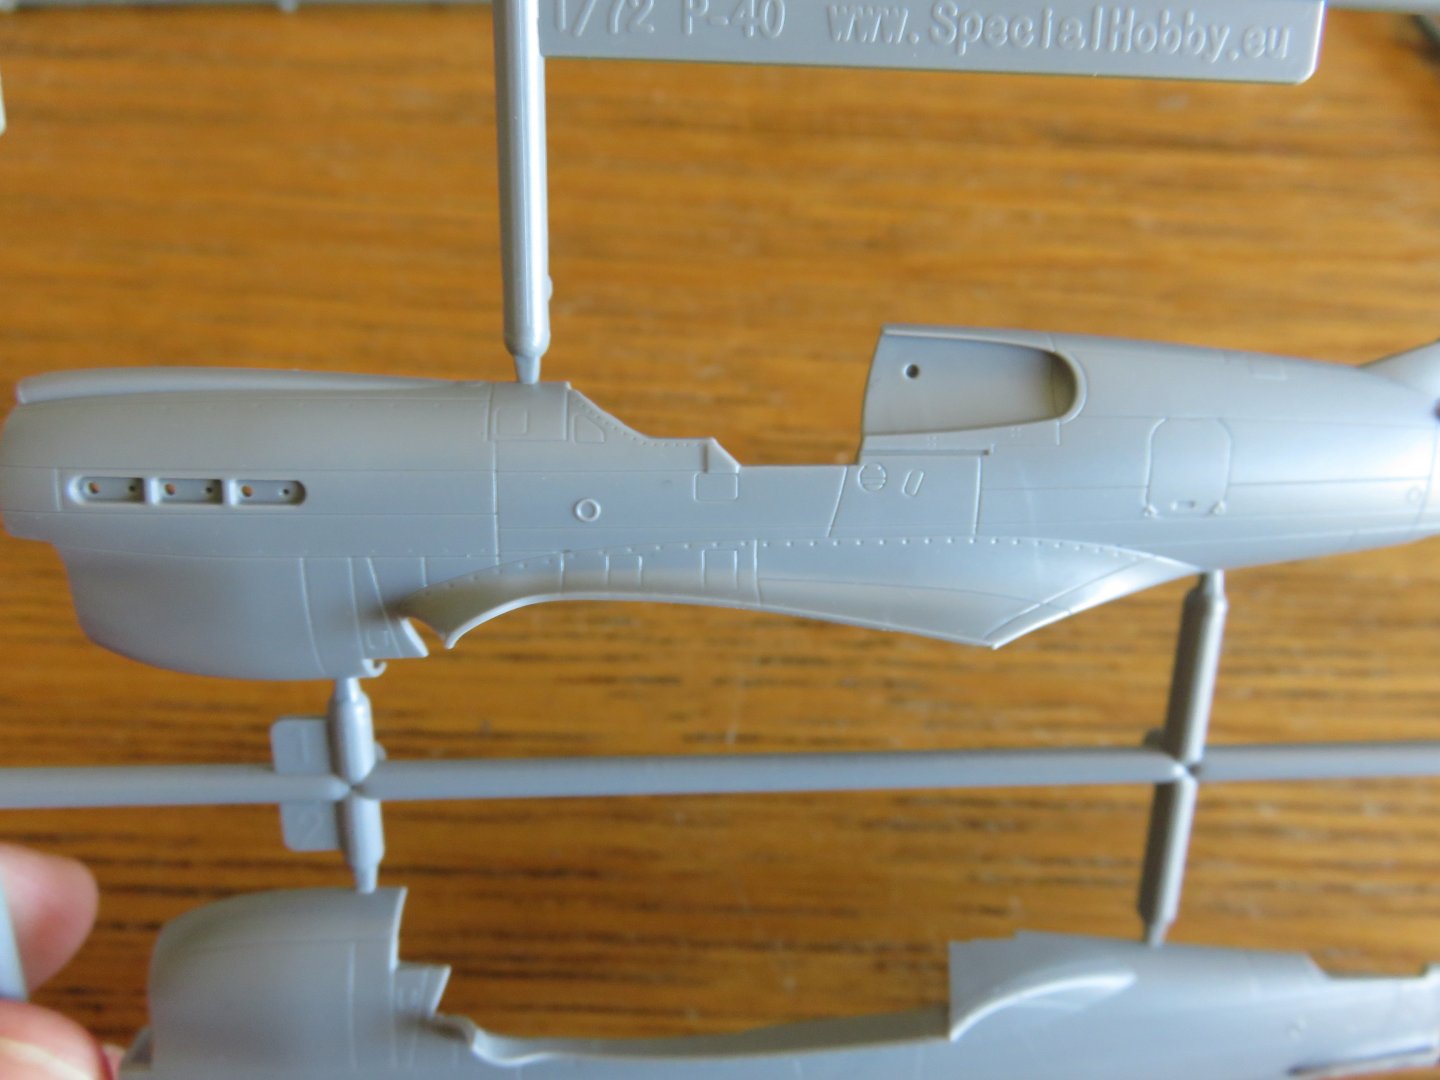
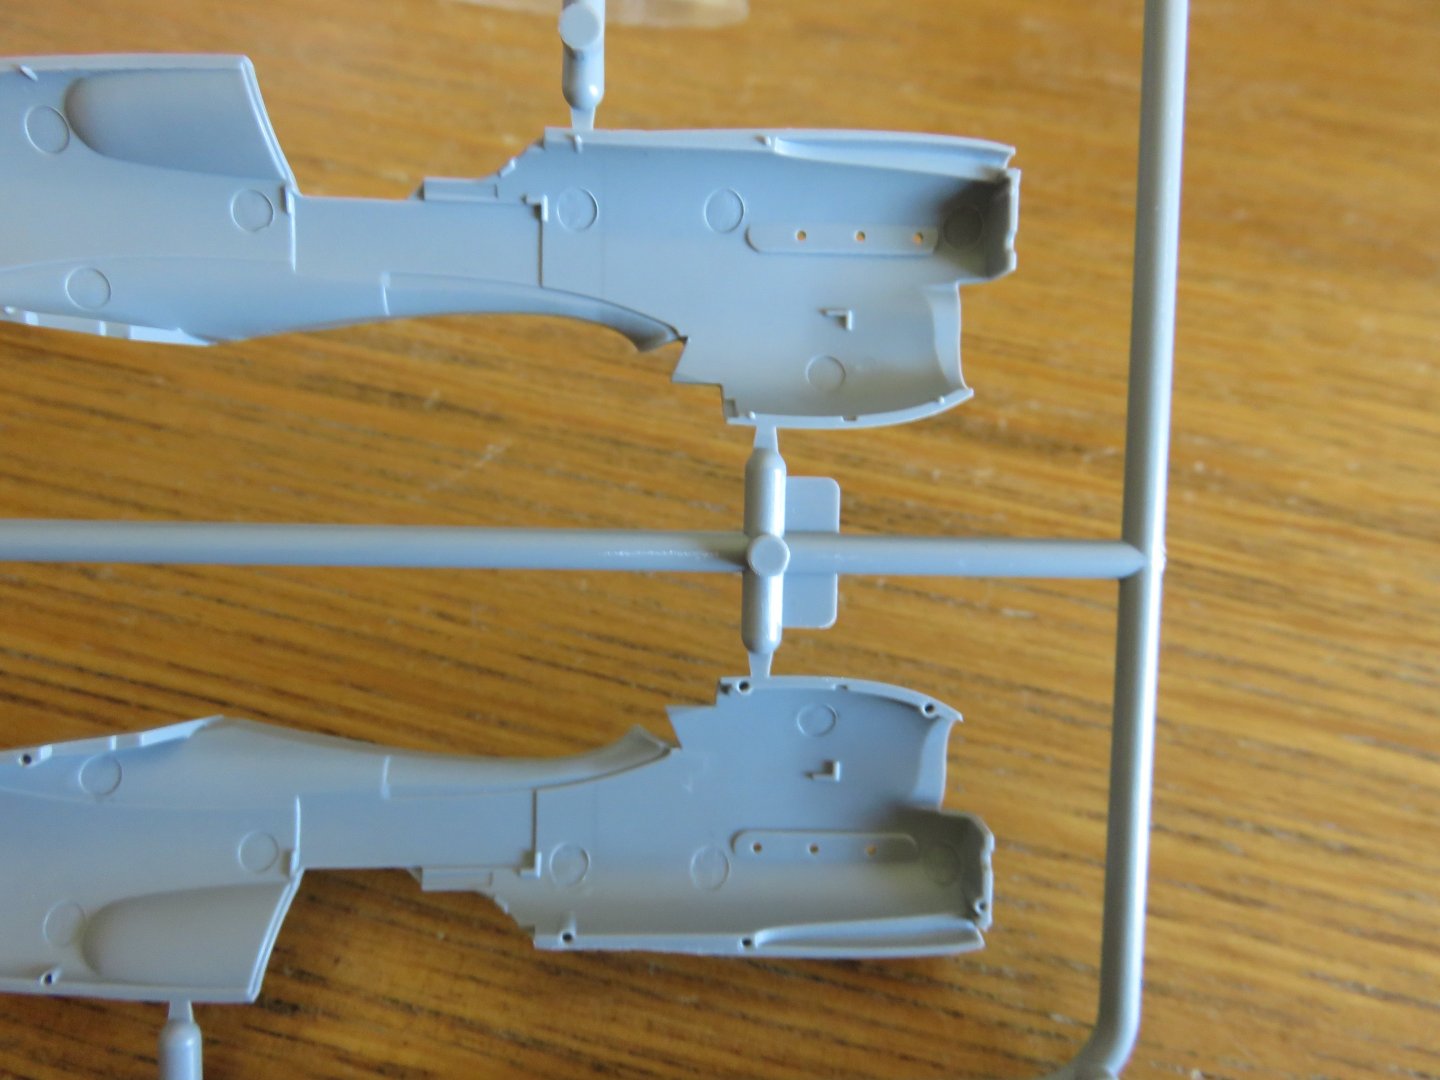
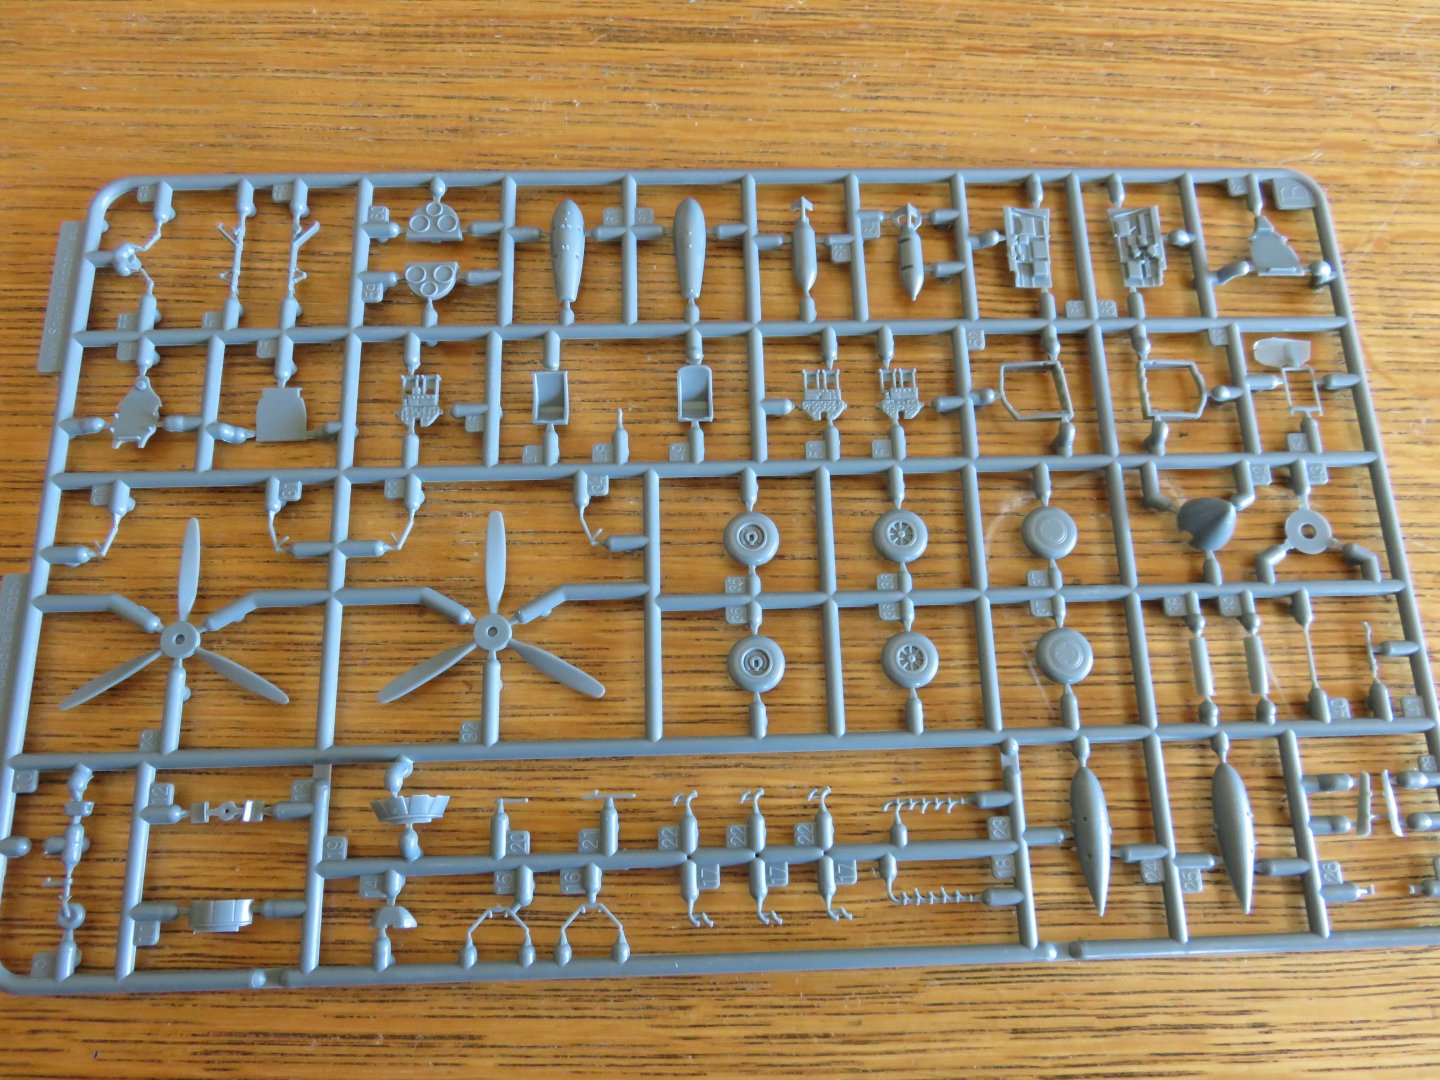
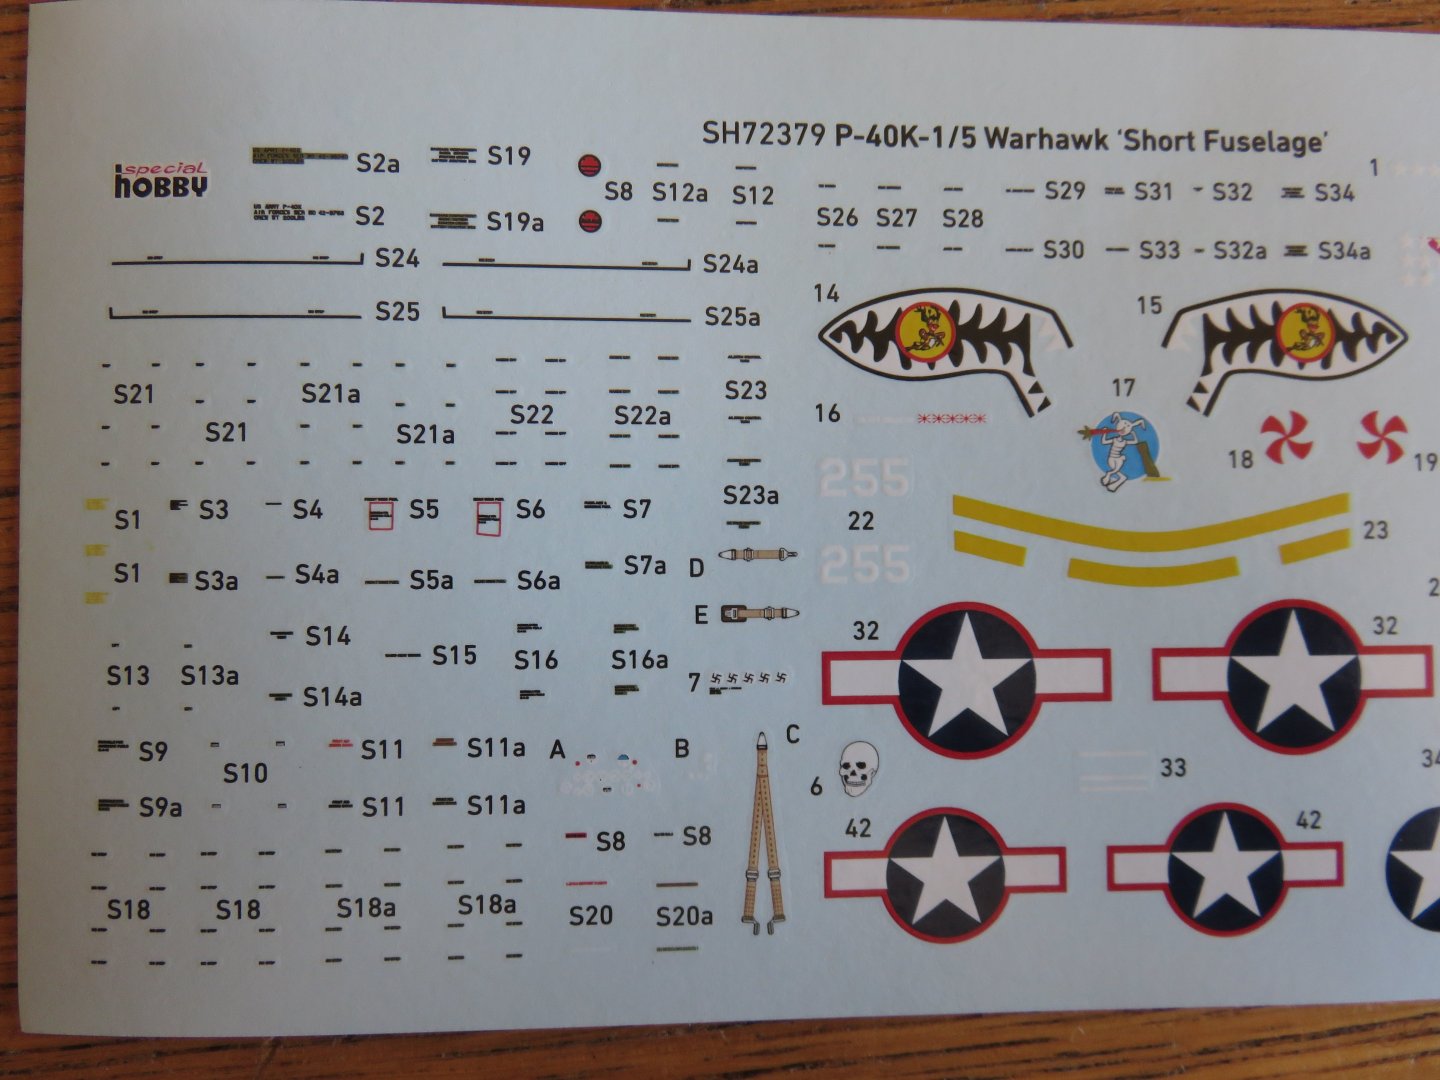
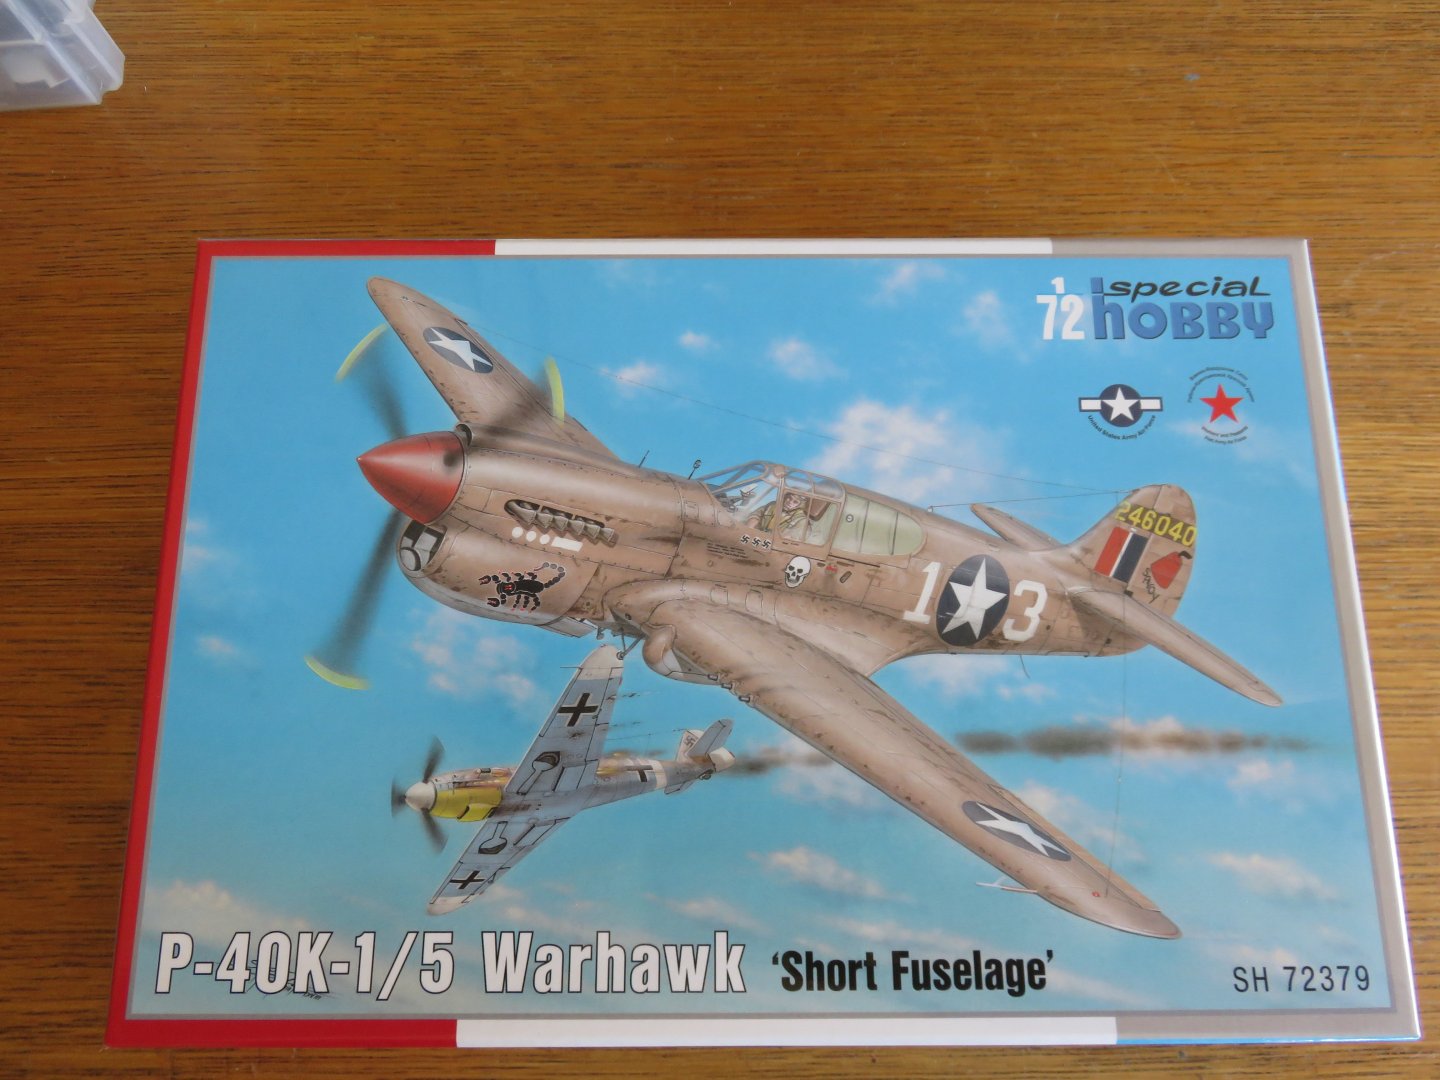
And now for part 2! The Kit Armed with the information I uncovered, it was now time to find a kit. I was immediately drawn to the selection of P-40 kits offered by Special Hobby. I had a great experience building their Blackburn Skua a few months ago. That particular kit is definitely not meant for beginners, but it is nonetheless a great kit. For those not familiar, SH has a rather extensive line up of later model P-40s to choose from, most of them are recent toolings. There are options for anyone looking to build a P-40E, D, K, M and N (and their RAF name equivalents), based on a tooling dating to 2017, for the more adventurous there is a P-40 F or L based on a 2008 tooling. Focusing on the 2017 tooling, Special Hobby has designed the kit along a frame of parts that are common to each variant, along with a selection of alternative parts specific to each variant. The subtle differences in fuselage are accounted for by the addition of a small separate frame comprising the proper fuselage for the variant selected. The kit itself is packaged in a rigid top opening box. This is one of the ways this kit is a generational step away from SH’s earlier offerings. You can see the differences clearly when compared to the package that came with the Skua. The lower tray is made of good stiff cardboard, even thicker that some kit boxes from other popular hobby brands. If you’re a stasher, this kit will happily (?) survive at the bottom of your stack. The plastic parts are contained in a single plastic bag, however there is a smaller bag for the clear parts and a tiny bag containing a pair of fragile resin parts to use on one of the kit variations. The clear parts are thin and very clearly moulded with minimal distortion. The canopy frame detail is well defined and for those who wish, they could cut their own masks relatively easily. There are two cockpit canopy options, so is can be posed open or shut, another nice change from their earlier models. The rest of the kit comes as three grey sprues. The two moulded in a darker grey contain the “common” and optional parts. Three separate IPs, two different seats, and two different rear bulkheads, among others. For the most part the moulding is crisp and the moulded details are up to an acceptable standard. There is a small amount of flash here and there, but no other defects such as short shots or mould misalignments. The fuselage halves come on a separate sprue, moulded in more of an “Airfix Grey” plastic and are specific to this variant. In this case, this represents one of the earlier P-40K variants. One of the issues pilots began to encounter was the P-40 could become unstable in a high speed dive. The first attempt to rectify this problem was to add an extended fillet on the leading edge of the vertical stabilizer, where it transitioned to the fuselage. While this helped a bit, it did not solve the problem entirely. A permanent fix was made by extending the fin and rudder aft, resulting in the “long tail” variant (it’s worth noting that only the fin and rudder were moved back, the tail plane stayed put). This modification was carried forward in all subsequent P-40 variants until the end of production. The details on the fuselage, like the rest of the parts are crisp and finely moulded. The panel lines are very finely moulded, with the more prominent screws and fasteners well shown. The cockpit sidewalls are separate pieces, so the moulded interior detail is minimal. Of note, SH is now including locating pins and other moulded tabs and slots to aid in assembly! The kit instructions come in a small booklet. They are printed in partial colour and include a sprue map which clearly shows which parts will not be used for this version. (the sprues also include numbers moulded beside the parts, yet another upgrade). There are paint callouts for Gunze paints, but the colour name is written out to ease choosing paints of a different brand. The instructions are fairly clear, although there is a lot going on with each step. The final pages of the instruction manual include full colour 4 view diagrams for each of the included paint schemes. In this offering there are three American schemes and one Soviet version. The last page comprises another 4 view diagram showing the stencil placement. The included decals are much better than their earlier offerings. I’m not sure who printed them, but they're almost Cartograph quality. I say almost as the stencil writing isn’t really legible where I’ve seen some impressively fine writing on the Cartograph decals included with Airfix’s kits. If you’re not worried about reading the various minute warning labels, that shouldn’t prove to be too much of a problem. The registration is accurate and the colour separation clear. Overall, this looks to be a very impressive offering from Special Hobby. Everything looks to be a significant improvement over their earlier offerings. While not a “shake the box” kit, it should prove to be a nice kit to build, and I am looking forward to the challenge. In the next part, I will go over the extras I have bought to upgrade the kit to build the model I wish. Andy
-
Thanks Chris! Interpreting the war diary has proven to be a much bigger project than I anticipated, but it’s really fascinating. Especially during combat, the entries are very abstract (dates, times and map coordinates), being able to “zoom out” and see the bigger picture, although sometimes complicated to piece together, has definitely provided much needed context. My hope is, when it’s all completed, to get it printed and bound in a hardcover book to share with my entire extended family (well, I will have multiple copies printed so there’s no squabbling 🤪) Andy
-
For those following at home, my hobby time has been a little curtailed as of late last winter. Other projects took priority and time at the bench has been limited. I'm not yet ready to get back to it, since the weather continues to slowly improve, and the outdoor projects are stacking up, but I thought I would at least start a topic as a placeholder for when I get back into model building. This particular project has come about as a result of another project I've been working on over the winter (and will be working on for a long time yet). It began with a google query made on the spur of the moment, and has since snowballed from there. To provide a little clarity, my great uncle was an officer in the 2nd Medium Regiment, Royal Canadian Artillery, during the second world war. He served in the Italian campaign as well as the final liberation of the Netherlands. He never spoke much of his experiences when he was alive, and even my uncles and aunt don't really know what he did during the war either. Just for a laugh, I decided to see if the regimental war diary was available online. Well, I had great success there and I have discovered some amazing stories. Cross referencing the war diary with some history books, I've been able to put things in their proper context, and I'm endeavouring to create a more readable history to share with the rest of the family. Anyway, getting more to the project at hand. My great uncle and his regiment arrived in Sicily in early November 1943. As part of the wheeling and dealing that saw the Canadian forces in Italy brought up to Corps strength, they arrived without any of their heavy equipment (no transport, no guns, just the packs on their backs). They remained in Sicily until the end of the year, before moving to the mainland in January '44. While the regiment's time in Sicily was largely uneventful, one particular occurrence caught my eye. On the evening of the 21st of November, a plane was seen to crash near one of the regiment's battery HQs: My uncle was assigned to "Q" battery, so I'm certain he was well aware, if not involved in, the aftermath of the event. The war diary recorded few details concerning the plane that crashed, including the type and the serial number. This provided a great jumping off point and I was able to find some interesting information, and a bit of a mystery. Researching the serial number, I found an online compilation of aircraft flown by the somewhat legendary 112 Squadron RAF. FR213, 42-45817 was delivered to the squadron as in July 1942, and assigned the code letters GA Q. It occasionally wore the code GA ? when used by squadron leader Billy Drake. The record I found doesn't note much else about the plane, other than it was a short tailed P-40K-5. The fate of the plane is recoded as "unknown". From my research, 112 squadron was based at a place recorded as "Mileni" towards the end of October 1943, and didn't move again until early '44. Although I can't locate the exact location, I think it was in the Foggia area. This brings up the first of many questions. If FR213 was still assigned to 112 Squadron, what was it doing in Sicily while the squadron was near Foggia (on the Adriatic side of Italy)? Secondly, it seems to have been quite an old plane by WW2 standards, almost 18 months, to still be in (front line?) operation, especially for the rough service conditions it would have experienced in the North African desert, maybe it's a good testament to the durability of the P-40 (its sister plane FR215 was struck off charge in April 1944, and some others made it until 1945!!). The third mystery is who this American pilot may be. Nothing else is noted, so was the plane returned to the USAAF (which should have been recored somewhere)? If so when? These questions aside, the thought of modelling FR213 (or at least, a version of FR213) proved to be very tempting. I will continue in part II with a description of the kit as well as some of the extras I've bought to go along with it. Andy
-

P-51D Mustang by CDW - FINISHED - Dragon - 1:32 Scale
realworkingsailor replied to CDW's topic in Non-ship/categorised builds
There seems to be quite a bit of online controversy generated by Eduard’s switch to these kinds of decals. The film doesn’t peel up cleanly, the decal can get torn and/or partially lifted by the process and their print quality isn’t very good. I had a taste of these decals with my Blackburn Skua build last fall, however I think I may have stumbled on to a reasonably reliable method to deal with them. After allowing the decal to really set on the model, be sure to allow at least 24hrs for curing, apply some Micro Sol, and after a couple of minutes, gently scrub the decal film off with a stiff bristle paint brush. It’s a bit counterintuitive, but managed to make it work with some small stencil decals, which are the trickiest to do. I’ve seen some folks advise using mineral (white) spirits, I think with Micro Sol there’s less risk of ruining the paint finish. Personally I’m not a fan of having to take all these risky extra steps. Andy -
Comparatively speaking, a container is fairly light. The heaviest containers are generally stowed low down, in the hold, rather than in the deck stacks. If the bridge was that vulnerable to collapse from a hit from a heavyweight container, I’d be more concerned every time a semi-truck jack-knifed (which happens waaayyy more frequently than a ship strike). Andy
-
It’s slightly more than just the angle of elevation that classifies whether a piece is a gun/howitzer/mortar. It also has to do with the trajectory of the shell, and the ratio of propellant to shell weight. To lob a mortar shell into a high looping trajectory takes far less propellant proportionally to the weight of shell than an anti-aircraft gun, even though both are designed to fire at high angles of elevation. However, you could technically turn an anti-aircraft gun into a mortar by reducing the amount of propellant from the cartridge. Jumping to WW2 British artillery practice, the QF 25 pounder field artillery, as well as the BL 4.5” and BL 5.5” medium artillery were considered to be gun-howitzers. Because their shells were loaded separately from their propellant charge, the charge weight could be altered on the spot, by the gun crews, as required. With this flexibility of trajectory, the pieces could be fired at low or medium angles. Both field and medium crews were trained in indirect fire as well as anti-tank shooting (the latter being done over open sights, direct fire, flat trajectory), although they seldom practiced the latter in actual combat. Andy
-
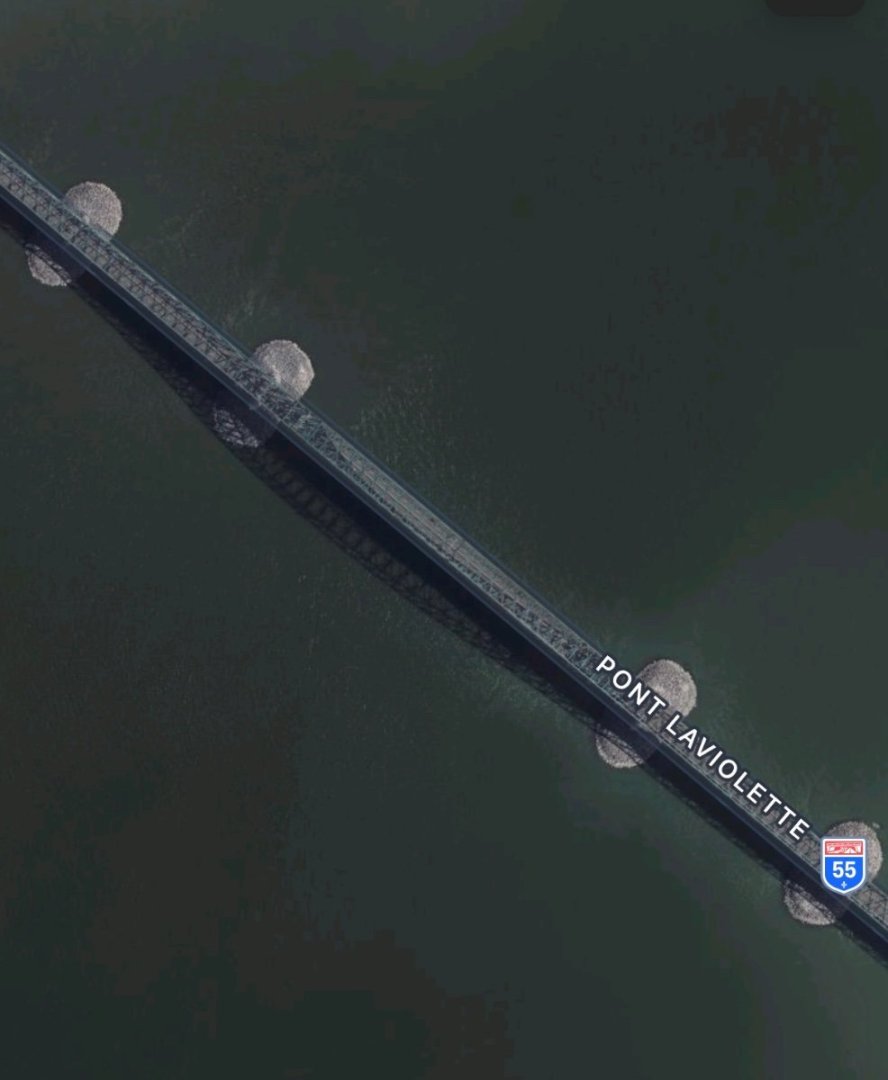
A better, long term and cost effective solution that could be applied to any potentially vulnerable bridge, no matter how old, is to put stone fill around the base of the piers abutting the channel. This would deflect any ship that strayed too close, regardless of size. The warning signs were there when the Sunshine Skyway collapsed in 1980 due to a ship strike. This is the LaViolette bridge across the St Lawrence river at Trois Rivières, about halfway between Montreal and Quebec City: You can see the stone armouring around the main piers. Andy
-
Have you considered, perhaps, a model smoke generator? https://www.walthers.com/smoke-generator-chimney-ready-for-model-buildings-667-117e This one from Seuthe has been around a while on the market and is relatively inexpensive. With one or two hidden in the base of your diorama, at strategic locations, you could add some ambient smoke when you want to. Andy
-
This painting is by Adam Willaerts dating from 1607: Almost front and centre is a small schooner with what could be considered a proto-Bermuda rig. Note that these are not lateen sails (lack of a vertical mast). Andy
-
Always the fun of dealing with Eduard PE. From my personal experience it has been more like assemble some plastic and PE components, look ahead six or seven steps in the Airfix instructions, study the Eduard instructions, wrack your brain trying to figure out how the next PE piece is supposed to be added/folded/bent, then turn the Eduard instructions over and realize that a different PE piece can only be applied two steps earlier in the Airfix instructions… try to add missed second PE piece without destroying anything done previously, then, after making a complete hash of it, go back to puzzling over the first PE piece….🙄 Andy
-

P-51D Mustang by CDW - FINISHED - Dragon - 1:32 Scale
realworkingsailor replied to CDW's topic in Non-ship/categorised builds
If you haven’t seen it, this might interest you: Andy -
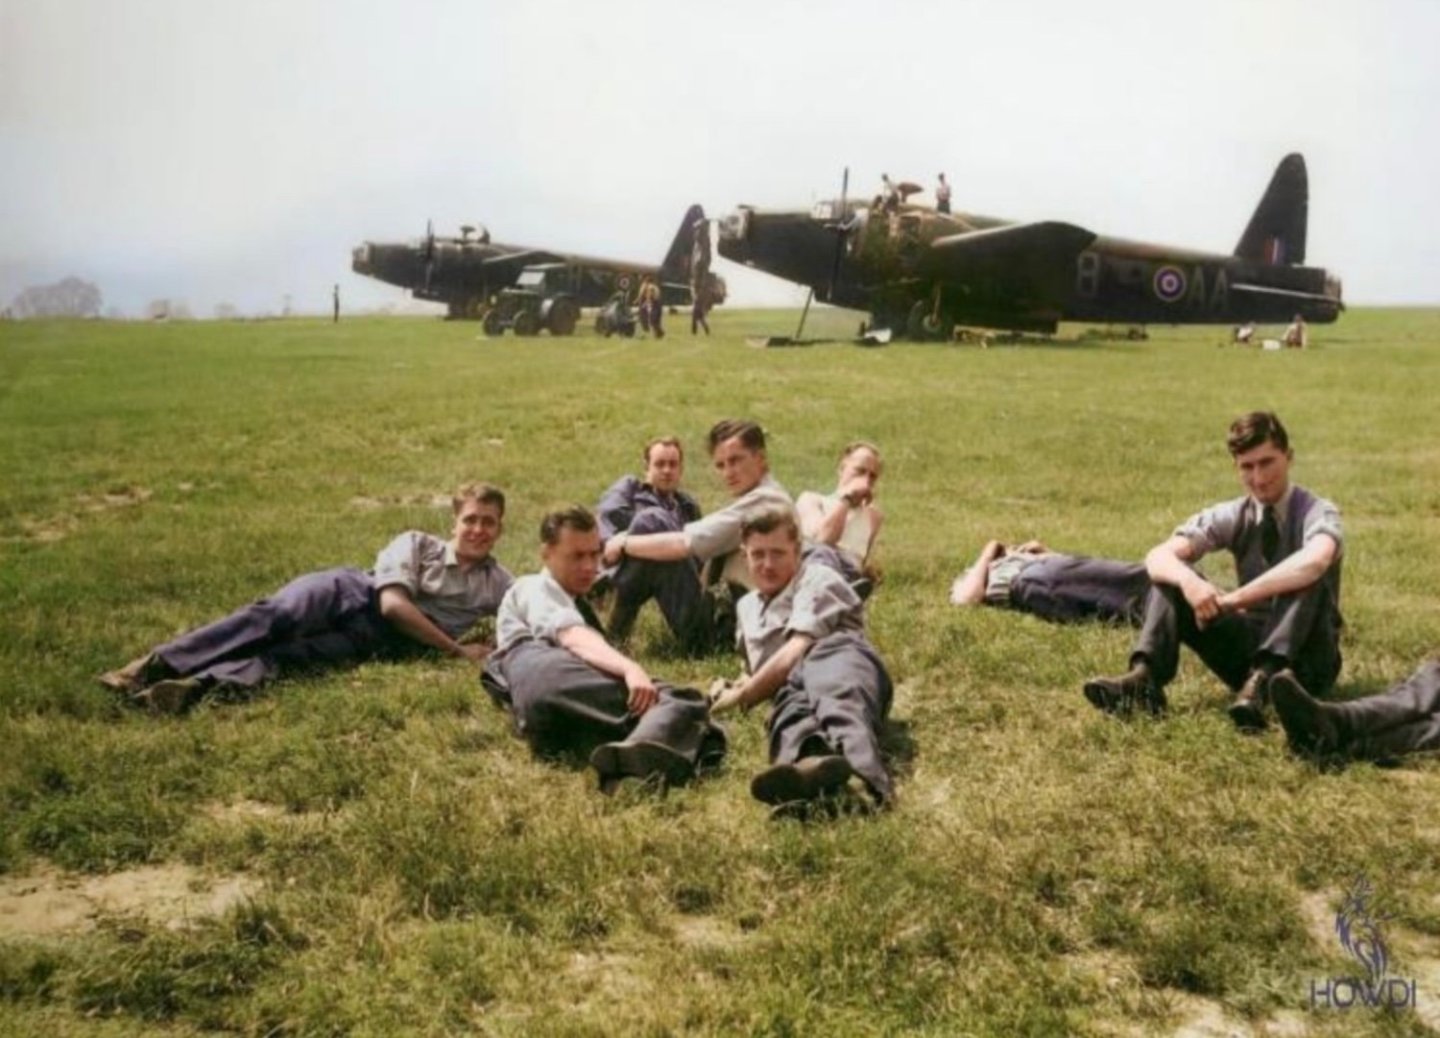
I’ve been basing my scenery on a few photos from a museum pdf file I found online. One colour photo in particular: According to the label on the package, the 4mm grass I used is supposed to be roughly 8” at 1/87th scale, so probably a little over 6”-ish for 1/72nd. Not much different in height from the grass these guys are lounging in. Admittedly, the grass in the photo is much more beat up than mine! Andy
About us
Modelshipworld - Advancing Ship Modeling through Research
SSL Secured
Your security is important for us so this Website is SSL-Secured
NRG Mailing Address
Nautical Research Guild
237 South Lincoln Street
Westmont IL, 60559-1917
Model Ship World ® and the MSW logo are Registered Trademarks, and belong to the Nautical Research Guild (United States Patent and Trademark Office: No. 6,929,264 & No. 6,929,274, registered Dec. 20, 2022)
Helpful Links
About the NRG
If you enjoy building ship models that are historically accurate as well as beautiful, then The Nautical Research Guild (NRG) is just right for you.
The Guild is a non-profit educational organization whose mission is to “Advance Ship Modeling Through Research”. We provide support to our members in their efforts to raise the quality of their model ships.
The Nautical Research Guild has published our world-renowned quarterly magazine, The Nautical Research Journal, since 1955. The pages of the Journal are full of articles by accomplished ship modelers who show you how they create those exquisite details on their models, and by maritime historians who show you the correct details to build. The Journal is available in both print and digital editions. Go to the NRG web site (www.thenrg.org) to download a complimentary digital copy of the Journal. The NRG also publishes plan sets, books and compilations of back issues of the Journal and the former Ships in Scale and Model Ship Builder magazines.


