Rowboat
-
Posts
142 -
Joined
-
Last visited
Content Type
Profiles
Forums
Gallery
Events
Everything posted by Rowboat
-
 Thanks for the info mikiek. I definitely want to display the side with the best planking and cannon view. Would not have thought about the billowing sails issue so nice to know. On my first ship I used wire to give the billow effect. Not perfect but they did the job. Will do some research and see what alternatives there are. Looking forward to your posts on your Enterprise, that log has helped me a lot. Rowboat out.....
 -
@ccoyle Dang, I did have issues getting the jaws to fit right. Not sure why I decided to carve hooks into the jaws? Now I know for the next time. Thanks.
- 195 replies
-
- 2
-

-
- enterprise
- constructo
- (and 1 more)
-
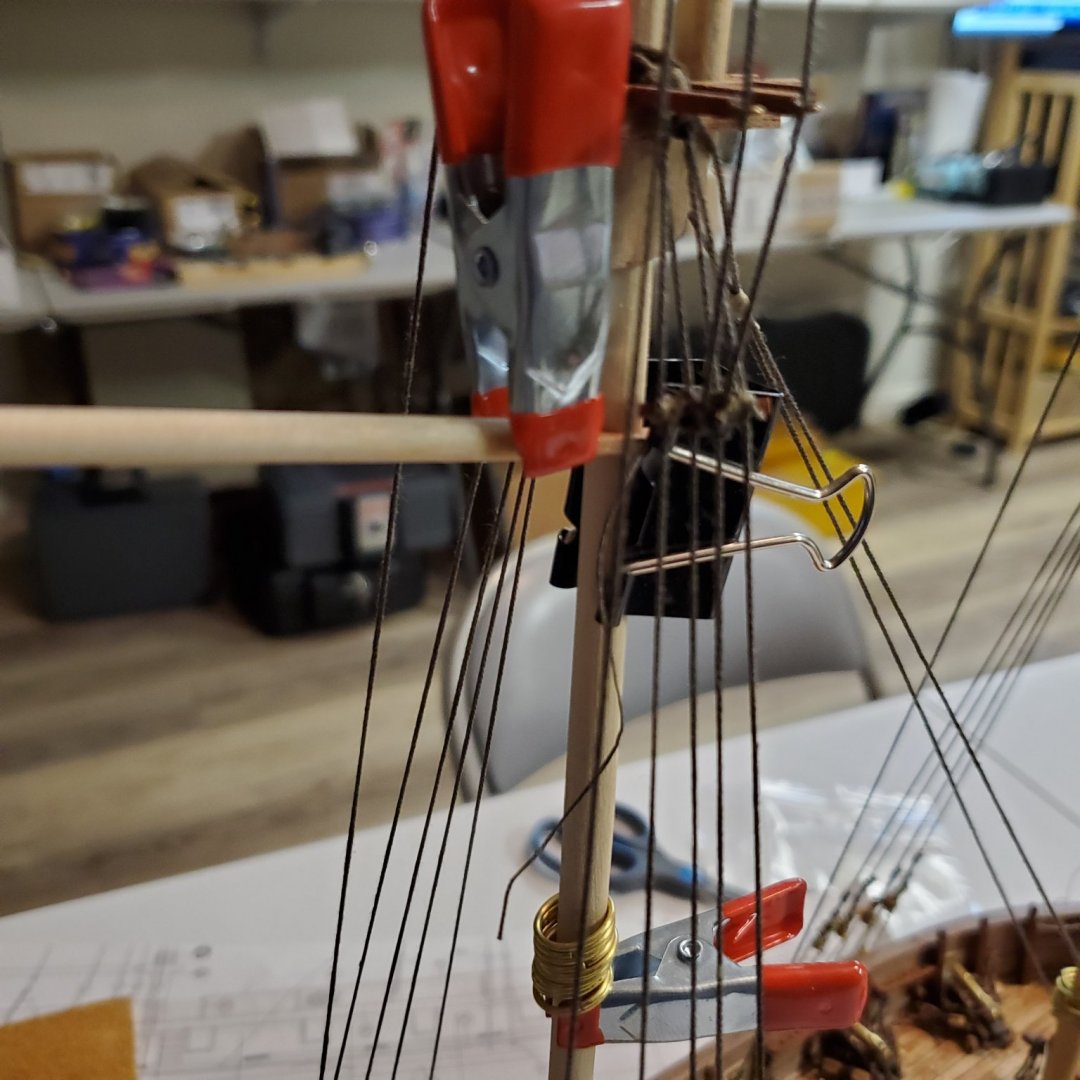
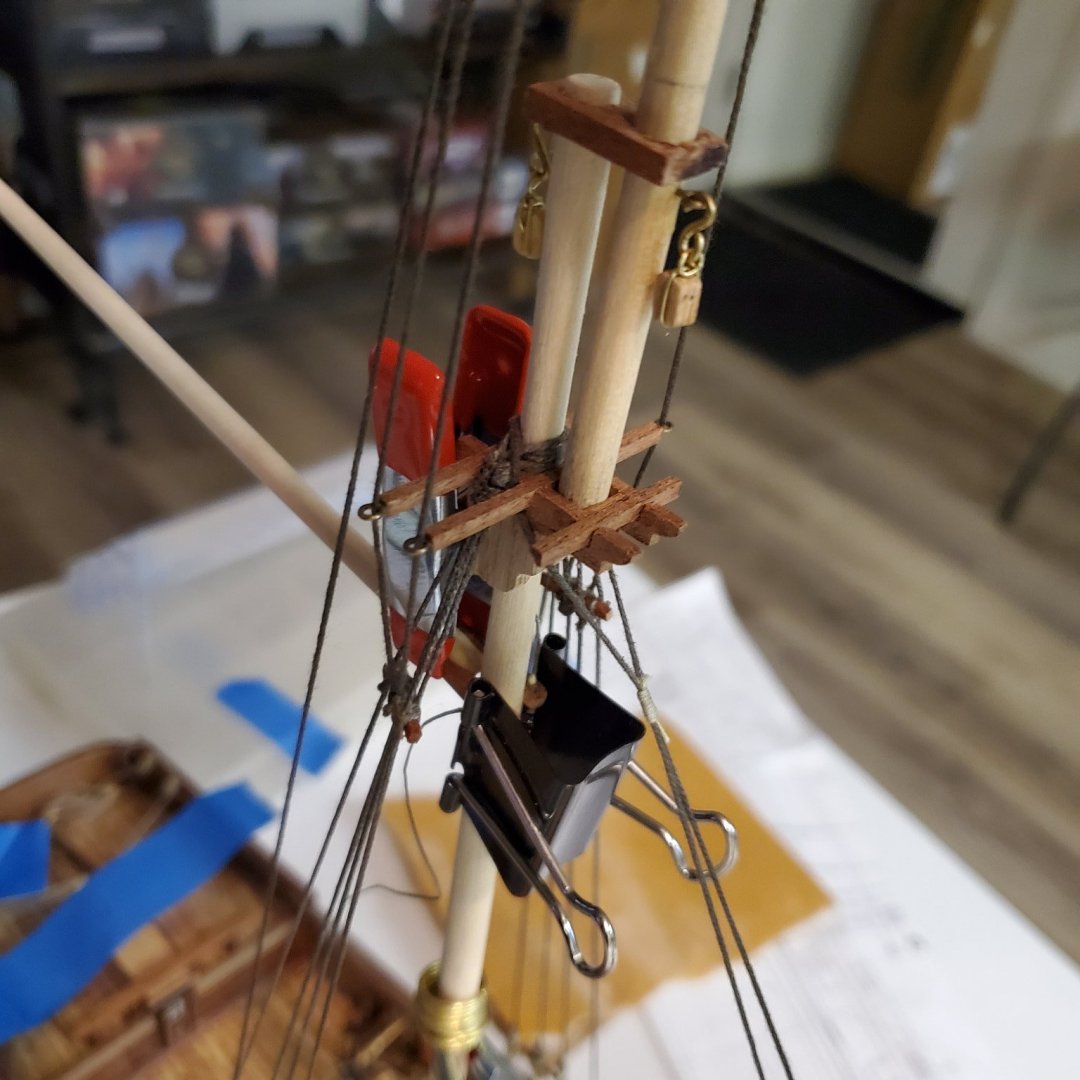
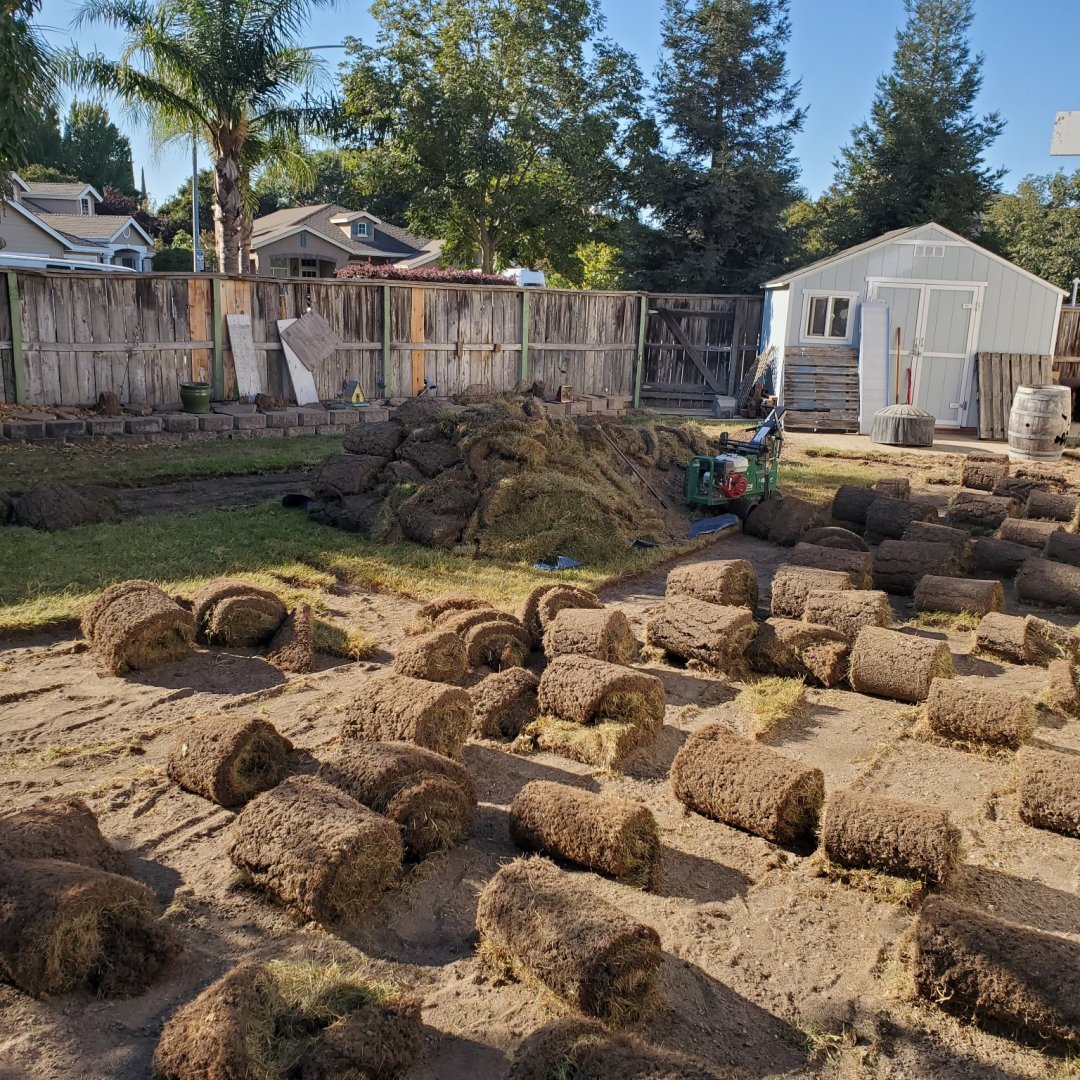
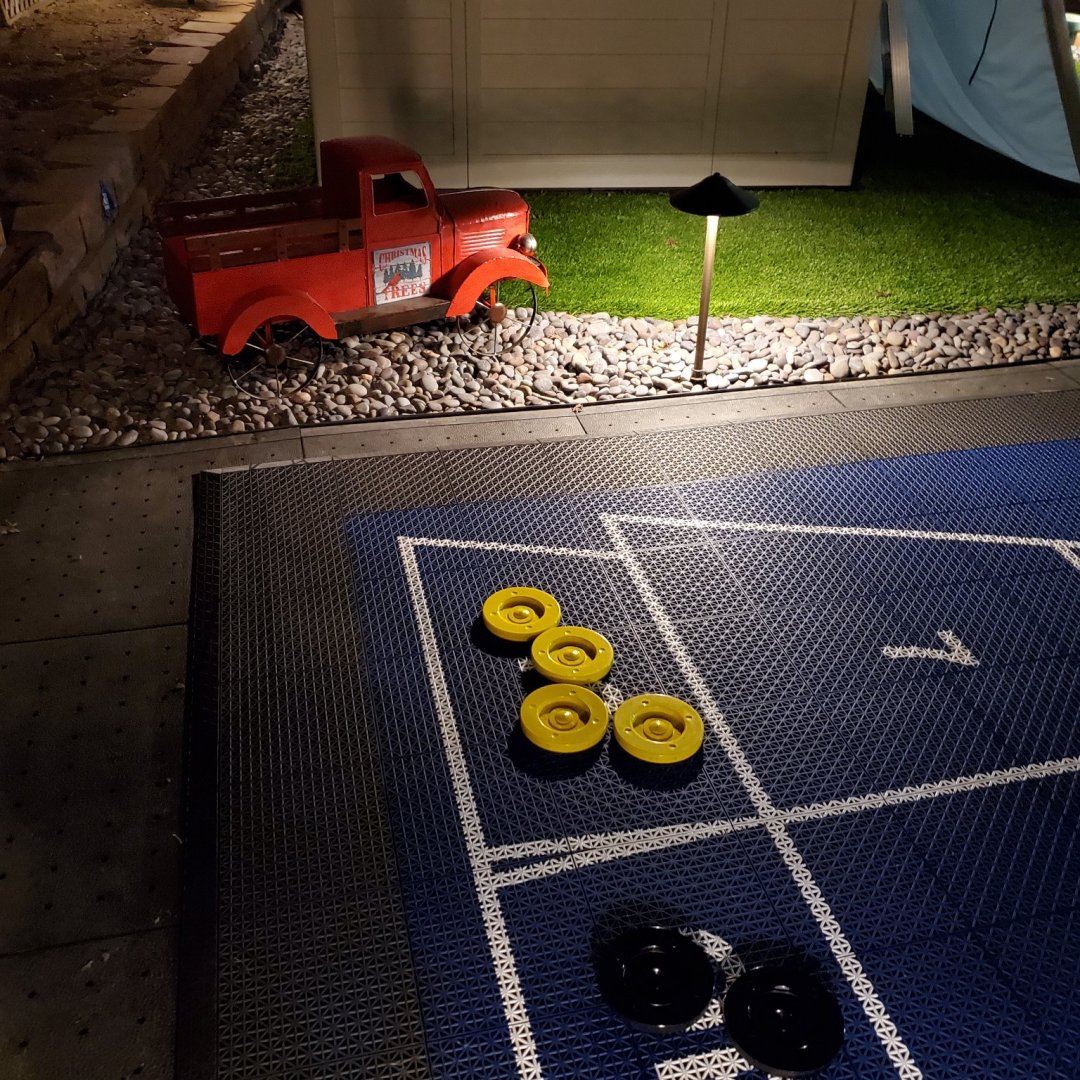
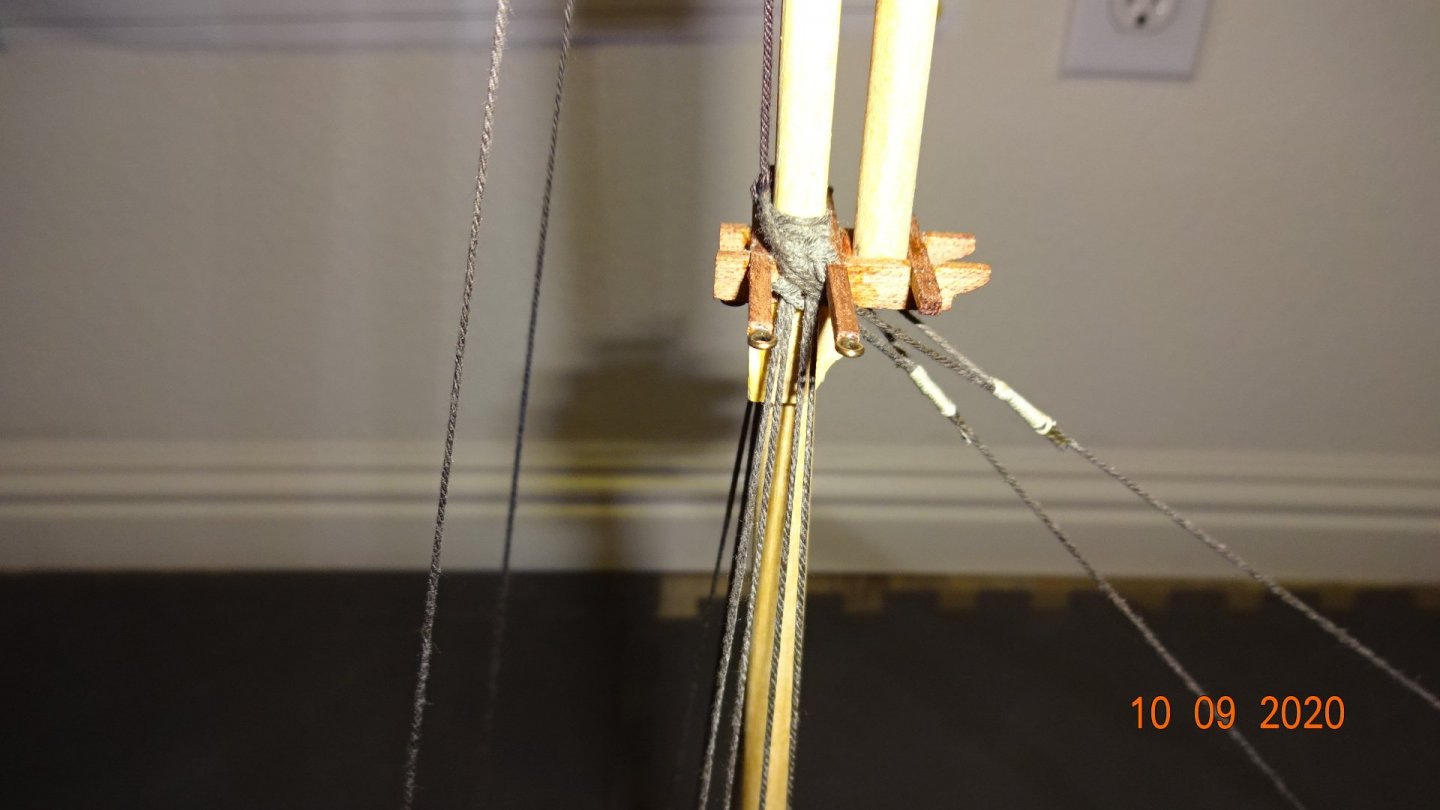
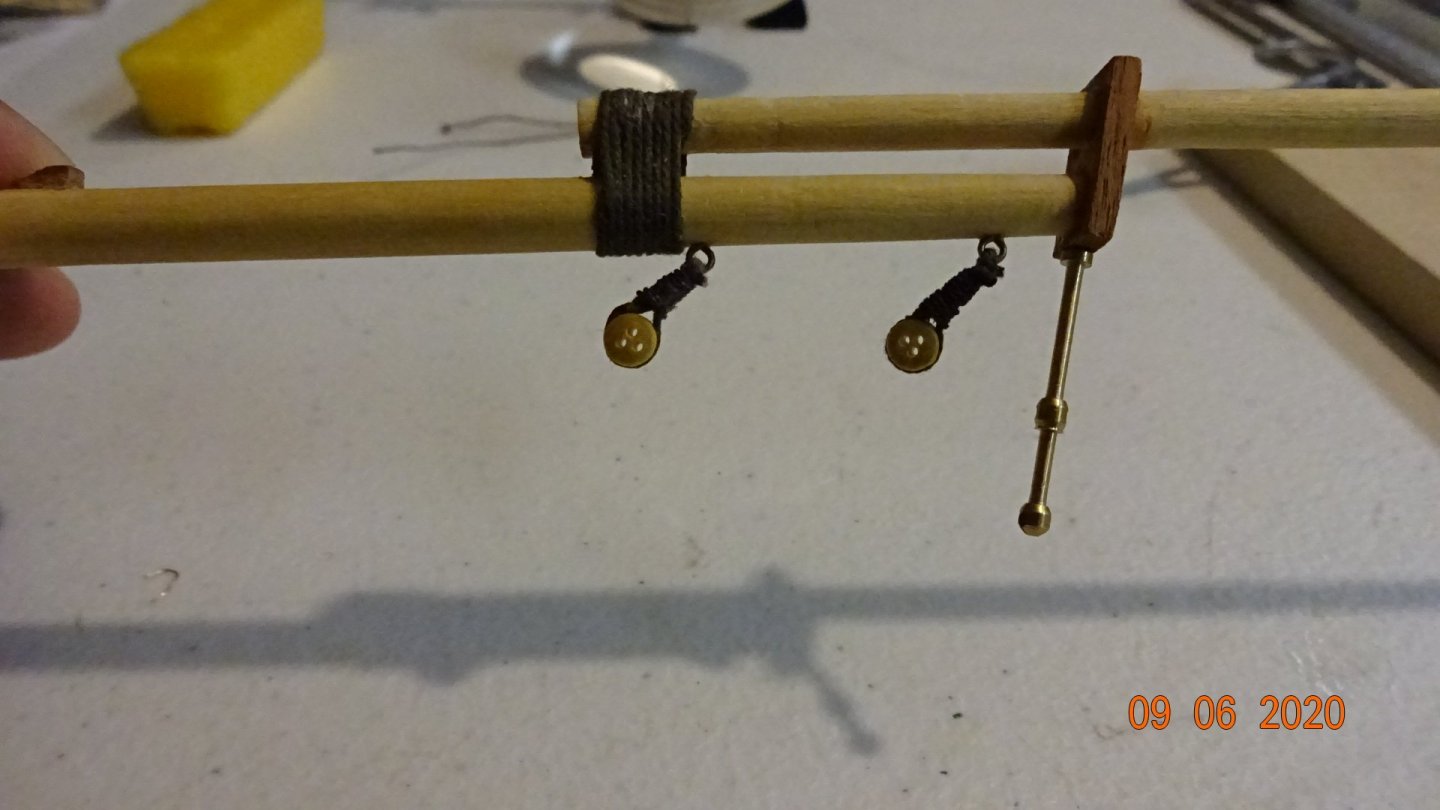
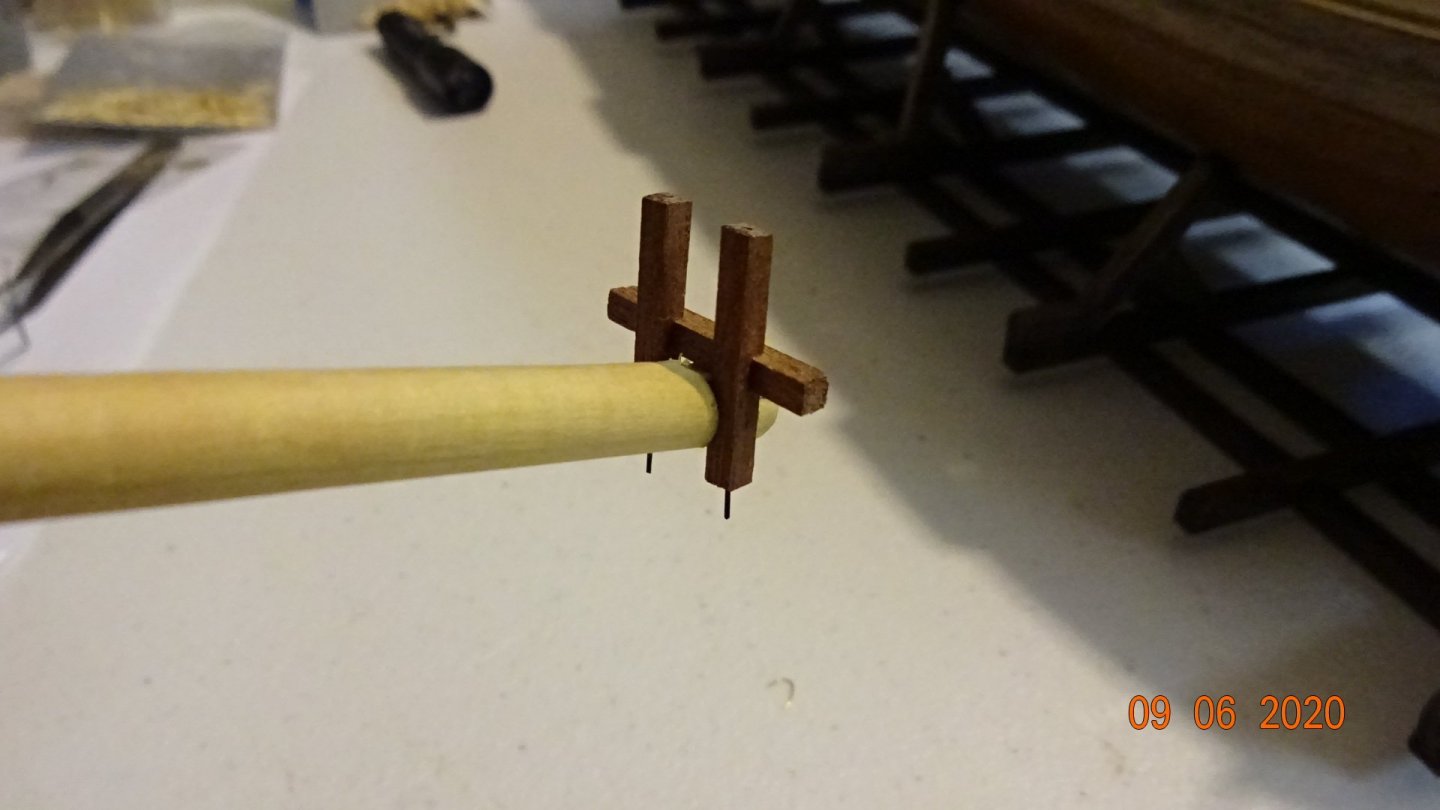
Completed most of the standing rigging except for the ratlines. Waiting for some more rope. Here's some pictures of my attempt at the gaffs. The observant eye will notice there is no hardware on the gaffs So now I'm attempting to add the rigging hardware while the gaffs are mounted . Here are some pics of the making of the gaff jaws. Not sure if it's the right way but it's what I did. Basically made my own design, sanded it down and used it as a template. It's been a while since I've posted anything,mainly because of the backyard remodel. We are almost done so I though I would throw up a few pics of the before and after. Not really related to model ship building but it is the reason I didn't get much done on the model . This is a DIY project! Before: After:


.thumb.JPG.1e5cce5a0890d05c8537da5e3f9e30e1.JPG)
- 195 replies
-
- 2
-
-
- enterprise
- constructo
- (and 1 more)
-
Did not have enough rope to make the rat lines so I ordered more. As well, ran out of double blocks so added them to the order. The shrouds are .88 mm so I'm thinking .40 mm or .30mm for the ratlines. Also, even though mikiek warned me, I attached the main gaff and fore gaff before attaching any hardware. 😡 Don't know what I was thinking 😨. Completely zoned out on that, probably just wanting to get something done on the model after spending the last 6 weeks remodeling the backyard. I'll post some pictures of my errors, lol.
- 195 replies
-
- 2
-
-
- enterprise
- constructo
- (and 1 more)
-
Great suggestions on the ratlines, gentlemen. I will try doing the ratlines first, executive decision made!
- 195 replies
-
- 1
-
-
- enterprise
- constructo
- (and 1 more)
-
Should I do the yards before the ratlines? Seems like ratlines could be put off till after installing and rigging the yards.
-
FYI, Although bathroom remodel is completed I took on the remodel of the backyard. That job is taking time away from my ship modeling :( . Almost done with the standing lines on the ship, except for the ratlines, so there's that 😁
- 195 replies
-
- 2
-
-
- enterprise
- constructo
- (and 1 more)
-
Mikiek , Great suggestion to go with smaller wrapping line. I used .88mm for the shrouds and .45mm for the wrappings. I think one issue is that I use bees wax on both lines. Later when I complete the wrappings and snug them tight this causes the bees wax to squeeze down into the wrapping line. I think this is one reason why the wrapping lines look as big as the shroud line. Not to appealing a look but I'm learning on this build so acceptable until I find a better solution, like using even smaller wrapping line (lol).
- 195 replies
-
- 1
-
-
- enterprise
- constructo
- (and 1 more)
-
@mikiek Thanks for the info. Still working on rigging the "standing" lines. I am trying to figure out where all the blocks and tackle go into the masts (fore and main) but it's a challenge. The plans sometimes show a block with only a line drawn to the mast. For example in the schematic, on the fore mast at the tree trestle there is a block on the aft side that ties into an eyebolt but on the bow side there are two blocks with only a line drawn to the tree trestle. Not sure how blocks like these are supposed to be attached, if they attached at all. It looks like the two blocks will hold up the fore sail. Because of things like this I am not sure if I should put eyebolts in now or not at all. Doing it later, would be tough as you have mentioned. Probably a week away from finishing the standing rigging.
-
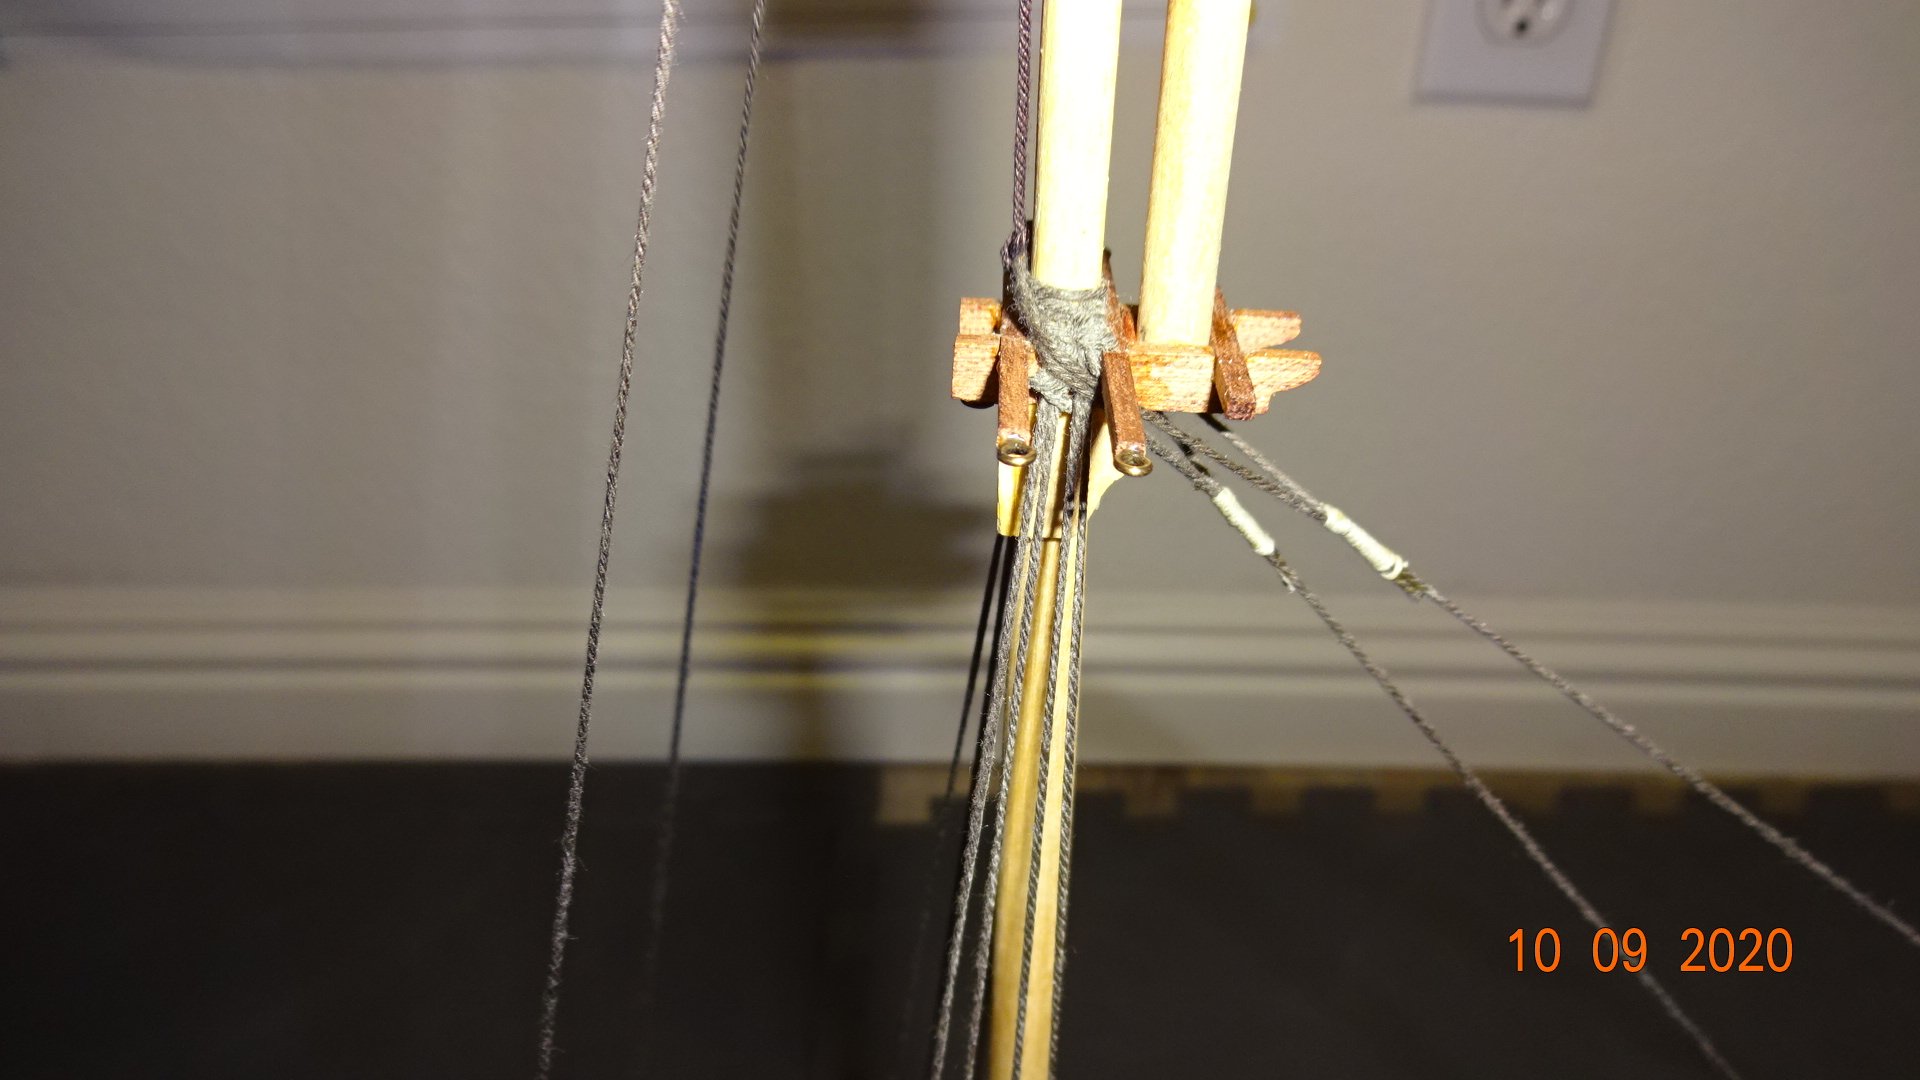
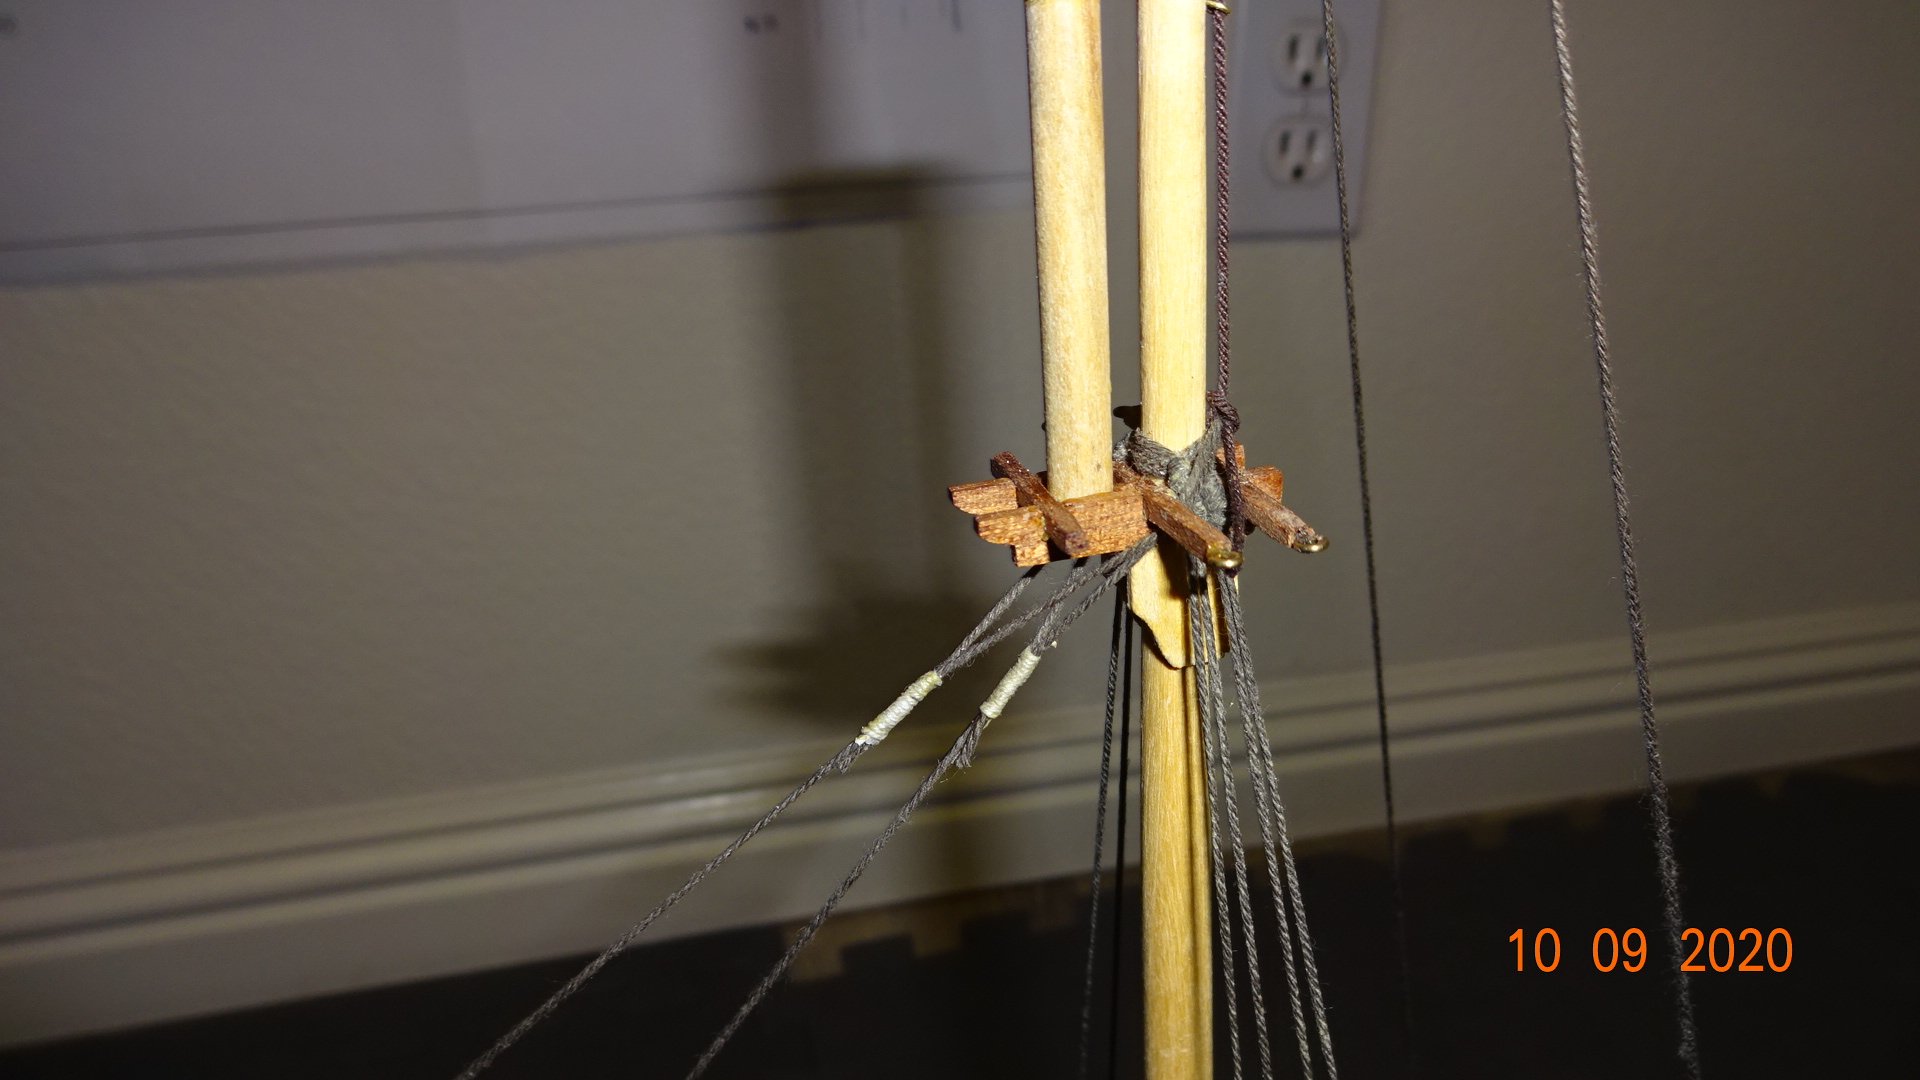
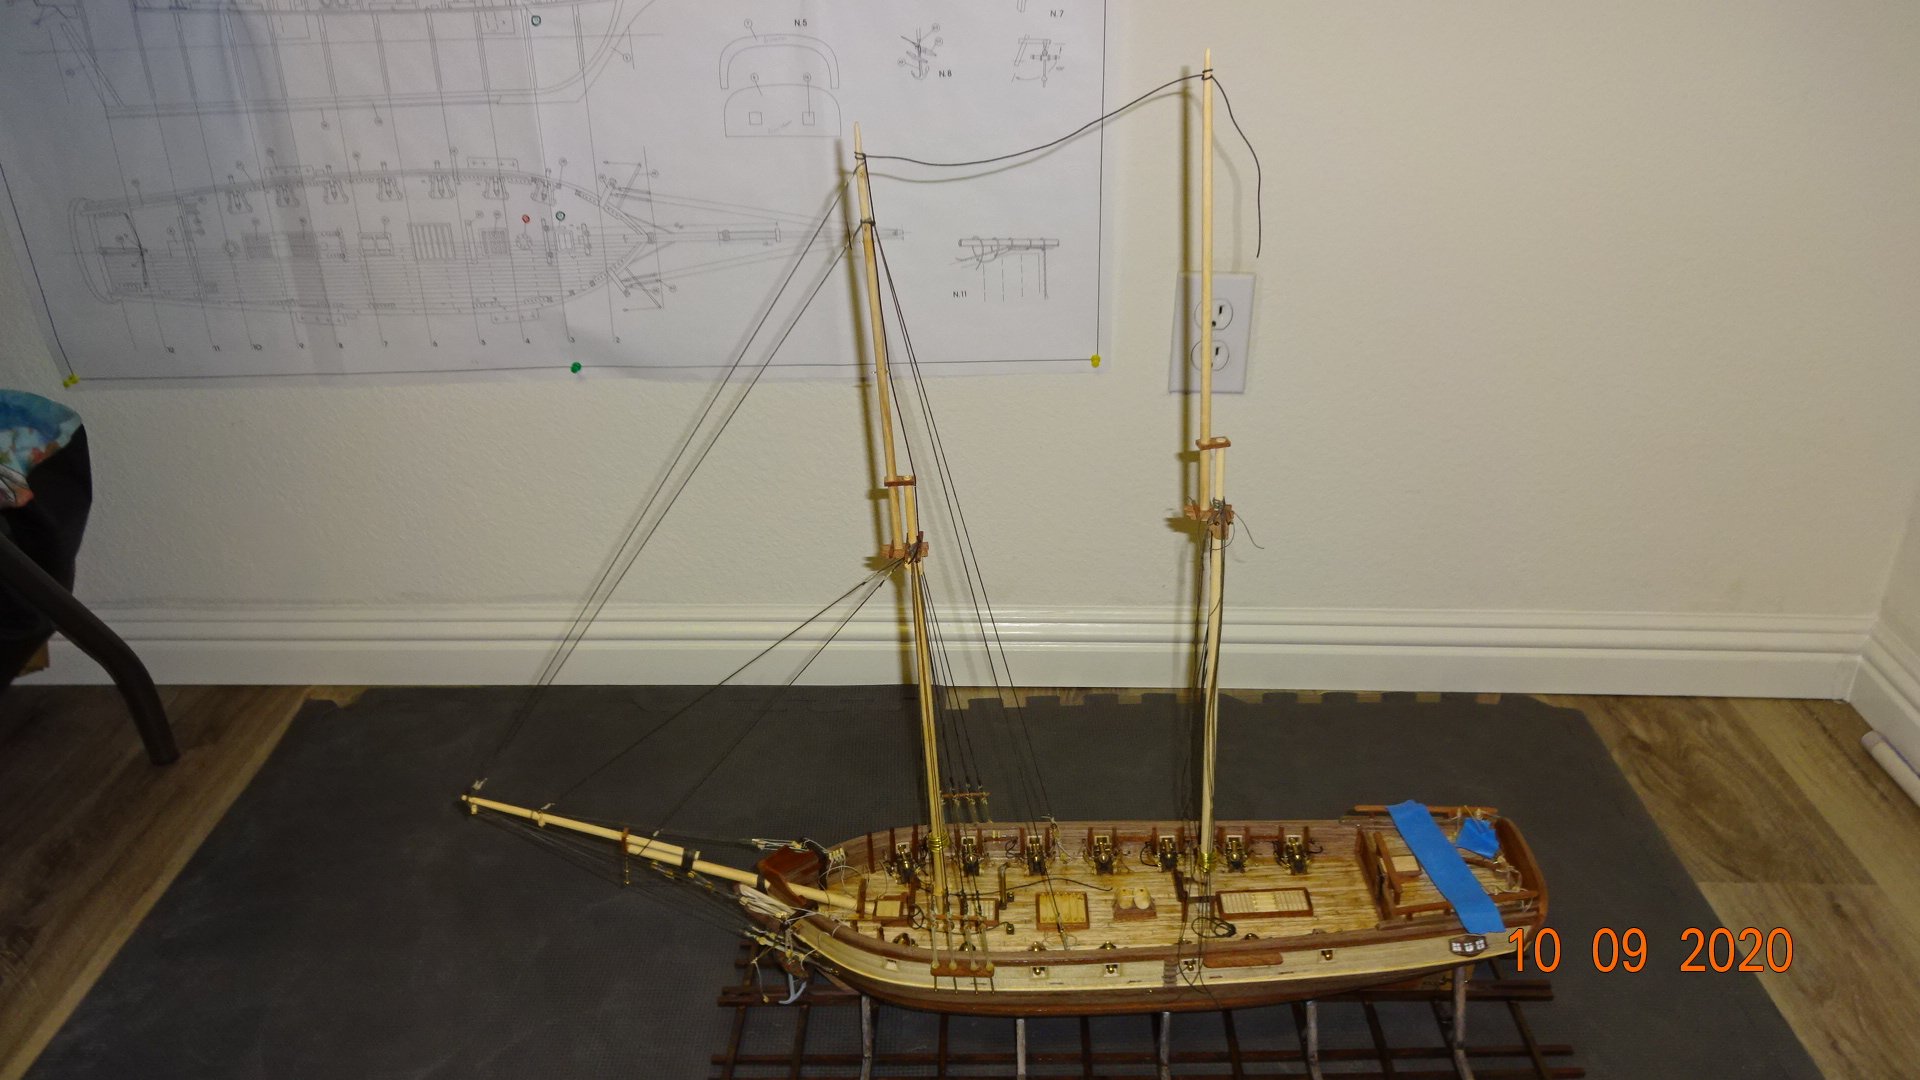
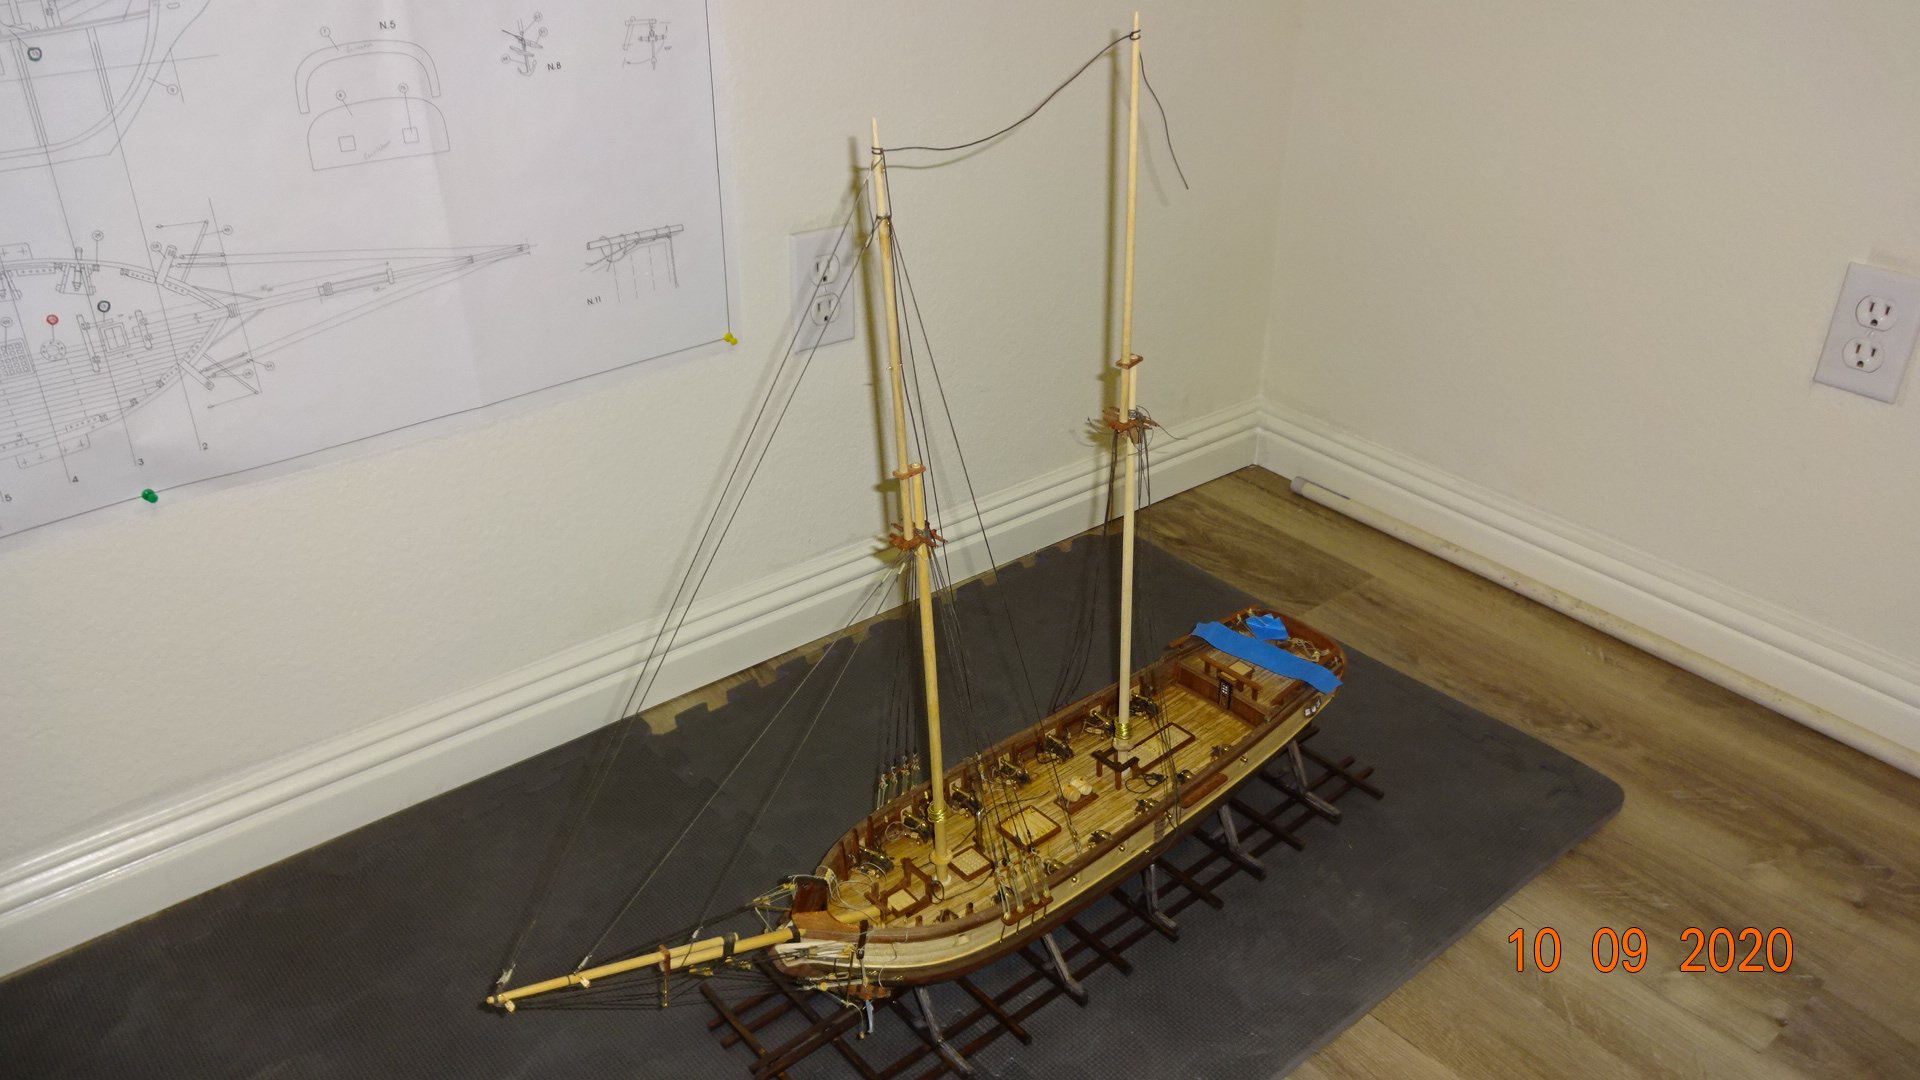
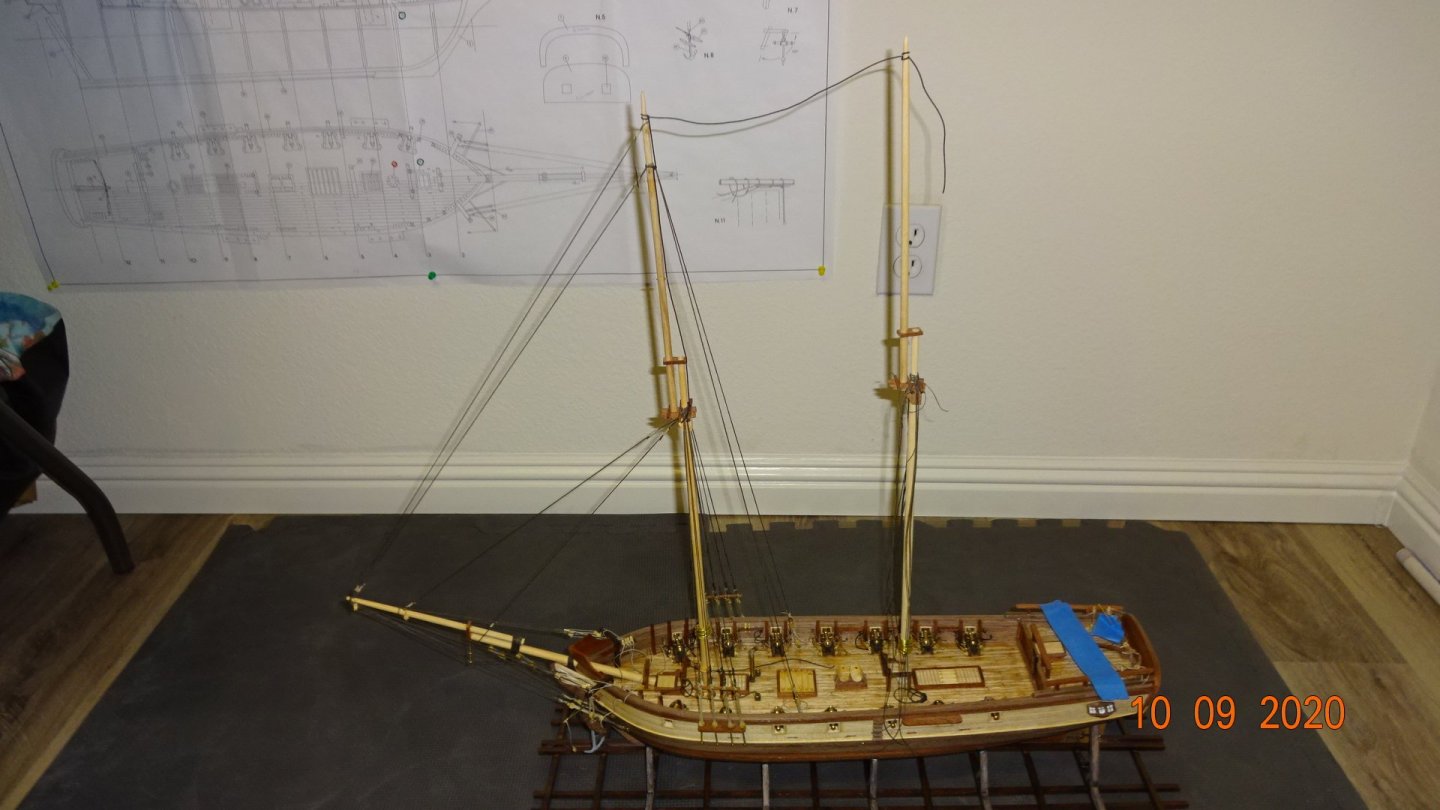
Spent a lot of time on where all the fore mast standing rigging lines tie off. Once I had confidence in the placement I began. Here is the 2 fore back stay lines rigged. From another angle. Initially I thought the lines would tie off at a belaying pin. However, there is not a pin near the blocks so I ended up wrapping the excess line around the tackle lines. Ran the fore stay and the jib stay lines next. The 2 lines on the right are those stays. I tied a line around those two lines at the fore mast (it runs straight up the fore mast), it will pull the 2 stay lines off the back of the shroud lines. Here's a better picture showing the line pulled taught. I next added the flying jib and the top fore mast rigging lines. I show here where the fore stay, jib stay, flying jib stay and the top fore mast stay all tie off to the bow spirit. Some pics showing them all connected. I have the main mast placed but not glued. I need to do a better job with the pictures. Flash kept going off and I was to lazy to turn it off. Also taking these entire ship pictures is challenging, either to far away and details don't show or to close and the masts get cut off. I did not realize that in taking on ship model building I would also need to up my photography skills Having the fore mast standing rigging completed is very a satisfying feeling. I actually look forward to rigging the main mast ! But then there's those ratlines ........


- 195 replies
-
- 4
-
-
- enterprise
- constructo
- (and 1 more)
-
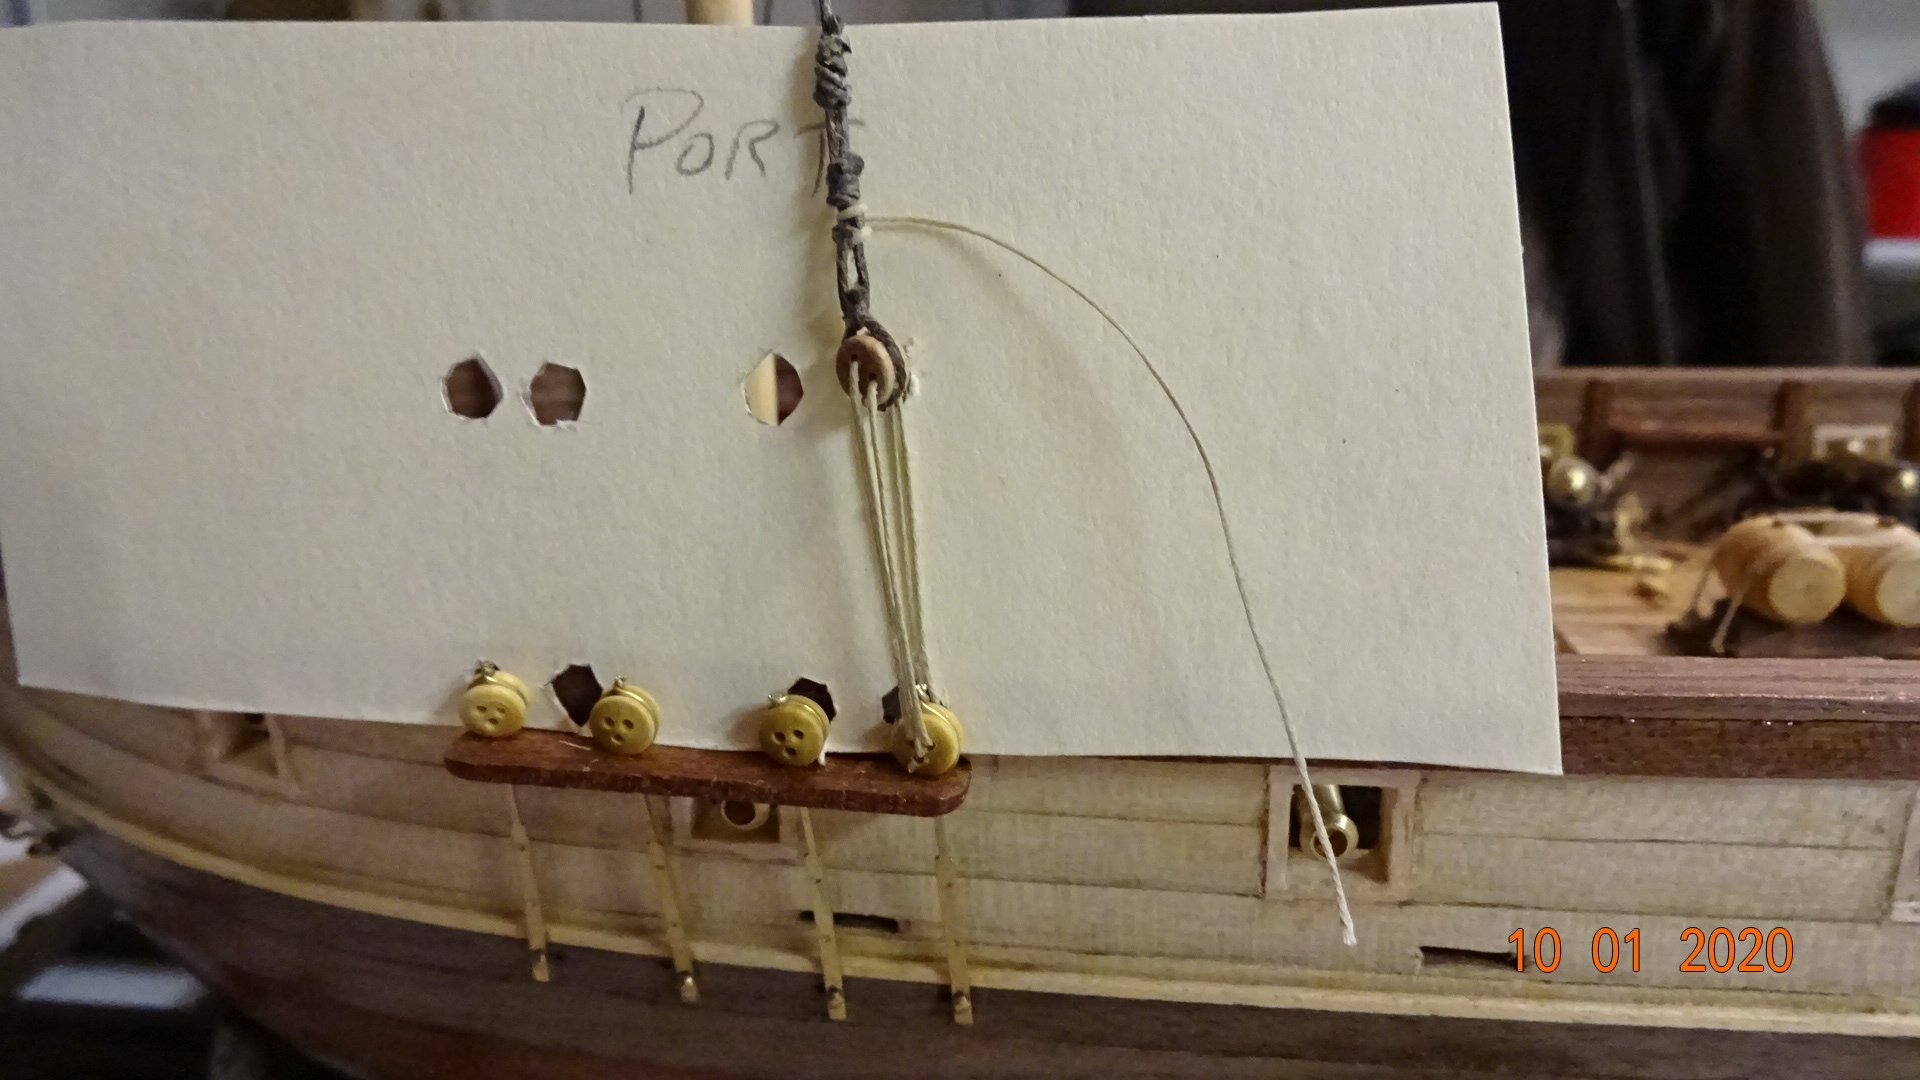
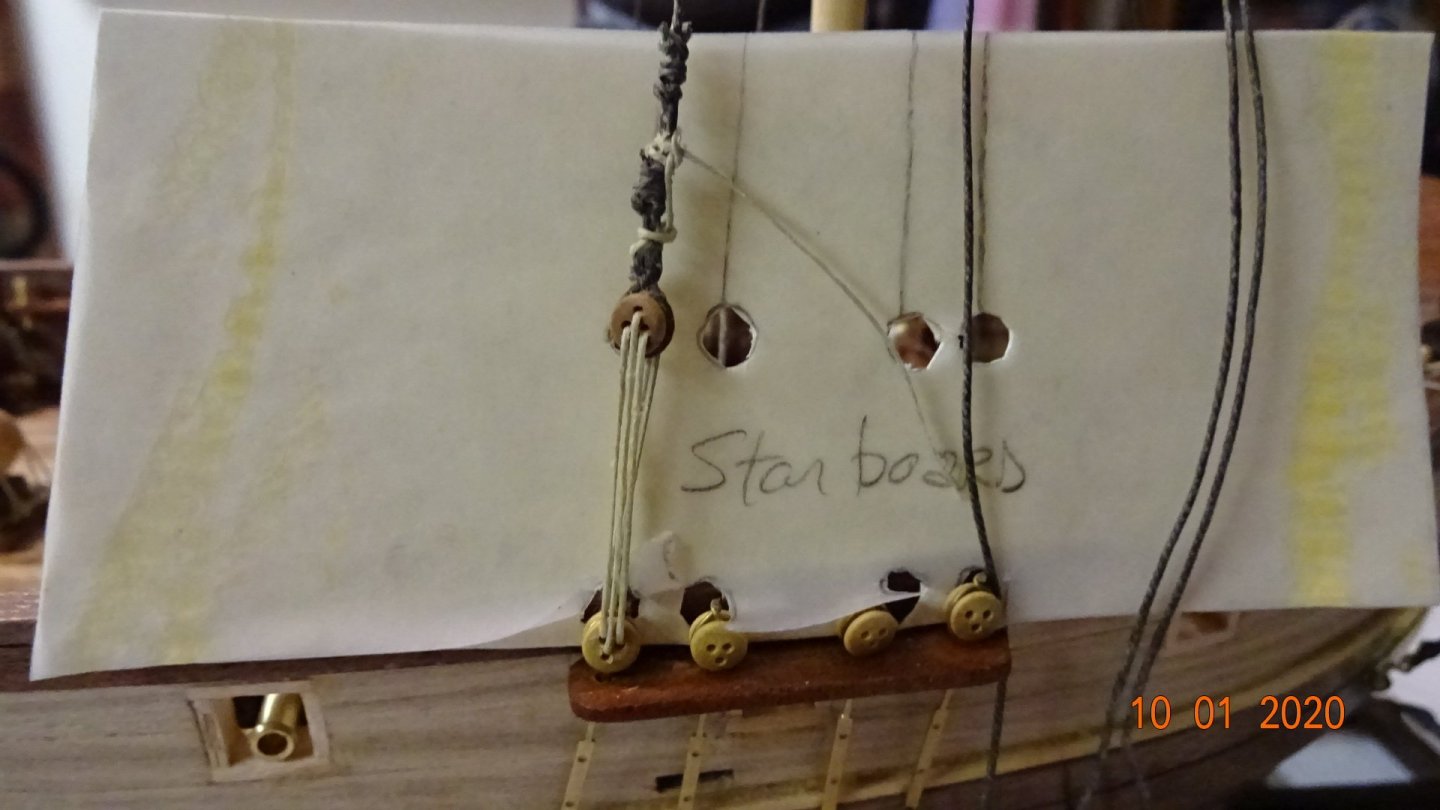
Starting to connect the shrouds. First I copied the drawing of the starboard shrouds to use for measurements. Then I cut out the holes for the top deadeyes to help with alignment. Used the back side of the drawing for the port side. As I started adding the shrouds I realized I forgot to make the holes for the stanchions. I drilled and tested, no gluing yet. Seems like someone mentioned to wait on the gluing. First shroud and deadeye tieoff was a bit unnerving to do, having the drawing for placement really helped out. Only did 2 a day. Still need more practice on "frapping" the shrouds. Next up is to finish the standing rigging on the fore mast.


- 195 replies
-
- 3
-
-
- enterprise
- constructo
- (and 1 more)
-
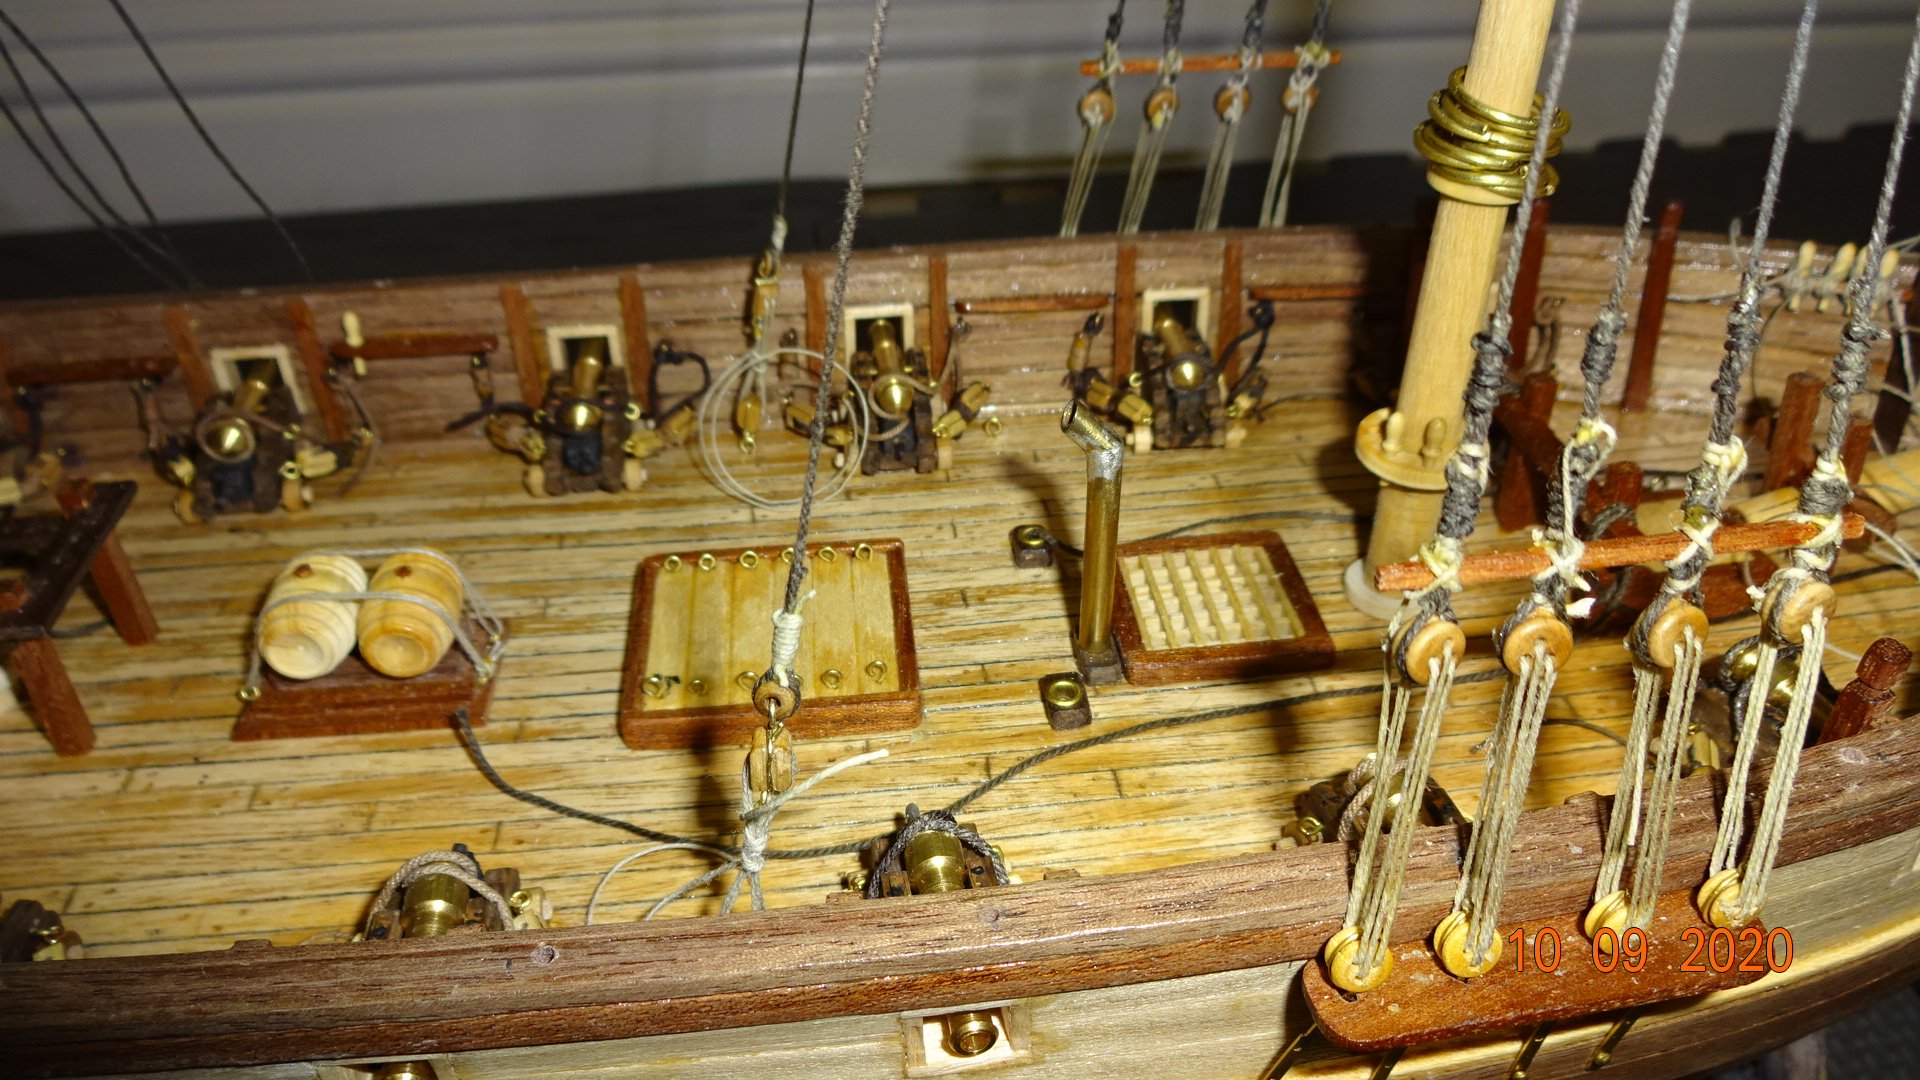
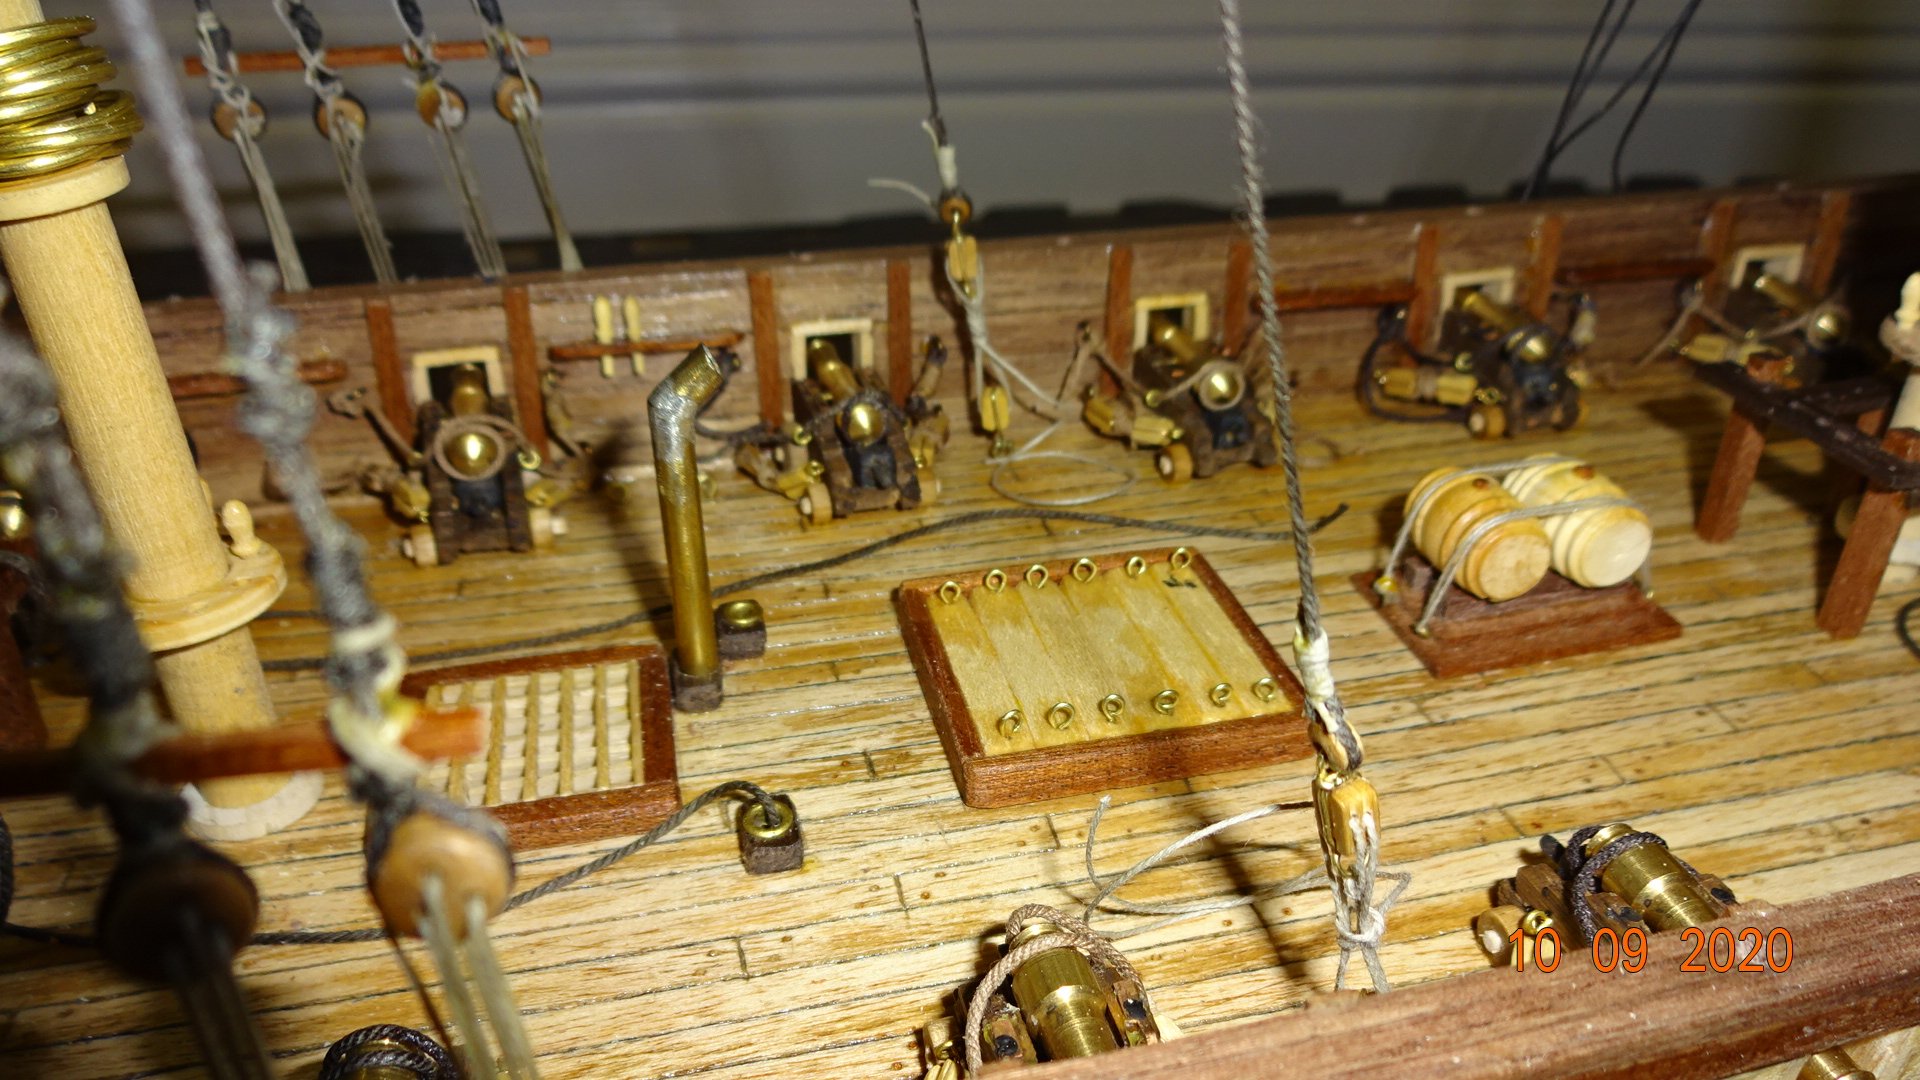
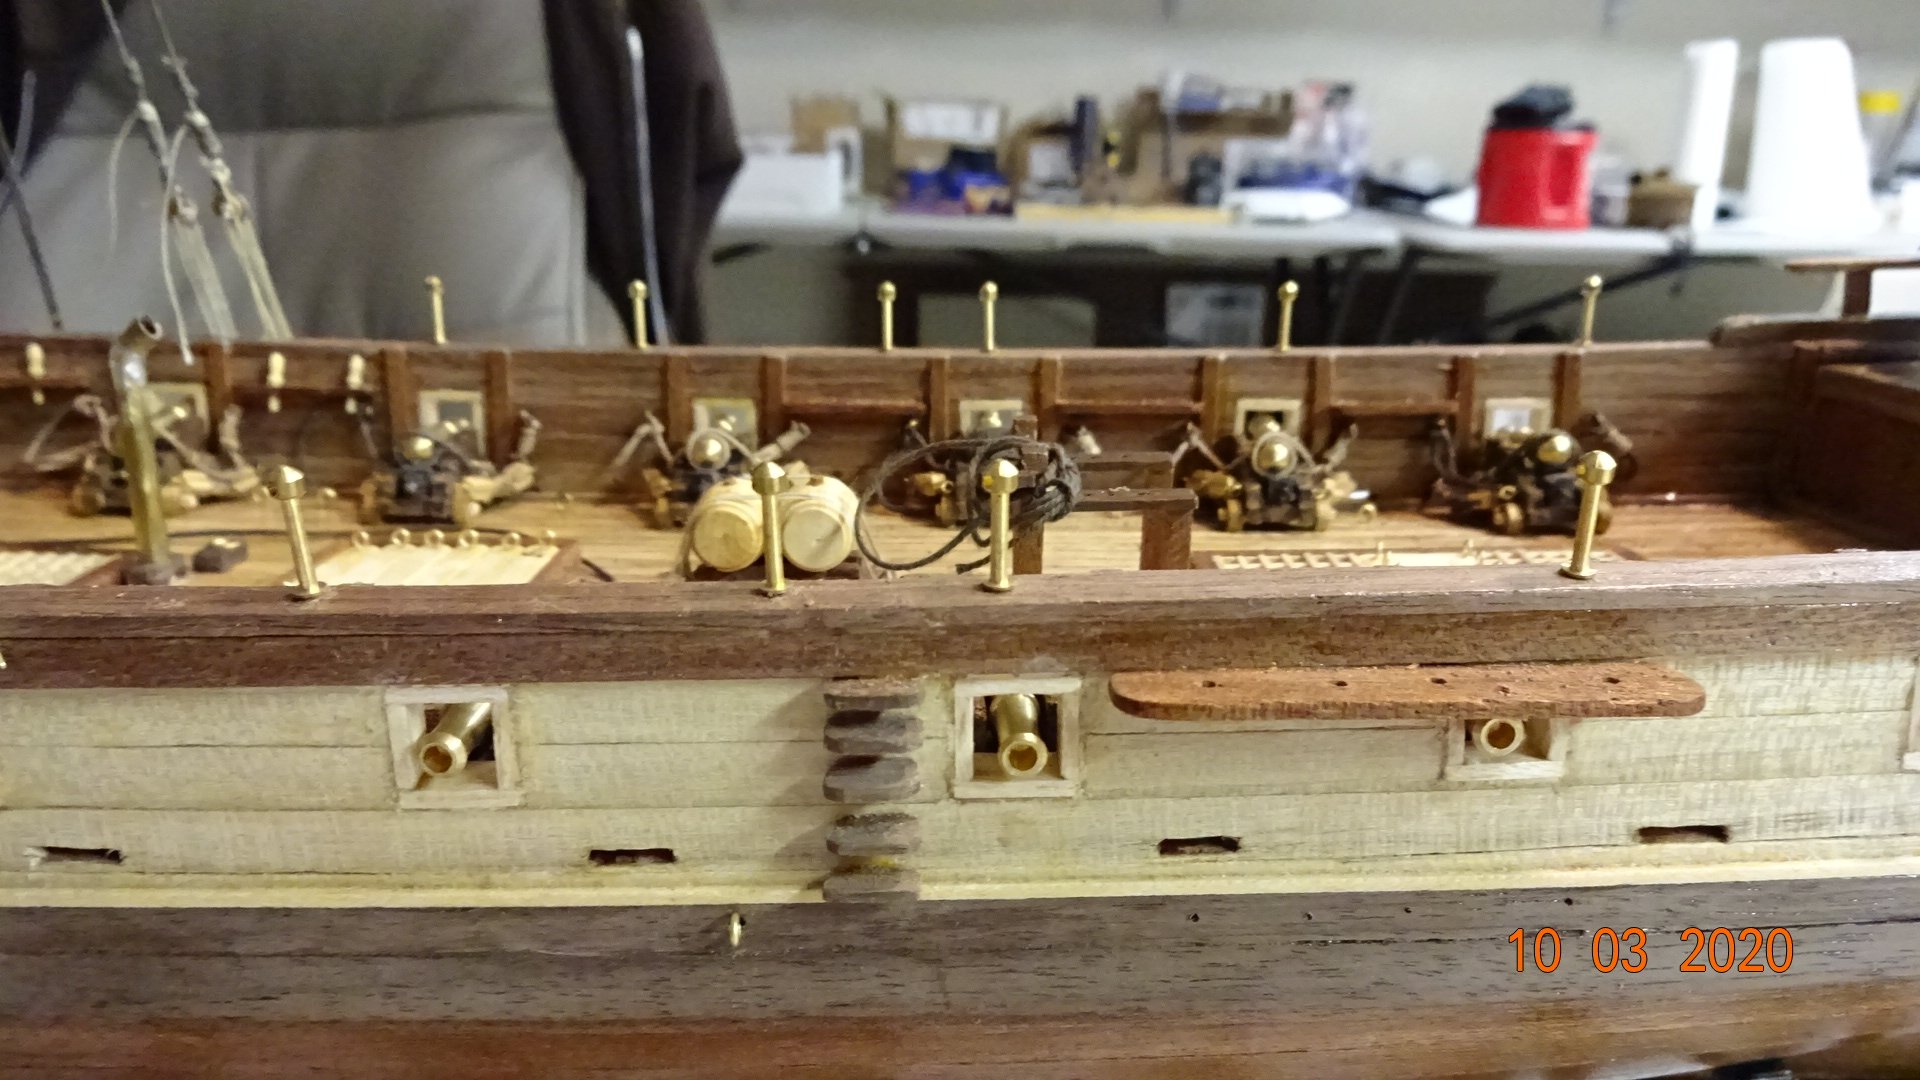
In better trying to understand where all the standing rigging lines go I looked at a number of images, online and in my books. Some lines were tied off to eyebolts, but I did not previously see any instructions on placing the eyebolts in the build instructions. Upon closer reading I found that the schematic used "small rectangles" to designate where an eyebolt should go. Look closely and see if you can find those areas... Anyway, I went back and drilled all the holes, made some eyebolts and glued them in. Working through where all the standing rigging ties off and almost have it figured out. For newbies (see myself) I recommend that you have a good understanding of where the lines run and what they are used for BEFORE cutting, running and tying off the lines. I've been at it a week or two and I now understand where/how the standing riggings (for this model) are used. I want to test run all the lines to see if I have enough standing rigging line or if I need to order more. That's it for now.

- 195 replies
-
- 3
-
-
- enterprise
- constructo
- (and 1 more)
-
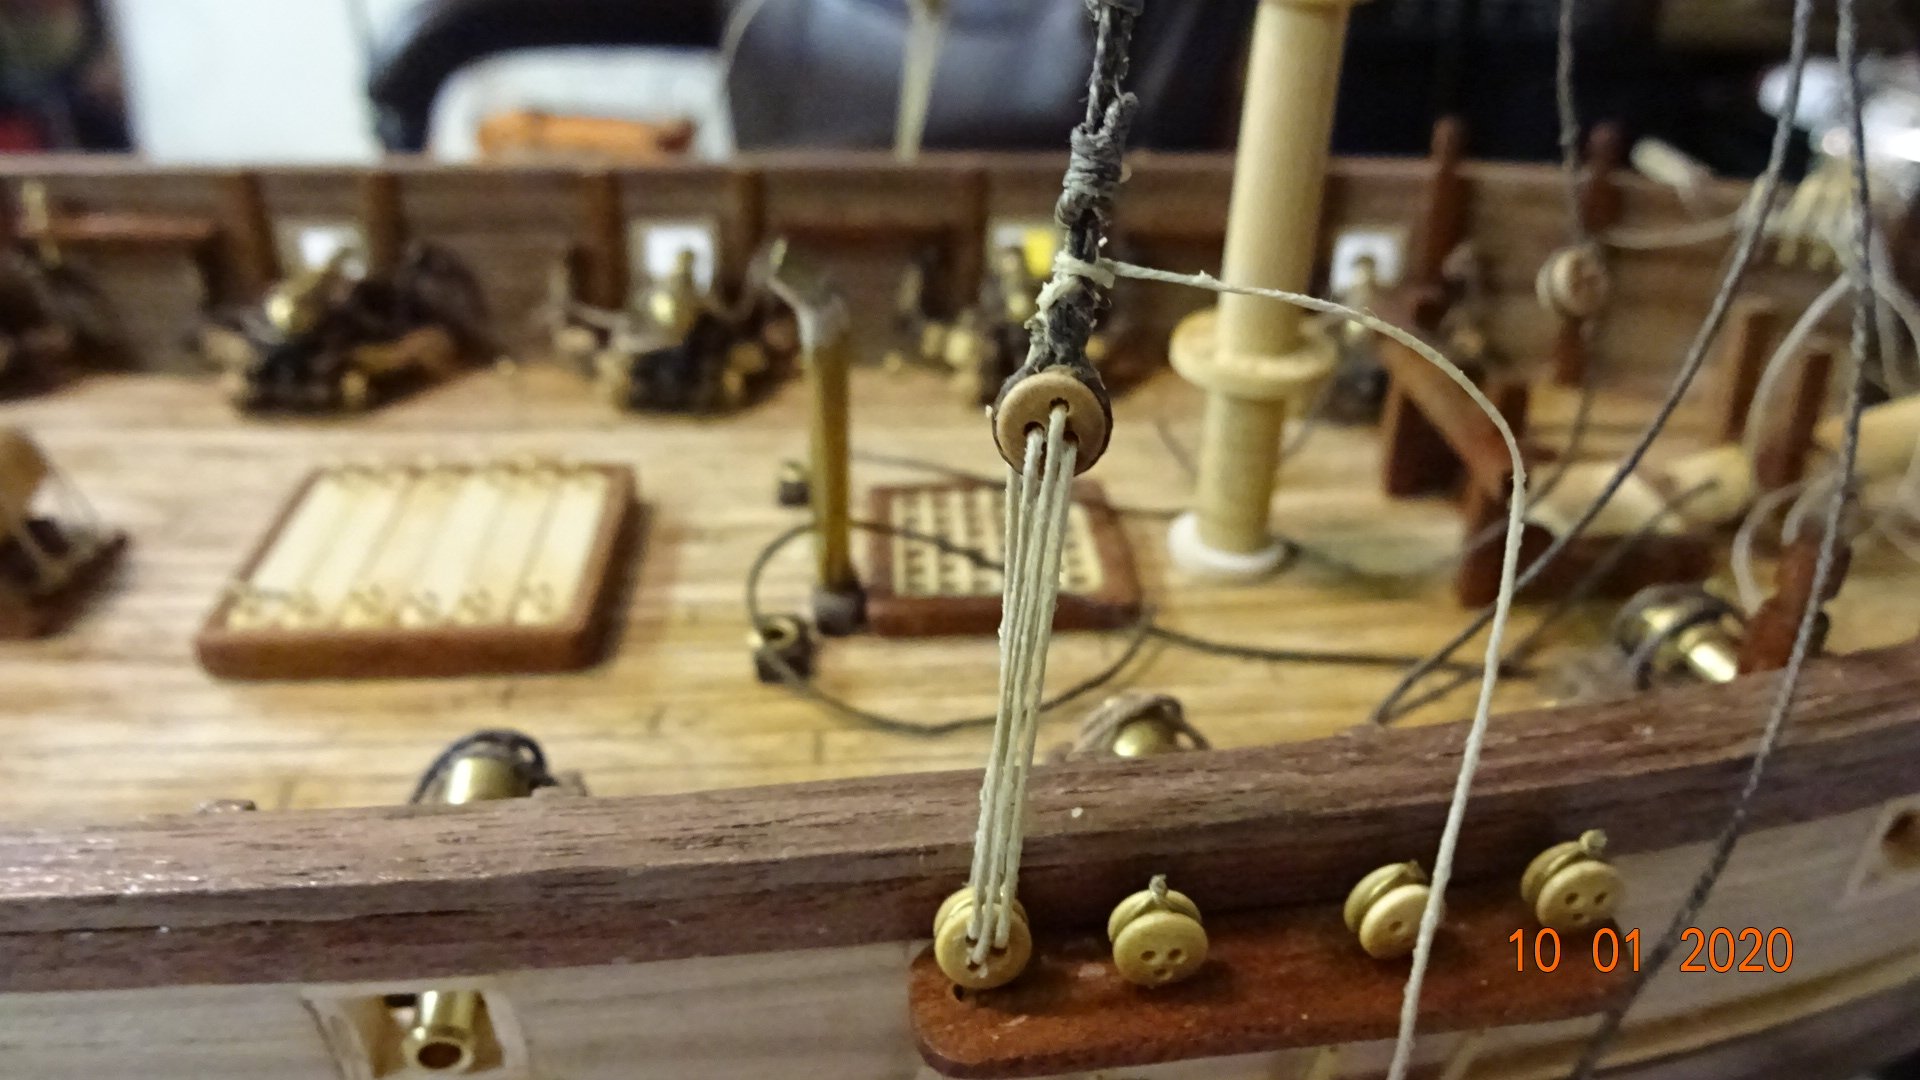
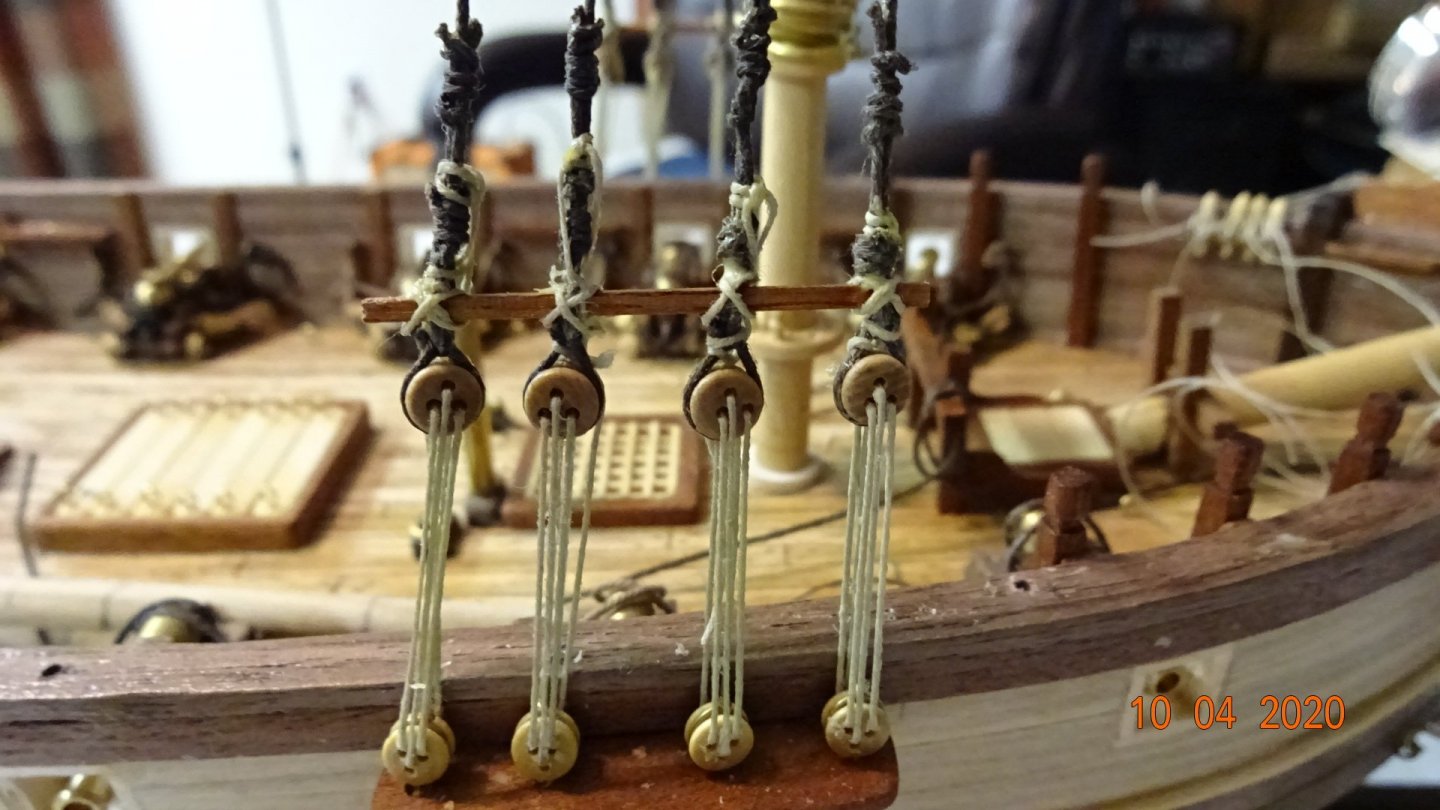
The making of the first shroud First I measured the distance to each block and tackle side, then I added another 6 inches of line just for good measures. I'm using 1 pieces of line that will tie off on both sides of the ship. Started the frapping process, and done! Snugged up the frap line to close the loop a little more. Test fitted it over the mast Continued the process .. Only 2 more to go for the foremast. The shrouds are not glued down yet, as well the foremast is not either. Did the same thing for the main mast.. Next up, tie on the deadeyes and attach to the hull.

- 195 replies
-
- 2
-
-
- enterprise
- constructo
- (and 1 more)
-
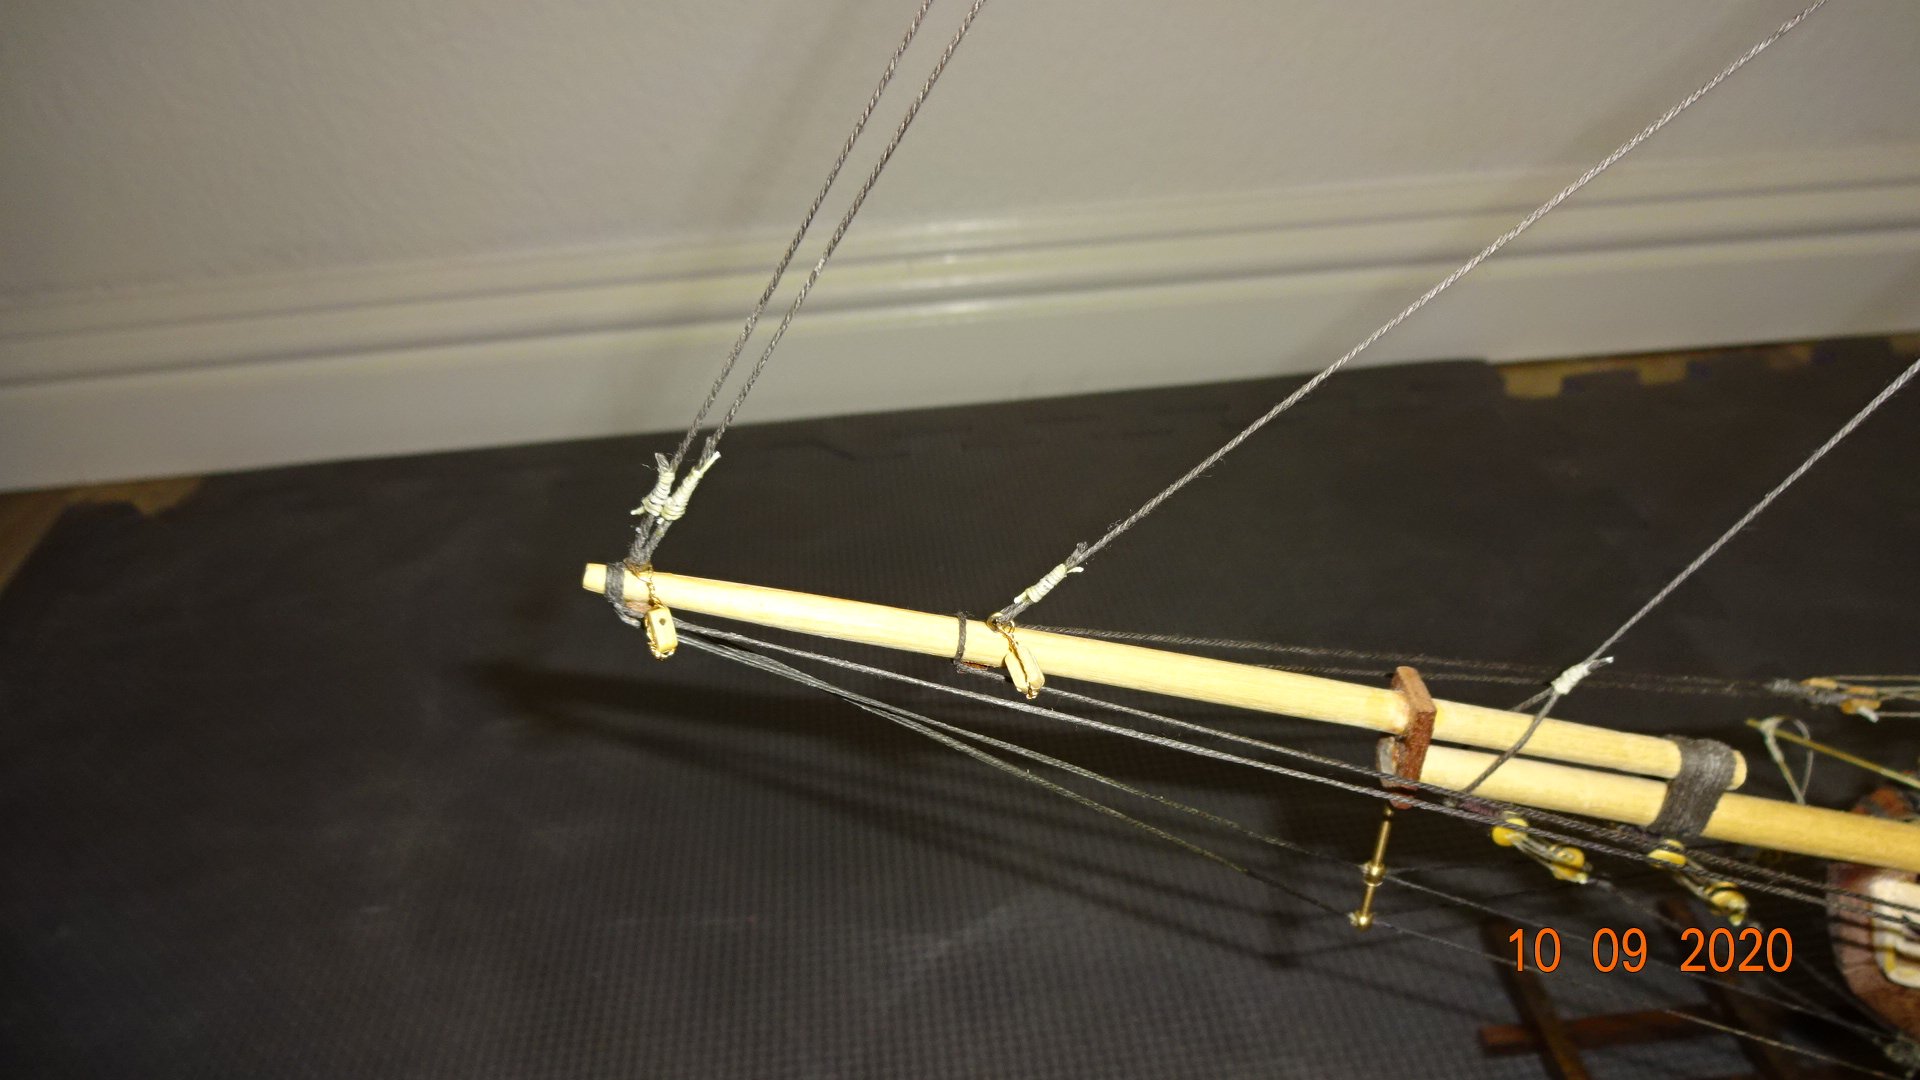
I have completed the bow-spirit mast with the attached rigging. Posting these pics as reference.


- 195 replies
-
- 4
-
-
- enterprise
- constructo
- (and 1 more)
-
@Valito Check out mikiek's build, first page. He does a good job of showing pics on how he constructed the hull. I use his build log to assist in my work. https://modelshipworld.com/topic/18090-enterprise-1799-by-mikiek-constructo-151/
-
I am about to start the standing rigging. Just put on the foremast shrouds yesterday, have not tied them off so they are just ropes hanging off the mast. You did a great job, with pictures, of showing the rigging process on your ship. I will be using your model to help determine where to put all the lines. As well, I'll take your advise and not glue any ropes or pins to the rails until till the end. Is it the case that standing rigging is meant to be tied off (secured) and not run through blocks and such. Only the running rigging needs the blocks? Also, are you now finished with your Enterprise?
-
Apologies if I posted on the wrong build log, I was replying to Redline11 request. Assumed, incorrectly, Valito was the same individual 😳. @Redline11, Check out my build log and I address how I did scuppers. Rowboat.
-
@Valito Good start on planking. One recomendation, start tapering the bow planks and angle them up. Definately do this on the second planking otherwise you will find the bow planks will not fit in the space.
-
How’s your build progressing? Did you get an answer to your question?
-
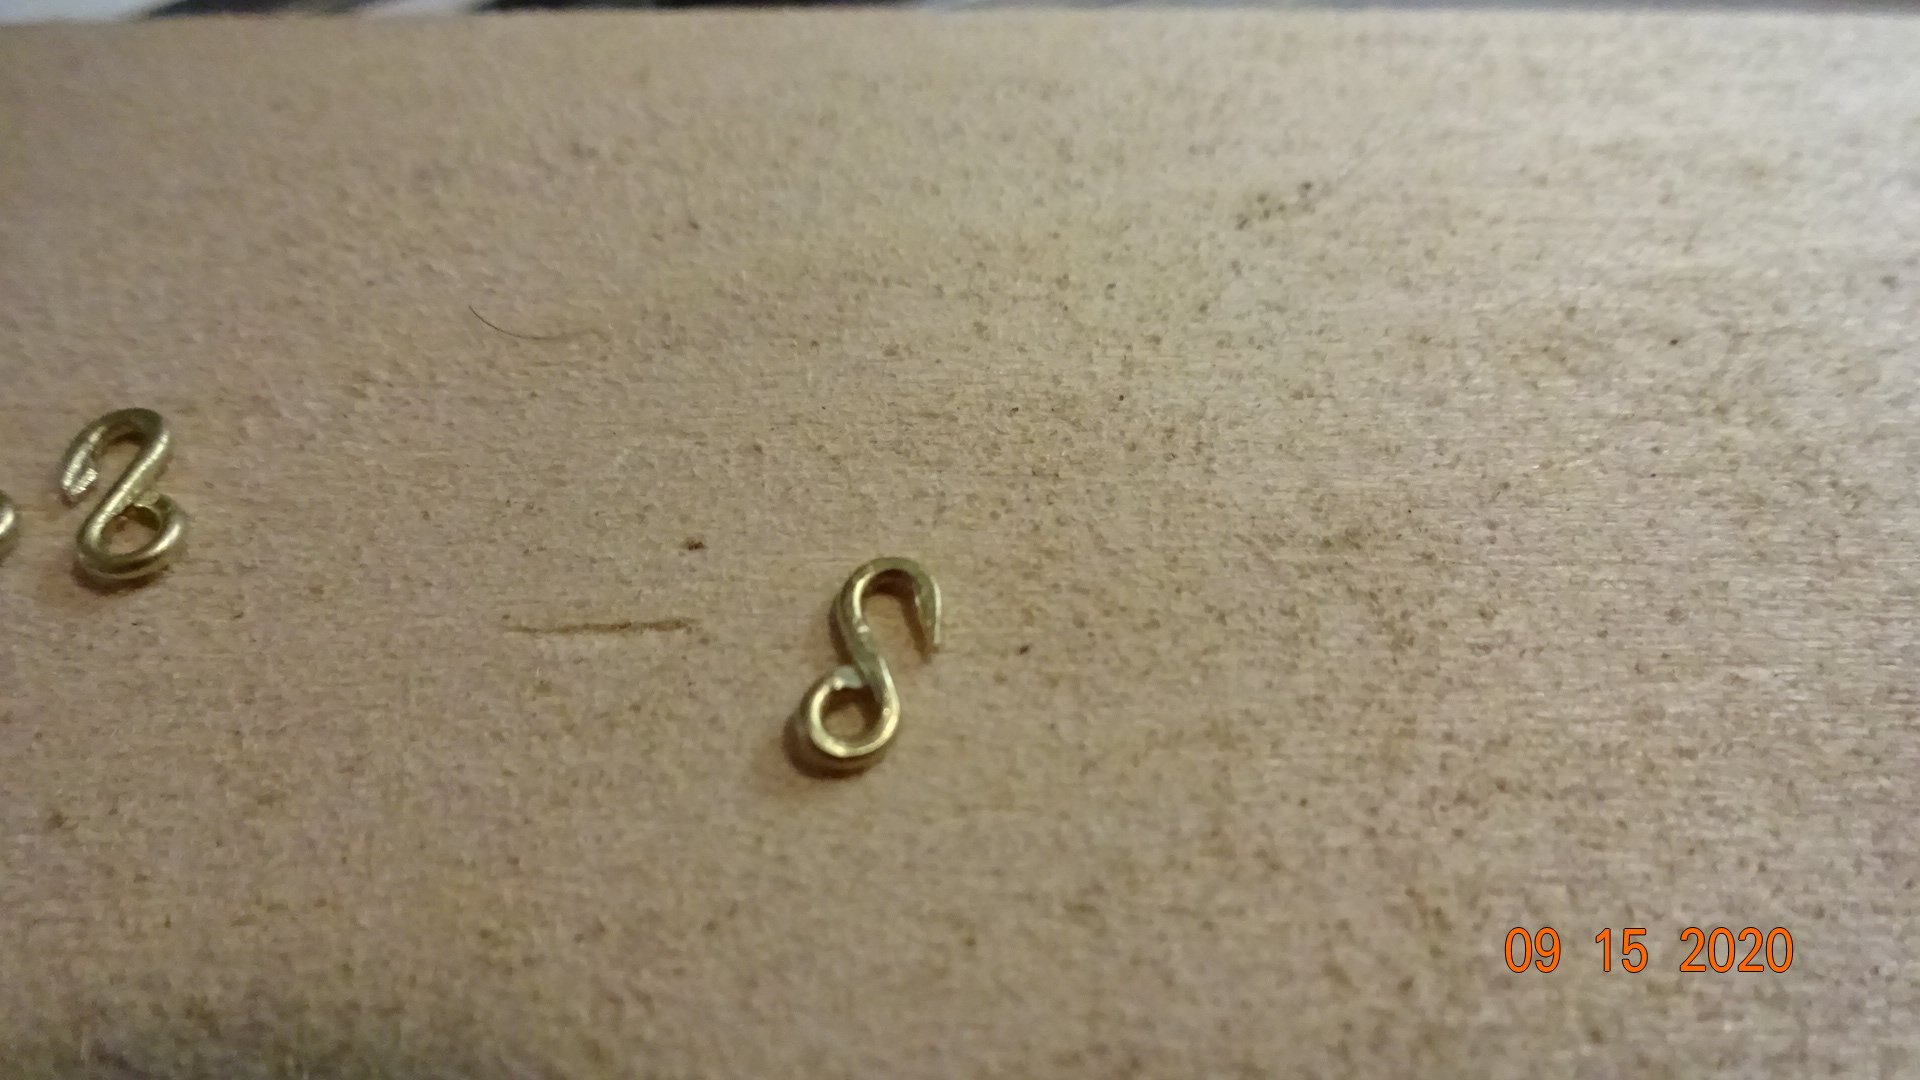
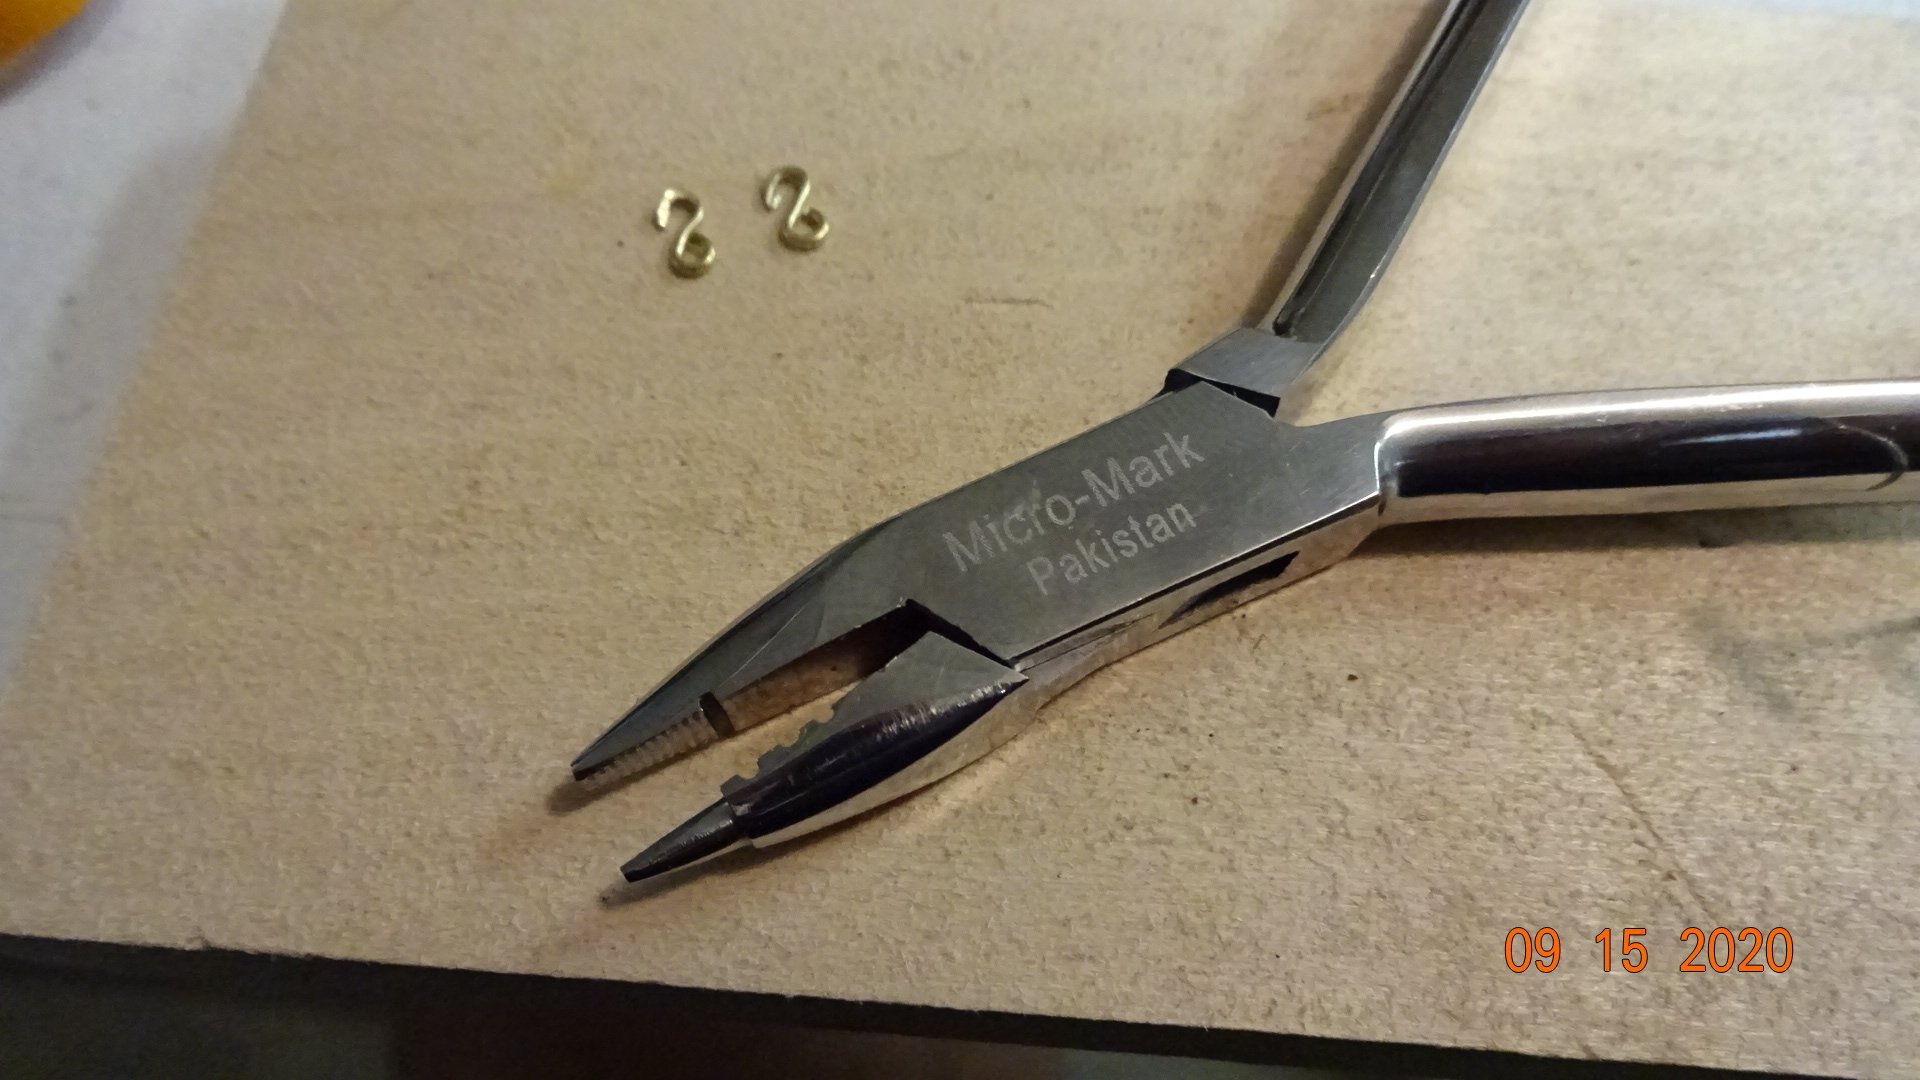
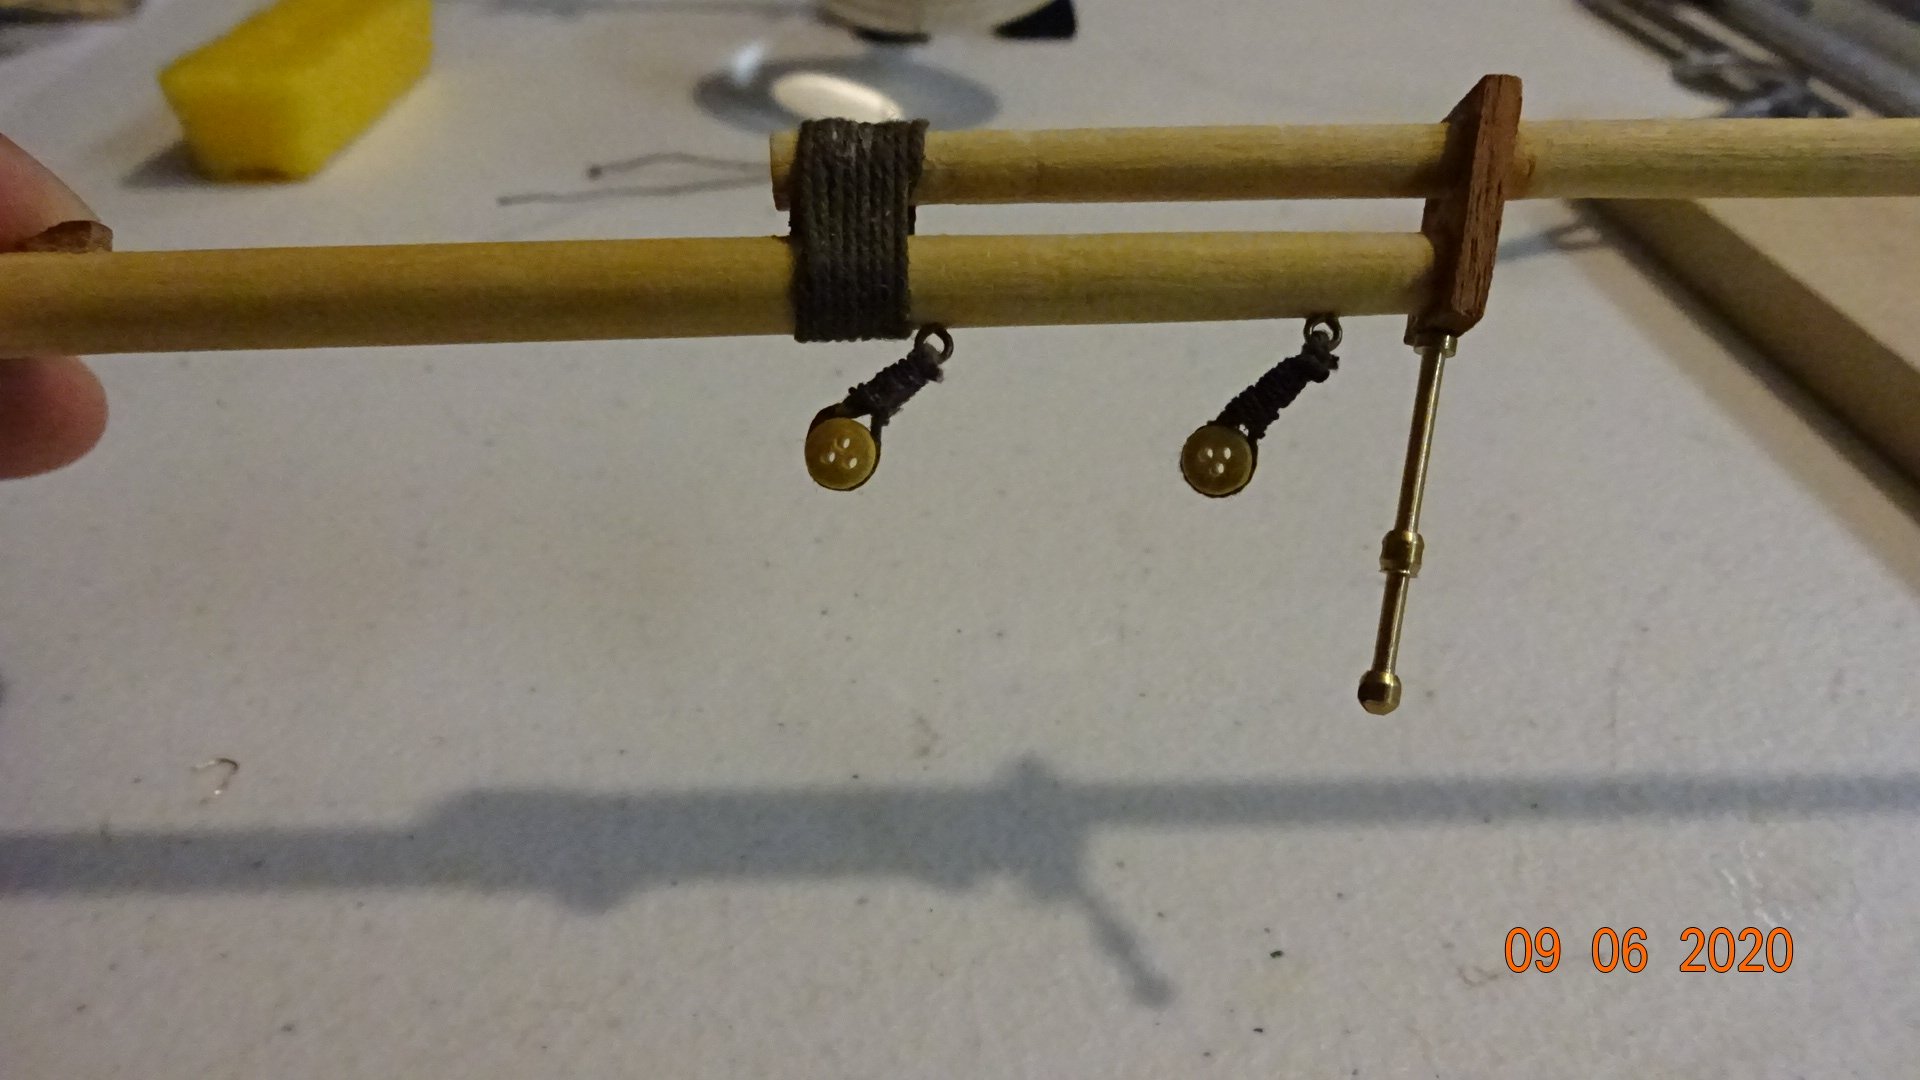
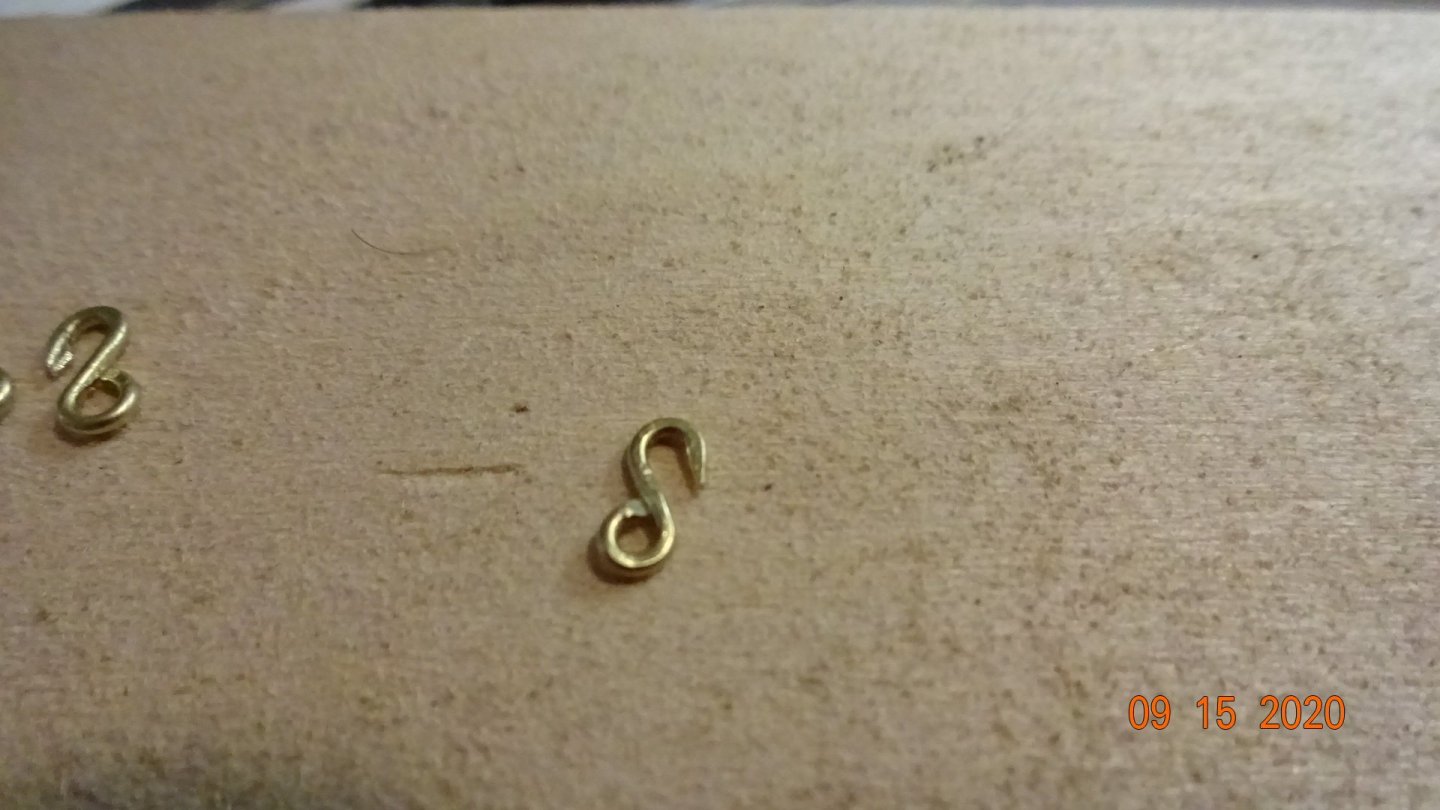
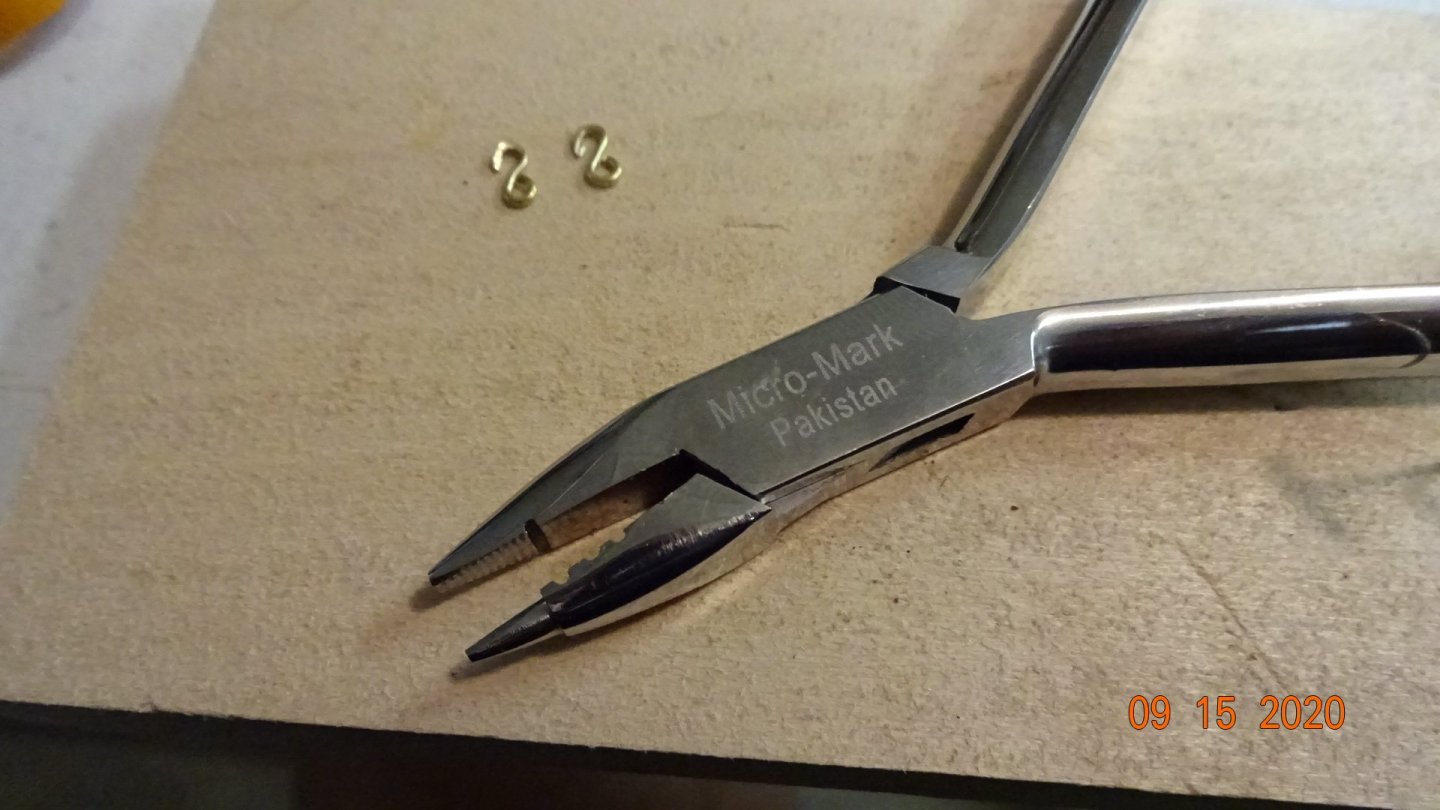
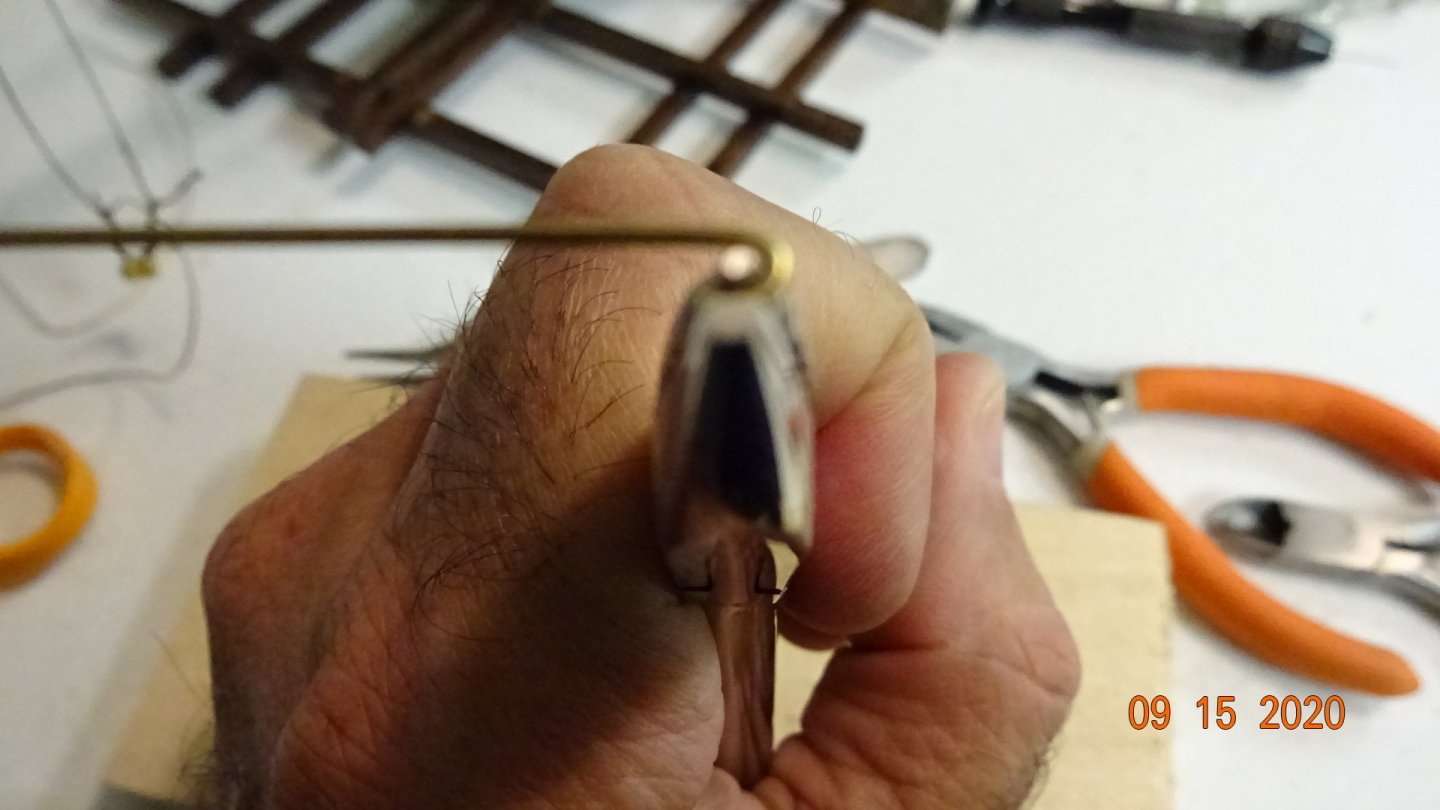
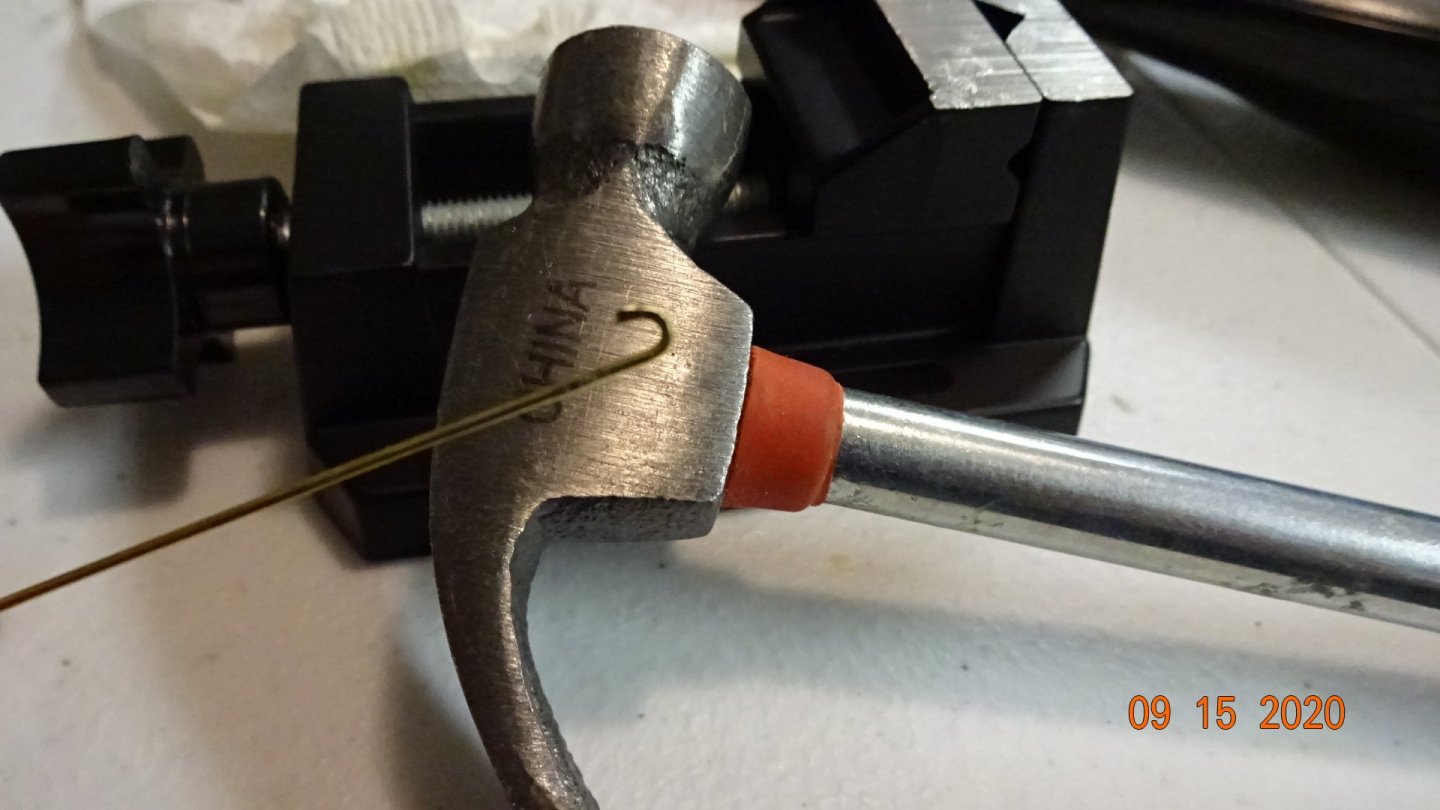
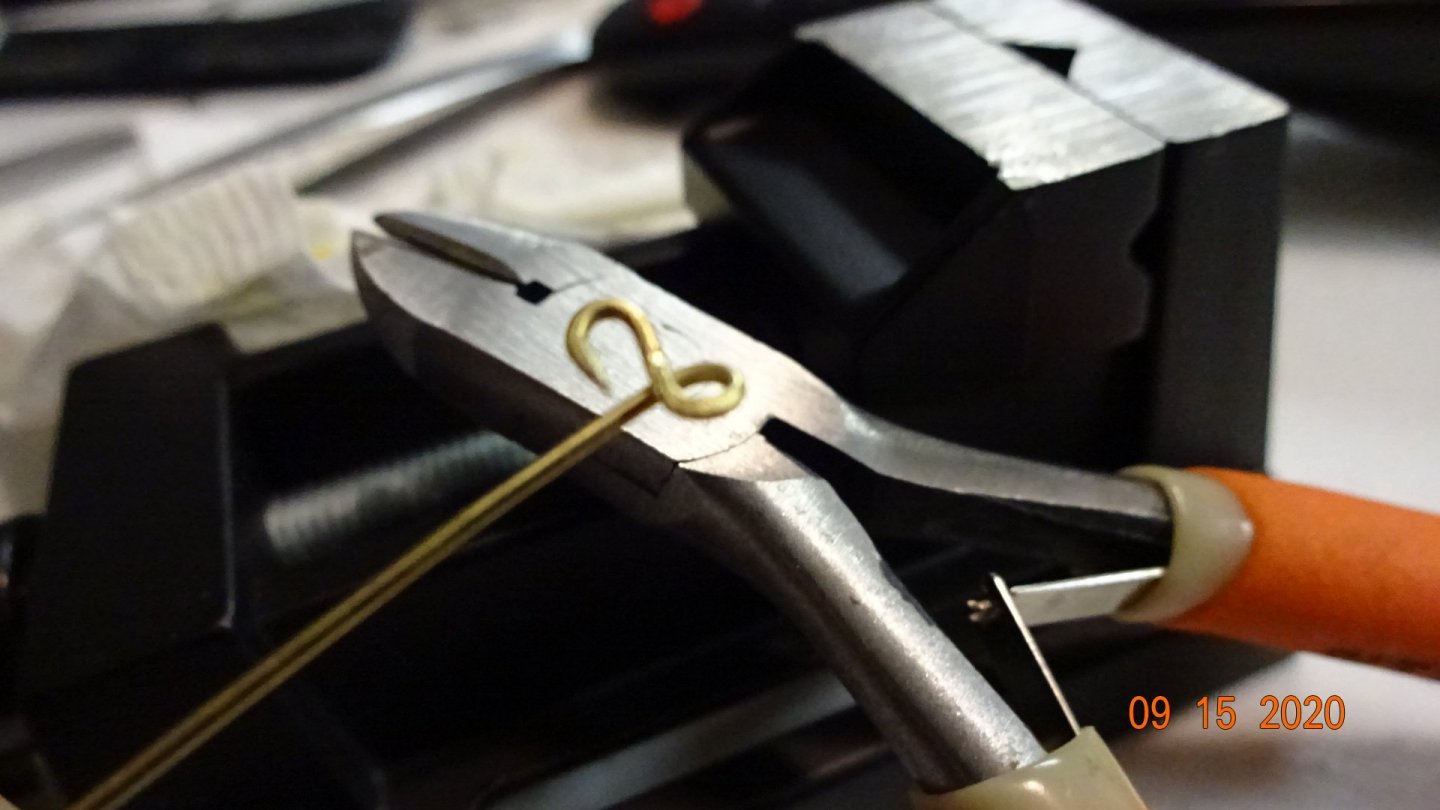
I noticed in the manual and on some online pictures that a hook is used to attach to eyebolts. Not having any I decided to make my own. I'm using .81mm wire. Here's the end product.. .. and here's how I got there.... Used some wire wrapping pliers to get the initial hook bend. Made as tight a bend as I could. Hammered on the end hook piece till it flatten. Then cut the hook end at a slight angle, making it pointed. Then used the wire twisting tool to form the bottom loop. Trimmed off the excess wire and filed the hook, done Here's a pic of it in use. I try to not just post completed pictures of a build part. I think adding the "how-to" is beneficial to others, even if it's already been done a 100 times by other modelers. Hope that helps someone
- 195 replies
-
- 6
-
-
- enterprise
- constructo
- (and 1 more)
-
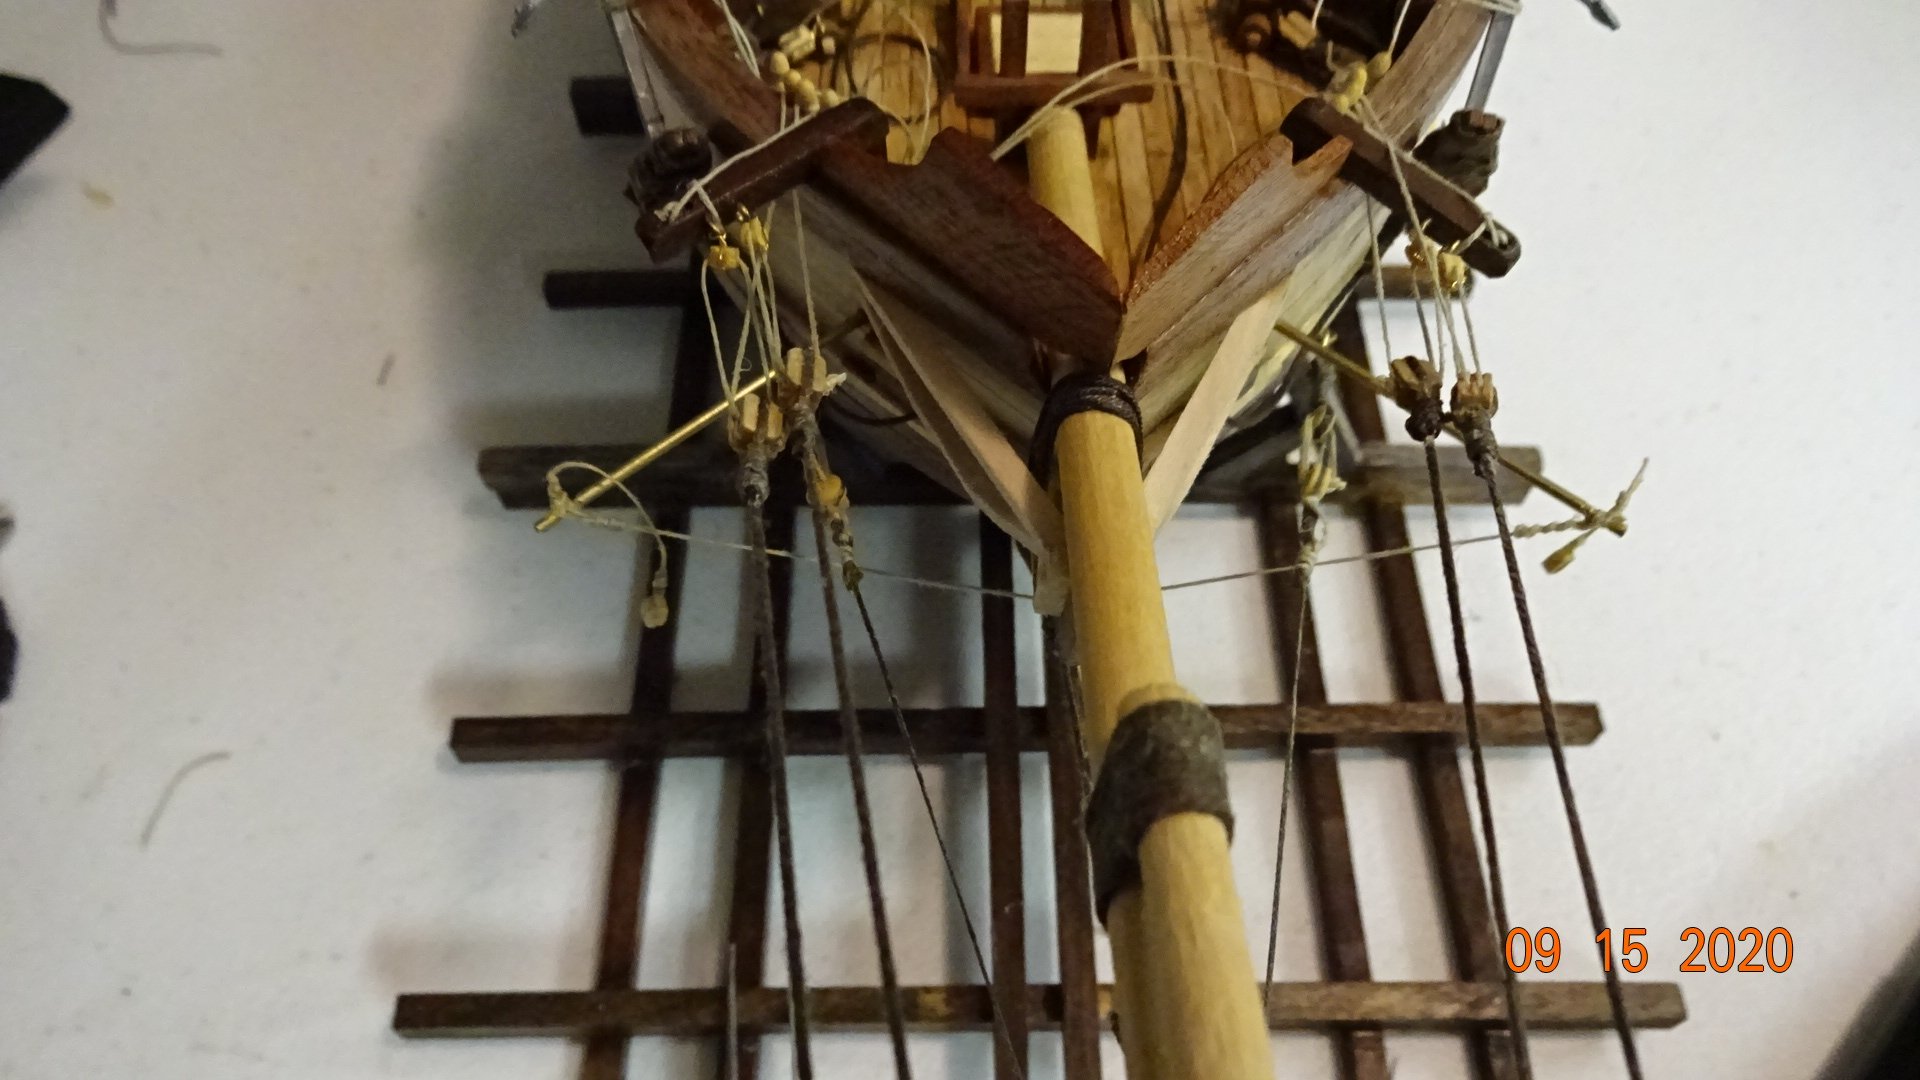
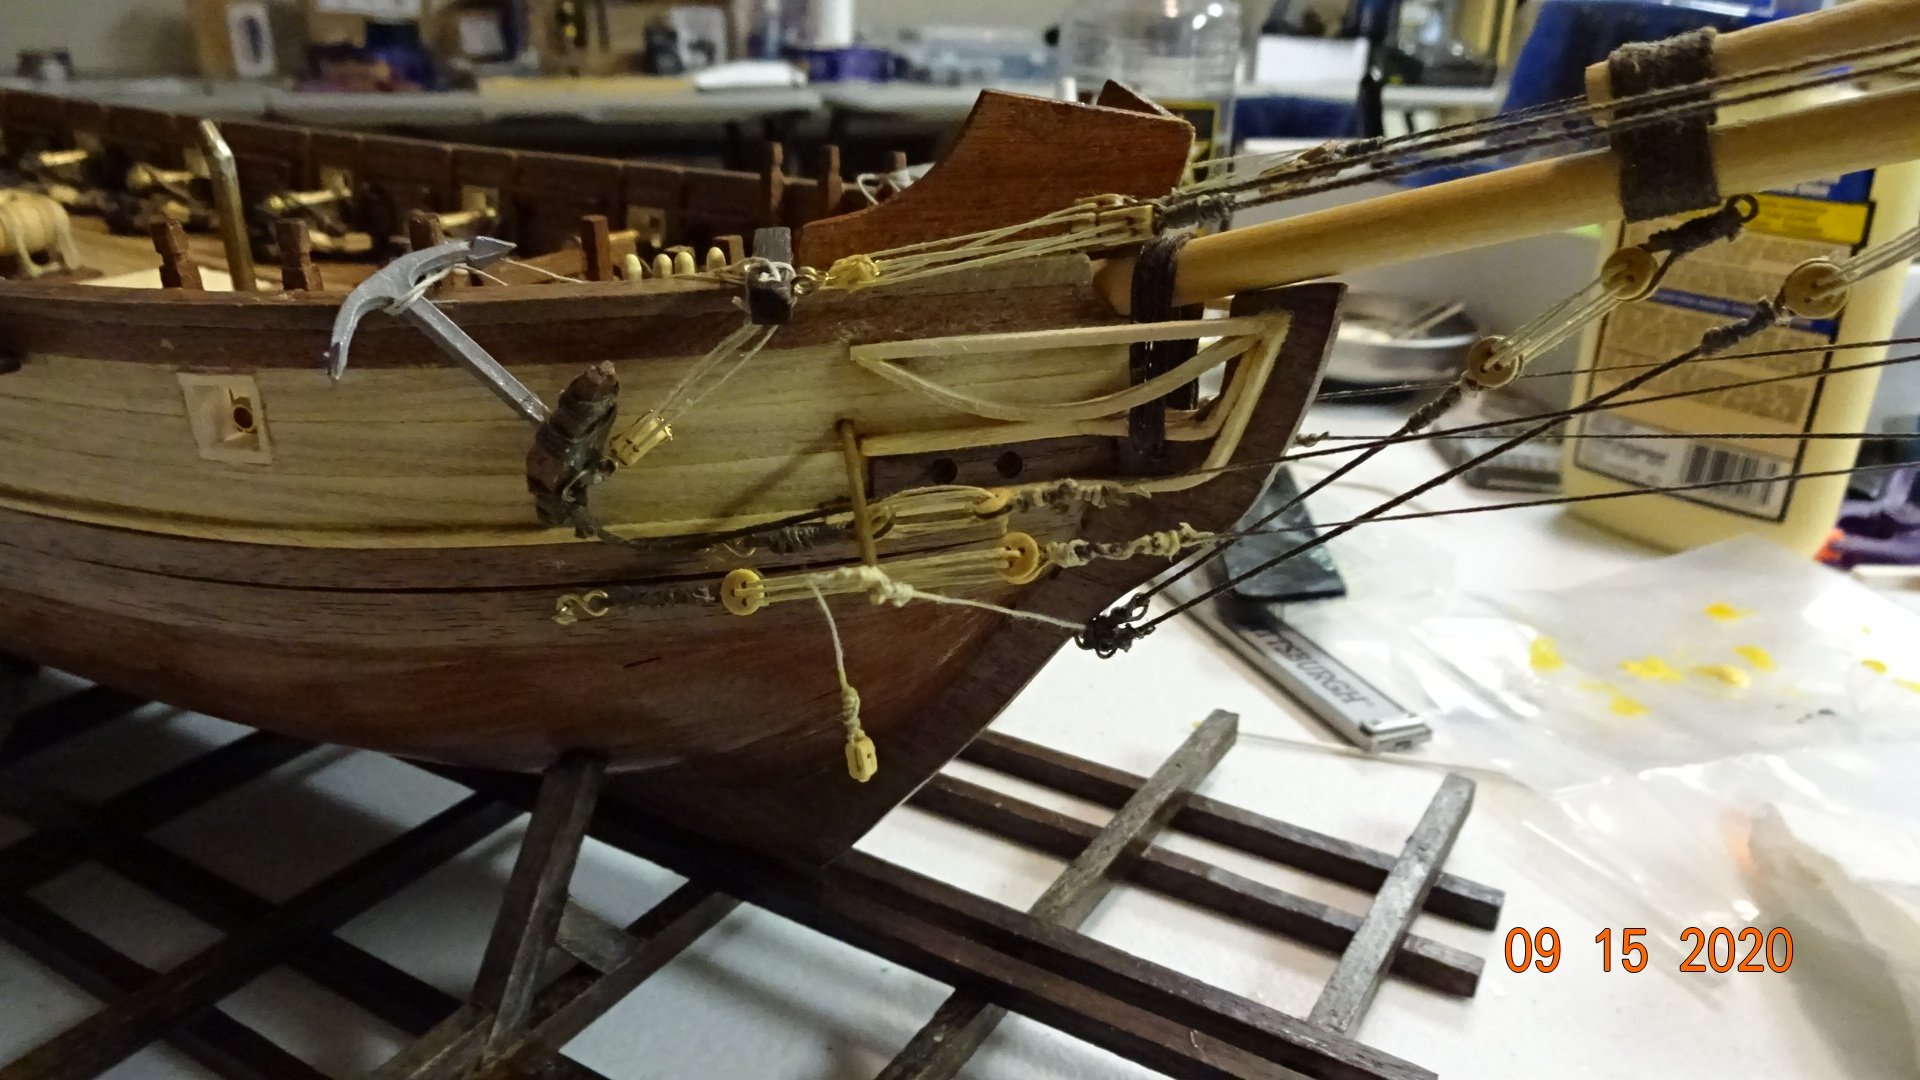
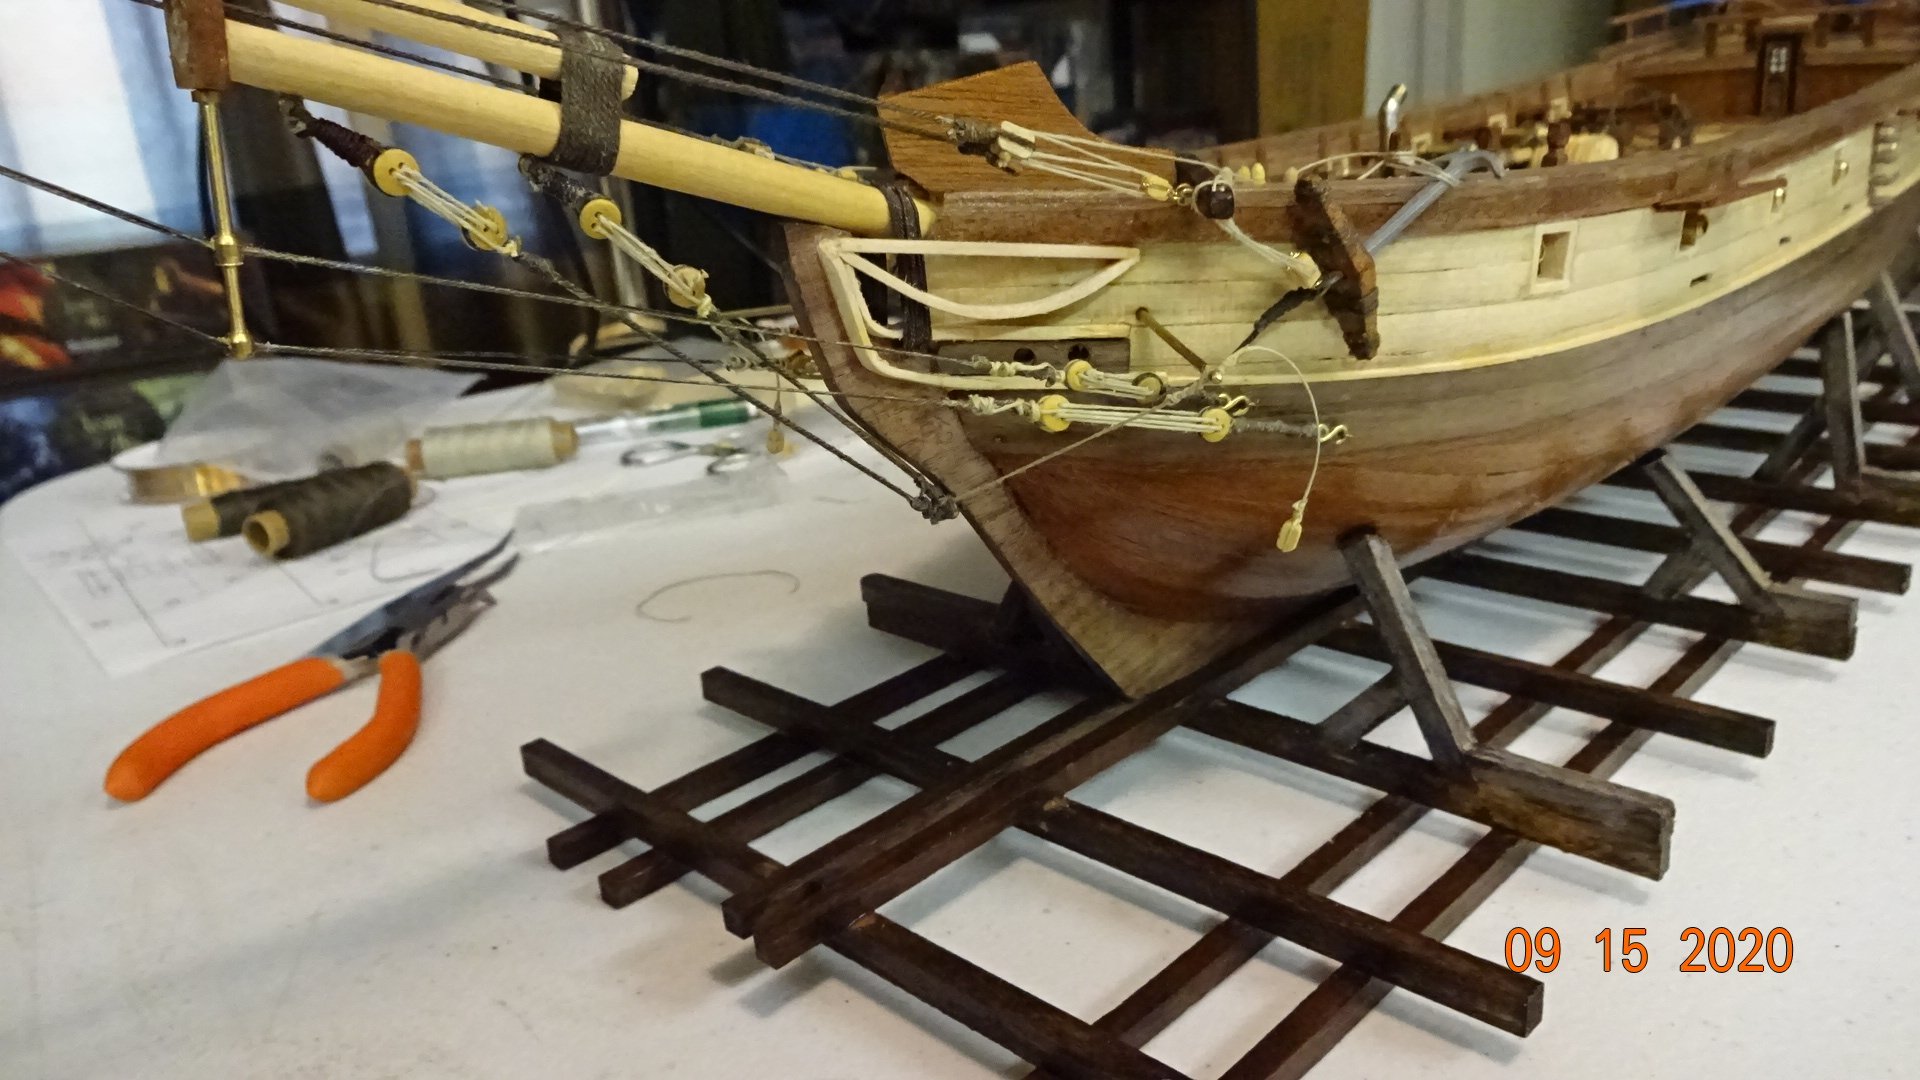
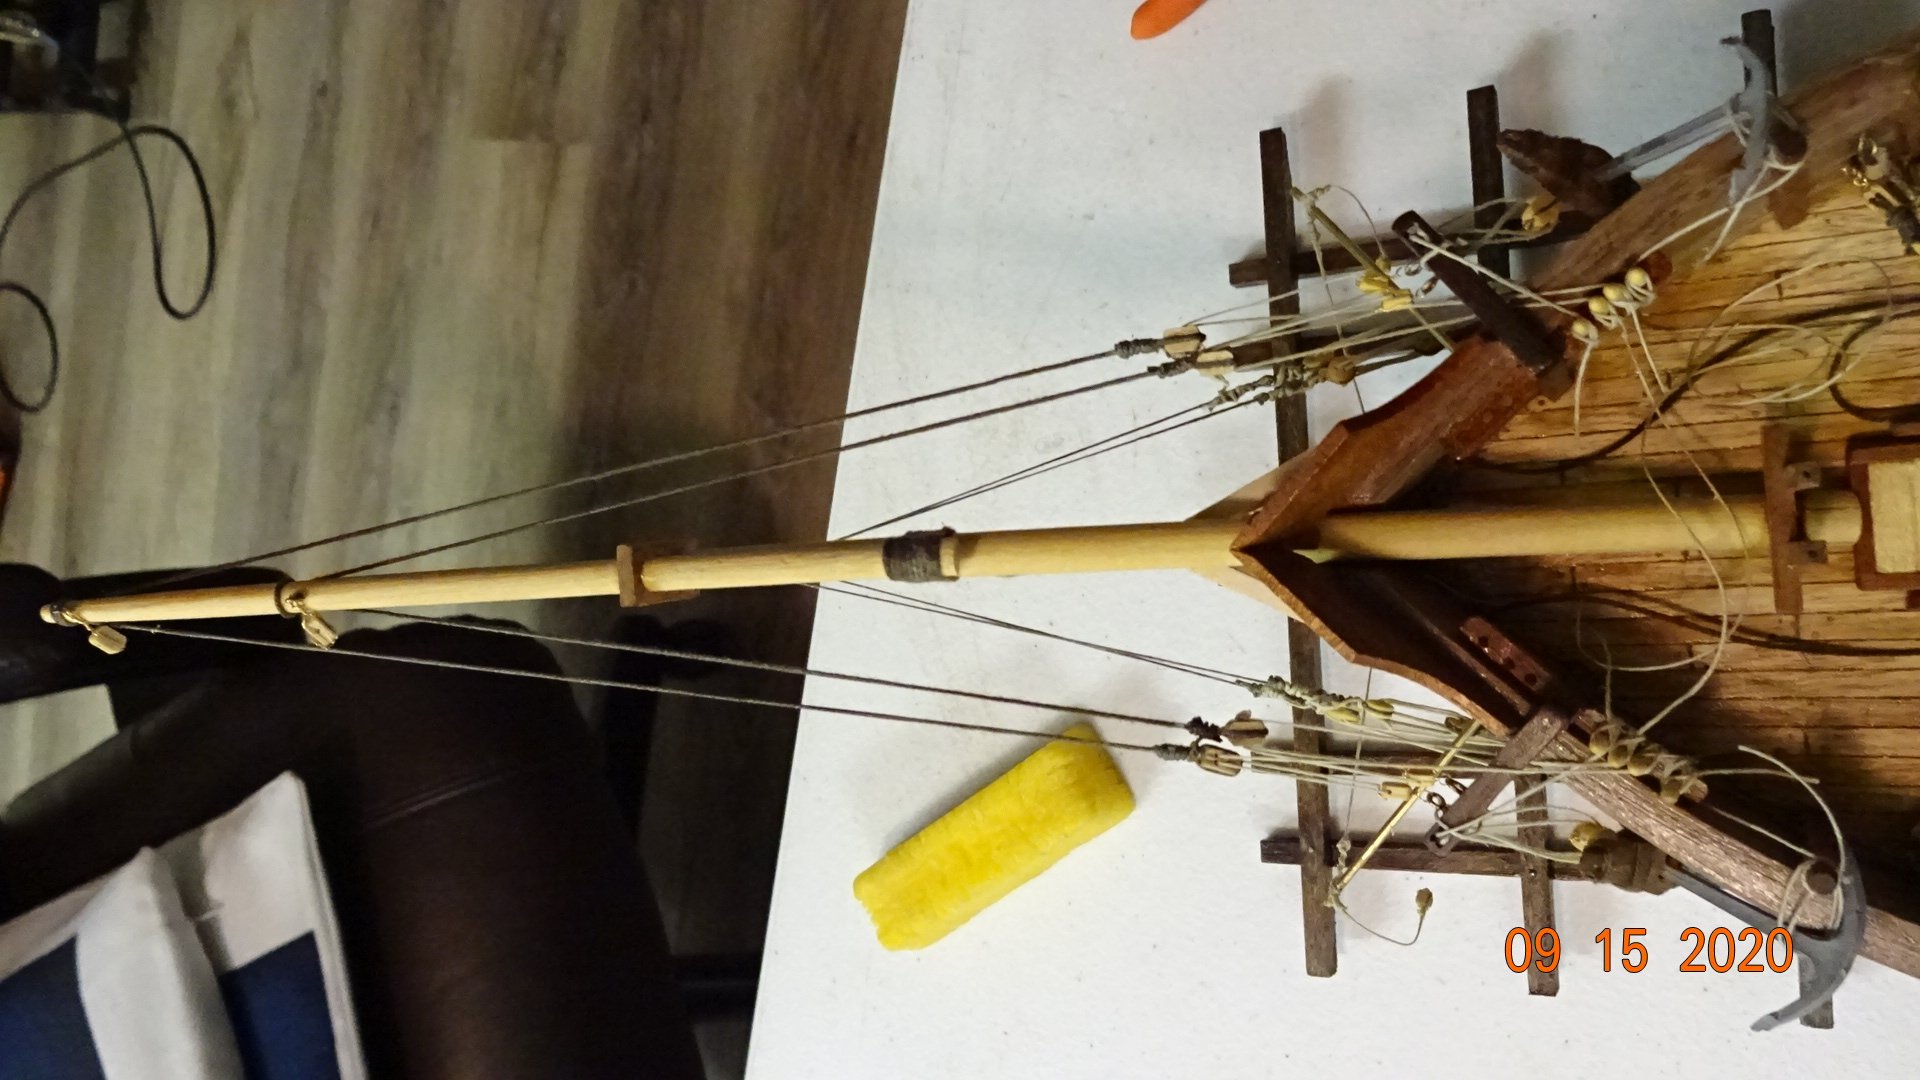
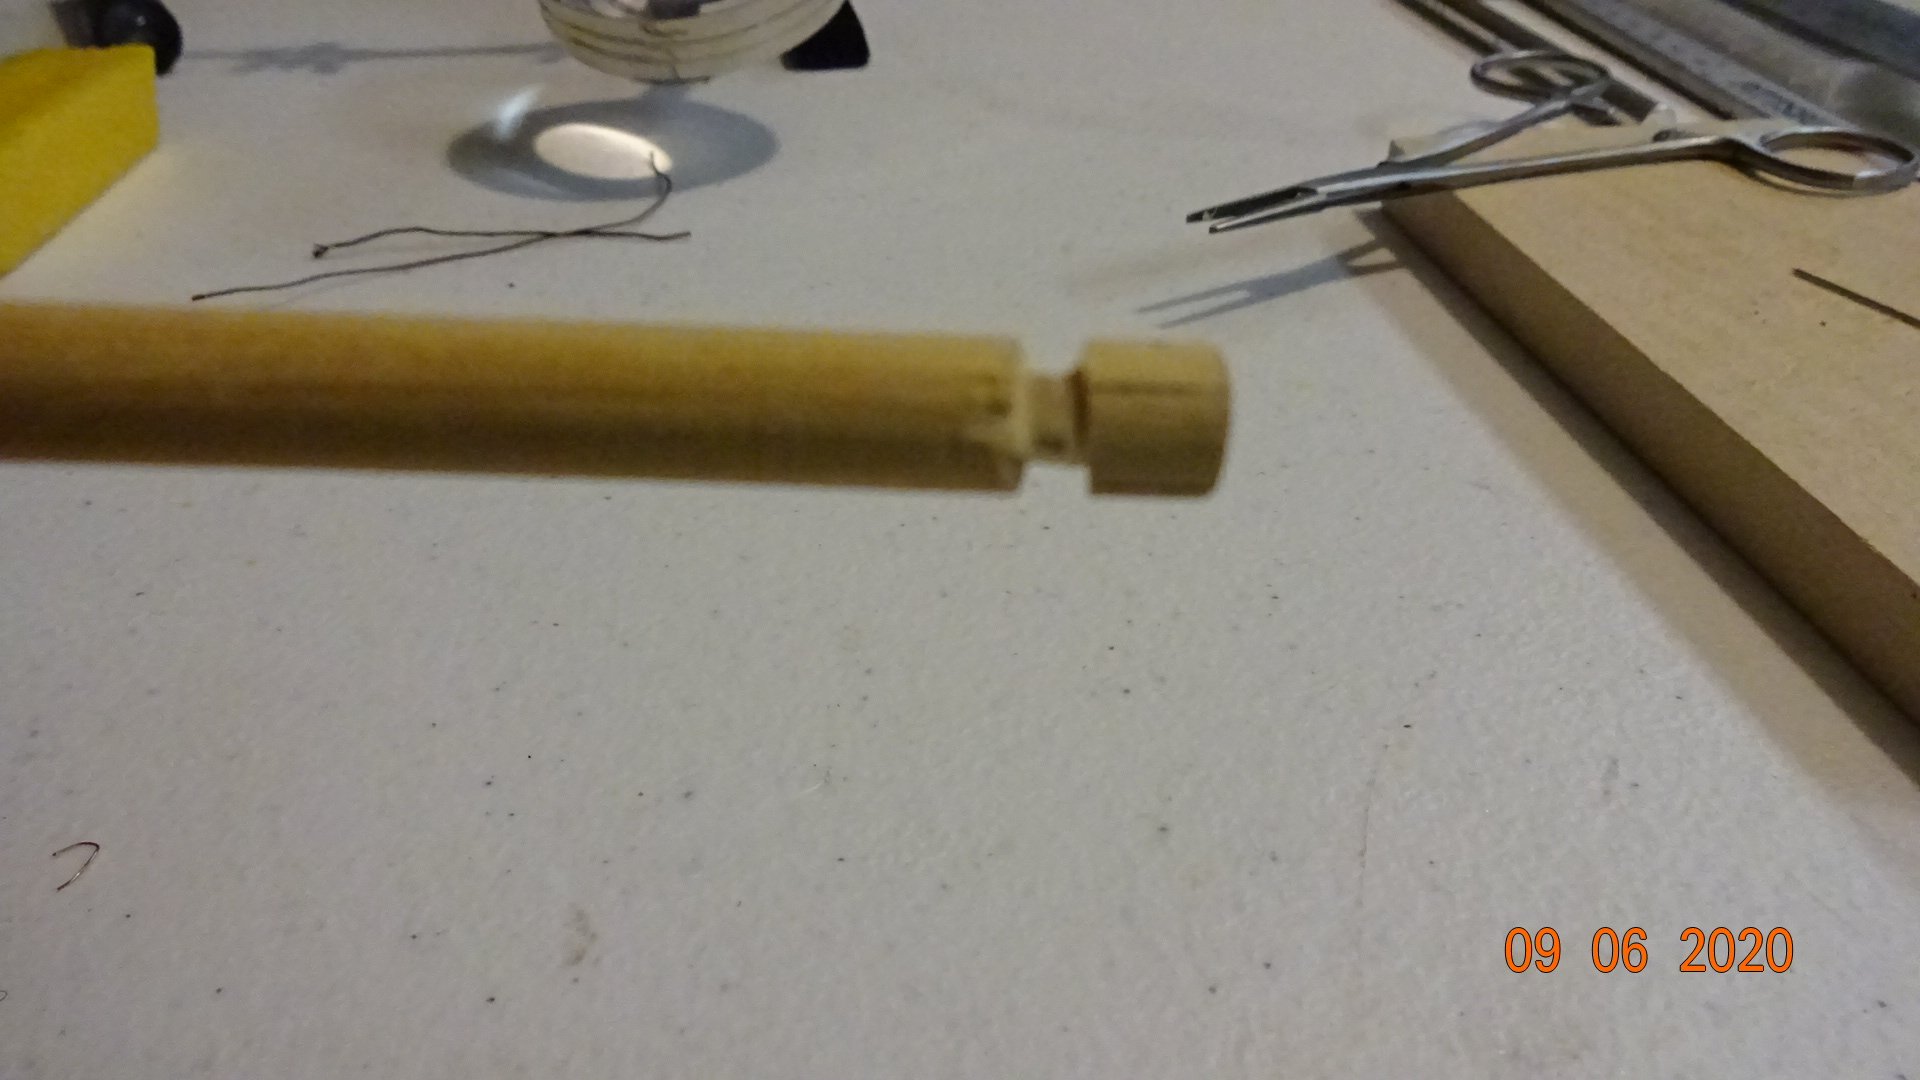
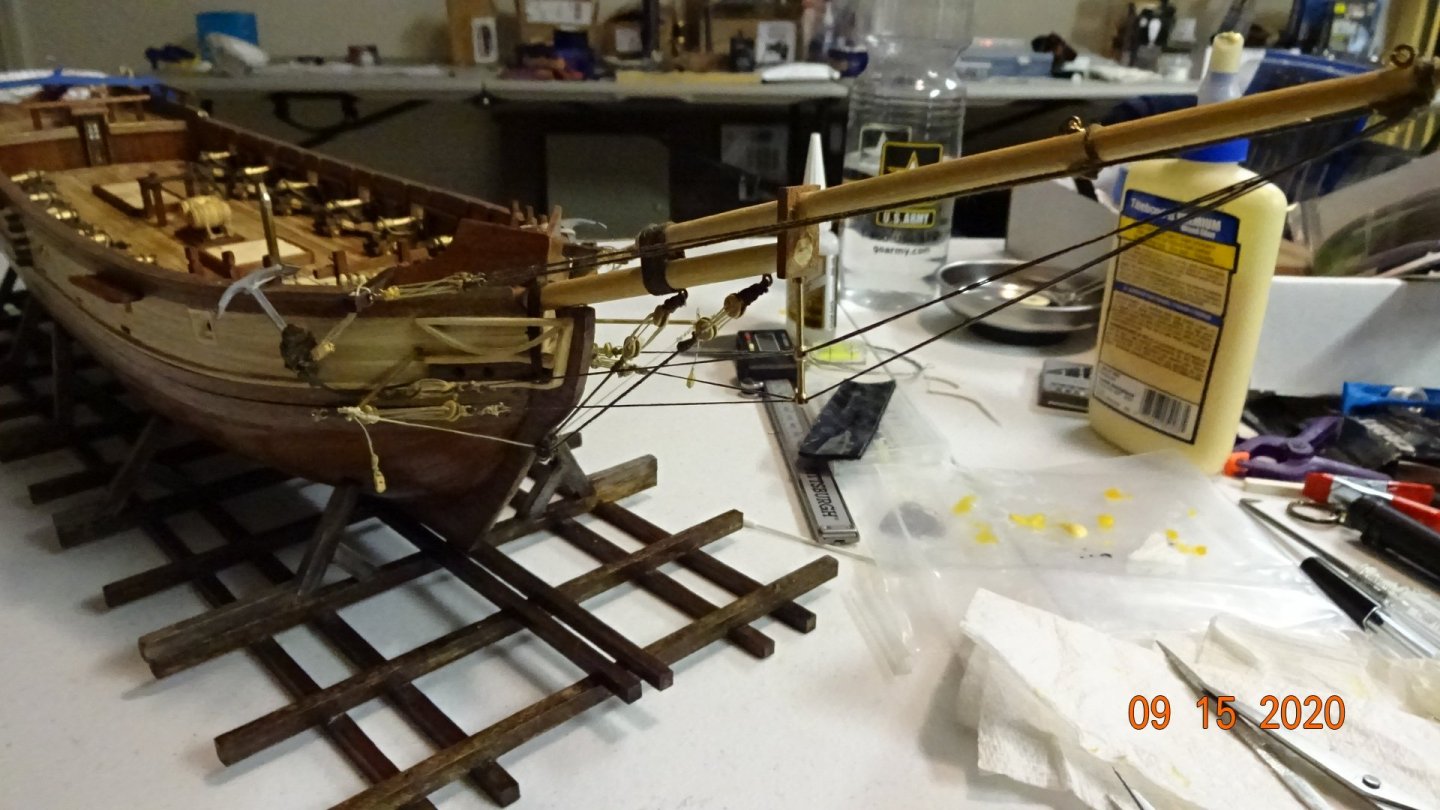
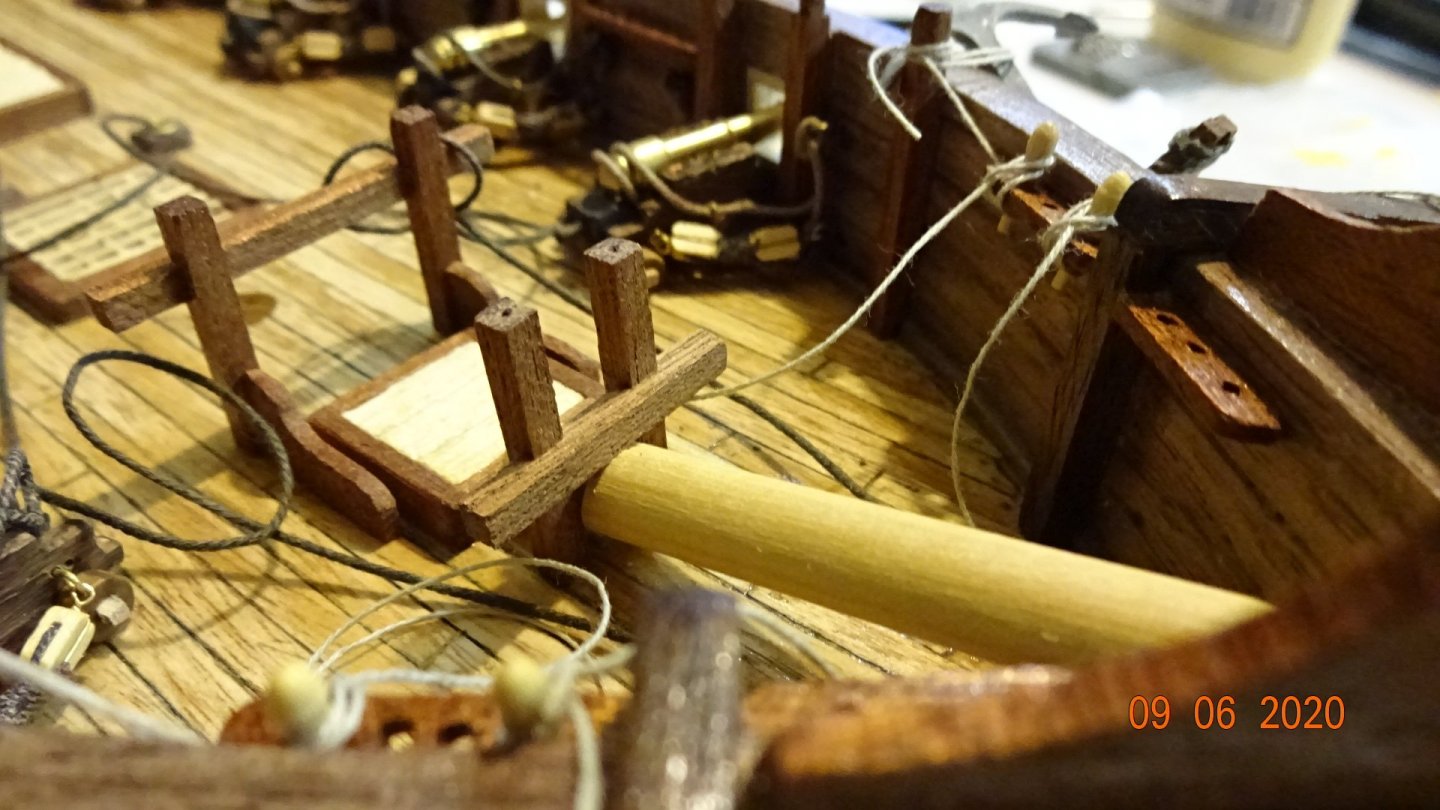
Putting on the bowspirit was slightly more complicated than the anchors. I first put on the last 2 deadeyes. Then I had to trim the end of the mast to fit within the fife rails. In retrospect I should have have just rebuilt the rail. Mark that down as being to lazy. Although it looks well placed in the pic below, later I find out that the mast does not lie straight. So I end up fiddling with the pieces to get a straight lie. Again, would have saved time if I just rebuilt the fife rail. Next post, bowspirit rigging.....

- 195 replies
-
- 3
-
-
- enterprise
- constructo
- (and 1 more)
-
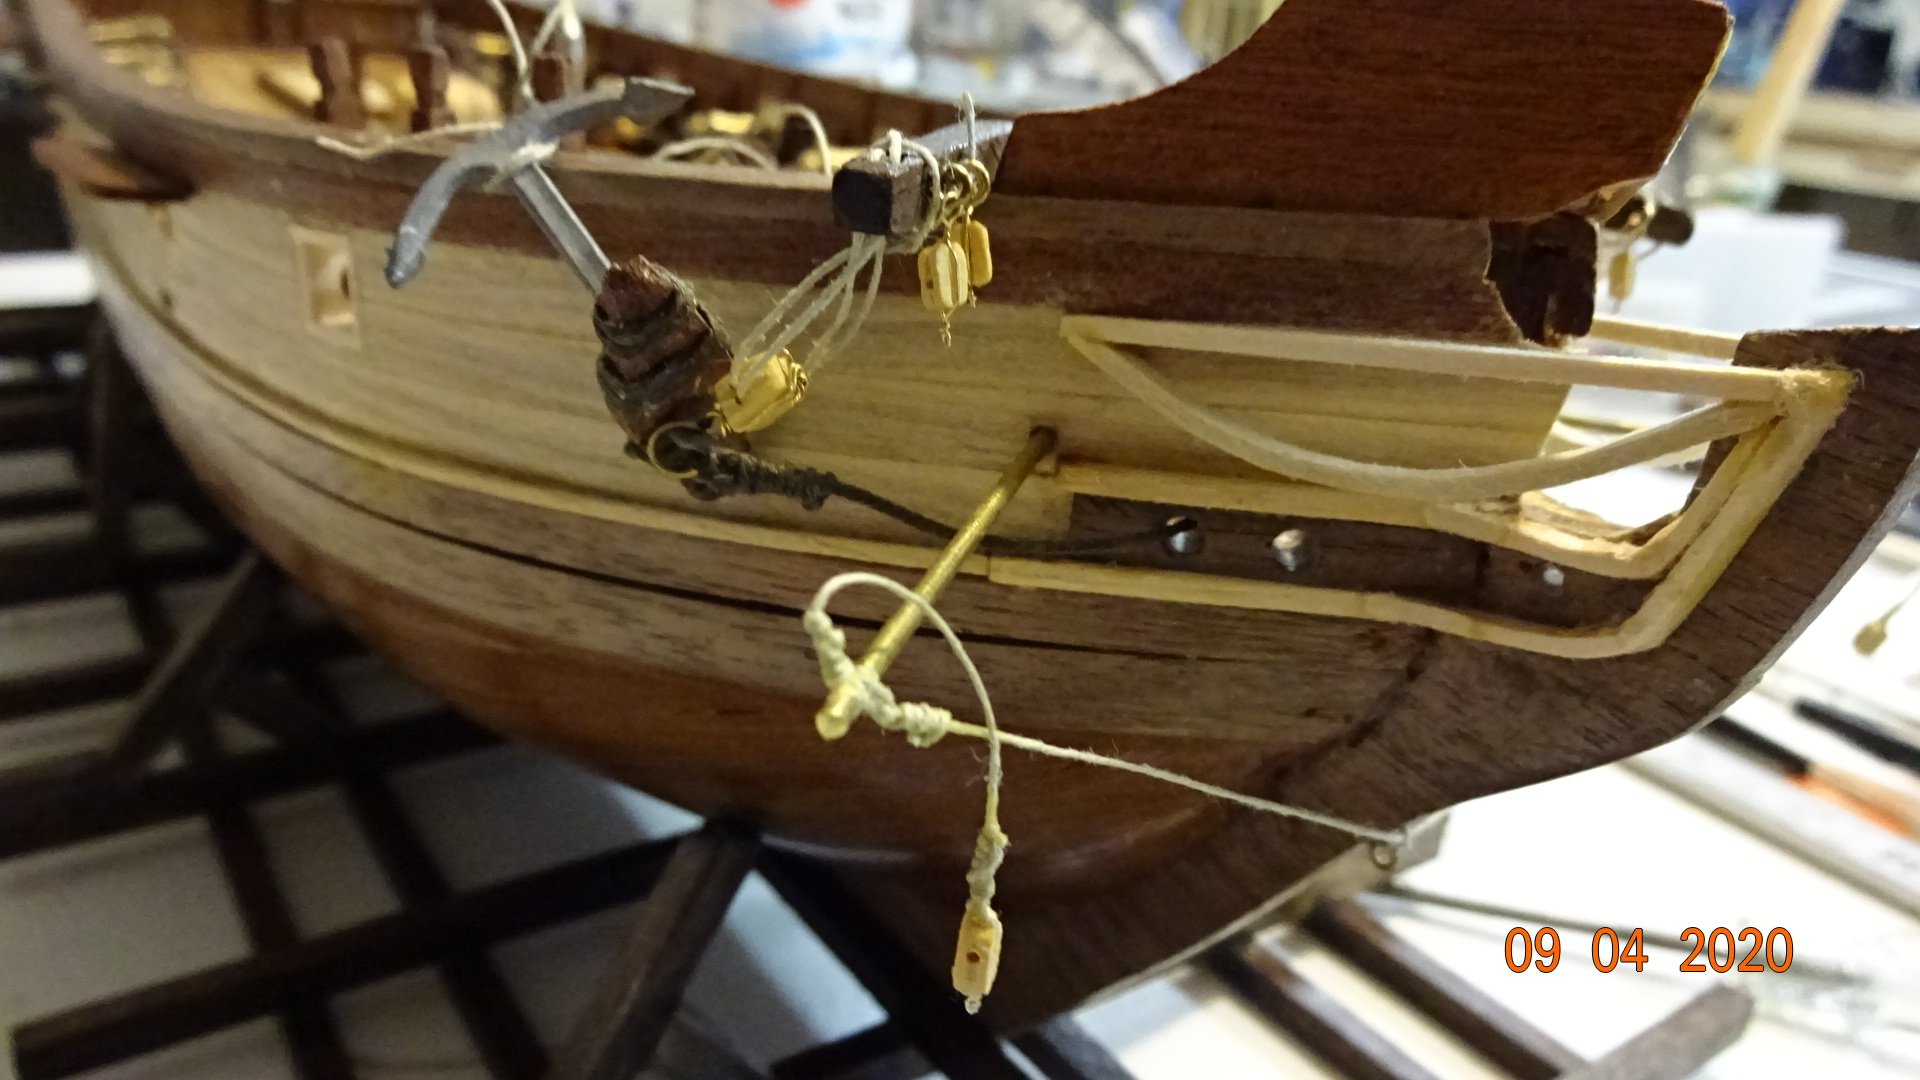
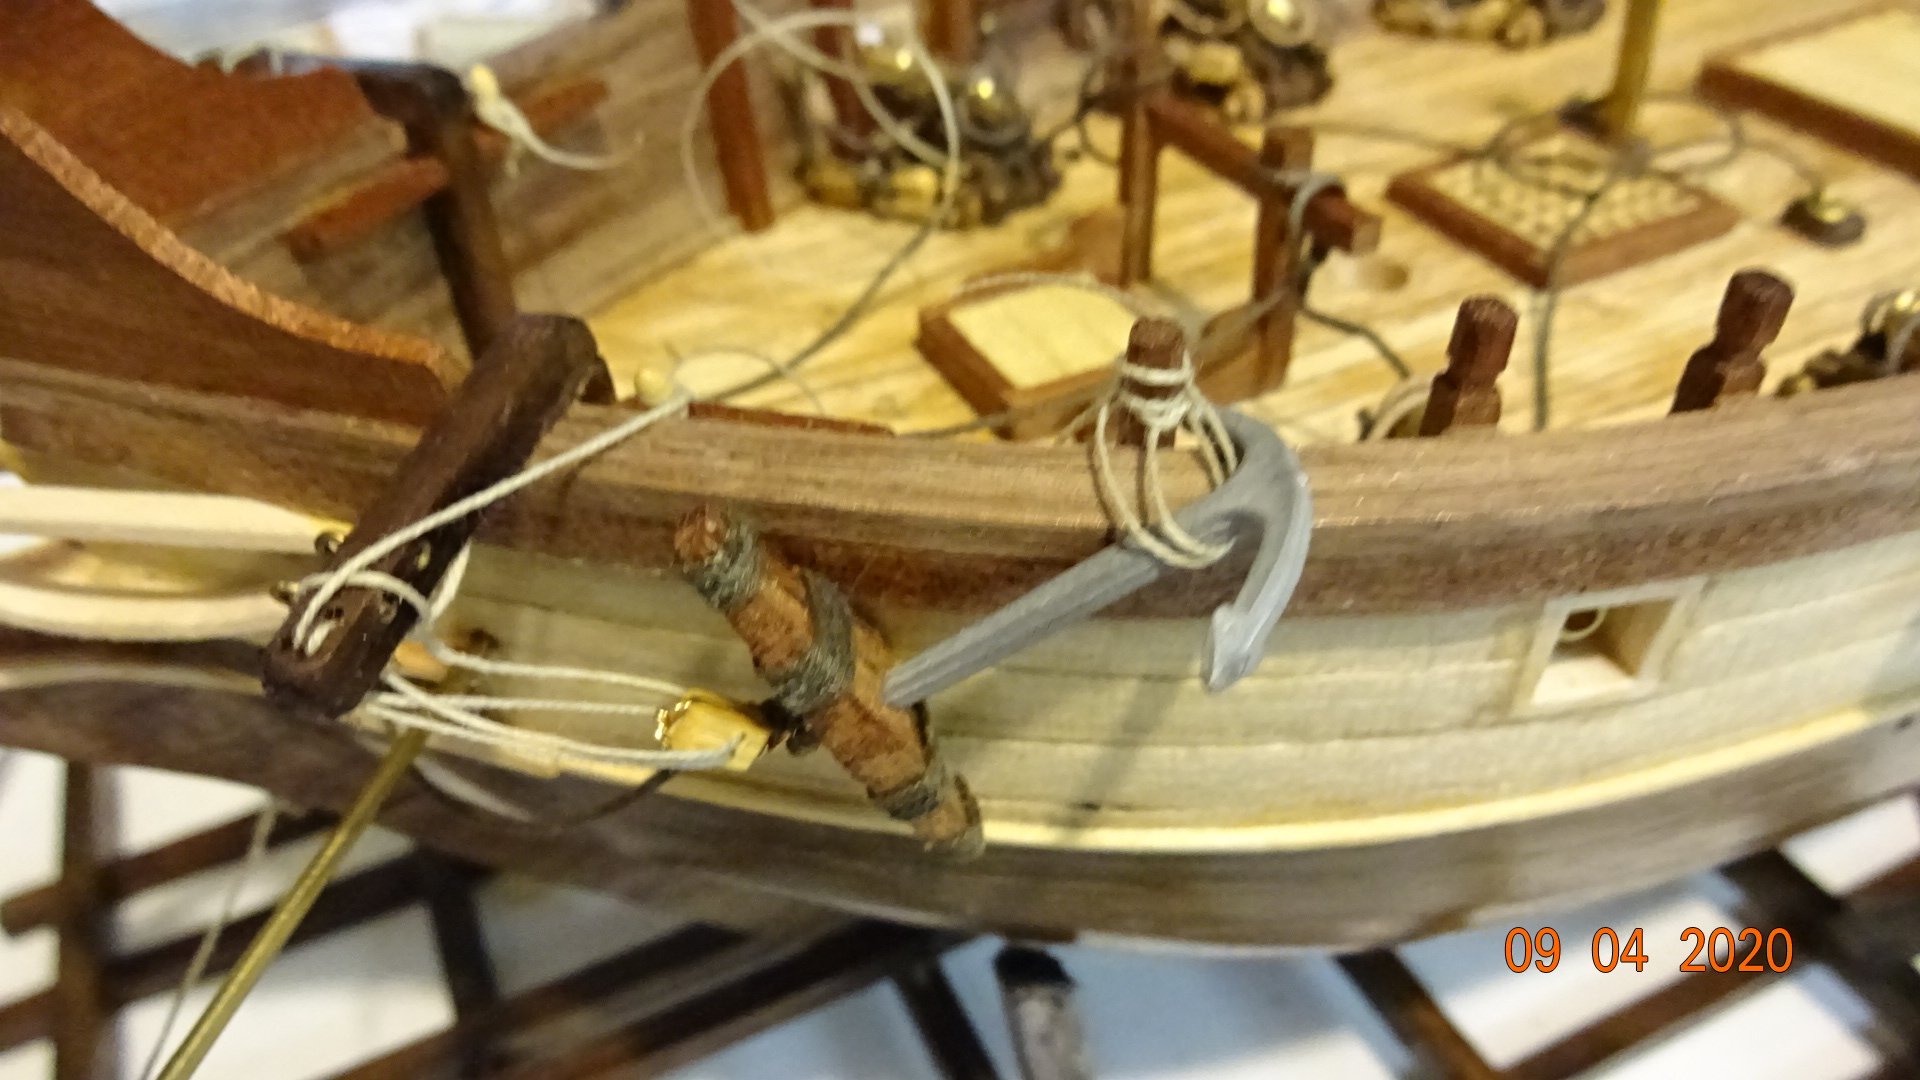
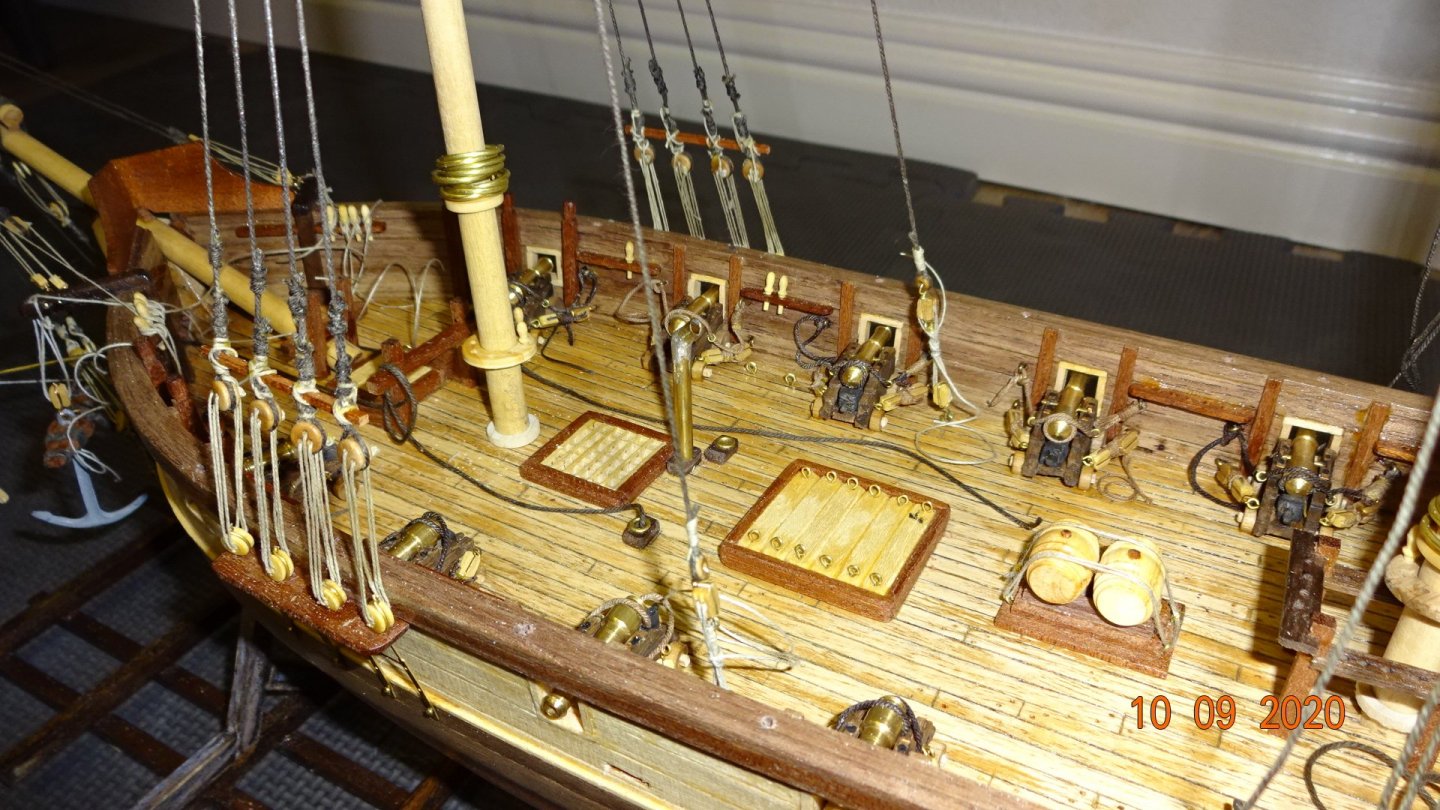
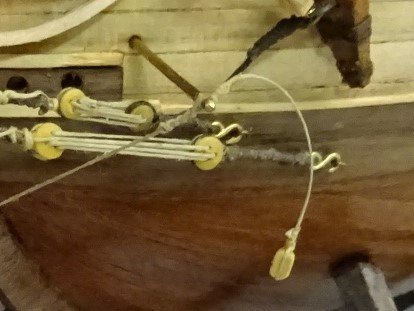
Here's the latest on the build. First, I mounted the anchor. Nothing to challenging. In the below picture one can see that the tackle block is secured to the cathead with a knot. This is different from the instructions in the manual which secures the line to an eyebolt. Just another difference between the various Enterprise 1799 models. Next up will be the first mast, the bow spirit.


- 195 replies
-
- 2
-
-
- enterprise
- constructo
- (and 1 more)
-
Managing to get some work done on the bowspirit as the air quality makes working in the backyard inadvisable. Once that is done I believe the foremast is next. Here's my pondering, do I work on the mast(s) off ship or on ship? I've read suggestions that say to make a jig for the mast(s) to work on as it will be easier. Any thoughts on this?
-
Thanks Sideways Sam, exactly what I needed.
-
Taking a break from remodeling. About to take on the rigging and have a question. How to tie the dead eyes together. Done some research and some examples show starting with tying a knot on the first hole, then thread through the other two holes. But not sure how they tie off the end piece. One example talked about frapping or wrapping the end piece. My thinking was to run the thread through all the holes and then tie the two end pieces togehter ( that is, tie the knot to the end piece). Maybe someone knows a build log where they explain this a little better. I'll keep looking in the mean time.


.JPG.67dc60152f0bee269b46171172531146.JPG)