ObviousNewbie
-
Posts
211 -
Joined
-
Last visited
Content Type
Profiles
Forums
Gallery
Events
Everything posted by ObviousNewbie
-
Hi there, sorry for the late reply. Frankly I`m not sure how the birch is treated, but as the store owner demonstrated, afterwards you can bend a 2mm by 6mm stripping in on itself without breaking, and I do mean a full 180° bend. Unfortunately the items are not listed on their web store, but here's the link to their home page with contact details. They speak perfect English btw. They sell the item under its Dutch name though: "Buigzame beuk", which is "bendable birch" literally translated. Not sure if ordering it from hem directly is an option for you, I`ll keep my fingers crossed. Sorry I could not help you any further, I do hope you sort it out. As you said, the bireme is a tough nut to crack, but if you persist, it eventually all comes together. It did in my case at least 🙂 All the best!
-
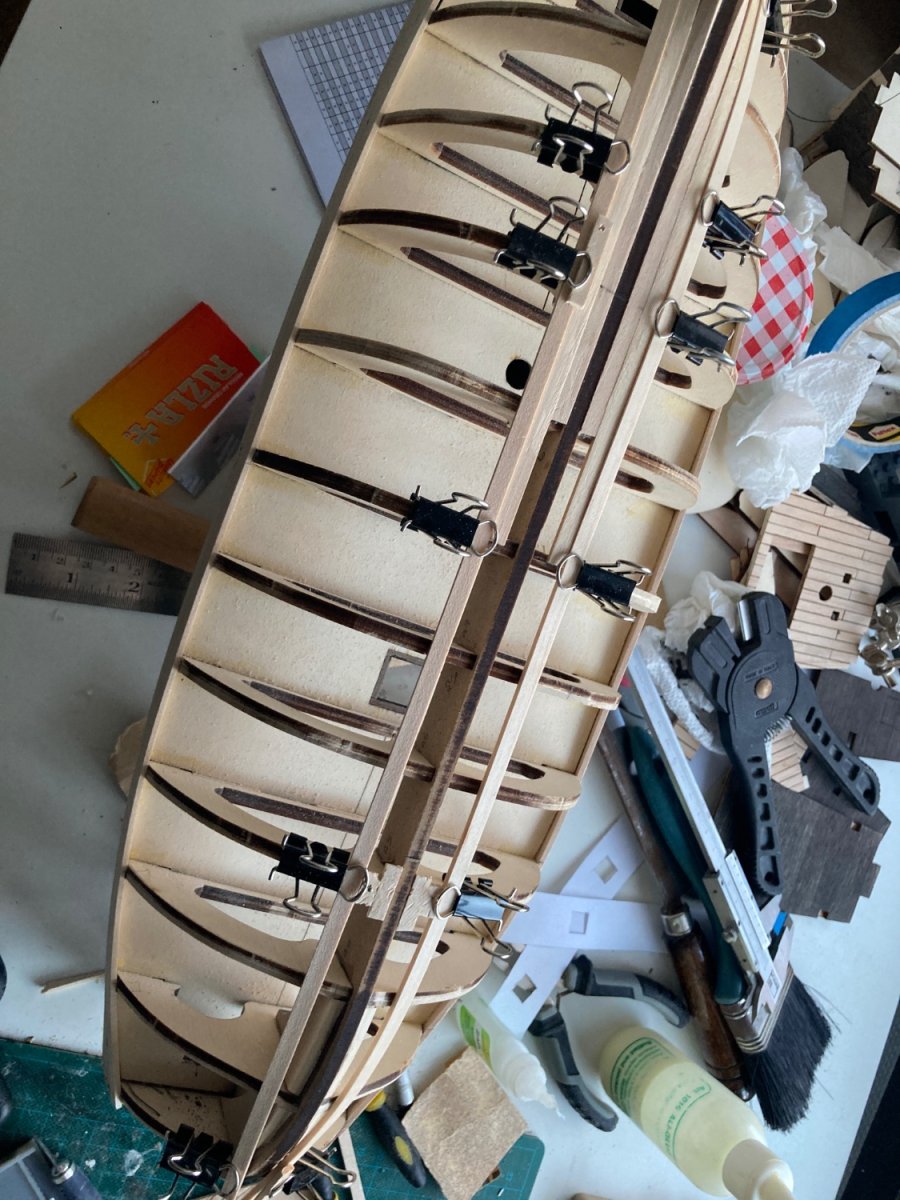
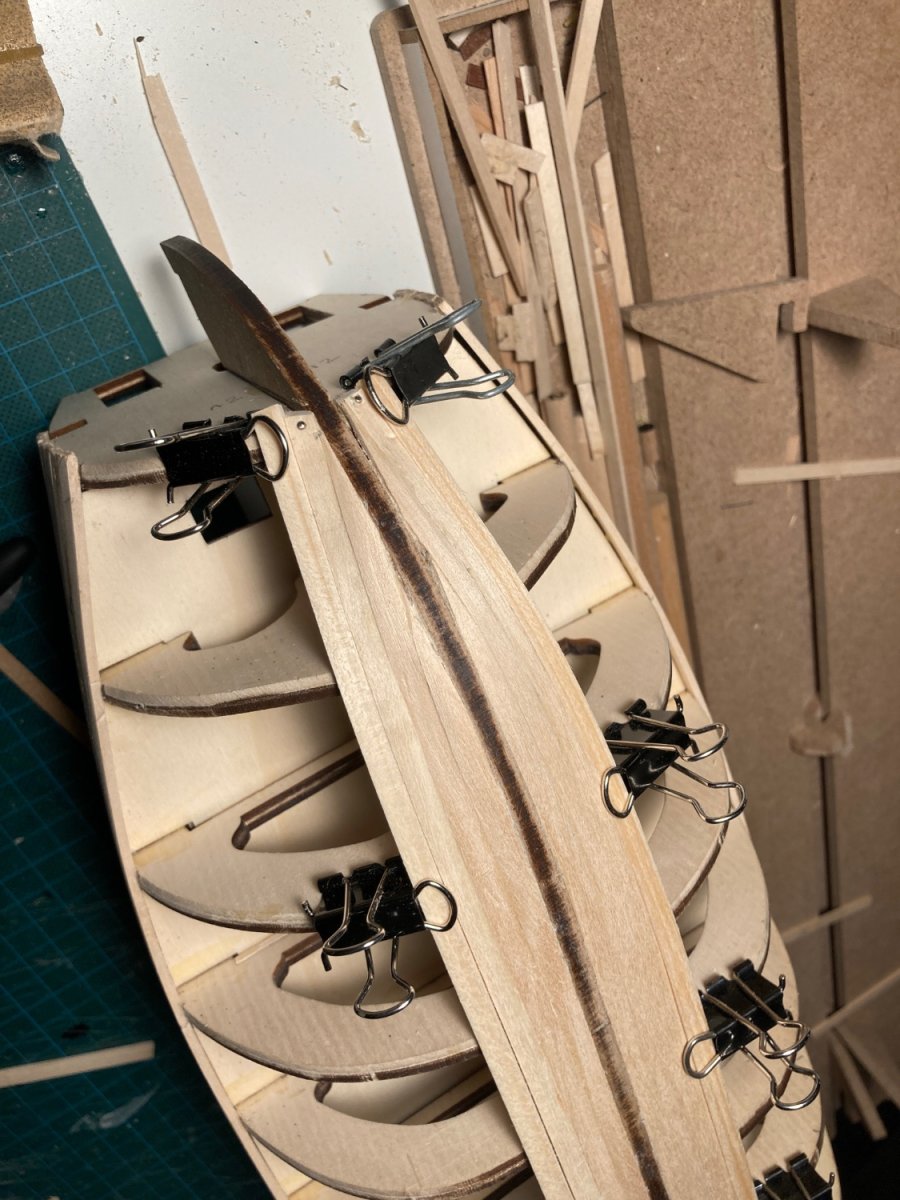
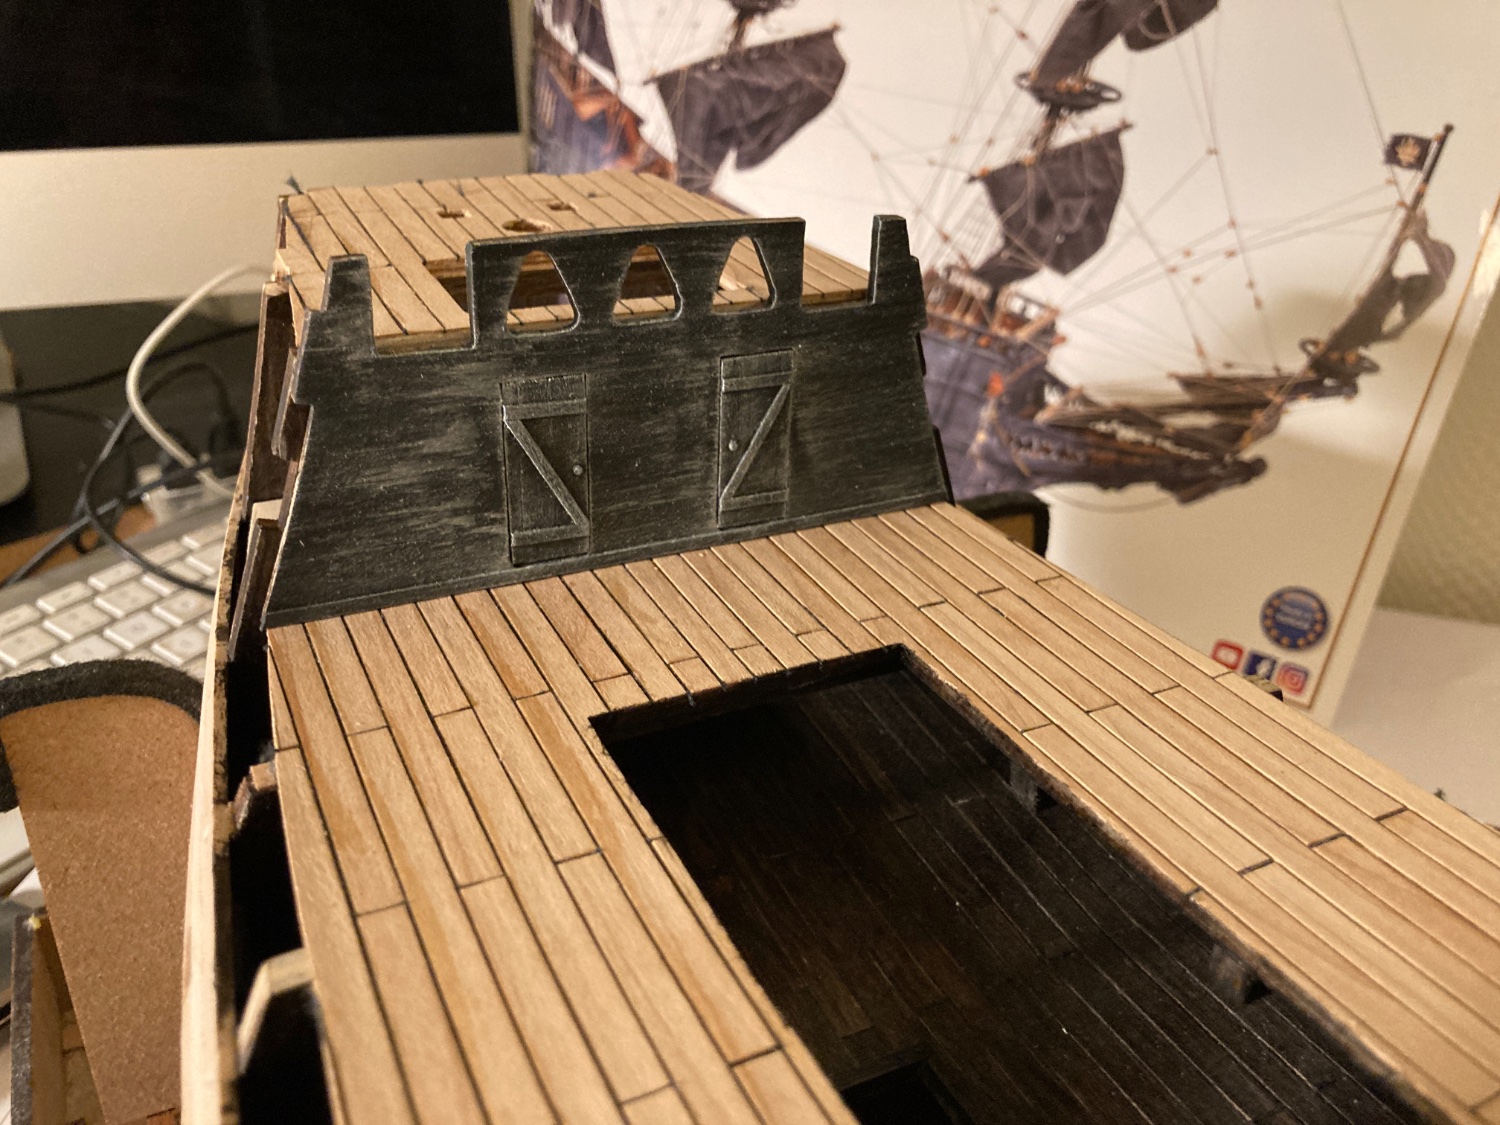
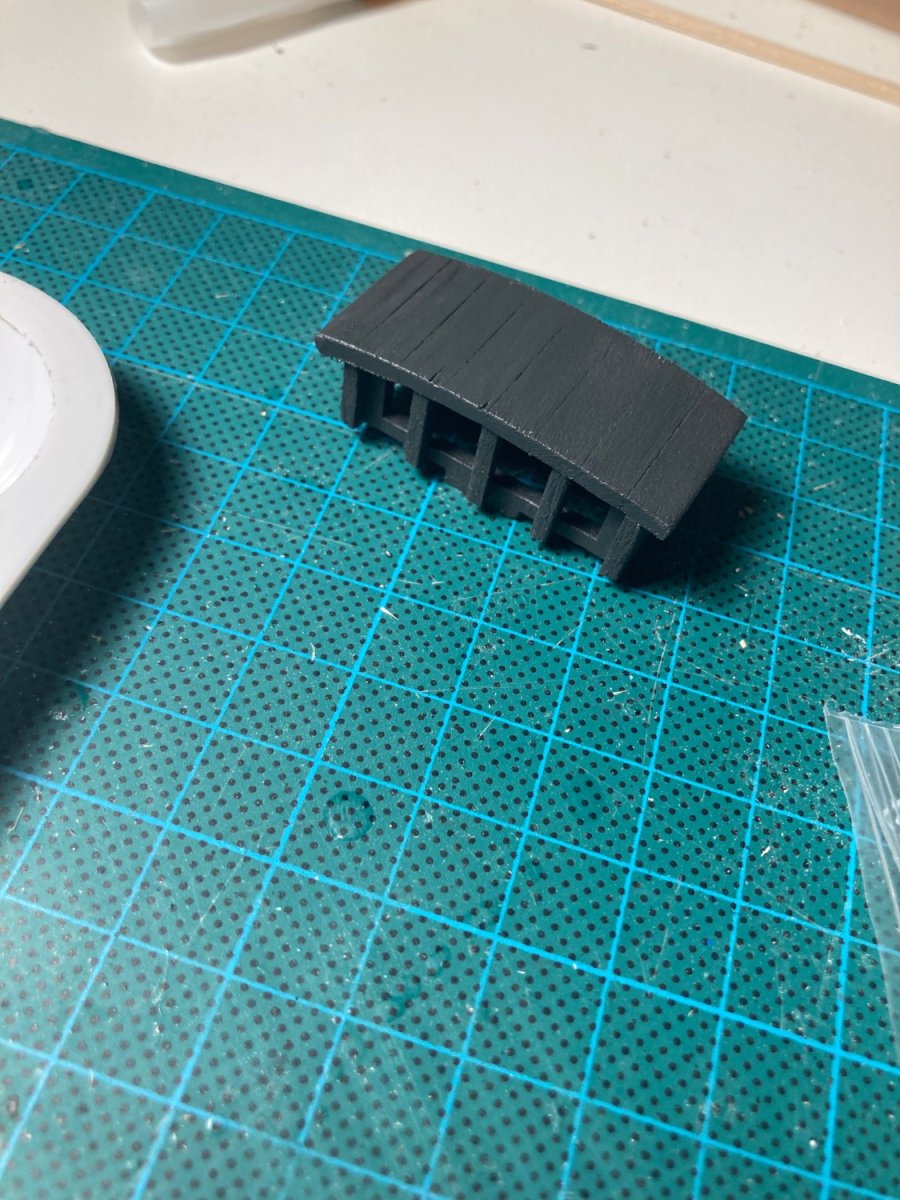
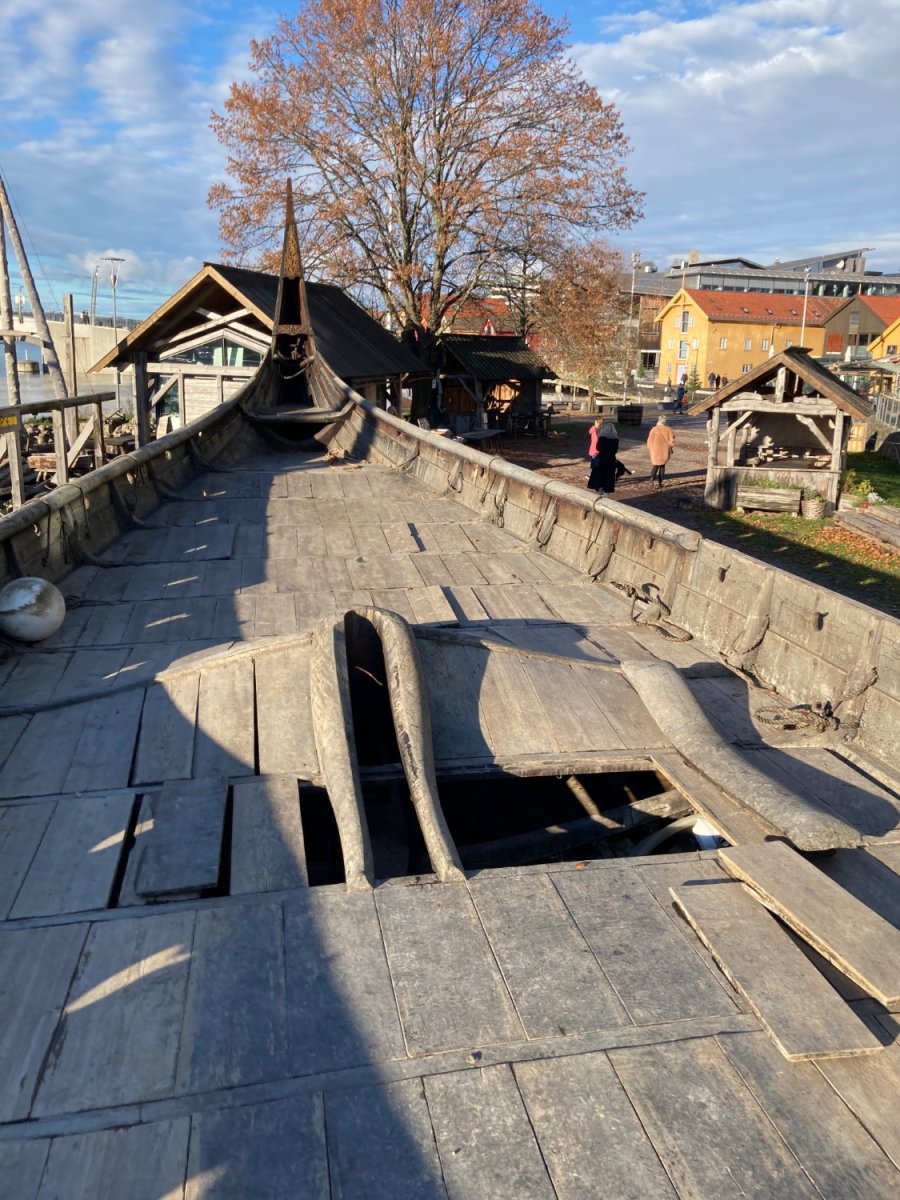
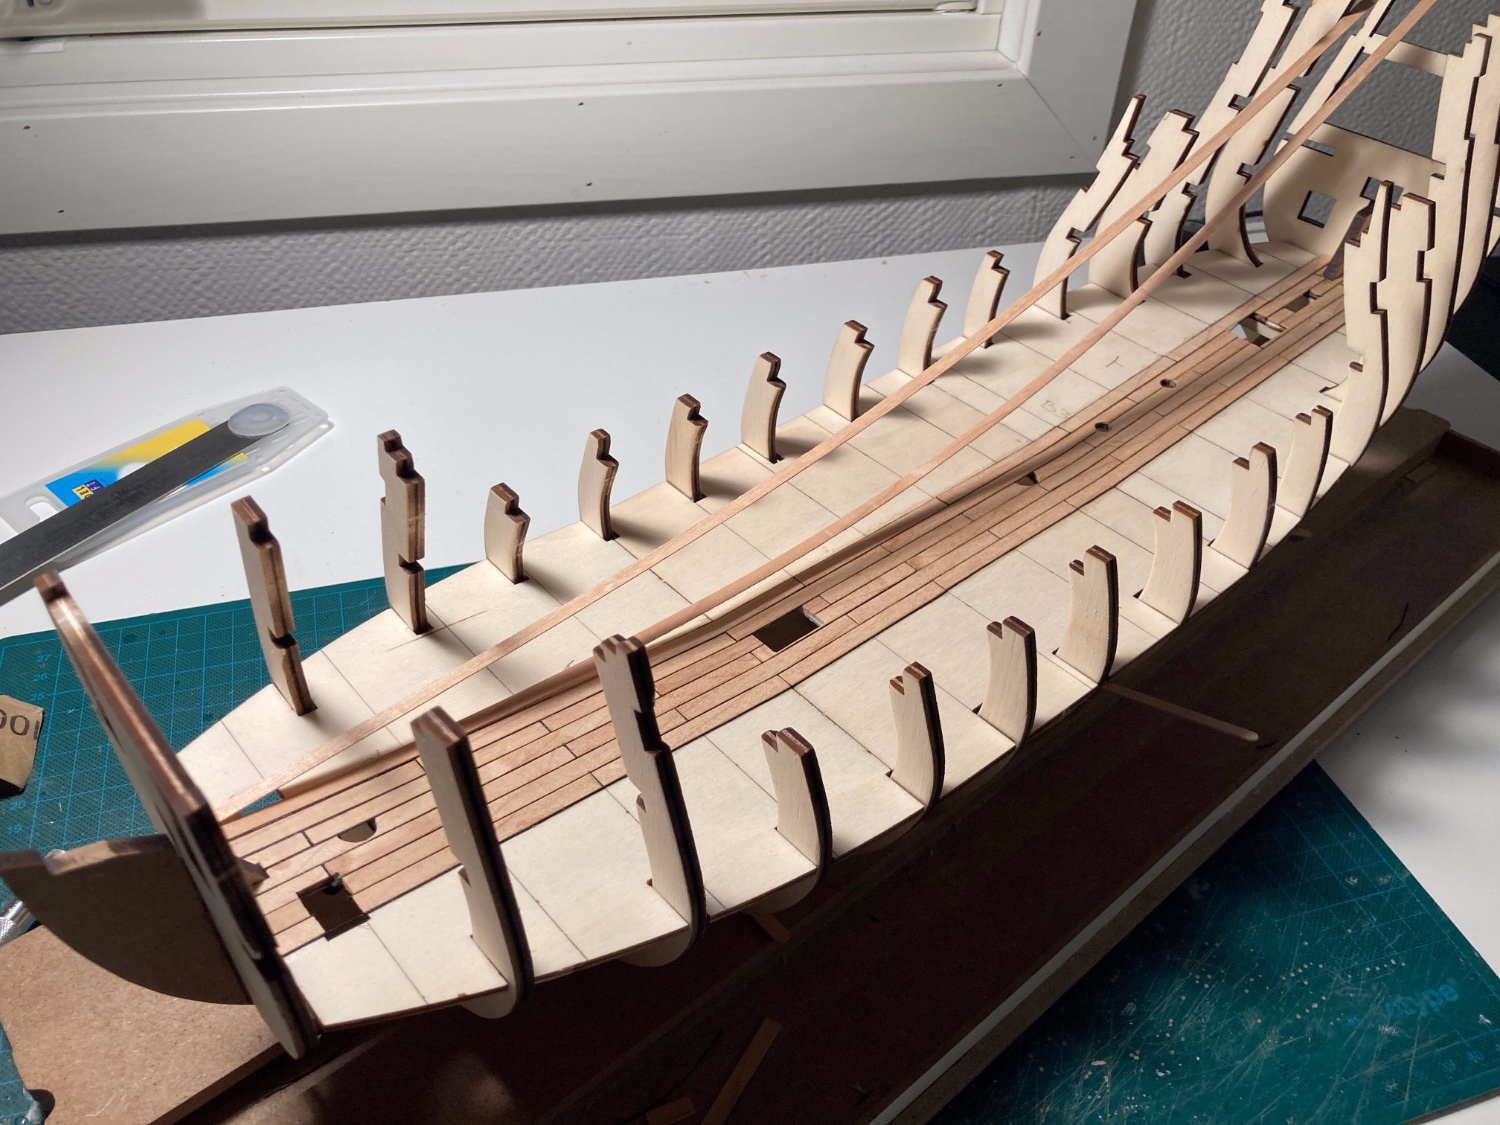
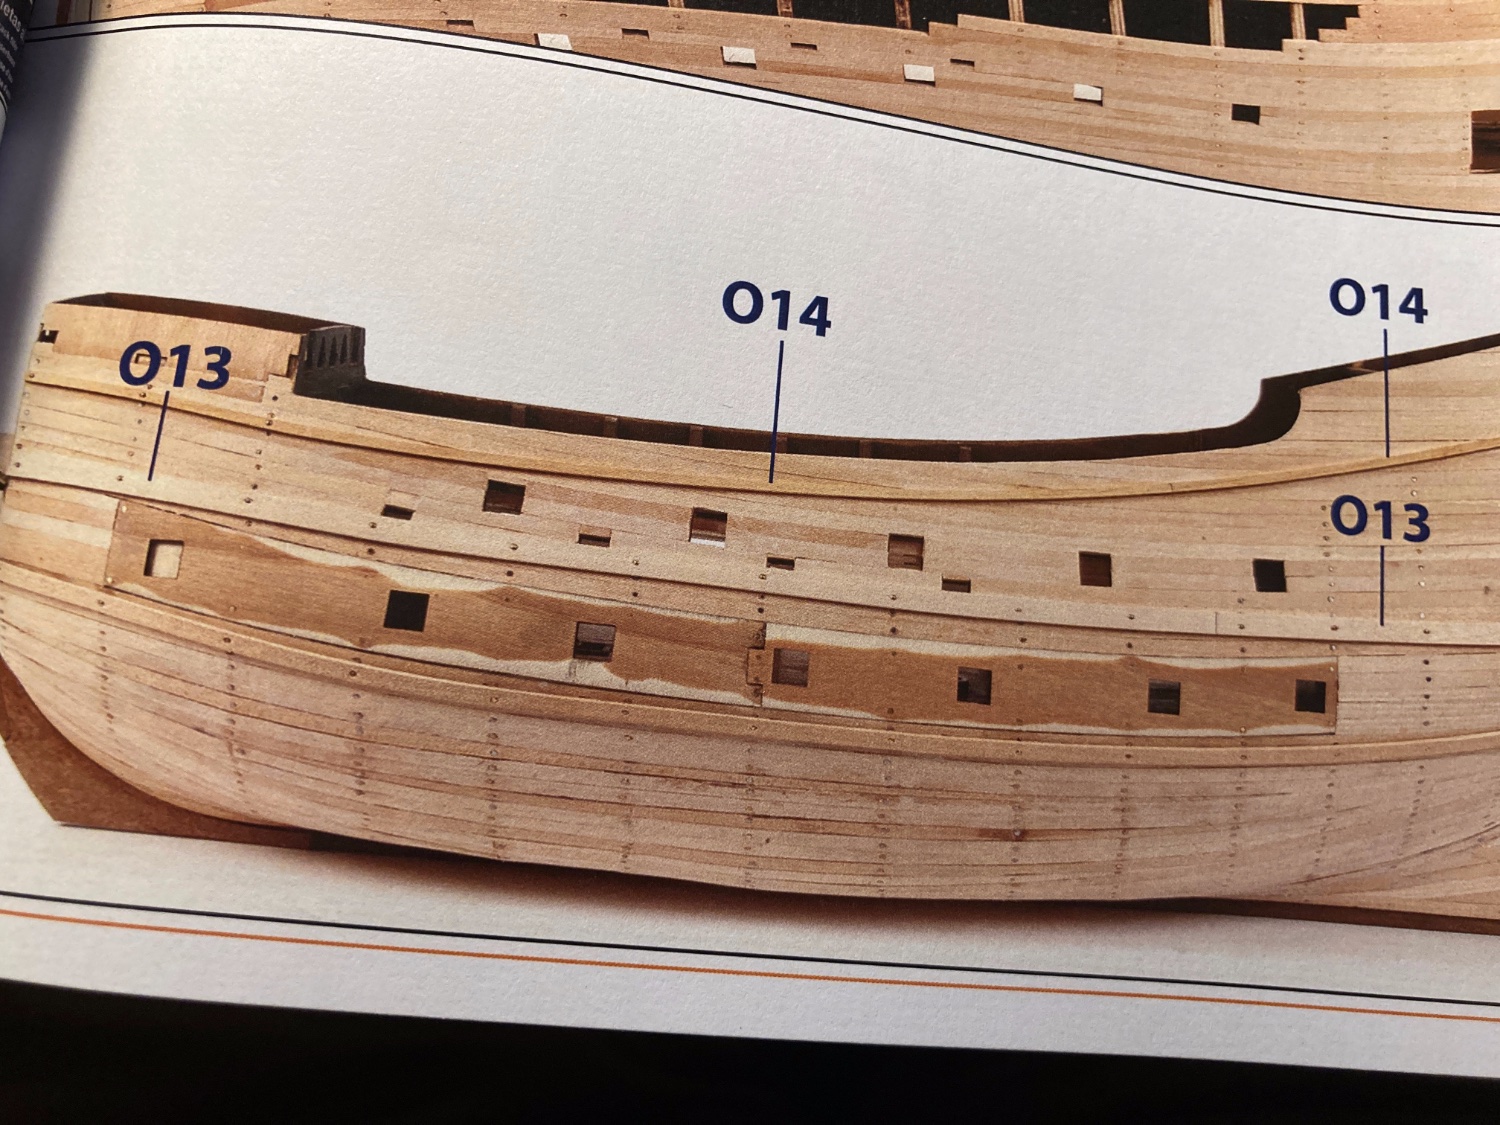
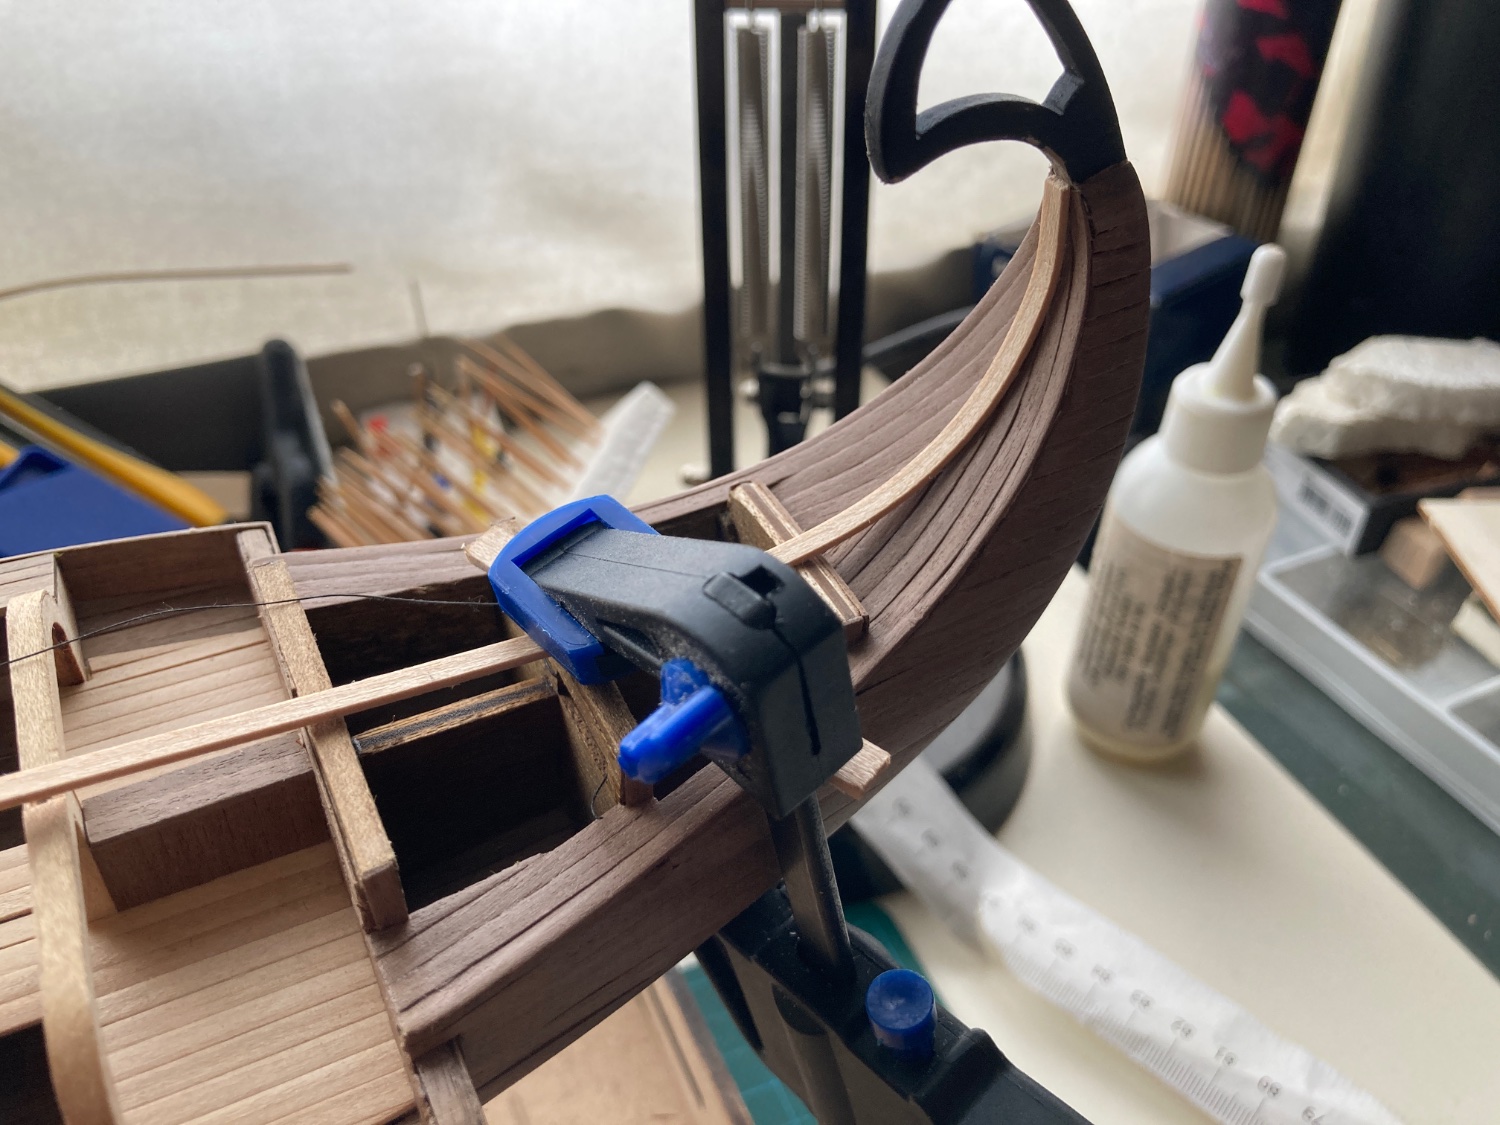
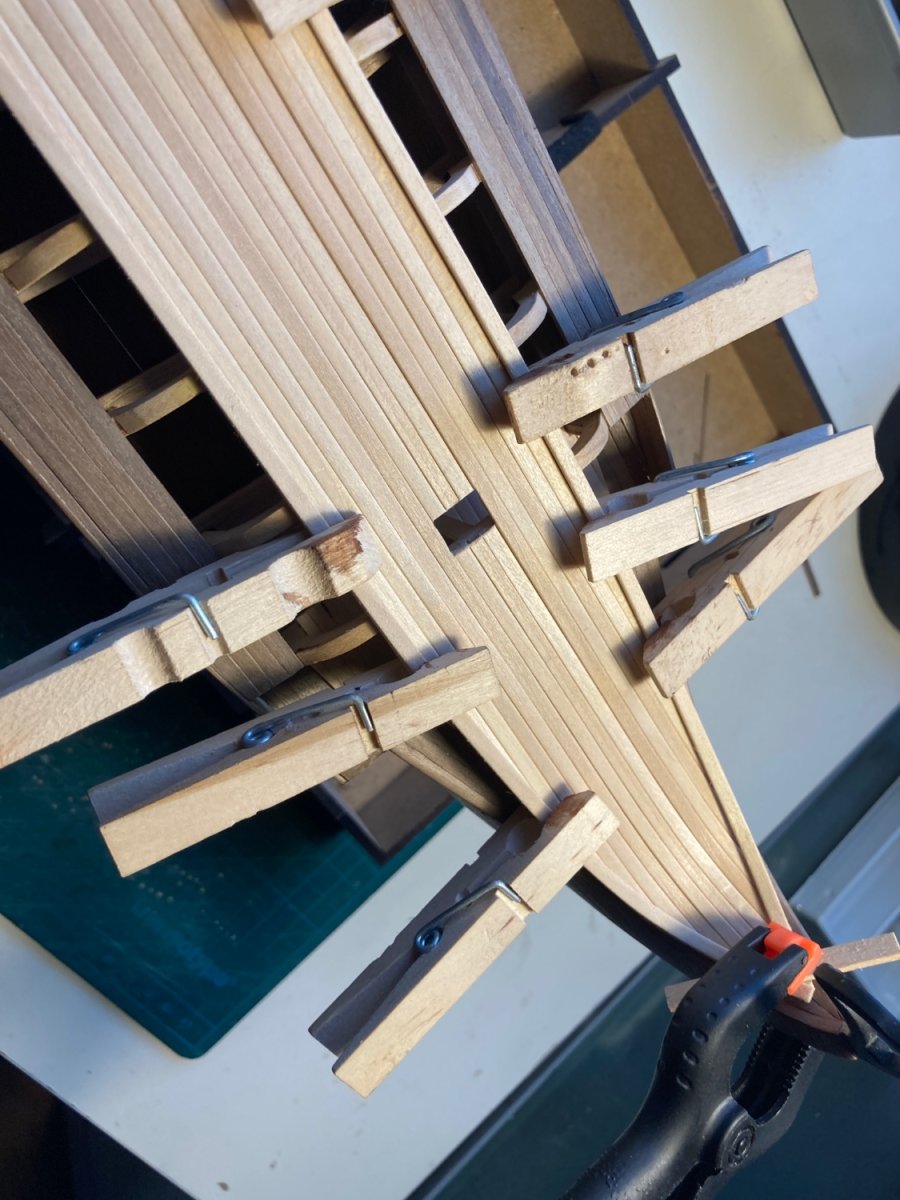
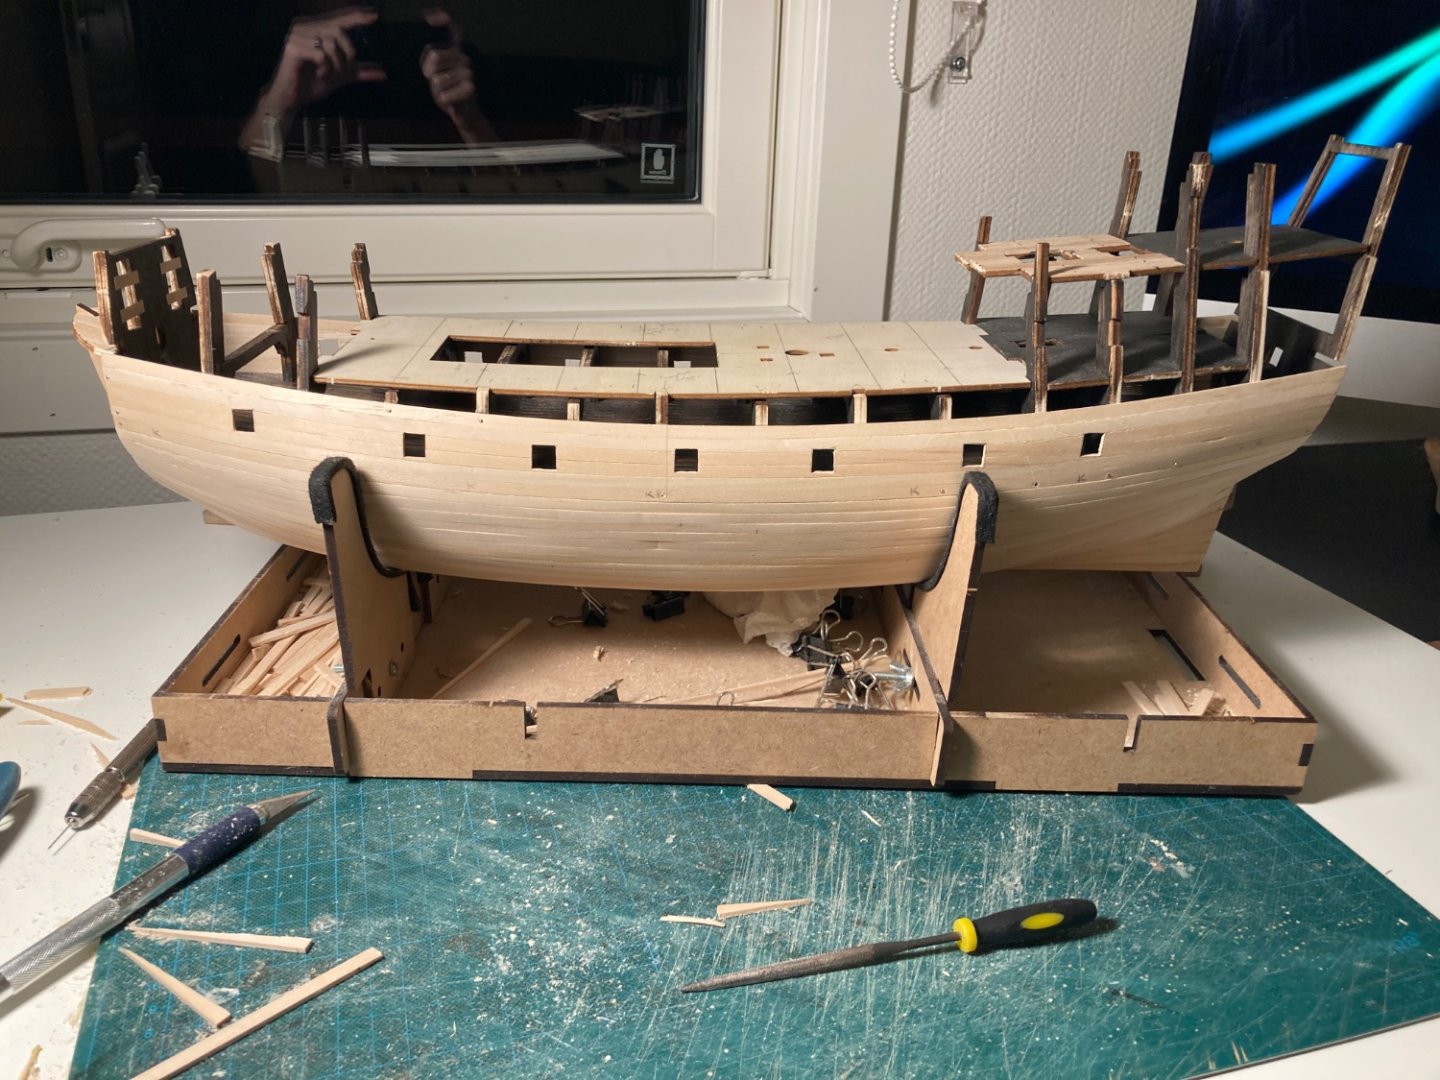
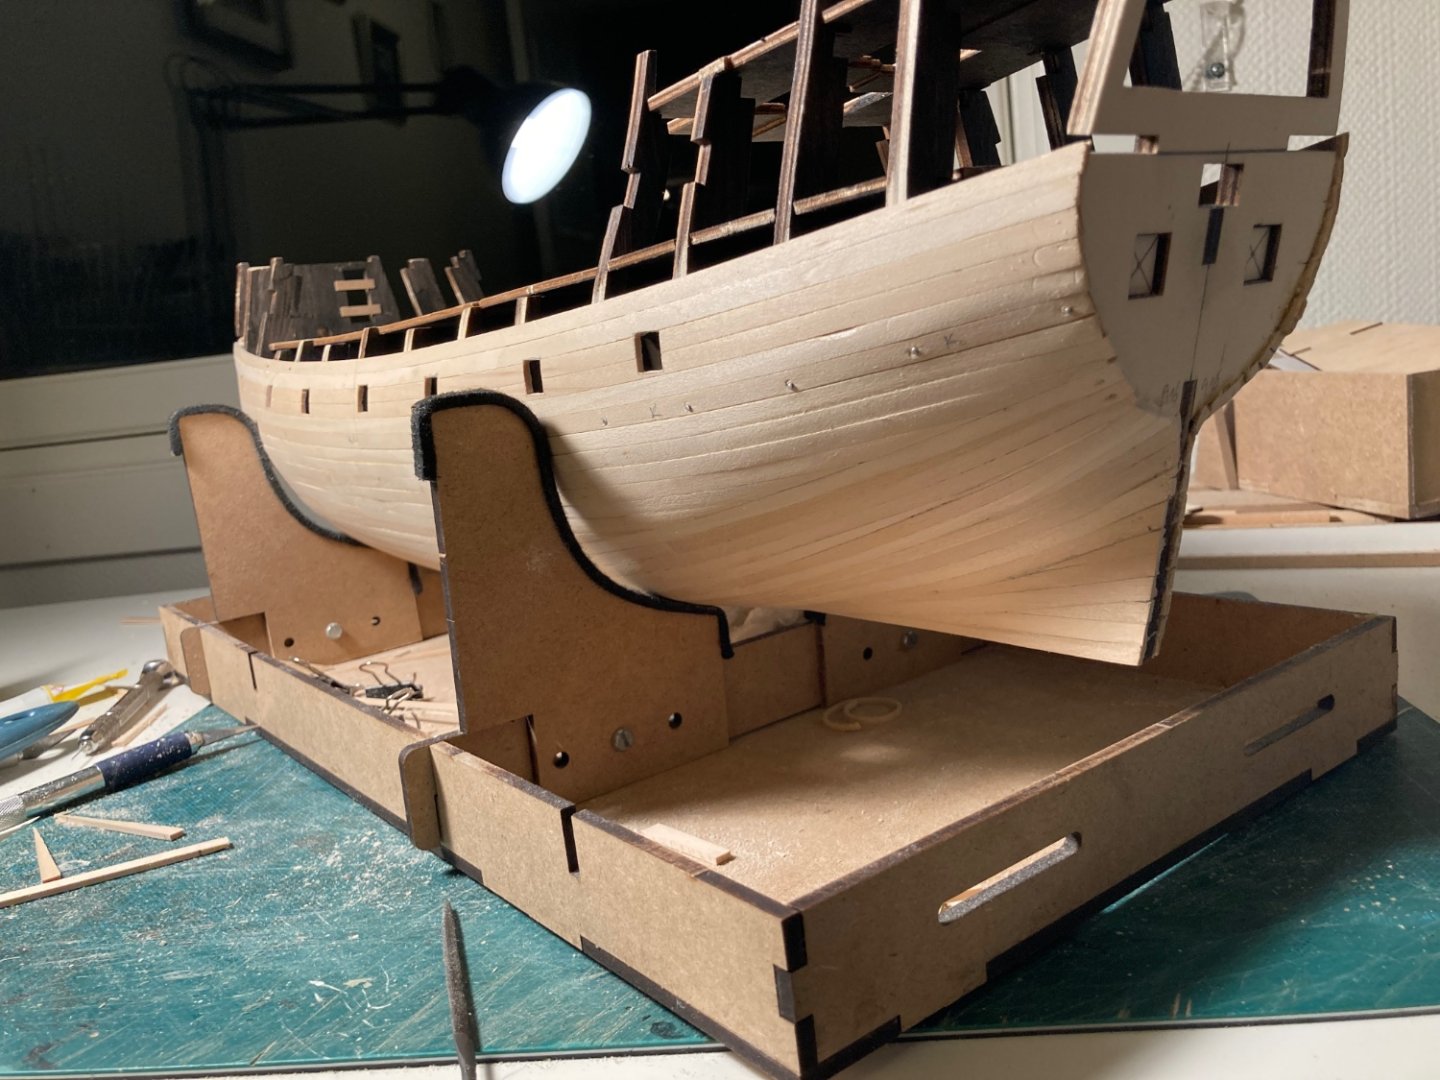
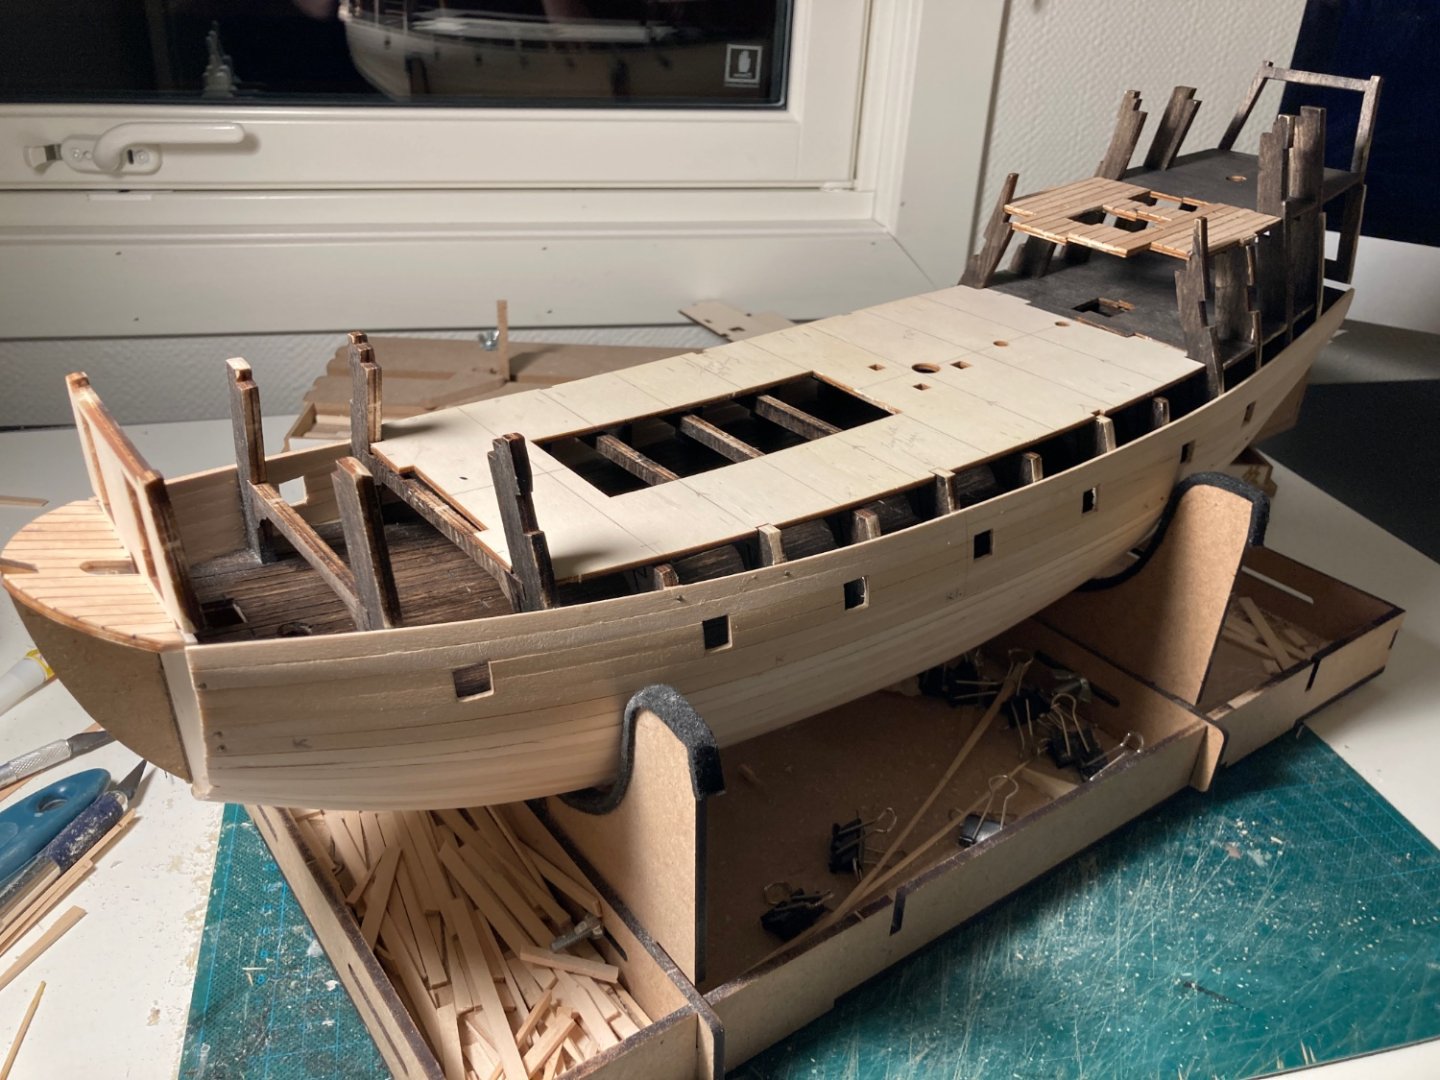
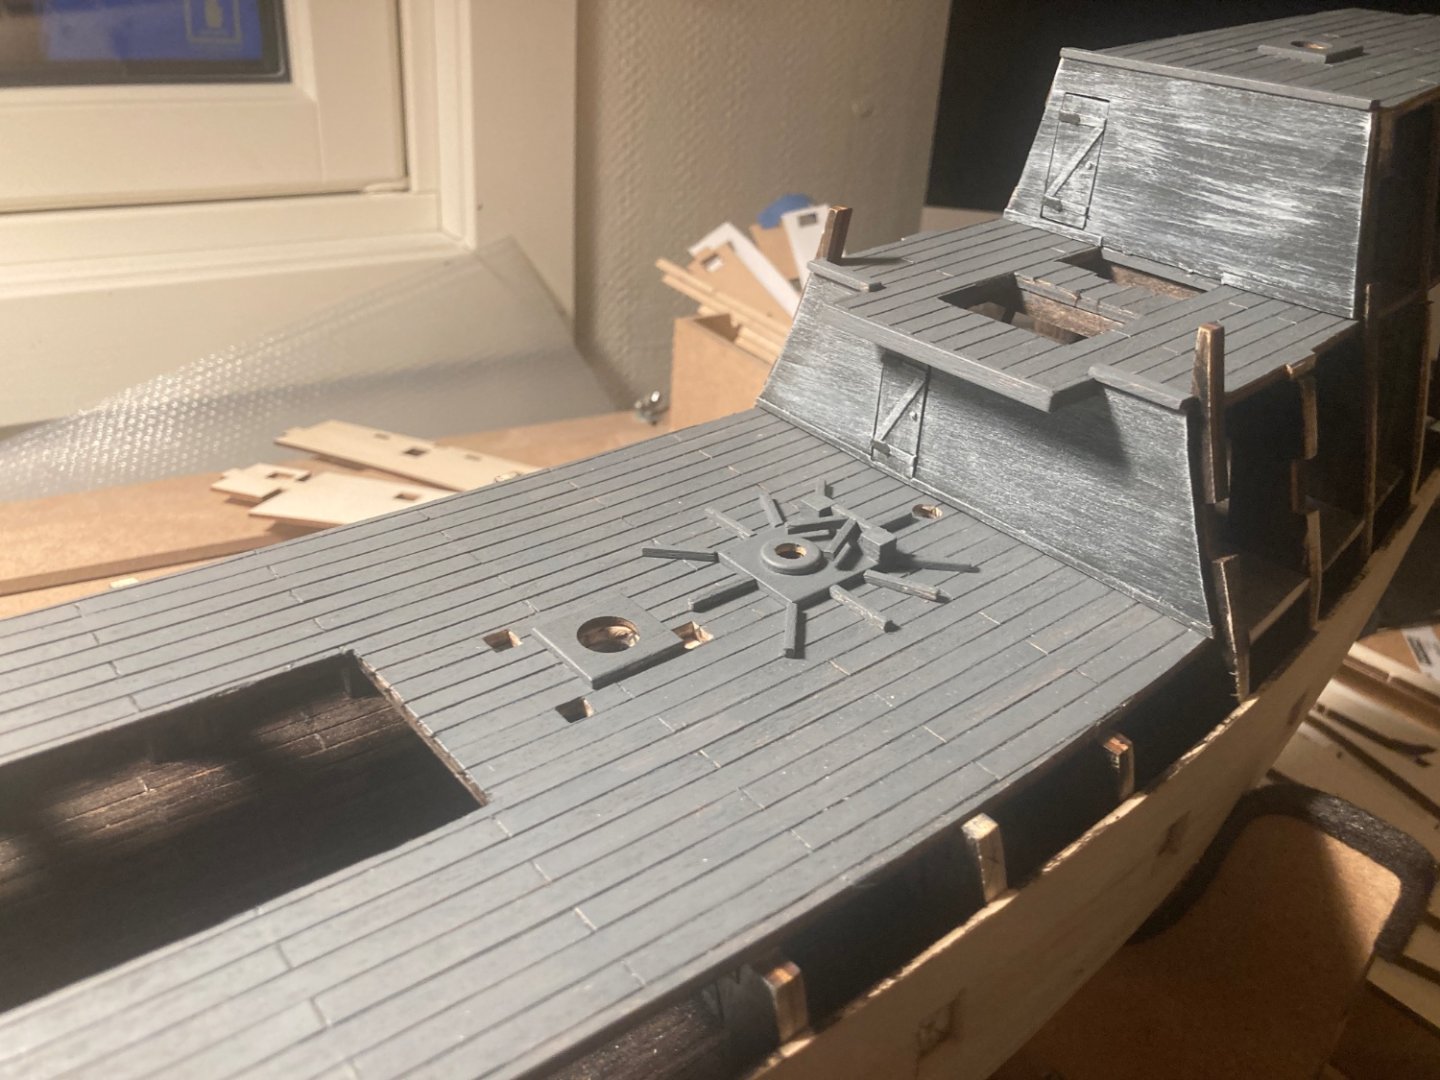
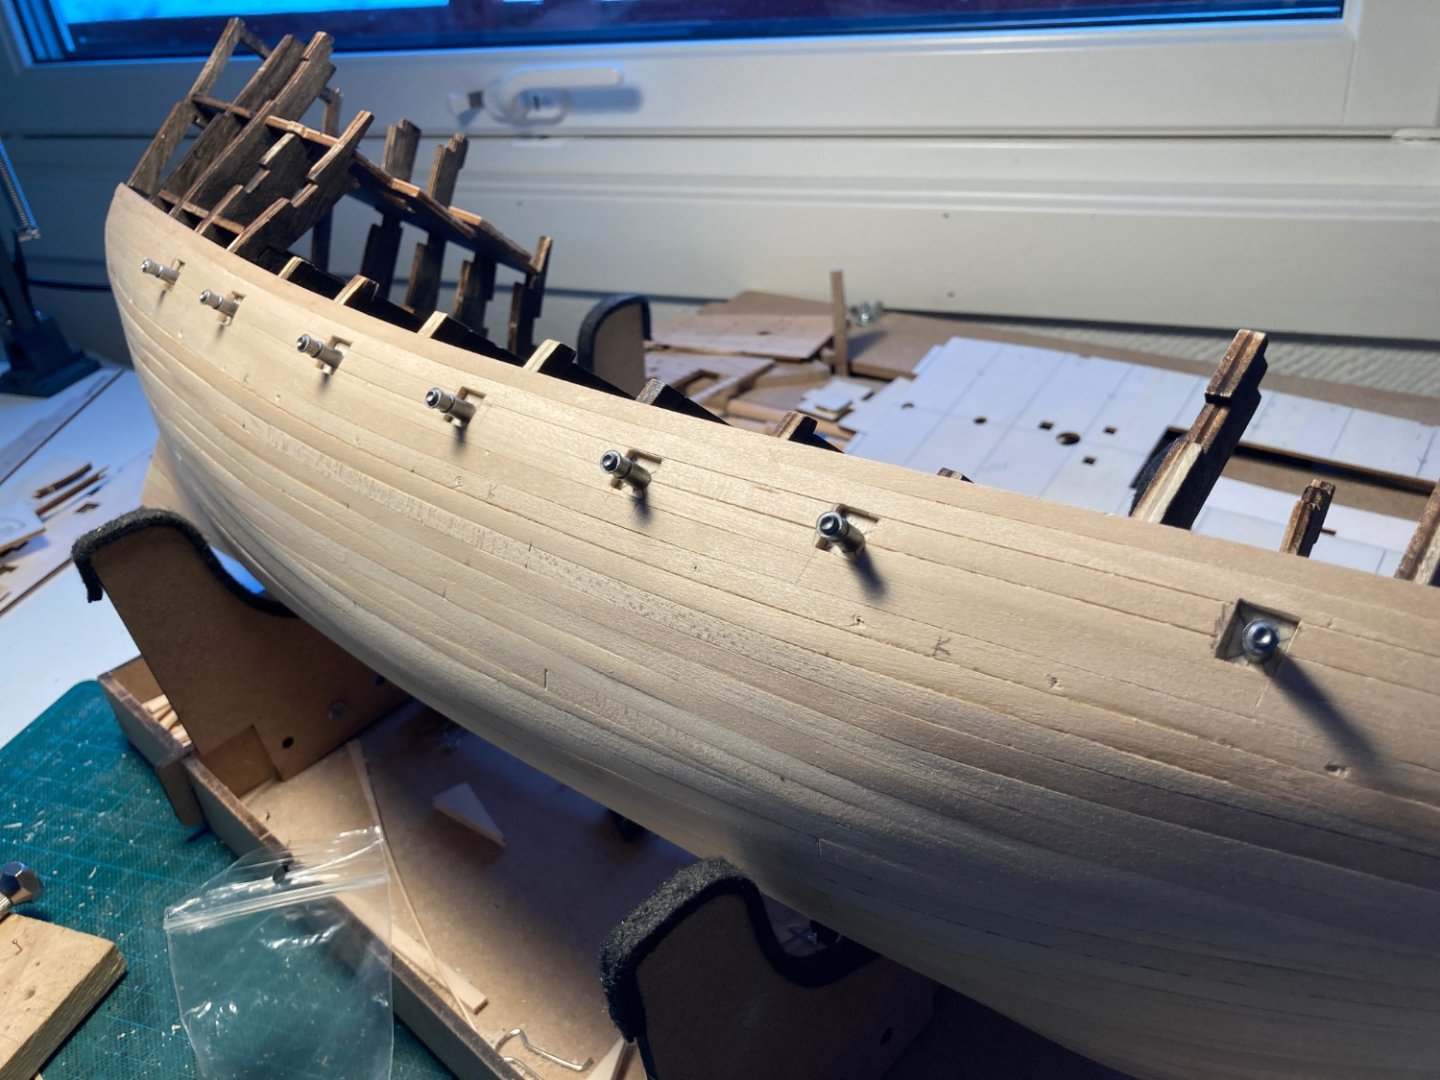
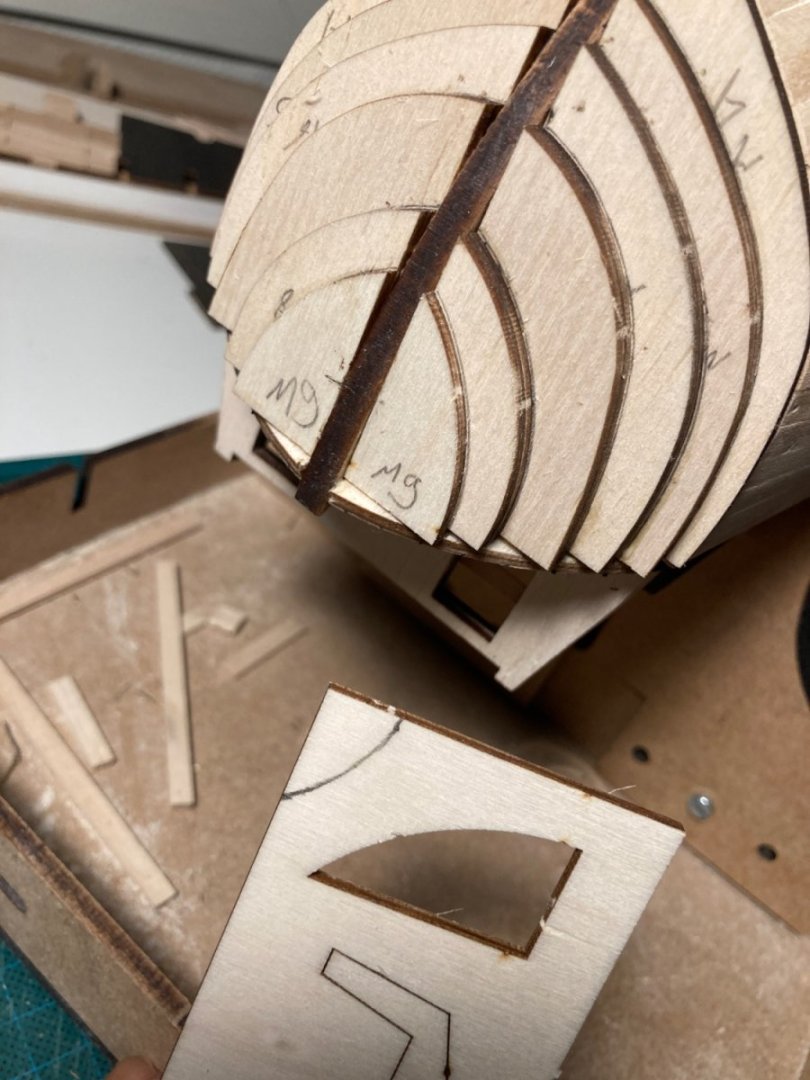
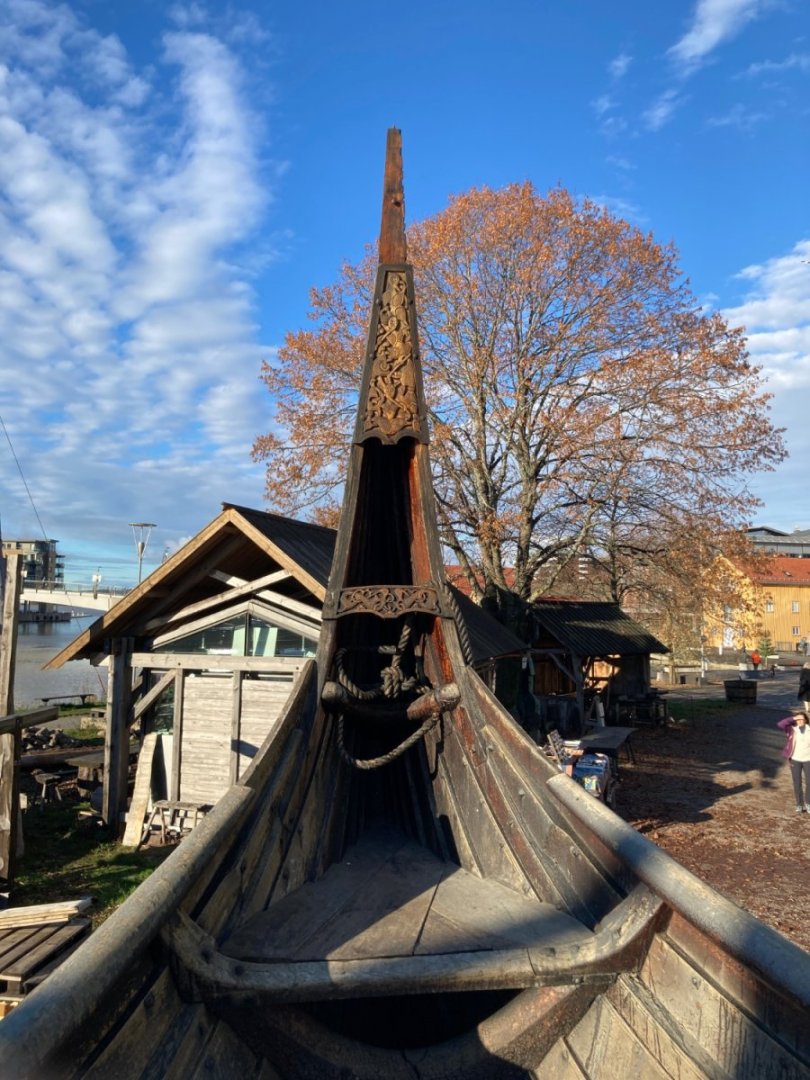
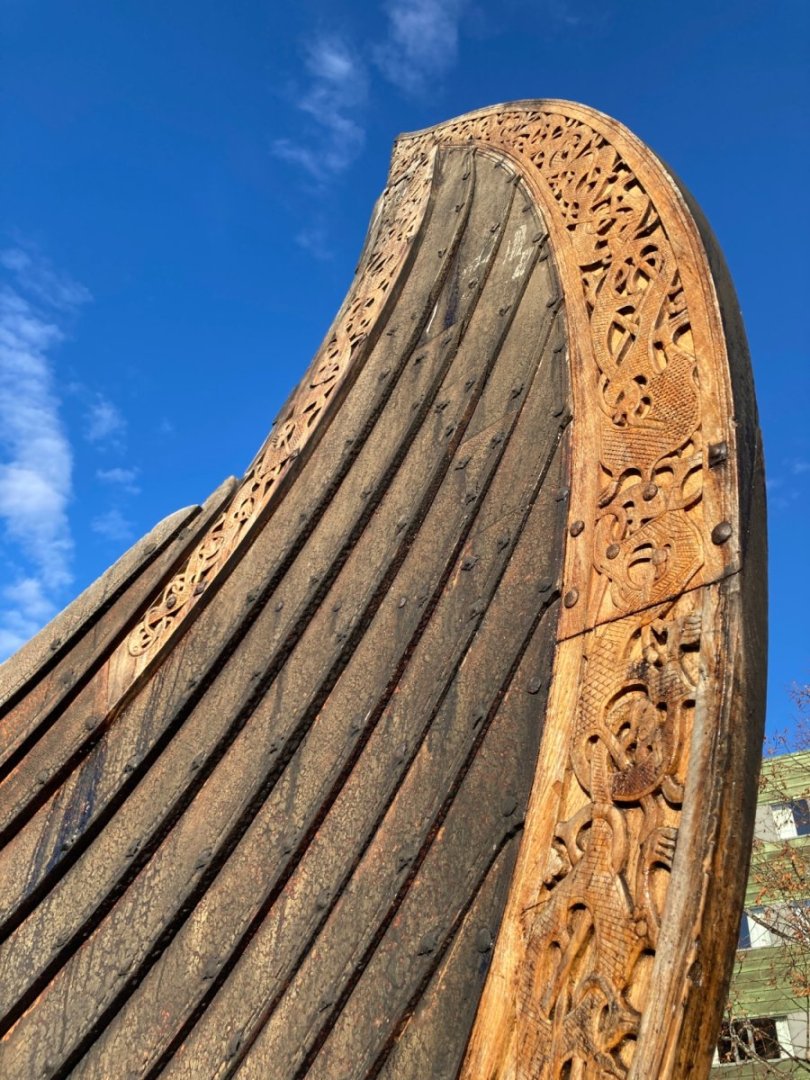
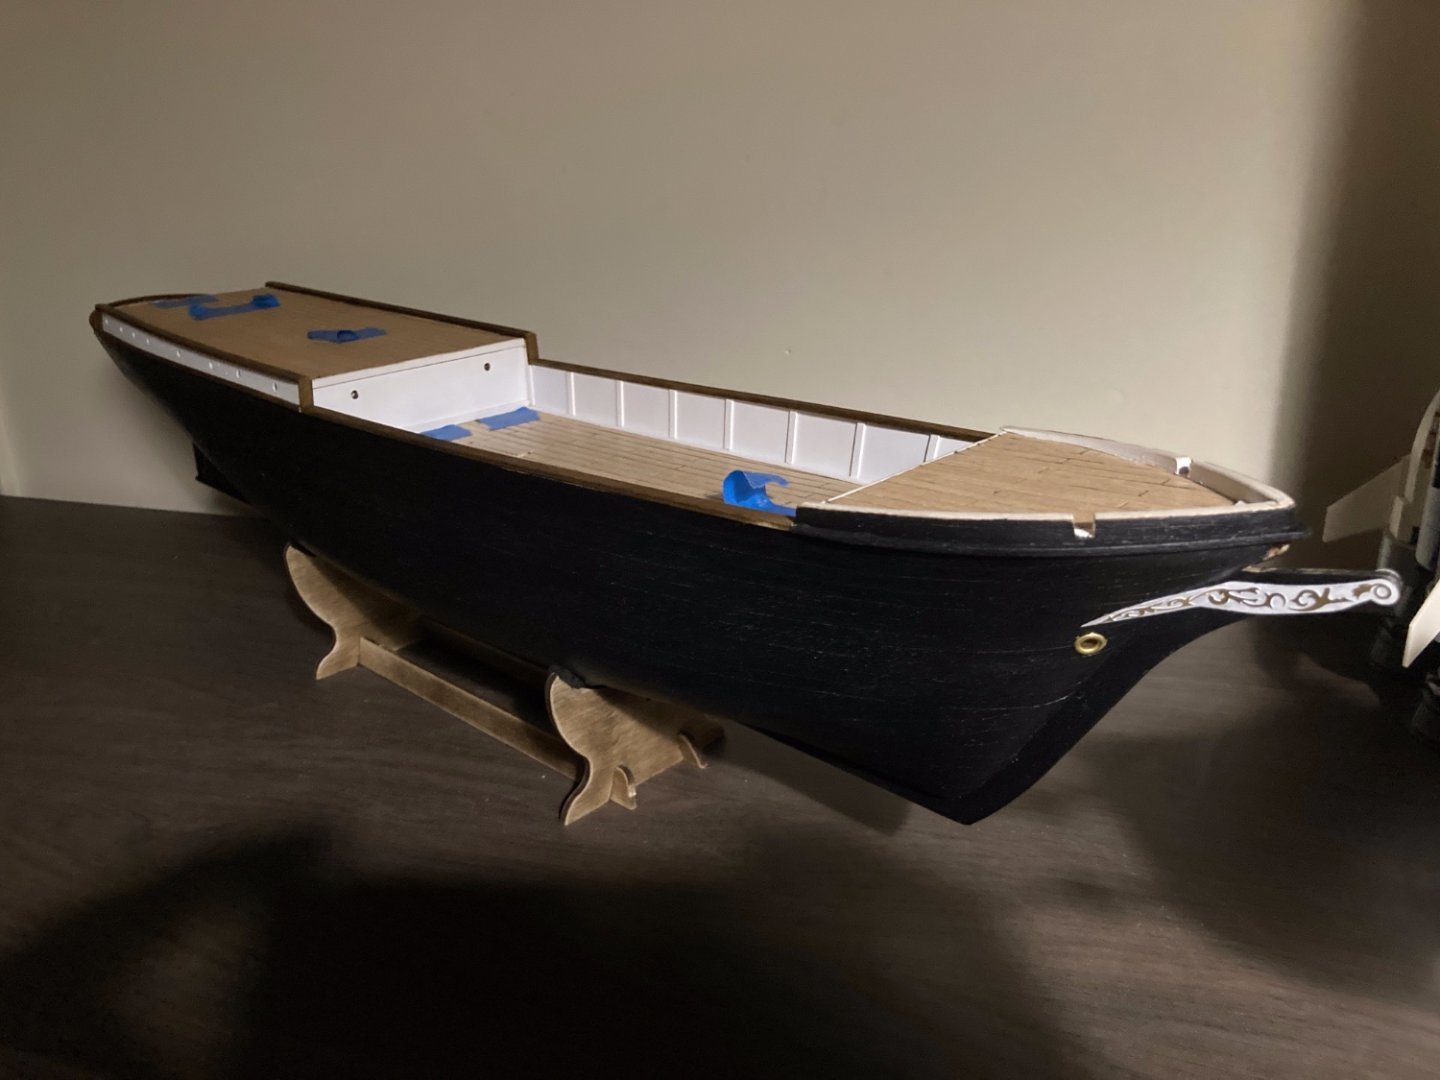
t's been a while, things have been.. Well, they could have been better. On the build side, I obviously massively underestimated the rethink needed to build the Dutchman closed, been going over the plans several times, changed my mind as to the approach, changed it back after another review, slowing down the actual build to a crawl. In the end the process flow I orginally devised still seemed to be the best: plank and install gun deck, cut gunports, then first planking, then install guns on gun deck. I changed the sequence a bit as I wanted to avoid turning the hull upside down with the guns installed, just in case. Planking the gun deck finished, tested some wood stain sourced locally, and applied to the deck. The result was, well, not what I intended: Contrary to the samples I tested the stain on, the gun deck has a bit of a satin finish, which I did not want. Also, the colour seemed to move more to the brown than to the grey. This area will be completely covered so I lfet it as is, but my staining solution for the upper decks went right out of the window. I almost threw in the towel there and then. The setback of the stain, the seemingly lower quality of fitting and construction design of the kit itself, which at each step seemed to throw me a curve ball, the continuous re-evaluating of my methods, all of this took a lot of the fun out of building. Decided I needed to take a step back and get some fresh air. Lucklily, there's enough of that around over here :-). Ended up in Tønsberg, south of Oslo, and the oldest town in Norway, going back to the Viking era. Little did I know that this town also held a fully functional replica of the Oseberg longship! It was even open to visit: Needless to say, that little visit brought some of the spirit back and I continued with the build. First up: planking the hull on the gun deck level. As the curve was significant, reverted to soaking each strip and clamping it into place, so it would keep it's shape after drying. Slow but steady progress, eventually I reached the point I could use the part Occre provides for the closed port side of the ship to draw a template of the gun ports on paper and transfer them to the hull Then, after reviewing my build process again, started on the garboard plank. I hit an issue here, as in previous builds the bulkheads would reach the edge of the keel, planking the bow was relatively easy. For one reason or another Occre decided to not follow that practice and design the bulkheads so the planks are level with the keel edge. That left me in a bit of a situation, as I could not see how to use the supports on the bow to attach te garboard. Decided to split up the plank, partly install this, then another strip, and use the third strip to cover bow to stern, allowing me to attach the front parts of strips 1 and 2 to the full strip. That went better than expected, continued working on planking the hull until complete: Some sanding still needed, but overall the shape is there. While pondering the placement of the guns on the gun deck, I noticed 2 guns were dummies. Decided to order the 12 remaining dummies to make up a fake gun deck, as I'm trying to make sure the hull can be moved safely back to my home country at the end of my assignment, and the fake gun barrels can be added at the end of the build. Bought some 4mm plywood, cut it to size and drilled the holes, ready to be fitted now. Then, on to the bow. After fitting the required pieces, saw that some part of the bow was still uncovered, so decided to add a piece to the tip of the bow, cutting it from some spare wood. After sanding the curvature came out right After a lot of testing and doubting, decided on the colors for deck and hull. Went for Vallejo Medium grey for the deck, German panzer Grey for the hull, as black seemed a bit too dark for my liking. Repainted the bulkheads from black to Grey, and did my first drybrushing: Gave the doors a bit of extra detail with some surplus strips, inpired by the build log of Fubarelf. After that, I painted the deck, glued the superstructure pieces to the frame and added some details on the edges for the upper decks. Also made the helmsman's cover, ready to be drybrushed as well Next up: drybrushing and varnishing the decks, and then planking the inside of the bulwarks. As they make a bit of a warp decided to plank only up to the top of the gunports off boat, and finishing the job after they've been installed. Wish me luck!


-
Hi Keith, Good to hear from you. I just added Cumbria to my Destination list, indeed, I can imagine the Norwegians feel right at home there 🙂 . Thnx for the tip on the strips, I admit I had a bit of a look at your Terror log before committing to these changes. Meanwhile, deck planking continues, slow but steady: Very focussed work, it seems a bit stupid getting all that effort in for a deck nobody will see, but I want to use this as a test bed for dry brushing and weathering techniques. Stay healthy and safe, Robert

-
Hi, thnx for your feedback. Indeed, there are some challenges ahead. First part will be to get my head around painting and weathering. As stated before, I don't consider myself a painter, more of a smearer, so I'm going to have to up my game, especially concerning the technique of dry brushing. Not to worried abut the single plank, but I will need extra wood to cover for the modifications I intend to make, and as my favourite supply shop is roughly 2000 km away, I need to check out the local offerings. Just another part of the adventure, I guess 🙂 If you'd happen to have links to the scratch builds you mentioned, I'd be happy to have a look. Thnx for the hat tip already!
-
Hi Patrick, Staying in a town between Oslo and Drammen, called Asker. Not too big, quiet, and very friendly. Of course, get in the car, drive around for 10 minutes and you're in the middle of nowhere surrounded by mountains, forests and lakes 🙂 . Simply majestic, I've been wandering around for hours already, trying to get it all in. Just stunning!
-
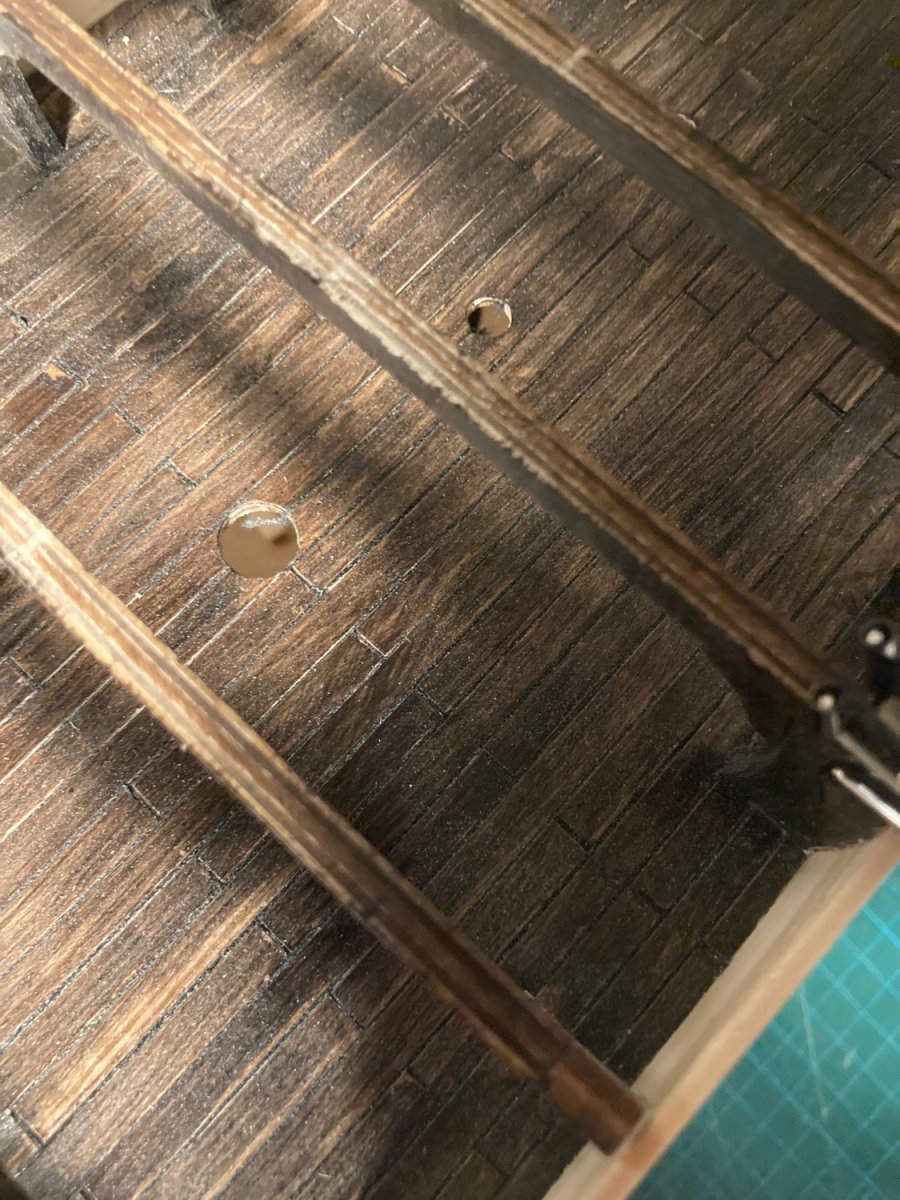
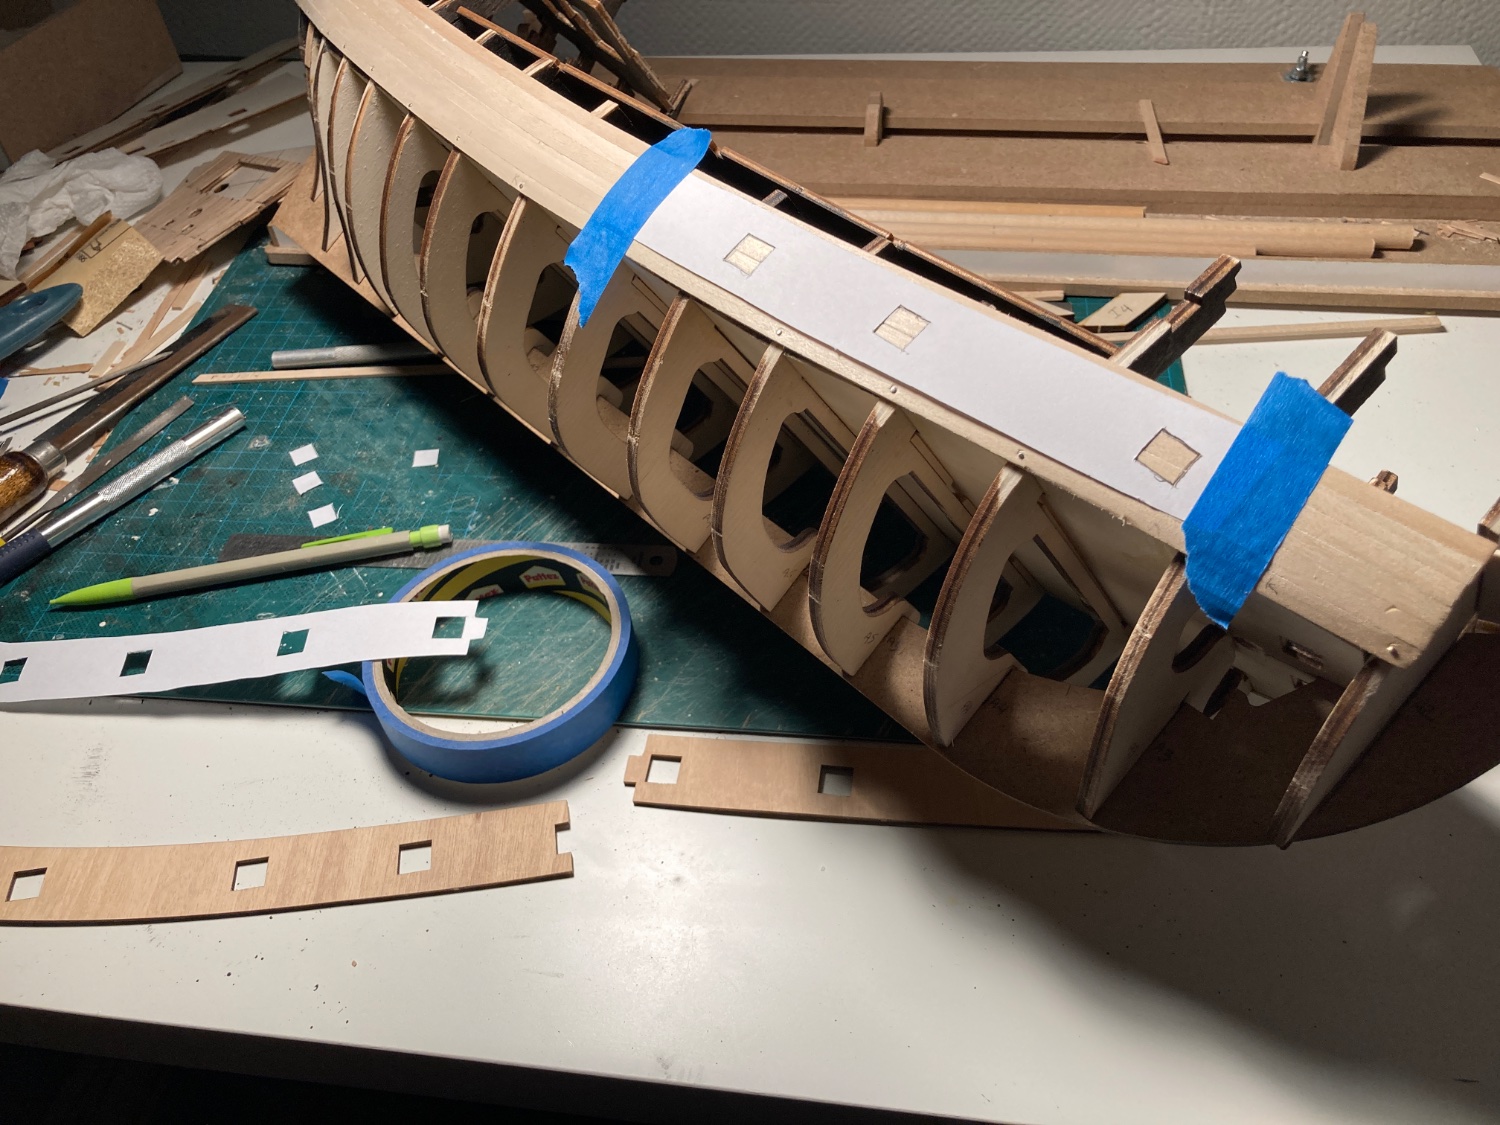
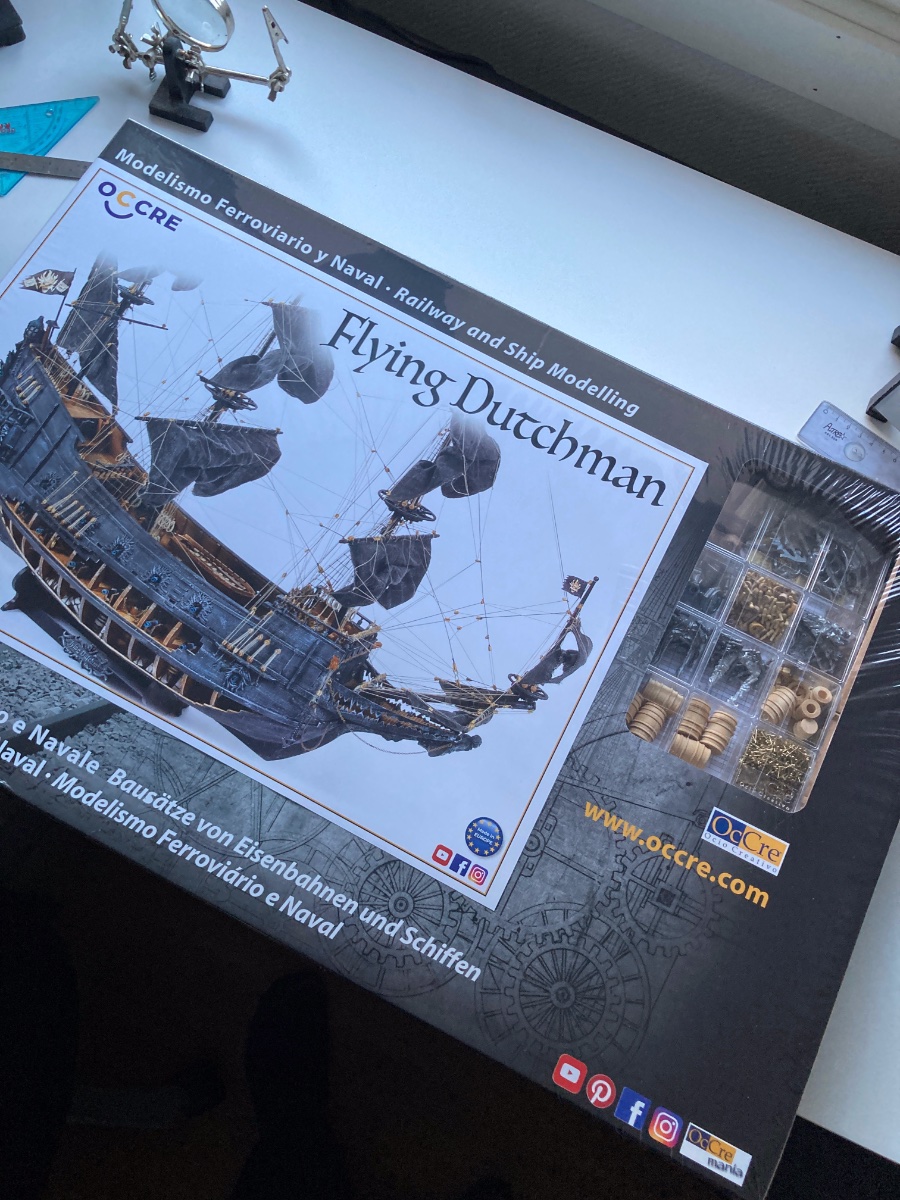
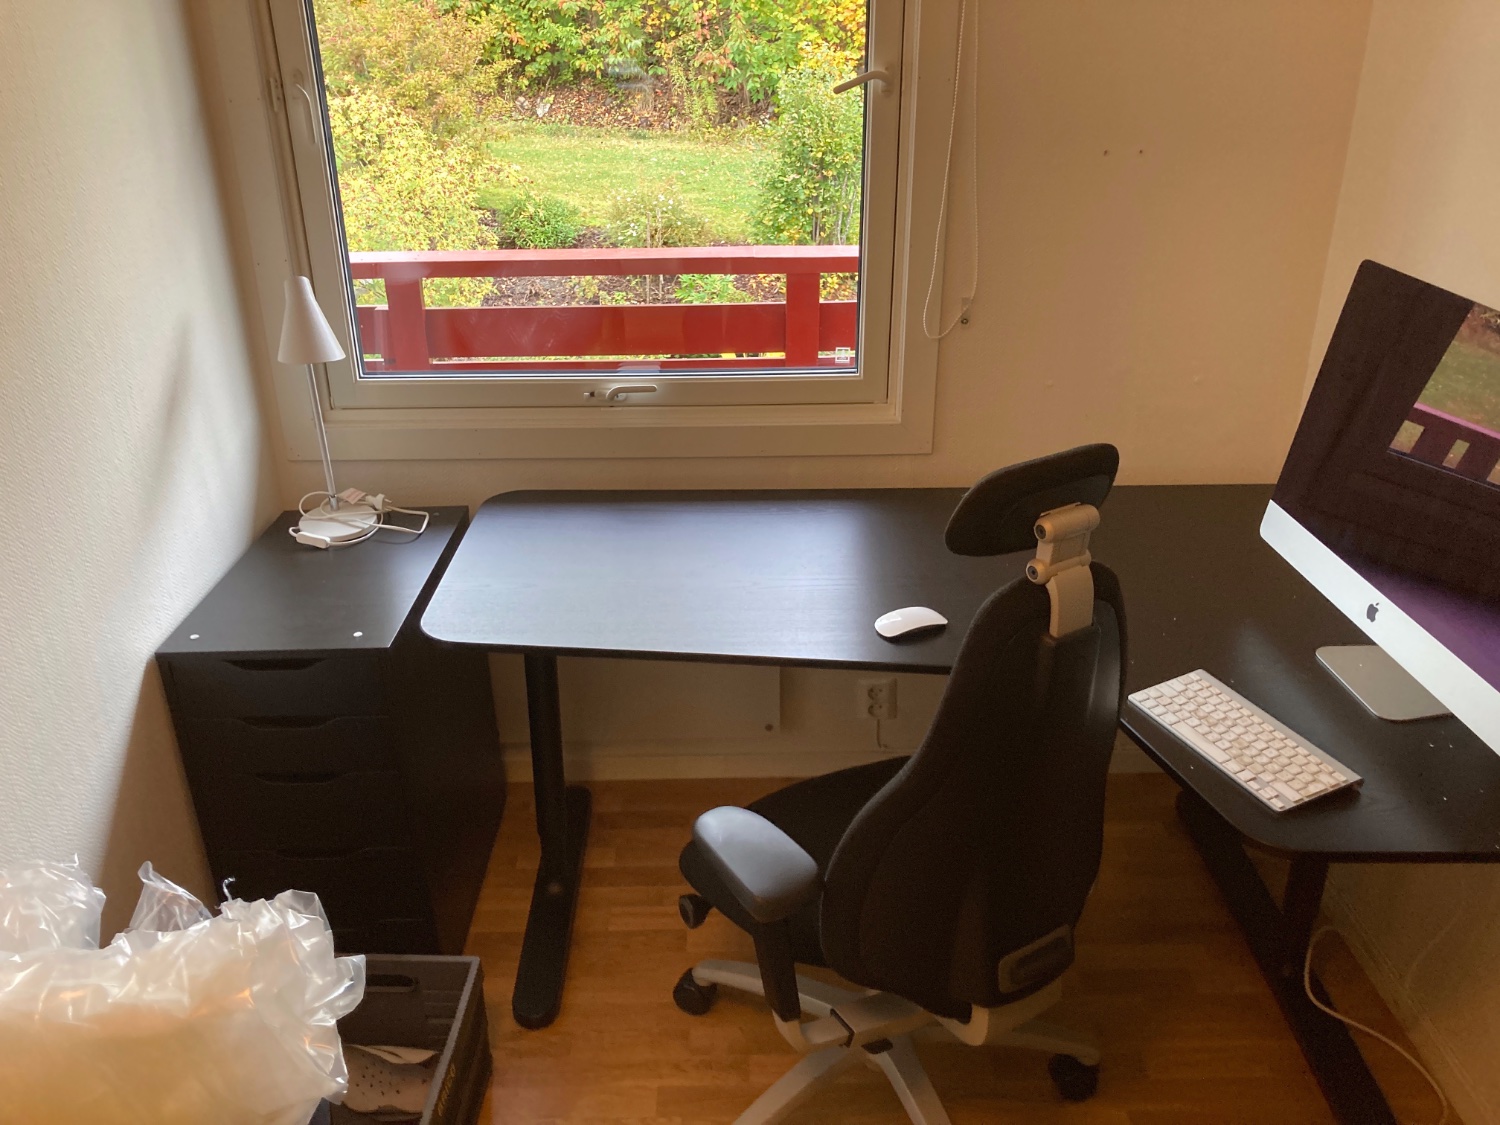
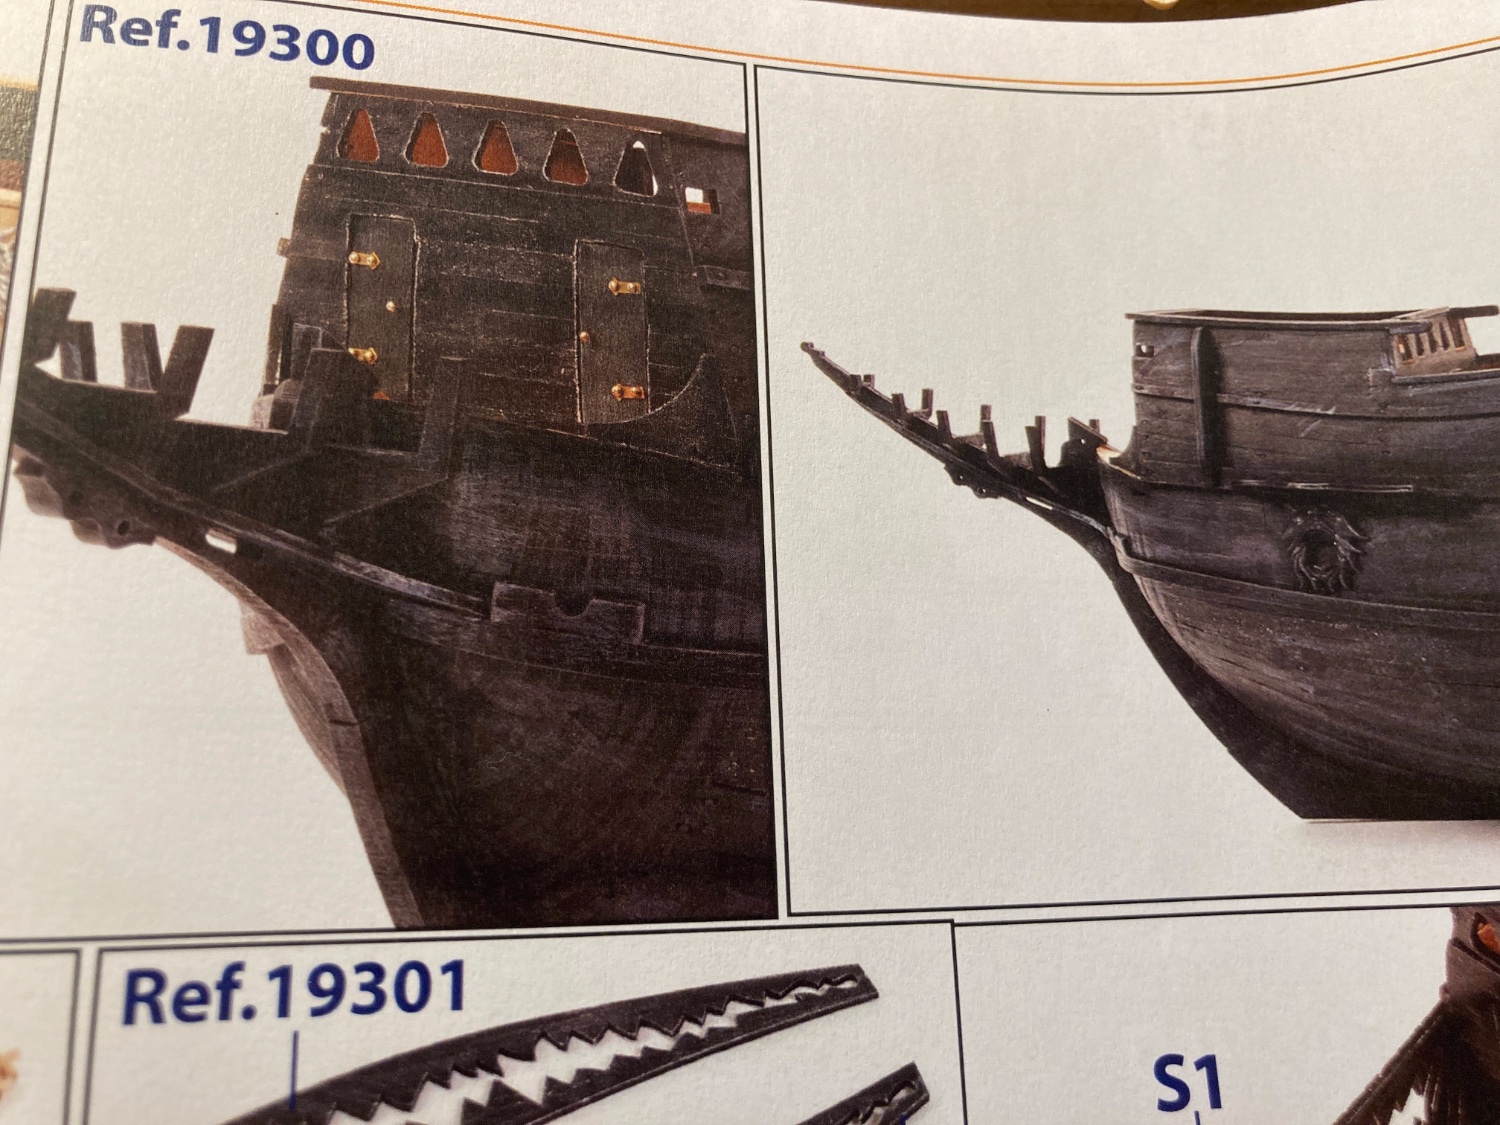
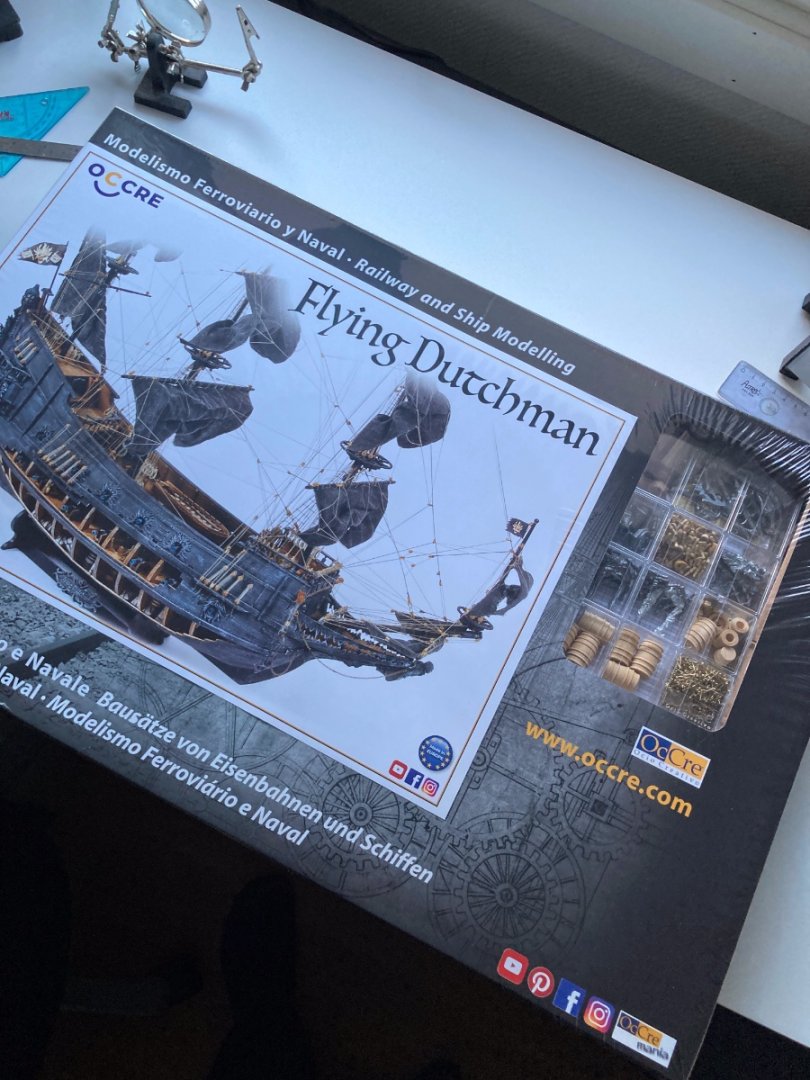
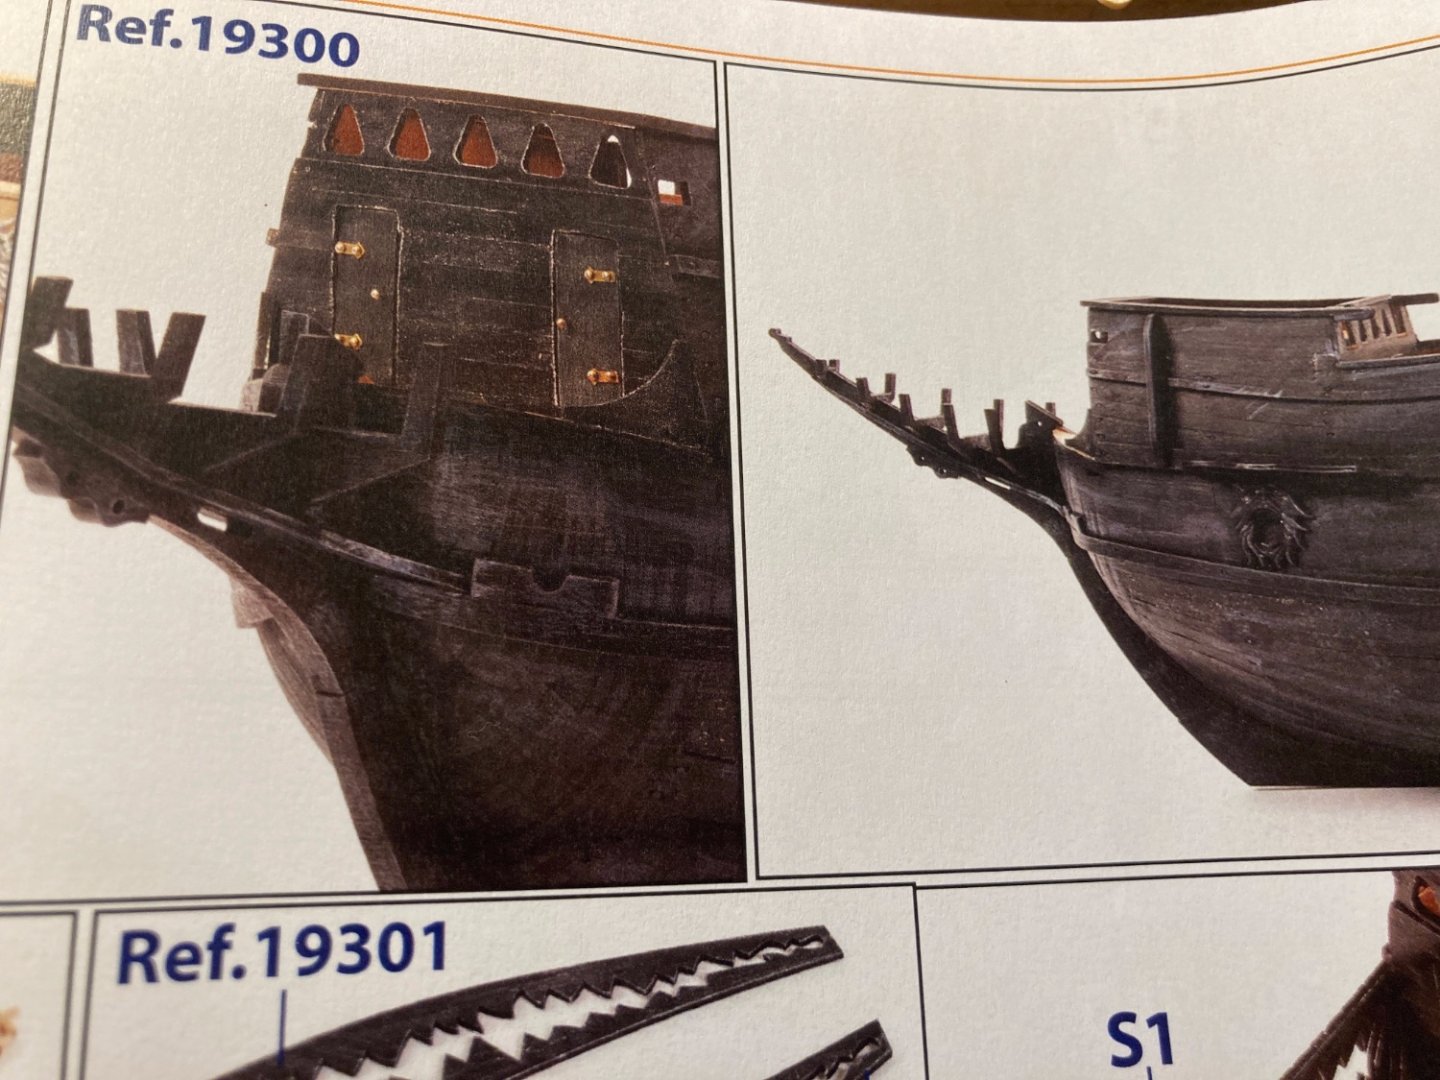
Hi all, After some running around and a lot of searching and discovering, I'm settling into my new (temporary) home in Norway. I managed to bring the shipyard over, and found some space for it: As the moving company did not want to take my current build and my materials (aka the wood strips), Endurance is in storage back home in Belgium, waiting to be finalised when I return there next year. This is how far I got before I needed to pack: So most of the hull is done, including painting, just need to add the rubbing strakes. And then everything else of course 🙂 Meanwhile, I managed to order and receive a new kit, to cover the long Norwegian winter nights: The Flying Dutchman, by Occre: In a way, I'm very happy getting this, as it was the Pirates of the Caribbean movies that resparked my interest in model building, and made me take the jump from plastic to wood two years ago. Having said that, there are some points in the build I think I can improve on, after studying the plans: First of all, the model is delivered with the starboard side opened up, exposing the gun deck. From what I can see, there's not that much extra detail added, and frankly I'm not excited about the way the gun deck itself is split into three pieces of plywood, so the deck does not follow a curve. To me it just feels wrong having the hull opened up, it takes away the feel of the curved line of the hull. So I decided to close her up, plank both sides of the hull. Which of course means the plans needs to be adjusted. Here's what I'm planning to do: build the basic frame, ensure the the frames are properly secured by temporarily fitting the decks, plank partially untill I reach the gunports, use the plywood with the gunport cutouts for the port side as a template to position the ports, and cut them out. Then build the gun carriages (12 go in the lower hull), position and secure them on the still open gun deck (thinking of using a brass rod from the base of the gun carriage into the deck), and after installing all of them, put the top deck on. My reasoning is that as the gun barrels are not fitted, the chance of accidentally hitting them during the next build phases and possibly losing them in the sealed deck will be minimised. What do you think, is my reasoning sound? Also, the ship is delivered as a single planked hull. No issues there, I single planked before. But in the plans, Occre builds up the bow by using plywood filler parts, which then are not covered by any kind of planking. In the pictures on their site and in the plans, that looks a bit awkward: So according to me I have two options: double plank the hull with any leftover 0,6mm Sapelli strips I have, OR single plank but omit the plywood fillers and bend the strips to cover the bow of the ship (I will need to add some blocks to ensure I have enough space to attach them to the keel). Not sure which is the best way forward, so I'd appreciate your expert thoughts on this. Thirdly, as said before, some parts of the hull are cut out from plywood, with the gun ports not being planked, according to the plans: Again, when painting this, the different approach to hull shaping would be visible, so decided to not use the gun port pieces, only as a template to cut out the ports in the planked hull. On the other hand, the metal castings for the gallery and the gun ports seem top notch, although I'm not sure why they went for metal instead of using plastic. Instructions are clear, but a general overview plan of the ship is missing, so I need to guesstimate positions of certain deck items and channels. In short, a number of firsts again on this build: Build up full hull Templating gun ports Install lighting in the gallery Weathering the ship to get that spooky look Other changes I'm planning to make: use dark thread for the running rigging (historically inaccurate, but from the pictures it just seems too clean to use light thread, and hey, it's a fictional model to begin with), darken the dead eyes, paint the deck in a slightly different shade of grey (a bit lighter) than the hull, as the Occre approach for a dark brown hull doesn't look right to me. And plank the inner bulwarks, as according to the plans, these plywood pieces are to be stained only, doesn't look right to me either. So a lot of customisation, fingers crossed I'll be able to pull it off. Again, I'd appreciate any feedback on my processes I described above, as this is my first time attempting to kitbash (a little) I'm sure I'm overlooking potential pitfalls. Thnx in advance for your comments!


-
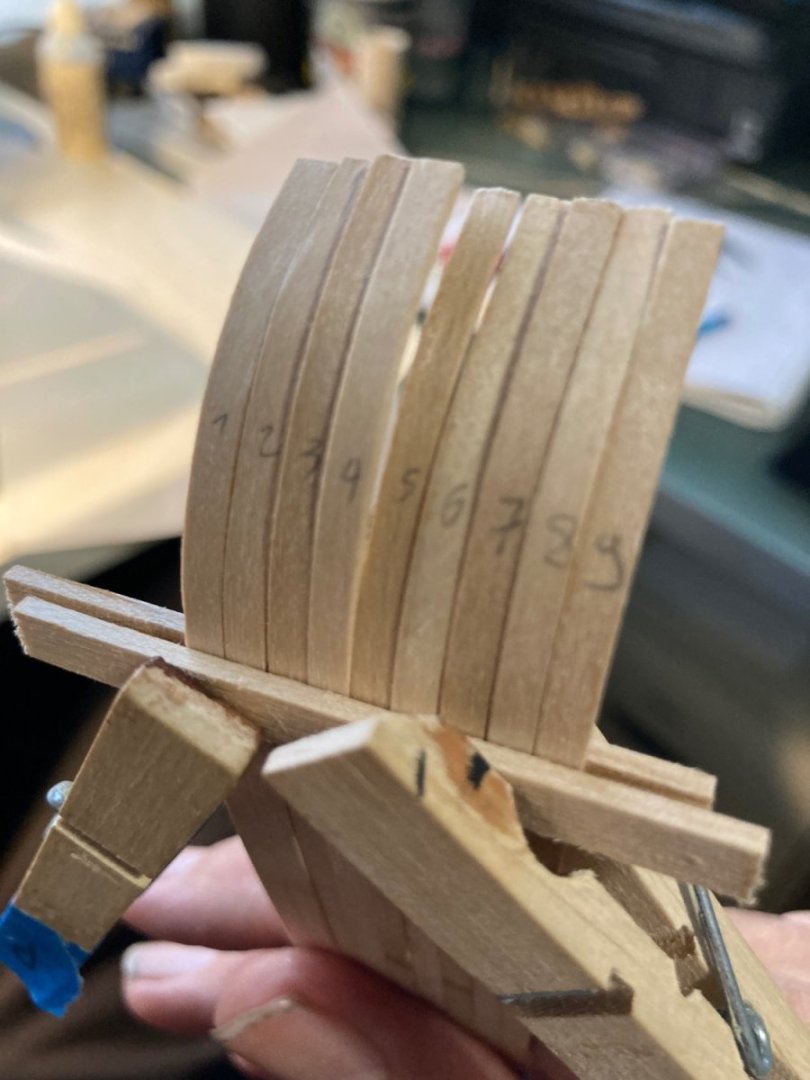
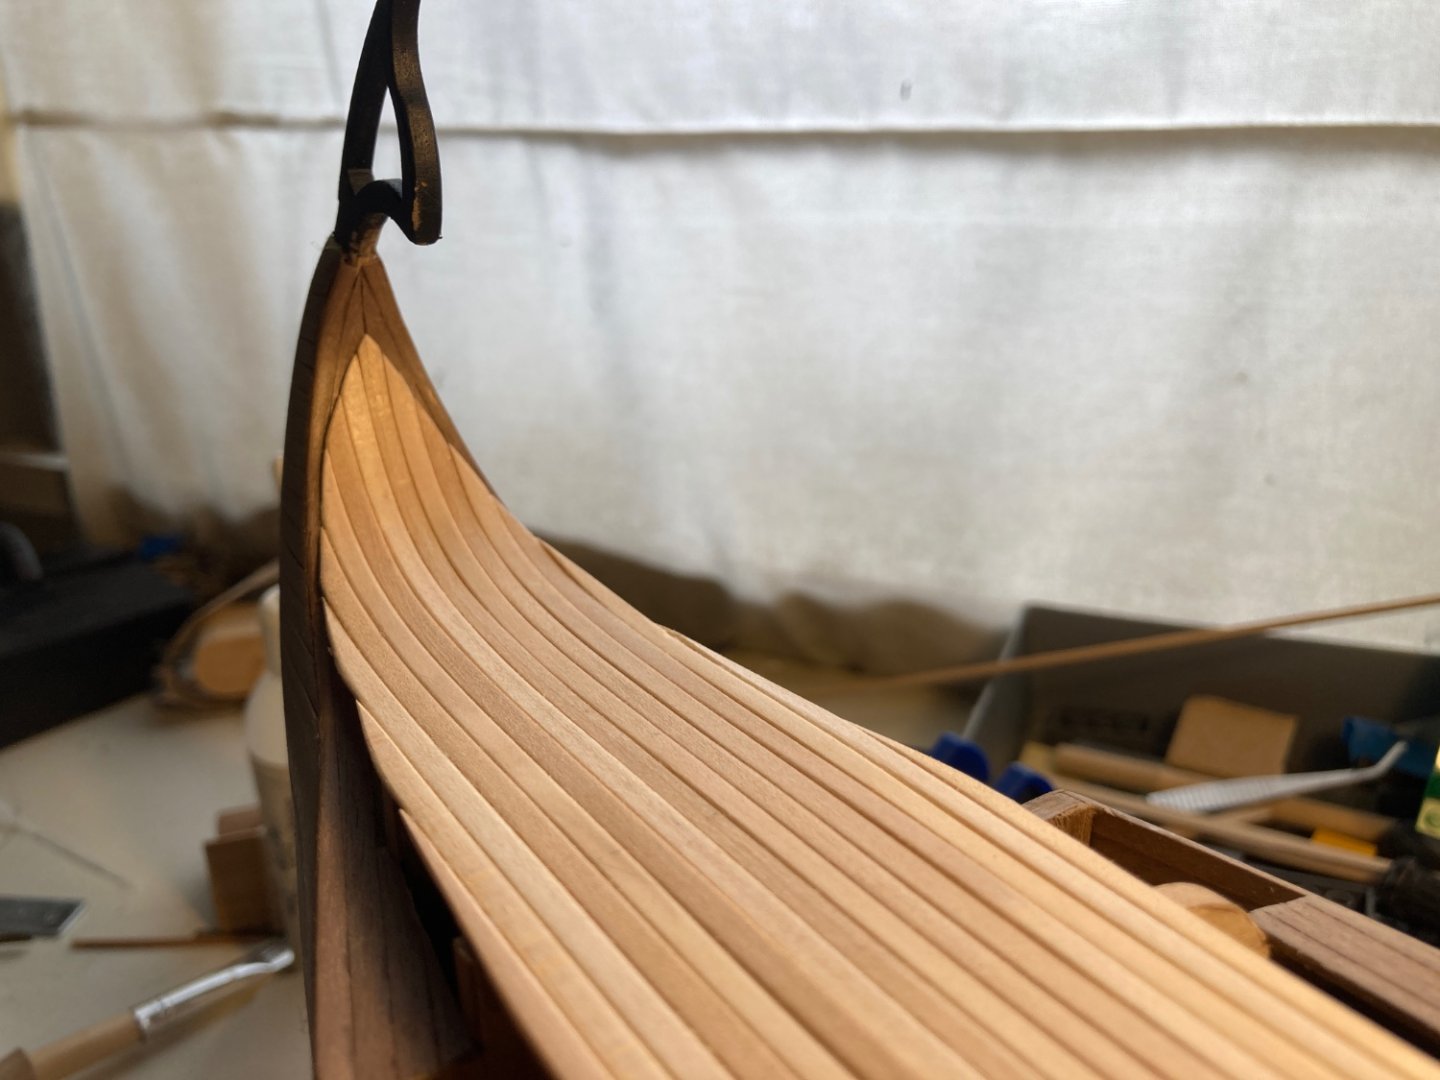
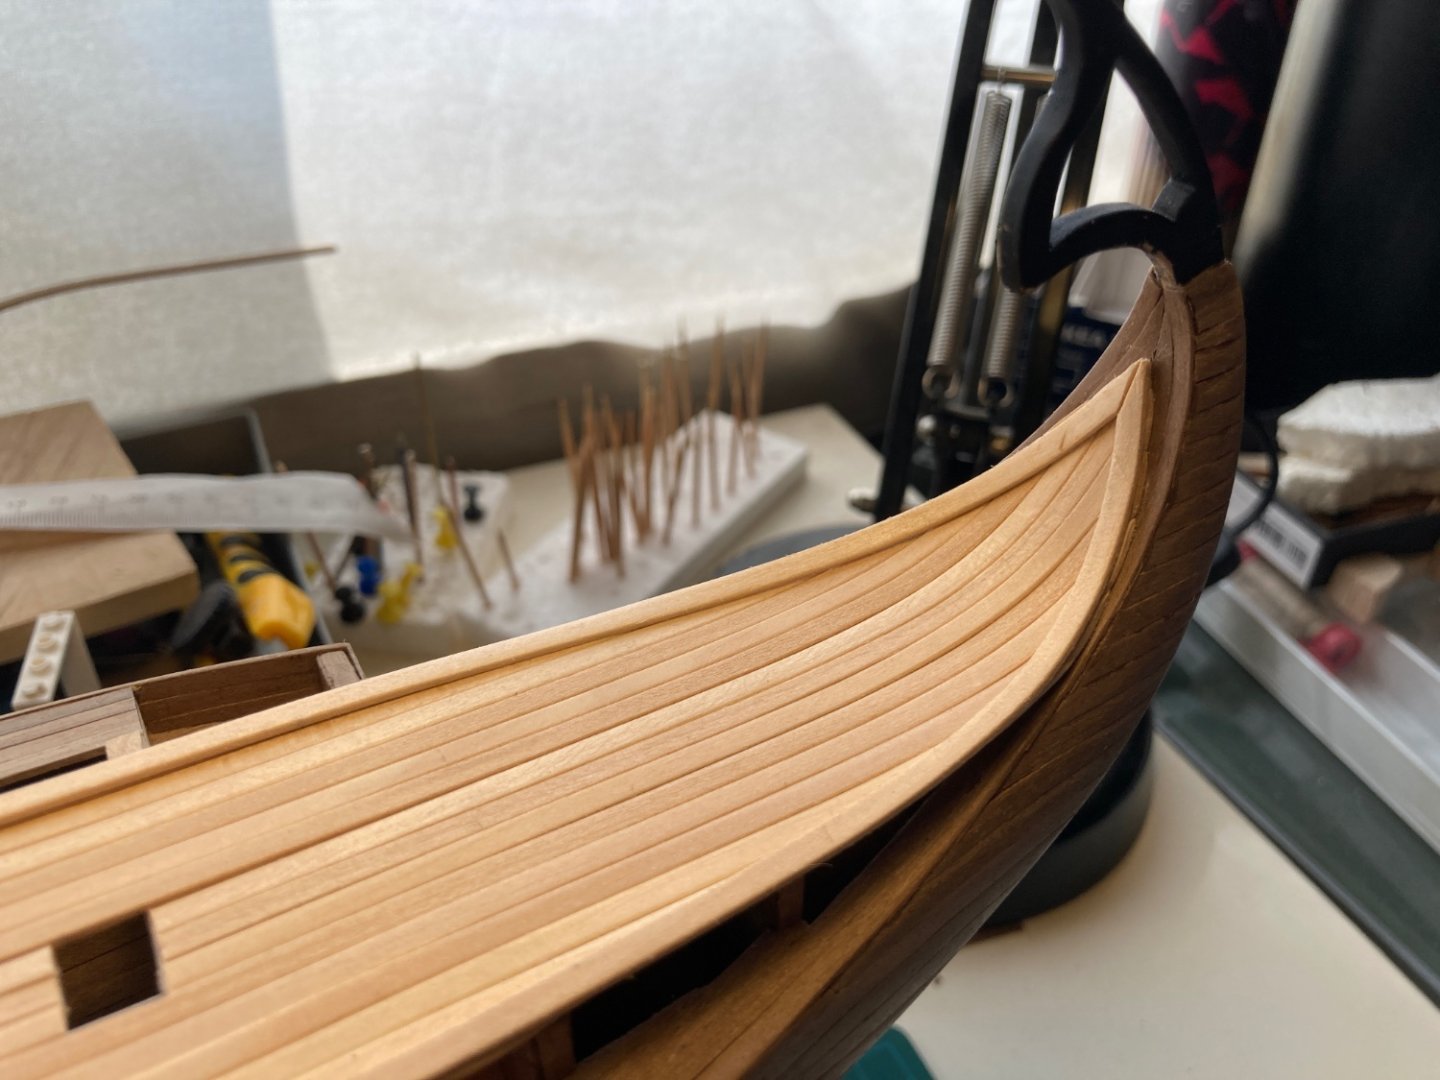
Hi Gary, apologies for my late reply, as I'm moving countries and am setting up. Unfortunately that means my computer with all my pictures is still in transit. If you can hold on until beginning of October, I can provide you with a detailed look. Meanwhile, I hope this already helps: I bent the deck planks in situ, holding them down with some spare wood as they dried: I calculated 9 strips, so bent them all using the same method: I numbered them because I wanted to make sure the sequence they were in when drying would be kept, just in case. Then I used some tracing paper and drew a copy of the stern end of the deck off the plans, put that on my bent planks and drew that line on the wood. Then some careful cutting and filing, this was the result: I first thought to leave as is, but as I had some 1x3mm strips to spare, I bent 2 strips (set them in situ again) for the edge. Resulting in this: Hope this helps, if not, let me know and I'll try to explain more. Good luck!


- 62 replies
-
- 6
-

-

-
- amati
- greek bireme
- (and 1 more)
-
Buying building kits in Norway (Oslo area)
ObviousNewbie replied to ObviousNewbie's topic in Wood ship model kits
Tusen tak Erik! Found their website, very informative, do you still have monthly meetings in the Framm Museet? -
Buying building kits in Norway (Oslo area)
ObviousNewbie replied to ObviousNewbie's topic in Wood ship model kits
Hi James, thnx for moving this to the correct spot. Indeed, I can order kits online, but I was more looking for small purchases (extra glue, extra strips etc), seems a bit of overkill having to pay shipping costs for those. Also, as I'm still relatively new to this hobby, I've come to appreciate the expert advice these store owners seem to have. But I can always get back here and ask, everyone here has been a great help in my previous builds 🙂 -
Buying building kits in Norway (Oslo area)
ObviousNewbie replied to ObviousNewbie's topic in Wood ship model kits
God dag, Erik. I’m following the instructions of the moving company, who basically said they will not take any wood with them. Checked the Norwegian customs site, the info is quite vague, probably because I need to rely on internet translation. Might be there is a difference between importing processes? -
Hi all, I hope this is the right place for my request, as I did not see any other category it could fit into. I've been a member for some time, so nothing new there, but my location is about to change, drastically. The company I work for is sending me to Norway (Oslo area) to lead a project for one year. As I'm currently building Occre's Endurance (no build log yet, sort, it's been hectic trying to organise everything over the last months) my original thought was to pack up the shipyard and continue in the new destination. Norwegian customers had a different opinion: no import of any wood is allowed. After some teeth grinding, here's what I want to do: pack the shipyard, put Endurance in storage, leave all the spare wood home and buy a new kit once I'm there. So here's the question: could any members who have experience with buying/building kits in Norway please share the names and addresses of the stores where they buy their supplies? Thanks a lot in advance!
-
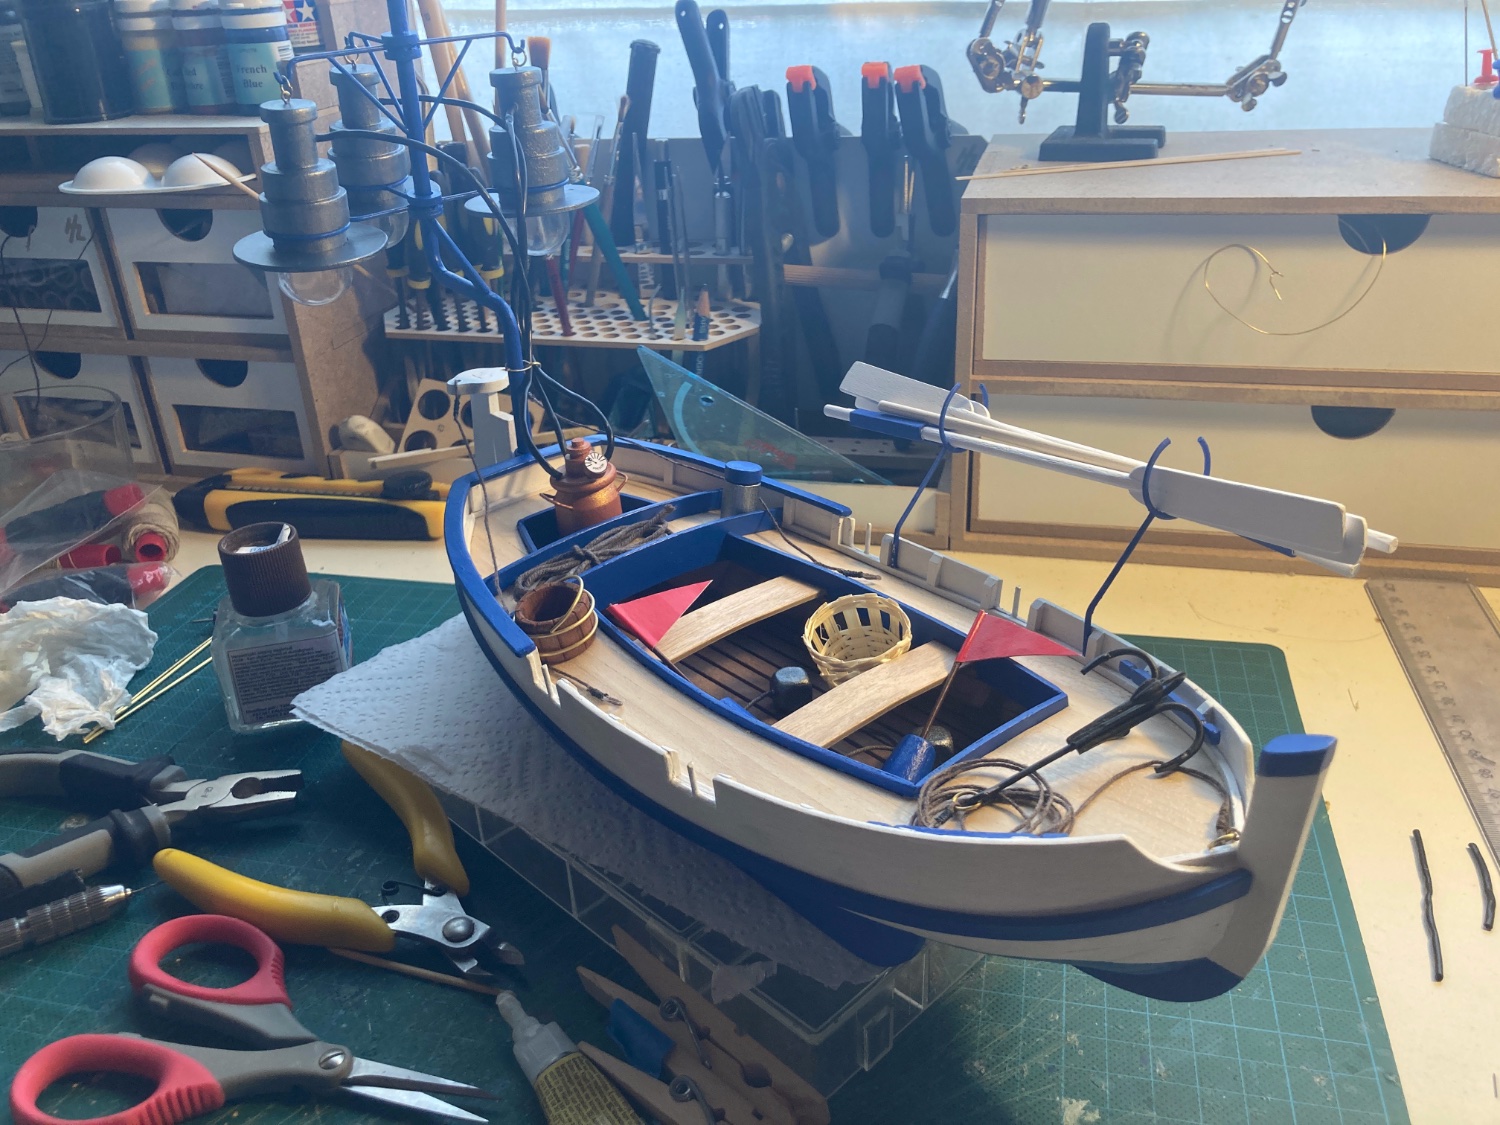
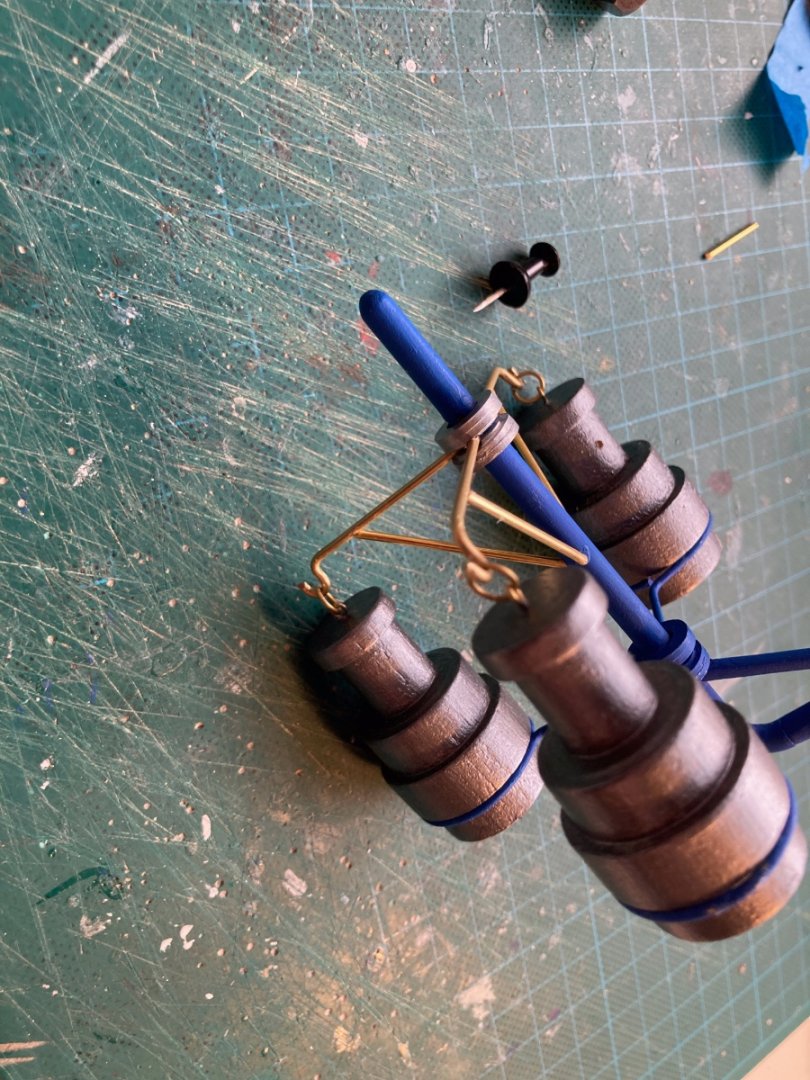
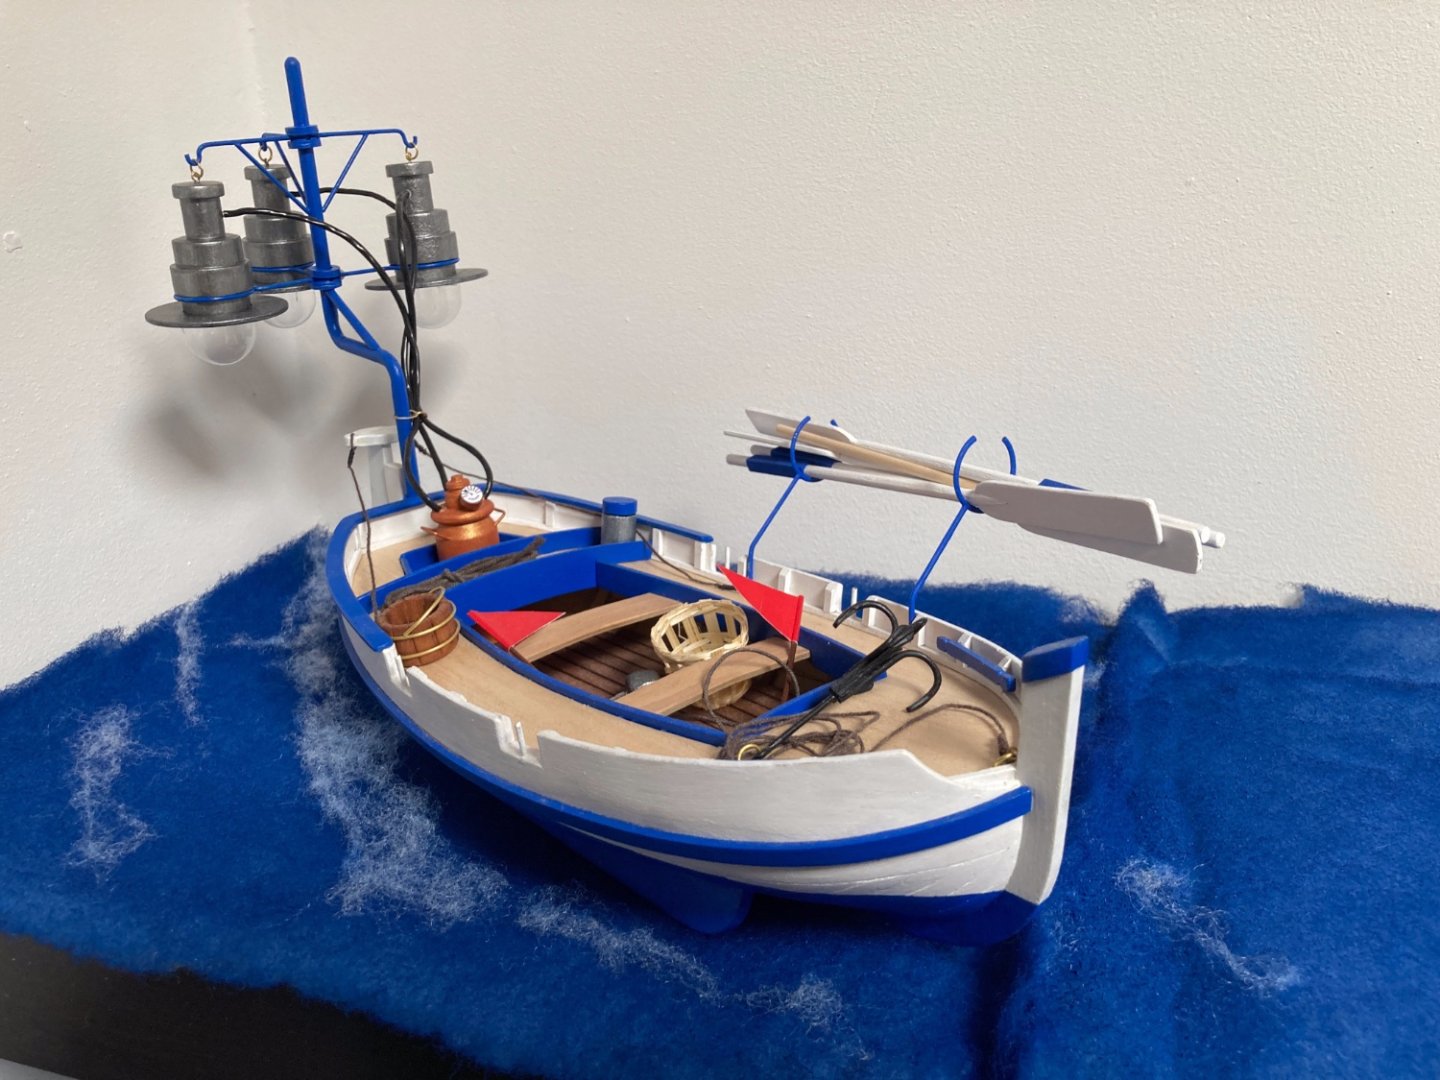
OK, this was a long time coming, apologies for the lateness, but as Calella was in hibernation for most of the winter (focussing on making sails for Bluenose), the was not much happening. After finishing the hull I proceeded with the light fixture. Starting with the attachment, which was a piece of metal. Thought I could drill through the part to ensure the pole for the lights went through, but the metal thought otherwise... I did manage to pierce the supports of the piece so I could at least attach it to the deck with some well placed nails. Then the fixture... Weight is an issue here, the complete construction weighs nearly as much as Calella itself! Aligned the lights without glueing, allowing for some corrections after assembly. Struggled a bit finding the correct colour for the lights, painted hem silver first, but that was a bit of a mistake. Switched to gunmetal grey, with a more subtle result. After that, I added a bit of 1mm brass wie to the foot of the pole, manage to pierce the metal support with a 1mm drill, so I'd have a little bit of support. Then, created the rest of the accessories and there she is: As this was another gift for the Admiral, she integrated it into her display of Ephialtes: Pretty straightforward build, good quality kit, but the size was something I needed to get used to. She's about a third of Diana's length but I think she still shines in he own little way. Wanted to try some weathering on the hull, but that was vetoed: "It looks so pretty now, why do you want to dirty it??".

-
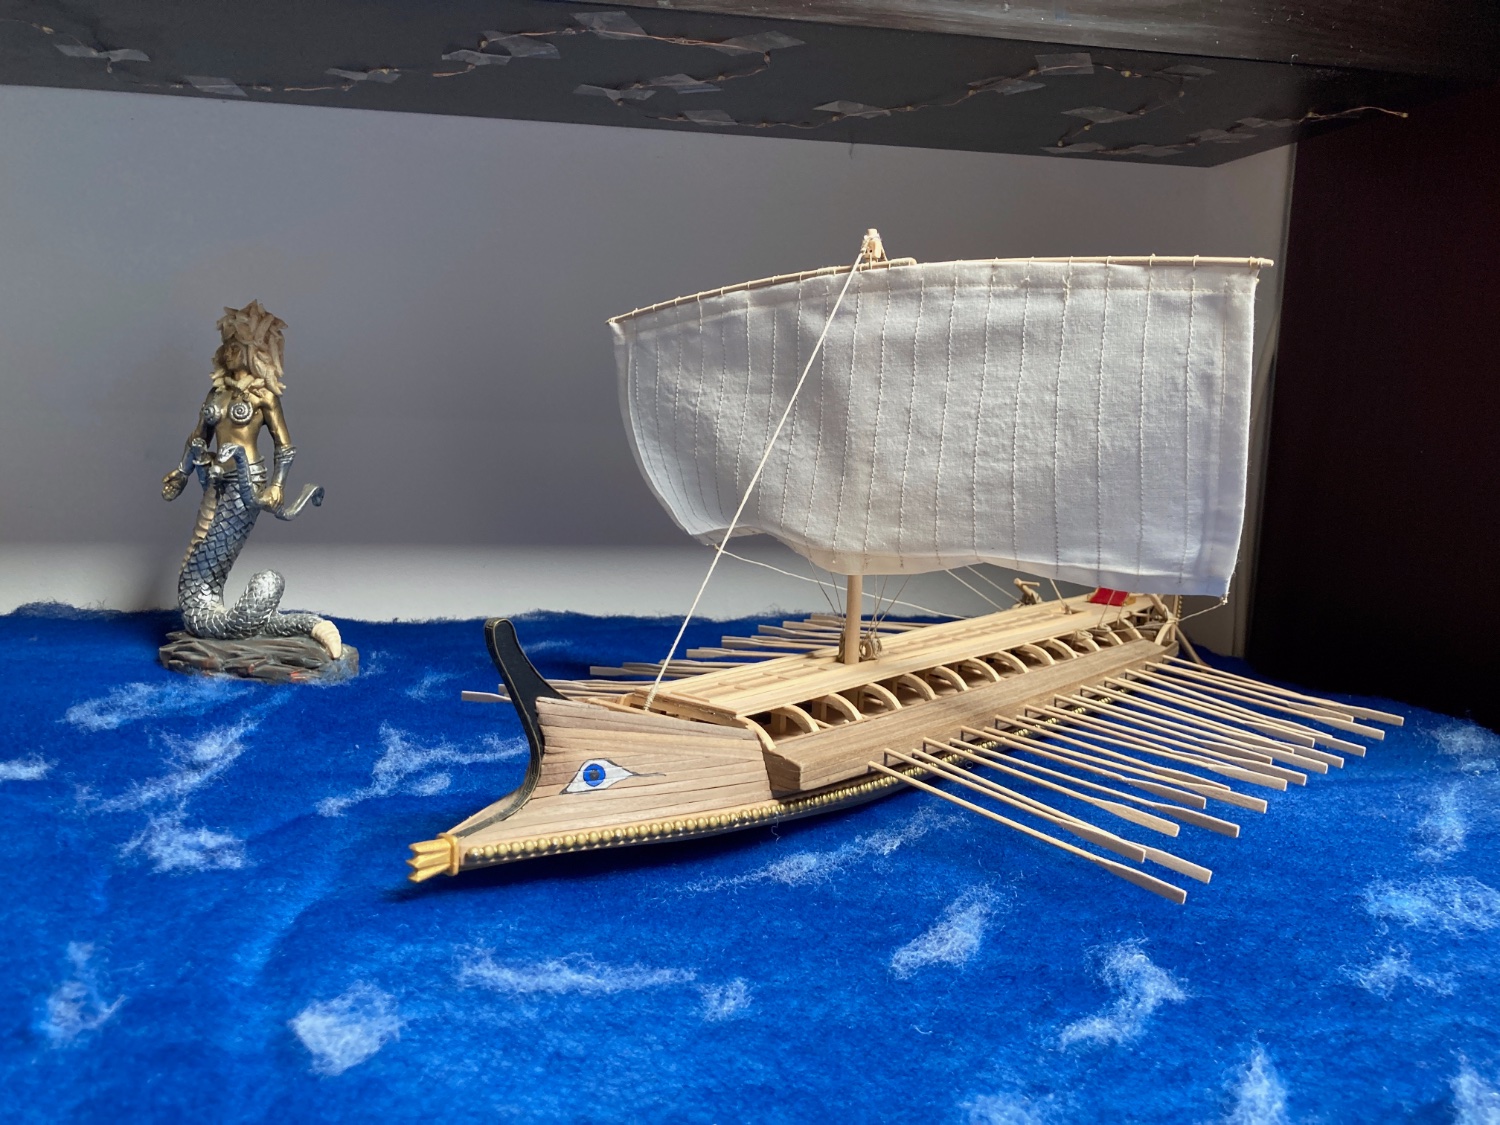
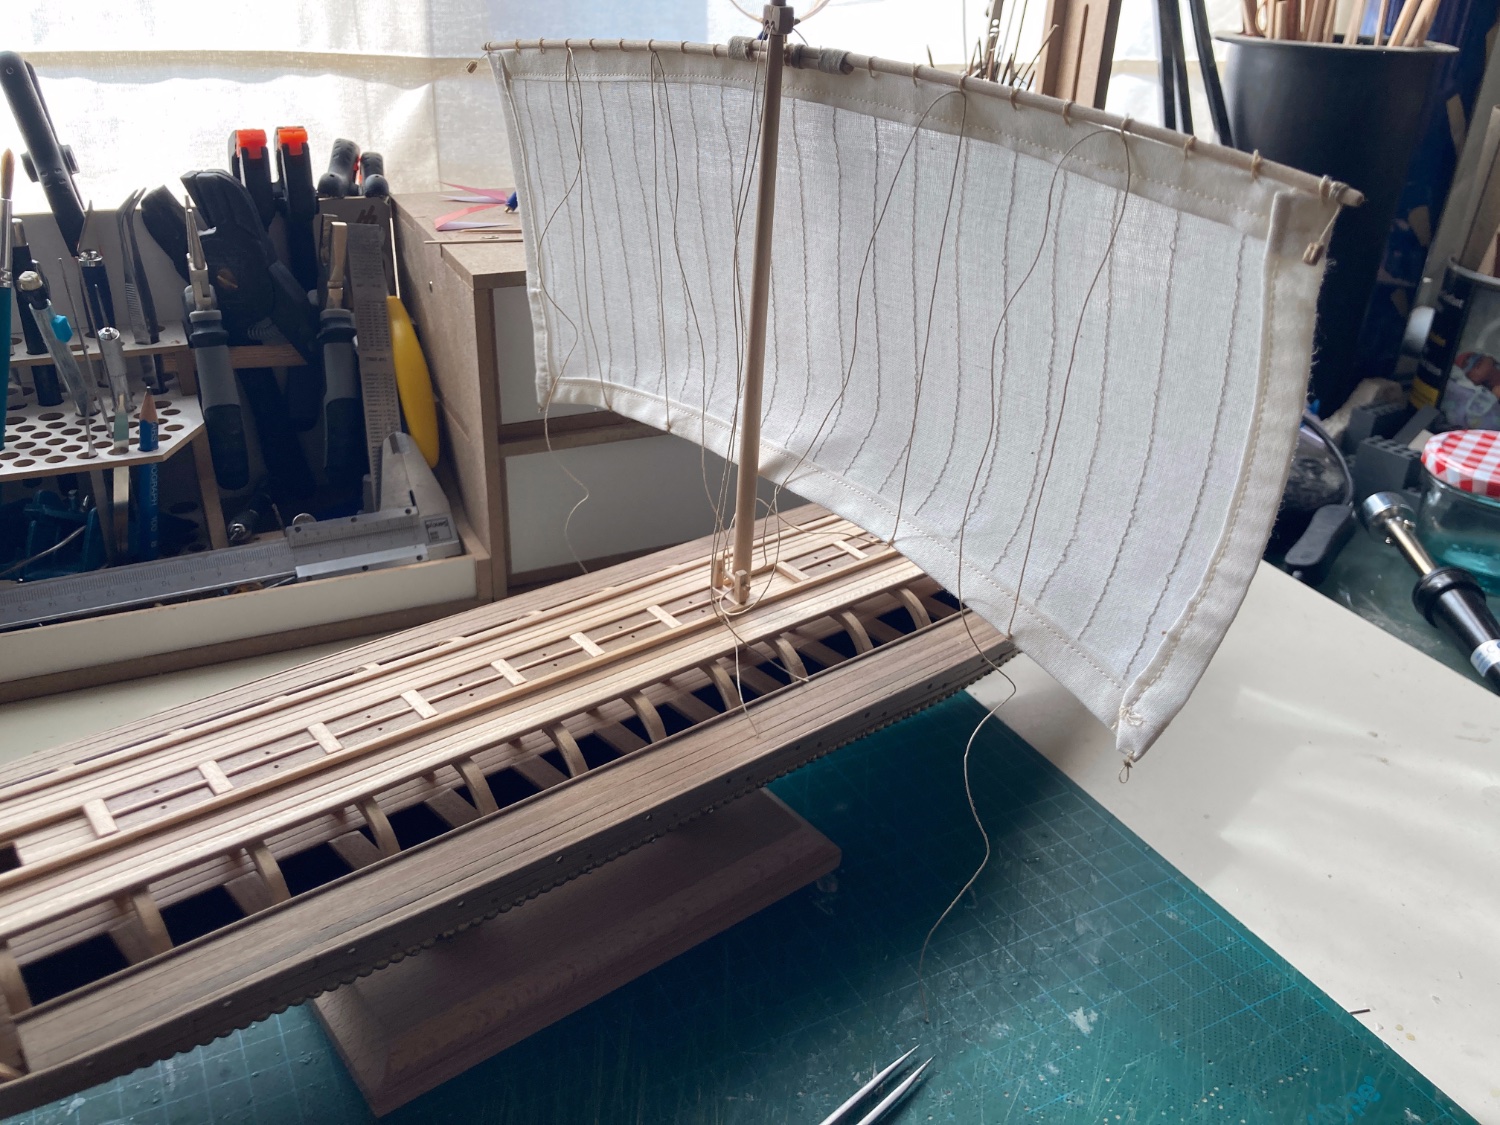
Hi all, apologies for the long silence, it's been hectic, did a lot of building, and no updating. So huge update coming on all current build logs, here goes for Ephialtes: The sail finally arrived! First try at attaching sails to yards: Finnicky, but doable. then the final rigging (nowhere near the level Terror and Diana) was over quickly and she was ready for delivery to the Admiral, who immediately built up the surroundings to give her a place of honour: More detailed pictures to follow later... All in all, very educational build, but also very frustrating, due to the lack of instructions. On the other hand, this forced me to think out of the box and make my own solutions. Thanks to all for all the help!


- 62 replies
-
- 11
-
-
- amati
- greek bireme
- (and 1 more)
-
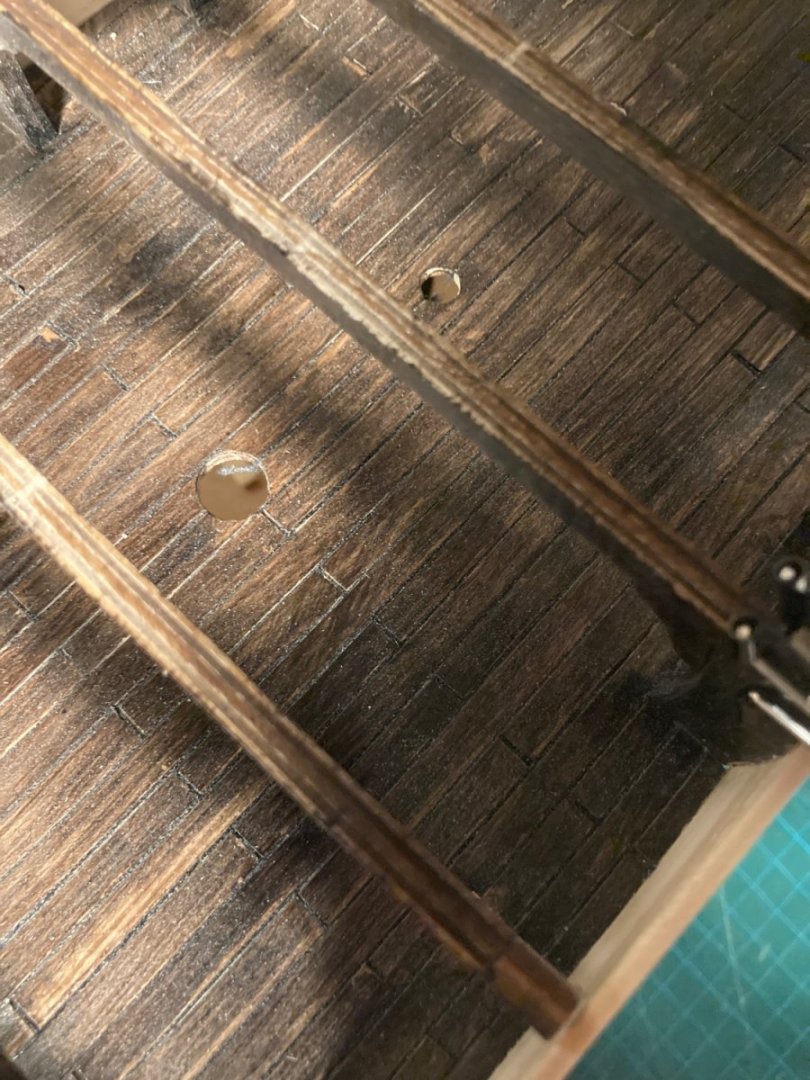
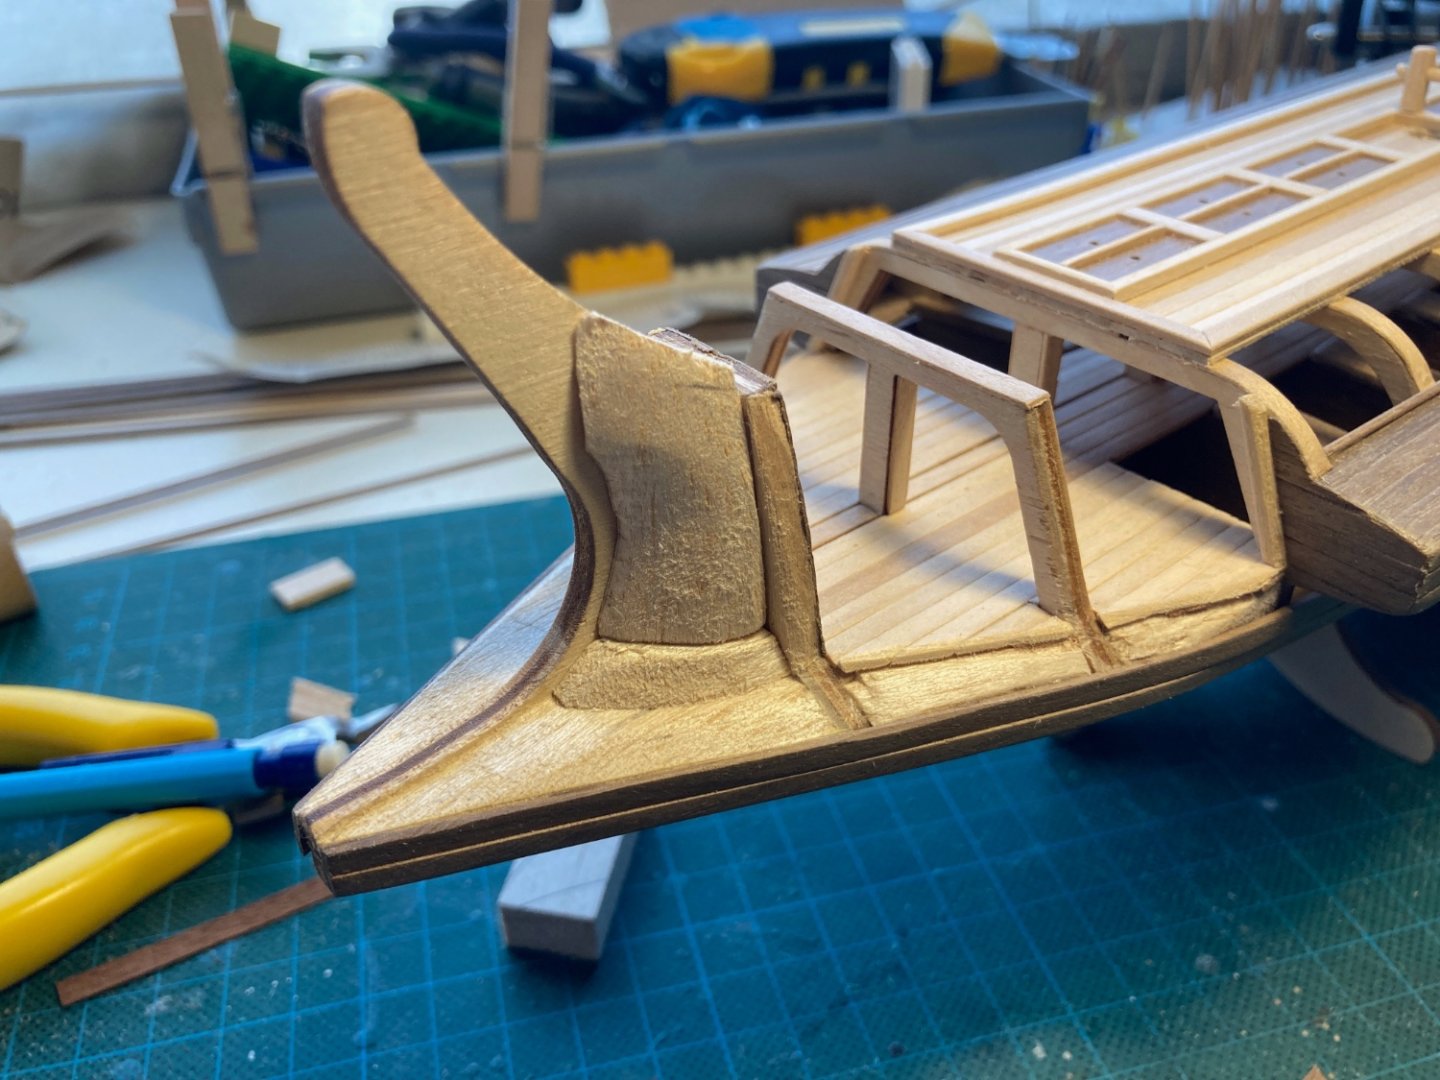
Hi @Rebelnfl, this kit is indeed anything but straightforward. Spent a lot of time trying to figure out the poor excuse of a plan before proceeding, I was also helped by some great build logs on the site (I linked them in a previous post). Regarding your query, I managed to retrieve this picture from the front of Ephialtes before planking: I took a stepped approach as you can see: first I formed the balsa needed for the wales, (did that before the planks went on obviously). I remember having to take a guess where the deck planking at the front would end, used a spare strip to approximate and drew a line on the deck, then carefully remove the surplus. The second balsa piece was to cover the angle the hull makes: largely flat, I left some space where the balsa meets the false keel to accommodate for hull plank thickness. Last part was the trickiest, as there's a significant bend to make. I used some spare 0,6mm strip left over from my Terror build to check the shape, overlaying it after each sanding session, checking, sanding again, etc, ad nauseam 🙂 Fairing of the bulkheads is really critical here, did a lot of measuring and trying before grabbing the sanding block. One more thing: you'll notice in the picture I added a little 2x2mm strip on bulkhead 3: this is not in the instructions, but as I saw no other way to fit the planks securely I worked this way. Hope this helps, if you have any other queries, don't hesitate to get in touch. Good luck!
- 62 replies
-
- 2
-
-
- amati
- greek bireme
- (and 1 more)
-
Hi Cat, I feel your pain, this was my third model, and after two double plankers with ample instructions, this was a huge challenge to complete. My advice, take your time, think every step in the process through before doing it, and try to think two steps ahead: as in:"If I put this there, then what about the piece which is supposed to attach?". That will save you a lot of trouble. Also, if possible, try and get your hands on some spare wood and test. There's not much extra in this box, but whatever there was I used to get to know the properties of this type of wood (walnut), which behaves very differently from the lighter lime. And believe me, that testing paid off, as it gave me a clearer idea of what I could do once I started planking. Meanwhile, the sail arrived 🙂 Been working on her off and on for some time, but life has a nasty tendency of interfering... I'll update later this week with some new pictures. Meanwhile, if you run into an issue or have a question, don't hesitate to ask!
- 62 replies
-
- 1
-
-
- amati
- greek bireme
- (and 1 more)
-
Hi Geowolf, so sorry about your loss, take care! Diana is all finished, working on three other models at the moment: the bireme is almost done, just raise the mast and the rigging, Calella is waiting for its lights and Bluenose is ready to have its masts set. Real life has kept me so busy I hardly have time to update my logs, hope to remedy that soon..
-
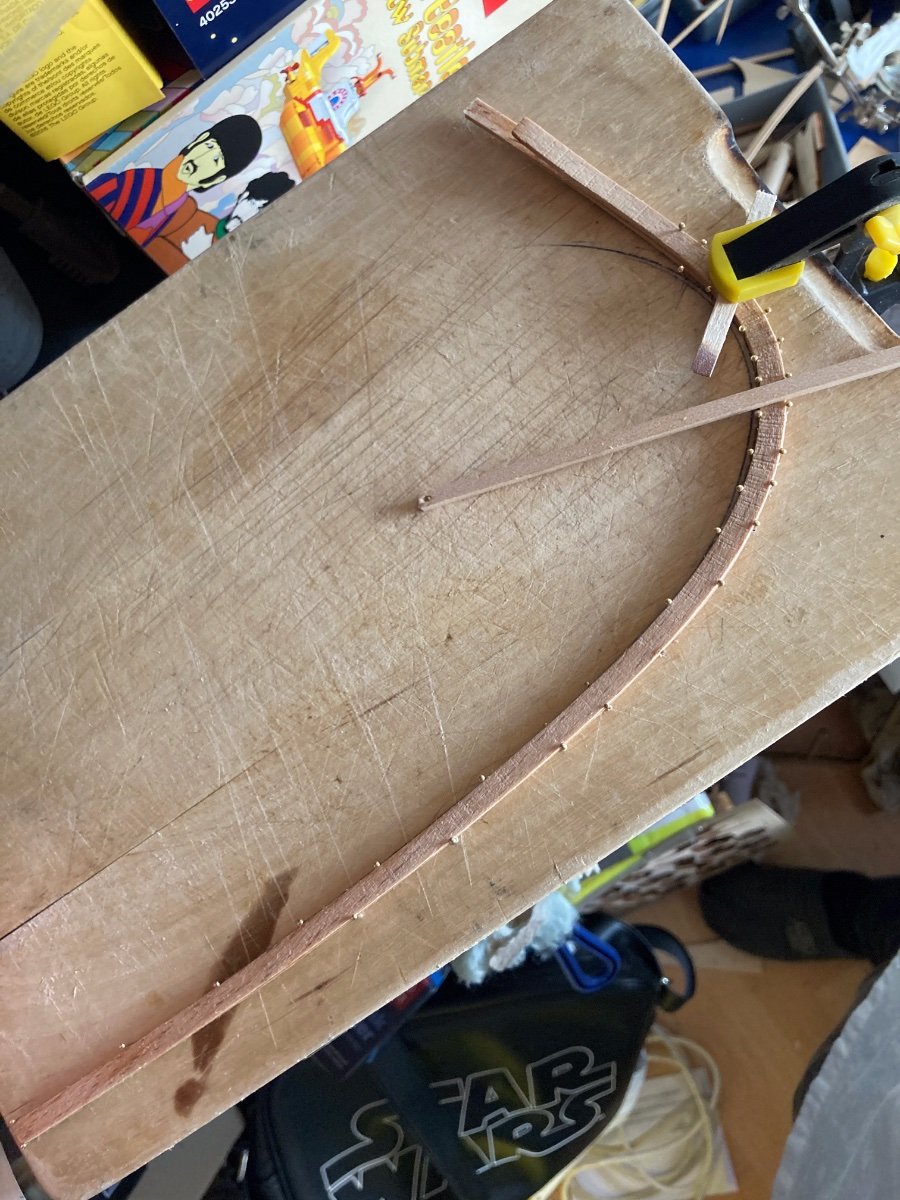
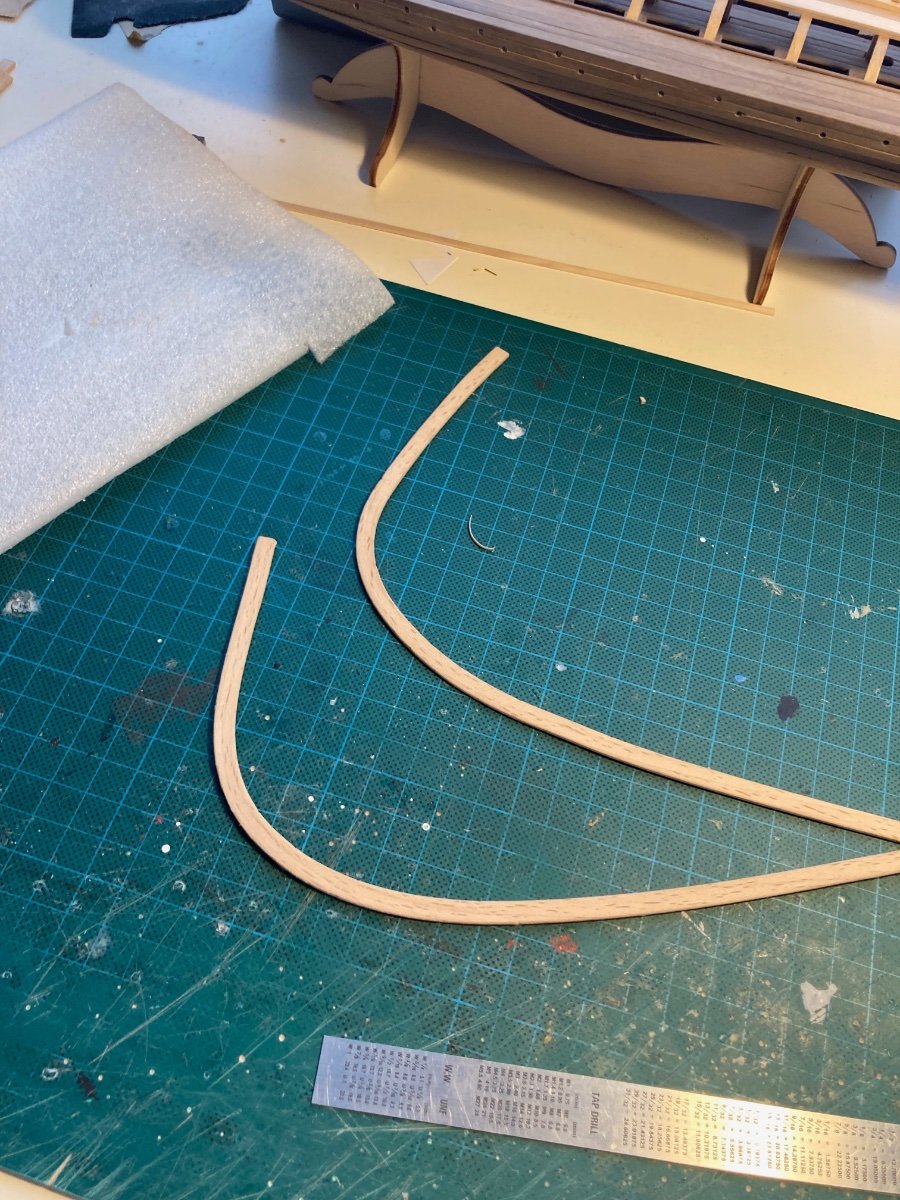
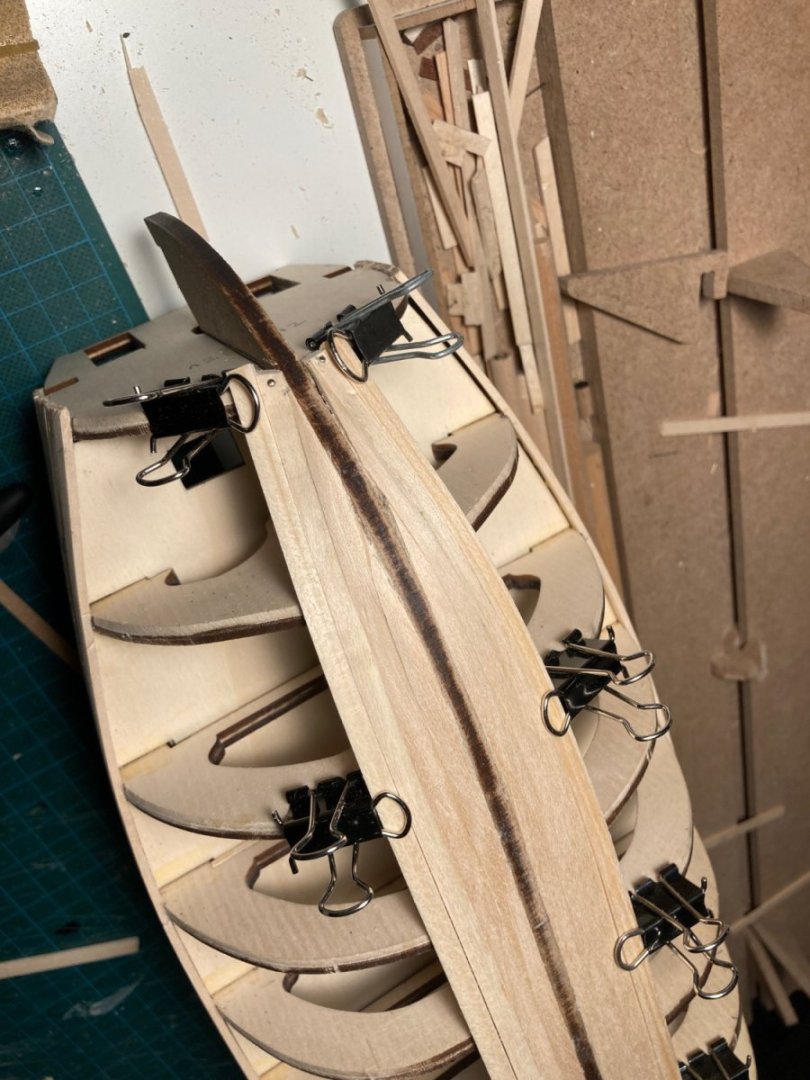
Hi Mike,I actually used a combo of tricks: first I drew the curvature from the leftover plywood on an old cutting board, and marked it with nails to keep the plank in place. Then I found some strips of treated birchwood in the right size in the local hobby store, this birchwood was treated in such a way it could bend 180 degrees without splitting, Soaked that in hot water for an hour and carefully mounted it in the template on the cutting board: After drying, the wales came out like this: So the trick is to use the treated wood, NOT the wood provided in the kit. Tried that a couple of times, and they couldn't handle the ben, as you also experienced. Hope this helps!


- 62 replies
-
- 4
-
-
- amati
- greek bireme
- (and 1 more)
-
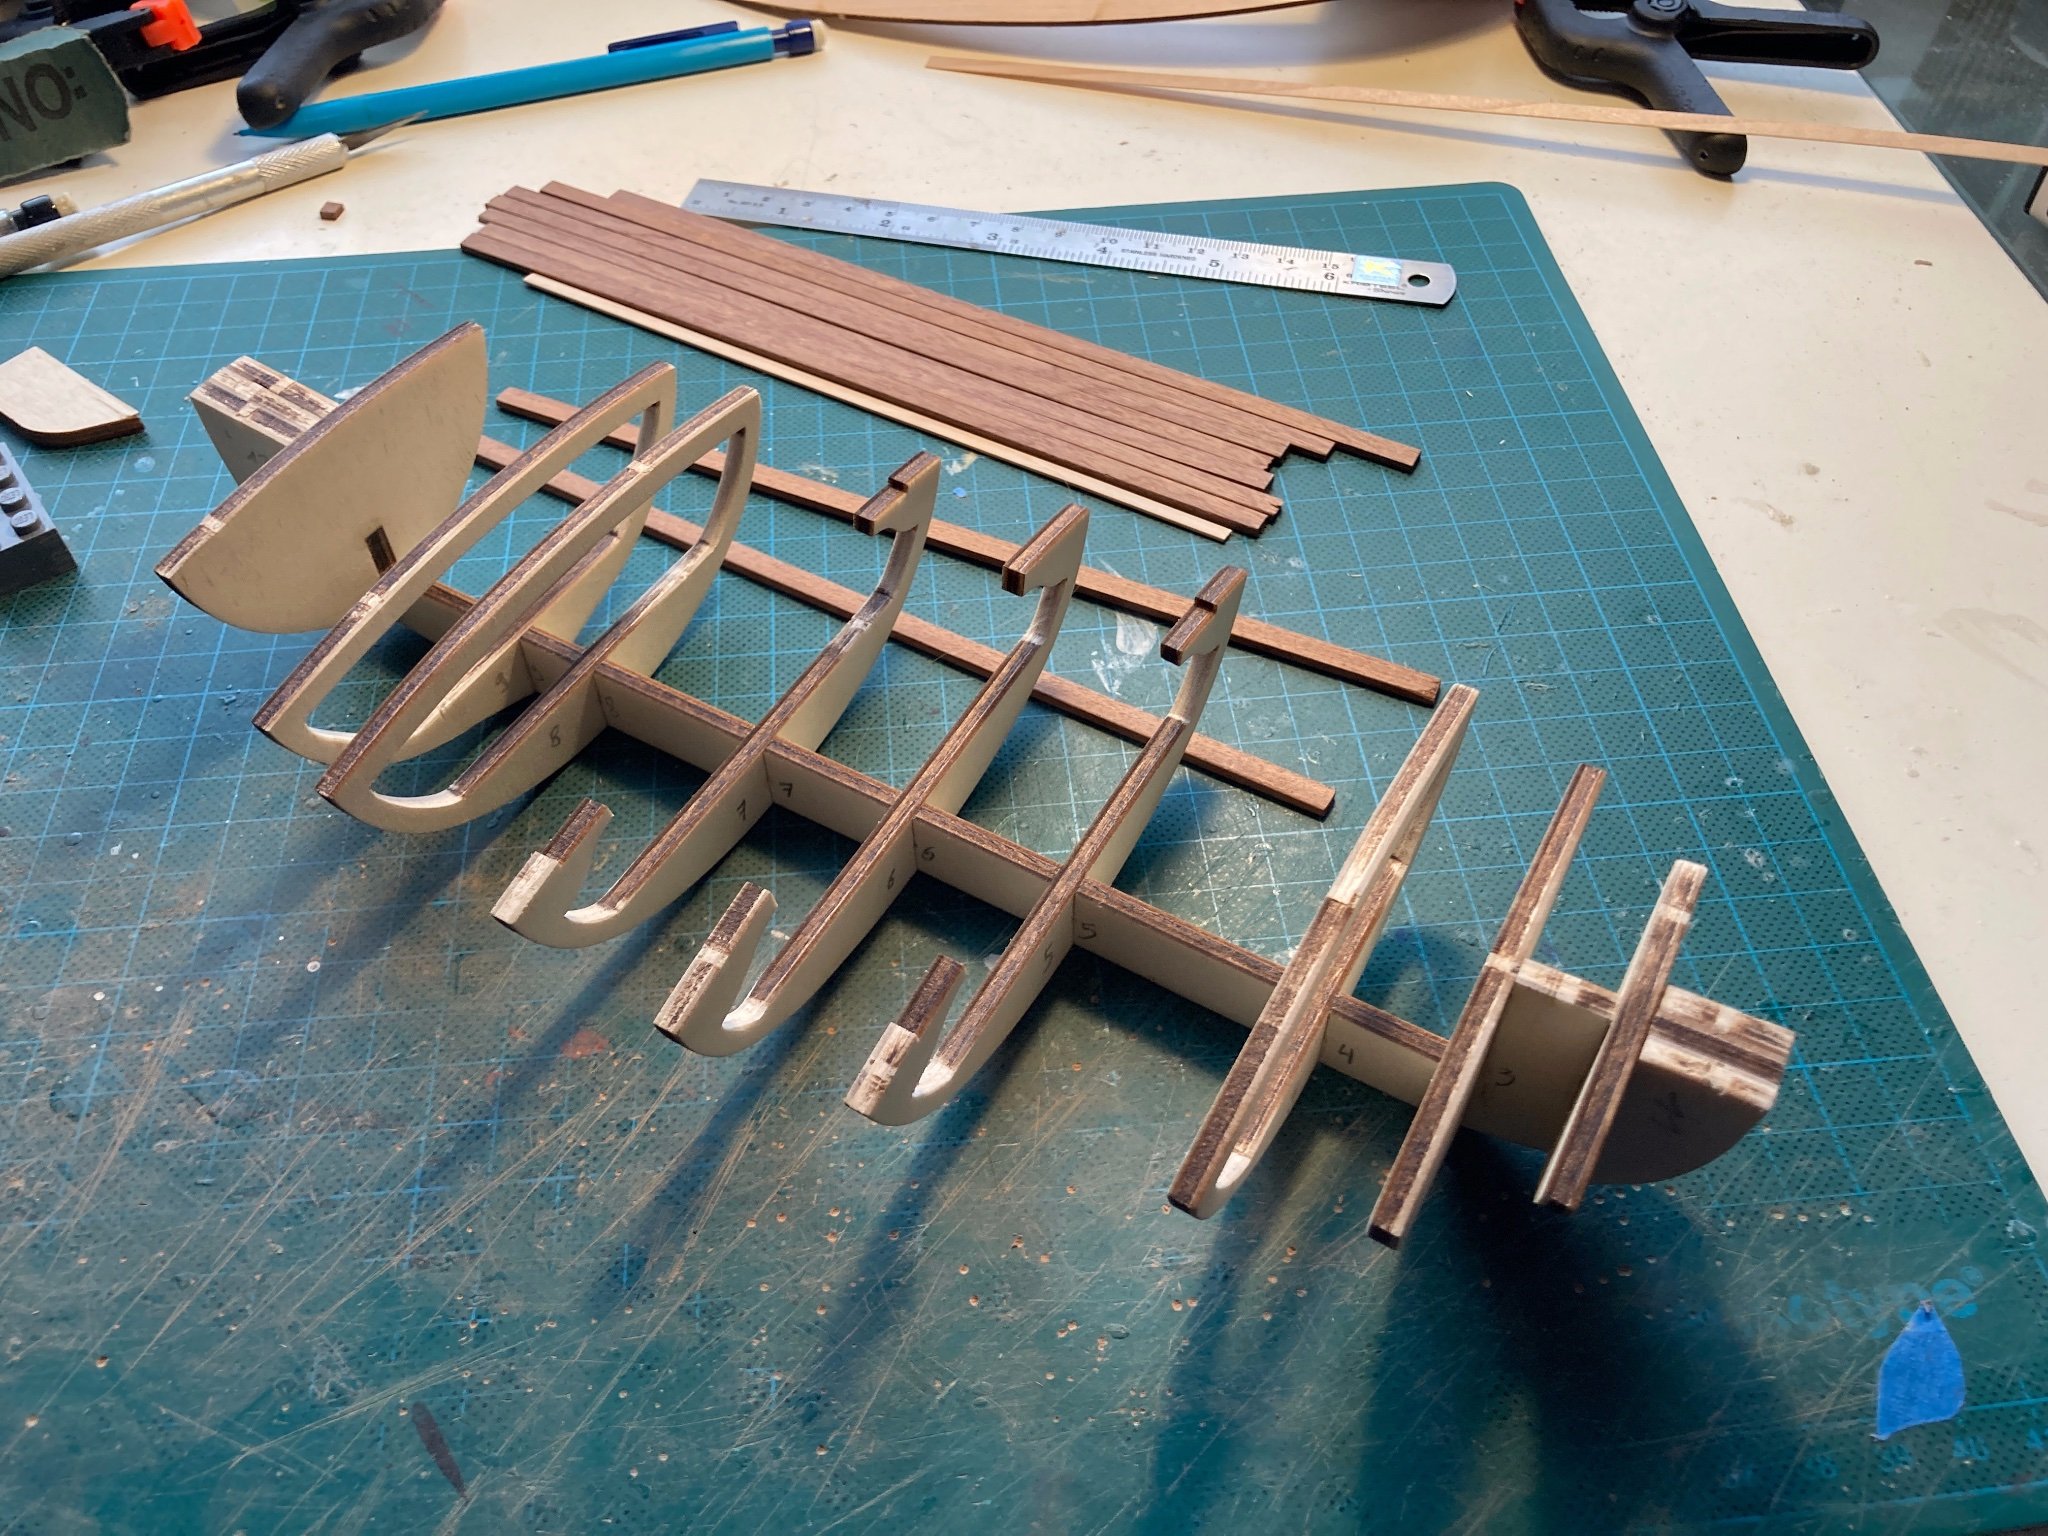
Building Bluenose - Part 1: keel and frames Although my experiences with my first Amati model were less than enthusiastic (Bireme build log), I really fell for the sleek lines and the history of Bluenose. After checking that there were indeed instructions and plans in the kit, I was quickly convinced and brought it home to the shipyard. After studying the plans, I got to the keel, and ann issue presented itself: The false keel had a serious warp. Normally I would count on the combo of frames and deck to straighten this out, but as the deck sits completely on top of the frames and is split in two, that was a no go. Tried wetting the piece of plywood and clamping it down for some days, to no avail. In the end I visited www.hobbyzone.pl, which had a simple slipway for sale. Using this, and some custom made supports out of pieces of balsa, I manage to straighten the hull enough to fit the deck: So after a lot of measuring and trying, the basic shape was set for fairing and planking. She's double planked, but after my experience with Calella, I decided to try single plank again. By the way, I'm very happy with the products from Hobbyzone, good quality, fast delivery, excellent customer service. I ordered some of their modular model storage spaces and the shipyard never looked so tidy 🙂

-
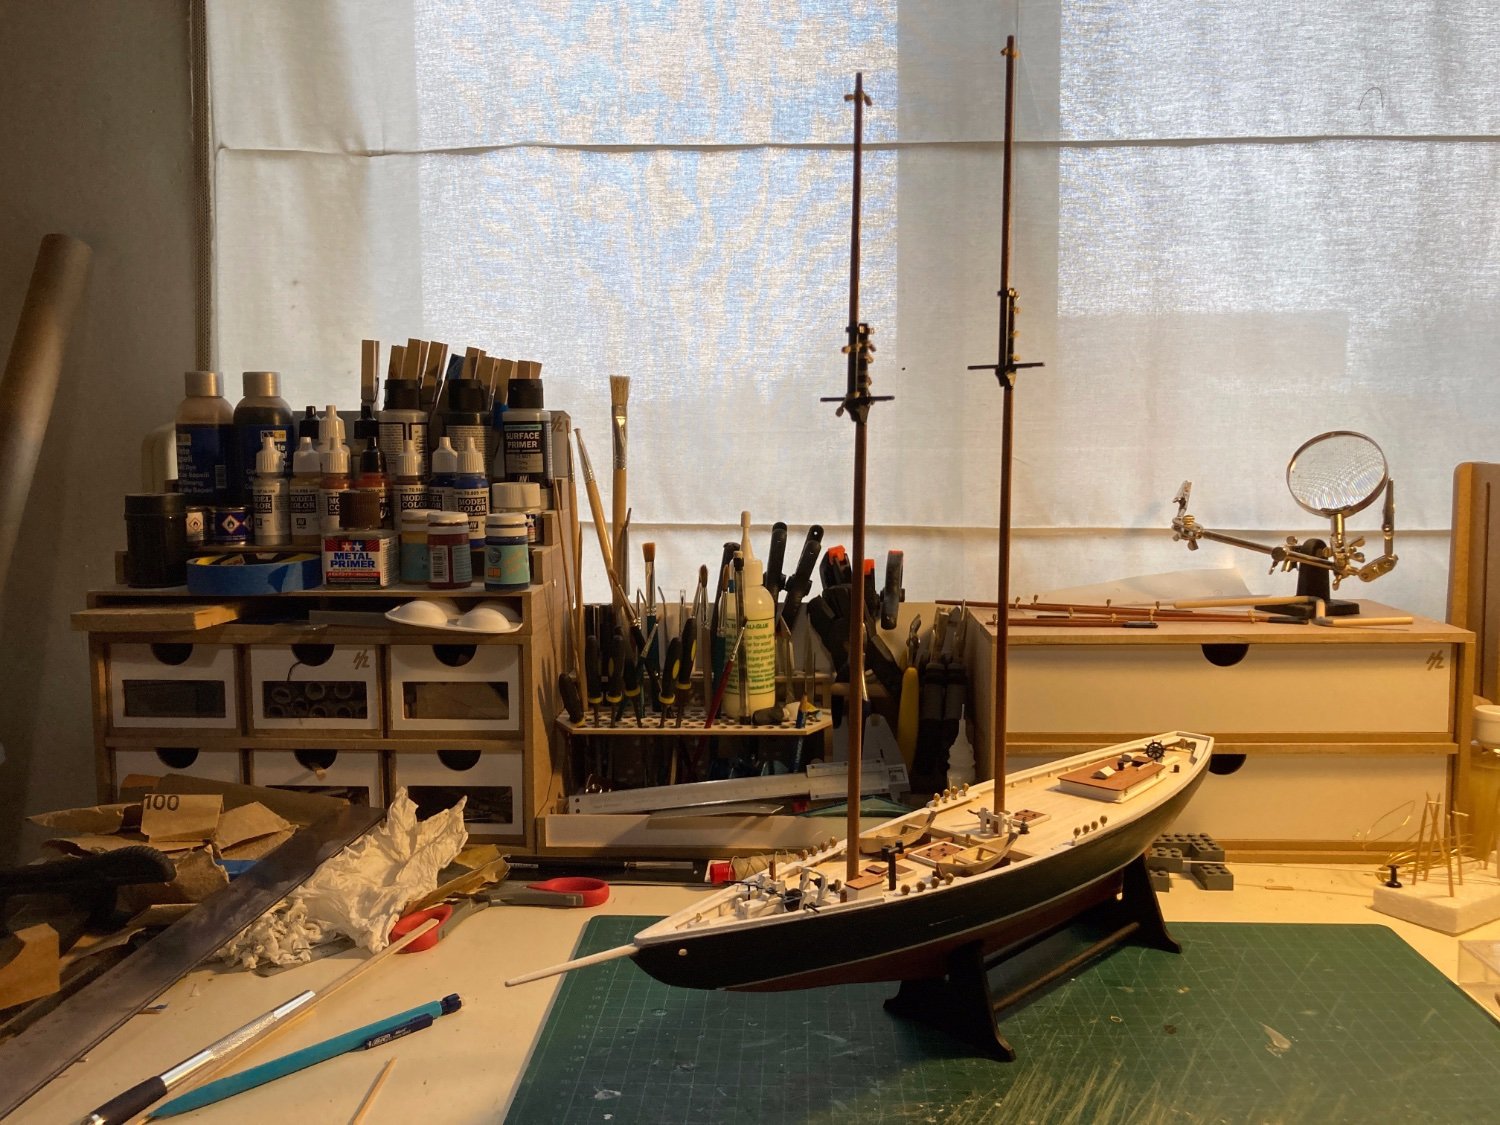
Hi all, it's been a while since I added to my build logs, but that doesn't mean I haven't been busy. While building Occre's Calella, I interchanged with another kit, Amati's 1/100 rendition of Bluenose. Got so caught up in working on both and life outside the shipyard I omitted to post regular updates, for which I apologise. To try and get some kind of build log on here, I'm going to split up my activities per post, starting with keel and frames (and the first issues). For reference, this is where she is today: Hull finished, painted and varnished, deck finalised, masts are dry fitted, all yards finished, making sails now (a first!)

-
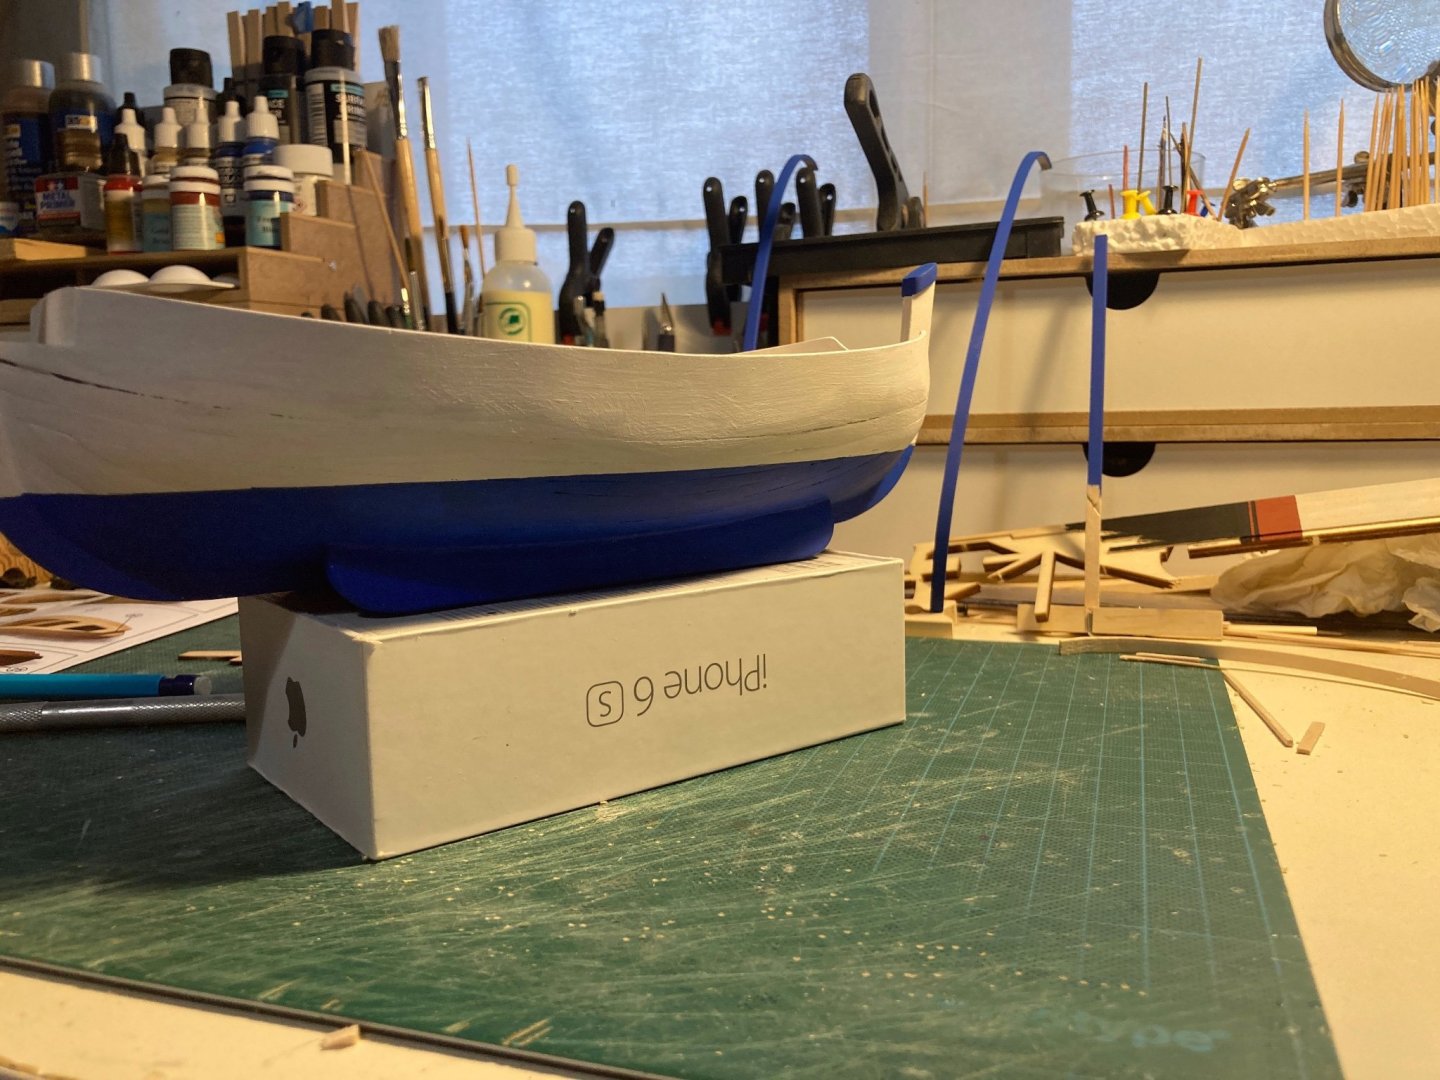
Hi all, quick update: managed to sort out the waterline: Realised this was my first waterline, so quite happy with it. Decided to prepaint the rubbing strakes after bending, seems to make more sense, but perhaps that's just the old plastic modeller in me 🙂 After that, installing the rubbing strakes, the inner decorations and painting blue/white. Here's the result so far: Two more pieces to install and paint, and then the hull should be finished, and then we get to work on the lights. Or finally start on the build log for the Bluenose from Amati, because there's been some developments there. Stay safe!
-
Hi all, thnx for checking in. It's been a while, but then again, I find myself working on two hulls simultaneously 🙂 Calella is coming along nicely. First I tackled the bulwarks, using my plank bender in anger for the first time. As said before I had to improvise with the bow and stern sections as these were not as high as the 7mm listed in Occre's instructions. After a lot of measuring and trial and error, they went on: Some small gaps were present, but as there will be a 2mm square piece on the inside of the corners, didn't worry too much about it. Had to fiddle around a bit with the stern part of the bulwarks, as installing it at the edges would not leave enough space for the lamp base. Mounted the piece from the inside, sanded and filled as I went: Installing the keel went OK, found some warpage in the center pice, but could correct. After that: painting! Used Vallejo white primer and two coats of white. Not completely covering it, so thought about the second coat, untill the Admiral saw and asked to keep it that way:"It looks a bit weathered, I love it". I'm a bit stuck here, as I'm trying to figure out where the waterline need to go. No mention in the instructions, so I sent a message to Occre for clarification. Will share when they reply. Take care!
-
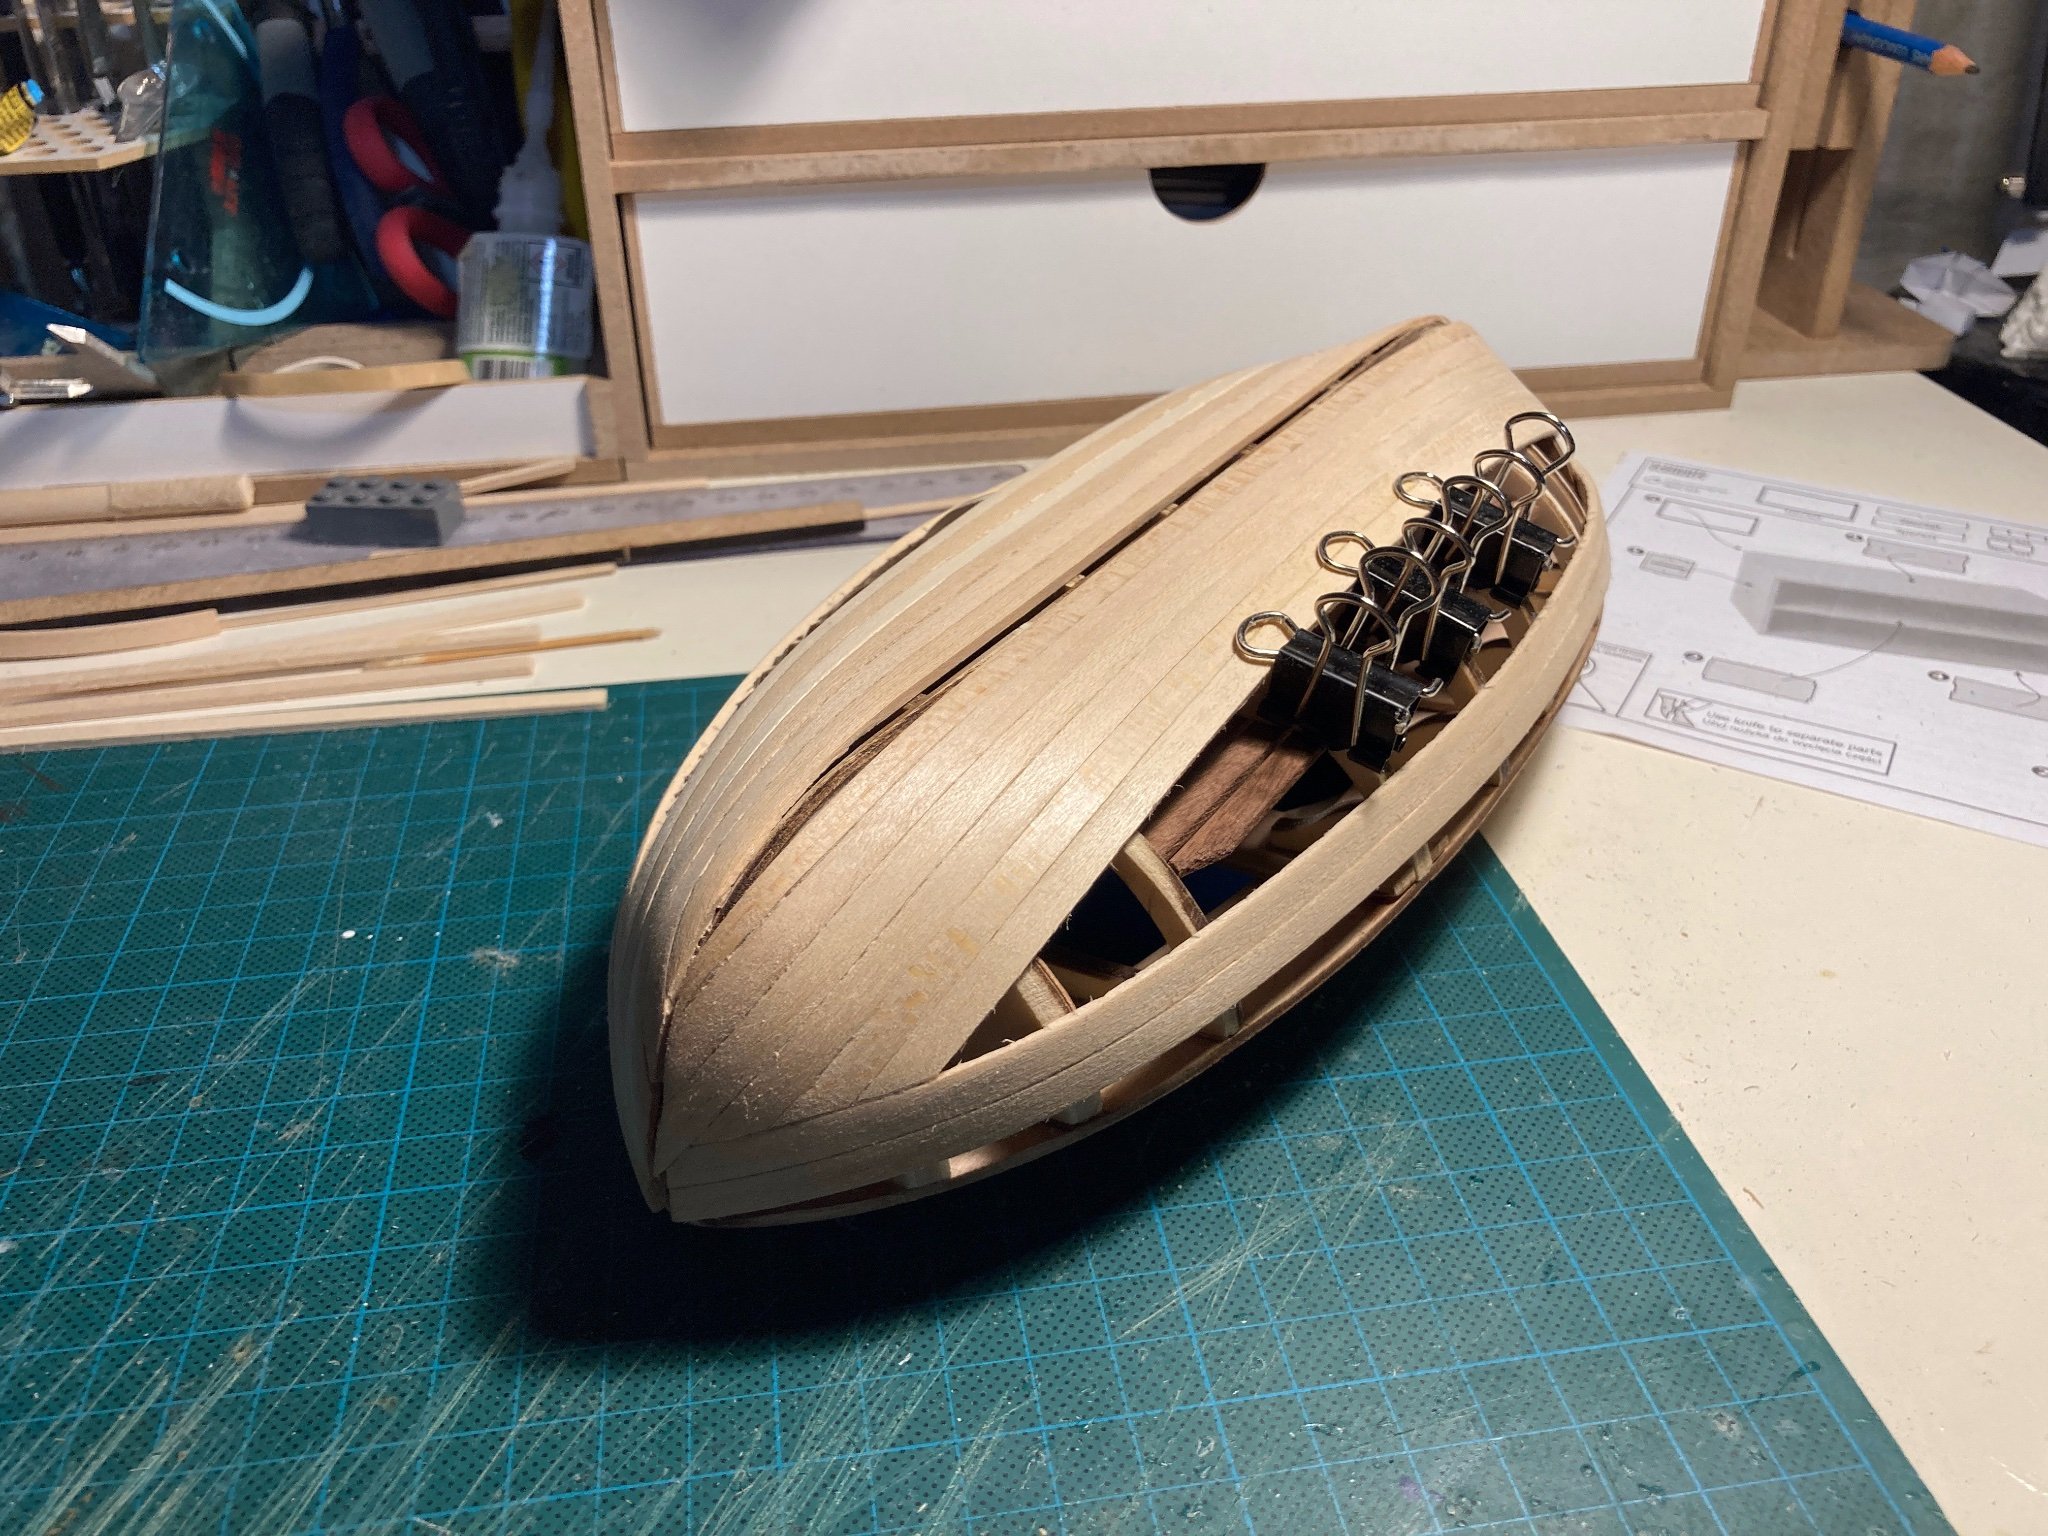
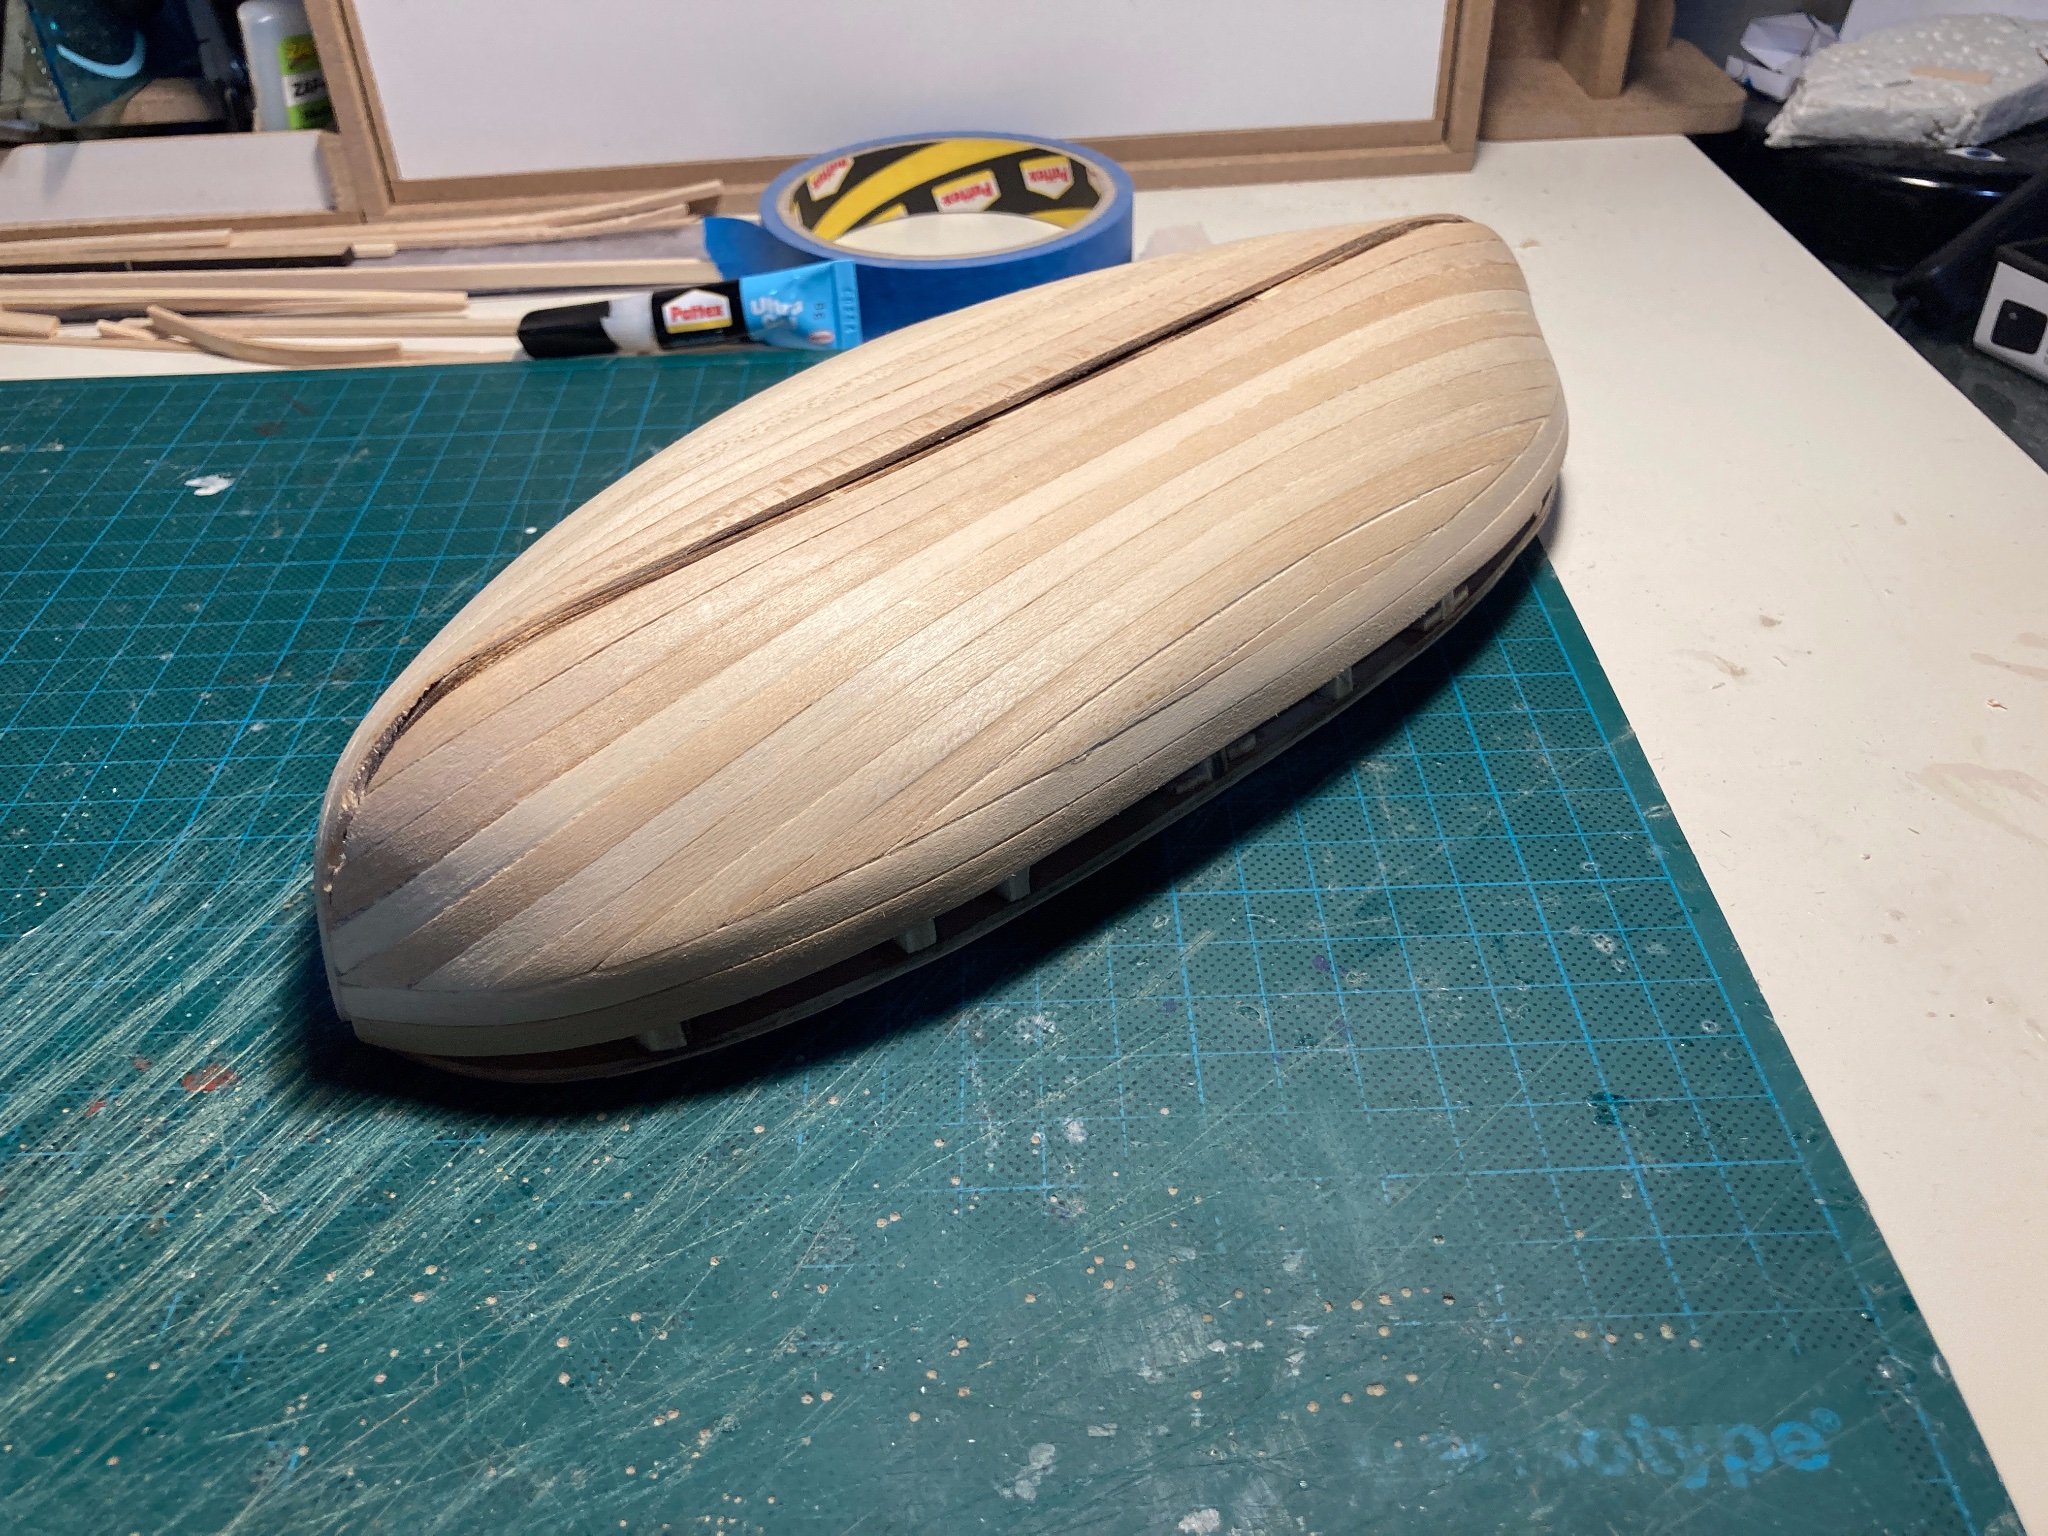
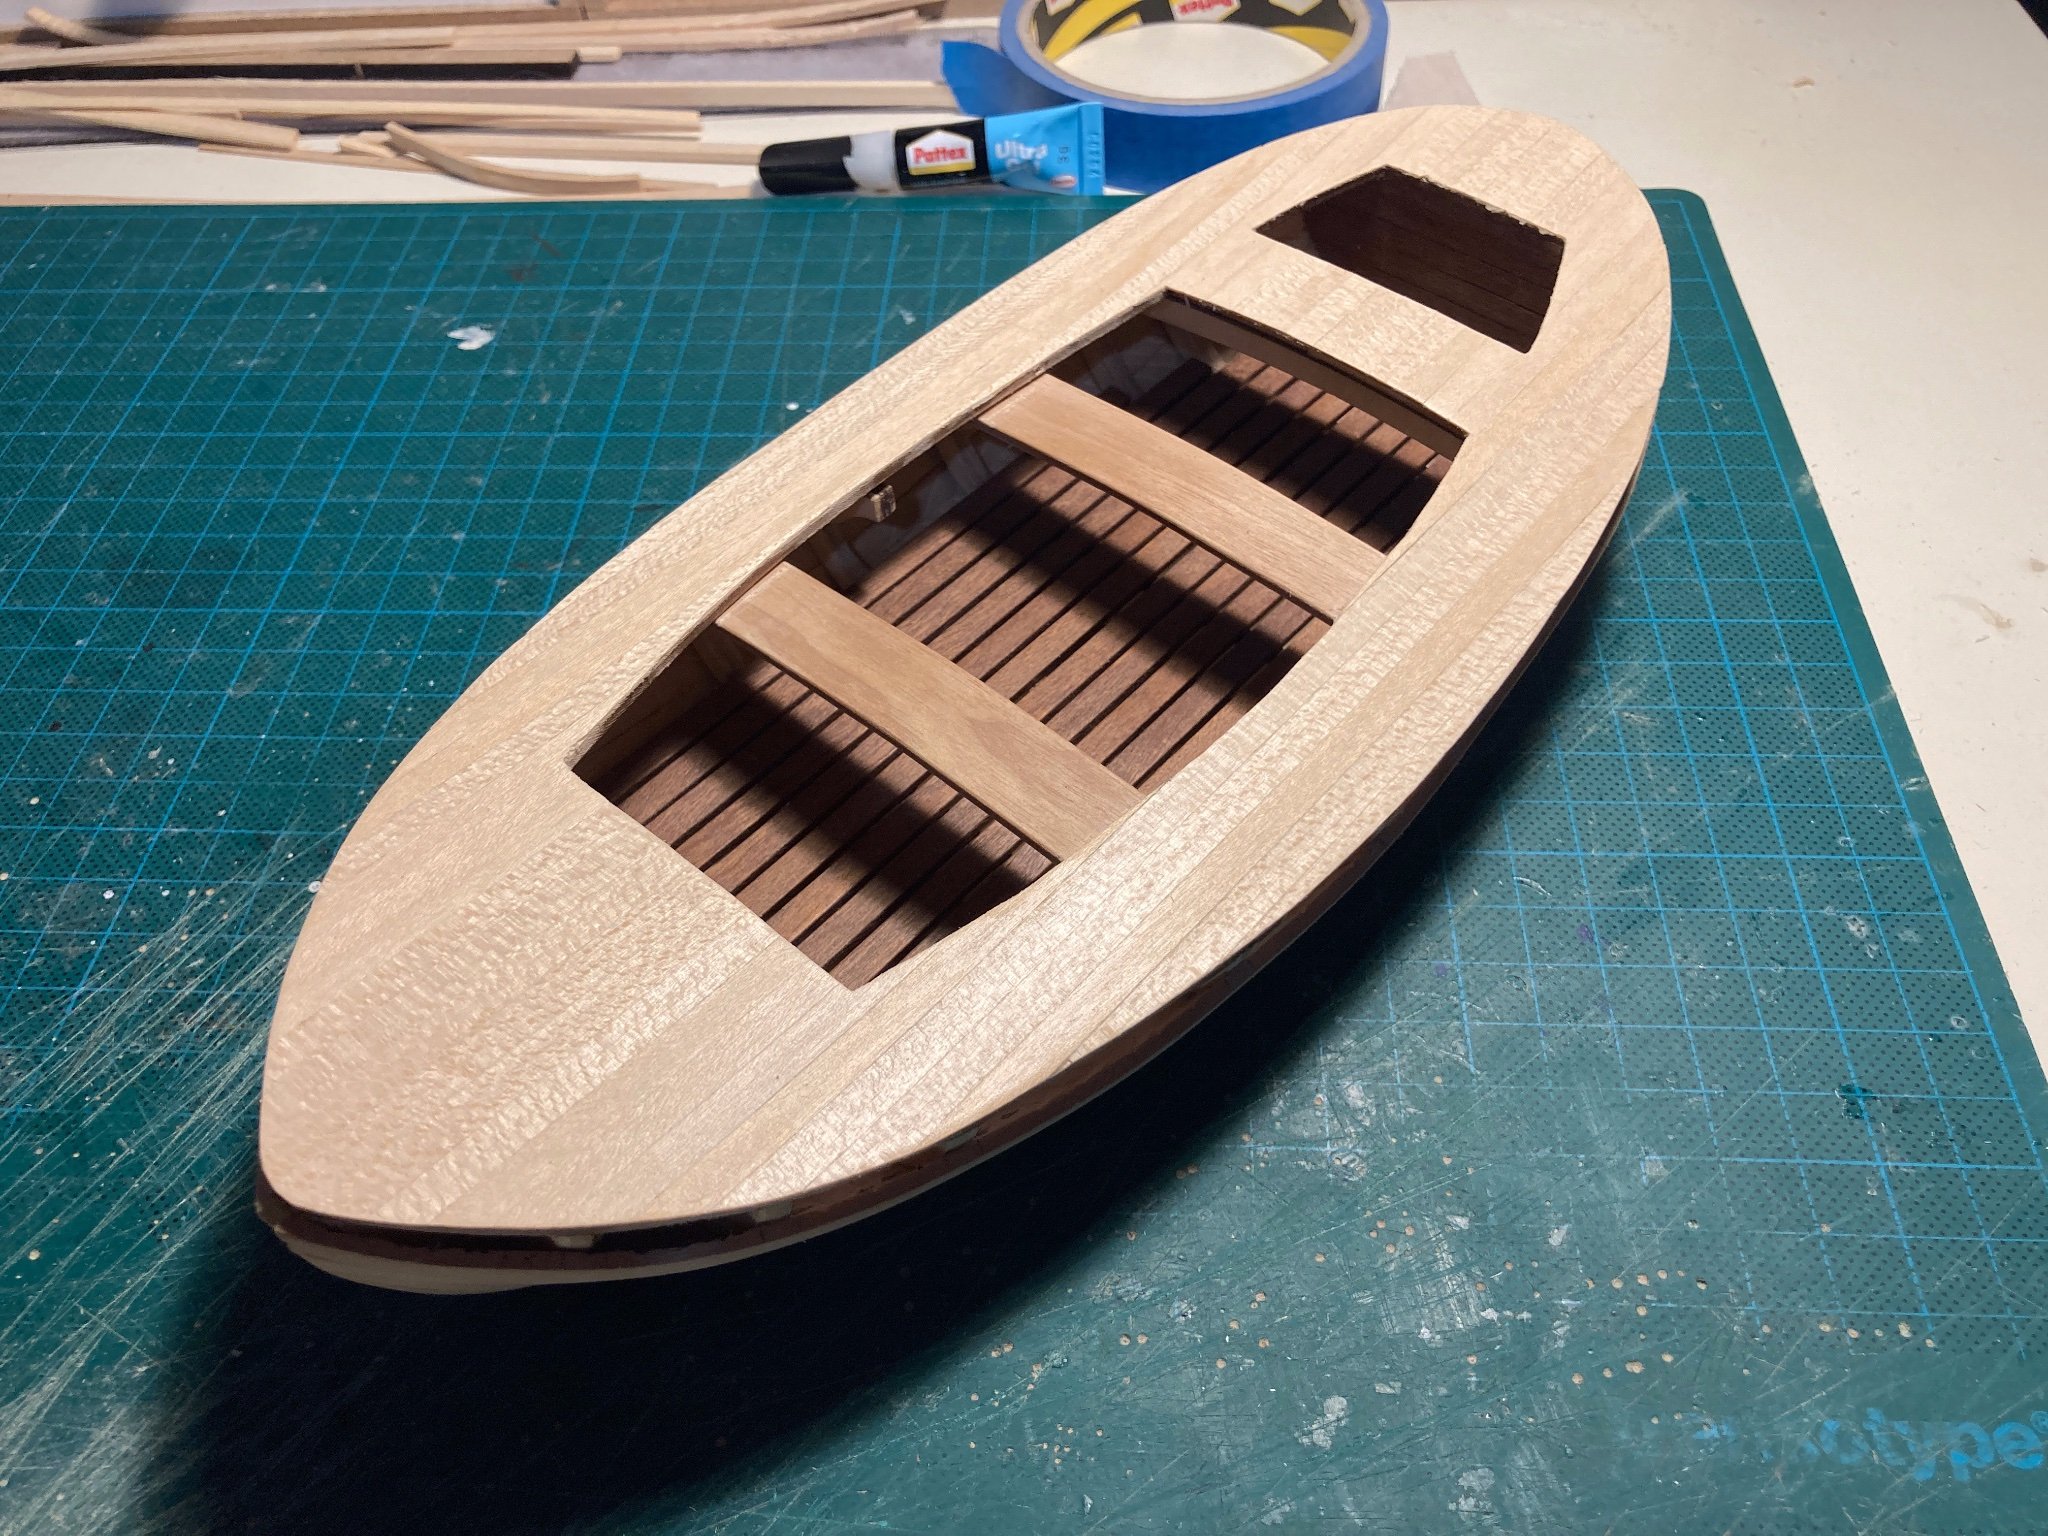
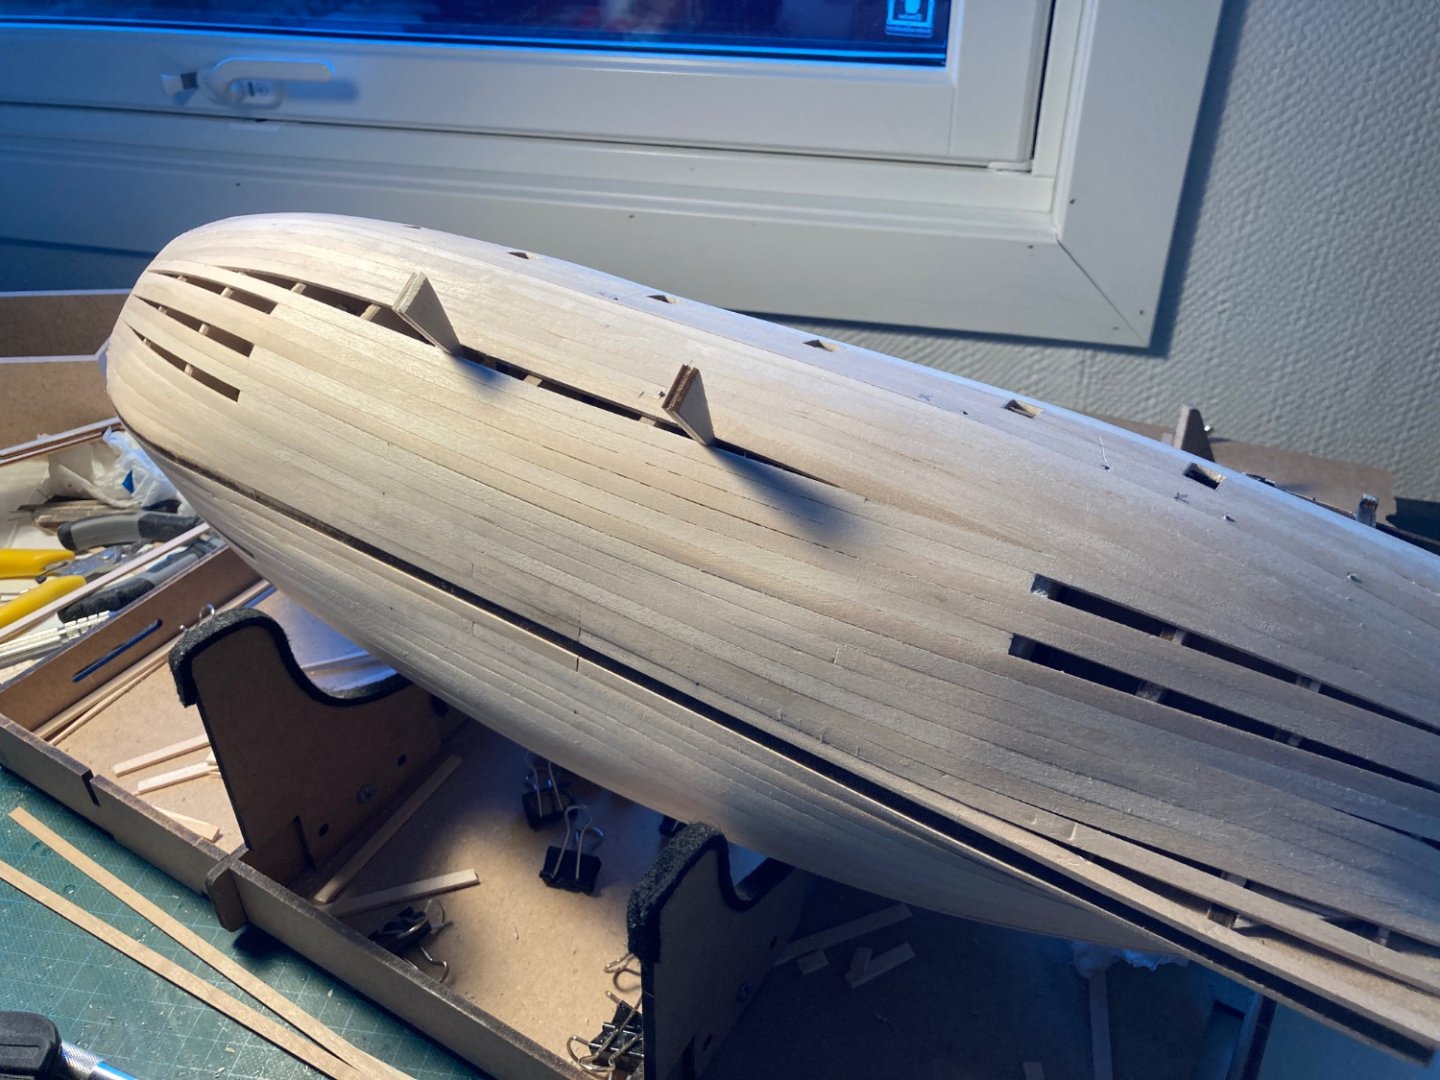
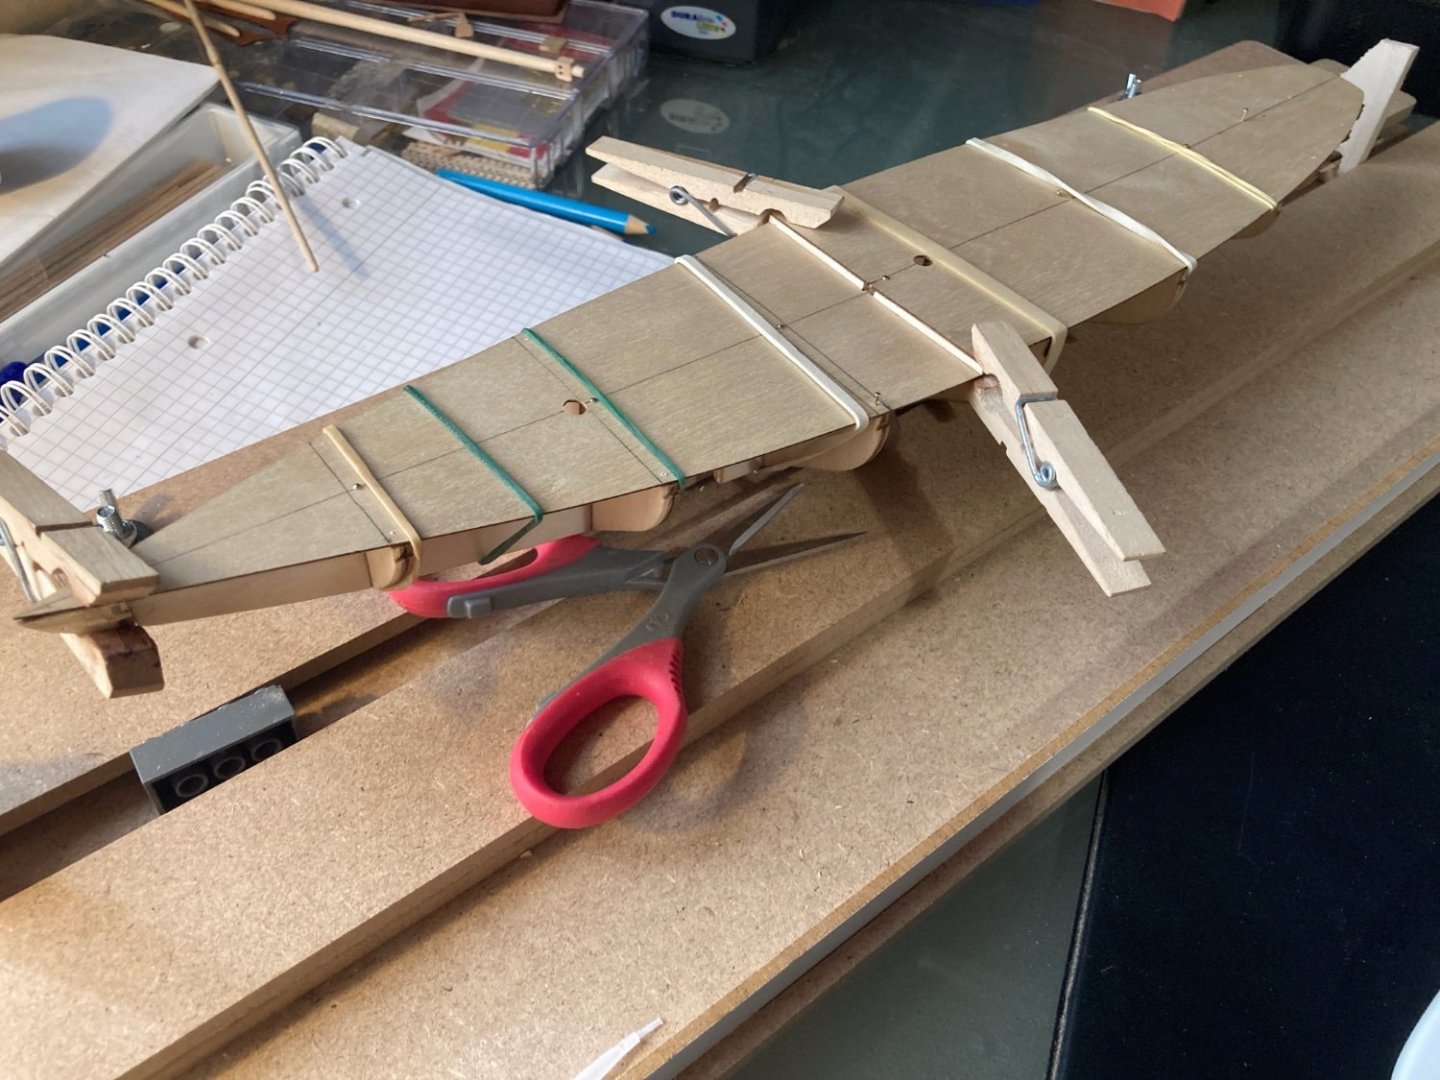
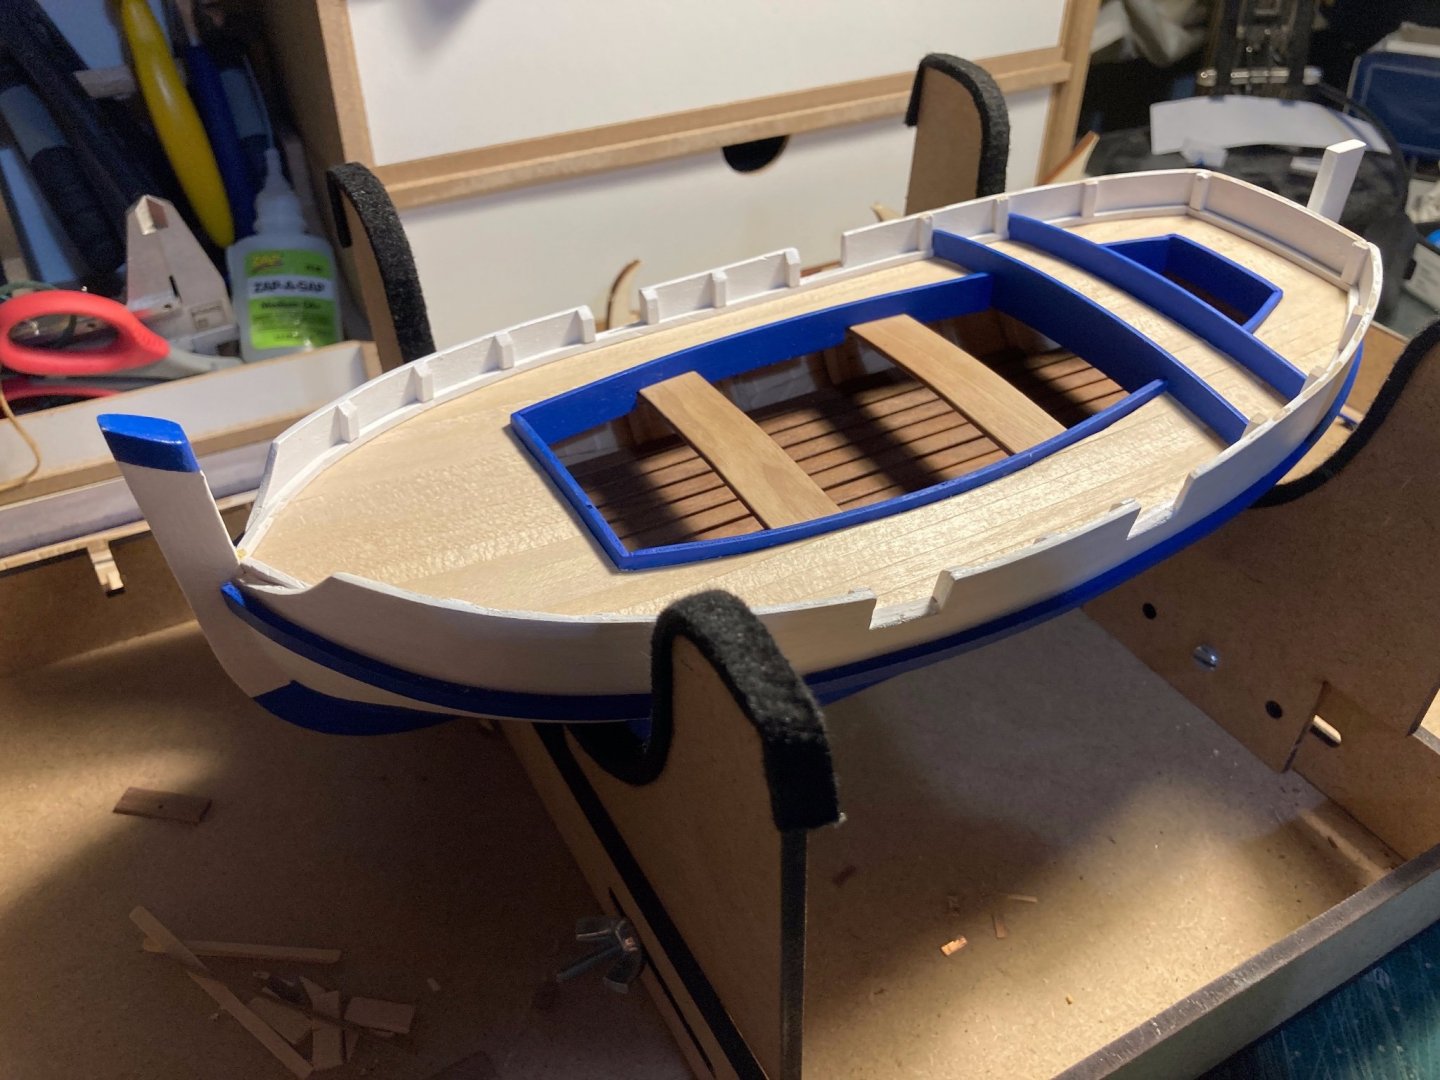
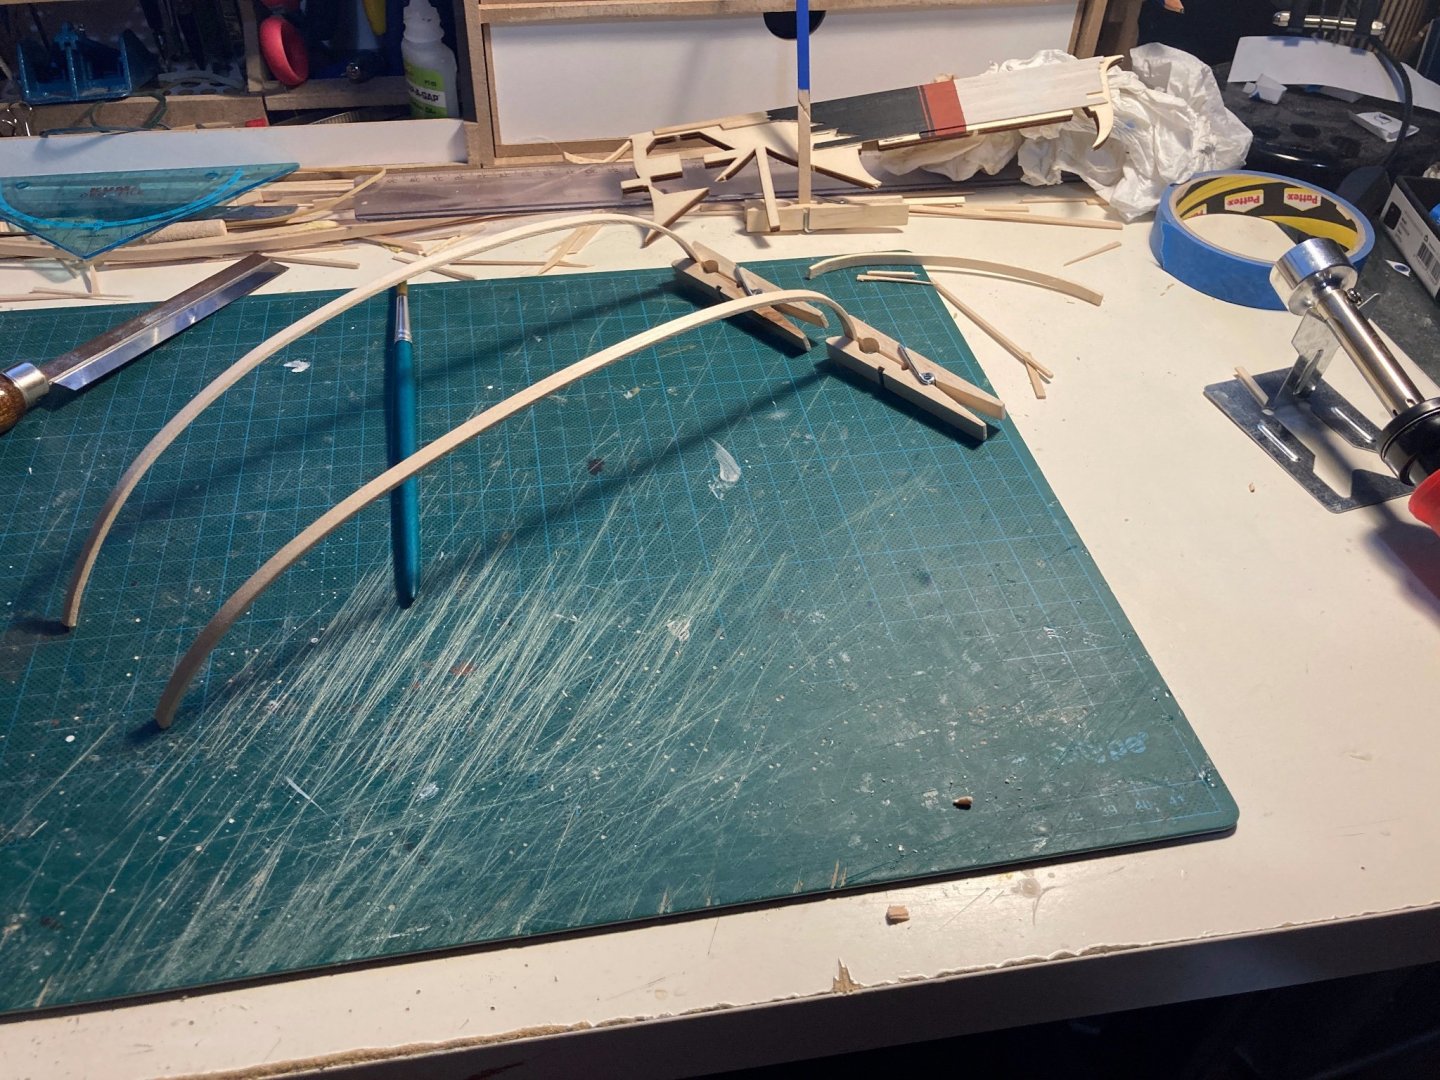
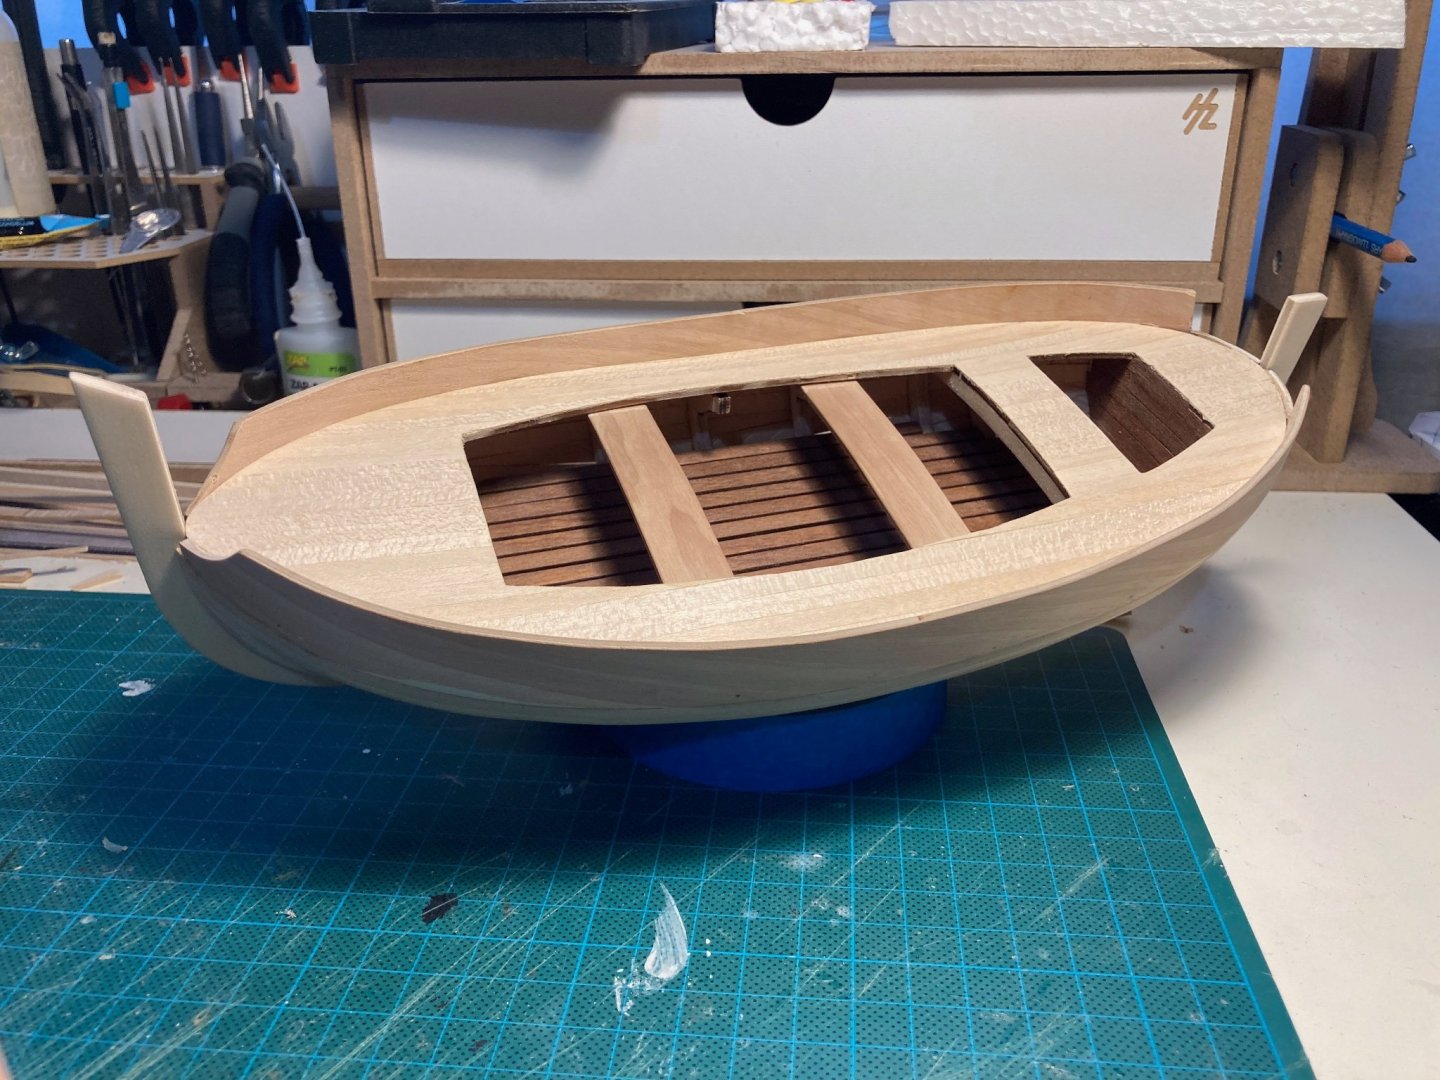
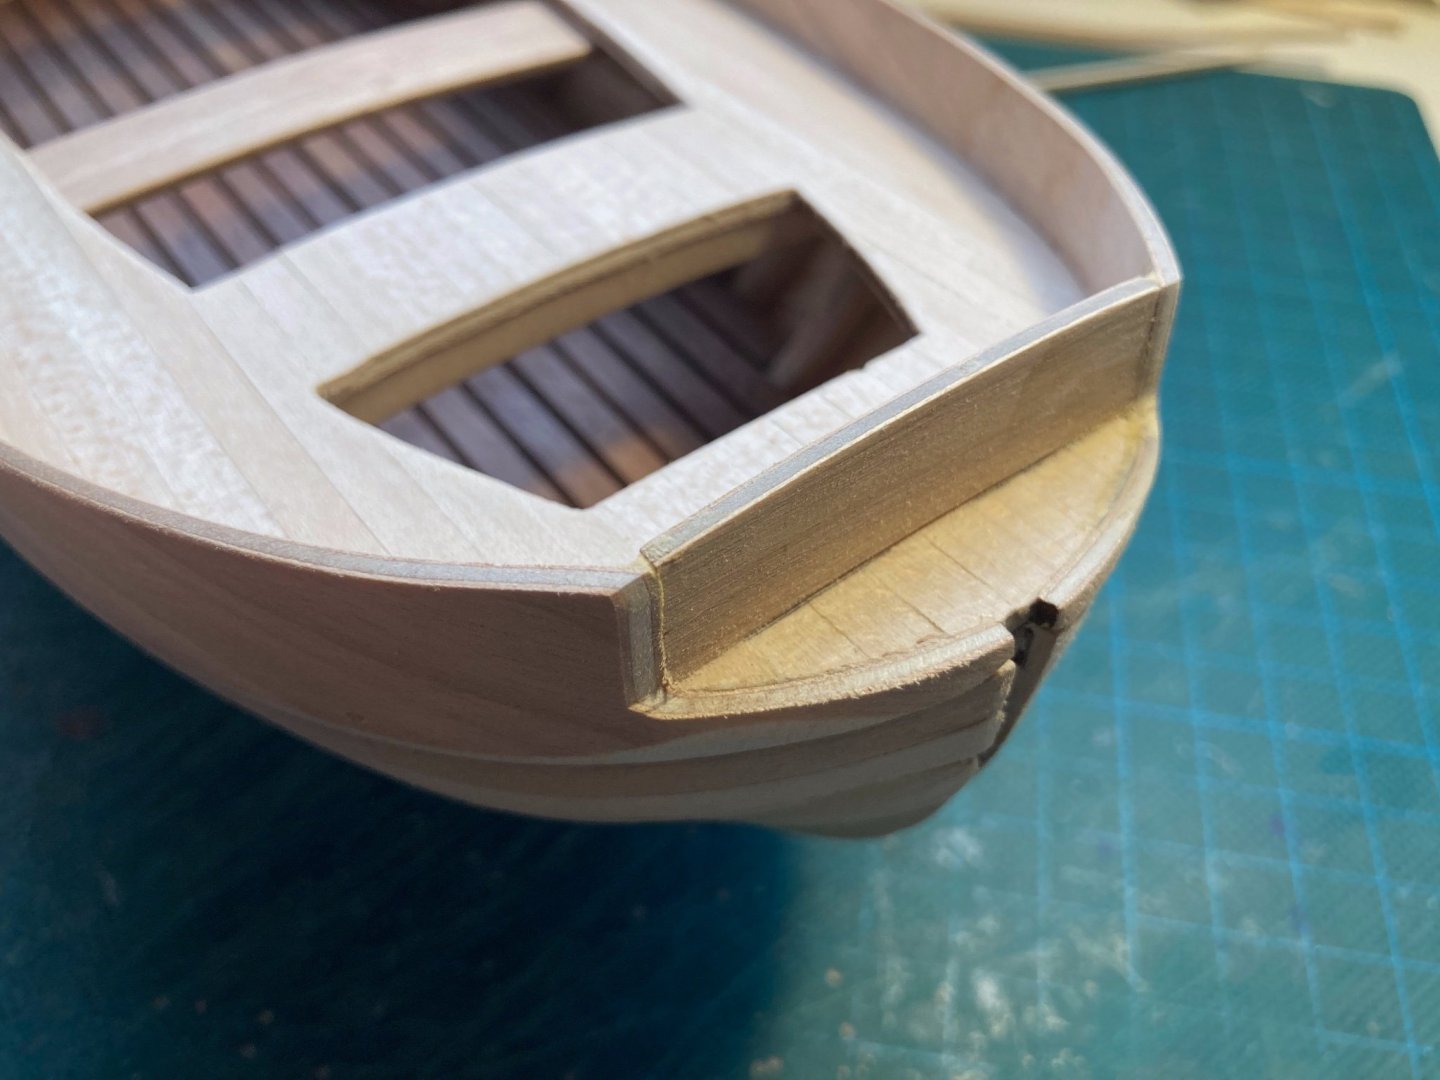
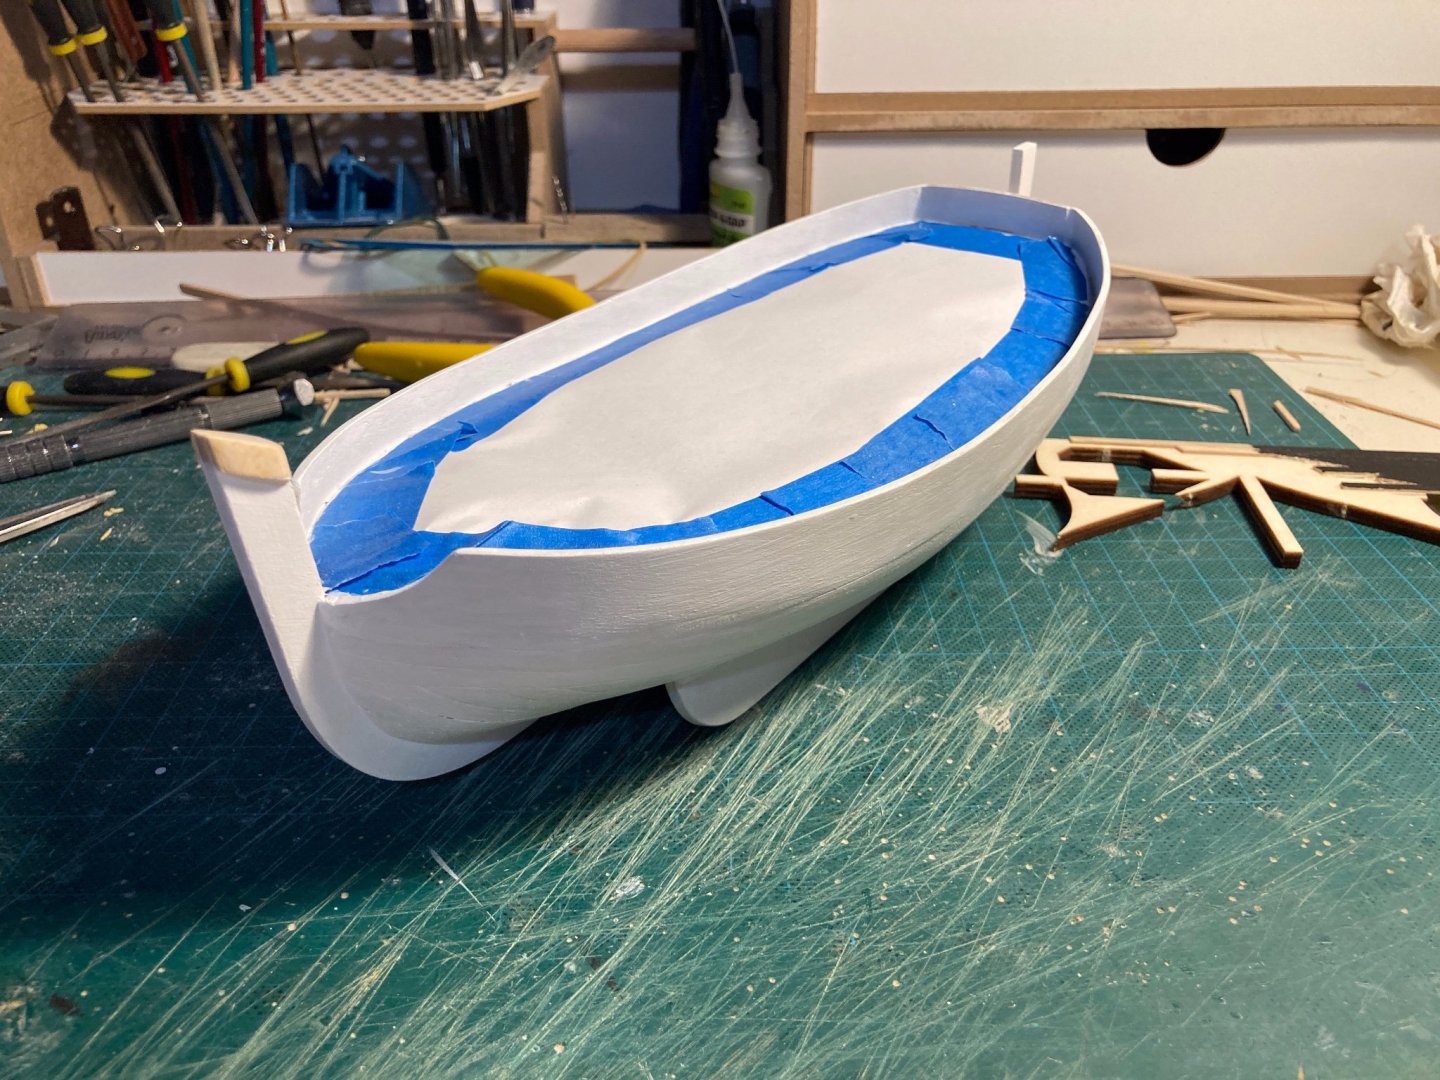
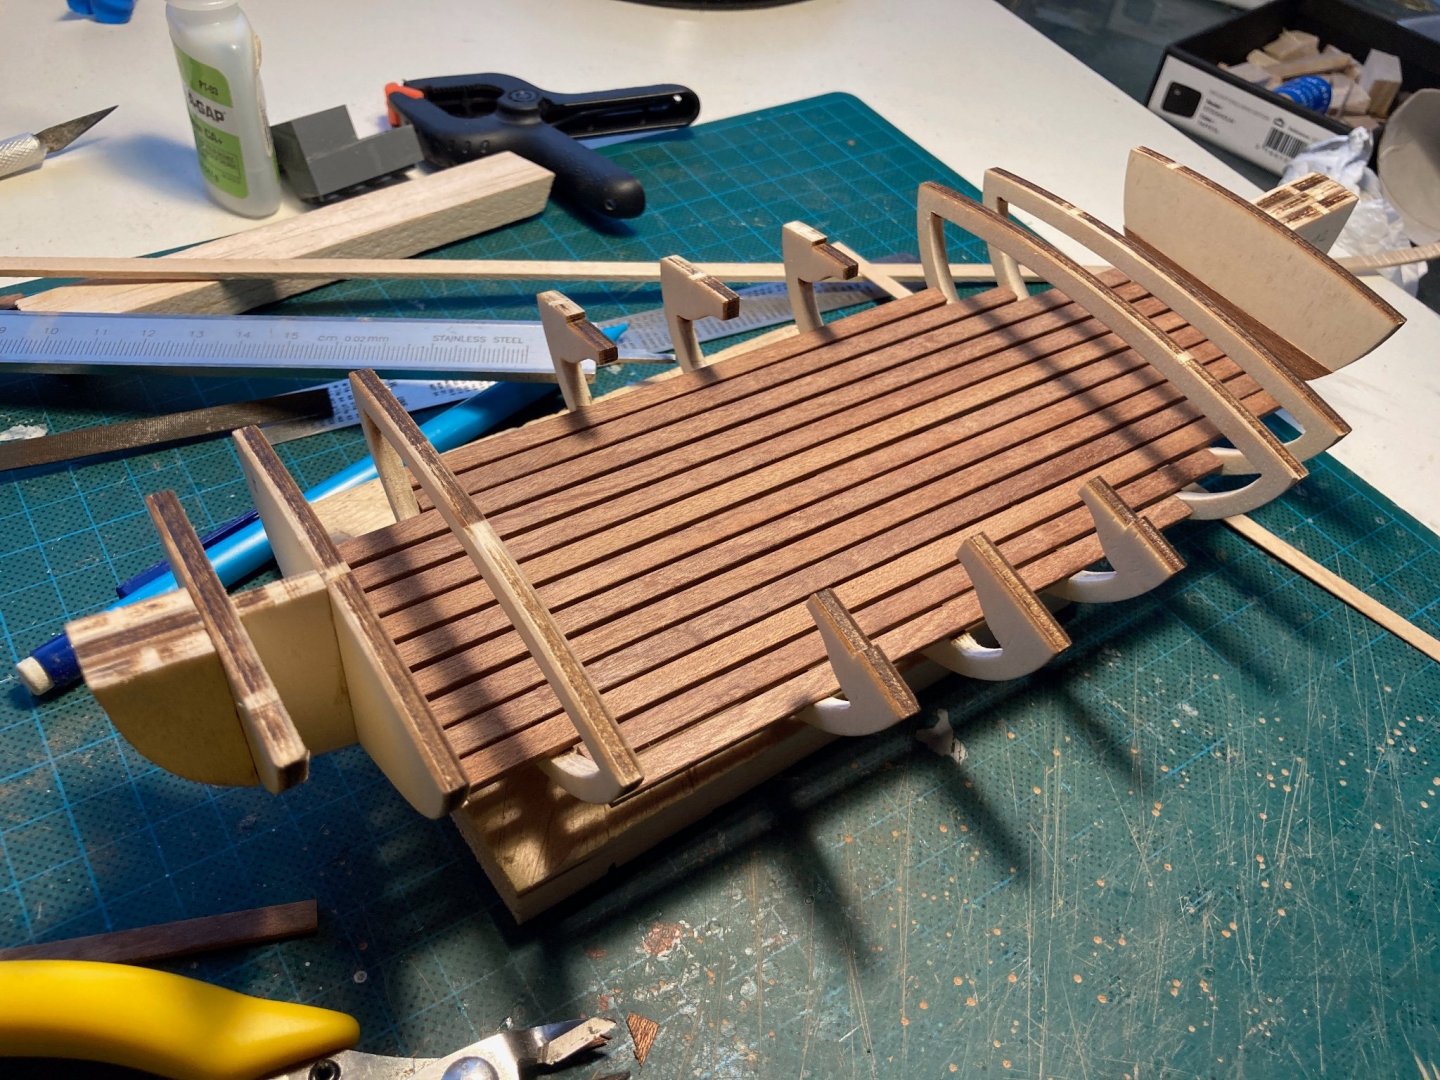
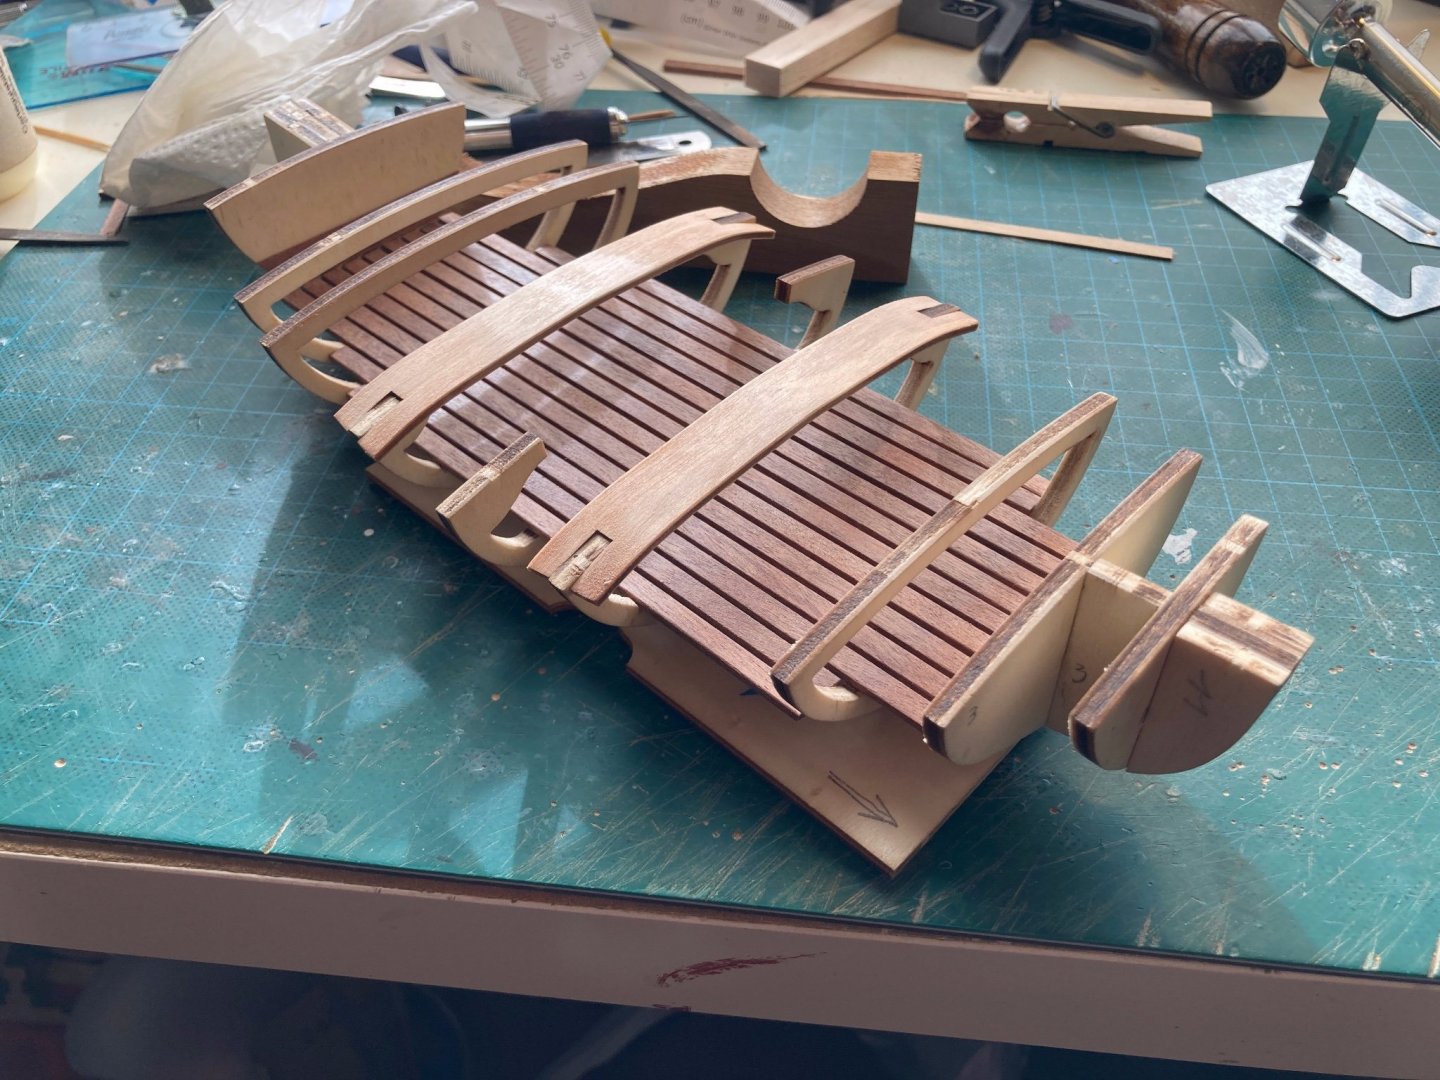
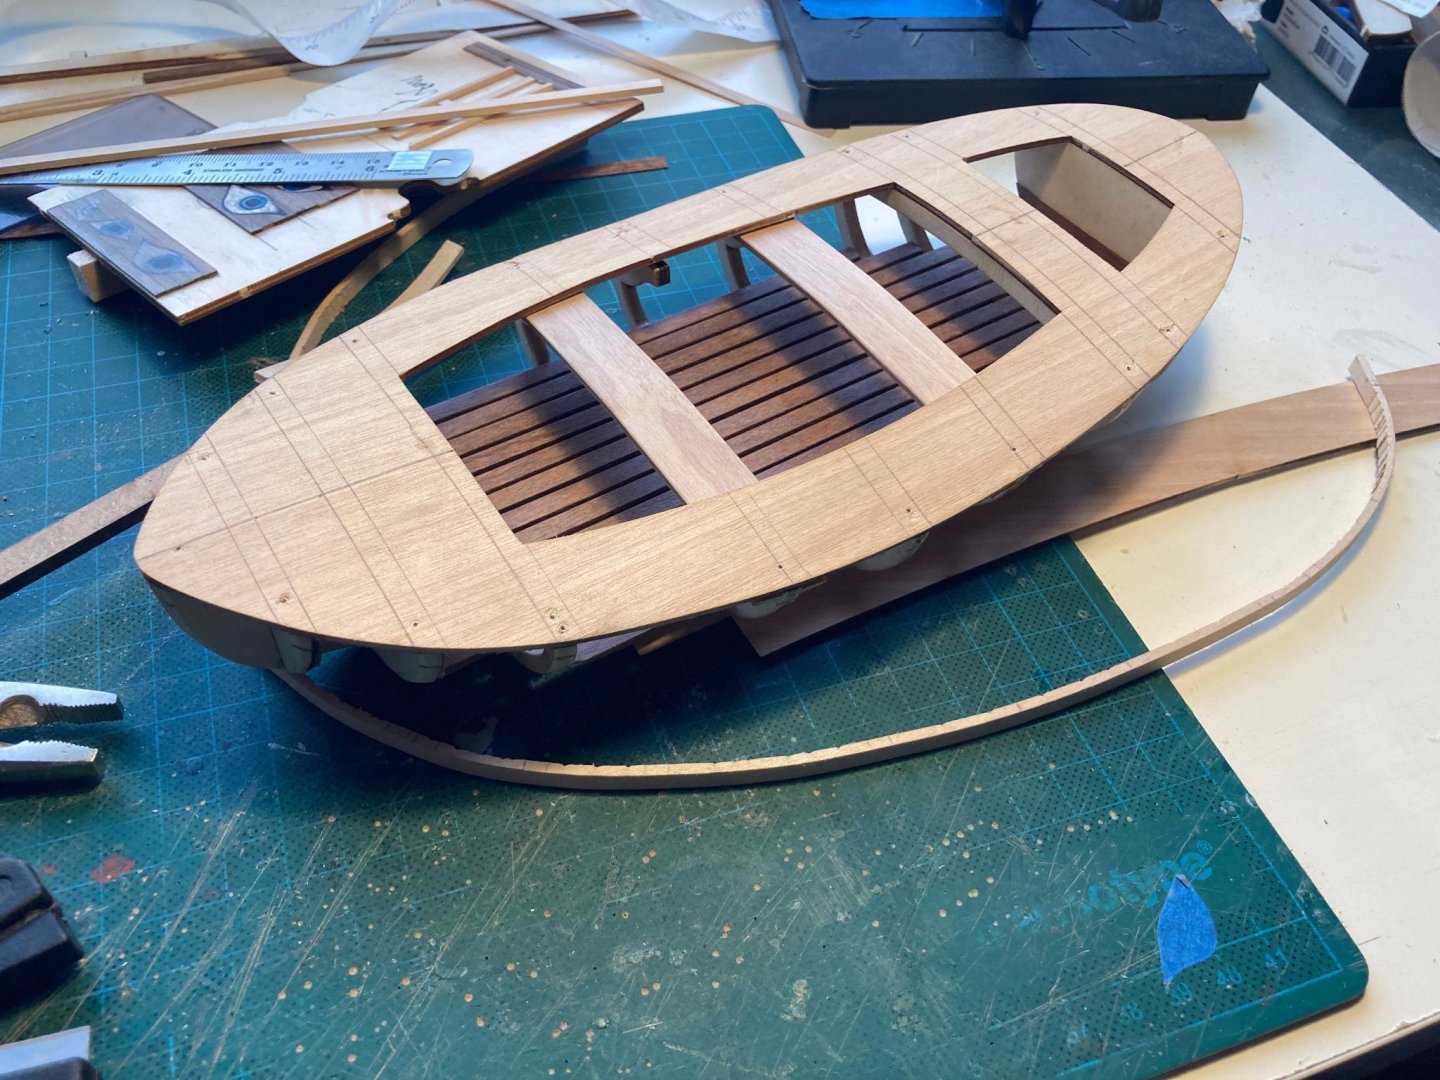
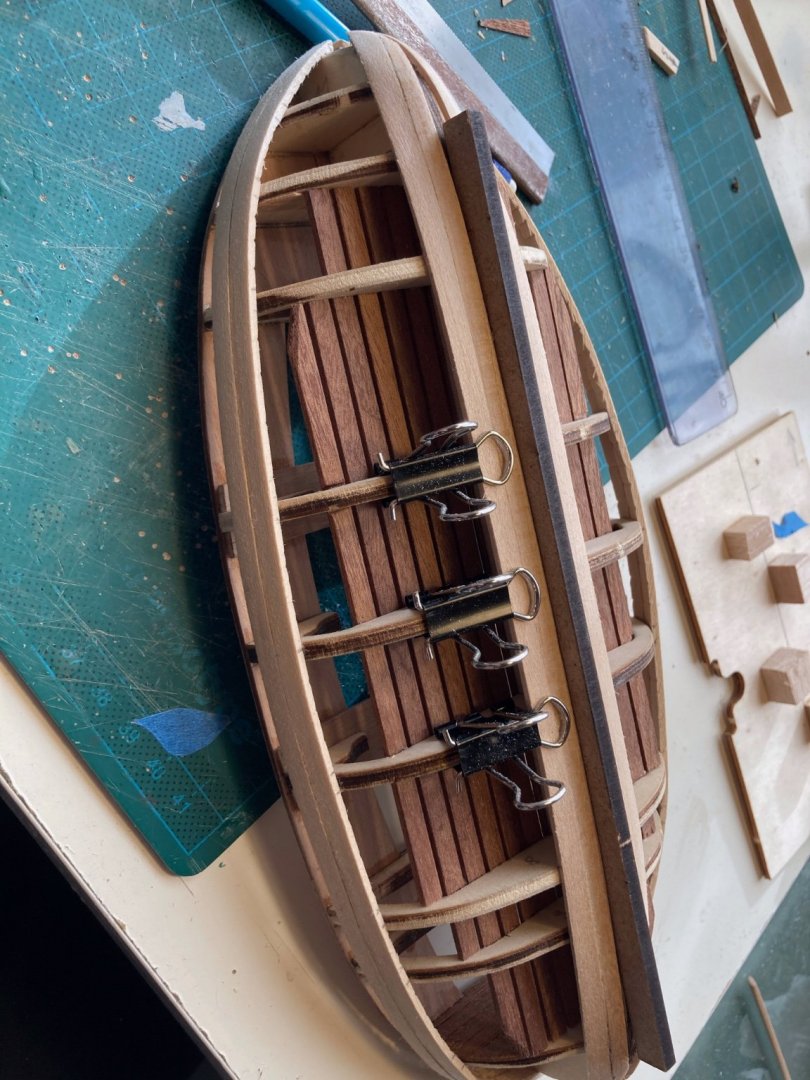
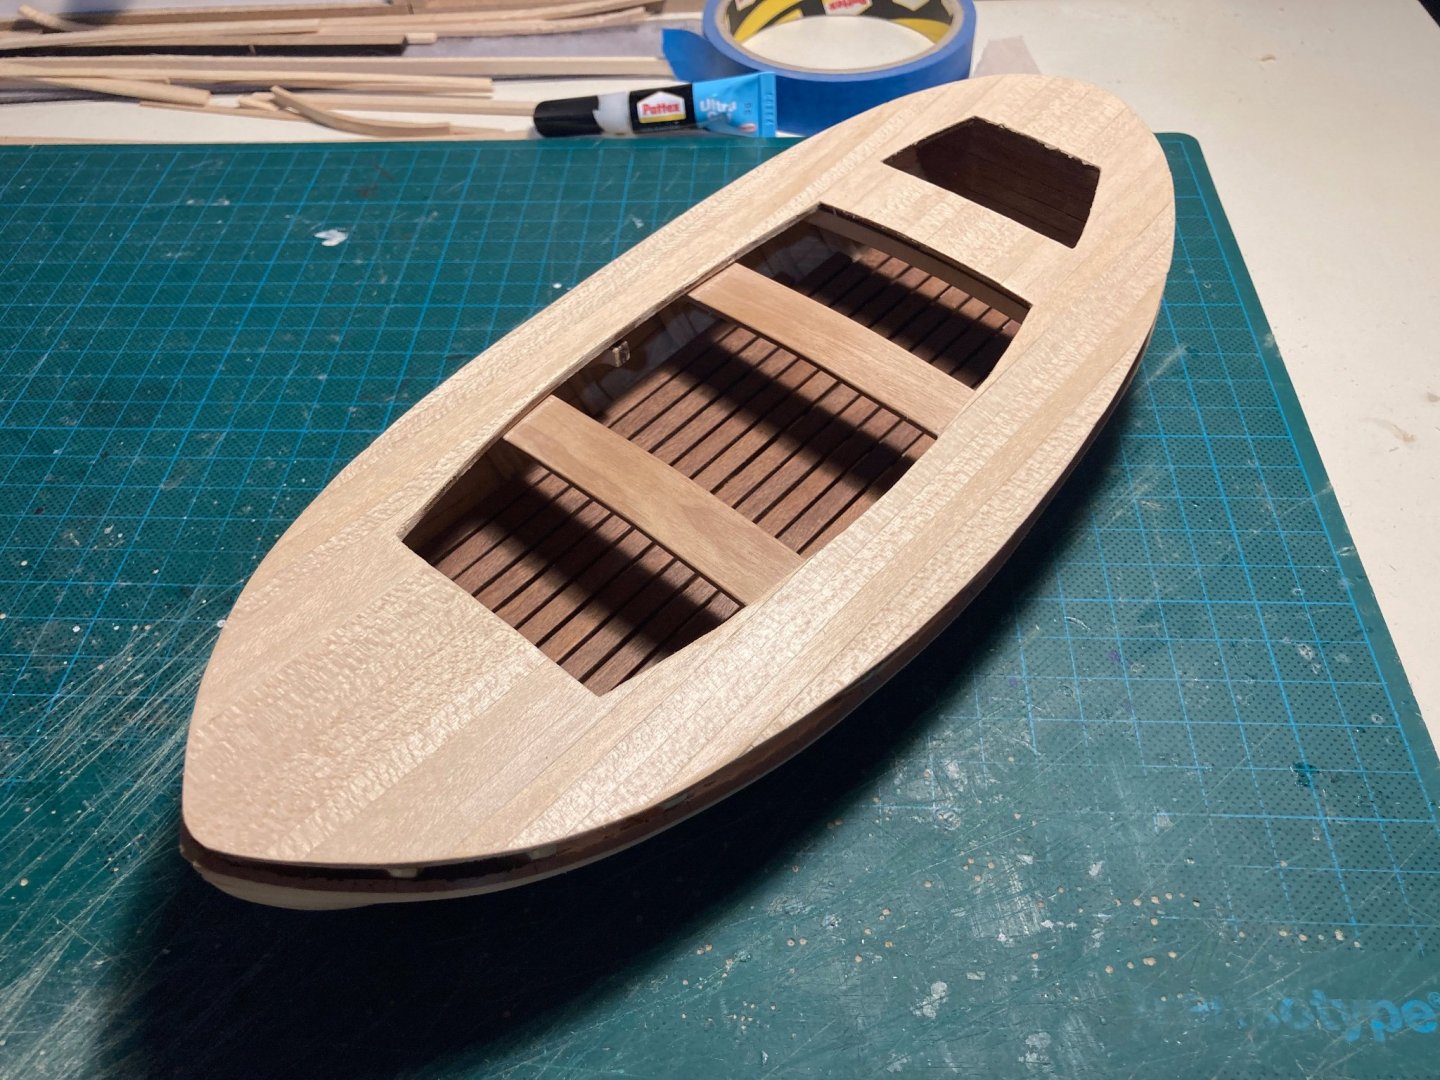
While waiting for the sail of the Bireme to finish so she can be finalised, I turned my eyes towards two boxes I had bought some time ago. As Calella was a gift to the Admiral for her Summer 2022 diorama, I started working on Amati's Bluenose (1/100), but a bent keel quickly put a stop to any progress (more info on that in a dedicated build log). While pondering my options for Bluenose, I started working on this little mediterranean fishing boat, with a couple of goals: try to go for single plank ( although satellite veneer is provided) and start getting used to using electrical tools such as a plank bender and the Dremel. Bulkheads and keel fitted perfectly, remember to clean the central bulkheads from laser char though as these will be visible: Next up, the flooring. Occre specified a distance between the planks of 1mm, so using some surplus wood I could easily keep that distancing, only to find out not all planks would fit that way... As these planks are at the sides, decided to forego placing them. Here's the result: After that the plank bender finally came out of its box for bending the seats. Tried doing this the manual way, but I could not get the angle of the edges correct. Stank a bit (first-time use), but after some warming up and some trials on scrap wood, managed to install the seats: I tend to varnish ay finalise surface as soon as it is finished, just to protect the wood, and after that, the deck came on, soaked for a couple of hours and then bent into shape on the hull Fastened with nails and rubbernecked bands, after drying fixed with both CA and PVA. Then came planking... Top tip: smaller does not mean easier! Had an interesting time with planking, taking my lessons from the Bireme, using CA gel as nails while PVA went in between the strips. And here's the result: Some sanding still needed, but I think I succeeded in my single plank challenge 🙂 . What I did in this case was to sand immediately after the planks were set, that gave me the space to work on individual fitting and the sawdust that got caught in the gaps stayed there. Planning to paint the hull white with blue highlights, so will be a shame to see this disappear under a layer of paint though.... When that was done (and after a celebratory coffee), started planking the deck: And that's where we are today. Next up: bending the bulwarks. A bit more of a challenge than usual, as I didn't follow Occre's instructions on keeping a 7mm distance between top of the first plank and the deck at the bow and stern. Tried it out, but the plank was all warped and didn't fall naturally. Will measure and cut part of the bulwarks in order to make them fit and then the bender comes out again... Stay safe!


-
Take care, anxiety can mess with your mind, hope to see you on the flip side soon.
-
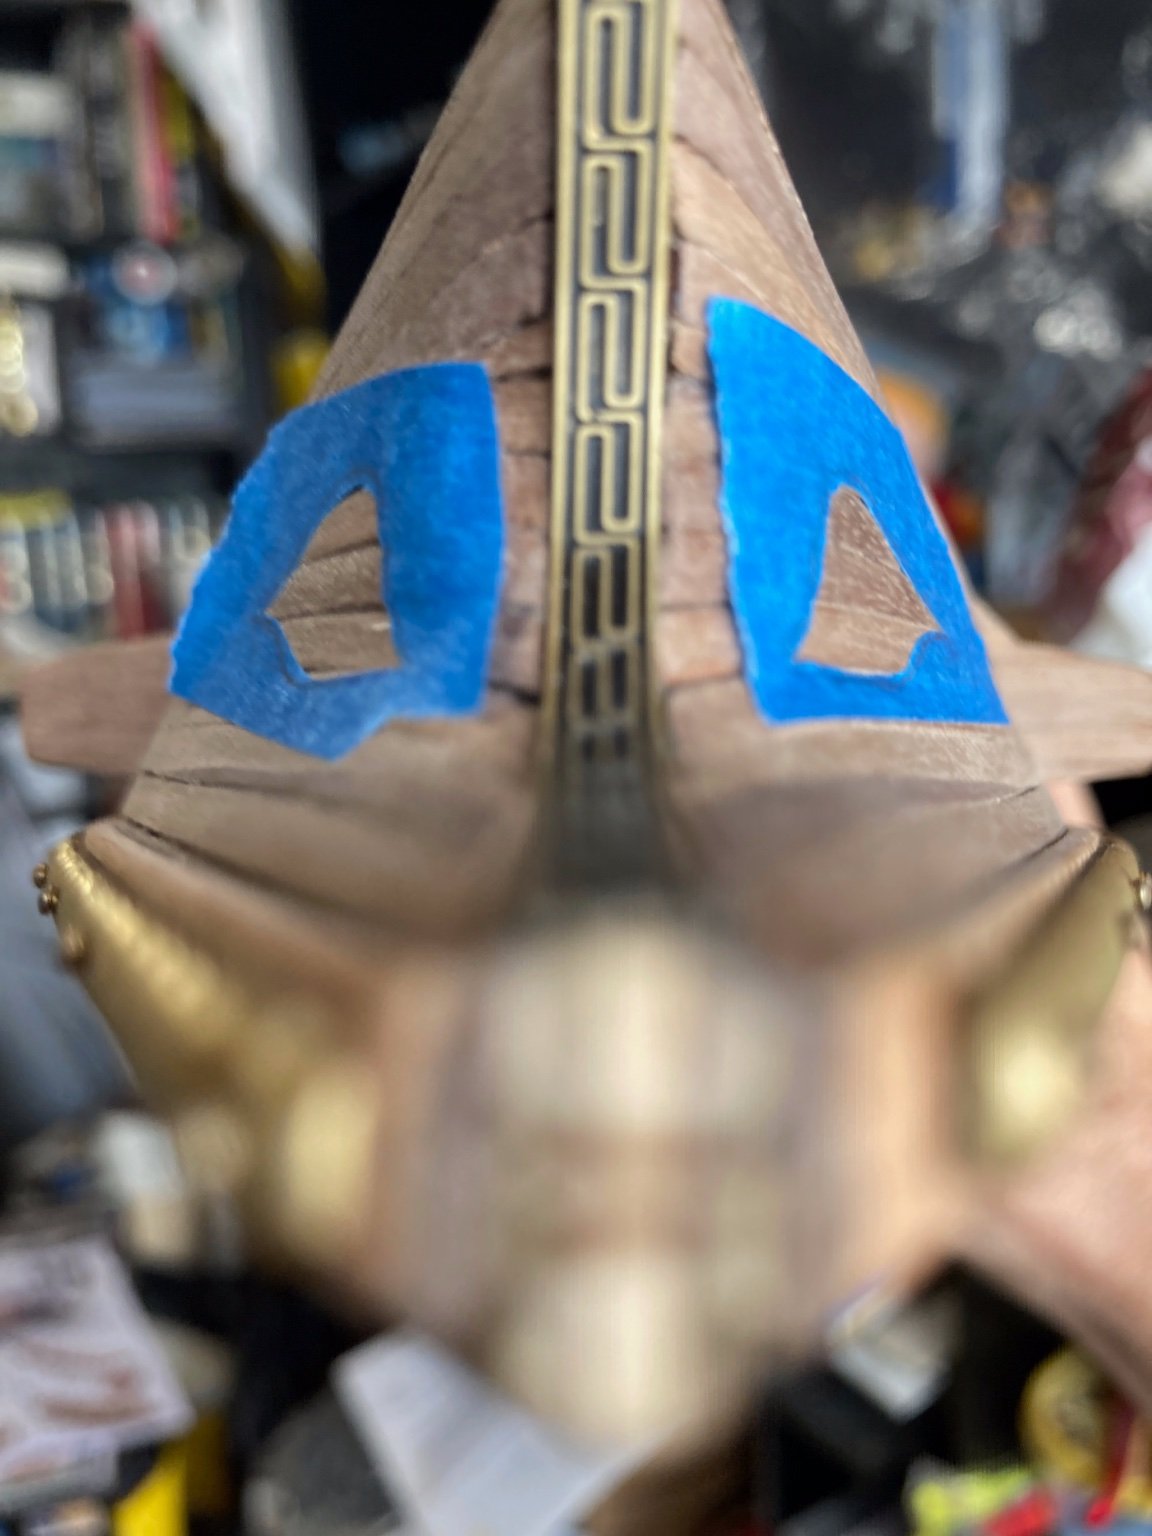
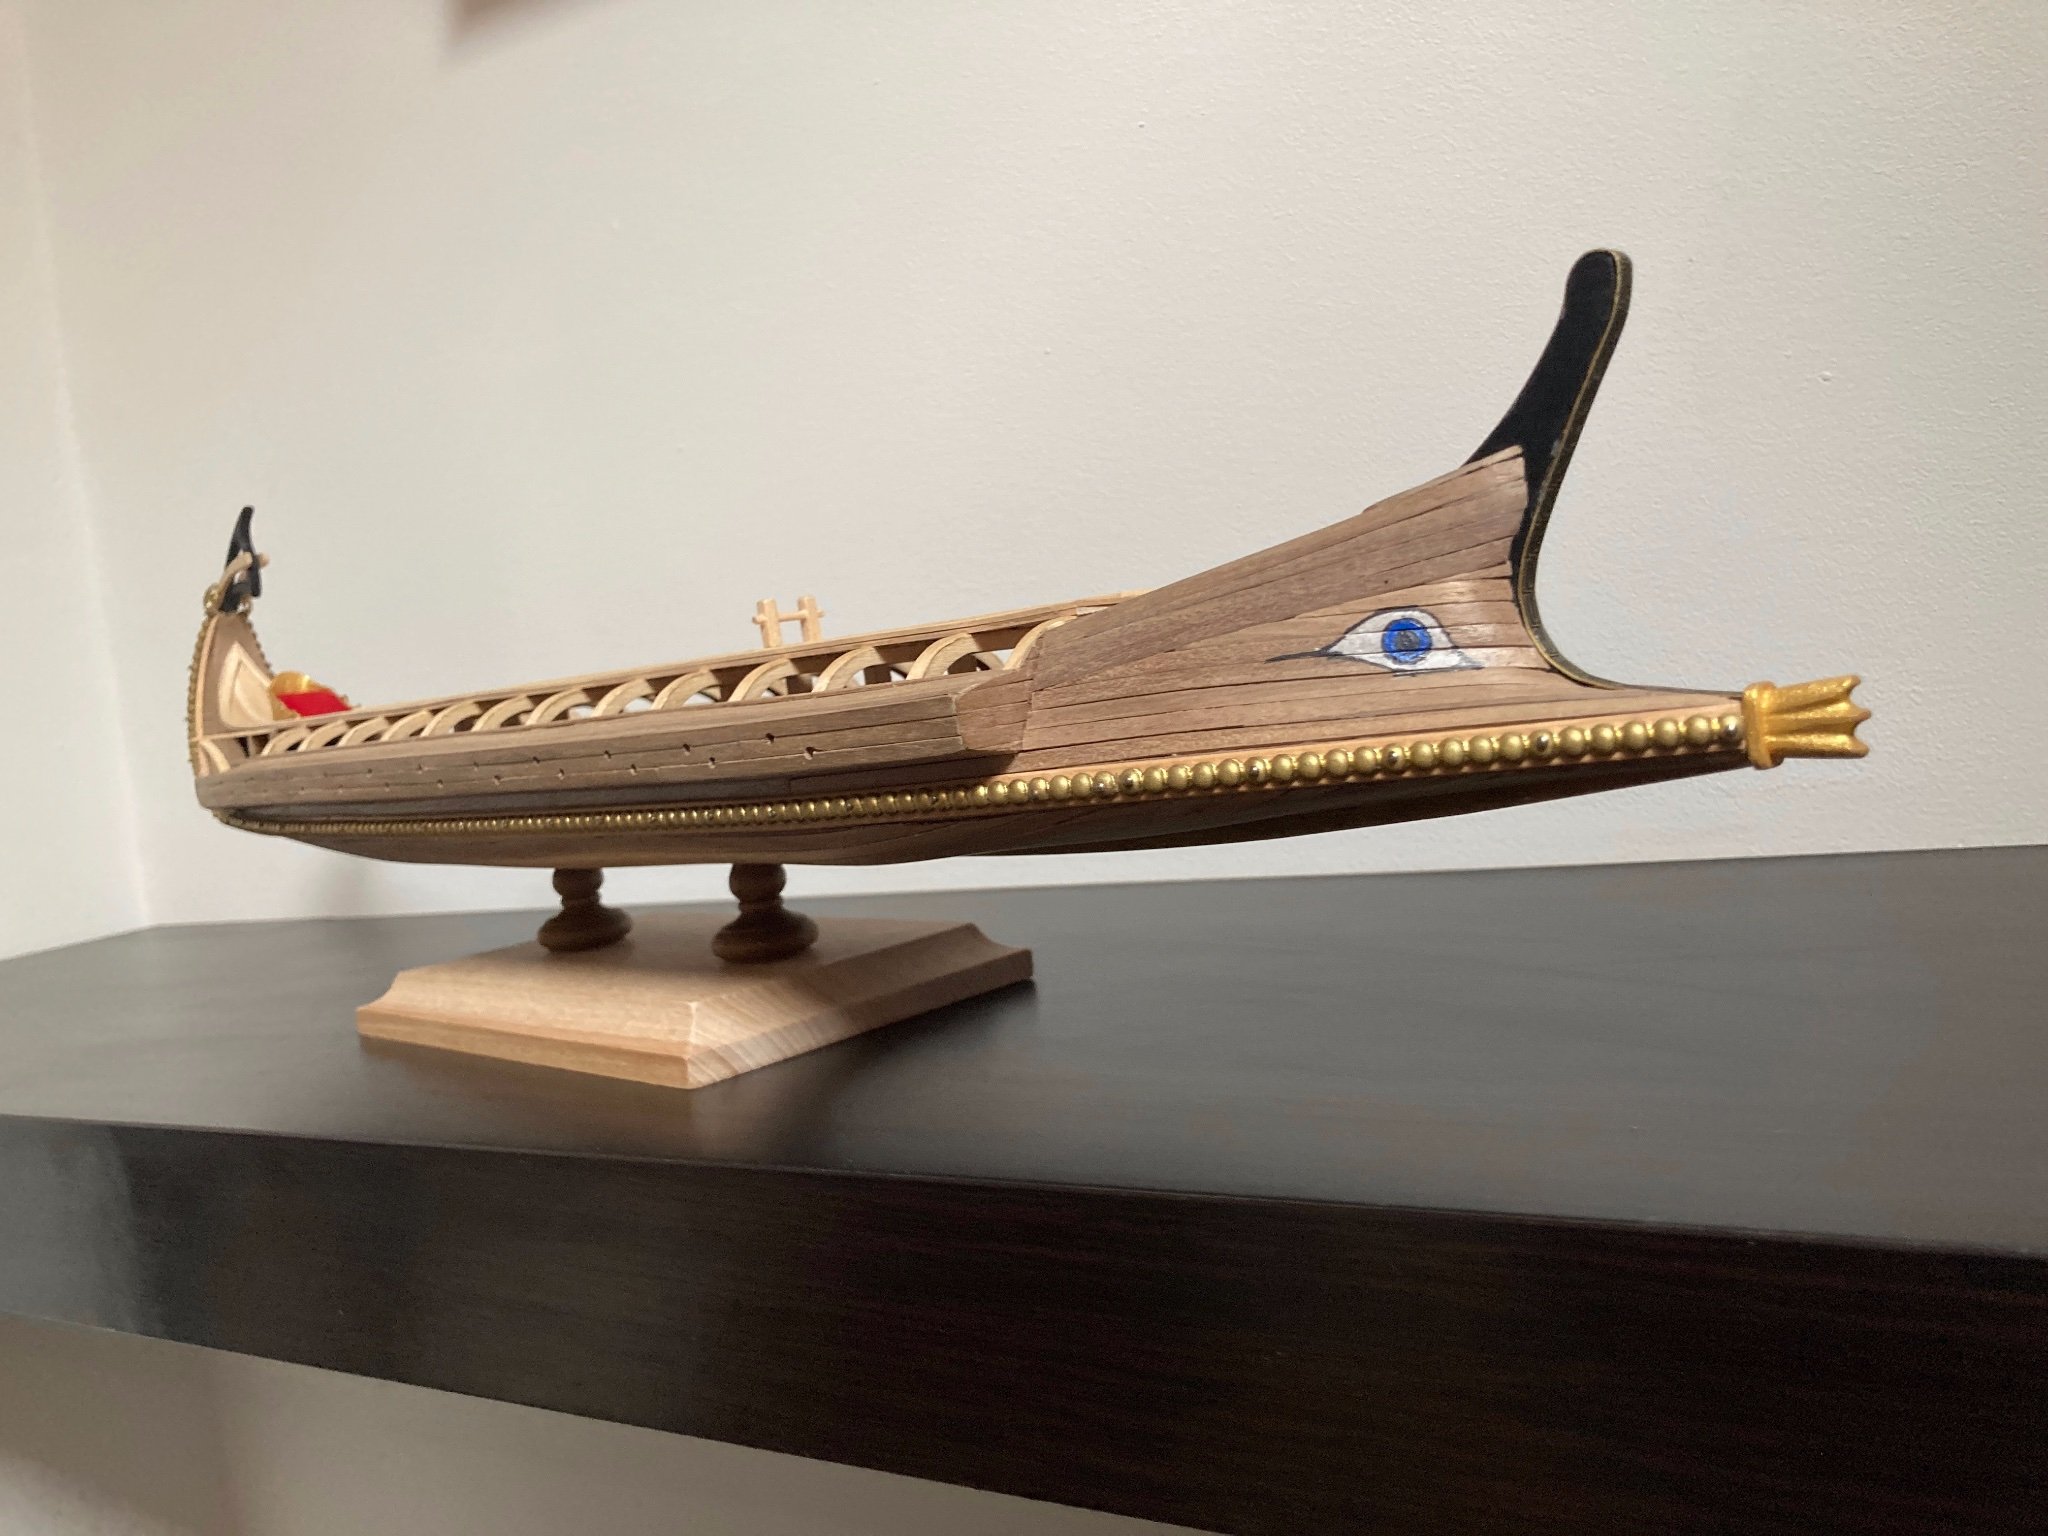
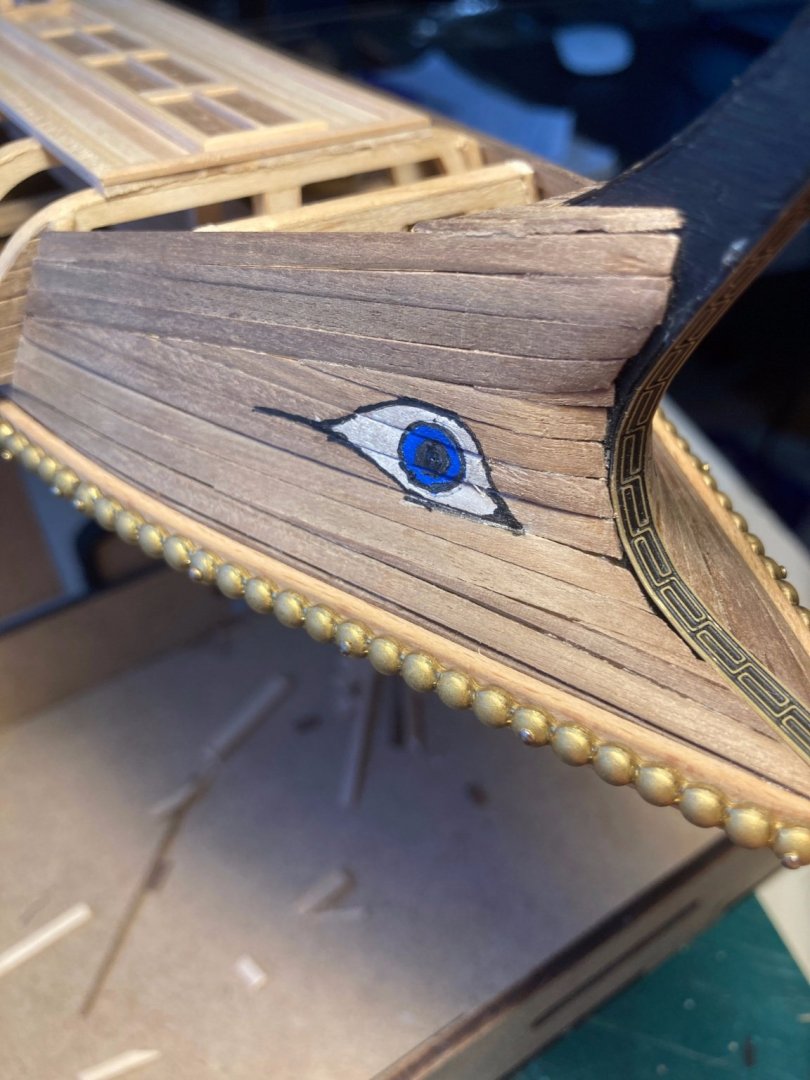
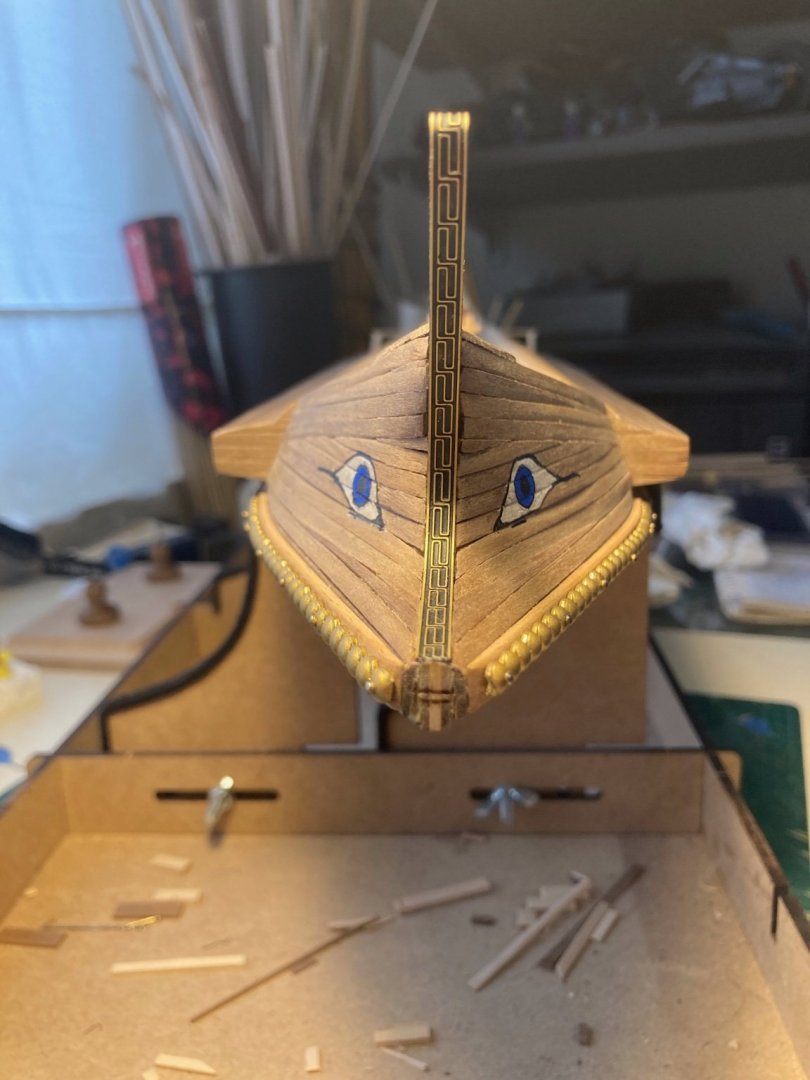
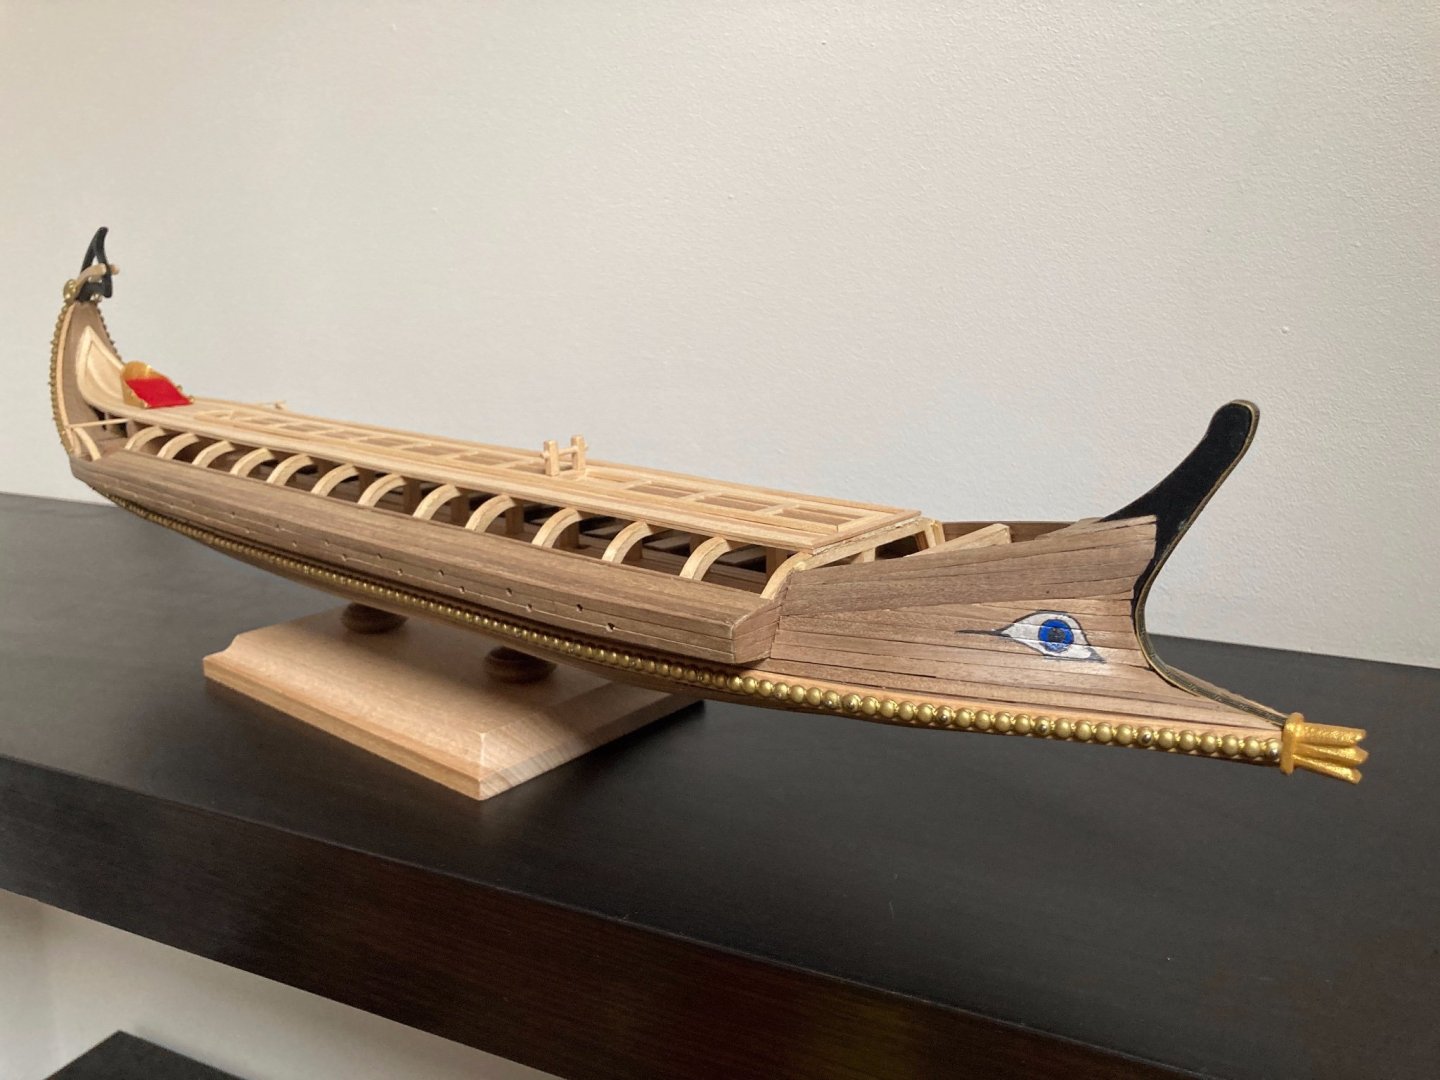
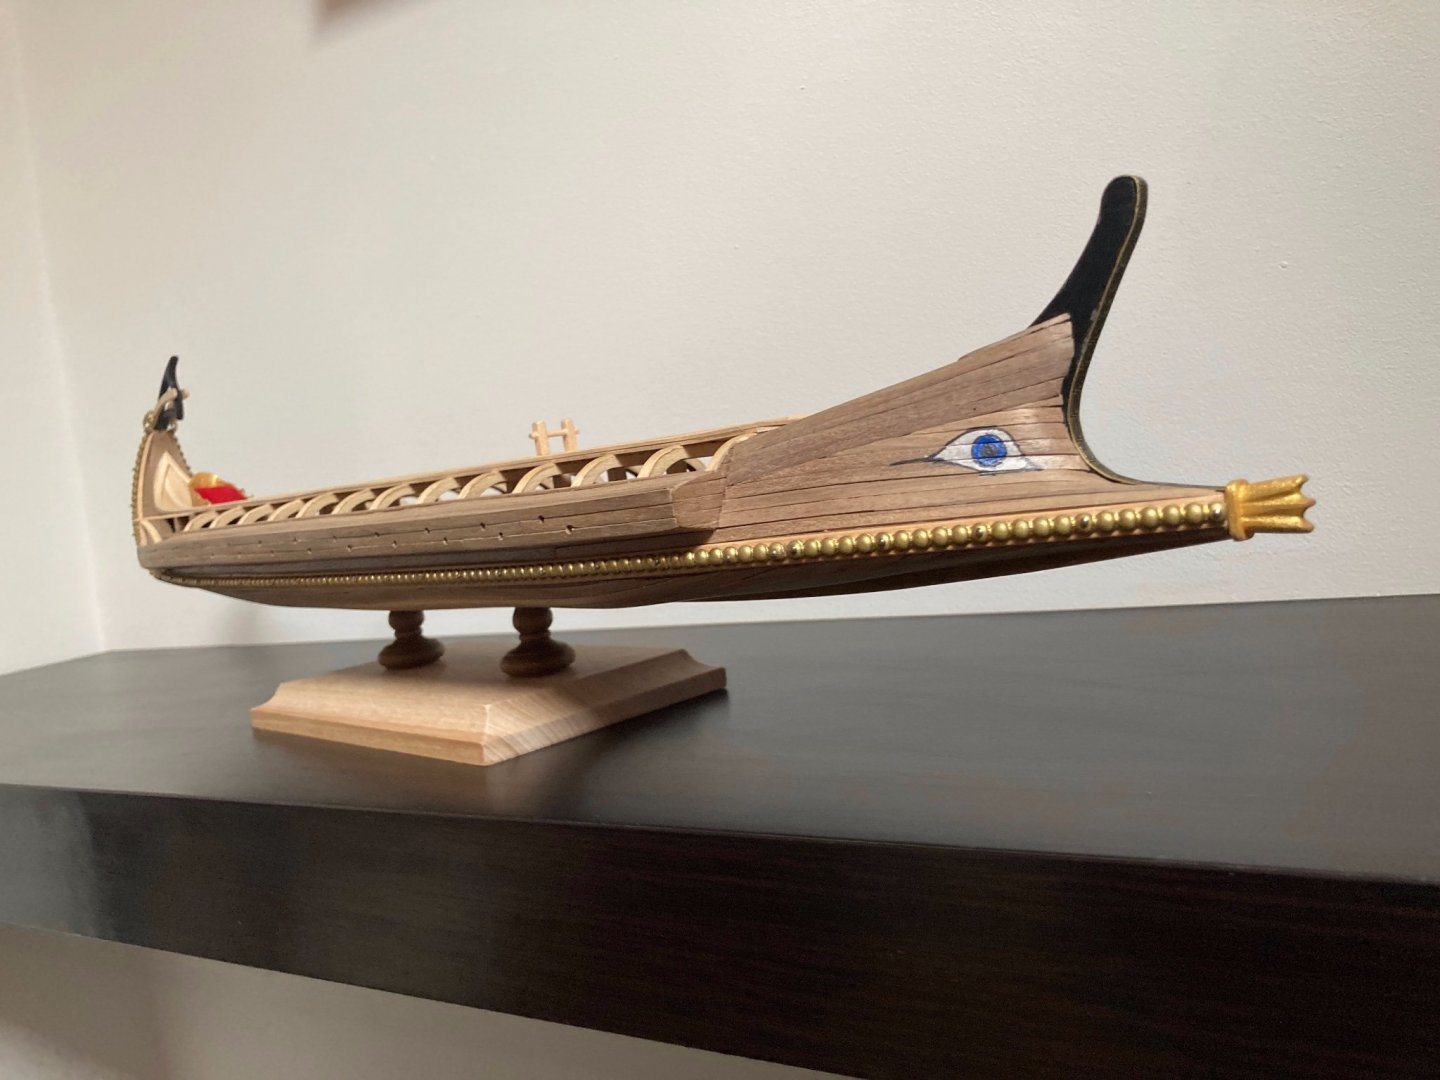
Hi all, eventfull weekend behind us: took several deep breaths, tested, retested and measured, and went for it: Made sure I cut out the masking tape from the same template, and NOT on the hull itself (again, the value of testing off-boat). Put down first layer of Tamiya matt white, but dotted, instead of brushing. Allowed to dry, then applied second template for the iris, used Vallejo royal Blue. After dying, used the Molotow Blackliners, 1mm for the eye, 0,5mm for the iris. Here's what I came up with: Wanted to make sure Ephialtes didn't end up cross-eyed, so each step was followed by measuring and re-measuring. It's not perfect, but I'm happy with the result. After that, apply varnish, attached the ram, added another display stand as the Anti one was not to my liking, some final corrections and Ephialtes' hull is finished: As said, the mast, yard and oars are all ready, waiting for the delivery of the sail now, which might take some weeks 😞 Rudders are ready too, but, knowing myself, they will be fitted last in order to avoid any "accidents". As soon as the sail arrives, she'll go back to the shipyard, in the meantime, those closed kit boxes are starting to look very tempting... Stay safe!


- 62 replies
-
- 13
-
-
- amati
- greek bireme
- (and 1 more)