HOLIDAY DONATION DRIVE - SUPPORT MSW - DO YOUR PART TO KEEP THIS GREAT FORUM GOING! (Only 20 donations so far - C'mon guys!)
×


desalgu
-
Posts
363 -
Joined
-
Last visited
Content Type
Profiles
Forums
Gallery
Events
Everything posted by desalgu
-
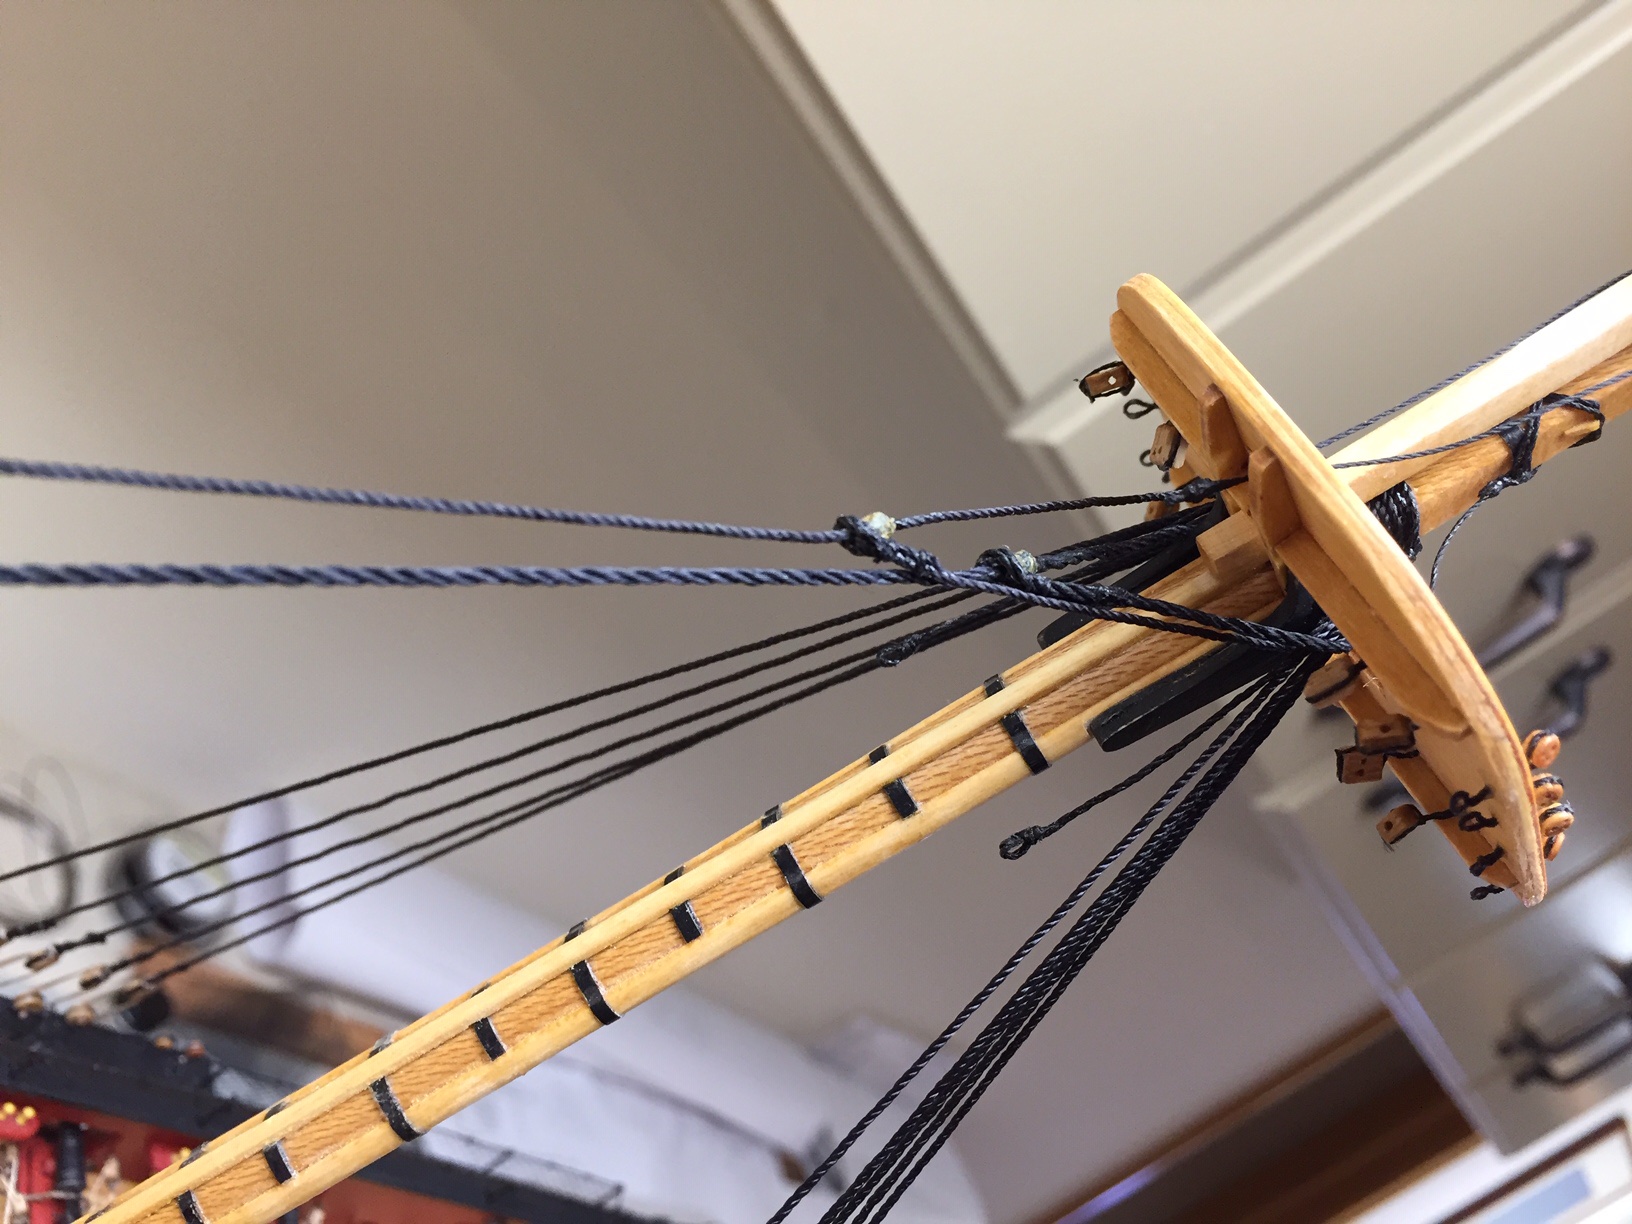
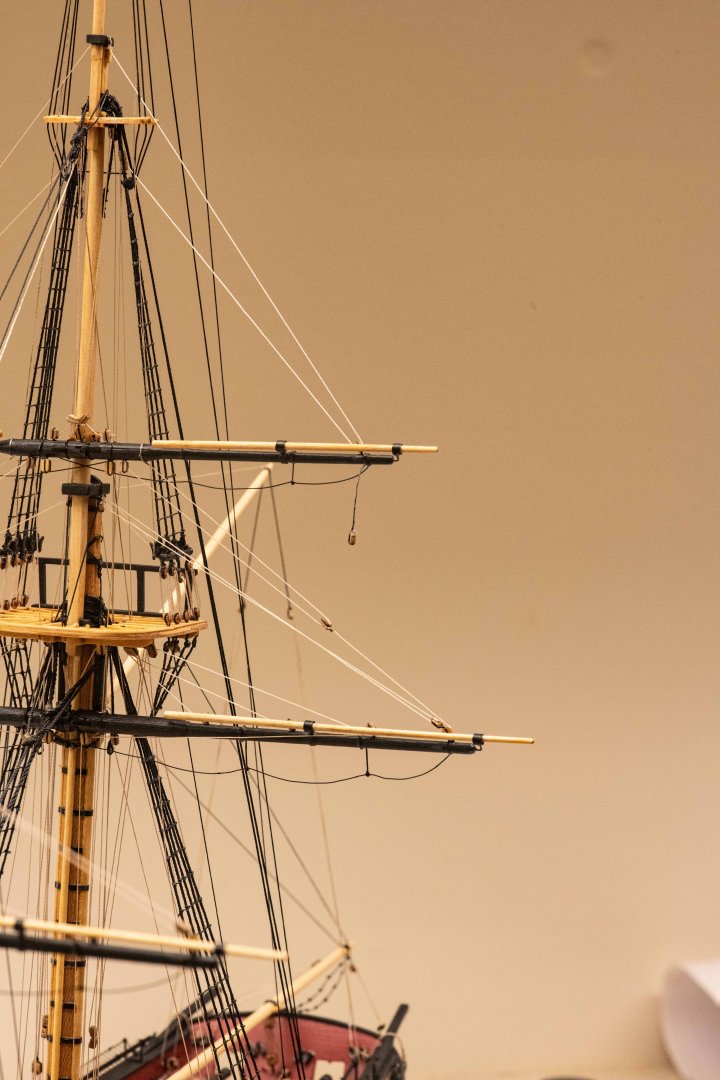
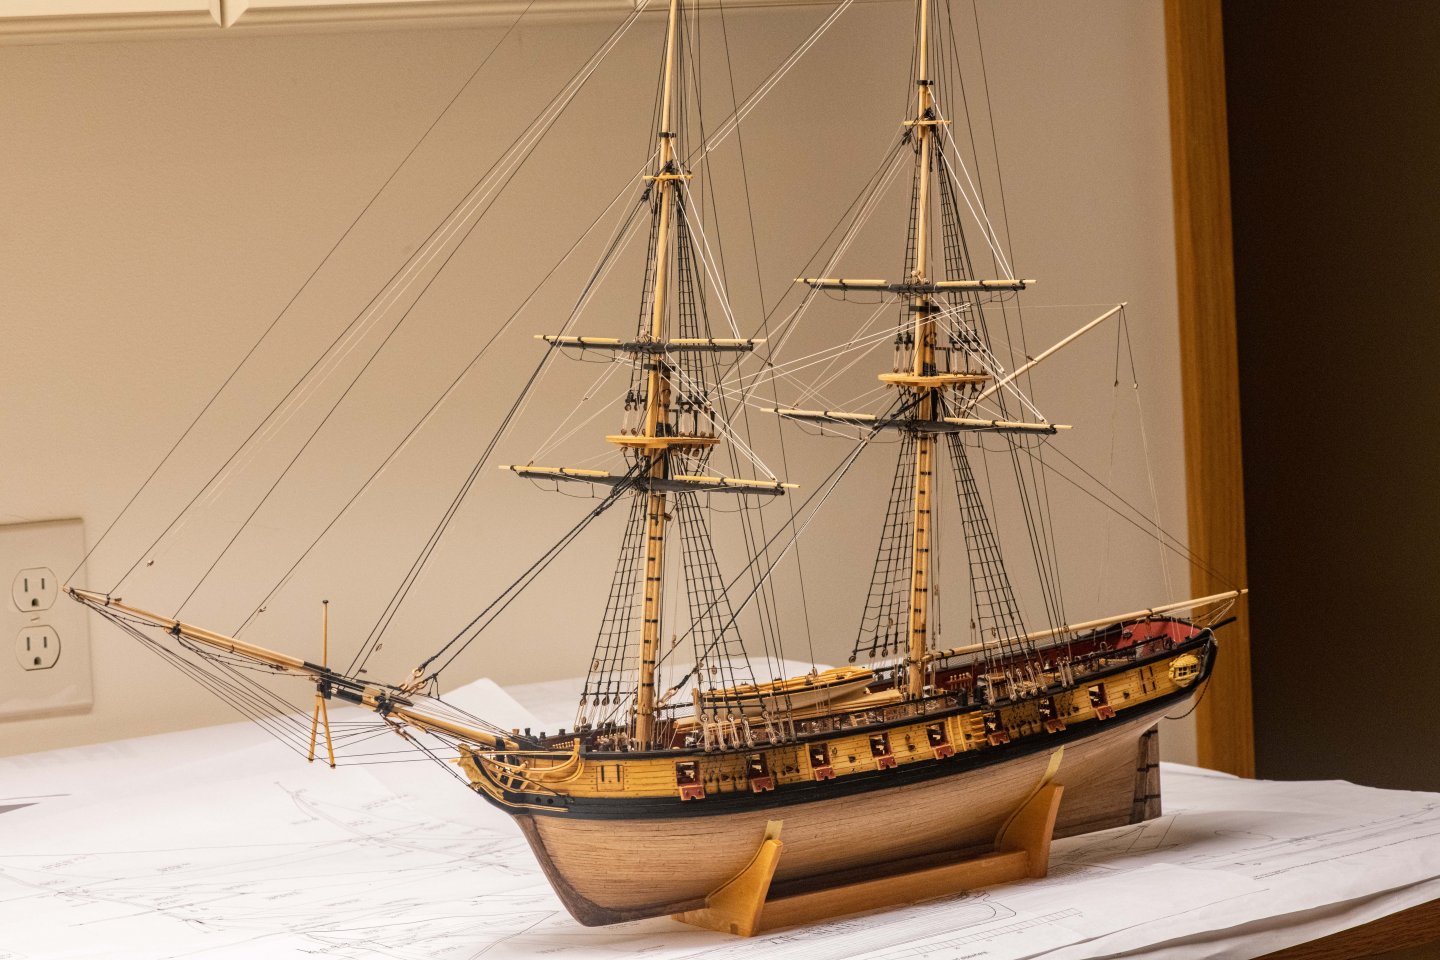
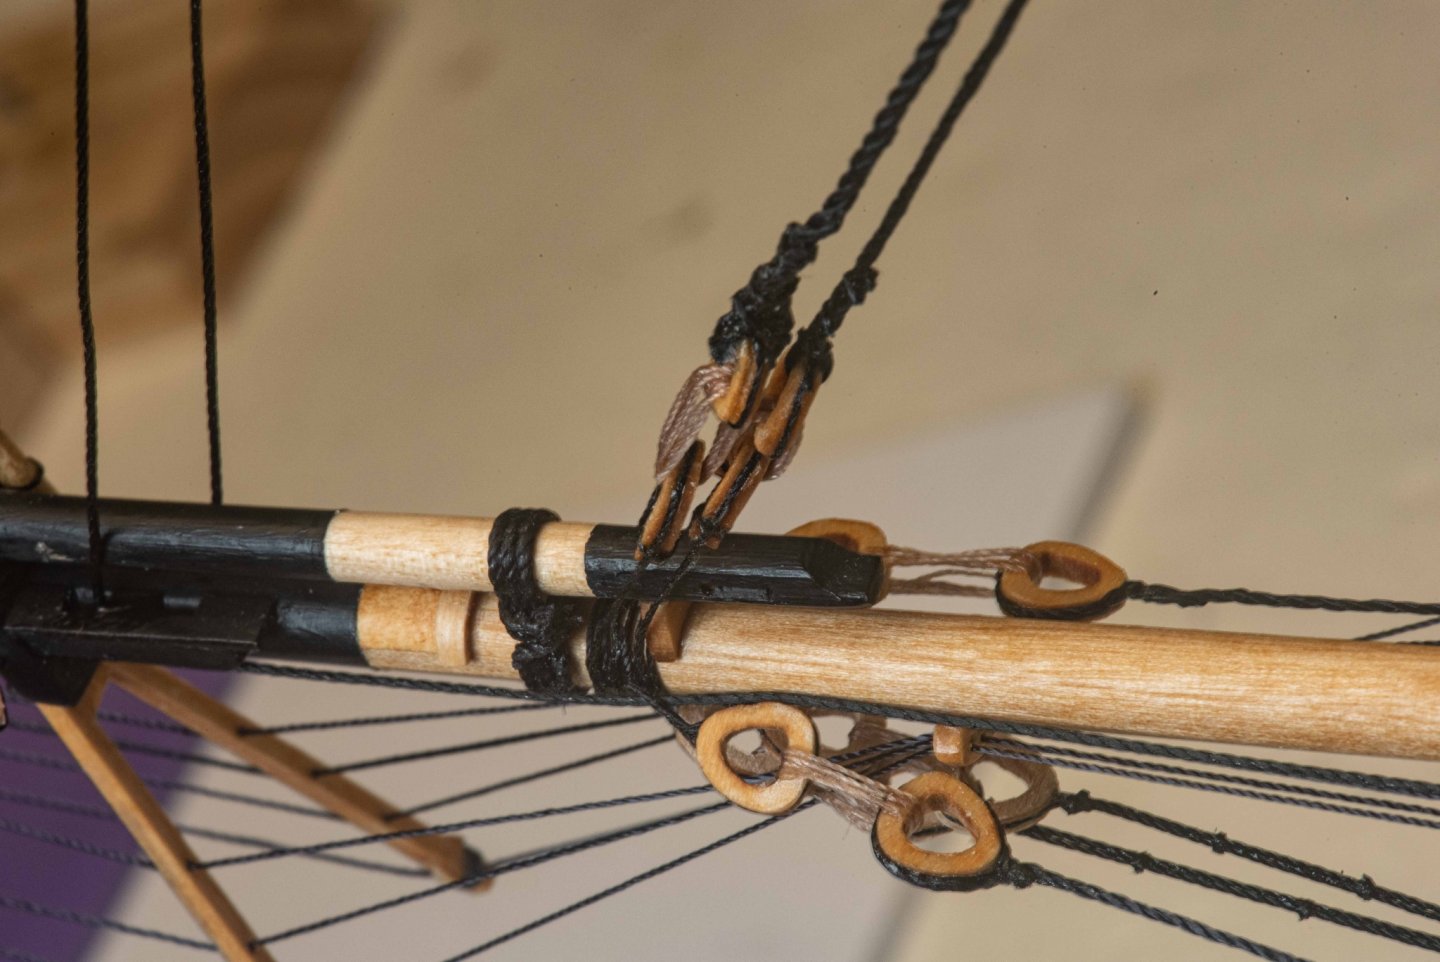
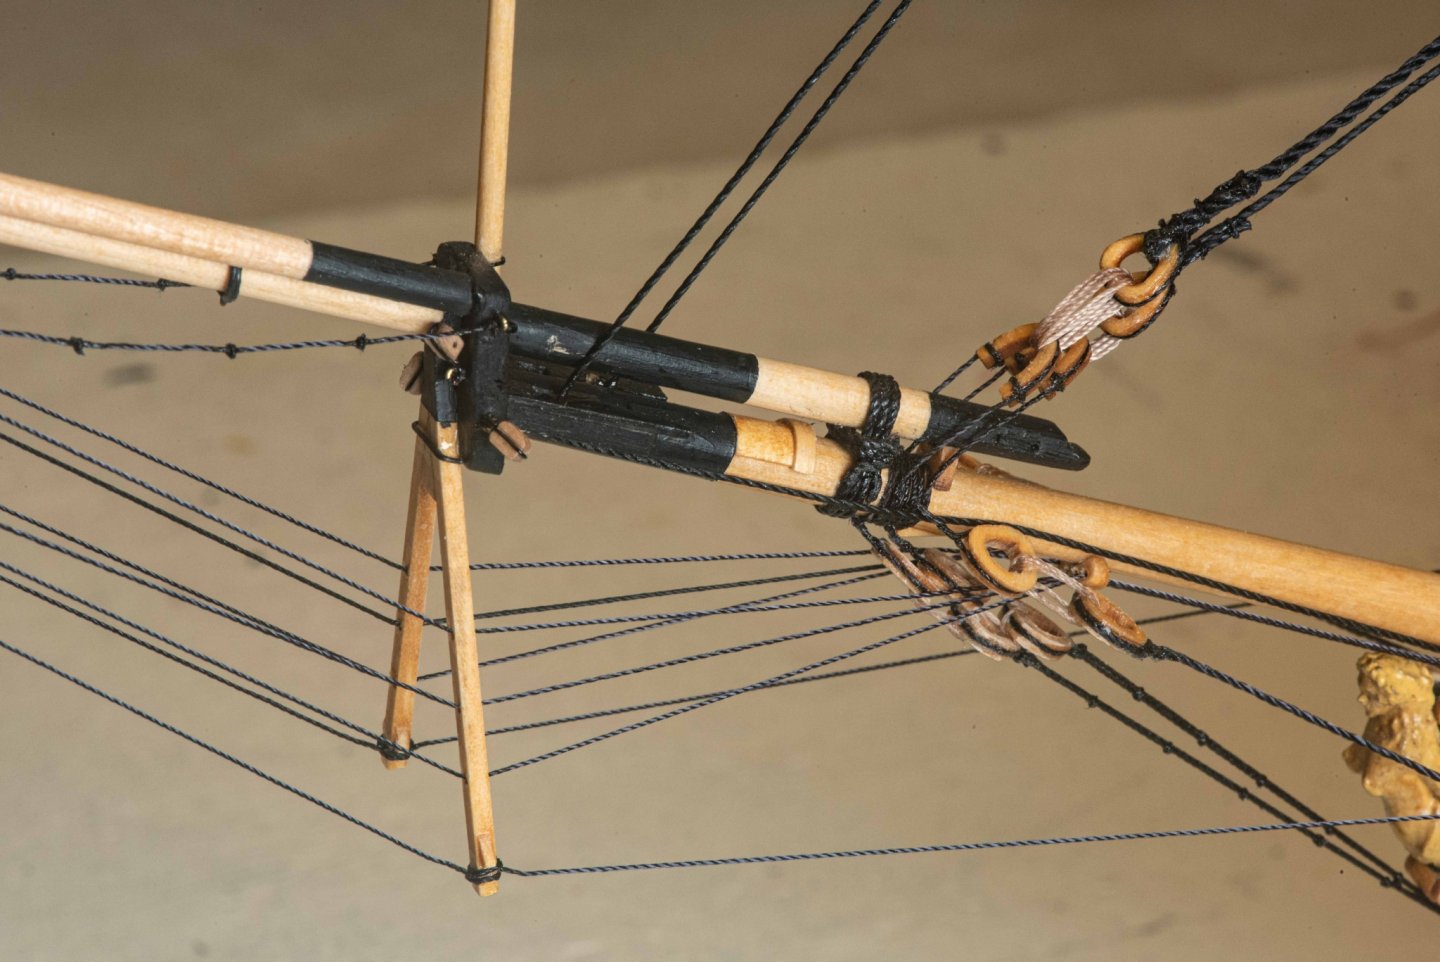
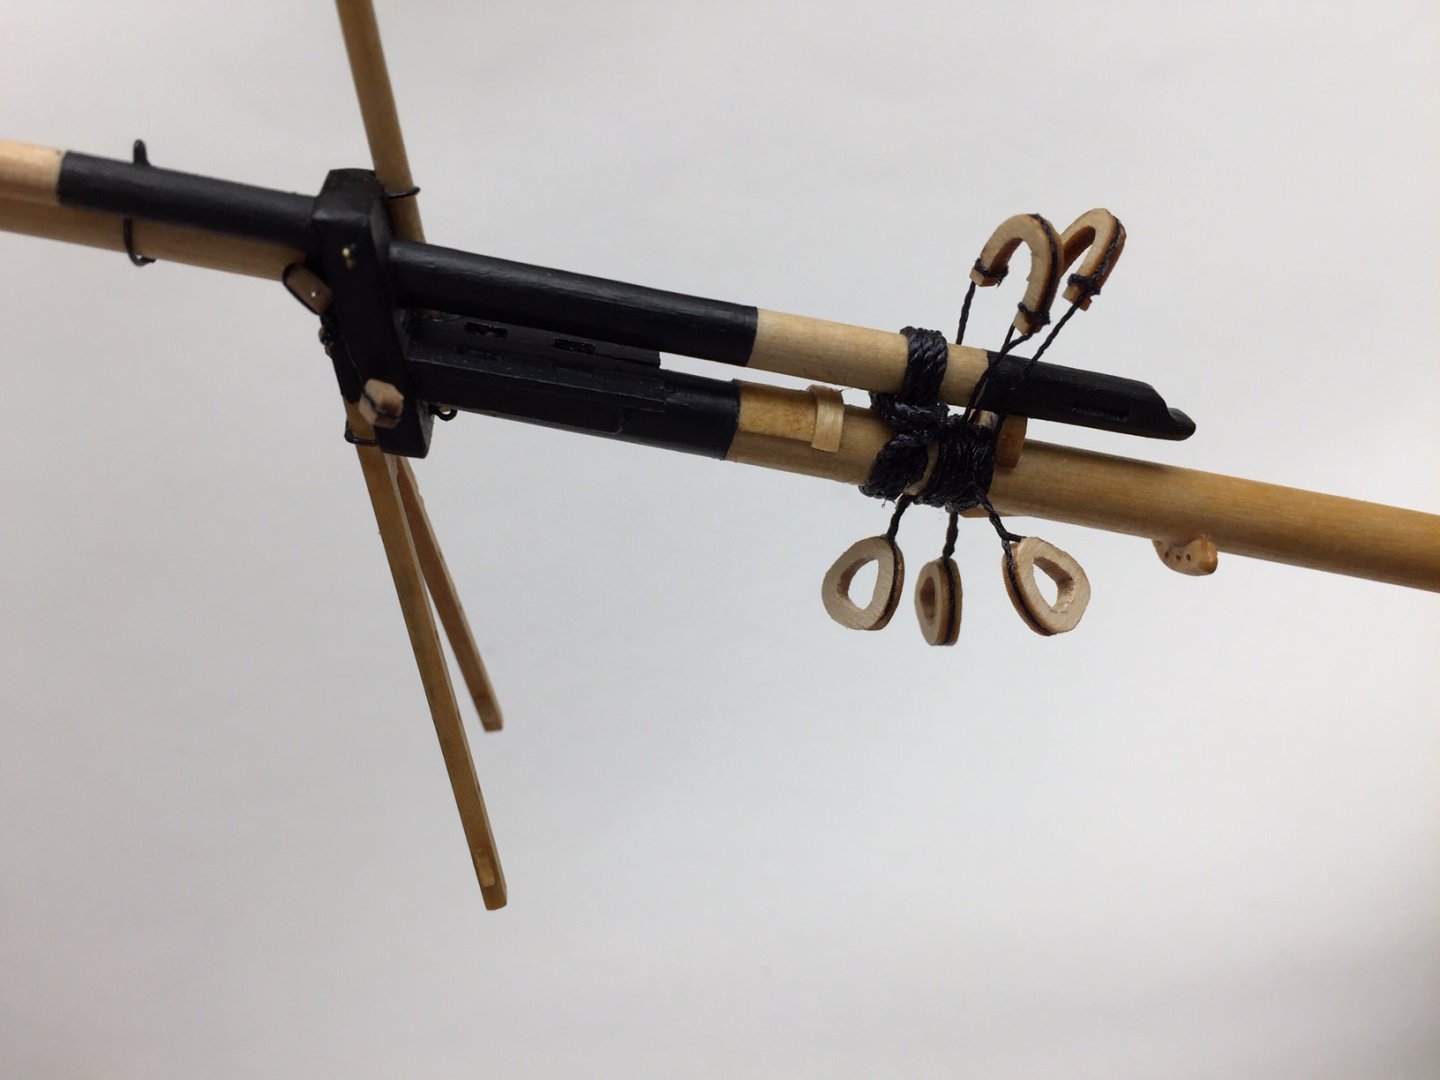
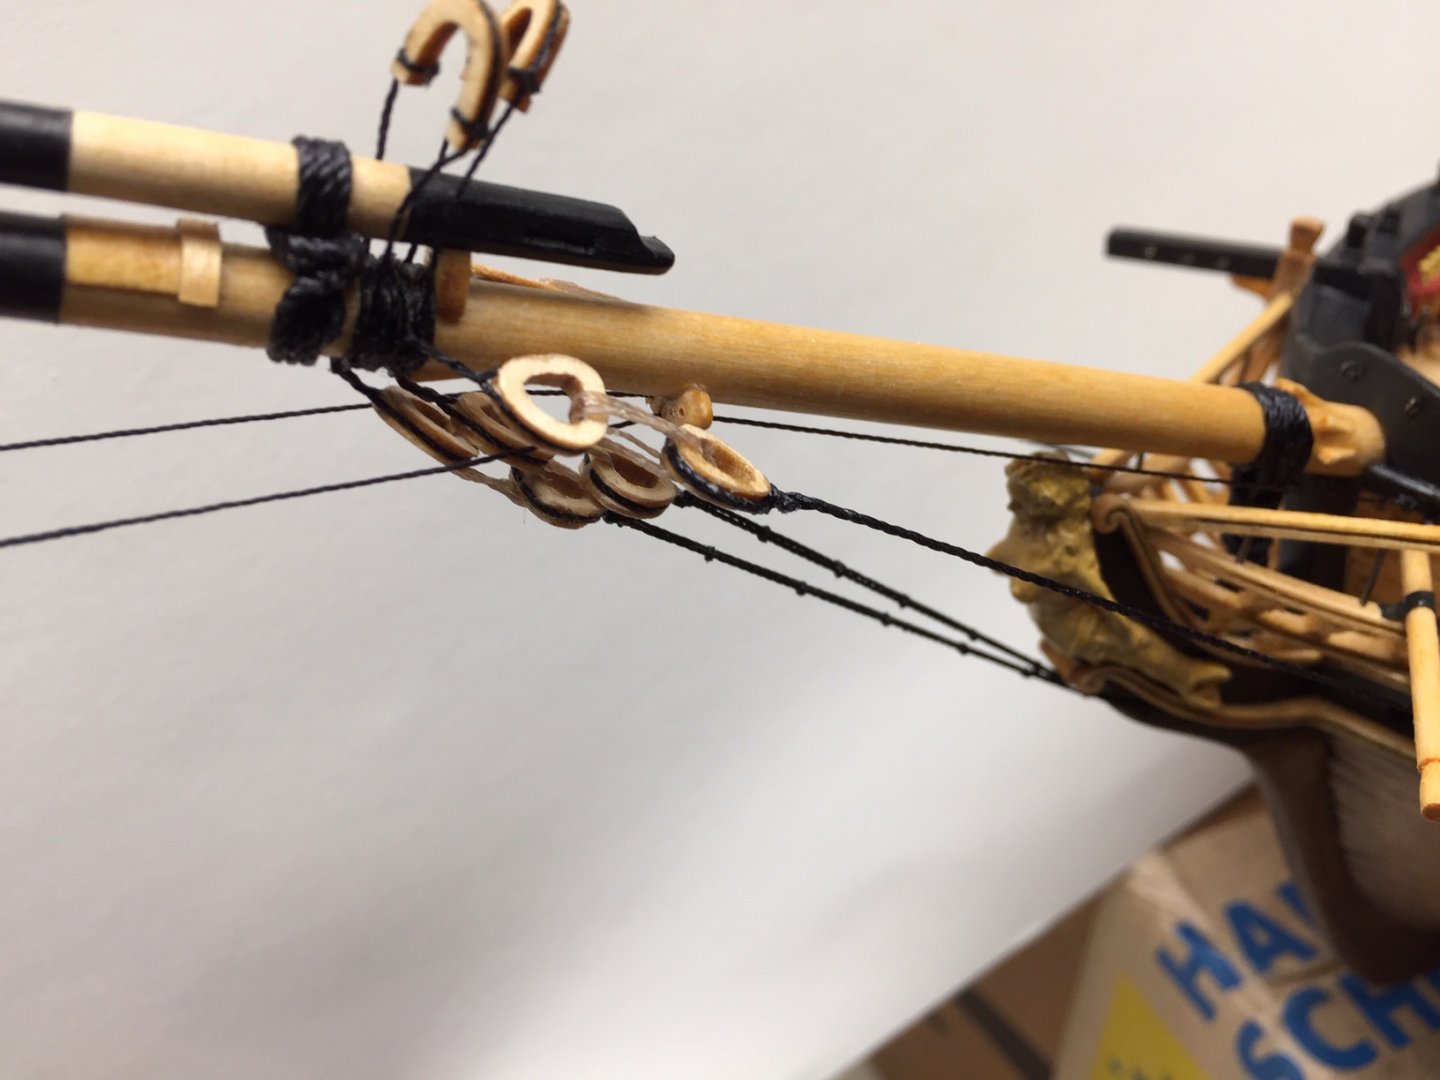
The topsail yards are mounted next. Rigging is similar. One difference is the jeer tie. It uses an unusual 3-block structure shown in the first photo. The jeer tie goes thru the center larger block, and the buntlines go thru the smaller blocks on top of it. The 2nd photo shows the topsail yard rigging. The lifts run from the end of the yard arm up to the mast, and the clews and sheets are between the lower yard and topsail yard. This photo also shows the lower yard buntlines. The 3rd photo shows the ship as of mid-Jan 2021 with lower and topsail yards complete. Adding yards really improves the look.

-
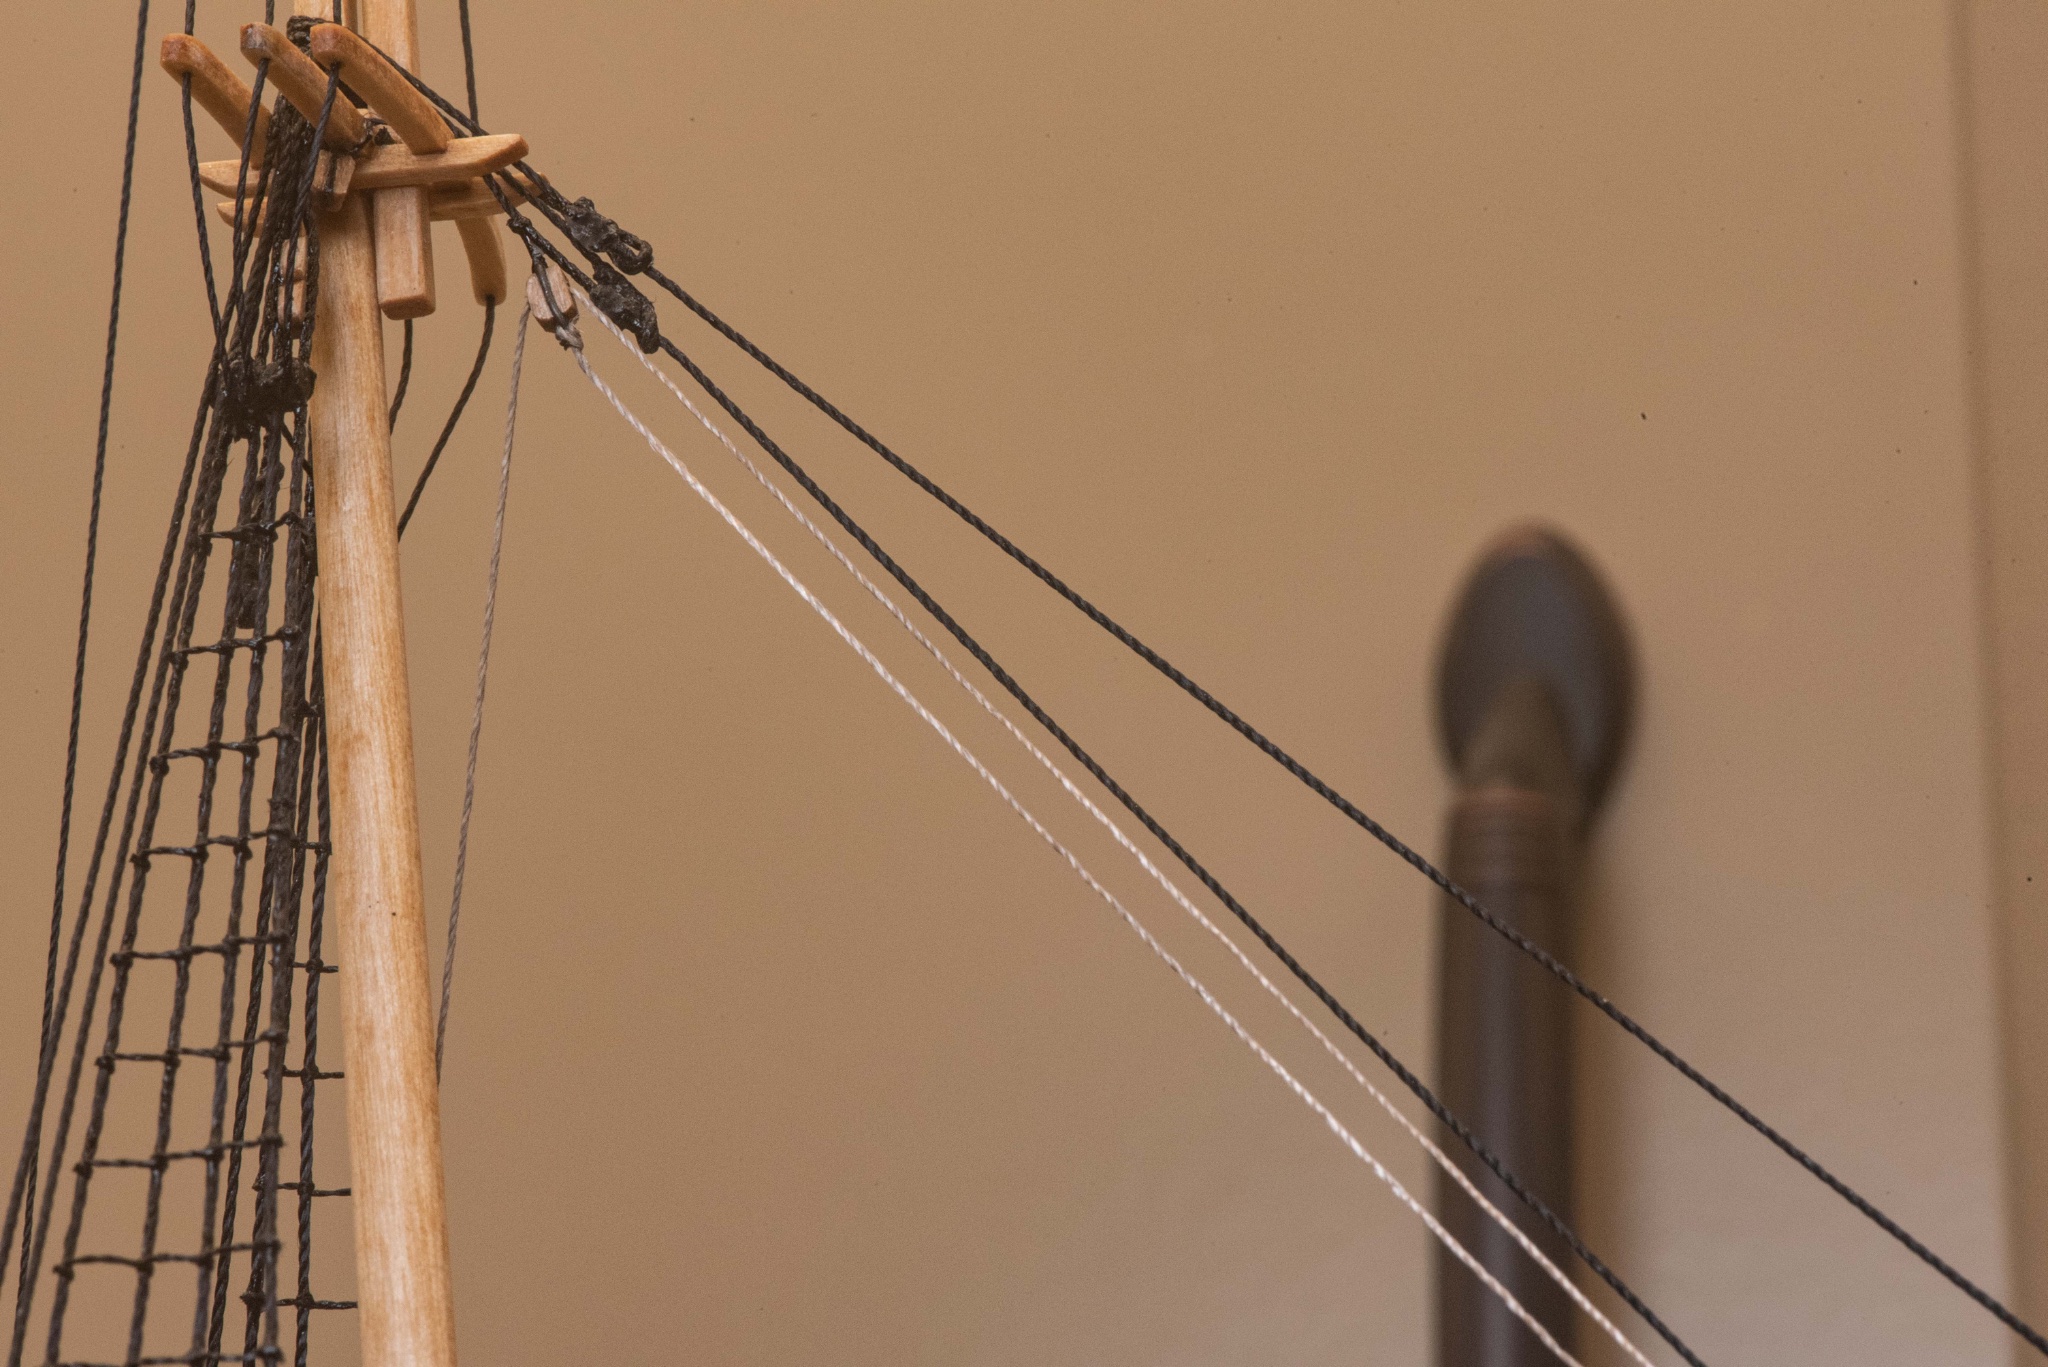
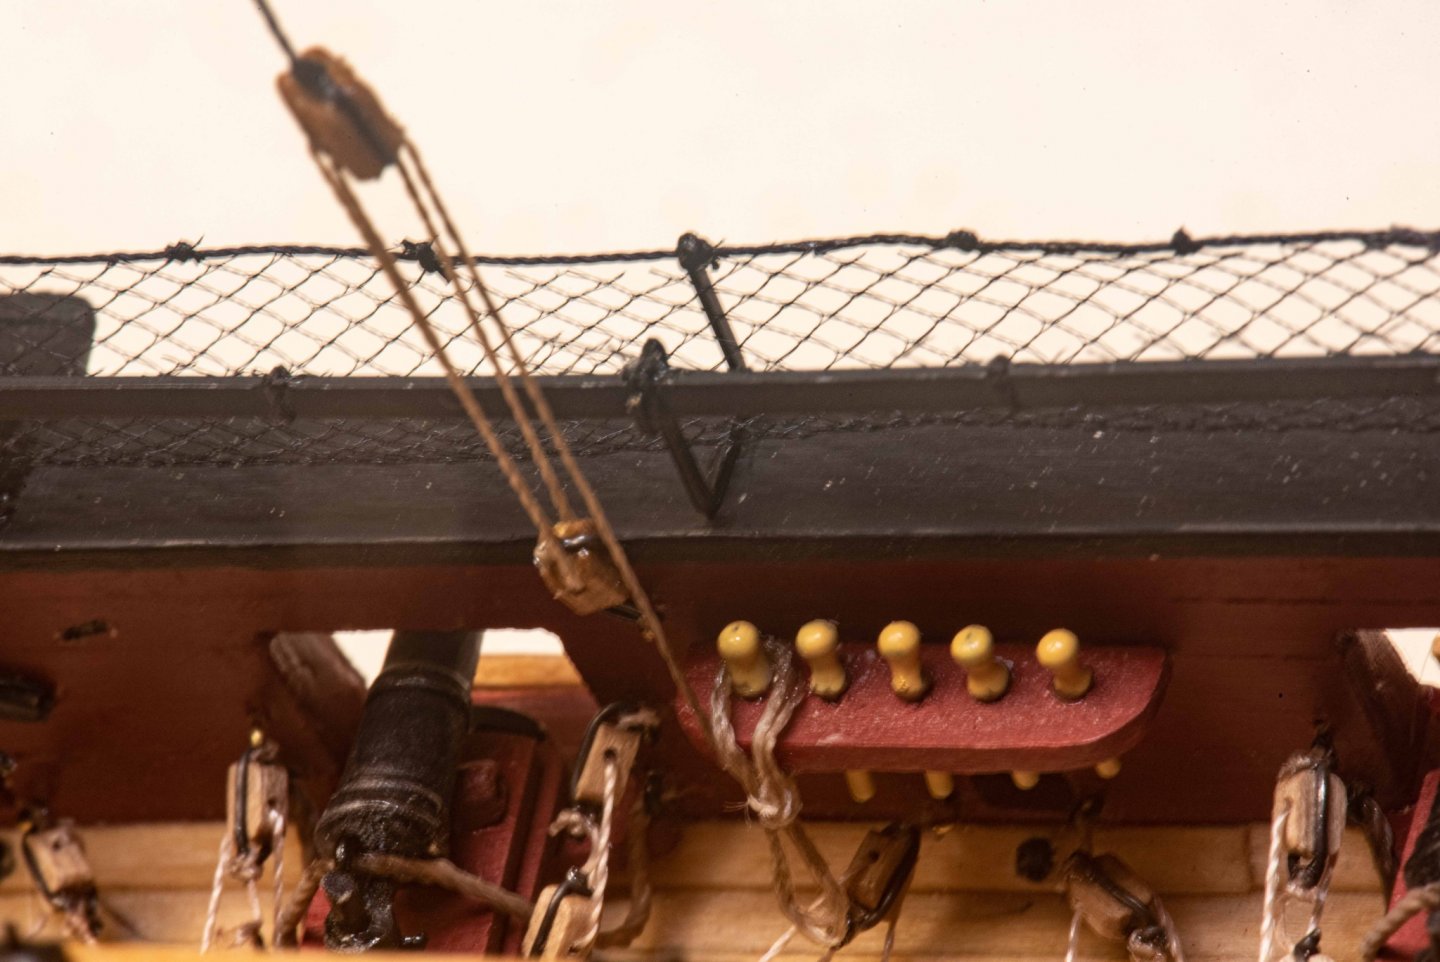
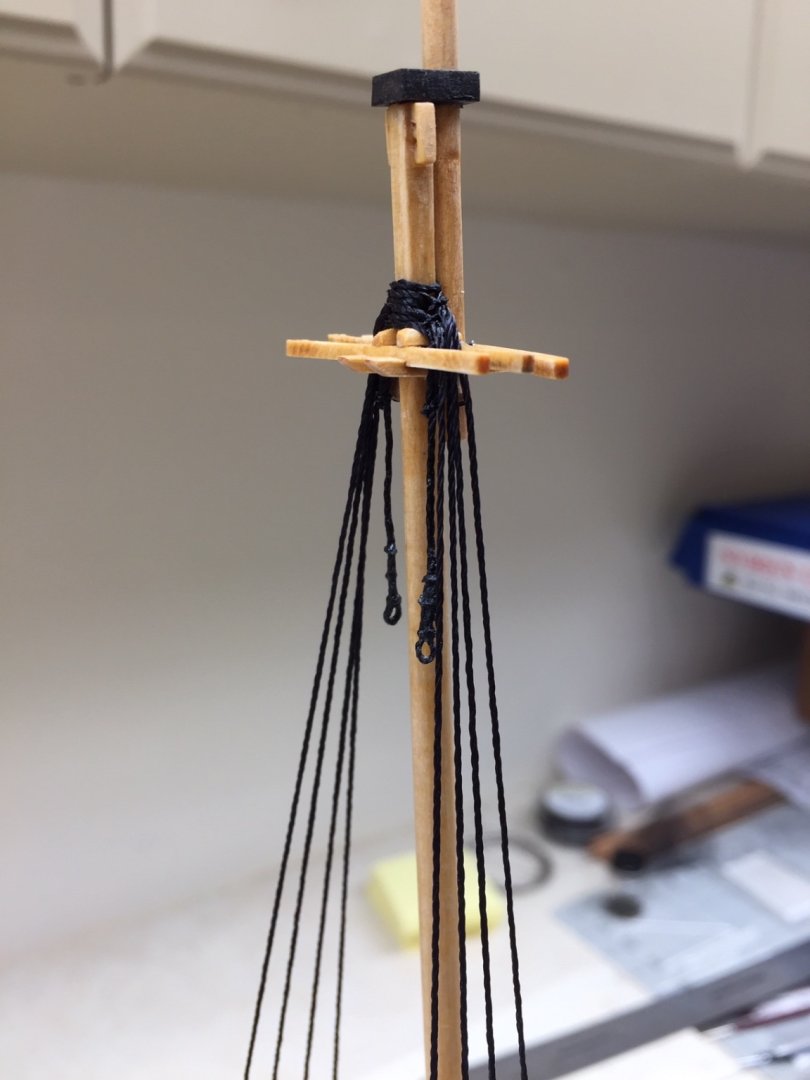
It's time to start adding the yards to the masts. The two lower yards are done first, main mast first, then foremast. The other yards are added working upward. All of them are rigged somewhat in a similar manner. The lower yards and topmast yard have buntlines, but the others do not. I think all the other lines are very similar. At this stage, I found it difficult to take photos of the rigging. I'll attach the ones I think are best. The first two show the lower yard lifts. These go thru blocks on the end of the yard (not shown), to blocks above the platform, and down to a block and tackle on the channels. The first picture shows the blocks above the platform, and the 2nd one the block and tackle on the channels. It's the block with the hook in between the deadeyes. The 3rd photo shows the two lower yards and rigging on the ship.

-
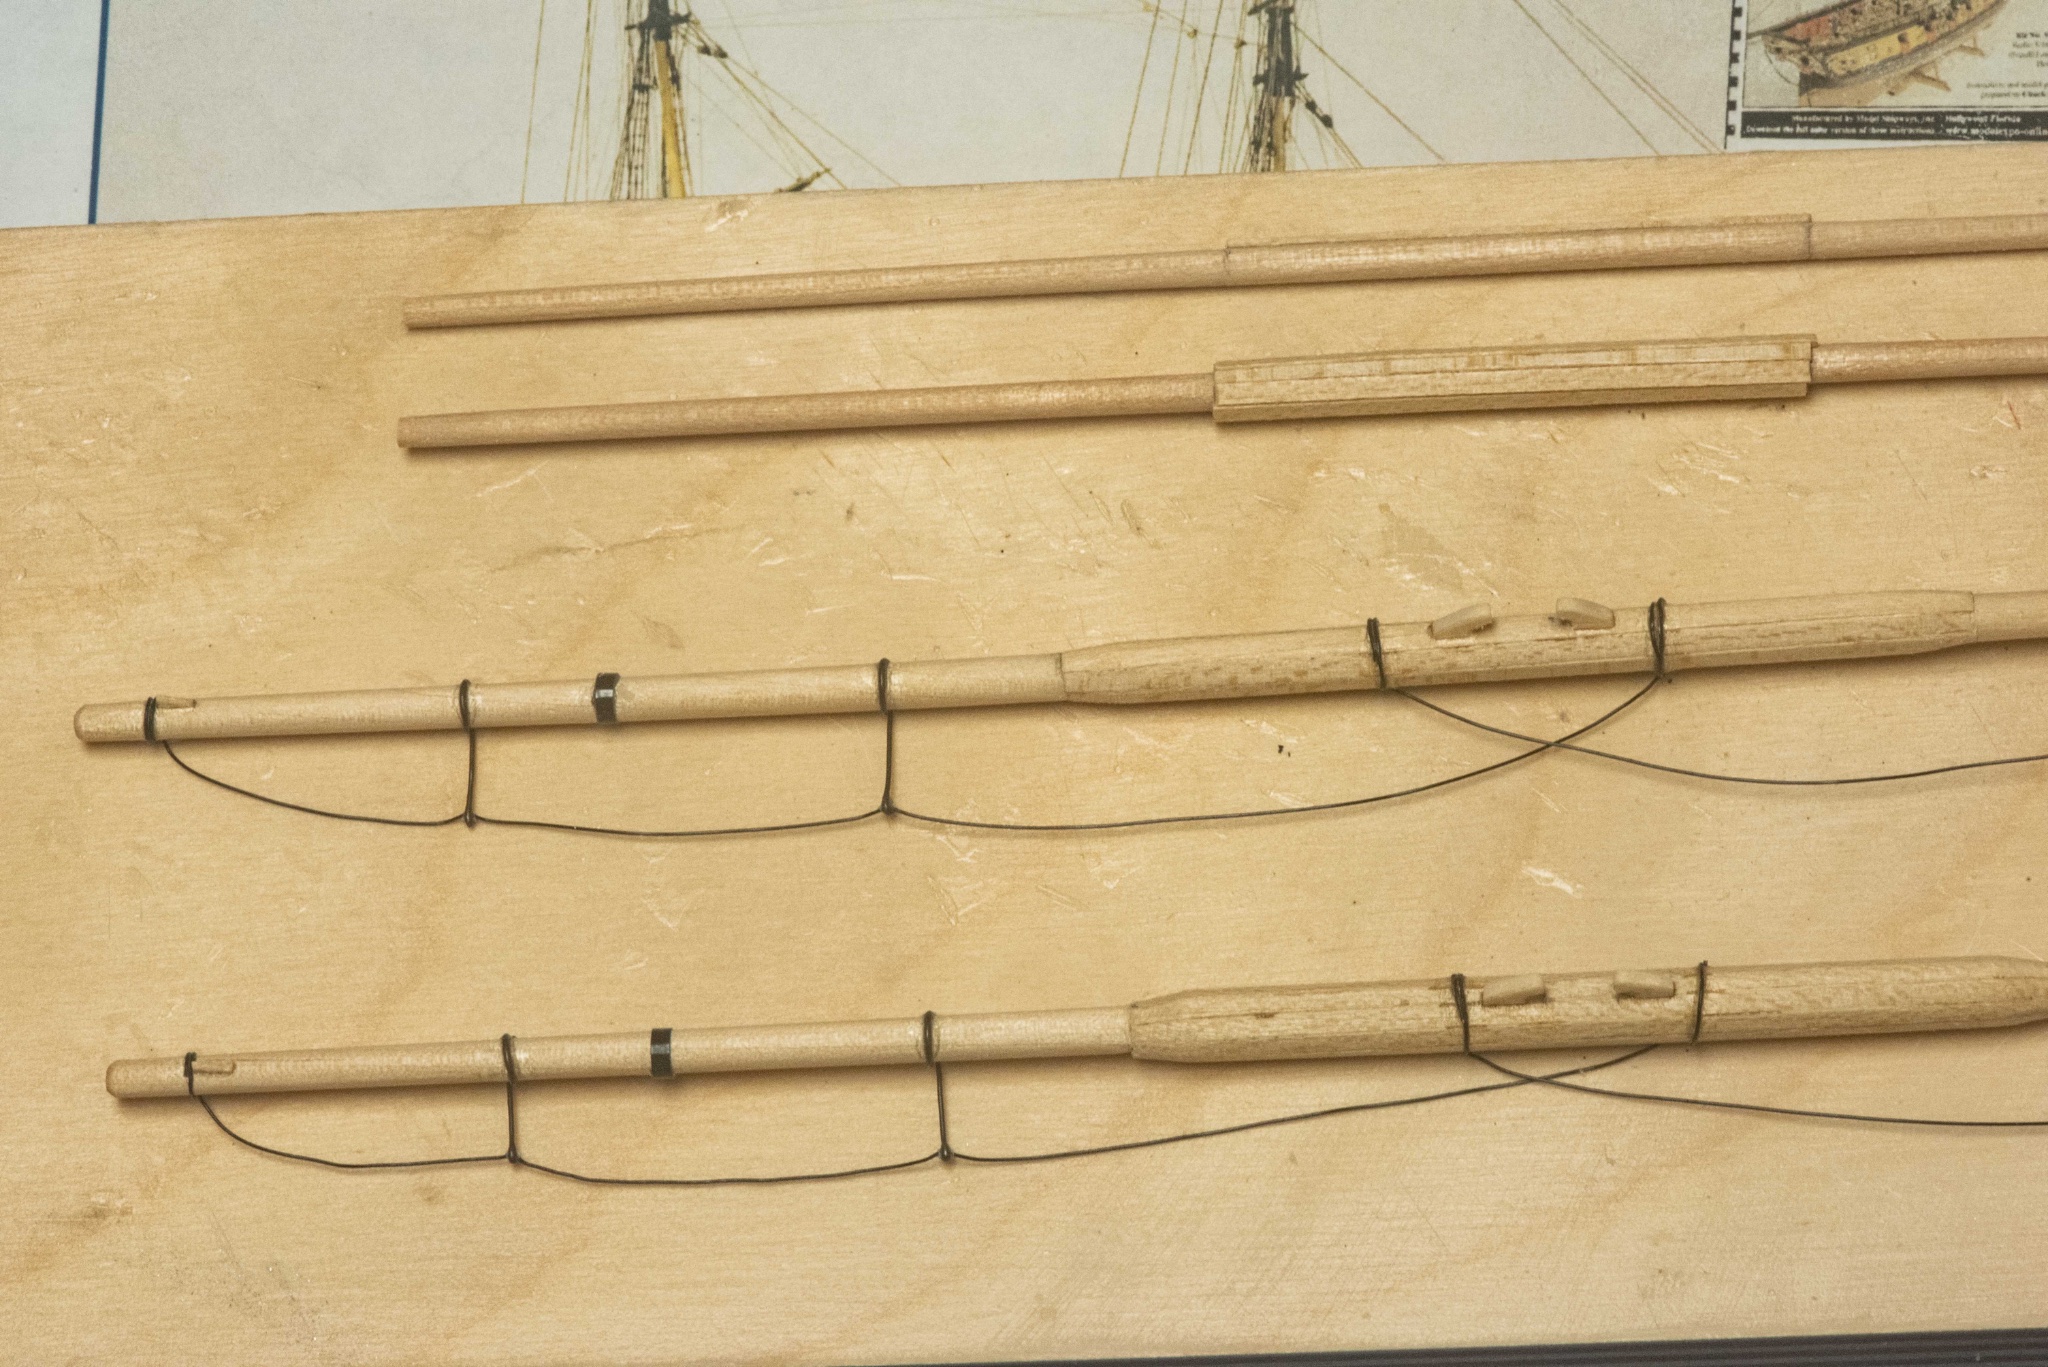
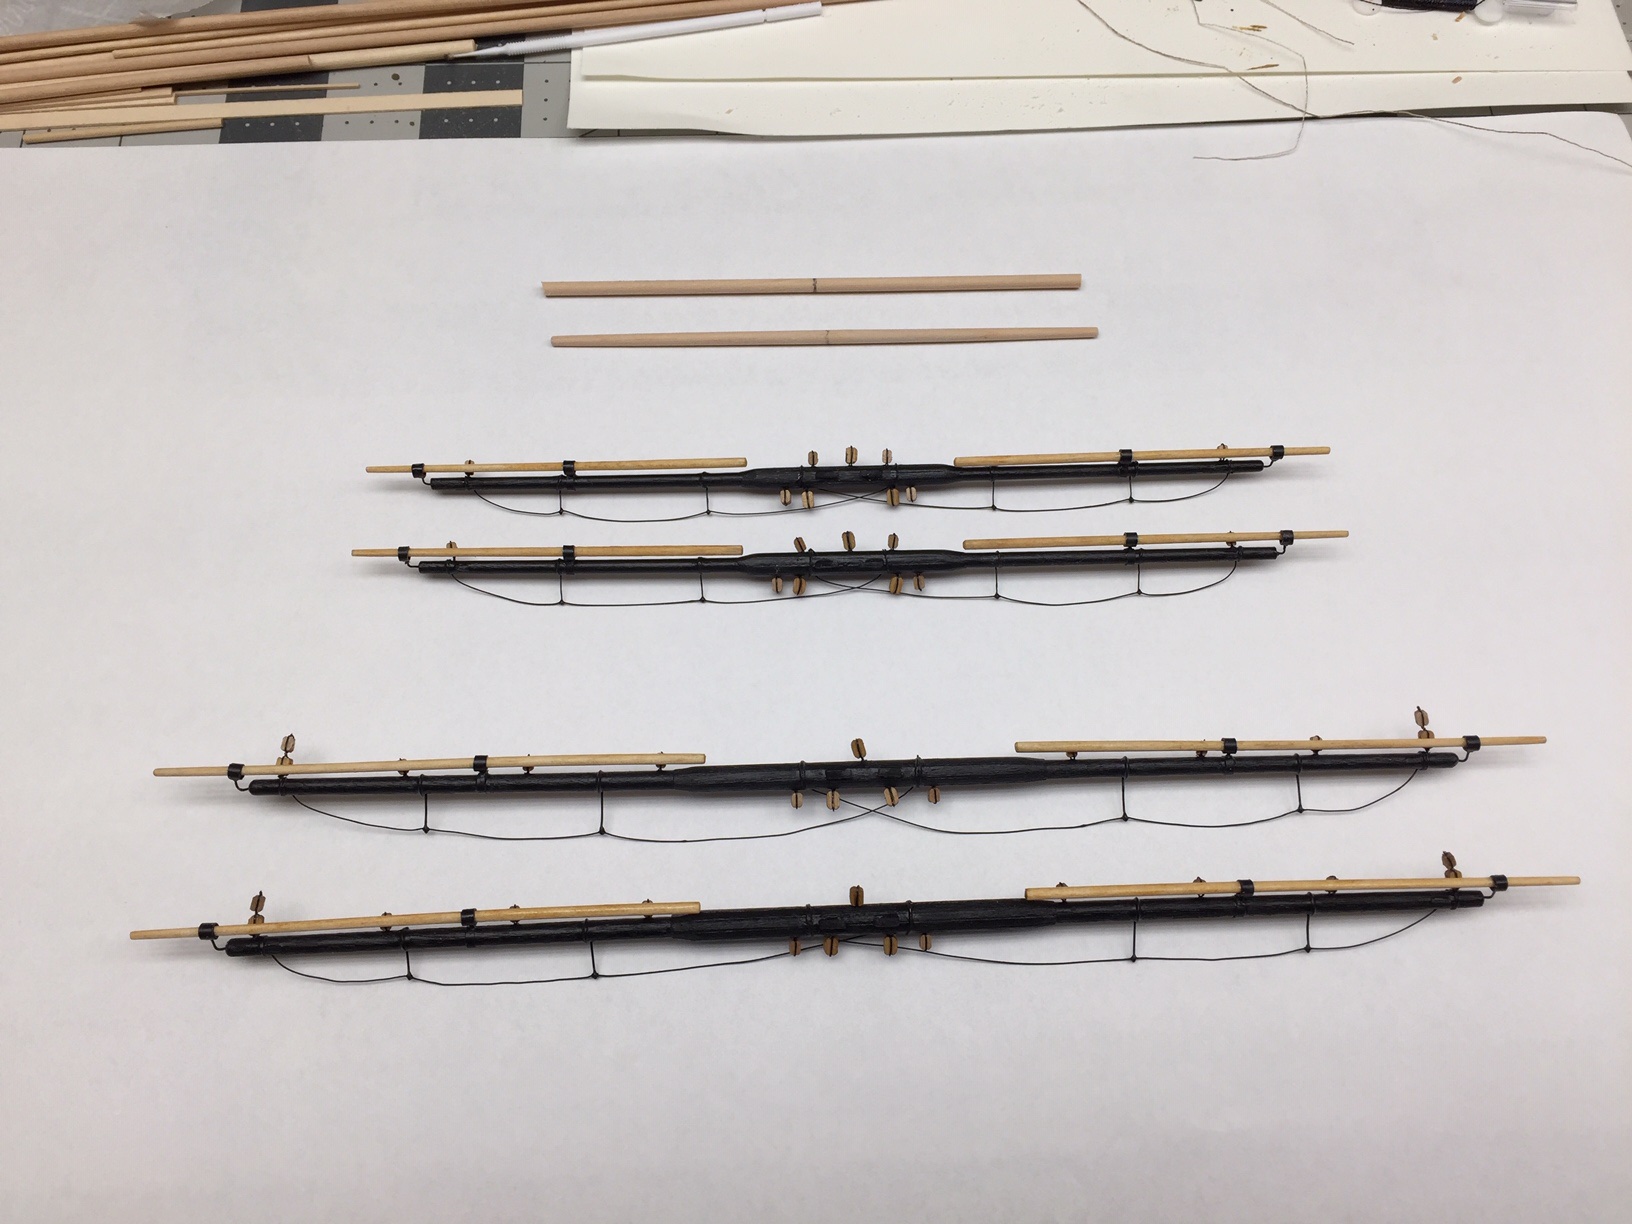
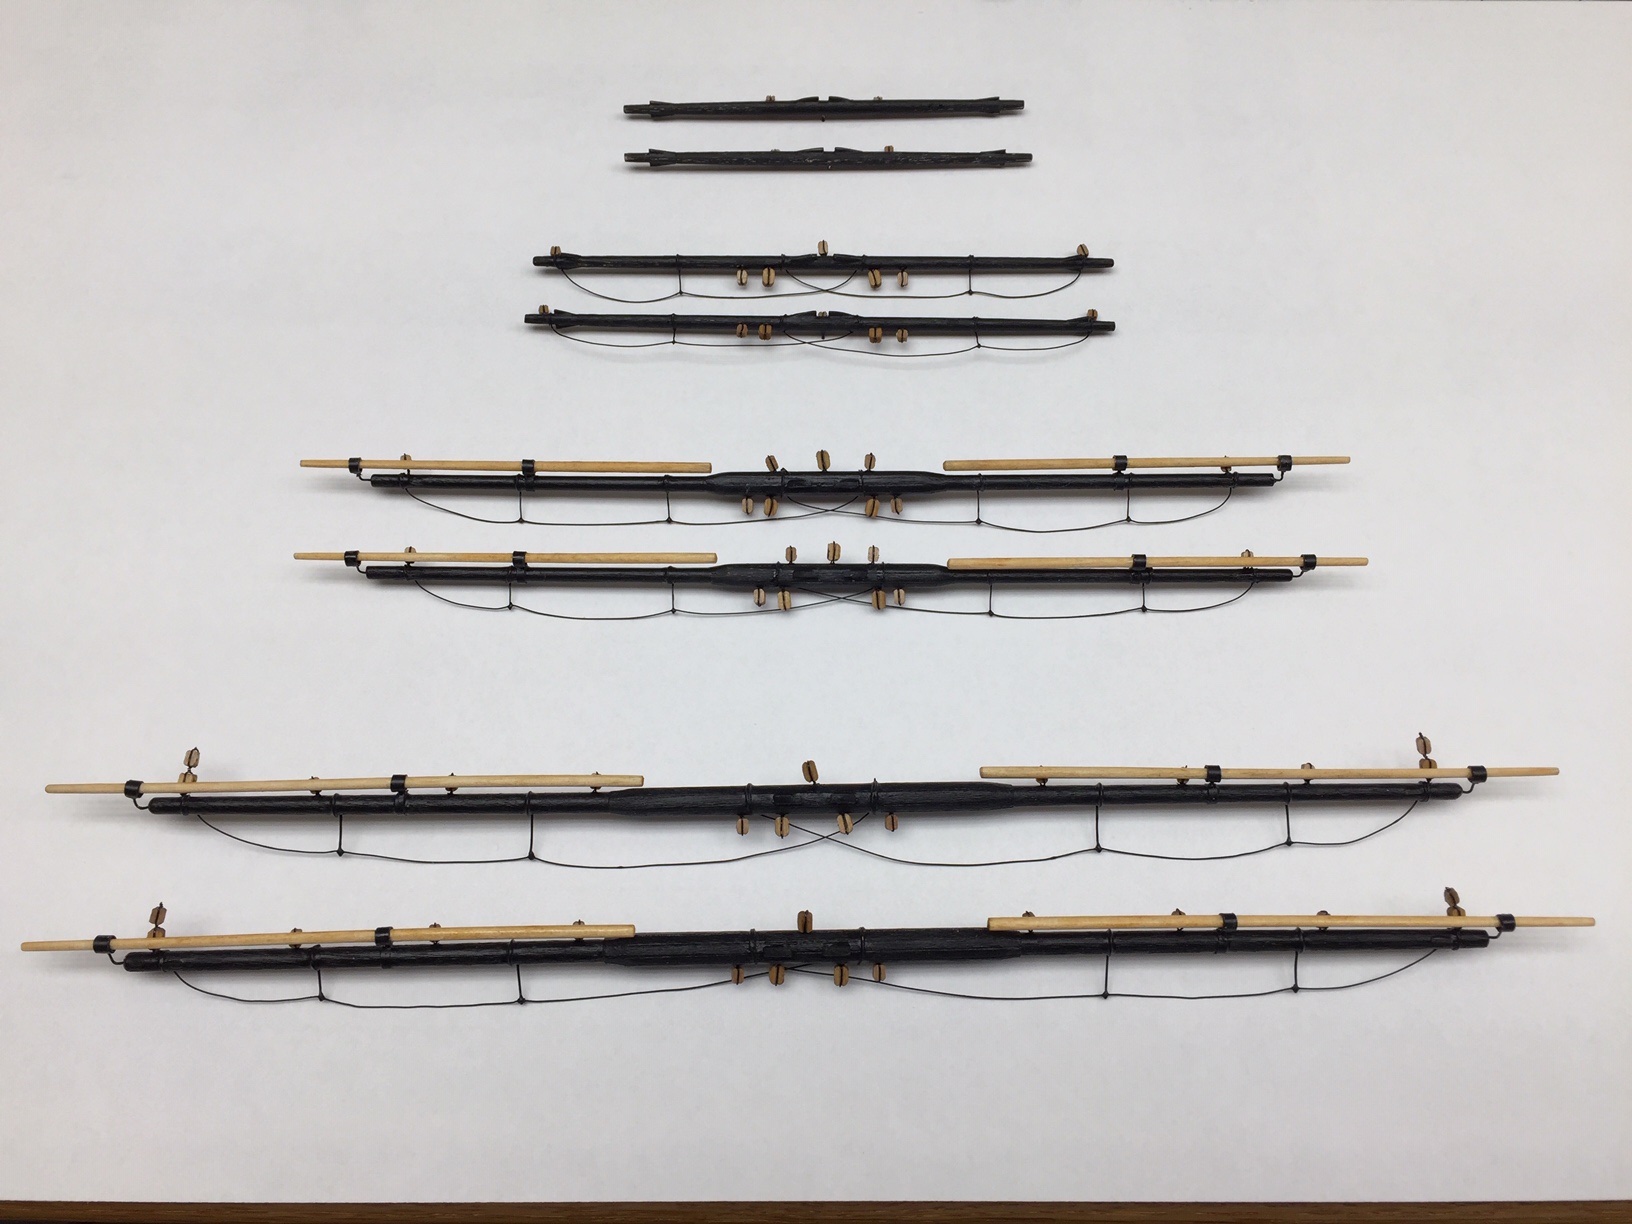
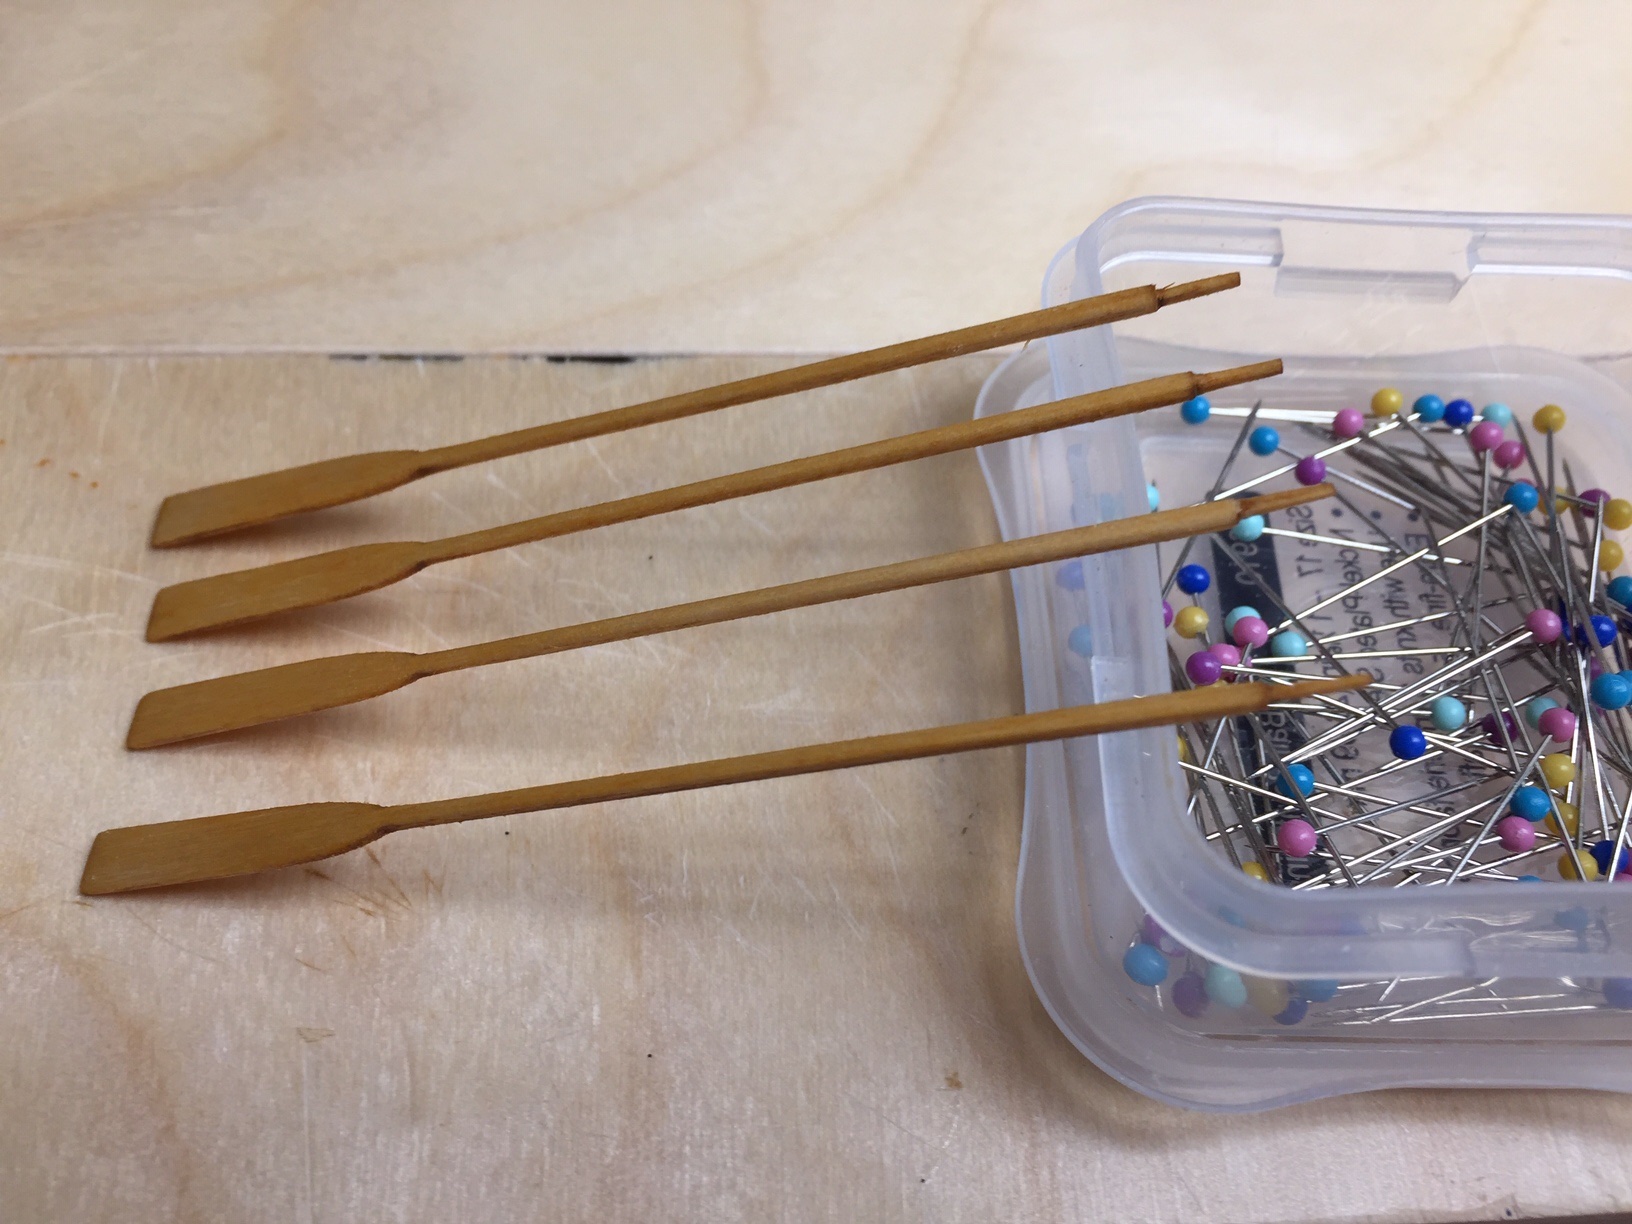
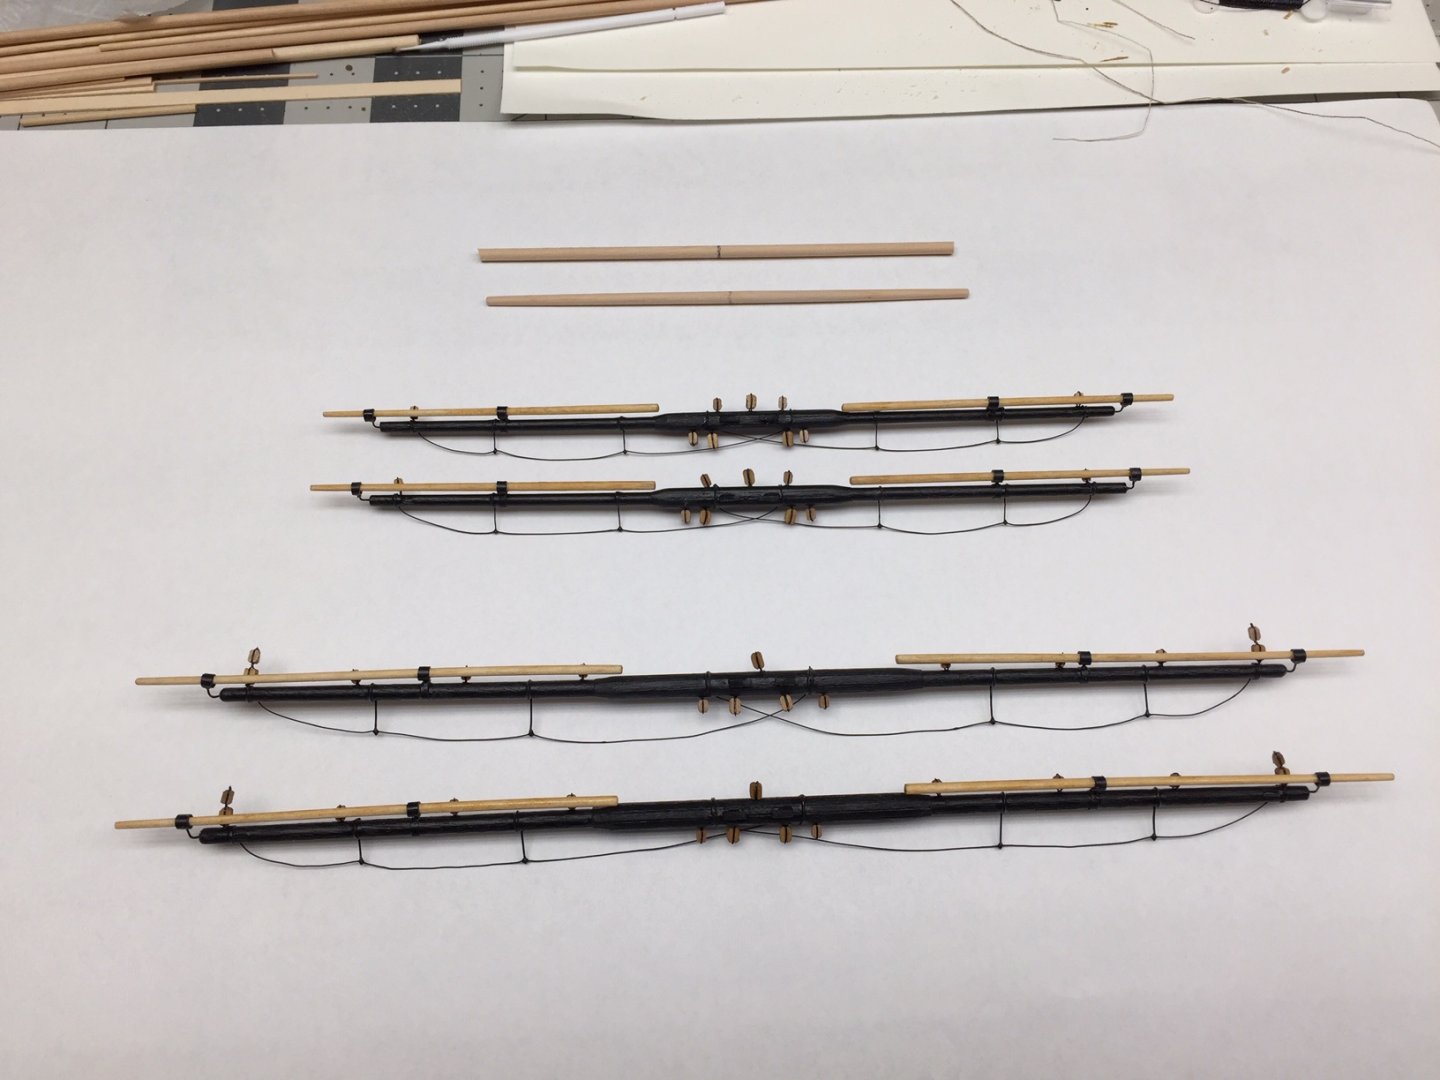
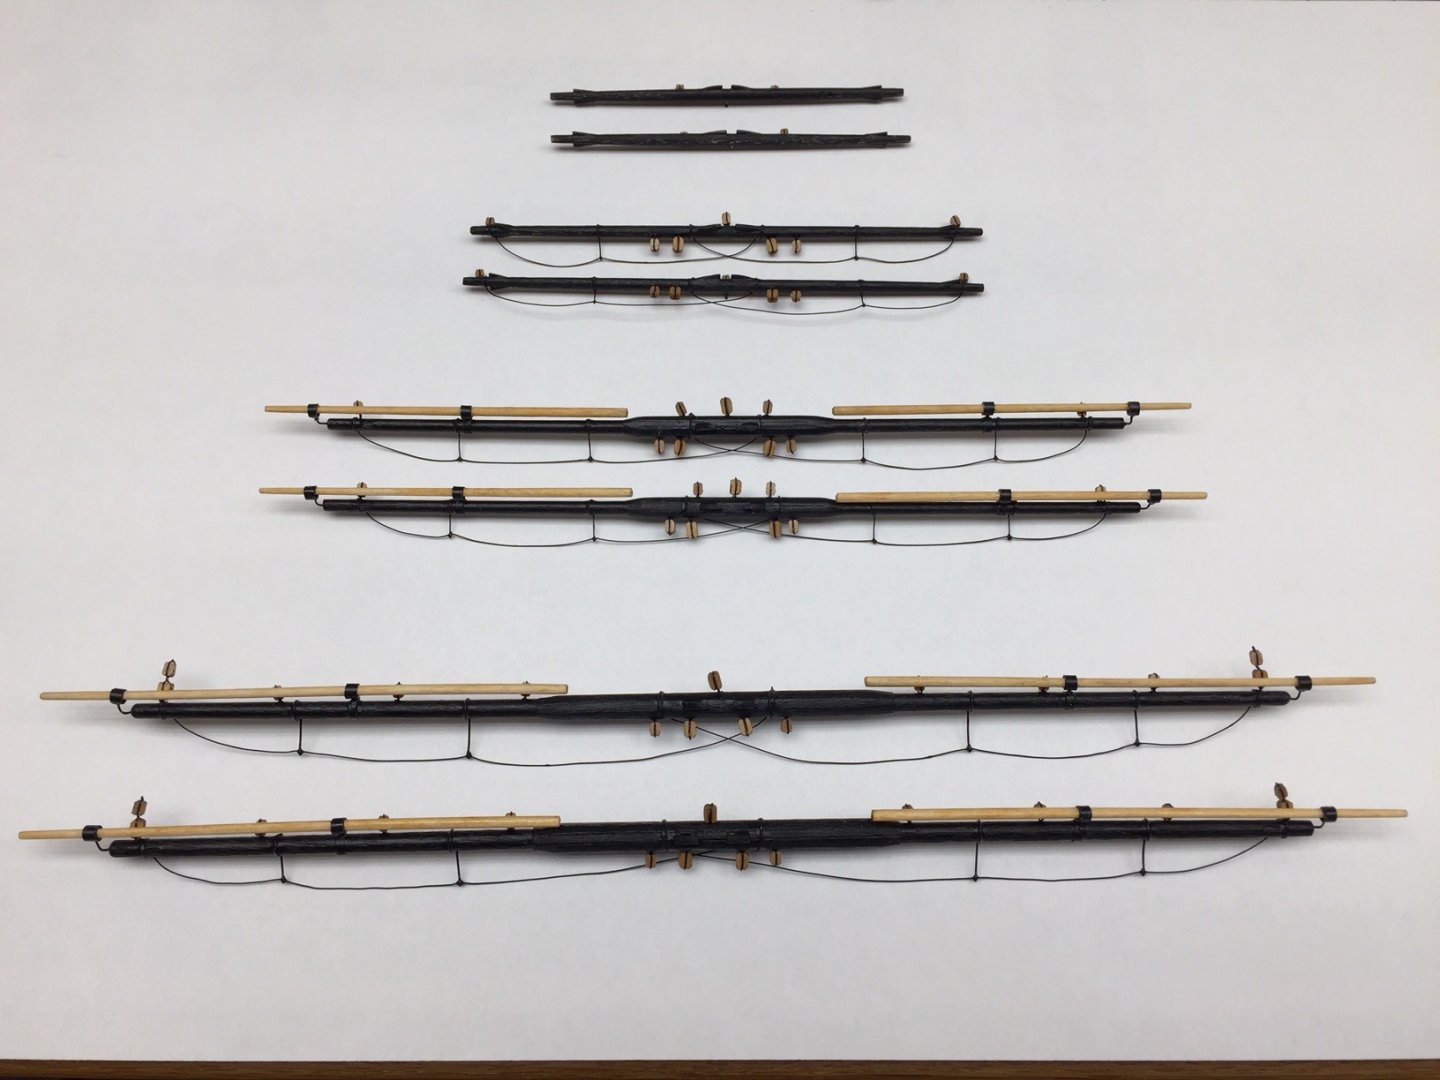
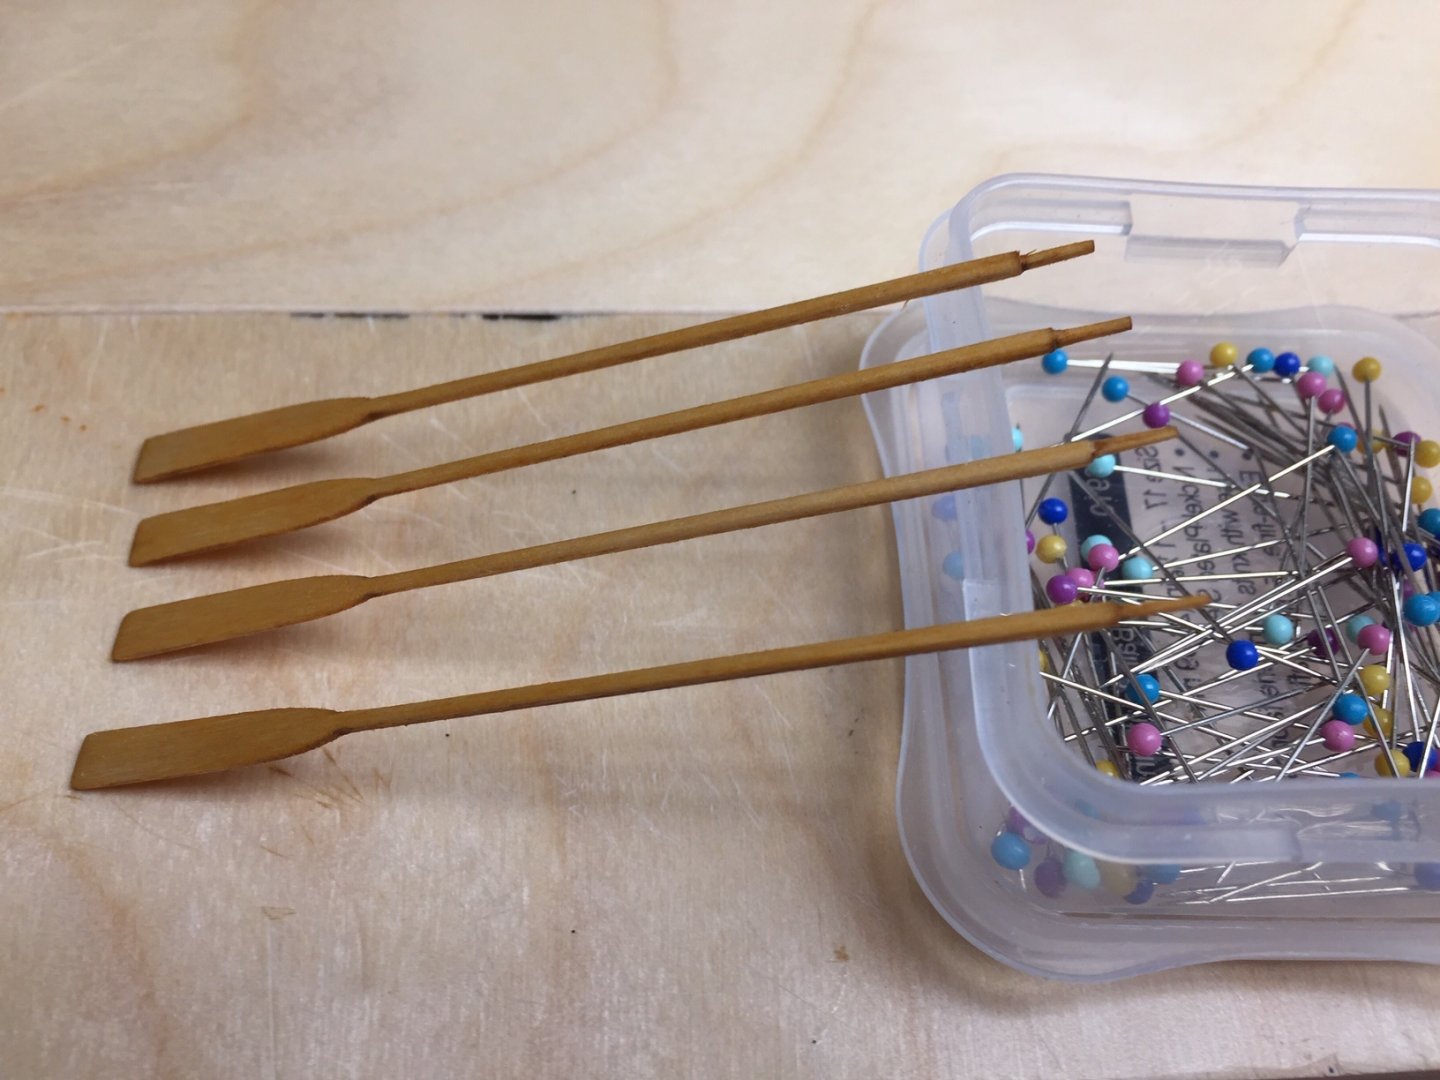
The yards were constructed next (Chapter 19). They are fairly straightforward. I glued the 1/32 basswood for the sling cleats and the yard arm cleats on the yard and then trimmed or "carved" them to shape. This worked well, and I think is the only way to do it. As mentioned previously, the wire foot ropes were fairly easy to do. In my opinion they look much better than thread ones. Plus they have the benefit that if you accidentally bend them later on, you can easily bend them back to shape. I use a piece of brass tubing or something similar to shape them. It's important to make sure you add all the blocks on the yards before you mount the yards to the mast. Before mounting yards I had to add the ties, which are not shown in the photo. I glued pins to the lower yards and topmast yards for mounting to the mast. I did not put pins in the upper yards, because the manual recommended that you only lash them to the mast. I thought about pinning the upper yards also, because I think it could be done if you use something like 30 gauge wire.

-
I only have a couple of pictures of the main staysail downhaul and halliard, so I'll include them here.


-
The boom and gaff were added to the main mast next. I believe the pictures are self explanatory.


-
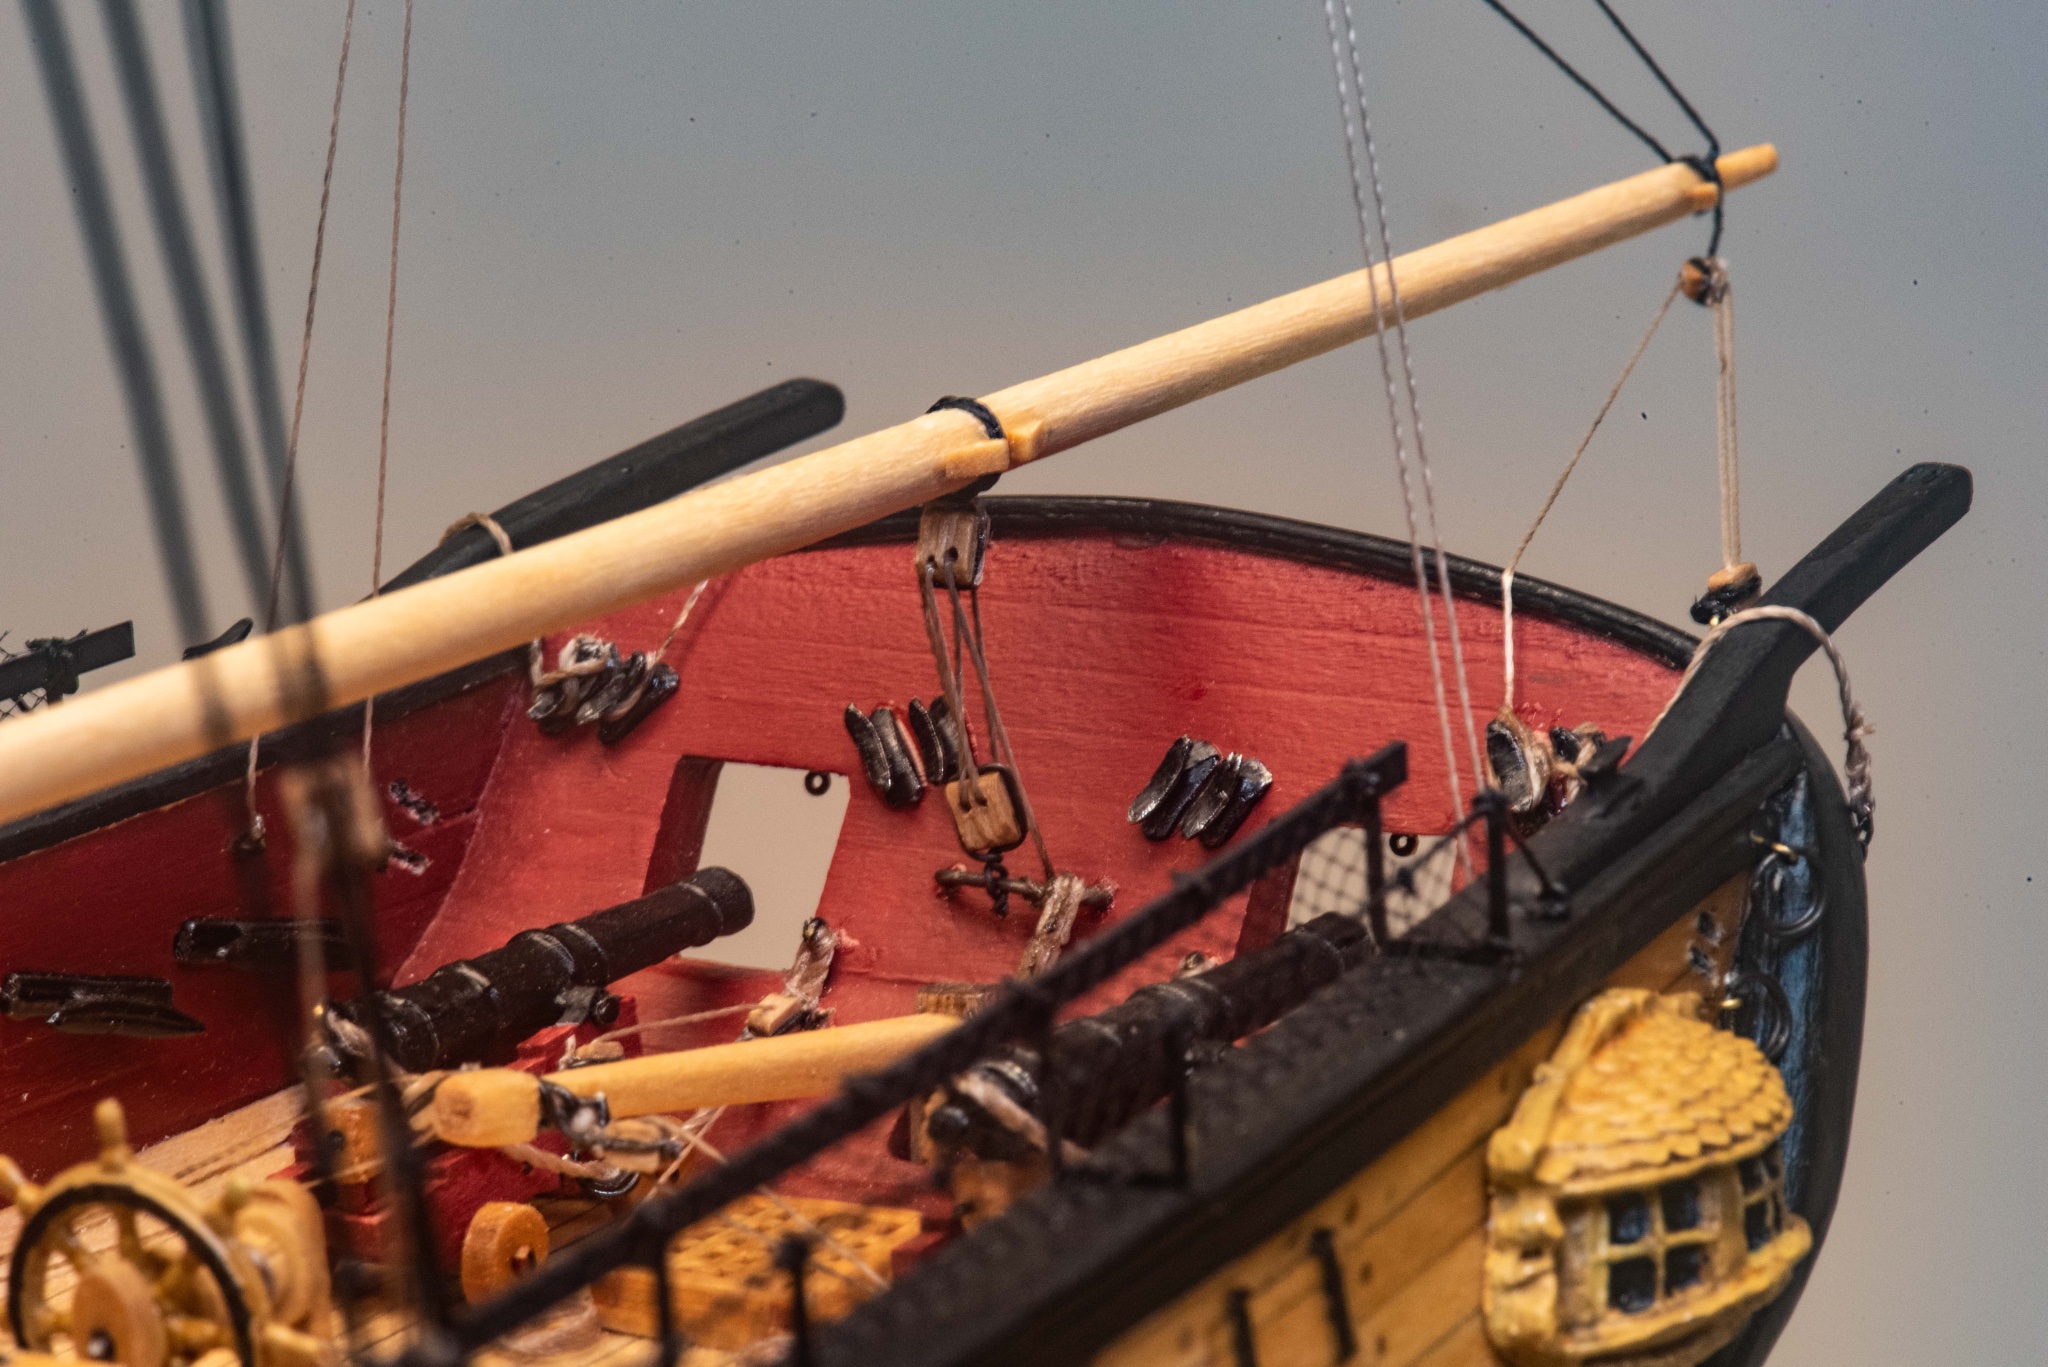
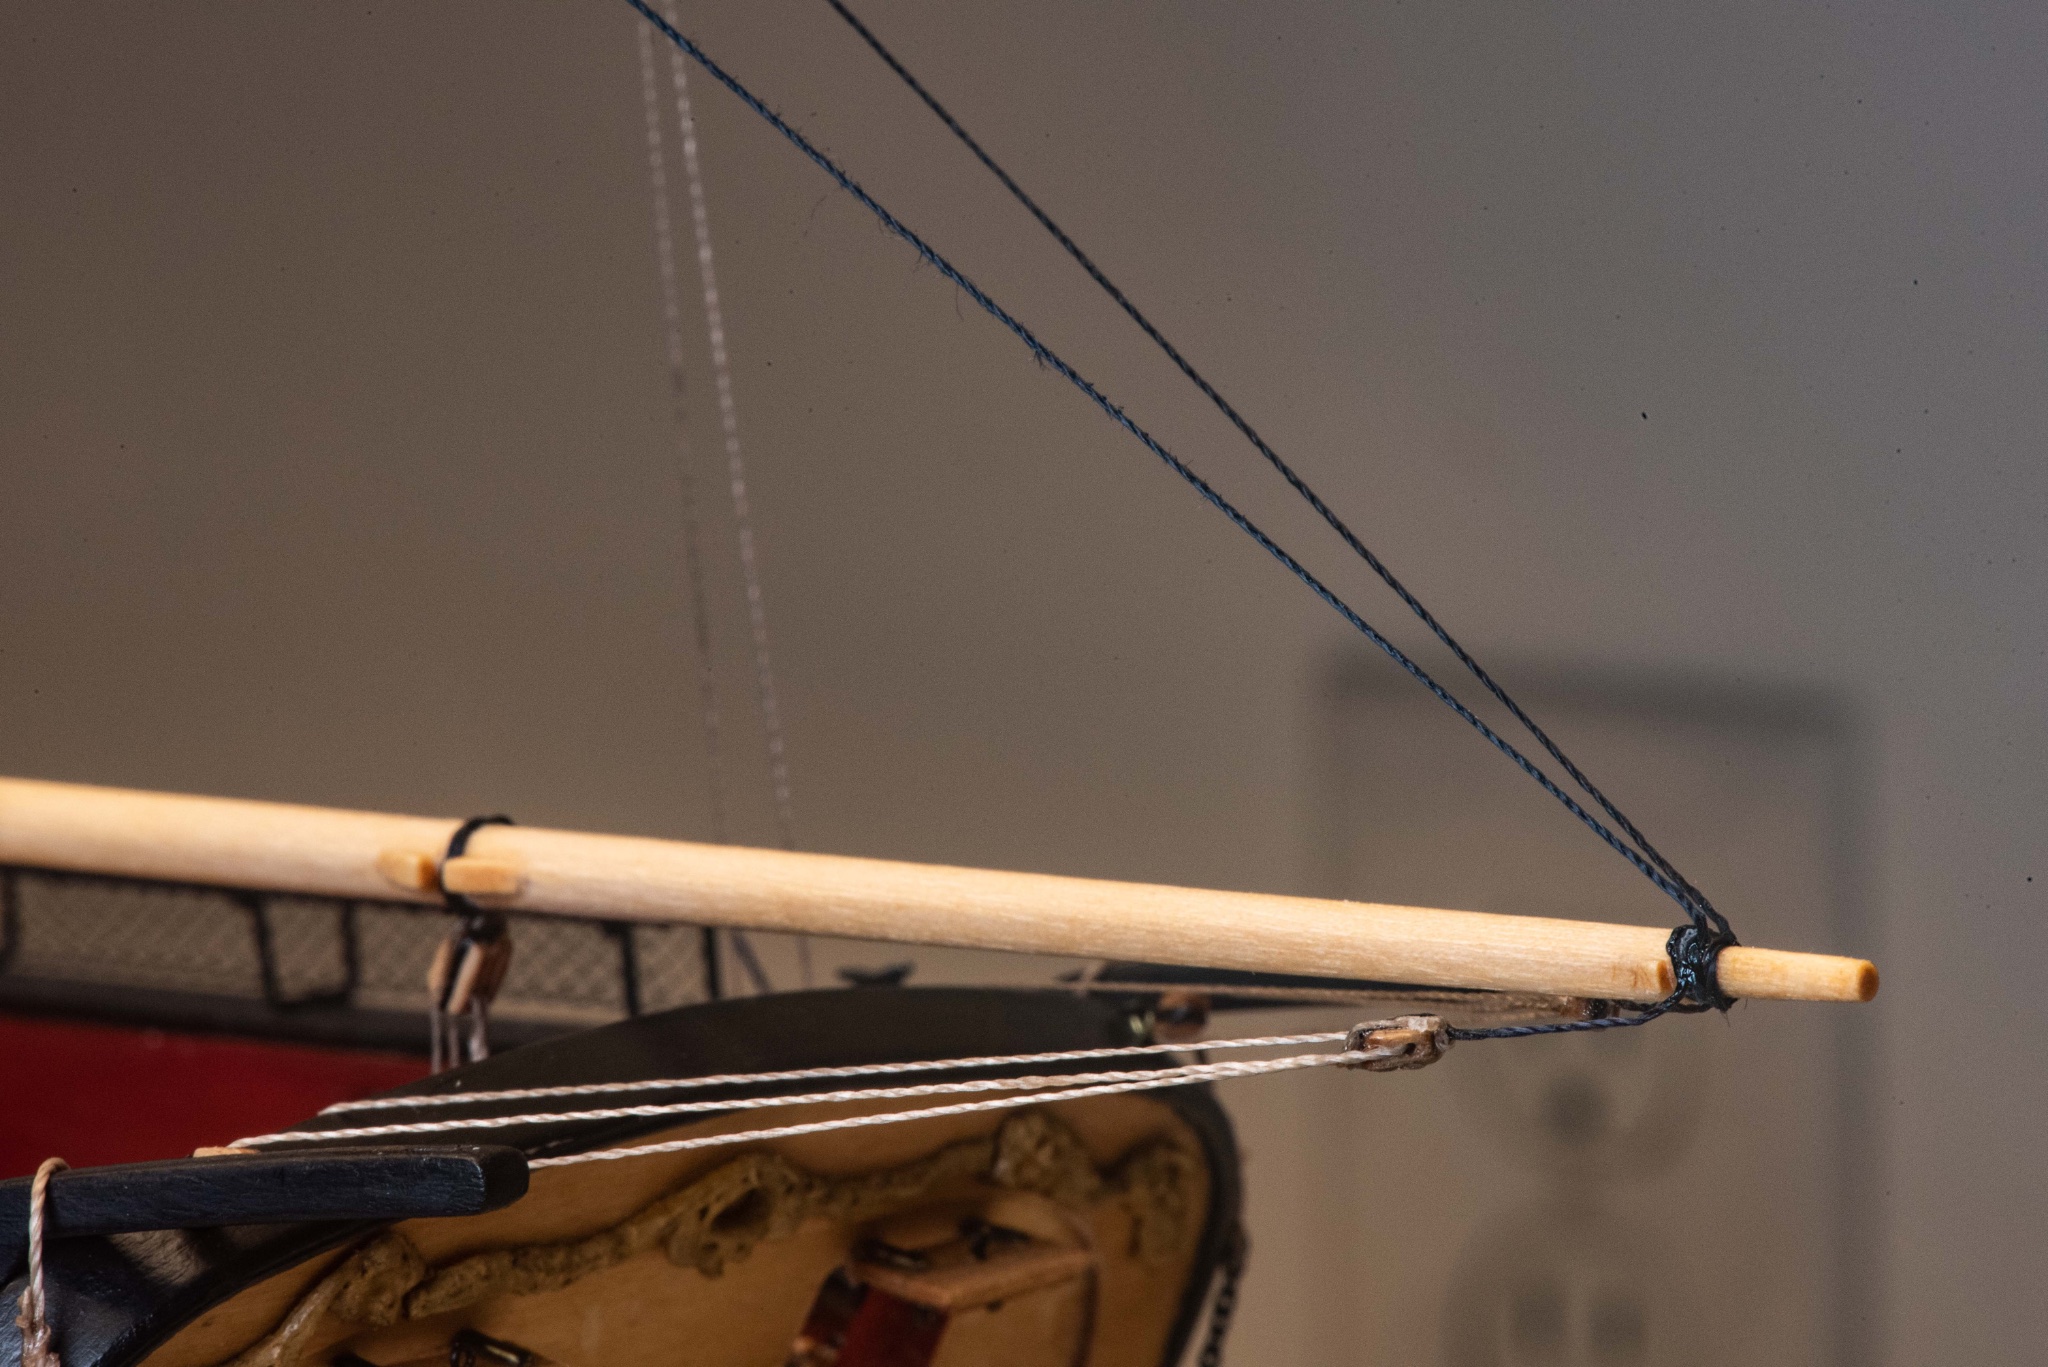
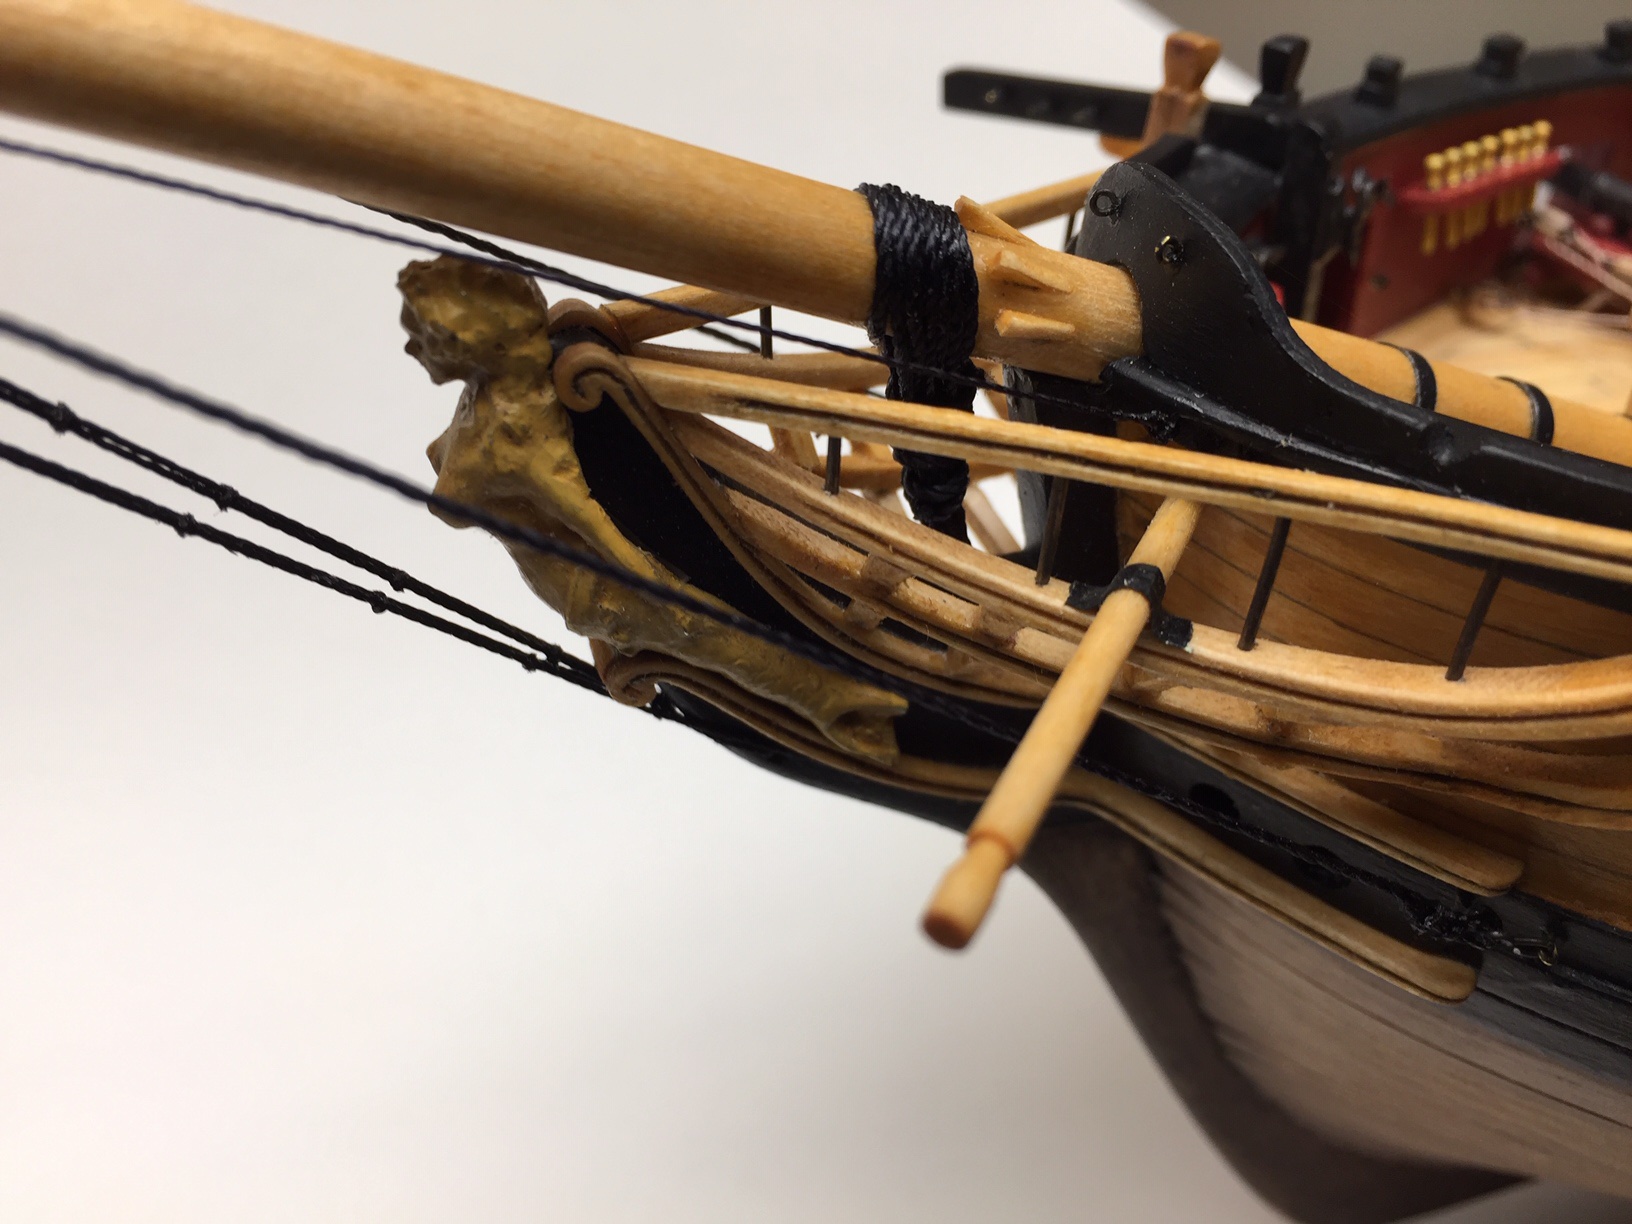
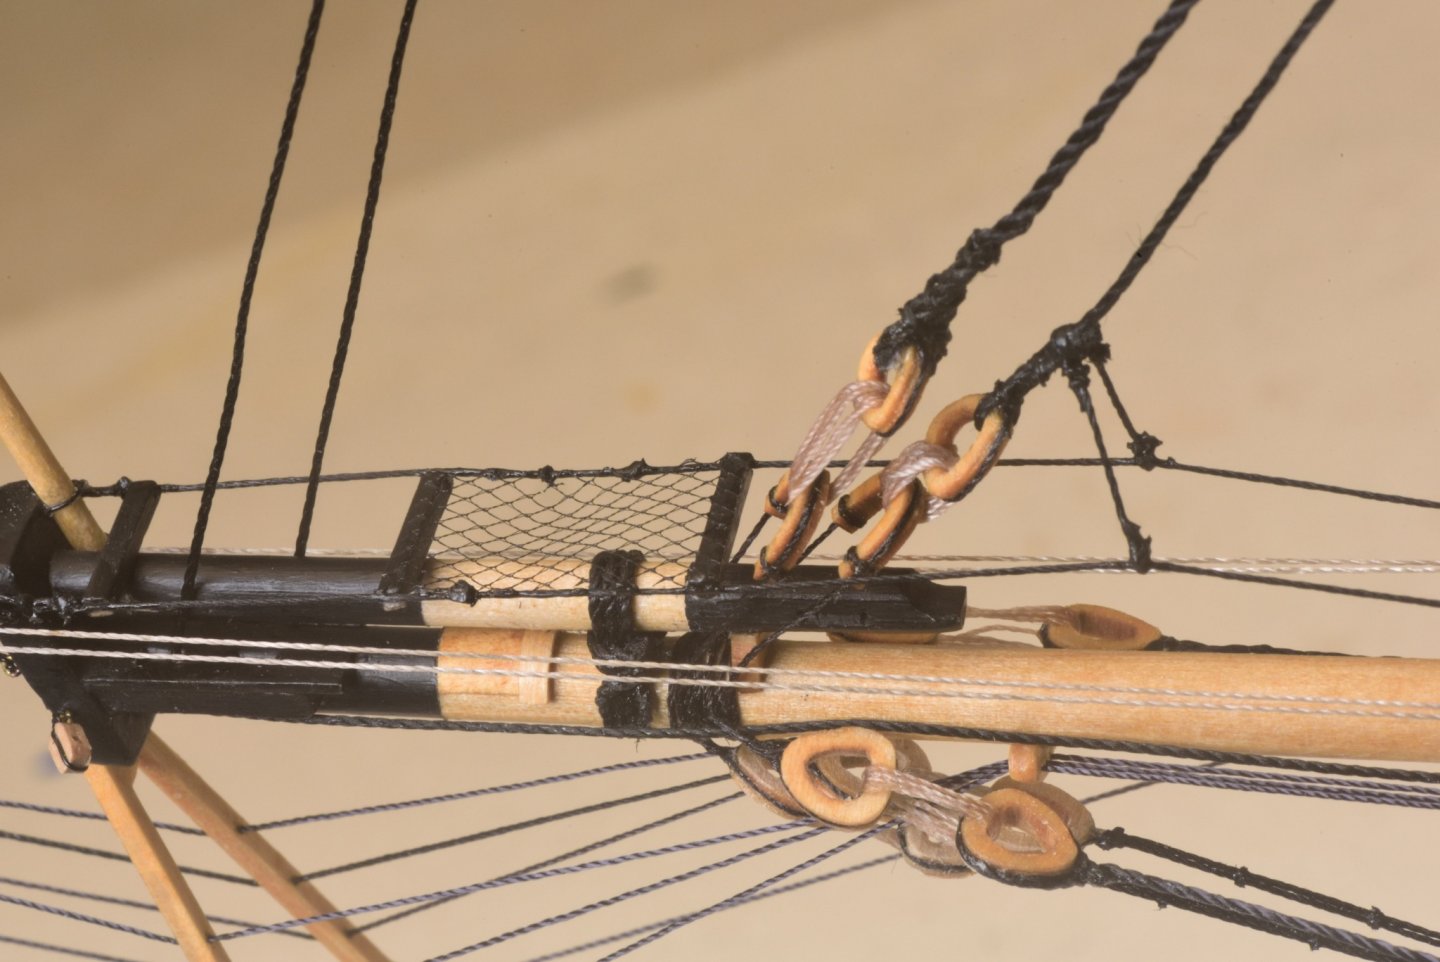
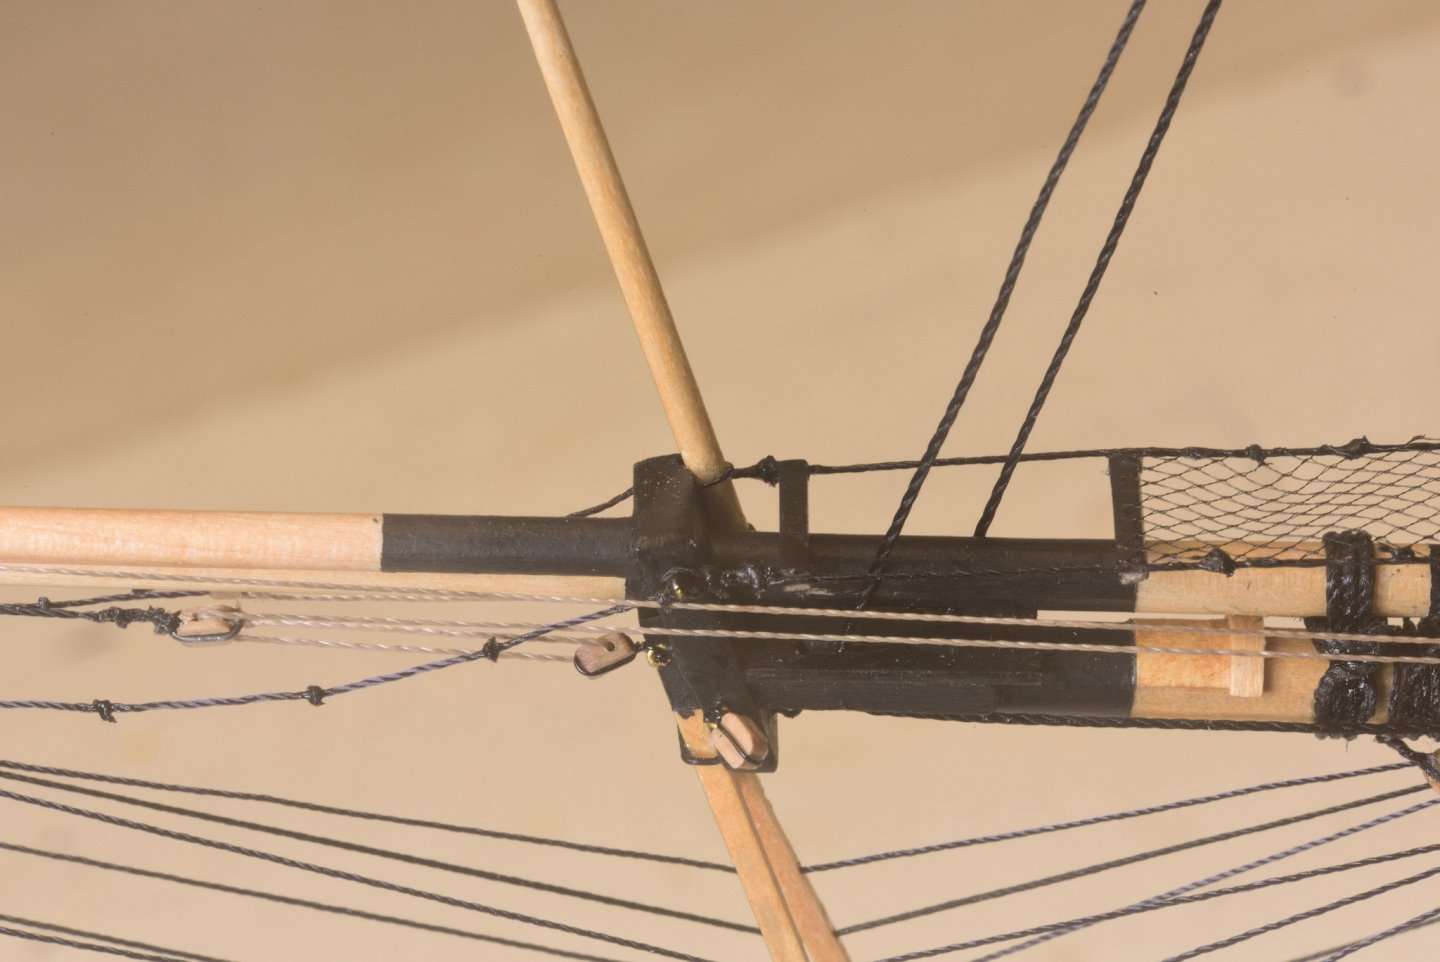
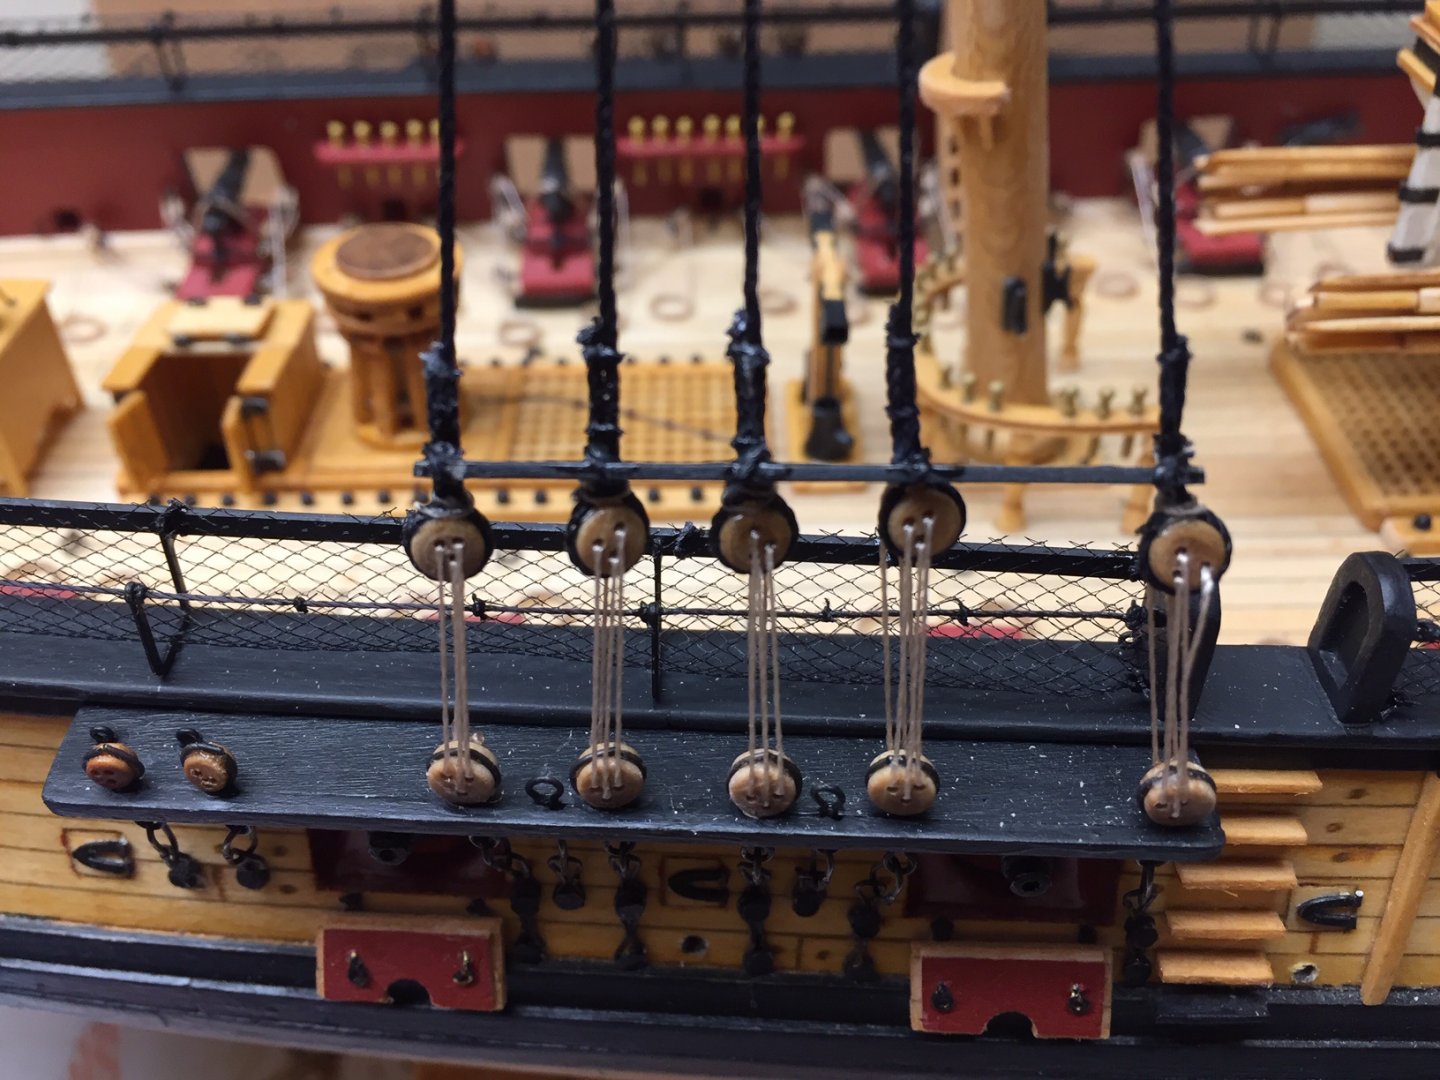
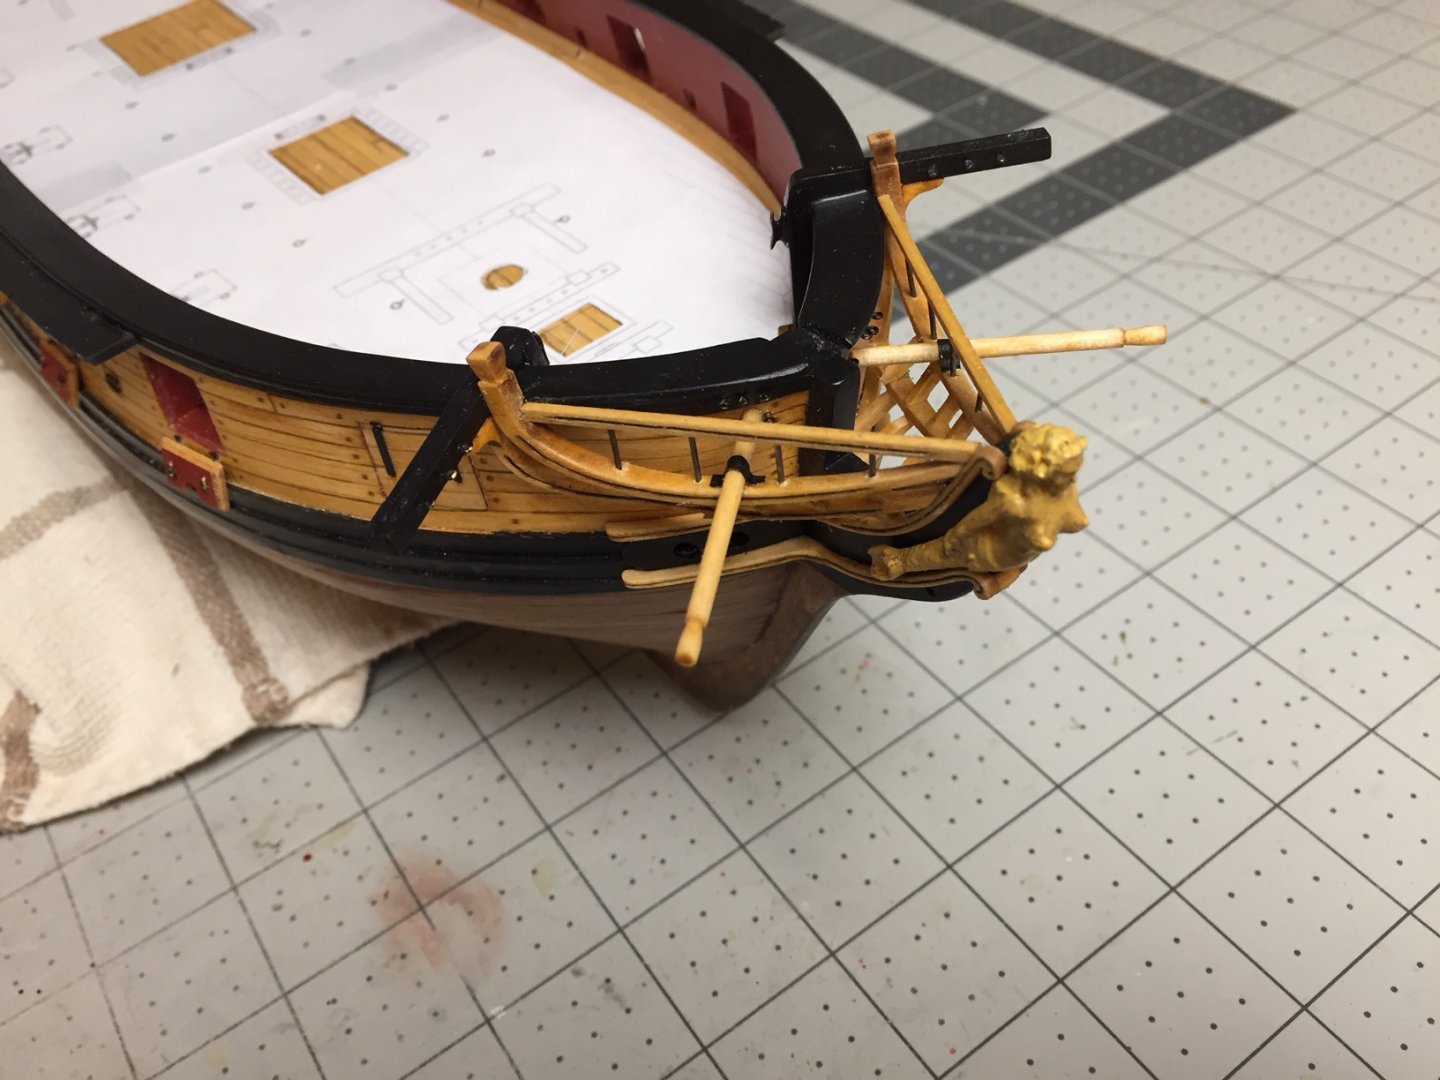
Here are more pictures of the bow rigging showing some of my comments in the previous post. The horses are a bit tricky to set up, but went ok. I had more trouble fitting the small piece of netting in there. It's flexible, so didn't want to stay straight. I managed, but it took several tries.
-
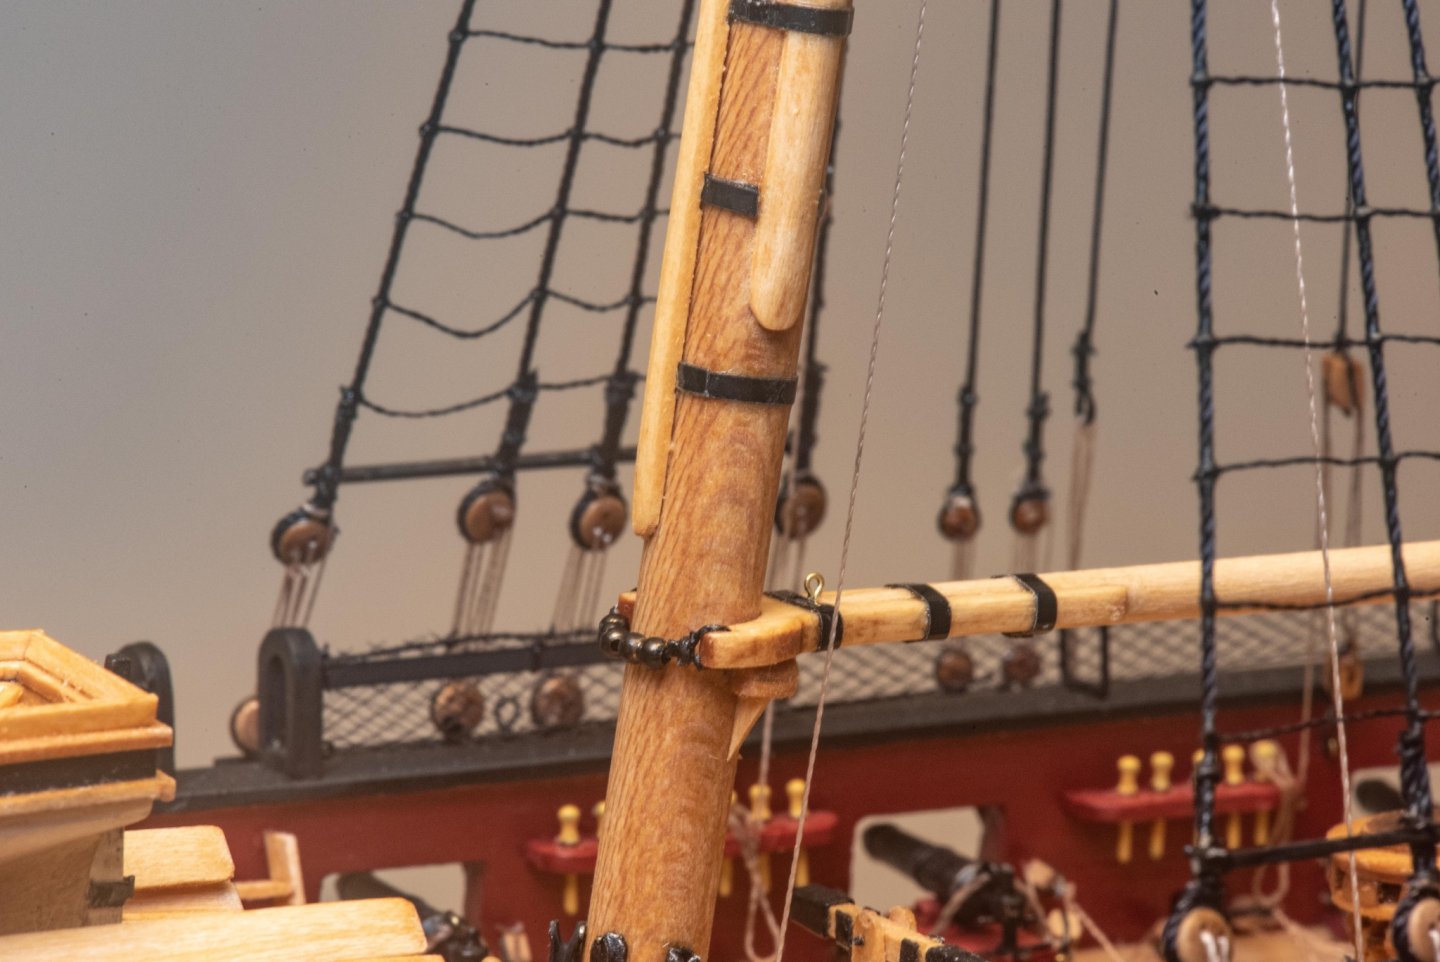
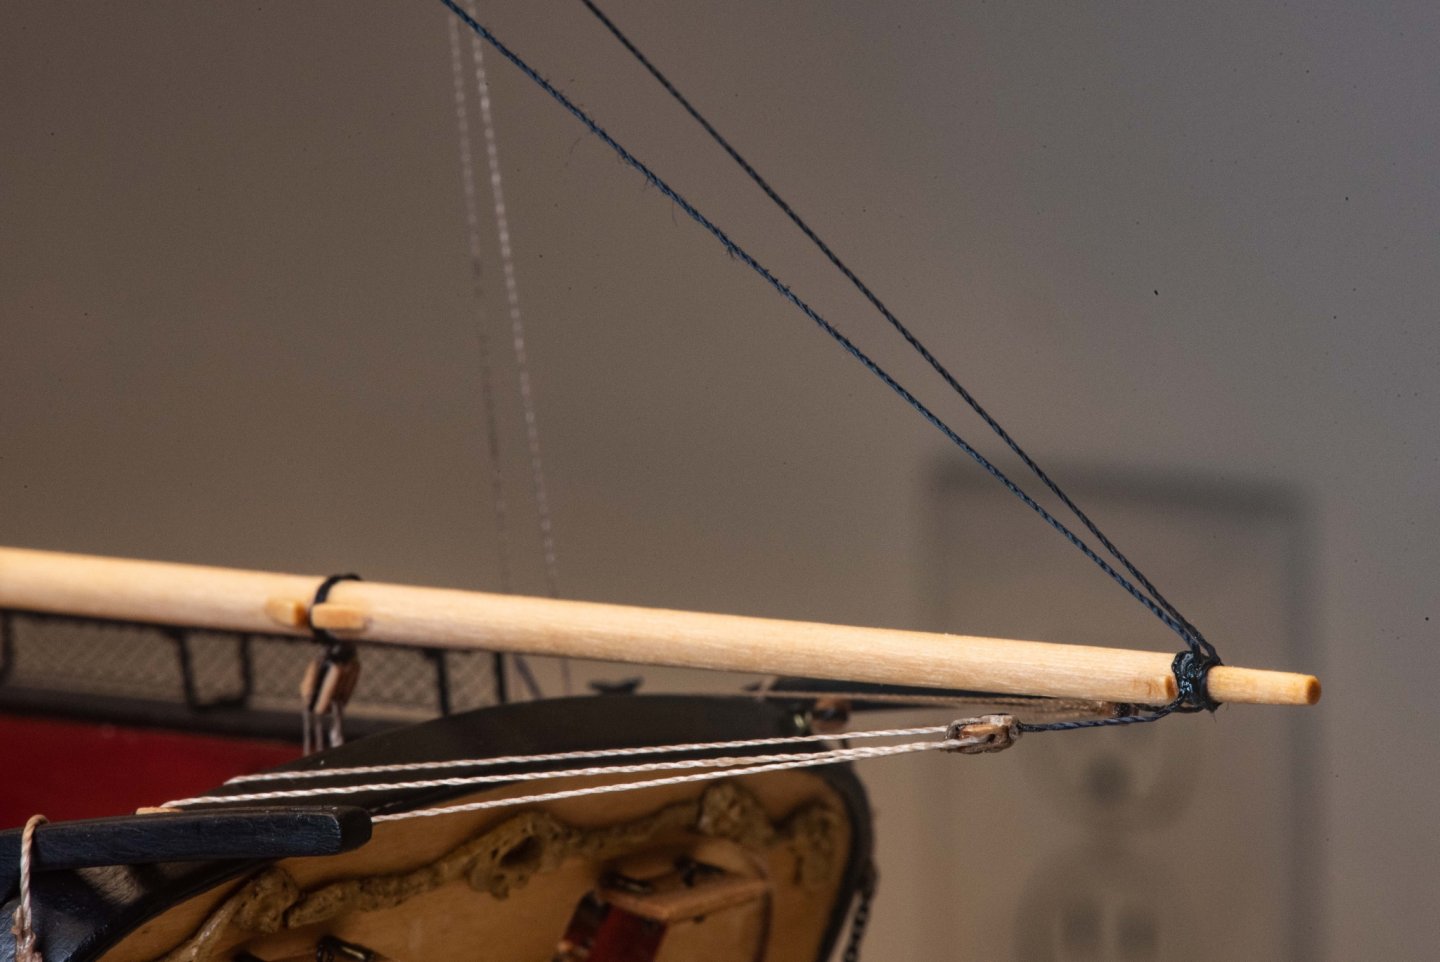
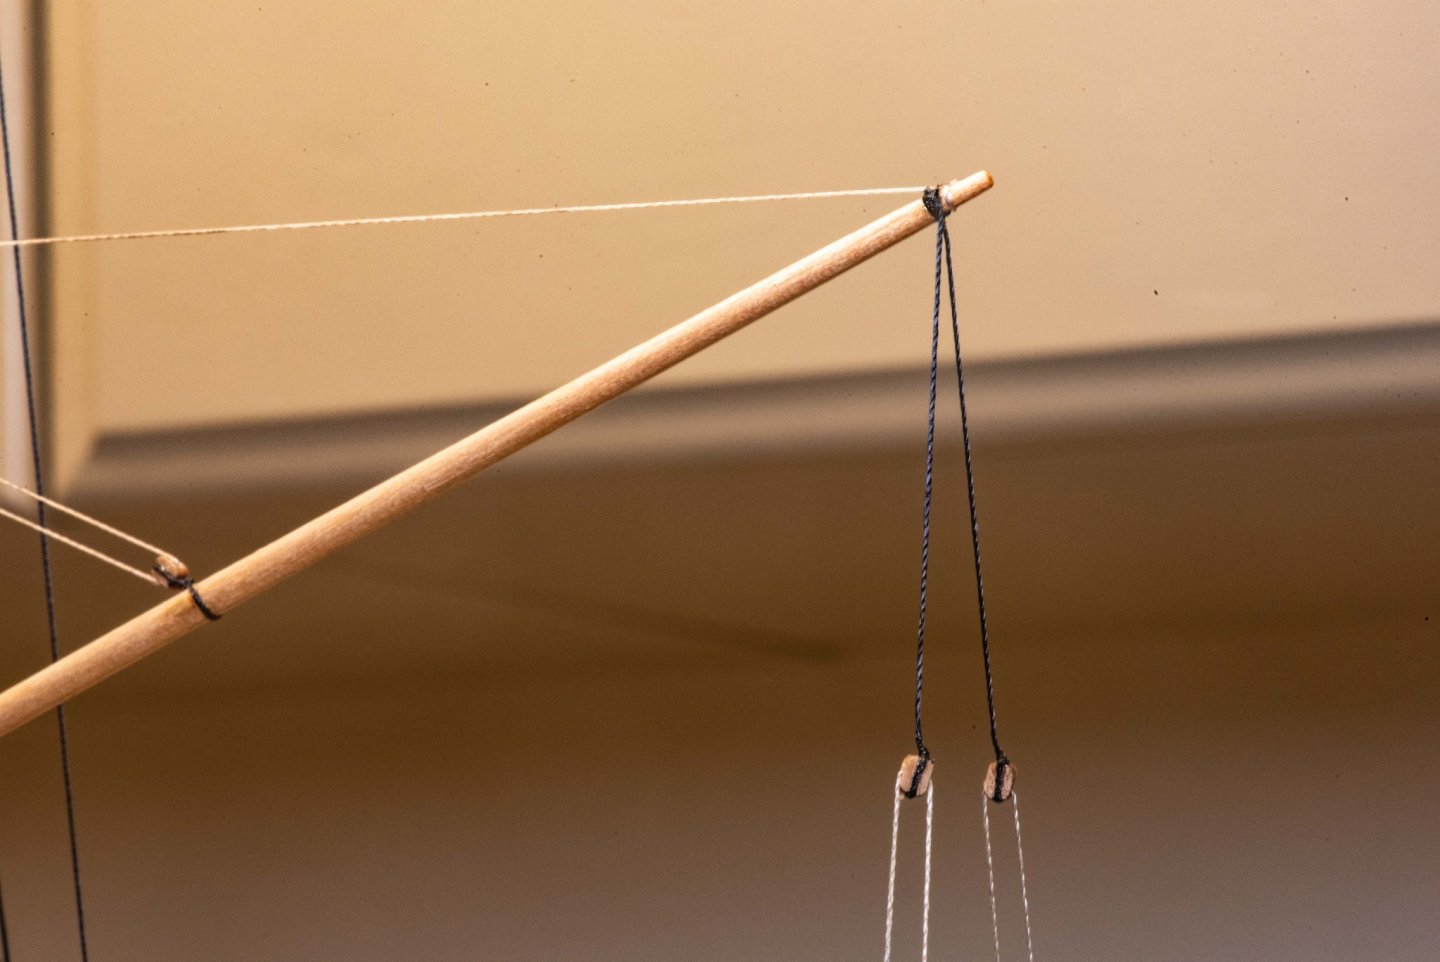
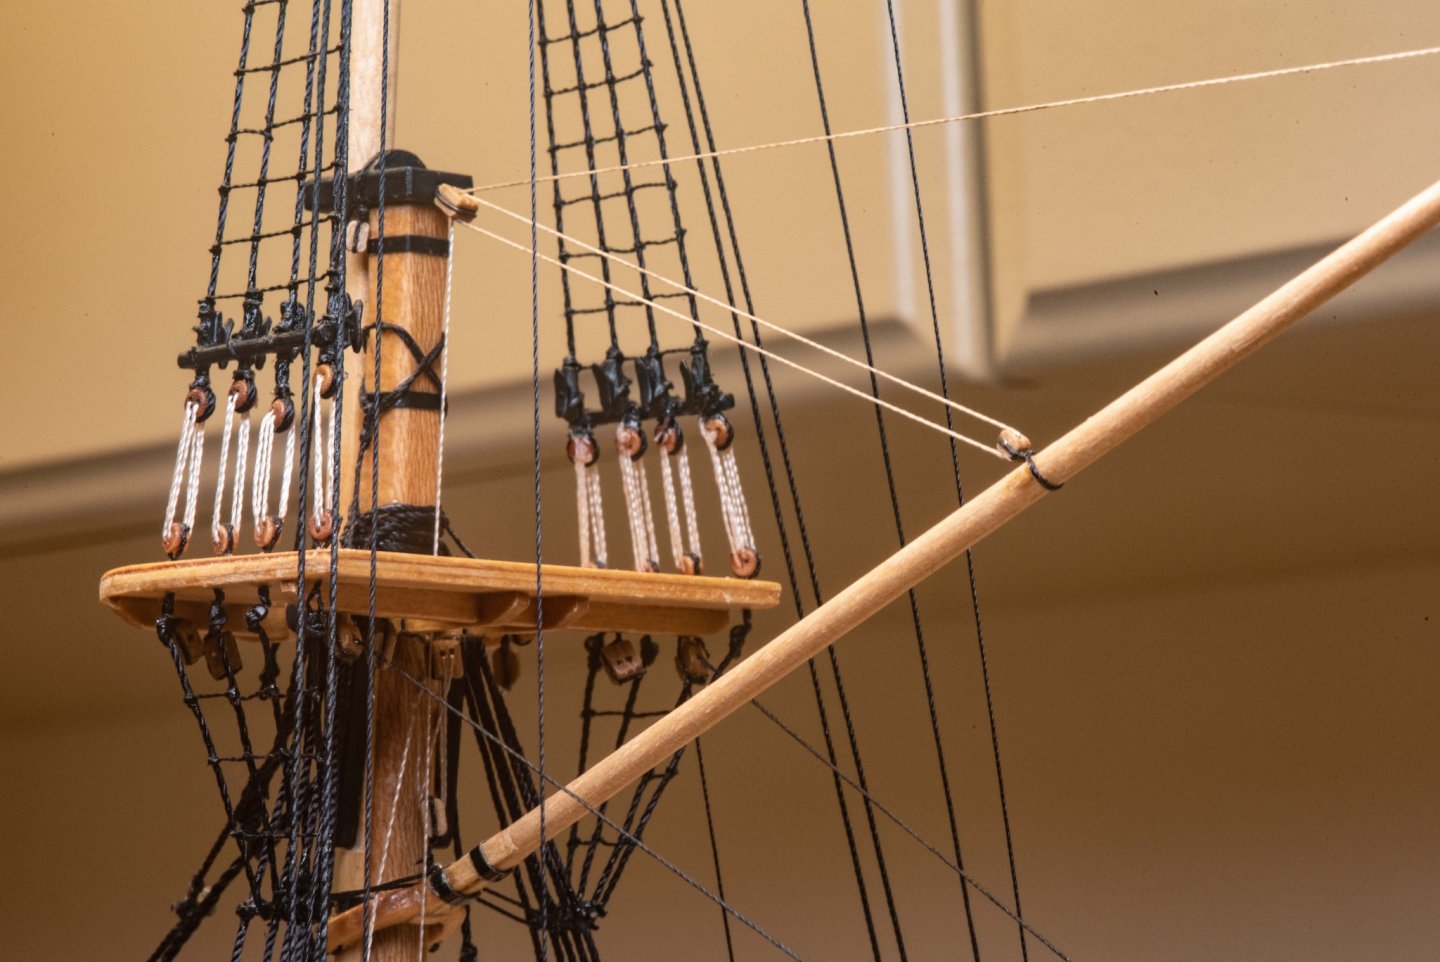
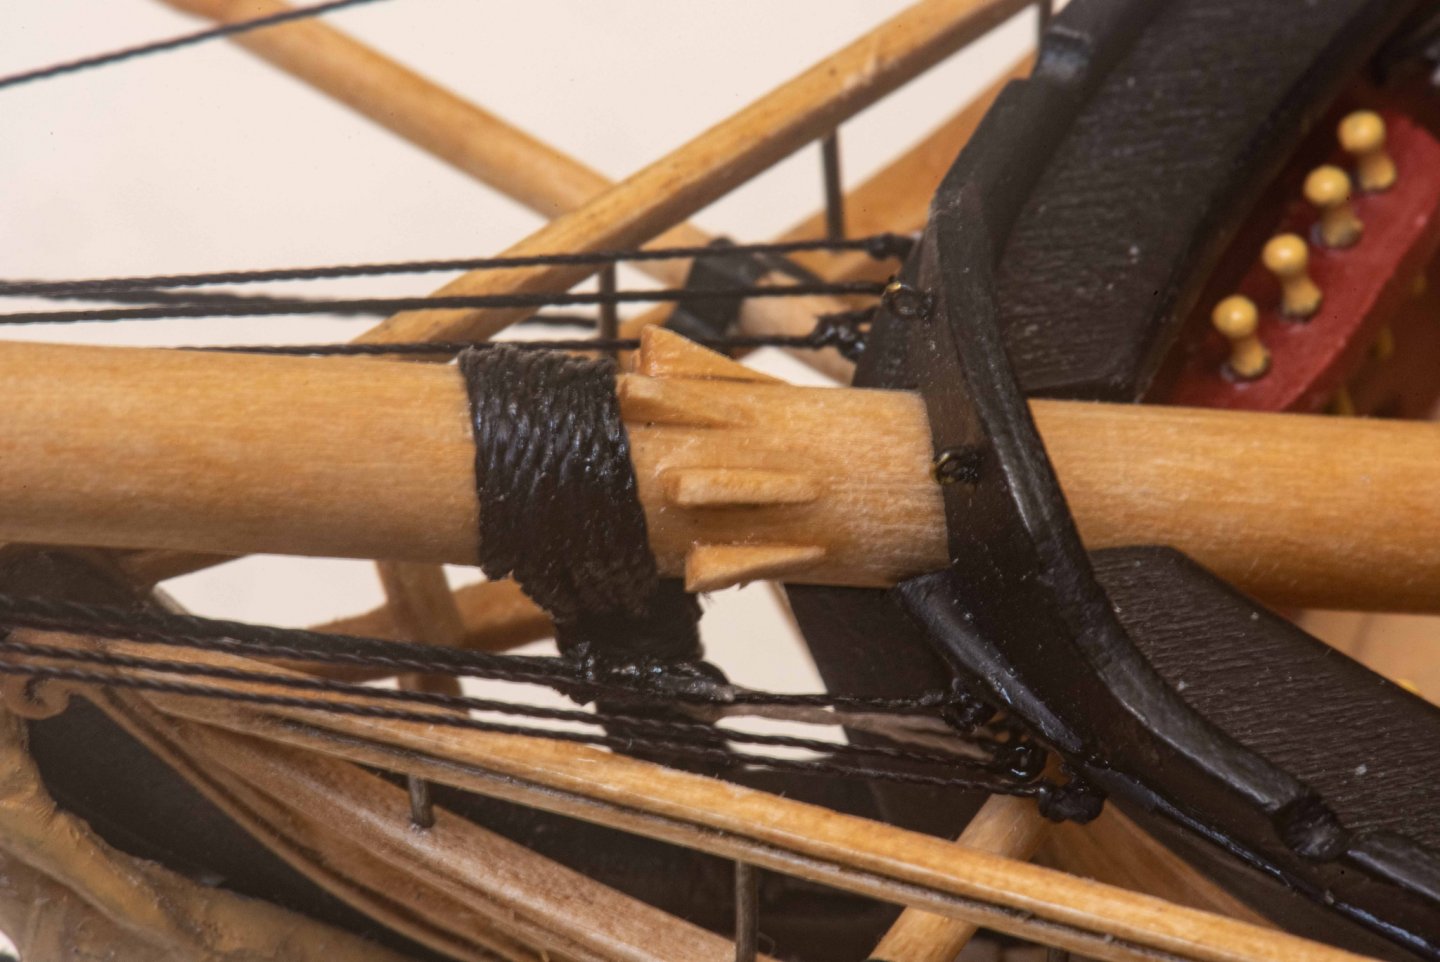
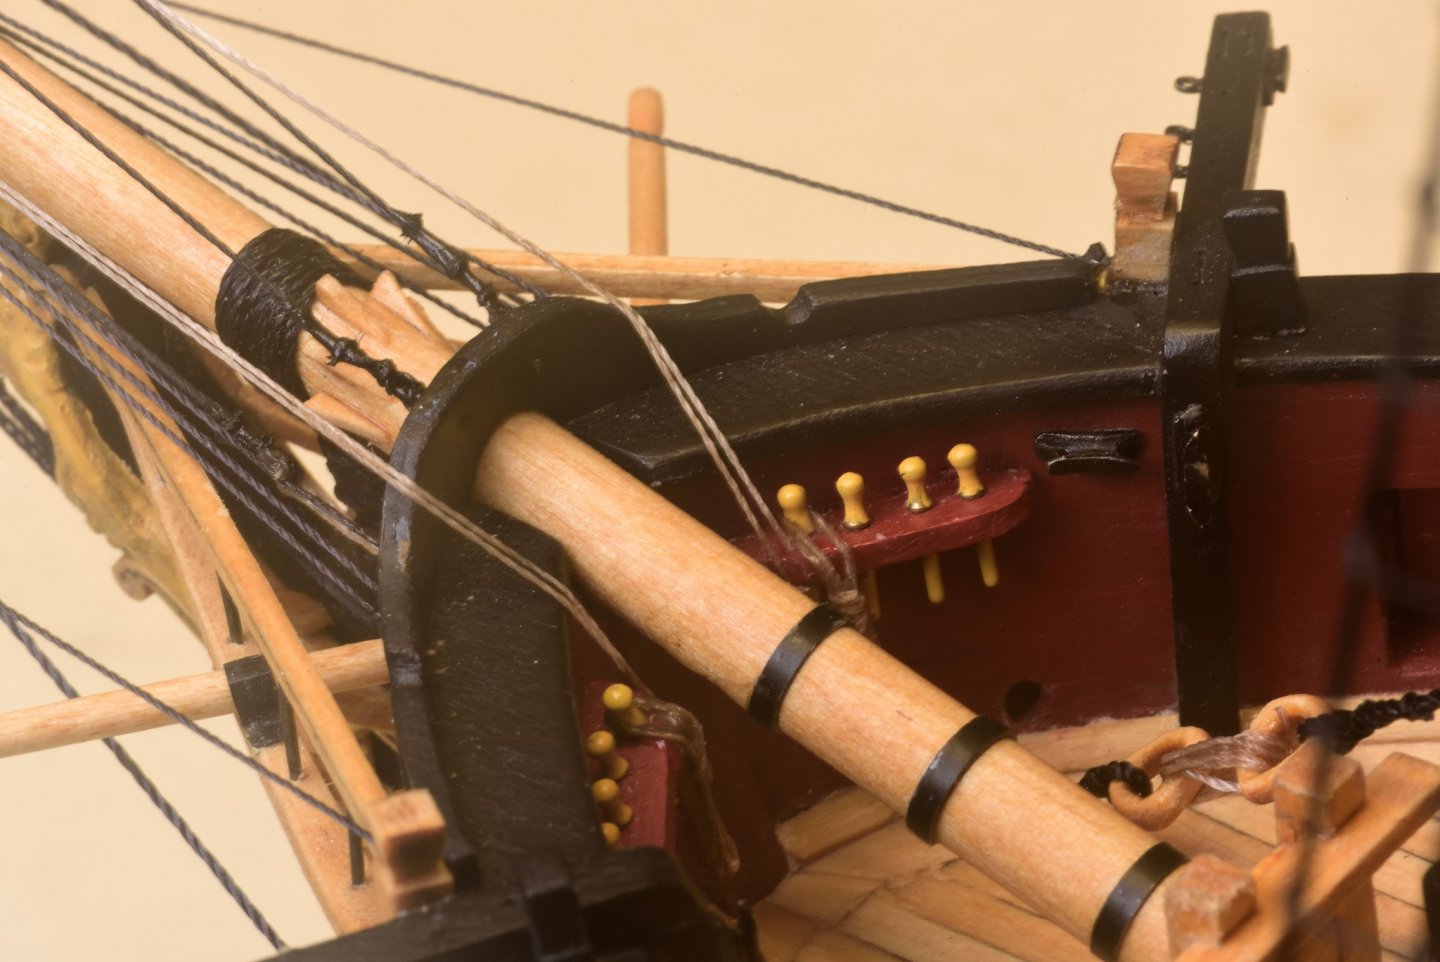
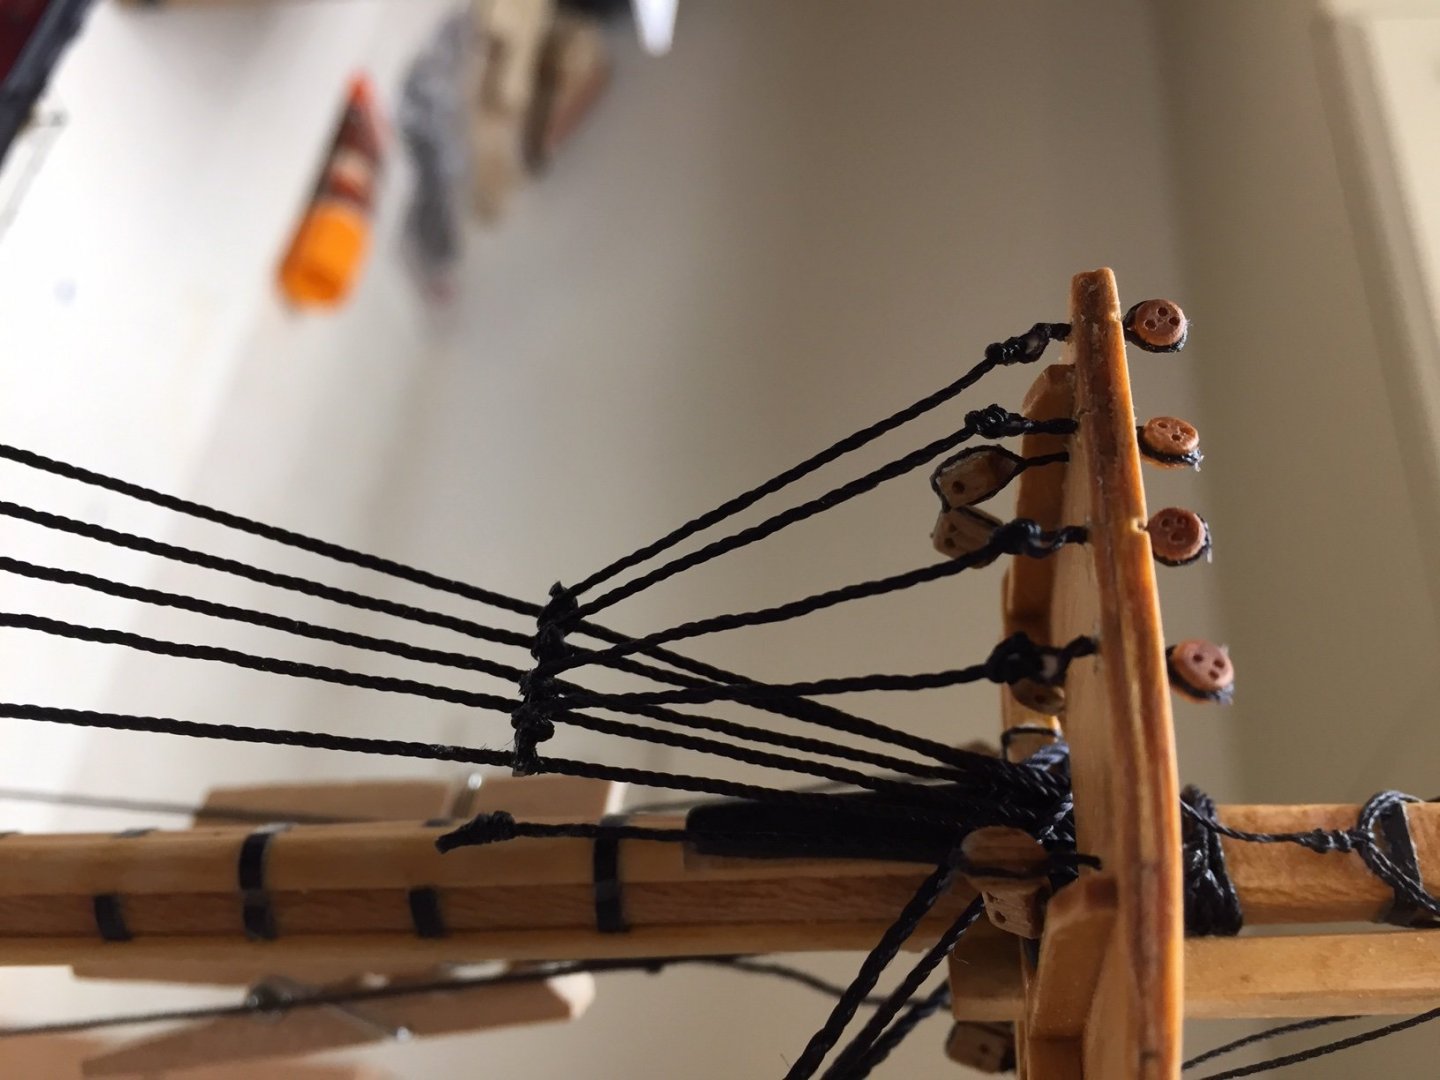
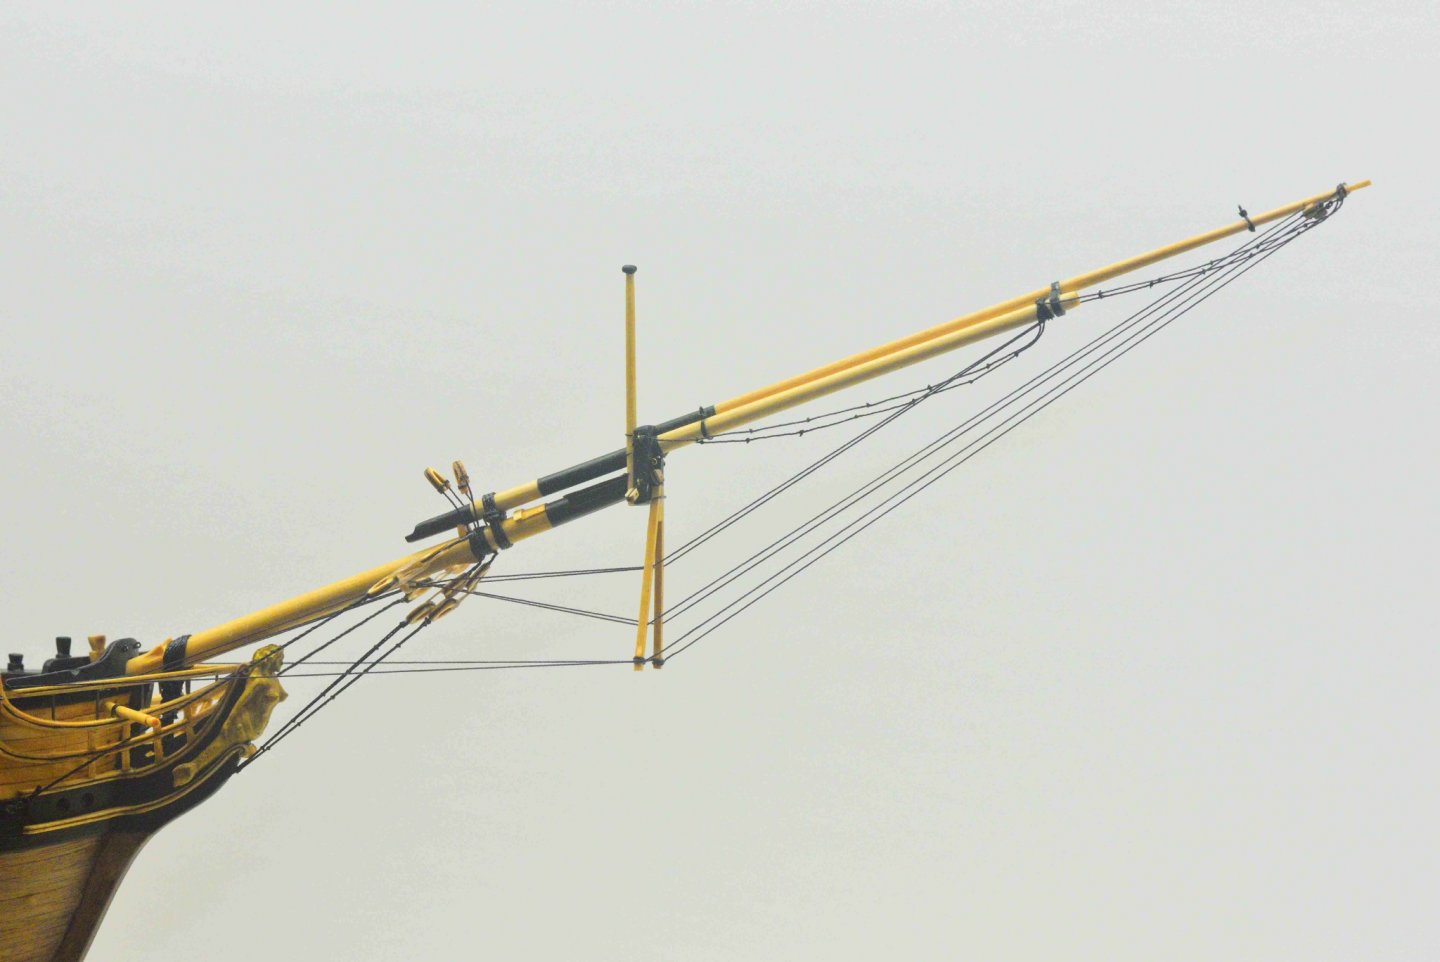
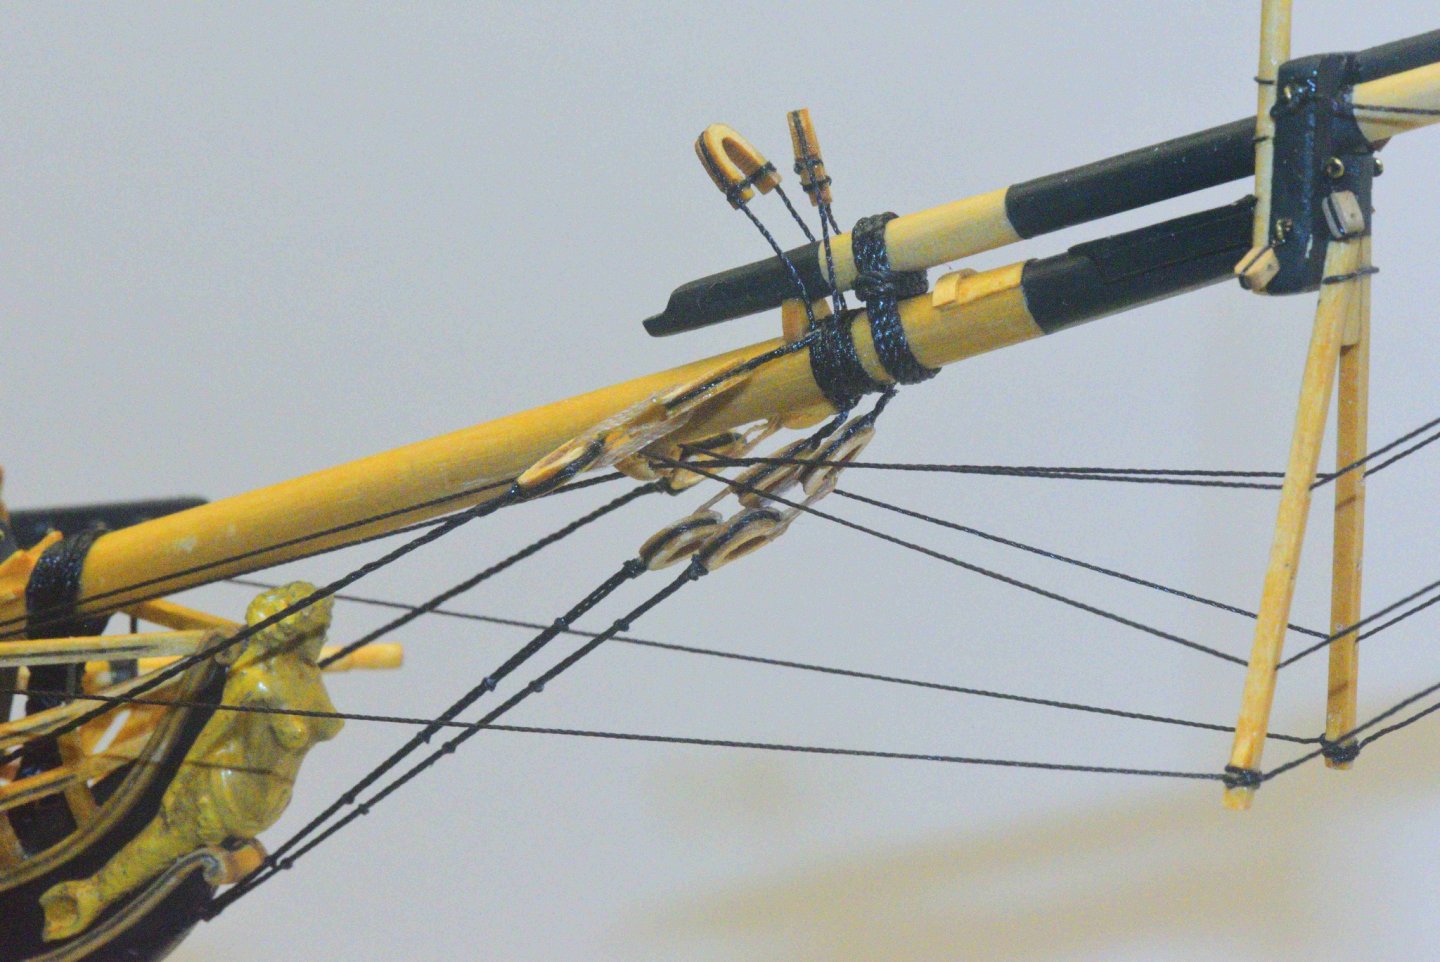
I'm including some detailed photos of the bowsprit rigging at this stage of construction. I simplified attachment of the lines coming into the eye bolts on the hull. These were all supposed to be eyes with lashing to the eye bolts, but I was unable to do this. I made an effort, but it's very tight quarters, and have no idea how you are supposed to feed lashing thread thru tiny eye bolts and thread eyes with little room to get in there. So I opted to tie the black rigging lines directly to the eye bolts without the lashings. After doing a lot more rigging, and learning more how to do it, I might be able to do lashings. But I'm certainly not going to redo anything. Hopefully I can remember some of this when I get around to another build. The last picture shows the block and tackle on the topgallant backstay. It was the first block and tackle I rigged and belayed to a pin along the bulwarks. Also this was first rope coil. I decided to do figure-8 style rope coils, which I saw in the book "model ships simplified". I don't know if these are better or worse than loop rope coils. I made a very simple jig or tool to make the coils. The first ones are easy to slip over the belay pins, but this got a lot more difficult as more lines come down to the pins. I know I did not loop the threads around the pin the "correct" way, but I was struggling just to tie it down any way possible. Besides the way you tie to the belay pin is hidden by the rope coil, so my thinking was it didn't matter. Perhaps it did, because if I'd done it correctly, perhaps the lines would not have interfered with the rope coils as much. I still have a lot to learn. My rope coils came out stiff from the glue used to form them. I had to put a 90 deg bend in them to fit over the belay pin and hang down. This worked, but it was difficult to make them consistent. Some are longer or shorter than others, and some of the tan thread is lighter or darker depending on the amount of glue used.
-
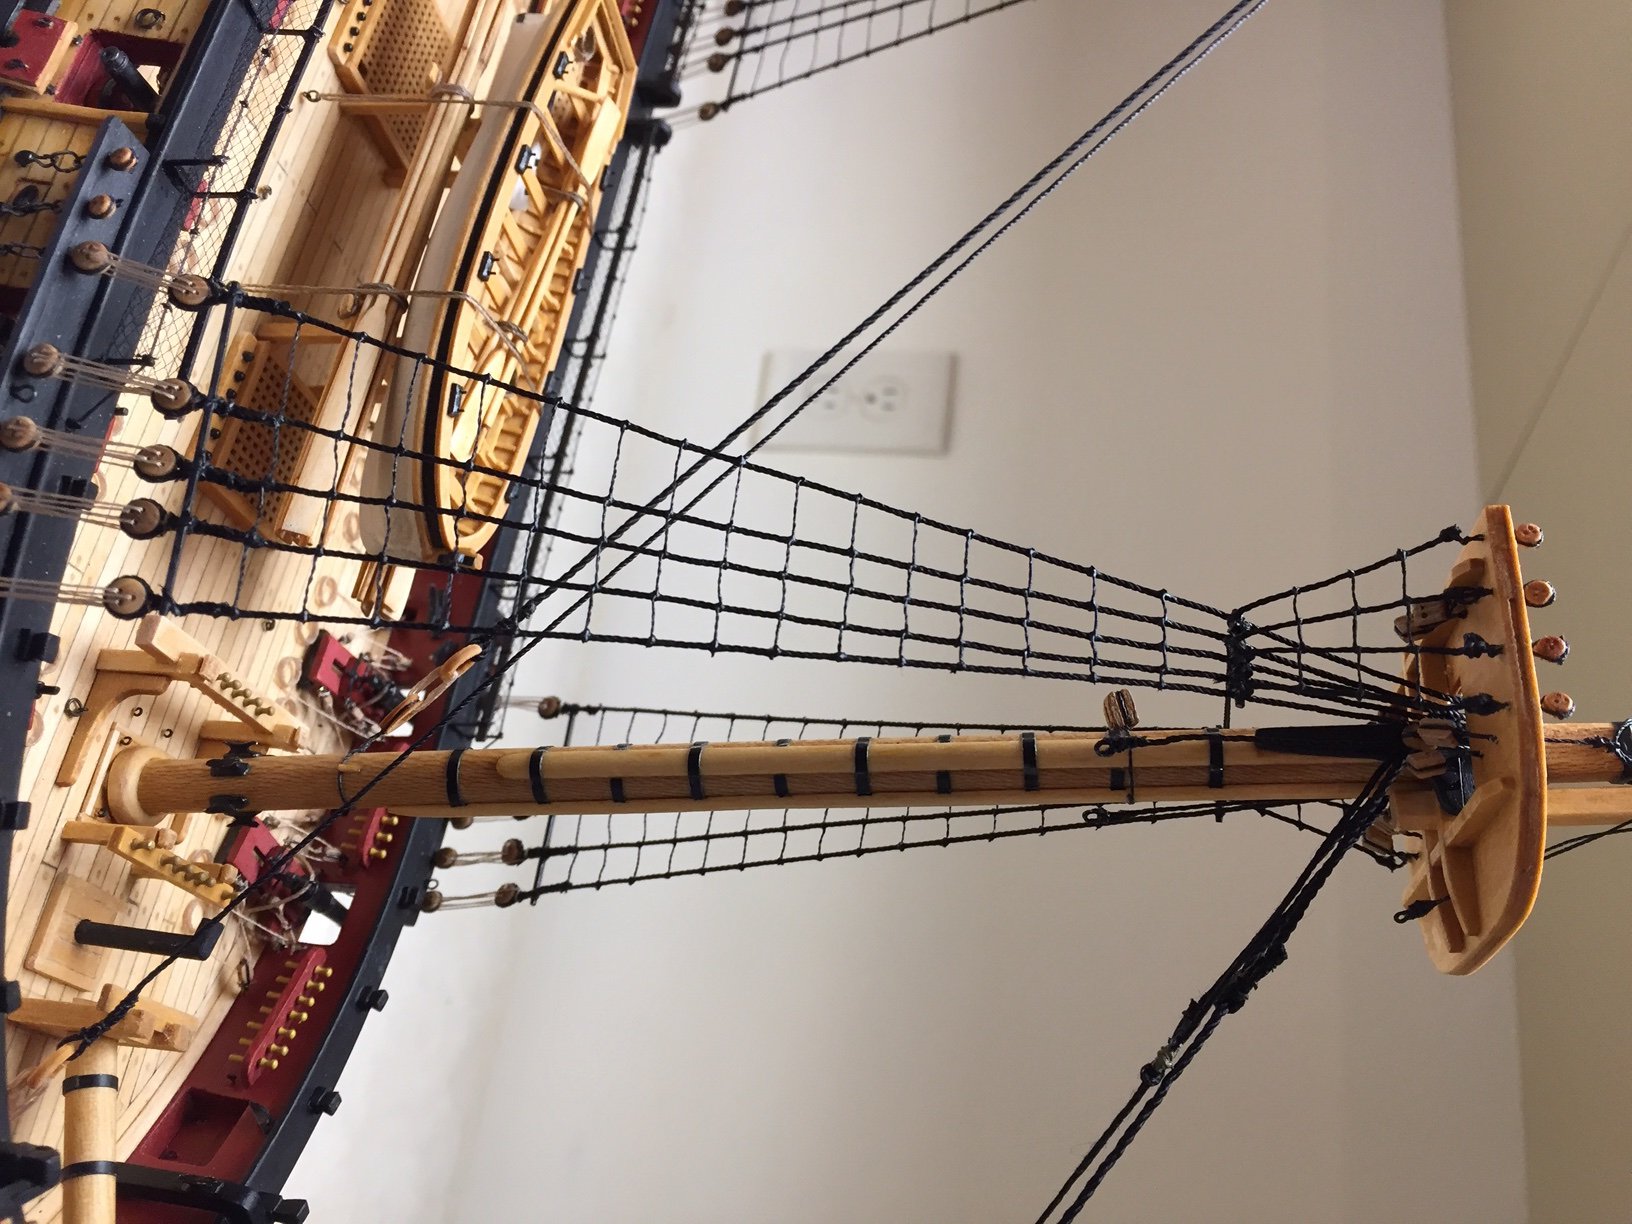
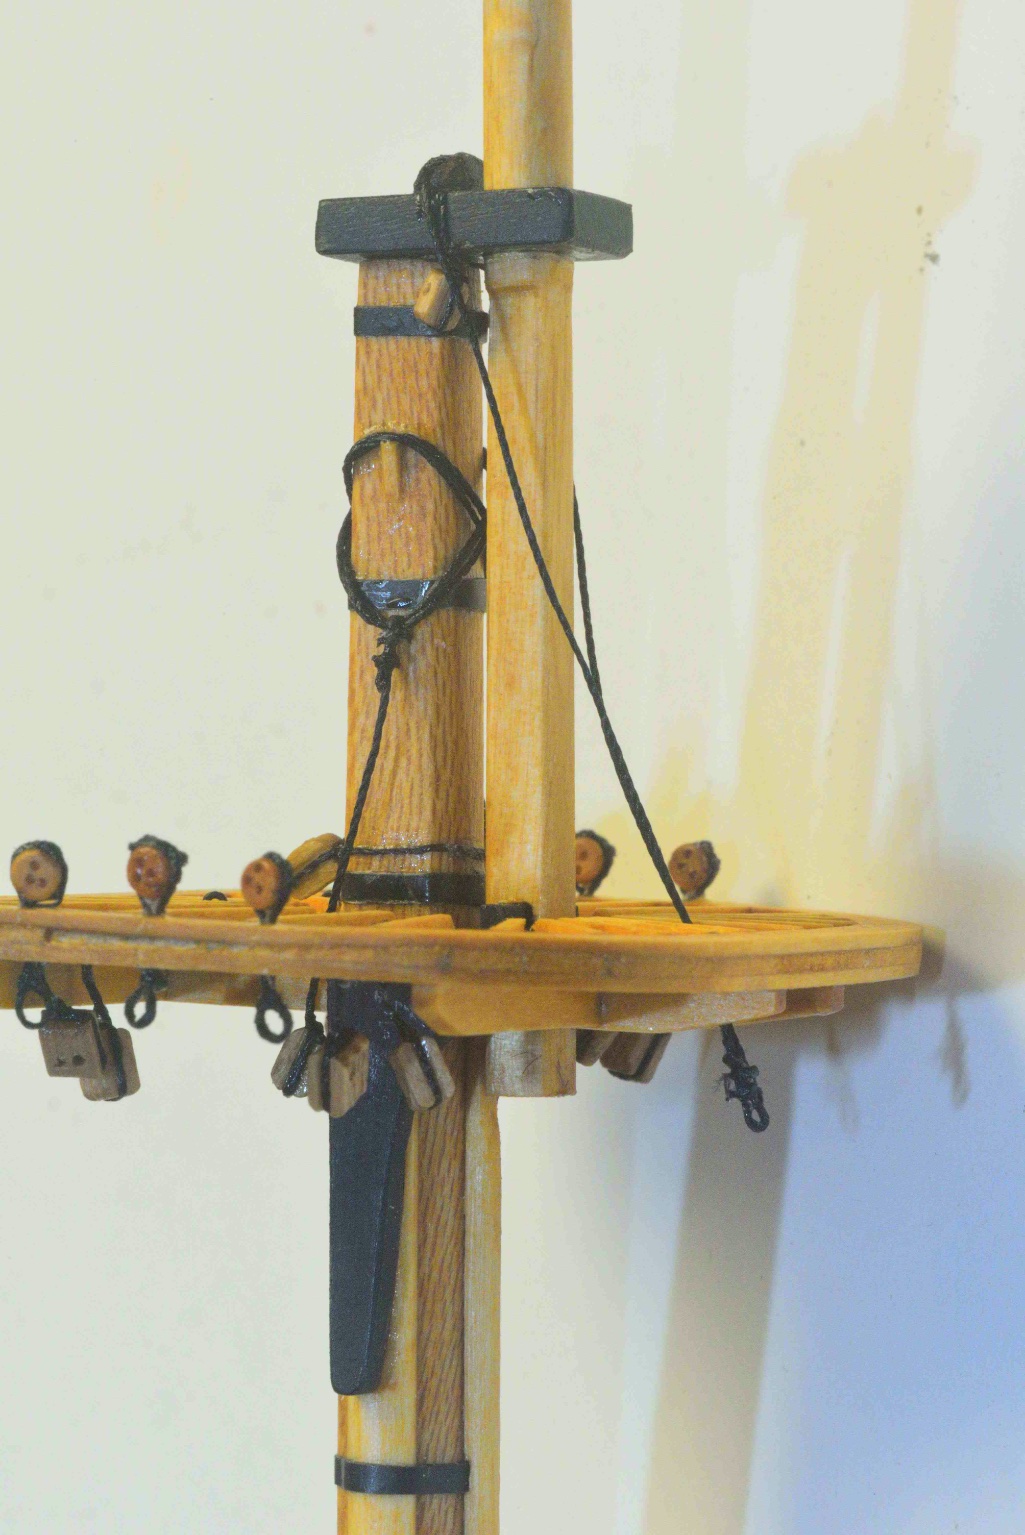
Moving upward are the topmast pendants, shrouds, and ratlines. These are all done in a similar manner to the lower shrouds and ratlines. The last picture shows the topmast stays. It also shows the "sister" blocks embedded in the shrouds.

-
Continuing with standing rigging, the first couple of pictures shows the main stay. At the top, it is secured with a rope eye and a mouse stopper. At the lower end the "hearts" are used to secure to the deck. The next pictures show ratlines on the lower shrouds. I used overhand knots on the two end shrouds, and loops around the inner shrouds. I discovered I'm terrible at making knots, especially with rigging thread, so resorted to overhand knots in most cases. Apologize for the sideways pictures. I'm new at this and don't understand why some photos import fine, and some come in sideways or occasionally upside down. It seems most of my vertically oriented photos are imported sideways. But you can still see what was done.


-
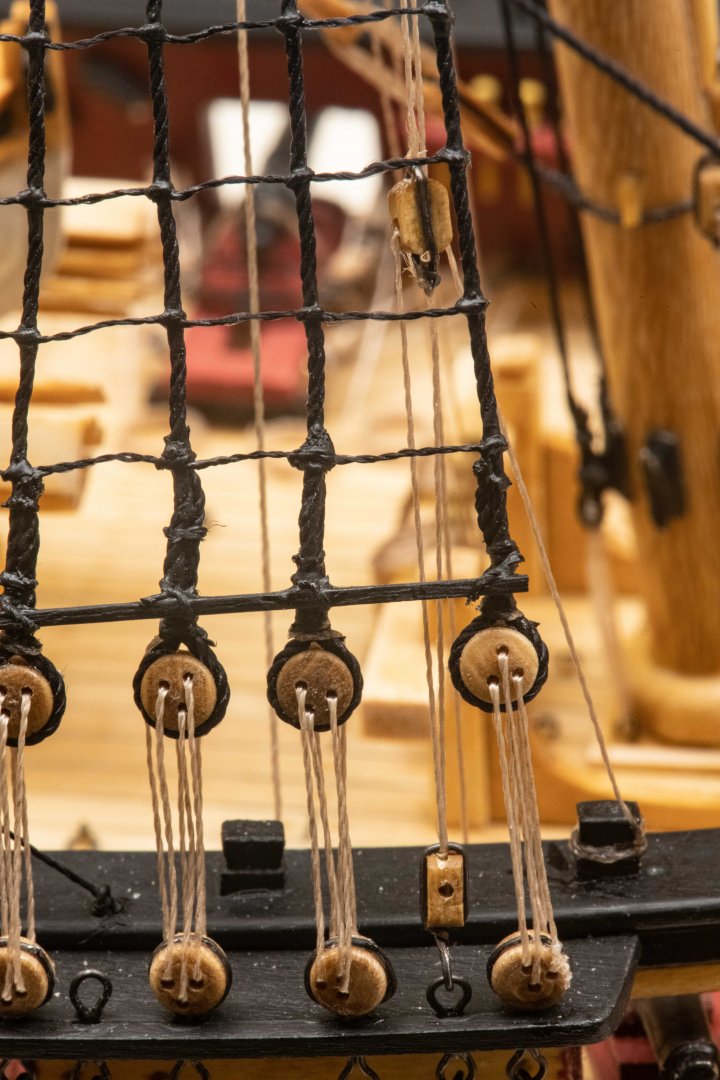
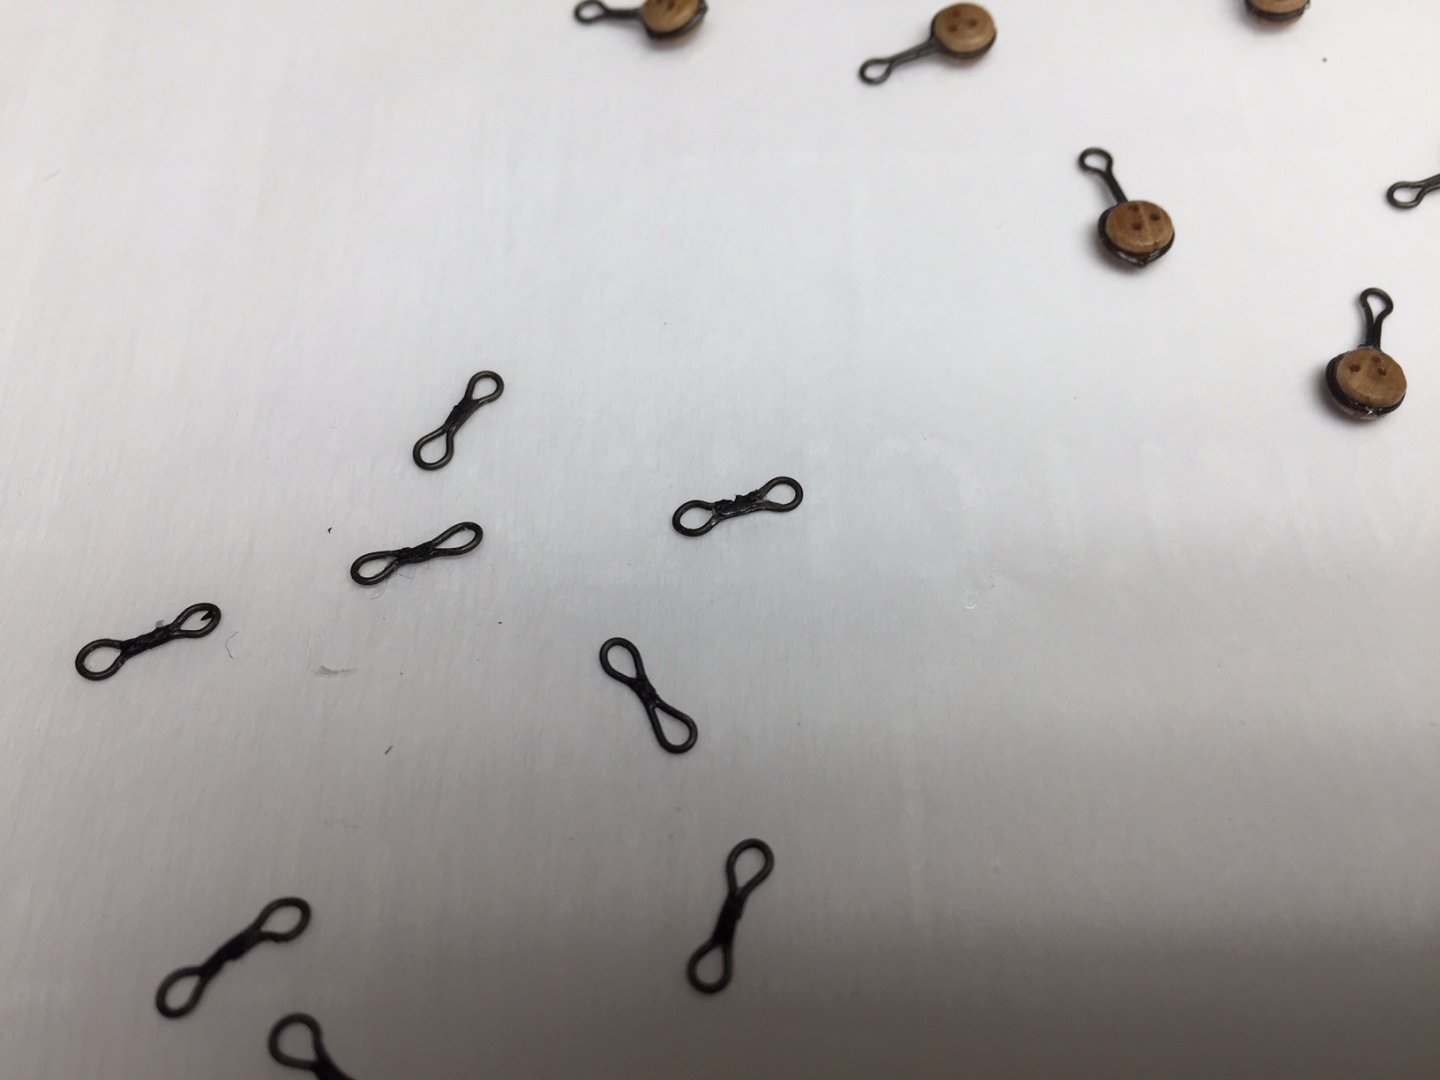
On to the standing rigging in Chapter 18. The first picture shows some deadeyes and links for the chains. This looks more difficult than it is. The manual has great instructions on how to make these. Lots of tiny parts! The next two pictures show the deadeyes in the channels with the chains dangling. The shrouds and deadeyes are done next. I used a little wire jig or claw to hold the upper deadeye in place with the proper spacing to the lower deadeye, and then I could wrap the shroud around it and seize it. Once I had the shroud and deadeye at the correct length, I could tie the deadeyes together as shown in manual. I have a problem of going too fast, so I didn't get the deadeyes all in the proper orientation in the chains and shrouds. So when I used the tan rigging to tie them together, it didn't come out as neat as I wanted. Kind of picking nits, but that what I do. On the other hand, I wasn't unhappy enough or motivated to redo it. The last picture shows the futtock shrouds going up to the mast platform. I see no reason why the platform deadeyes couldn't have wire strops around them like the channel deadeyes. It would have been easier to make them consistent than using thread, at least for me.


-
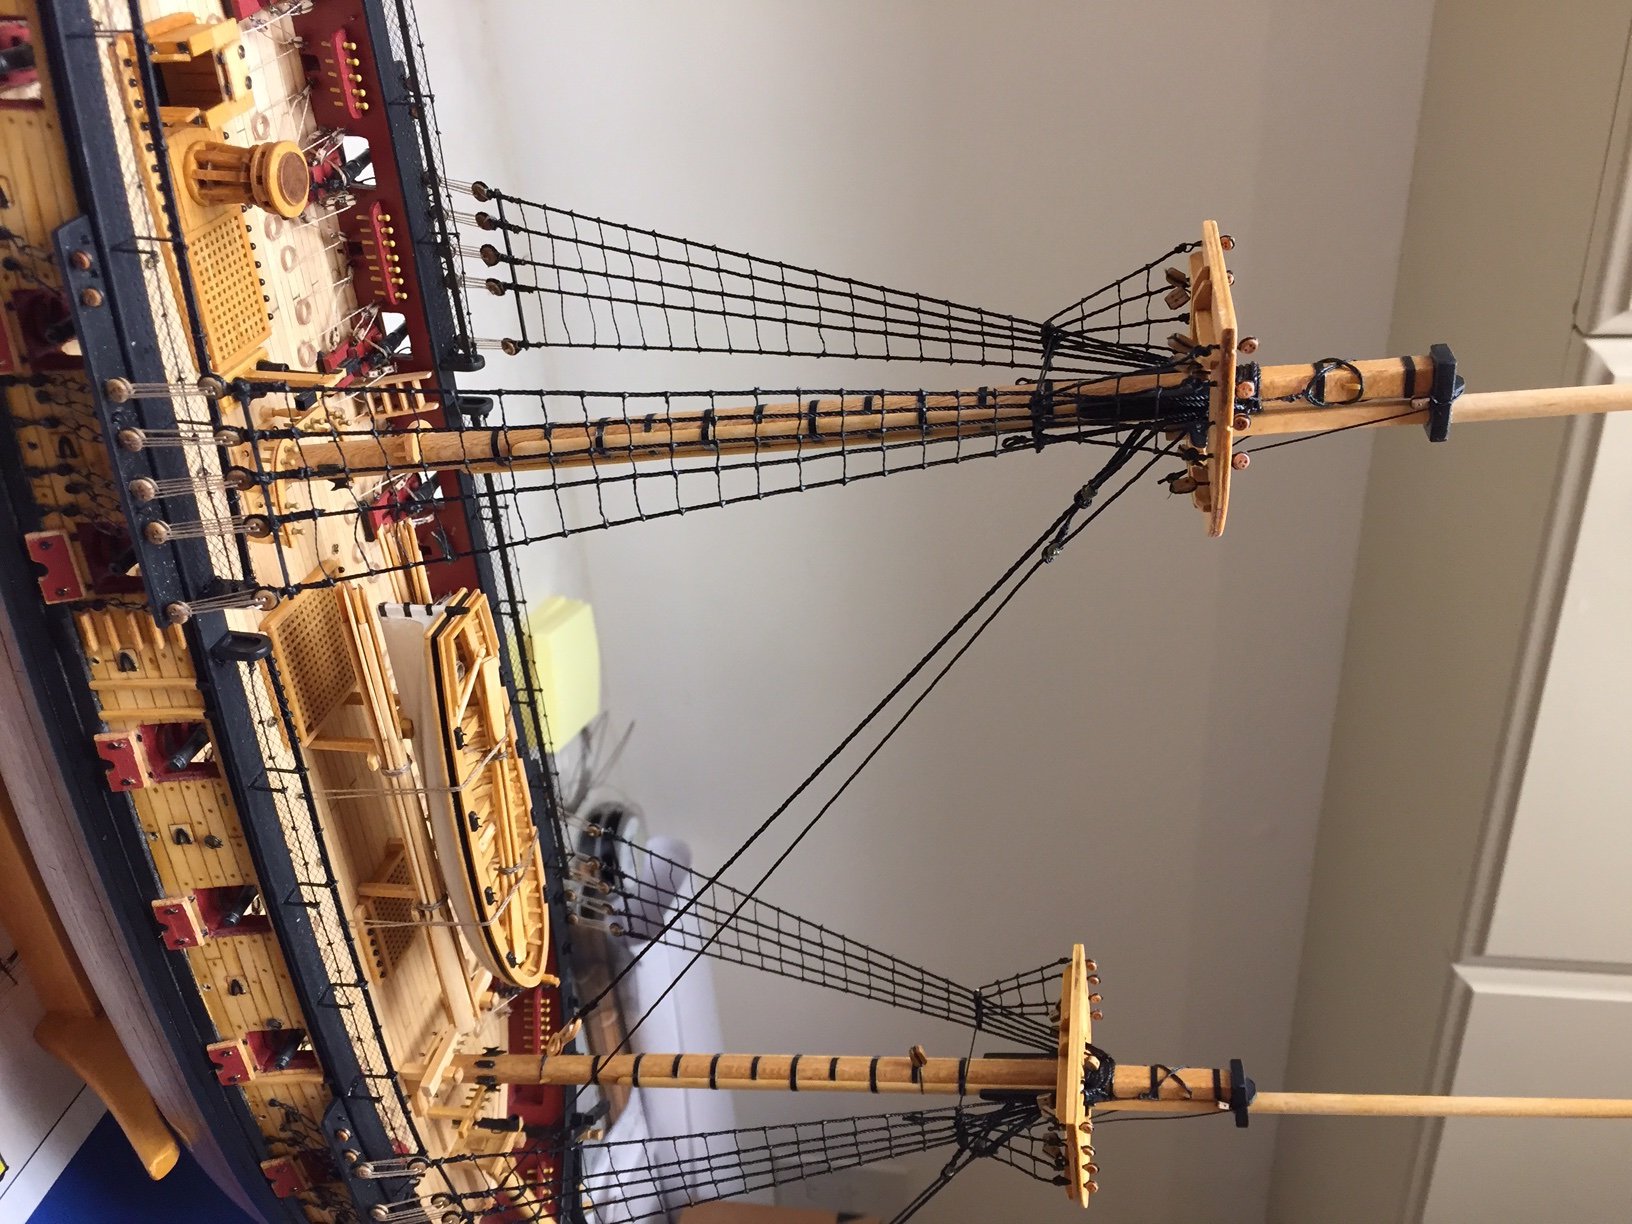
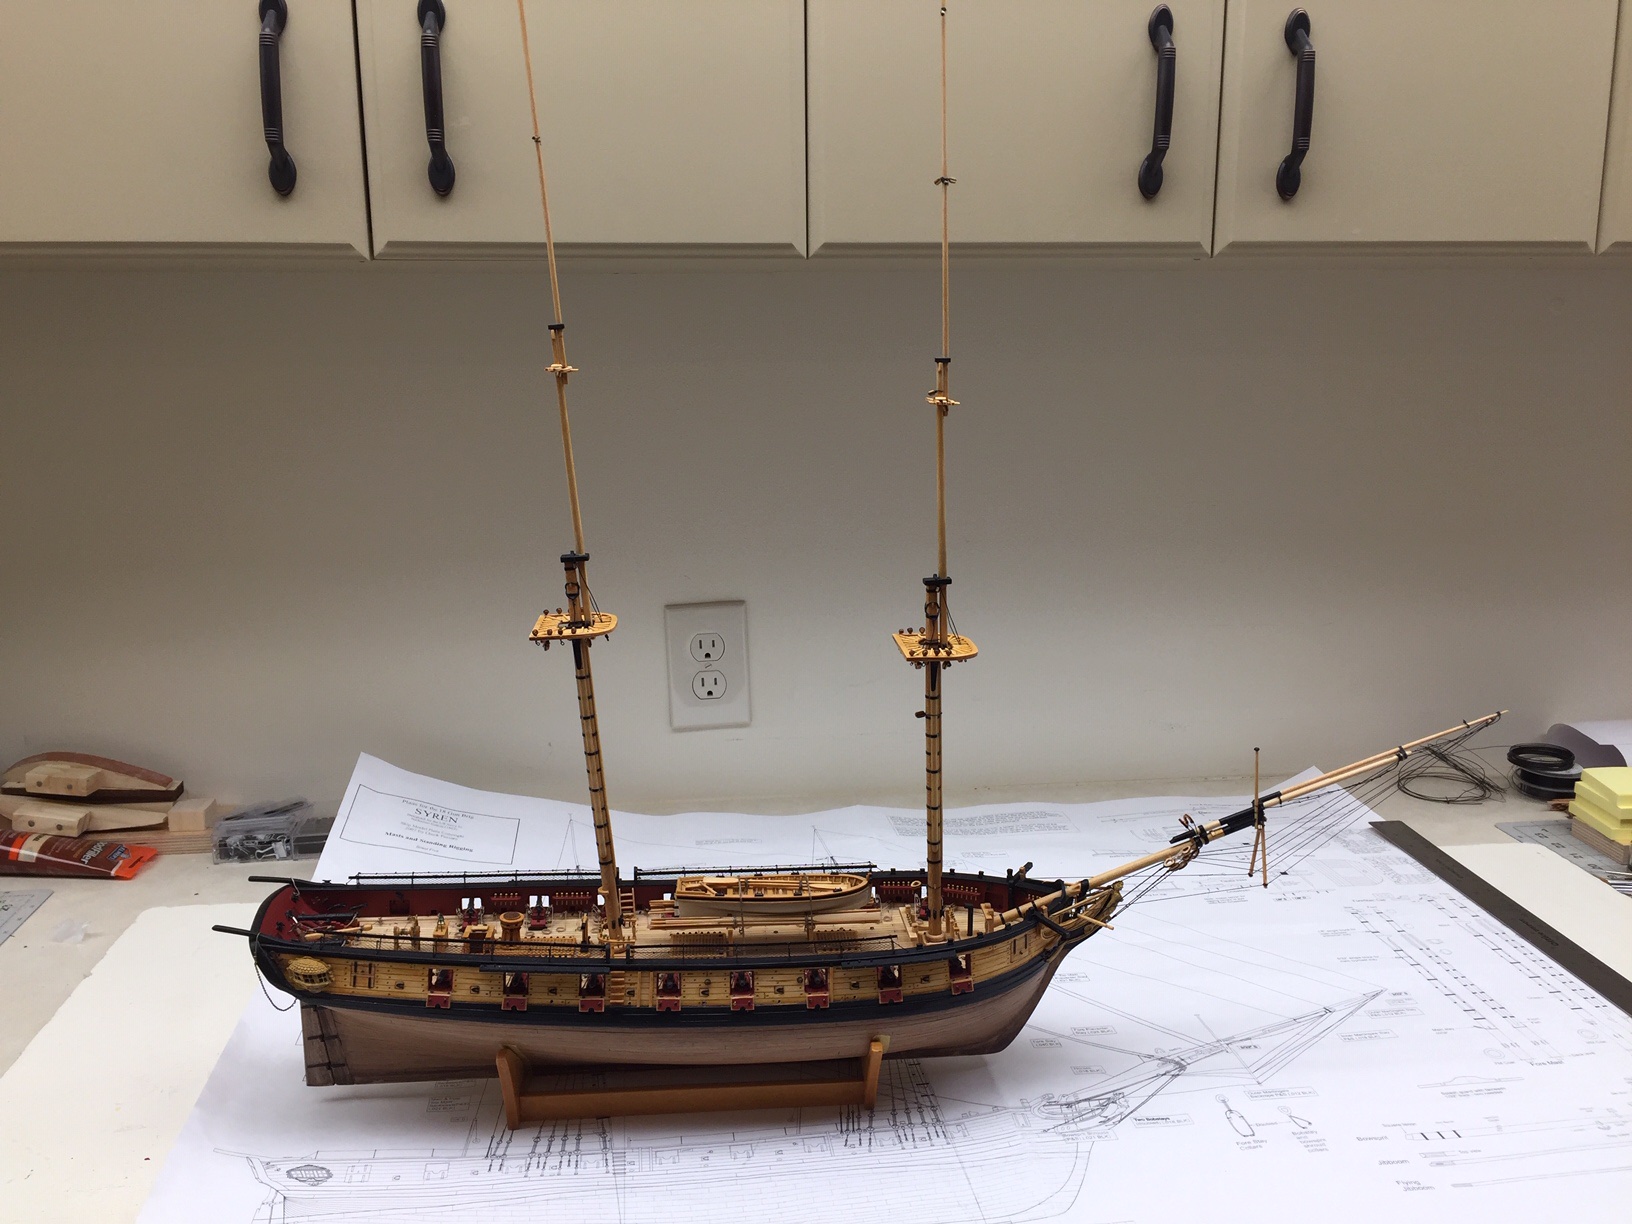
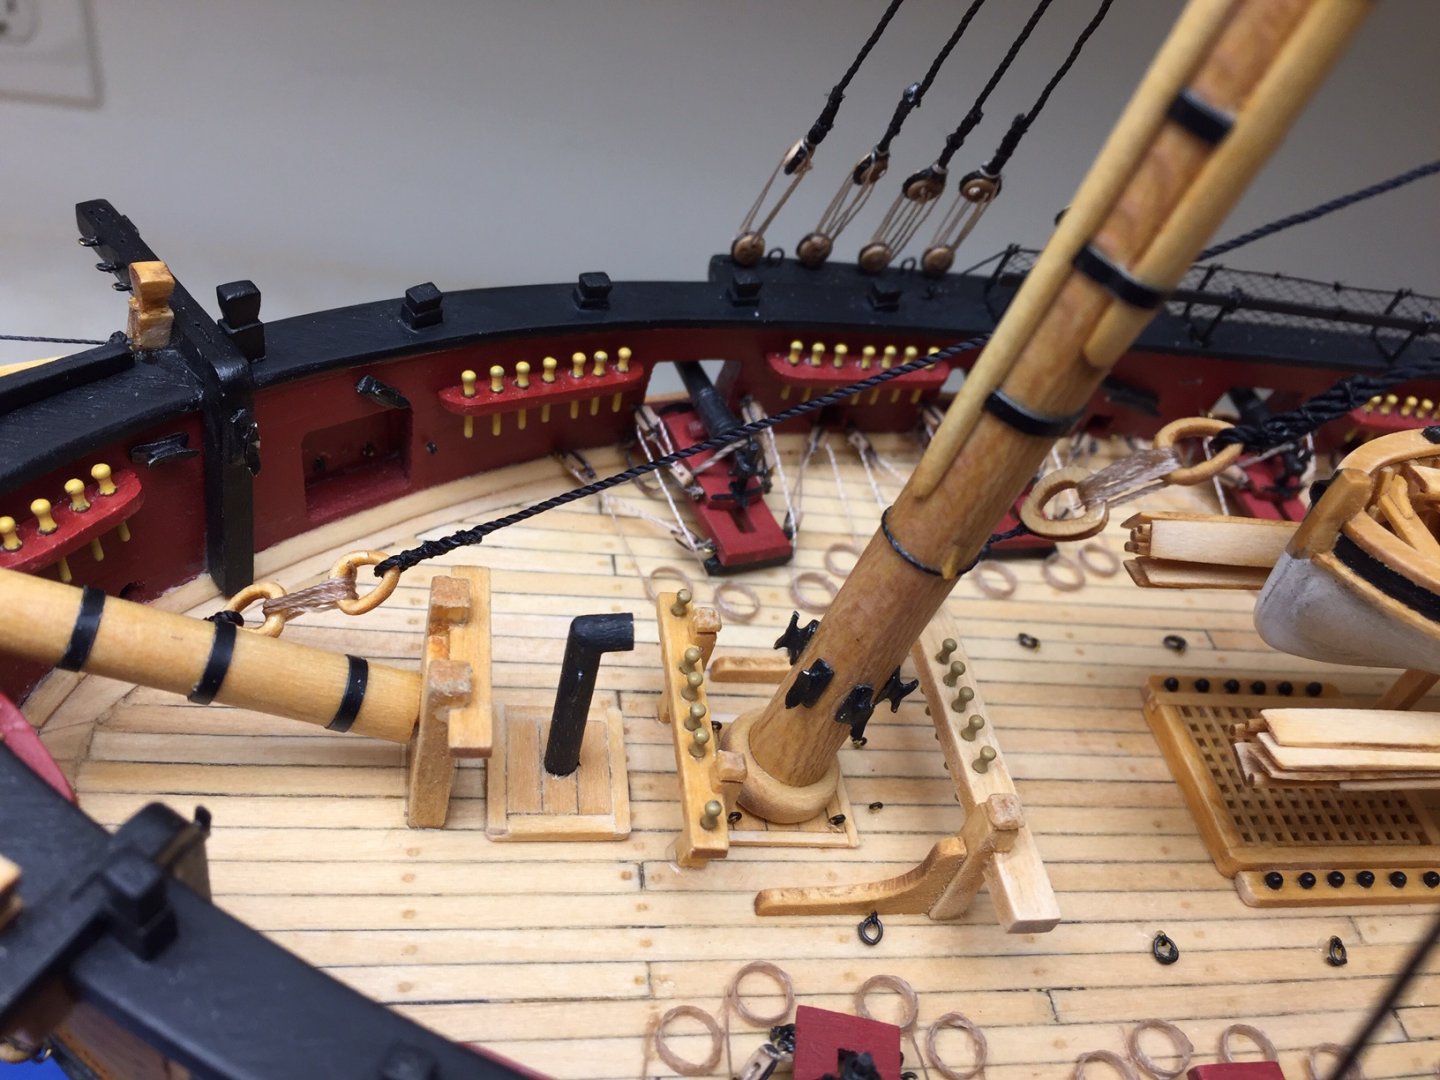
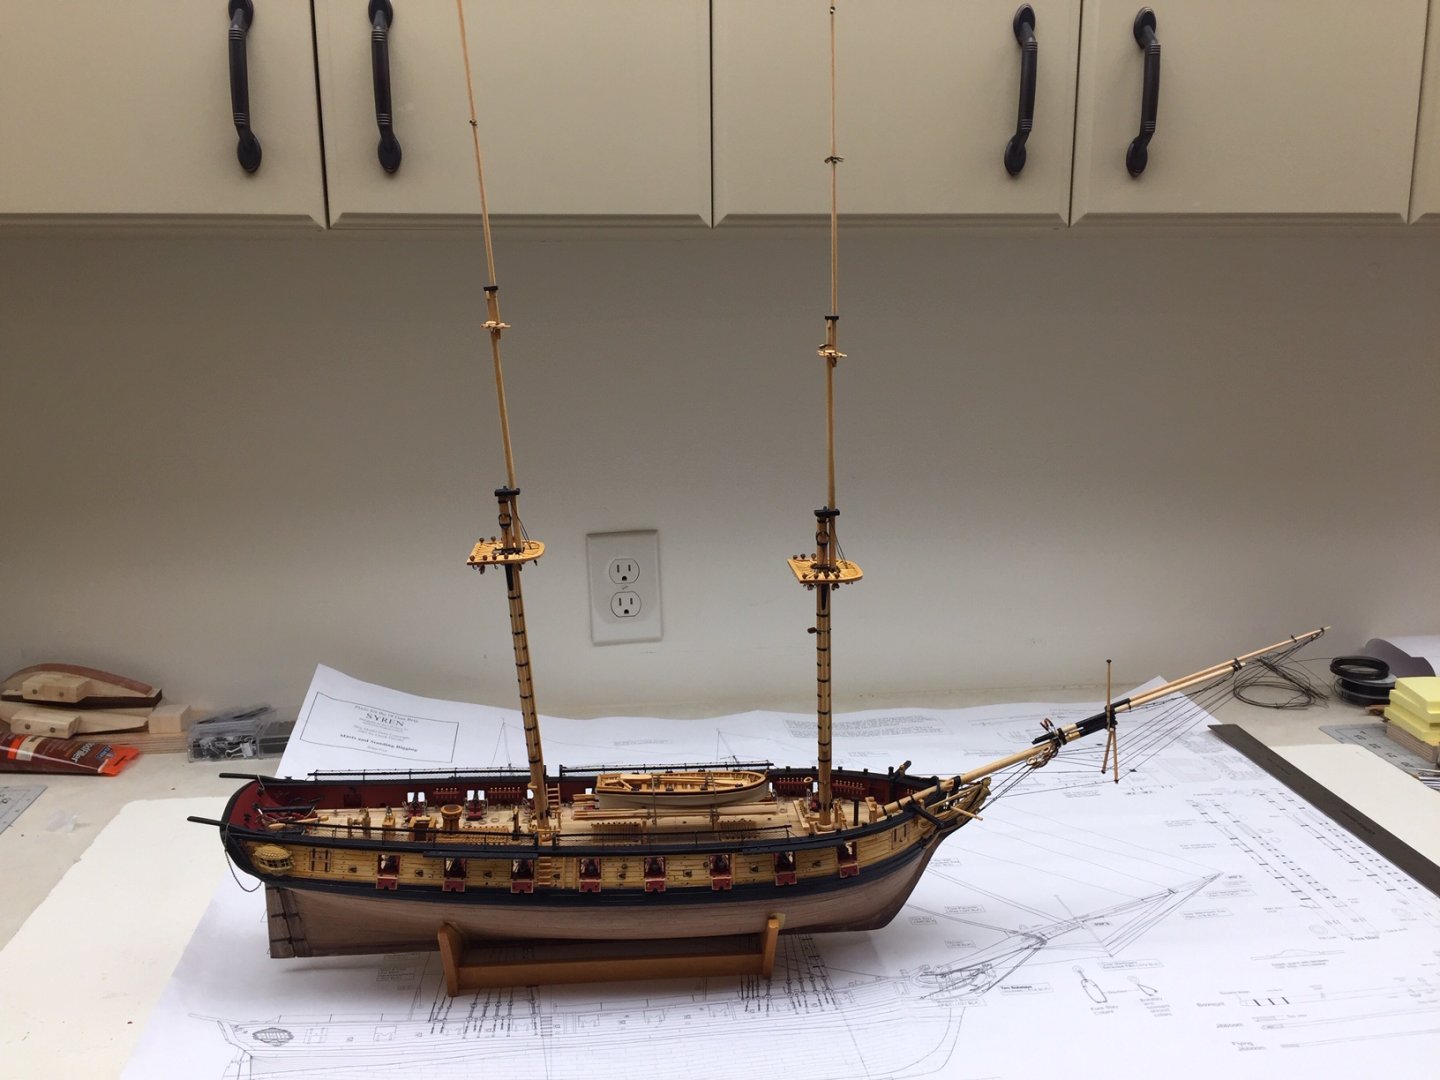
The next pictures show the masts stepped or mounted. One pictures shows what I used to get them aligned properly. One mistake was to not drill hole deep enough in deck to keep mast secure as I had to reglue it at least once. And after all this work aligning, the rigging pulled the masts aft giving them more rake than I wanted, and this is what caused the glue joint to break. These will be things to watch closely on the next build. I didn't take pictures of all the blocks I added to the masts and crosstrees before stepping. And despite trying to be careful, I missed a couple, but didn't know it until later. Believe me, it's sure better to add them now instead of later.
-
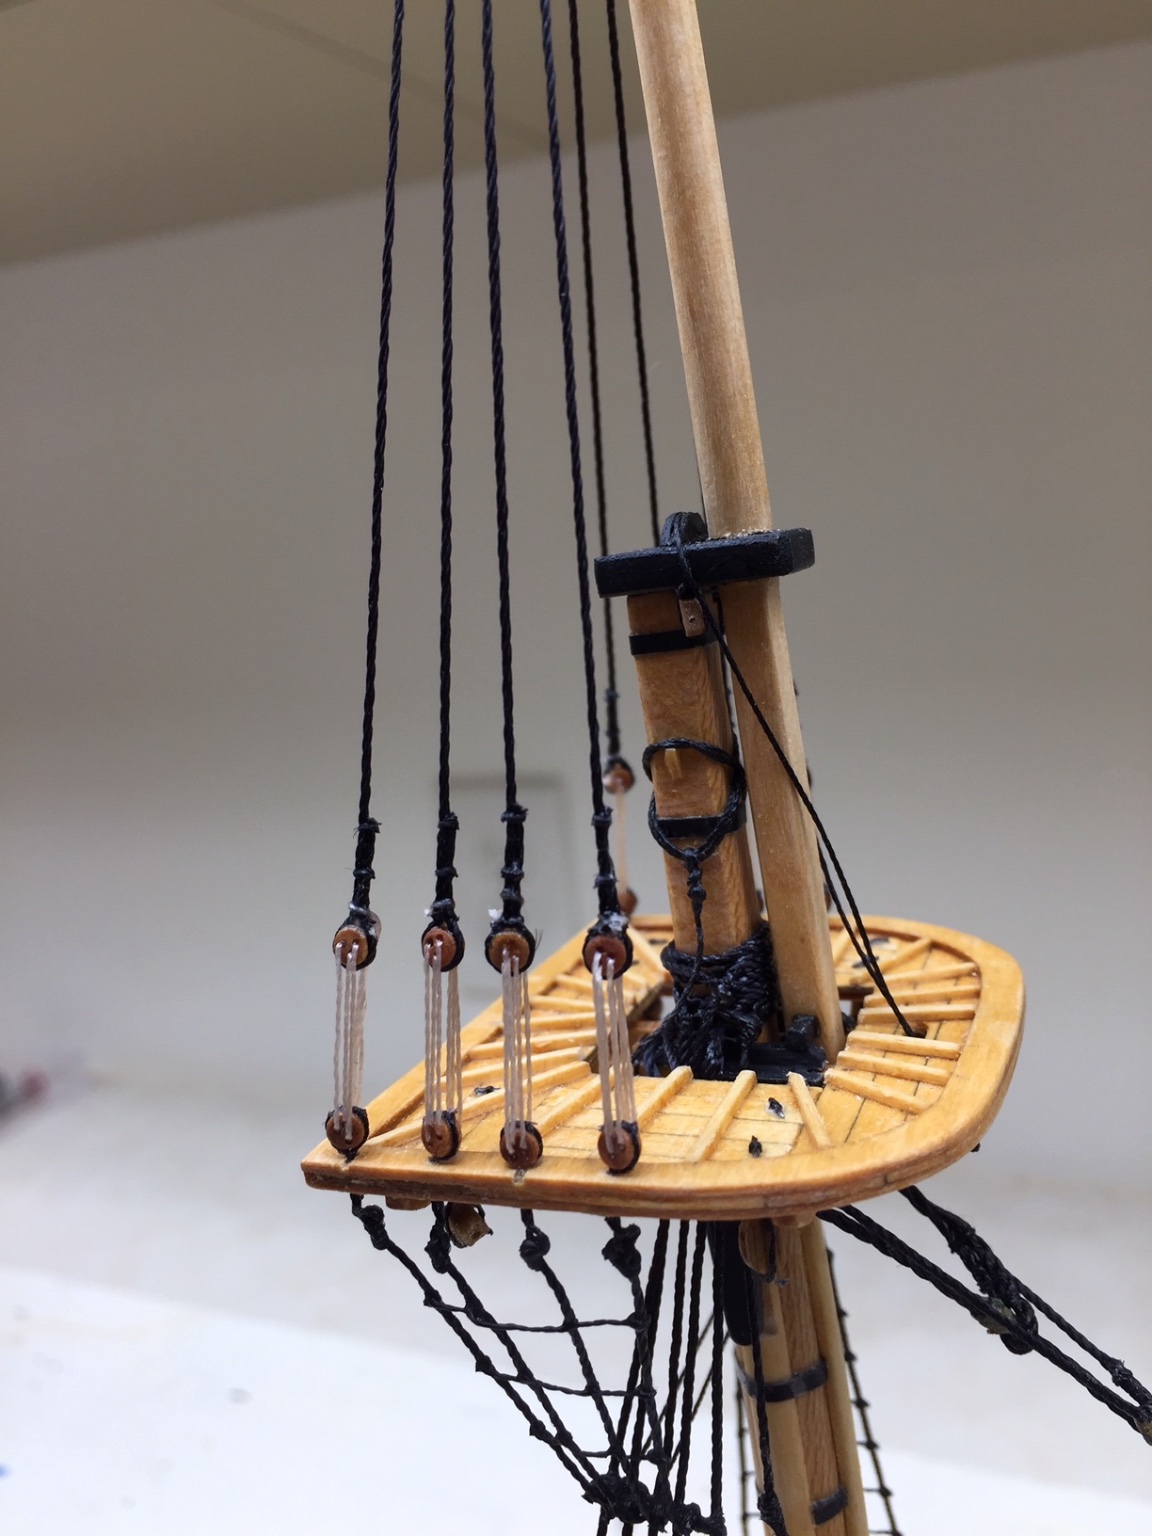
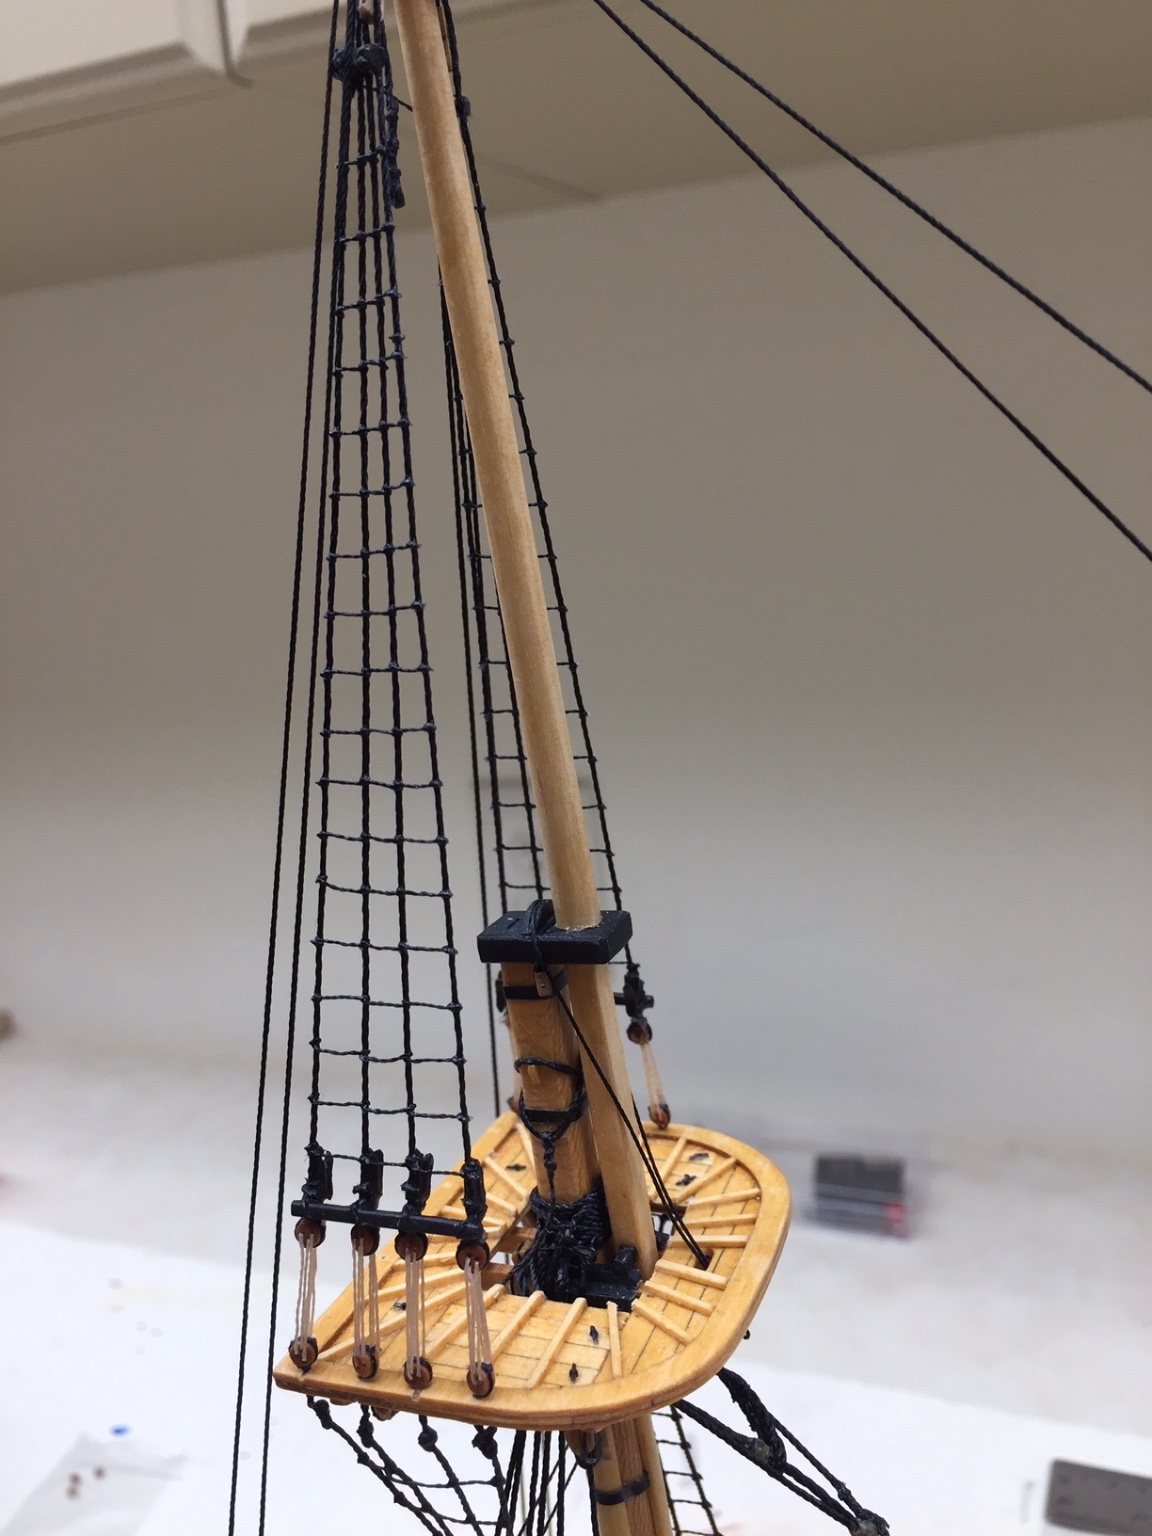
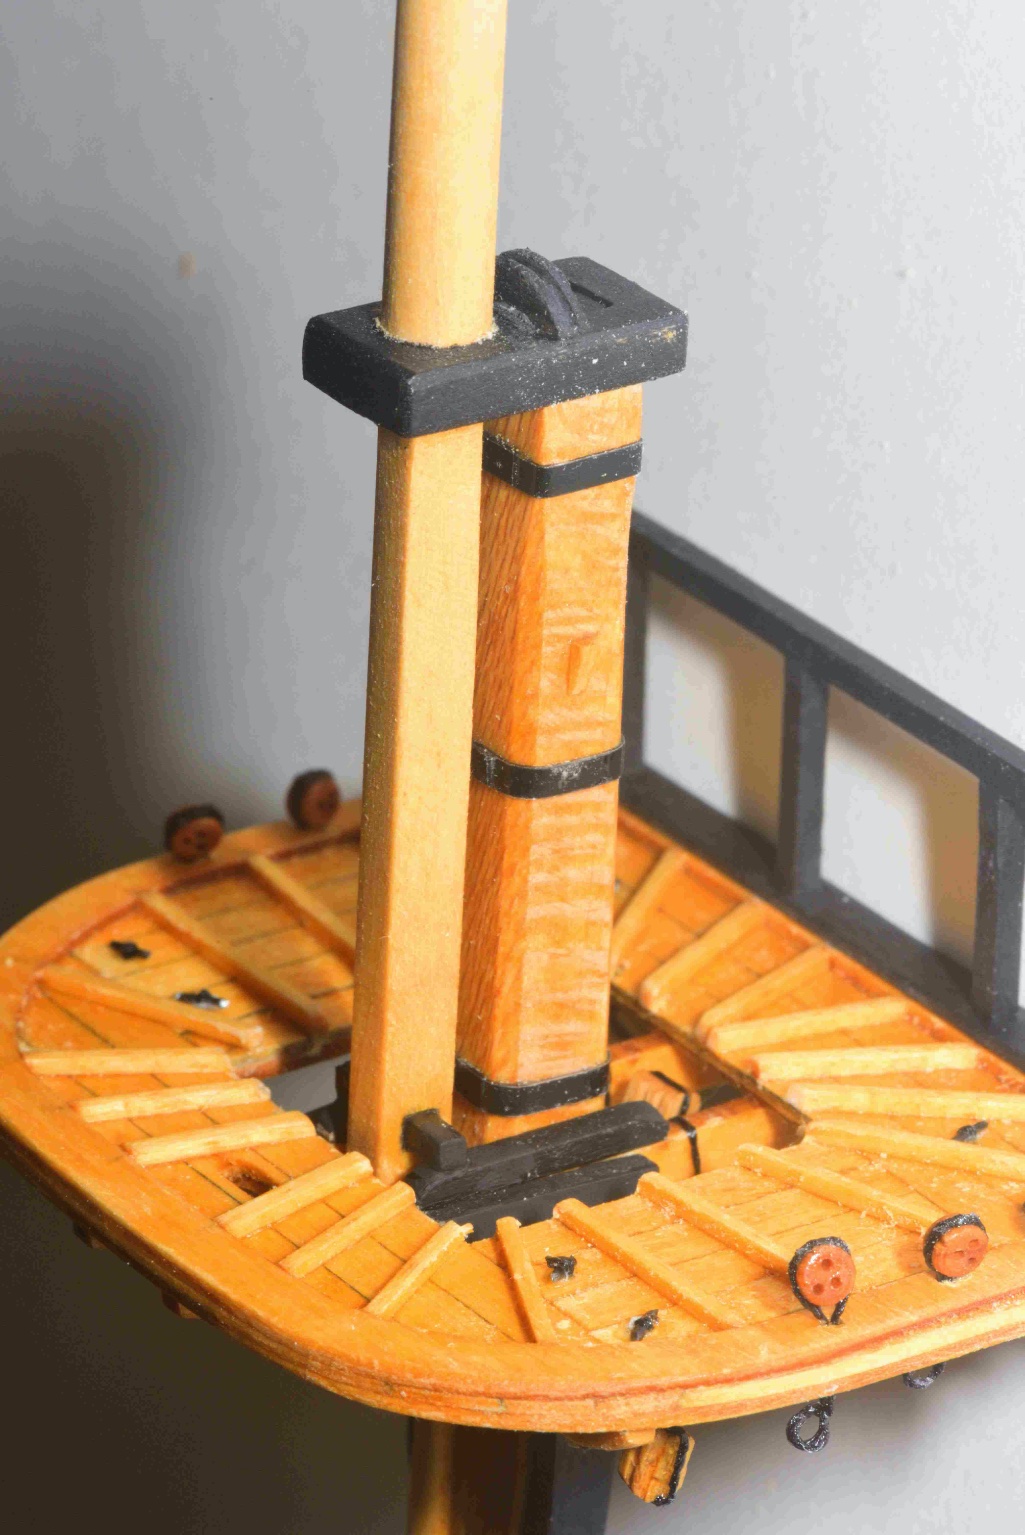
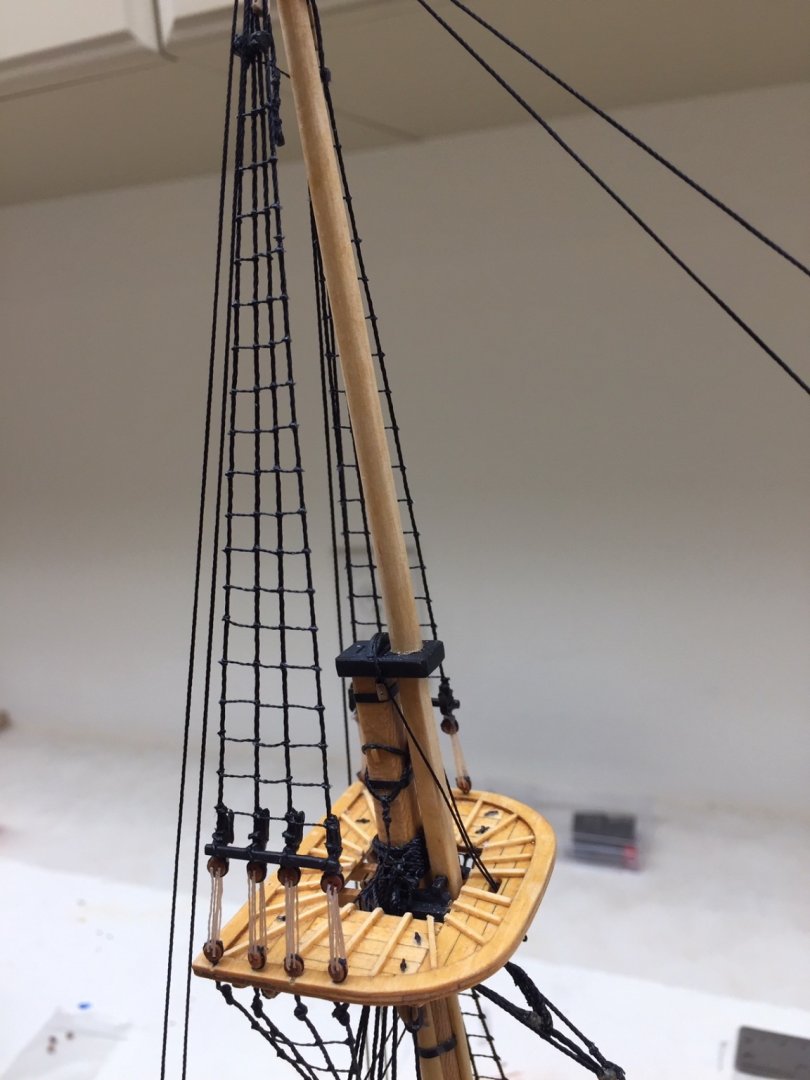
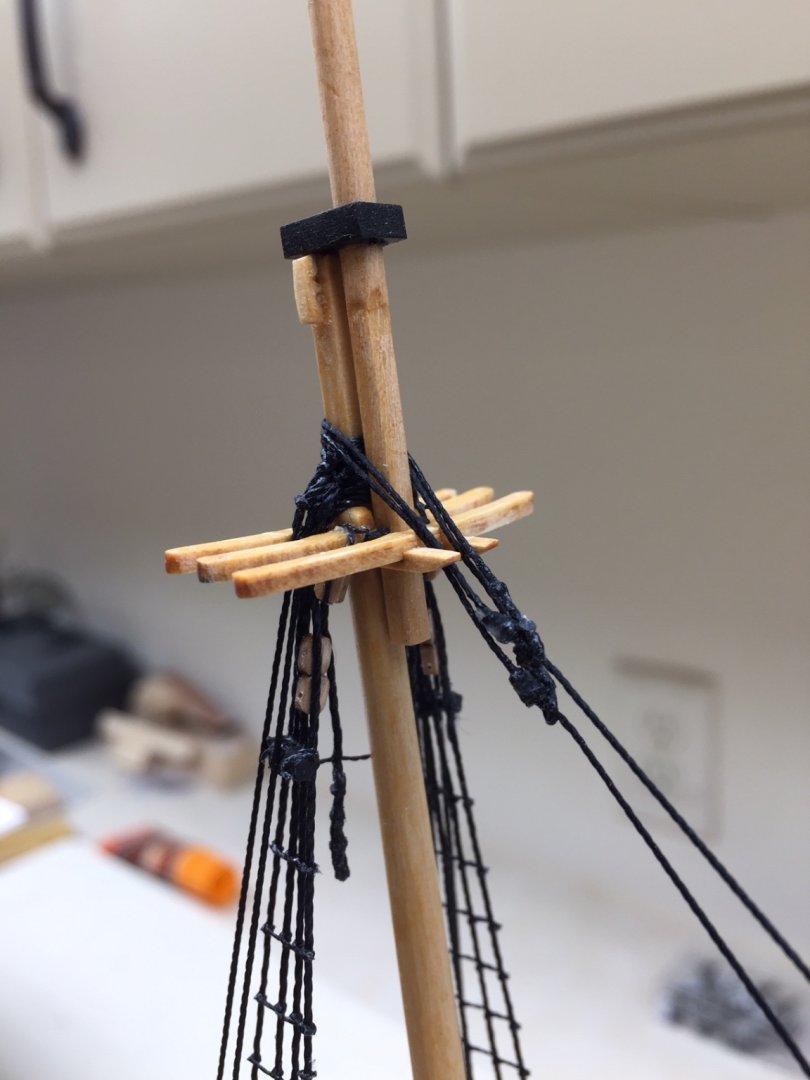
Thank you for the kind comments. Here's more pictures of the foremast, working upward. I struggled wrapping thread around the small deadeyes on the platform. It was much easier wrapping wire around the deadeyes on the channels. If I was to do this again, I would think about using wire on these deadeyes. Once again I felt I needed smaller thread than what was in the kit, but for some reason was stubborn and stayed with what the kit provided. I decided not to paint the platform black like in the manual. It seemed like too much black in that area, with masts and future yards, so I wanted something with a little contrast. There were only a few places I deviated from paint scheme shown in manual.


-
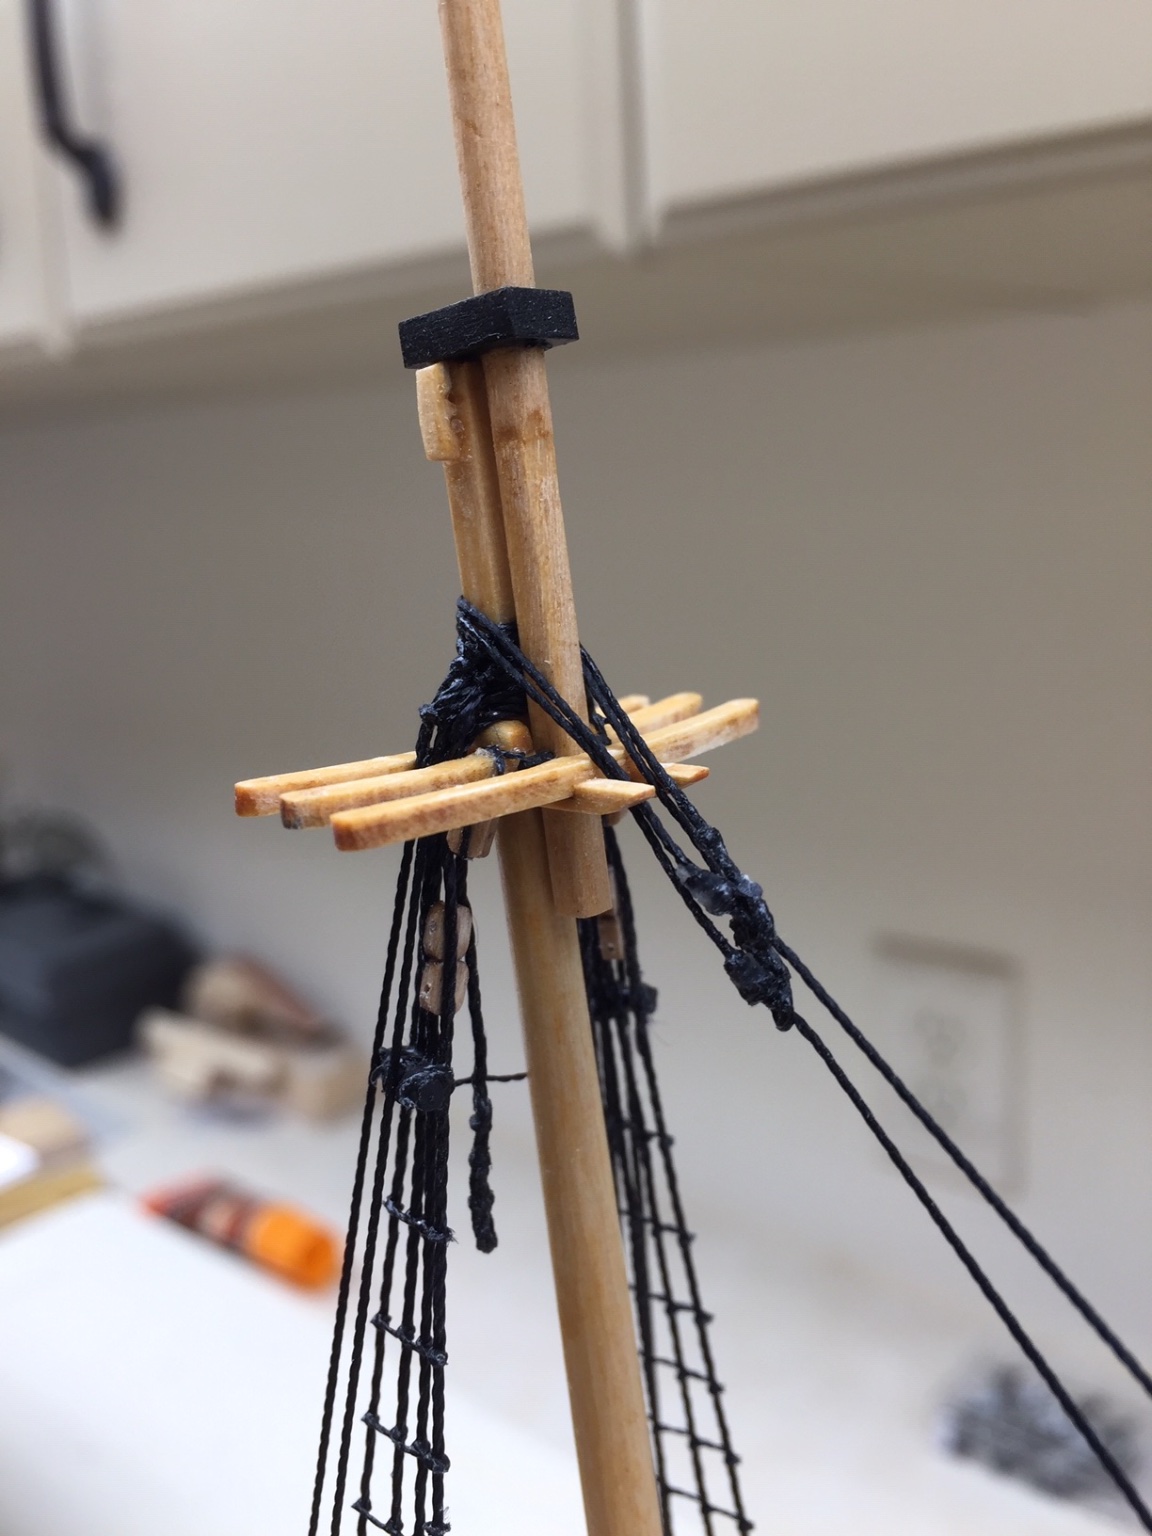
The masts are next, Chapter 17. I'll just show the foremast, because they are both nearly identical. I had some difficulty stropping blocks and mounting under the platform. With practice, I got better stropping blocks with thread, but I struggled on the first ones under the platform. I had the same problems learning to make little eyes with thread. I never found a quick, easy way of doing this. The blocks are tiny and difficult to hold, and the rigging thread is stiff enough that it doesn't want to go around the block. Perhaps a better rigging thread would make this easier. I try to hold thread around 3 sides of the block, apply some CA (I use medium thickness CA and apply small amounts with straight pins), wait a little, and then try to tie an overhand knot on the remaining side. By mashing thread around the overhand knot with fingernails and applying glue, I can get the loose threads approximately in the position I want. I've lost a quite a few little blocks on the floor. When I did the blocks under the platform, I was still trying to figure this out, and I haven't been happy with results. This was my first experience building masts. The first model ship I made just had simple dowels for masts without all the detail on this model. The detail adds a lot to the model, and is well worth adding.

-
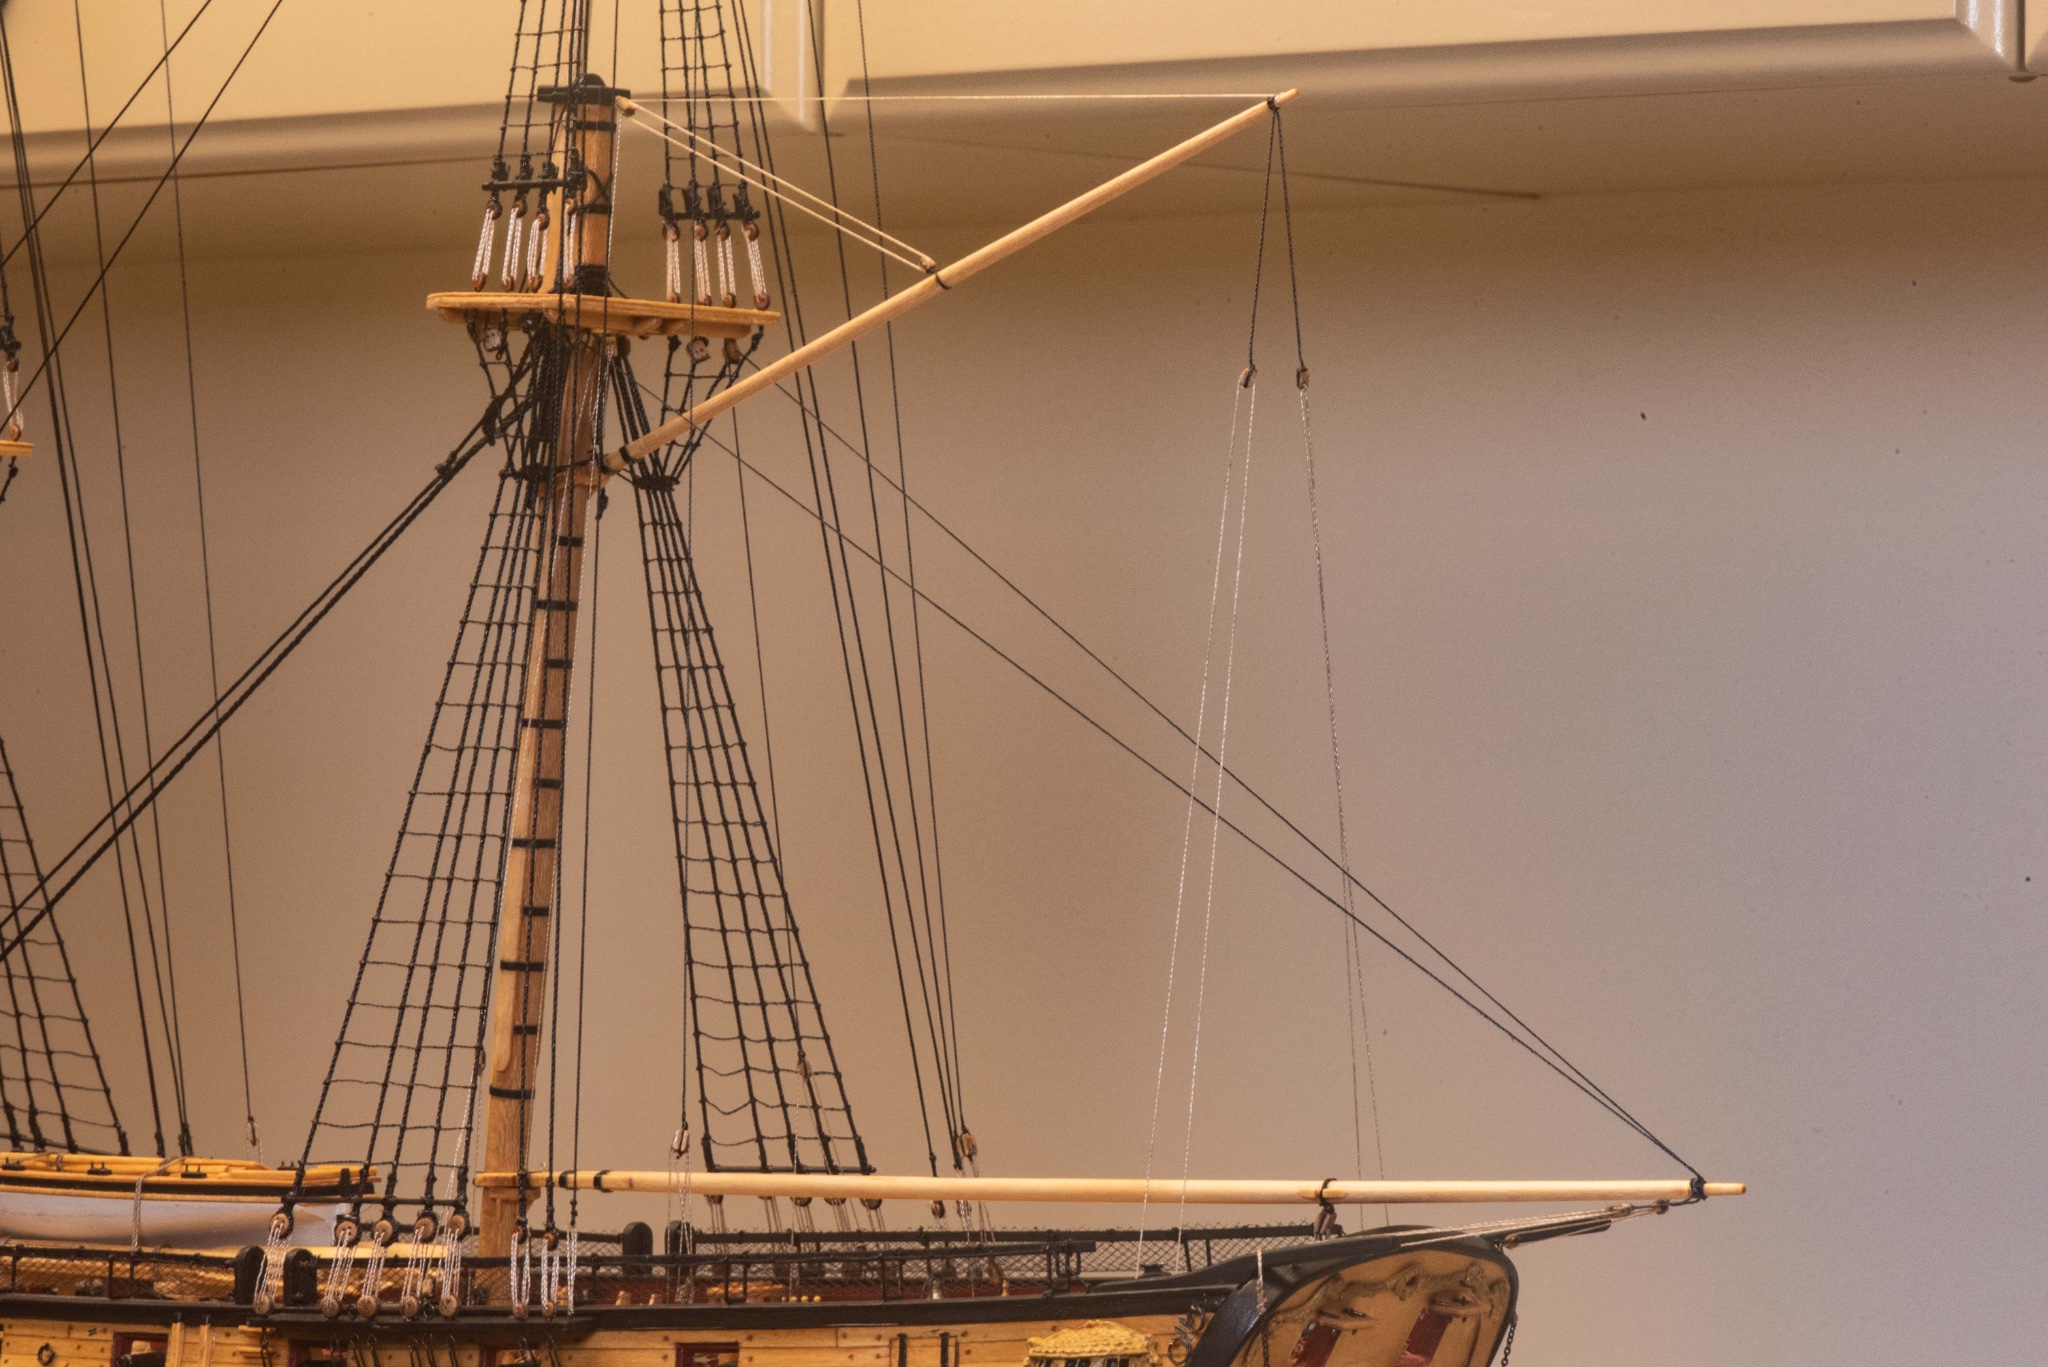
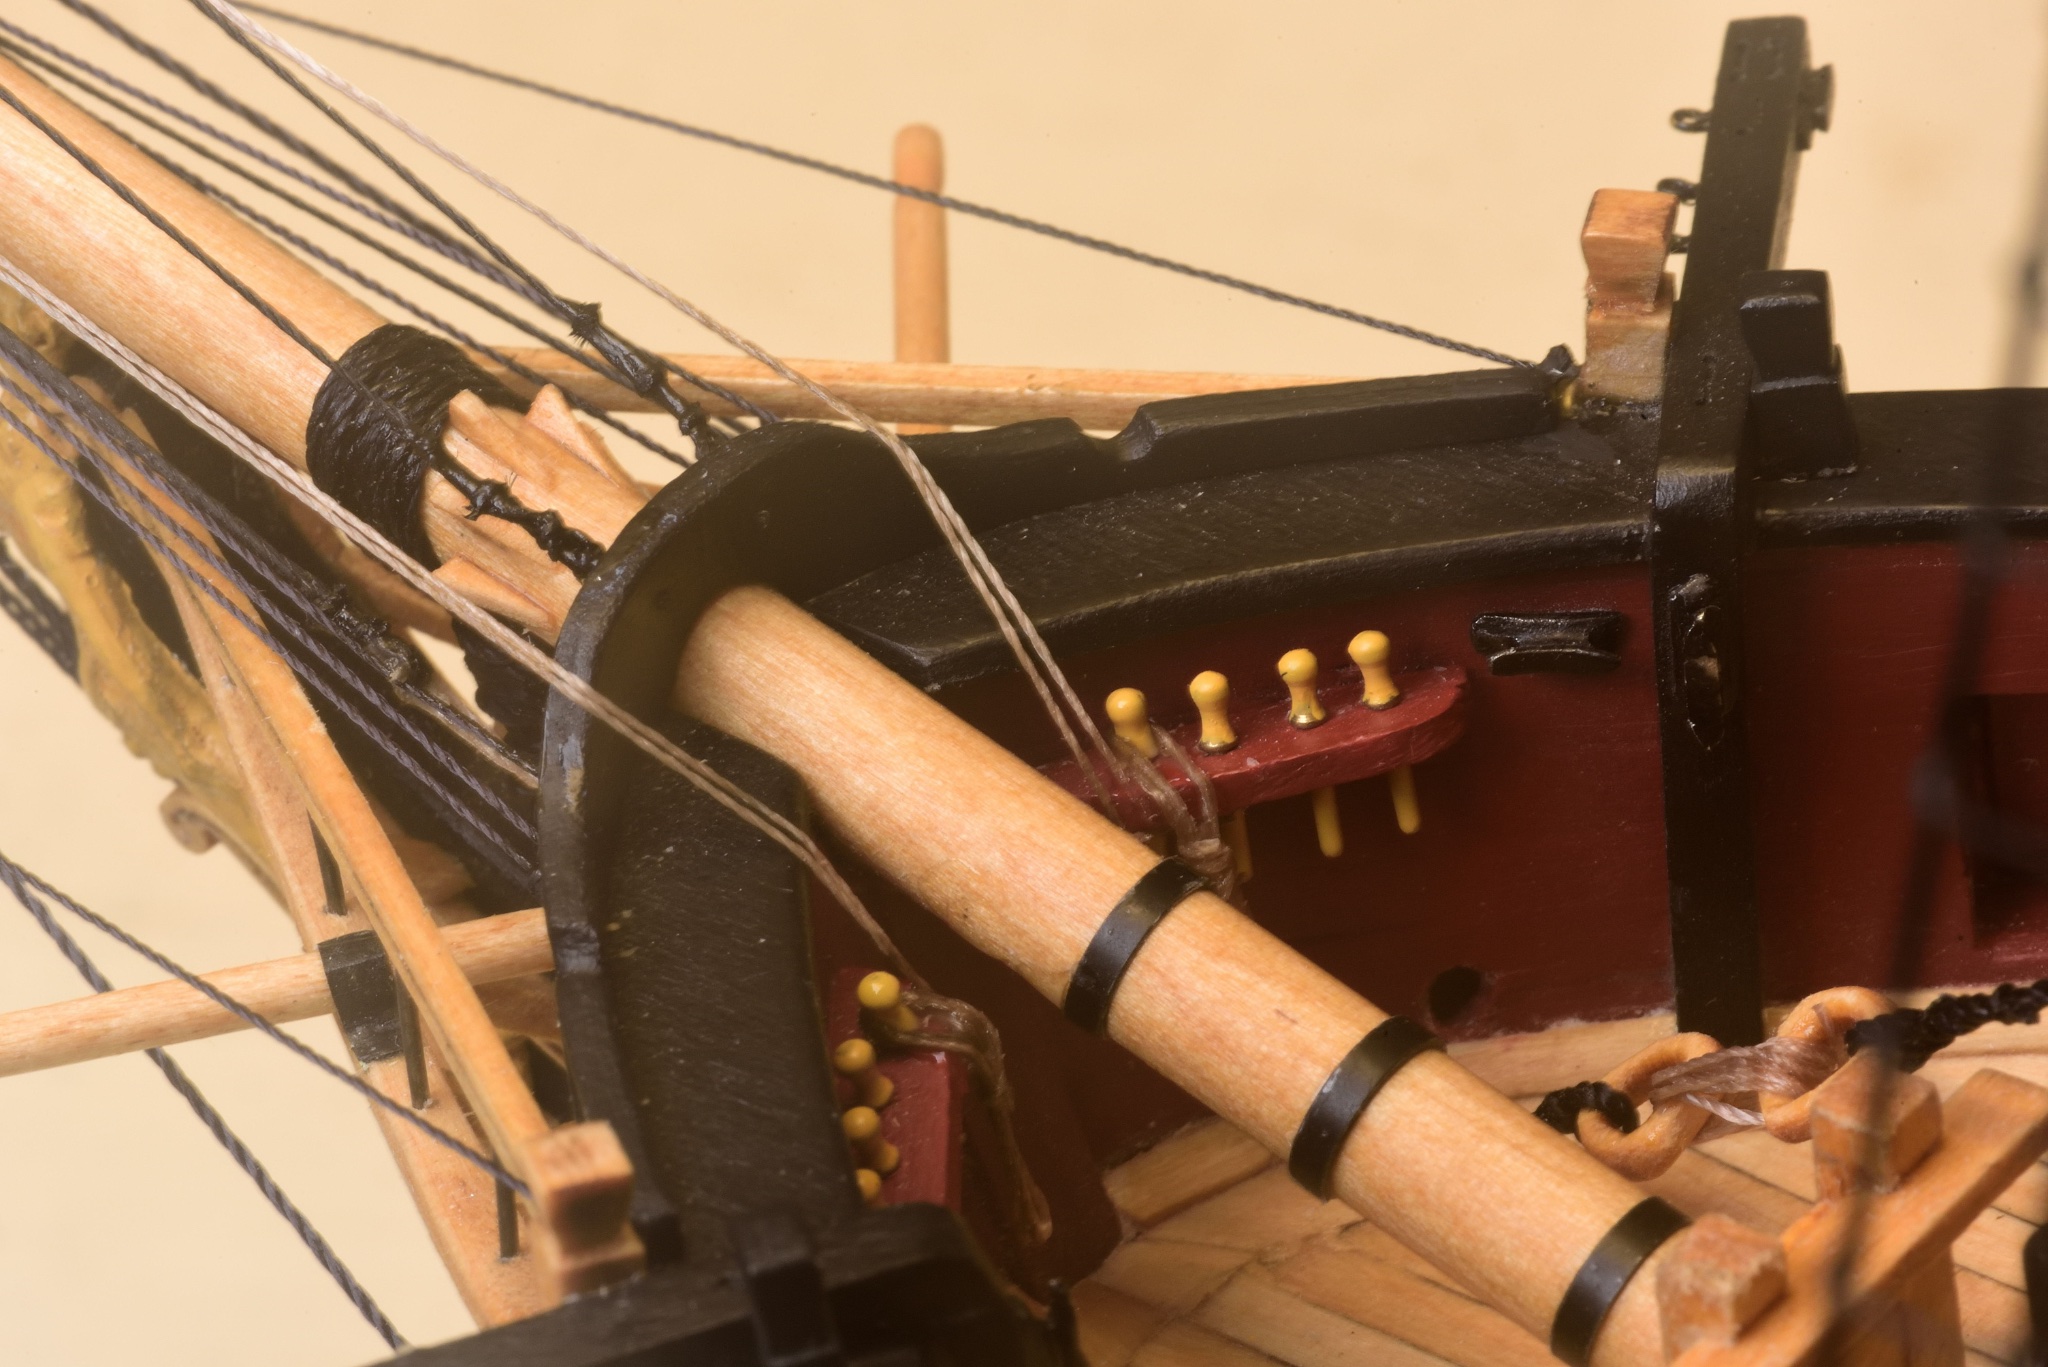
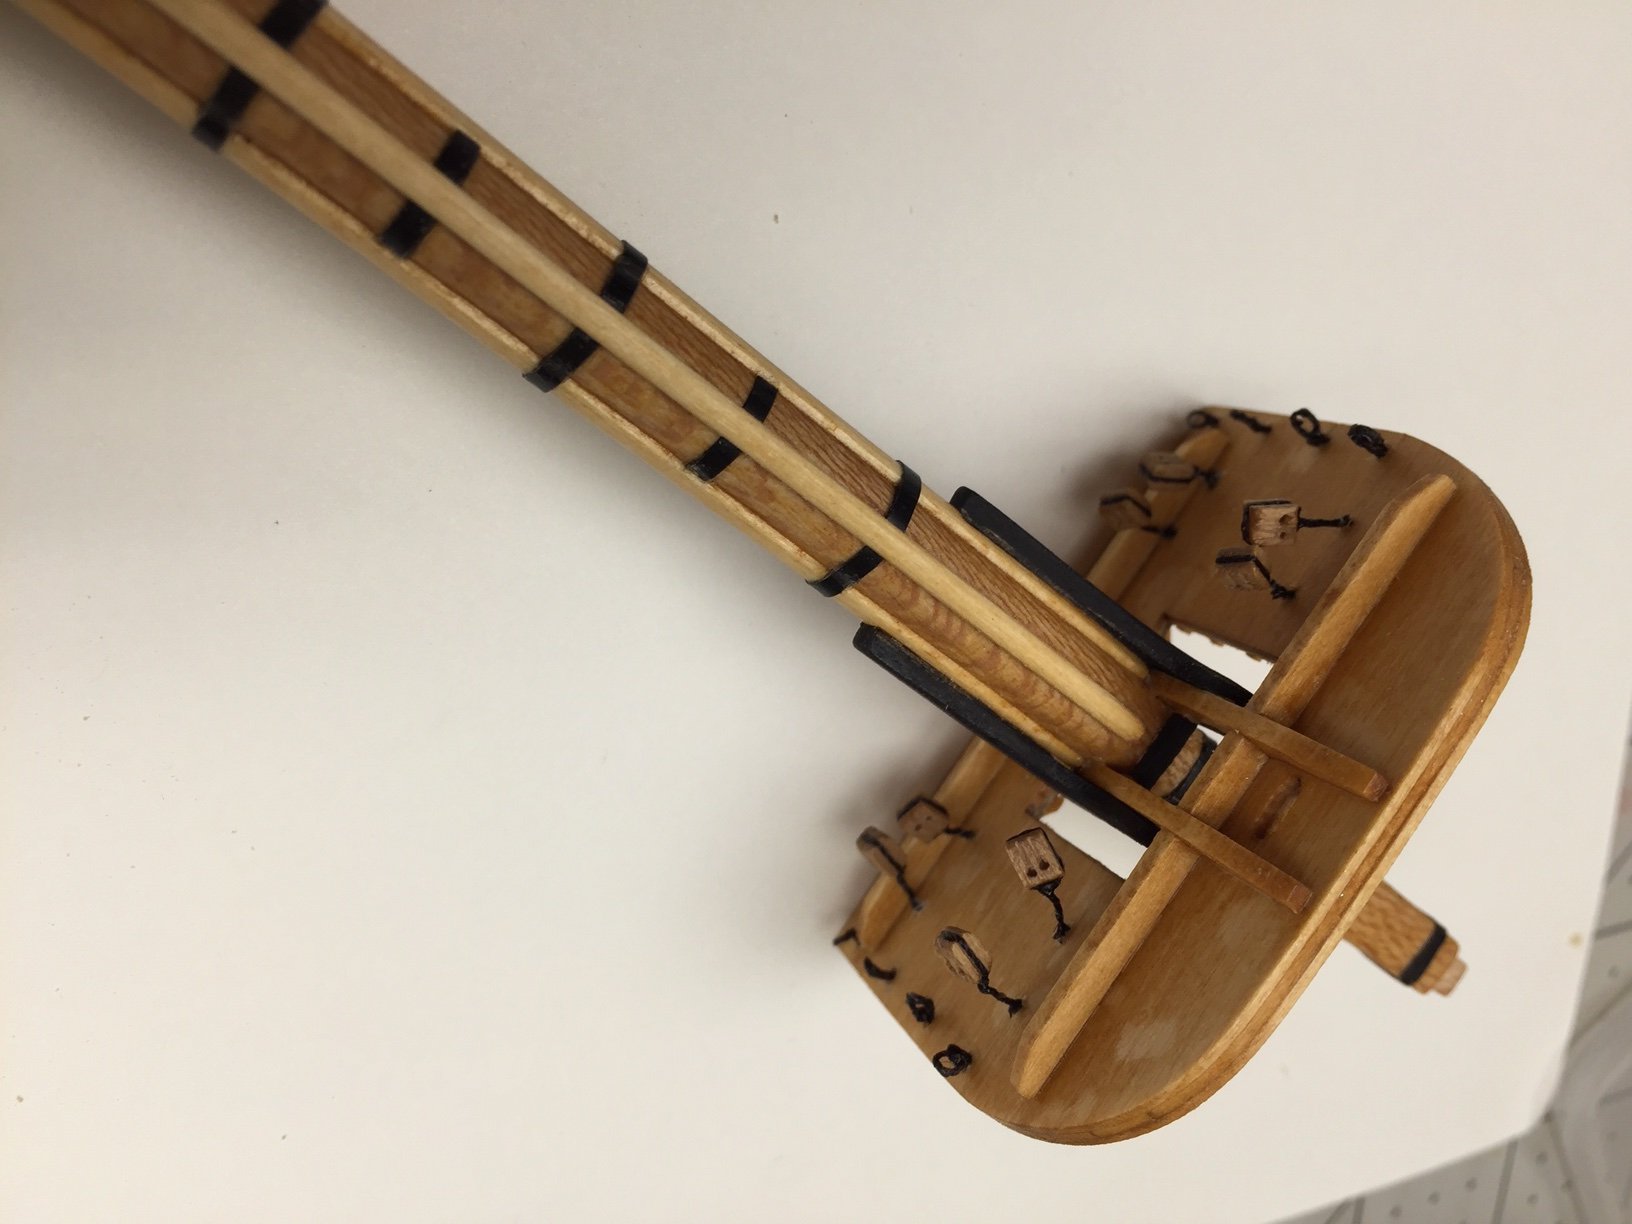
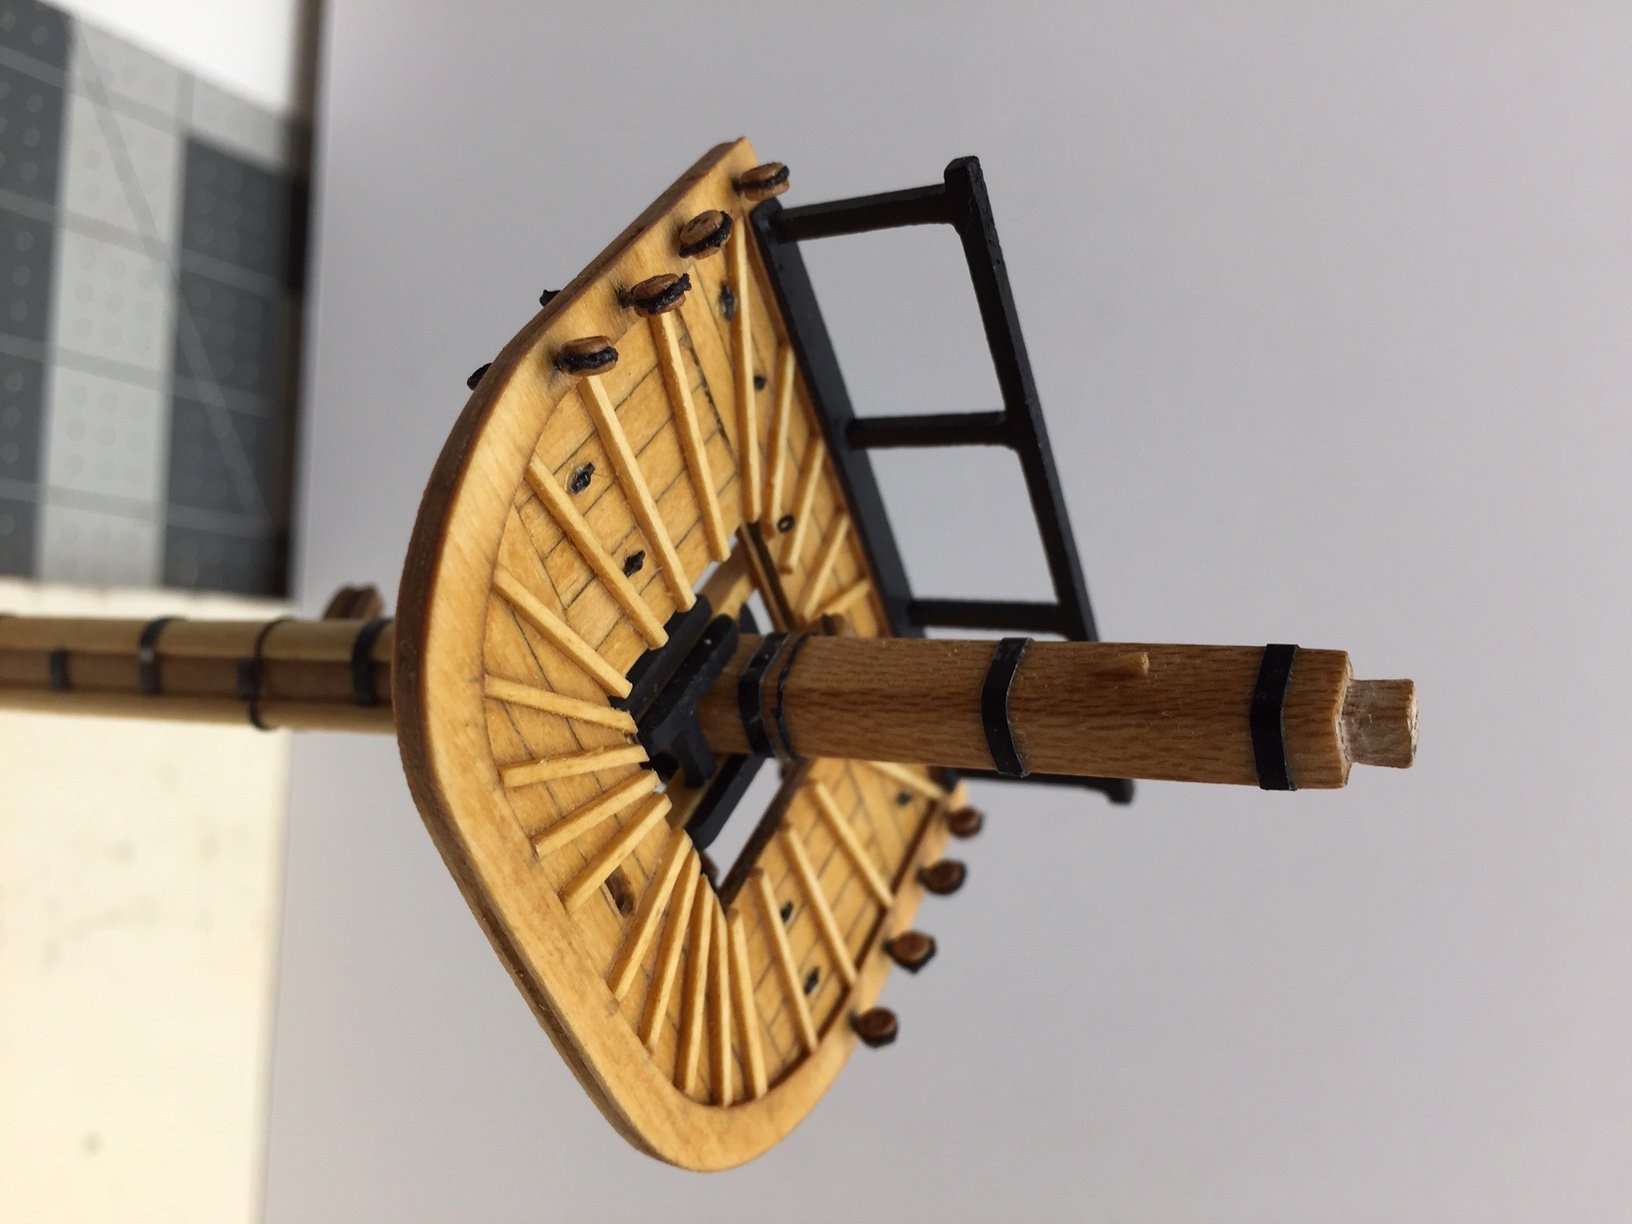
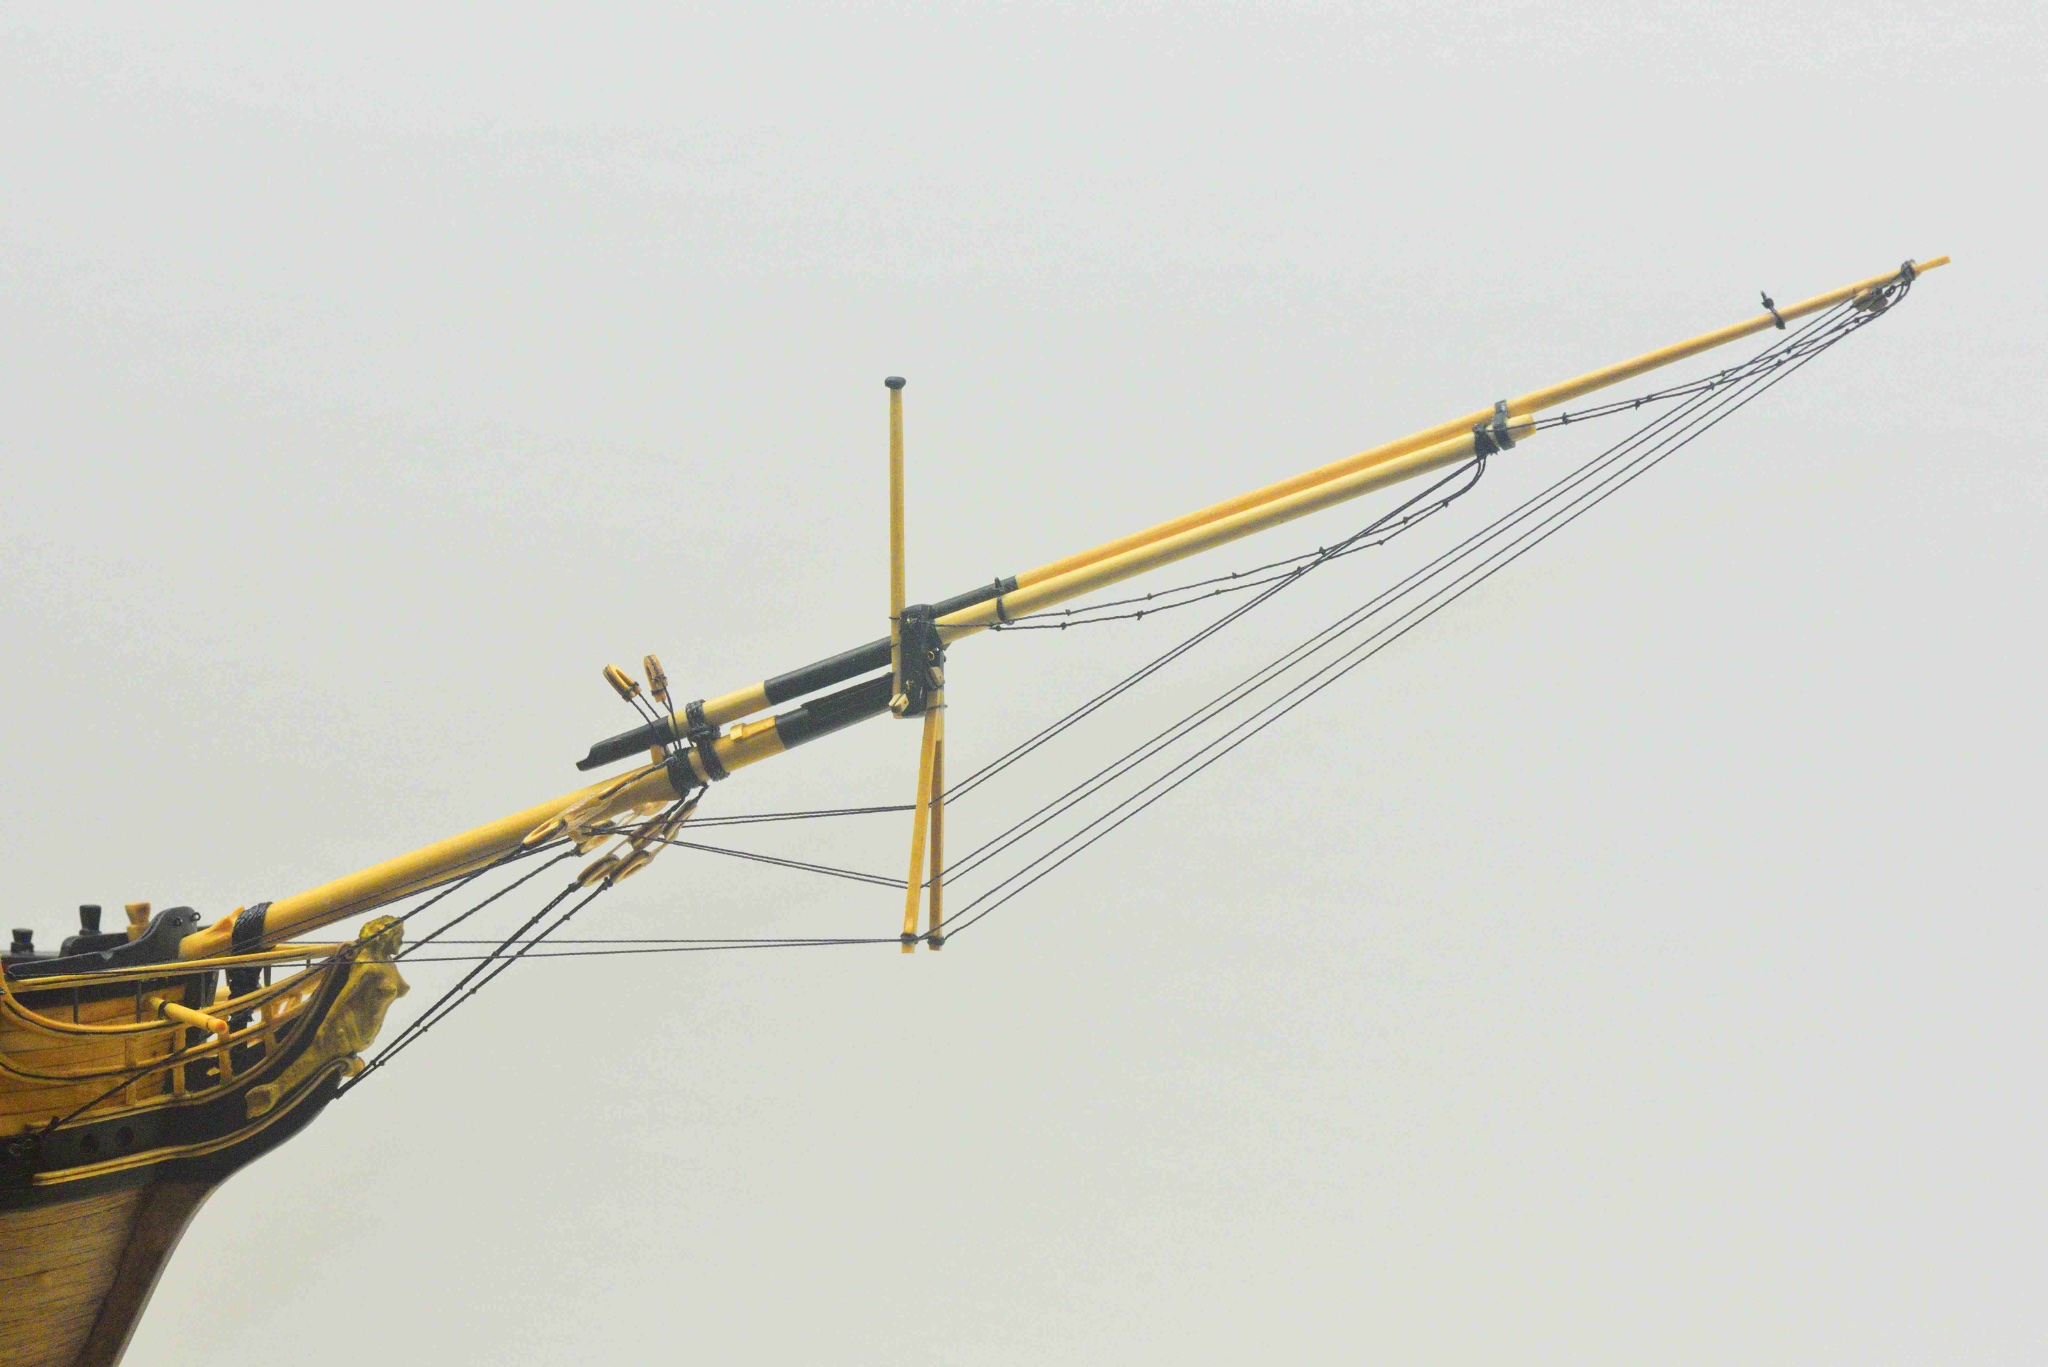
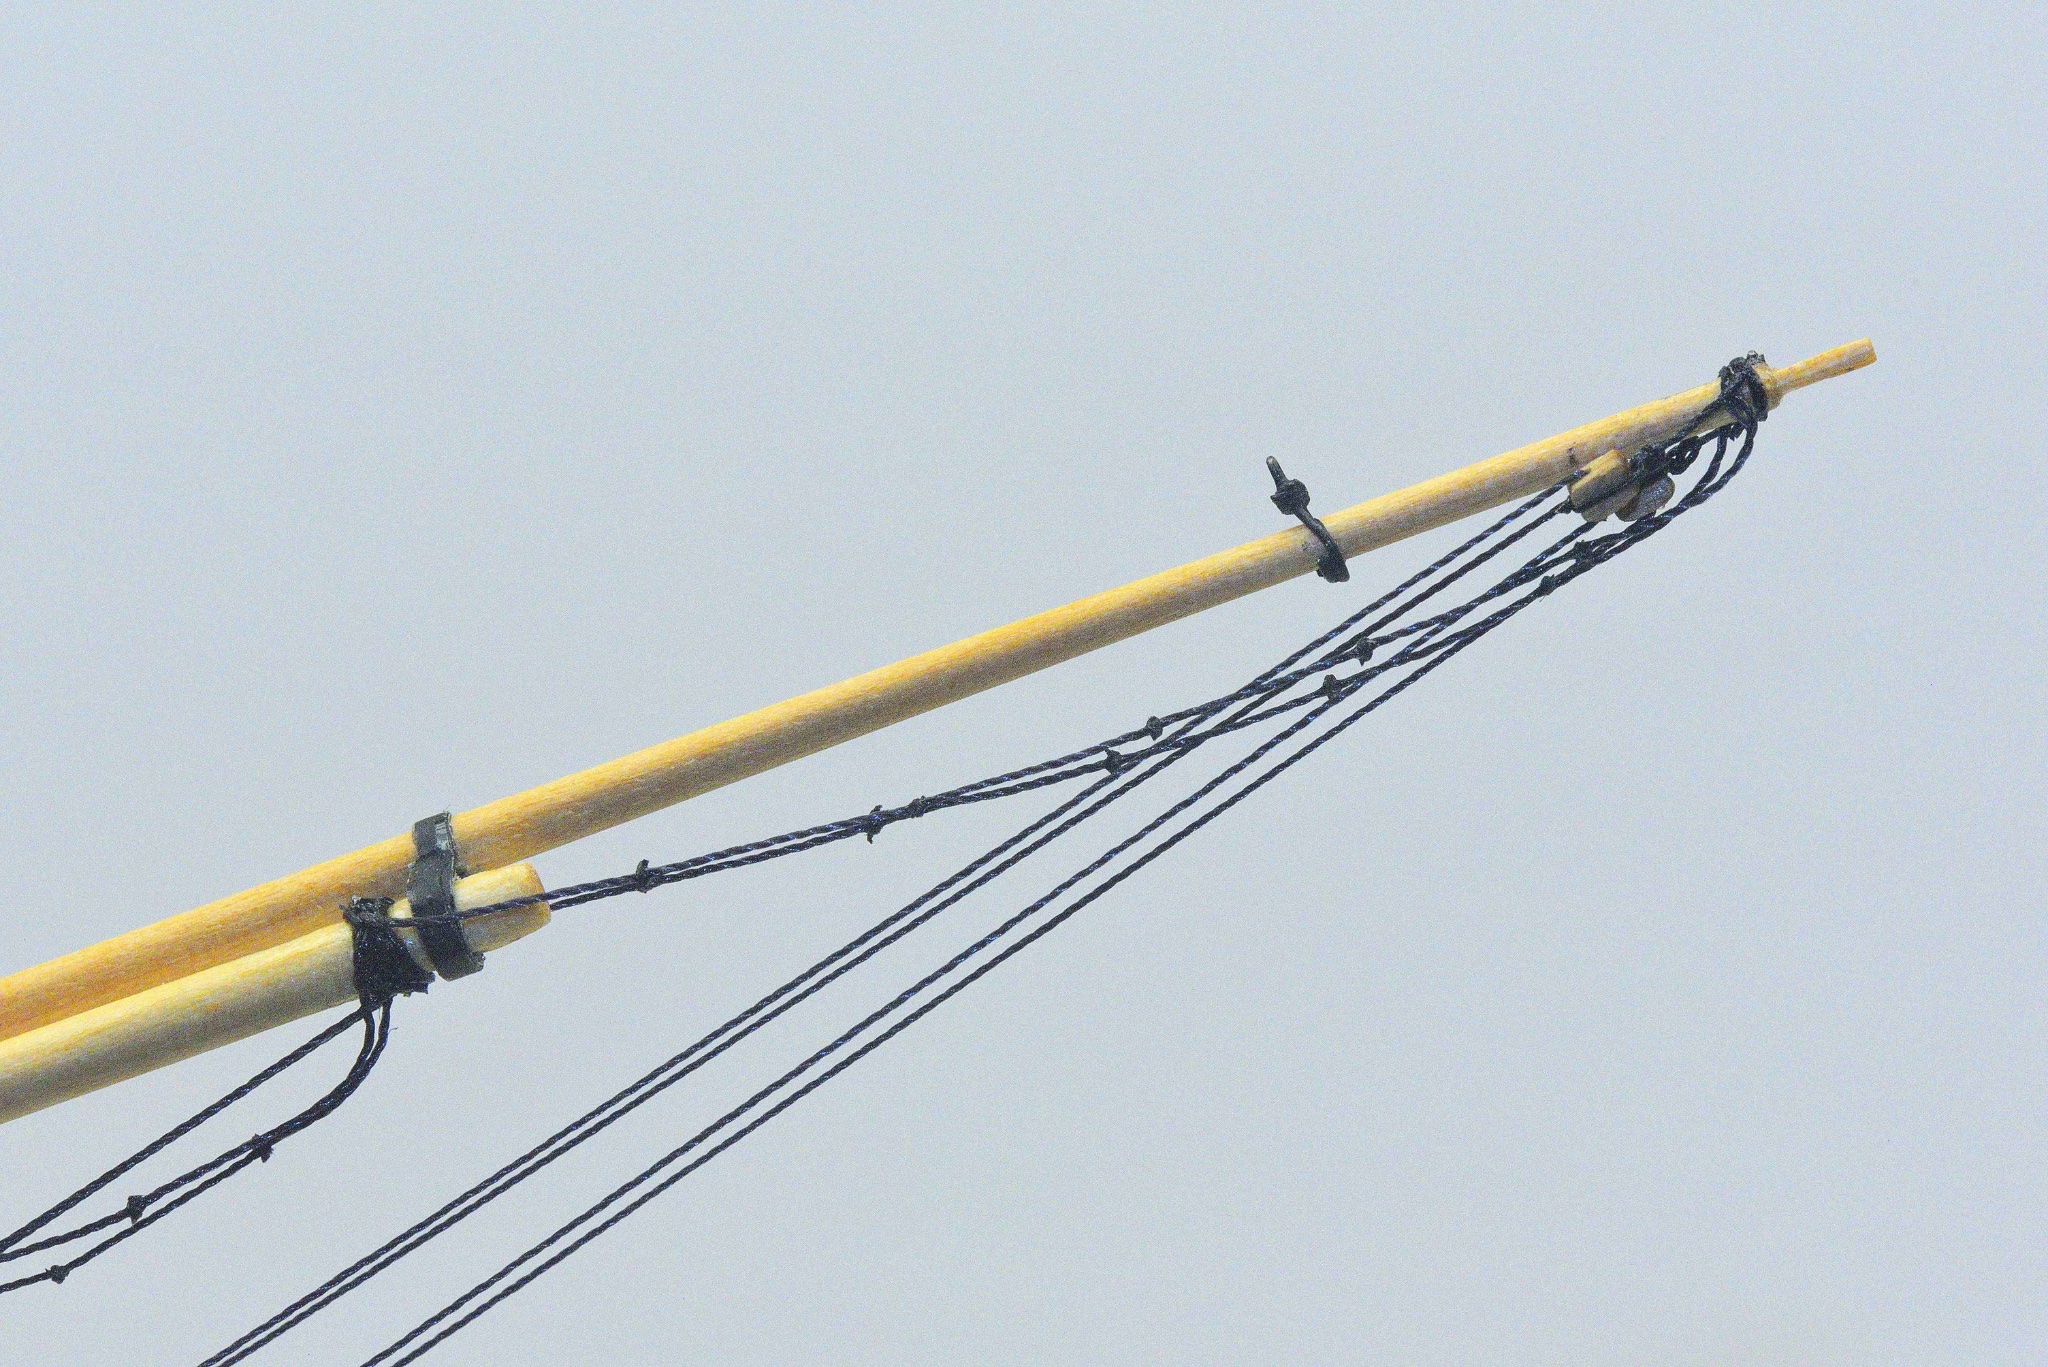
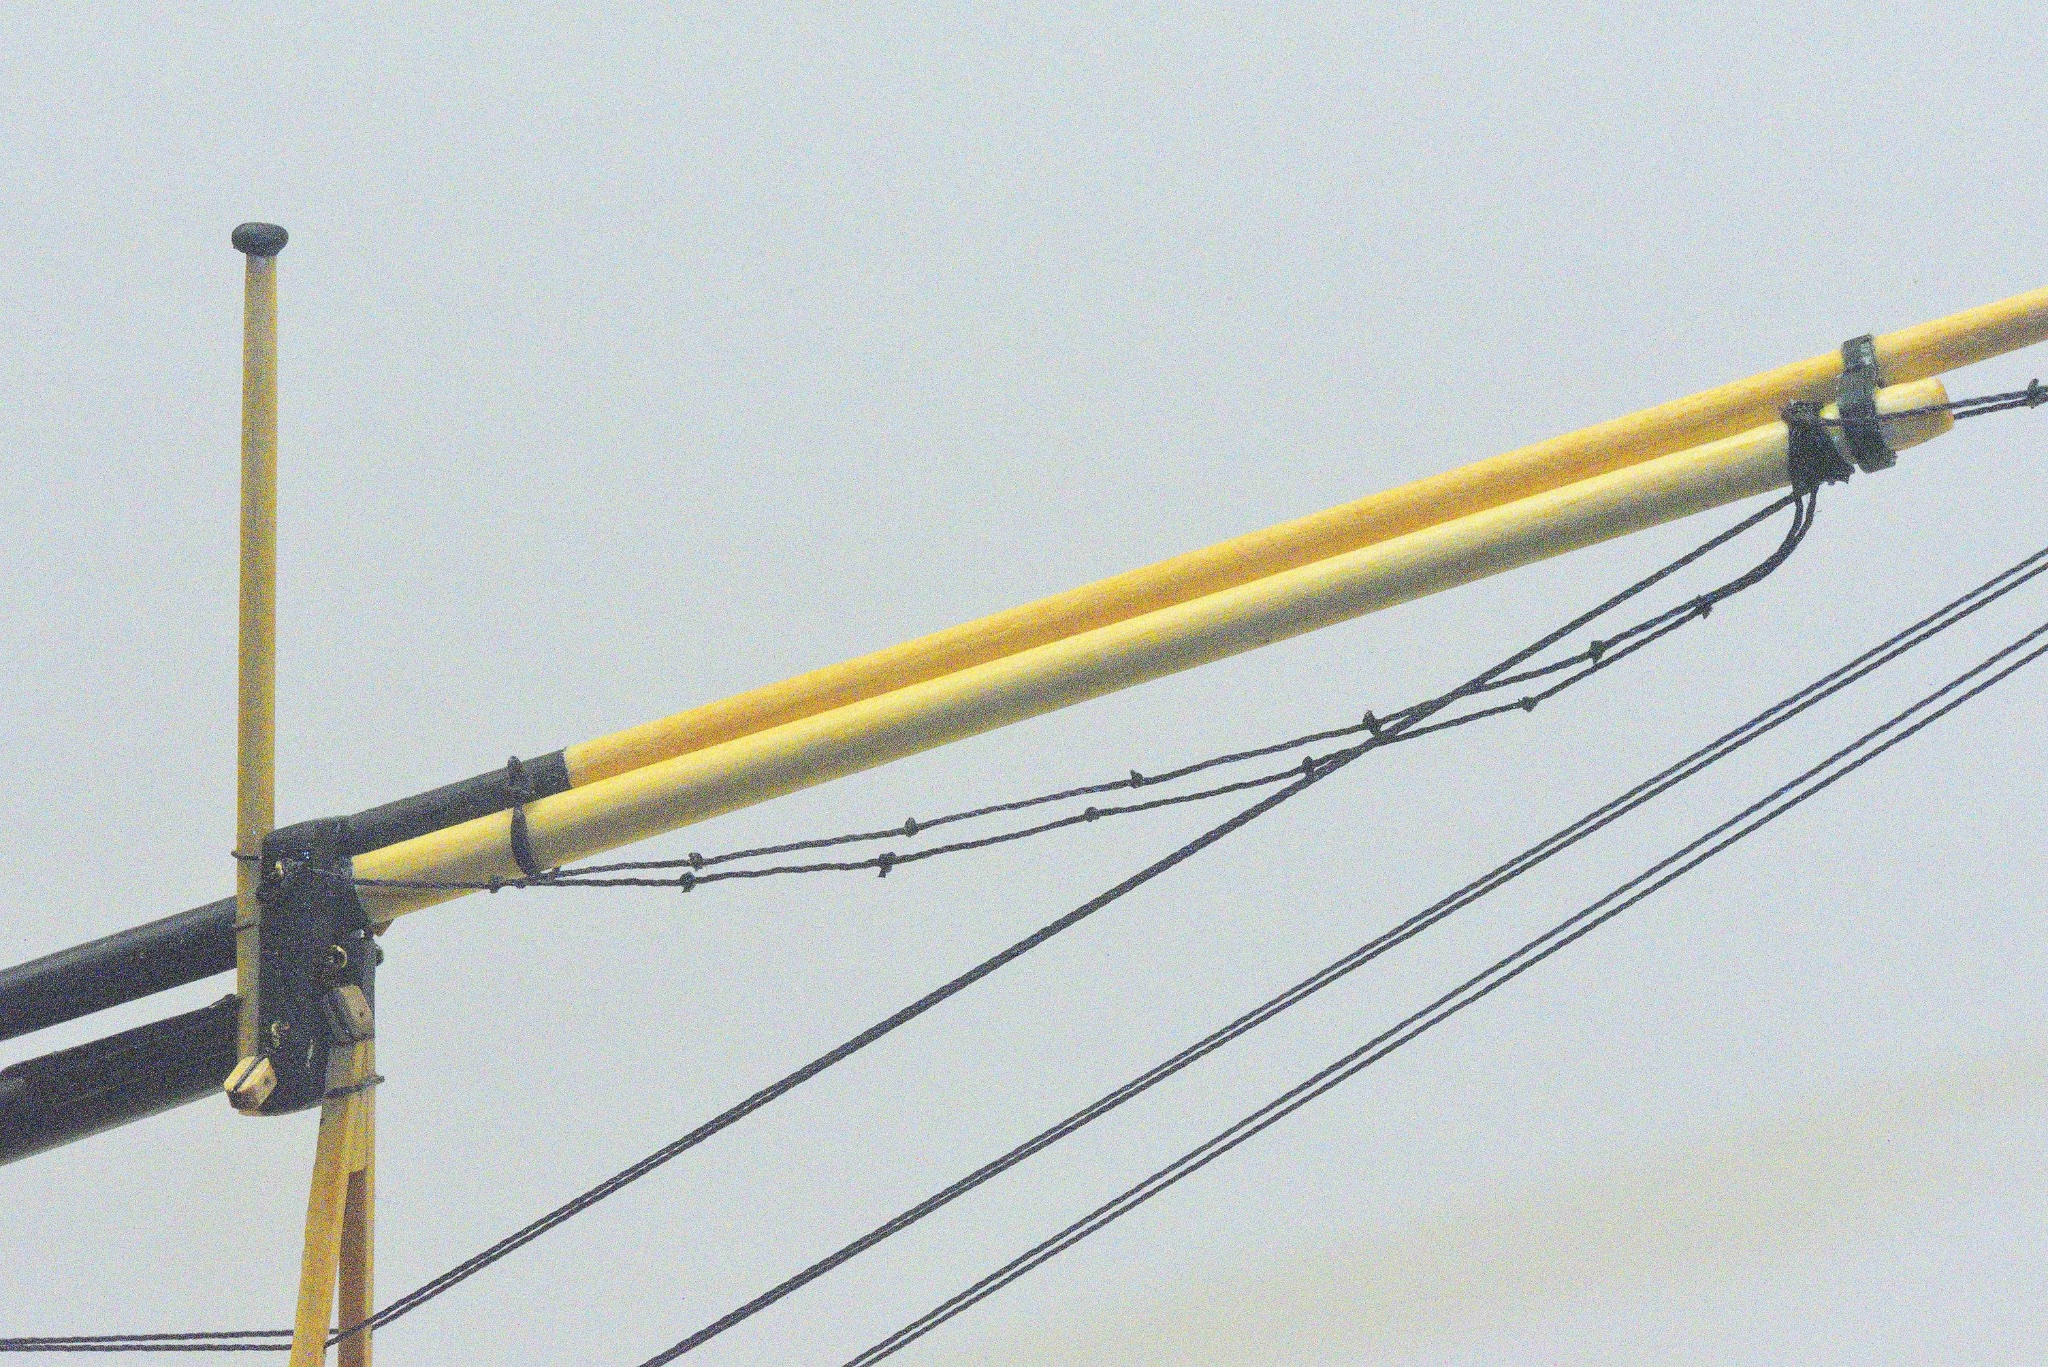
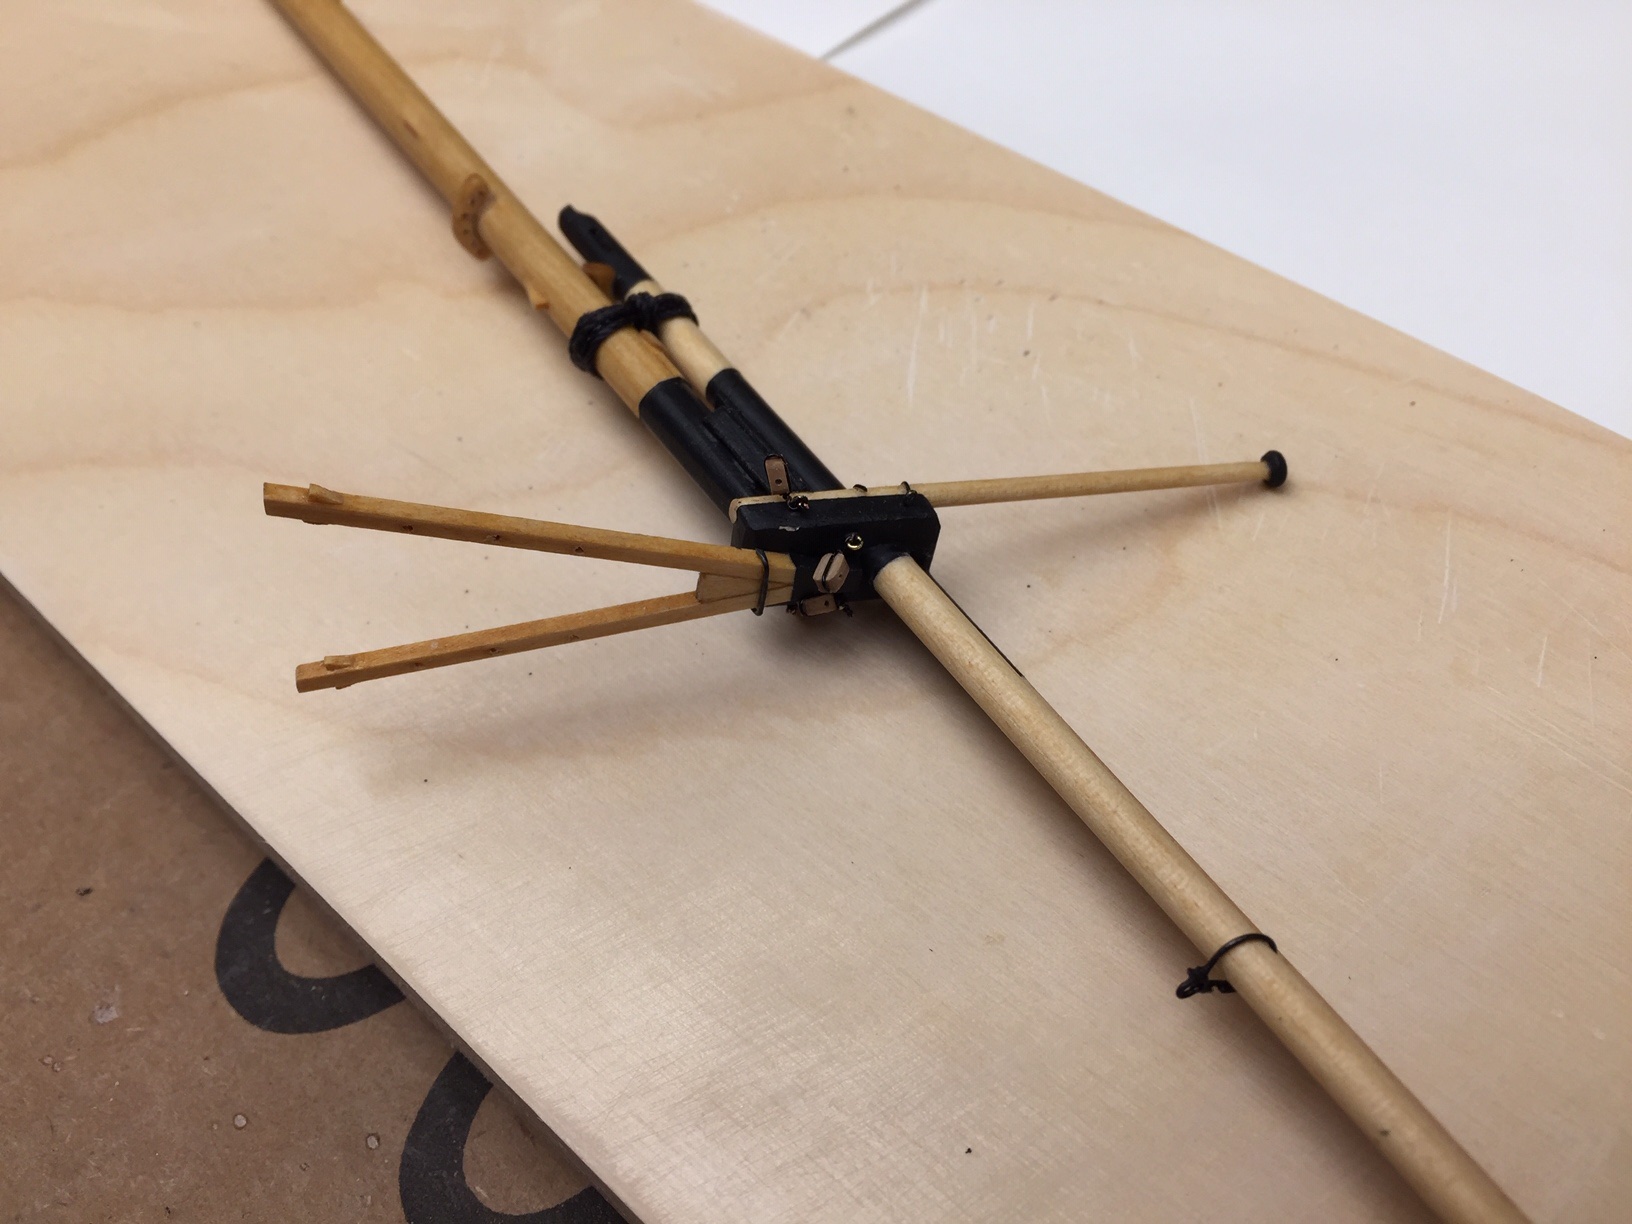
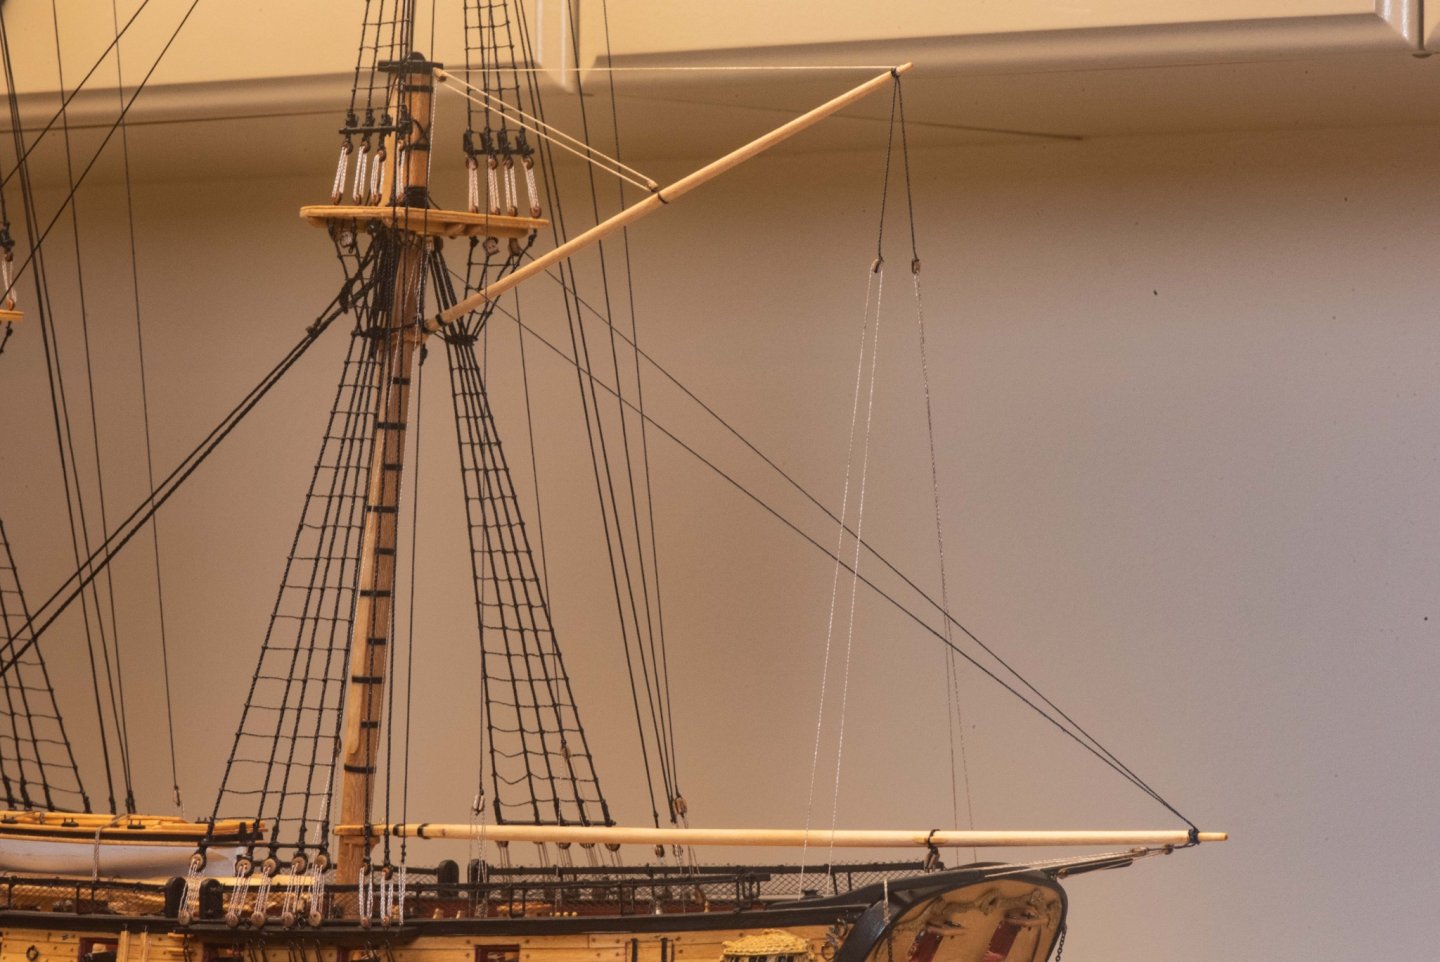
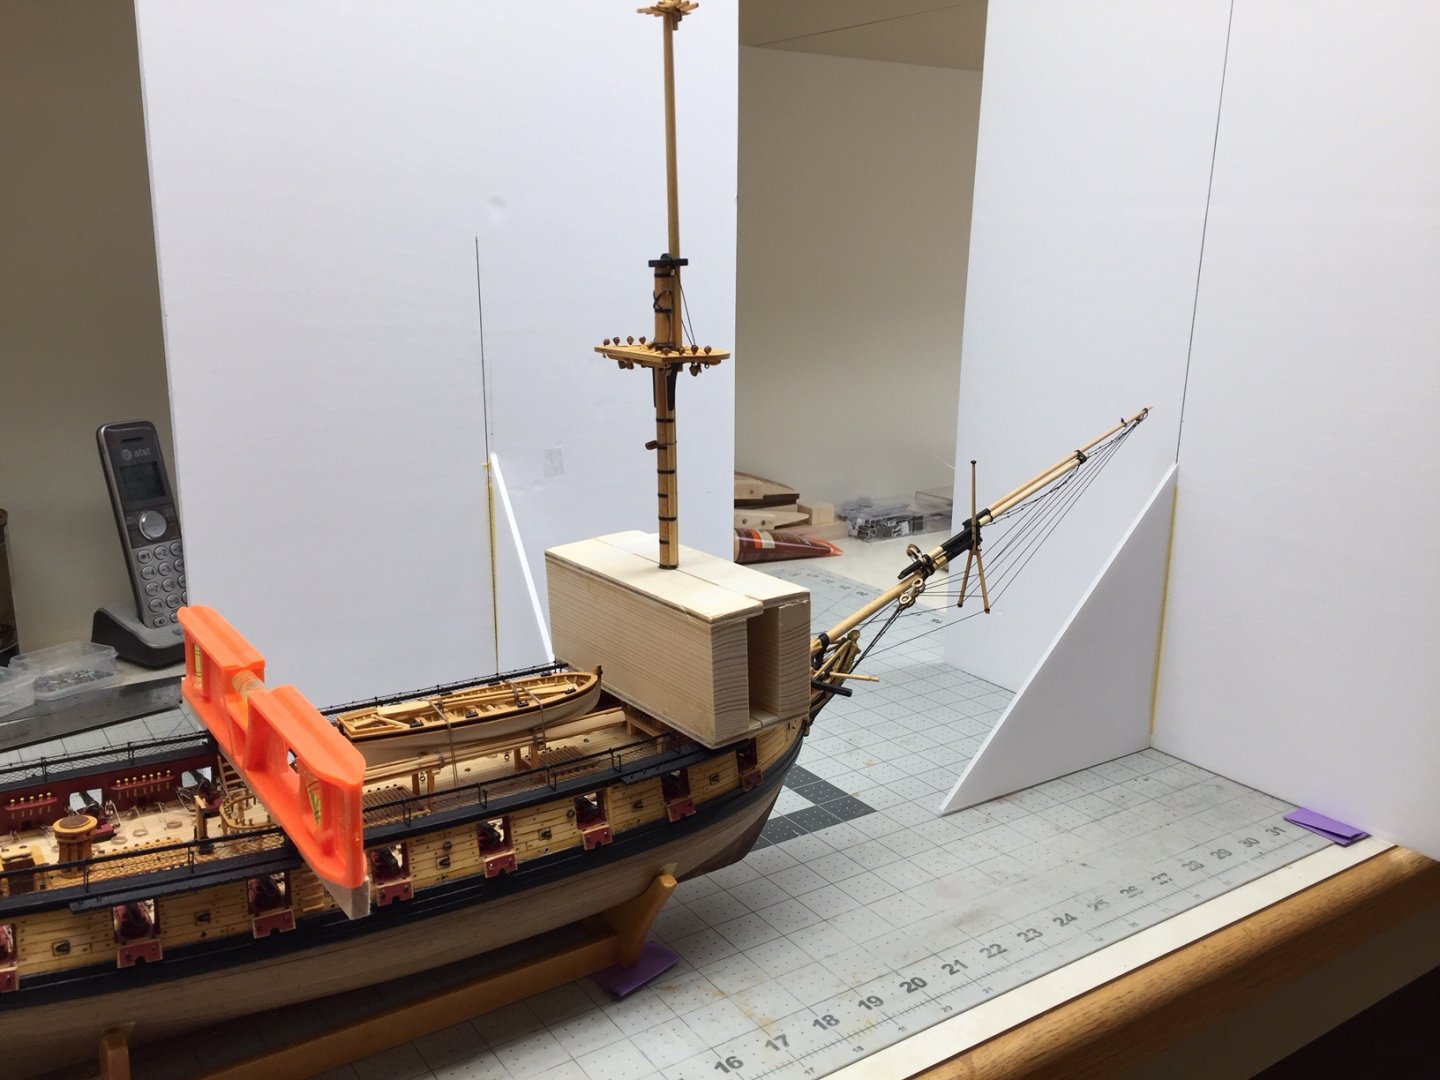
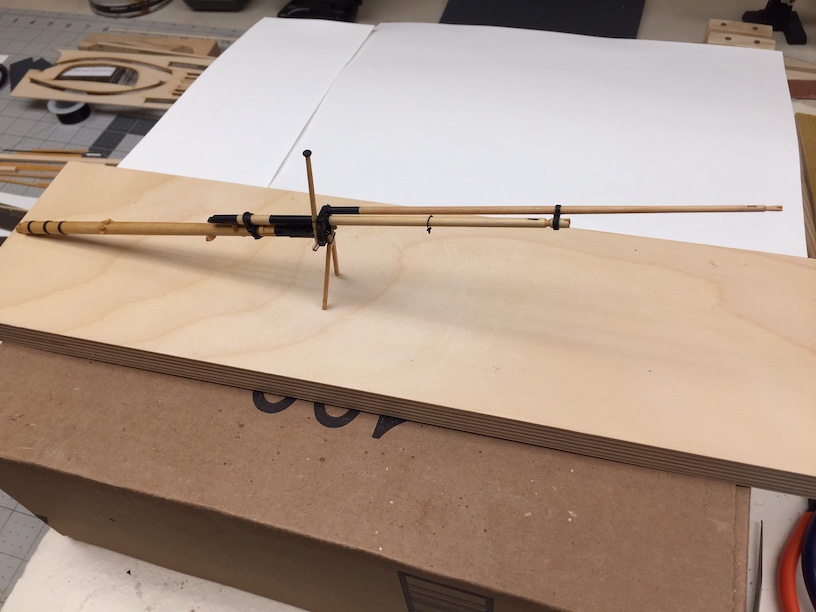
Continuing on with mounting the bowsprit assembly. One thing you quickly notice is how much larger the boat gets. Once you add the bowsprit, it becomes a lot longer and you have to be more careful moving it around. Once you add the masts, it gets very tall, and even more difficult to move around. The bowsprit foot ropes were a challenge. Getting thread to hang anywhere close to the way a rope hangs is very difficult. Now that I've used wire for yard foot ropes, it makes me think I should have done that for these foot ropes as well. No reason you can't tie knots around wire as easily as around thread to get the right look. I've found the wire foot ropes on the yards work well, and if you bump them slightly out of shape, they are easy to bend back. One thing I discovered is it's difficult to take pictures once you start rigging. It's hard to isolate what you want to show. It's easy at this stage, but gets much more difficult as more rigging is added.


-
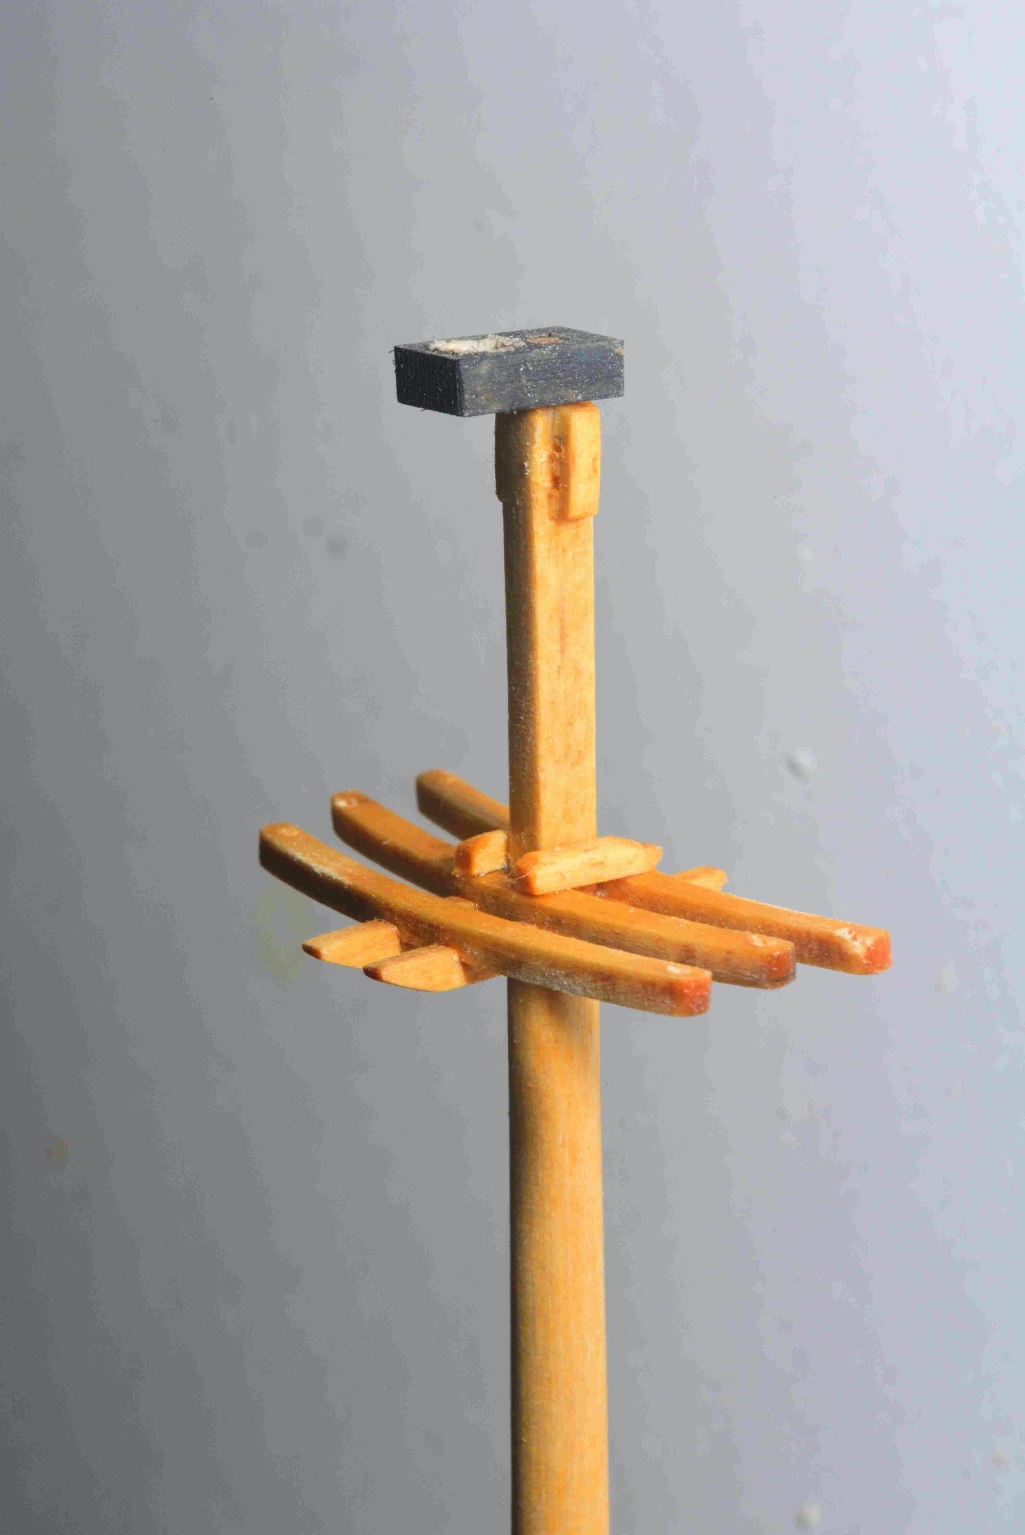
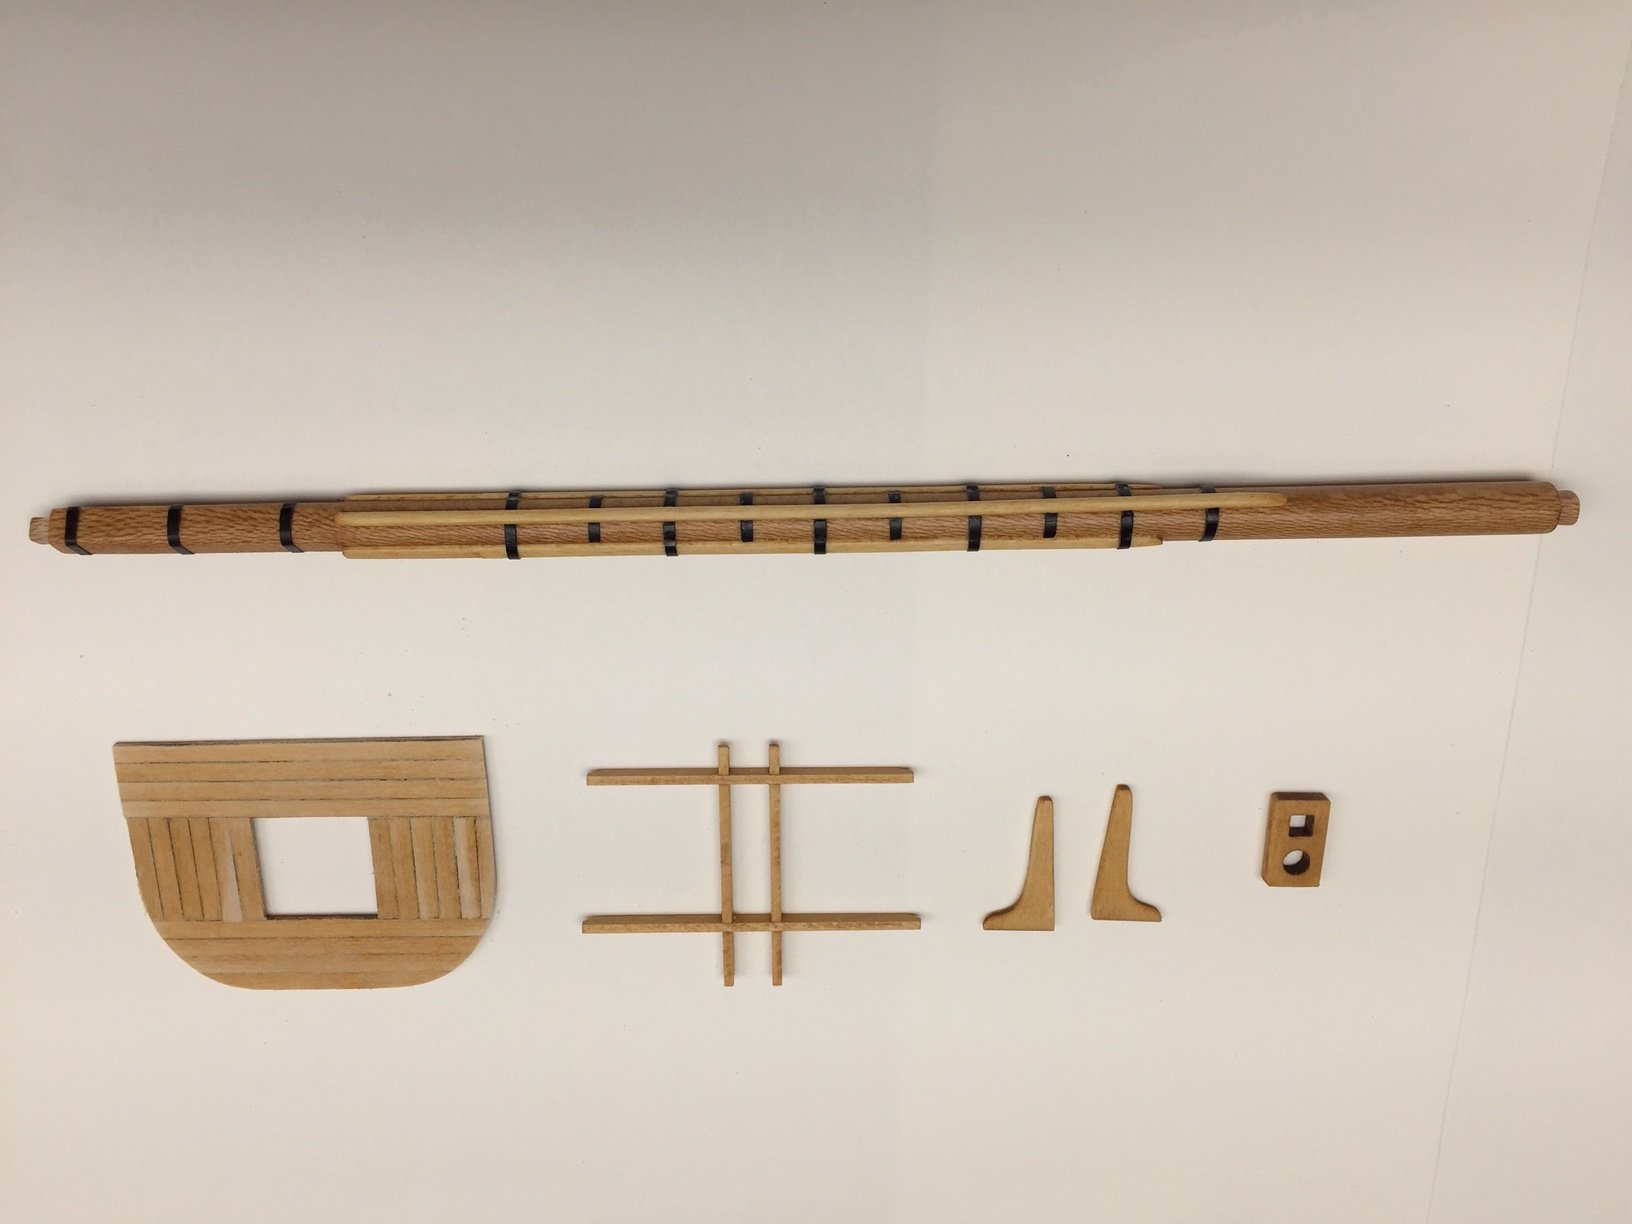
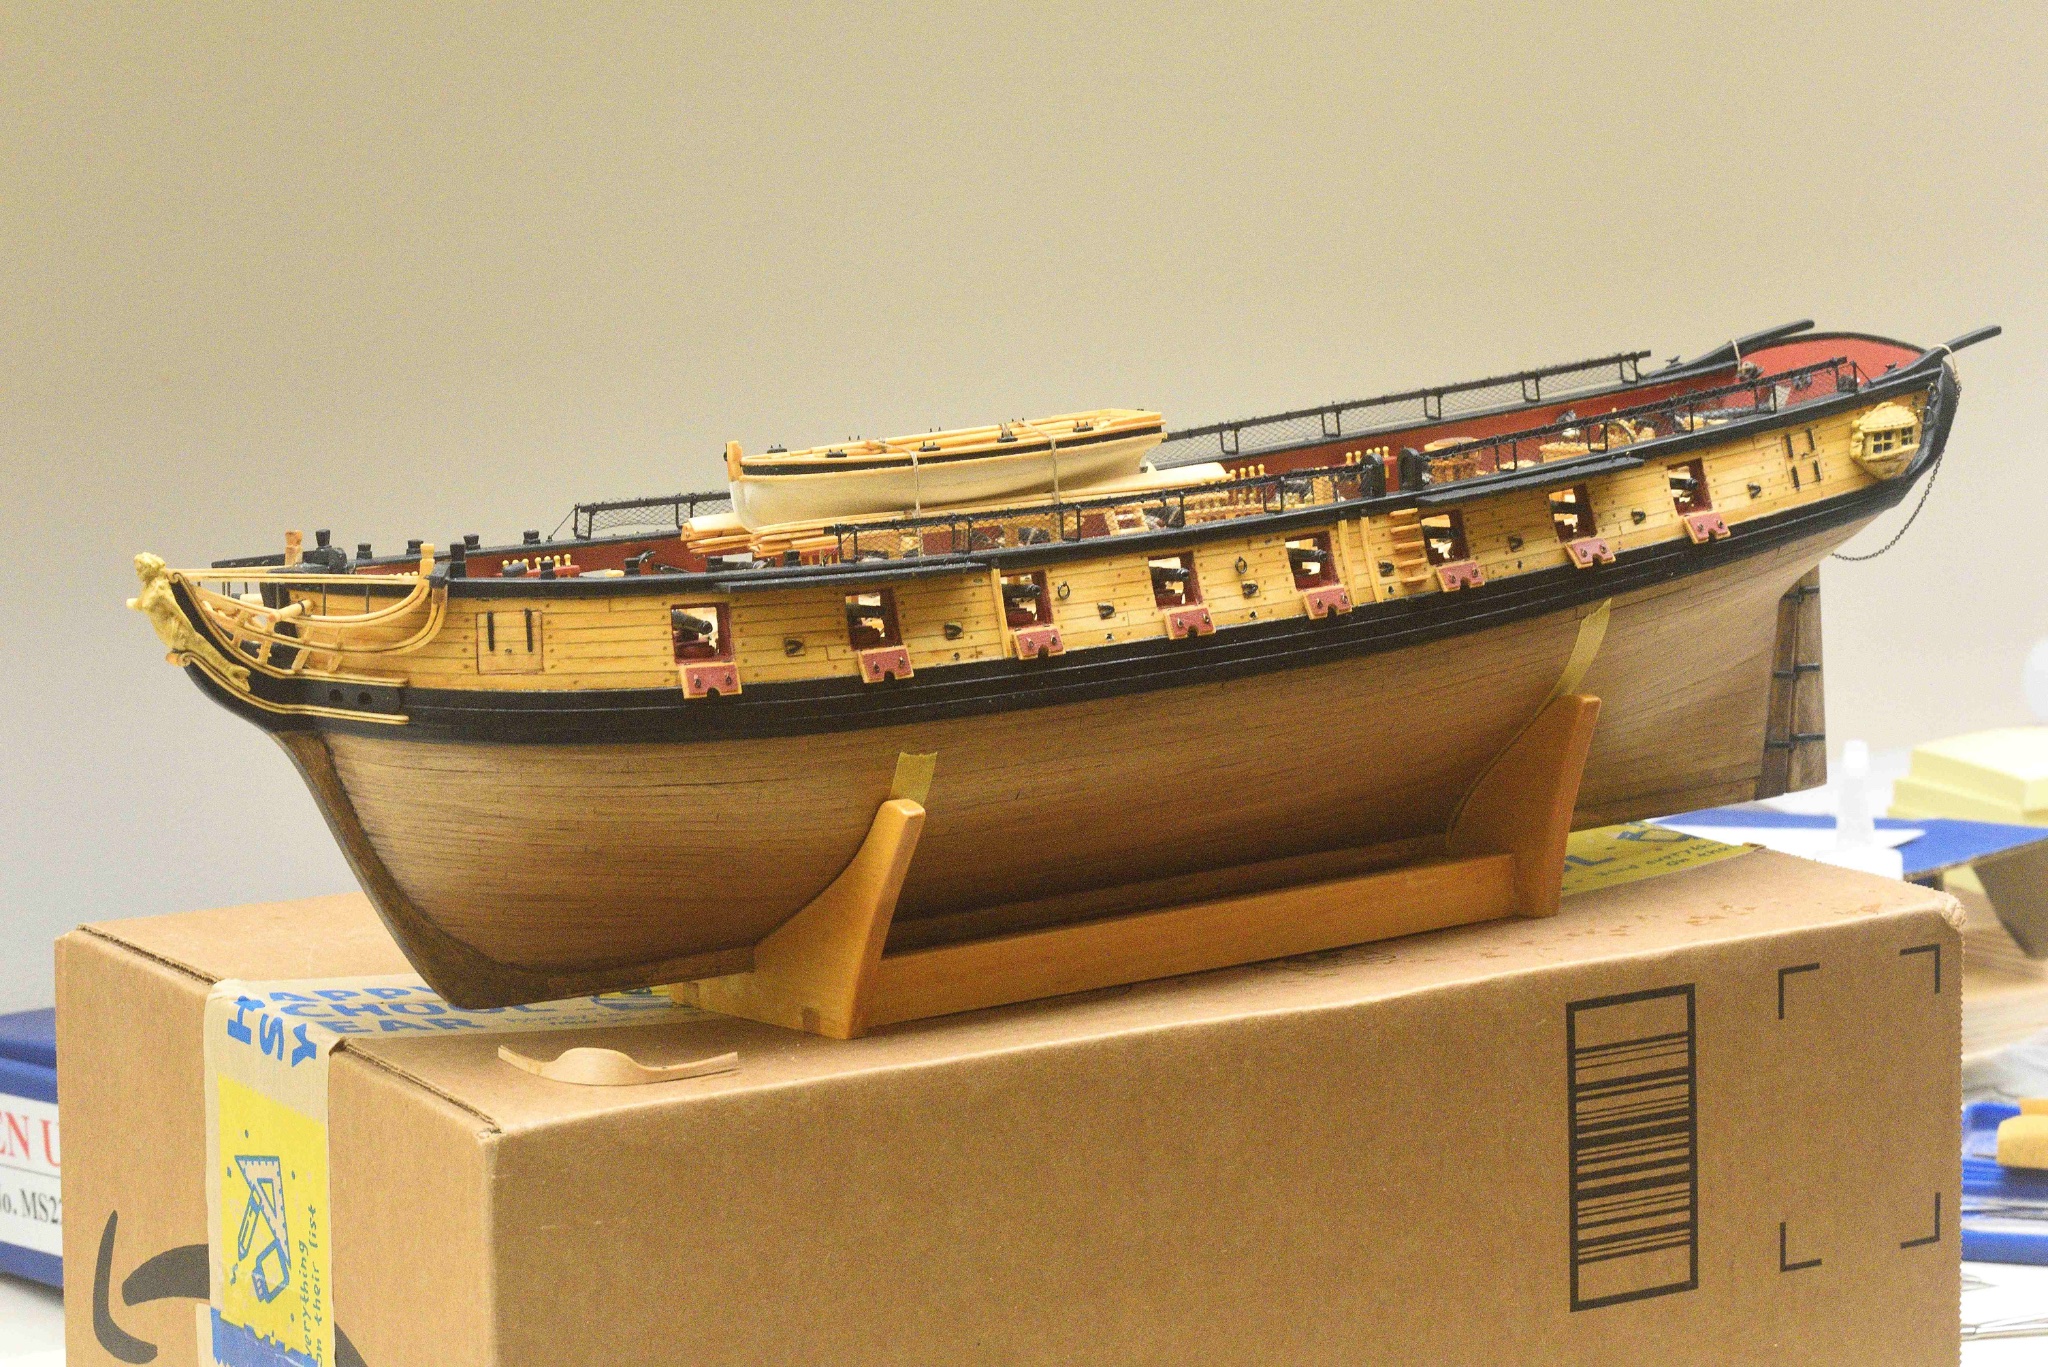
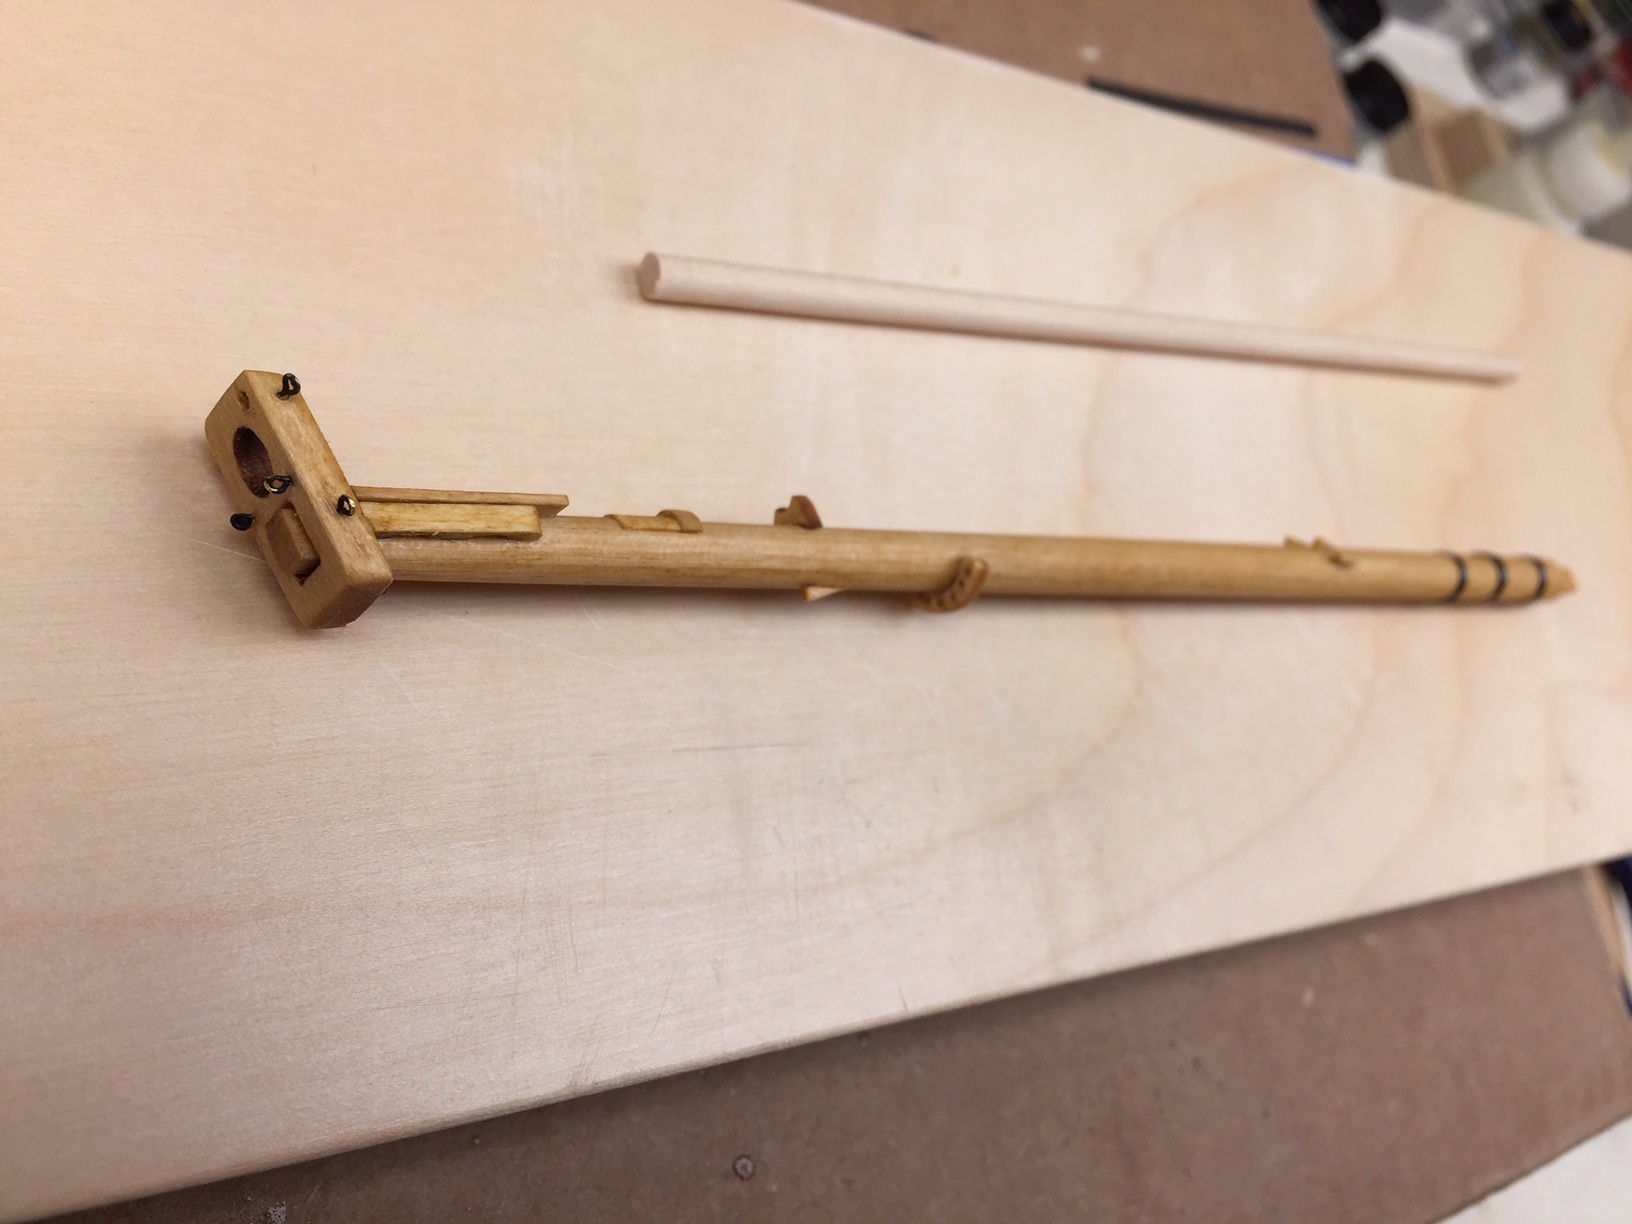
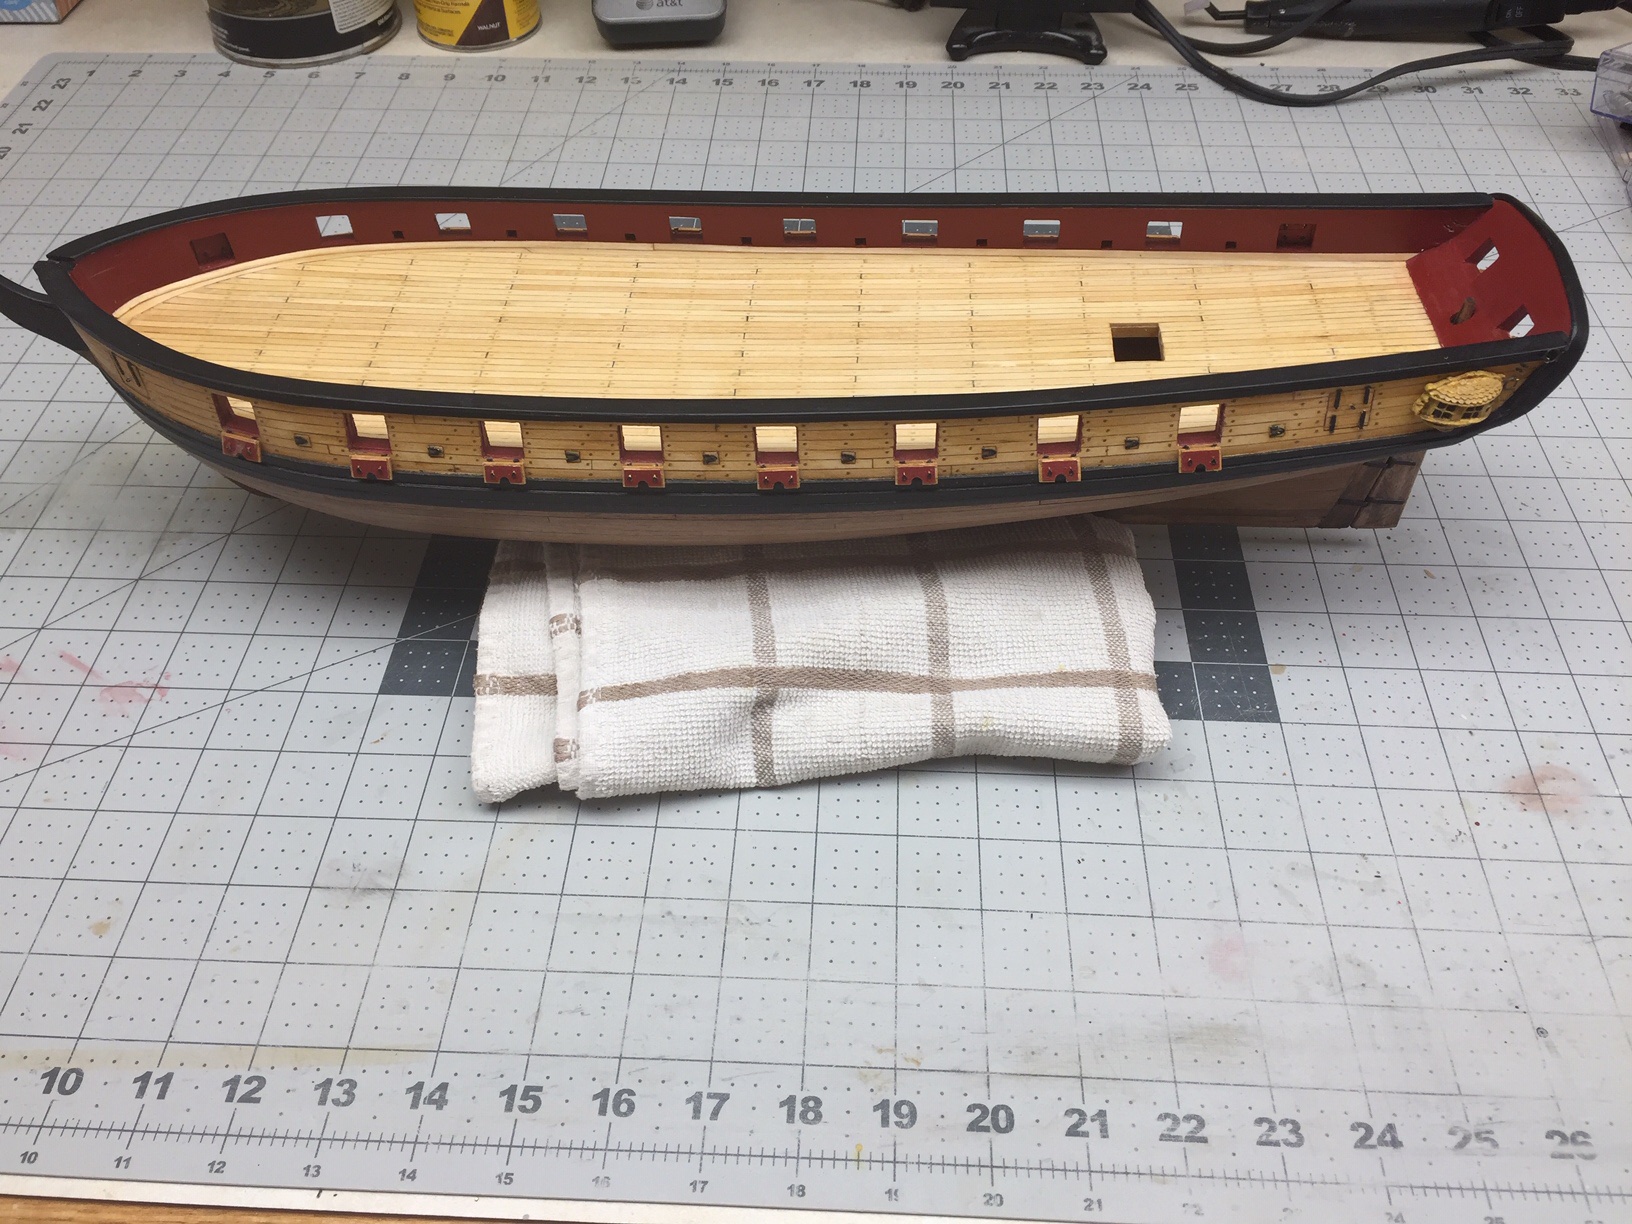
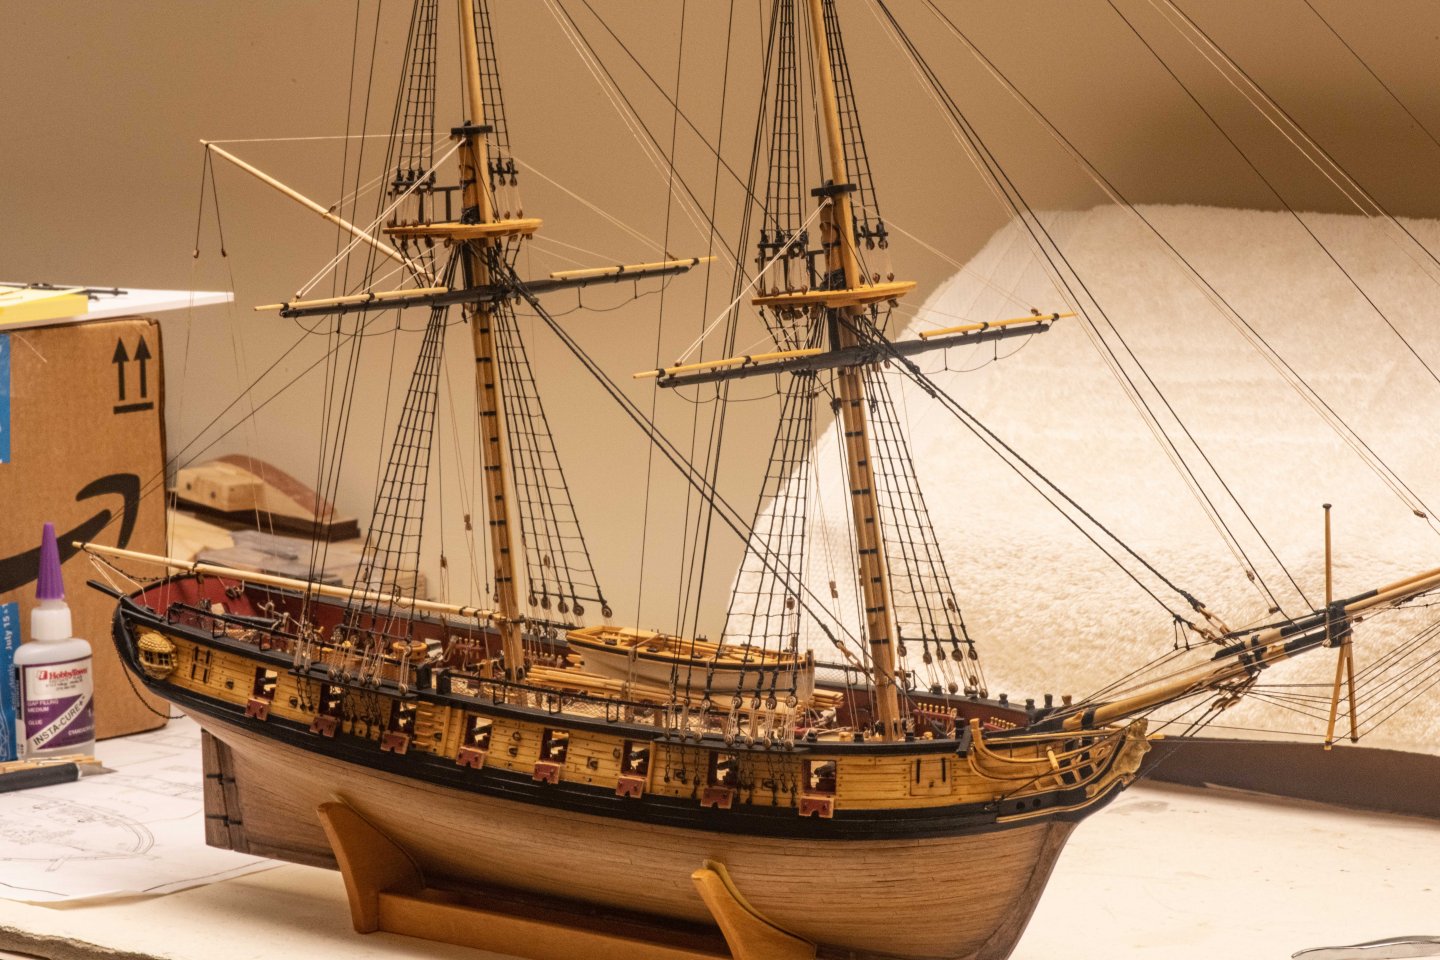
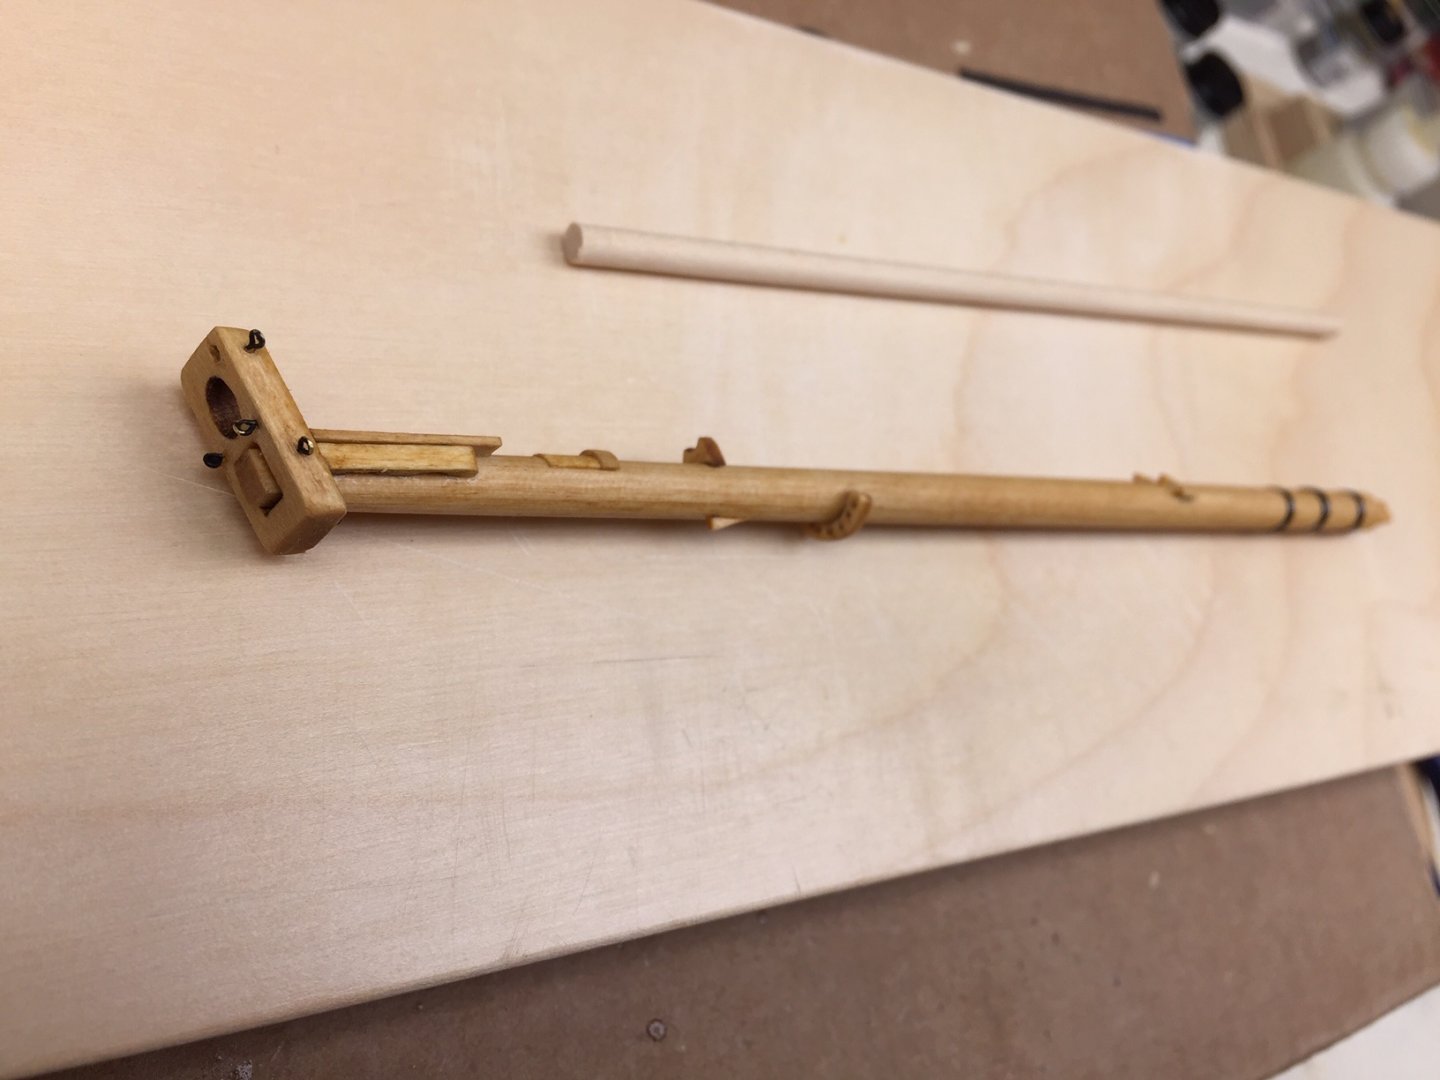
The hull is done, so it's time for bowsprit and masts. The next step, Chapter 16, is to make the bowsprit. I don't recall any difficulties with this part other than working with tiny parts, so I'll just attach photos. First photo shows the entire hull at this stage.


-
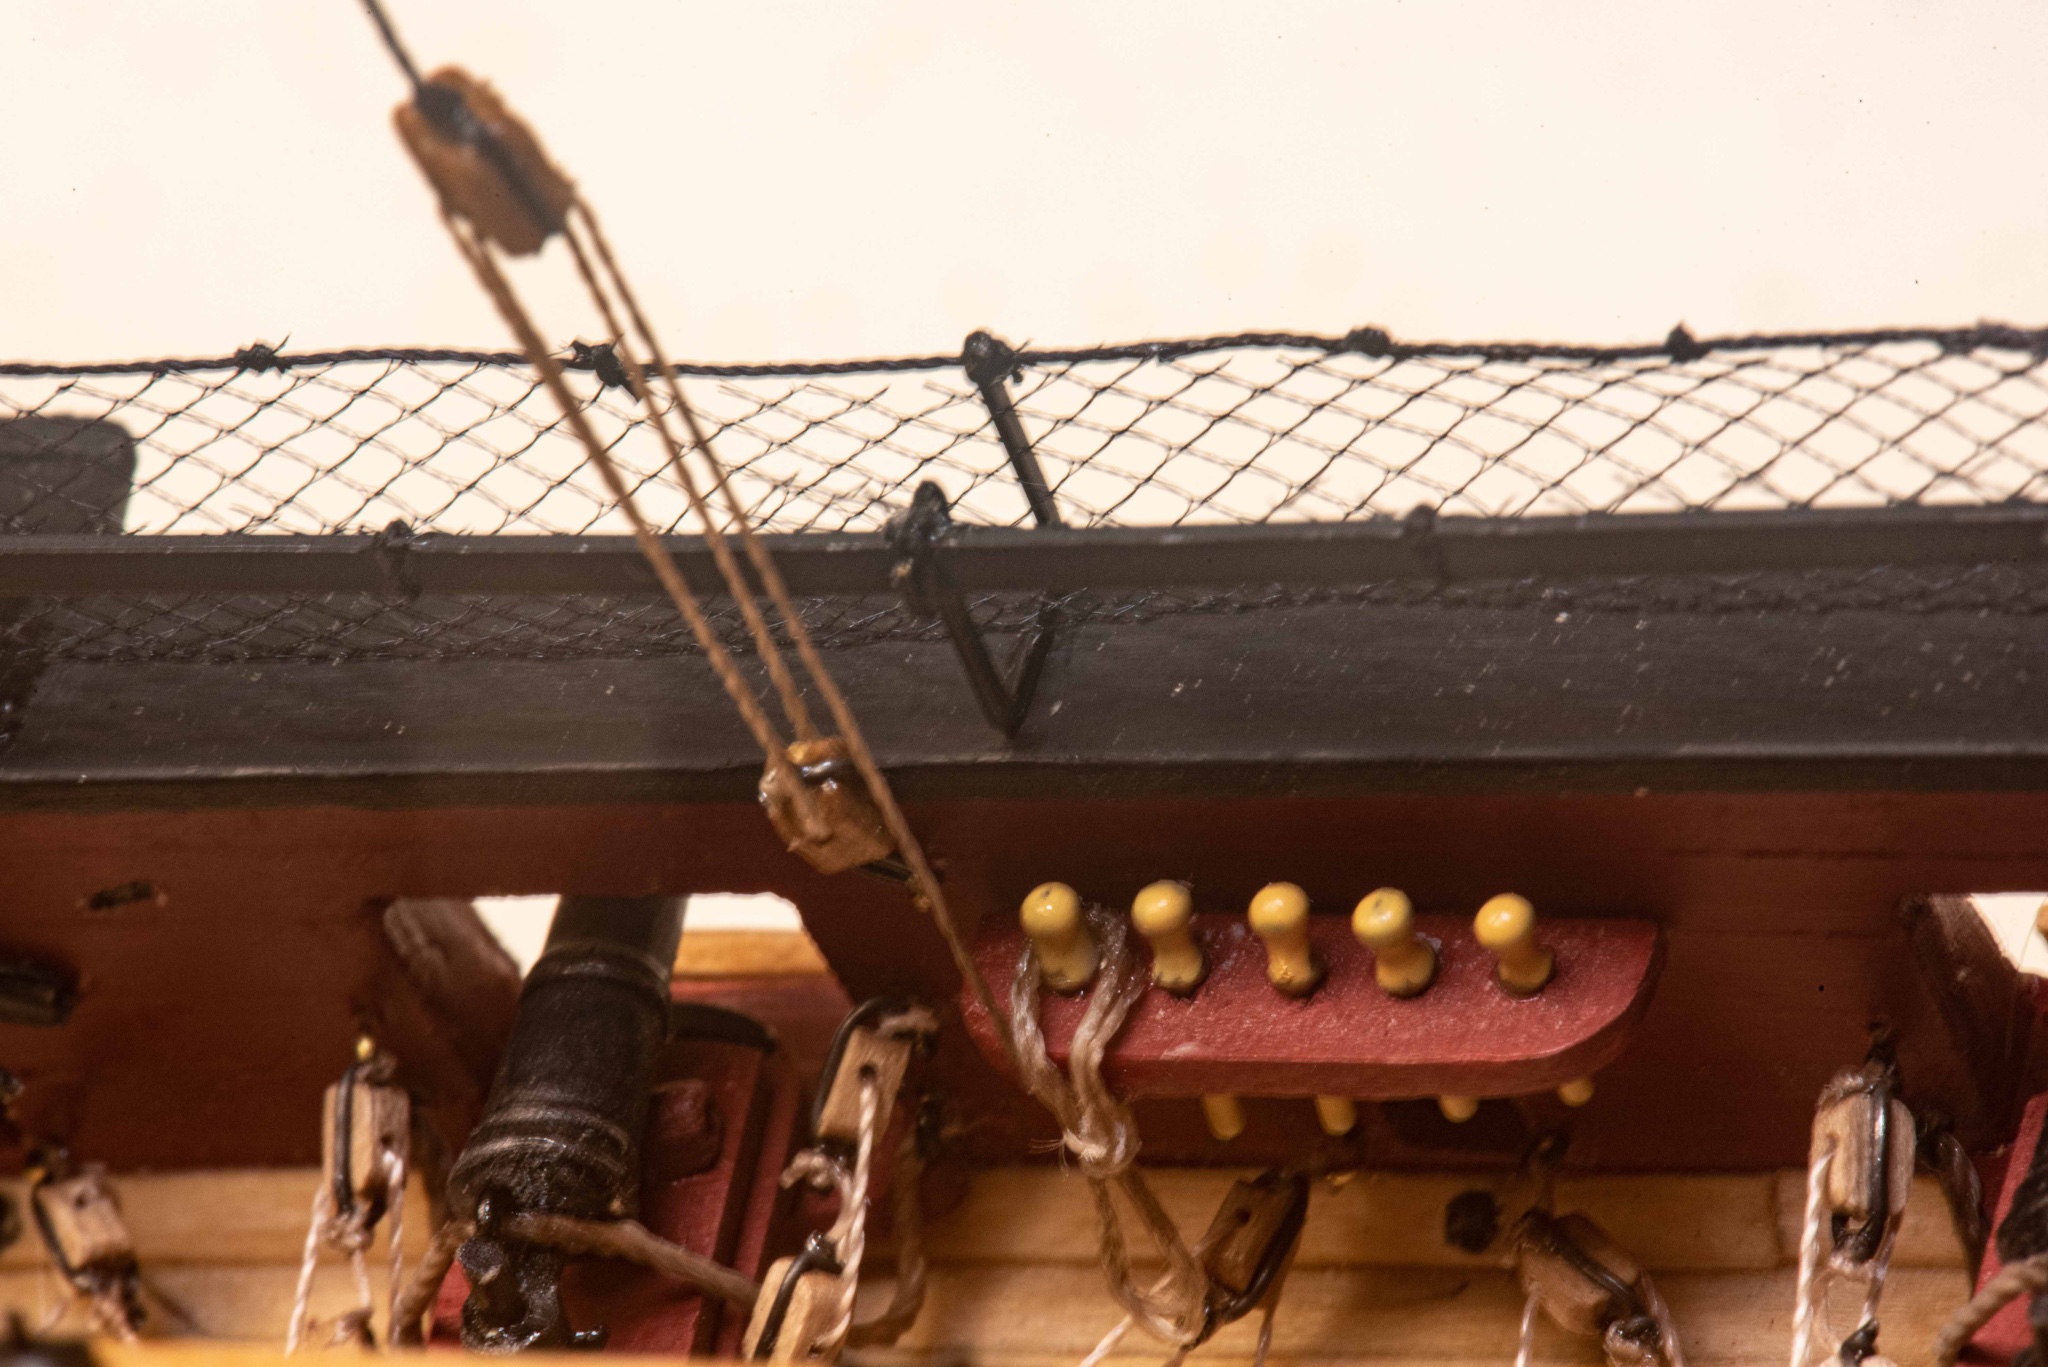
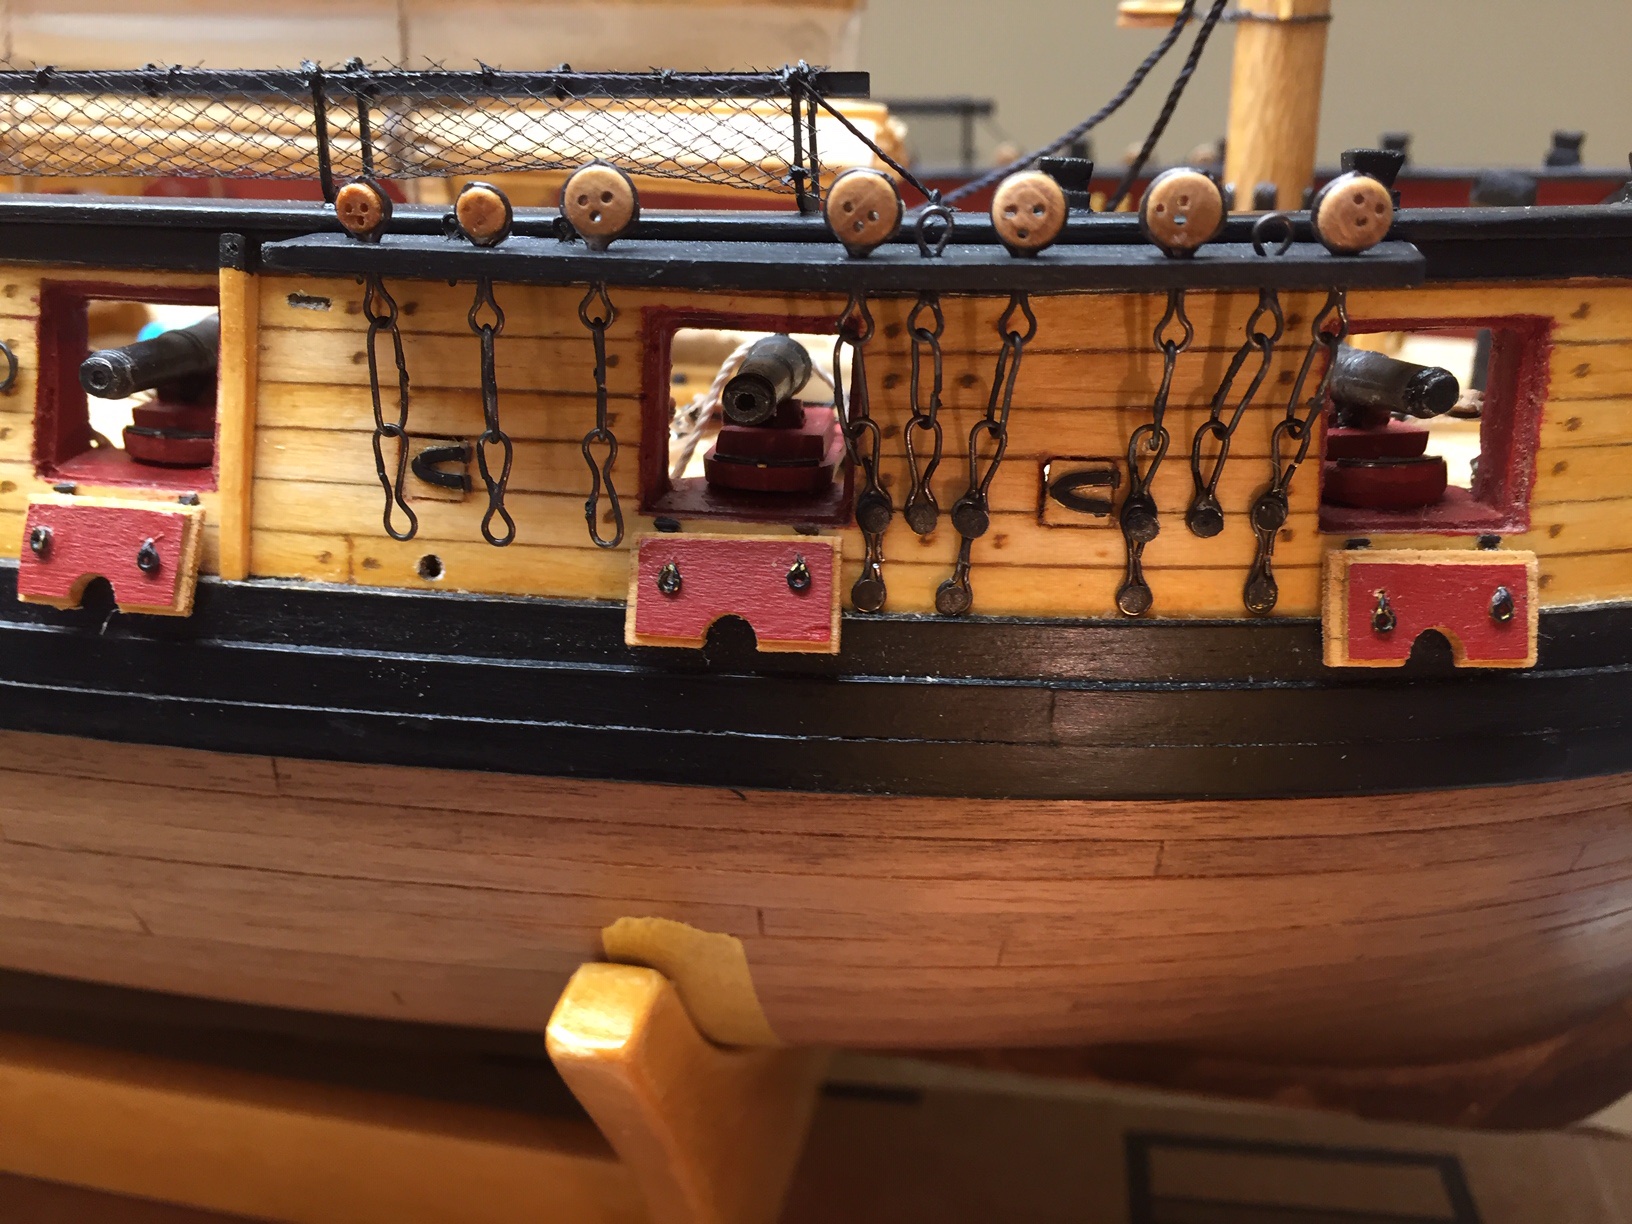
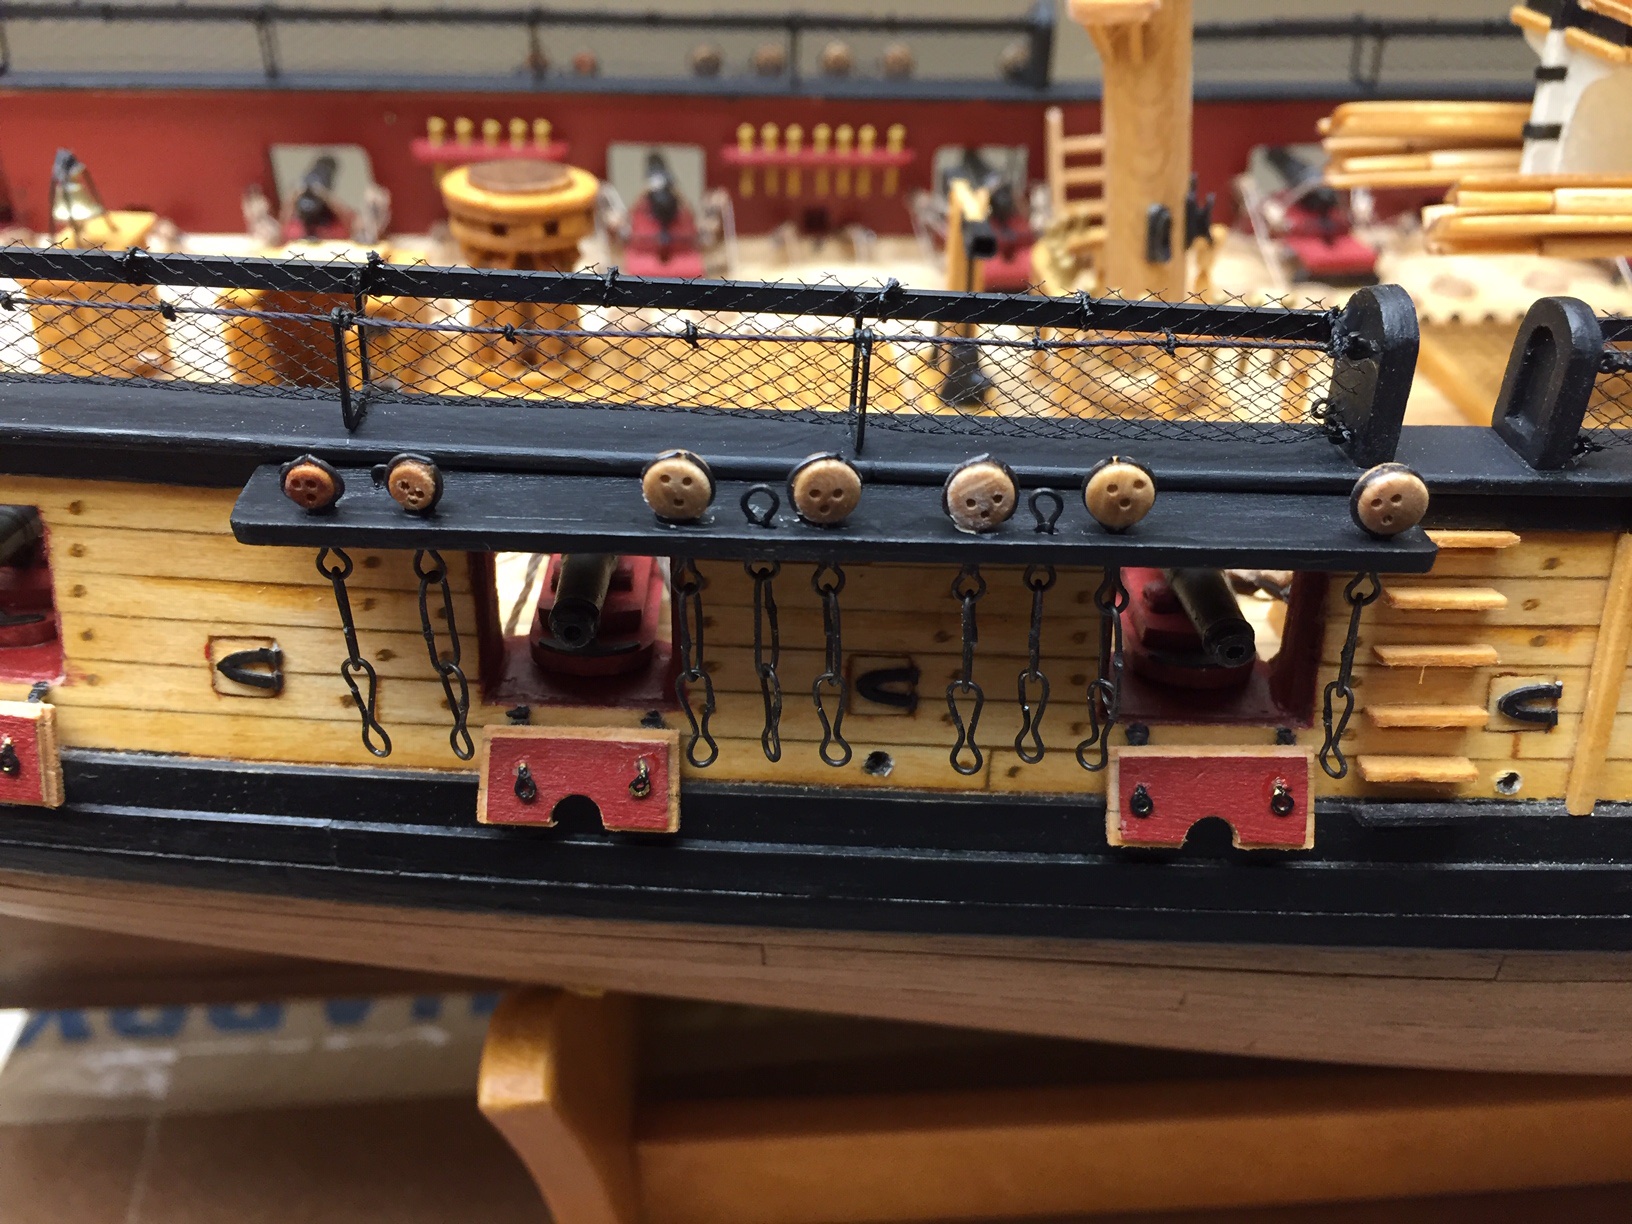
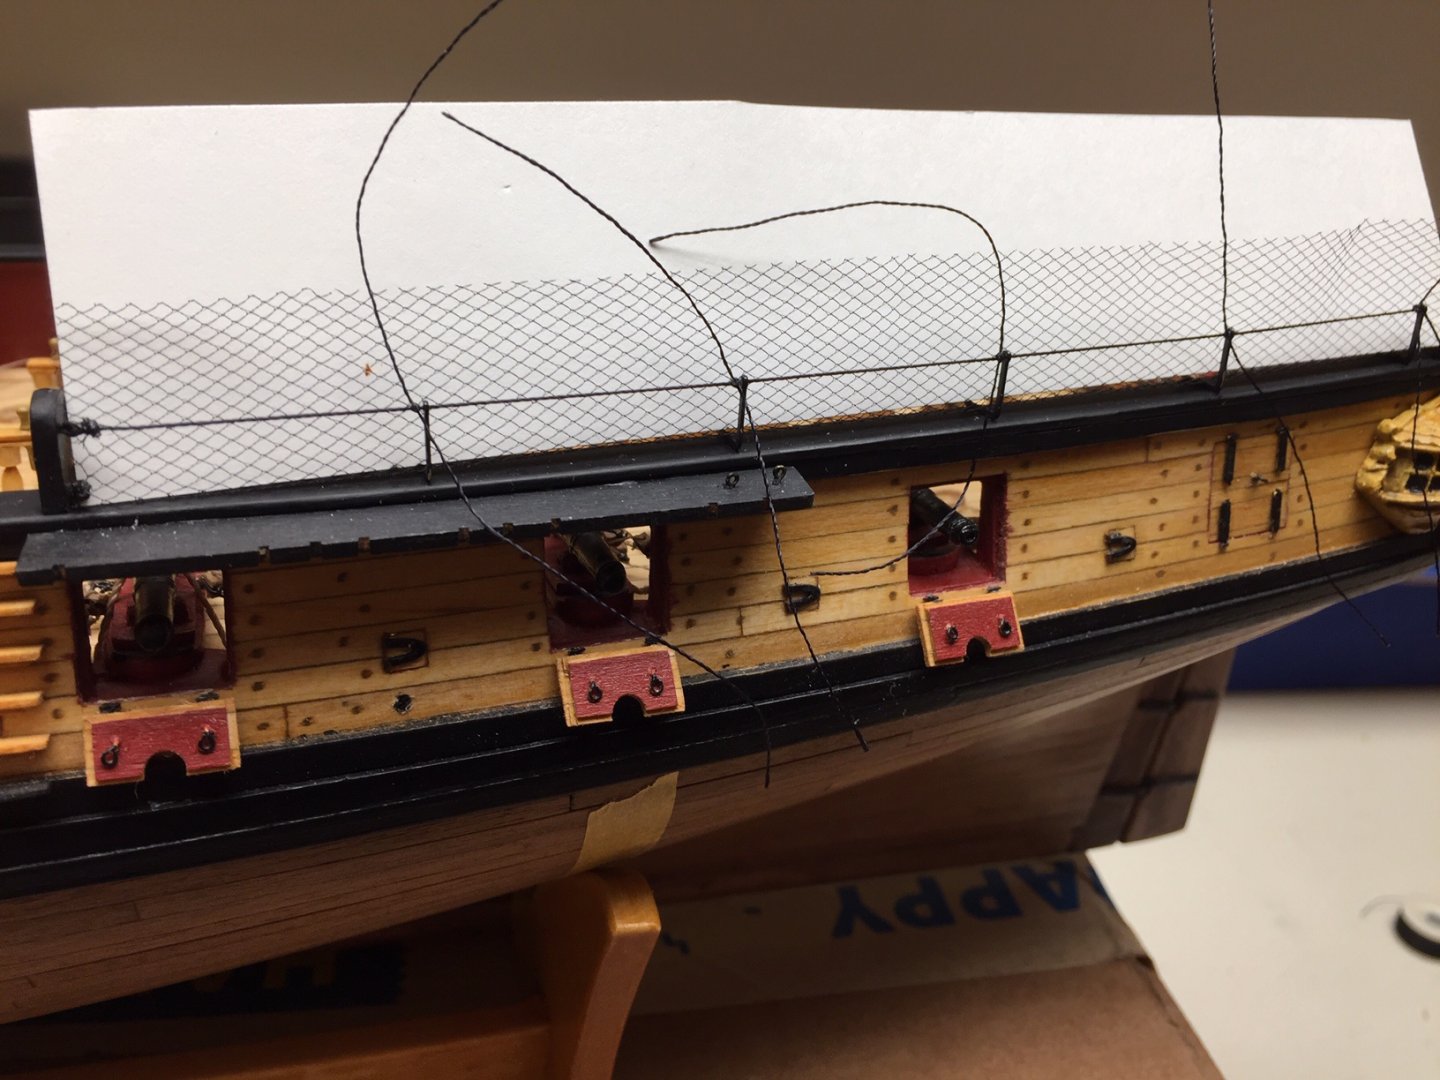
Now for the cap rail details. I was kind of dreading working with netting, but once again, following instruction manual I was able to get through it ok. Not the greatest job, and I ran into some difficulties, but it came out ok. I think the worst part is after working on the netting, from there on, I kept brushing my hand or fingers on it. It's very hard to avoid when belaying threads or doing anything on the deck. I remember trying to fit basswood in the net cranes and then deciding to use a small strip of plastic I had. This turned out to be a mistake, because it's hard to glue plastic to wood. I've had to repair the joint between the boarding panels and the plastic upper part that runs parallel to the cap rail. I used rtv type glue, but it's not that strong and after hitting a couple of times with my fingers, it breaks. I learned the hard way, but I think basswood would have been too soft. A strip of hardwood would be better. Once again I wished I had thread smaller than the 0.008 rigging thread in the kit. The knots holding the netting are too large. And I got lazy. Instead of searching for smaller thread, I used what I had. I had an awful time trimming the netting along the top rail and thread. I tried several methods, and I think a brand new, super sharp xacto worked as good as any, holding end of net with tweezers and trimming. It's very tedious however you do it.
-
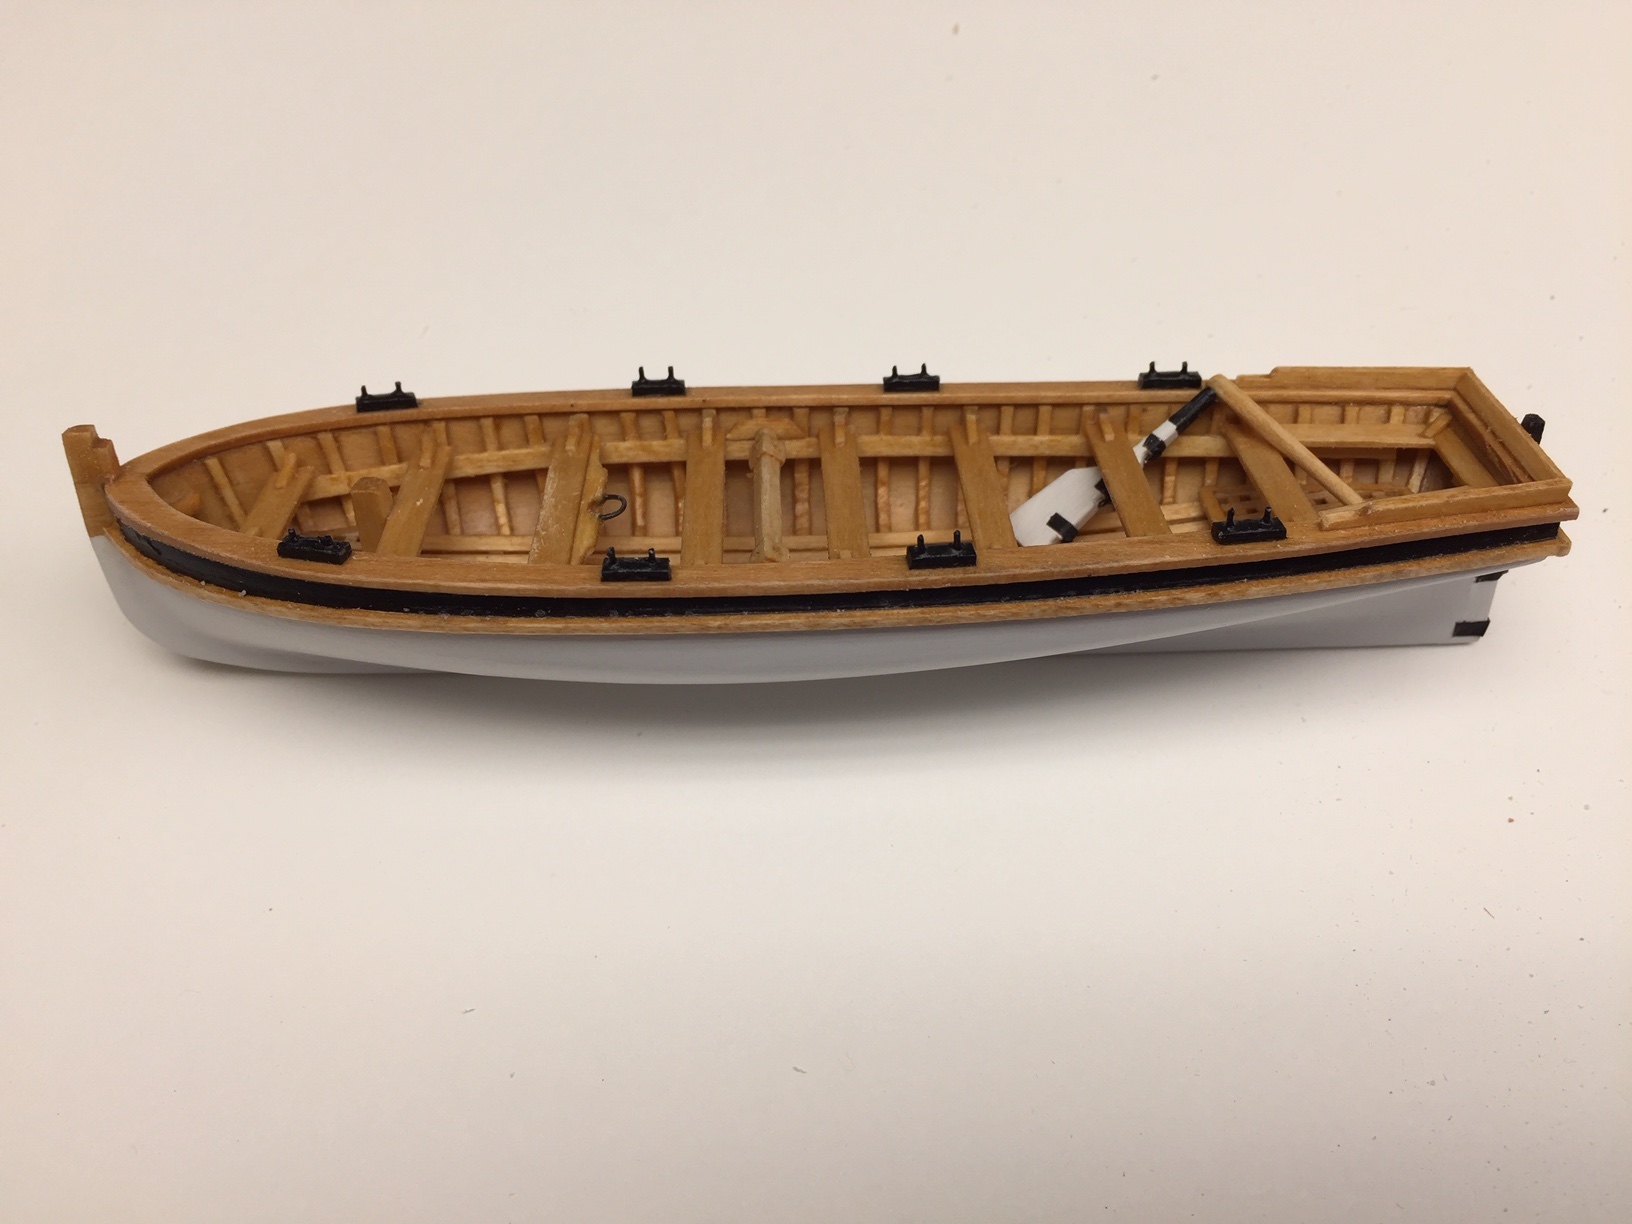
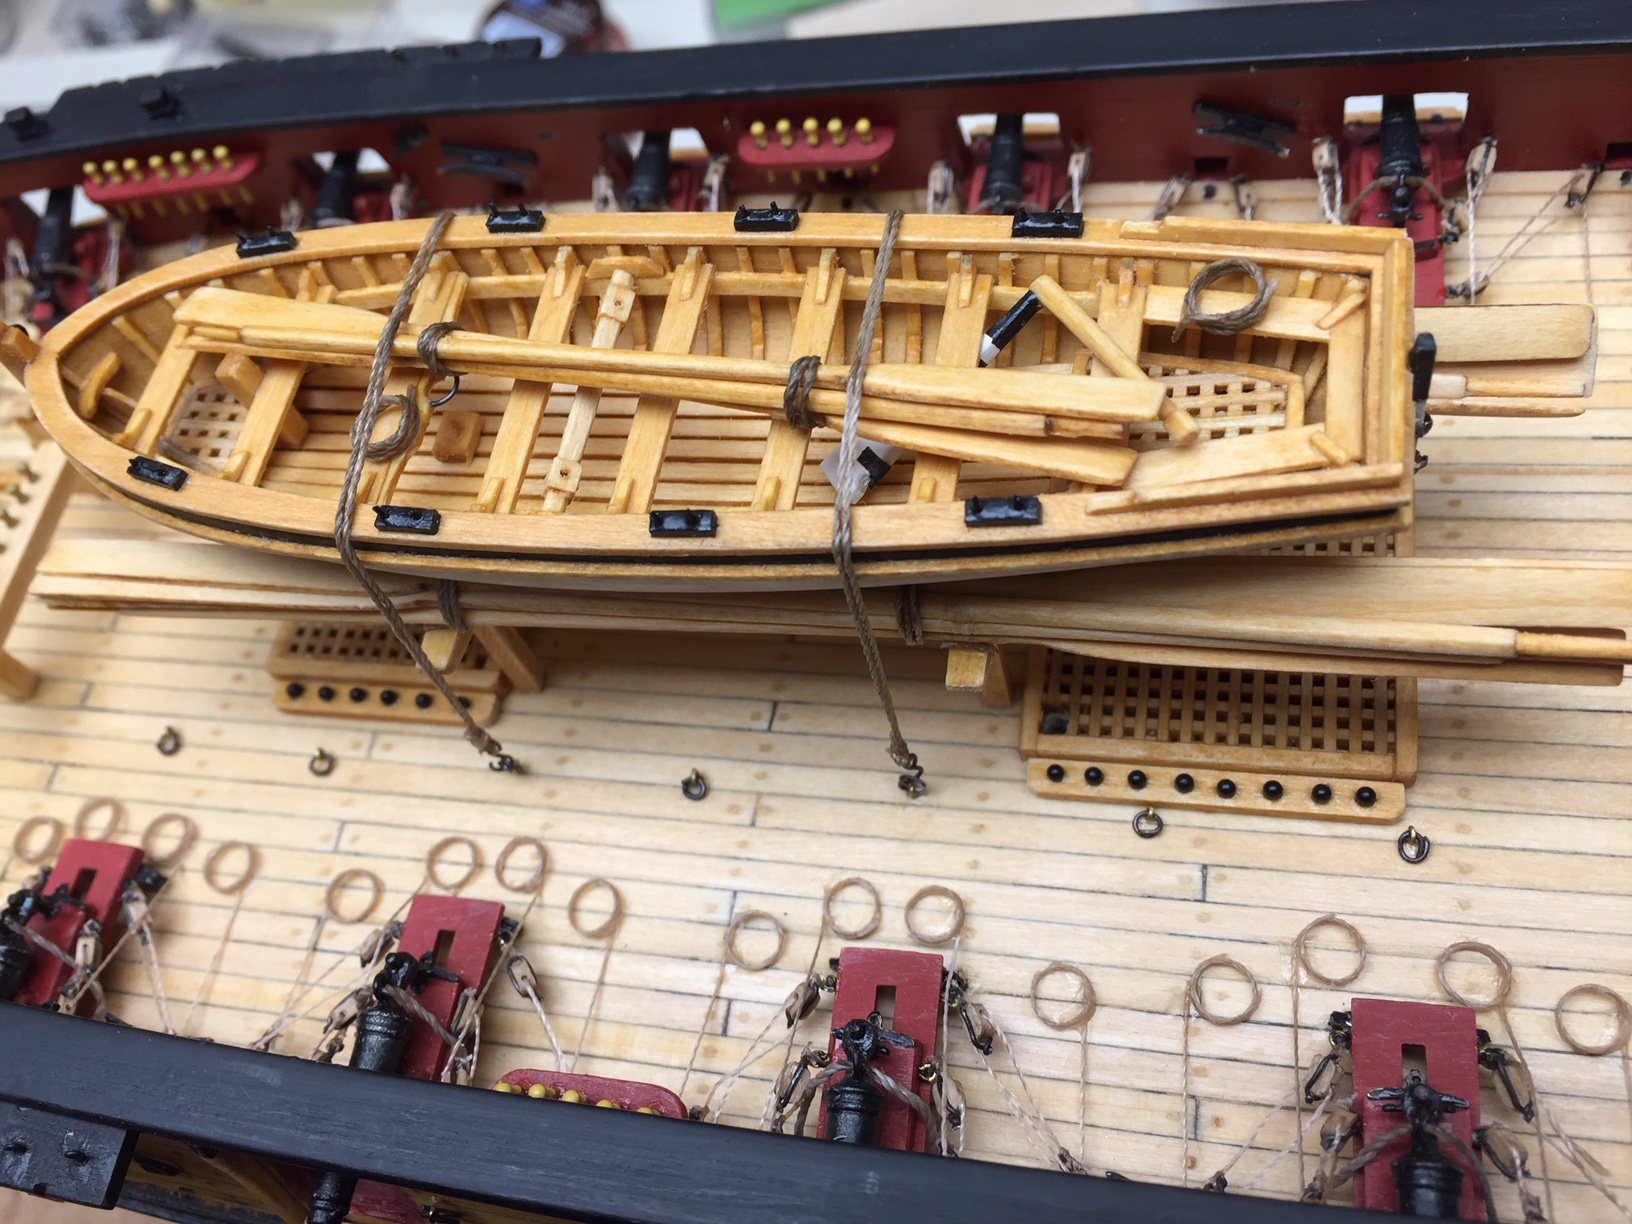
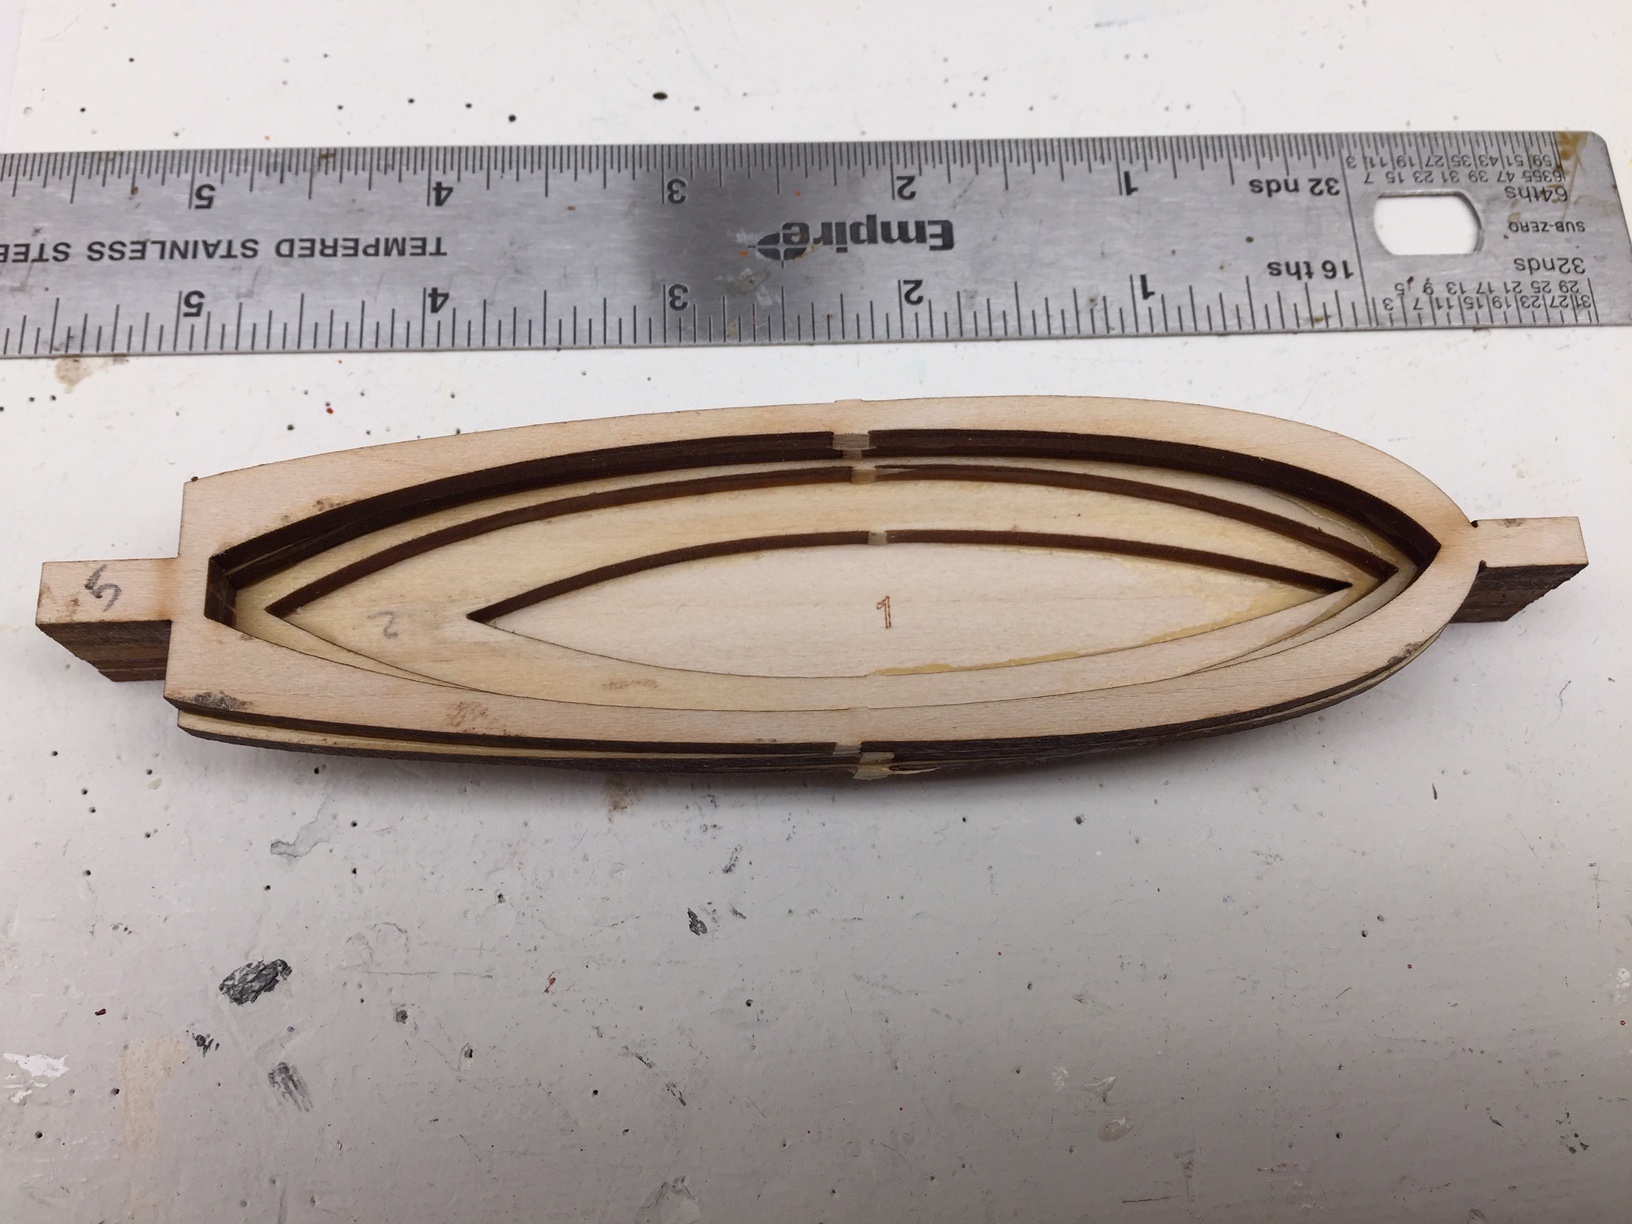
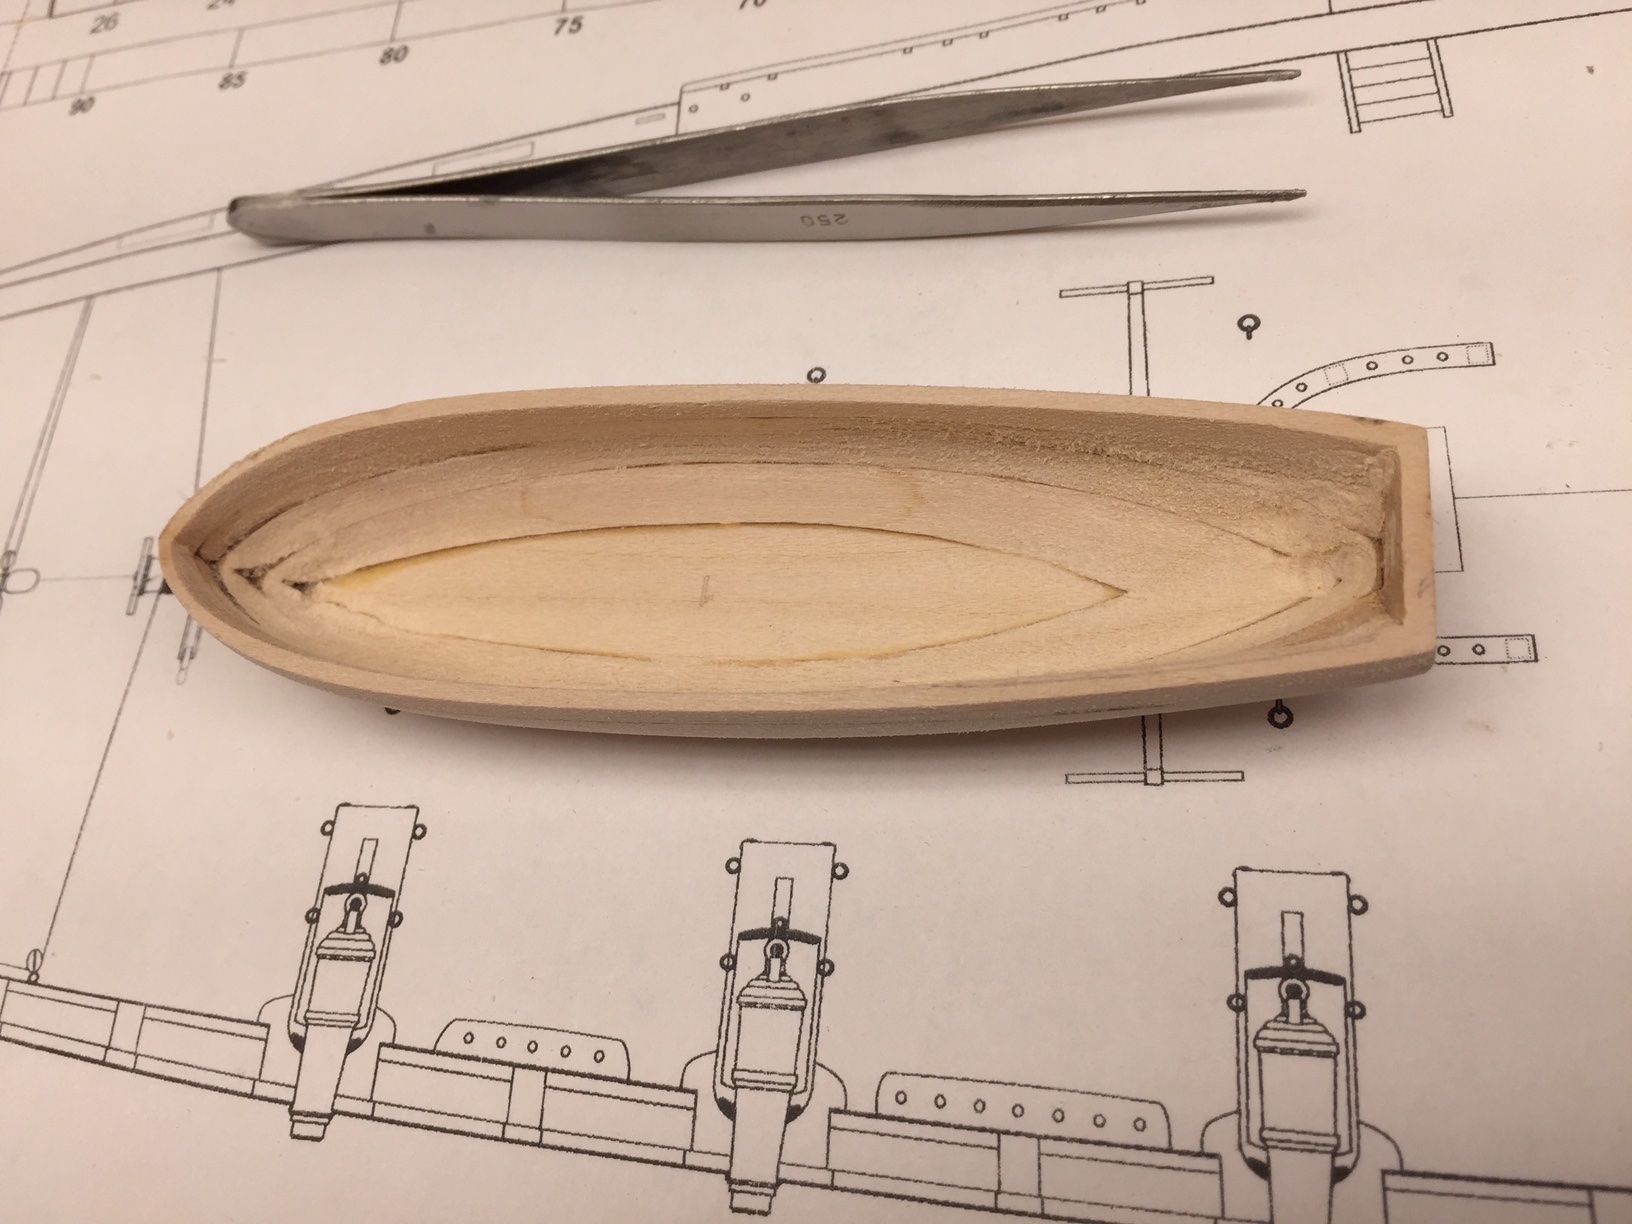
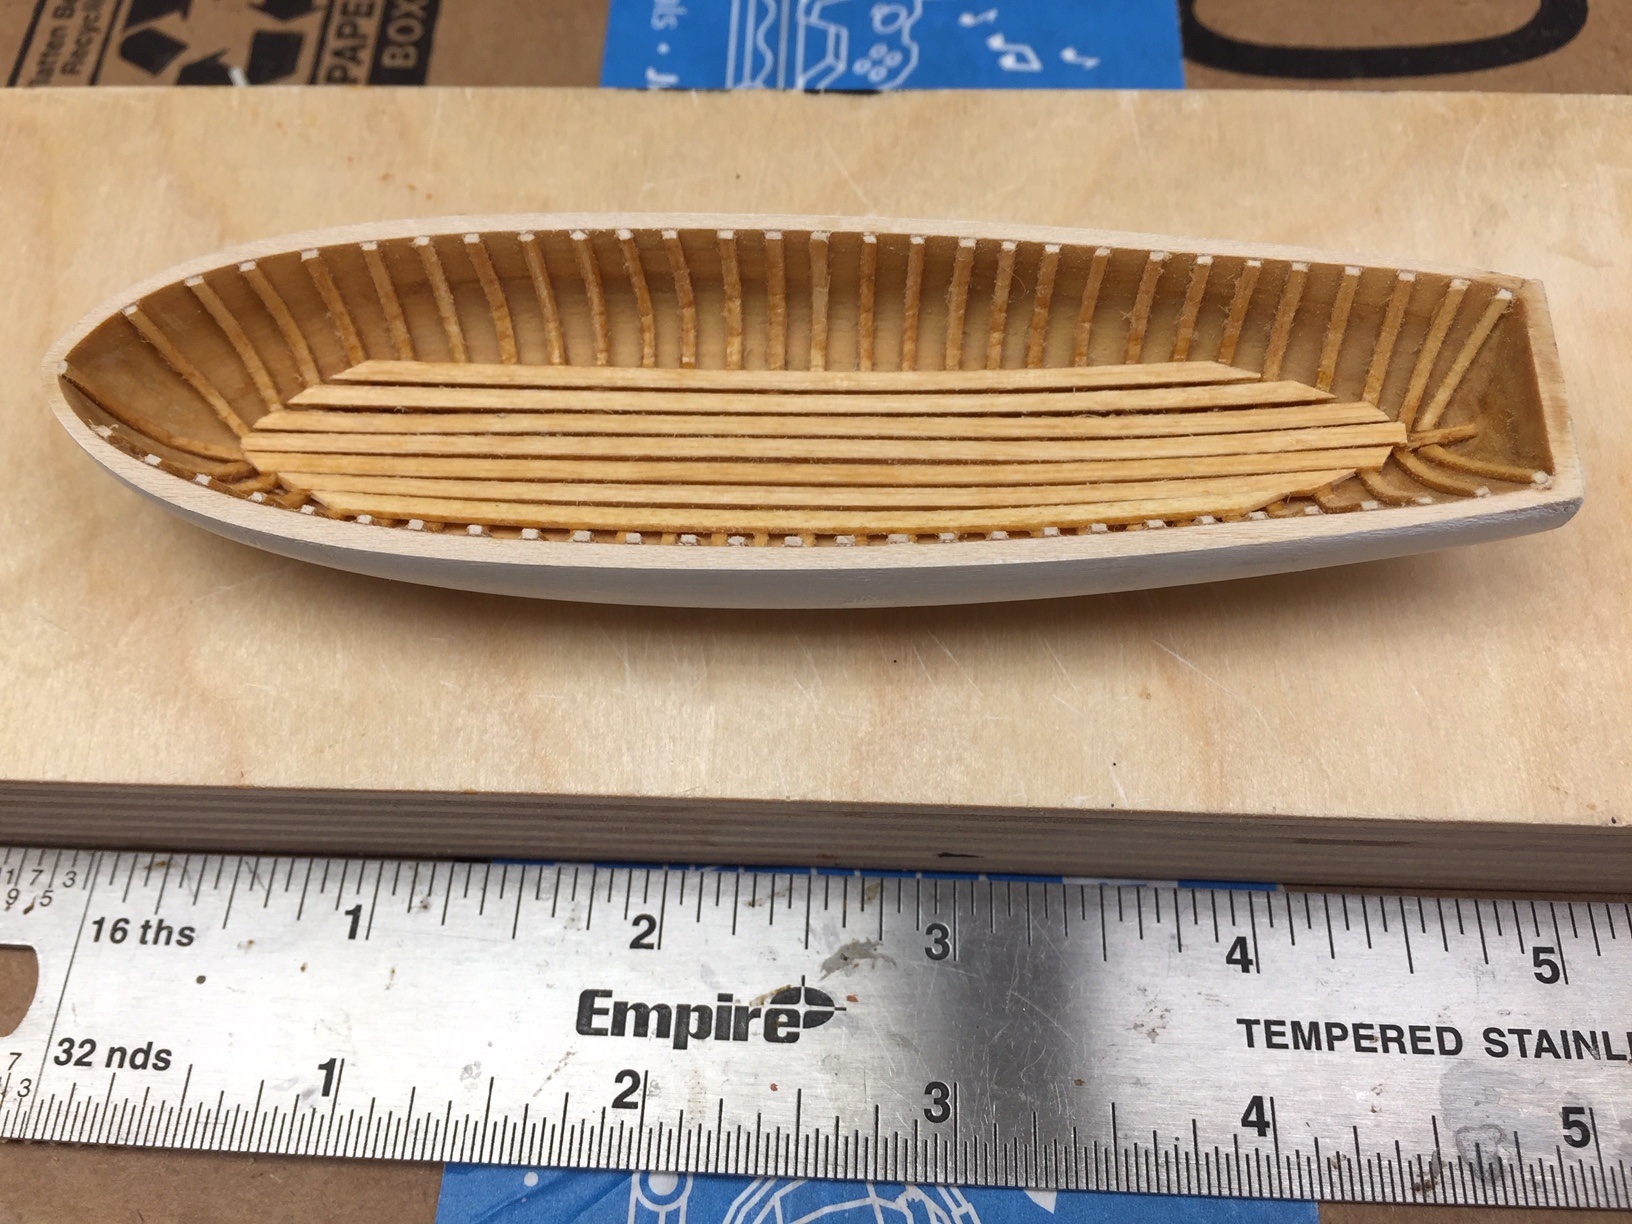
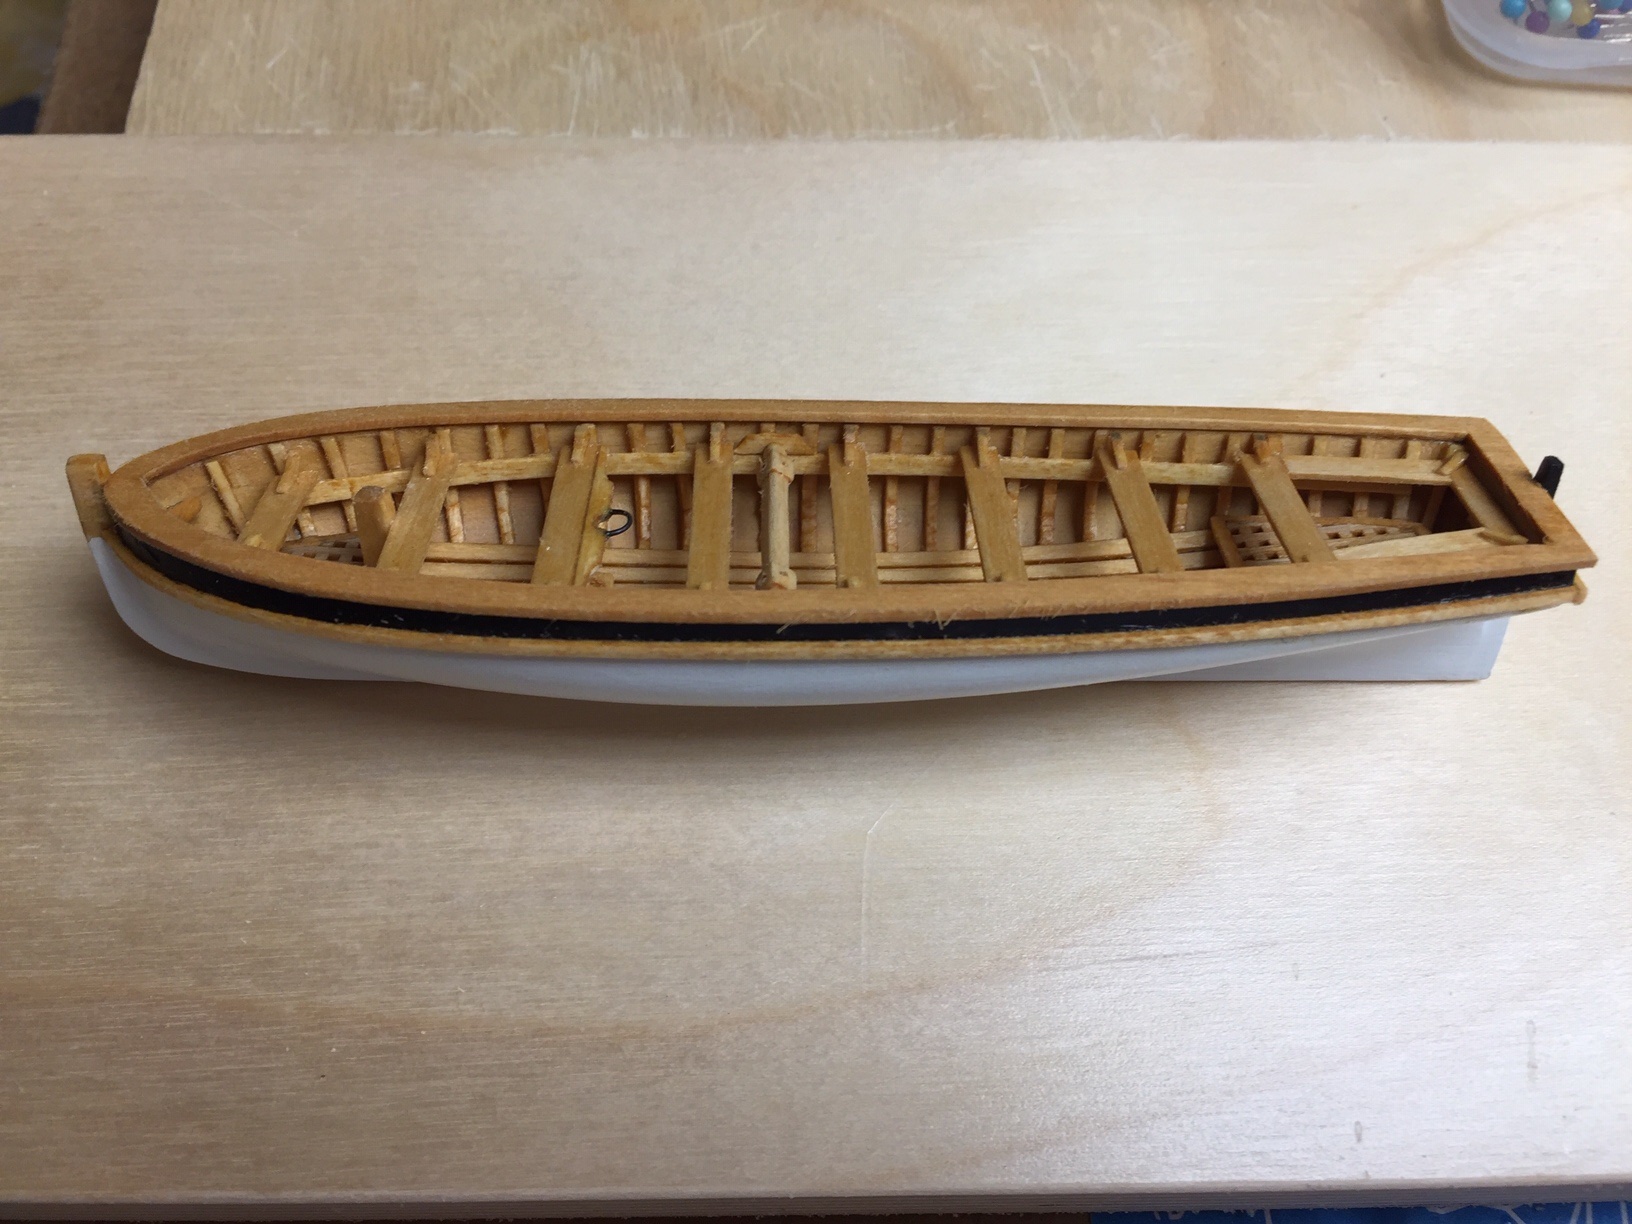
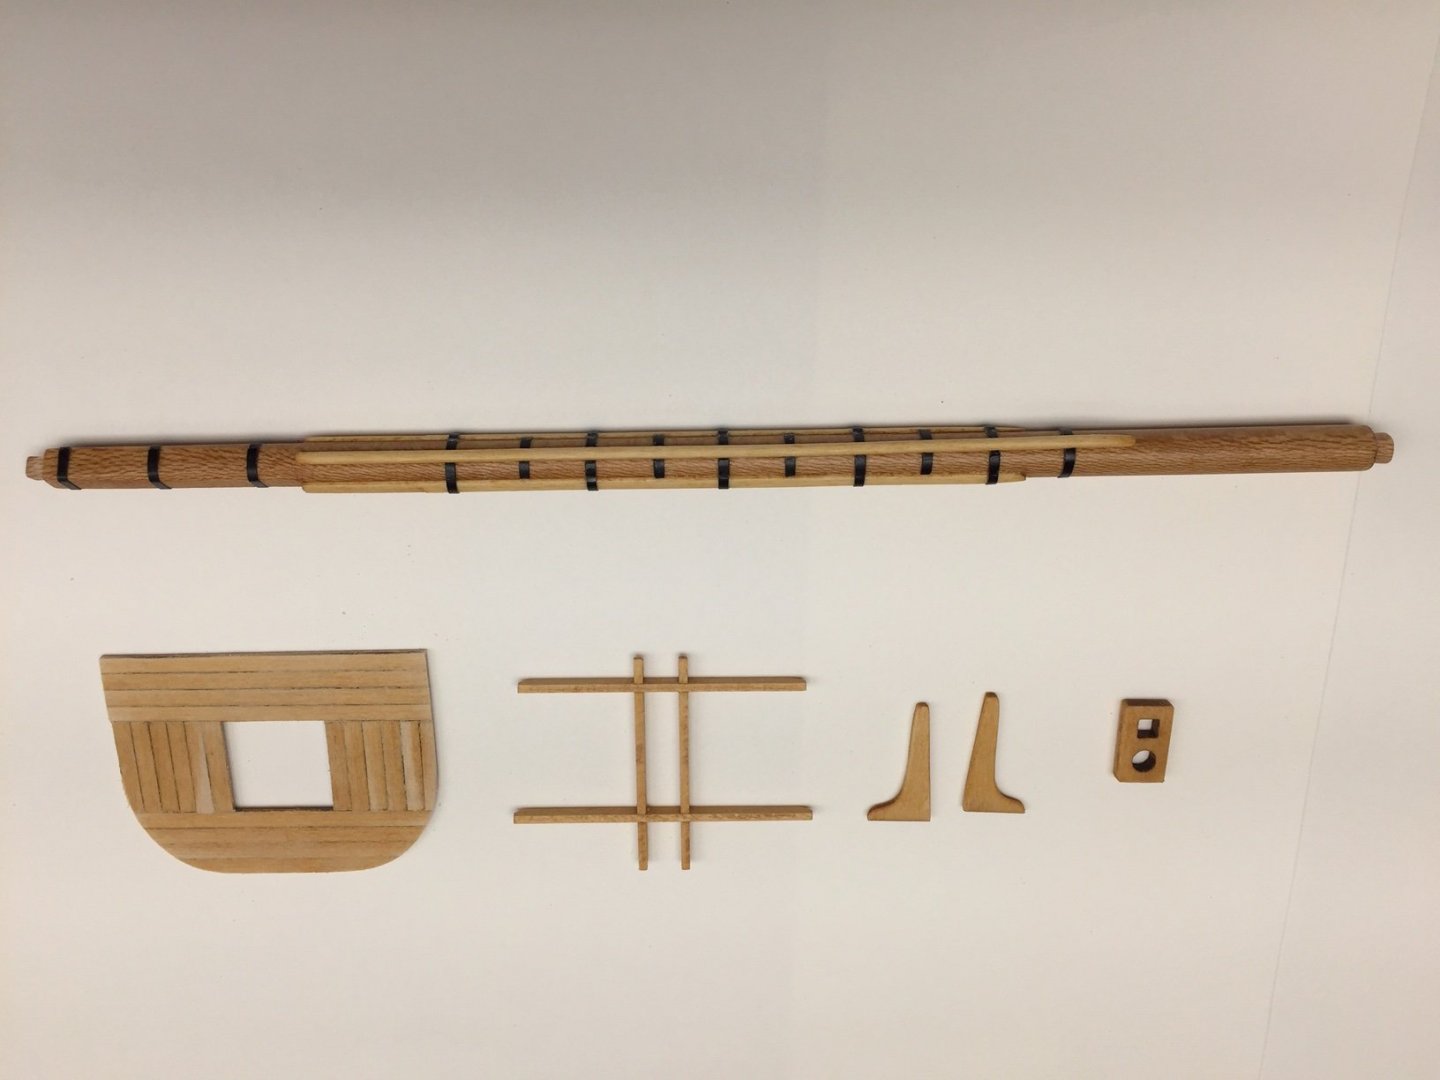
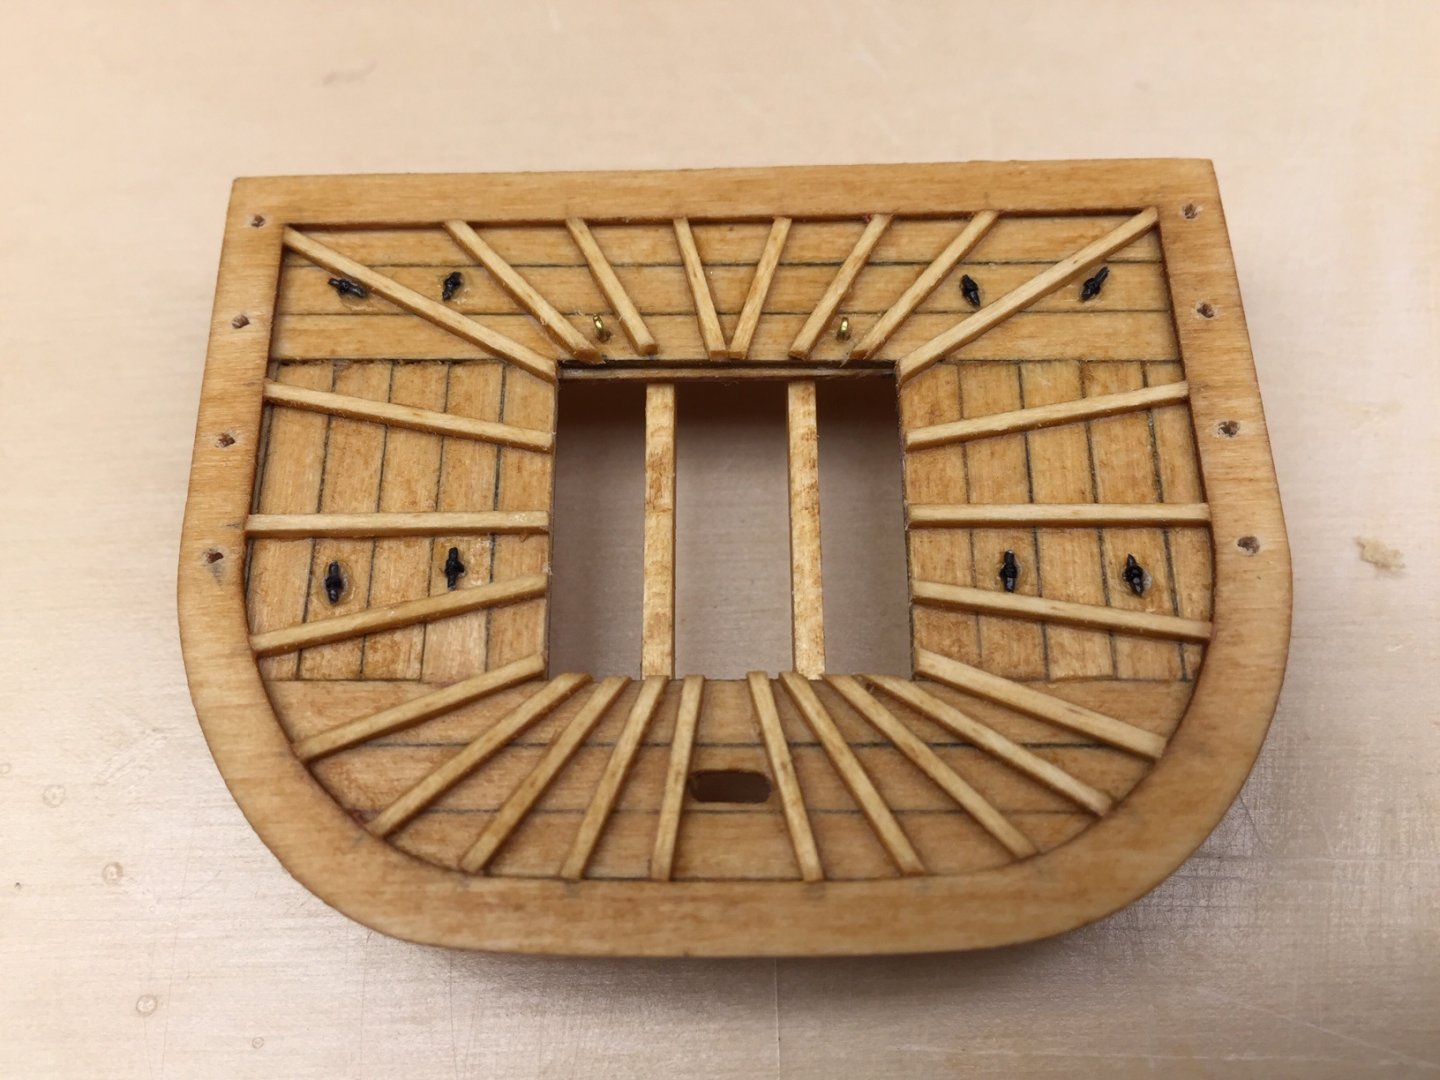
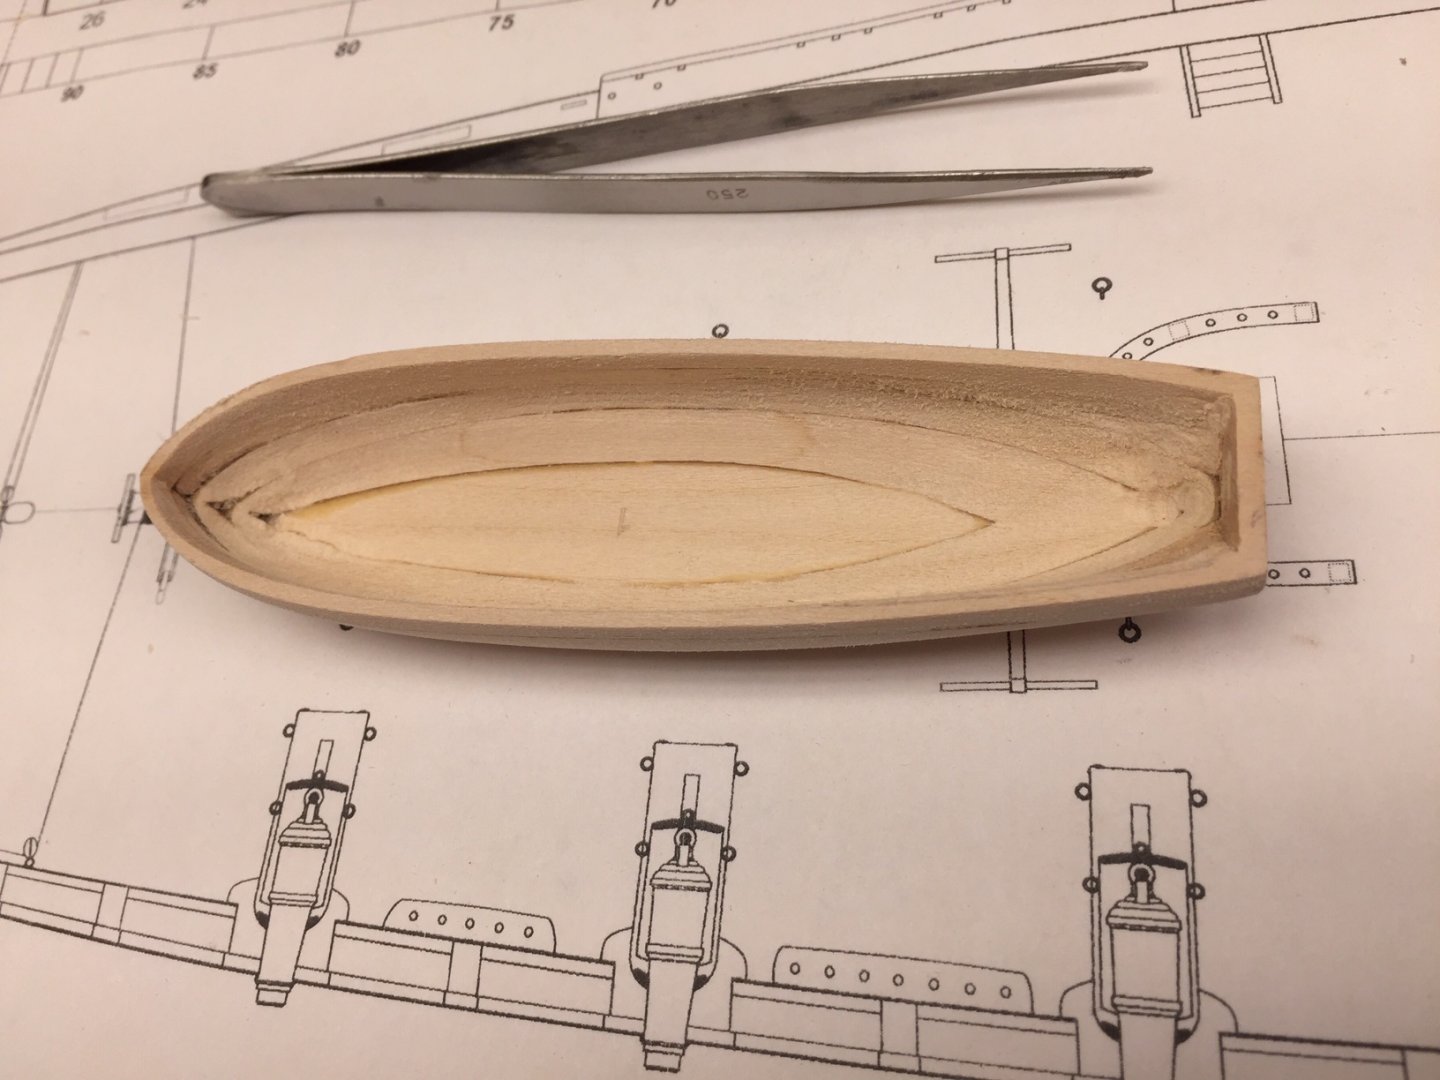
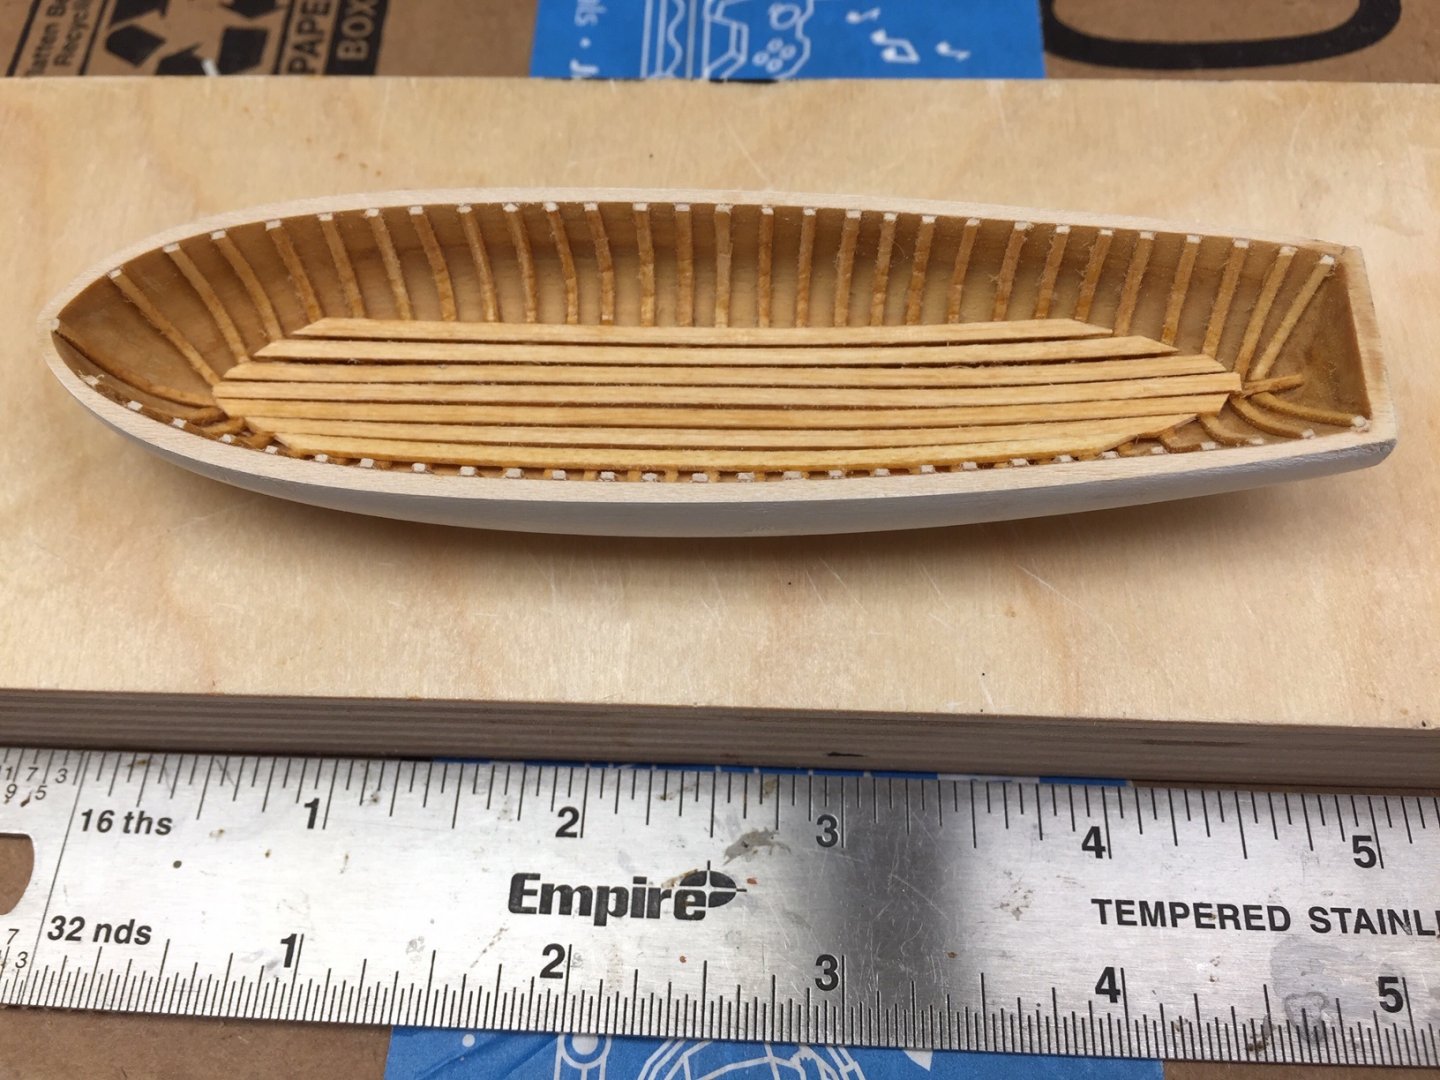
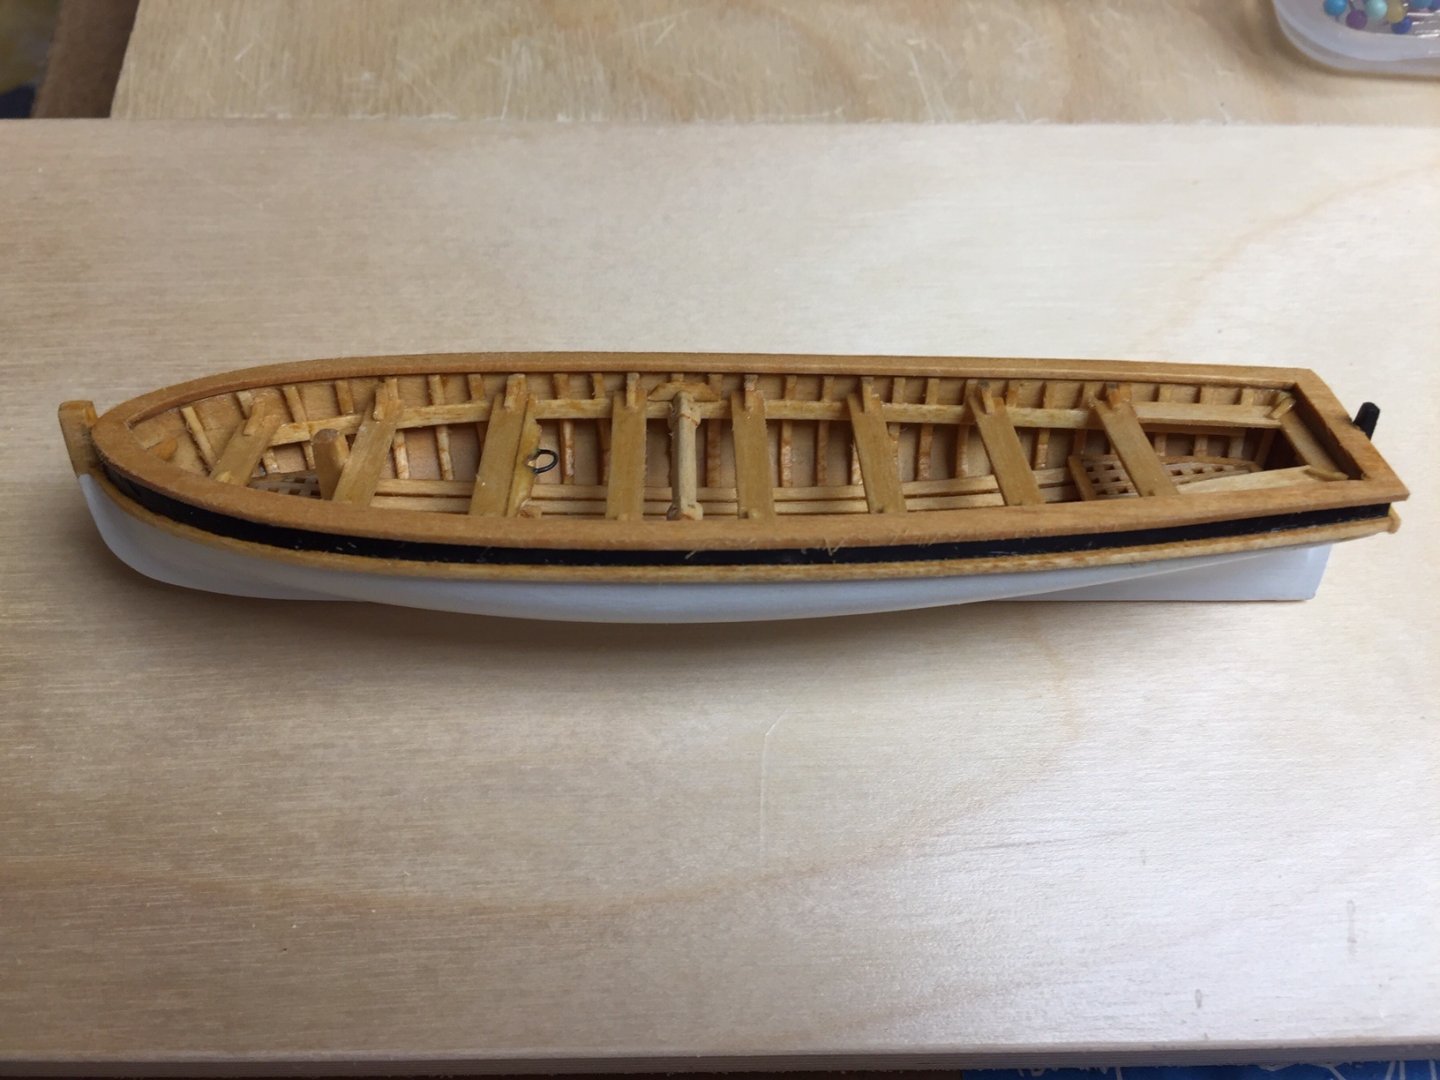
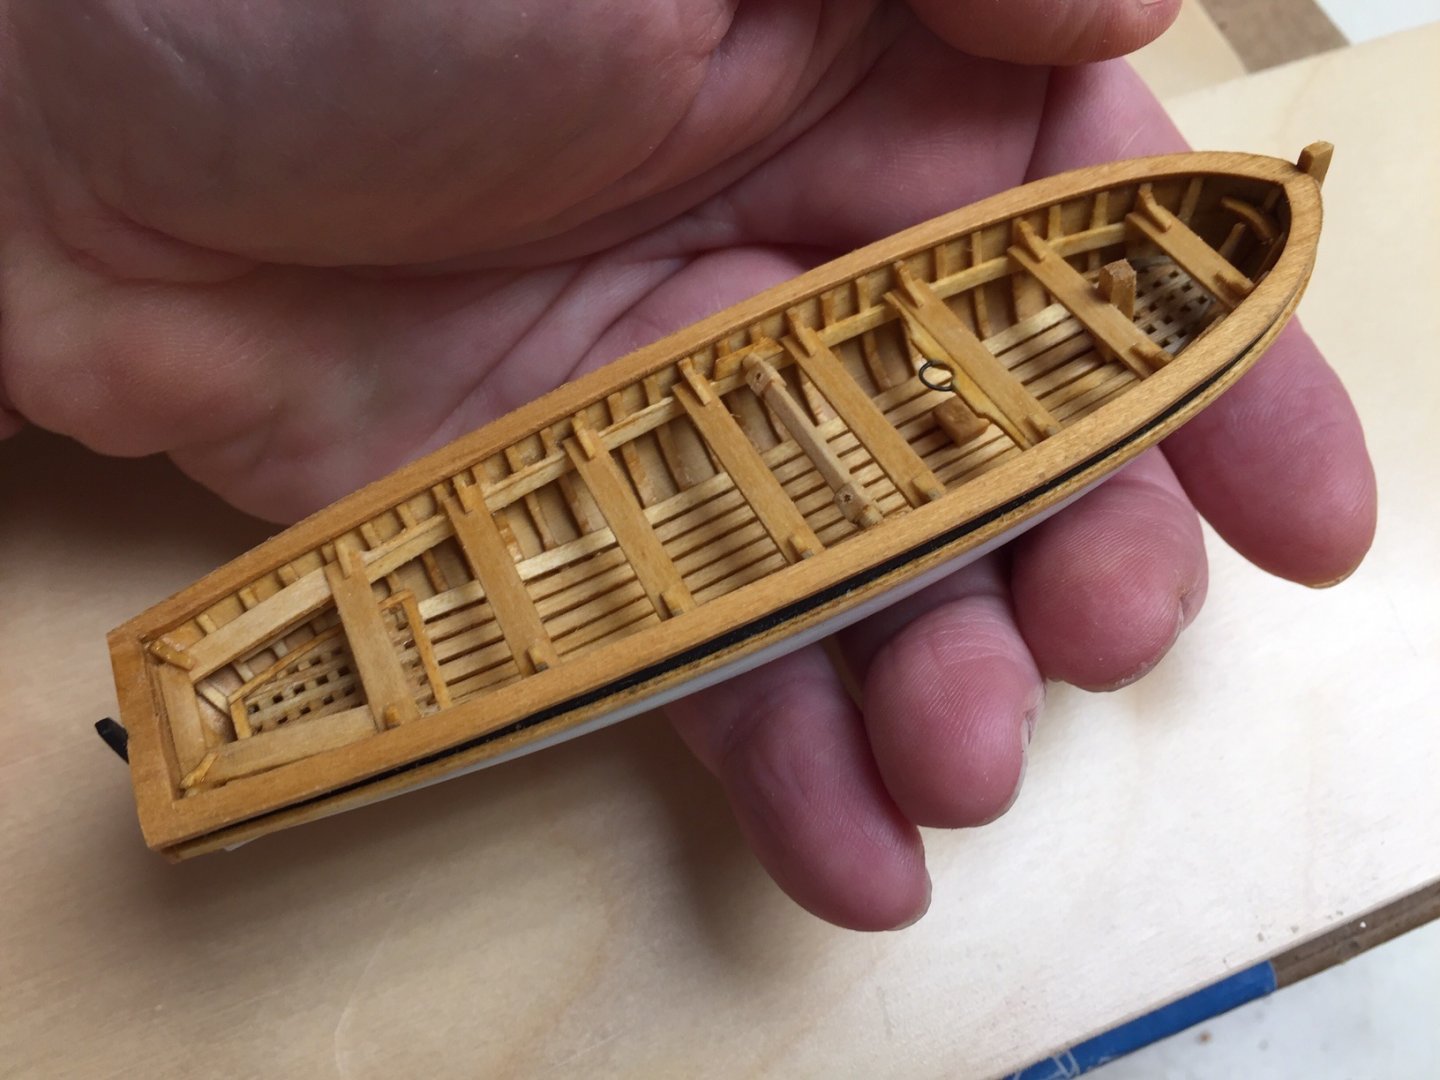
I decided to make the long boat next, so did Chapter 15 first, and then Chapter 14. I decided it would be easier to mount long boat in the center of the ship before adding cap rail details. The long boat is a separate project all by itself. It looked a bit intimidating, but turned out to be a fun project. I just followed the manual and made steady progress. The long boat on my previous model was from a Model Shipways kit and was plank on frame. This one was different being laminated patterns. Both methods work, and I don't think one is any easier than the other. The difficulty is making something this small and detailed. You can do small, detailed planking. Or you can do a lot of sanding and shaping, being careful to sand just then enough and not too thin.

-
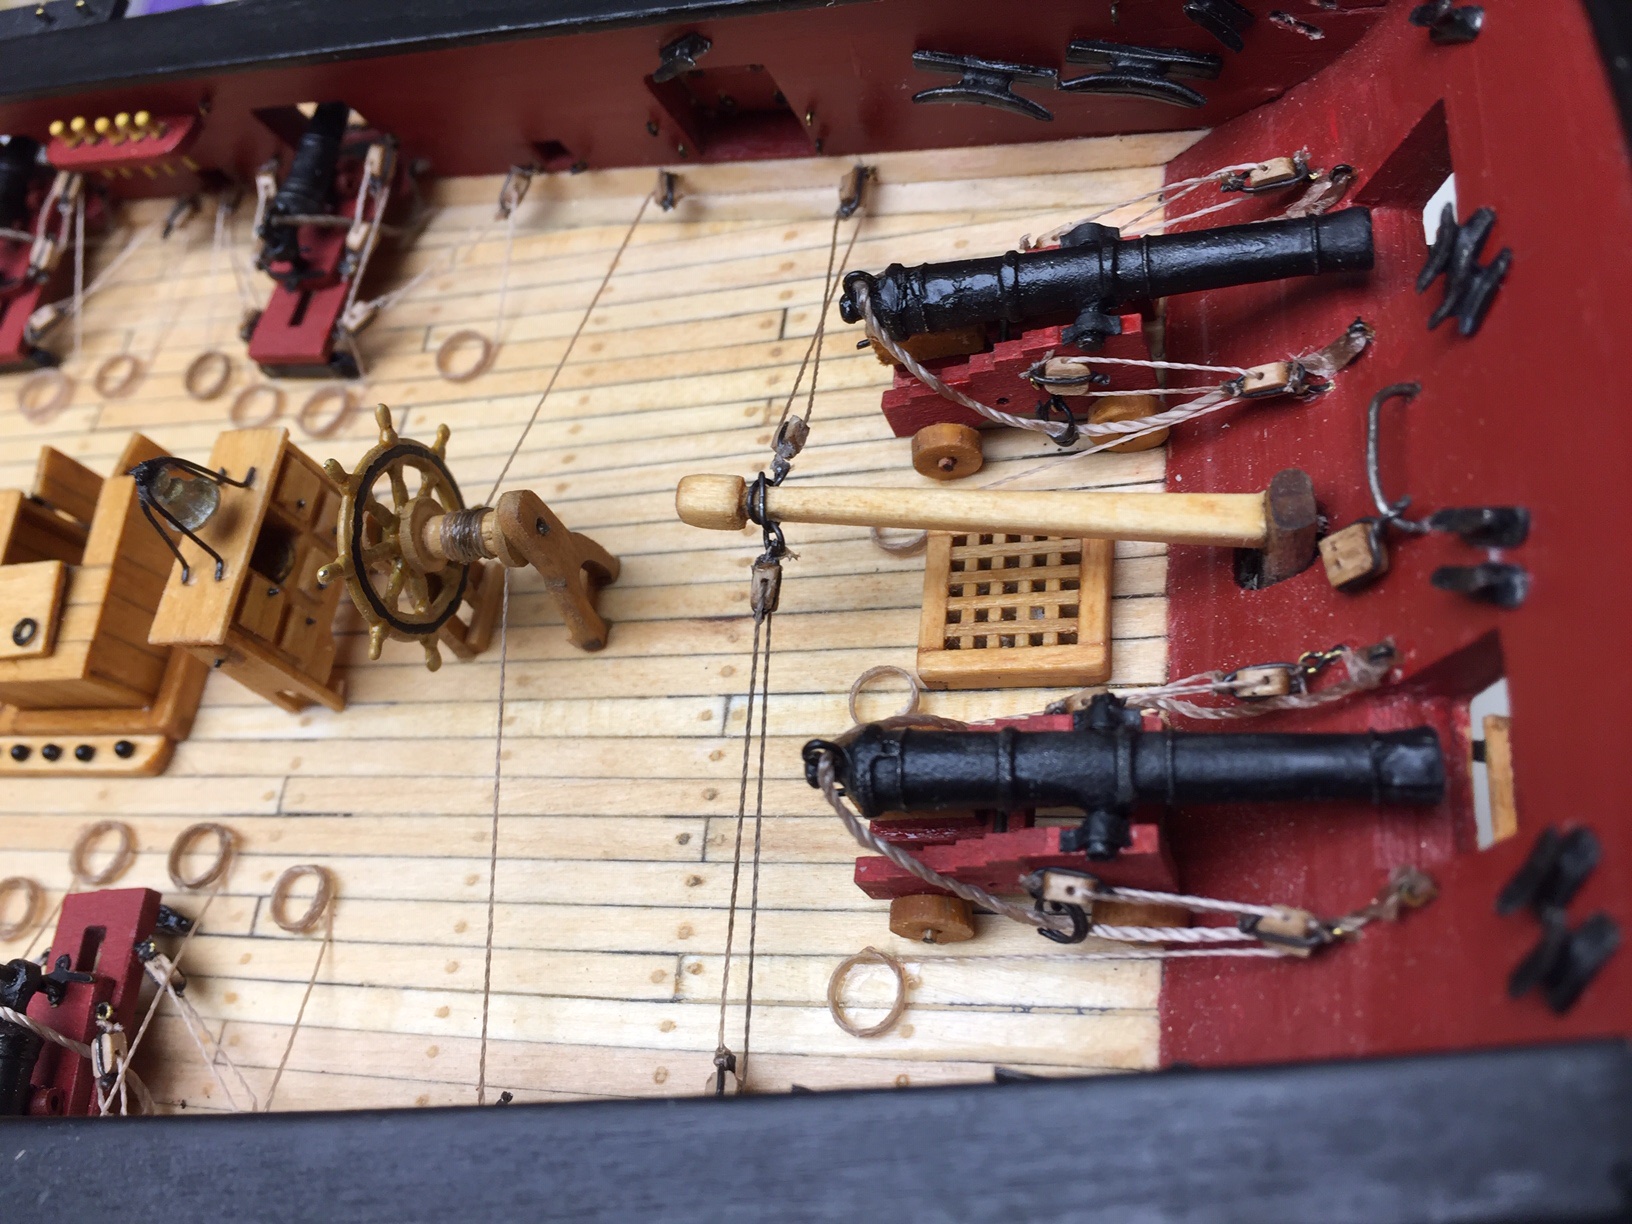
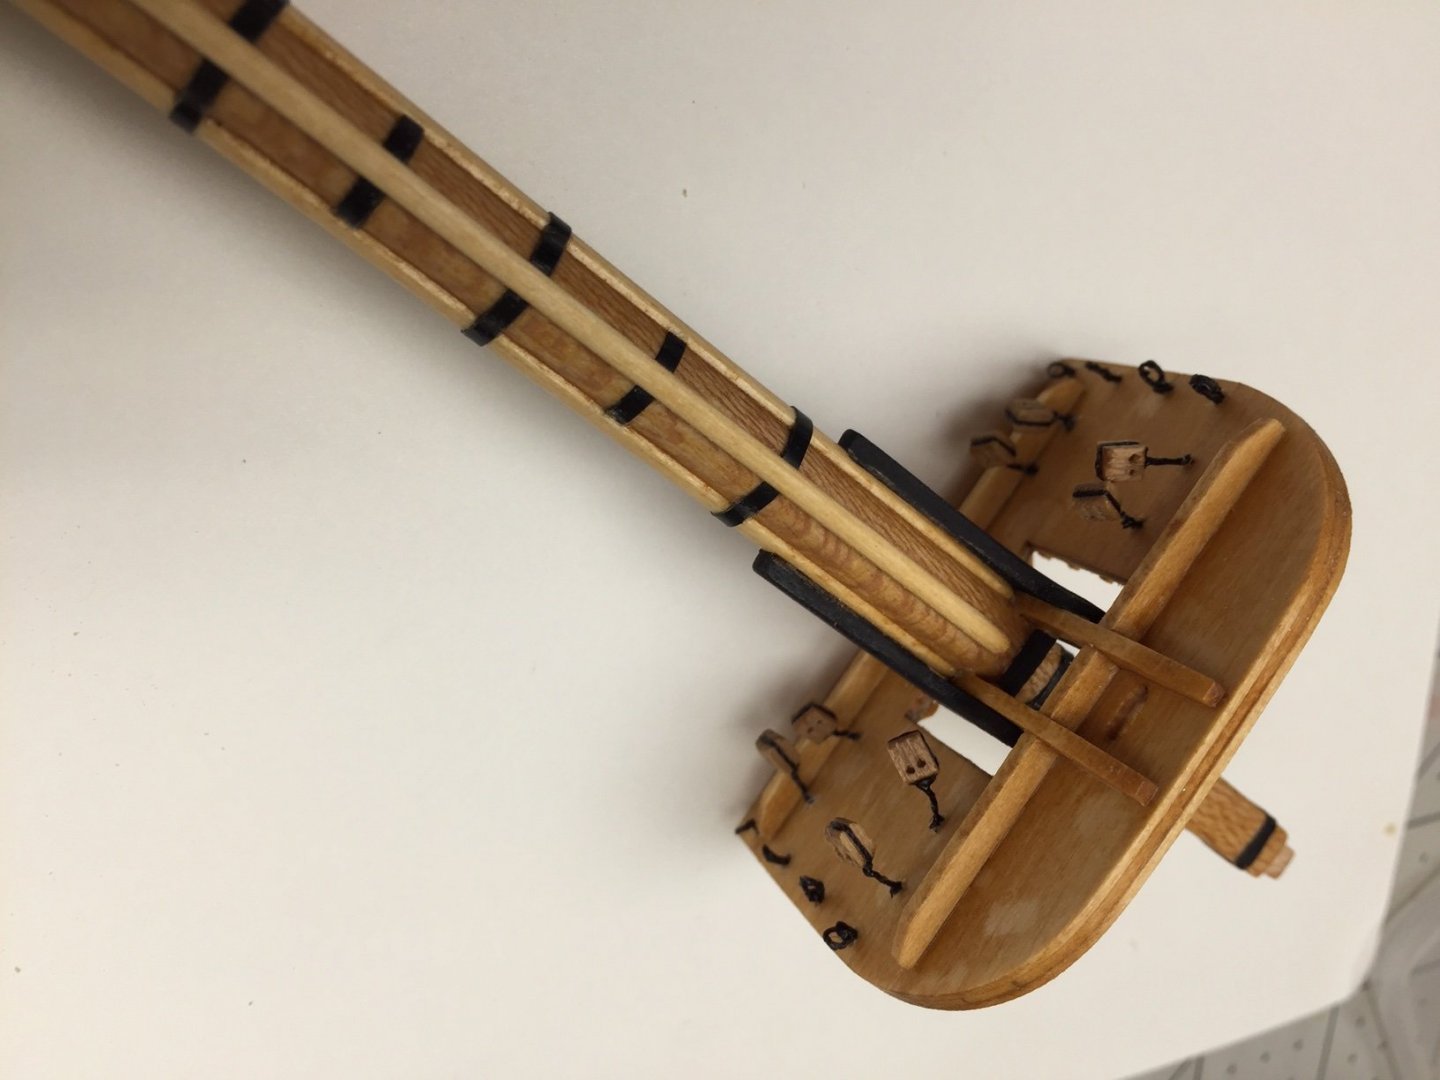
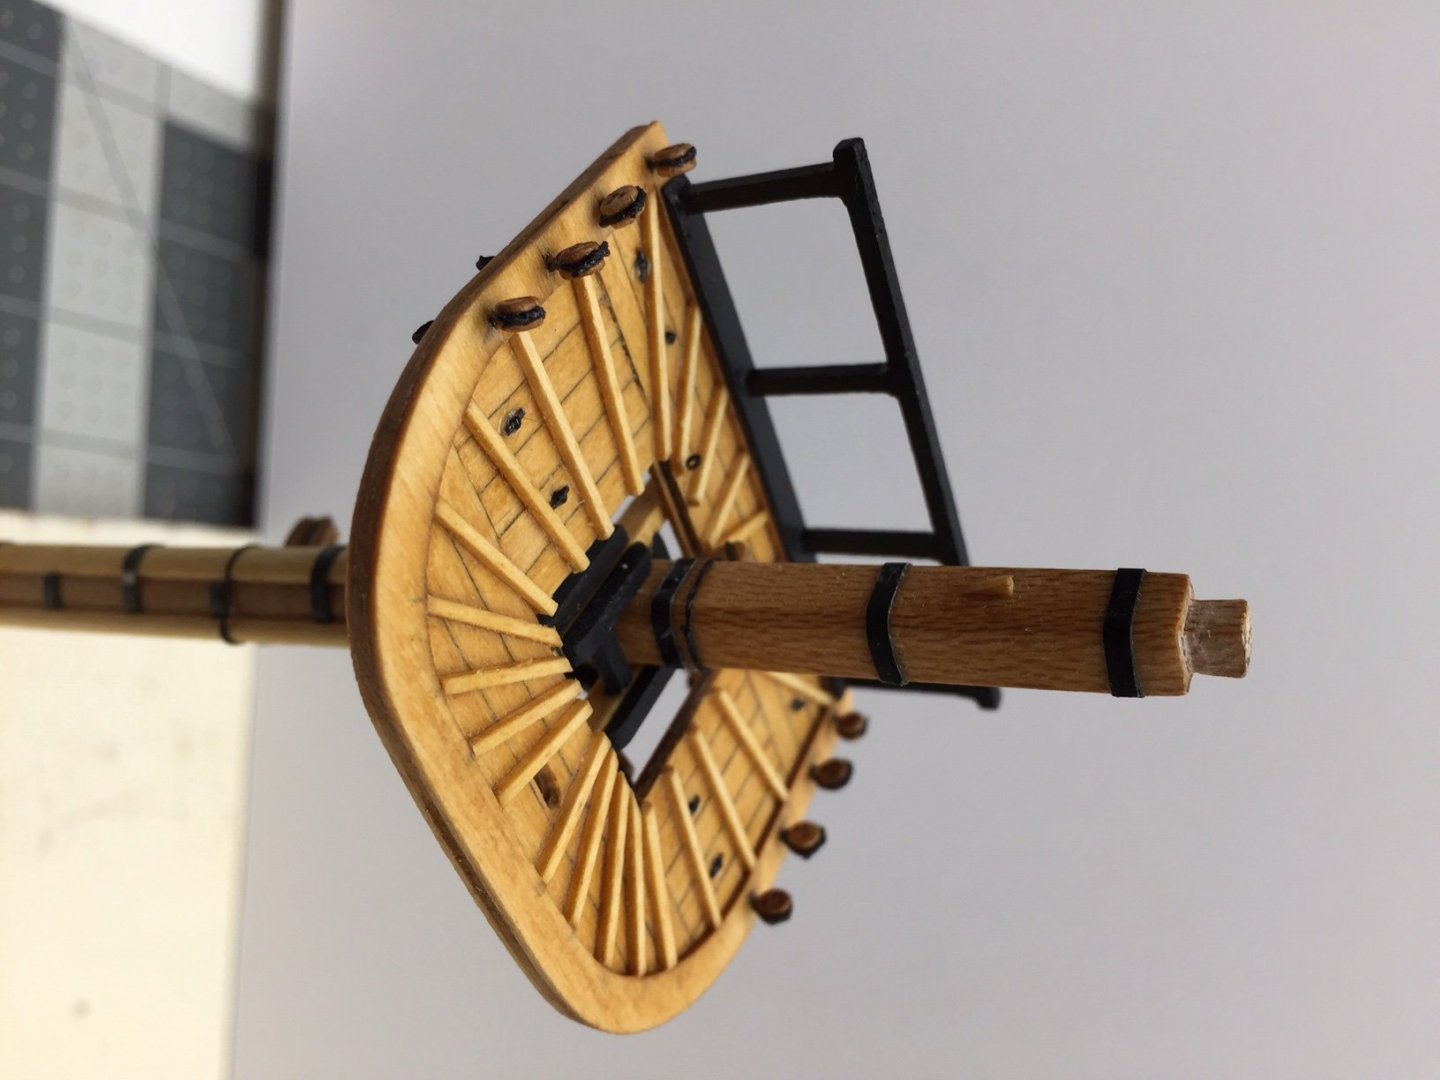
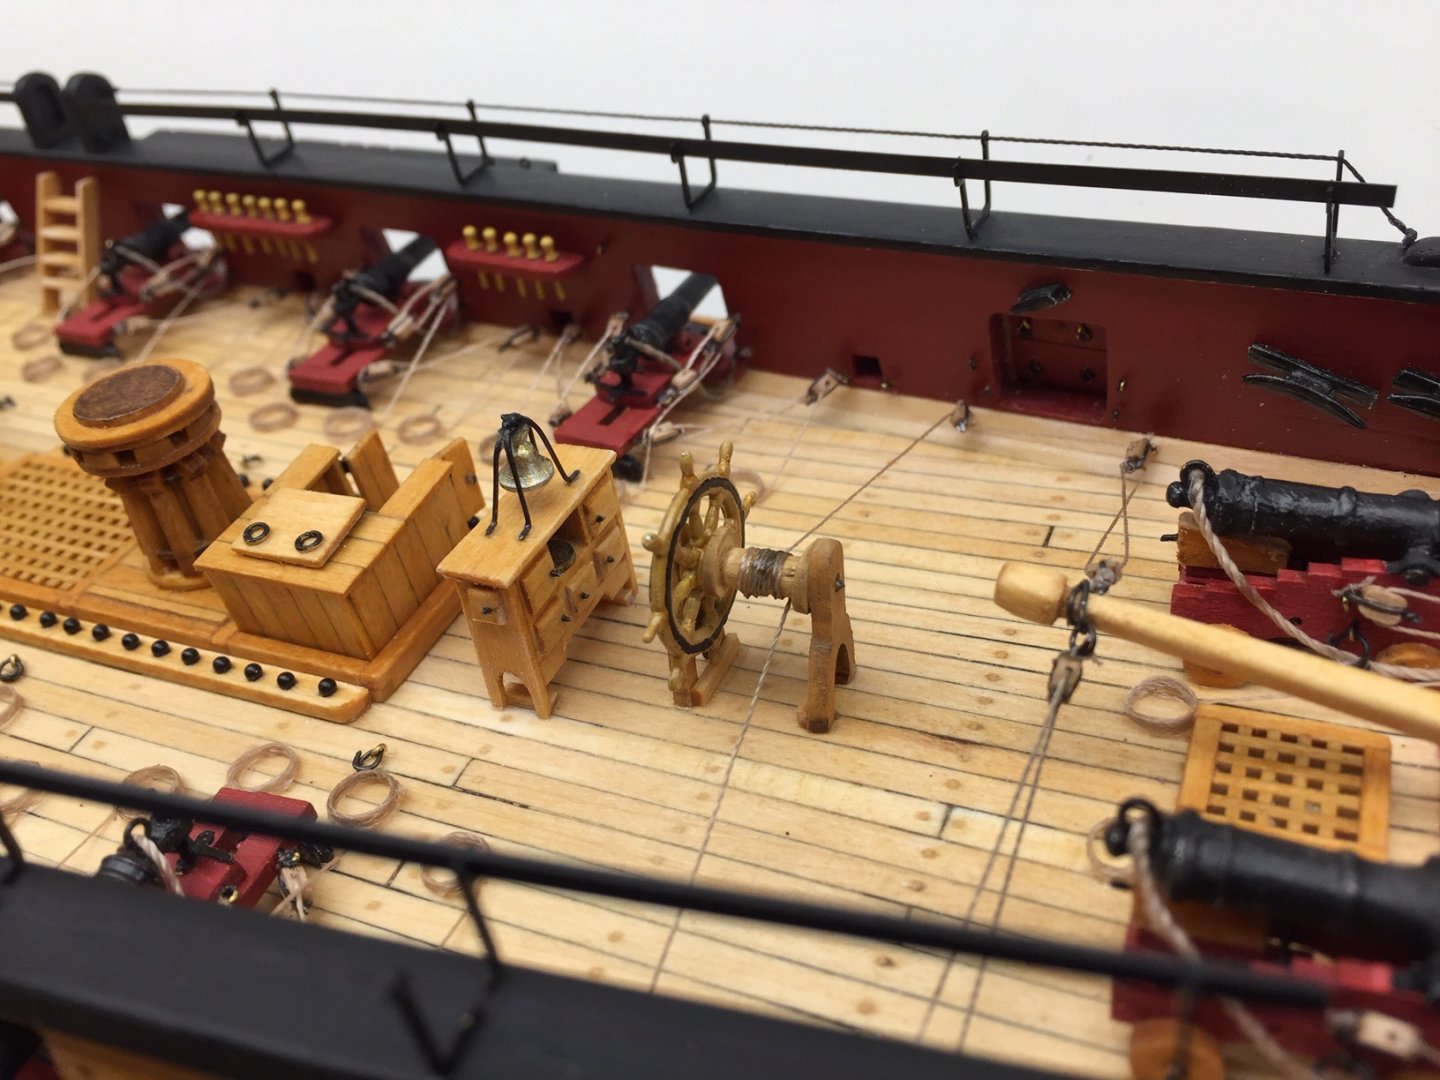
Here's more deck fittings. For whatever reason I found the ladders one of the more difficult fittings to make. Getting them to sit right was not easy with the carronades in the way. The photo showing the ladder was before I got it fitted and glued. It looked a lot bettet later on.


-
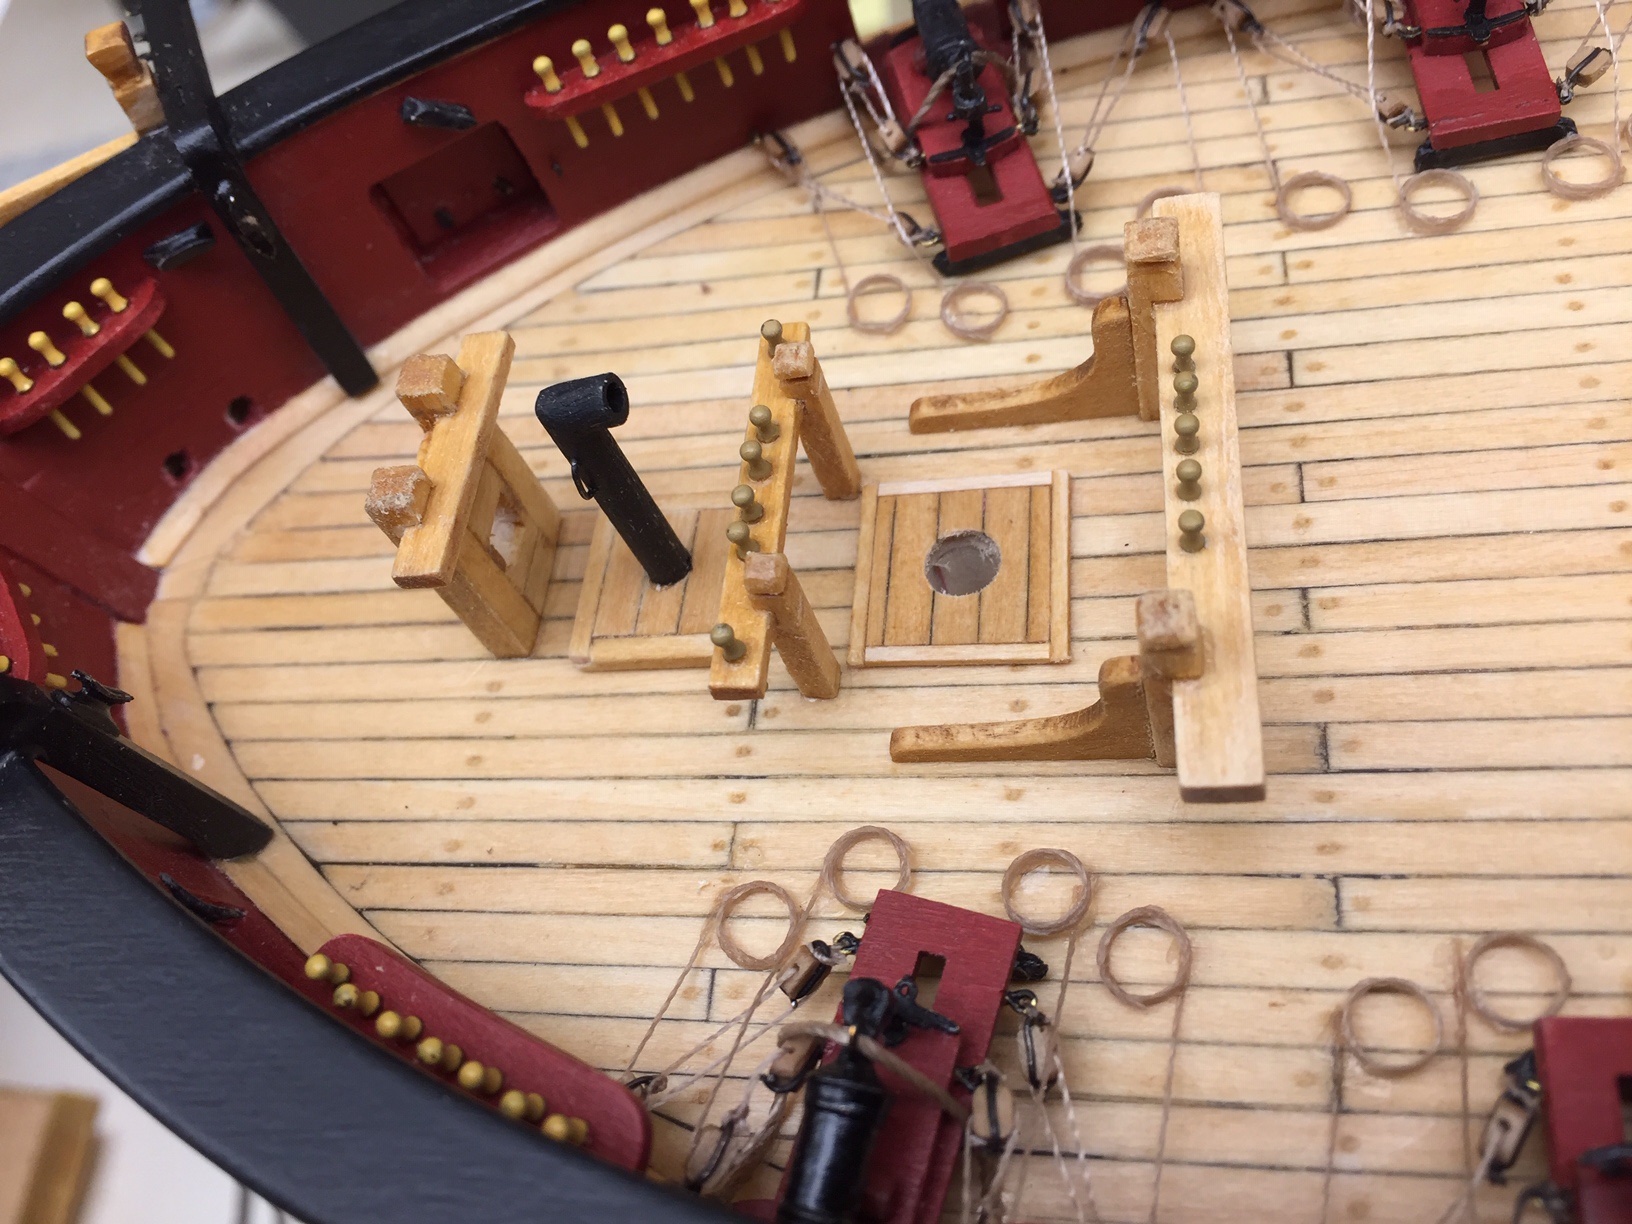
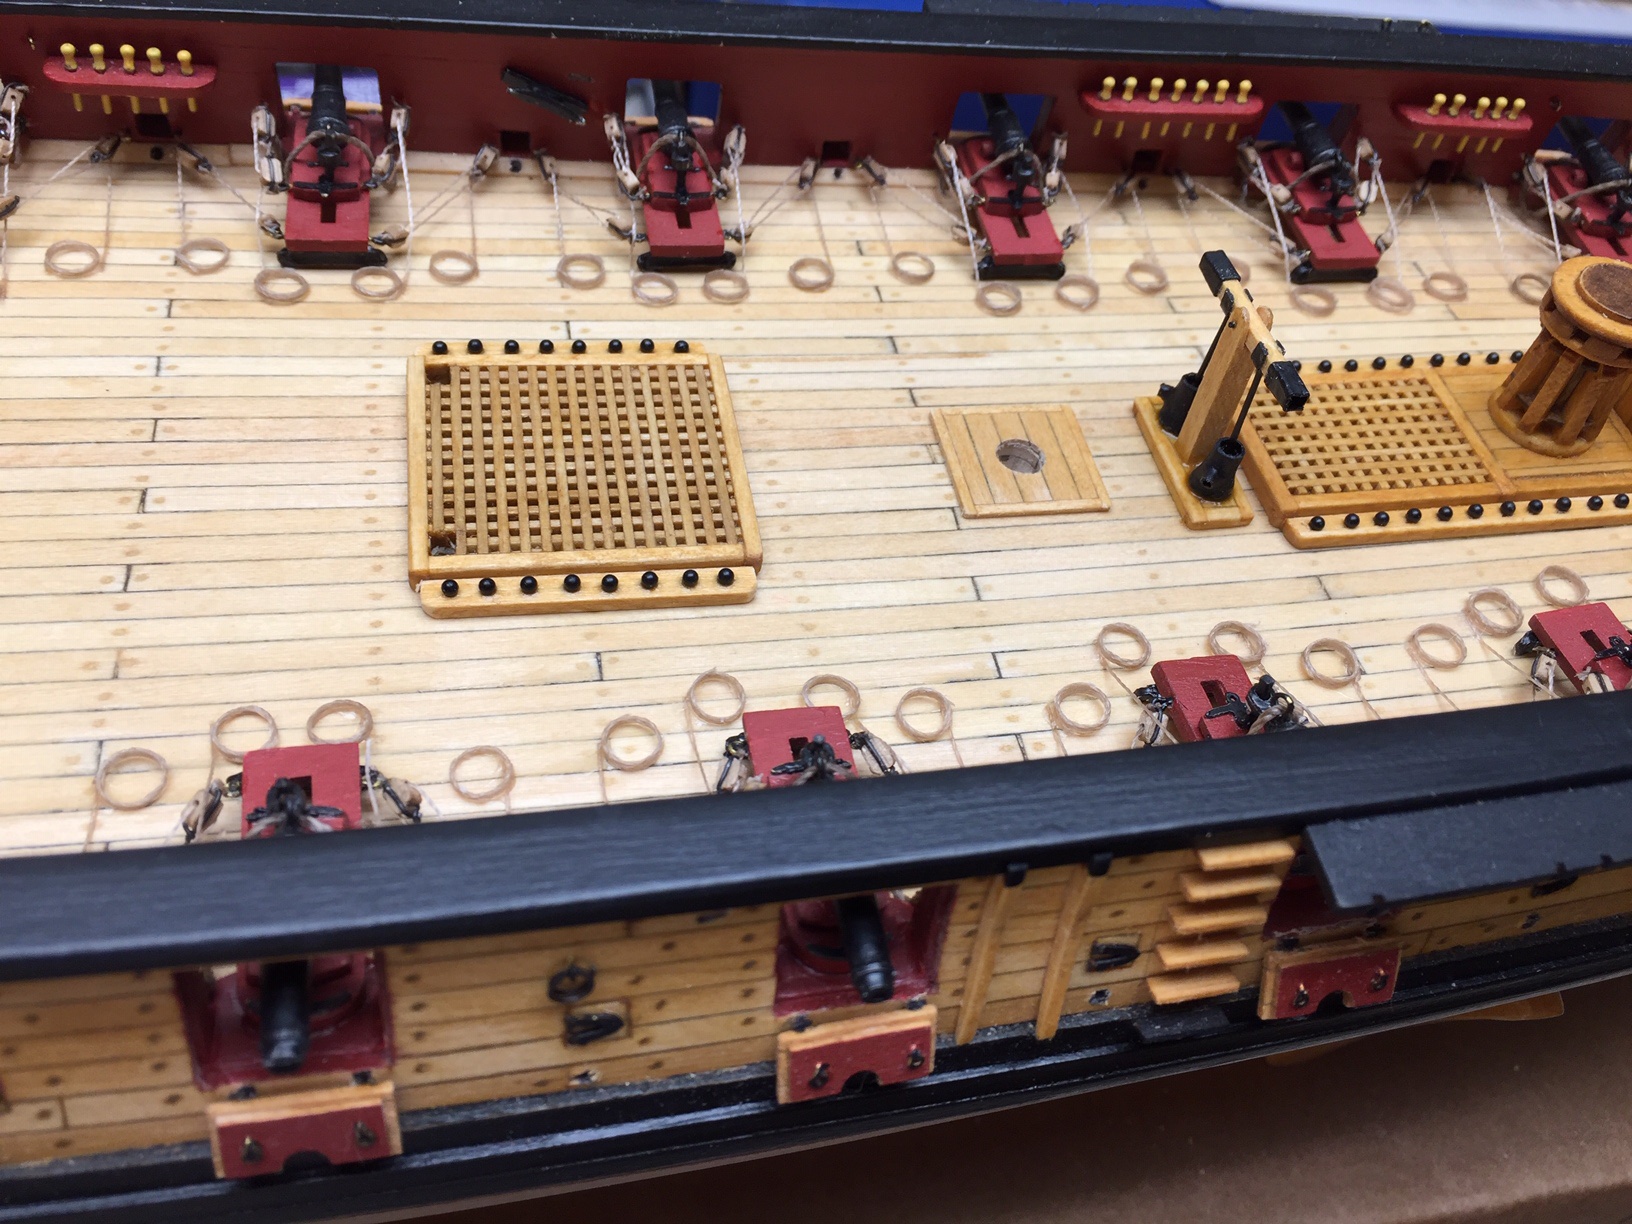
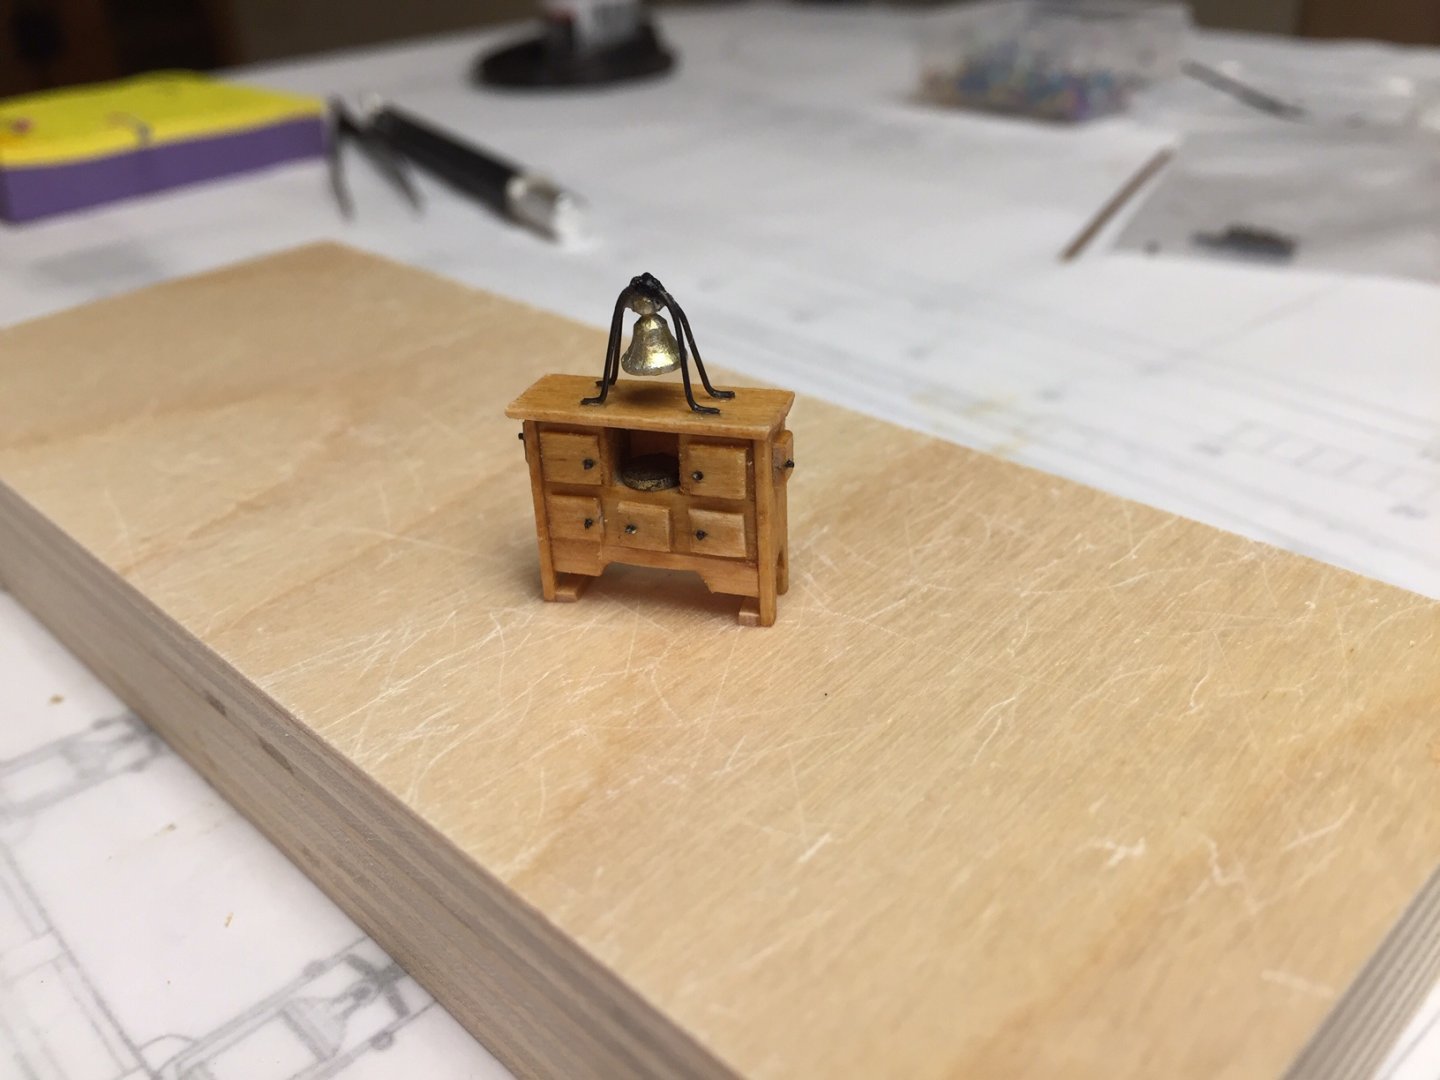
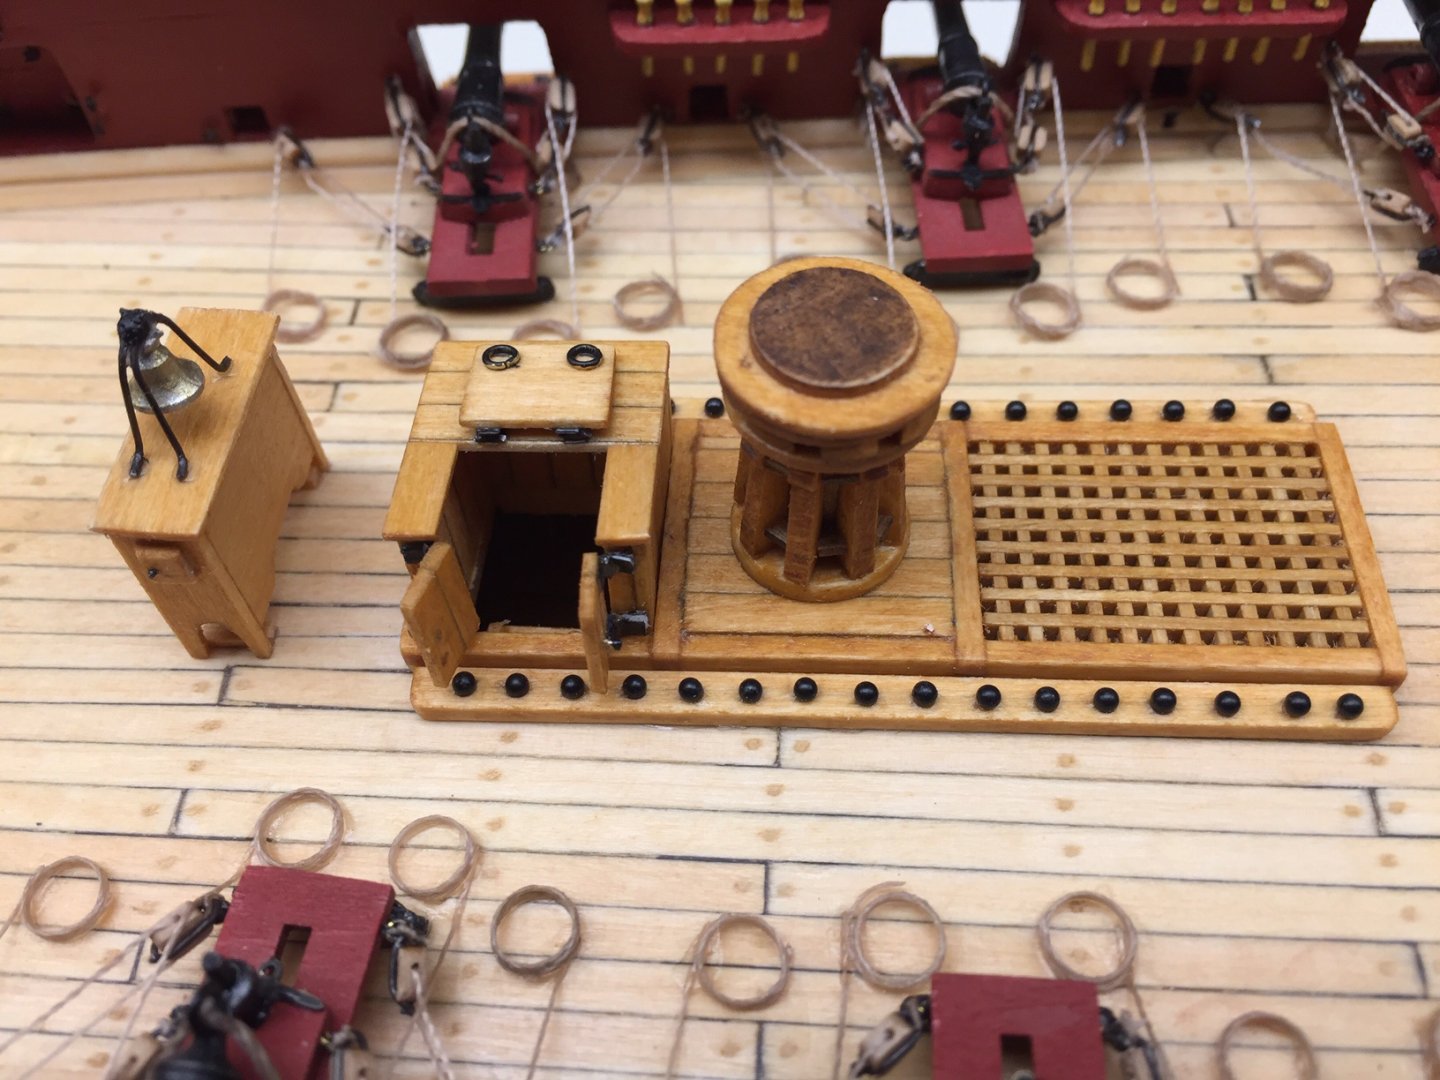
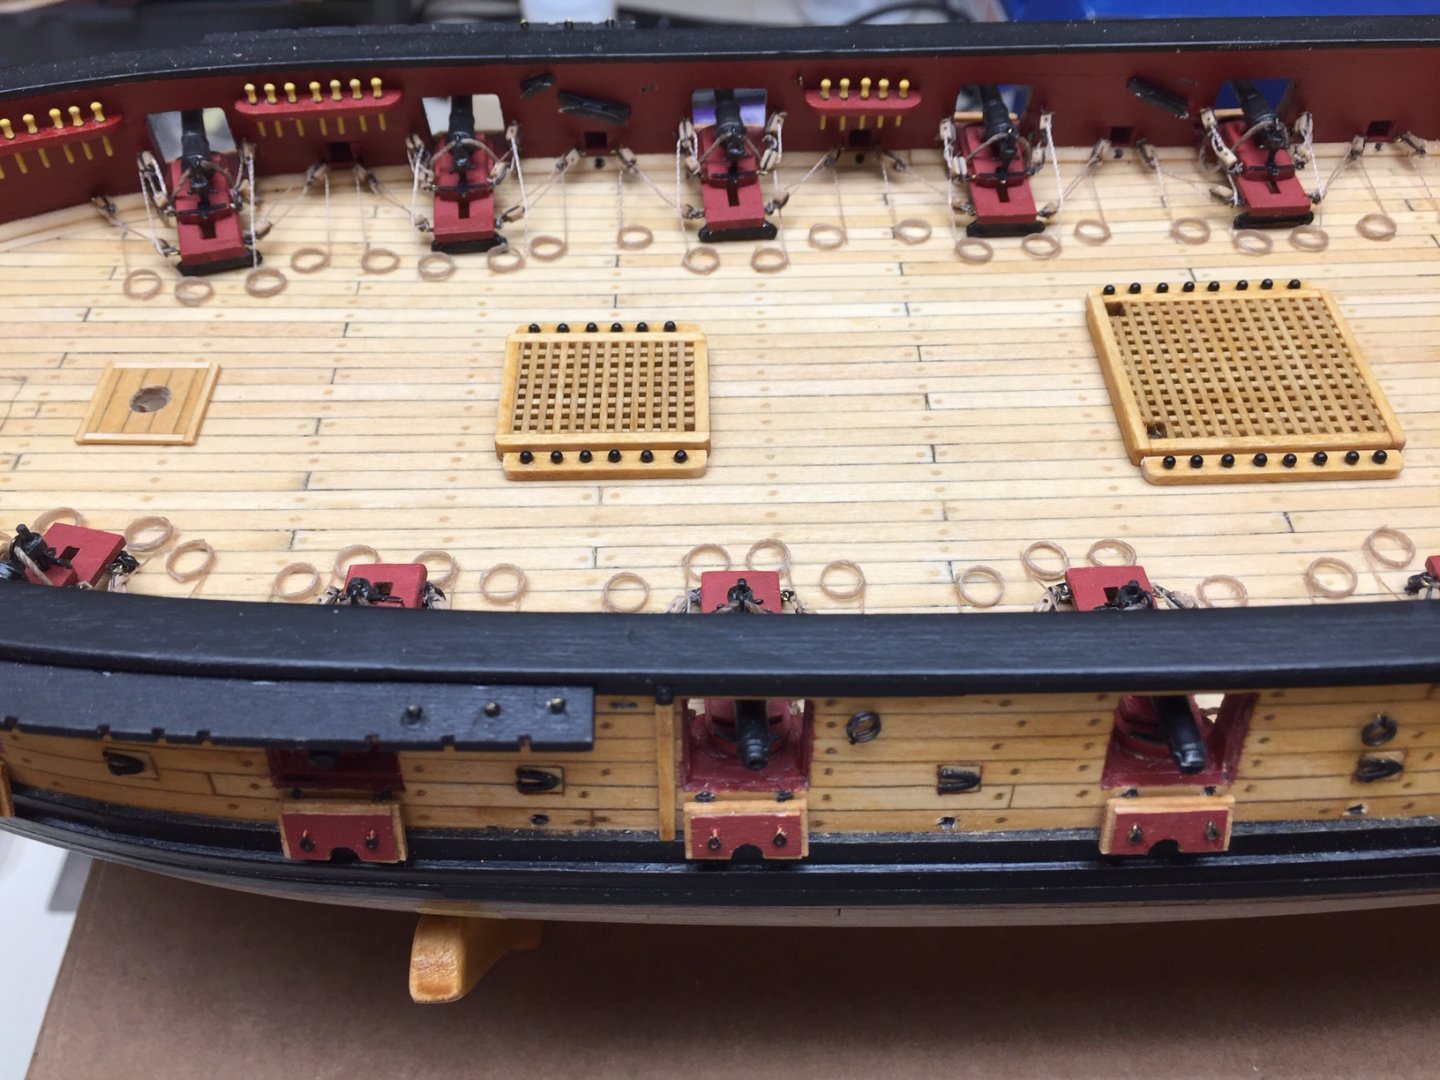
Deck fittings are added in Chapters 12 and 13. I had fun doing this part. Each little part is different, and there were no particular difficulties. I was amazed how adding one deck fitting would make the model look more ship like. It kept looking better and better each time I added a fixture.

-
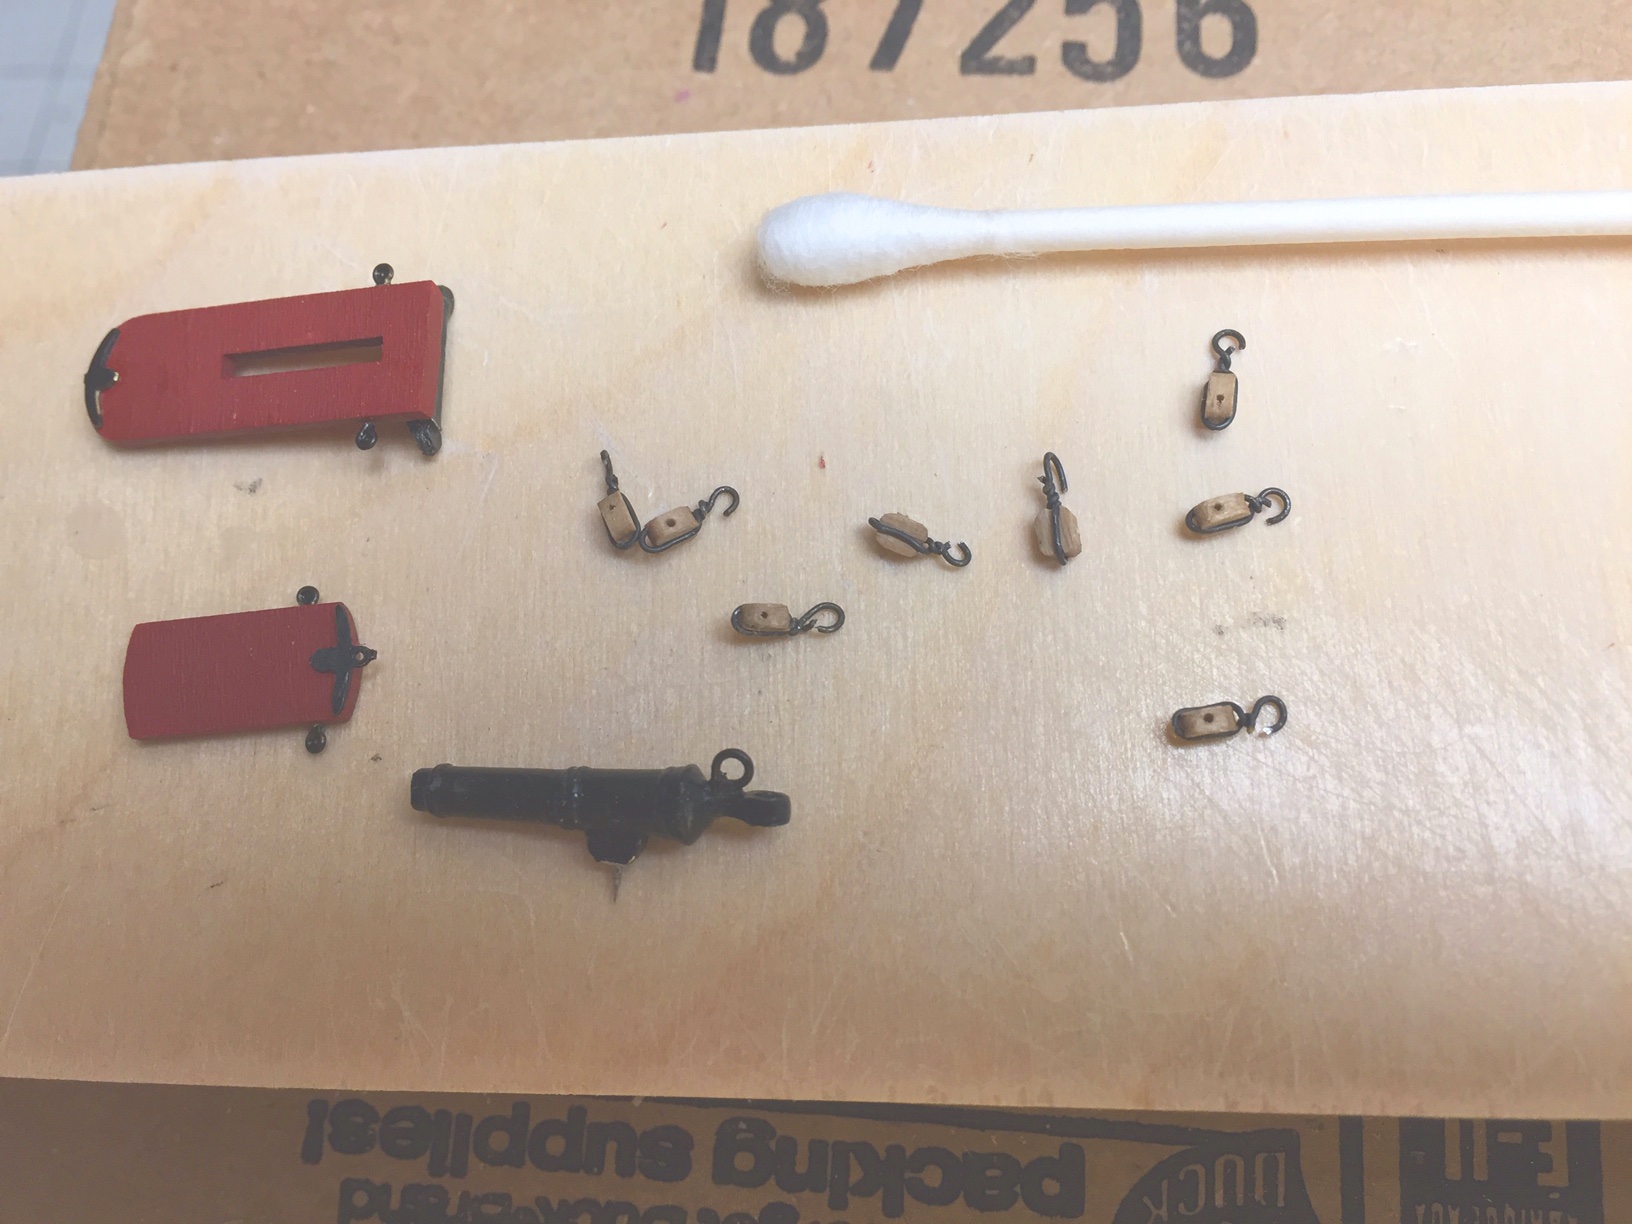
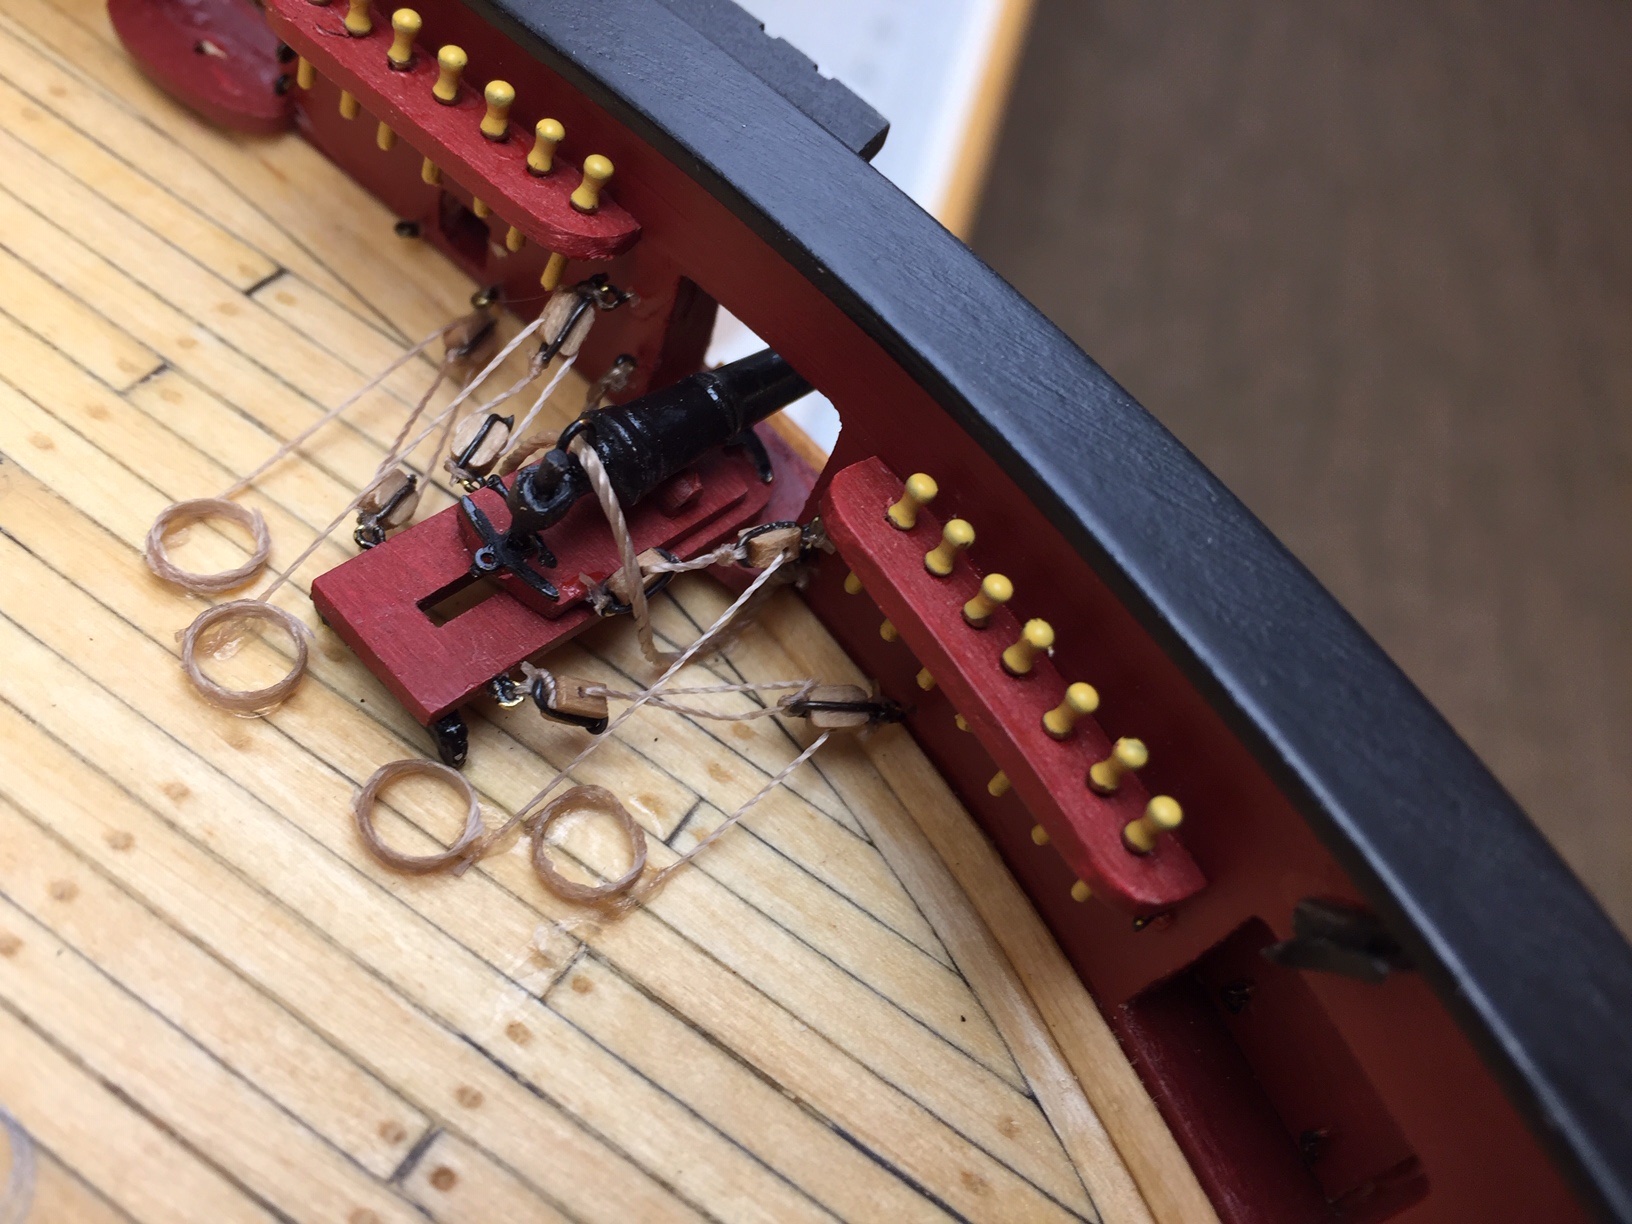
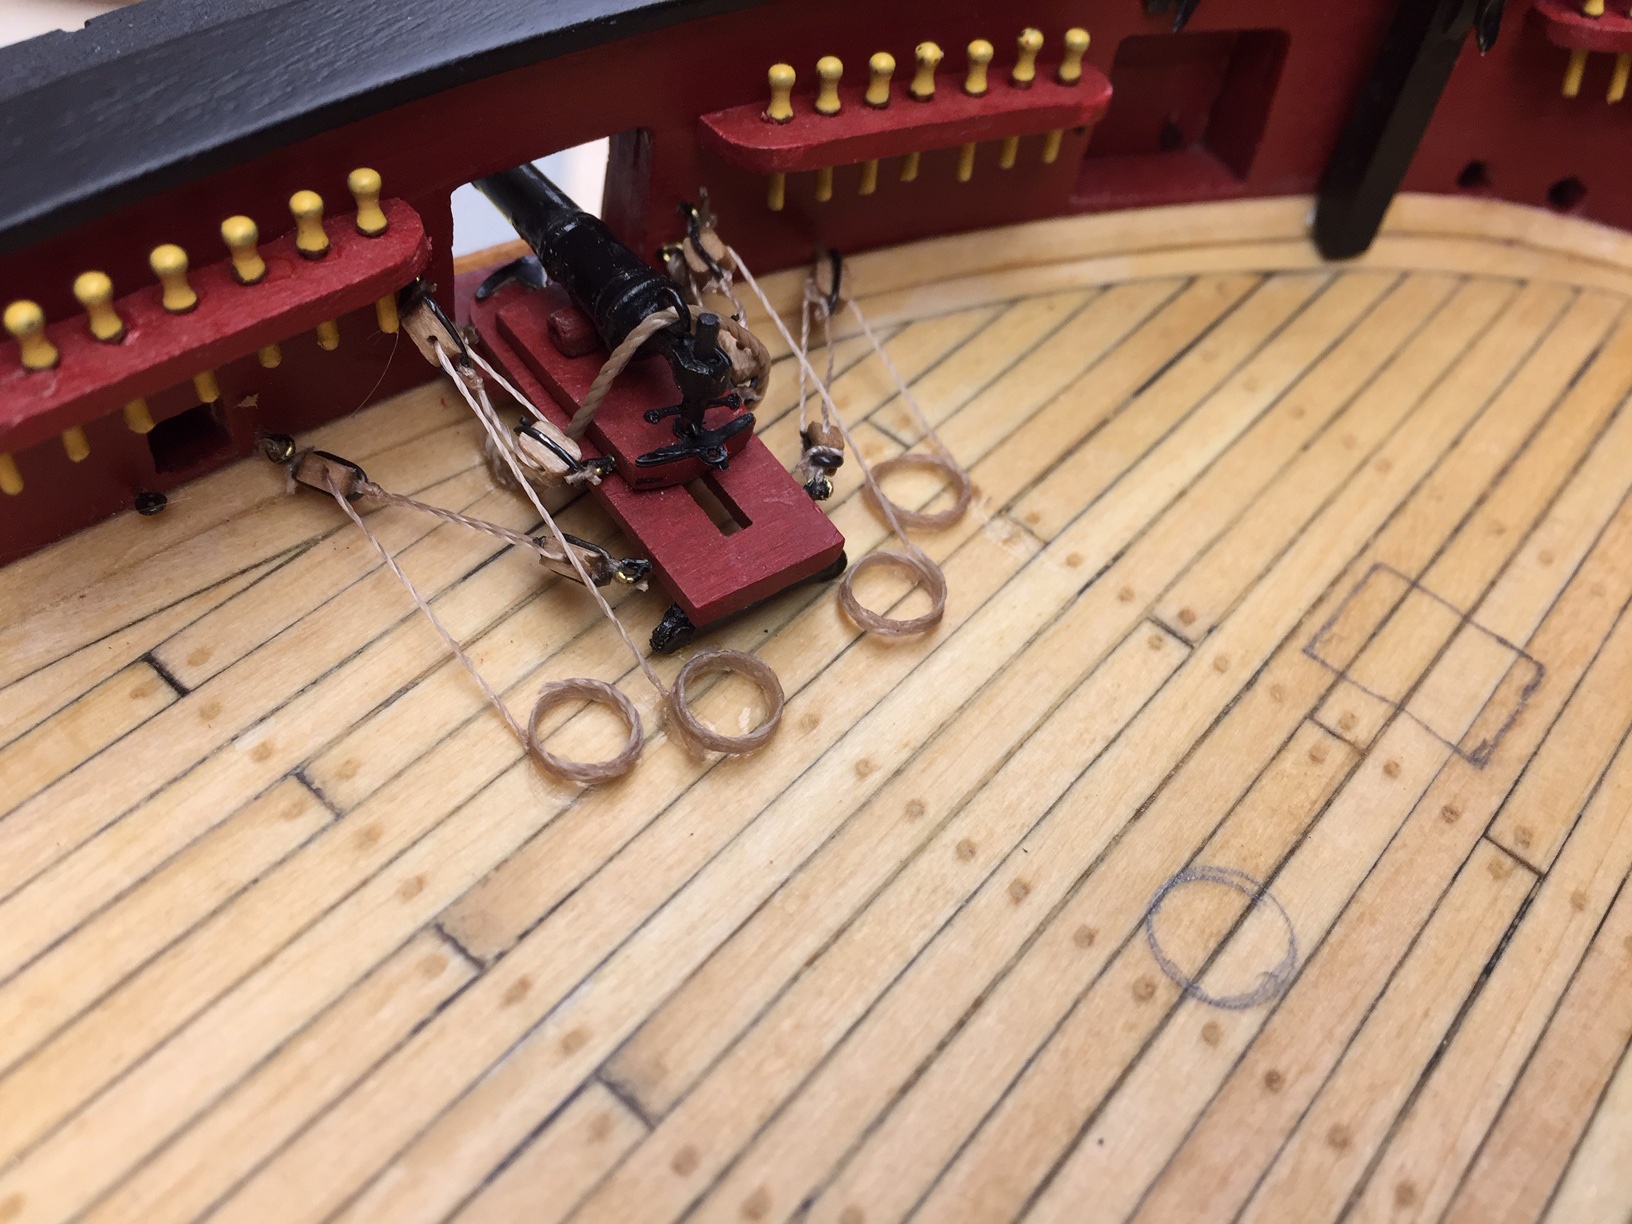
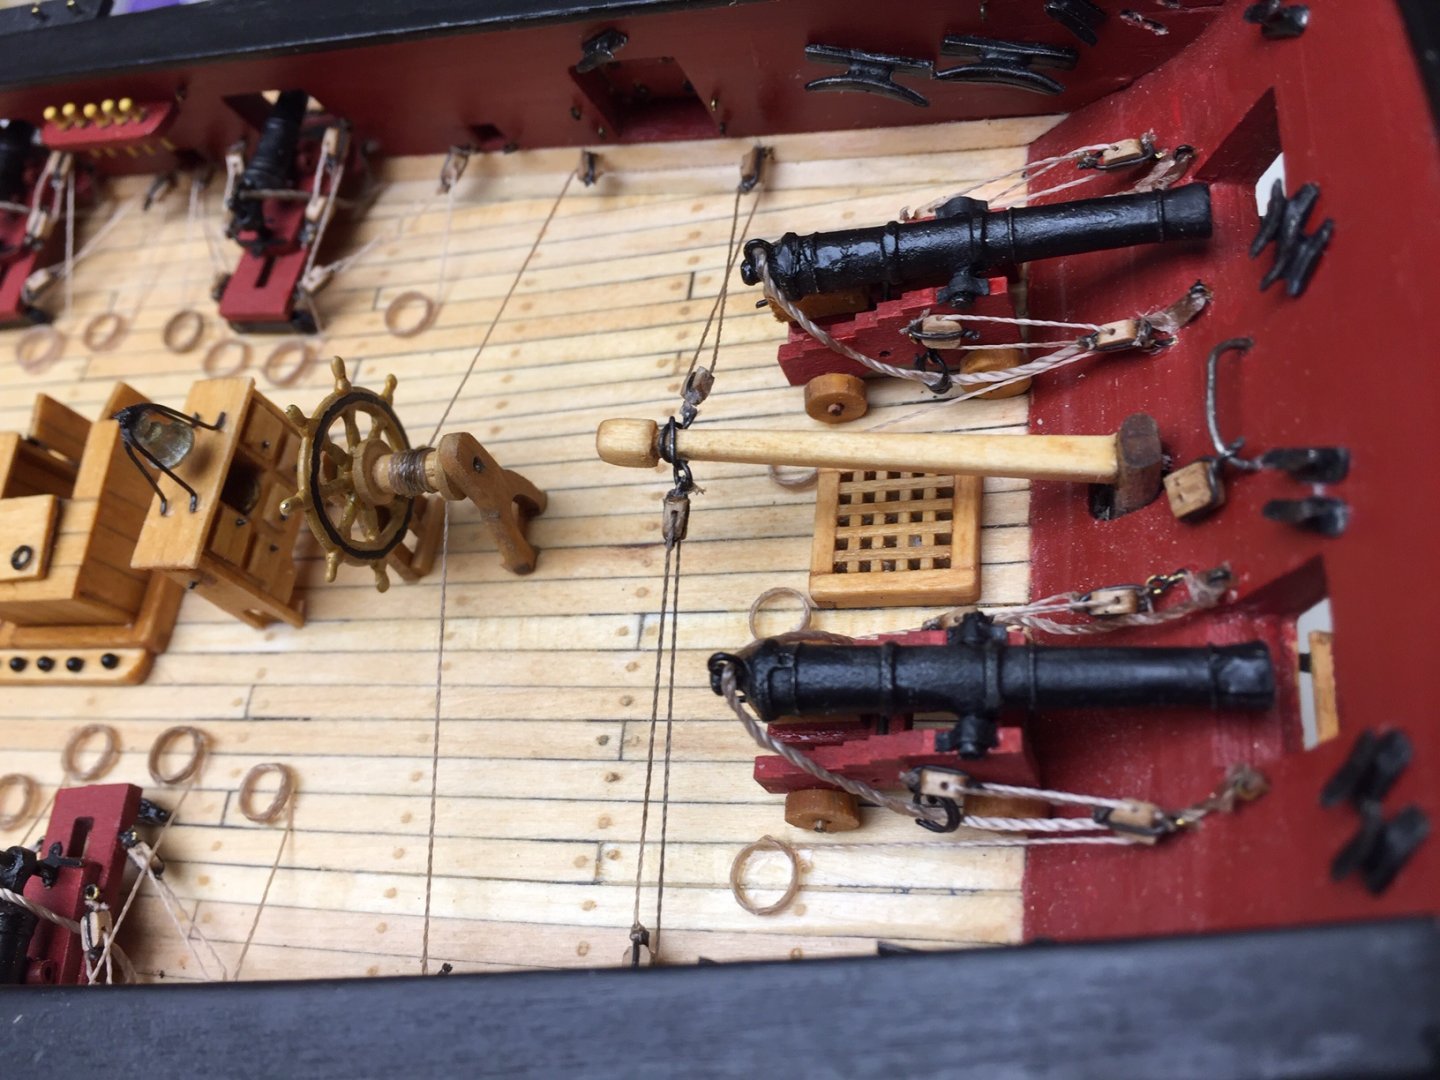
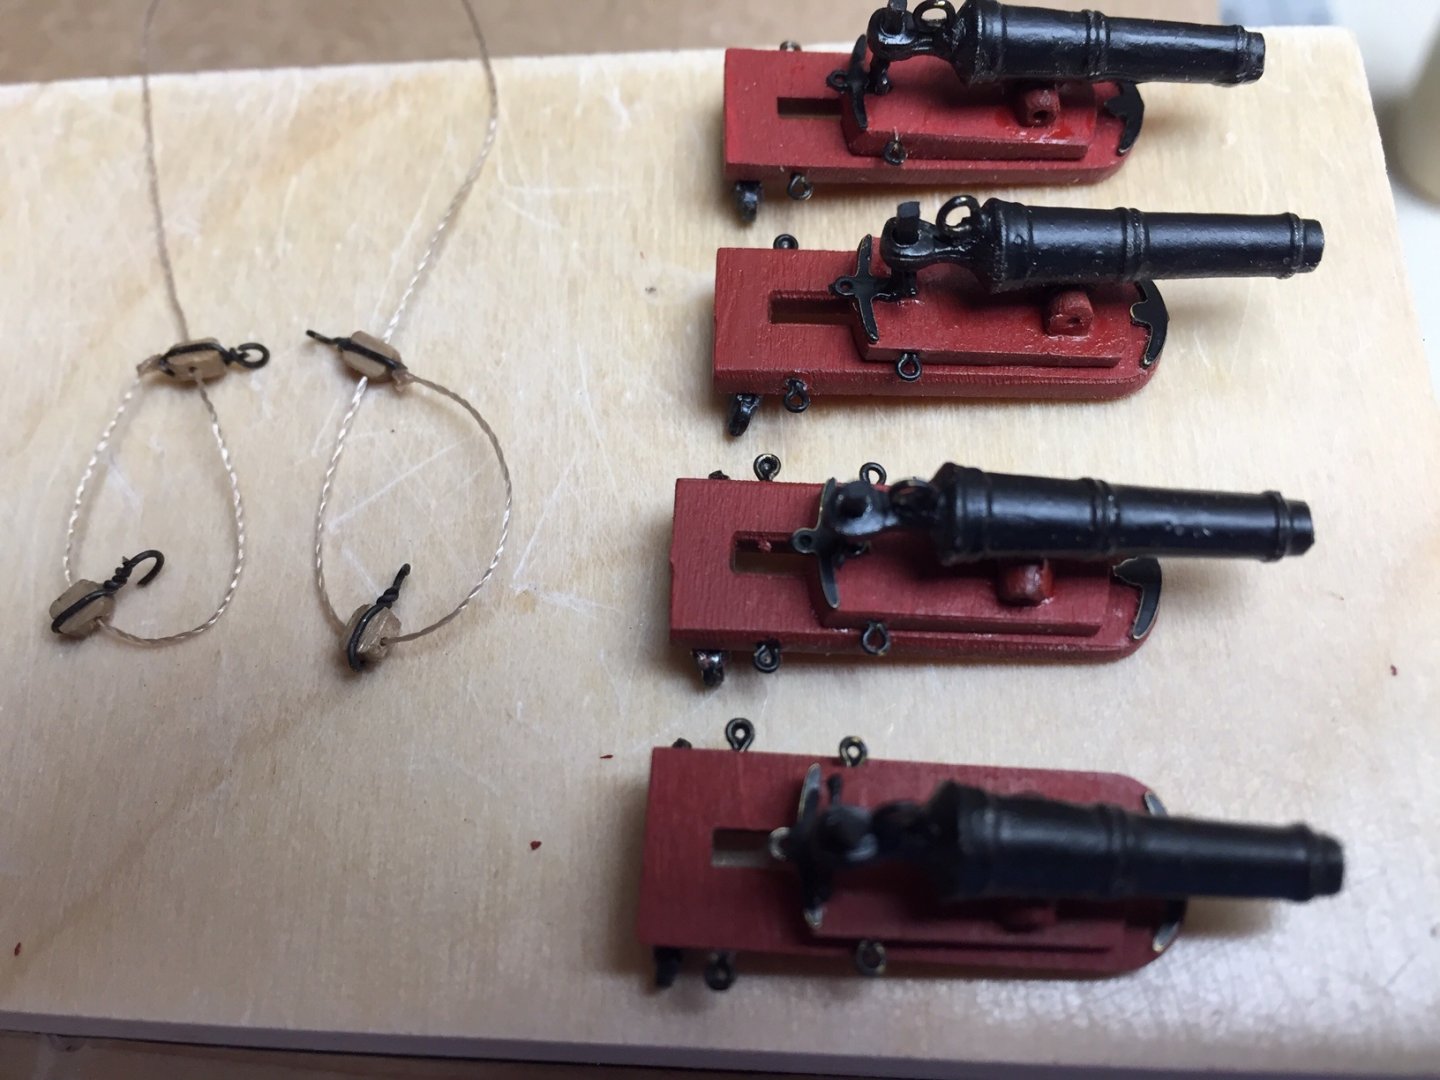
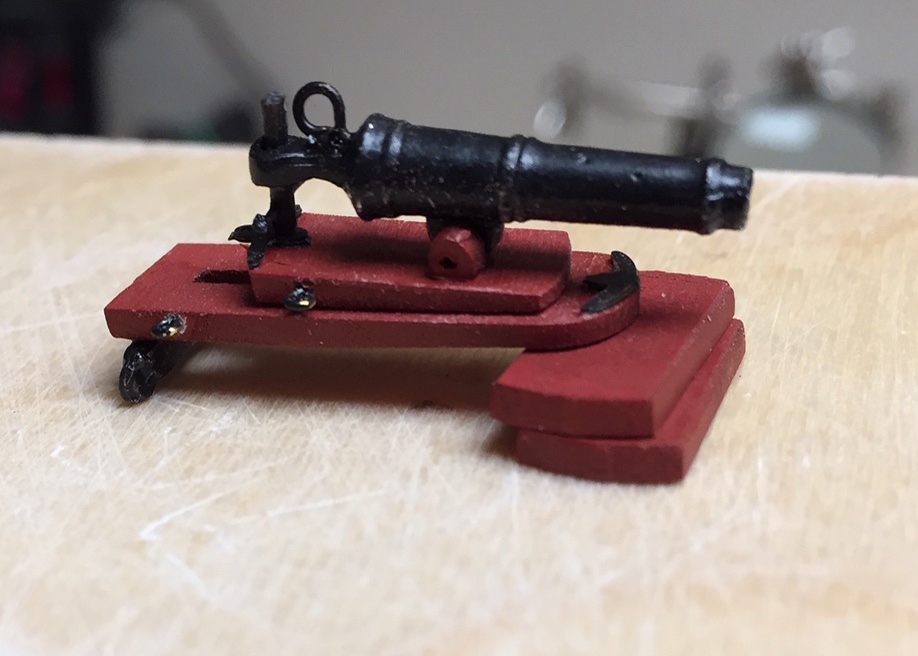
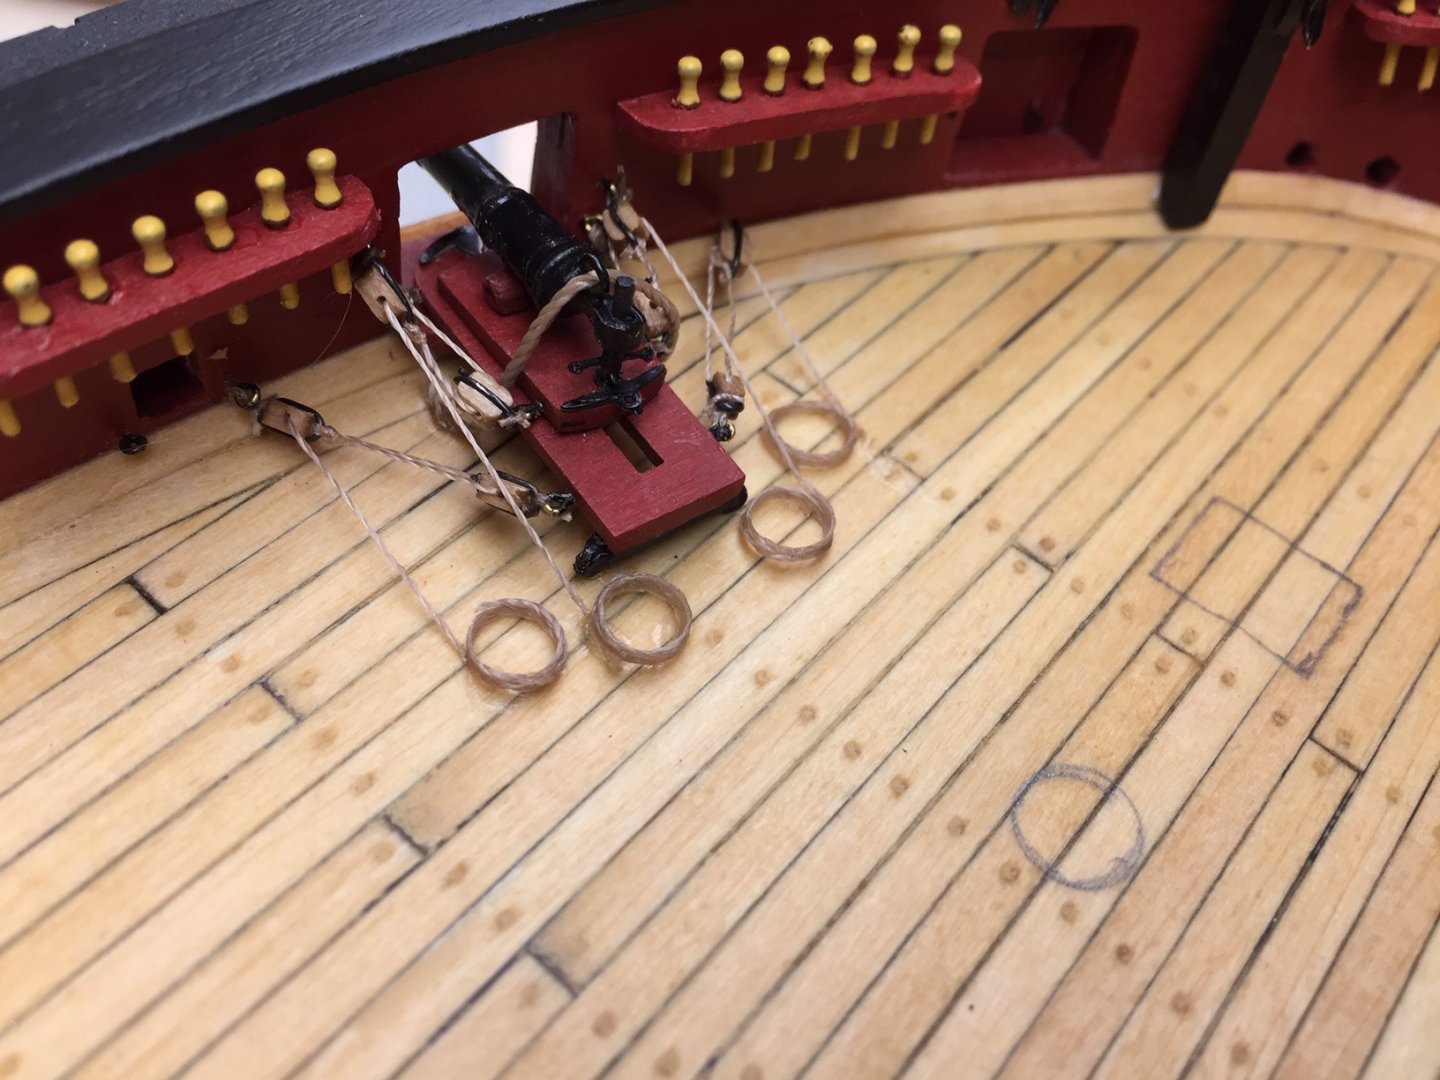
Now for the carronades. I had never rigged carronades before, and had not done rigging for about 15-20 years, so this was a challenge. About the time I got halfway good at it, I was done. I used blocks provided in the kit, and I was unable to drill holes in them for hooks without splitting the wood. No matter how careful I was, the wood split, so I quickly gave up on this idea. Instead I used wire strops and formed a hook from one end of the wire. This was not hard to do and at this scale you don't notice unless you look real close and know what to look for. I'm guessing that you could do hooks as shown in manual using boxwood blocks from Syren Models. A trick for threading rigging thru blocks is to dip about 1/2" end of thread in CA and let dry. This stiffens the end of the thread making it easy to feed thru blocks or eye bolts. It works 100x better than needle threaders. I tried those on the first model ship, broke a ton of them, and finally started stiffening thread with glue. No more problems! It's one of the few things I remembered from building the first ship. I also took liberties when seizing ropes. I've fought this on all rigging, and have never come up with a good method. I used rigging thread provided in the kit. I'm guessing rigging thread from Syren Models is much better and would make this task easier. It seems to me that I needed a thinner thread than the 0.008 provided in the kit for seizing ropes. Whatever I've done looks clunky and out of scale.


-
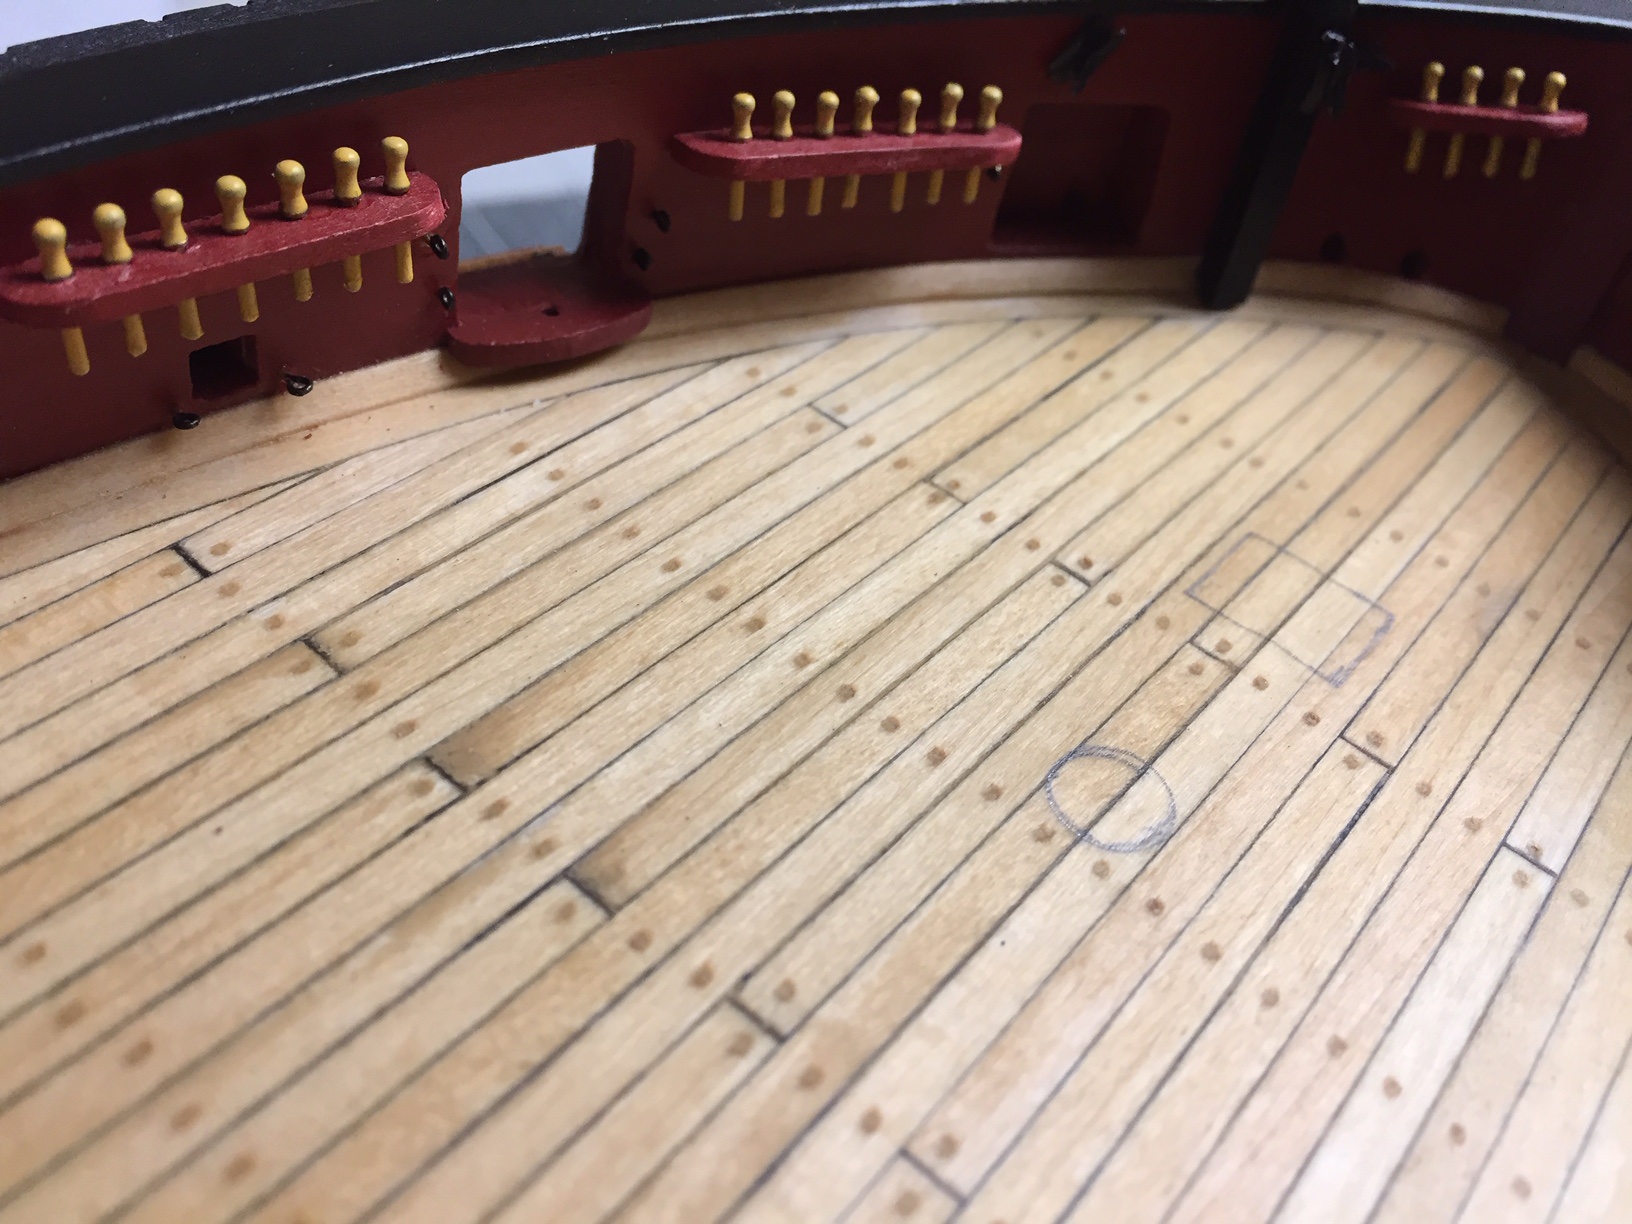
Chapter 11 does the inner bulwarks details and carronades. When making carronades I had the same thought about a boat with 20 guns. But it sure looks neat when you get finished. All details on this ship model are more details and complex than on the first model ship I built. It's been challenging, and hopefully, I've learned a lot. The trick is not to forget what you learned on the next build. I'll start with a couple of pictures of belay racks. I used the brass belay pins in the kit, and painted them the "wood" color I used on badges and figurehead. It's close to a brass color, so about all it did was take the shininess off the brass. I guess there will be only one picture. The other one attached upside down again. Haven't figured out why this happens. Picture displays fine on my Mac. You can see on this where I've marked deck fitting and mast locations. Looking back, I should have drilled holes for the masts at this point. I think it's best to do this as early as you can, when you can still easily make a jig of some sort to hold boat firmly for drill press. When I did it later on, it was more difficult.

-
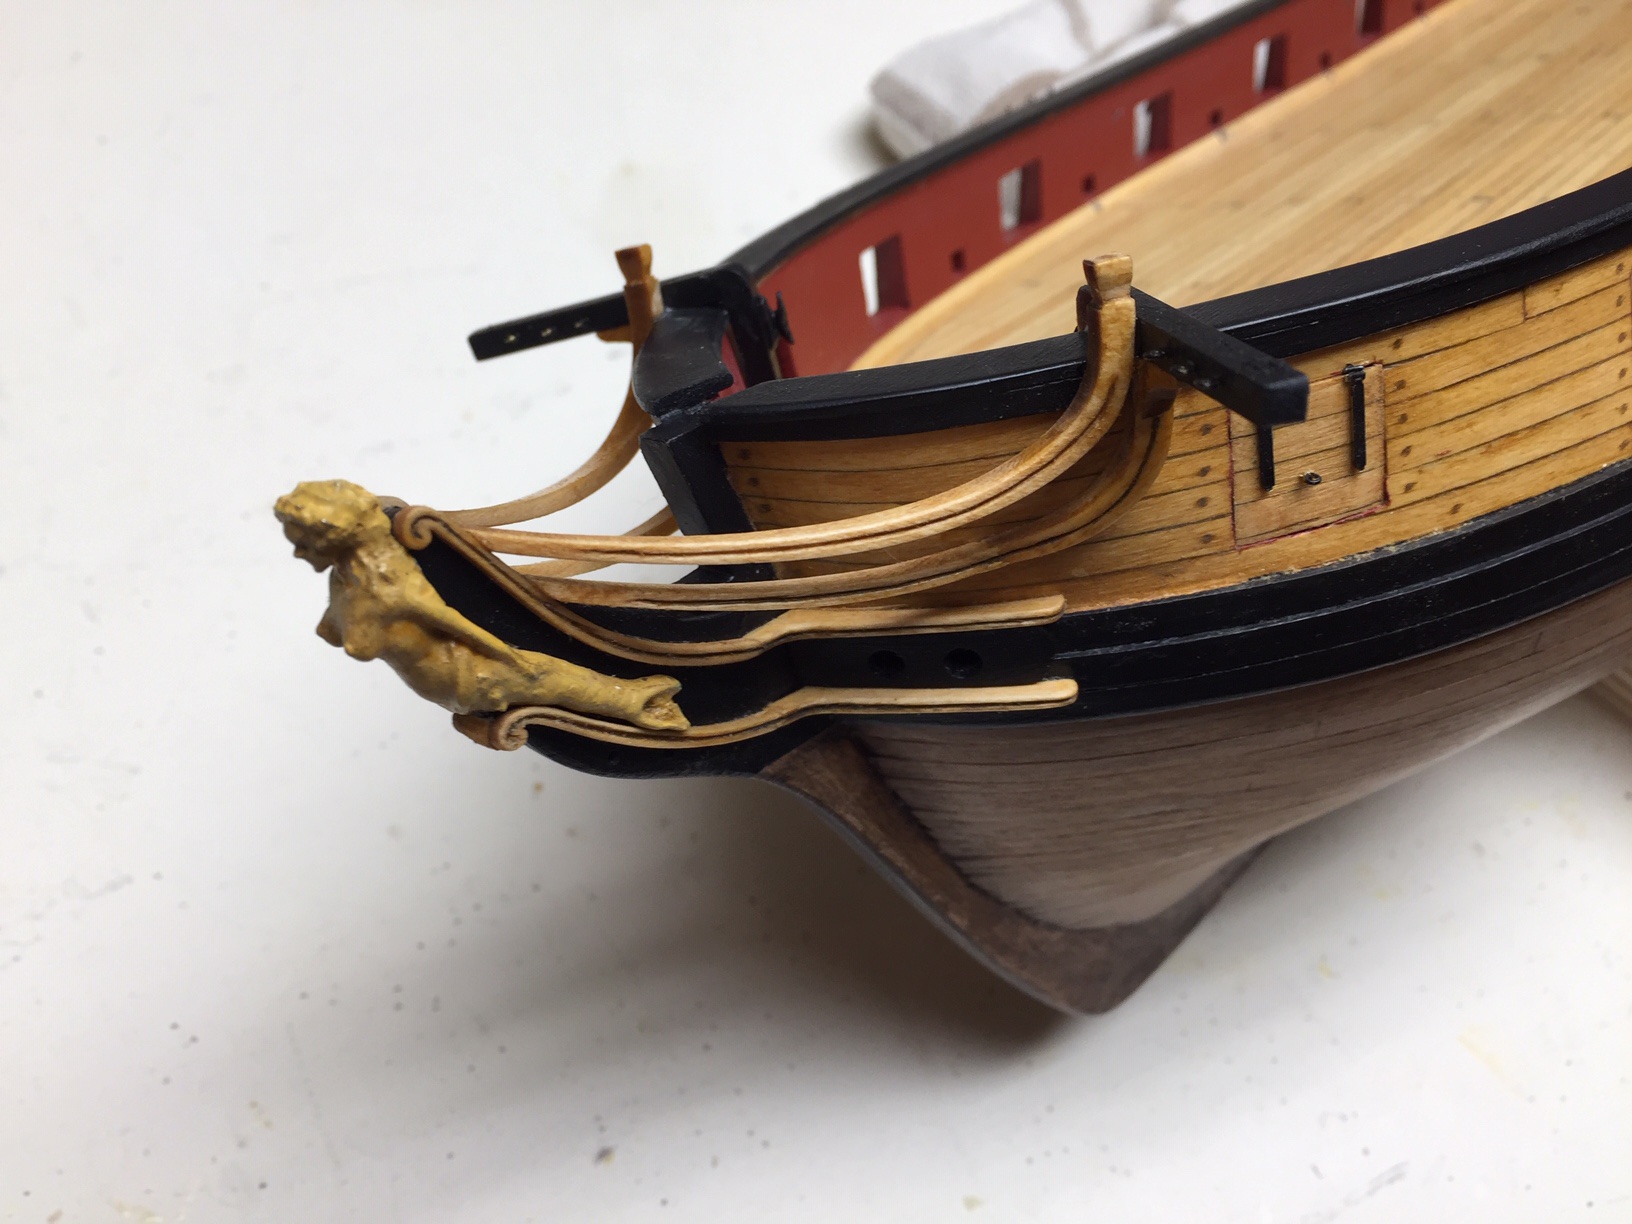
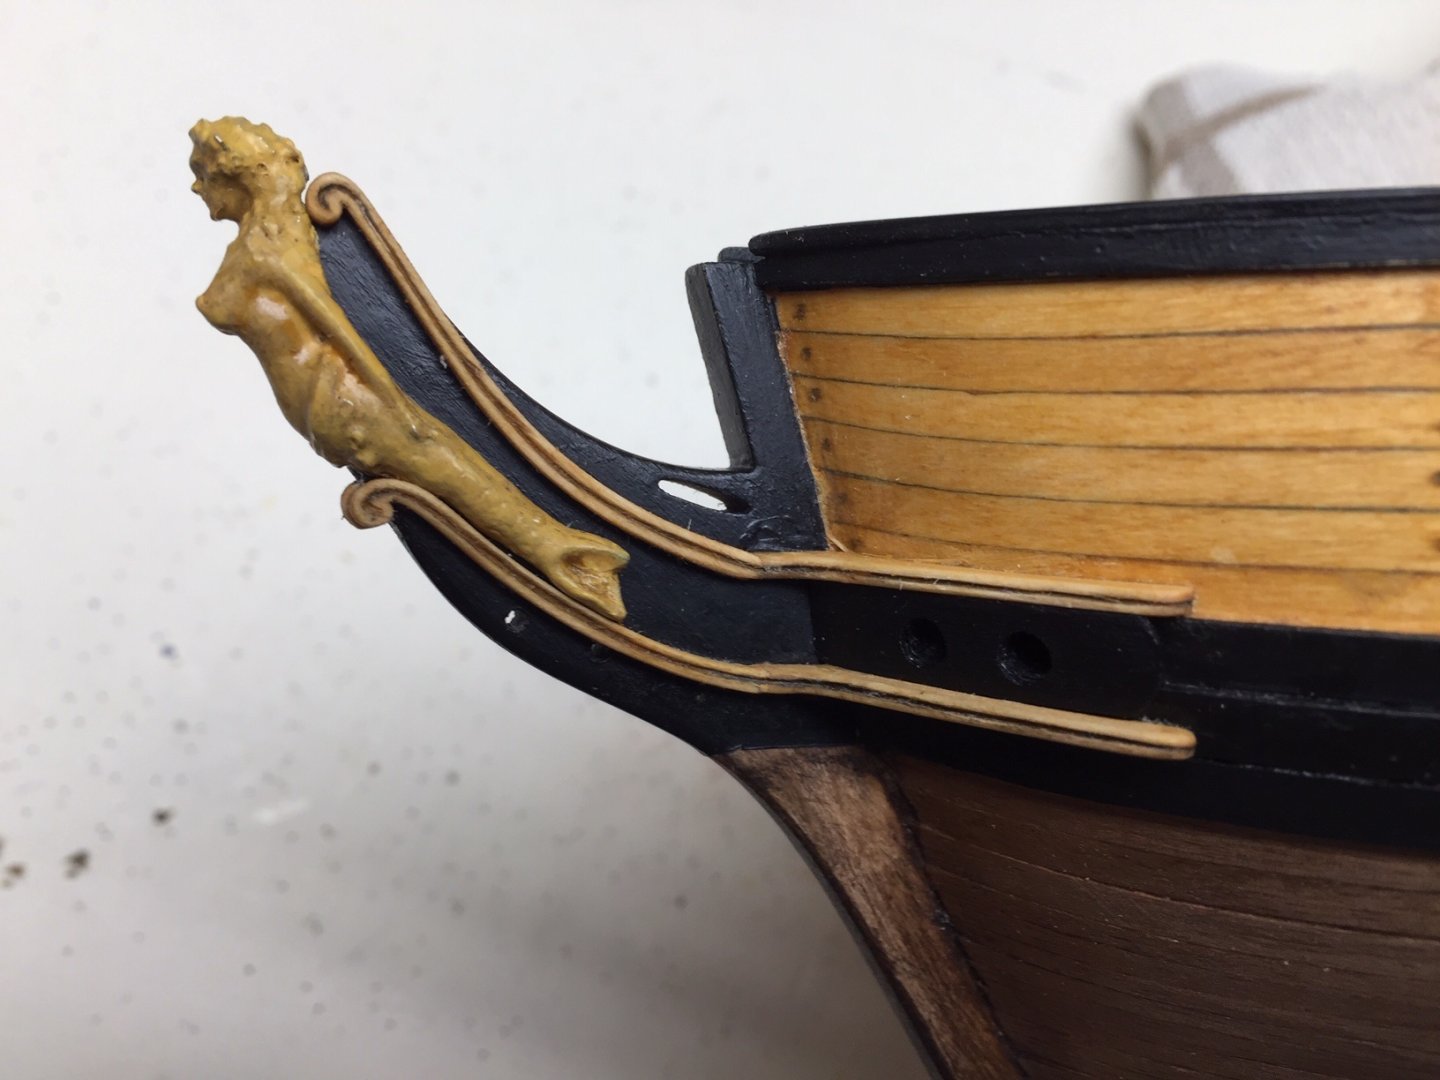
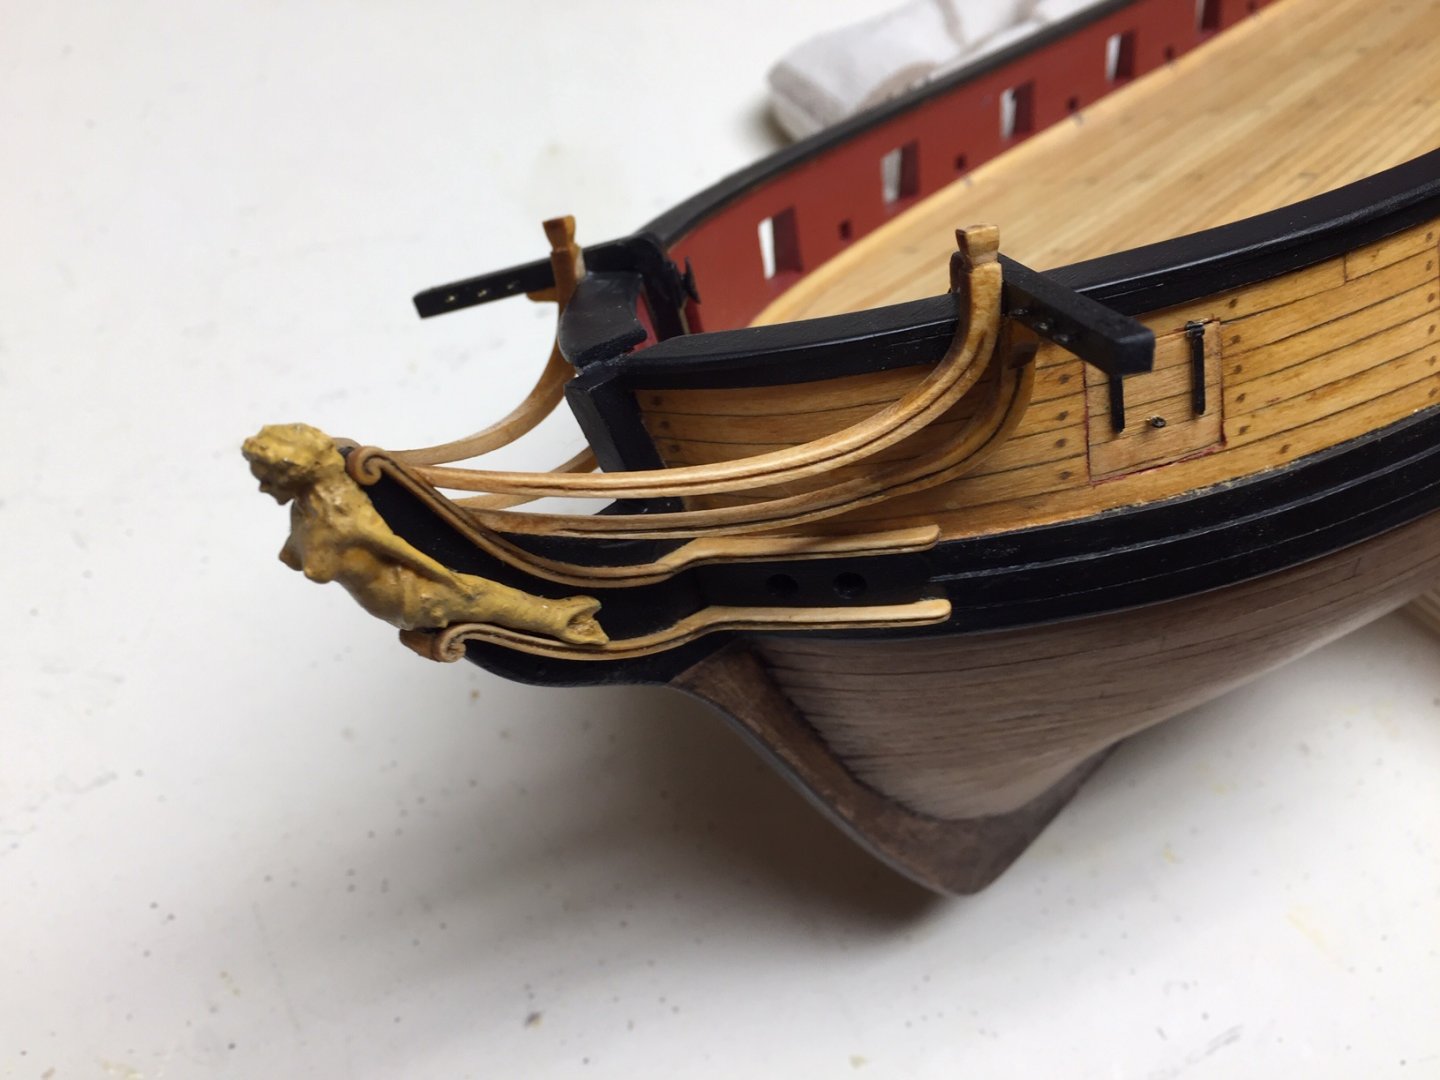
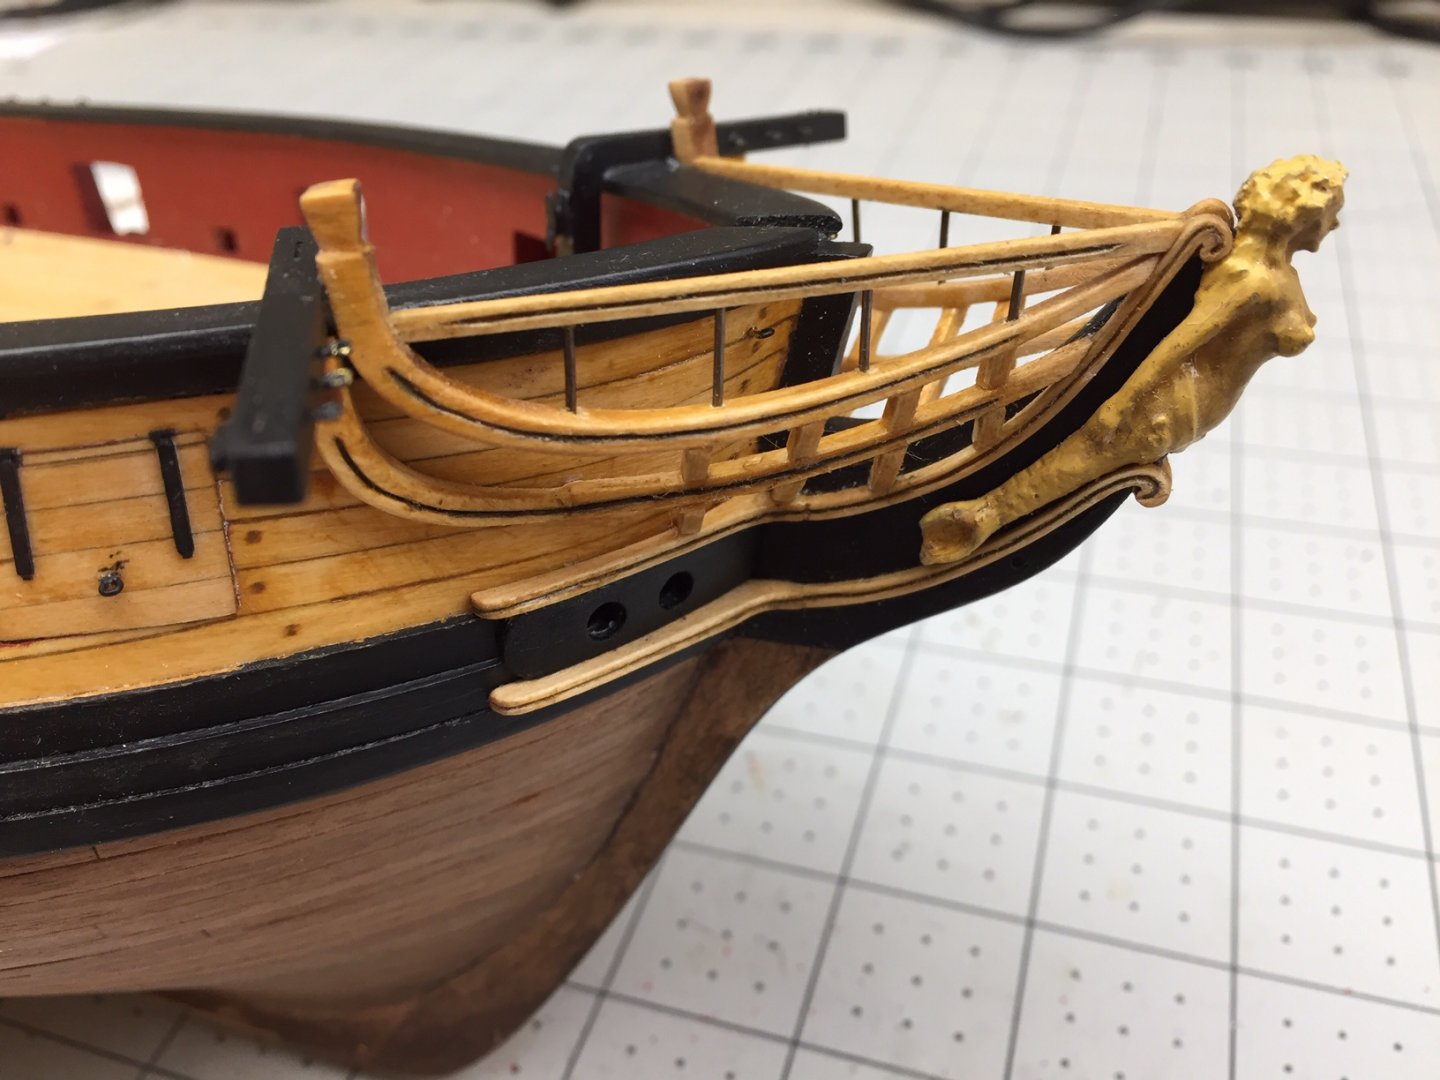
Bow details are next, and probably like a lot of people, I was a bit intimidated. Instructions in manual were excellent and made it not too difficult. I would have struggled a lot if all I had were plans and a couple of photos. In many cases like this, I learned a lot from the instructions. I wish all model ship kits had instructions like this one. I can tell Chuck put a lot of work into it, and it made life a lot easier for me. The most difficult part was fitting in the head timbers. Each one had to be custom fit and no two were alike. On some I got lucky and got a good fit without too much trouble. On others, it took a bunch of tries to get something that fit halfway decent. Once again, at a certain point, I decided that was the best I could do, and moved on. I used the metal figurehead provided in the kit, filing and test fitting before finishing the bow details.
-
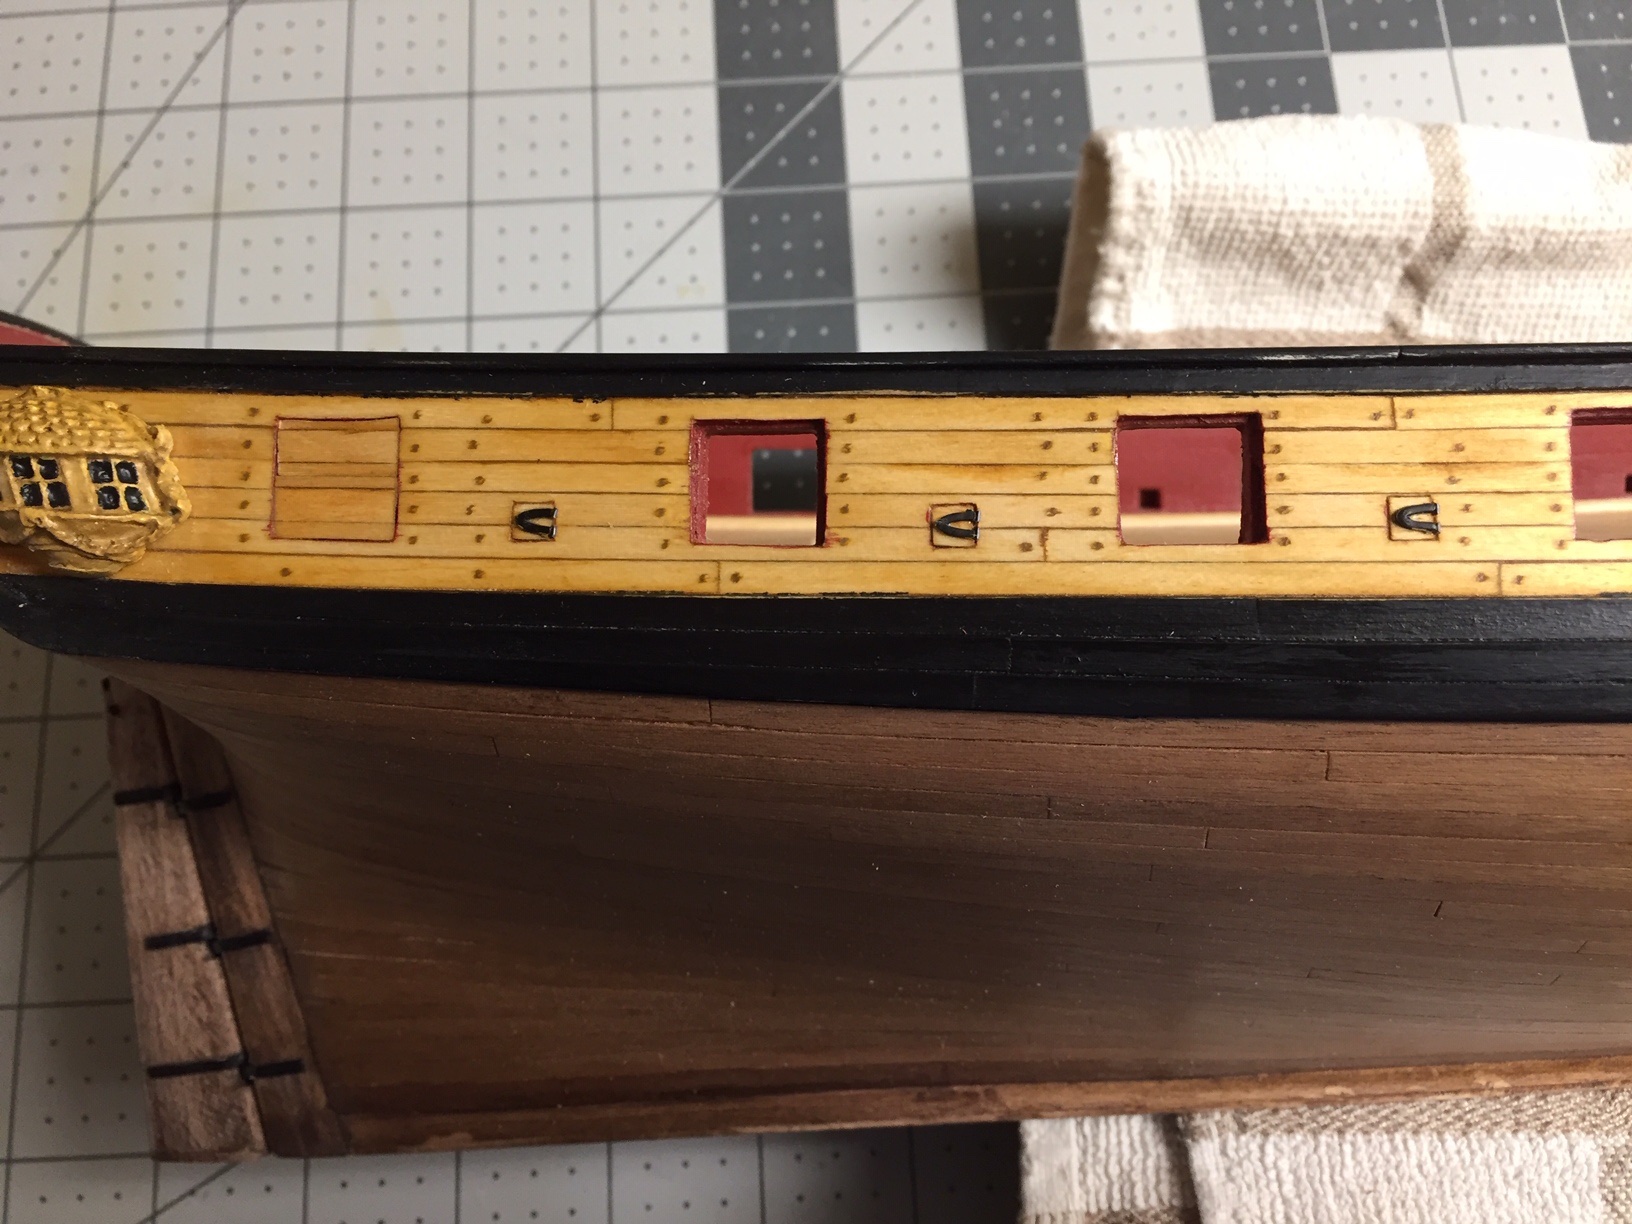
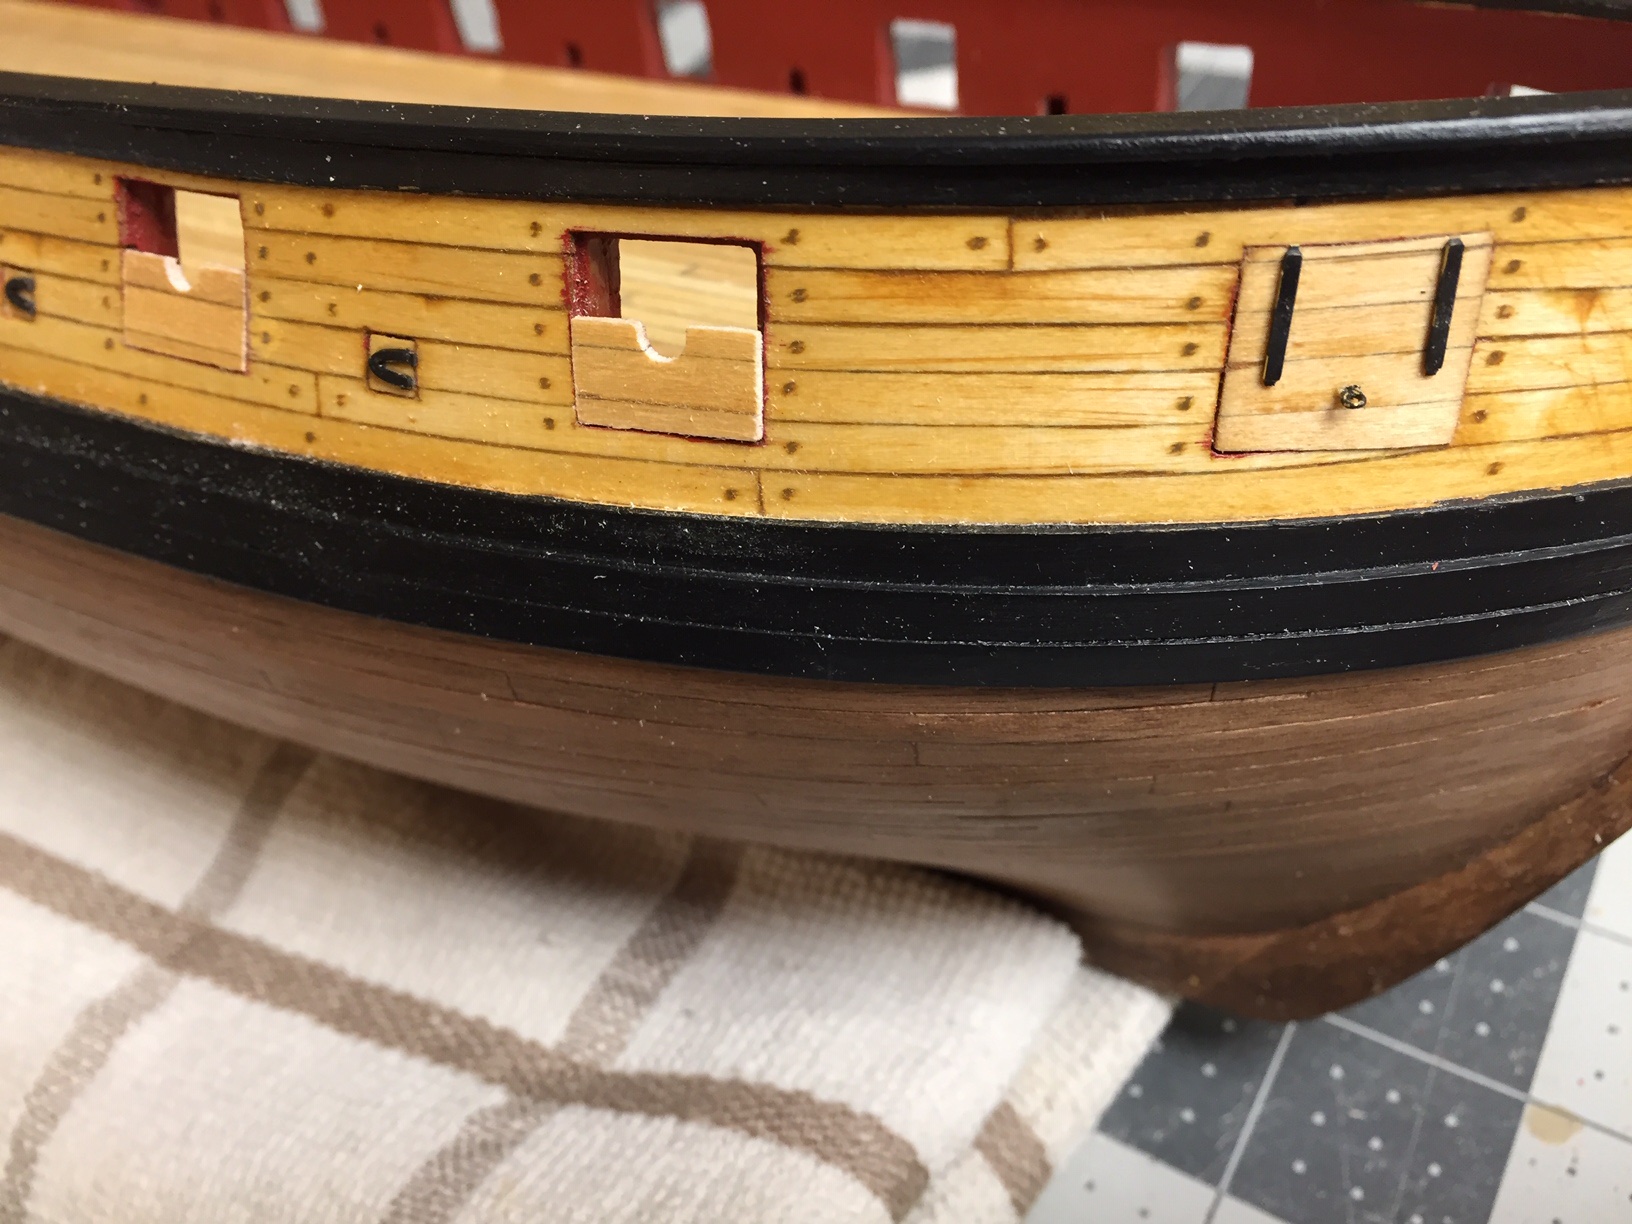
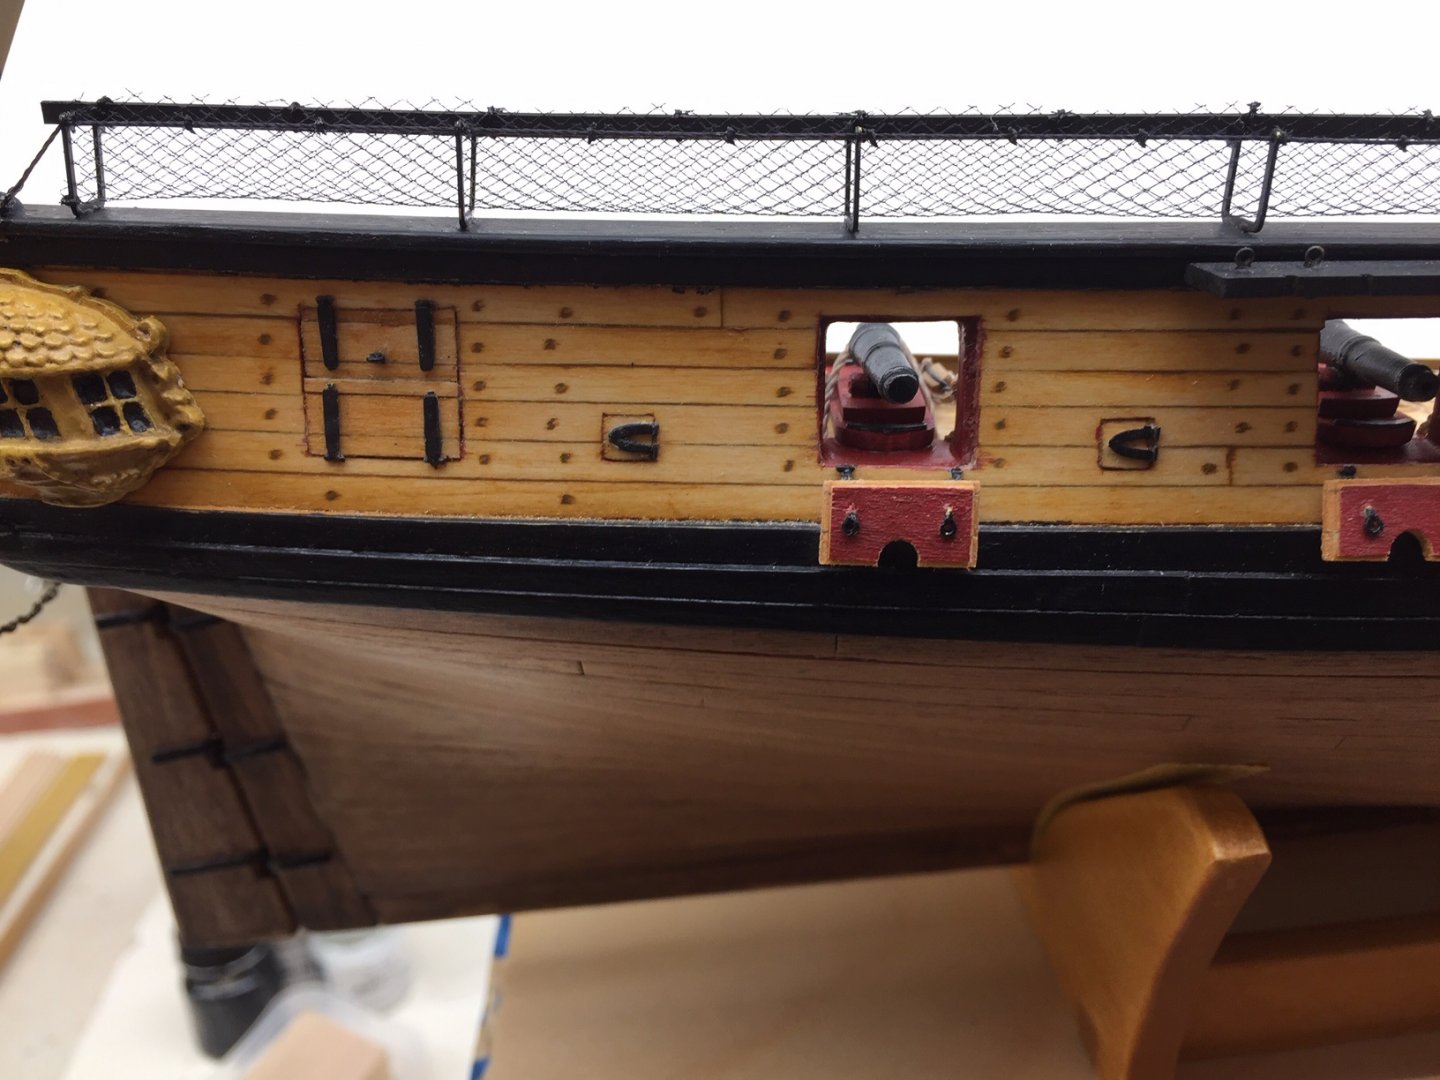
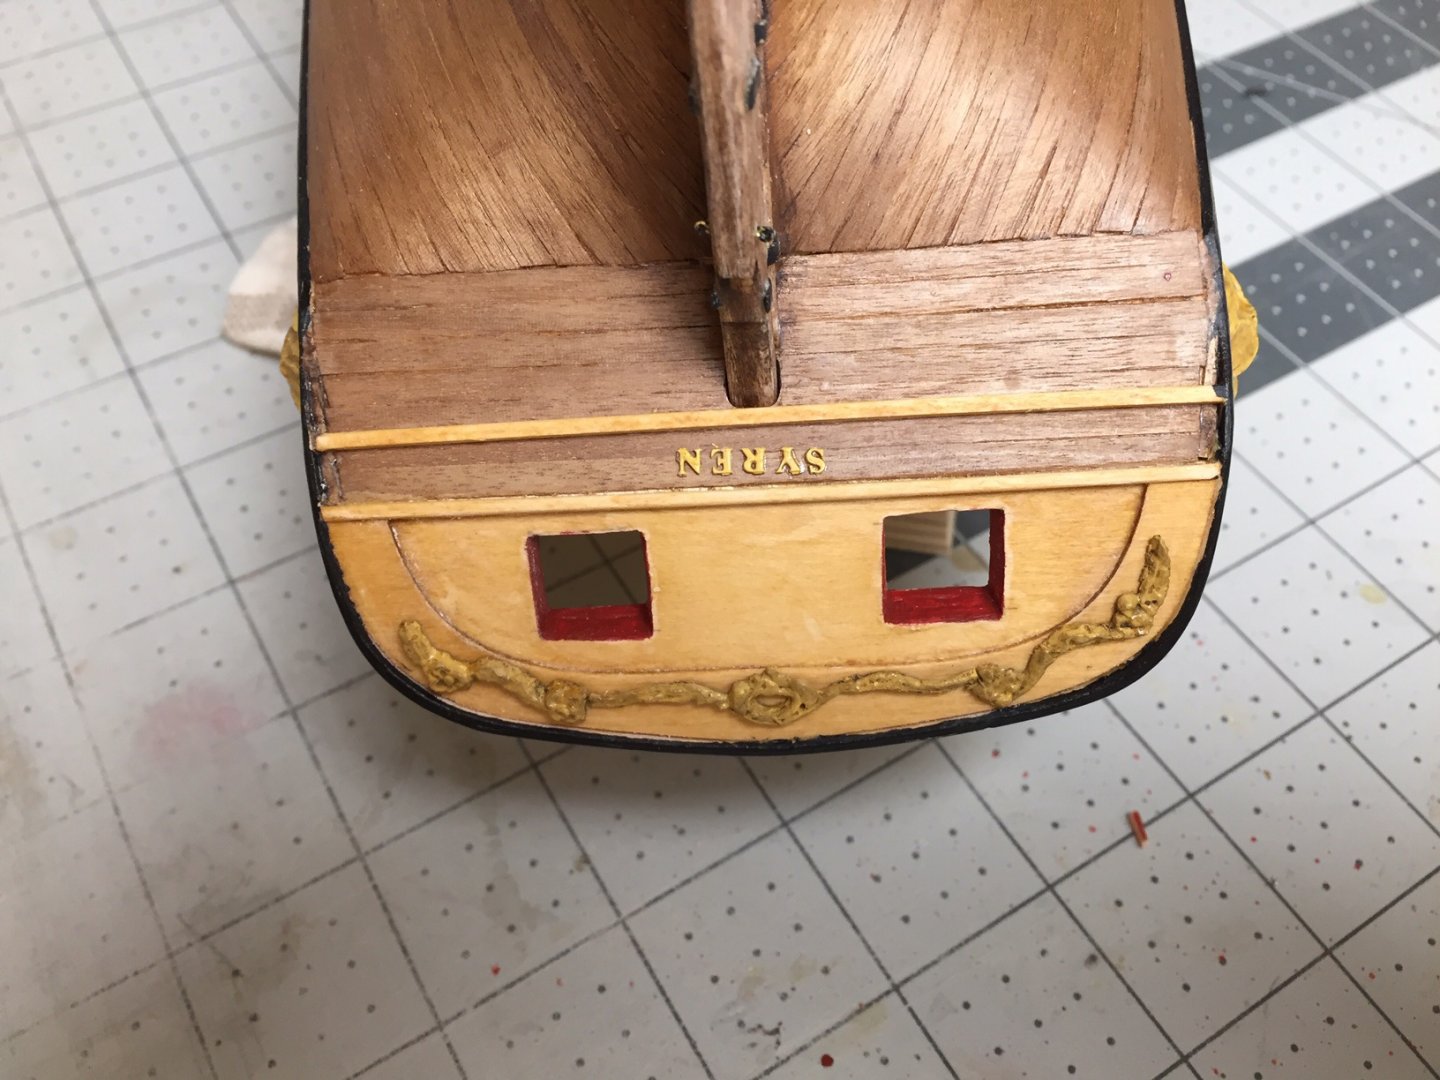
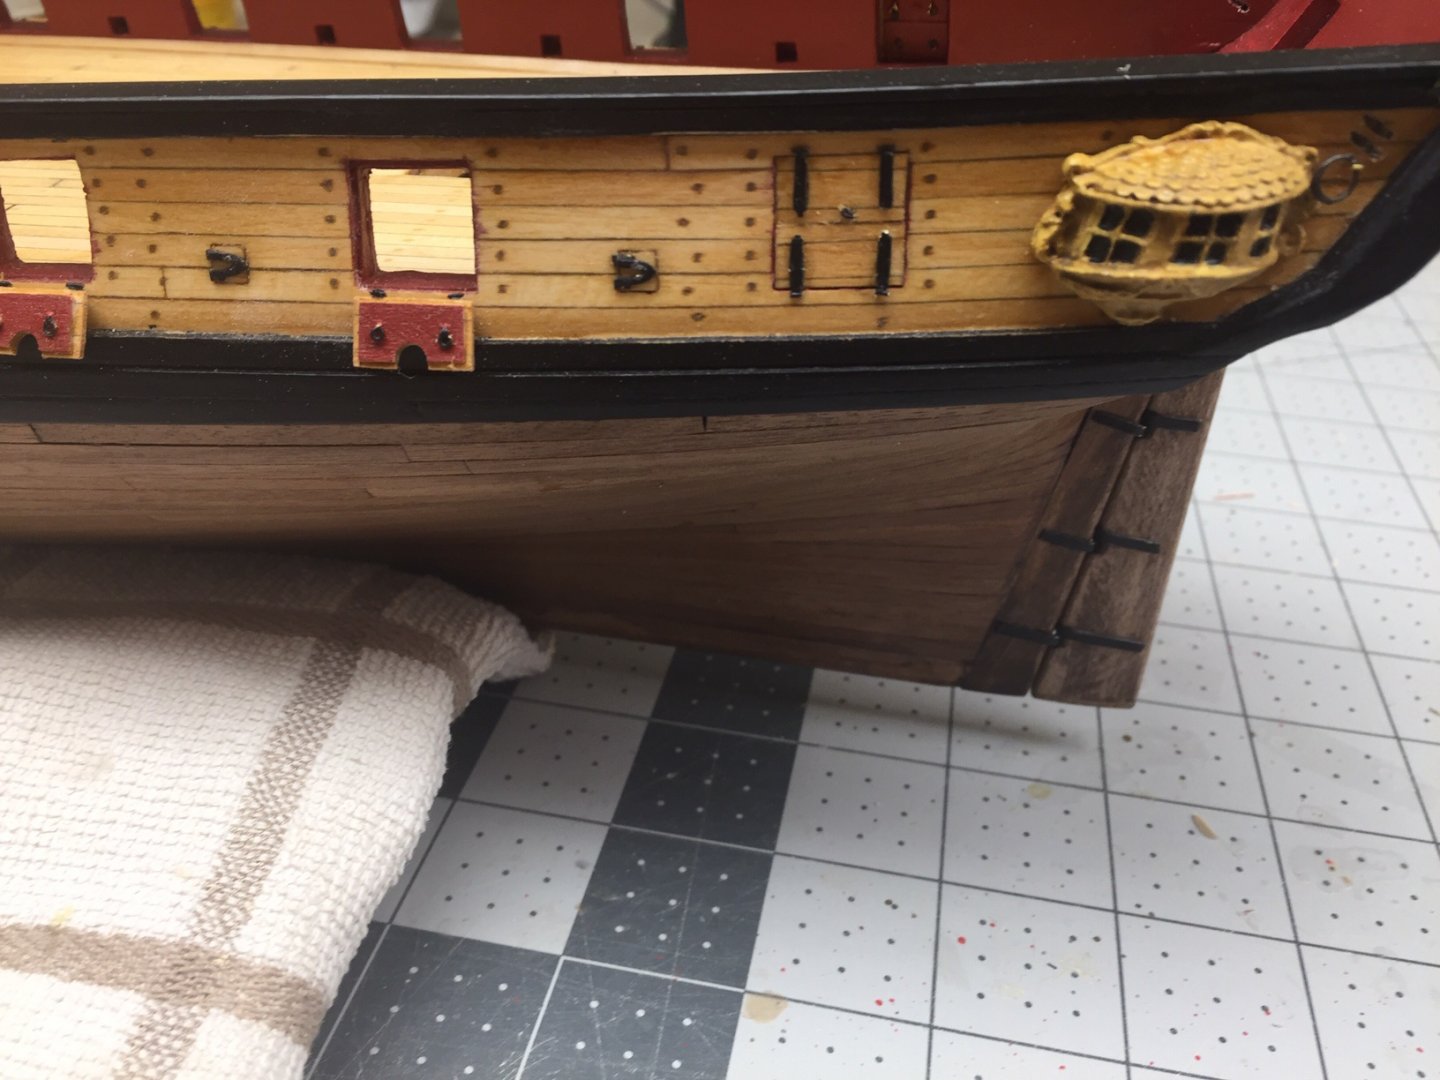
You're right, I decided early on to double-plank instead of copper. Just like the look of wood, and didn't trust my skills at doing copper. Chapter 9 adds details to the hull. What I remember are the gun ports. I have a hard time repeating stuff over and over, and I remember thinking I should have selected a ship with 4 guns instead of 20! It certainly makes me think about building a ship with more than 20 guns in the future. Gun ports came out pretty good along with other details. I used the metal badges and scrollwork provided in the kit. Gun ports and small metal pieces were my first experience dealing with tiny parts and you can tell by the Syren lettering on the stern. I had a hard time mixing a "wood" color to match the golden oak stain I used on the bulwarks. I got it close, but not as good as I wanted. I used Model Masters acrylic paint for everything on the ship. I should have made a jig holding the hull vertical, bow down, so I could be more accurate placing the letters. This was also before I learned to use the wax tips for holding and placing tiny parts. On my Syren the sailor that did the lettering had had a bit too much grog!


-
Since I double-planked the hull, the only part of Chapter 8 I did was the rudder. I stained the rudder in an effort to match the hull. Looking back, should have gotten a piece of walnut for the stern post and rudder, but I didn't think about this until later. I remember having great difficulty getting gudgeons to follow shape of hull and transition from stern post to planking. So I made them shorter so they fit along the stern post. This was a decision based on frustration at not being able to get a good fit.