HOLIDAY DONATION DRIVE - SUPPORT MSW - DO YOUR PART TO KEEP THIS GREAT FORUM GOING! (Only 20 donations so far - C'mon guys!)
×


desalgu
-
Posts
363 -
Joined
-
Last visited
Content Type
Profiles
Forums
Gallery
Events
Everything posted by desalgu
-
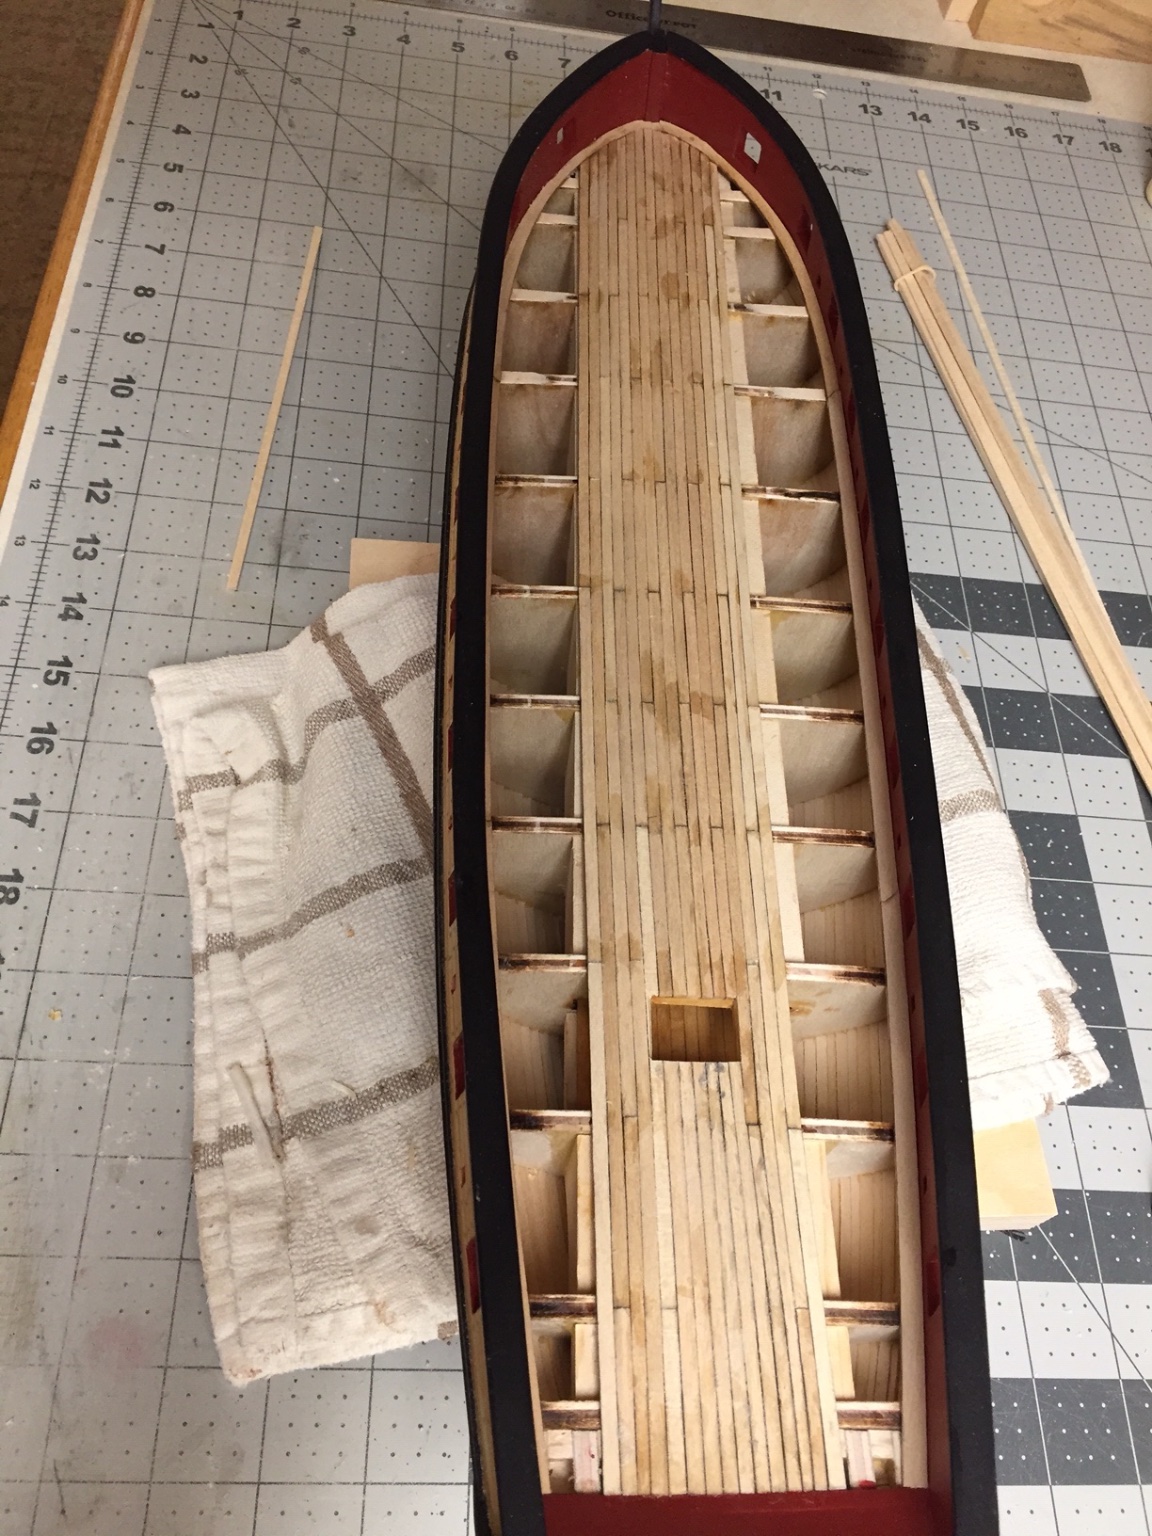
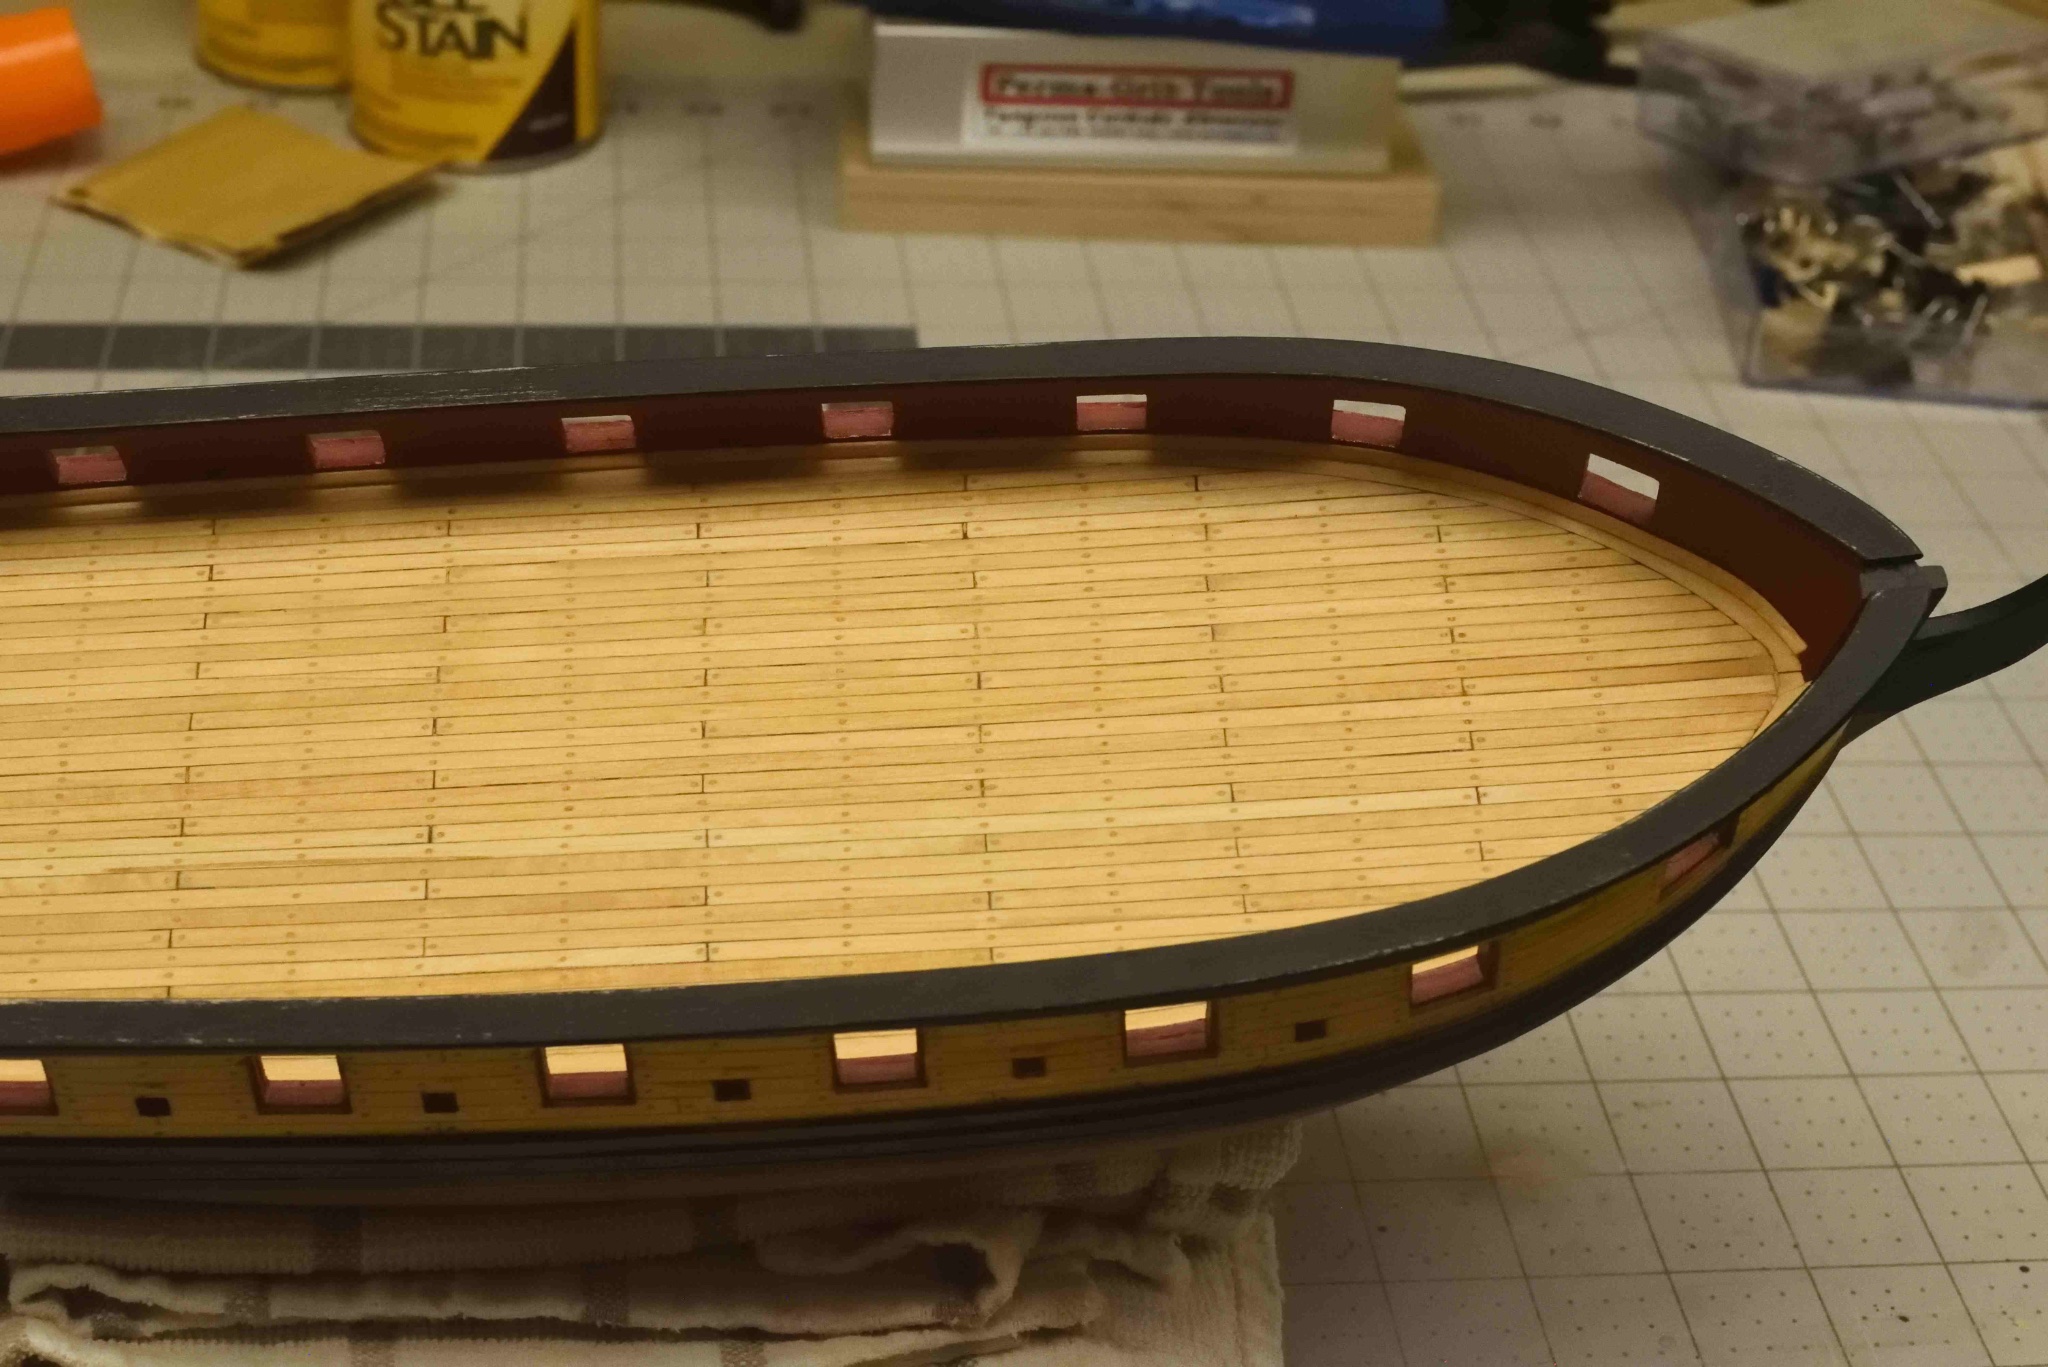
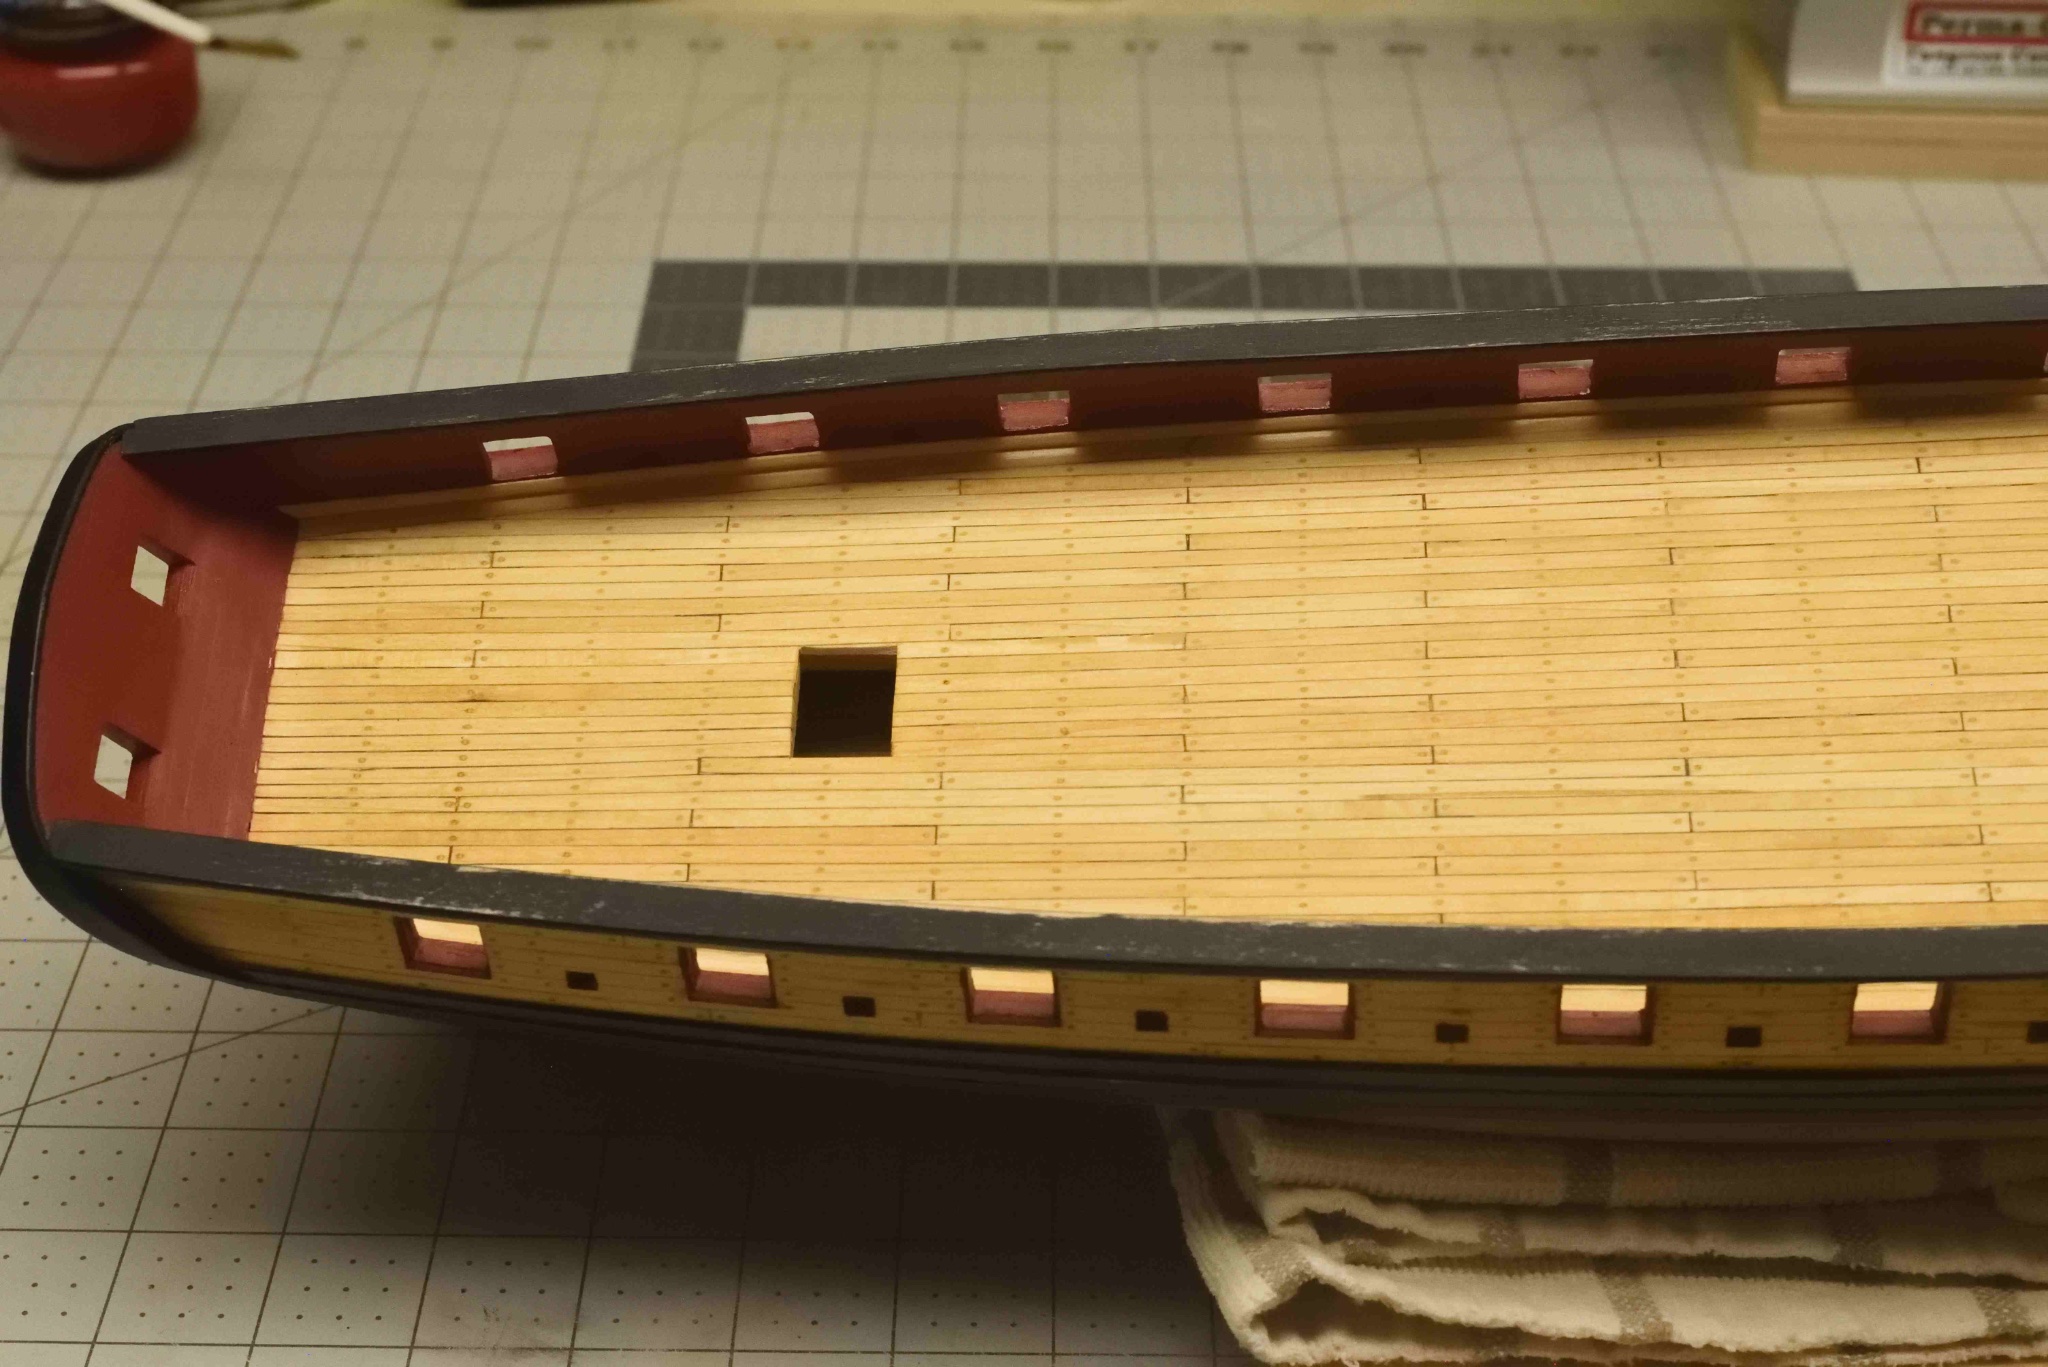
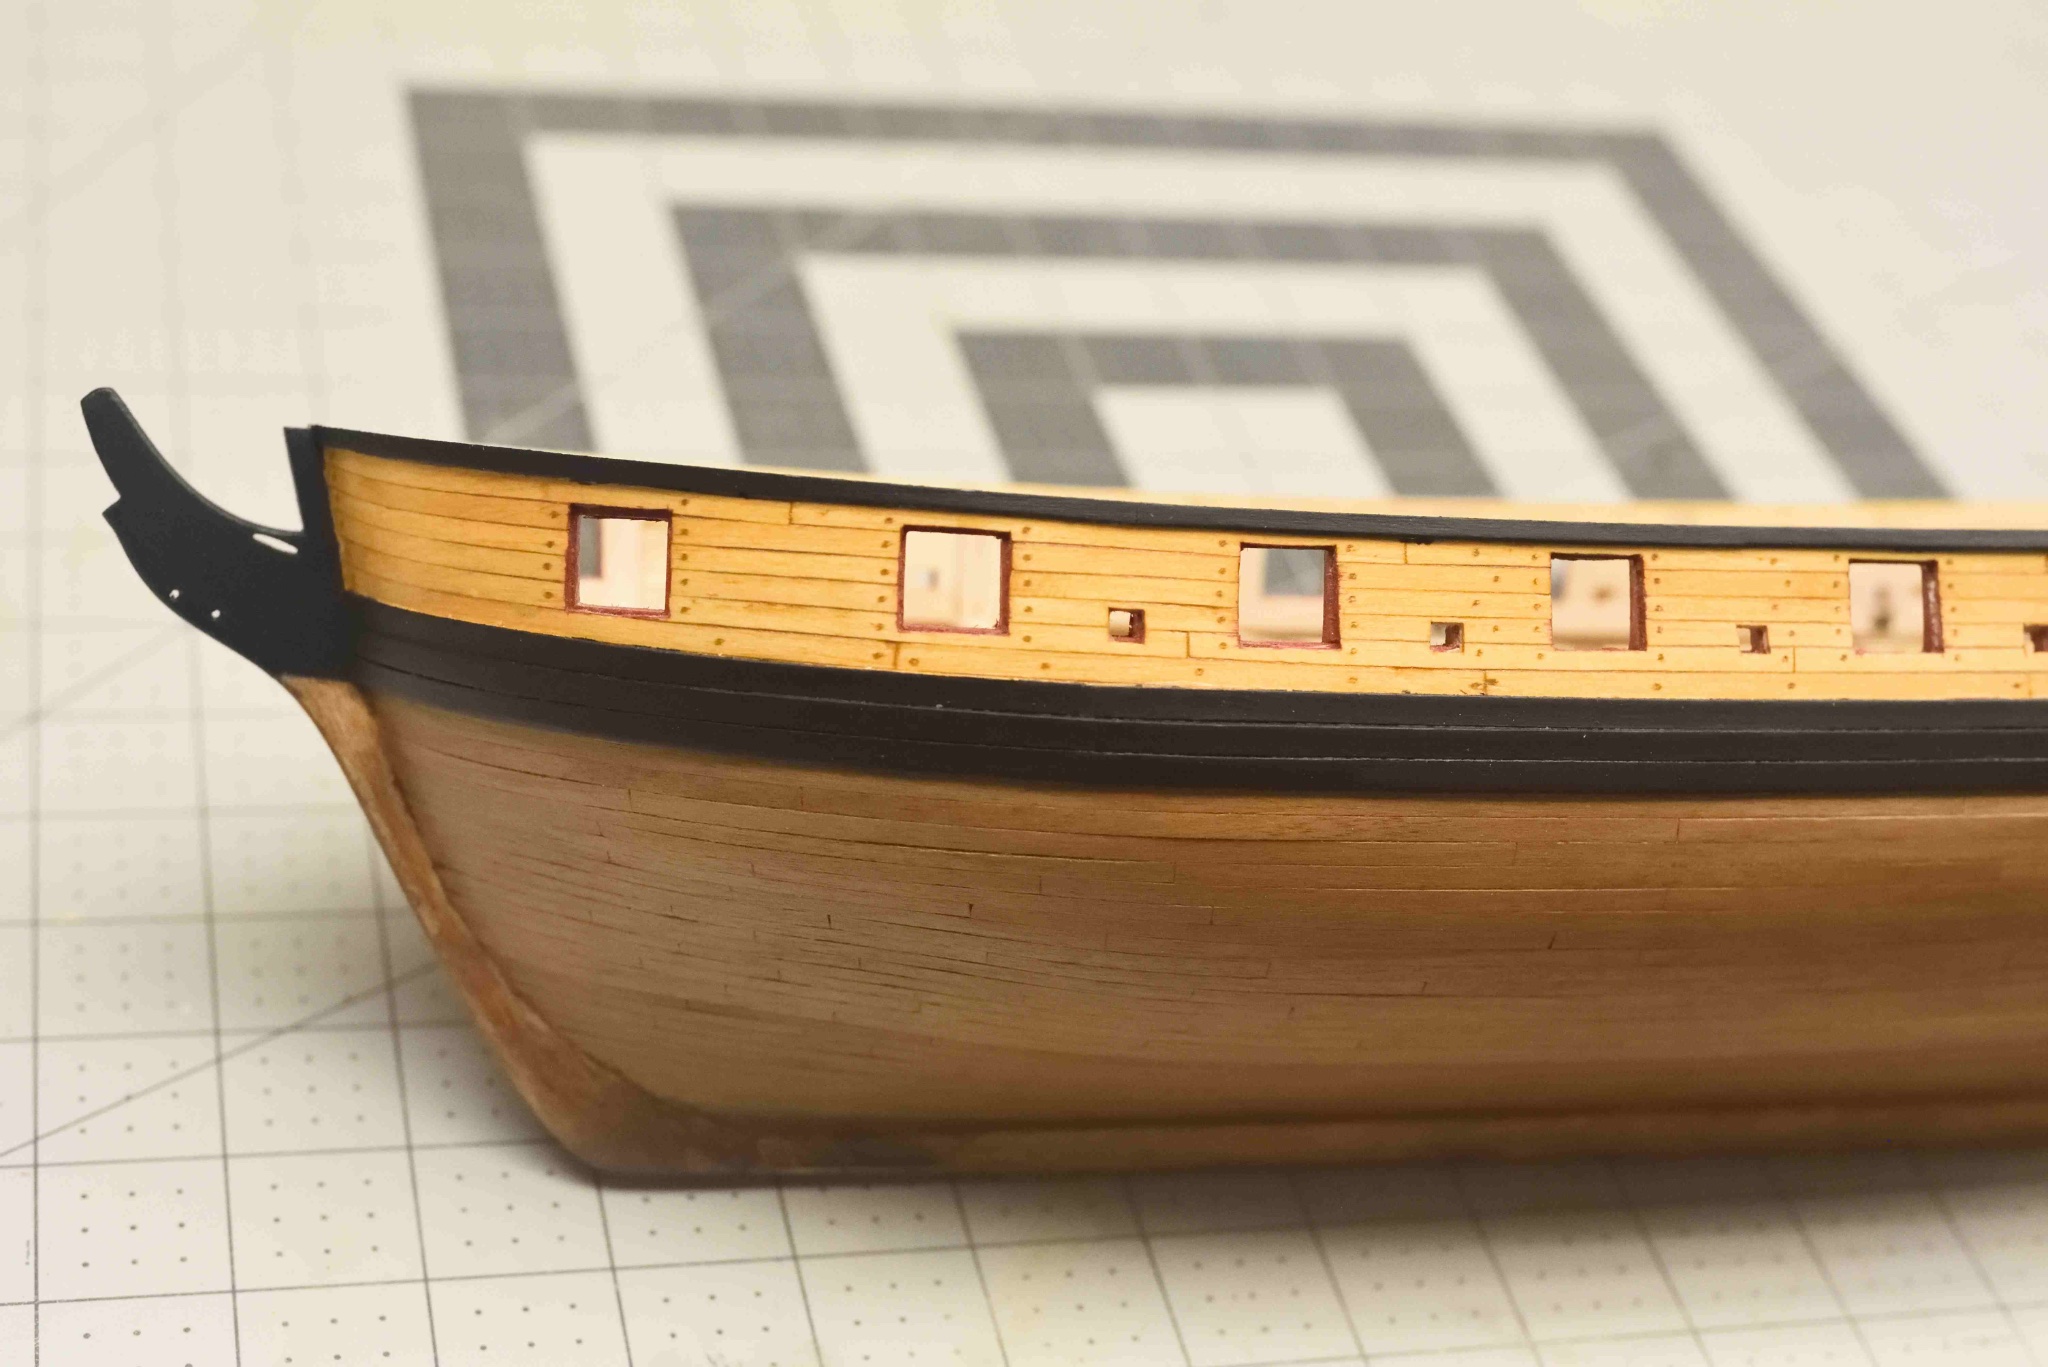
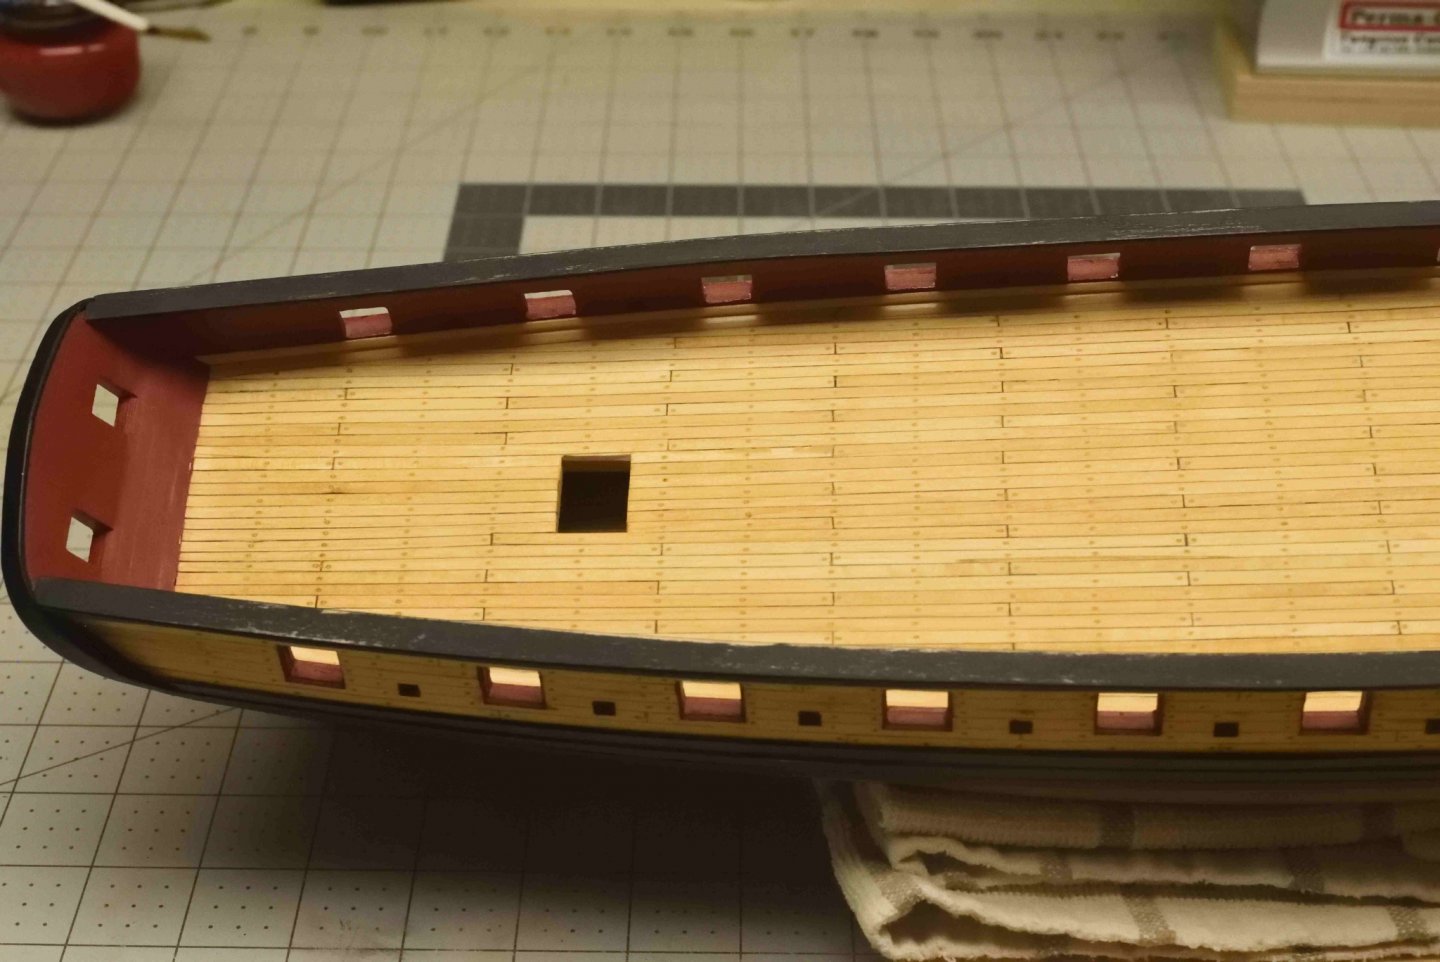
Deck planking was next (Chapter 7). I decided not to do the joggled planks at the bow. Deck planking was not difficult and this simplified it more. I made this decision based on my skill with little details like this. I think if I was to do it again, I'd go ahead and try it.


-
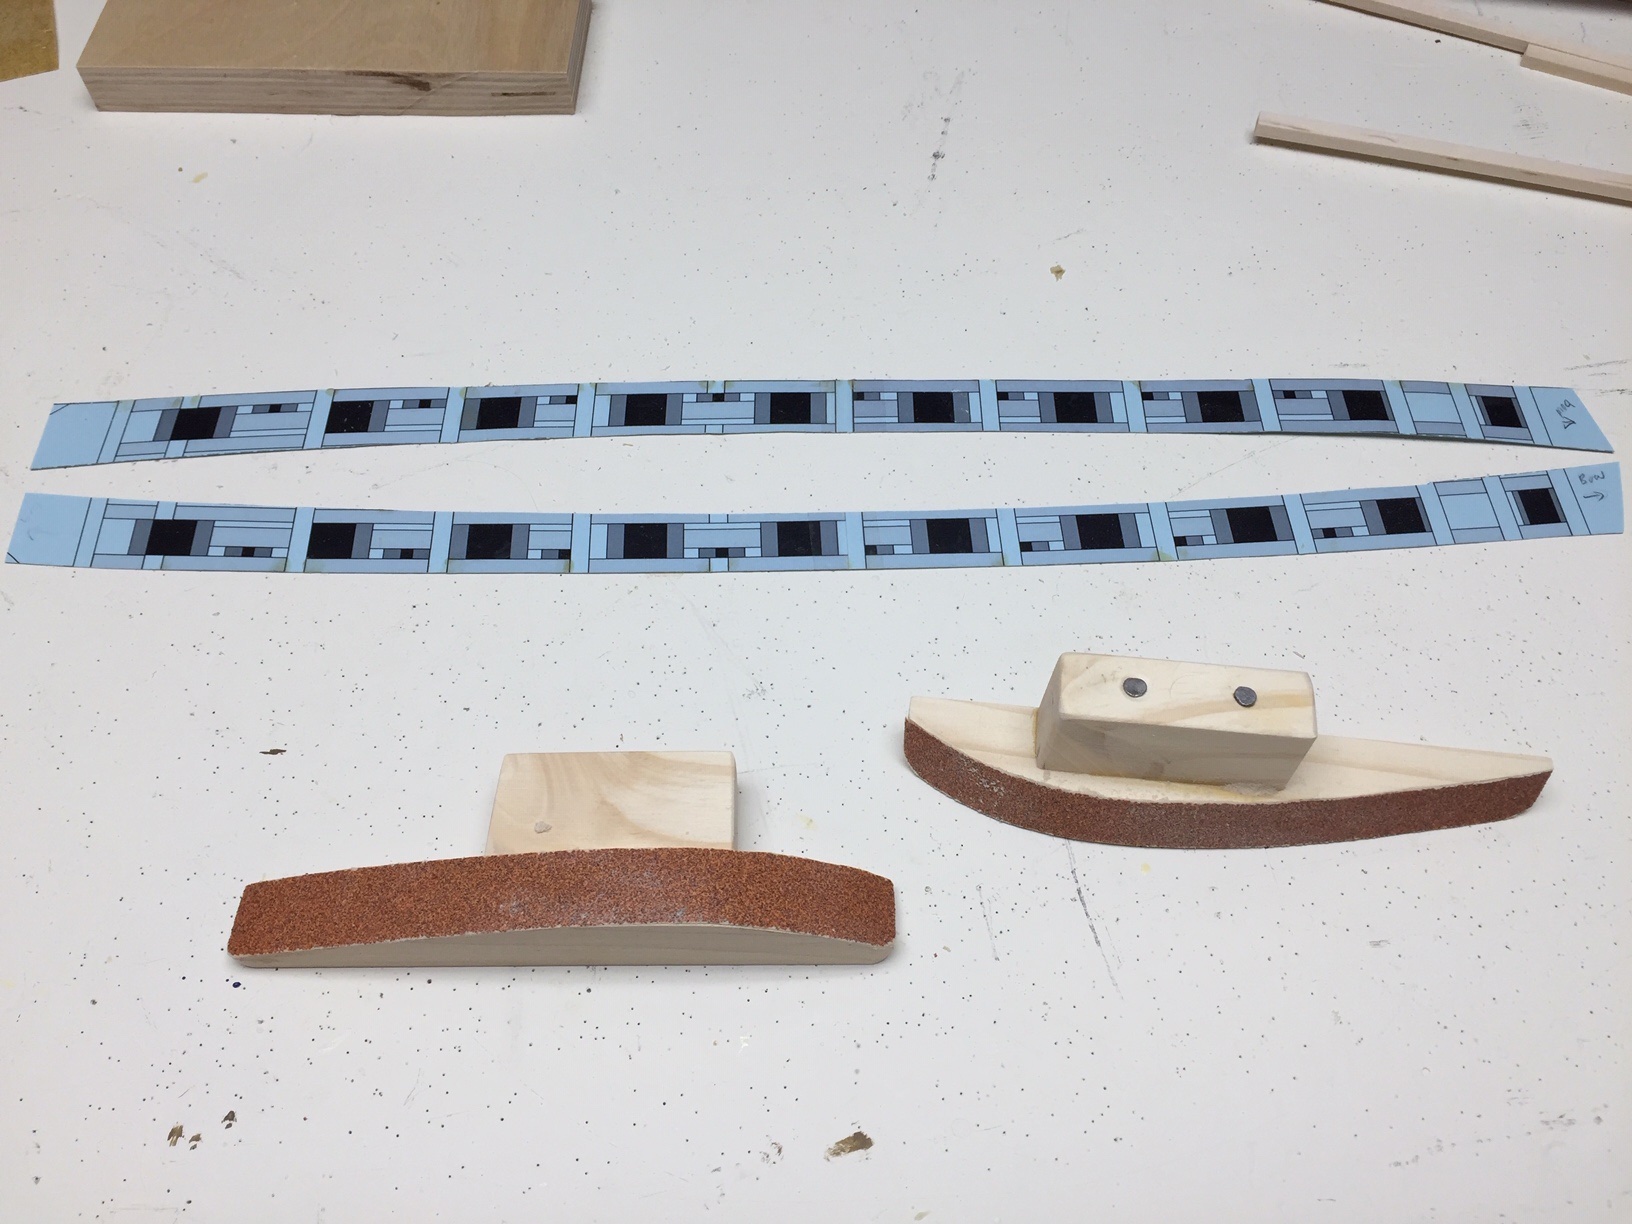
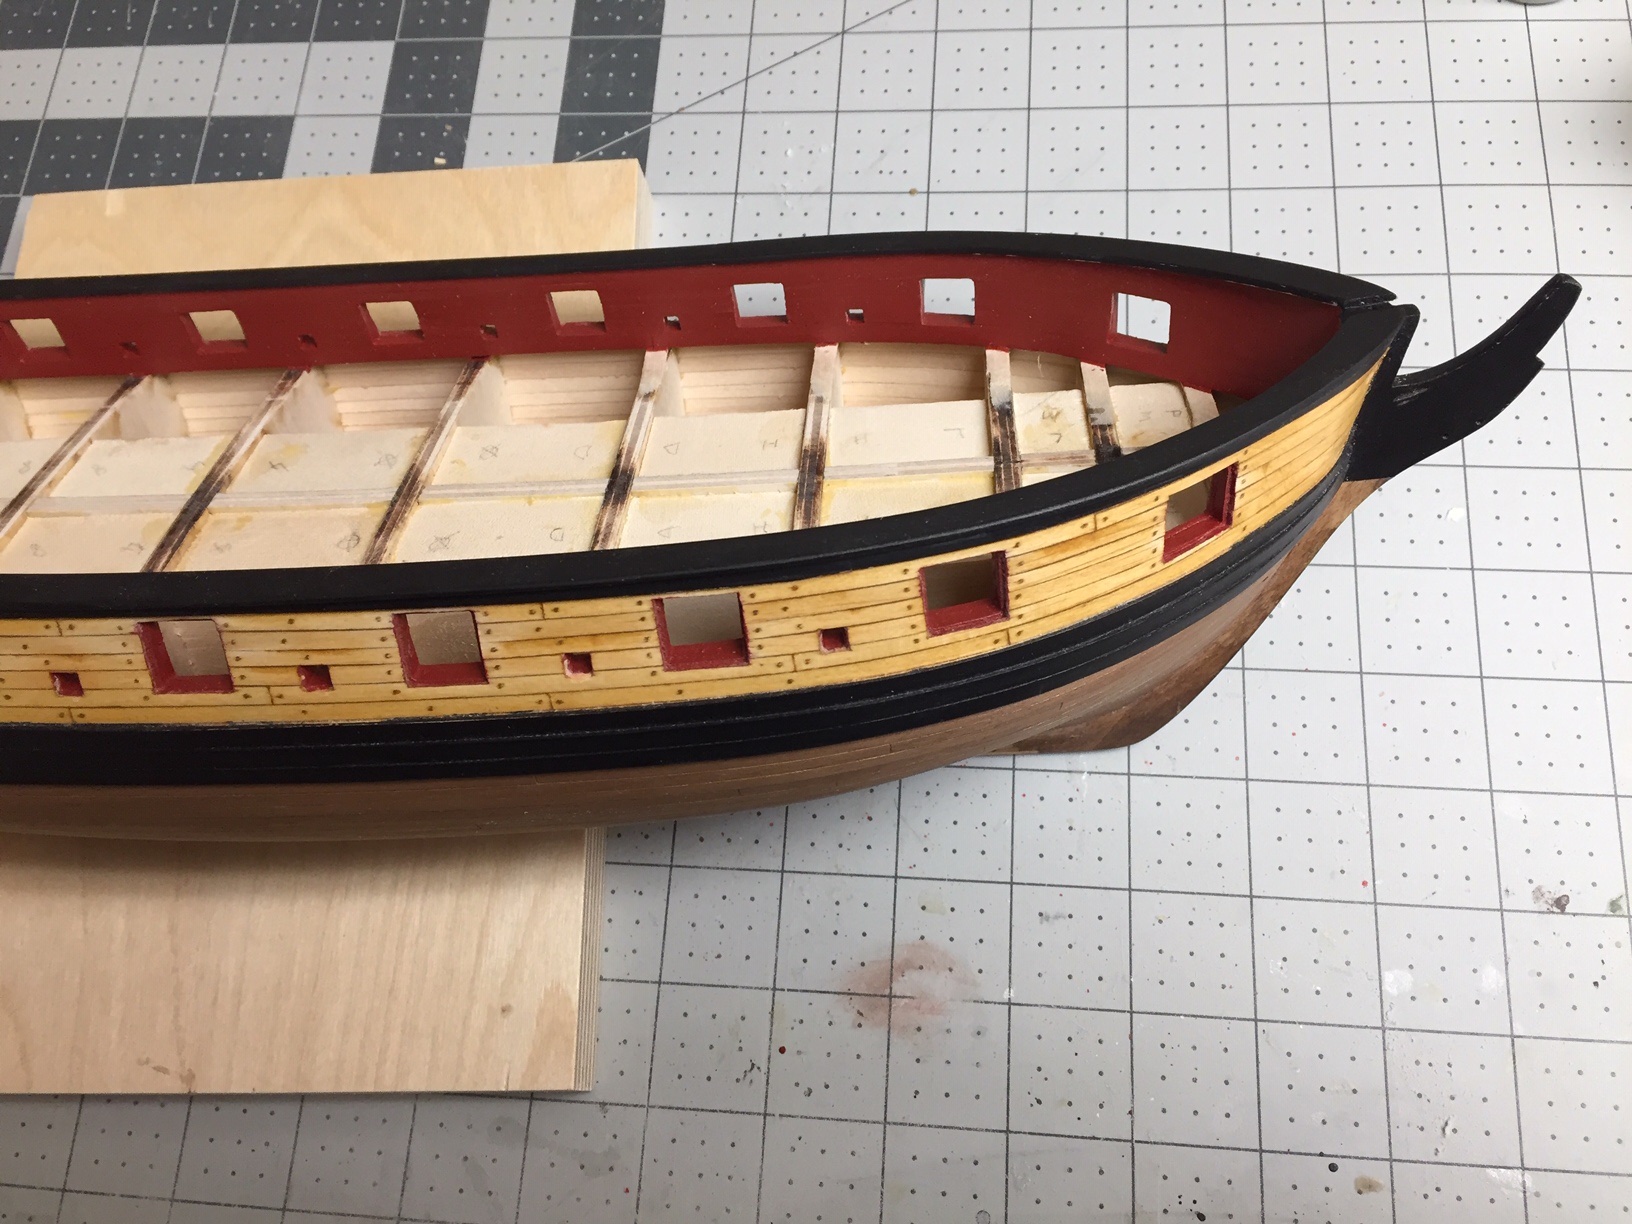
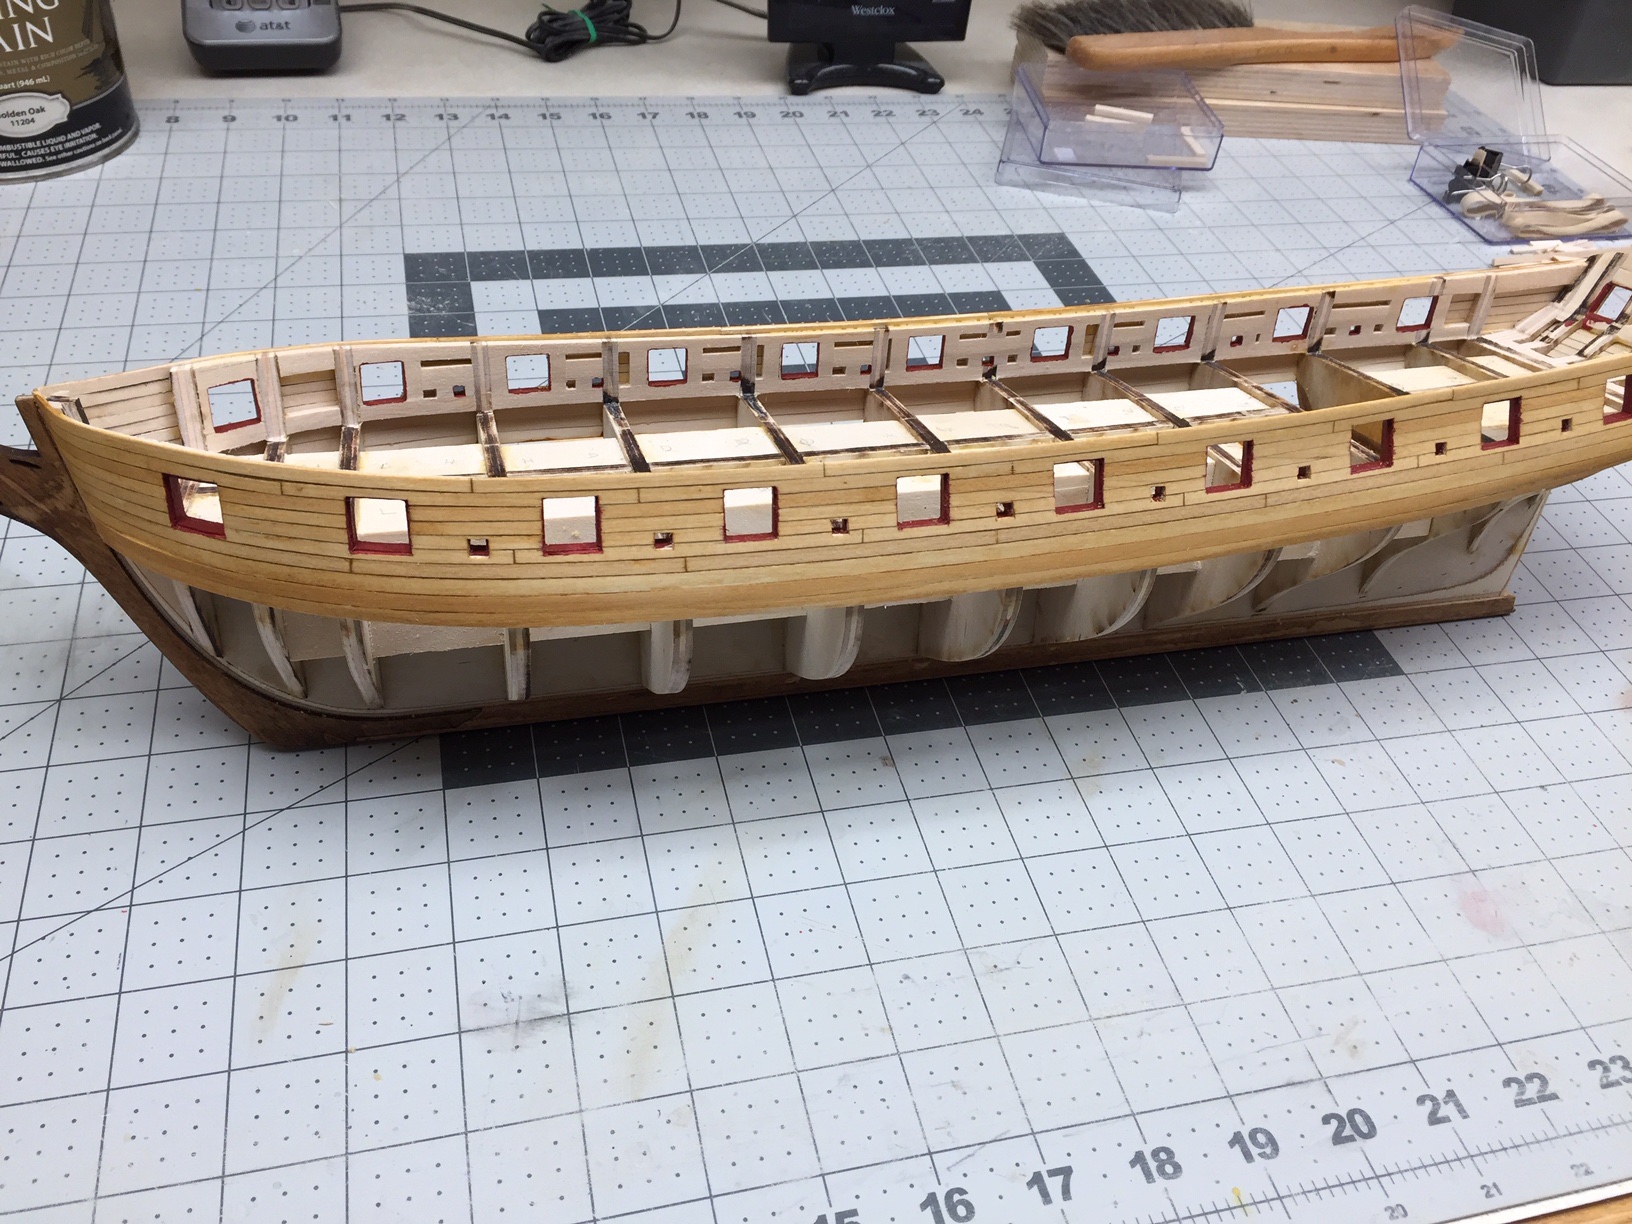
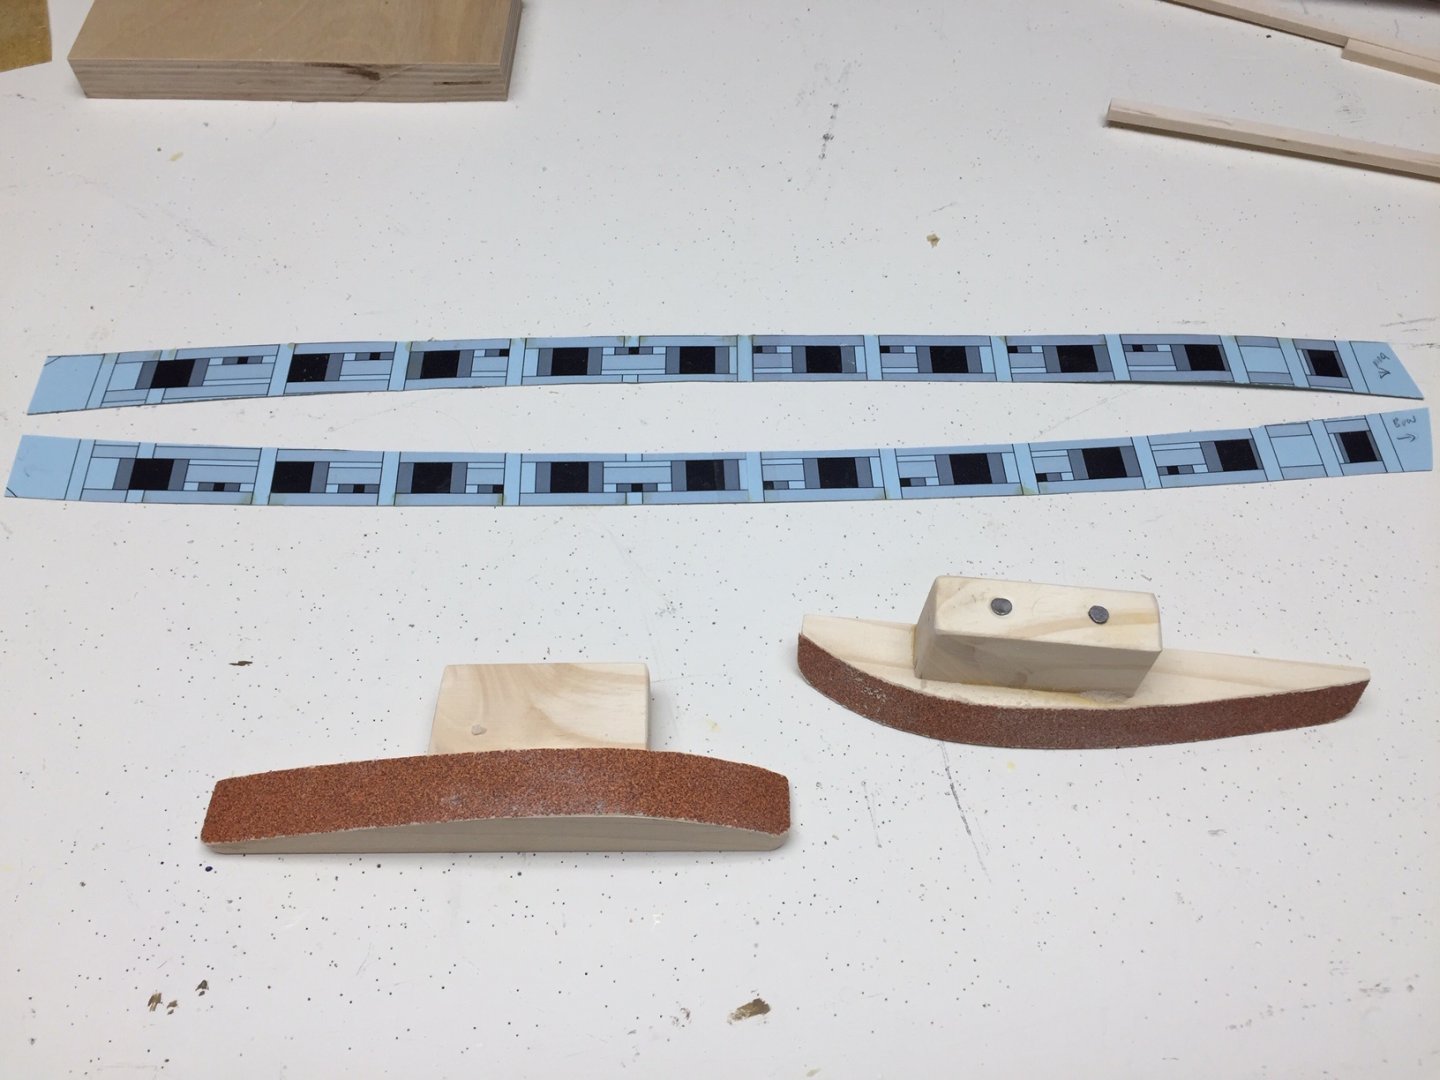
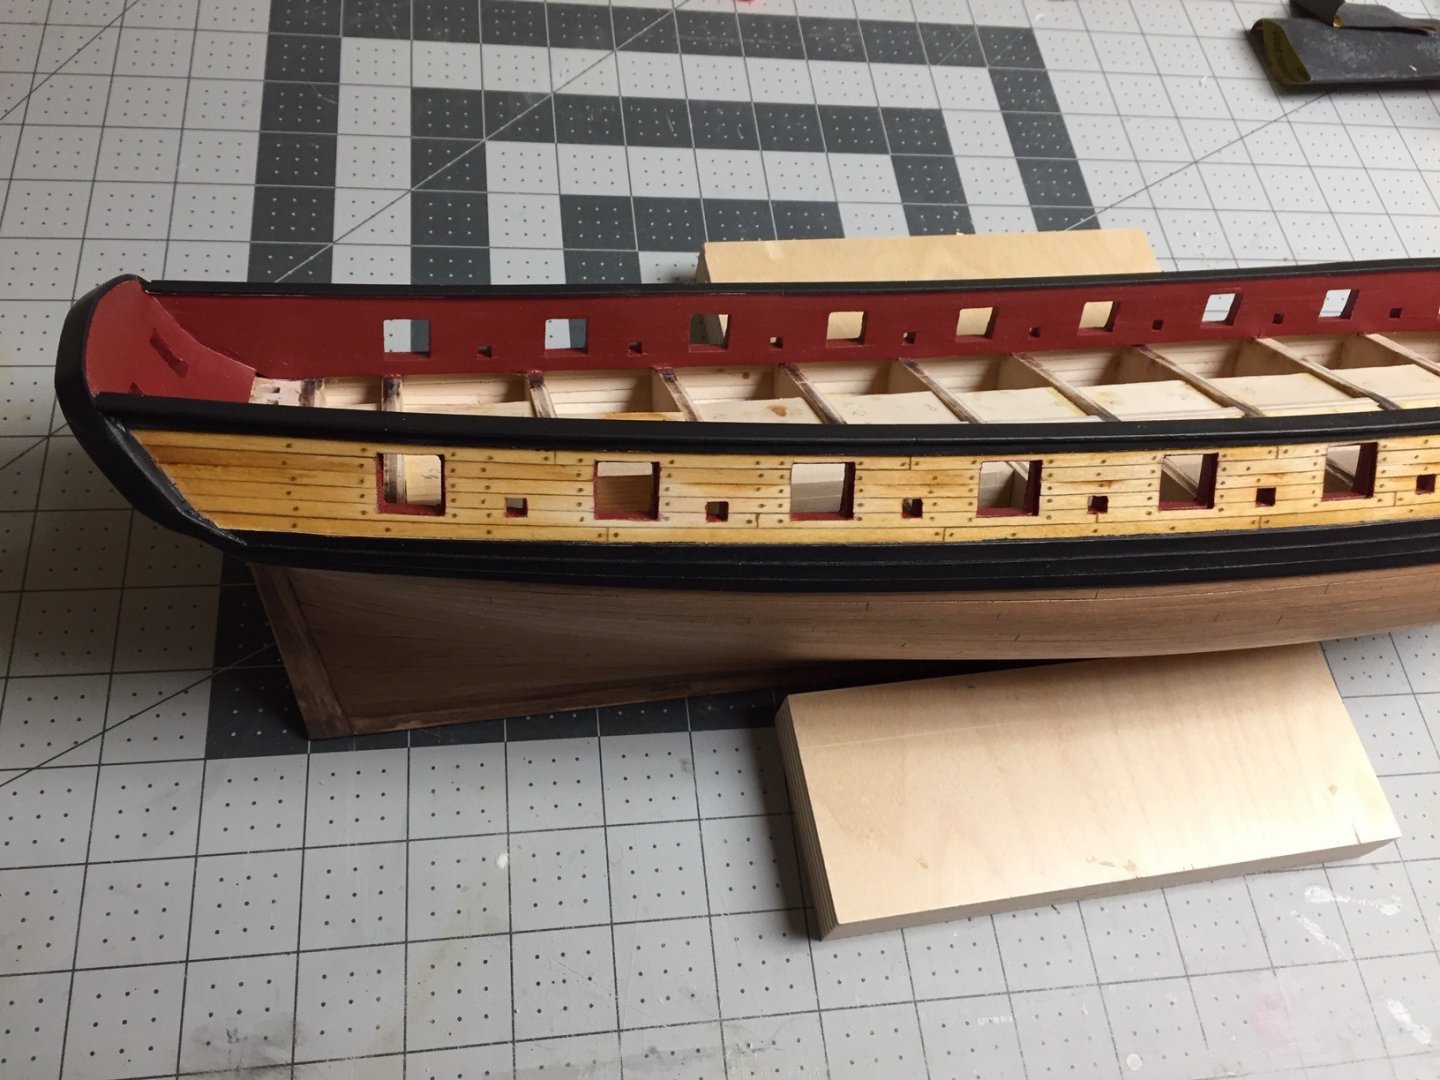
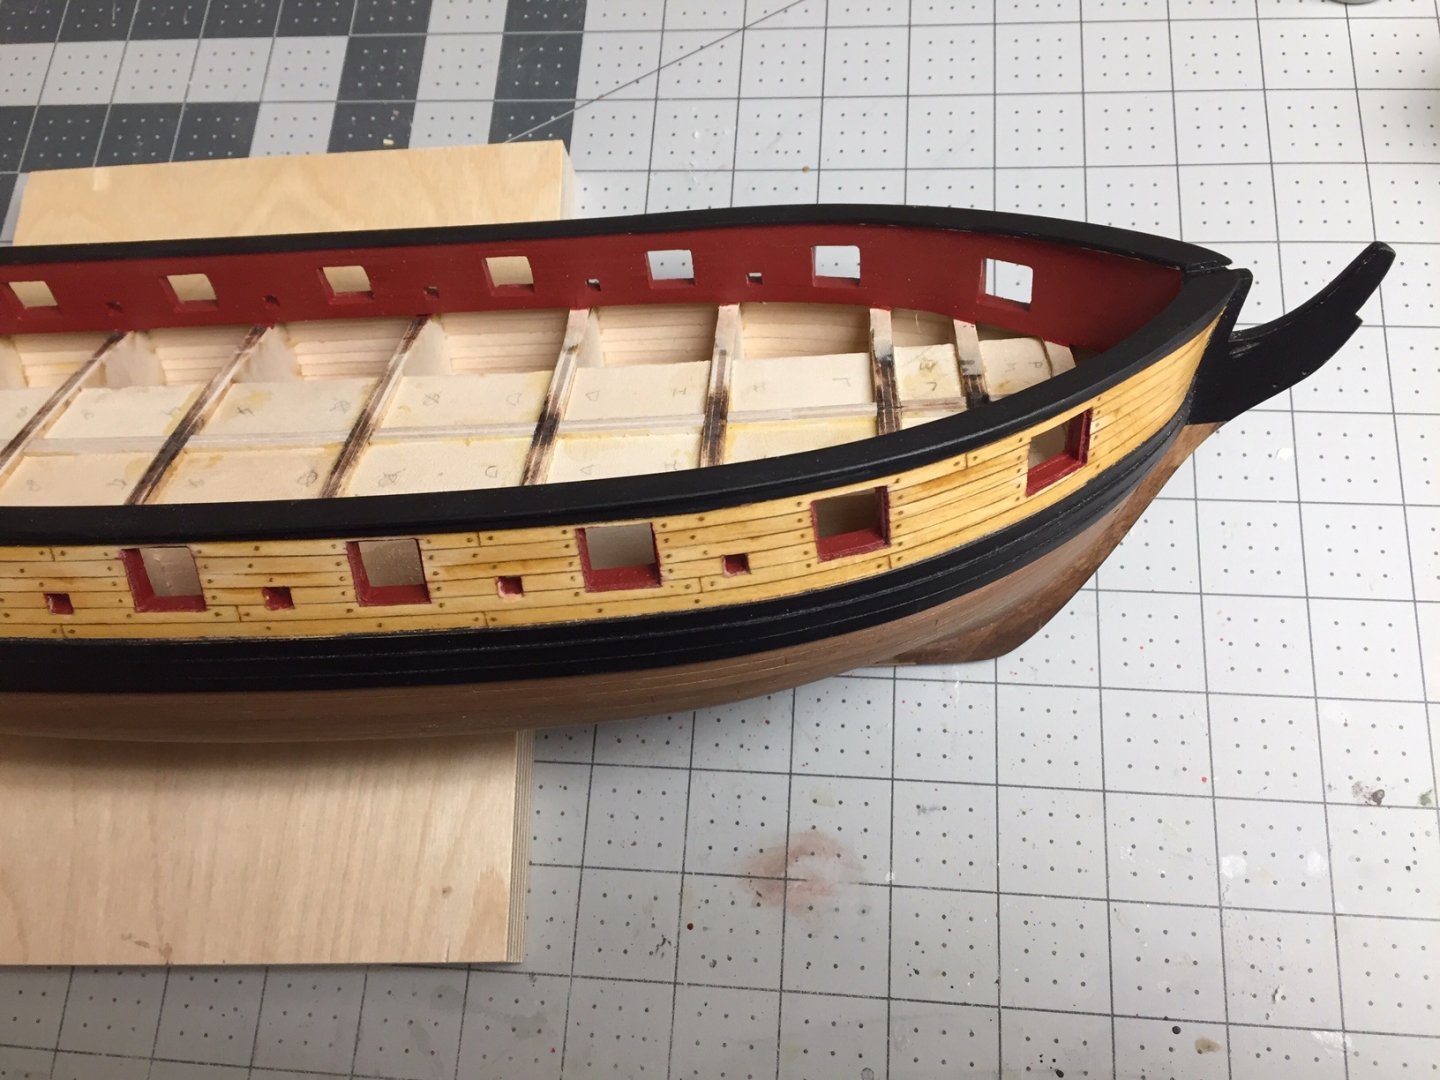
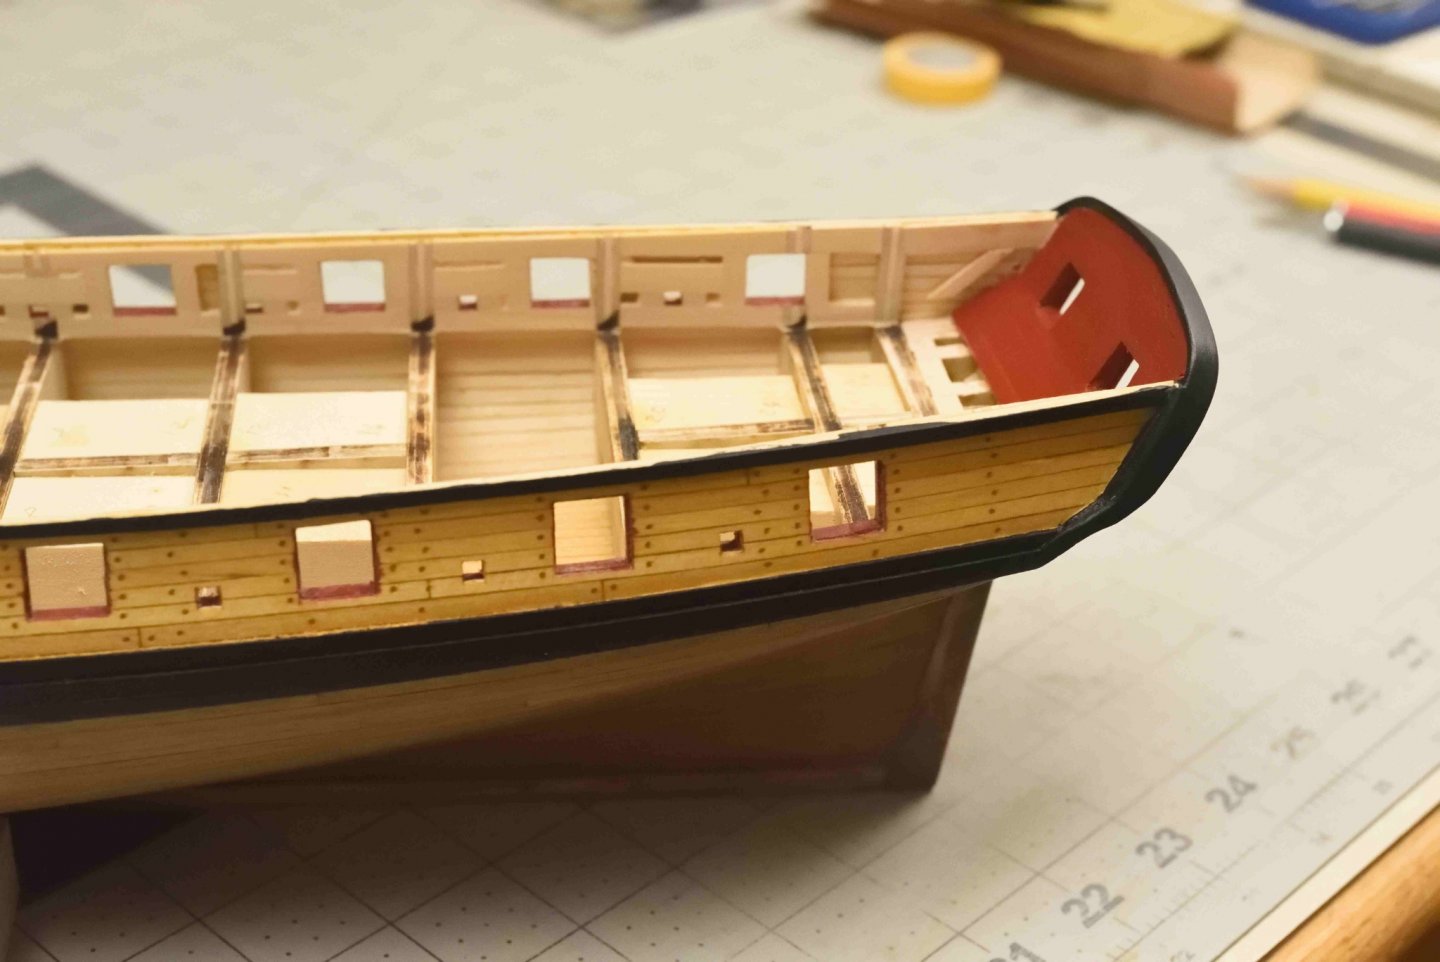
The next step was the inboard bulwarks planking, and how well I remember this. Sanding the inner bulwarks was a challenge. I made some sanding blocks with curvature in an effort to make it easier. It was still not easy, and I didn't get the frames as thin as I wanted. Some months later I got a mini vibration sander. I don't know if this would have made it any easier or not. I think it's probably one of those steps that requires a lot of patience, and you sand until you are tired of sanding. I used a slightly darker shade of red for the inner bulwarks than it looked in the manual. At first I wasn't sure about the red accent, but the more I worked on the ship, the more I liked it. Pictures show the inner bulwarks planking and cap rail completed.
-
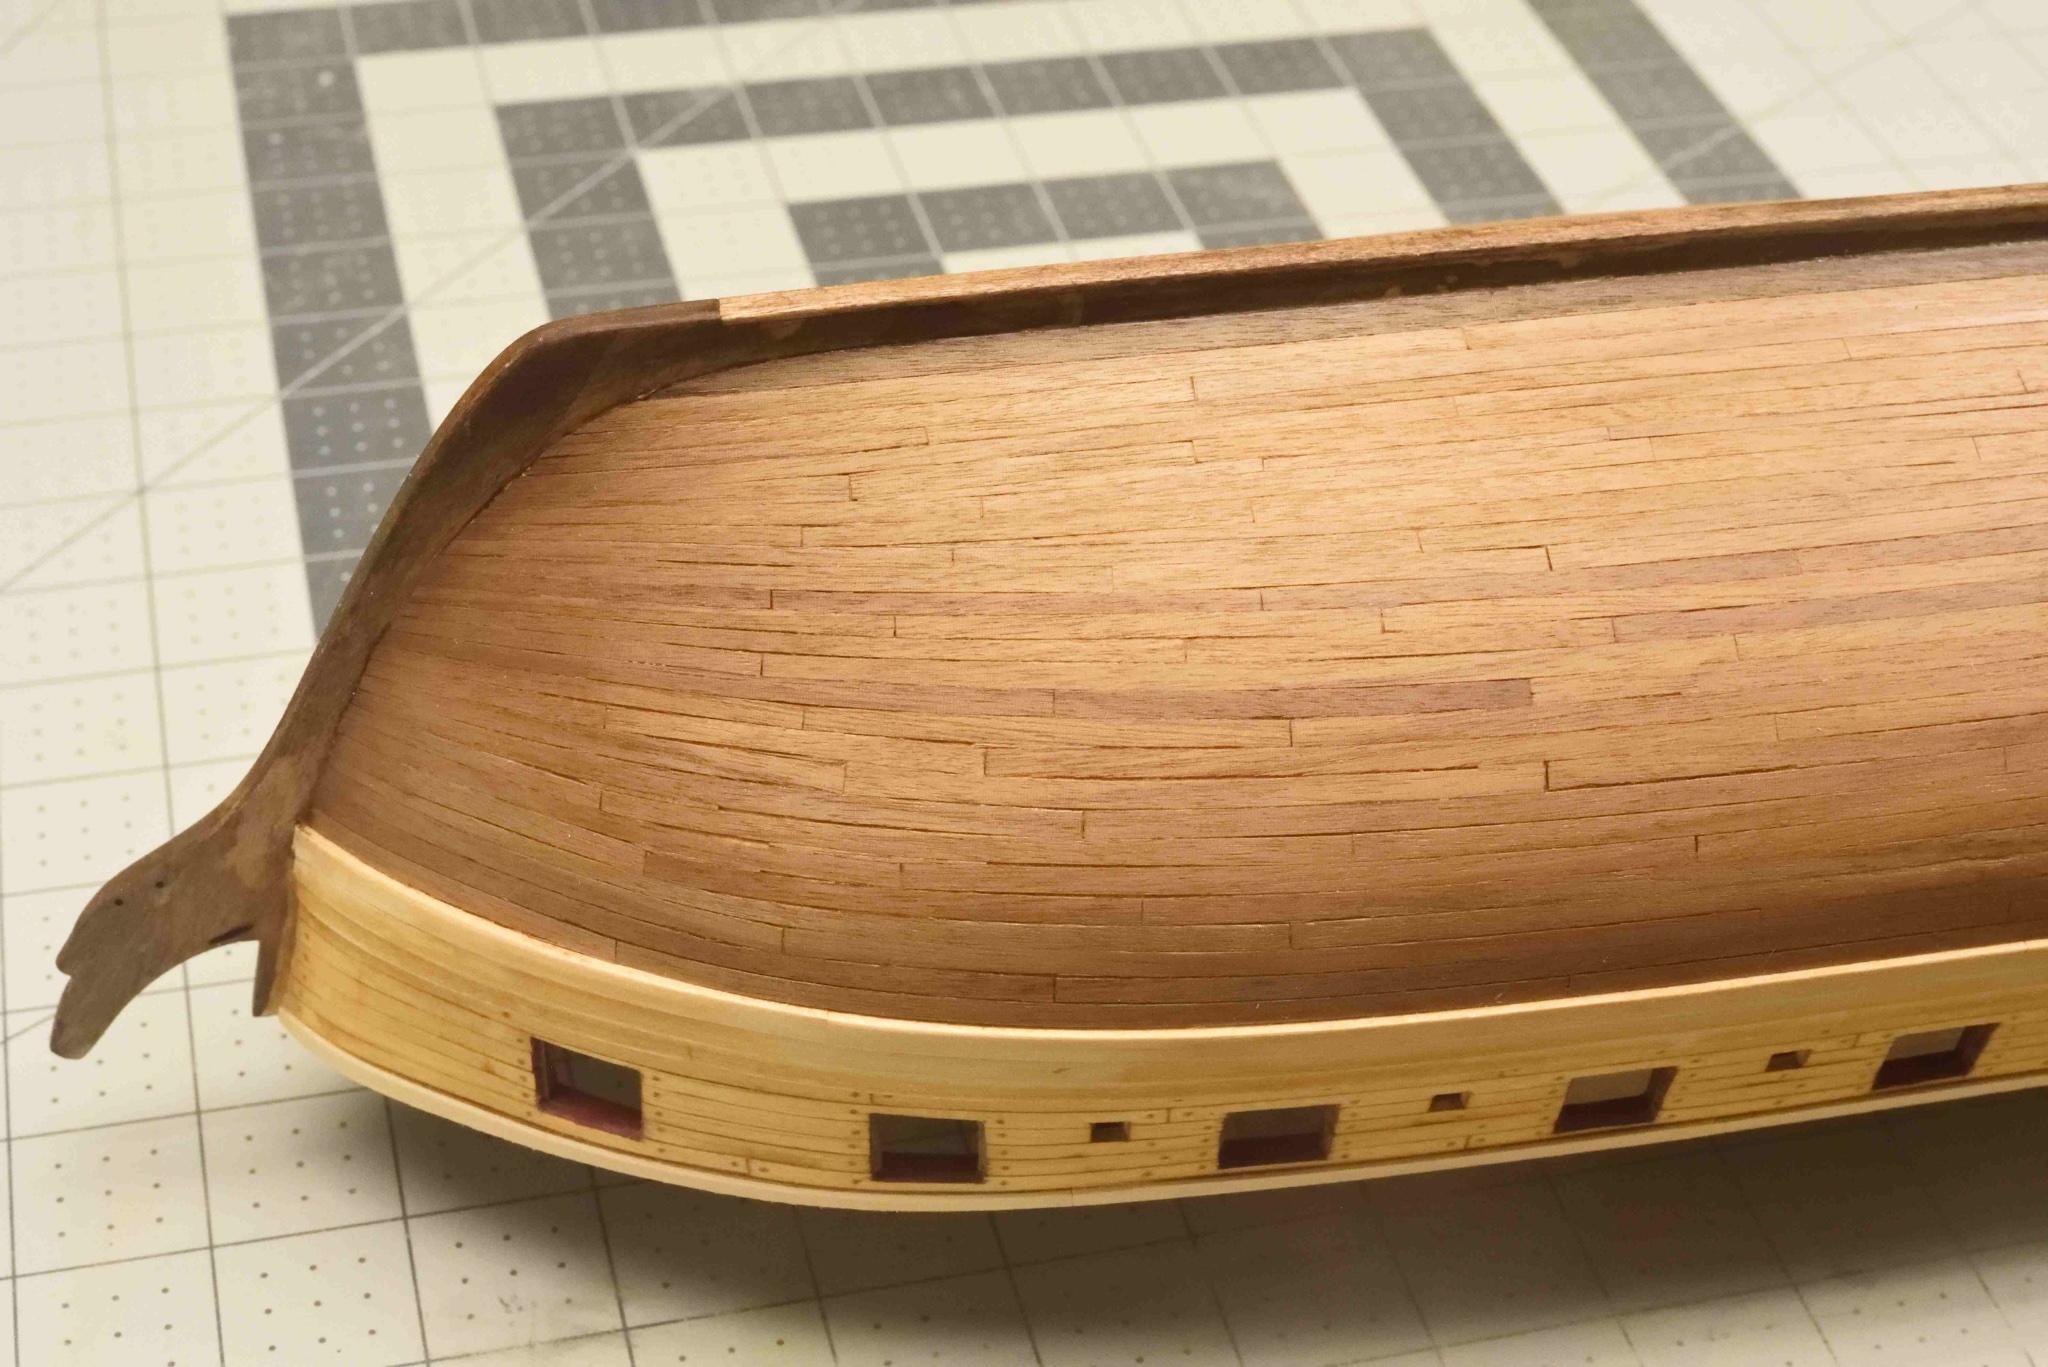
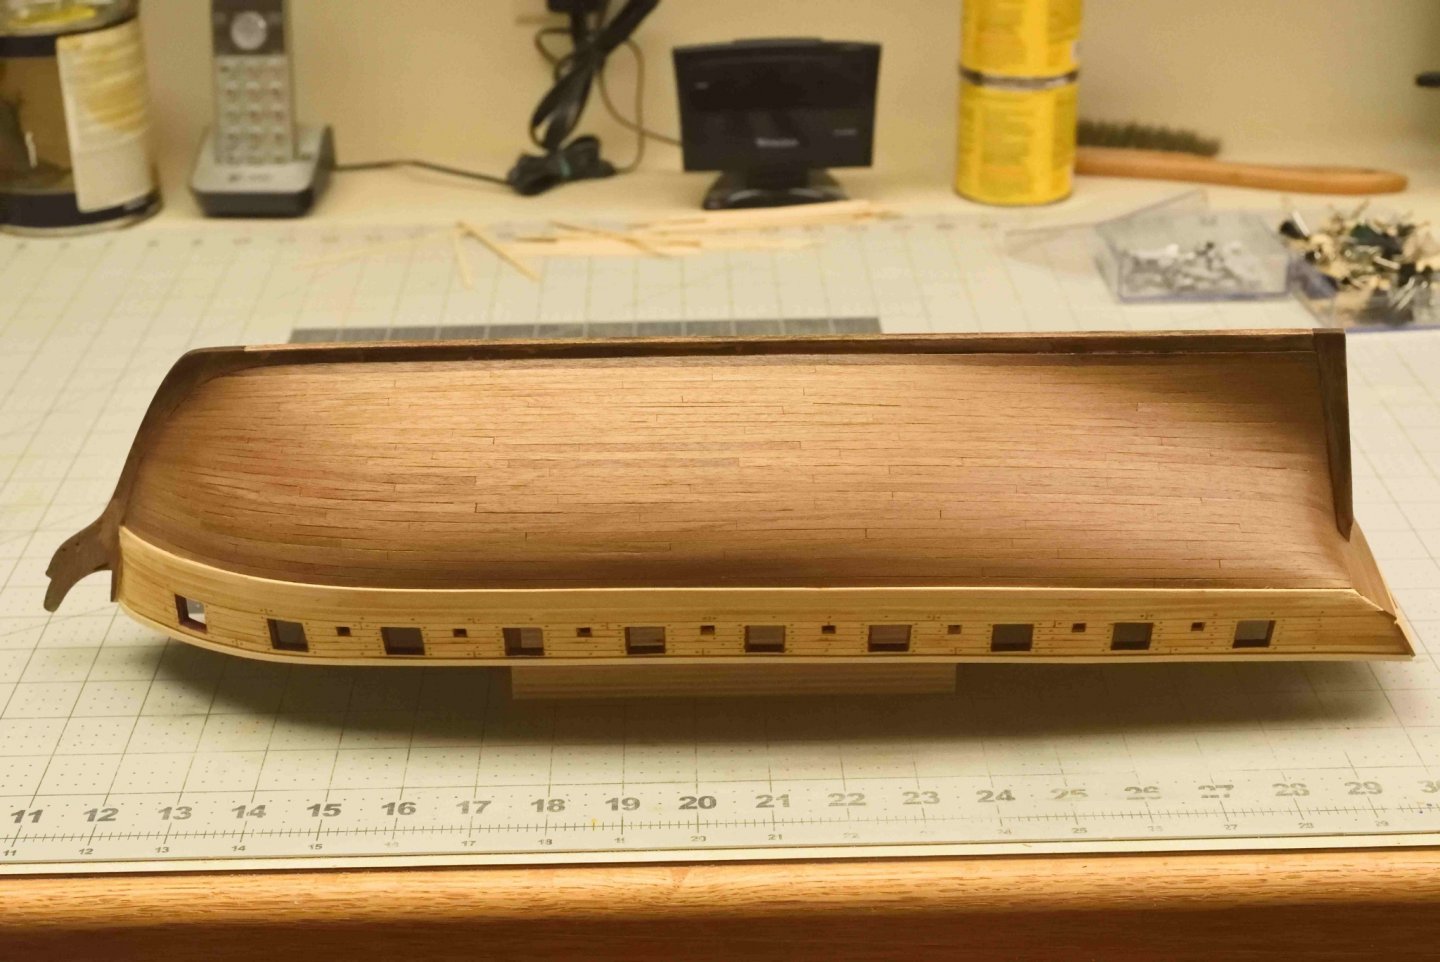
Because I double-planked the hull, I only painted the wales black. I used a very neutral stain on the walnut. From experience with the first model ship, I wanted this one to be lighter, so it's easier to see detail. I also painted the extra top plank along the bulwarks black. I followed Chapter 6 completing some stern details, or I should say details at the time. Looking back, I'd call this basic construction.


-
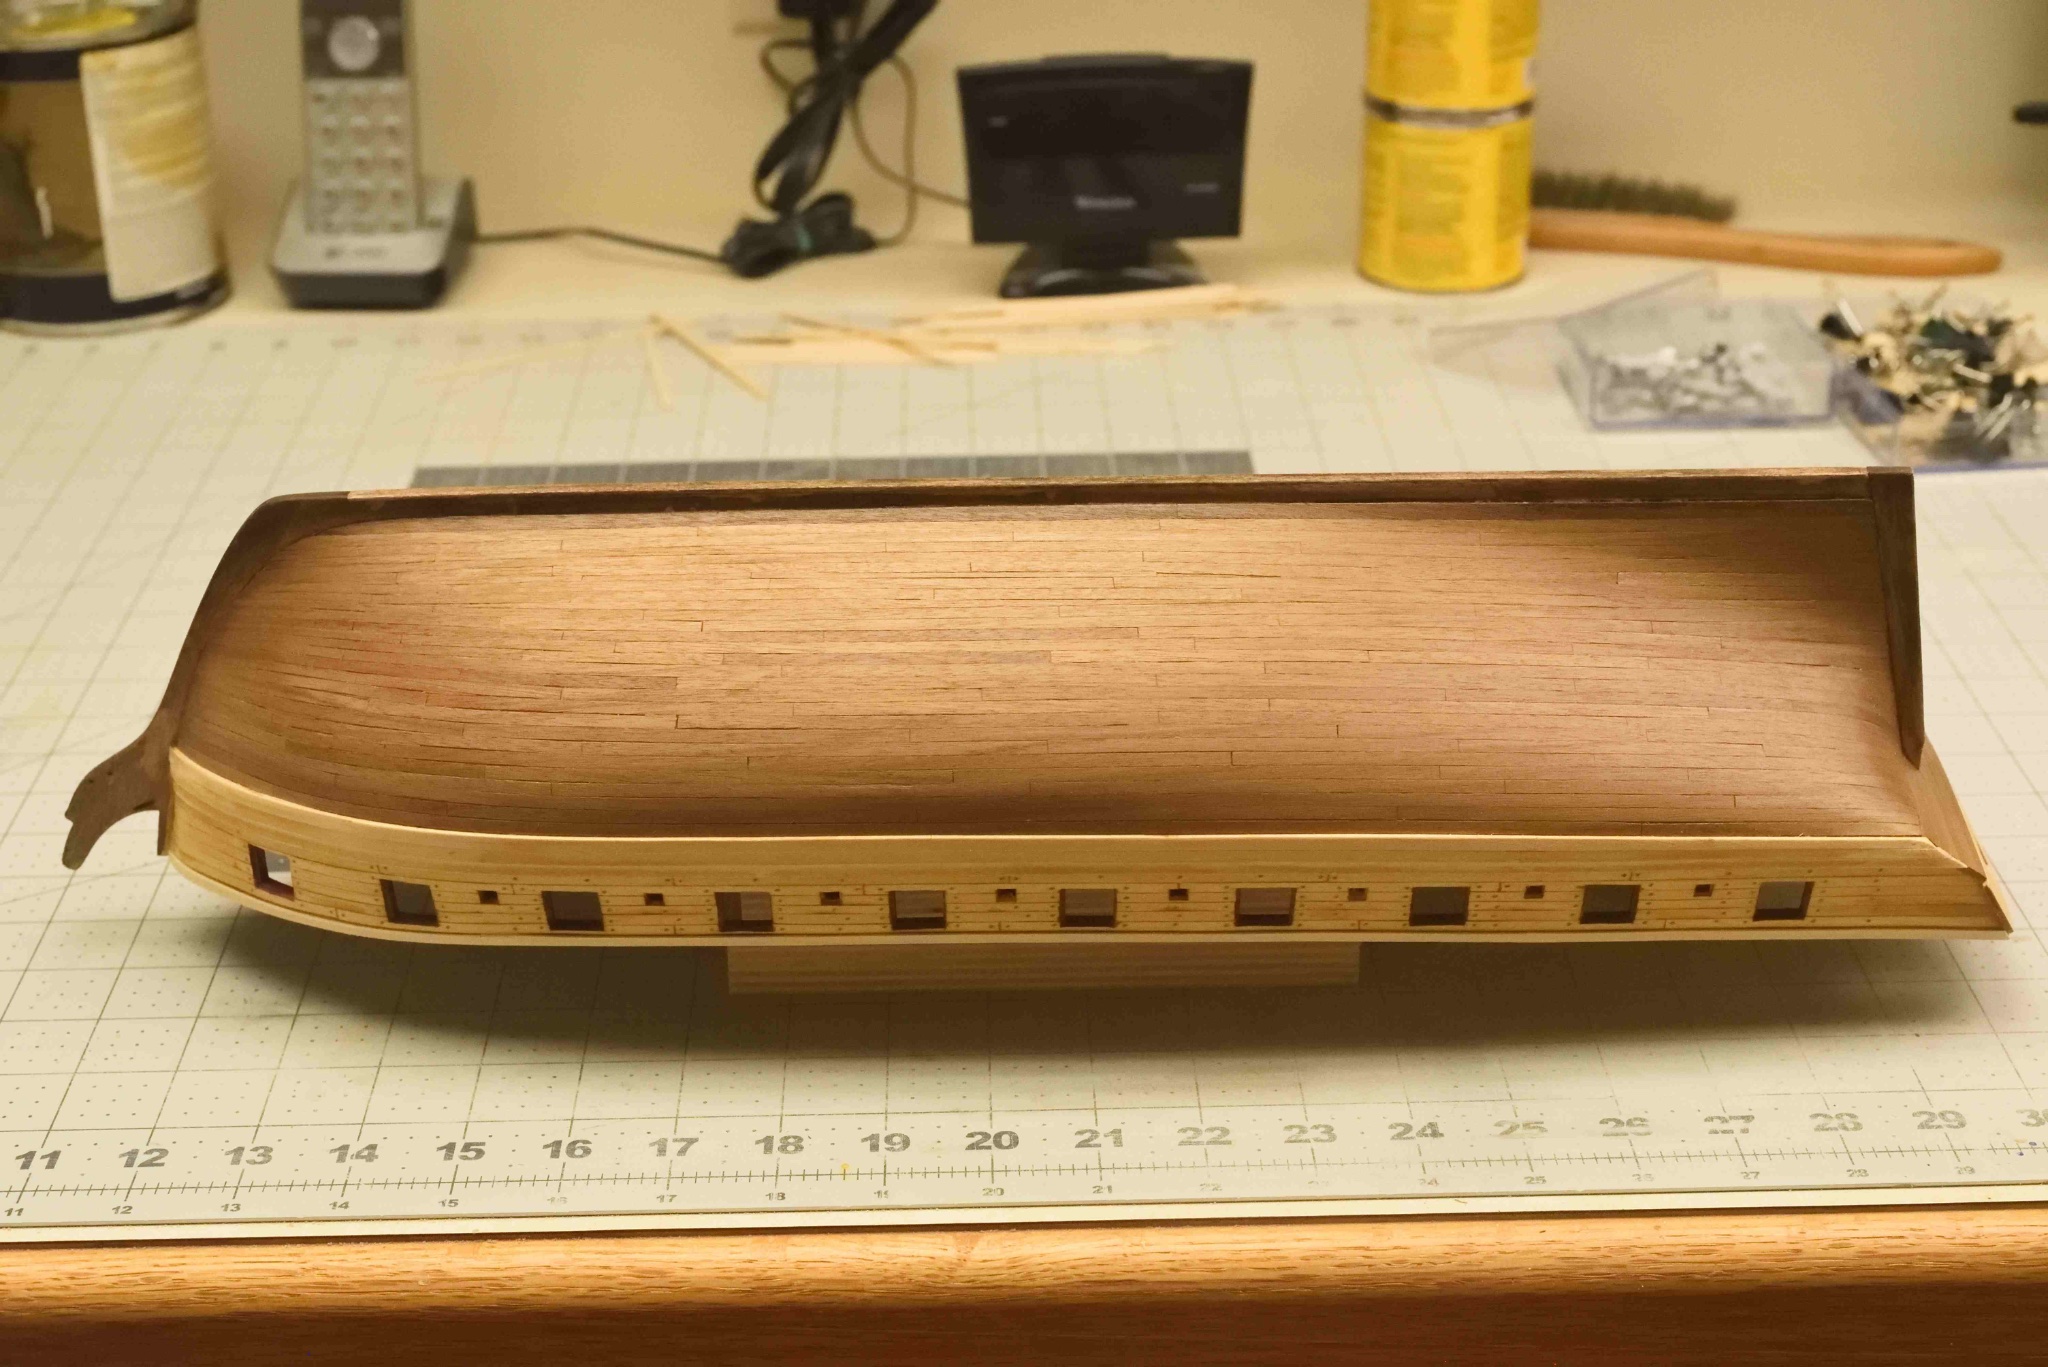
After I finished the first layer of hull planking, I did the usual sanding and filling until reasonably smooth. I wanted it to be as smooth as possible to provide a good base for the 2nd layer of planking. I added the 2nd layer of planking using the same procedure, working from the wales and from the keel, filling in the gap in between. If I remember right, I used 5-6" lengths of strips, and I staggered the breaks along the hull. I used a tool I got from Model Shipways for bending strips. I soaked or wetted the strips, placed them on a pattern, and used the tool to heat and steam them to shape. The wood released a little when removed from pattern, so pattern needed to have a little more curvature than needed. I used CA to glue on strips, and didn't worry about simulating treenails on this part of the hull.


-
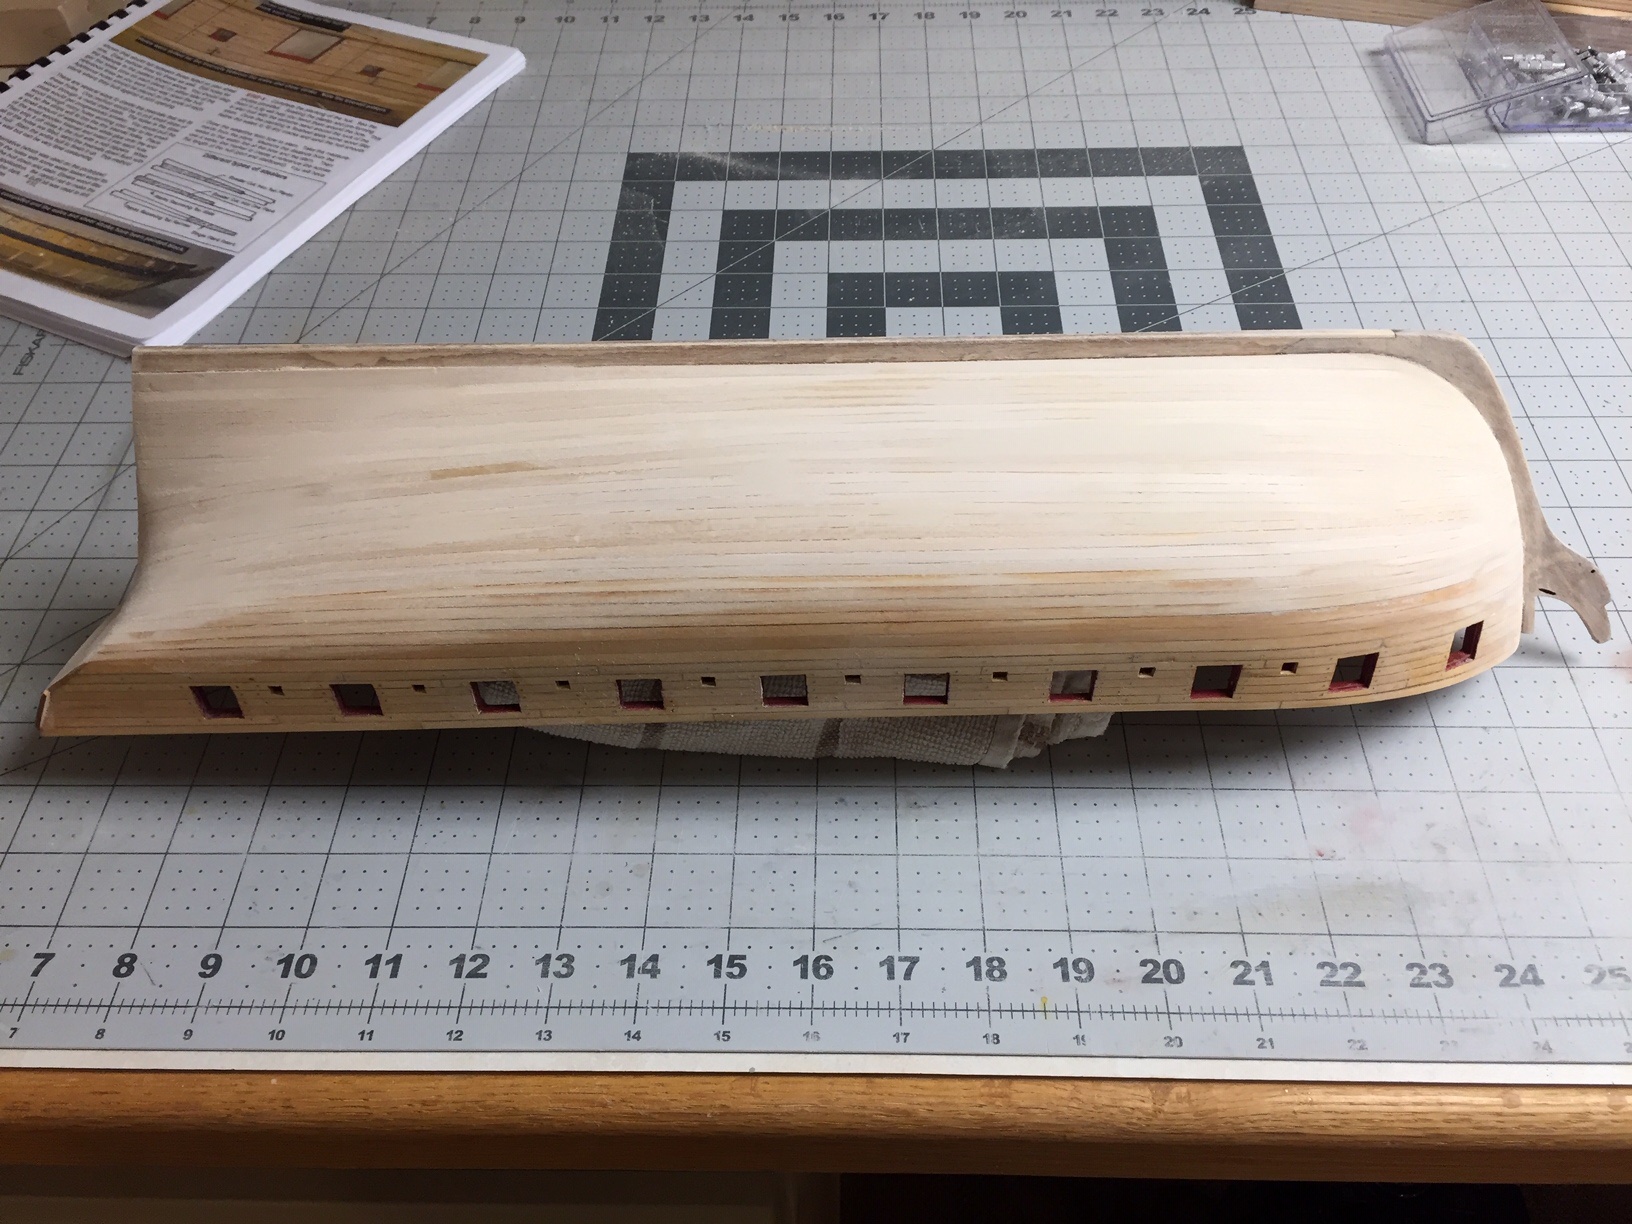
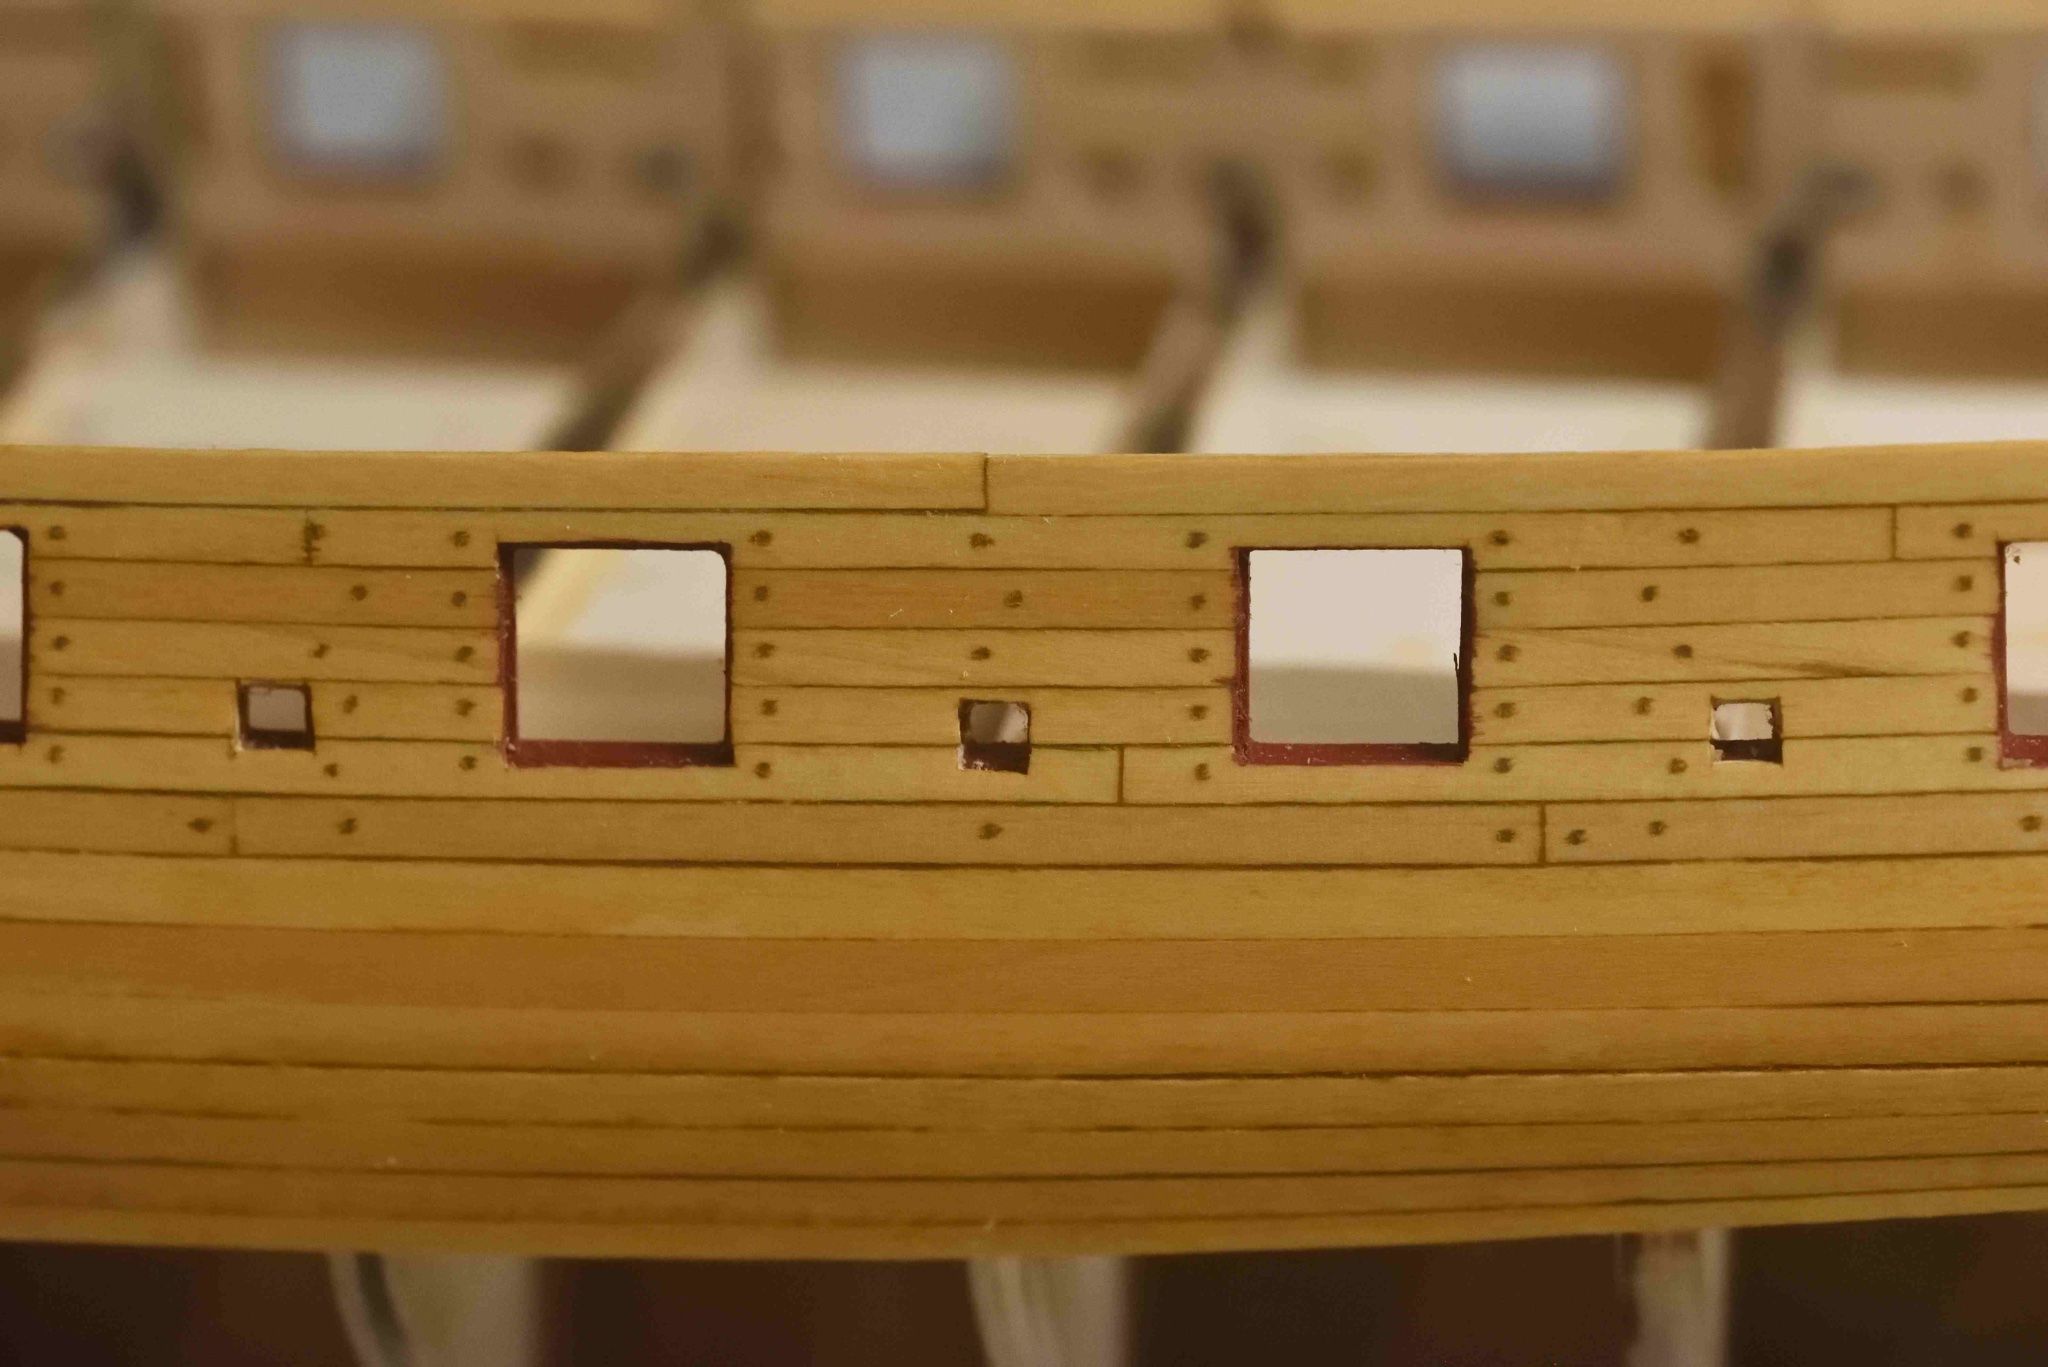
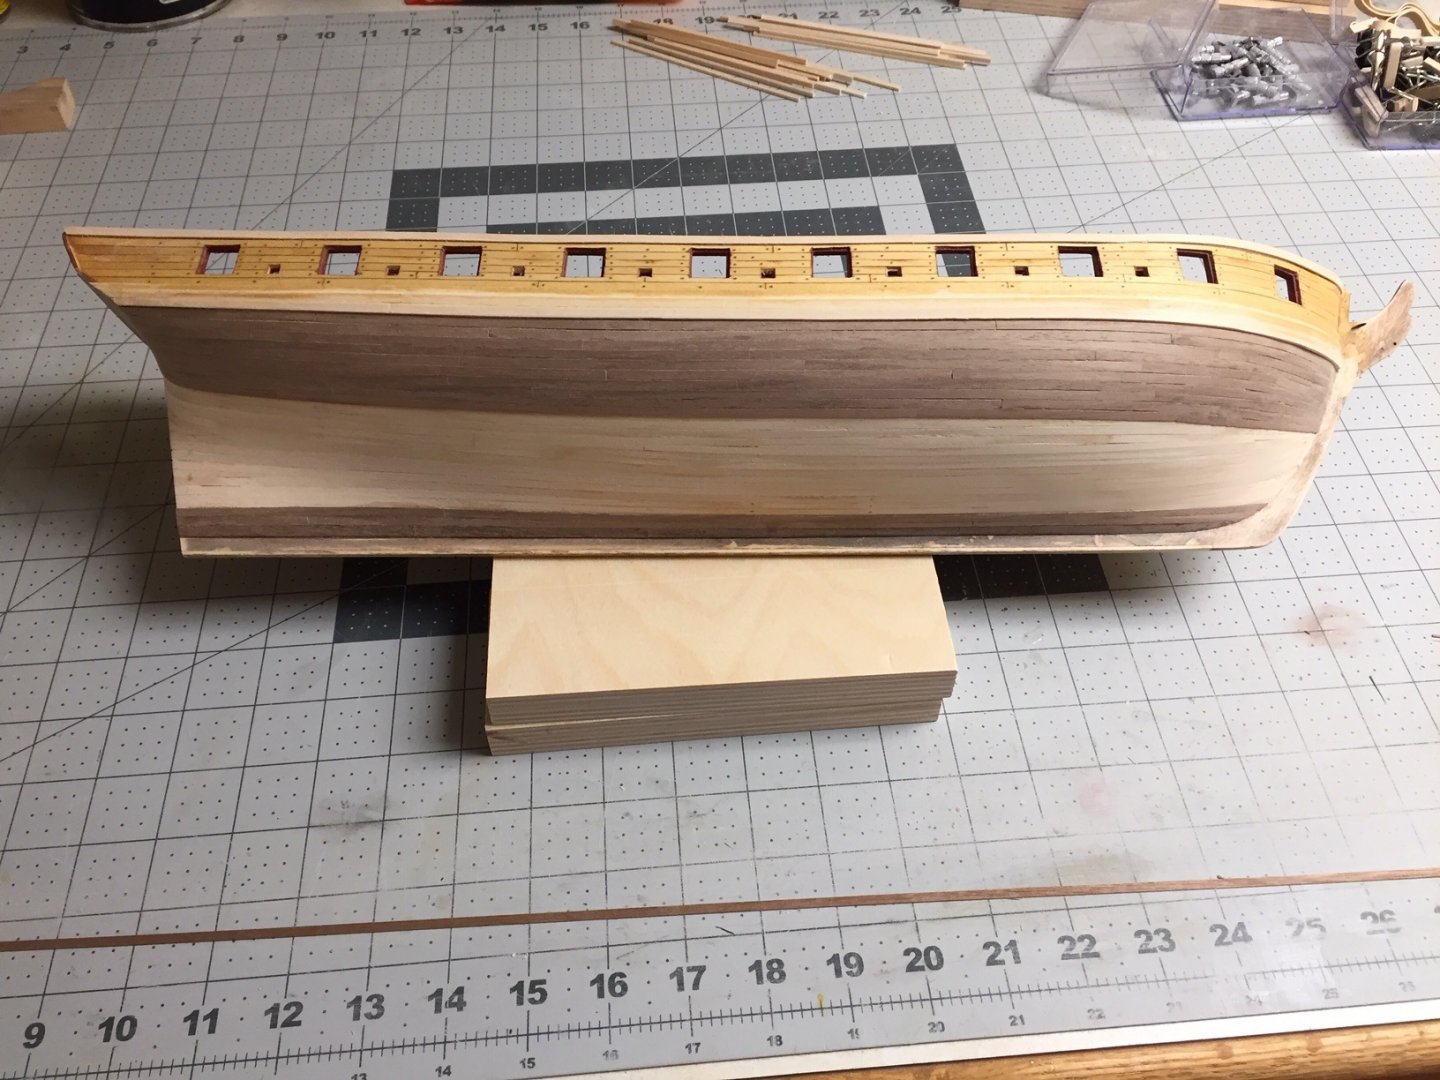
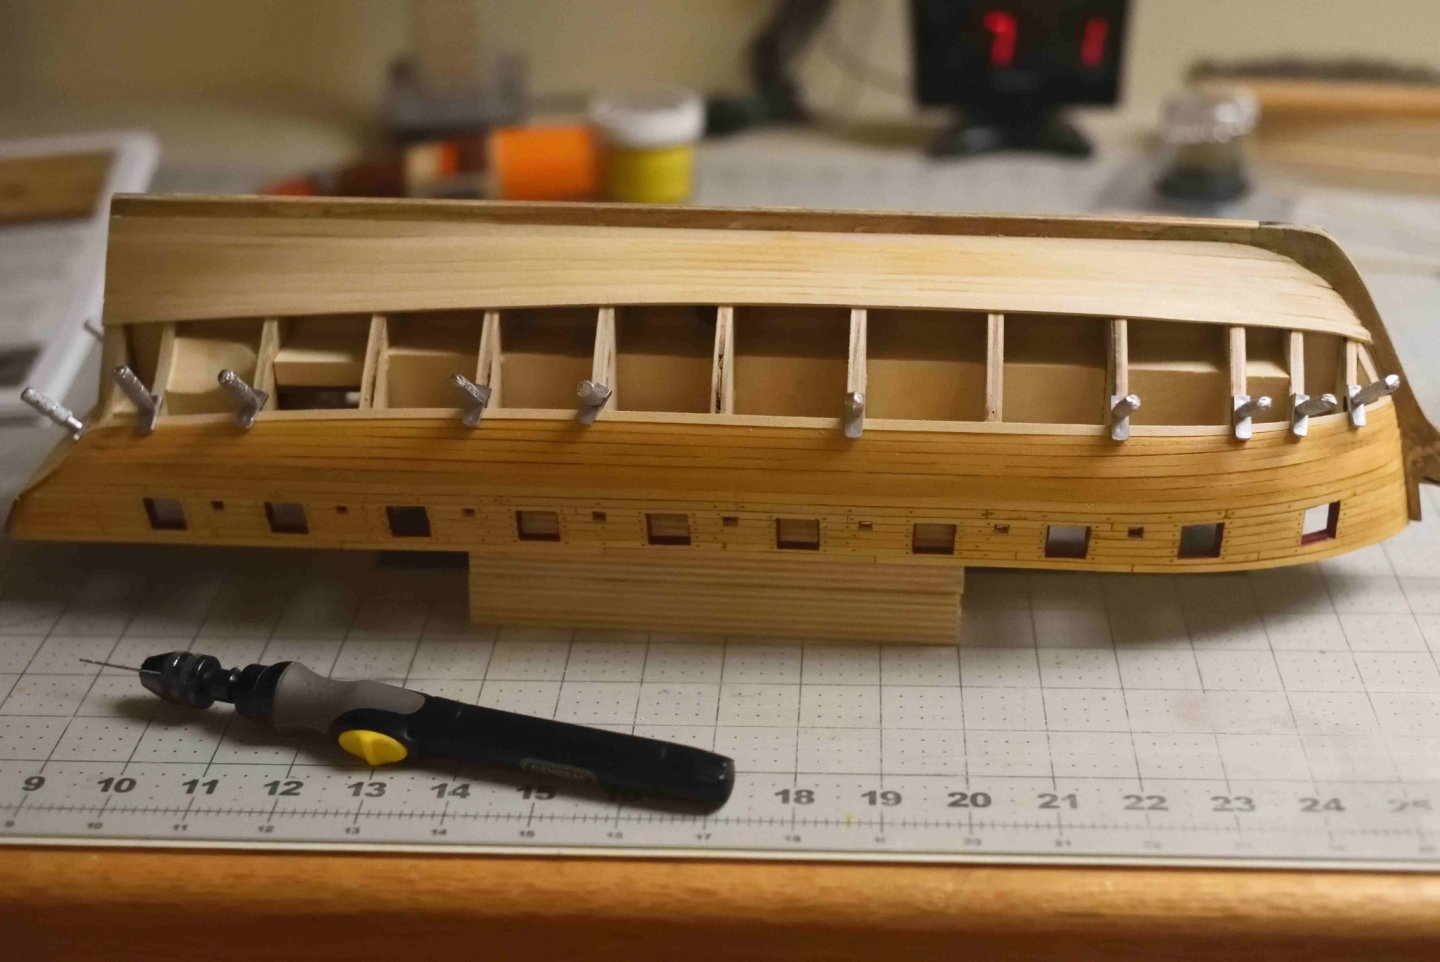
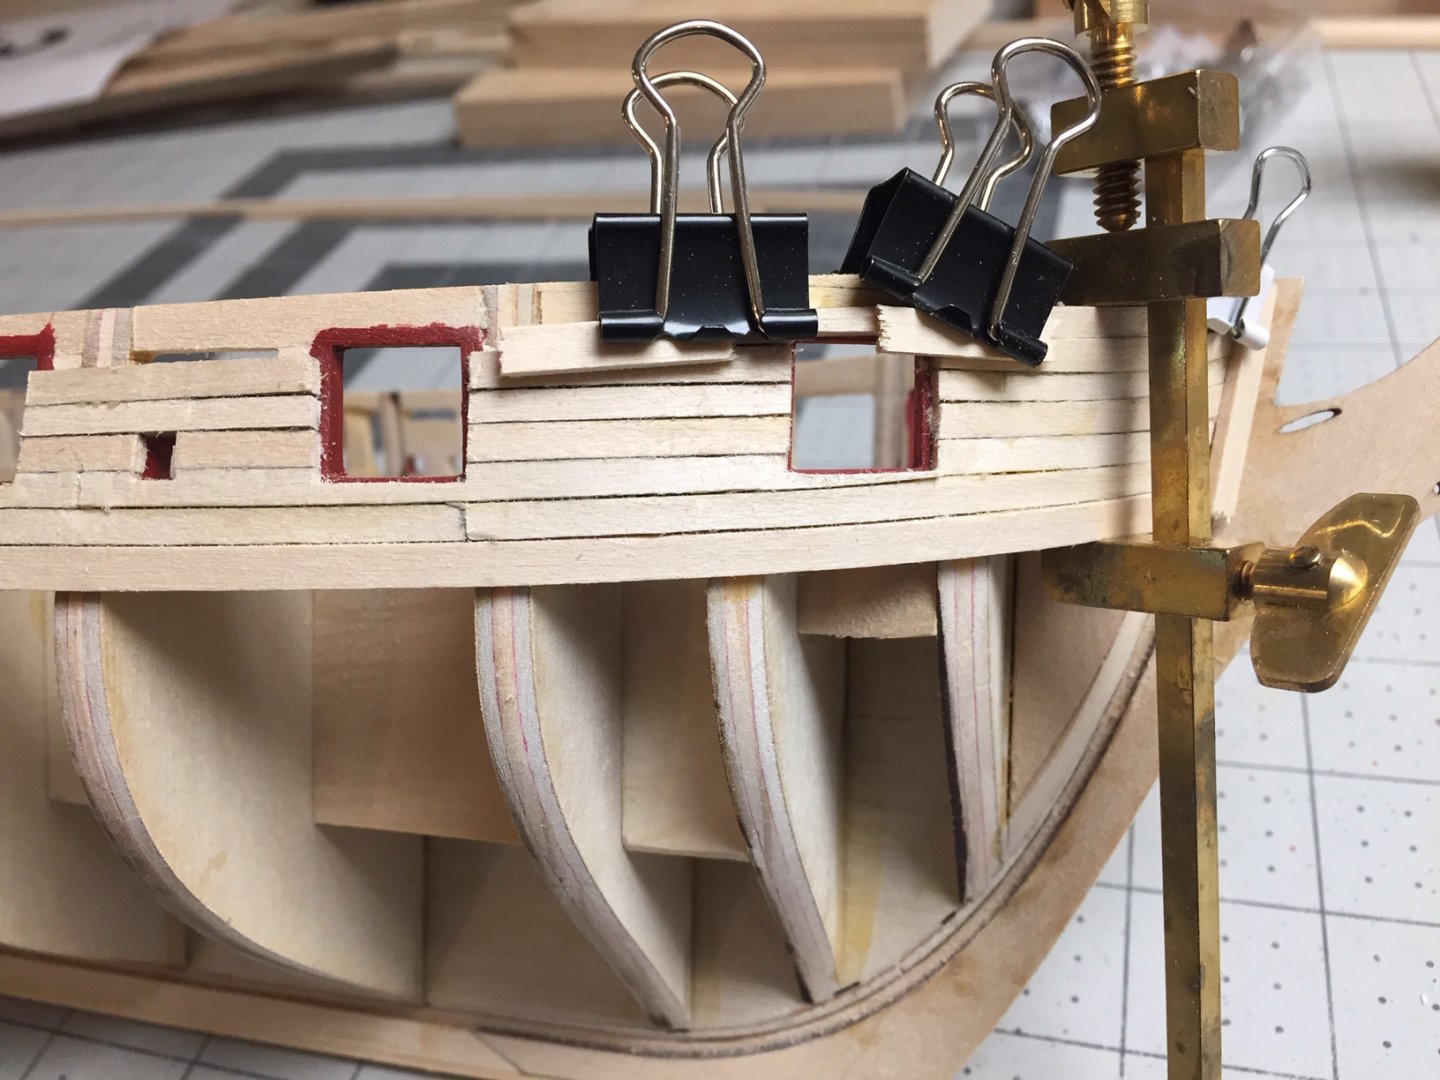
Even before starting Syren I decided I would plank the bottom part of the hull (below the wales) with walnut instead of copper like in the kit. It's just me, I like the look of wood. Plus copper looked rather daunting to make it look right. This is the only major change I made to the kit, so my Syren is a double-planked version. I'm in Chapter 5, Steps 3, 4 and 5 in the excellent instruction manual. In my case this will be the first layer of hull planking. I followed the manual doing some planking below the wales and along the keel, leaving a gap in between to fill in. This procedure worked well. I also added treenails along the bulwarks. Chucks trick for simulated treenails worked great and was not difficult. You need battery powered mini-drill and #60-80 drill bits. I used this tool a lot all thru the build. One picture shows the clamps I was using. I wasn't that happy with how these worked, but I used them until the gap between the planked areas got too small. I may look for a better clamping method on the next build.


-
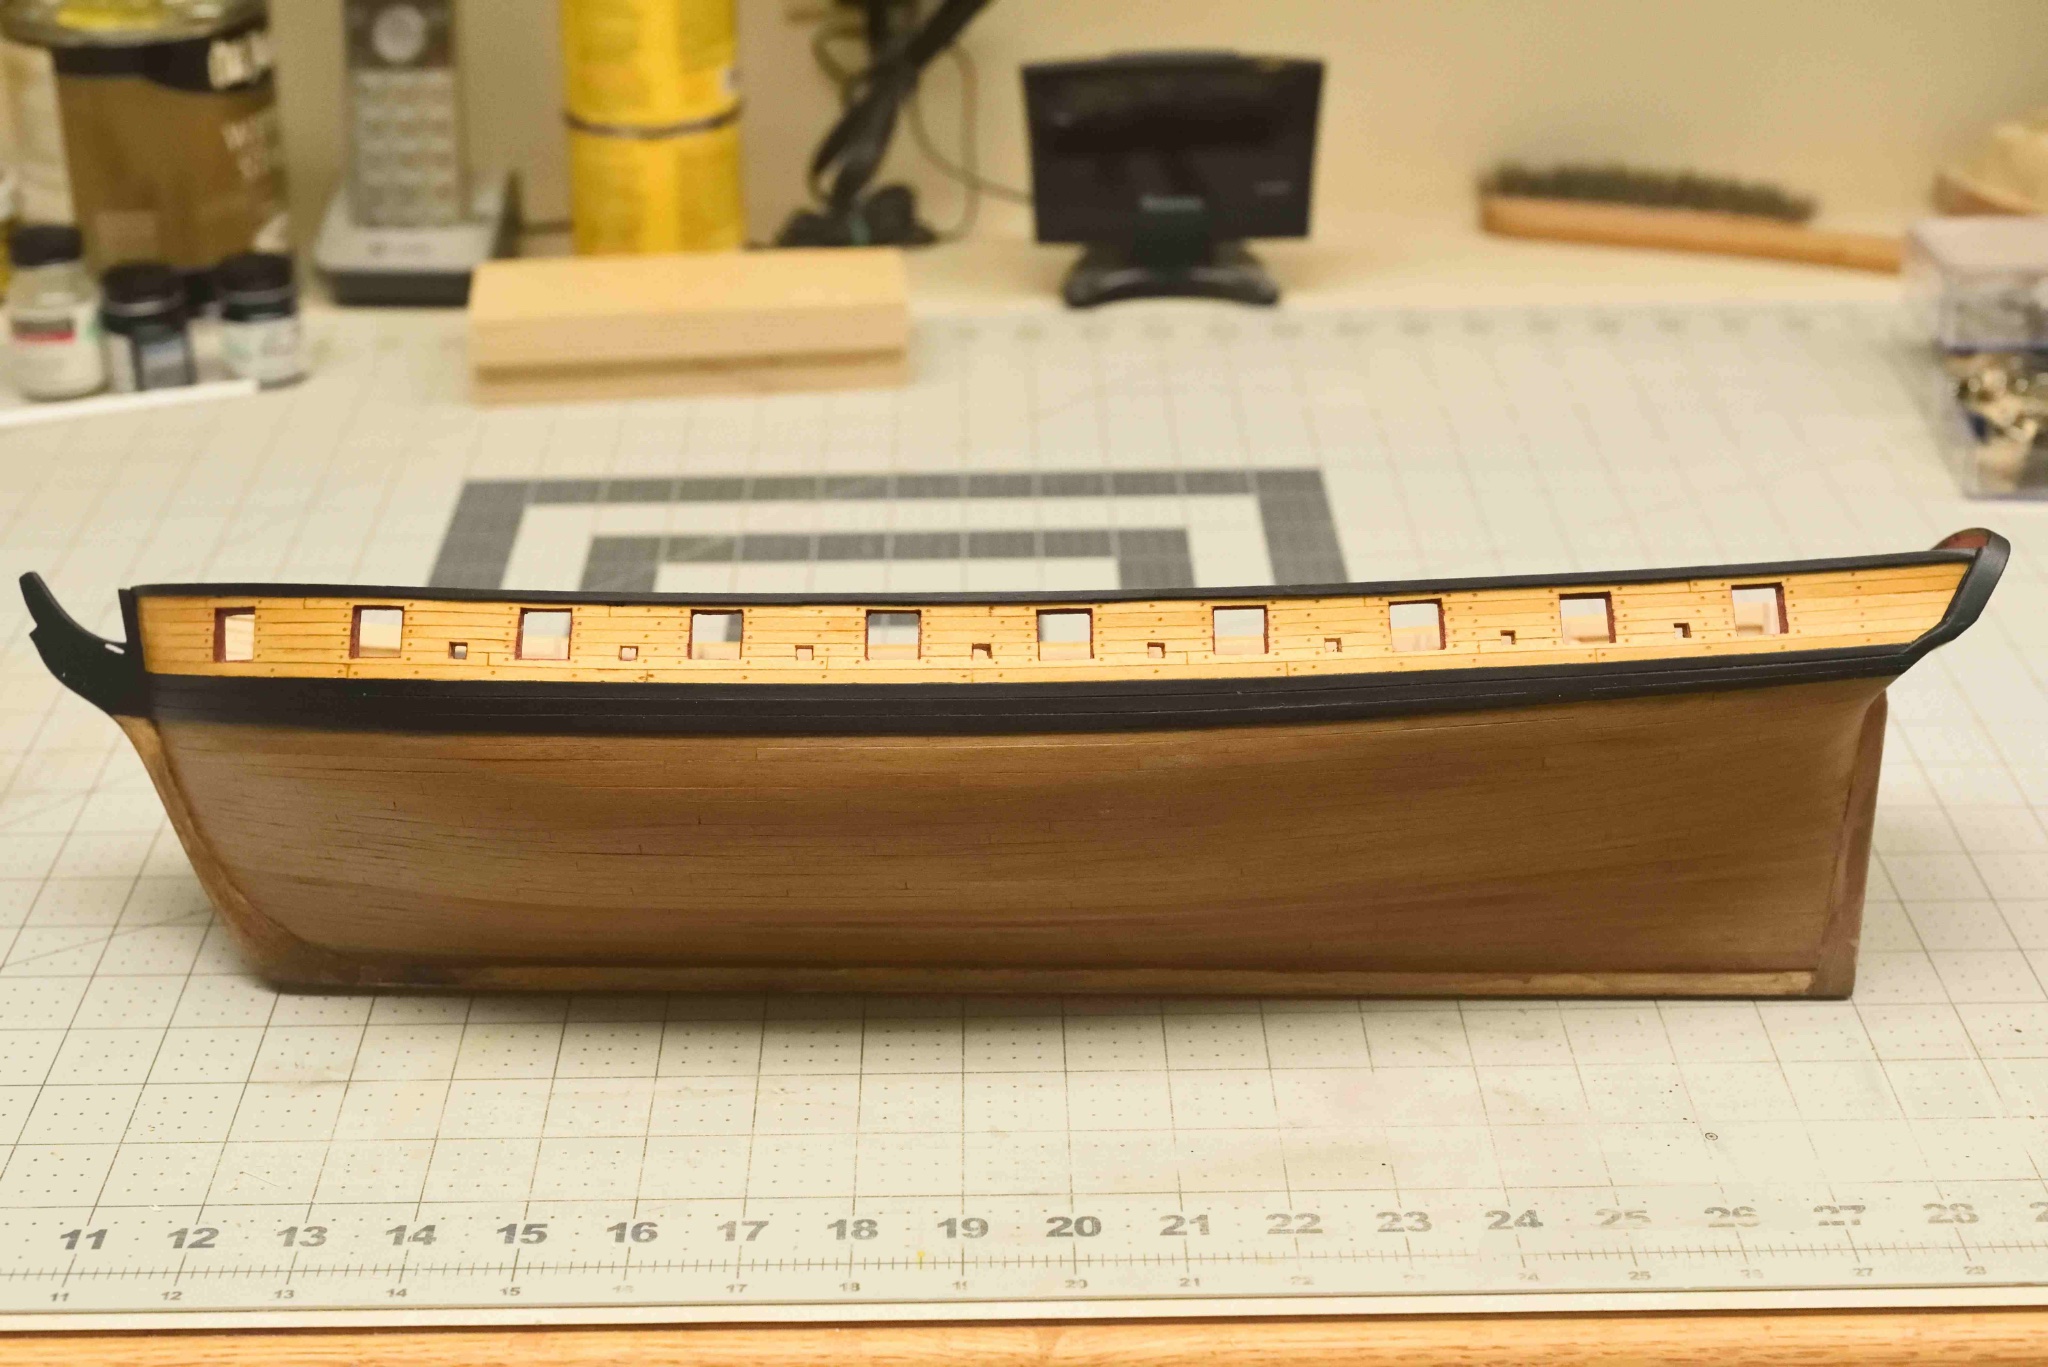
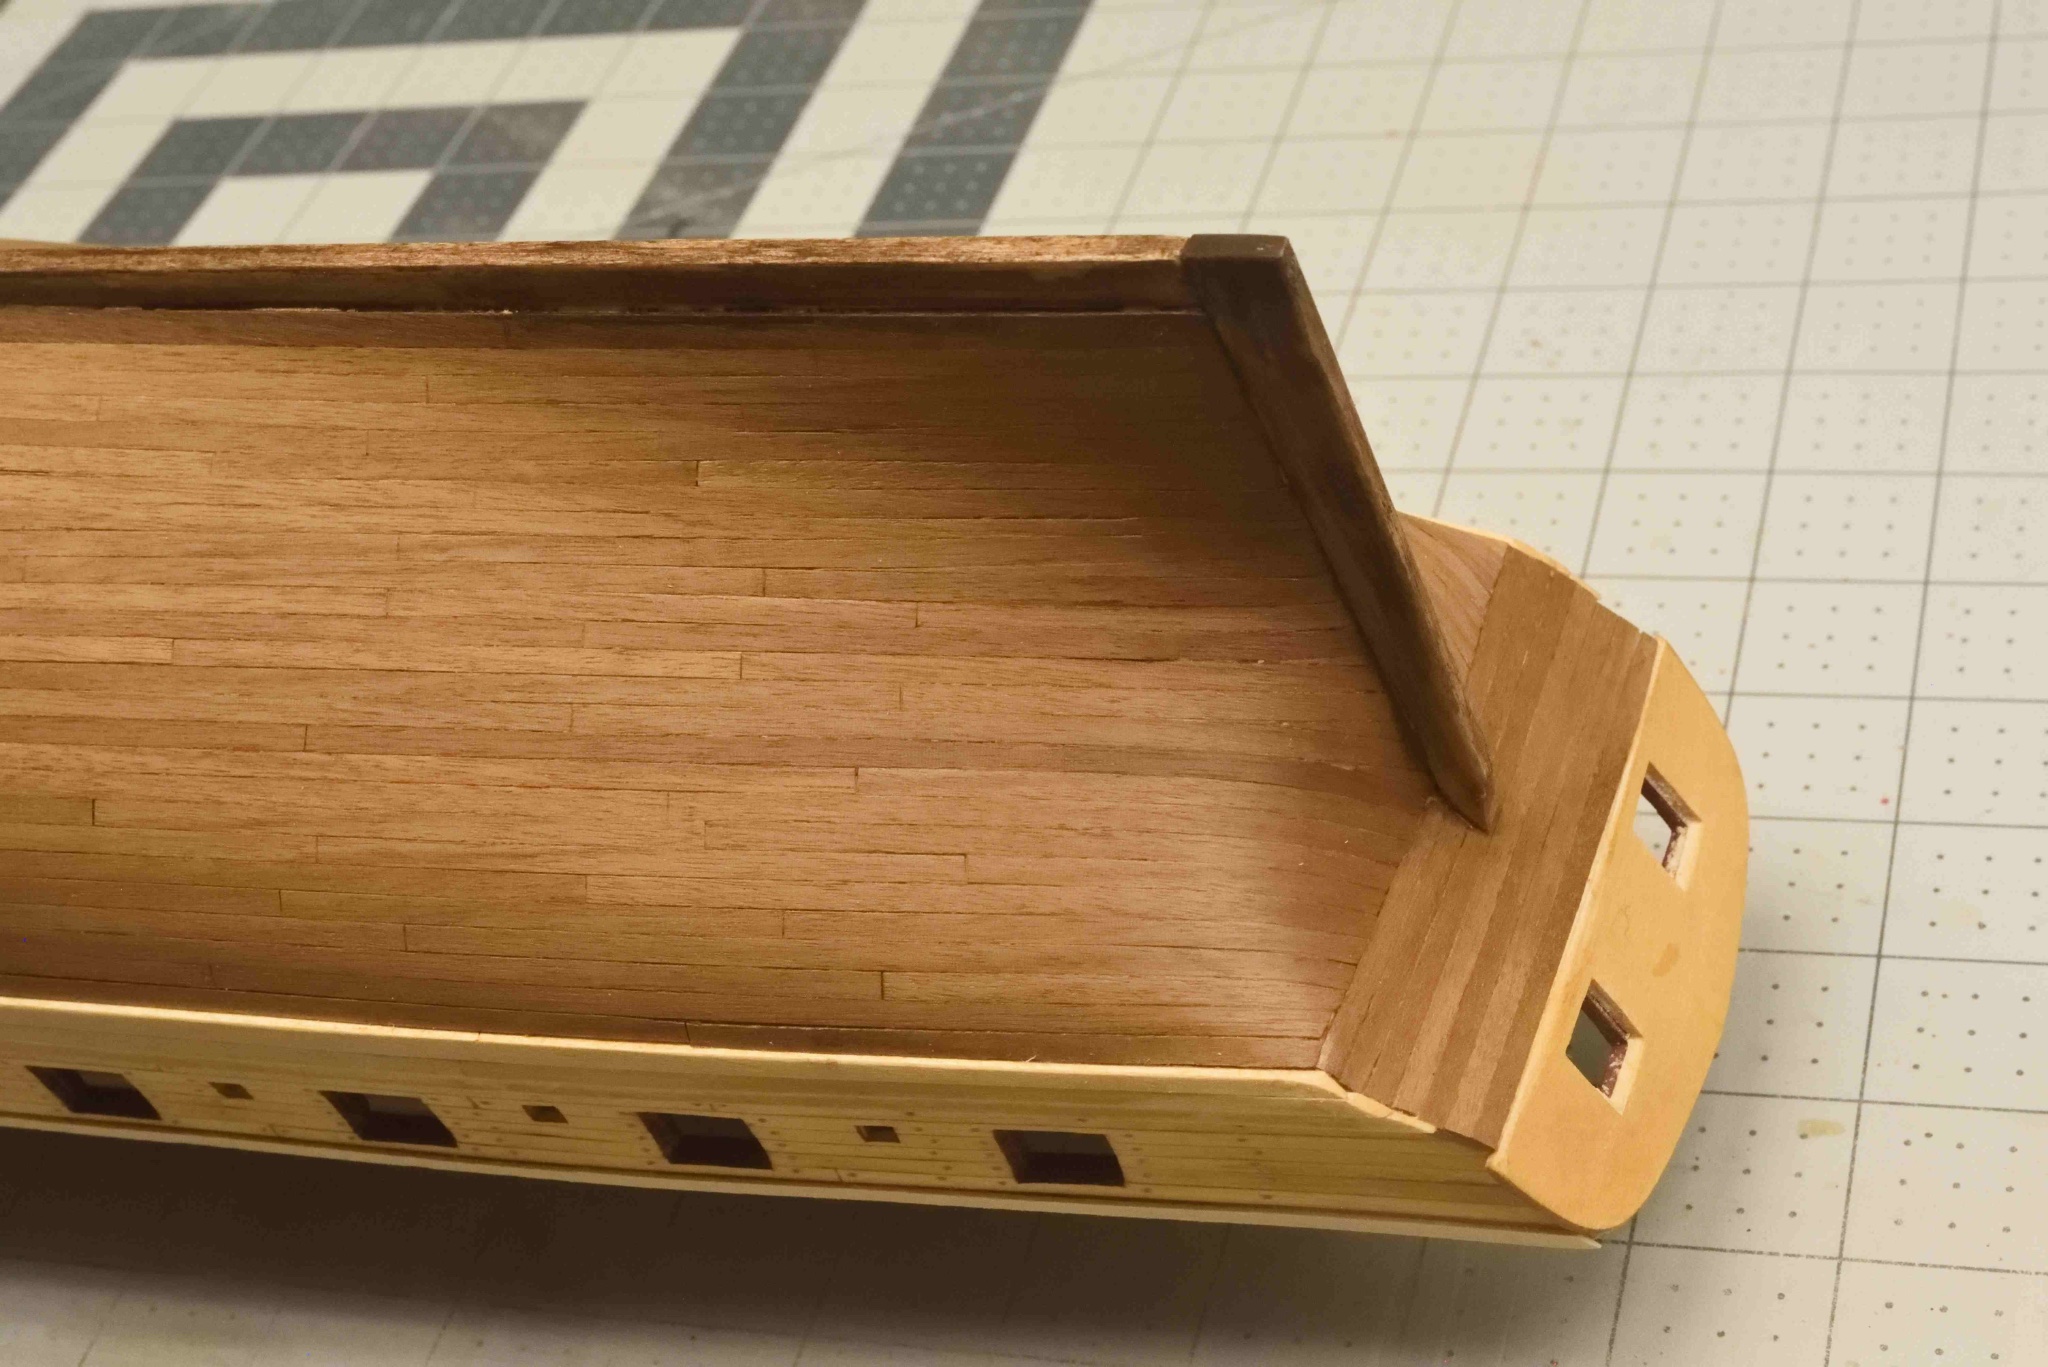
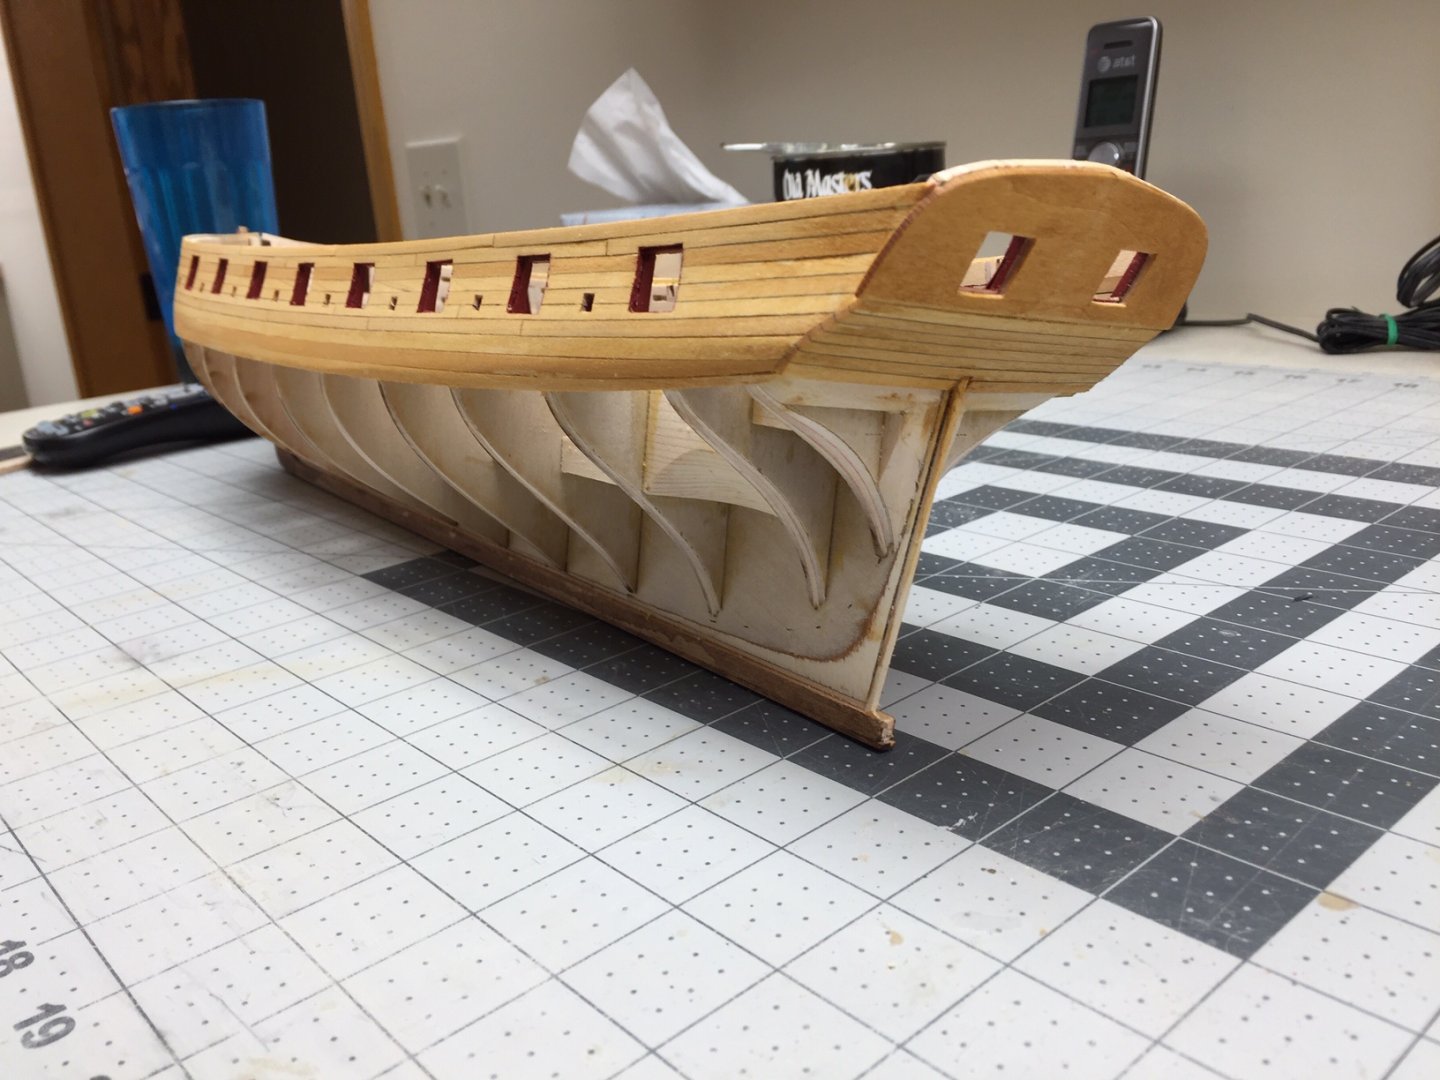
Here's the transom and stern bulwarks planking. I also added the remaining planks for the wales. After quite a bit of sanding, I stained the planking with "golden oak" stain. I probably could have sanded more than I did. It seems impossible to sand too much. Interesting that one photo attached upside down. I have no idea how to rotate it after attaching. I tried several times rotating it differently before attaching and no luck, so I gave up on it. There's plenty of pictures as is.

-
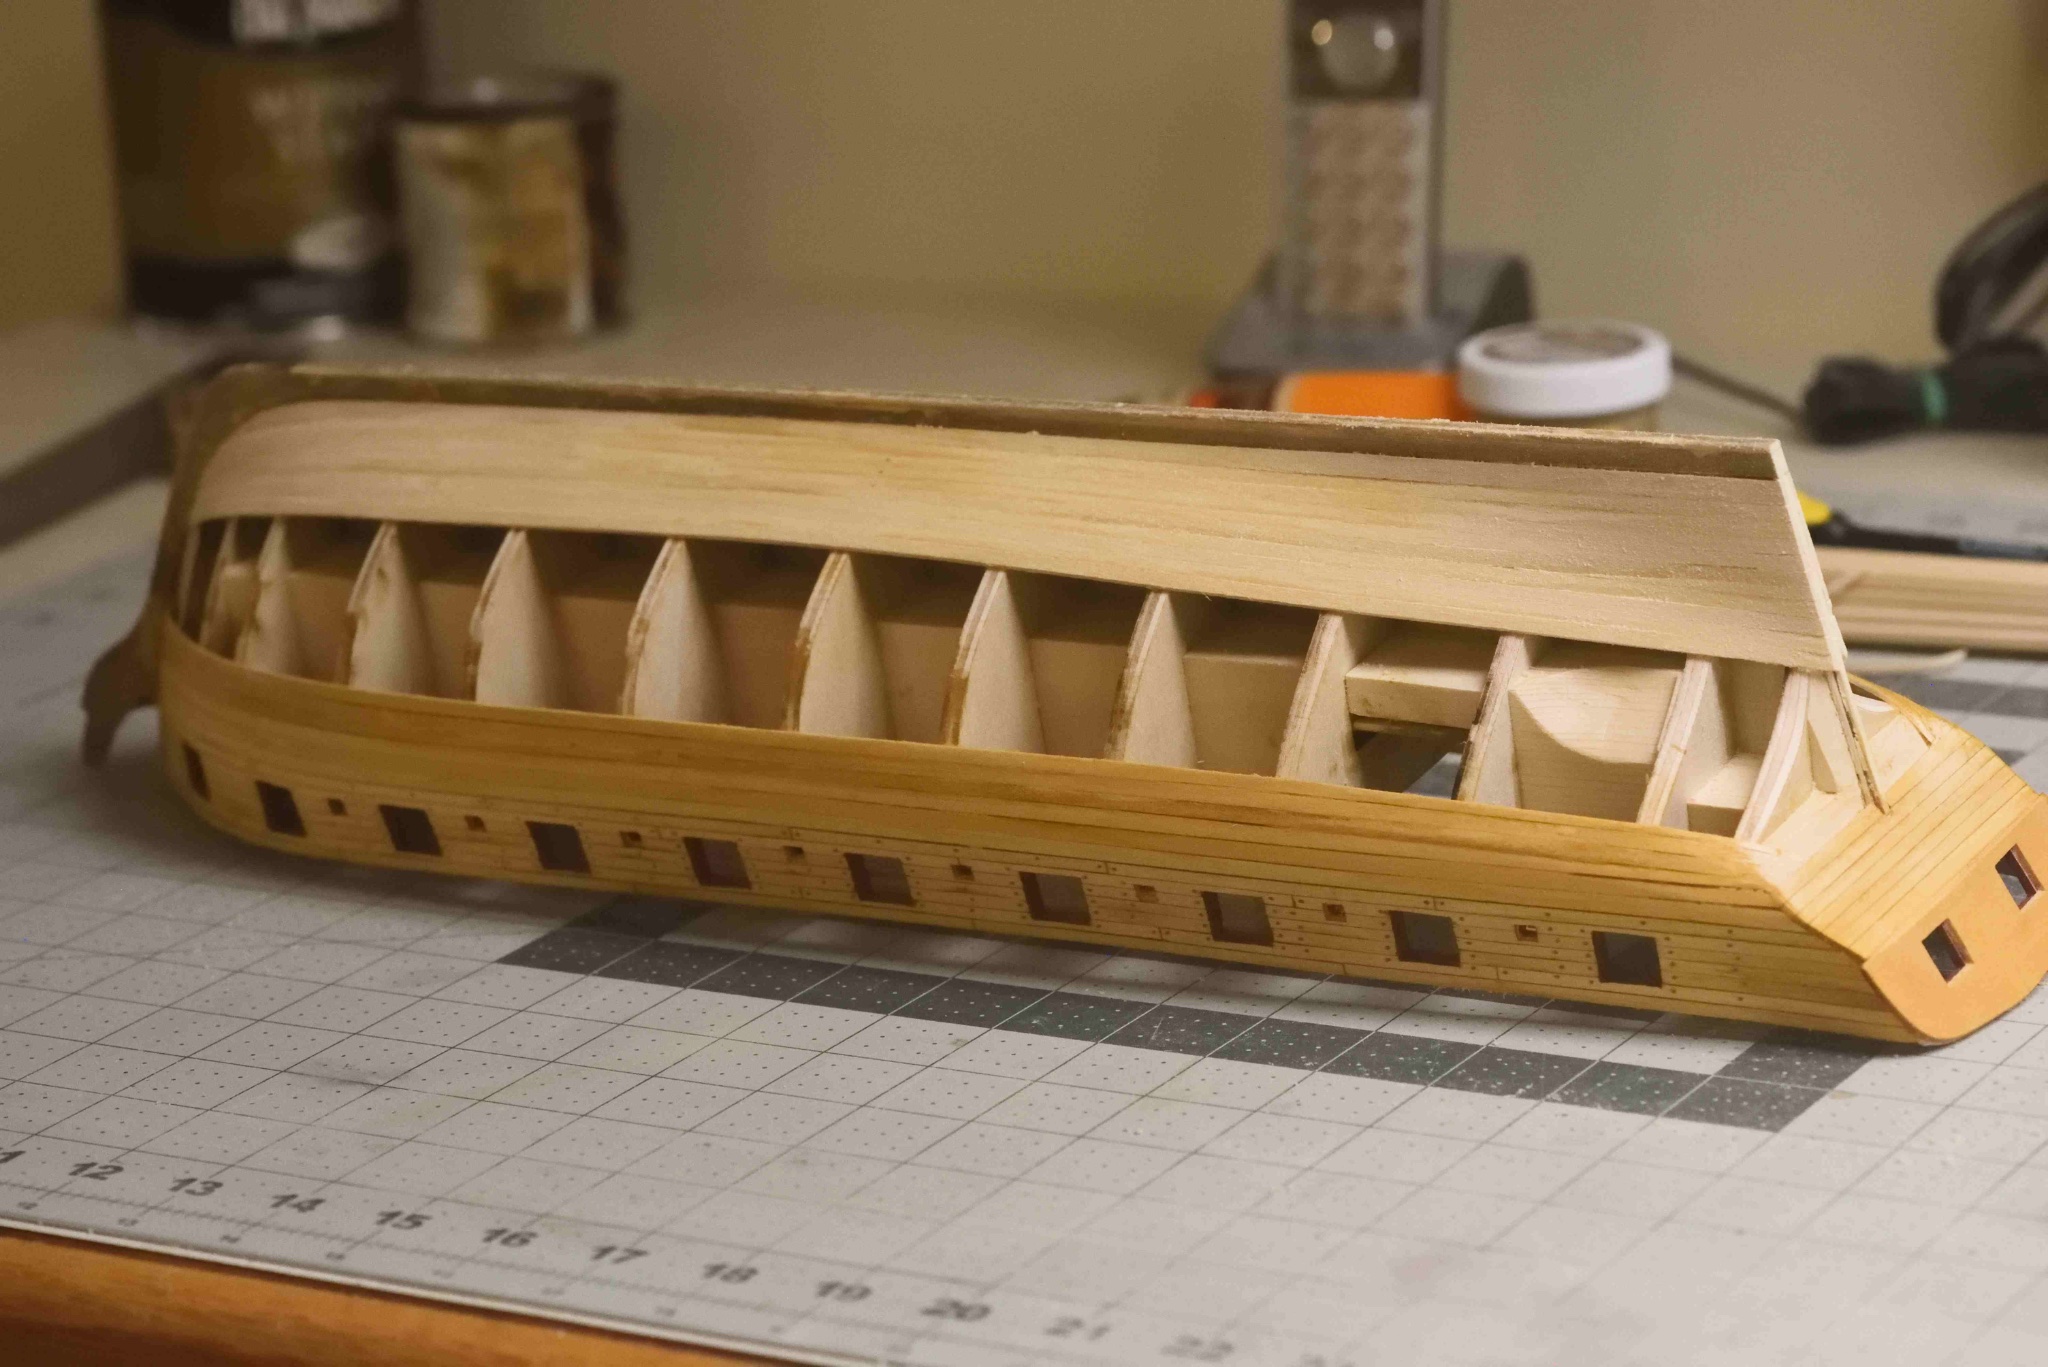
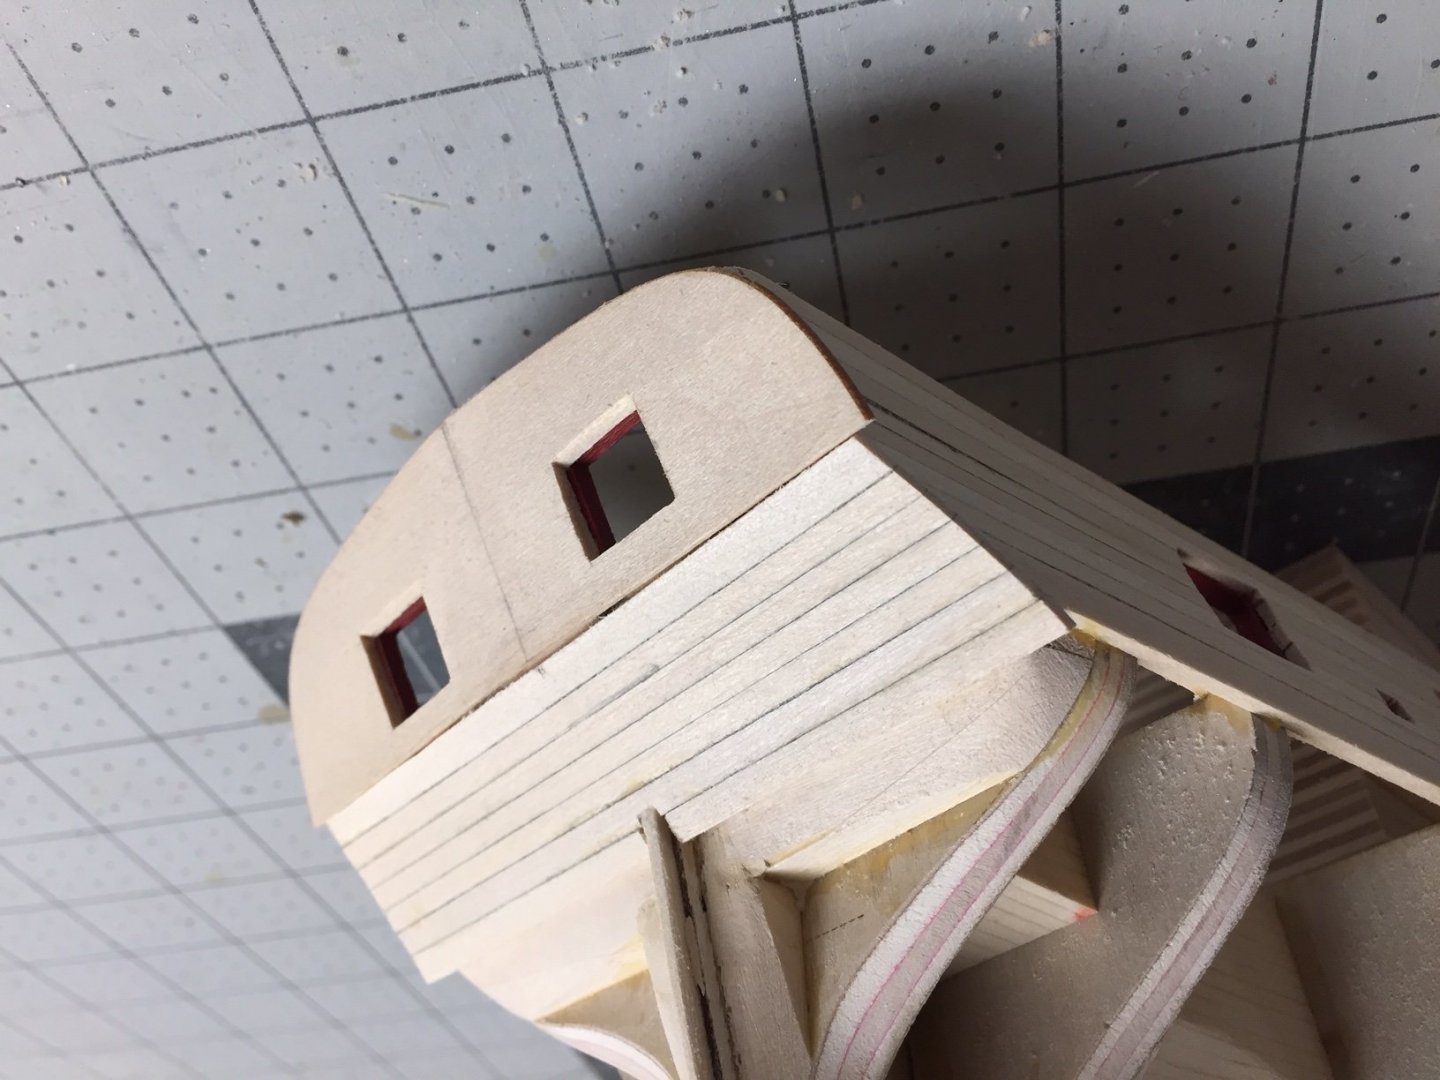
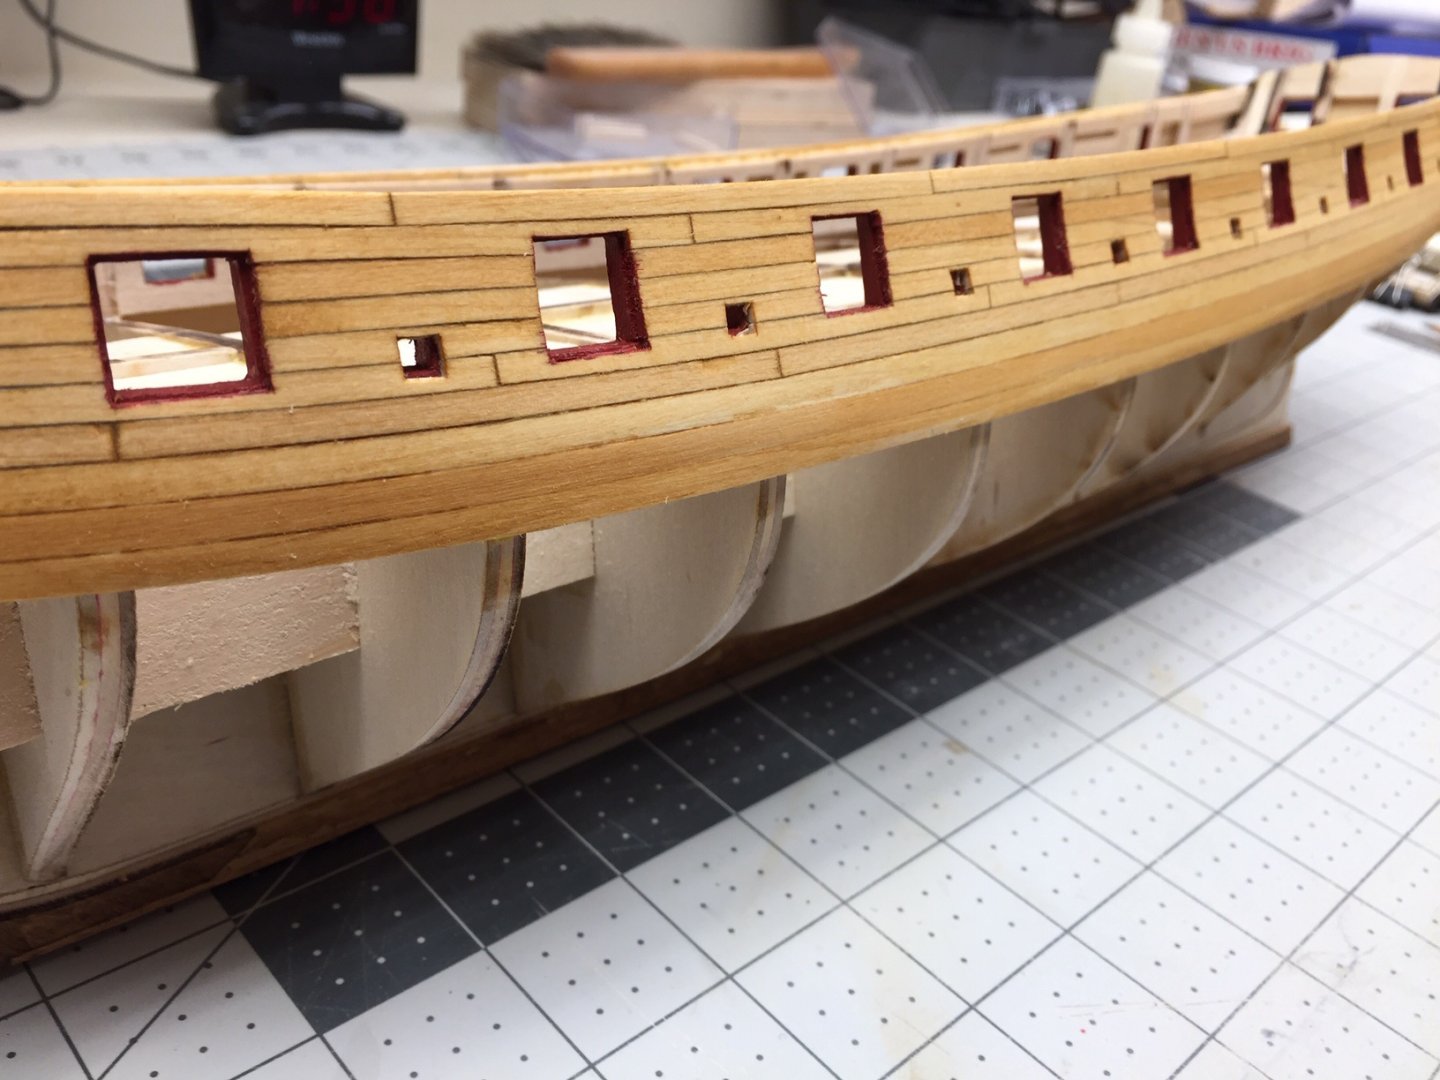
Here's pictures showing the start of planking. The first is the first wale plank. This is followed by the bulwards planking on the outside of the hull. I used Chuck's trick of using pencil along edge of planks so they show up later on. It worked great. I should have been more careful planking around the gun ports and oar ports, making sure everything was square and clean. This was the time to do it. I was not able to improve it later on. I had a hard time clamping around the bow. These clamps left marks in the planks that had to be sanded out or filled a little. Perhaps steaming them to get a little curvature beforehand would help, so you wouldn't need as much clamping force.

-
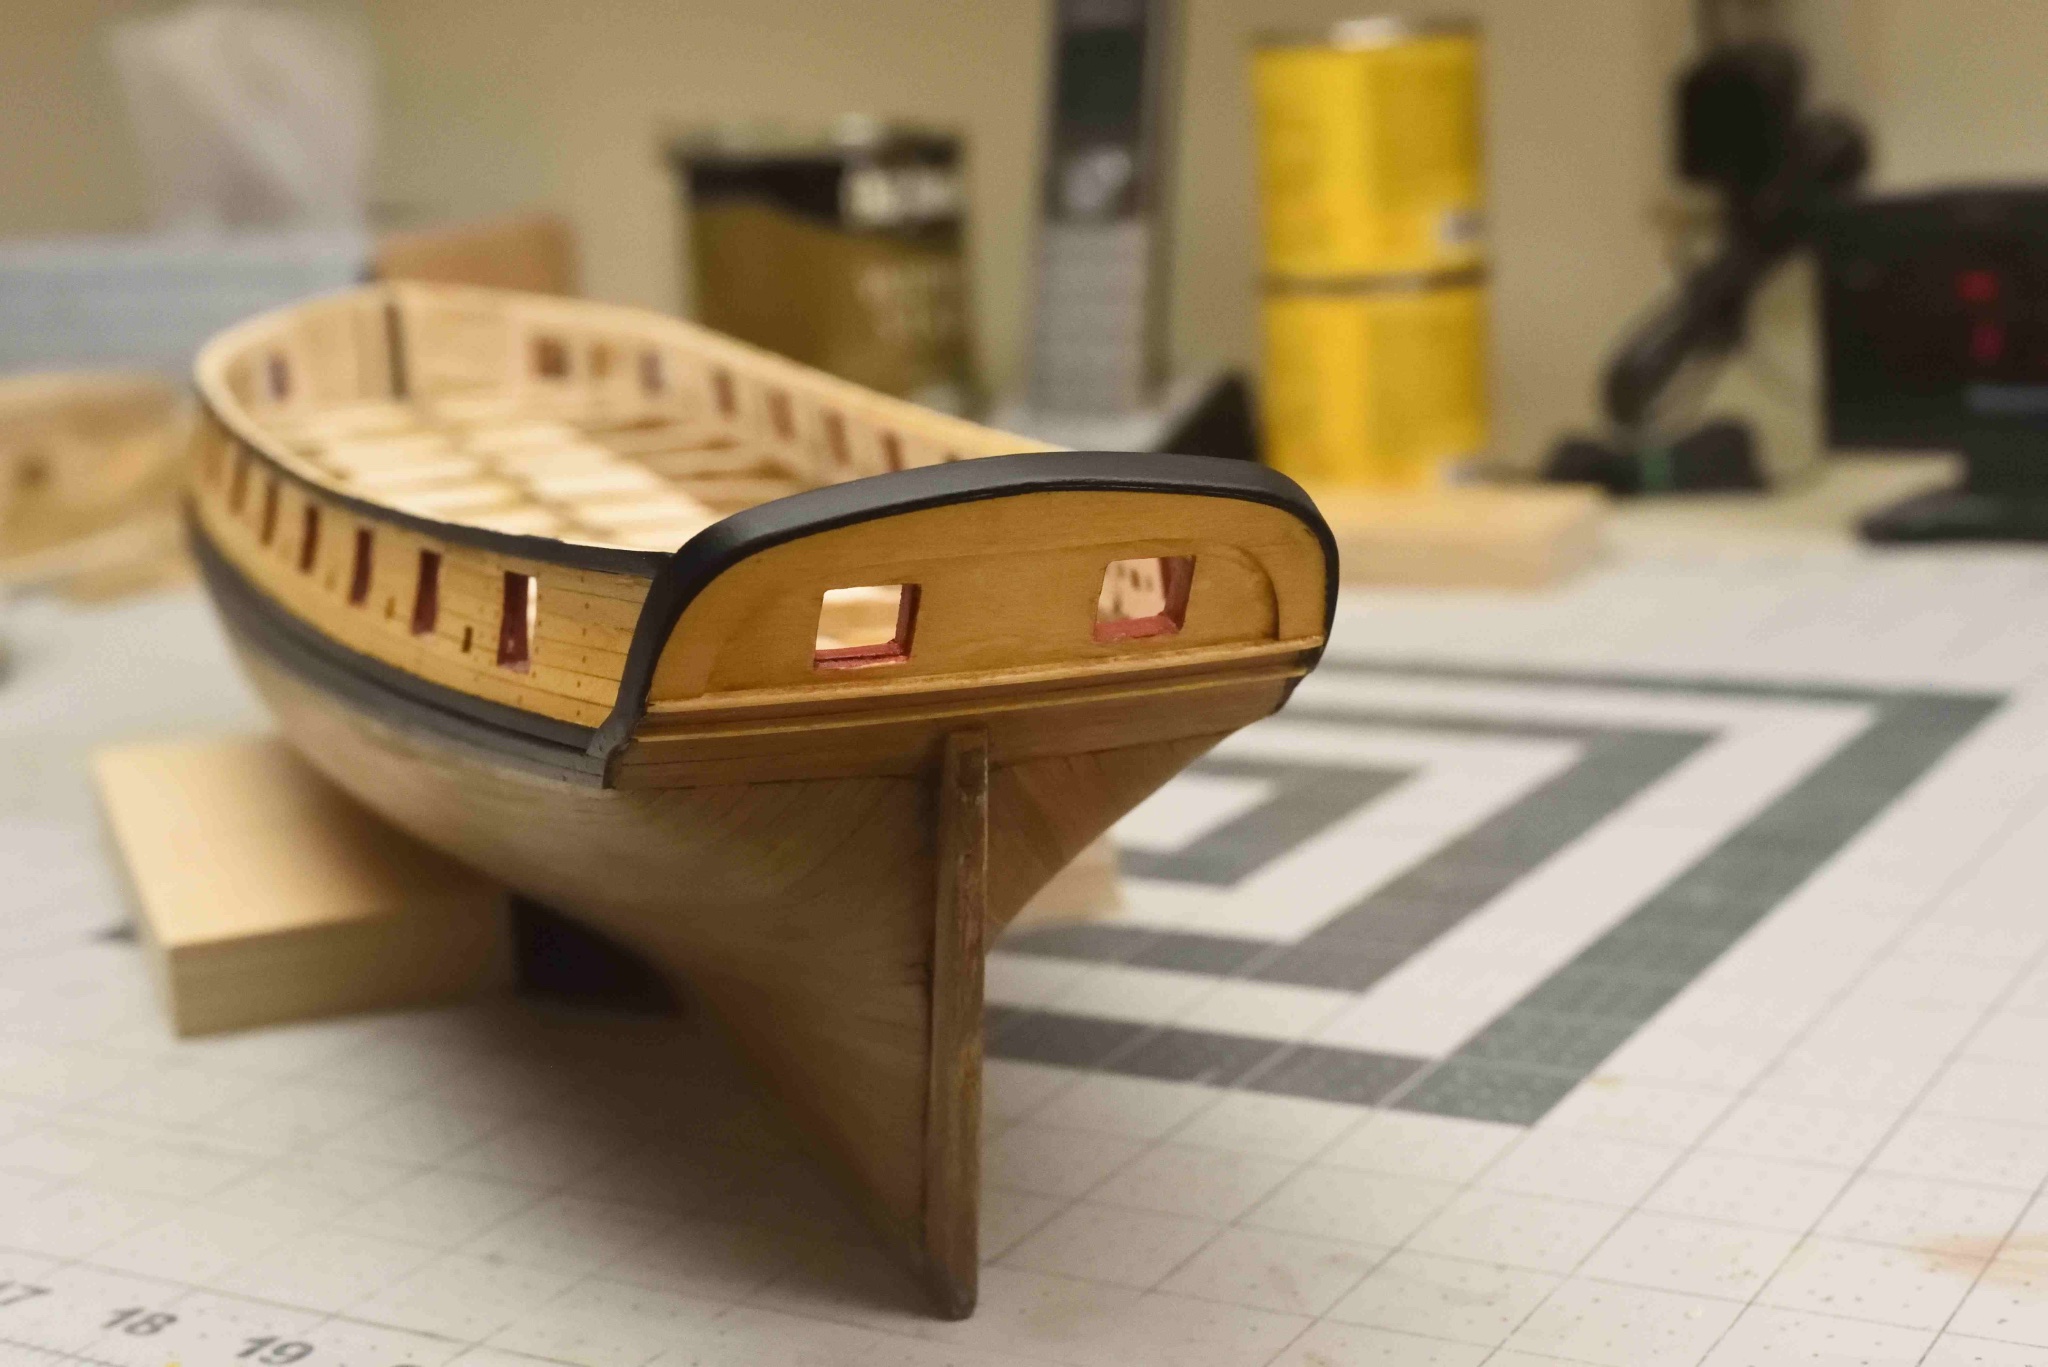
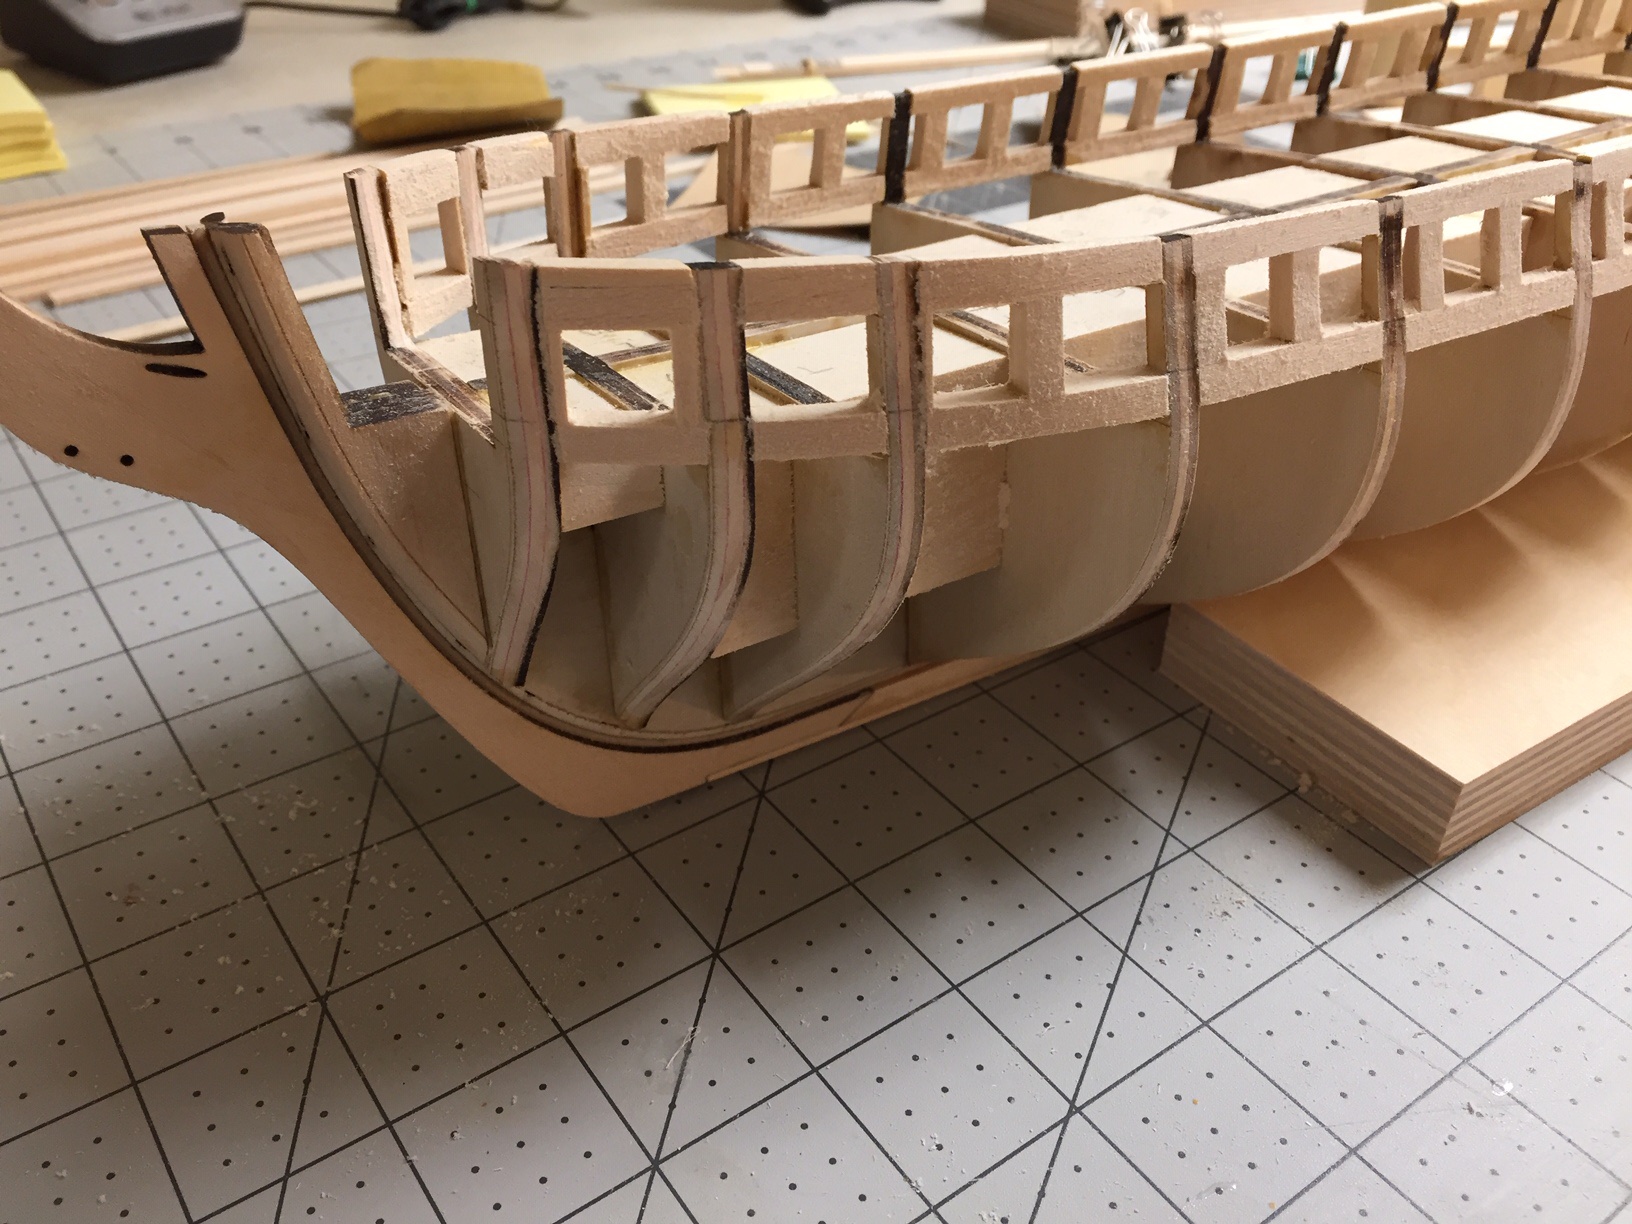
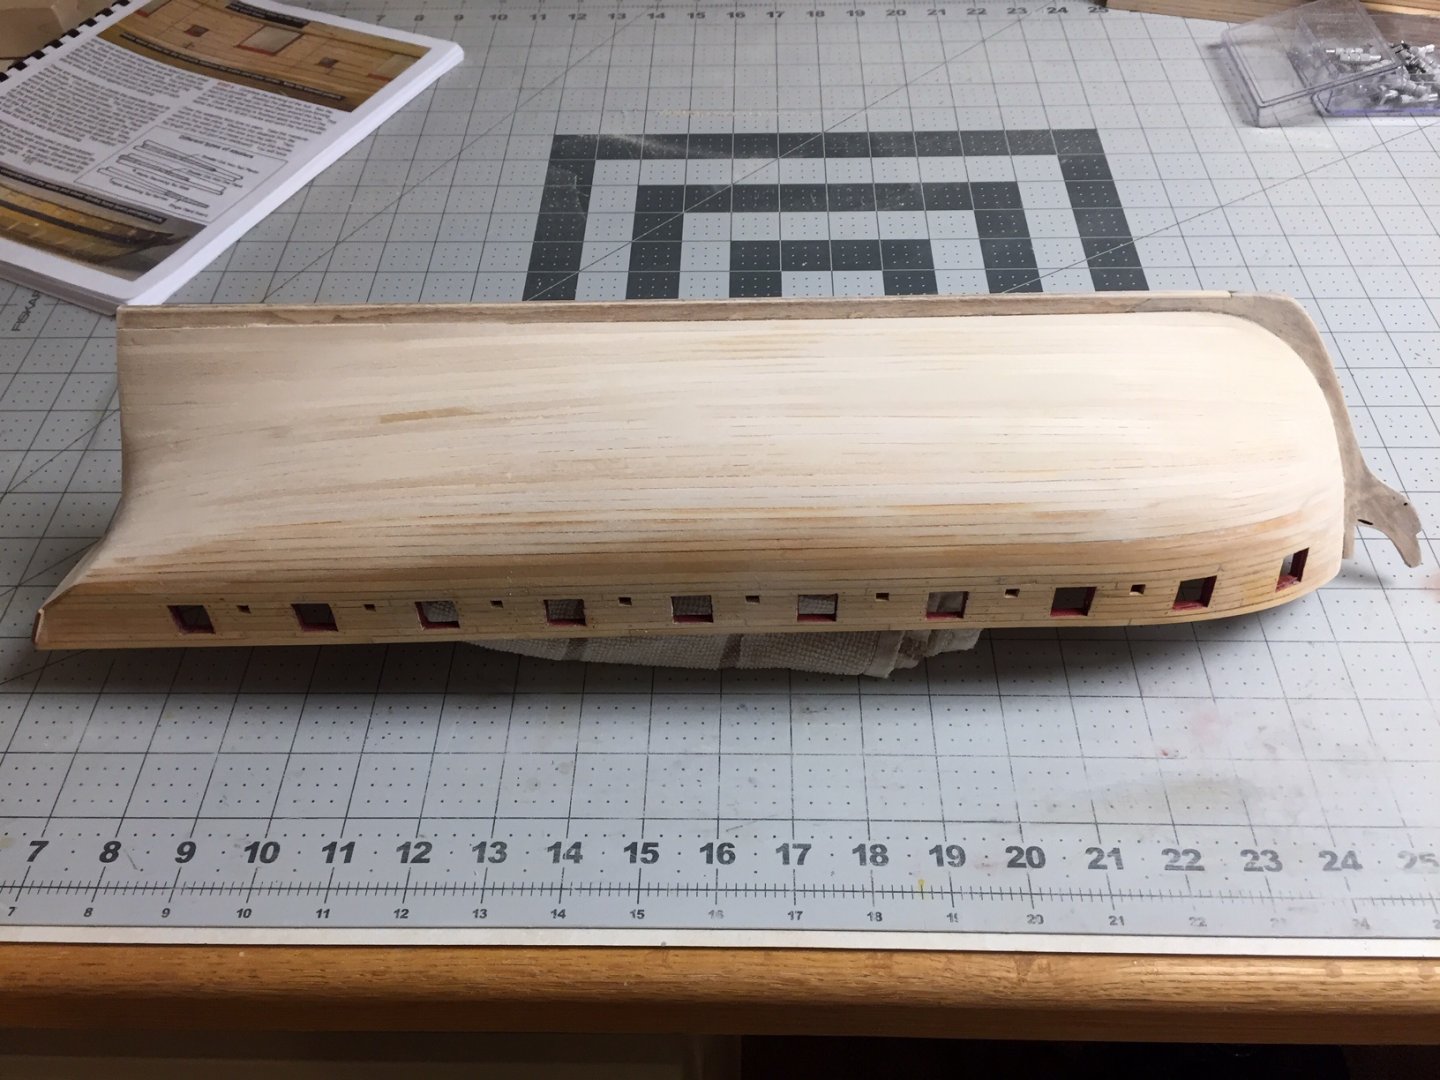
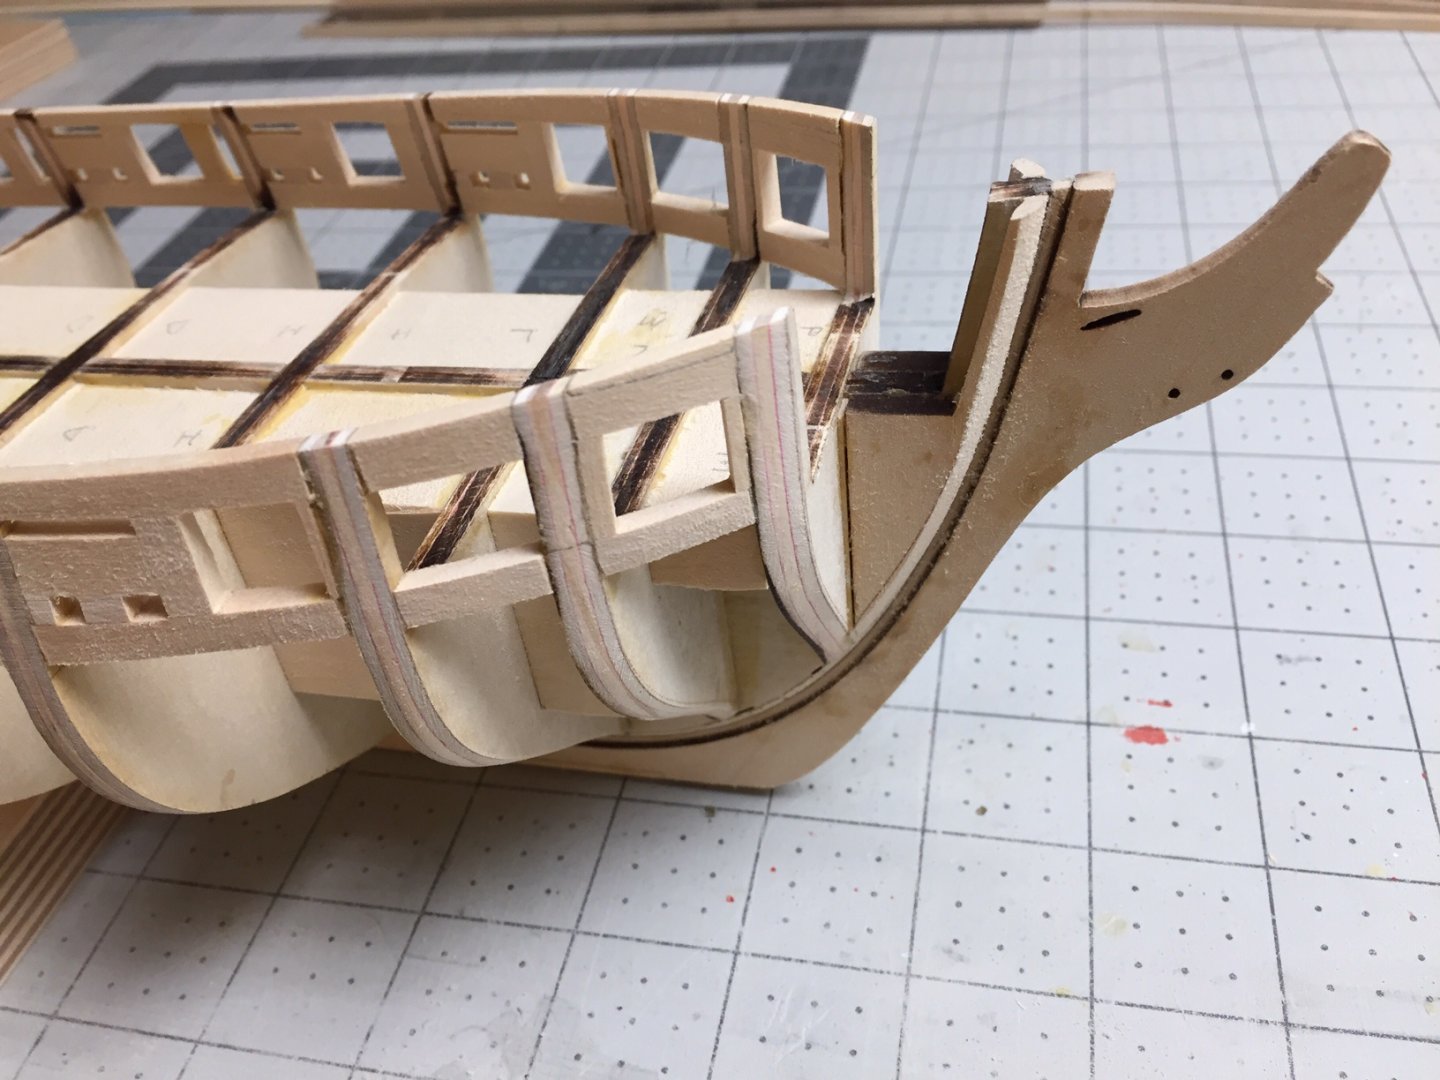
Here's the stern framing after much sanding. I remember this part was tricky and I had trouble getting the stern frames aligned. It wasn't perfect, and required quite a bit of sanding. I used dremel for sanding to remove larger amounts of wood, and sanding blocks or sticks when I got close to what I wanted. I'll also attach a photo of the bow when ready to start planking.
-
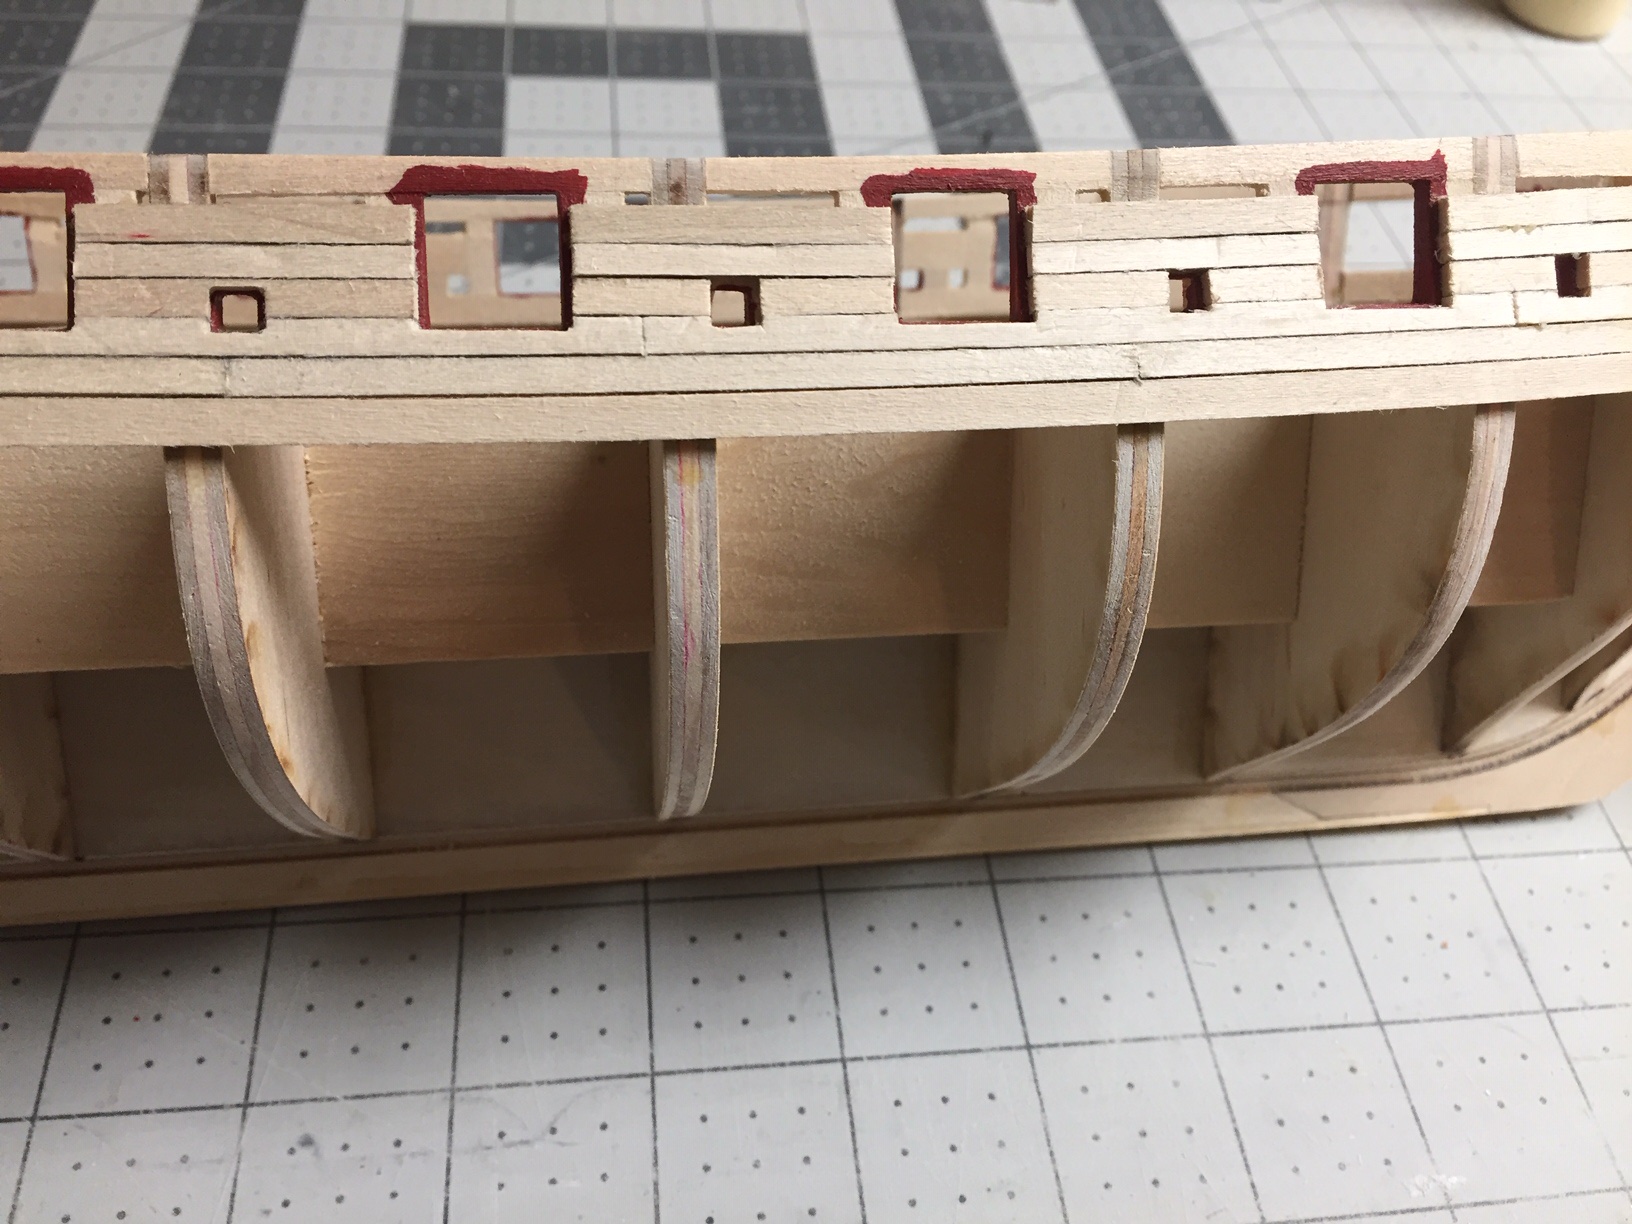
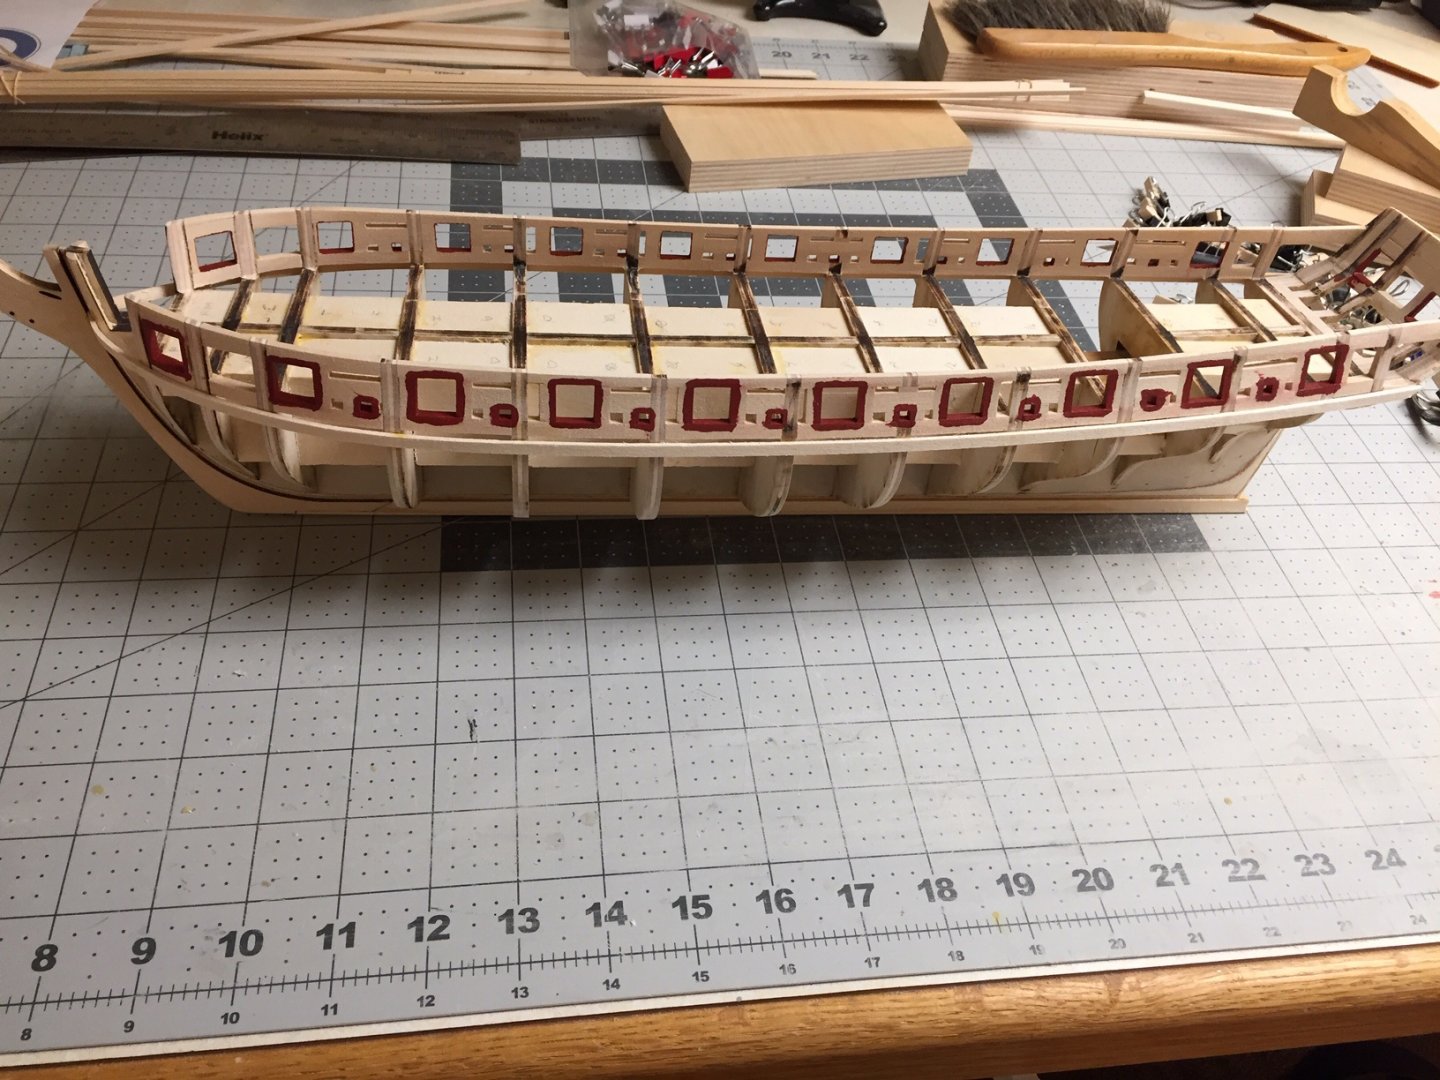
Learning to do this build log. Looks as if I "reply" to add more. Here's the gunport sills and lintils. The last photo will show the oar ports. Up to this point, I remember everything being straightforward. My experience with with model airplanes, kits and scratch built, and I've built one model ship about 20 years ago.


-
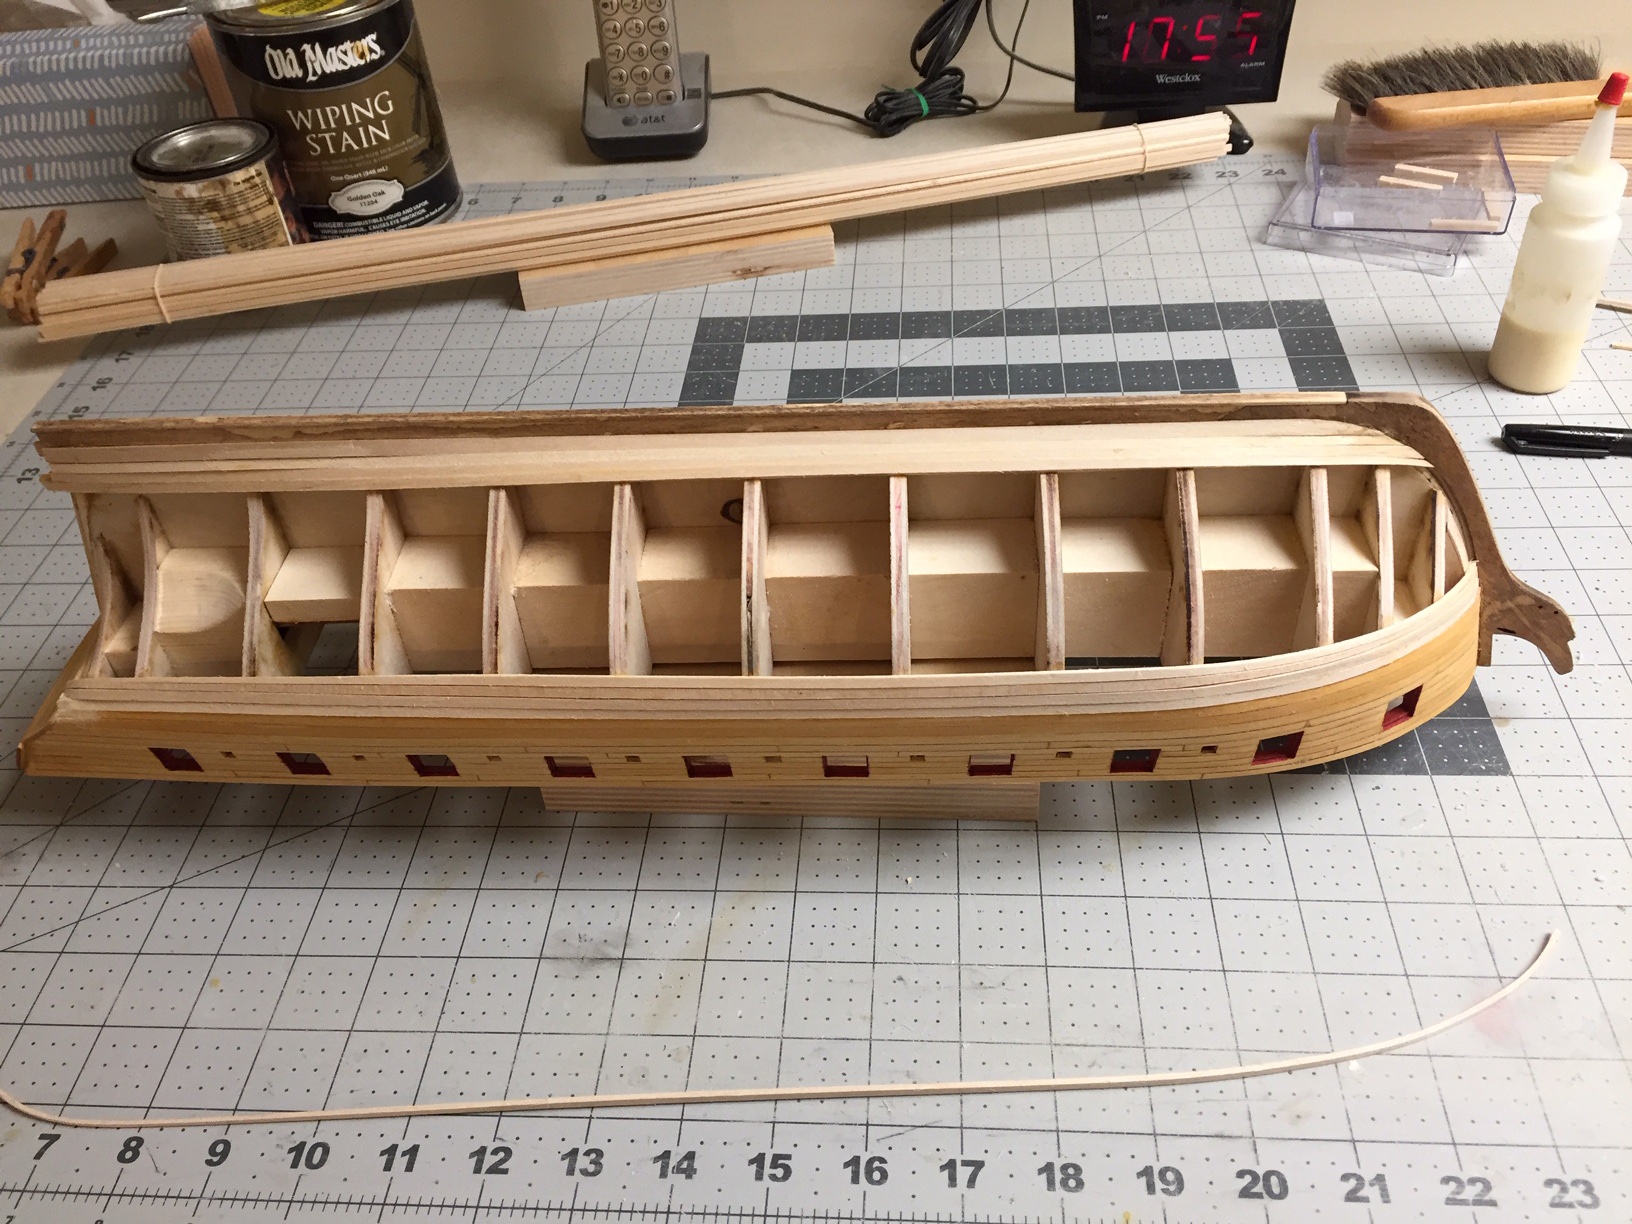
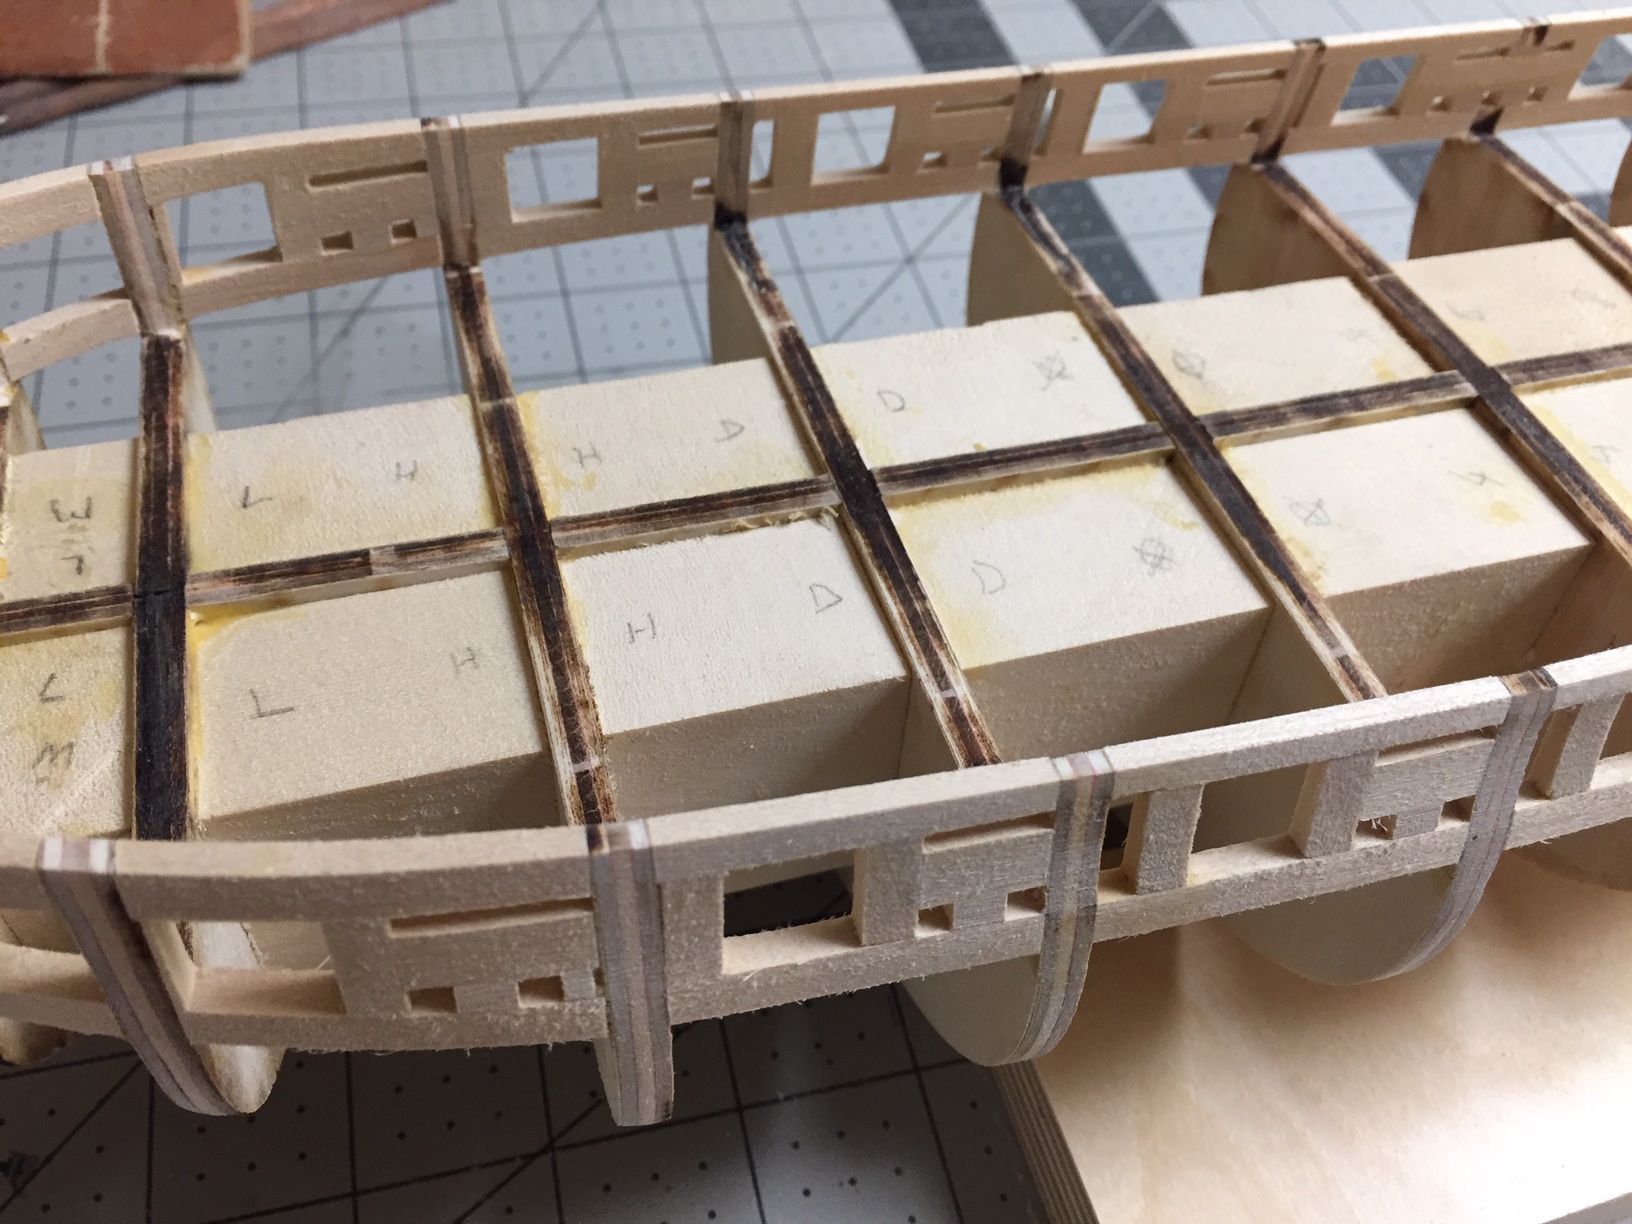
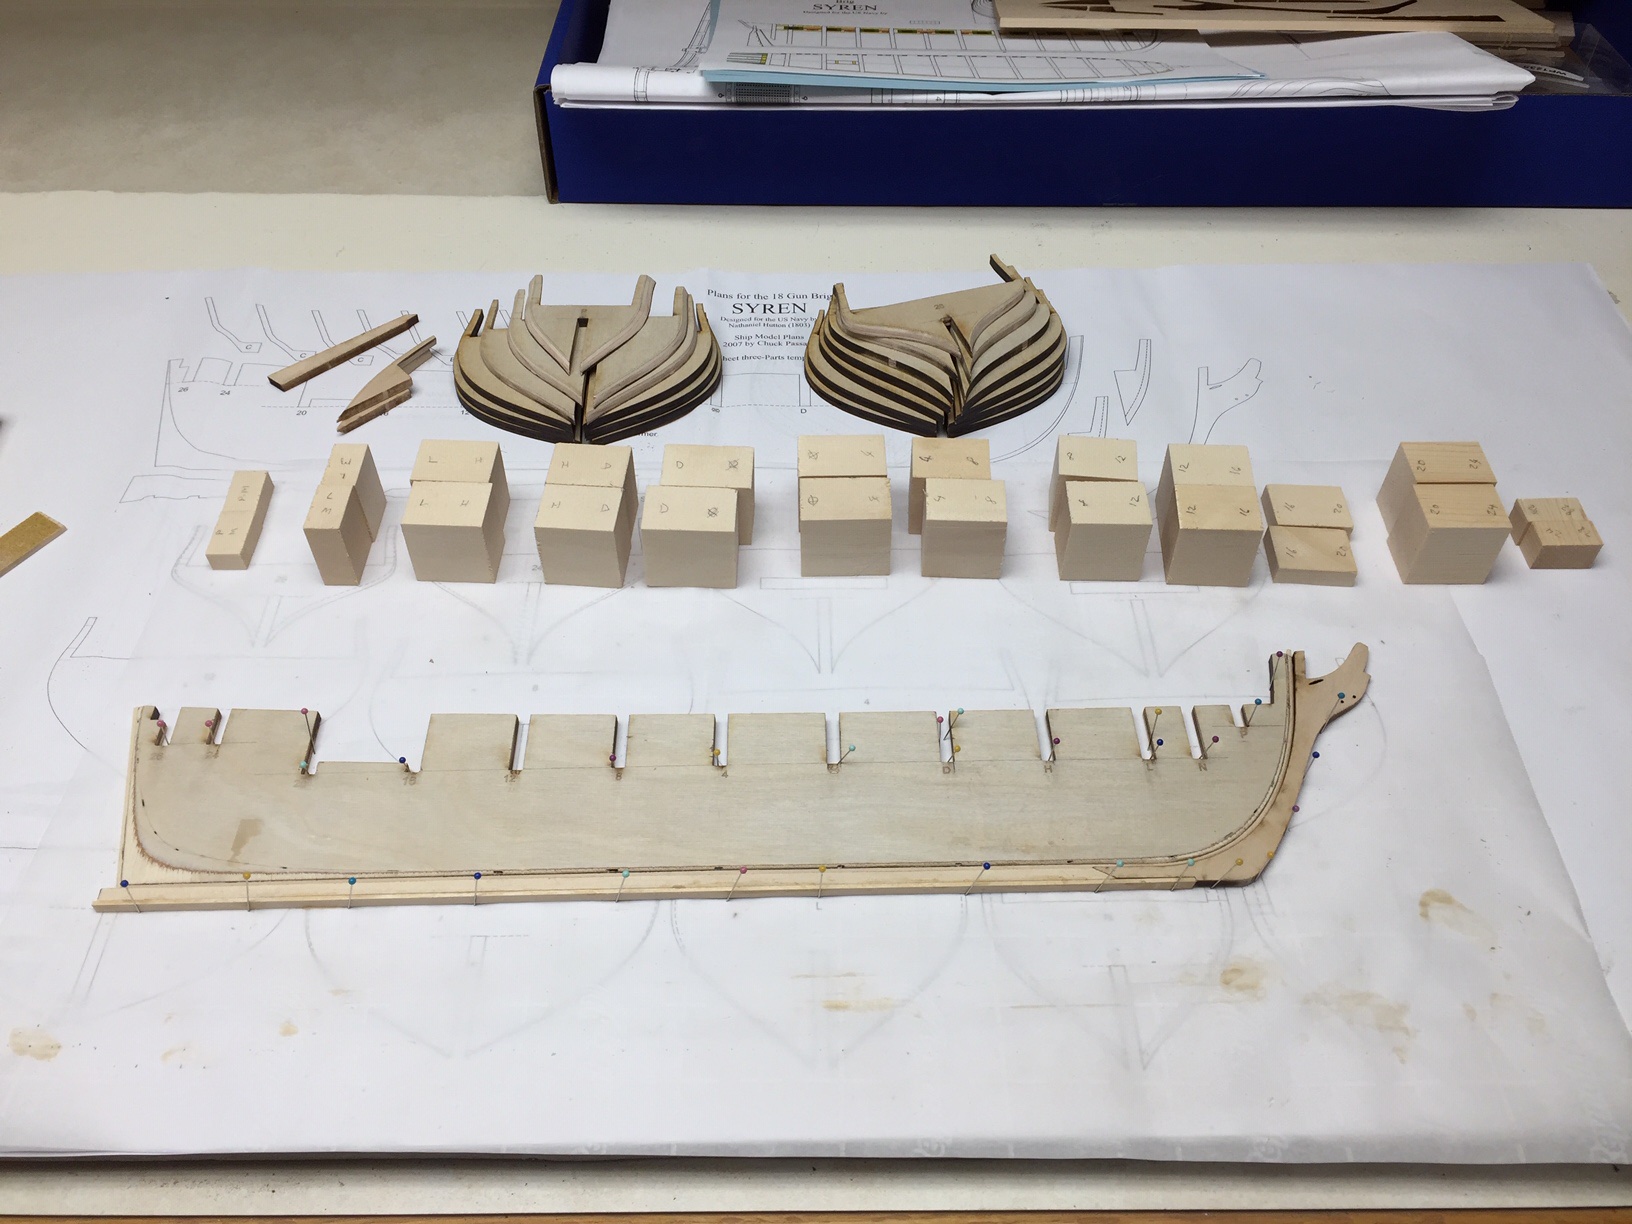
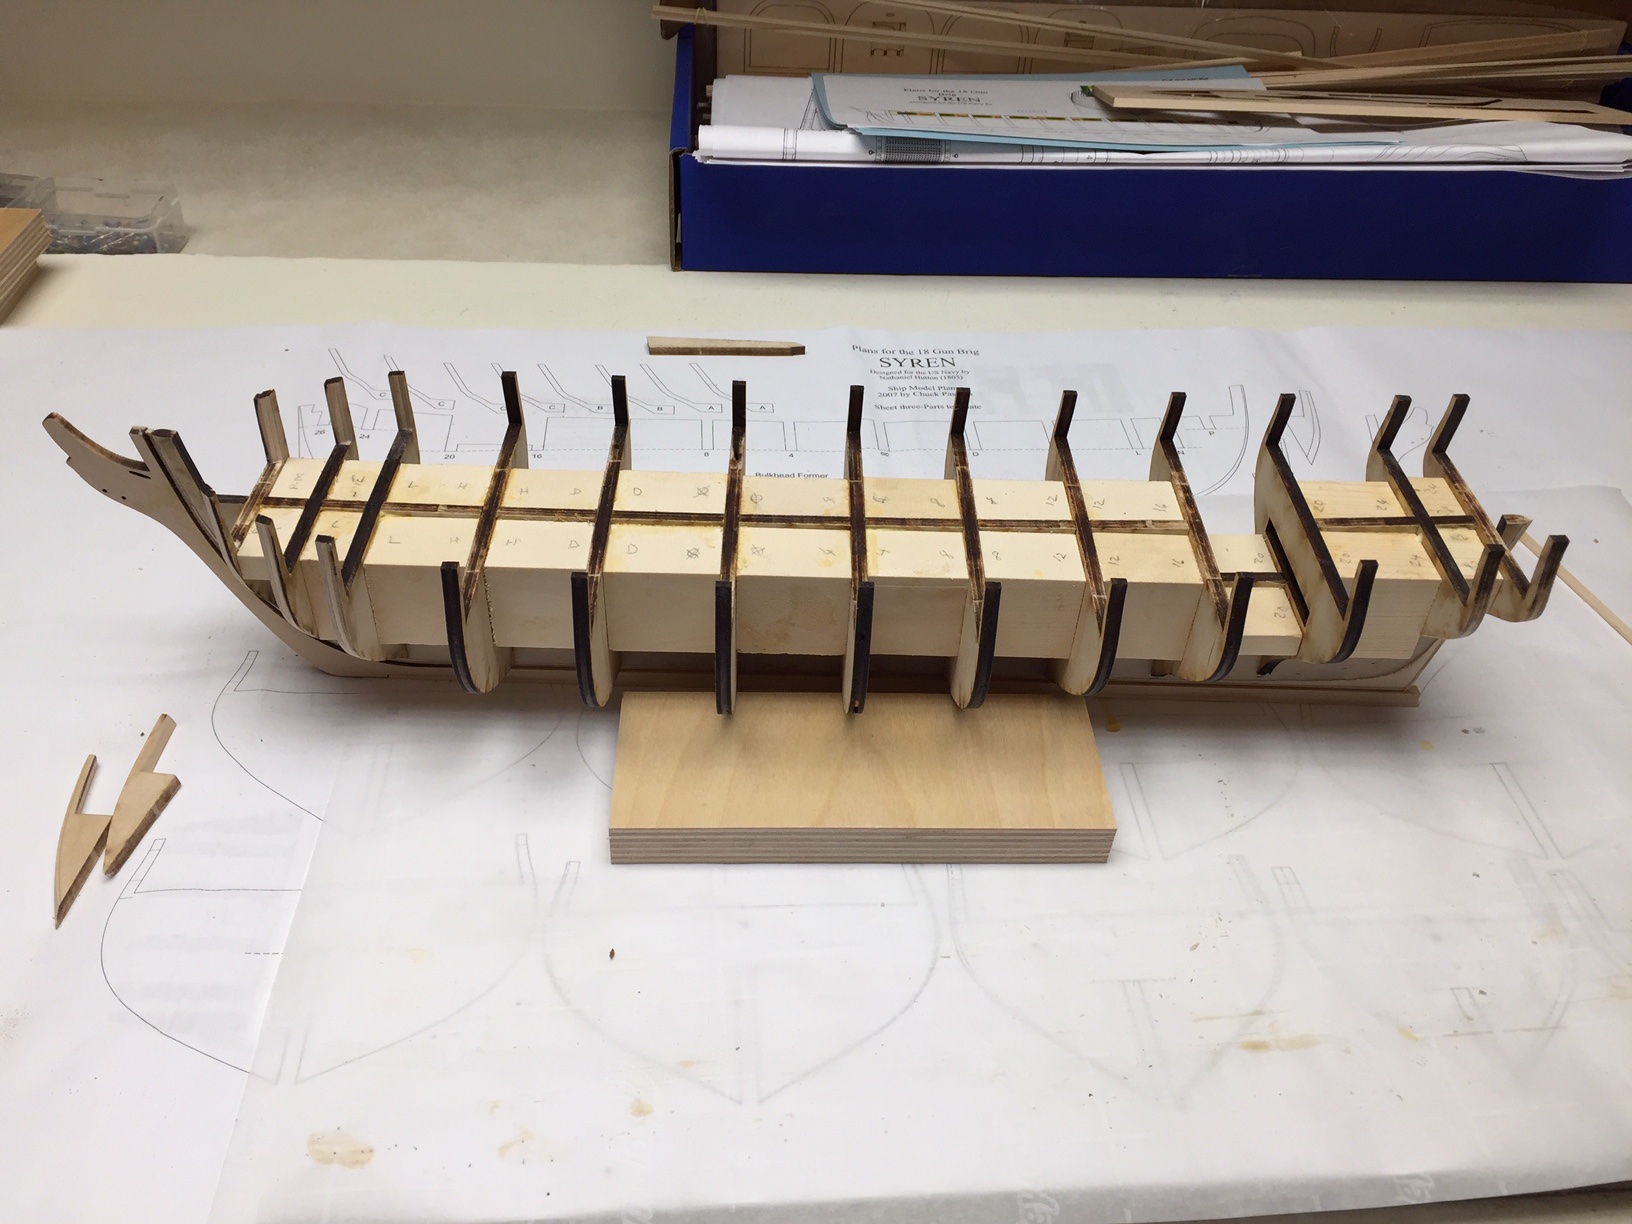
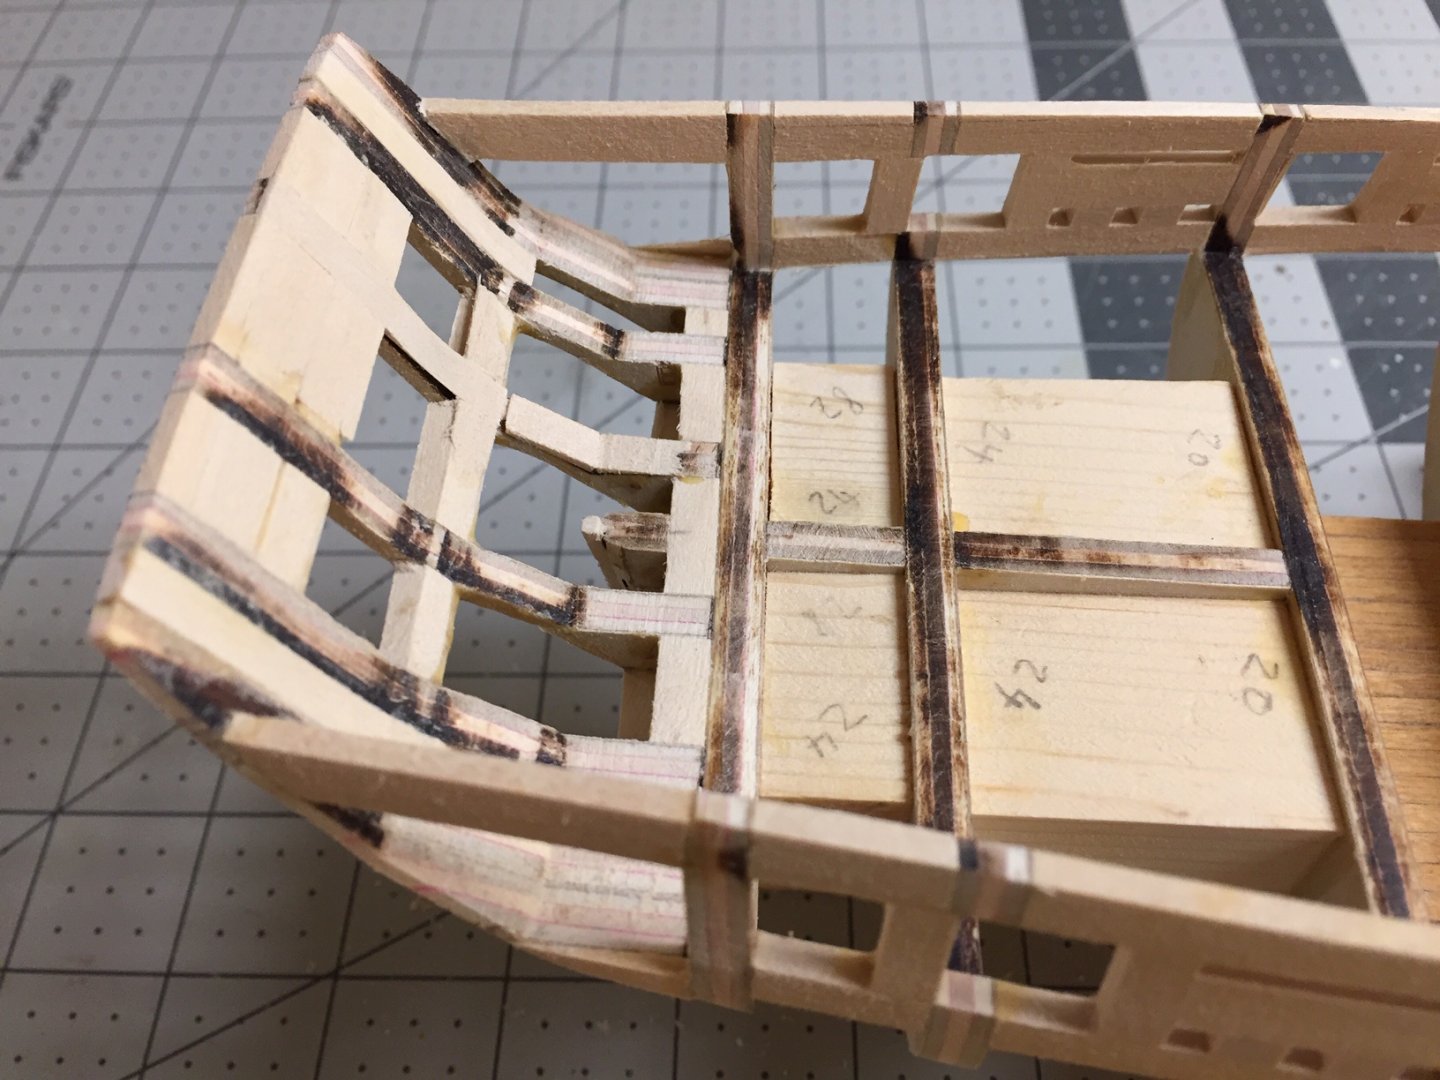
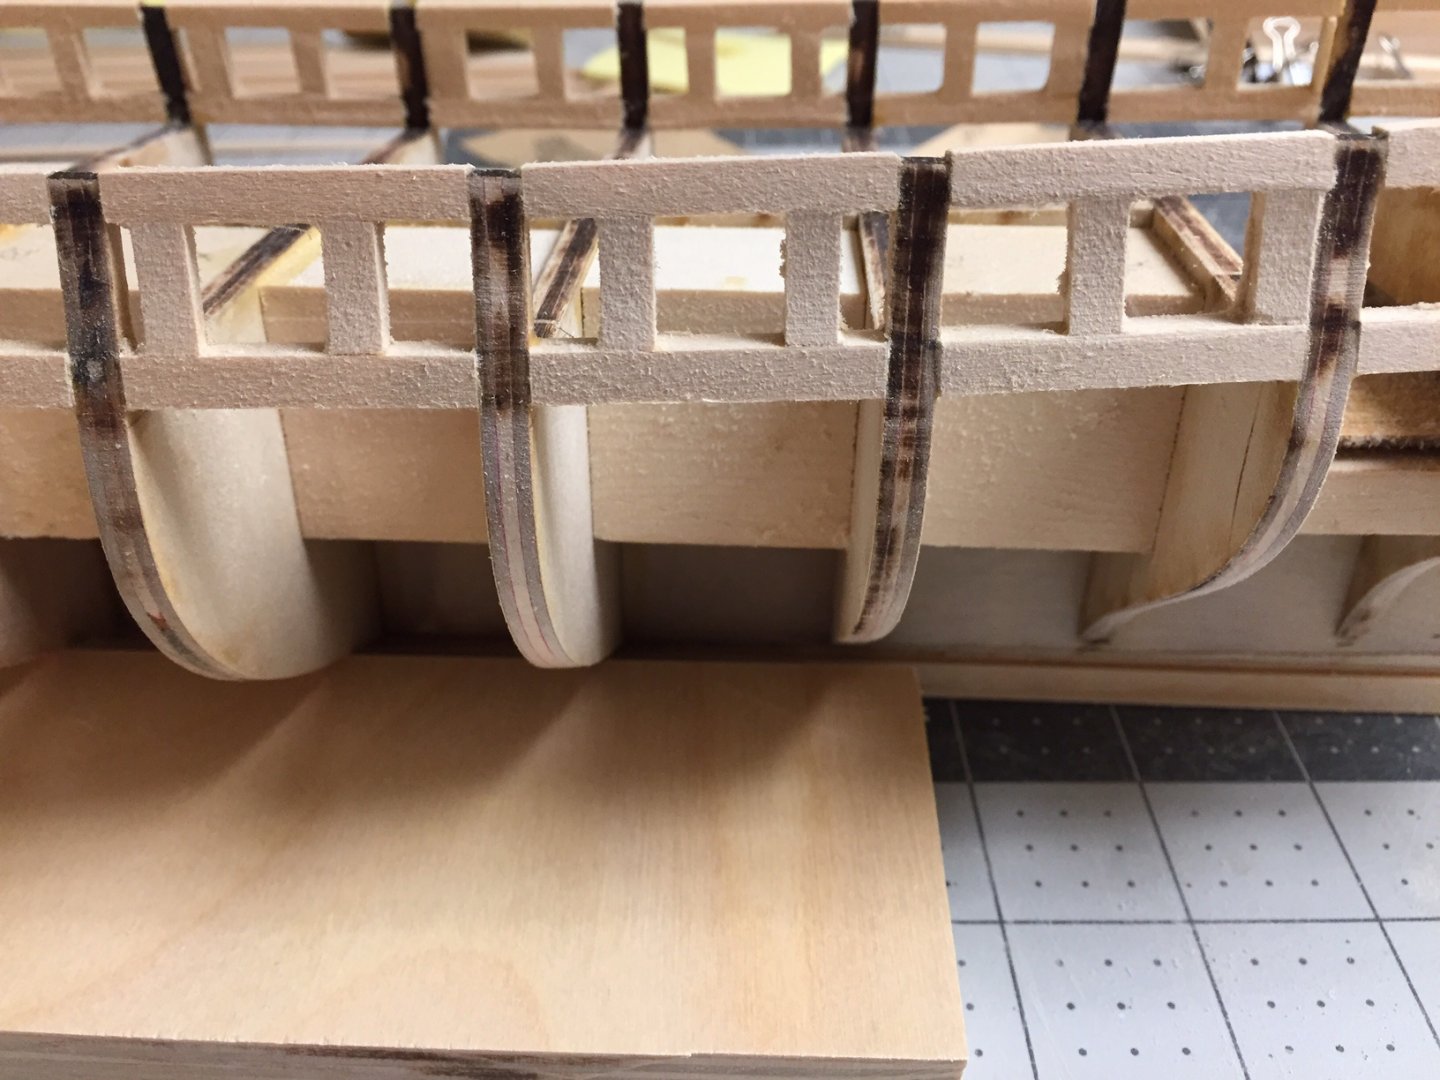
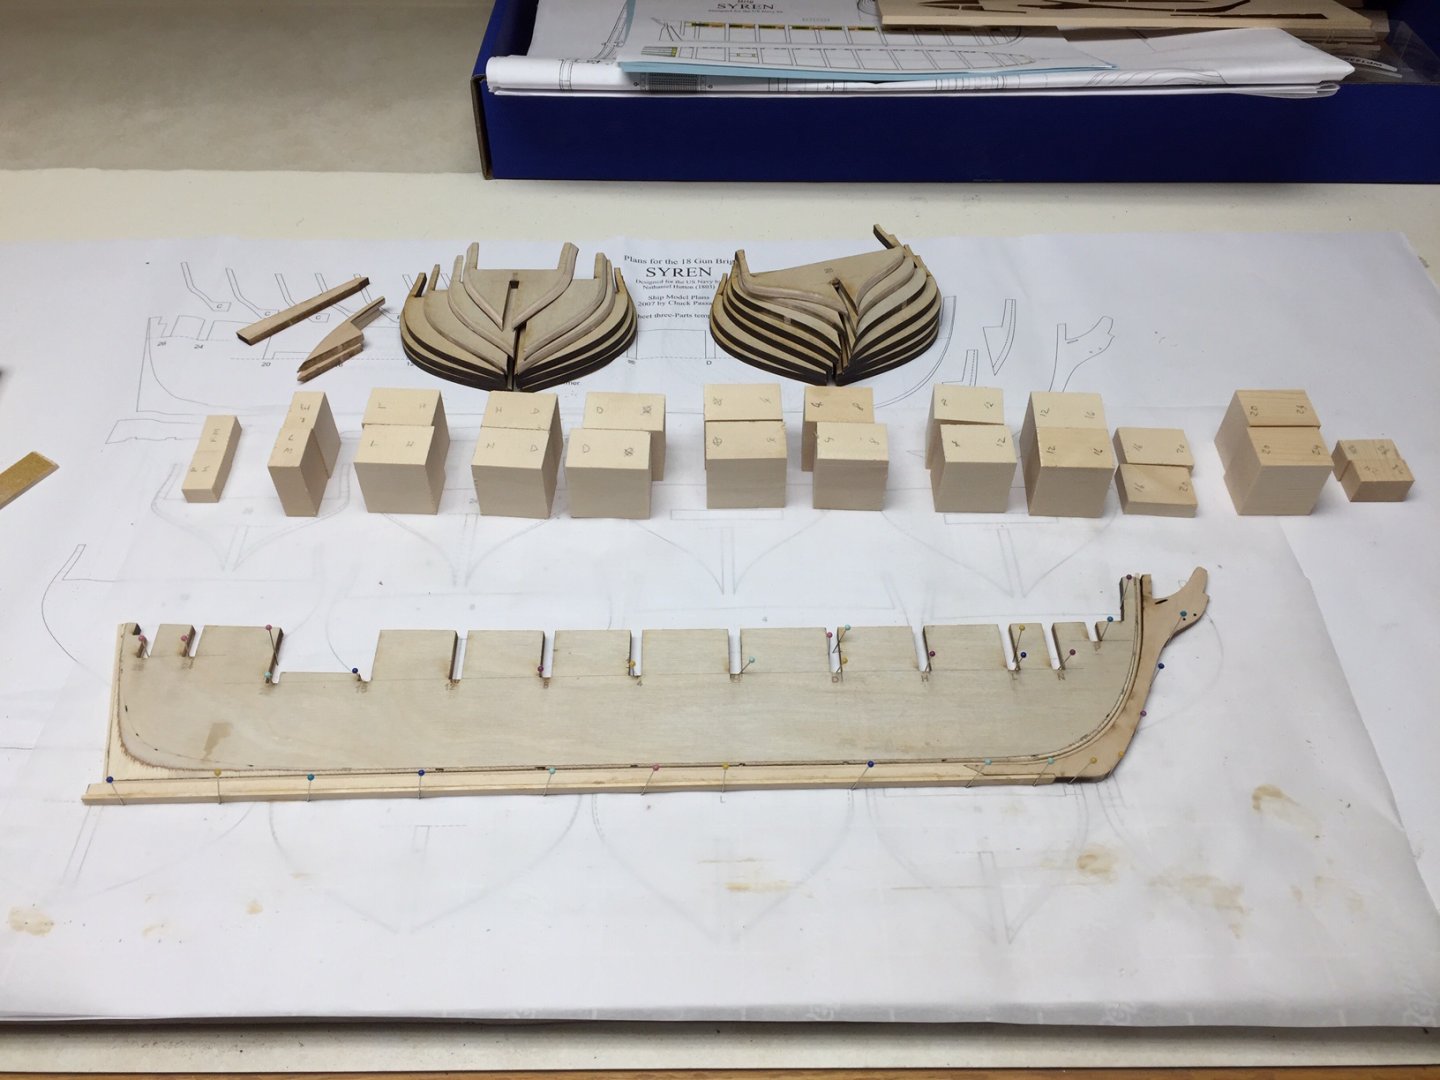
I'm going to do a build log even though my model is nearing completion. If nothing else, it will remind me of what I've done, both good and bad. There are certainly a lot of areas I can improve on in the next build, which is yet to be determined. So here's the beginning with the frame, bulkheads, and spacing blocks. Spacing blocks were cut on table saw from scrap wood and make alignment super easy.

-
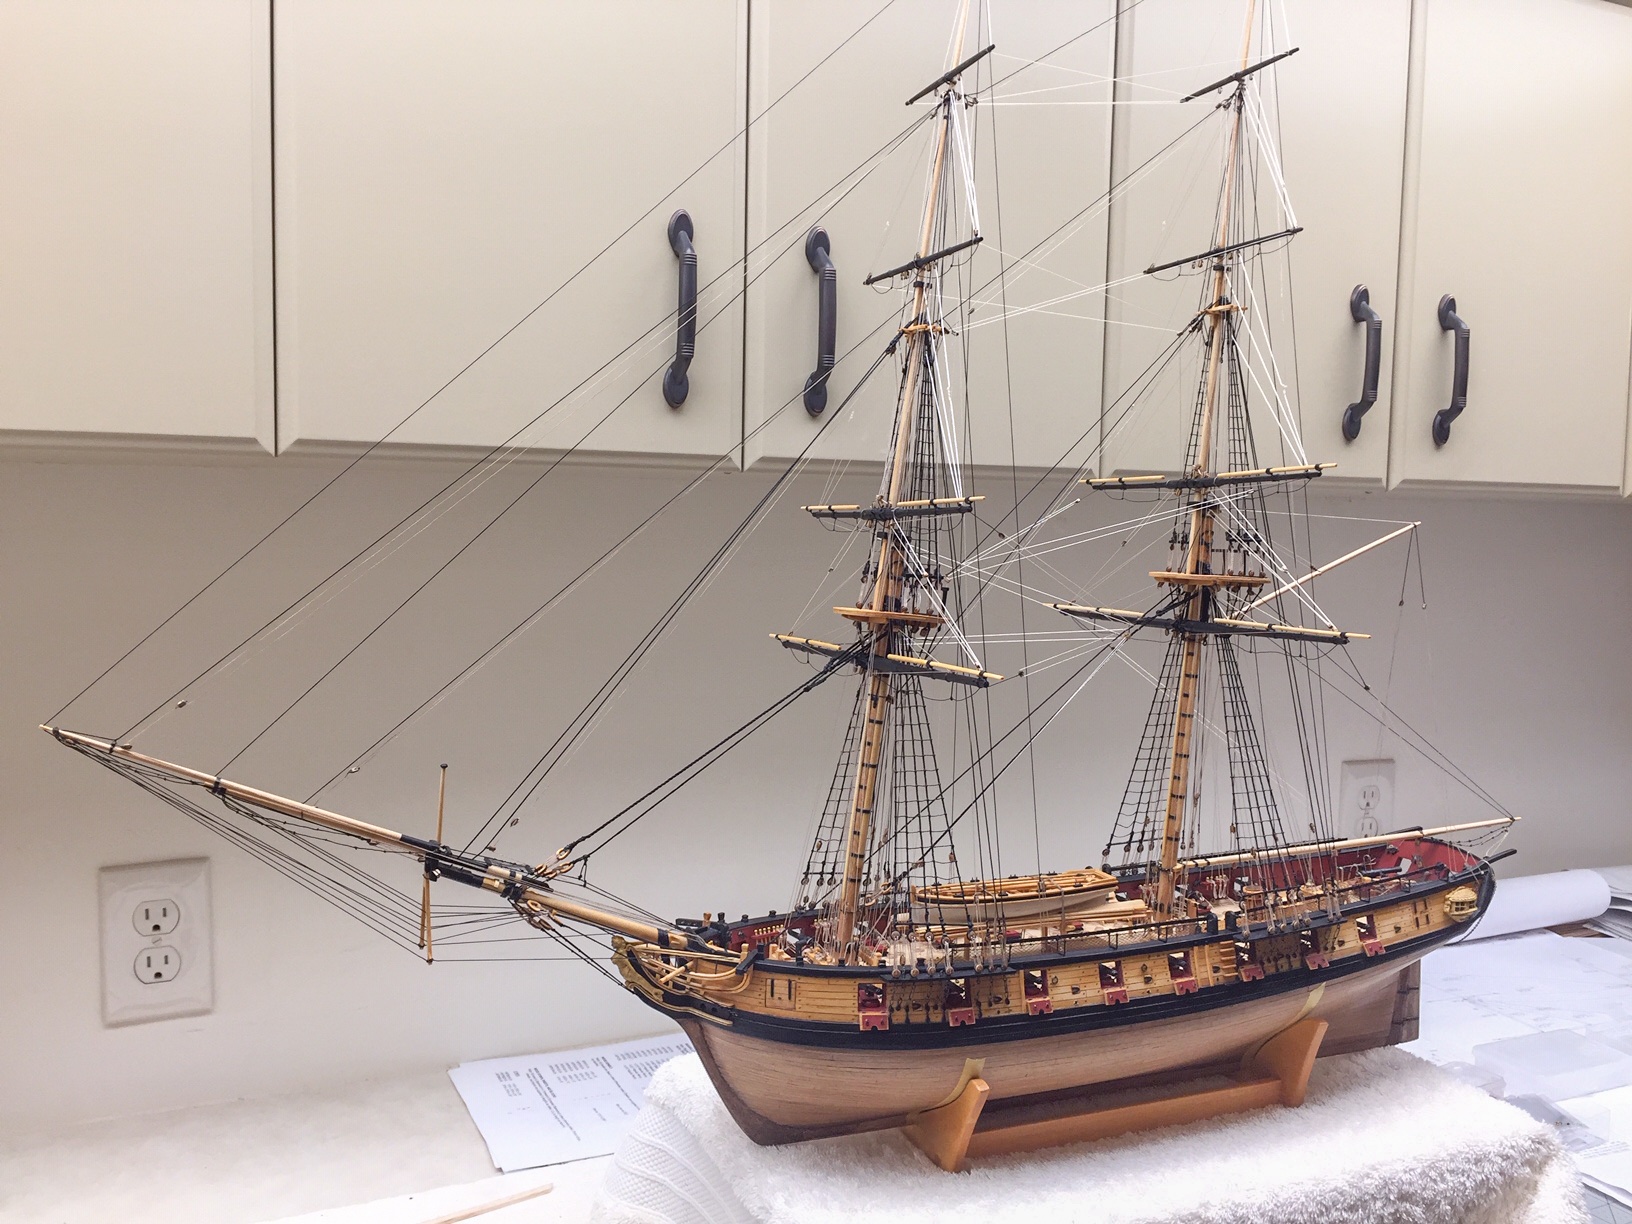
Hi Everyone, especially Chuck Passaro, I've been retired a while and building model airplanes (electric rc park flyers - stick and tissue type). About 20 years ago I built a model ship, the Prince de Neufchatel, a ModelExpo kit. Back then, I went to local hobby shop to buy the kit, and just picked one I thought I could build. After building model airplane kits, I was disappointed with the kit, but proceeded to build it. I was working, so it took about 2 years to build the hull. Then it sat in the garage for about 10 years as work and other things interfered. Finally finished it, and at the time, said I'd never do another. But now I'm retired and got tired of airplanes. Plus the FAA is imposing some regulations making it not quite as much fun. So after looking at some reviews online, I selected the US Syren kit. I didn't know about this web site and all the information on it, so proceeded along like I've always done. Now, 2 years later, I'm getting close to finishing it. Building the Syren has been a completely different experience from the first kit. Excellent instruction and plans, so well done Chuck Passaro!! Only slight disappointment was the usual rather poor metal fittings, blocks, etc. from ModelExpo, and I know that's to keep costs down. But I knew what to expect, so it was no big deal. Several months back I discovered ModelShipWorld and it's amazing. I'm starting to take the time to participate now, and I'm a bit overwhelmed. Many thanks to everyone that posts build logs, articles, photos, etc. I wish I had found this before I started the Syren, but now I know about it. I'll create a build log for my Syren, so I can learn how to do it, and someone might be a little interested. However I've been humbled by what I've seen, and mine is hardly up to the quality of others. I'm sure I'll build another ship, and when I do, I'll start another build log. I'll also raise my standards and try to do better! I will attempt to attach a snapshot of Syren as of today. Thank you everyone!

-
Thanks so much for the links on how to get started on model ship world. There's so much information here, I'm a bit overwhelmed. I built mine based mostly on experience from the first boat many years ago and from model airplanes. I'm retired, so have no excuse for lack of time! But my eyes have gotten worse over the years from staring at computer screens, and it seems my thumbs are bigger than I remember. I should have upgraded rigging and blocks like you did. I didn't discover Chuck's web site until I was too far along to change. I'm very impressed you tried carving the badges. I think they look great. I stuck with the metal ones and wasn't too happy with them. But they are small, and after you get everything else done, they don't show all that much. I also noticed you did the ships wheel. Those were real good decisions! I tried to find a wood color to paint the metal parts, but it's only so-so. Looking back, it's kind of funny I never thought of making my own replacements for some of the metal parts. The additional boat on the aft end is another wonderful addition. I did think about that and chickened out after doing the long boat. One advantage I found is that the more details I add, the less you can see all the little mistakes I made. The rigging really distracts your eye away from hull and deck details. Of course, I know where I messed up, and there's a few things I couldn't hide. We can only try to do better next time! Your comment about the ship getting taller and larger with masts is so true. I had the same feeling. And the display case being large is true. My first model was Prince de Neuchatel and the case ended up quite a bit larger than I expected. Syren is about the same size, a little less in width. I plan to put in LED strip lights in the top of the case which will let you see it a lot better. No lights in the first one, and the ship is too dark. I'm sure you'll do better, but I had trouble with rigging bending the masts a little. It's hard to get enough tension, but not too much, and to balance it fore/aft and port/starboard. Both of my masts ended up with a lot more rake than they should have, and one is bent a little to the side at the top. I swear they were straight when I rigged them, so am wondering if humidity changed the tension or if I just overlooked it (most likely). The stays are real tricky. They are all interconnected, so pulling one loosens another. Drove me nuts! I finally get impatient, say it's good enough, and proceed onward. Otherwise, it would never get finished. You've got a wonderful model! Can't say that enough. I felt rather humbled after looking at all your photos. And BTW, your photos are excellent also. I better get back to it. I'm working on the triple blocks for the lower yard sheets/tack/clew lines. I'll look into doing a build log of my version of Syren.
- 950 replies
-
- 2
-

-
- syren
- model shipways
- (and 1 more)
-
I'm new to model ship world forum. I'm getting toward the end of building US Syren, and it is also my 2nd model ship. I'm extremely impressed with yours!! Having been thru this myself, your workmanship is much better than mine. We did things a little different in places. I planked the bottom of the hull with walnut rather than copper. I just like the wood look. Most areas I painted like Chuck suggested, but I tweaked it a little. Love your hammocks in the netting. This has the side benefit of making those stronger. I've been very impressed with instruction manual Chuck put together. Much better than first ship I built. I found a few belay numbers on plans or in manual that didn't seem right. Could be I couldn't find the ones he was talking about. I had to order extra rigging thread and extra 3/32 blocks. I gather this is common on ModelExpo kits. But there were extras for the laser cut parts and some of the metal parts. I like that you painted belay pins black. I left mine brass but yours look better. Awesome rope coils!! I'll have to look more closely to see how you did those. You've also been making faster progress than I did. I just passed the 2 year point in Dec, and I'm close to starting the last chapter. I can only work on it so much before needing a break. My eyes get tired and I start going too fast and make mistakes. I also take several months off in the summer. I'm so impressed with how much you've done in less than a year, and the quality, amazing! I can only hope to get this good after a couple more models. I have a bunch of pictures and thought about making a build log. Don't know how to start this or if anyone is interested in another US Syren log. Mine would mostly be pictures of what I've already done. Keep up the fantastic work!!
- 950 replies
-
- 2
-
-
- syren
- model shipways
- (and 1 more)