HOLIDAY DONATION DRIVE - SUPPORT MSW - DO YOUR PART TO KEEP THIS GREAT FORUM GOING! (Only 20 donations so far - C'mon guys!)
×


desalgu
-
Posts
363 -
Joined
-
Last visited
Content Type
Profiles
Forums
Gallery
Events
Everything posted by desalgu
-
Here's some photos of making chain plates. I used same procedure shown in manual.
- 55 replies
-
- 3
-

-
- 18th Century Longboat
- Model Shipways
- (and 1 more)
-
As usual I agree with all the comments, this is a truly beautiful model. I think Chuck may have some competition! He really designed a nice kit, and I like all the extra details. The manual was excellent, and he provided simpler options in it that I used. You went for it all plus some! I sure thought there were more than 60 rope coils. Felt like about a 1000. Yours came out great! I think the varying length makes it look realistic, although the video said the bosun liked them all a certain length. I guess it depends on the bosun on each ship! Can't thank you enough for your advice and reference on rope coils. I've made a couple for long boat and like them much better than what I did on my Syren. Finishing running rigging is major accomplishment. Almost done!
- 950 replies
-
- 1
-

-
- syren
- model shipways
- (and 1 more)
-
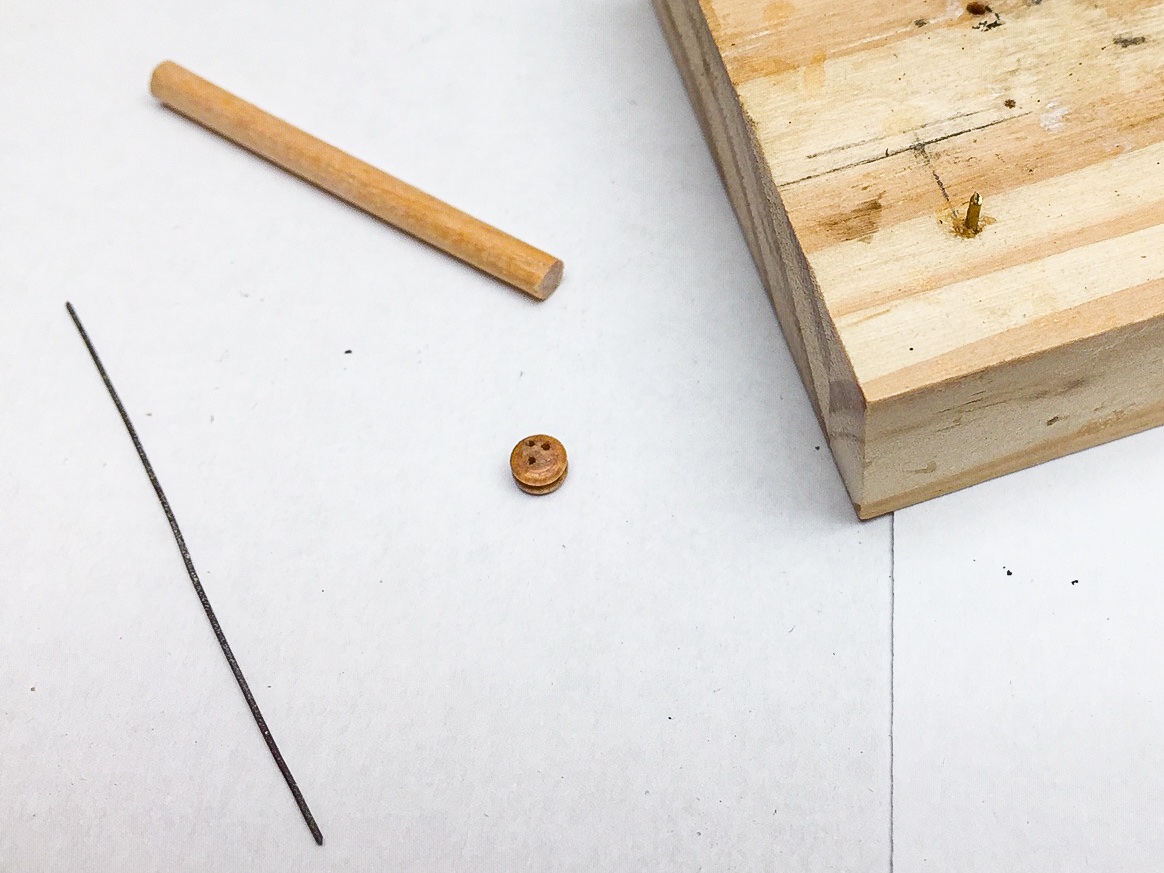
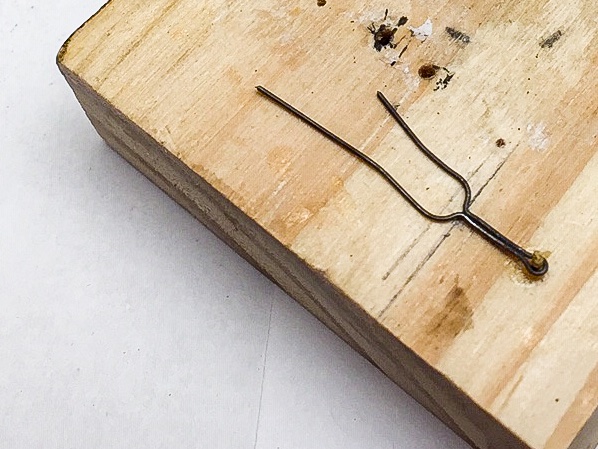
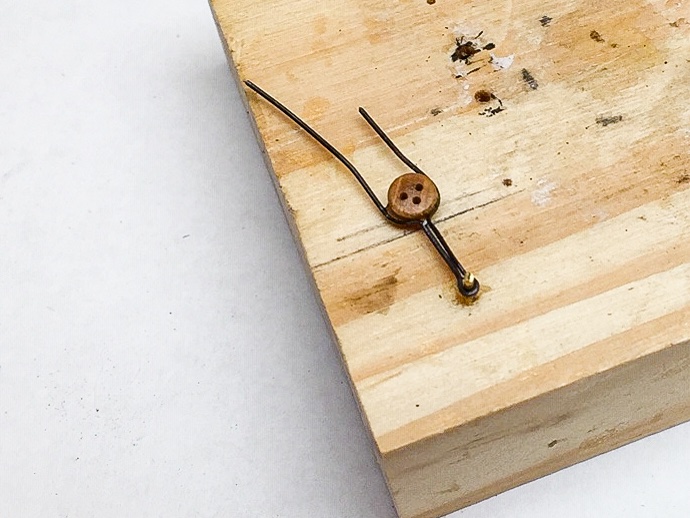
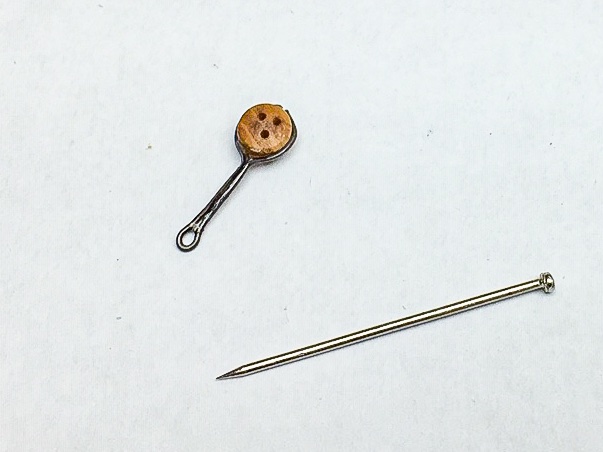
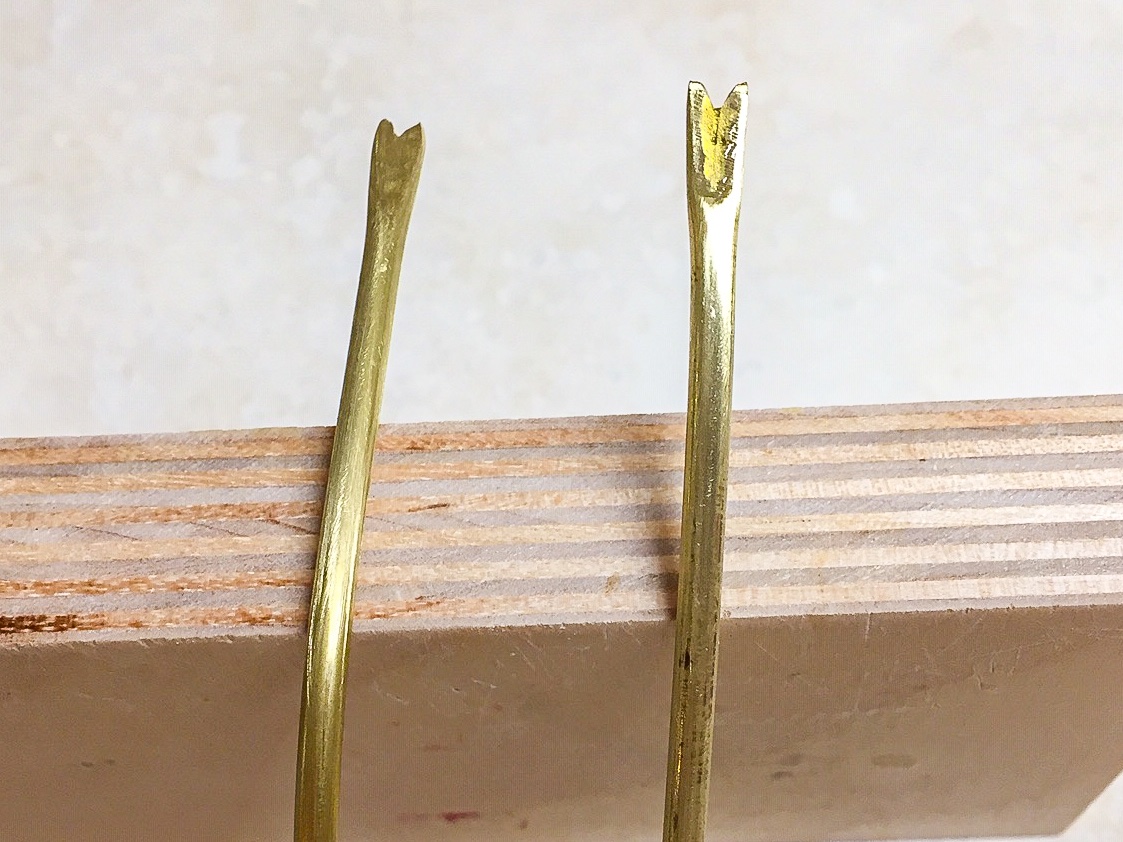
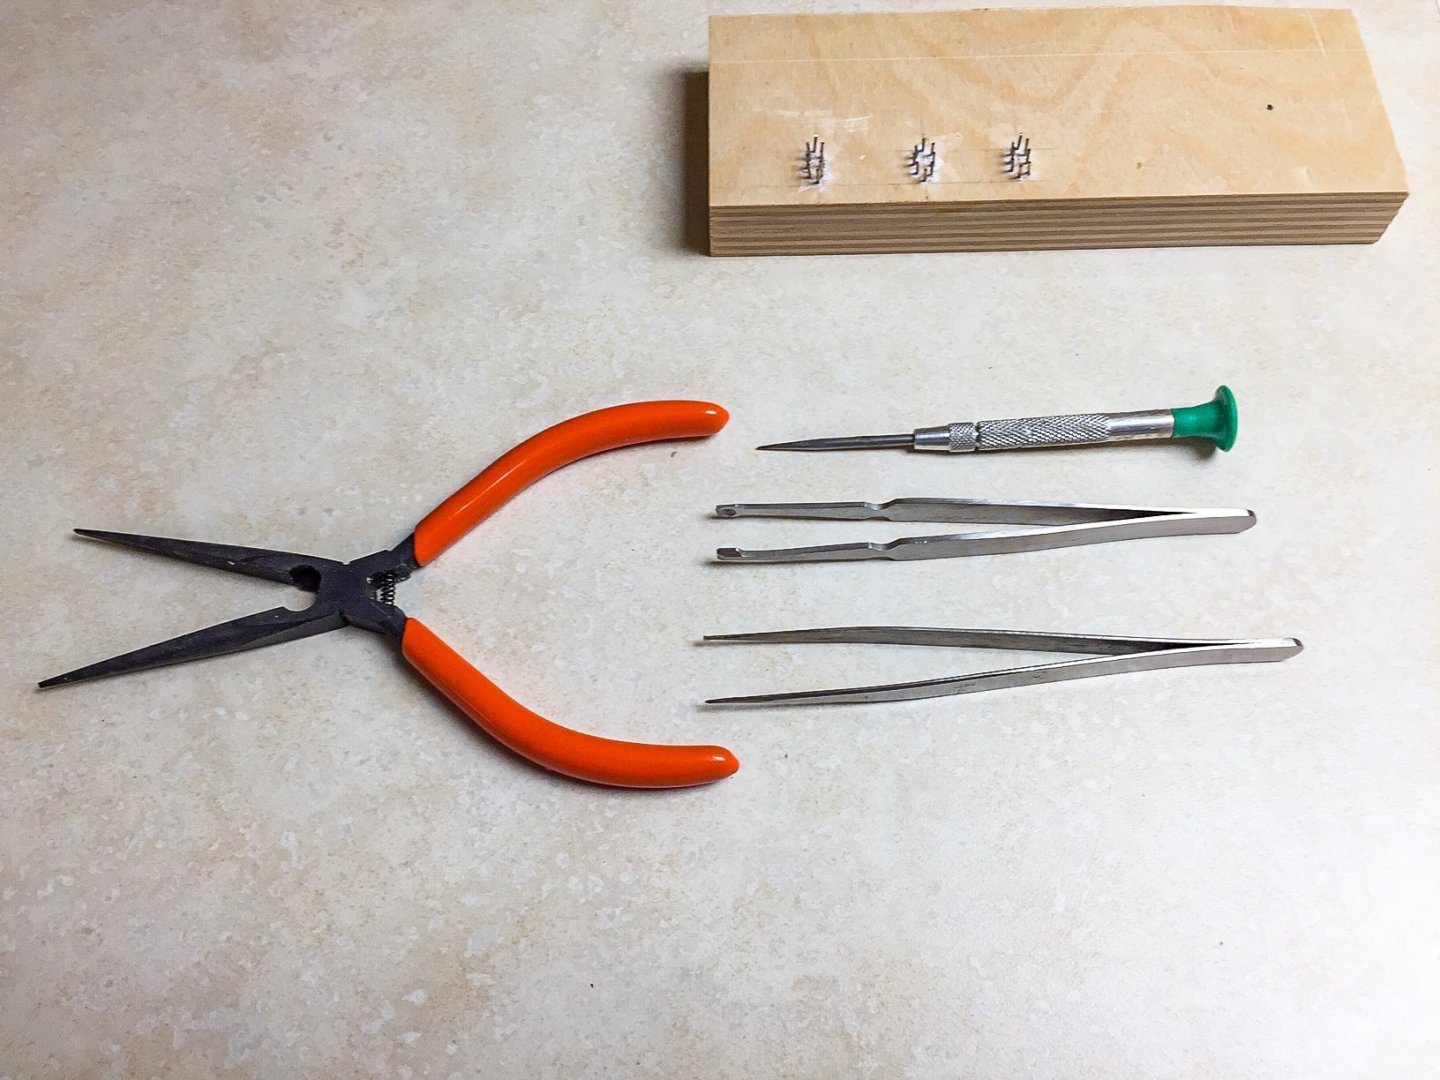
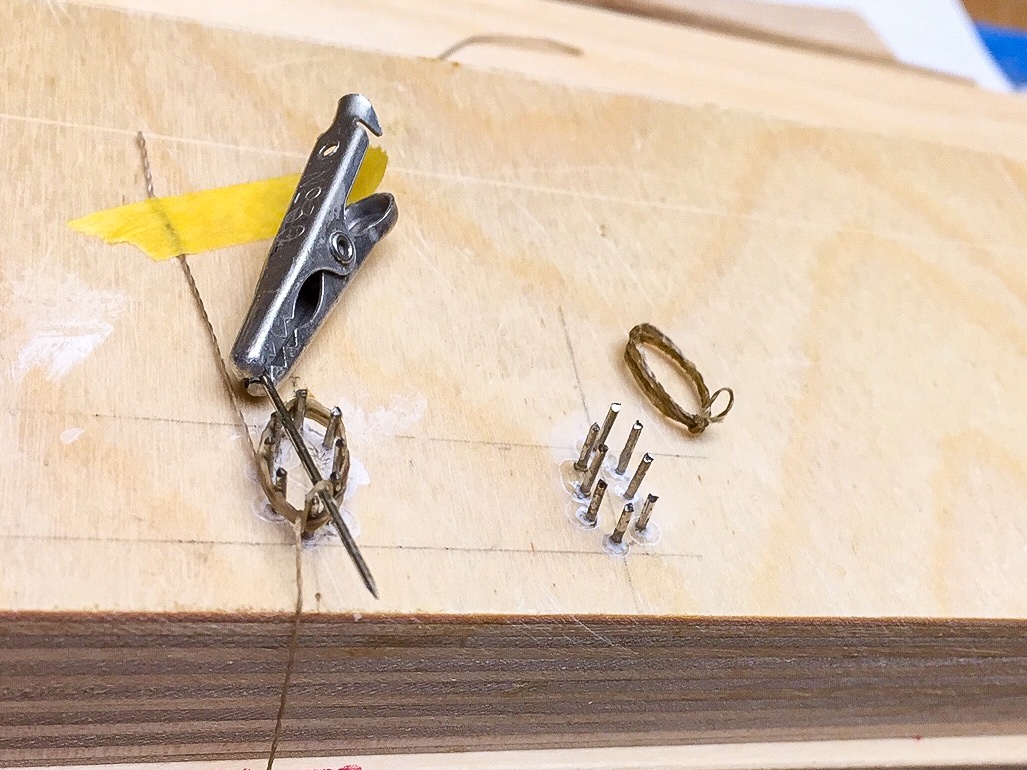
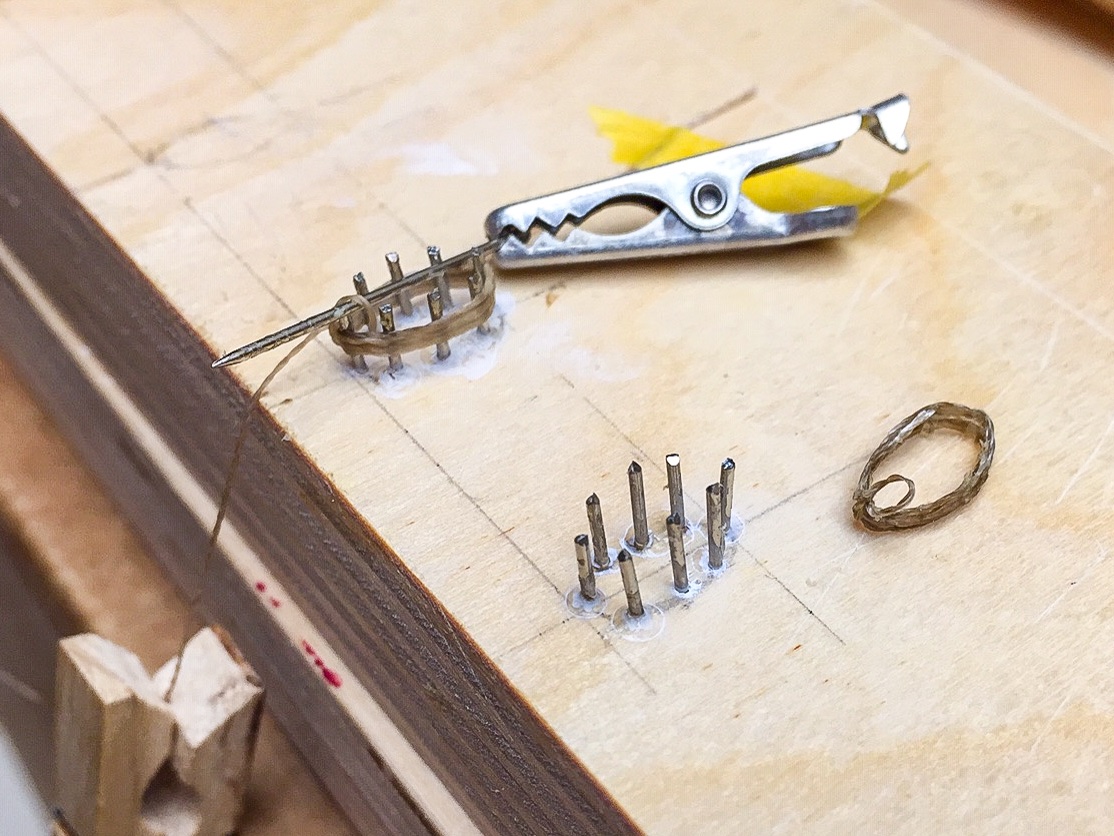
I thought that someone might be interested in tools I've been using a lot lately. And I've included some info on what I did while rigging boom and gaff. First photo is of crude belay tools I made from brass tubing. Just needed something to hook rigging line and move it around under and over belay pins. These are simple to make and work as good as anything I've tried to buy. I found after I got one line under and over belay pin that I needed to tighten it and put small drop of medium CA on pin to hold line. Once this set, I could go under/over belay pin a couple more times, trim line, and add rope coil. I use straight pin to apply CA to stuff, so I can control the amount better. Second photo is of some other tools that I've been using a lot lately. Nothing unusual. For getting thread thru blocks, I put a little CA on each end of the thread going about 1/4" back. This makes the ends stiff so you can use tweezers to feed thread thru a block or sheave. This works much, much better than the needle threaders I tried a long time ago. For the jaws on the gaff, I laminated two 1/32" sheets of basswood together with grain running 90 deg to each other. You end up with a 1/16" thick piece of basswood that won't split, so you can make very small pieces like these jaws, sand them, drill holes thru them, etc. I believe this is a common technique to avoid wood splitting. I tried using some weathering powder on the tan rigging line to darken it a little. You can vary the amount you use to control how much it's darkened. I learned that after you use your dry fingers to put on powder, it's best to wet your fingers and run them up and down the thread some, and then lightly dry it with paper towel. This gets a more even distribution of the powder. Seemed to work ok. Weathering stuff is available at most hobby shops. I used an olive drab color. I made a rope coil pattern or jig from block of wood and straight pins. Drilled holes to define the coils and glued straight pins in. Then trimmed off straight pins to about 1/4". You can see from photo how I've wrapped rigging line around pattern. I put thinned yellow glue on line before going around pattern, so it will hold the coil when dry. One end is taped to the wood - this will be the loose end of the coil. The other end is wrapped around the rigging line to form a loop that will go over the belay pin. I used a straight pin and small alligator clip to hold this loop in place while glue dried. From what I've seen, this is similar to what everyone does. Can't thank everyone enough for putting all the info out on this web site.
- 55 replies
-
- 3
-
-
- 18th Century Longboat
- Model Shipways
- (and 1 more)
-
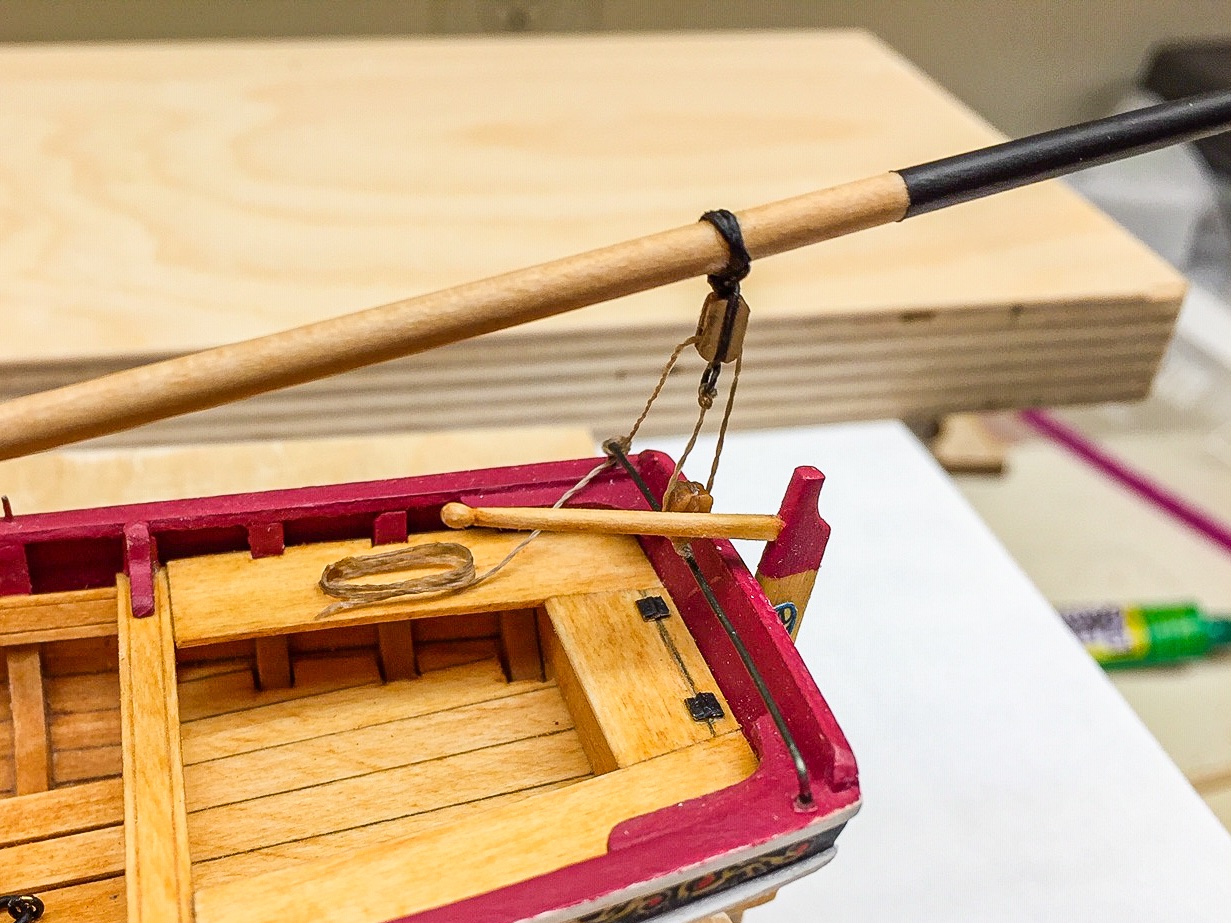
I got the boom and gaff on the long boat mounted. Since it's a good stopping point, I took some photos. Only a couple of problem areas. One was attaching line to the end of the gaff. There was nothing to tie to, and gaff is very small at the end, almost a point. I ended up doing the best I could, but not too happy with it. Actual size it doesn't look that bad, but it doesn't look good in closeups. The other problem was with the parrels for the gaff. I used the little balls in the kit, but they should be a lot smaller. Now that I've thought about it, I could have found some small beads at crafts store that would have looked a lot better. Again it doesn't look bad actual size, but it does in closeups. Thanks to WalrusGuy and other posts, I made more scale-like rope coils for the belay pins. Turns out they were not that difficult to make, and for this boat, I don't need very many. I found these to be much easier to attach to belay pins than what I used on Syren. Being a landlubber, I had no idea how they were done on a real boat until watching a couple of videos. I'm slowly learning. The boom and gaff are aligned, but don't look like it in some photos. This is some kind of distortion from wide angle lens.


- 55 replies
-
- 5
-
-
- 18th Century Longboat
- Model Shipways
- (and 1 more)
-
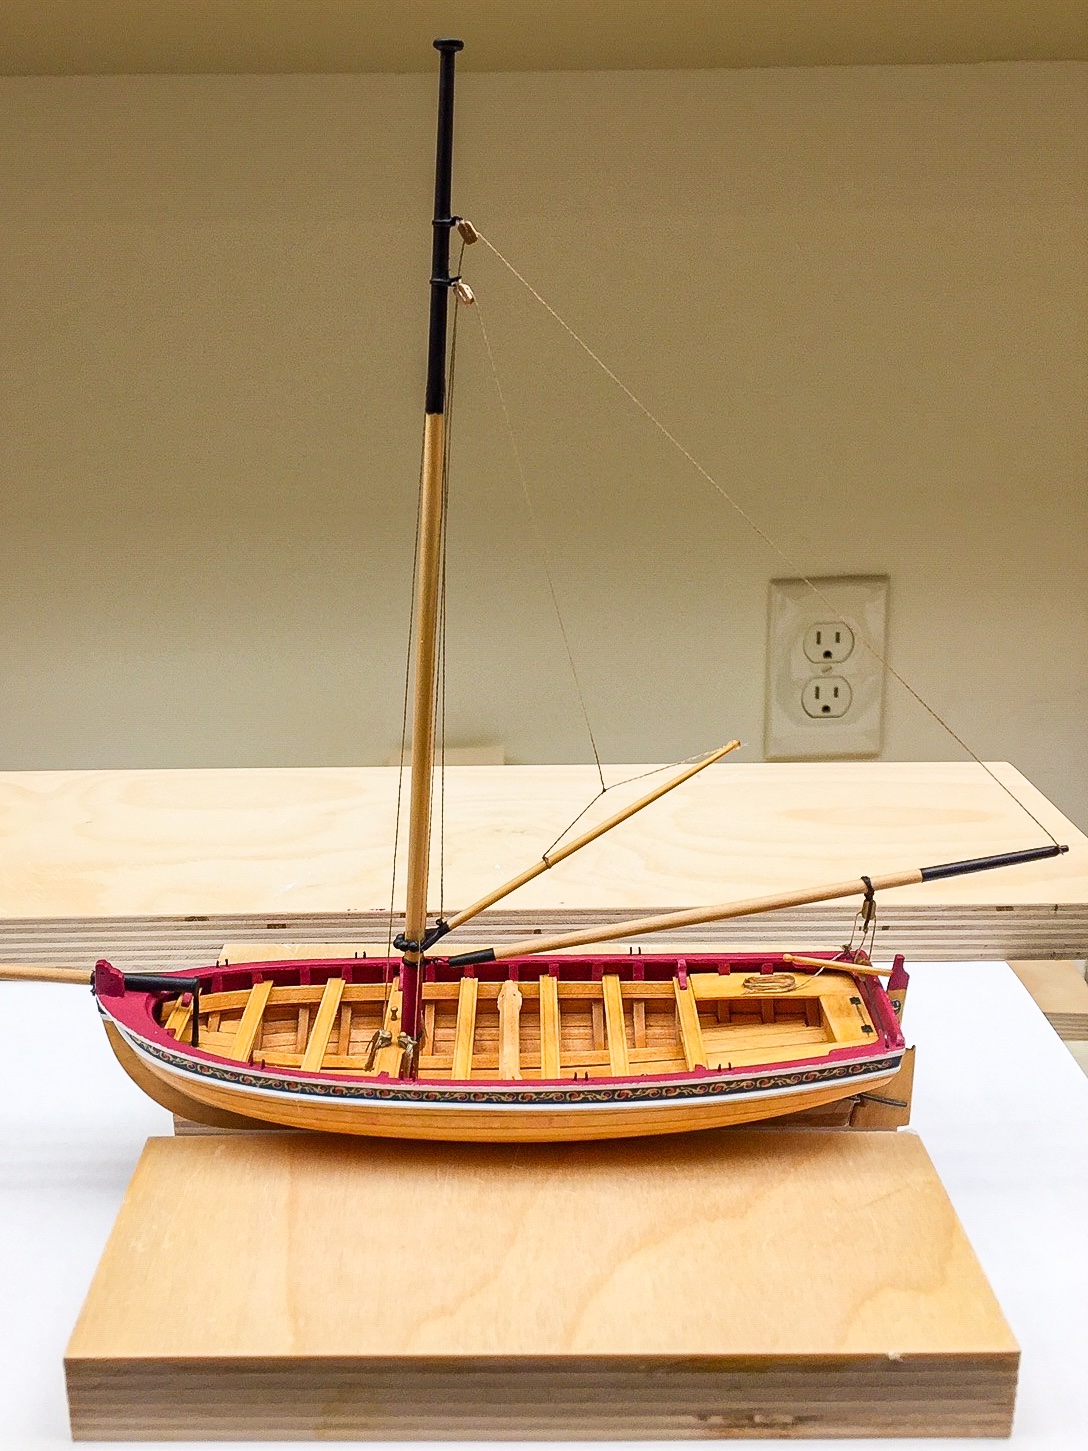
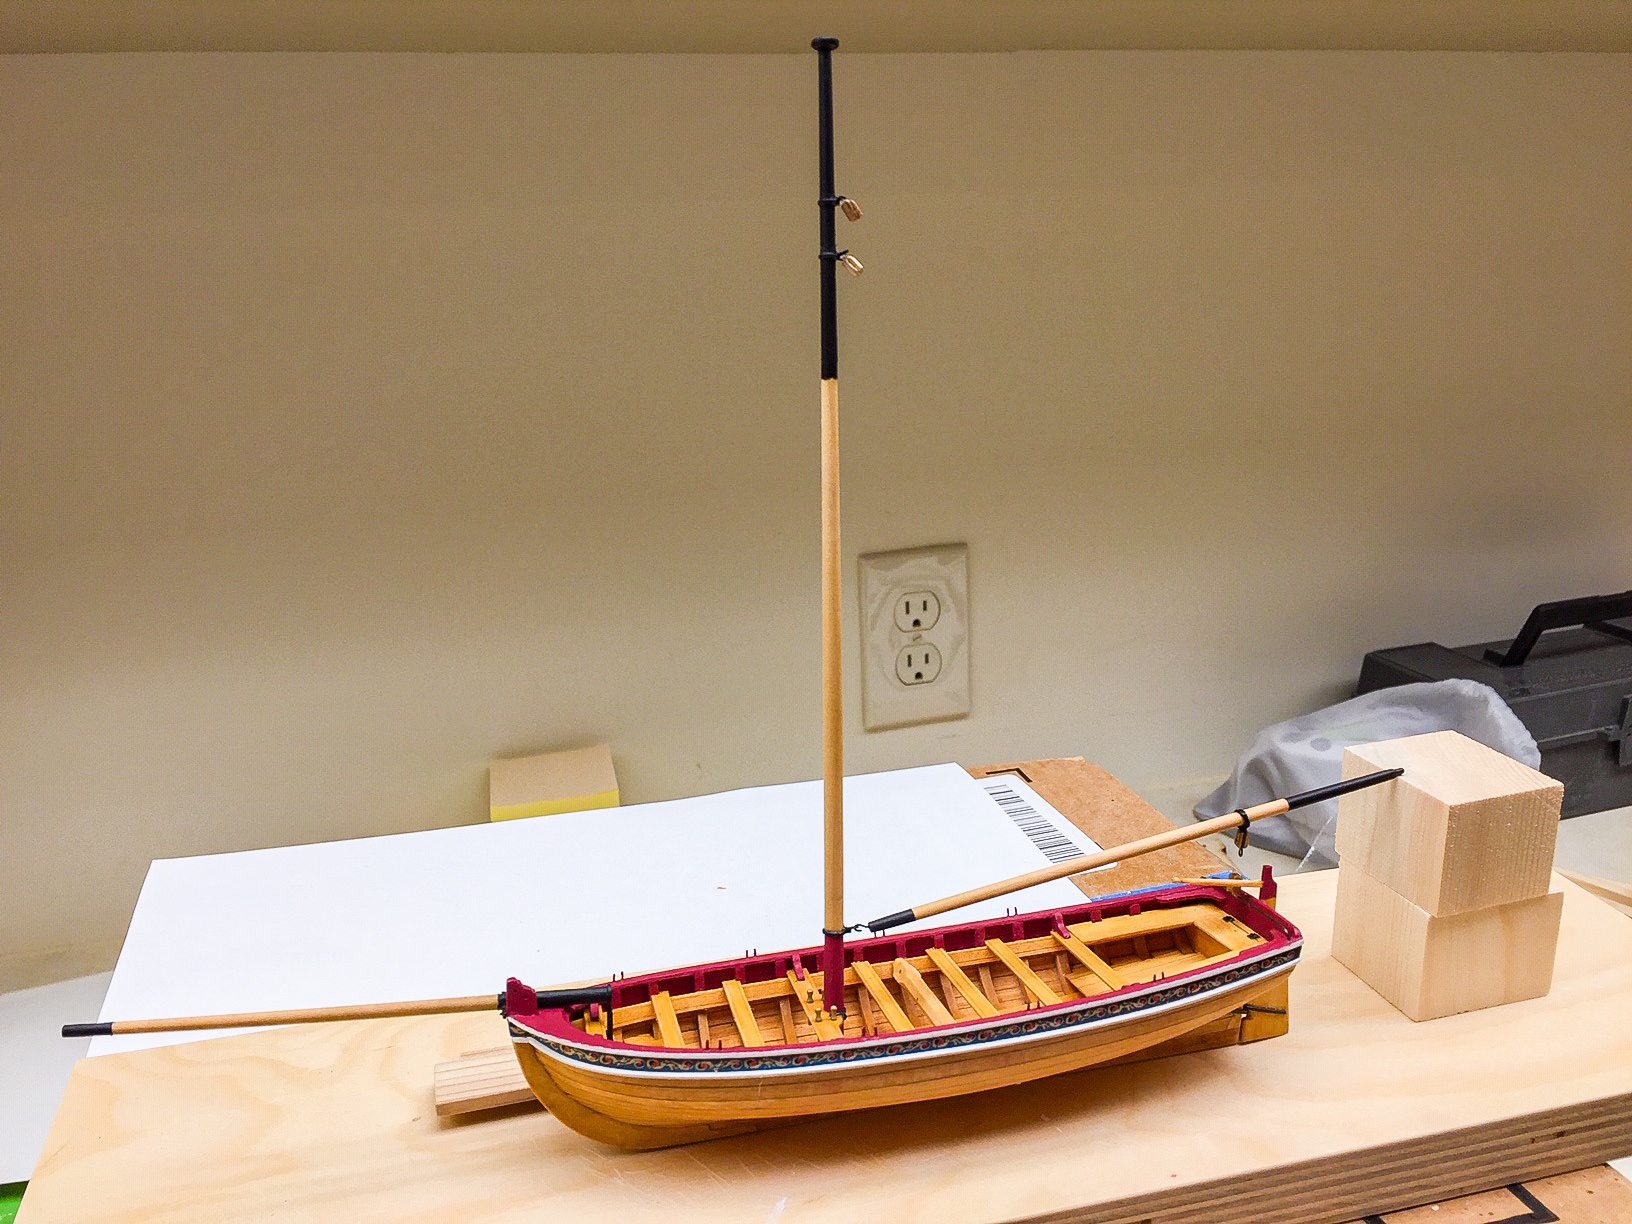
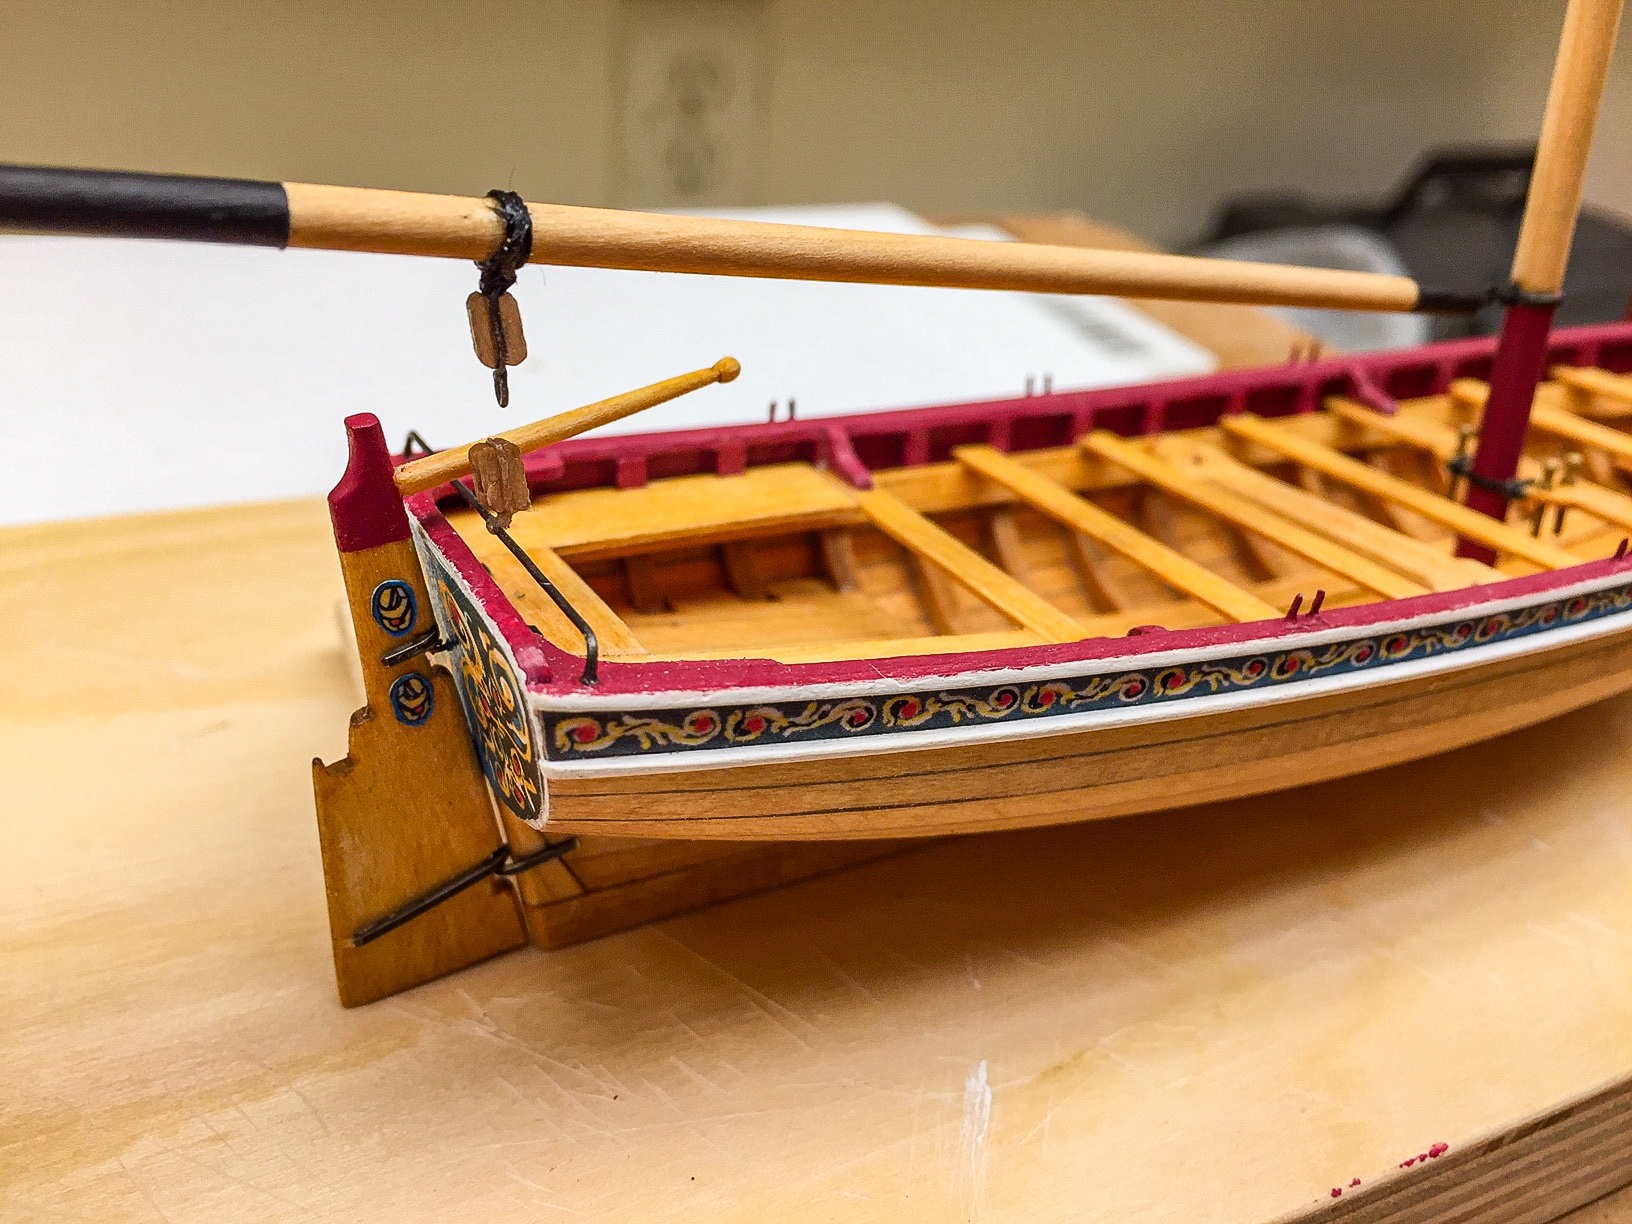
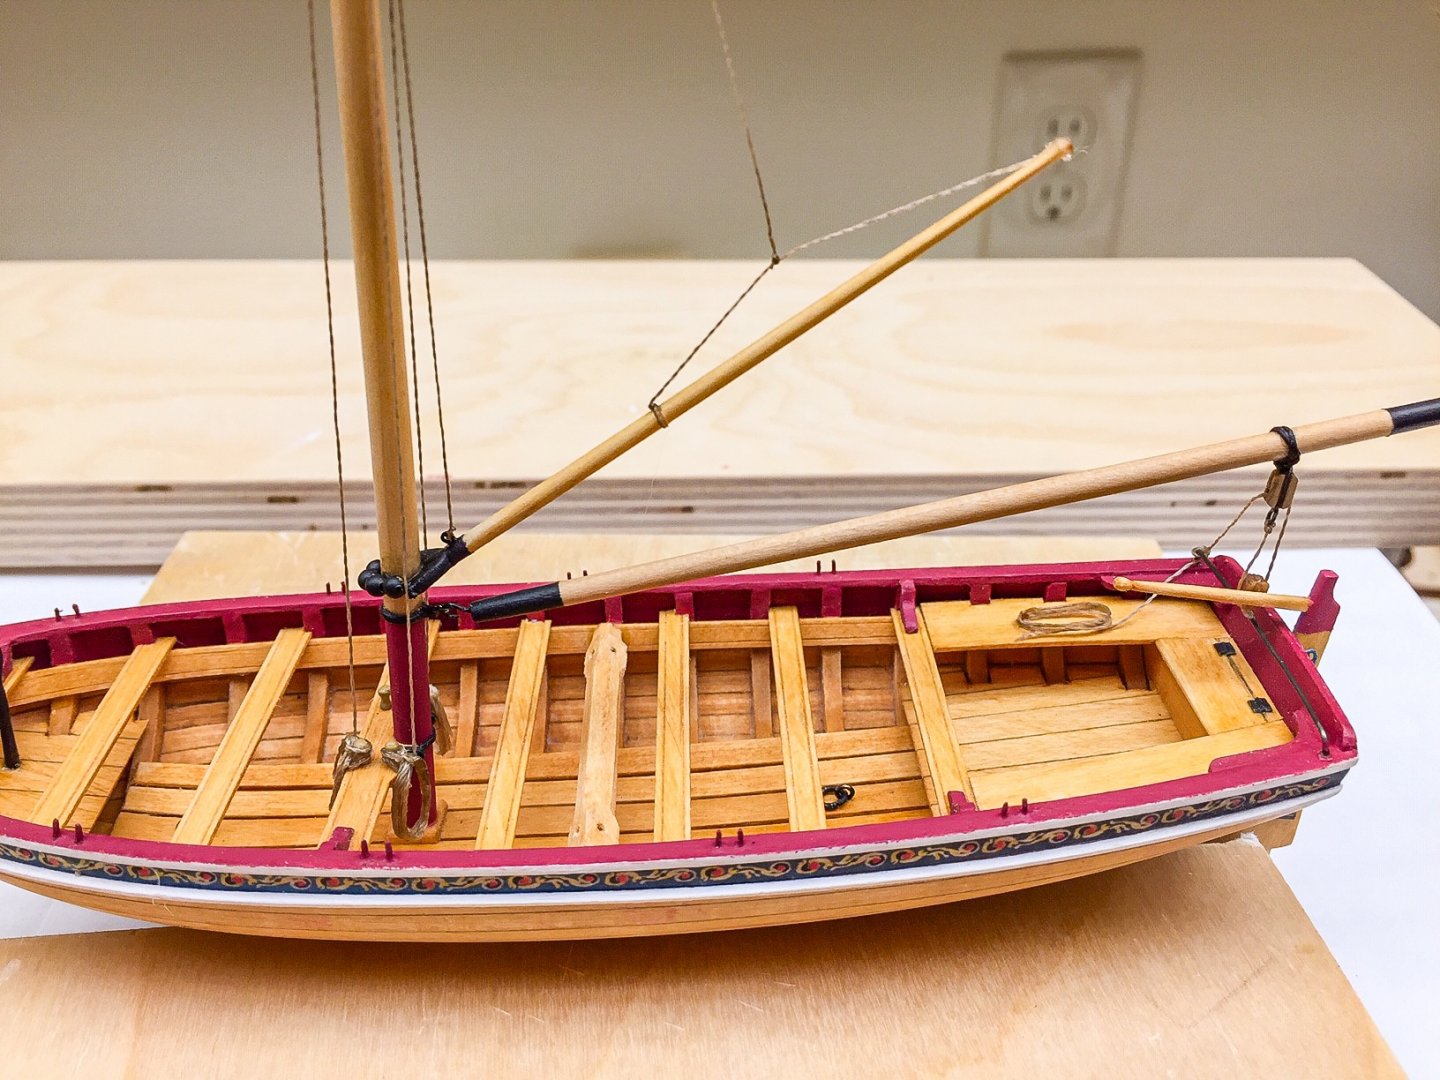
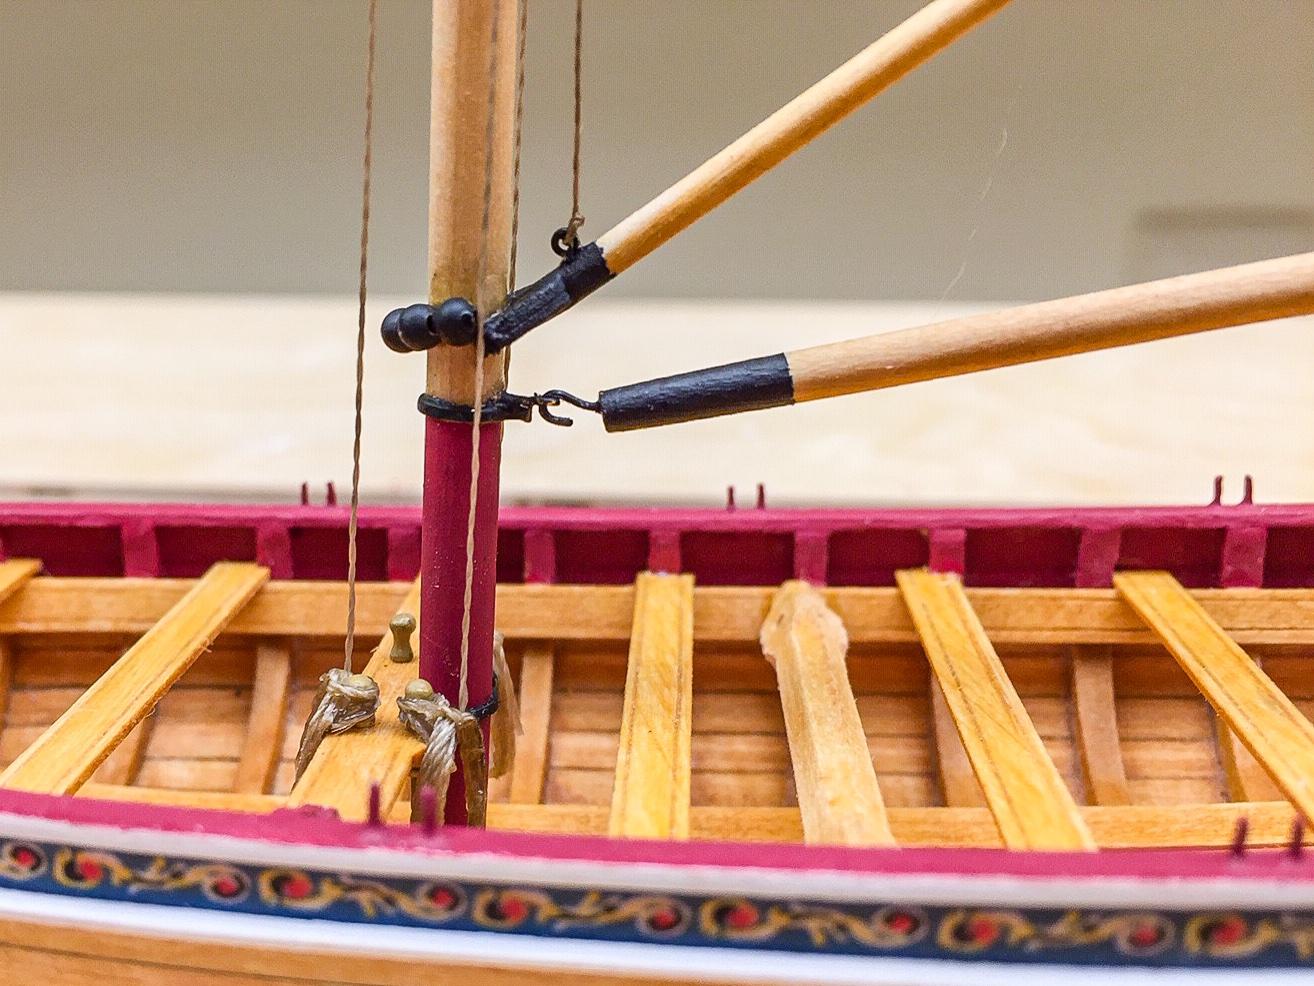
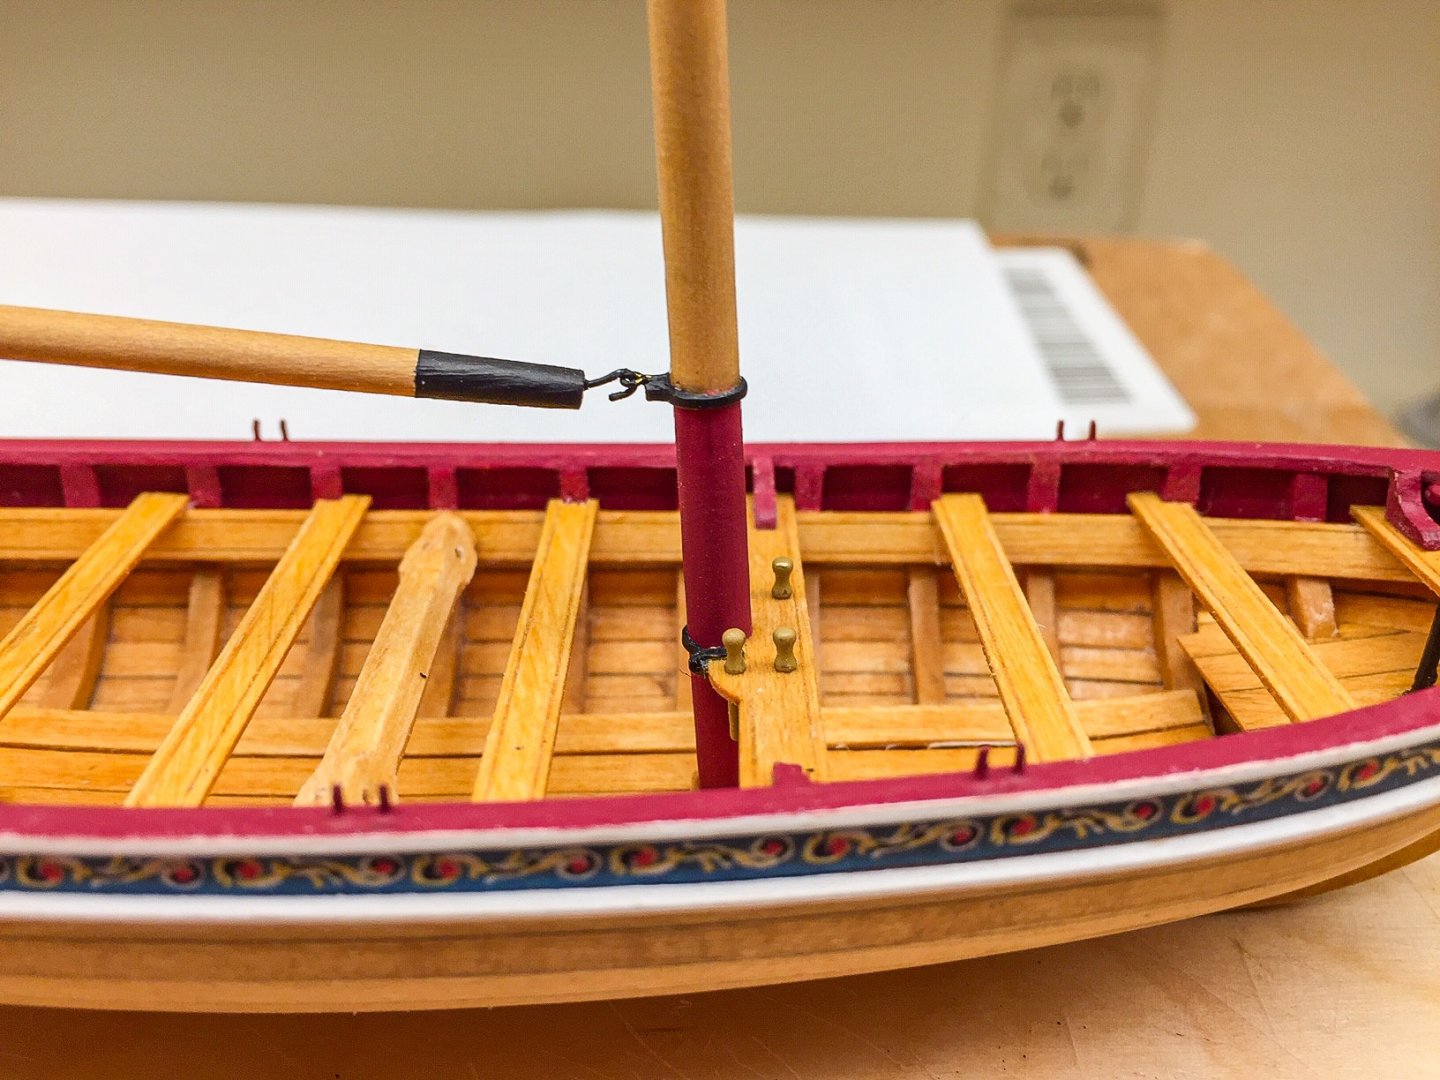
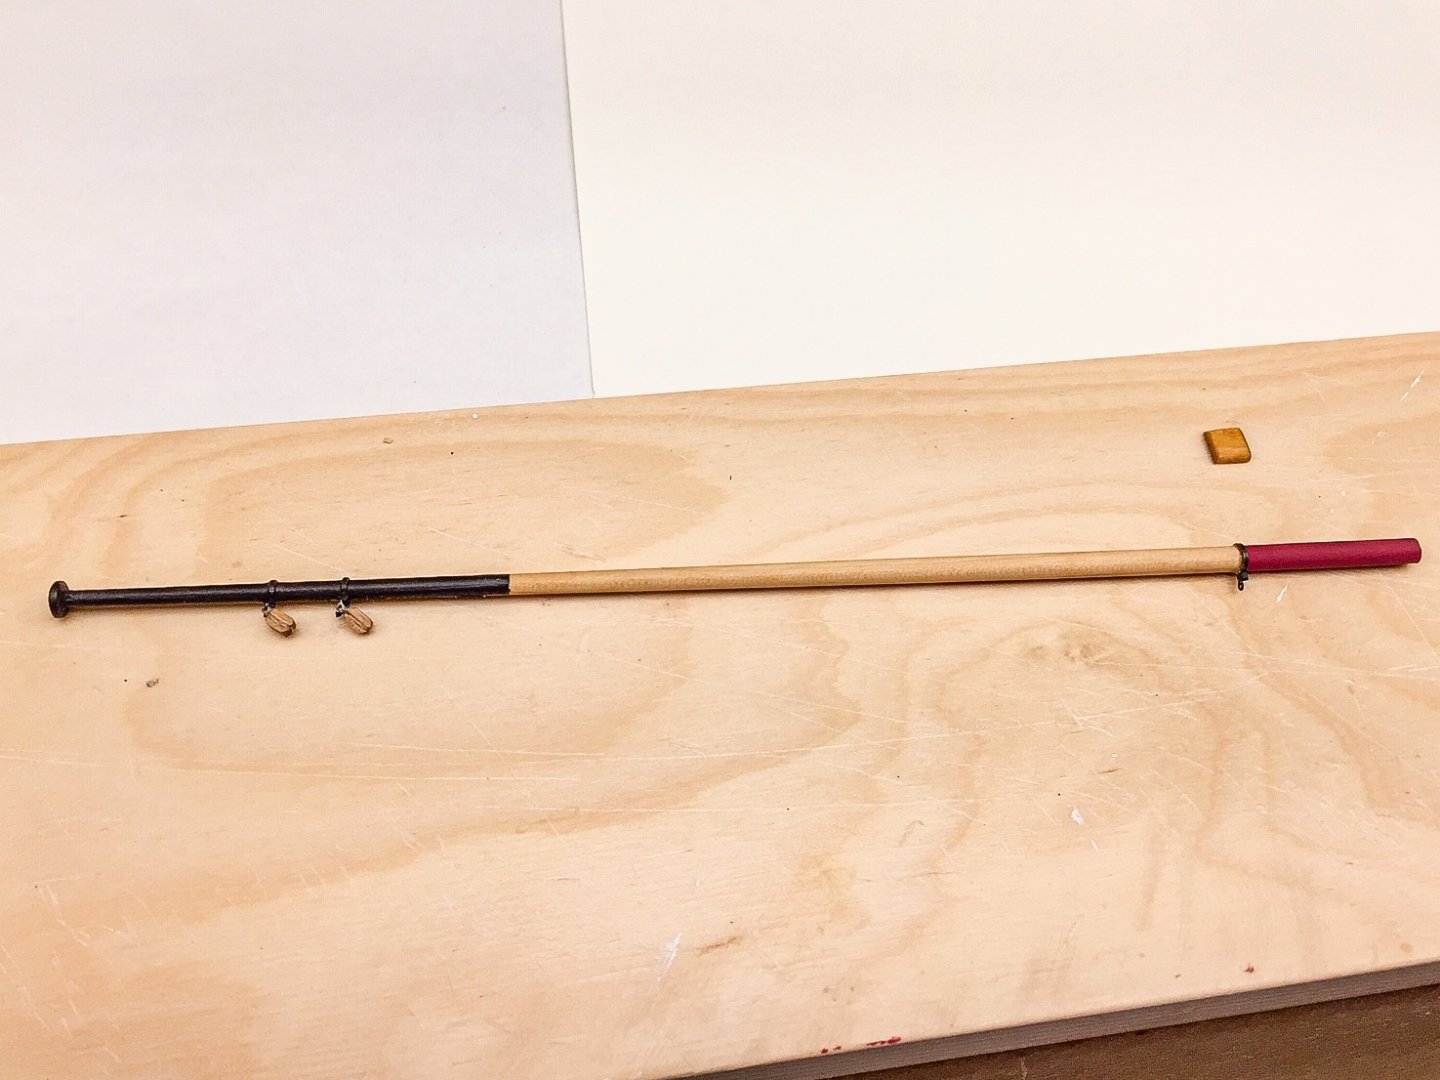
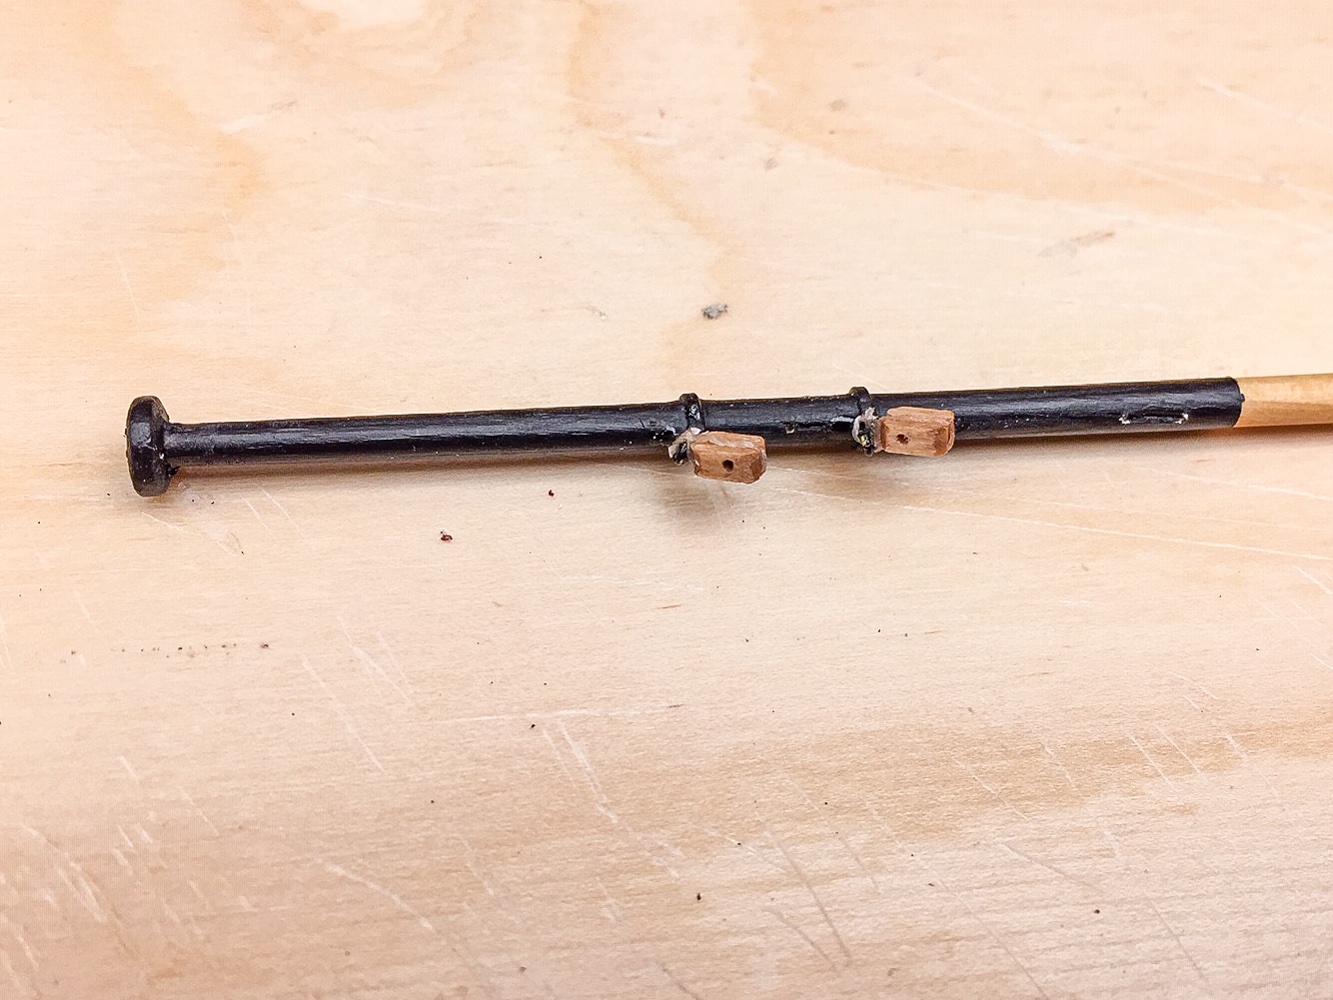
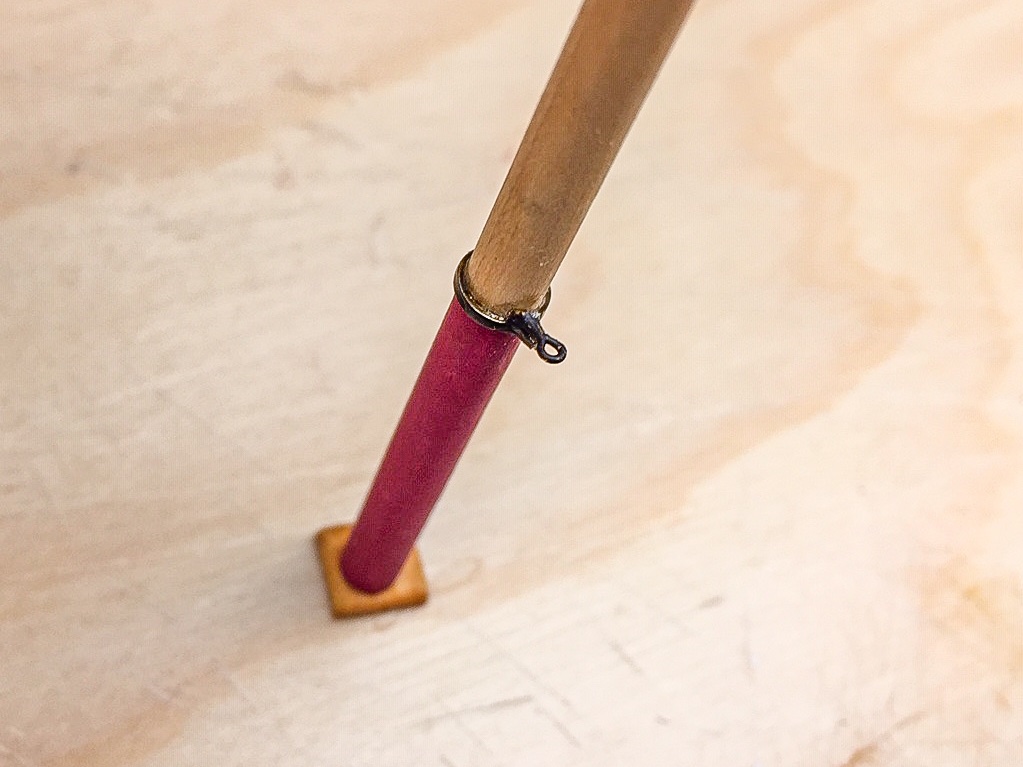
Here's some more long boat photos. First shows the boat with mast, bowsprit, and boom. The next two show the boom with the hook going thru the iron band bracket on the mast and the blocks for the boom sheets. You can see my iron band for the boom has an eyebolt inserted just above the band, close enough that it looks all one piece. I found this much easier and acceptable appearance-wise compared to trying to drill small hole in the band. If band had been made from slightly wider brass, I would have been able to drill the hole. I'm going to rig the boom before putting on the gaff just to get it stabilized. Right now it's flopping around making it hard to work.


- 55 replies
-
- 5
-
-
- 18th Century Longboat
- Model Shipways
- (and 1 more)
-
Mounted, or should say "stepped", the mast and just glued the bowsprit on. Used tape to hold it in place before gluing.


- 55 replies
-
- 8
-
-
- 18th Century Longboat
- Model Shipways
- (and 1 more)
-
I've been slowly working on the long boat mast. I had a lot of trouble drilling holes in the iron bands. The brass is only 1/32" wide, so the hole needed to be centered. But I had a terrible time punching a starting dent in center with small awl. I couldn't hold it in center and tap. It would slip every time. And when I drilled hole slightly off center it was too close to edge. I was using #78 or 79 drill, so it was a small hole. I tried several times. I felt like I needed a punch the size of a straight pin or smaller, and not sure where you find such a tool. I was using a punch from a micro screw driver set, so it was pretty small. I finally gave up on that idea and decided I could simulate a hole in iron band with eyebolt. So I made a plain iron band and after gluing it on mast, I drilled small hole as close above it as I could, right next to it. Inserted an eyebolt so the ring was just outside the end of the iron band, and now I had a ring or hole to tie the blocks to. I did the same for a hole for boom to hook into. It was a work around, but when it's all painted black, no one will notice unless looking extremely close. Also had trouble drilling holes for sheaves. Had a hard time keeping them straight. Not too bad and being black, it doesn't show. My drill press, which isn't all that large, is too large for this type of work, so was doing it by hand using a small battery powered screw driver / drill. It drills very slowly, but still had trouble getting it aligned. I'll have to think about this more next time. A jig of some sort was needed.
- 55 replies
-
- 4
-
-
- 18th Century Longboat
- Model Shipways
- (and 1 more)
-
Just checking in. All I can do is echo all the previous comments and say "Wow"! Your Syren is really a museum piece. Love all the photos. You do a great job with them also. You are getting very close to being done. I find the little differences between yours and mine very interesting. I still haven't gotten around to taking some final photos of mine. This time of year I get distracted with yard work and stuff outside. Still working on finish on display case, but getting there. Maybe another week. I assembled the frame and it sure got big! It's going about like my Syren, ok, but not by any means perfect. Is there a way to send more of a private message to you? Just curious what you're working on in grad school. i was aero engineer...long time ago, ha!
- 950 replies
-
- 1
-
-
- syren
- model shipways
- (and 1 more)
-
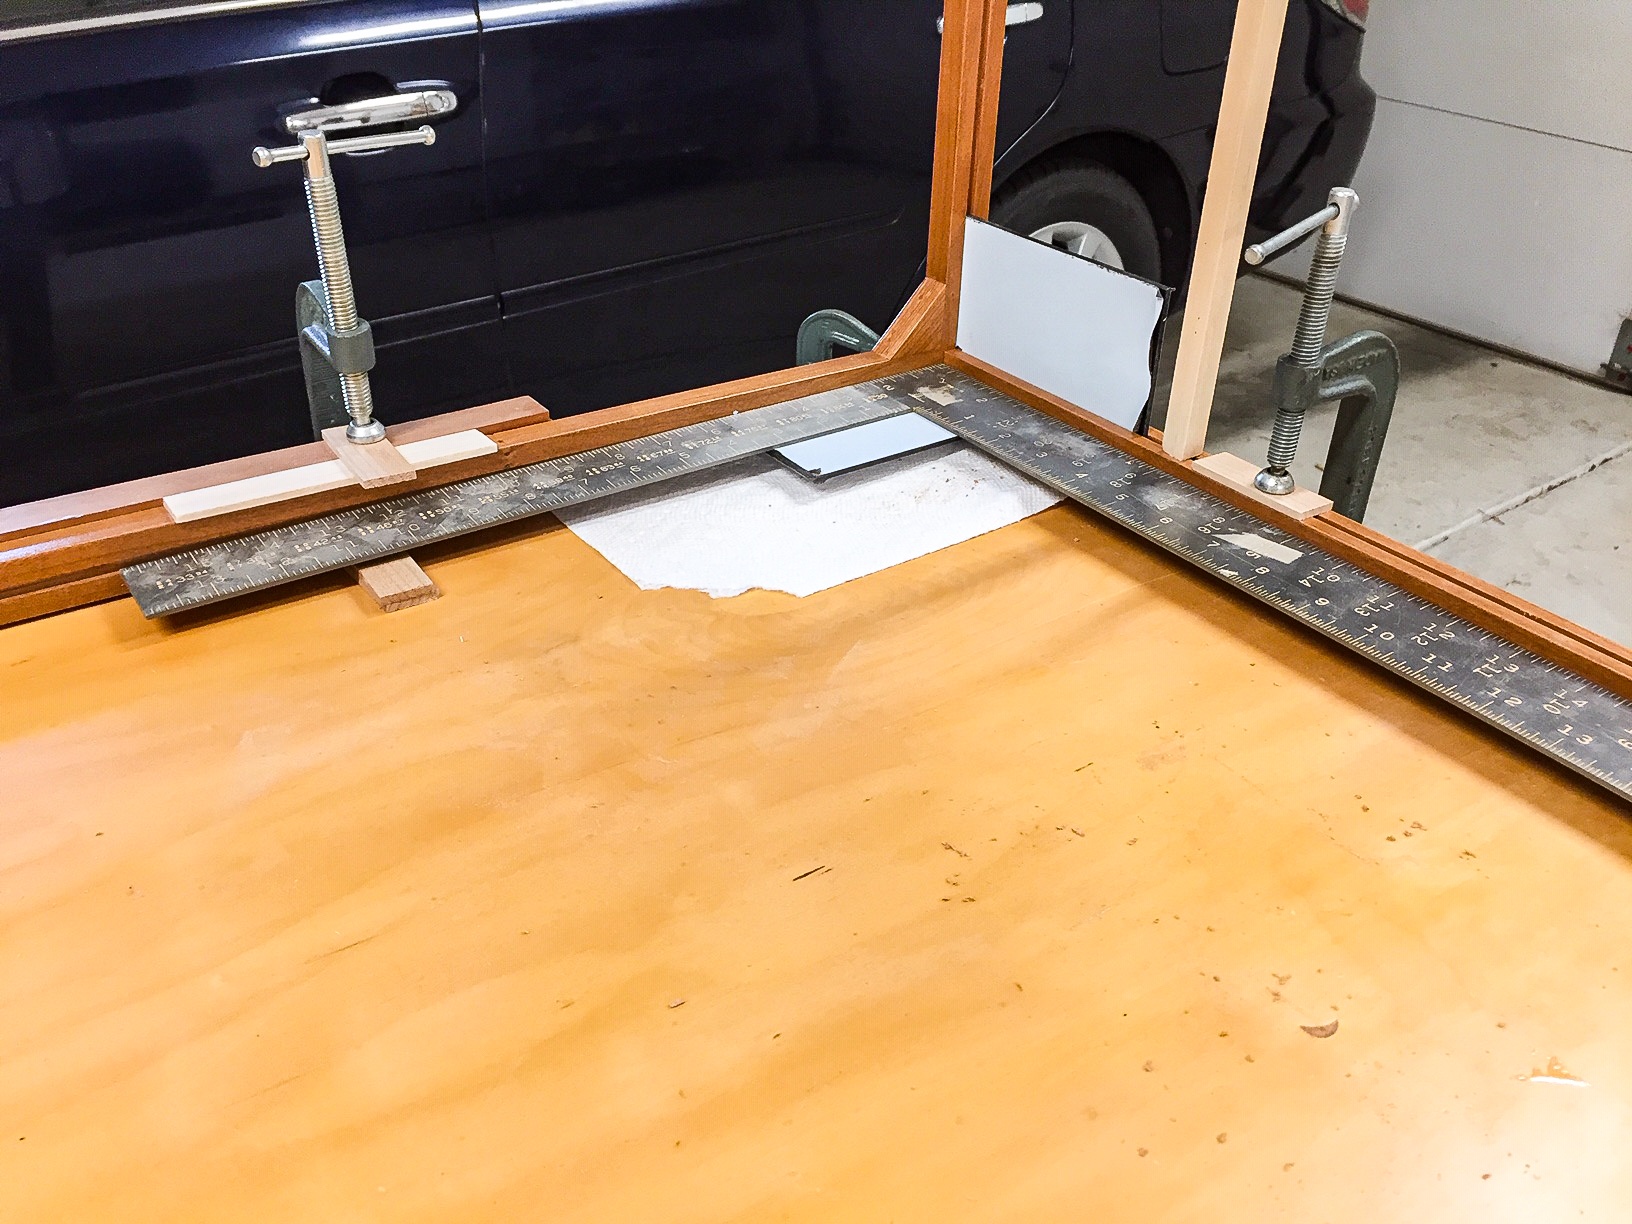
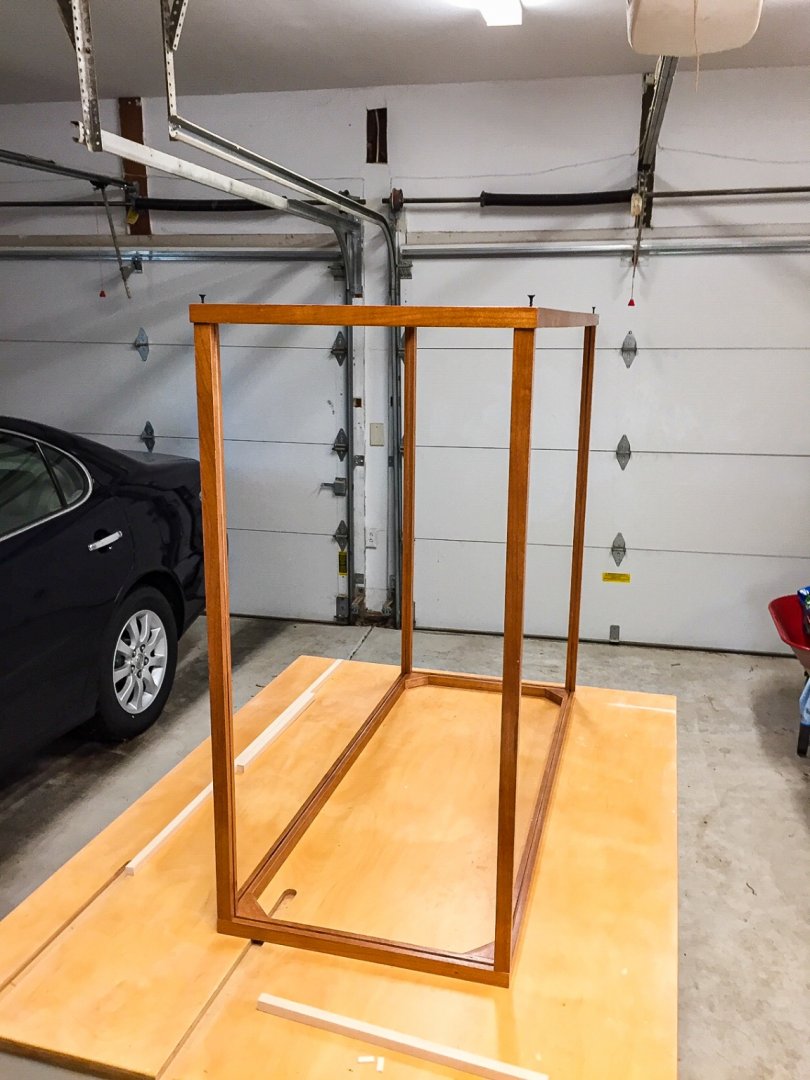
I've got the uprights mounted to the display case frame, and holes drilled for the top frame to attach to the uprights. Before I work on fitting plexiglass in the frame, I decided to go ahead and add more coats of lacquer, so the finish will be done other than perhaps a little touchup. First photo shows how I aligned and clamped together everything to drill holes in the top frame and uprights to hold top frame on. Small pieces of plexi were placed in the grooves to make sure grooves line up. I used the same approach when drilling holes for the bottom frame and uprights. I'm using 2" deck screws to hold top and bottom frames onto uprights. I also used epoxy on bottom frame/upright joints. I was little disappointed joints weren't cleaner, so must have had something not quite square when I made cuts with saw. Second photo shows the frame assembled, although screws for top frame haven't been tightened. All of a sudden it gets big. Of course it has to be pretty good sized to cover the Syren. I used clear gloss lacquer for all but the last coat or two, and then I'll use satin. I'm about to put the satin coat on the frame now. It's a slow process, because I spray each side separately and let it cure overnight. I only spray the flat surfaces to avoid drips, and then turn the frame each day to get the next surface sprayed.

-
Just checking in. Every time I look at your photo's I say "wow!". Love the boom irons. Looks like you used brass tubing. I used aluminum tubing because it's softer and easier for me to work with, plus I had some laying around. Yours always come out cleaner and more precise than mine. Very impressive! I'm making slow progress on 18th century longboat. It's much needed practice for me, and hardly a beginner's model. Display case is on hold waiting for warmer weather to work in garage. Shouldn't have to wait long, but in you never know in Kansas.
- 950 replies
-
- 1
-
-
- syren
- model shipways
- (and 1 more)
-
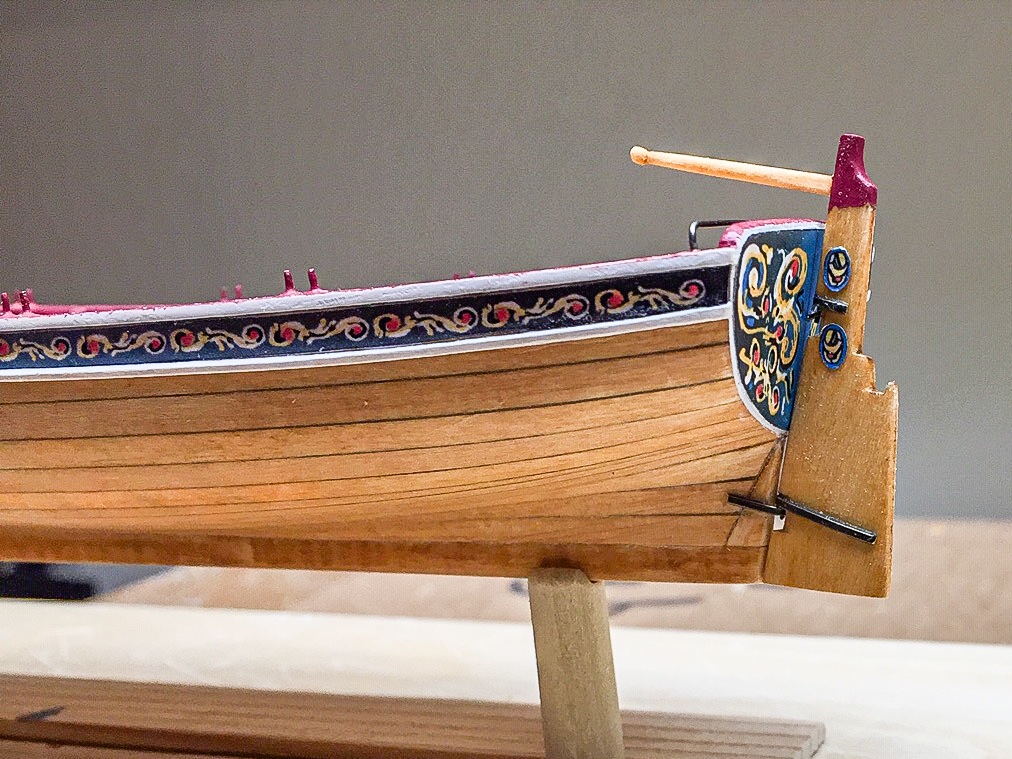
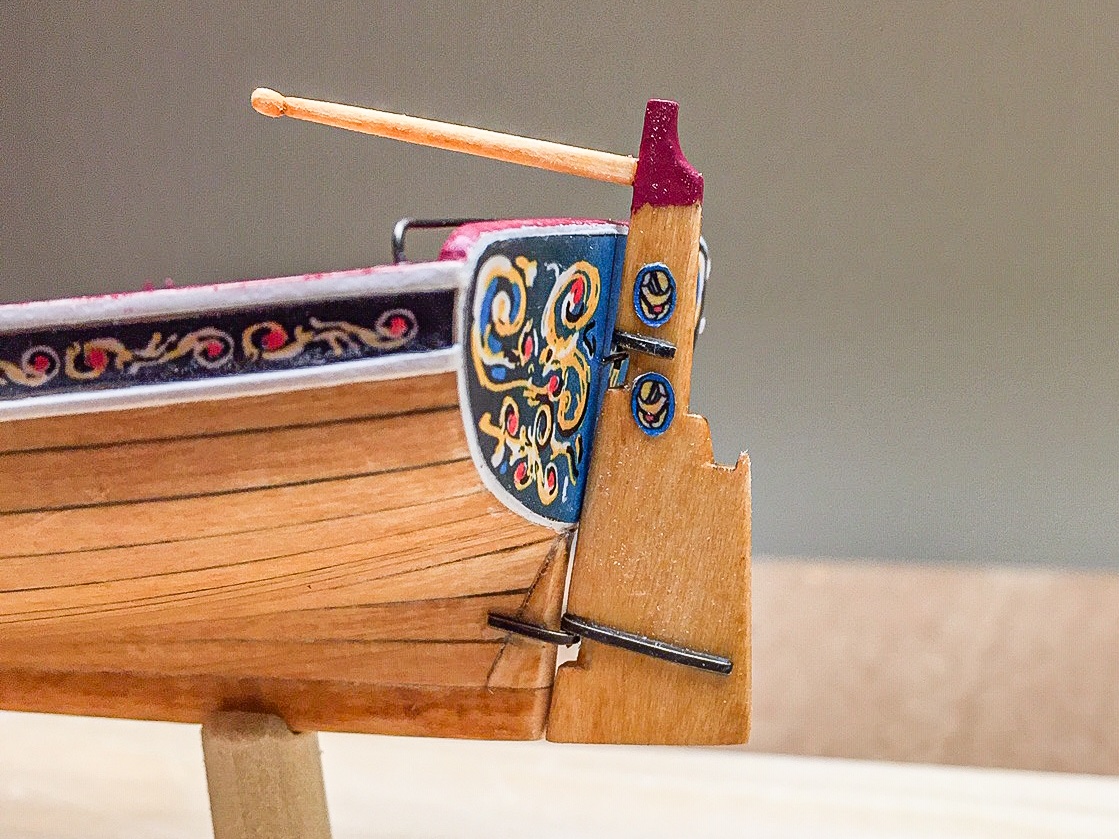
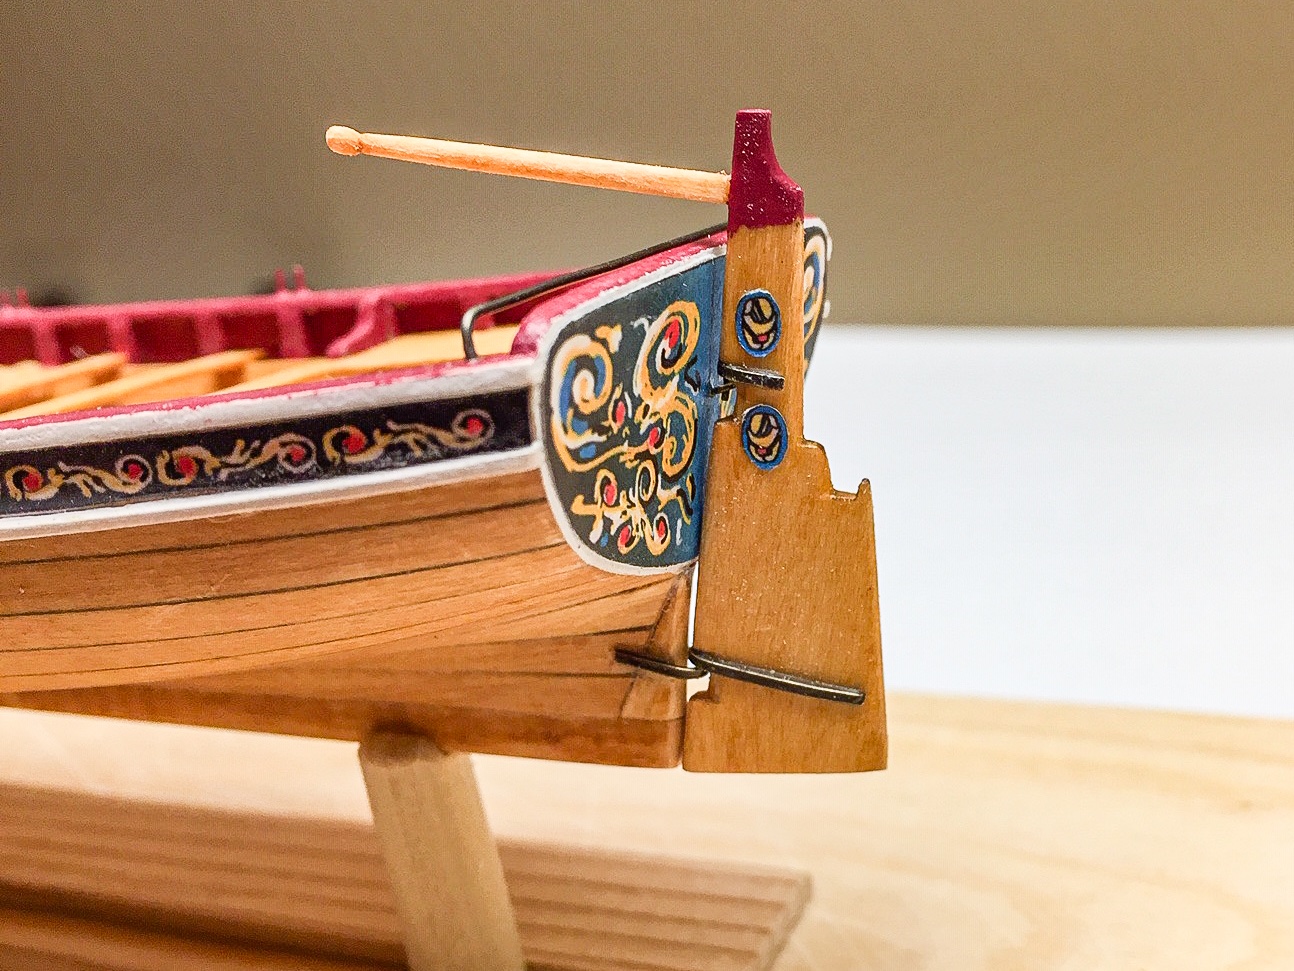
I've been working on the rudder and tiller, so took some pictures. Other than cleaning up a couple of things, like getting the red paint on top to align with the hull and a cleaner masking line, it's basically done. The rudder hinge doesn't secure the rudder to the hull that well. I didn't make the pins quite long enough, but there had to be enough room to get the pins over the hinge and eyebolt. As it is, the rudder pops out pretty easily. Since this model will just sit on a shelf, I'm thinking I'll glue the rudder on. If someone else were to touch it and the rudder popped off, they'd feel terrible even though it's nothing. It's not like anyone will play around with the model. I opted for a straight tiller like Chuck's in the manual. The photos show some wood pedestals that I'll use for mounting the long boat. Just getting started on them. It was something to work on while paint was drying.
- 55 replies
-
- 6
-
-
- 18th Century Longboat
- Model Shipways
- (and 1 more)
-
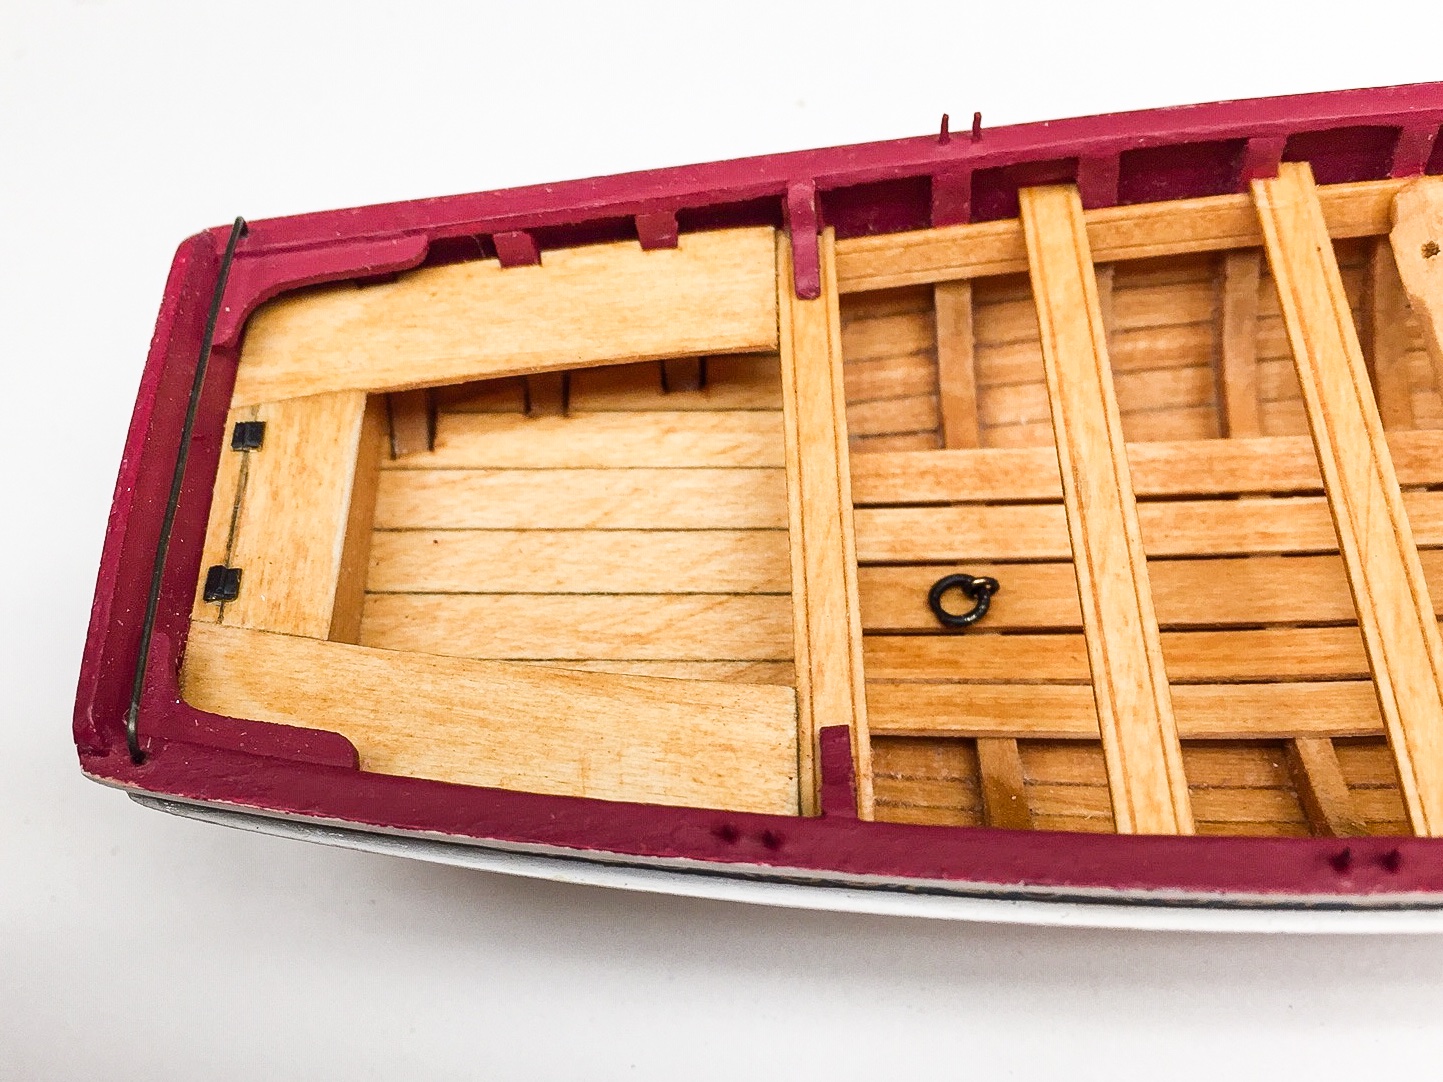
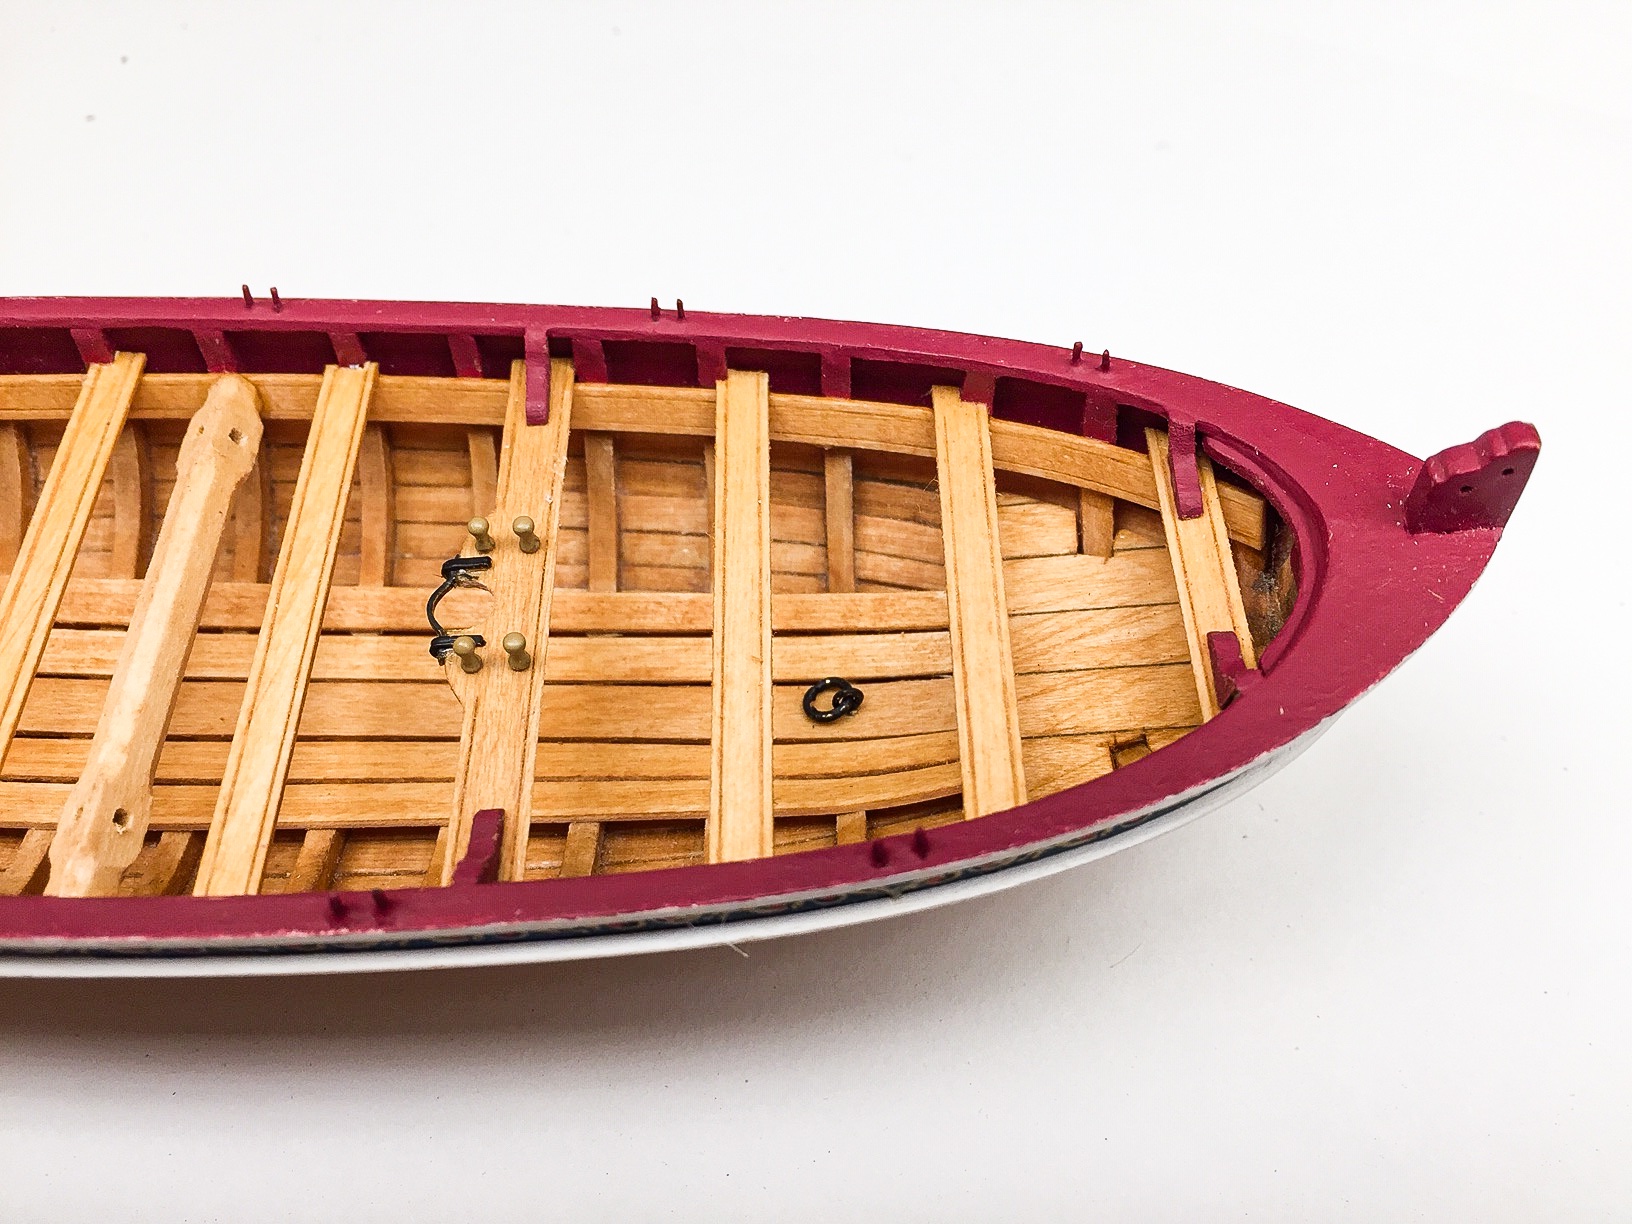
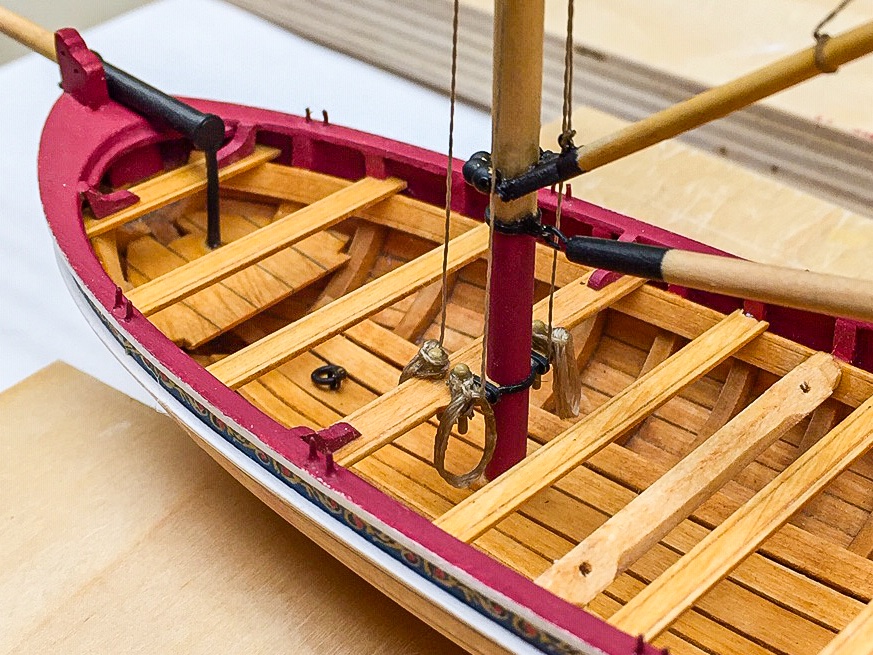
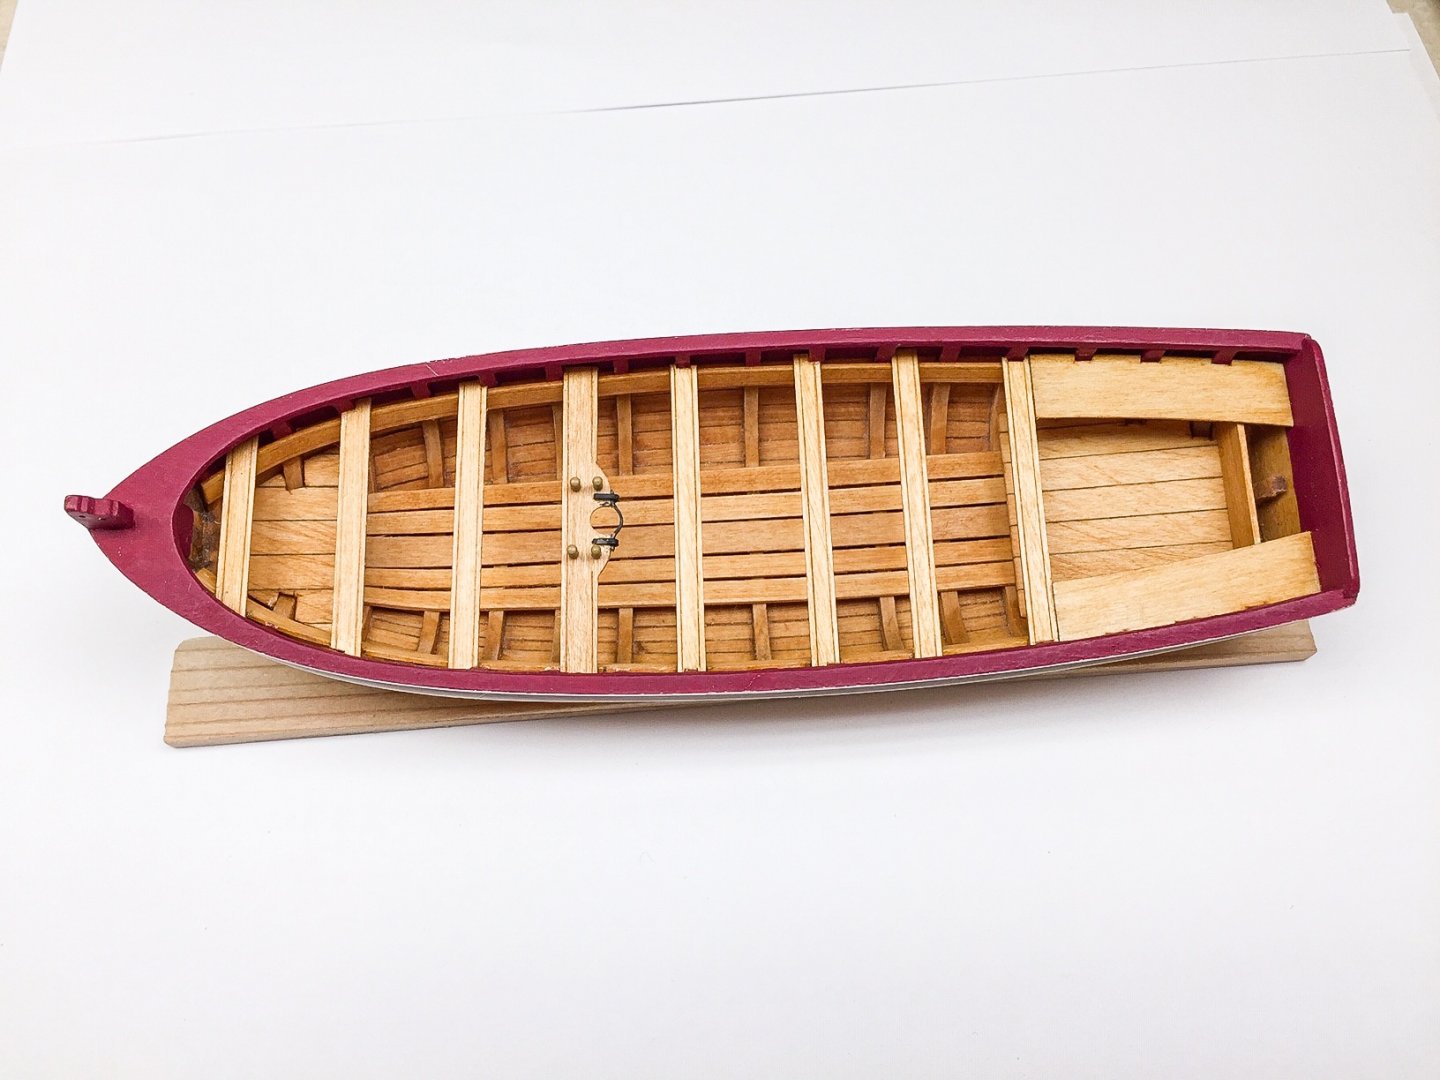
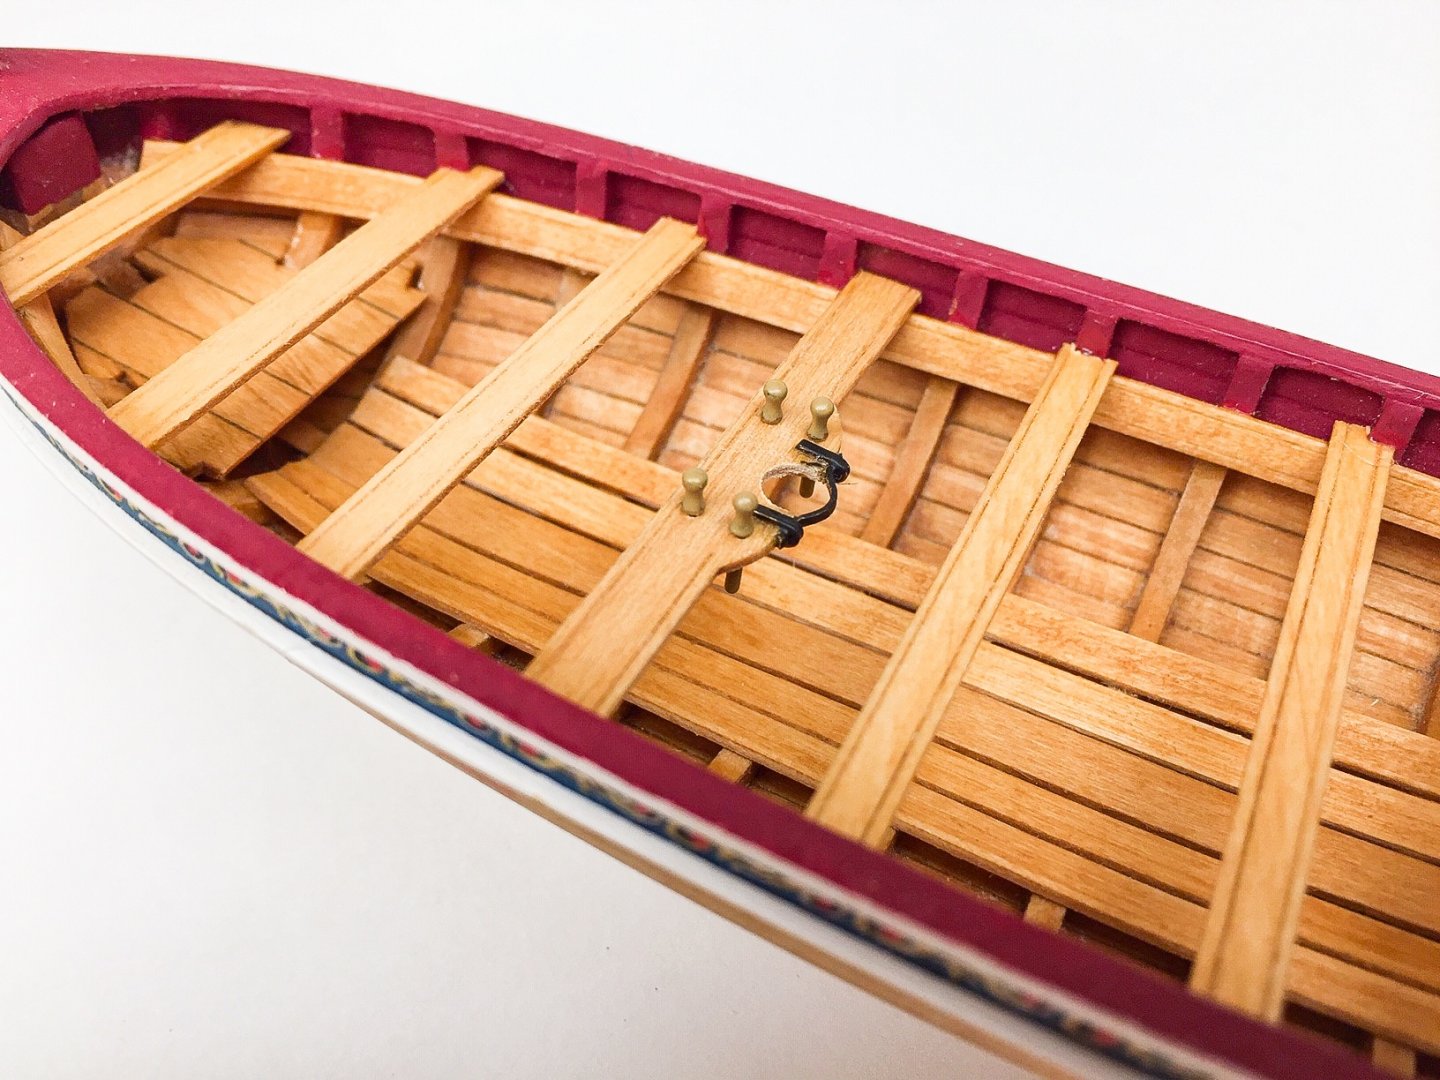
Thanks Ryland! I'm still learning. Doing this boat to get more practice working with little pieces, and it's certainly good for that. Just my opinion, but I don't think this is a beginner's model. That's especially true if you don't know about all the information on this web site. I added the remaining knees, and I also added the wire details like oarlocks and ringbolts. I'm always amazed at how adding just a few details to a model makes it look better. I struggled working with the small pieces like sanding the knees. I have a hard time holding onto them, and have been on the floor looking for them a few times.

- 55 replies
-
- 4
-
-
- 18th Century Longboat
- Model Shipways
- (and 1 more)
-
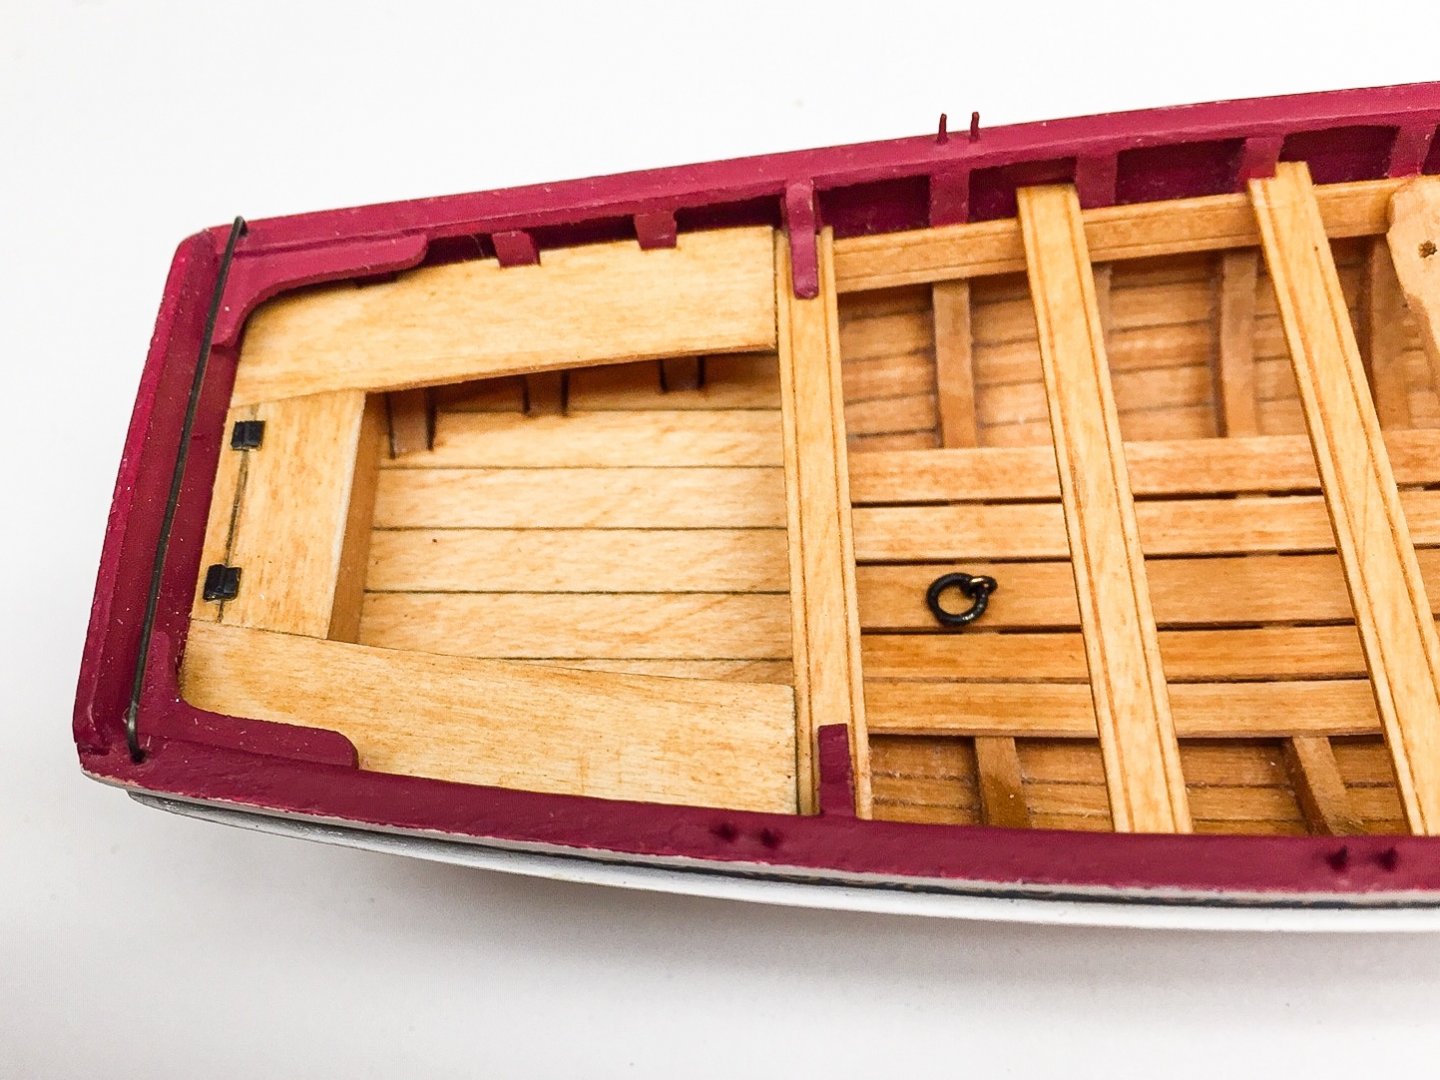
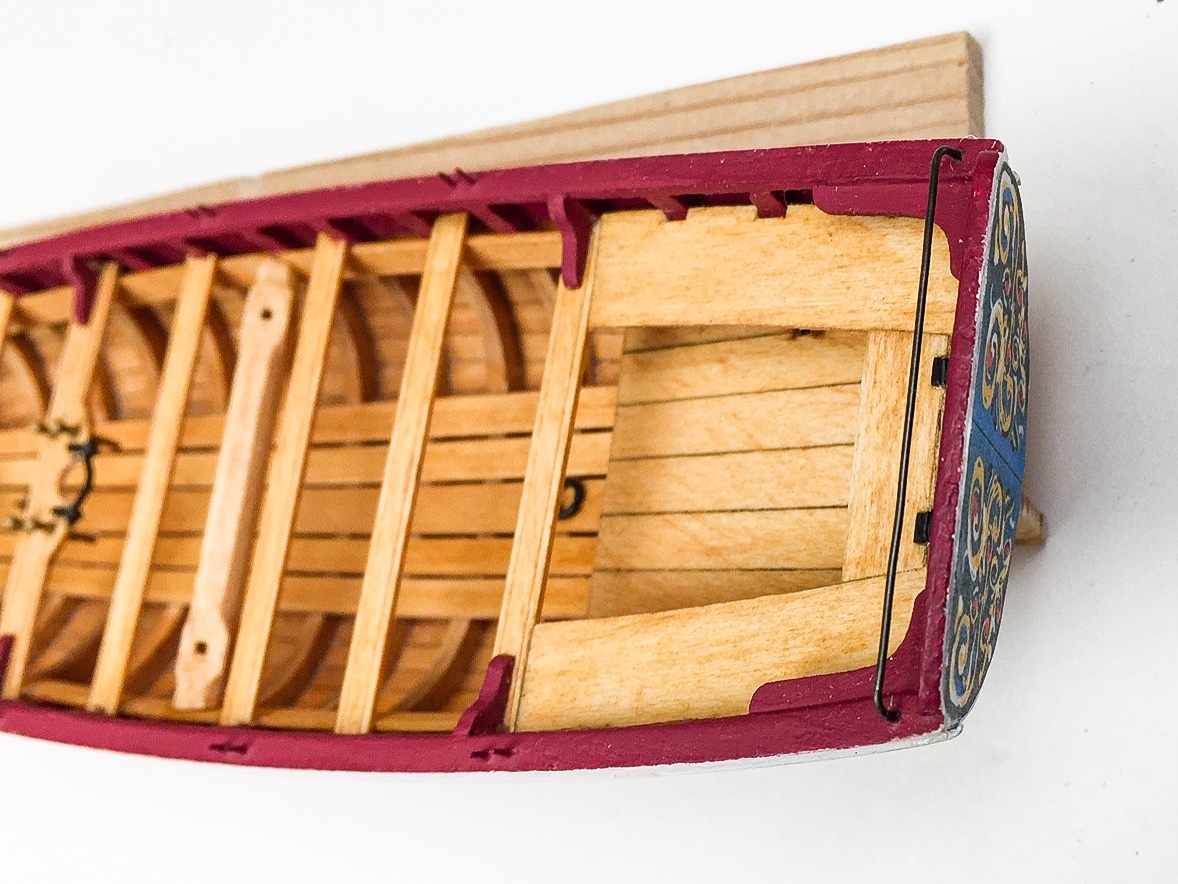
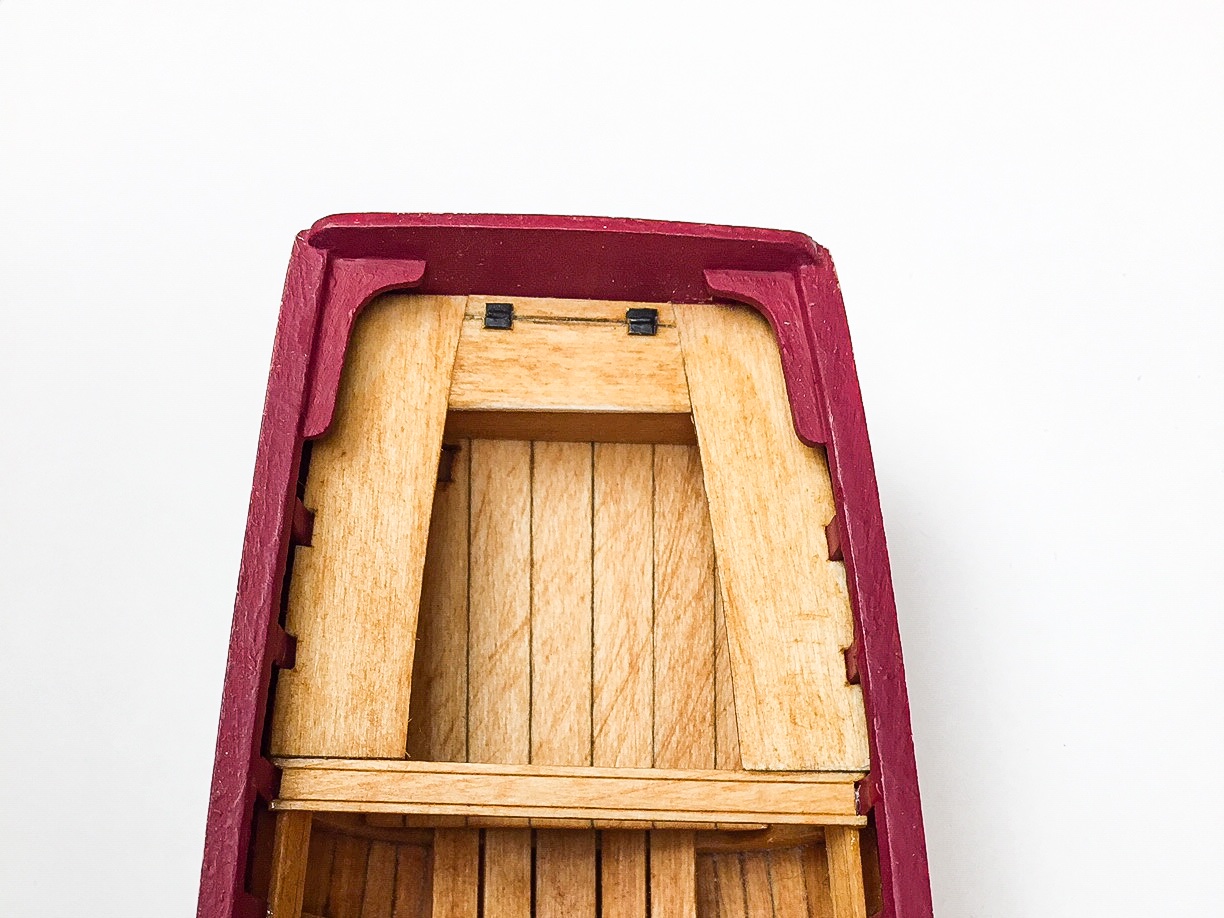
Add the aft hatch cover. I decided to use one piece of wood and simulate a joint along the hinge line. The hinges were made as described in manual. I also added the two knees at the transom.
- 55 replies
-
- 7
-
-
- 18th Century Longboat
- Model Shipways
- (and 1 more)
-
Love your rope coils, and they go on the belay pins so much easier and hang naturally compared to what I did. I was using a method from a book that wasn't very good or accurate, and of course, I struggled with it. The coils were easier to make, but I could never get them to hang right. Yours look so good, and good job matching the color. I had the same problem taking pictures of rigging. The tan lines don't show up well. I still haven't taken a bunch of "good" pictures yet, because I'm trying to find a good place and I've been a bit lazy about it. Plus I want to do focus stacking and that takes a bit of a setup and processing. I have an off white wall I'm going to try, hoping the lighting will make it look a little gray and rigging will show up. The blocks you are using are so much better than the ones in the kit. I struggled with them, but got better as I went along. Your's look great with the hooks and everything. I'm surprised at how fast you're progressing, although once you get the hang of rigging, it goes faster than you expect. The foot ropes look great! Real ropes instead of wire is a great look. You're always going the extra mile, and it shows. I'm so impressed with your ability to make the eyes, knots, and little details with rigging thread. At my skill level, I was doing good to make foot ropes with wire. Once all finished, they look fine, but yours look so much better in closeups! You're getting close. First couple of yards take some work, but it gets easier with repetition, and as you work up, they are a little simpler.
- 950 replies
-
- 2
-
-
- syren
- model shipways
- (and 1 more)
-
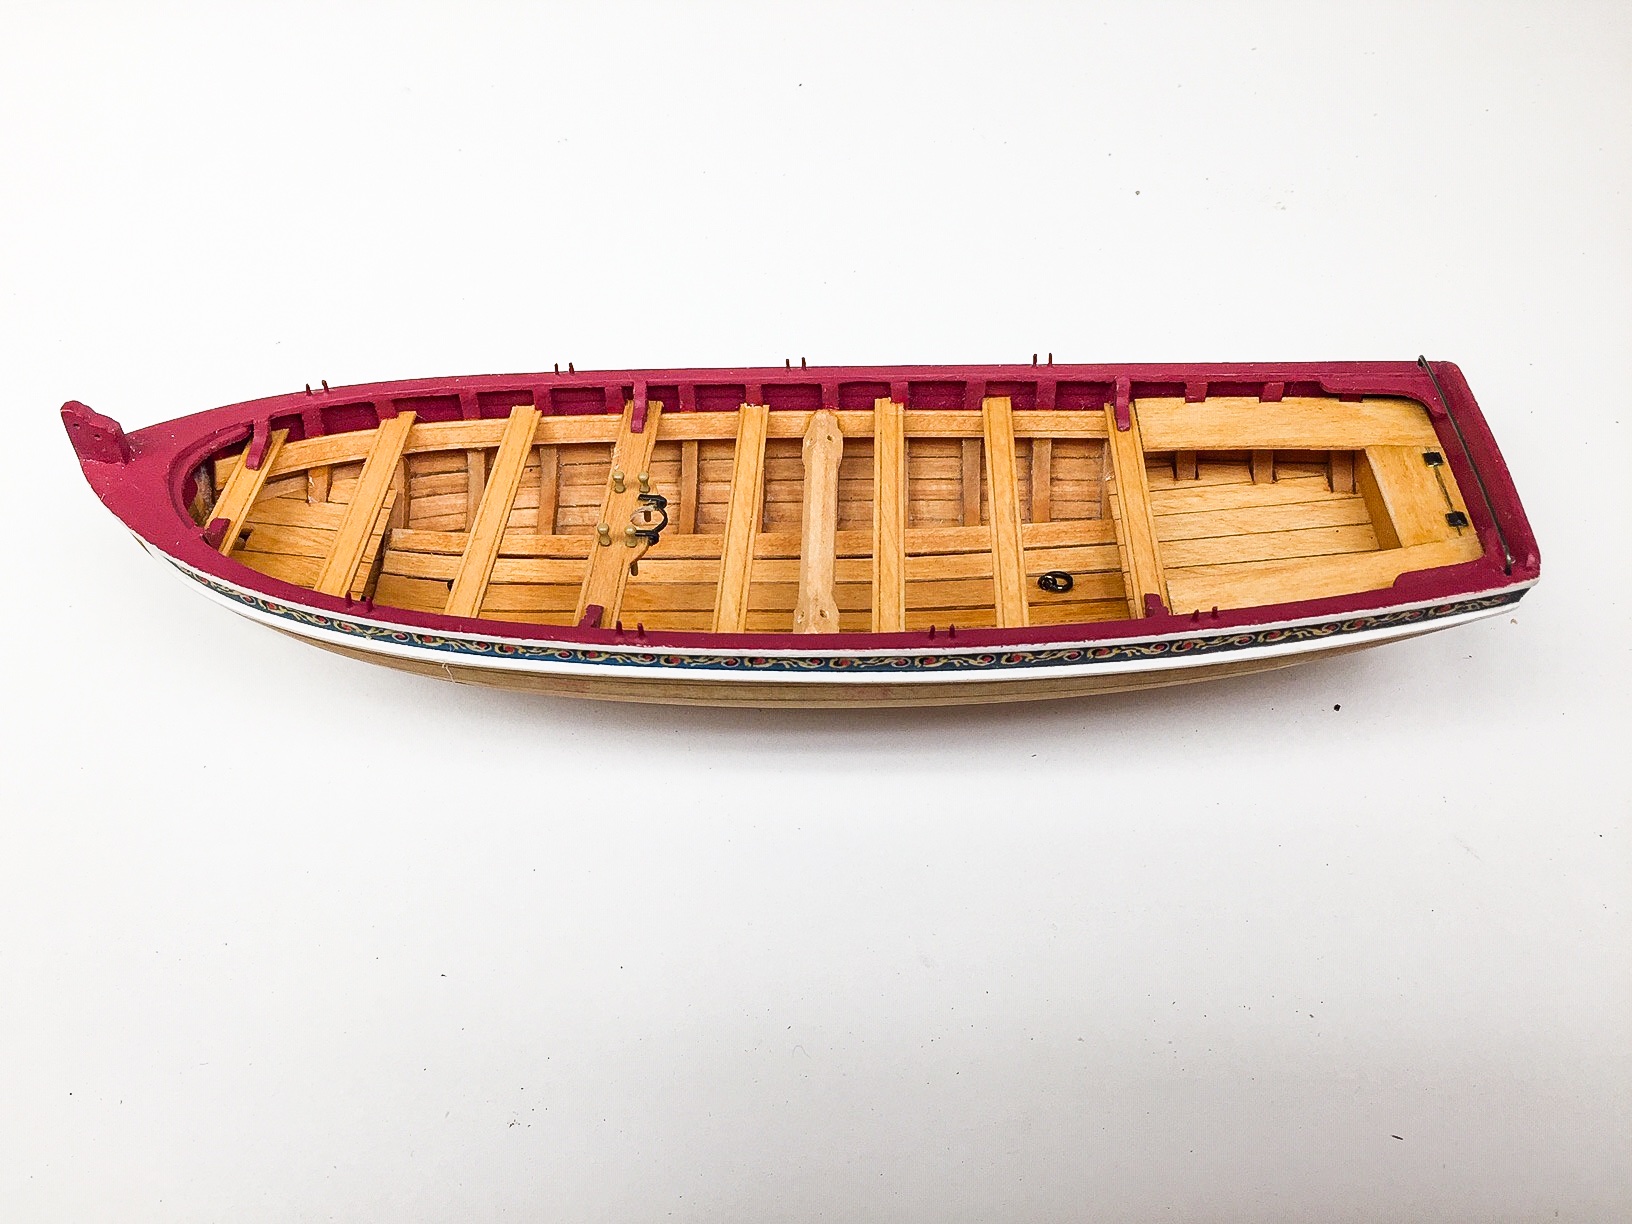
Weather turned bad, so I'm back inside working on the boat. Added the thwarts and seats for officers. I've actually been working slowly on these a number of days. The bracket for the mast took a few tries. Thwarts were a little hard to fit in there because the cap rail has a little overhang, so they don't fit up tight to the hull planking. It's something you won't notice unless you look real close. I suspect my cap rail is a little wider than it should be.
- 55 replies
-
- 9
-
-
- 18th Century Longboat
- Model Shipways
- (and 1 more)
-
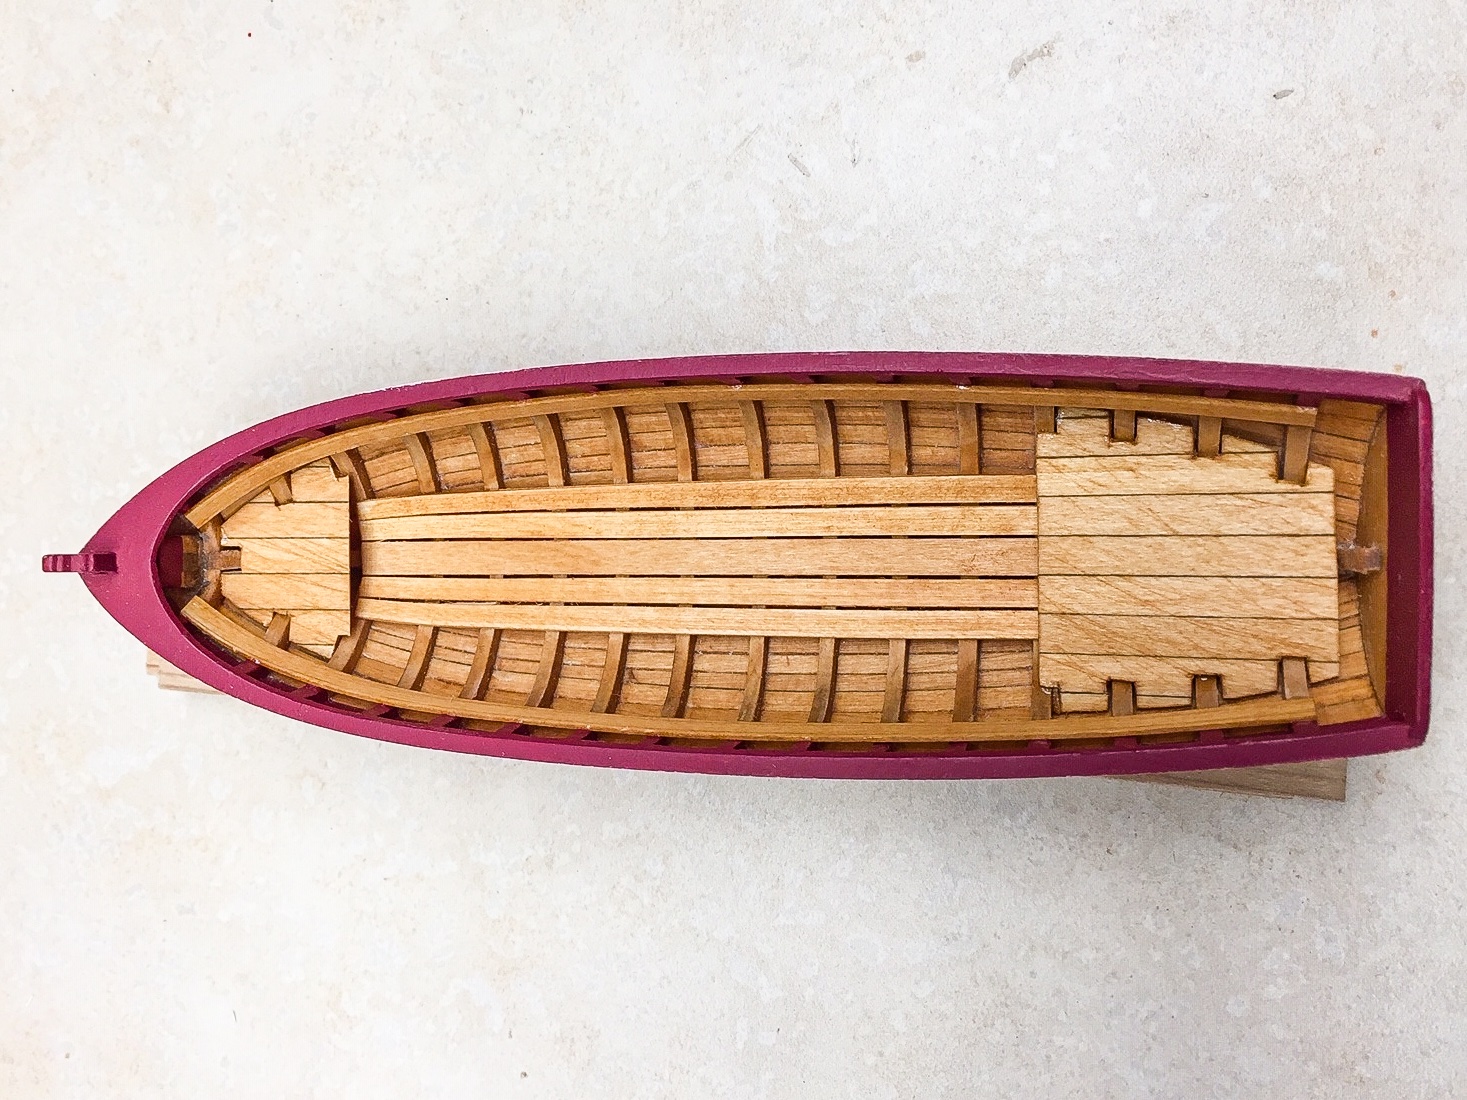
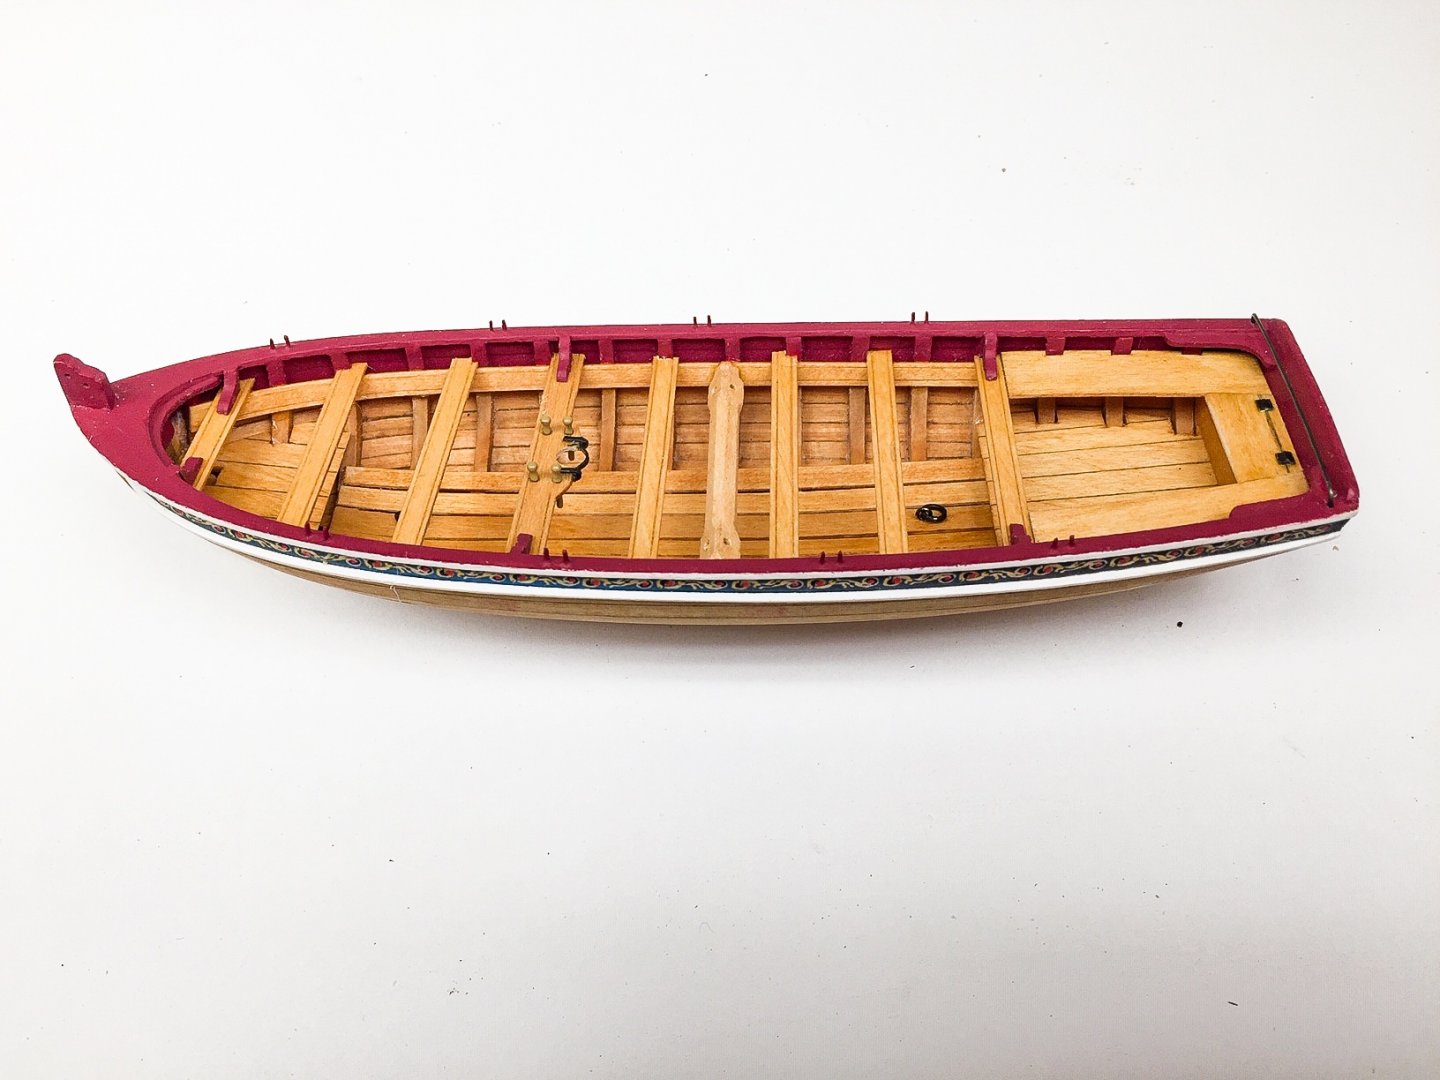
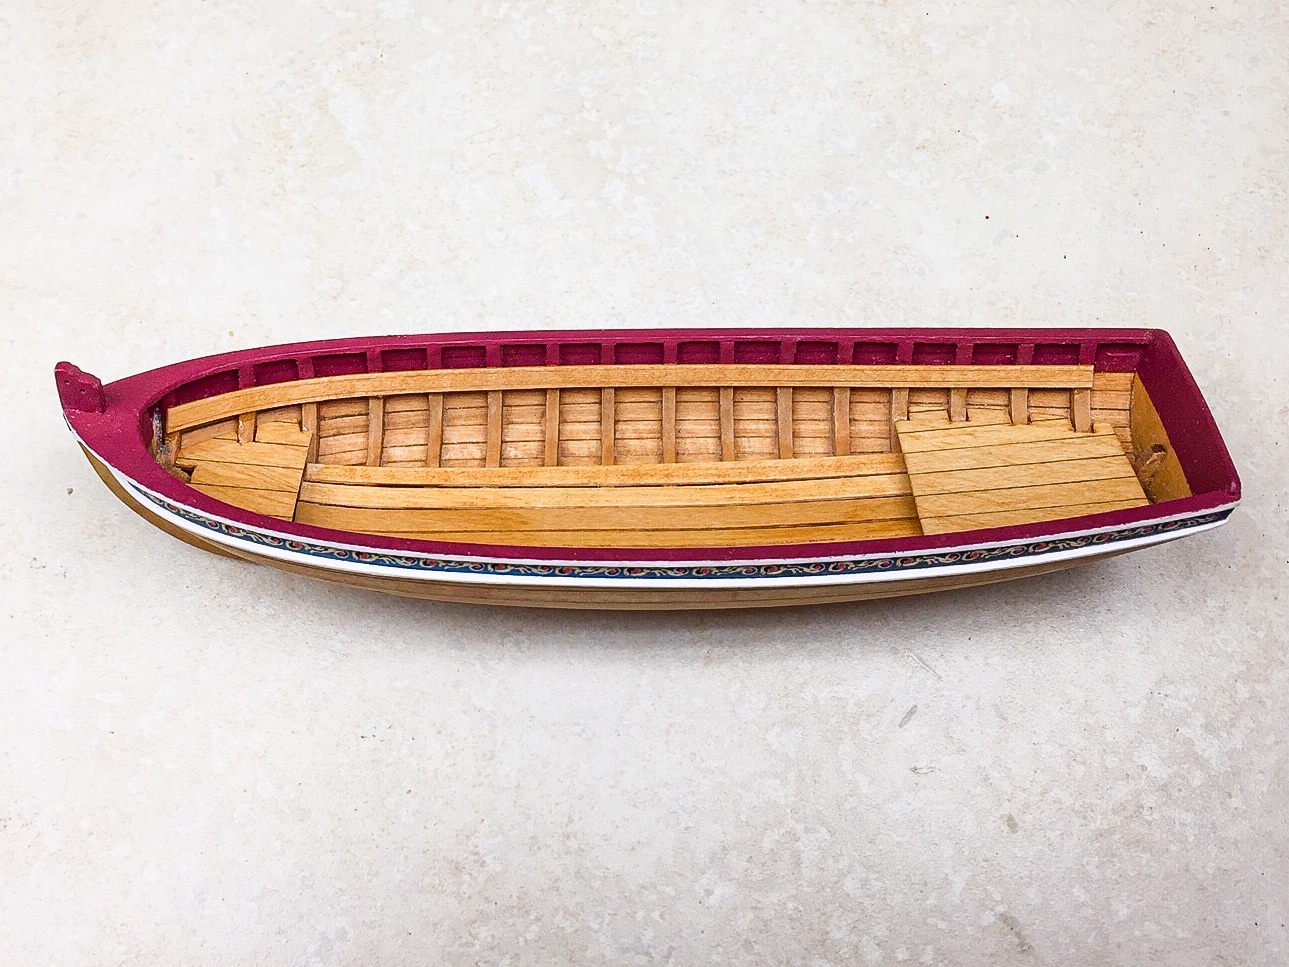
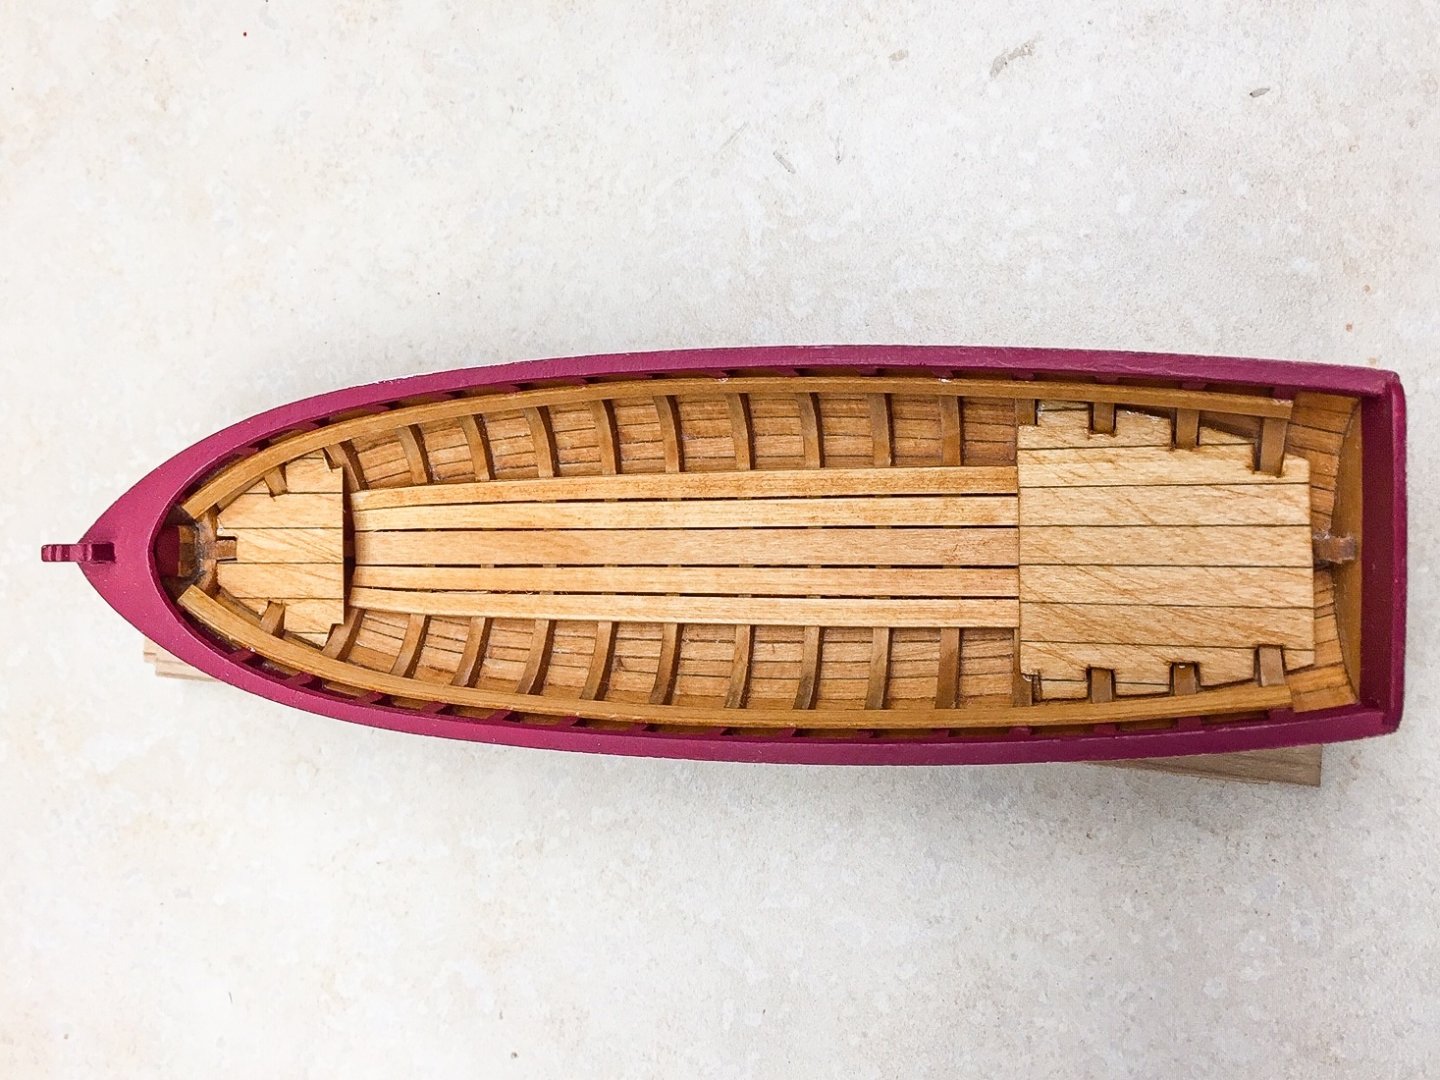
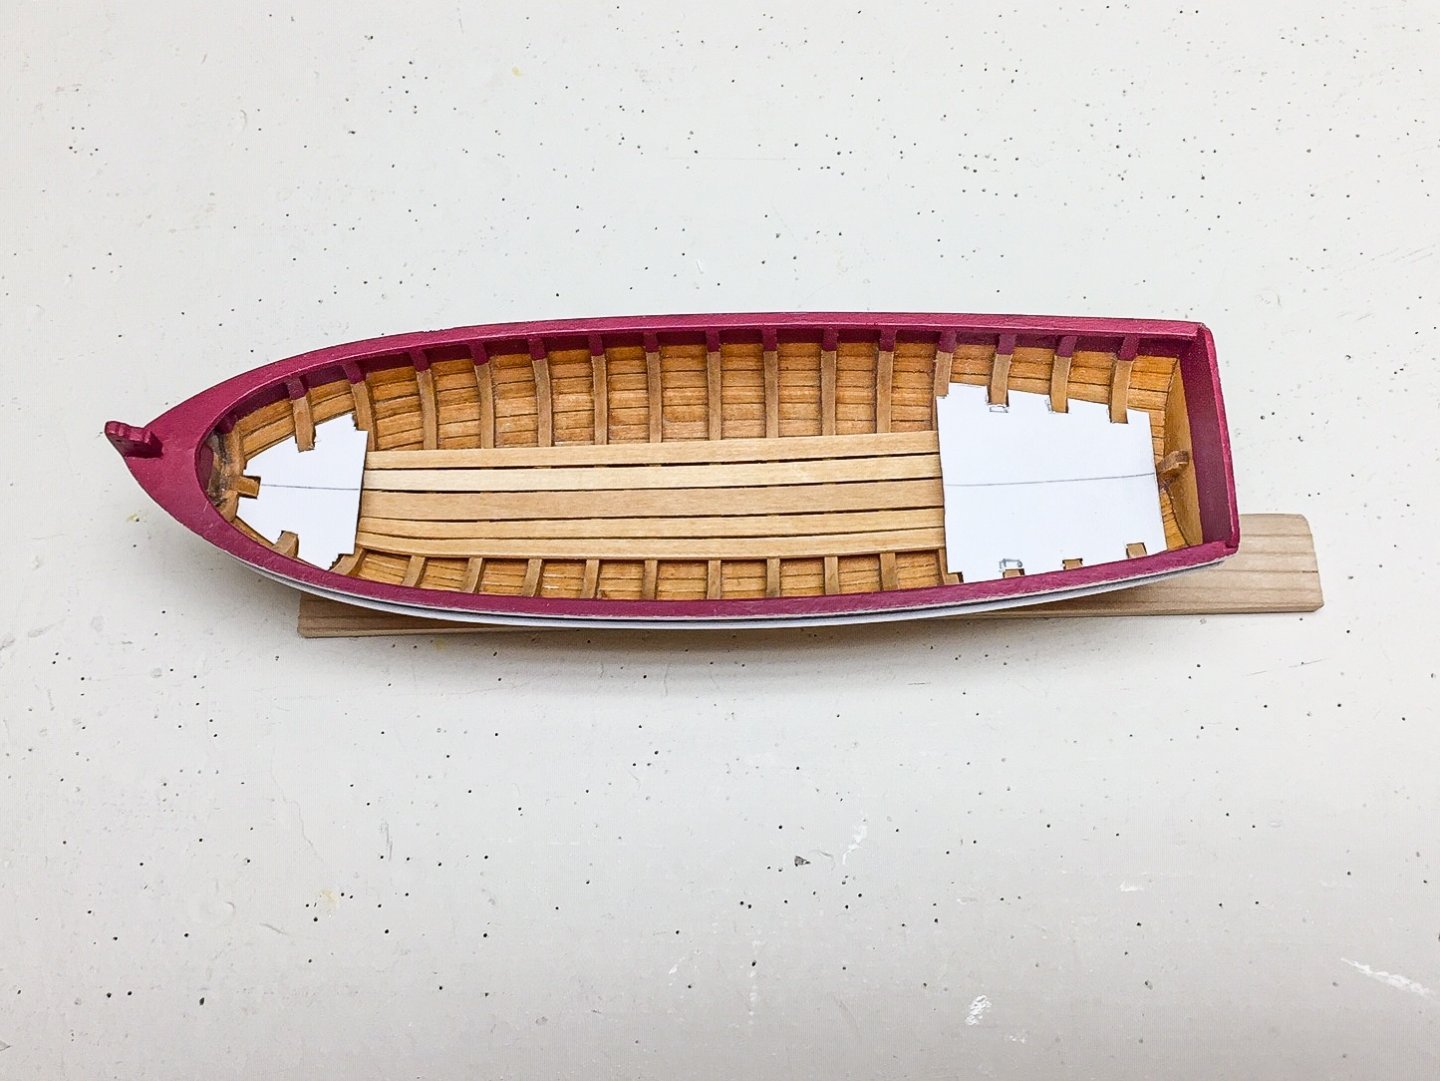
I've got too many projects going all at once, so took a break from the long boat. Here's the bow and stern platforms cut and and glued into place. Despite patterns, I still had some fitting to do. I've also added the risers. No real difficulties on these steps.
- 55 replies
-
- 7
-
-
- 18th Century Longboat
- Model Shipways
- (and 1 more)
-
I haven't checked in for a while, and I'm always stunned at your rapid progress, and how clean and crisp it looks in closeups. Amazing craftsmanship! This will be a stunning model when finished. You'll be amazed at what a difference it makes when you start adding each yard and rigging. Glad you caught the extra block on the crosstrees (I think that's where it was). I didn't notice it, and adding it after you have a lot of rigging on was a bit difficult. Much easier to get all the blocks and details on beforehand. I agree with comments about iron bands around the spars. A very nice detail to add, and kind of surprised it wasn't mentioned in the kit as an optional detail. Chuck added so many small details like this, it really makes the kit. And you have to draw the line somewhere. Yours always looks better than mine in the photos. I had a hard time with the netting on the bow. It was hard to trim to the right shape because it wanted to deform, and when I started tying it, it didn't want to stay flat. I managed, but yours looks a lot better. Perhaps eyes and fingers about 50 years younger than mine make a difference? Ha, ha! It's just patience and your knack for getting details right. I'll be patient for a while, and then get going too fast and make little mistakes. Display case is coming along slowly. I've been sanding & spraying on coats of lacquer on the parts. I'll assemble after I get the parts finished except for a final coat.
- 950 replies
-
- 1
-
-
- syren
- model shipways
- (and 1 more)
-
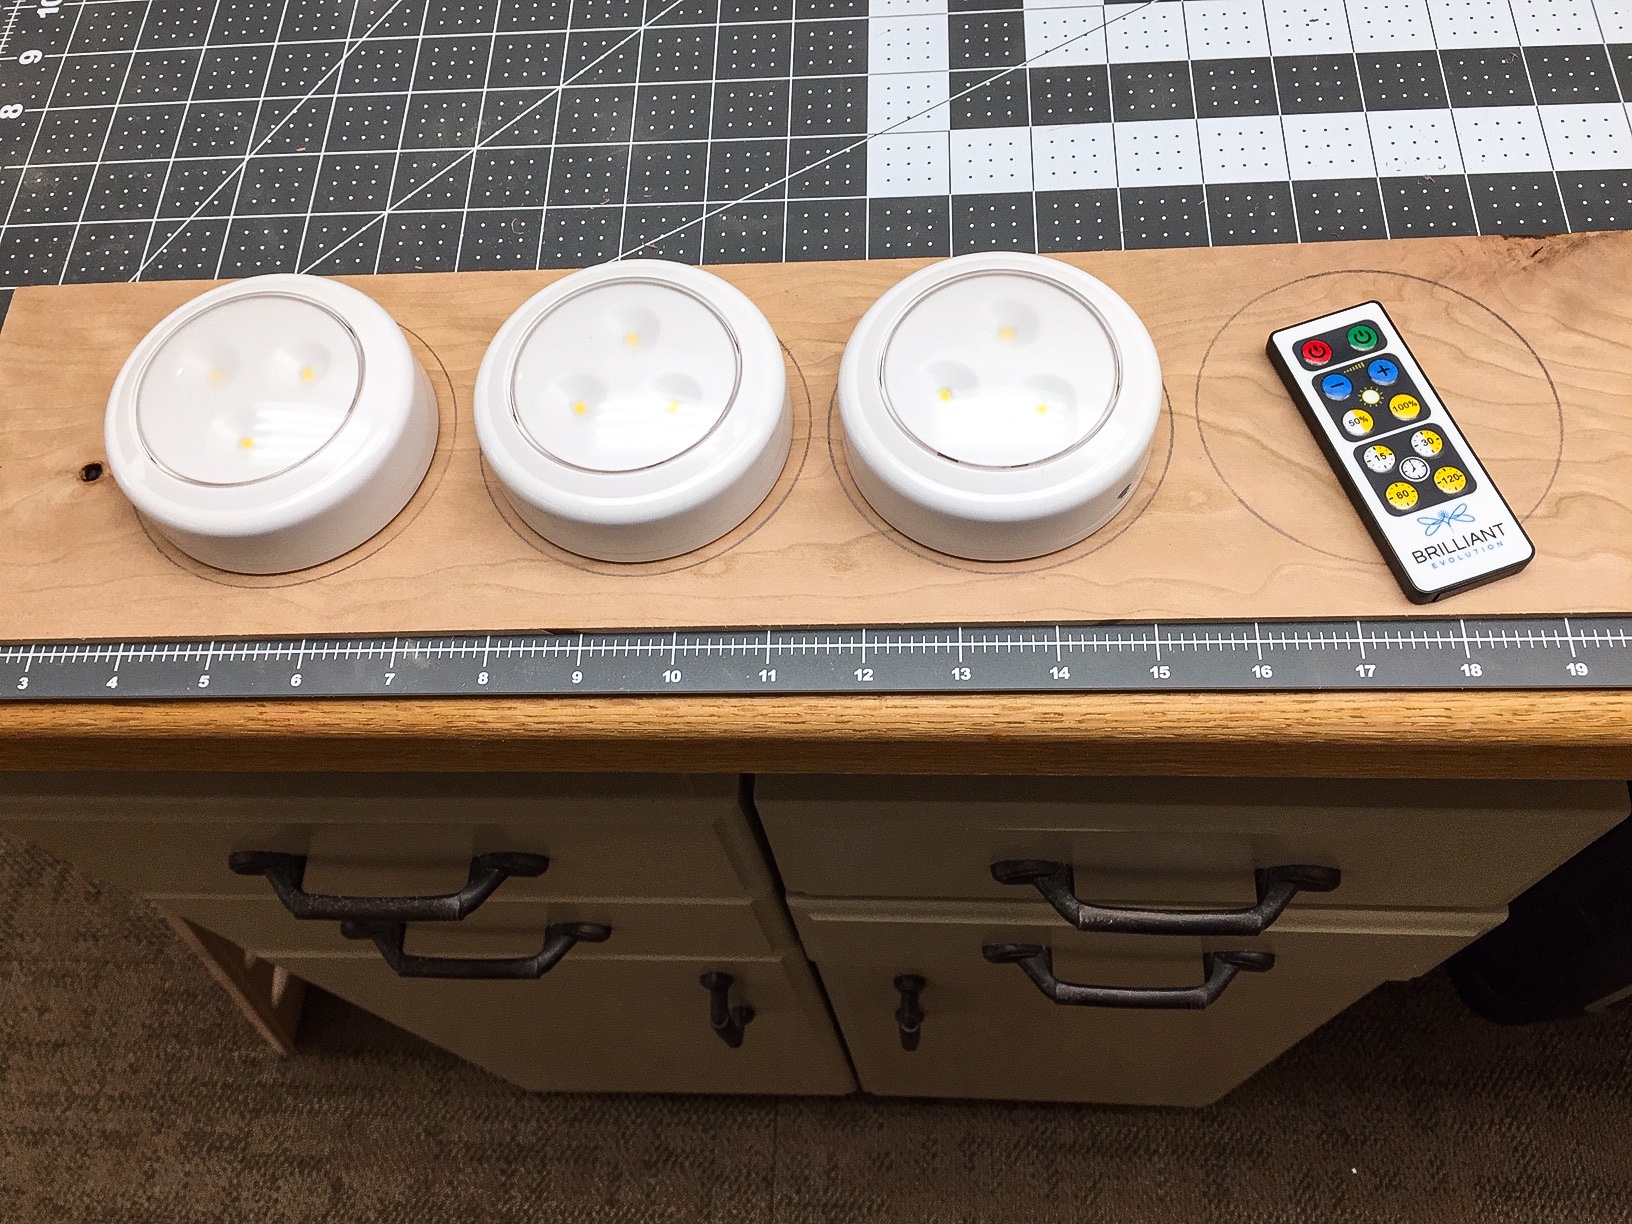
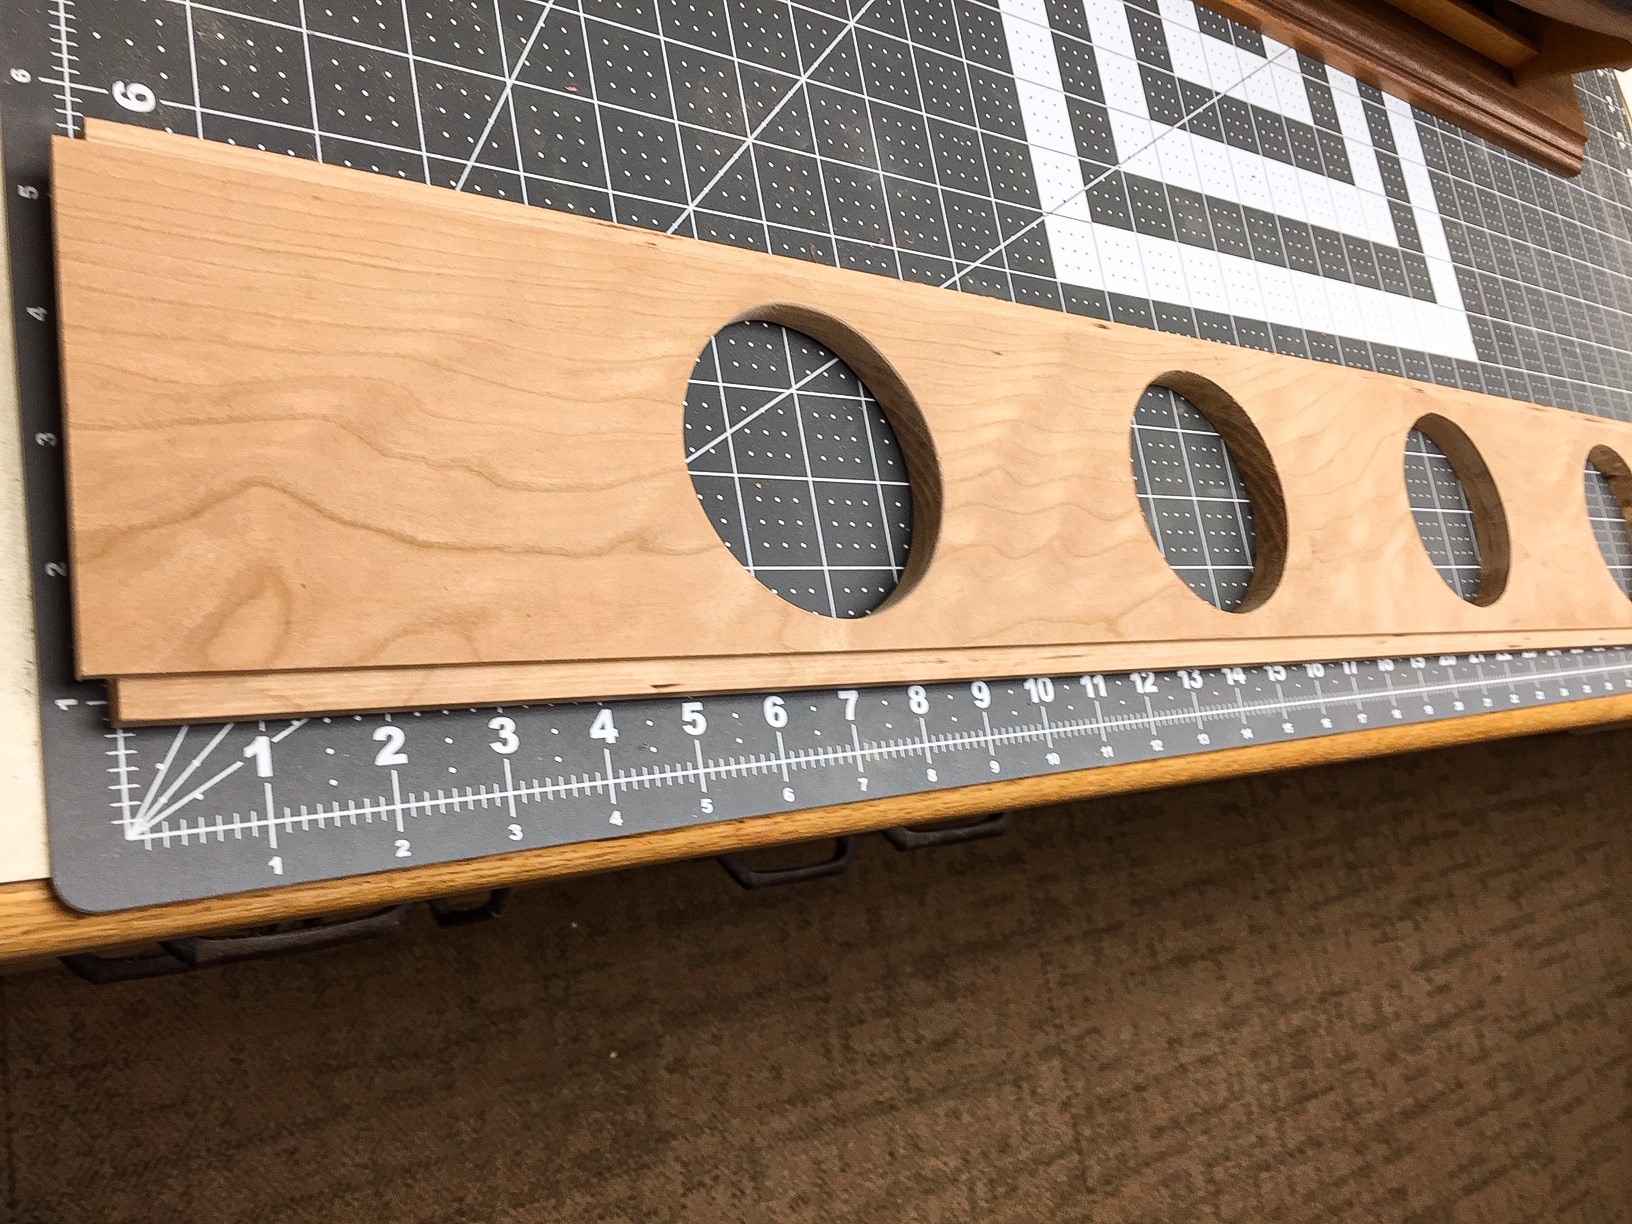
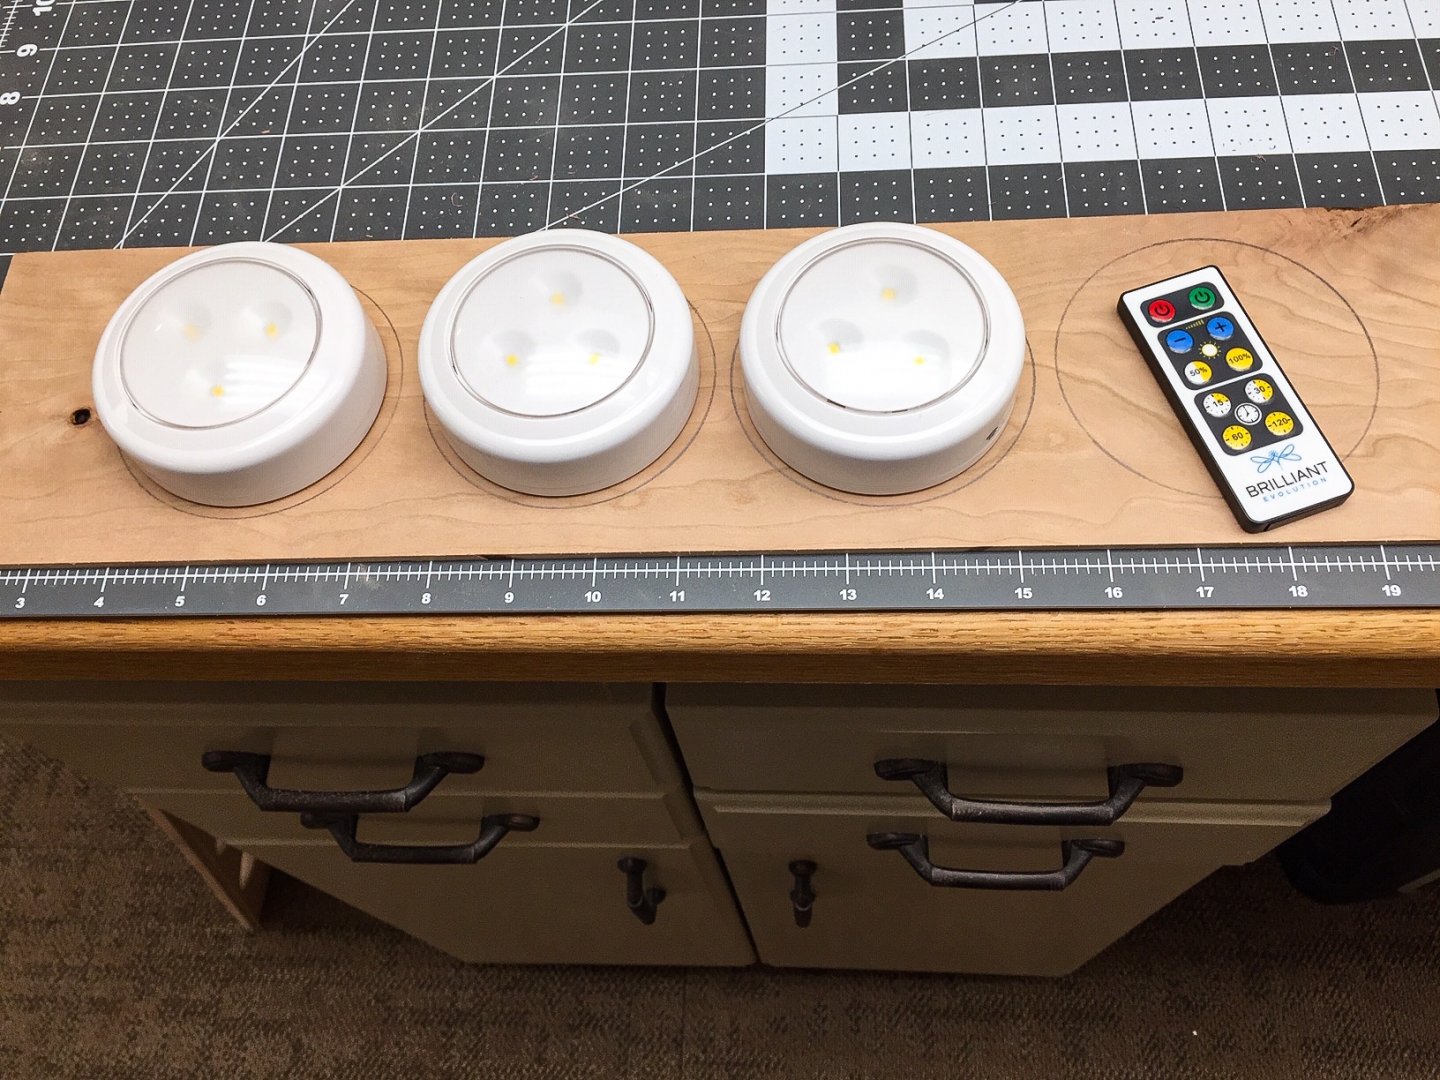
Here's photo of the LED lights I decided to use and the remote that turns them on and off. The lights are dimmable, so I opted for 4 of them across the top of the case. I wanted plenty of light since I can always dim if it's too much. I bought "warm" lights. With LEDs you have to be careful. Many have a blue/white look that I don't care for. The lights will drop into a piece of wood extending across the center of the top of the frame. It will have 4 holes in it that the lights will drop into. I'll mount the base of the lights to thin pieces of wood cut to be a slightly larger diameter than the lights. The wood will keep the lights from falling thru the holes. They won't be glued in, but will rest on the center piece of wood. They have batteries that will need to be replaced, or they might have other problems, so you need easy access. They will lift out for maintenance and then drop back in the frame. The 2nd photo shows the center piece with holes for the lights. I haven't quite finished it yet. I cut the holes with my small hobby jigsaw, and it wasn't quite large enough to do a good job. So I've had to do a lot of filing to smooth out the holes and get them so the lights just drop thru. With the center piece there will be two pieces of plexiglass on top, one on either side of the center. So the center piece needs rabbits for plexiglass that match those of the top frame. You can see how the center piece will sit in the rabbit of the top frame, and then extend the rabbit down both sides of the piece. This will be easier to understand when it's all put together.

-
Plexiglass also needs to go on top of the frame, so the top part of the frame has a rabbit cut in it for plexiglass to sit in. Since I wanted lights, my design will have a center wood piece on top that will sit in the rabbit, and two open areas on either side that will have plexiglass. This is a little hard to describe, but hopefully as I get further along, it will become clear what I'm doing. Photos show the rabbit cut on the top of the top frame. This is same part shown above flipped over.

-
The top part of the frame will sit on 4 uprights (or stanchions!). I've cut these pieces and you can see them in the background of the previous photos. The top part will have grooves in the bottom to accept the plexiglass sides. The plexiglass will slide in grooves in the uprights and rest in grooves on the bottom part of the frame in the base. The top part of the frame will enclose the plexiglass pieces with the grooves. The top part of the frame is slightly larger than the bottom. This gives a little overhang of the uprights and I think looks better than a flush fit. Overhang is small. In my case about 3/32", or just enough to show. The grooves for plexiglass were cut to the same dimensions as the bottom part of the frame. They were aligned with small pieces of wood in the grooves keeping grooves in both parts identical, so the grooves form a rectangle that's square with the world.

-
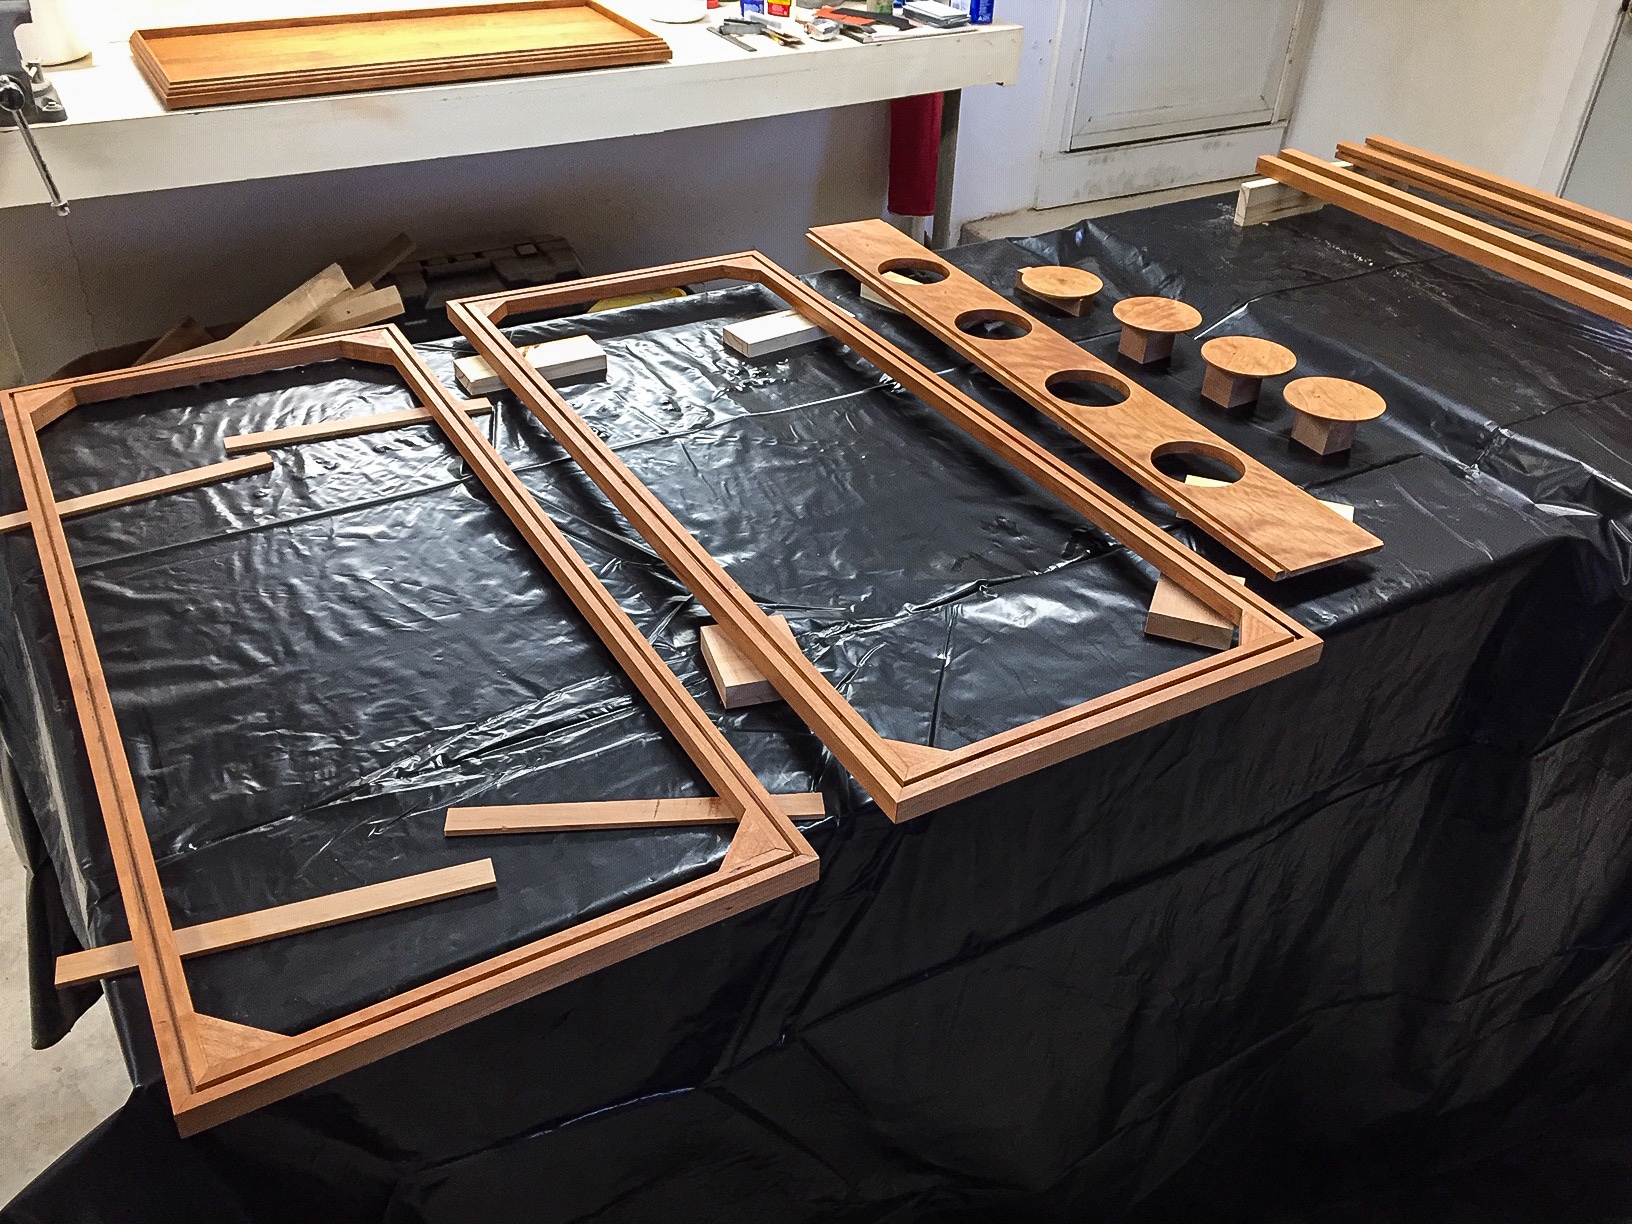
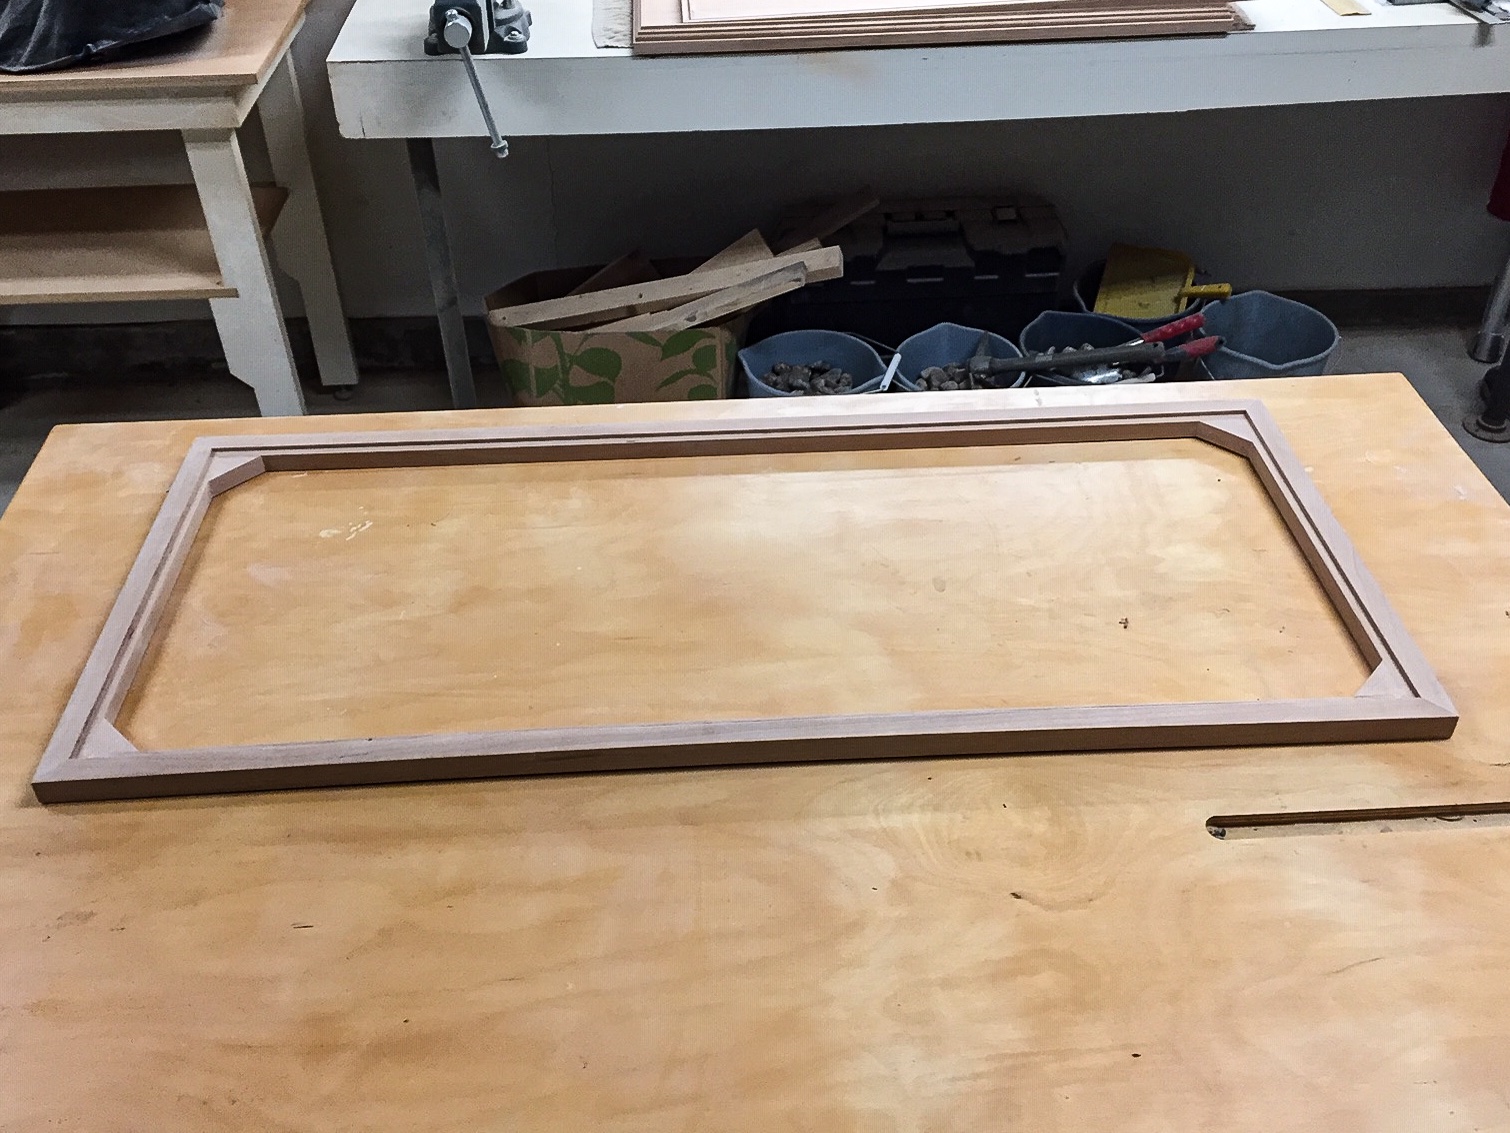
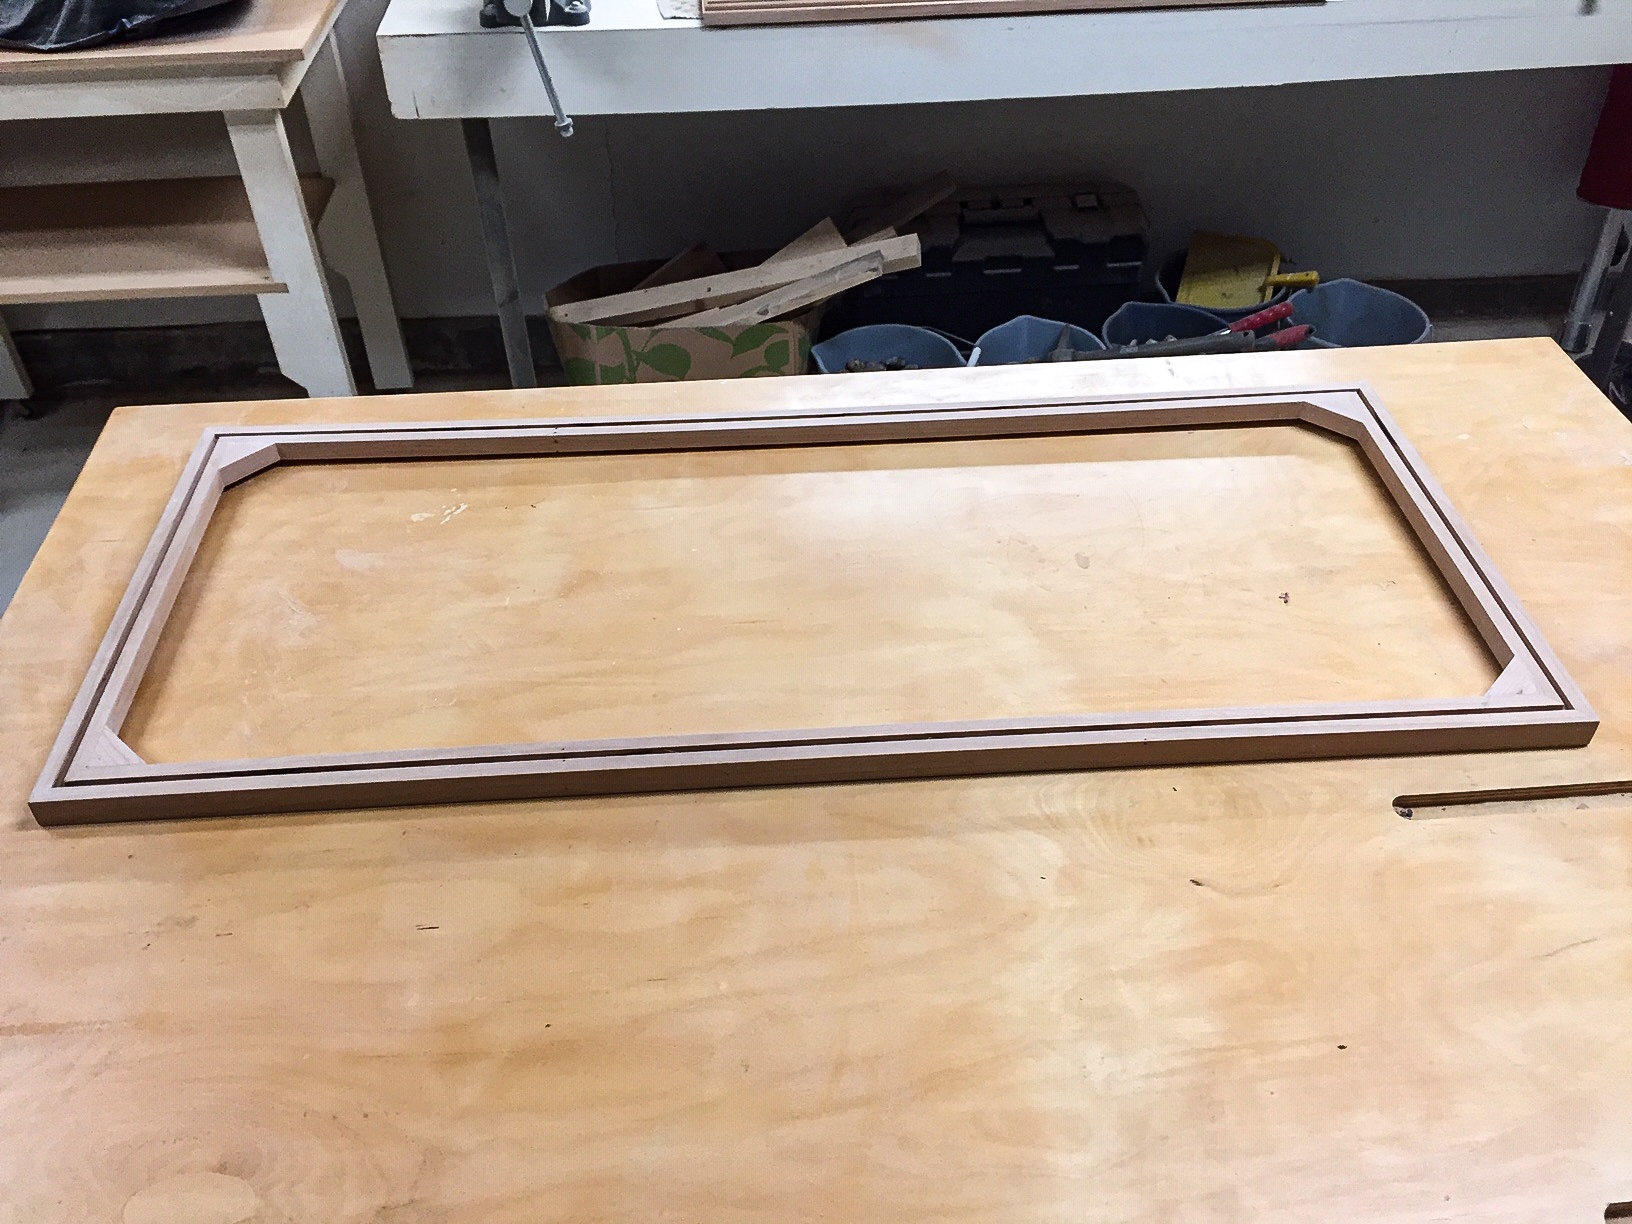
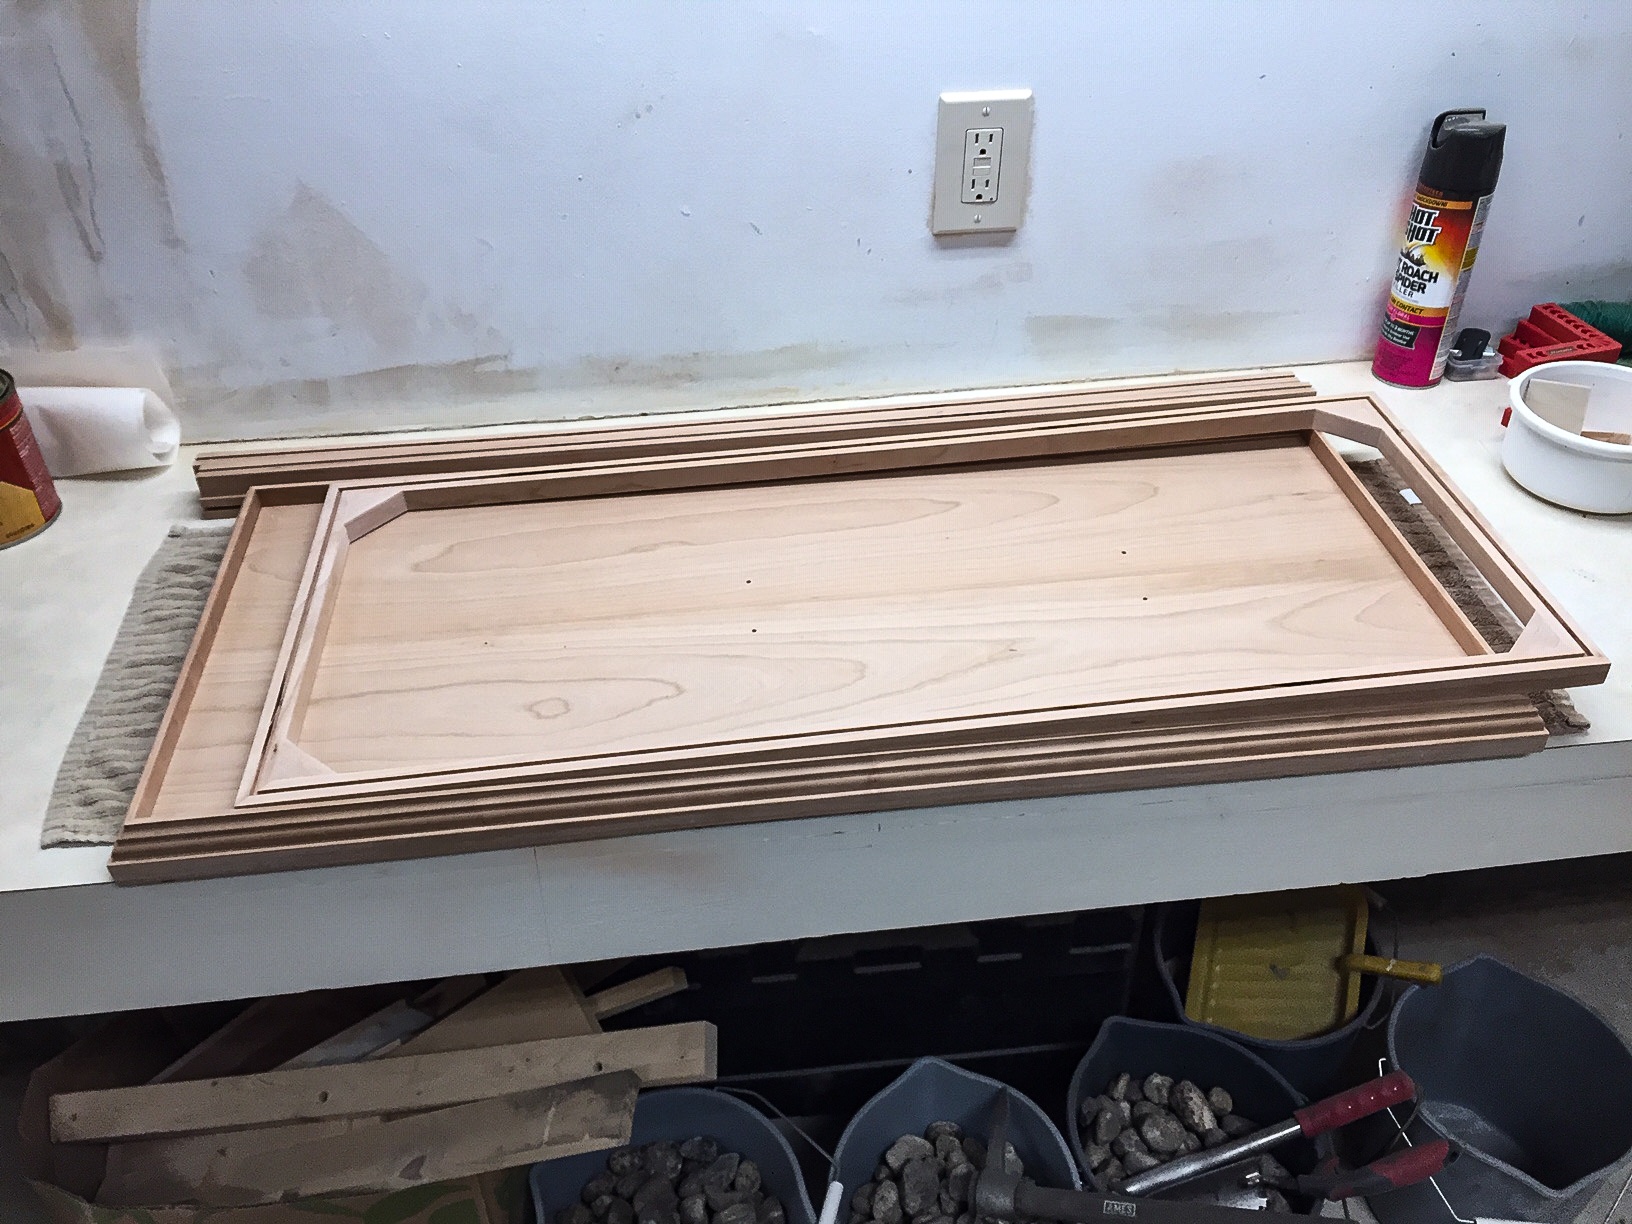
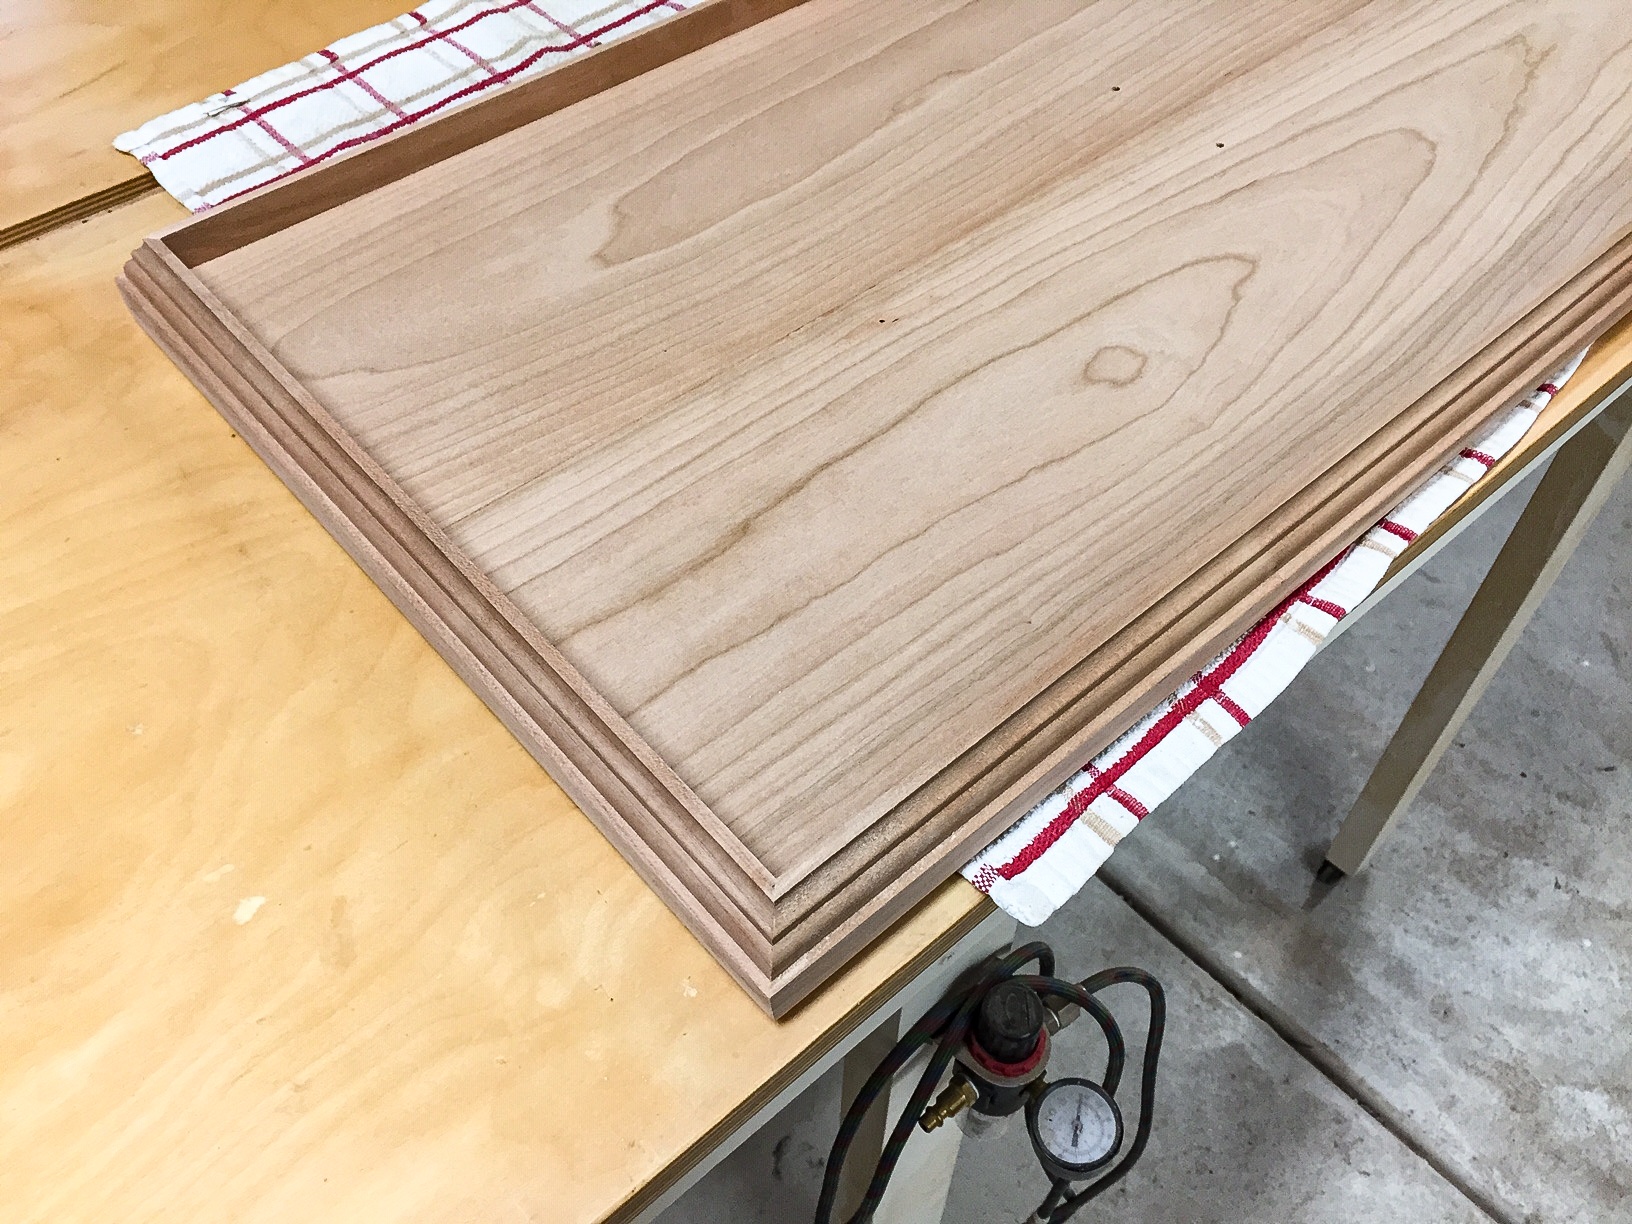
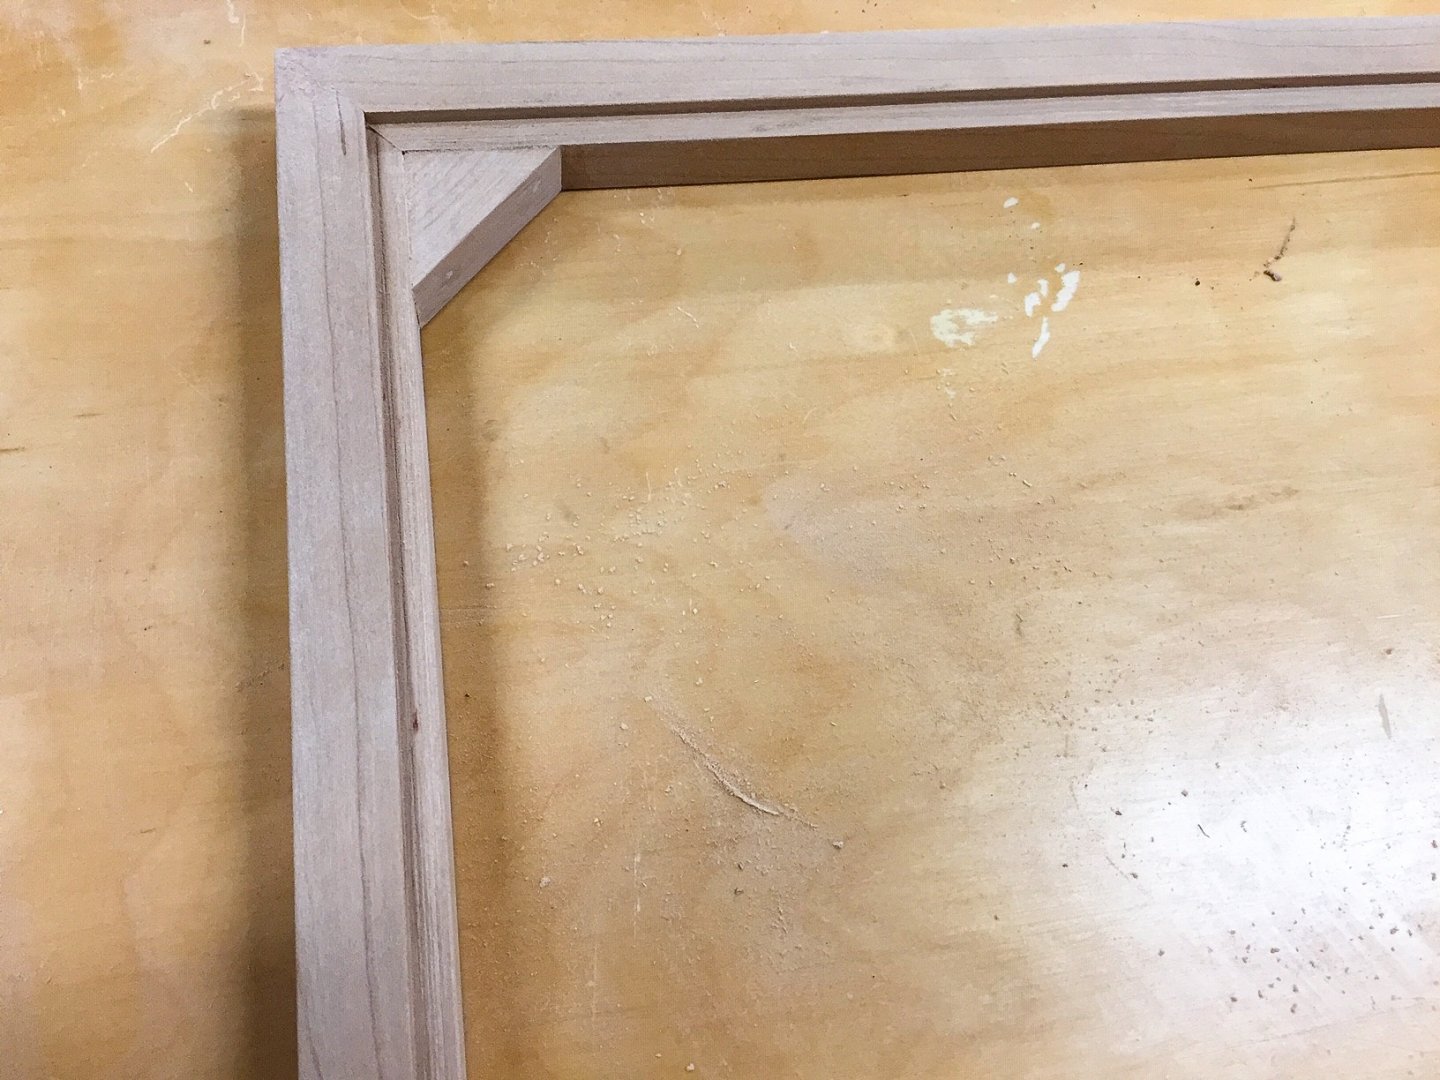
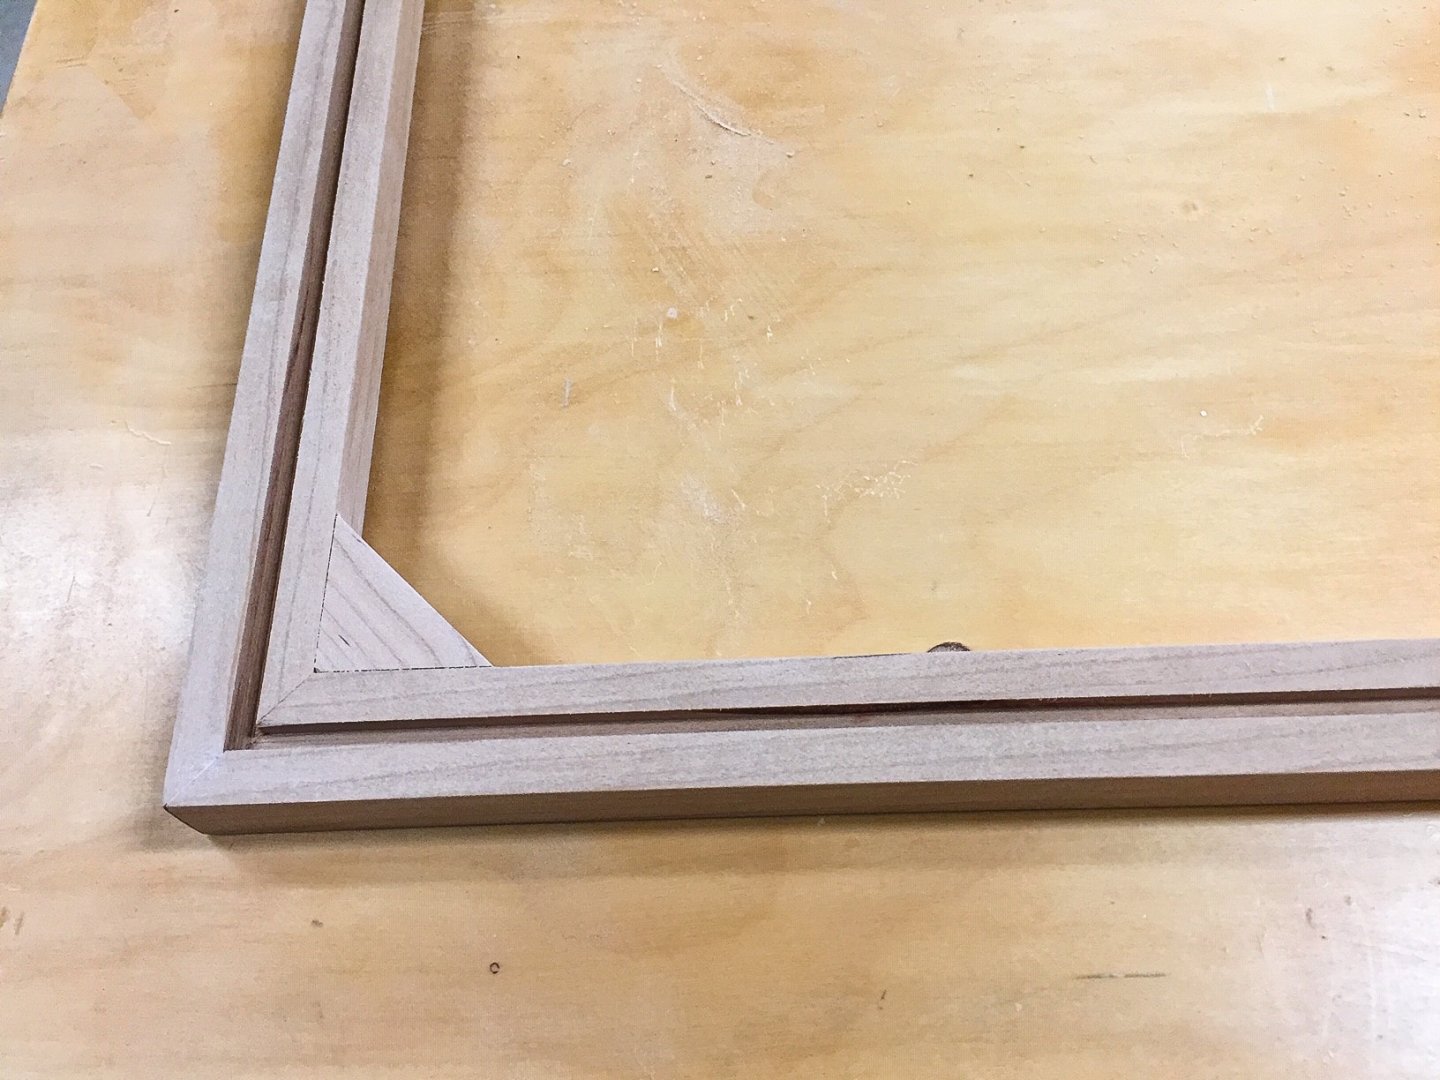
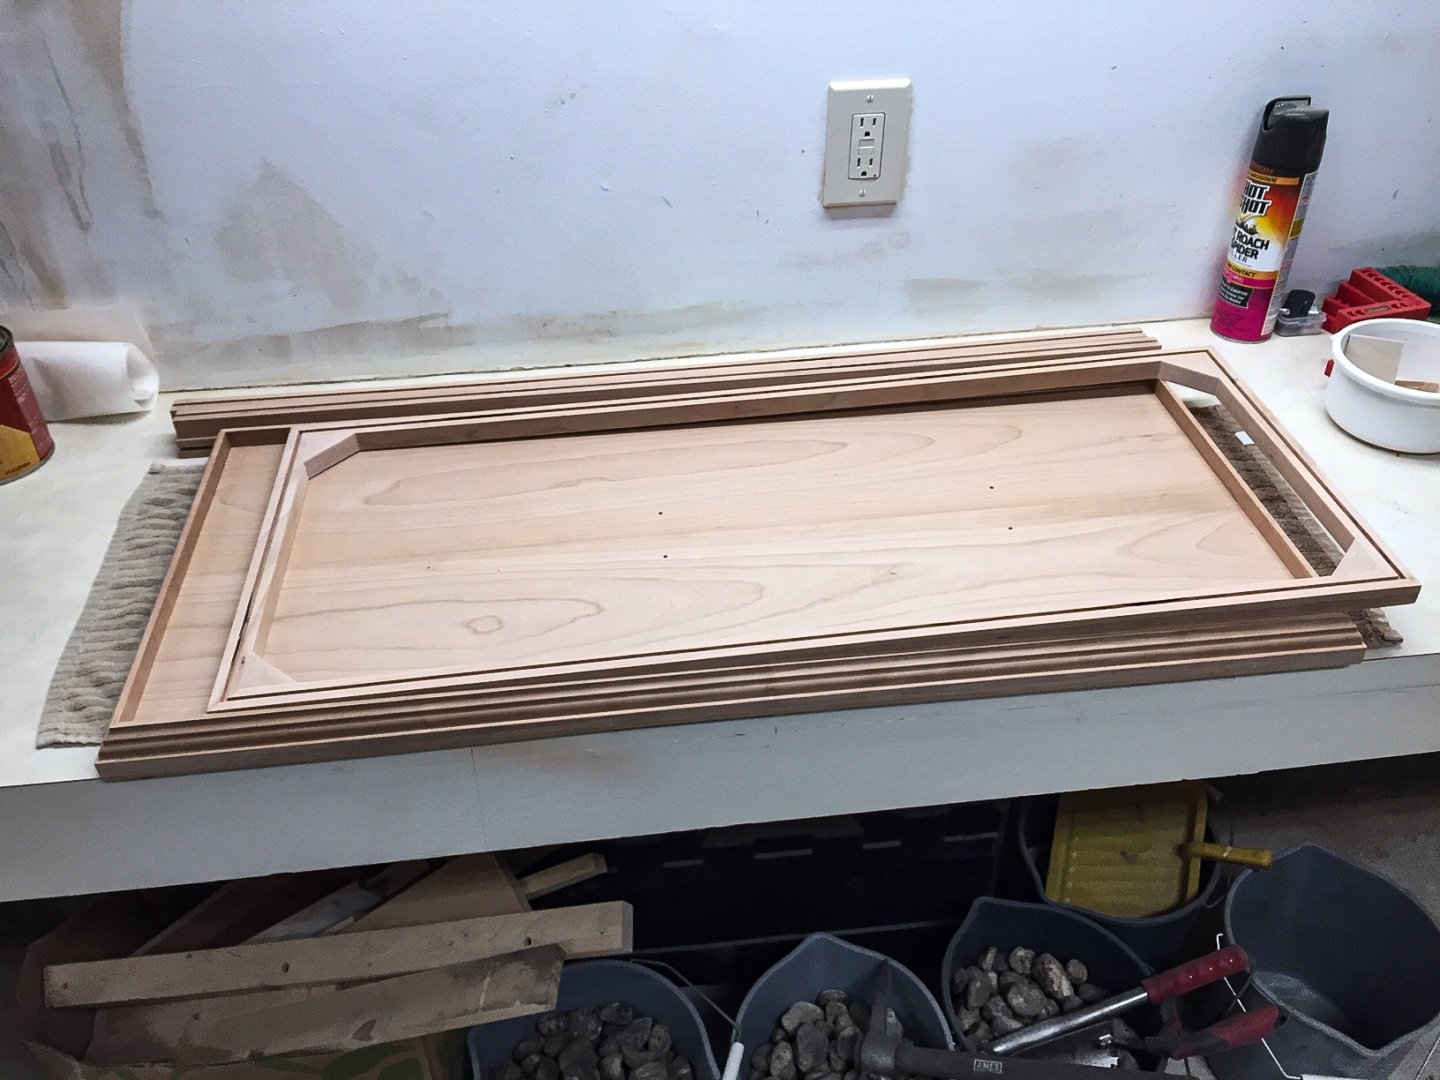
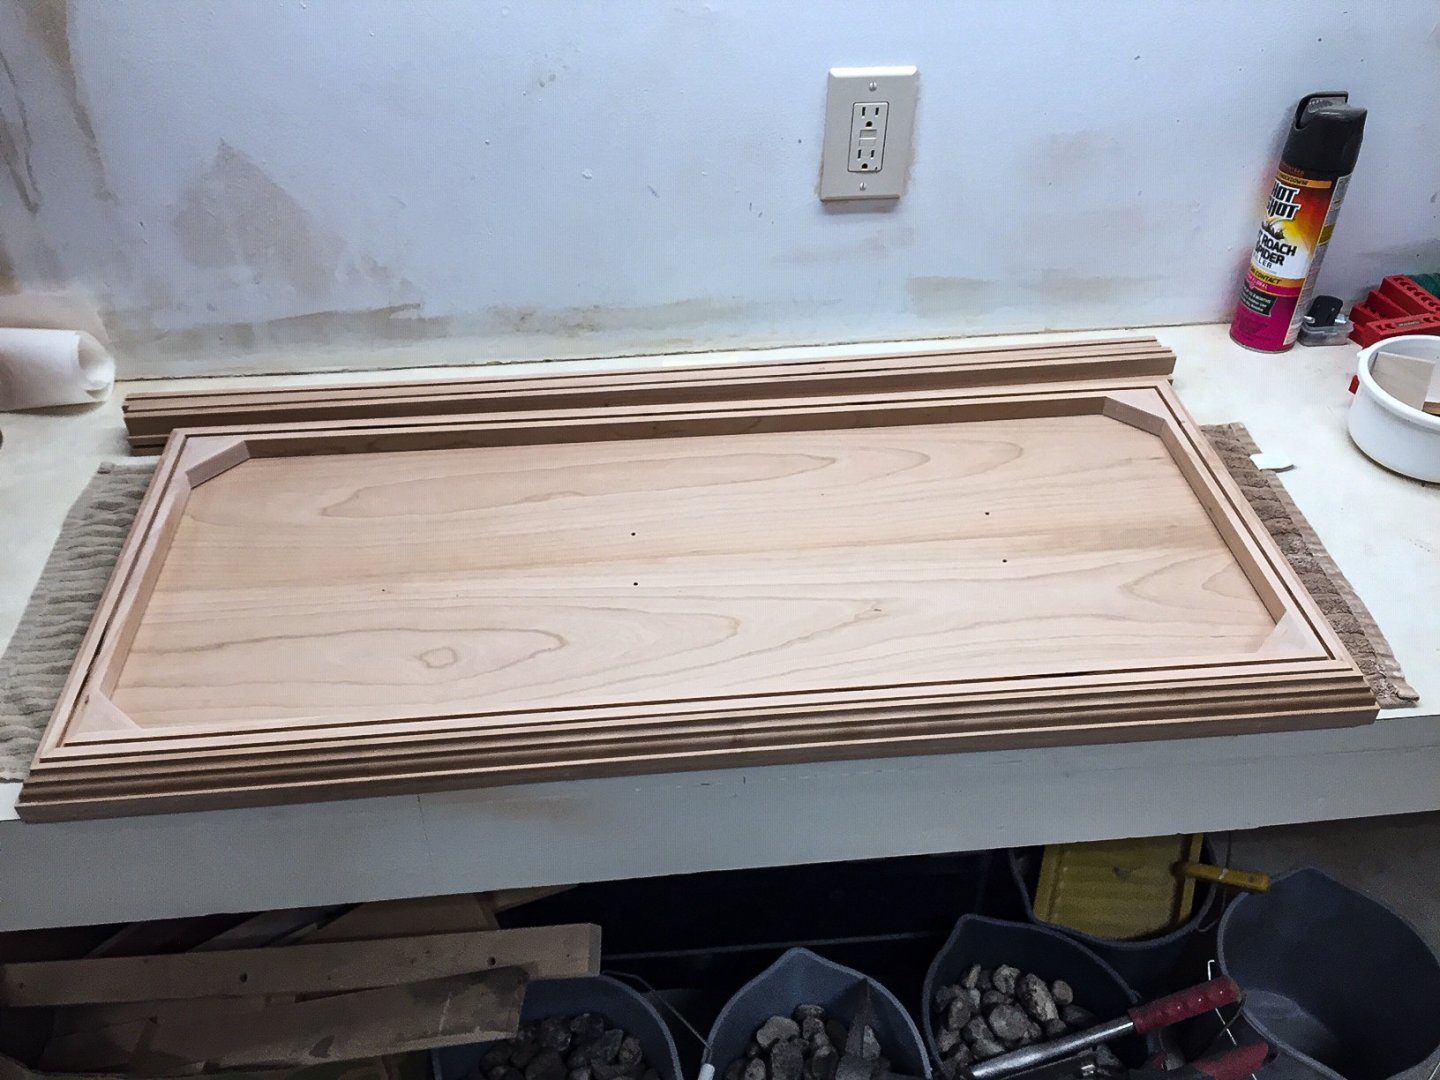
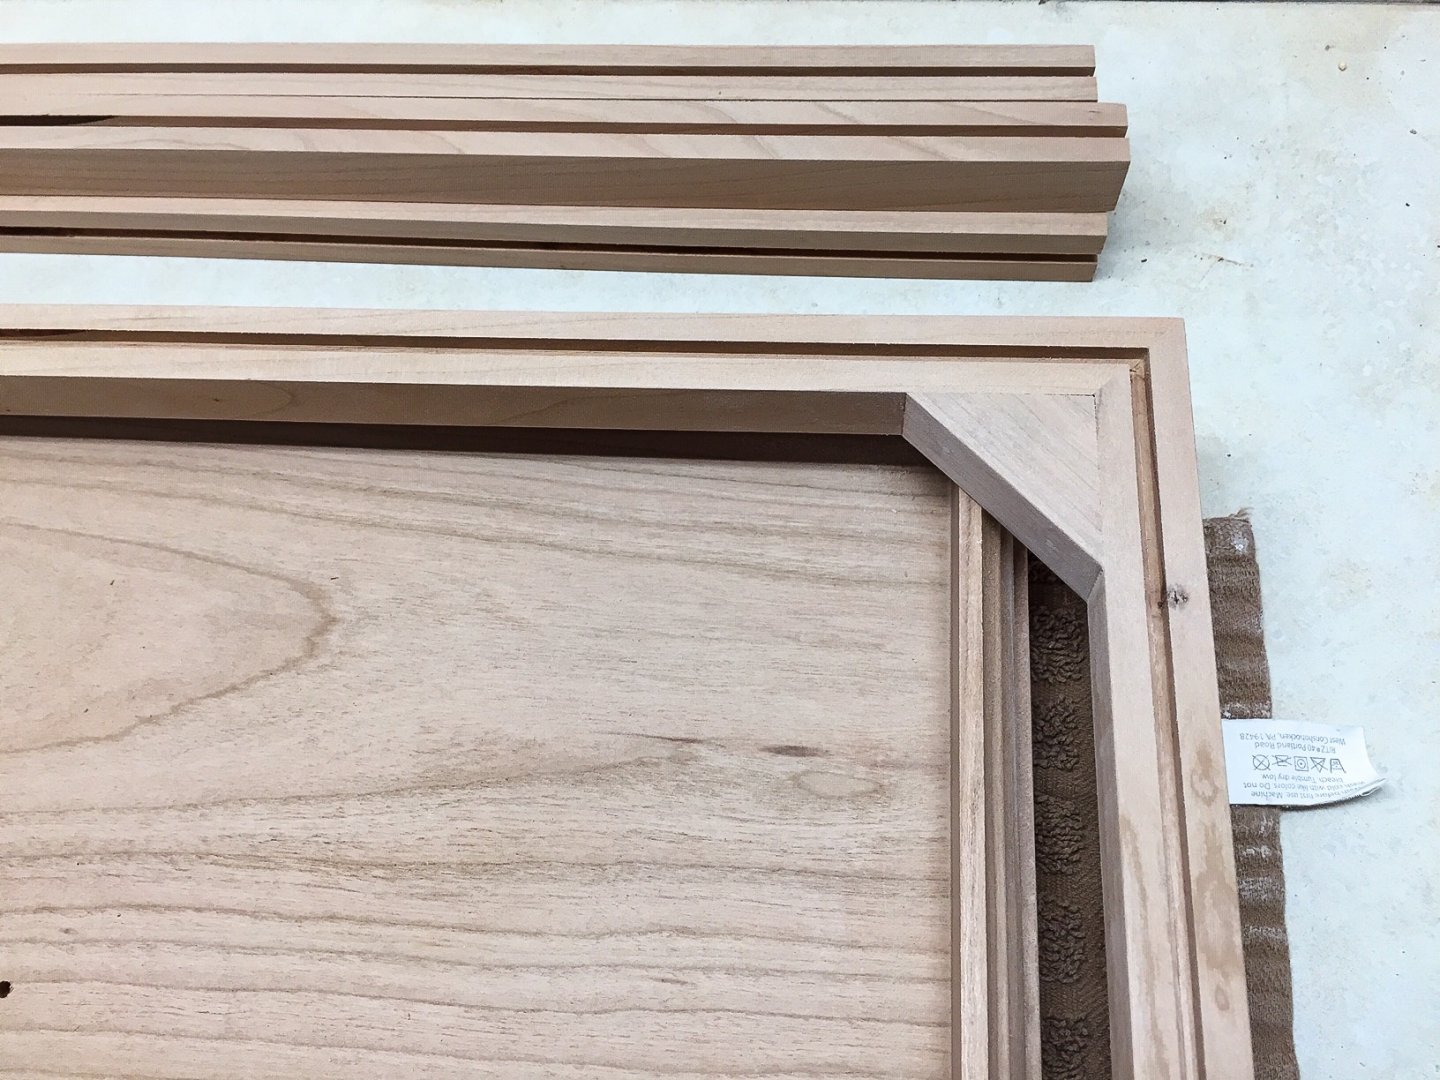
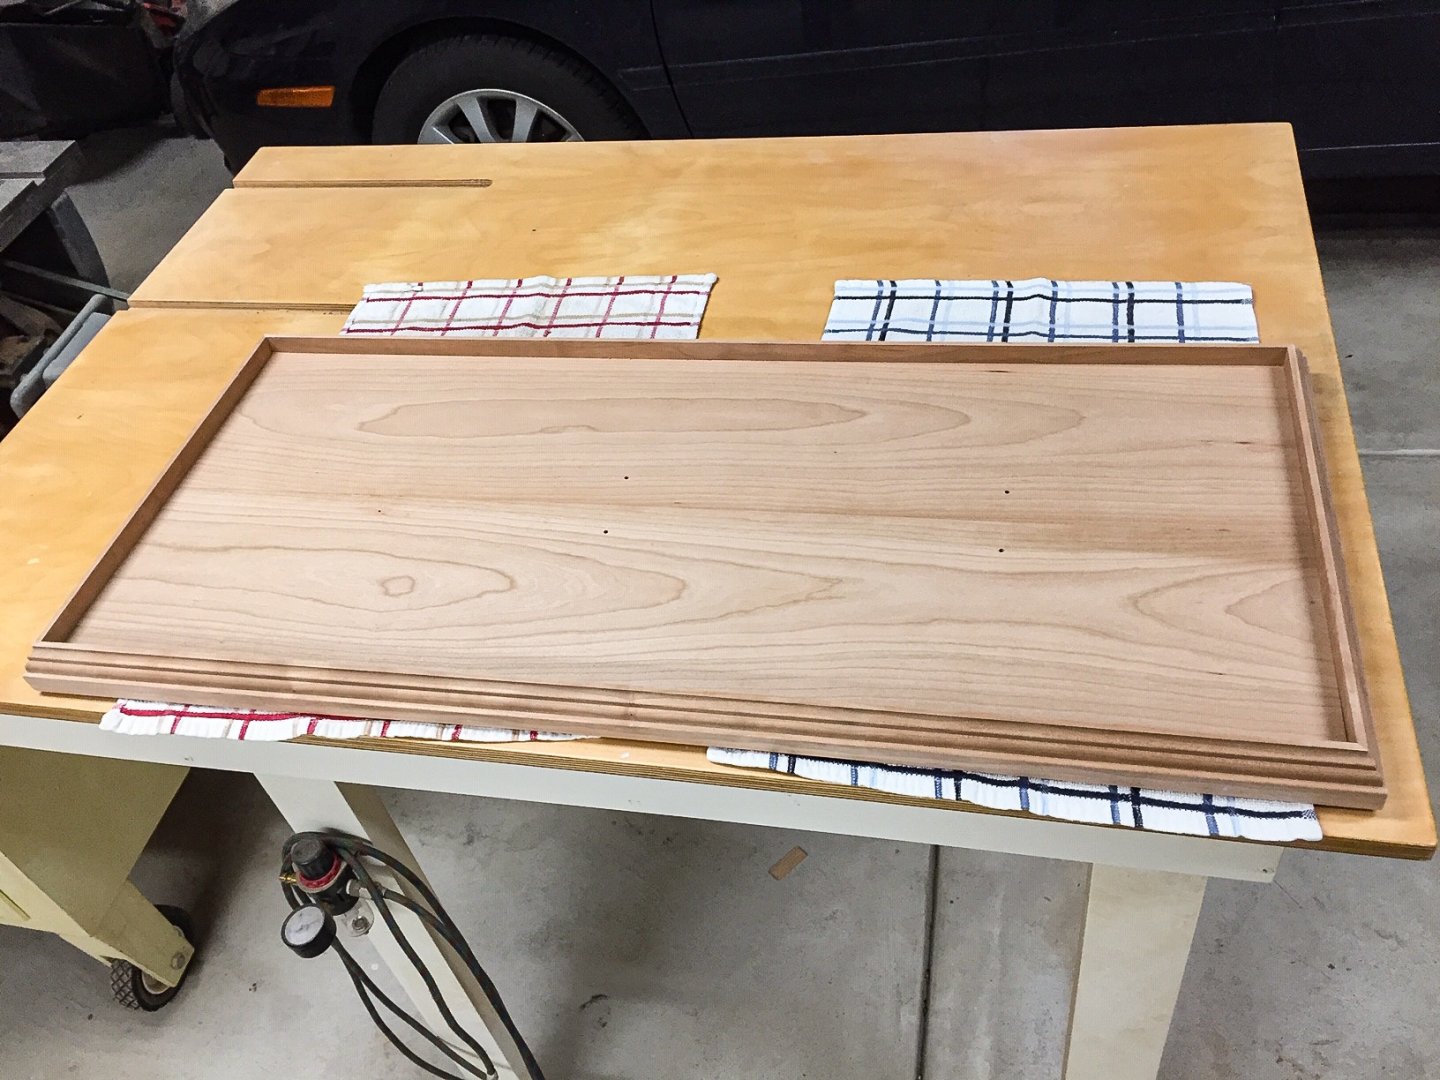
The remaining work is to build the frame to hold plexiglass and sit inside the base. The photos show the bottom part of the frame that sits inside the base molding. I used the base and molding as a jig to size and glue the frame parts. I used some card stock shims between the frame parts and the molding to get a little spacing, so the frame will lift off the base easily. Grooves in the bottom part of the frame are for the plexiglass. I plan to use an art store to cut the plexi for me, and they gave me a couple of scrap pieces I used to size the grooves. I made the grooves a little larger so the fit isn't tight. Wood swells when humid, so I wanted some tolerance. The plexiglass should slide into the grooves easily. Gussets were added to the corners. I strengthened the joints by drilling holes and glueing part of a nail in each one. I didn't trust the glue joint to hold when hammering a nail, but I think I got the same effect by drilling slightly oversized hole and sliding nail in with glue. Wood filler was put over the hole to hide the nail. The holes were drilled from the inside, thru the gusset first, and then into the frame. But I didn't drill them all the way thru, so the holes/wood filler will only show on the inside of the gusset, not on the outside of the frame. The first photo shows the bottom part of the frame sitting inside the base molding like it will be when assembled. The next photo shows detail of one of the corners, but it's been lifted out, so you can see the frame pieces. The last photo shows the bottom part of the frame lifted off the base.
-
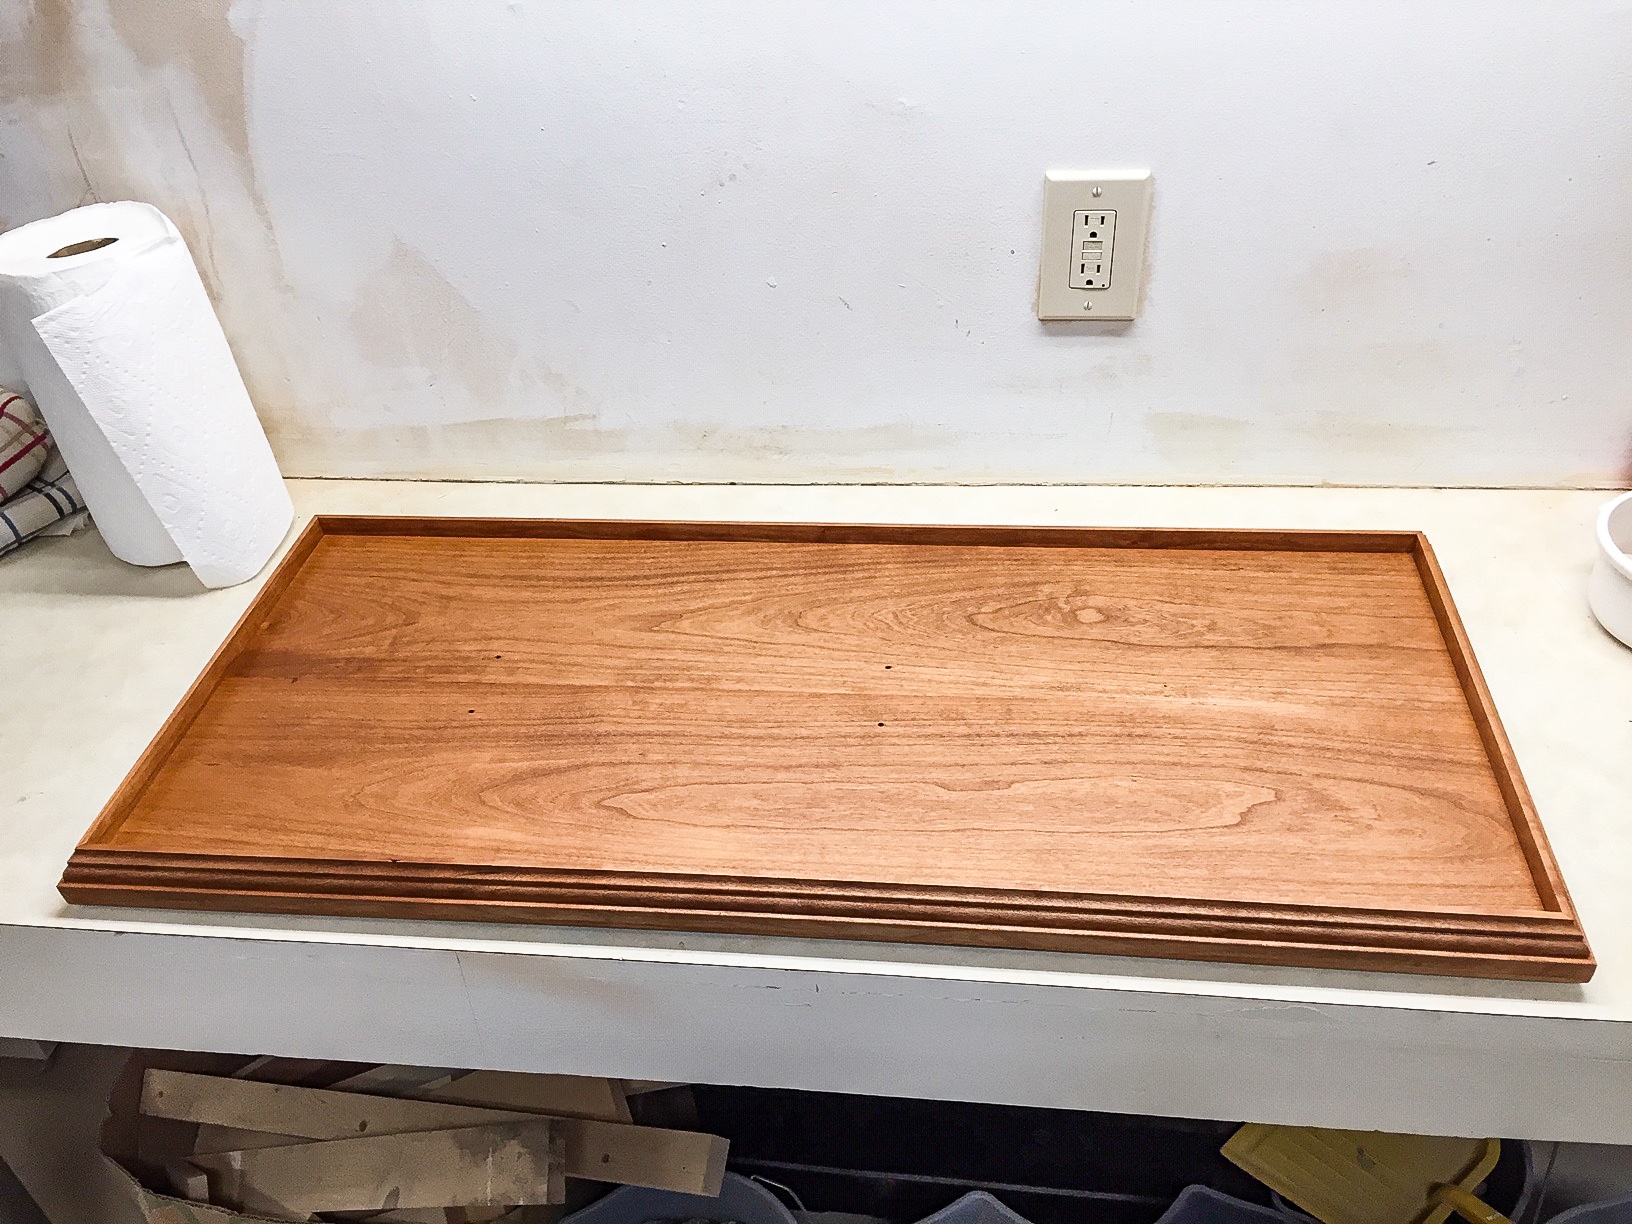
I designed a display case and used ideas from report by Wes Marden available online. It's worth the cost if you've never made one. It gives you some good ideas. I didn't follow everything, but I liked the idea of the frame with plexiglass fitting into the base, so you can lift it in and out. I used Solidworks because I have an old version, but you could draw it up with any CAD software. I wanted lights in the case, so found some remote controlled, battery powered, LED lights that will work. Strip lights that I found didn't put out enough light. These lights are designed for underneath shelves or inside closets. I experimented and decided to put 4 of them across the top of the display case frame. Reviews said batteries don't last long, but I'll probably only use lights when a few of my friends come to visit. I made the base first. I used cherry because I've always like the look and I plan to put the case on a table made of cherry. Only problem is my nose doesn't like the dust, so I wore mask and eye shield when sanding and sawing and that has helped. I opted not to get one of the "fancy" dust protectors. The base required two pieces of cherry laminated together. I used 3/4" thick wood, which is really about 0.82" thick. After cutting to size (36" x 15" if I remember right), I added some crown molding around the sides. This extends above the thickness of the base over 1/2". The top frame with plexiglass will sit inside the molding. If you look close in photo, you can see some small holes in the base. I put the Syren model on the base and got it positioned where I wanted it, centered, and with clearance on tip of bowsprit and stern boom. Then drilled holes in the base plate of model and base of display case, so I can easily get boat positioned in the future. I don't plan to screw these together. Planning to use dowels in the holes to maintain the position. The display case will just sit on a table, so it's not going anywhere.

-
Thank you bruce d. Here's the patterns I came up with for bow and stern platforms. All these do is get you close to the final. I cut out the stern platform, but found I needed to tweak it a fair amount to get it to fit good.
- 55 replies
-
- 5
-
-
- 18th Century Longboat
- Model Shipways
- (and 1 more)
-
You're really making progress. You're going a lot faster than I did, and yours looks cleaner or crisper than mine. I can only echo everyone else saying excellent work! Thanks for including photos of rope you made. This is first time for me to see homemade rope, so it was most interesting! I'm not sure I'm ready to take that step, but you definitely tweaked my interest. I've been sawing and sanding pieces for display case. I'll try to remember to post some pictures soon. I'm not sure the pieces will make a lot of sense, but it might be interesting to some people.
- 950 replies
-
- 1
-
-
- syren
- model shipways
- (and 1 more)