DONATION DRIVE - SUPPORT MSW - DO YOUR PART TO KEEP THIS GREAT FORUM GOING!
×


desalgu
-
Posts
363 -
Joined
-
Last visited
Content Type
Profiles
Forums
Gallery
Events
Everything posted by desalgu
-
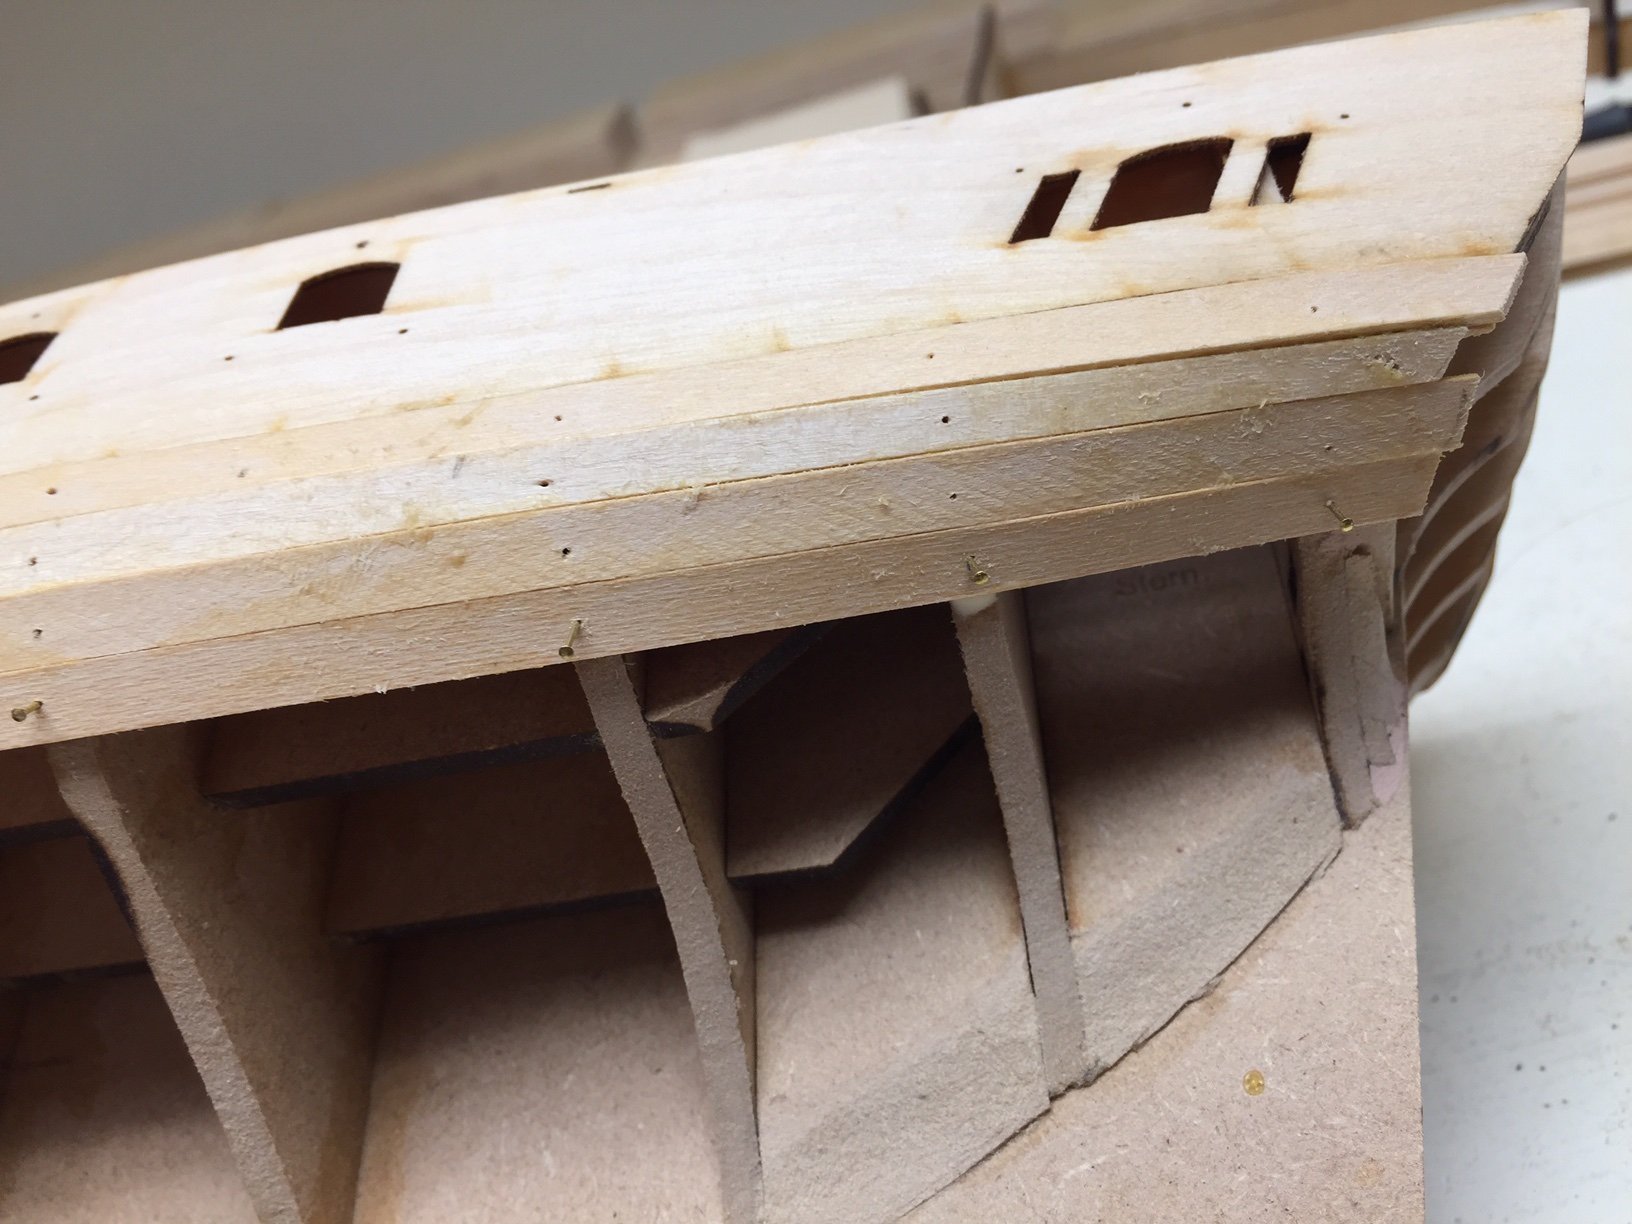
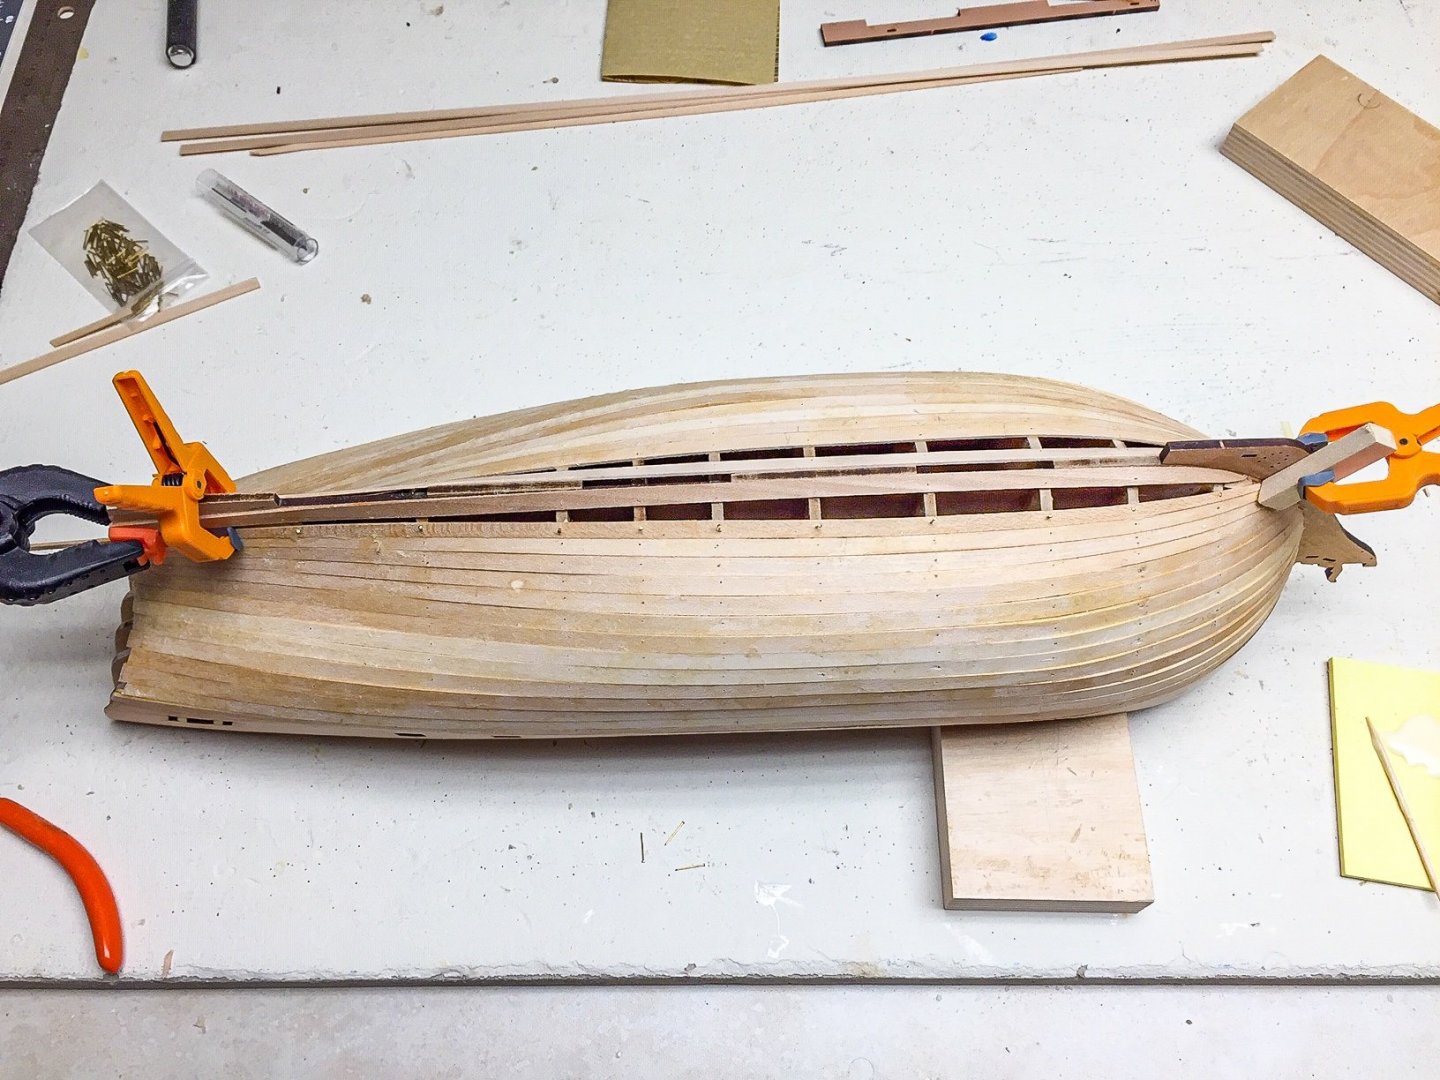
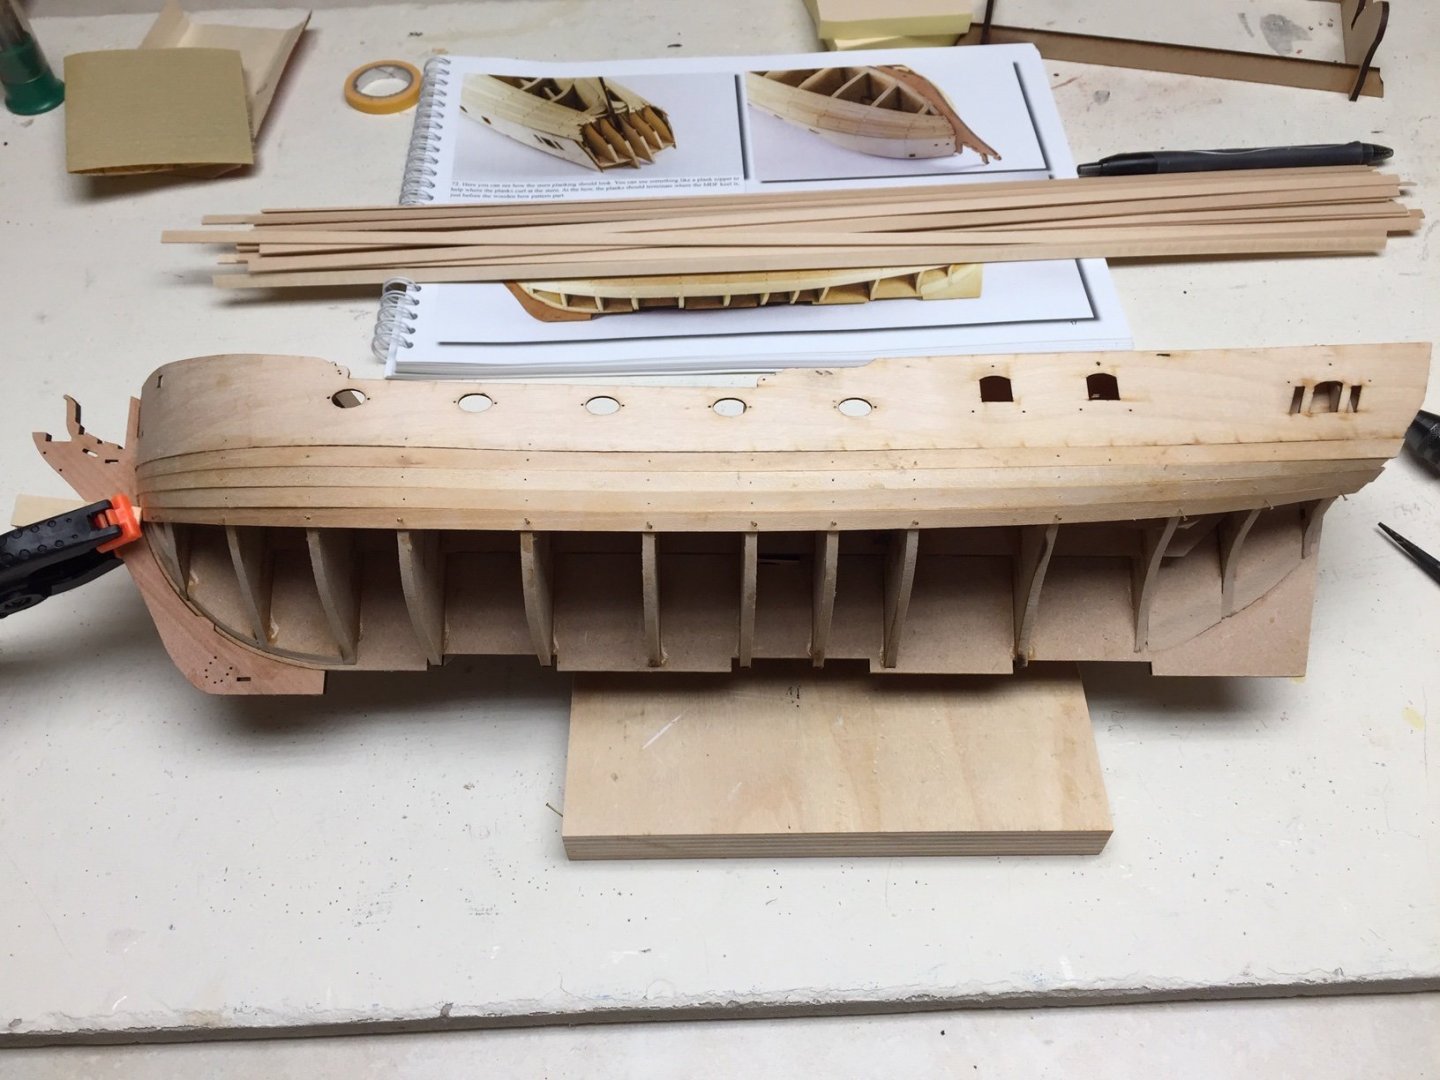
Appreciate the support and nice comments! It helps keep me going. Thought I'd take one last photo before finishing the first layer of planking. The last 3 or more planks have fit on the bulkheads better than ones about halfway down. As I got closer to the keel, it's been easier. I'm almost there.
-
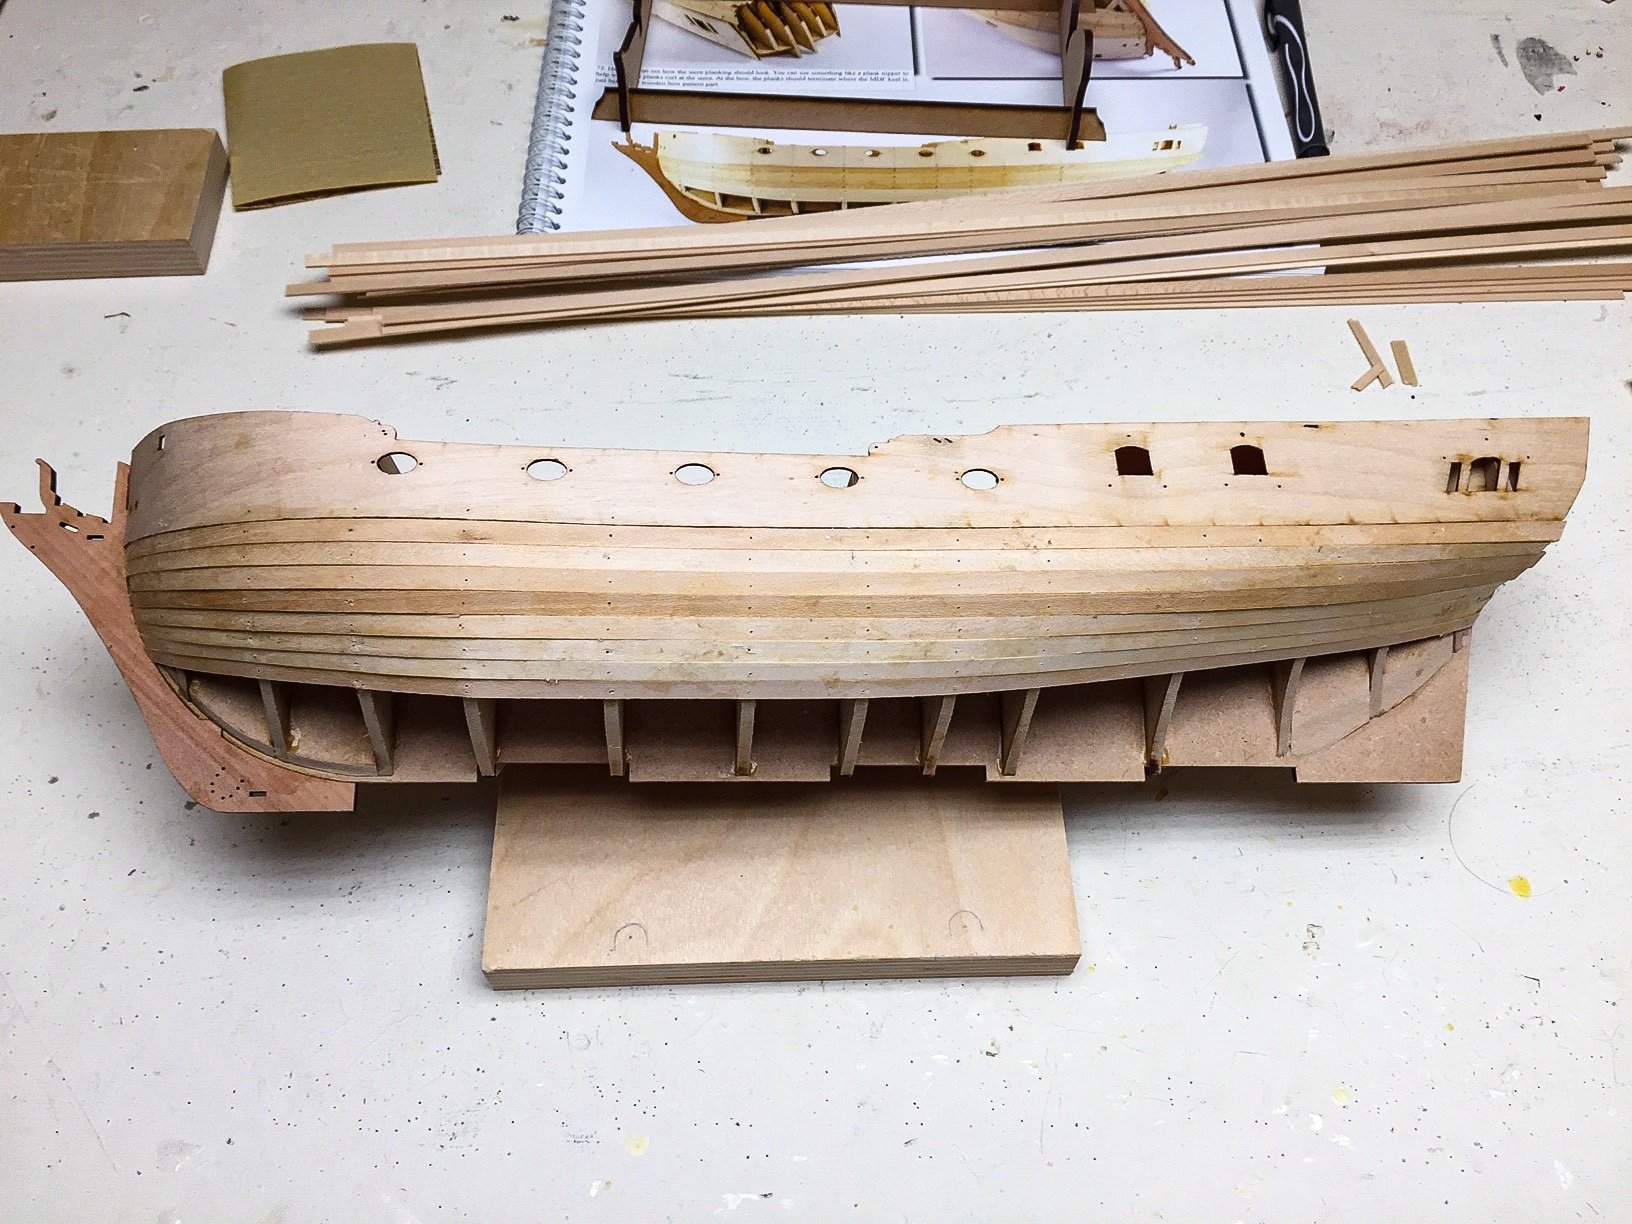
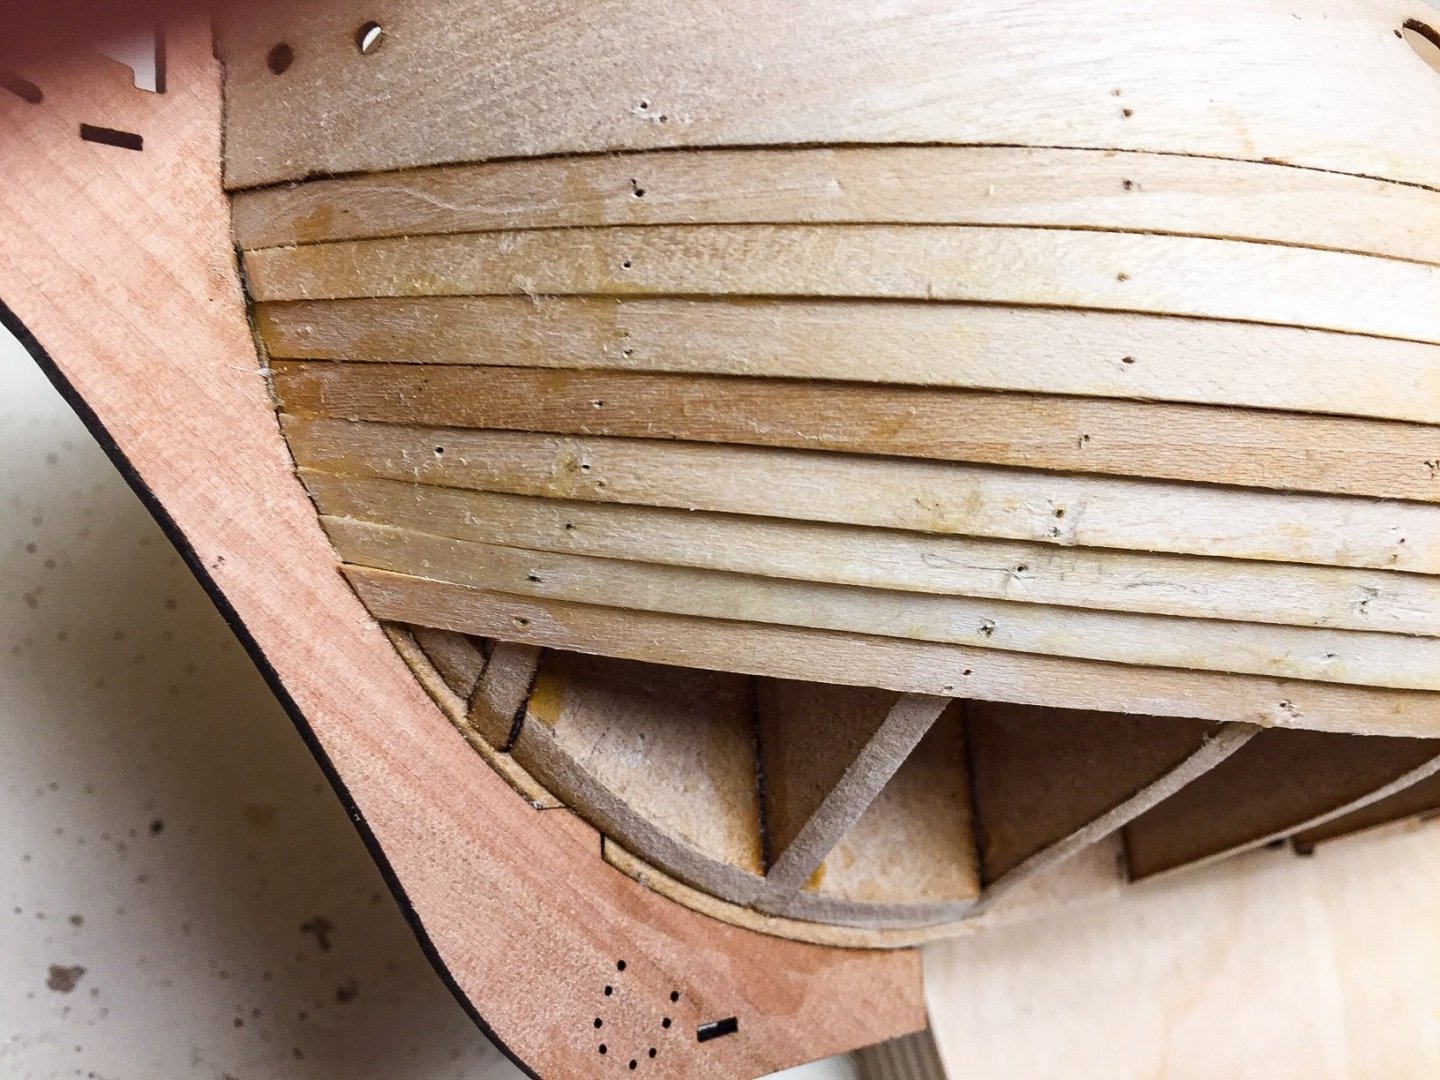
I haven't posted anything for a while as I've been distracted with other stuff, but I've been slowly adding planks. I've got approximately an inch gap on both sides left to do. I'm getting there. In this photo the problems I'm having with planks curving around bow on the bulkheads shows up better. Lots of edges showing. I'm gradually getting better at it. Hoping by the time I start the 2nd layer of planks, I'll be able to do a better job.
-
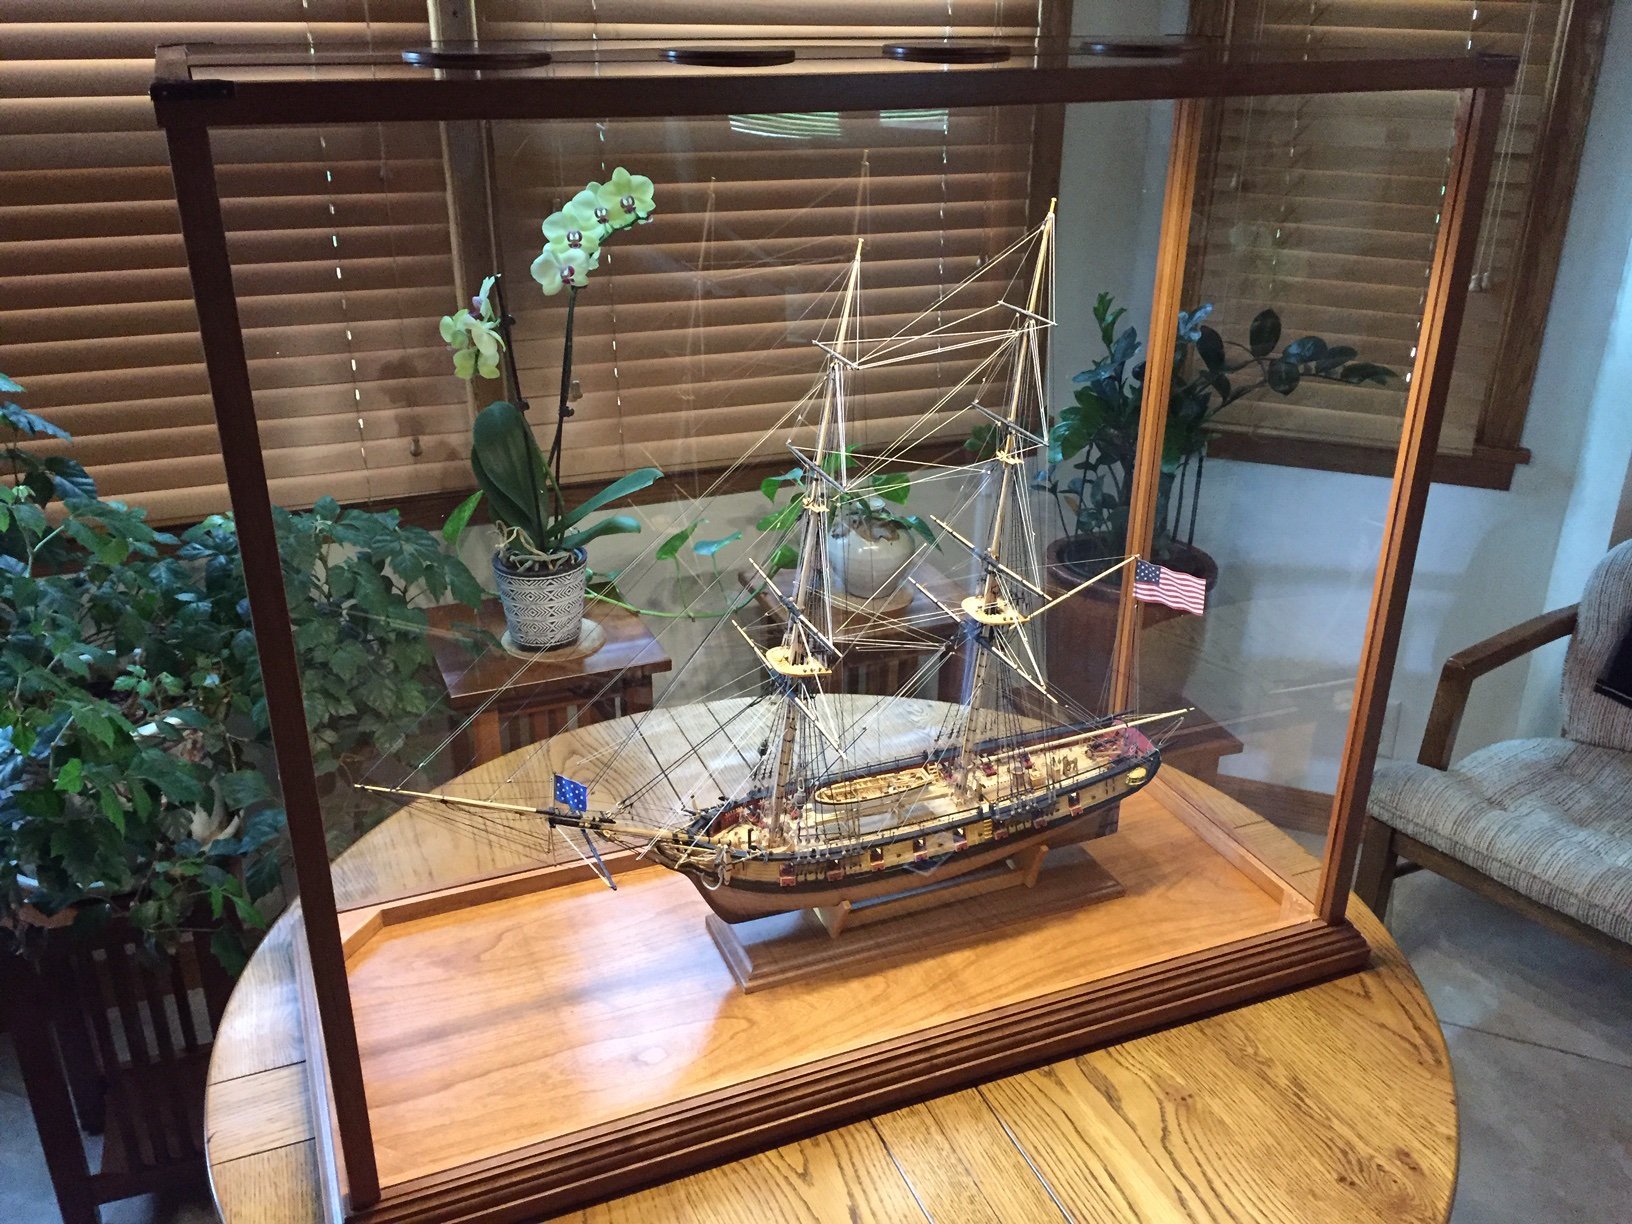
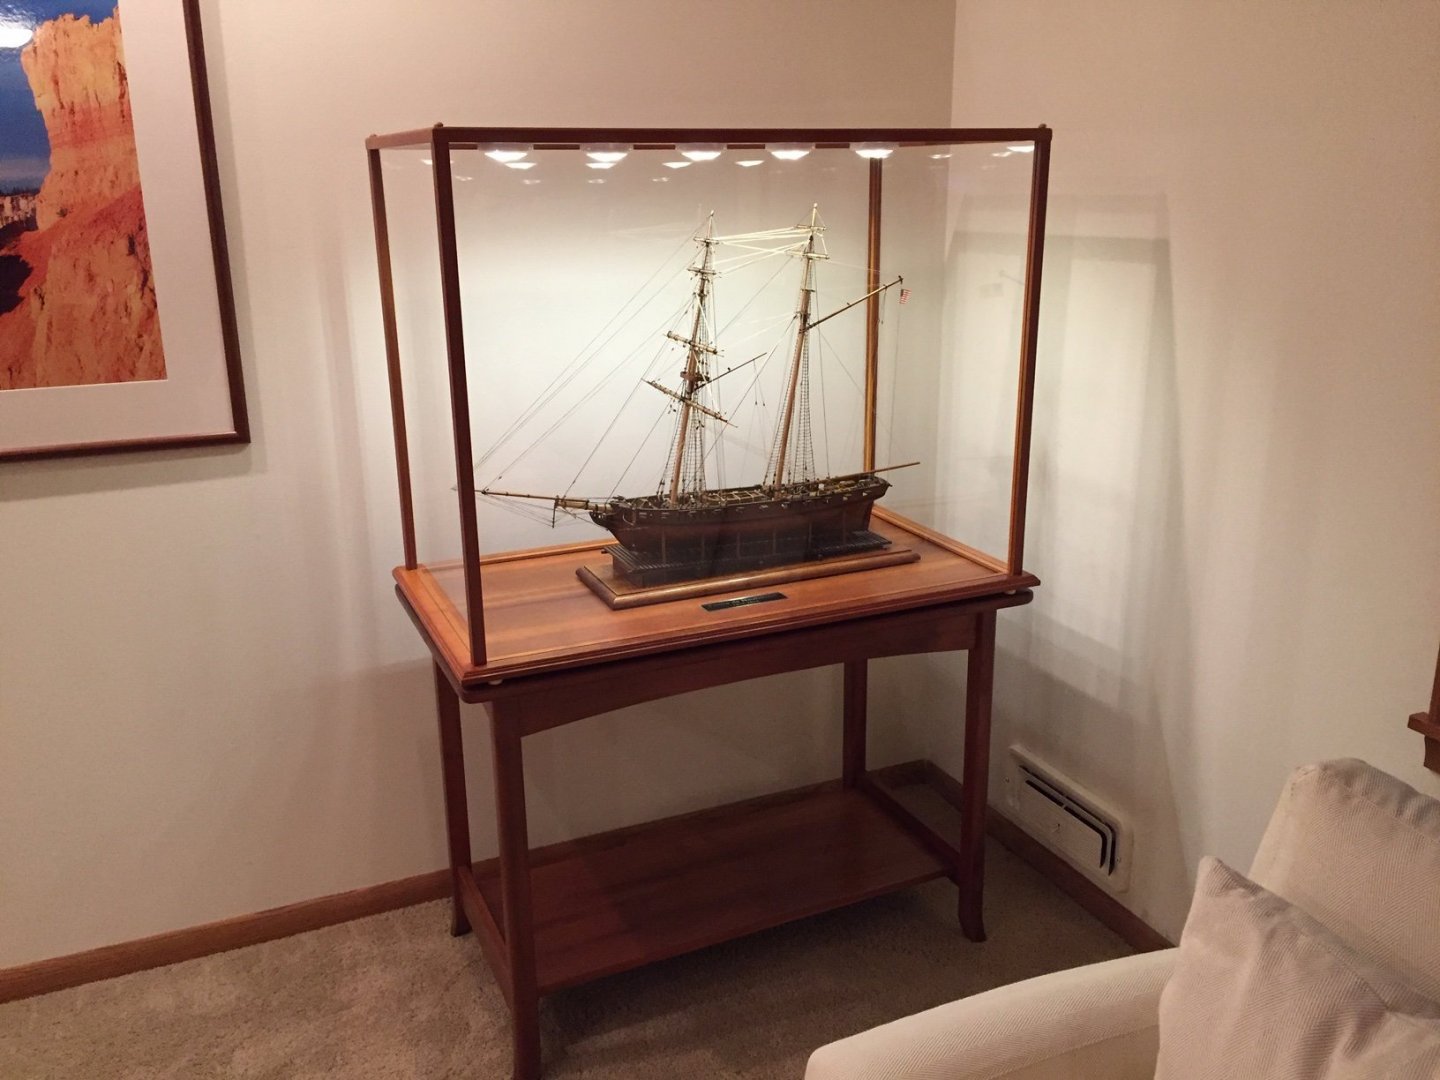
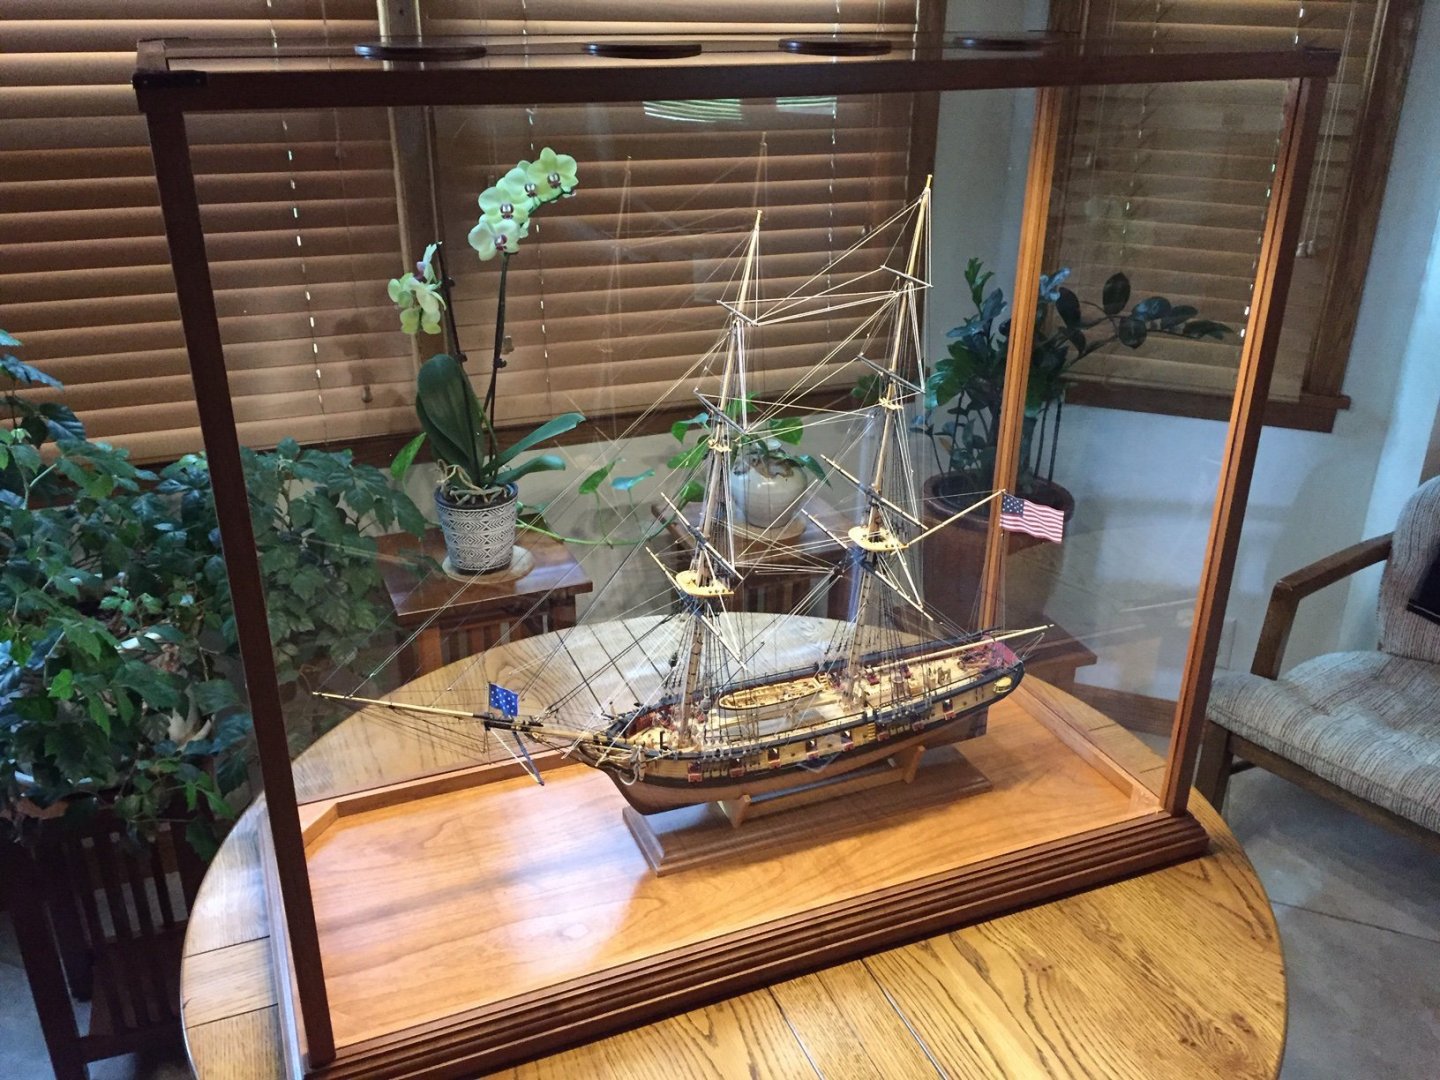
Prince de Neufchatel model, case, table, and lights. Included this just to show effect of new lights in case.
-
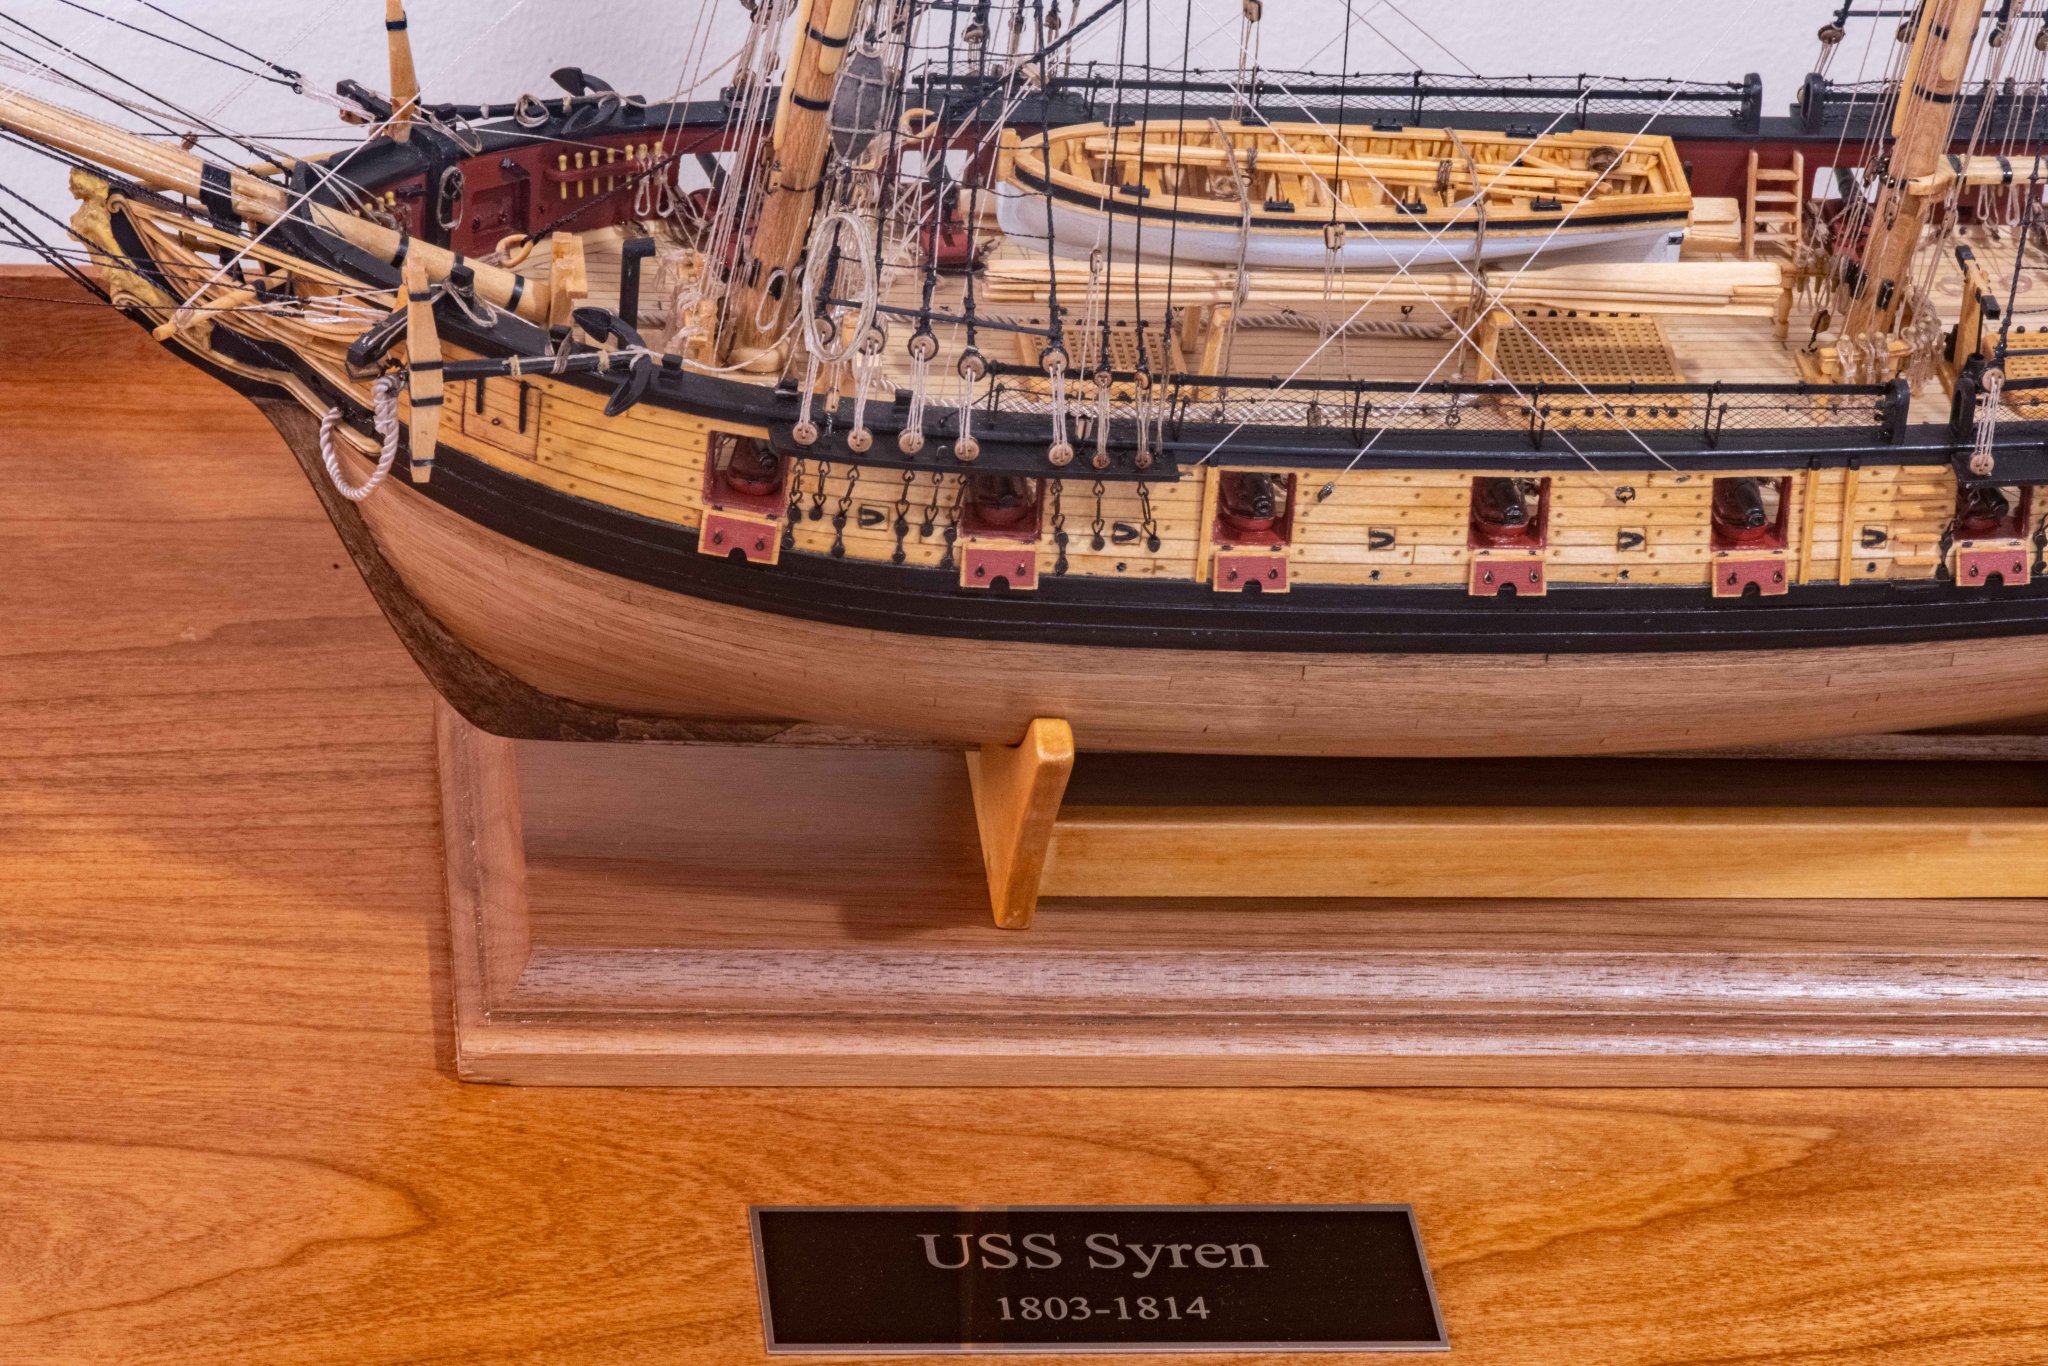
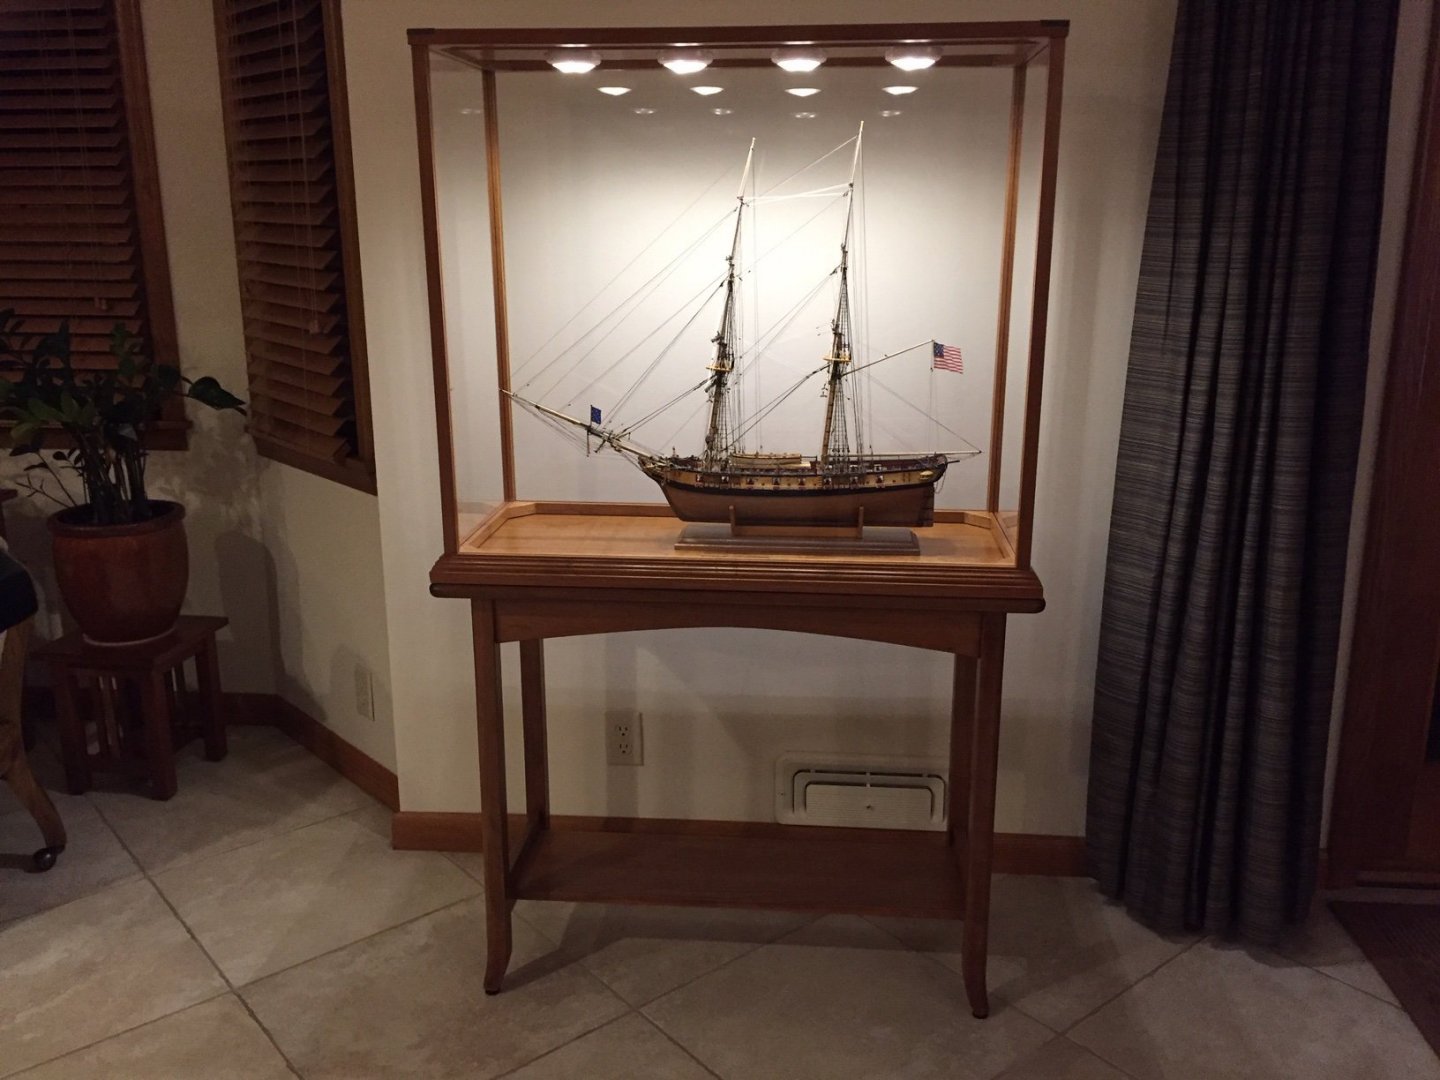
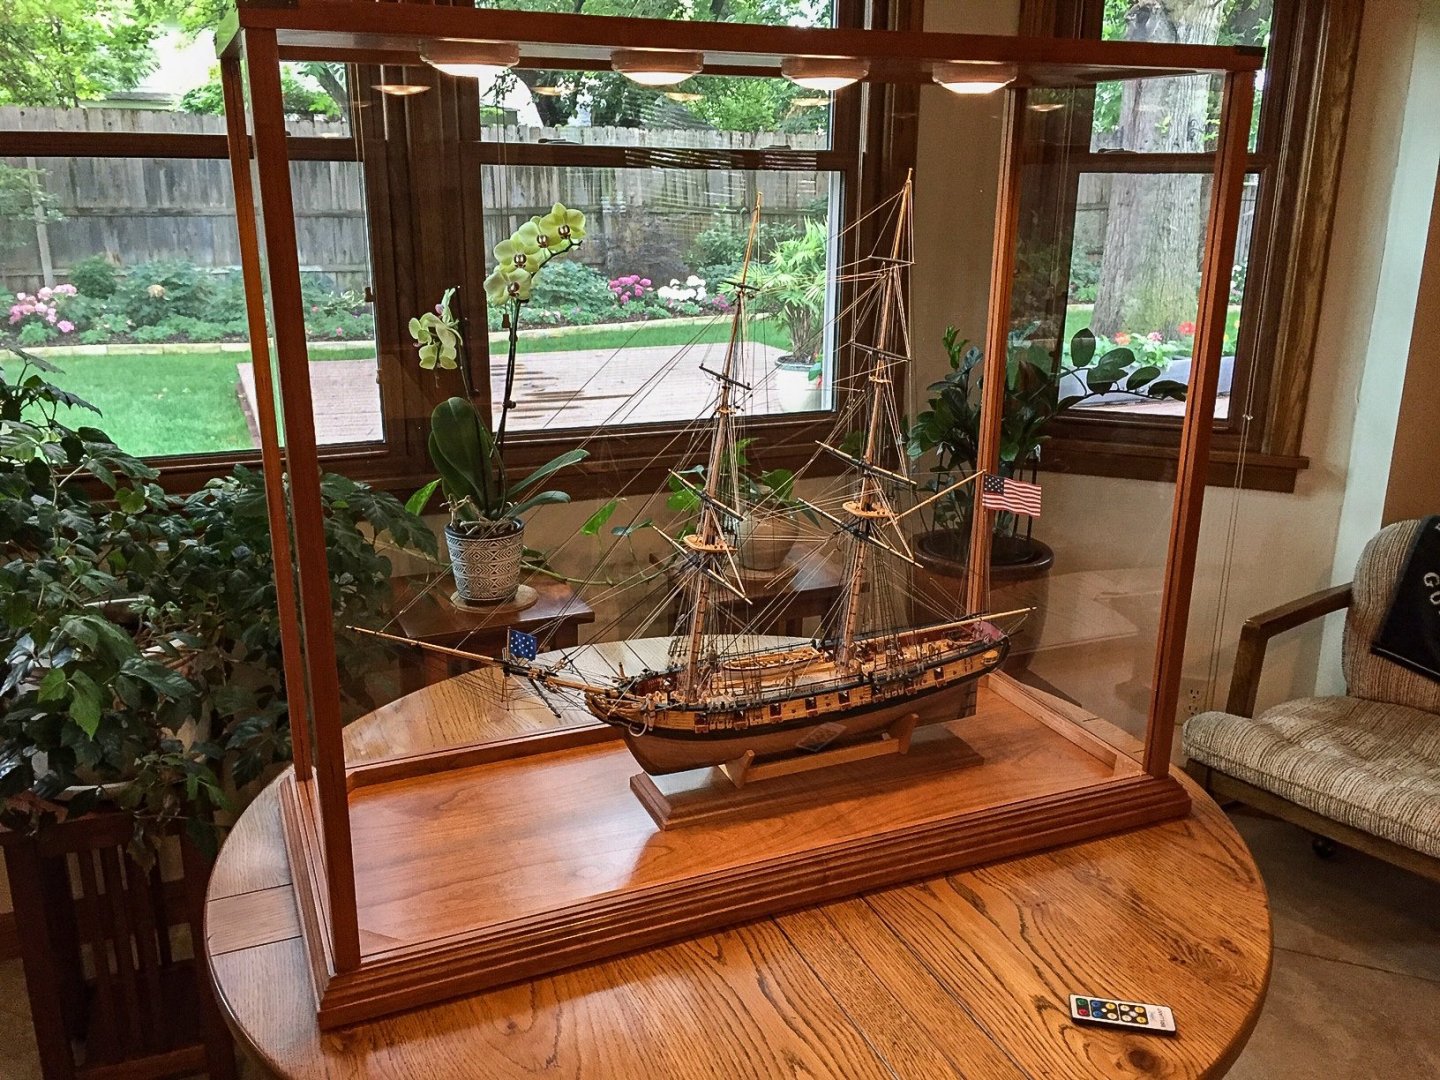
I finally received the custom table for the Syren display case, so it's now officially done. I also had a nameplate made for it. It looks very nice. Wish I hadn't gotten so much rake in the masts, but that kind of happened before I realized it. Always learning! I also added lights to the old display case for the Prince de Neufchatel. This was my first model ship and I stained the hull & deck too dark. I looked at notes and the Prince was finished in 2005, the display case in 2006, and the table was added in 2007. The lights really show up the rigging and deck. It's a big improvement. And of course, it's been moved to a new location in the house. Photos show both cases and tables, Syren first, Prince last. I'll include photo of nameplate. This was an inexpensive addition and I was surprised at how something that simple made it look better.

-
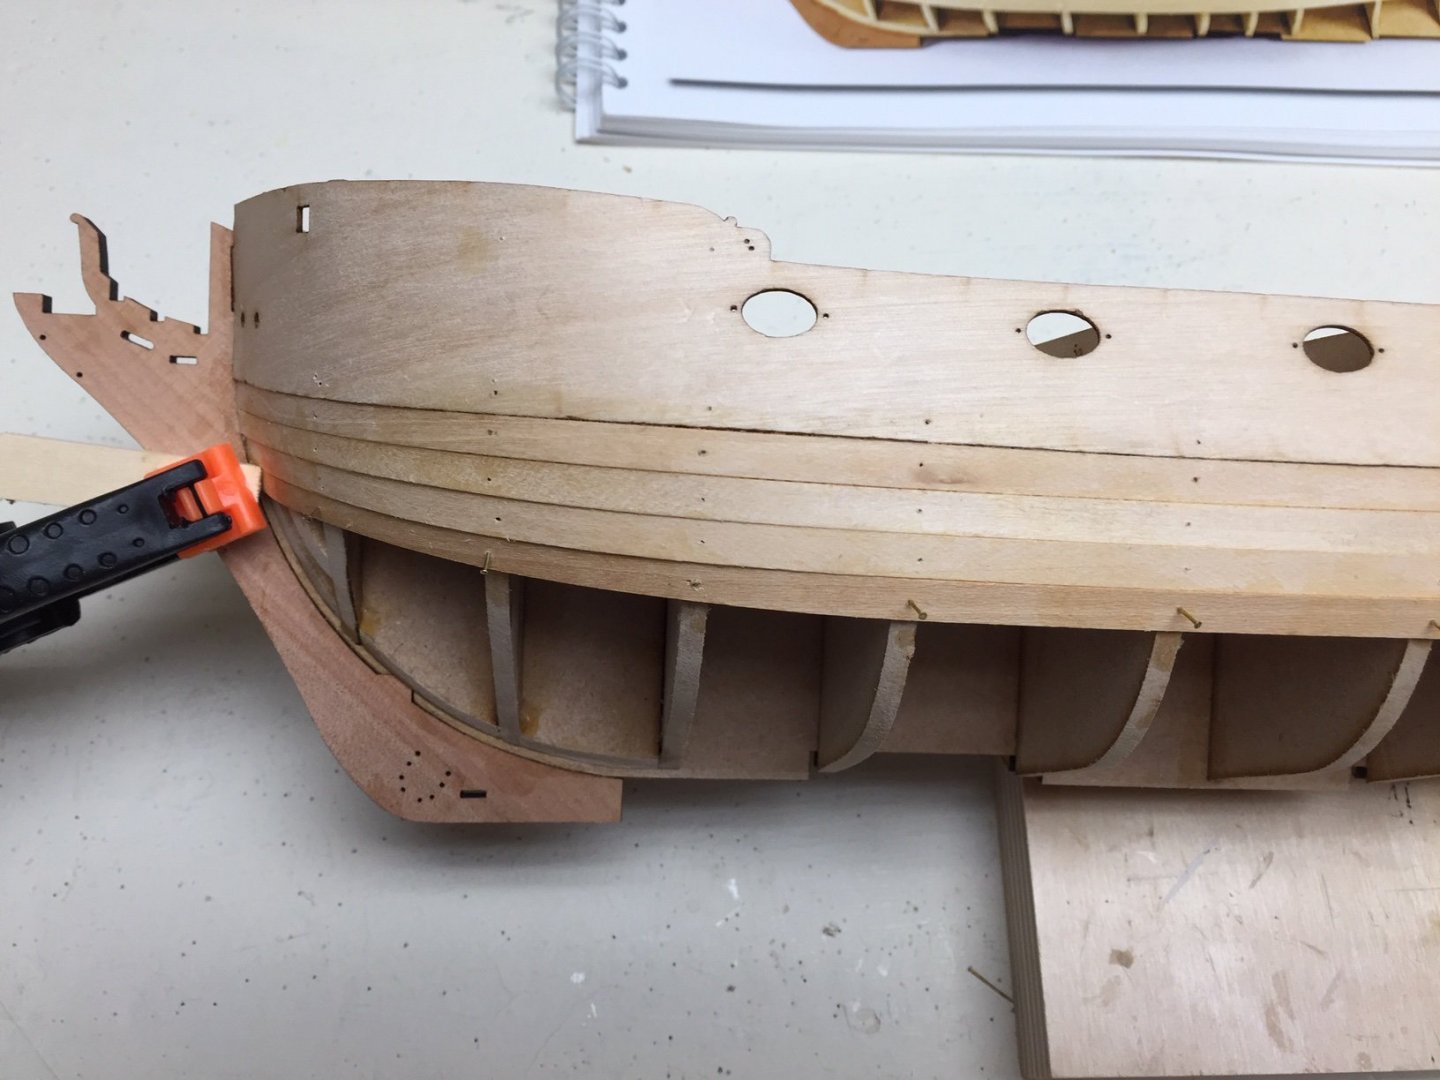
I think I'm doing a little better on the starboard side.
-
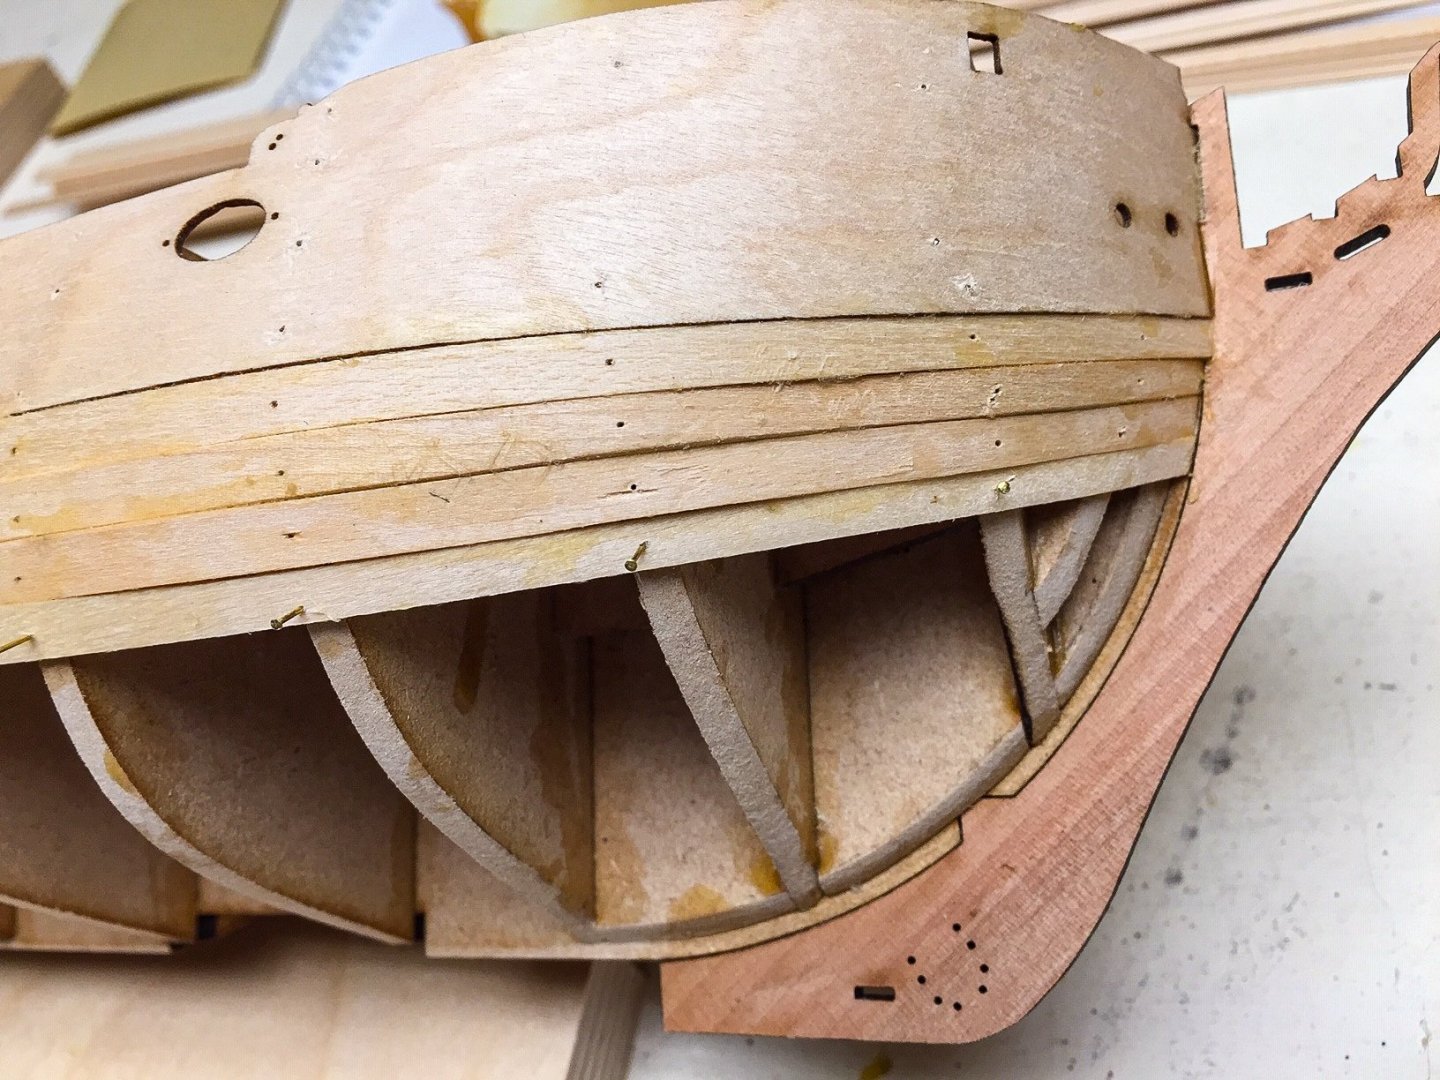
I'm going real slow with planking. It's a fairly slow process anyway, and I got distracted with some other projects. It seems like there's still something I don't understand about how planks fit when curving around the bow. I've been edge bending them downward, and that helps getting them to fit, but I still can't get them to lie flat on the bulkheads. In the bow area around bulkhead 2, I have to force them down to the bulkhead and it's hard to hold them there even with a couple of nails. And if I do get it on the bulkhead, the planks don't want to stay in contact edgewise in between bulkheads. I think I'll need a lot of filler to get all this smooth. I'm furthest along on the port side.

-
Beautiful work, as always!!
-
That makes sense to me, and thanks!!
-
I've added 3 more planks as of today. This will take some time, so I'll only occasionally post pictures unless I run into trouble.

-
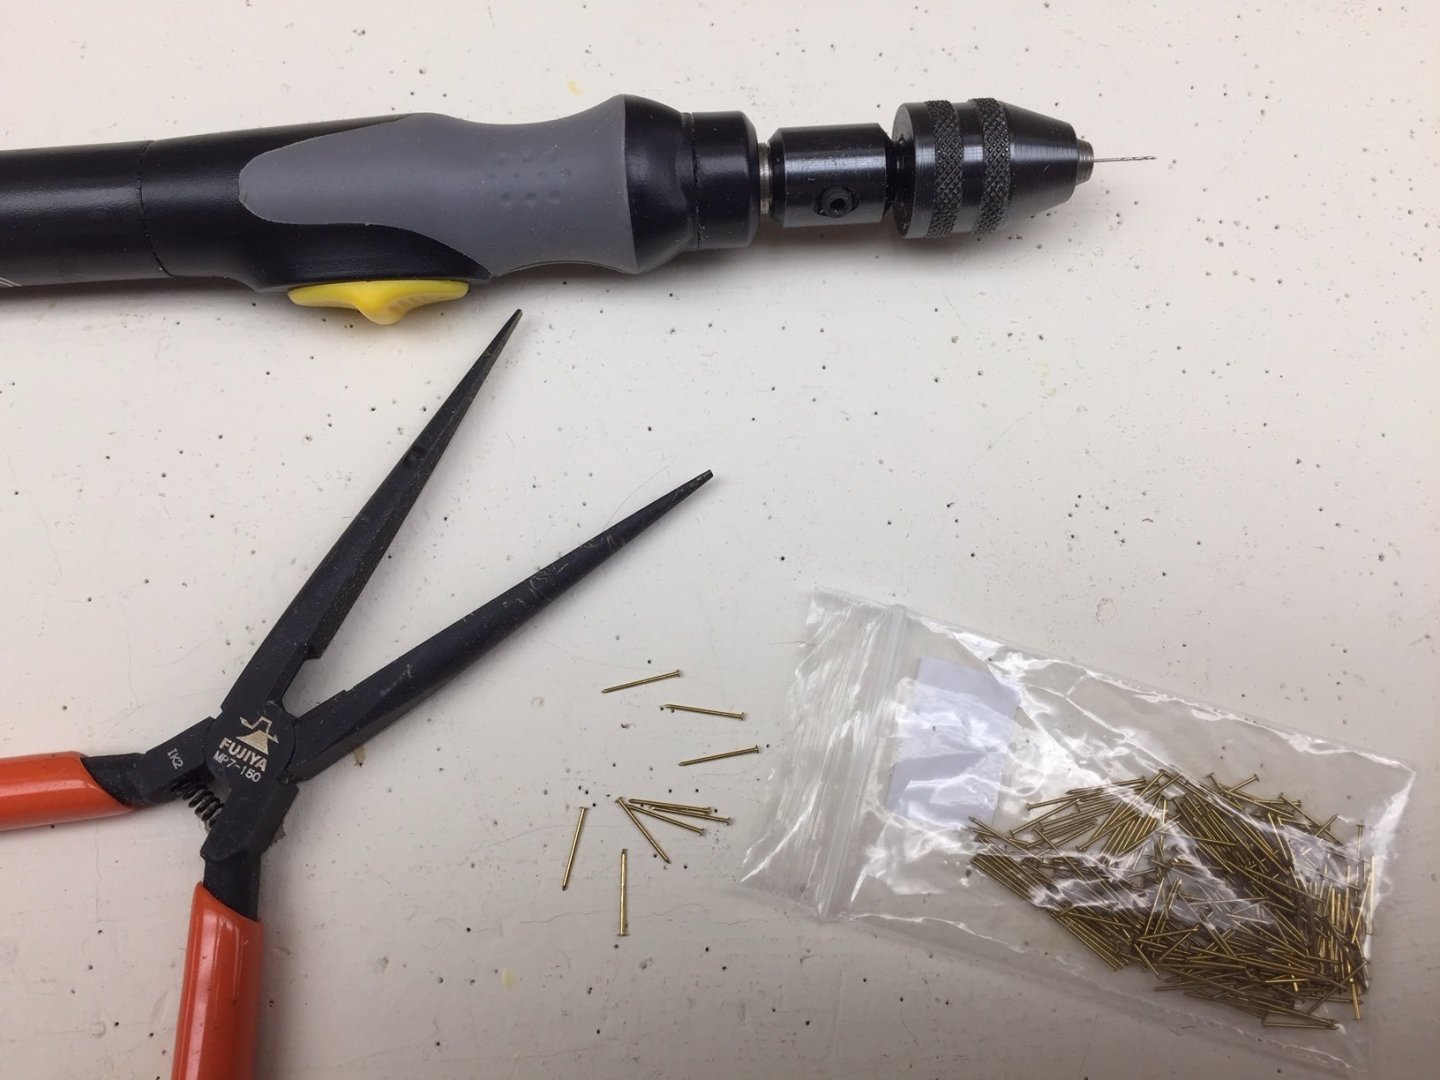
Then I put on first plank just below bulwarks. No particular problem other than getting used to using nails to hold it in place. I glued sections at a time, most sections covering 3-4 bulkheads. I used Titebond glue for this layer, the same I've used for everything else. I used a battery-powered drill that rotates very slowly and a #78 drill to predrill holes for nails. It's easy to drill starting holes thru the plank and into the bulkheads. I start the nail holding it in pliers, and then use flat side of pliers to push it in. It works pretty good. Only bent a few nails.

-
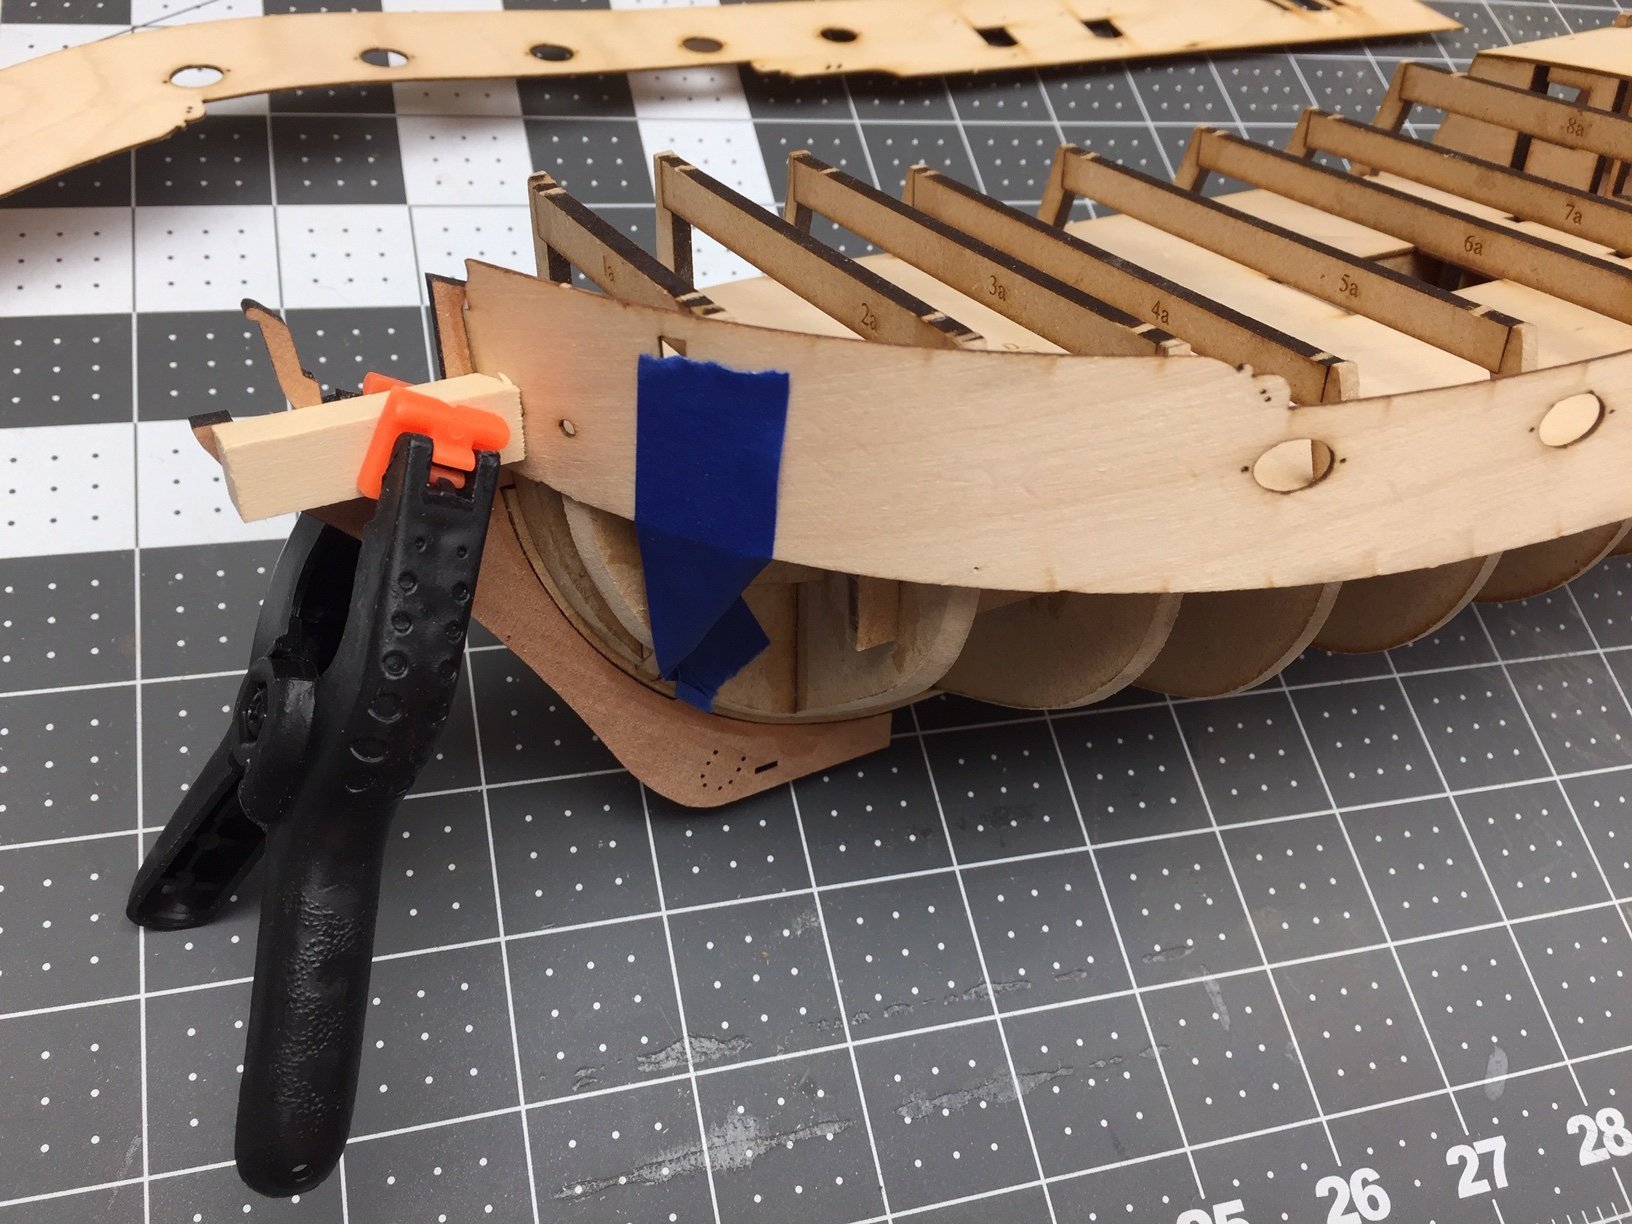
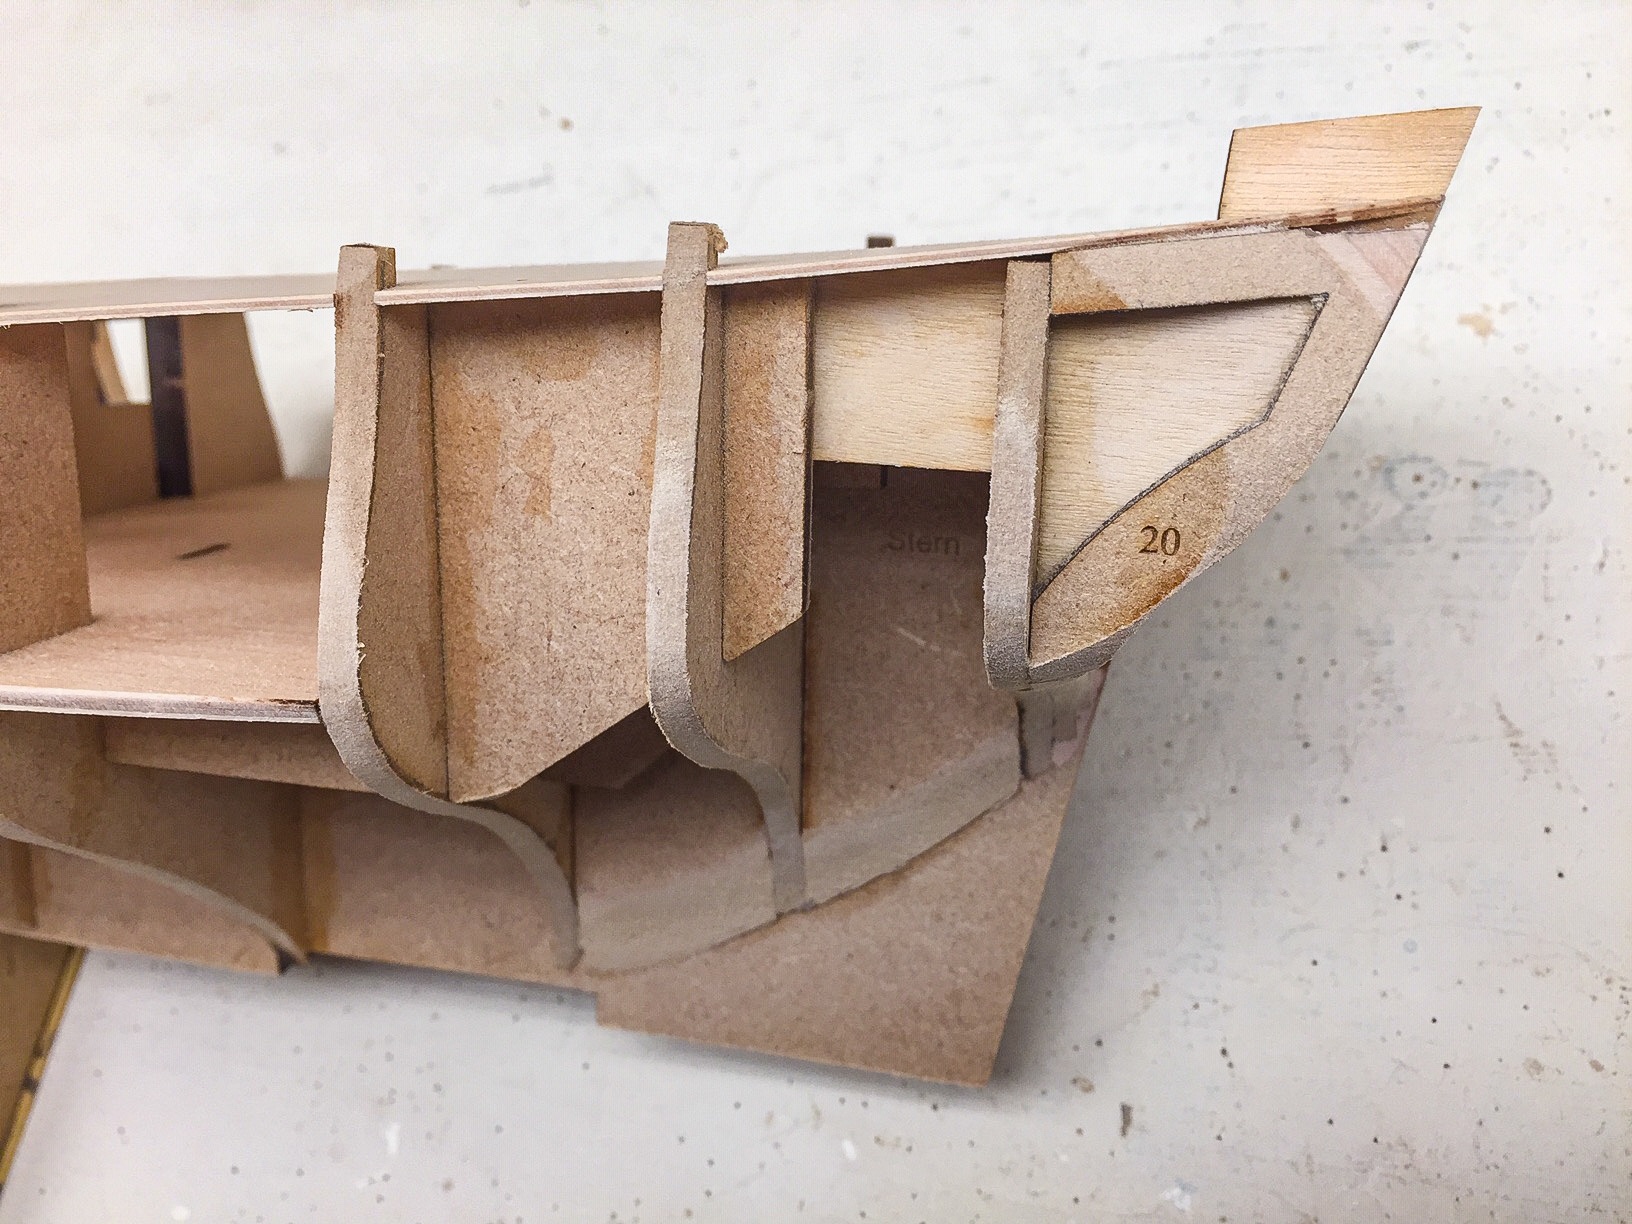
Thanks James H! Waiting to put keel piece in to avoid damage makes sense. I didn't quite understand what you meant by "deadwood area" though. I'm still learning terminology everyone uses on model ships. When I started fitting first plank, I realized, like Glenn Shelton, that I should add a filler block right at the stern, so there would be something to glue to. So I used some scrap MDF, and glued in a small piece, and shaped it.
-
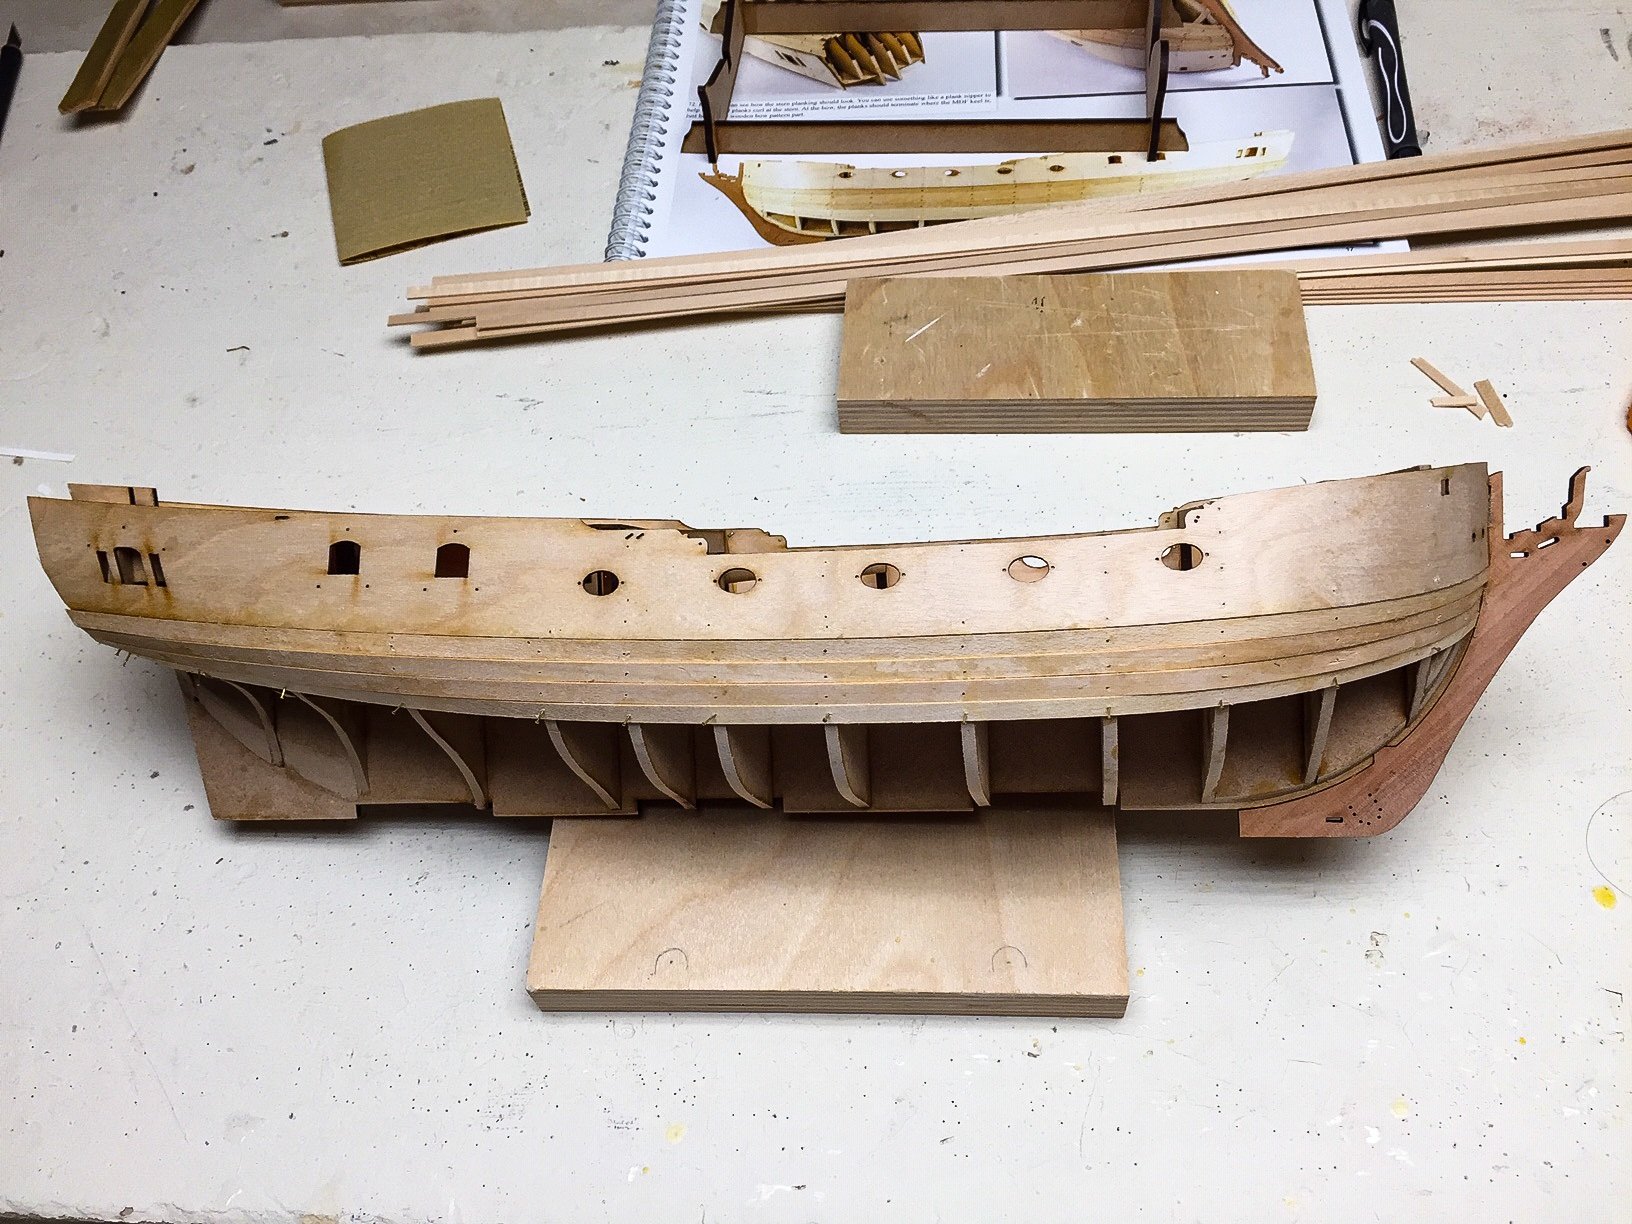
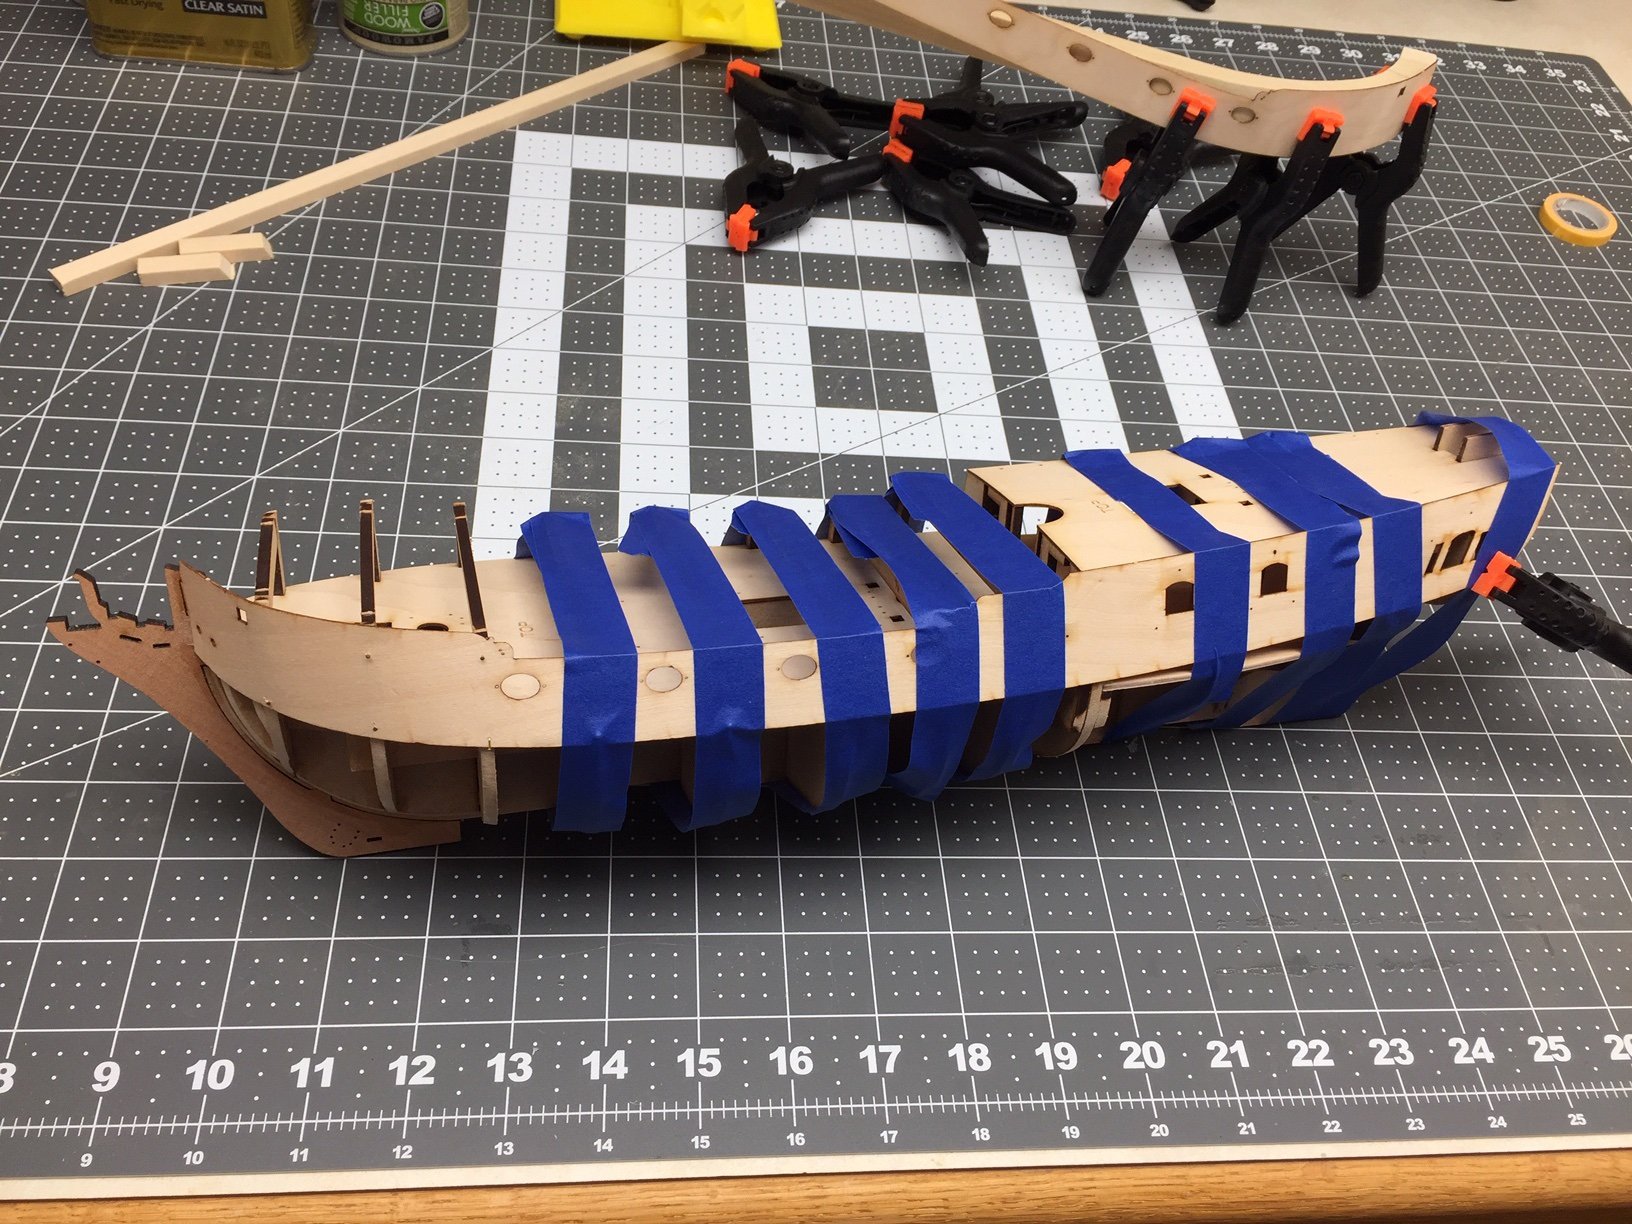
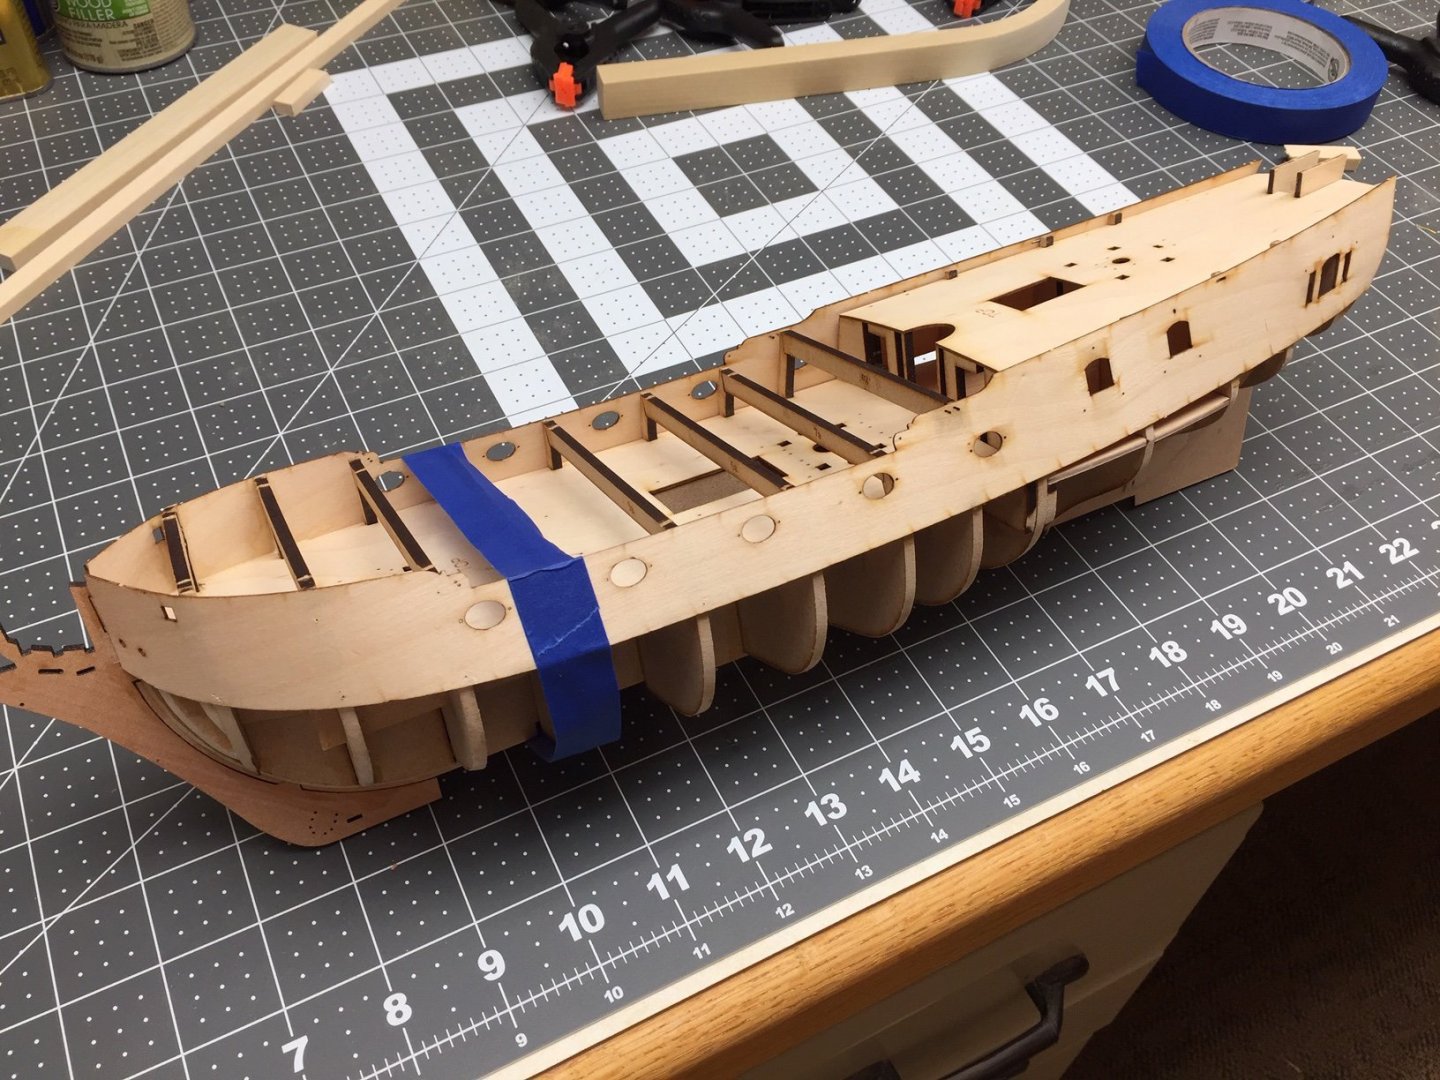
Finally got the bulwarks plywood pieces done. I used more of the nails to hold bulwarks when gluing the second side. The combination of nails and tape wrapped around the bulkheads worked pretty good. I didn't get them aligned quite as good as I thought, but hope it's good enough. Next step is first layer of planking. Interesting that manual has you put on first layer before putting the false keel on. Pictures look like you plank downward all the way to the keel, instead of working downward from wales and upward from keel, meeting in the middle. It looks like you plank downward until you think you're at the keel, leaving a slot for the false keel. When I get to that point, I may stick the false keel in place, so I know where to plank to. Seems like you could glue it in now before planking, but I'll follow the manual. There may be a good reason for waiting to glue it in. I'm thinking it would be easier to plank with shorter strips. Instead of going the entire length of the hull, go about halfway, so it takes two planking strips for the entire length. Seems like the bends would be easier. Since this is first layer, don't think it matters, and no need to do scale length planks. I can put the joint at different bulkheads near the middle so they overlap. I was under impression lime wood and what in the US we call basswood were the same. But the lime wood for first layer of planking sure seems like higher quality wood than the basswood I've used before. The grain looks tighter and it feels a little harder than basswood. Basswood is very soft and splits along the grain real easily. Upon first inspection, the lime wood looks and feels like it won't have these problems, or at least they'll be minimized.

-
I got the port bulwarks glued, so started on starboard side. I'm using same method, gluing the front of the bulwark piece into the slot on the bow stem and letting it dry over night. It's really nice having this slot to get bulwarks aligned at the bow. Now I've glued the bulwarks to the first two bulkheads and used the nails to hold it in place. No trouble with the nails, they are tiny, but much easier to use than ones in previous kits. I wrapped tape around everything at bulkhead 4 making easier to pre-drill and put in the nails in bulkheads 1 and 2. I also put a small piece of tape at the stern to keep it from flopping around. Since I'm just doing 2 bulkheads at a time, I didn't bother to mark bulkhead locations. I was able to easily drill for the nails by eyeball (although I did miss one - drill slipped a little). Once I found the trick of first gluing the front of bulwarks in the bow slot and letting it dry, and realizing how the curve and twist in the bulwarks made it fit, it has been pretty smooth sailing. I think if I was doing this again, I would consider modify the form I made for soaking and shaping the bulwarks to include the angle change or twist. This would take some work up front, but seems like it would make it easier to glue later on.


-
Thank you Thomas and Paul. I now want to add lights to the display case for the first model I built around 15-20 years ago. Without lights, that model is too dark in the case. It would look so much better with lighting, and I could use the same method as on this case for lights. I was surprised at how well this worked.
-
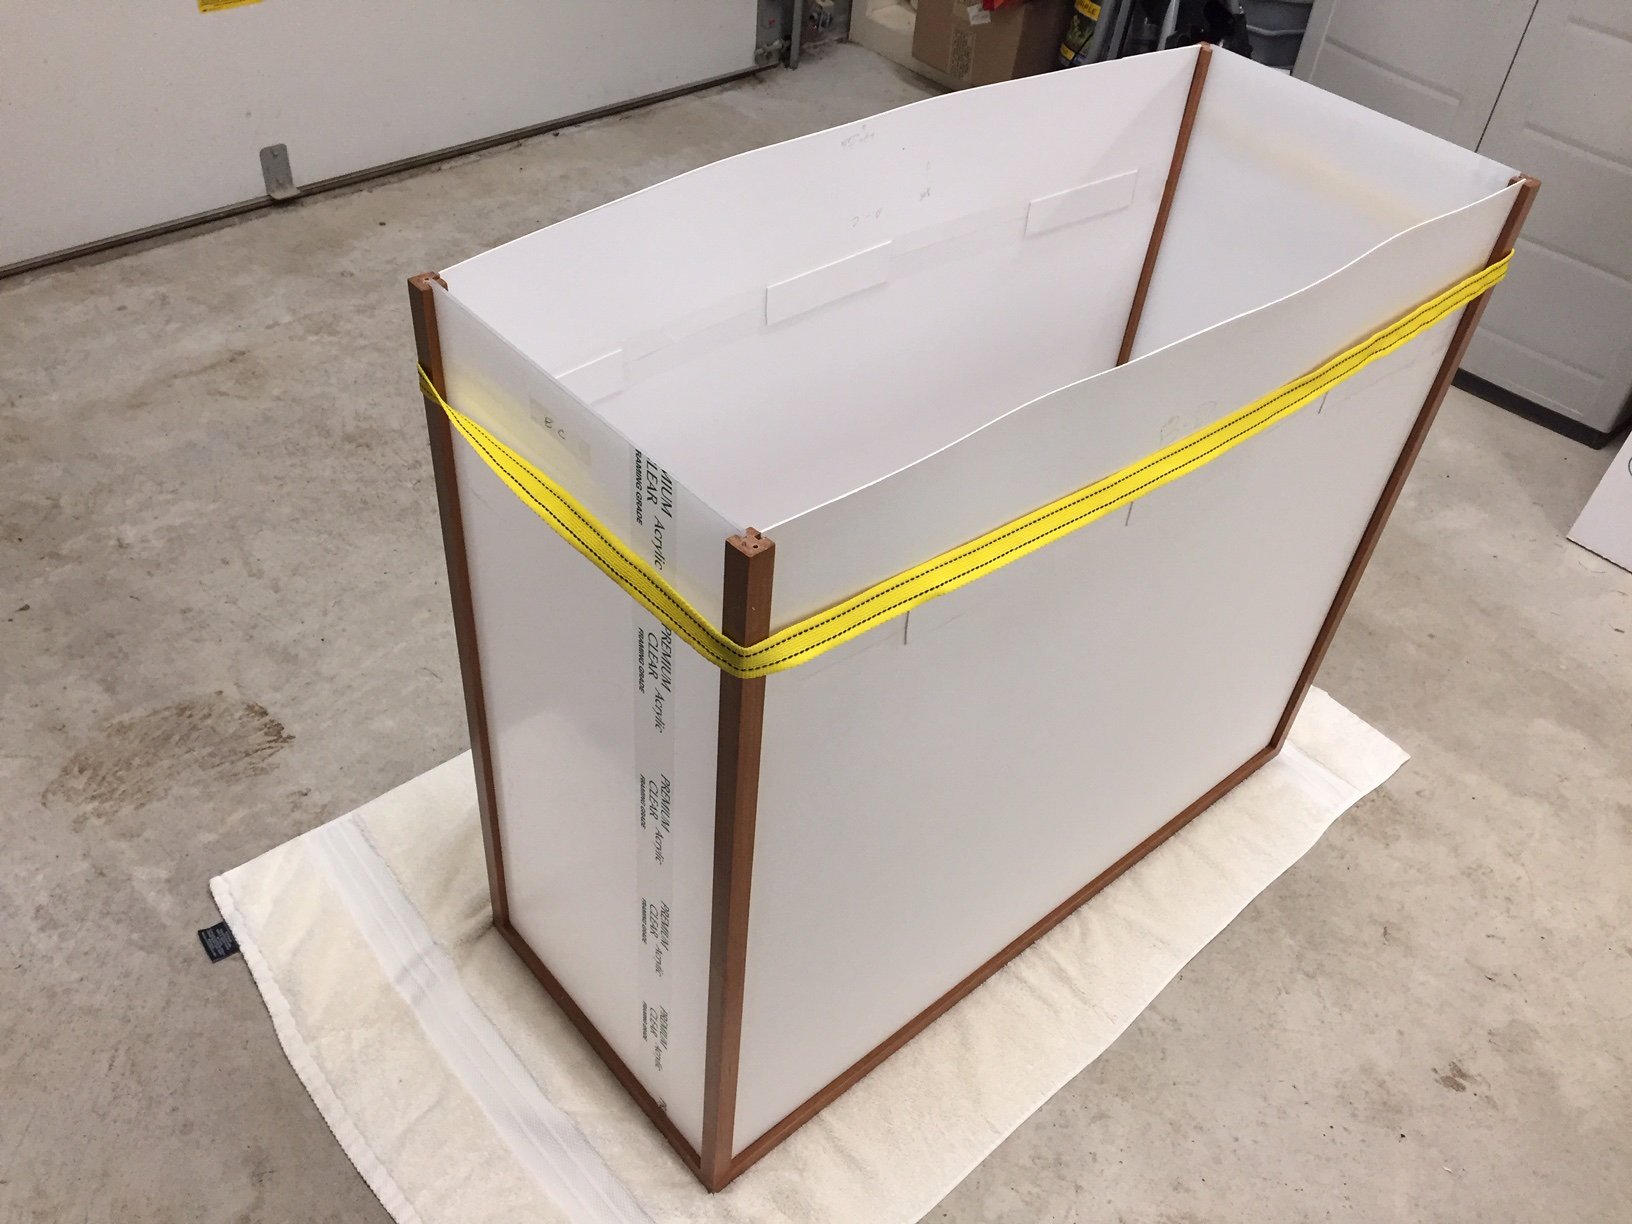
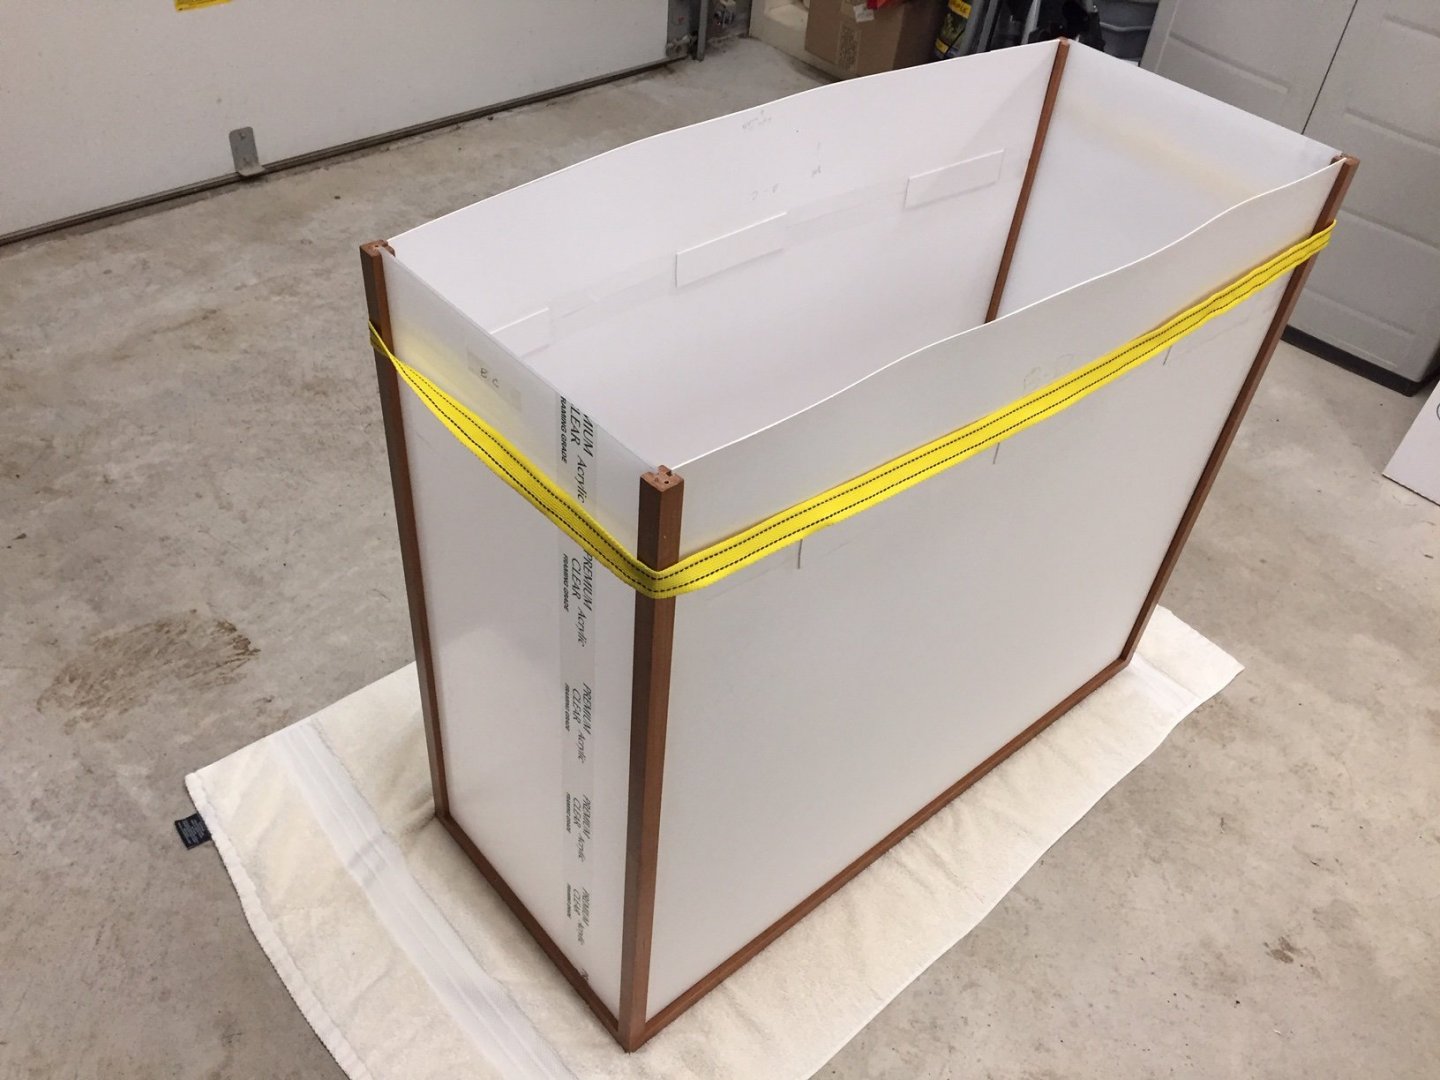
Got the display case finished! Once I decided to cut plexiglass myself, it went about as smoothly as any project like this does. I had test fit everything several times, so it all went together easily. The lights work great, even better than I expected! Well worth the effort. The lights I used are battery powered, remote controlled, for closets and shelves. Amazon has a bunch of them. I put 4 in the case and it's about right at 100% brightness. Reviews said batteries don't last long, so I made it so I can quickly remove lights and change batteries. I figure I won't have to do this too often, because I'll only use lights when showing off to visitors. I have it sitting on a game table for now, so there's background distractions. When custom table arrives (I've been told about a month), I'll put it against a wall and I think it will look even better. Photos picked up some reflections, which you don't actually see.
-
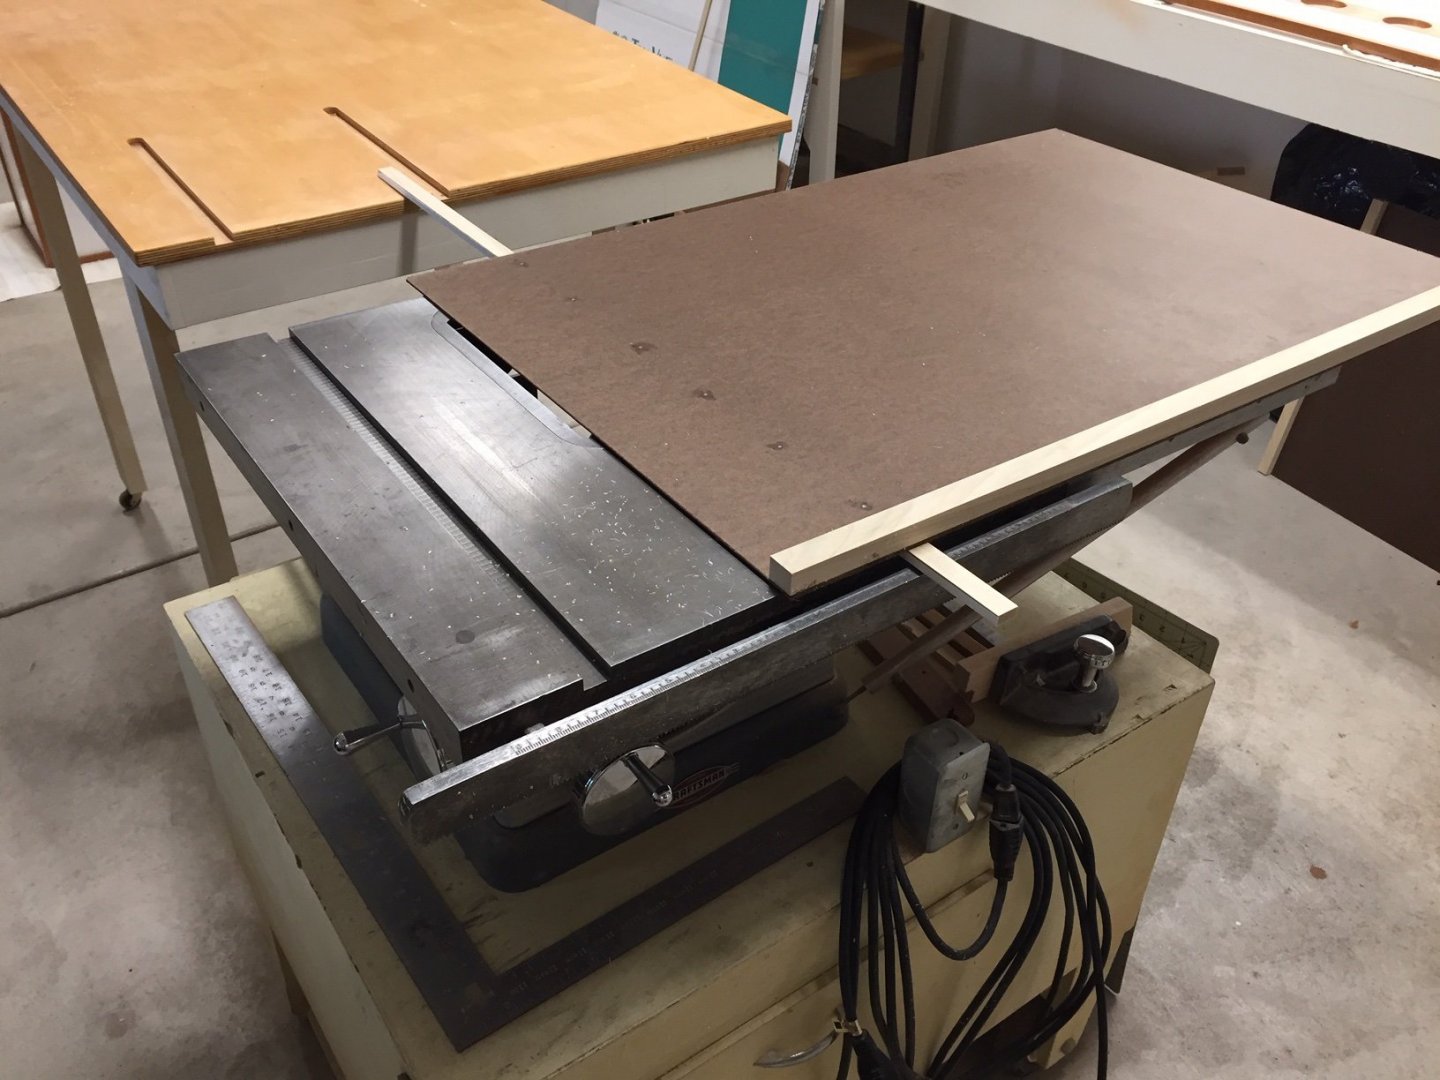
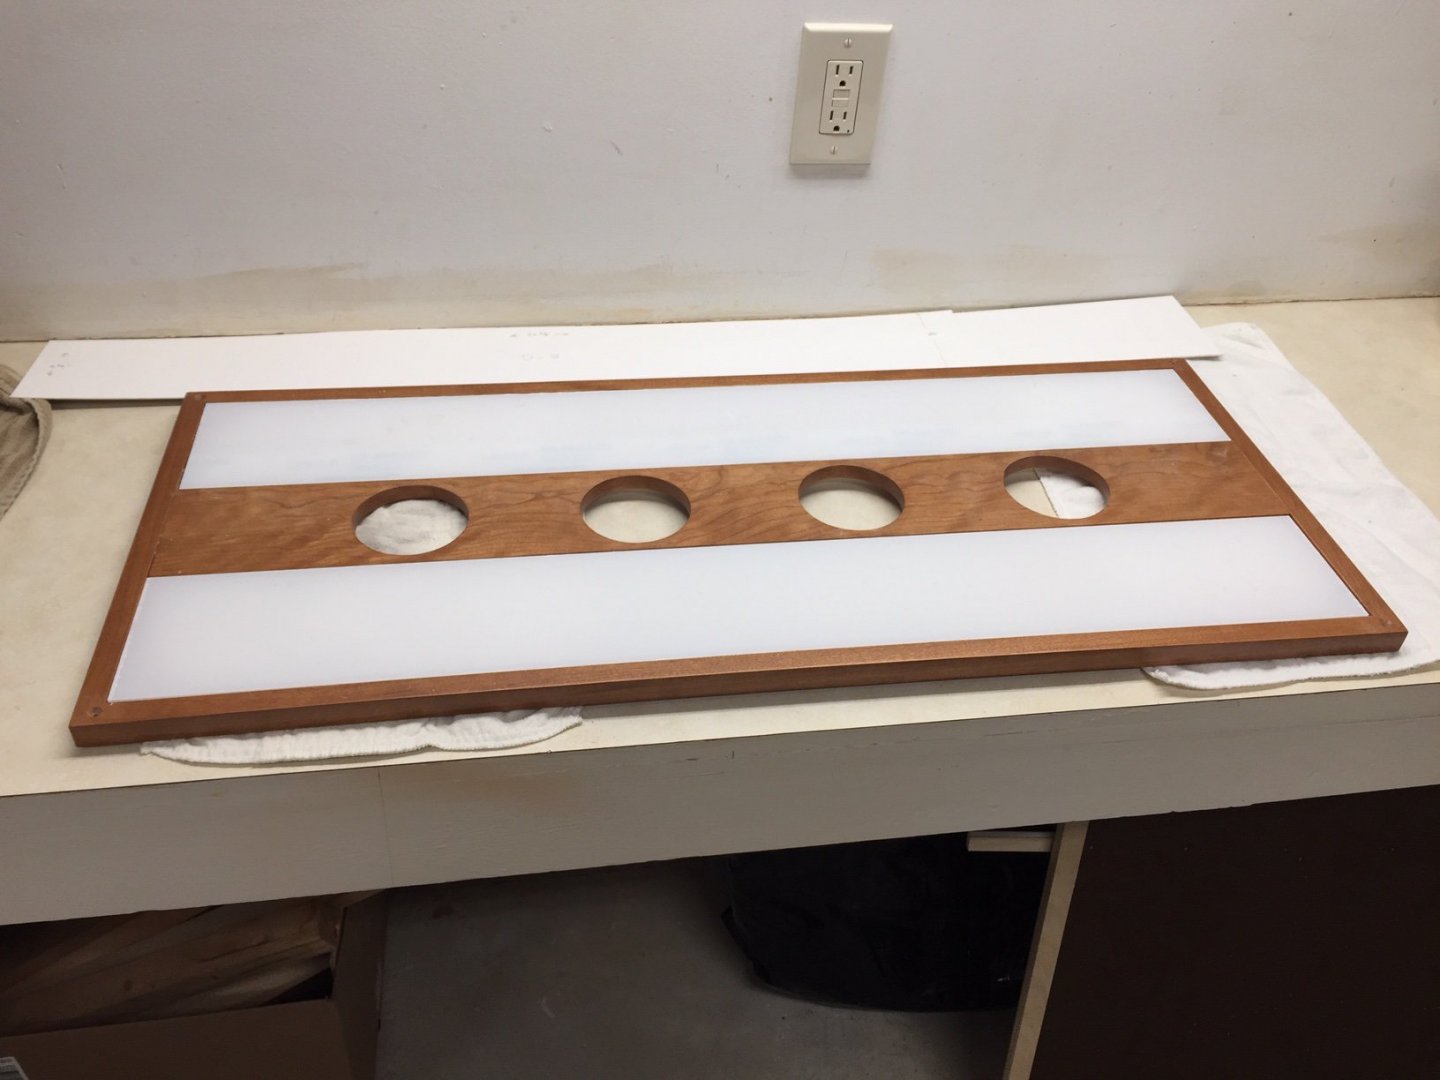
Thought I'd post an update on the display case. The woman at the art store that was going to do plexiglass for me had a medical problem (she will recover with time), so they decided they didn't want to do project. This turned out a blessing in disguise. I bought the plexiglass from them and used table saw to cut using my cardboard patterns. The table on my saw isn't very large, so I had to make trays to hold plexiglass for cutting (first photo). I'm familiar with this method, but hadn't made trays this large before. This turned out to be so easy, there was no reason to get anyone else involved. It took a little time, because I measured everything 2 and 3 times, in an effort to avoid the "senior moment" and waste plexiglass. I used a new finishing blade on the saw and it gave pretty clean cuts with no cracking. The plexiglass sits in slots in the frame, so you don't see the edges. I used the cuts from the table saw "as is" without further smoothing. The next photo show plexiglass fitting into the top frame. It still has the protective covering on it, which I'll remove at the end. The last photo shows plexiglass fitted to the ends of the case. The sides still had the cardboard patterns when I took the photo. Since then I've fitted all four sides of plexiglass and screwed the top on, so it's all secure now. Not a lot left to finish display case. I'll take the protective cover off tomorrow and hope there's not too much static to attract dust. I've ordered some anti-static plexiglass cleaner, so if this is a problem, I'll wait until it arrives to clean & finish.
-
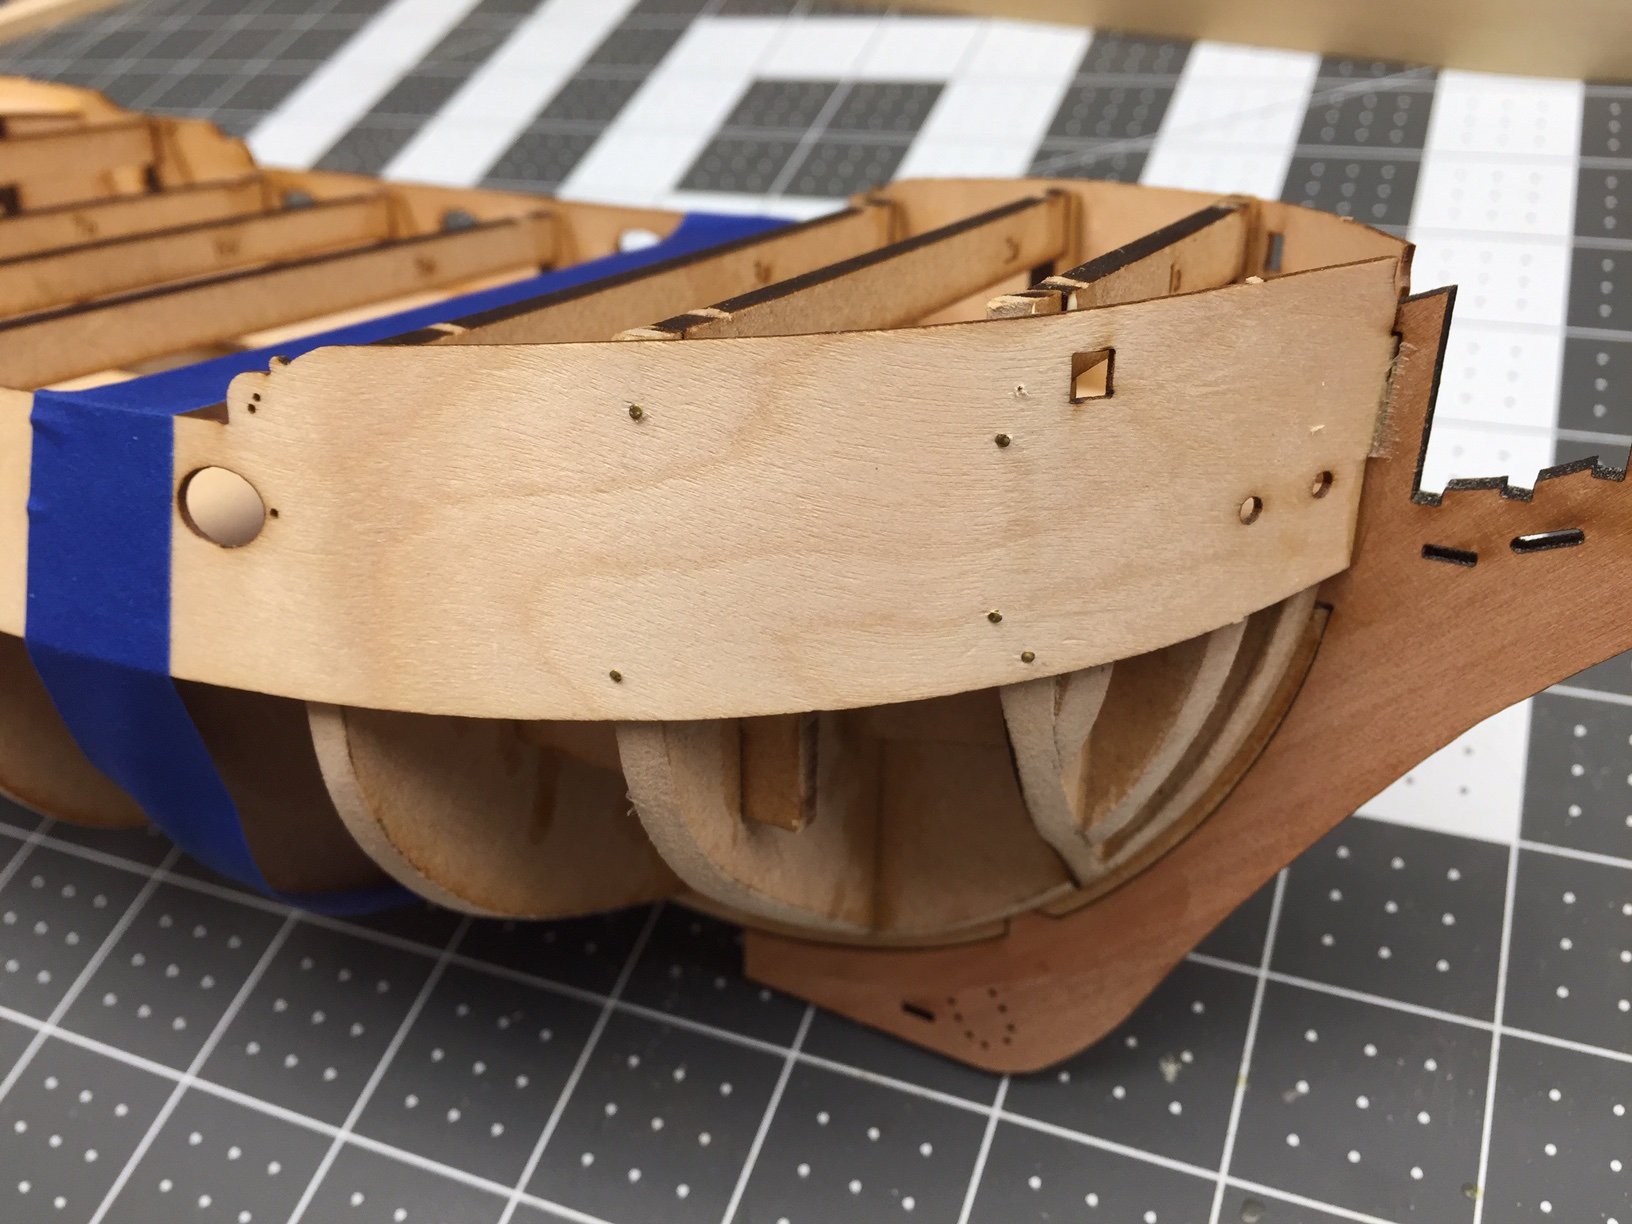
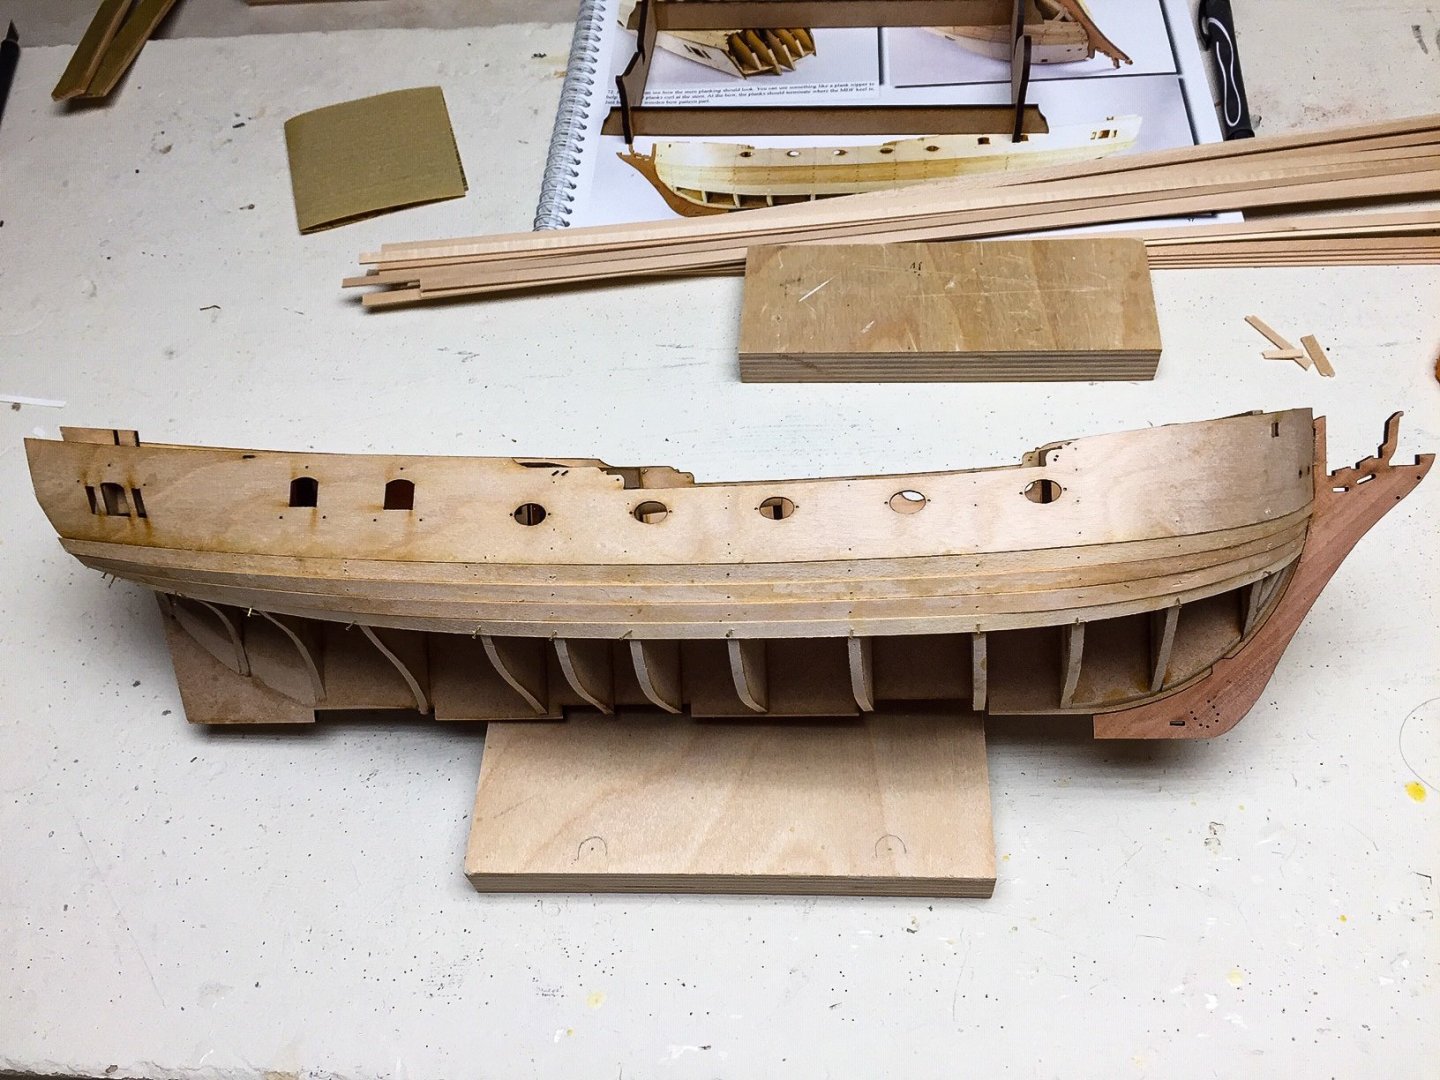
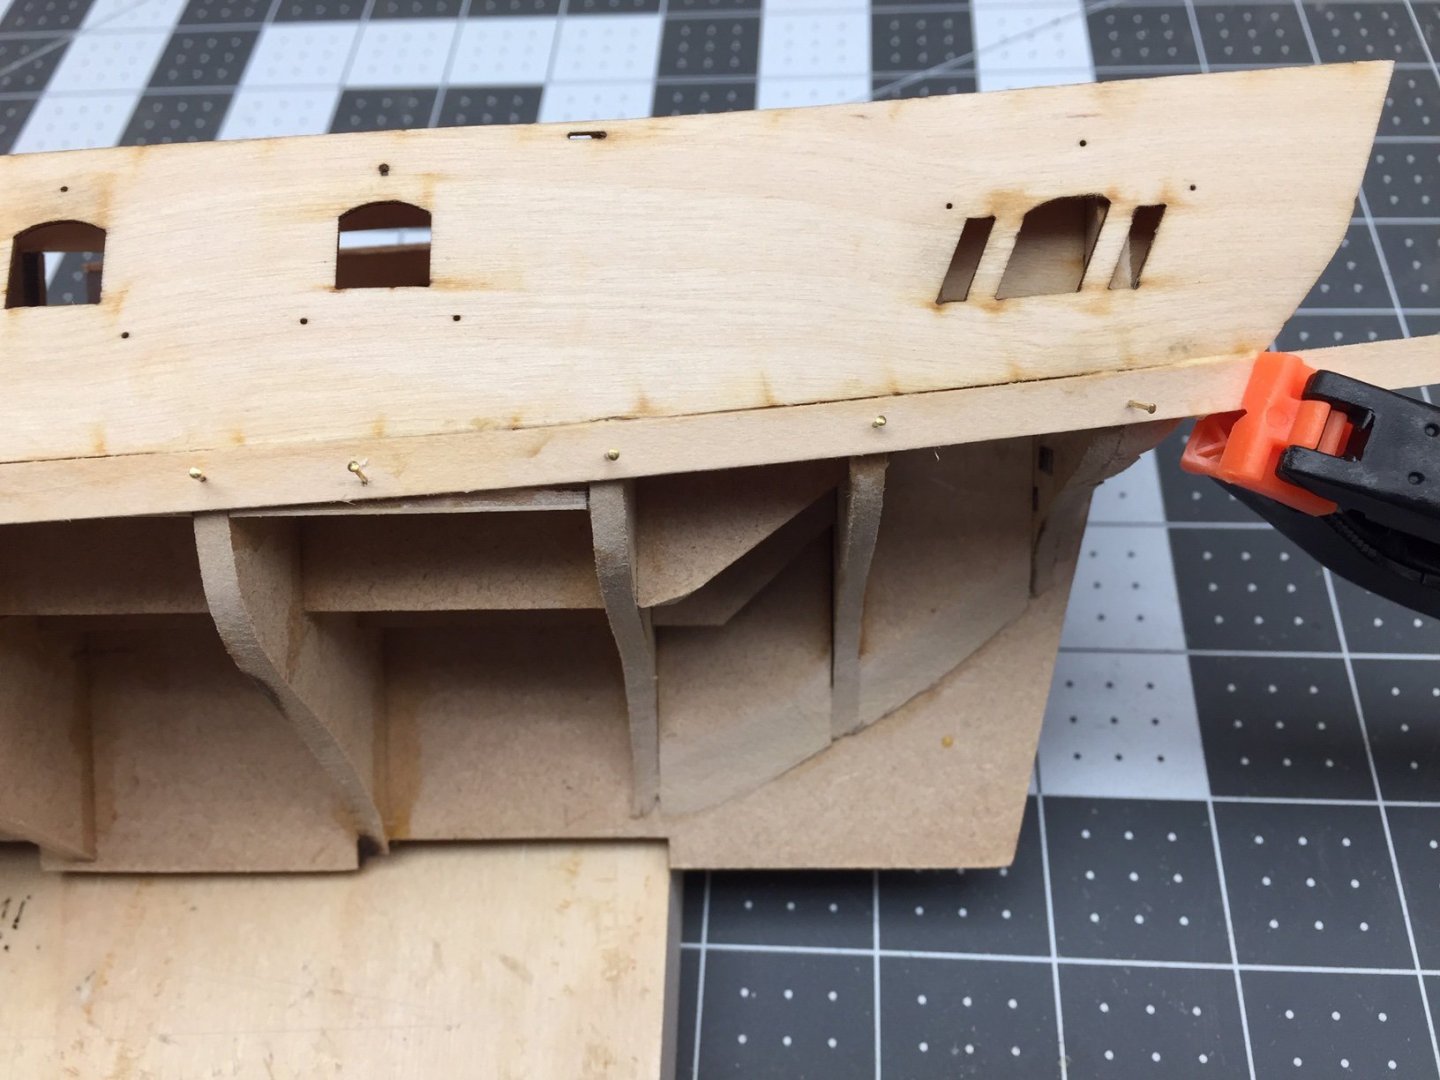
Thank you Chris and James for advice on nails. I used nails on the bow bulkheads, but didn't need them after about bulkhead 5. I pre-drilled thru the plywood and into the bulkhead, so I could push the nails in with pliers. Without pre-drilling the length of the nail, I couldn't get them into the bulkheads. Used #77 drill in case anyone is interested. Perhaps a nail pusher would have made this much easier. To get the nail holes in plywood and bulkheads aligned the way I wanted, I had to hold/clamp/tape the ply in the correct place and then drill thru both ply and bulkhead at the same time. This was what gave me problems until I realized I needed to glue the ply into the bow stem first. After that, I was able to work my way around the bow, pre-drilling, gluing, and nailing. I did one or two bulkheads at a time. it helped to wrap tape around the 2 bulkheads just aft of the one I was gluing. This relieved stress on the plywood somewhat, so the nails could hold it against the bulkhead. All this has worked. Once I got past the bow curvature and twist, the plywood bulwarks laid along the hull pretty nice. I just used tape on that part to hold it in place as shown in photo, and glued it to all remaining bulkheads at the same time. The plywood extends past the stern about 1/16", but I'm very happy with the fit. Progress!

-
After seeing your tests, I like tung oil the best also, and I'm glad you decided to use that. It really brings out the grain in the wood. The planked parts you've done look super nice! When you get to a place that you think you want to use sealer or acrylic again, do another test comparing it with tung oil. I think oil will be hard to beat and will still give you enough contrast with other wood. I'm thinking I'd better get some and give it a try.
-
I'm still struggling with bulwarks plywood piece. I think the problem is I don't have enough hands to hold it firmly against bow stem and bulkhead formers and do anything else, like mark where bulkheads are as shown in manual, clamp, tape, nail, or anything. Tried several different methods, and every time the plywood piece would slip out of the slot in the bow stem. So finally decided to start at the bow stem where the slot is, and glue that first. Hopefully with that stabilized, I can then gradually work my way aft, drilling and nailing to each bulkhead former and hold it in place while glue dries. So I'm going to go slow, letting glue dry at each step. I think once I get the bow curvature secure around the first 4 to 5 formers, it will go much easier. In the process of experimenting, I found wrapping ribbon-like velcro all the way around formers worked, but I couldn't hold everything in place and get it tight enough all at the same time. I had the same problem using tape around the bulkheads. So I tried the nails again. I was able to use the nails to hold it, but the tiny nails are difficult to work with, and it came loose at the bow like all other attempts. I don't have a nail pusher, and I think that would make putting nails in a lot easier than using pliers, but they were out of stock where I usually order small tools like that. I'm assuming the nails are temporary, used just to hold the plywood piece while glue dries. And then you remove them. I think the nail heads would get in the way of planking. I'm also guessing that this way of doing bulwarks is an extremely common method everyone else knows, and it's just my inexperience that's causing me problems. I'm calling it a learning experience.

-
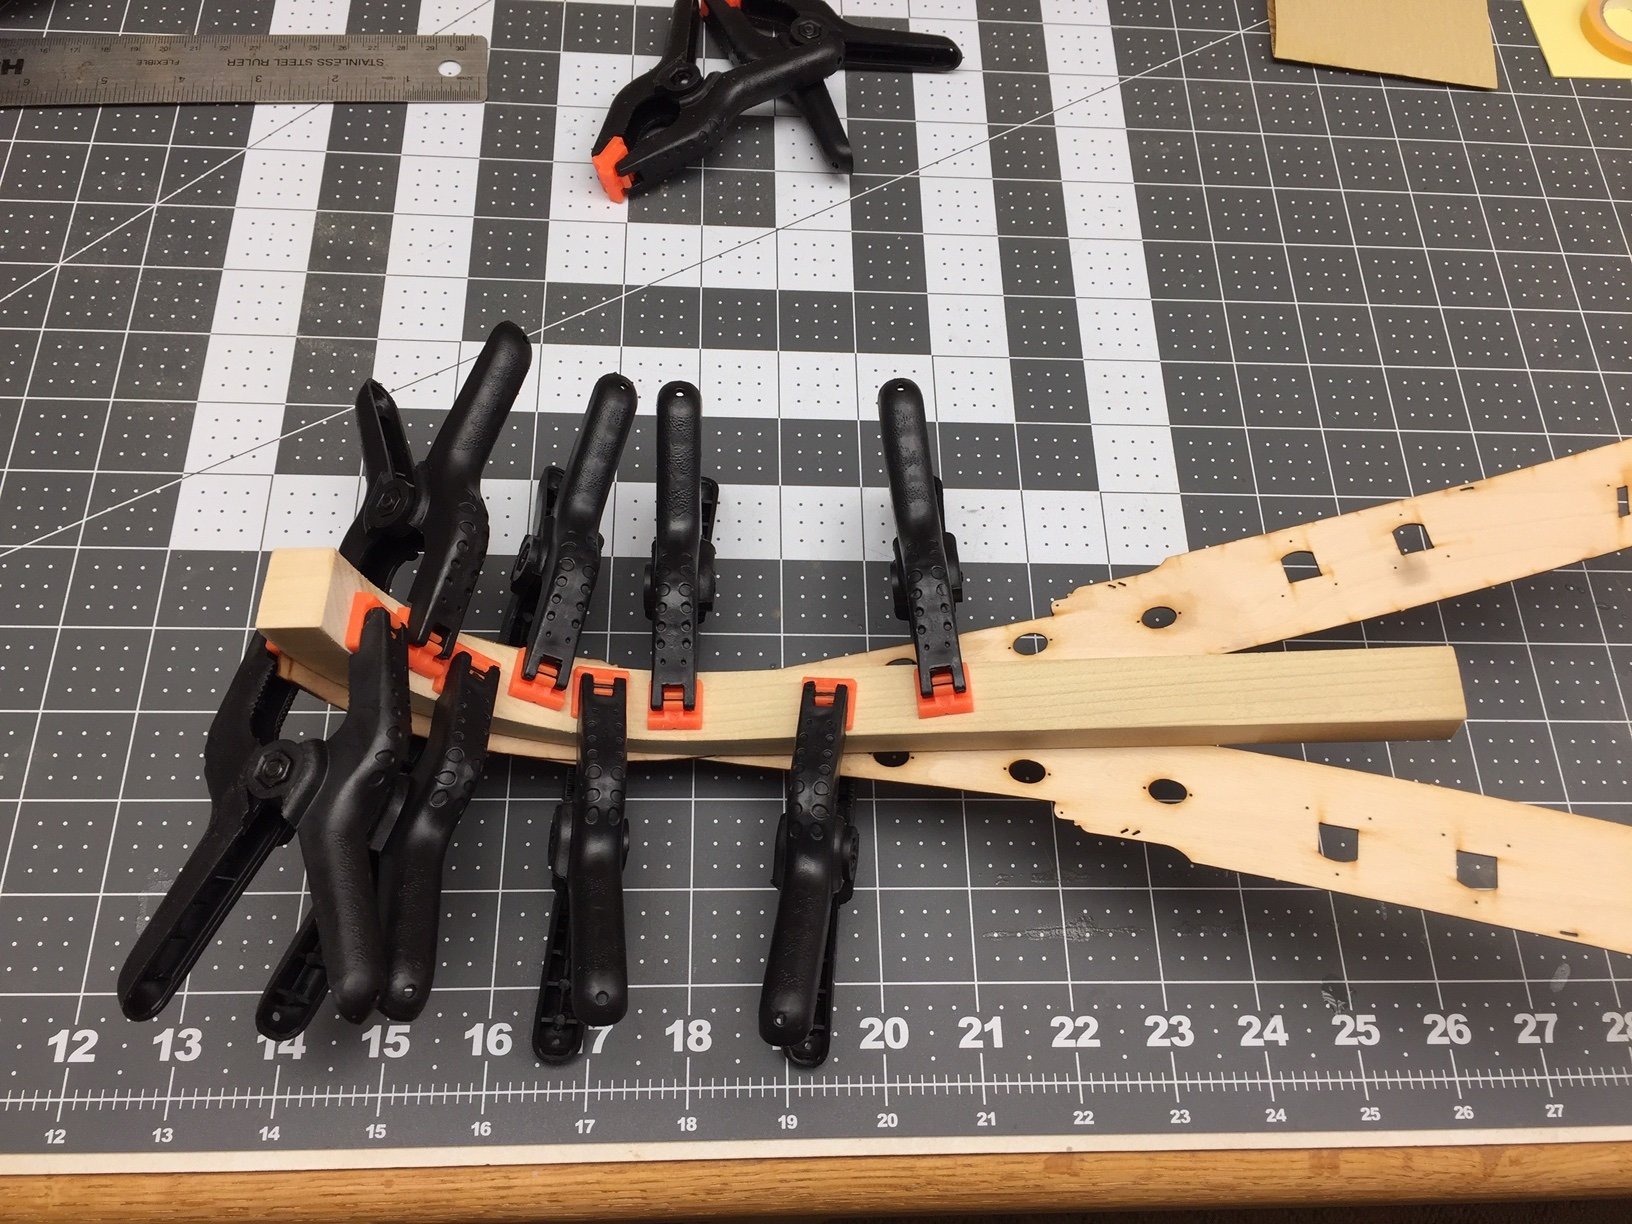
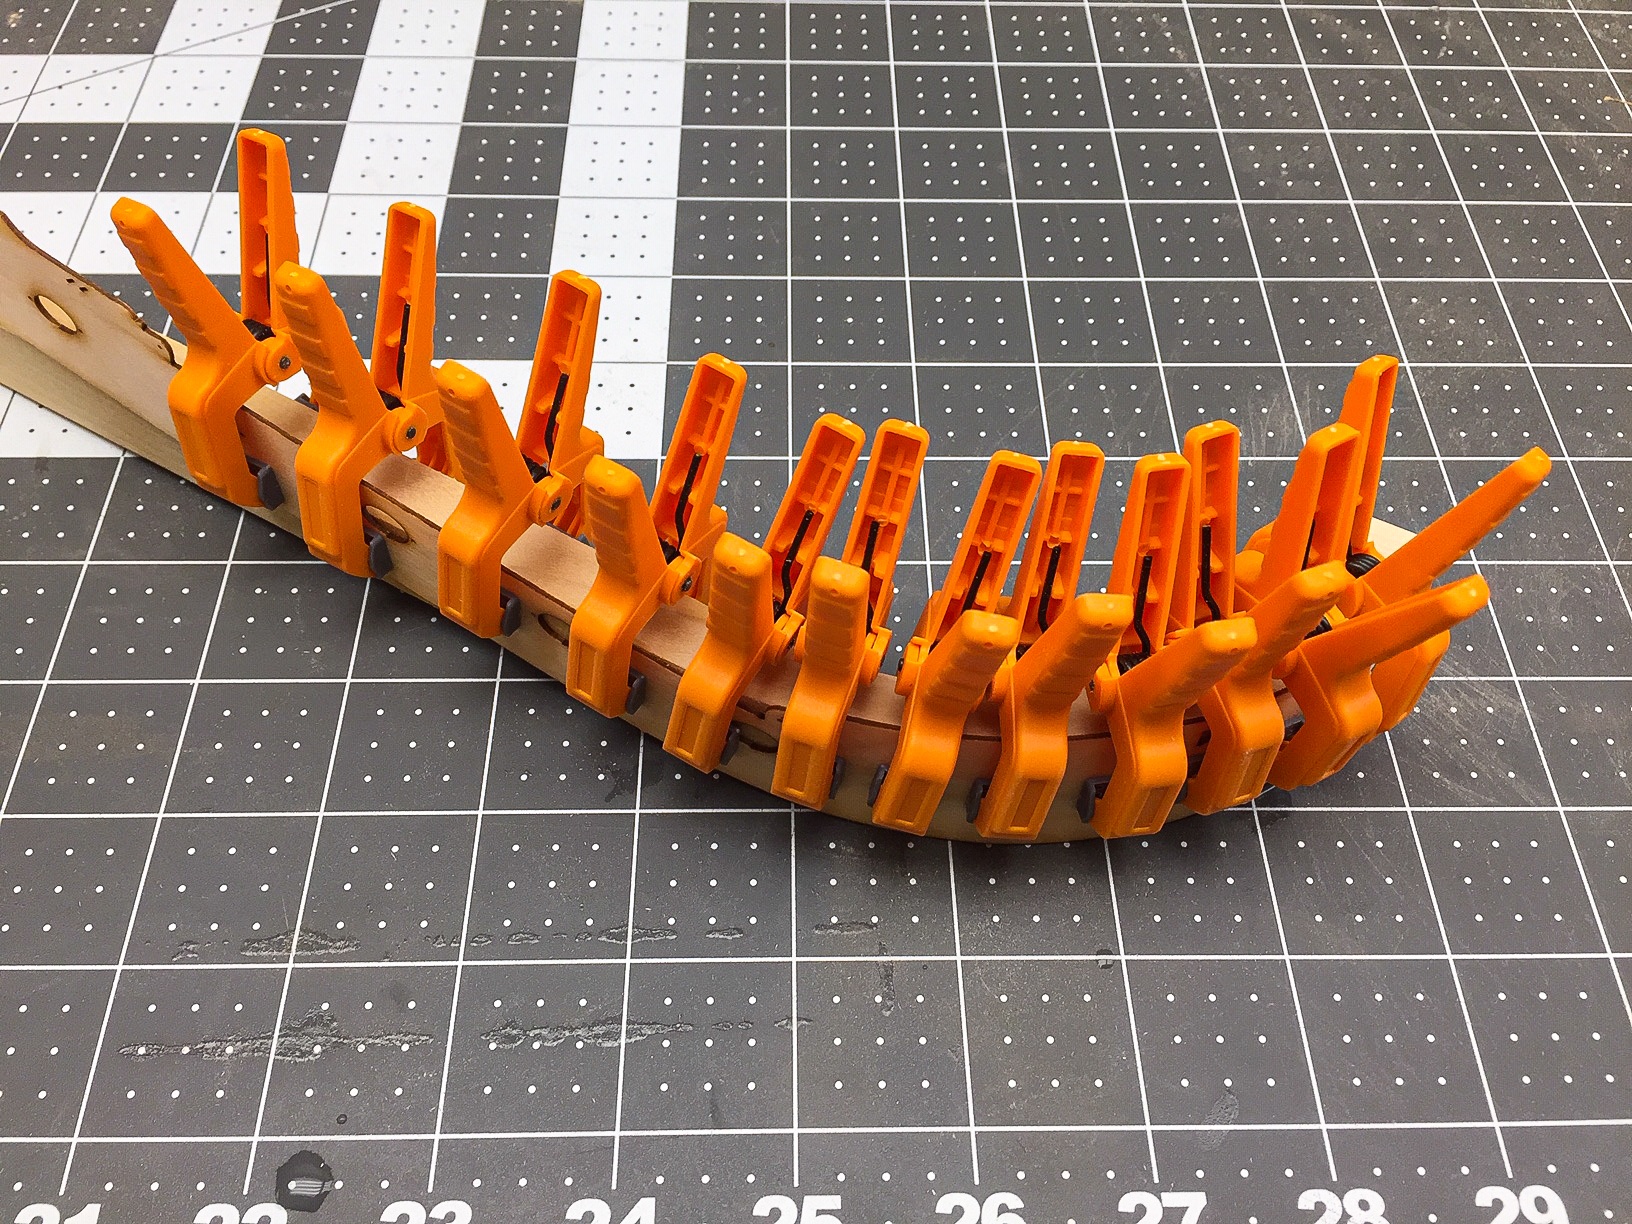
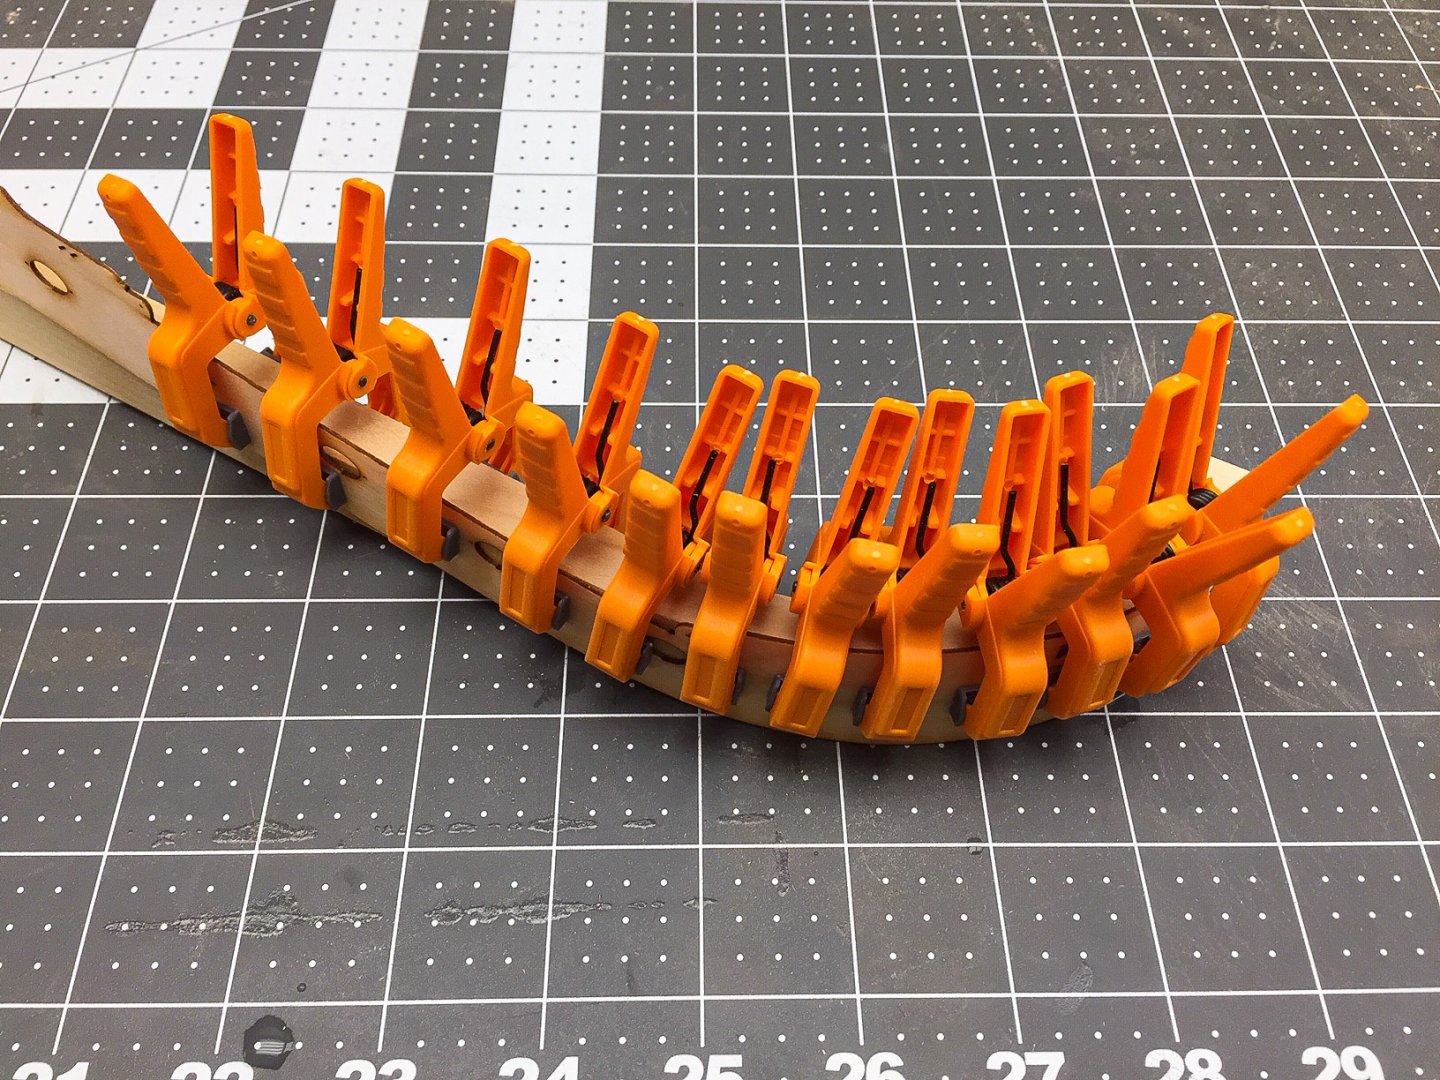
Well, silly me. While playing around with the bulwarks plywood piece, I realized I wasn't holding it firmly against the bulkhead formers, especially at the top around #3 and 4. I was holding it firmly against the hull along the deck where it's strong, but wasn't holding it against the formers at the top where the formers are weaker. To get the plywood against the top of the former, especially #3 bulkhead, you have to twist it a little, and then like magic the aft end of bulwark plywood drops down and fits against the hull like it should. So, much ado about nothing. Maybe I can call it a "learning experience" instead of a senior moment. I'd tried to edge bend one bulwarks piece, and of course, the wood didn't like it, so it ended with some little ripples in it I didn't like. I just soaked both pieces again and clamped them to my form. I decided I could do both at the same time (photo), and will give them extra time to dry, maybe 2 days. So I've got lots of time to think about how to hold or clamp them against the hull when gluing. The manual says to use the little nails, but I've had poor experiences with them in the past. It requires a firm grip to hold plywood against the top of #3 bulkhead, and offhand can't imagine nails holding it in position, but maybe they would. Perhaps if you use Glenn Shelton's method of gluing to a few bulkheads at a time and working from bow to stern, it would work (I've been looking at his build log a lot, and really appreciate all the photos and notes). I've got various clamps I think I'll try first, or perhaps wrapping all the way around the bulkhead with tape or velcro strip. I'm thinking gluing to 3 or 4 bulkheads at a time is a smart way to go, so you can clamp, wrap, or nail short sections at a time. The hard part appears to be in the area of bulkhead #3. Once I get that little twist, or whatever you want to call it, glued in place, the rest looks simple.

-
Beautiful work, as always. Interesting to me how low the stern gunports are, just above the waterline I'd guess. Not quite sure how you could see anything to shoot at from there. Out of these two finishes, I like tung oil the best. Sealers have fillers in them which doesn't let the wood show thru as much. They tend to have a cloudy look to them. Matt or flat finishes are similar, but with a lot less filler. If you put multiple coats of matt or satin finishes on something, it will tend to get a "cloudy" look or hide the wood grain a little bit. I've learned the hard way making little end tables that for furniture it's best to use glossy until the last couple of coats, and then put on final satin or flat coat. You don't notice it with 1 or 2 coats. You might try clear matt or flat acrylic that you get at art stores. I've used this before and it's worth trying. Easy to use since it's water based.
-
Thanks for all the nice comments! I ran into first real problem with bending the bulwarks on former. When I did a test fit and got it fitting the bow fairly good, the bulwards curved upward and was about 3" above the deck at the stern. If I got the bulwark piece down at the stern, it didn't fit the bow right. Looked pretty obvious to me that it needed an edgewise bend downward at the bow, so the aft part would fit right. But I haven't read of anyone else having this problem, so am a bit confused. Maybe everyone else knows this from experience. I know you have to put downward edgewise bends in planks, but didn't think you'd need to do it with this piece. And it's not like plywood likes to be bent edgewise. I soaked the piece again, and tried to put some edgewise bend in it, so will see if that works. It didn't like getting bent like that, and I had a hard time clamping (had to get some stronger clamps), so now it's drying and I'll see what happens. Sure hope it fits better this time. If anyone has some advice on this, I'd appreciate it!
-
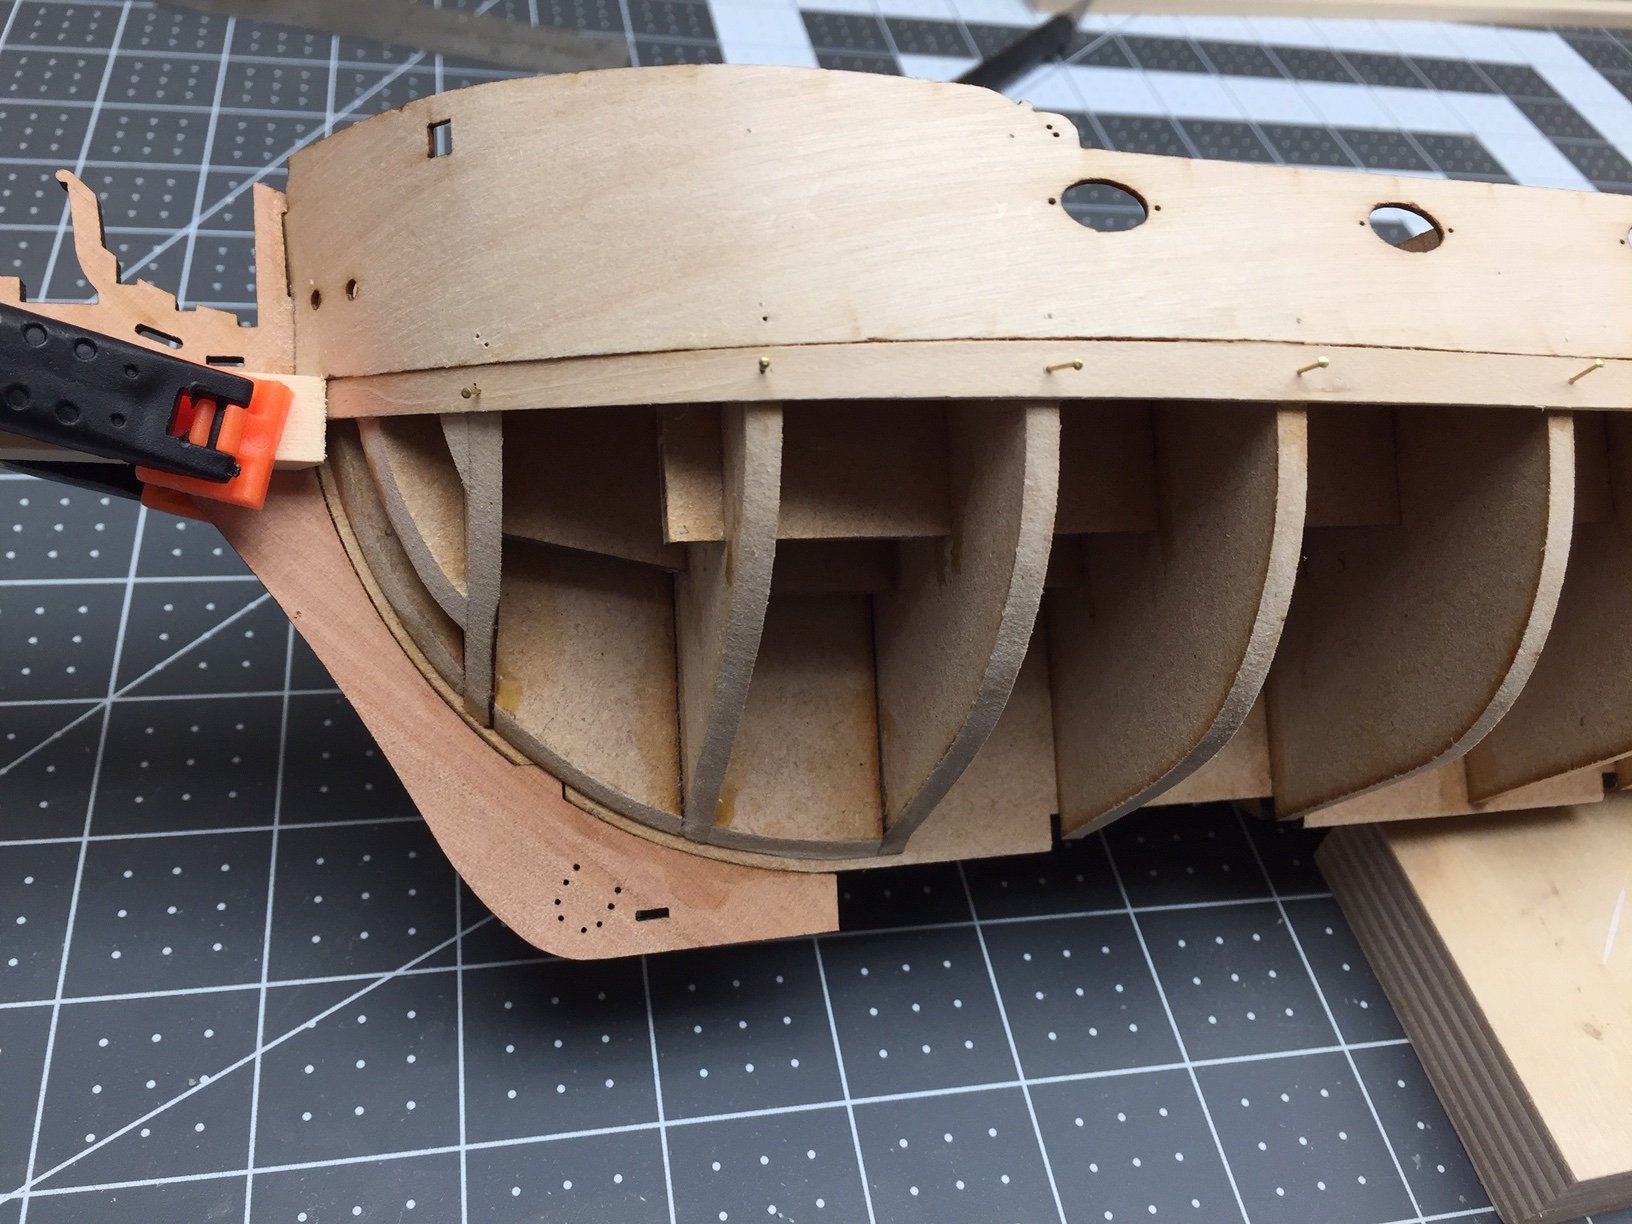
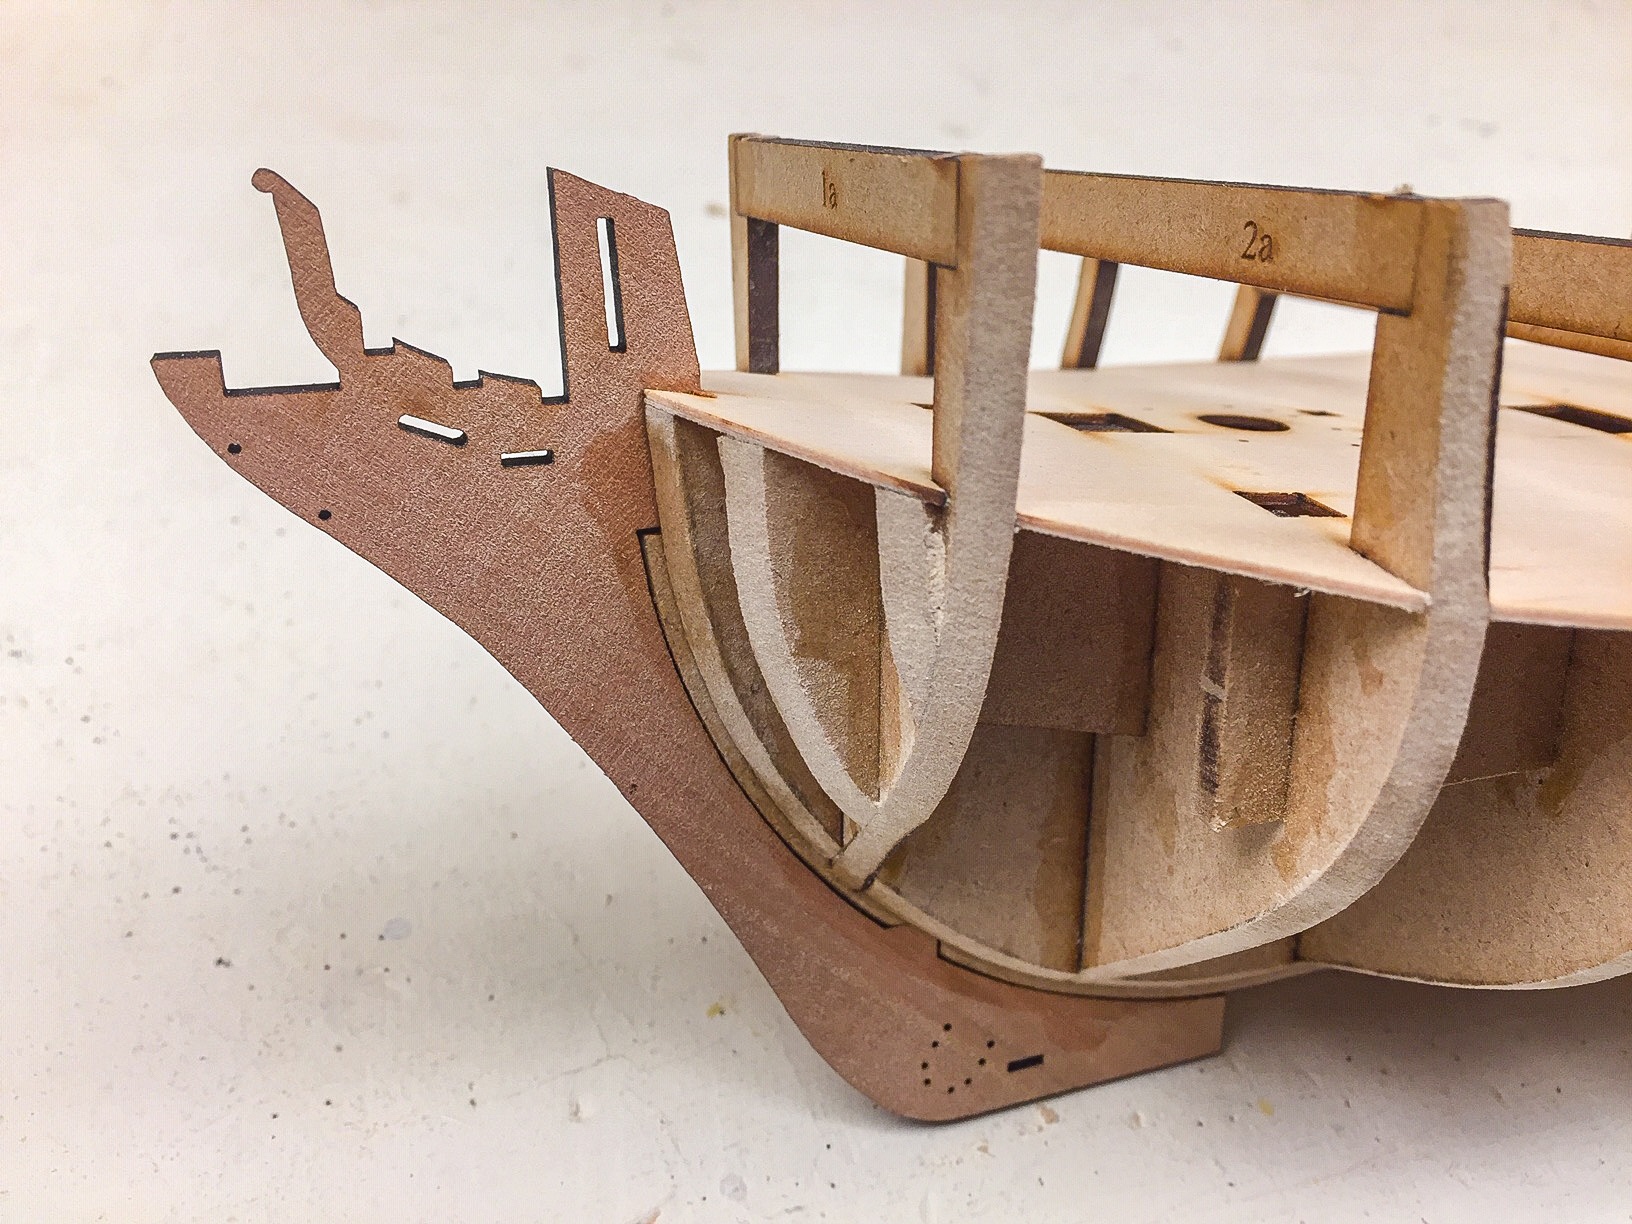
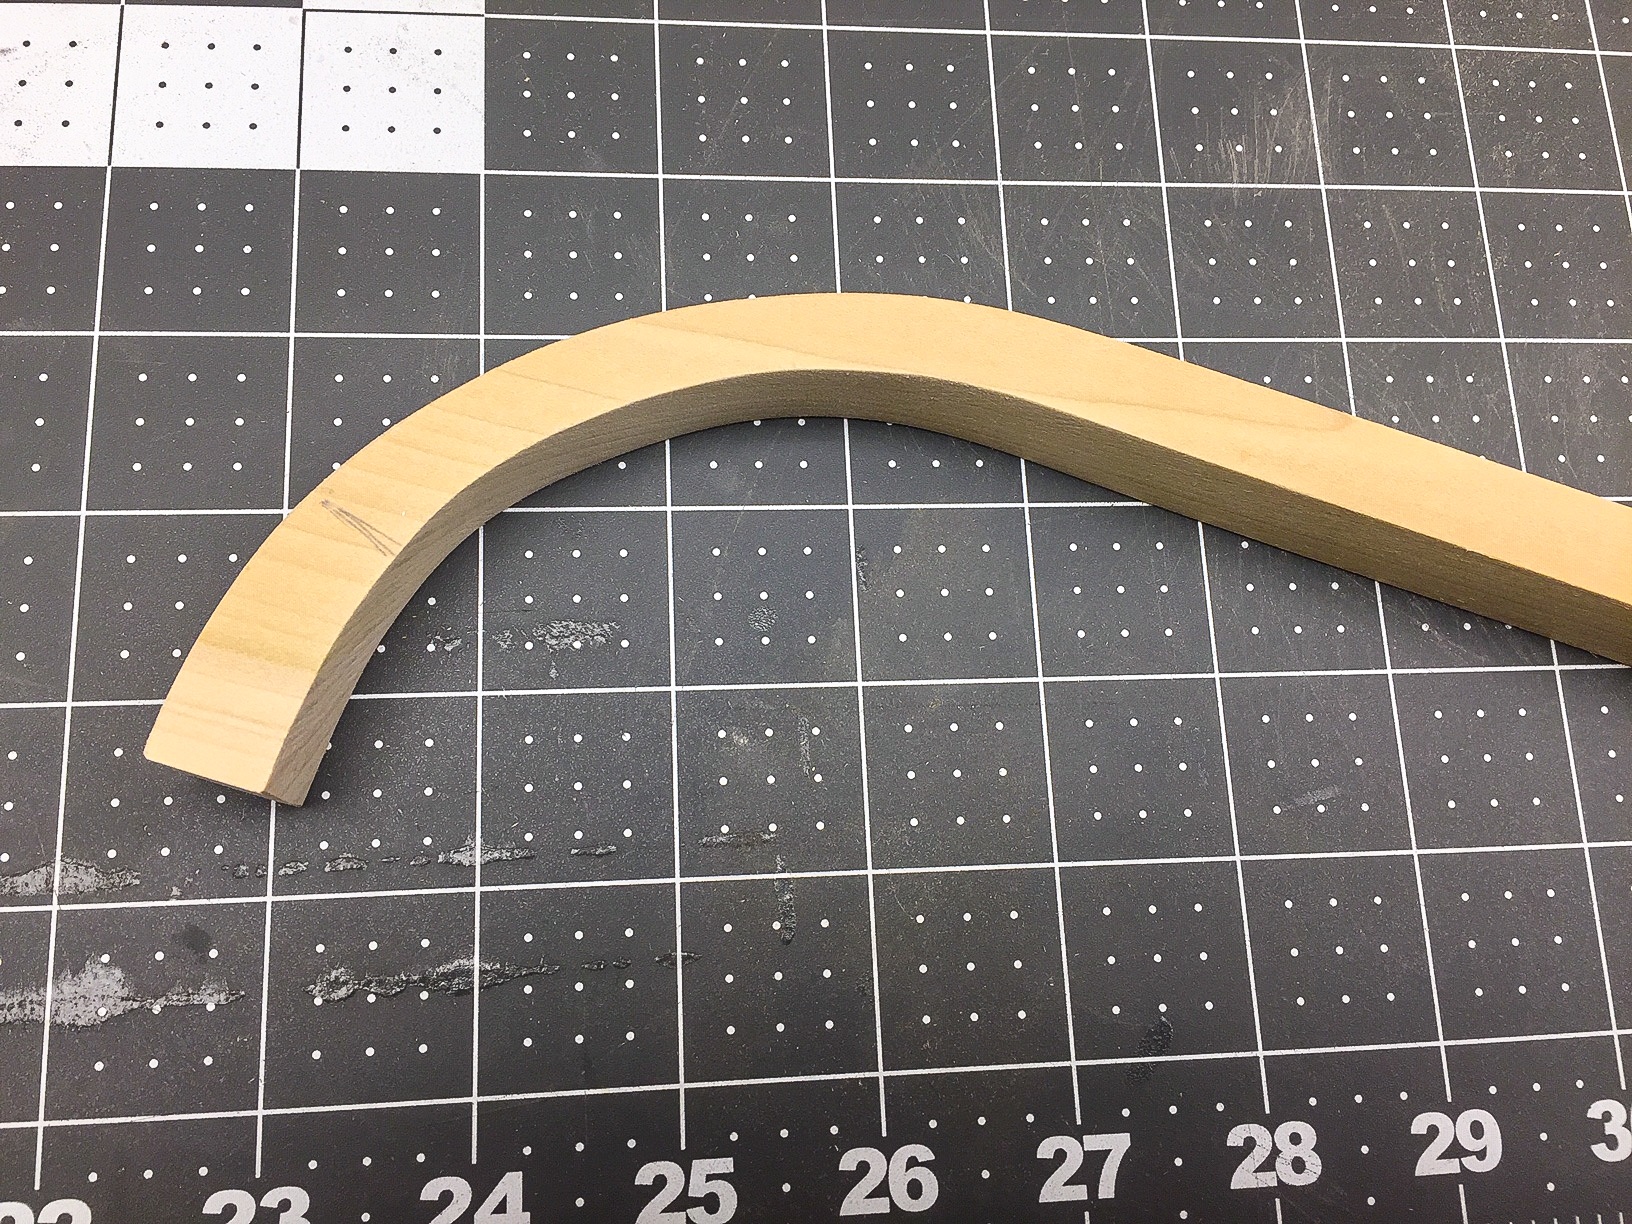
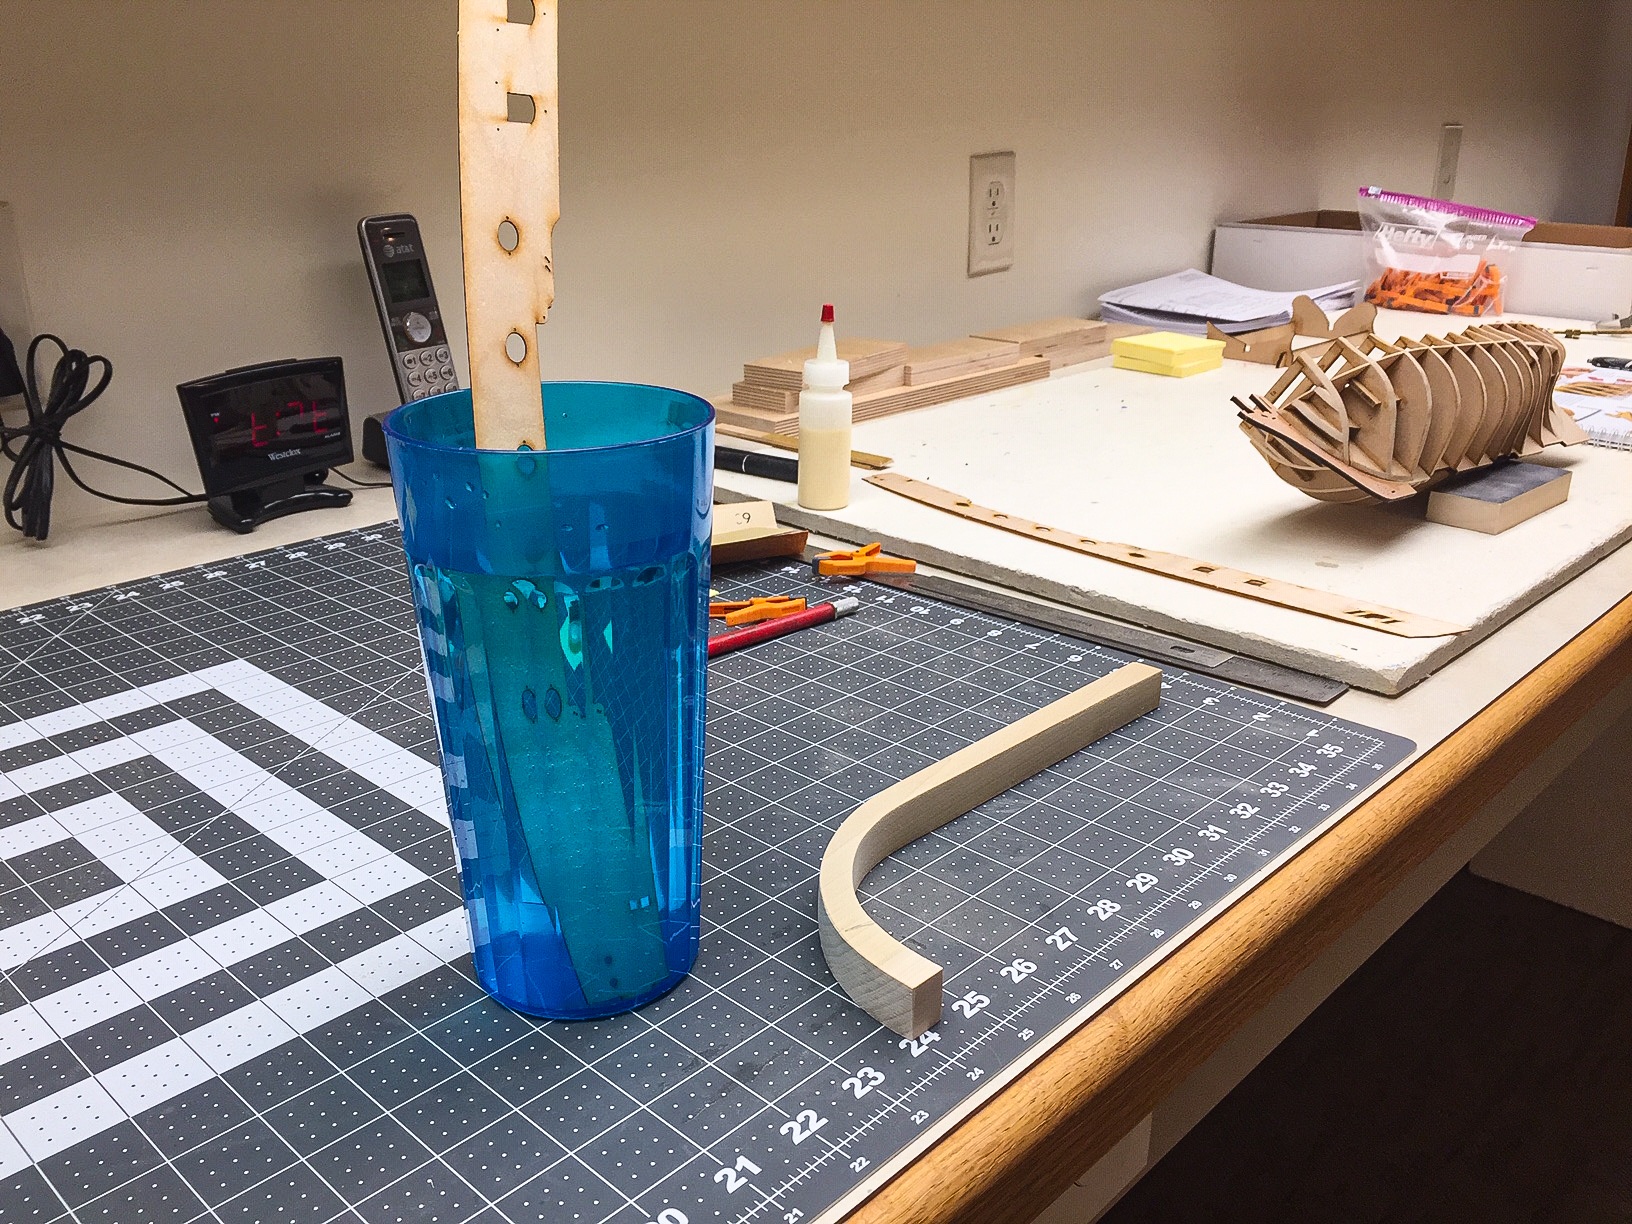
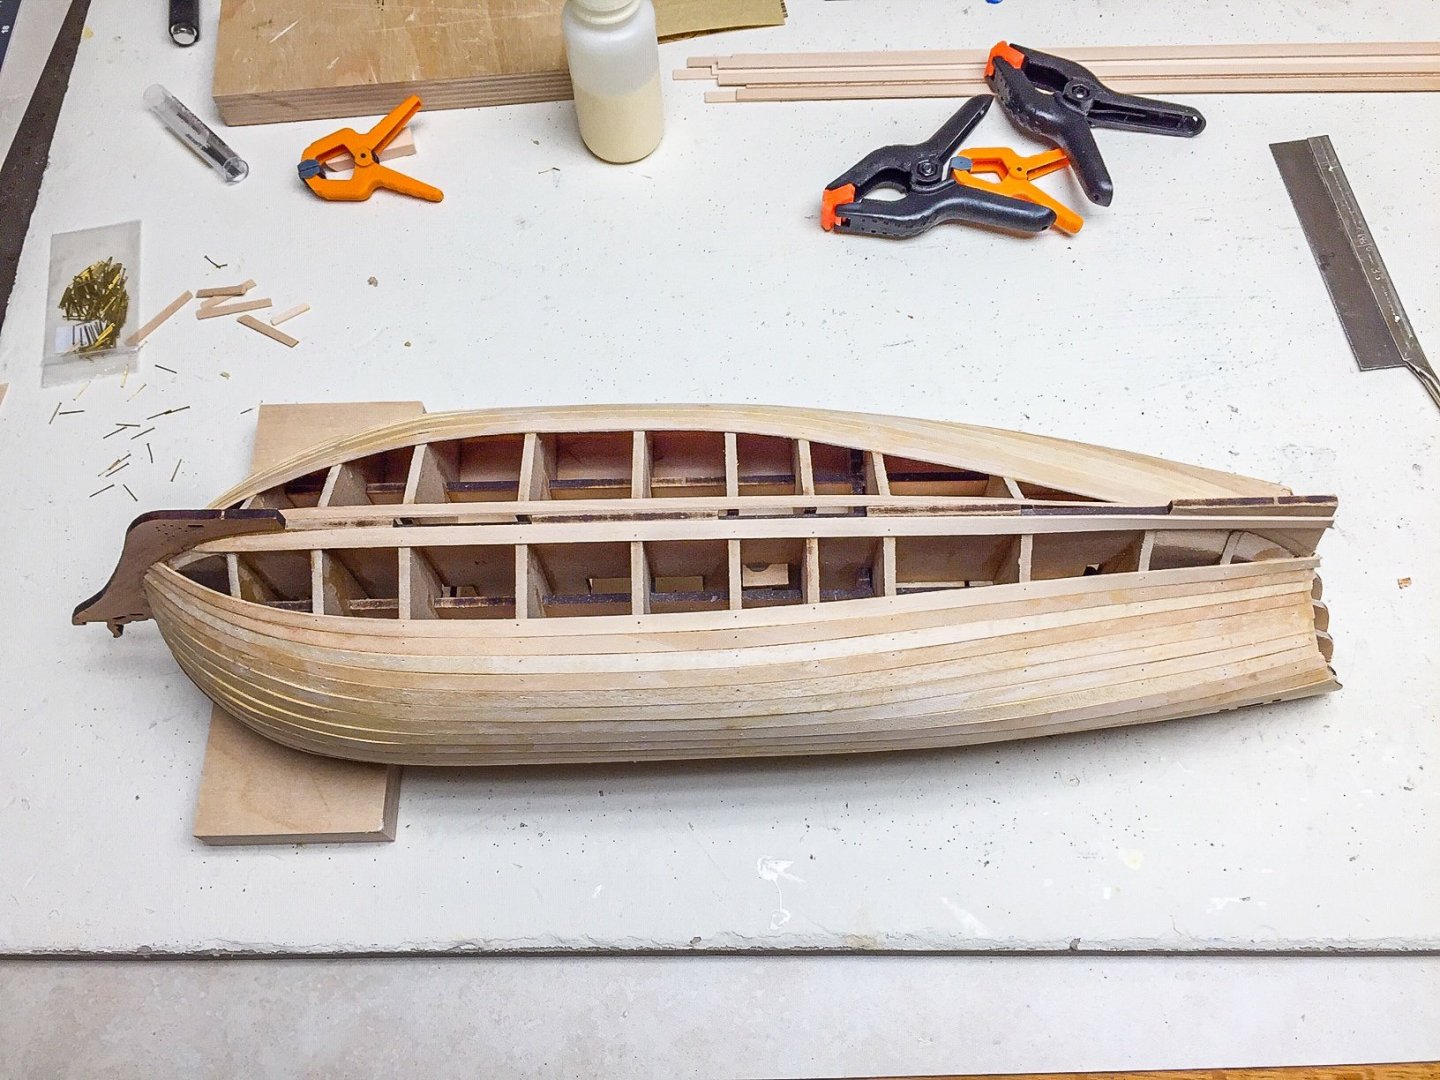
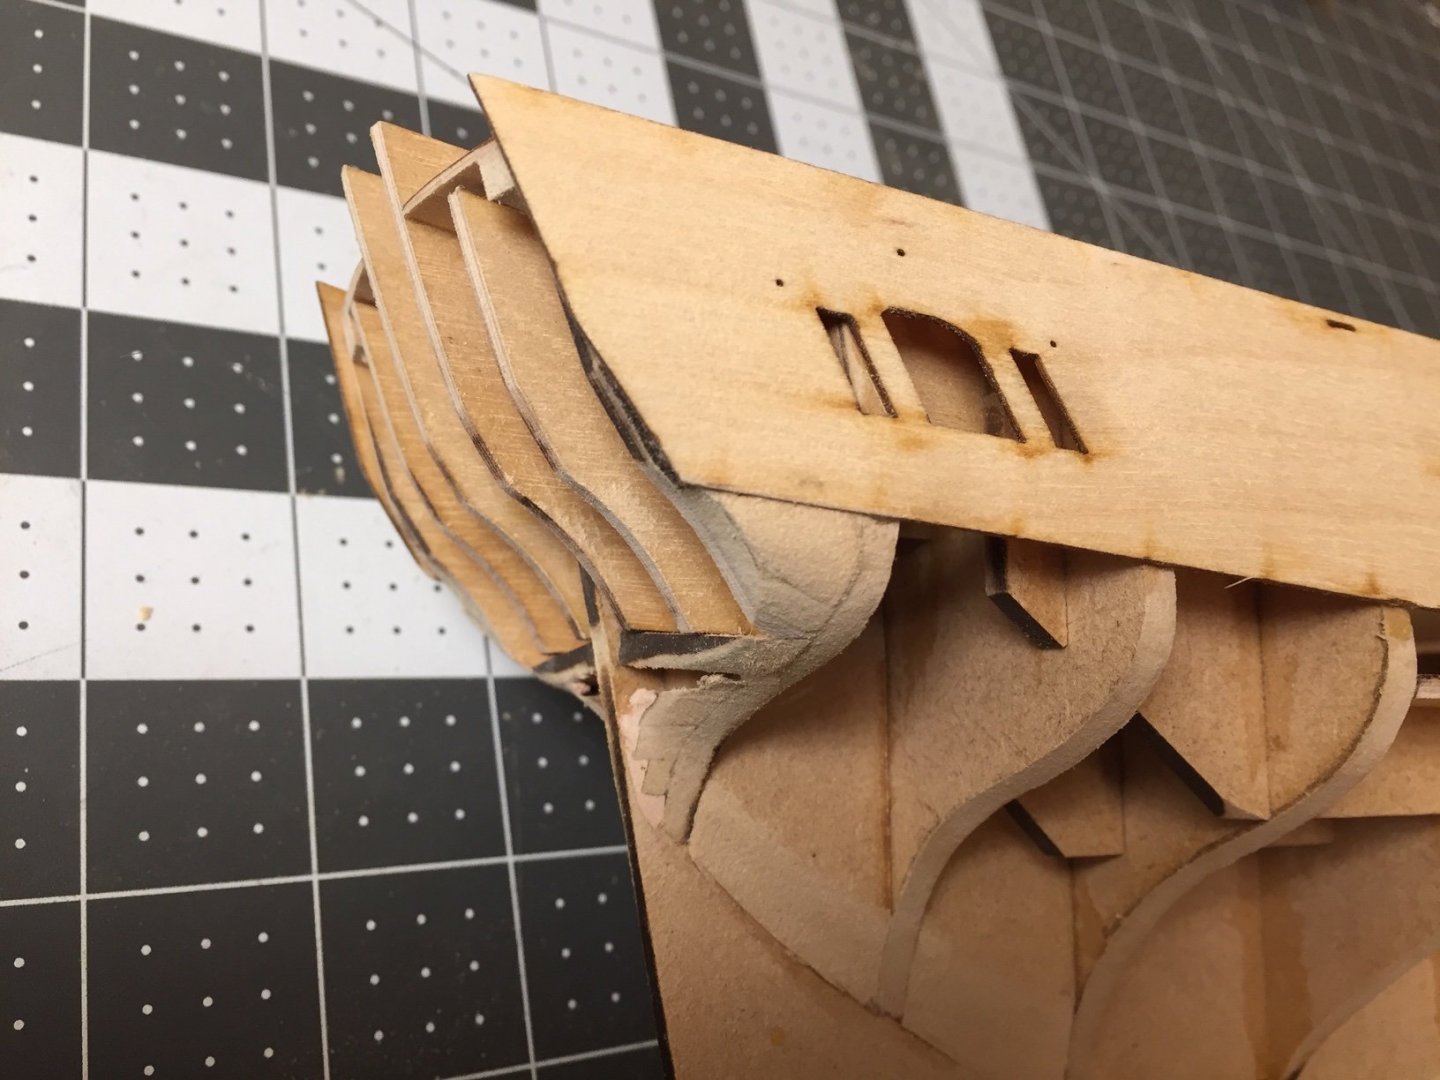
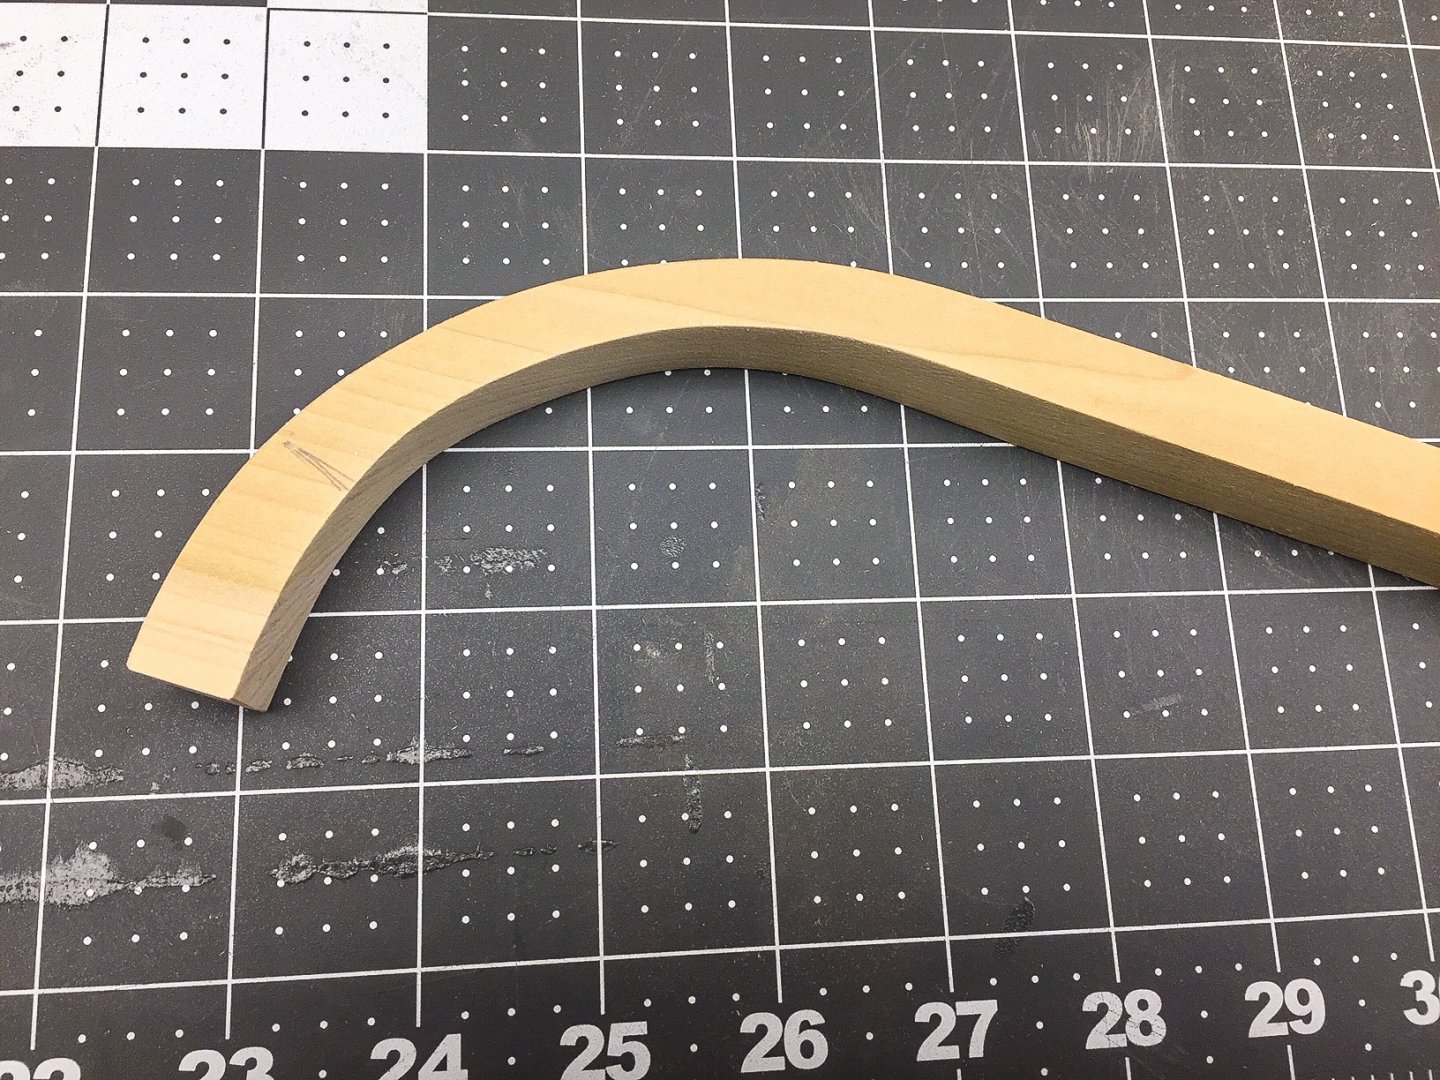
Glued on the bow pattern last night. It was a tight fit between the two formers on the bow and even required tapping a little bit to get it in there, so only clamped it along the keel to maintain alignment. The next step is to curve the plywood bulwarks. Manual says to soak and wrap it around a can, and that's what I've seen others do in build logs. It's about a 6" diameter, but I couldn't find a can, tube, or anything of that diameter here at the house. But I have lots of small pieces of scrap wood, so decided to make a form. I made a bow pattern from the forward deck piece, and used jigsaw to cut out a form with the correct curvature. I think the scrap wood I used was popular, but not completely sure. I had to file and sand it smooth, and I cut the inside curvature out so I could clamp to it easily. Soaked the bow part of the plywood for 30 min as manual and others recommended and clamped bulwarks around the form. Now I'm waiting 24 hrs, and then I'll do the other side. Hopefully I will end up with port and starboard pieces. I've been warned enough about it, so surely I can do it right, ha, ha! I'm known to be a slow learner when it comes to things like this though.


-
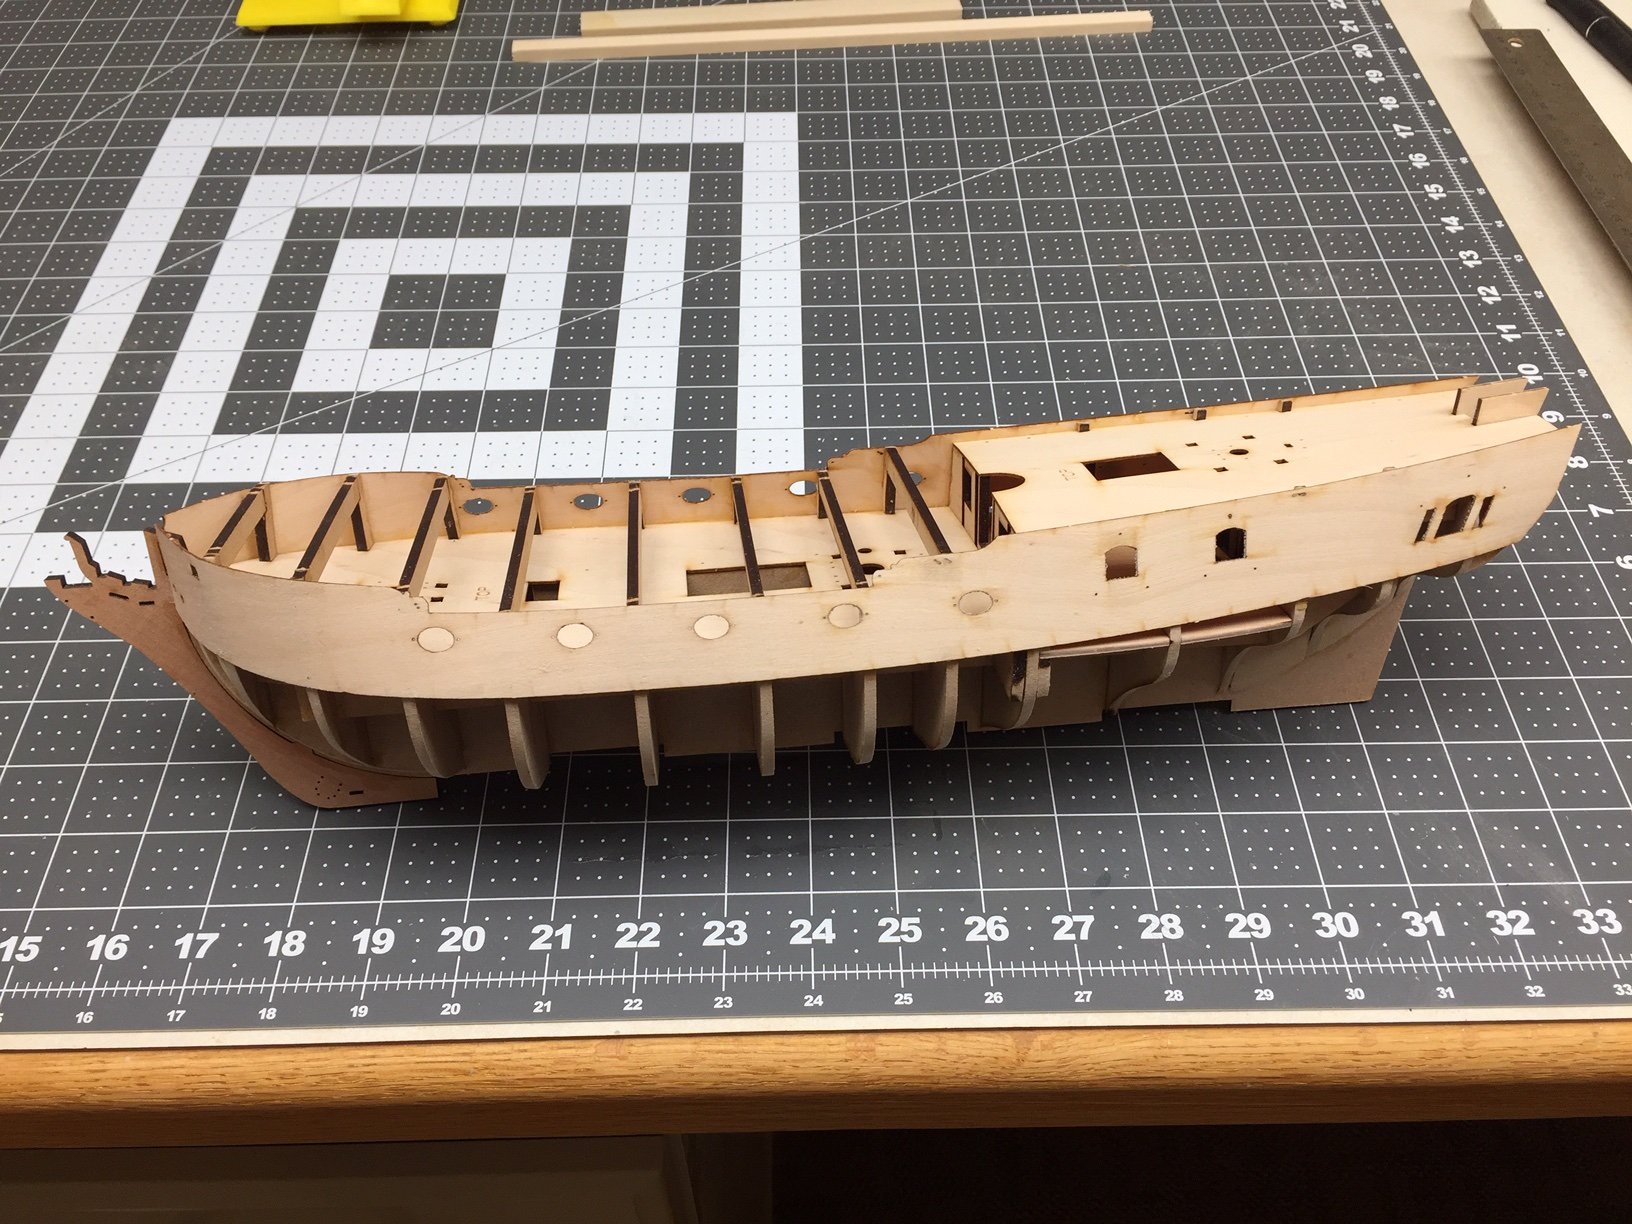
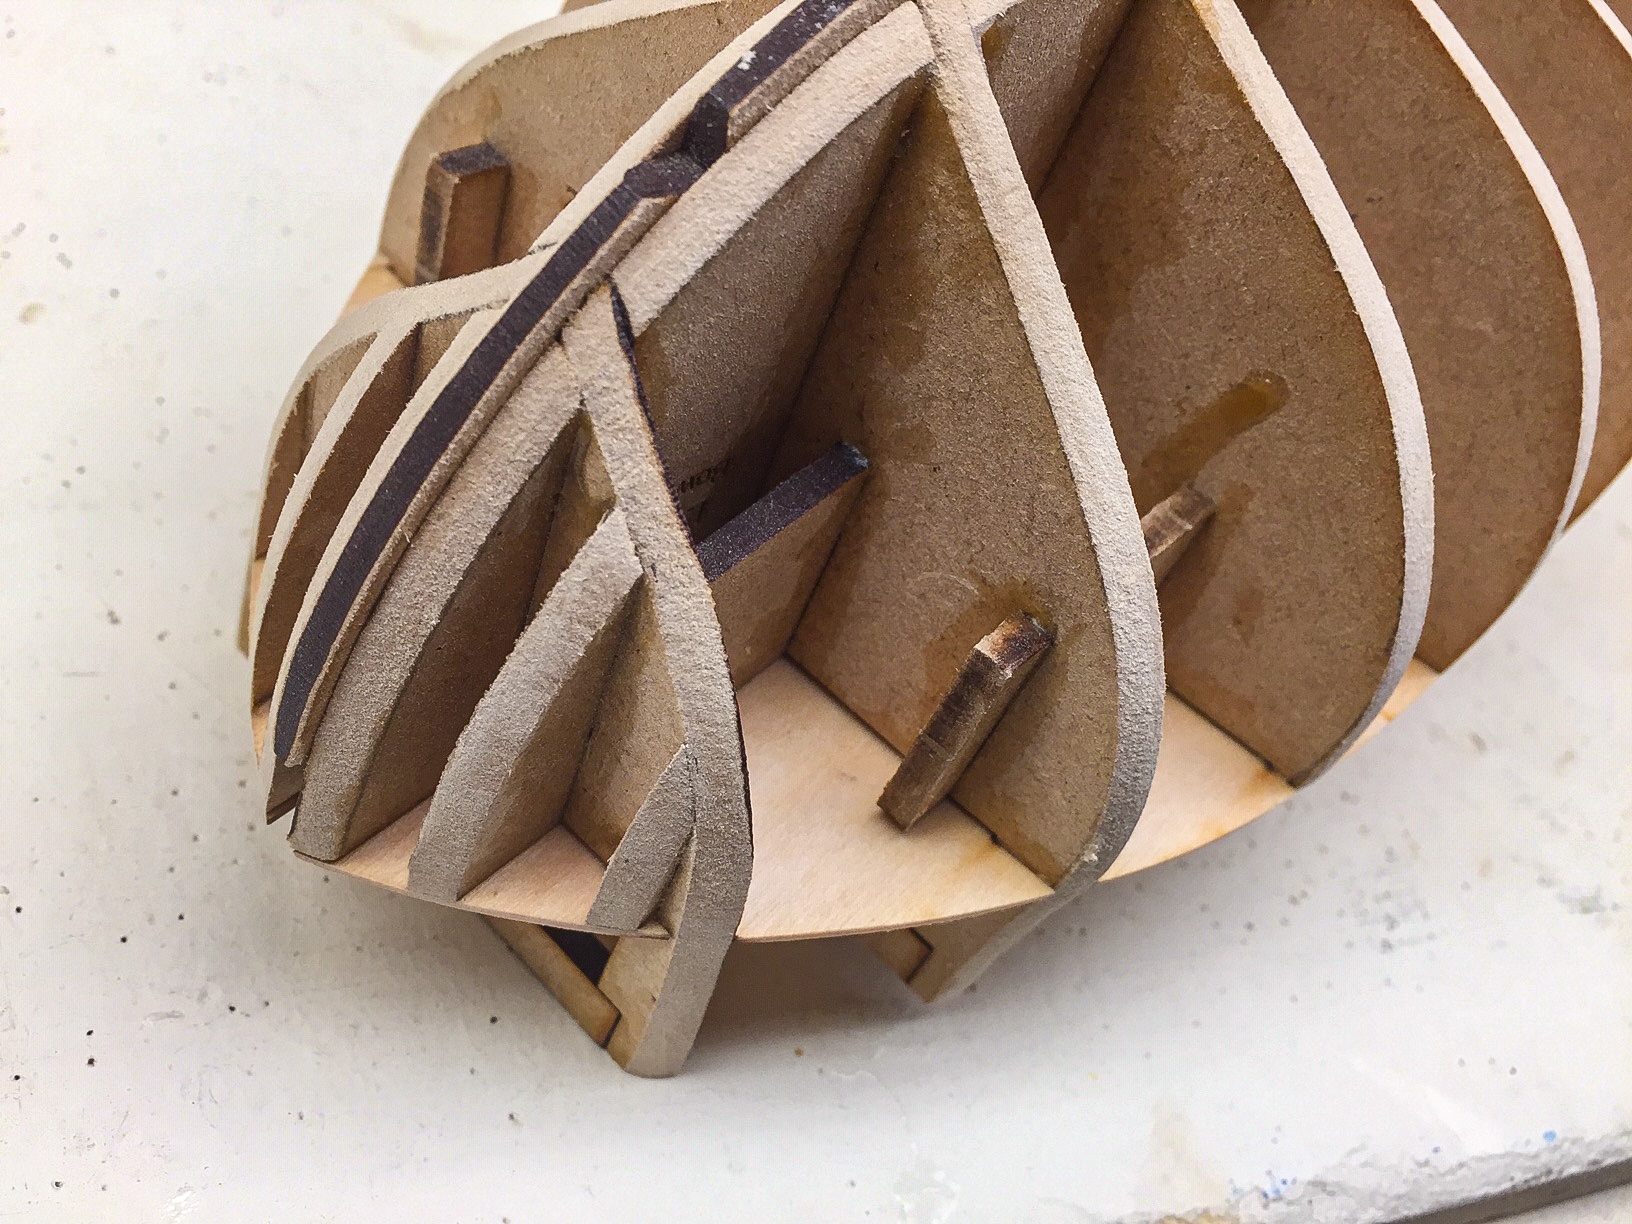
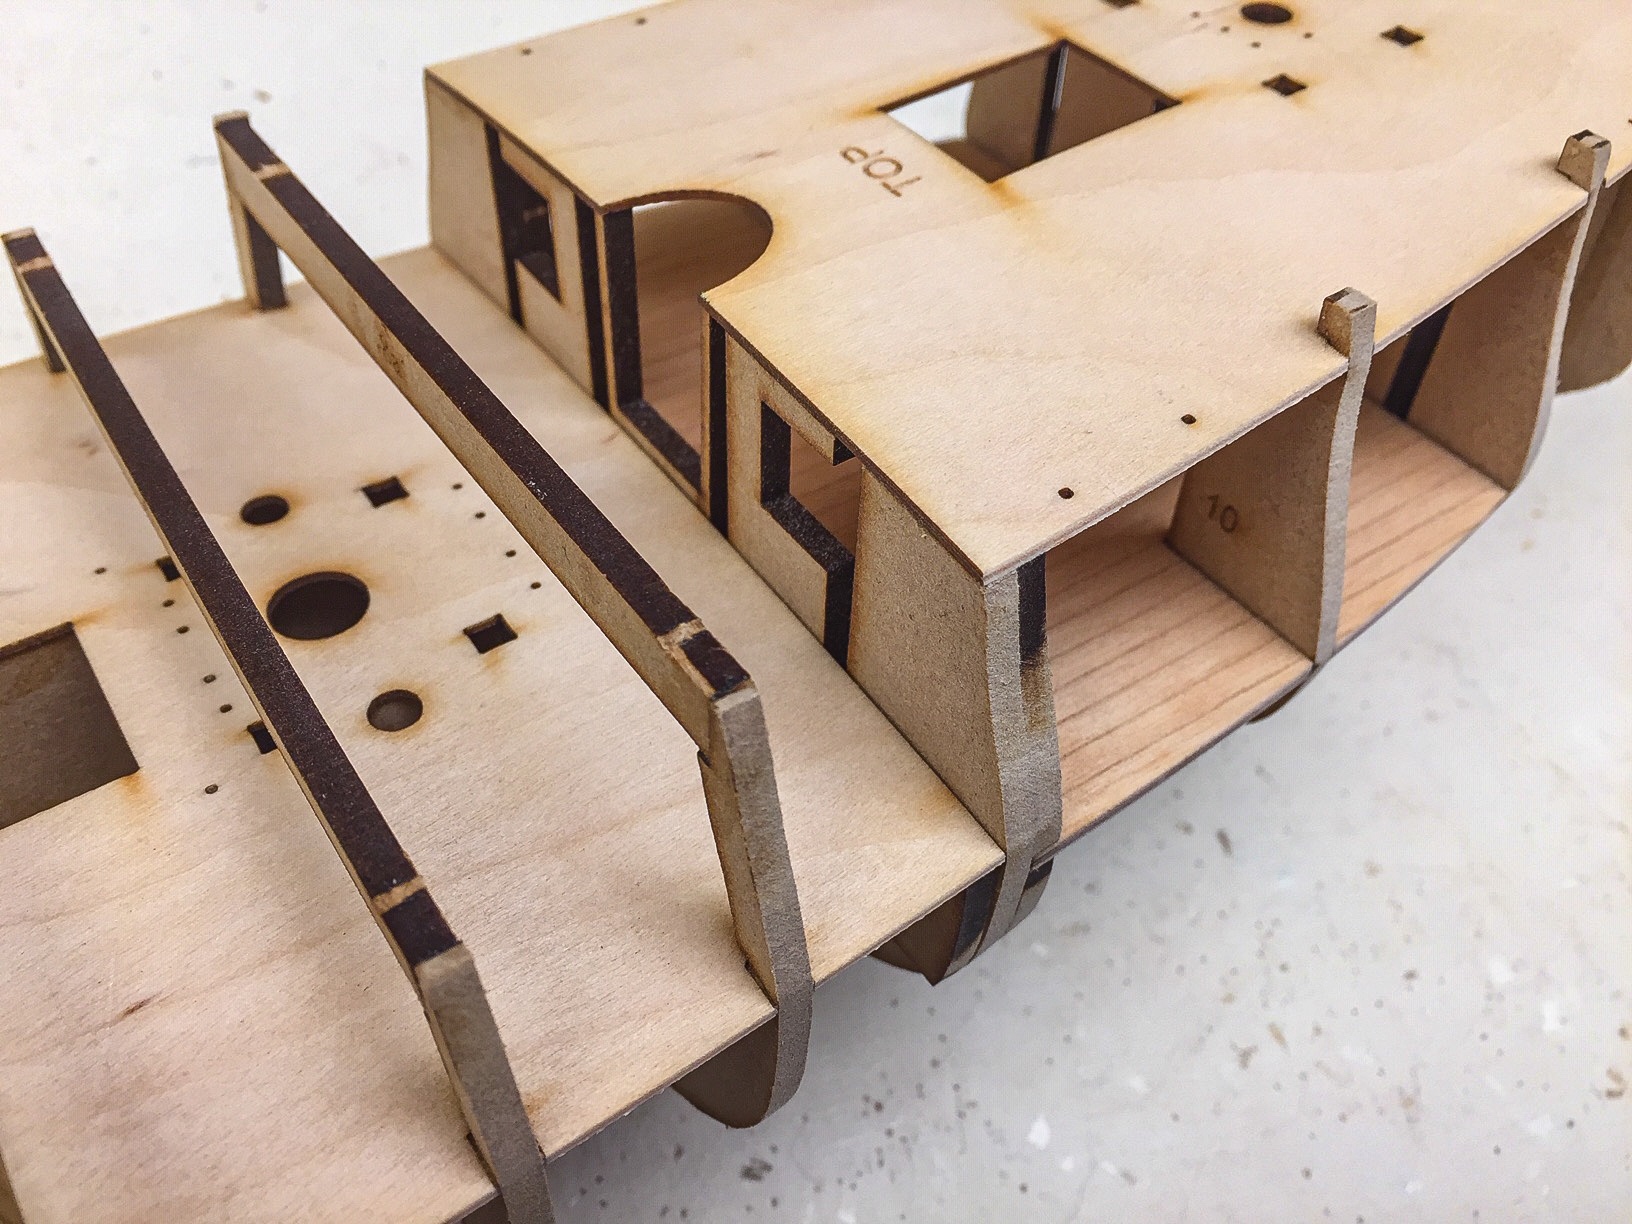
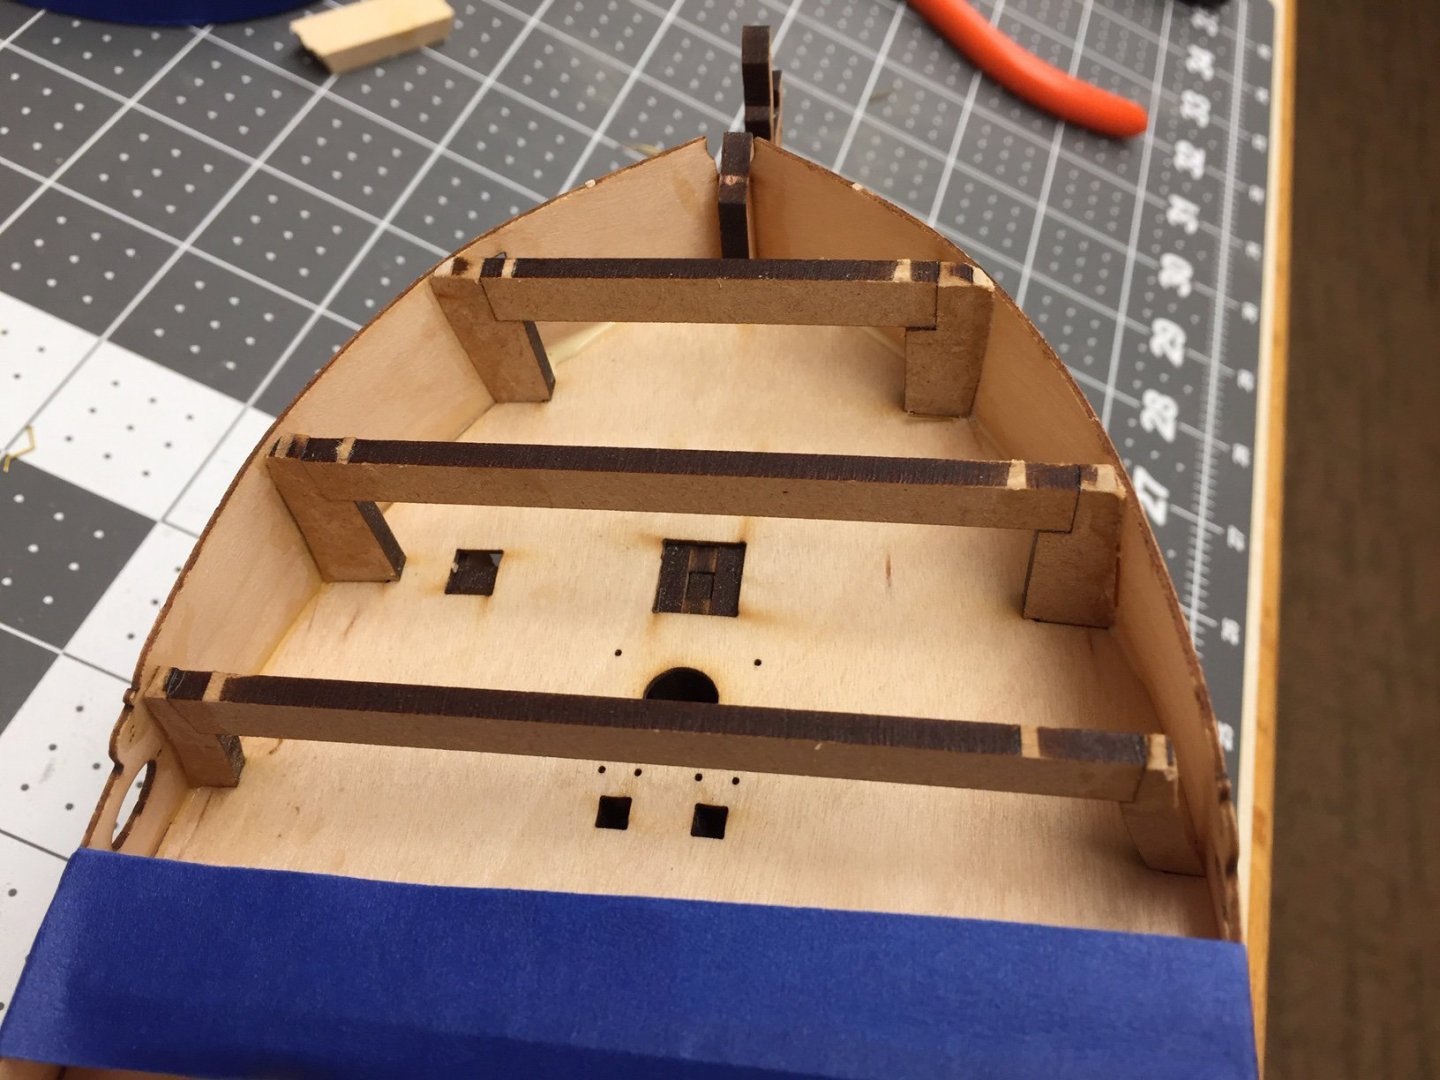
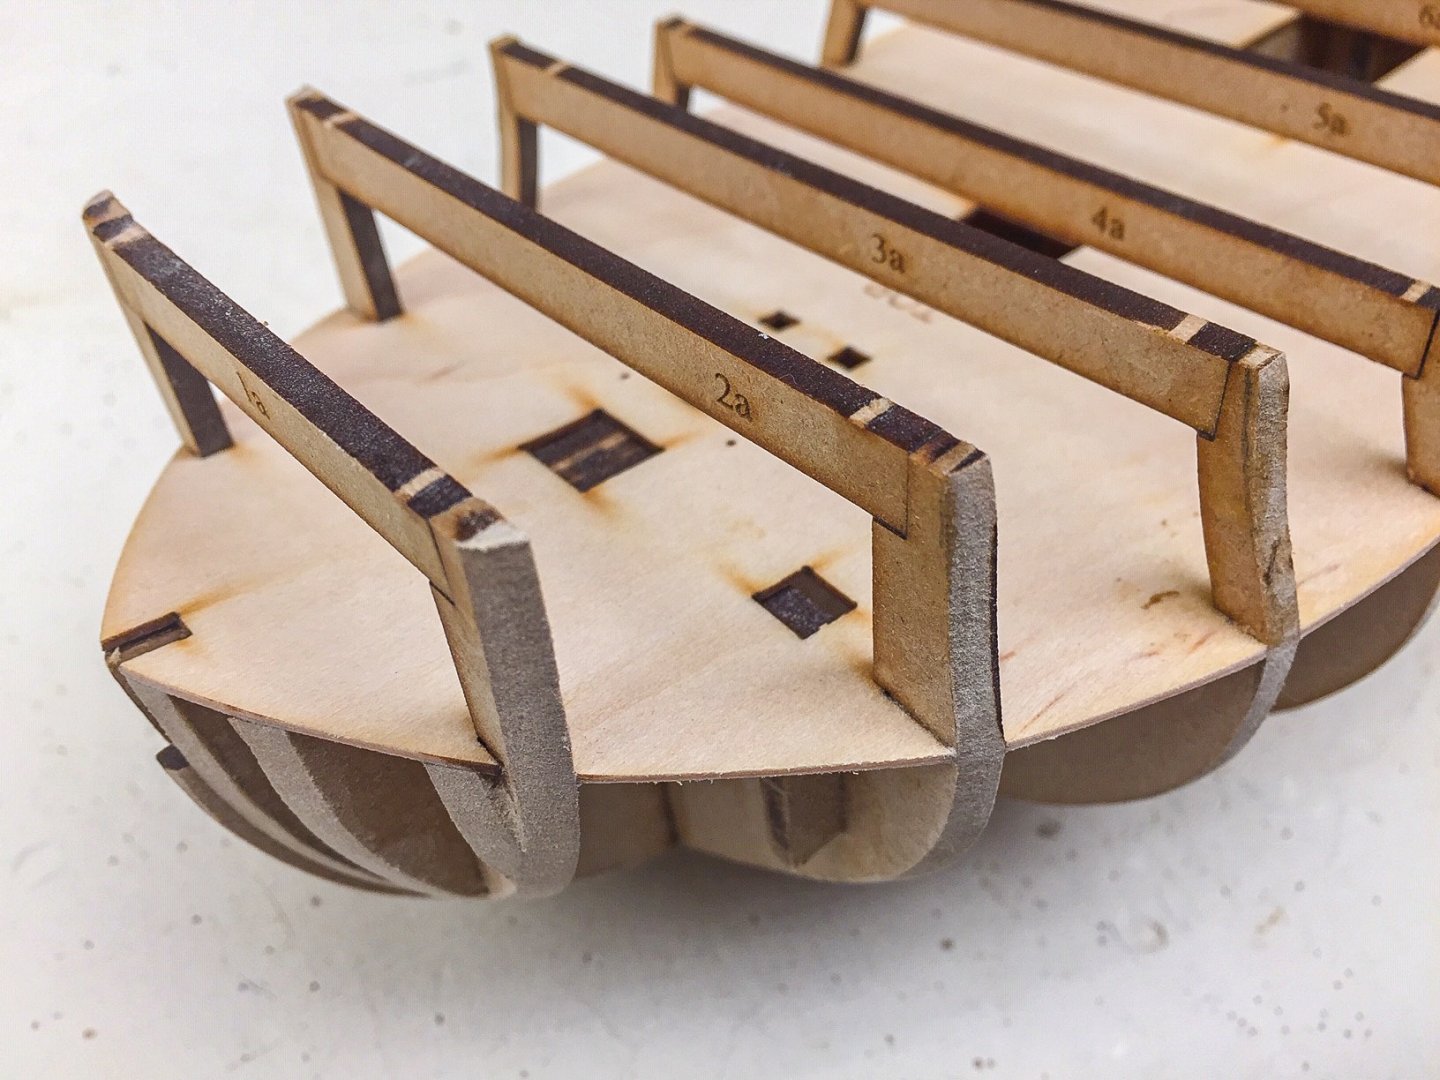
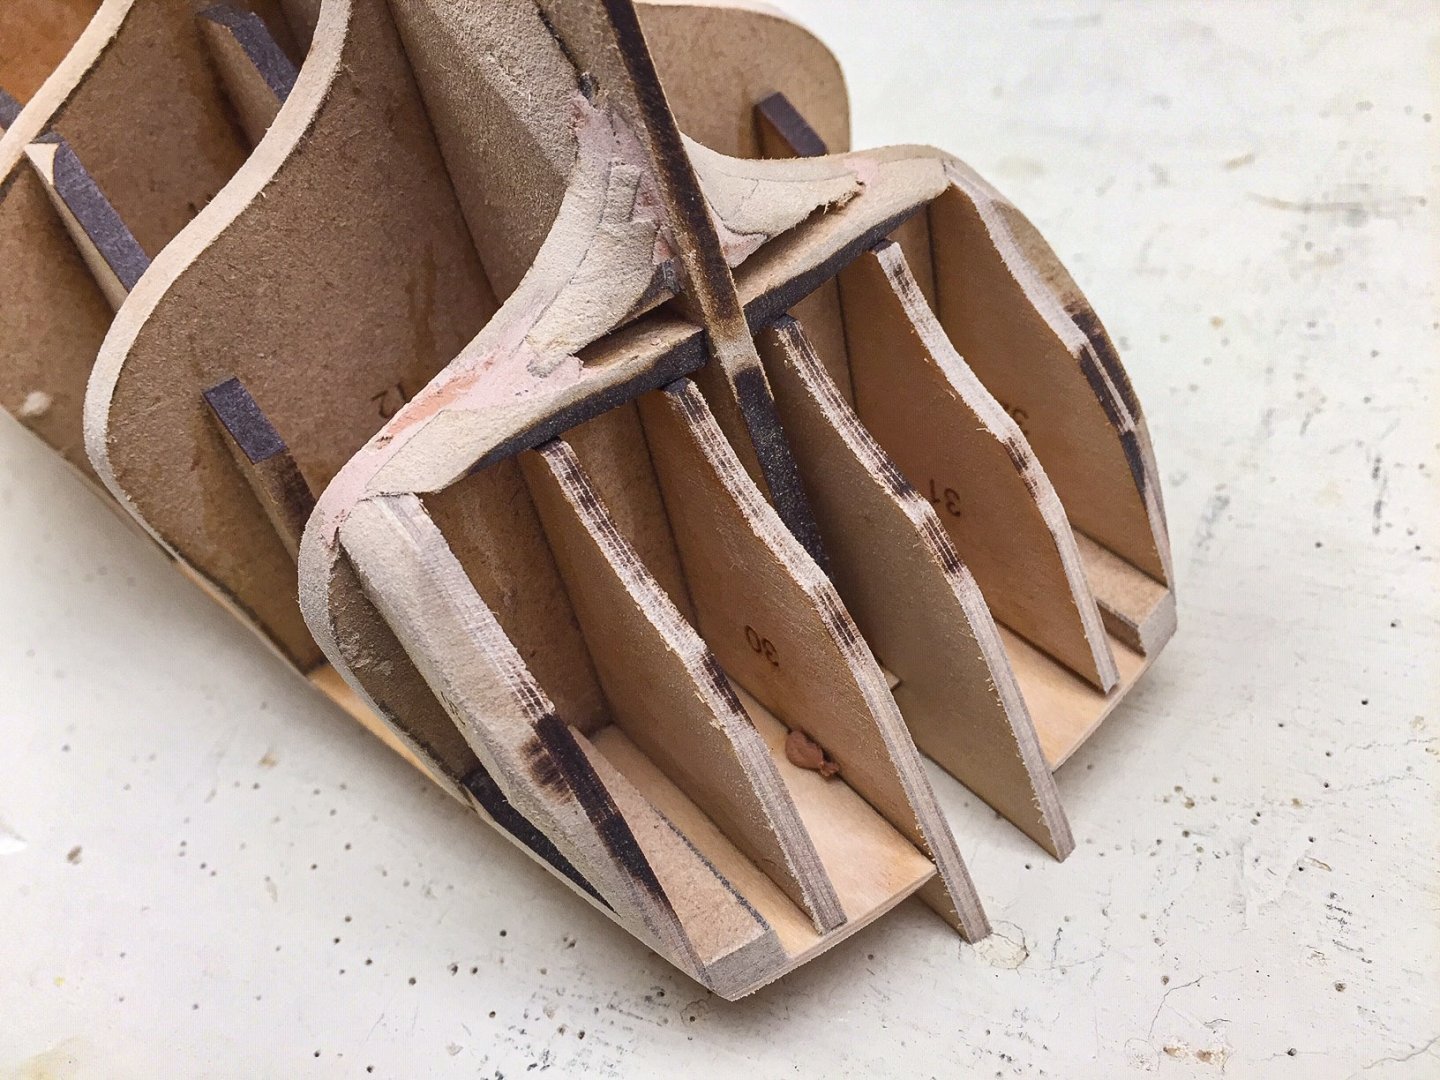
Thank you James H! So far no major problems, only a couple of very minor ones hardly worth mentioning. I think I have the hull faired. It always seems to be a judgement call, but it looks ok, and I can run a strip of wood along it, and that looks ok. One place along the edge of the deck near the bow I sanded a tad too much, but I don't think it will be a problem. For me the stern area was the most difficult to fair, and I hope I did it right. I tried to match the many great photos in the manual. The photos gave me confidence that I've done things correctly. I used a variety of tools to fair the hull. For the larger areas I used a sanding block with 120 grit paper. For concave curved areas I have a couple of sanding tubes and used both. For the stern with tighter curvature I resorted to perma-grit files. You have to go easy with sanding tubes and files. They easily cut thru the MDF. I used some 220 sand paper to clean things up in a few places. I brushed on glue after assembling the frame and while sanding I got a little vibration in a few areas, usually the deck and bulkhead joints. So I had to add a little more glue to make them solid. I still like this method, and as I've mentioned before, I've used it when building balsa model airplane kits with similar egg-crate structures.


-
Well done Glenn! When you get your display case, could you post a picture of it? I'm always looking for ideas. Also wanted to let you know I've started the Duchess and your build log has already been useful. Thank you for doing the log and including lots of photos. I'll continue to look at it as I work my way thru. So far I really like the design of this kit. David