DanielD
-
Posts
651 -
Joined
-
Last visited
Content Type
Profiles
Forums
Gallery
Events
Everything posted by DanielD
-
 Good morning mates, well…its seems that the best laid plans need room for change. As I have been working on the mid ship crane/derrick, I discovered that there are two lights on it that are important for the lighting effect. Except that I didn’t plan for them in my initial design. After a little fishing and rewiring, I was able to get the derrick lights to work with the deck lights. Change is good, or so I’m told.
-
Quick update, derrick motor paint nearly complete. I covered it with a black wash to hopefully highlight the details.

-
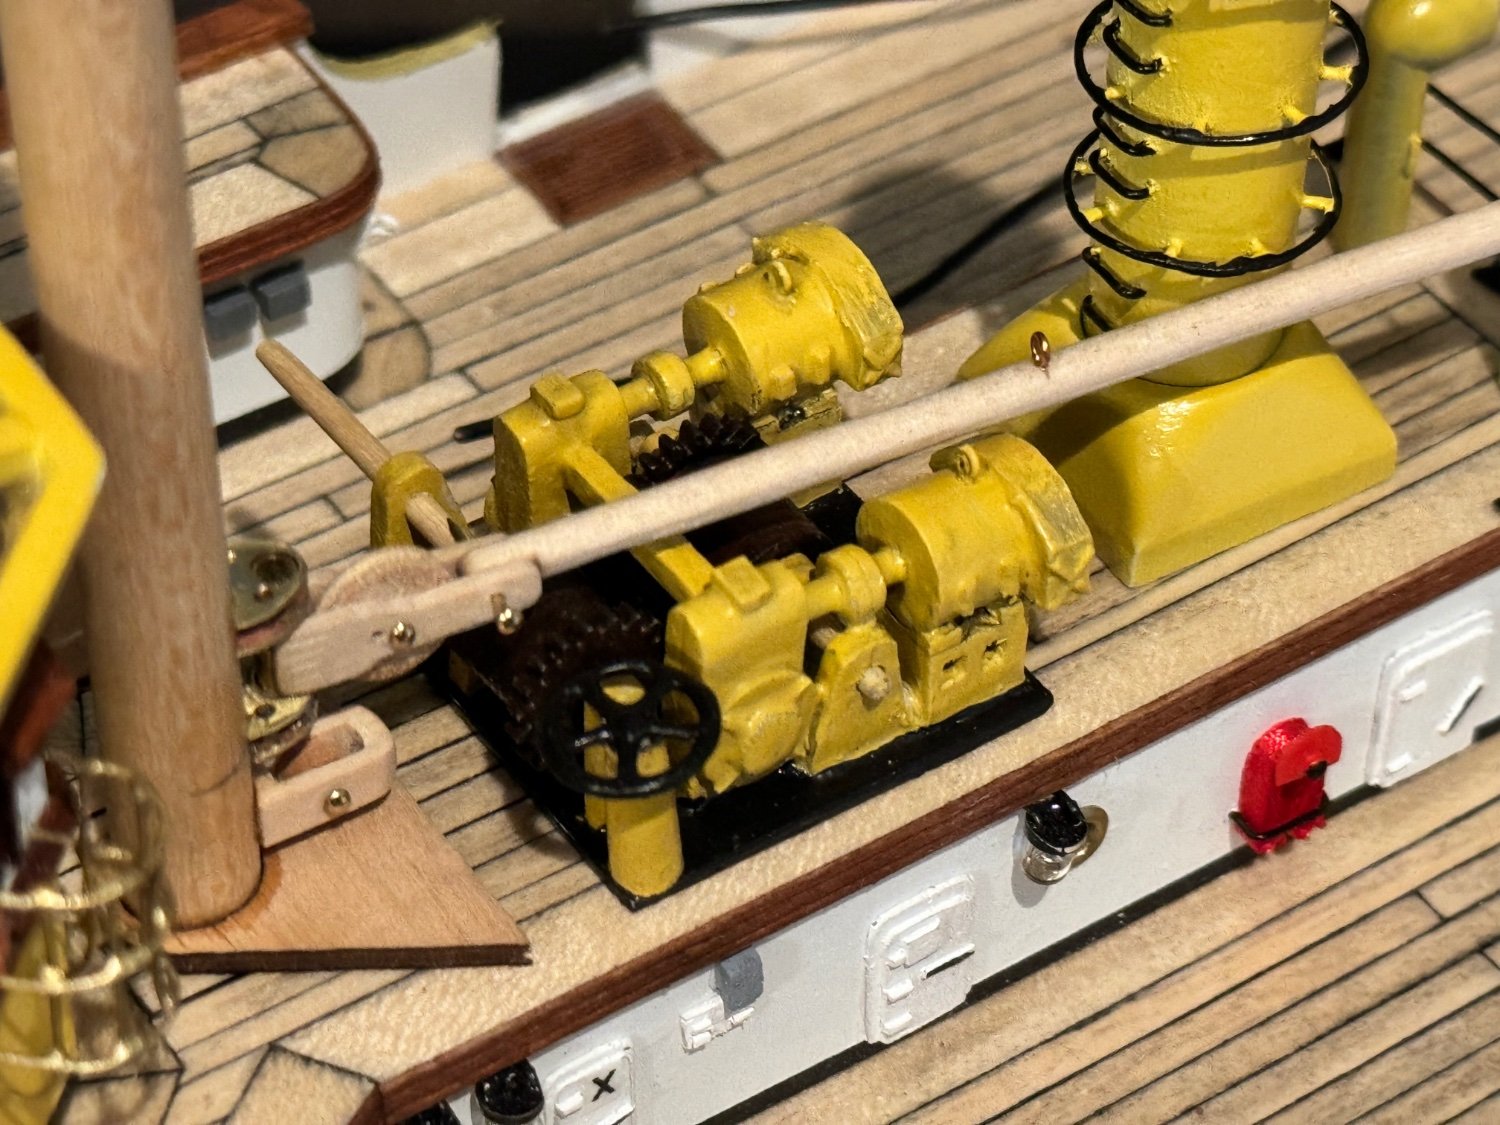
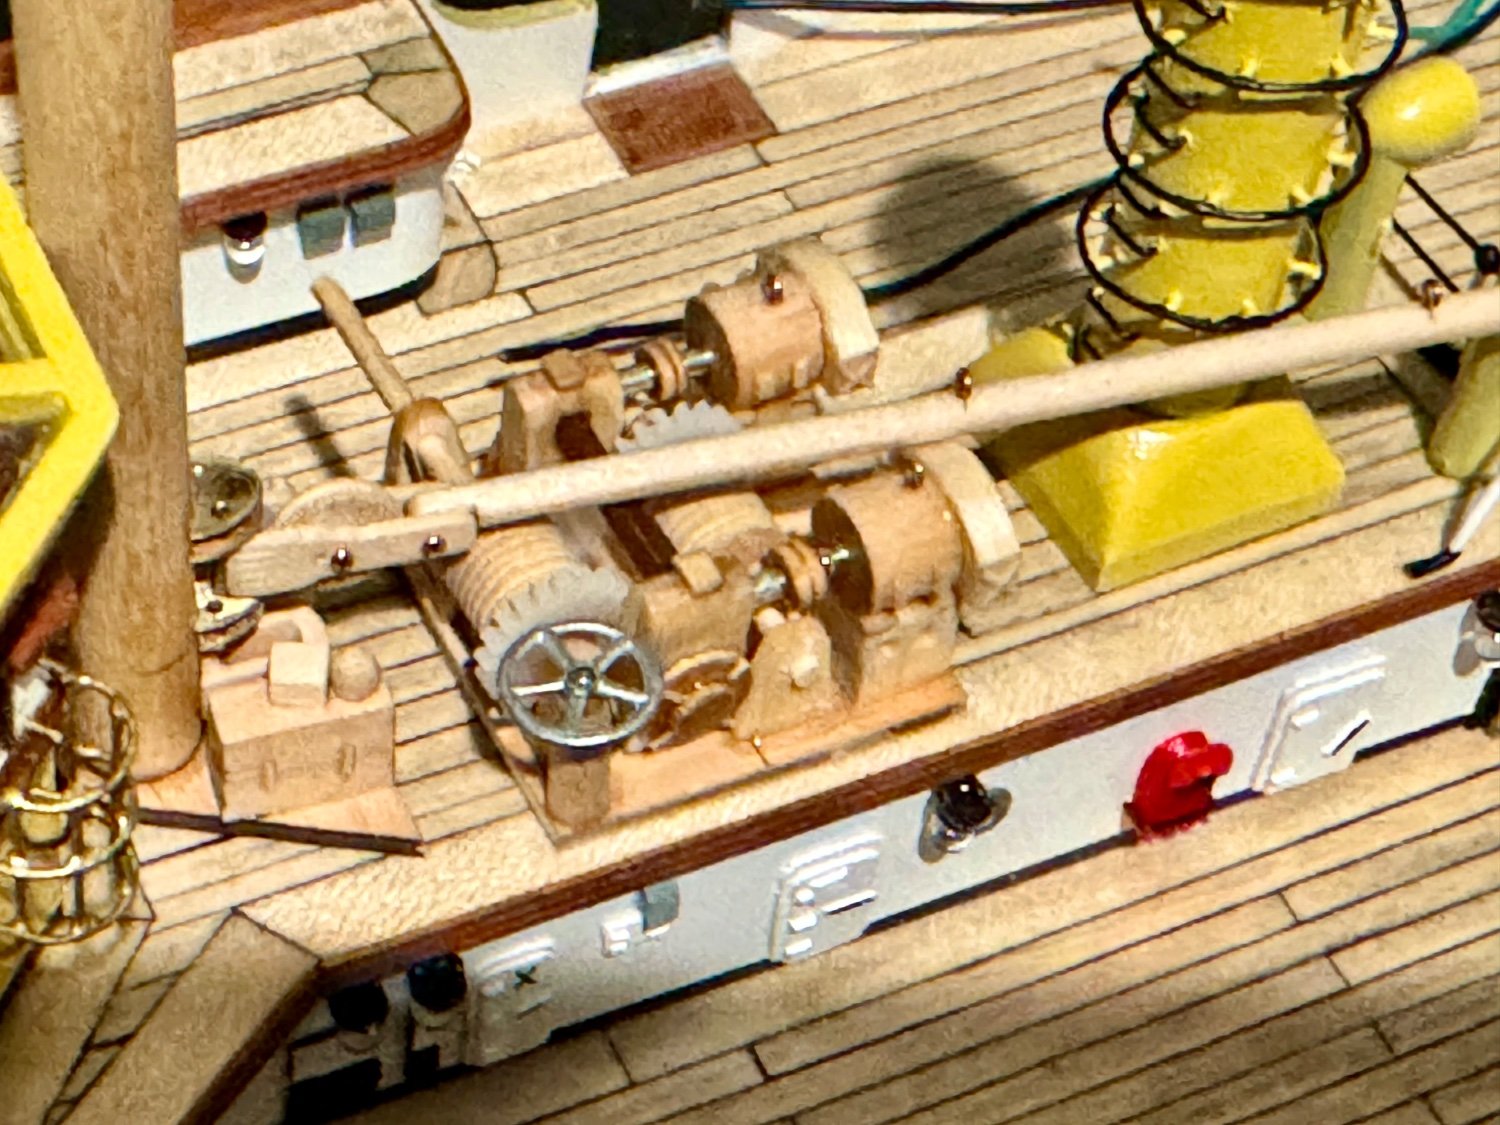
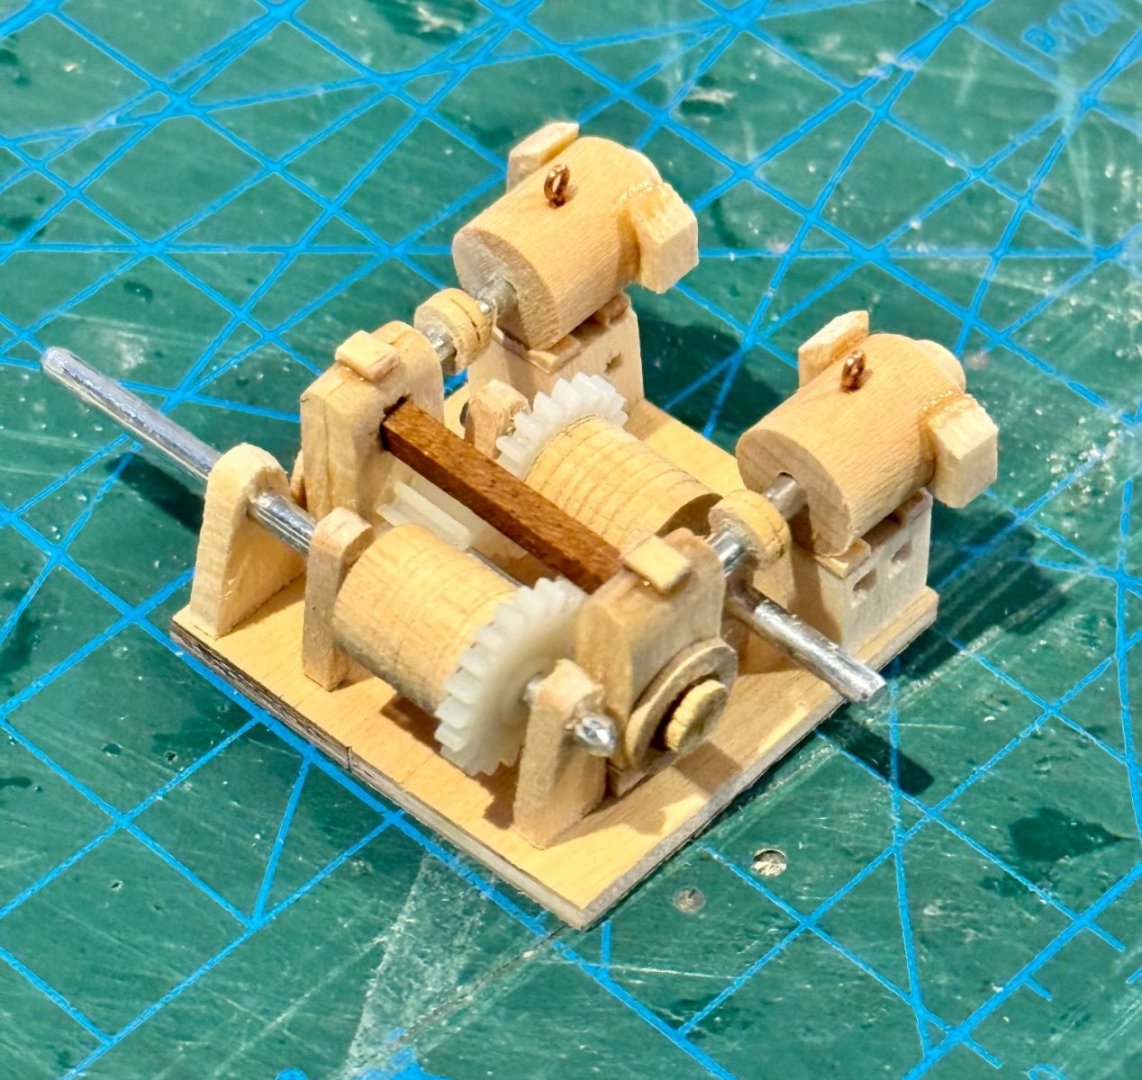
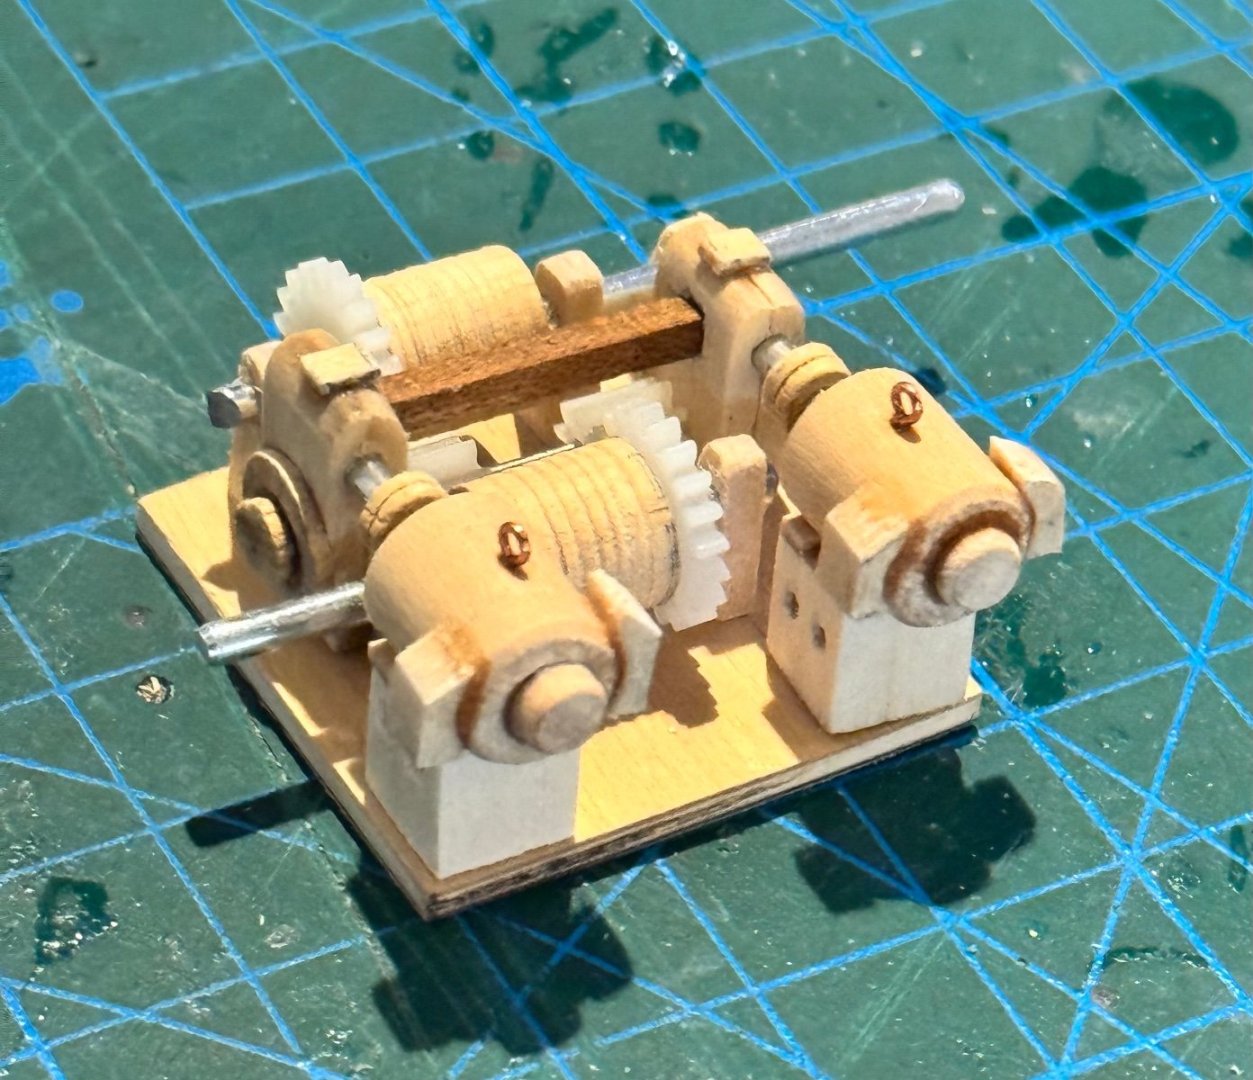
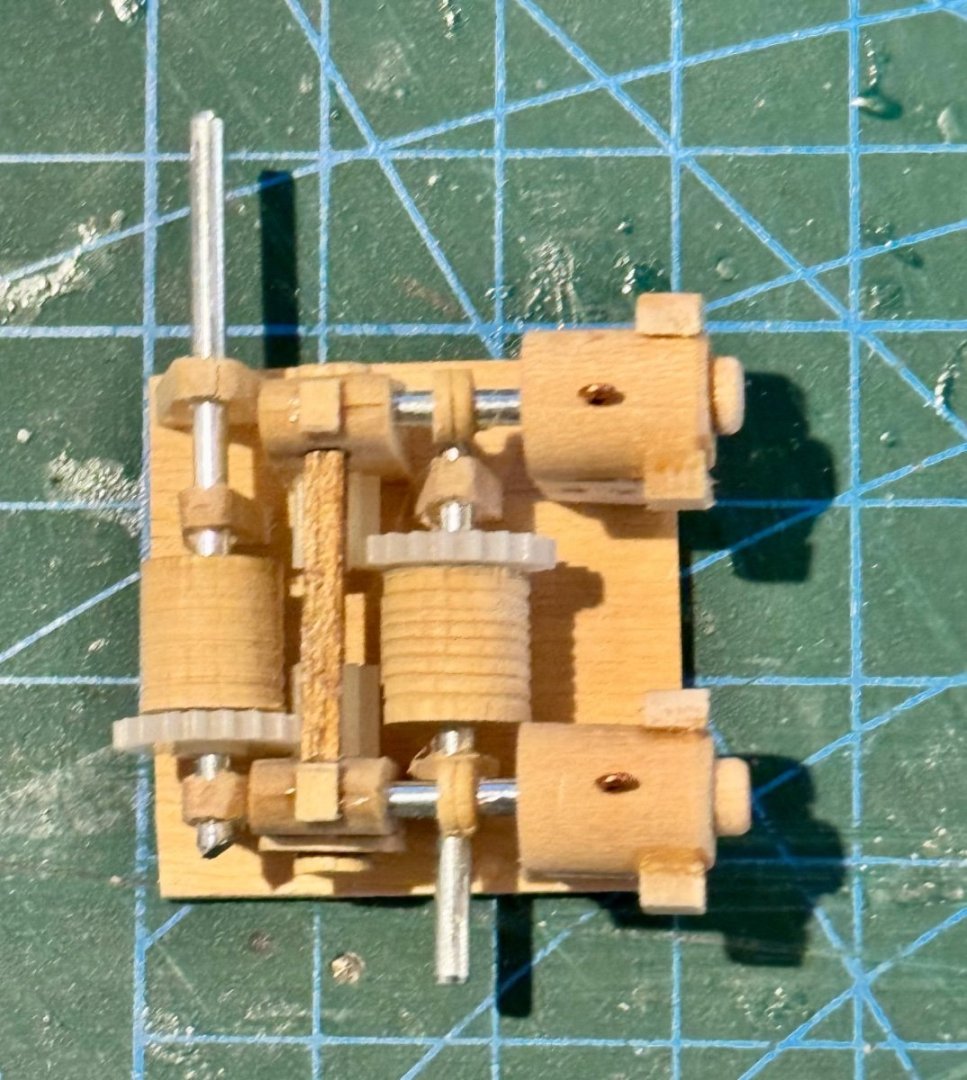
Good evening mates, more work completed on the Derrick motors, just about ready for paint.


-
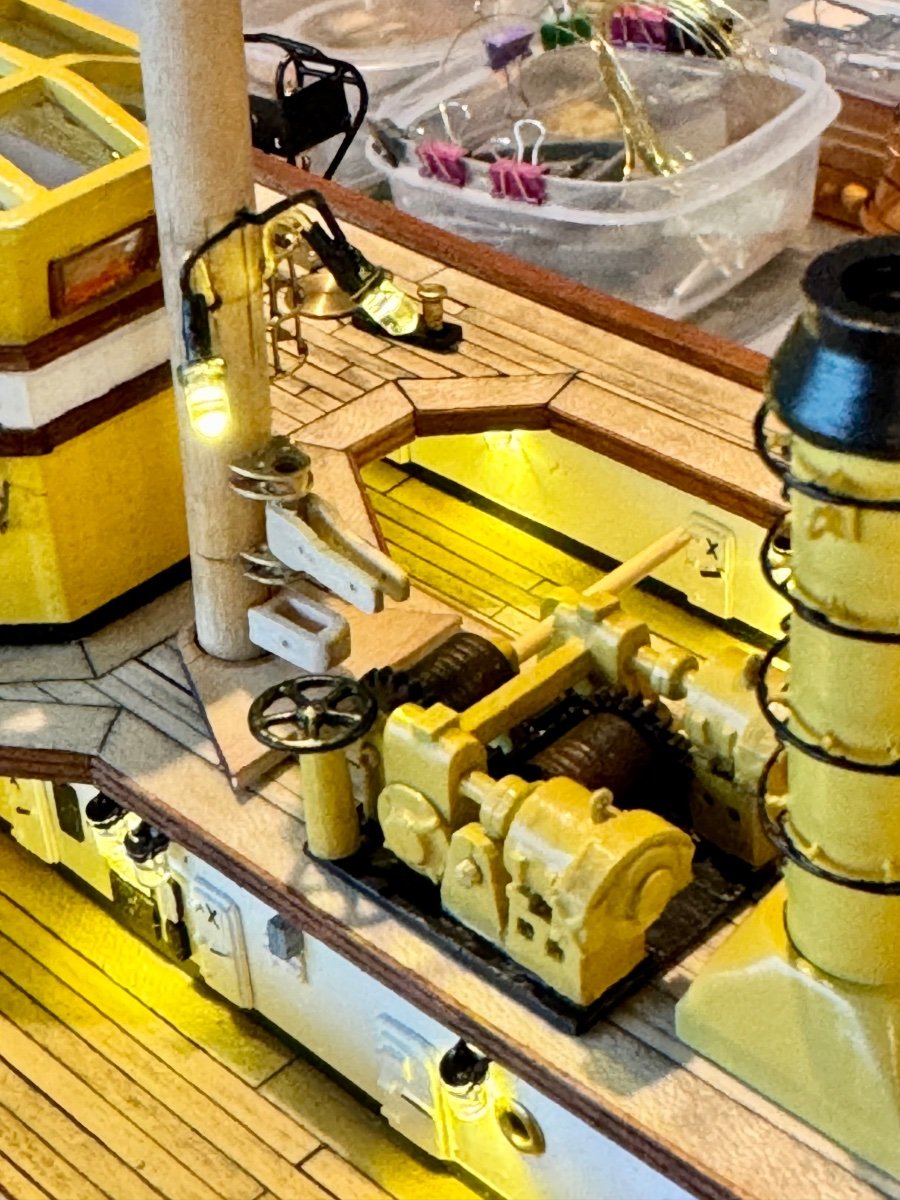
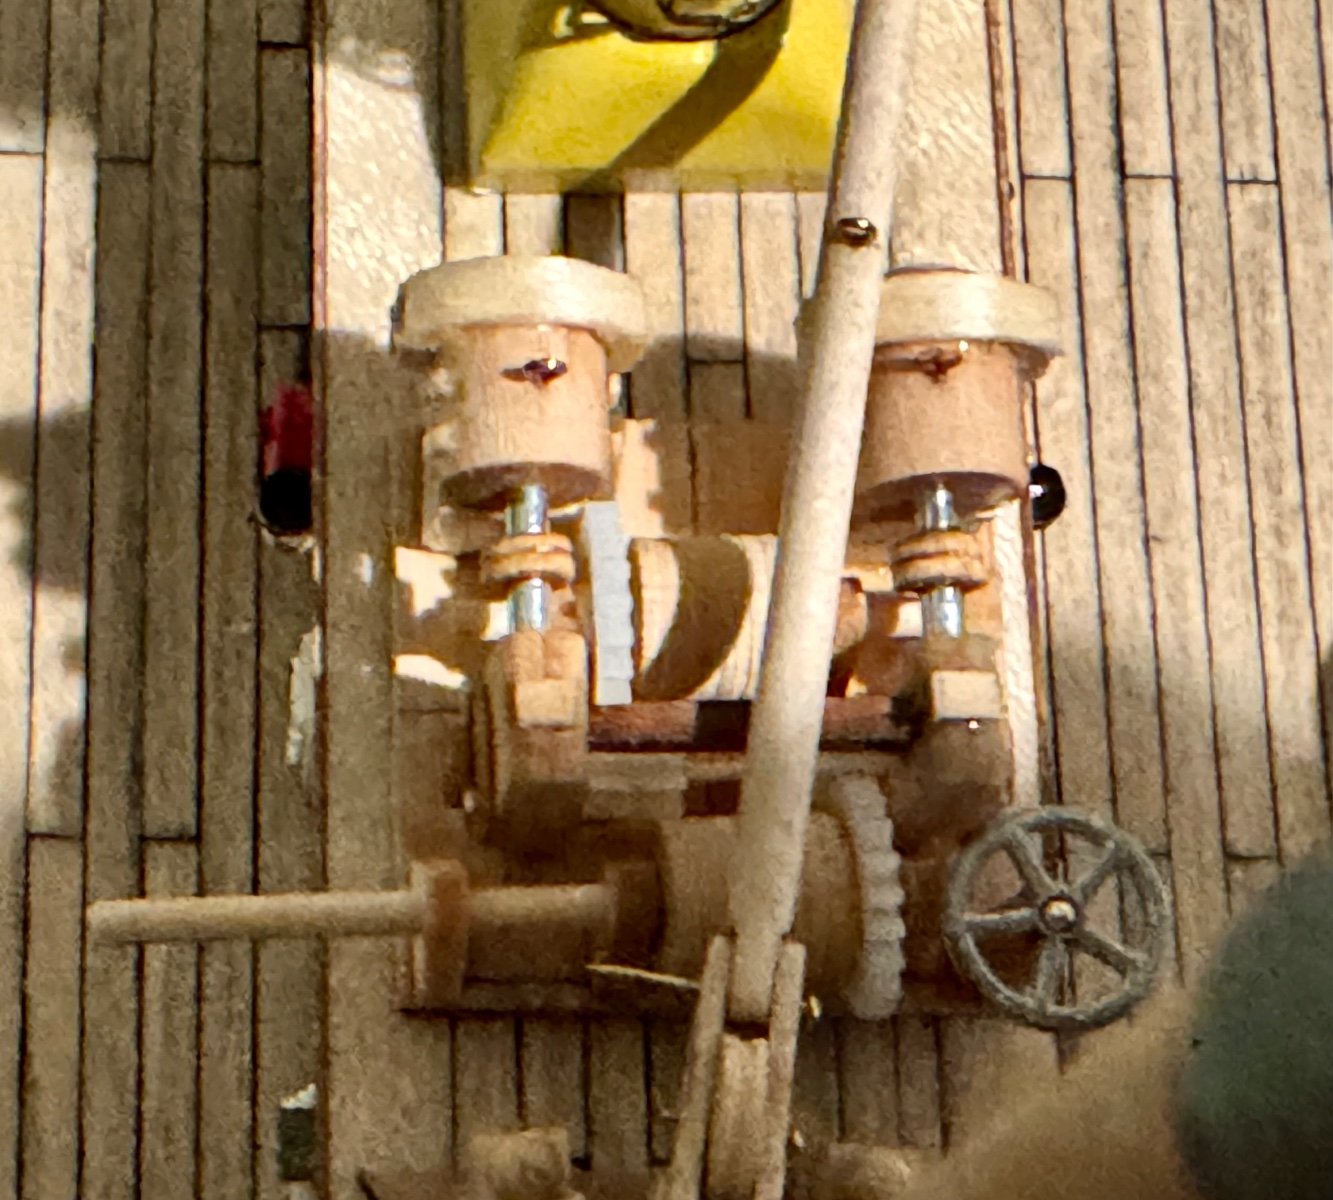
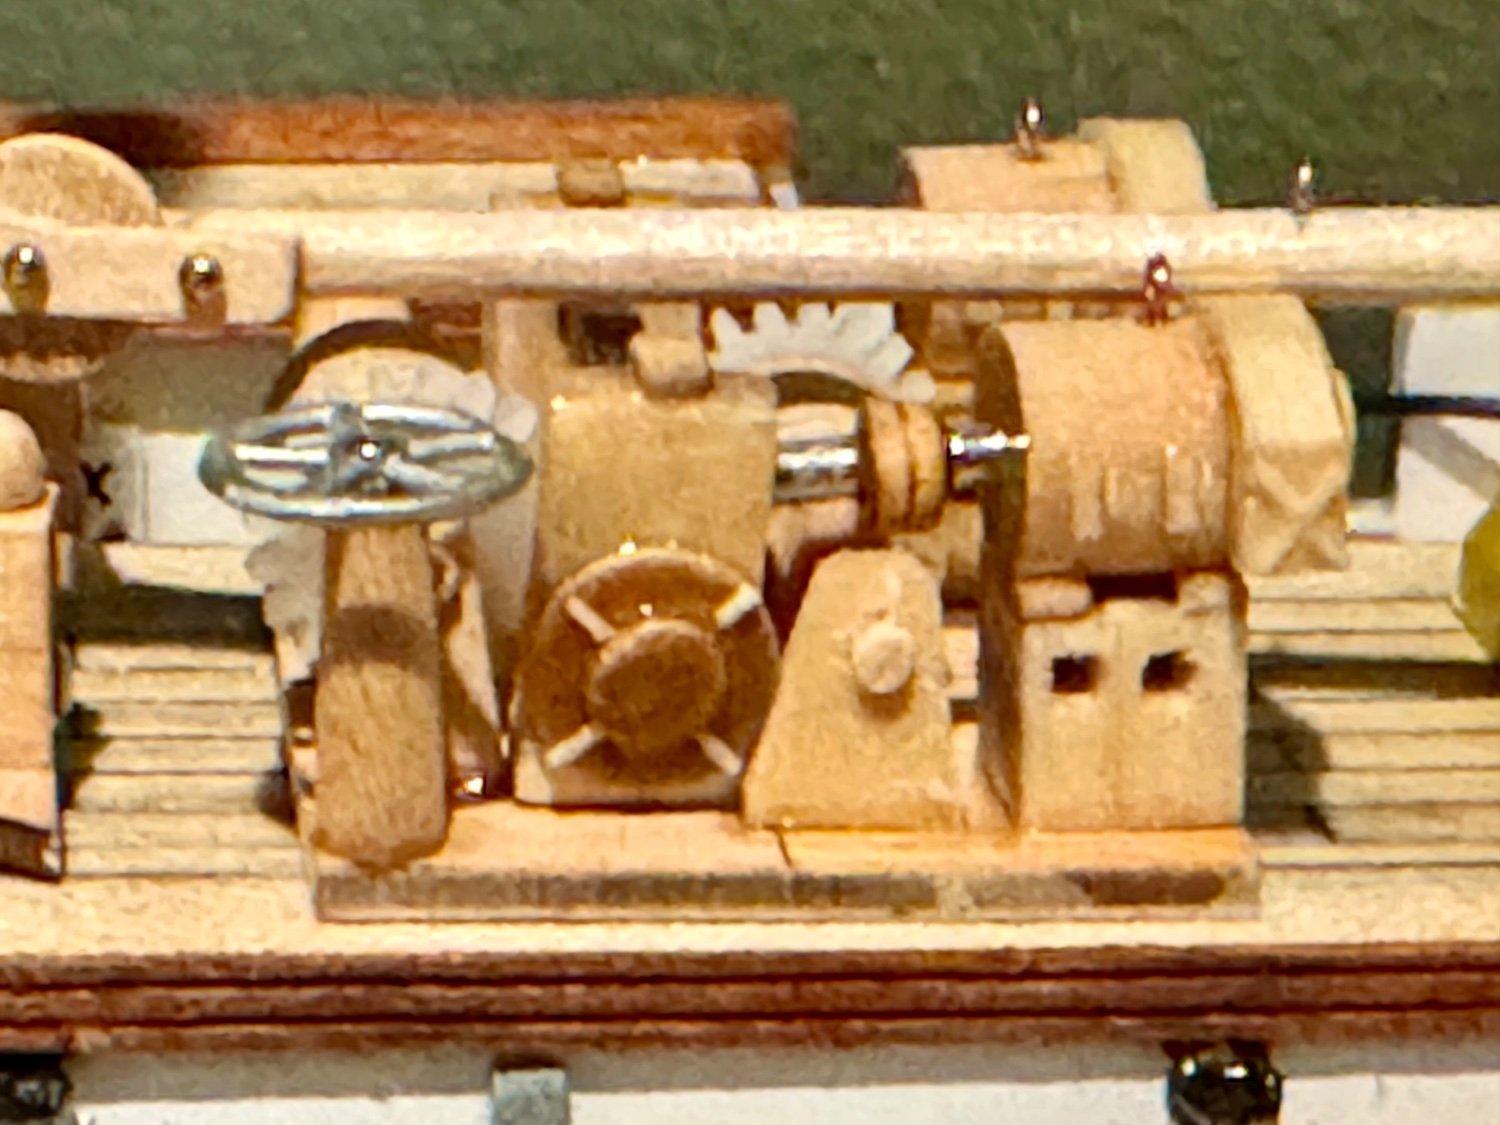
Another update, this time with my progress on the motors that drive the derrick. A few more odds and ends to add, but I’m happy with the progress. The last two images are actual images of this section of the ship.
.png.496398561b129526bb2e1c02155f6f7d.png)
.png.e02033ffd686ae893c03e59a4705ac4f.png)
-
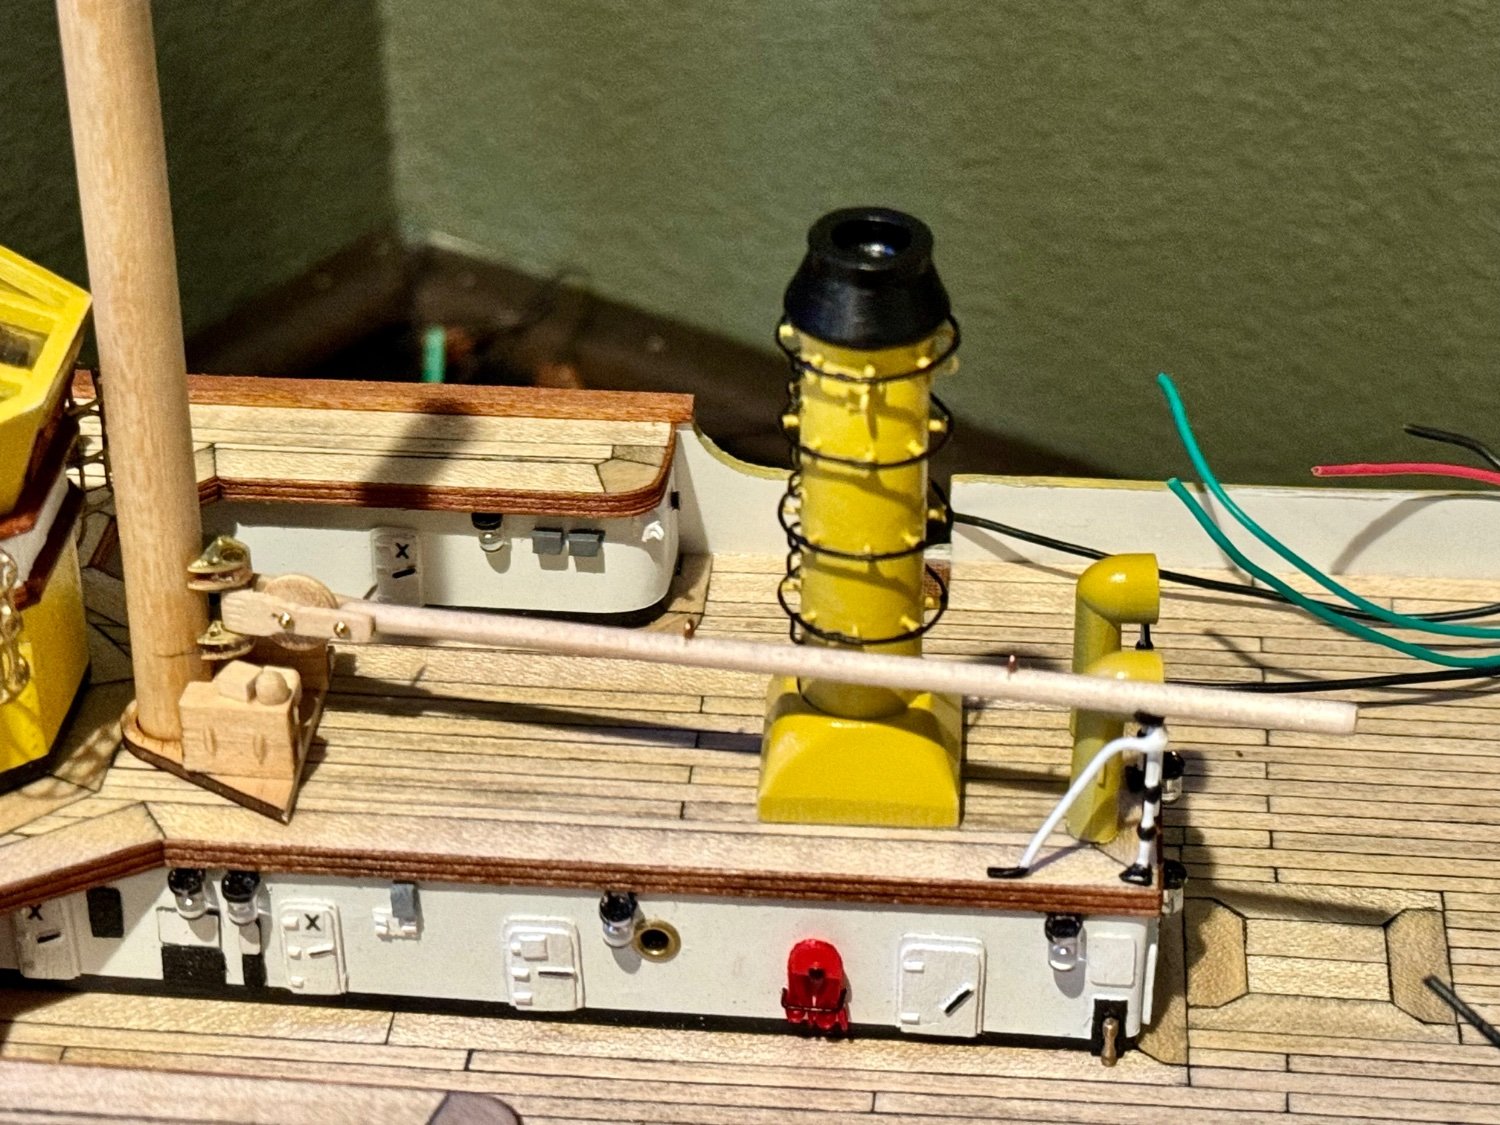
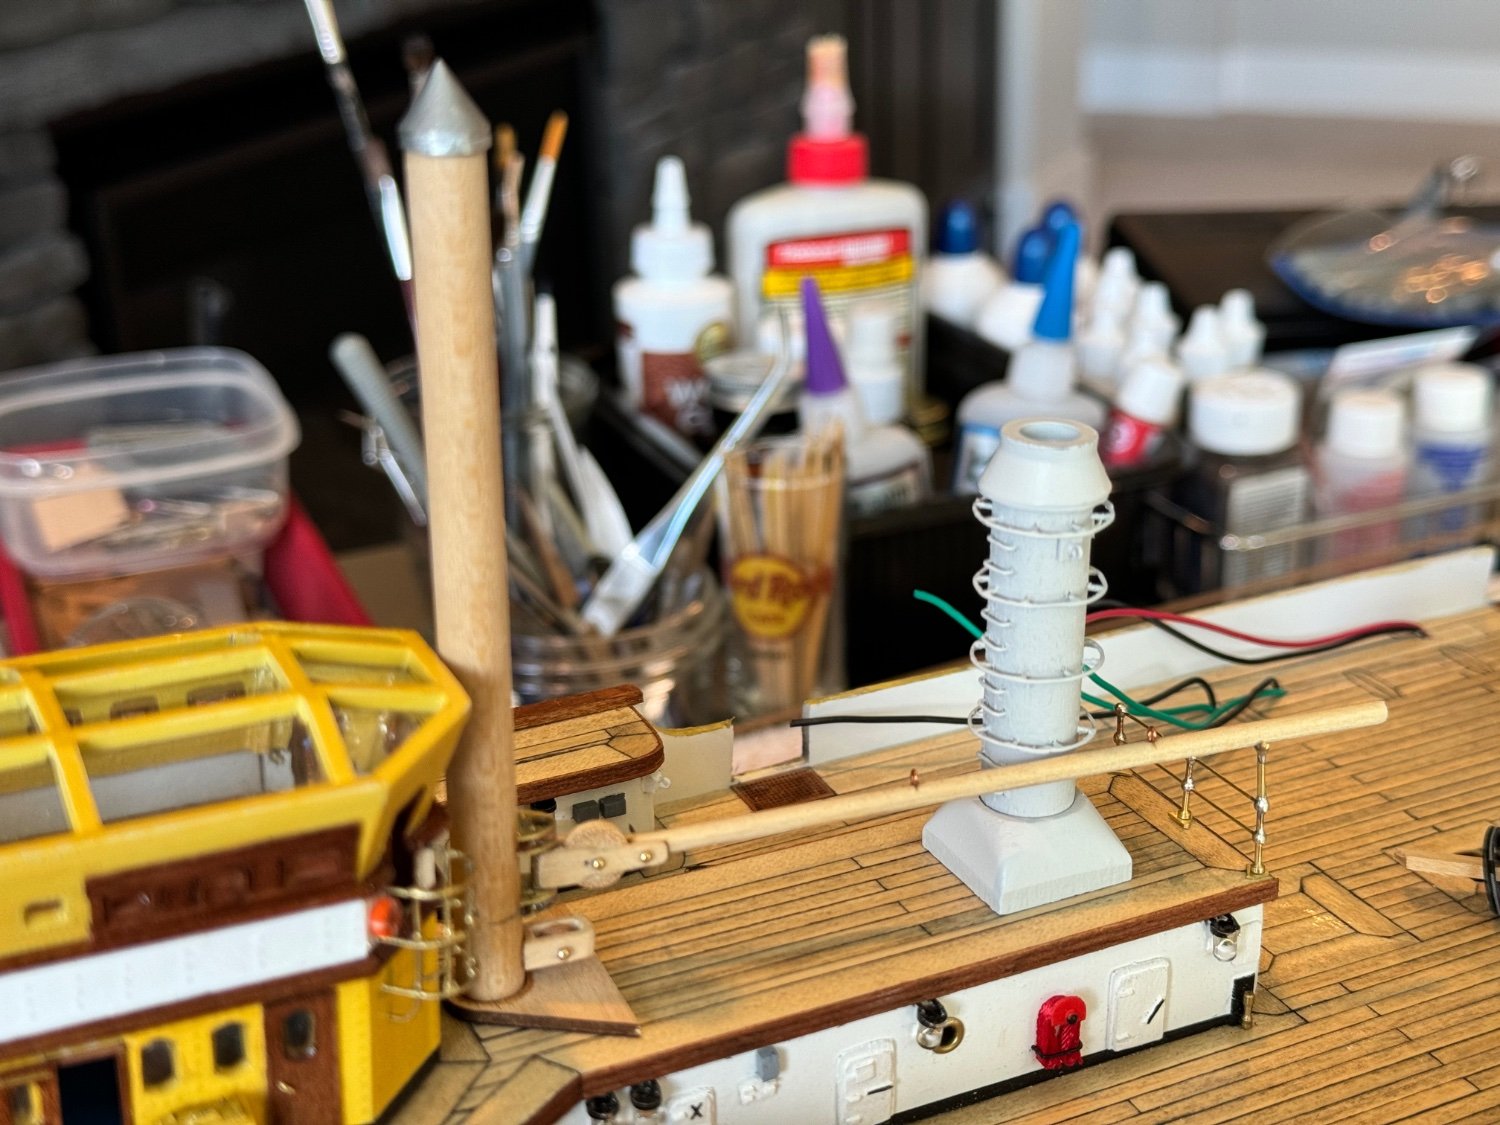
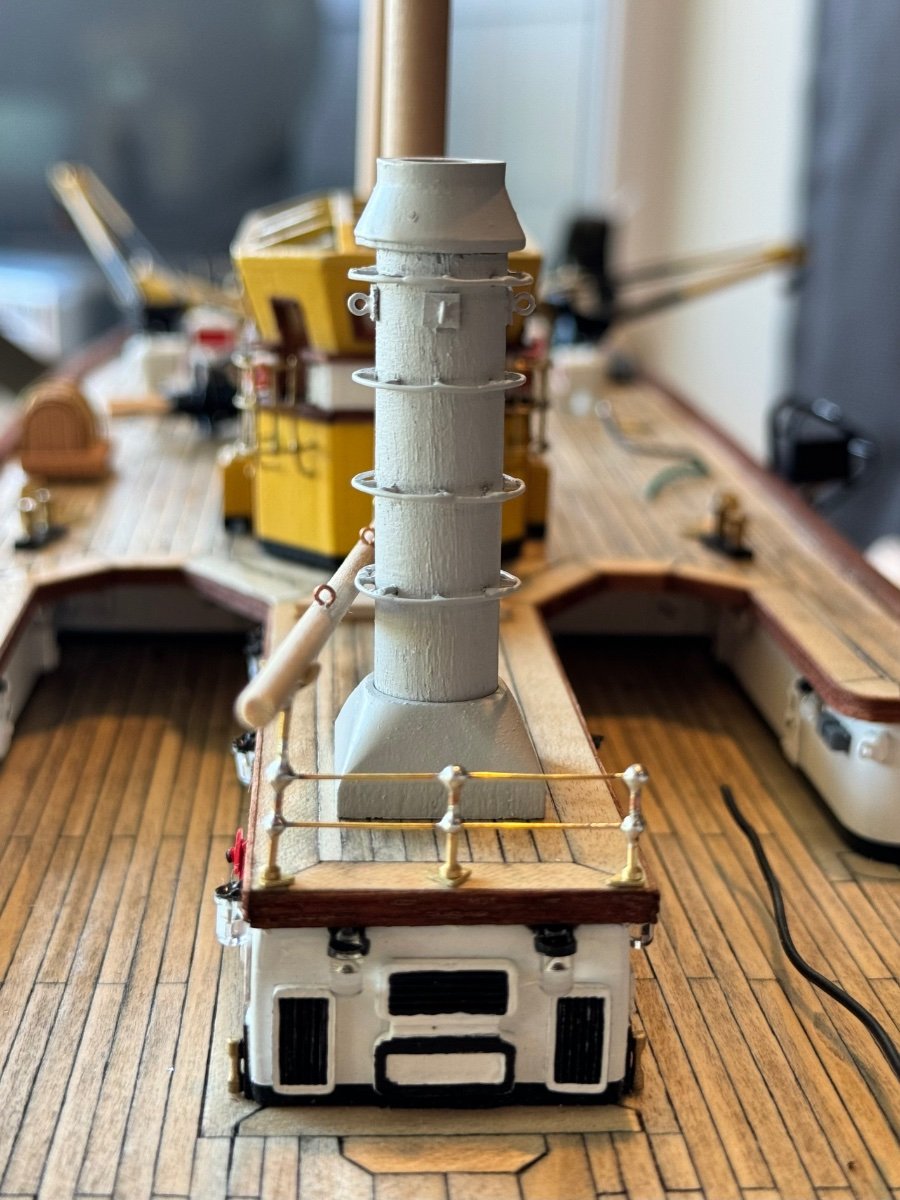
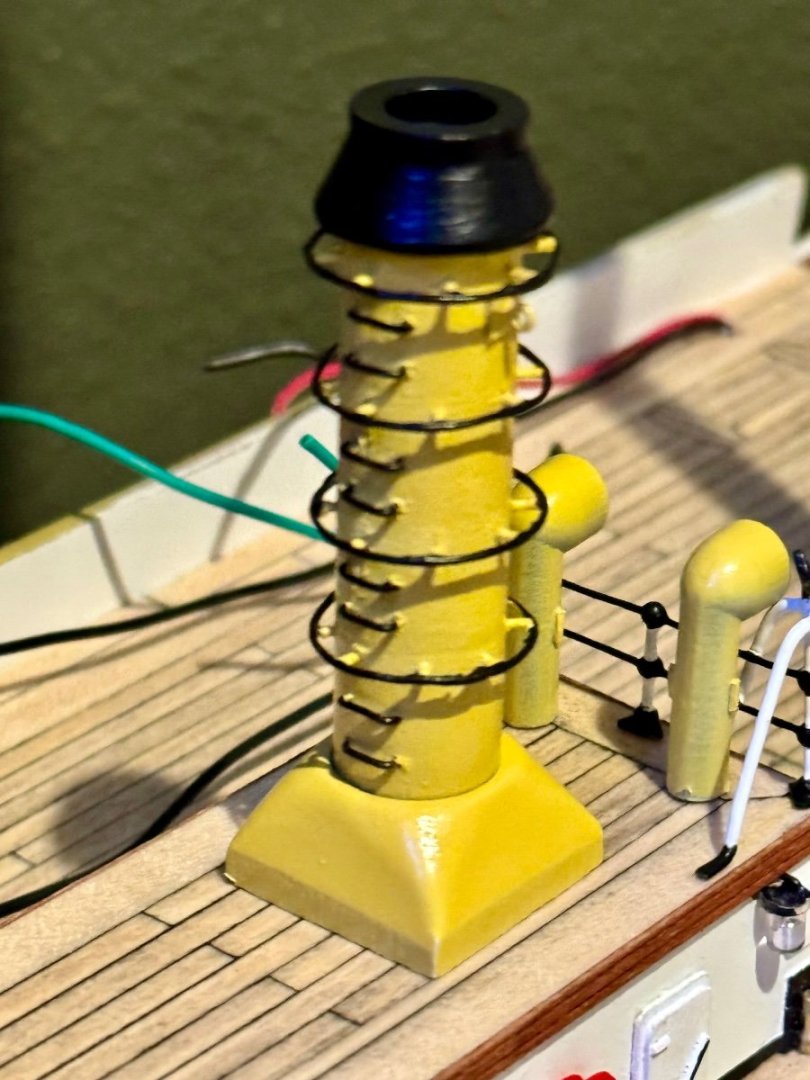
Good evening mates, more progress on the ships funnel as well as improvements on the derrick and its home resting on the railing.

-
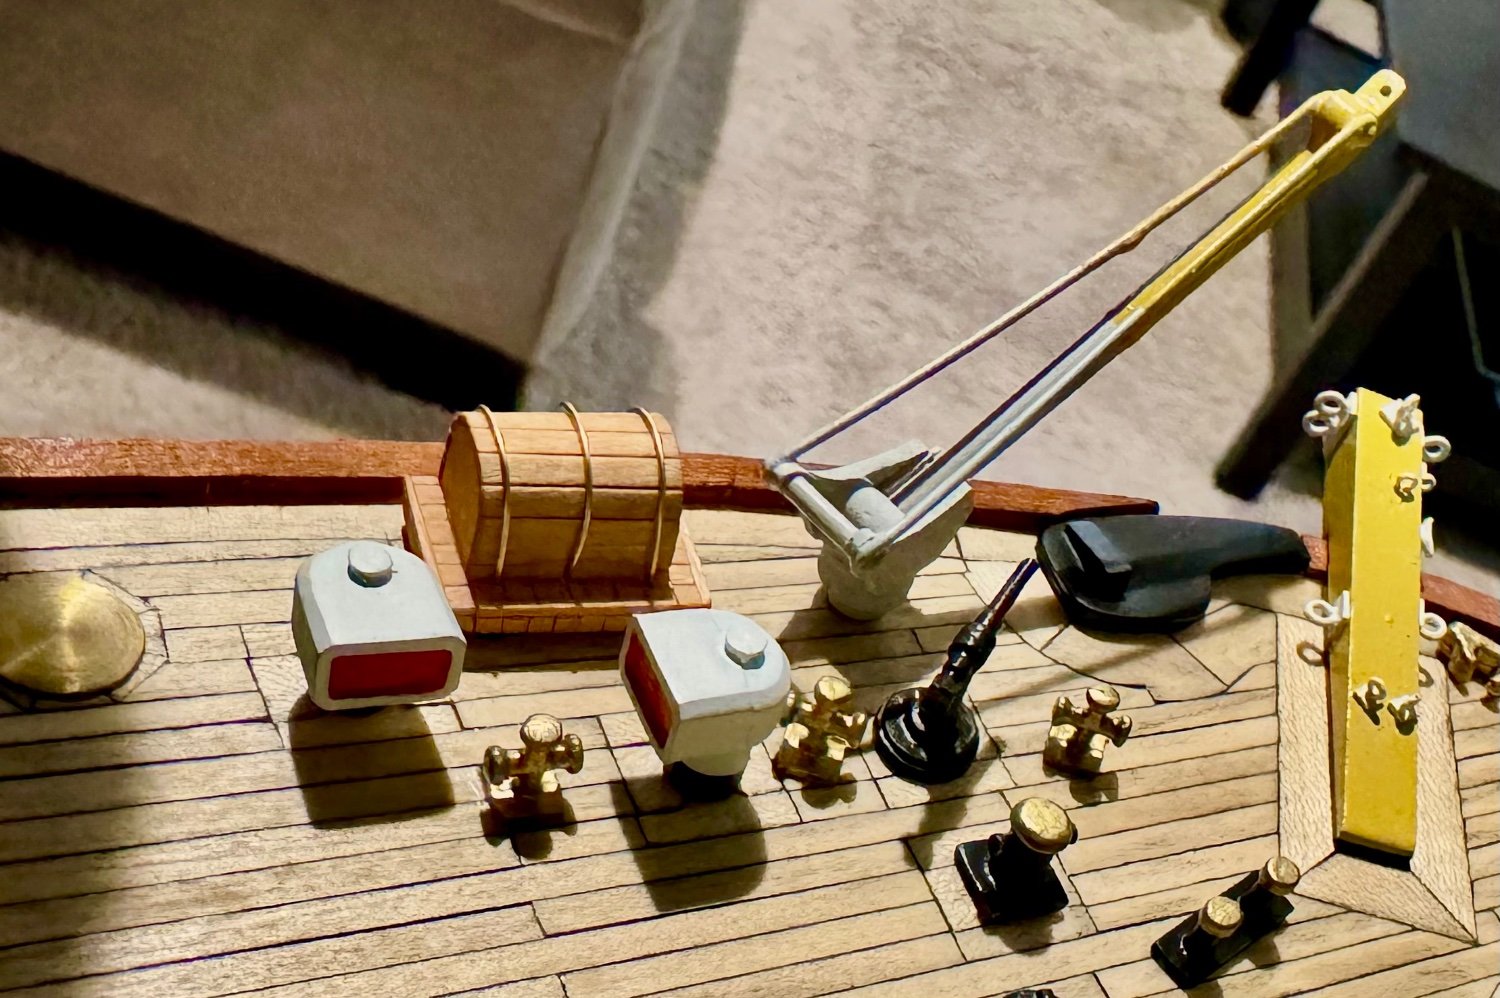
For all the US captains, Happy Thanksgiving and for all the other captains I hope you will have a great weekend! This last week I started working on the major crane on board the AV. I feel that OcCre failed us with their design of this portion of the ship in that their design feels/looks clunky. So…I have again deviated from the plans and am working from actual images of the Amerigo Vespucci. Below are the first images of my take on this section of the ship. The cranes boom is functional in both the x and y axis. If I was thinking about this area of the ship months ago in the planning stage, I think I could have made a working crane with motors, alas I didn’t think that far ahead. Also, I have finished the stack/funnel and first layer of primer and almost finished the railing with one more support to make before paint.


-
My next project was finding wheel handles for the vents. I needed round wheels 4mm in diameter with three spokes. I wasn’t able to find any for purchase with these specs so I decided to manufacture them myself. I first tried using wood dowels, but that didn’t work at all as the thickness of the wheel just makes wood way too fragile for this use. Next I used brass wire connecting the pieces together with CA glue. As you could imagine, this was very messy, gluing my fingers more than the wire. Finally I soldered the wire together. While this worked well, it took several attempts to get something I liked. Keith (clearway), why do we continually put ourselves through these kind of things? …just follow the plans, it’s so much easier!
-
Good evening mates, finally finished the hatch by making the vent more scale appropriate, finishing the port holes and even added a small red sticker that is present in many of the AV images available. Also added a valve handle to the fire apparatus but not sure if I’ll leave it brass or paint it black.

-
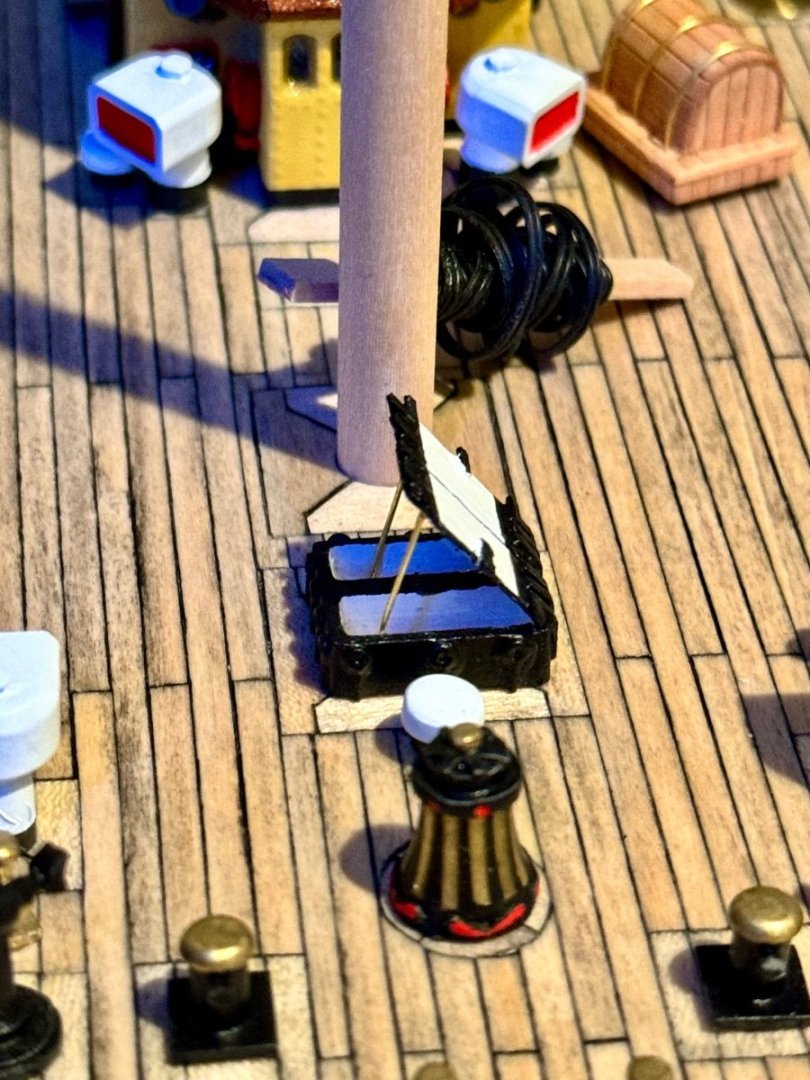
Good evening mates, had a little time in the shipyard today after chores and was able to complete my second hatch. This time I used the OcCre provided parts as they appear the same as on the real AV. Also did a little fire fighting fittings. Had to make a couple of versions to get the scale correct as I was attempting to put too much detail in them which made the pieces way too big for a 1:100 scale model. Will see how this looks for a while, maybe make another one (or two)…
-
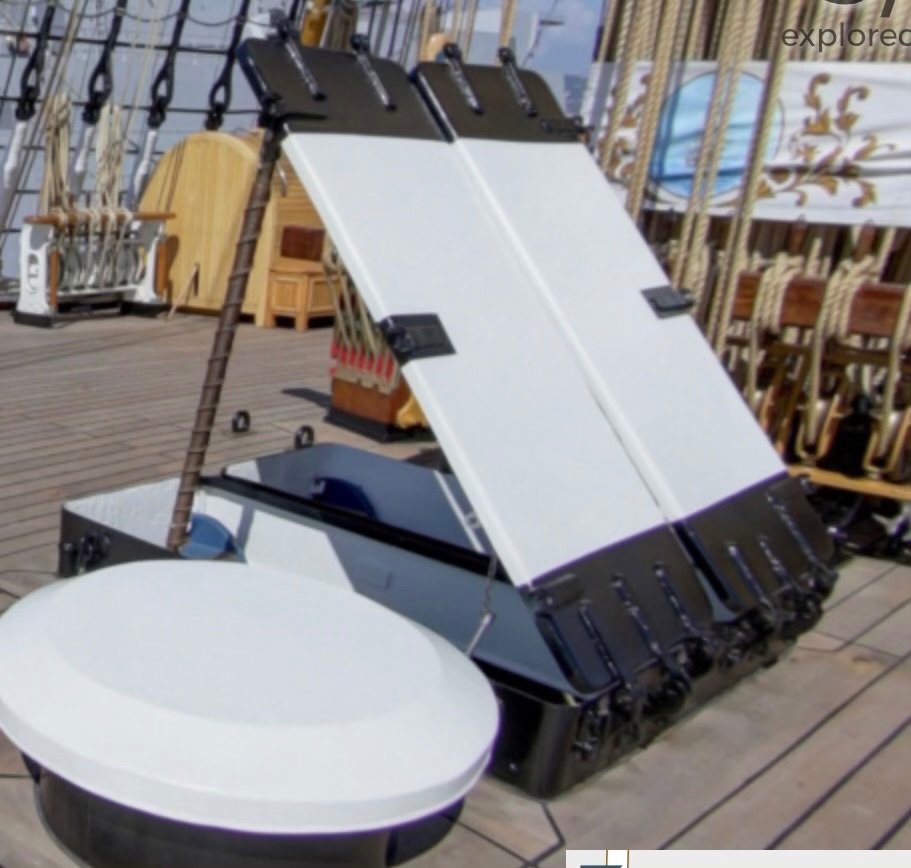
Good evening mates, today I worked on my first hatch. I’m not happy with what OcCre provide in the kit, so I made my own version. The first two images are my attempt and the last two are photos from the actual AV.


-
And a little update today with the port side railings painted as per the AV.
-
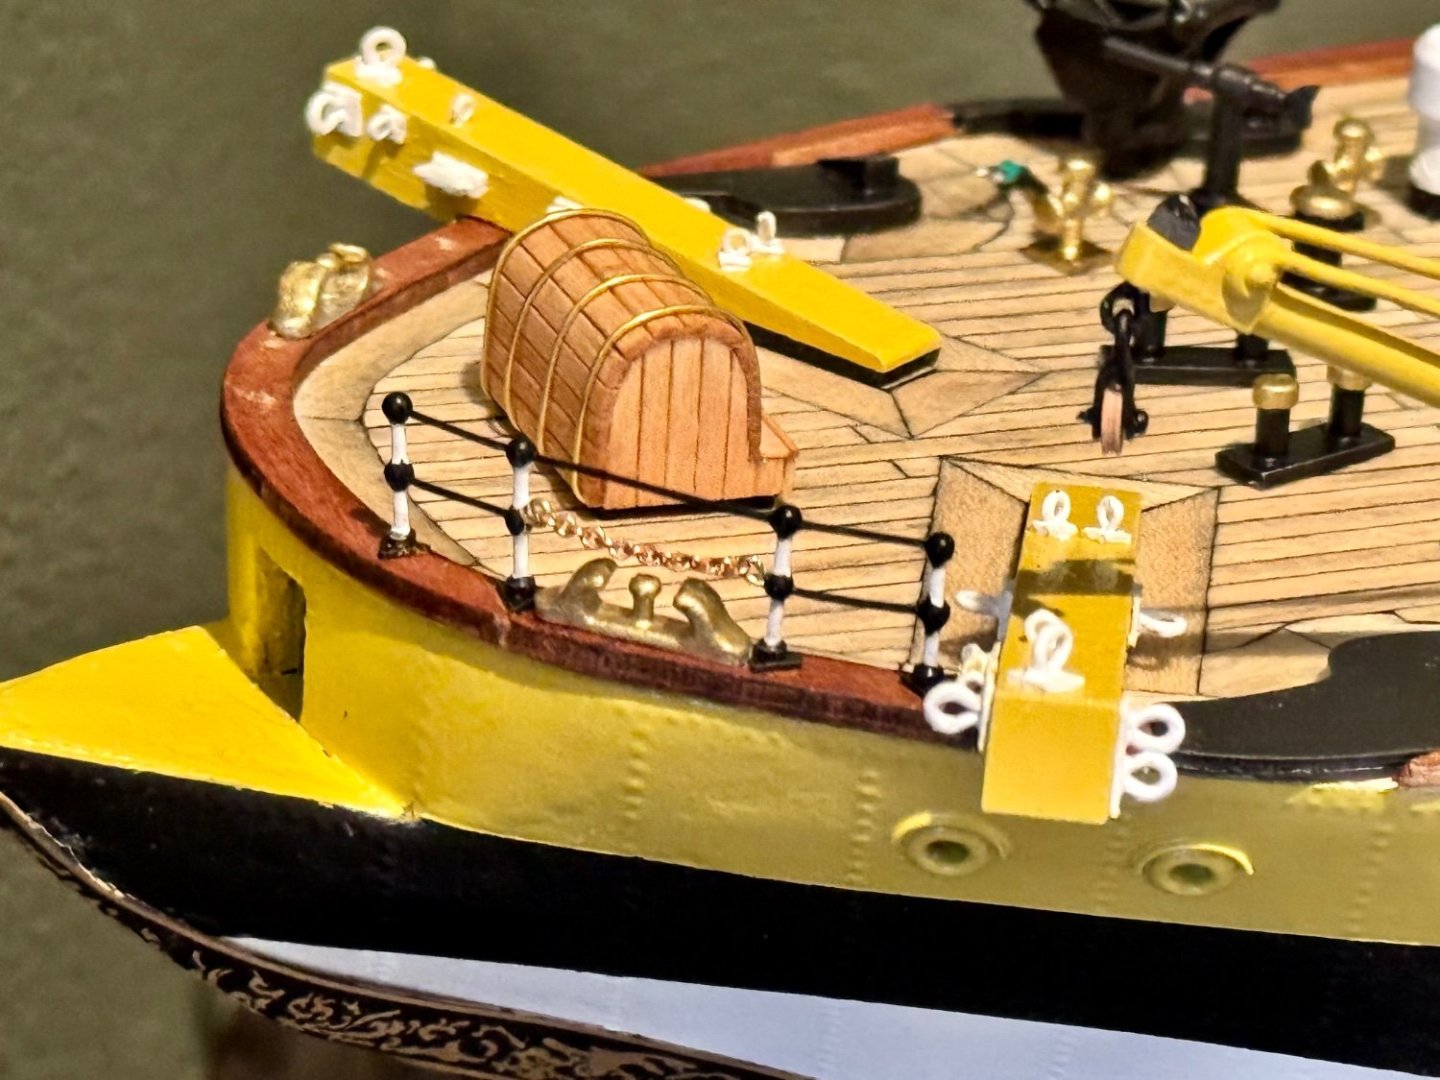
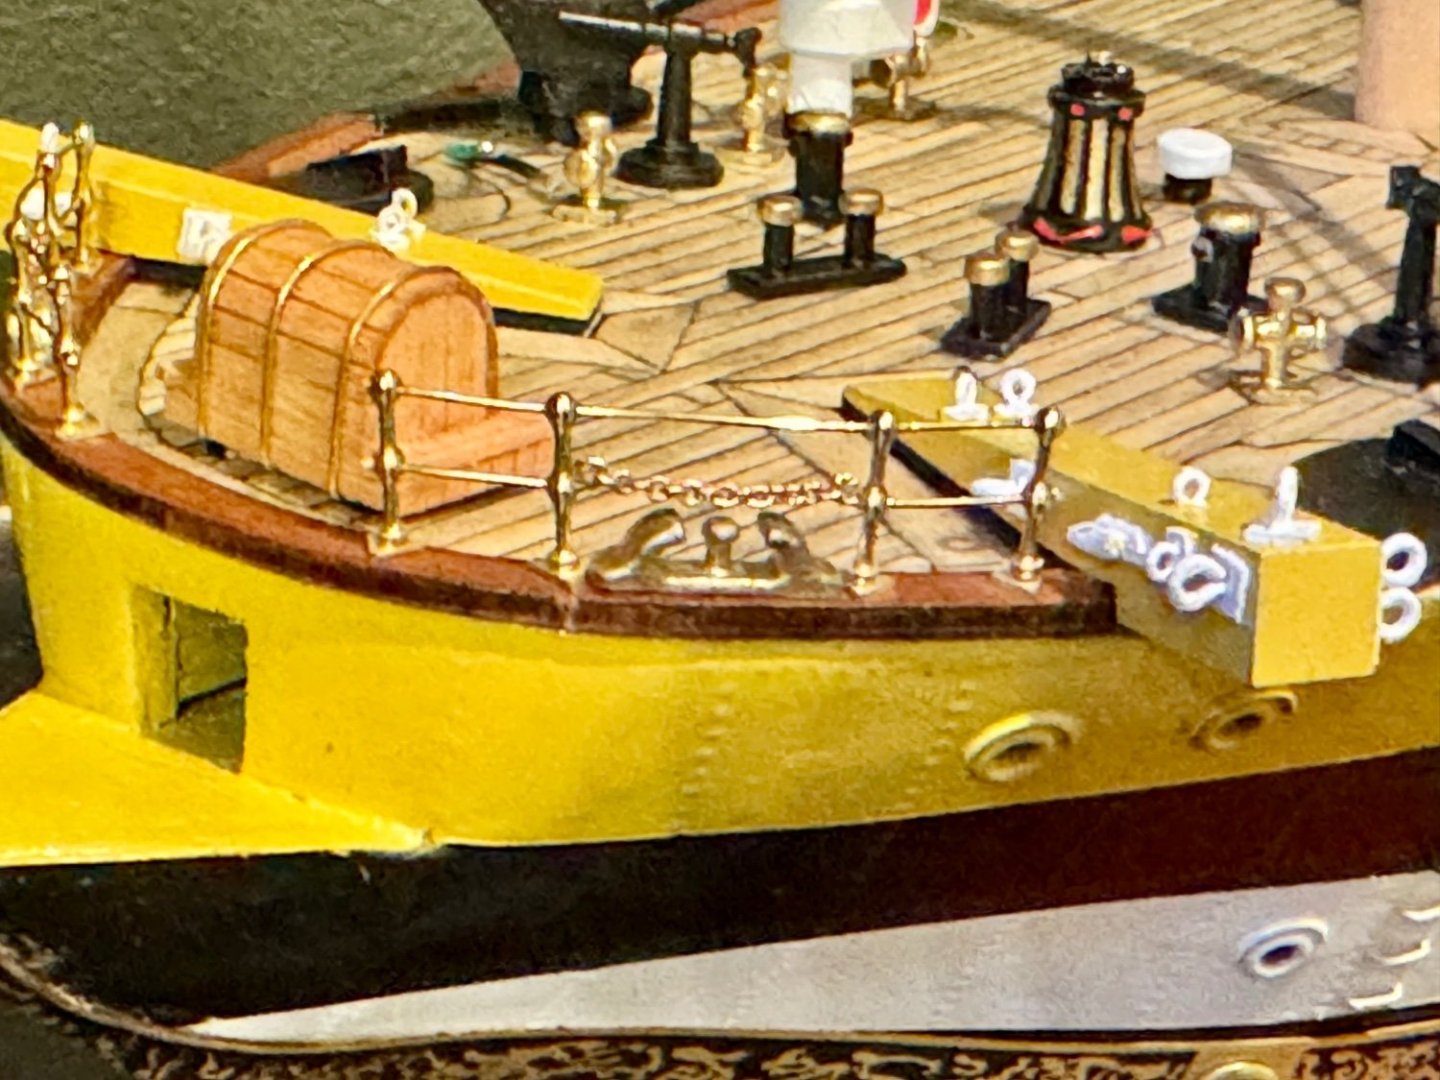
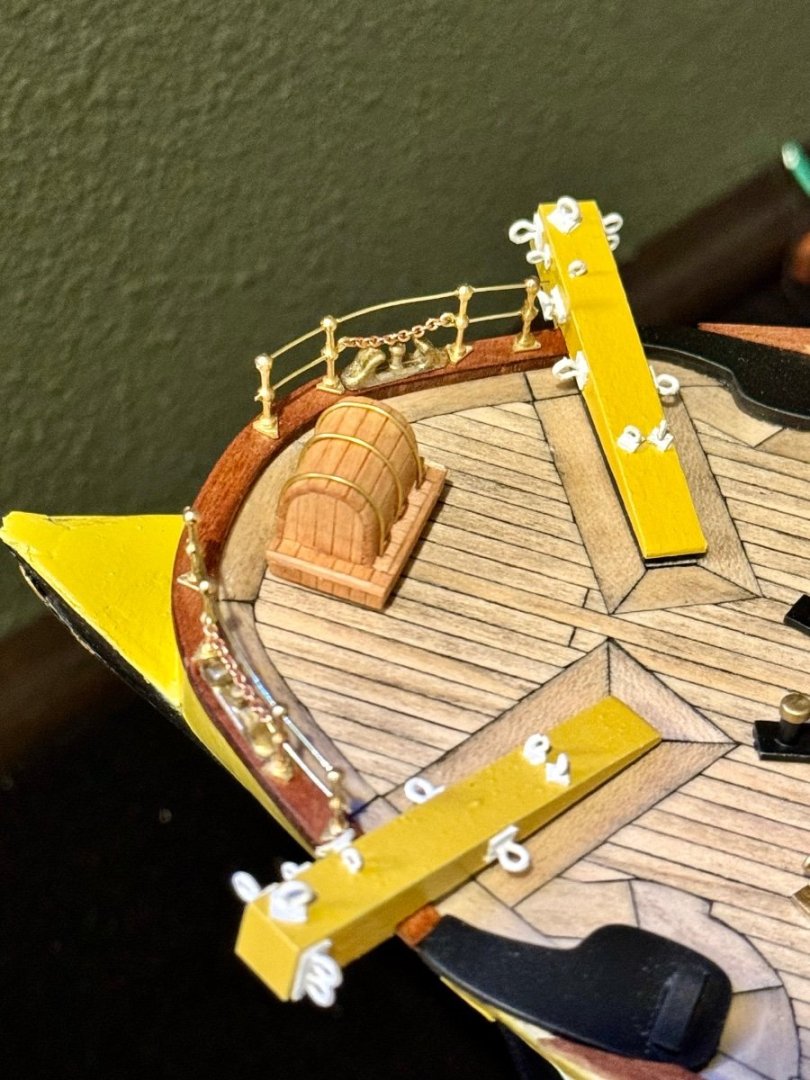
Good evening mates, the last couple of days I’ve been studying the Amerigo Vespucci fore deck railings. The kit supplied flat etched bollards are, well, very poor so changing it up a bit. It’s no easy task but I’m pleased with my progress. Not permanently installed yet as the railings get painted black and white, but getting there. Thanks for stopping by and for all your support.
-
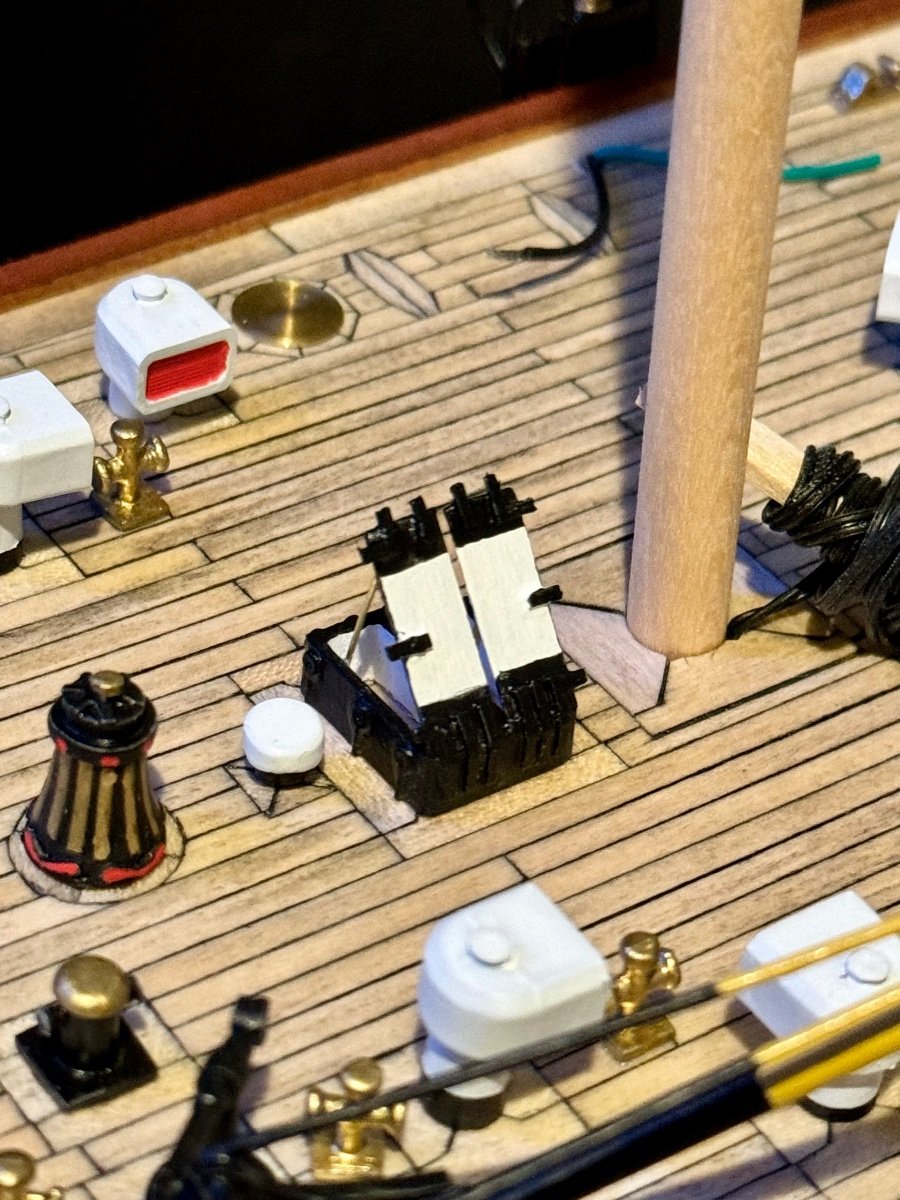
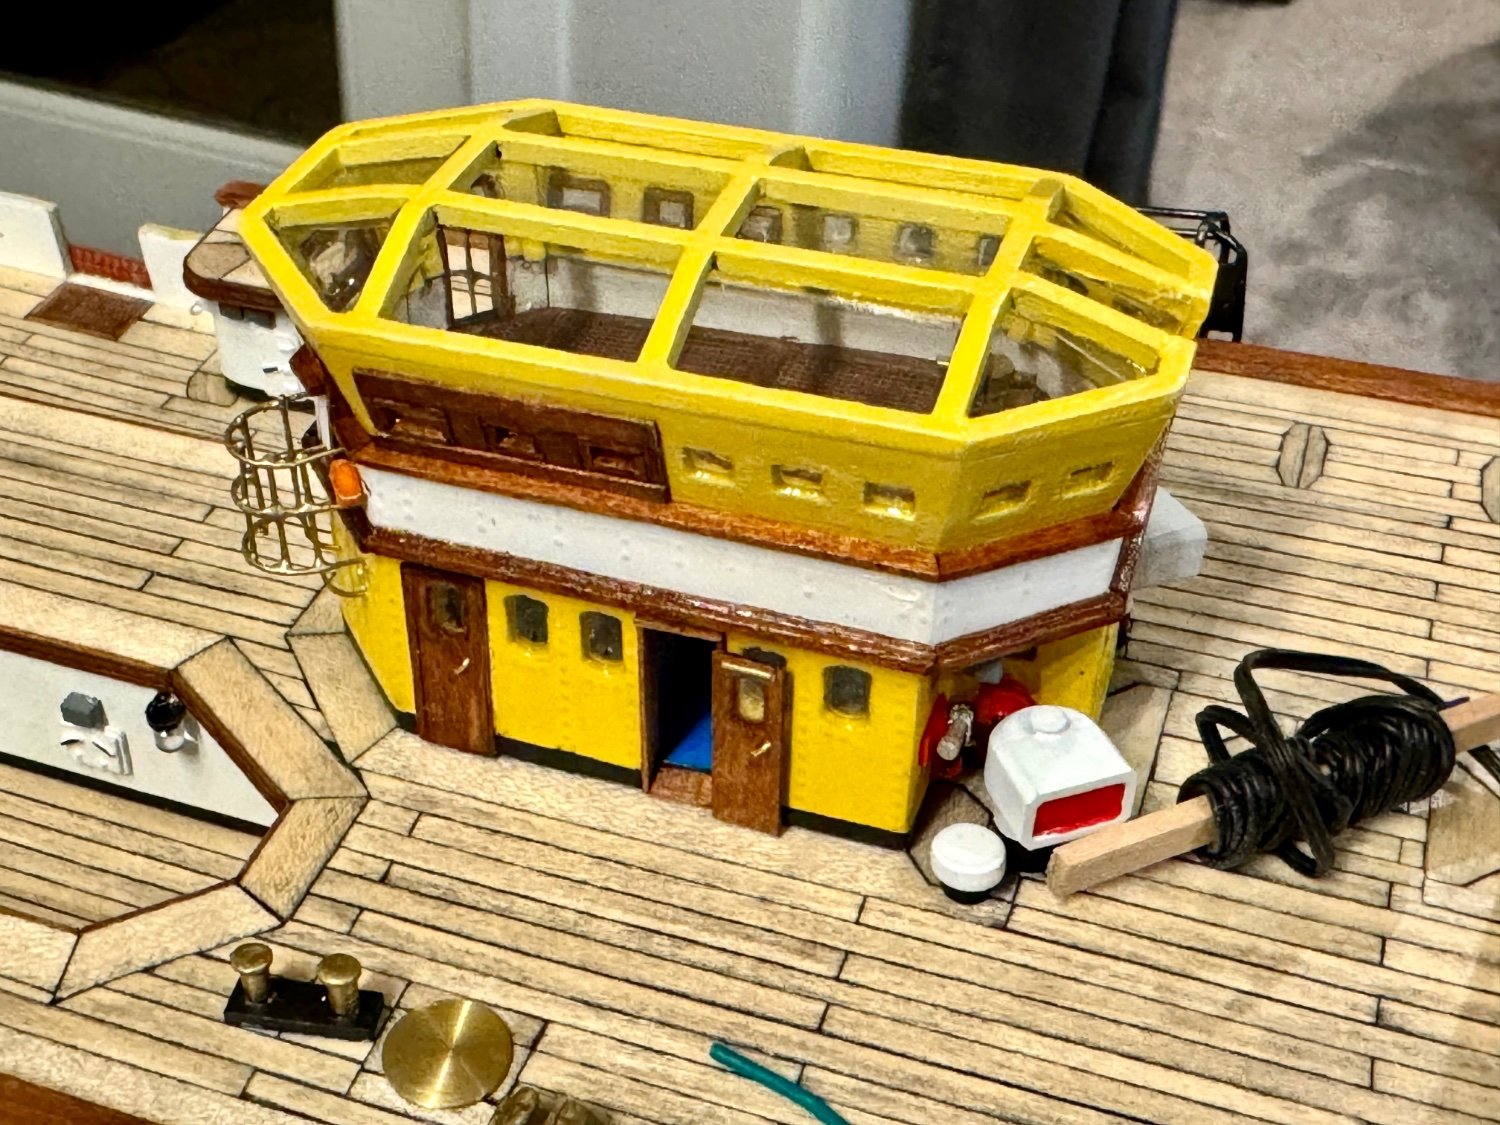
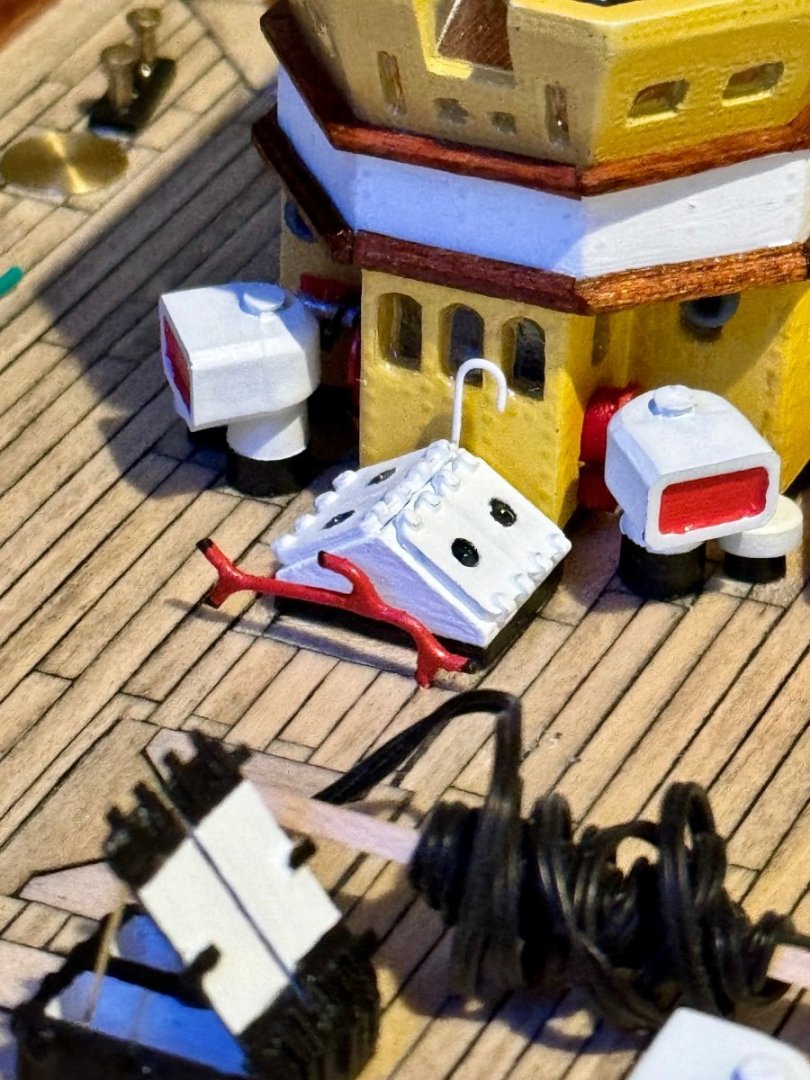
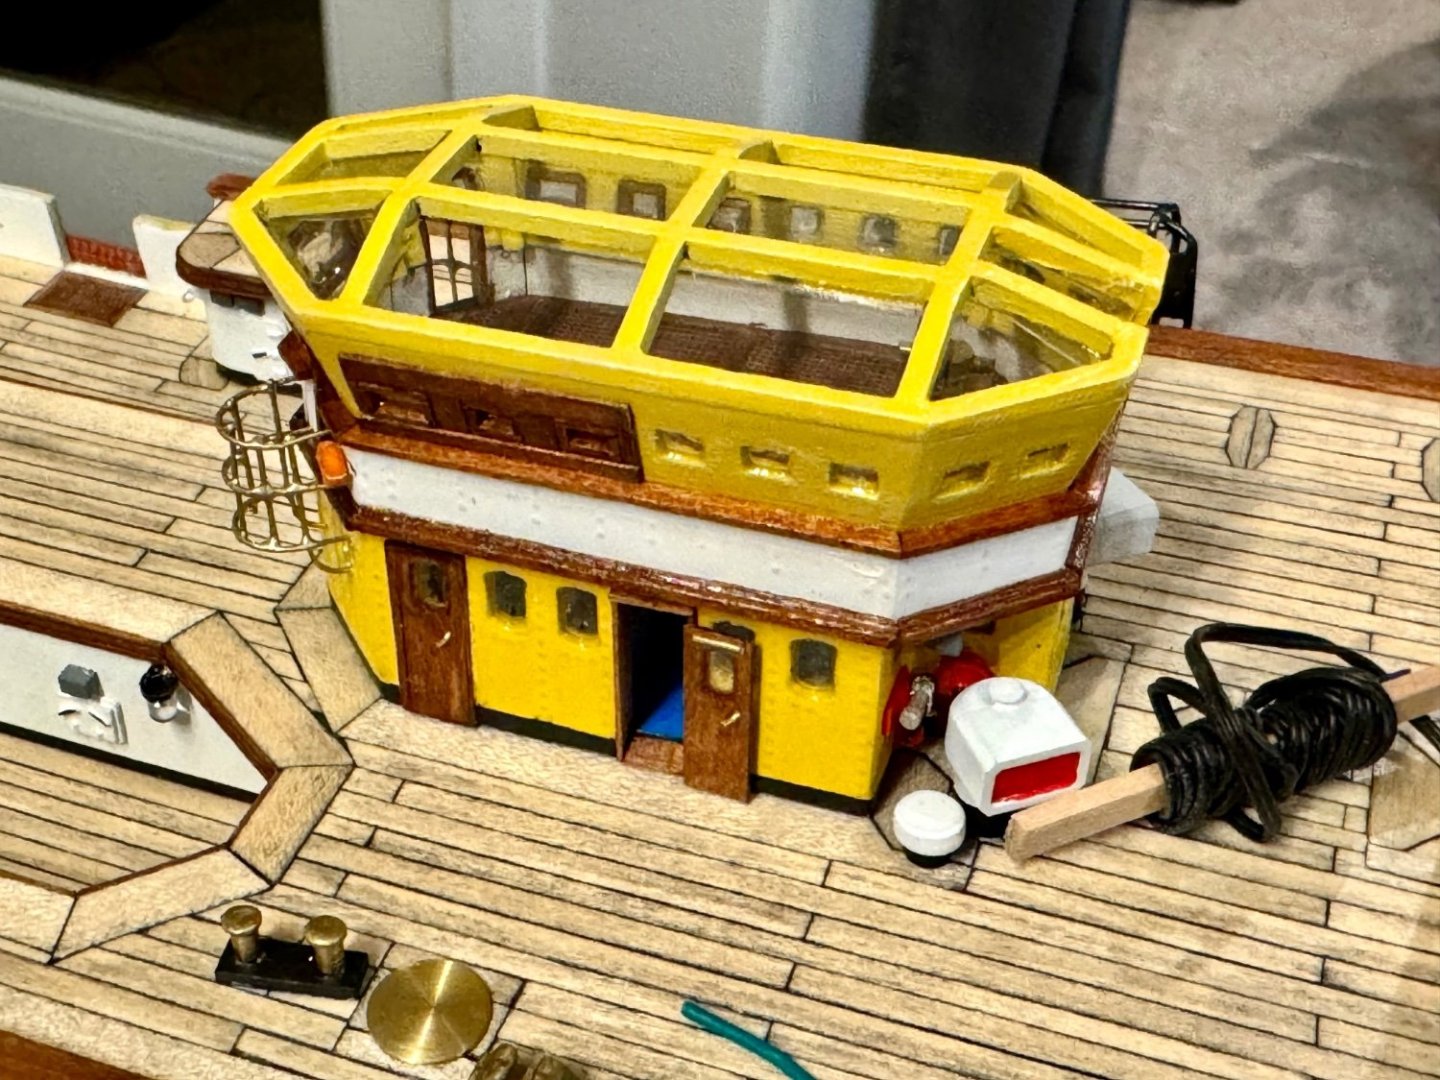
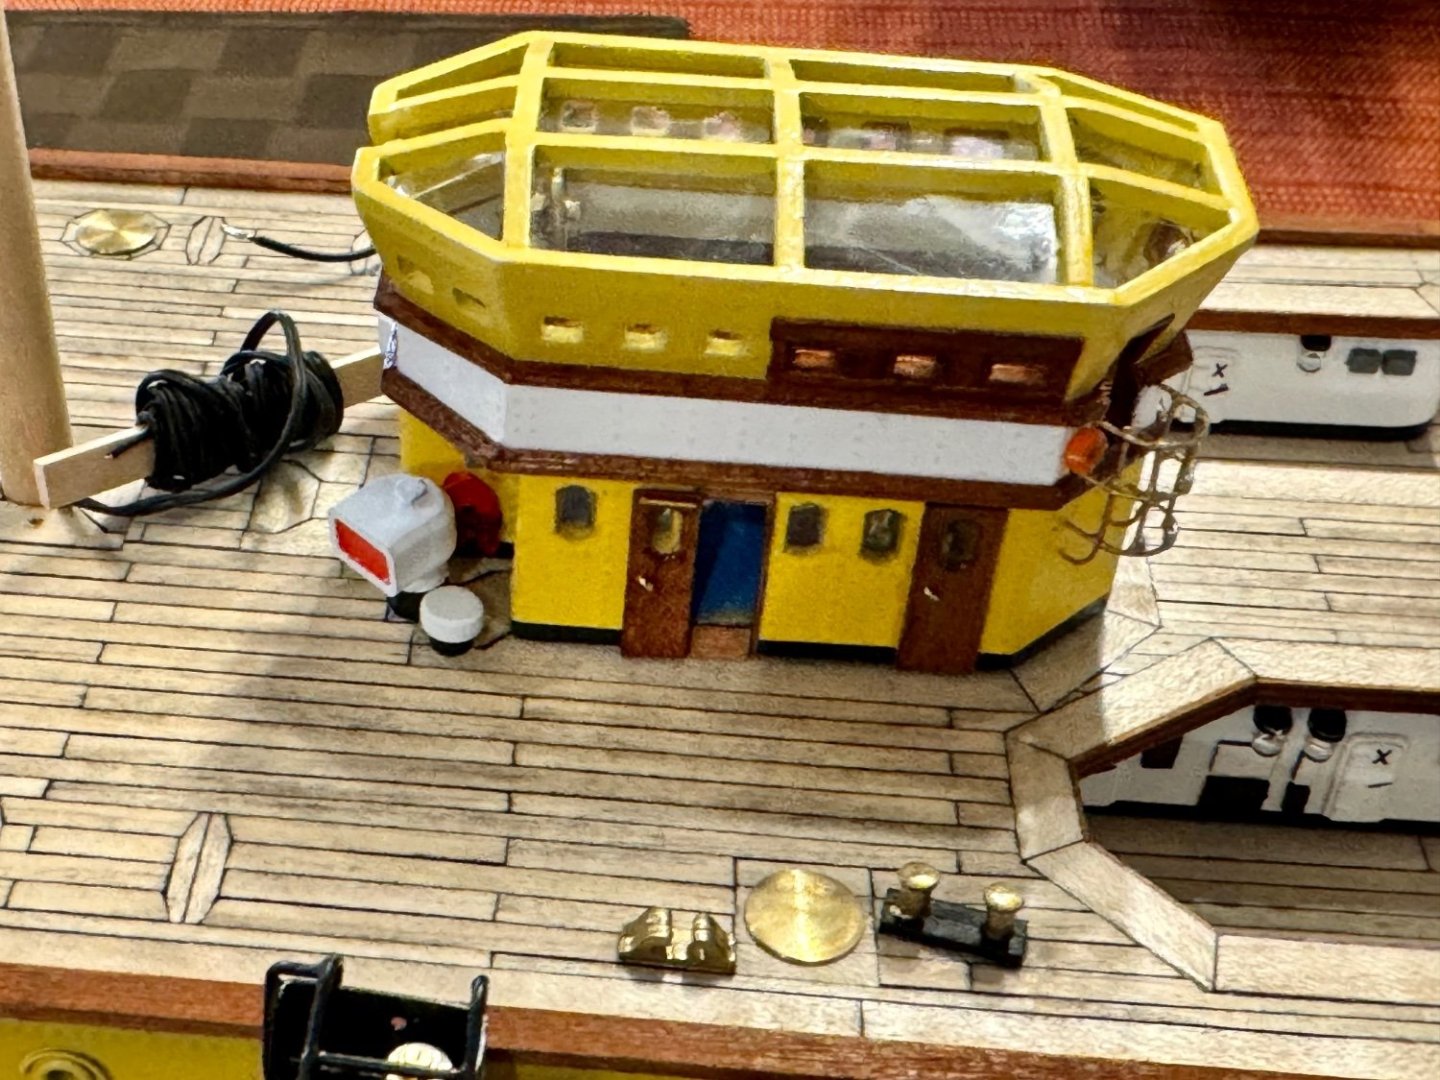
Good evening mates, I spent the last couple of days getting some of the details on the chart room/sky bridge completed. Long list of “upgrades!” Life rings, horn speakers, fire fighting equipment, ladder cage, doors with handles…and I’m sure more things I forgot. Finally I have installed the building back on the hull for the last time.
-
Good evening mates, I’ve made a bit of progress on the chart room and sky bridge. Added the trim today and started working on the fine details. Hopefully by the end of the weekend I’ll have it reattached to the ship, for the last time!
-
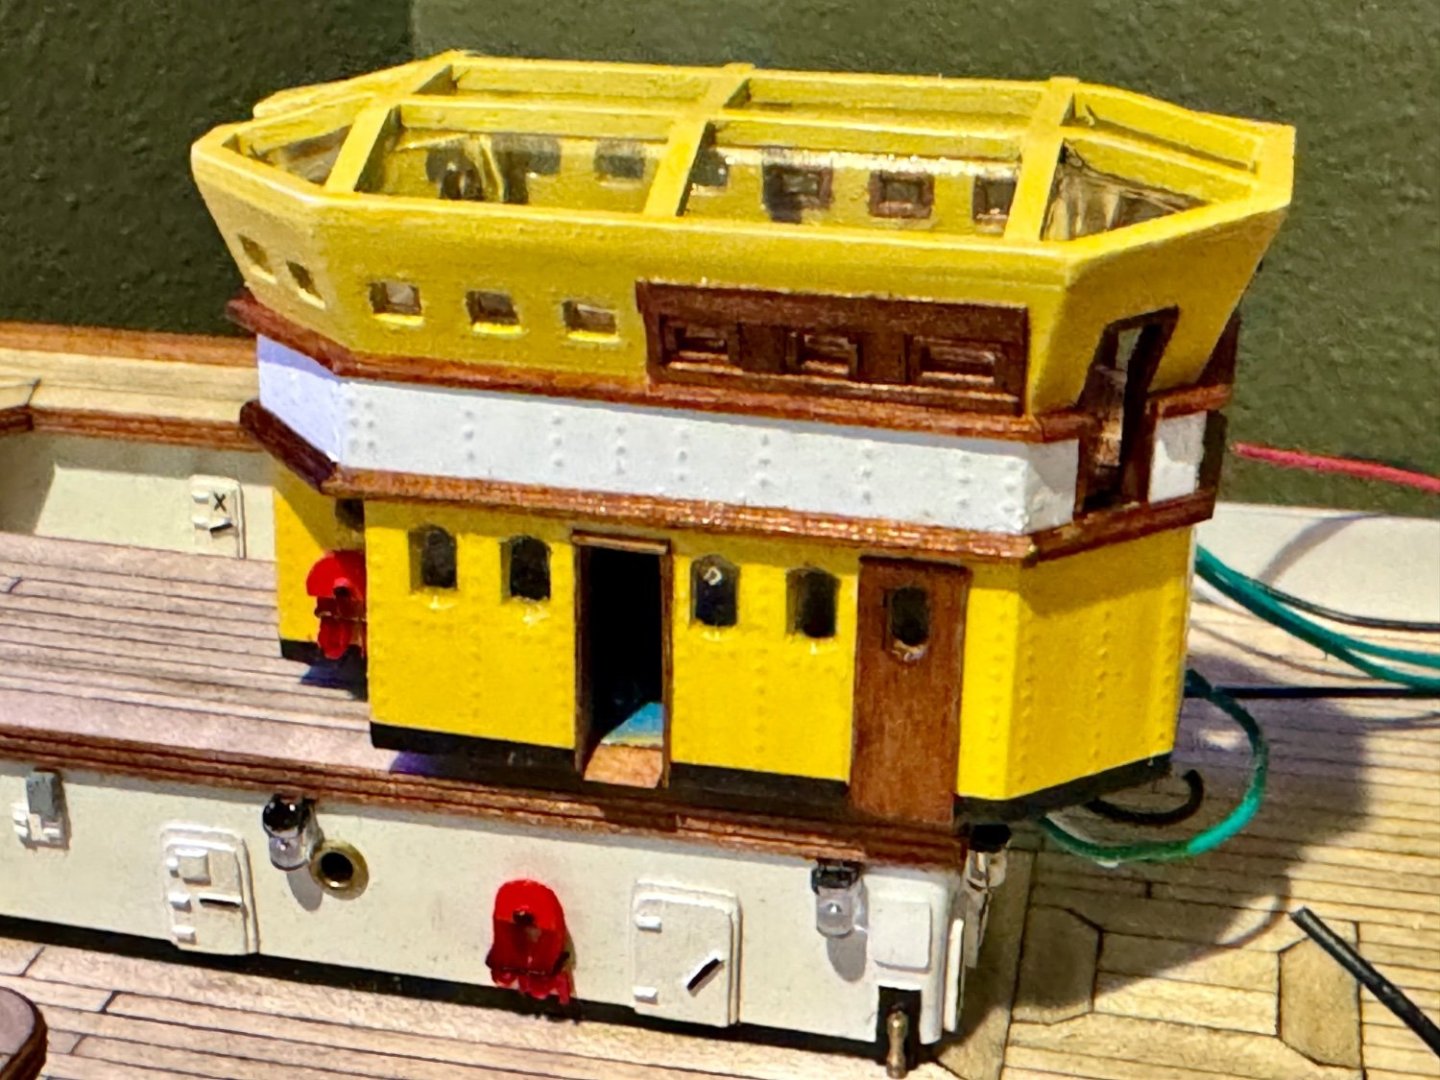
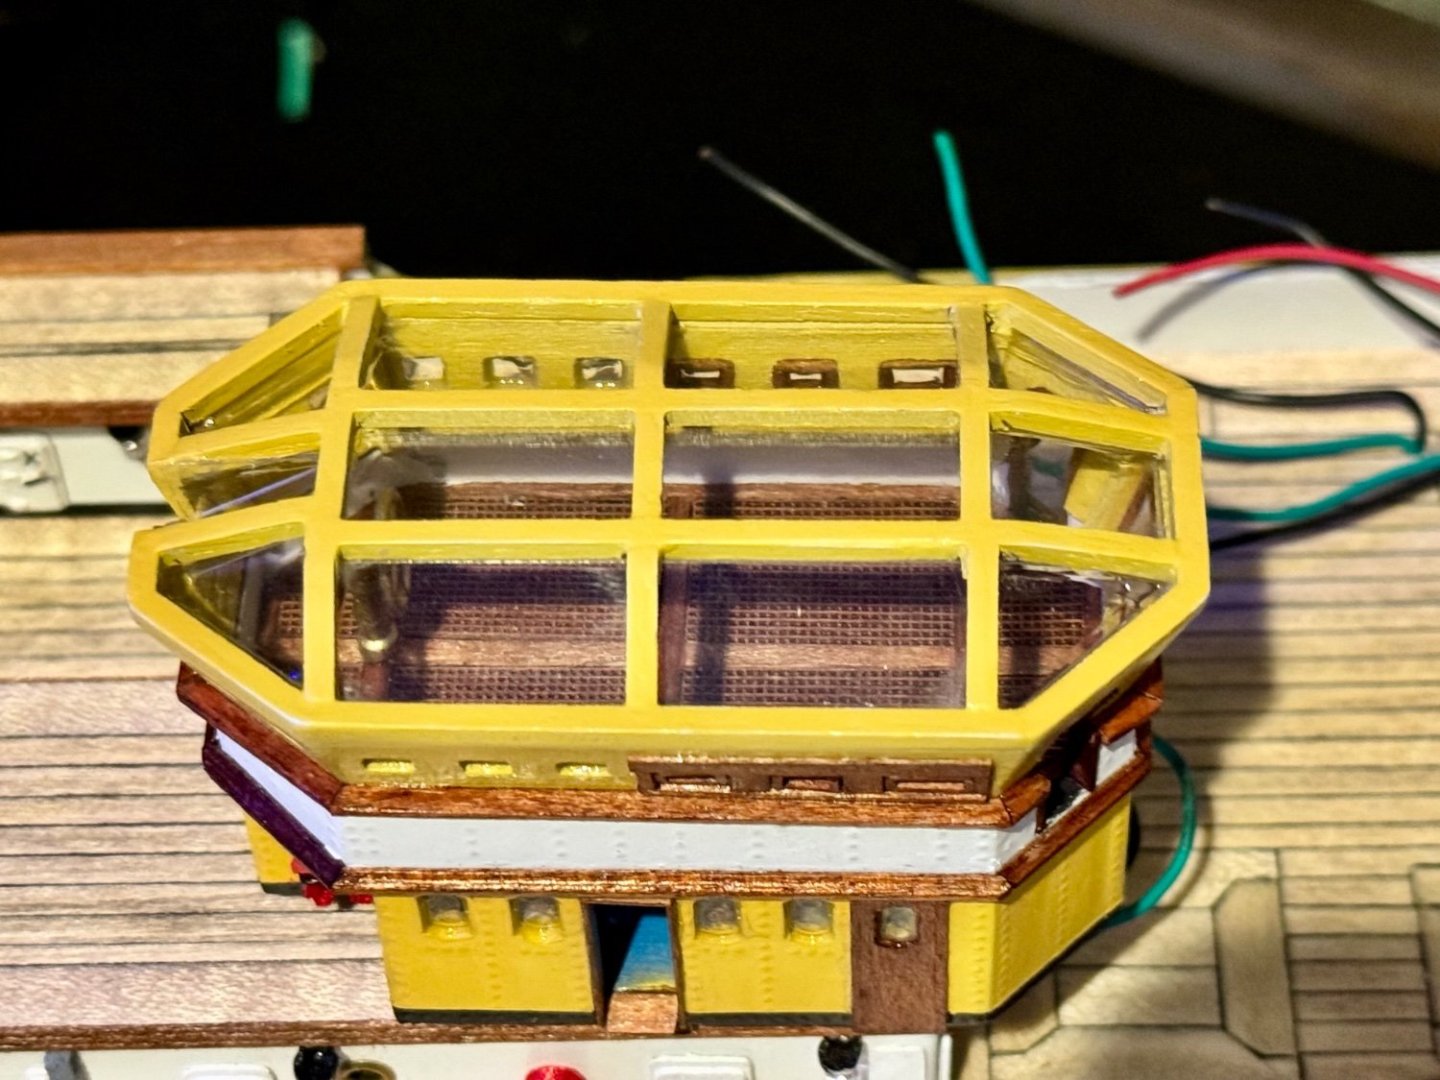
Another update, I have installed the window trim, 28 very tiny pieces, from 2-6mm long.
-
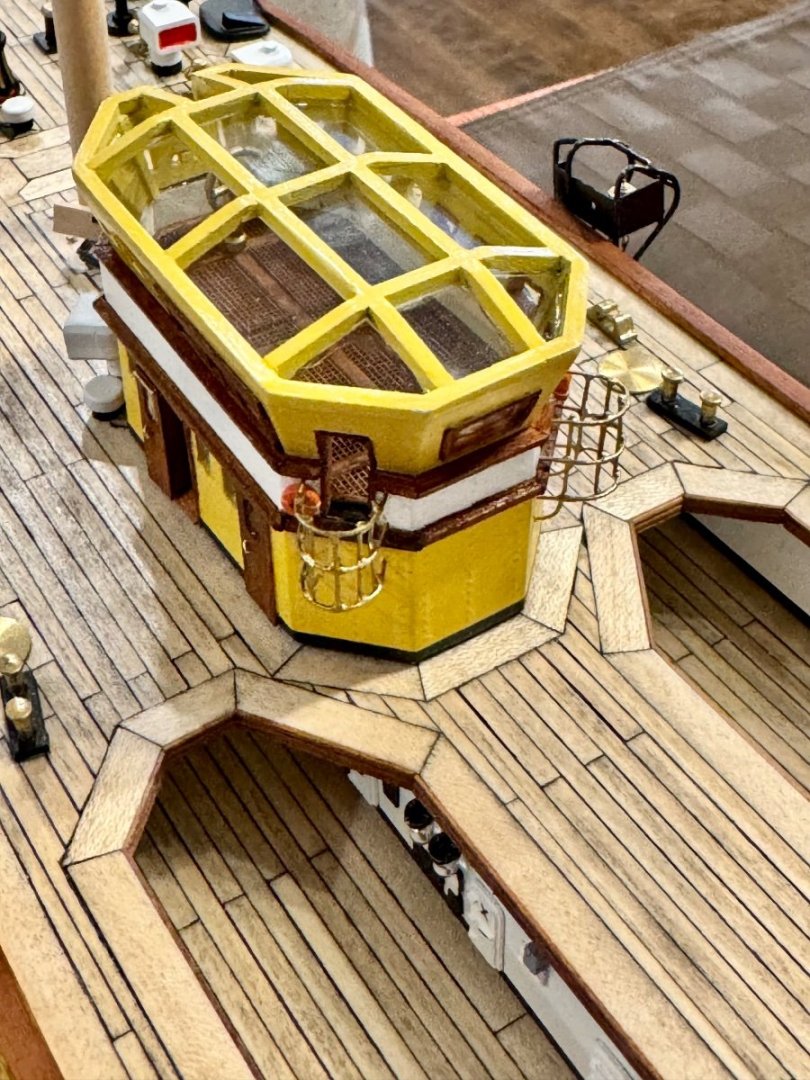
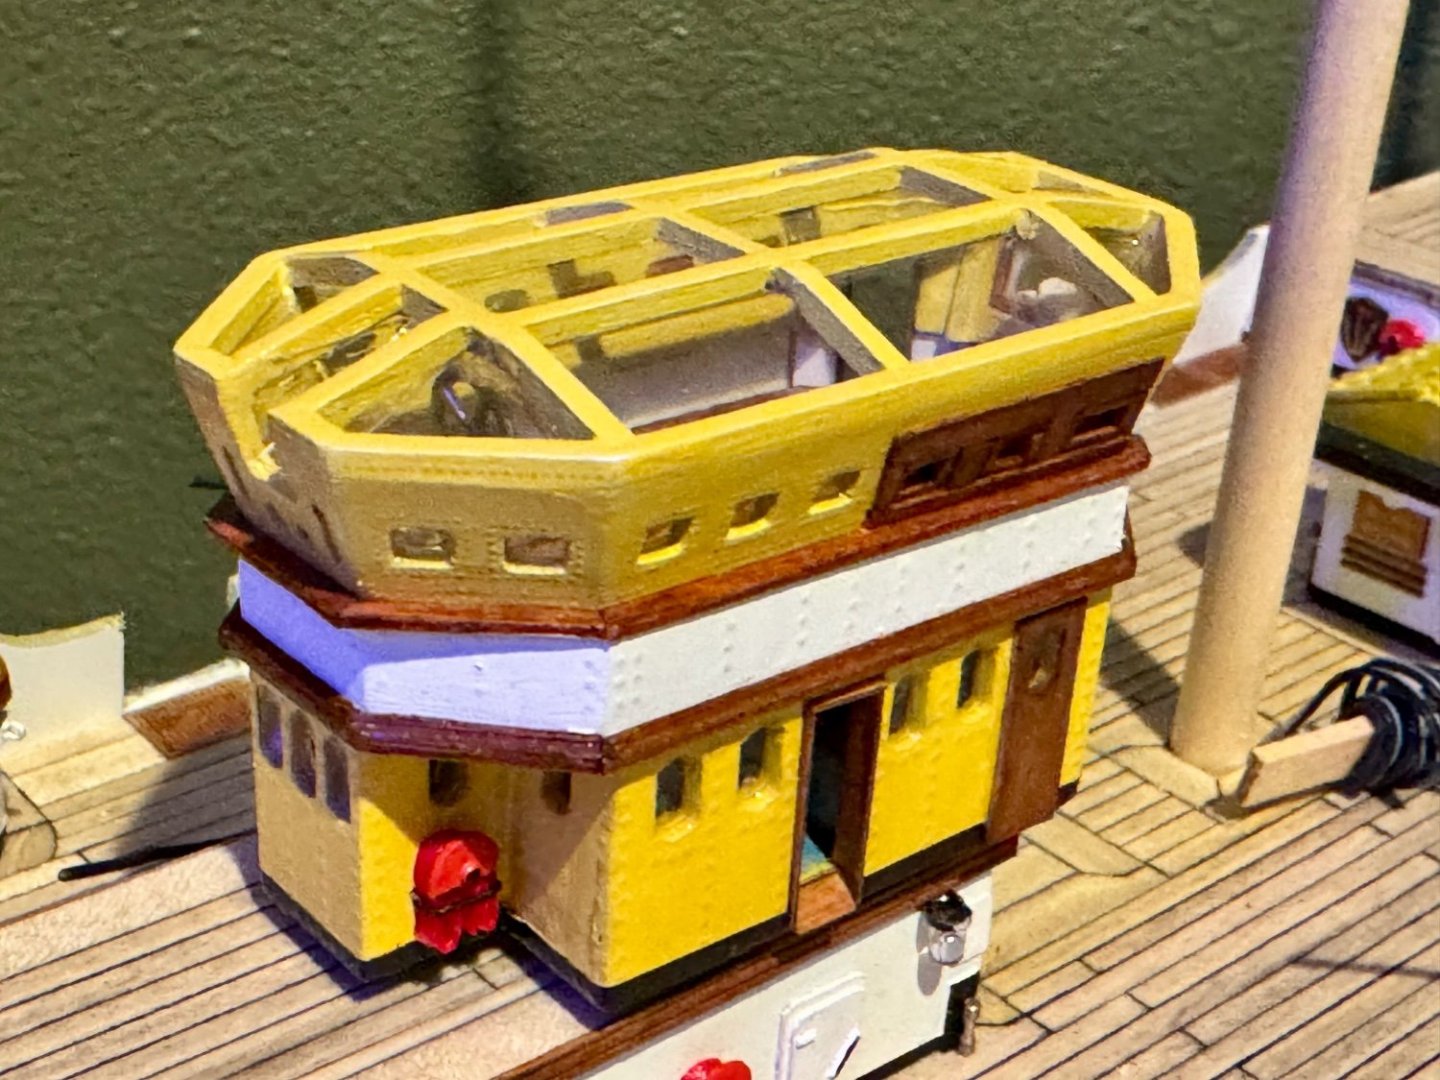
More progress on my fly bridge canopy…but still lots to do.

-
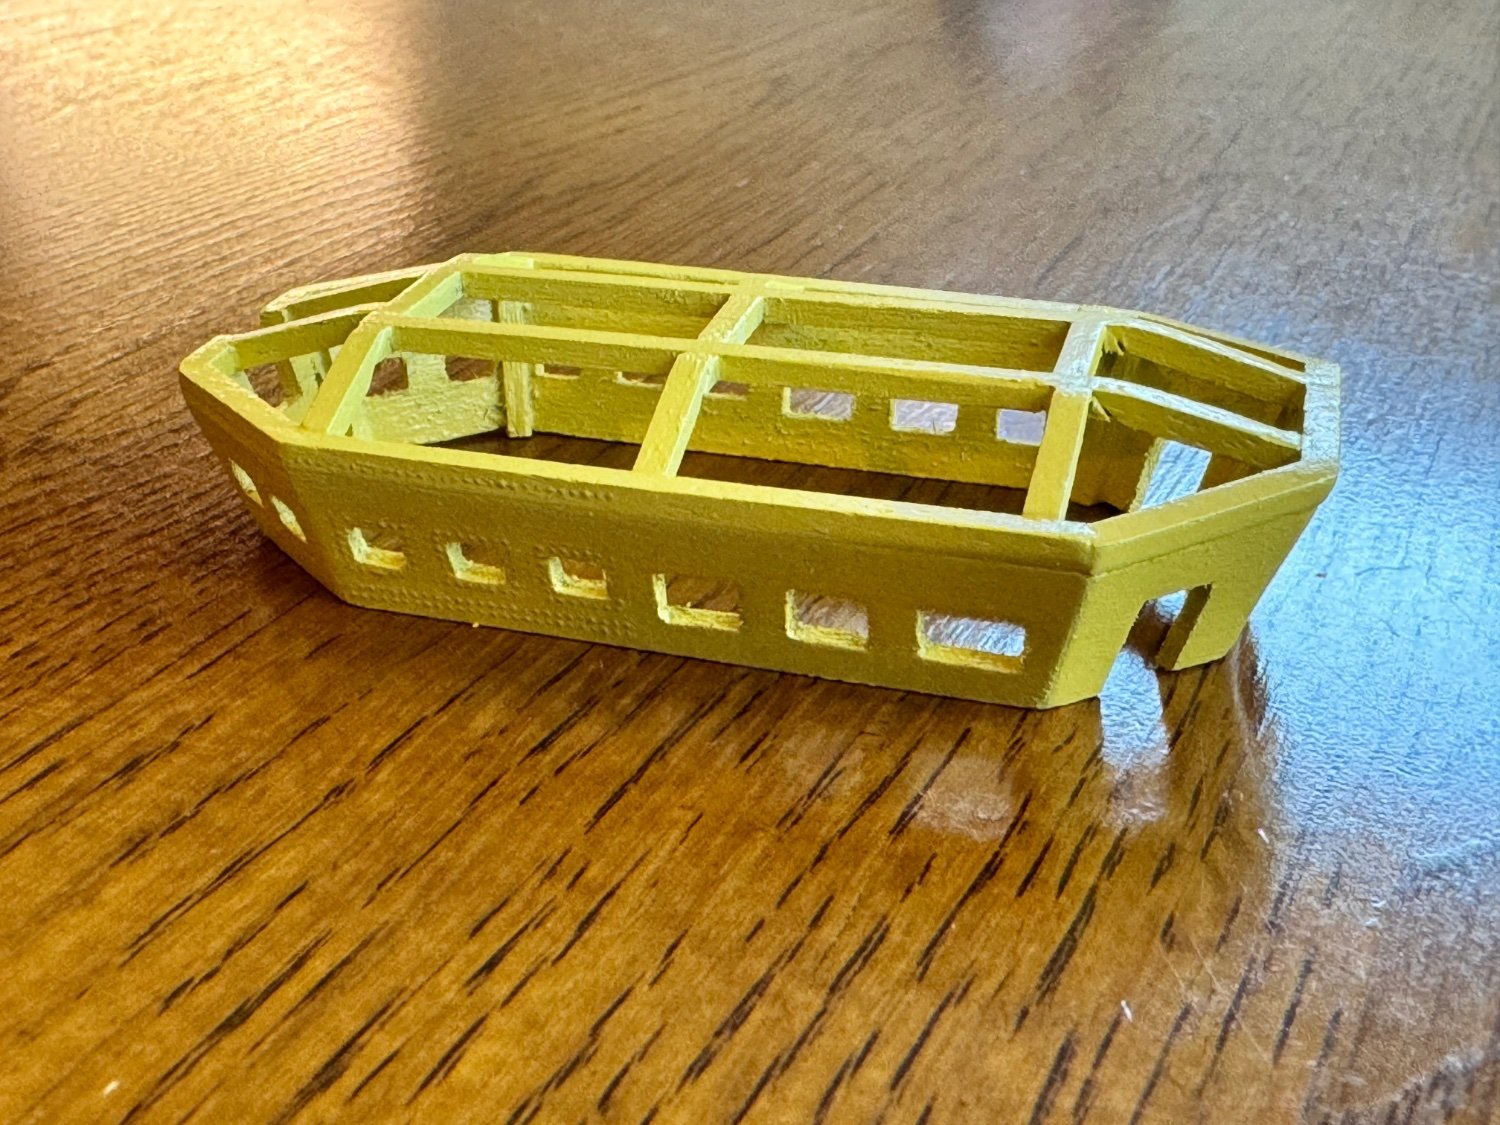
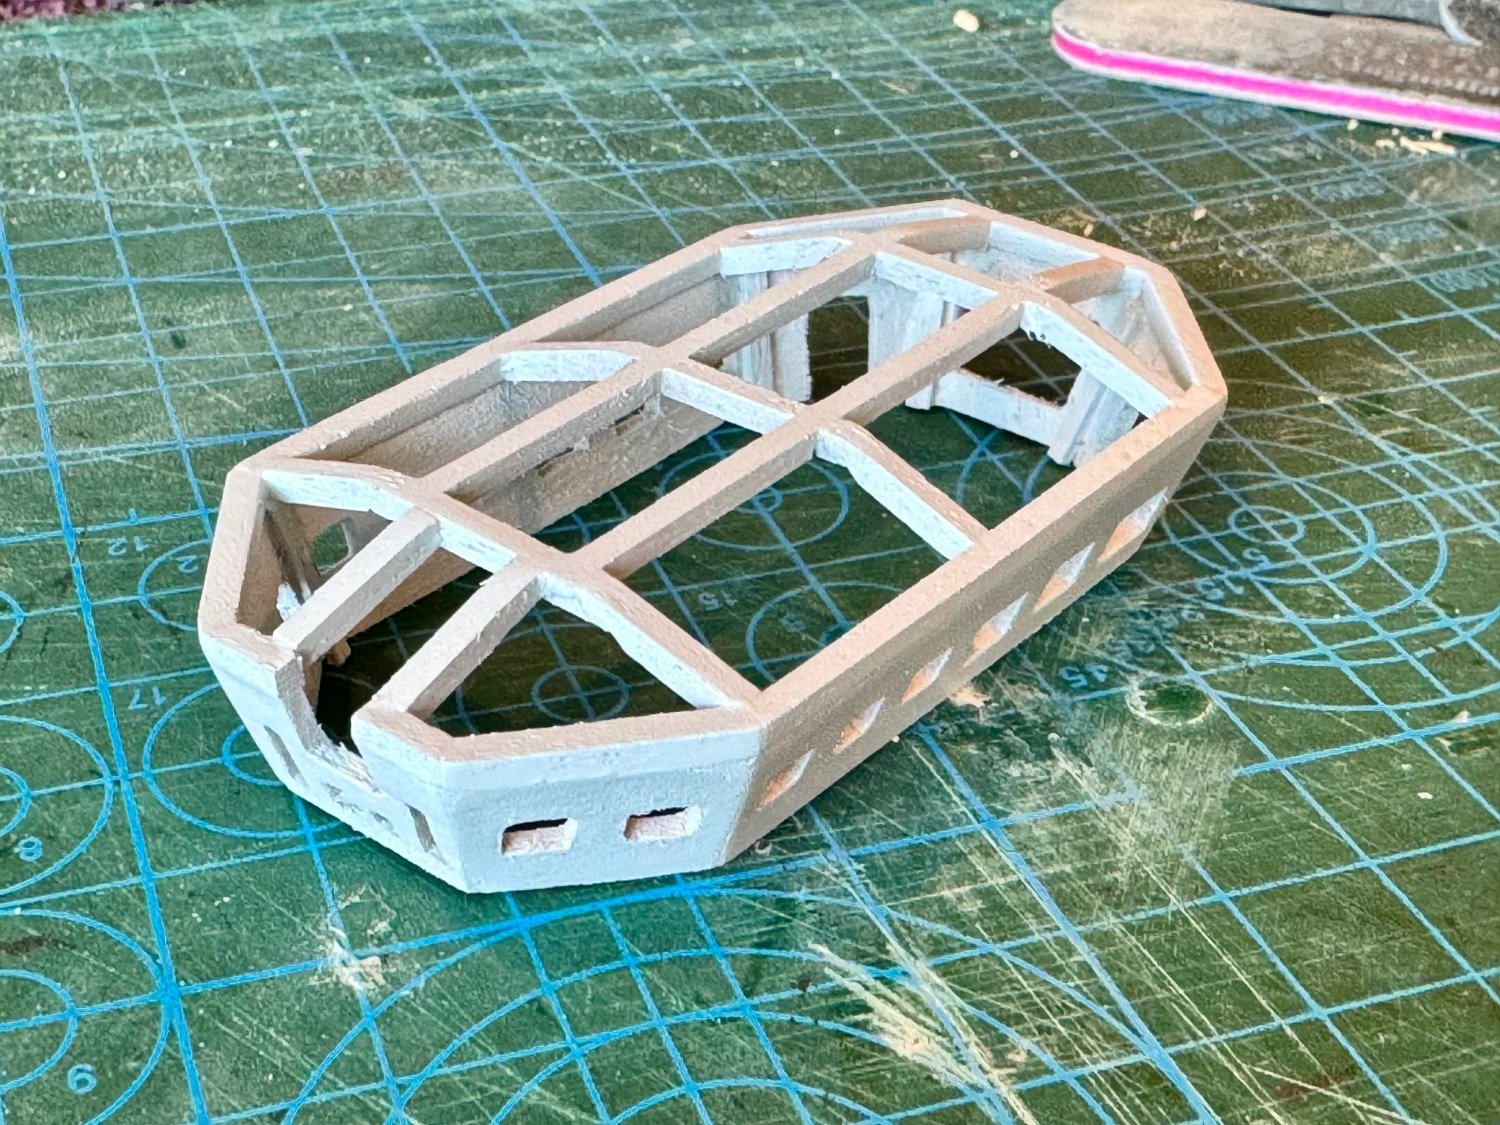
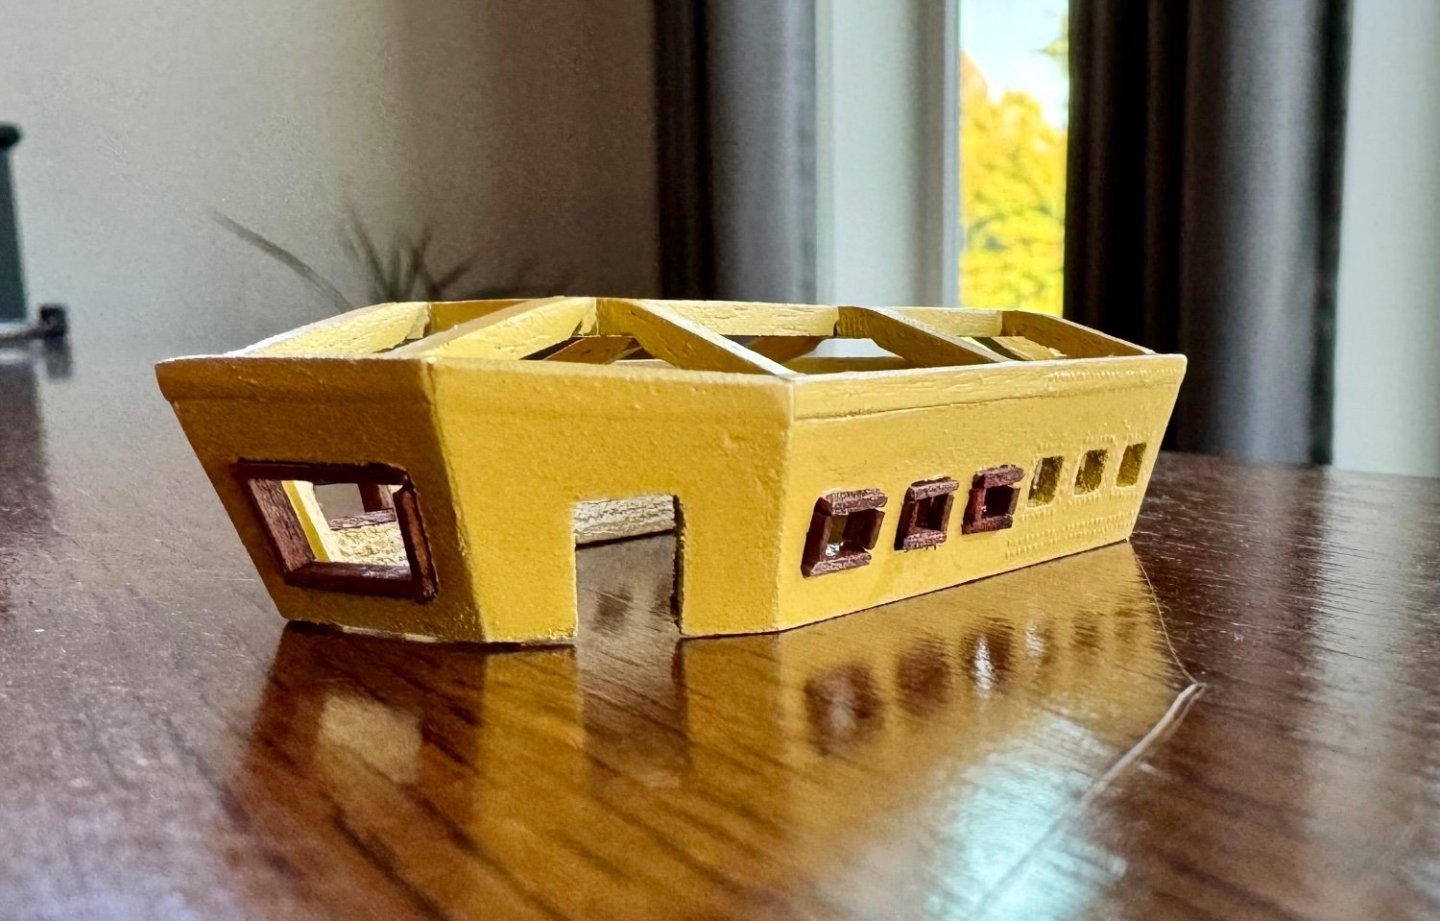
Good afternoon all, here is the progress on my new design canopy for the fly bridge. Next step, install the rivets, then prime again as the yellow paint does not like to stick to the rivets, then paint AV yellow, install glass, window trim, install on main structure and finally install molding between canopy and base. Wow, lots to do.

-
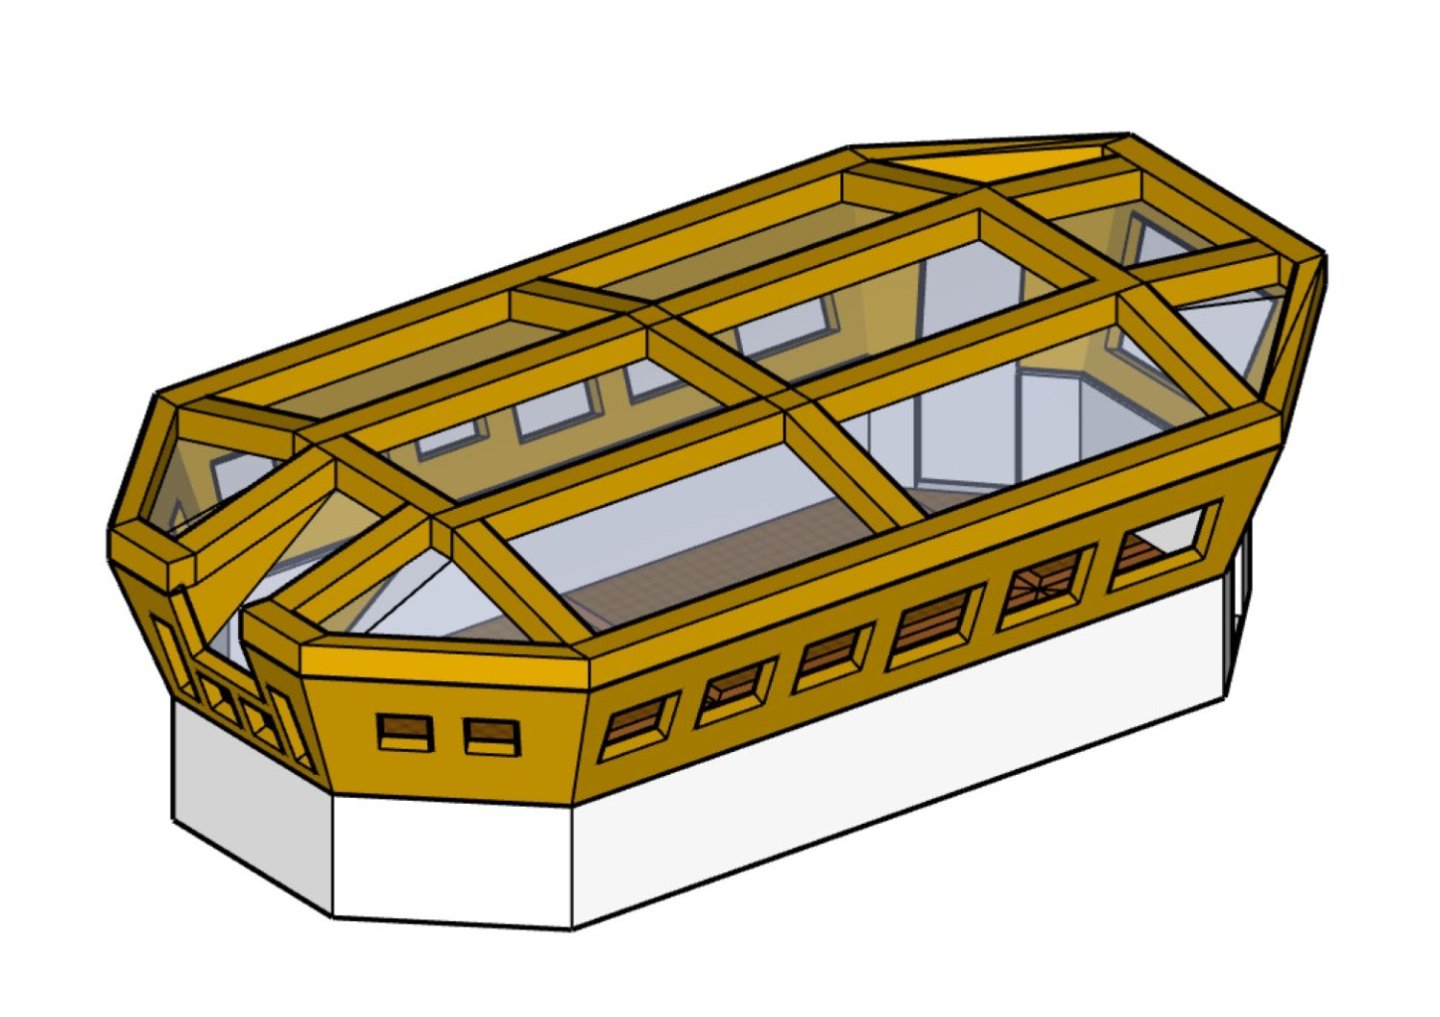
Well mates, it’s been a few days since my last update, so I thought I would give a little hint on what I’ve been up to. I’m not happy with the way OcCre designed the canopy for the fly bridge, basically gluing small pieces of wood stock to the clear plastic which makes sanding and blending very hard not to mention painting. So I’ve designed my own to be made of 1mm plywood, which will look like the sketch below. These pieces are small and I broke my first attempt, but a little redesign and I think this one will work.
-
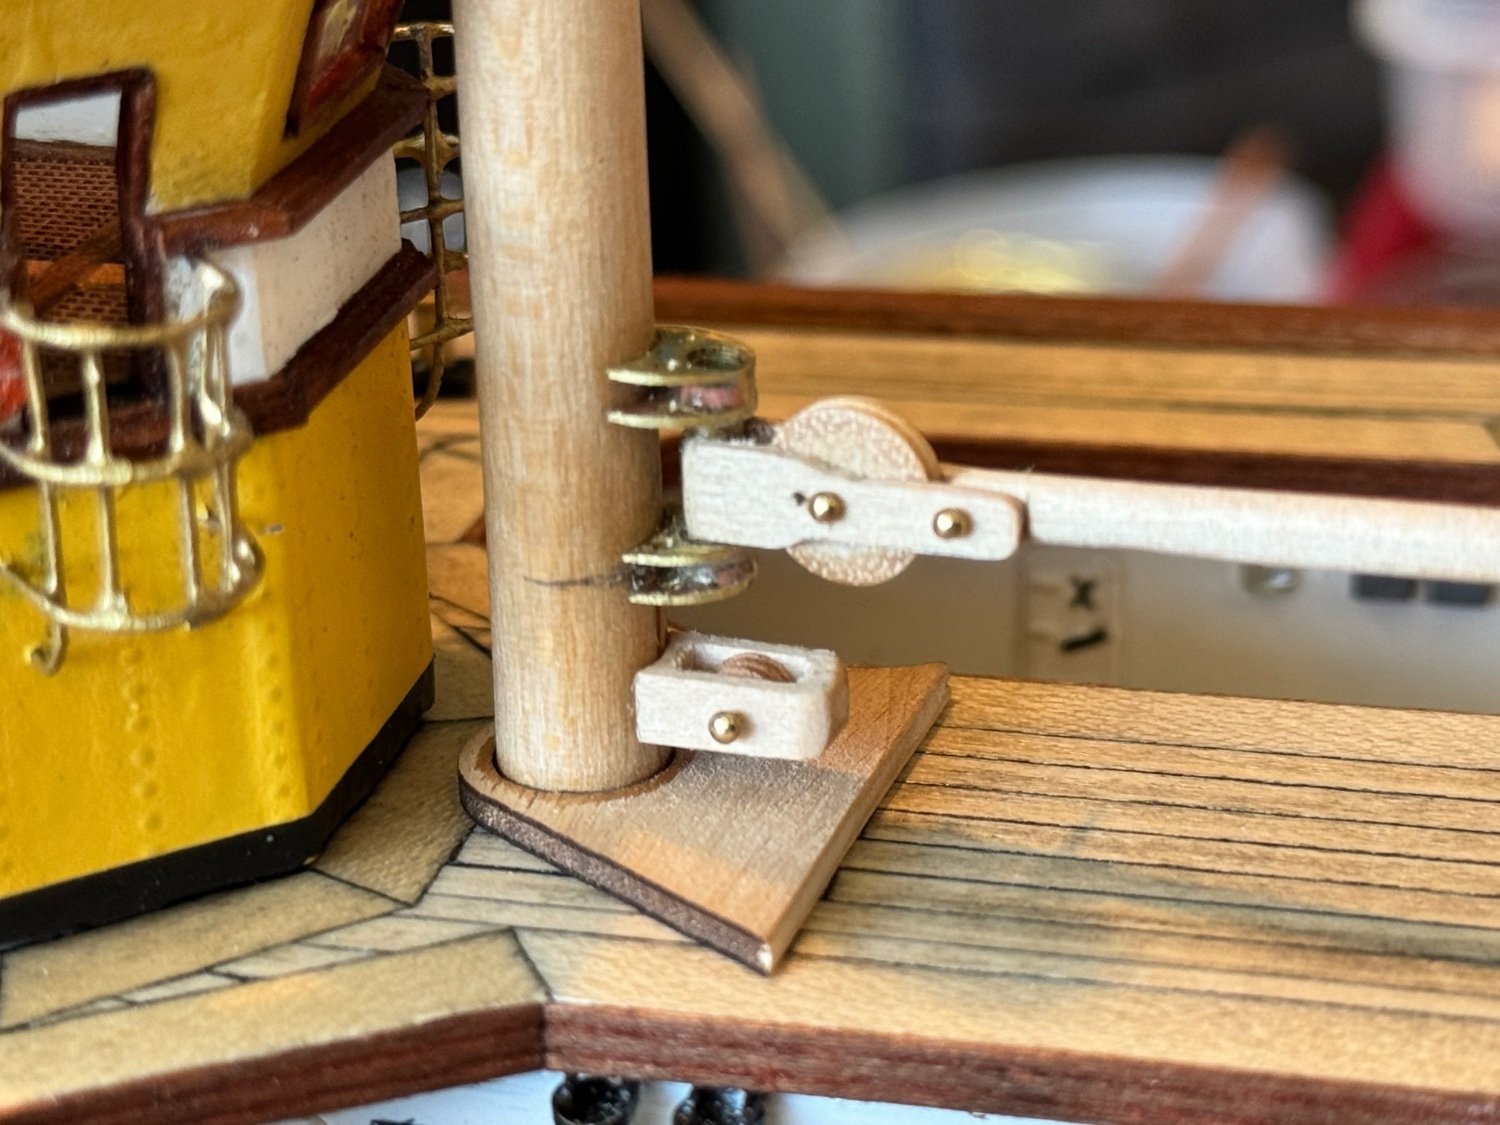
Good evening, today’s update is all about the cranes located at the bow. The hardest part for me was building the tackle, these pulley's are very small, just 3mm at the widest part.

-
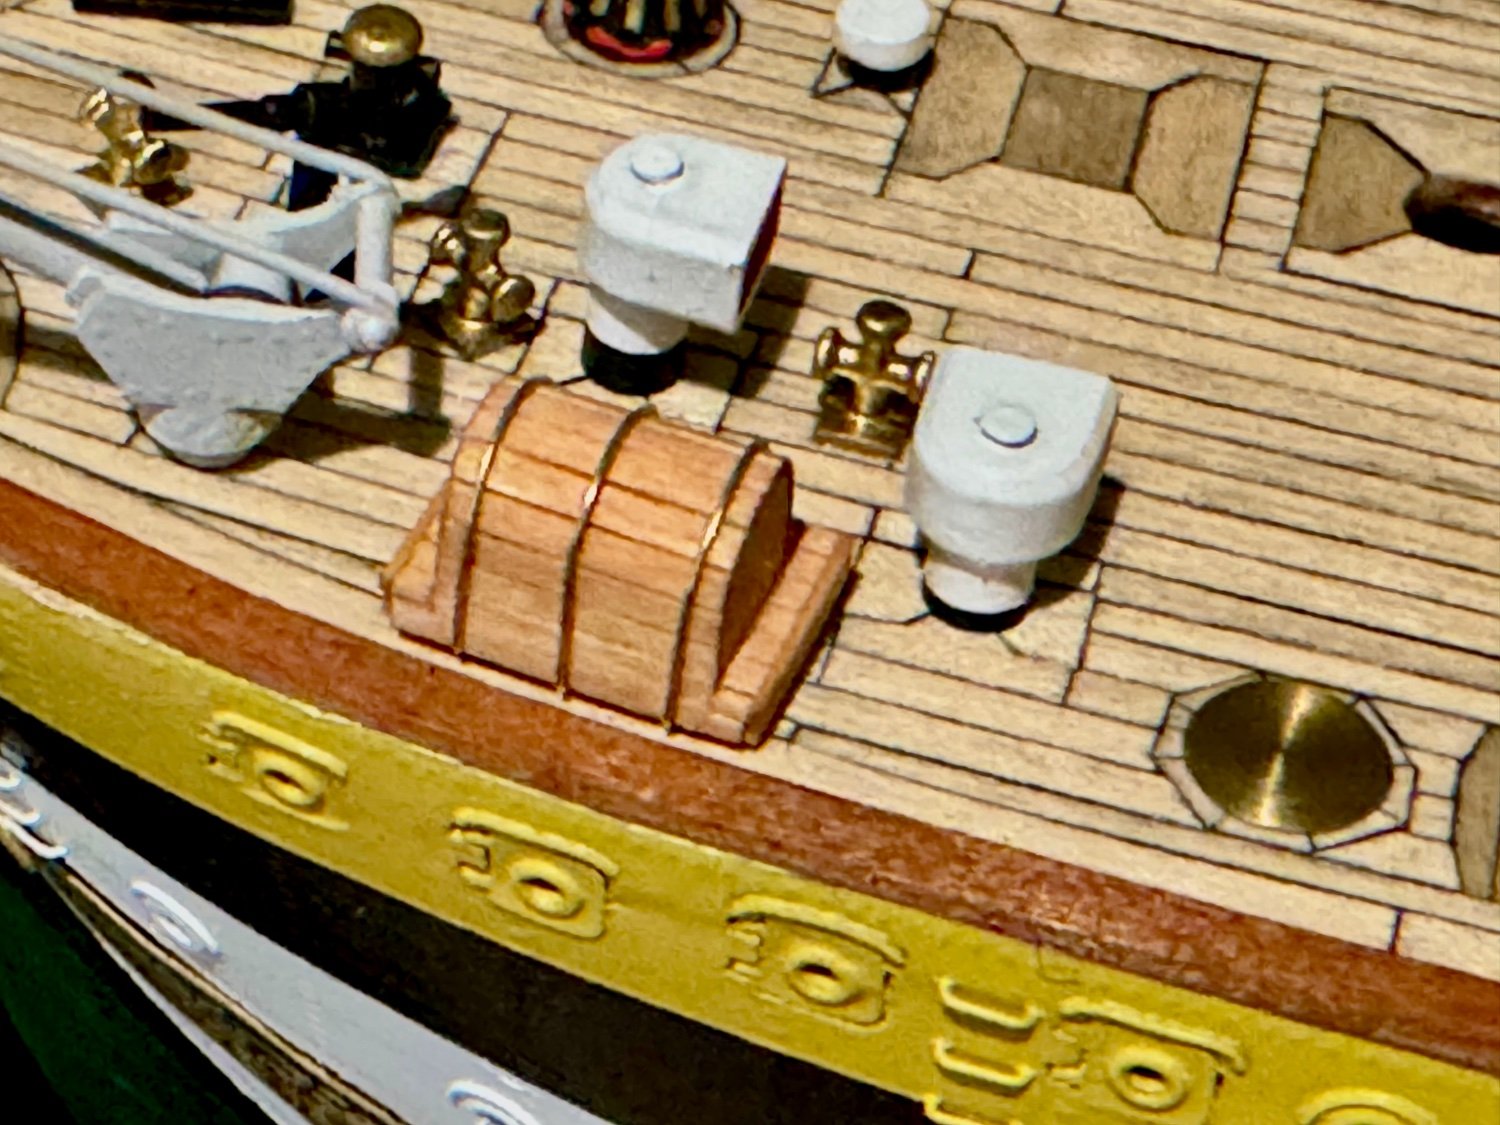
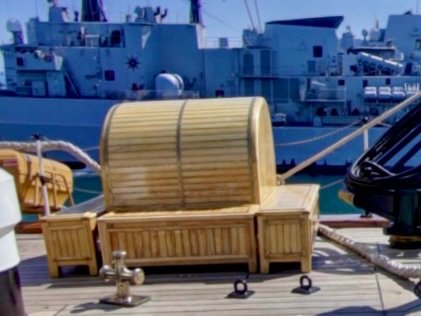
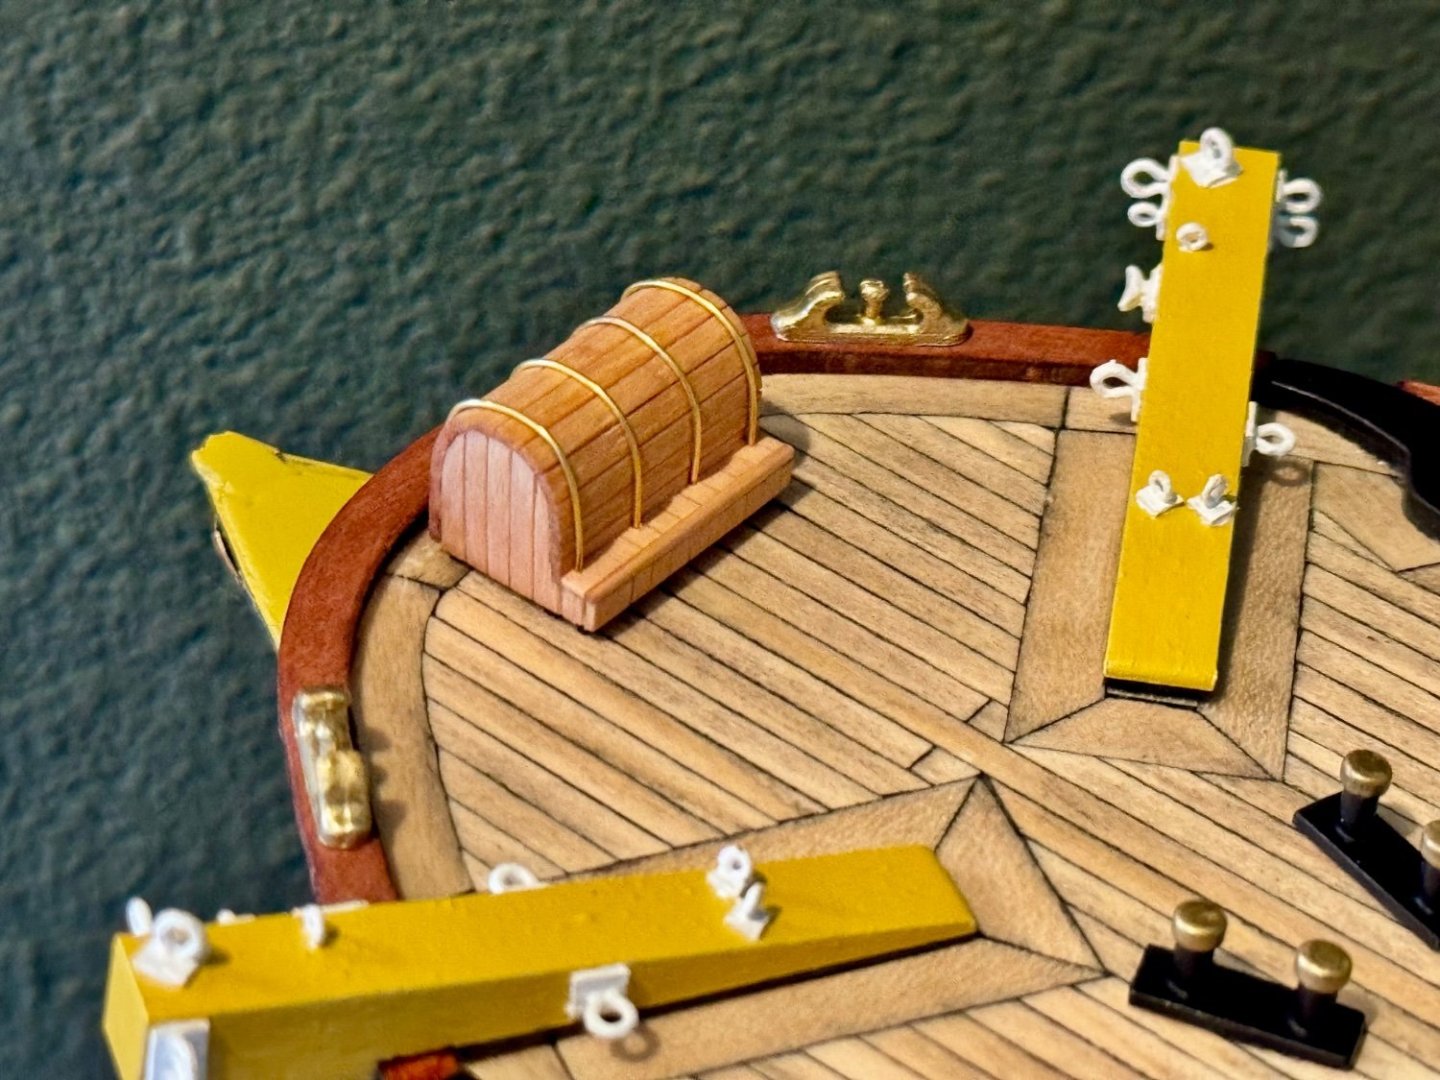
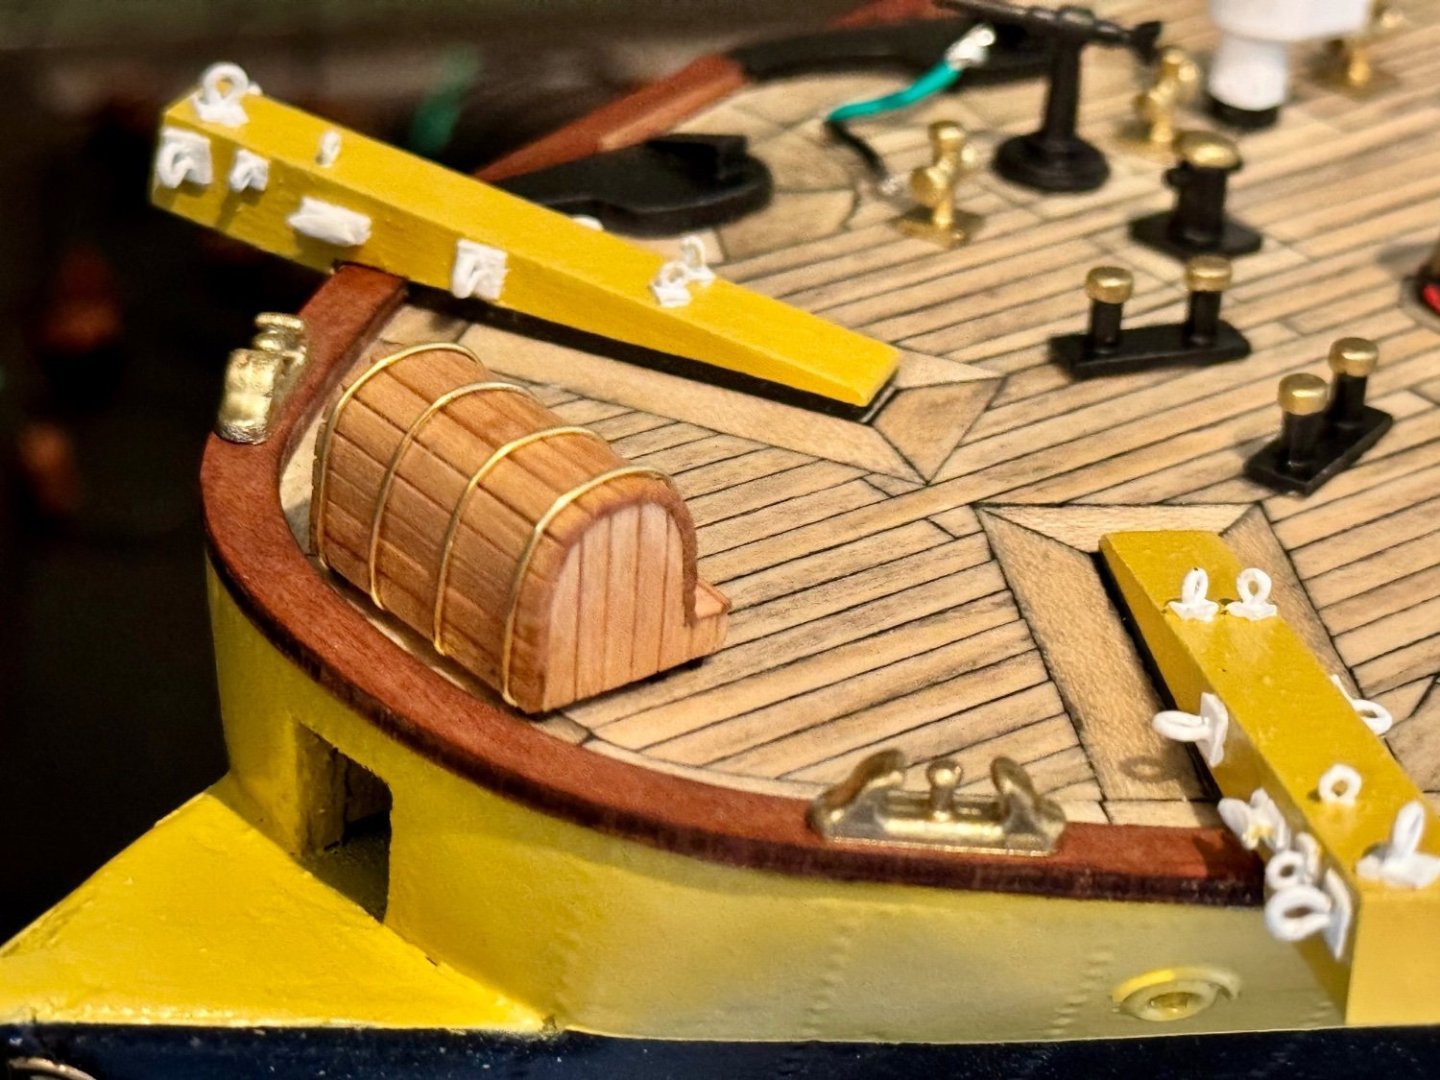
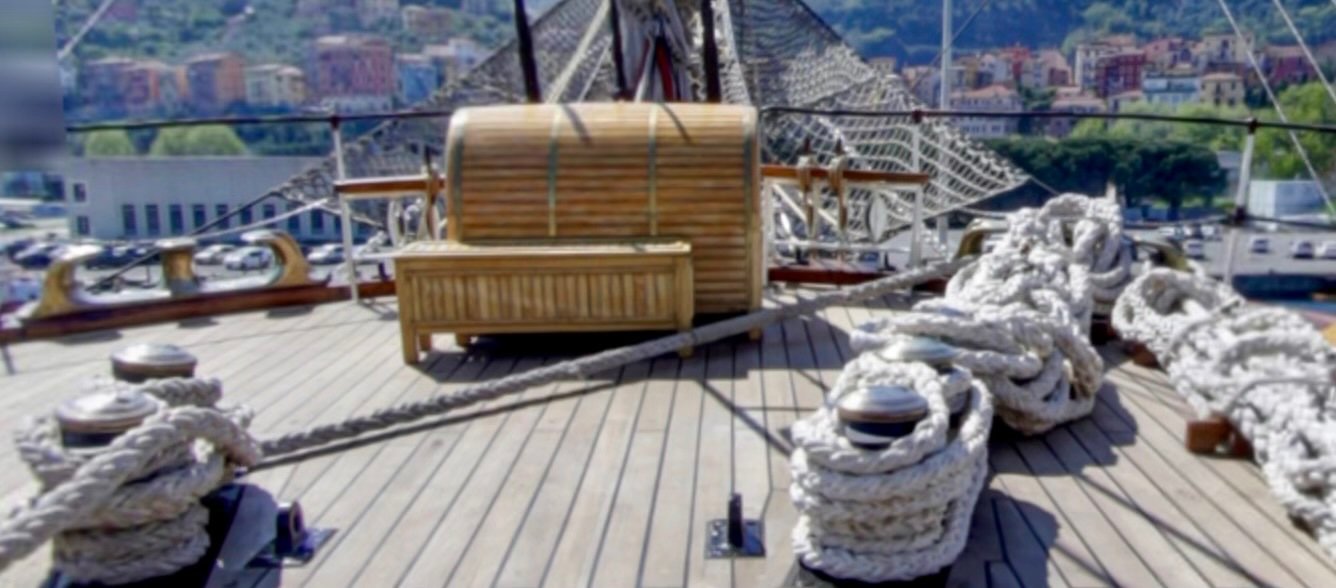
Good evening mates, I hope you all have had a great weekend. I’ve been a little under the weather so more time in the shipyard. This weekend I’ve been working on another storage bin with seats and a couple of cranes (see next post). For this one I had to modify the OcCre supplied parts and create one like the one on the real Amerigo Vespucci (see last image). I find that it takes hours to work on these miniature pieces, some of them about the size of an American dime.


-
Good afternoon mates, the last couple of days I attempted to make one storage bin with seat. I had to modify the OcCre plans to make more realistic, but I am fairly happy with the outcome.
-
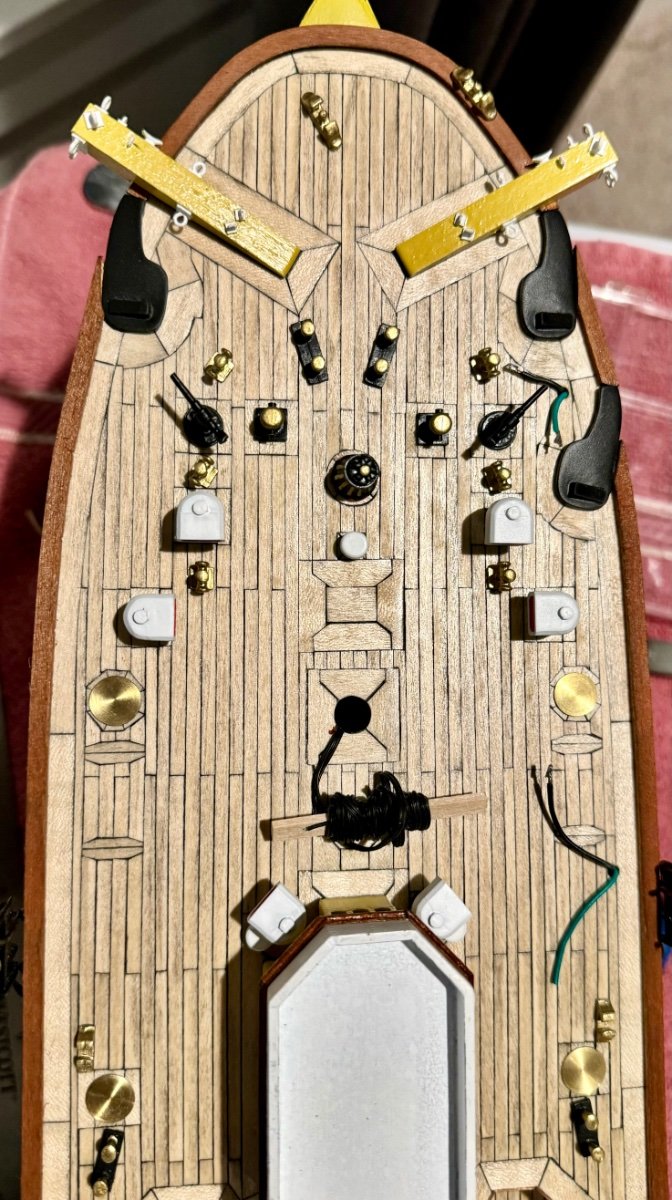
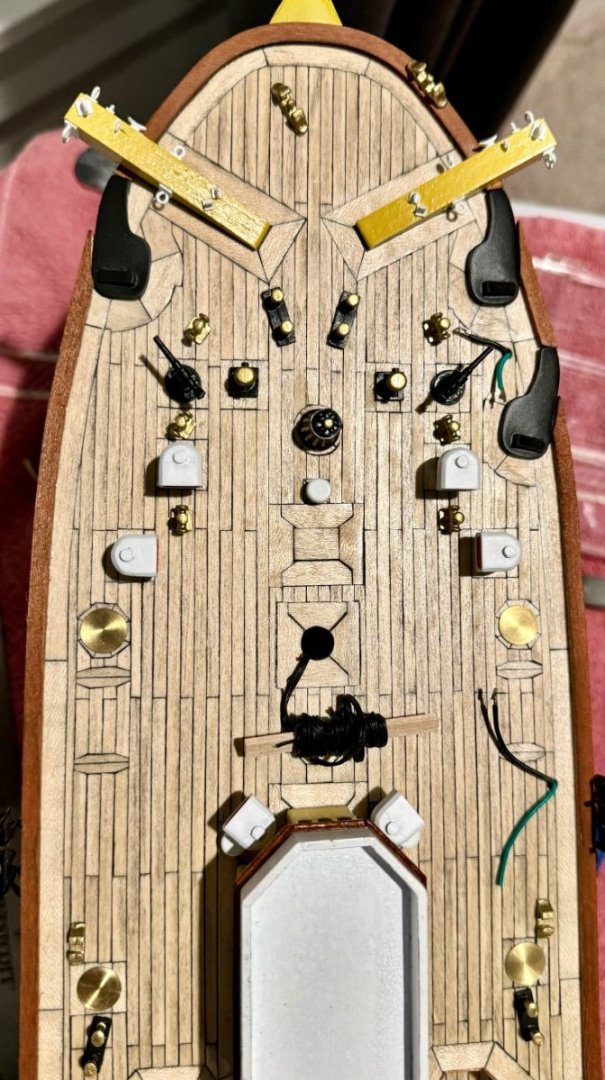
Good evening mates, it’s been a couple weeks and very little AV progress. The admiral and I took our first ever cruise so have been out of touch. In this update, I have secured the equipment to the fore deck and am about to start working on the hatches and finish up the chart room / fly bridge building.
-
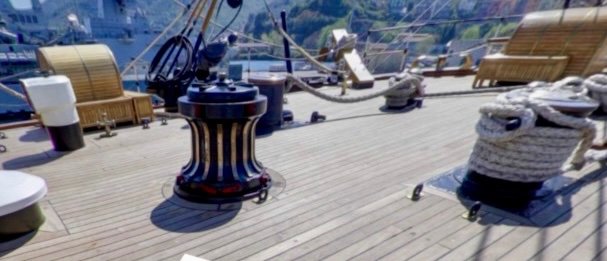
Good evening mates, I have spent a few days working on the forward capstan, lots of layers of paint and time between coats. Below is the before raw metal version provided by OcCre, followed by my completed version, and the last image the real one installed on the foredeck of the Amerigo Vespucci. The real version appears more straight, but I’m not sure I want to make one from scratch. Keep in mind that this entire piece of equipment is smaller than an American dime.


-
Good afternoon, more deck equipment for today. I took on the task of making the brass deck “scuttles” (waterproof hatches, sometimes used to load coal). These were made from flat brass stock, cut into an approximate circle, then soldered a brass rod to the bottom center so that I could turn in my mini lathe.

-
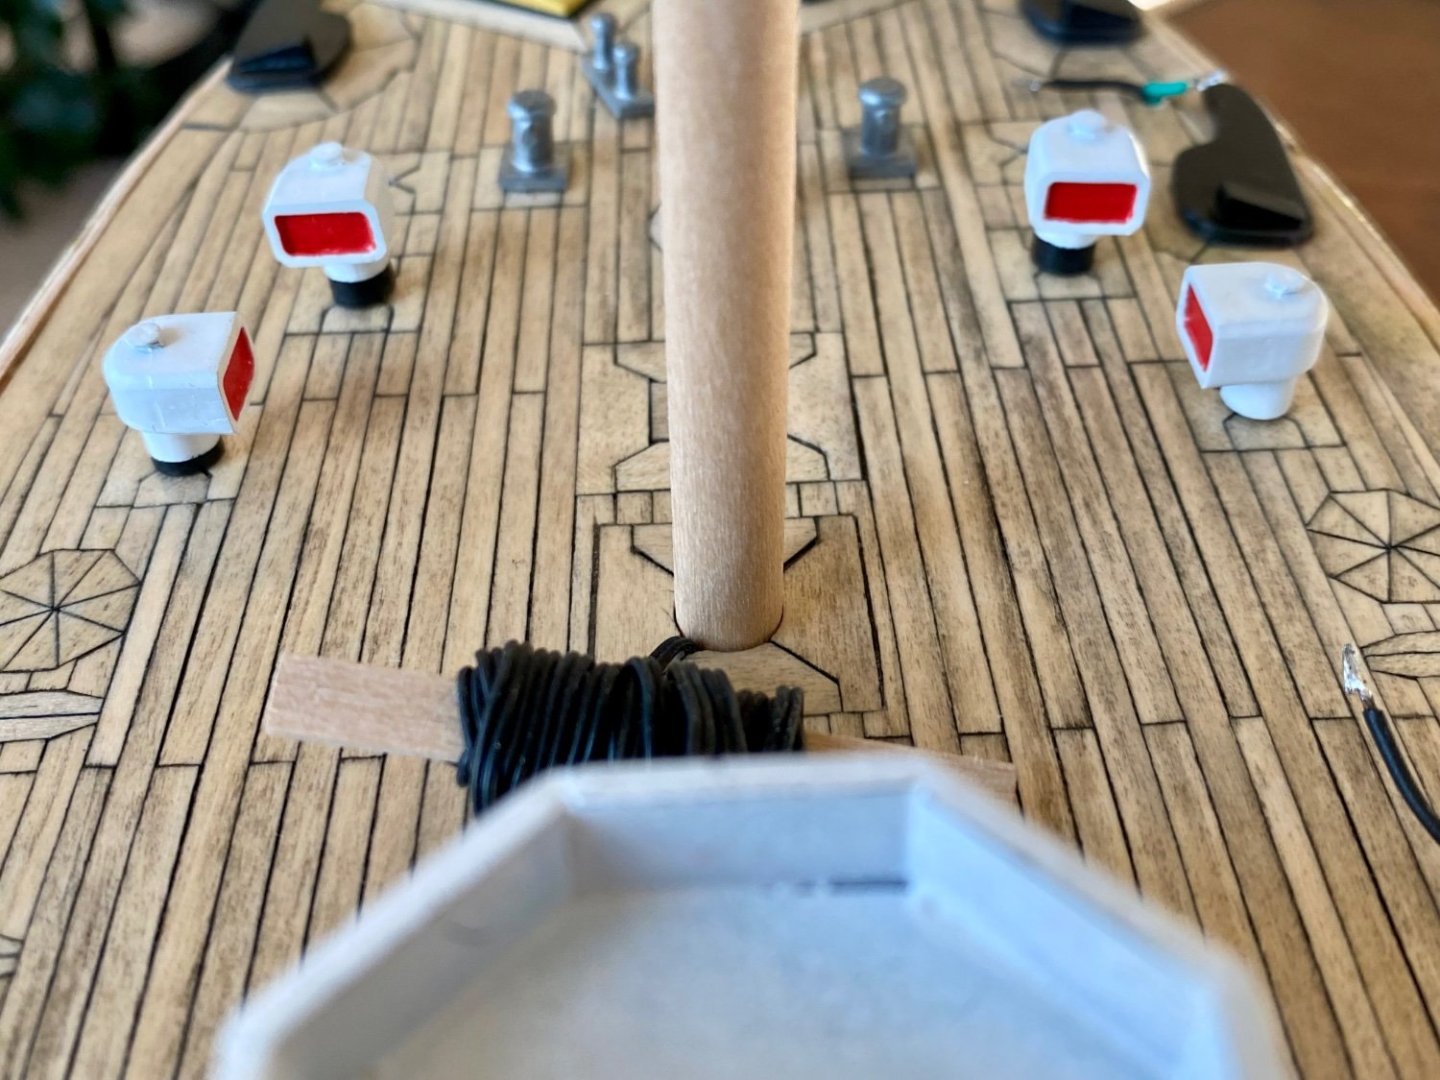
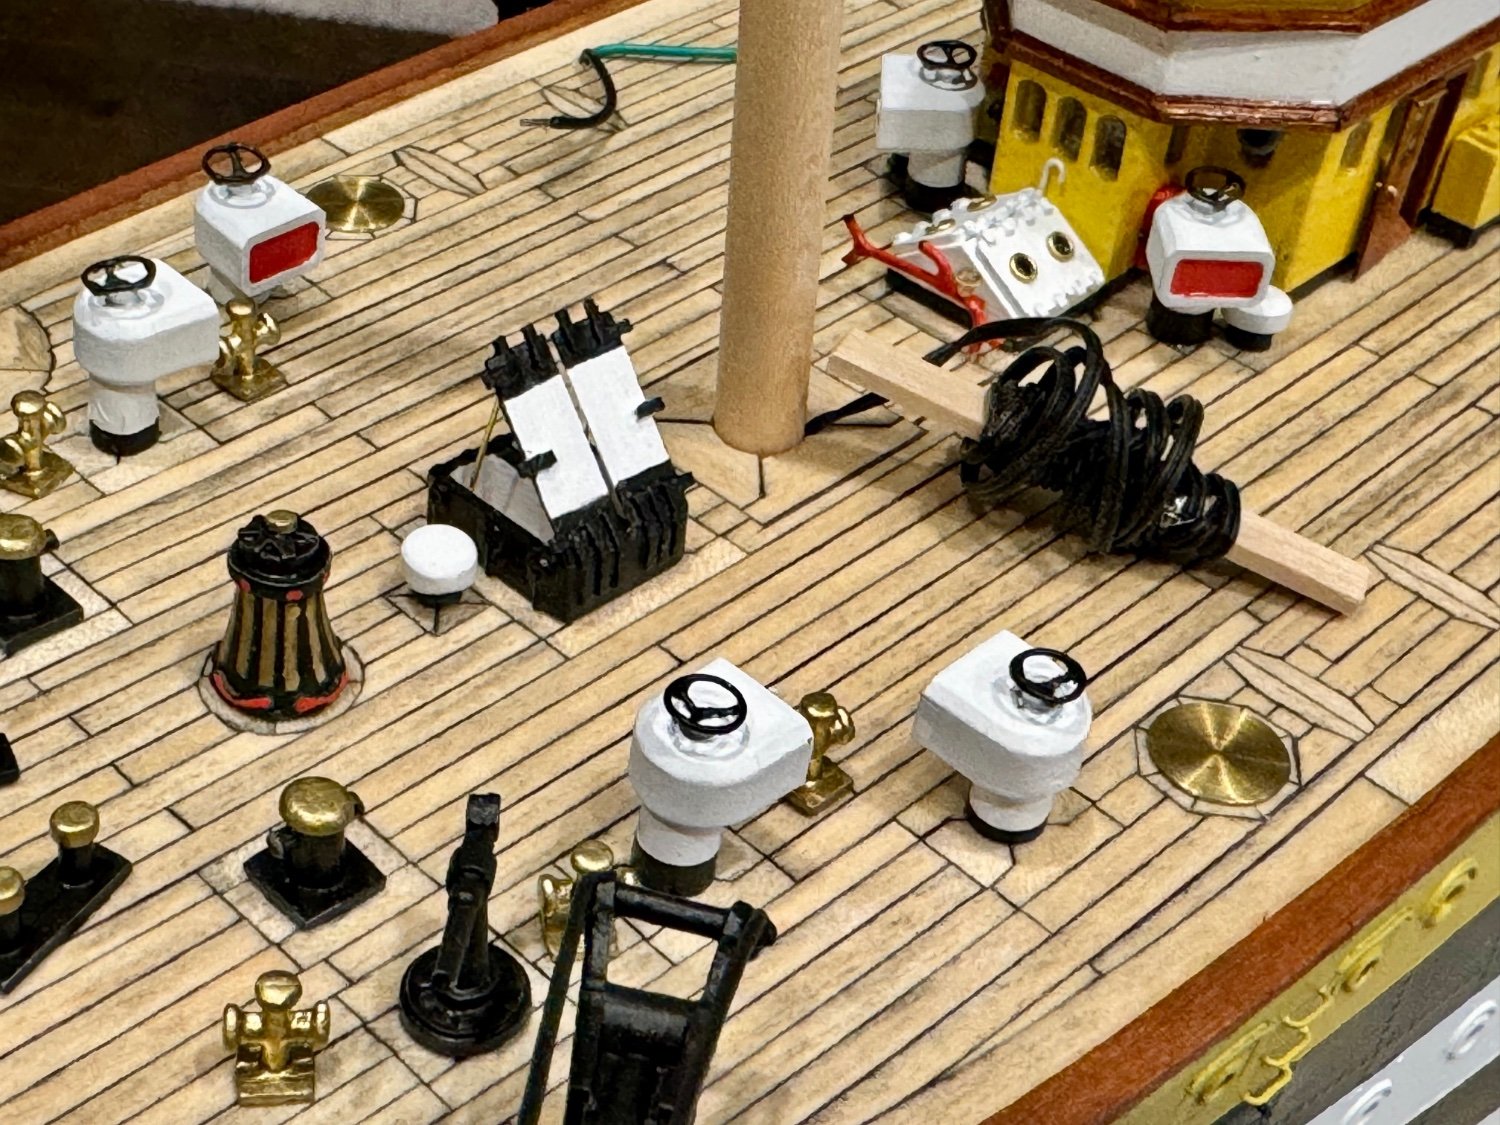
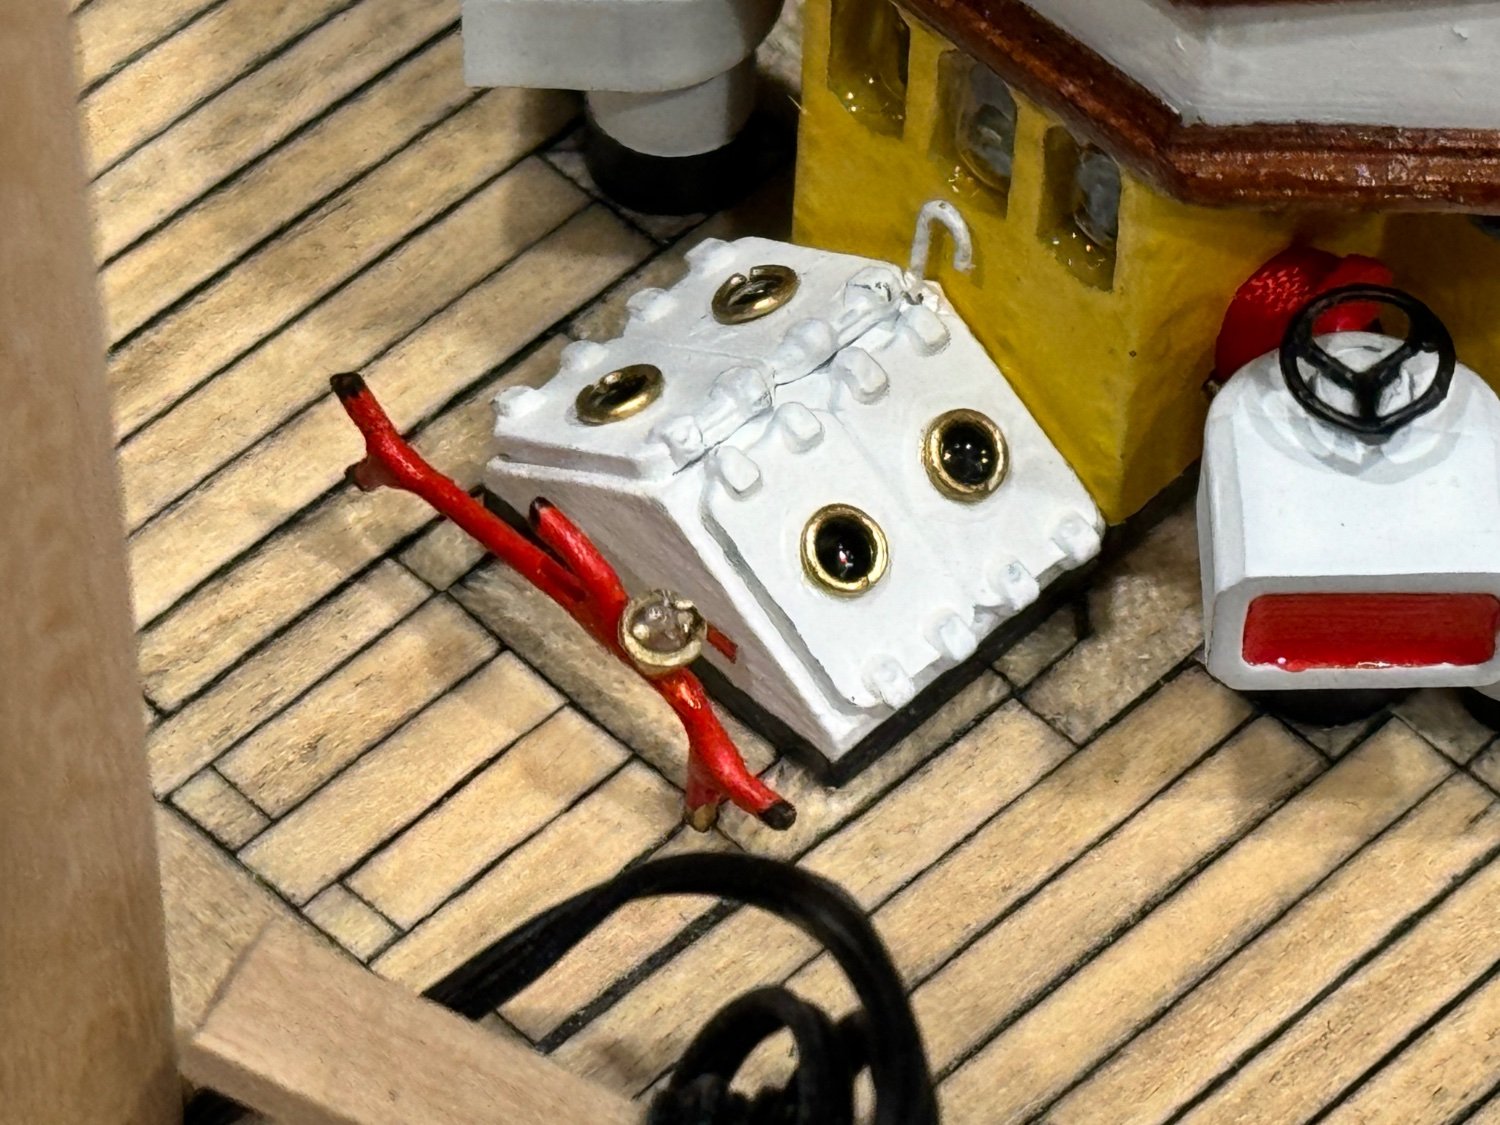
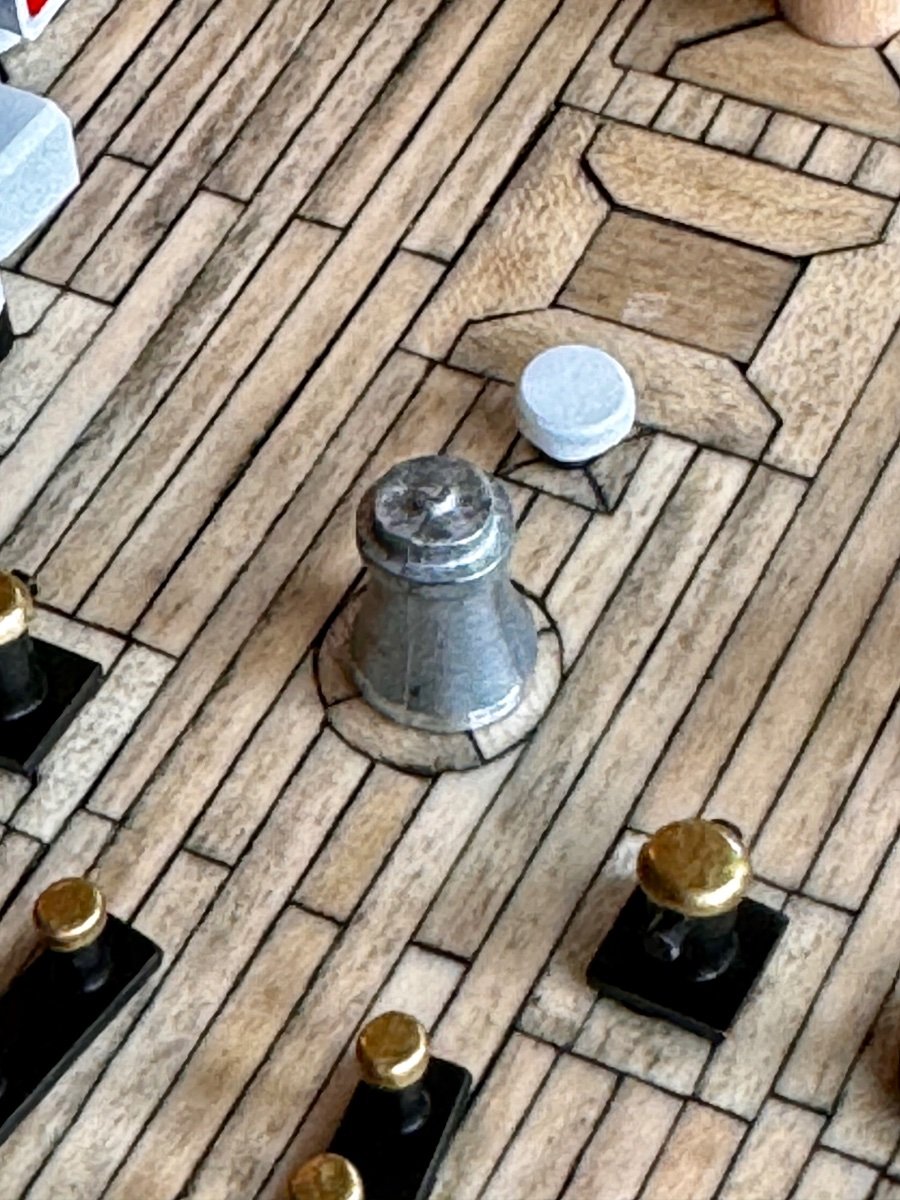
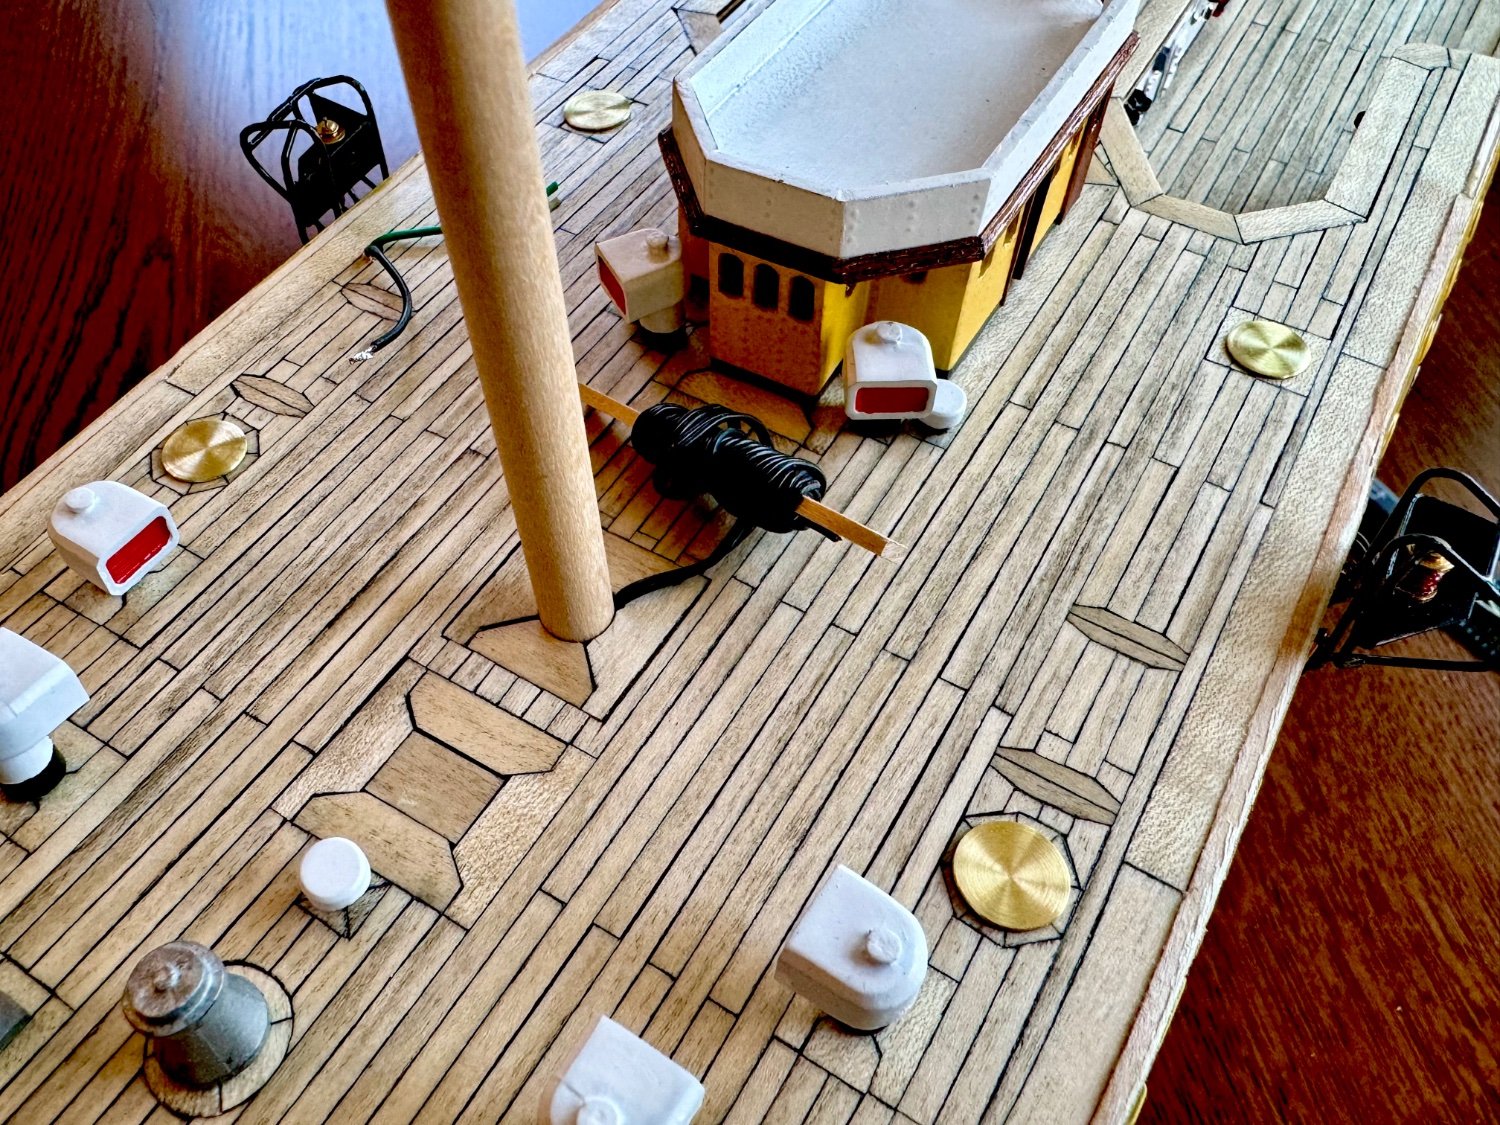
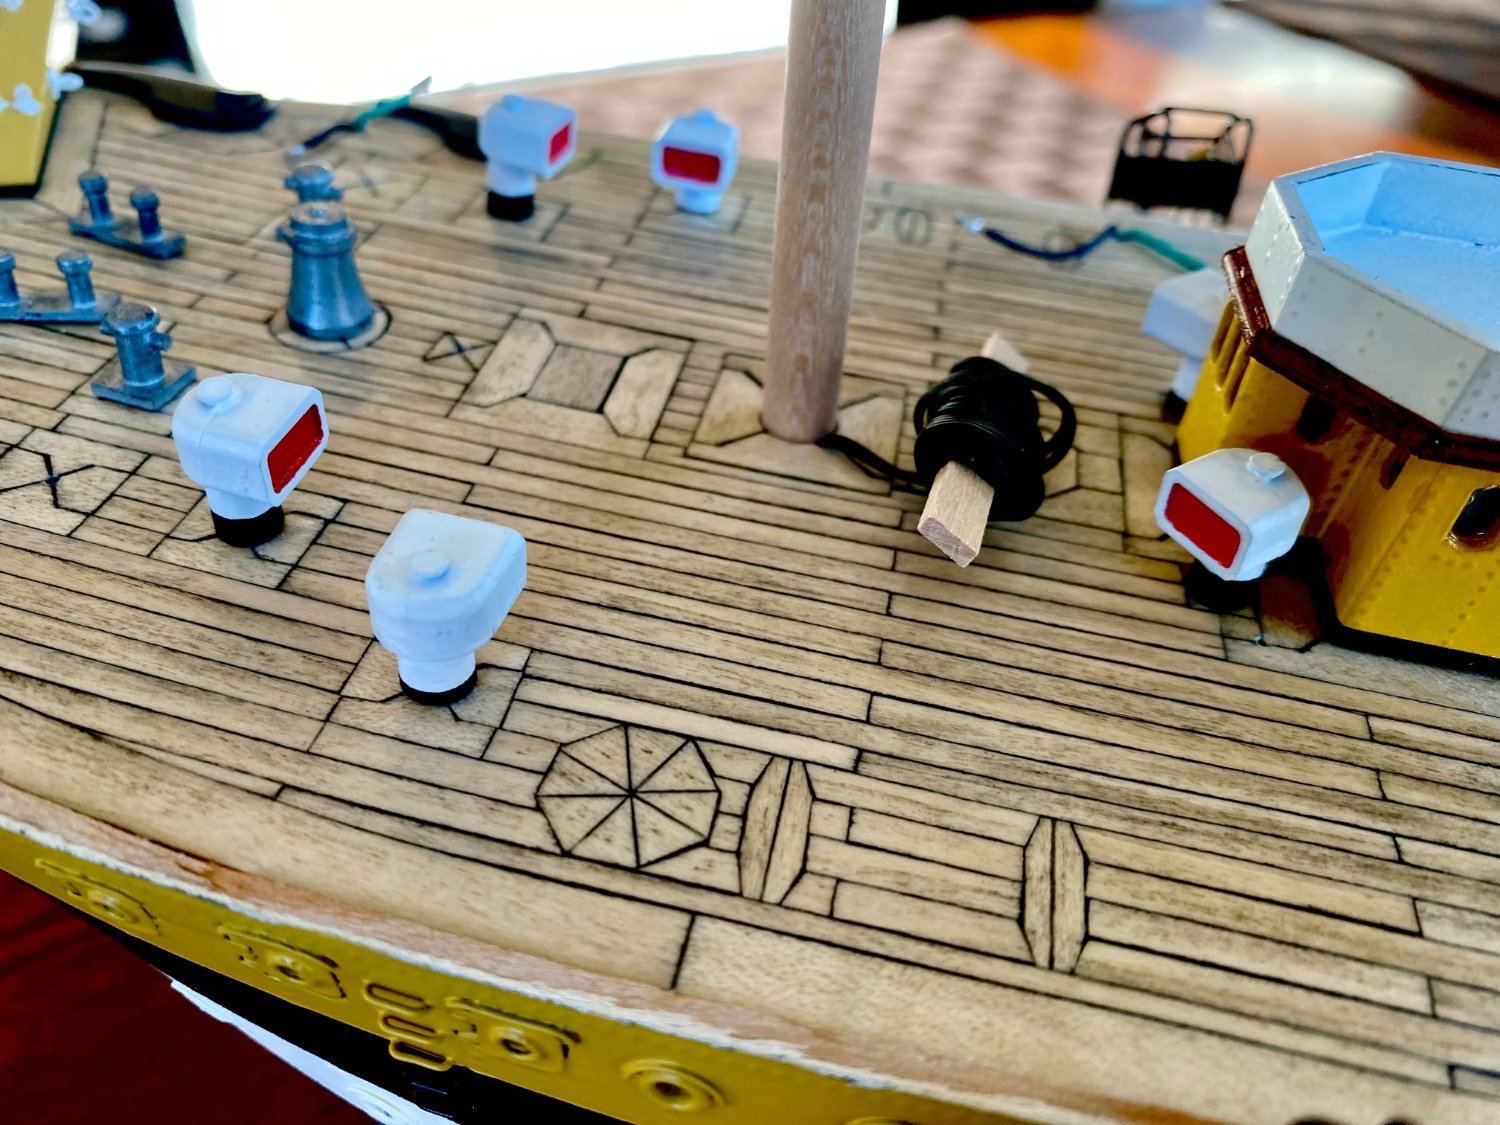
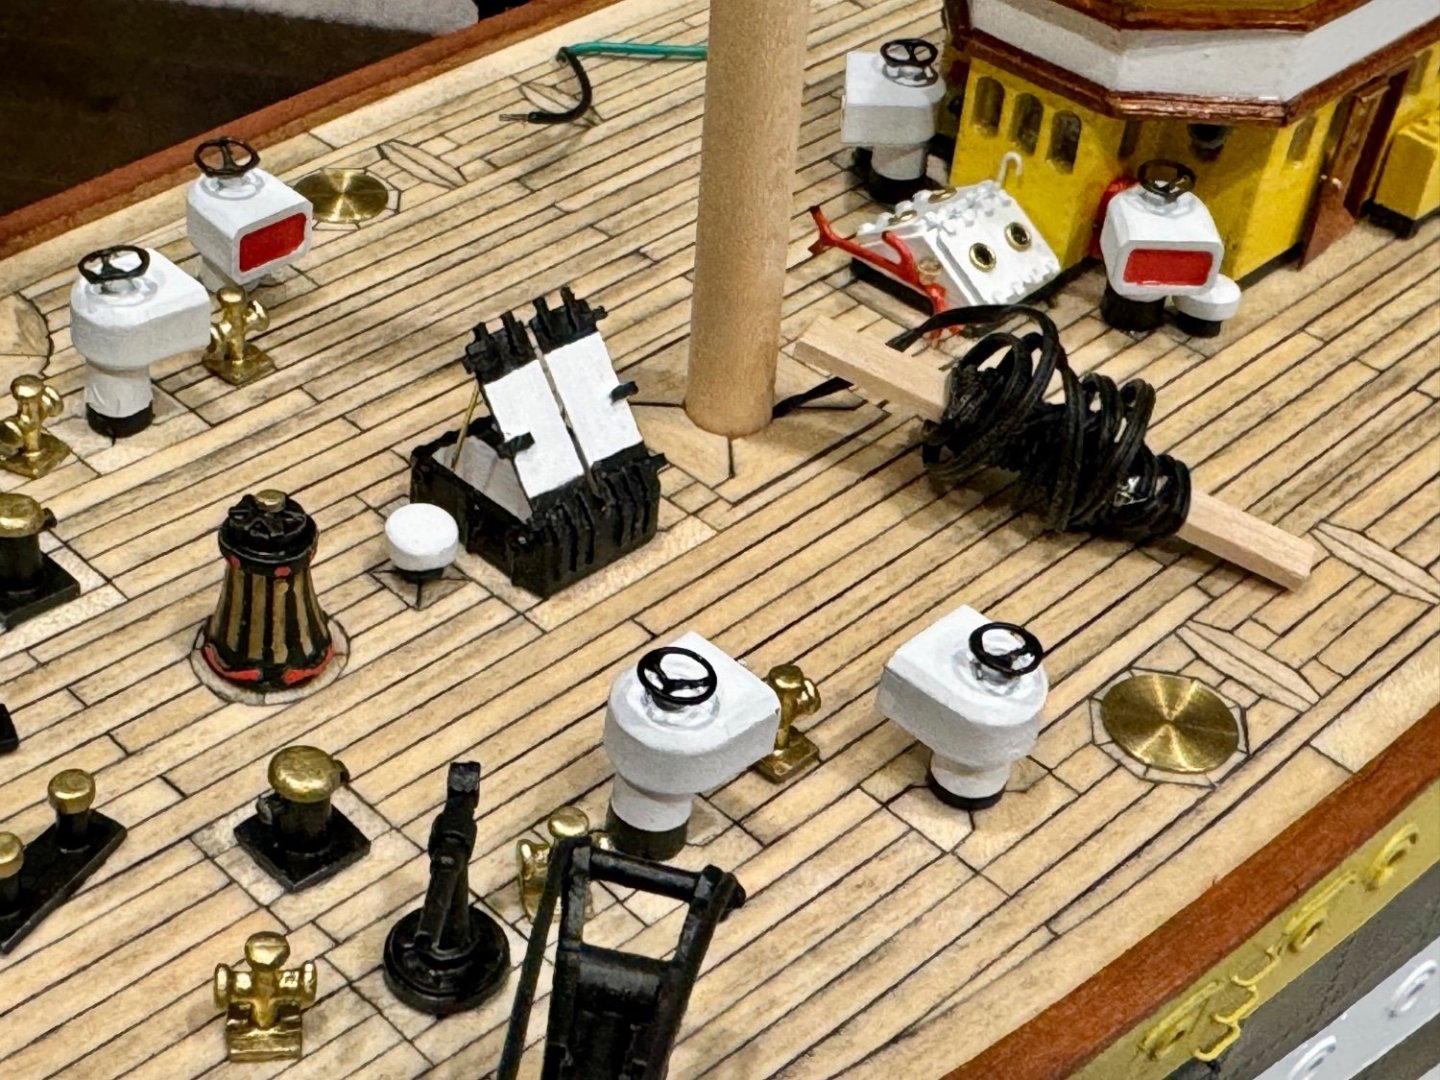
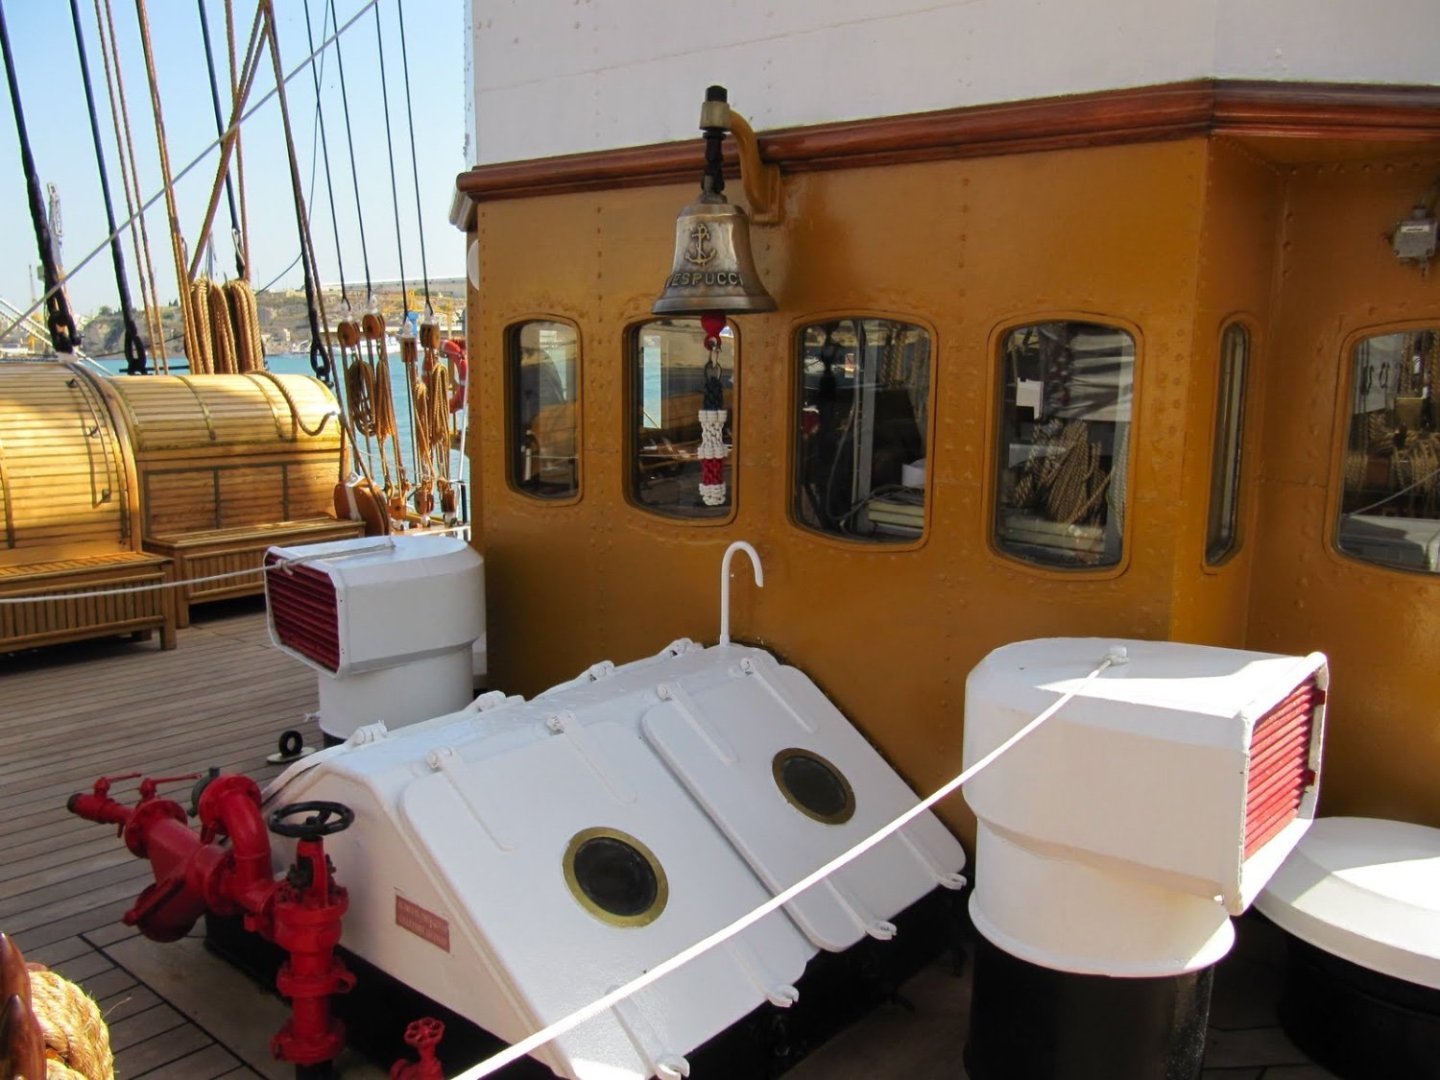
Good morning mates, more work going on for the deck equipment. I’ve been painting up the deck vents (not sure what they are called) but they add some nice color to the ship. Interesting note, I showed the completed vents to the admiral and her first comment was “why does the one vent not have a black base like all the others?” Ummmm, well, I really don’t know. However, when you look at pictures of the actual AM deck, this one vent has a white base while all the others have a black base. Not sure why, but that’s the way it is. Thanks to the Amerigo Vespucci virtual tour for the real deck image.