Supplies of the Ship Modeler's Handbook are running out. Get your copy NOW before they are gone! Click on photo to order.
×


Mirabell61
-
Posts
7,403 -
Joined
-
Last visited
Content Type
Profiles
Forums
Gallery
Events
Everything posted by Mirabell61
-
 super Siggi, nice photos also. Will you have some outcuts in the deck allowing view to the below interior ? Nils
 -
Many thanks John, I`ll take your opinion for more realistic as well. (official Merchant flag of those years) The novel "The Sea Chase" by Andrew Geer of 1948 begins in your hometown in Sydney Harbour appr. two days before WW2 broke out. I saw this movie so many years ago , but still remember, that the captain ordered even to break down the wooden Lifeboats and everything made of wood on the steamer for feeding the boilers in lack of coal on his escape... Nils
-
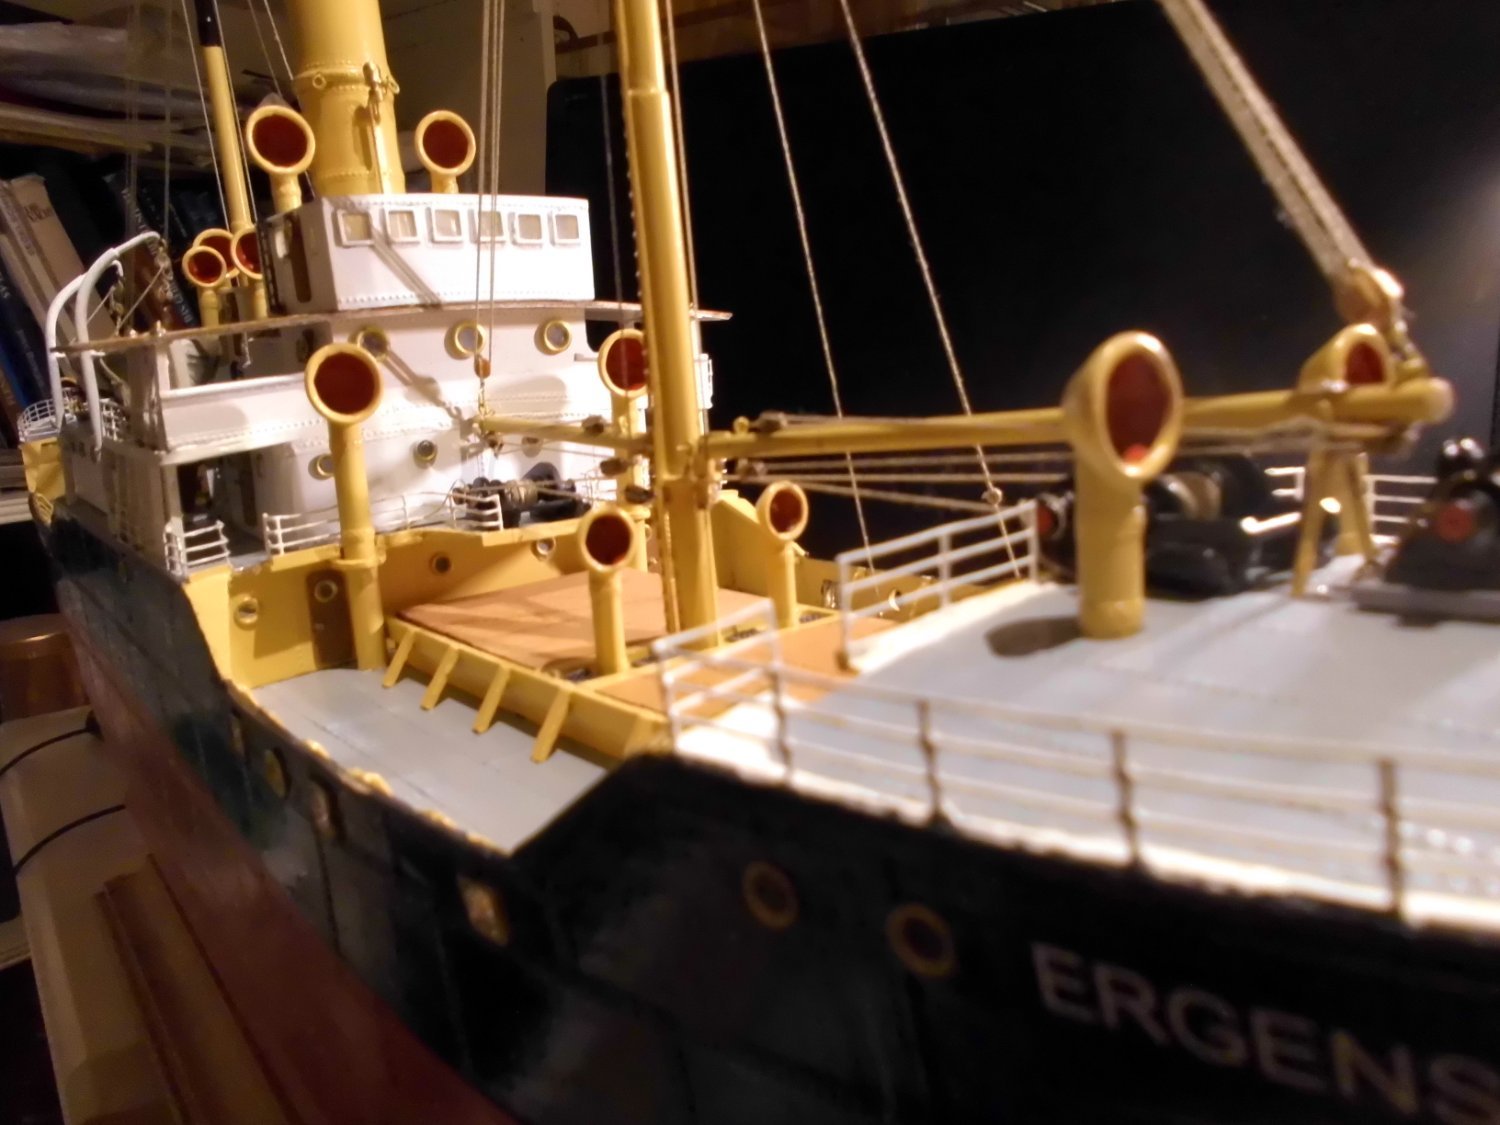
thank you very much Keith, I hope I`m achieving a good mix of the old 1918 Corsicana and the 1955 movie-ship Ergenstrasse. I`m wondering wich nationality flag they were flying, as the capt. had order to "break through the British controlled lines" and head back to Germany. in that case it would not have been wise to set the German flag anyhow. In the movie the capt. set the German marine war-flag ( it was a civel ship though ! ) at the time the Ergenstrasse was intercepted in the Norway waters by the Royal Navy. As a civel ship she must have been flying the official (between 1935 and end of WW2) german merchant ship flag, which is the general red backgrond with the white Hakenkreuz on it. In the movie the capt. held this in hands for setting but then decided to set the war-flag instead, like German battle ships were flying. I would like to set a flag to my model, but unfortunately do`nt know wich one, Any recomendations ? Nils
-
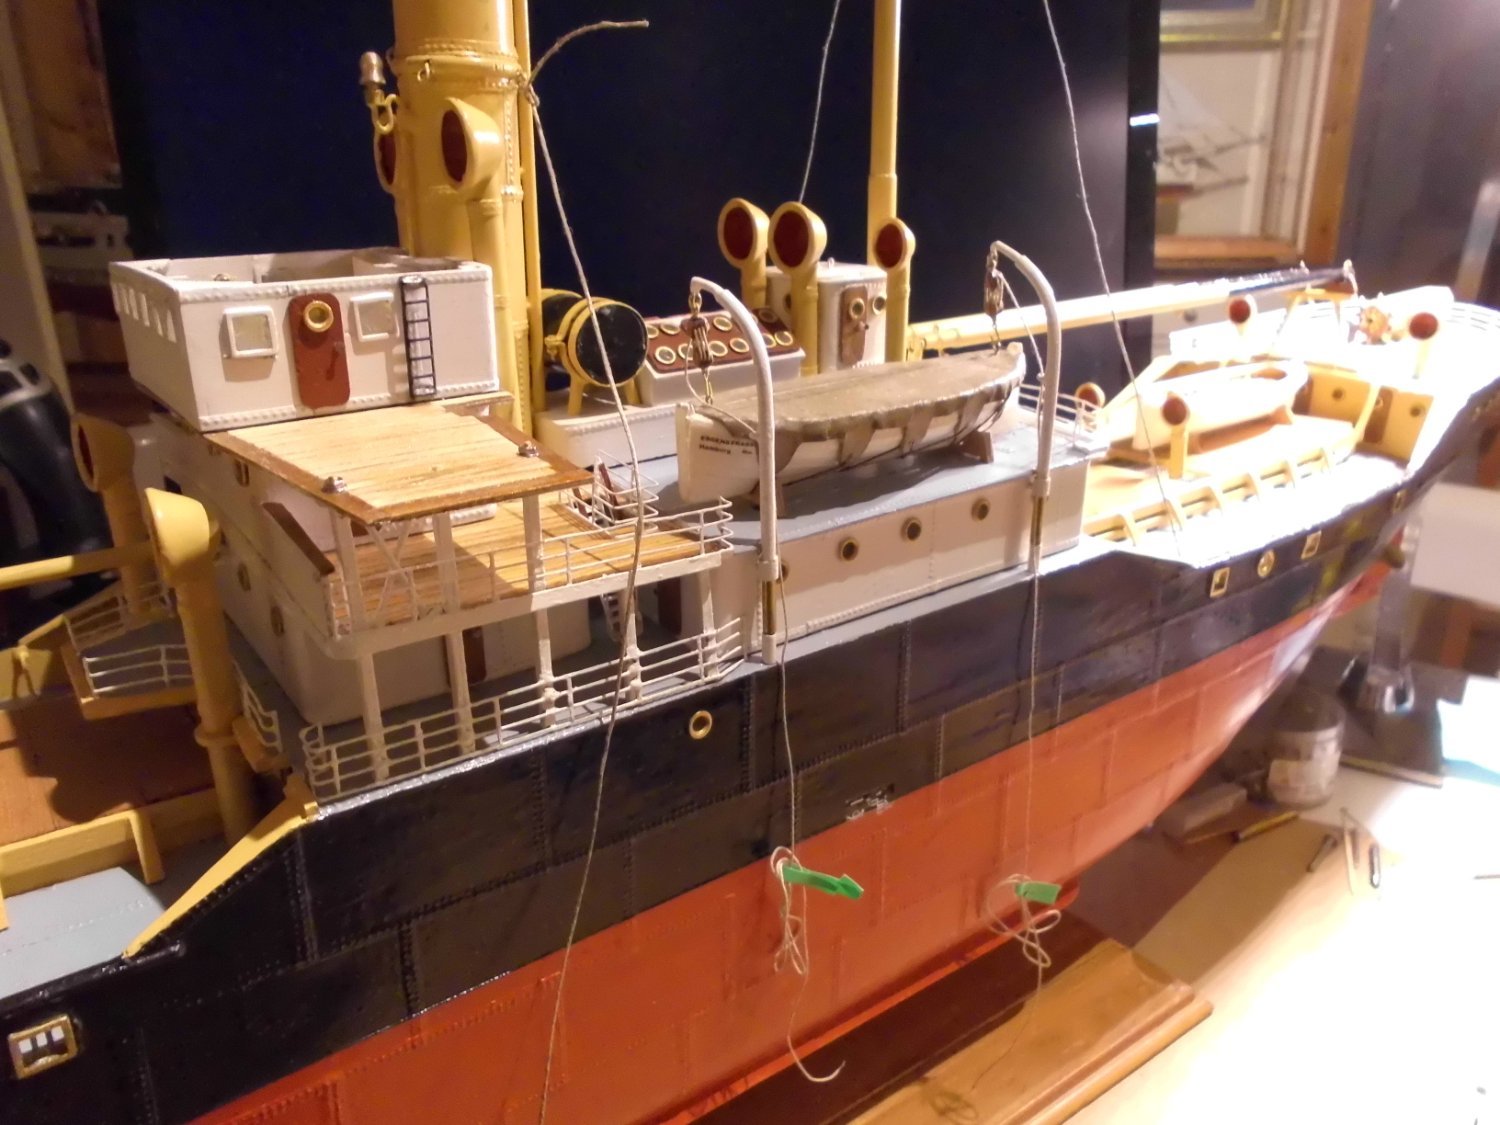
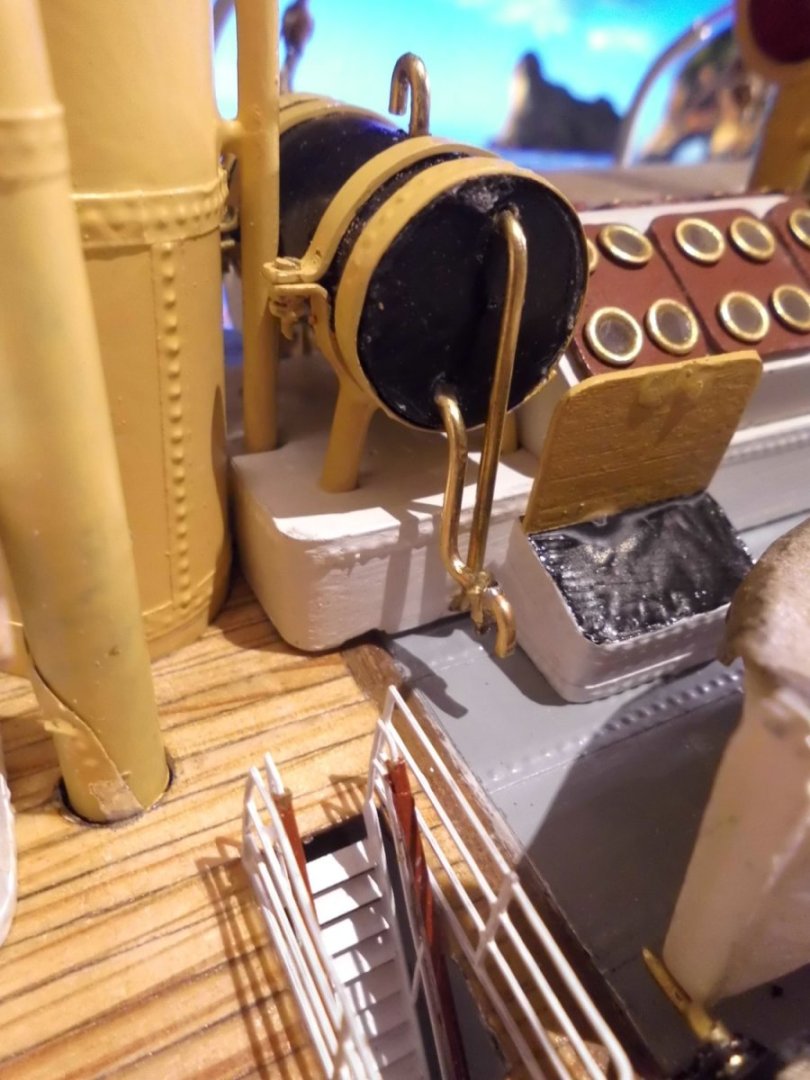
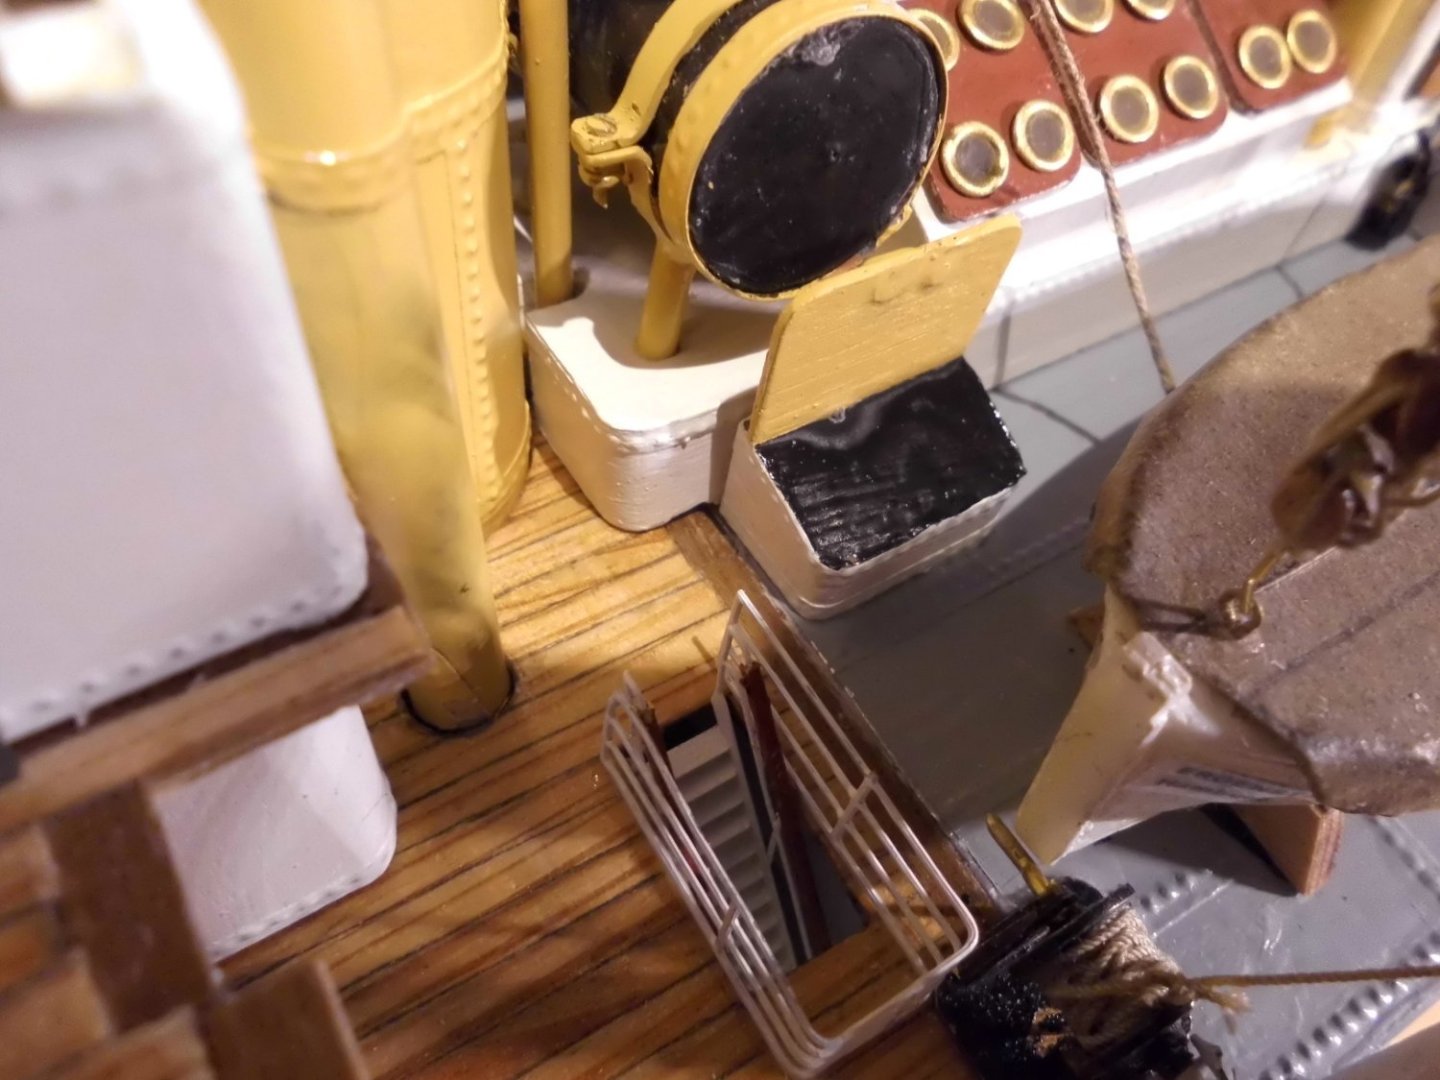
Update before rigging the aft mast, I connected the tubes to the fresh-water tank..... Nils the stb. side tubing : discharge to mach.room, winter anti-icing with bypass heater-spool from the funnel inside, and swanneck vent on top of the tank for tank ventilation port side tubing : filling tube from lower freshwater supply, discharge, local for boats deck with tap. Maybe I`ll also hang a small bucket near the tap the two heavy front bollards with mooring rope for going through the bow front bulwark openings


- 330 replies
-
- 17
-

-

-
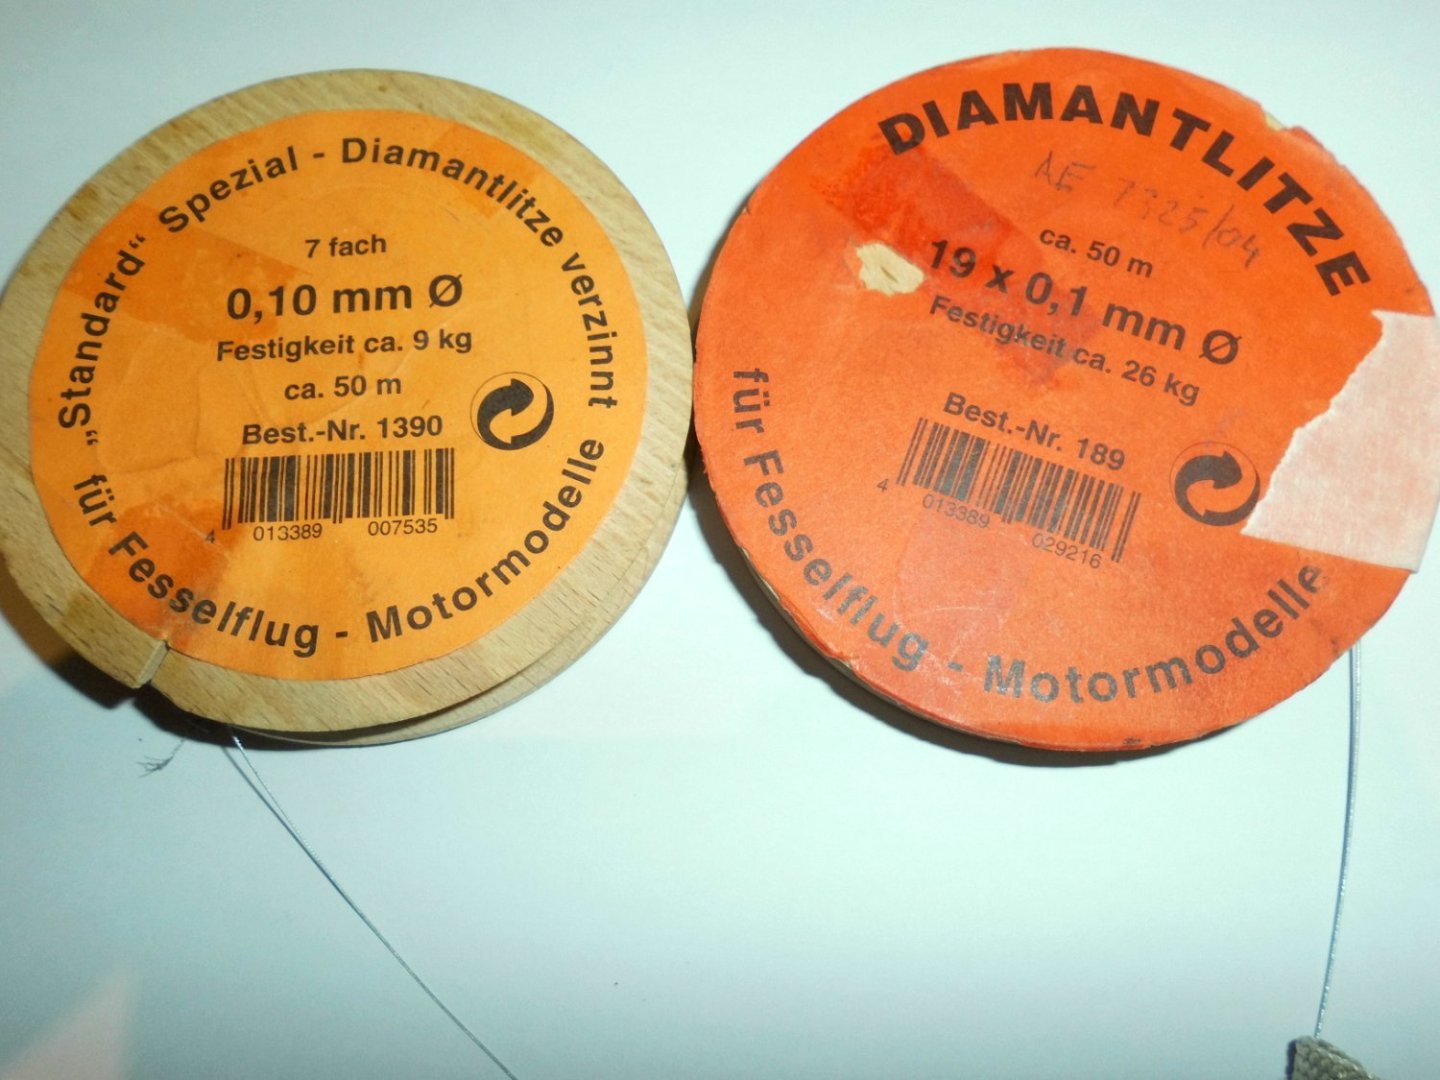
This is to pass on my special thanks to all fellow builders with their kind recommendations for scaled wire ropes for rigging purposes. I have own good experience with using steel rope like the (meantime not any more common) remote wire control for model power planes. This steel "Diamantlitze" is either total 0,5 mm OD, 19 strand x 0,1 wire .....or total OD 0,25 mm 7, strand x 0,1 mm. Both are galvanic tin coated. I applied this very suitable material (50 Meters on the spool) for soldering for the stays and shrouds of my tallship-models Pamir and Gorch Fock, as those would be spanned and confrontrated with considerable pull-forces caused by the working bottleneck screws Nils
- 330 replies
-
- 10
-
-
Good point Vezett, many thanks for your comment. The "Litze" is silver-coated, which is good for applying, but the seller recommends special caution when soldering, is nothing for beginners... Nils
-
Eberhard, many thanks for your idea input here. I`ll have that in mind. Also the possible use of fishing-line (Japanese) material sounds interesting Nils
-
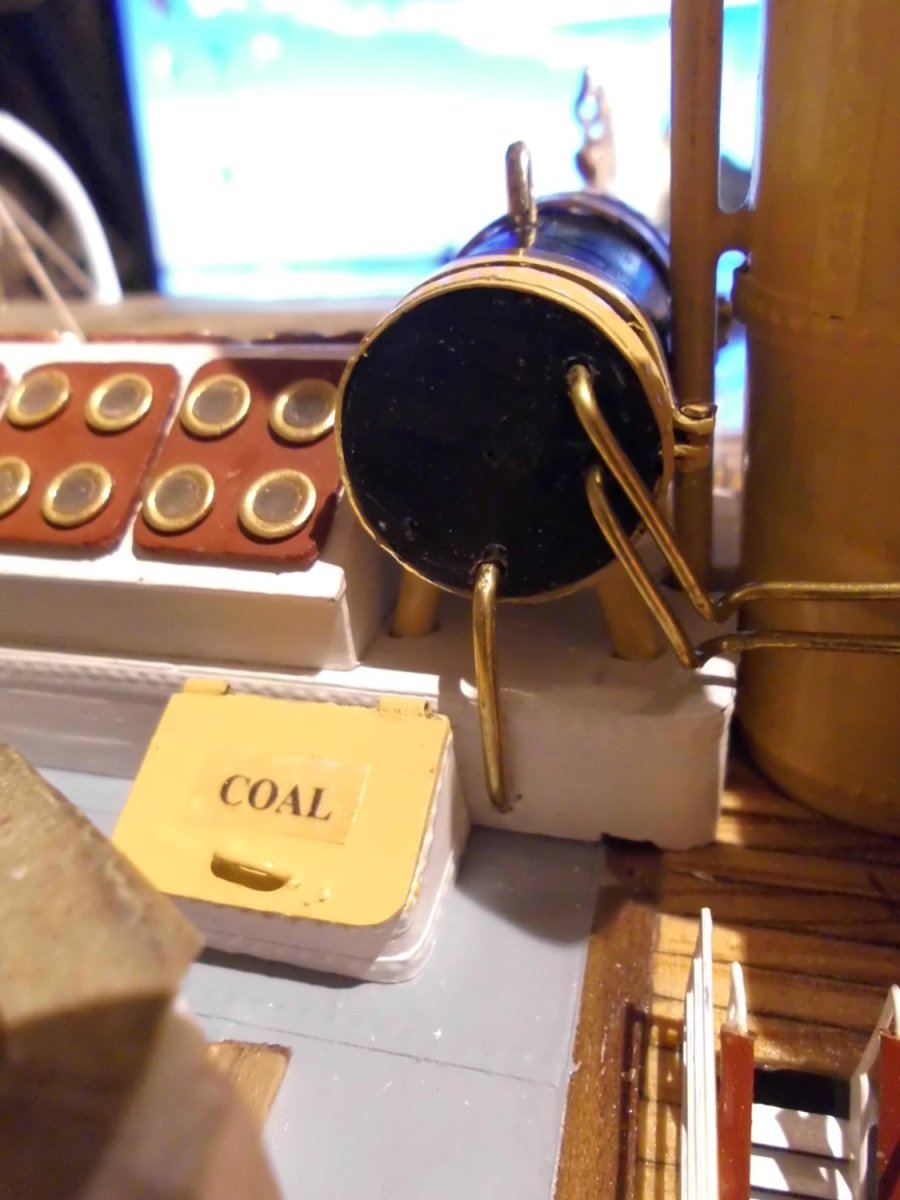
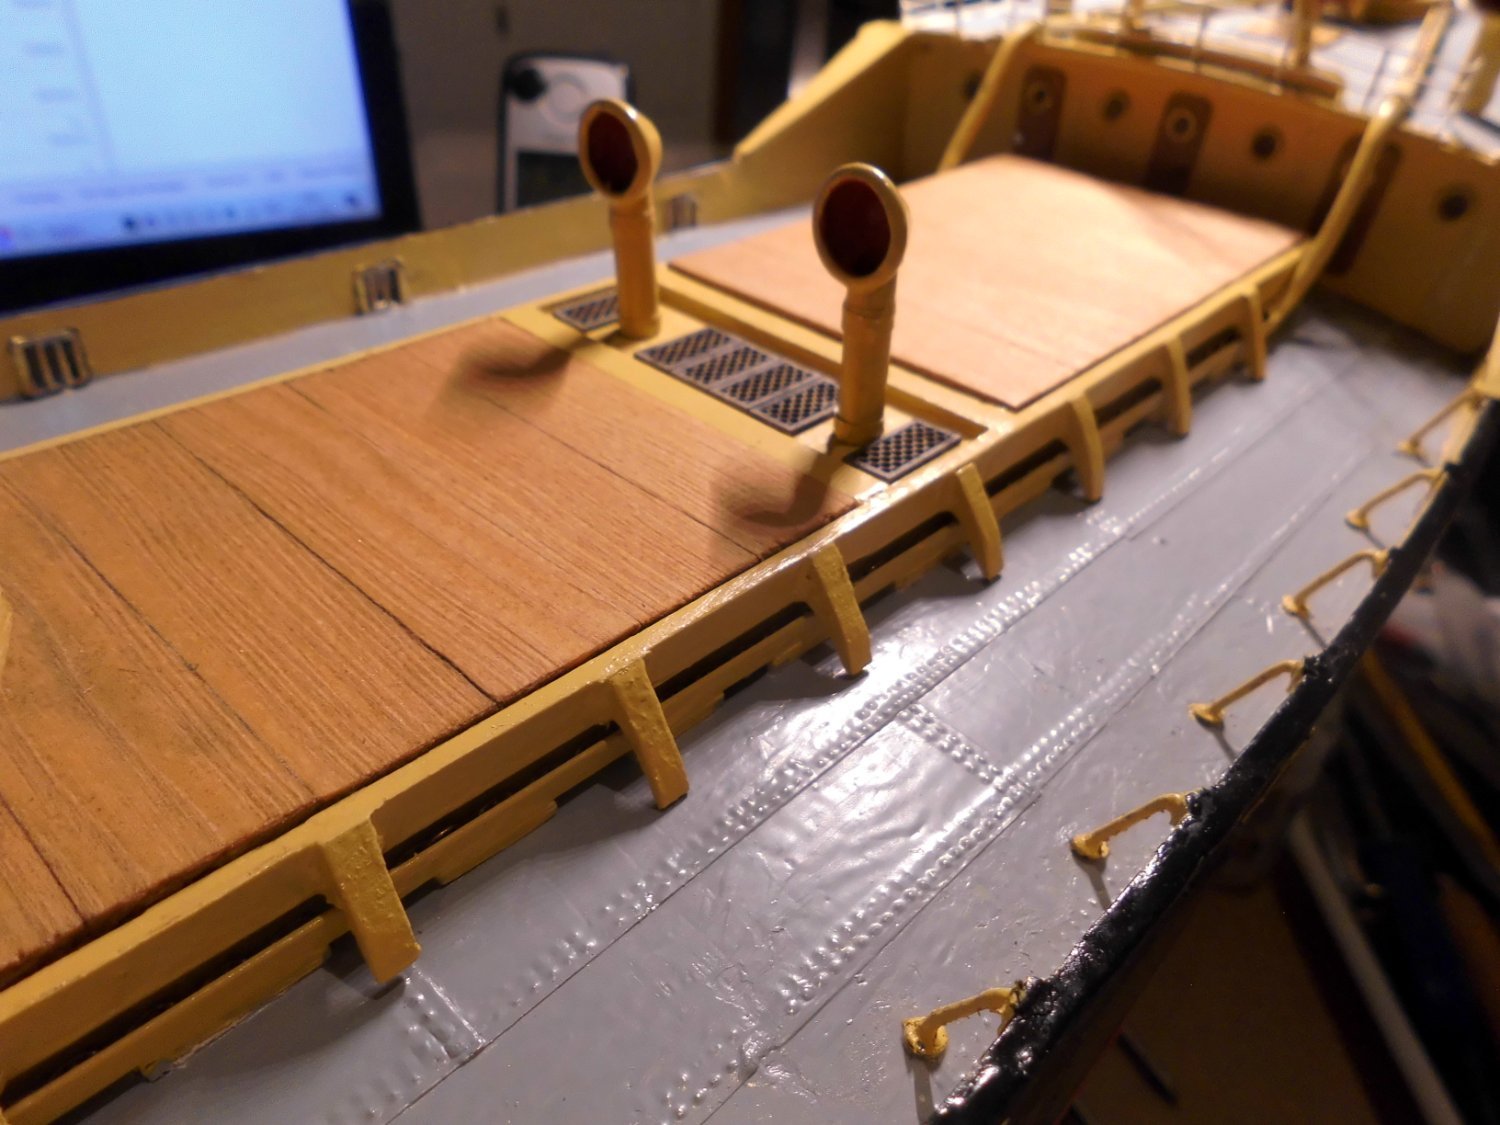
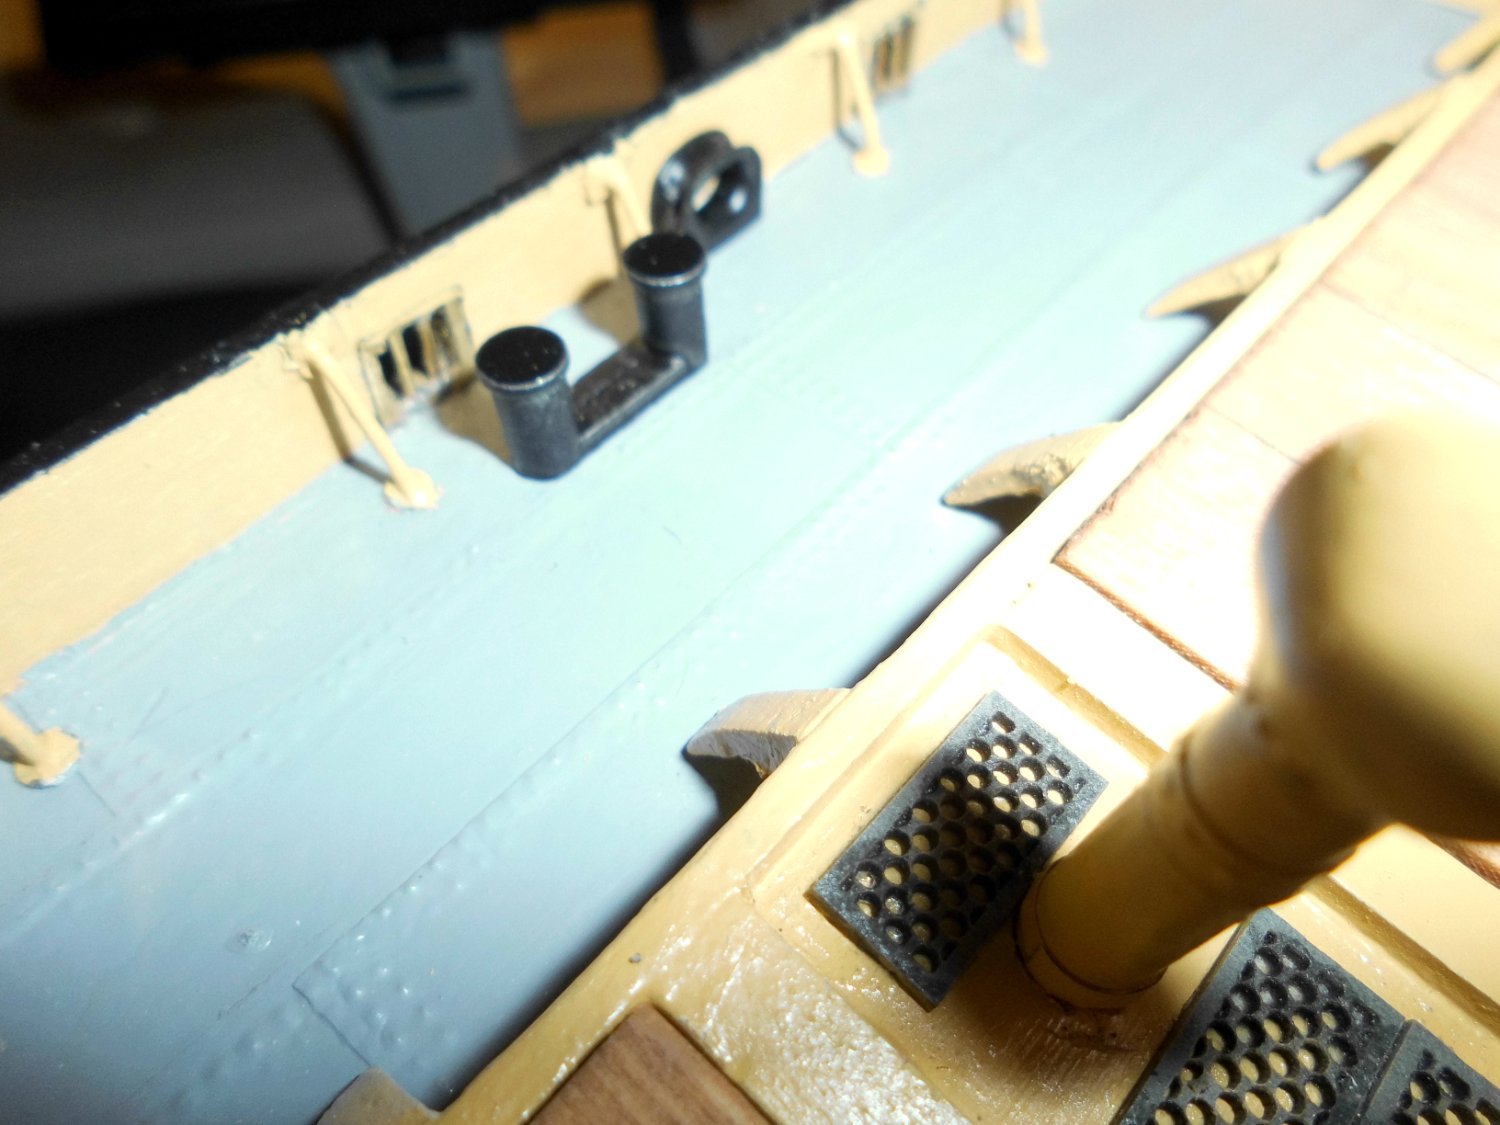
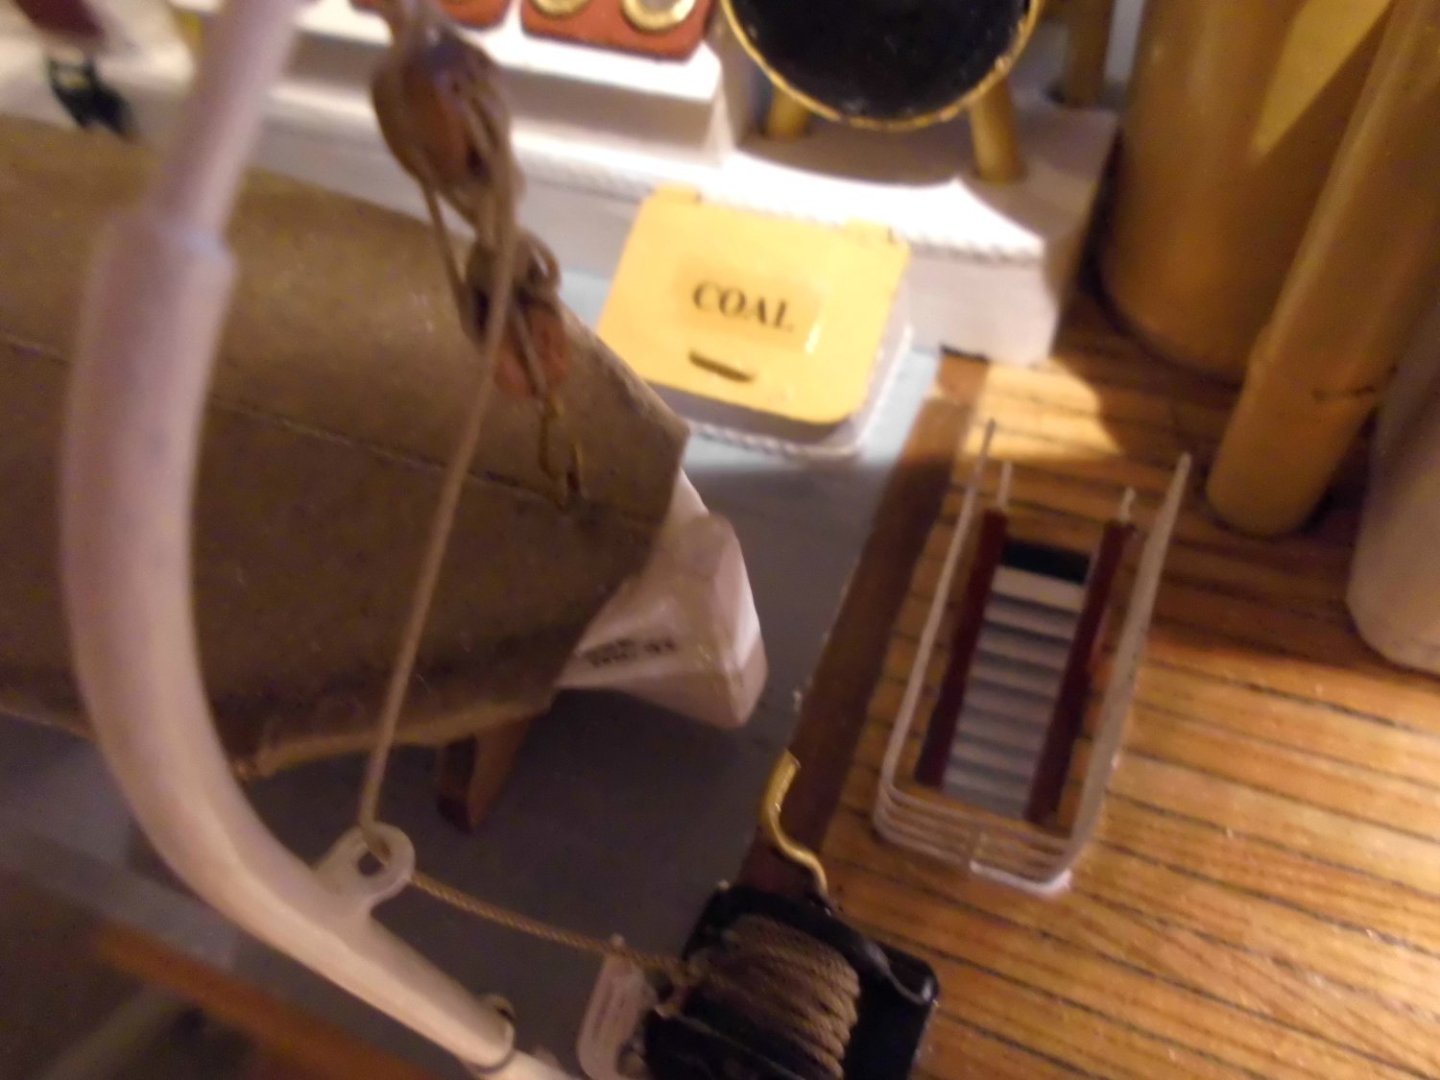
Thank you very much, Javelin, John and Phil, for your good advice with the making of fake wire. I`ll keep that in mind...., but meantime can also live with the greyish 0,7mm polyester rope, also used for the davits rigging. I`ve just made the infeeds of the coal chutes for the bunkers, and acc. to Andy`s post (#137) and my post (138) they are situated (dryfit) on the boats deck near the funnel. Stb. side is a closed chute cover, and port side the cover is open with view into the chute. They may be shifted a bit, when the tube connections to the watertank are made Nils cover for the coal chute closed and open on port side
- 330 replies
-
- 16
-
-
Thanks John, your words made me smile this morning, but who knows, perhaps someone one day will show me how it goes with wire ropes for these small winches. The stays will be of tin galvanized steel rope. Nils
-
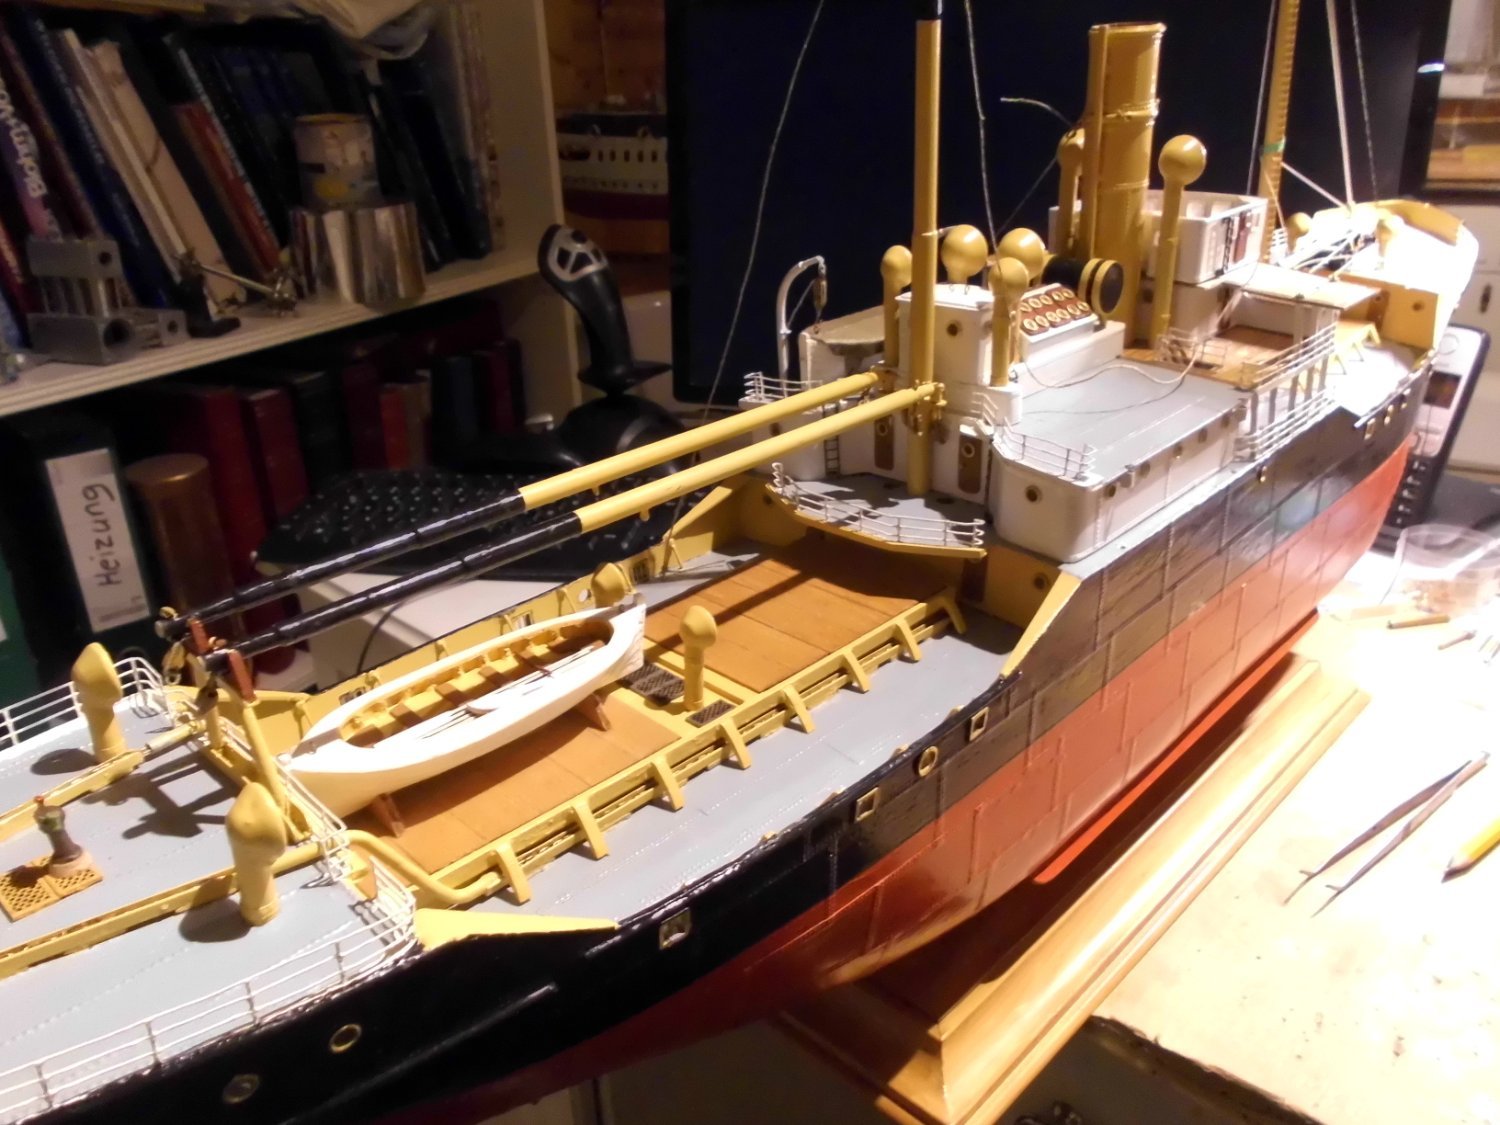
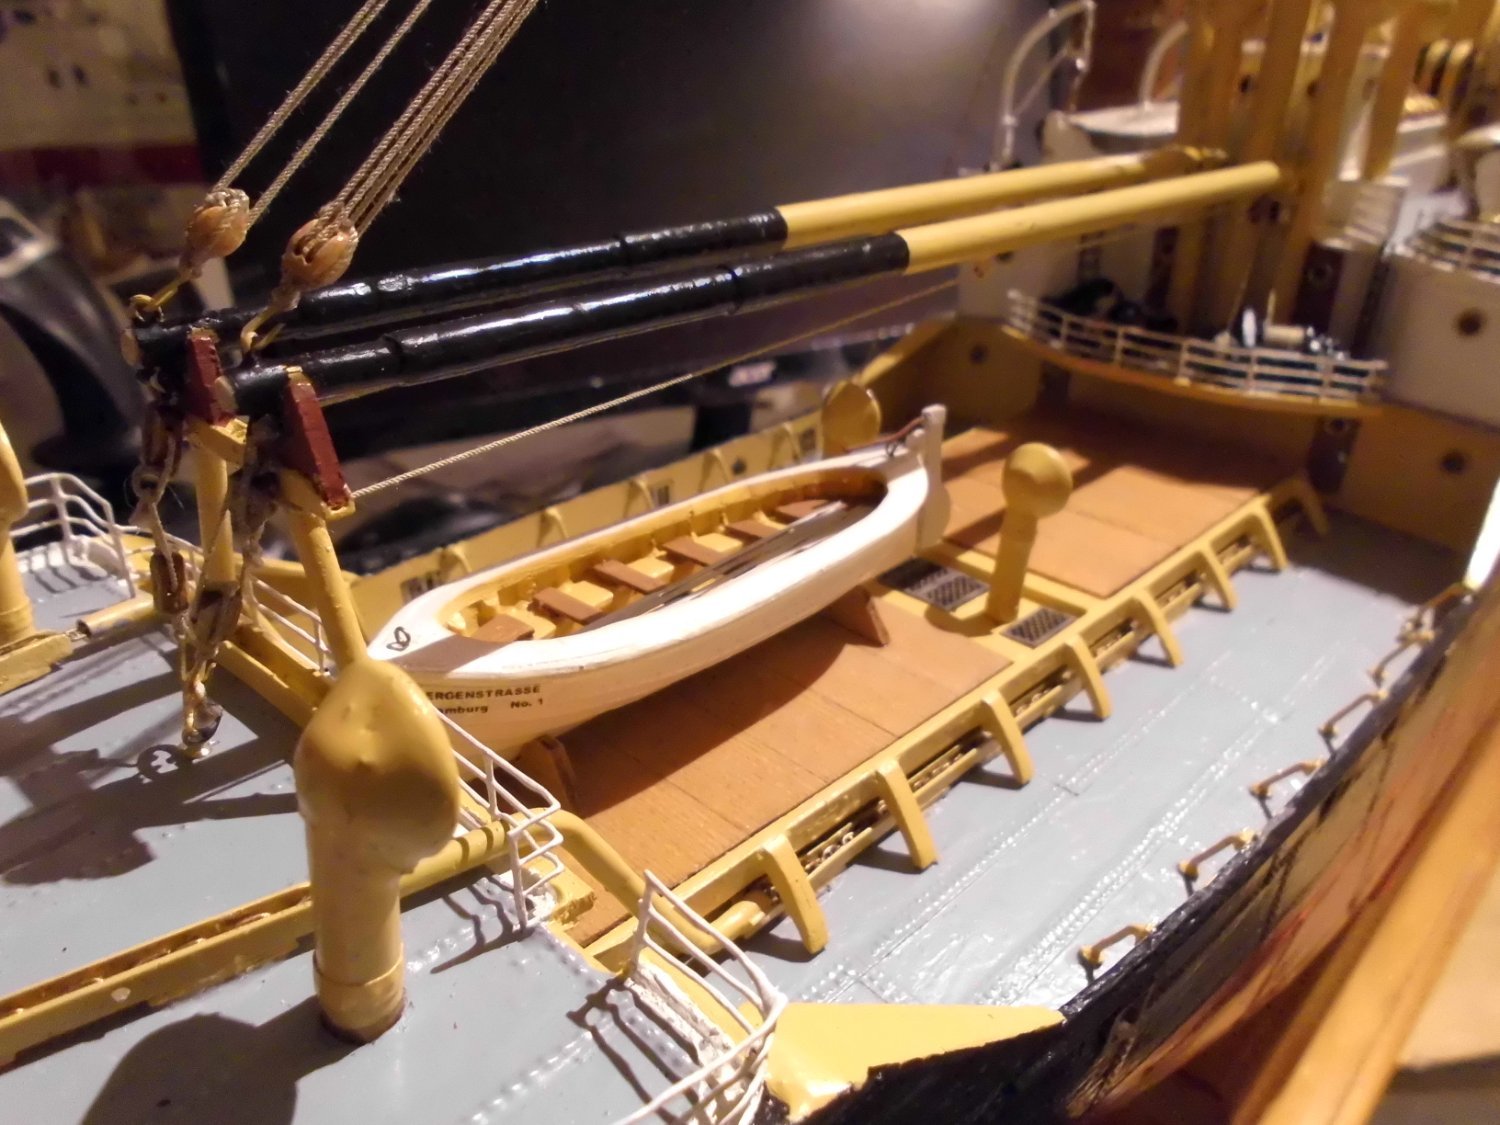
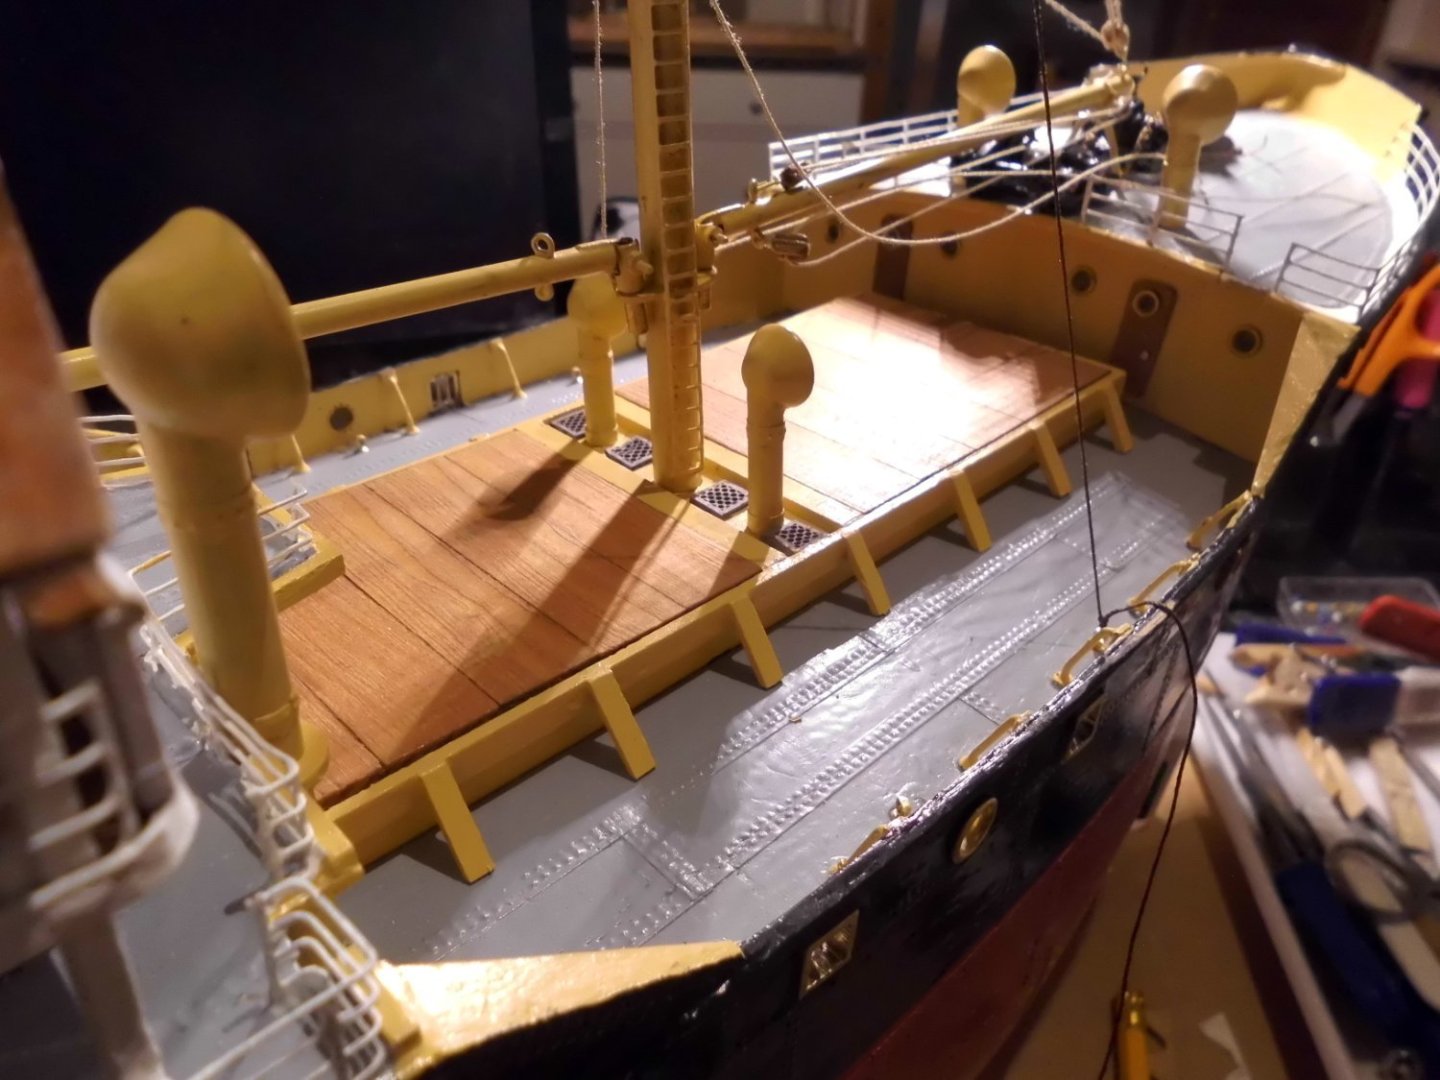
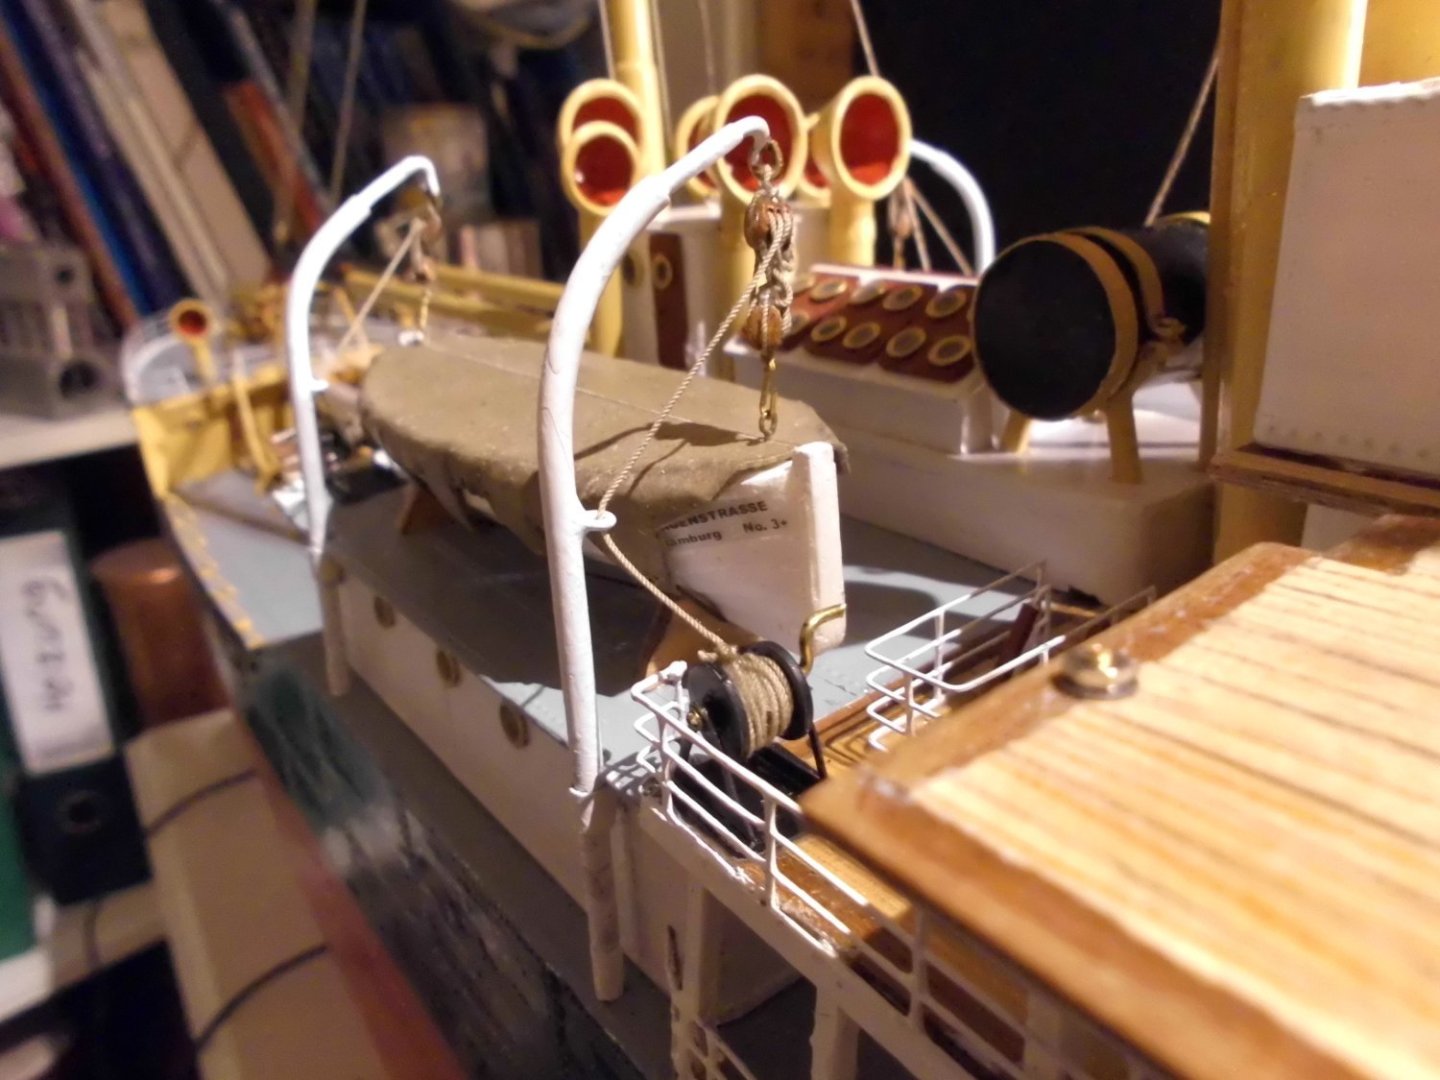
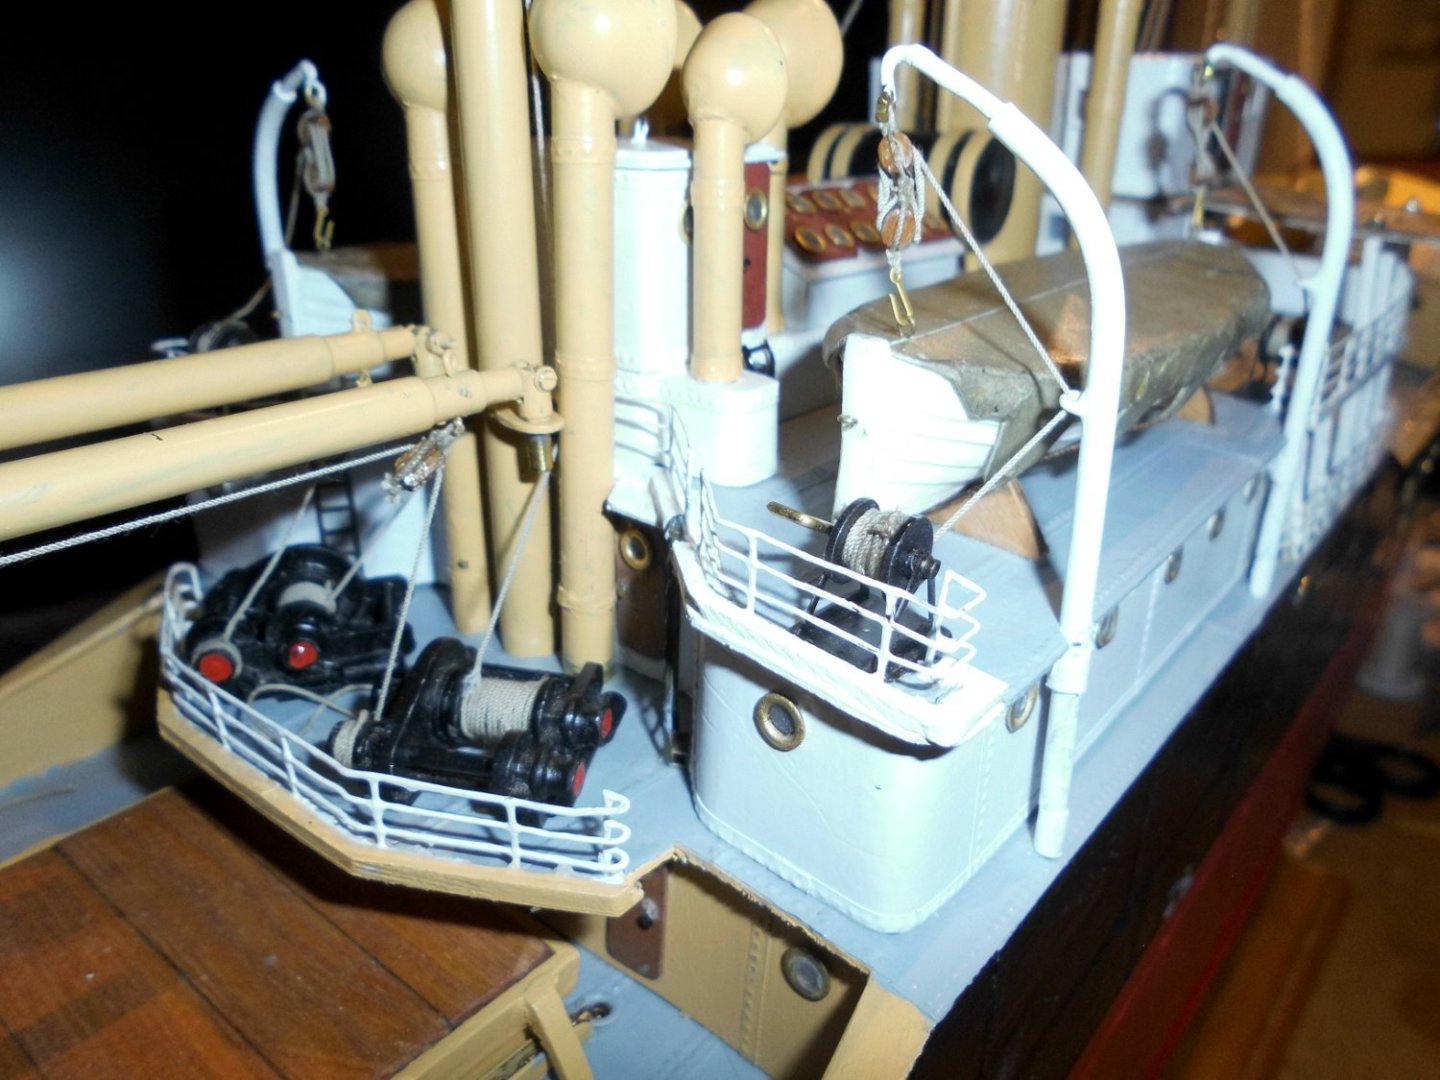
Update Made the rigging for the boats and for the cargo derricks. There are also hand-winches for the boats. The fastening points for the stays are set, I`m waiting for some ordered workable bottleneck-screws to arrive. The bridge still needs to be done. Nils all holds have supporting brackets The cargo derricks are rigged the boats have their own hand-winches (two per boat) the derrick winches are rigged


- 330 replies
-
- 21
-
-
-
beautiful work Valeriy, I like the reinforcement brackets at the mid-island front area... Nils
-
Thank you very much Richard, for looking in intensively...., and for your kind comment yes, I use brass quite often as this is a nice material to solder Nils
-
Thanks for your input here Keith, it looks like this has been an interesting sort of study for metal-plate riviting on a not further known or named dummy hull, in order to try out the process. The copper-plates seem to be real rivited and additionally soldered afterwards Nils
-
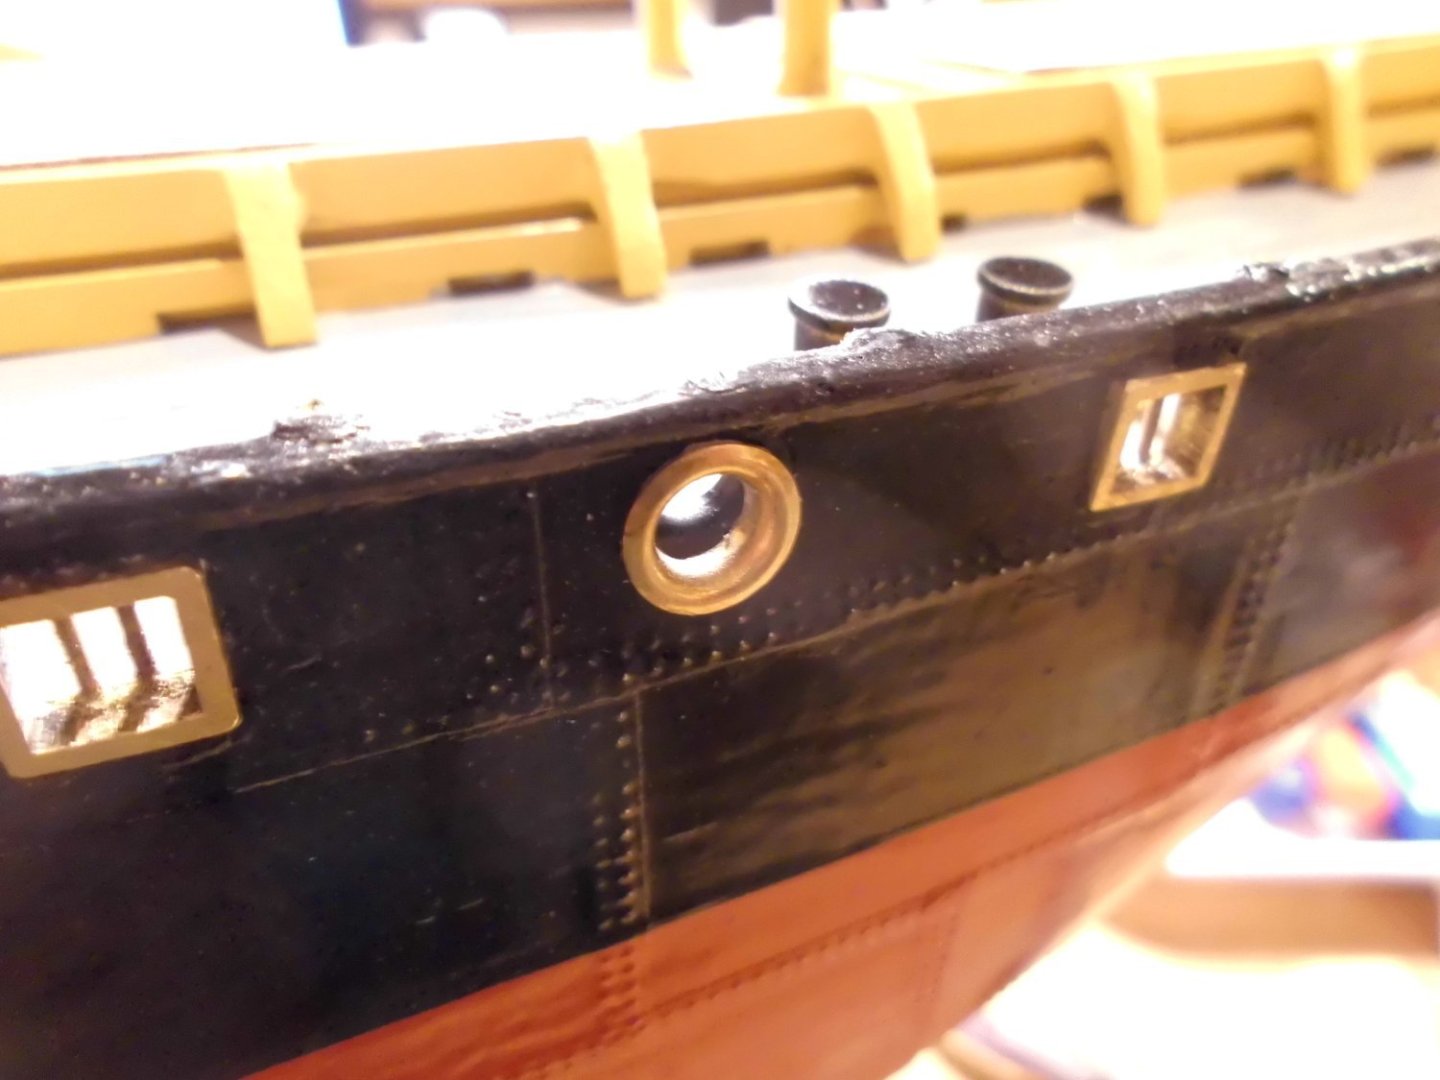
thank you very much Javelin, I love old steam ships, and of course the riviting detail, knowing that it may be slightly oversized for that scale, but the rivited hull would loose its characteristic look, which I I like to see on the model. It shows up quite well, even through the painting. The riviting must be made out, also when the model is viewed in it`s casing from a meter away or so... Nils
-
Keith, I see you`re gonna do it in the approved handcraft way (hand held jig saw) etc. I`m myself 75 years now and I still love scratch-building by doing the frames in this way. Will stay tuned... I wish you much fun in building the lovely Cangarda Nils
-
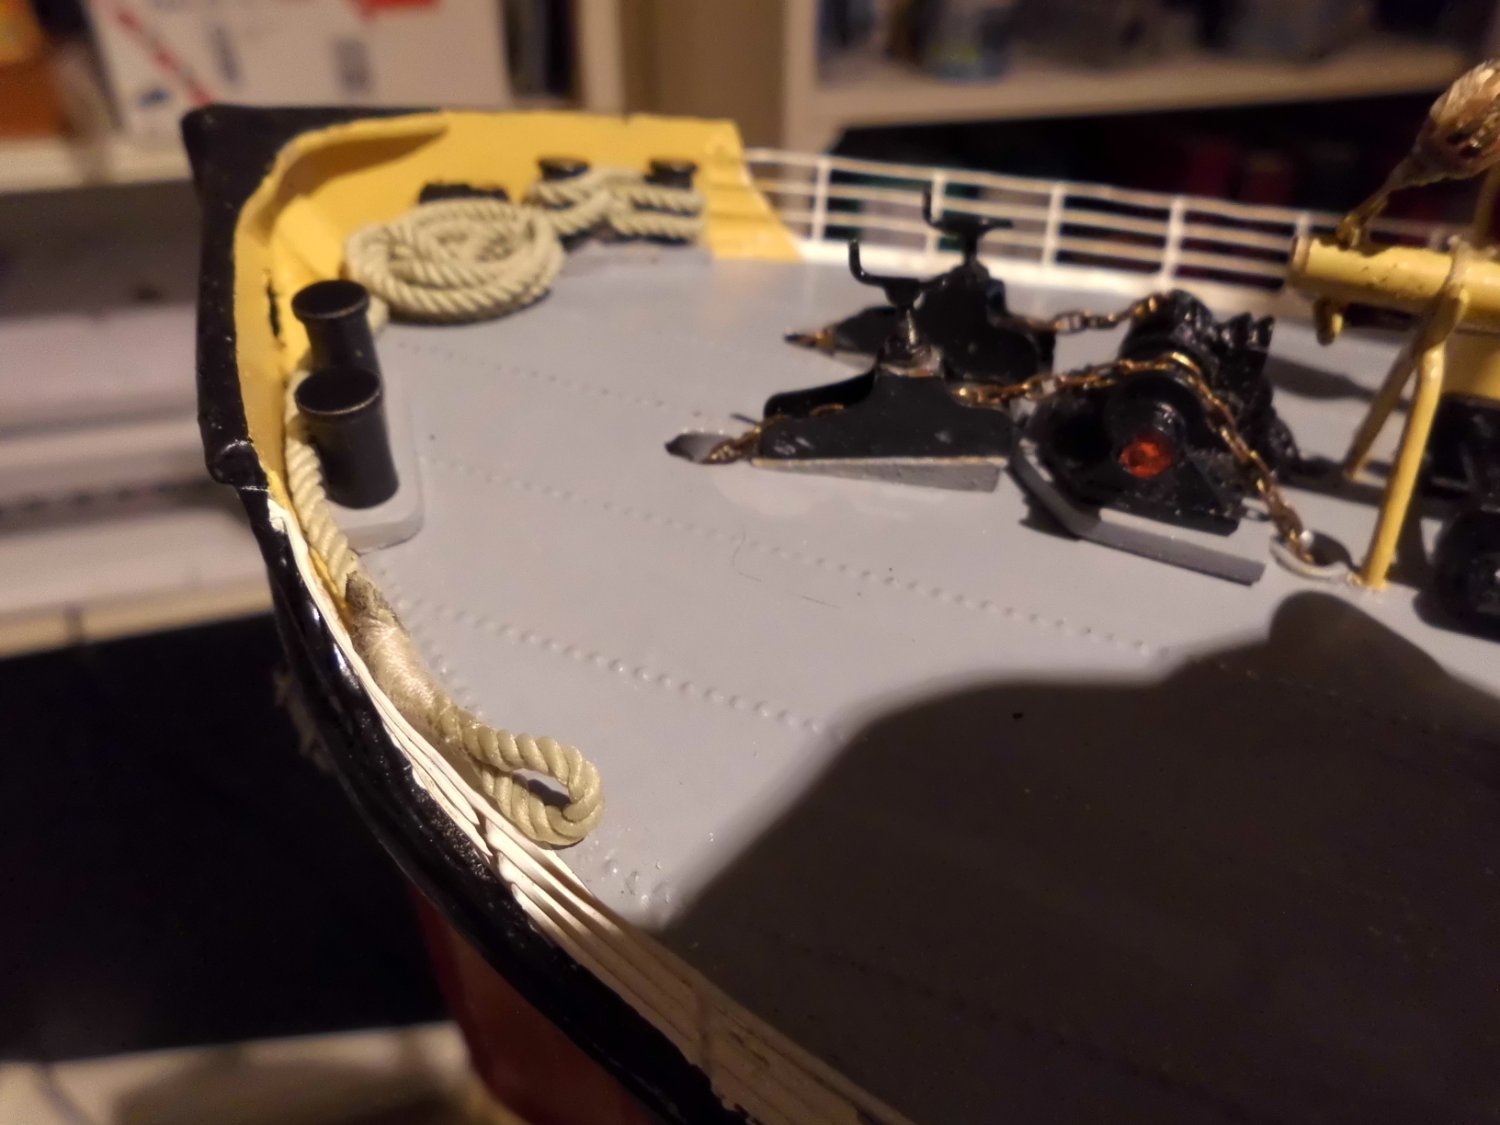
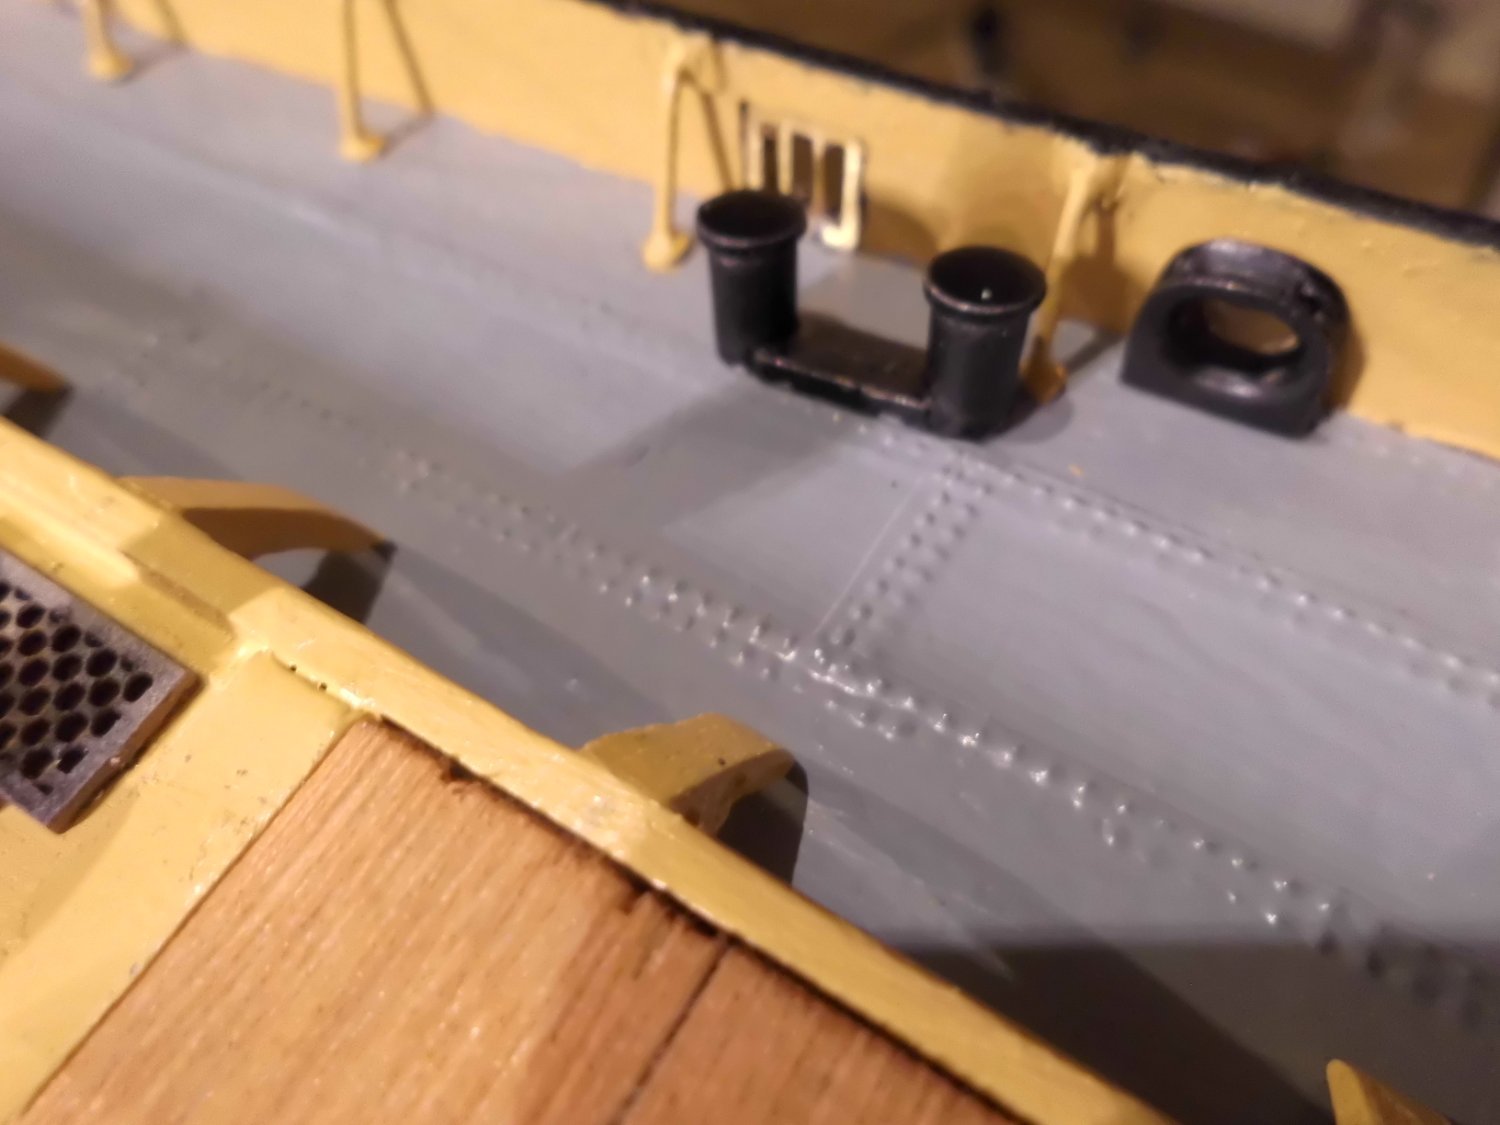
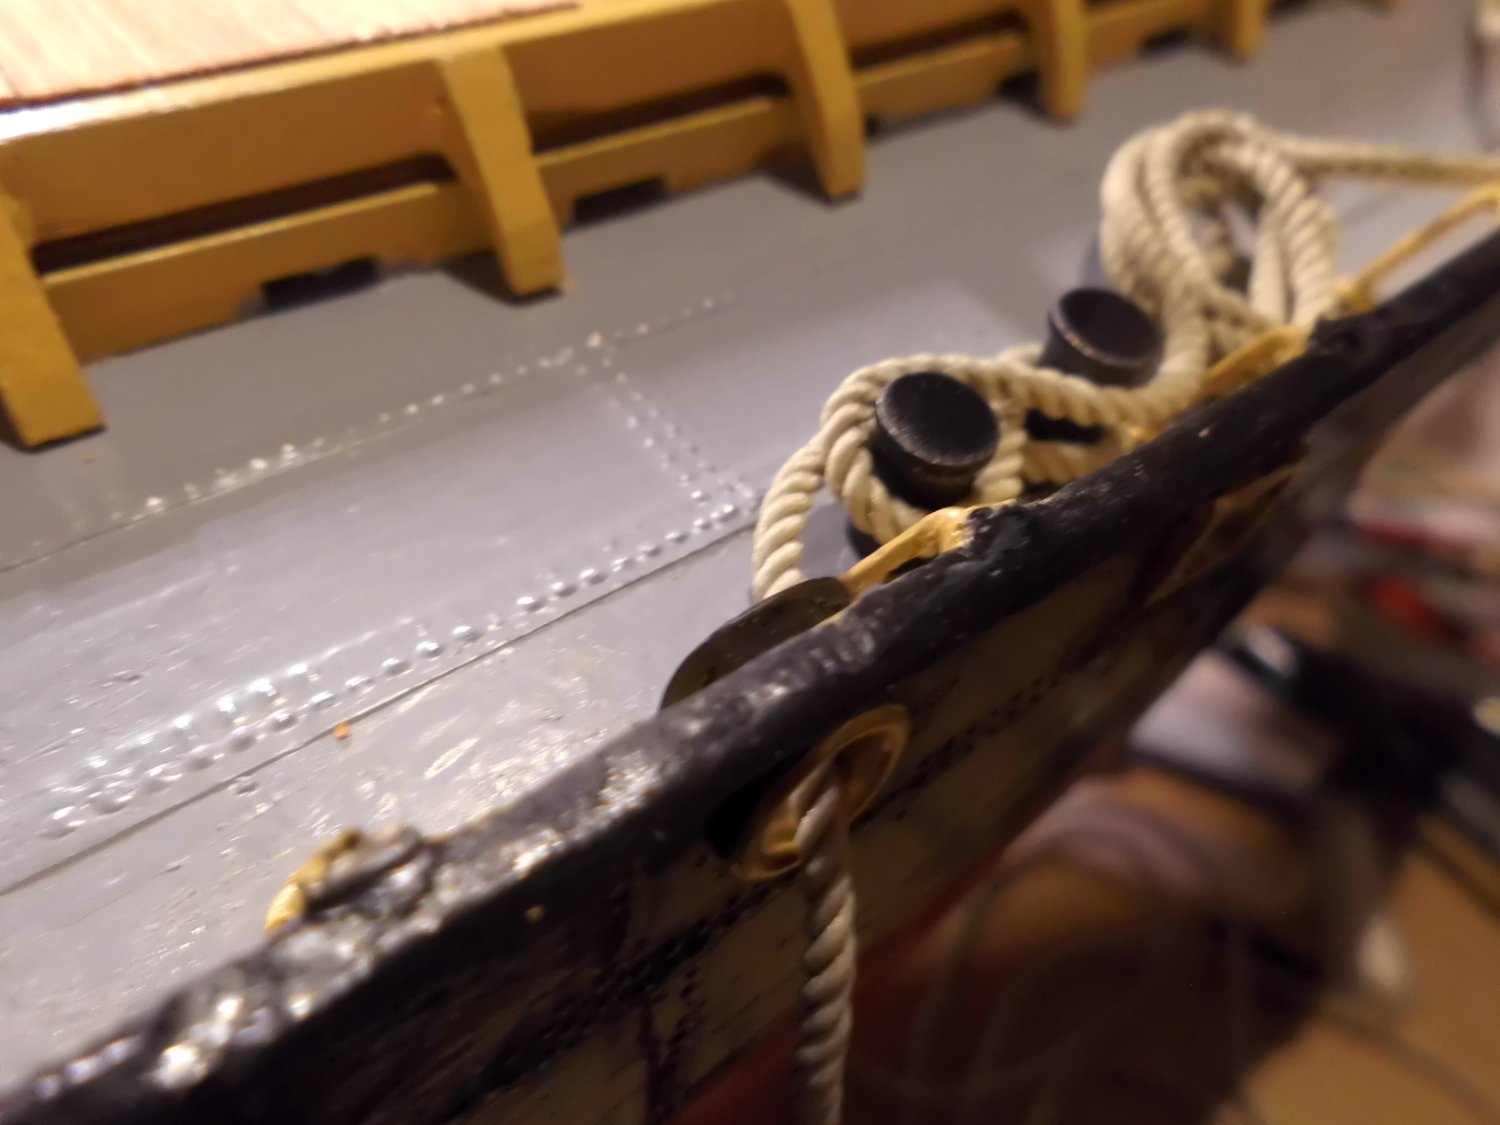
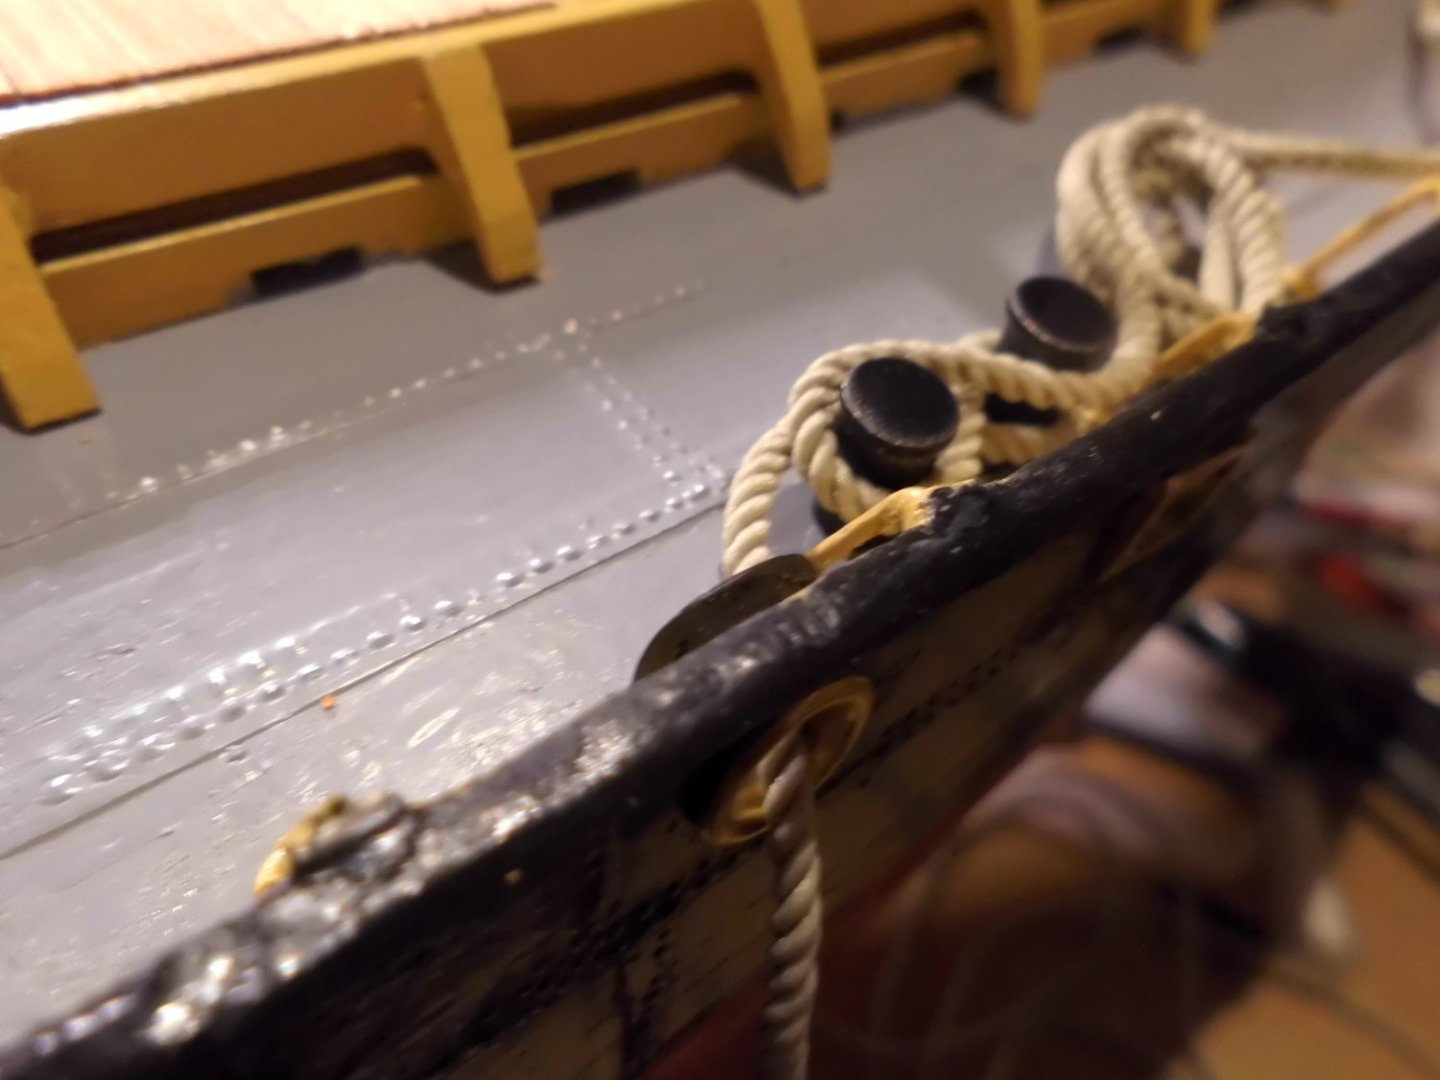
Update today the stanchions for the hold-sides are done, the first fairlead for the mooring ropes and in combination with a heavy twin-bollard on deck Nils the guiderails for the rudder chain run alon the hold sides, behind the stanchions the Panama fairlead is directly behind the through lead opening in the bulwark bulwark outside view, will probably paint the fairlead black in combination twin-bollard with Panama fairlead mooring rope ( 2 mm polyester) for aft portside welldeck


- 330 replies
-
- 18
-
-
Beautiful recovery-work Javelin, after the polyester /glasfibre objection. I can feel with you for all the patience in doing all the sanding work, great look now Nils
-
Keith, that`s a good point, funny I was just thinking the same this morning..... the common procedure is now to ask myself a) will the objection be looking at me for all times after ? or b) can I live with it ? (nobody is perfect) If the answer is "a" then it`s a candidate for the bin, or to do it over again for a second run. Much is stored in the box "experience", so that something likewise hopefully does`nt occur again, but I would`nt build the same ship twice. Nils