Mirabell61
-
Posts
7,410 -
Joined
-
Last visited
Content Type
Profiles
Forums
Gallery
Events
Everything posted by Mirabell61
-
 wonderful work Valeriy, this is very encouraging work for all who are using brass sheet metal for modeling, well done ! Nils
 -
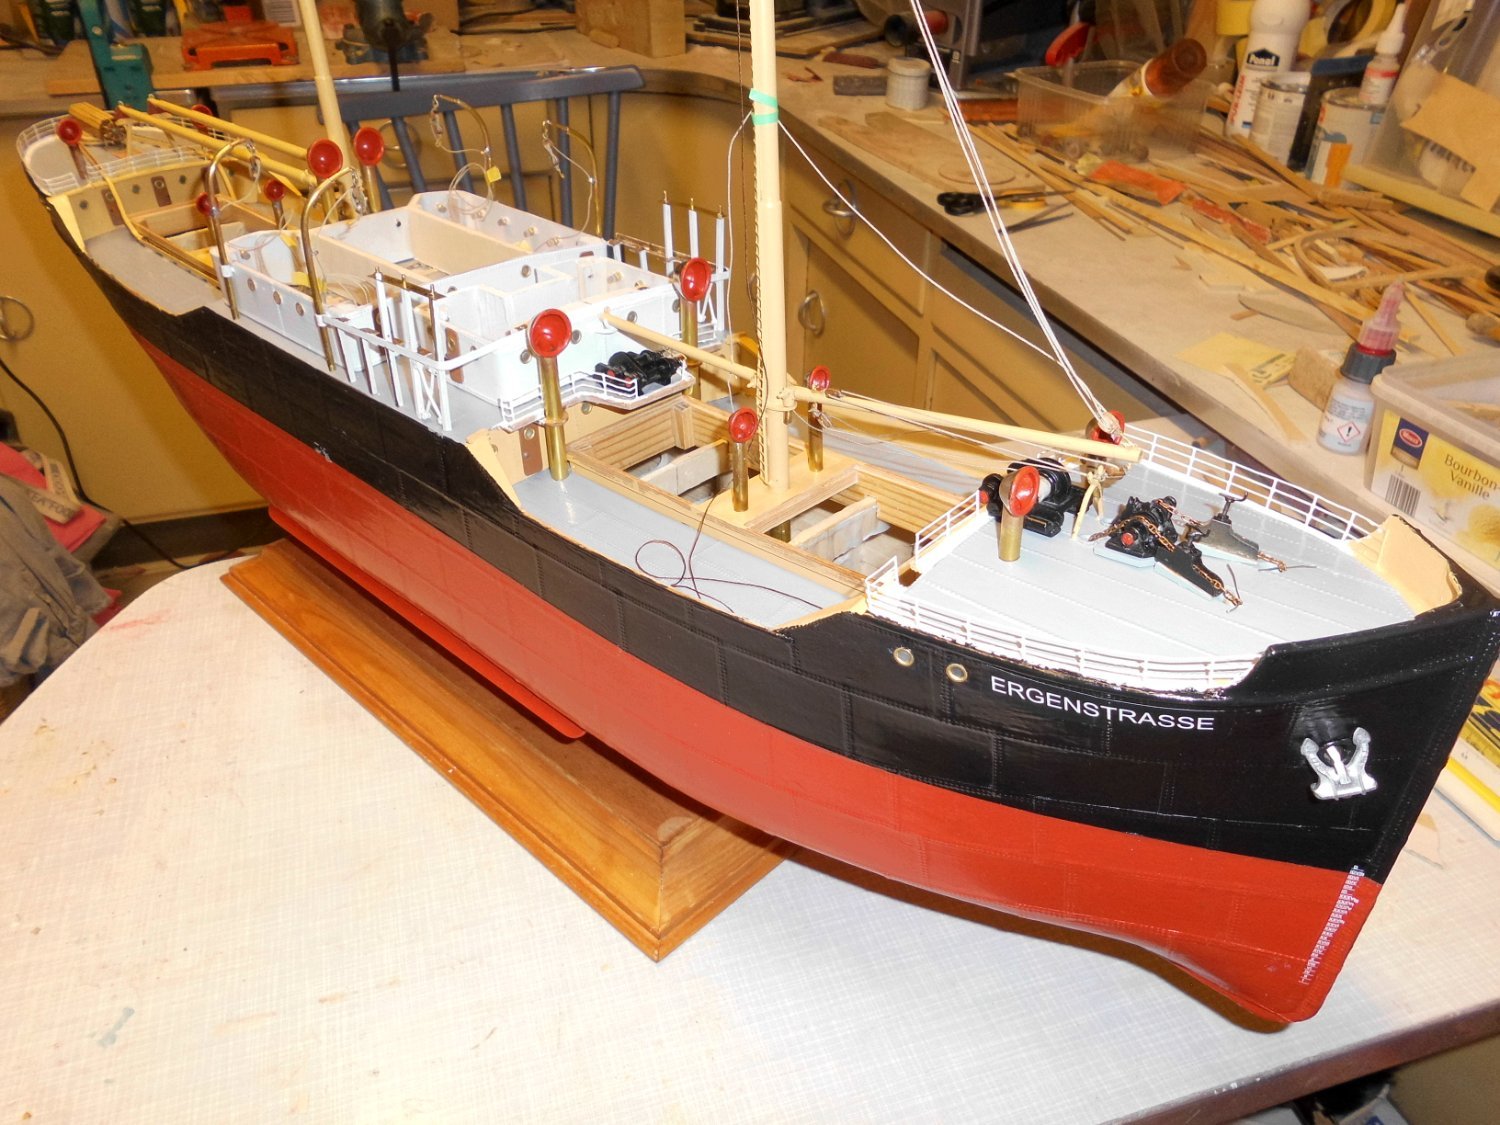
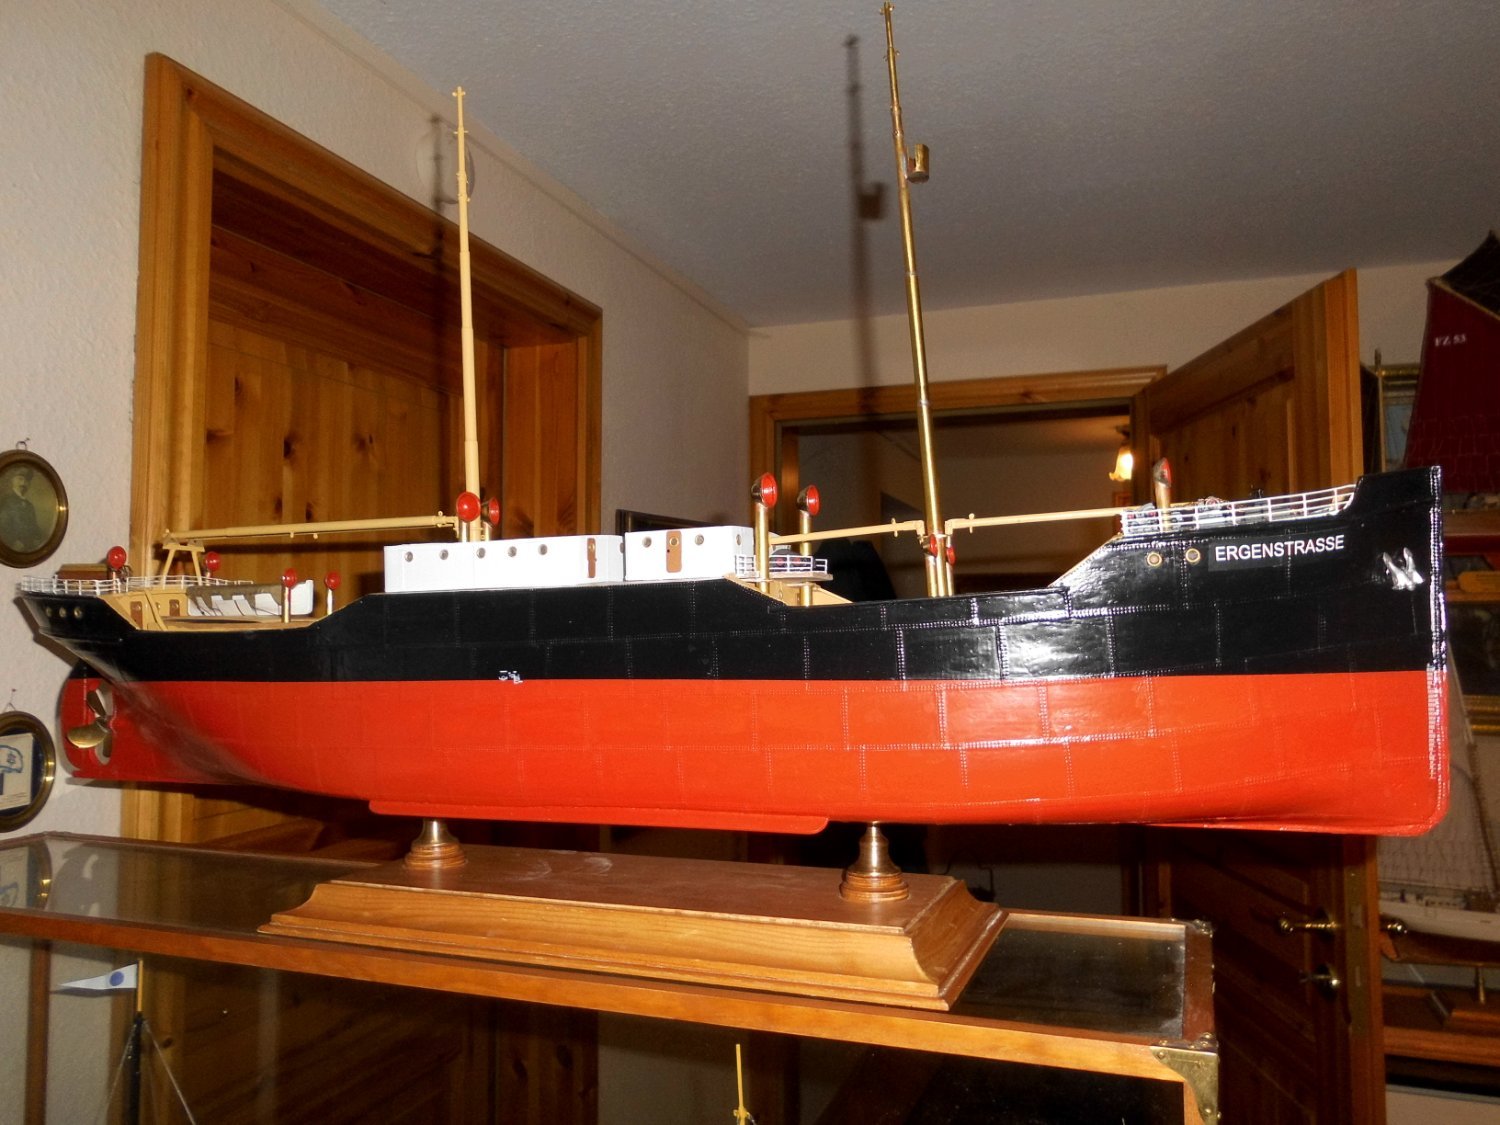
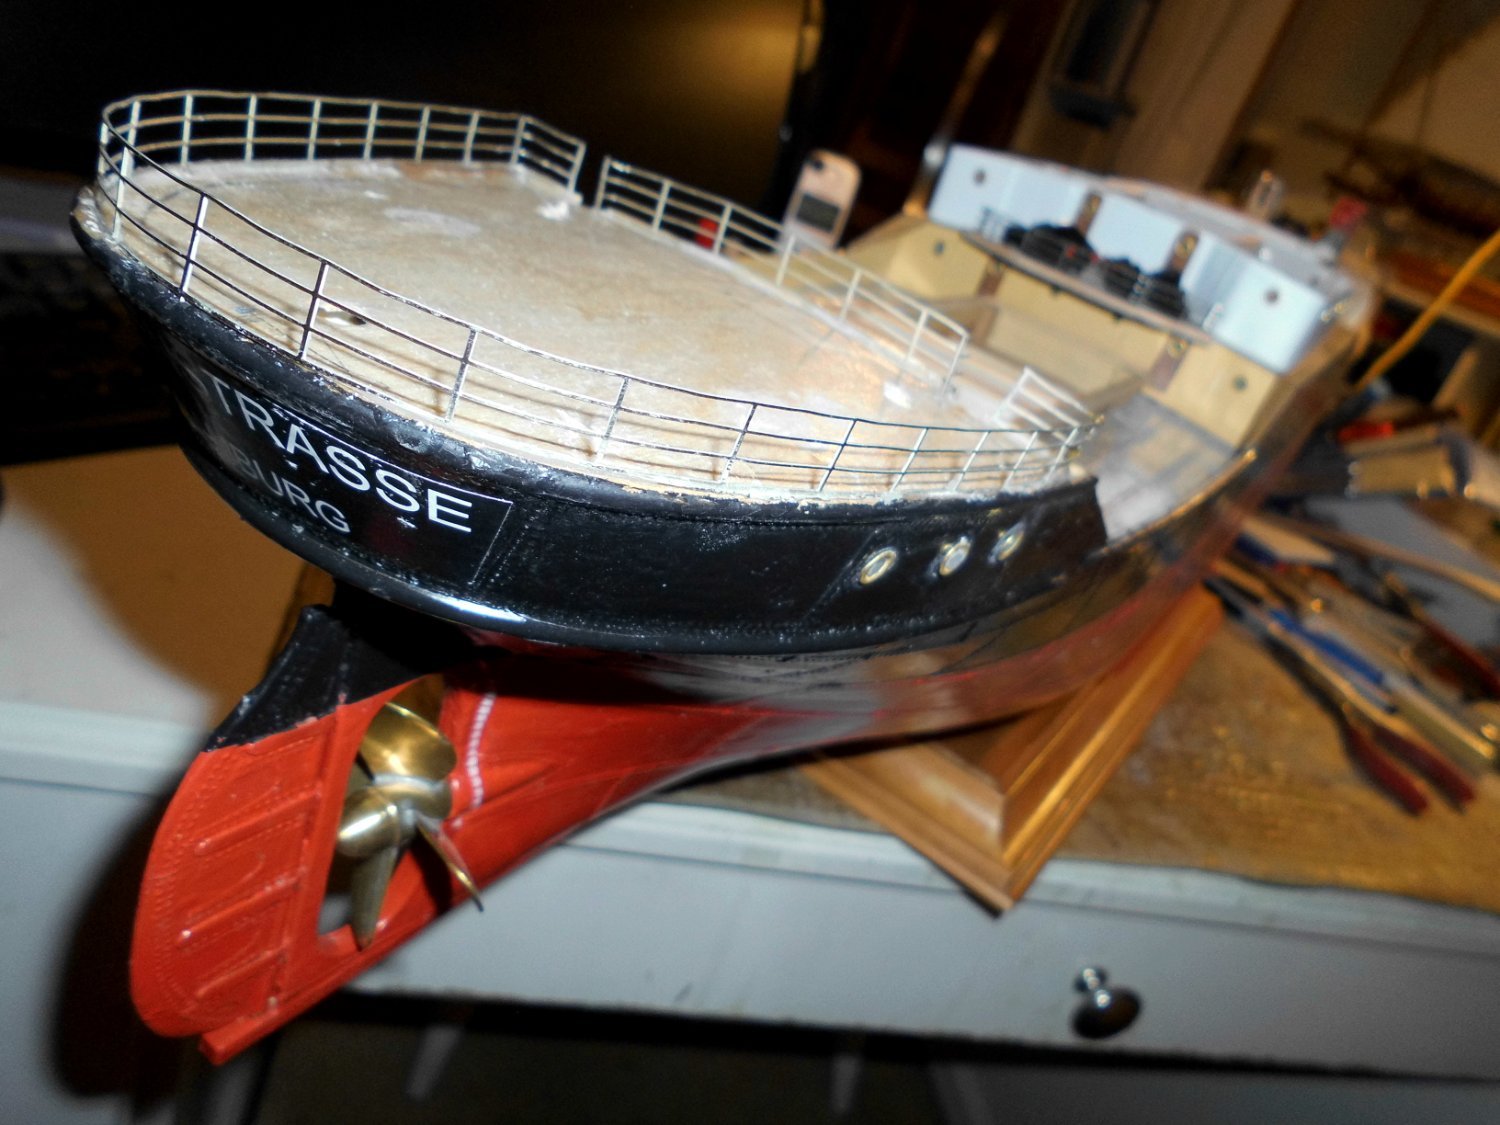
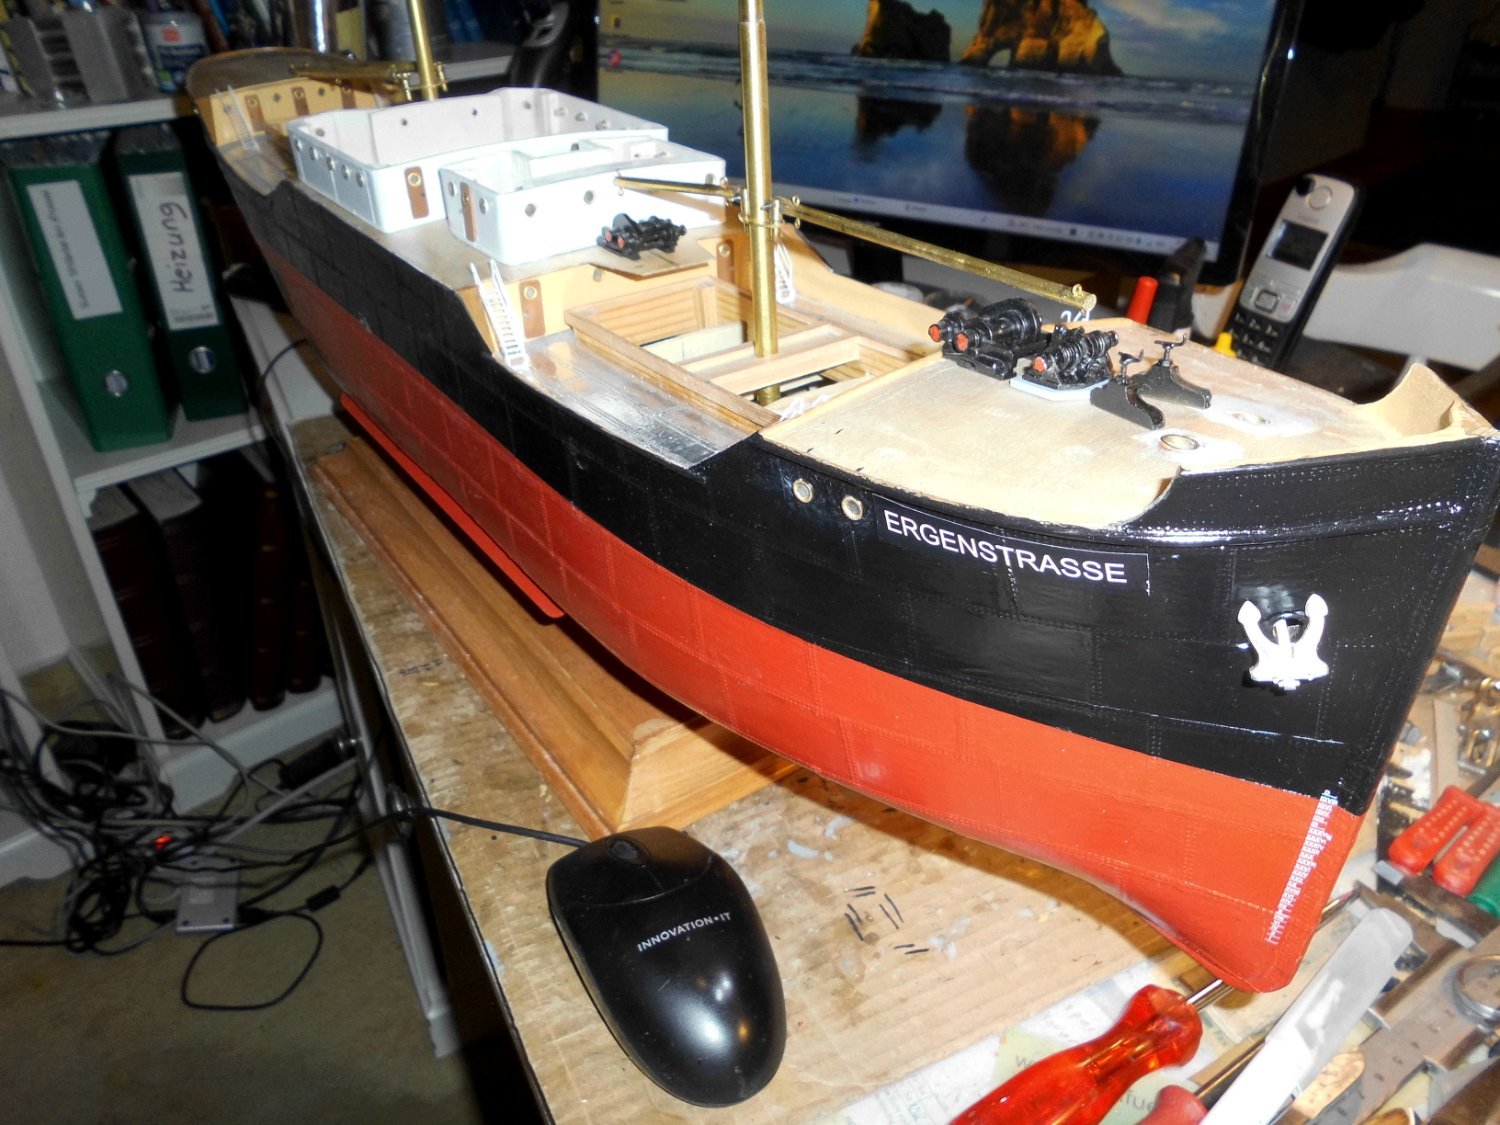
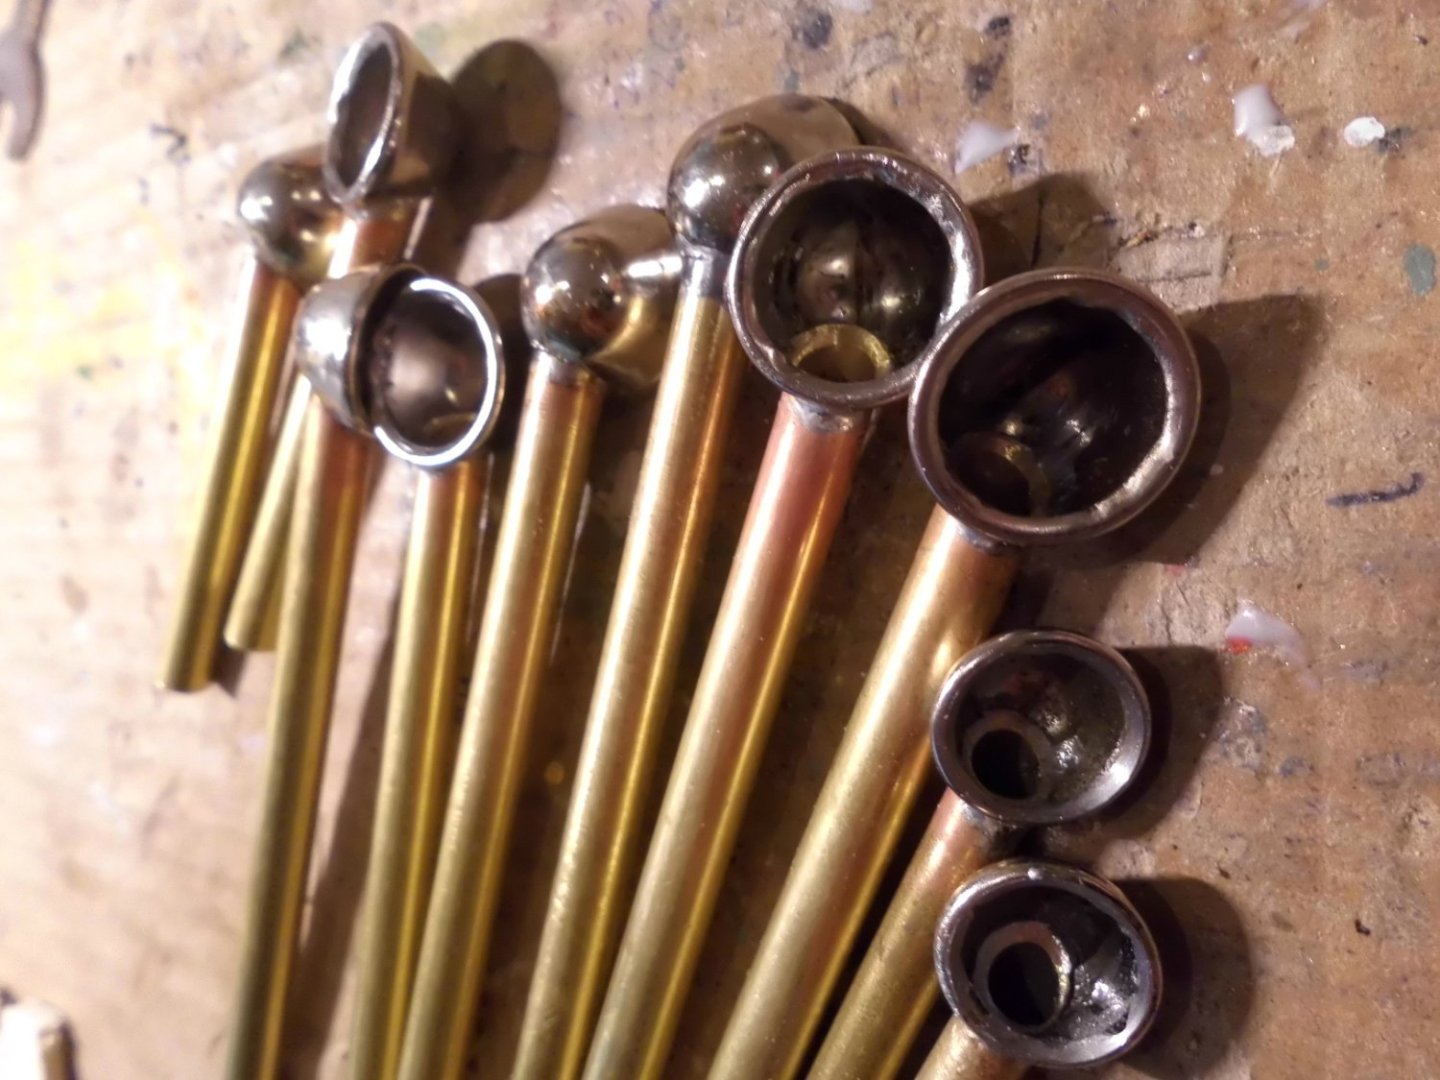
Many thanks Ras and John, Ras, Thanks for your interest and for having an intensive look into the log. It seems a bit large at first look, but the base ship without the later look in the movie is the former laker steamer Corsicana and the rating for the model is exactly 1:87 The lines and frames are adapted from the Ferris type freighter of the US-Emergency fleet. I found a Polish sychronised version of "The Sea Chase" on the web and made the stand-pics from the video as needed for the details. John, you have a good eye, and yes, as the cargo derricks are made from brass tube, they are open at the ends. Thanks for the tip, I`ll have them closed later on. Nils
-
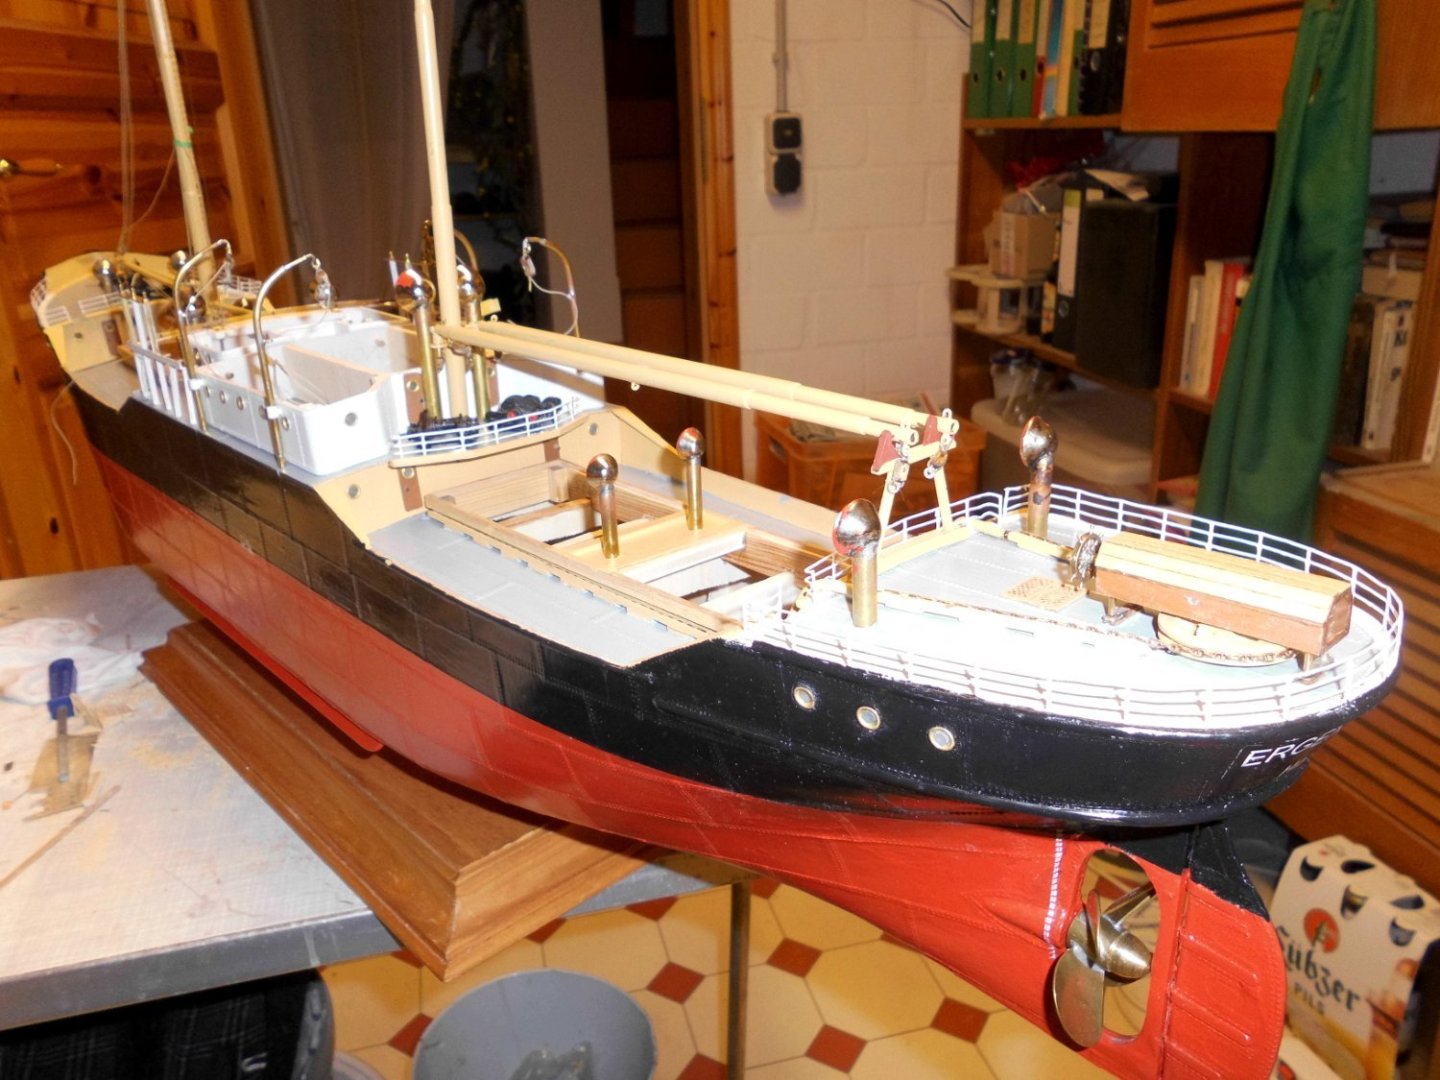
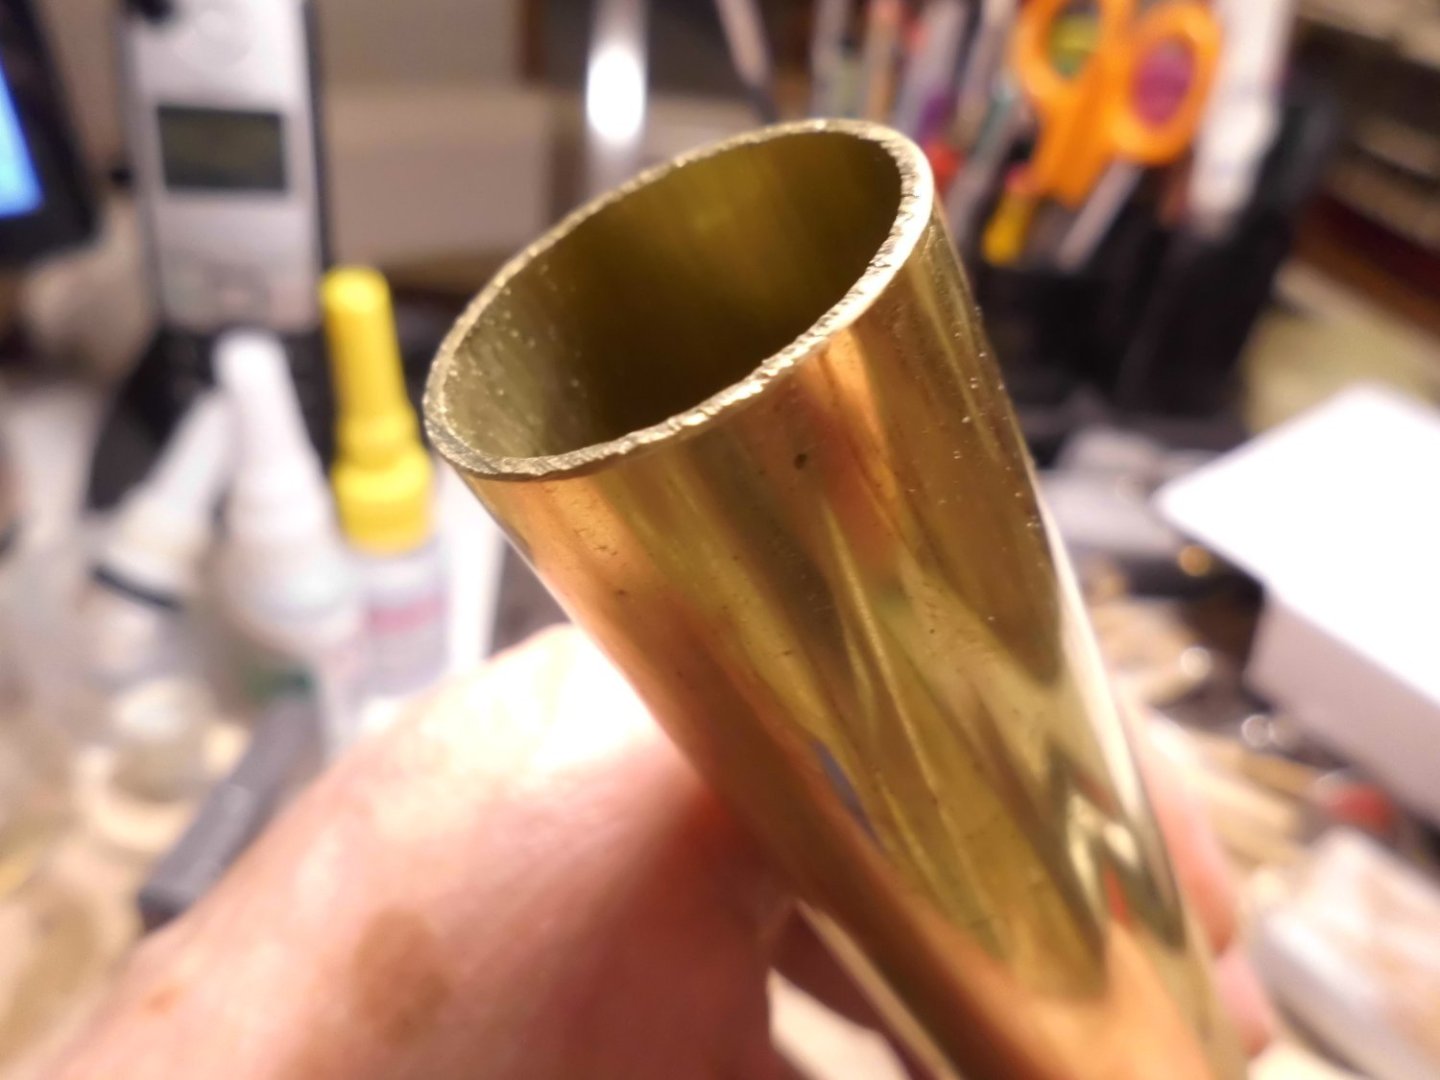
Update here is the current state of progress, am starting with the rigging ..... Nils the funnel will be made from this 1 inch OD brass tube


- 330 replies
-
- 19
-

-

-
What a beautiful build Häkan, its been a pleasure to look into. I`m sad that I did`nt notice this log here before Nils
-
Siggi, your two "fill-horn" carvings are top notch. Wonderfull work, well done ! Nils
-
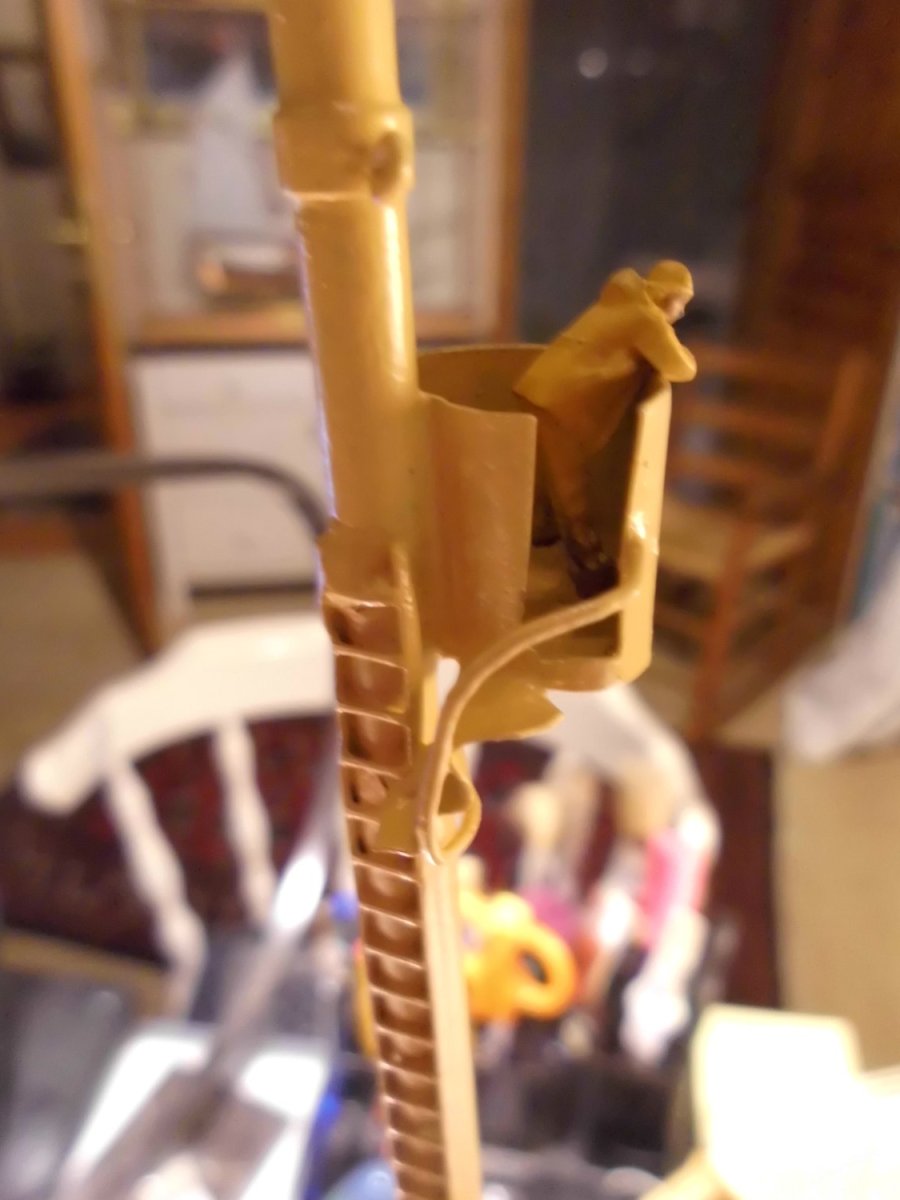
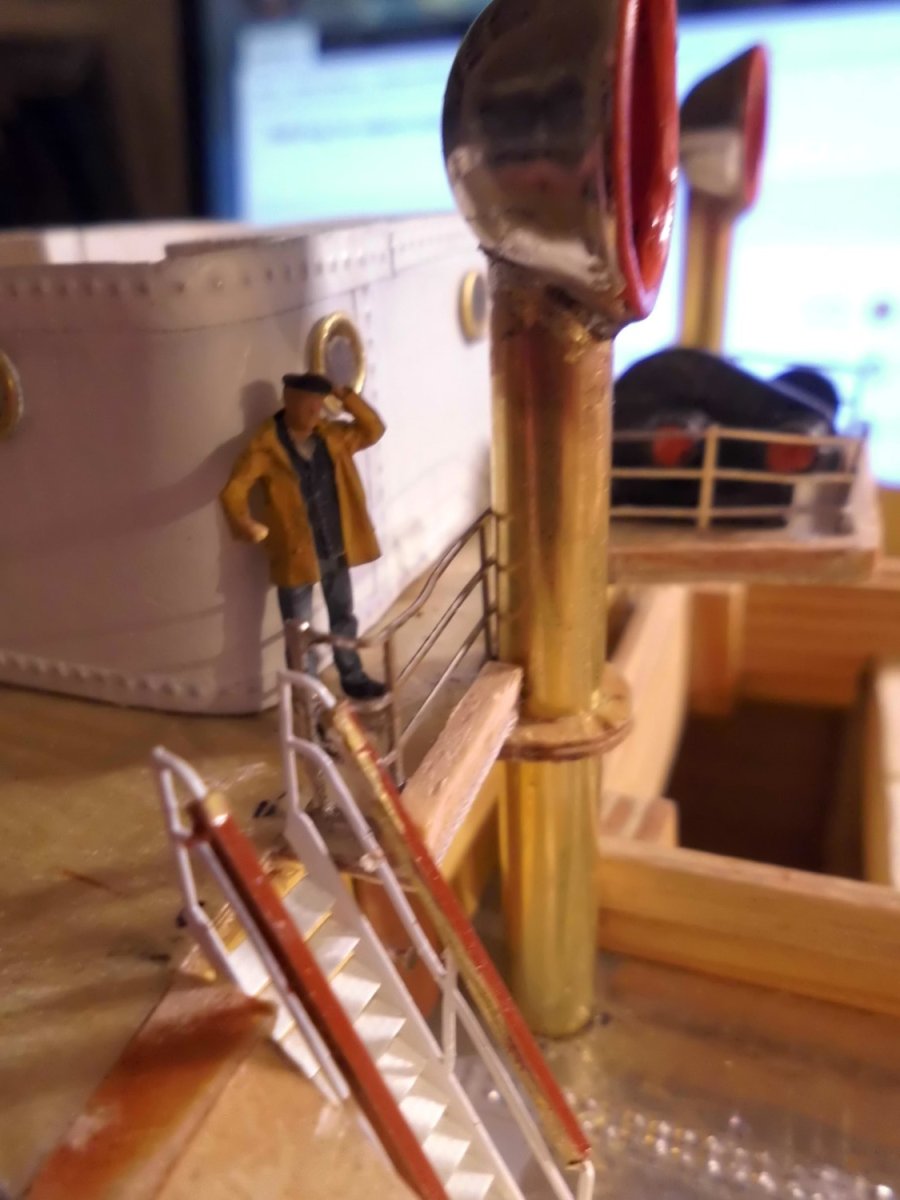
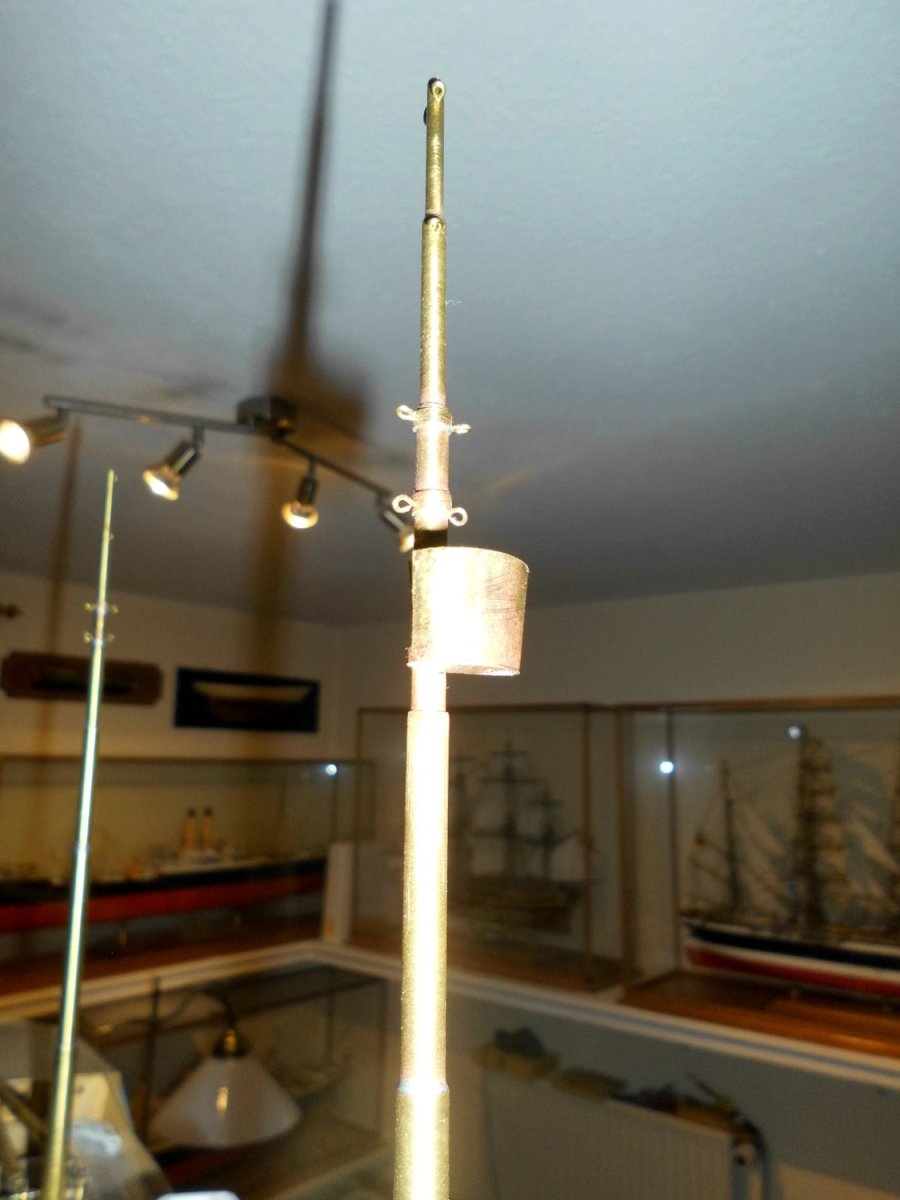
Many thanks John, here is the outlook in the crow`s nest .... with mast ladder, because there will be no ratlines to the shrouds, and access (with handrail) from outside the lookout post

-
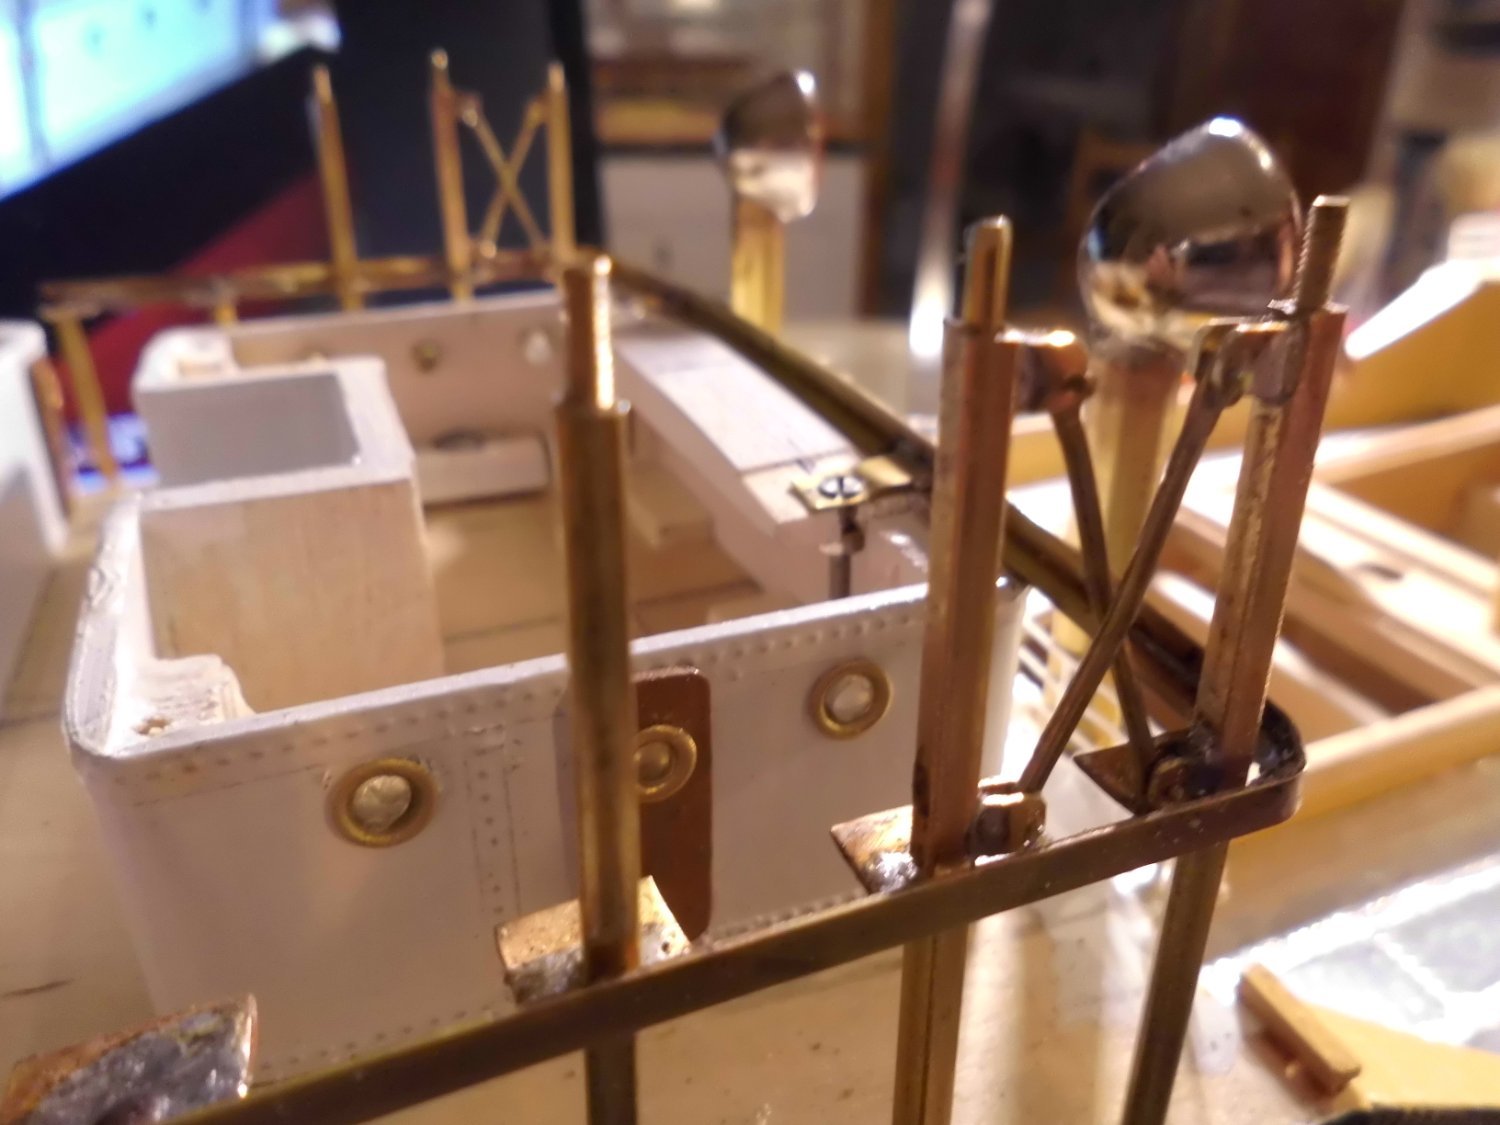
Thank you ver much Gary, I`ve just made the stiffening out truss bars for the two outer bridge deck supports, its been a little tricky soldering and the drilling of the tiny pivot holes in the connection rods .... Nils

- 330 replies
-
- 12
-
-
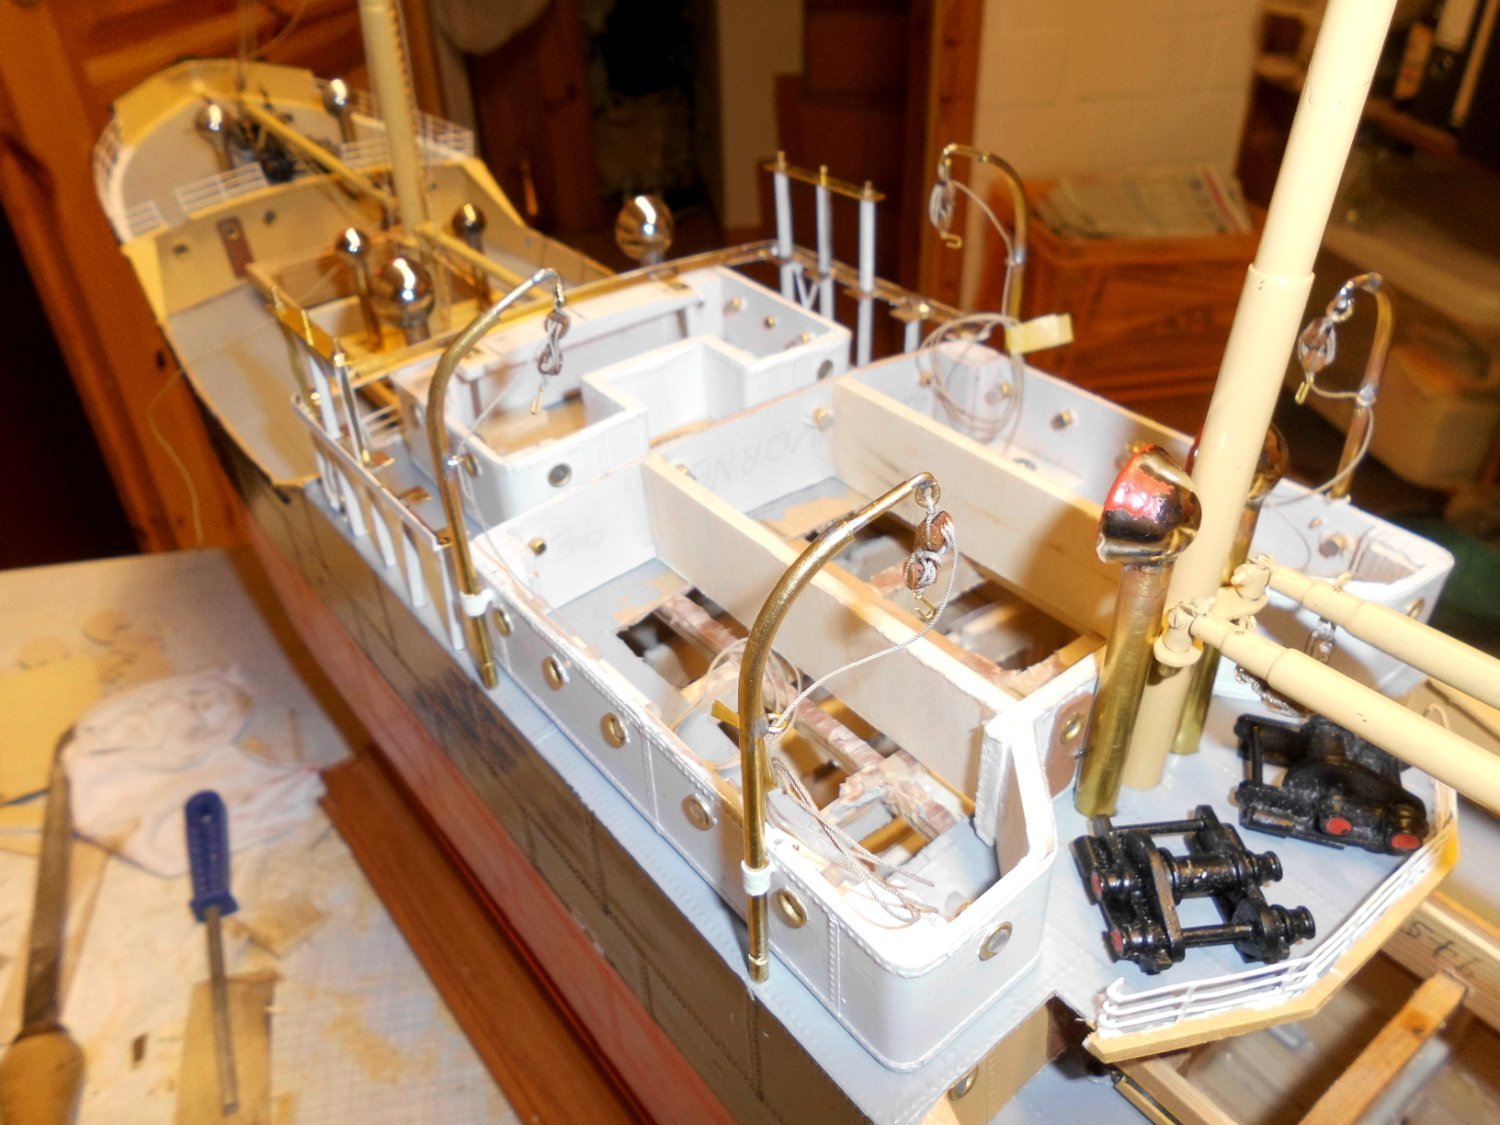
Thank you for your nice comment John, I still have some 3 sheave blocks (4mm) and wanted to use these for hanging the boats under the davits. I had ordered some 0,5mm Polyester rope to keep things halfway in scale, with a slight bit of widening the sheave holes with a 0,6mm drill its still a tricky job, but I think it works .... Nils
-
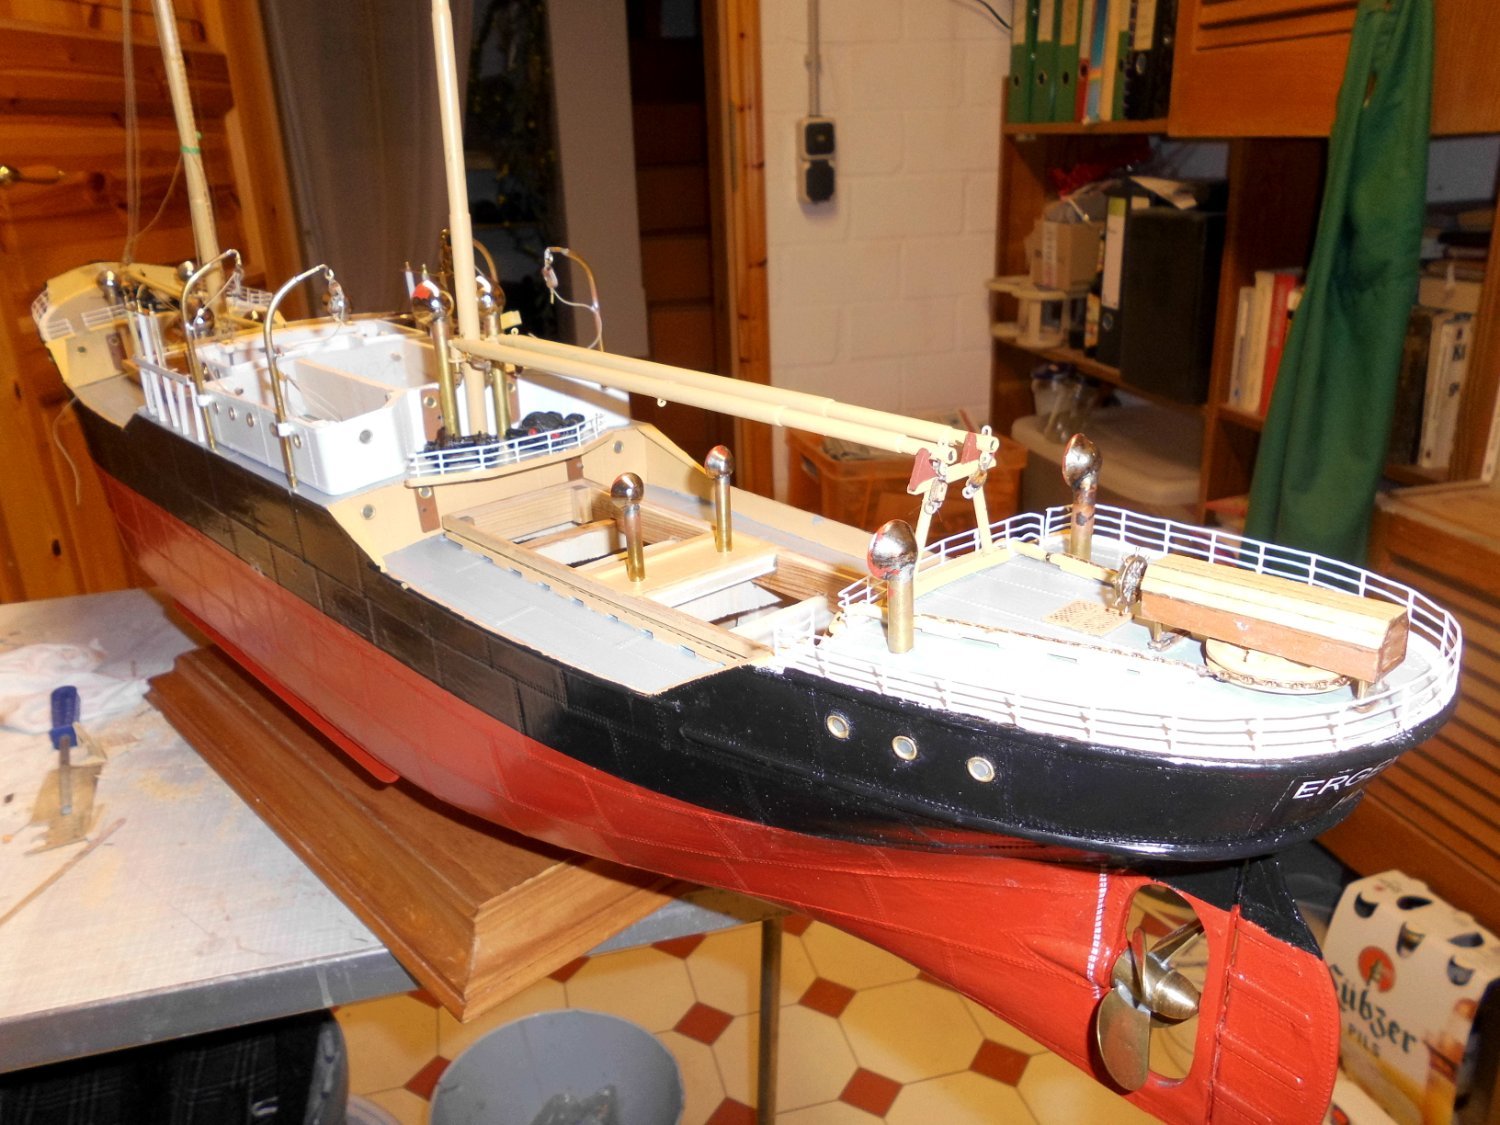
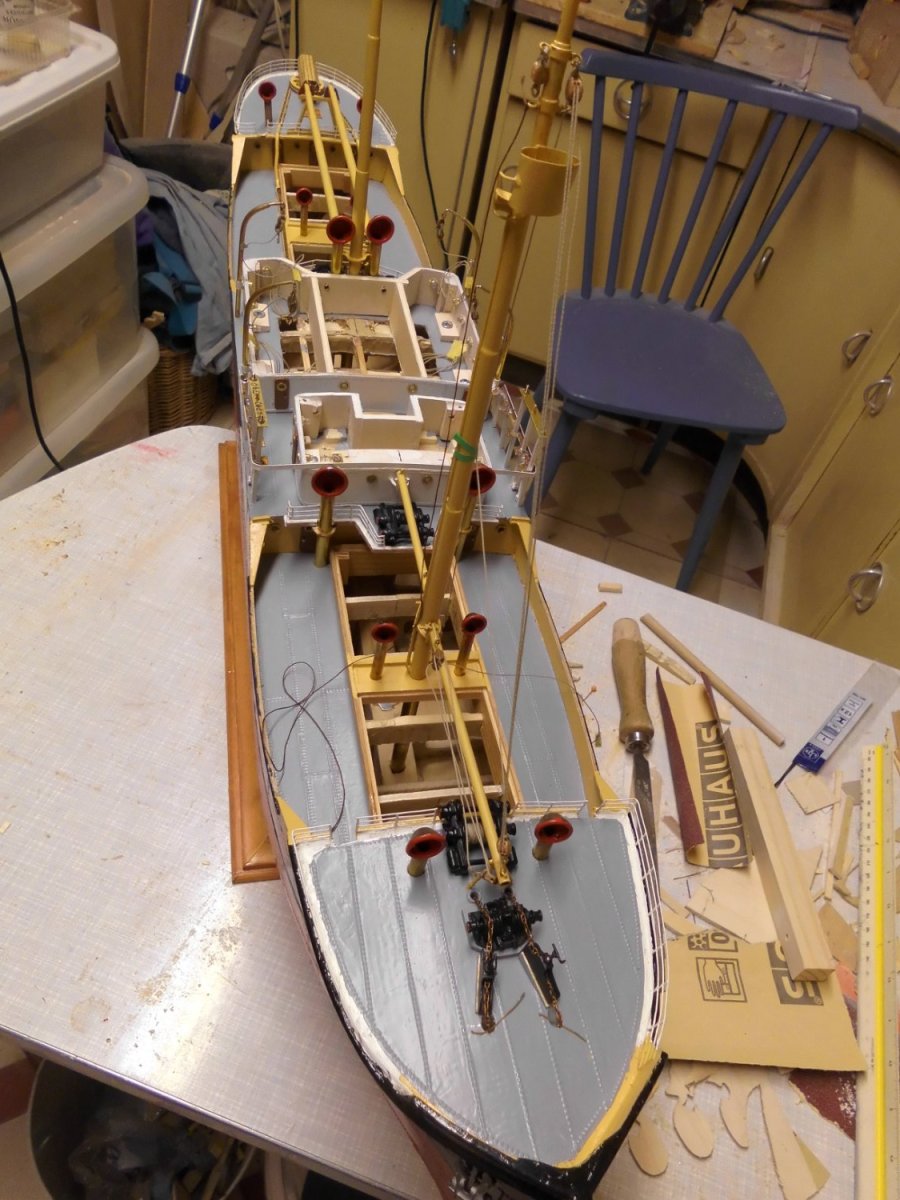
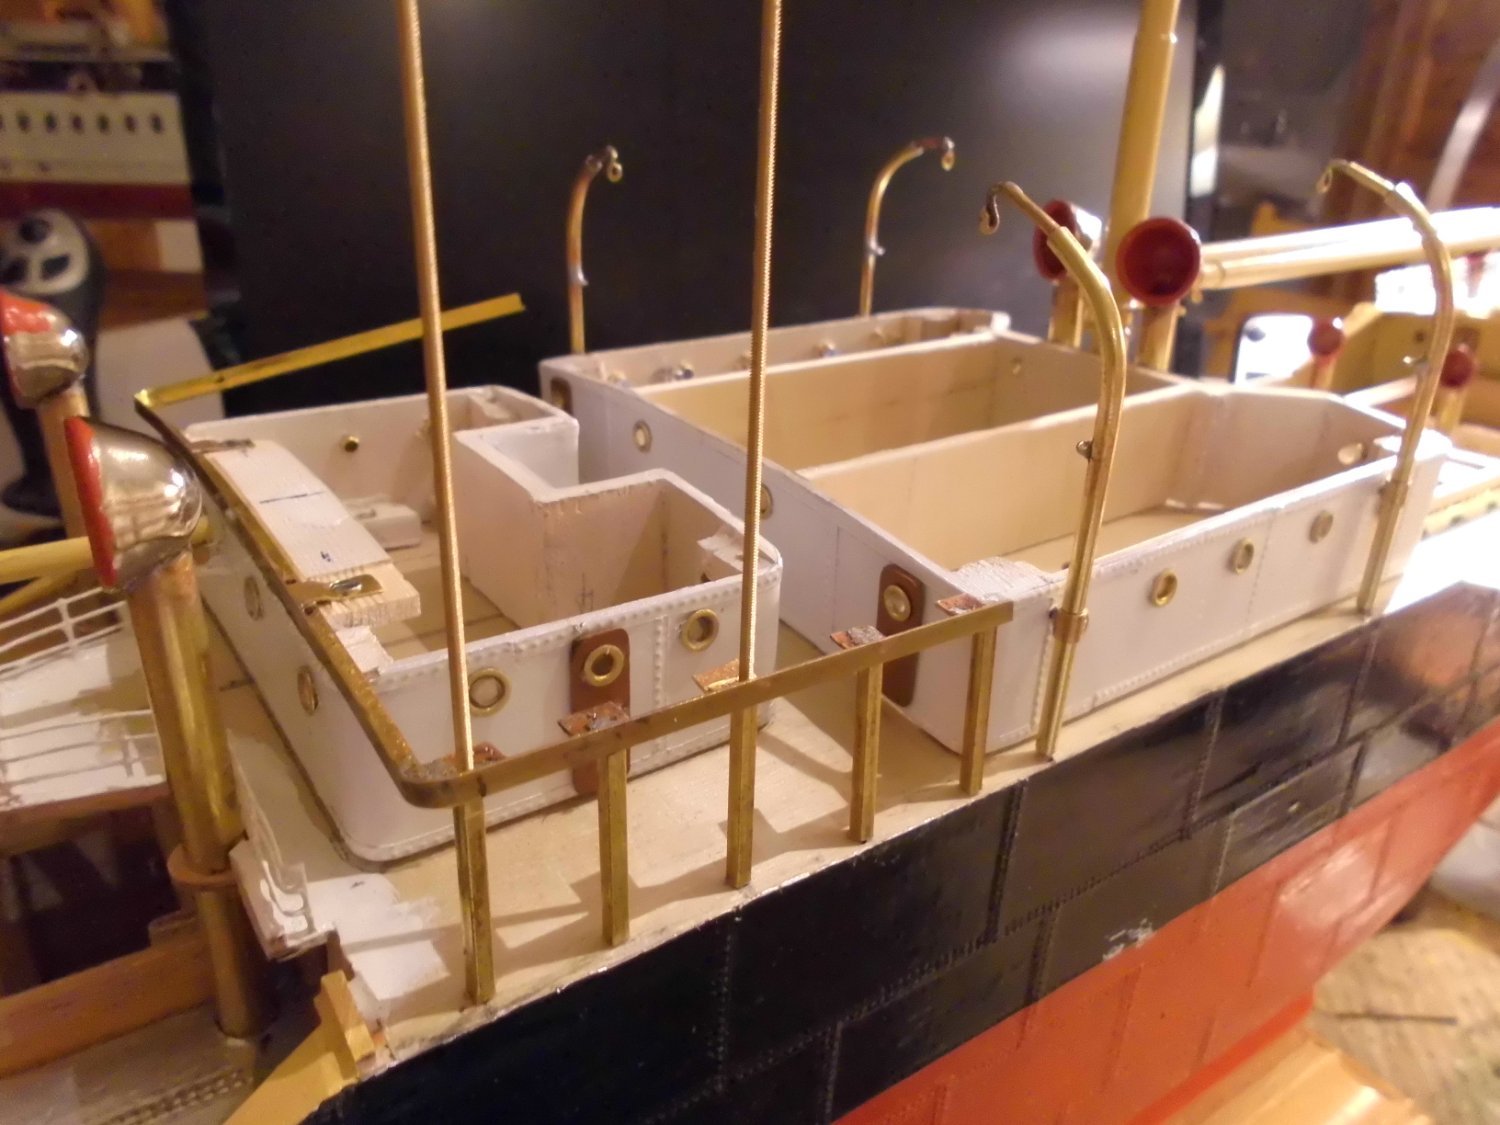
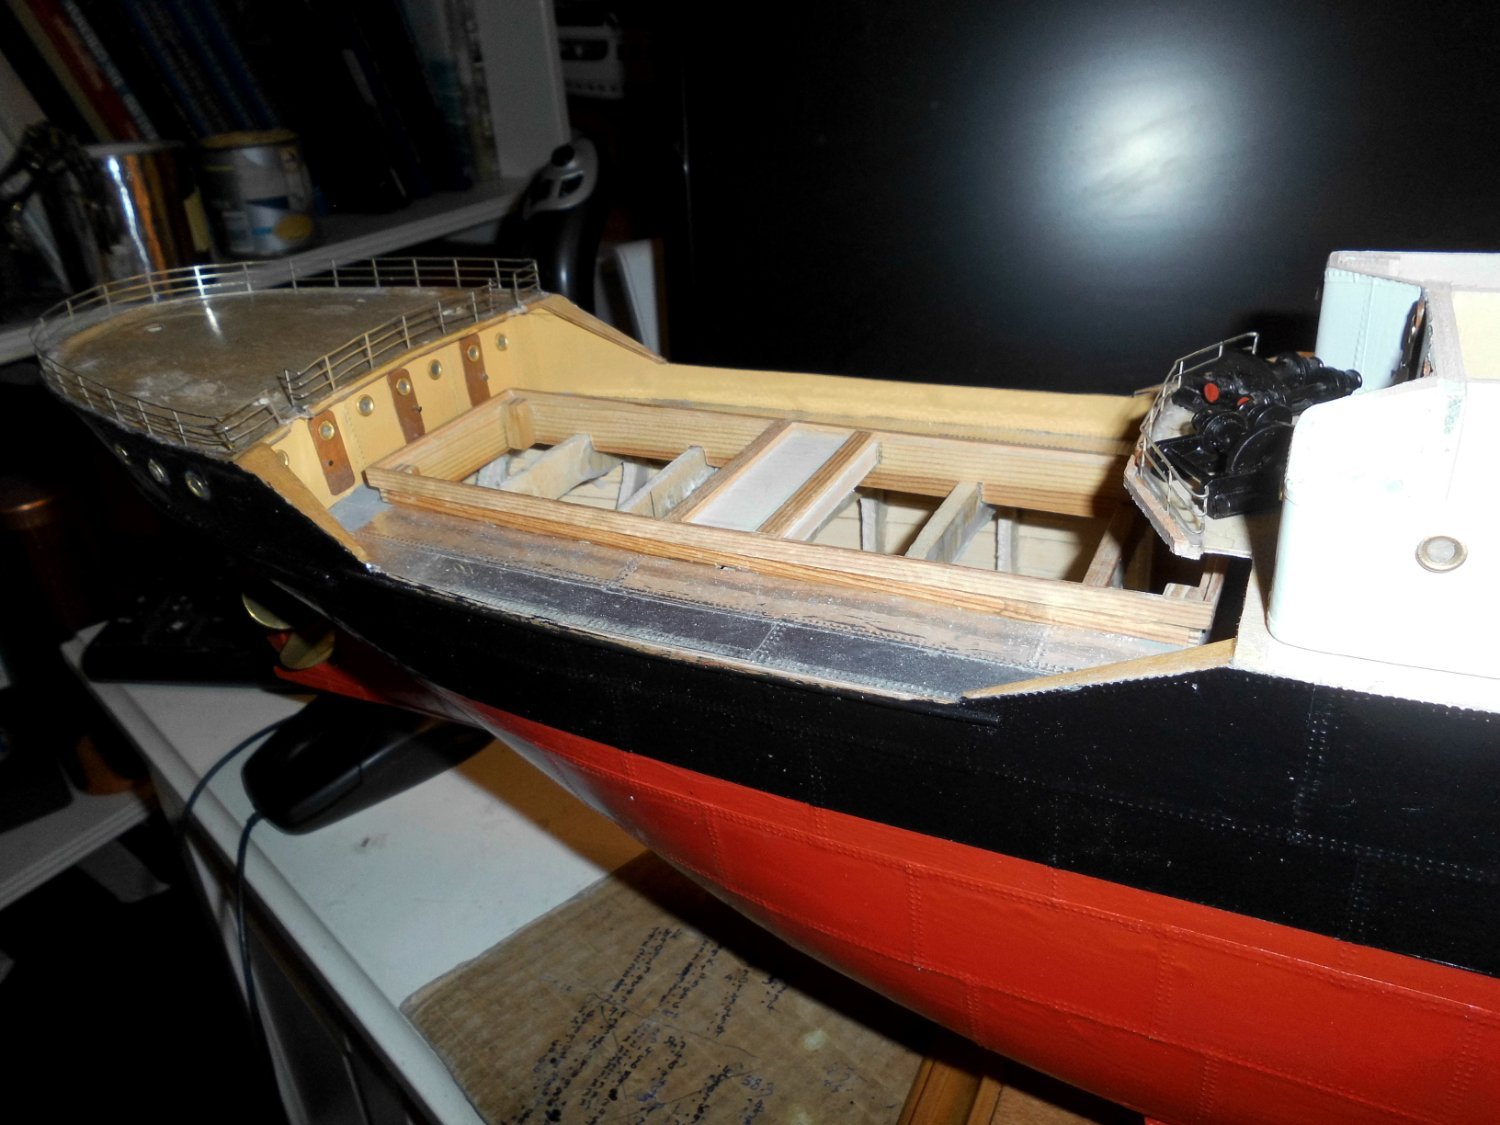
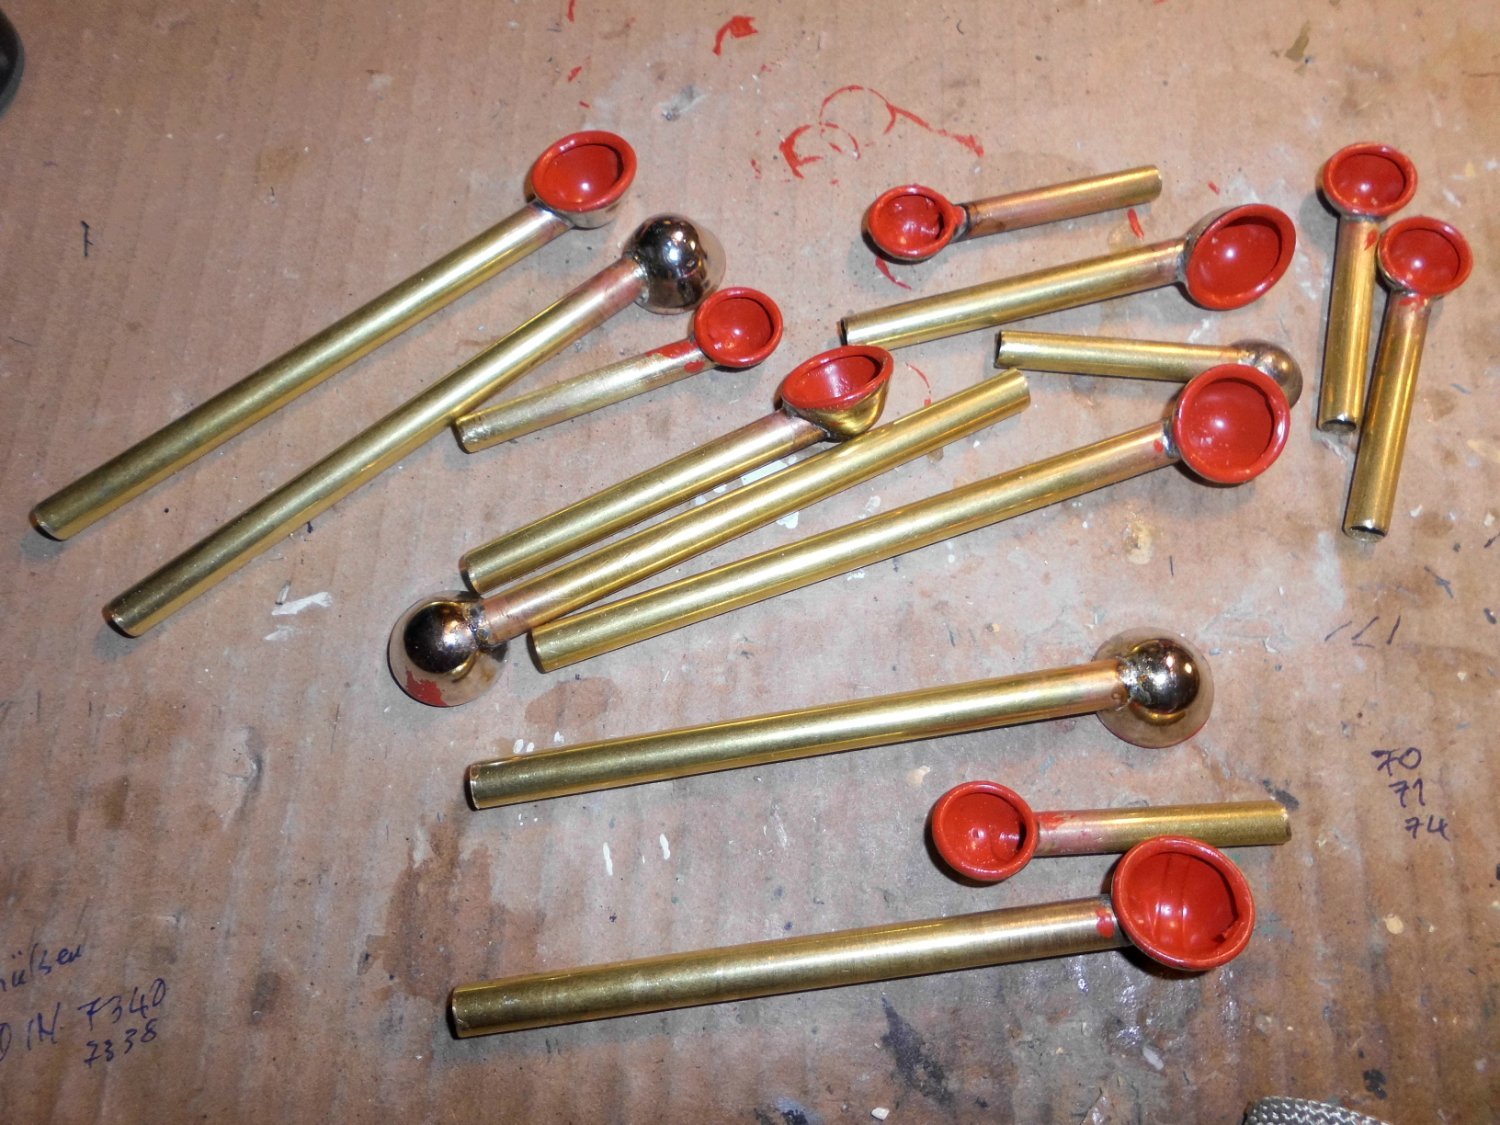
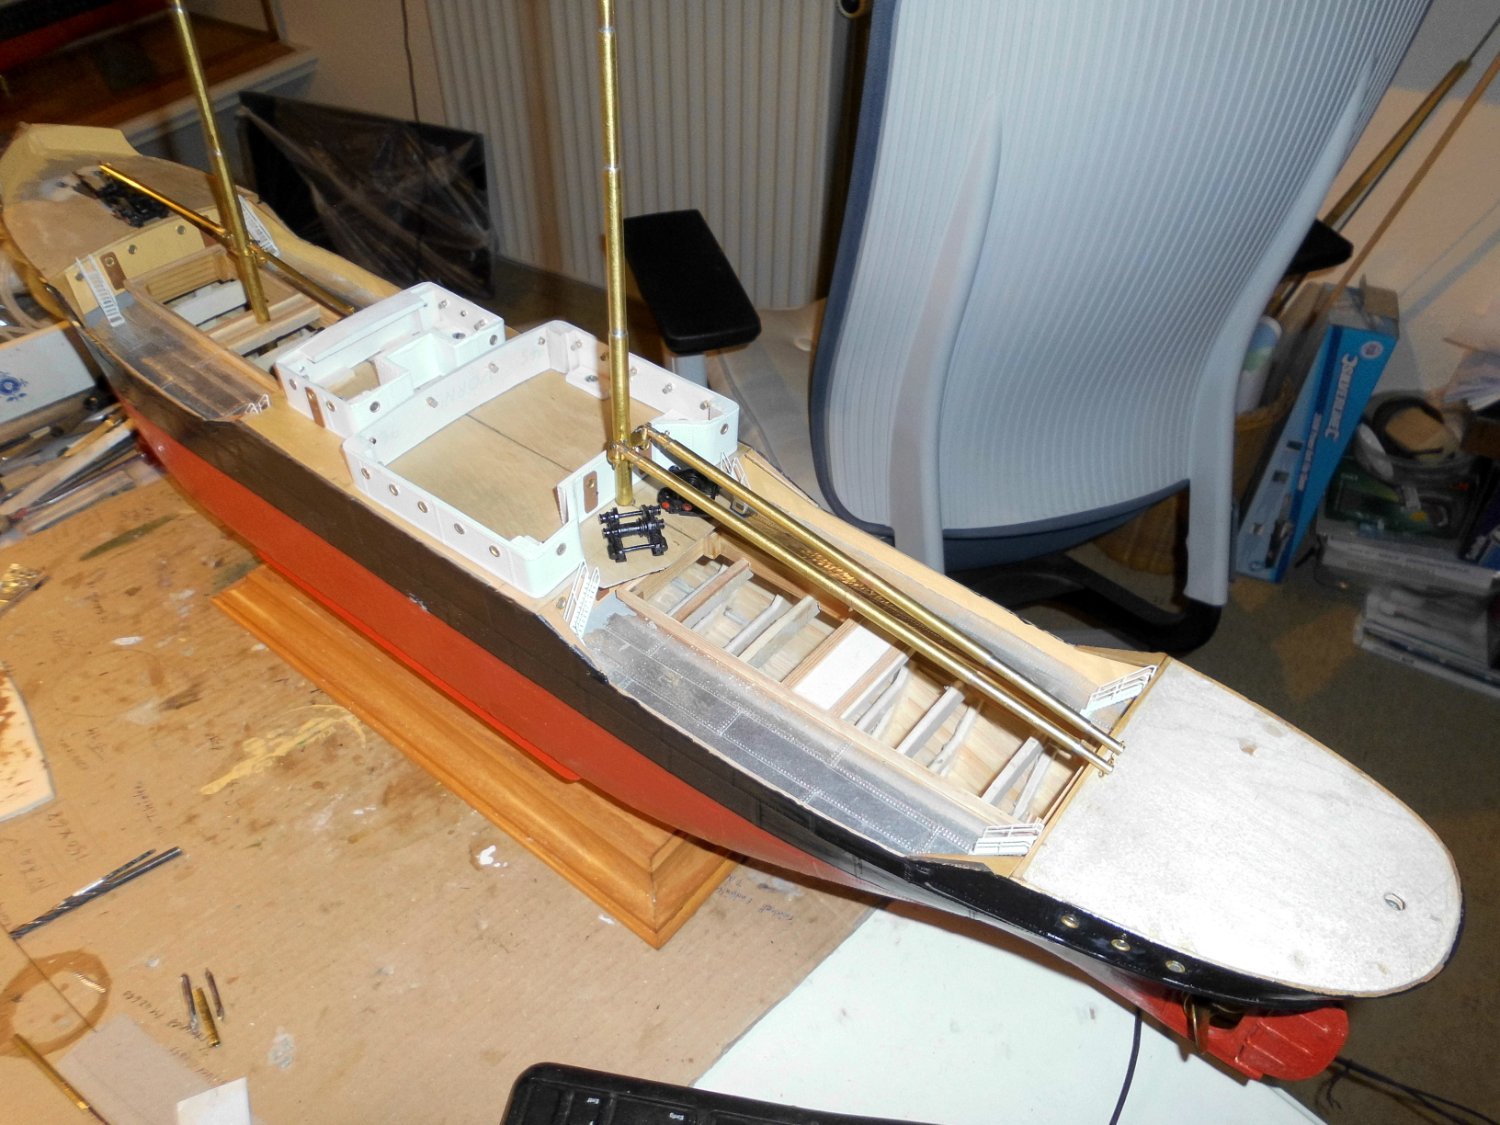
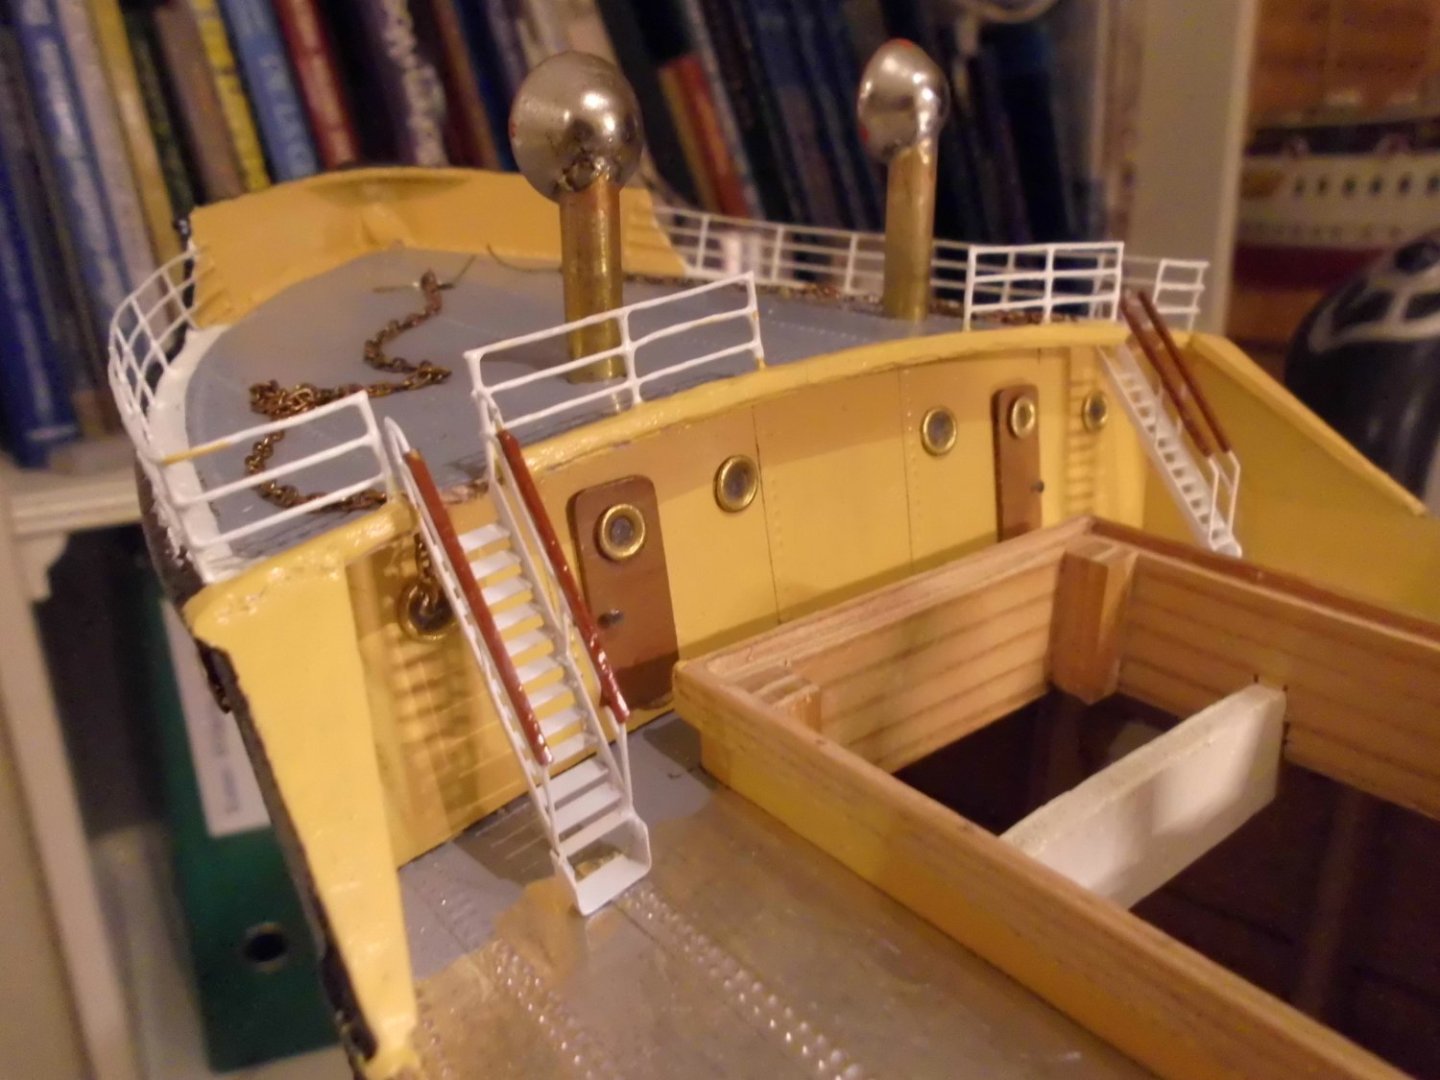
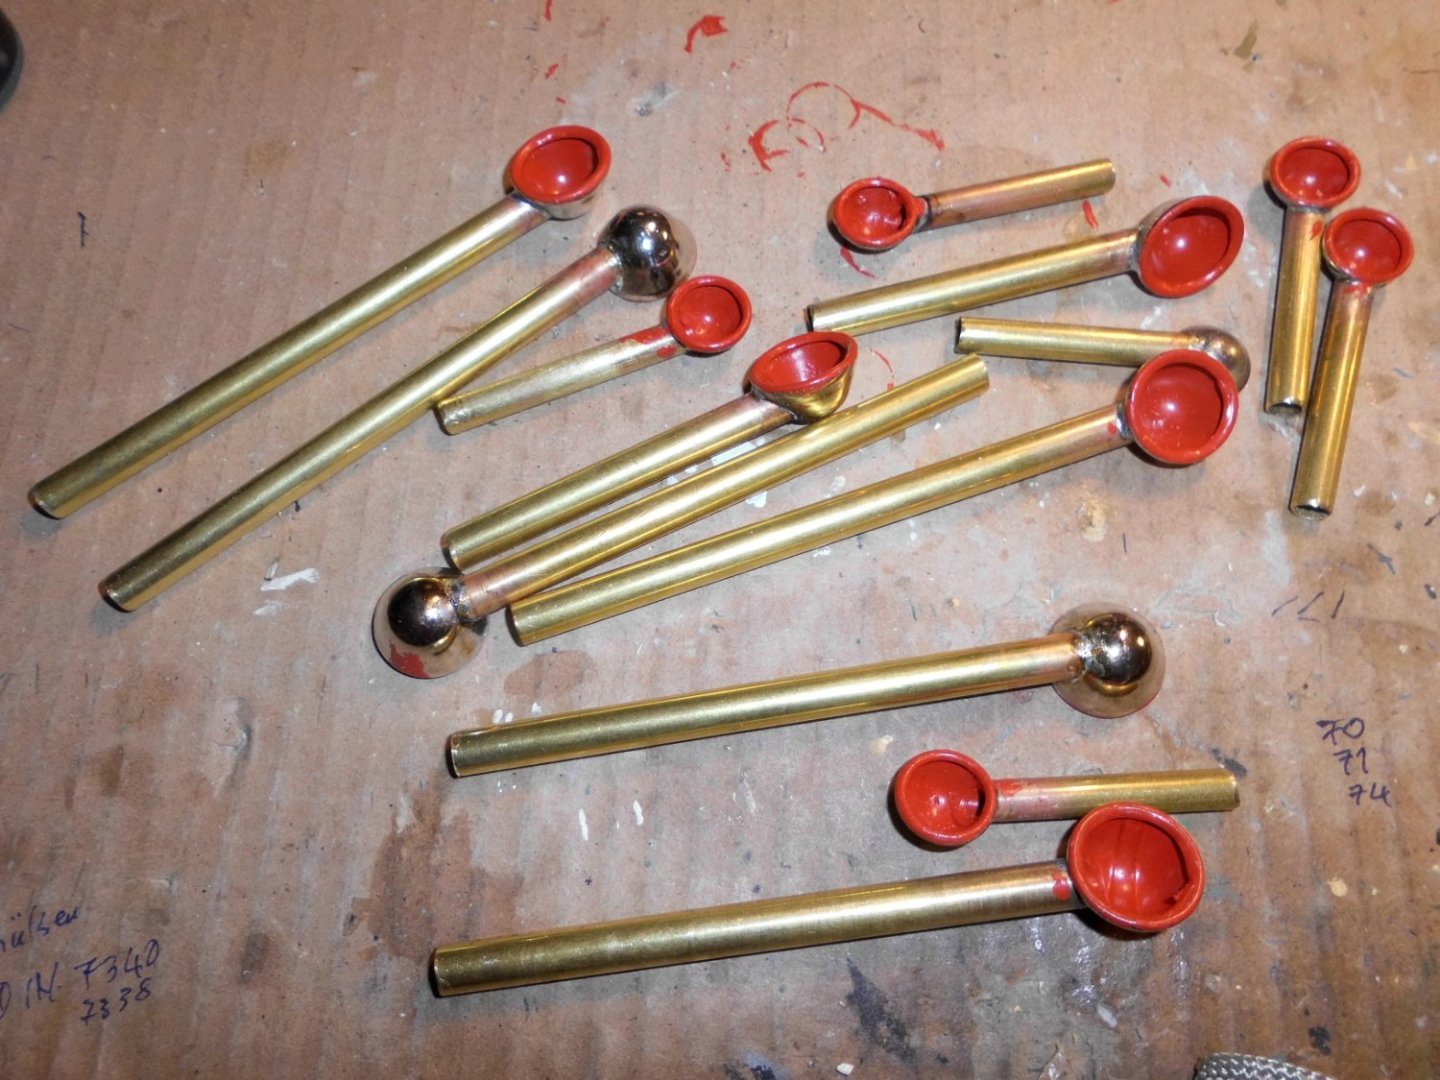
Update made all 4 Davits and am starting with the supportframe of the front boatsdeck.... Nils Stb side view of the old steamer of 1918 build the threaded rods M1,6 go through the mini spacer-squaretubes. They will also also support the bridgedeck. The angle profile 4x4 will take up the front portion of the boatsdeck


- 330 replies
-
- 16
-
-
Hi Zappto, thanks for your kind word, and yes, I intend to do a glass cabinet after it is completed Nils
-
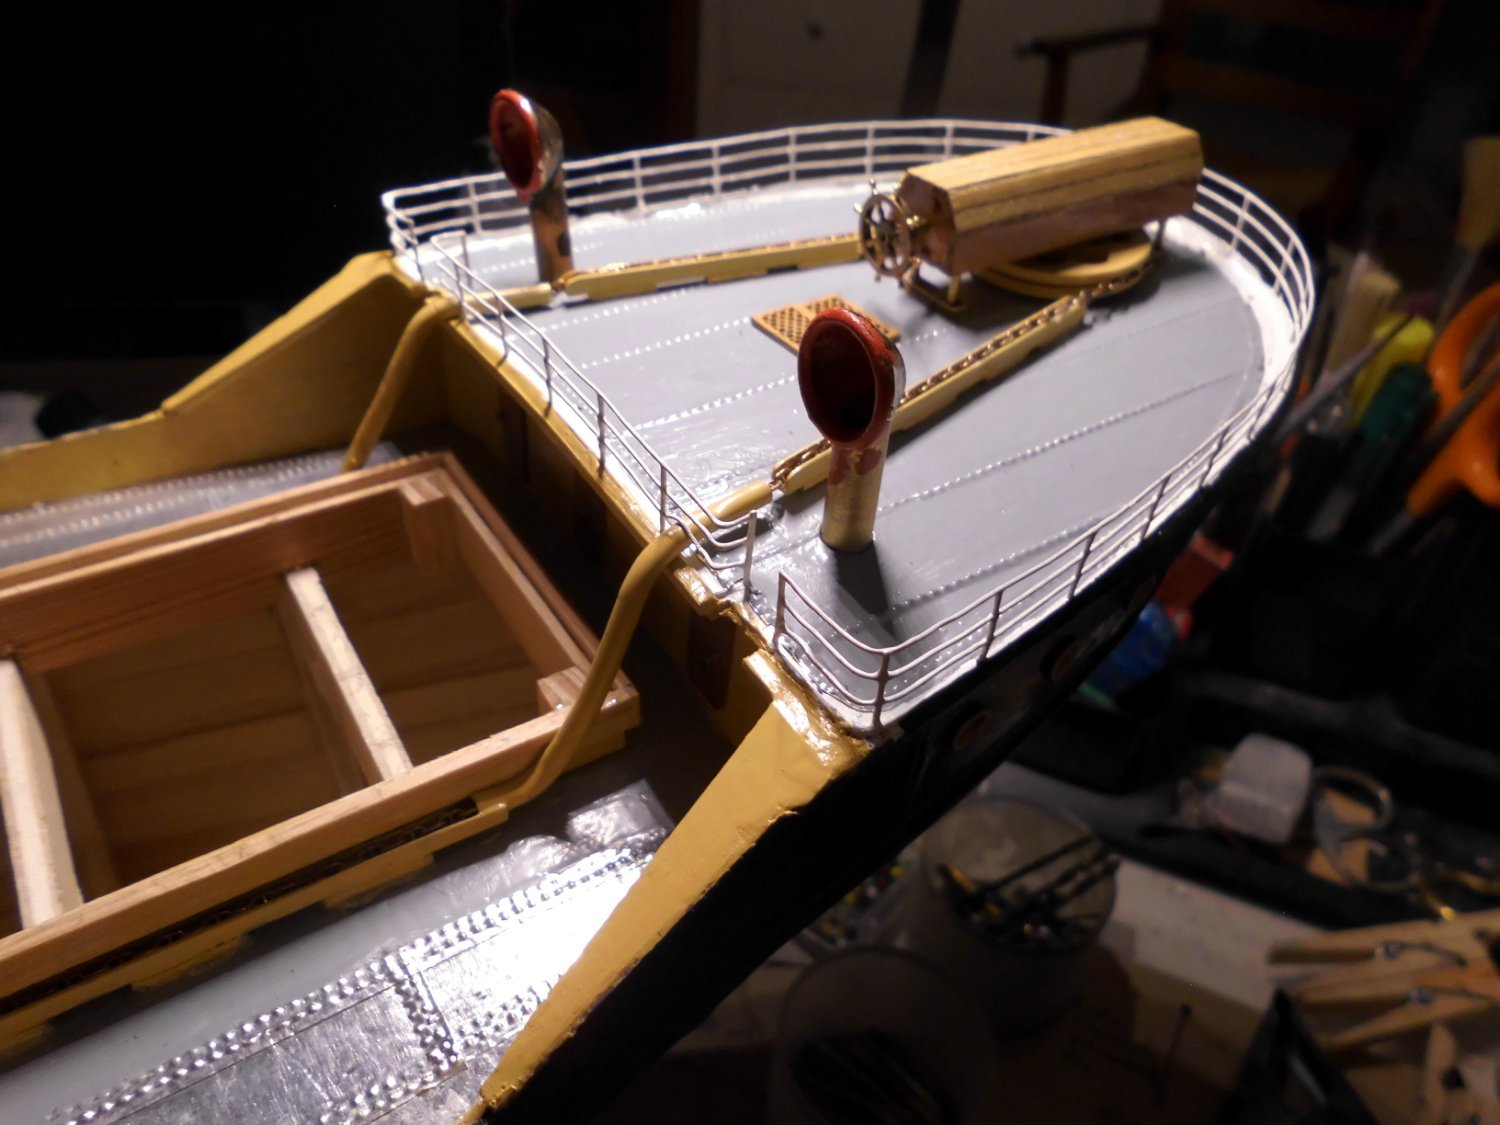
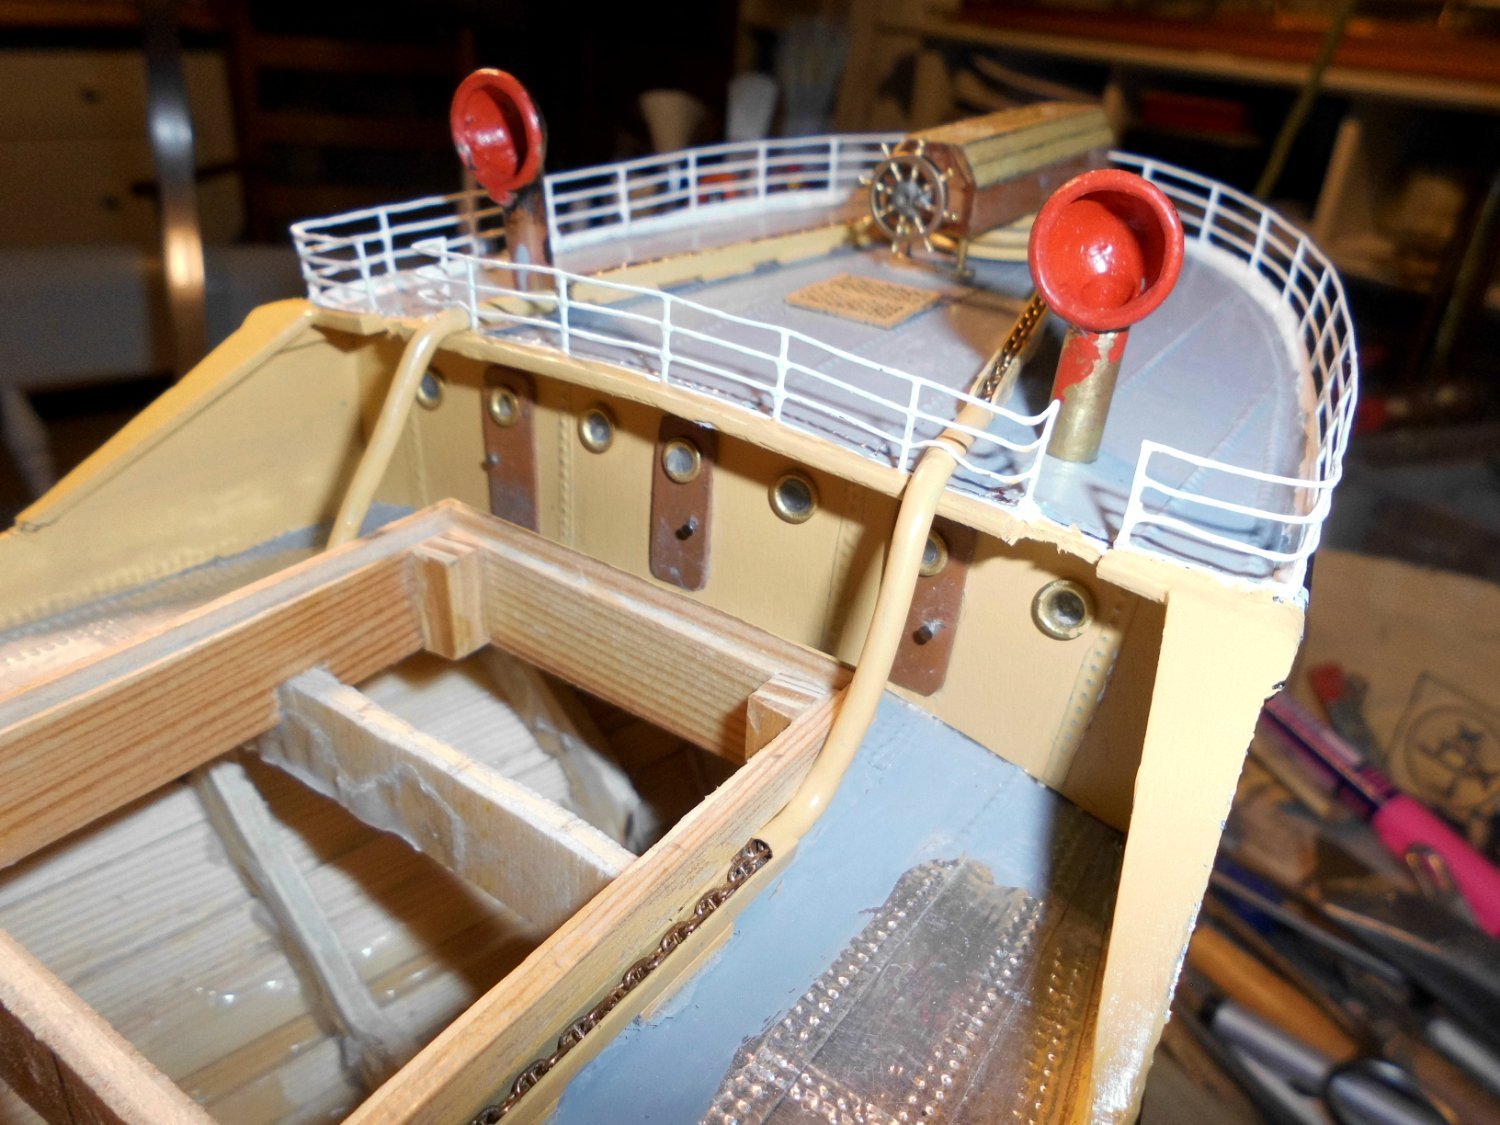
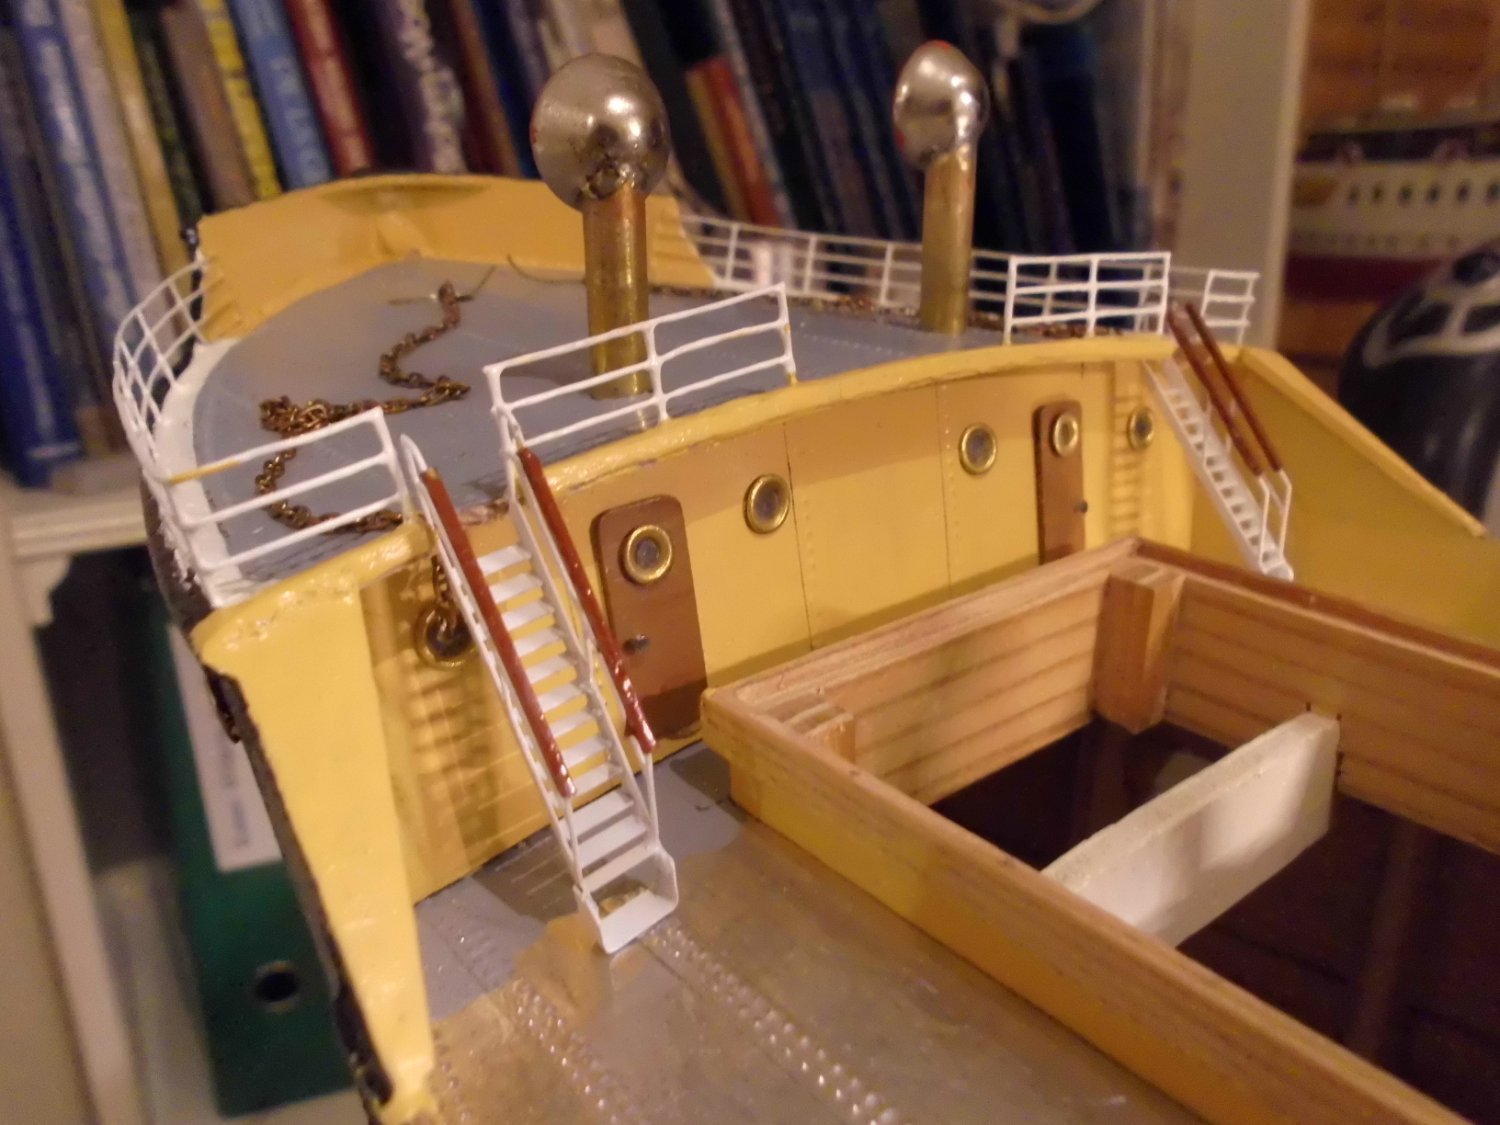
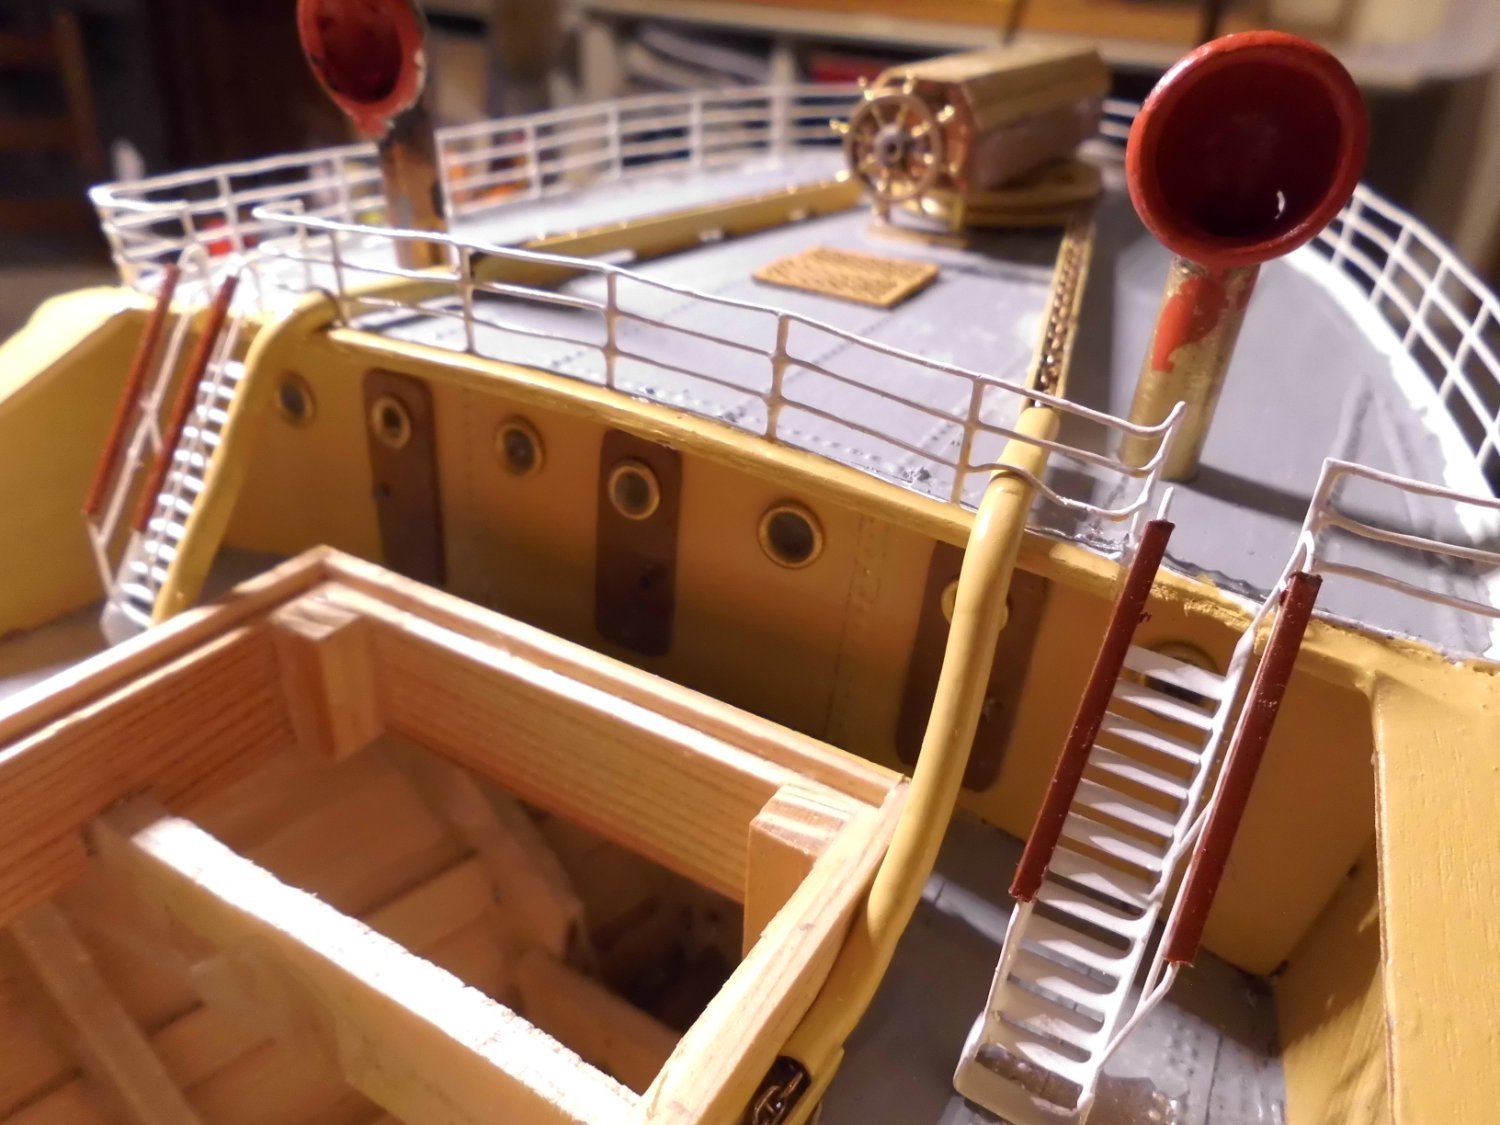
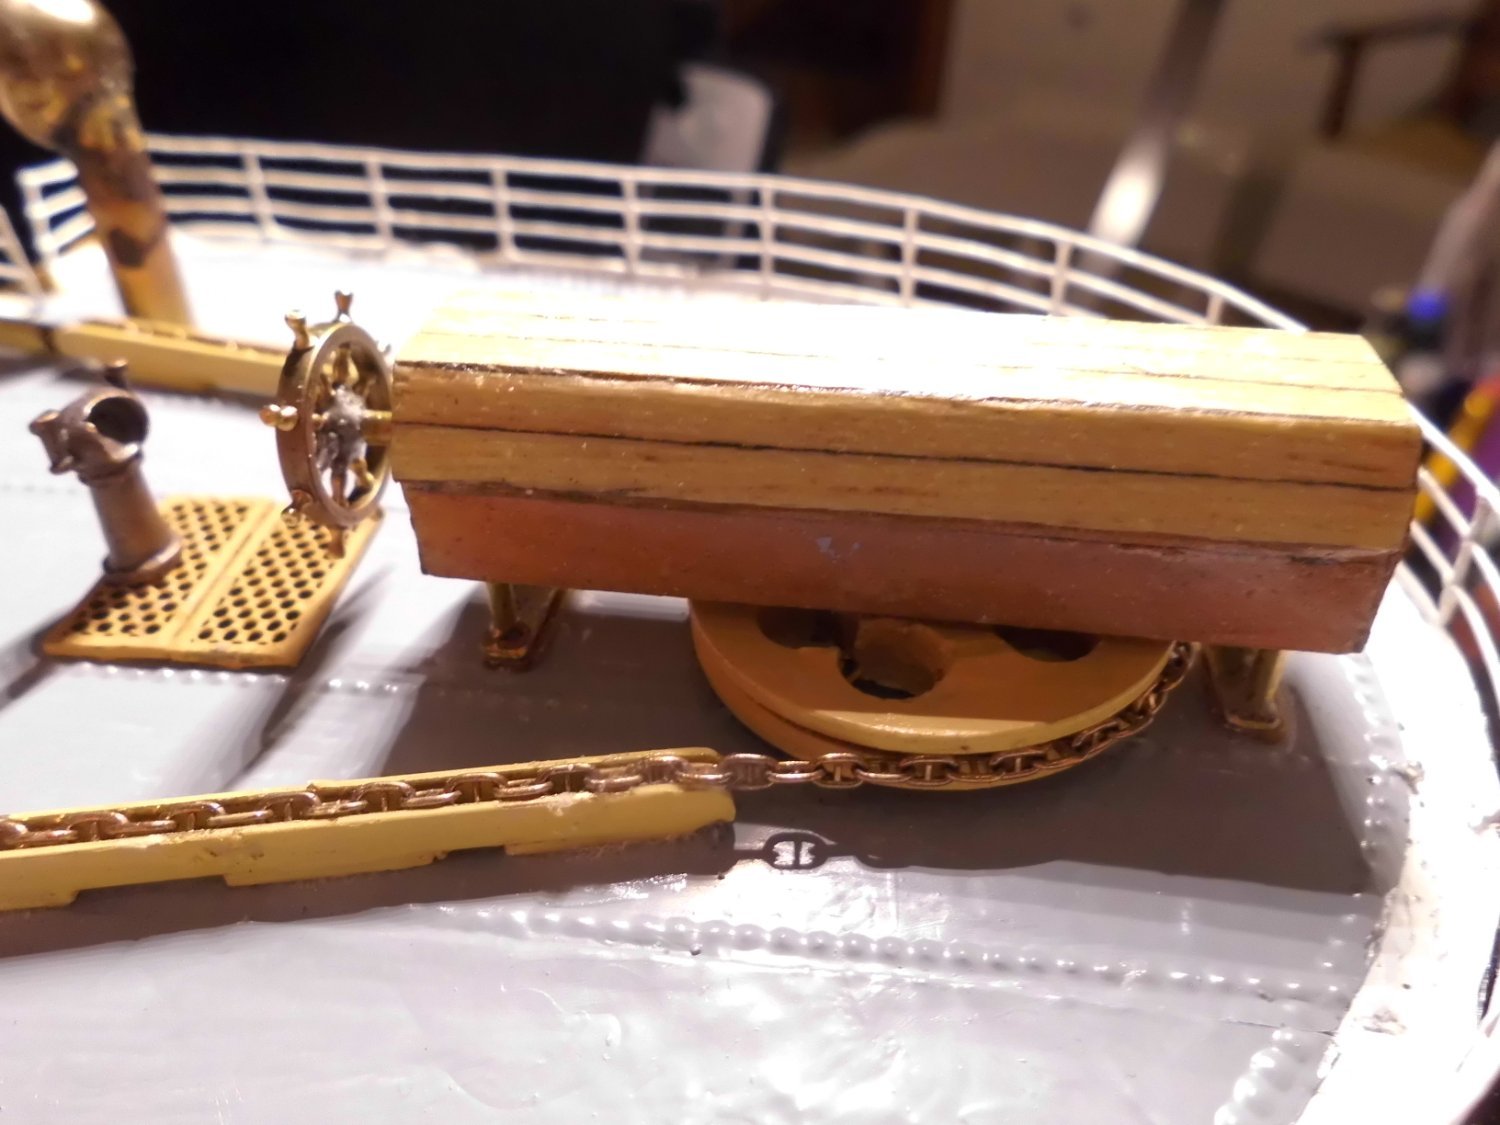
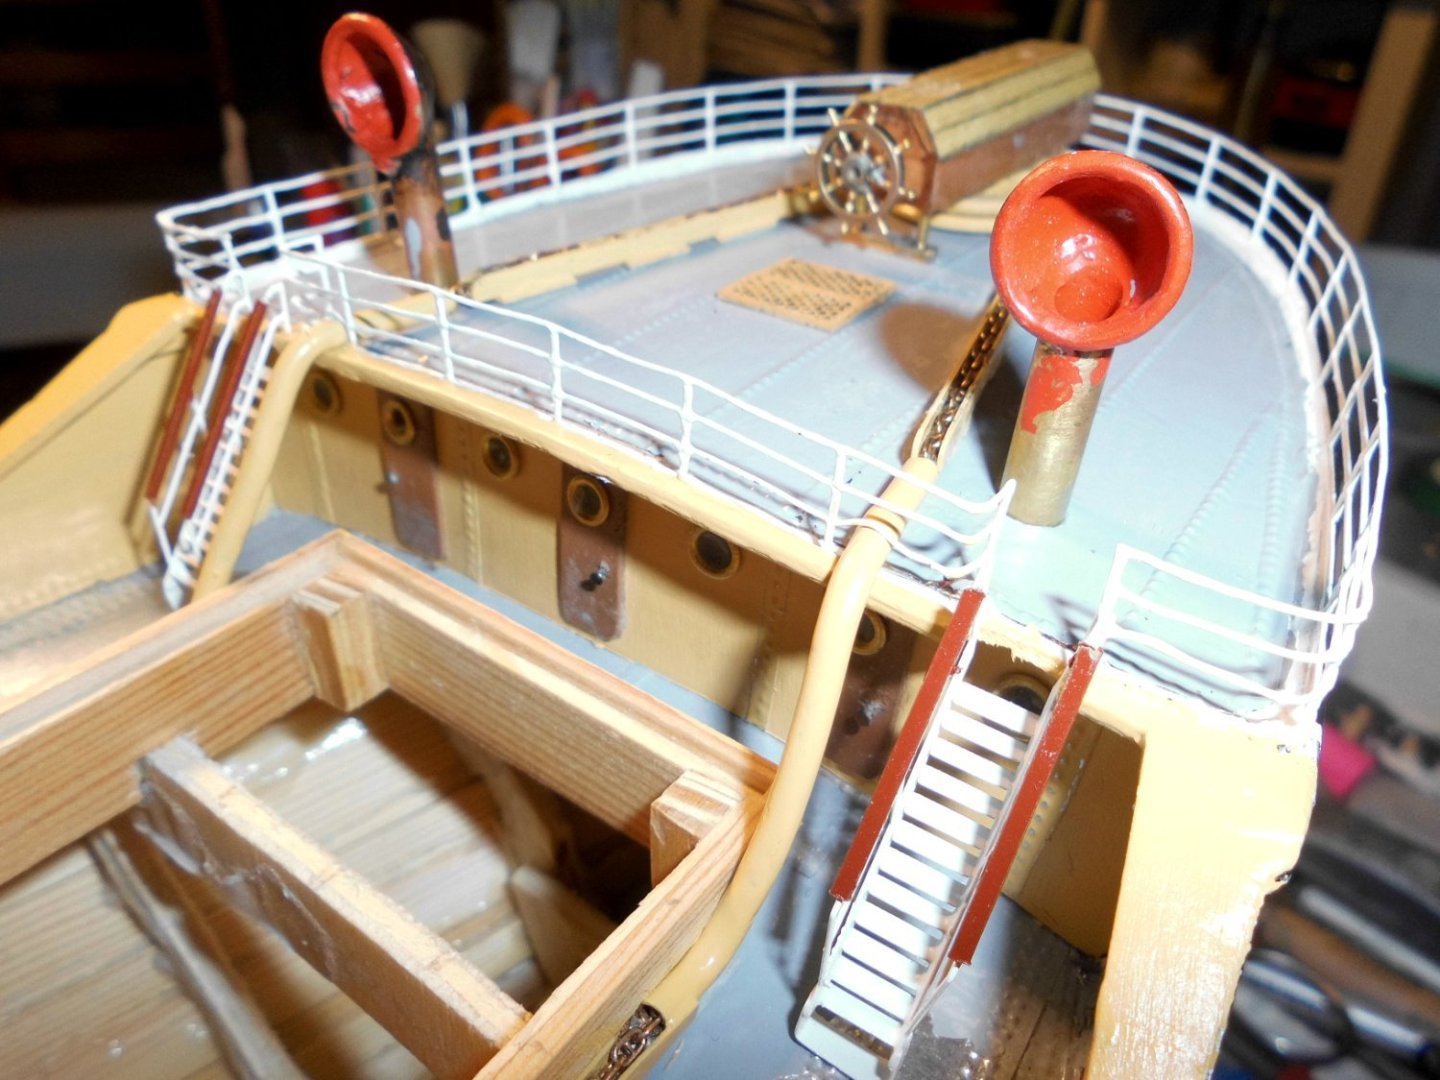
Update under work : anchor- and rudderchains, emergency rudderstand, stairways, railings, etc.... Nils rudderchain U-guides and lead tubes anchor chains brought to forecastle-deck emergency rudder device connected to main ruddershaft


- 330 replies
-
- 19
-
-
-
Thanks Phil, Nils Michael, thank you very much for your tip. I`ll remember this and try for the next ocasion to come.... Nils
-
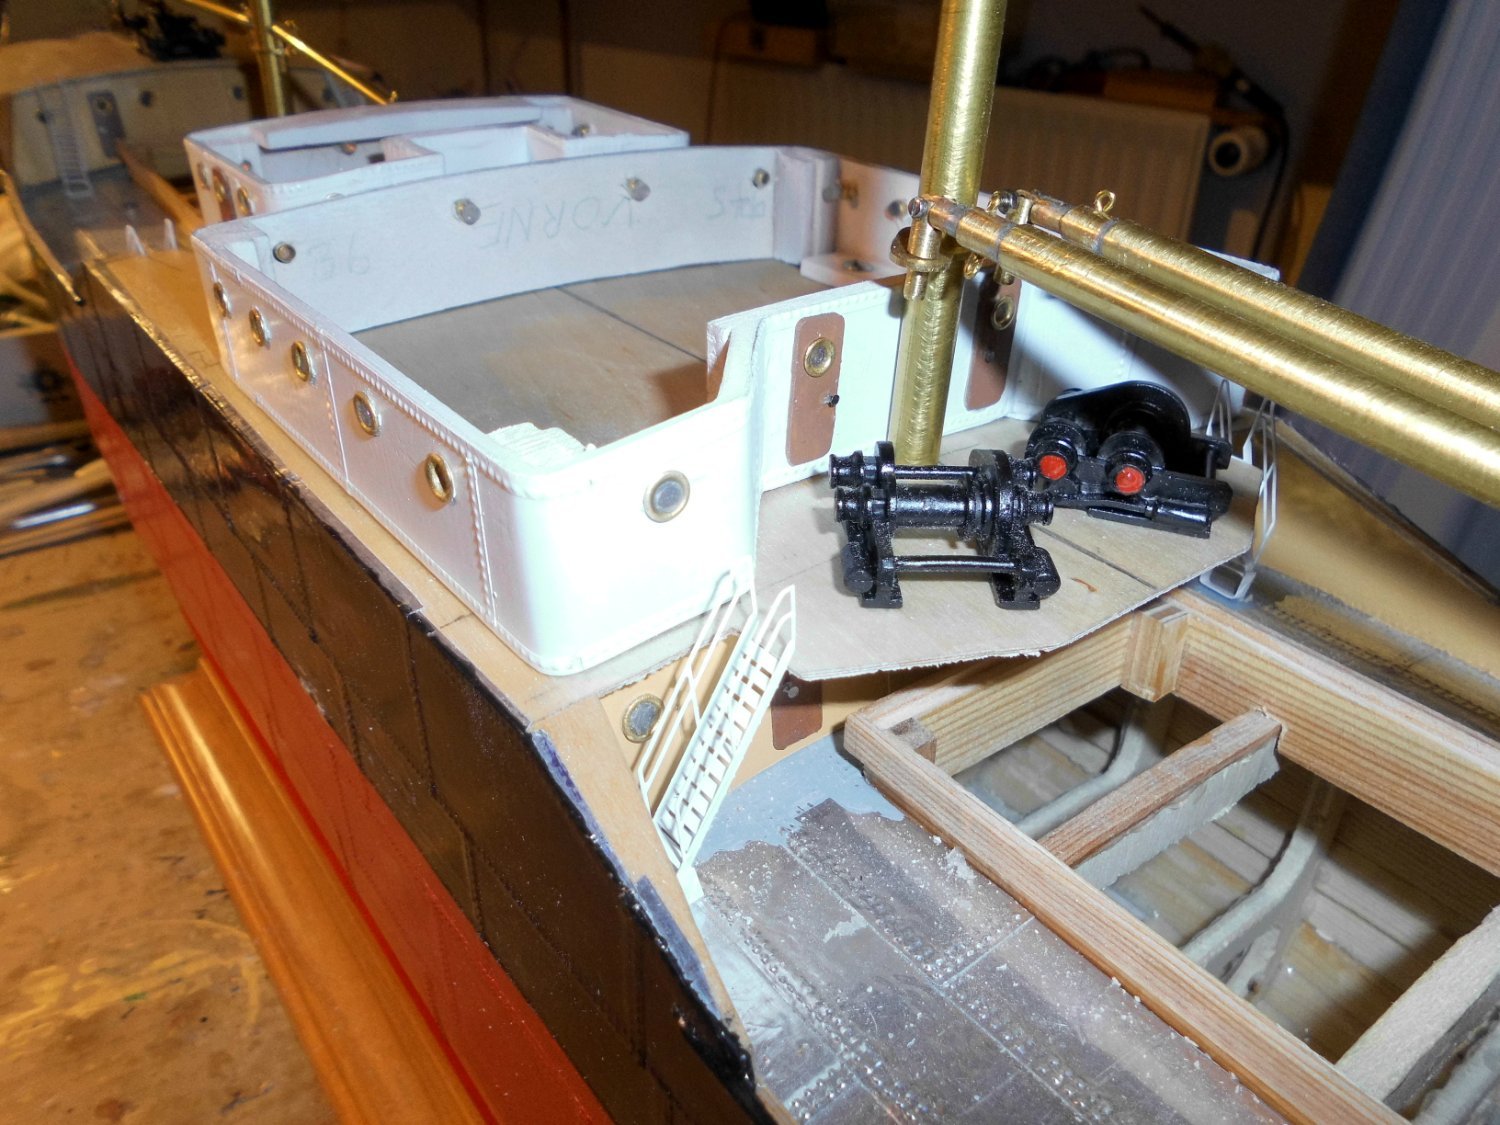
Hi Michael, I`m pleased to see you on board, many thanks for looking in, we have`nt exchanged thoughts for rather a long time, welcome and enjoy the build. I often think it could go even faster, but there are so many little details where I first have to find a way how to do, for example: I`m trying to get the rudder chain to the poop deck using a guide rail (U-profile) and some appropriate tube guiding for the chain lead curves and onto / over a horizontal installed chain wheel beneath the wood cladded containment of the emergency rudder steering wheel device. I spent two to three days to find a solution. Now i think i`ve found a solution and am working on it..... I was just looking for a suitable thin walled brass tube ca. 28 mm OD to make the funnel from. I found something in copper, which will also do. Nils
-
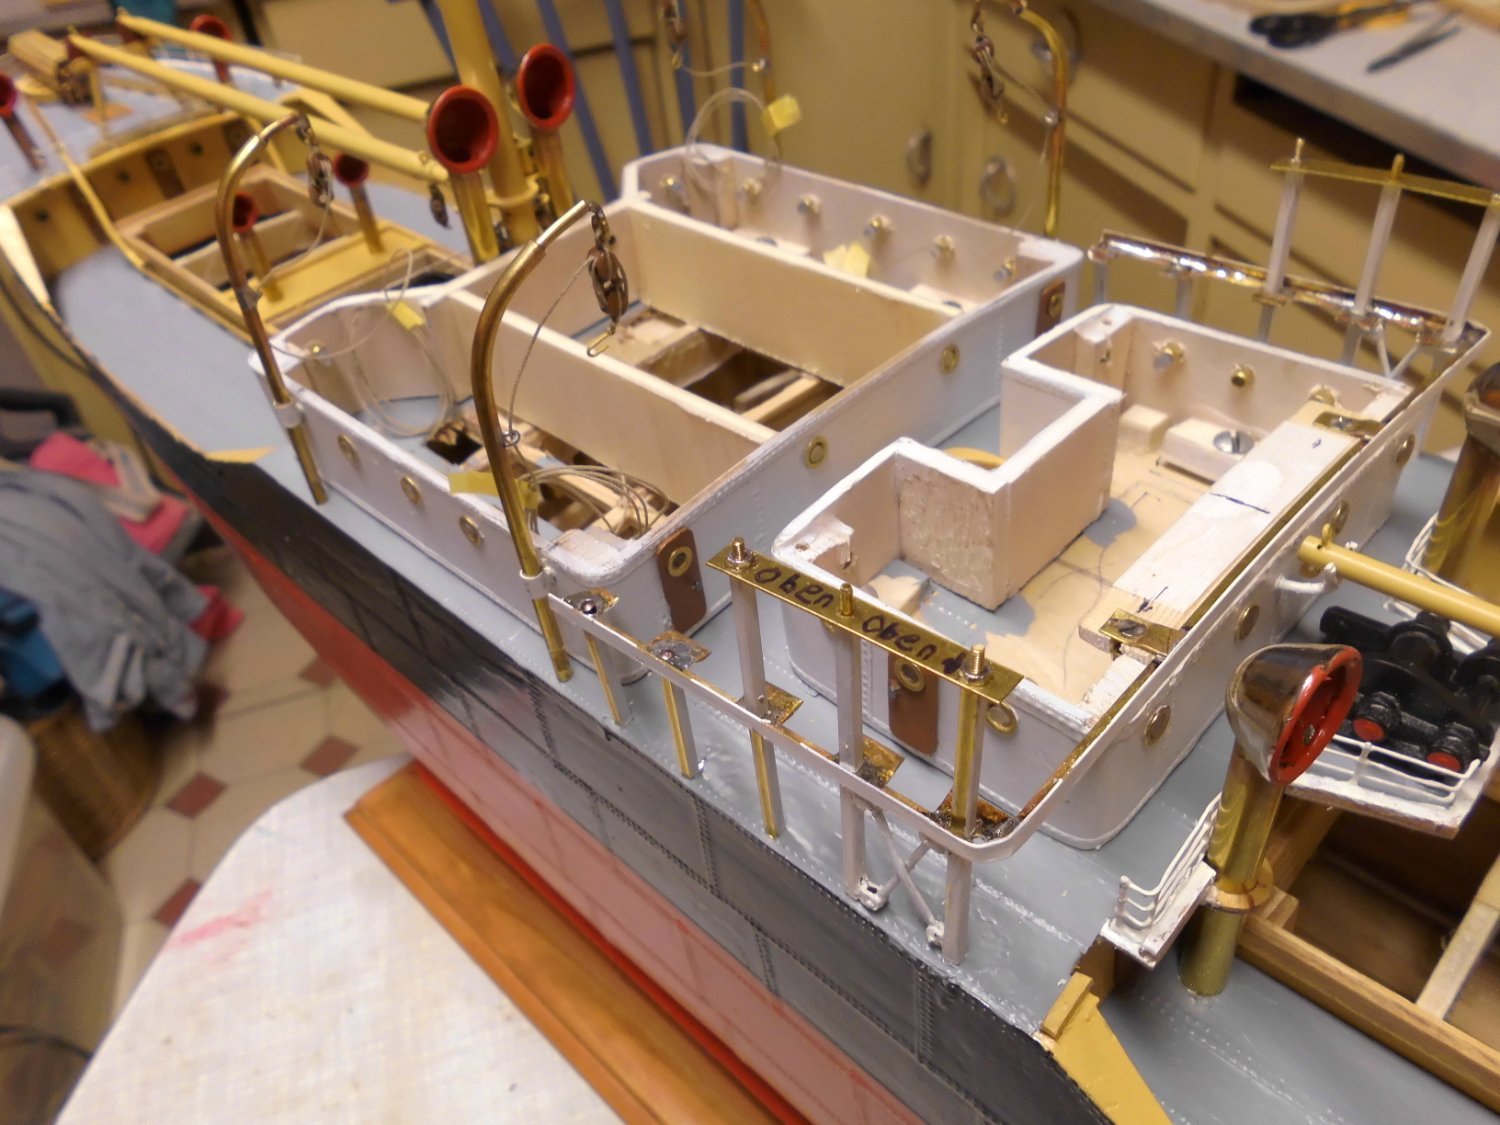
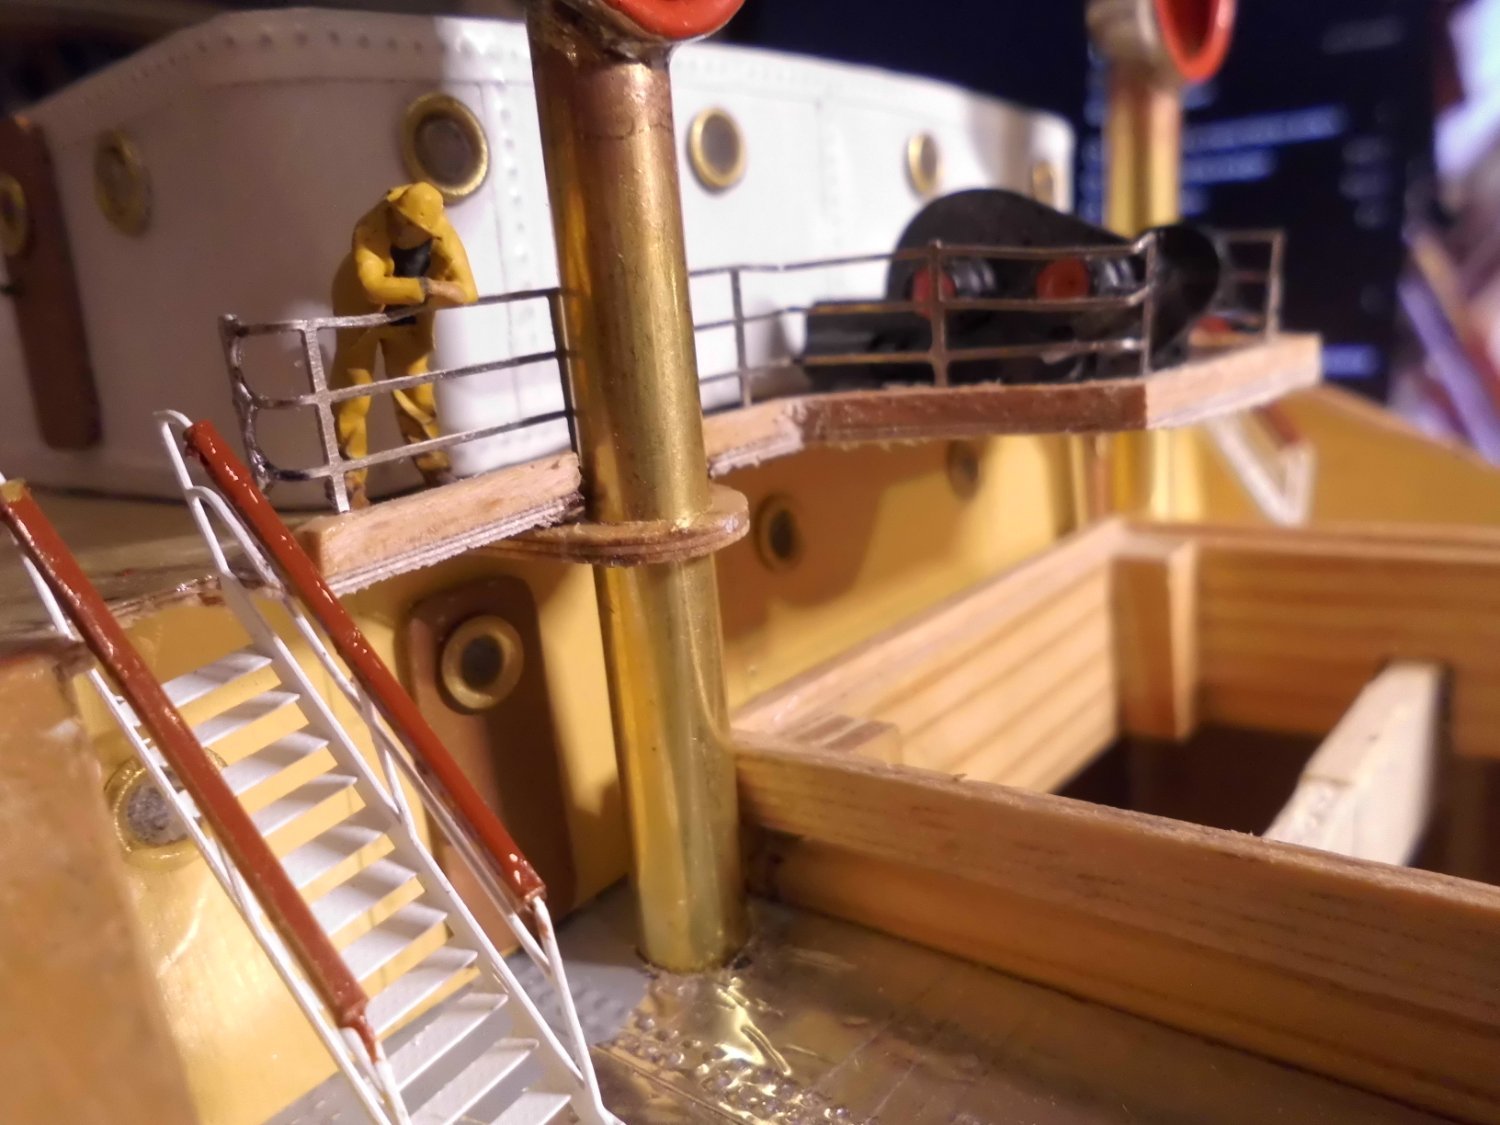
Hi John, thanks for your word, I`m experimenting with the best way of fastening the railing to the decks, looks like thixotrope viscosity-conditioned CA does a good job after its cured out.... Nils
-
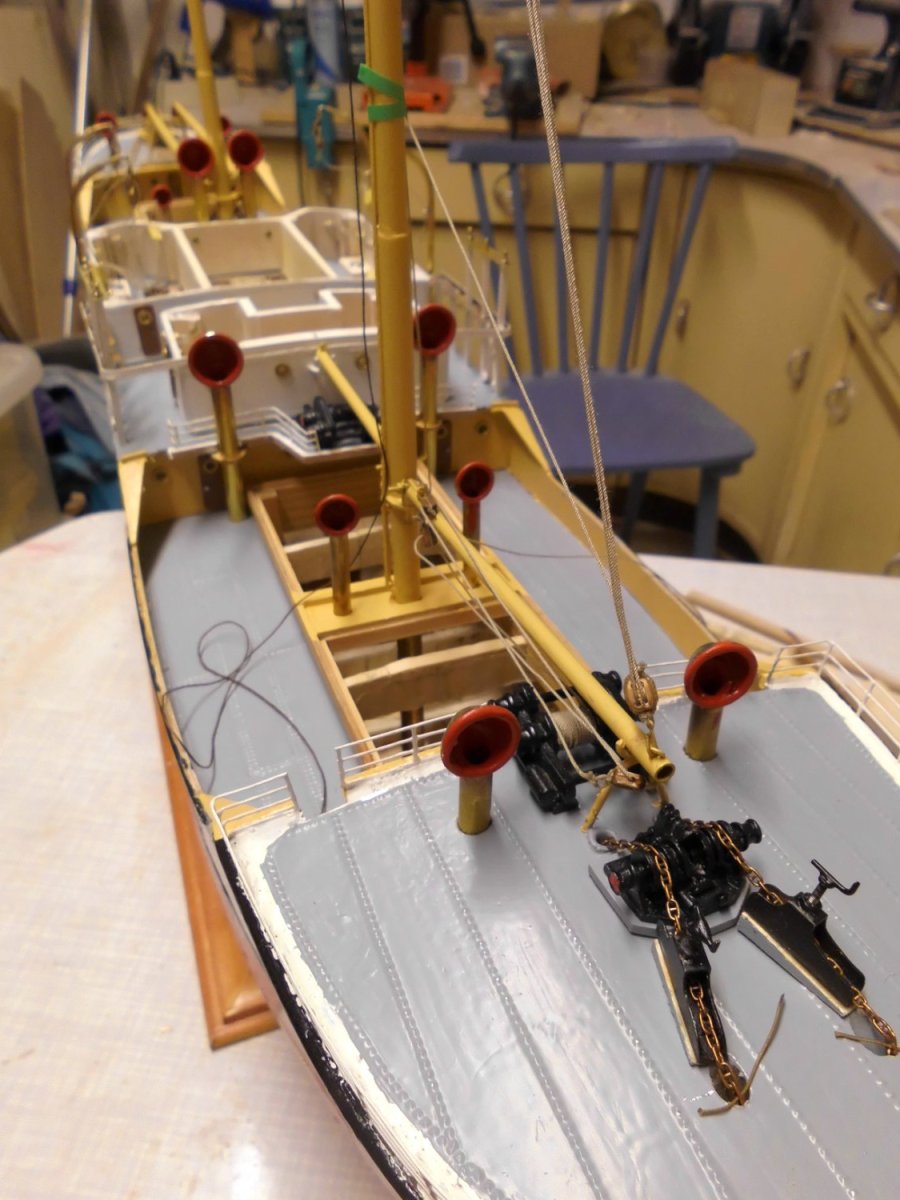
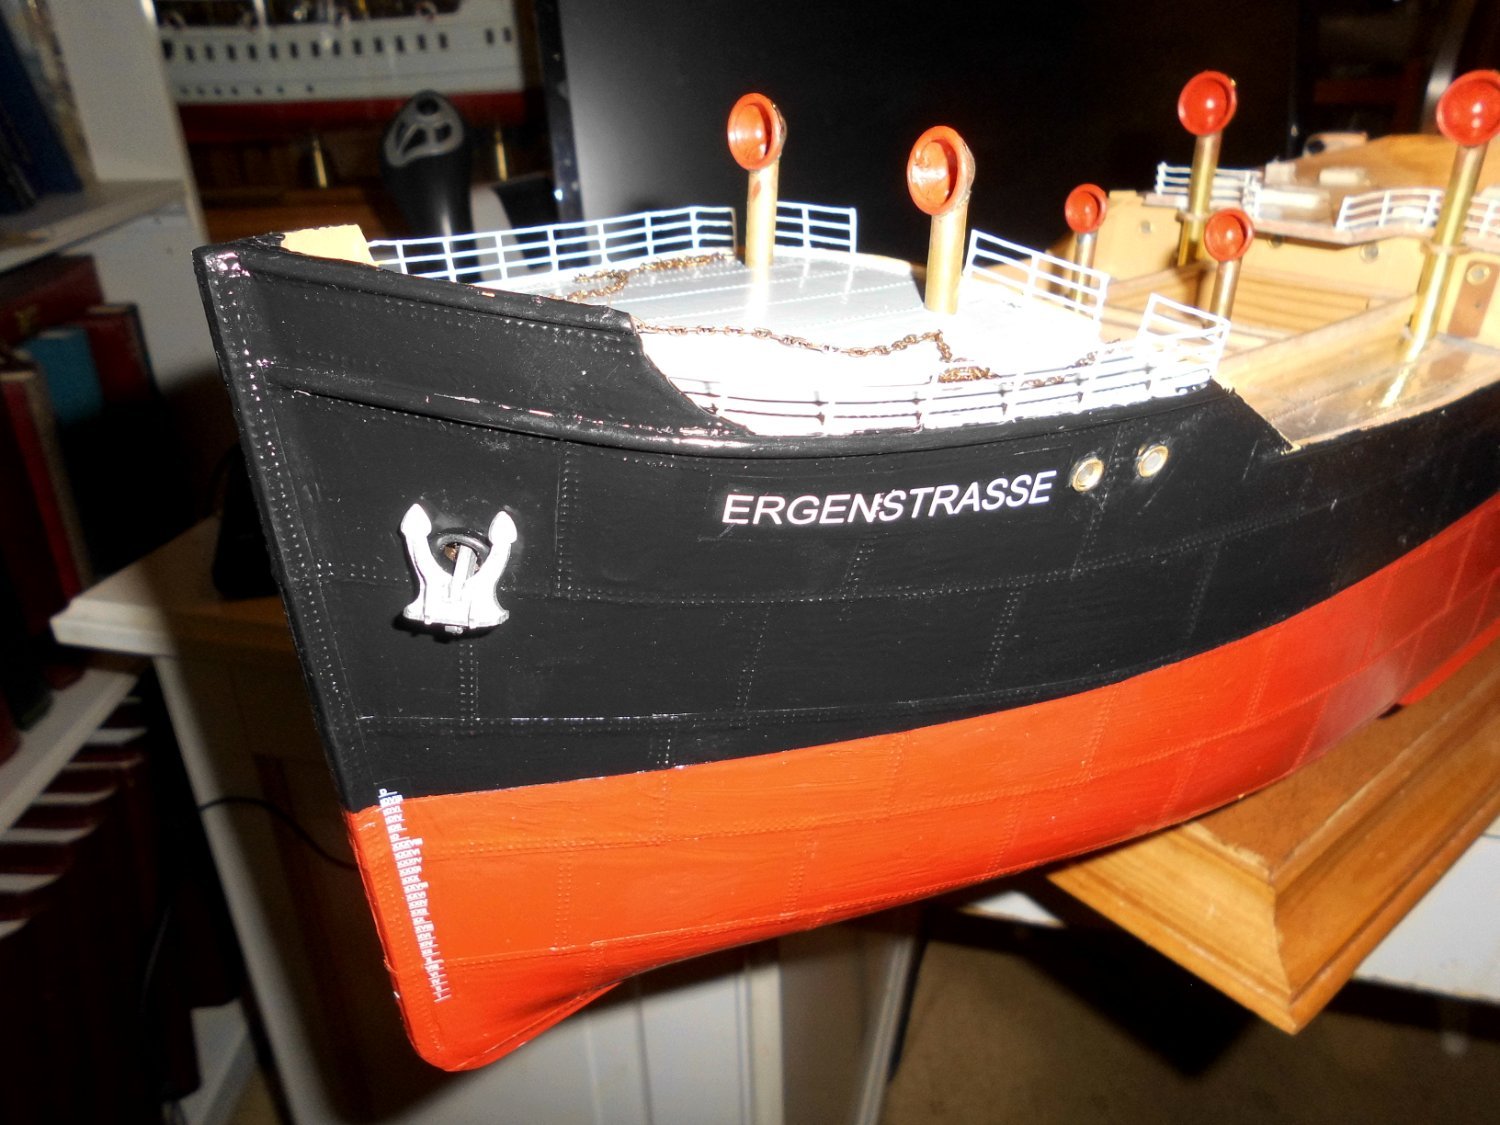
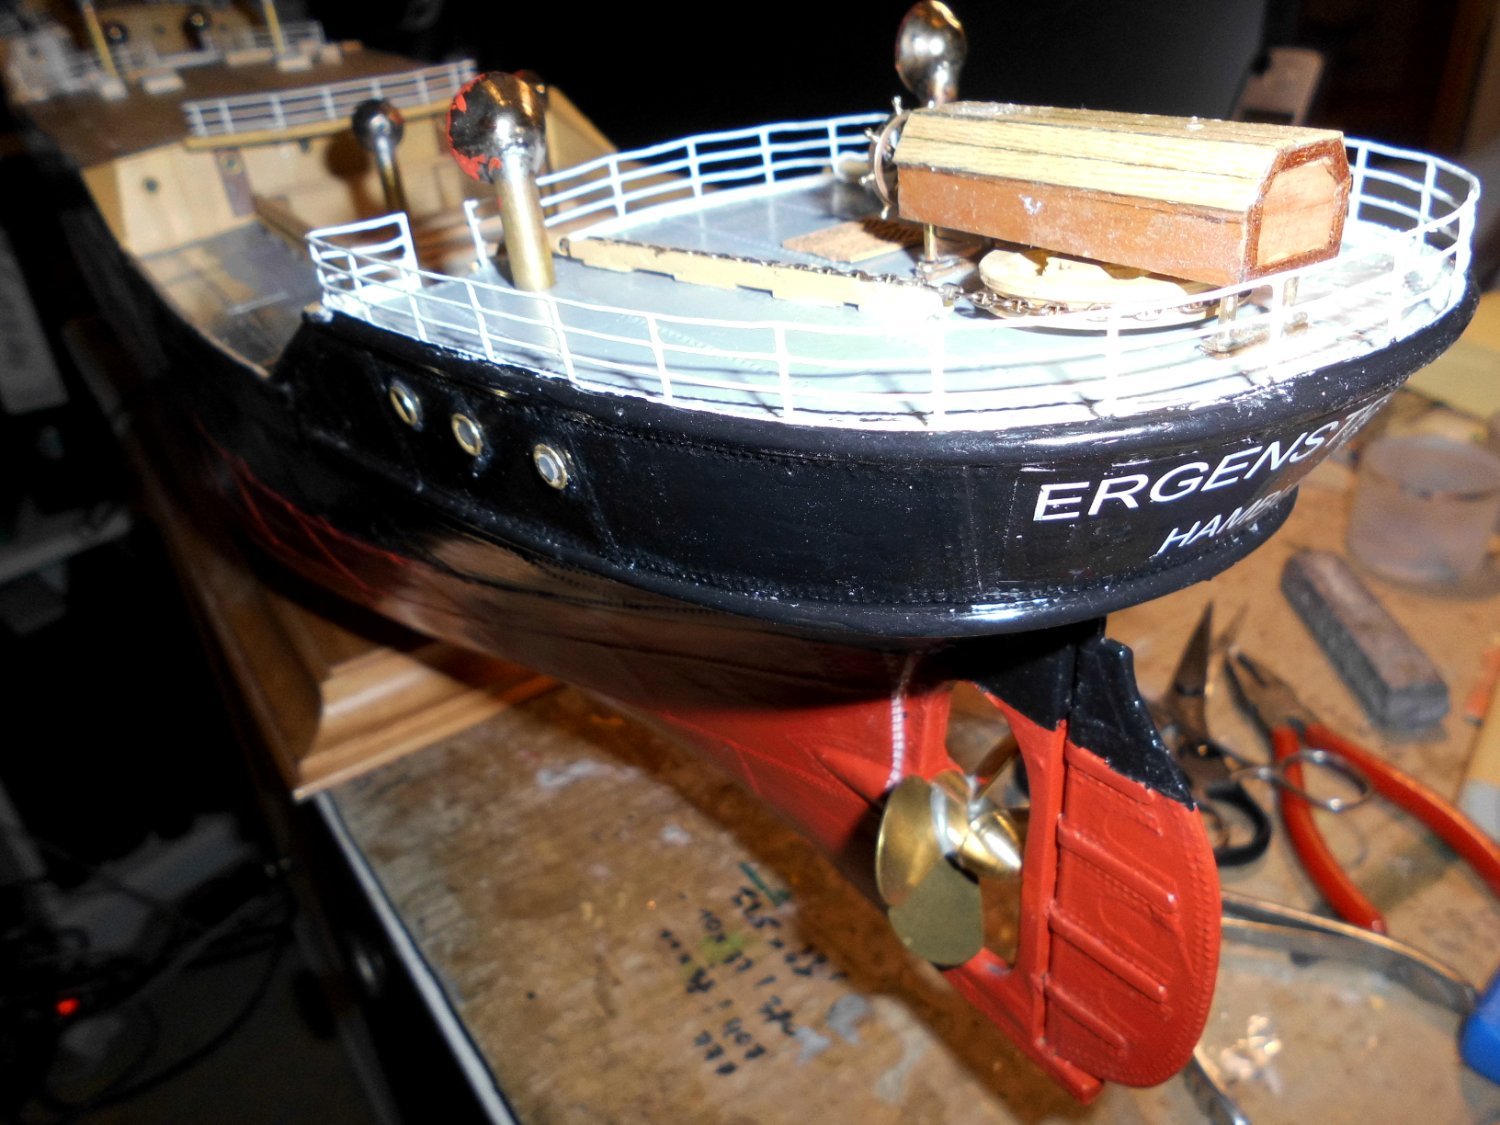
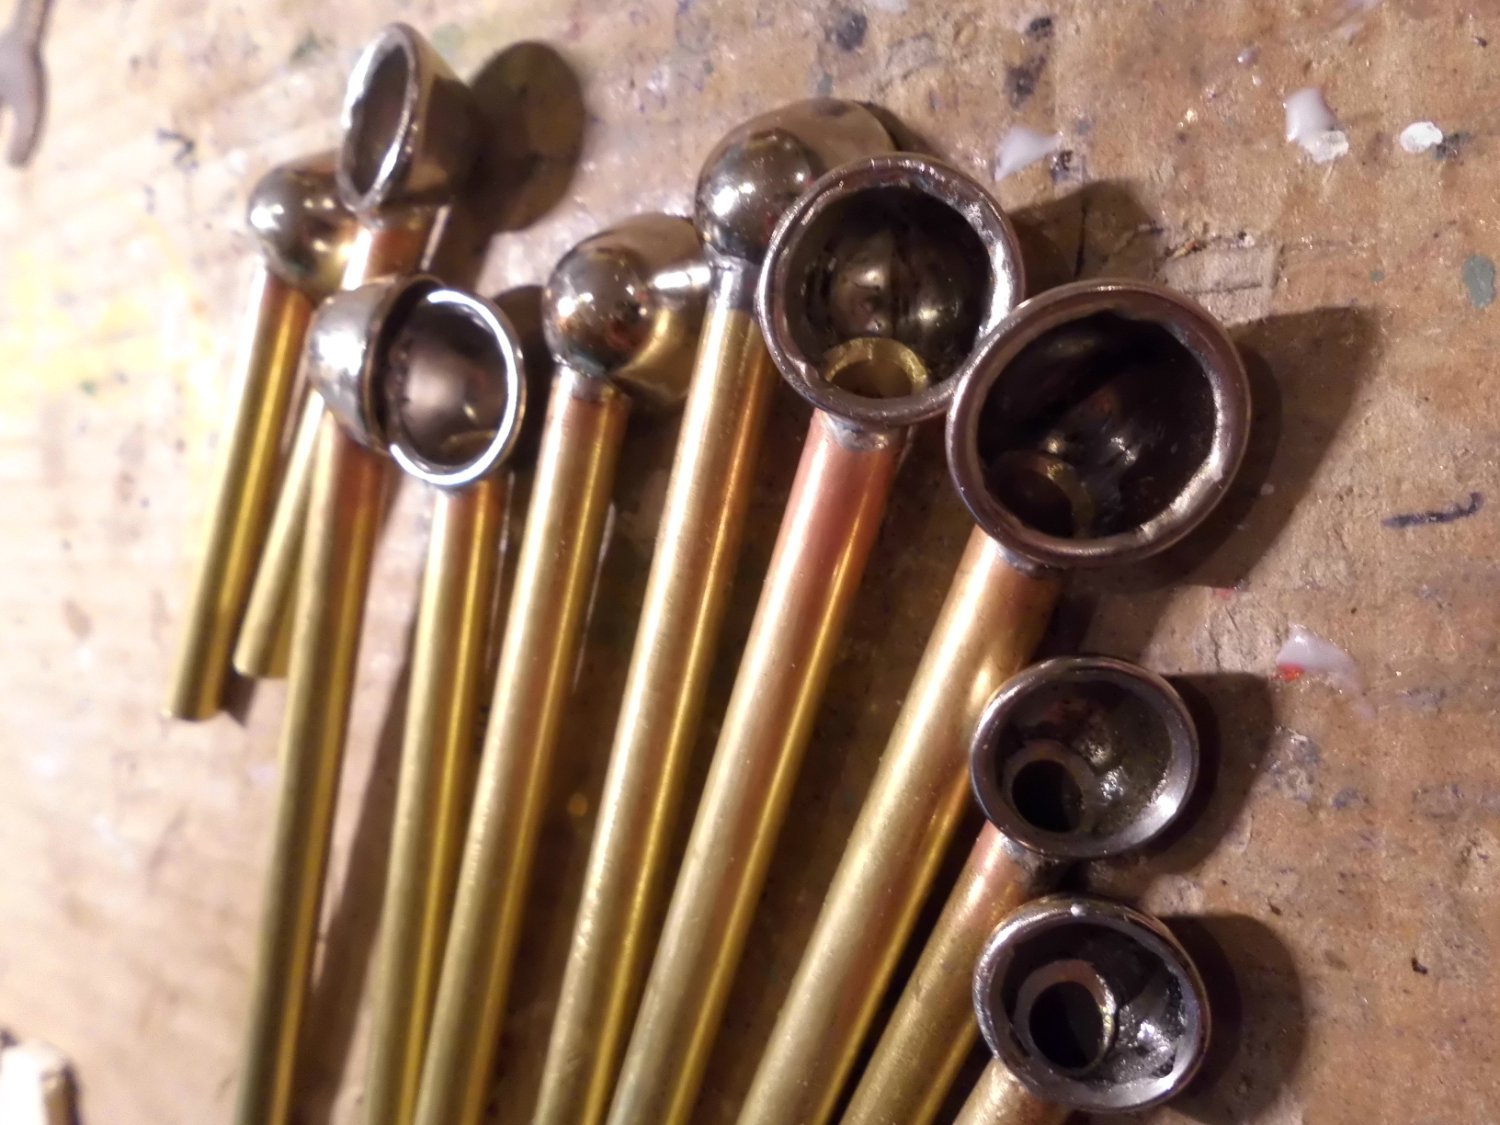
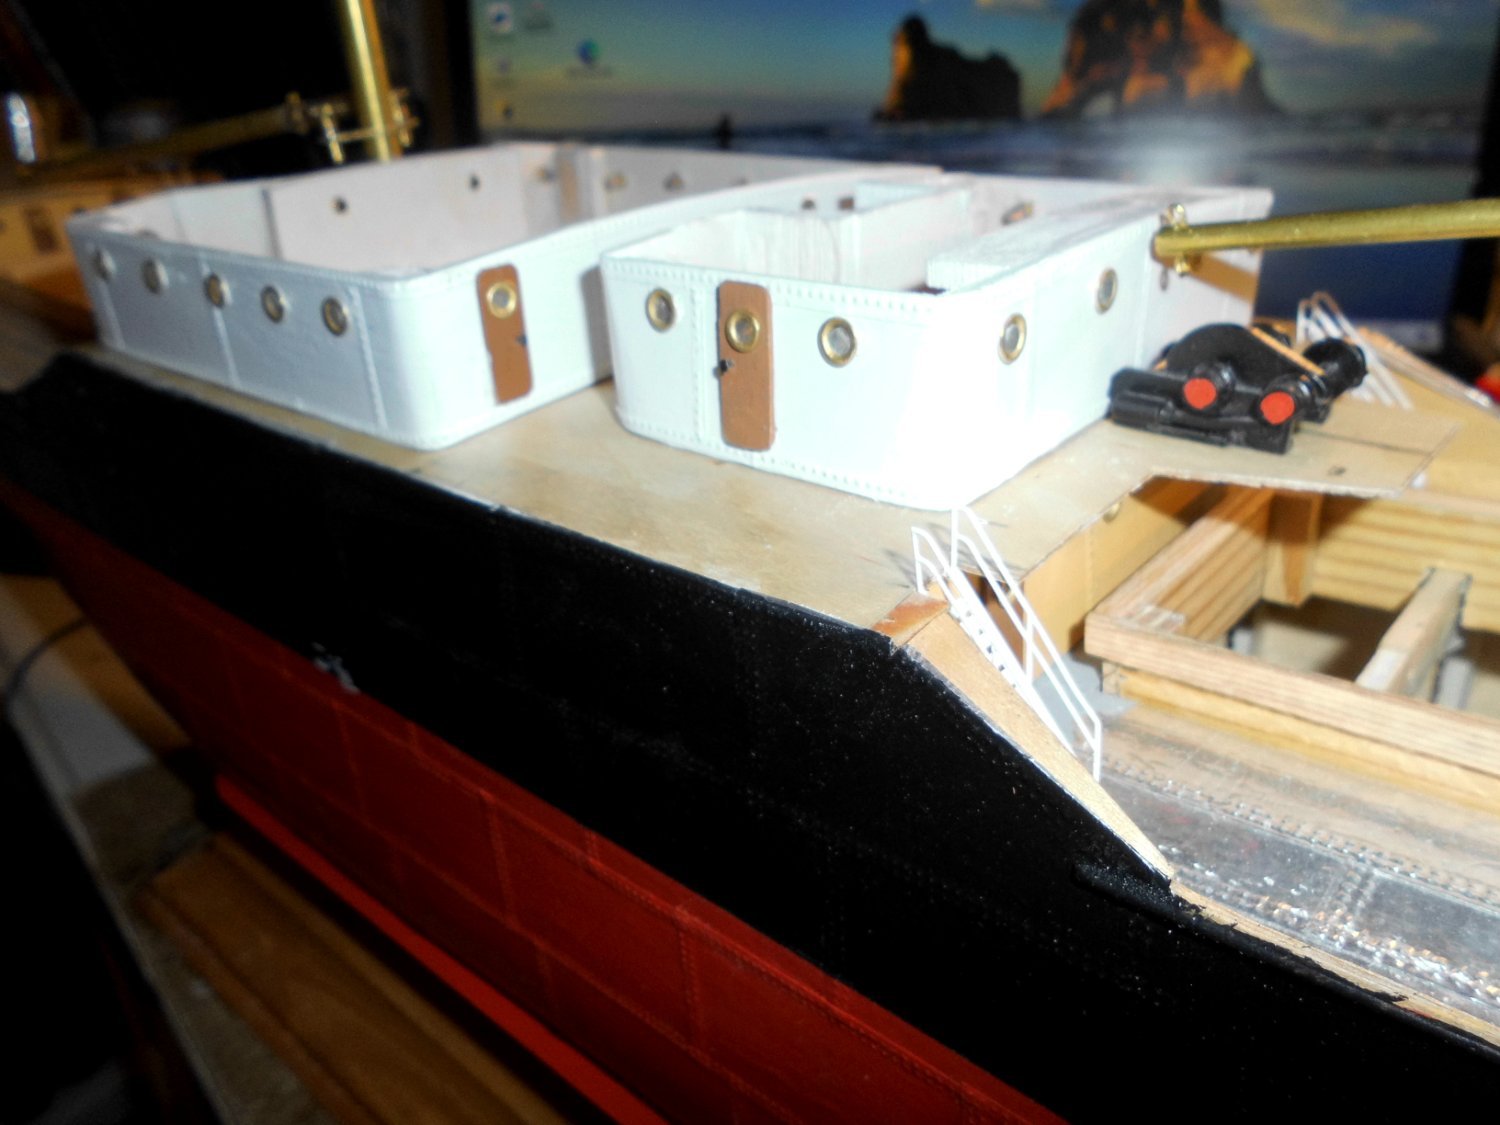
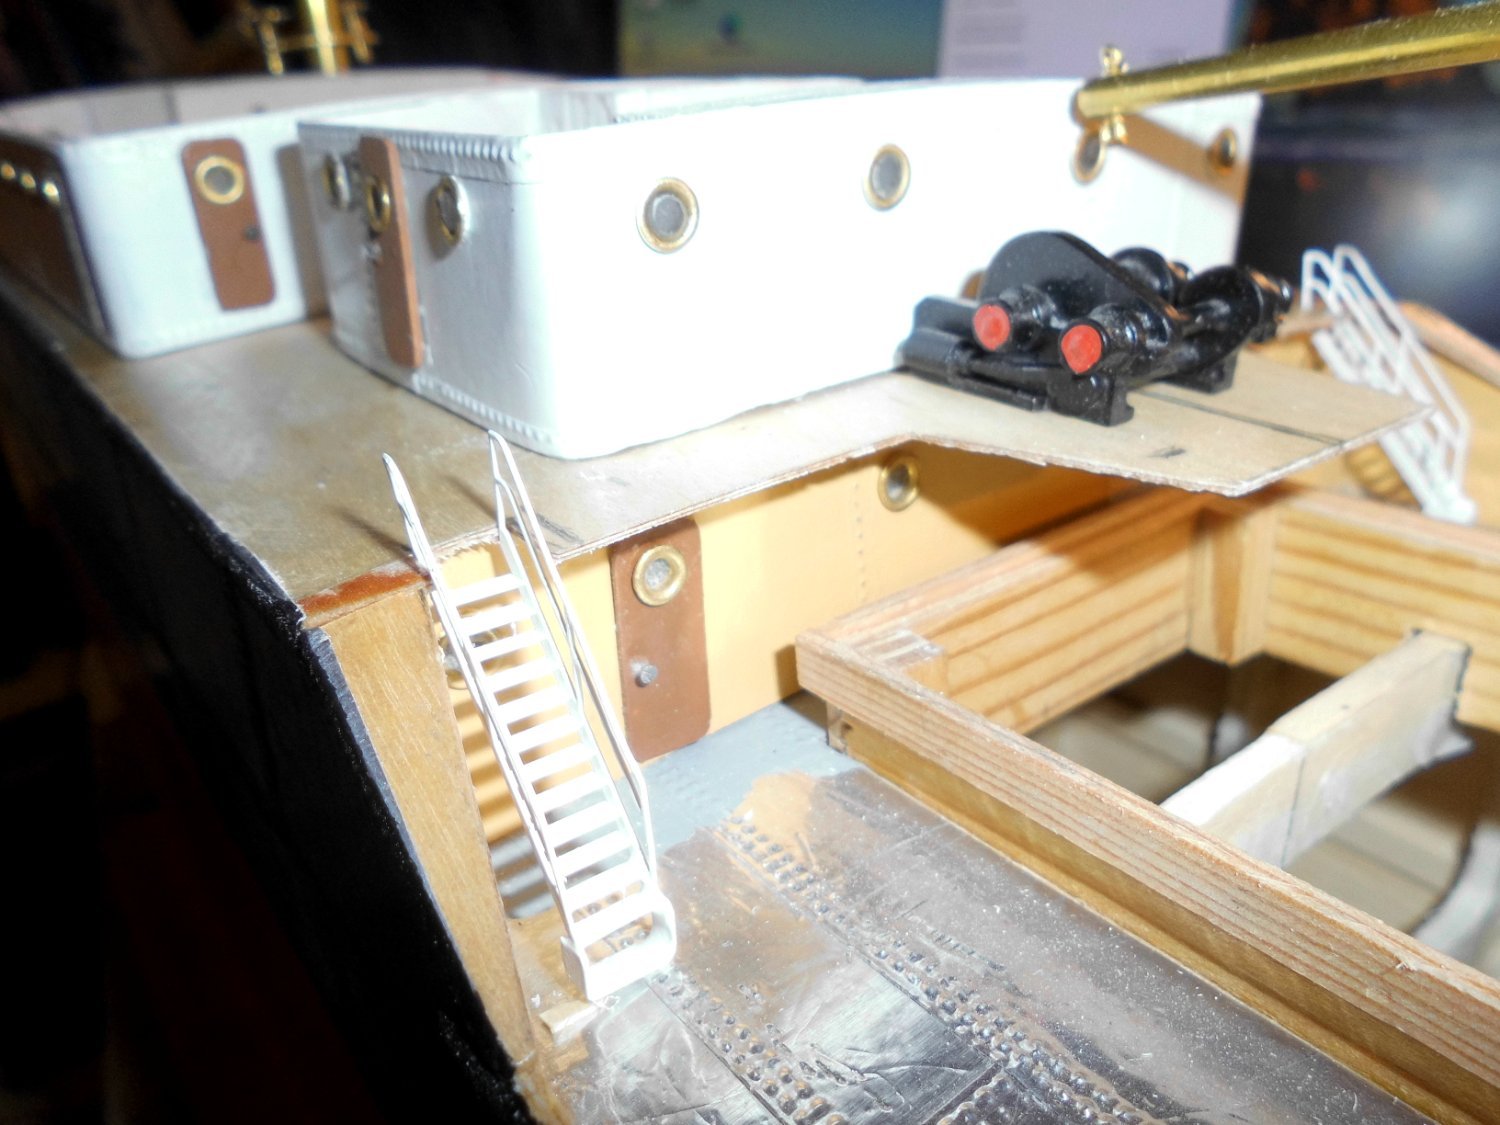
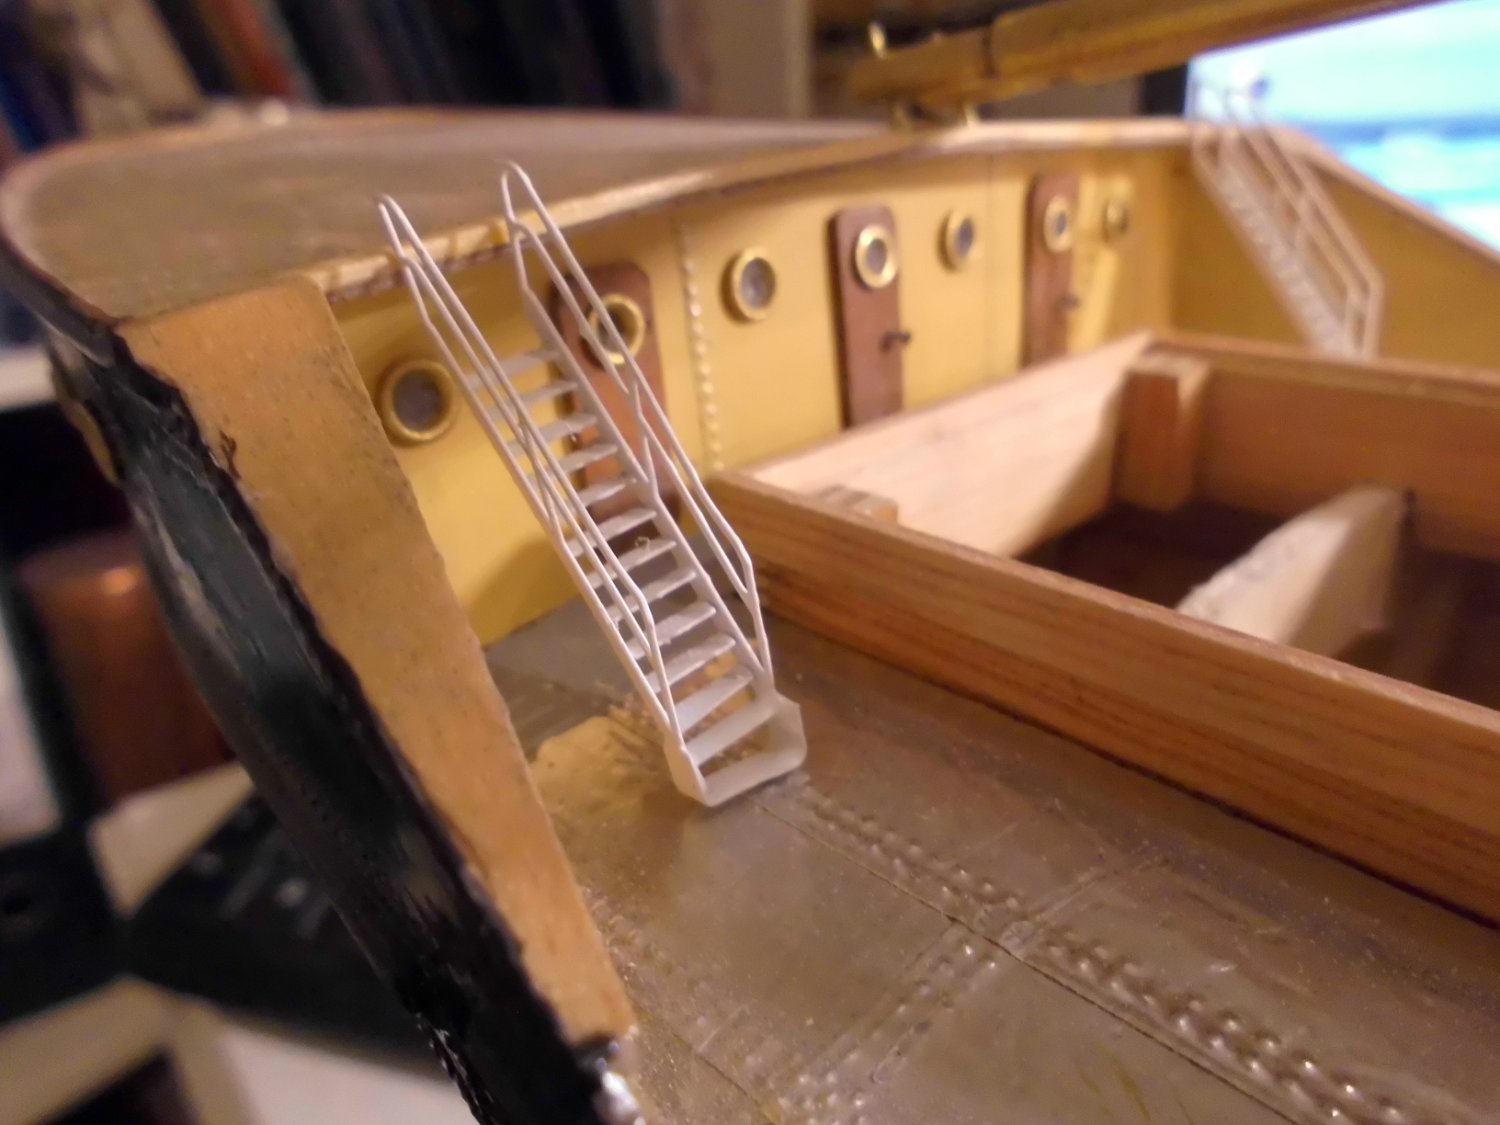
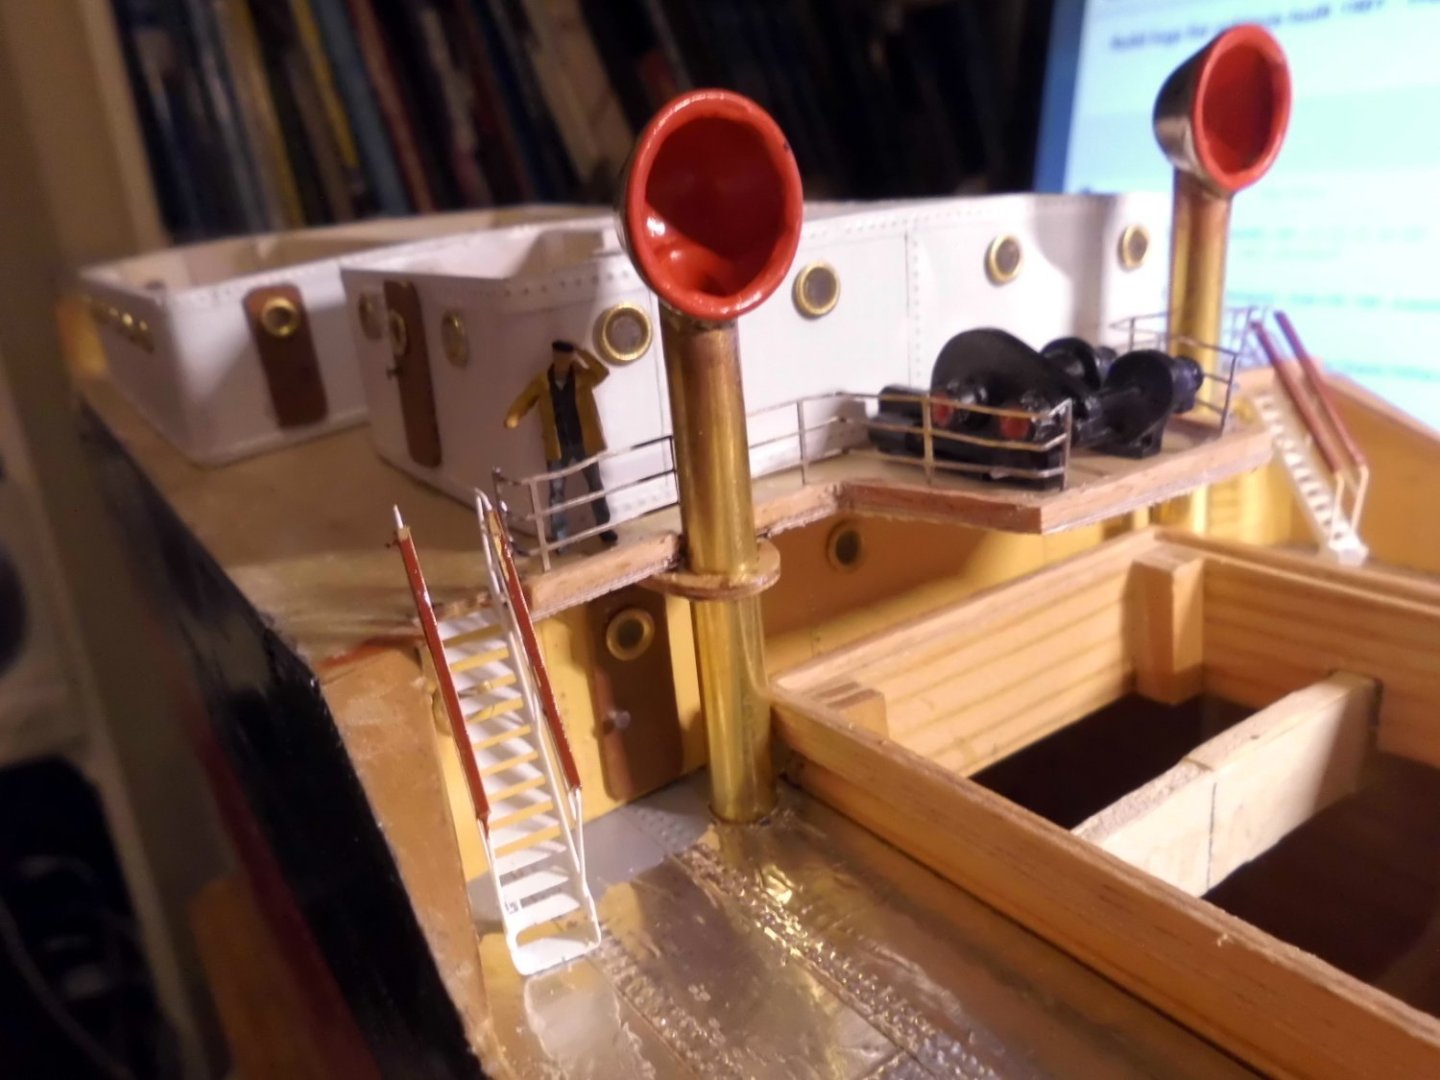
Update Railing and vents are under way, .... Nils vent tubes 7mm for the 18mm diam. scoops and 6 mm for the 14,5 diam. scoops. The soldering goes quite well the etchd brass railing is 11 mm high and very fragile. The lettering had been damaged through tape to hold down the railing. It needs some touch up the stairways were all fitted with "mahaghoni" handrails


- 330 replies
-
- 14
-
-
Good comments Andy, and many thanks for your much appreciated expertise, I`ll leave away the radio cabin, you convince me that I`m running into some questions, but its for the sake of the film ship model that inspired me to start the project after I read Andrew Geer`s pocket edition of The Sea Chase. I hope no one takes it too seriously. I was wondering why I could never find a model of the ship elsewhere, (Probably it was not known that the laker Corsicana aka Margarethe Shafer was utelized for the mövie, and no modeling plans available there), as Geer`s story was a runner in 1938 already and the film in 1955 was published in many countries and languages. I think its like with the ship from "King Kong" movie of which I understand there is also no model on the market. Nils
-
Update started with the vents in different airscoop diameters and appr. tubes. The foremast now carries a crow`s nest with sidewise opening to allow access from the (not yet) made ladder from deck Nils the air intake scoops are made from different sized nickel plated steel bagfeet, then soldered with the brass tubes


- 330 replies
-
- 15
-
-
many thanks Andy, right, I intended to place the coal bunker hatch on the boats deck, next to the funnel but there between front housing and coal hatch is a tall vent tube upwards as well. There is an awning on the boats deck after bridge area and funnel sides which may interfere with coal hatch when loading coal from above. will have to think out a solution. Also the aft mast front shrouds will have to be fastened as far as possible spread outwards to fit between the lifeboats on the boats deck, to allow swinging out of the boats What makes me curious about an radio operator booth is this pic..... Nils

-
Hi Andy, thanks for your good comments, much appreciated, let me explain why I did so.... I looked up the haulted video pics several times over and over, to understand why this ship was so strange in fitting out. you mentioned in one of your earlier posts that the owners of these laker ships changed several features regarding to the needs they had. The Corsicana originaly used to carry 4 masts (8 winches necessary, one per derrick). The poop mast fell away, so those winches were not concidered here anymore. The aft welldeck with 2 long derricks required 2 winches, and these stood exactly where I put them, also in reality, allthough the mounting bracket is hanging a bit over Hatch 3. That was so in real. The forecastle mast was cut and taken away, but the 2 winches there left on the forecastle-deck. I left one away because the second would only be unused and therefore unnecessary ballast, One derrick to be attended to. The mast of the front mid-island was taken out, but the two winches left still standing on the bracket, partiell covering hatch two. I removed one dead-ballast winch. Thats the reason I did not place the winches around the foremast, and taking the handicap in account that the leads are above the front welldeck. One handicap the model has, is that the front welldeck area could have been a little longer, this resulting in the rather short #2 derrick. This depends on the "Ferris type" frameplan and lines I used. Thanks for your scetch with t-shape arrangement of the mid-island housings. Of course my model does not exclude this, especially in respect to the "gallaries" and to the engine room-shaft, (inside not visable on the model), up to the next deck with eng. room skylights etc..... The main mid Island deck-housing is not flush with the hull sides because the backstep flat takes up the davit sockets, (one deck below the boatsdeck) I know that crew members and harbour stevedores would be cursing due to the rigging arrangement, but I guess that the movie makers did not even understand what the one or other misallignment would cause in real action, and the model is to be showing the "movie ship" after all. What the pics do not show, is if there is a radio operator booth, perhaps on the boats deck aftwards of the engine room skylights ? regards, Nils