modeller_masa
-
Posts
950 -
Joined
-
Last visited
Content Type
Profiles
Forums
Gallery
Events
Everything posted by modeller_masa
-
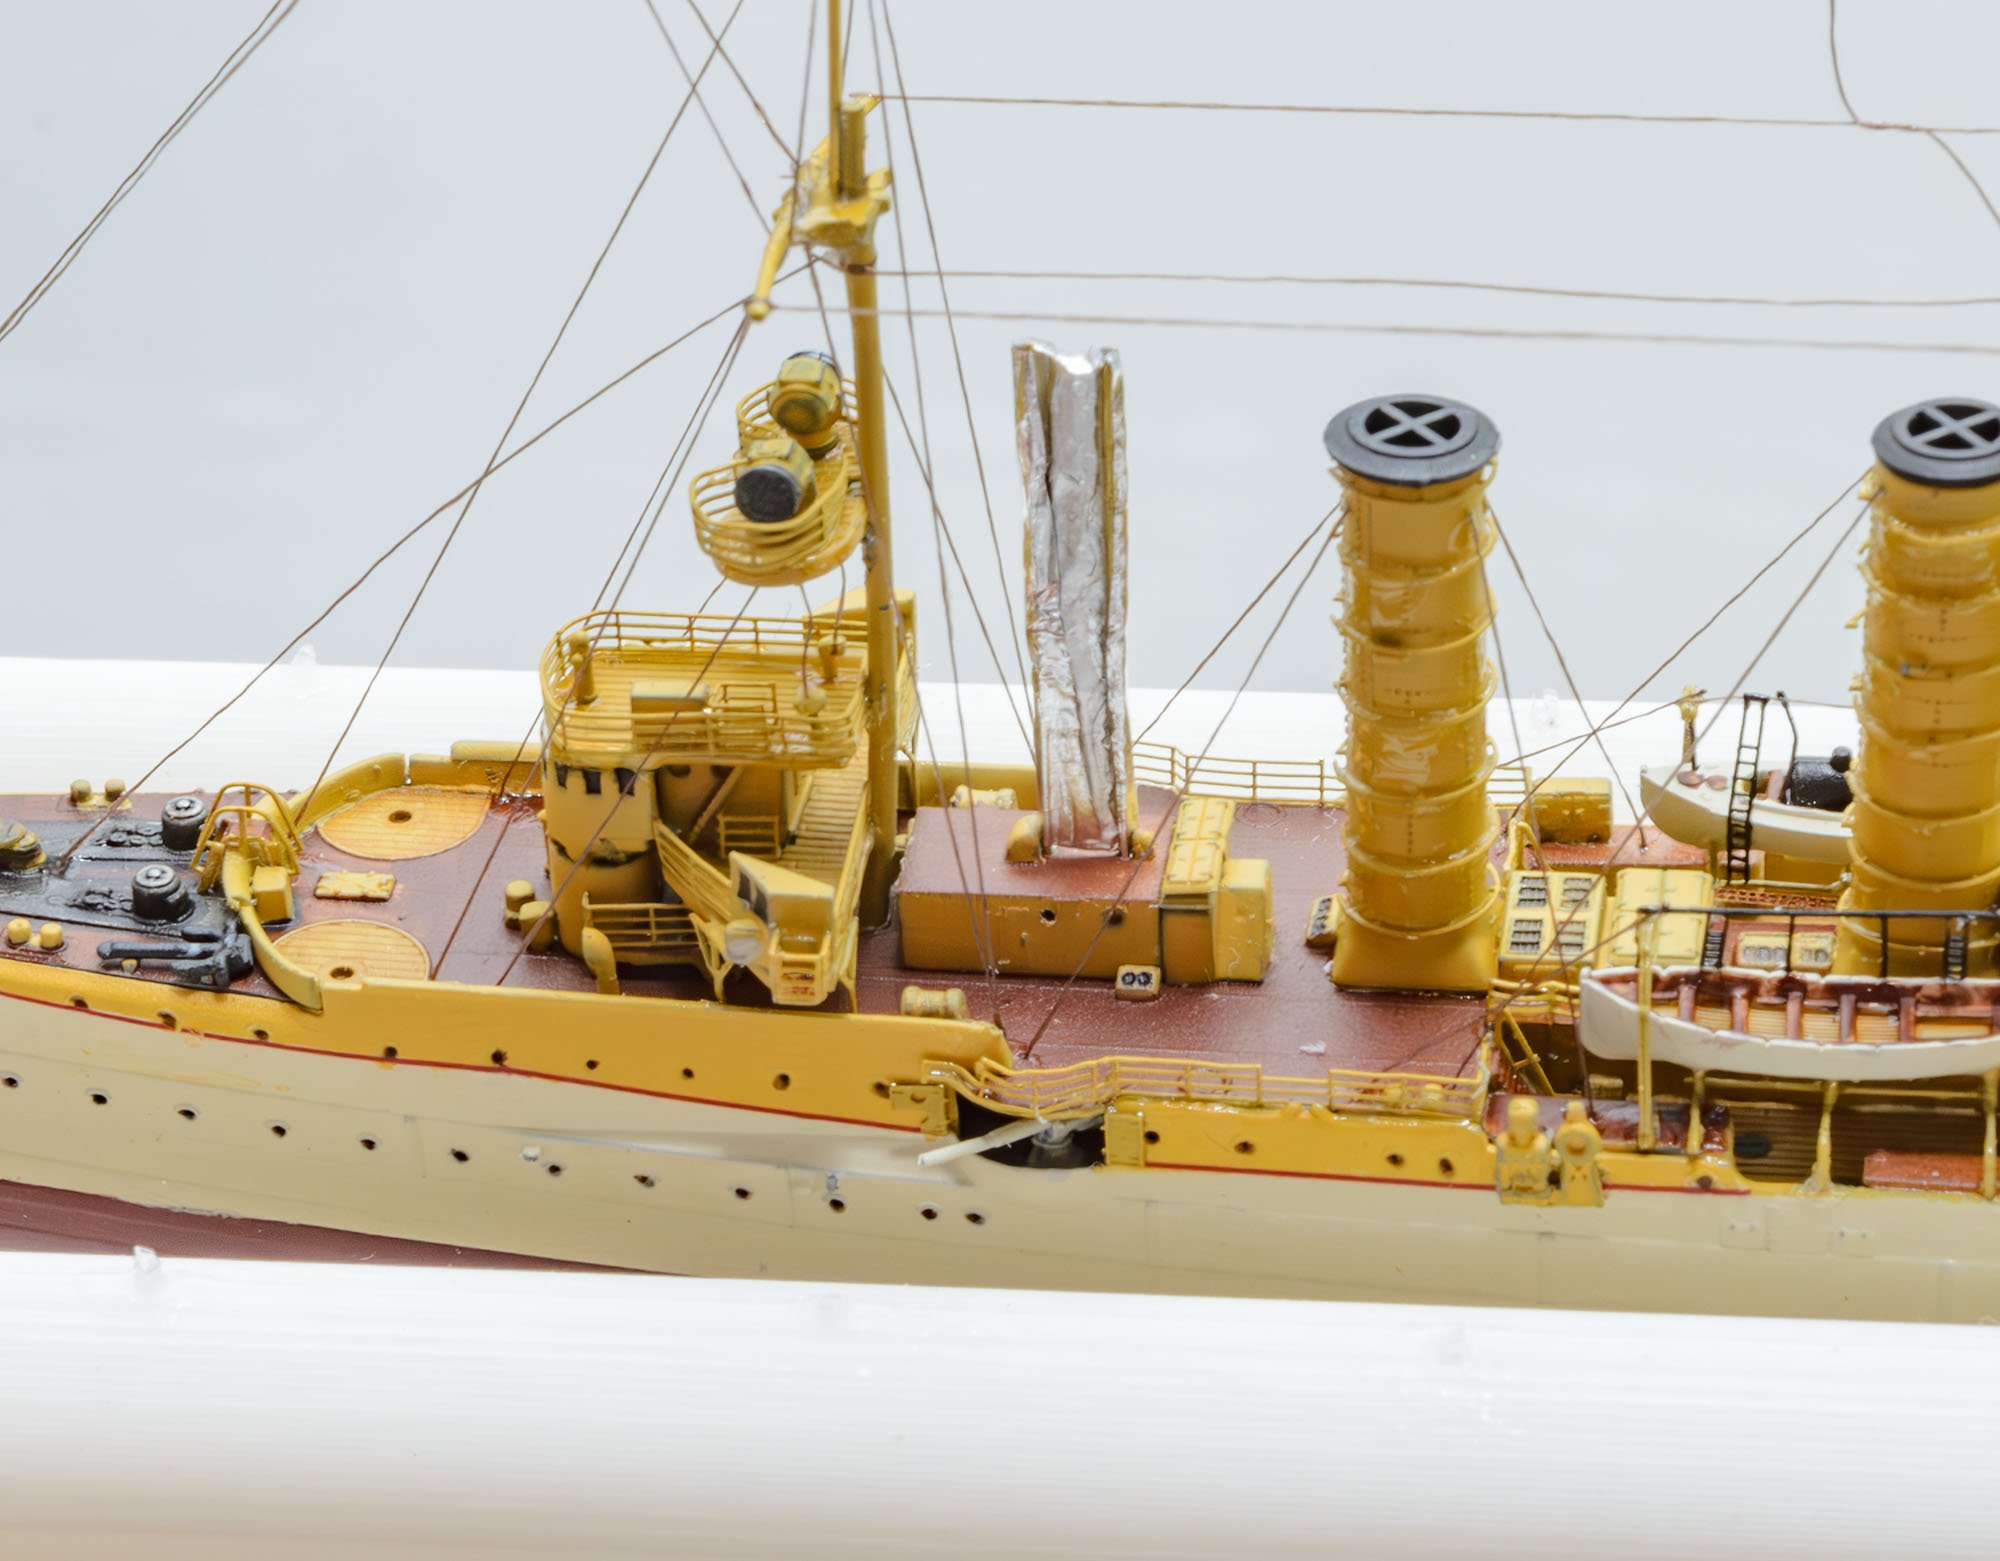
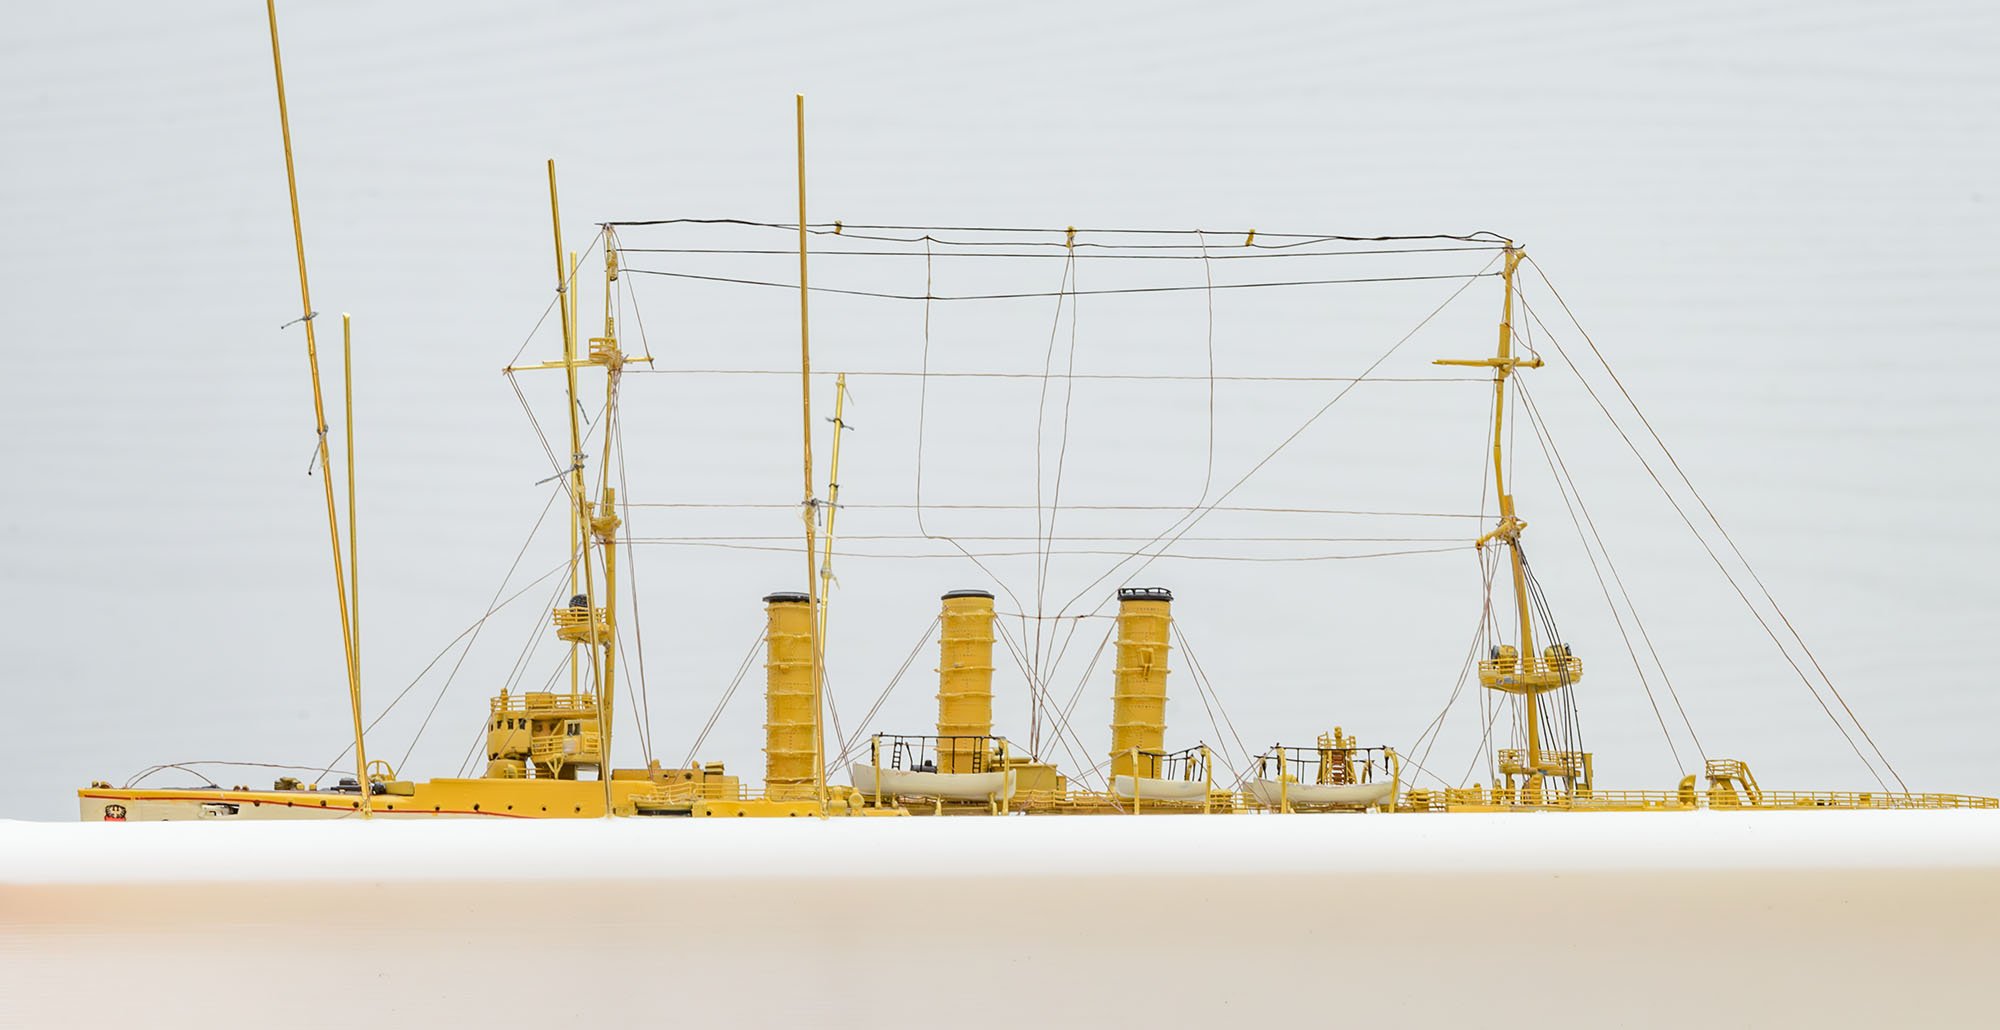
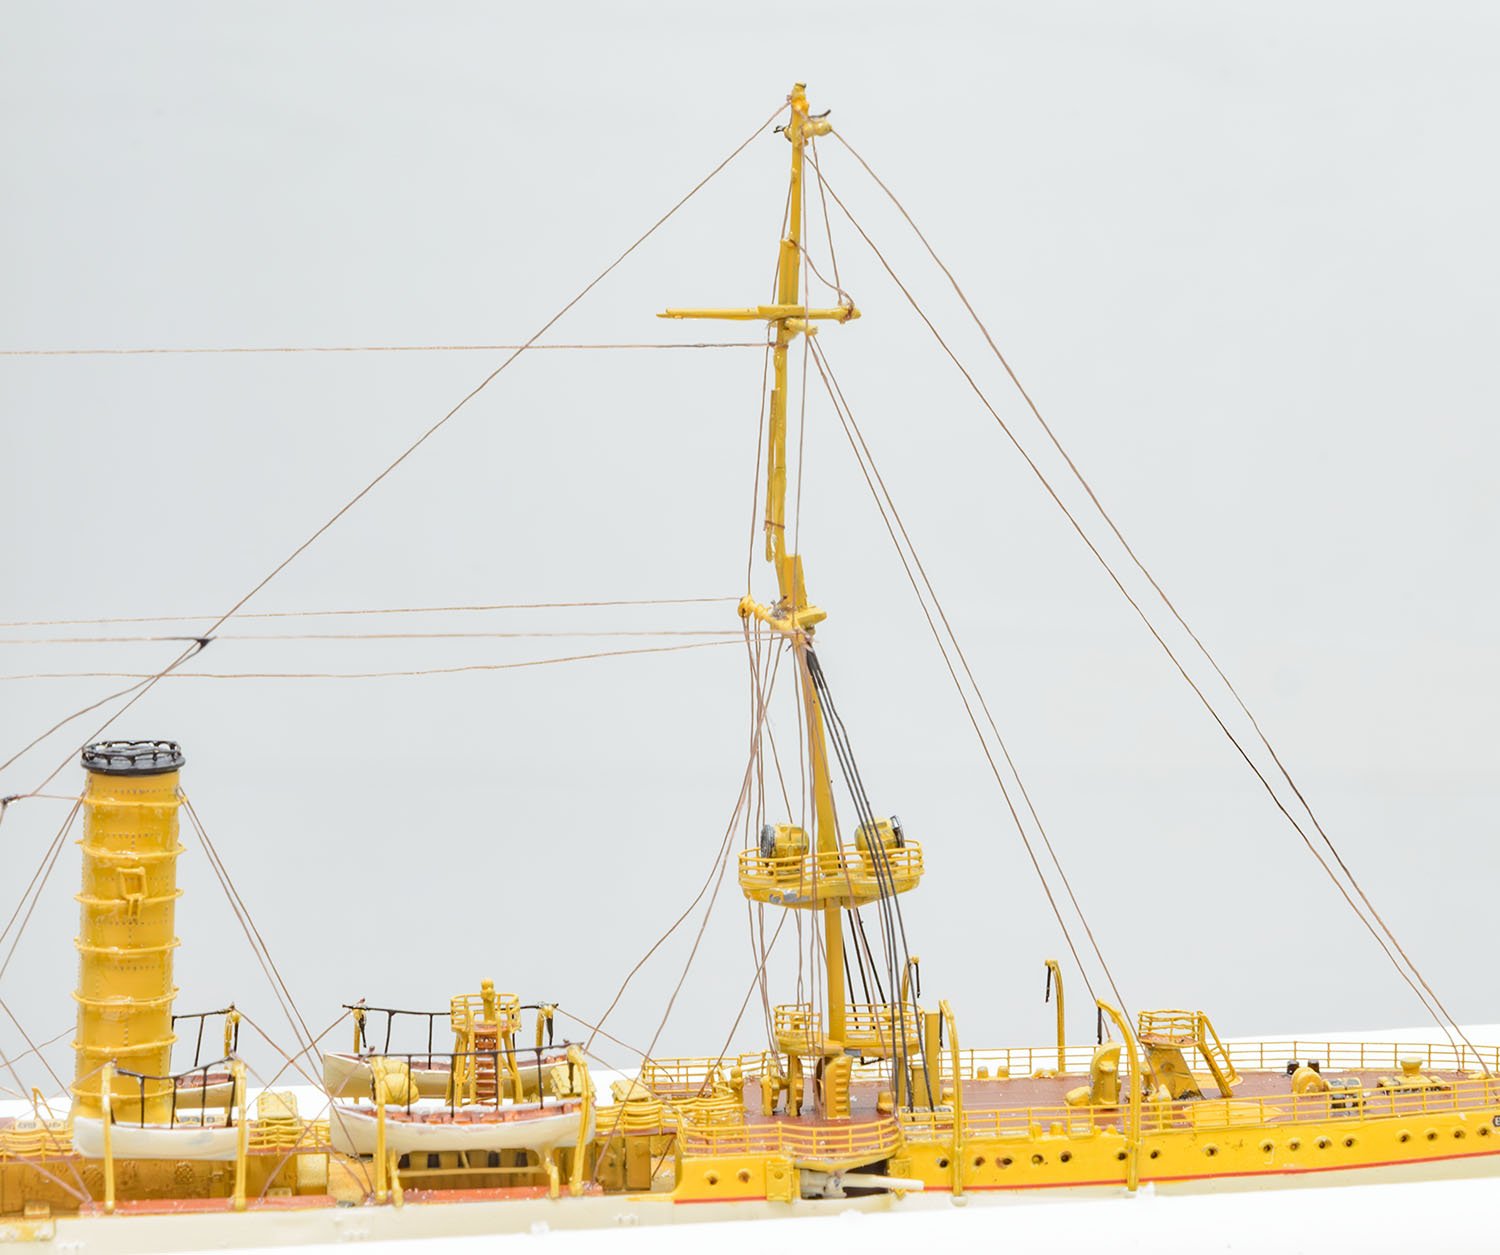
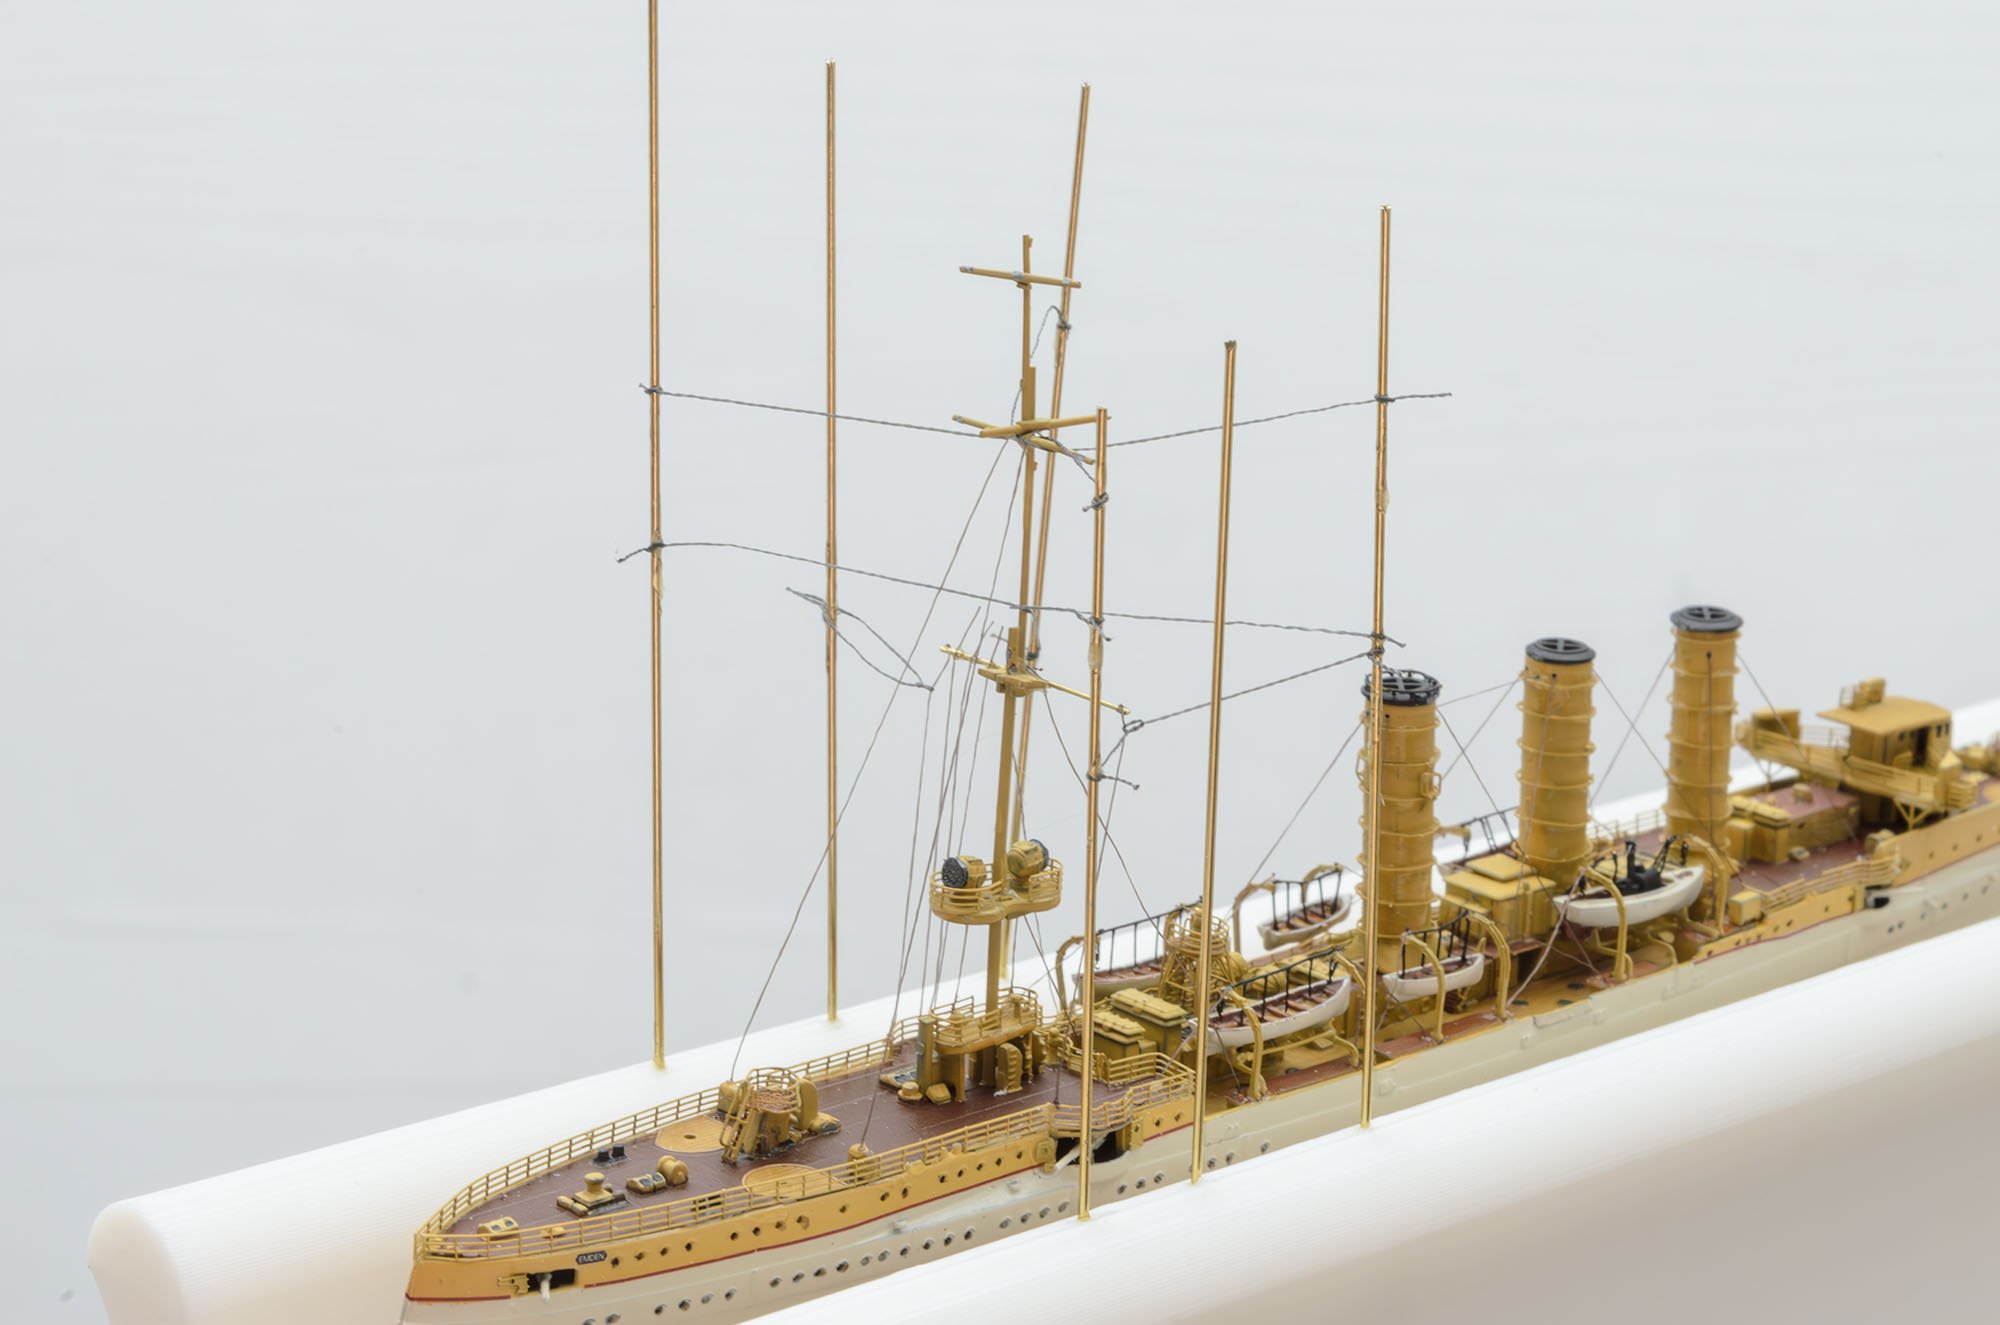
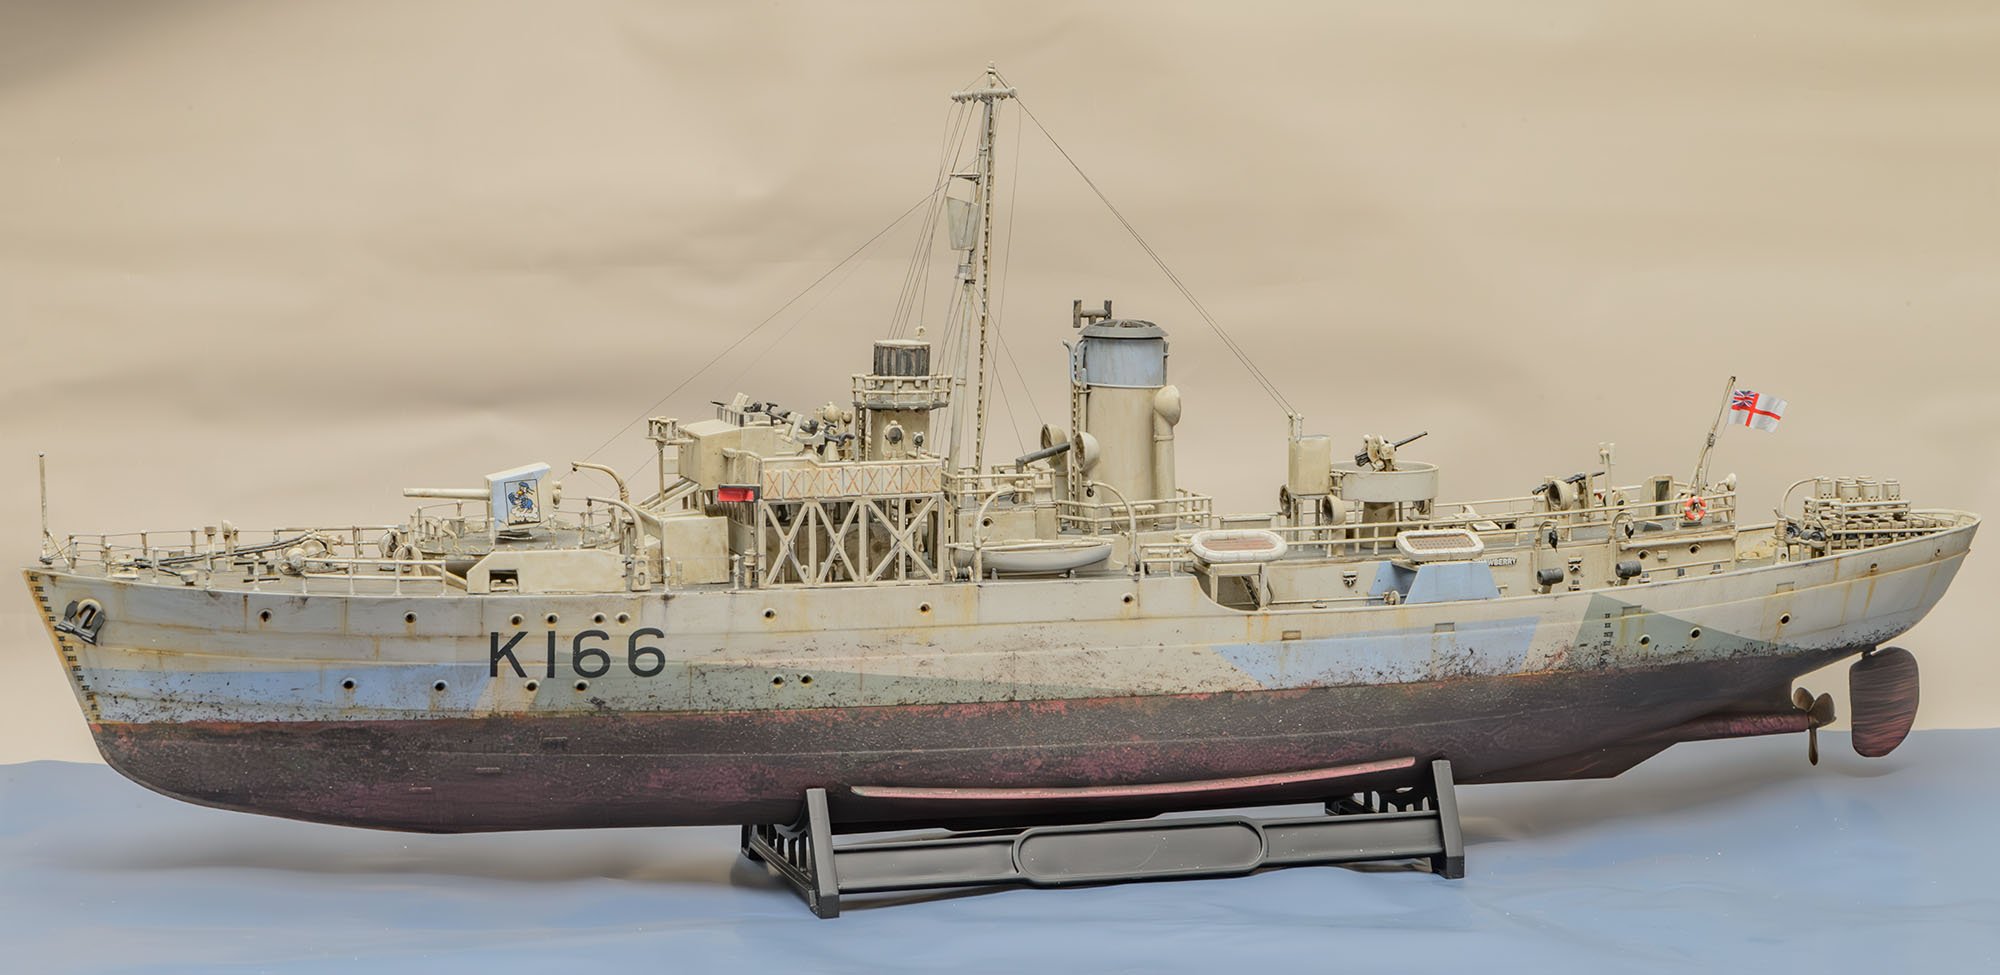
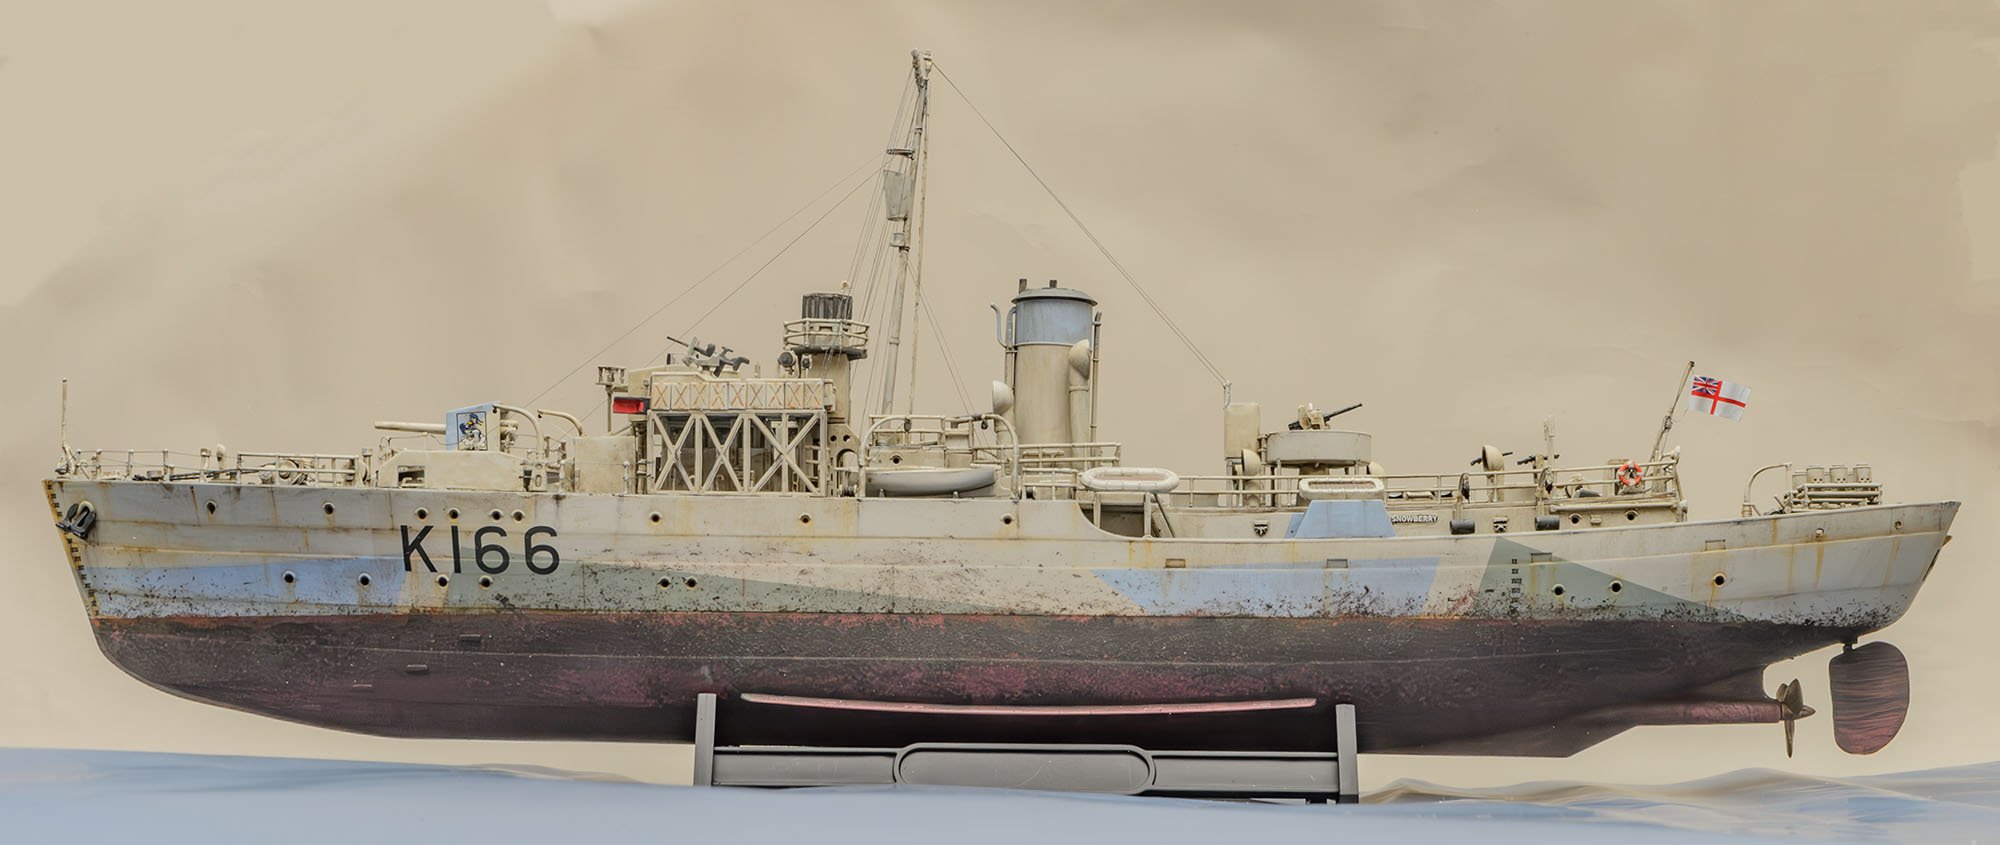
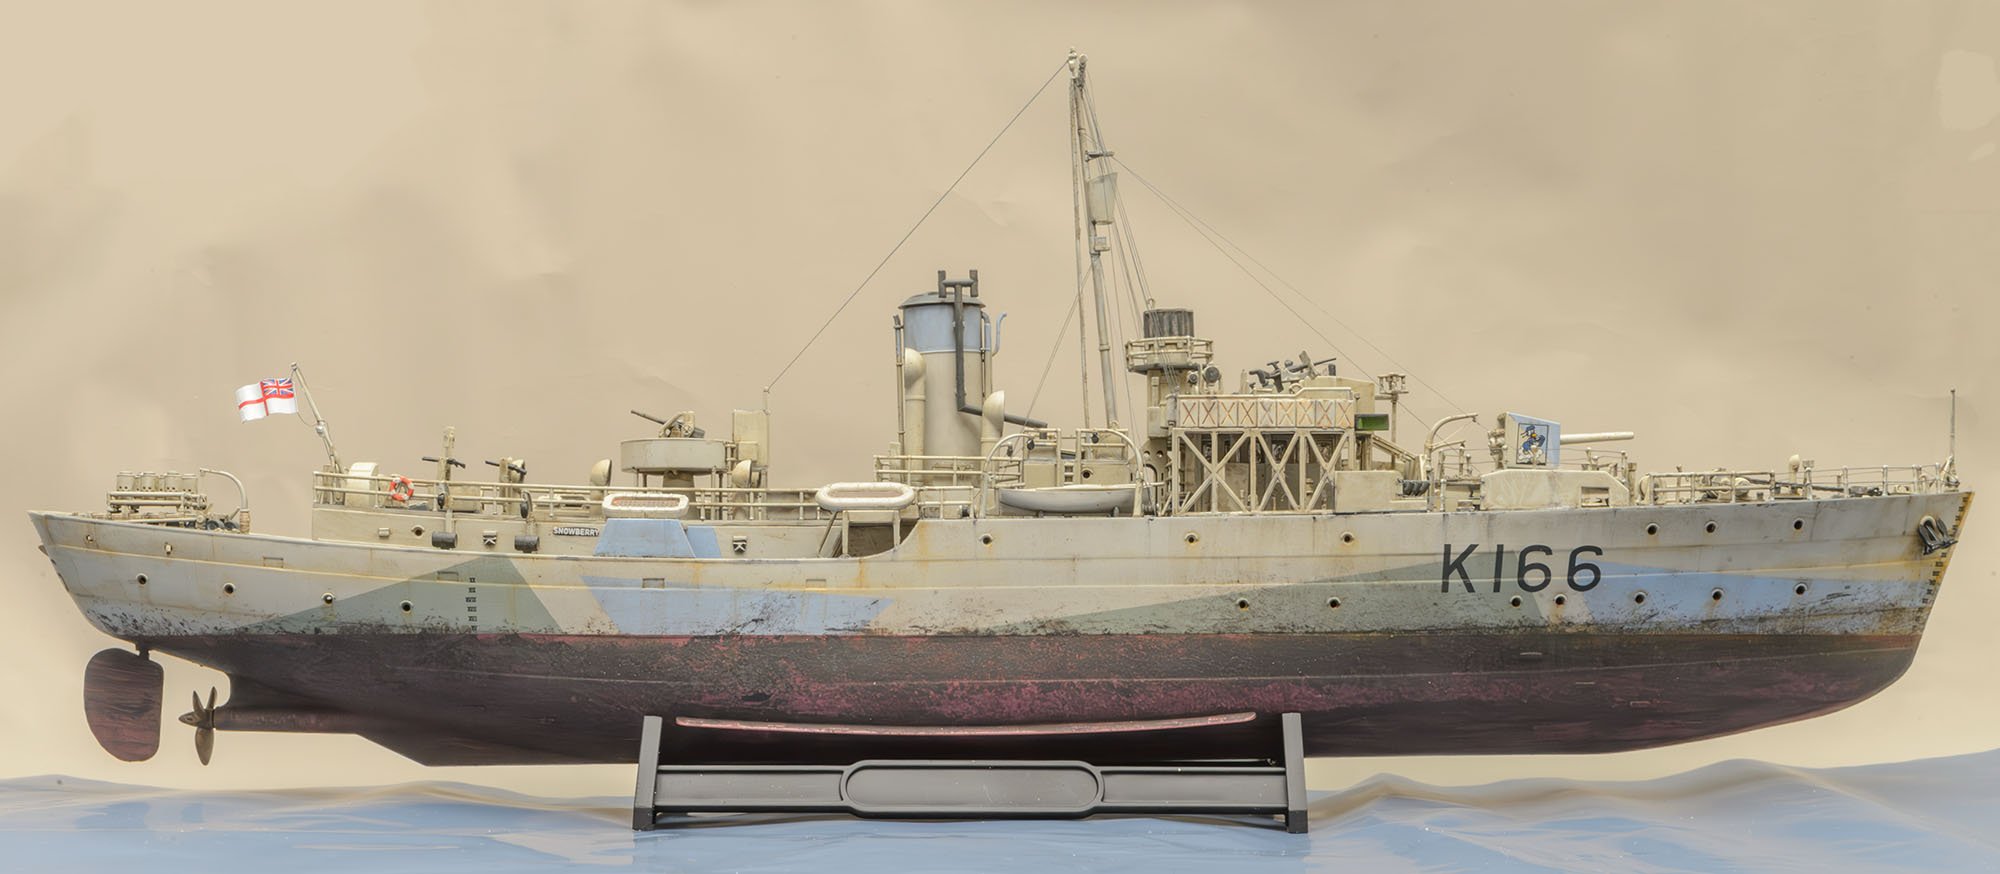
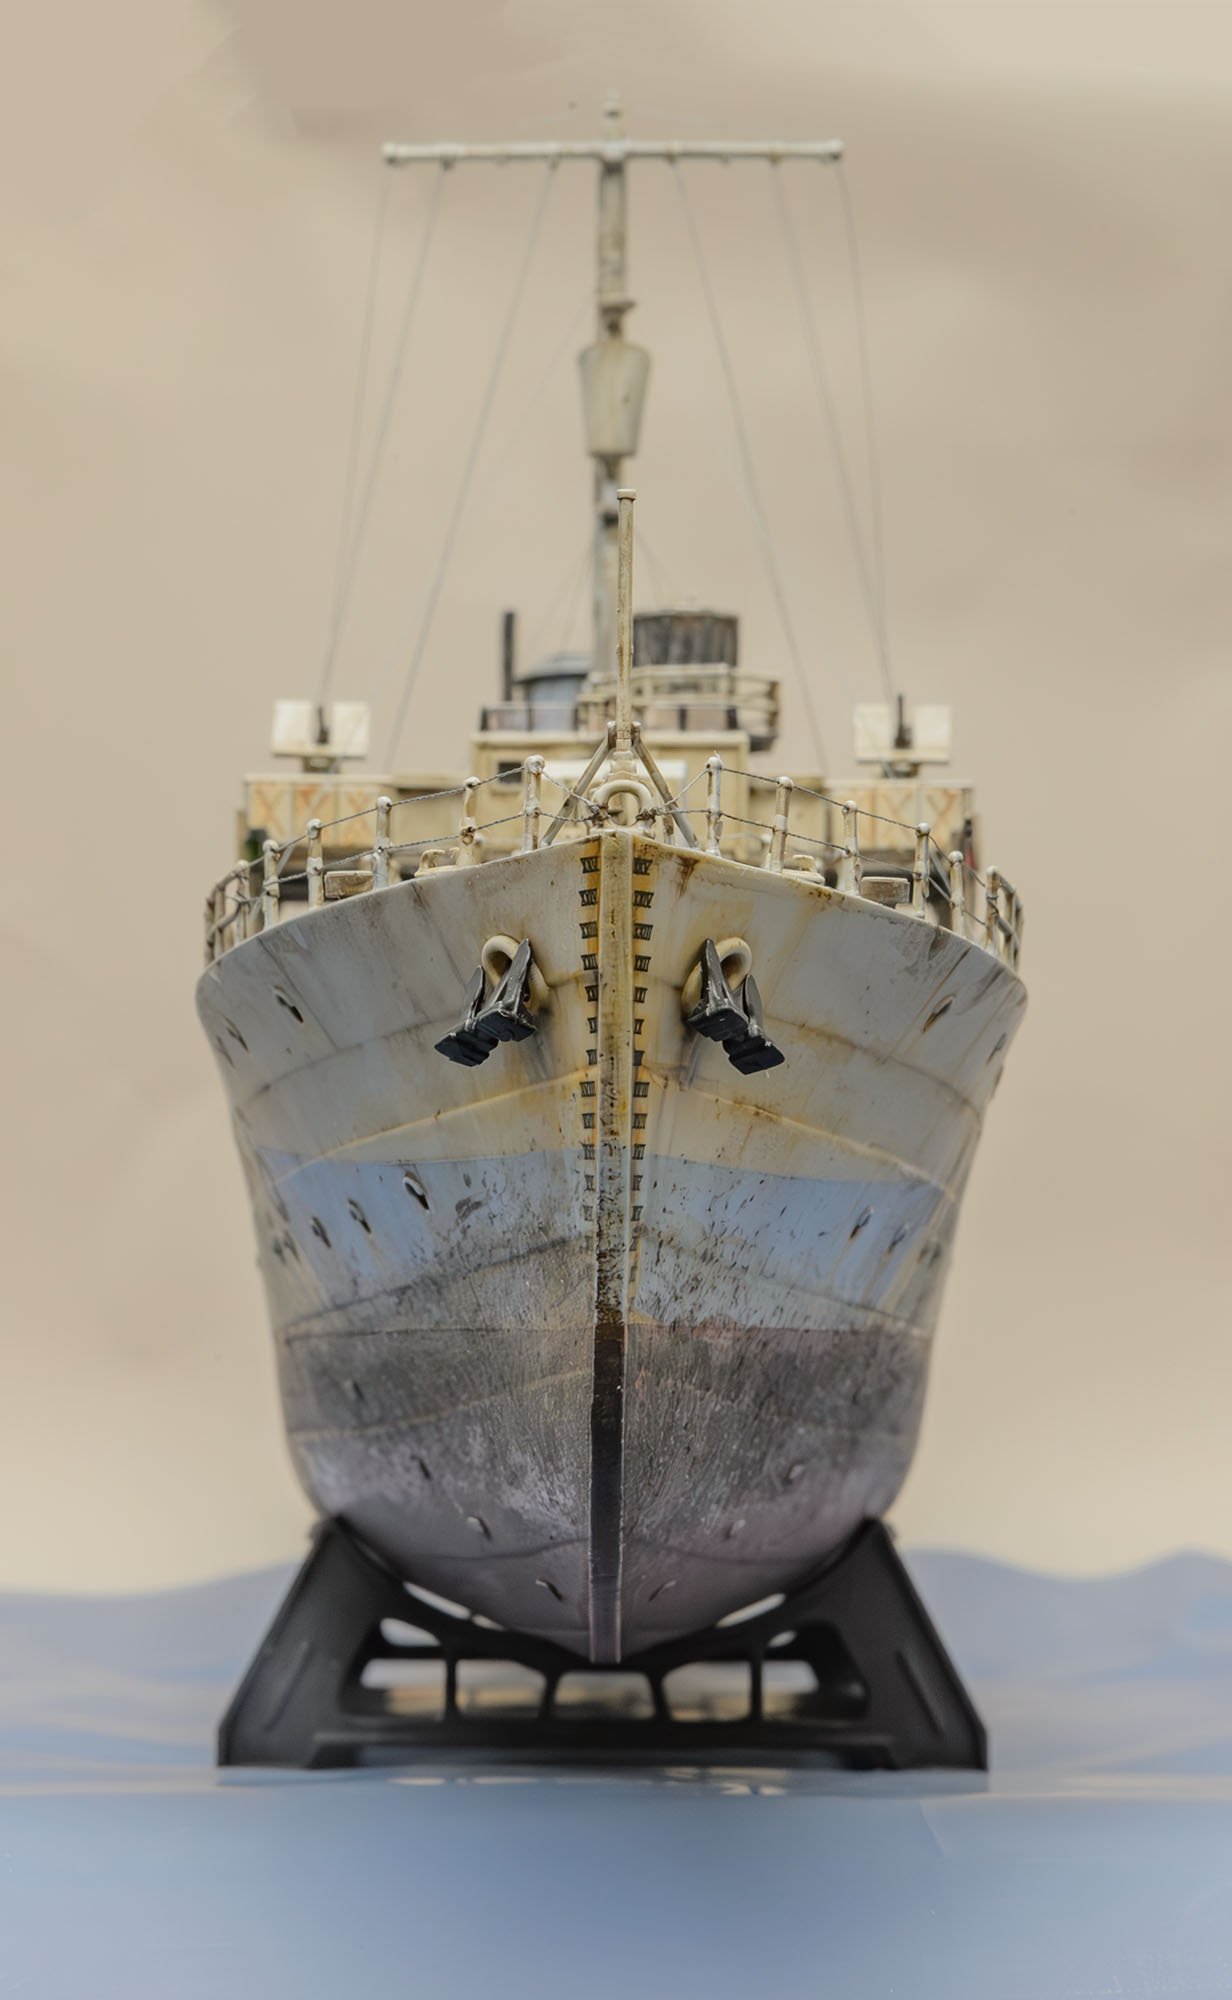
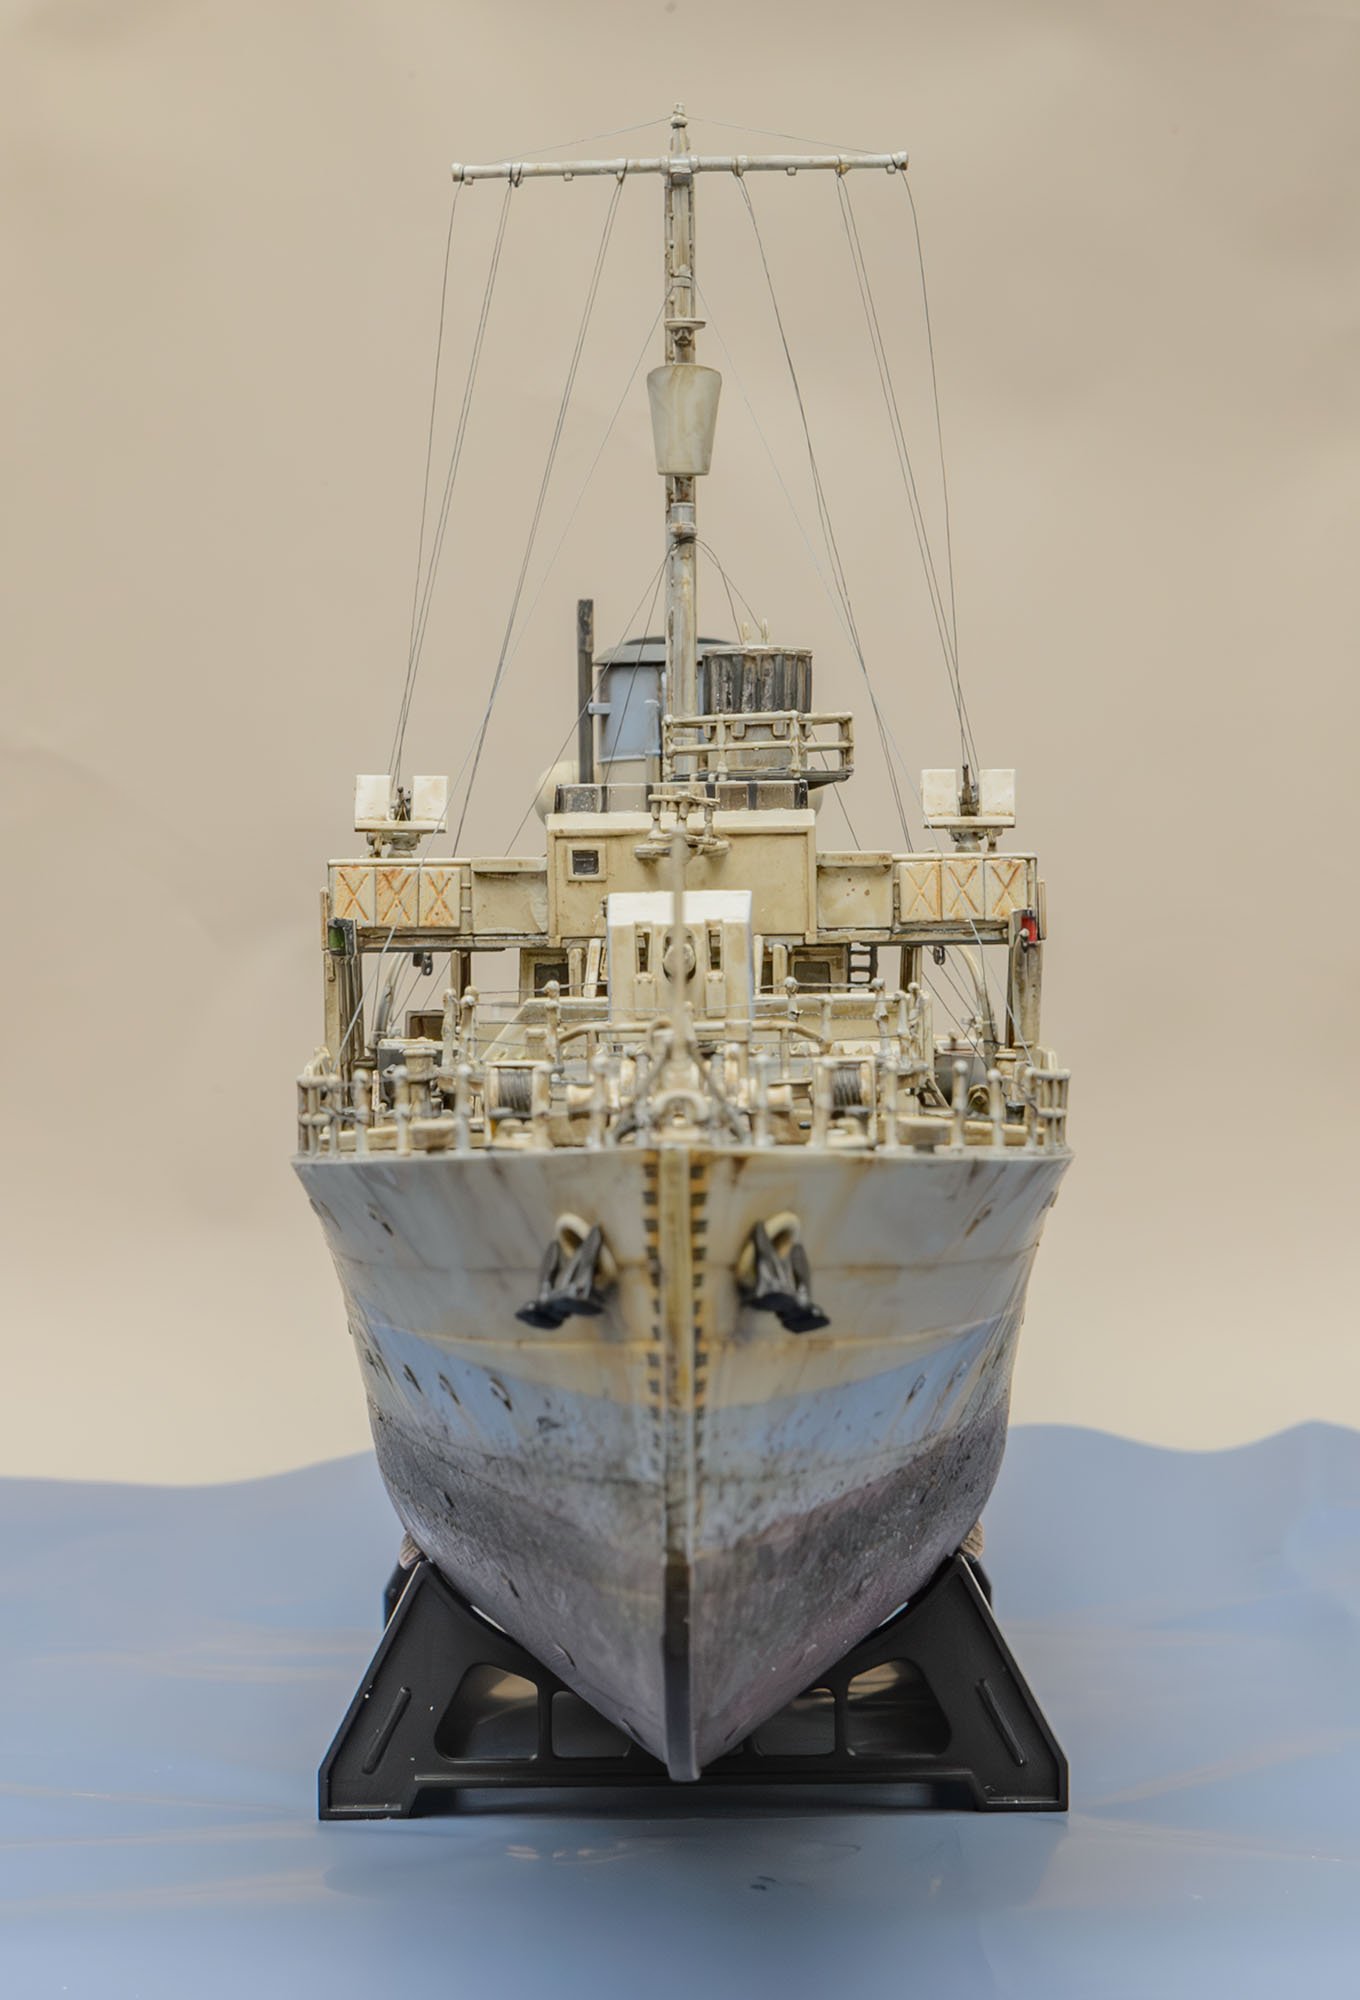
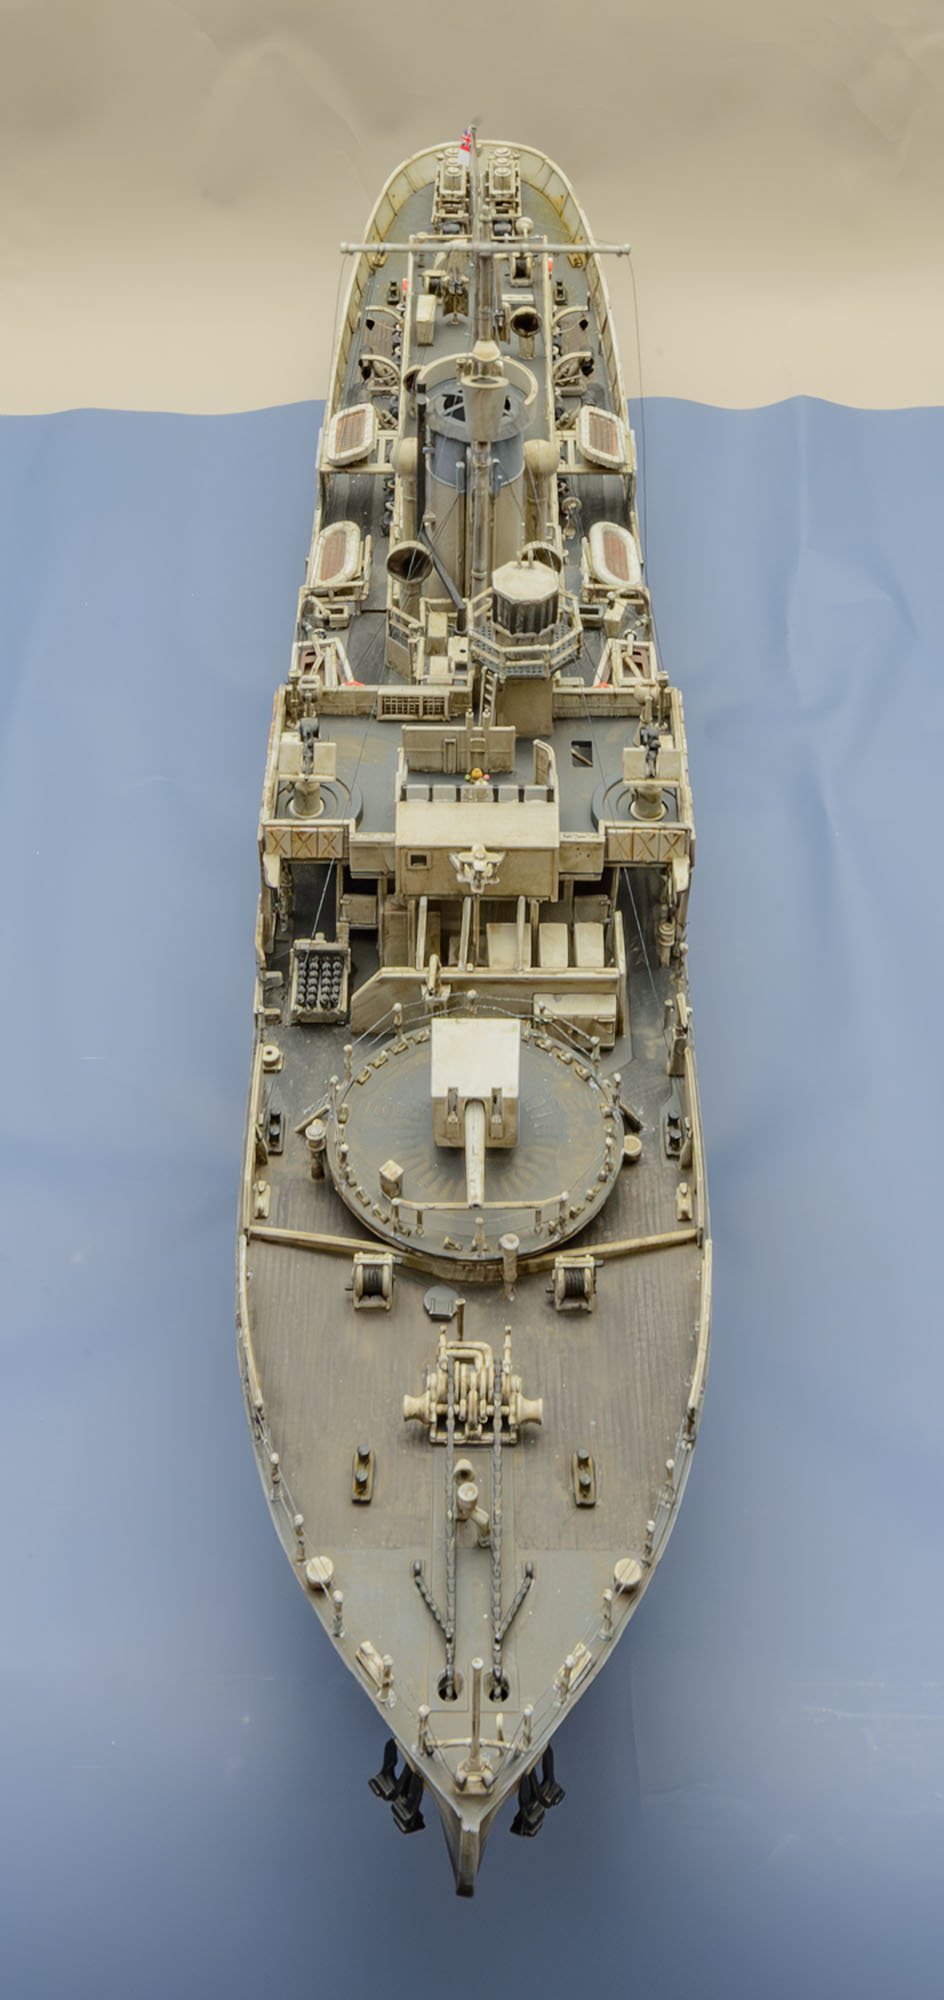
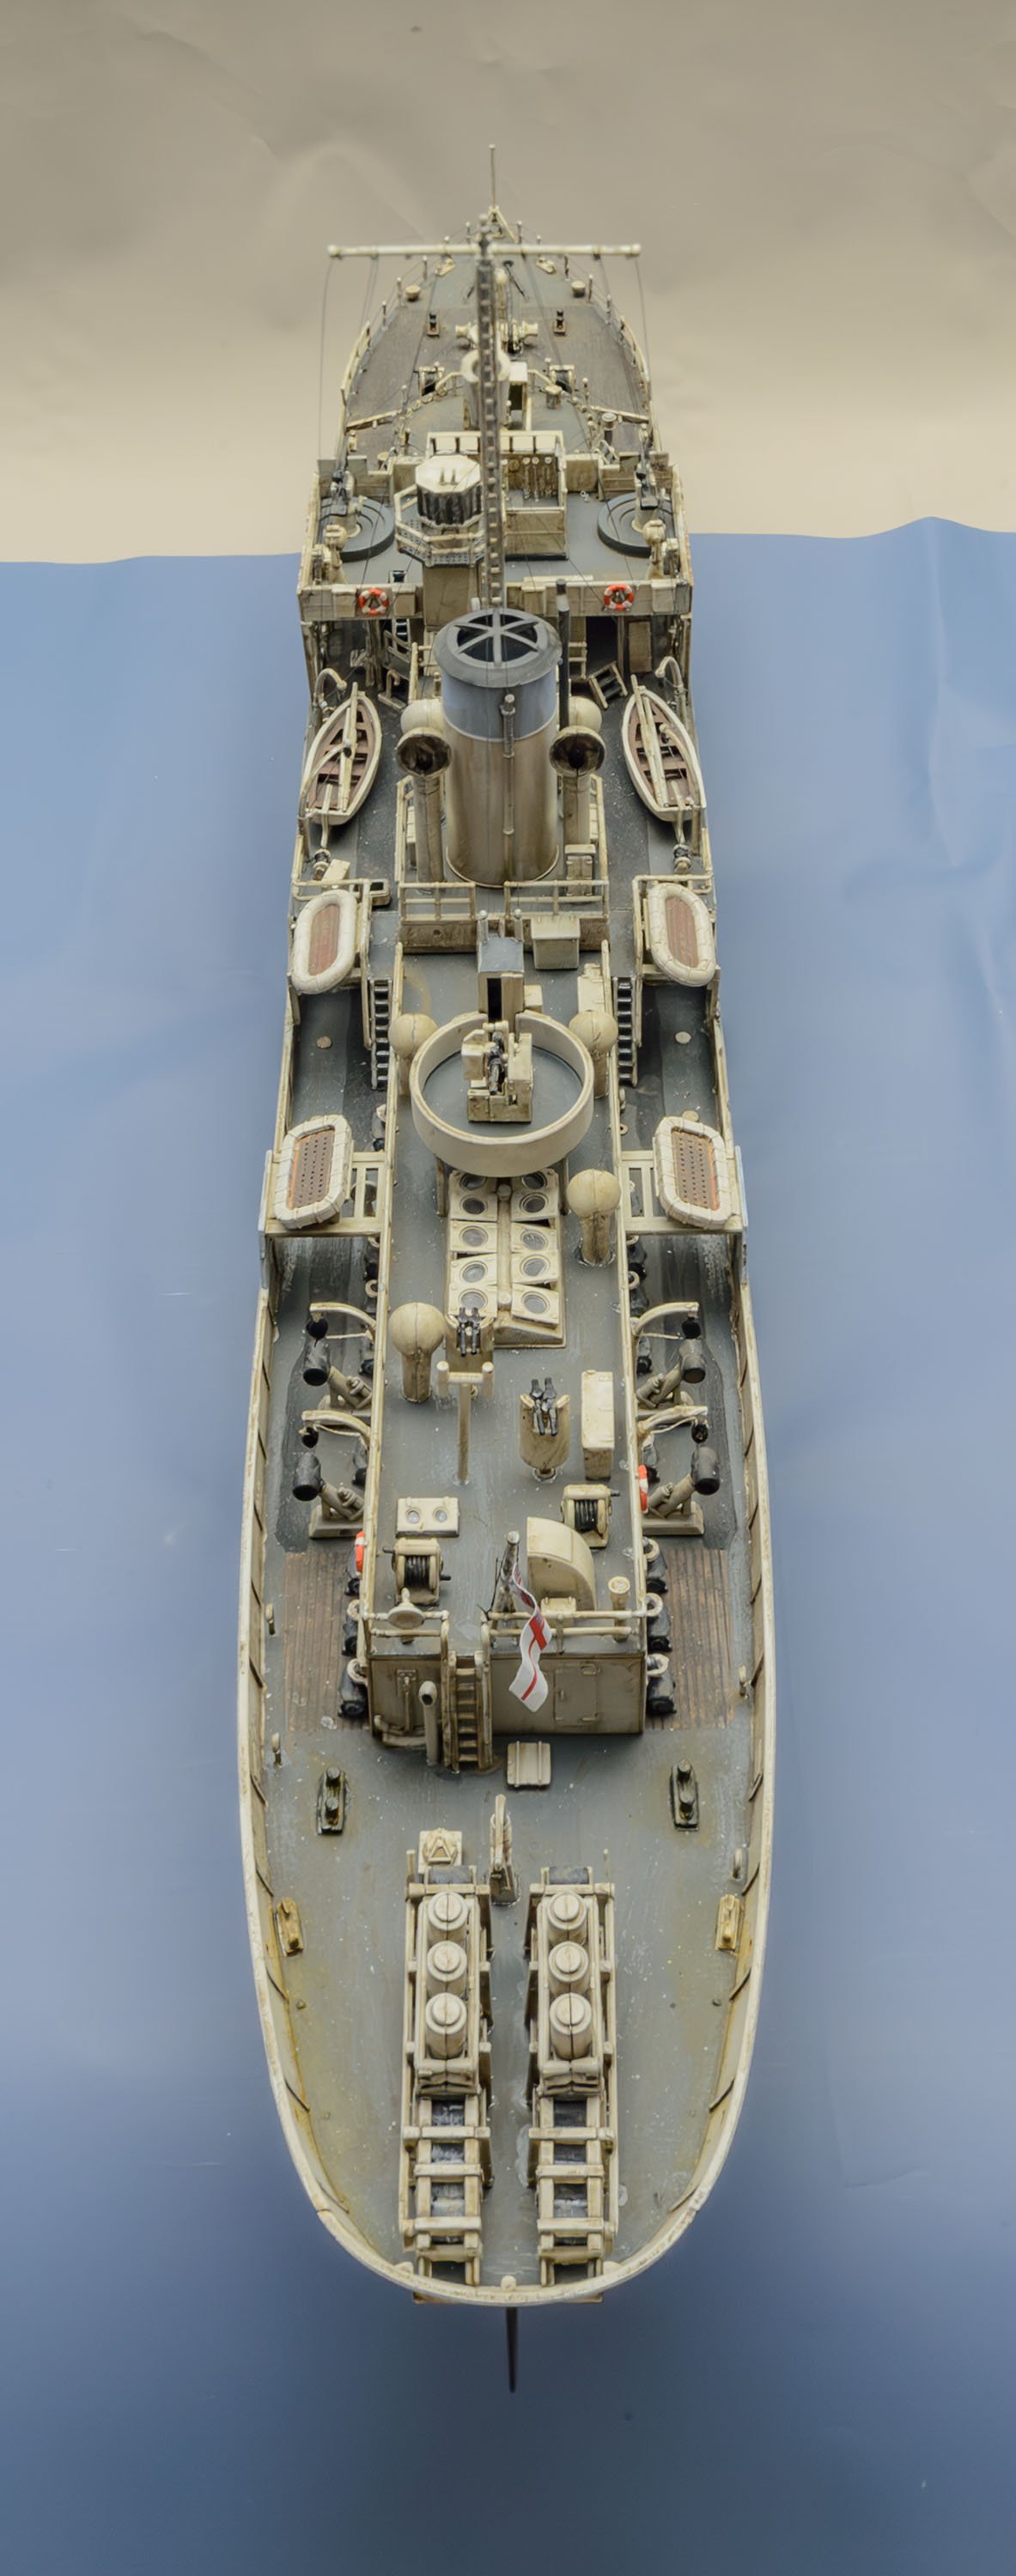
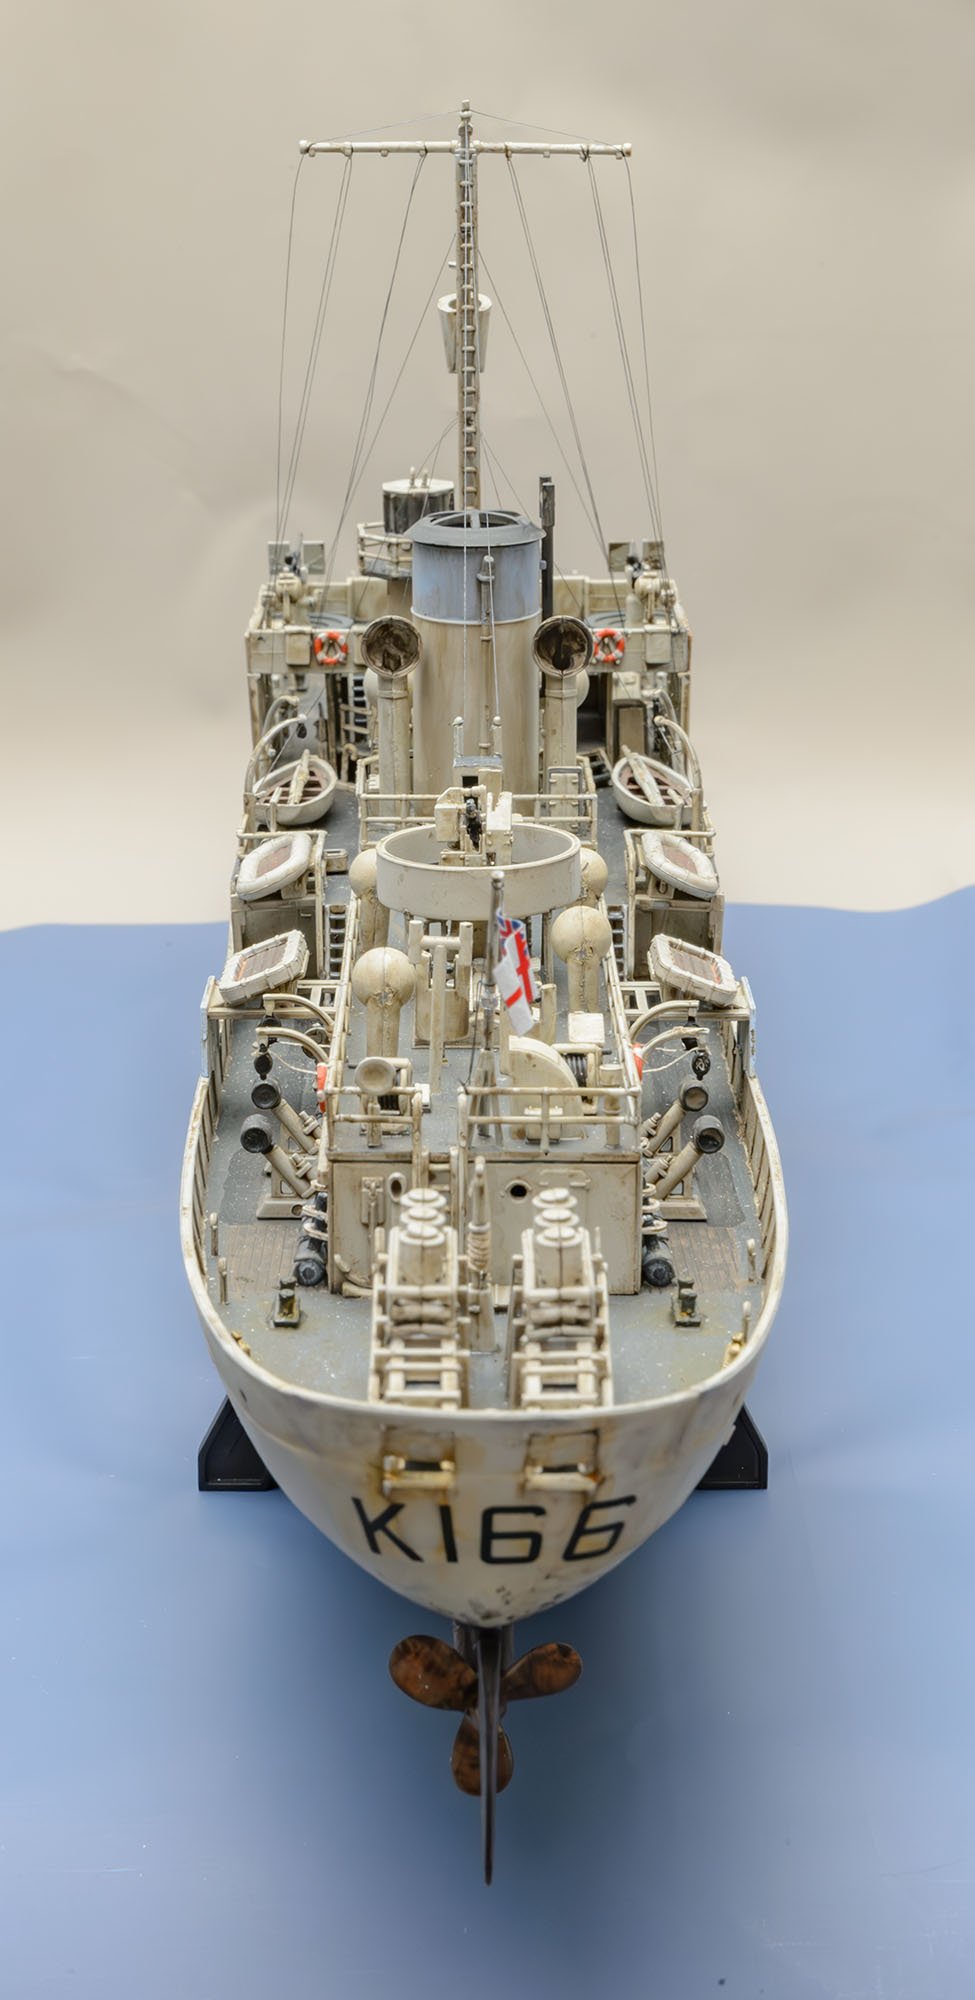
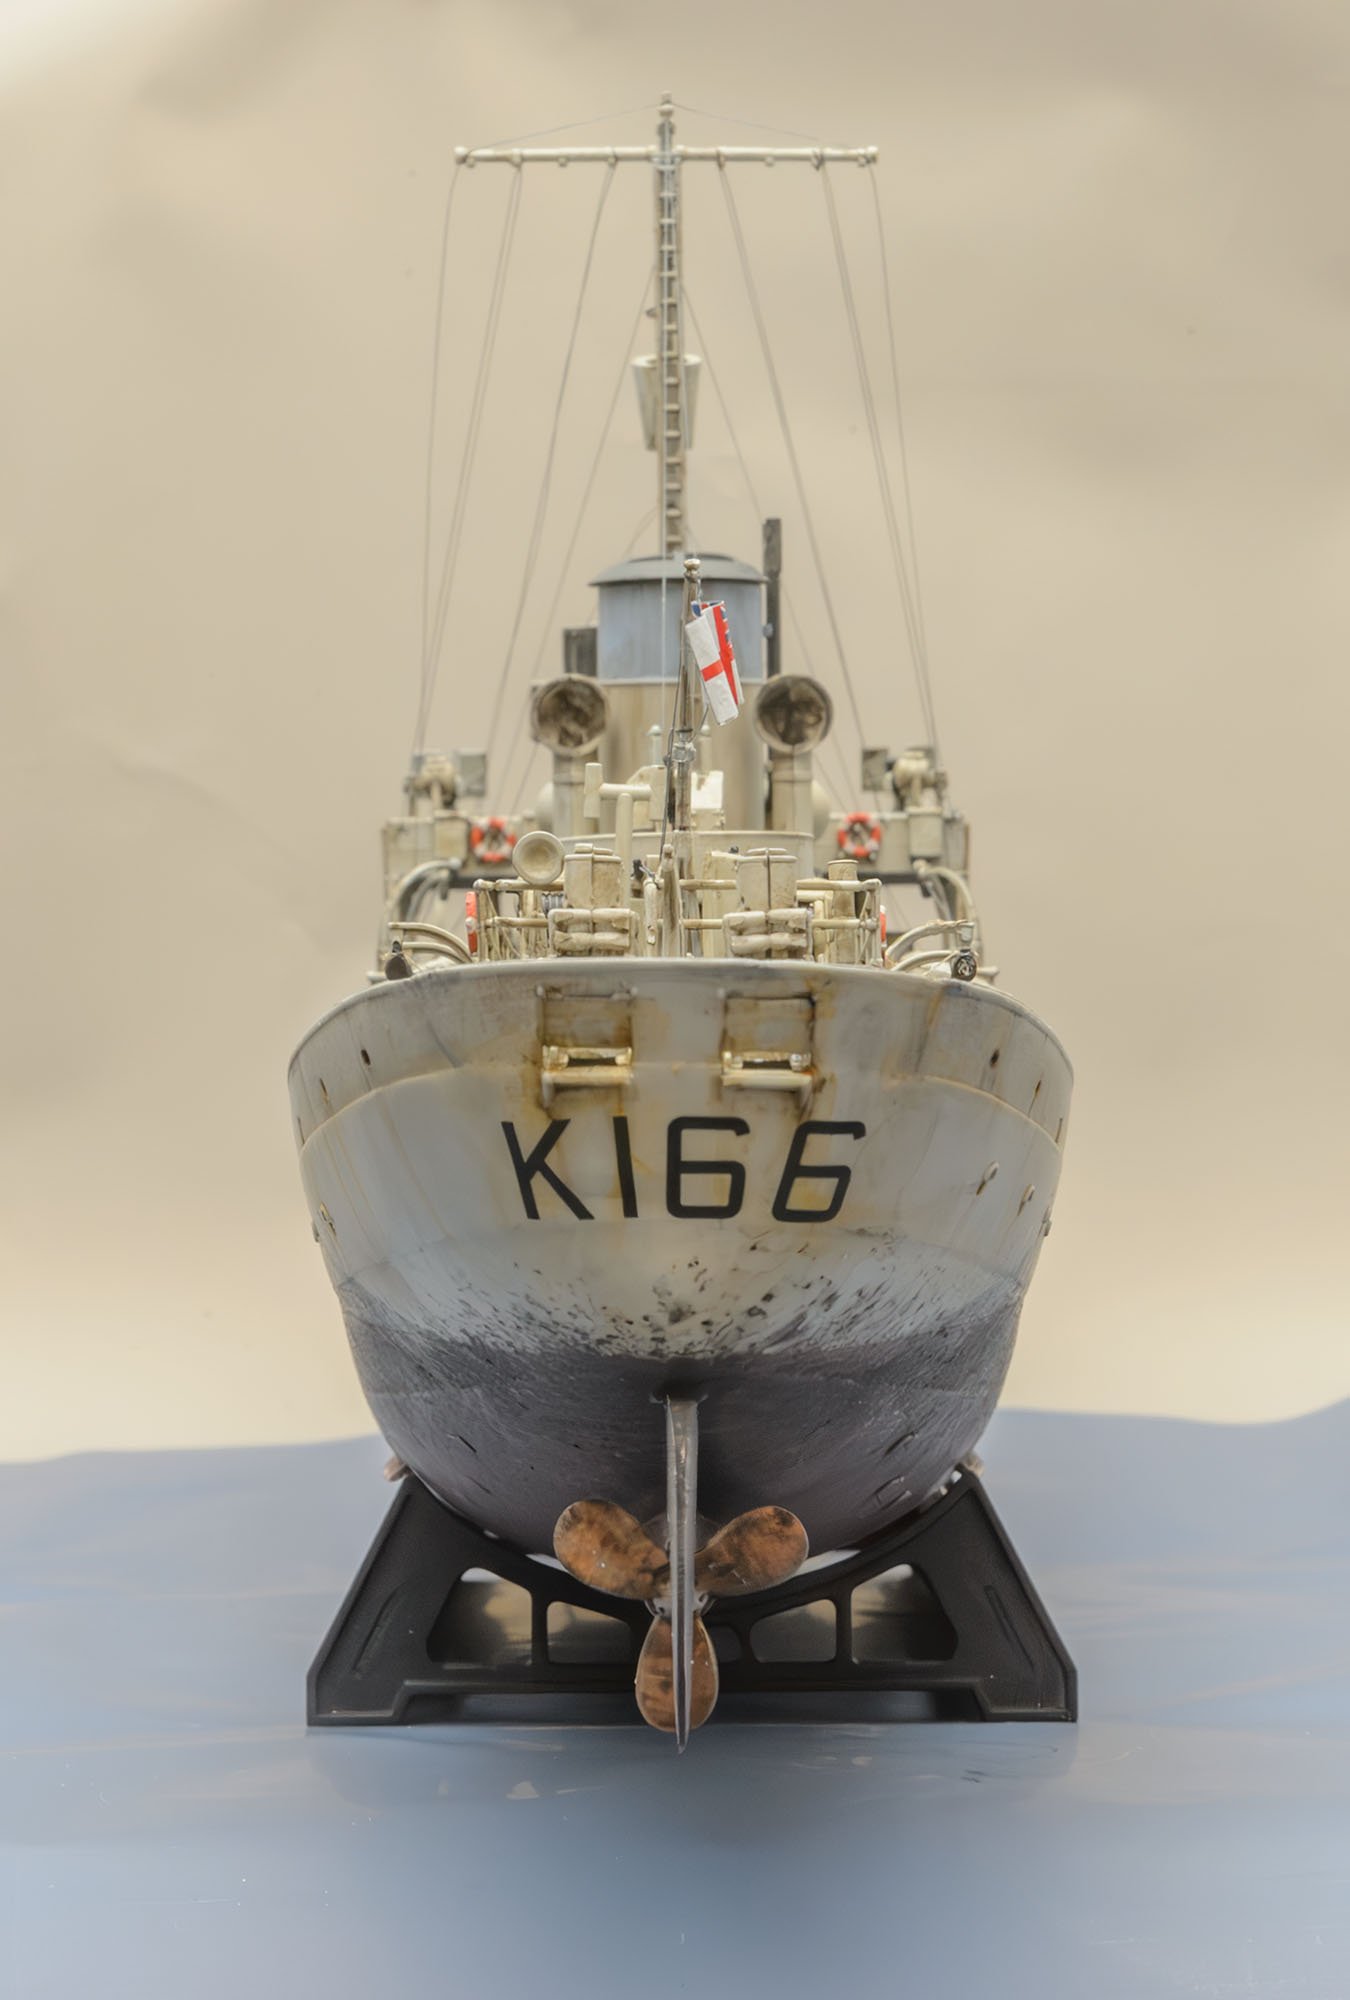
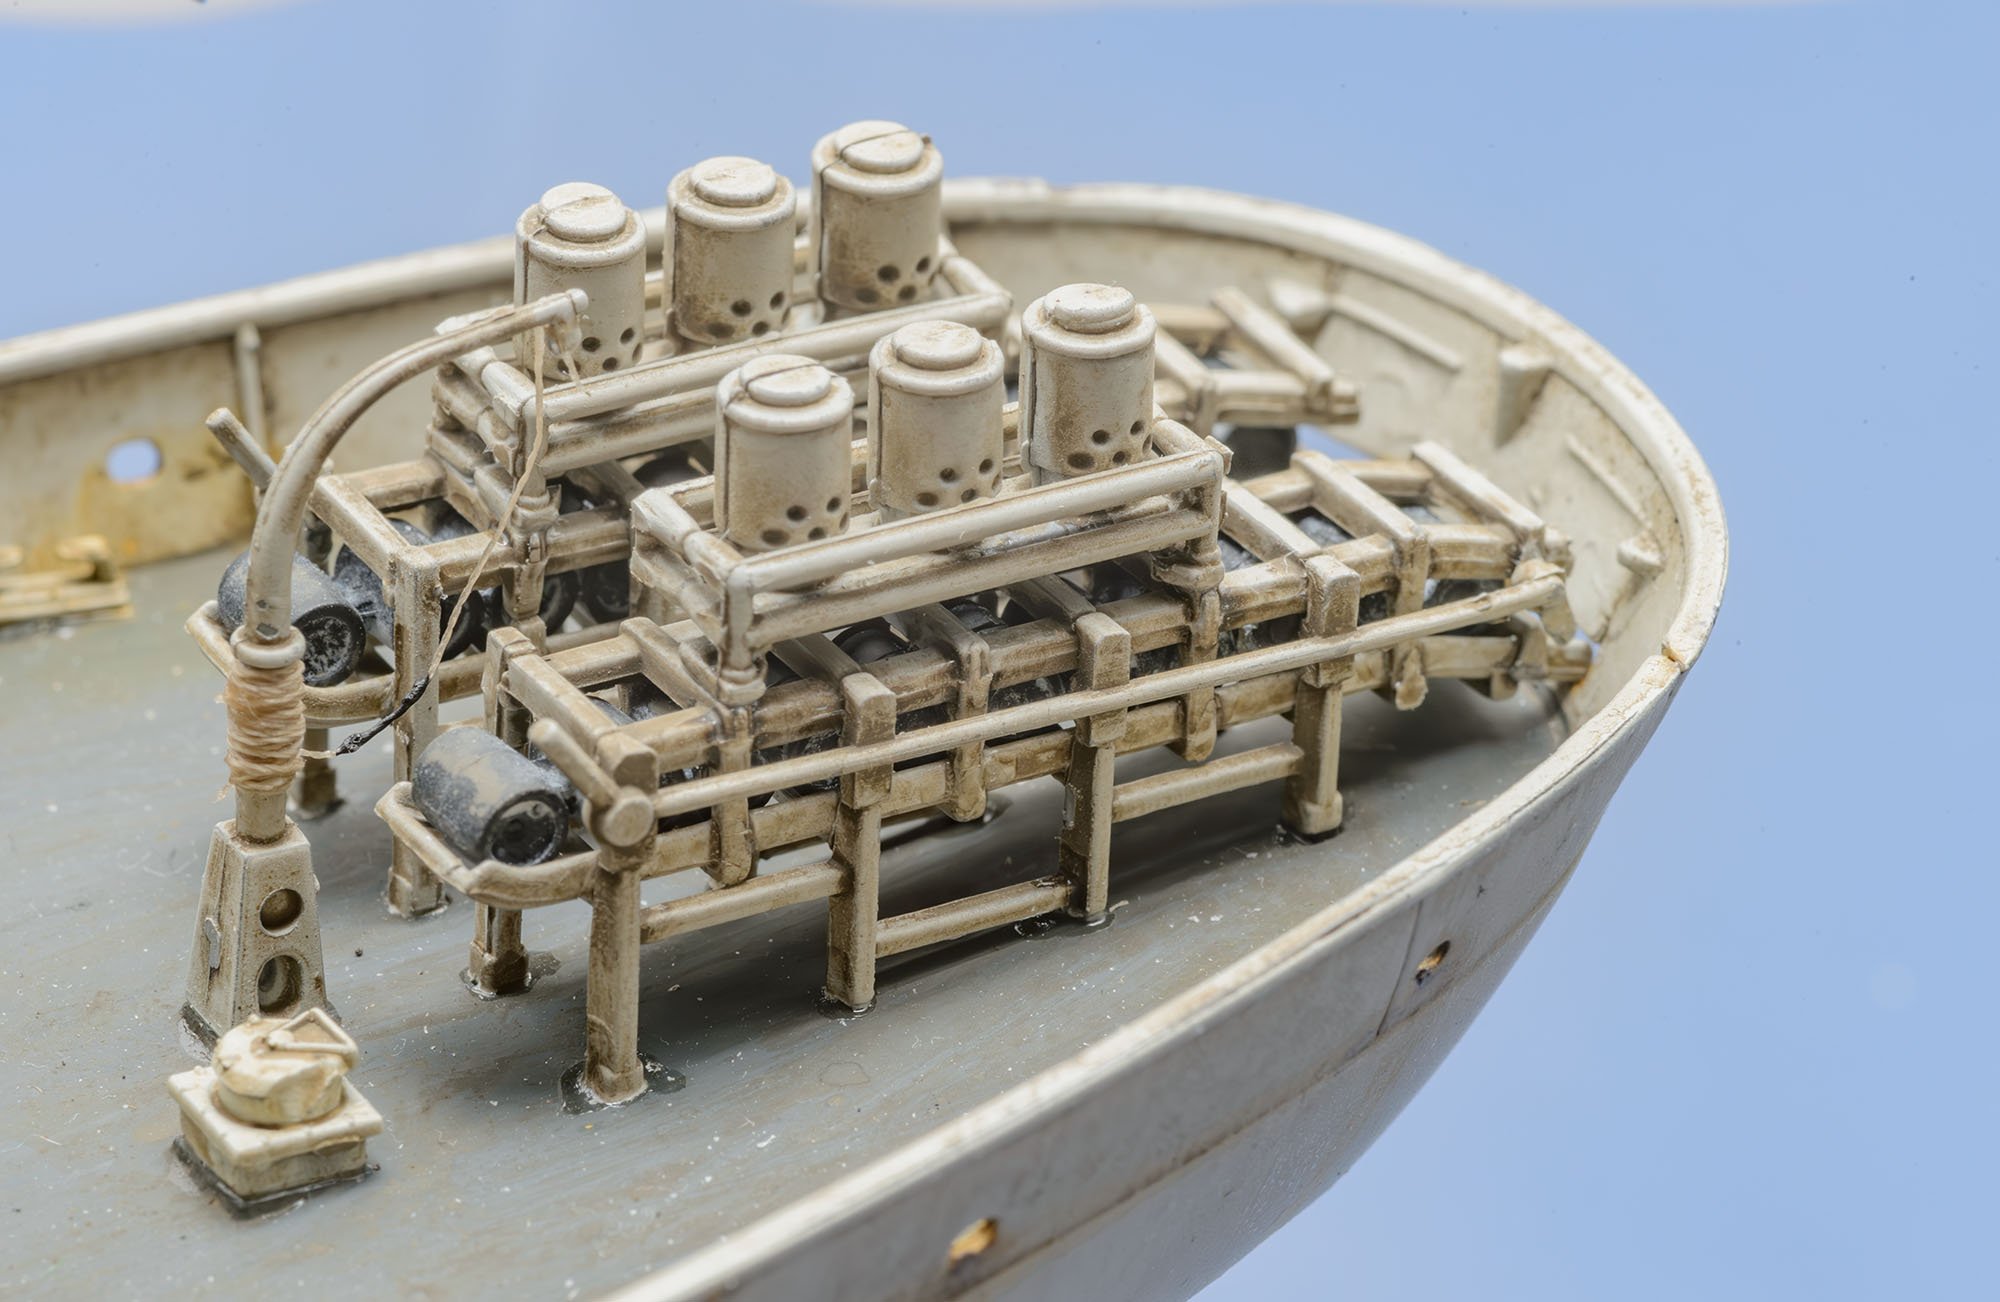
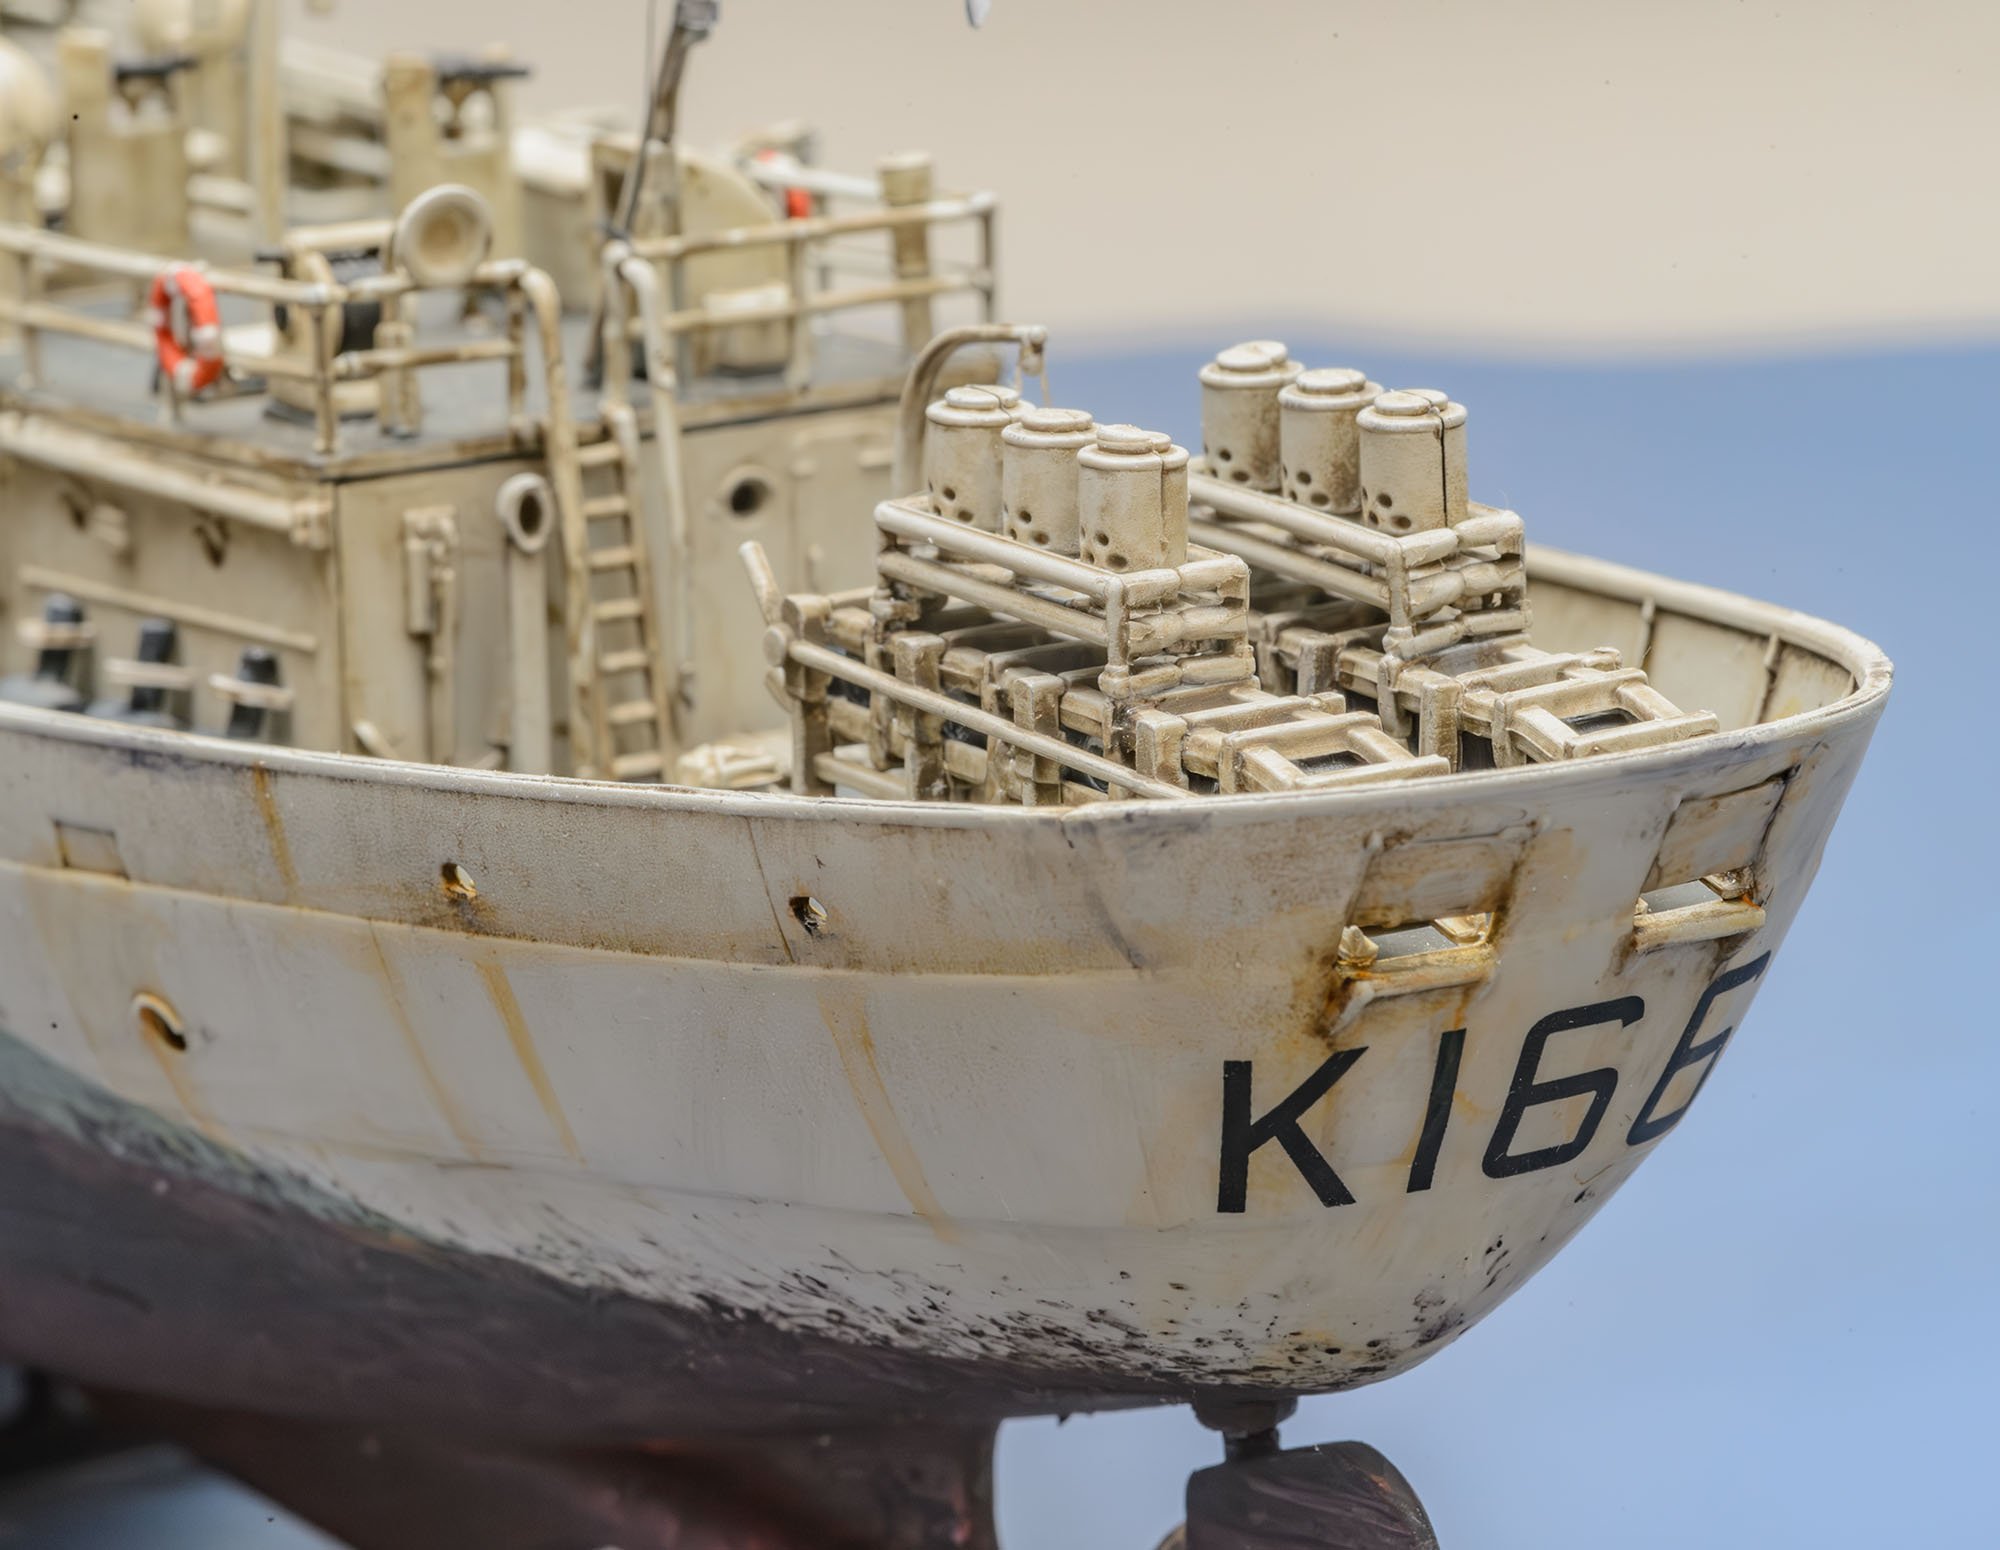
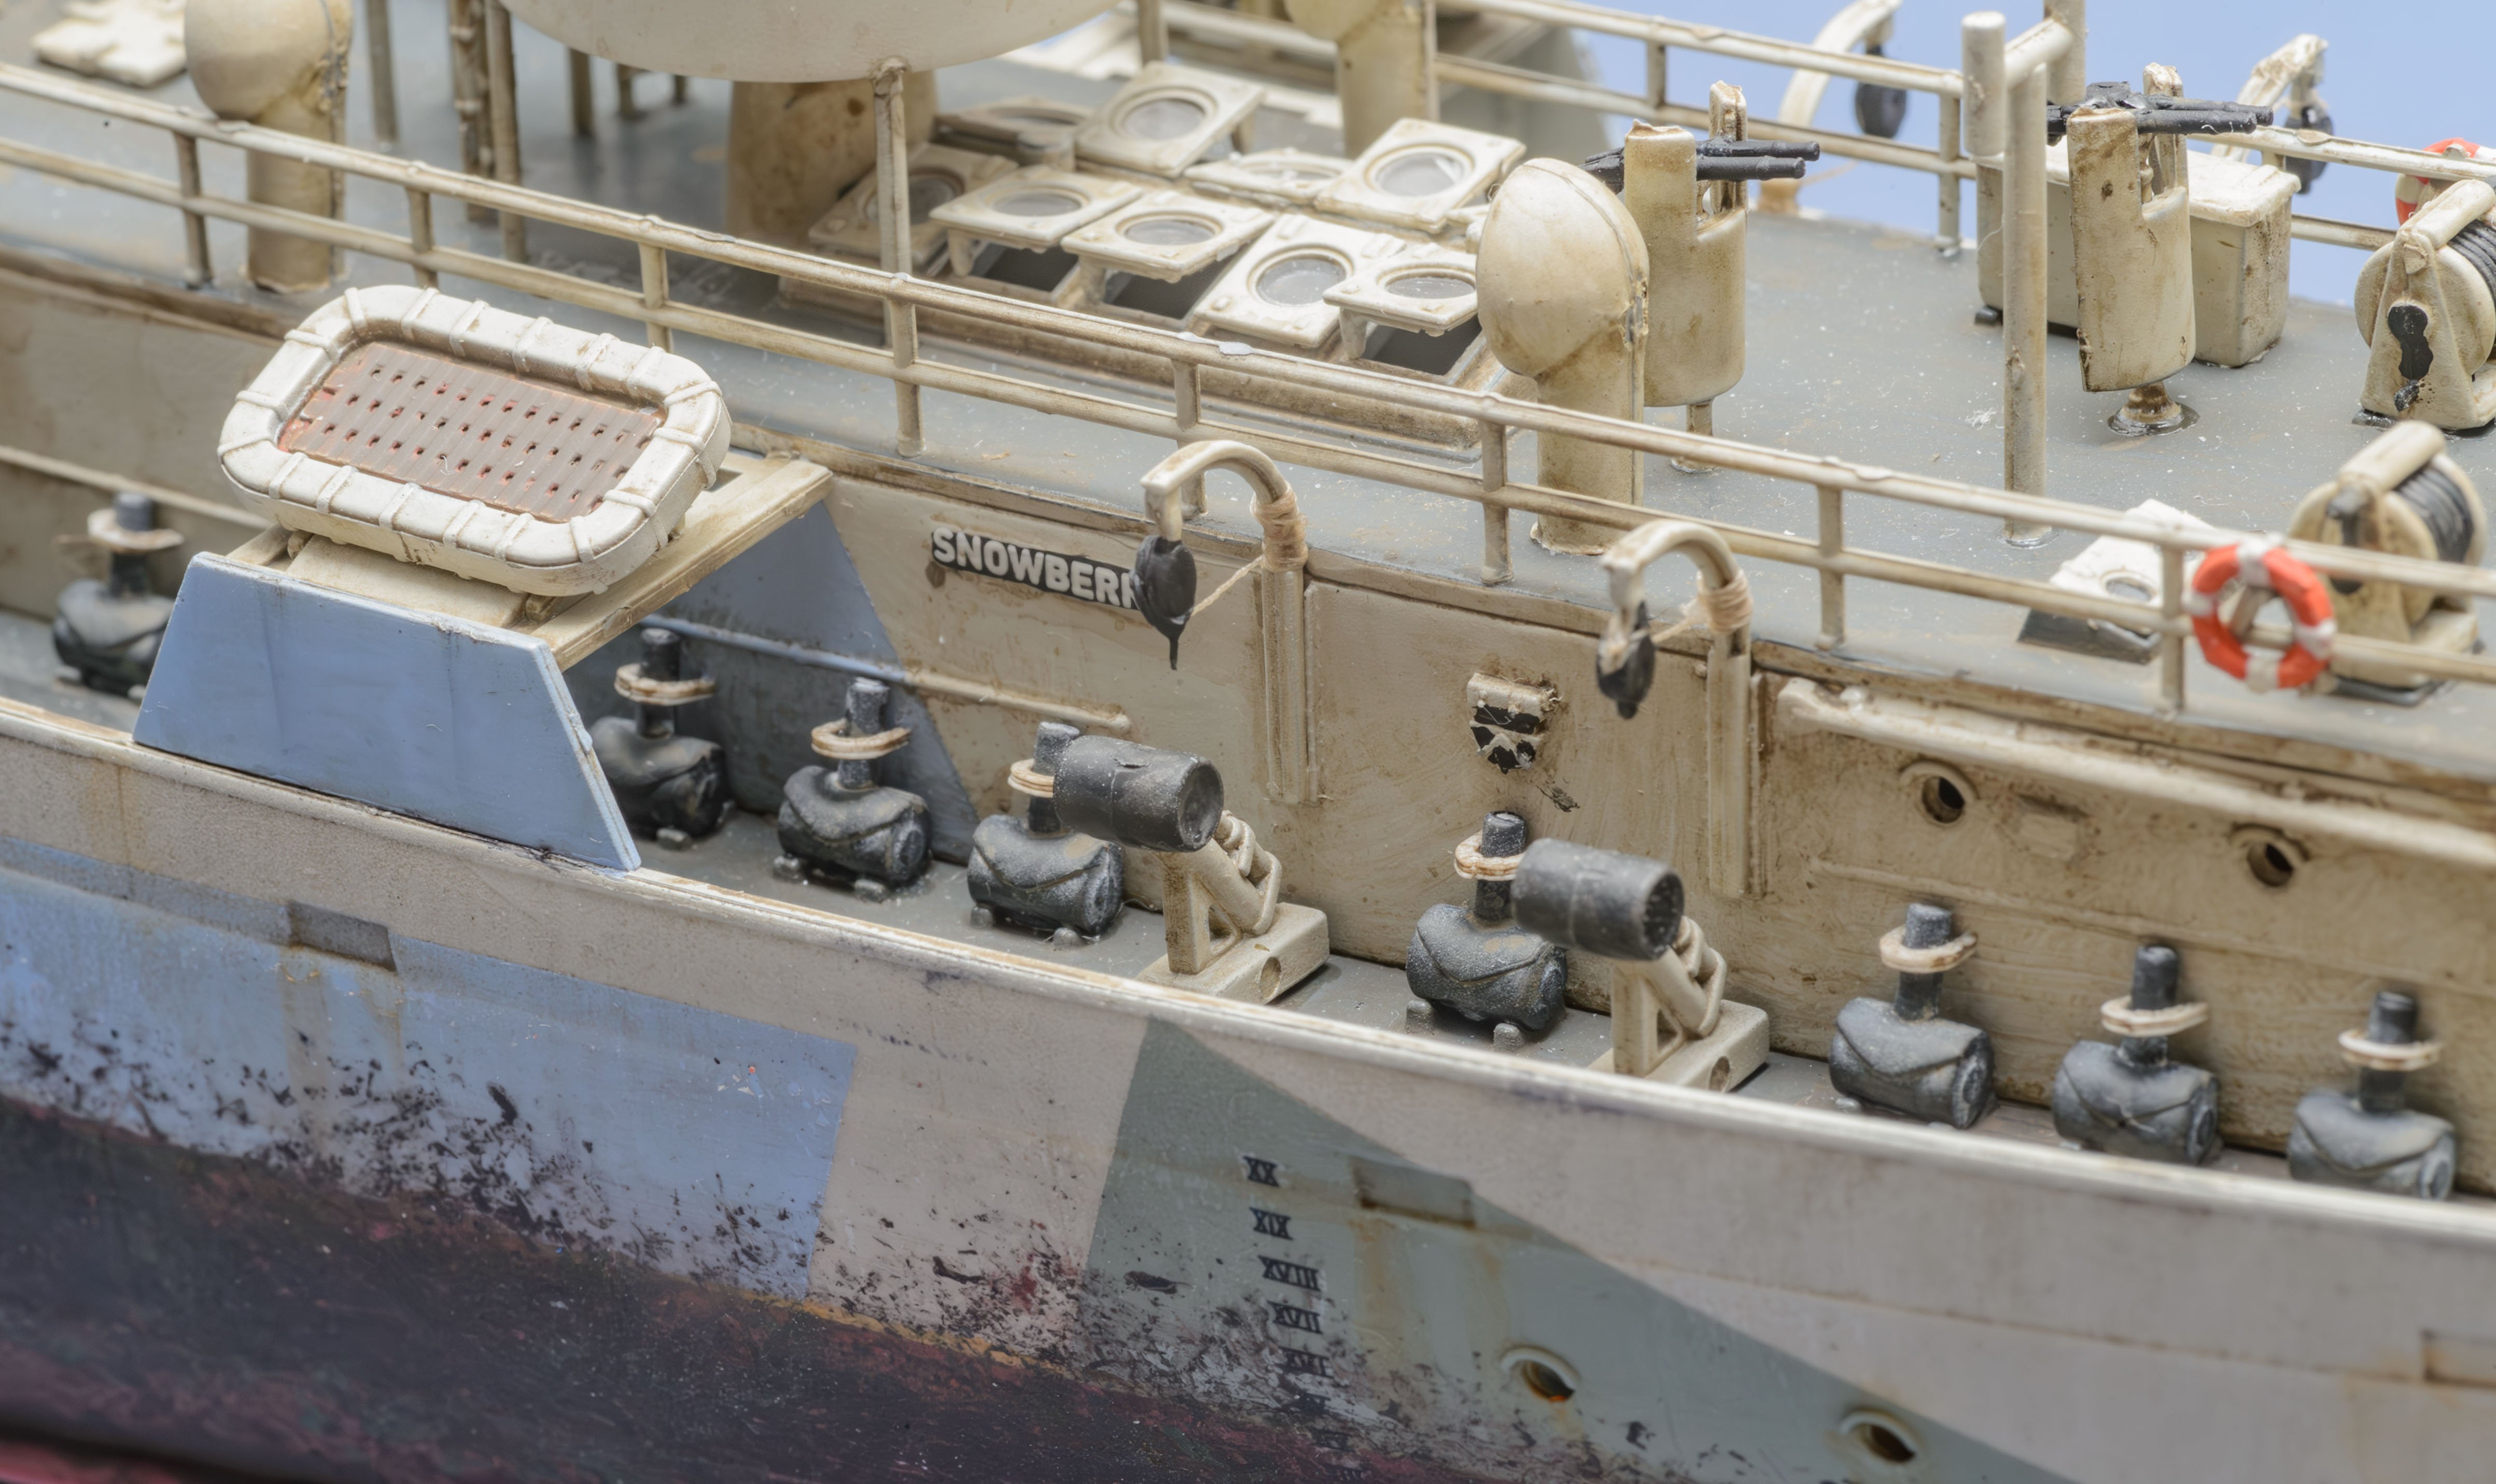
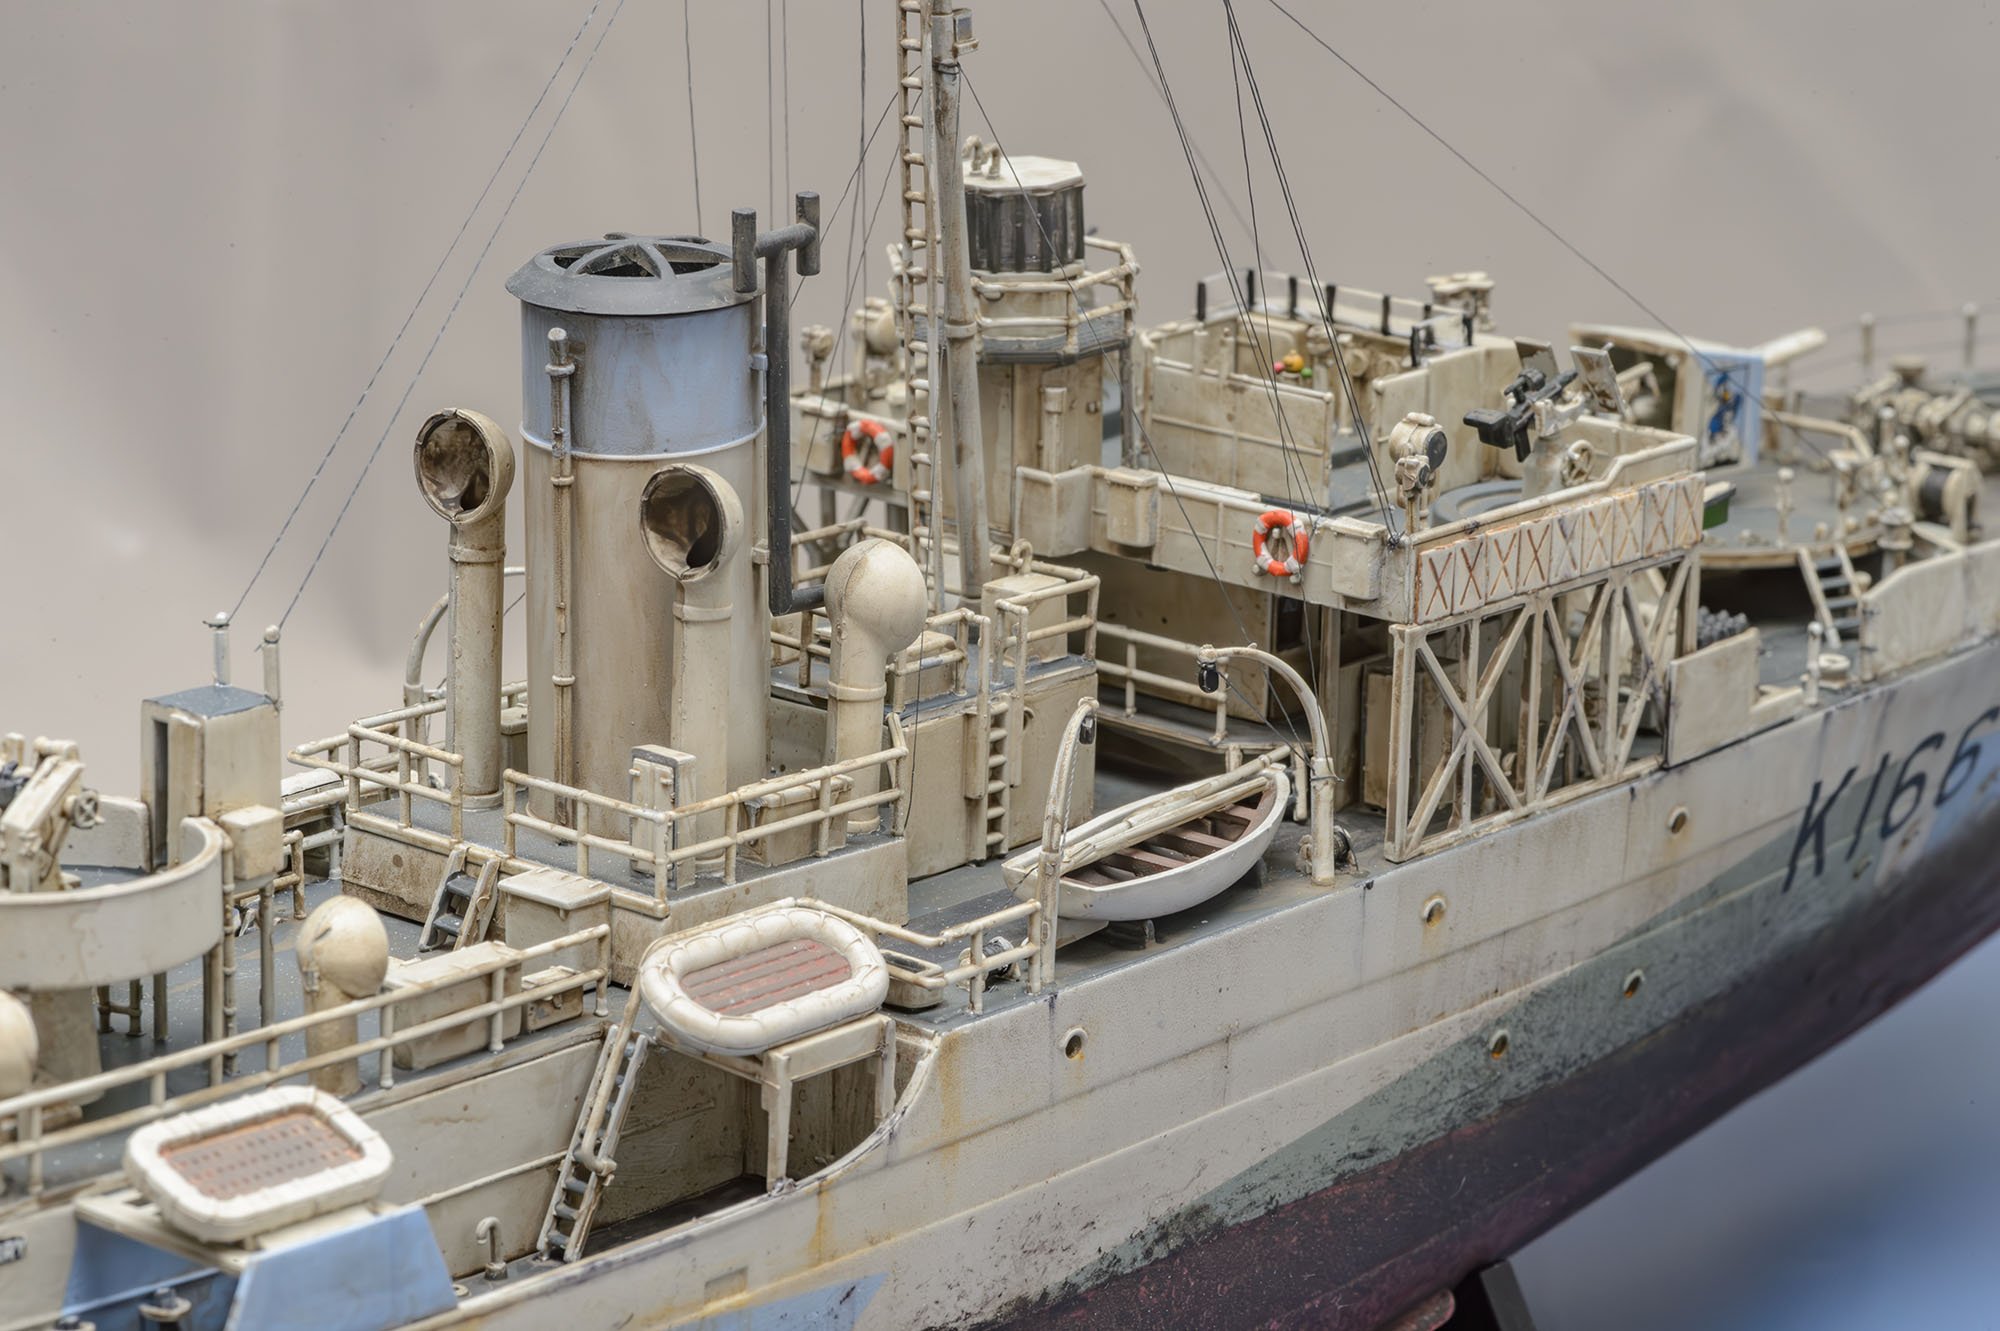
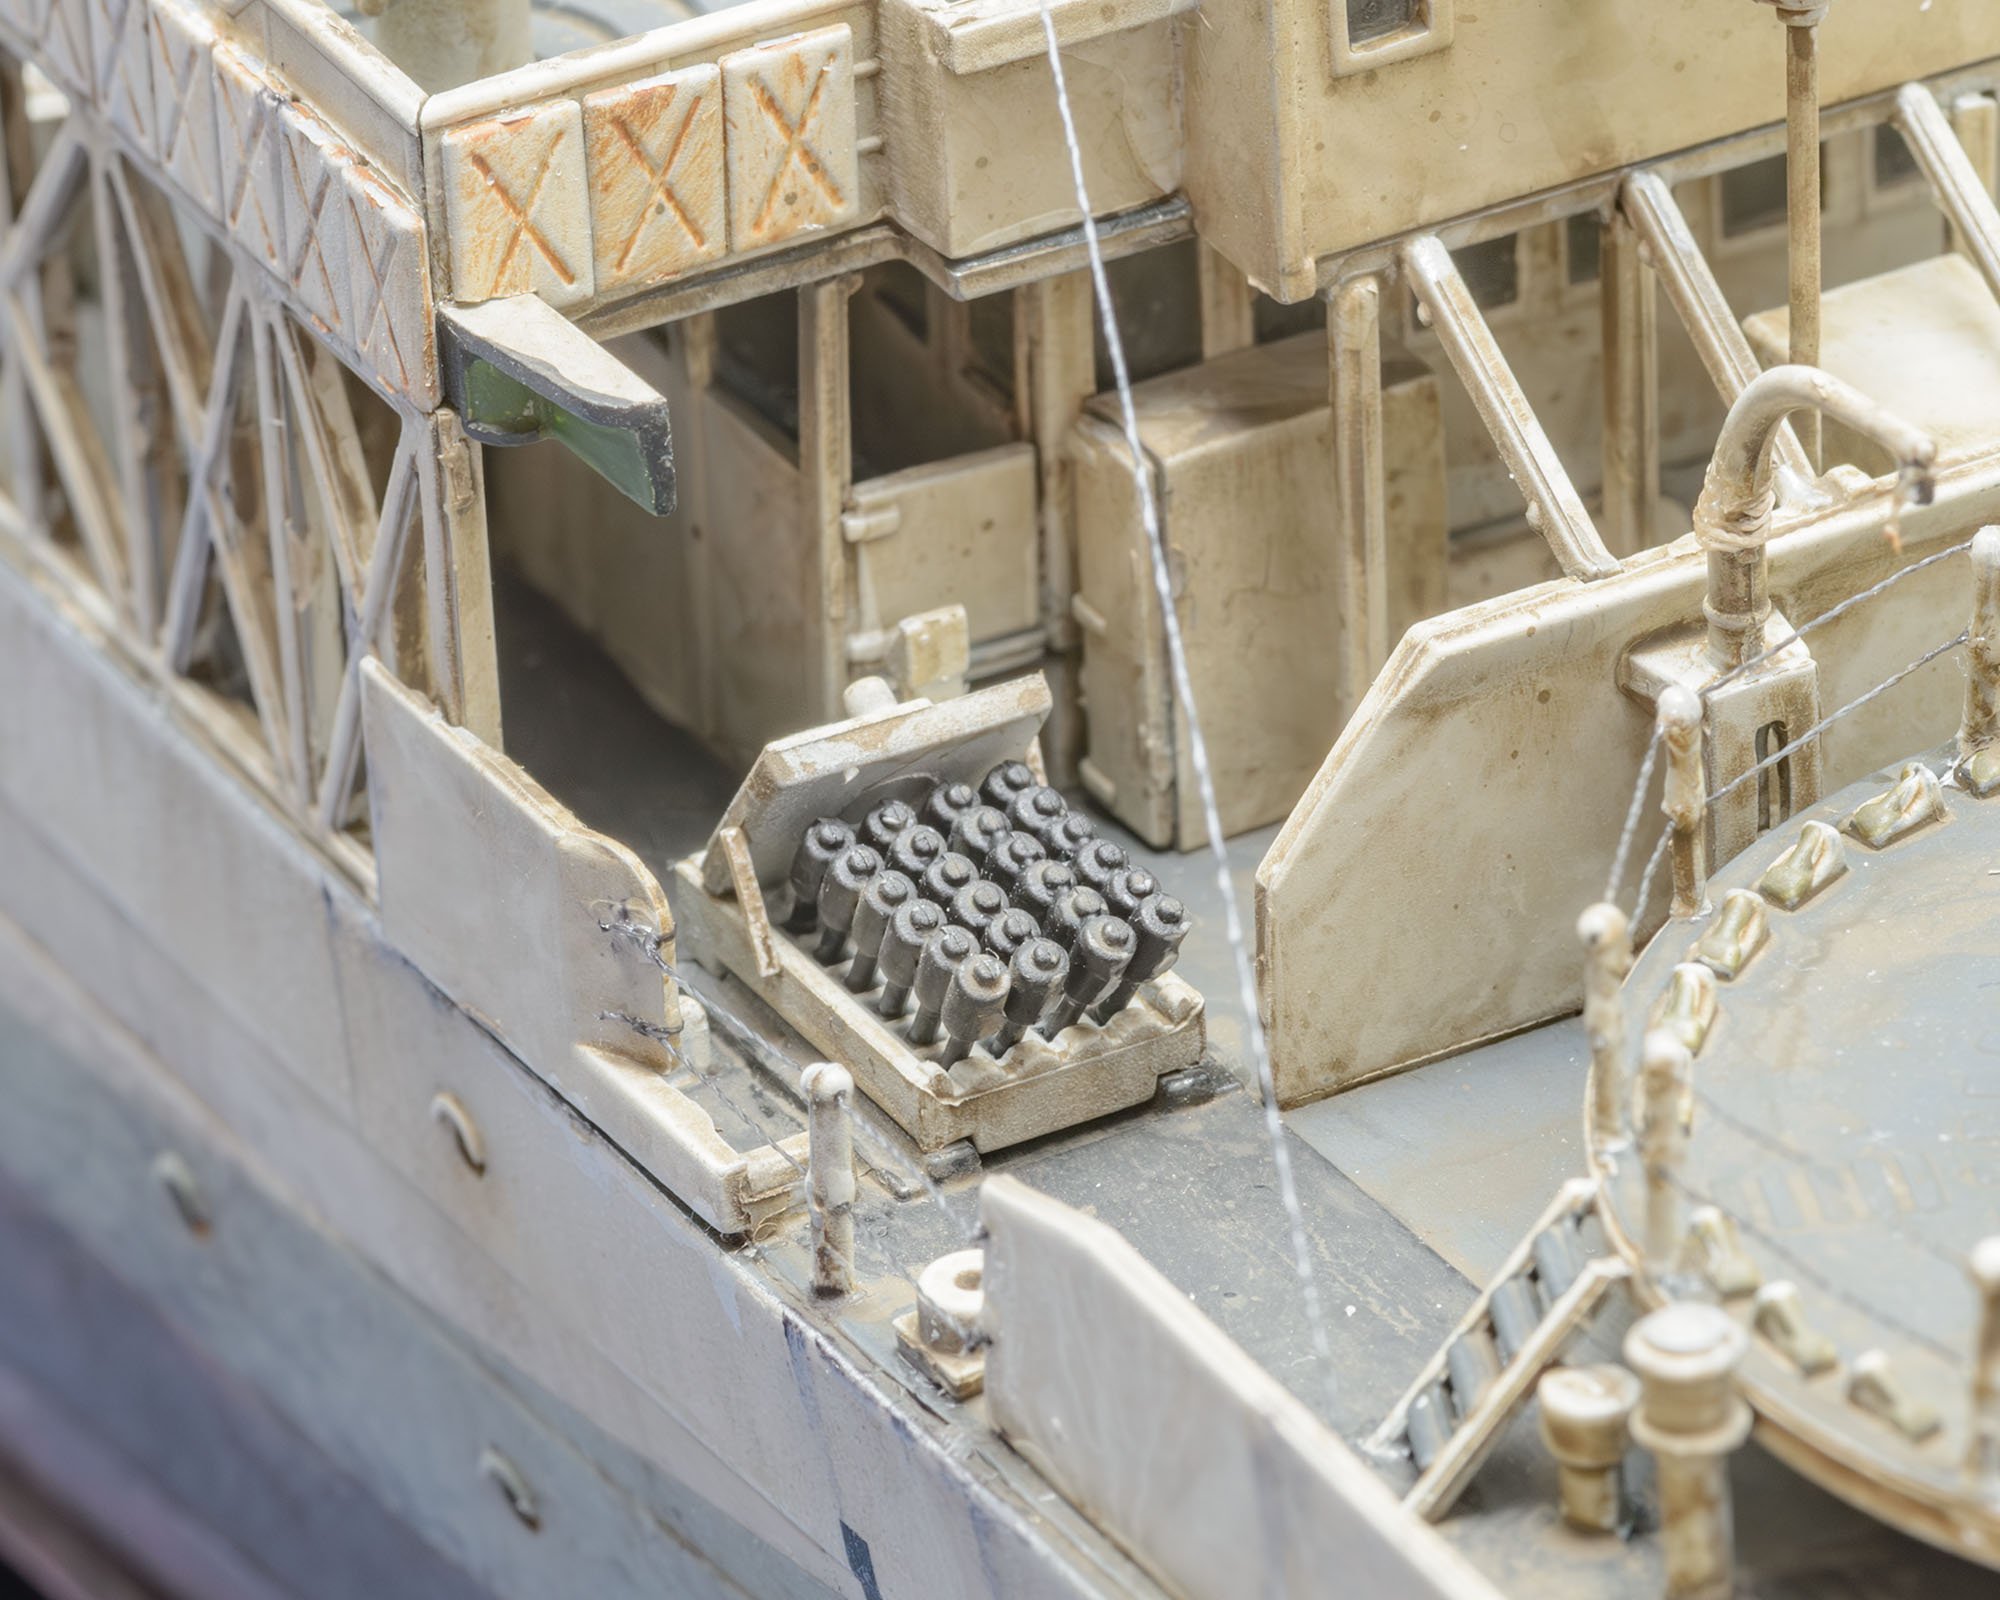
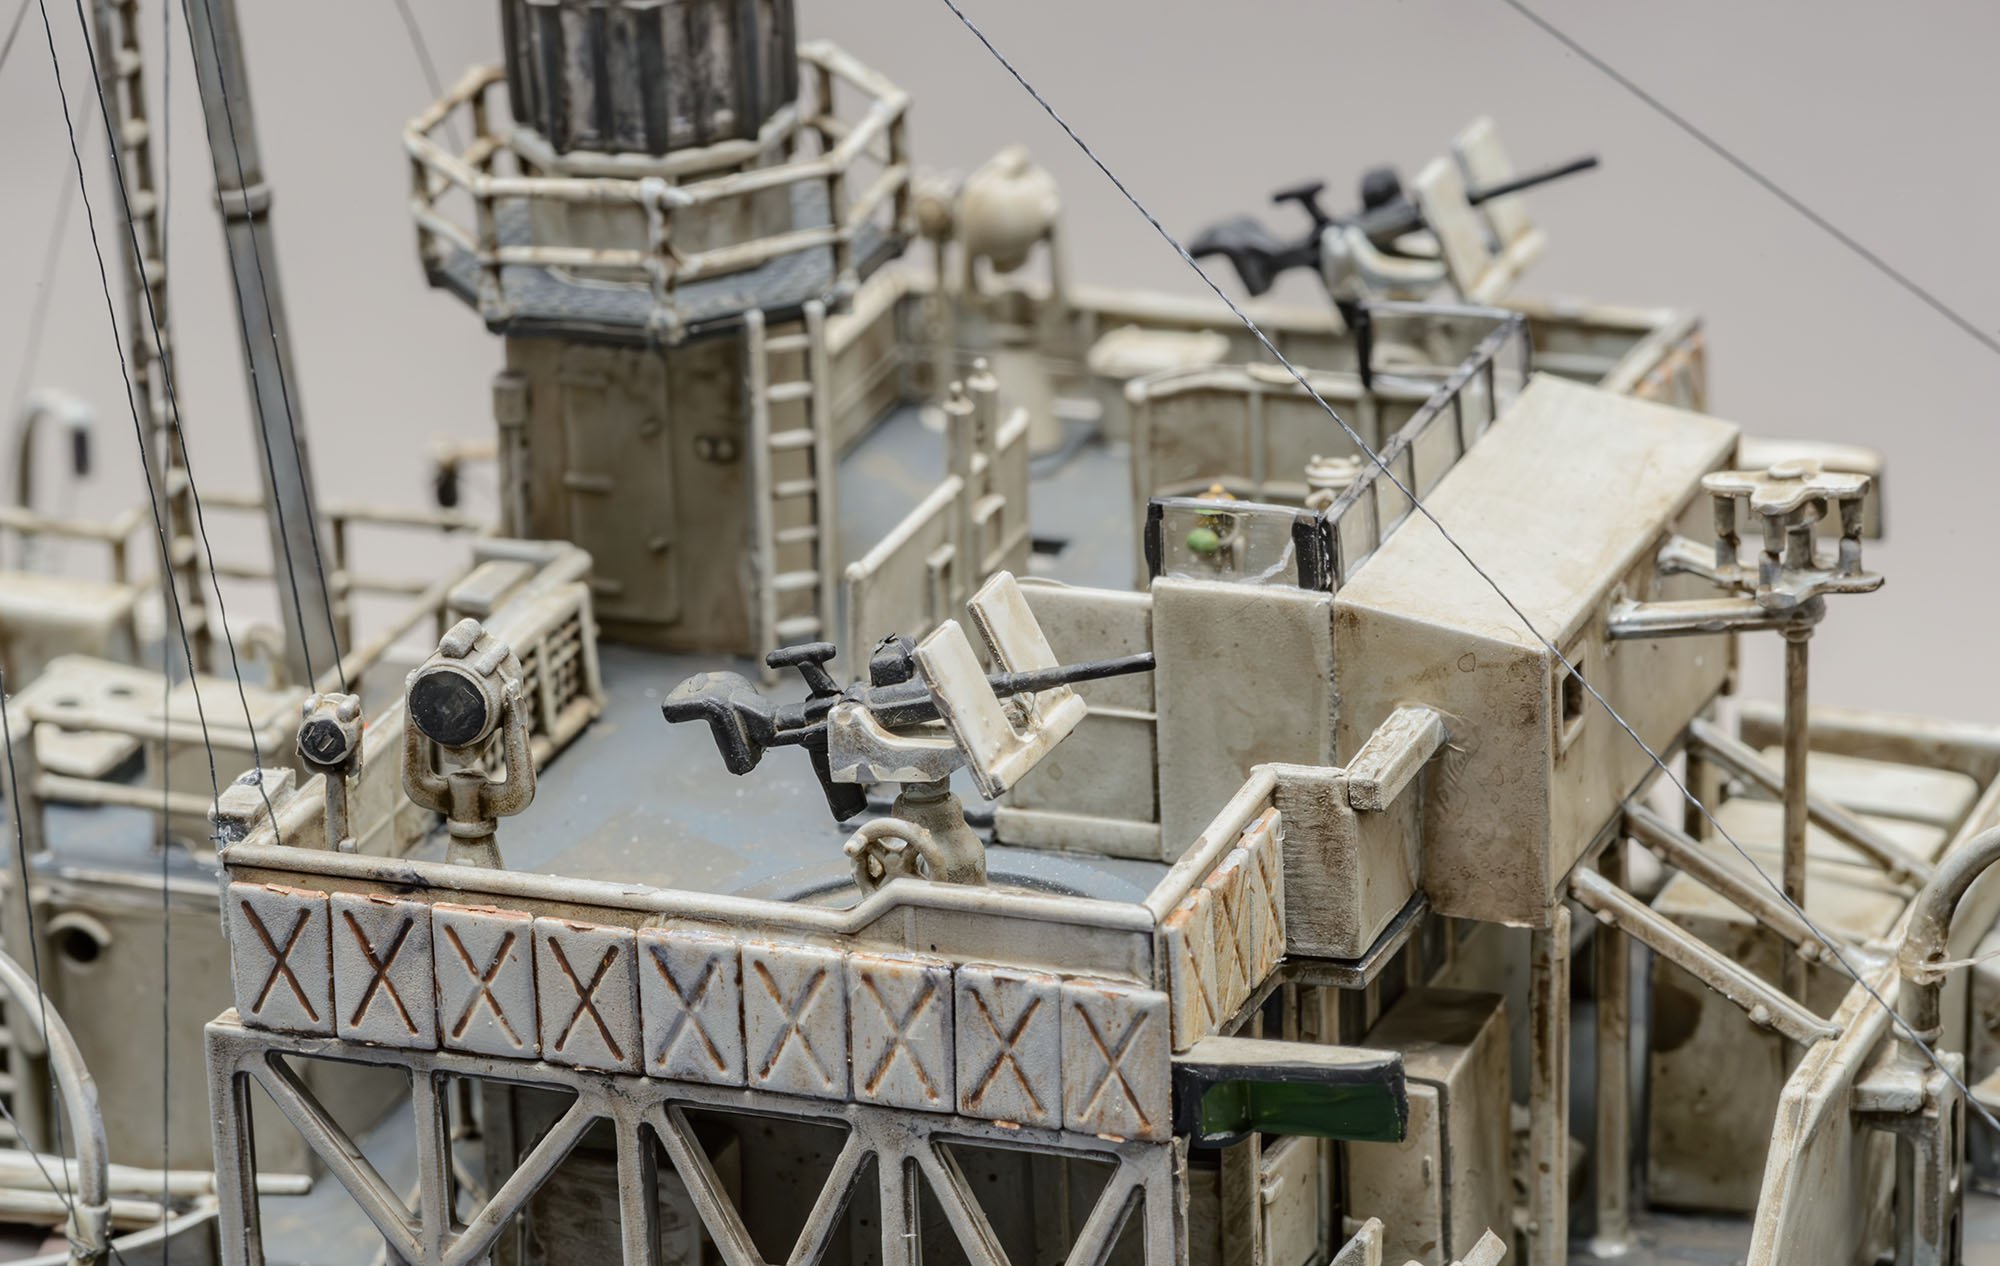
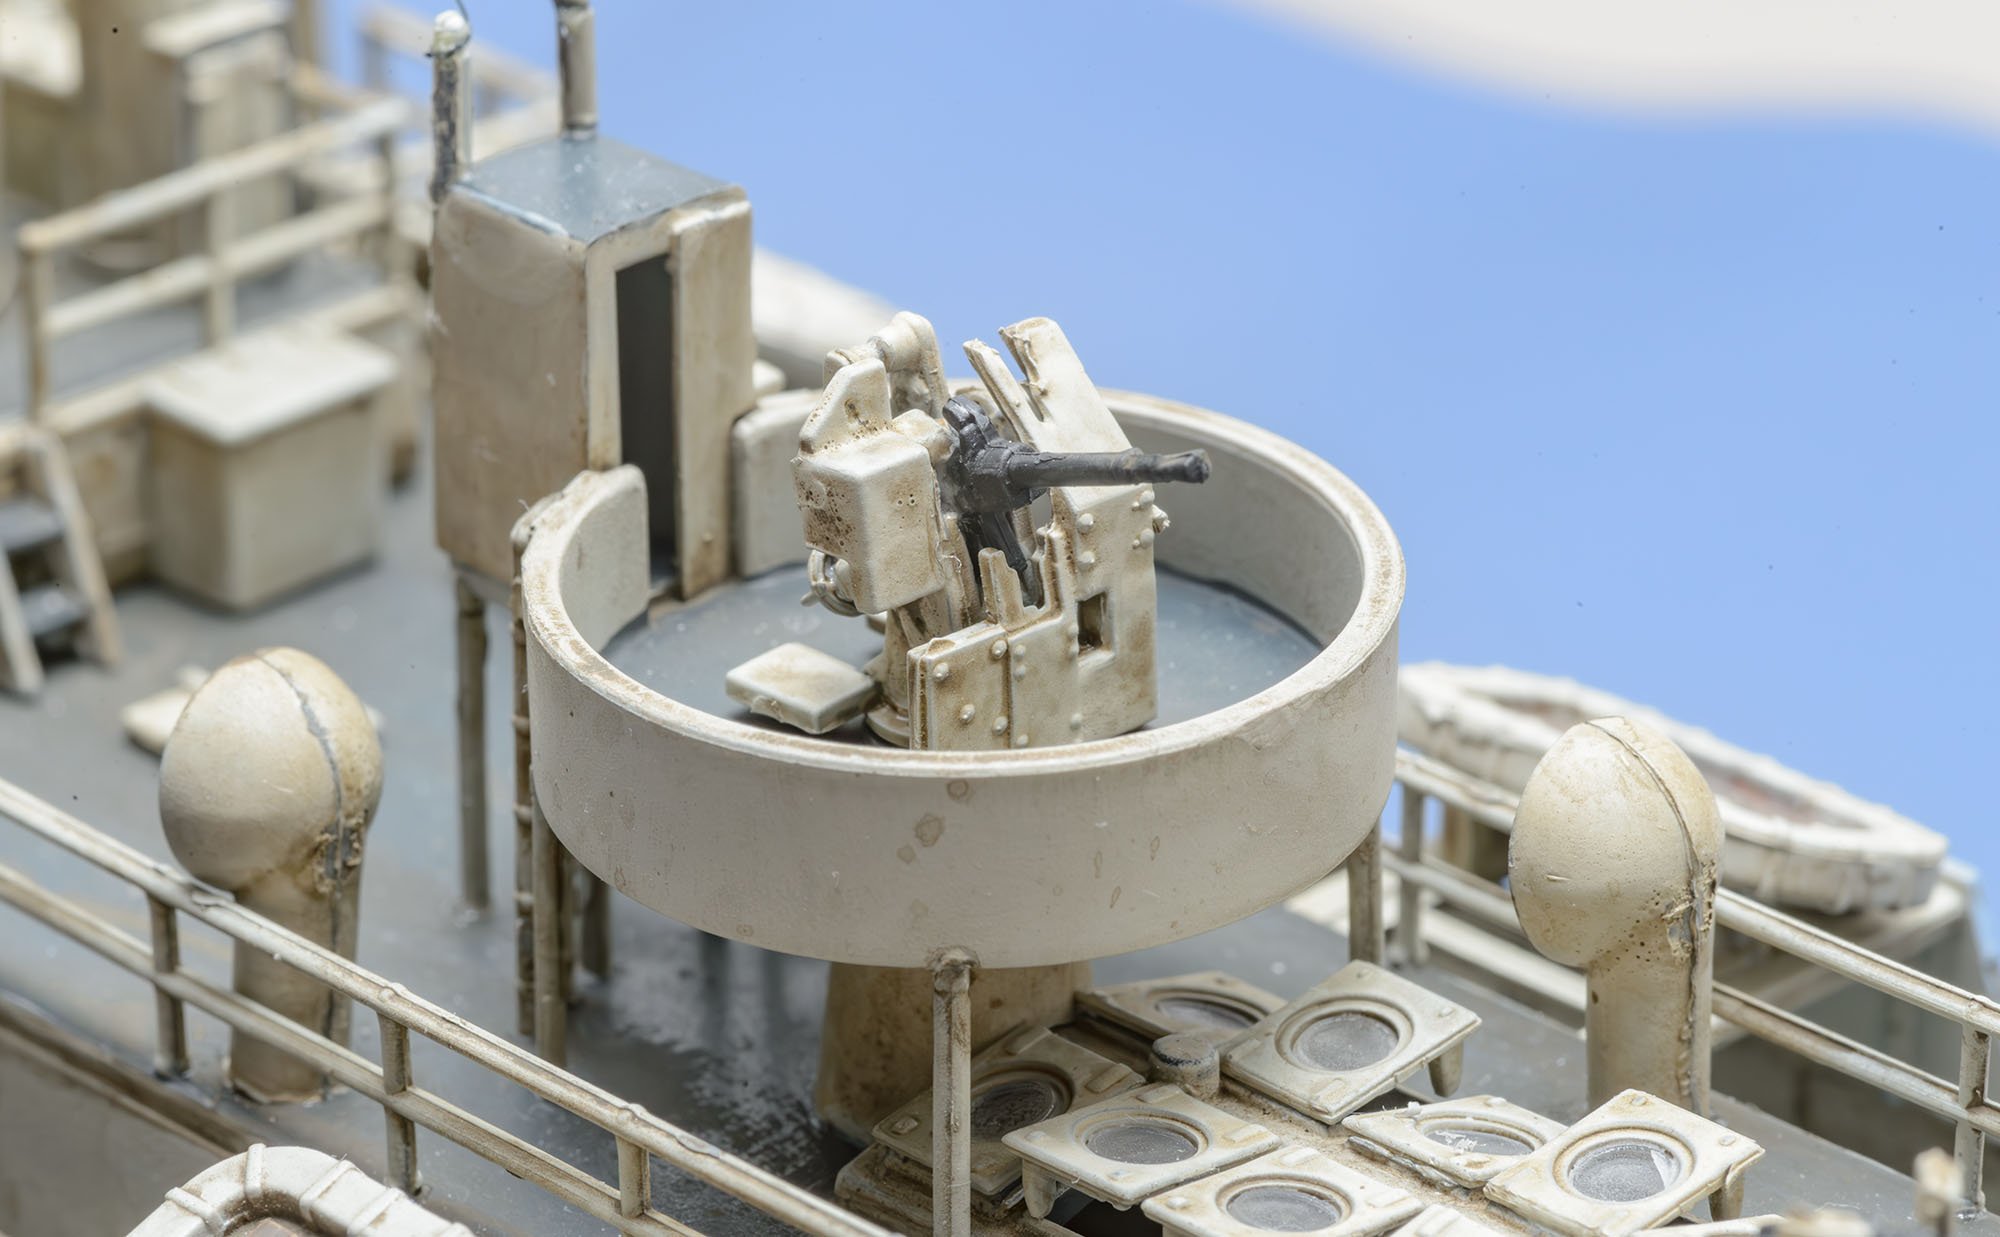
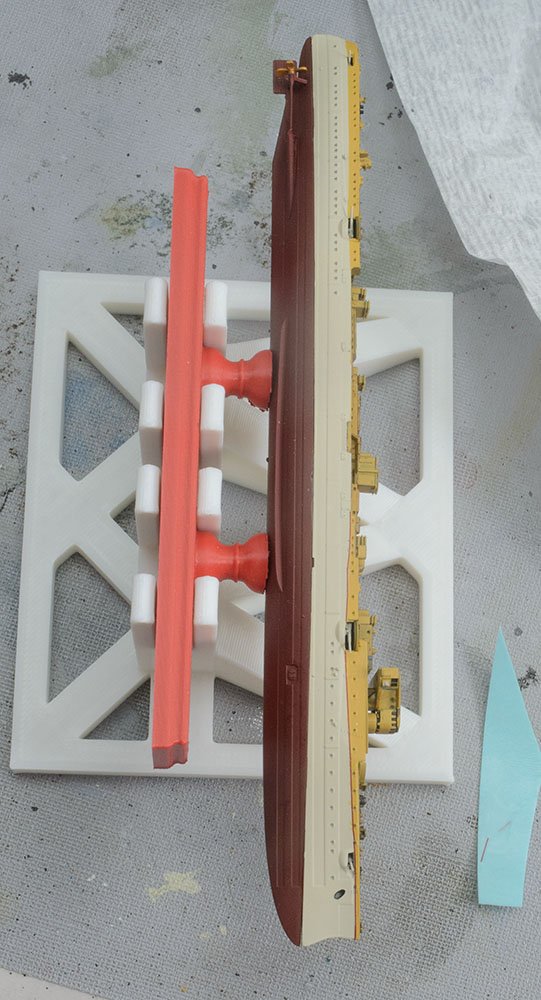
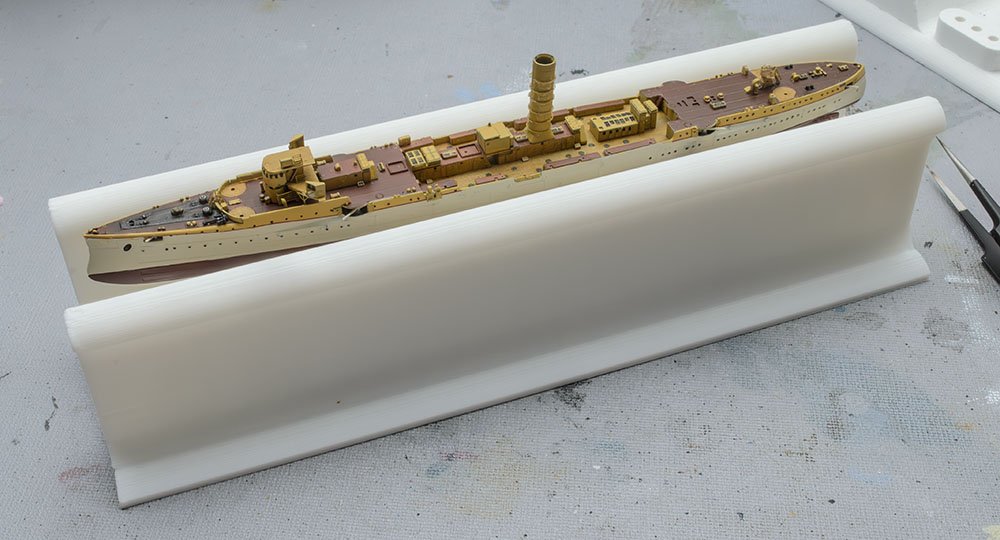
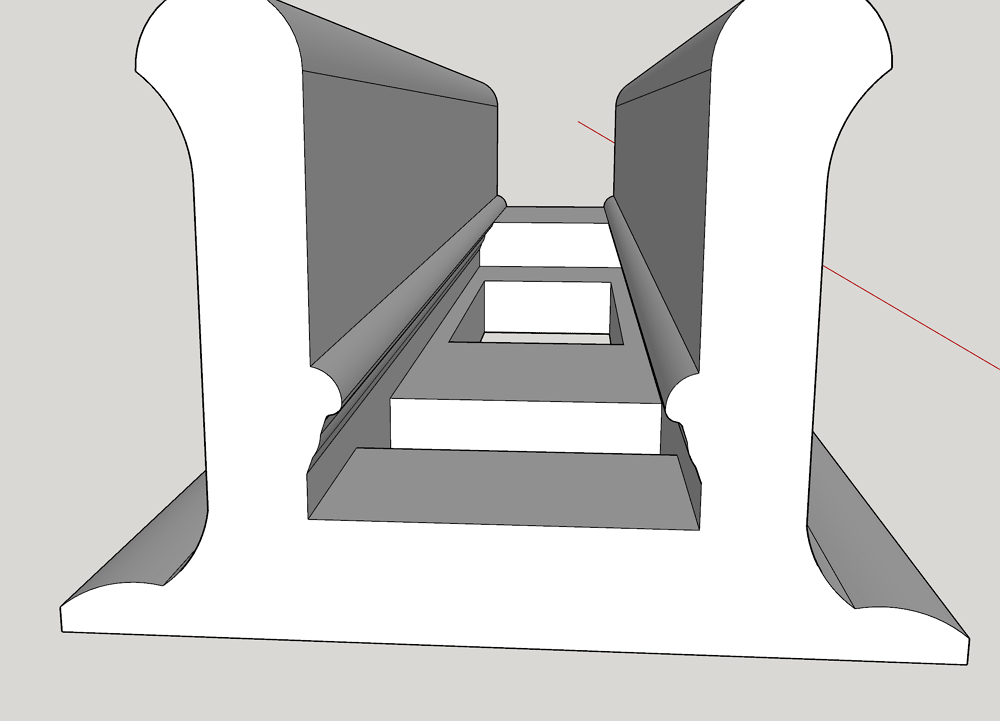
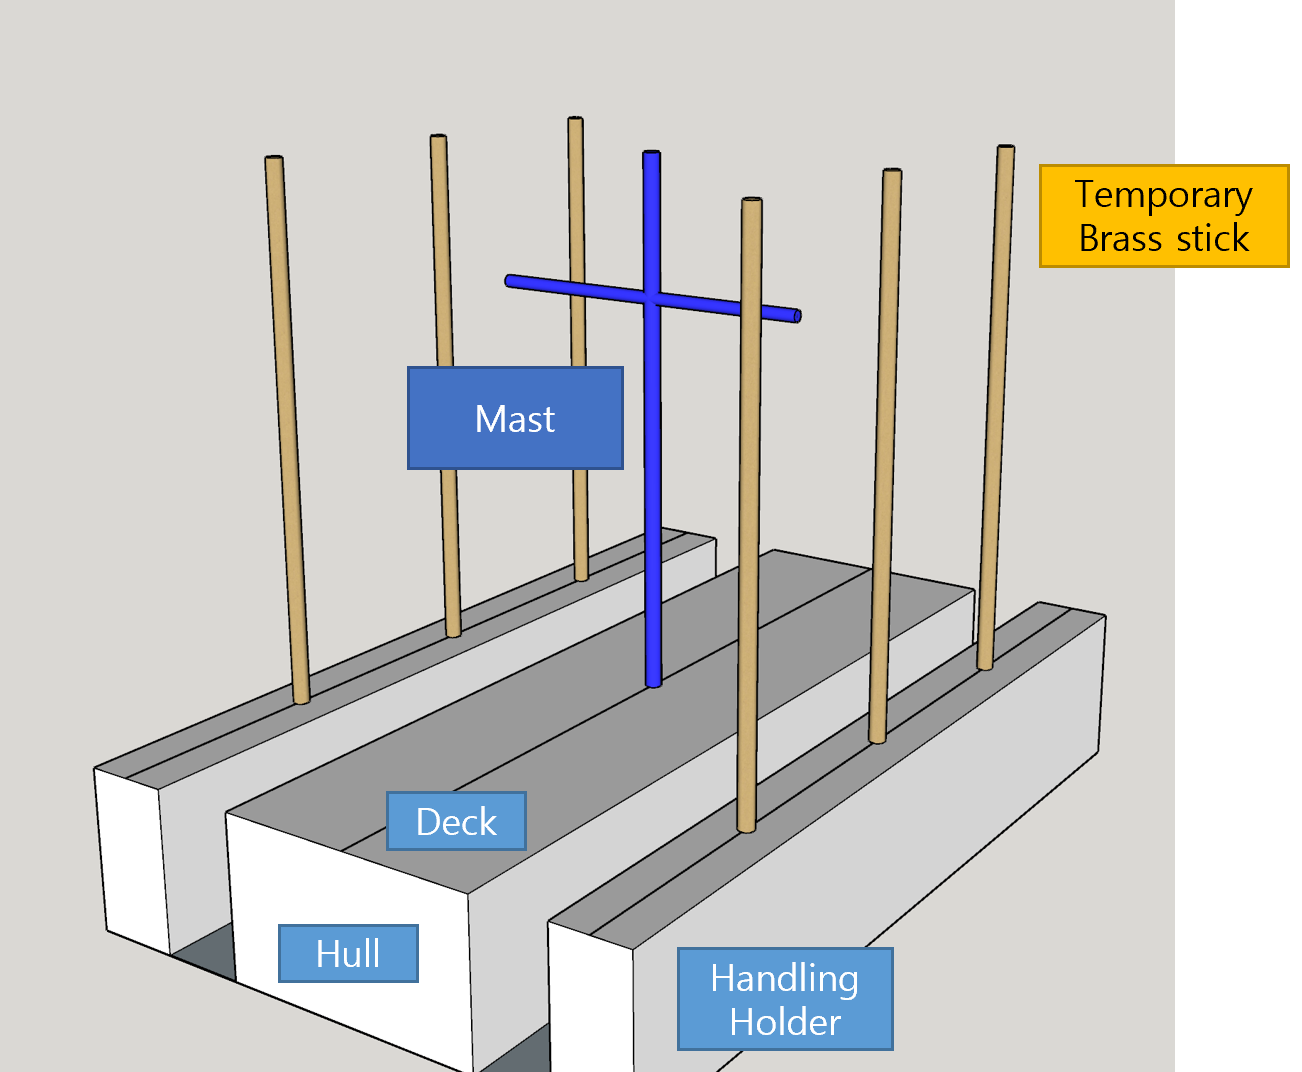
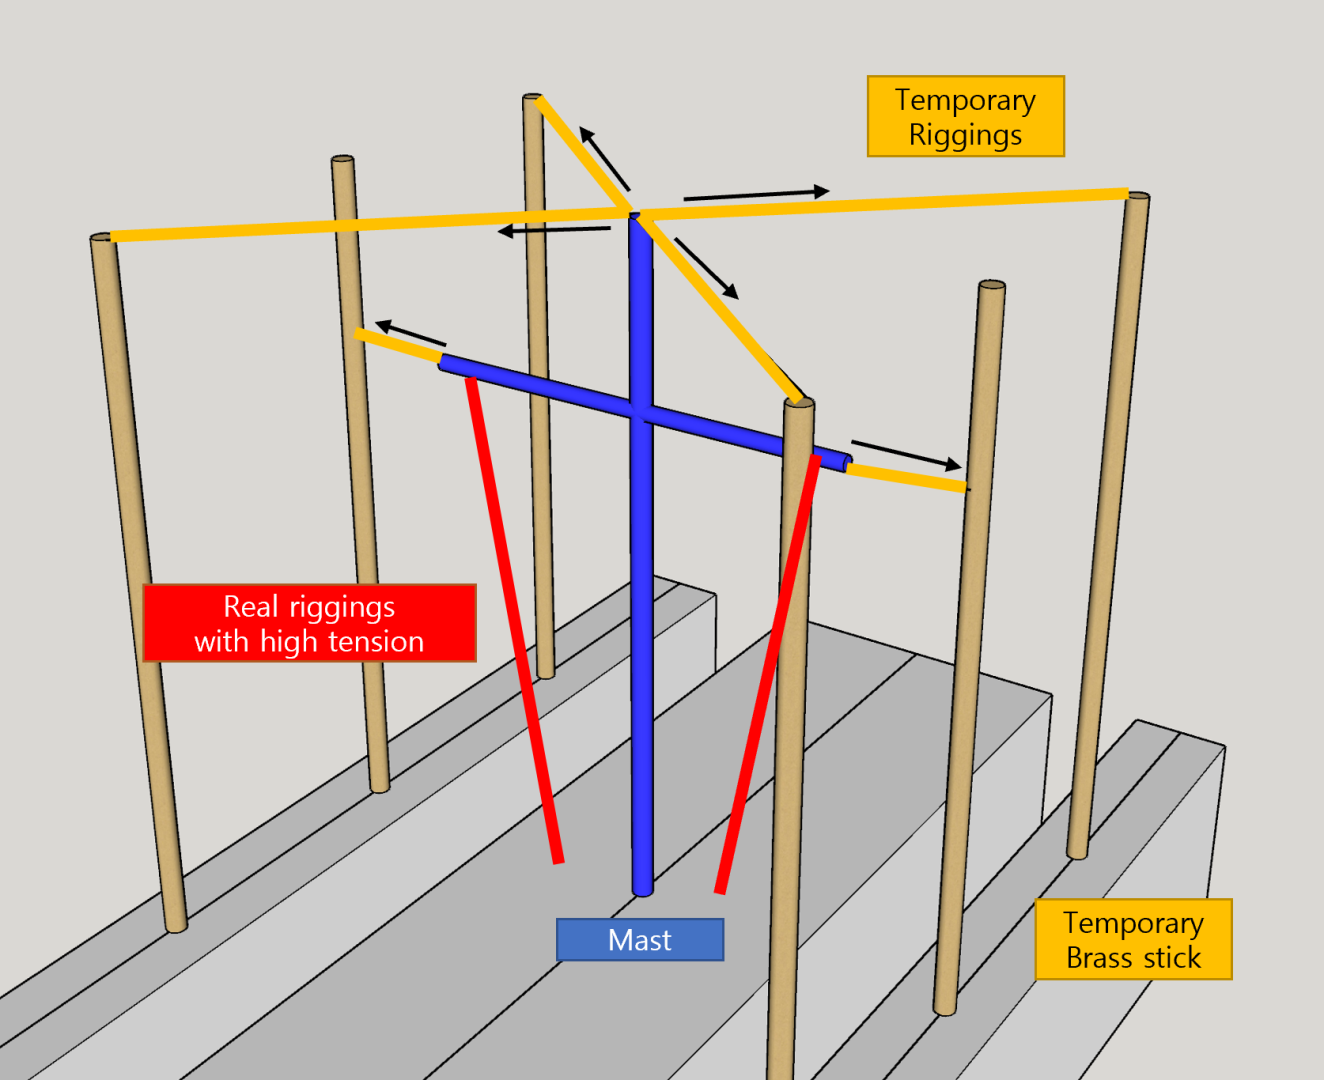
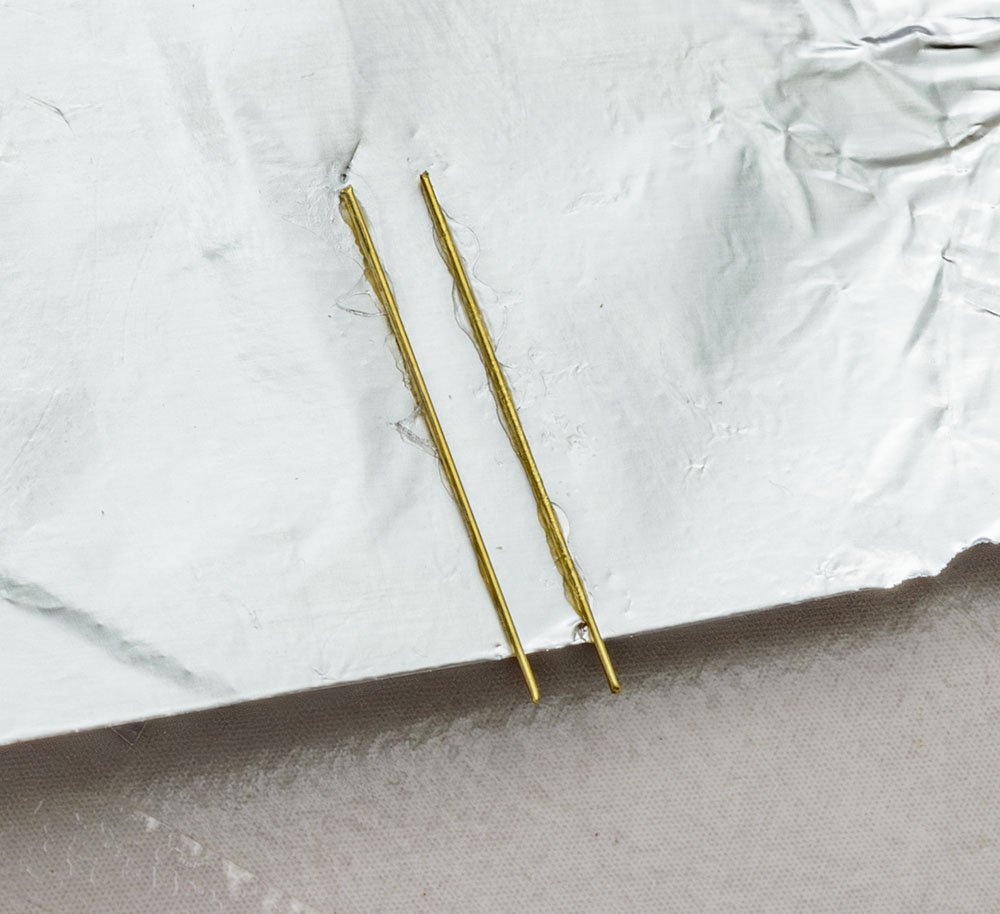
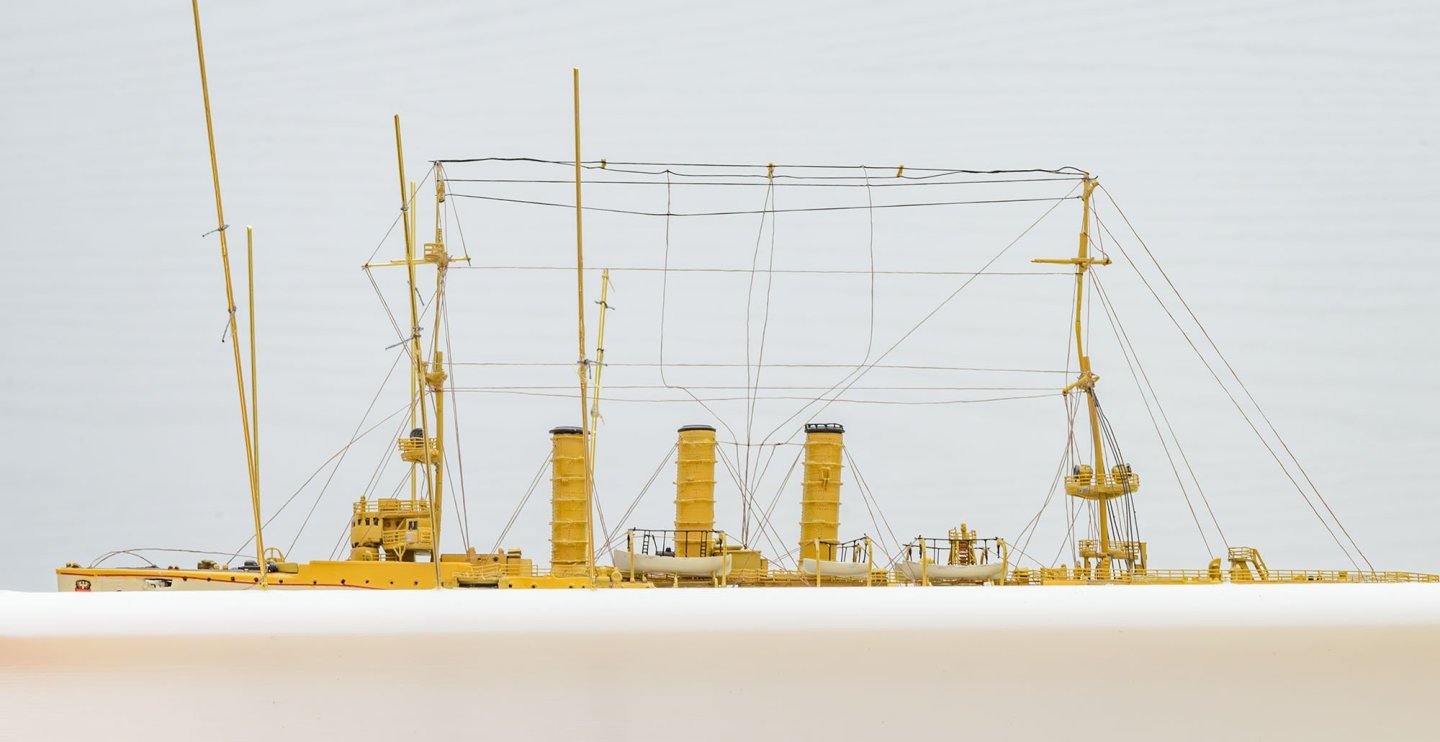
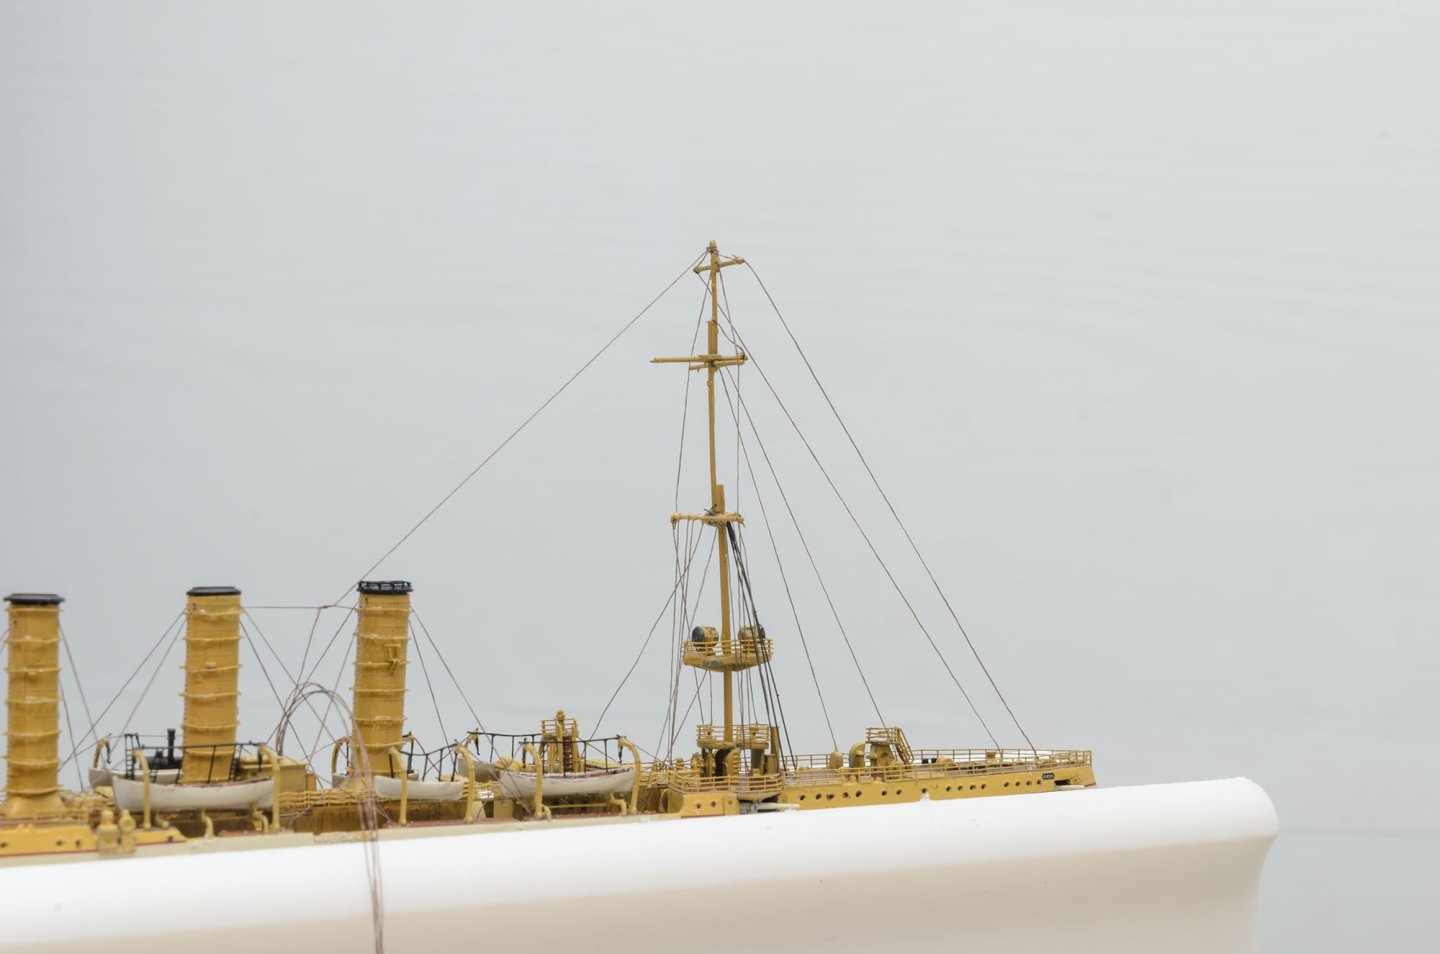
This is a legendary ship of the German Kaiserliche Marine. I saw an interesting model that has a fake canvas funnel, so I started the same project. Flyhawk is a well known brand as a high difficulty 1/700 kits. I invented several methods to compete with the difficulty. This kit is very small, so I had lots of trouble holding it. I made a handling floating dock to protect the side hull. The side walls protect the tiny parts and paints of the side hull. I learned this "temporary rigging" technique from the previous online lecture at the NRG. Those temporary rigging fix the plastic mast and yards. I made a straight and nice main mast successfully. I added the fourth fake funnel using a brass rod and aluminium foil. The main mast was broken when I was sprinting toward the goal. My heart was broken, too. I tried to fix it, but the nice mast didn't come back. I had to remove the entire rigging and start from the beginning. I gave up some and removed only the strongly twisted rigging. I added a less detailed rigging and wrapped up the project.


-
Thank you for kind comments. Midnight is the most sentimental time to write an article. 😂 I'm sorry, but these are more excuses... 1. I wanted to upload "full" article here, including the youtube video. As I said, the gallery doesn't support video. 2. Most plastic projects finish within a week or a weekend. In this case, I feel writing a build log only delays the build time. It is ok to pass the rule by uploading only one picture of mid-building, but I don't want to tease other members with worthless picture. I'm in favor of serious build logs. 3. In some cases, I don't satisfy the current project and decide to make it again. In this case, I may build HMCS Buttercup with an expensive PE upgrades in a distant future. Therefore, I didn't want to expose the Snowberry project at the top... I understand that the technical issues can't be solved very soon. It happens to many sites, including the Korean modelling community. They paid several years to fix some minor issues. I may use some mid-building pictures next time. I always take a video when I build ships, so I can't give up the build log board. Thank you again for watching my complaints, and happy new year~ ---- * Korean doesn't upload a build log. All the posts in the Korean modelling community are completed projects. That was a big difference when I came here.
-
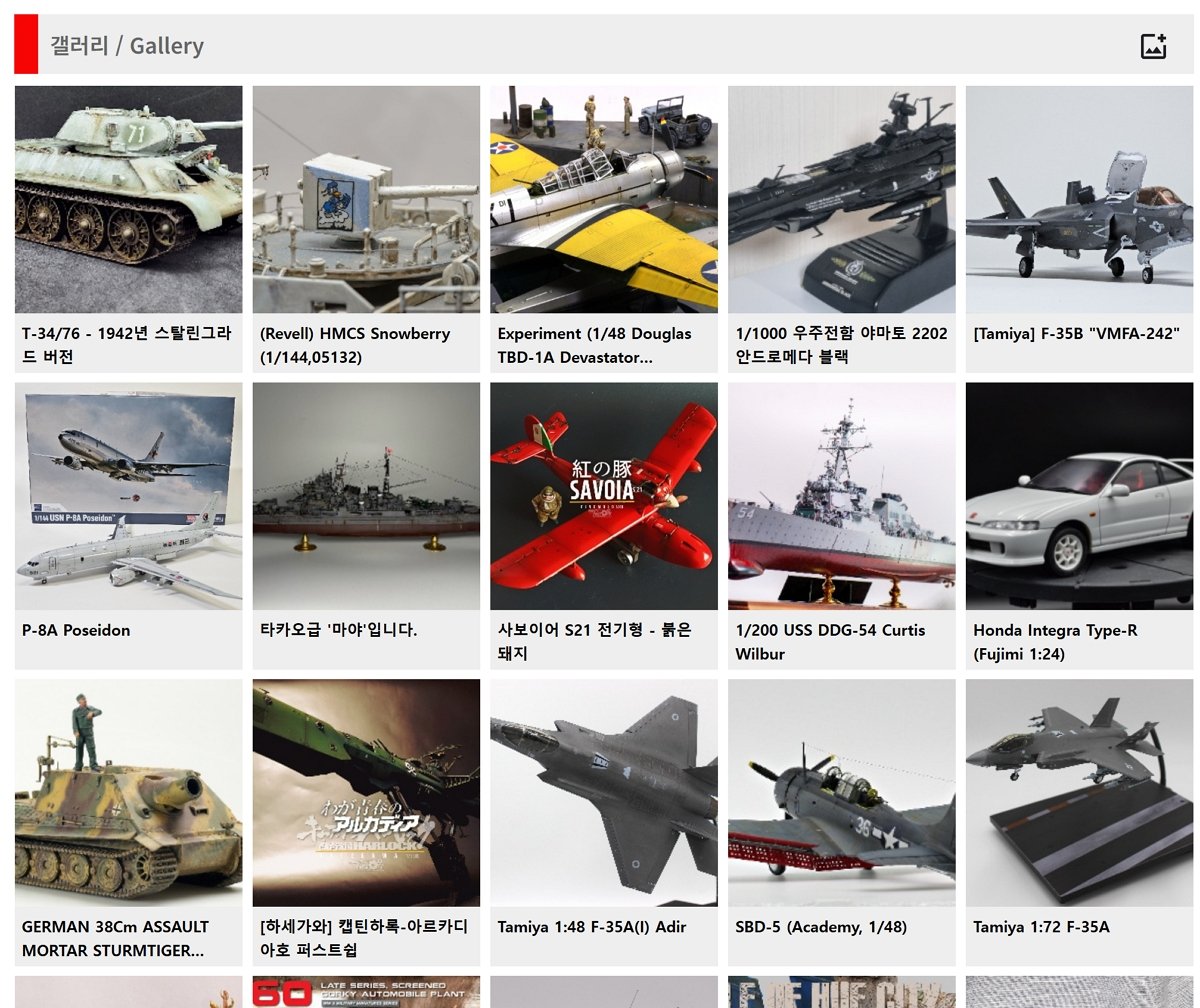
Hello, I have some ideas about improving the completed gallery. The ideas are not organized yet, so I apologize for nonintuitive post. https://modelshipworld.com/topic/37869-hmcs-snowberry-by-modeller_masa-finished-revell-1144-plastic/#findComment-1083231 The idea came from the Chris Coyle's comment. I thought the post wasn't a good place for continuing discussion, so I moved it here. I'm here for productive discussion, rather than a dirty debate between explicit and implicit rules of the boards. Let's shortcut to the past 'culture' of this site and please focus on better user experience. Issue 1. Did members who wrote formal build logs use the completed gallery after they finished the projects? Issue 2. Should the finished project without a full build log go to the completed gallery? Issue 3. How can we improve the gallery board? Issue 1. Did members who wrote formal build logs use the completed gallery after they finished the projects? From the past experiences, it is clear that many members who wrote build logs didn't upload the last pictures to the completed gallery. Most members tend to finish the build logs without using the completed gallery. Why? Uploading the same pictures to multiple boards on the same site seems rather pointless. - People don't like to upload the same post again. Are there any technical issues? Yes. - The completed gallery has limited functionality. It doesn't allow uploading video or Youtube. - Posting photos in a desirable sequence is a bit complex. On the contrary, I can manually and freely arrange photos in the other boards. What are awkward factors to post in the completed gallery? - It is inconvenient to upload the same post double time. Where is the "copy and paste" button? - The completed gallery shows every photo at the headline! Every member investigates and grades my project with an electron microscope! - The headline section spreads every photo I posted in an album. I don't want to monopolize the top of the site for a week. I hope to share the limited headline space with other members. It is a reason I upload only 6 pictures per album in the gallery. It will be better to show only one title picture of each gallery post at the headline. - There are so brilliant neighbors next door - a gallery of contemporary models and scratch build models. I feel burdened by the greatness. It is easier to cut in among crowded build log boards rather than standing between two great men. - Self-censoring. Issue 2. Should the finished project without a build log go to the completed gallery? I would like to respect the terms of service of this site. However, the technical and mental barriers of the gallery make me hesitant to use it frequently. I think I should upload only selected projects in the gallery or nothing. Issue 3. How can we improve the gallery board? I have some ideas to improve usage of the gallery board. Unfortunately, most of the ideas need modifications to the board system. (Source: https://mmzone.co.kr/ ) This is the top screen of the famous modelling community in South Korea. The top screen shows only the first image of each gallery post. Some members use the title screen wisely, so they select an interesting picture or add letters on the first image. It also gives additional chances to showcase previously posted albums. Each row shows 5 different projects. Thanks to the board system, I don't hesitate to upload 20 photos at once. If people don't like it, a carrot will help to accomplish the goal. A simple magic - transfer button to move the selected photos of the finished project from the build logs board to the completed gallery will be very helpful. There is no reason to always be the best. I don't think we need to fix everything and make every site the same shape. Each site has a service agreement to achieve a specific goal. It can be called "a culture". However, when some site design factors reduce user experience, so they make it hard for members to reach the goal-terms of service, action will be better to make members swallow the goal smoothly.
-
Thank you for your comment, ccoyle. I thought this isn't enough level for helping others who want to build the same kit. This project was quite straight and easy, which I didn't polish gate and parting lines. I tend to upload more unique and difficult projects in the gallery. 😎
- 4 replies
-
- 1
-

-
- Snowberry
- Flower-class
- (and 2 more)
-
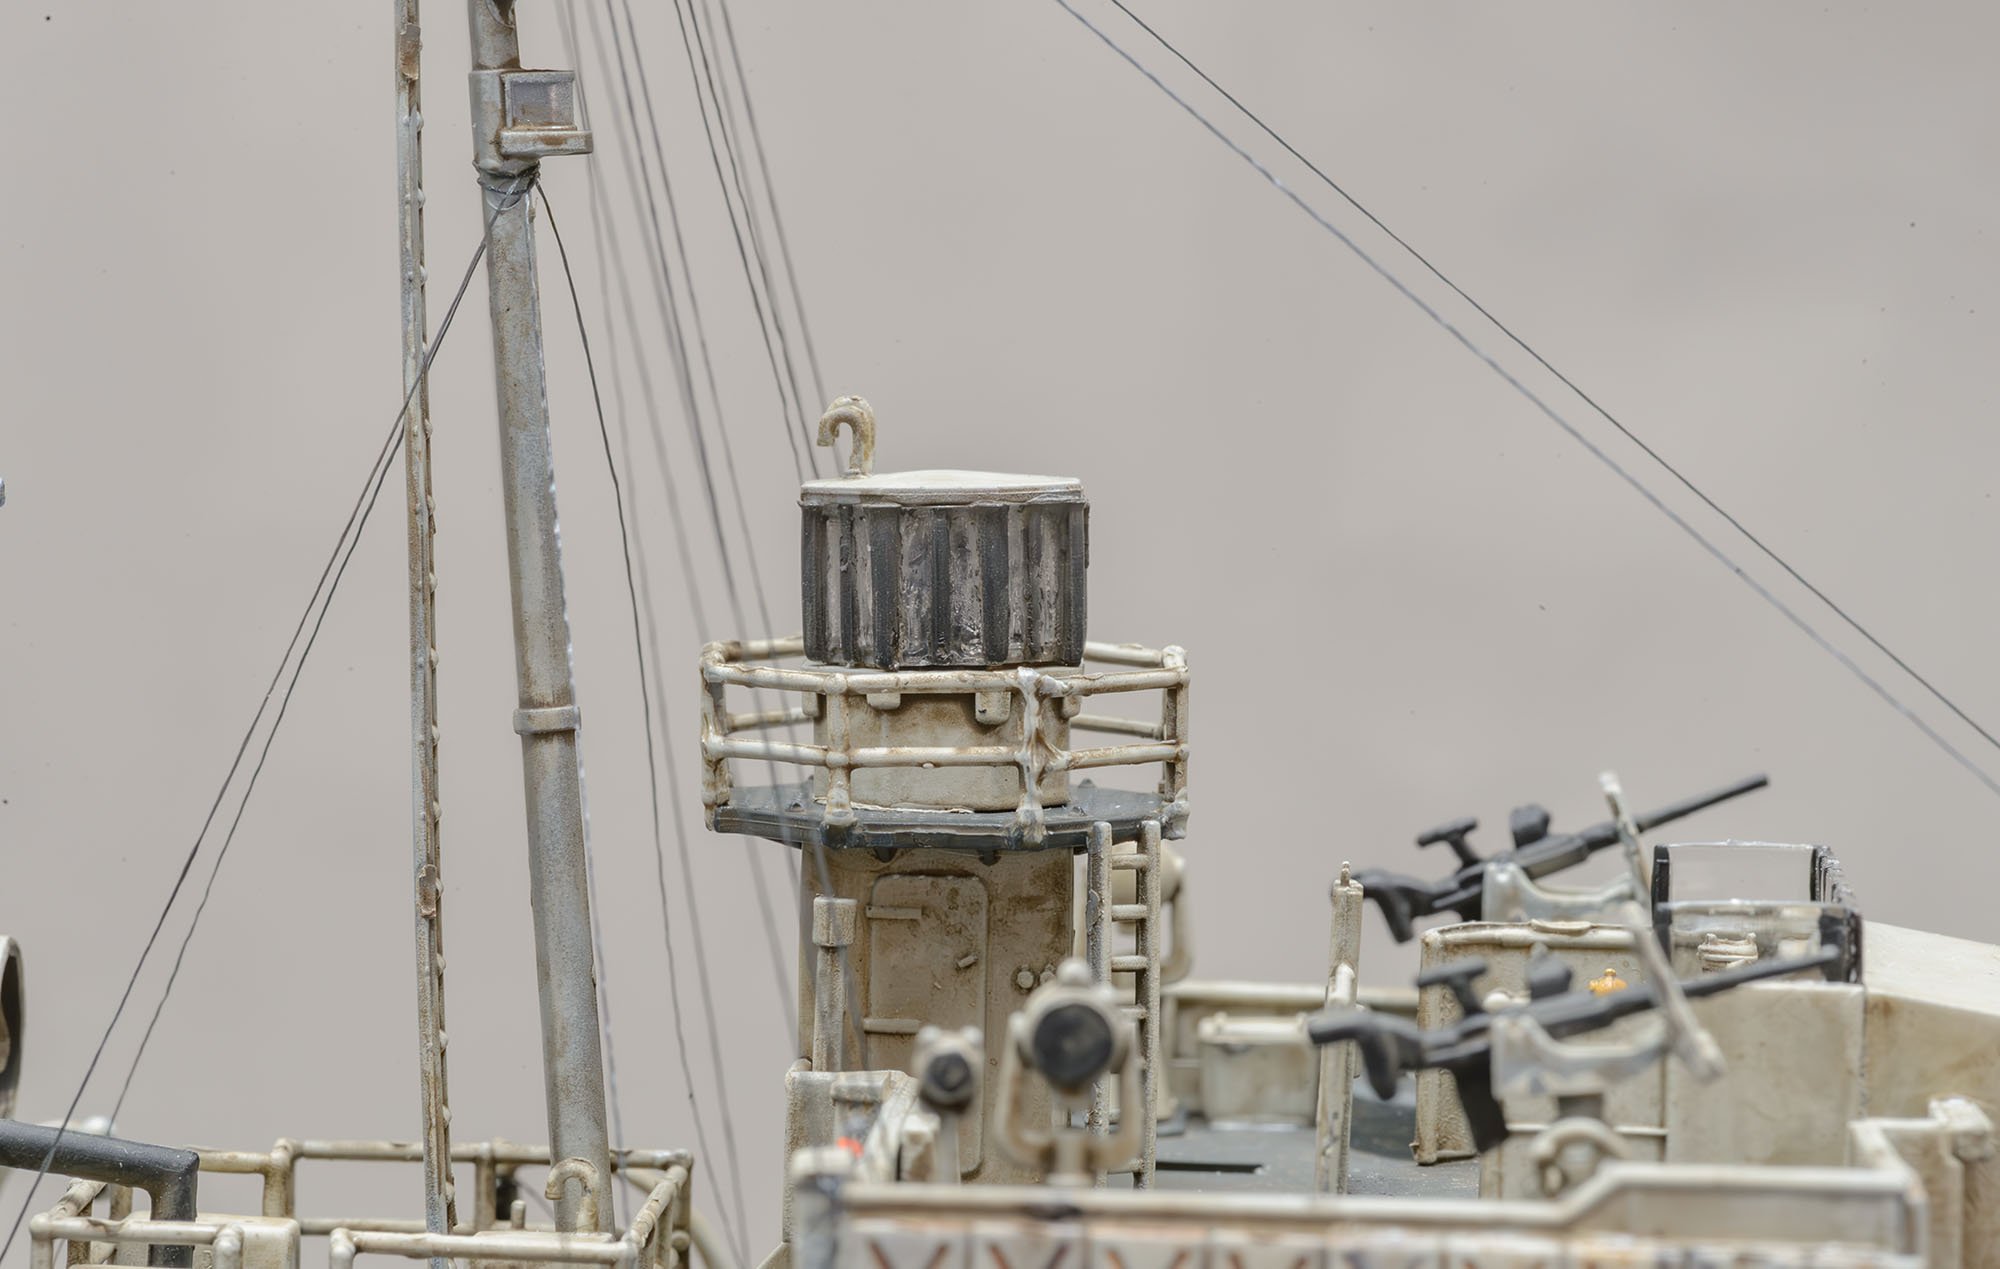
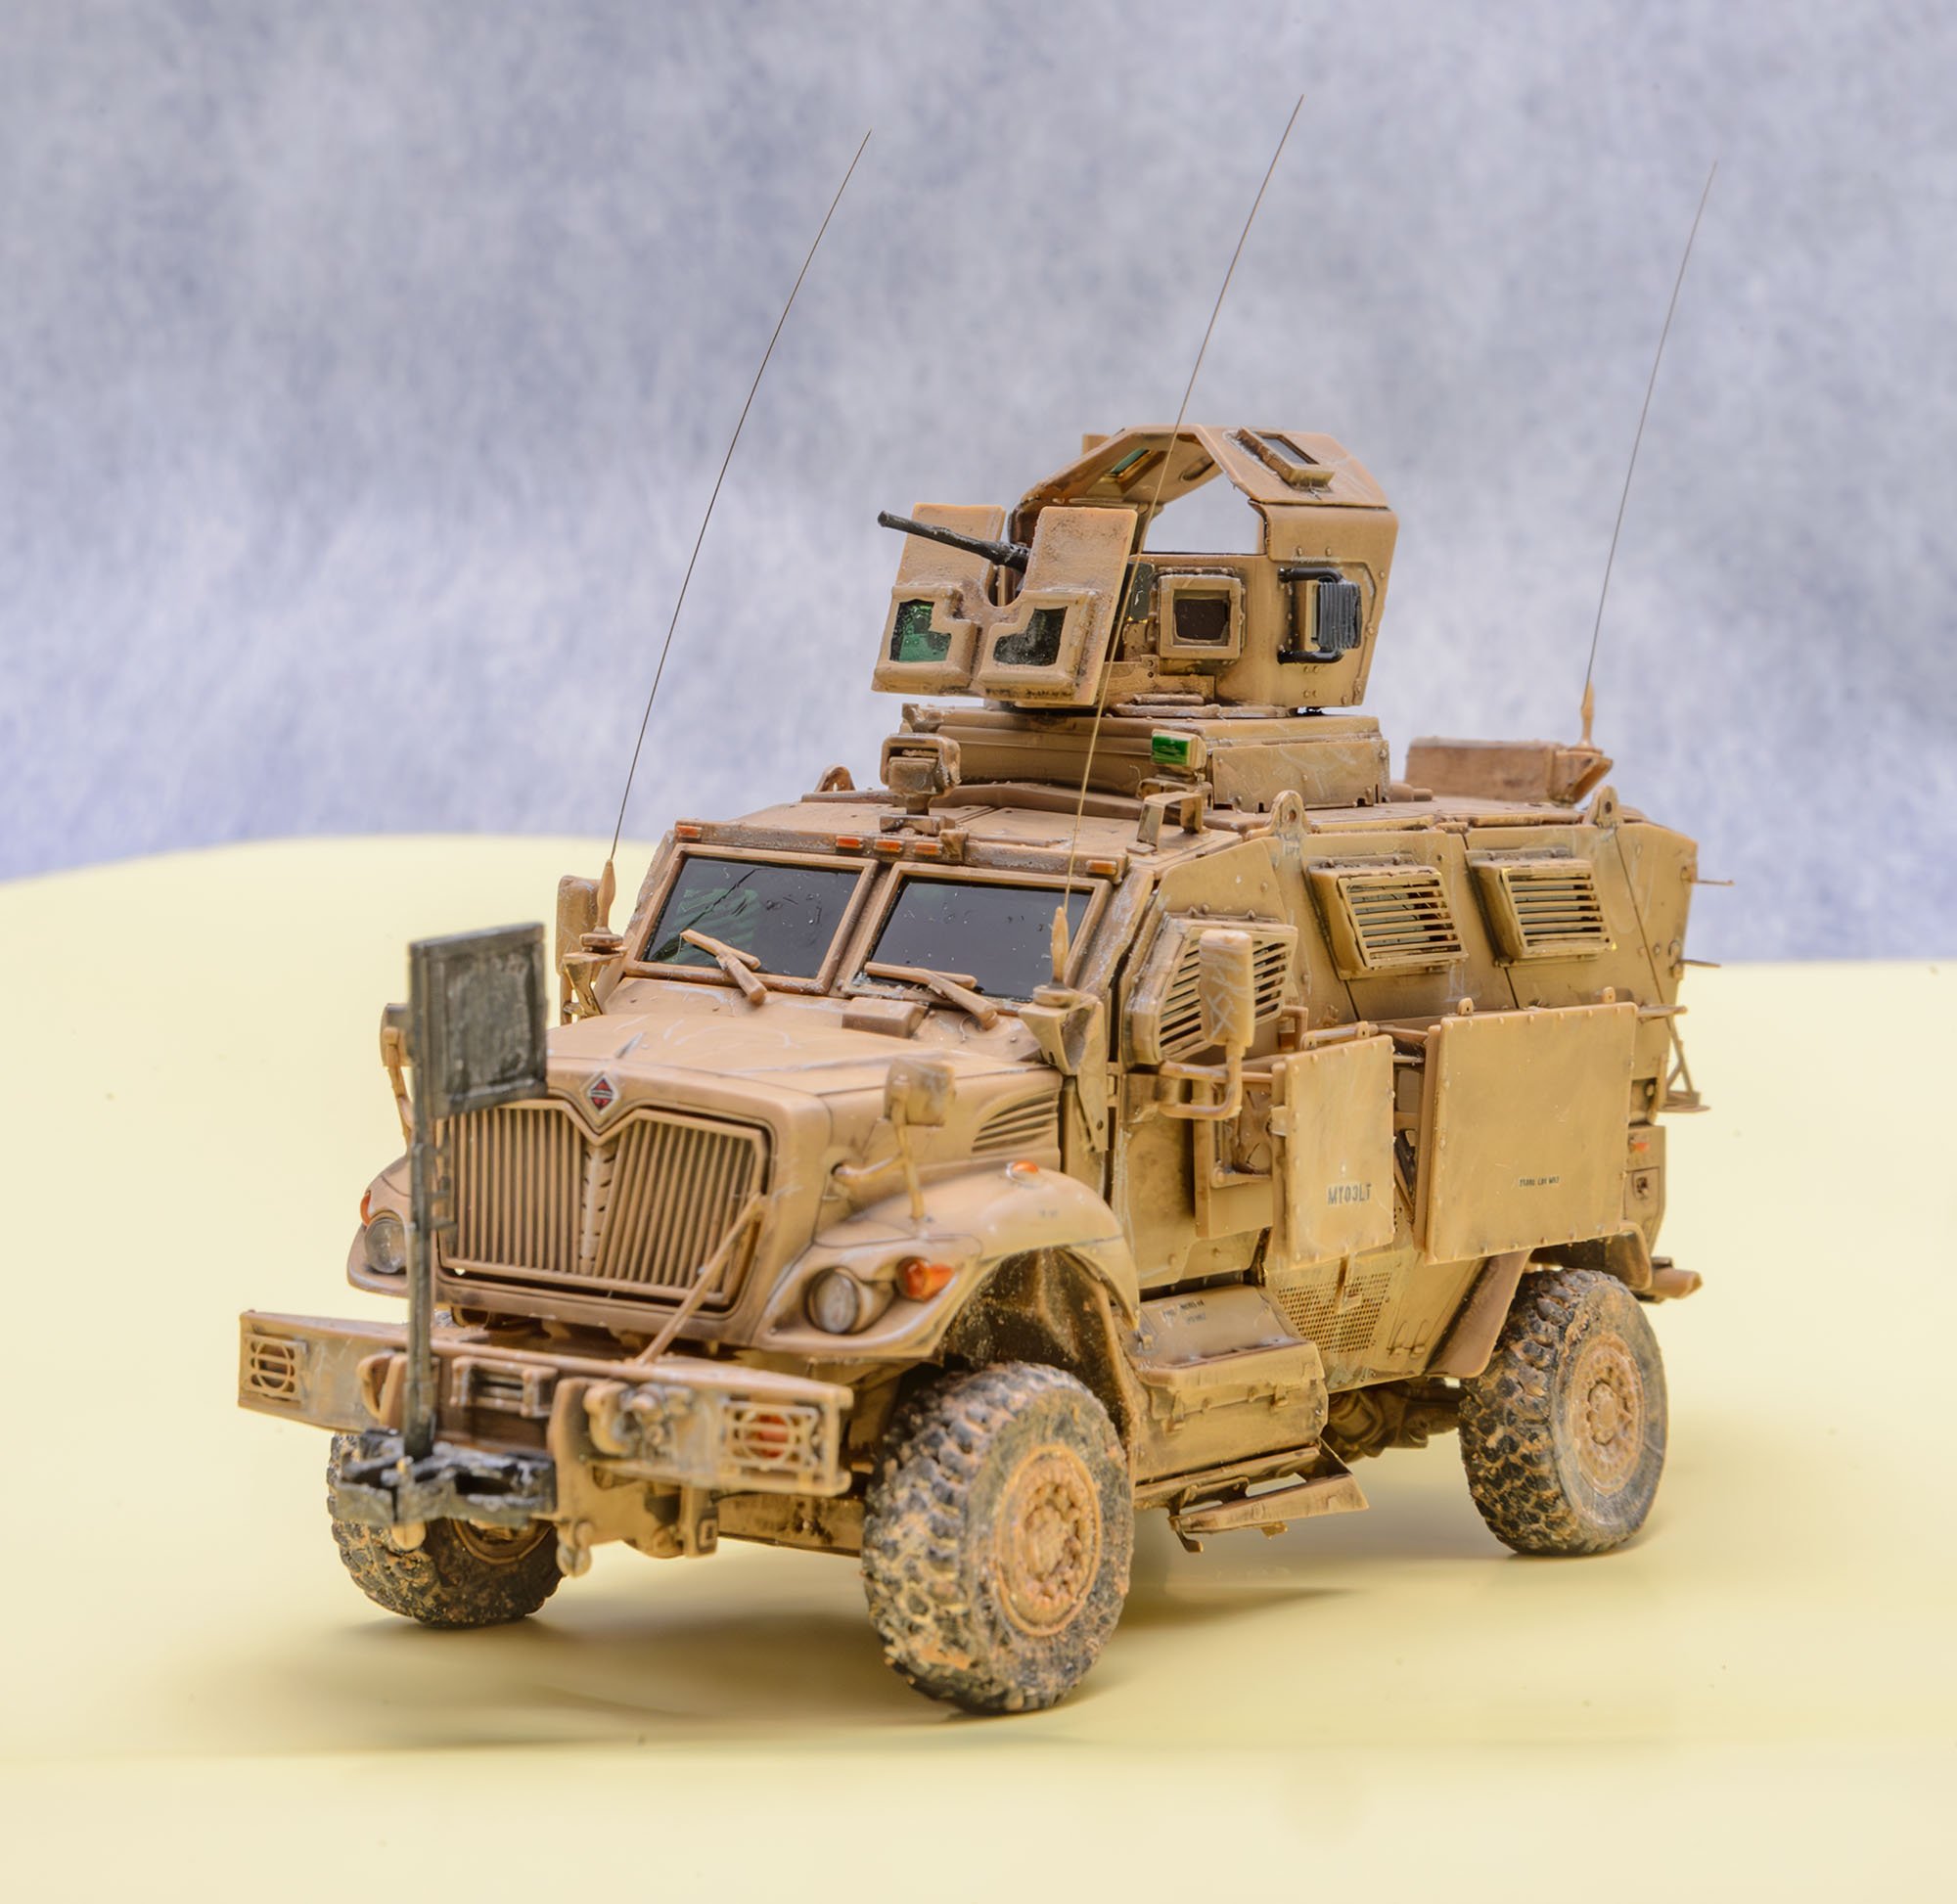
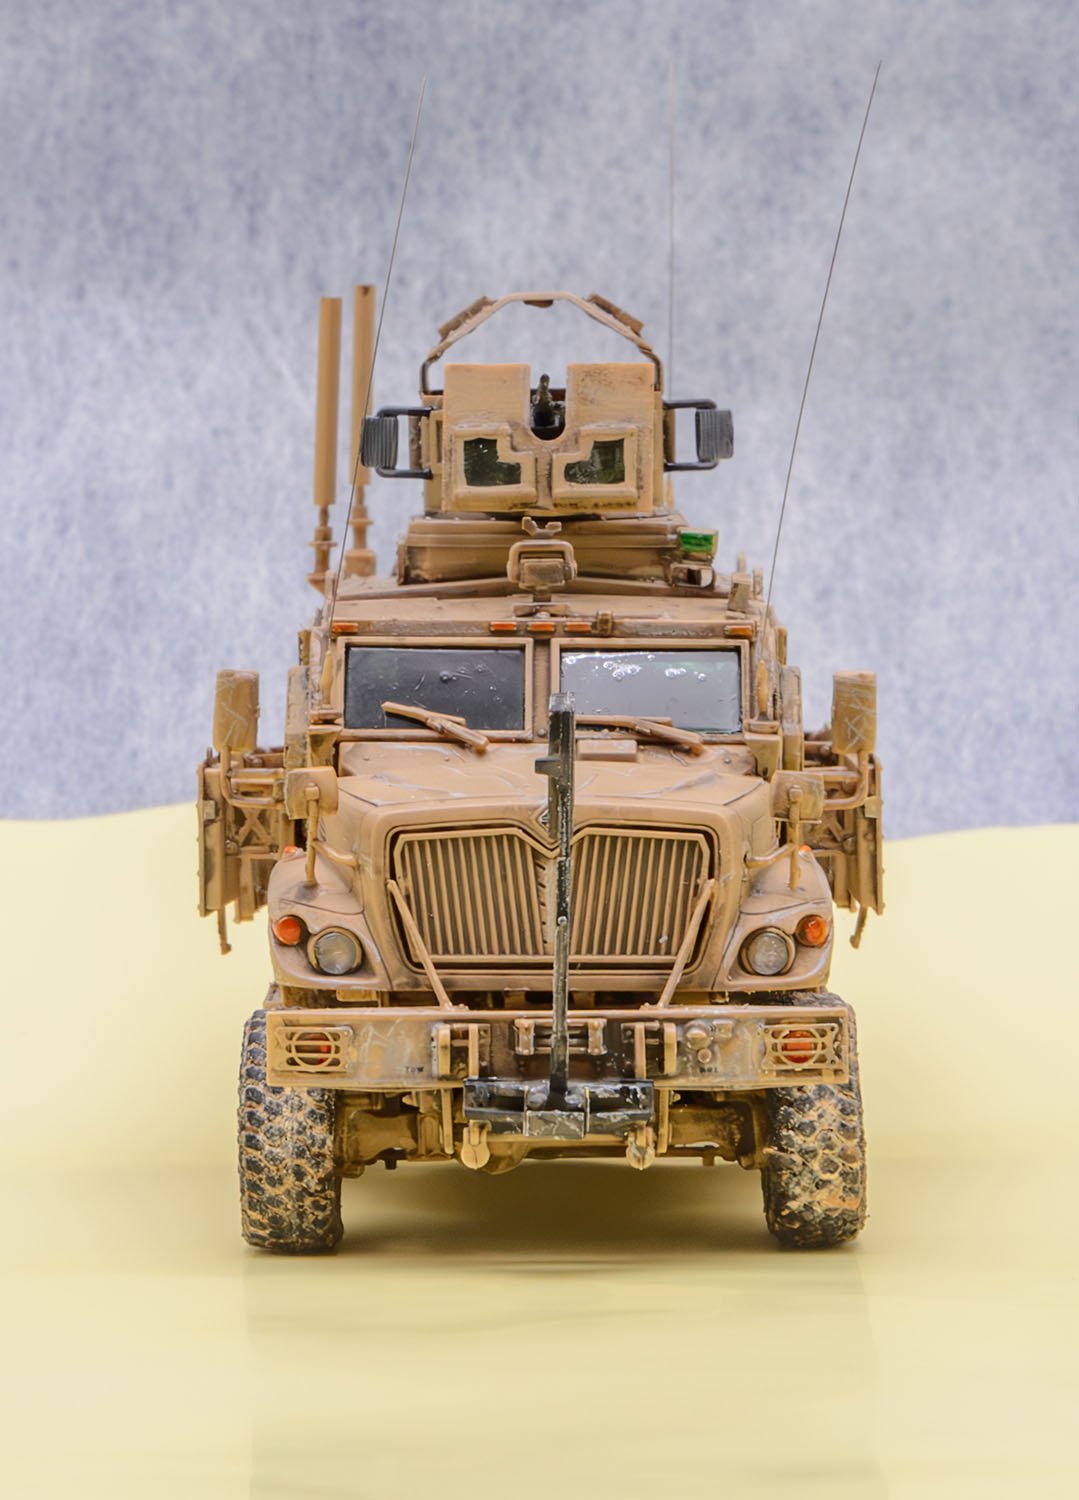
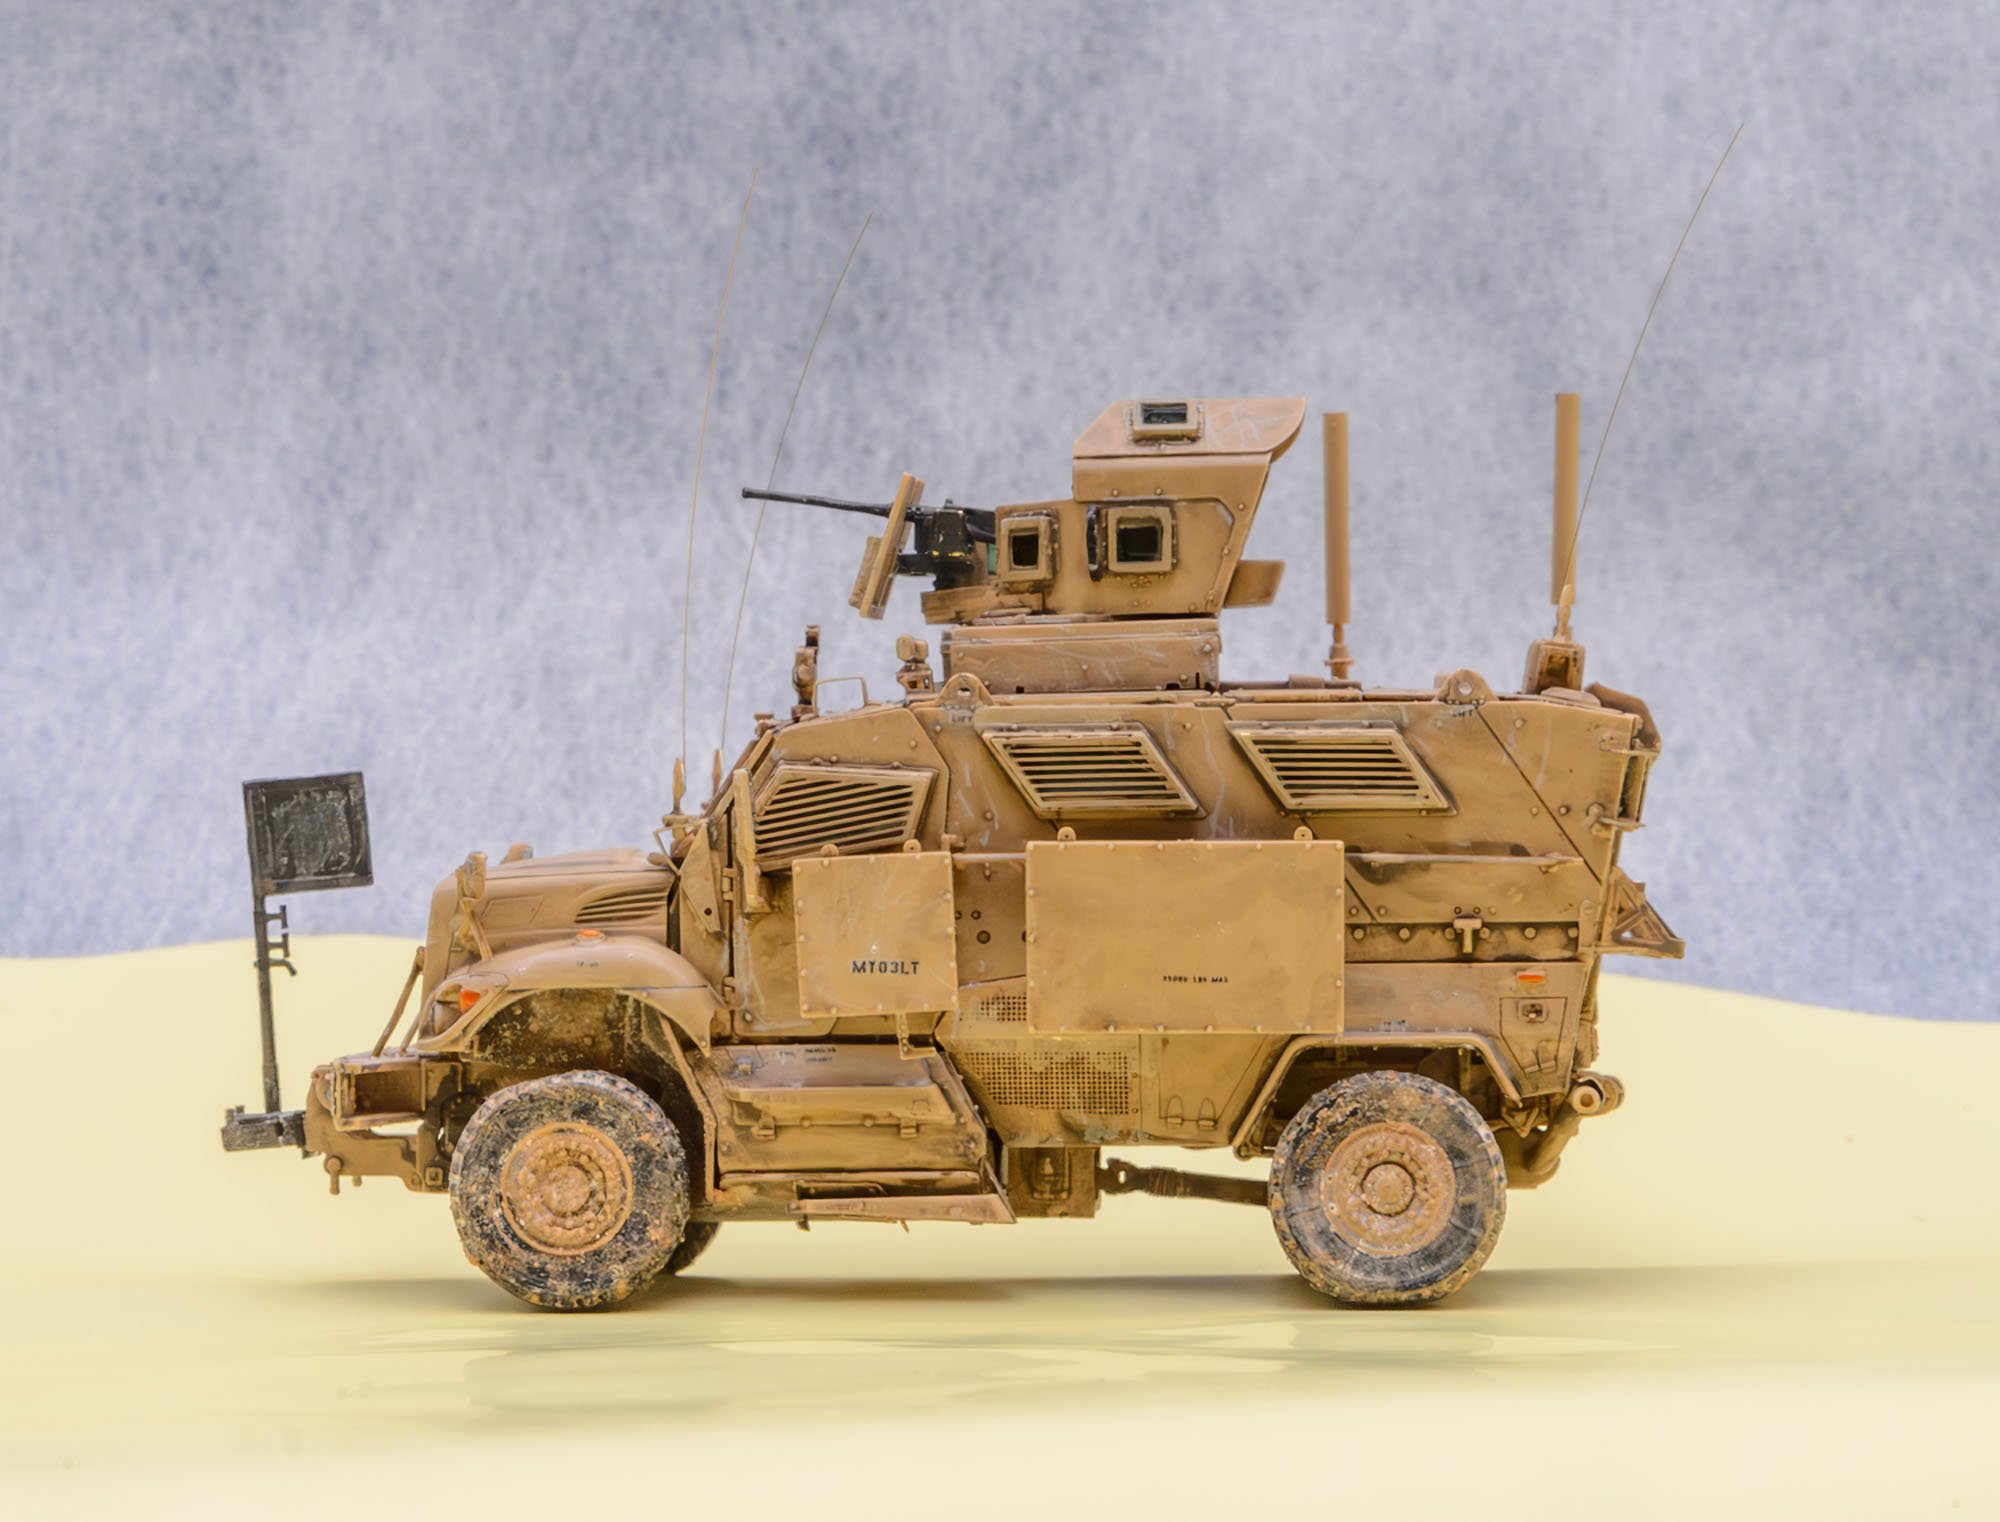
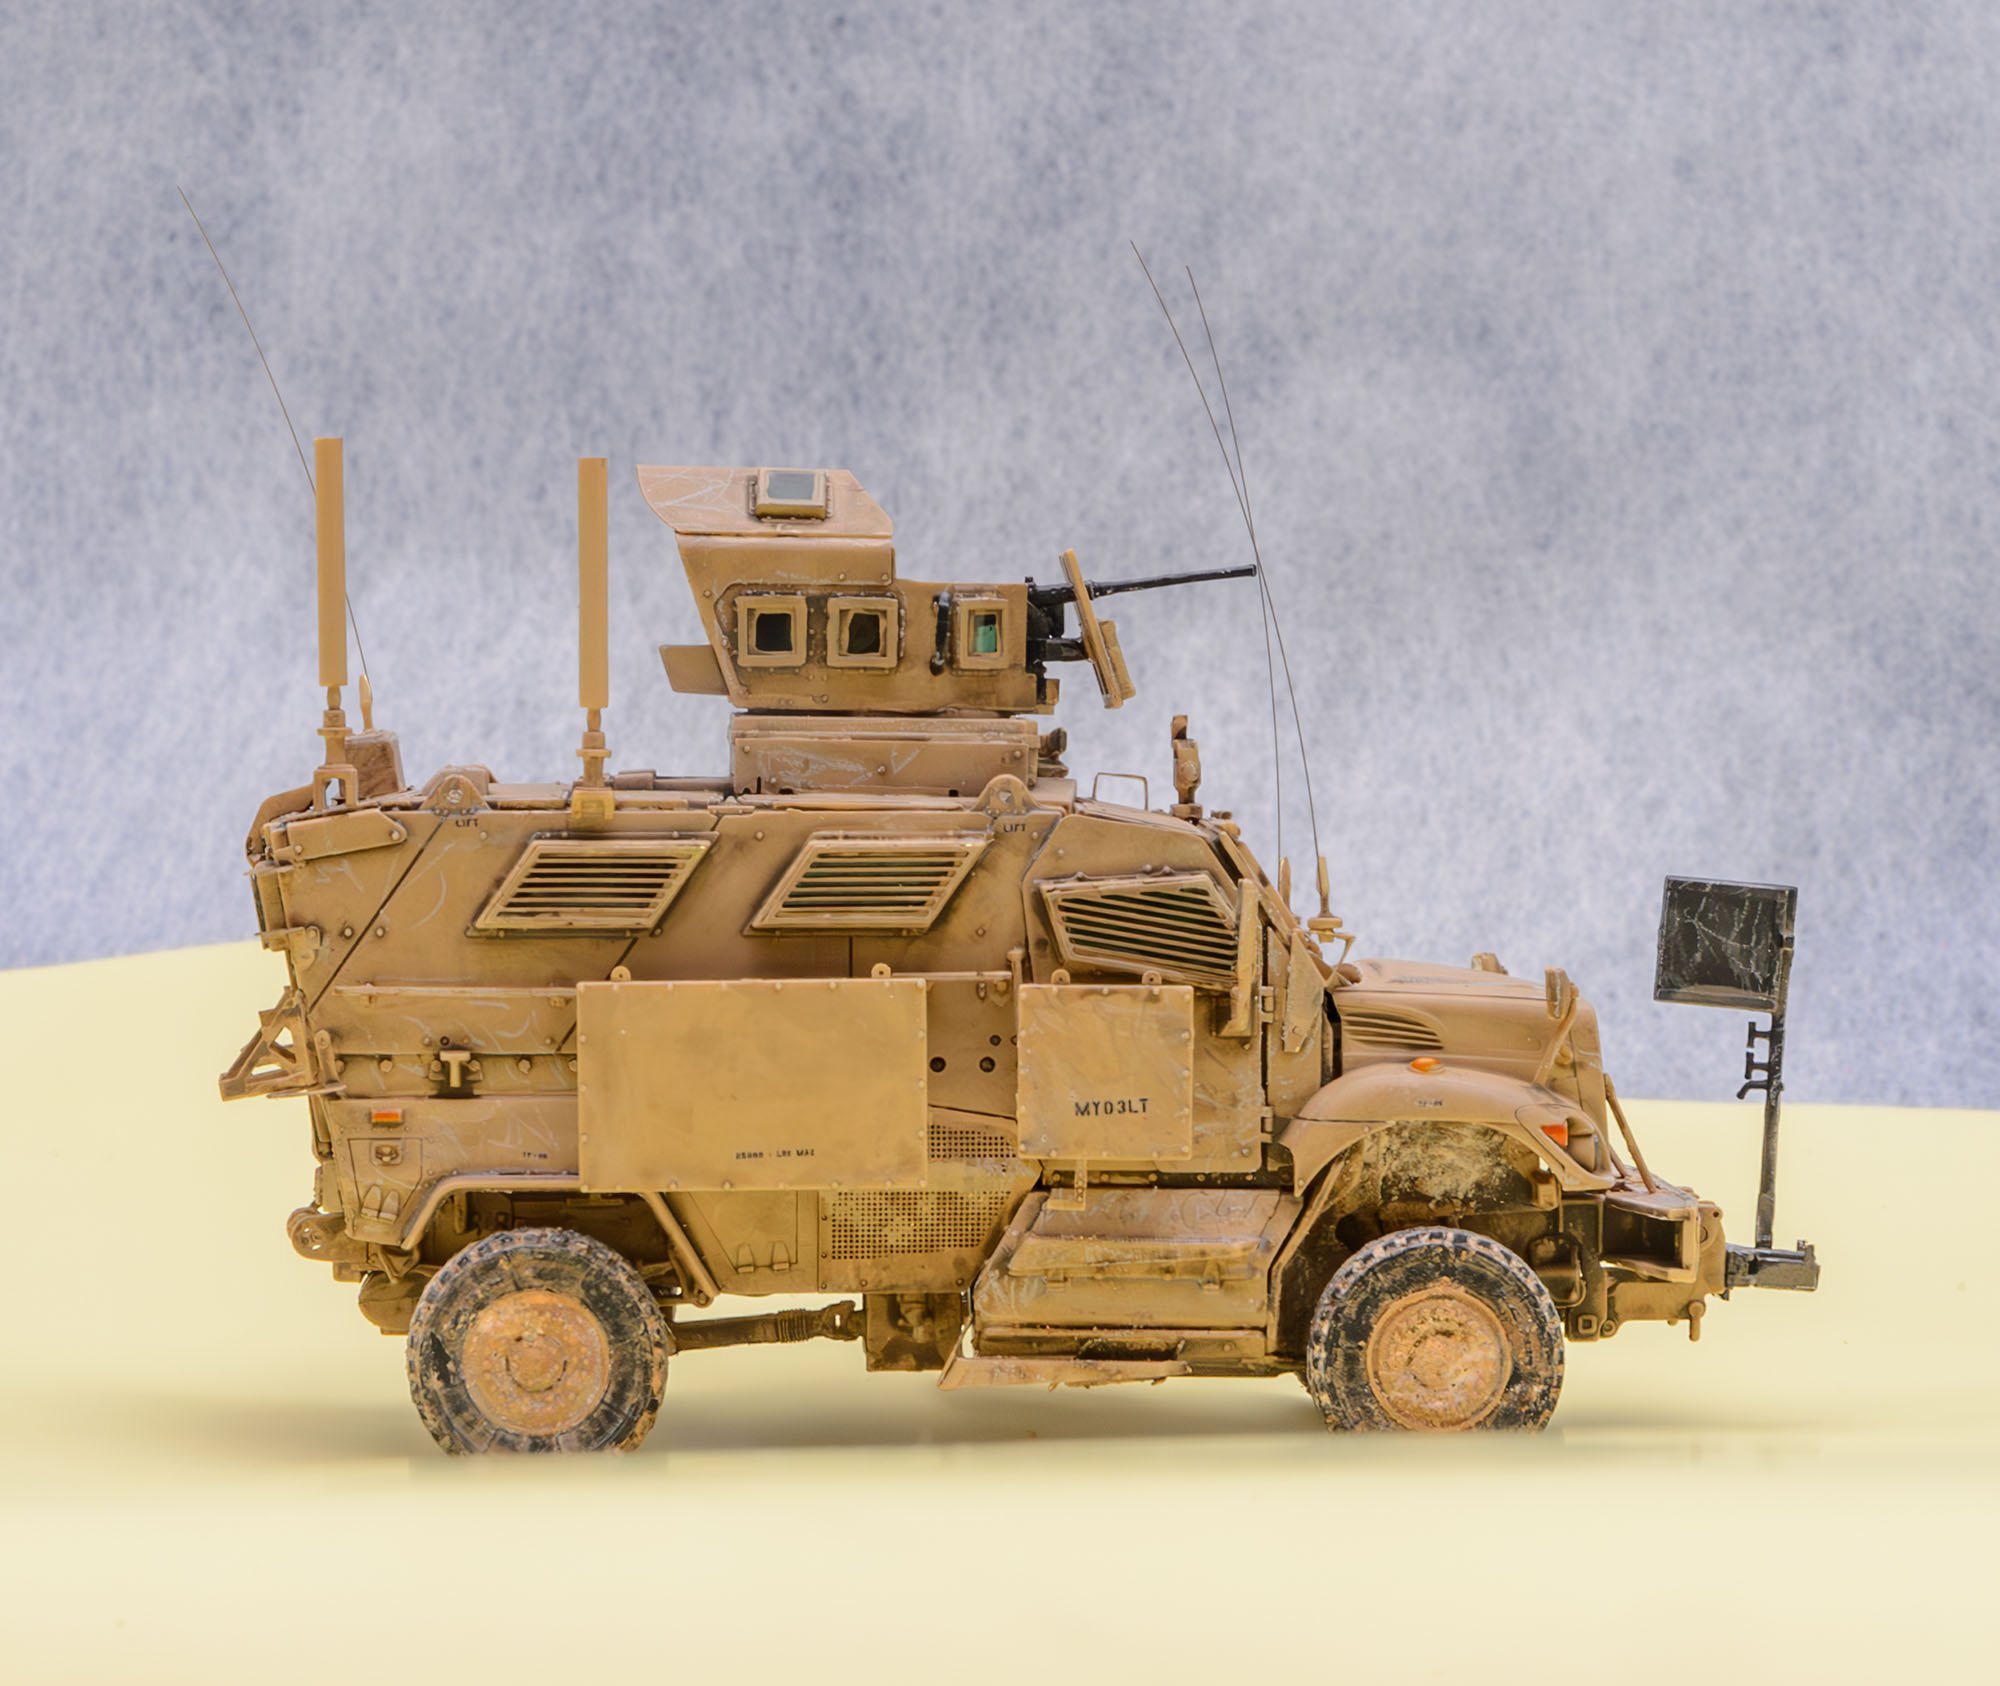
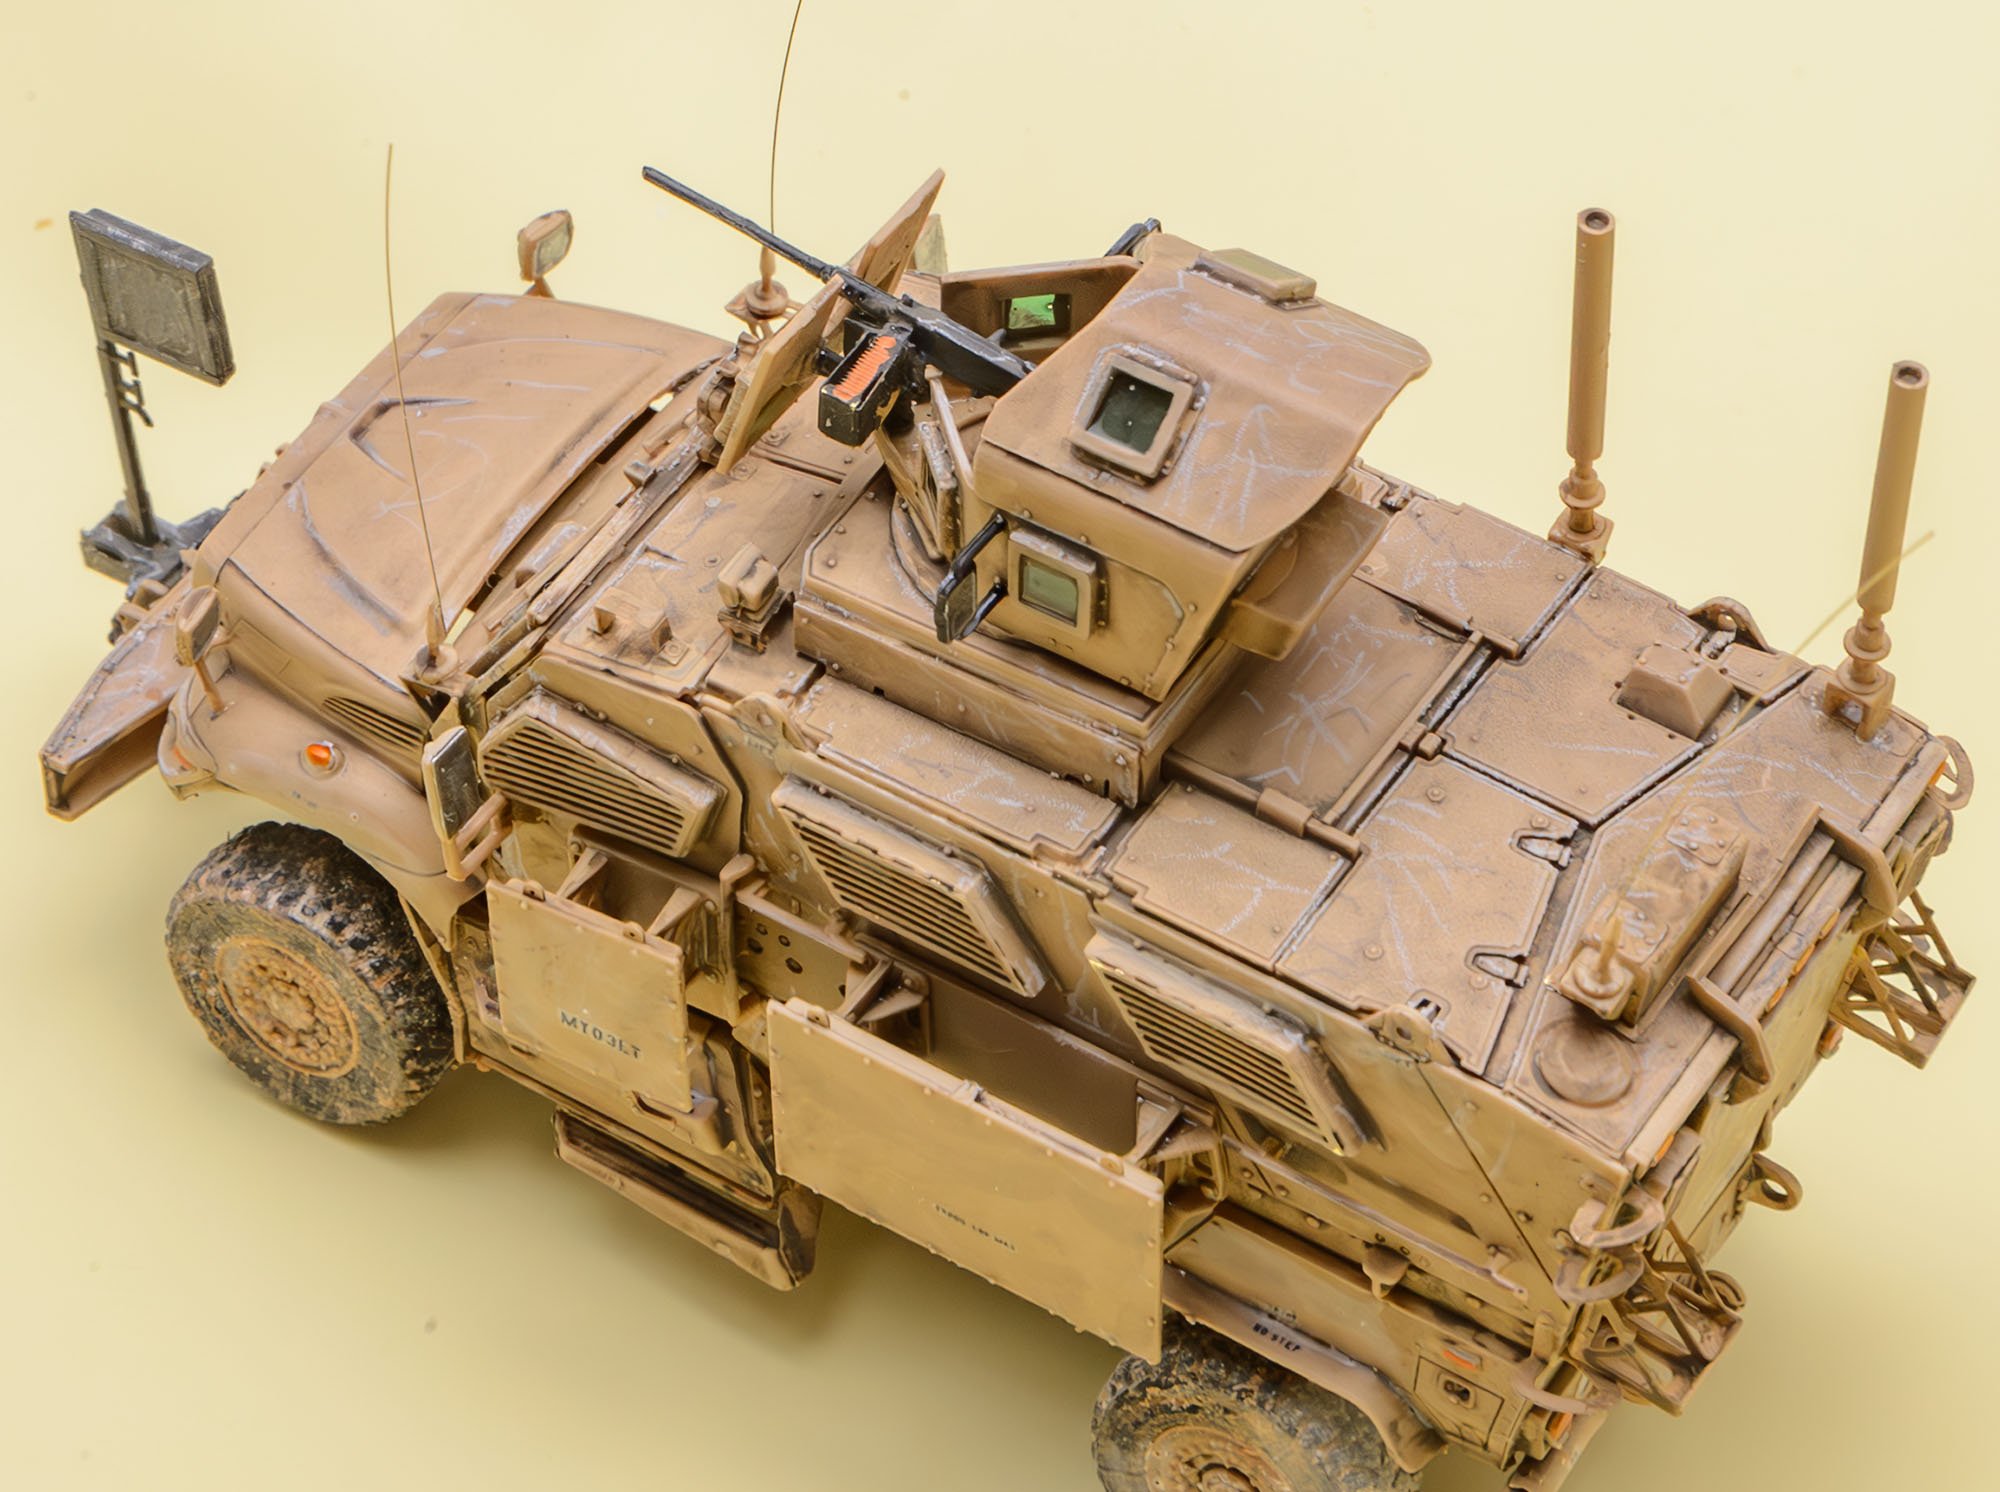
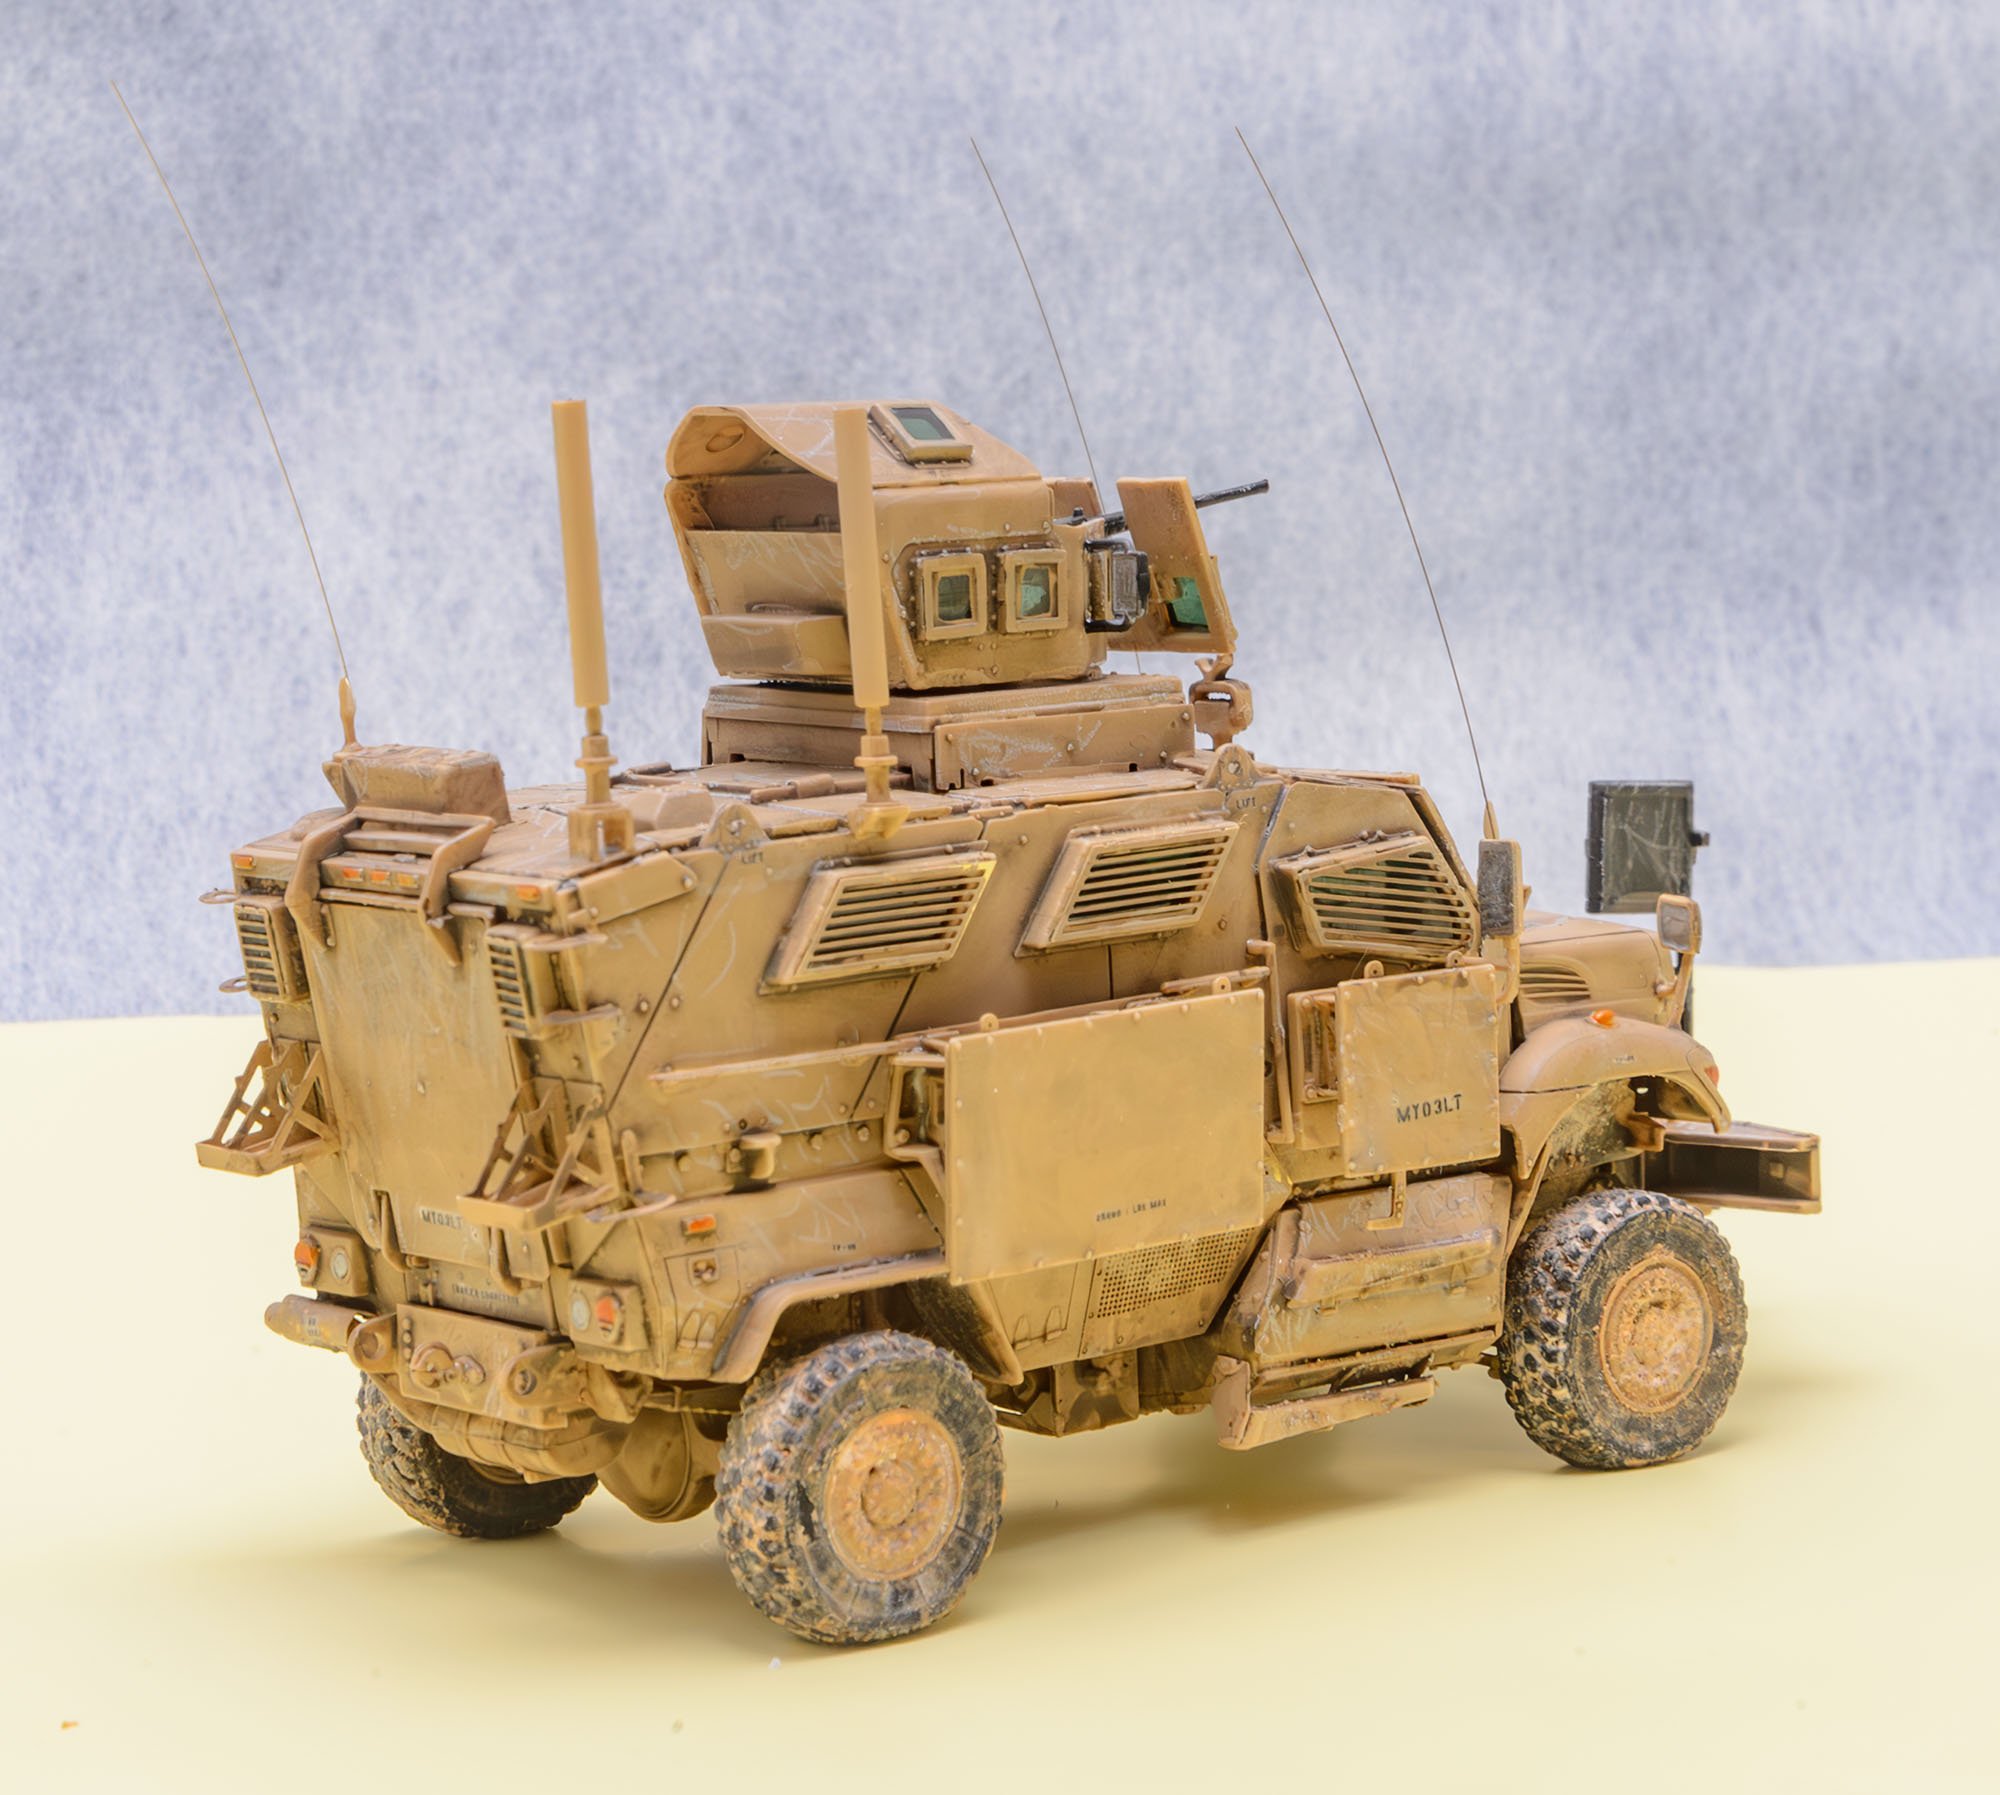
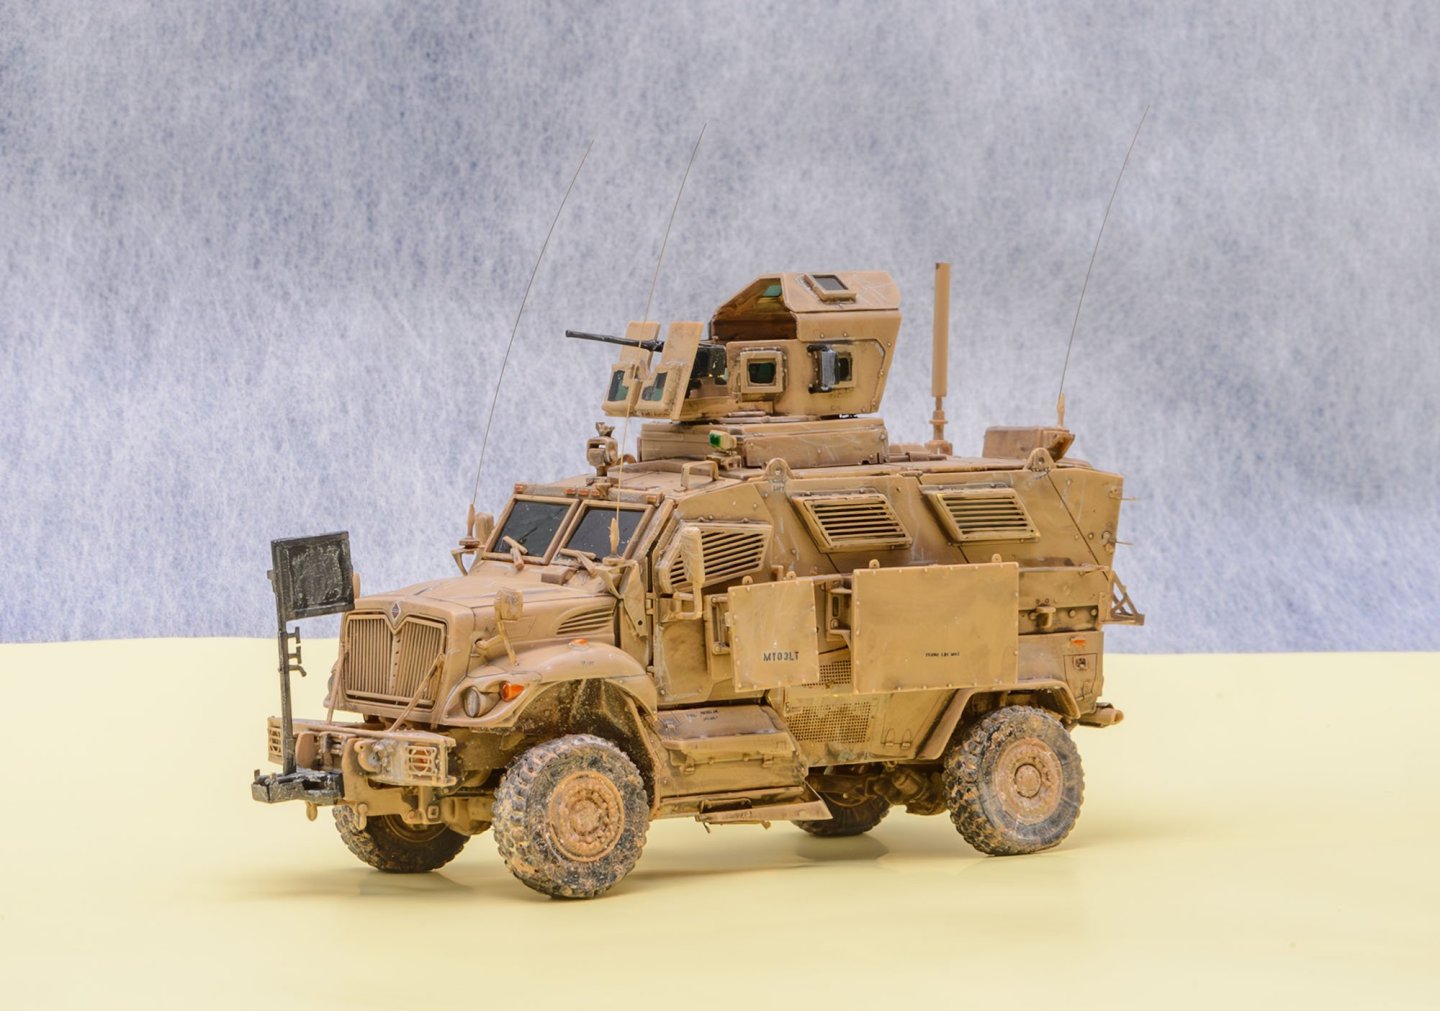
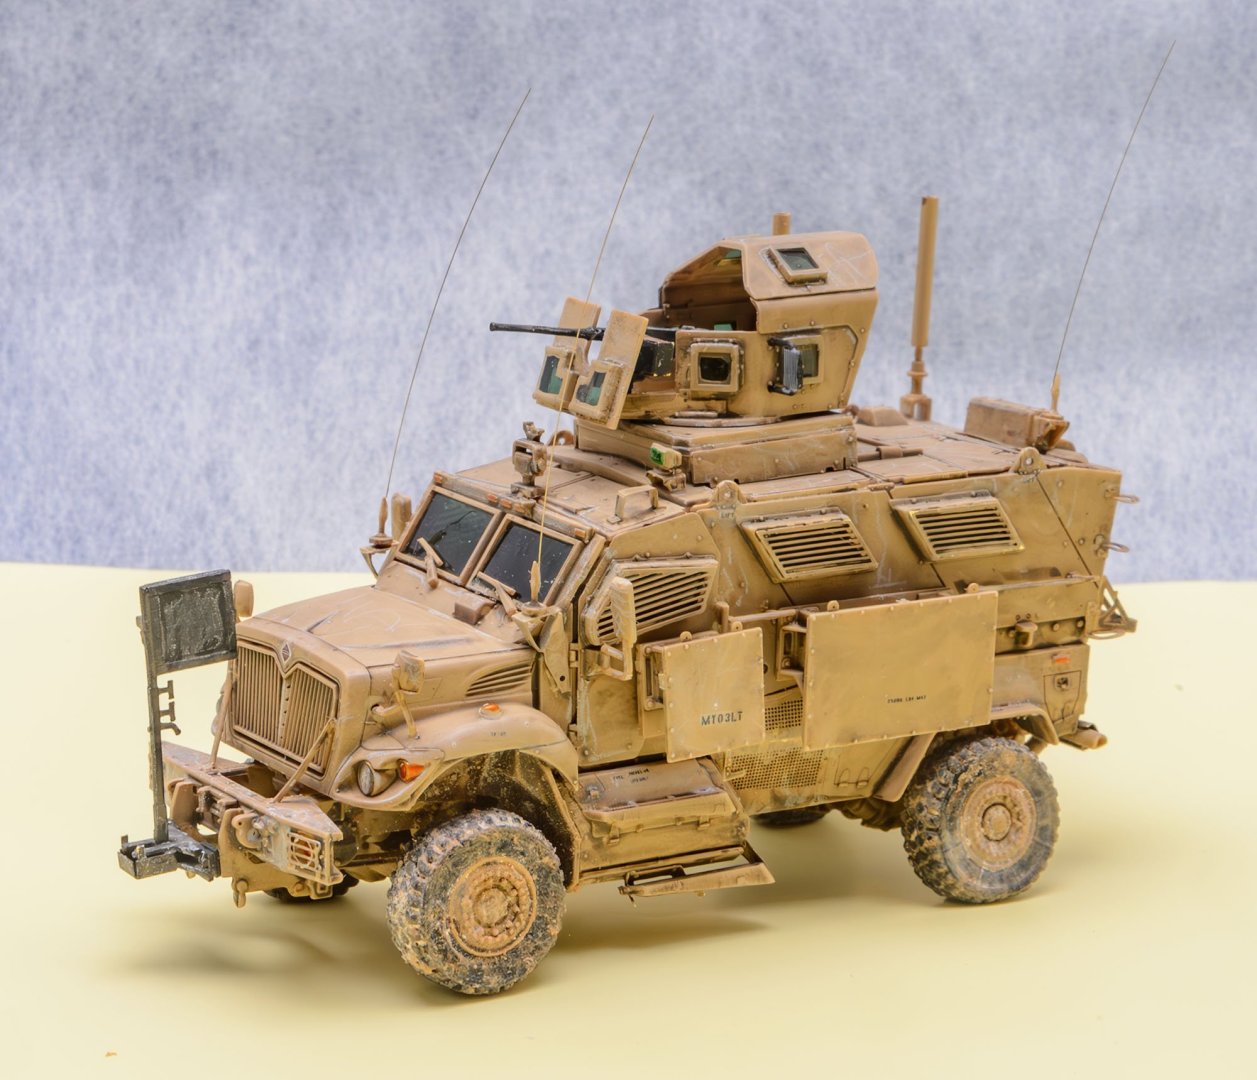
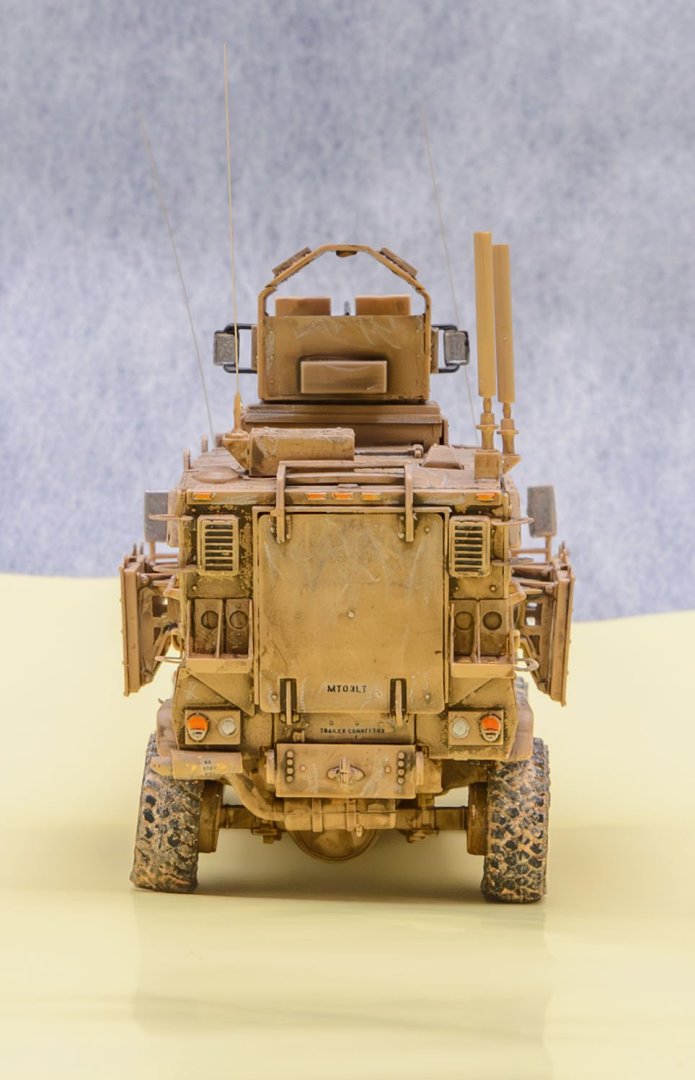
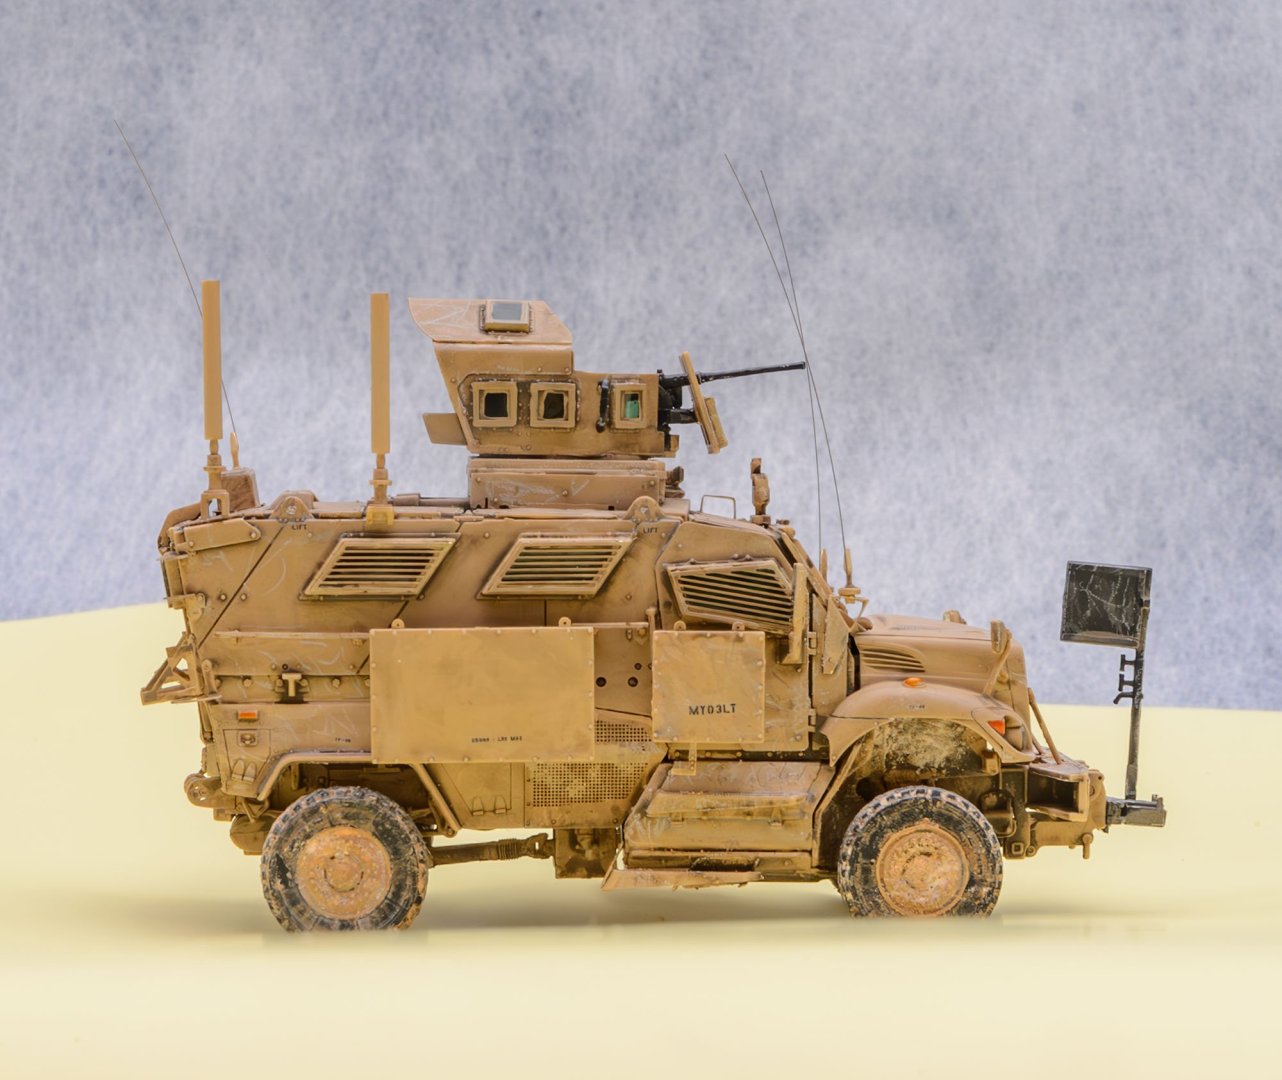
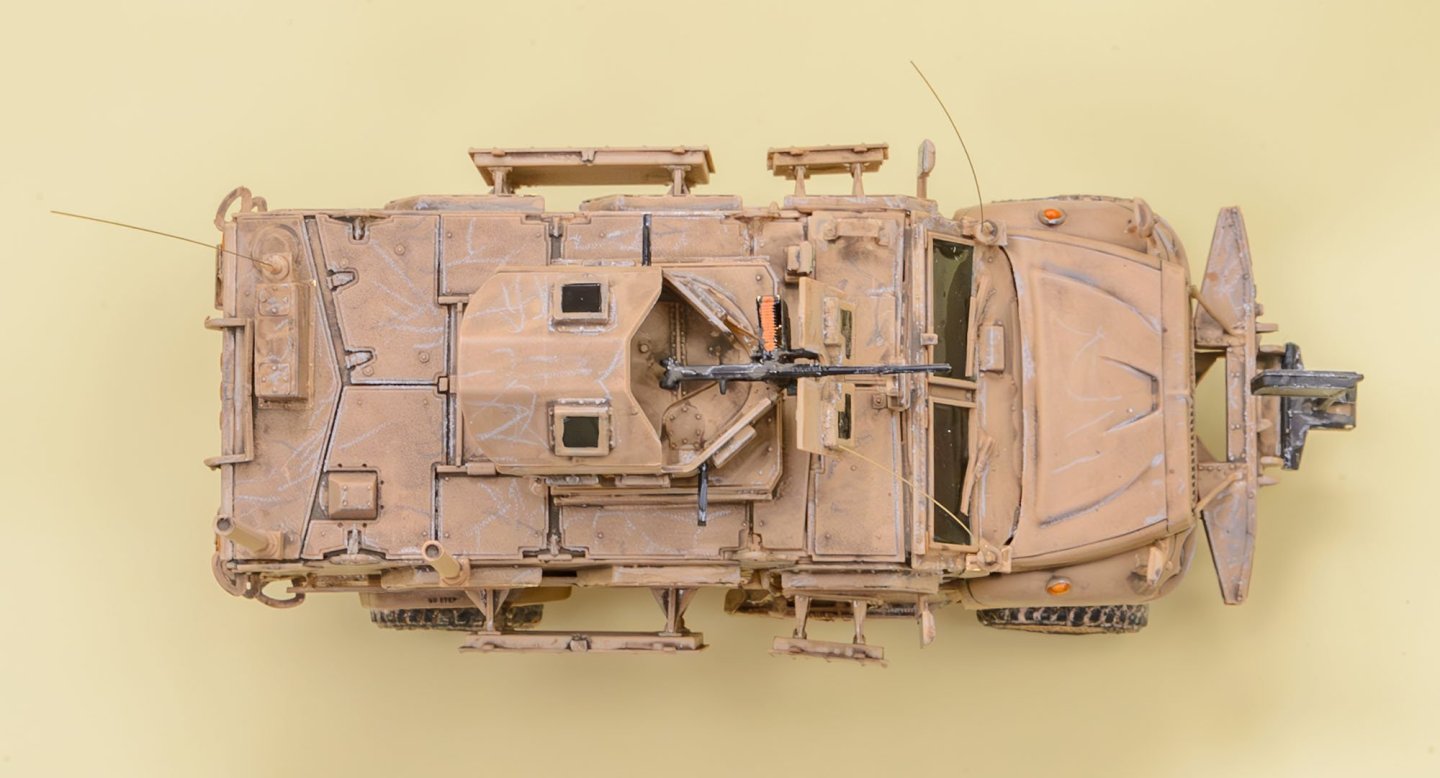
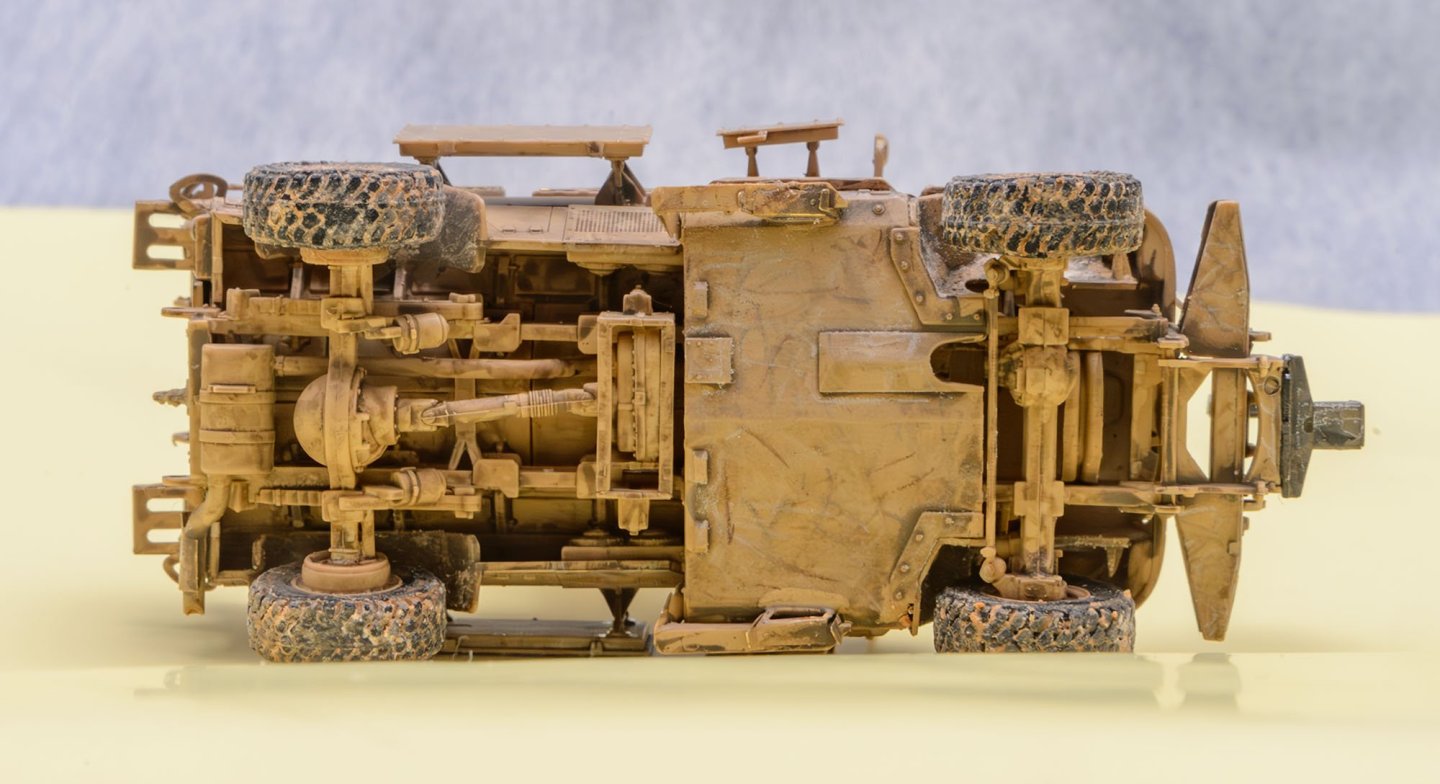
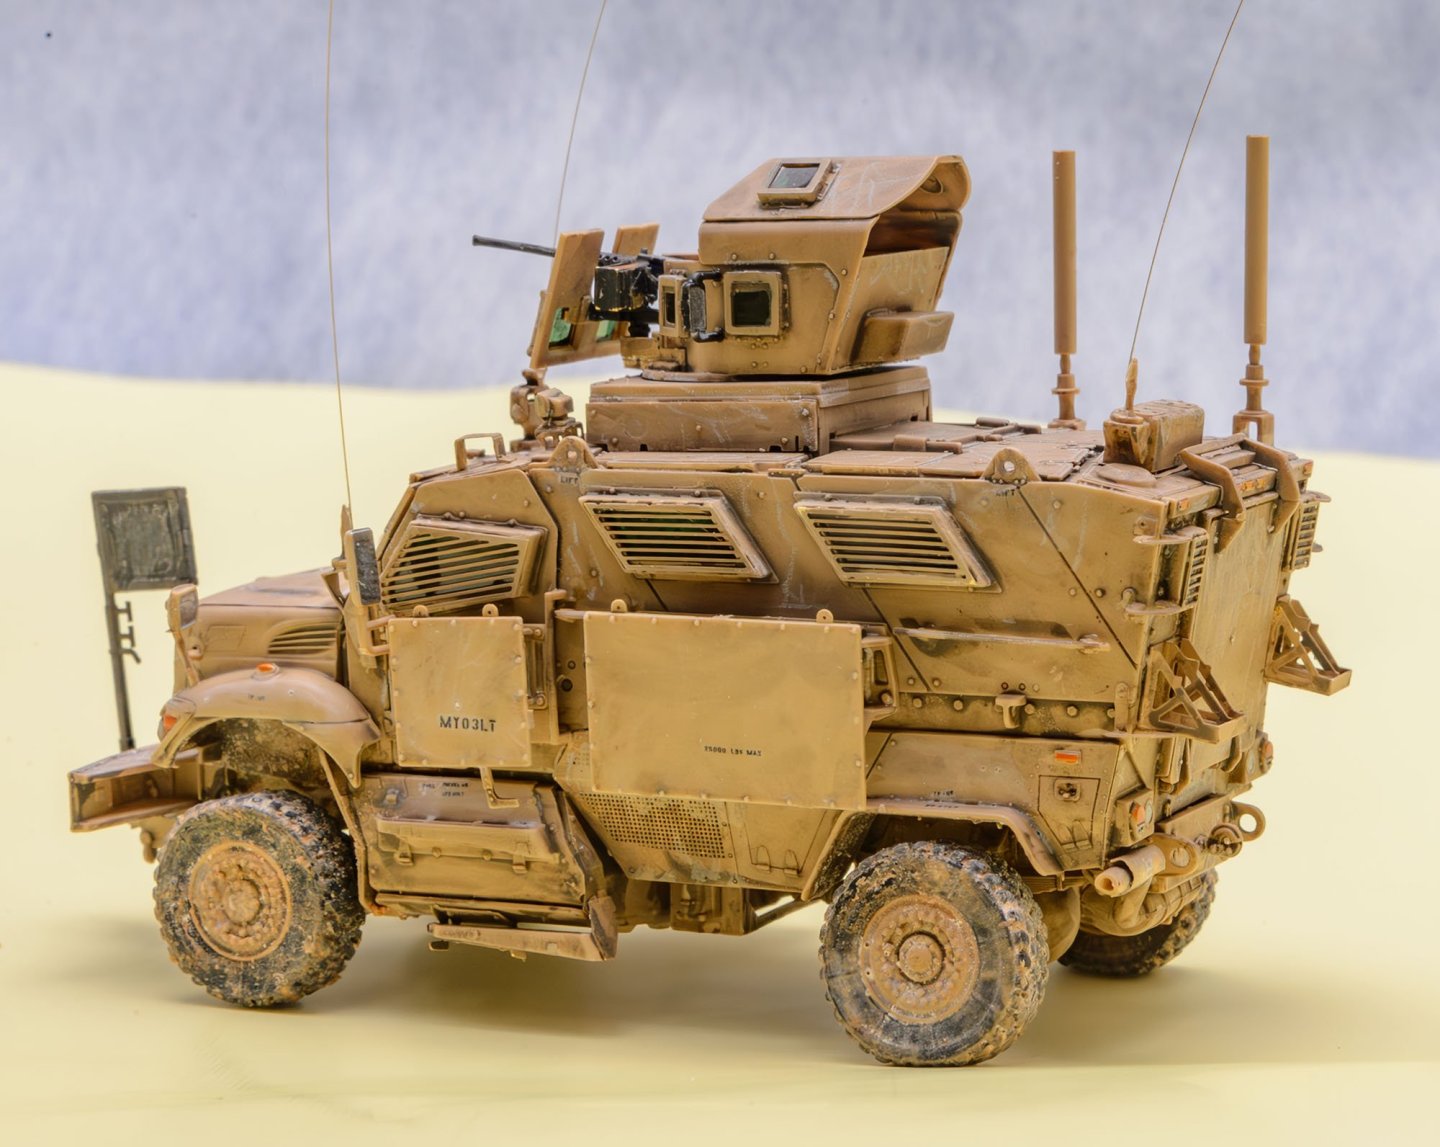
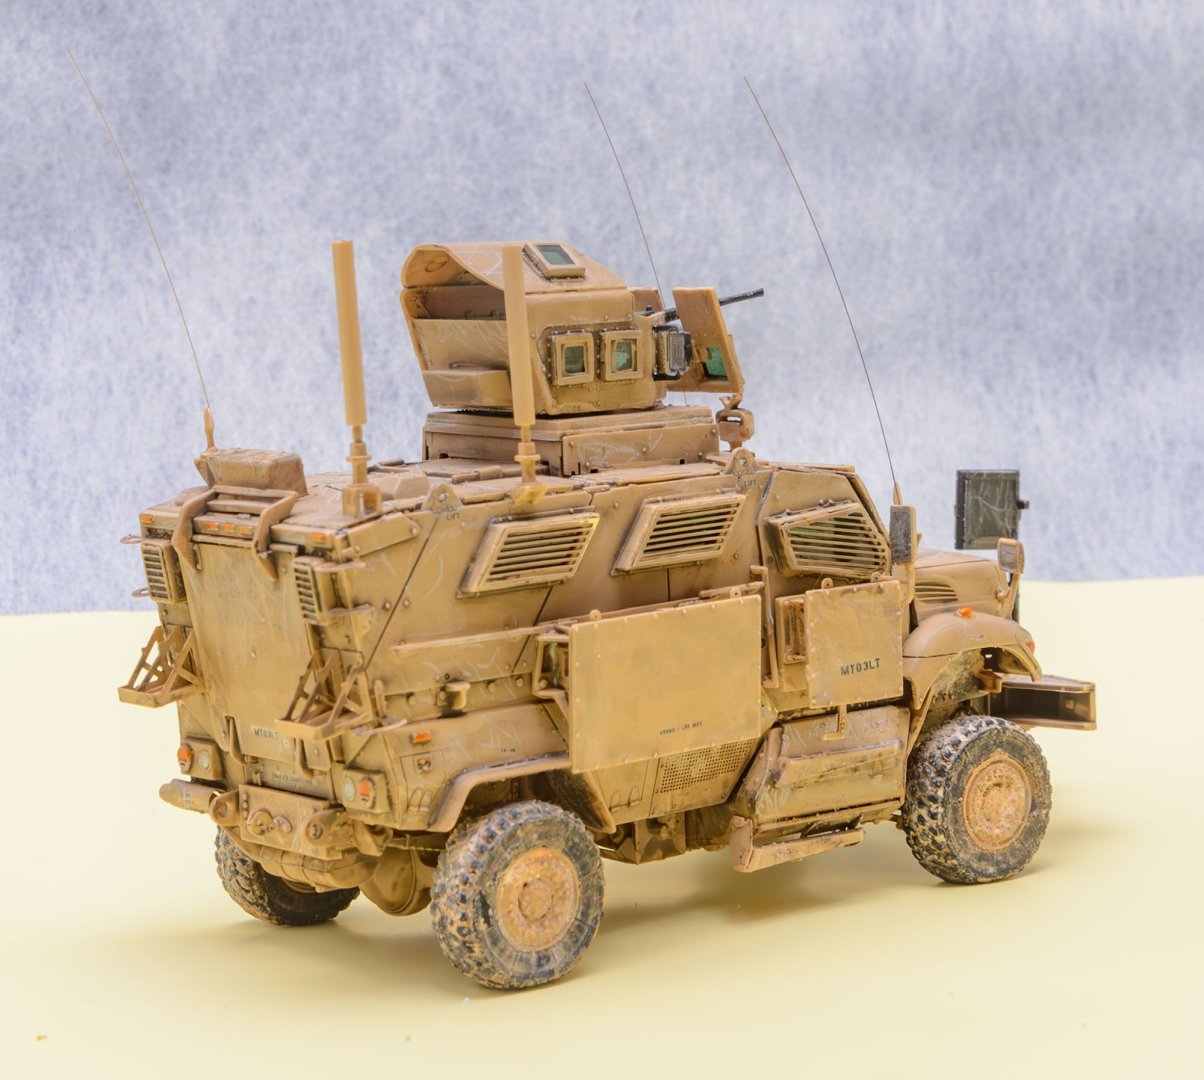
This is a M1224A1 Maxx Pro Mine Resistant Ambush Protected Expedient Armor Program All Terrain Vehicle. The kit is from Galaxy Hobby. (1/72, GH72A04) Where are my international parcels! (No thanks to emergency martial law.)


- 1 reply
-
- 11
-
-

-
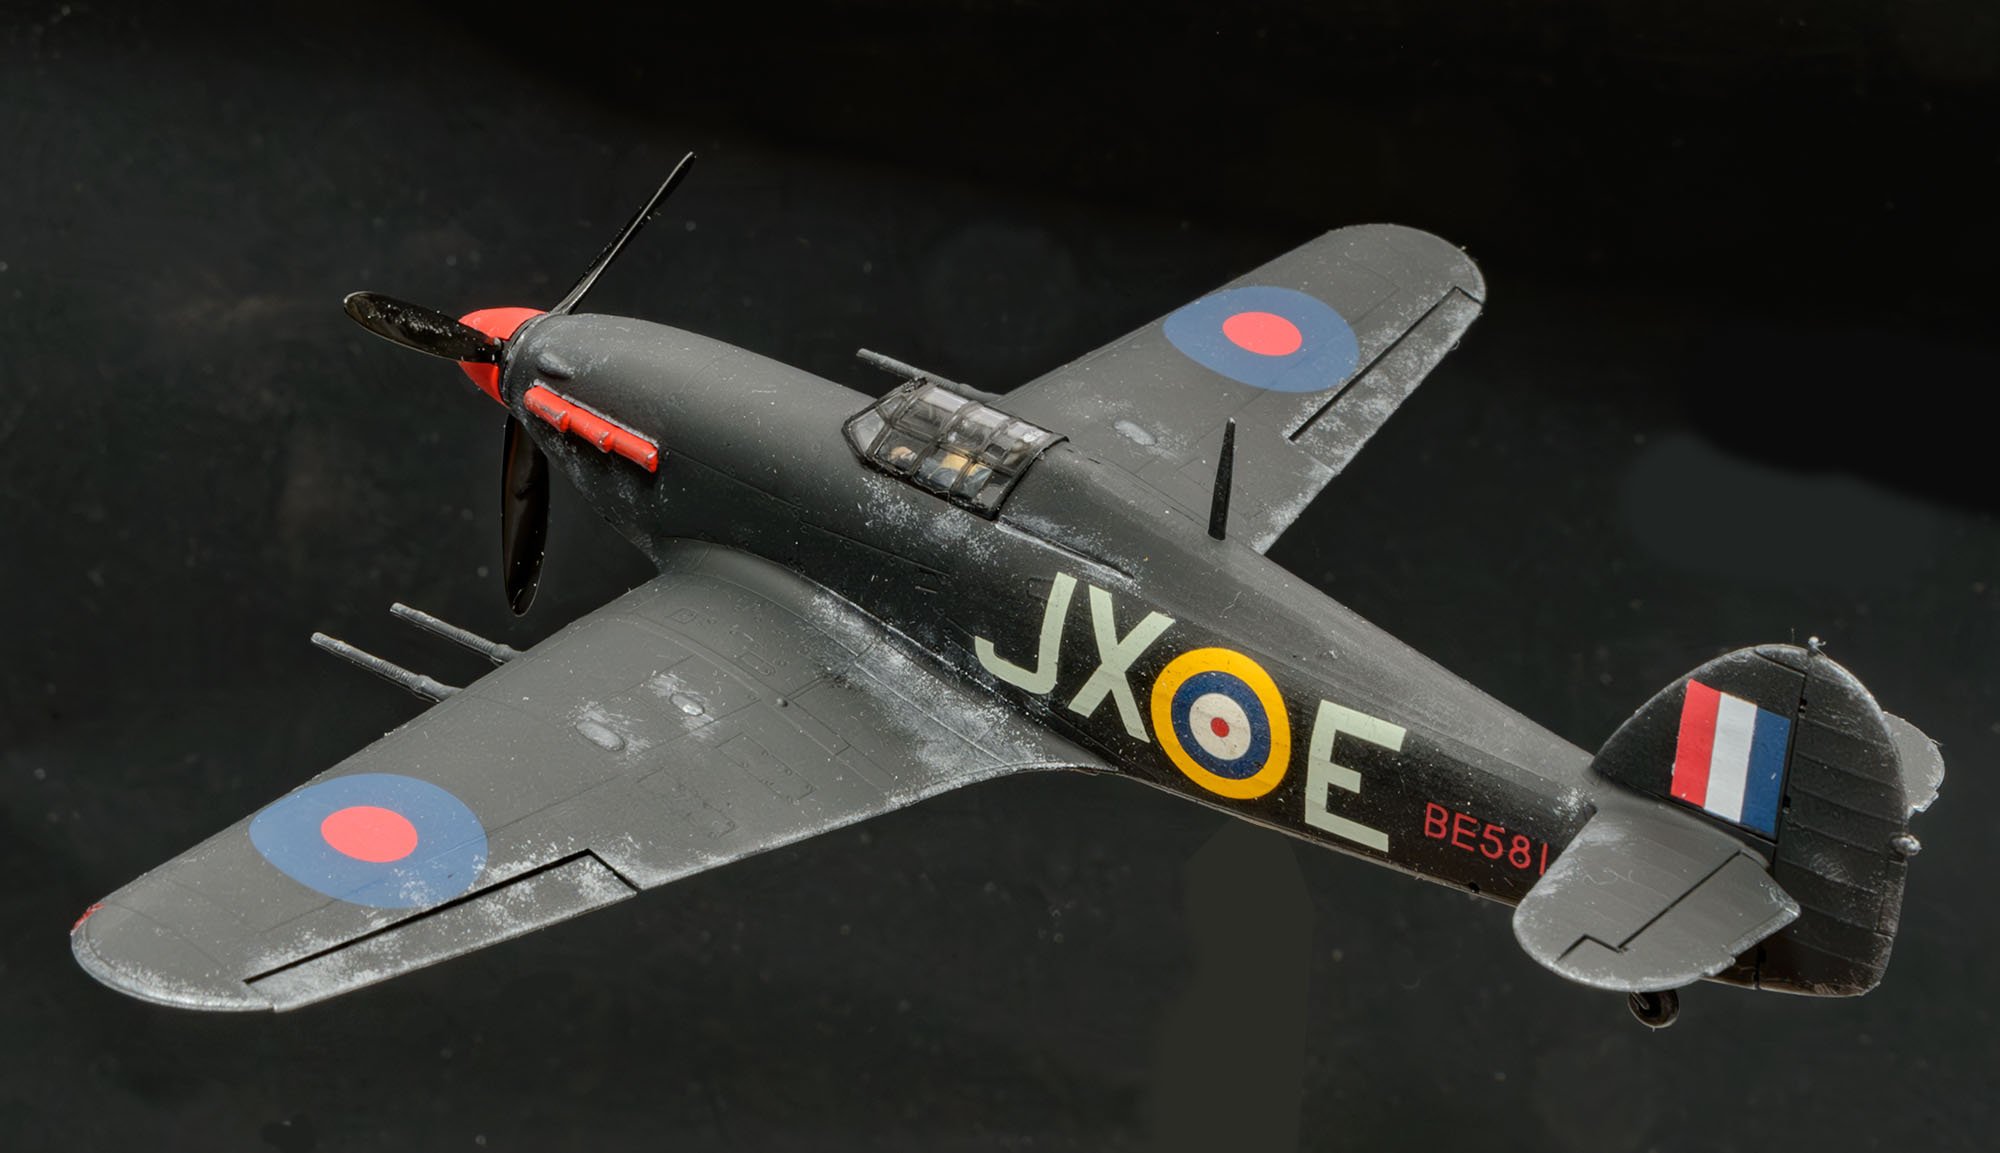
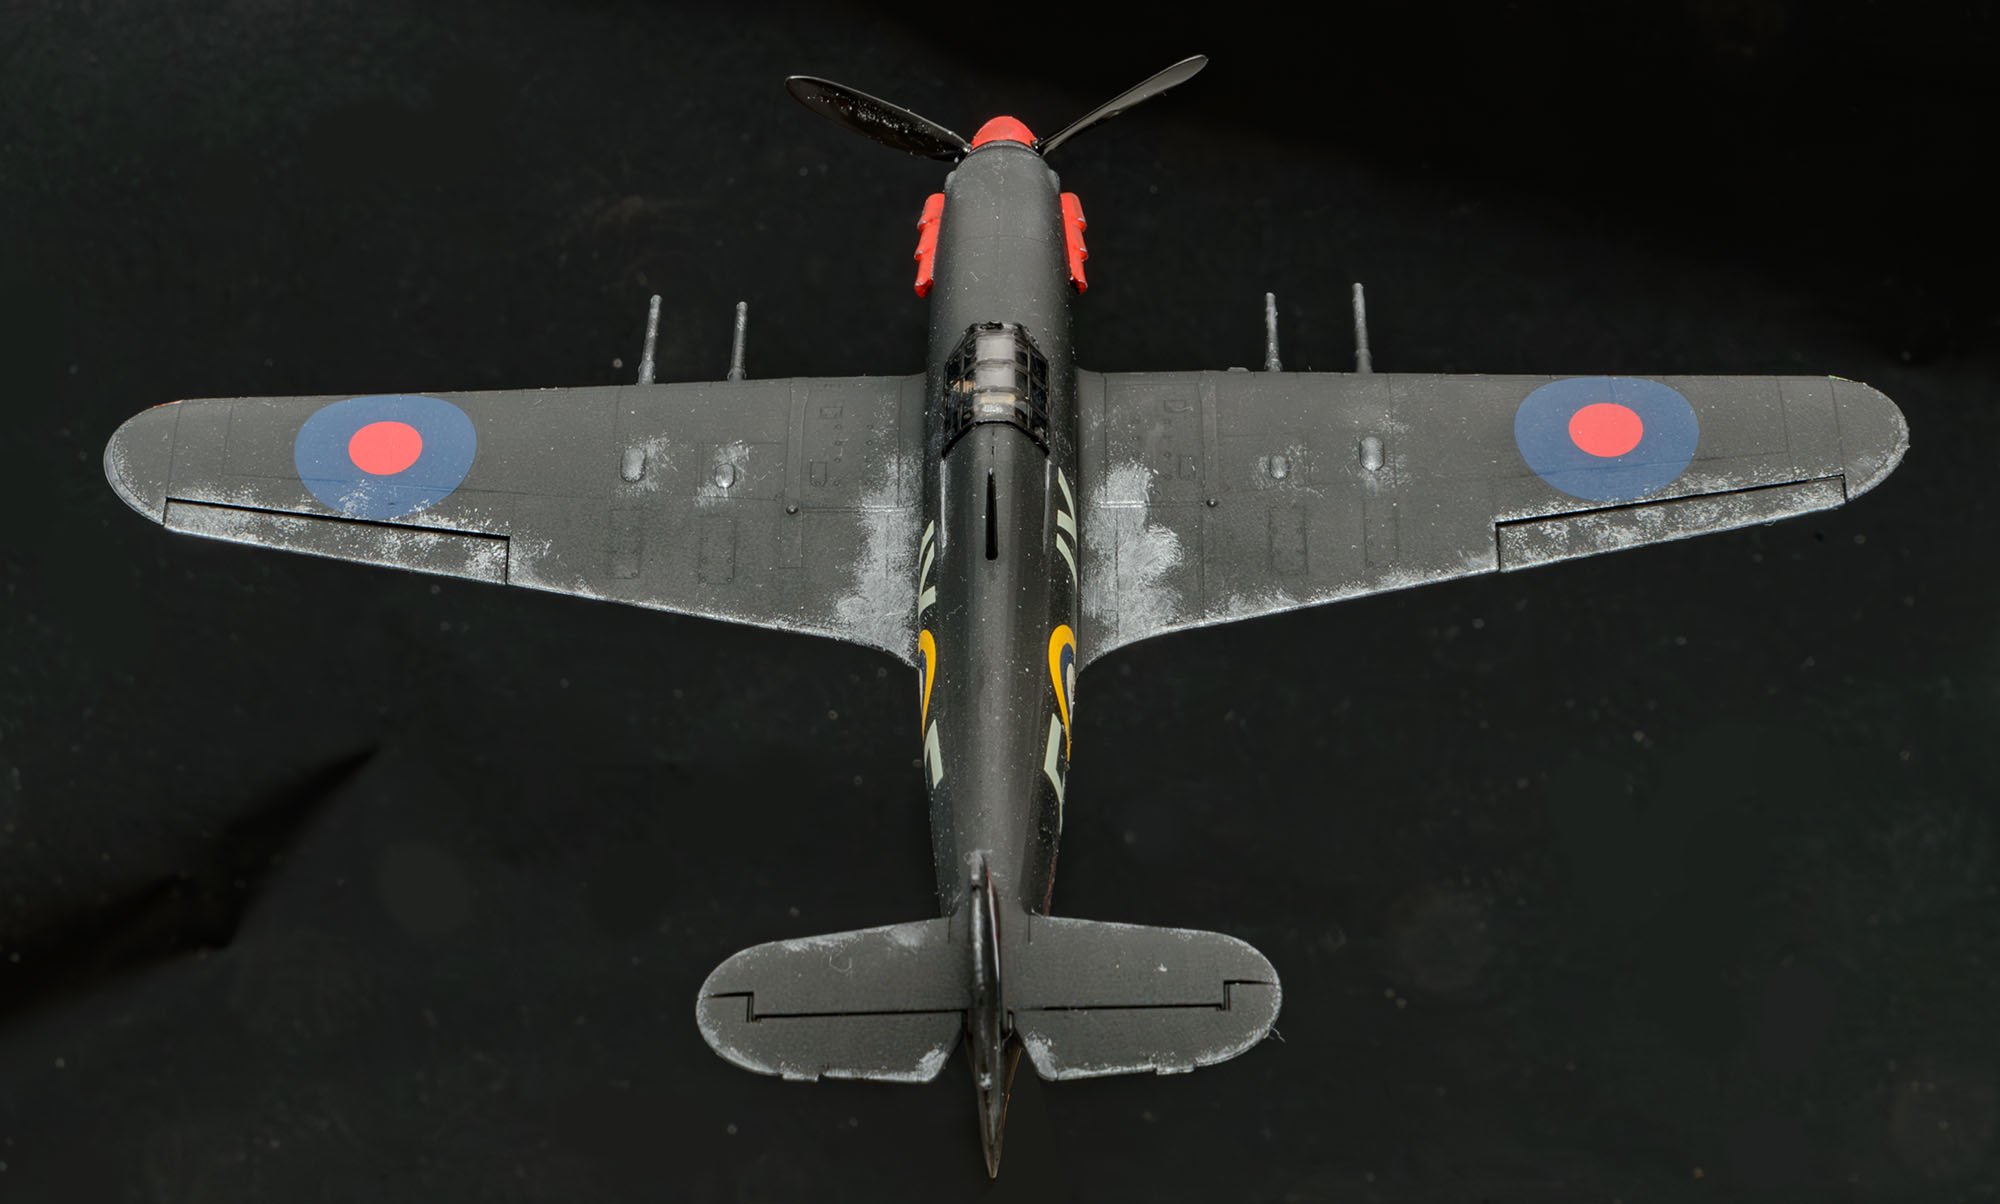
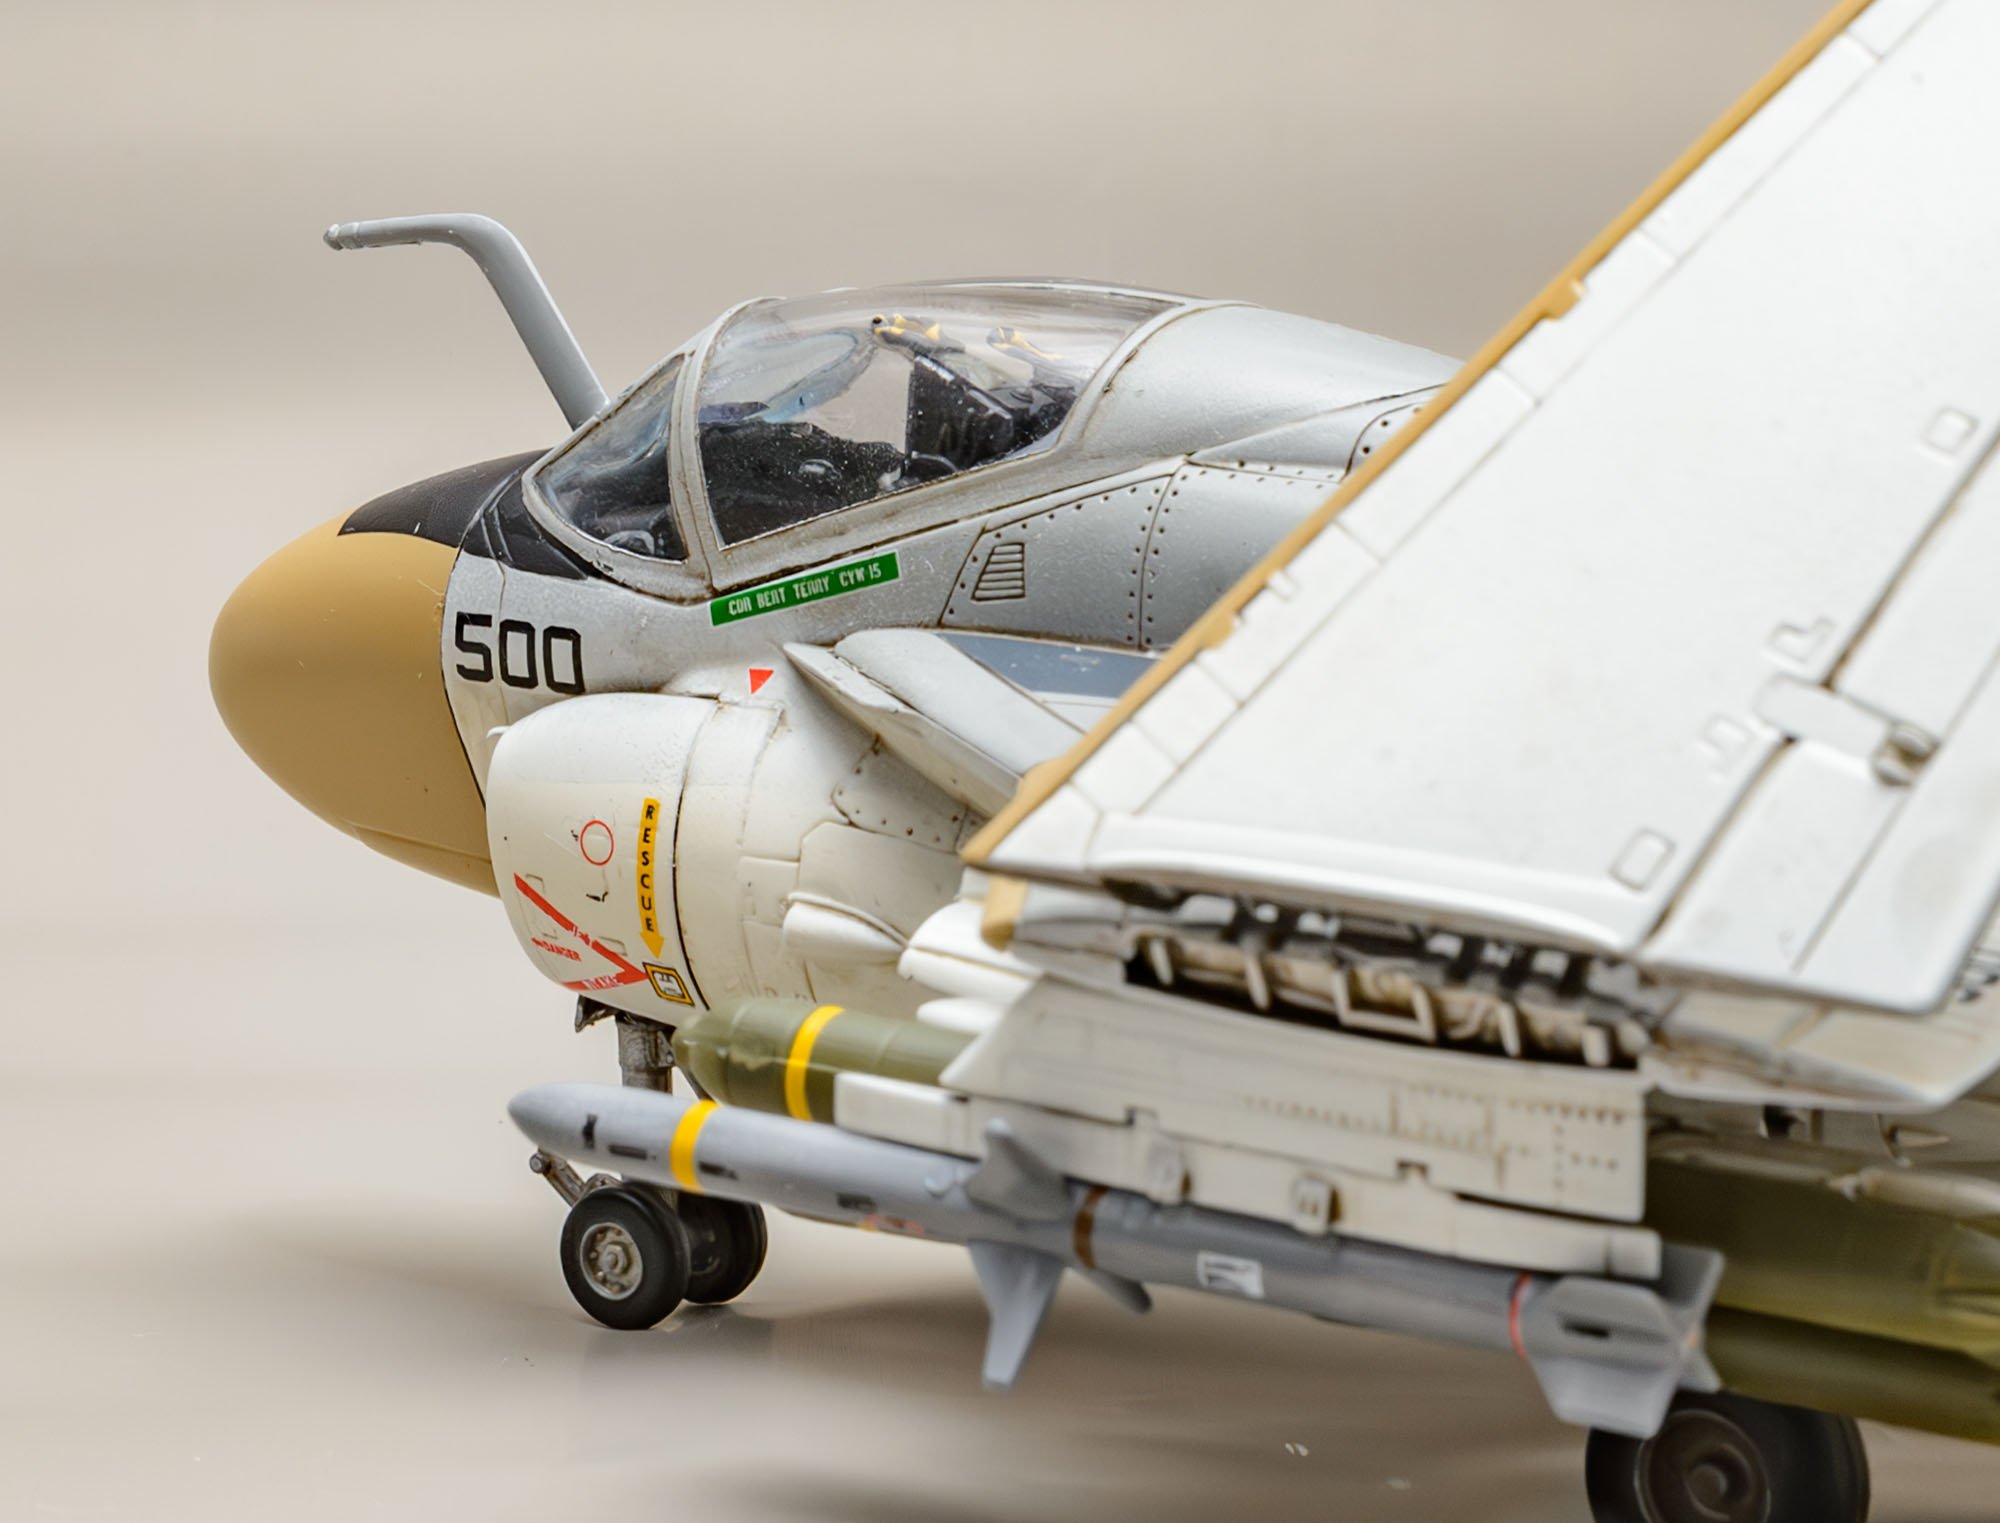
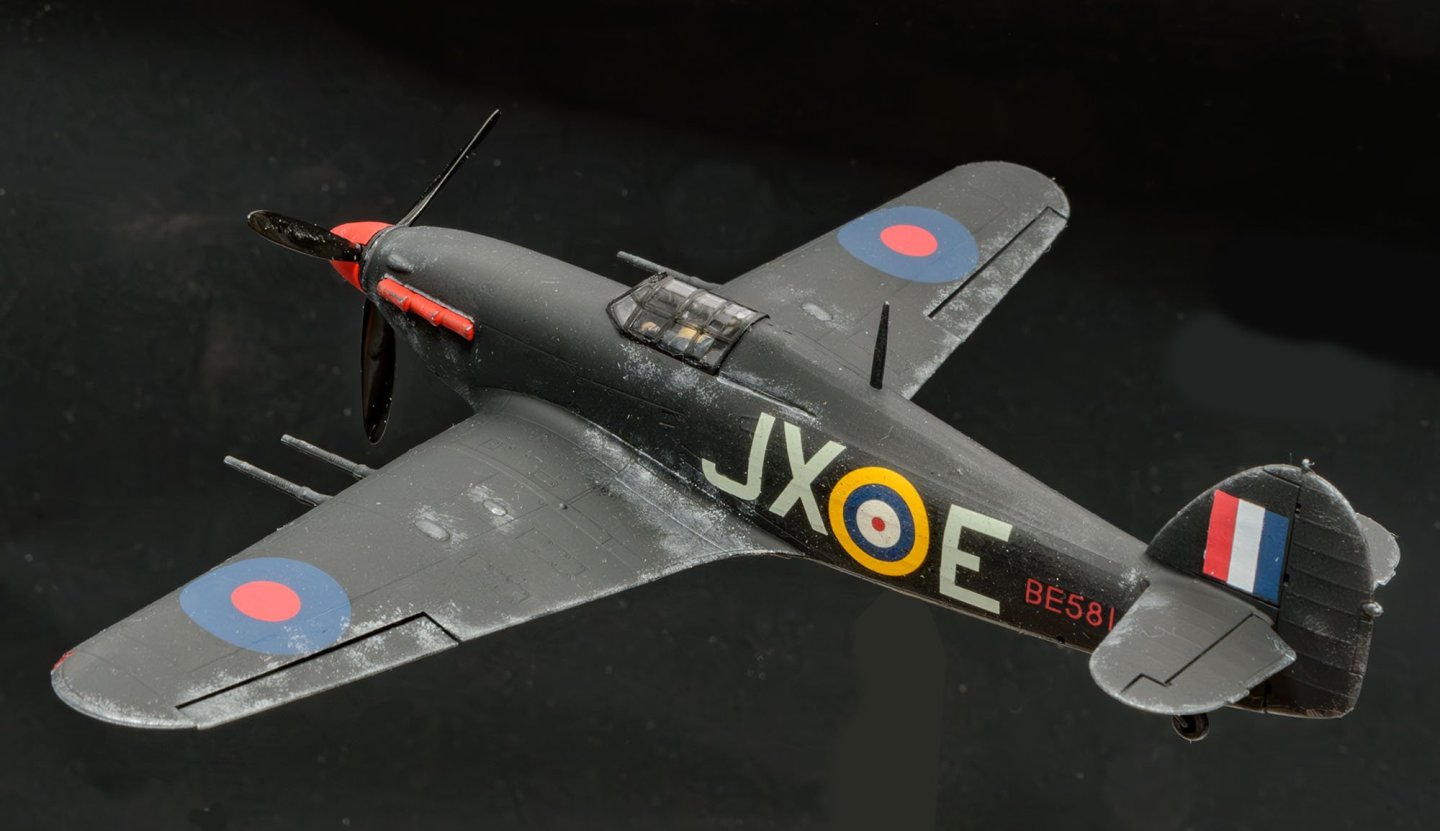
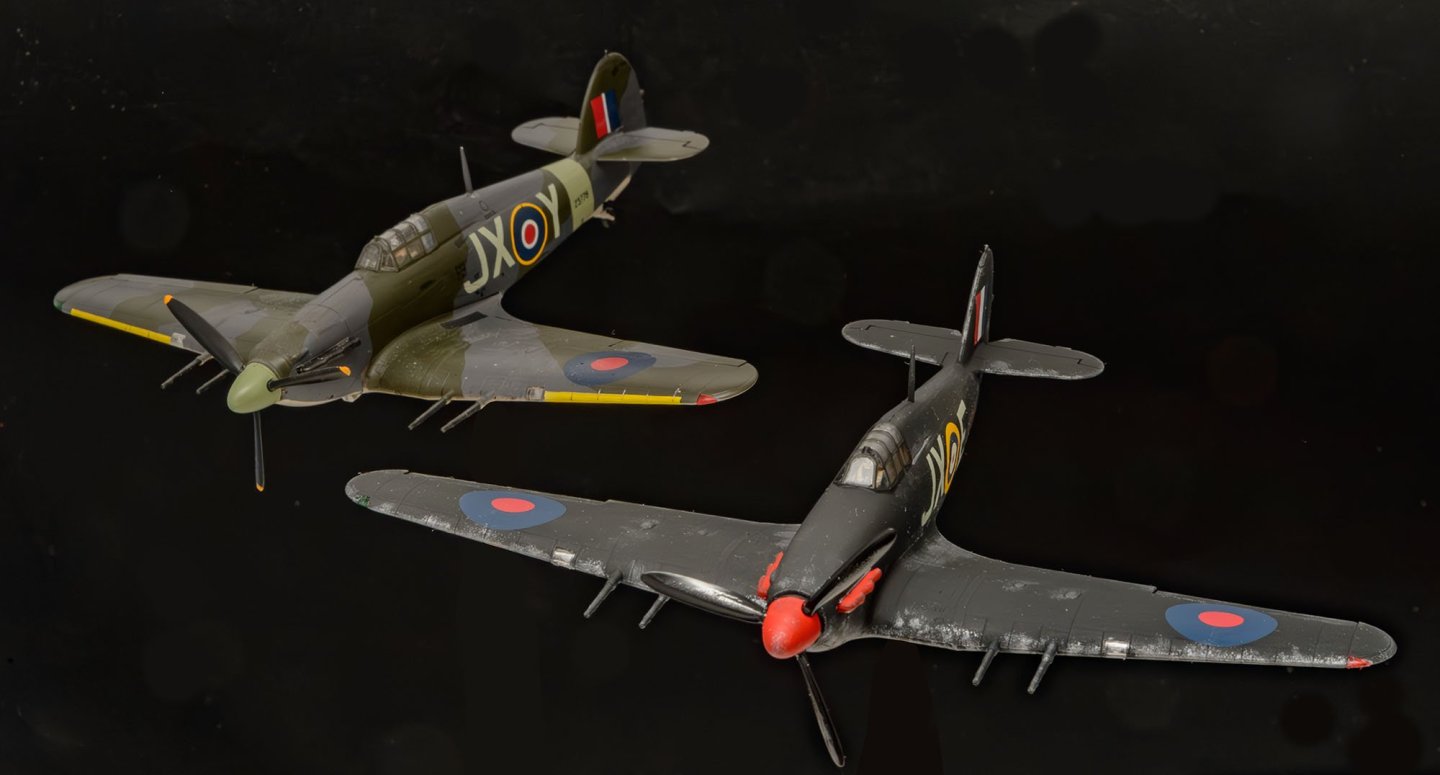
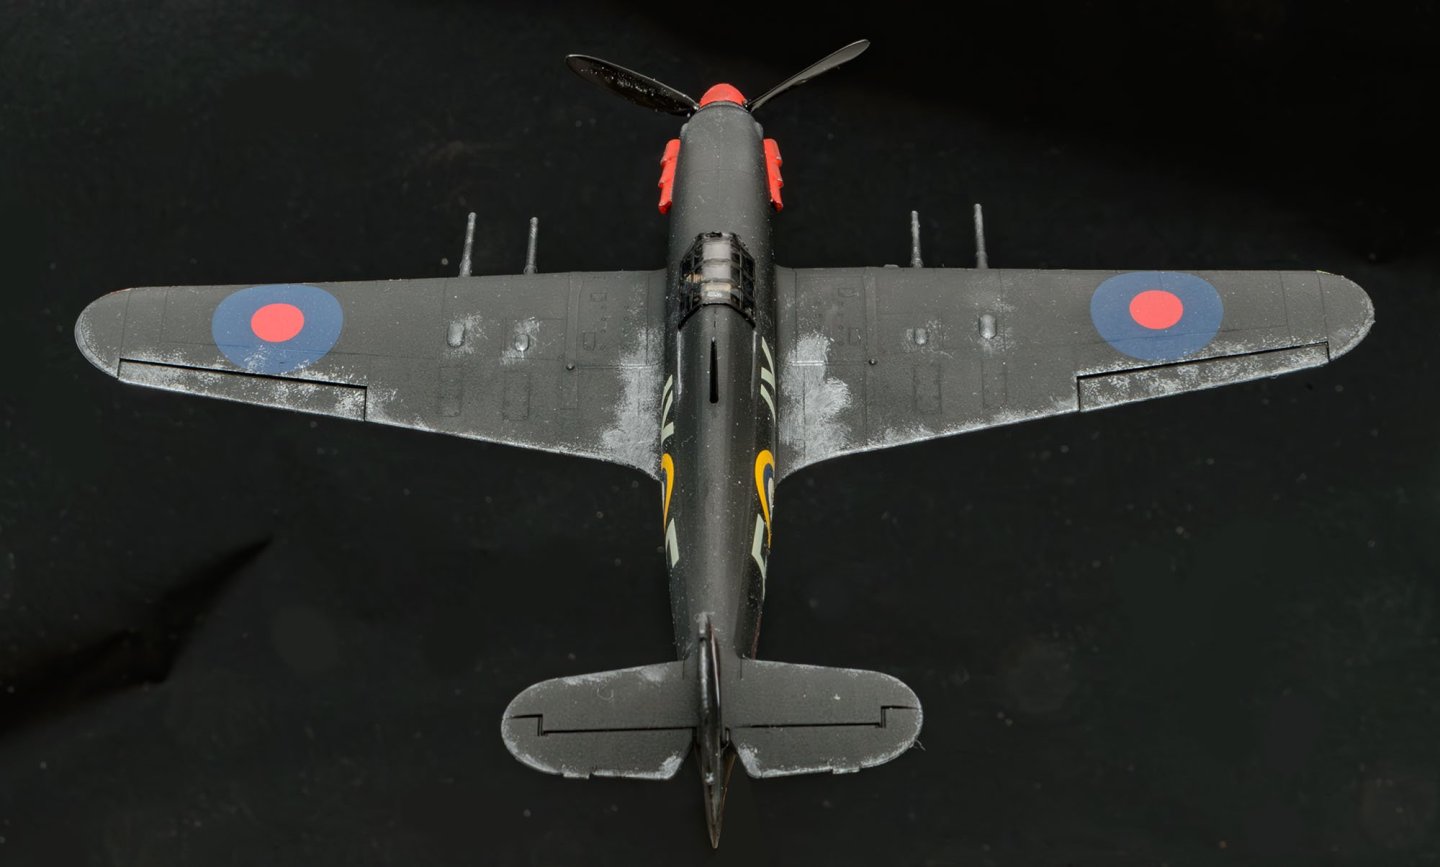
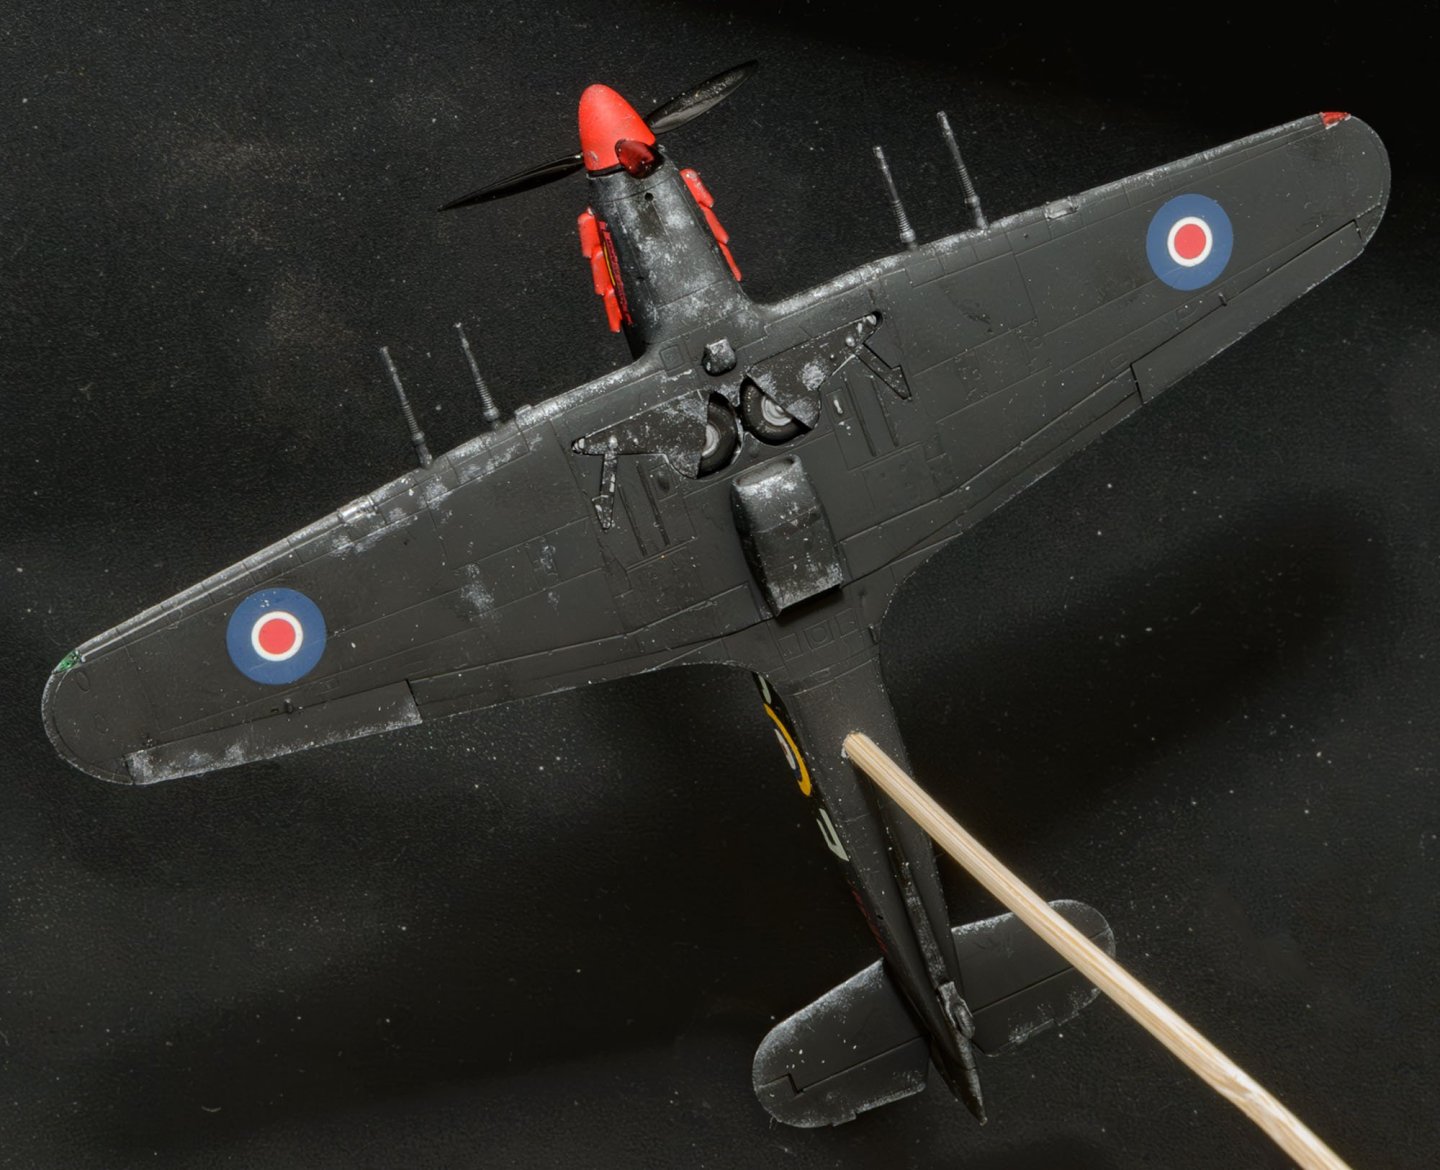
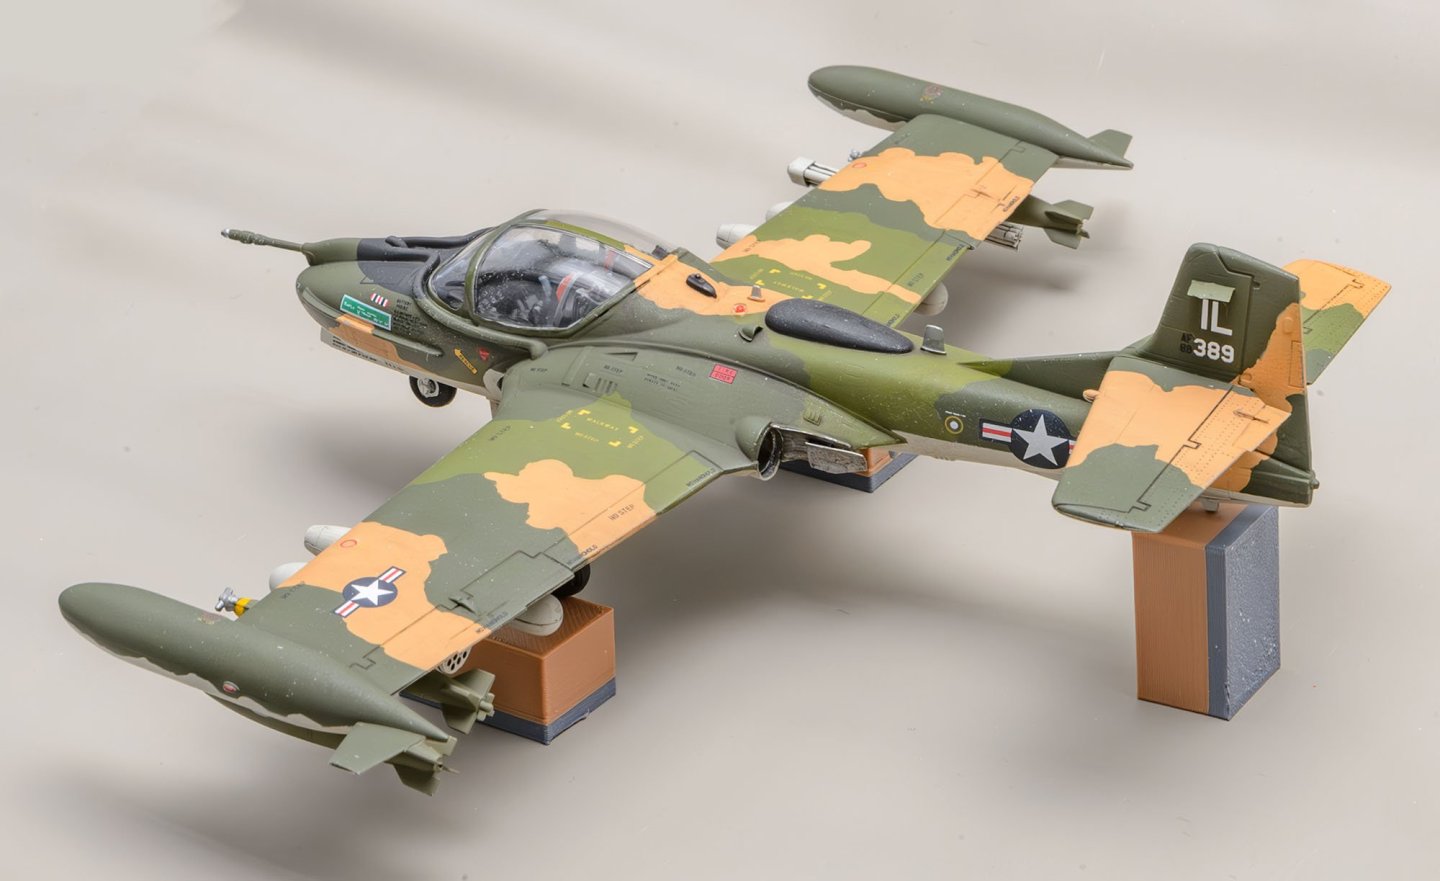
I agree with that. I watched some lecture videos for AFV and tank models, and found that the technique isn't suitable for 1/72 mini scale aircraft. I ordered a gun metal colored pencil to draw more controlled scratch marks.
-
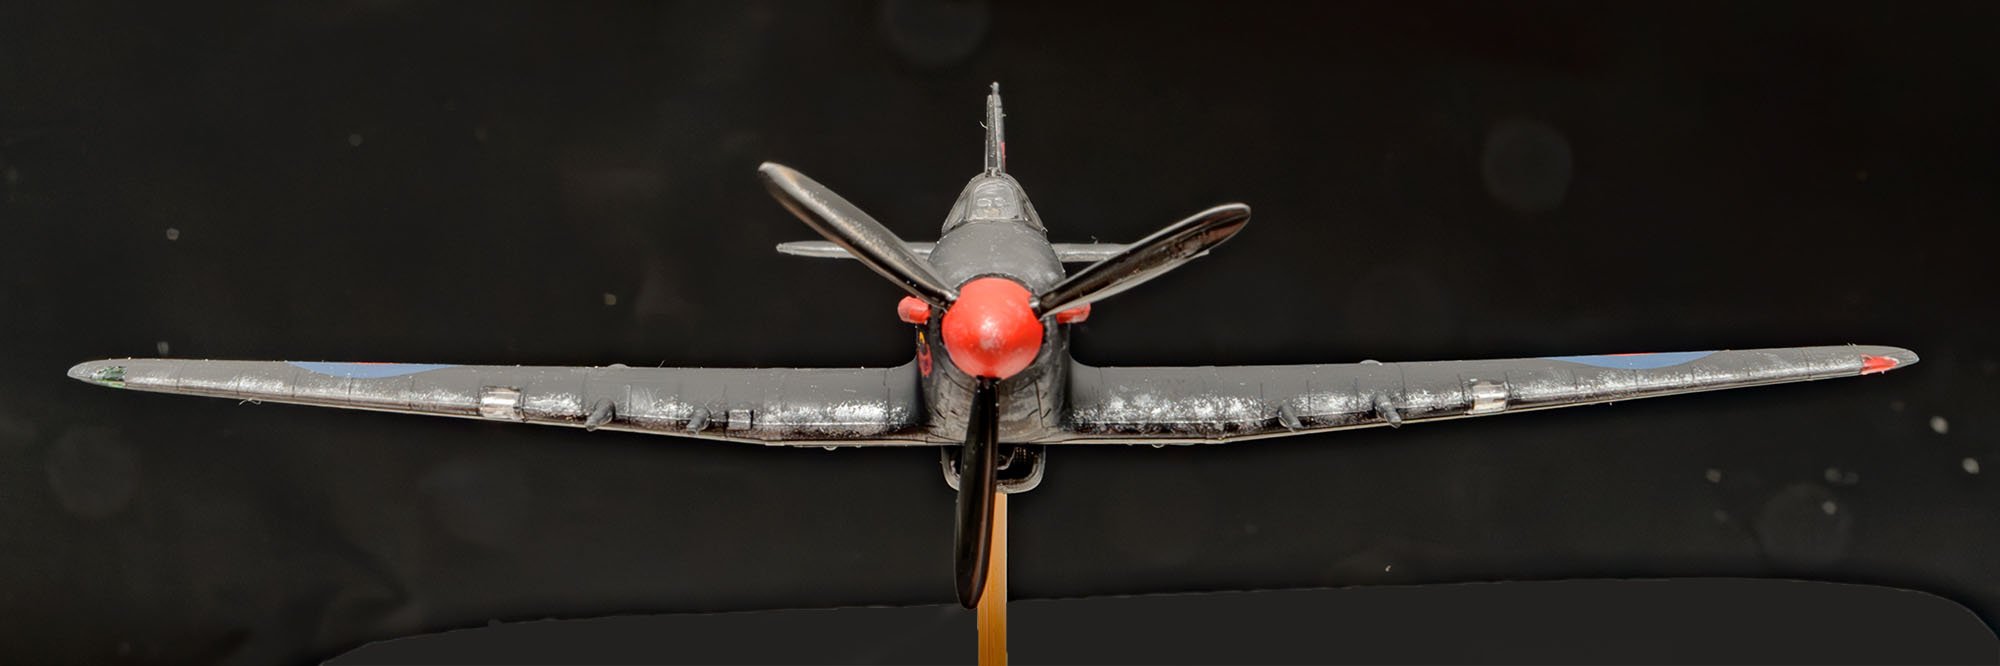
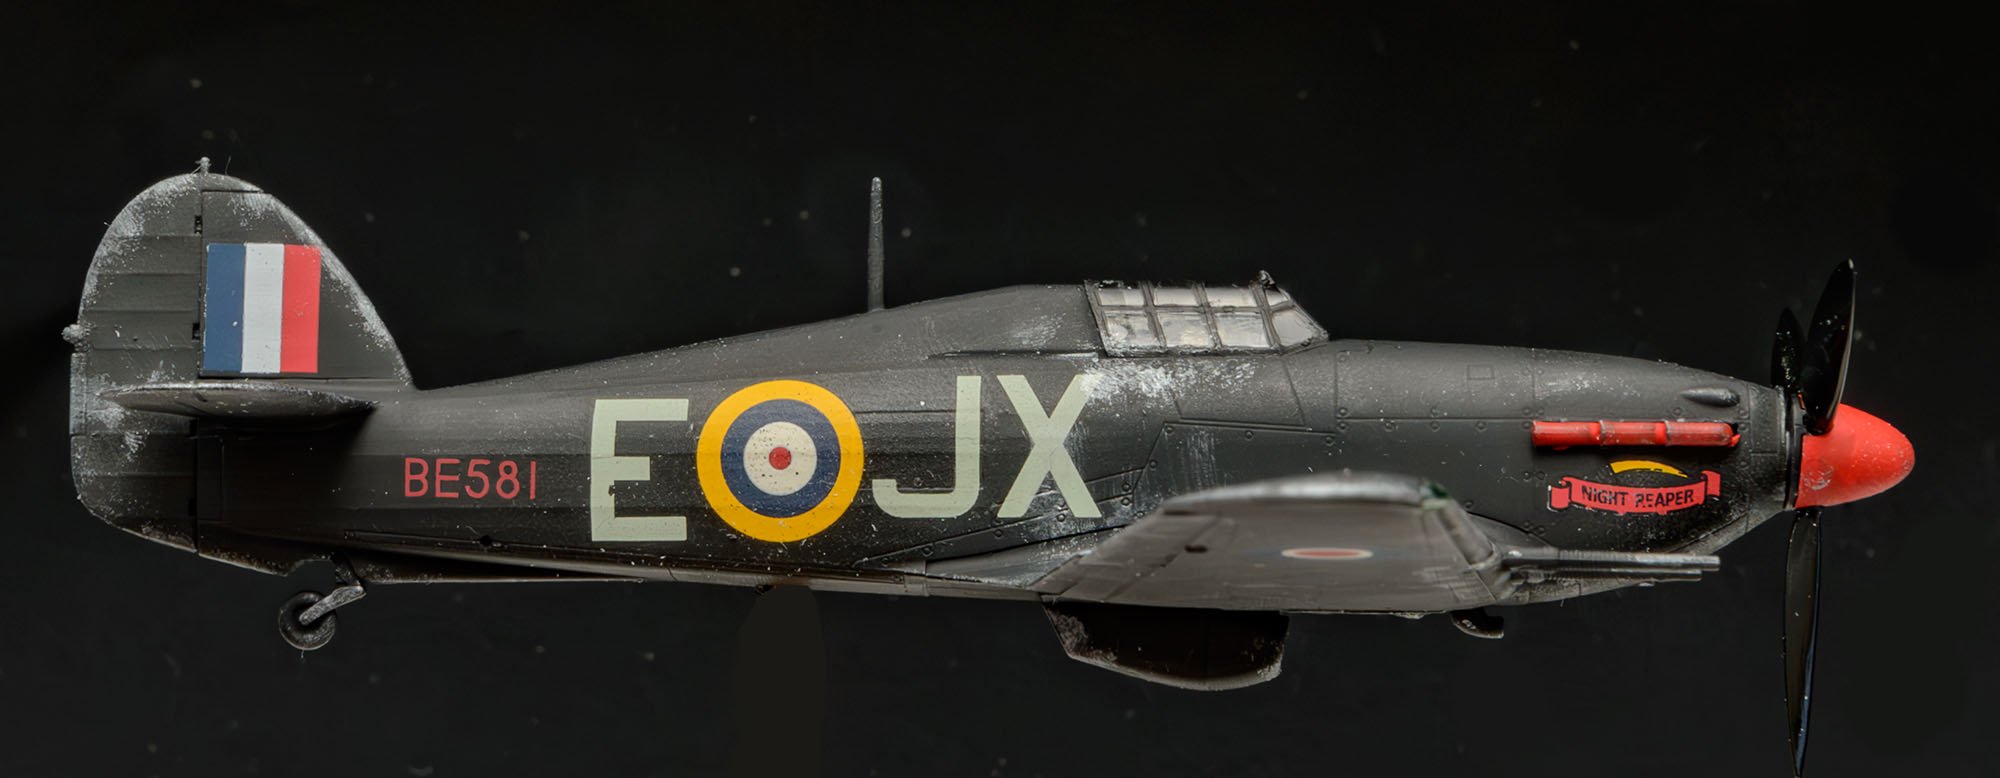
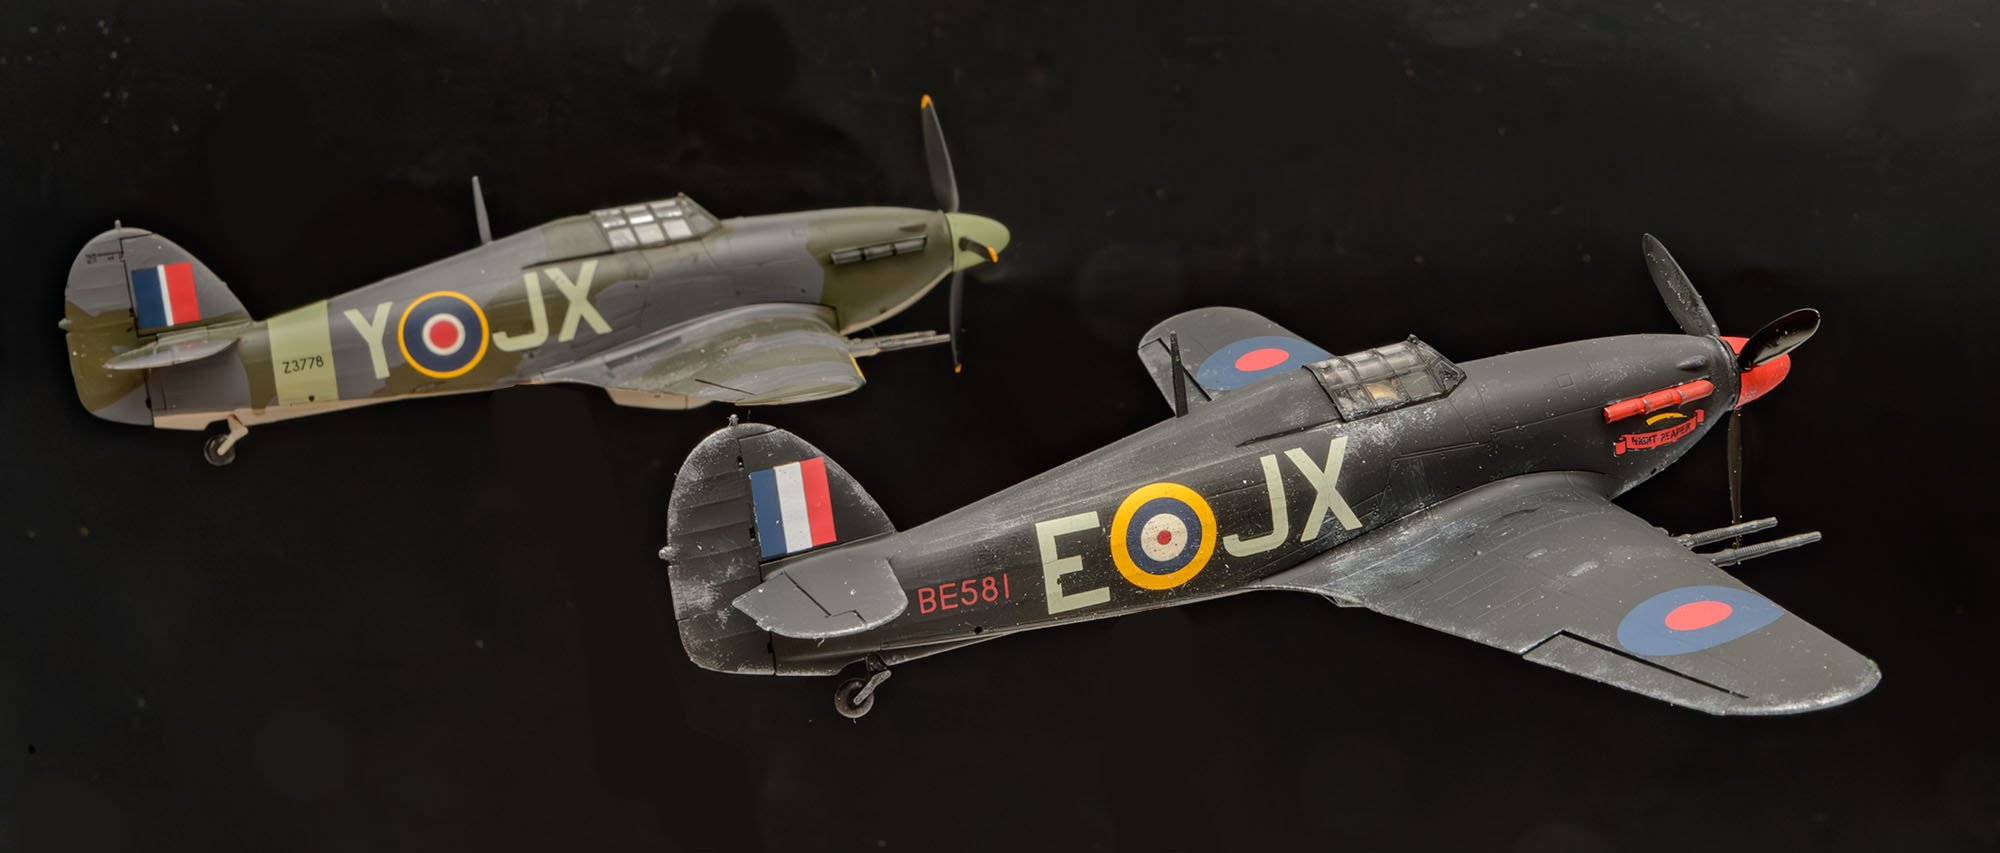
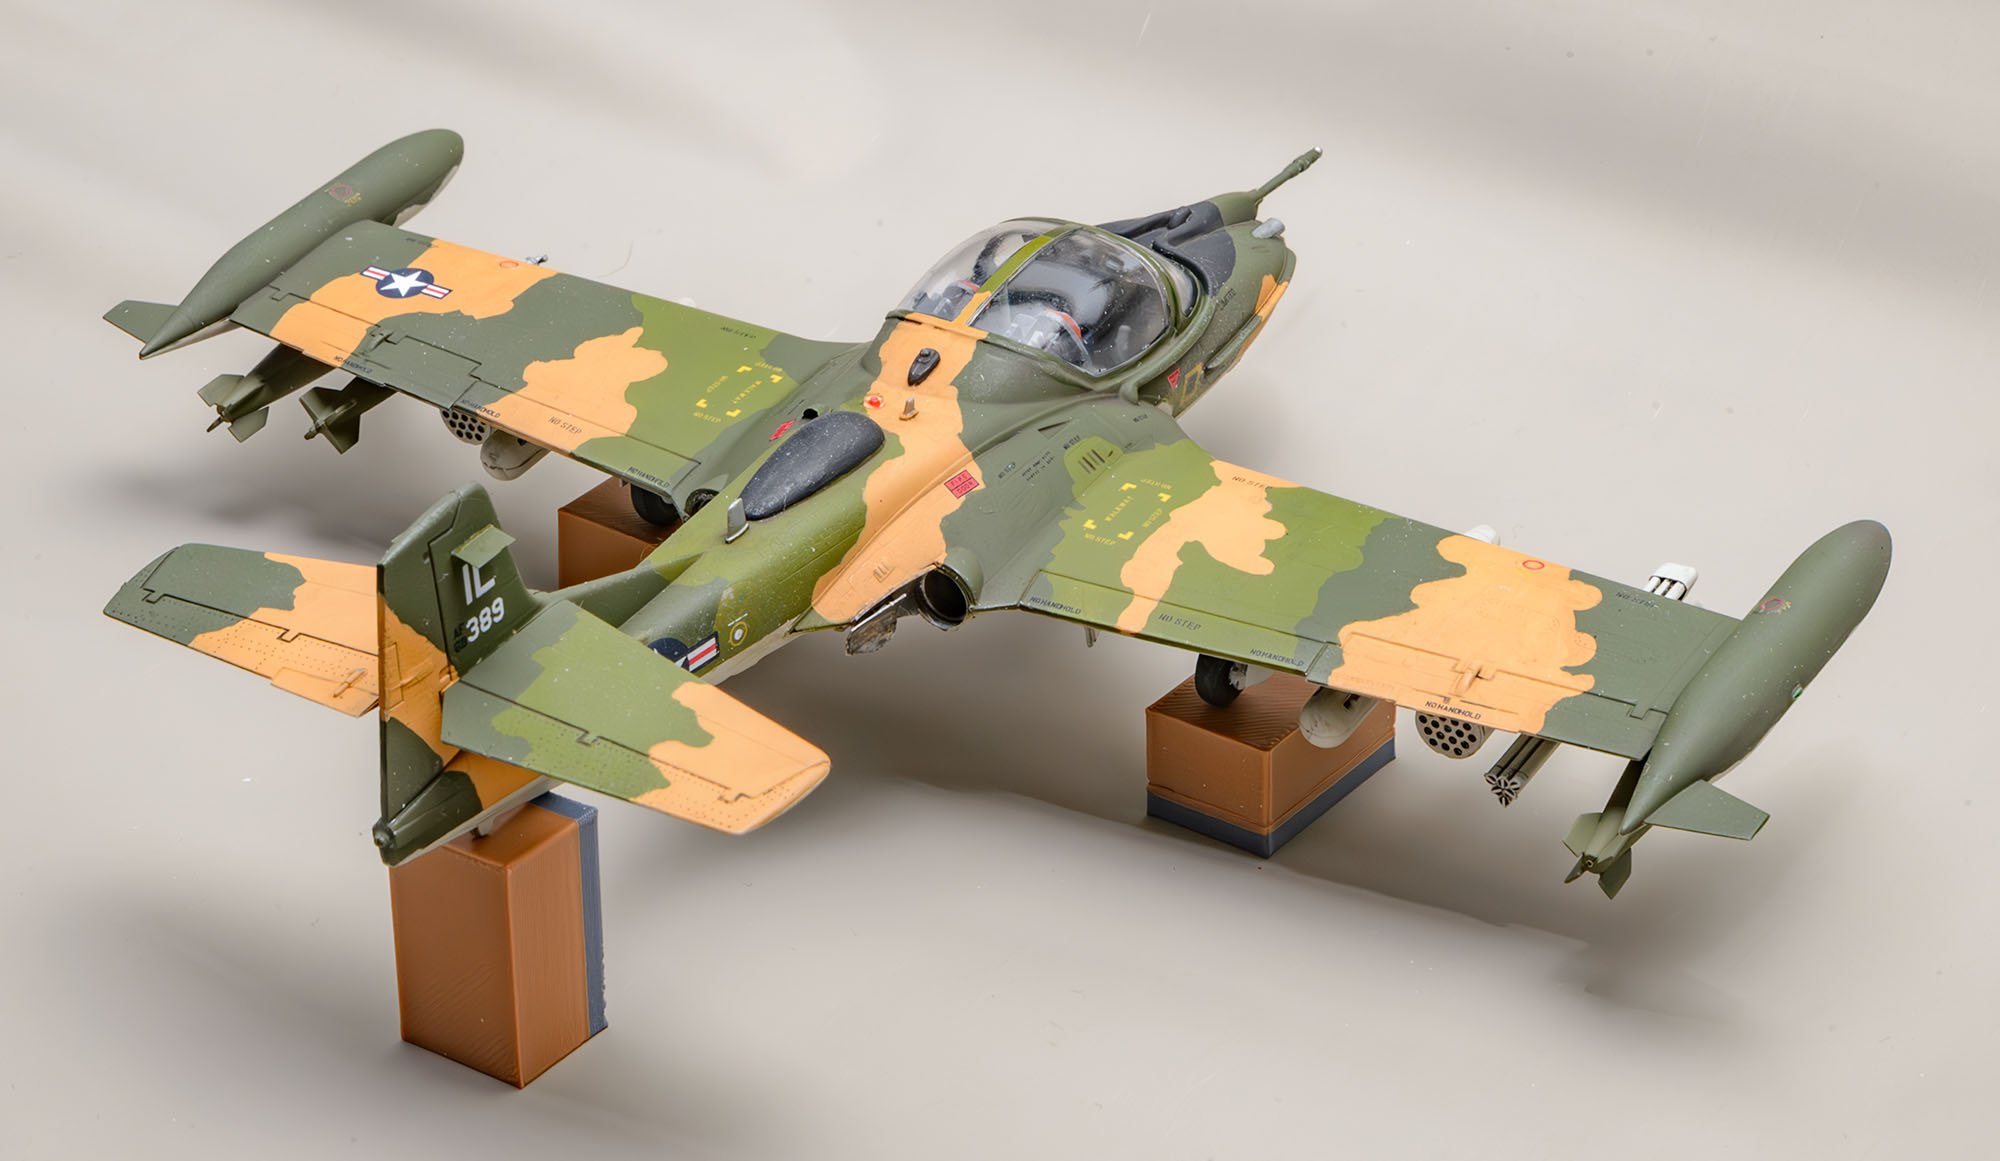
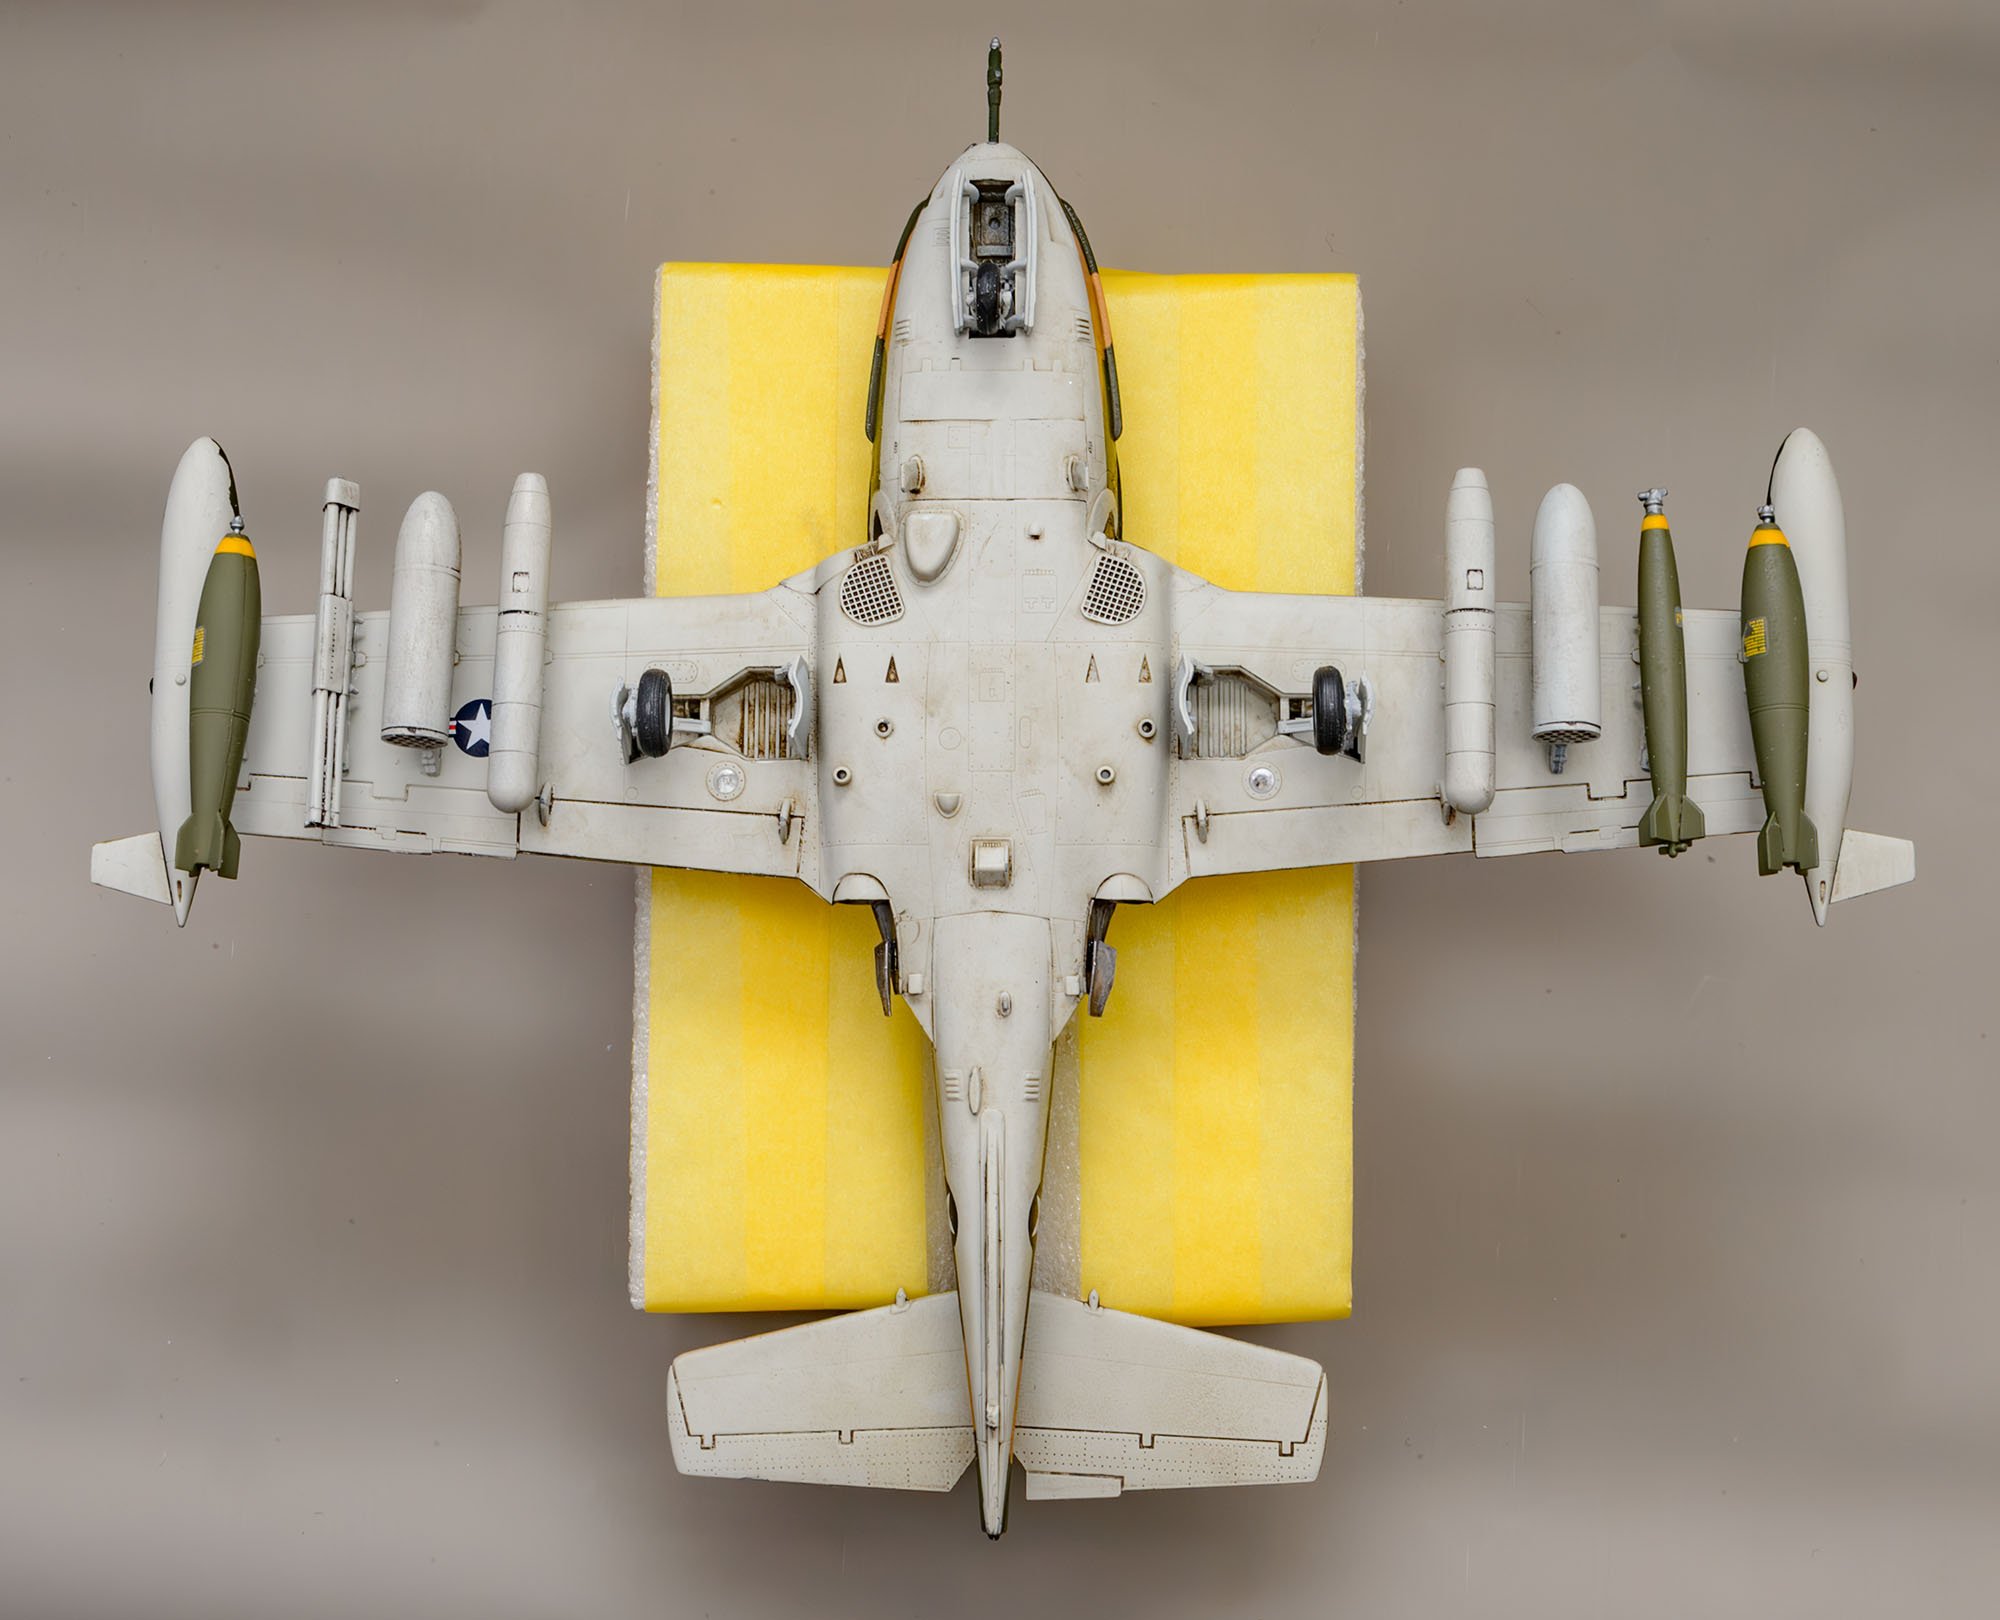
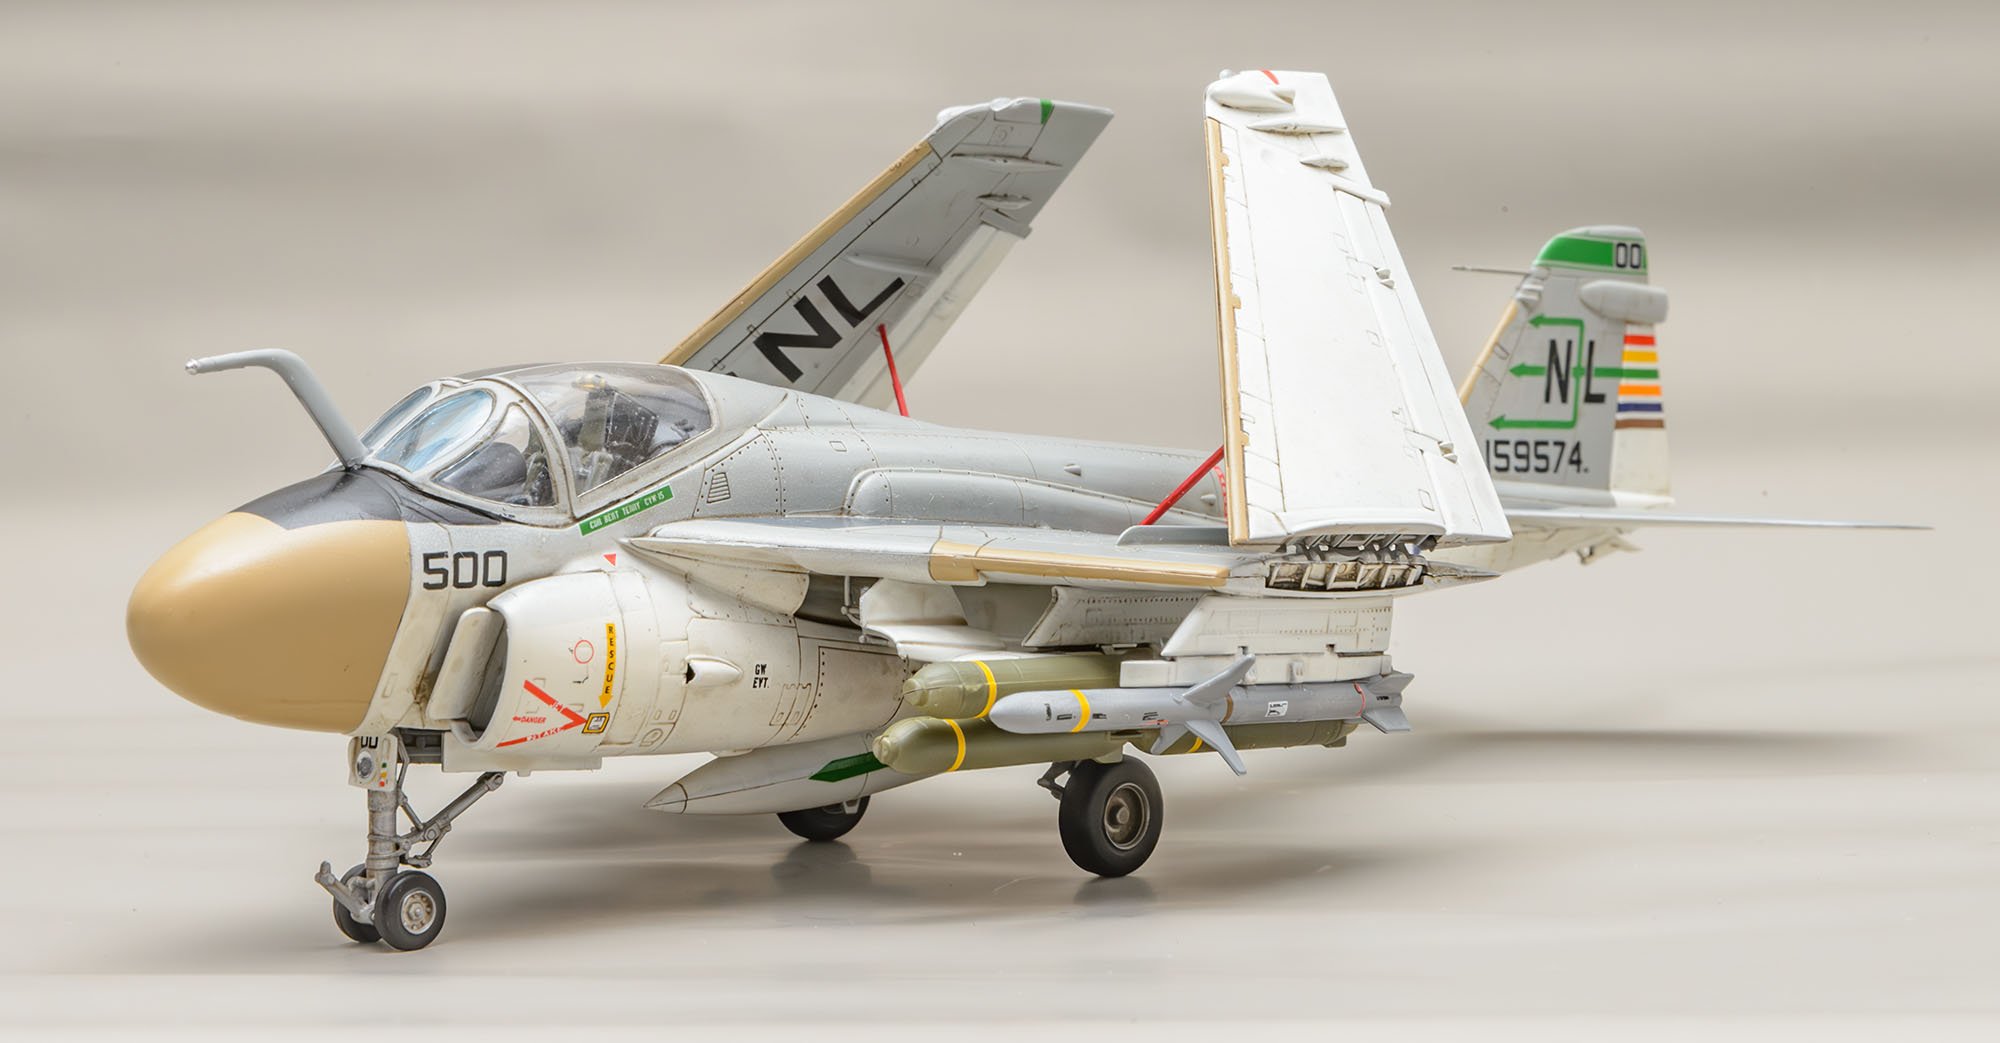
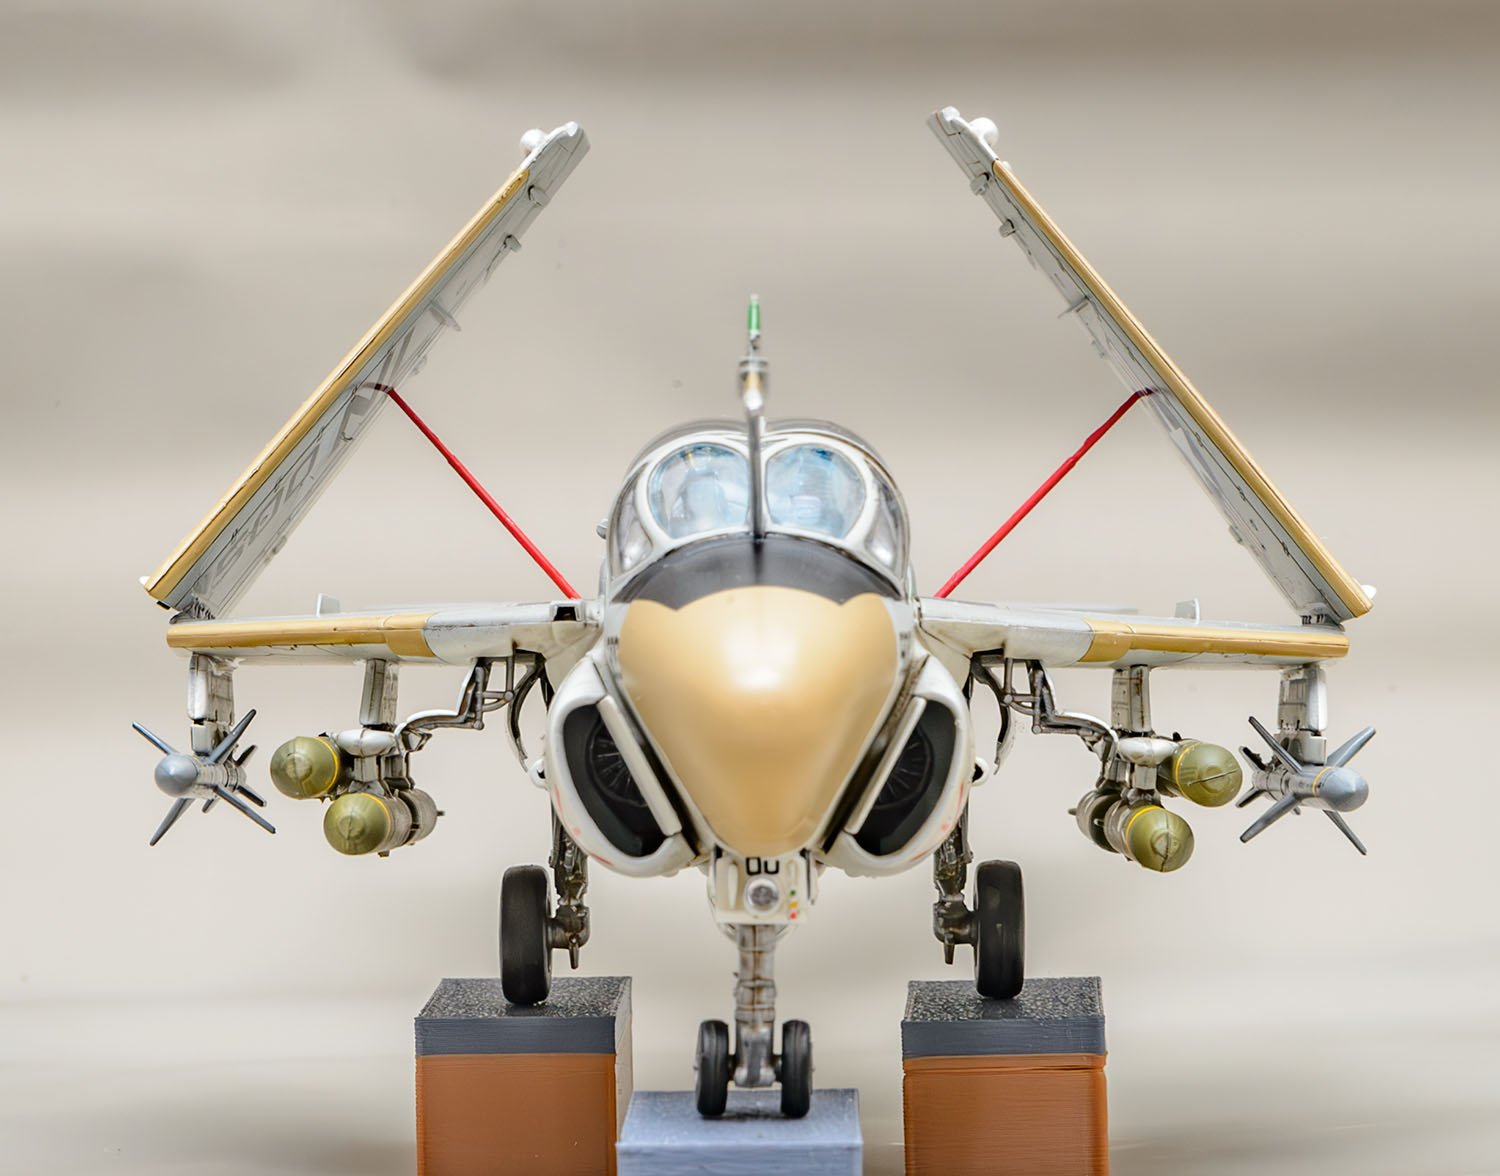
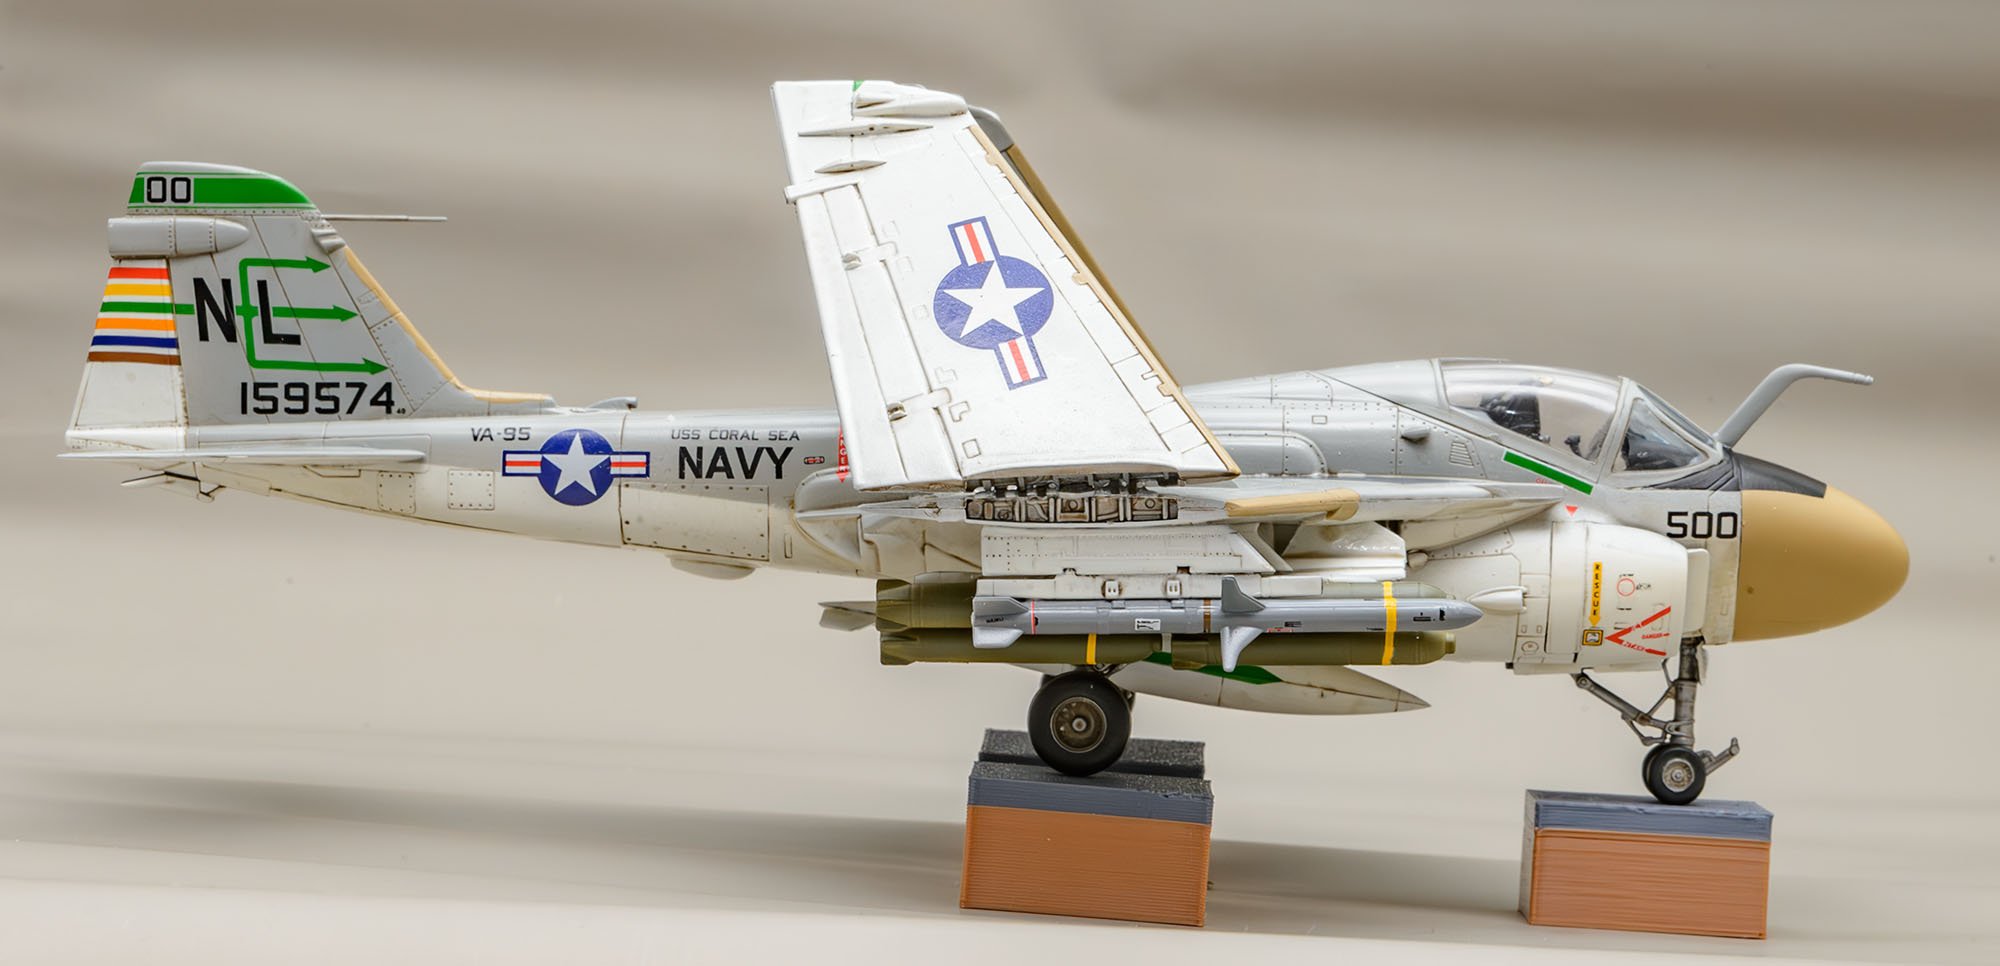
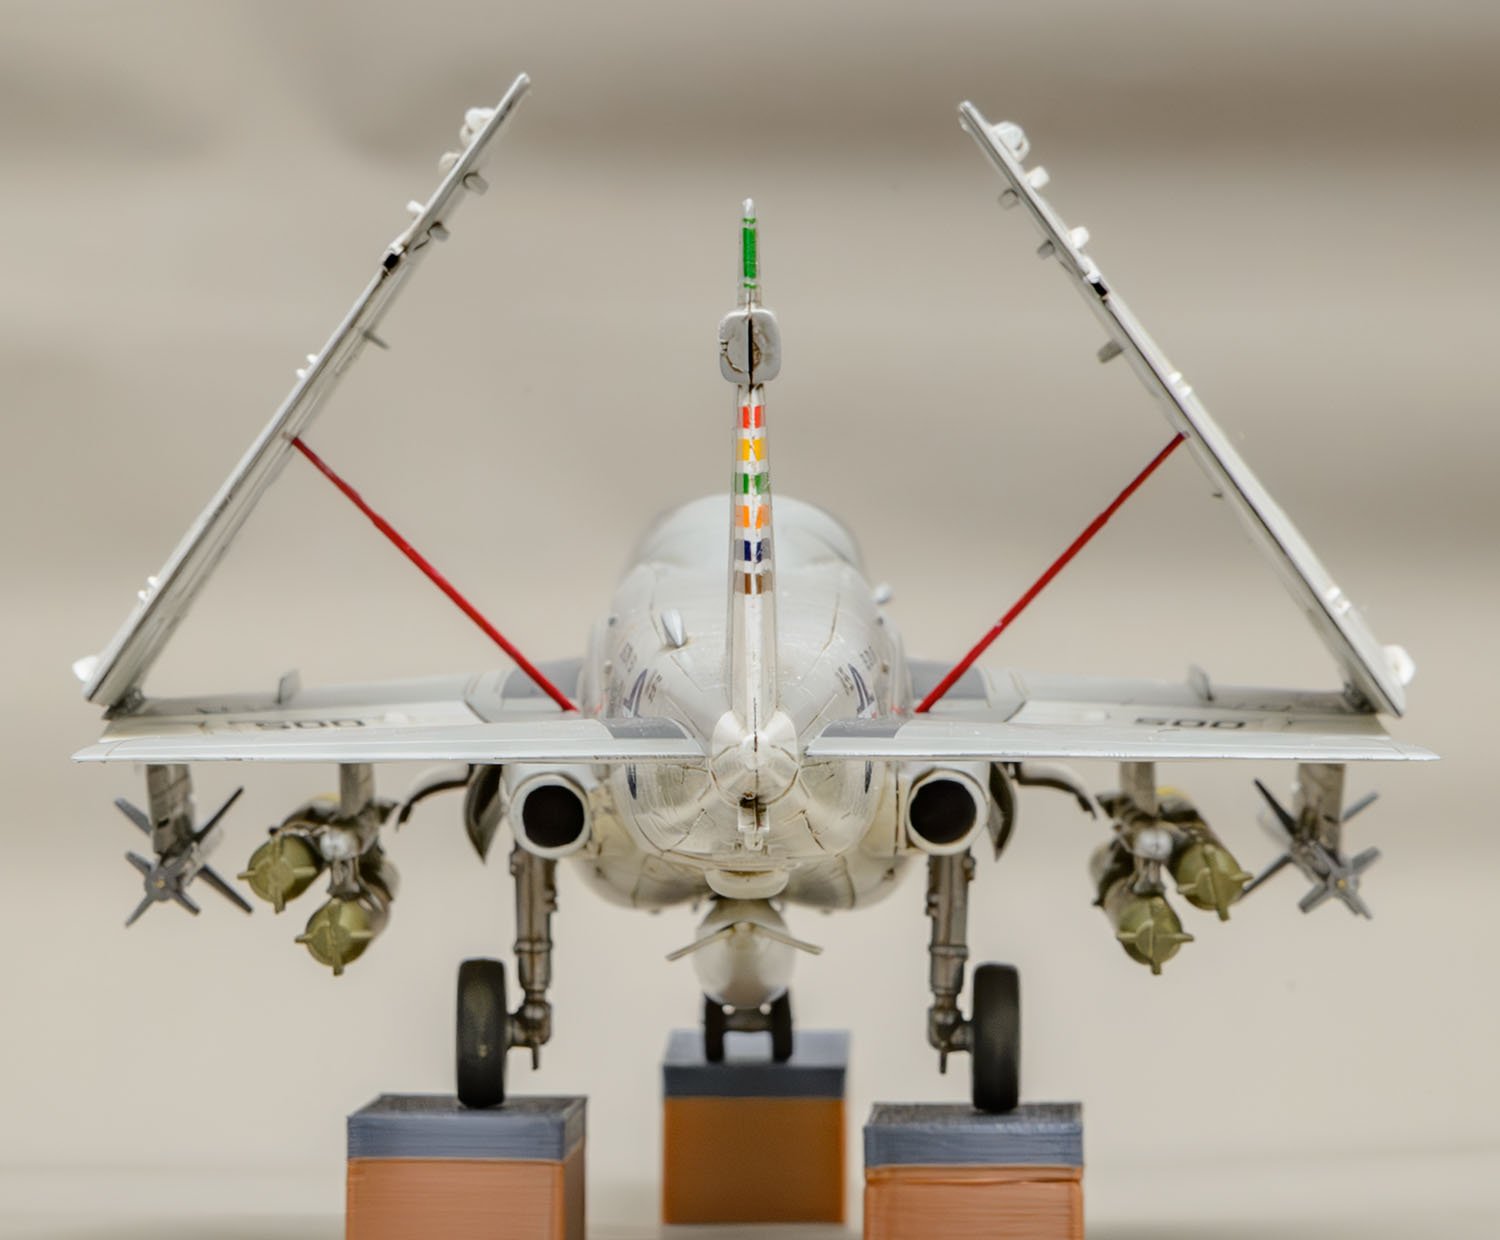
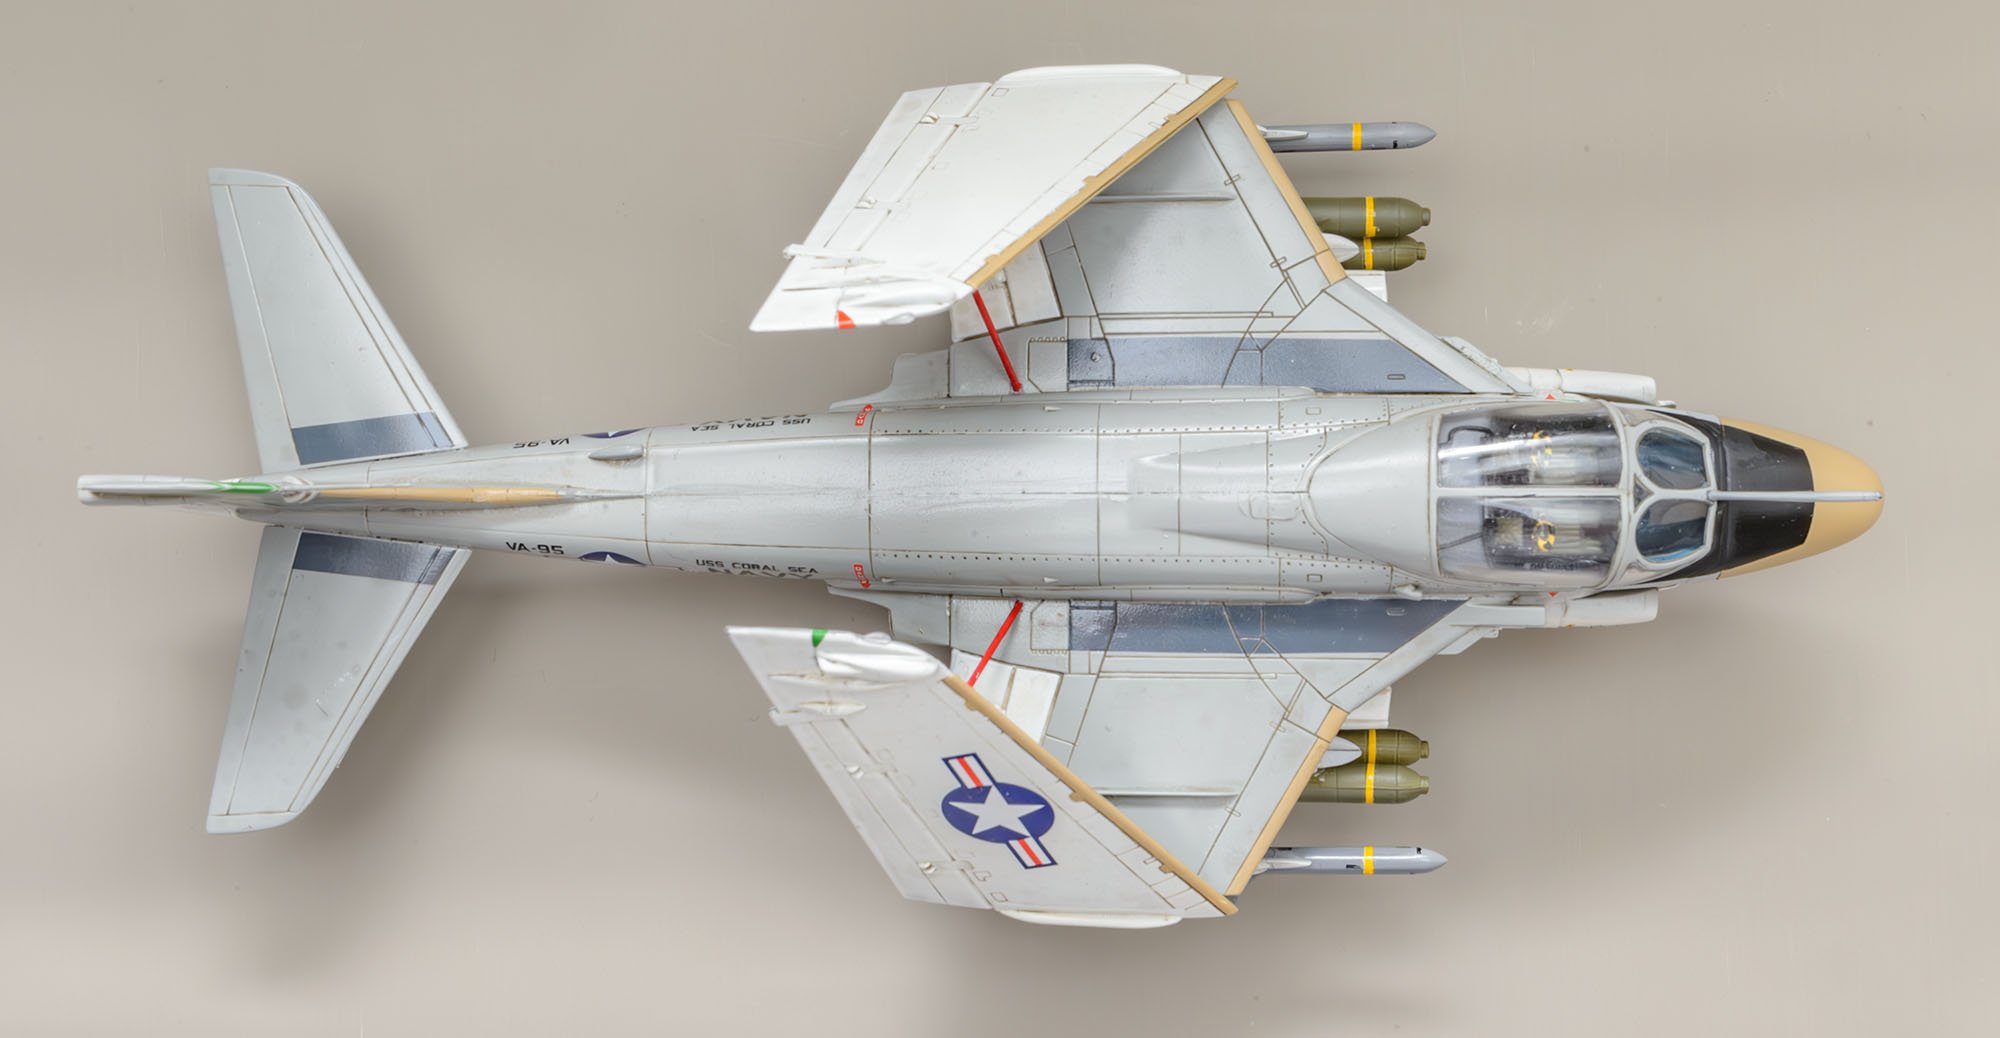
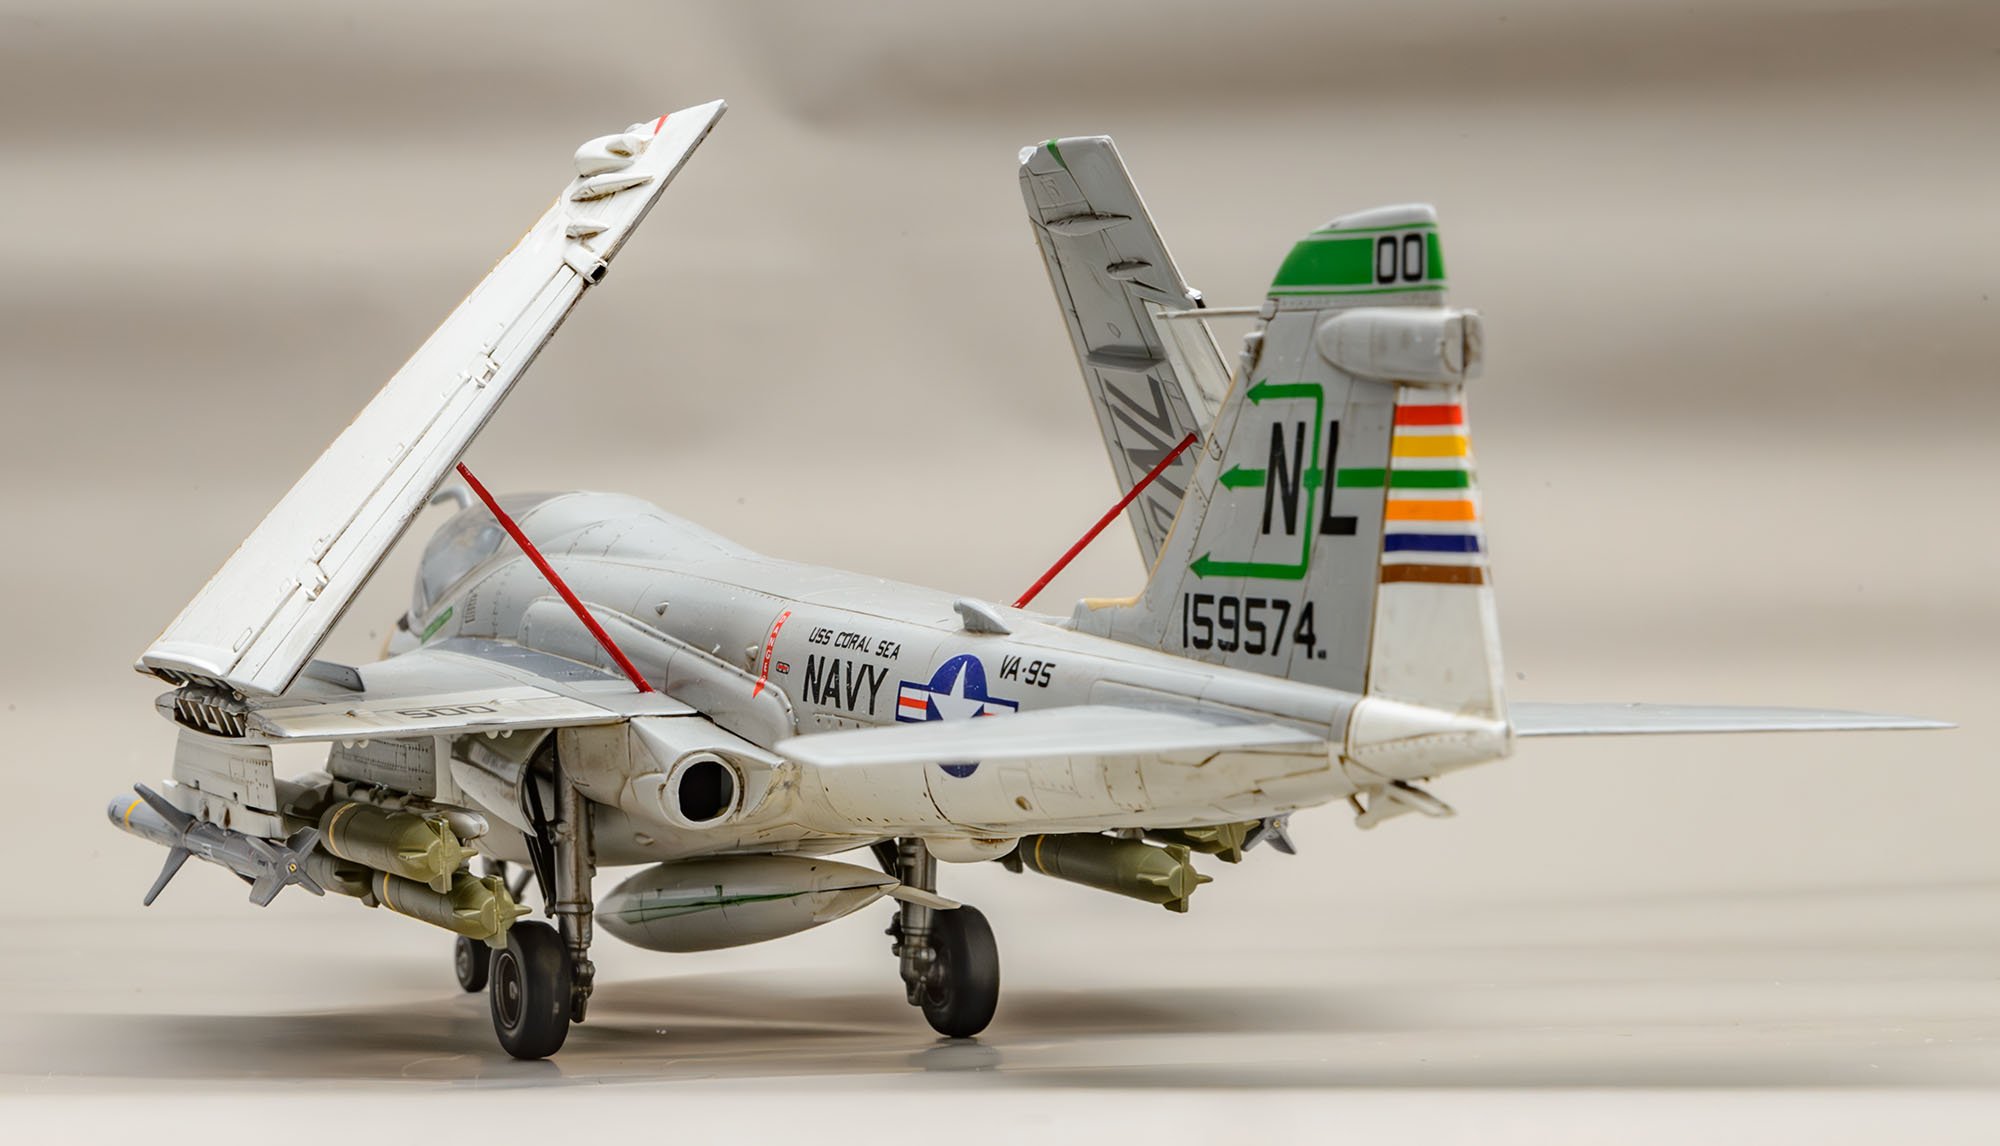
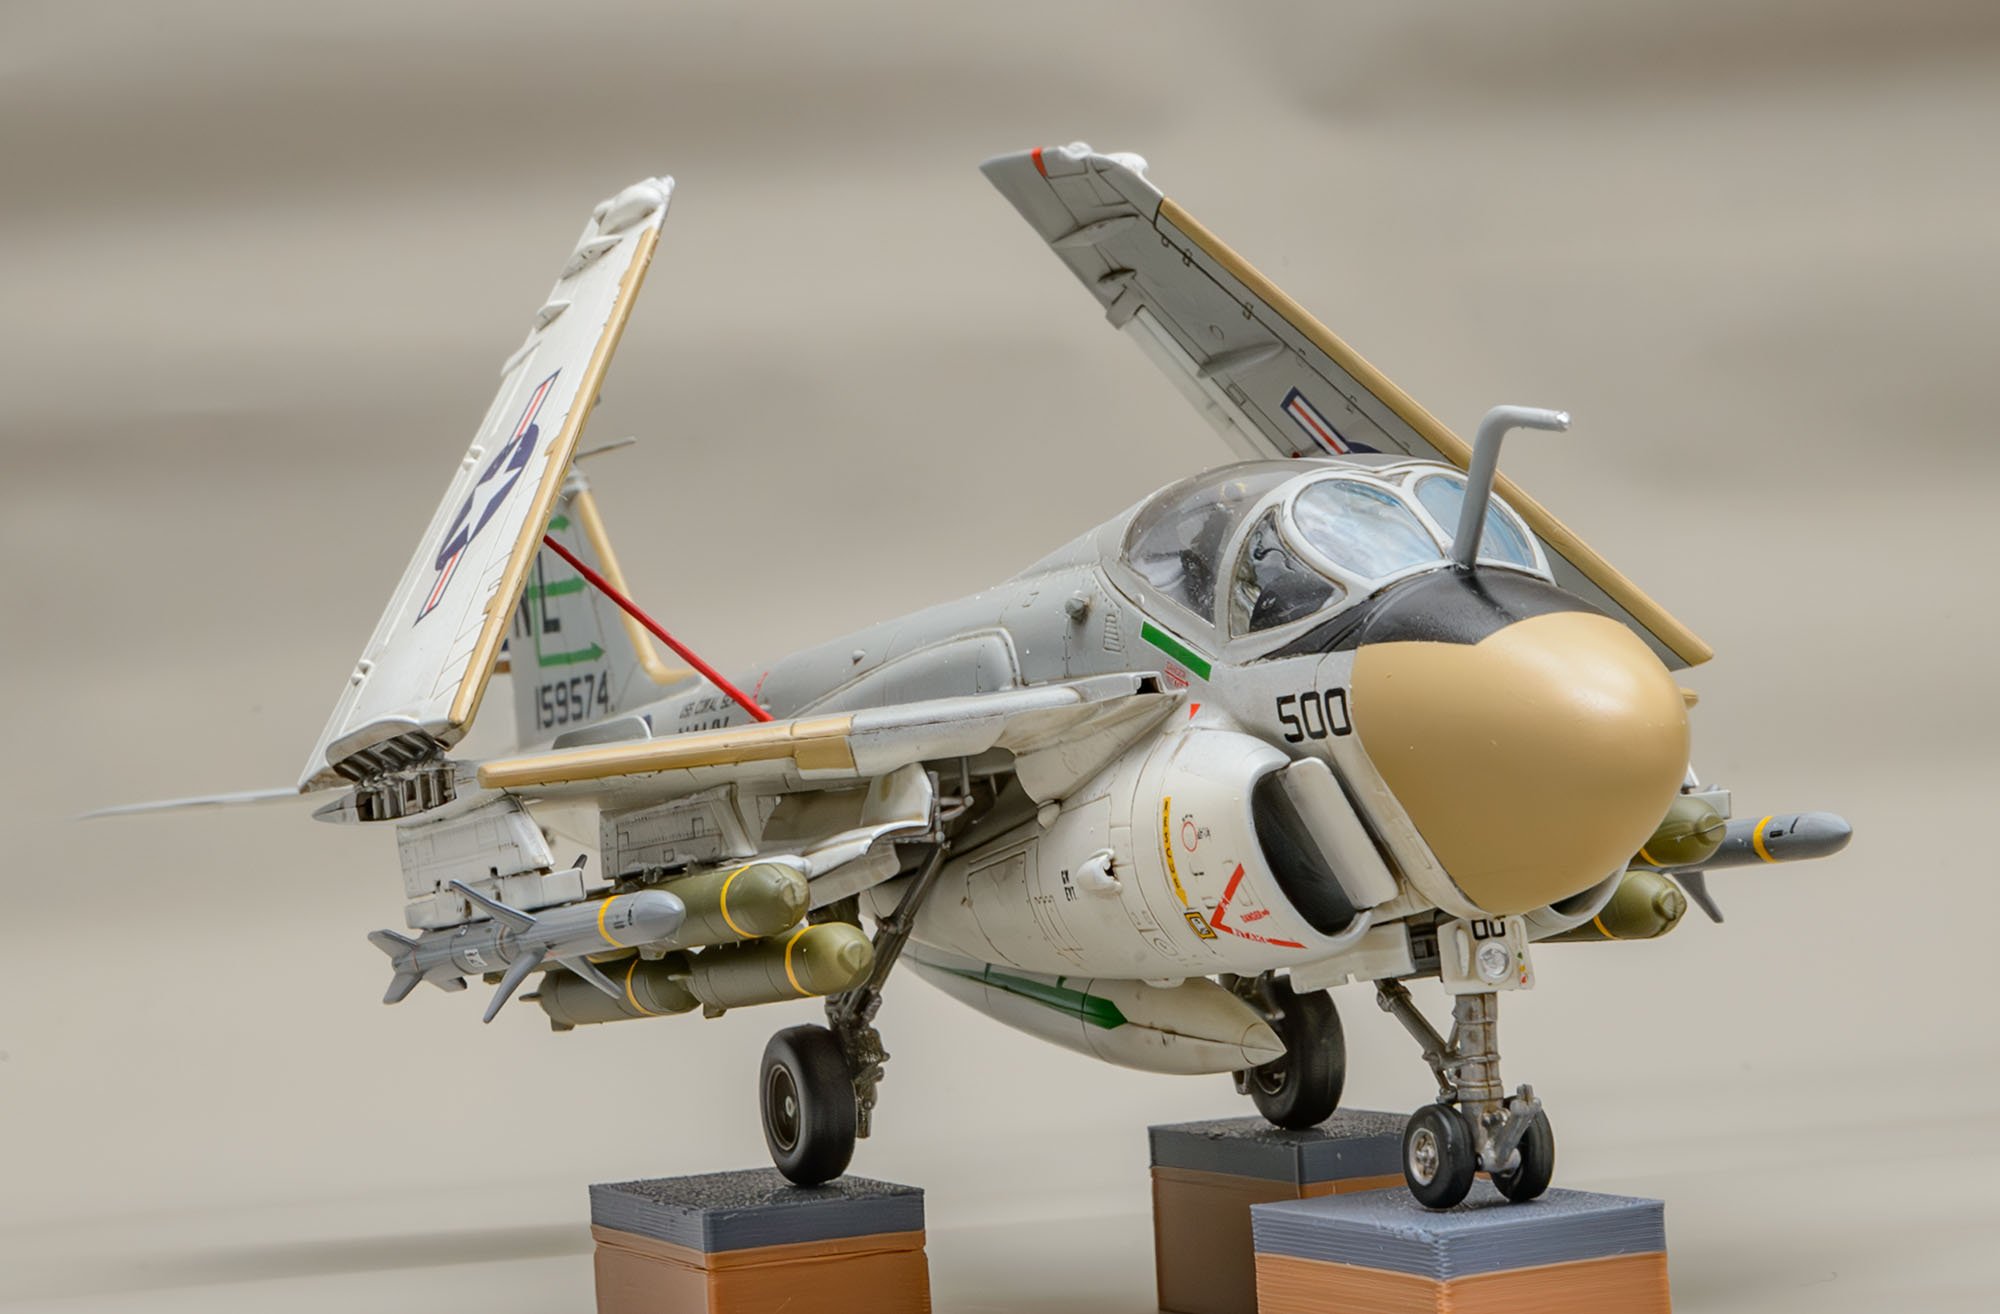
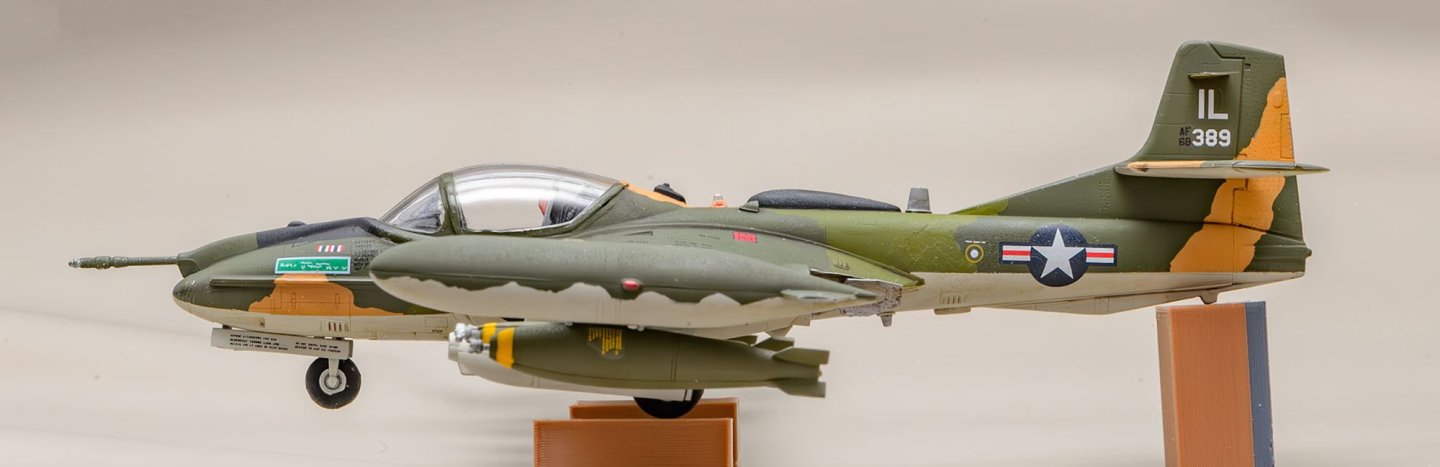
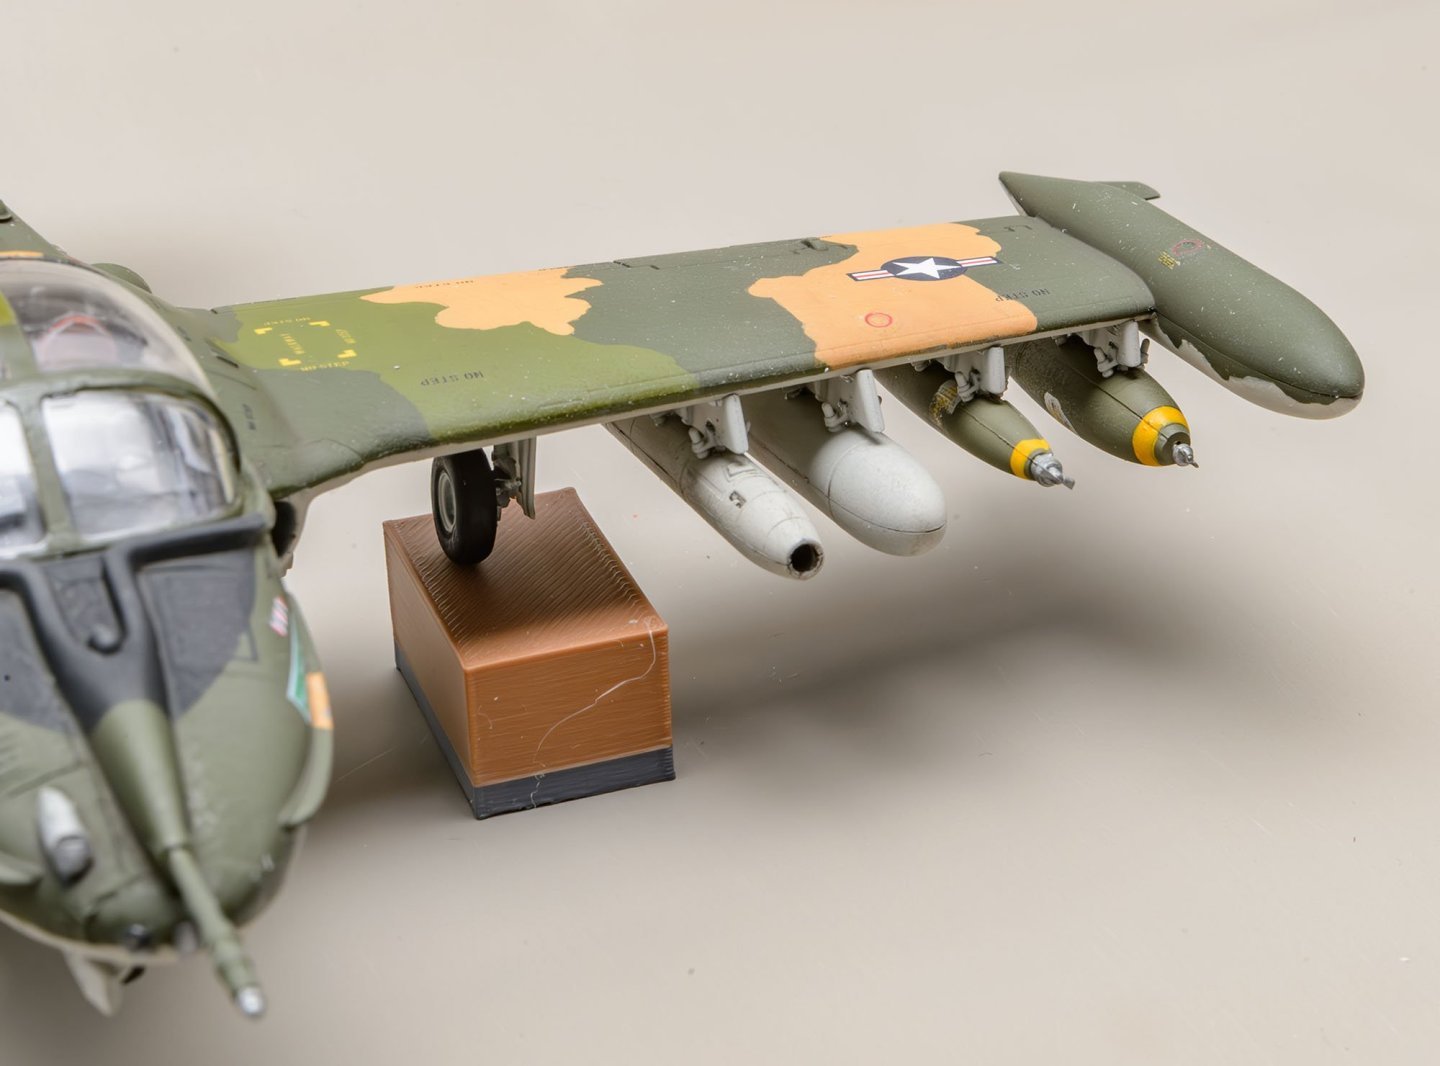
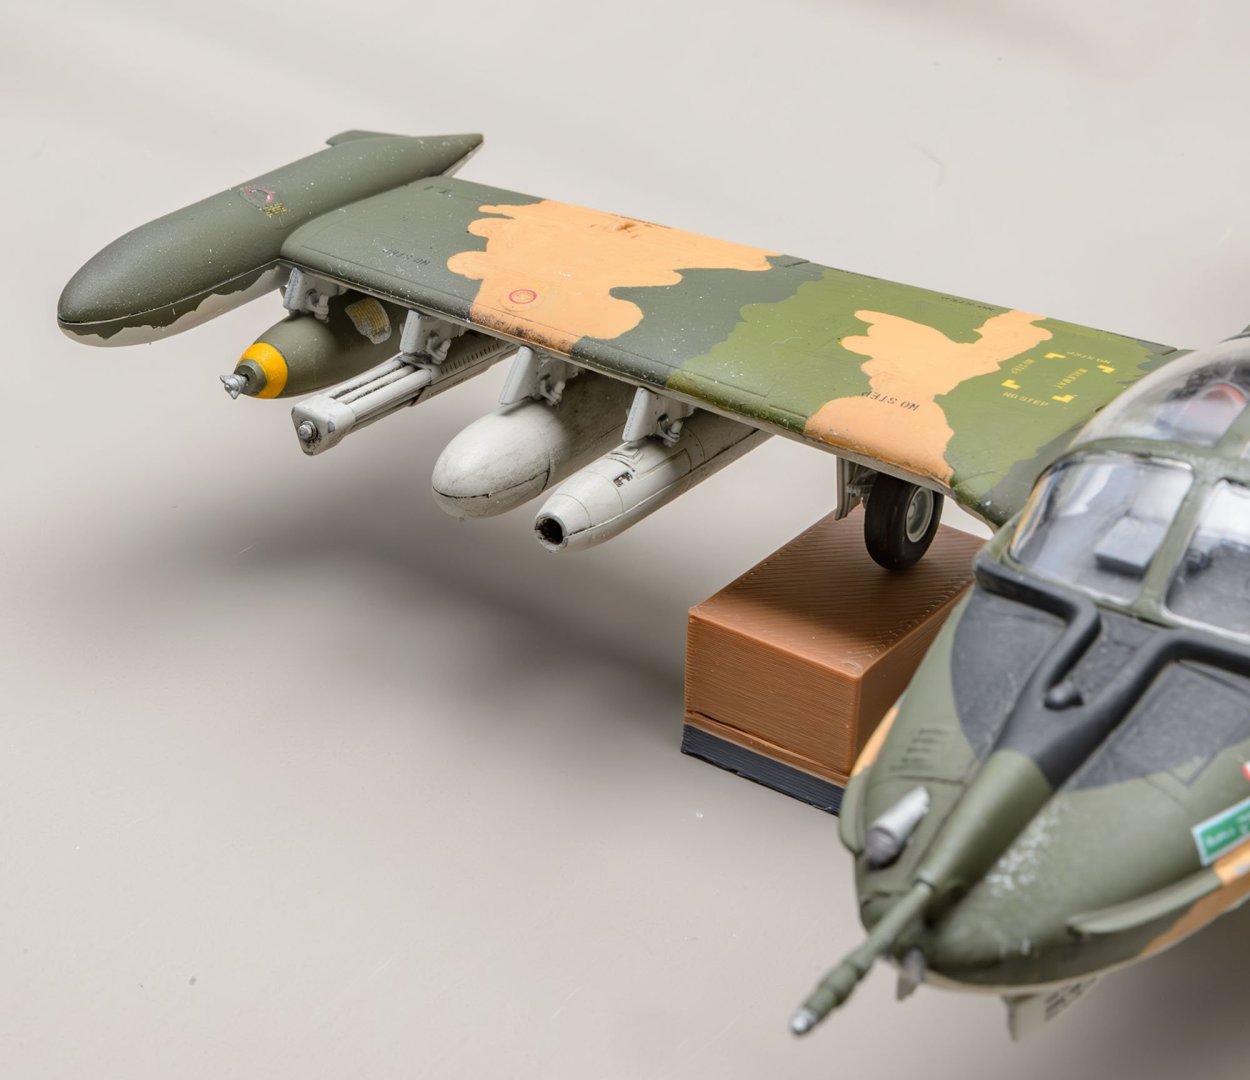
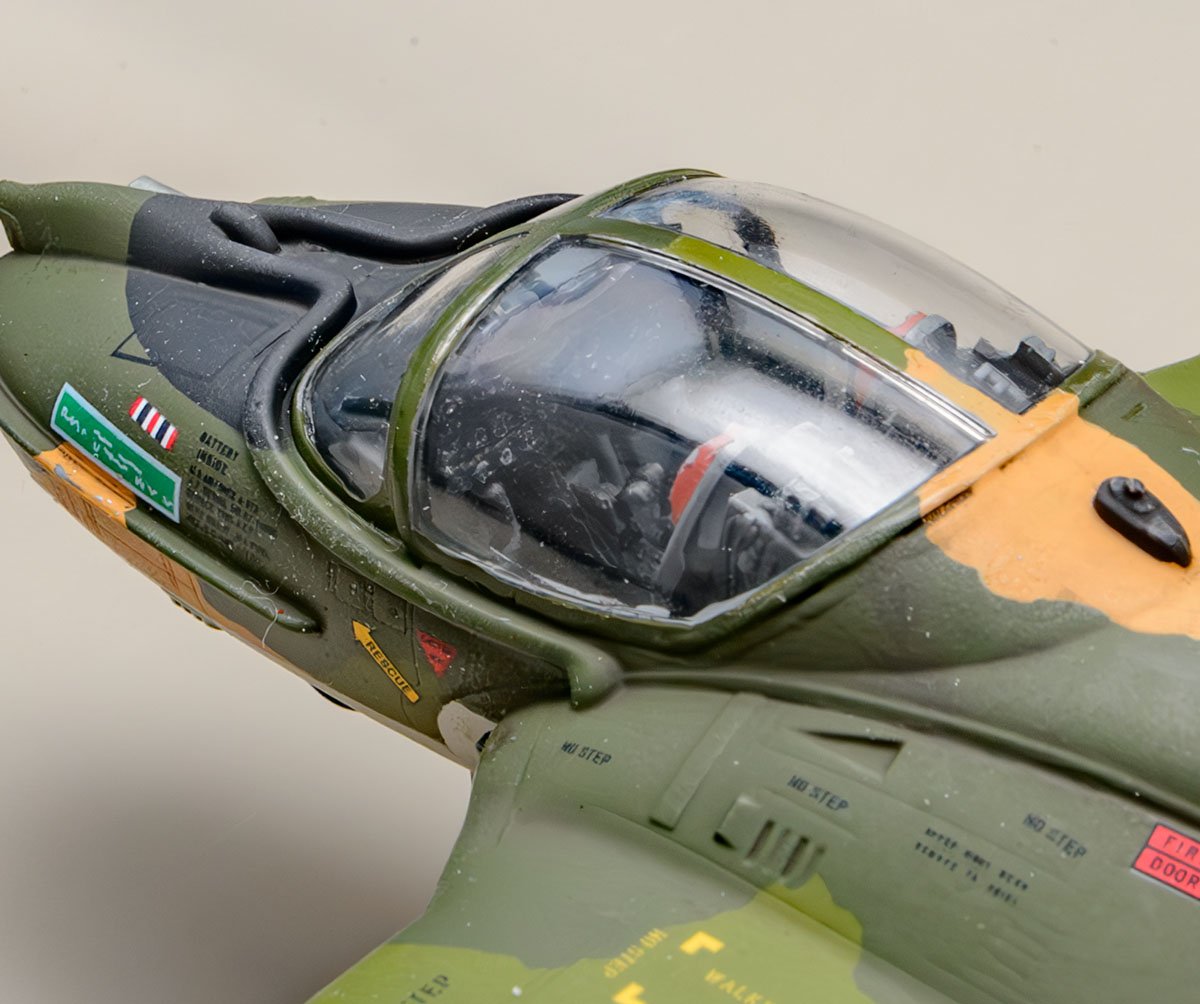
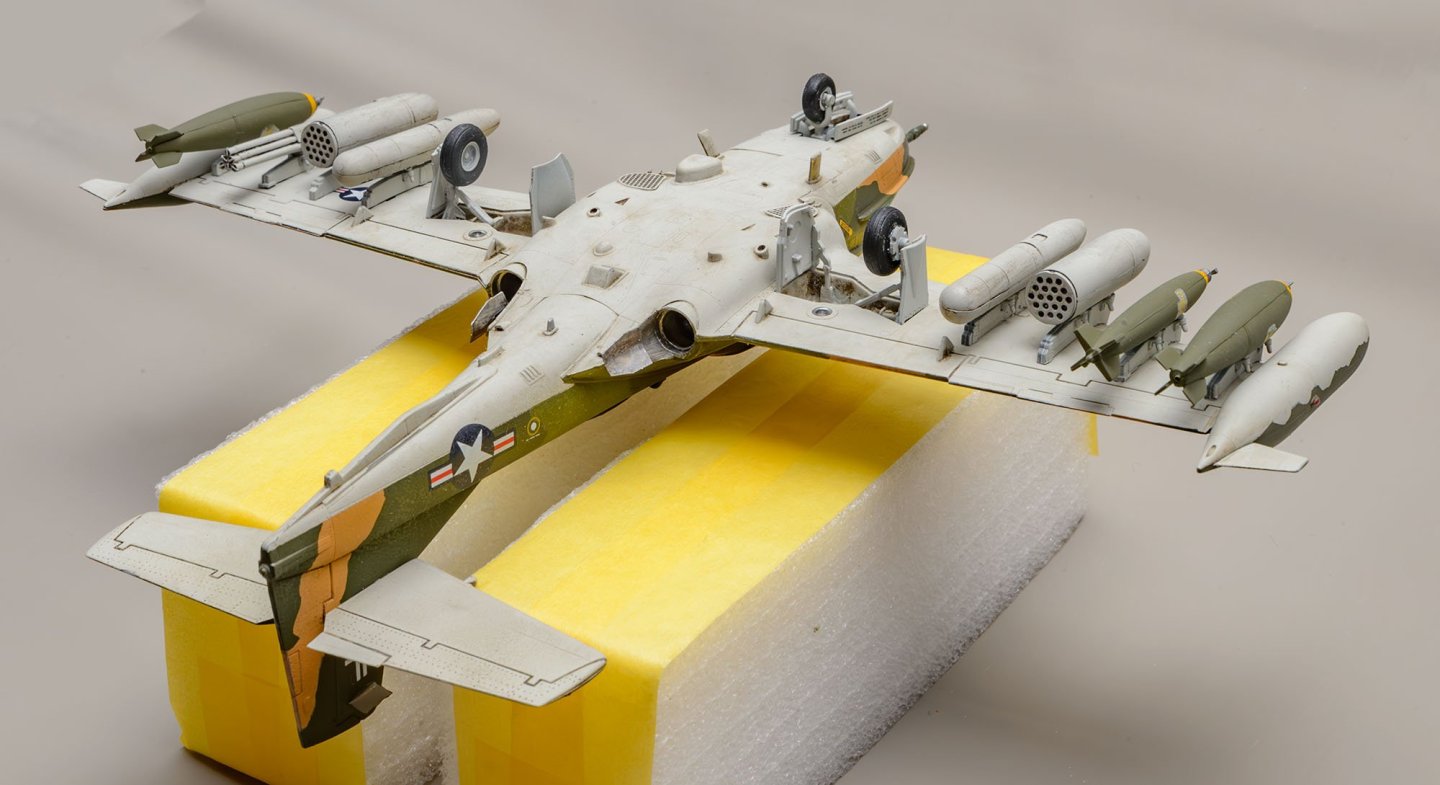
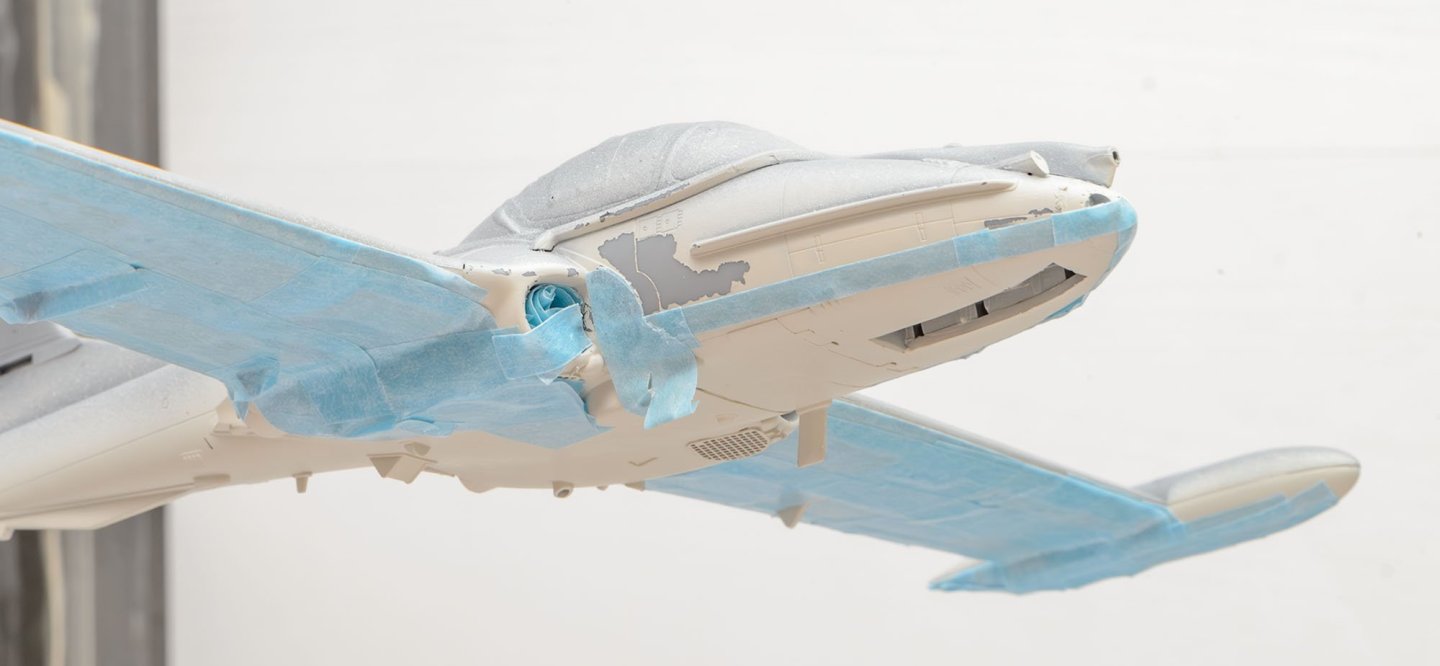
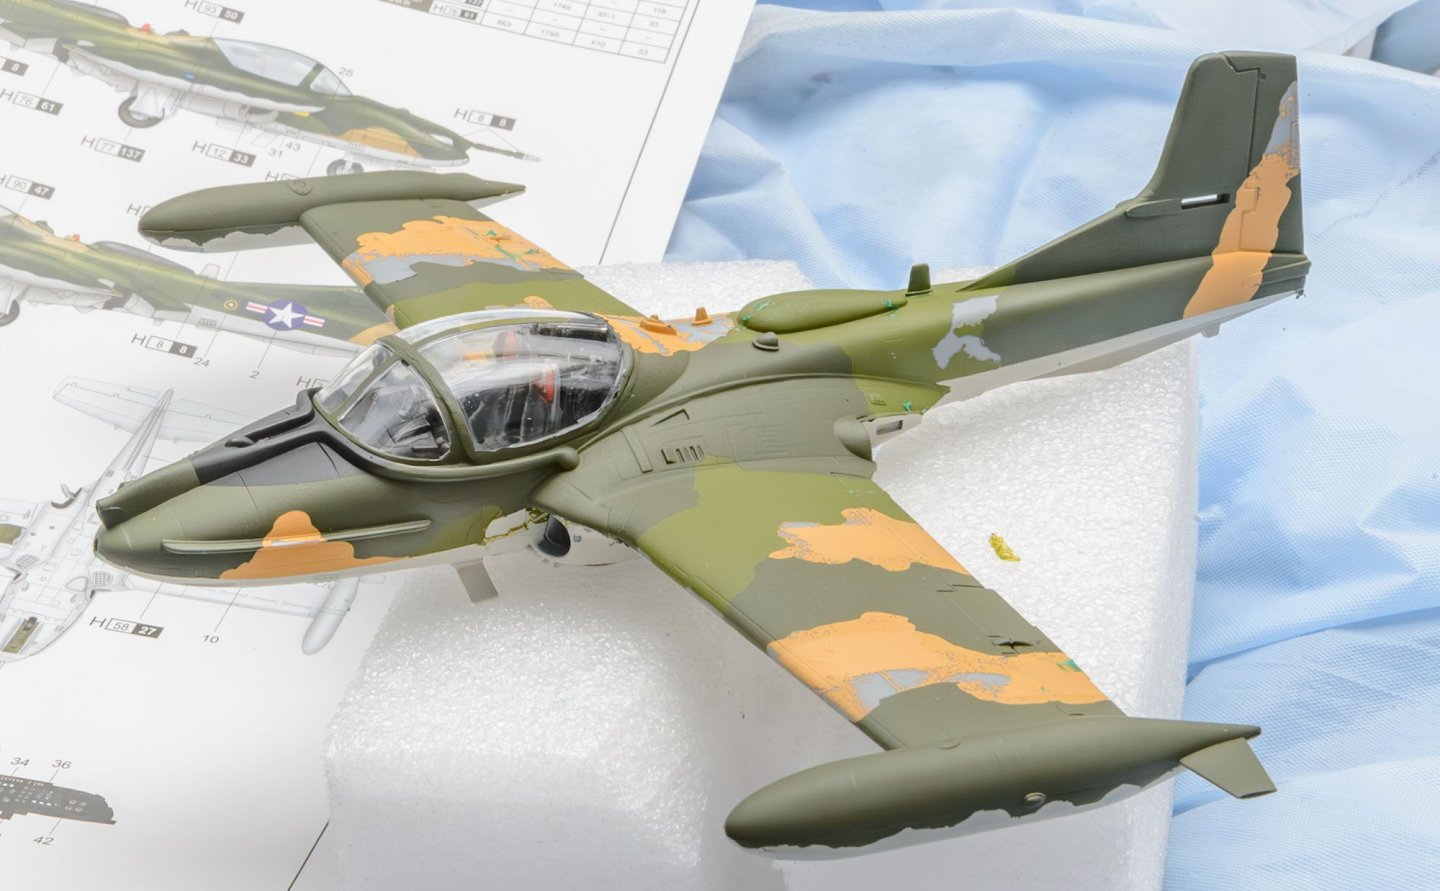
This time I tried some new methods, such as sponge weathering and liquid masking. All of these methods were unsuccessful, so I'll try another ways next time. Hope to enjoy your night flight.


- 4 replies
-
- 11
-
-
This is an awesome build, Yves. I attempted this kit but abandoned it due to my lack of skill. It is good to see the great showcase.
-
Nope. I'll buy the Le Soleil Roral at the local hobbyshop due to the increasing exchange rate.
-
Here are two hoppfish! one is from the sea, and another one is from the land. This kit needs lots of preparation, including weight.


-
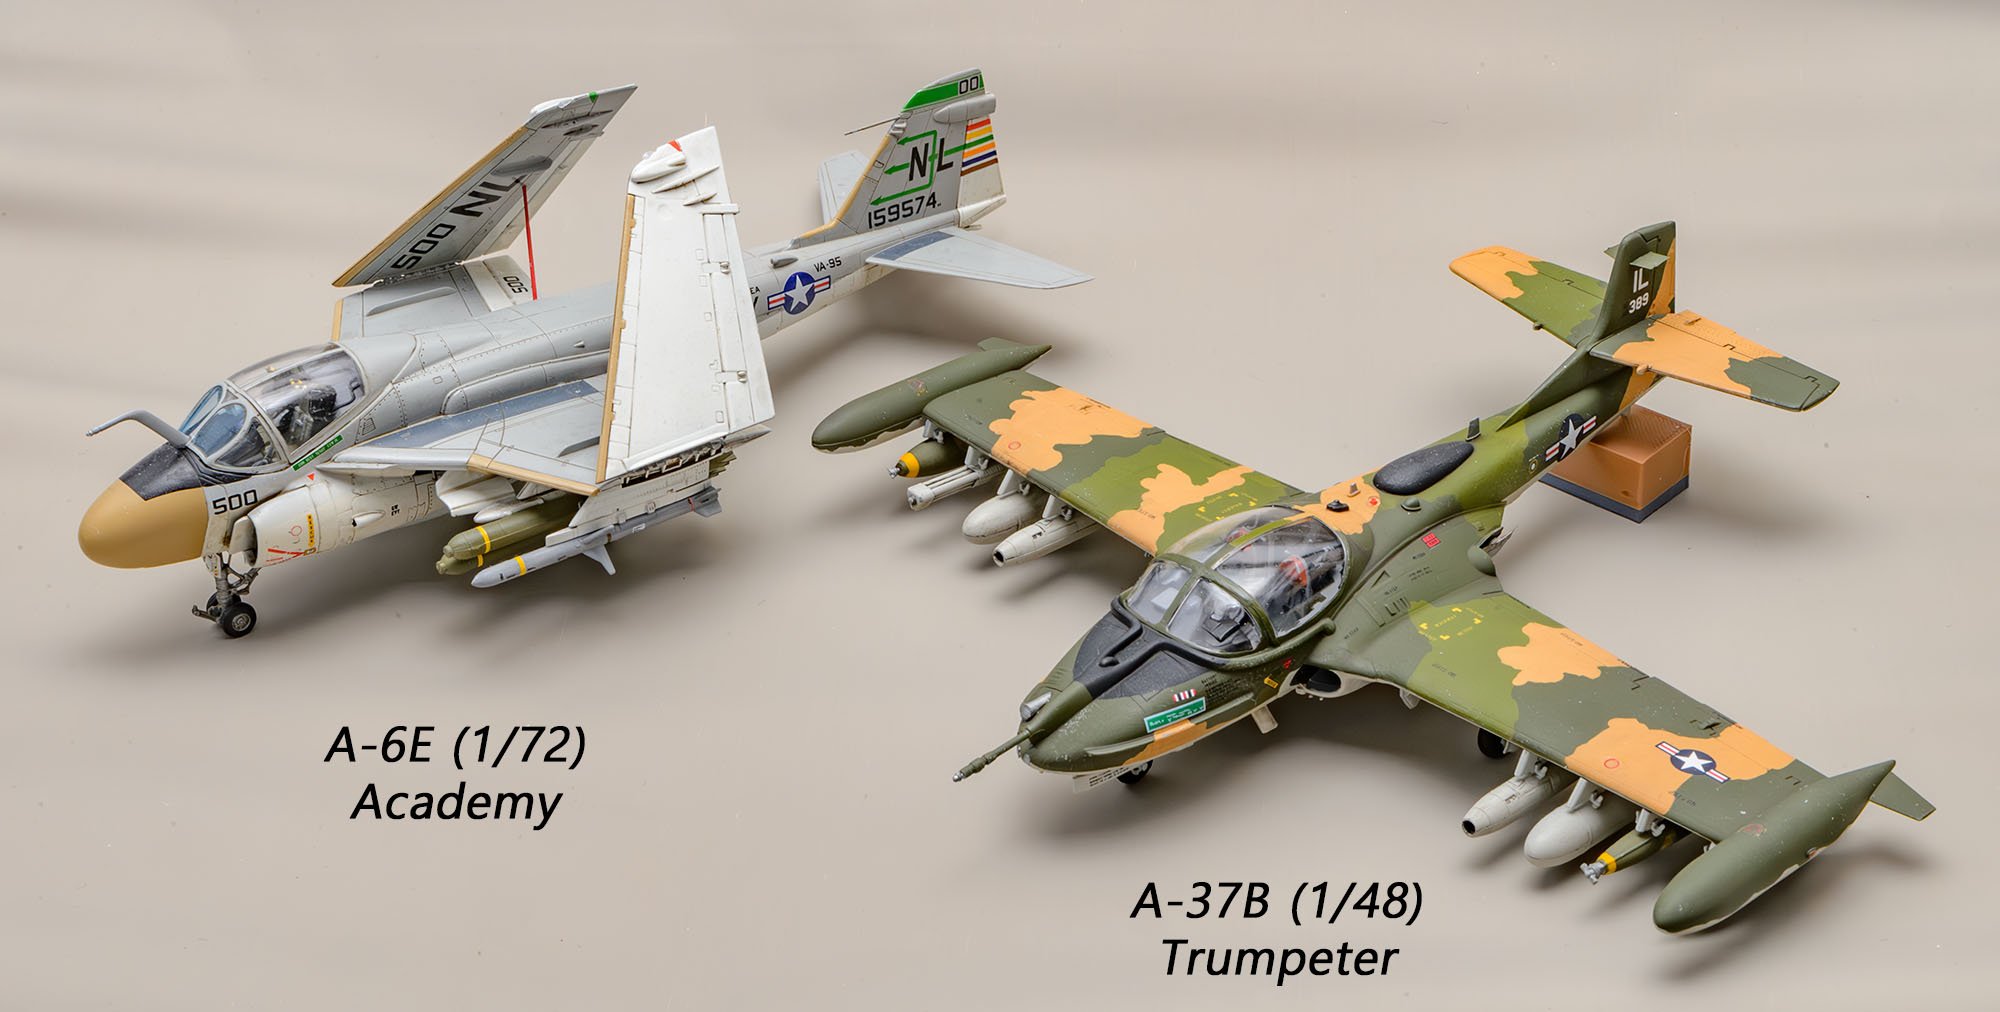
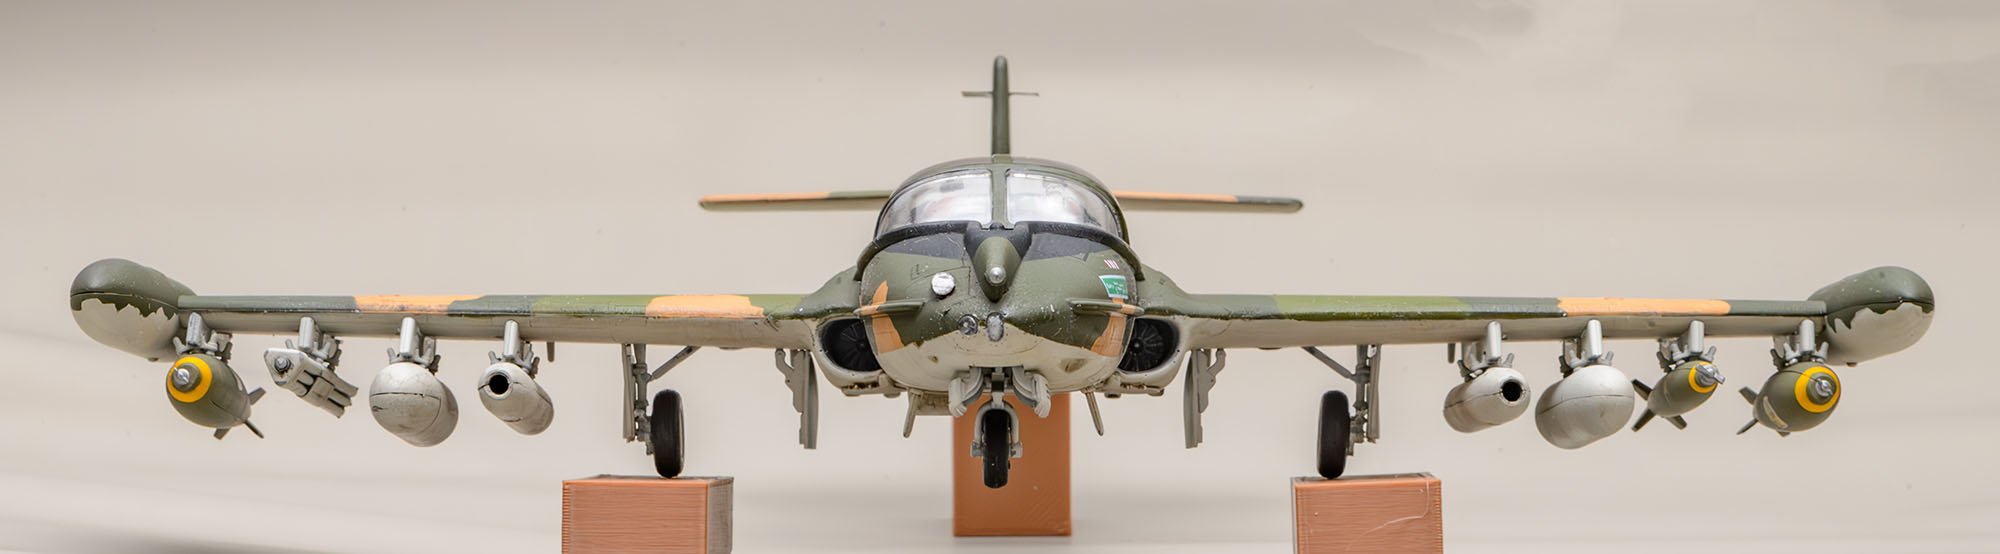
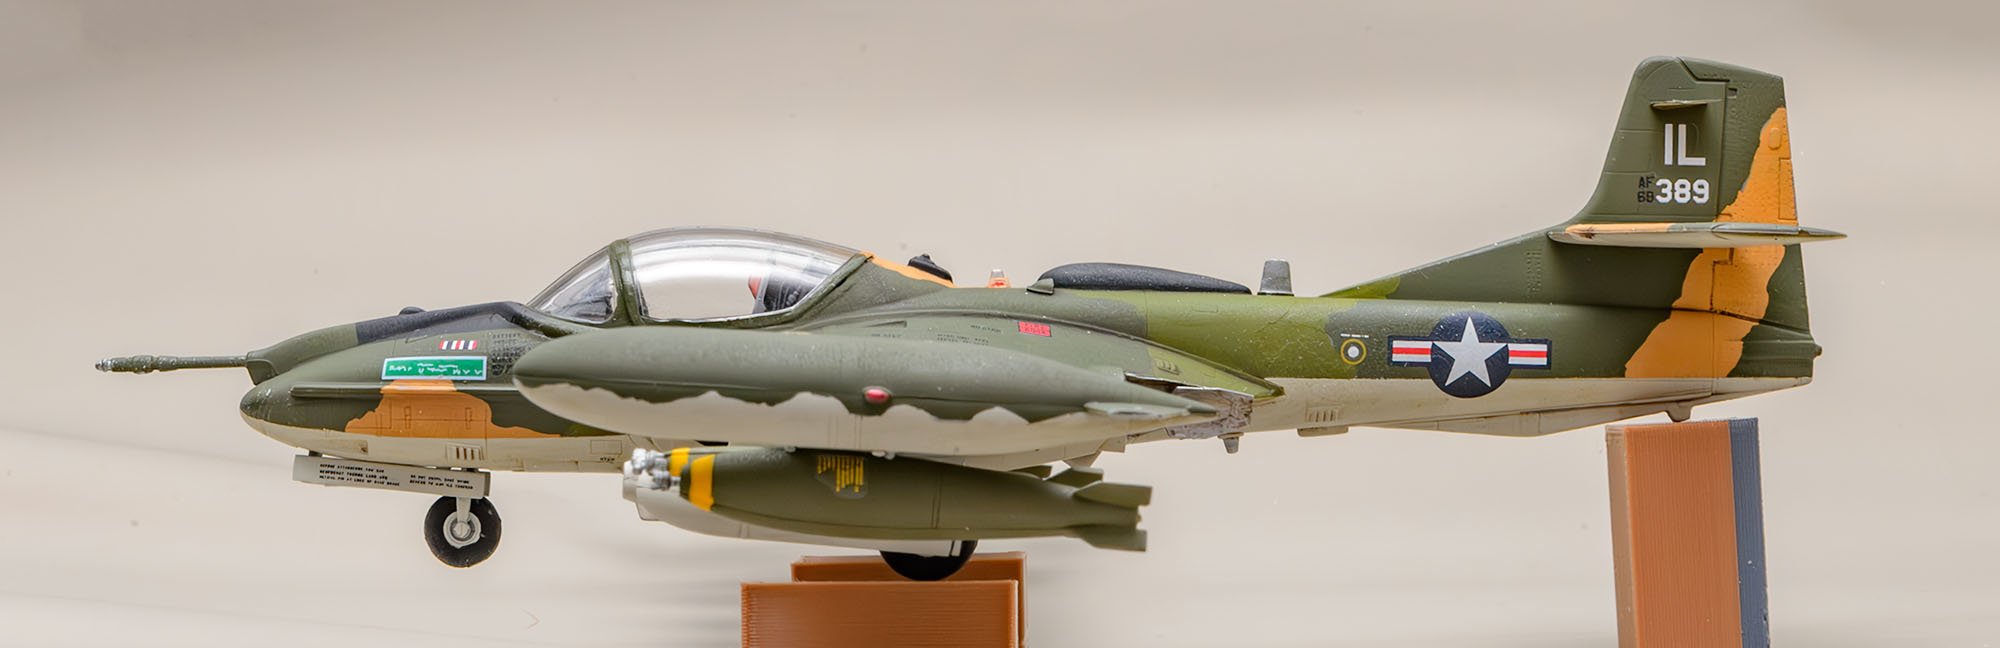
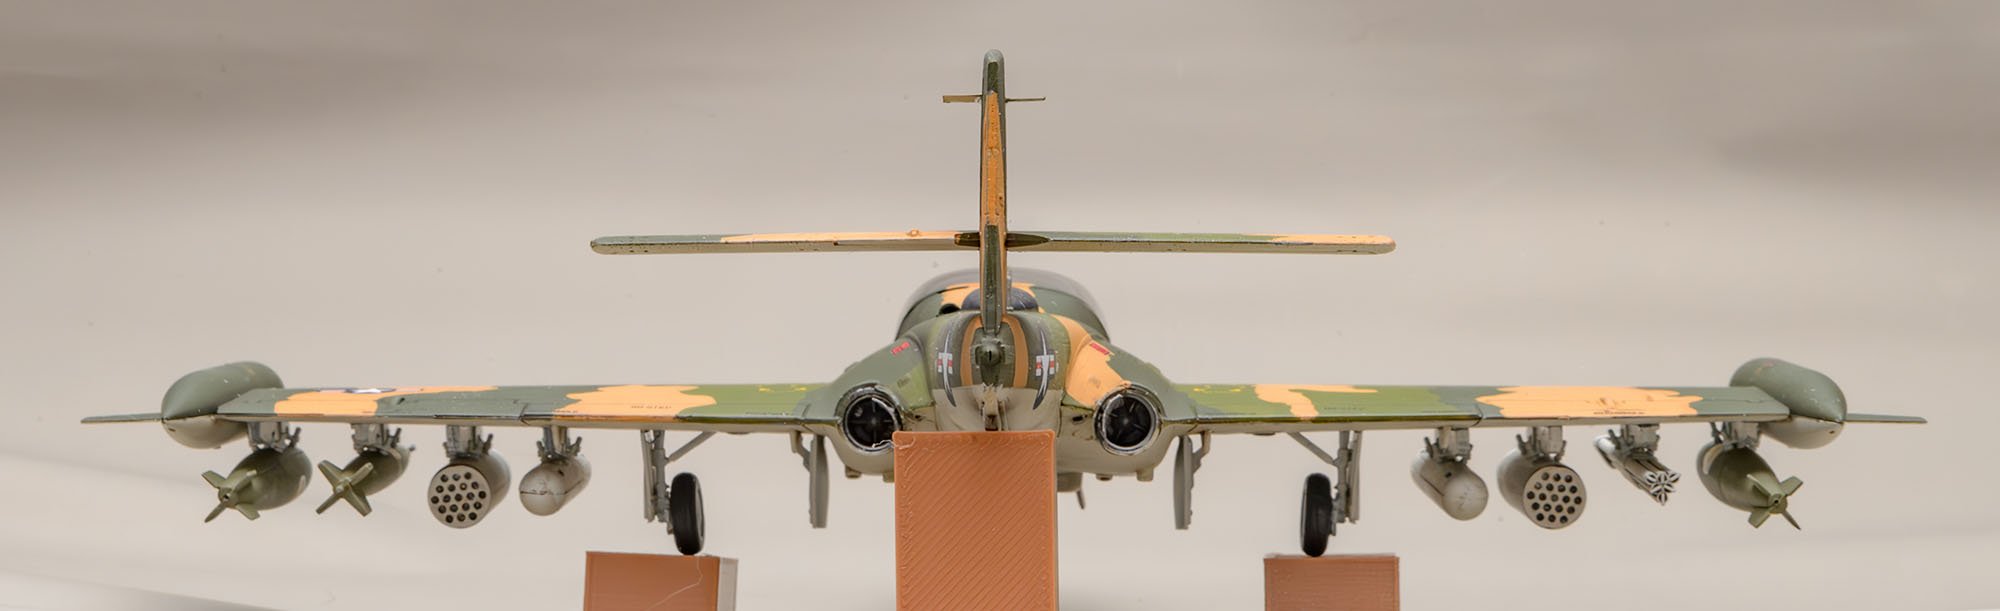
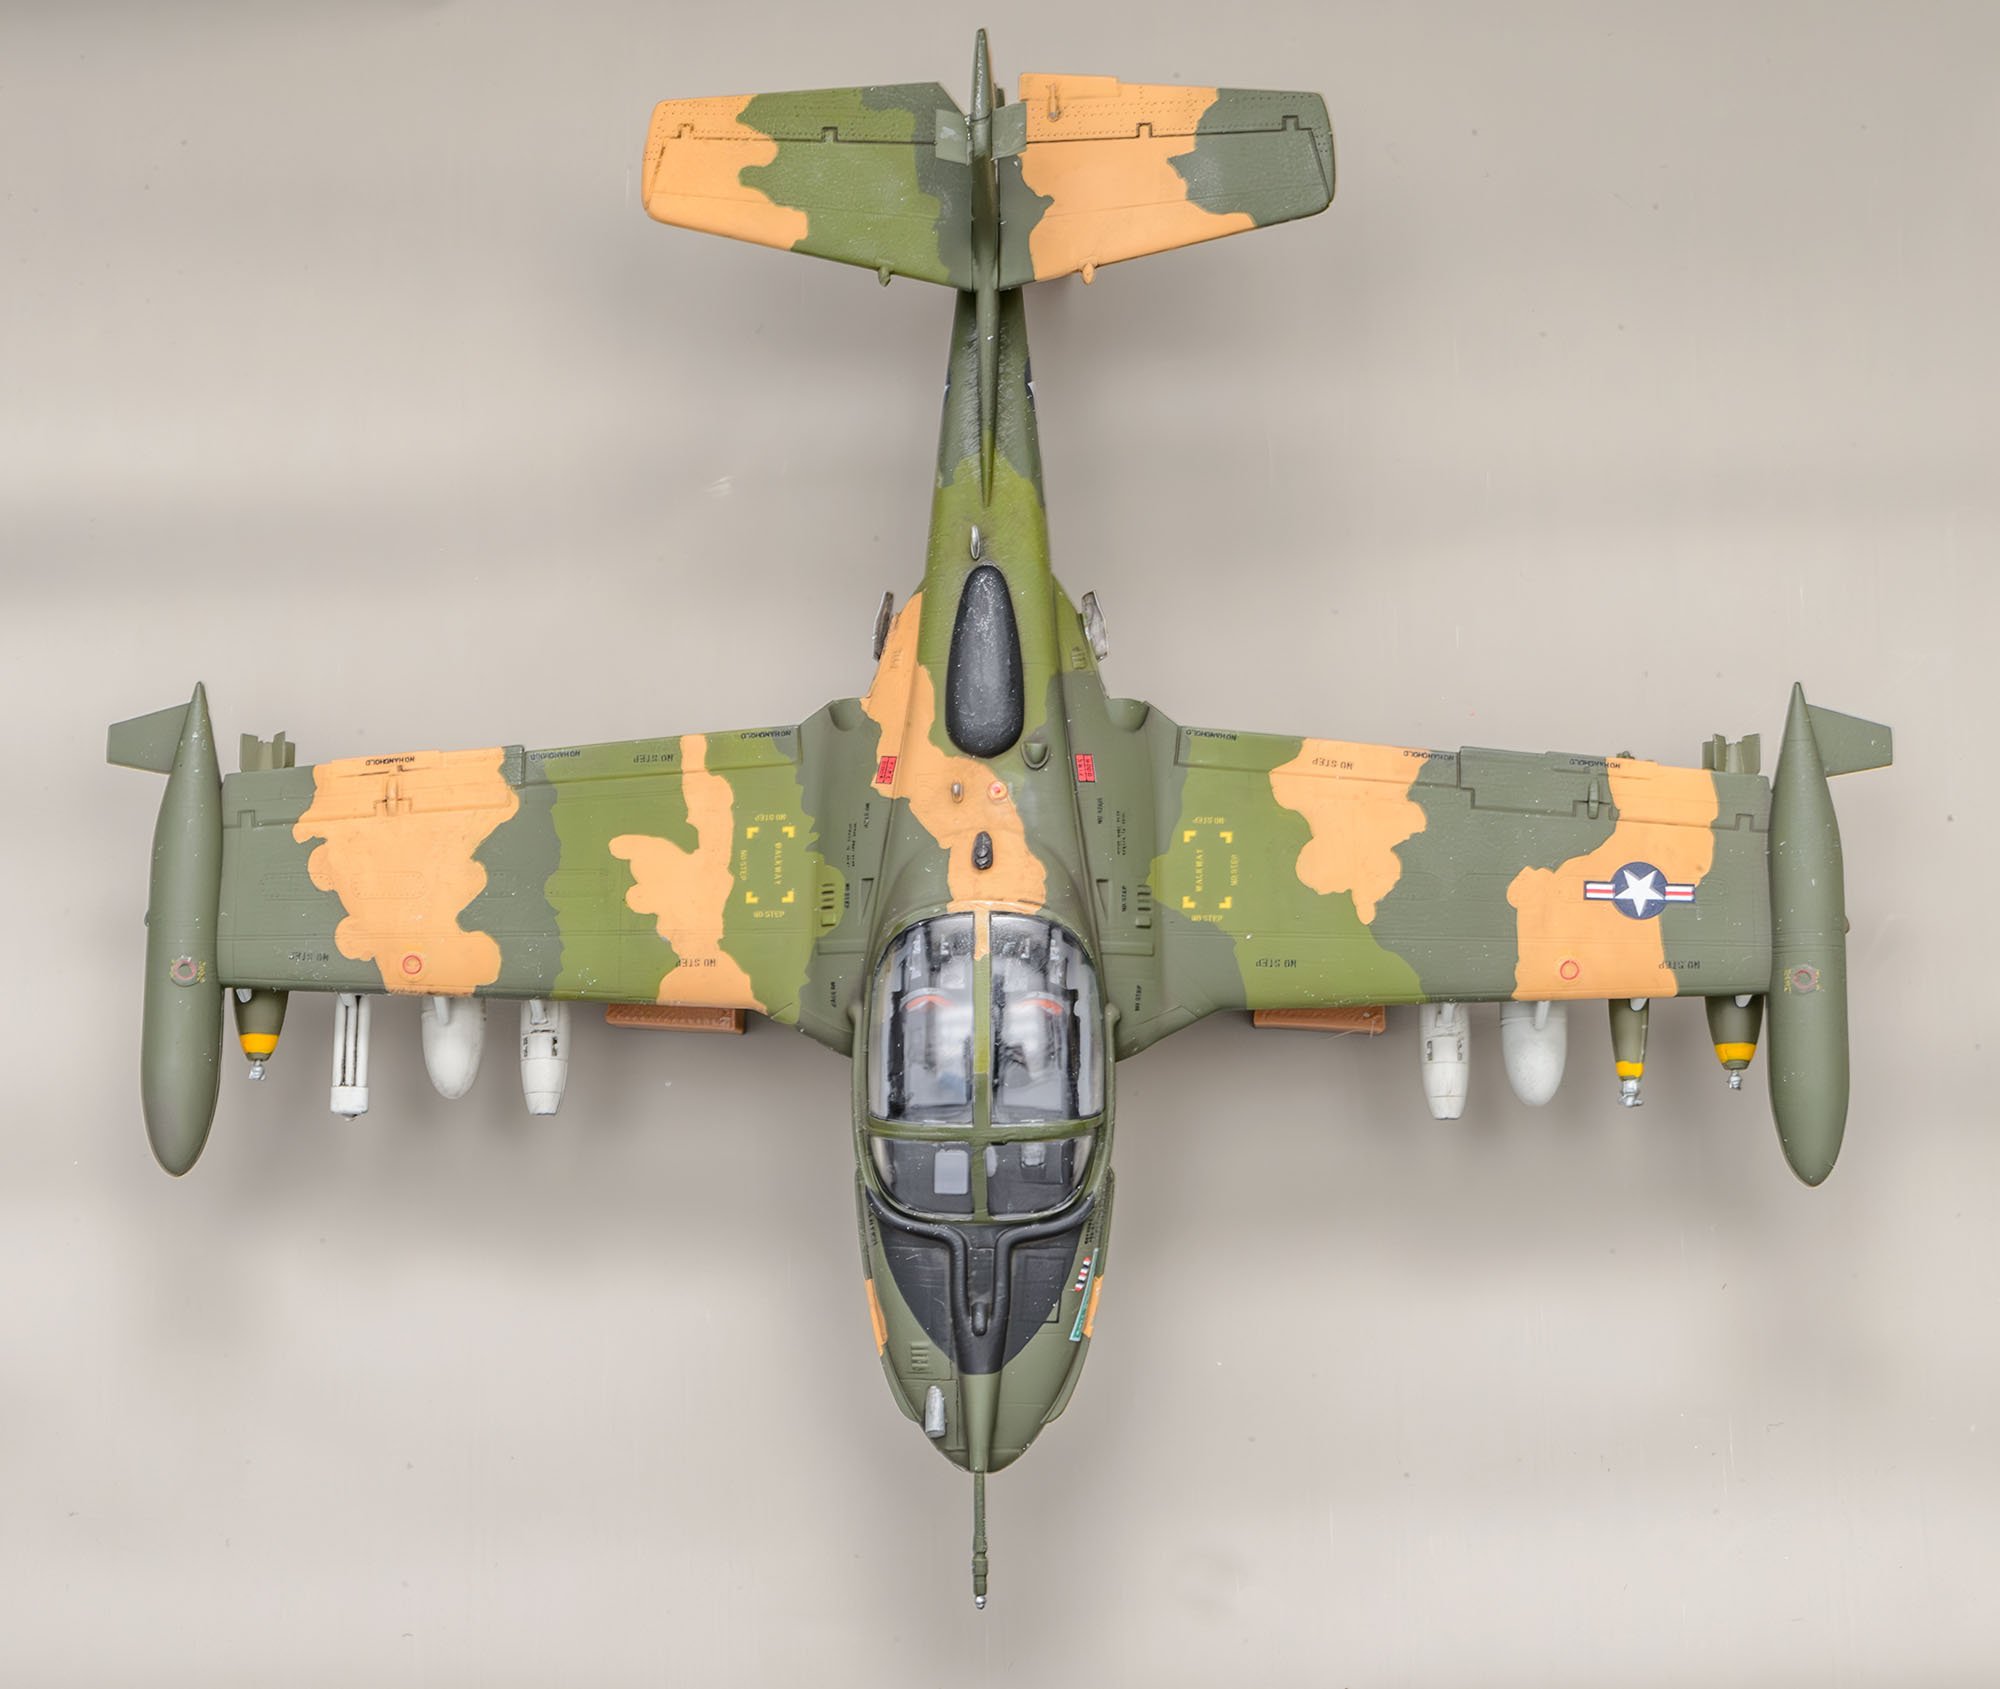
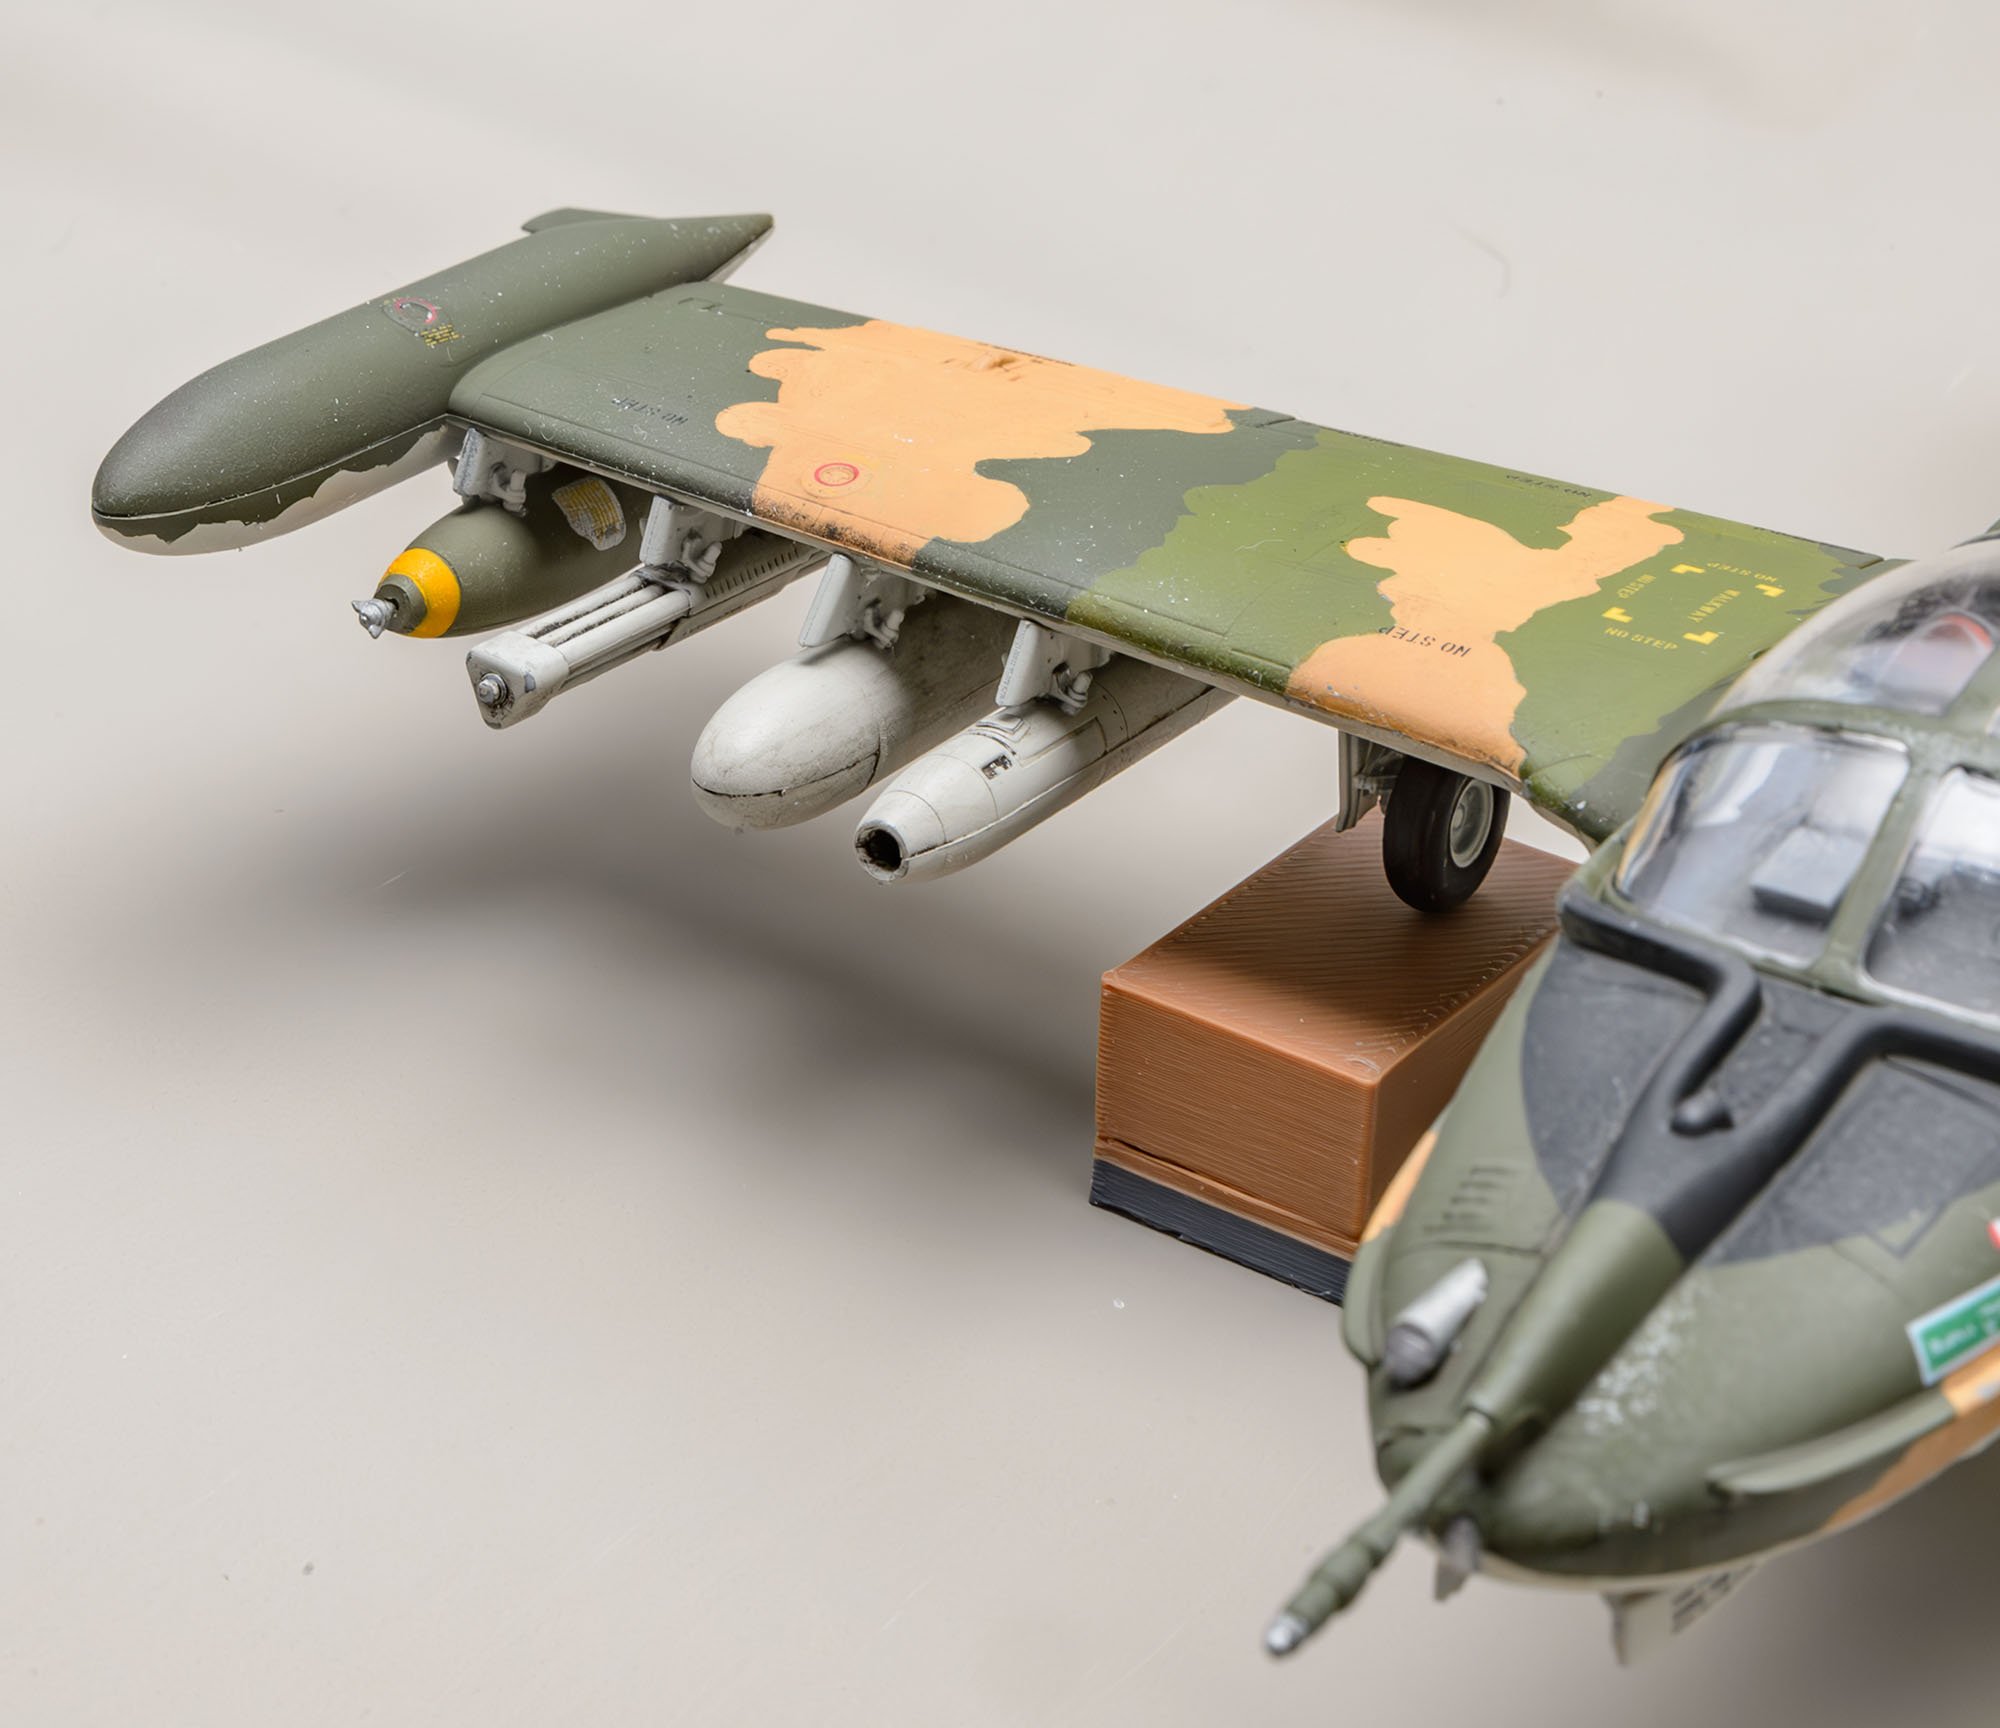
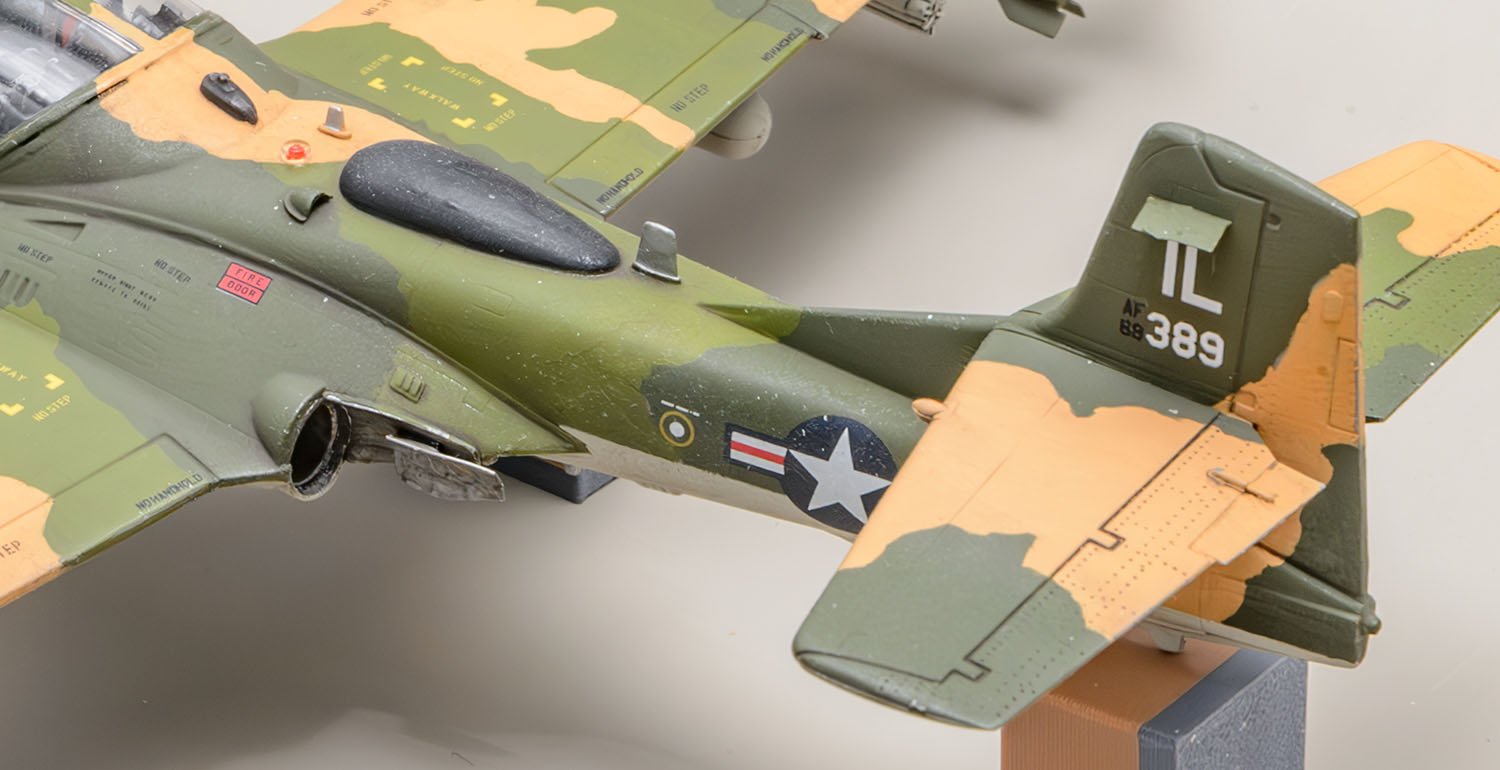
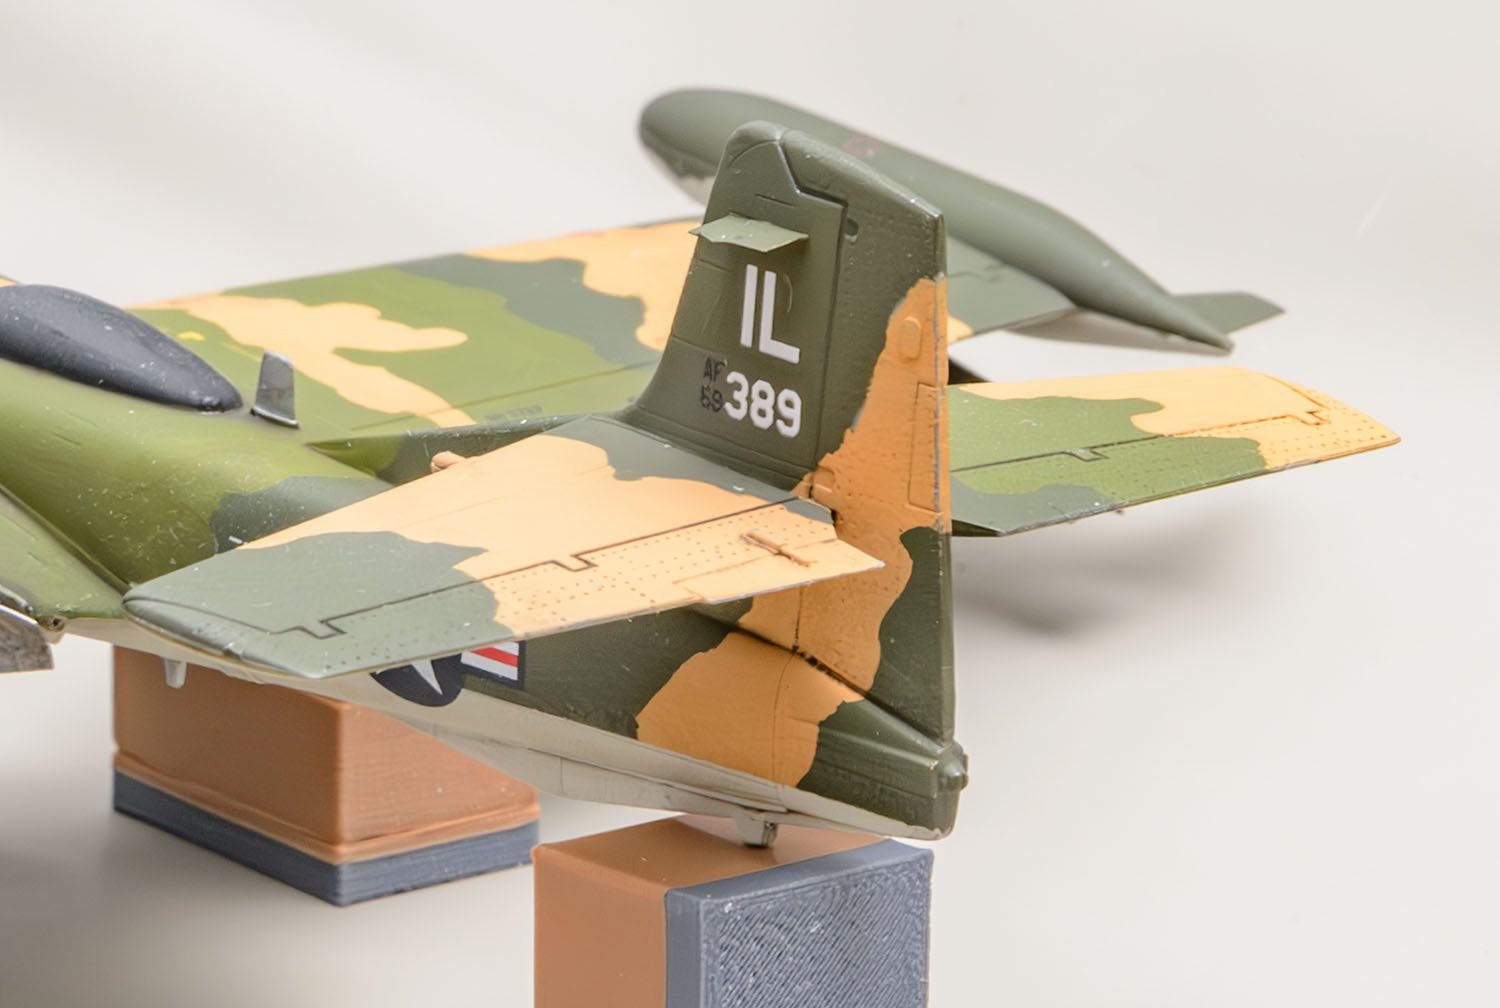
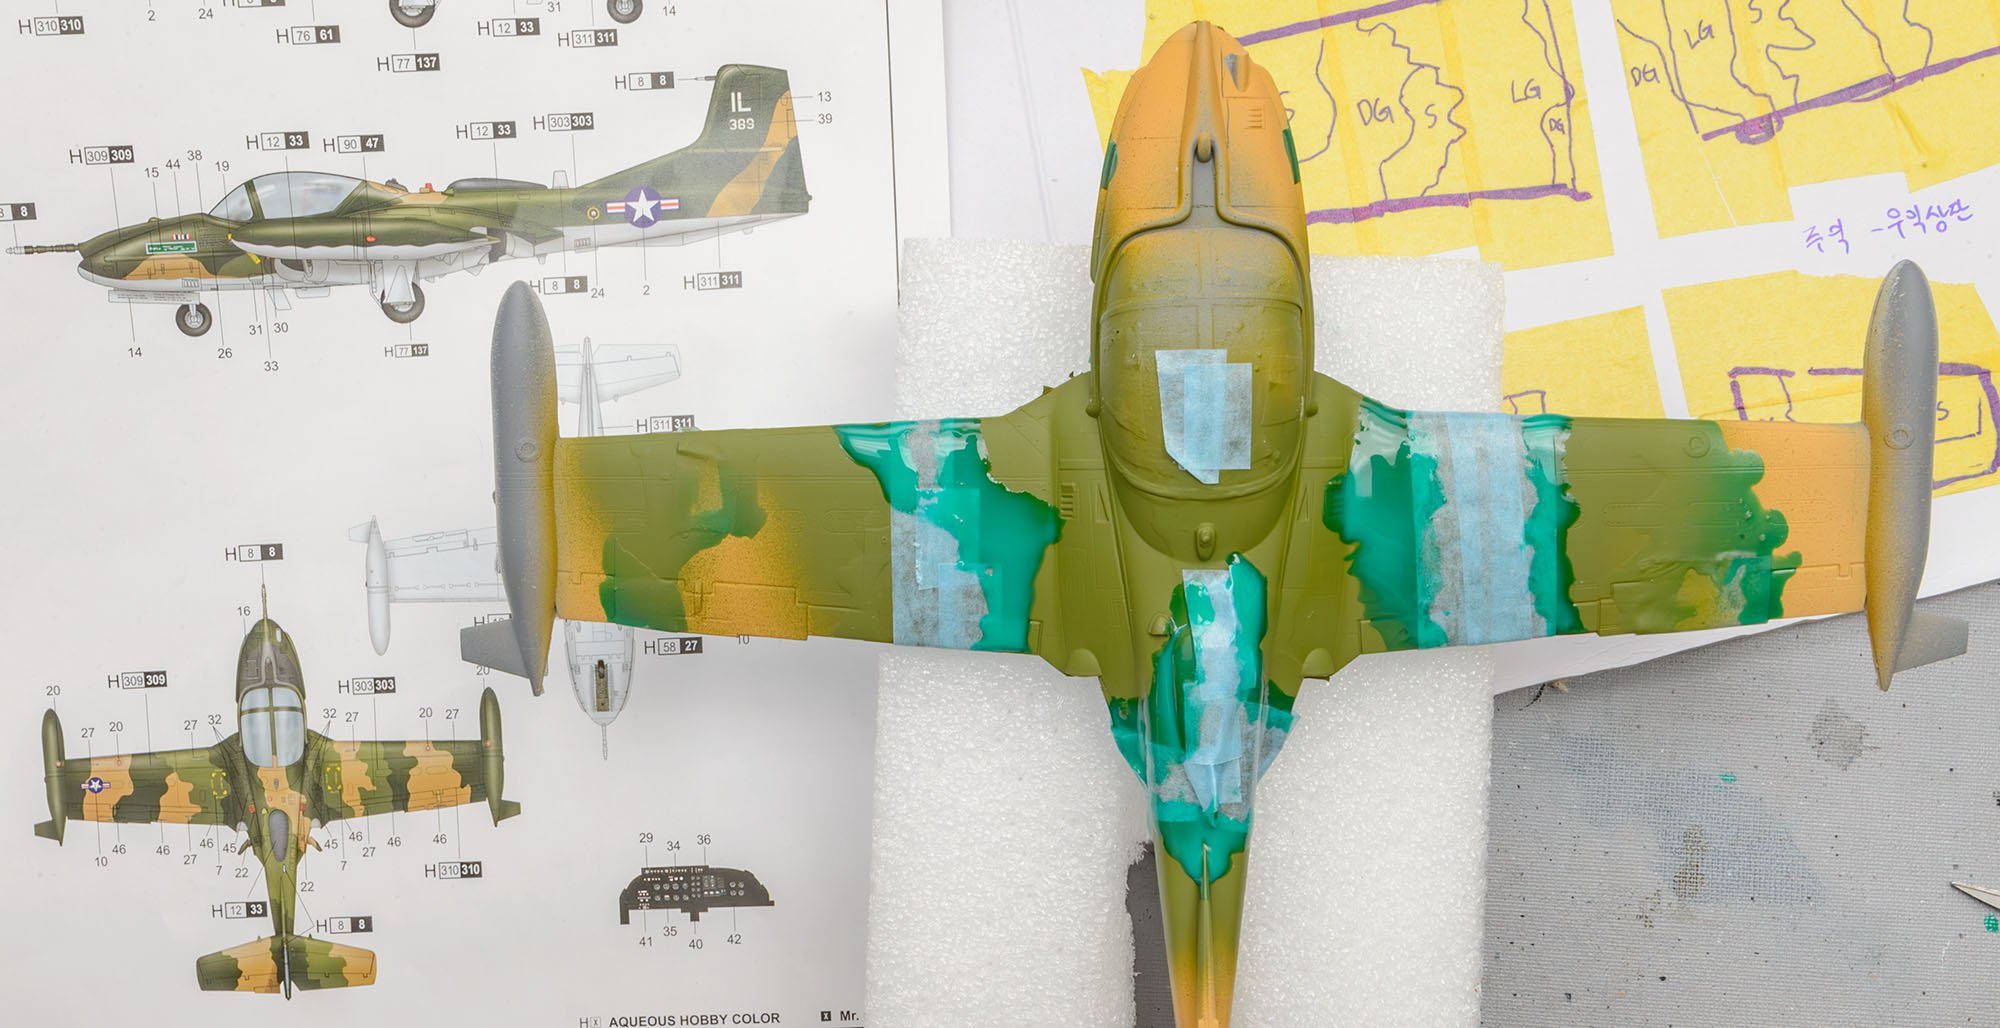
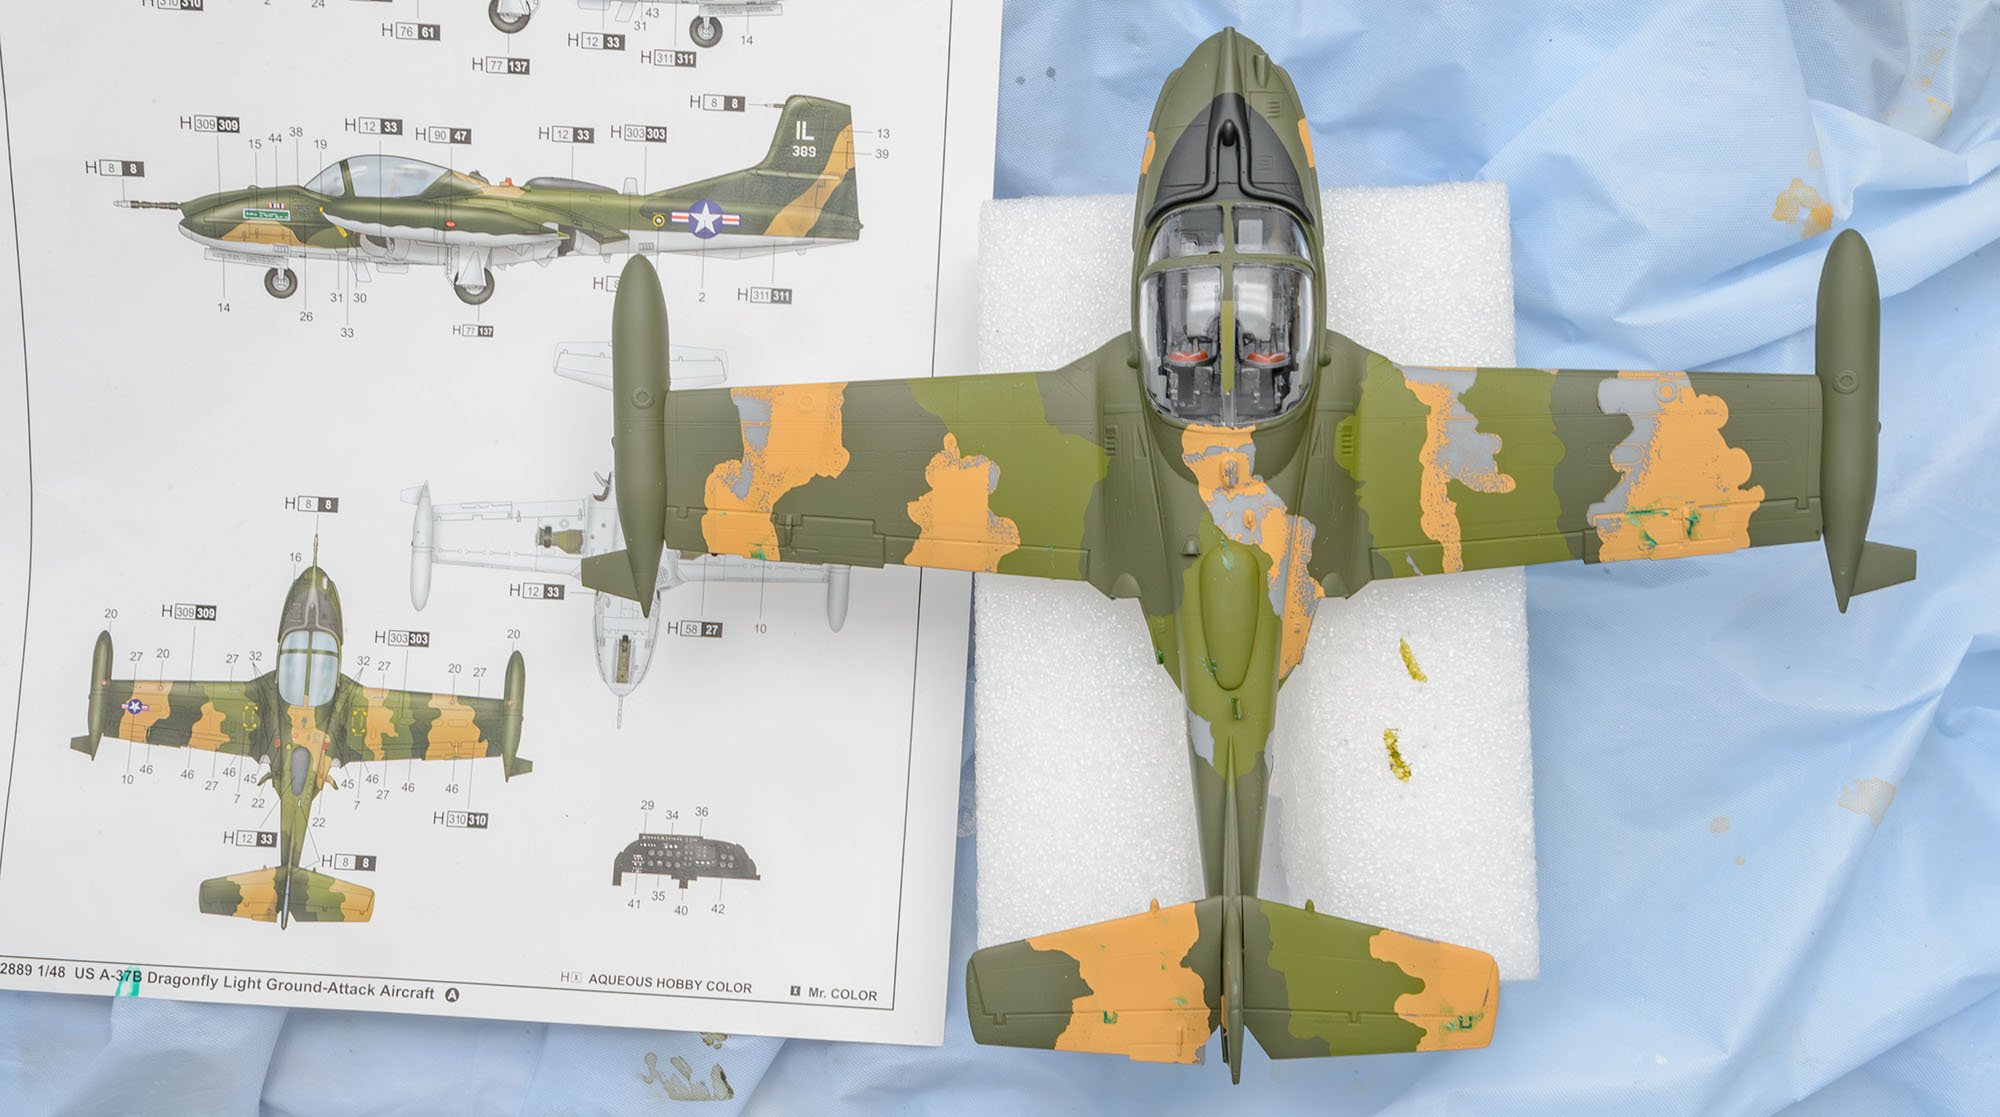
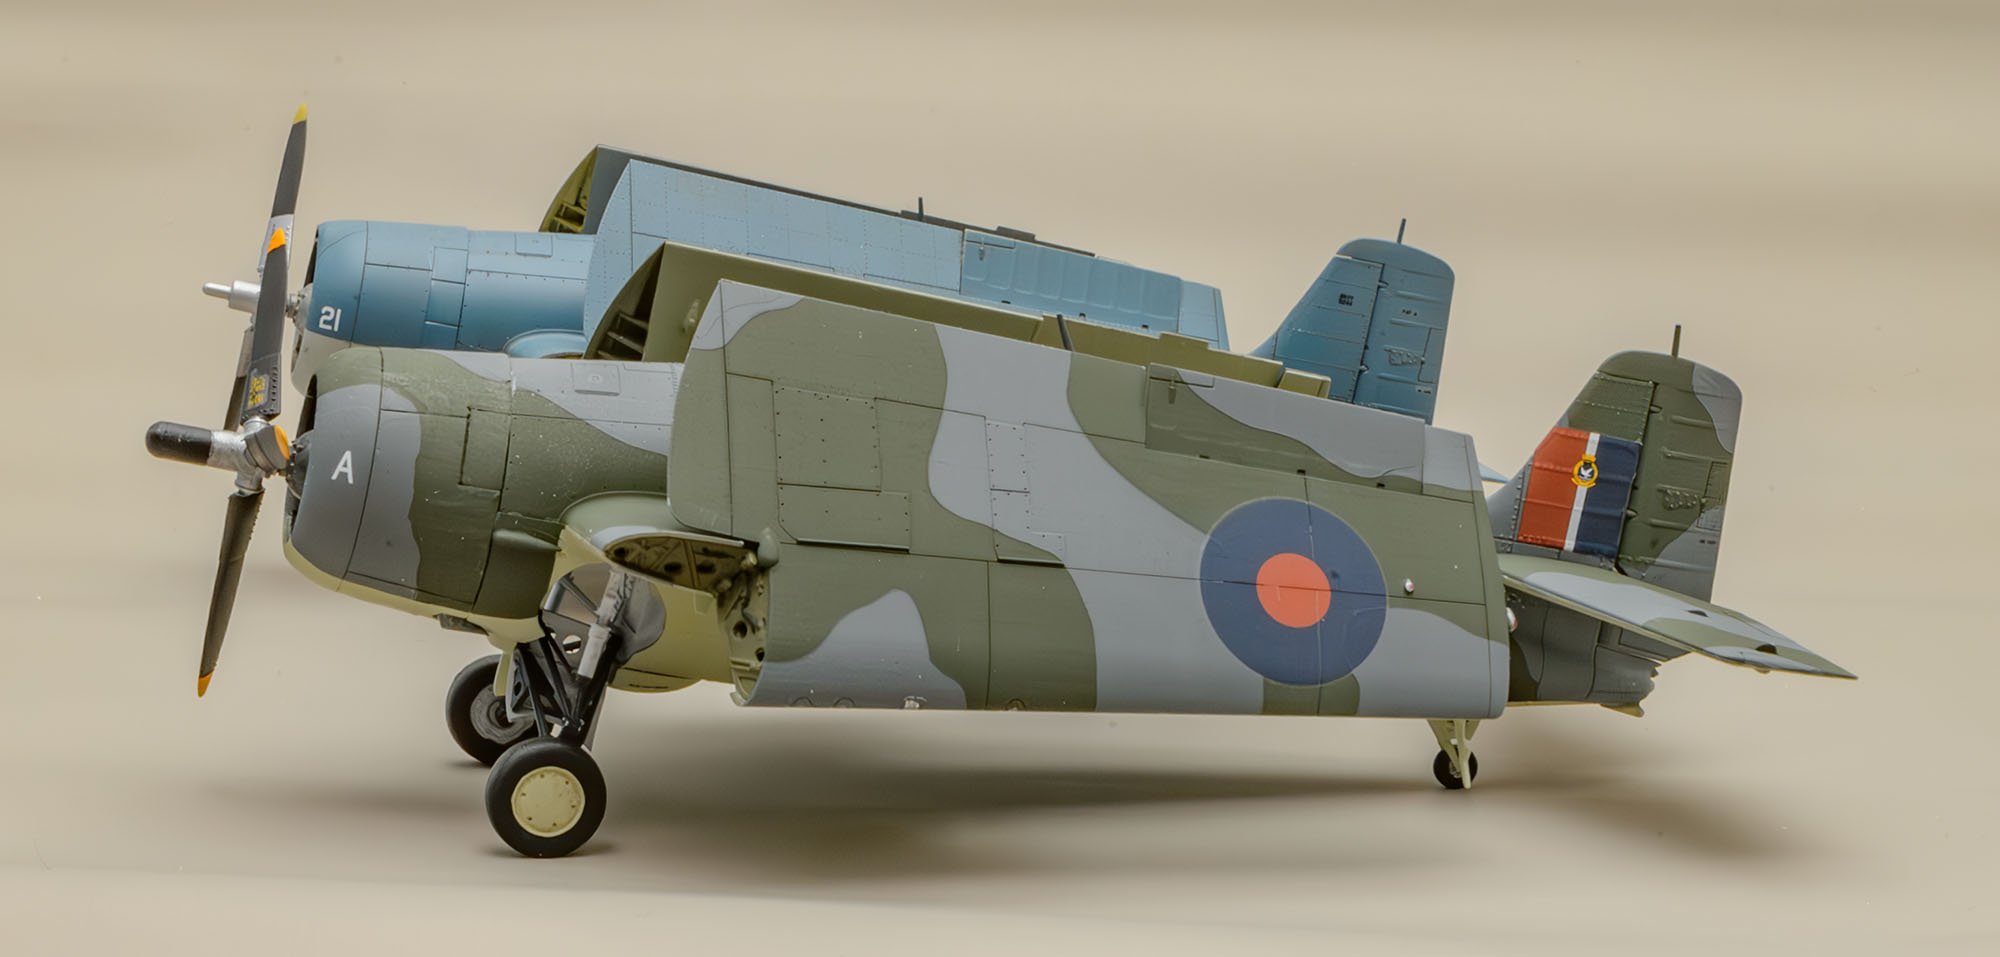
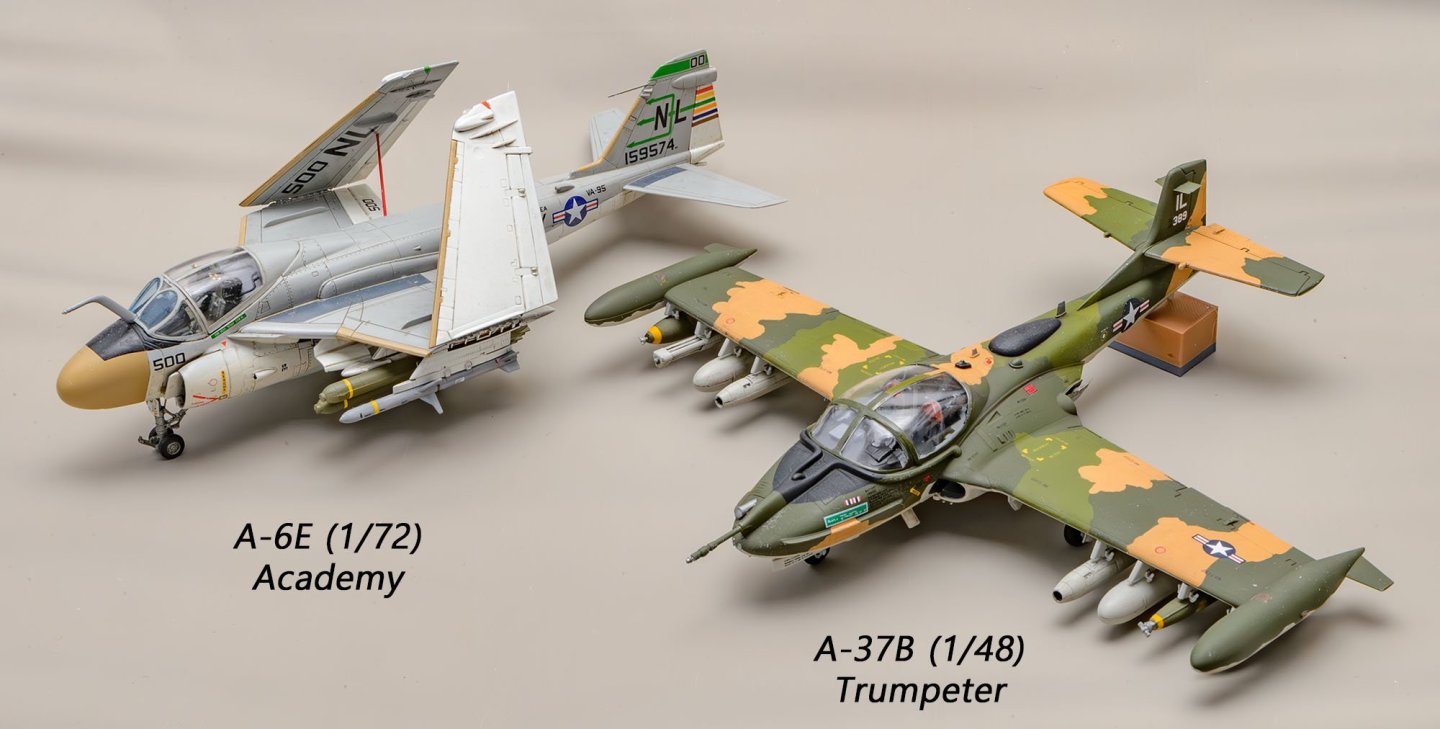
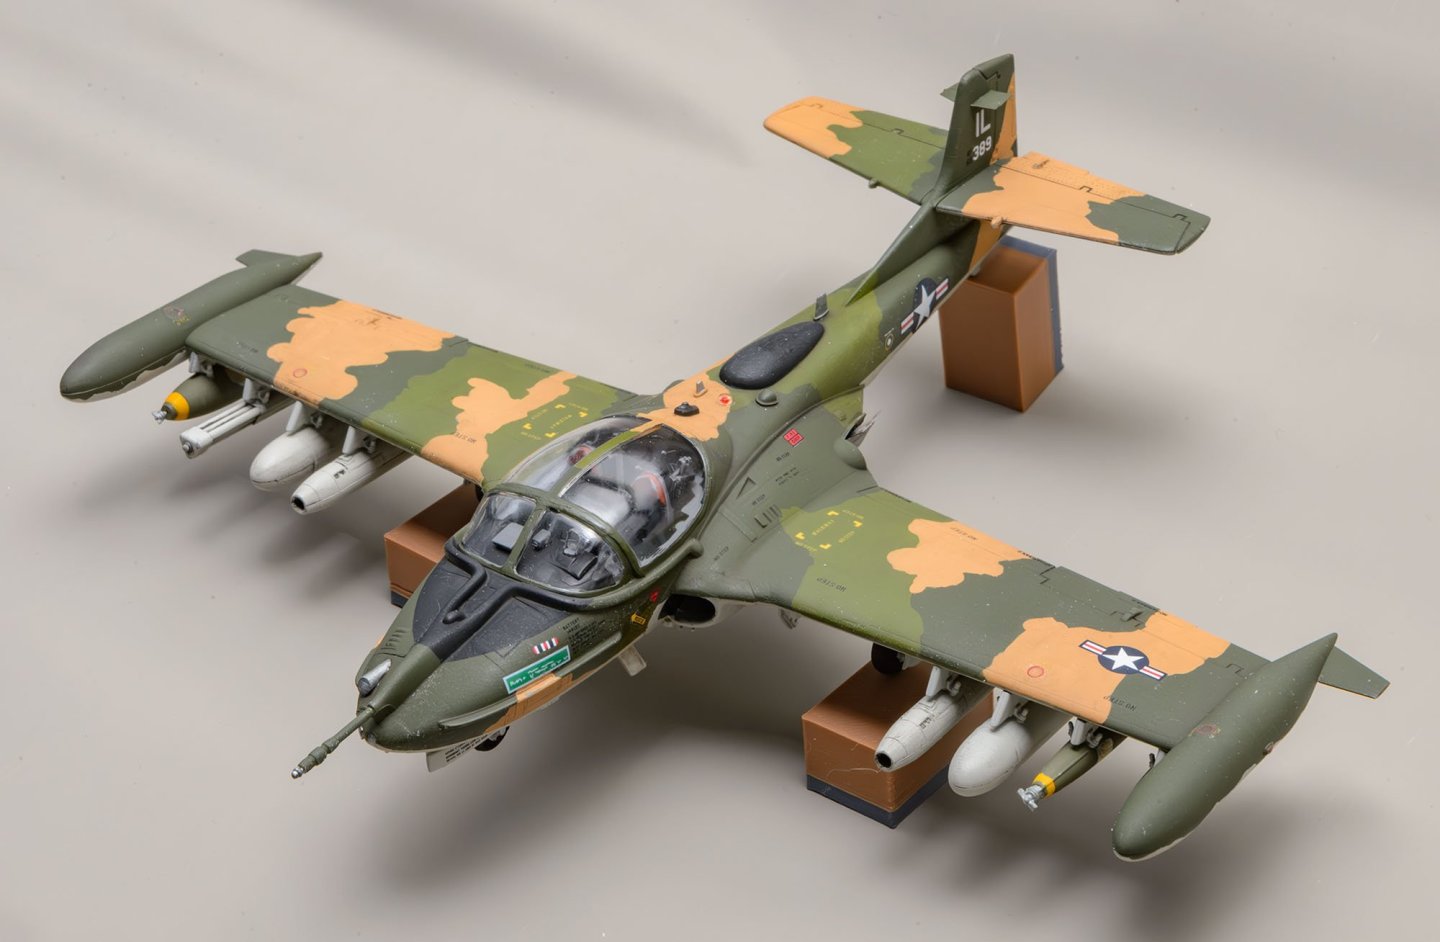
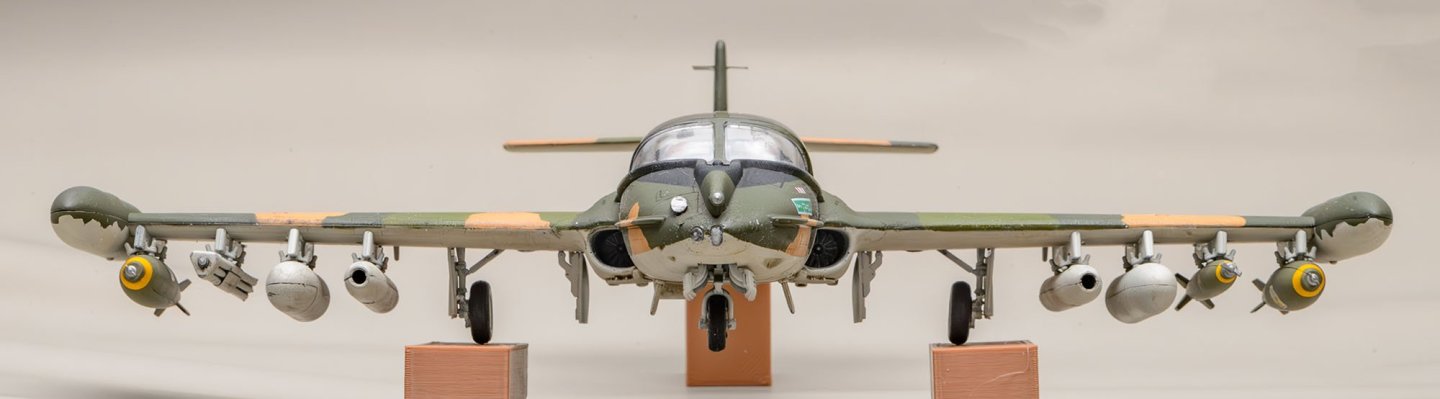
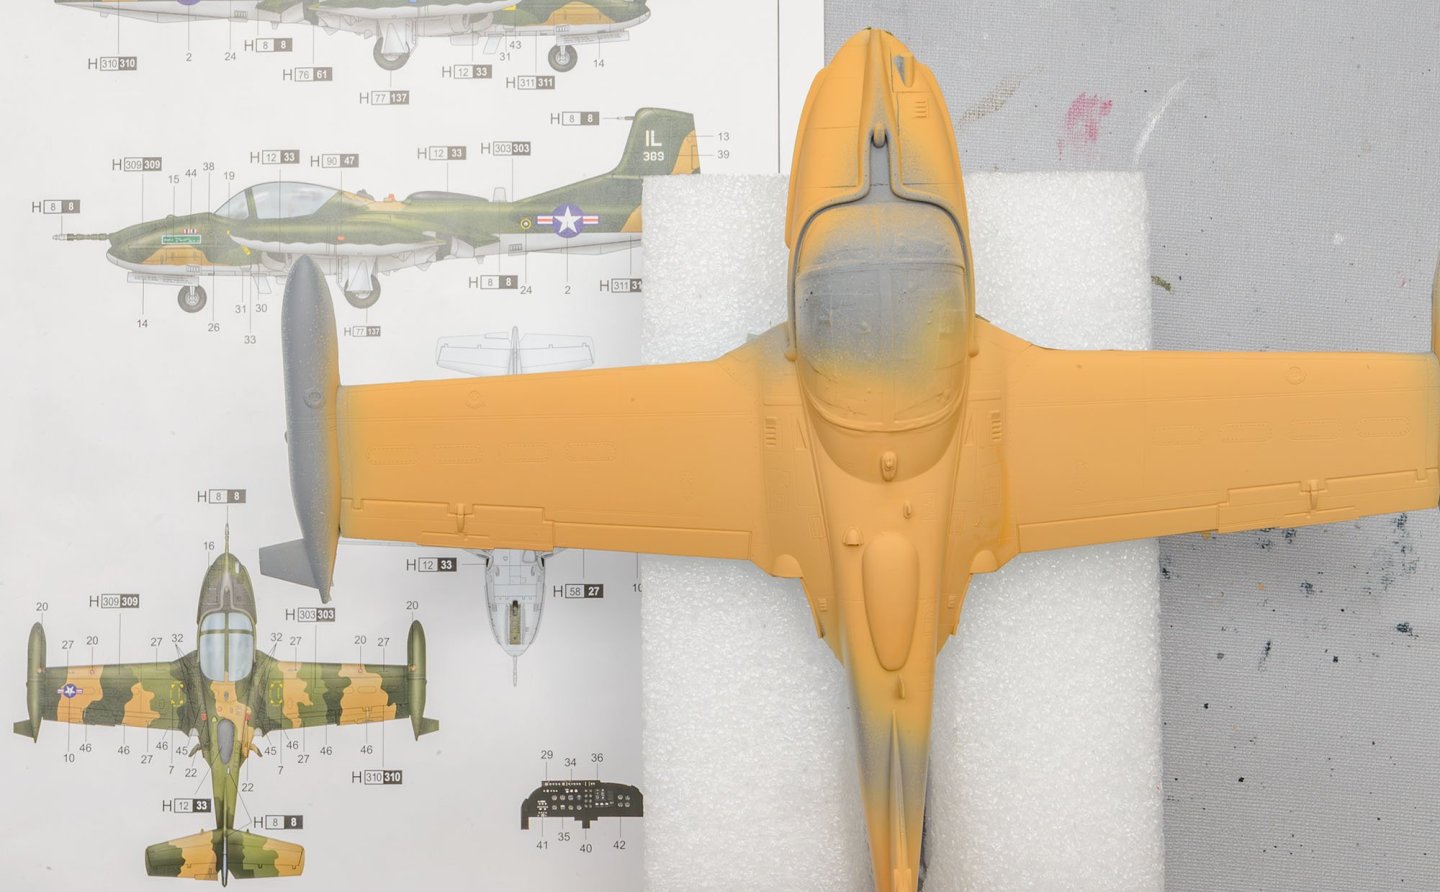
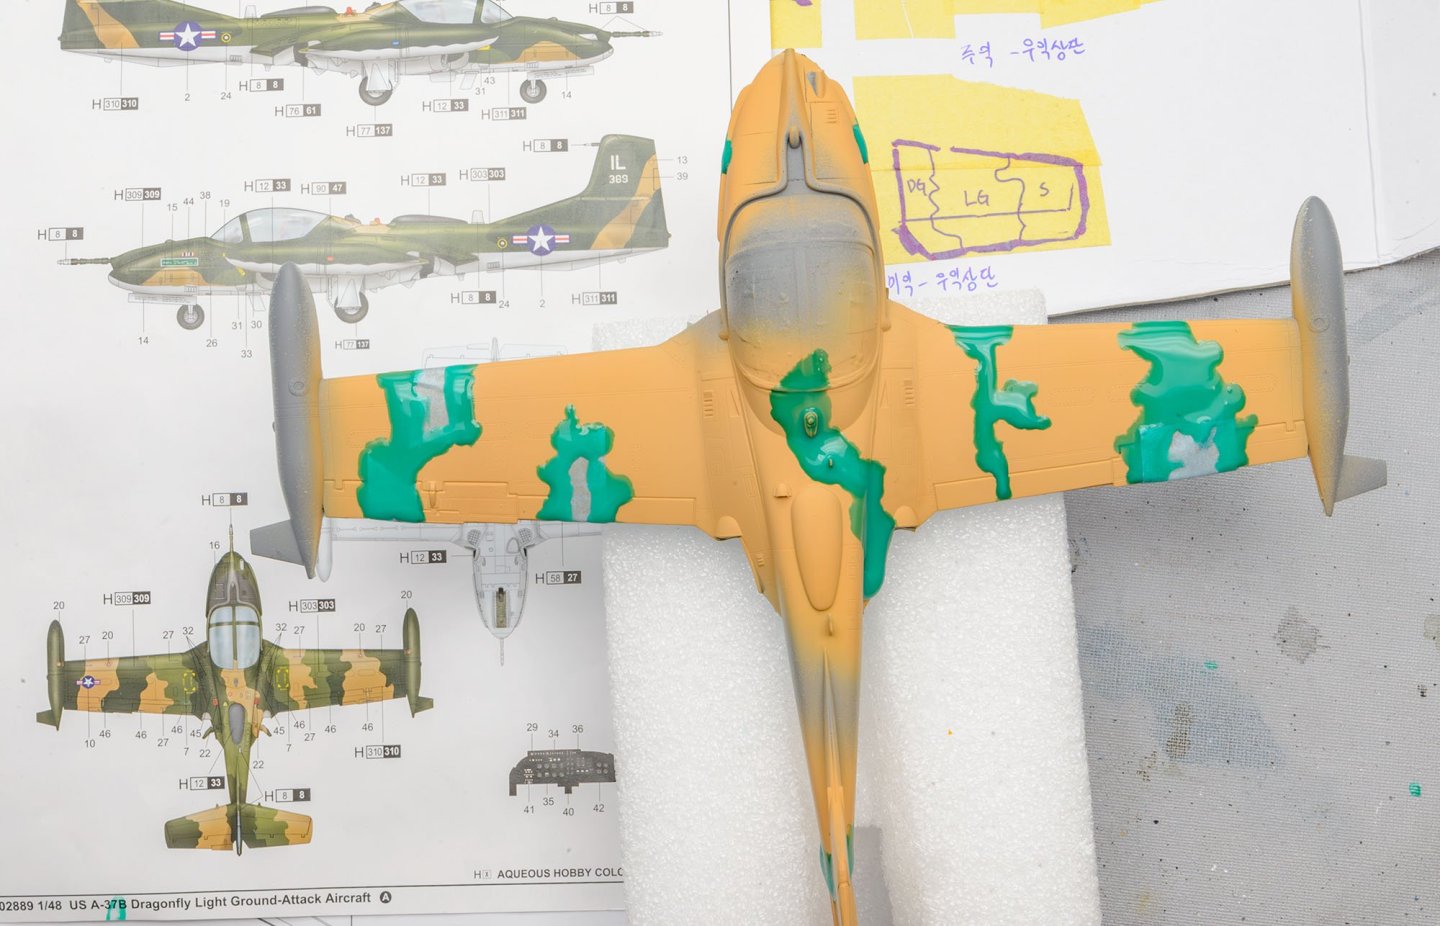
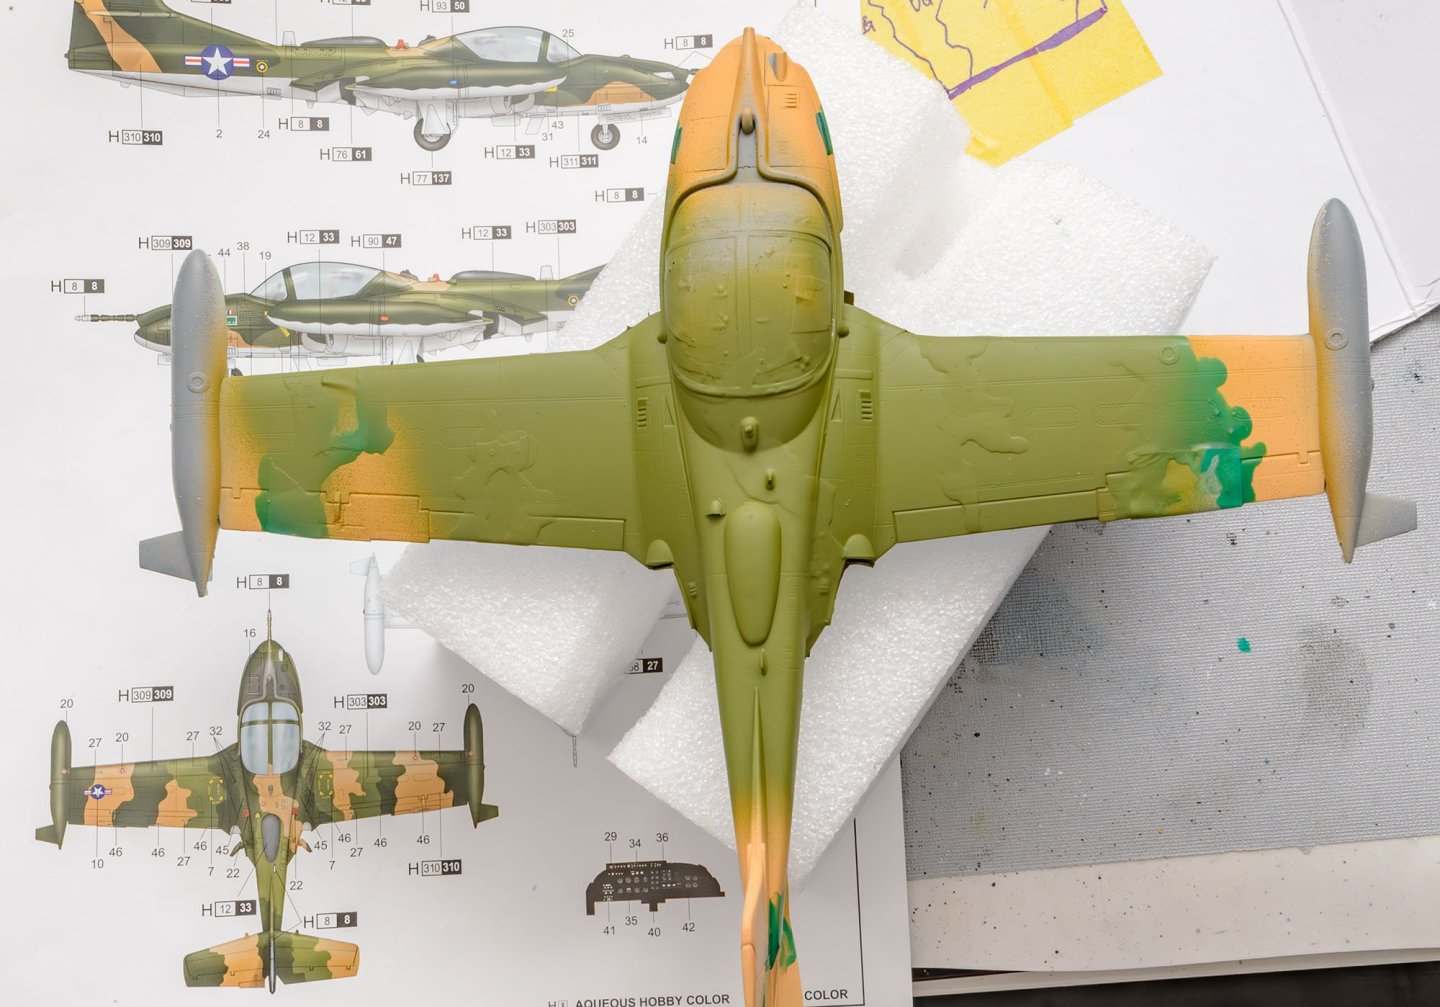
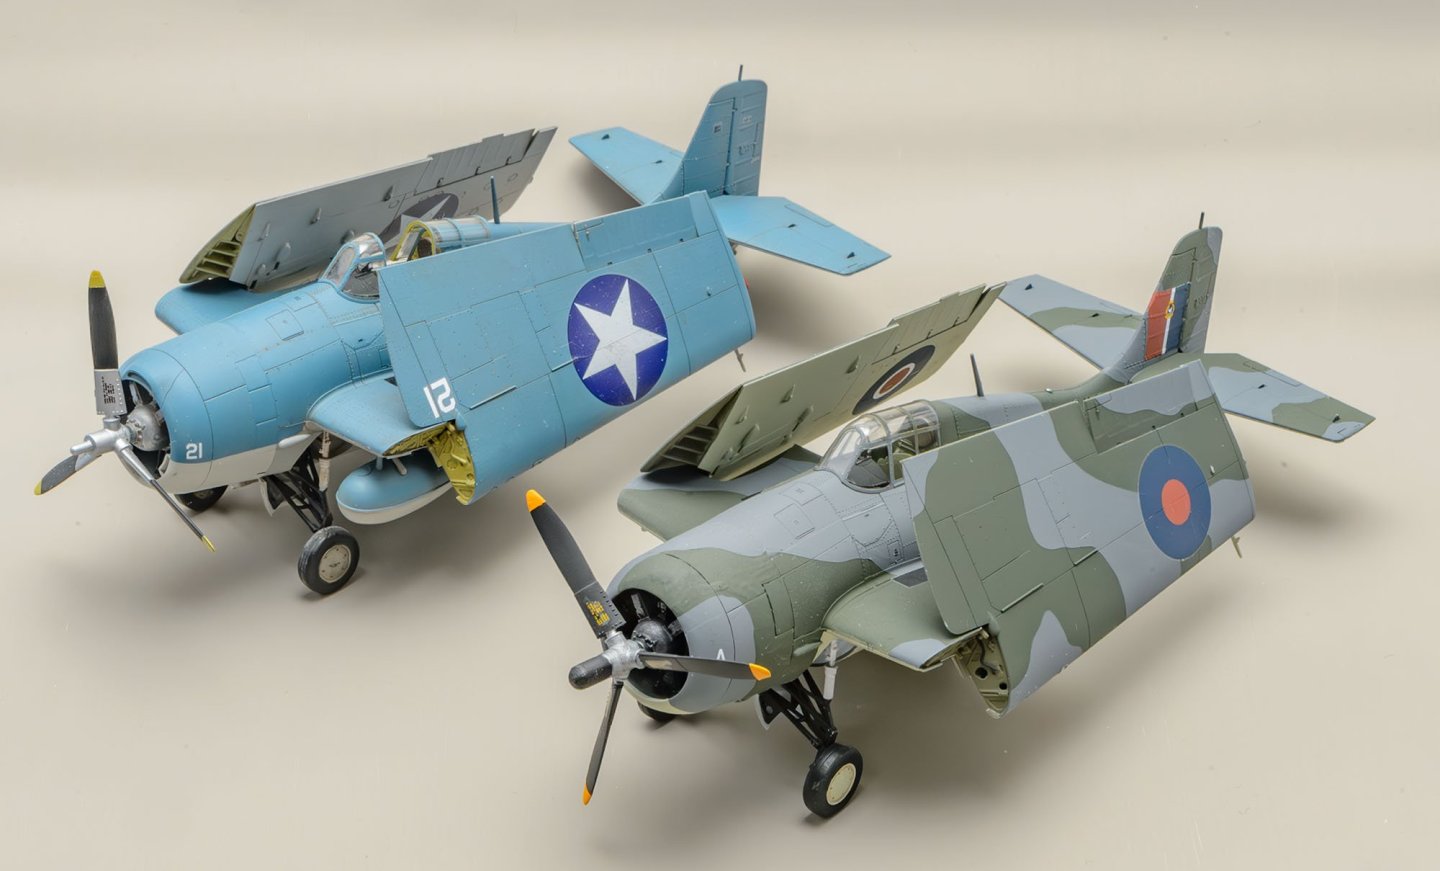
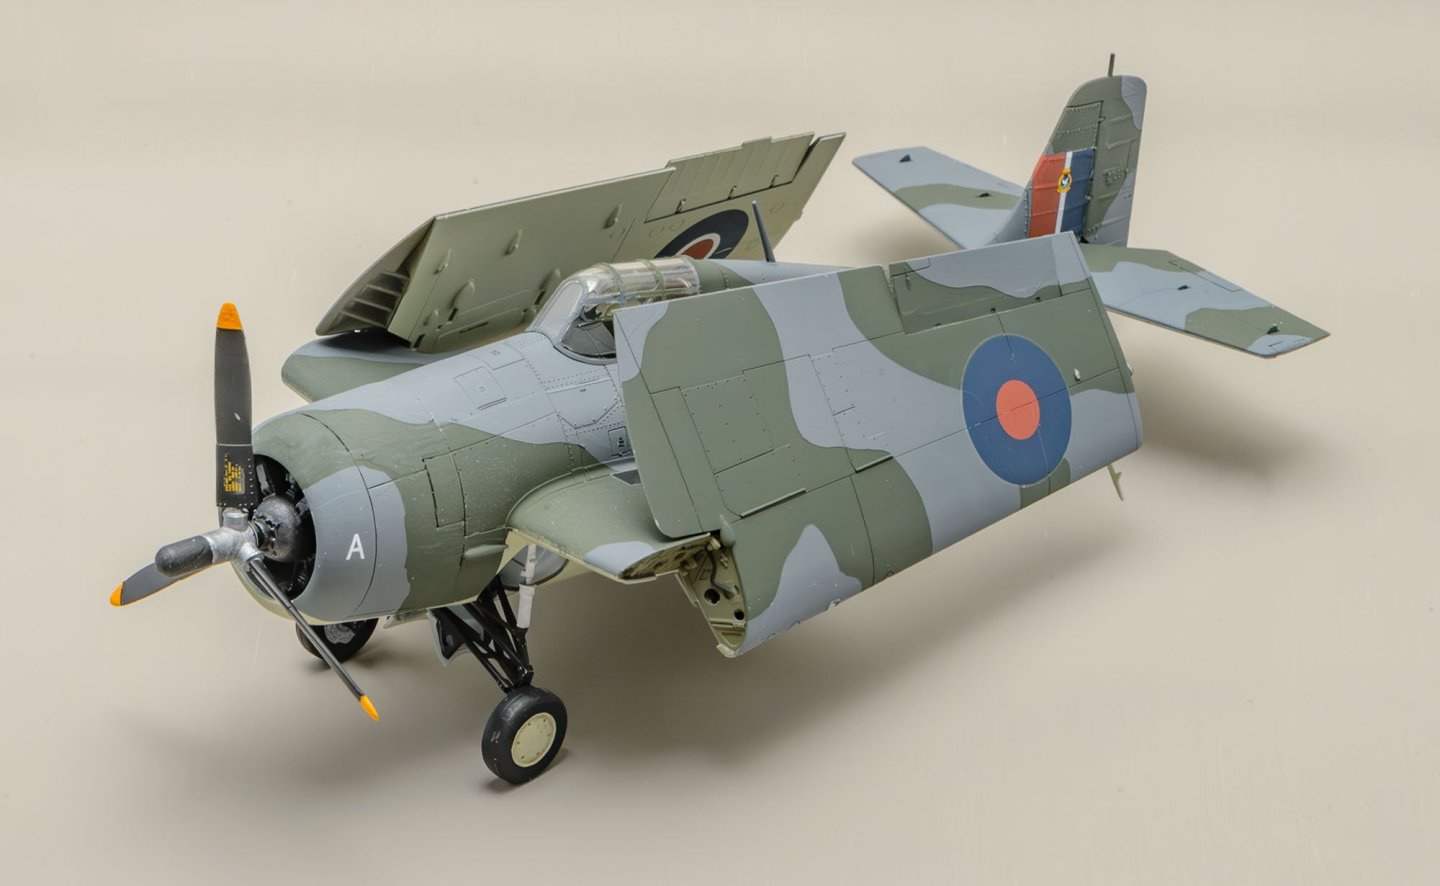
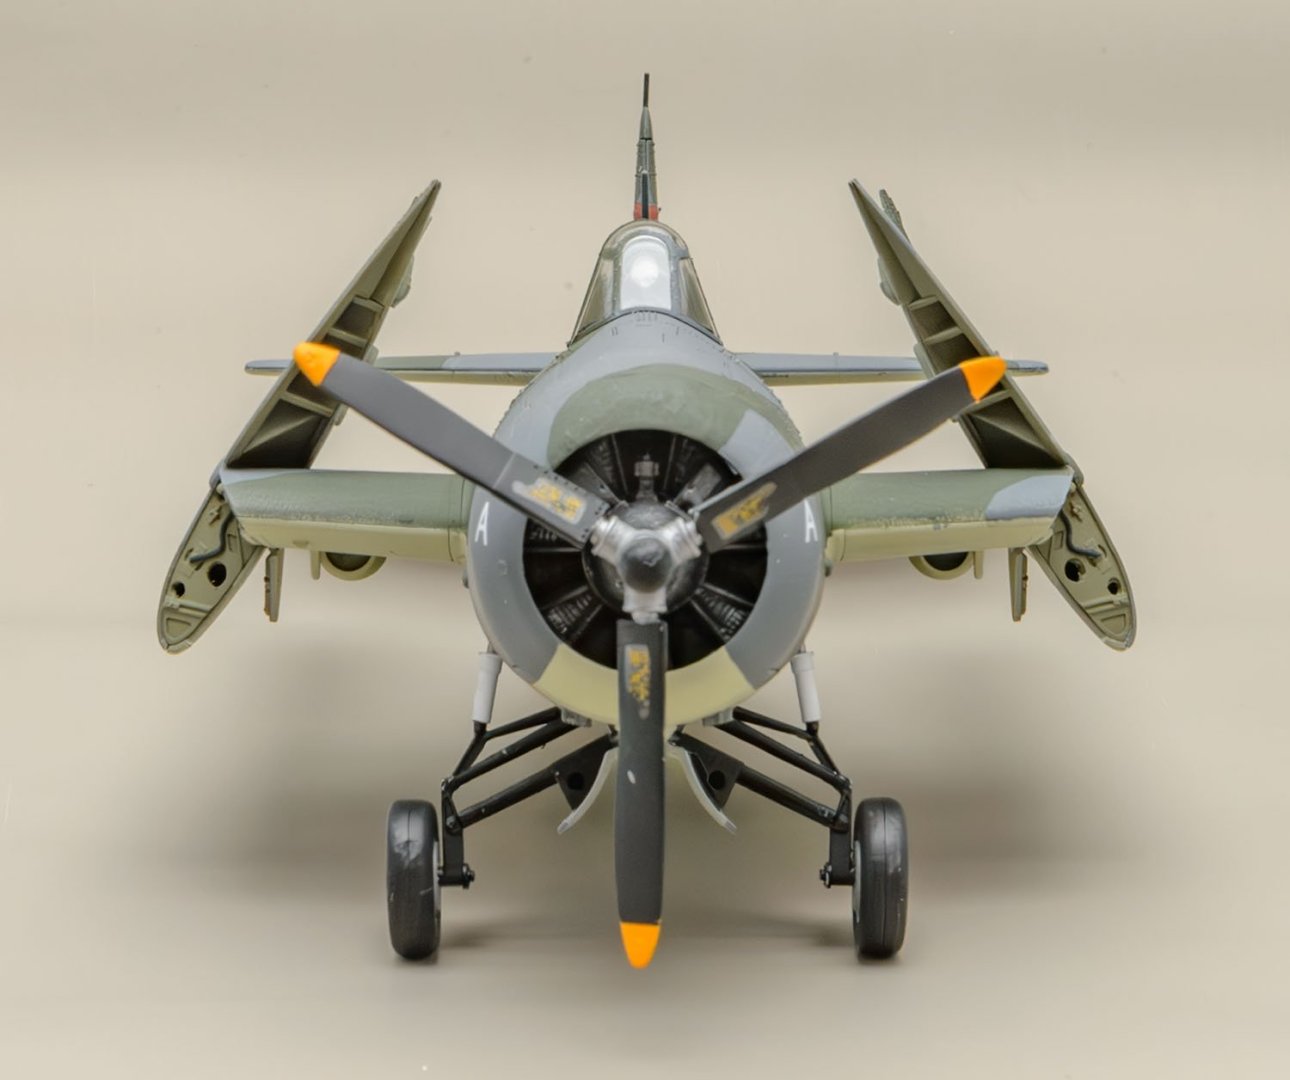
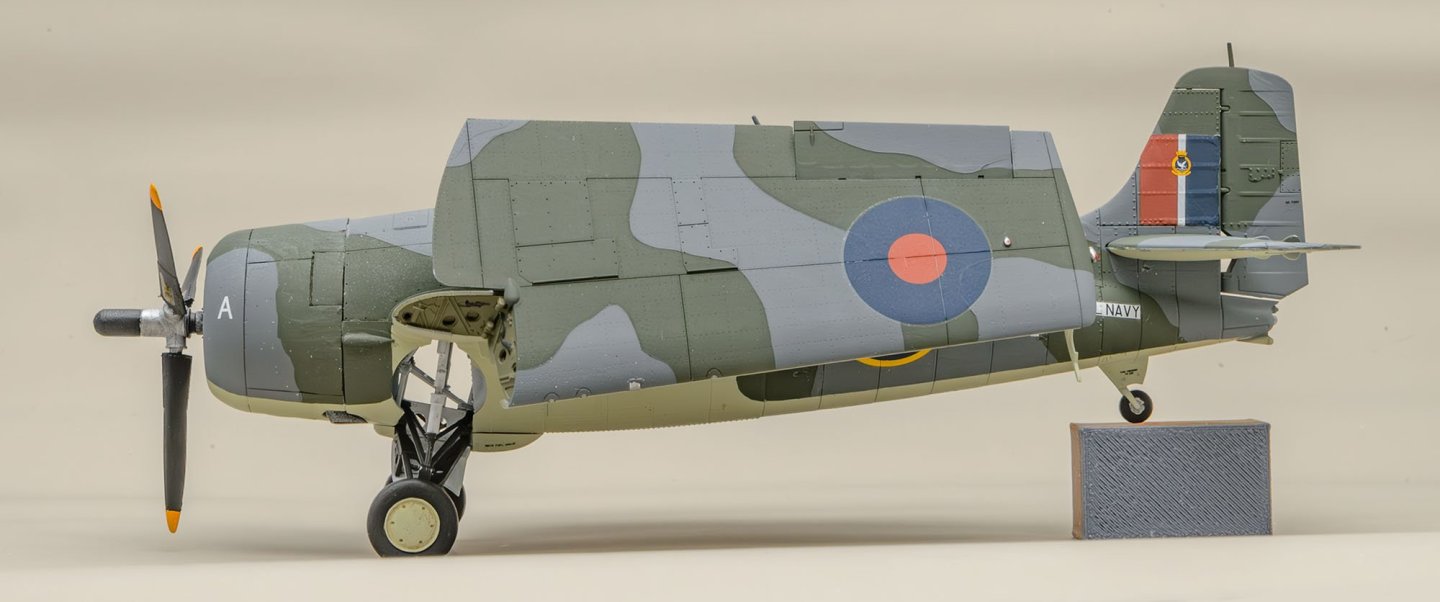
The next project has attractive camouflage patterns. In this project, I used a new method - masking sol. I quickly discovered that the release agent had contaminated the kit sprue... I haven't washed sprues since I used the Badger primer. Cleaning the release agent is essential to masking-intensive projects... I knew that it would be a huge problem, but the broken arrow is flying. The first color. #1 camouflage. #2 color #2 camouflage There are many defects everywhere. 🤔 I'll clean the rest of the masking sol tomorrow and finish the project by brush-painting.


-
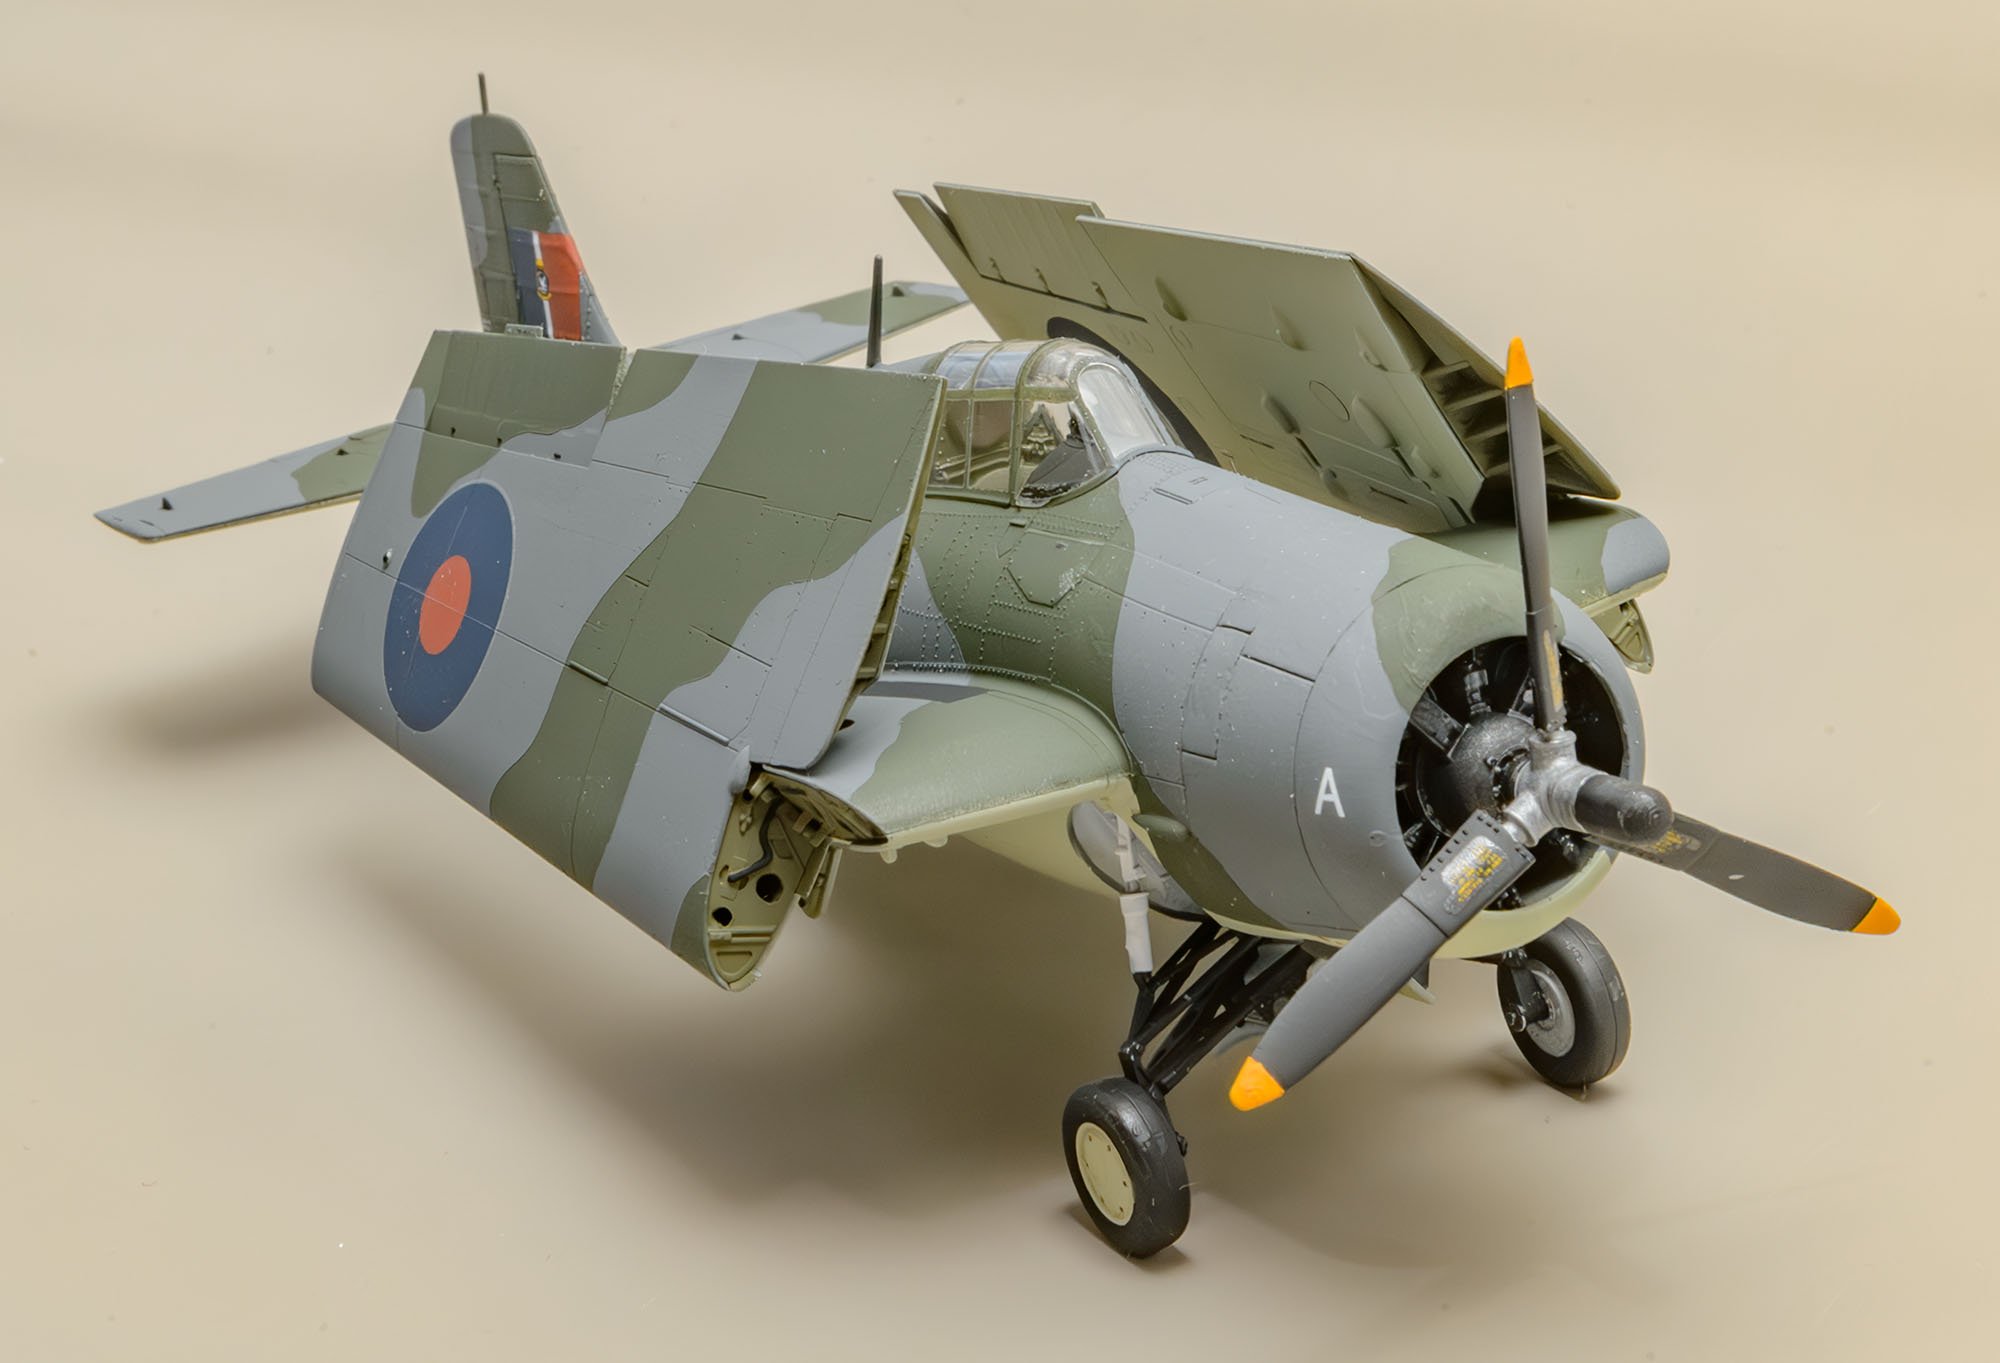
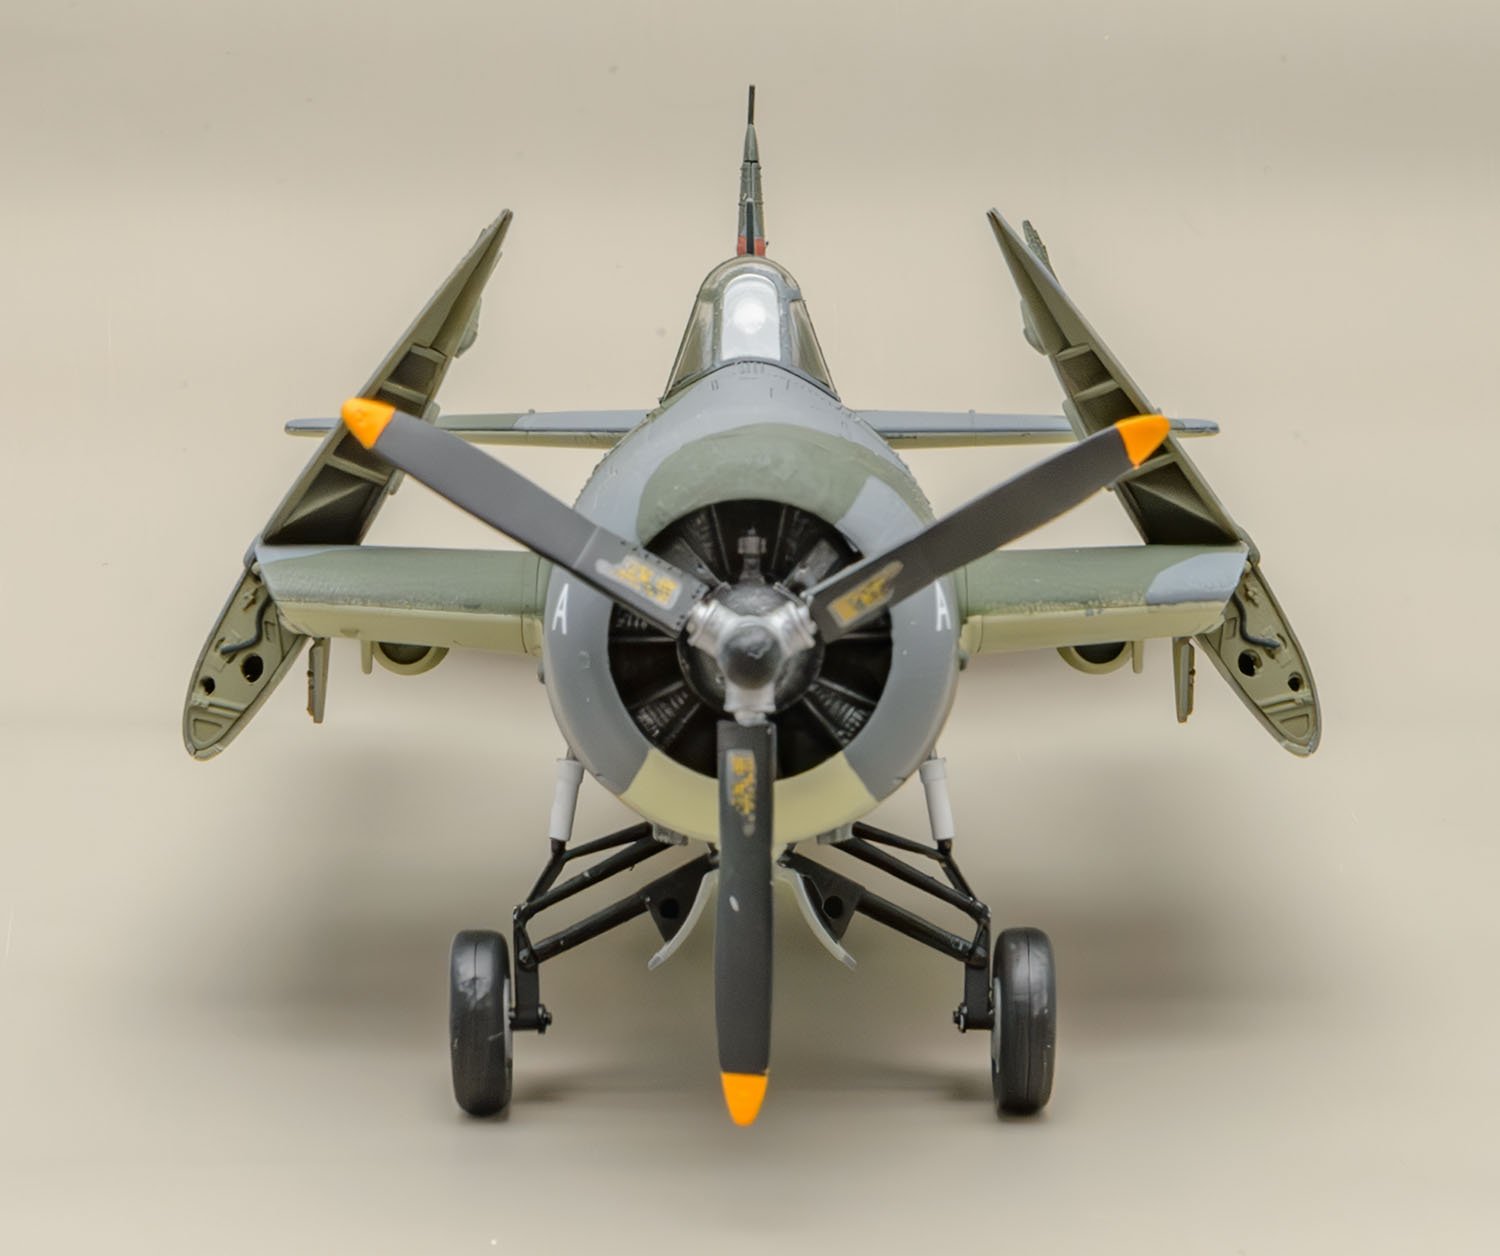
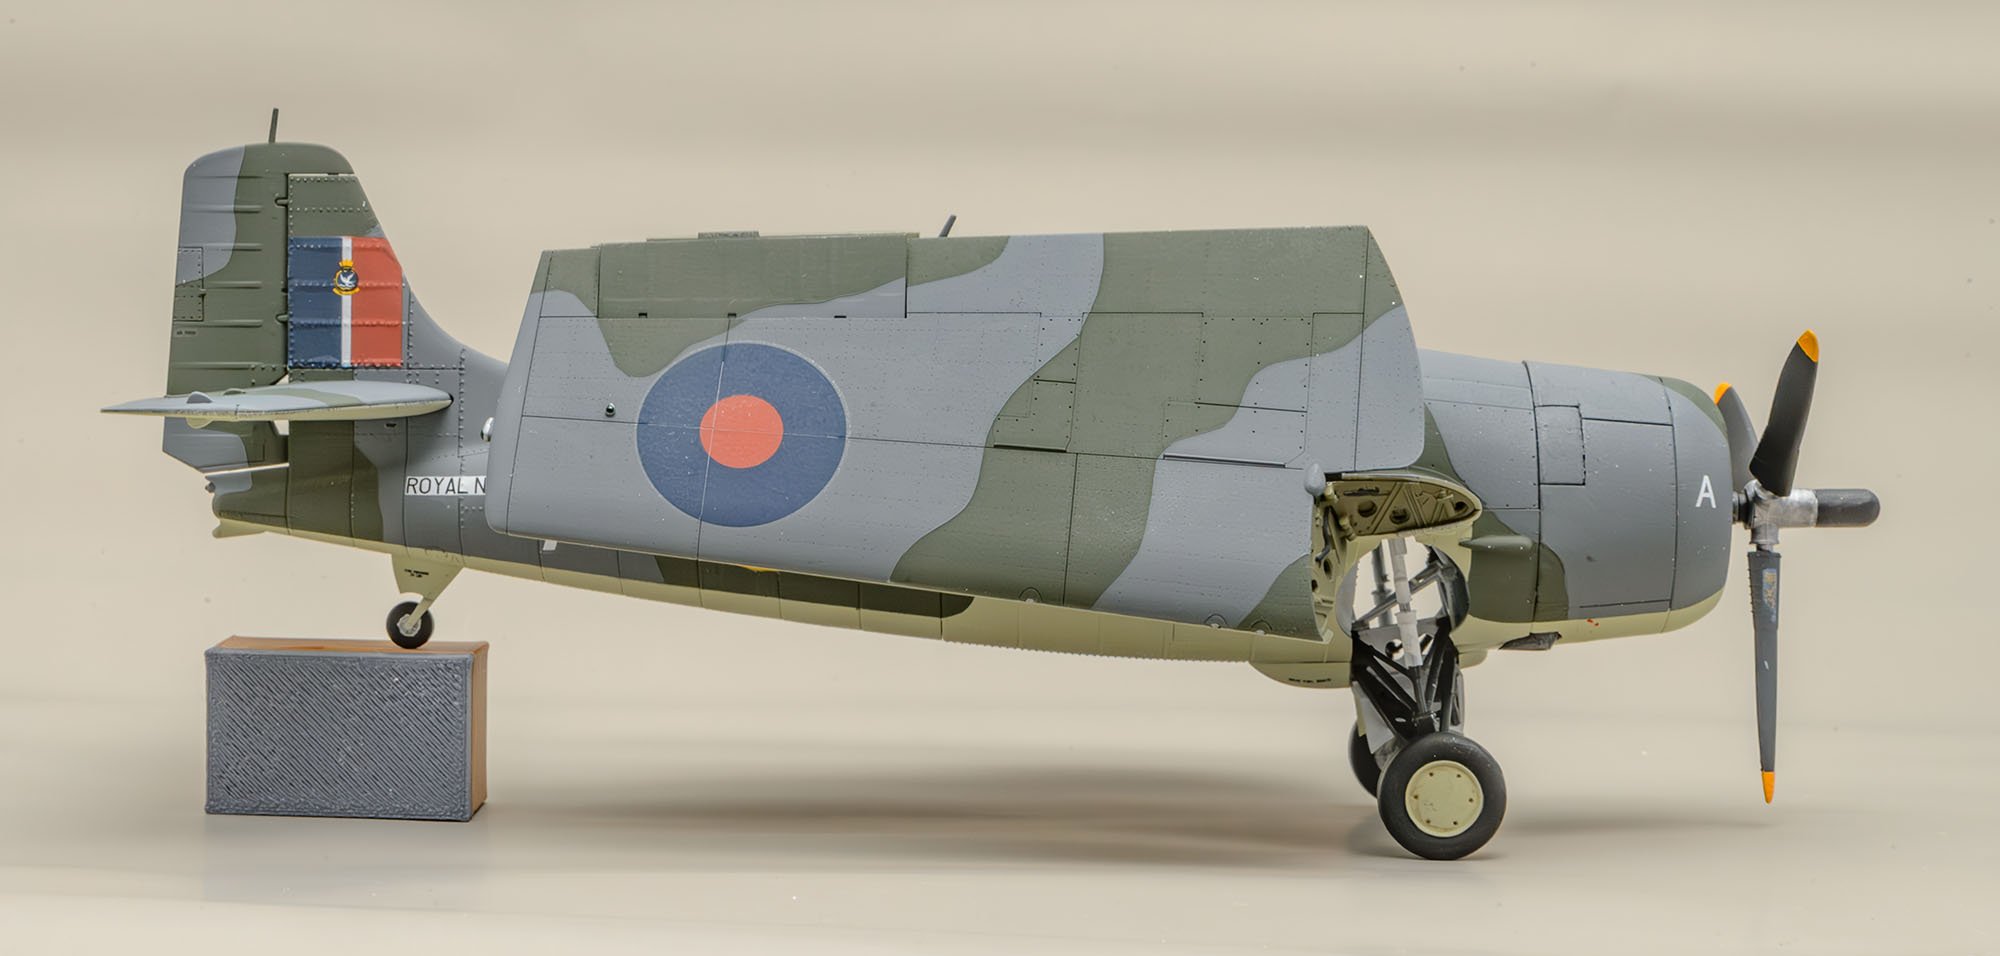
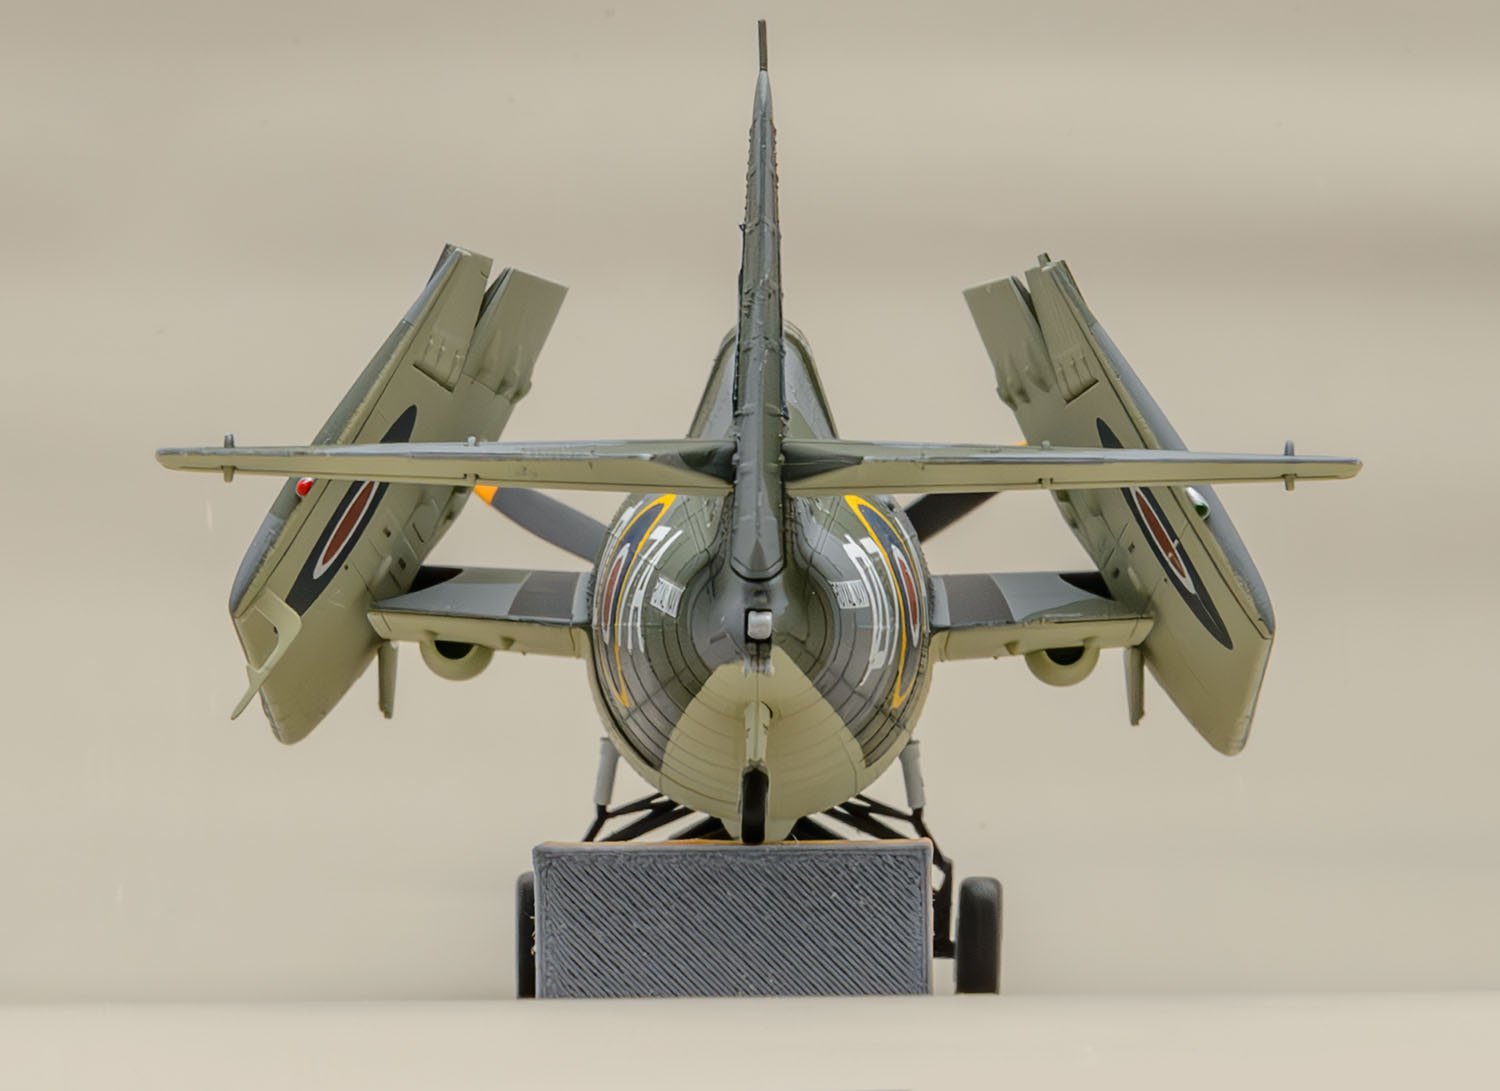
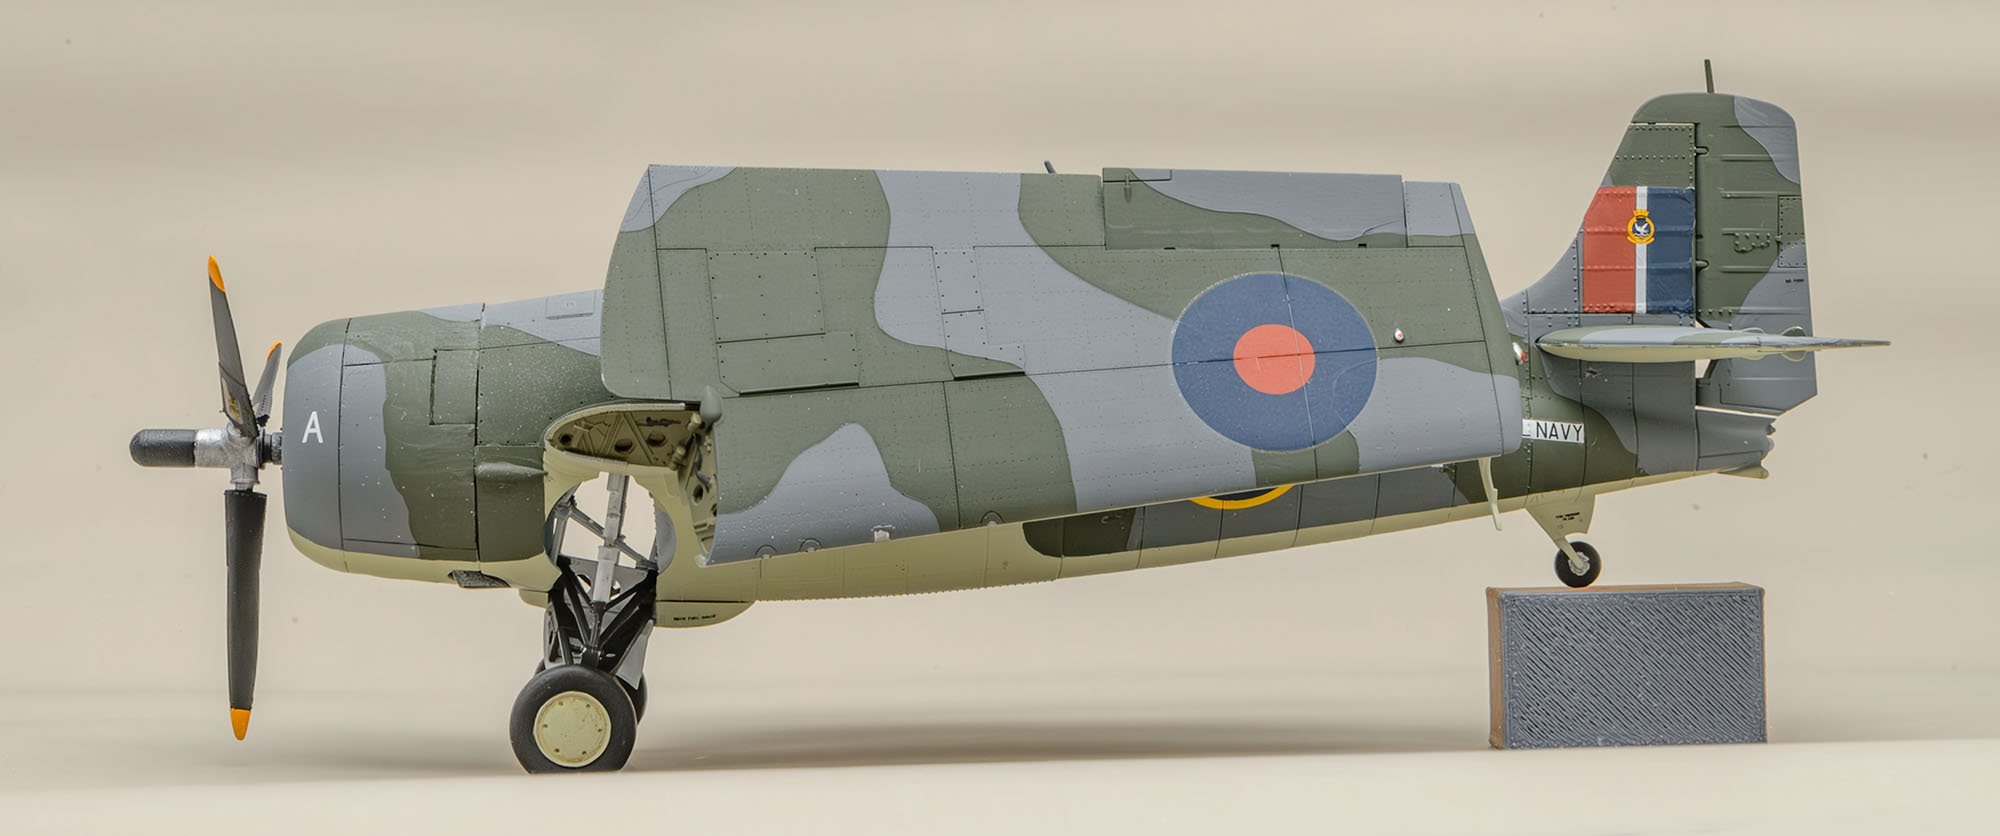
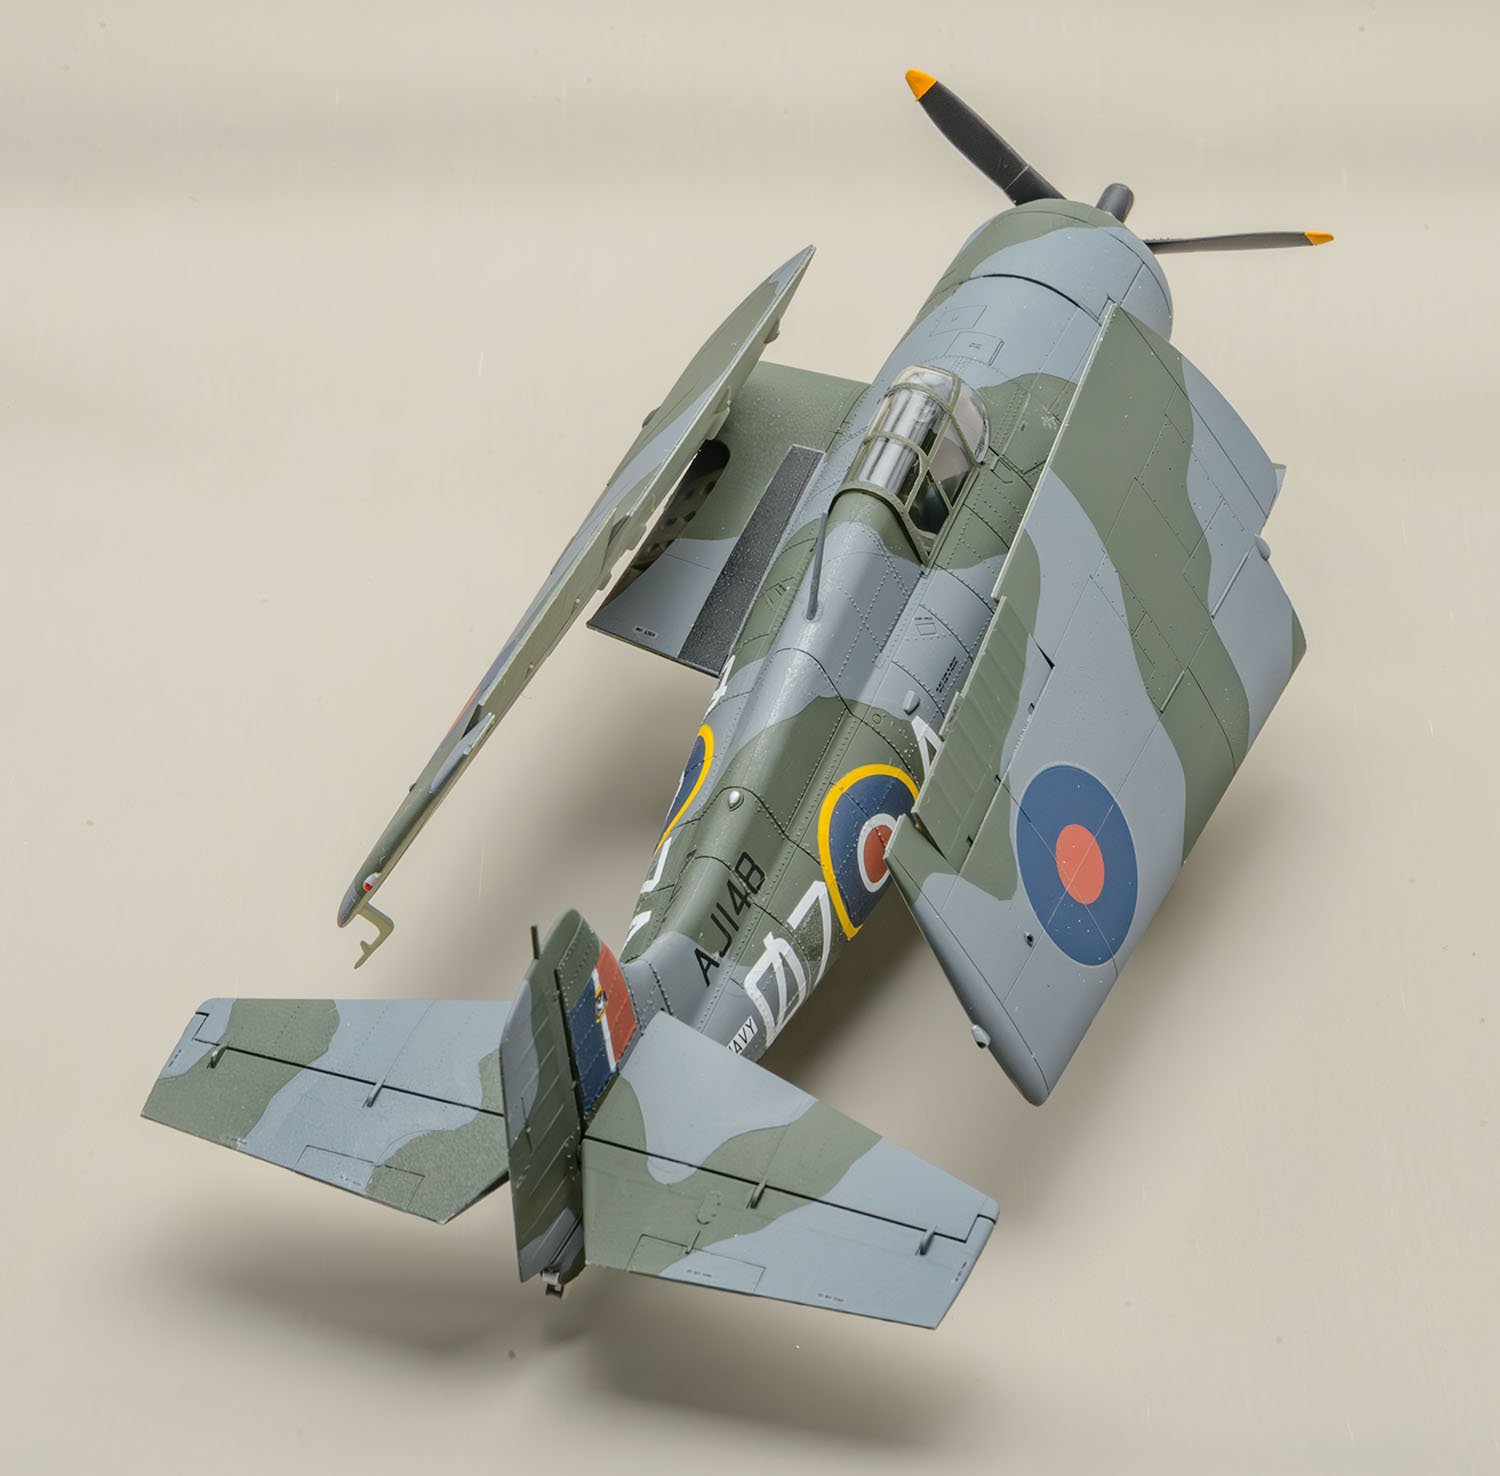
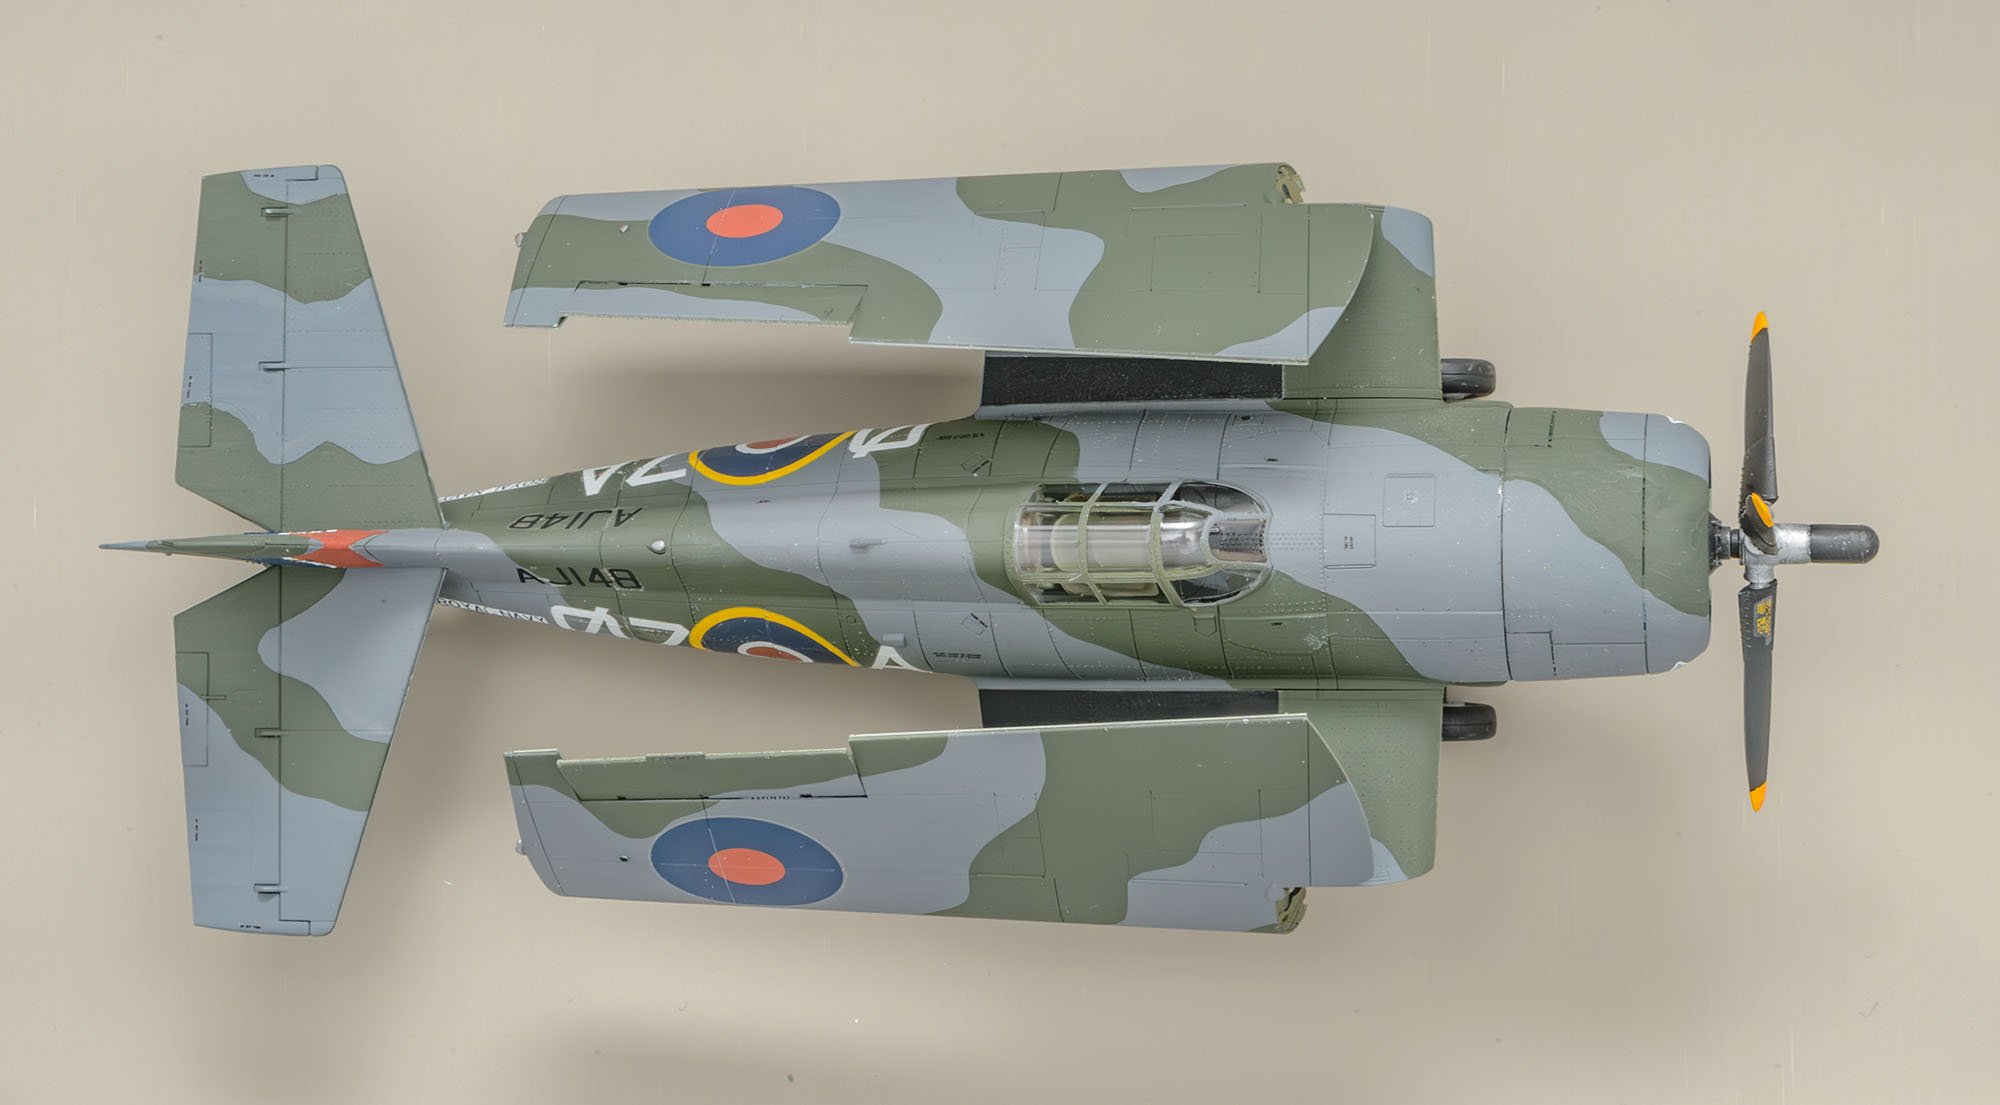
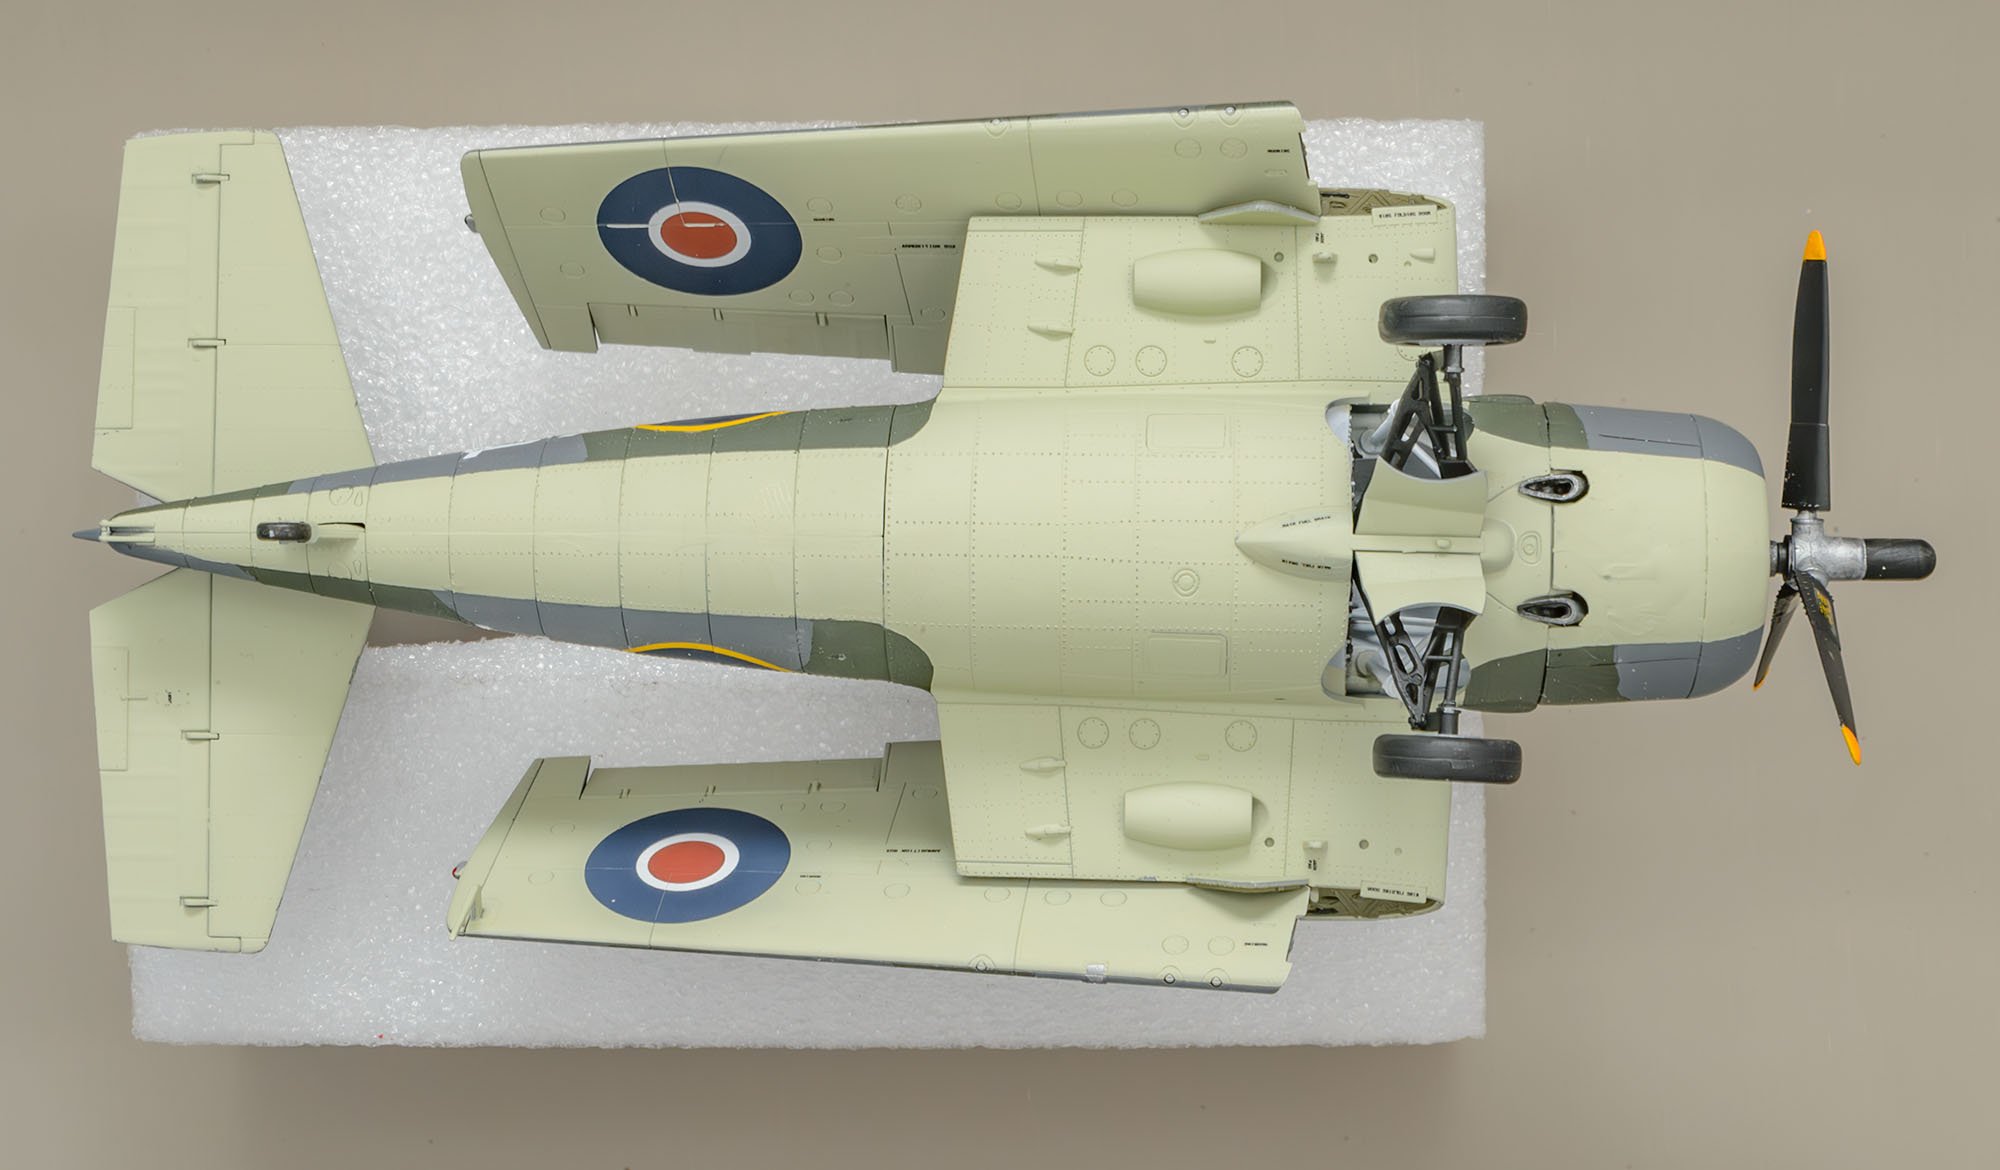
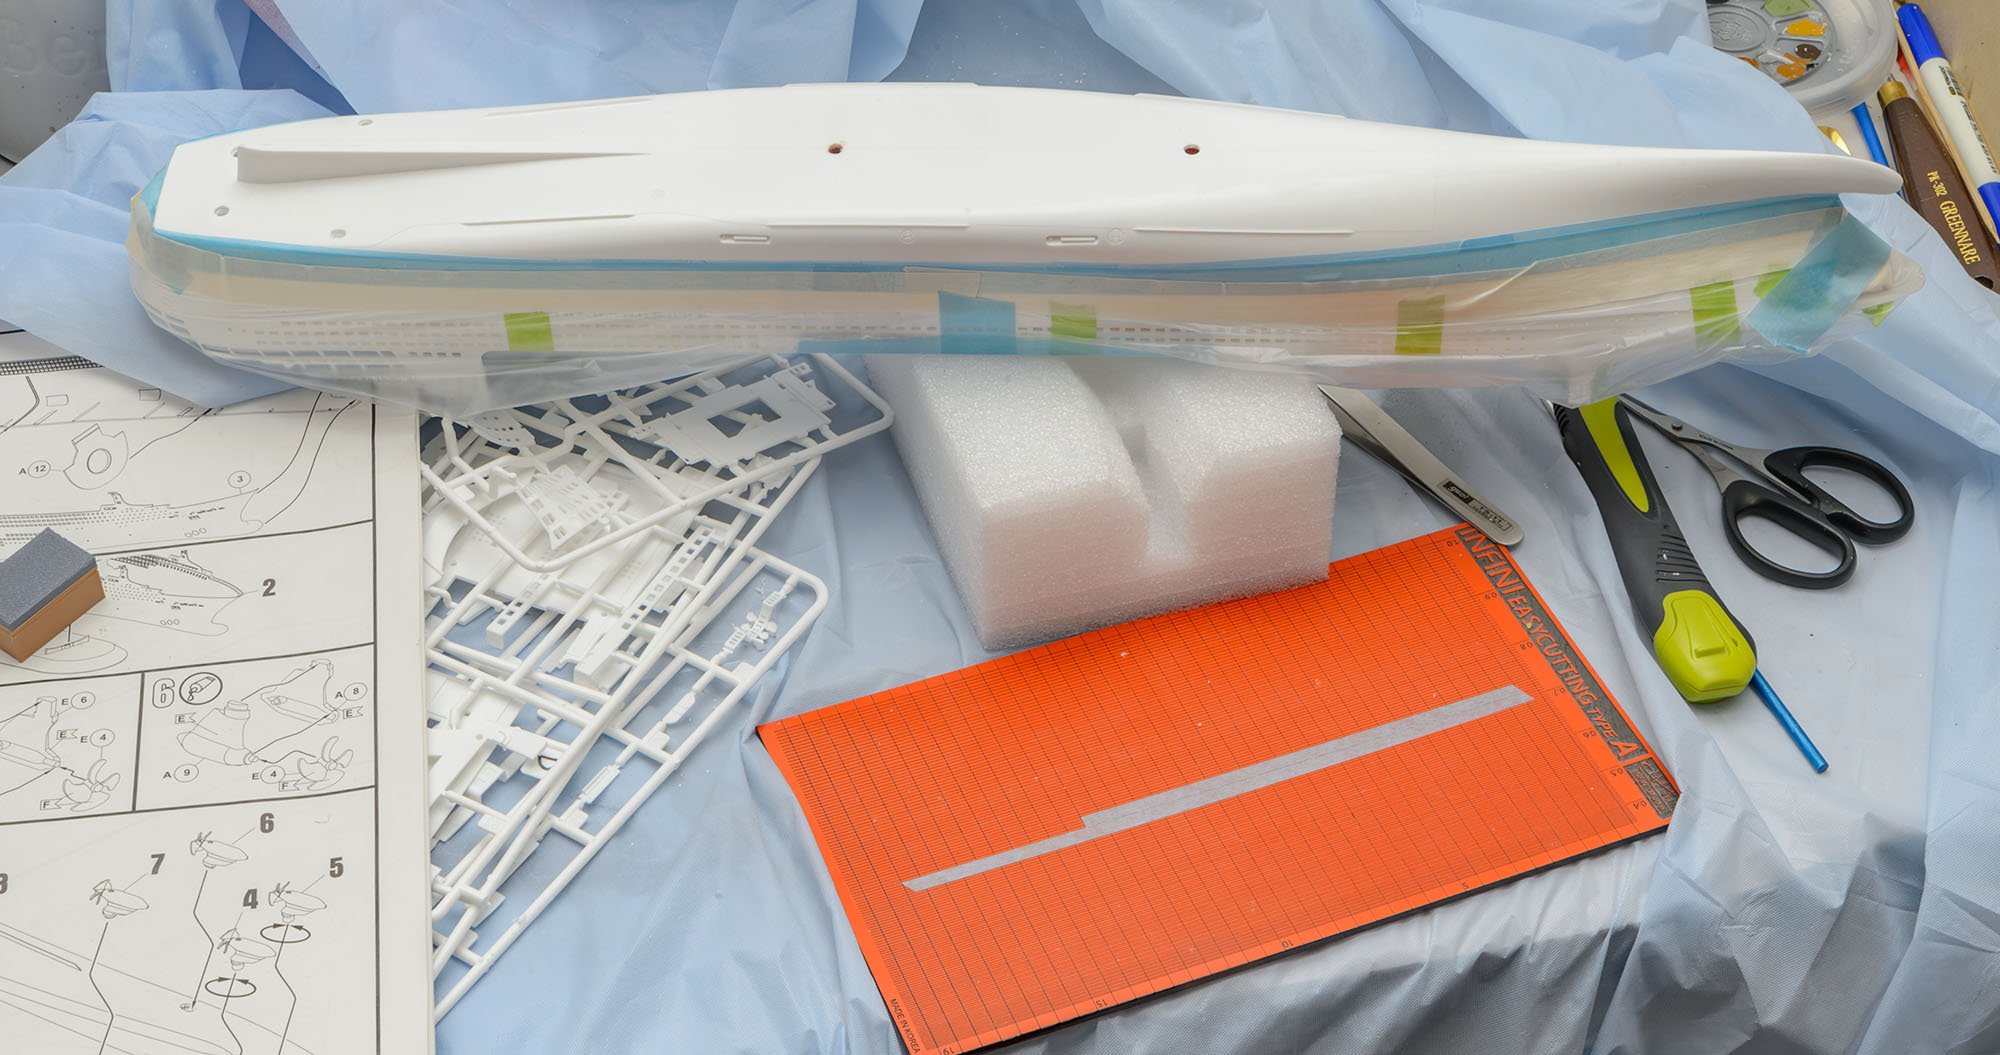
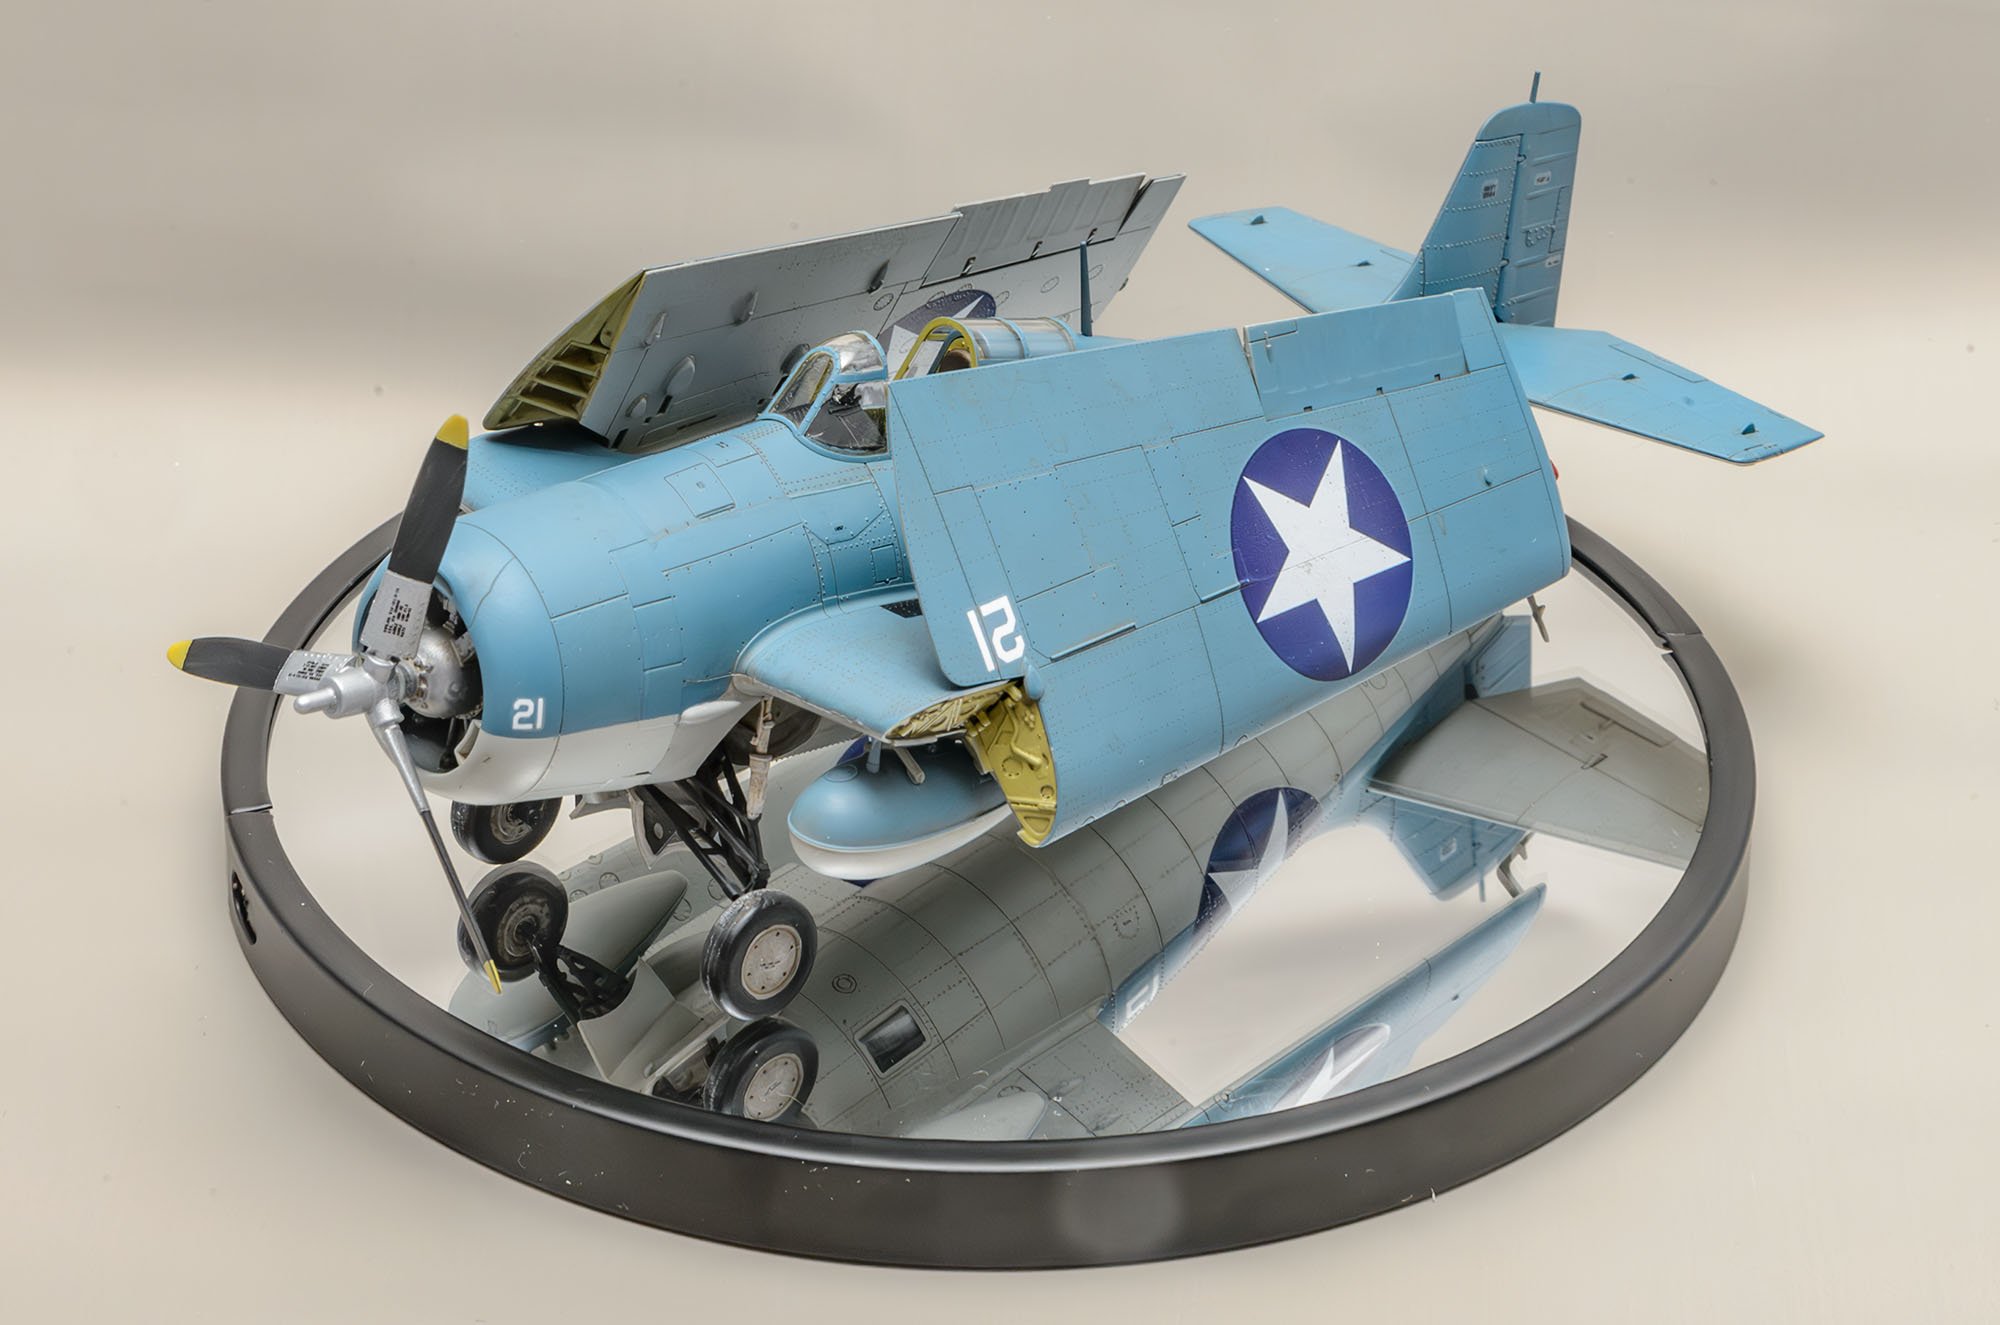
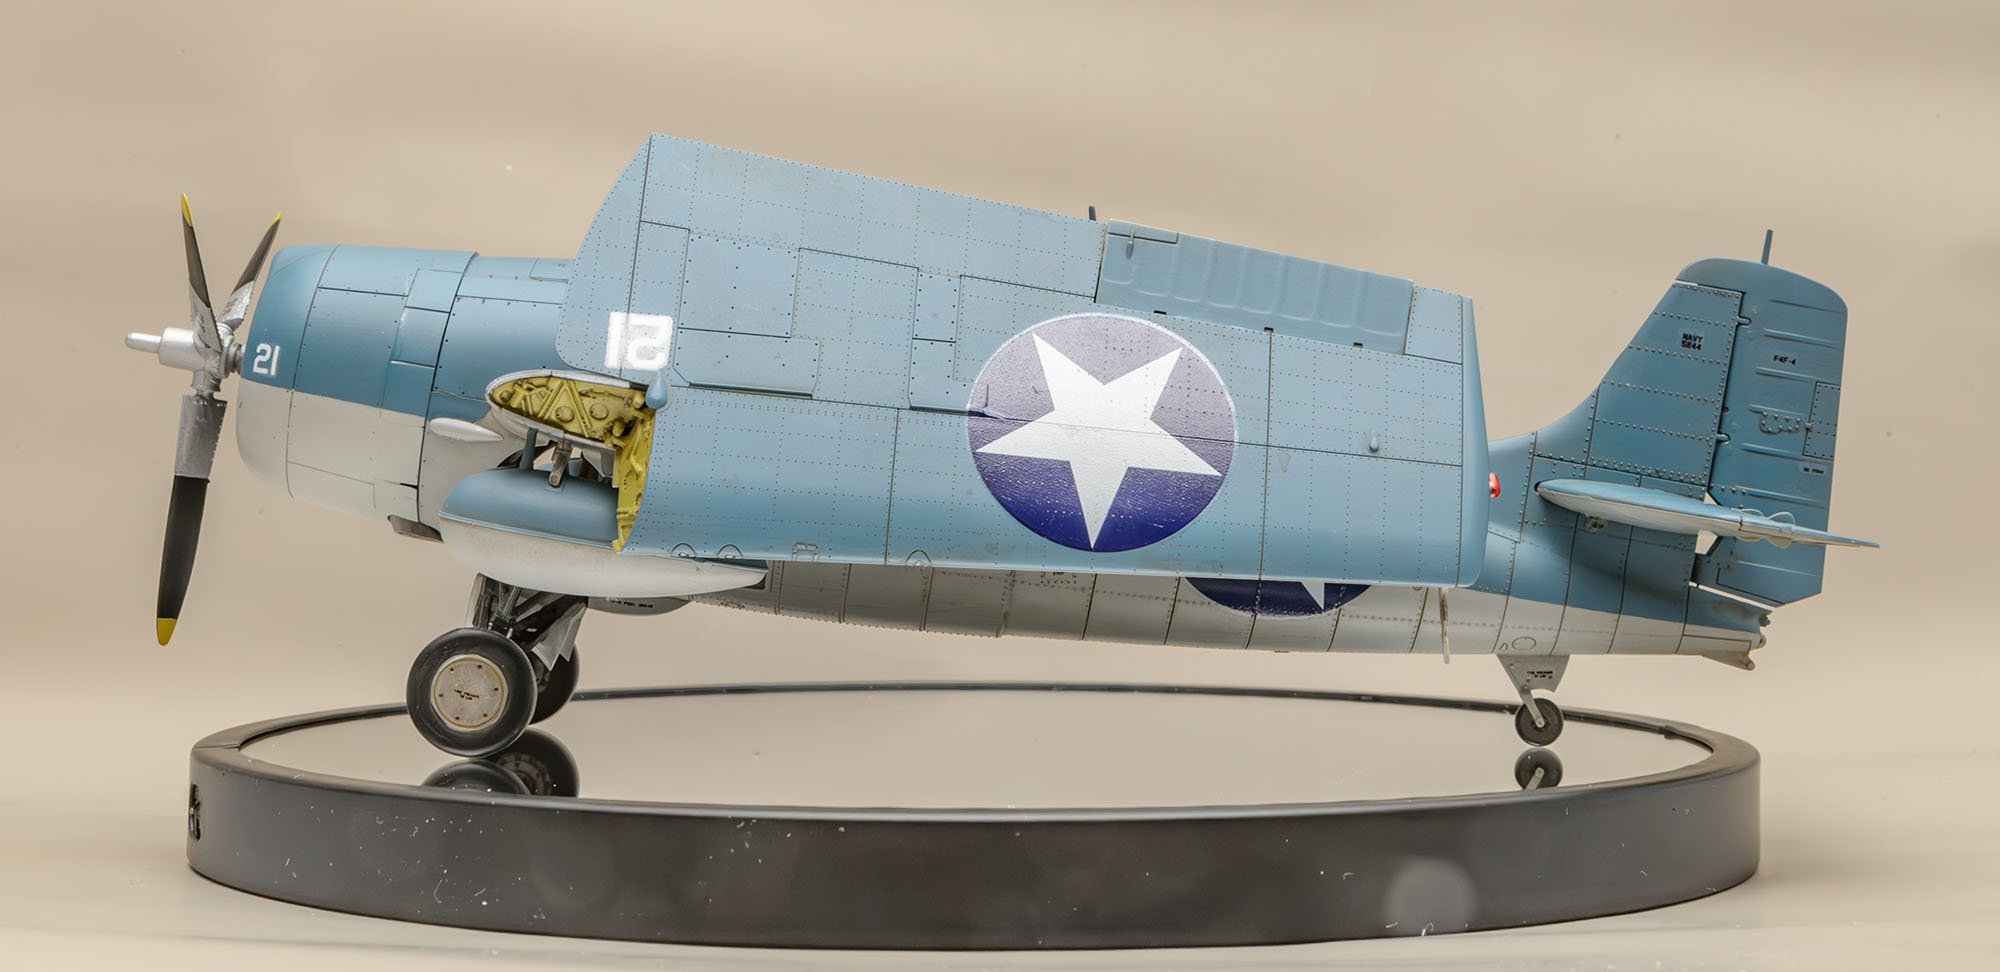
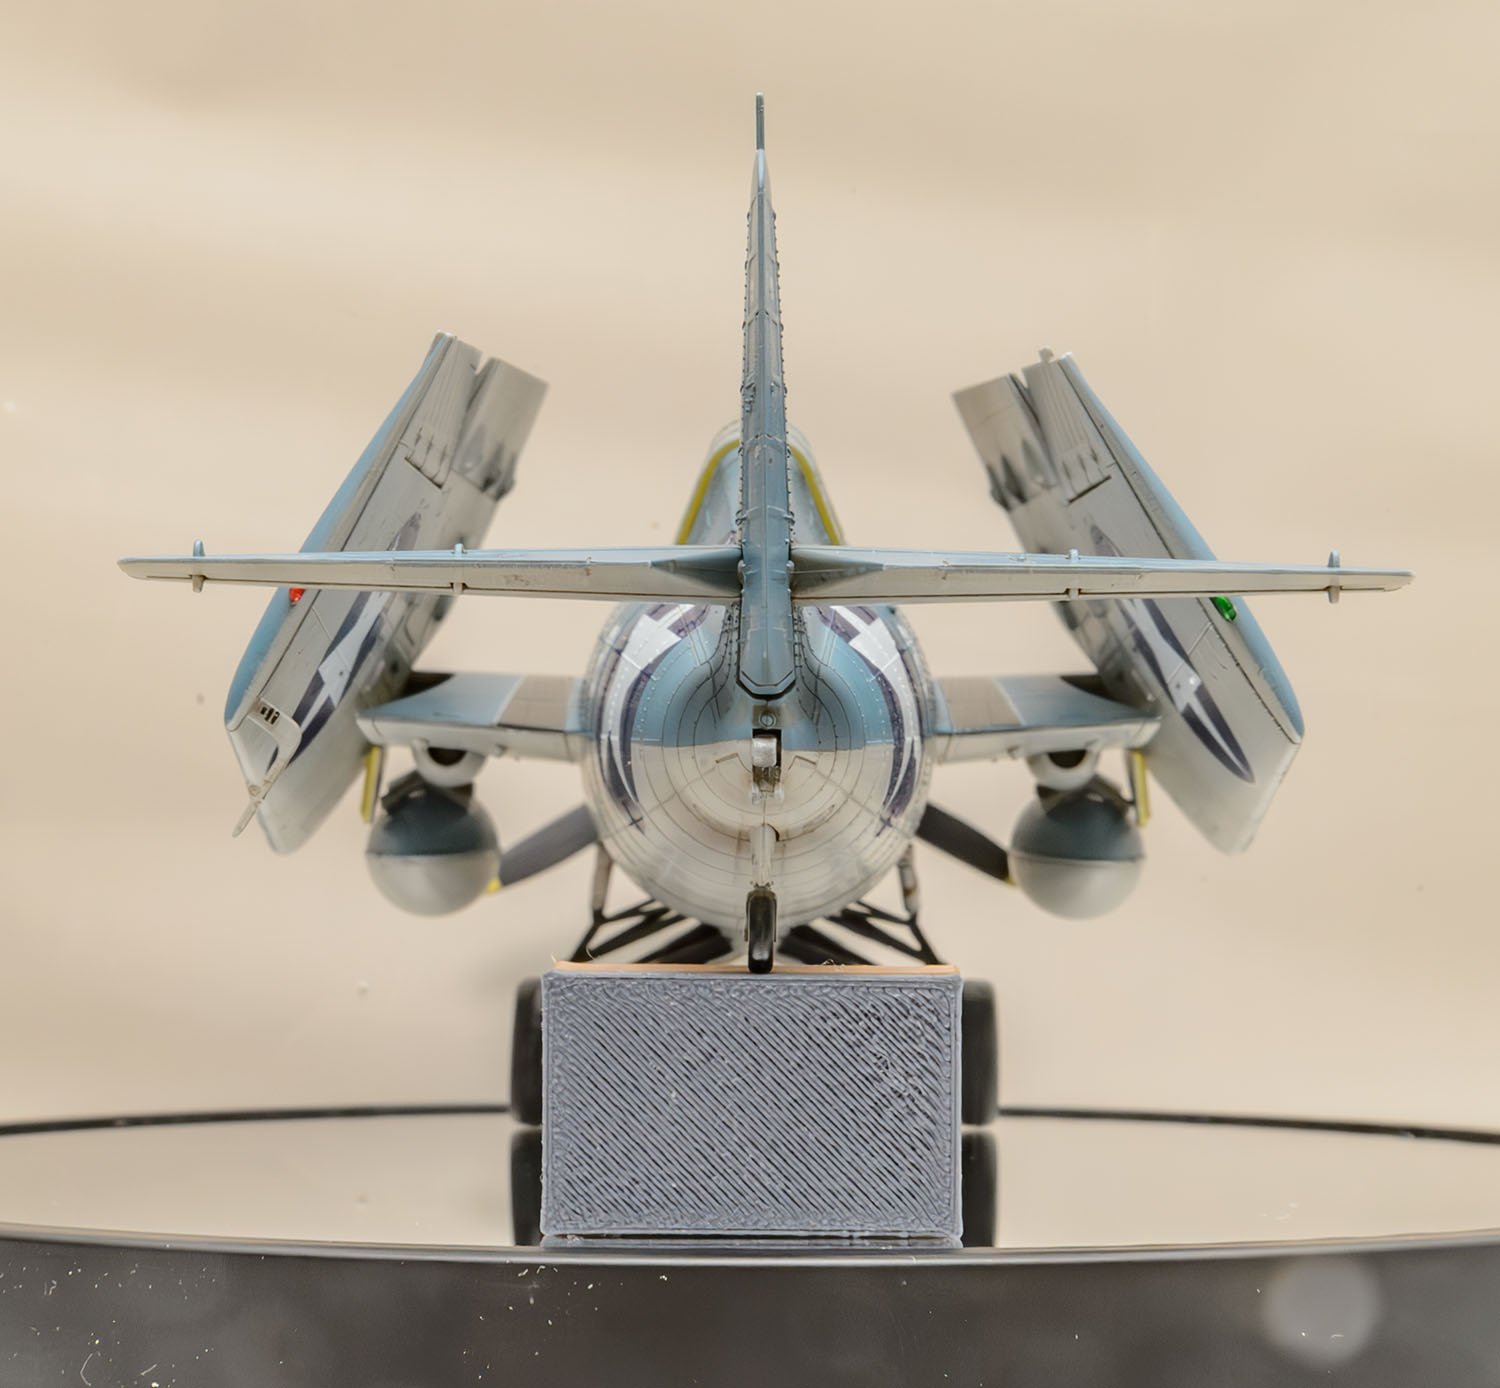
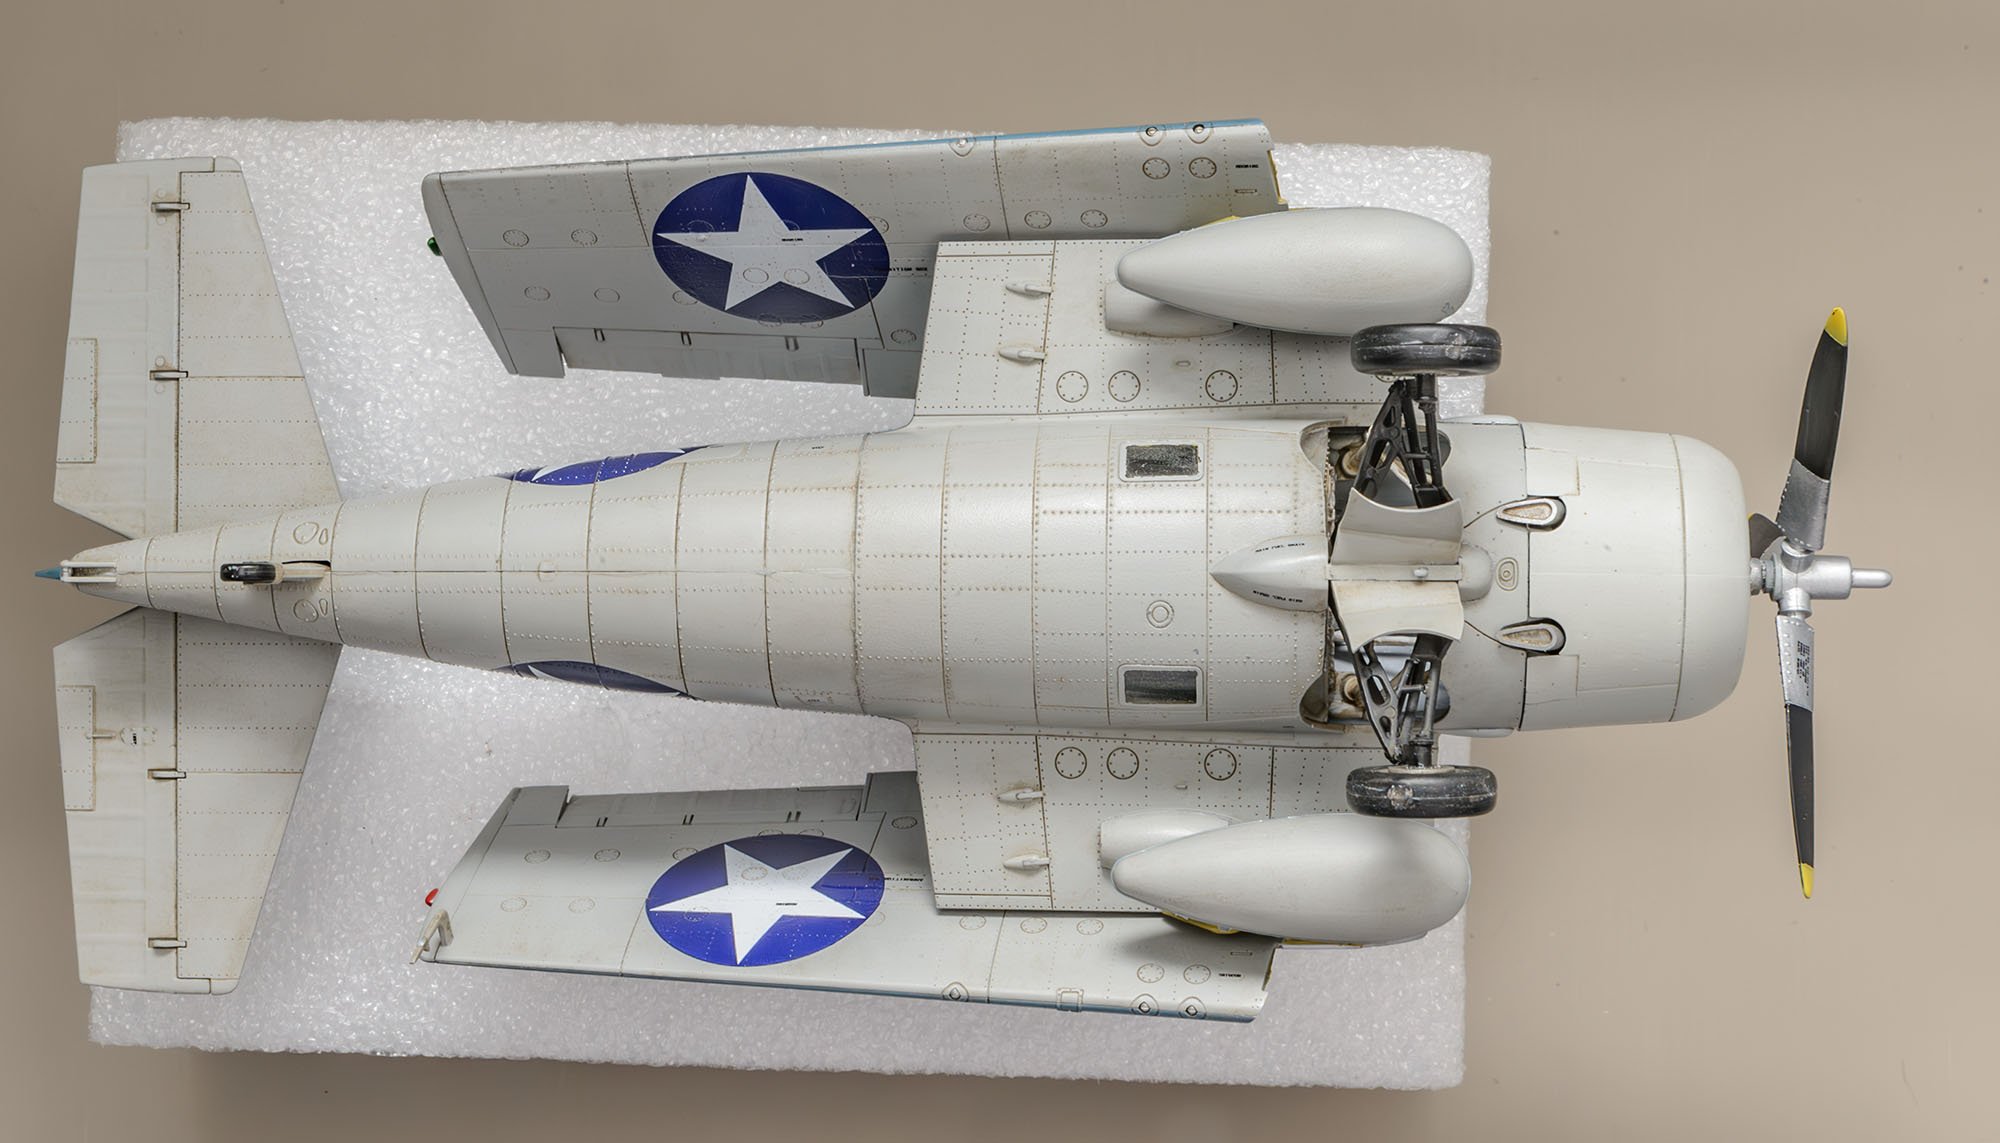
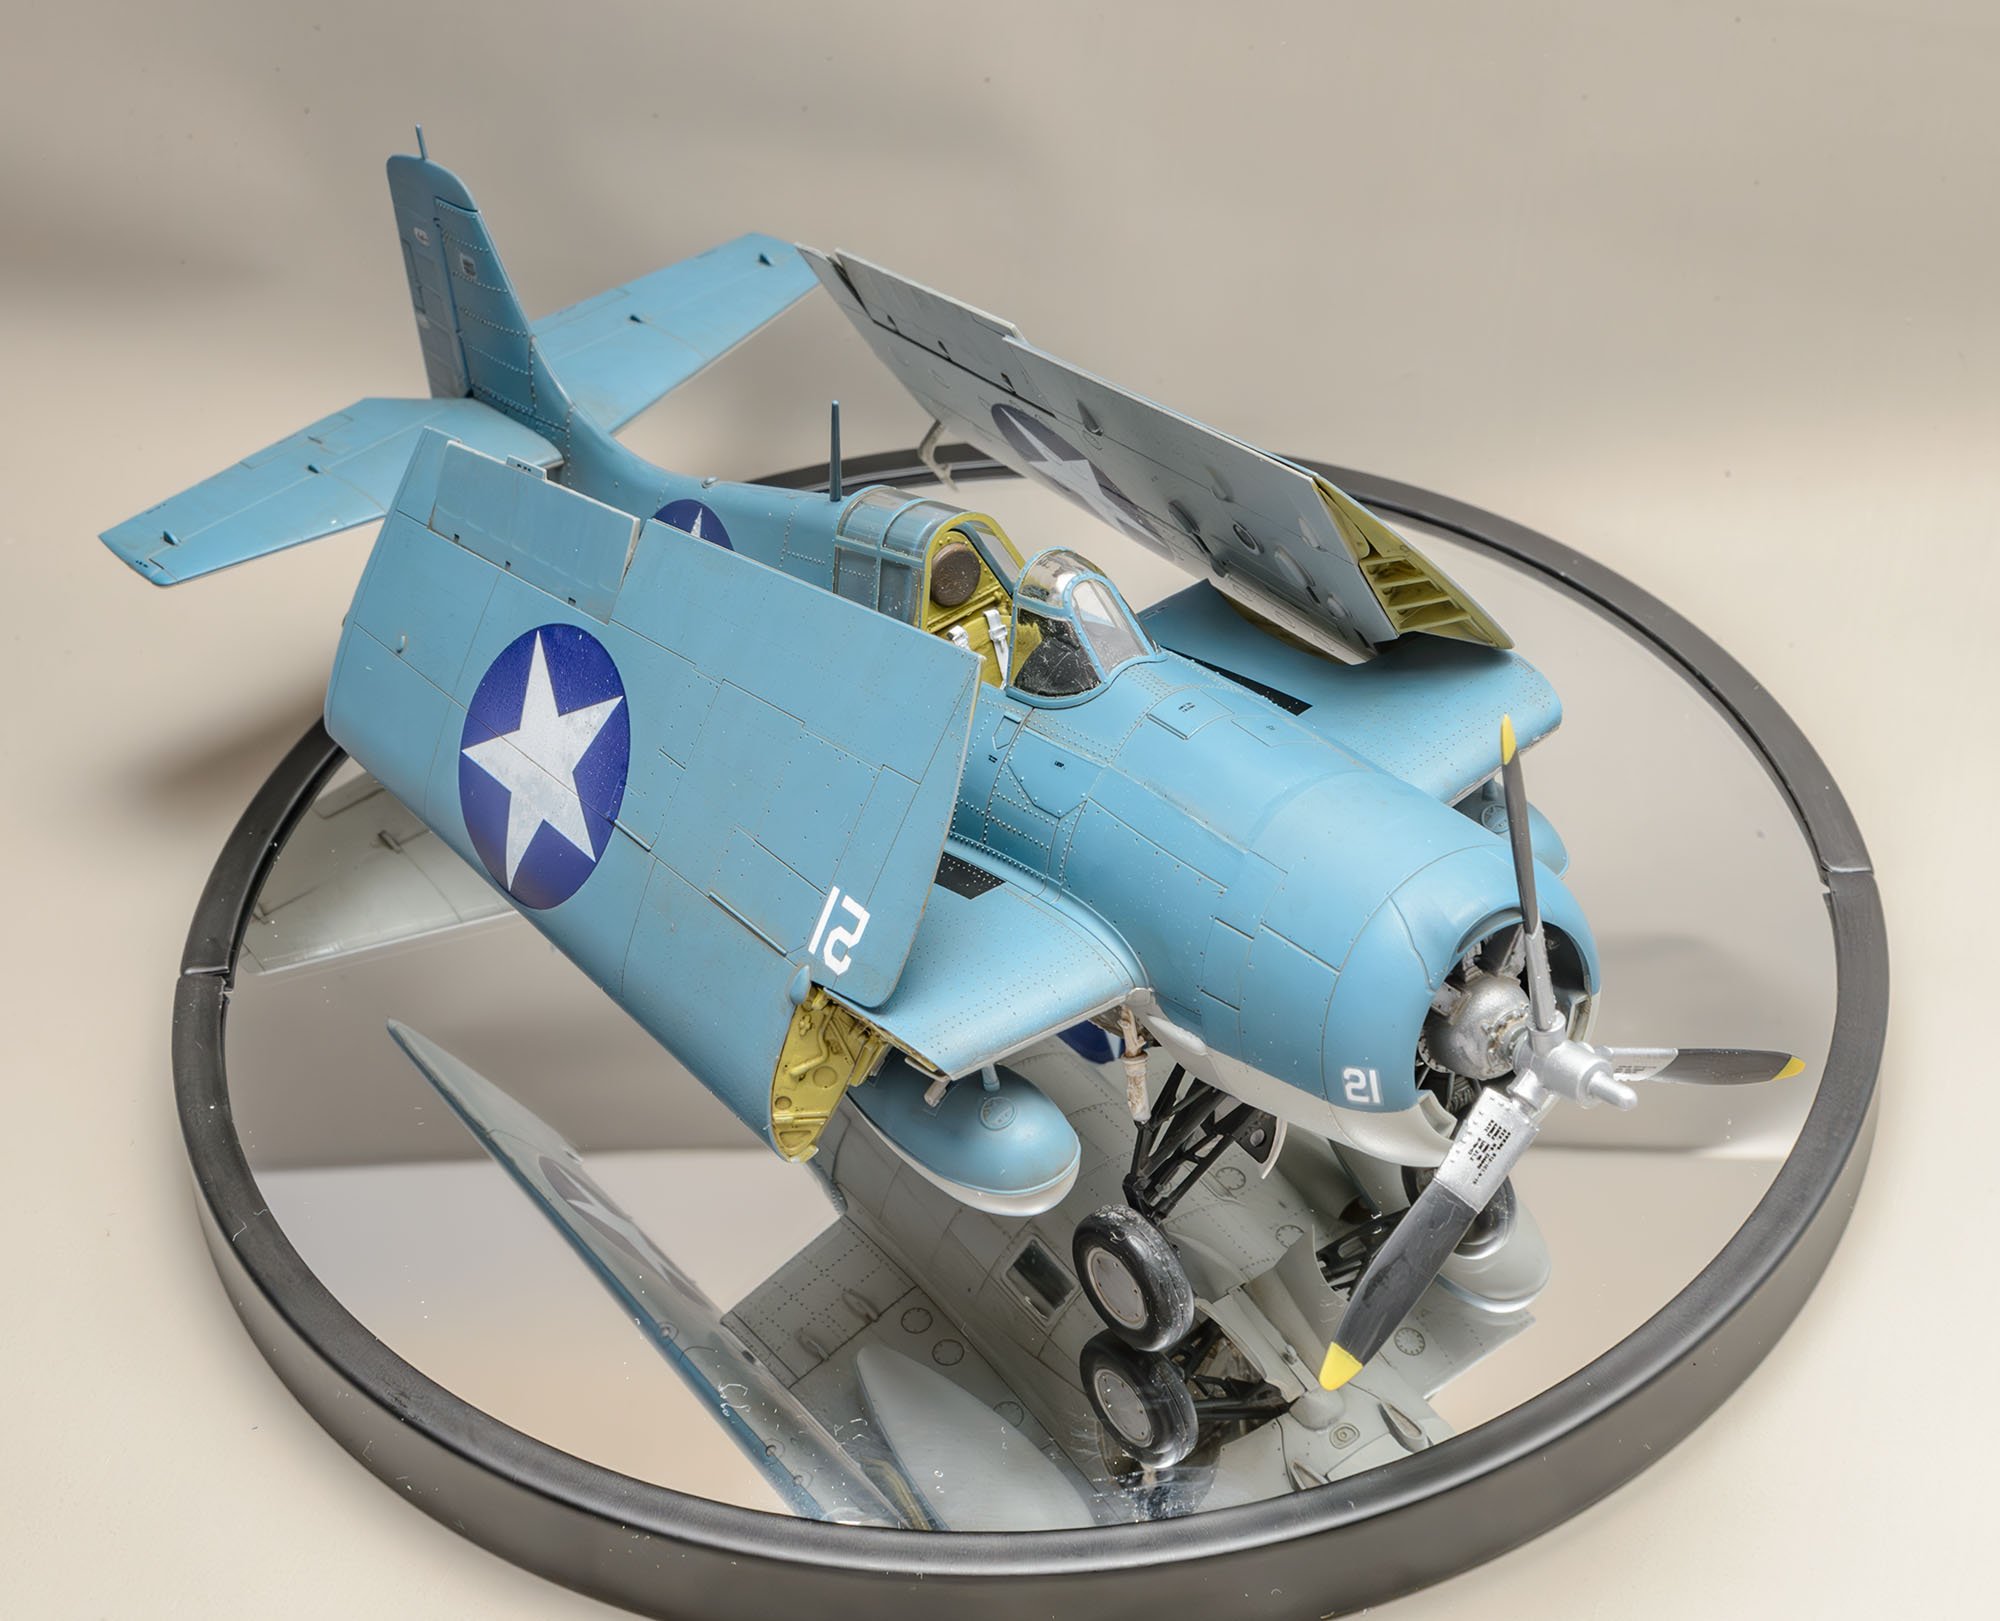
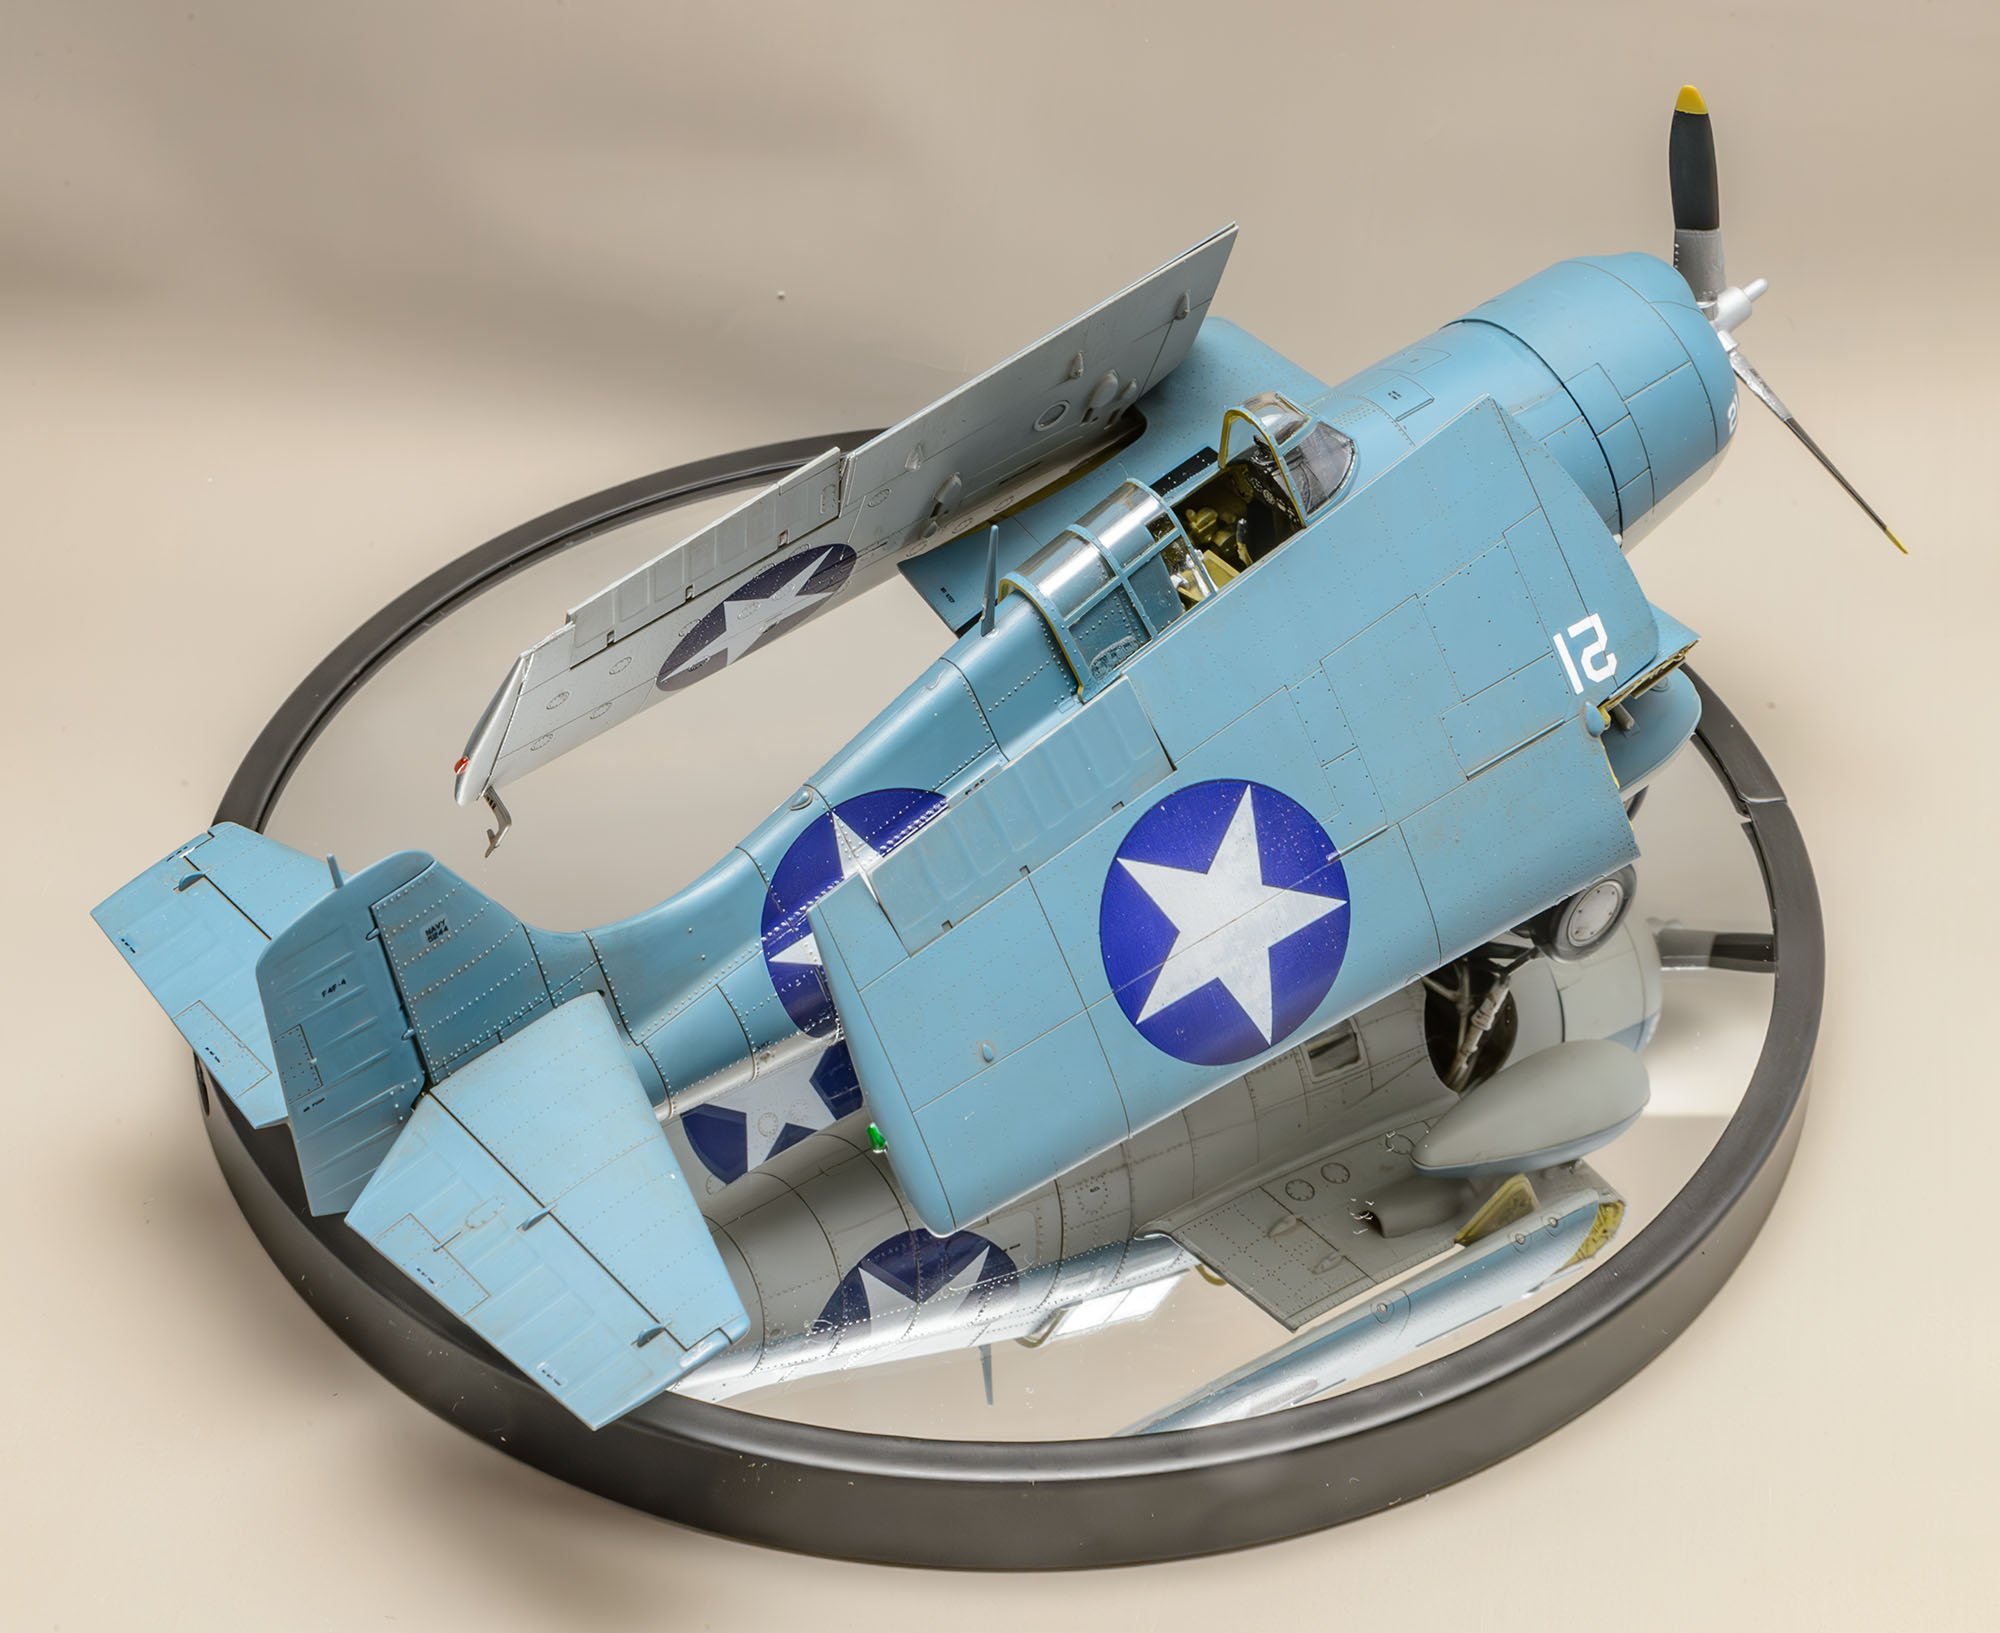
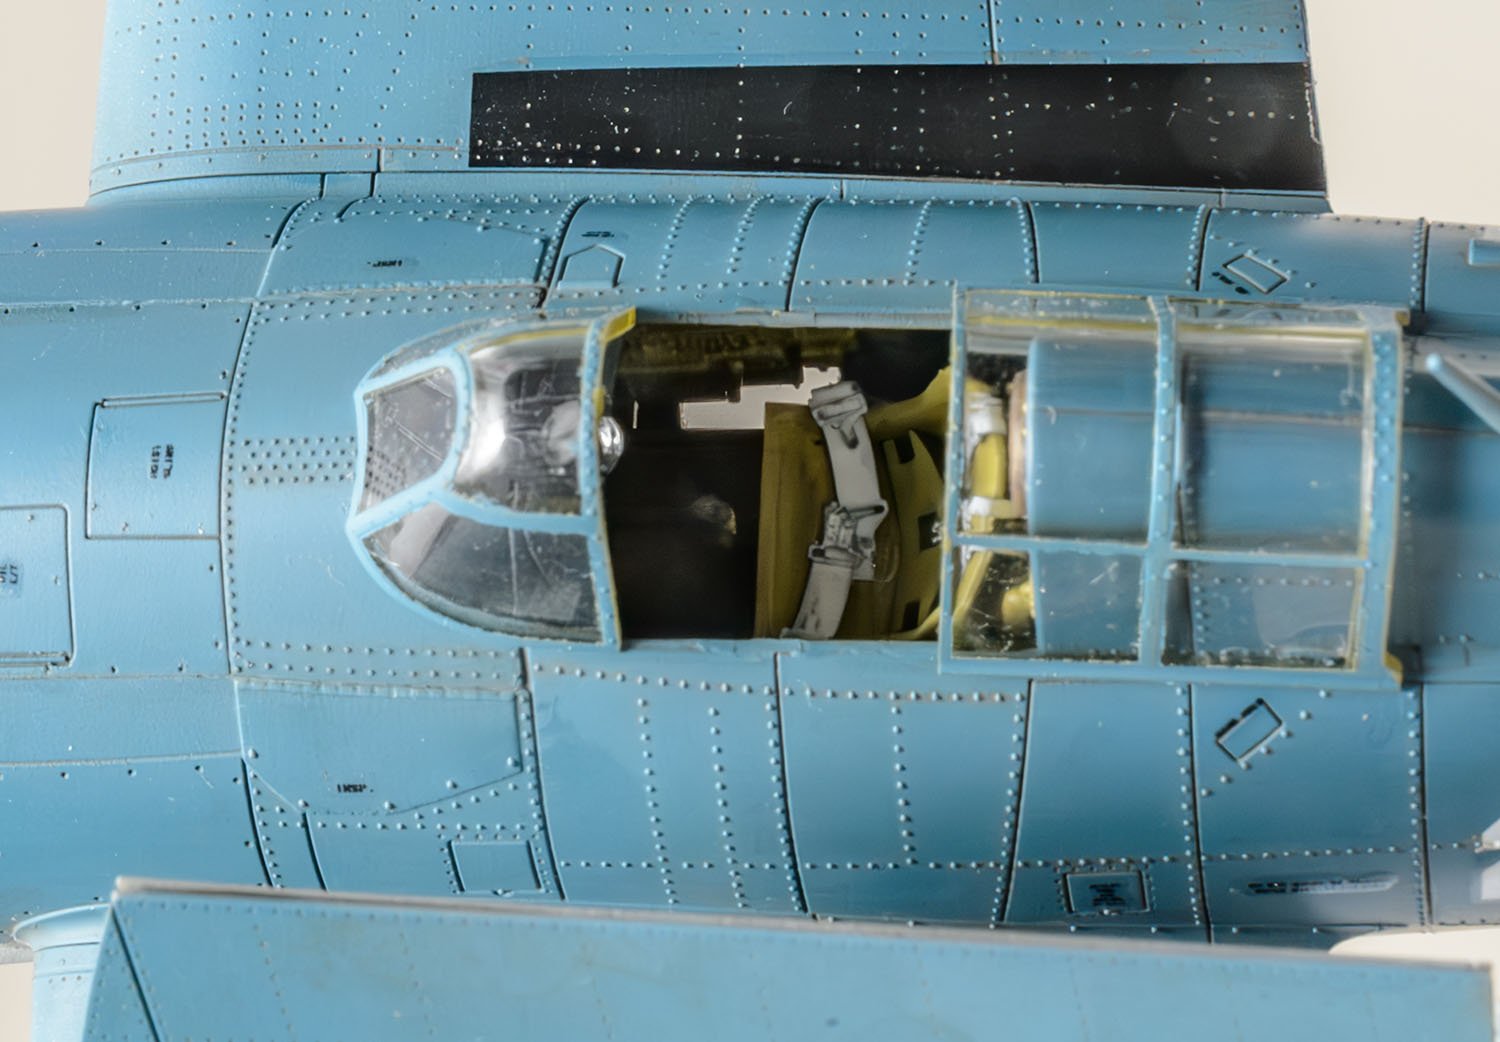
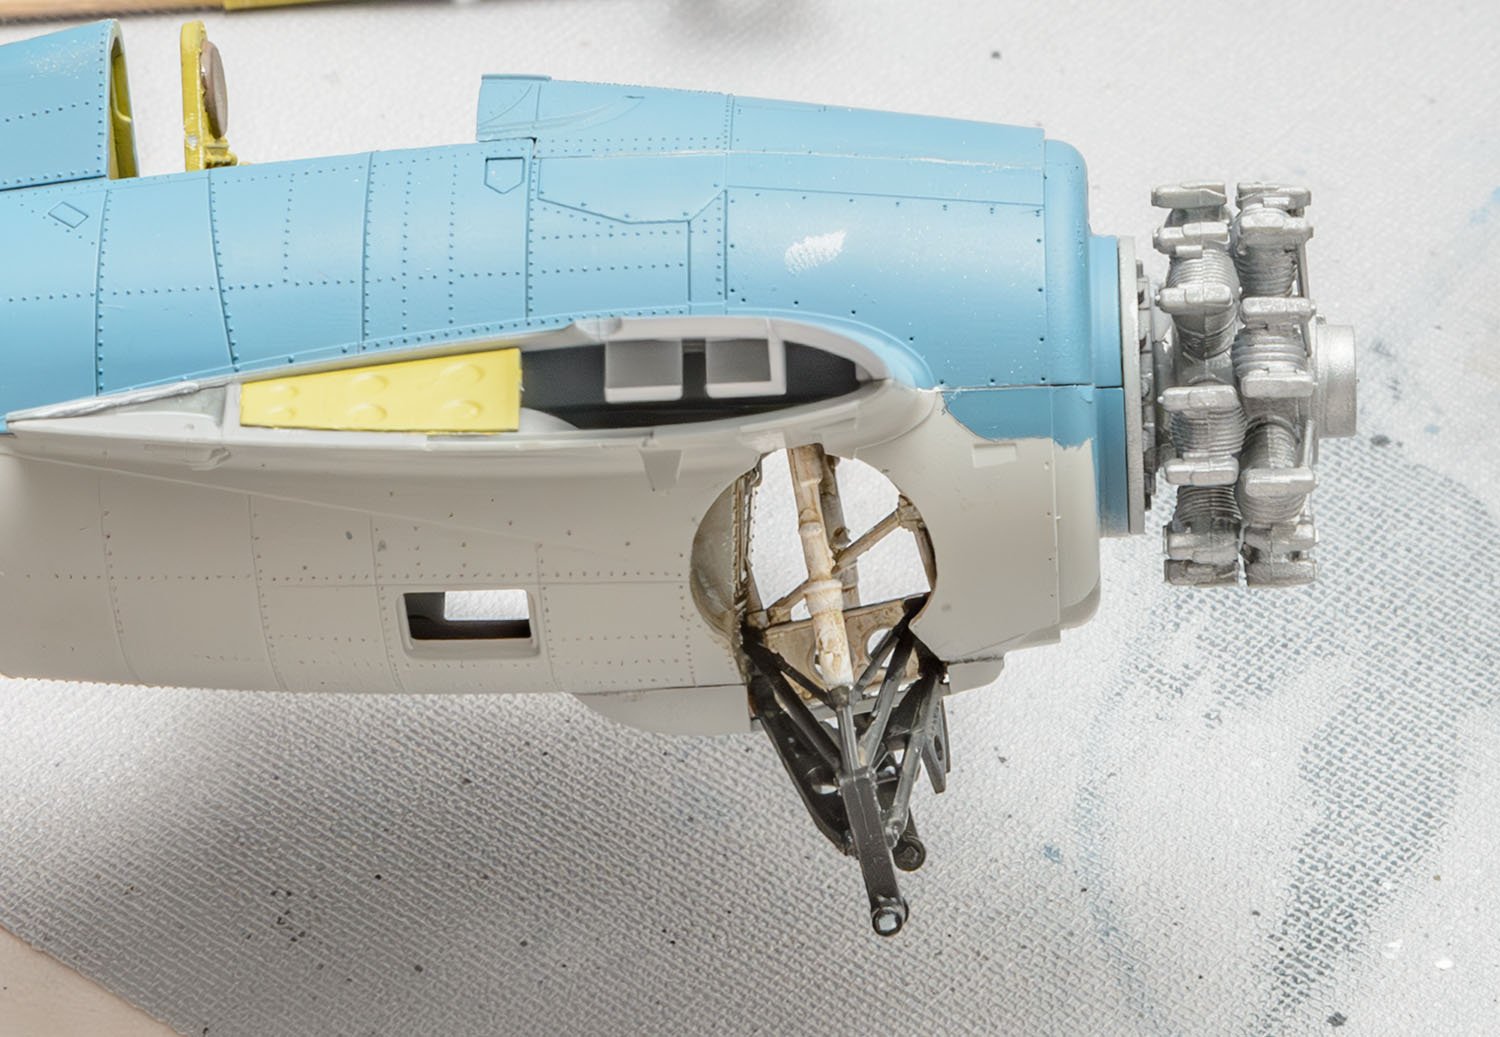
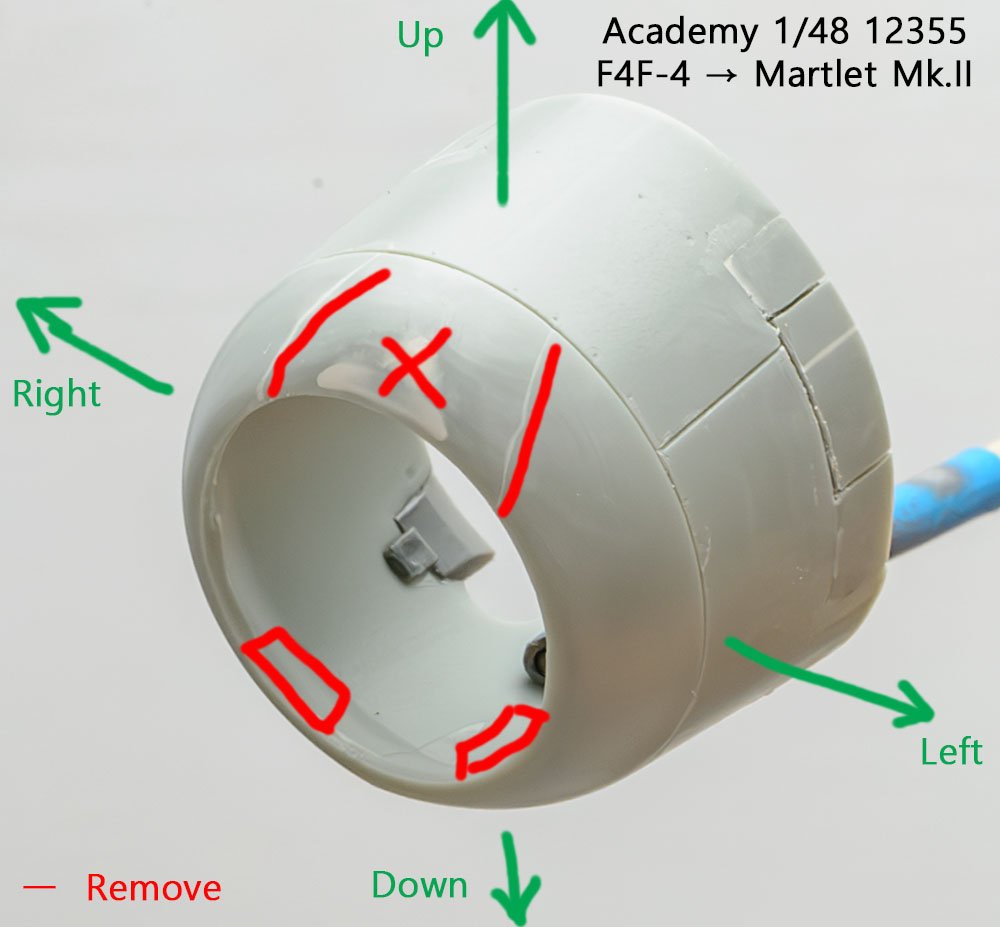
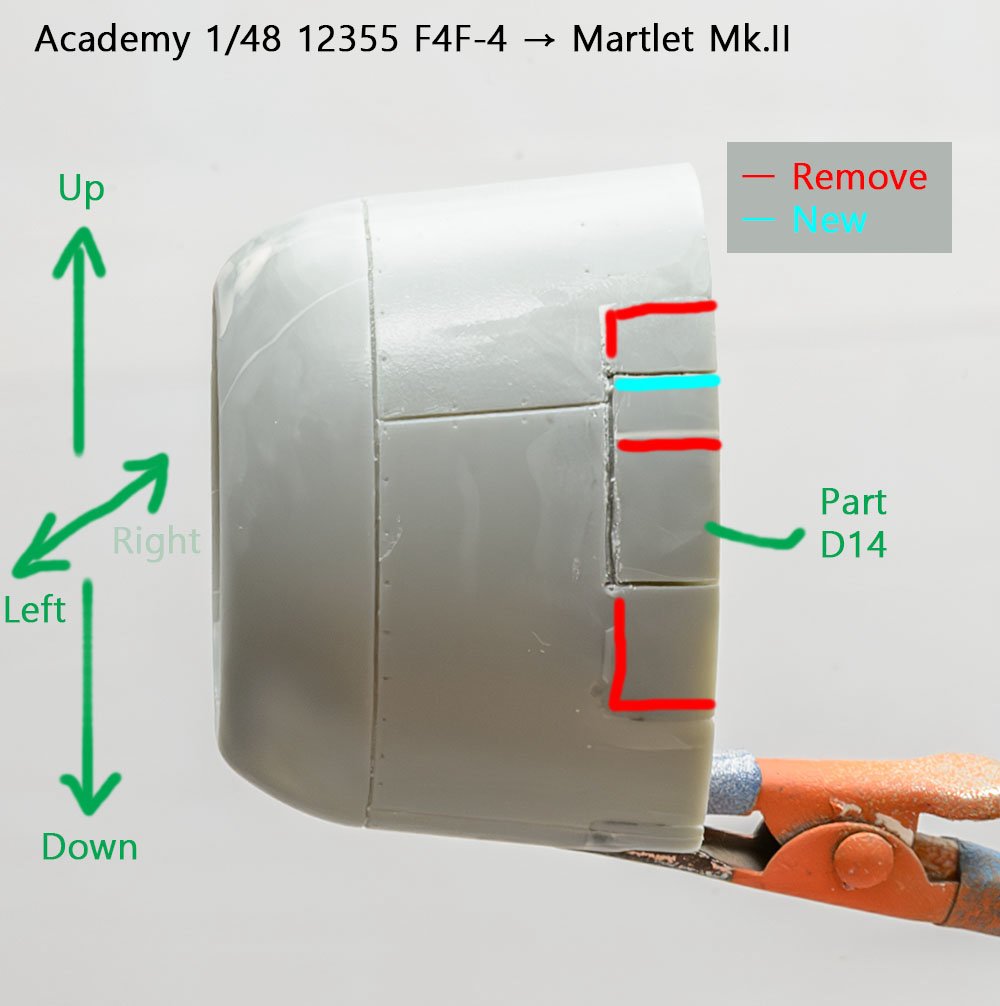
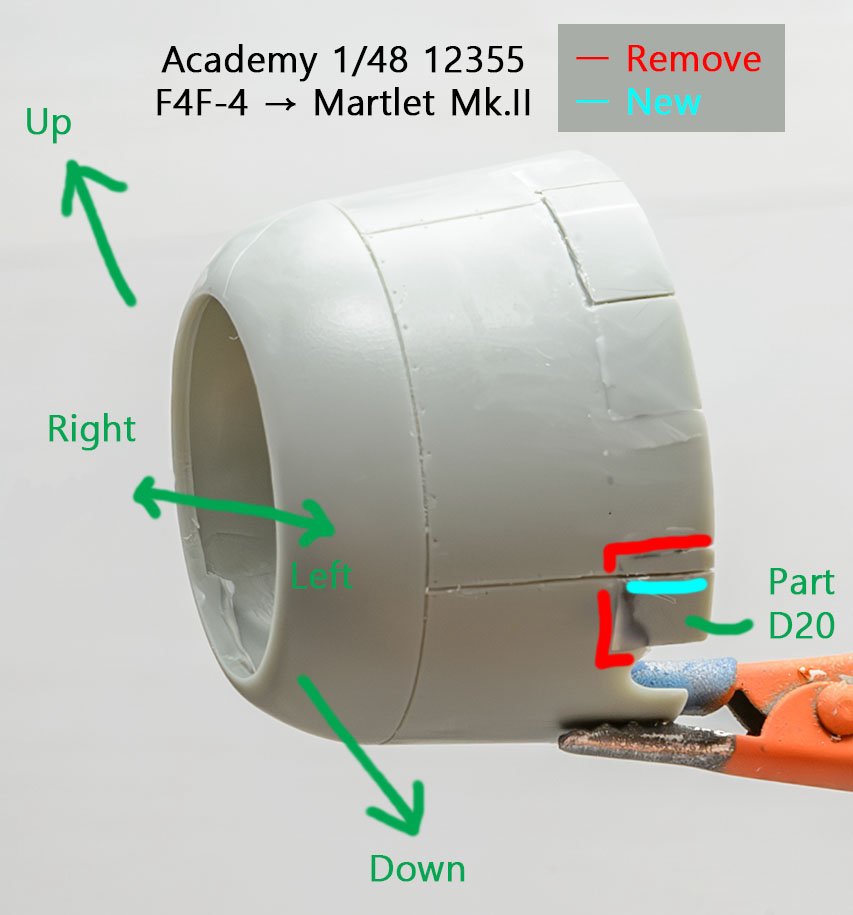
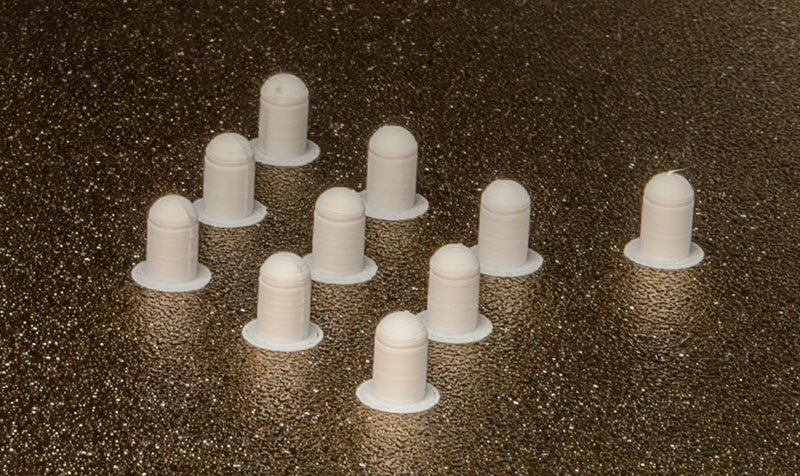
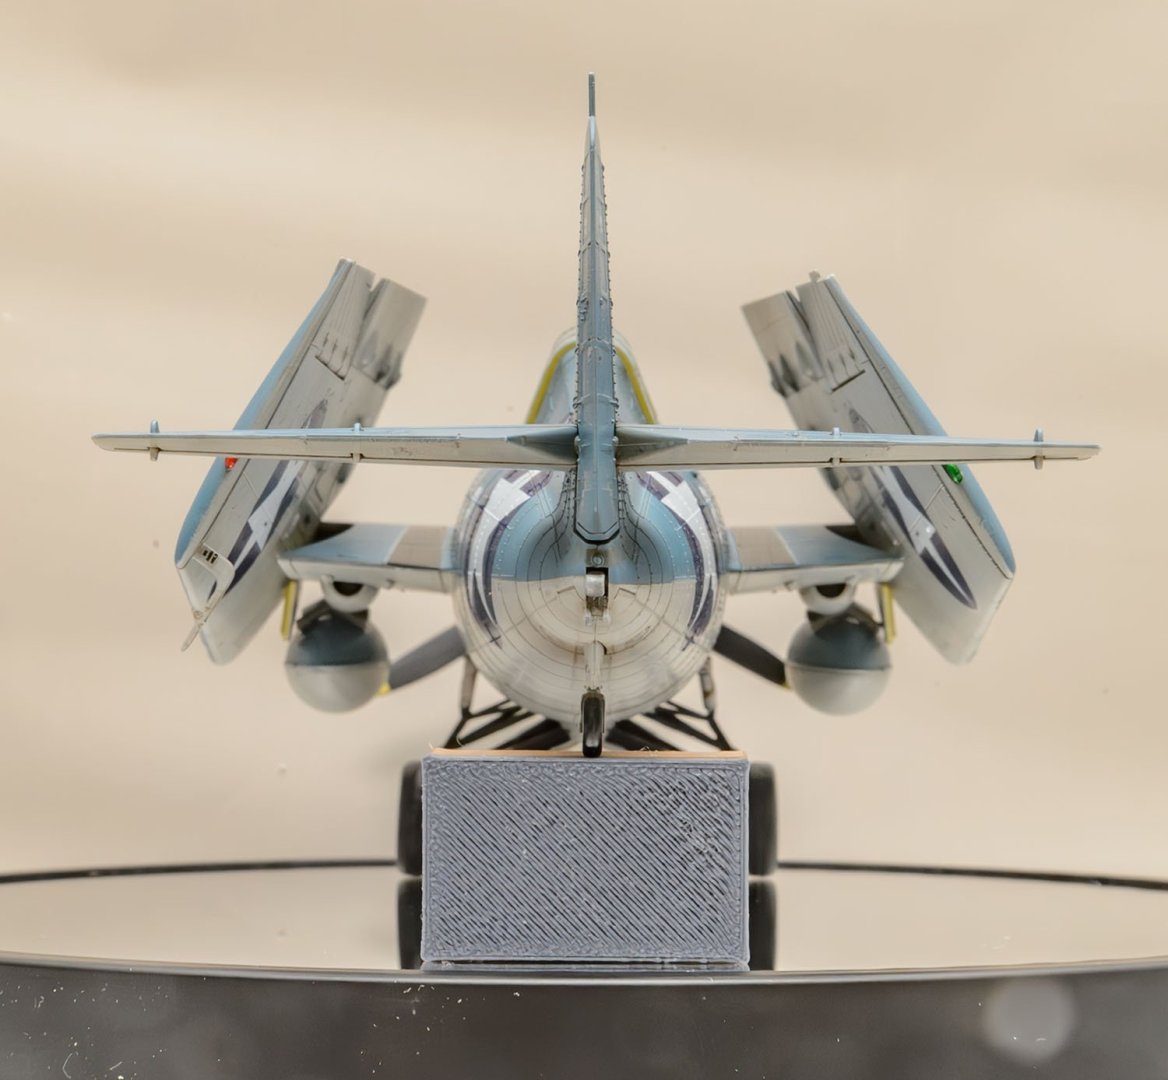
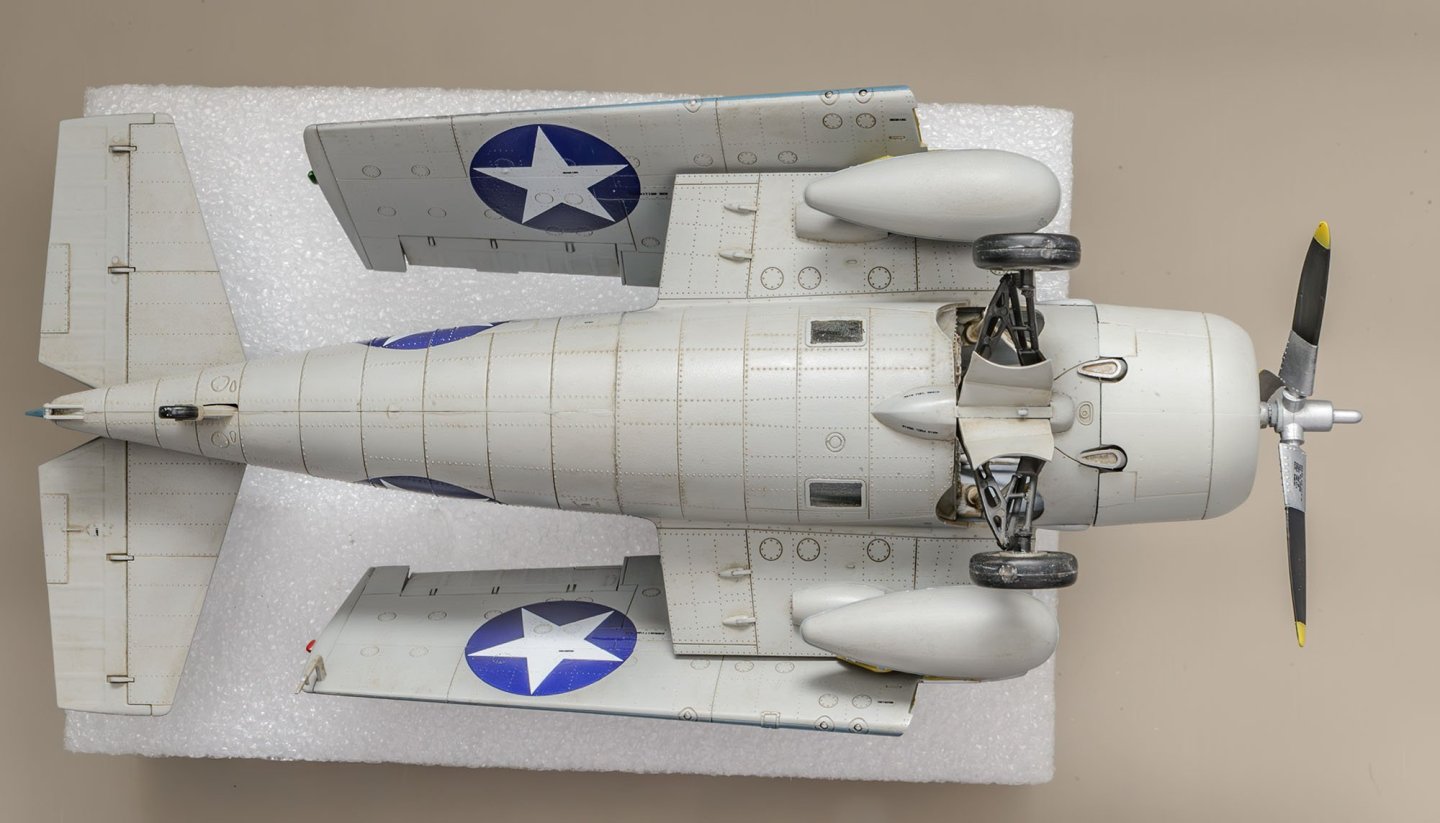
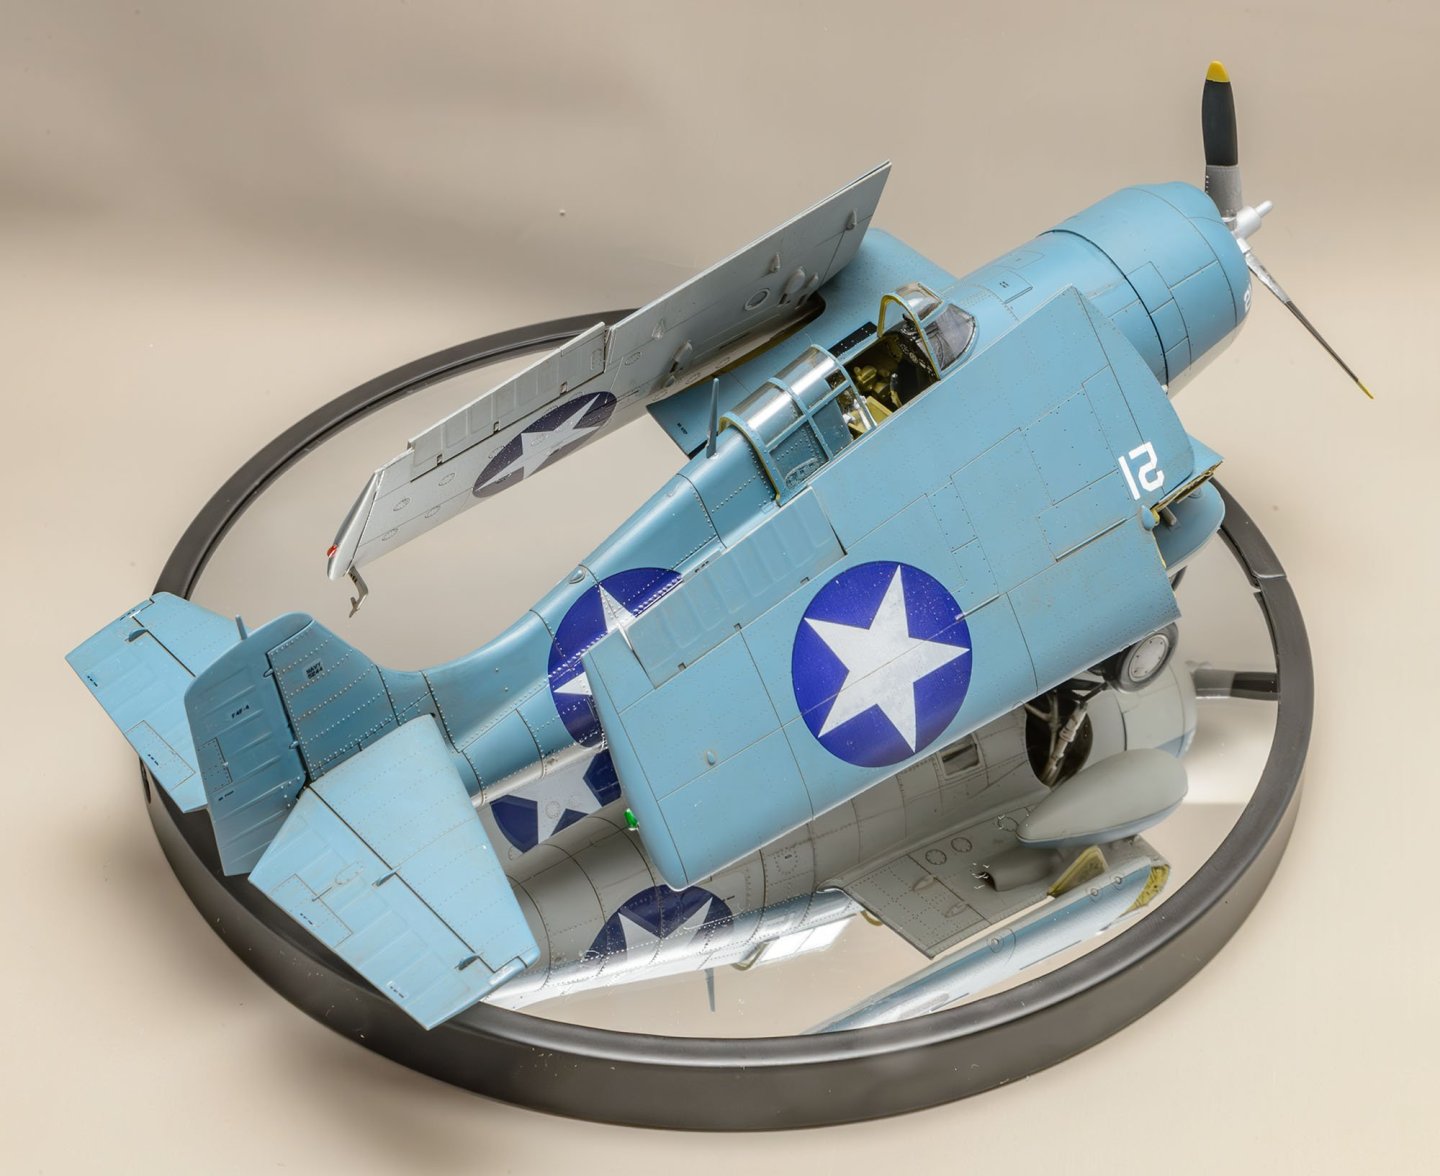
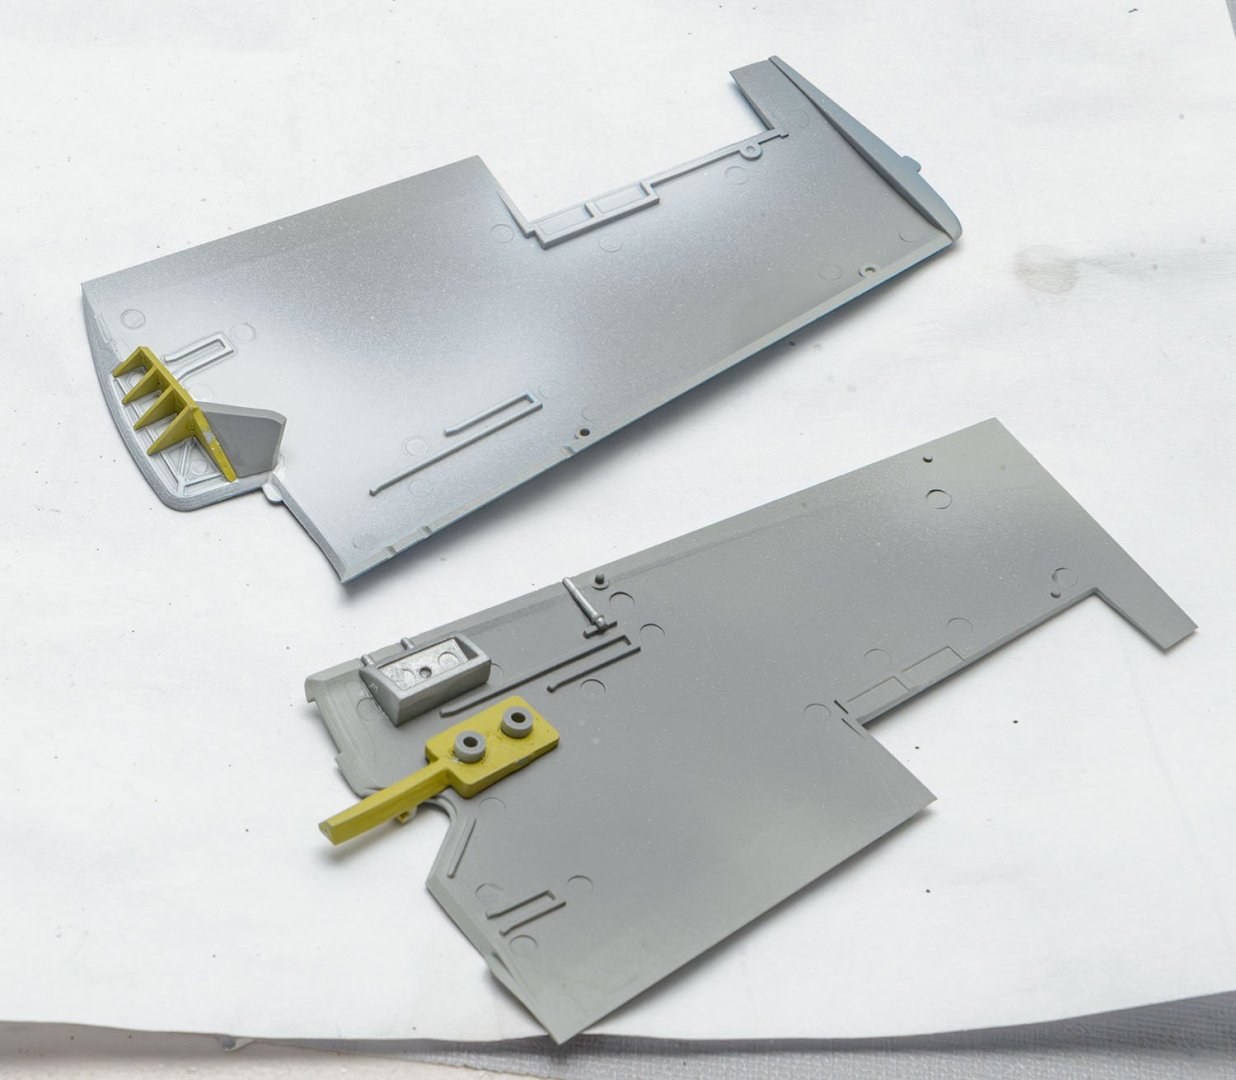
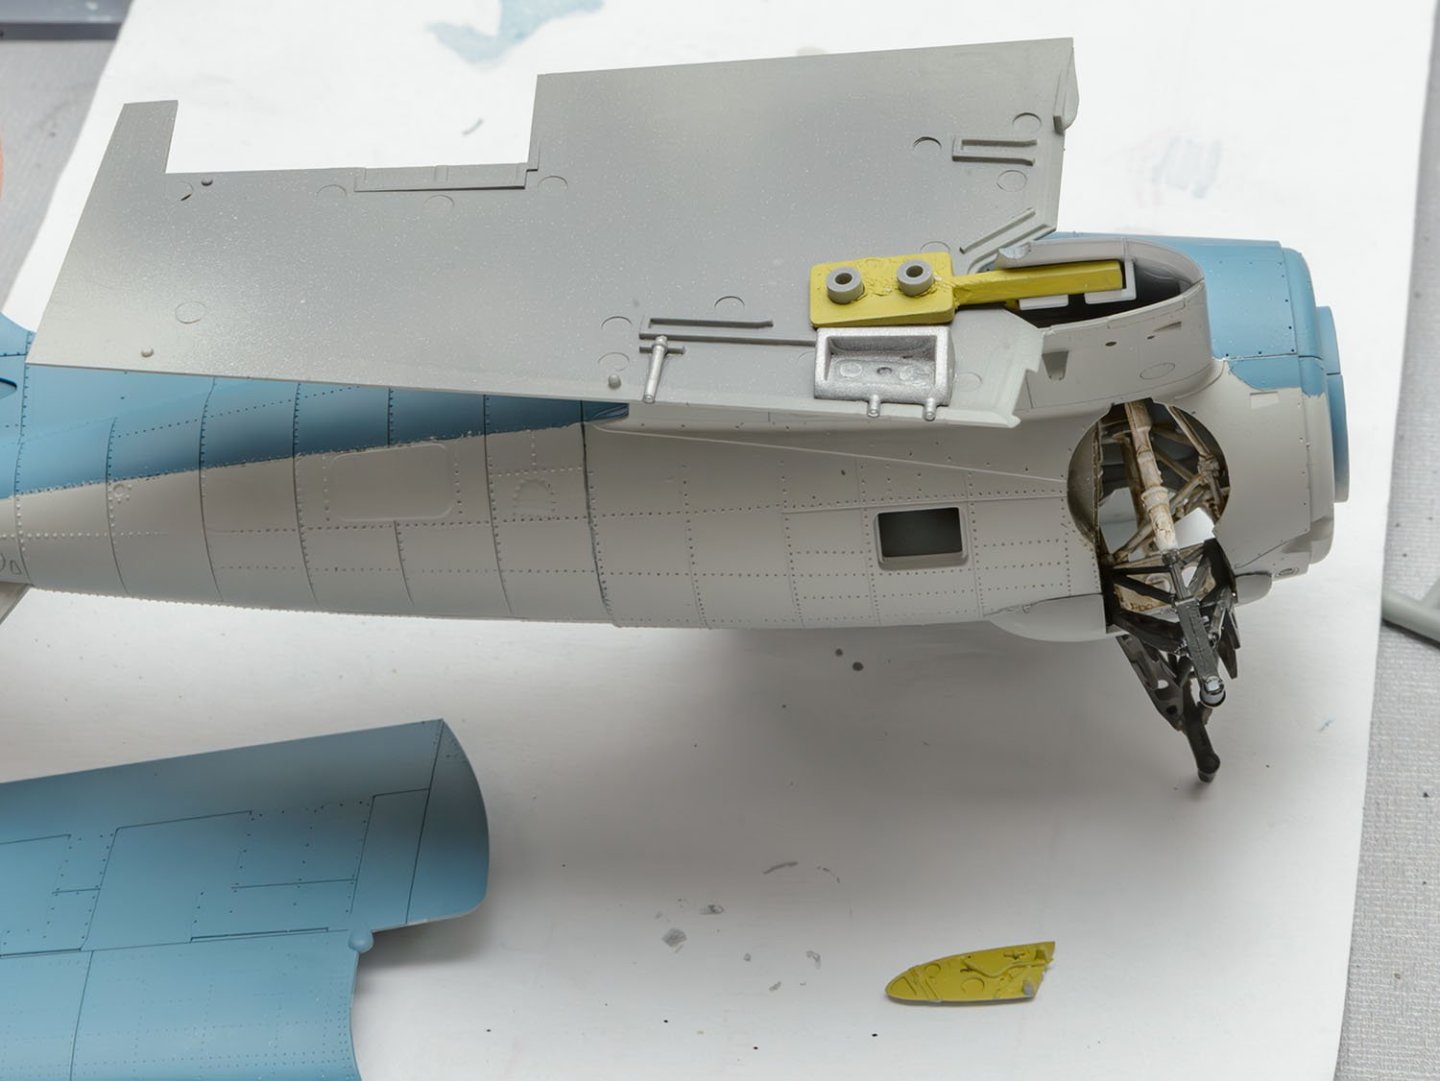
I slightly modified the Academy F4F-4 kit. You can find some interesting stories about the AJ148. https://armahobbynews.pl/en/blog/2022/02/07/the-grumman-martlet-mk-ii/ Here are some basic tips to help you convert to the Martlet Mk.II. I made the longer propeller nose cone using a 3D printer.


- 3 replies
-
- 15
-
-
-
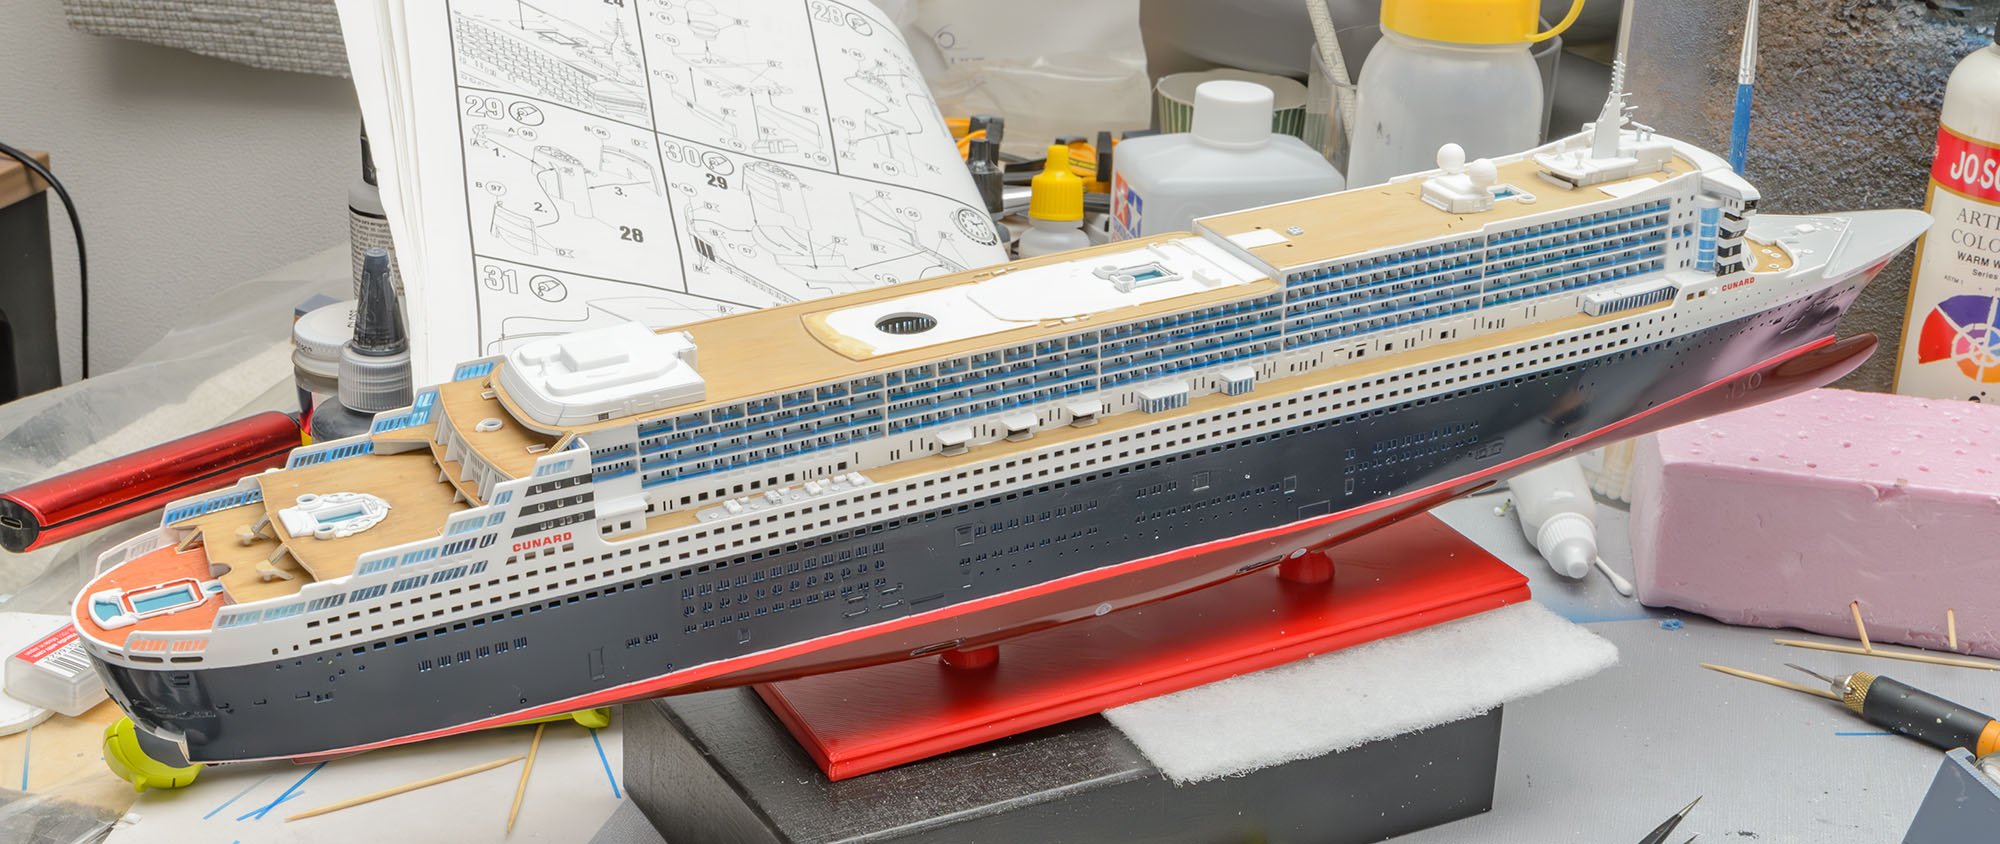
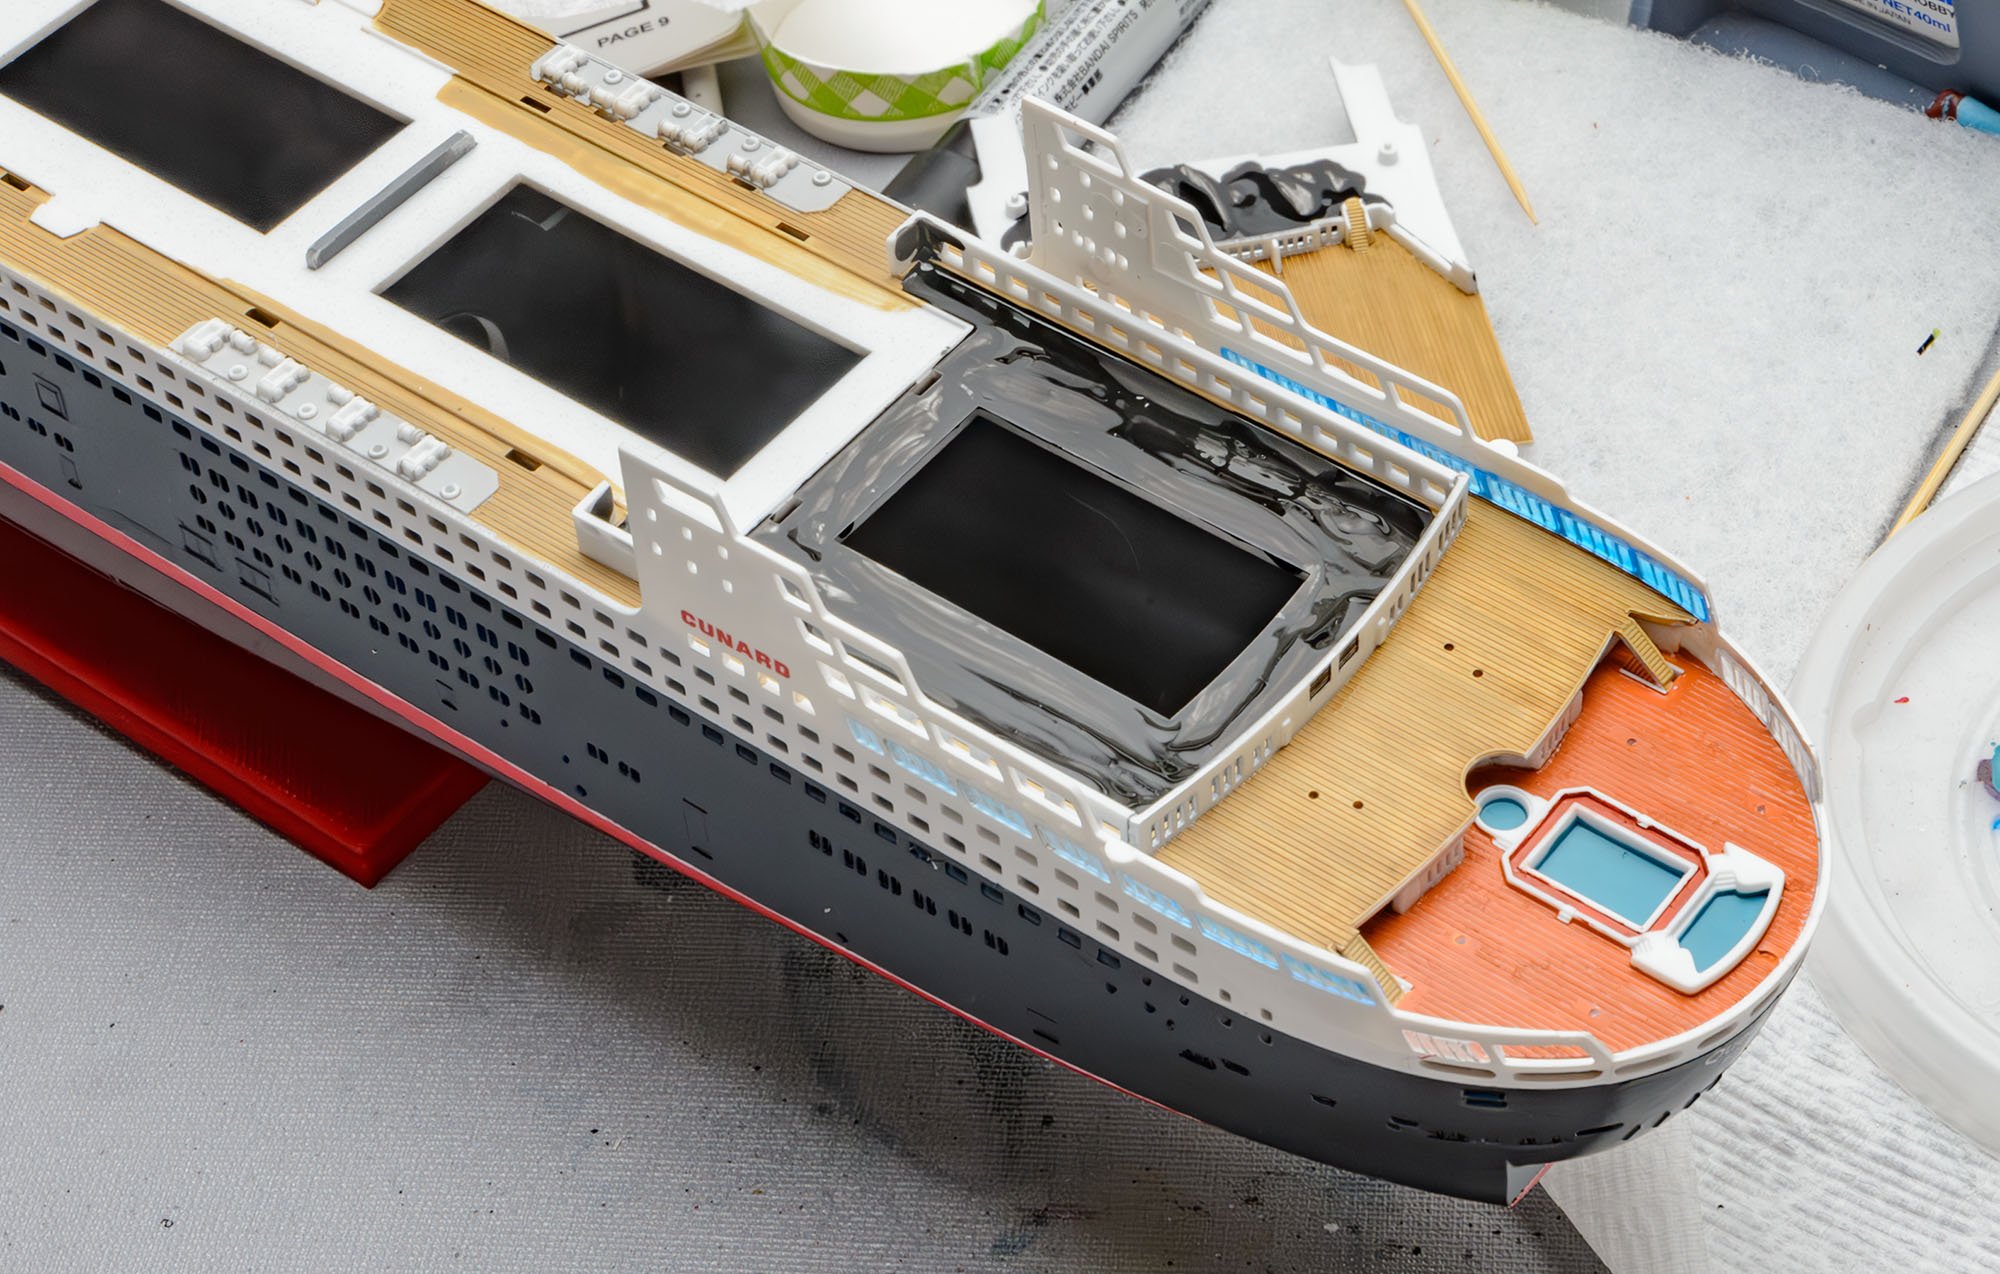
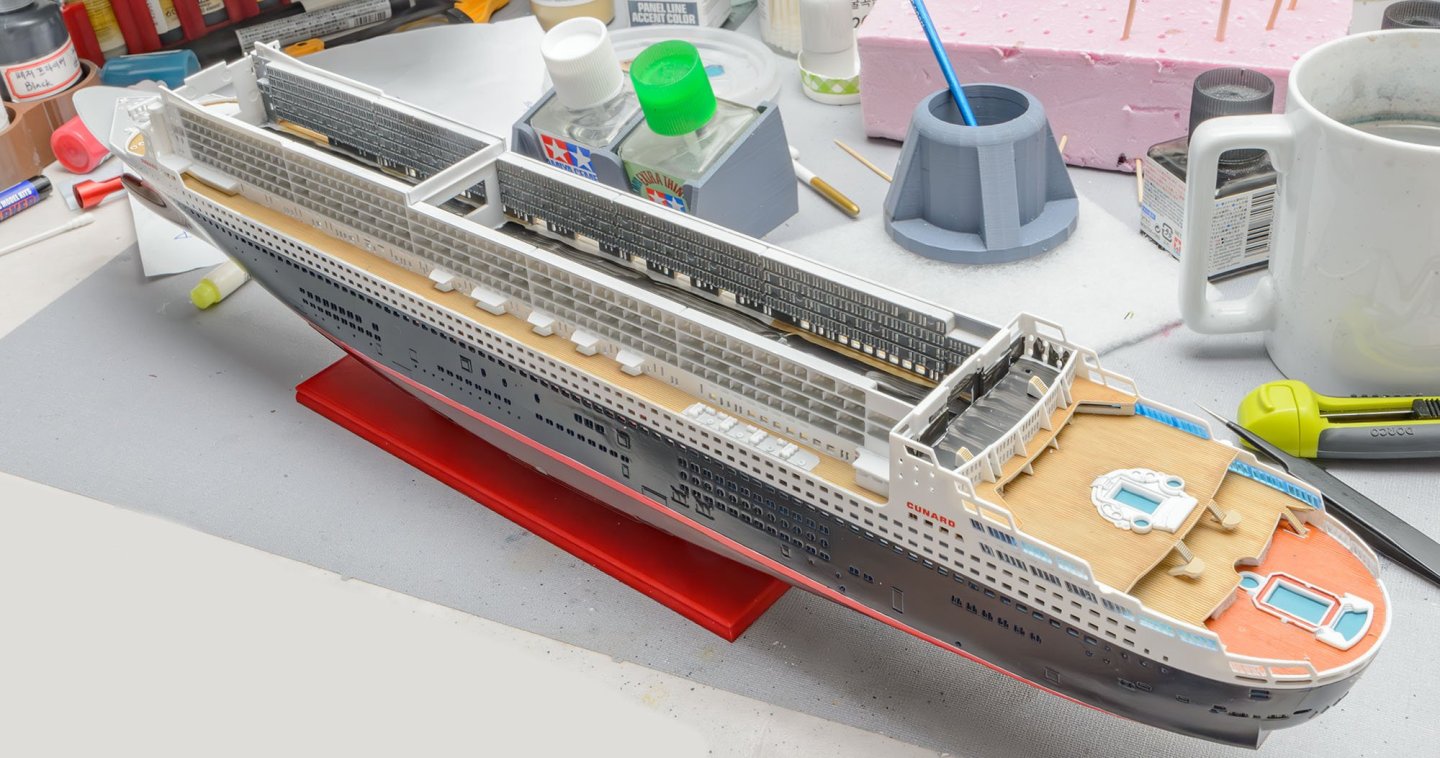
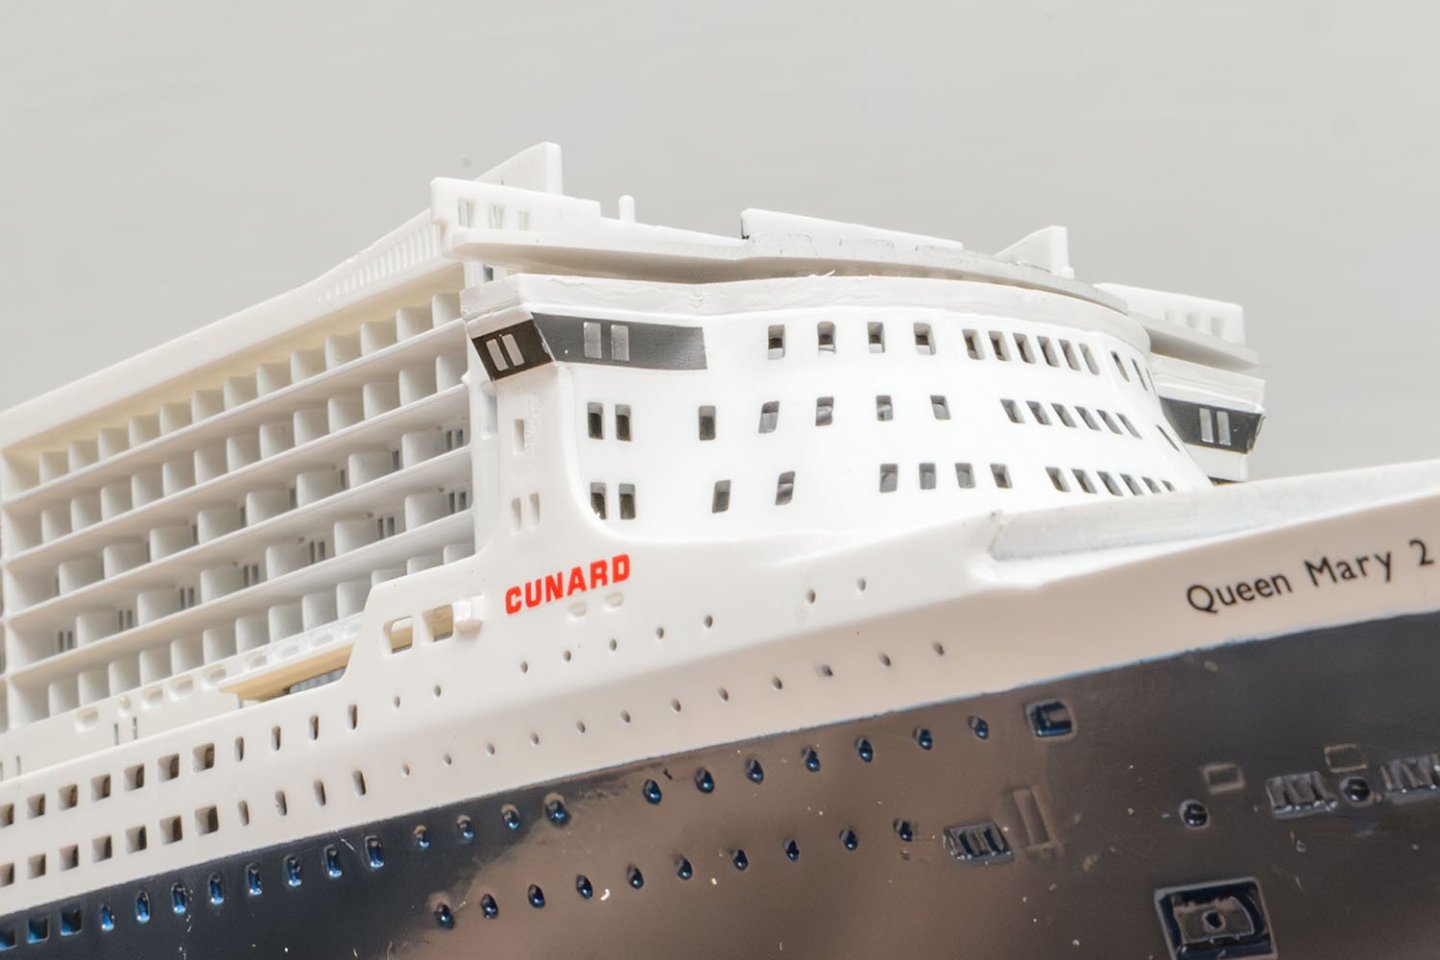
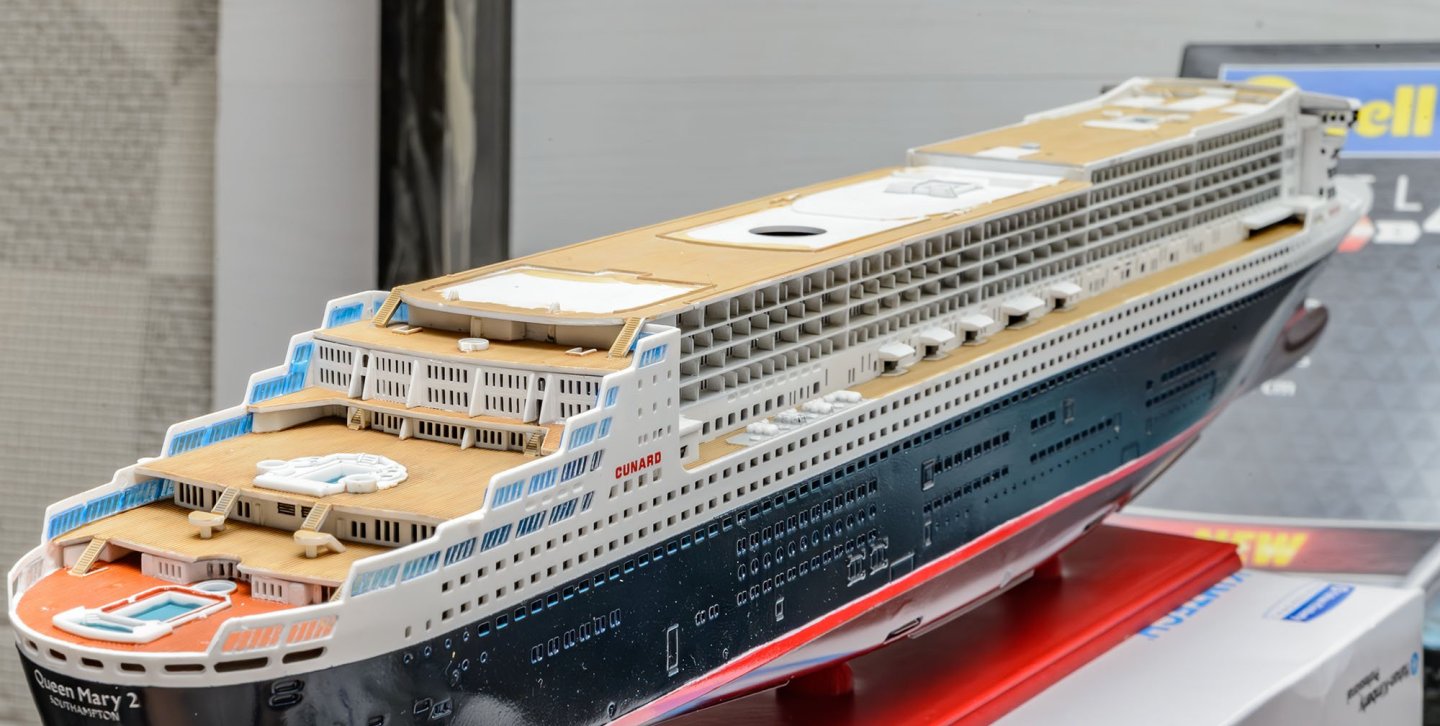
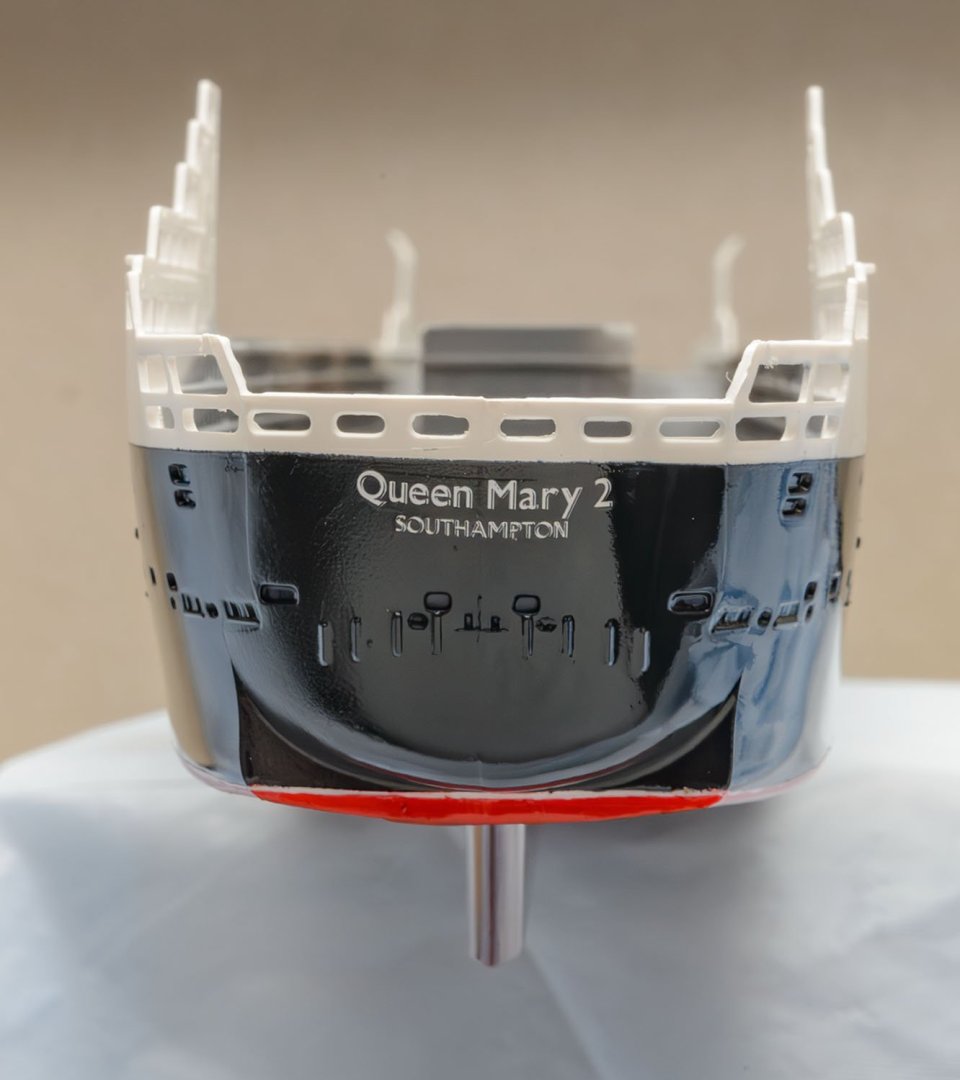
Hmm... I have decided to halt the build and will wait for a package. I have placed an order for detail parts, such as PE railings and ladders. This kit deserves to have better details. Also, I need to recover some broken parts. Fortunately, they are basketball park rails, so I'll replace them with OHP films. The next post will be in 2~3 months...

- 5 replies
-
- 4
-
-
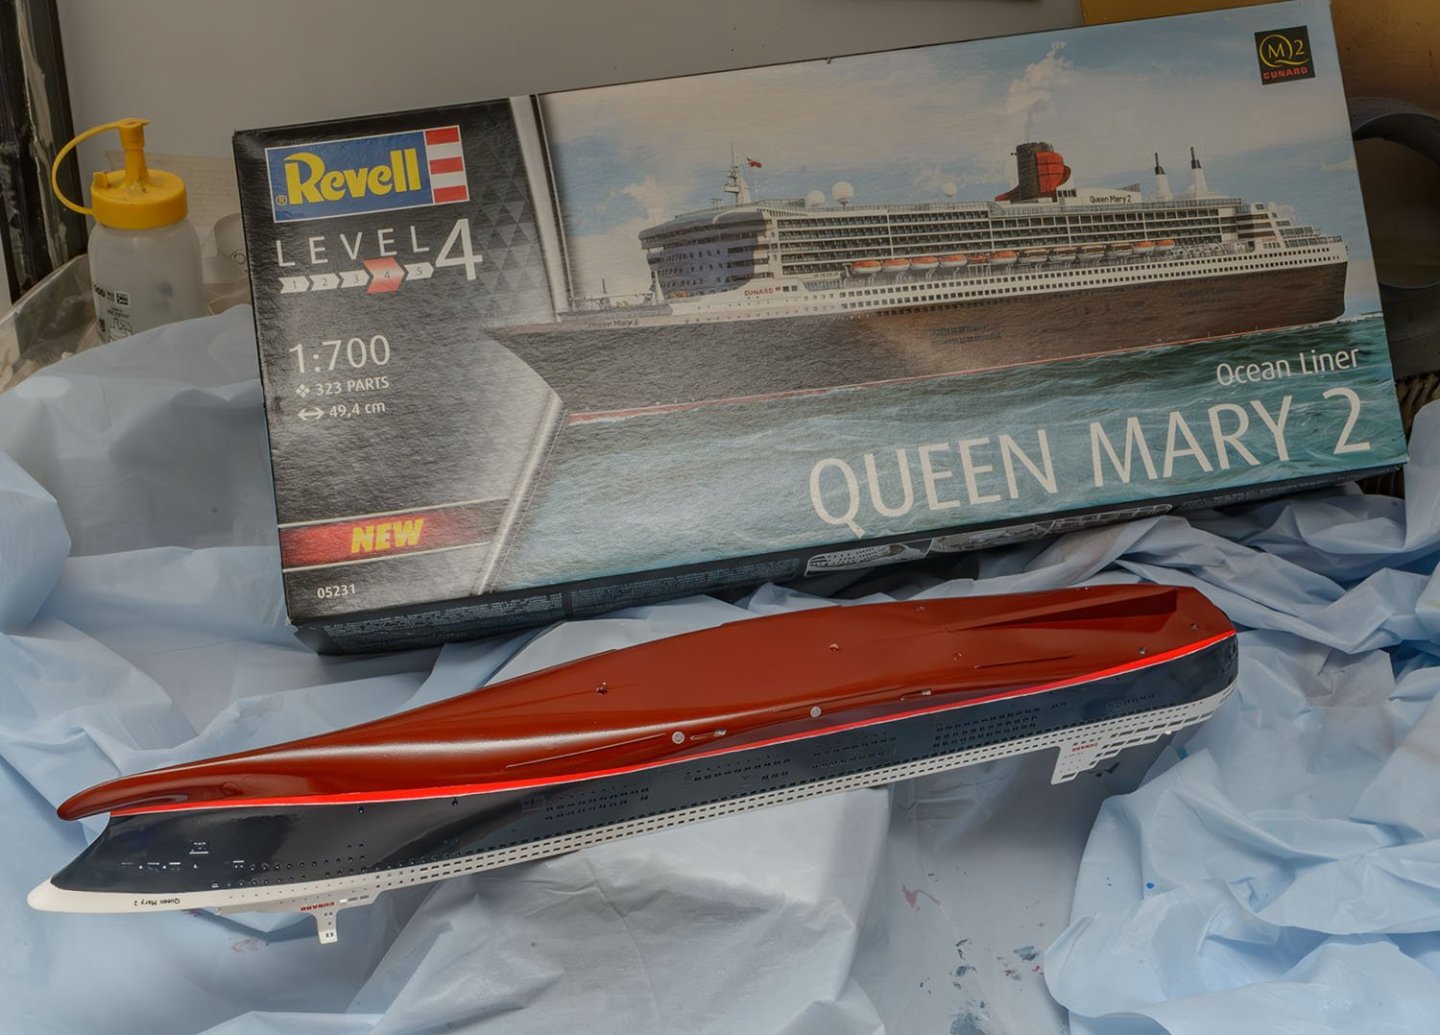
- Queen Mary 2
- Revell
- (and 1 more)
-
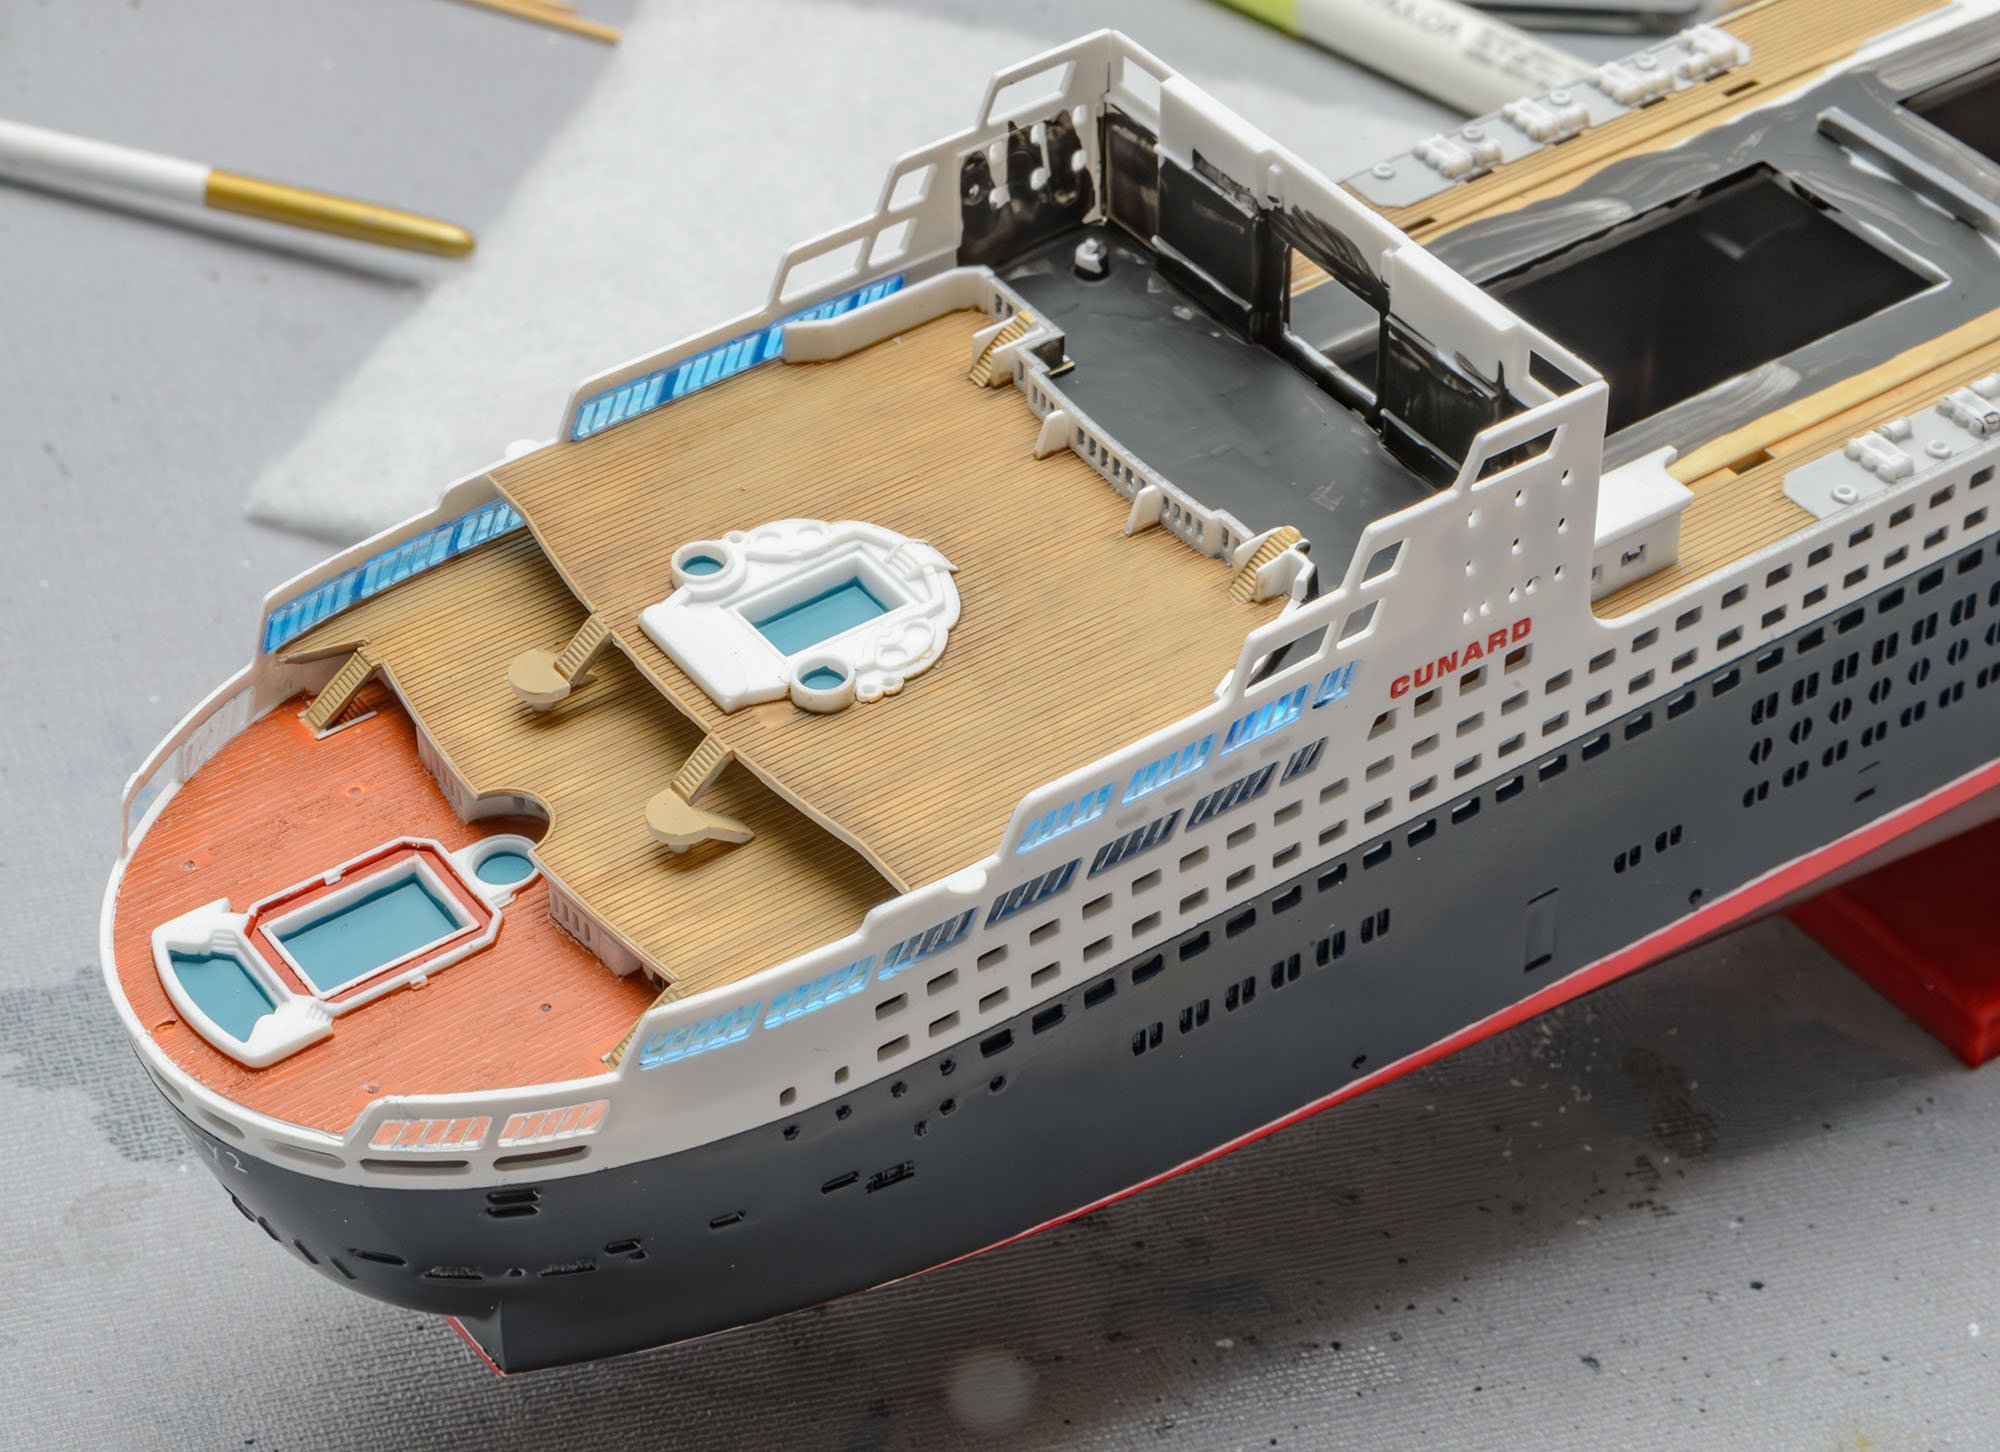
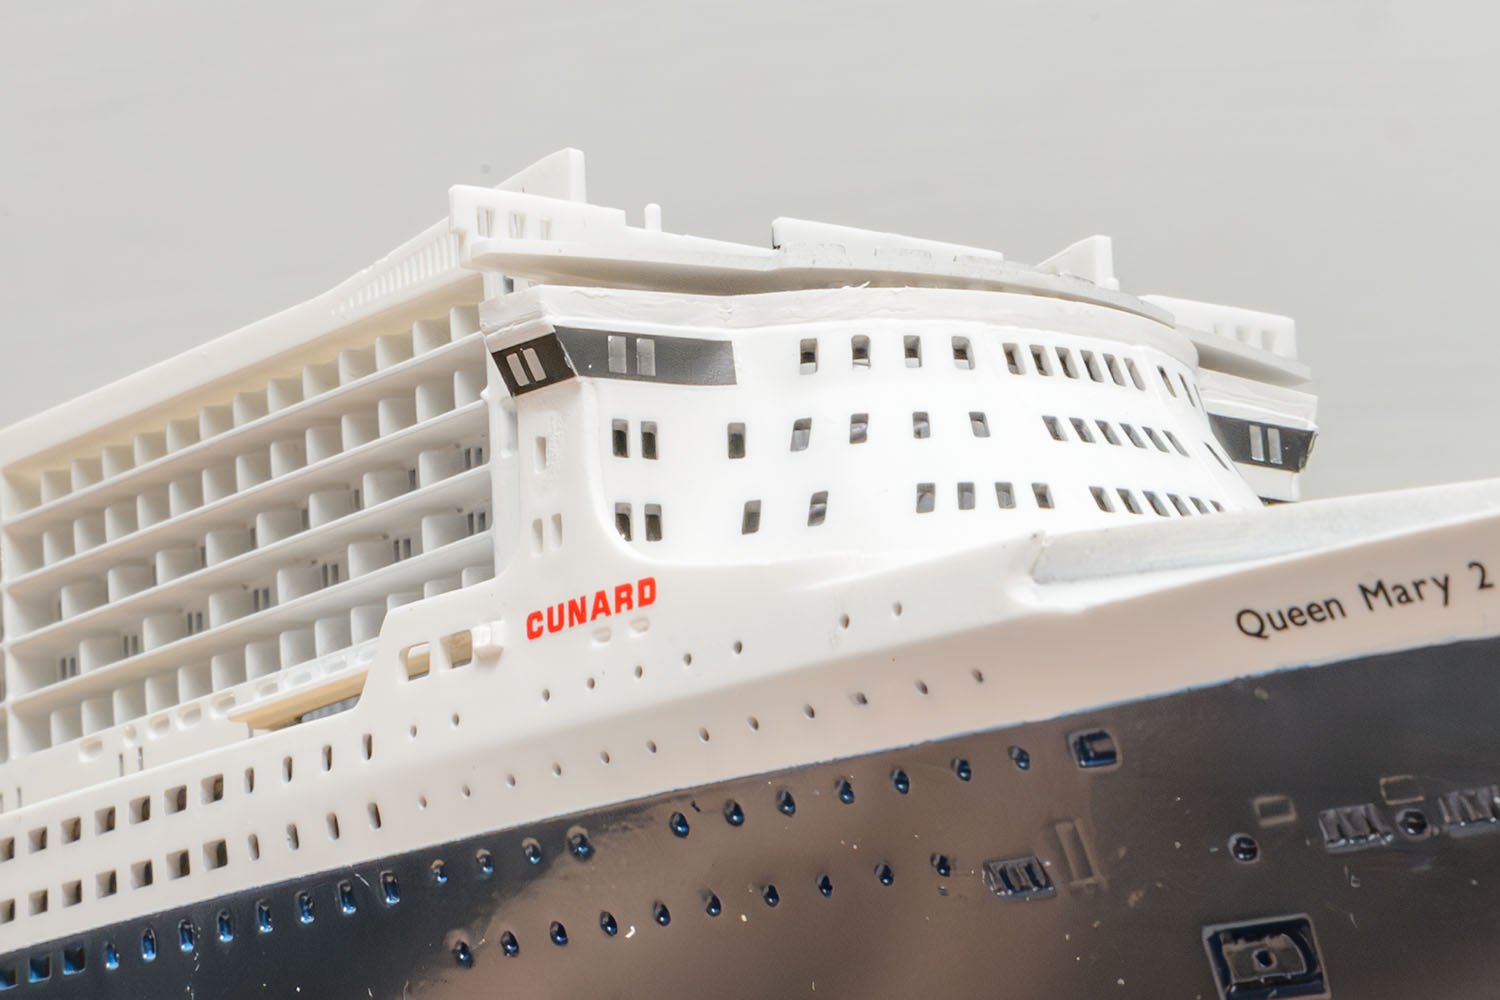
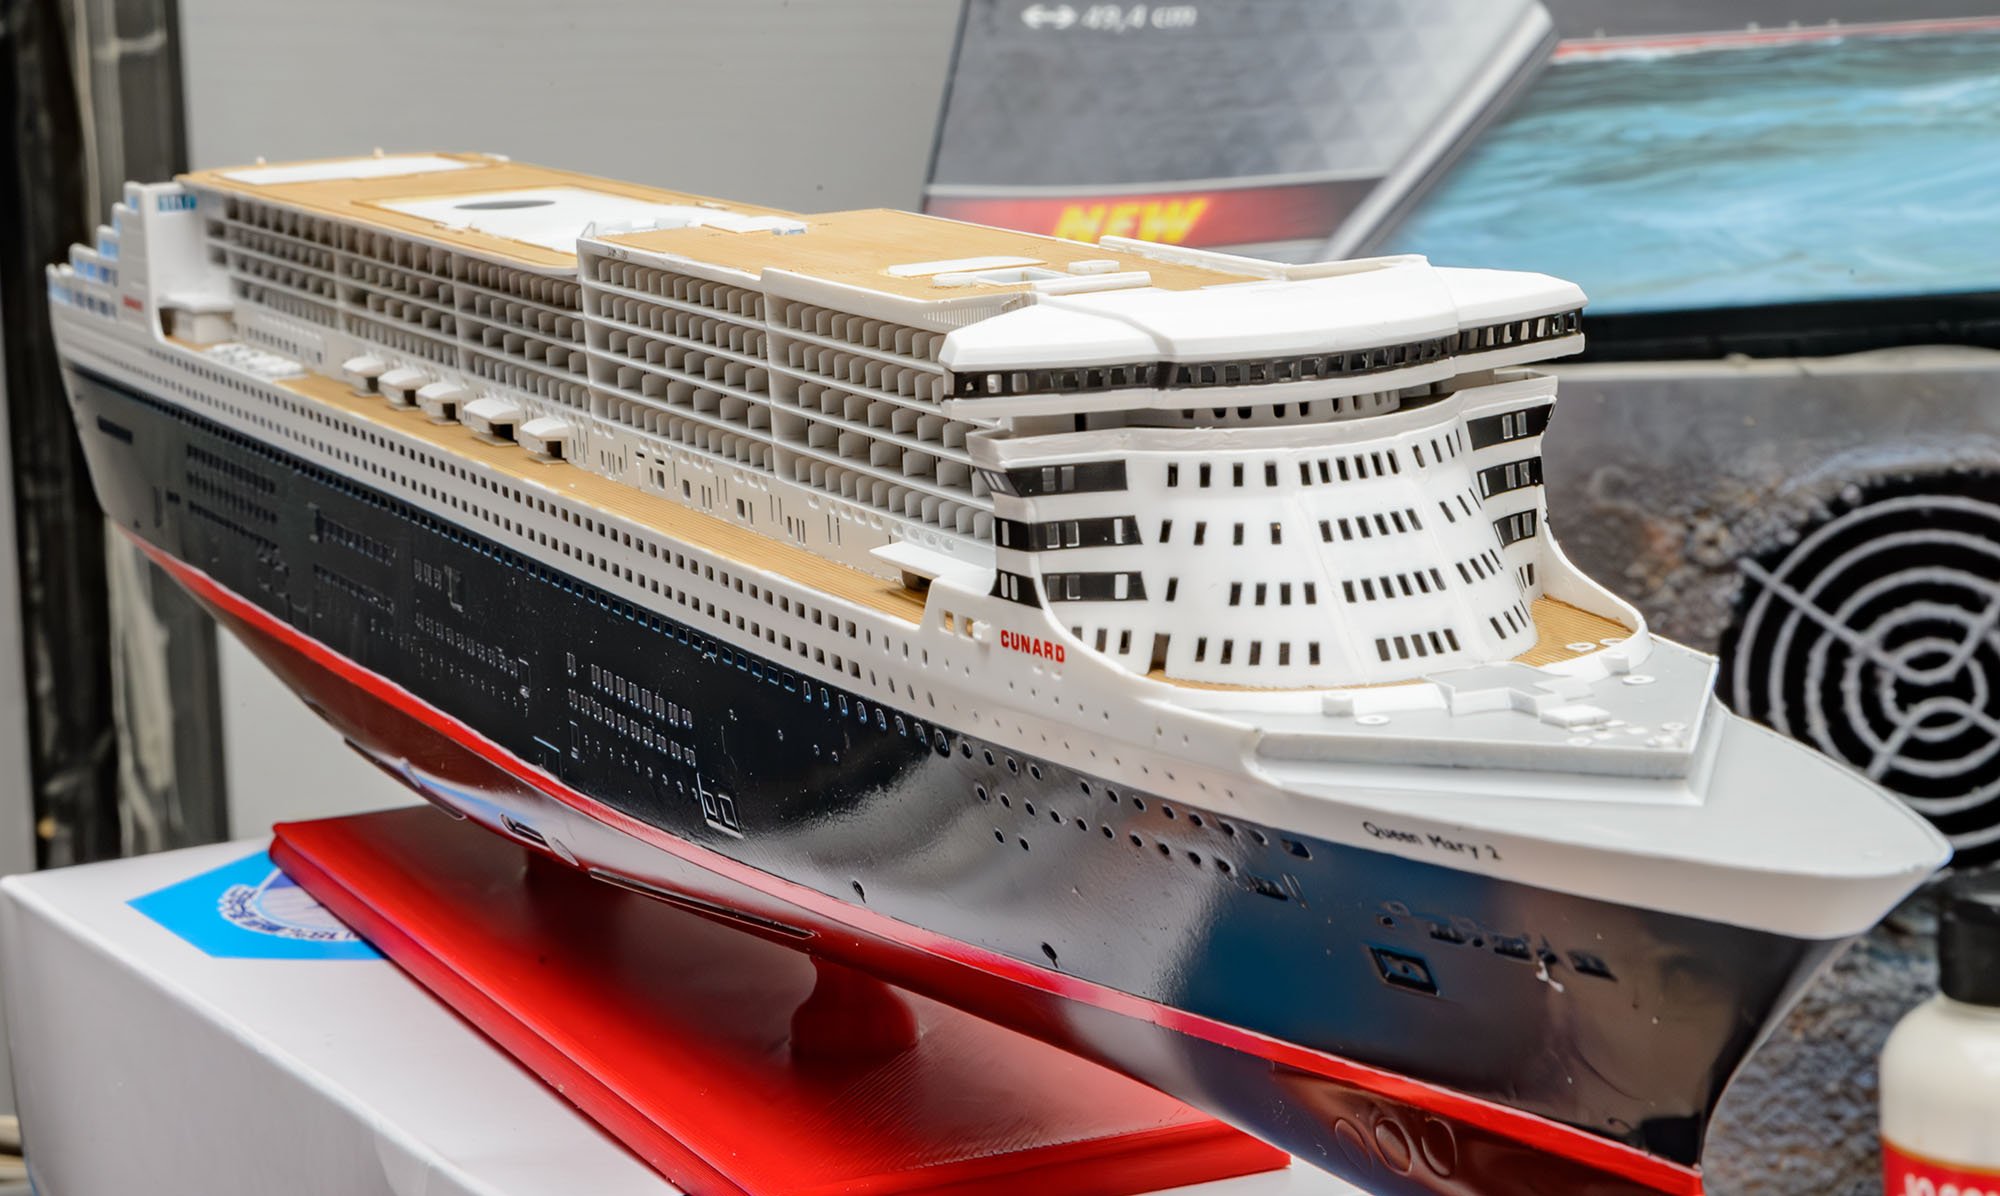
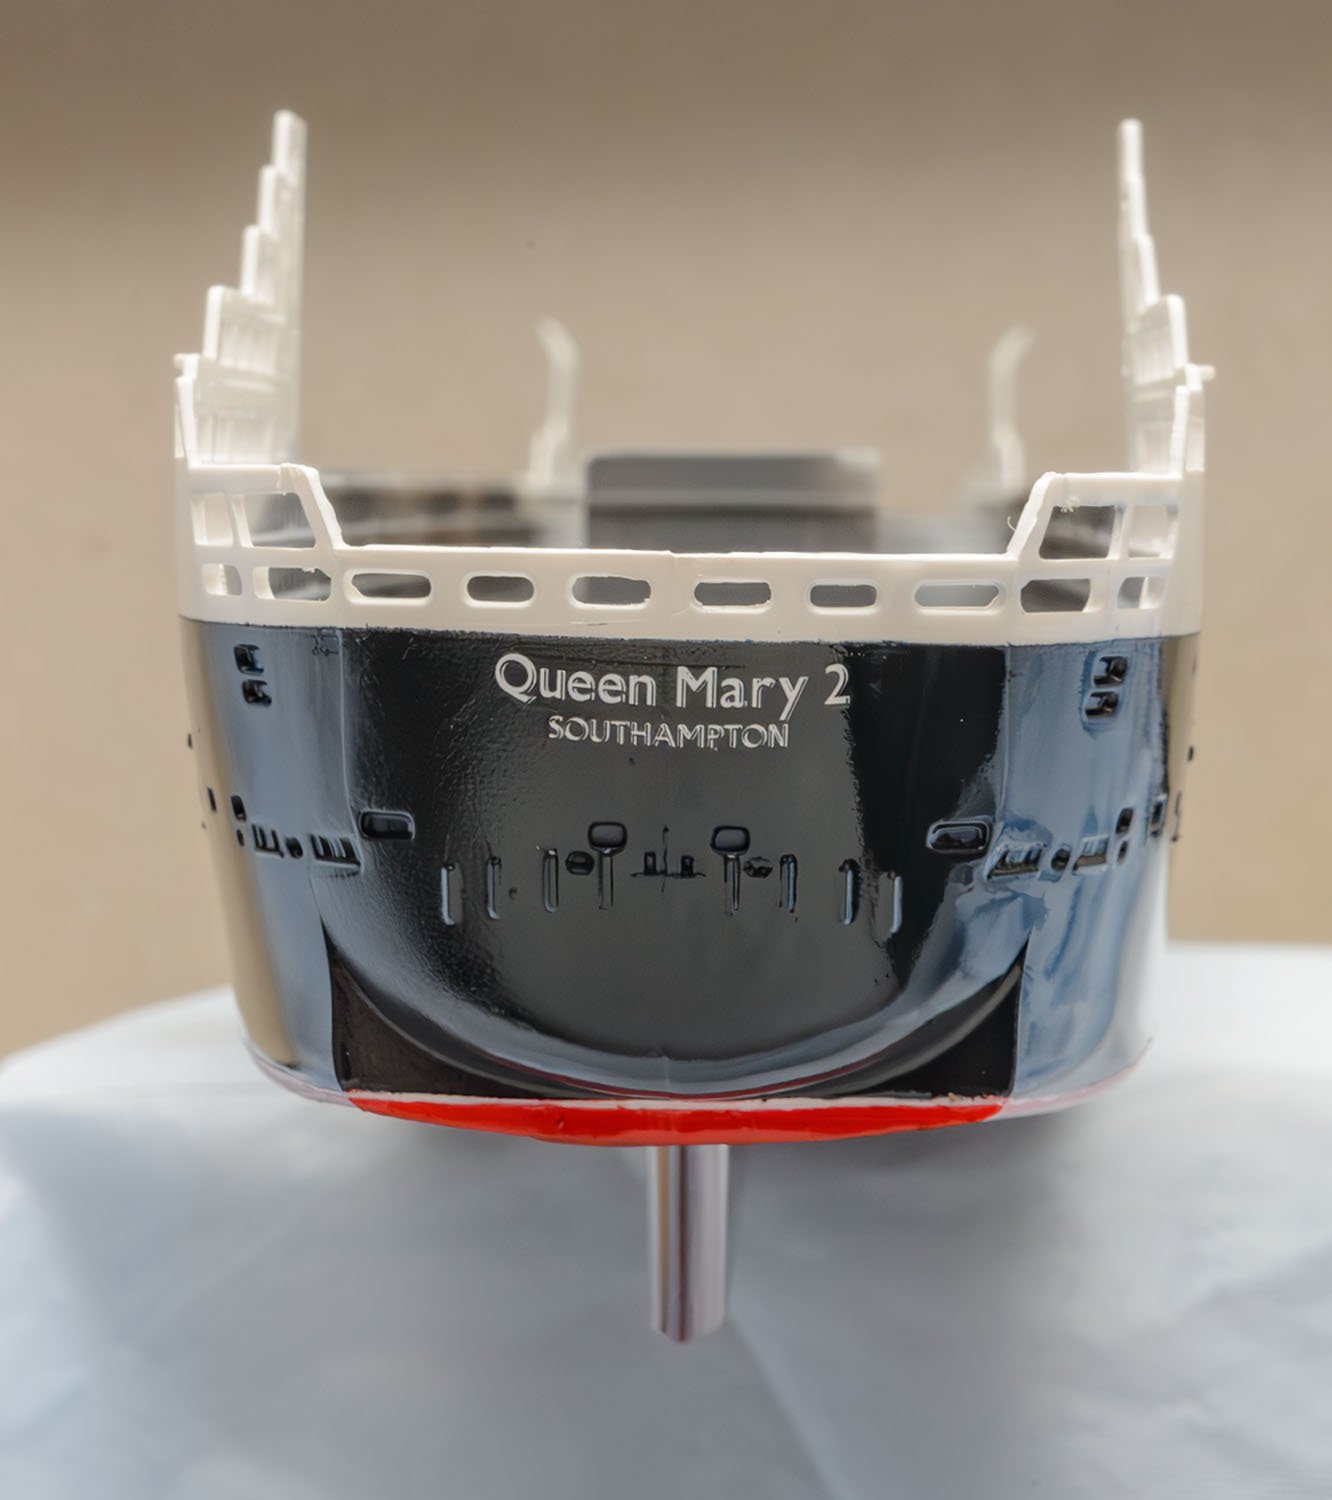
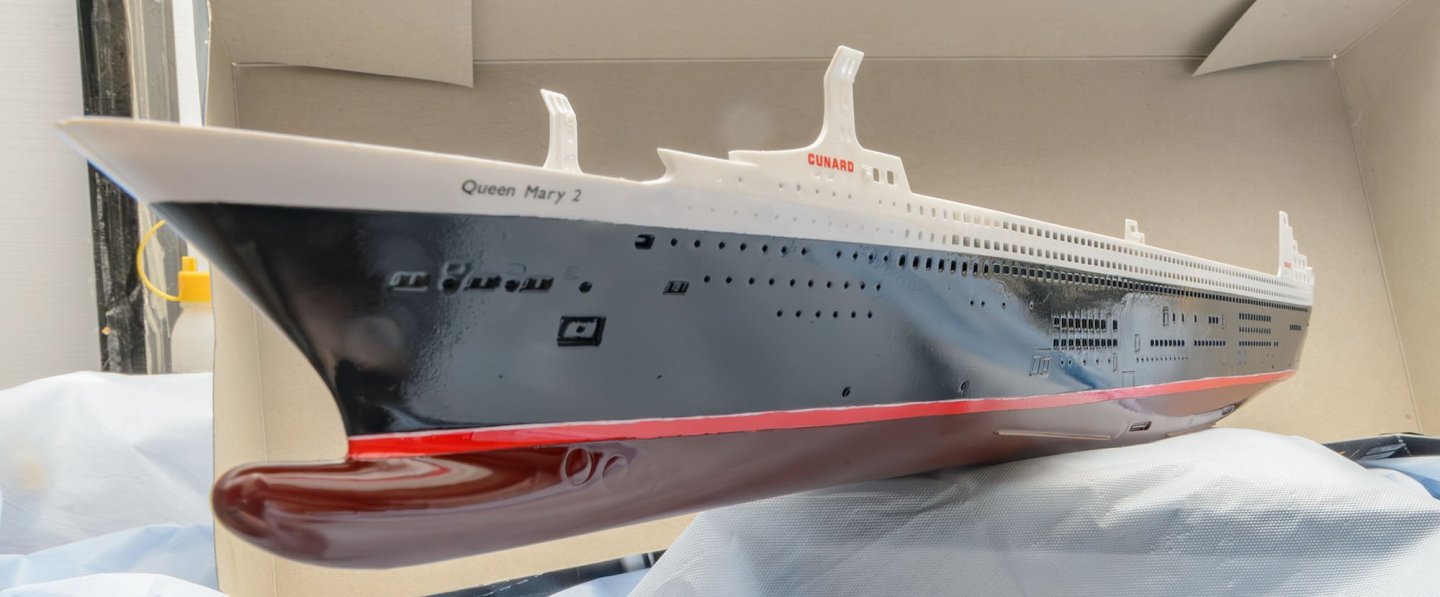
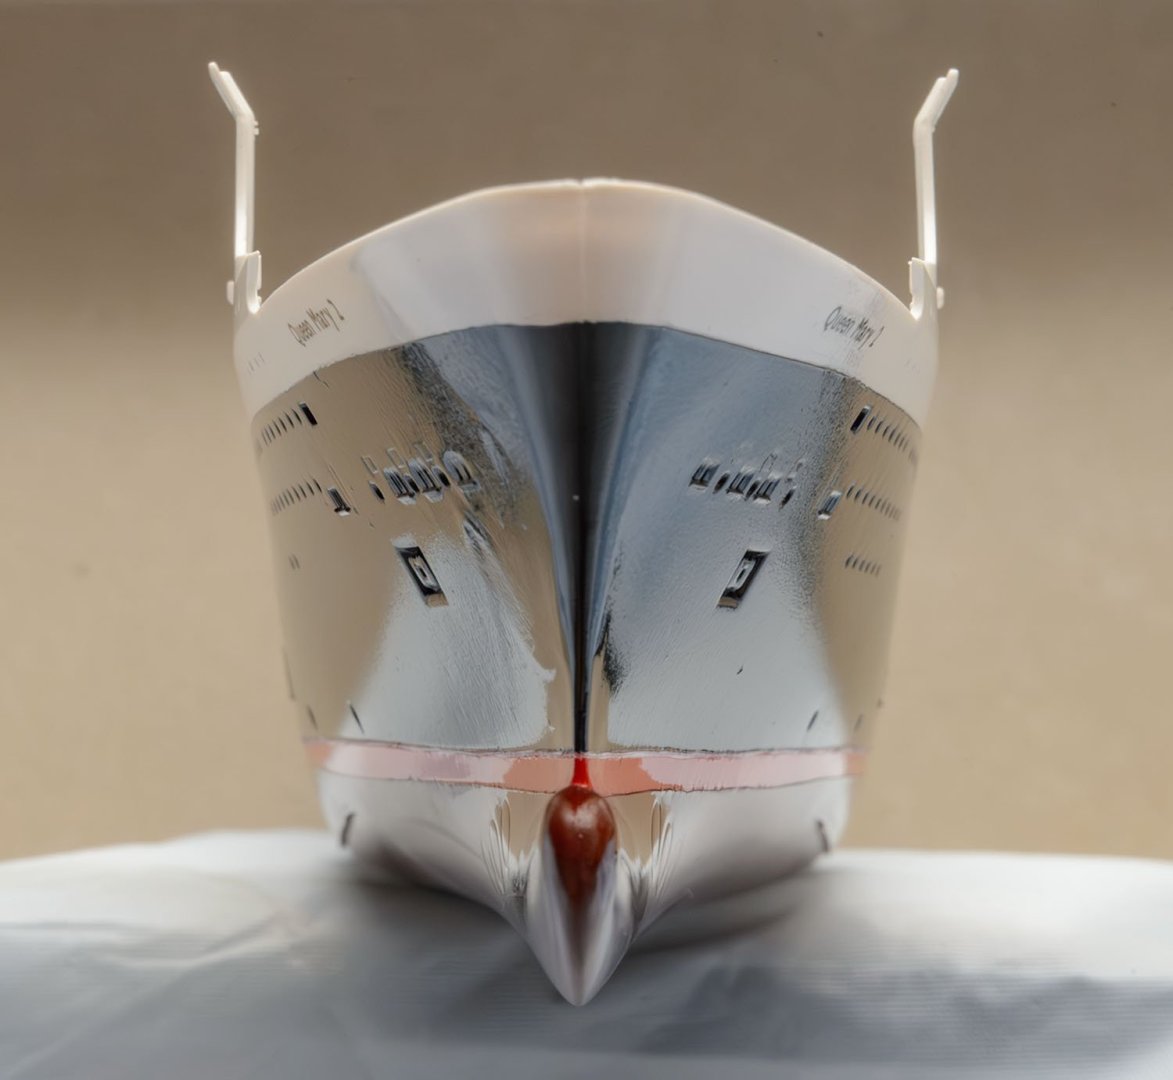
Thank you for the comment, Alan. I'll spray matte finish over the hull. All the paintings are hand-brushed. It's really labor-intensive and time-consuming. I'll use airbrush and masking when I build the 1/400 scale version. (30~40 years later)


- 5 replies
-
- 5
-
-
-
- Queen Mary 2
- Revell
- (and 1 more)
-
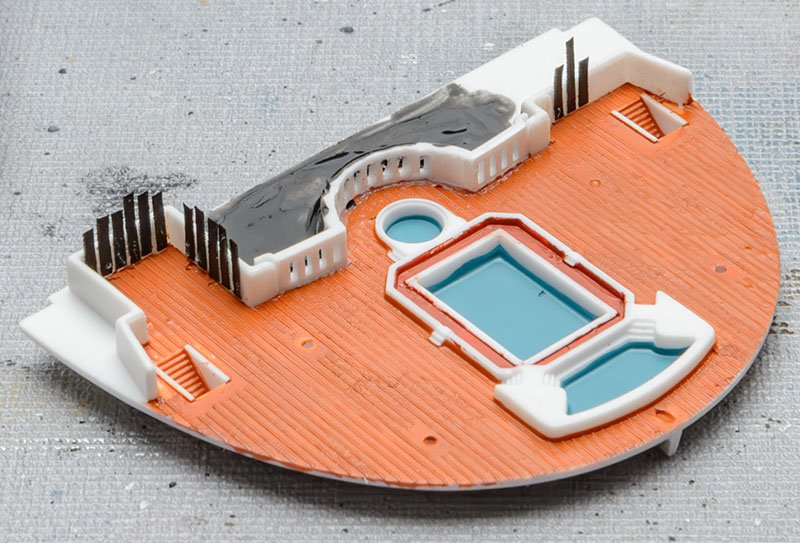
Nice to see you again! This is my ongoing project. I just finished painting the hull. I didn't use waterline decals. 😂


- 5 replies
-
- 6
-
-
-
- Queen Mary 2
- Revell
- (and 1 more)
-
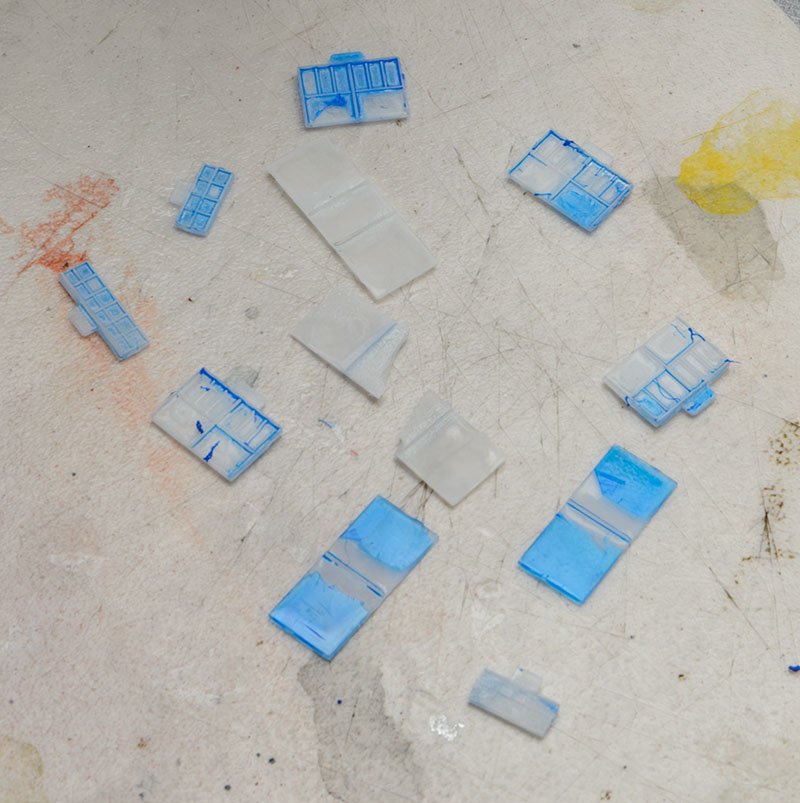
This is a polyjet 3D printer, which uses FDM filaments as ink. It uses 7 filaments to mix colors. - C, M, Y, Bk, Wh, Transparent, Urethane (Flexible) - Support (It fills empty space.) Examples (In Korean)
-
That's exactly the same on my Roden SPAD XIII. Your skill is fine. Only the blue water slide paper is exceptionally difficult. I also added brass pins to both edge of the wing pillars. Without the metal guide pins, I couldn't bind the biwings with rubber rings.
-
Thank you for watching and see you tomorrow!


-
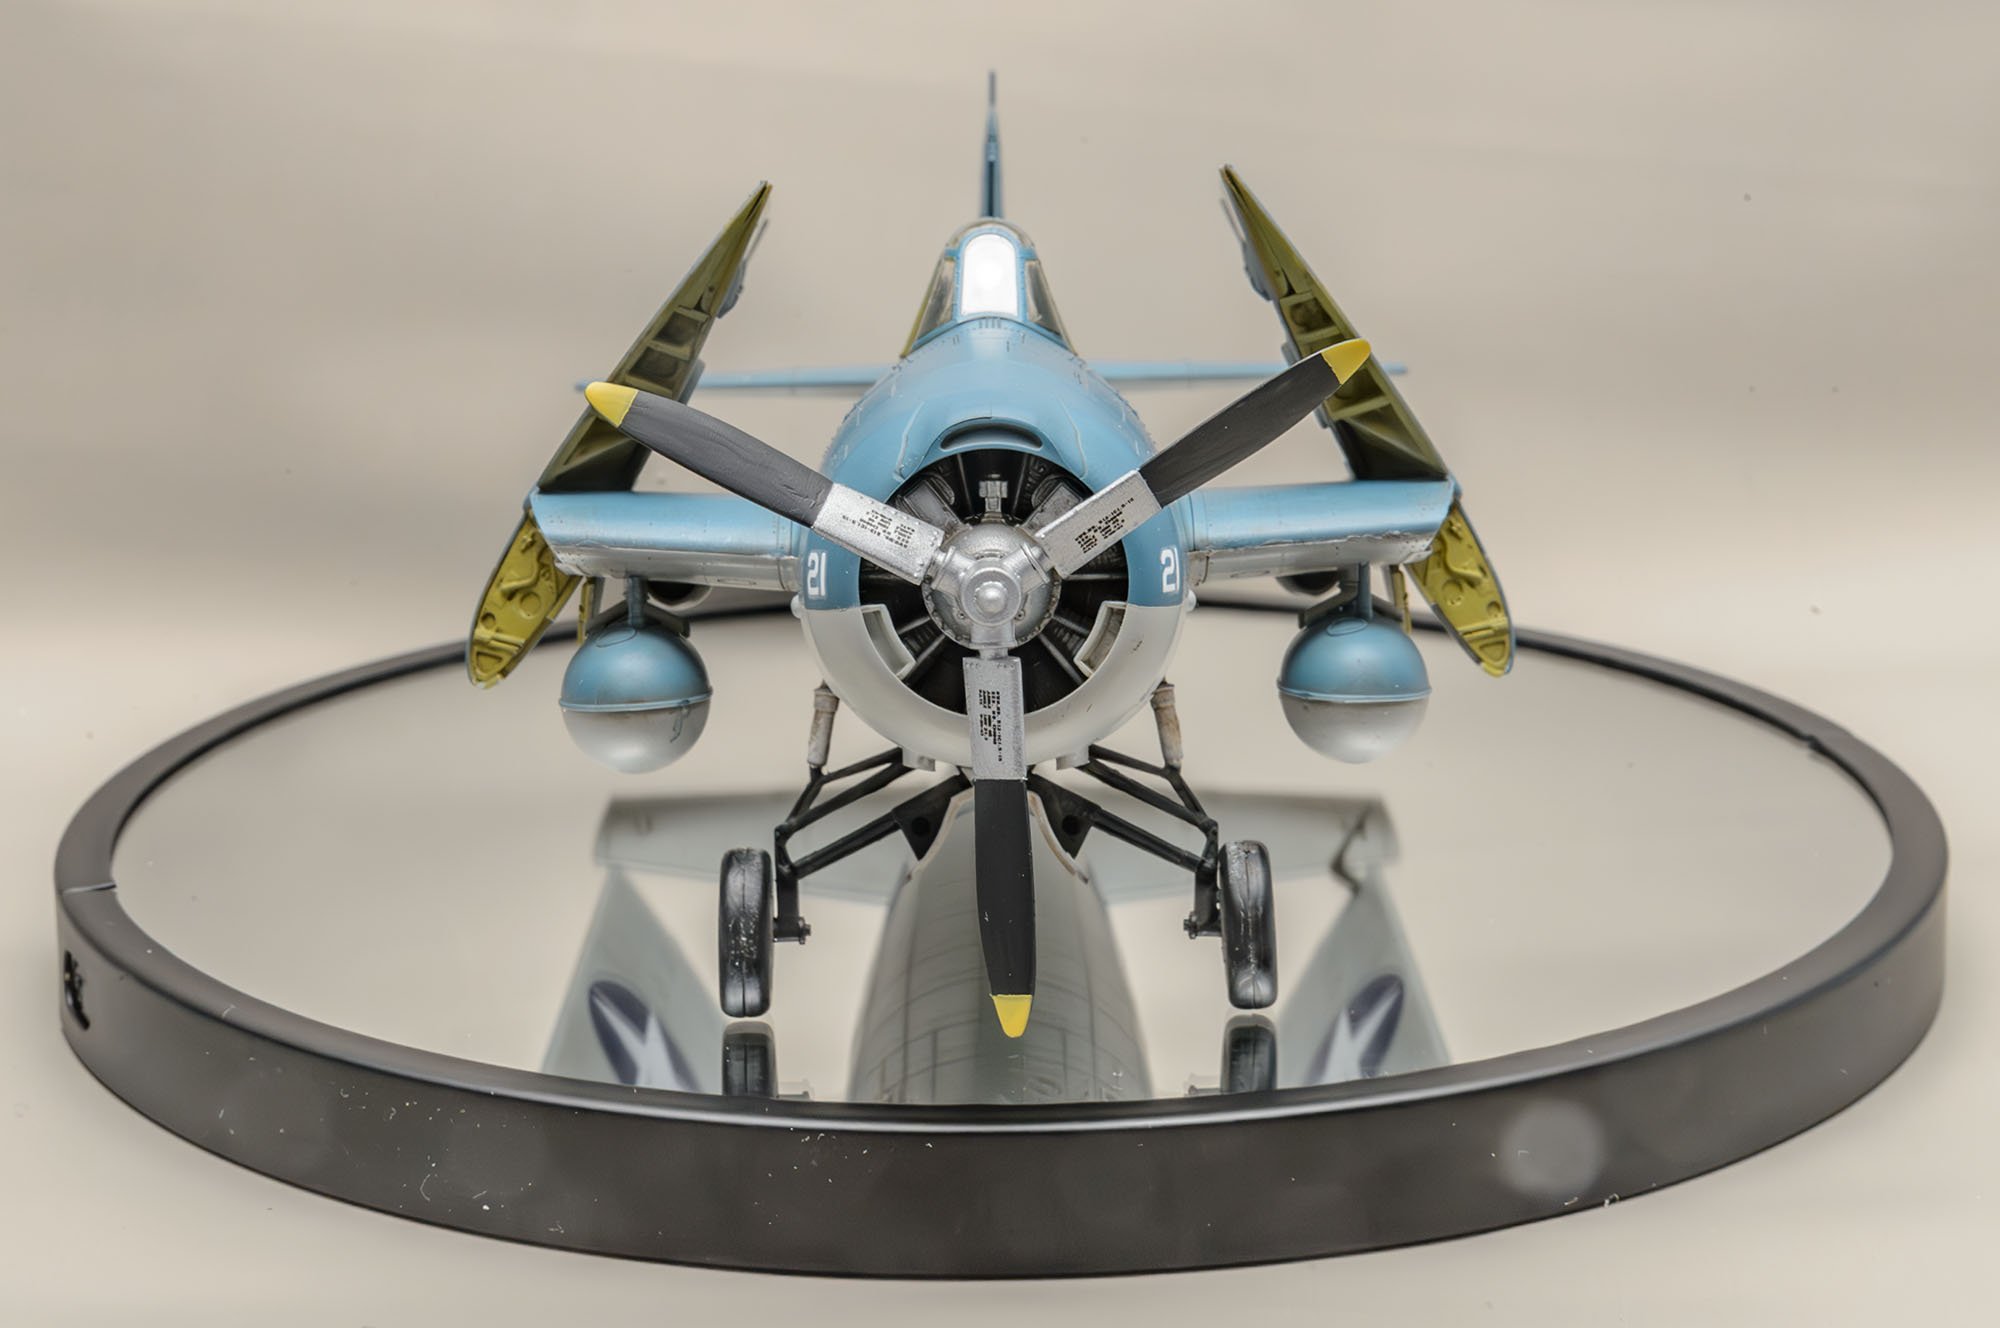
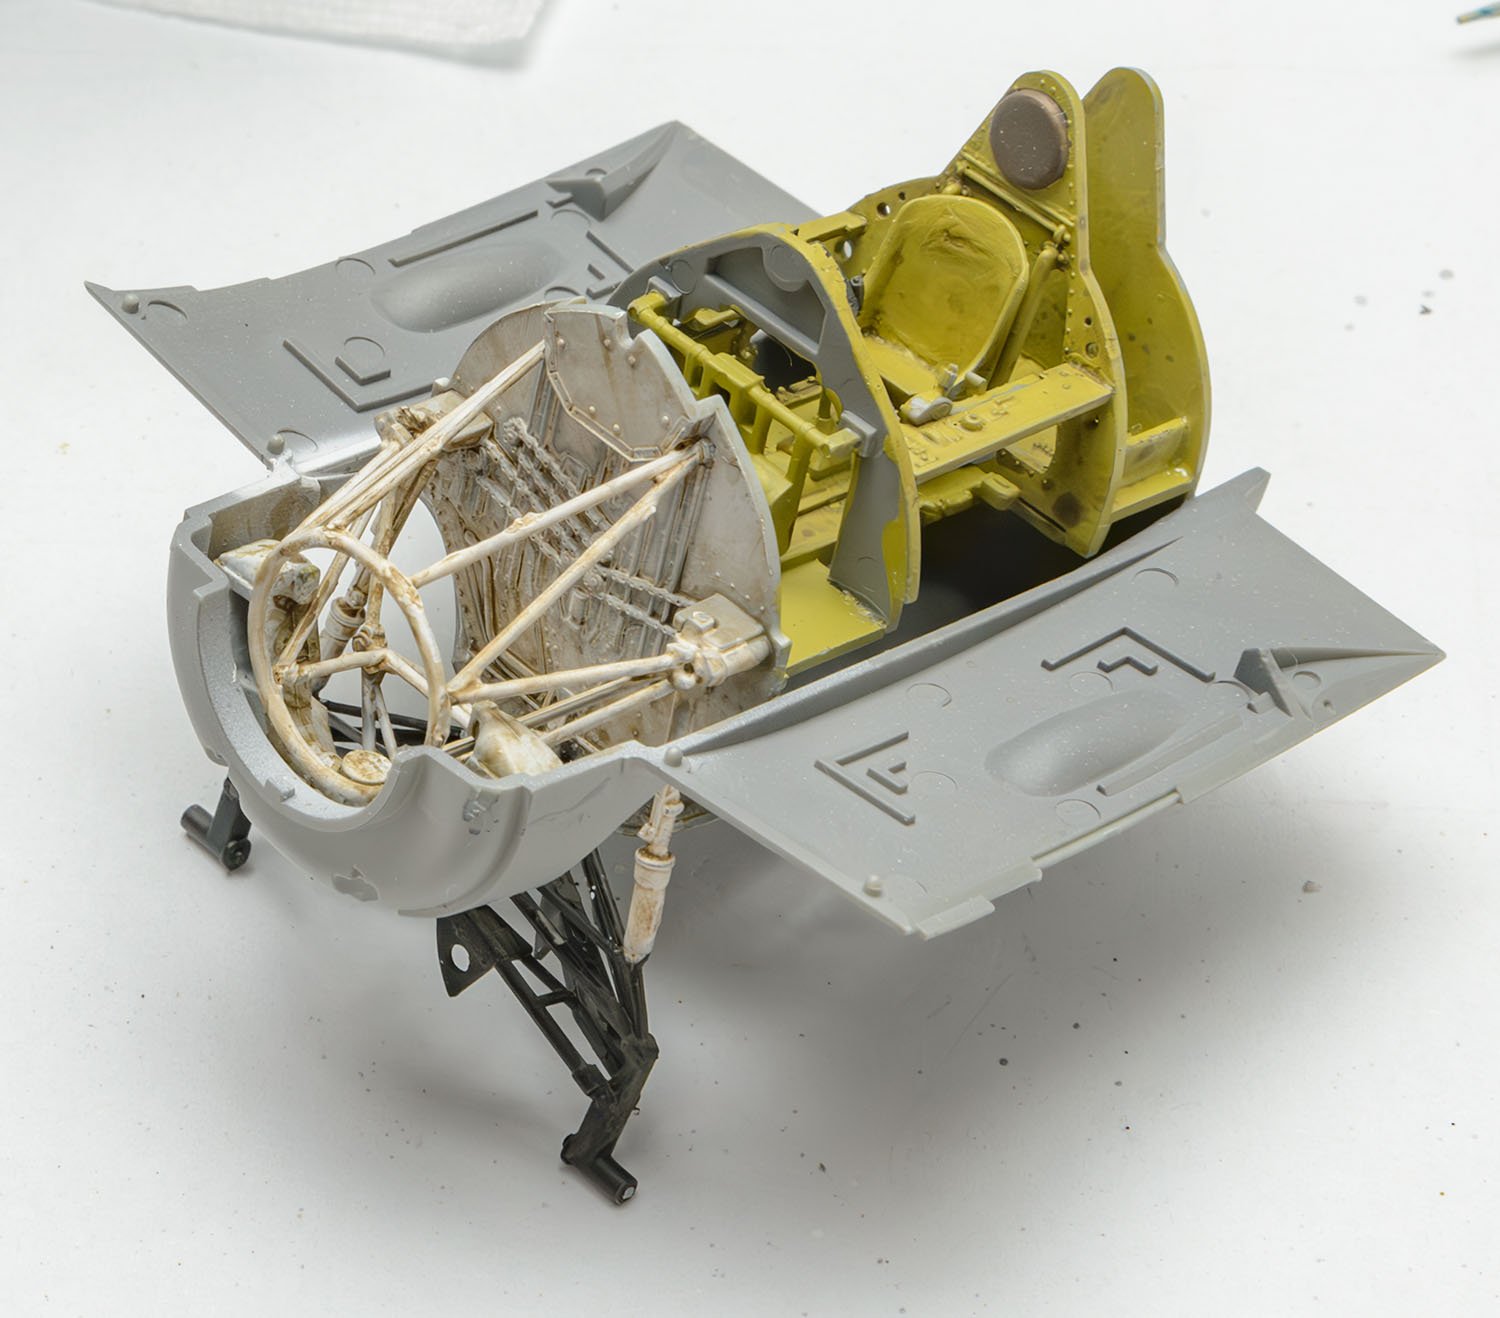
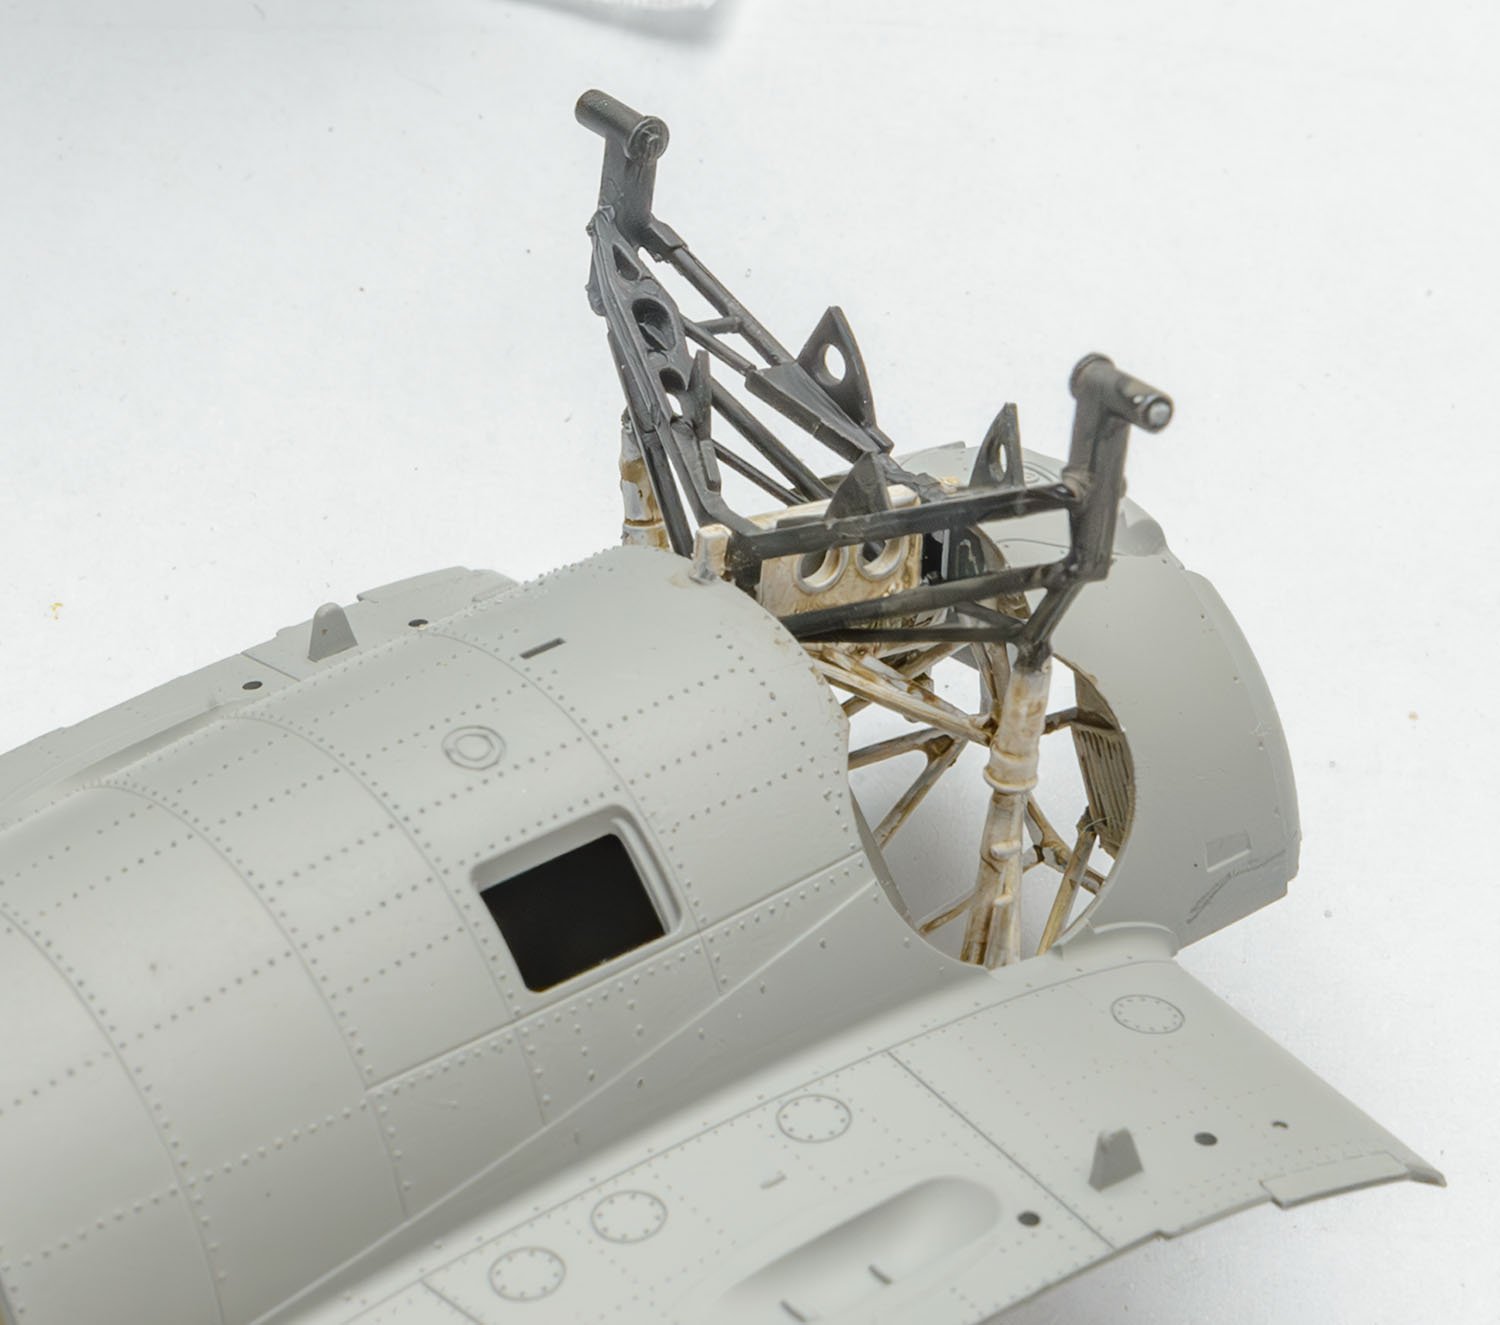
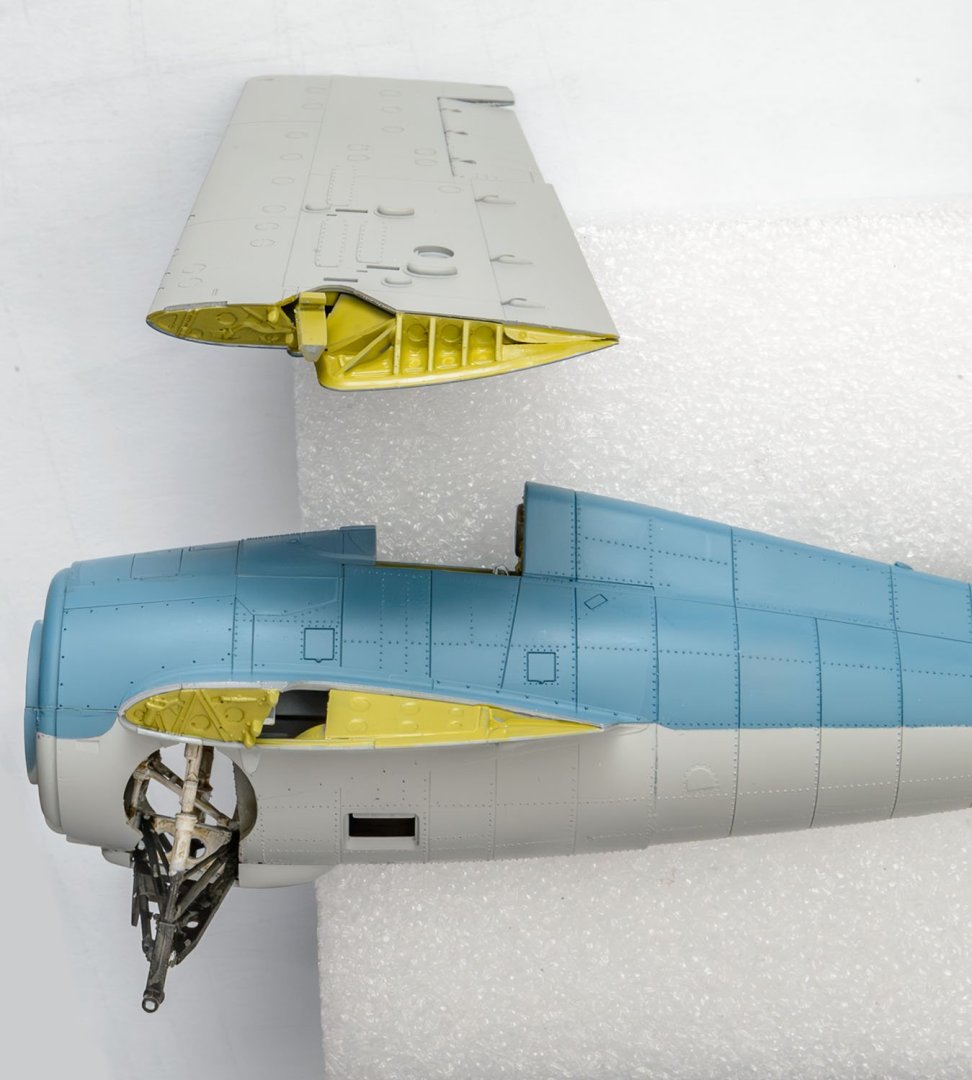
This small bird is an Academy 12355 USN F4F-4 Wildcat kit. The FM-2 version will be released. Nice interior details and complicated landing gear. The wings are foldable, but the wheels are not.


-
The laser's thickness is pretty wide. It is enough to replace classic milling machines and table saws, but I doubt it'll be the new standard. The real game changer is a resin 3D printer. There are tons of new 3D printed kits on the world market. It is essential device to reach the next level of modeling.
-
It is a famous Lycra flexible thread. Also, it is known as the EZ line. There are no turnbuckles. + The thicker lines are 0.30mm brass rods. I tried to apply the brass rods to all... and ran away.
-
Ok... It looks like the instructions are only available on Youtube. At least the Victory is better than my HMS Supply because it comes with some paper templates. I'm capturing the video instructions one by one, and the video file size is over 7 GB...