

ZyXuz
-
Posts
429 -
Joined
-
Last visited
Reputation Activity
-

 ZyXuz reacted to ianmajor in HMS Unicorn by ZyXuz - Corel - Scale 1:75
Wow ZyXuz,
That is some great work. It is hard to believe that it is from the Corel kit!
Good to hear that your father is better (and that you are still alive and kicking! )
-
ZyXuz reacted to olliechristo in HMS Unicorn by ZyXuz - Corel - Scale 1:75
Welcome back, I missed your posts, good to hear good news.. Look forward to seeing your new progress
-
ZyXuz reacted to mtaylor in HMS Unicorn by ZyXuz - Corel - Scale 1:75
ZyXuz,
It's good to see you back and with good news about your father. I like the doors under the forecastle, though I'm pretty sure, there never were any. On the other hand, it dresses up the forecastle nicely.
-
ZyXuz reacted to src in HMS Unicorn by ZyXuz - Corel - Scale 1:75
Z,
Sorry to hear about your father, he is doing better now, thats great news.
Your build is coming along nicely, nothing like some build time to let go of troubles and worry for a while.
Sam
-
 ZyXuz got a reaction from Ferit in HMS Unicorn by ZyXuz - Corel - Scale 1:75
I'm back!! Finally!! The reason for this long absence is that my dad was diagnosed with a cancer relapse and has been in hospital for nearly 1 month plus.. So, my life was like work and go hospital everyday. Anyway, he's turning a lot better now and I can have more spare time for myself already One funny thing was that, Ian did message me in person during the MH370 incident worrying that I might be on that mysterious flight and causing this long absence (Anyway, Ian.. Thanks for your concern )
Another news is that I've just resigned from my job, and that will make me have more time on my ship recently BUT I'll have no laptop 'cause I was using my company's laptop all the while for both my personal and office stuffs =.=" gonna buy a new one this weekend. I'll need to return it to the company tmr.. so, I'll post the current look of my ship first now and then the progress after I got my new lappy..
It's a bigger leap compared to the last update since there were some progress that I haven't updated here... However, the Unicorn now is just so my version..
I added doors under the forecastle to cover the ugly interior.. I'm not sure whether any ship is built with this design? That the stove is inside the 'cabin' or very close to the manger? If so, then I can decide the location of my vent better.. hope anyone can help here
Belfry is also added by referring to Pegasus.. but I think I still missed out 2 cleats on the sides of the bell
The bitt
Also, I've changed the rail to straight down instead of using round ones as instructed in the booklet. This might match my color scheme better
The bow rails and cat heads, which I ald done before CNY but haven't updated here. The one at the starboard side snapped off from position when I show my ship to my little cousin during CNY @.@ Anyway, the rails part is not done yet. I'm hoping to add a thicker rail or a jawed one on top of the others..
Thanks for viewing
-
 ZyXuz got a reaction from WackoWolf in HMS Unicorn by ZyXuz - Corel - Scale 1:75
I'm back!! Finally!! The reason for this long absence is that my dad was diagnosed with a cancer relapse and has been in hospital for nearly 1 month plus.. So, my life was like work and go hospital everyday. Anyway, he's turning a lot better now and I can have more spare time for myself already One funny thing was that, Ian did message me in person during the MH370 incident worrying that I might be on that mysterious flight and causing this long absence (Anyway, Ian.. Thanks for your concern )
Another news is that I've just resigned from my job, and that will make me have more time on my ship recently BUT I'll have no laptop 'cause I was using my company's laptop all the while for both my personal and office stuffs =.=" gonna buy a new one this weekend. I'll need to return it to the company tmr.. so, I'll post the current look of my ship first now and then the progress after I got my new lappy..
It's a bigger leap compared to the last update since there were some progress that I haven't updated here... However, the Unicorn now is just so my version..
I added doors under the forecastle to cover the ugly interior.. I'm not sure whether any ship is built with this design? That the stove is inside the 'cabin' or very close to the manger? If so, then I can decide the location of my vent better.. hope anyone can help here
Belfry is also added by referring to Pegasus.. but I think I still missed out 2 cleats on the sides of the bell
The bitt
Also, I've changed the rail to straight down instead of using round ones as instructed in the booklet. This might match my color scheme better
The bow rails and cat heads, which I ald done before CNY but haven't updated here. The one at the starboard side snapped off from position when I show my ship to my little cousin during CNY @.@ Anyway, the rails part is not done yet. I'm hoping to add a thicker rail or a jawed one on top of the others..
Thanks for viewing
-
 ZyXuz got a reaction from Aussie048 in HMS Unicorn by ZyXuz - Corel - Scale 1:75
Here comes a short update..
Ladder Making
Ladder has to be done before the hull planking, so that it's easier for me to check whether the feet of the ladder 'landing' correctly from outboard.
The kit provides the materials of the ladder, with pre-cut ladder slot for the steps. Anyway, they are not as good as expected.
As you can see from the picture above, the slots of the ladders are not aligned. I've tried switching them, but still only a pair matches.
For the 'surroundings' and steps, I used these:
I made the wider strips inside the narrow ones, so that it acts like plug to the deck. After some measuring and checking, here's the result:
It's a bit terrible, isn't it? lol Especially at lower right corner..
I remade one anyway.
And then insert the steps into the slots.. steps are in 20mm length.
Just glue them together and they're completed.
View from this angle, the extended part can be seen clearer. It also helps covering the ugly plywood cross section.
As seen from deck..
Picture below shows how I check the angle of the ladder from outboard.
I haven't made the handrails of it, because the stanchions provided by the kit is way out of scale in their height. I might adjust the upper deck higher, or remake the stanchions.
Thanks for viewing!
-
 ZyXuz got a reaction from ianmajor in HMS Unicorn by ianmajor - Corel - Scale 1:75, 1748 to 1771
Nice update, Ian and I have to say that the main bit is totally brilliant!
I really hope can make my ship as accurate as historical, but I think my ship is currently so on 'my own way' now lol
-
 ZyXuz got a reaction from Landlubber Mike in HMS Unicorn by ZyXuz - Corel - Scale 1:75
I'm back!! Finally!! The reason for this long absence is that my dad was diagnosed with a cancer relapse and has been in hospital for nearly 1 month plus.. So, my life was like work and go hospital everyday. Anyway, he's turning a lot better now and I can have more spare time for myself already One funny thing was that, Ian did message me in person during the MH370 incident worrying that I might be on that mysterious flight and causing this long absence (Anyway, Ian.. Thanks for your concern )
Another news is that I've just resigned from my job, and that will make me have more time on my ship recently BUT I'll have no laptop 'cause I was using my company's laptop all the while for both my personal and office stuffs =.=" gonna buy a new one this weekend. I'll need to return it to the company tmr.. so, I'll post the current look of my ship first now and then the progress after I got my new lappy..
It's a bigger leap compared to the last update since there were some progress that I haven't updated here... However, the Unicorn now is just so my version..
I added doors under the forecastle to cover the ugly interior.. I'm not sure whether any ship is built with this design? That the stove is inside the 'cabin' or very close to the manger? If so, then I can decide the location of my vent better.. hope anyone can help here
Belfry is also added by referring to Pegasus.. but I think I still missed out 2 cleats on the sides of the bell
The bitt
Also, I've changed the rail to straight down instead of using round ones as instructed in the booklet. This might match my color scheme better
The bow rails and cat heads, which I ald done before CNY but haven't updated here. The one at the starboard side snapped off from position when I show my ship to my little cousin during CNY @.@ Anyway, the rails part is not done yet. I'm hoping to add a thicker rail or a jawed one on top of the others..
Thanks for viewing
-
 ZyXuz got a reaction from egkb in HMS Unicorn by ZyXuz - Corel - Scale 1:75
I'm back!! Finally!! The reason for this long absence is that my dad was diagnosed with a cancer relapse and has been in hospital for nearly 1 month plus.. So, my life was like work and go hospital everyday. Anyway, he's turning a lot better now and I can have more spare time for myself already One funny thing was that, Ian did message me in person during the MH370 incident worrying that I might be on that mysterious flight and causing this long absence (Anyway, Ian.. Thanks for your concern )
Another news is that I've just resigned from my job, and that will make me have more time on my ship recently BUT I'll have no laptop 'cause I was using my company's laptop all the while for both my personal and office stuffs =.=" gonna buy a new one this weekend. I'll need to return it to the company tmr.. so, I'll post the current look of my ship first now and then the progress after I got my new lappy..
It's a bigger leap compared to the last update since there were some progress that I haven't updated here... However, the Unicorn now is just so my version..
I added doors under the forecastle to cover the ugly interior.. I'm not sure whether any ship is built with this design? That the stove is inside the 'cabin' or very close to the manger? If so, then I can decide the location of my vent better.. hope anyone can help here
Belfry is also added by referring to Pegasus.. but I think I still missed out 2 cleats on the sides of the bell
The bitt
Also, I've changed the rail to straight down instead of using round ones as instructed in the booklet. This might match my color scheme better
The bow rails and cat heads, which I ald done before CNY but haven't updated here. The one at the starboard side snapped off from position when I show my ship to my little cousin during CNY @.@ Anyway, the rails part is not done yet. I'm hoping to add a thicker rail or a jawed one on top of the others..
Thanks for viewing
-
 ZyXuz got a reaction from Griffon in HMS Unicorn by ZyXuz - Corel - Scale 1:75
I'm back!! Finally!! The reason for this long absence is that my dad was diagnosed with a cancer relapse and has been in hospital for nearly 1 month plus.. So, my life was like work and go hospital everyday. Anyway, he's turning a lot better now and I can have more spare time for myself already One funny thing was that, Ian did message me in person during the MH370 incident worrying that I might be on that mysterious flight and causing this long absence (Anyway, Ian.. Thanks for your concern )
Another news is that I've just resigned from my job, and that will make me have more time on my ship recently BUT I'll have no laptop 'cause I was using my company's laptop all the while for both my personal and office stuffs =.=" gonna buy a new one this weekend. I'll need to return it to the company tmr.. so, I'll post the current look of my ship first now and then the progress after I got my new lappy..
It's a bigger leap compared to the last update since there were some progress that I haven't updated here... However, the Unicorn now is just so my version..
I added doors under the forecastle to cover the ugly interior.. I'm not sure whether any ship is built with this design? That the stove is inside the 'cabin' or very close to the manger? If so, then I can decide the location of my vent better.. hope anyone can help here
Belfry is also added by referring to Pegasus.. but I think I still missed out 2 cleats on the sides of the bell
The bitt
Also, I've changed the rail to straight down instead of using round ones as instructed in the booklet. This might match my color scheme better
The bow rails and cat heads, which I ald done before CNY but haven't updated here. The one at the starboard side snapped off from position when I show my ship to my little cousin during CNY @.@ Anyway, the rails part is not done yet. I'm hoping to add a thicker rail or a jawed one on top of the others..
Thanks for viewing
-
ZyXuz reacted to ianmajor in HMS Unicorn by ianmajor - Corel - Scale 1:75, 1748 to 1771
Before going too far I made sure that the sub assembly would line up with the existing parts of the model. To do this I had to drill the 2mm holes in the deck. The photo shews this done. The smaller hole in the deck is a 1mm pilot. There is another in the sub assembly base. I use these to align the sub assembly with the deck. When I am sure that all lines up I will open the pilot holes to take the lower end of the main mast.
The parts in place with a 1mm drill bit used to align the sub assembly.
-
 ZyXuz got a reaction from maddog33 in HMS Unicorn by ZyXuz - Corel - Scale 1:75
Colour Theme Selection
I've been selecting colours for my ship since the ordering is placed, and till now, I've successfully narrowed them down to two final choices.
Picture below shows how the original kit colour of the ship looks like (Sorry Ian... hope you don't mind the angle is actually perfect for me to make references before I start painting them ).
Original kit instruction suggests a natural finished by using 3 different colours of woods: walnut, maple, and ebony. The original natural colour for the ship is actually nice already, but I really would like to put on the colours I want to my ship.
So, the 2 pictures below show how I hope my ship looks like:
1st Version: Blue Strips + Yellow Gun port + Black Wales + White Waterline
The gun port 'frame' will be coloured to red. And, compared to original colour, the yellow gun port area is actually widen.
This is where the inspiration comes from
La Gloire
(so.. am I applying a French Ship colour to an English Ship?? )
And second version with red stripe on it. I'm still choosing between these 2..
I thought it'd be an easy modification until I learned that the width of the wood strips are actually different! The walnut strips are 5mm in width; while the maple and ebony strips are just 4mm in width! And even the thickness are different! Walnut strips are 1mm in thickness; while the other 0.6mm!
So, if I'm going to make a smooth hull without sunken gunport, I'll need to use all walnut strips for the hull planking. It's certainly workable, but I might run out of wood strips. This is now what troubling me... Still a far way to go though, since I haven't started my first planking..
Anyway, I'm going off for a short vacation (4D3N) tomorrow to Sumatra, Indonesia.. with all my crazy friends :D It's gonna to be a fun trip!
Thanks for viewing & hope you can help me selecting a colour theme!
See you guys soon! (I got to start packing now!!! :P)
-
ZyXuz got a reaction from maddog33 in HMS Unicorn by ZyXuz - Corel - Scale 1:75
Greetings!!!
After resting from ship modelling for 2 months, I am finally back! (Not a long time tough... )
I've been lucky enough to win this kit from an auction at a cheaper price right after my Race Horse, and it's in great condition. She arrived my door 2 weeks after that, and I've been studying the plans and instruction since then. Thanks to Ianmajor and Mike who had discussed about this ship earlier in other topic, so I can now plan for some modification on this ship. The wide waist of the Unicorn really makes this model a good ship to add more fittings on.
Anyway, here's some quick peeks to the kit.
Brief Introduction According to Corel Kit
Historically, the frigate Unicorn has left as no tales of outstanding war feats or important enterprises, those which often mark the career of a man of-war so that be remembered even after his disappearance. All we know is that this ship has been designed by F.H. af Chapman for H.M.S Fleet in 1700s. On the other hand we have many accurate data regarding its construction. In fact, Chapman, member of the Swedish Royal Academy of Sciences in his admirable volume "Architectura Navalis Mercatoria" printed in Stockholm in 1768, gives an extremely detailed account of the calculation relating to the design of the ship and not only the constructional ones, but also those relating to the study hydrodynamic-resistances. All this together with a most beautiful drawing of the frigate, which have used to develop this model. The results of Chapman hydrodynamic investigation are clearly visible in the lines of the hull which are quite advanced for the epoch in which the ship has been built.
So...
In conclusion, even Corel doesn't really understand much about the ship! You can try search through the internet or wikipedia, and you will find there were around 6 Unicorns between 17th to 18th Century!! LOL!! Here's the link.
Anyway, I do agree with Ianmajor that this HMS Unicorn is the one as mentioned in wikipedia which serviced from year 1747 to 1771.
"... the Unicorn having a beakhead bow, a unicorn figurehead , two-light quarter galleries and only five pairs of quarterdeck gunports... "
This line describes real close to the ship
Check here if you're interested to know
However, whether it's historical accurate or not, I'm gonna kit bash it
Time to unbox!!
The instruction plans of Corel is a bit... err... mehh...
The font used is too small... might need magnifying glass (just pretend the sunglasses as magnifying glass )
Anyway, the picture instruction are good
Excellent wood quality
Some well cut strips..
Same goes to dowels
Shiny figure head
Terrible capstan...
Despite the excellent quality of the wood strips and dowels, some fittings are badly shaped.. This is one example.
Smaller blocks and gratings are to be trashed too
I love this!!!
Even the cannons are already blackened!
And the stern gallery... hmm
I don't blame the manufacturers for this, there's no way they can provide their customers well carved galleries.. planning to remake them. It's challenging, but learn a new skill.. y not?
I'm overall satisfy with this kit. at least the wood quality is much better than Sergal ones.. oh ya, the ship cradle is included too!
I've just done putting on the bulkheads, but haven't taken pictures.. Will upload them soon!
Cheers!
-
ZyXuz got a reaction from ianmajor in HMS Unicorn by ianmajor - Corel - Scale 1:75, 1748 to 1771
Nice update Ian Actually, flat gratings looks better for my eyes
-
ZyXuz reacted to ianmajor in HMS Unicorn by ianmajor - Corel - Scale 1:75, 1748 to 1771
The frames were then fitted around the lined holes.
Once the frames were glued in to place I did a test fitting of the stove and its flue.
Then the gratings were tried for fit.
The gratings should be curved to match the camber of the deck but I left them flat to match the existing gratings. The frames are also rather too thick in cross section but again this matches the existing fittings.
Then I had a Homer moment. I looked at Dan Vadas' Vulture and realised the lip supporting the gratings should only go across the ends not down the sides. I should have used thinner lining down the sides. Doh! -
ZyXuz reacted to ianmajor in HMS Unicorn by ianmajor - Corel - Scale 1:75, 1748 to 1771
Many thanks for the likes they are most apreciated.
Gianni, the main advantage of this extra grating is that it hides some of my poor work around the bow!
Well - I am back from an enjoyable trip to the NMM during which time I had no access to the Web. So I will add a slight digression off topic.
On arriving I got my first view of the Cutty Sark.
My wife and I walked around the adjacent old Naval College then in to the nearby NMM building. Much of our time in the museum was spent looking at the paintings in the "Turner and The Sea" exhibition.
After some of the comment on MSW I was not expecting to see many of the old models on display. I was, therefore, pleasantly surprised that there were about 40 sailing ship models to be seen. A few were in the children's section on the top floor of the west wing, the rest were in two large glass cases in the next room. I took a few photos of them - in particular I was interested in the early 18th century rigging. All the models from this period had lateen rigged mizzen masts - this conforms to the way I wish to go with the Unicorn.
The next photo is one of those that I took and which I will use to guide my rigging efforts. It is of one of the models in the children's section. It shews the mizzen mast of a ship dated 1710. In the background is an English galleon of 1588.
I was trying to see how the running rigging was belayed since there are no belaying pin racks to be seen. I need to understand this better before finishing the deck fittings. In some of the models there were belaying pins fitted in to the top rail of the open bulwarks, others the rope was wrapped around the bulwark rail. In some of the models the rigging appeared to be simplified with, for example, rope passing in to a block with it apparently glued in to the block then cut off at this point - presumably the result of a repair at some time. I will have to consult a copy of Lees.
I have added a general view of one of the main glass cases.
-
ZyXuz got a reaction from Landlubber Mike in Badger by Landlubber Mike - FINISHED - Caldercraft - 1:64 - Brig
Congratulation on your build, Mike! you made her a beautiful art piece, and you'll make better ones in your future builds
Looking forward your Unicorn!
-
ZyXuz reacted to Landlubber Mike in Badger by Landlubber Mike - FINISHED - Caldercraft - 1:64 - Brig
Here are the pictures - sorry they are a little dark, but the lighting in my living room (the only neutral background I could find) is not the best. Thanks!
-
ZyXuz reacted to ianmajor in HMS Unicorn by ianmajor - Corel - Scale 1:75, 1748 to 1771
Hello ZyXuz,
The blocks that I am referring to are the ones I need for rigging the cannon.
The two blocks on the bow are euphemistically known as the seats of leisure. None of this is covered by the Corel kit.
-
ZyXuz reacted to ianmajor in HMS Unicorn by ianmajor - Corel - Scale 1:75, 1748 to 1771
I have been away from the workshop for much of the last 6 weeks so progress has been rather steady. I had intended to start rigging the cannon but discovered I had only ordered sufficient 2mm blocks to do one third of them. So before putting in a fresh order to Cornwall models I decided to get a few other jobs done to see if I needed any other items.
My main work was fitting gratings around the bow area of the ship. I had previously ordered some Mantua 1.5mm beech grating for the cluster around the main mast. I had been unable to source the Corel variety. When I received the Mantua gratings I was very pleased with the quality. It is much less fragile than the Corel offering.
The question was - did I have enough to do all the gratings including those in the bow?
The gratings took a lot of fitting to get them in to place. I don't think the Corel grating would have stayed in one piece with all the sanding and filing that I did. The bow on my Unicorn is distinctly asymmetric so I had to be careful that the lines of the grating didn't accentuate this. I think I managed reasonably well.
The foremost grating inclines upwards, which it probably shouldn't, but it does now cover some of the horrors in that area.
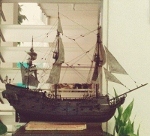
After the lousy weather of the last 3 months it was nice to have a day of sunshine. So I took a photo of the old tub out in the fresh air.
I have ordered the extra 2mm blocks plus some trim to try to improve the area around the stern.
First, though, I am away from the workshop again for another week. I will be in the London area and I am taking the opportunity to make my first visit to the NMM. It has an exhibition of Turner paintings on display at the moment - I will get to see the painting of "The Fighting Temeraire" amongst others.
Then on my return I hope to make some serious progress on the Unicorn. -
 ZyXuz got a reaction from ringbolt2013 in HM Colonial Cutter Mermaid by olliechristo - FINISHED - Modellers ShipYard -
thanks for sharing it it's simple, yet effective
-
ZyXuz got a reaction from ringbolt2013 in HM Colonial Cutter Mermaid by olliechristo - FINISHED - Modellers ShipYard -
wow! the barrel is just amazing!!
great job!
-
 ZyXuz got a reaction from ken thomson in HM Colonial Cutter Mermaid by olliechristo - FINISHED - Modellers ShipYard -
well done on the ladder
-
 ZyXuz got a reaction from mtaylor in HMS RaceHorse by ZyXuz - FINISHED - Sergal - Scale 1:47
Hi Tyrnac,
Thanks for your kind words.
I used the materials provided by the kit, should be LIME wood I think. The kit instruction suggests to use separate wood for the handrails: 3mm x 2mm for inner part, and 2mm x 2mm for the outer part or in total 5mm x 2mm. As shown
But, if you just use 5mm x 2mm instead, it will cause the bow part impossible to bend.. Hope you get what I mean