ZyXuz
-
Posts
429 -
Joined
-
Last visited
Content Type
Profiles
Forums
Gallery
Events
Everything posted by ZyXuz
-
 Brilliant works on the planking, Medic! Hope to see your next update soon! Happy new year
 -
Brilliant brilliant work on the wheel, Ian!! That's the most detail wooden wheel I've seen in such scale, and it looks better than the Corel one. I've no opinion on the position of the helm, but I think u can make a more detail toplight
-
Superb planking!!! can't wait to see u lay the last plank on! cheers!
- 191 replies
-
- 2
-

-
- victory
- caldercraft
- (and 1 more)
-
nice work, Charlene and I love che chopper, really makes cutting thin strips easier and more accurate
-
Fantastic Ian! It can't go any better I really love your drawing, it's just like the one for a real ship
-
Breathtaking Ian!! I must say the details of the chain is simply awesome! and surprise... I'm BACK!!! lol I was busying with my new job.. and recently, Chinese New Year.. I got my new job last September, but the bad side is that it's in Singapore.. so, I can't continue with my Unicorn anymore. She's now resting in shelf. My plan is to work here for like 4-5 years for a better savings, and then only return to Malaysia. Hope everything goes smooth. Seeing your works really 'turn me on' back on this hobby, haha.. now i'm considering making a smaller model here like a boat or sloop which use only minimum tools and take up lesser space. It's time to visit cornwallmodelboat again!!! Anyway, just a pic of my unicorn before I put her in shelf. I did a quick + full time work on her before i got to Singapore. Hope you don't mind You can see that hull started cracking... Mike, I also just learned that you started your Pegasus, nice work so far! The hull looks well after sanding
-
well done on the cranks, Ian! nice and neat take a shot of your full deck view, I can sure it looks awesome! Anyway, sorry about your cannons.. Glad Corel didn't no produce any real ones for ship battles
-
Mike and Ian, I really love how you guys study the Unicorn plan to make this a more accurate model. The stern part took some of my times too. I also made the degree of the stern more 'gradual' (like what shown by Ian, 1st picture 2nd image), because I feel that the original one was too steep. The captain would have problem walking toward the stern direction Take your time on your scratching, Mike. We'd really like to see more discussion here.. it helps us a lot on knowing more about ships and of course, Chapman's Plan
-
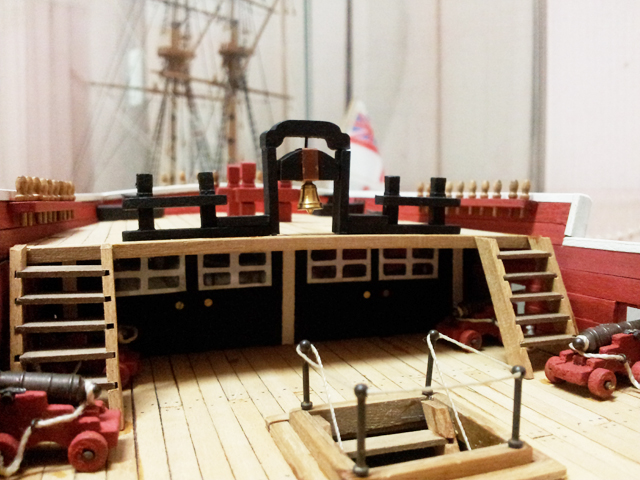
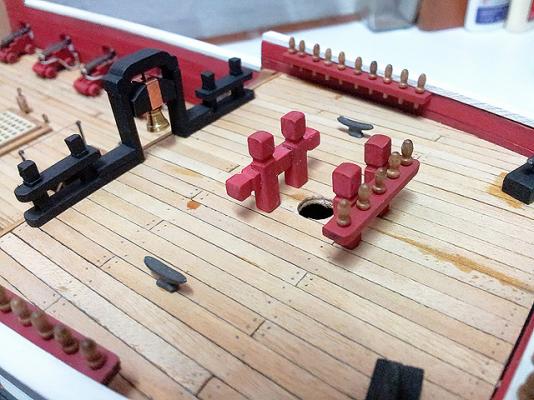
Belfry Making I've lost track of my updates since some photos of mine are missing... =.= So, I'll just upload part by part. Up till now, I've basically done the forecastle fittings including the catheads. Anyway, this is how I make my belfry. I used the beech woods for the bits that came with the kit and 2mm x 5mm walnut strip for the rail. To produce the bits, I mill them with a reverse milling bit to create the head, and then cut them into half. I really don't like the color of the beech wood, but since I'm gonna paint them any wood will do. For the crown on the belfry, I cut the original one into 5mm width. The rail.. For the headstock, I used the 6mm x 5mm walnut strip which is the same as the cat head, and sand it manually to the shape. Well.. it was taller, because I forgot to add the width of the rail in.. So, I trimmed them down another 4mm. And I added a copper piece on the head stock. Install the bell and Done. This is an older photo actually.. compared to my previous post, you can actually see I had added a one more strip at the concave area. Thanks for viewing
-
wow! that's brilliant! well done, Ian
-
Hey Mike, Glad to see you had started your Unicorn log. Can't wait to see you to lay the keel Anyway, have u tried fitting the bulkheads to the keel? I remember they don't.. u might need to sand them.. Good luck on your build! I'm following ur log!
-
Thanks all for your kind words.. Just received another good news that my dad can finally discharge from hospital tmr now I will need to clean my house especially my room b4 he sees it LOL
-
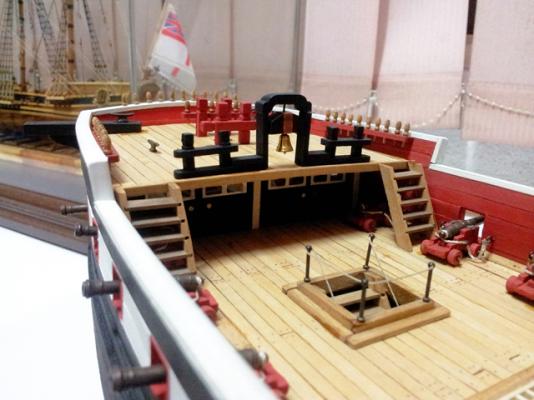
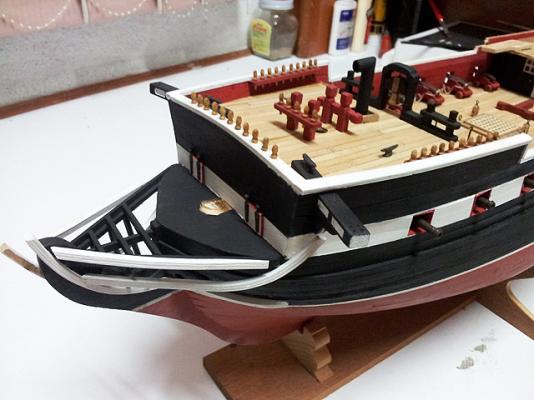
I'm back!! Finally!! The reason for this long absence is that my dad was diagnosed with a cancer relapse and has been in hospital for nearly 1 month plus.. So, my life was like work and go hospital everyday. Anyway, he's turning a lot better now and I can have more spare time for myself already One funny thing was that, Ian did message me in person during the MH370 incident worrying that I might be on that mysterious flight and causing this long absence (Anyway, Ian.. Thanks for your concern ) Another news is that I've just resigned from my job, and that will make me have more time on my ship recently BUT I'll have no laptop 'cause I was using my company's laptop all the while for both my personal and office stuffs =.=" gonna buy a new one this weekend. I'll need to return it to the company tmr.. so, I'll post the current look of my ship first now and then the progress after I got my new lappy.. It's a bigger leap compared to the last update since there were some progress that I haven't updated here... However, the Unicorn now is just so my version.. I added doors under the forecastle to cover the ugly interior.. I'm not sure whether any ship is built with this design? That the stove is inside the 'cabin' or very close to the manger? If so, then I can decide the location of my vent better.. hope anyone can help here Belfry is also added by referring to Pegasus.. but I think I still missed out 2 cleats on the sides of the bell The bitt Also, I've changed the rail to straight down instead of using round ones as instructed in the booklet. This might match my color scheme better The bow rails and cat heads, which I ald done before CNY but haven't updated here. The one at the starboard side snapped off from position when I show my ship to my little cousin during CNY @.@ Anyway, the rails part is not done yet. I'm hoping to add a thicker rail or a jawed one on top of the others.. Thanks for viewing

-
Nice update, Ian and I have to say that the main bit is totally brilliant! I really hope can make my ship as accurate as historical, but I think my ship is currently so on 'my own way' now lol
-
Nice update Ian Actually, flat gratings looks better for my eyes
-
Congratulation on your build, Mike! you made her a beautiful art piece, and you'll make better ones in your future builds Looking forward your Unicorn!
- 153 replies
-
- 1
-
-
- badger
- caldercraft
- (and 1 more)
-
nice work on the gratings, Ian shaping them to fit the rails is really not an easy job.. well done! Your works always inspire me, and now I'm thinking to add gratings on the bow too anyway, what are the 2 blocks there? or which ship structure u refer from?
-
haha.. the same thing happened on me too when I'm about to modify something caring too much really just slow things down, just make a decision and start working I dipped the plank in boiled water first, that will make the strip easier to bend, then only clamp and glue. Hope this help
-
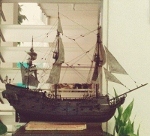
cool! Black Pearl was my very first model ship, but she was a pirated product.. Nice to see it's being issue now
- 40 replies
-
- 1
-
-
- hatchette
- black pearl
- (and 1 more)
-
wow, very neat. nice job
-
Hi Tyrnac, Thanks for your kind words. I used the materials provided by the kit, should be LIME wood I think. The kit instruction suggests to use separate wood for the handrails: 3mm x 2mm for inner part, and 2mm x 2mm for the outer part or in total 5mm x 2mm. As shown But, if you just use 5mm x 2mm instead, it will cause the bow part impossible to bend.. Hope you get what I mean

-
nice start Glenn. after more sanding the filler, your 2nd planking shouldn't have much problem.
-
I did think of adding them, but still don't have a clear plan.. will make up my mind soon and place an order together with other materials if needed. Ya, the carriage itself is really well pre-built, saved a lot of my time comparing to other models' just that the blocks are just too bad in quality.. not only the blocks for the guns, but all the blocks..
-
Cannon Rigging Well, after a week of Chinese New Year celebration, and another week before it as preparation, I finally can sit down here and make some updates. Corel doesn't provide a clear instruction on the cannon rigging, and even the rigging blocks are not coming in correct size. Purchasing them will be really out of my budget, while making 80 of them sounds bit crazy for me, so I decided to make a easier version. I first made me a jig for the rigging before putting them to the deck. The horizontal line marks the level of the eye bolt on the bulwark. I started the first one on top of the jig as here gives a larger space for me to work on. After making the first knot, I applied glue to secure it before rigging it down. After this, I transferred it down and did the same on the other one. Done. On the deck. From this picture, you can see that I've also added the the waterway and rail, I'll make the update as soon as possible. Thanks for viewing.