Egilman
-
Posts
4,382 -
Joined
-
Last visited
Content Type
Profiles
Forums
Gallery
Events
Everything posted by Egilman
-
 Ahh... late to the party, but, I see the main attraction hasn't arrived yet, just being introduced.... Grabbin a seat......
 -
That's not the cannon mounted in fighter aircraft, (well a modified M-61) with the Navy's Phalanx system adapted to 20mm rounds, mounted on a mobile chassis.... Limited to 1,000RPM in burst mode The Israelis are the only ones that actually used it to shoot down an enemy aircraft in combat.... and they did it only three times. It was mostly used in the same manner as the M-16 modeled above, as infantry support. It's no longer in use by the US military being finally phased out in 1994. (replaced with the M-6 stinger equipped Bradley AFV. Currently the US Army uses the actual Phalanx system (known as the Centurion C-RAM Scroll down for it) mounted to trailers for DIVAD. (can also be mounted on a HEMTT) and I understand that they are phasing that out as well.... Guns for DIVAD have been rated as ineffectual for several decades.
-
Try again.... M-163 M-113 -w- Vulcan Divad...... From Amazon.....
-
SBD-3 Dauntless 1:48 Hasegawa - Edwardkenway-FINISHED
Egilman replied to Edwardkenway's topic in Non-ship/categorised builds
But I already promised SWMBO a floaty thingy. After this current build.... (but I think that the guns and motive power is not going to be what she expected) And SWMBO is much more powerful than the Borg..... -
Artillery/mortarman Huh? that's ok, I like artillery. The only thing I don't have in the stash is what isn't being molded at this time... (and a 8" howitzer) based on the long tom gun which is still easily available. (including their standard or substitute standard prime movers) Beautiful work...... nice collection....
-
Everyone else is in the same prison, so if someone was brave enough to do that, (defy the government) he would be crushed by the demand for cakes with metal accoutrements... and then of course the government would see to his edification..... But, yes, we need to see your army brother... that is if you really want to display the contents of your arsenal....
-
Nope there isn't, and the guvenor has just built the walls a bit higher, since it is claimed that no one is following his no large gathering orders, he has now ordered a stay at home decree, closing all non-essential businesses. and everyone needs to stay at home unless an emergency happens.... We are one step away from martial law...... (here in Washington state)
-
SBD-3 Dauntless 1:48 Hasegawa - Edwardkenway-FINISHED
Egilman replied to Edwardkenway's topic in Non-ship/categorised builds
GAWD! youse guys with your US Navy builds.... (gotta... resist.... temptation......) Gorgeous work my friend...... EG -
Beautiful work... Well done..
-
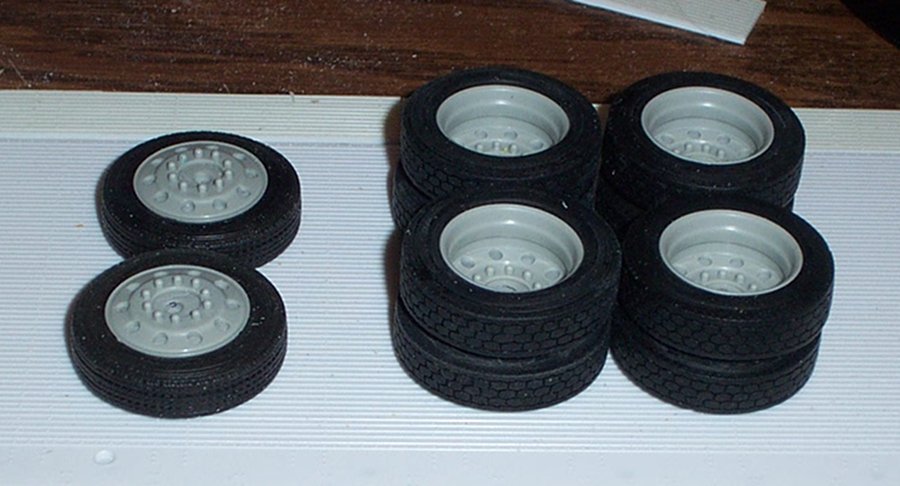
Just ordered up some Mr Surfacer 500 & 1000 and the matching thinner from Sprue Bro's. Should be here in the next couple of days. Meanwhile I will start setting up the tandem unit. (the wheels and tires should arrive in the next couple of weeks) But I also received my replacement wheels and tires for the tractor and the suspension parts I've been told are on the way.... so If I run out of things to do with the trailer, I'll switch back to the Tractor.... Solid resin and solid rubber tires, with the correct tread pattern as well! They actually look the part and will not disintegrate, split apart or go flat....
- 103 replies
-
- 10
-

-
Well I just thought I would ask, I mean going through and doing a fantastic dio of a WWII collapsed/destroyed stone church somewhere in France/Germany would look strange with a late '60's jeep. The m-60 is what stuck in my mind.... Not trying to be a rivet counter and an M-16 and M-151 are entirely believable in the right context, but your builds are too gorgeous to make that kind of anachronism my friend.... (so I figured I should mention it)
-
I'm very familiar with Verlinden, his items were always pricey, but well worth it.... The reason I asked was I was wondering the setting with a classic late '44 M-16 which is very well built and an also very well built M-151A2 MUTT complete with wading kit, and M-60 all fitting in the same diorama....... M-16's were extensively used in Vietnam one of the best local defoliators around, so the MUTT isn't unusual in that respect, just wondering about the WWII setting... Beautiful work on both I may add...
-
Just a question, is this an old stone church in Vietnam?
-
It looks absolutely beautiful.... Nothing done at this point is going to change that....
-
Already got one on the back side OC, too much detail on the front side that has to show on the finished model is the issue here.... Thank you for the suggestion... EG
-
Another Wow!!! Mr Surfacer looks to be the ticket in this specific application no sanding needed at all. The vallejo plastic putty could also work and would be fairly easy to remove if it goes wrong..... Thank you for the suggestion ken and thank you Lou for the videos, I went ahead and found a few more video/demonstrations of both Mr Surfacer and plastic putty.... I can see uses for the plastic putty, but to be honest what Mr surfacer is showing is exactly the ticket. all the rest eventually drag out the sanding sticks which I have to avoid here, I do have needle sanders for getting in those real real tight places, but I don't even want to go to those with this... Going to give Mr Surfacer a try and see what I can do with it.... Now to order it and wait for it to get here... The real issue here is the huge decal that has to go over it. If the surface has issues larger than the beading detail it will show up like a waving flag. no amount of clear flat will hide it........ Thank you Ken..... Thank you Lou.... I"m going to test all of them and see what I can do with them....
-
WOW! that is an idea I never thought of it would work wonders in many applications. I'm going to throw together some scrap and test it out.... Thank you, I can think of several situations where this will come in handy....
-
The back side has a strip of .020 backing the joint for reinforcement and leveling the joint so there is no access to the back side..... But thank you it was a thought...
-
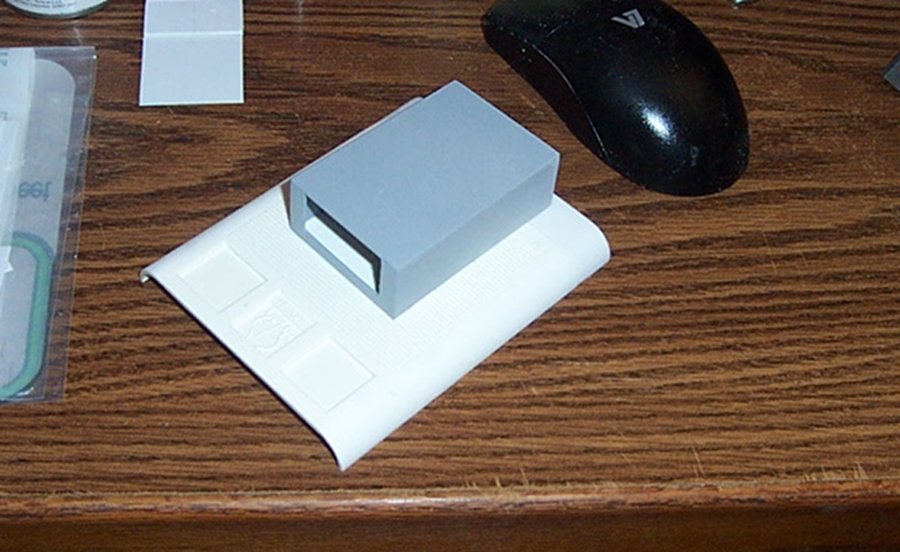
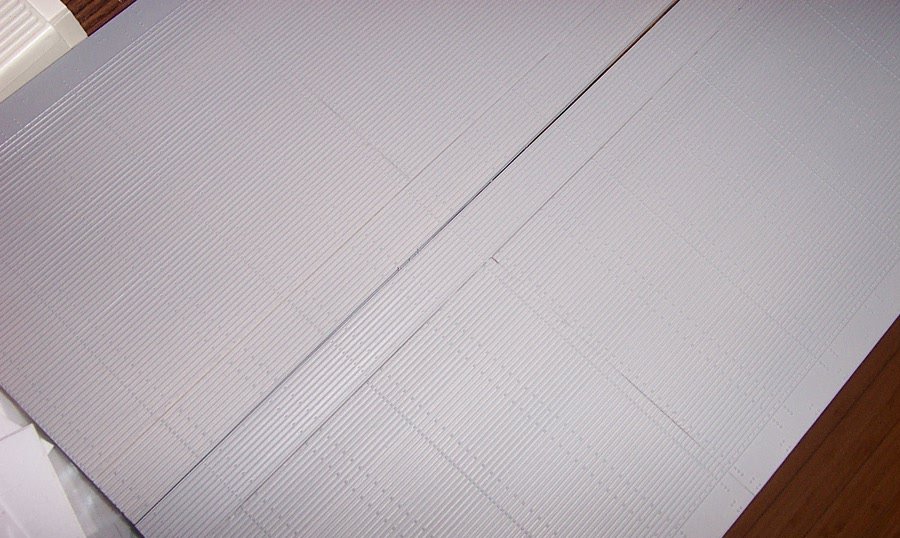
Primered parts..... The reefer unit came out nice, all that is left is detailing and painting.... The side panels I"m not so sure about.... The gap shows, but then again, this is why we use Tamiya ultra fine primer. To show the defects. You can clearly see some gaps.... Horizontal joints...... It measures out at 1/64th to 1/32nd inch. Not very much, but enough for microsol to pull the decal into it. Vertical joints... Measures less than a 64th but it's there..... So the issue is, I need a way to fill those gaps without effecting the surface detail. As you can see the detail is fine and very close to where the fill needs to be applied. This rules out most hardening putty's that need to be sanded. I was thinking about a self leveling filling primer. (if there is such a thing) Or, in the alternative, successive coats of future, which dries very thin and build up the joints over the gaps... It will need a coat of Tamiya fine white primer & Future before the decal gets applied. I don't think gap filling CA is the answer, a little too much or an unsteady hand and you have to sand.... Any suggestions? Maybe someone has dealt with this before.... Thank you in advance, any ideas welcome

-
Blue deck stain was not used when there wasn't any to be had. In that case they went ahead and painted the decks 20B Deck Blue.... I'm assuming that you deck location is not in an area where they landed or launched aircraft. So no black streaks and wear marks down to the wood would be appropriate.... so you have a temporary storage or standby area of the deck, solid blue would be appropo.... The only thing I could suggest would be if you want a more combat used look, oil stains, tire marks through oil stains footprints, etc, etc... and maybe a bit of assorted patches of whitening/lightening to represent a faded deck... but otherwise, outstanding job..... oh and a storage area would have tie downs. So call it a standby area.....
-
That was a guy hauling construction machinery on a flatbed. Thing is they still don't know what happened. Yes he struck the bridge knocking out a small crossmember in the last bay of the truss. He actually cleared 85% of the bridge including the approaches into and out of.... He exited the bridge and continued on his way not realizing what had happened. Several cars that were following also crossed the bridge before it collapsed... Then all of a sudden it let go..... Based upon the measured height of the load he should have cleared by 6" but they do not know if that particular piece had been damaged earlier and was hanging lower than the others... Also, he has already passed under at least six overpasses and two other similar bridges on his trip from where he loaded up..... They still do not understand what caused him to strike that one piece after clearing all the other cross members..... There was nothing in the roadway to cause the trailer to jump. One of the strangest things the engineers had ever seen with no explanation... The bridge was scheduled to be replaced anyway but they figured that it would last a few more years..... So yeah it is not all driver stupidity....
-
Yeah, I wonder what gets in their heads at times. We have a bridge here in Tacoma over the Puyallup river and the lead in to the UP rail yard about a half mile long multi-span truss girder type, all along it you can see where the riveted girders are bent and deformed from where the trucks have repeatedly hit it... Happens all the time around here especially around the Port of Tacoma. Never hit a bridge in my short career of driving (three years) but then again I always checked the rig's height with a telltale and parked my butt right behind another rig, if he made it, I would.... (I didn't get paid enough to take such risks especially going somewhere I was unfamiliar with)
-
Thanks, but a potential problem might make it all for naught, I forgot to check the decals. I have the SATB decal set for the truck and trailer from Modeltruckin' (moebius trailer version) I can't use the mural cause it is low grade and besides it is hopelessly out of scale, but the rest of the decals are perfect. I scaled the reefer to the images from the movie and what I could find of the real thing to get the proportions right... but before I can paint it I should have checked the decals to see if they fit. Now I may have to alter the decals to fit cause the reefer is correctly proportioned which is probably the way I'll go. (matching the movie rig comes first) But, I got in so all fired a hurry to get it made that I forgot a basic step.... Slippin' in my old age...
-
Take care of you and the family my friend, this will have it's day, I'm sure....
-
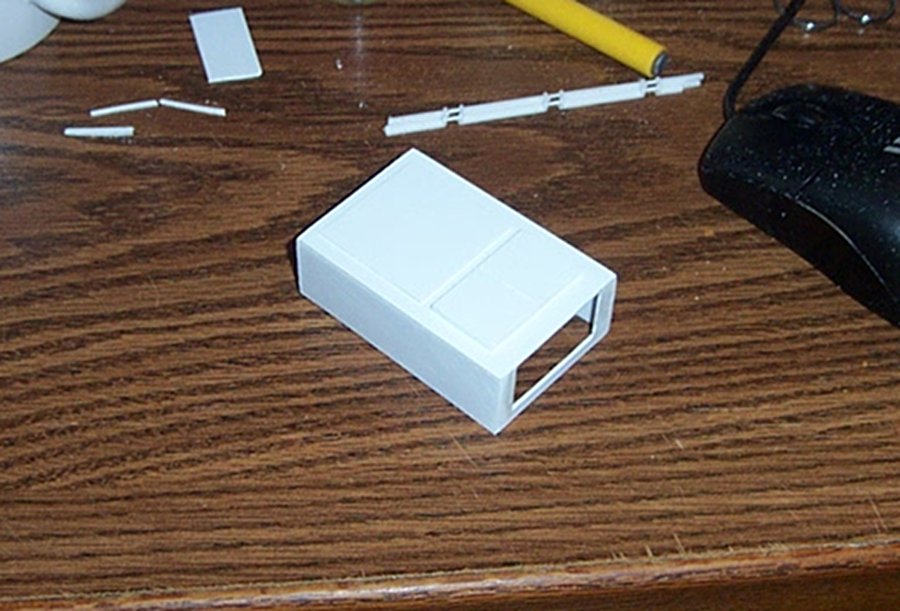
Welp, that was quick and easy..... Ready for primer In fact I will primer everything at this point to make sure all the joints are ok....