HOLIDAY DONATION DRIVE - SUPPORT MSW - DO YOUR PART TO KEEP THIS GREAT FORUM GOING! (78 donations so far out of 49,000 members - C'mon guys!)
×
Model Mariner
-
Posts
95 -
Joined
-
Last visited
Content Type
Profiles
Forums
Gallery
Events
Everything posted by Model Mariner
-
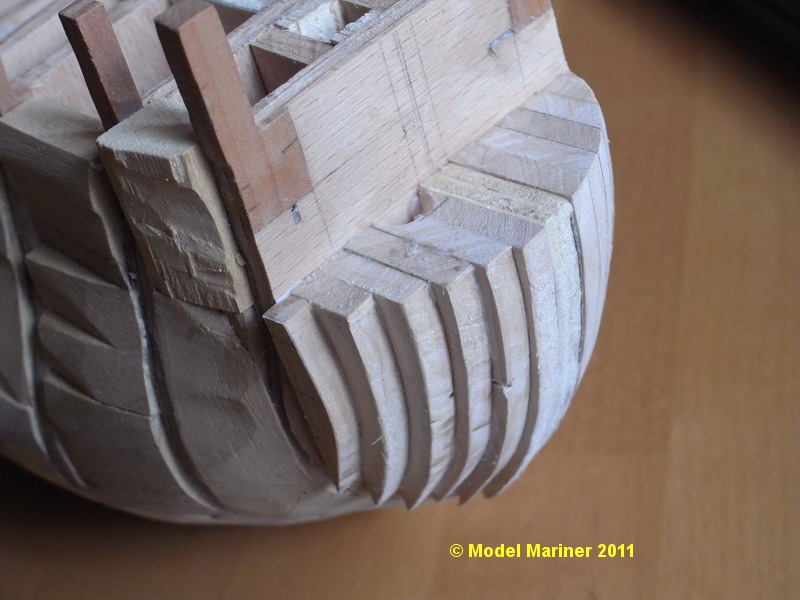
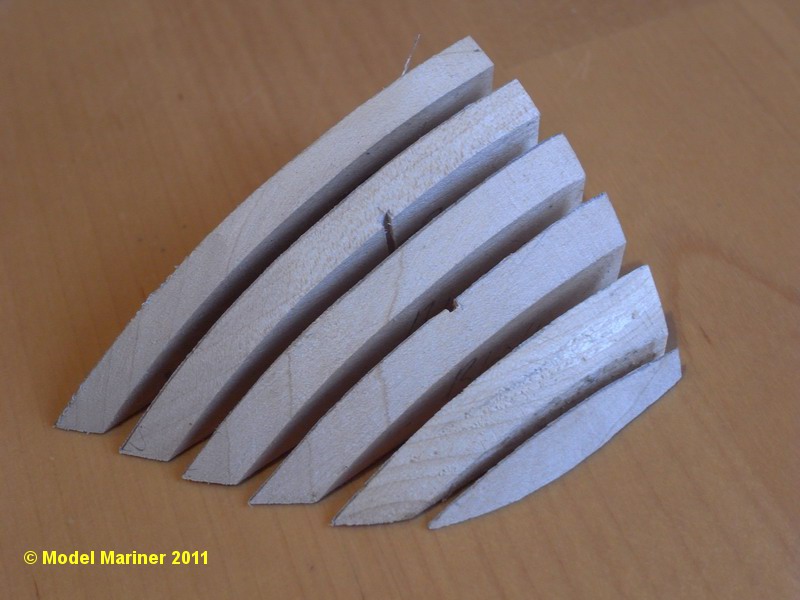
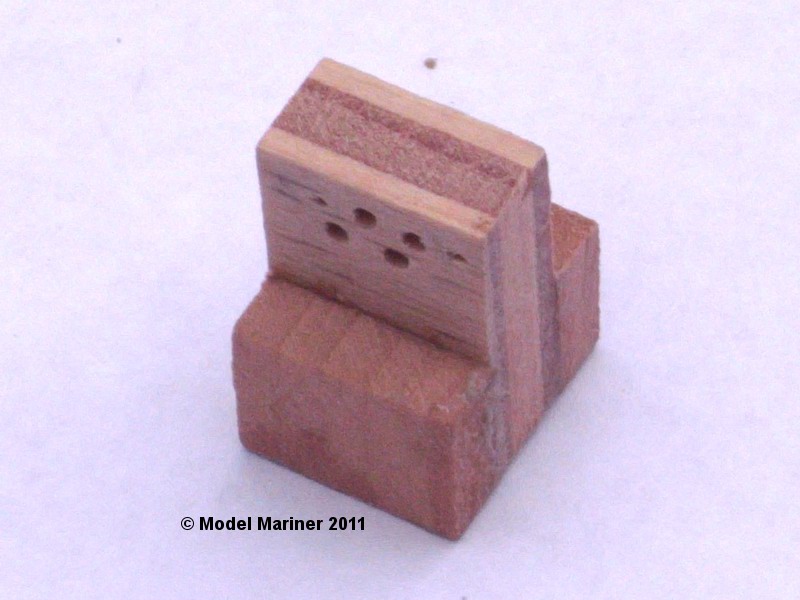
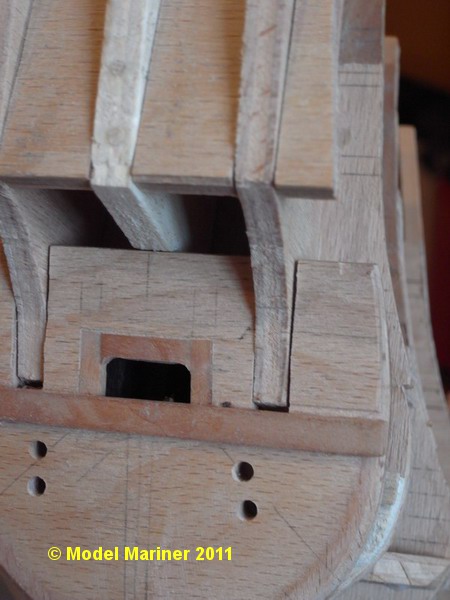
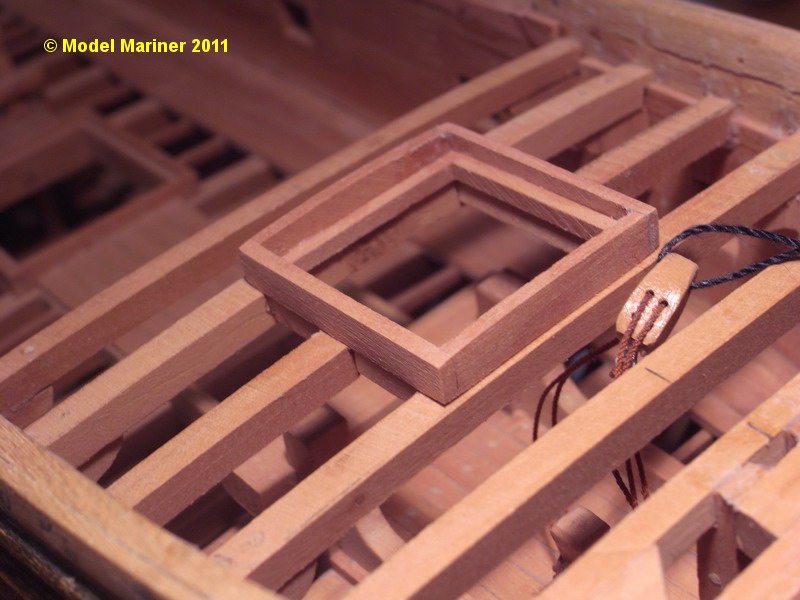
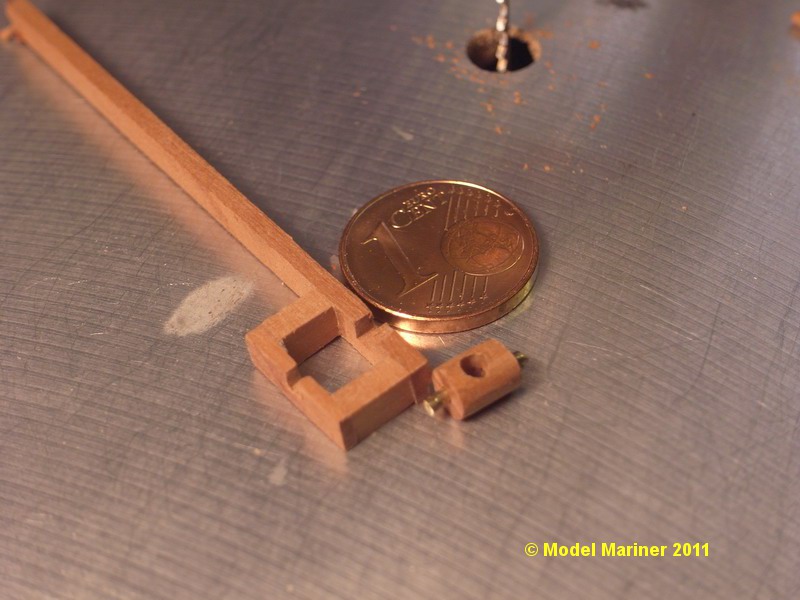
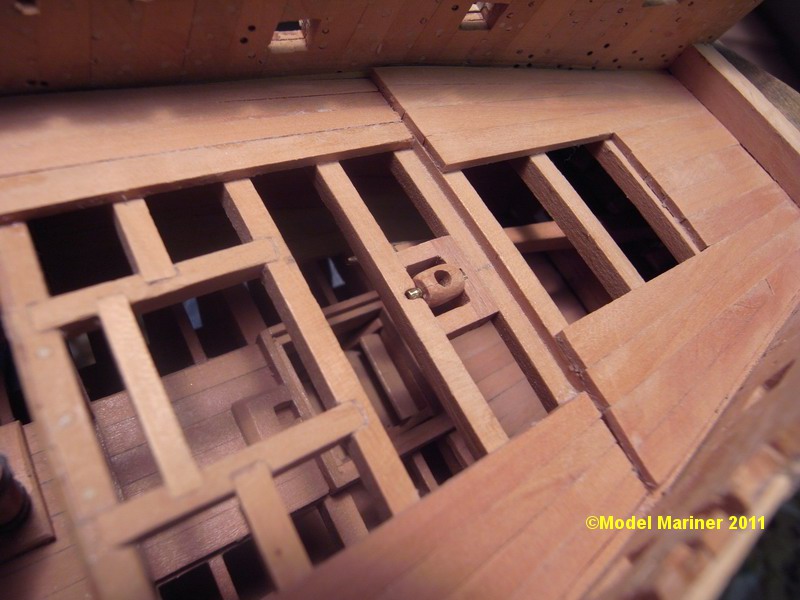
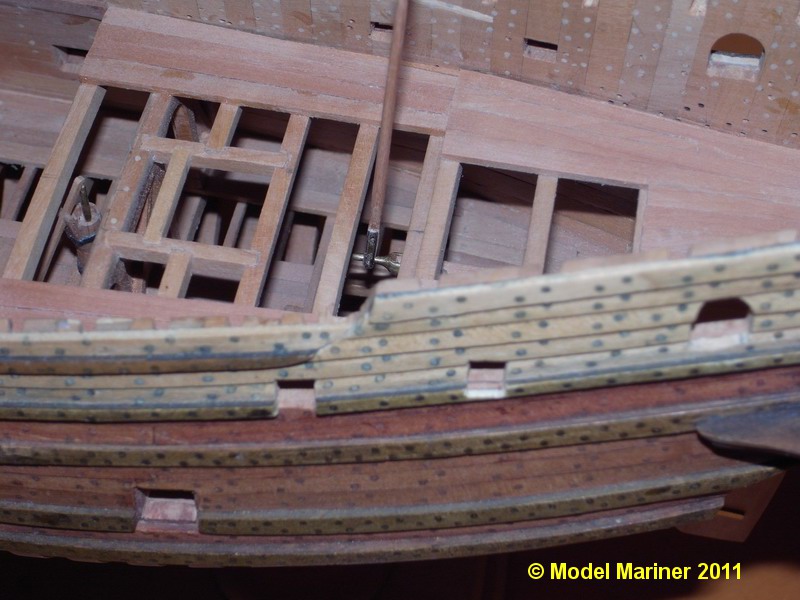
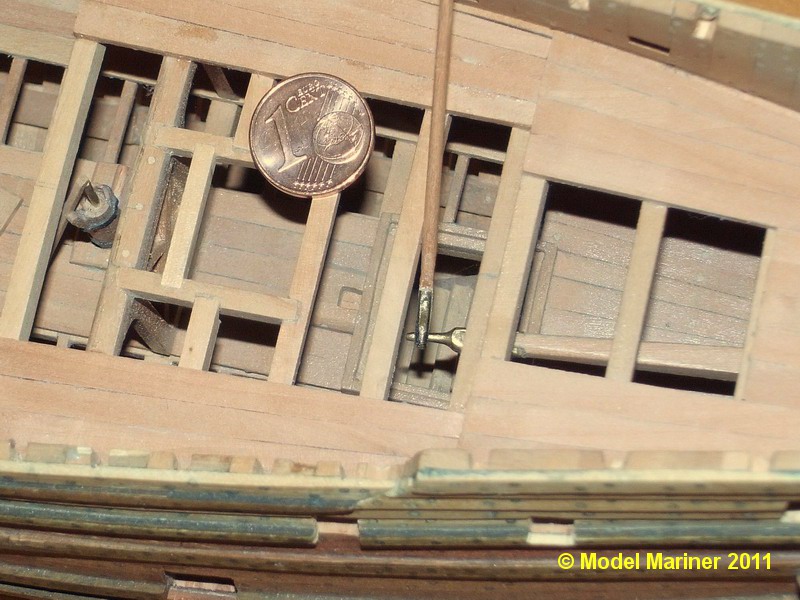
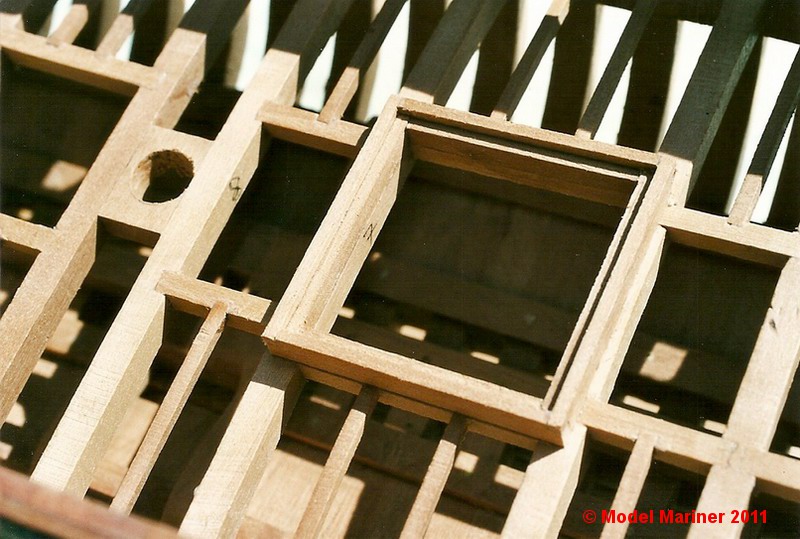
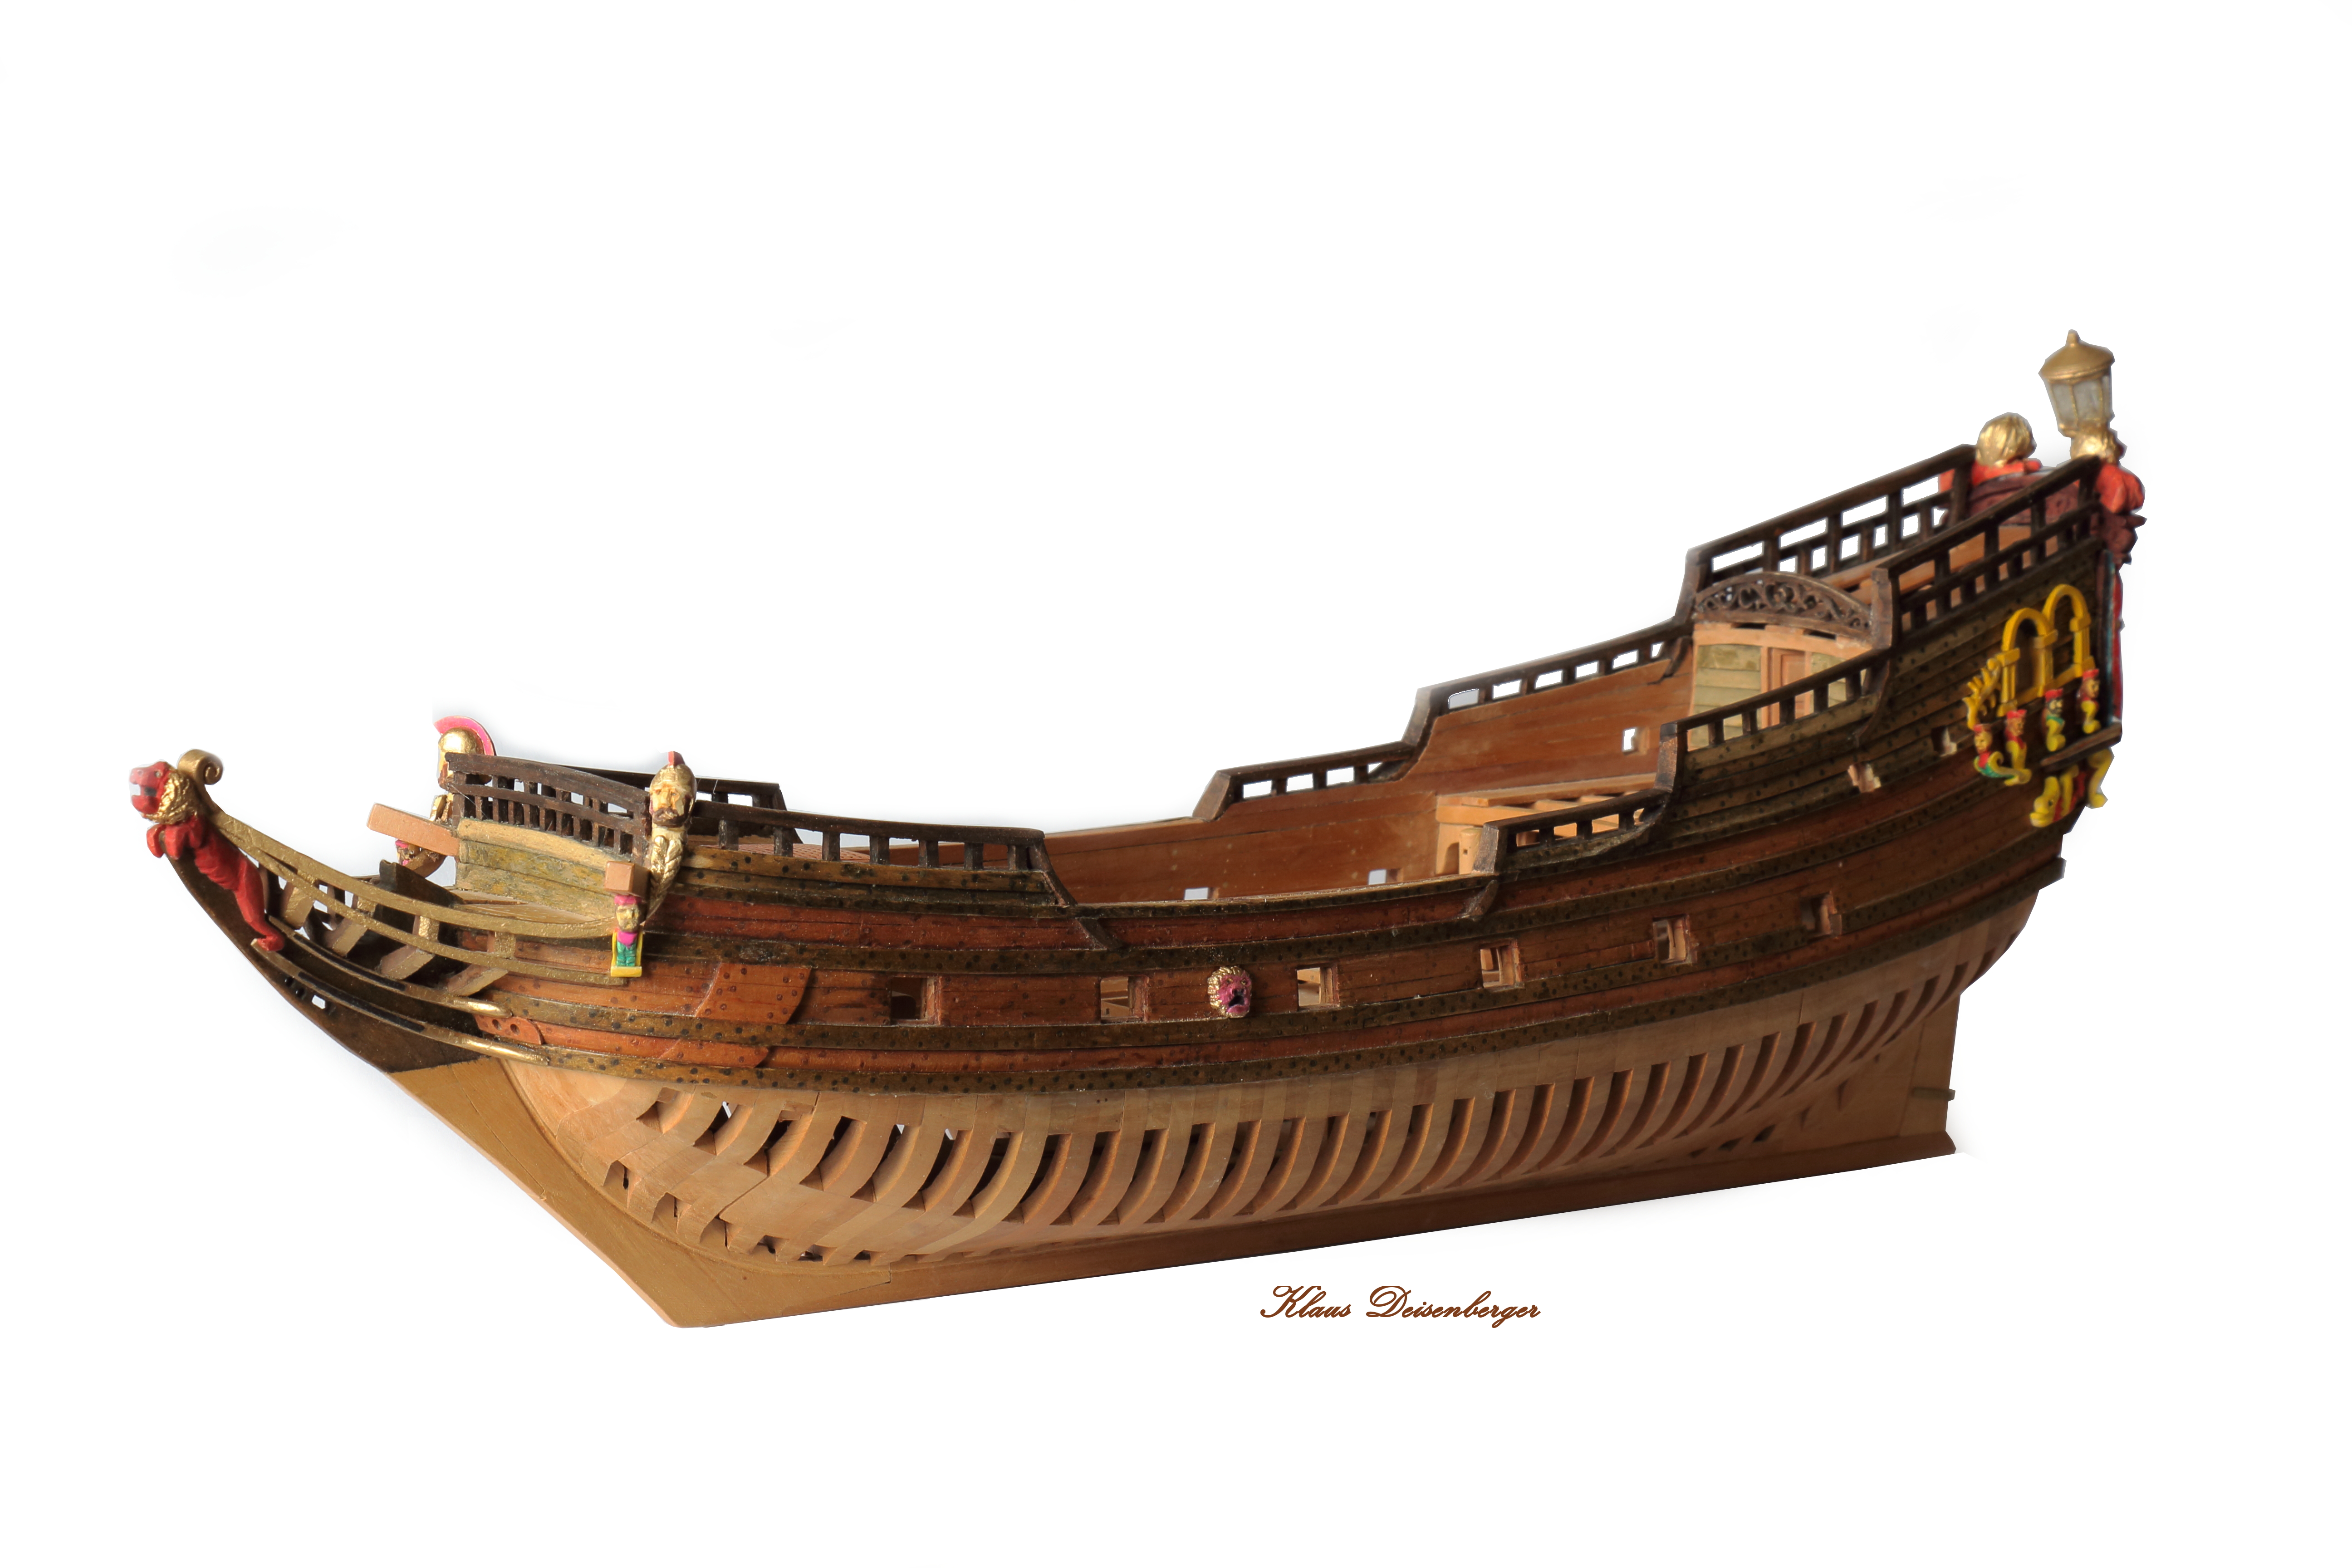
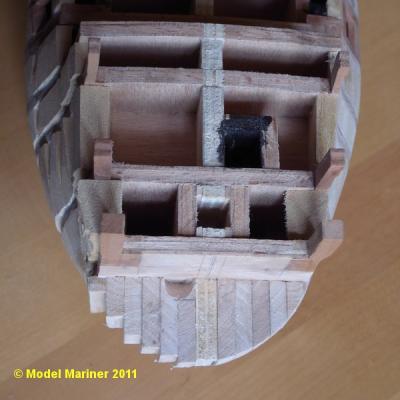
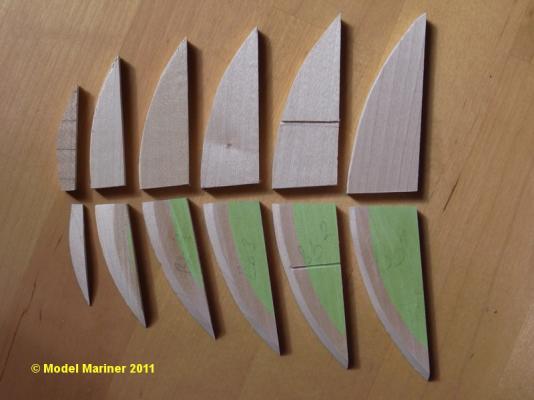
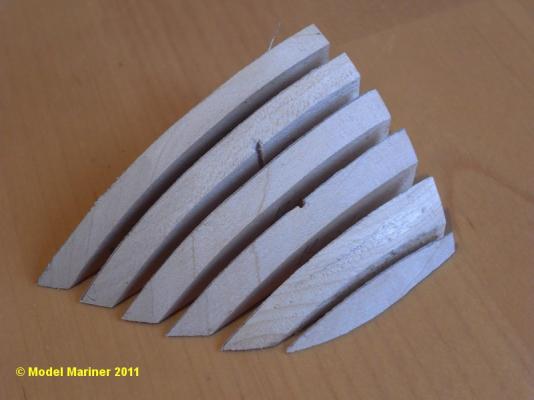
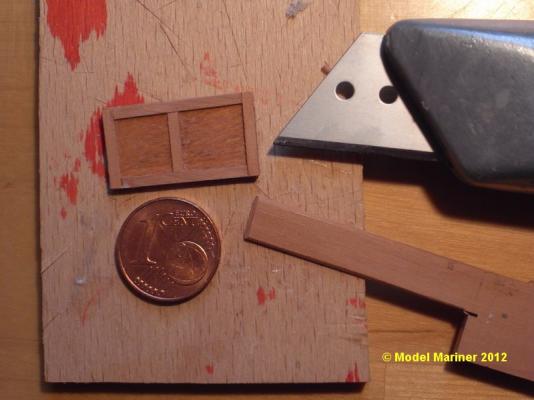
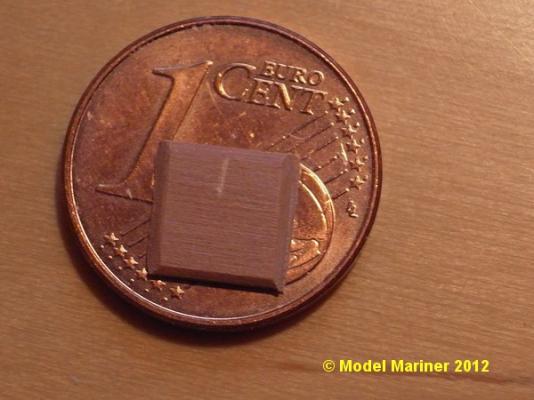
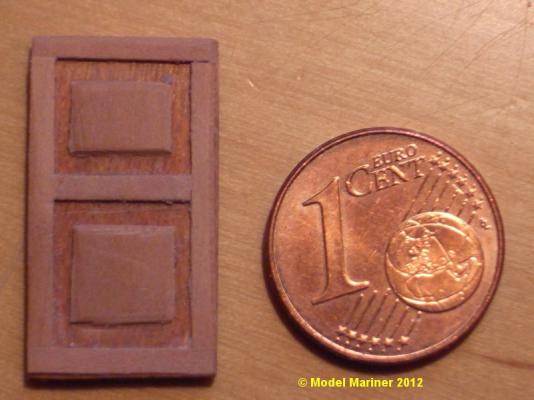
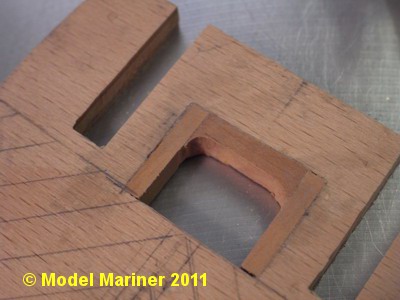
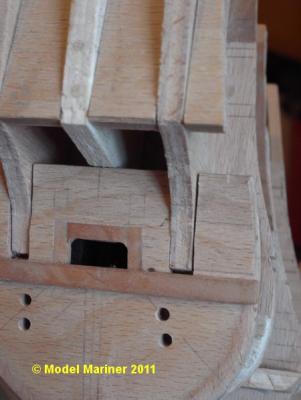
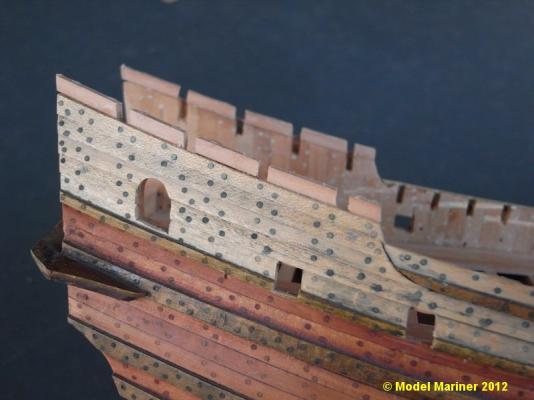
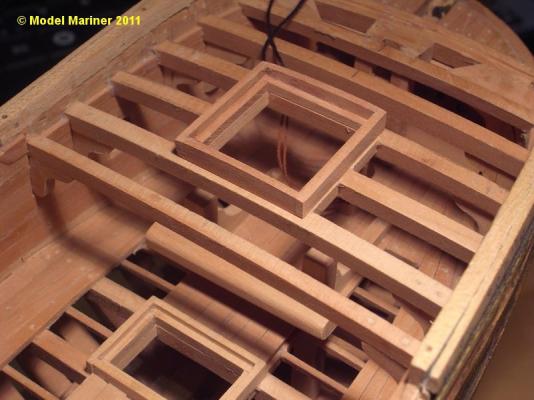
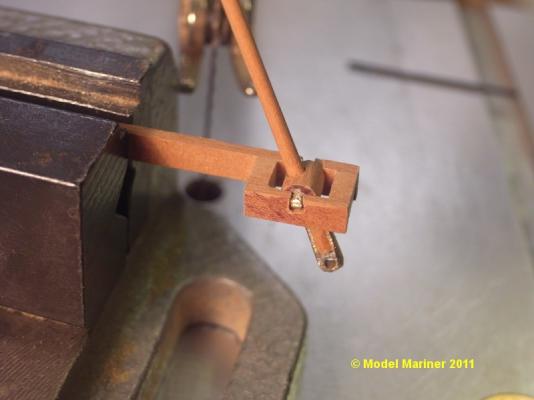
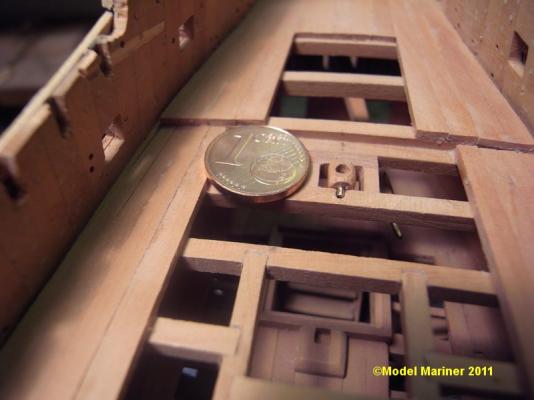
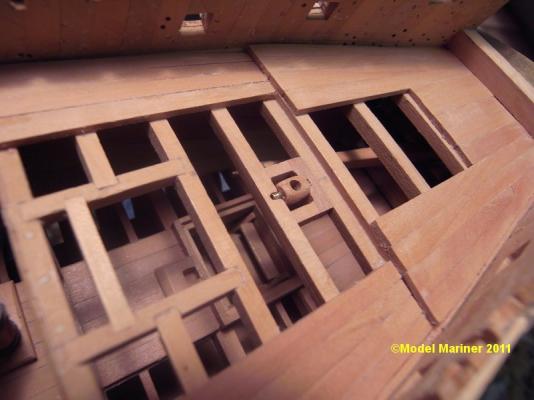
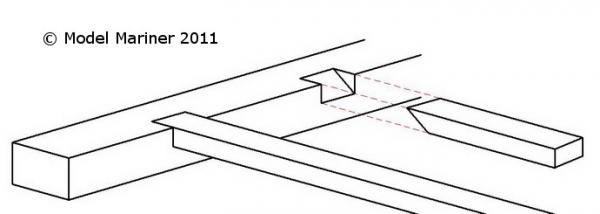
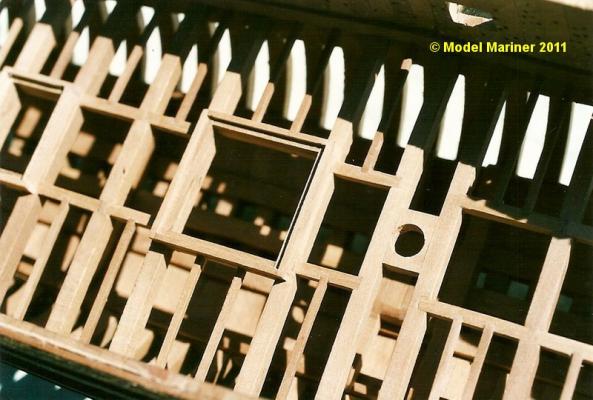
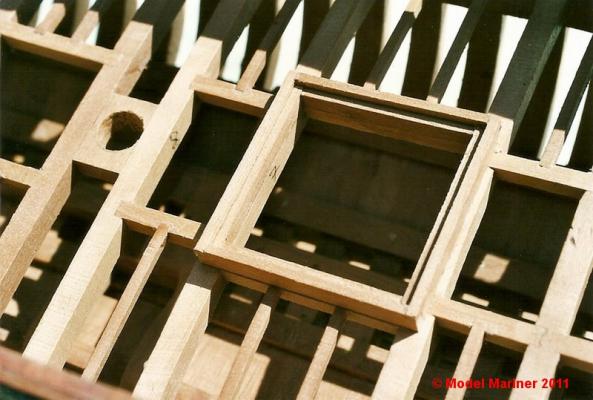
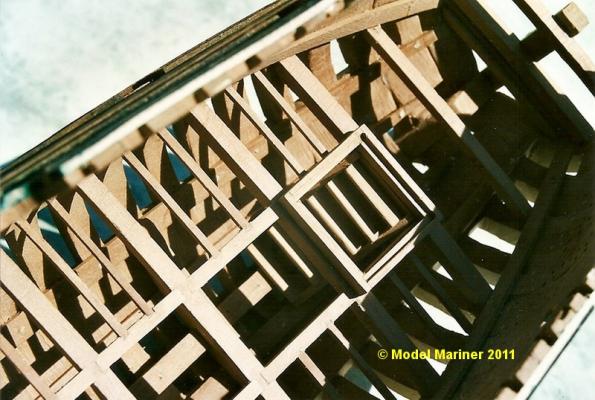
 Thanks for the compliment E&T. Up to now she does not really look like a ship but rather ugly. (Dummy) knight for the fore yard tie: The knight for the fore yard tie is located under the forecastle deck and will not be visible on the finished model. The only thing which will be visible is the upper part of the halyard rigged between the knight and the ramshead block and it would be impossible to rig this halyard later on. To overcome this I made a square hole and a dummy knight which fits into it. The dummy knight (with the halyard rigged to a ramshead block) will be glued into this hole later before the forecastle deck will be closed. Preparation for planking and fairing the hull: I prefer to plank in one layer of the correct thickness rather than making the double planking as it is done with the majority of PoB models. In my opinion the best way to get a perfect bevelling is to glue in fillers between all bulkheads and sand them to the required shape. This ensures that the bevelling is correct at each height at each bulkhead. For the fillers I use Obeche, except for the fillers at the bow which I make in layers in following 2 steps: At first I make the bow filler on one side only by cementing 6 layers of 5mm maple wood temporyrily togehter (rubber cement). These are then sanded to the required shape. By taking the layers apart I get templates for the other side, this makes it quite easy the get the bow fillers symmetrically. The fillers at the port side are glued in and sanded to the required shape: and with the starboard side also done she begins to resemble a ship: Klaus
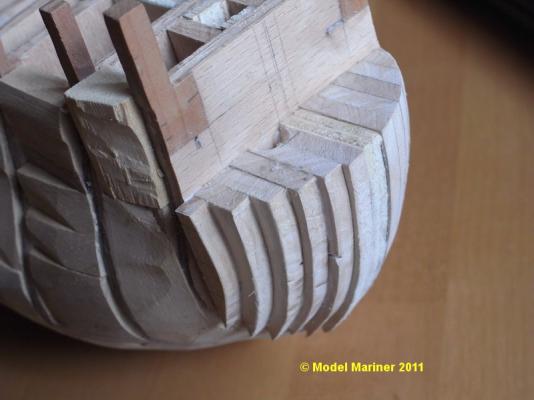


-
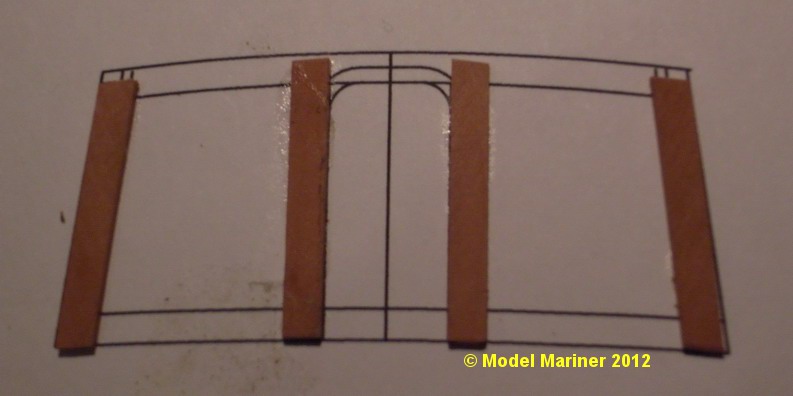
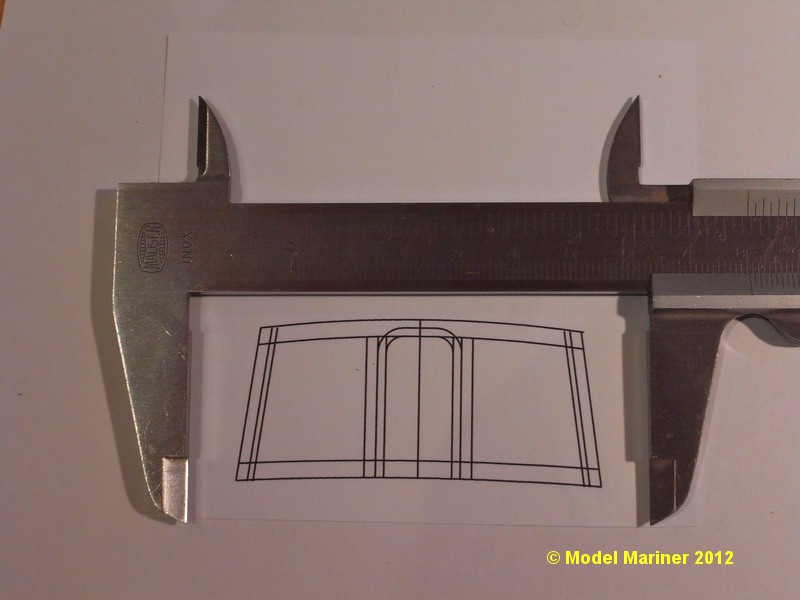
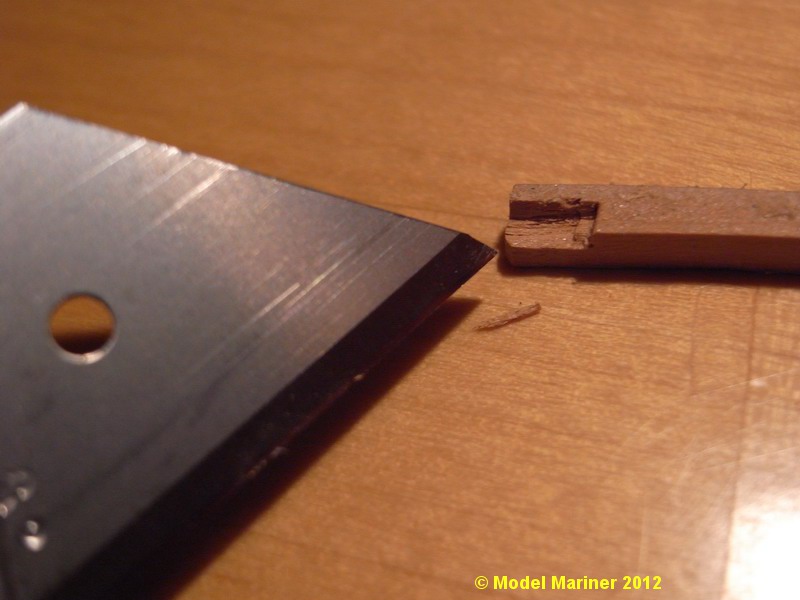
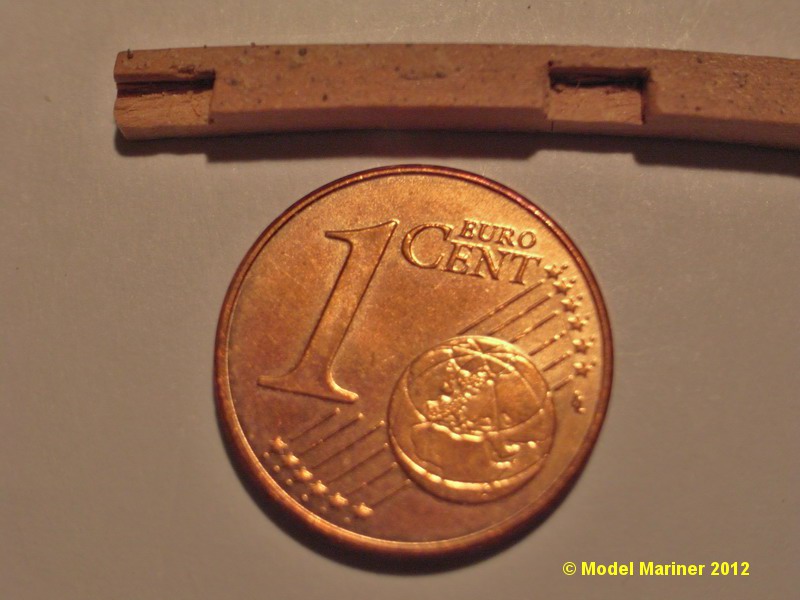
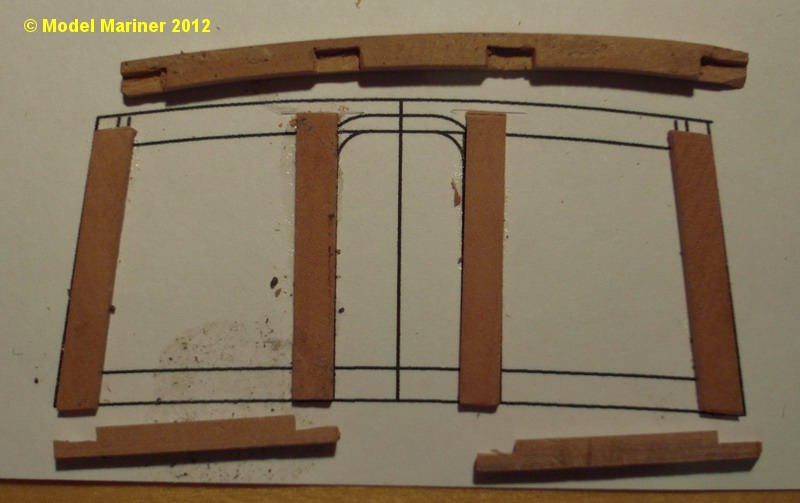
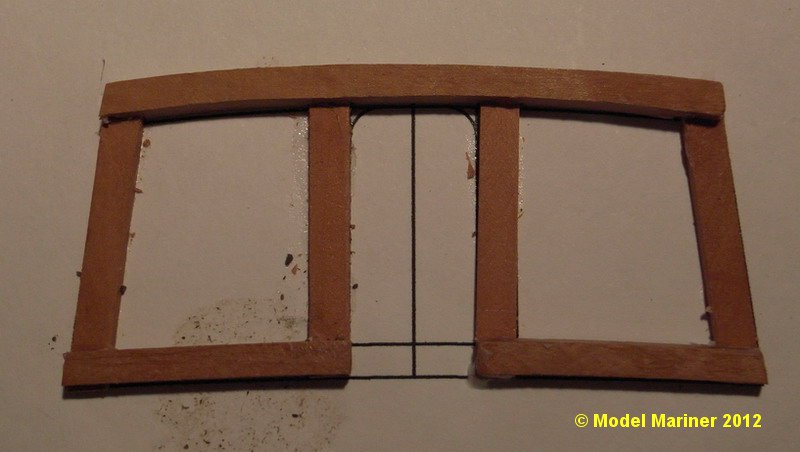
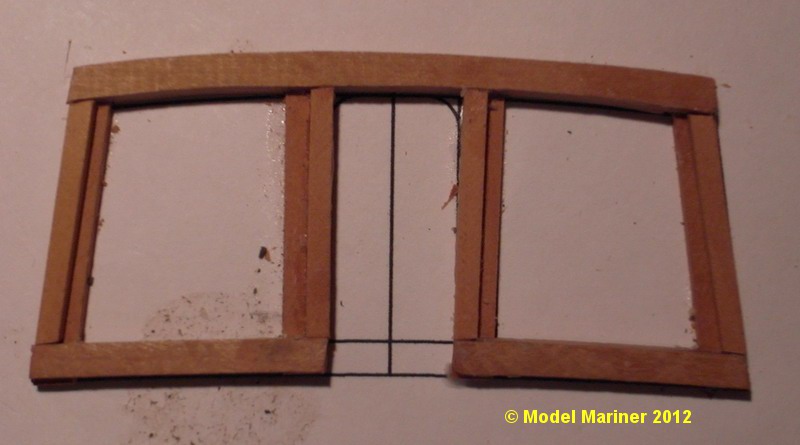
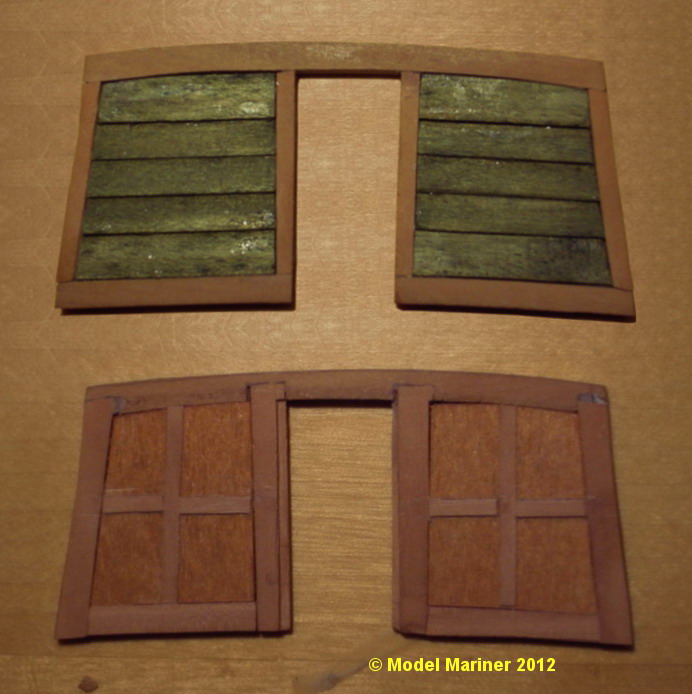
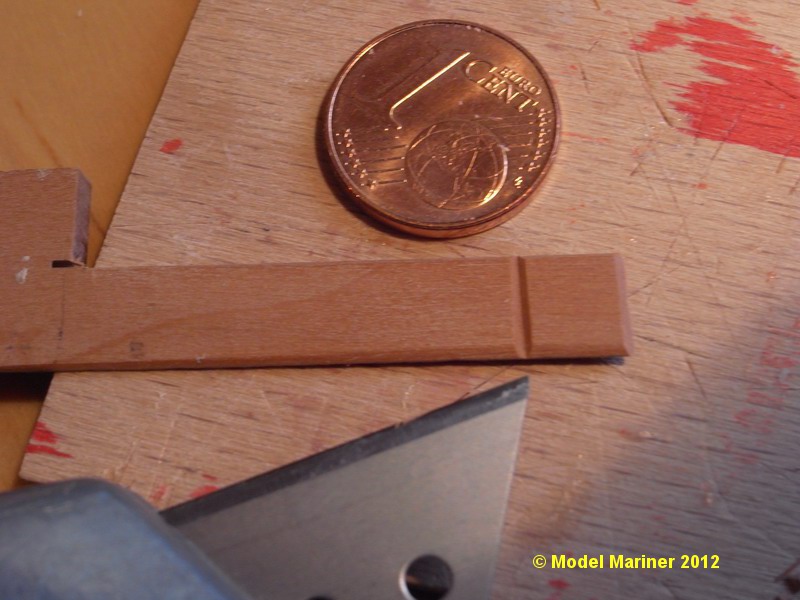
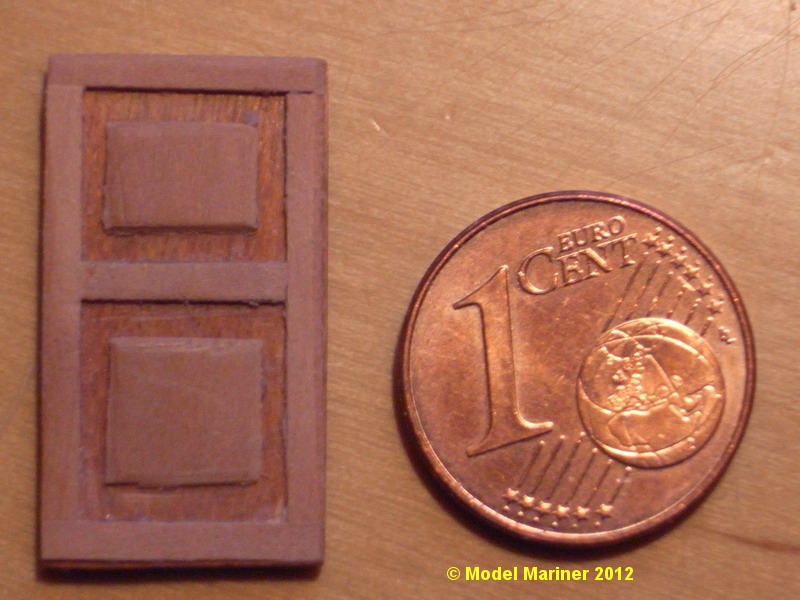
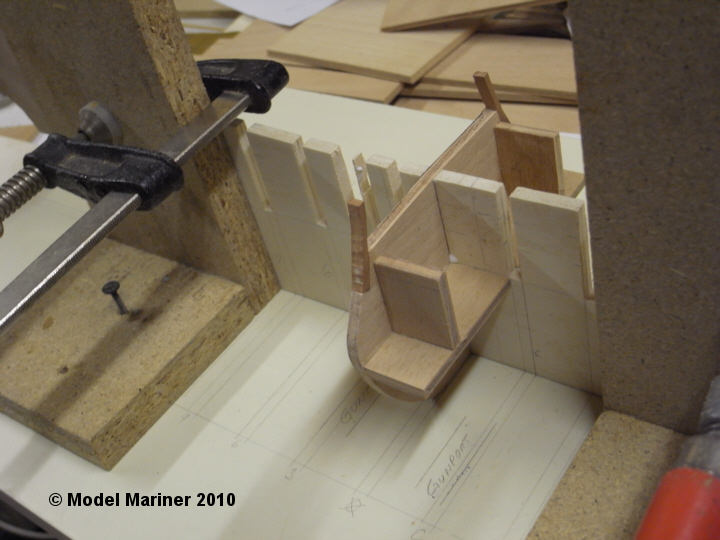
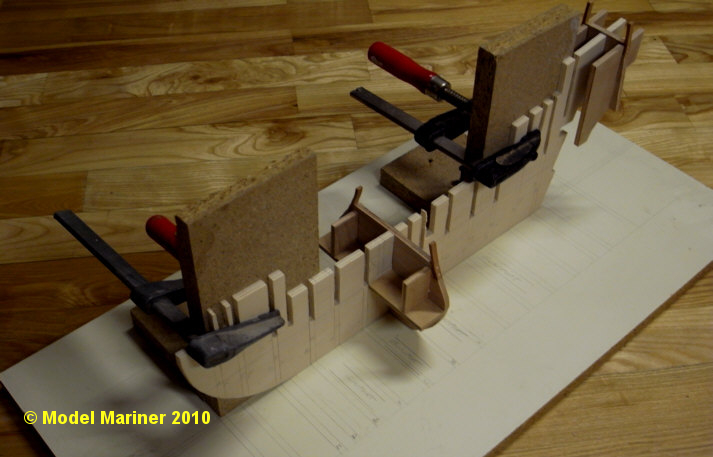
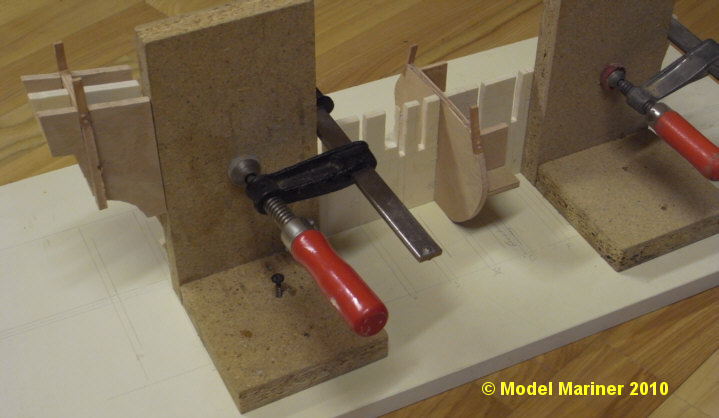
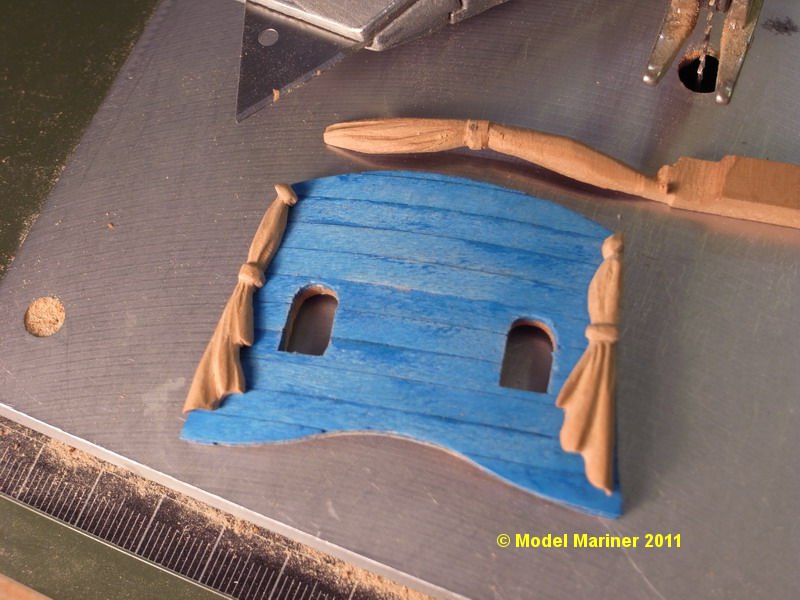
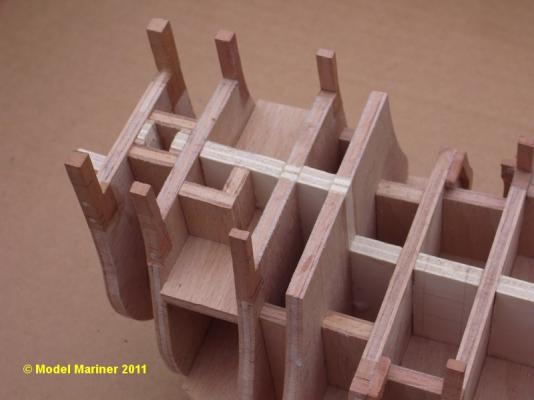
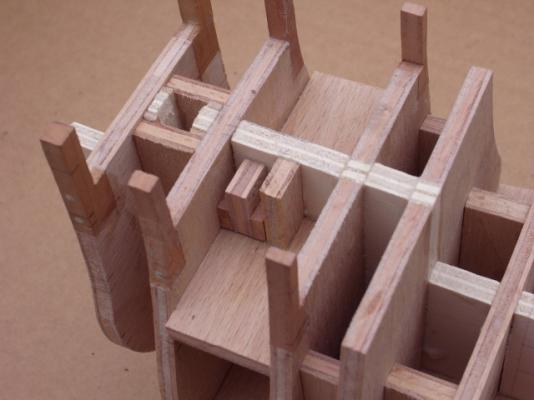
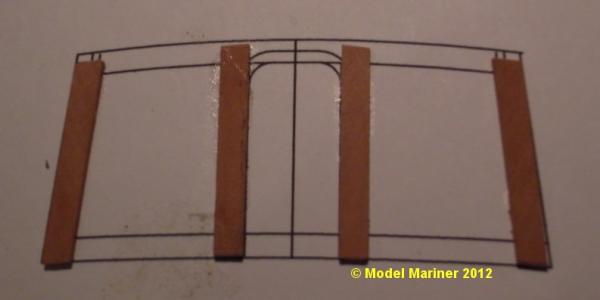
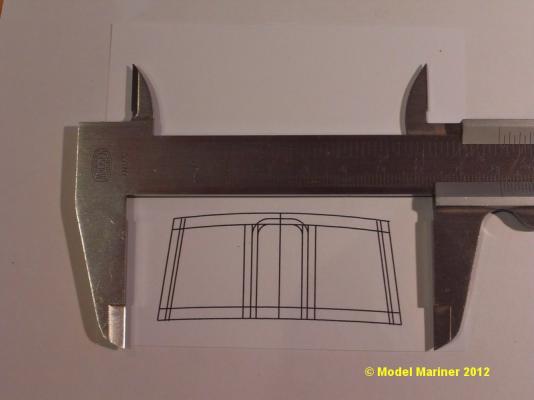
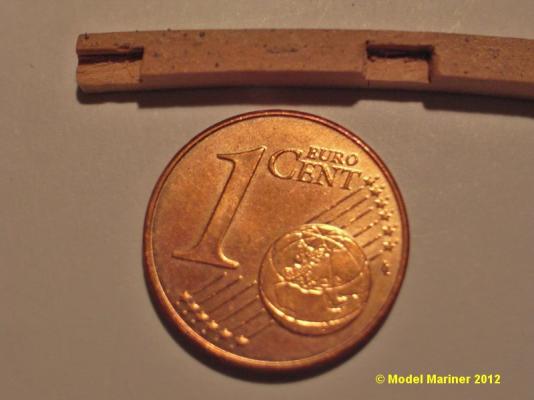
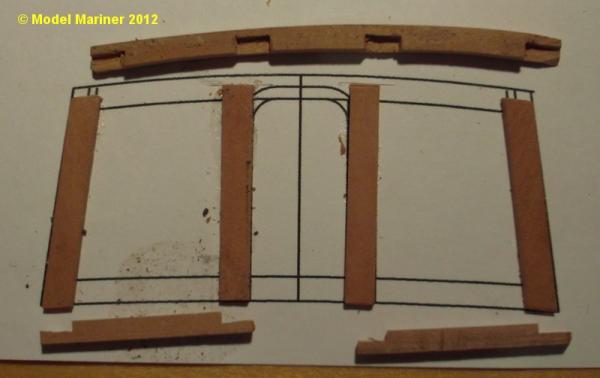
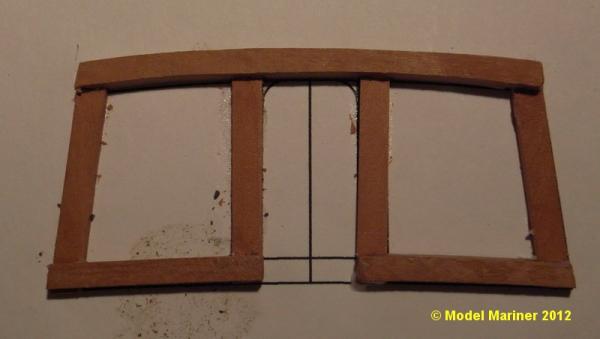
Poop Bulkhead: There is a saying "a picture tells more than a thousand words". So here are a few "thousand words" about making of the poop bulkhead: Klaus


-
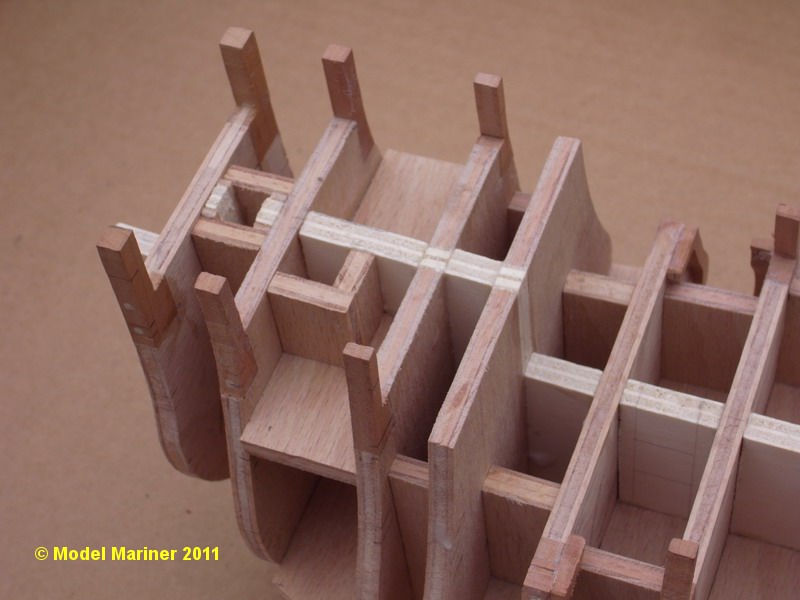
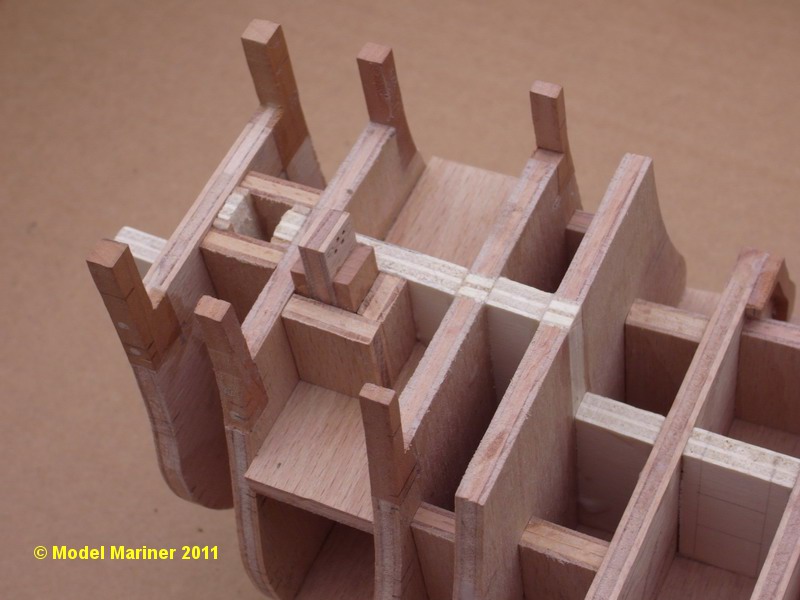
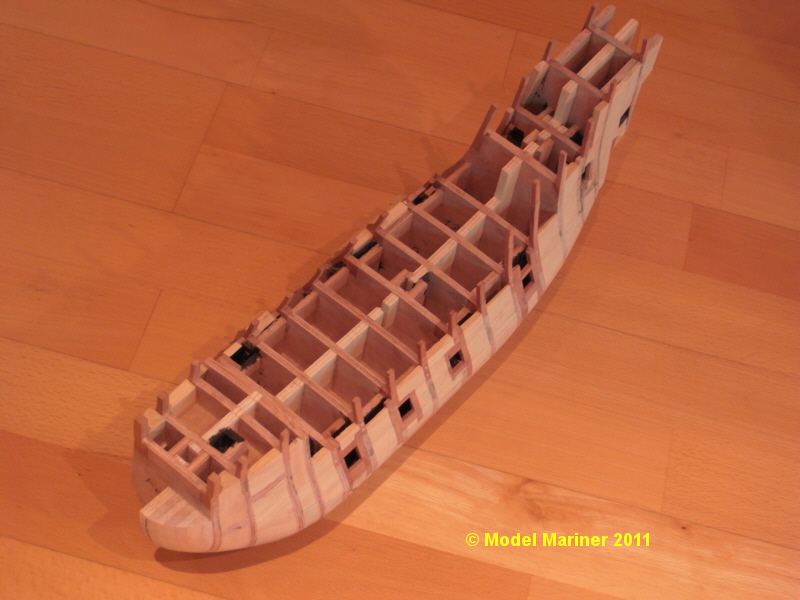
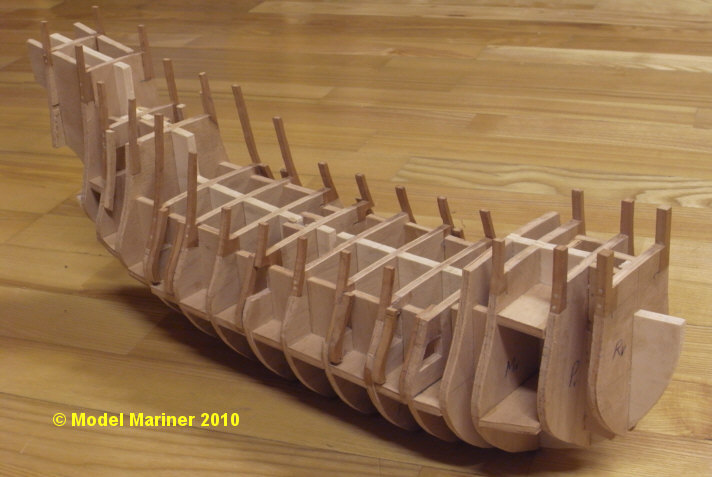
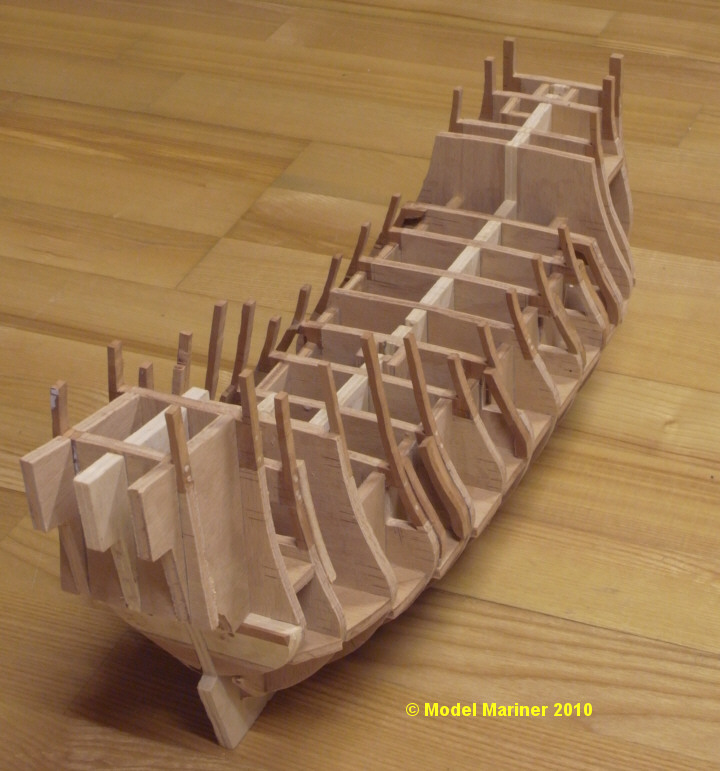
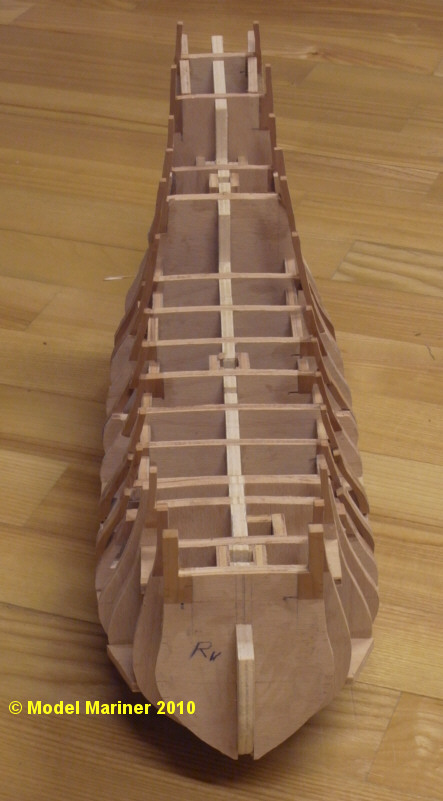
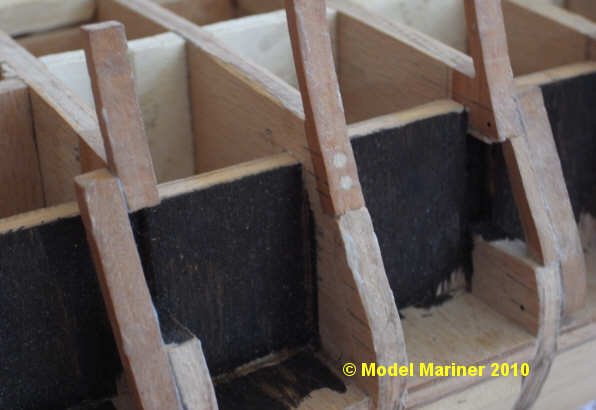
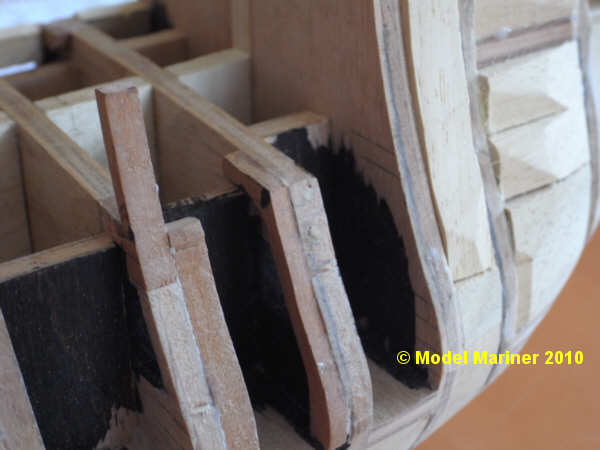
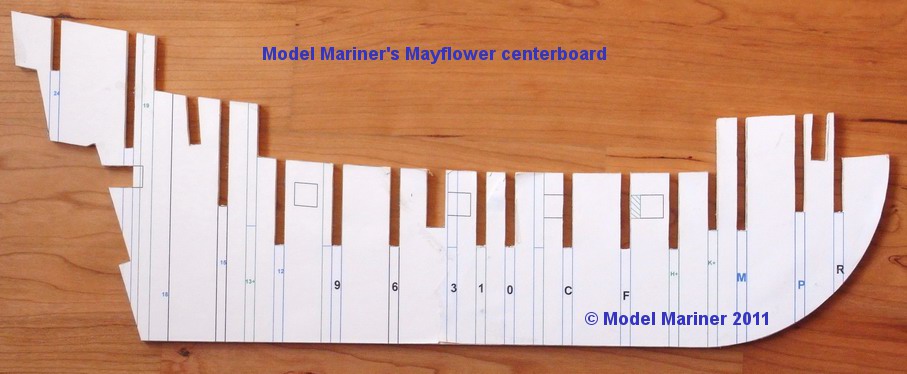
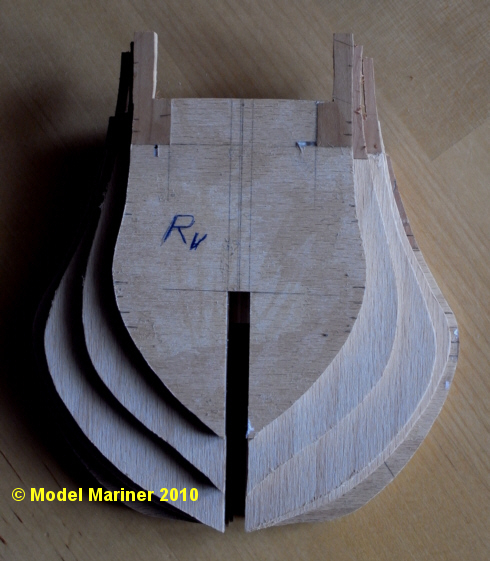
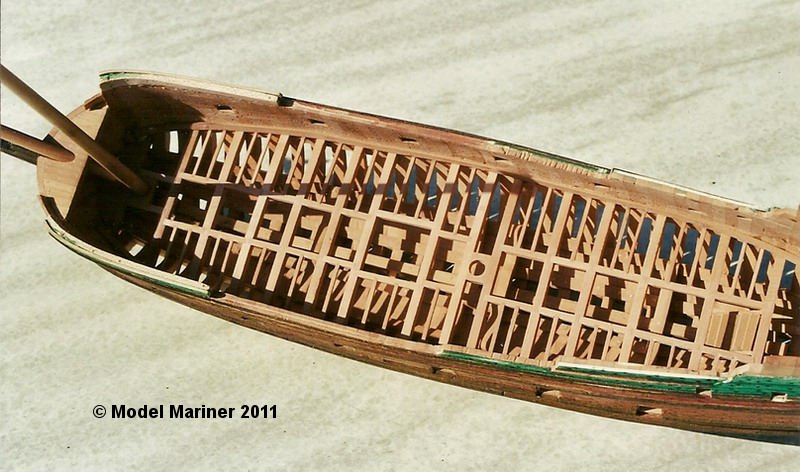
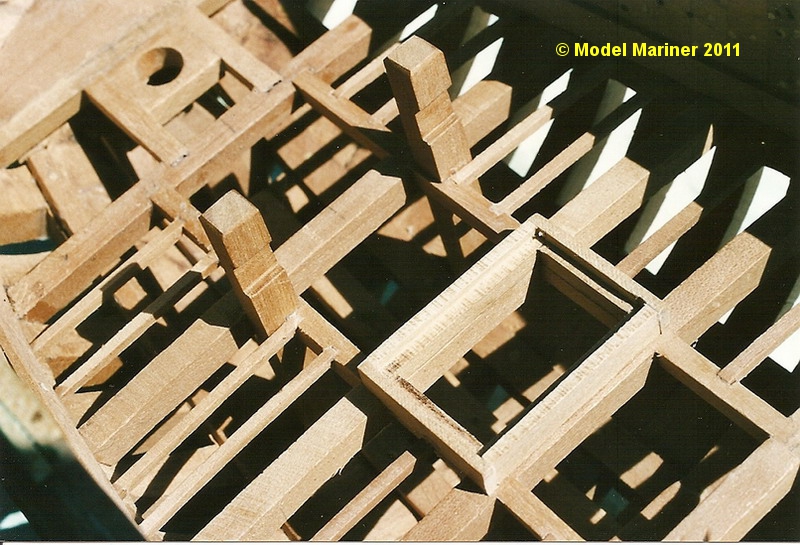
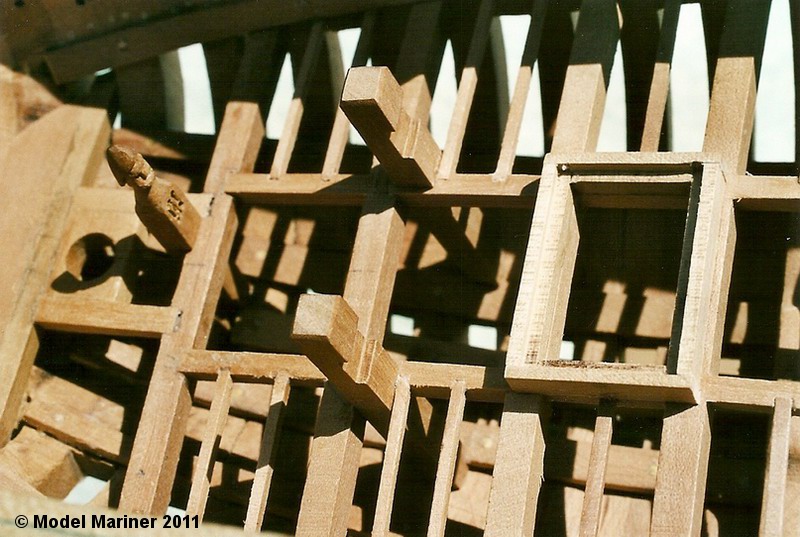
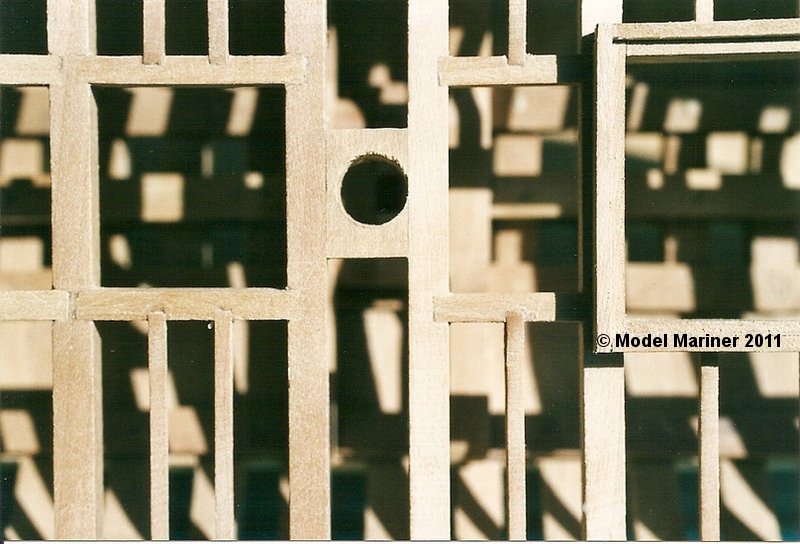
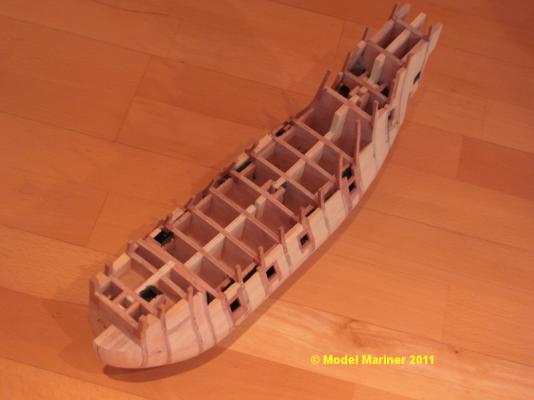
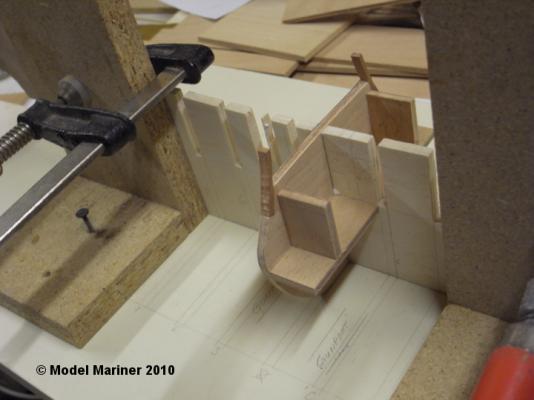
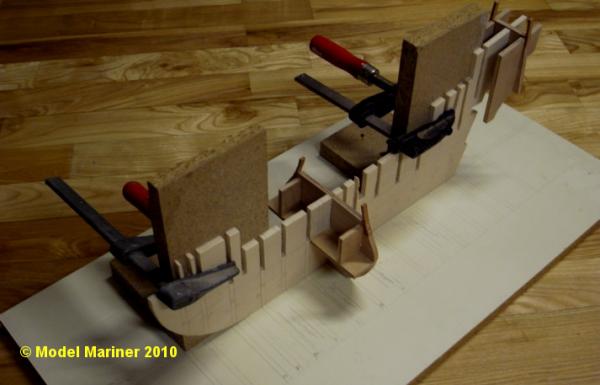
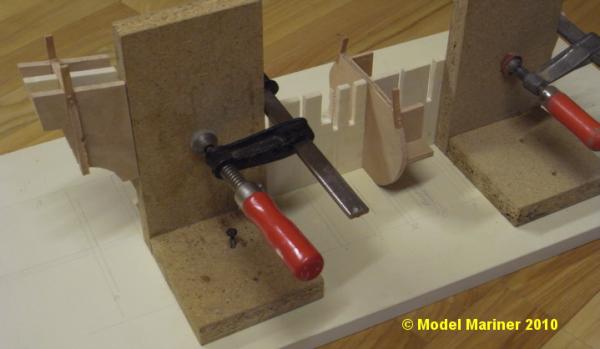
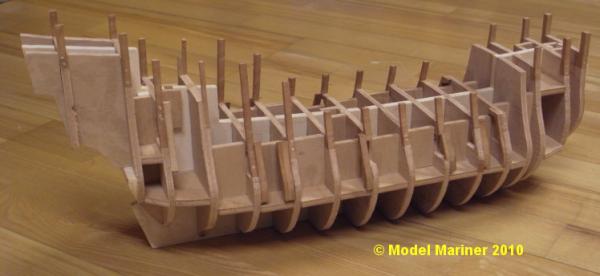
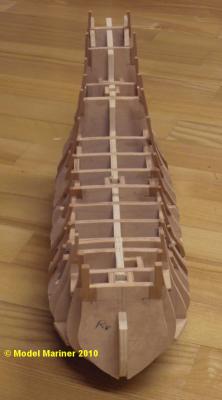
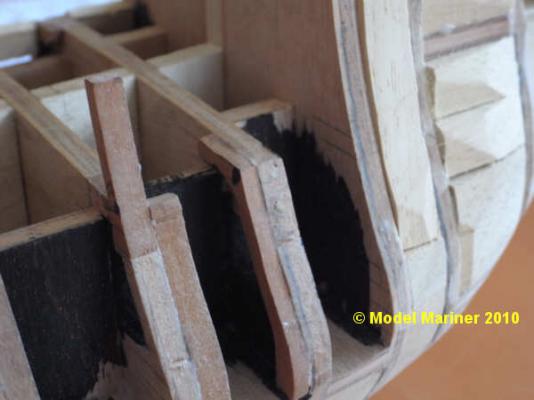
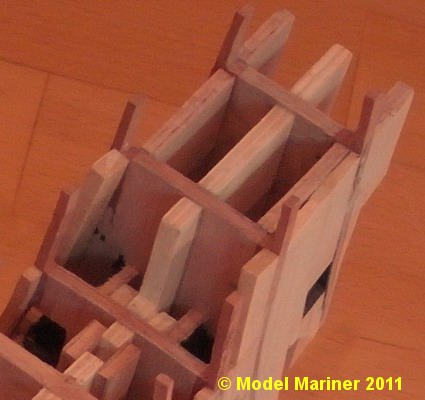
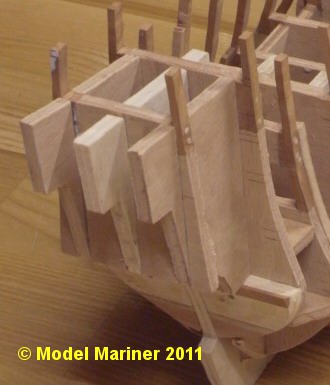
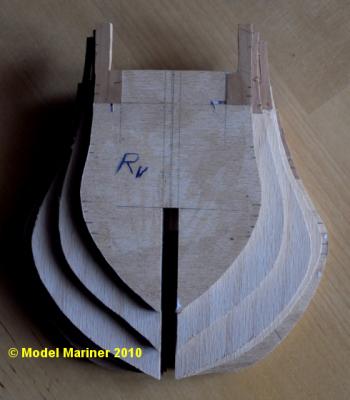
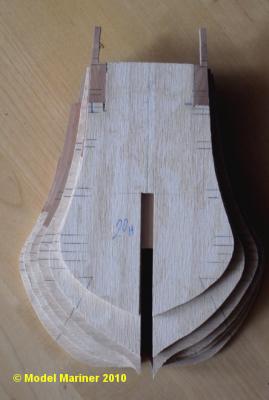
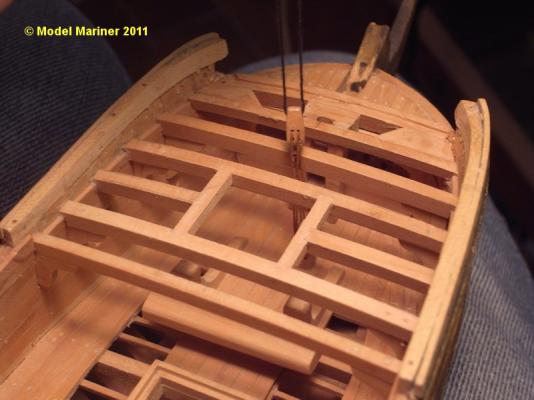
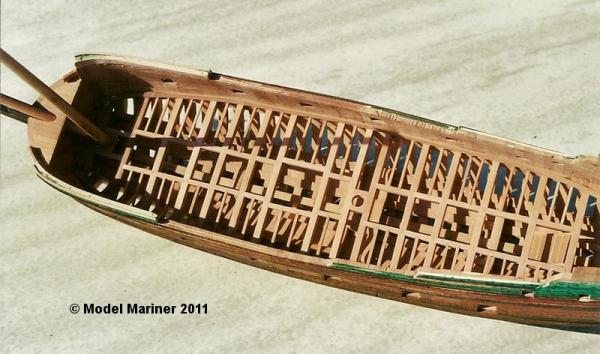
The centerboard does not include the keel, stem and sternpost, these parts will be made from pear and glued on later. It seems it is impossible today to purchase a bit of ply which is absolutely straigtht, my centerboard was also slightly bent. To rectify this I clamped the centerboard to a flat board onto which I had marked the centerline and the bulkhead positions and so forced it to be straight. Between the bulkheads I glued rectangular stiffeners with the result that the centerboard could not bend back and remained absolutely straight. after all bulkheads and stiffeners were glued in I had a straight and very rigid framing: Since the toptimbers and parts of the frames through gun ports will be visible later on I have inserted pieces of pear in the respective positions. The stiffeners in areas behind gunports have been stained black. View of the stern assembly: The helm port is framed with pear and a false transom (also pear) has been glued onto the tuck piece: Klaus


-
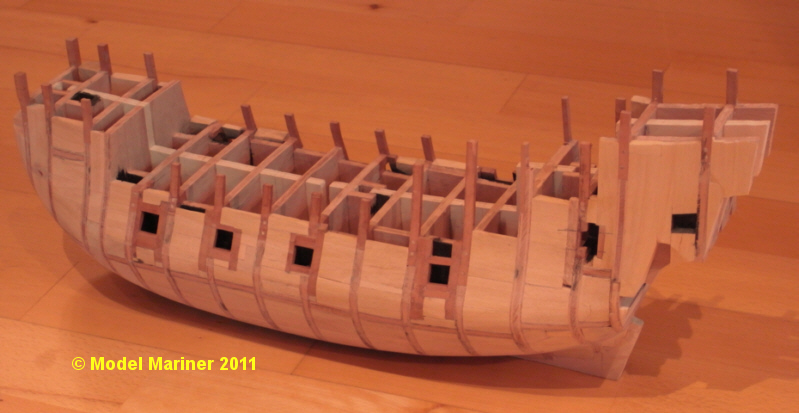
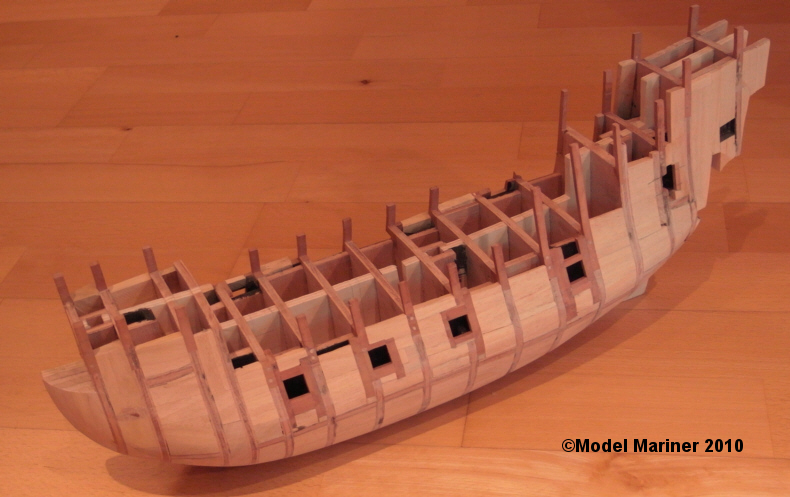
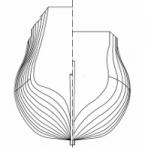
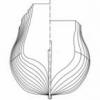
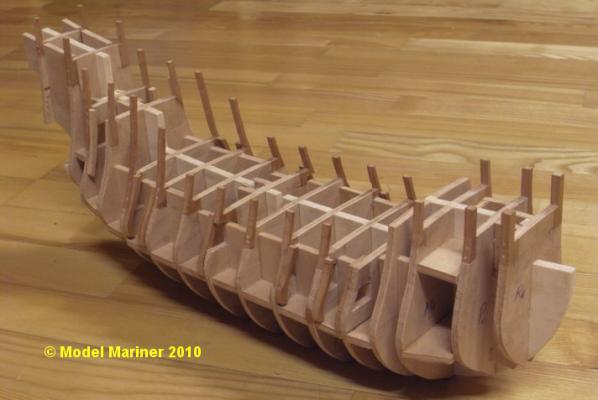
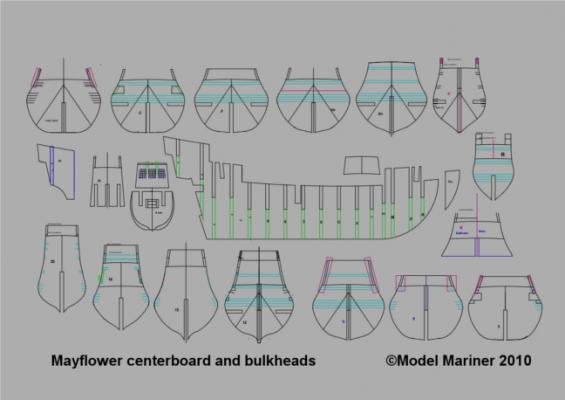
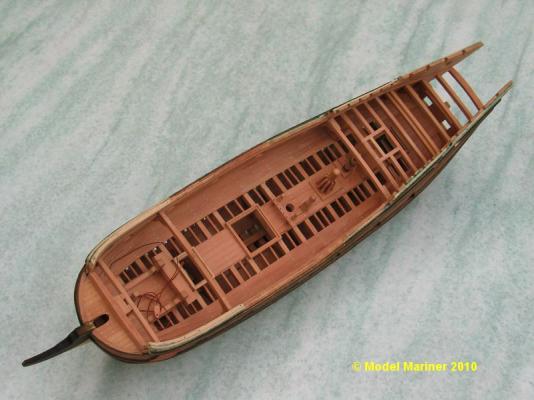
I did not work on my models for nearly one year,so this log also slipped from my mind. But now I have resumed work on both my models and intend to bring also this log up date (in a slighly shorter form then the "lost" log). When I started with the re-construction I had not yet decided if I would build a model in the Navy Board style (for this reason I prepared the drawing with the disposition of Navy Board framing) or a PoB model. Later on I decided to take the second option and to build a fully planked PoB model in scale 1:64. The bulkheads and centerboard will be made from ply, all visible wood will be pear. So as next step I had to draw a plan fort he bulkheads and a centerboard: and with this the work on the model started: Centerboard and bulkheads: the centerboard (6 mm plywood): the bulkheads are also made from 6mm ply, for toptimbers I glued pieces of pear wood on. My aim is that on the finished model no piece of ply should be visible: bulkheads forward of midships: and the bulkheads of the aft part: Klaus

-
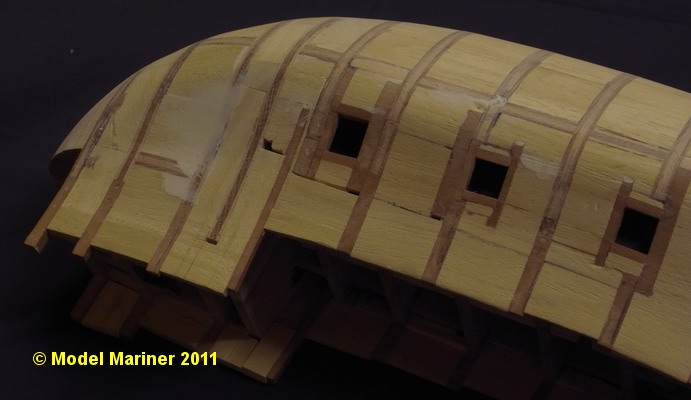
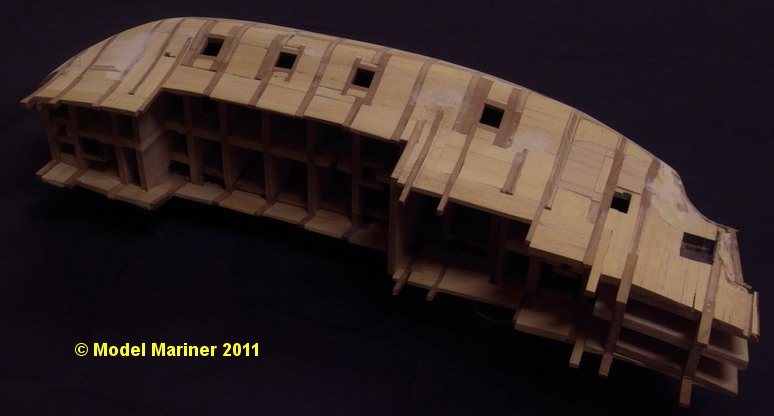
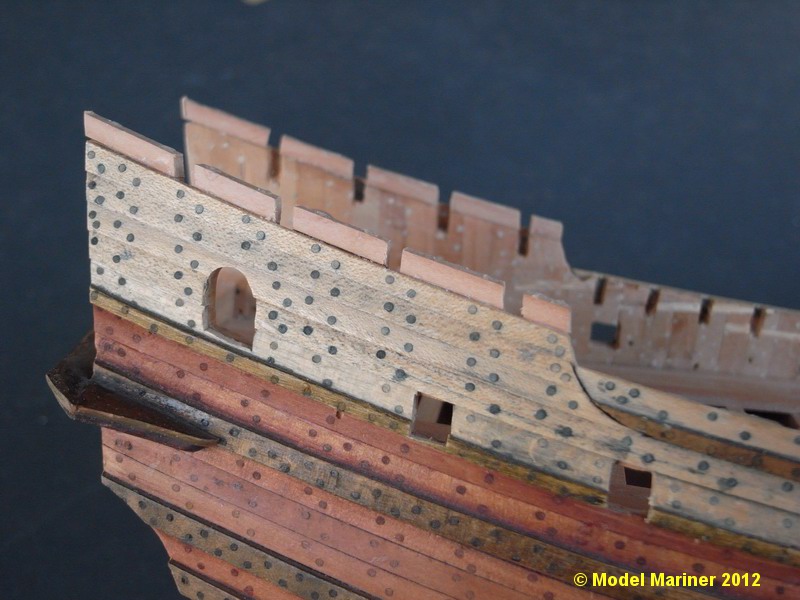
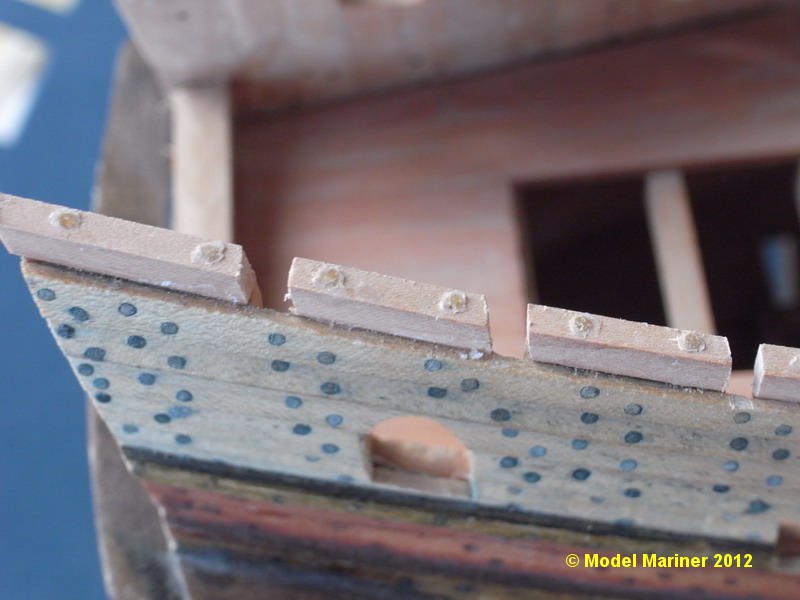
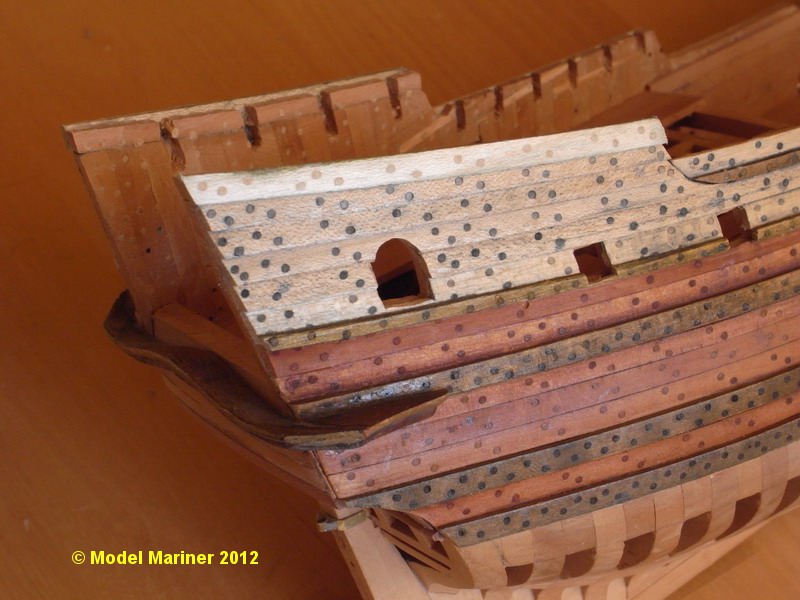
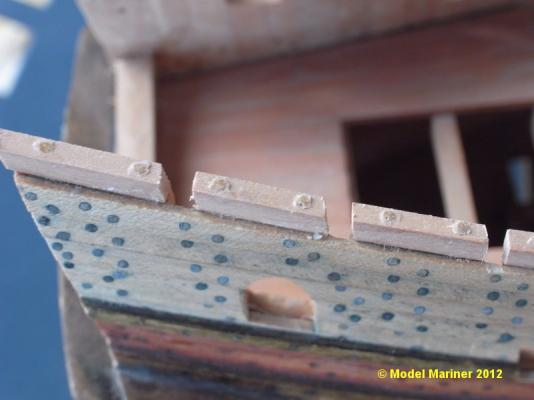
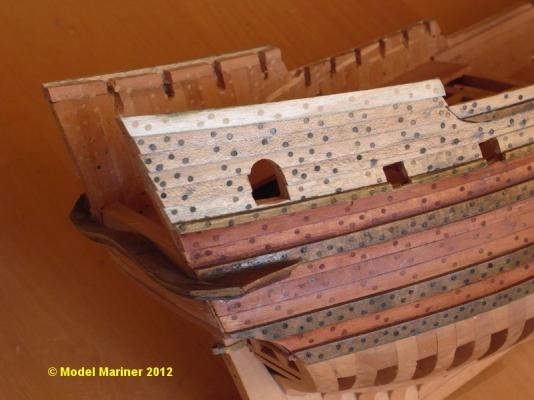
When I took measurements for making the poop bulkhead I discovered that I've cut the toptimbers in the aft part too low for the required height of the great cabin. To remedy this I glued a square piece of wood over the toptimbers which gave me the required additional heigth Into this I cut slots for an extension of the toptimbers and tzhe outside was covered by on additional strake of clinker pkanking Klaus
-
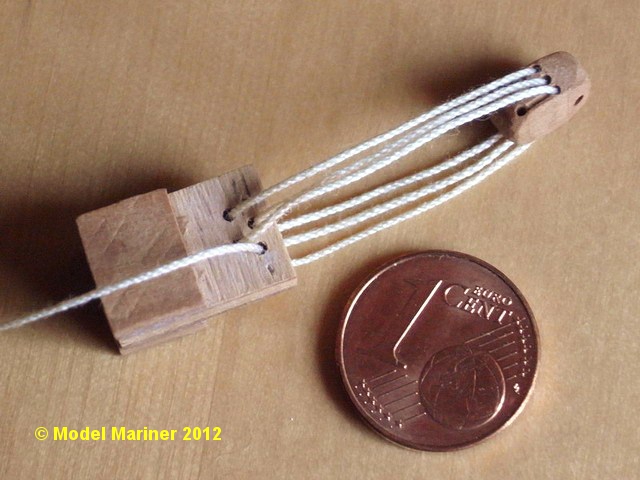
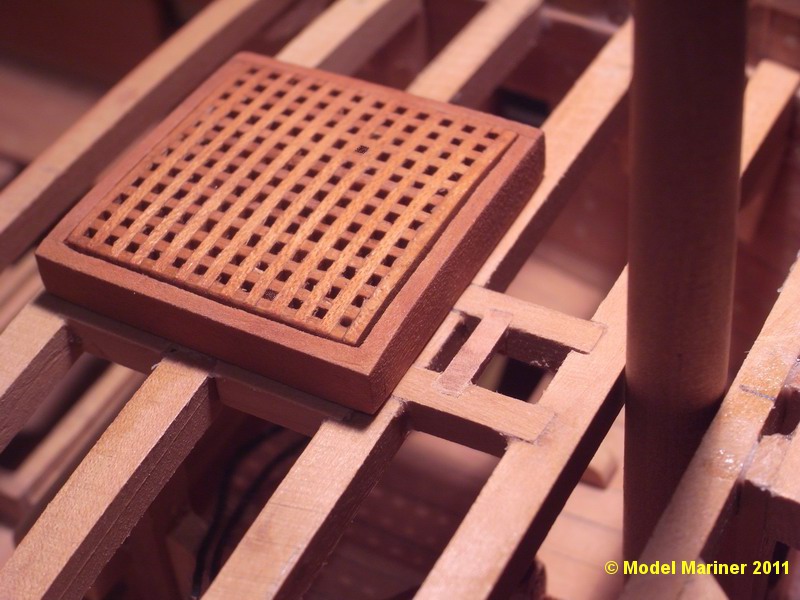
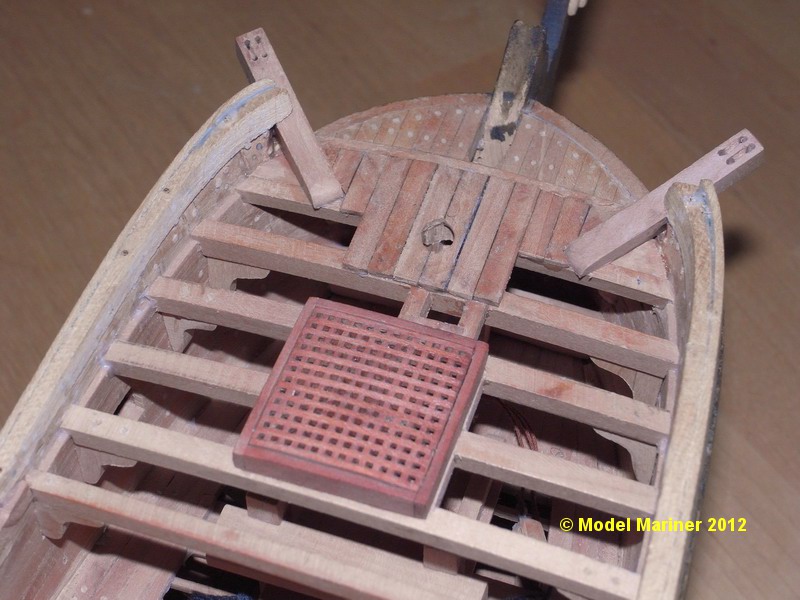
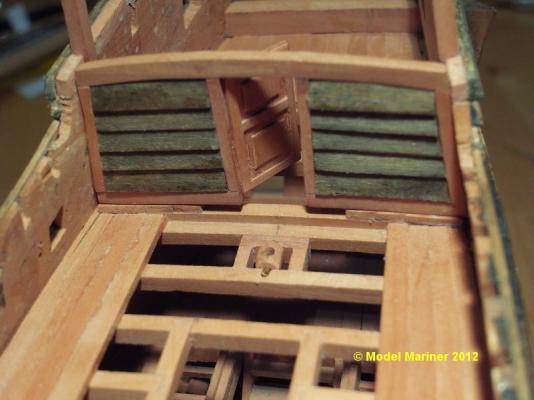
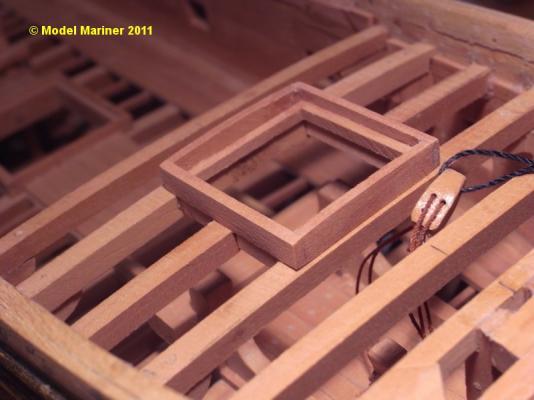
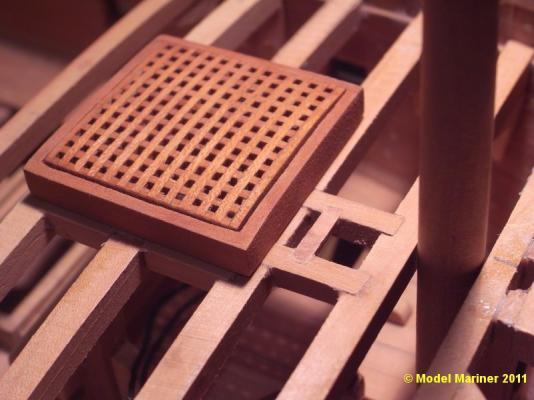
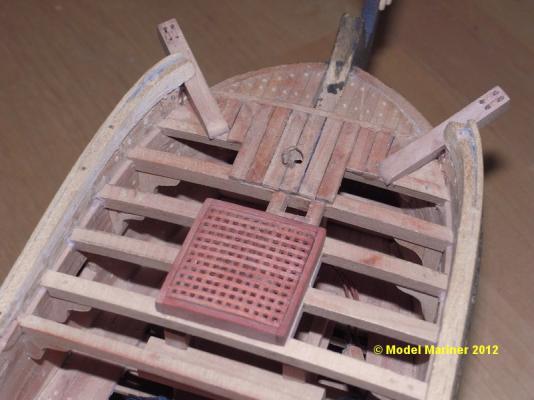
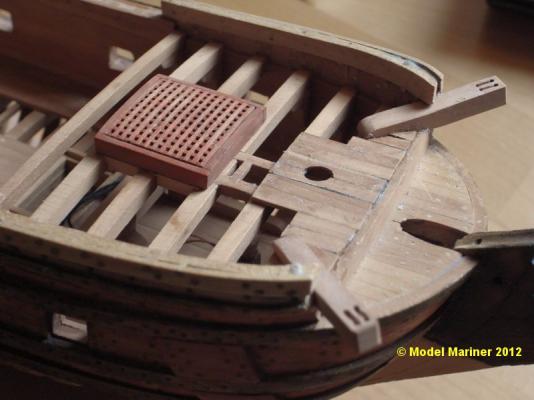
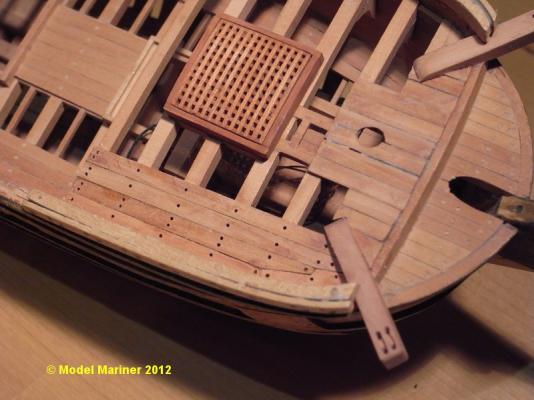
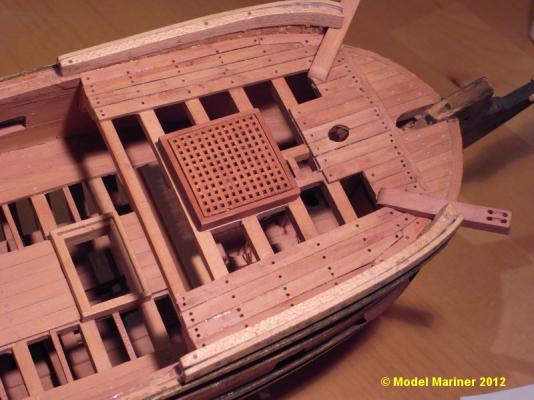
Thanks Nils an Janos Hatch in the forecastle deck built in: The ramshead block and lanyard between block and knight for the fore yard tie has to be rigged already now, because later on it will not be accessible any more. The black thread through the upper part of the block is temporary only to be able to pull the block up through the small opening and will be replaced later by the tie. Grating and opening for the lanyard added: Planking of fore castle deck and catheads added: Klaus

-
I just could not find the time to make an update of my log as intended, whenever I started there was something more urgent to be done and so time went by. Whatever, I will try now to catch up and to bring the log to the current status by reposting the Pictures with only a few words. Steering gear: I intend to make a working steeering gear (don't know yet if I will succeed) the making the whipstaff rowle and the rowle inserted in it's place in the hull: Klaus PS: for whatever reason the inserting of the pictures did not work as it should, I could not place the pics at selected positions in the text. After clicking on "Add to post" no attachment code was visible at the selected positions and all pics were shown after my post

-
I have bought this book mainly because it contains the plans taken off of an original 17th century Navy Board model and apart from Lenox I don't know of any other plans of such a ship available. At the first glance the book and plans made a good Impression, but after some closer looks I was rather disappointed. Gilbert Mc Ardle's craftsmanship is no doubt at a very high level, his model of Sussex looks very good and seems to be an exact (or very close) copy of the original model, at least the exterior. Regarding the decks the model is possibly better than the plans. The first mistake on the model which came to my attention is the dimension (up and down) of the ledges.The ledges of McArdles model have the same thickness as the carlings but should be much thinner - I don't kow if the original model has the same fault, but I doubt it. This would be the only original Navy Board Model I know which would not show the ledges in the correct thickness. One of the first thing I look at when I get ships plans is if the different plans (side view, longitudinal and cross sections, line drawings) match each other. This is not the case in this set of plans. It is certainly not easy to take off the lines of such a model (and the lot of decoration on the outside of the hull makes it even more difficult) and I suppose that McArdle did a fine job on this (I hope at least for evrybody building a model based on the plans that this is so) as far as the exterior is concerned. With the decks shown in the longitudinal section and in the stern view it is a different Story. In the longitudinal section it is not quite clear what the height of the decks is, the way they are shown looks quite strange to me and is not as decks are shown in ship plans of the 18th century (I have never seen an original plan of the 17th century). Sometimes the cross sections of timbers are drawn hashed, sometimes the spaces between them. The height of the decks in comparison to the gun ports is very dubious. This is where the model is presumably better than the plans. McArdle describes in the book, that the has marked the height of the decks clamps by means of a jig a certain distance below the lower sill of the gun ports, so whatever mistake is in the drawing was not transferred to the model. The decks are obvioulsy drawn to high in relation to the gun ports (I suppose that these are correct in the drawings. In midhips the gunports are 25 1/2" above the gun deck (which is 31/2" less then Deane specifies in his Doctrine), this might however be OK but at the aft end the distance is a little bit less then 21". According to the stern view the ports of the stern chasers are only 13" above the deck, which just can not be correct. If we transfer the height of the stern chaser ports to the longitudinal section then we find that the middle of the lower row of ports are at the height of the wing transom, the middle of the upper row of stern ports is exactly at the level of the upper deck! I can only recommend everybody who wants to build a model based on these plans to make a lot of checking before making too much saw dust. Klaus
-
What praise can I add which has not been stated by others, this is just brilliant!!! Klaus
- 662 replies
-
- 1
-

-
- bonhomme richard
- frigate
- (and 1 more)
-
Thanks for the birthday wishes and kind words folks . An update will follow soon Cheers Klaus
-
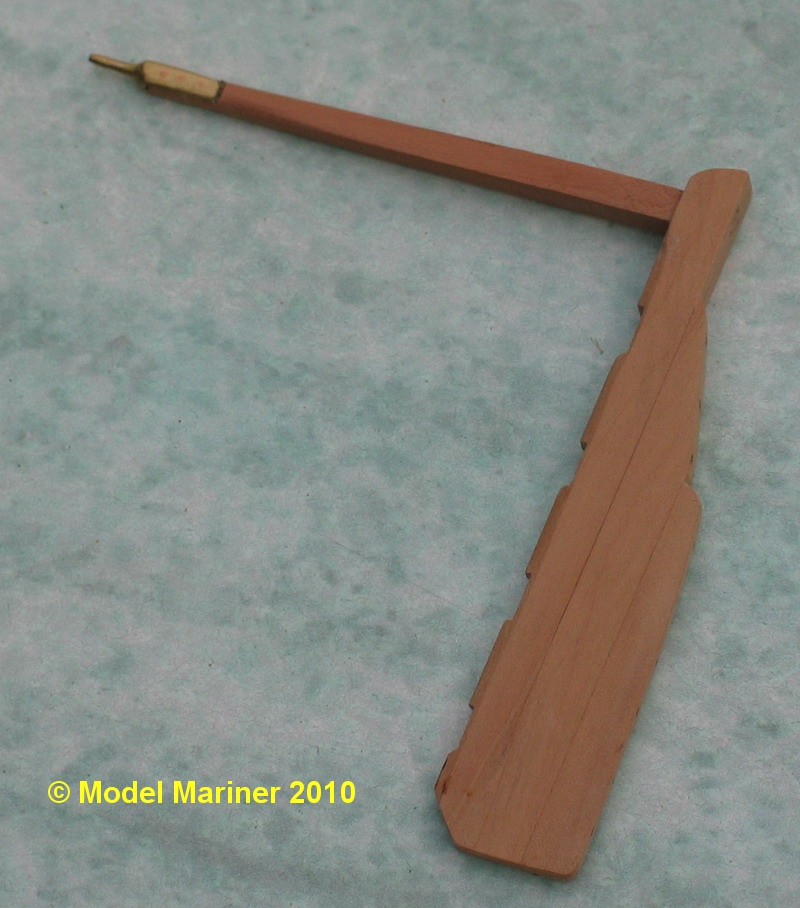
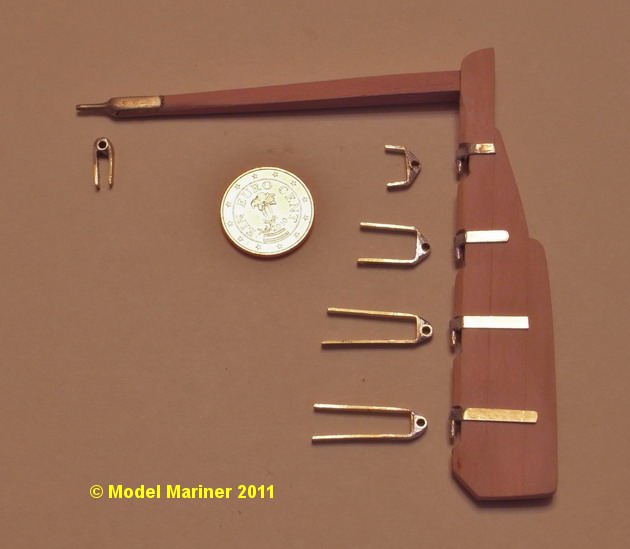
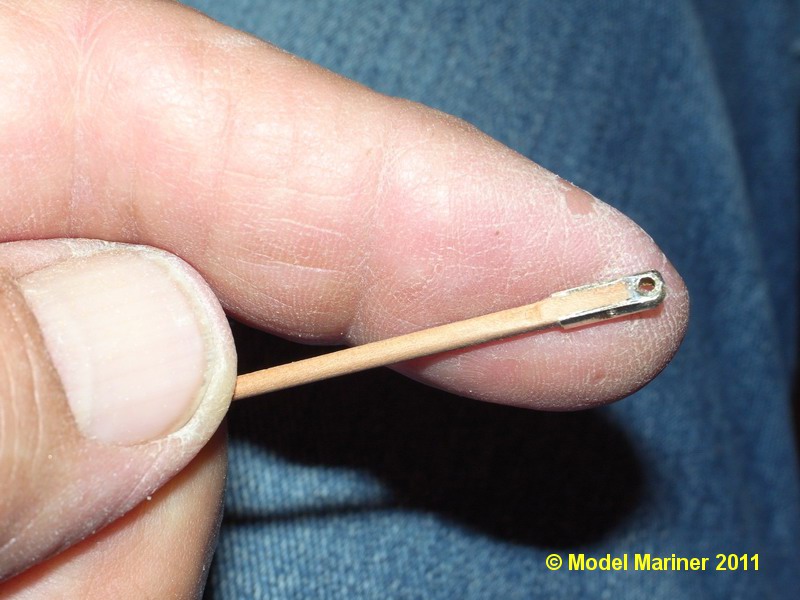
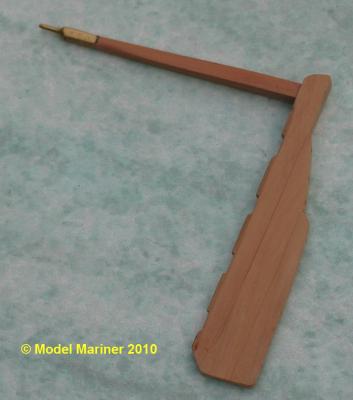
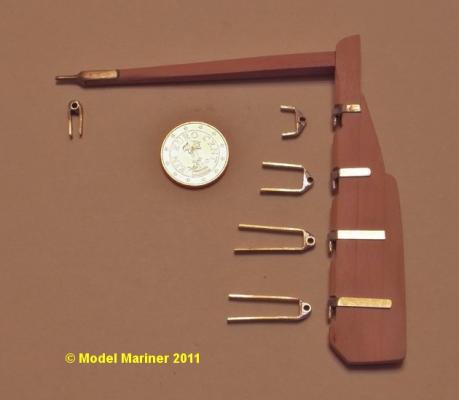
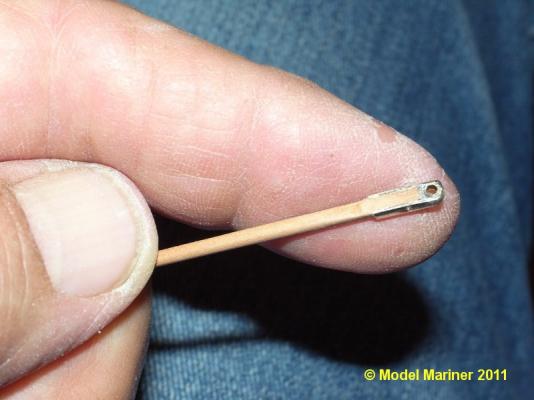
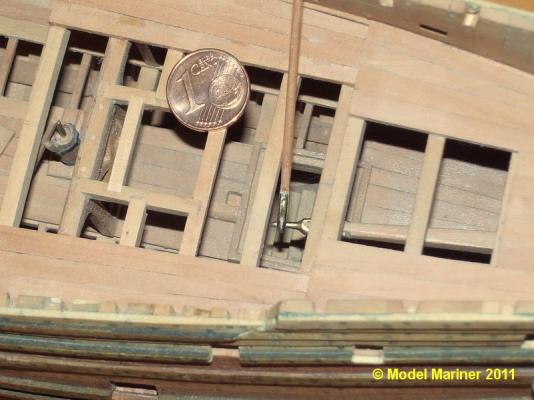
The steering arrangement: My intention is to make a working steering arrangement (moveable rudder and whipstaff - I hope I will succed), but in the end I will however fix the rudder in the midship position by means of a drop of super glue The rudder is made from 3 pieces of timber bolted (and glued) together, the gooseneck (made of brass) is bolted to the tiller by means of three thin copper bolts: The pintles and gudgeons are made from a thin strip of brass onto which I have soldered a piece of tube respectively wire to form the hinges: This will become the whipstaff (still a little bit too thick and too long), the metal fitting with the eye is bolted twice to the wood with thin brass bolts: The rudder is fitted temporarily to the model and the and the whipstaff (still much too long) is inserted the next pictures show the eye of the whipstaff fitted over the gooseneck of the tiller: The step of the mizzen mast is visible between the beams forward of the tiller: Next step will be to make and fit the rowle into it's scuttle Klaus

-
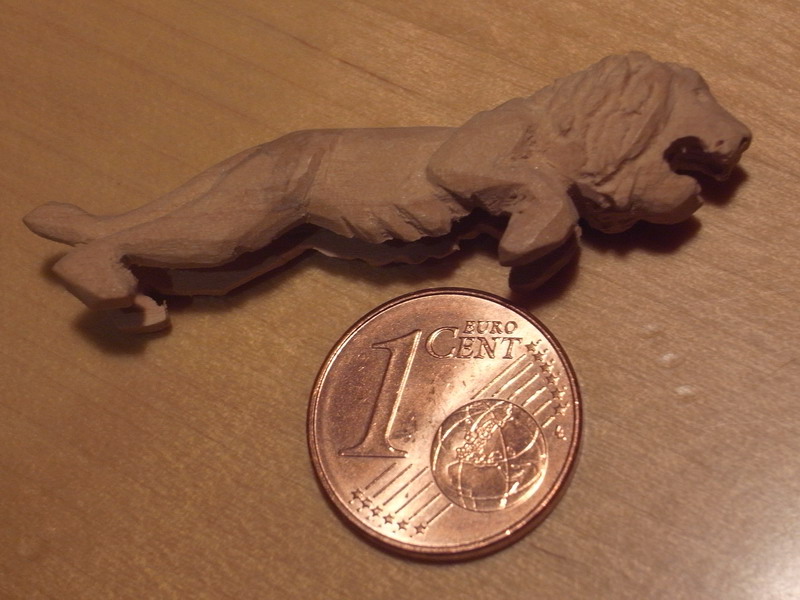
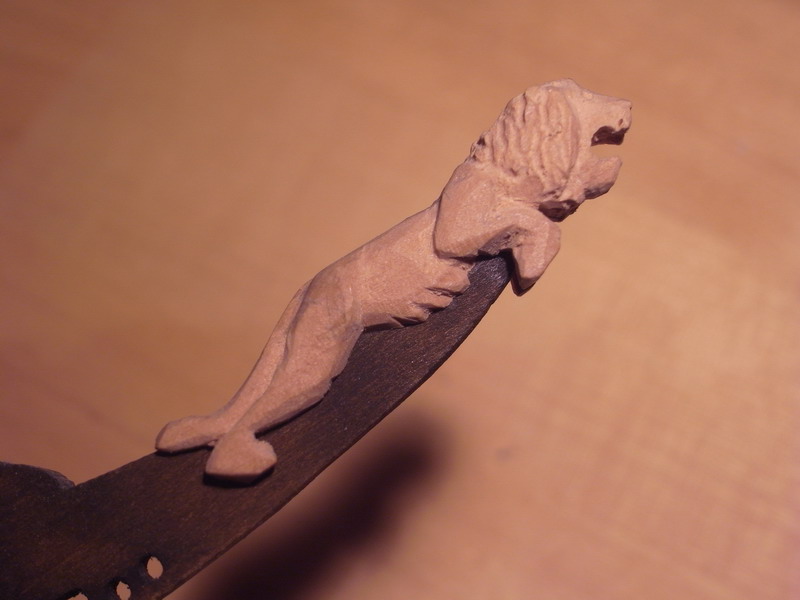
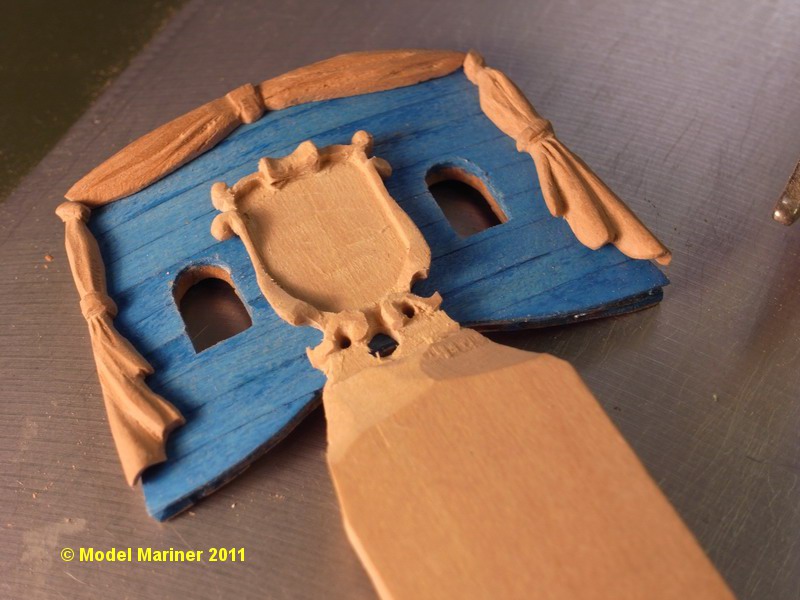
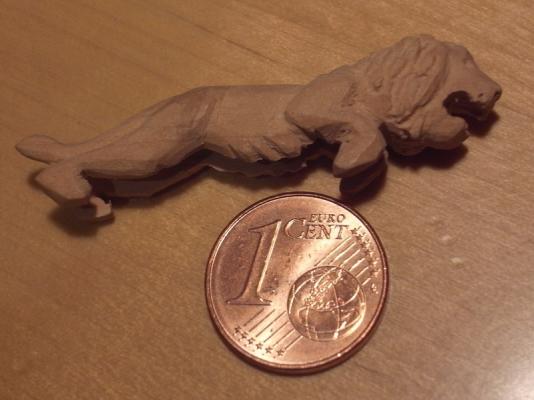
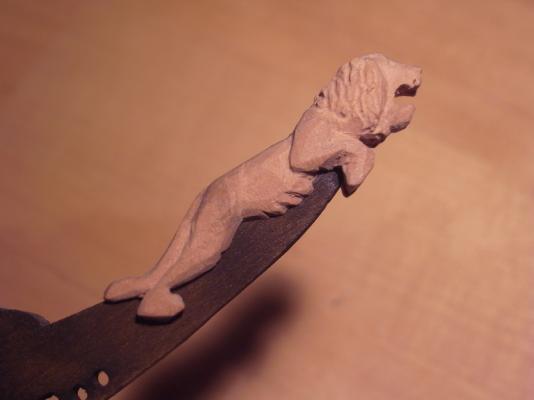
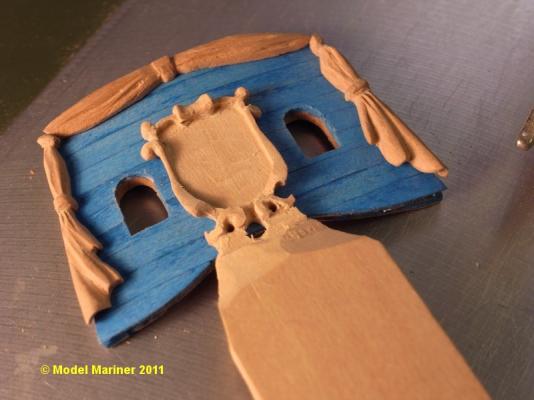
The central area of the coat of arms has been cut out by means of a small milling cutter set to a depth of half the thickness of the wood. For the coat of arms I have used maple, the curtains as well as the lion are carved from pear Since you are buidling (of have built) also the Berlin, what about a build log of at least sharing some pictures of your model? Klaus
-
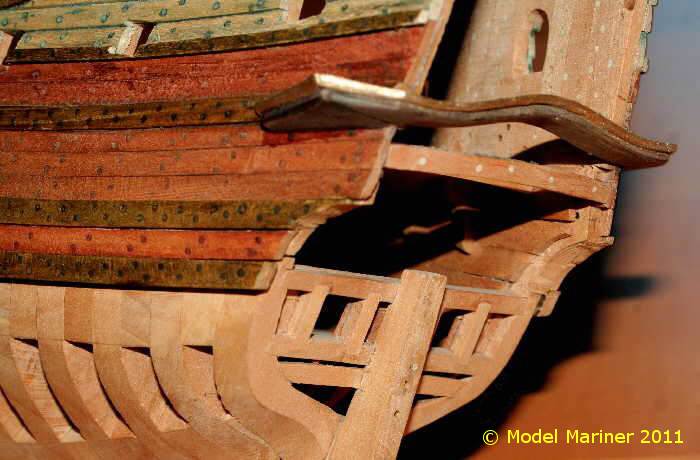
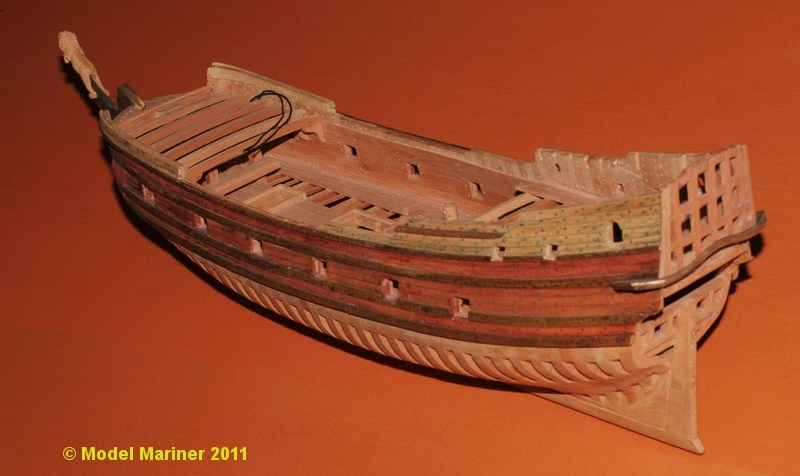
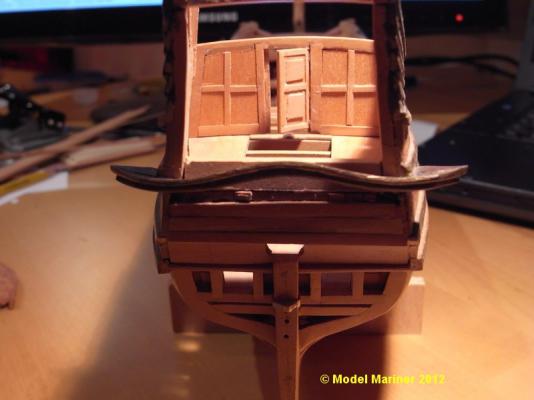
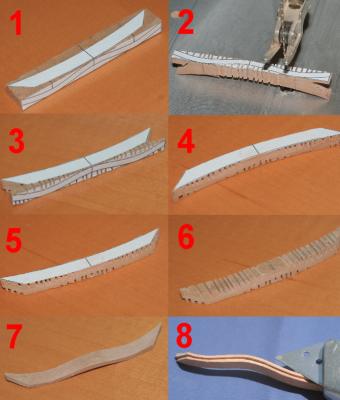
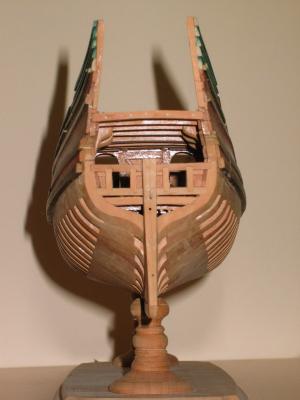
Thanks for the kind words folks A view through the open stern to the bulkhead on the quarter deck: this shows how I made the curved timber (I don't know how it is called in English) between the upper and lower stern which is typical for Dutch built ships: The upper stern has been planked and I have started to carve the decoration: Klaus


-
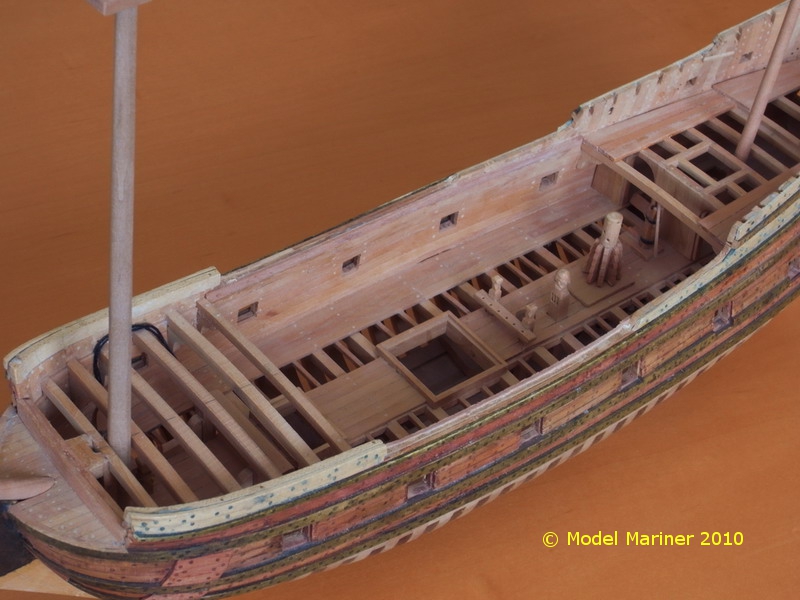
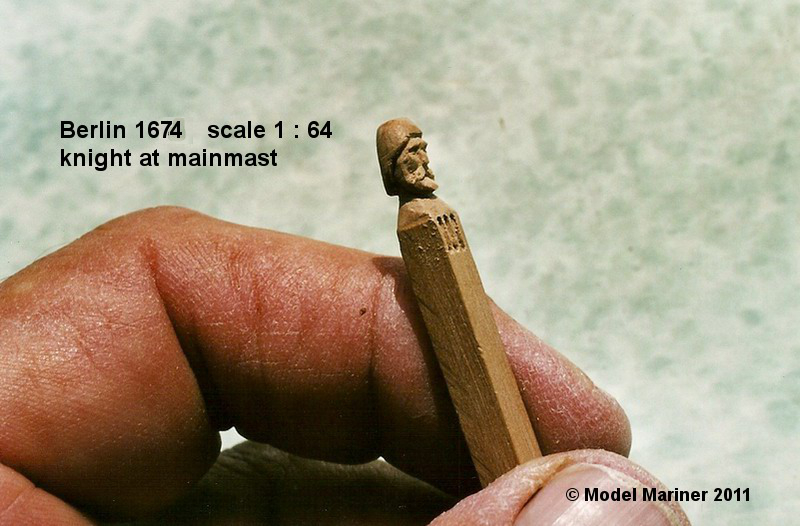
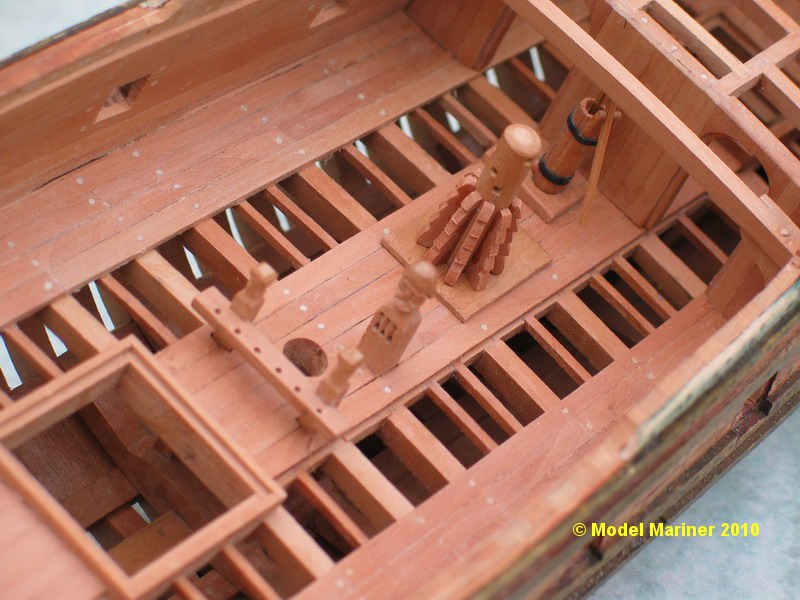
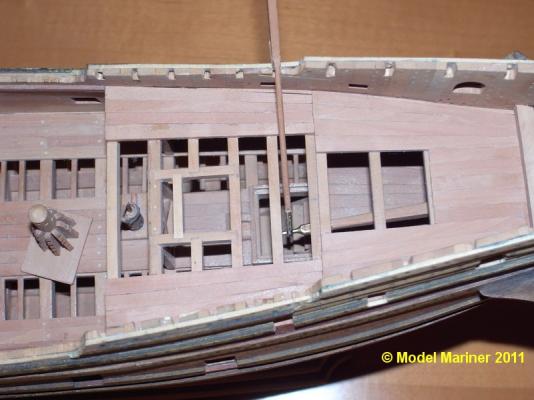
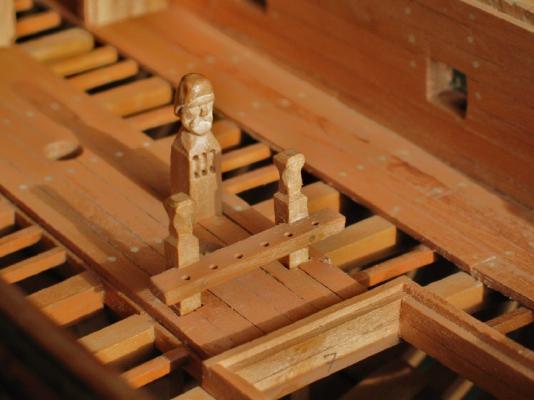
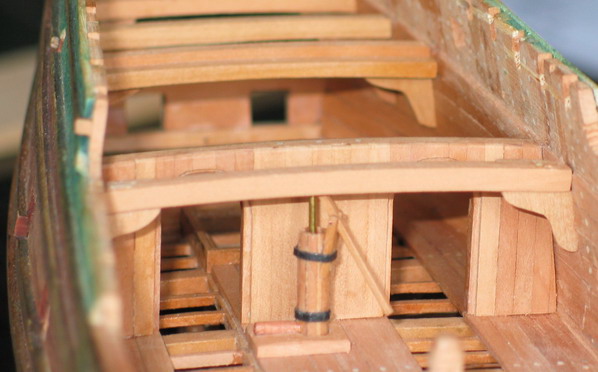
the following picture (which I should have posted earlier) shows the bulkhead below the quarterdeck and the elm tree pump: The knight at the mainmast and the main topsail bitts: All beams of the forecastle deck are in (two beams have to be cut out for a hatch) and the quarterdeck is planked: the framing of the upper stern is temporarely fitted: Klaus


-
Thanks for the answers folks Klaus
-
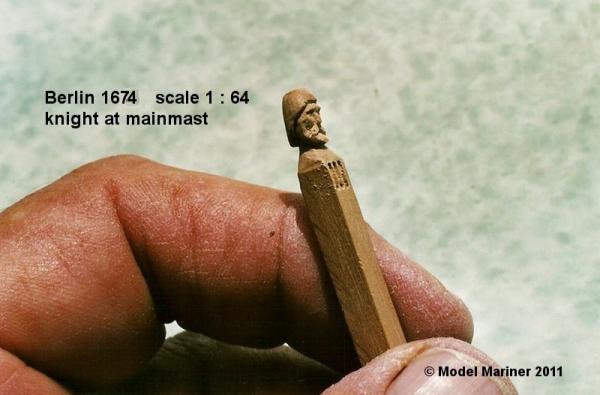
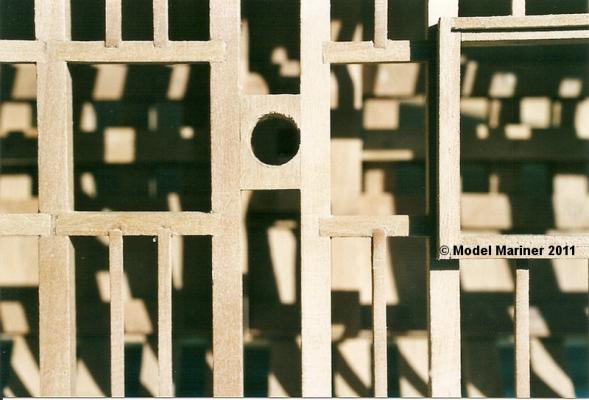
Thanks folks The knight at the main mast is carved: I cheated a little bit when making the mortises for the carlings and ledges: I made the cut outs in the beams only triangular, this is much easier and the visible result after putting in the carlings and ledges is just the same: the main deck is planked, bitts, knights, capstan and elm tree pump as well as the bulkhead below the quarter deck are built in. One of the riders is visible through the main hatch: Most of the deck beams of the quarter deck and the first two of the forcastle deck beams are installed: Klaus

-
I have bought a bottle of Birchwood Brass Black Metal Finish http://www.birchwoodcasey.com/Finishing/FinishingDetails.aspx?ProductID=d66c82b1-292e-4753-84d7-290d6728fd8f When I dipped a piece of brass wire into the solution it turned completely black within seconds (accoridng to the instruction on the bottle this should take up to a minute). For some parts the blackening effect is just what I want but for other parts I want to achieve a lighter or darker brown color. Does any one know what I can use as thinner? Water or some special thinner? Klaus
-
seems your build log is up to date again Ihan! Beautiful work!!! Klaus
-
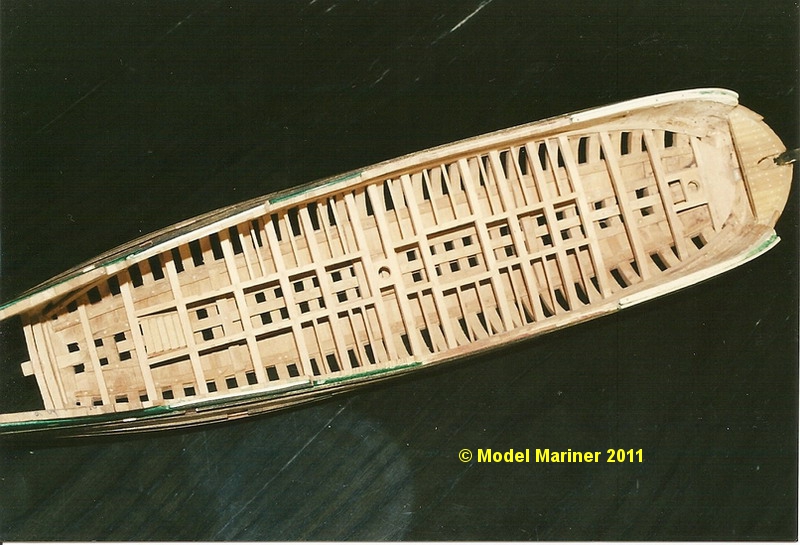
the majority of the deckbeams is built in and I have started to put in the carlings and ledges: forward part of the maindeck with view to the fore mast partner, fore Knight, riding bitts (cross beam not yet installed) and the hatch for the anchor cable: main mast partner and main hatch: aft part of the main deck with a view to a ladder down to the hold, the keelson is visible just forward of the ladder: All these pictures are scans of relatively small photographs (taken long before I had a digital camera), therefore the quality is not that good Klaus


-
... and a master model shipwright as well What is the scale of this model? Klaus
- 662 replies
-
- 1
-
-
- bonhomme richard
- frigate
- (and 1 more)
-
Of course Amazon.com is available in Europe and they offer some (but not all) Seawatch books. I just made a test and put some books into my cart (without finally placing the order) with following results: Swan class volume III price Seawatch: $ 65.-- plus $ 18.-- for shipping Amazon price: $ 126,22 plus $ 23.95 for shipping and handling Building a Navby Board Model of HMS Sussex price Seawatch: $ 75.-- plus $ 18.-- for shipping Amazon price: $ 340,41 plus $ 16.95 for shipping and handling and in both cases after the end price there is a note saying: "please note that your country may charge import duries and taces and fees that may you may have to pay ahead of delivery" There were also 2 offers for volume III of the Swan class books for "only" $ 78,90 (excluding shipping) but these sellers don't ship to Austria. So much about the Amazon option Klaus
-
There will be a lot more pictures to come as the log goes on and some of them will show also the klinker planking in more dteail Klaus
-
Well, it's obvious that these books do not sell like Harry Potter but I don't see why they (at least some of them) should not sell as good as for instant the books of Conway's "Anatomy of the ship" series if promoted accordingly. Klaus
-
I appreciate that there has to be enough money to pay the printer's bill and that there should also be a profit in it. The problem with the end price for European customers is aggravated by the fact that custom duties are not only charged for the goods but also for the relatively high shipping cost. Maybe I am completely wrong, but I think if you get somebody to print and sell these books in Europe to a price (including an appropriate profit for Seawach books) which is reasonable for the publisher as well as for the customer) the safing in shipping and customs duty (including customs duty for shipping) would be more than enough to cover a profit for this publisher and Seawatch book and to bring a considerable advantage for European customers. I suppose also that a lot more books would be sold in Europe. I am obviously not the only European who would like to buy one or the other of these awesome books but is reluctant to do so because of the end high price (within only a couple of hours after I mentioned this idea yesterday for the first time there were already several people who were in agreement). I could imagine that companies like Conway Maritime Press of Chatham Publishing would be interested in acting as European partner for Seawacht books. Just a thought, but possibly worth to follow ....... Sorry Chuck to misuse your log! Klaus