HakeZou
-
Posts
325 -
Joined
-
Last visited
Content Type
Profiles
Forums
Gallery
Events
Everything posted by HakeZou
-
Oh yes, there's a lot of sanding to do still, Keith! I just about have the rough shape on one side, but there's a lot more to do before I can actually call it done. The plans in the Betts book are definitely helpful for the shape of the bumpers. As near as I can tell, the cap rails aren't shown in those plans, which gives a clearer view...unlike the plans from OcCre which include the cap rails.
-
Wow, Daniel, I'm just now getting caught up on your log. Beautiful work! The sails are looking great!
-
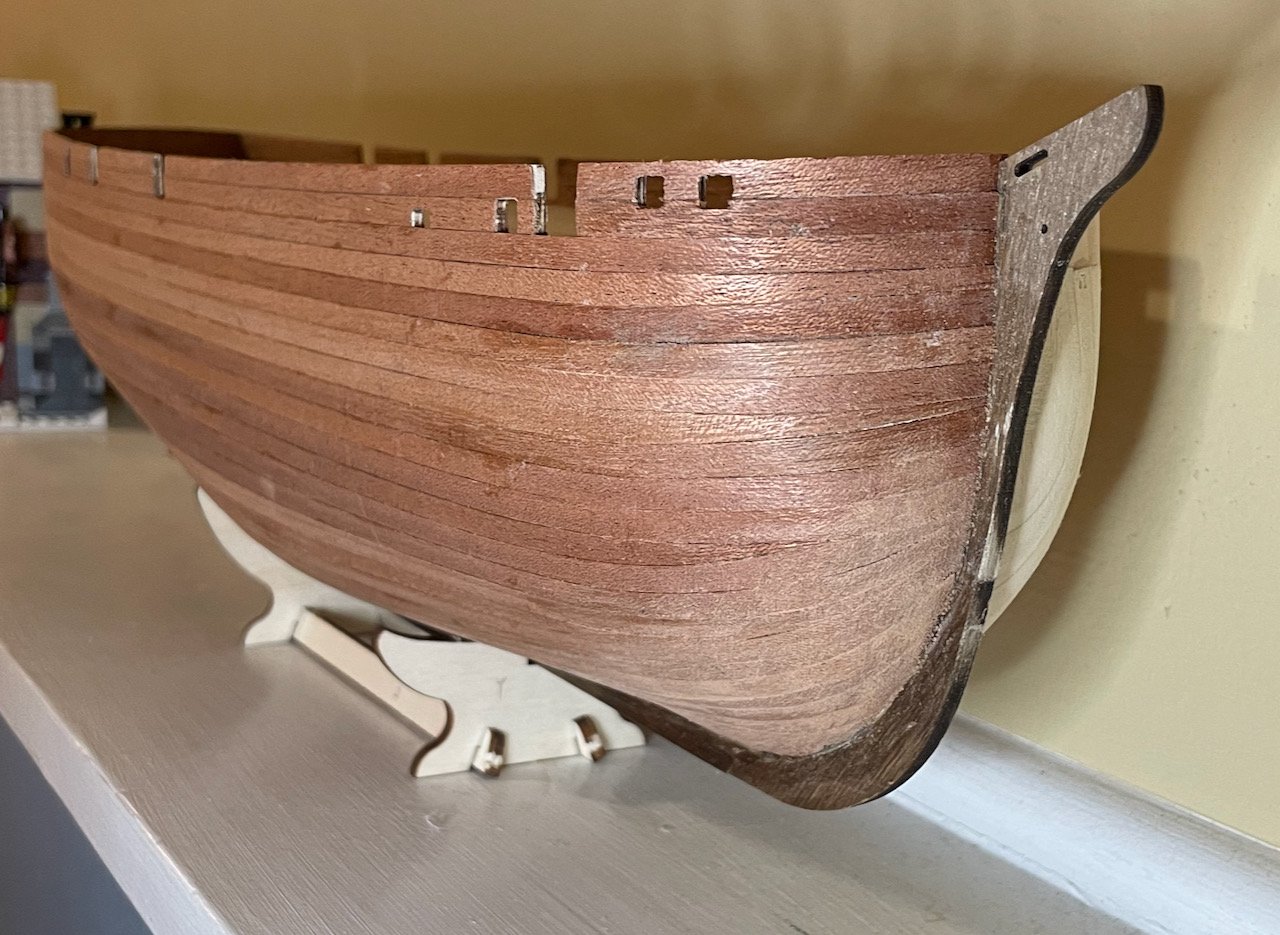
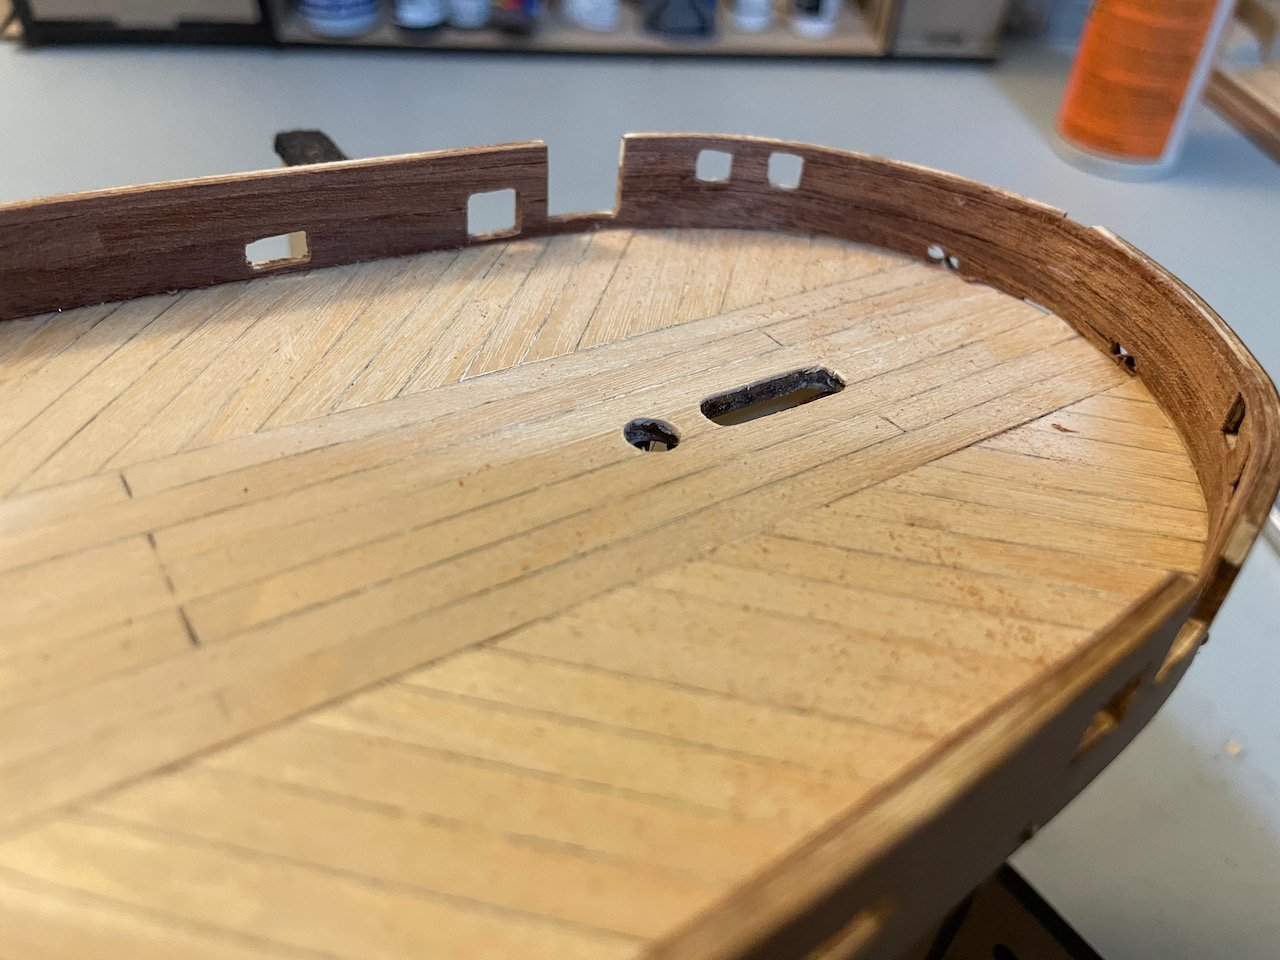
Keith had warned about the joys of sanding the ice bumpers. This is indeed a process that is going to require patience and a lot of clean-up. Although I spent part of last week traveling in Northern Minnesota (an especially beautiful place at this time of year!), I've put in a few sessions working on sanding the bumpers. The top sides are mostly even. The starboard bumper is mostly even on the outboard side. Next up will be working on the outboard side of the port bumper, then evening up the bottoms. After that, I'll use some wood filler on the gaps (which are all too clear in this photo!) and work on smoothing out all of the surfaces, so they are better than just "mostly" even. I'm still looking at a lot of work and a lot of sawdust before these are finished. I've struggled a bit to get a handle on the tapering of these bumpers. However, I finally found a very helpful description in Matthew Betts's book. In short: during the 1836 refit, "six large, unglamorous protuberances" were added as ice channels to protect the chain plates. In the 1839 refit, the spaces between these ice channels were connected, "to form a sort of uninterrupted smooth and tapering 'bumper', if you will" (page 90). Betts goes on to describe the materials and design of the bumpers, noting that they extended about 2 feet from the hull. If I'm doing my math right, then I'm envisioning the bumpers as being a consistent .8mm thickness (60cm/75) from the forward end of the foremast chainplates to the after end of the mizzenmast chainplates; then the forward and aft ends should probably taper gracefully to the stempost and the support pieces at the edge of the transom. Betts also mentions that some of the 1839 plans indicate iron plates running on the top side of the bumpers. It's unclear whether they were actually installed, and as I study the photos and videos from Parks Canada, I'm not convinced that I see (with my very inexpert eyes!) any metal plates there on the wreck.
-
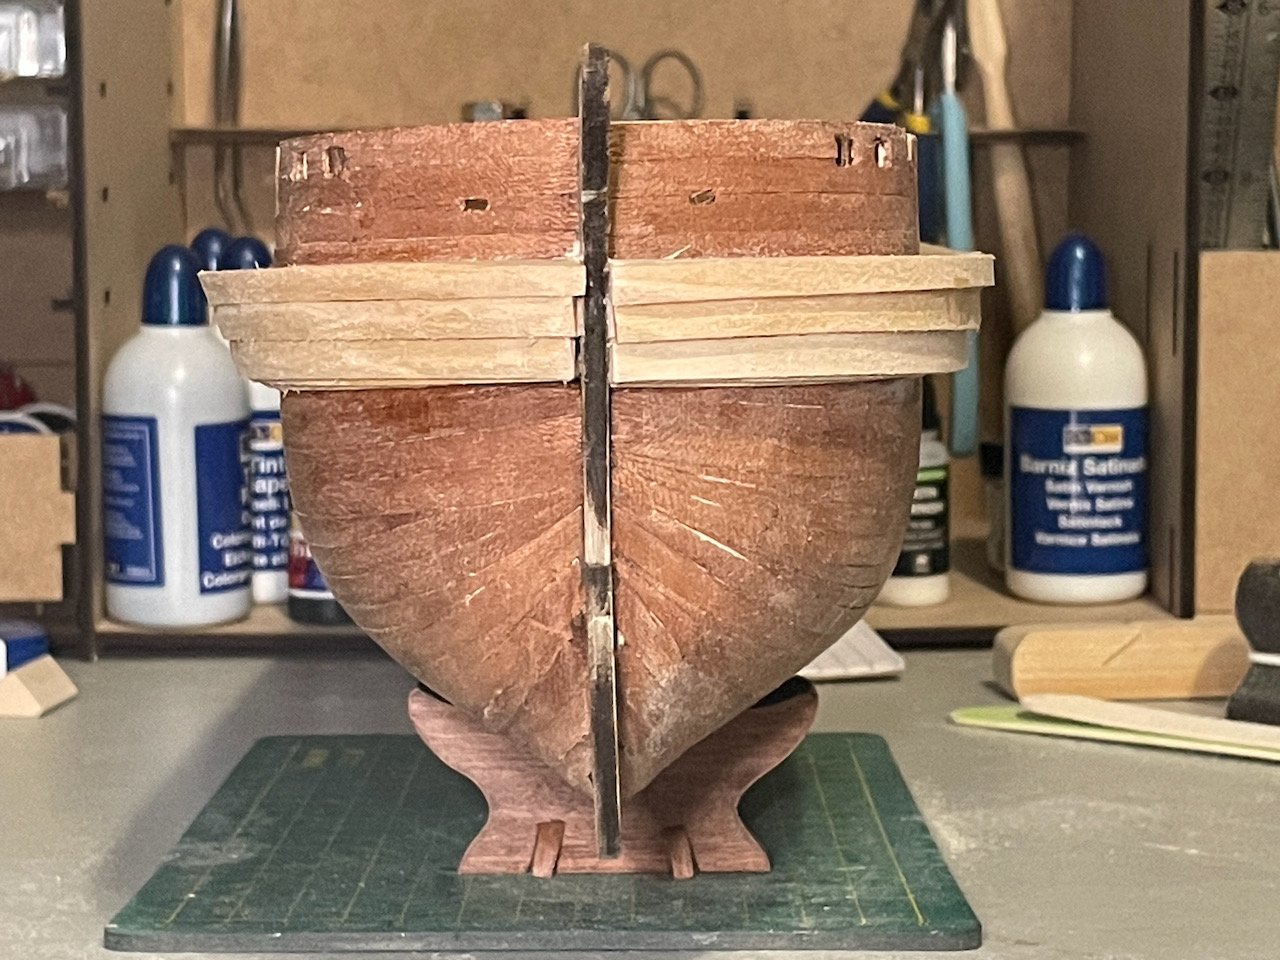
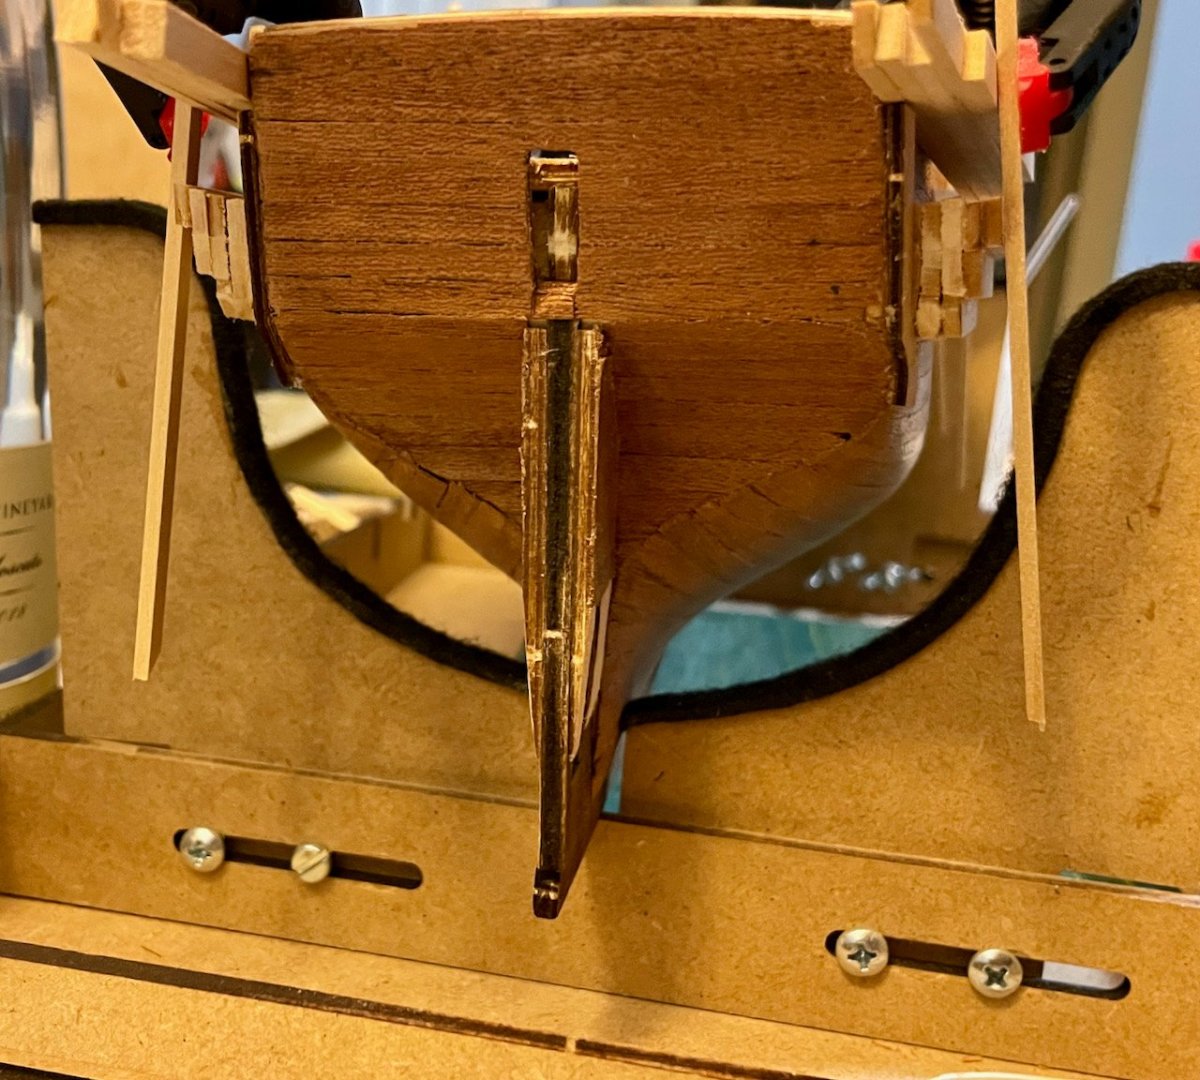
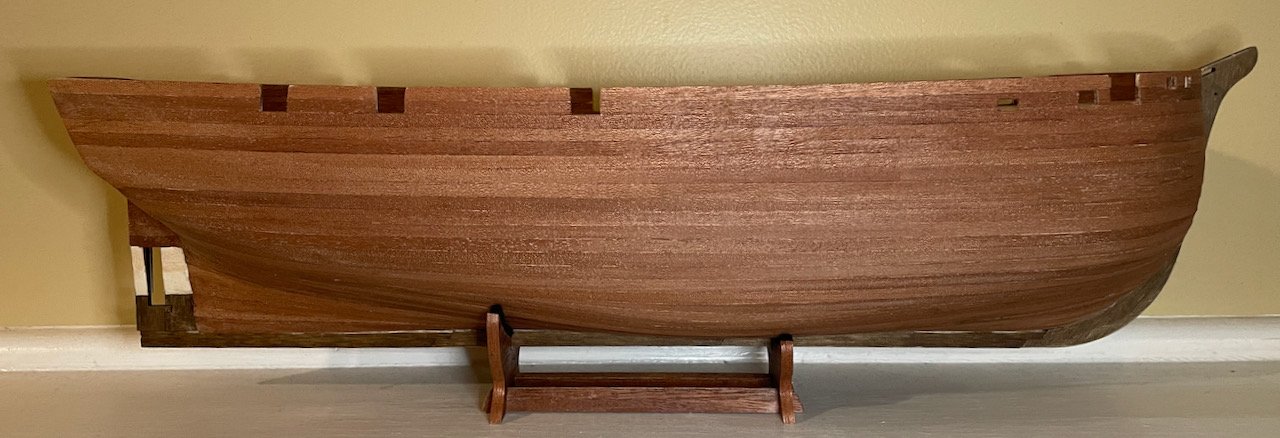
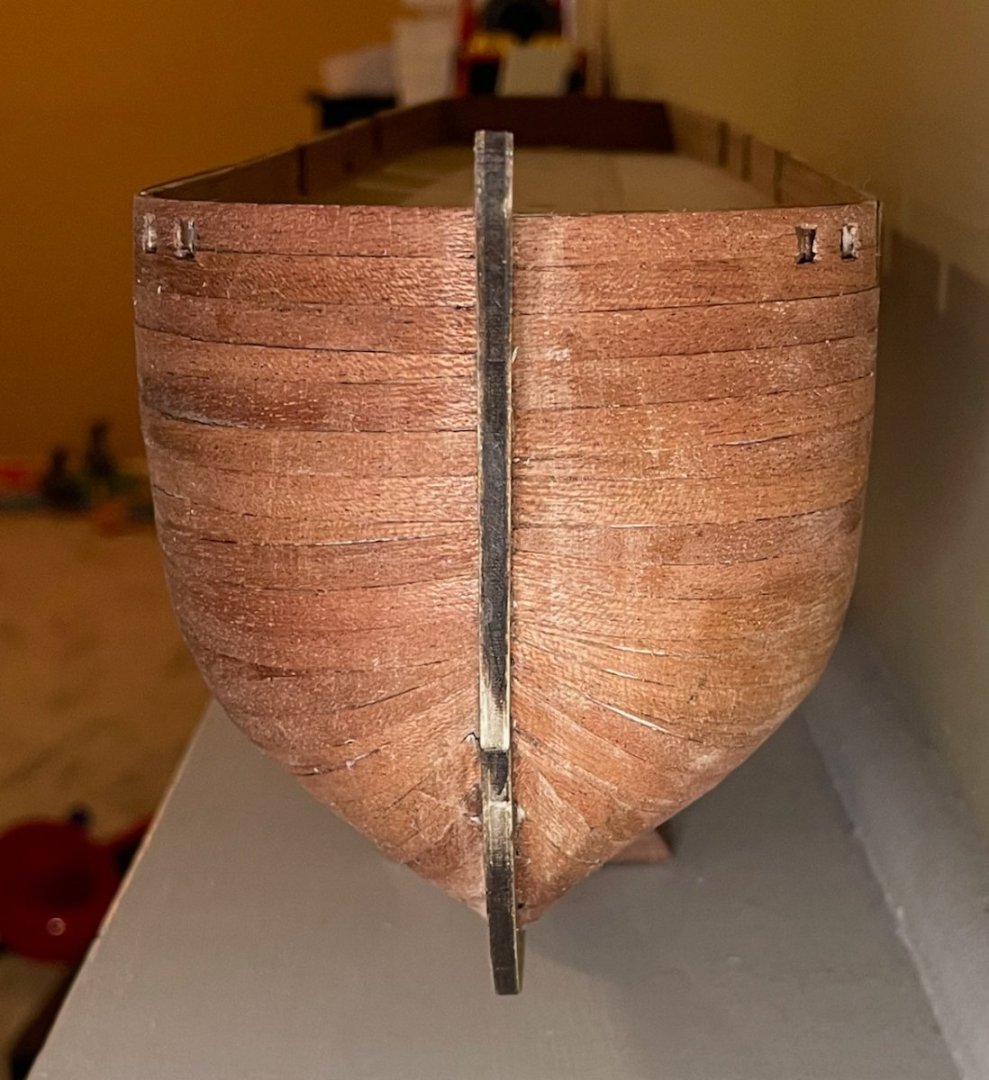
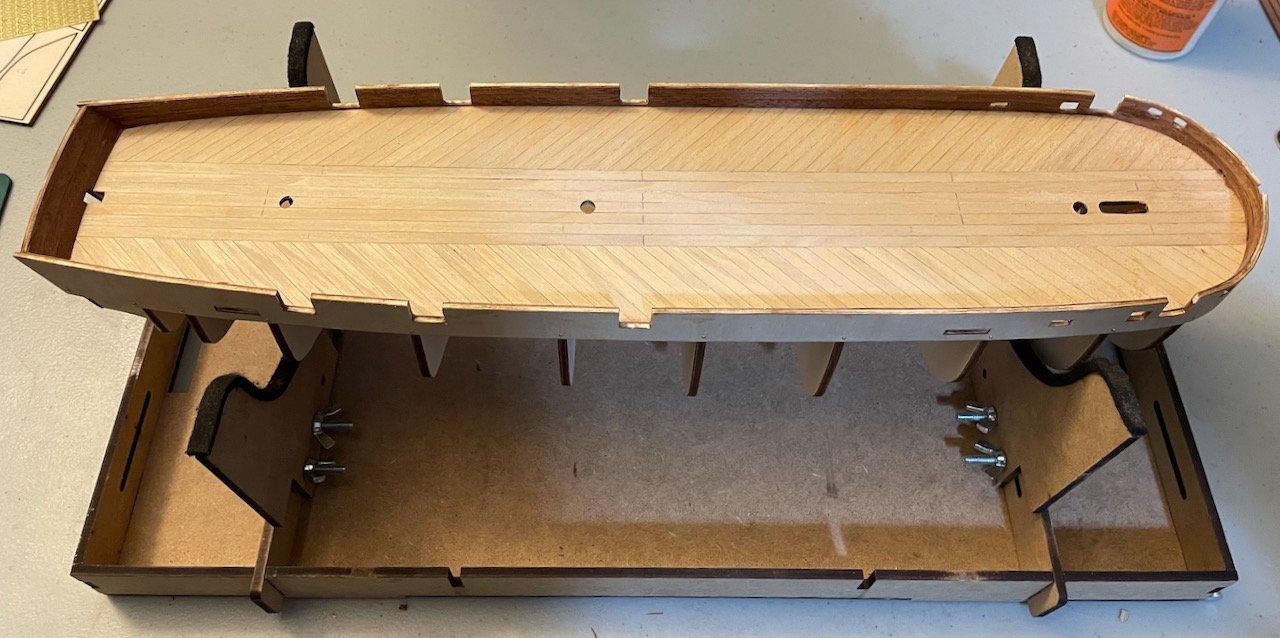
I finally have some progress to report! I've attached all of the 5x2mm planks for the ice bumpers. I did end up installing all of them the full length, so the next step will involve a lot of sanding. I'm generally pleased with how these are looking, though the photo from the bow shows that I'll need to do a little bit of correction while sanding. A plank bending iron made the job go pretty easily. That this took a few weeks was more about how little time I been able to spend at my worktable as I'm adjusting to the rhythms of a new semester in a new position. Next step: sanding down the ice bumpers. Even though I'll be painting the ship, I'm thinking about lining the ice bumpers with sapele strips to get the texture of the planking that is shown in the midship half section plan; however, I'll have to see how well the planks will lie on the curved angles near the bow.
-
Wow, Keith, this is really looking fantastic! My copy of Matthew Betts's book arrives tomorrow, but in the meantime, I've been poking around in the RMG's digital collections. A propos of the discussion about the azimuth compass, I thought this was an interesting watercolor of two sailors taking a reading from one. Obviously, the ship is not the Terror and wouldn't be dealing with the challenges of navigating near the north magnetic pole...but still interesting to see one in action.
-
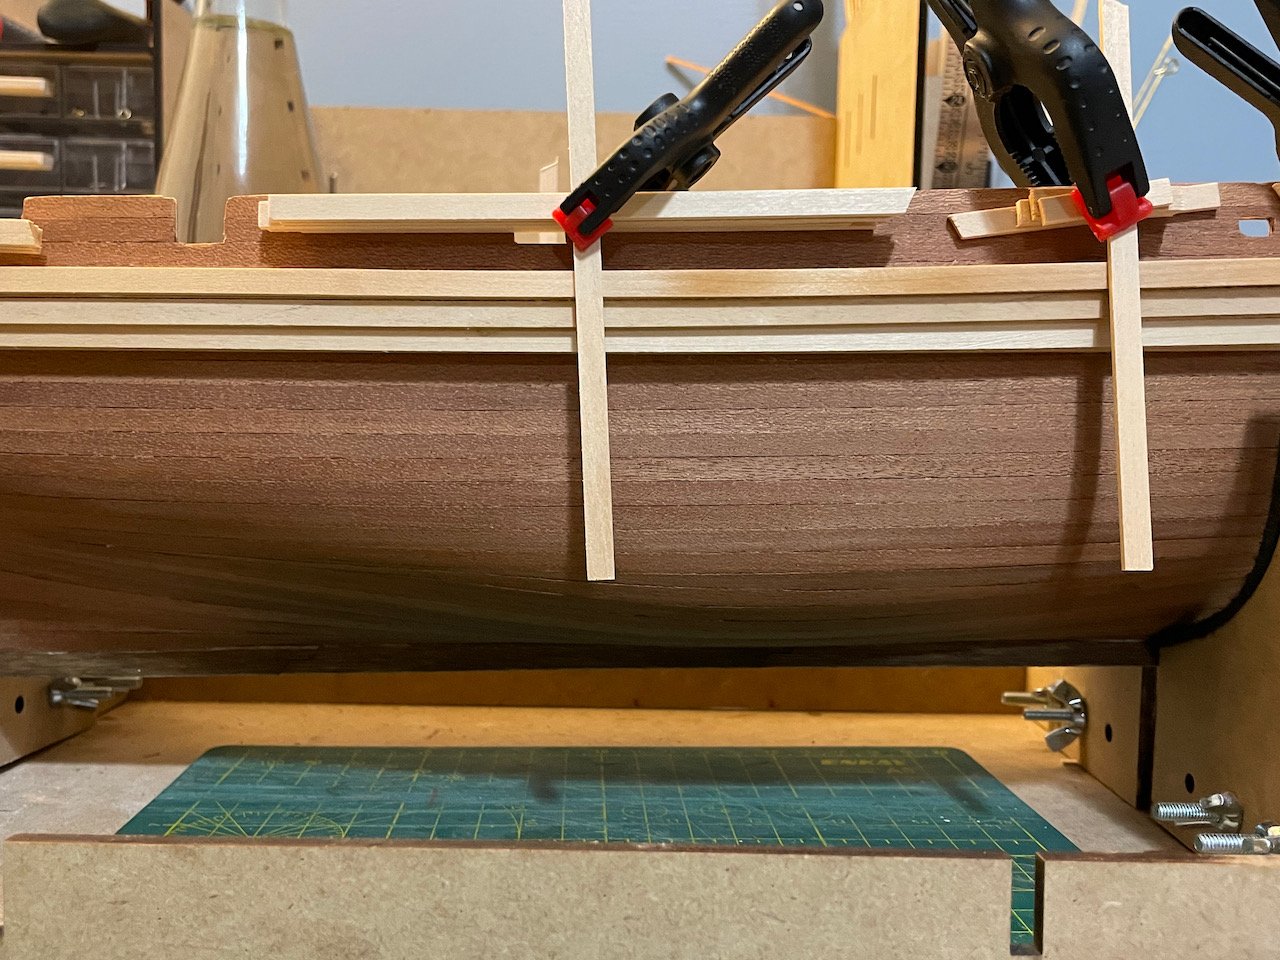
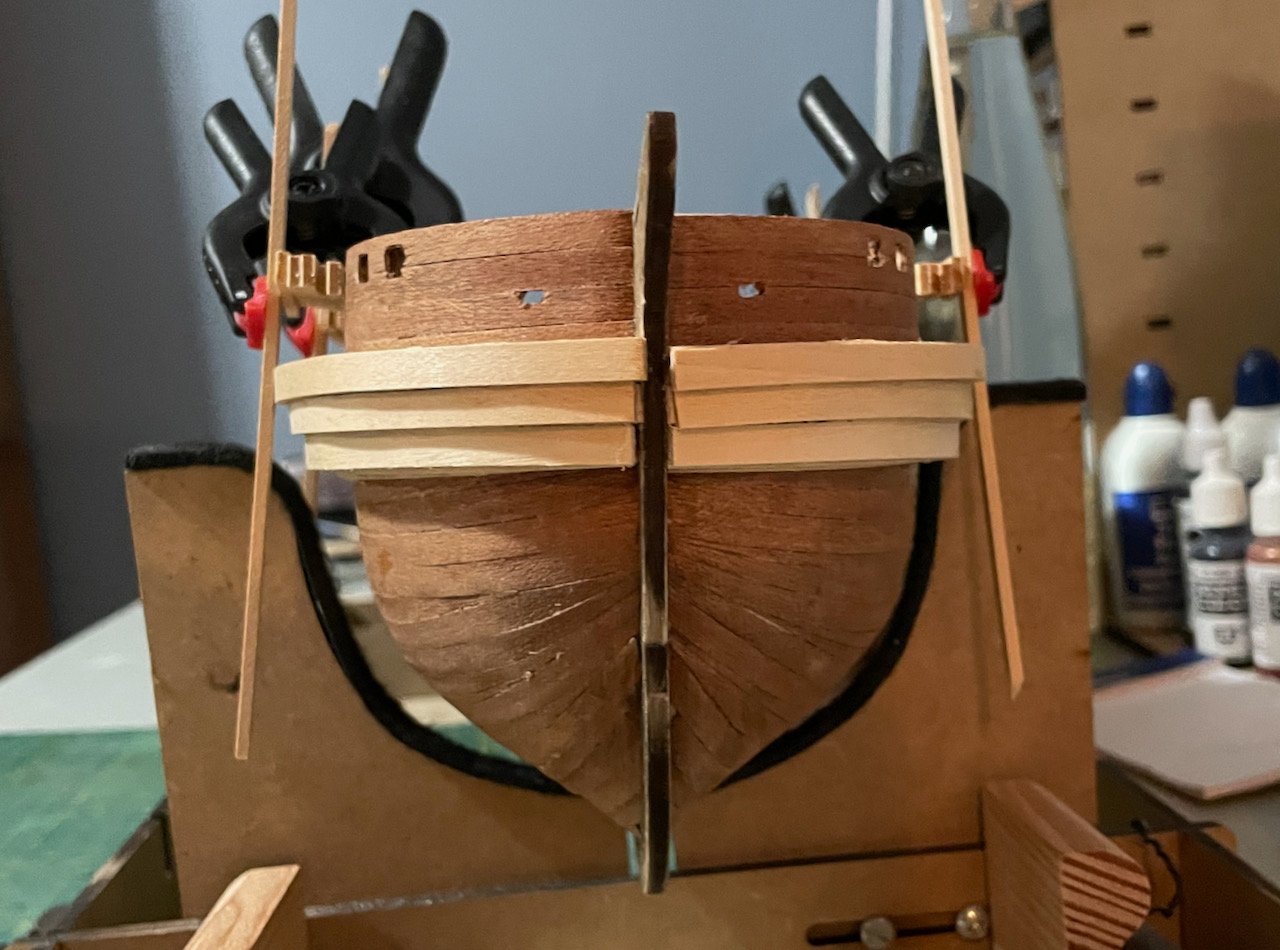
Thanks for the encouragement, Keith! I have plenty of time to study and plan, to figure out what I'd like to try to achieve. All I know for sure right now is that there are things that I think I can improve on...I don't know which things or how many of them yet, but I'm grateful for all of the inspiration that's out there now! After a few weeks away from the Terror, I made a point tonight to start getting back on the horse. I installed the second layer of the ice bumpers on the port side, so the ship is balanced again. While the glue is still setting, I have them clamped pretty thoroughly—3 clamps squeezing the three planks vertically (parallel to the hull), and another three holding them down to the hull with some pieces of spare wood. Once everything is dry, I'll sand these down, so that I have an even surface for the third layer. Even though it feels like a baby step, it was nice to be back at my (messy) worktable and making forward progress. A quick question for the Keiths and other Terrorites: since the ice bumpers aren't a uniform thickness, is it really necessary to install all five layers the whole length of the ship? That seems to me like I'm just setting myself up for a LOT of unnecessary sanding.
-
Thanks to both of you, Keith(s)! As I started checking in again on MSW, I was surprised to see that I was suddenly about 90 posts behind on reading Keith's (clearway's) log! I'm not sure how much I've set my own course yet. I went into this planning to more-or-less build the kit to the instructions. But as I've read more and learned more, I find myself—once again, just like with my Endurance—wanting to push myself and challenge my current skills. Keith S, thanks for bringing your log back to my attention. I have browsed through it awhile back, but haven't studied it closely yet. I'll let you know if I have any questions!
-
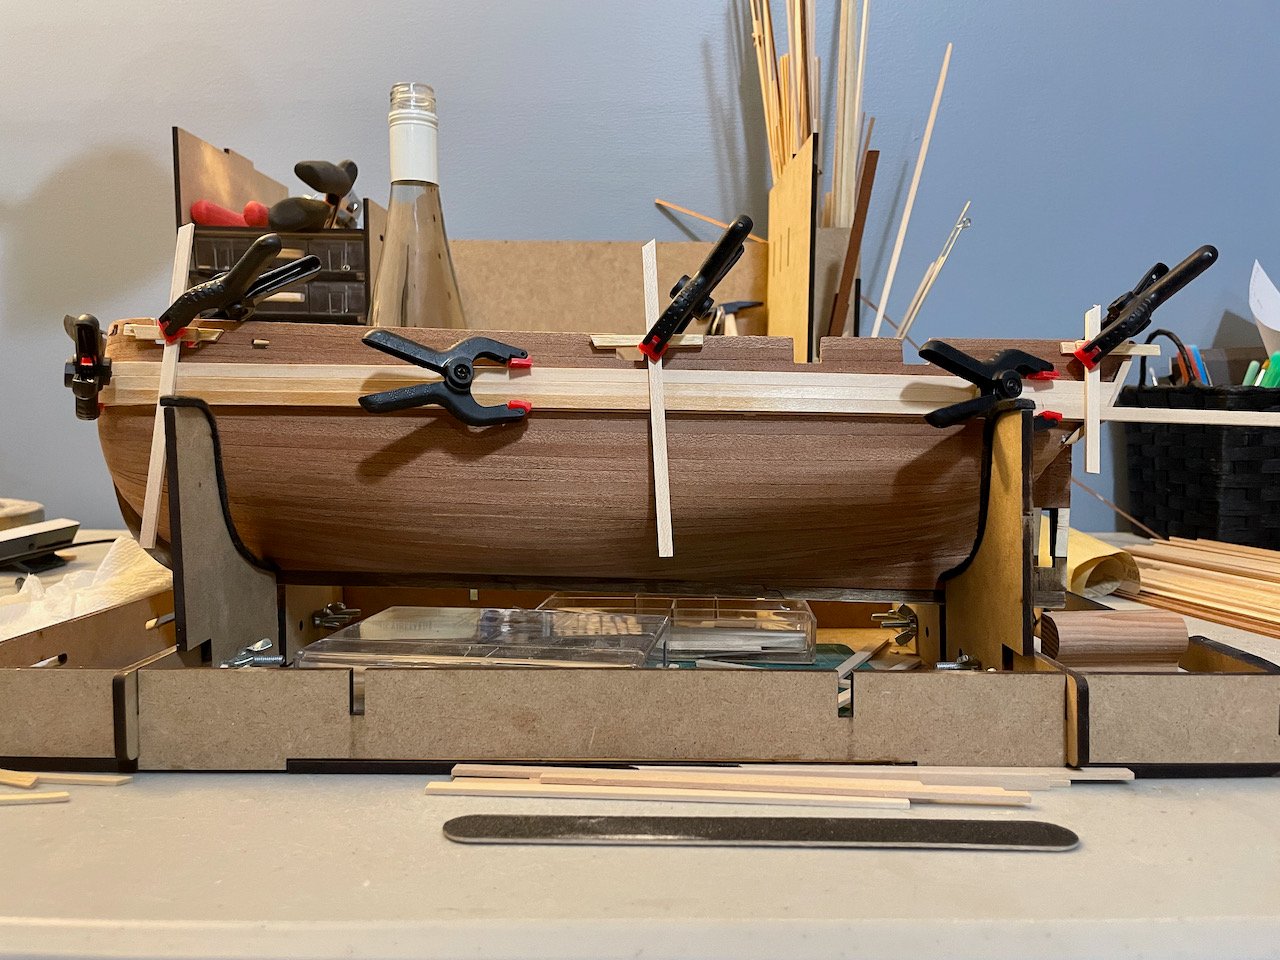
Thanks, @DanielD! @allanyed, my apologies for the radio silence. Between a much-needed vacation and a very intense start to a new semester, I've been away from the Terror and MSW. But to your question! To be honest, my research has mostly been focusing on learning the story of Franklin's expedition and less on the details of the ship itself. For that, I've been relying heavily on the work of Matthew Betts and @clearway, who've both done so much of that research so well. As I finish up the hull, though, I need to start digging into more of that work in preparation for the work on the deck, where I'm anticipating that OcCre has made more compromises. I know that the davits in the OcCre kit are a pretty significant simplification and I'm going to try to do those more like in the midship section plan preserved at the museum in Greenwich. And a quick progress update: I've started building up the ice bumpers. These are made of 5x2mm planks; 5 layers in the top tier, 4 in the middle, and 3 at the bottom. At this point, I have installed 2 layers on the starboard side and 1 on the port side. Hoping to get back work on these later this week.
-
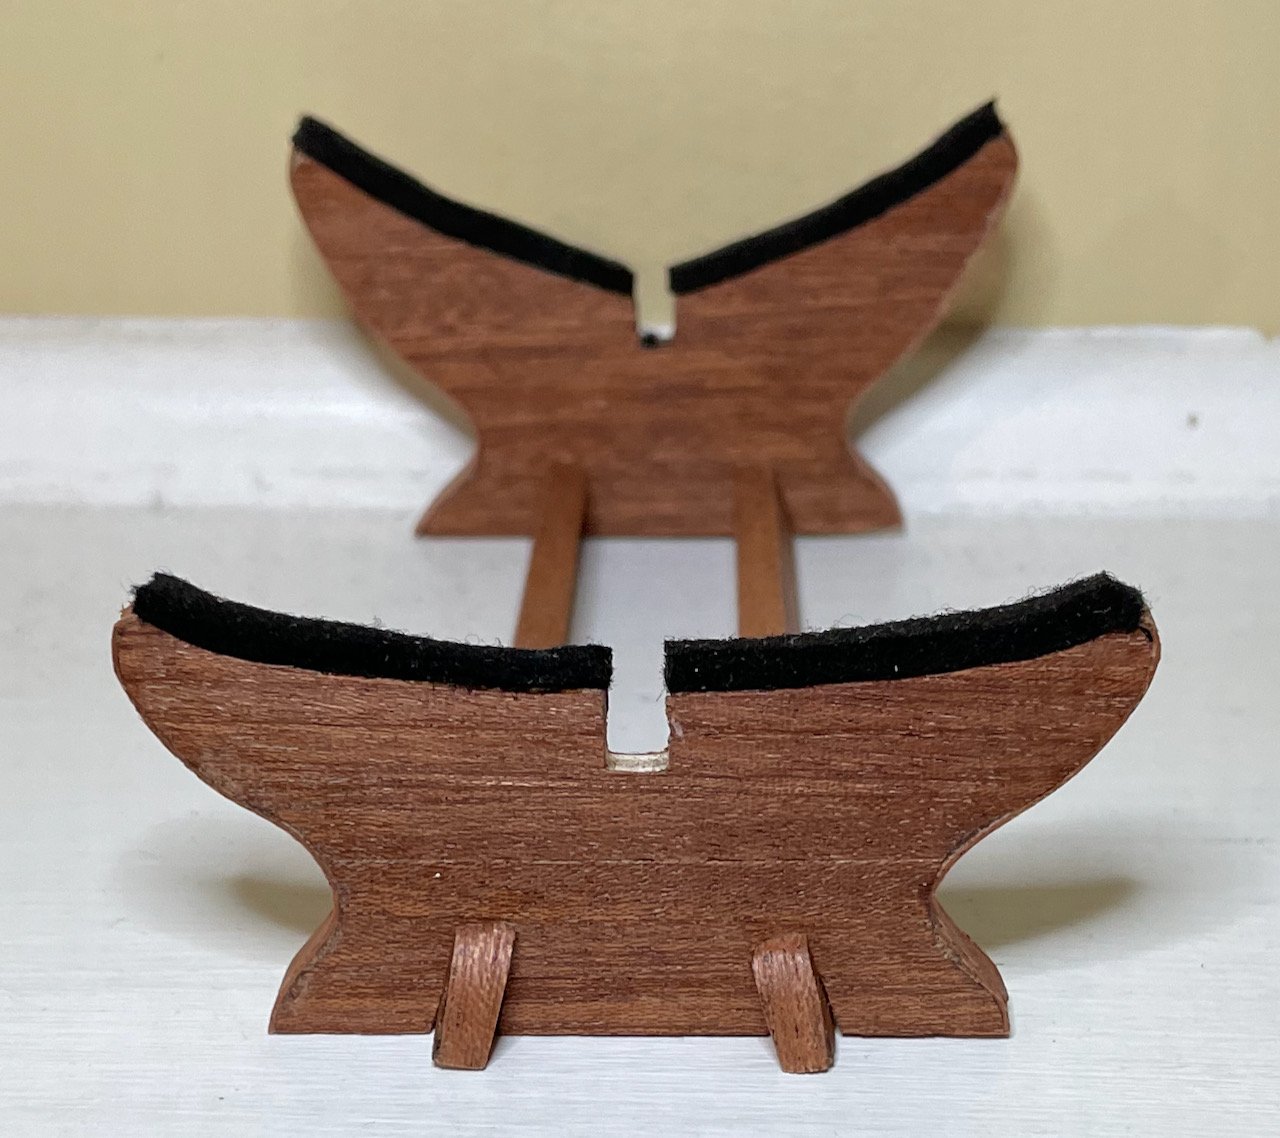
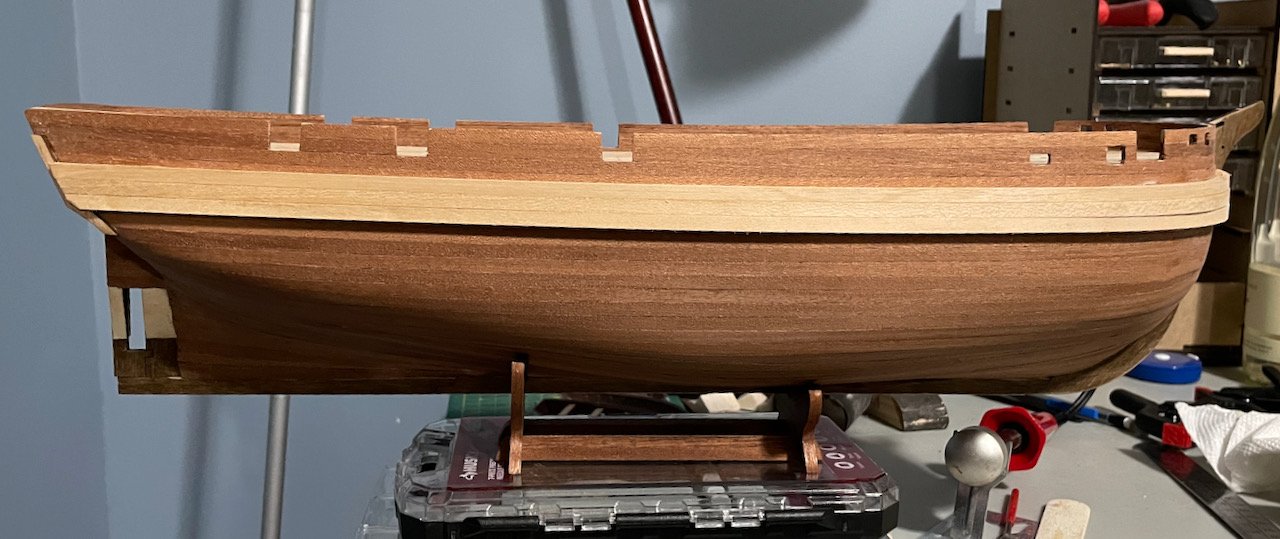
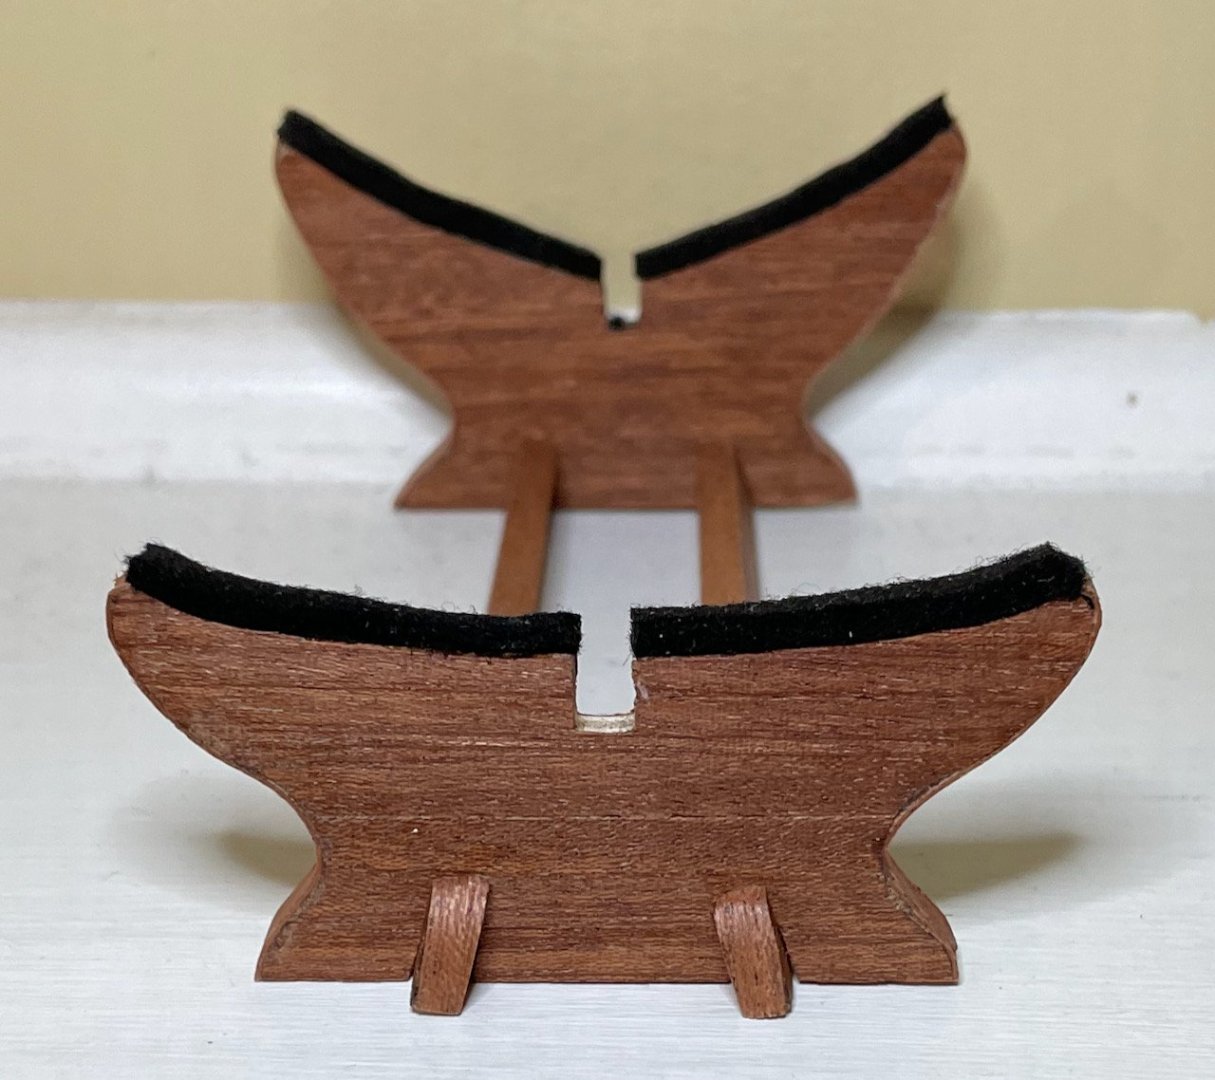
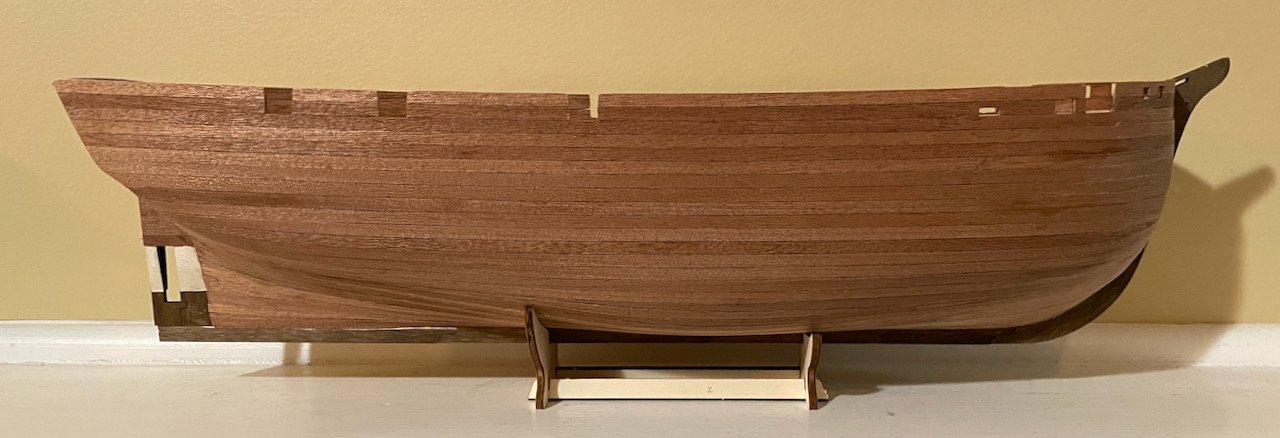
Another week of steady progress and I've finished the second layer of the hull! Everything generally went pretty smoothly with this. It was very helpful to have cut a rabbet line into the keel and stempost, since that helped keep everything firmly in position while I was fitting, marking, and then installing the shaped planks. The planks on the two sides are not perfectly symmetrical, but the metal plates will cover up the most noticeable issues there. The sapele planks in this kit are not as high of quality as I've worked with in other kits (including OcCre's Endurance), so I went over everything with a thin coat of pore-filling varnish. I'll sand that off before installing the ice bumpers. Knowing that I'm nearing the stage at which it will be helpful to have my stand ready to go, I also came to a decision on that. Eventually, I'll install this on a base, but for now, I've dressed up the plywood stand pieces that come in the kit by lining them with sapele and adding strips of felt where the hull will rest. Next steps: sand off the pore-filling varnish, then start work on the ice bumpers.
-
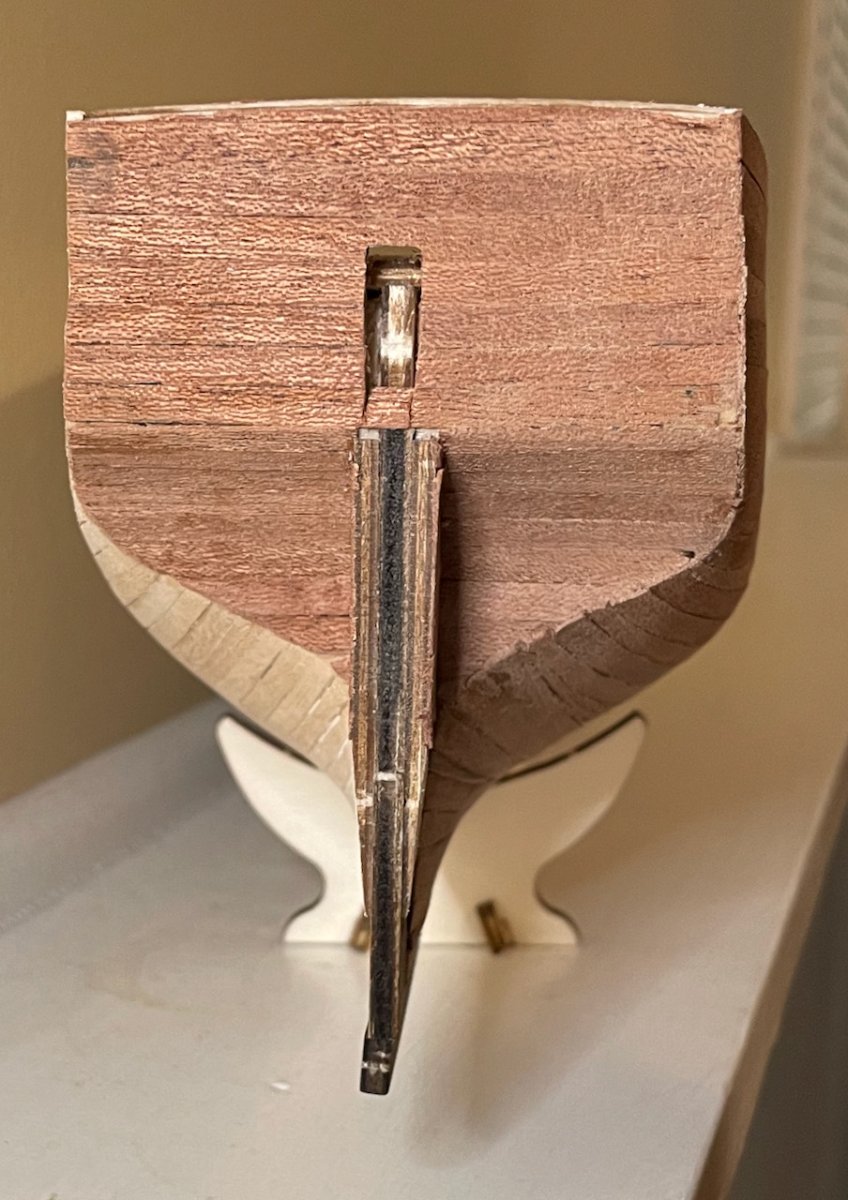
I've managed to get in a fair amount of work on the Terror this week. I installed the stempost, keel, and sternpost earlier than OcCre calls for, so that I could use a rabbet line while installing the second layer of the hull. That rabbet line was massively helpful, which has allowed me to make fairly quick work of the hull. As of this morning, I've installed all of the second layer planks on the stern and on the starboard side of the hull! Plenty of sanding left to do, but I'm mostly pleased with how things look...though I'm also glad that there will be paint to cover up some of the imperfections (especially on the transom). After looking at that last photo, I noticed that the keel got a bit wonky at the stern...I'll have to take a look at that when I head back down to the basement. Next step: install the second layer of the hull on the port side.

-
Thanks, Keith! I'm assuming that this is the video to which you referred? At the very least, this was a very interesting hour to spend with Betts!
-
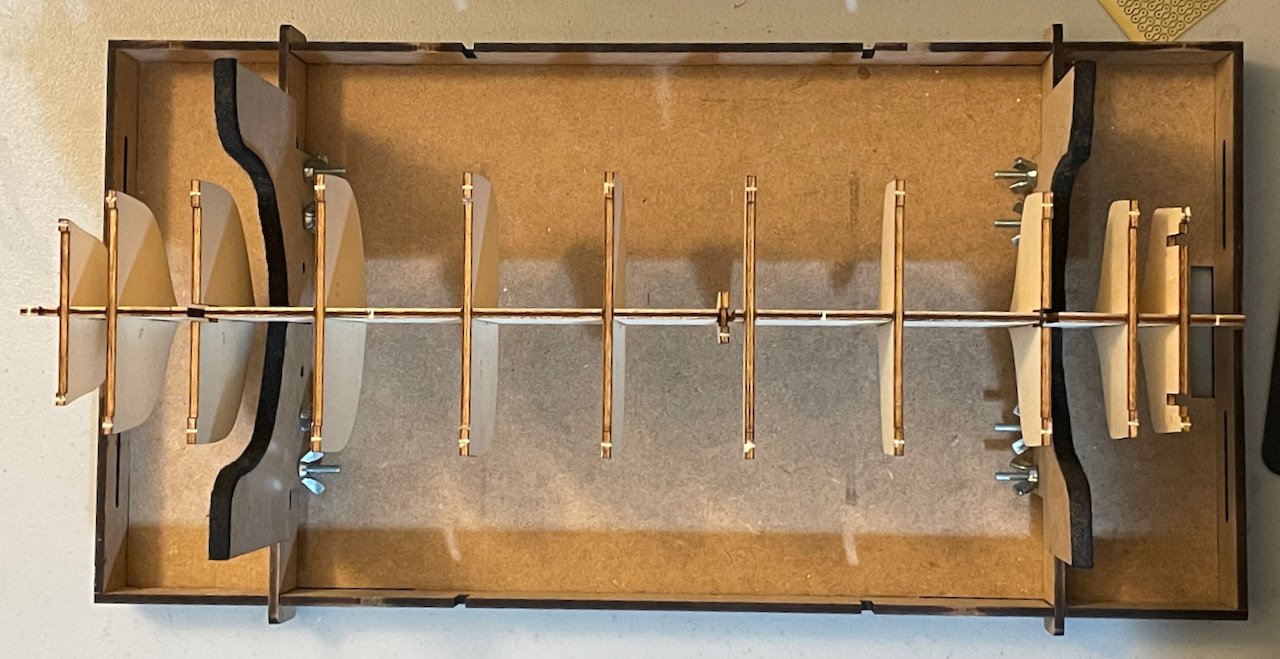
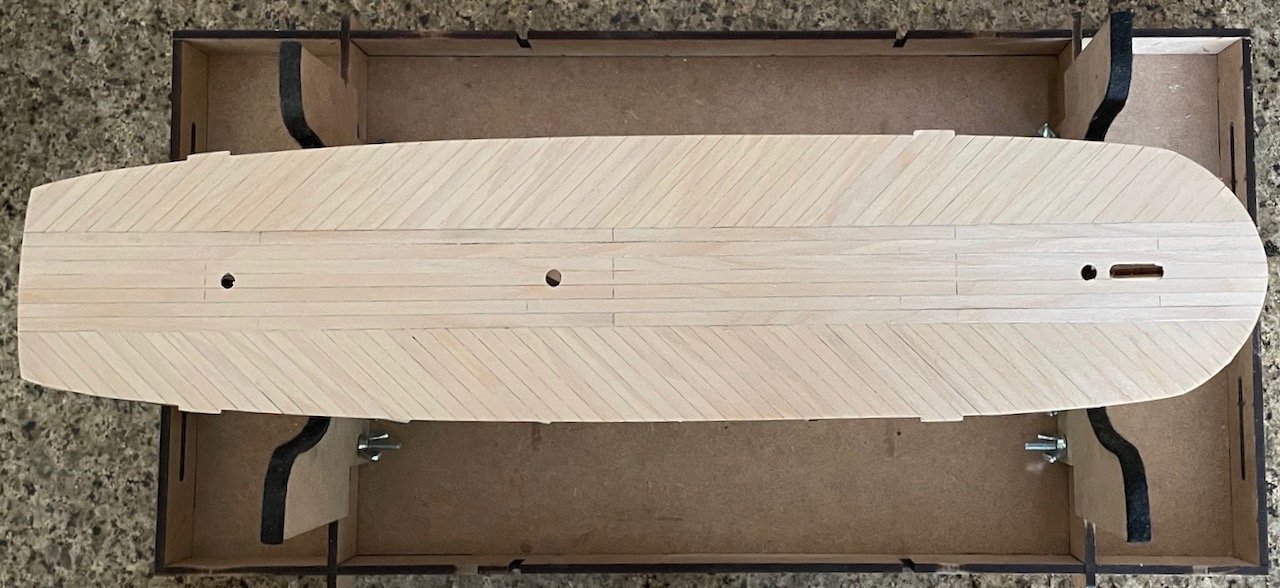
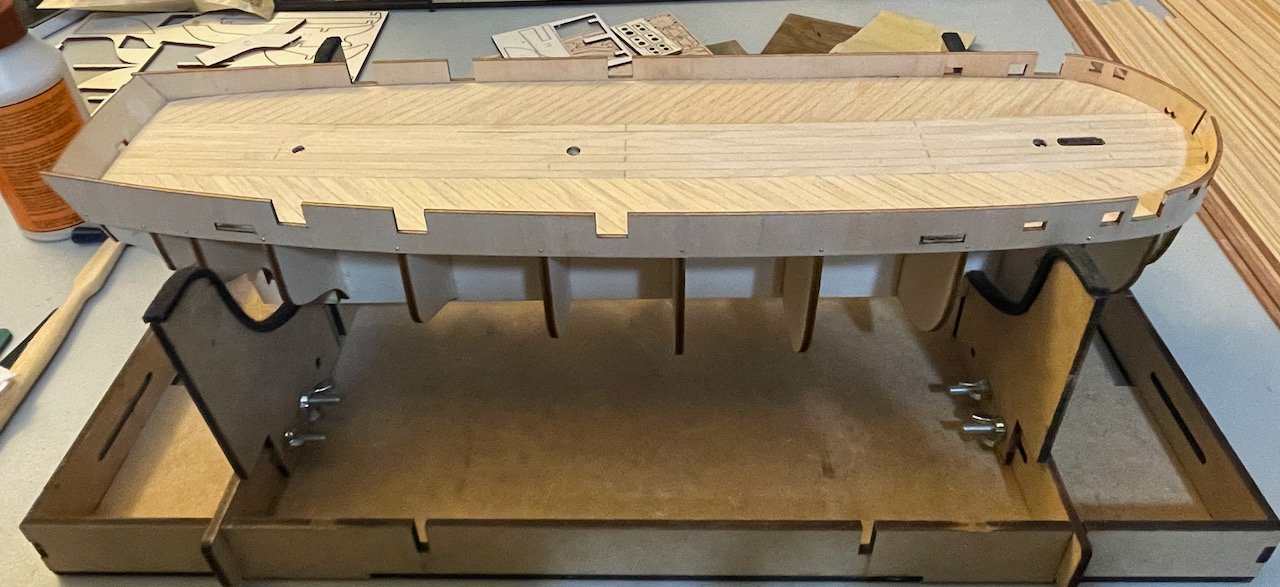
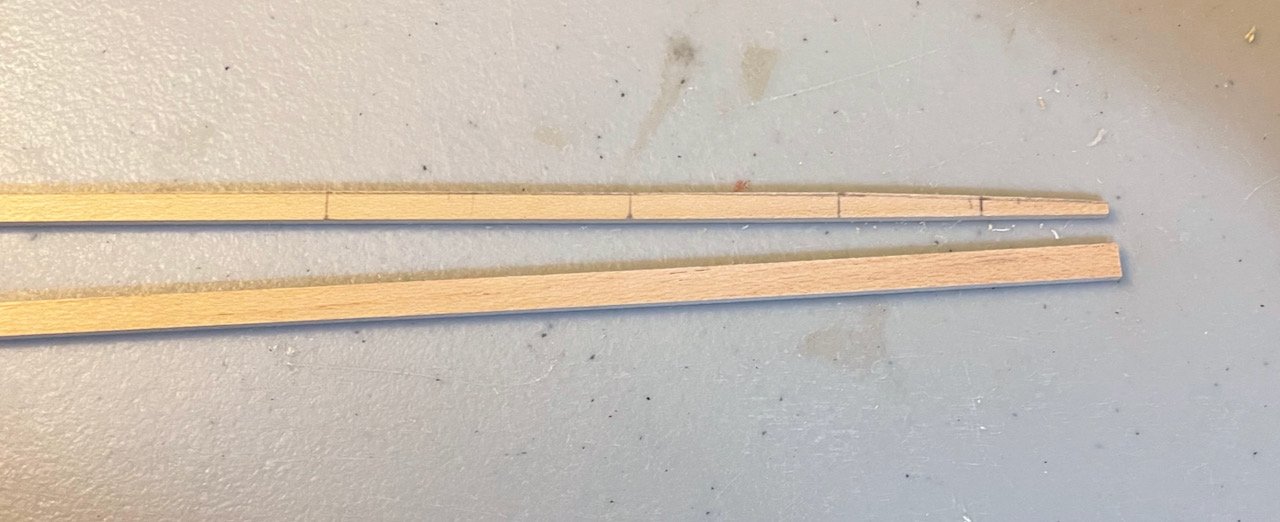
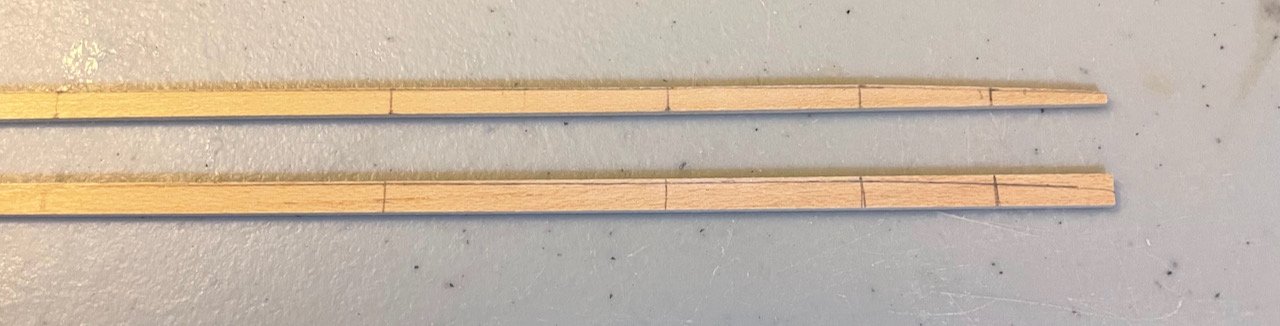
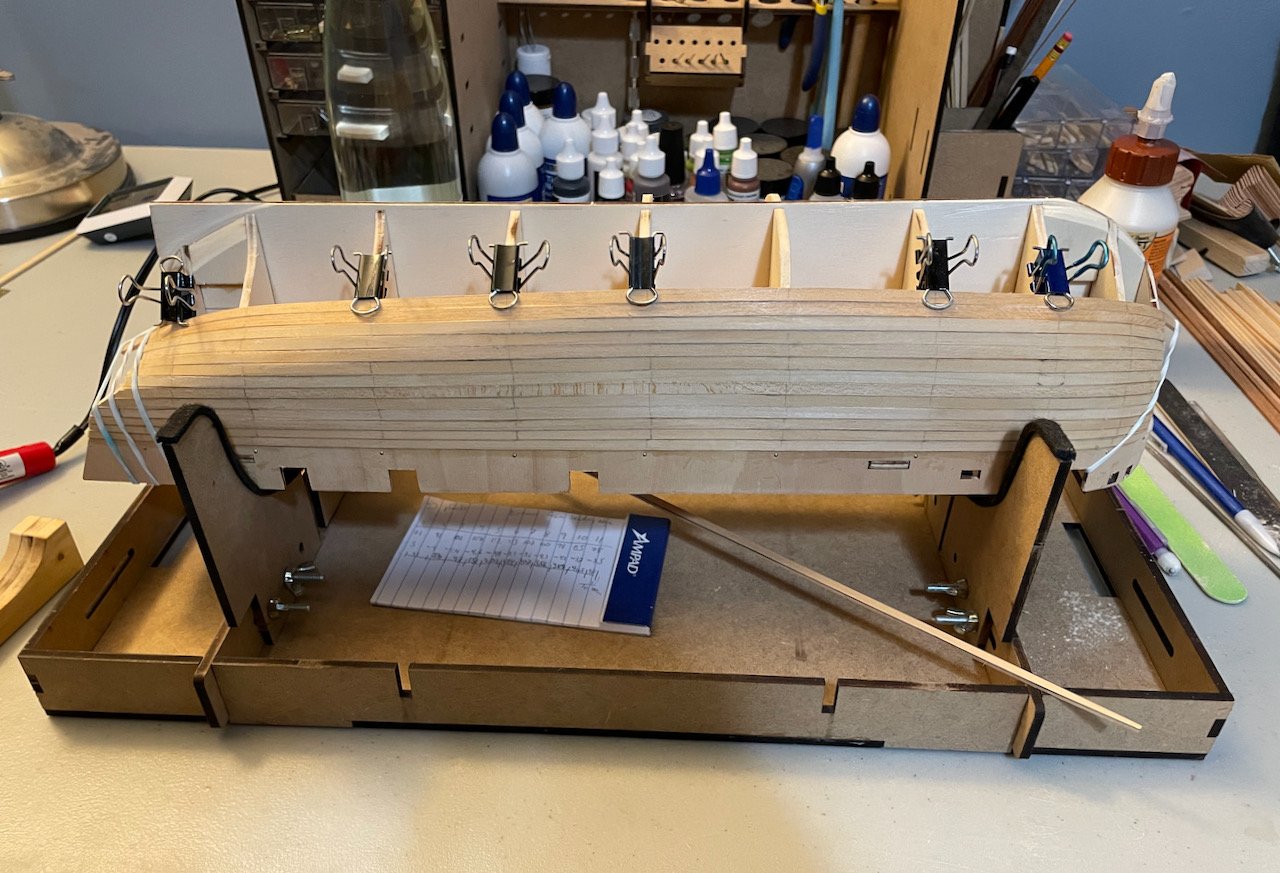
When I started building model ships, I was mostly interested in building French ships. But when OcCre released their Endurance kit, I jumped at the opportunity. Researching and working on the Endurance, got me thinking about building a collection of ships of exploration (I'm just not all that interested in warships). So, after browsing around and considering my options, I thought the HMS Terror looked like an interesting next project for me. And thus, I've joined the Terror Club here on MSW! When I started the project, a few months ago, I didn't know anything about the Terror beyond the blurb on OcCre's website. But browsing through the other buildlogs and through Matthew Betts's outstanding blog, really got me hooked. I've already watched AMC's series The Terror. I'm reading Paul Watson's Ice Ghosts: The Epic Hunt for the Lost Franklin Expedition (I highly recommend this piece of popular historical work for anybody reading this who hasn't read it yet). And I have devoured all of the documentaries and other videos that I can find about the Franklin expedition, especially the coverage of the discovery of the ships a few years ago. I got obsessed with the Endurance as a teenager, but now my interest in the Terror is rivaling that. I approach each project by thinking about particular skills I want to develop. In this case, continuing on my experiences with the Martegaou, I'm very focused on the hull. The rigging is, by far, more complex than anything I've done, so I'm looking forward to that challenge somewhere down the road. This will also be my first experience with plating a hull, so that promises to be a bit of an adventure. But enough introduction, time for the photos! I've been working on this ship since May, holding off on starting my buildlog since I knew I was going to build the first layer of the hull at a very slow and deliberate pace. The kit started off in the usual way, by adding the frames to the spine. I didn't include a photo of it here, but I use 1" square braces to align each frame while the glue dries. As with the Endurance, the pieces here are cut really well and fit perfectly without sanding. Next up was the deck. All of my previous decks have just had planks running the length of the deck. The pattern for the Terror added a fun new wrinkle to that. I'm generally pleased with how that turned out. The lines marking the ends of the center planks are a departure from OcCre's designs; they approximate what Betts found in his research and did on his model. Then, on to the bulwarks. I used a plank bending iron, which made fairly quick work of shaping the plywood pieces. As an upgrade, I chose to line the bulwarks with sapele strips, rather than staining the plywood. In hindsight, I probably should have waited until I had finished the first layer of the hull, but my thought process at the time was focused on cutting and filing out all of the ports. On close inspection, I'm concerned about the cable holes that will be on either side of the bowsprit. I think OcCre misplaced the slots for the forward tabs on the deck, positioning them about 1.5mm too low and causing these holes to eventually be buried by the channels that edge the deck. I'm not entirely sure yet how I'll address that problem, but I have plenty of time to work out a solution. (Sorry that I didn't vacuum up the sawdust before taking the photo!) After fairing the frames, it was on to the first layer of the hull. As has been noted elsewhere, OcCre's approach to lining the hull is a simplified approach that involves laying as many straight planks as possible, then filling in the gaps with wedges. However, I wanted to try running strakes that were much more consistent in shape. I measured each frame, found that I would need 23 strakes, and then divided the length of each frame by 23. I don't have digital calipers, so there was a bit of fudging the measurements. But while watching one of the video updates on the rebuild of the Tally Ho, I was struck when Richard discussed using measuring sticks. I realized that this strategy would help me achieve a higher degree of consistency across all of the planks. So, I made one for each side. These photos document my process. The measuring stick is on top, with lines marking the forward edge of each frame. There's a bit of extra length on both ends, so the first pencil line on the right is actually the forwardmost frame. First, I aligned each new plank alongside the measuring stick, so I could copy over the vertical lines for the frames. Then, I aligned the measuring stick on top of the new plank, so I could trace the shape. The result looked like photo #2. After this, I sanded the plank down to shape it, checking it on the hull to confirm where any beveling might be needed. After soaking the plank, I used the plank bending iron to do the final shaping. While the glue dried, I clamped the plank in place with a combination of binder clips and rubber bands (and eventually thumbtacks when there wasn't enough room for the clips anymore). The notepad in this photo has my chart of measurements. The plank underneath the ship is the measuring stick for the portside, tucked out of the way while the glue dries. I need to keep practicing with this planking strategy, but I'm generally happy with how it turned out, especially since I had to fudge my measurements a bit. Based on my measurements, I expected to need 23 strakes per side, and I ended up with 22—only one of which doesn't run end-to-end. There are a couple gaps that will need wood filler (especially one sizable gap on the starboard side), but they are generally lying well against each other. This week, I installed the whiskey plank and the forward blocks (per OcCre's instructions, there are four plywood pieces used on either side of the stempost to create the bluff bow). Then it was time to sand and fair the hull. I've made a lot of progress on that, though I'm not done yet. However, it is satisfying to hold something that actually looks and feels like a ship! Next steps: finish sanding and fairing the first layer of the hull; prepare the rabbet line in the stempost, sternpost, and keel.
-
Good eyes, Keith! I remember spending some time looking at that photo and I could never quite figure out where it actually was on the deck!
-
It's great to see you back at your Endurance, Keith! Those white railings look really sharp! I'm glad to see you revising that hatch, especially since that's one of the places where OcCre's plans don't align with what we know of the real ship. As I revisit the photos, I think that there was a skylight there, but not a hatch (here's a useful photo from the shipyard in London). If there were a hatch, there'd be stairs or a ladder dropping down into the saloon of the Ritz and I don't recall seeing that in any of the photos. I think that the hatch that OcCre positioned there was actually on the quarterdeck, after the skylight over the officer's mess...but I'm having a hard time confirming that with photos today. I hadn't noticed before that you removed the catwalks from the bridge deck piece. I would be curious to hear your plans for installing them? (Especially when you plan to install them...there's a whole lot of awkwardness yet to come in that area!) On a side note, I've just started building the HMS Terror...still reading through your buildlog and others, but I'm grateful to have yours as inspiration!
-
Thanks, Chris! As somebody who has only sailed once (and then only with an under-experienced friend who couldn't handle the high winds that day), it's really satisfying to create functional rigging that helps me better understand how it all works!
- 59 replies
-
- 2
-

-
- Billing Boats
- Le Martegaou
- (and 1 more)
-
Thanks, Bob! And thanks for cheering me on again!
- 59 replies
-
- 1
-
-
- Billing Boats
- Le Martegaou
- (and 1 more)
-
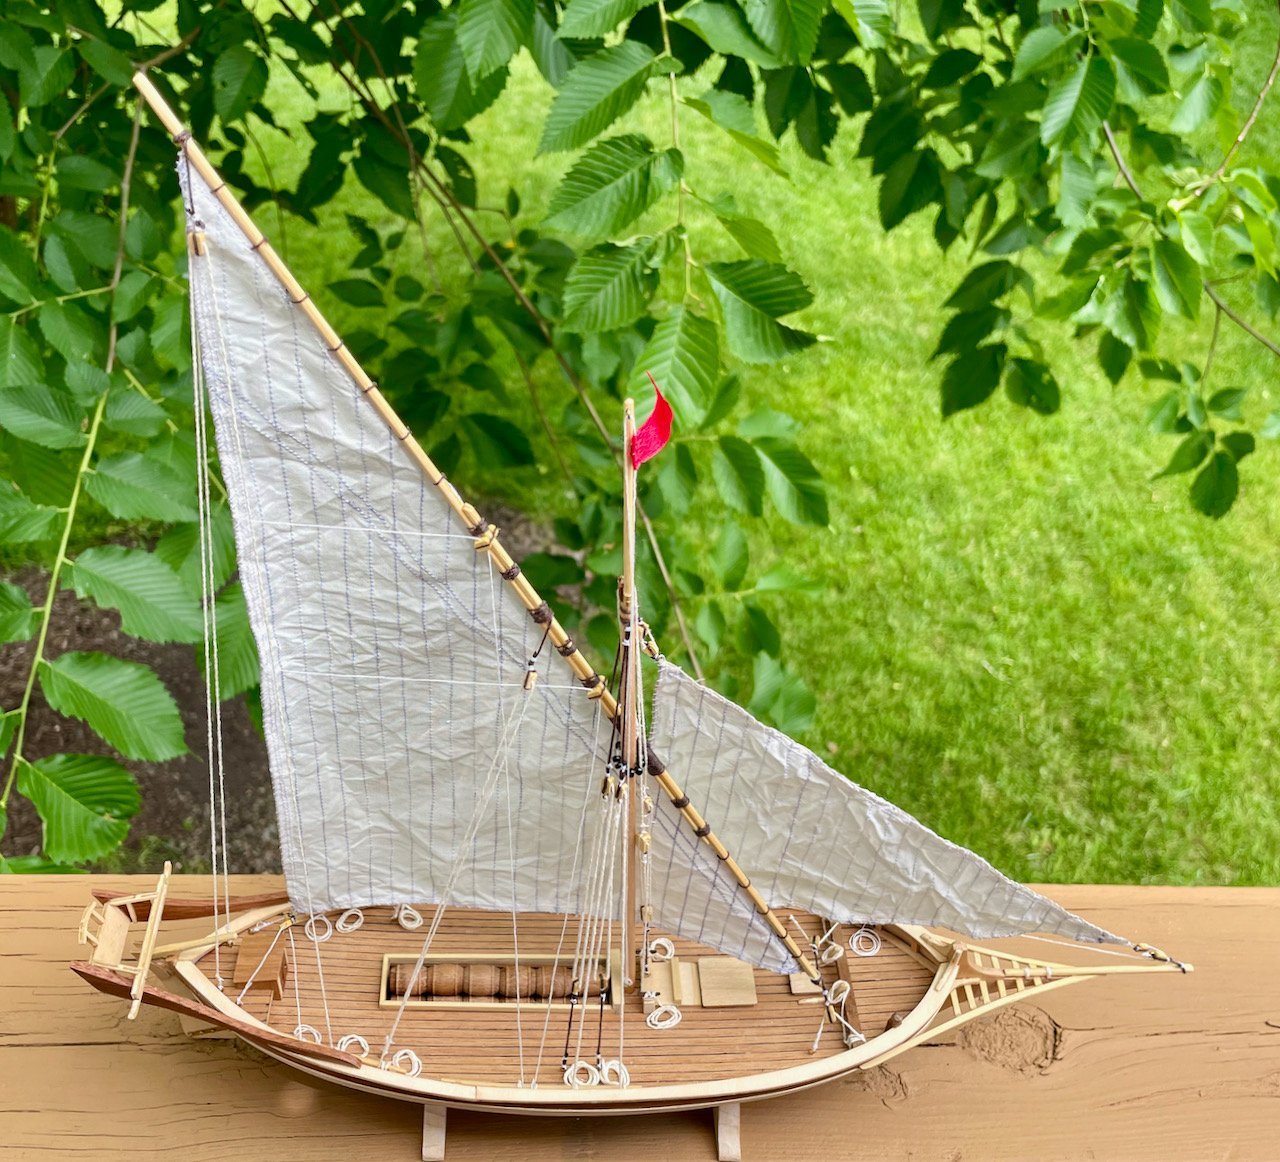
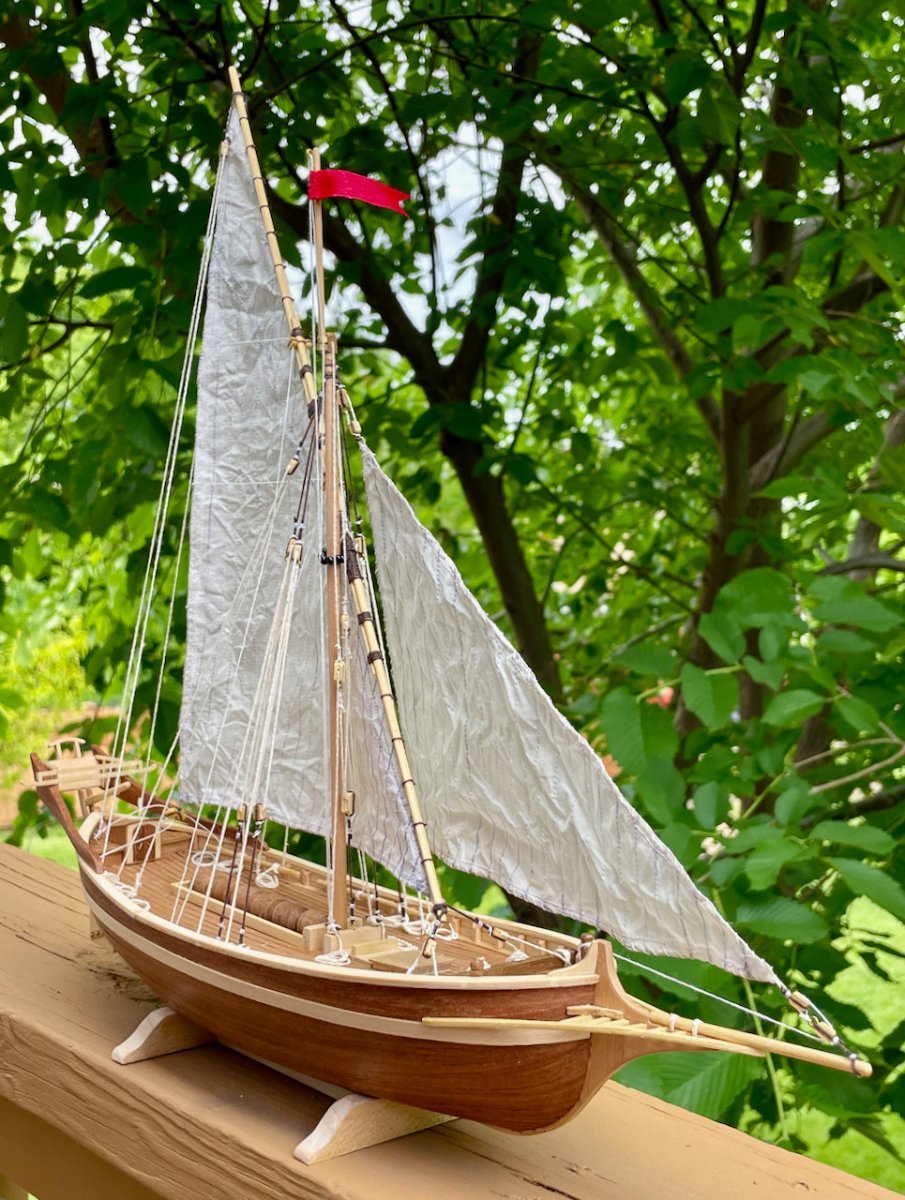
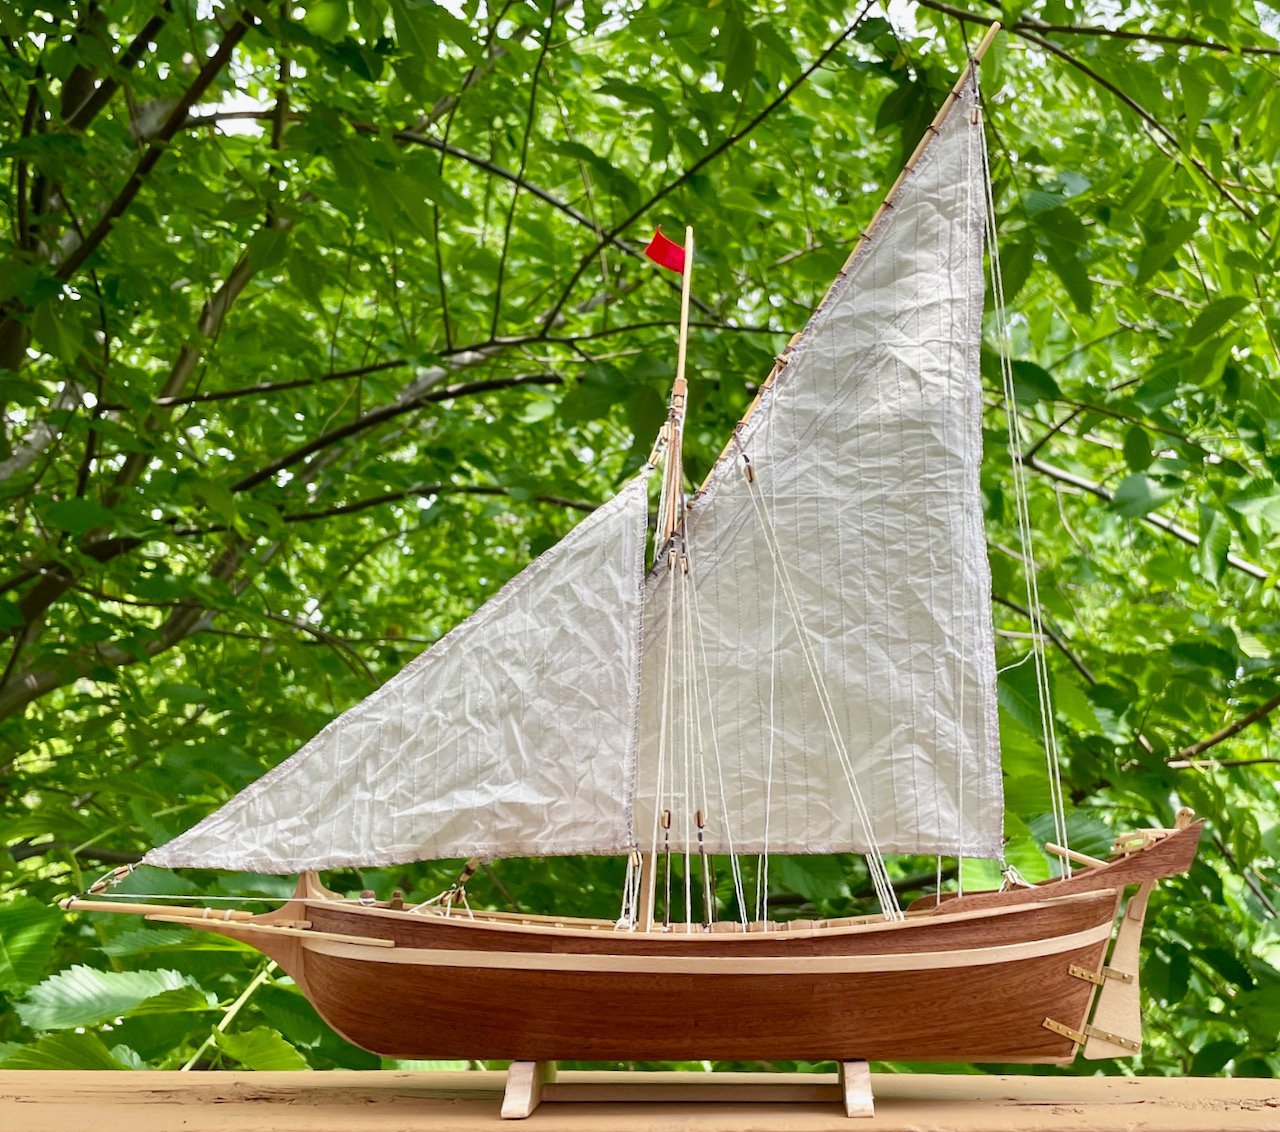
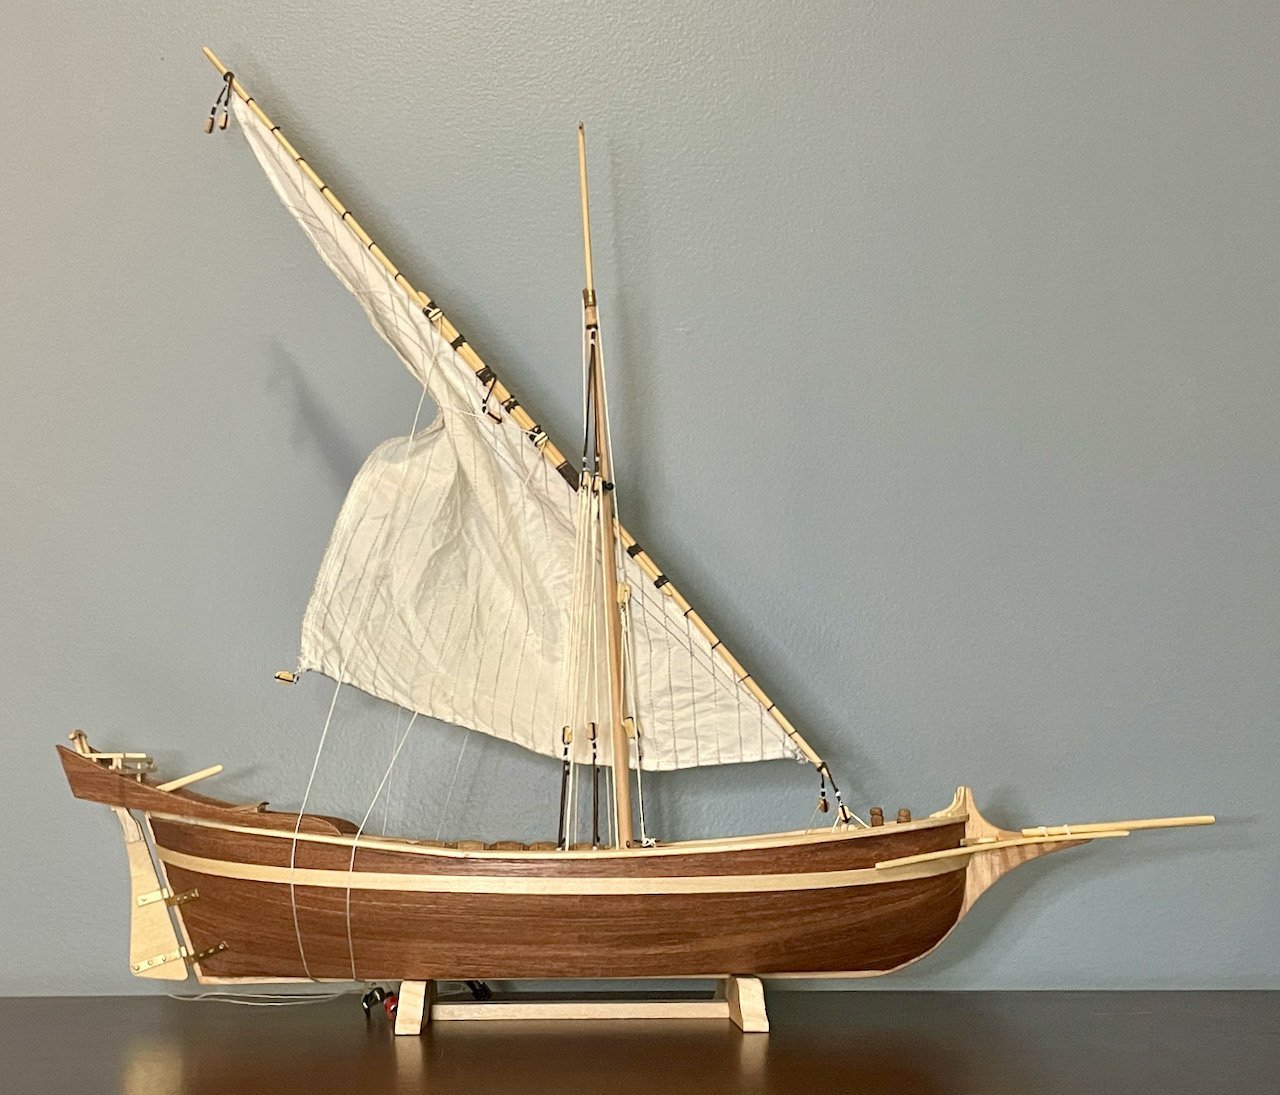
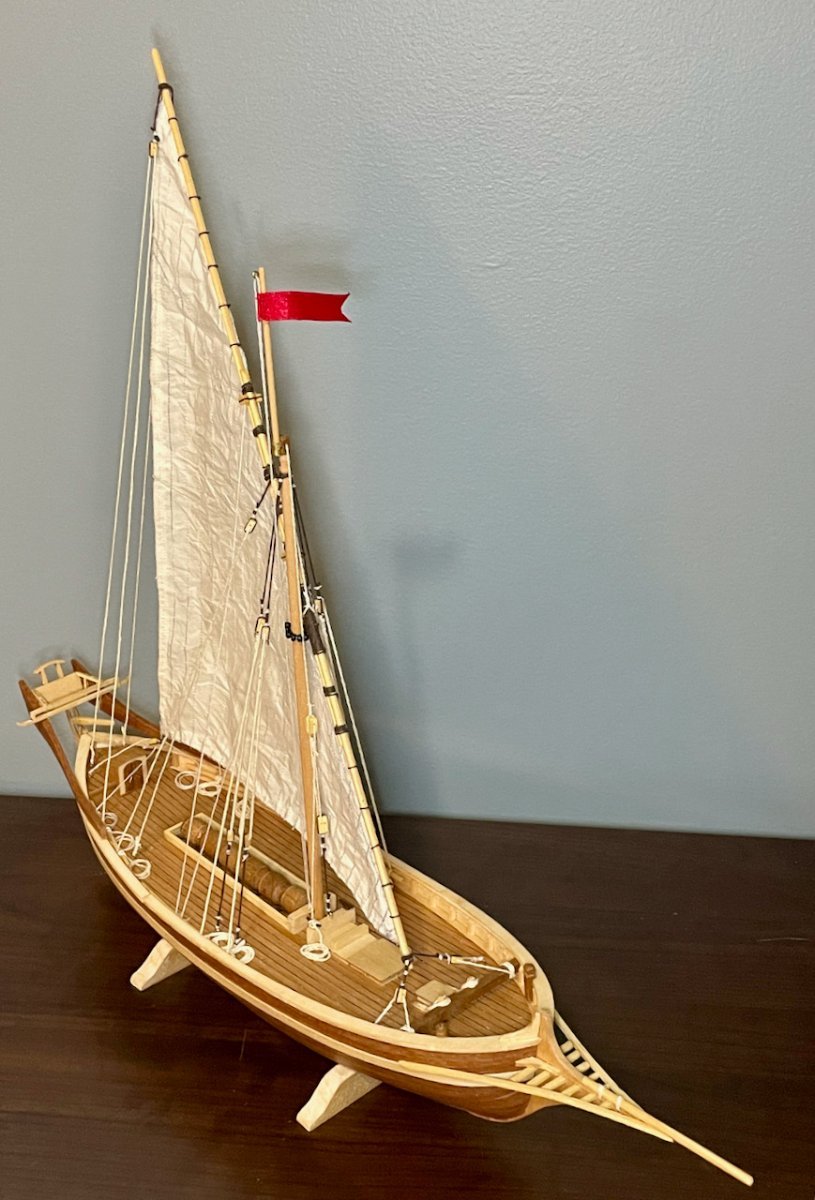
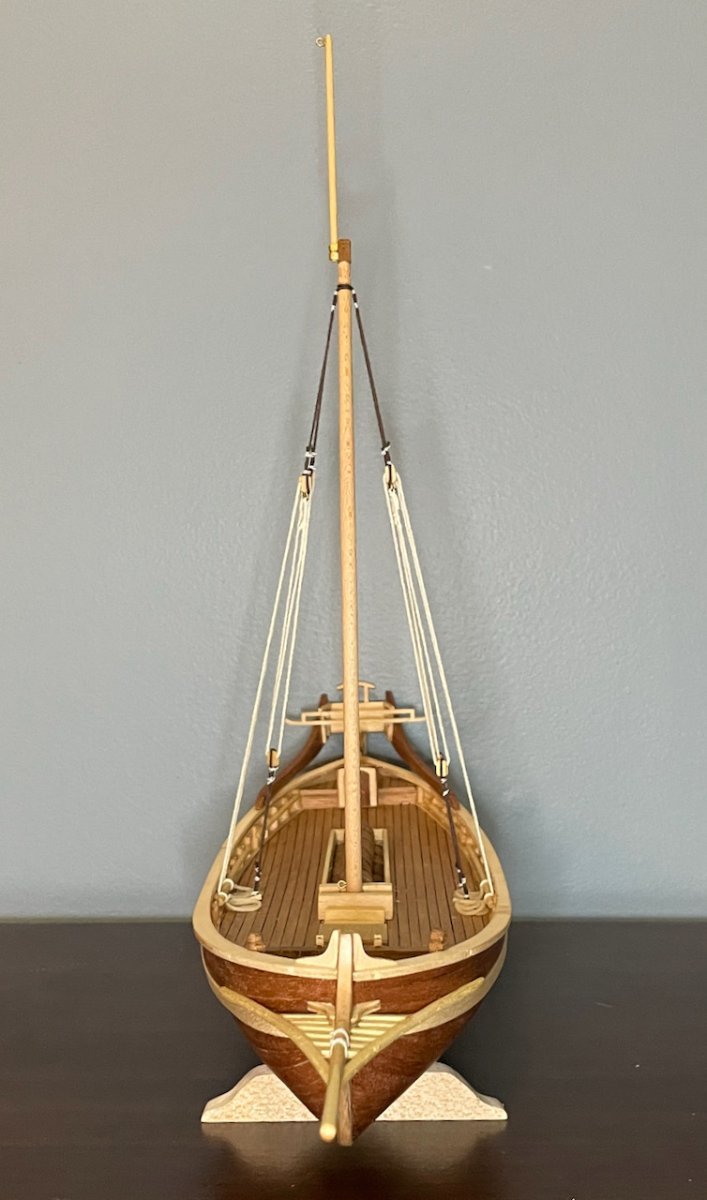
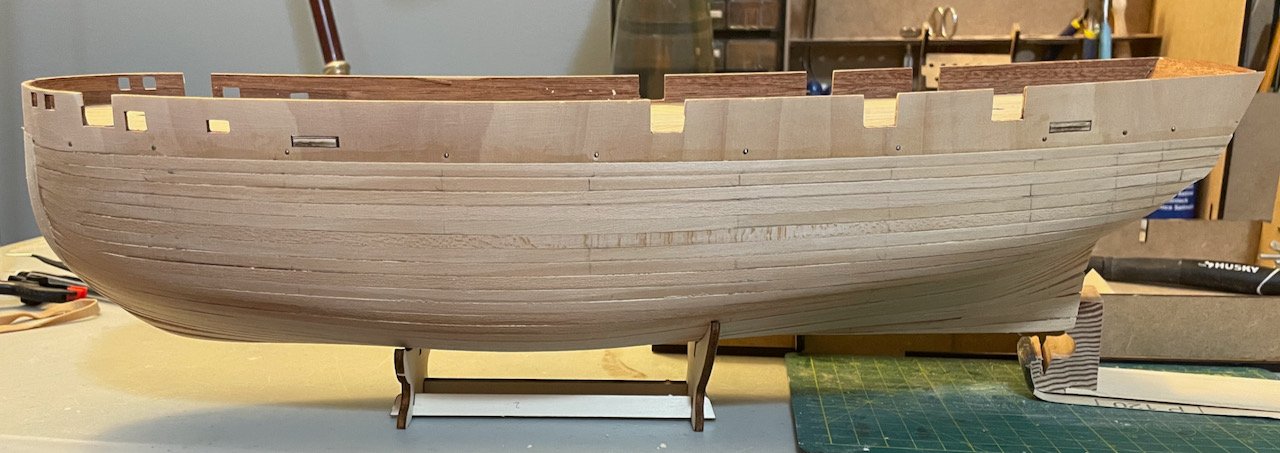
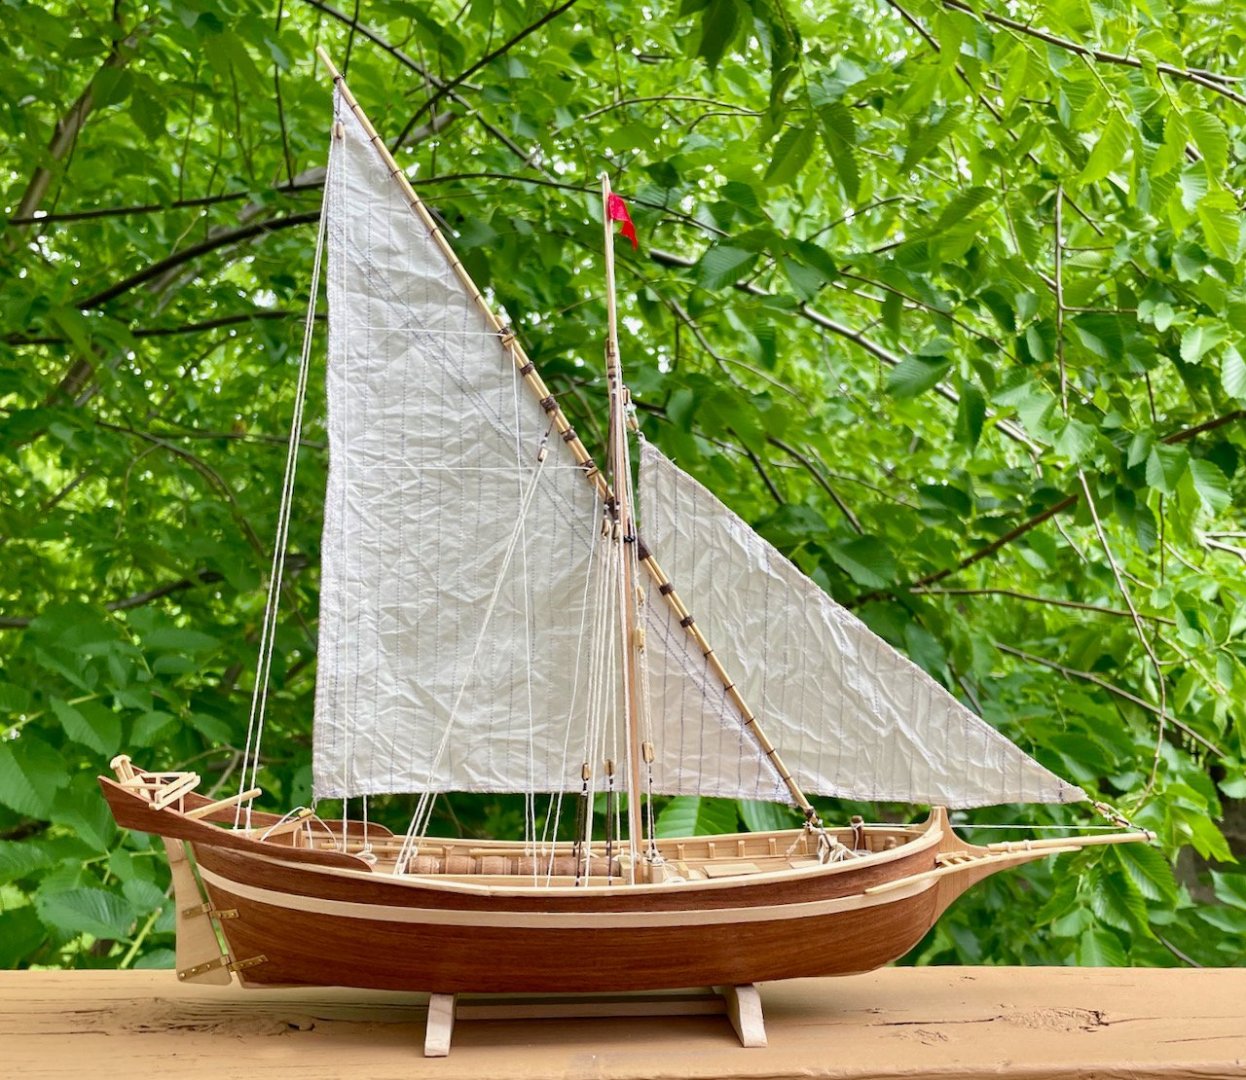
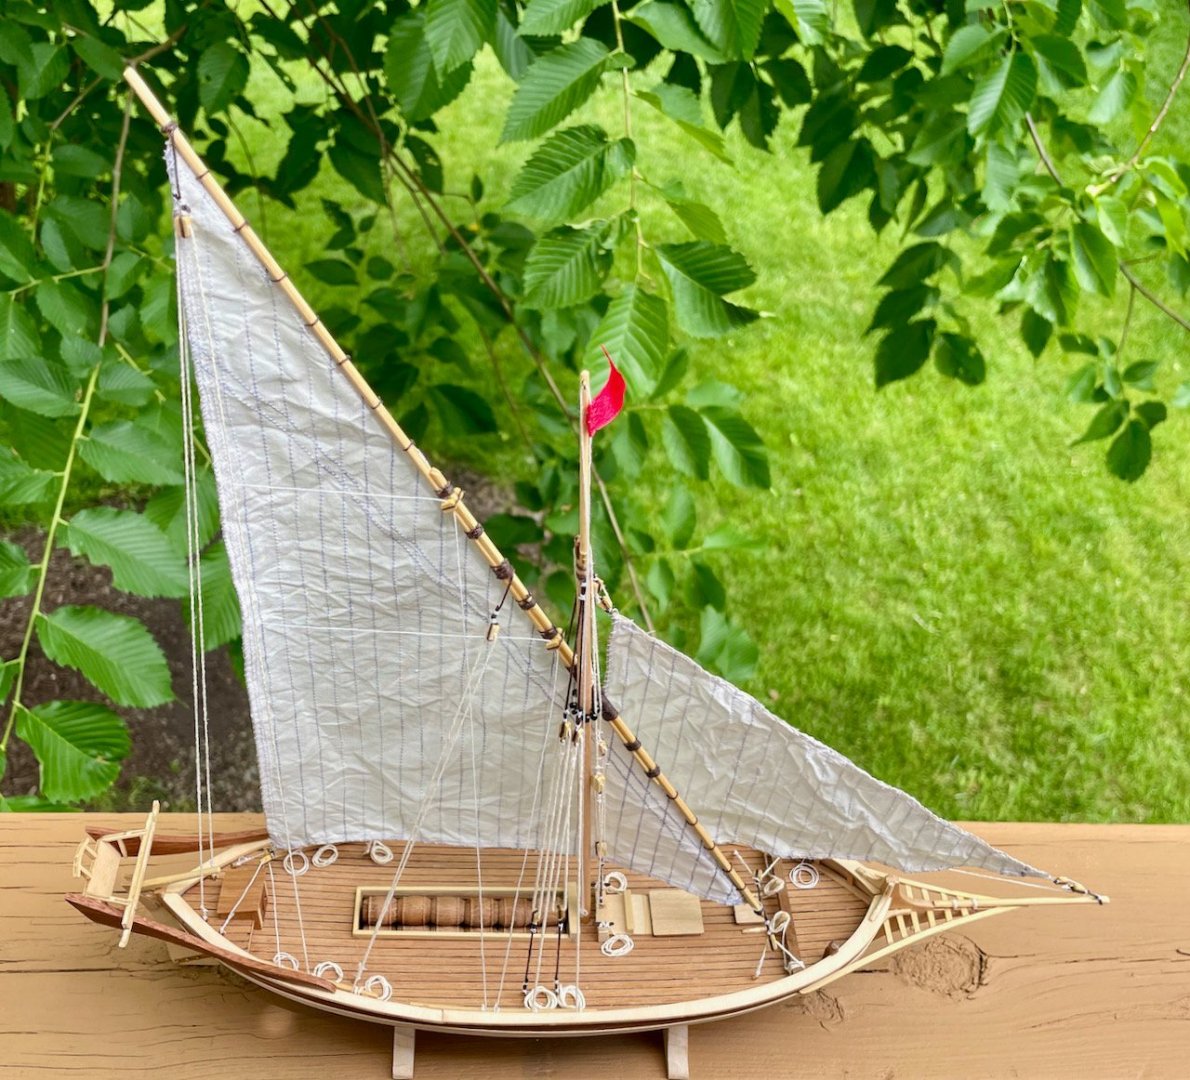
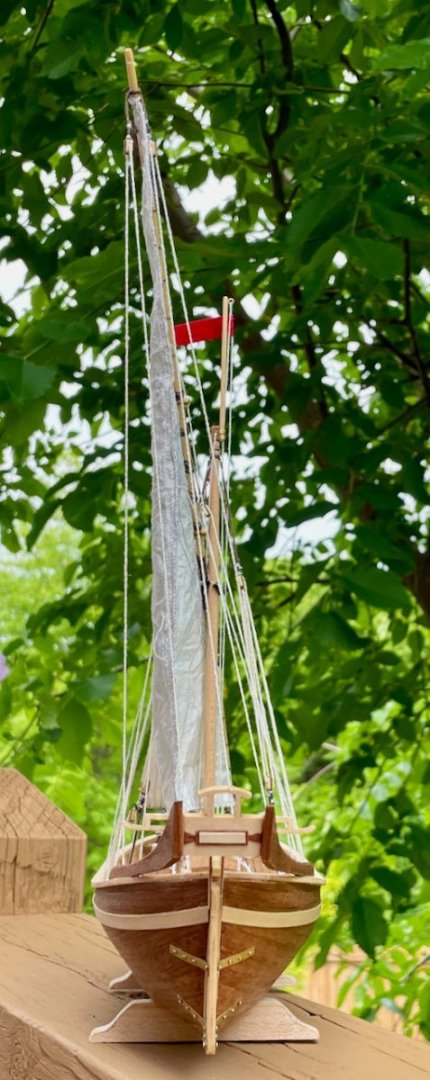
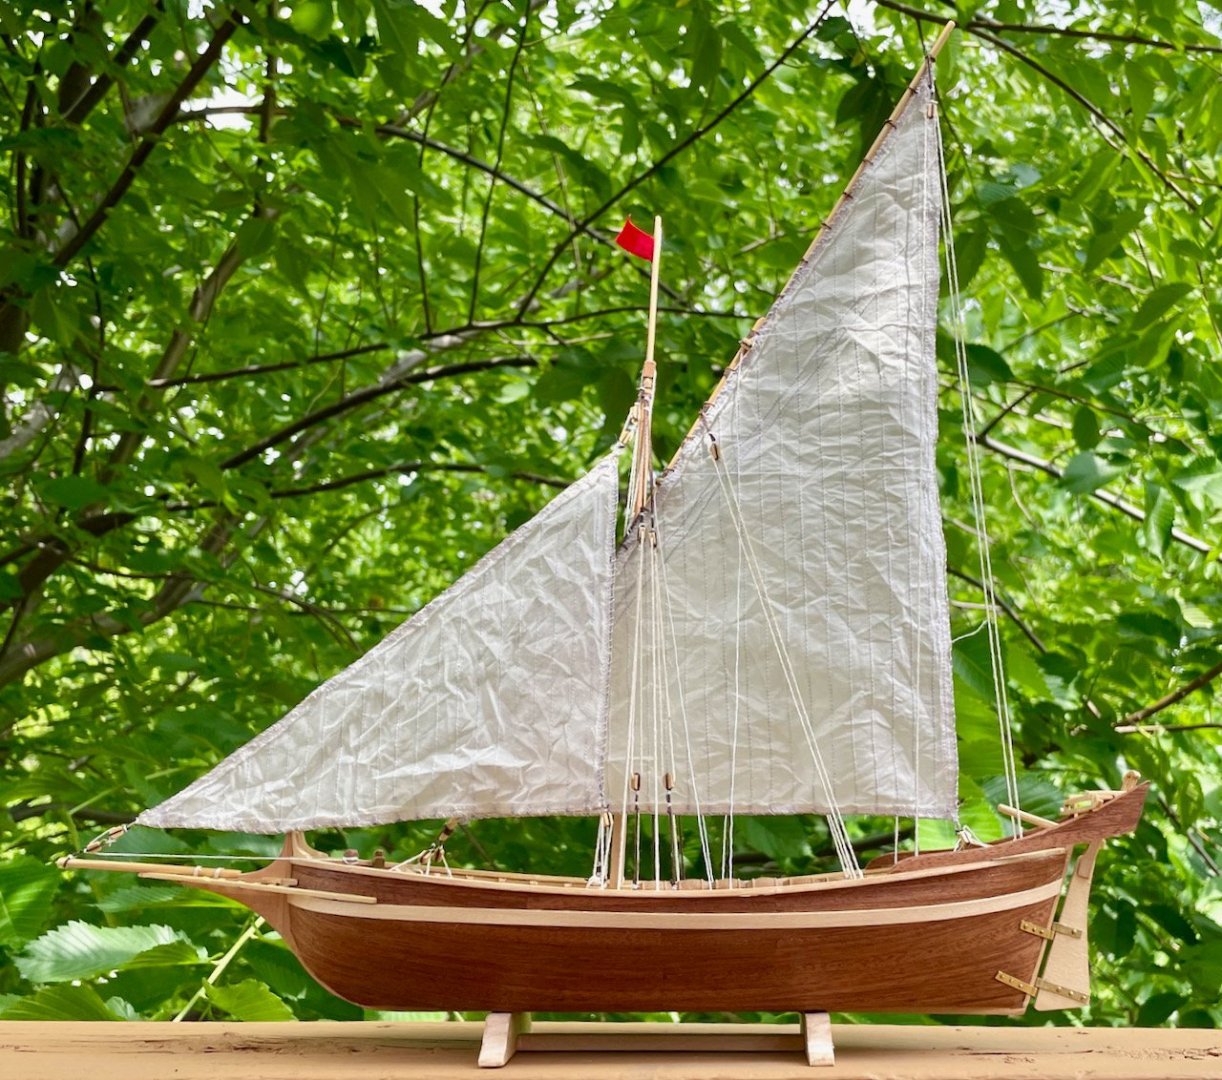
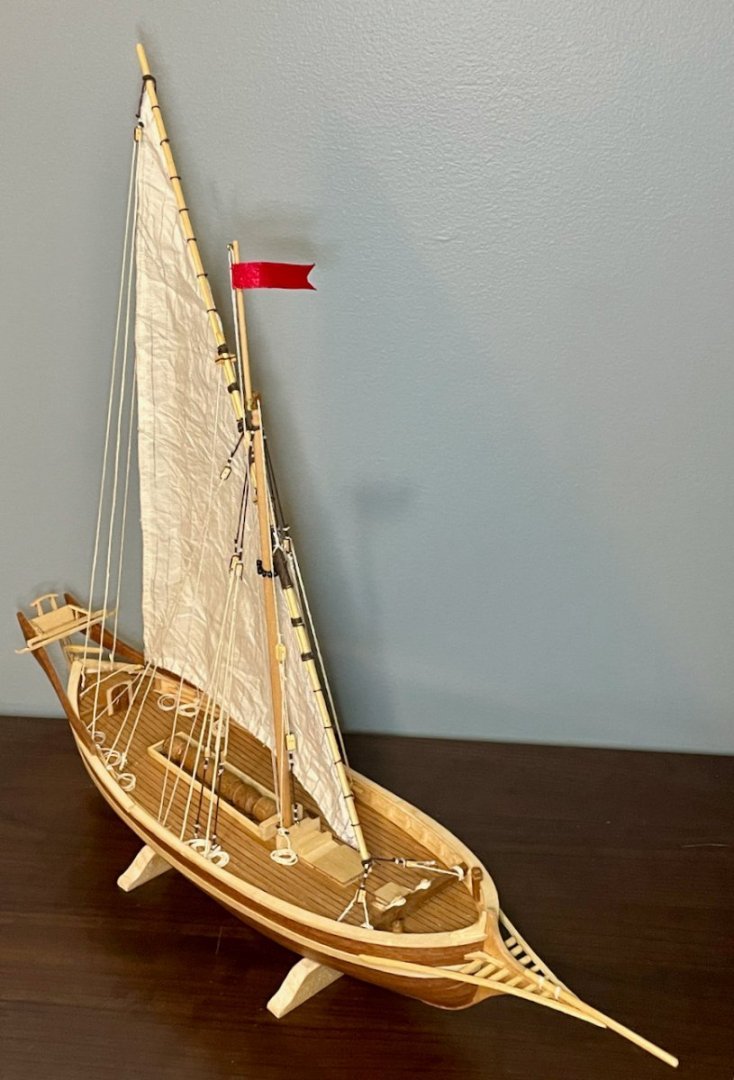
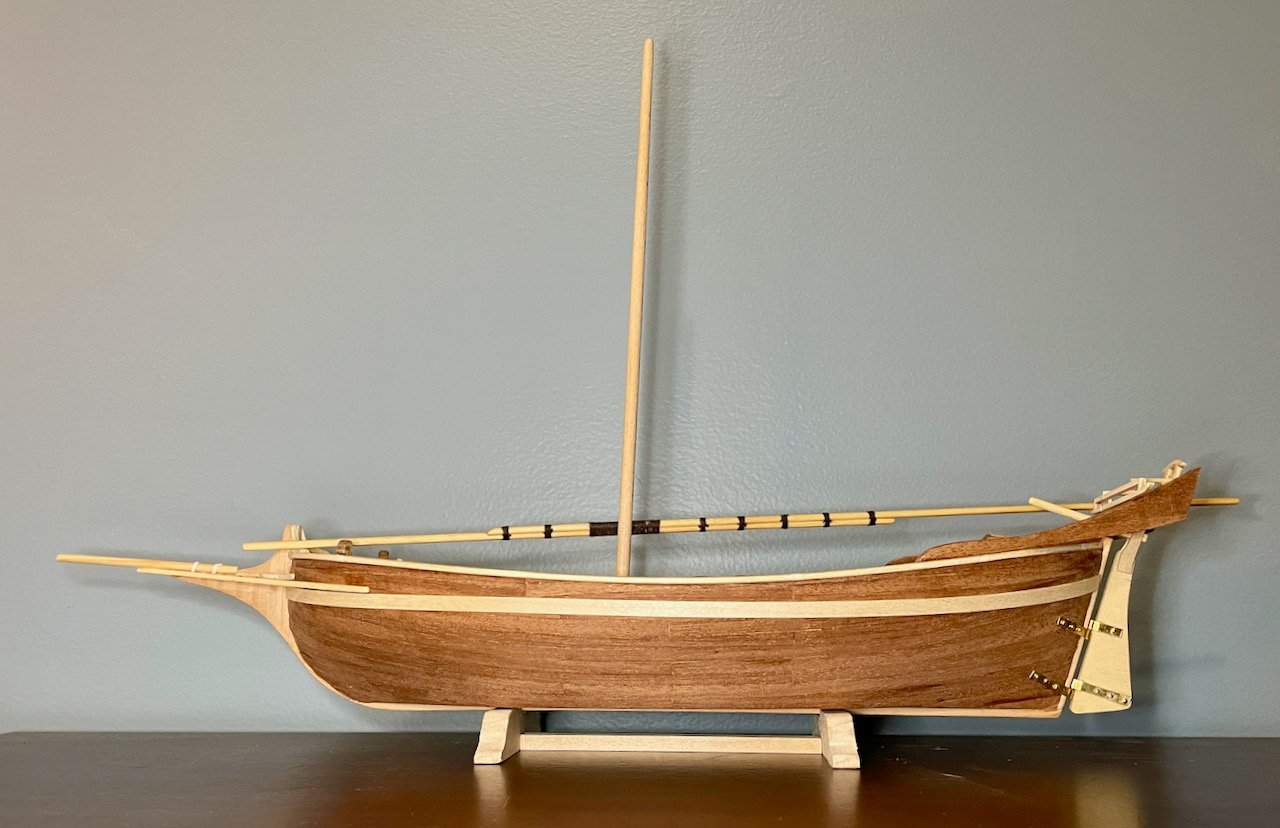
Et voilà! My work on the staysail went smoothly and fairly quickly, so the build is done! When I set out to build this kit, I wrote that I had three goals: Focus primarily on improving my skills, particularly in regard to planking the hull and the deck. I'm really pleased with how the hull turned out! I learned how to prepare a rabbet line and was much more careful while shaping the planks. It's not perfectly symmetrical, but it's smooth and beautiful. And there isn't any wood filler on the hull, which is a first for me! Generally speaking, I like how the deck looks. I laid black string between the planks to simulate caulking, which was a new technique for me. I have very mixed feelings about how that turned out and it created a number of extra hassles....I'm not sure whether I'll do that again, but I'll also spend some time studying other builds that use that technique so I can learn how to do it better. Beyond the hull and the deck, it was a completely new experience for me to make my own sails and flag. Make a good enough build that I don't have to use paint to cover up mistakes. A definite success here! I got some nice variation in color by using several different types of wood. I used satin varnish, but no paint or wood stain. Try some kitbashing and upgrading. I did a lot more of this than I originally planned to do and am very pleased about how those upgrades look. All in all, this feels like a big success for me, though in a different way from building the Endurance, which is the largest and most complicated build I've attempted yet. This build focused much more on getting the small details right and I think I did a good job of that. I let my imagination run free, too, which gave me some creative solutions for the upgrades. A quick review of the kit for others considering the Martegaou: Although this is a smaller model with relatively simple rigging and not too many detailed bits to build, it's not a great choice for a raw beginner. Billing labels it as "advanced beginner," which feels about right to me. It's a good challenge for somebody who has built a couple kits and who is looking to improve their skills. For more experienced builders, it's a blank canvas in a lot of ways, creating a lot of opportunities for kitbashing. Just with the rigging, there are a lot of opportunities to create different sail and mast configurations to match the various images of the allèges that I shared in my first post; I can imagine a striking version of this kit riding a tailwind, with the mainsail thrown all the out to the side and with the staysail mounted on a boom thrown out to the opposite side—along the lines of Baugean's woodcut of the Allège d'Arles descendant le Rhône. Although I had some frustrations along the way (especially with the warping of the thin plywood sheet that includes the deck pieces), it was a satisfying and enjoyable build. And now, the glamour shots, taken out on the back deck with the sails catching a gentle breeze!


- 59 replies
-
- 9
-
-

-
- Billing Boats
- Le Martegaou
- (and 1 more)
-
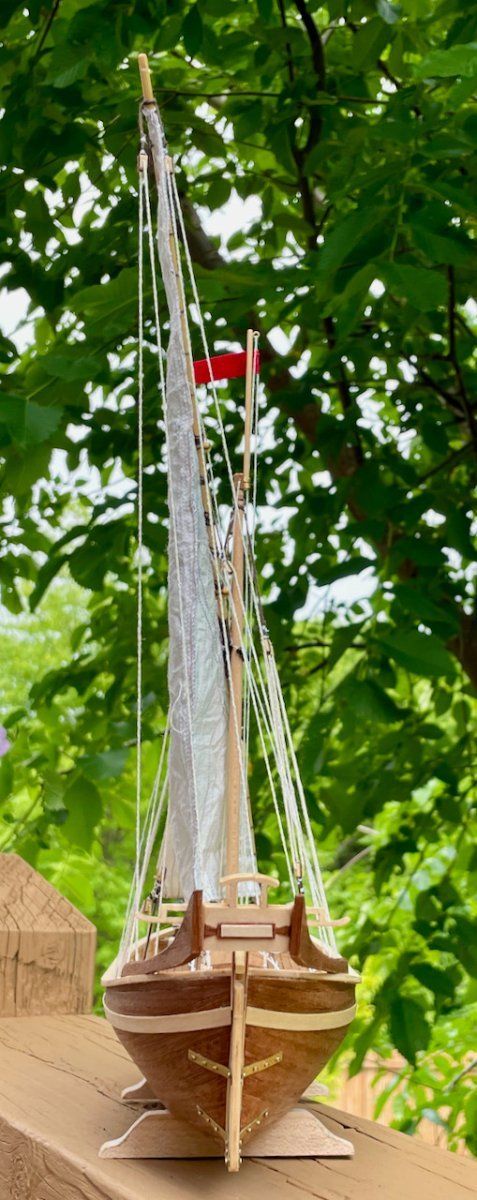
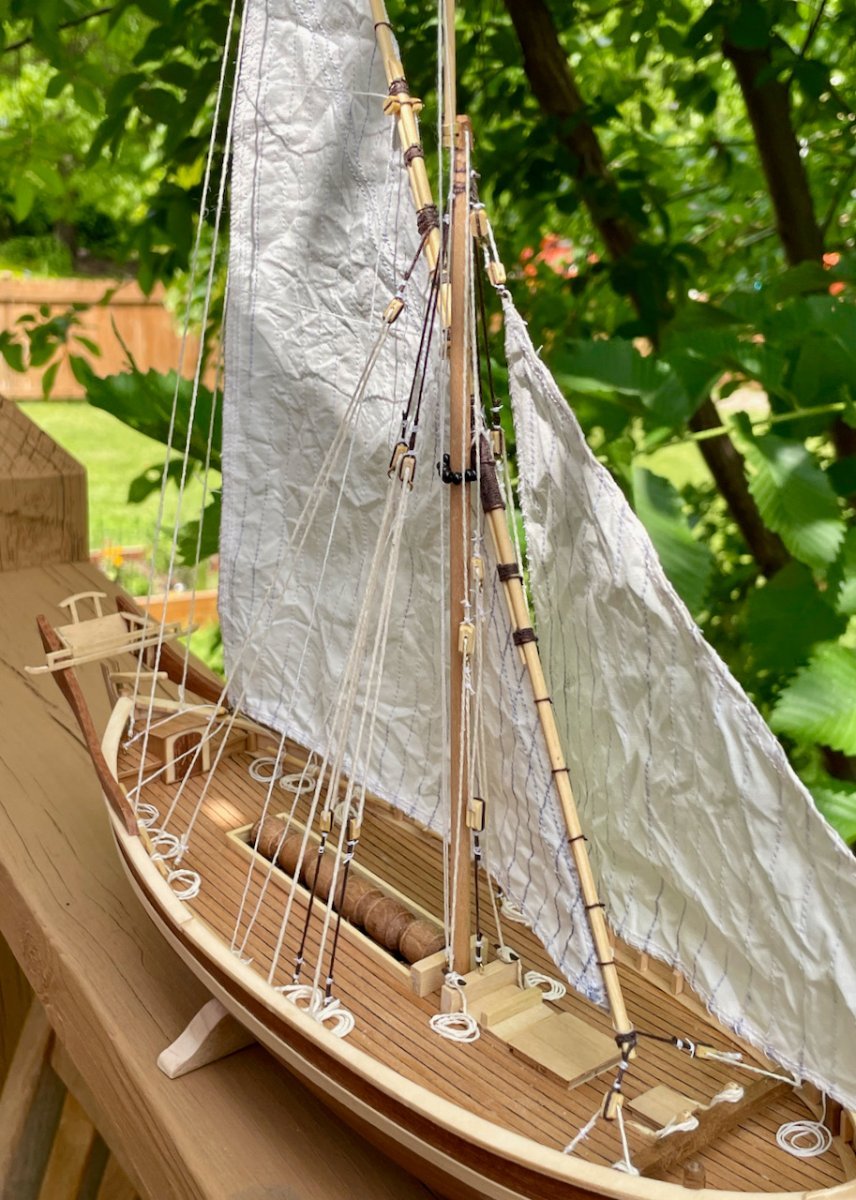
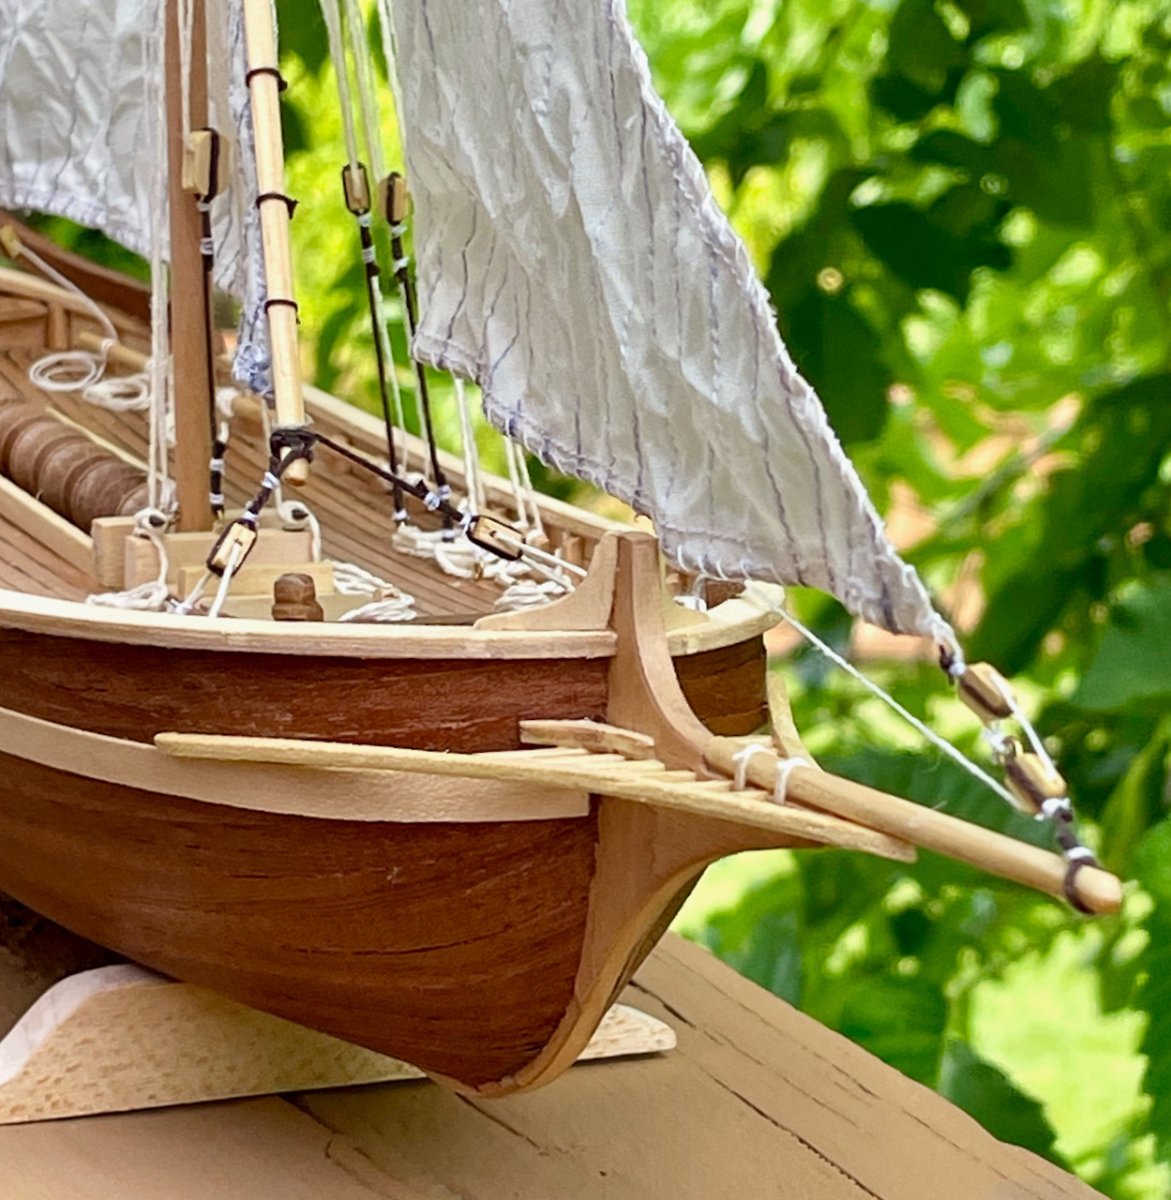
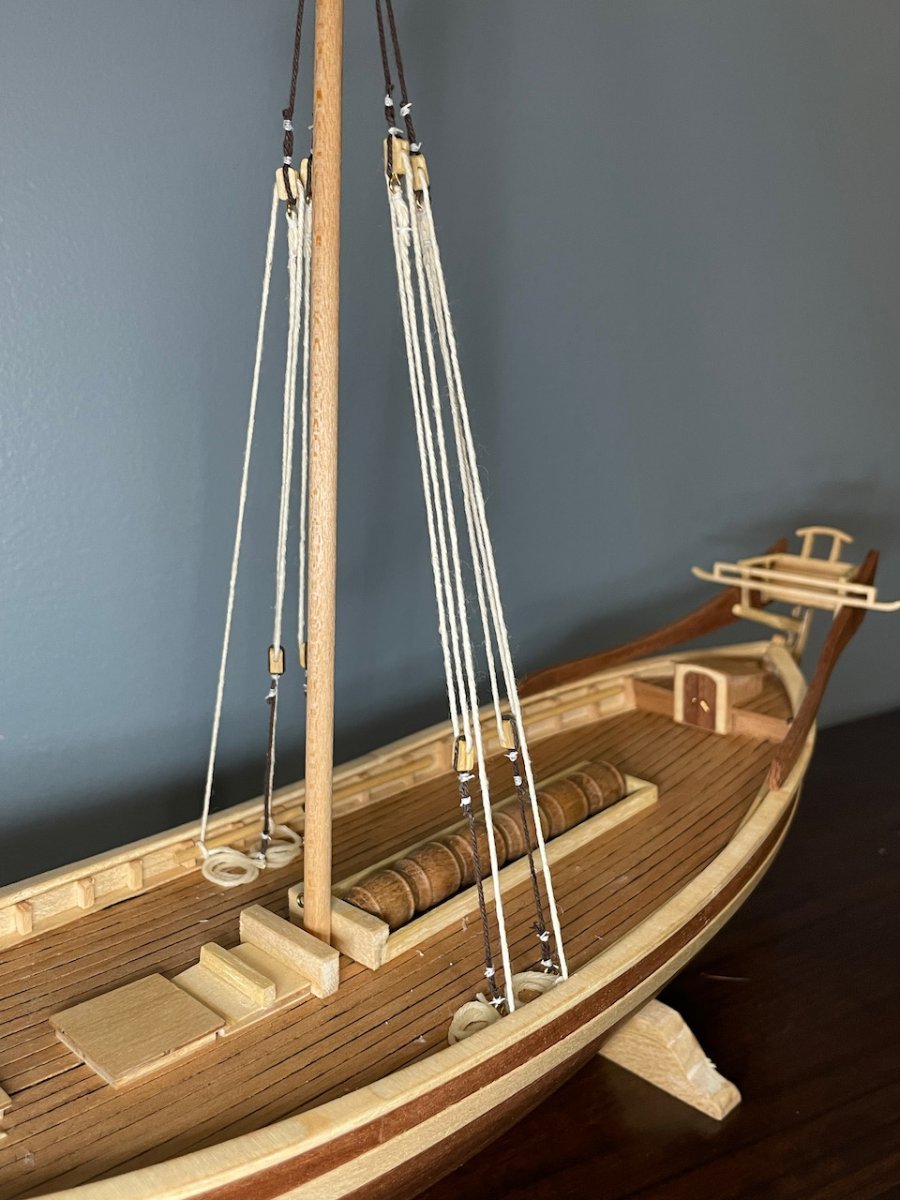
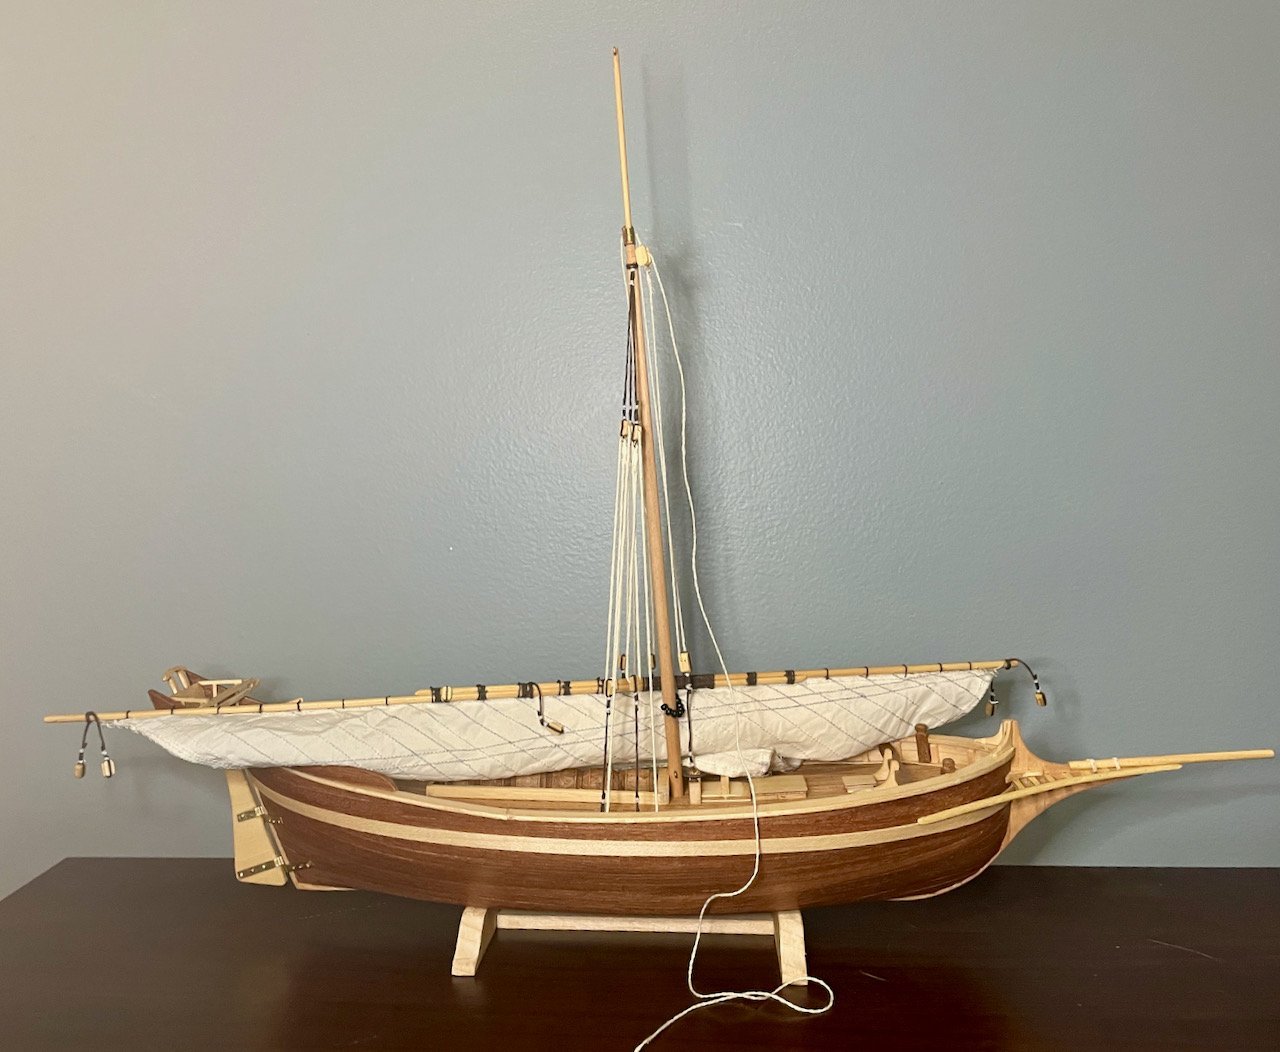
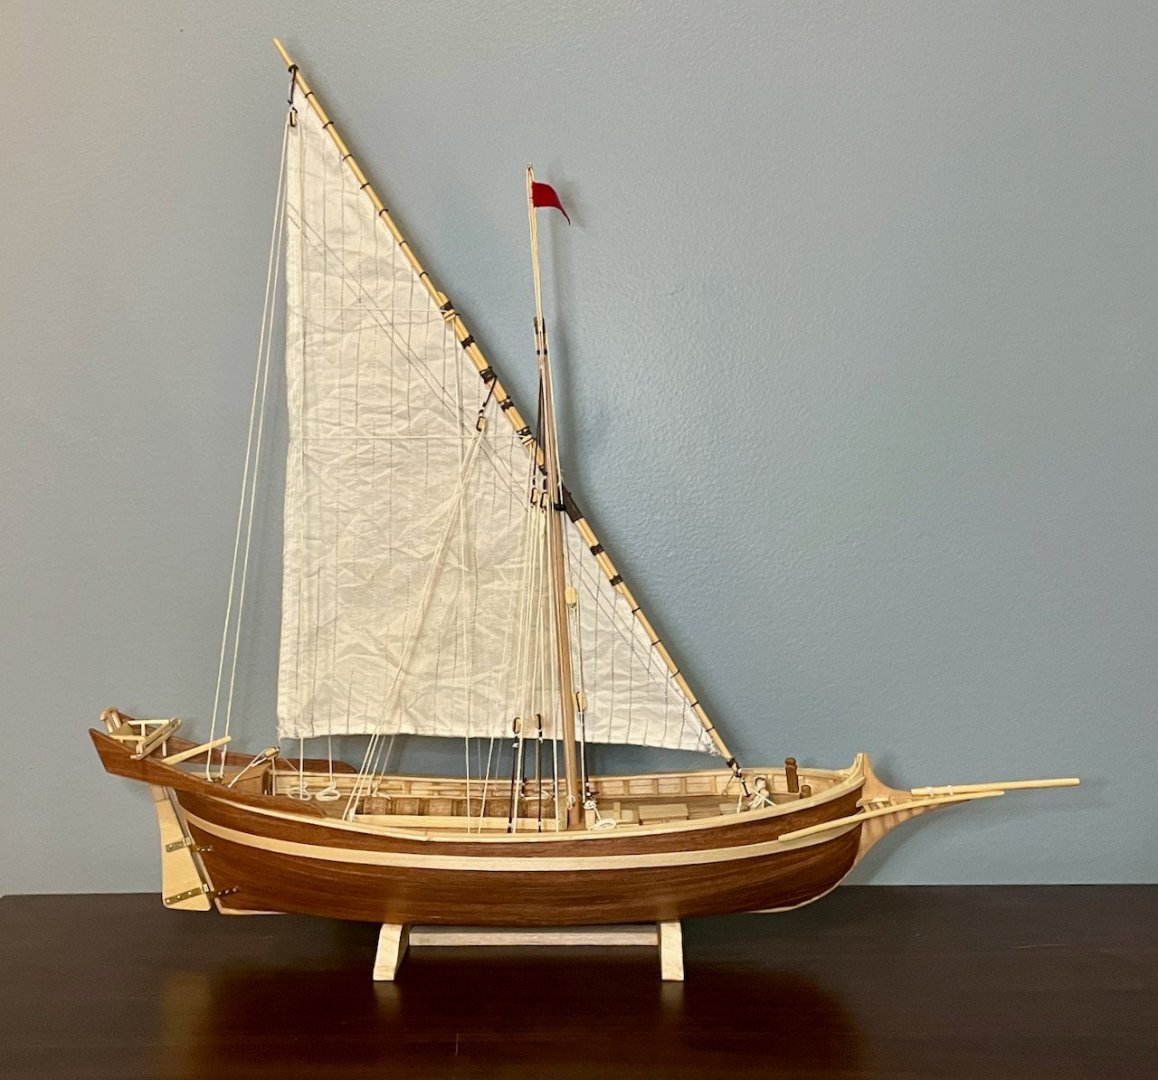
After a lot of hours in the basement today (in between mowing, walking the dog, and chauffeuring the kids), I've hung the mainsail! I made a point to seize all of the ropes at all fixed attachment points, using two seizing knots for each. This detail is a step up from what I've done in previous kits and I'm glad I did it! All of those attachment points look much better than when I had used simple overhand and square knots on my other ships. It took a LOT of patience, but I really got in the zone and was able to work through everything...and only had to tear out about three or four of the seizing knots. I get a real sense of satisfaction out of creating rigging that actually works. So, along the way, I stopped for a couple tests and photos. First up was a shot of the mainsail halyard before the antenne had been hoisted. You can see the working portion of the halyard dangling onto the table. If you look carefully, you may also notice that I added some parrel beads...that might have been a case of me getting carried away, but I had a bunch of beads left over from my Endurance build and this seemed like a good place to use them. I also repositioned the cleats for the mainsail and staysail halyards; in the plans, they are mounted on one side of the mast, but I moved them to the block just forward of the mast. Next were the brailing lines. Although I've made a couple lateen rigs before, none of the prior kits included brailing lines. So, this test was about better understanding how they work. The plans aren't all that clear on how to install these lines, so here's how I ended up doing it. Like the plans, I only installed two brailing lines, though in hindsight I think it probably should have three. First, I mounted blocks on either side of the antenne, lining up with about the half- and three-quarters levels of the sail's leech. I lashed these on, but also used a bit of CA glue for a bit of extra strength. Then, I ran the line through the small gap between the sail's leech and the bolt rope, aligning the center point of the line here. From the leech, each line runs along both faces of the sail to the blocks on the antenne; from there, it drops to the deck on both sides and is tied off on the rail that I installed. (I think the plans drop the lines down to a single belaying pin mounted on the cap rail.) In this photo, the brailing lines are still dangling on the table, gator clipped together on the port side of the ship. After that, it was time to start running the various lines that control the antenne. I also hoisted the flag, since its halyard would be hard to access if I waited any longer. It was a long day's work, but I really wanted to get all of these lines set and not have to stop halfway through. In the second photo here, you'll notice a lot of rope coils; since there are no measurements given for any of the ropes, I was guessing at lengths. After cutting a couple too short, I made a point to cut things very generously. Each of those rope coils is actually the excess once I pulled the line taut. Next (final!) step: rig and hang the staysail, which will be a MUCH simpler task than the mainsail.

- 59 replies
-
- 4
-
-
-
- Billing Boats
- Le Martegaou
- (and 1 more)
-
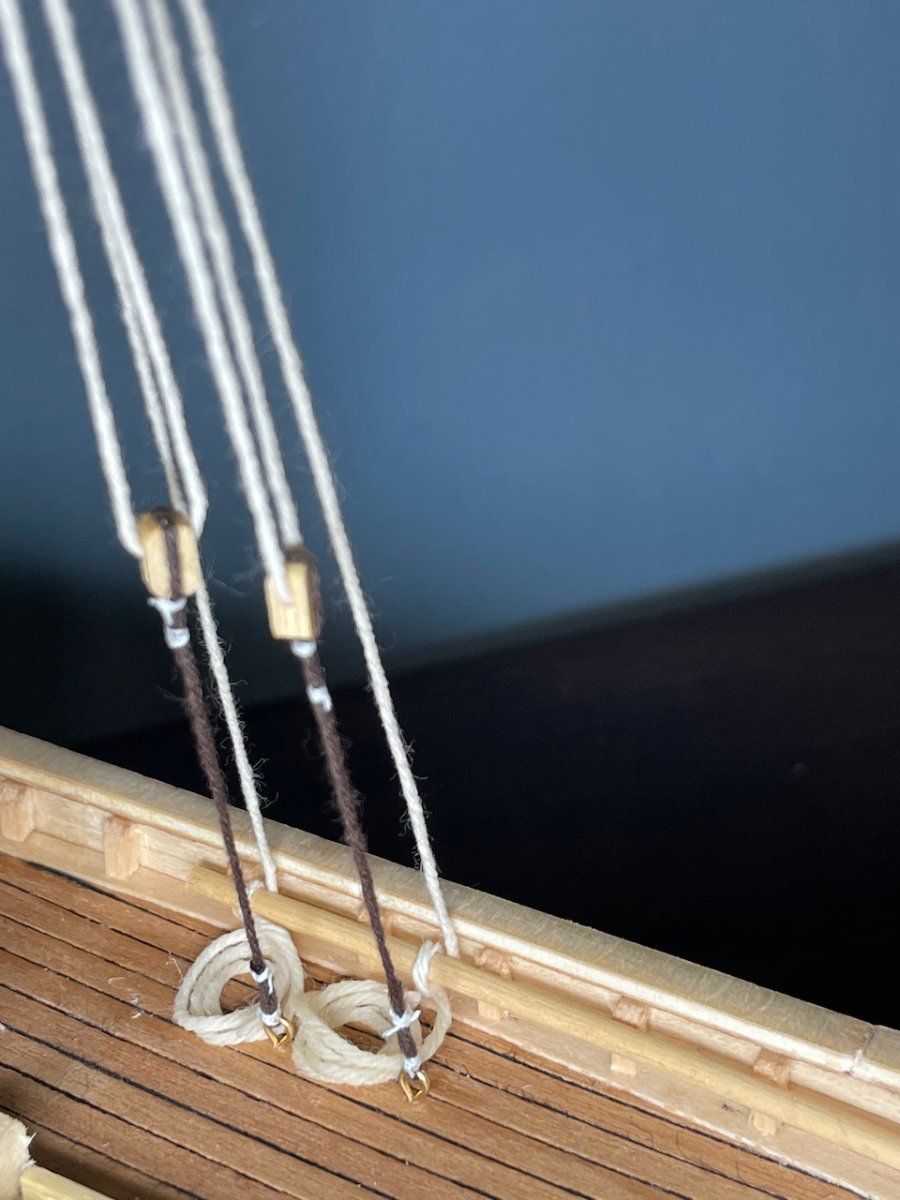
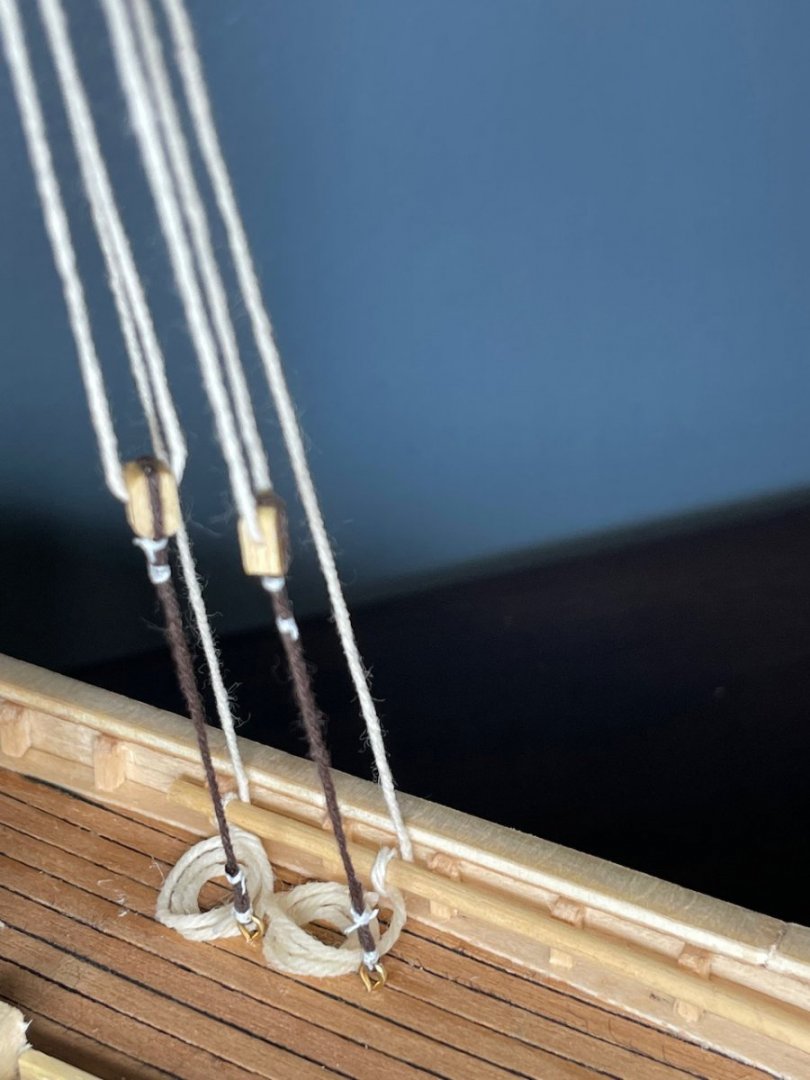
I probably spent a bit more time on the Martegaou today than I should have, but it made for a relaxing morning and evening. After lashing the mainsail to the antenne, I installed the mast. Then this evening, I ran the shrouds. As I worked out my rigging plans, I made a number of changes from the plans that come with the kit. Most significantly, the kit calls for a number of belaying pins and blocks to be mounted on the cap rail. This is different from what I've seen in a number of sources, especially Pâris's Souvenirs de marine conservés and the ANCRE monograph on the Allège d'Arles. So instead, I'll be using a combination of eyebolts mounted on the deck and rails mounted on the bulwarks. The shrouds give some sense of what I've planned. First, I'm using some leftover brown cotton thread for the fixed parts of the rigging. The white thread came with the kit and will be used for the running rigging and the adjustable parts of the standing rigging. The "small stuff" used for seizing blocks is just white sewing thread. The rope coils are genuinely the excess rope from the adjustable parts of the shrouds; I wrapped them around the handle of my Exacto knife, dabbed on some Dritz FrayCheck, then adjusted it until I was satisfied. Next steps: rig and hang the mainsail.


- 59 replies
-
- 3
-
-
- Billing Boats
- Le Martegaou
- (and 1 more)
-
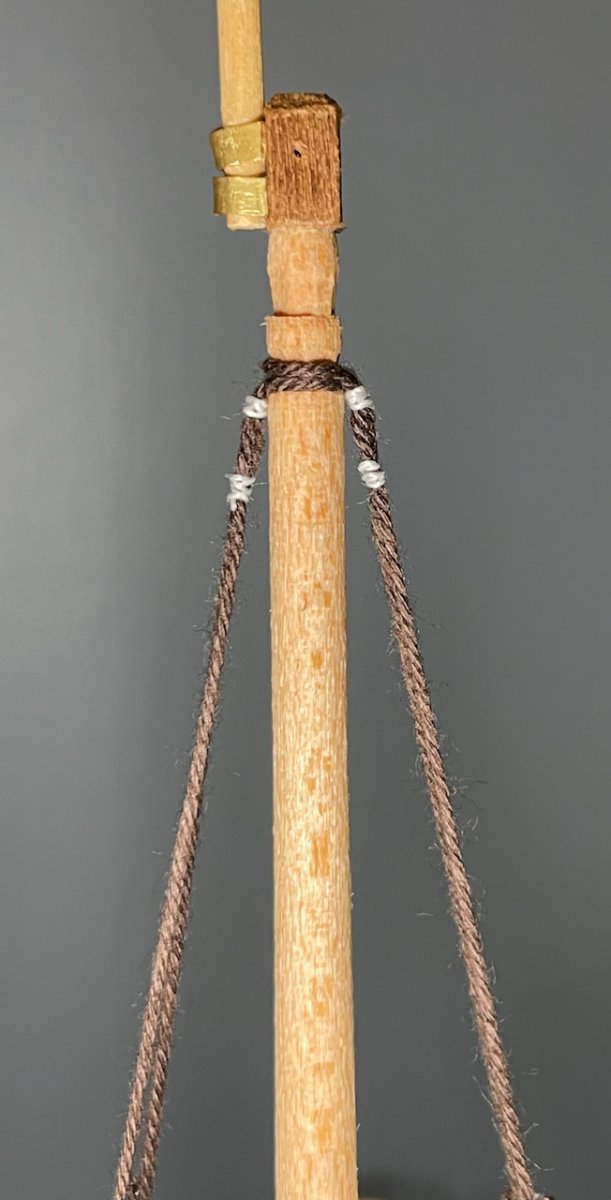
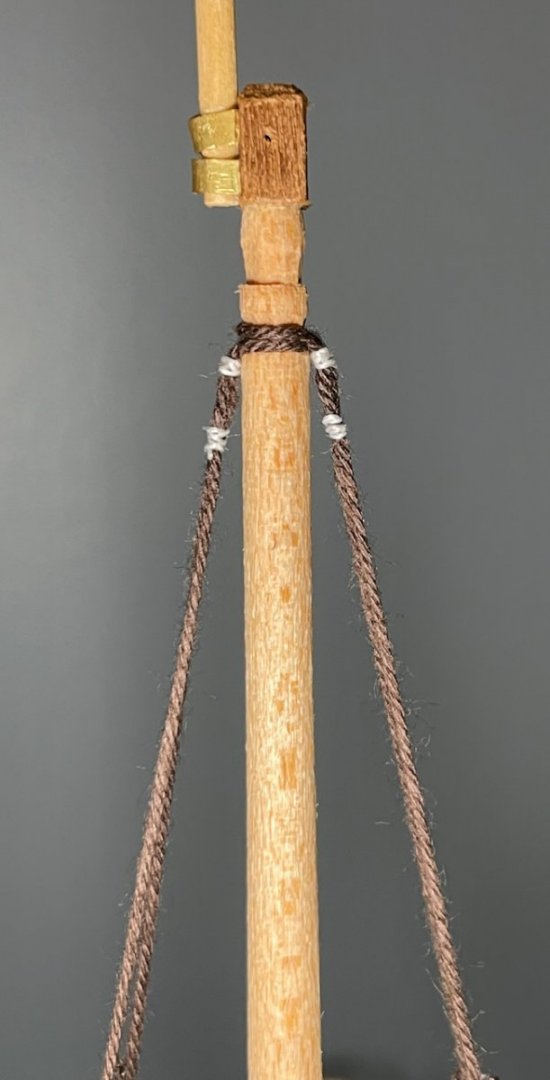
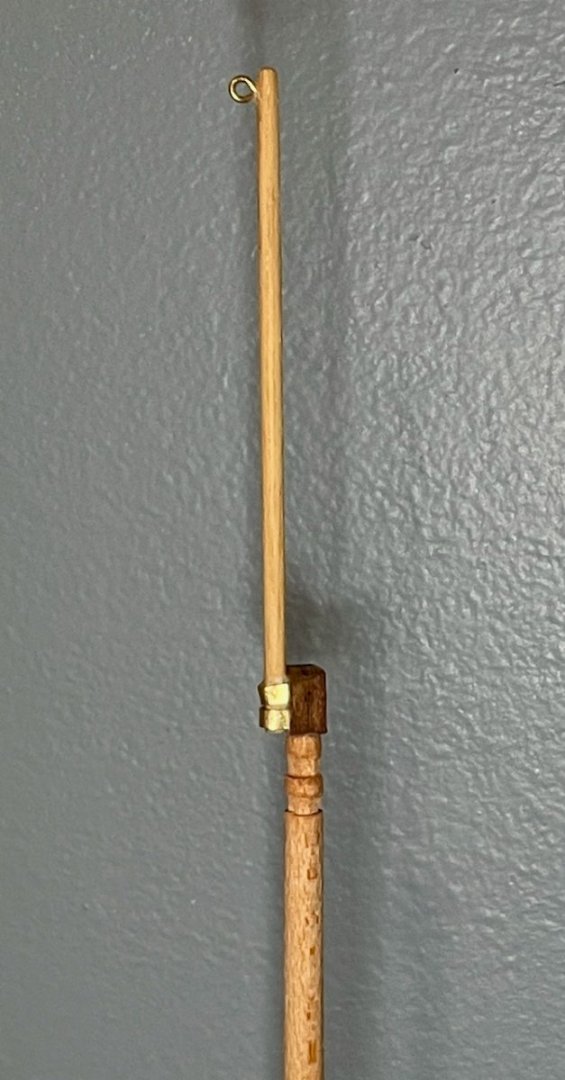
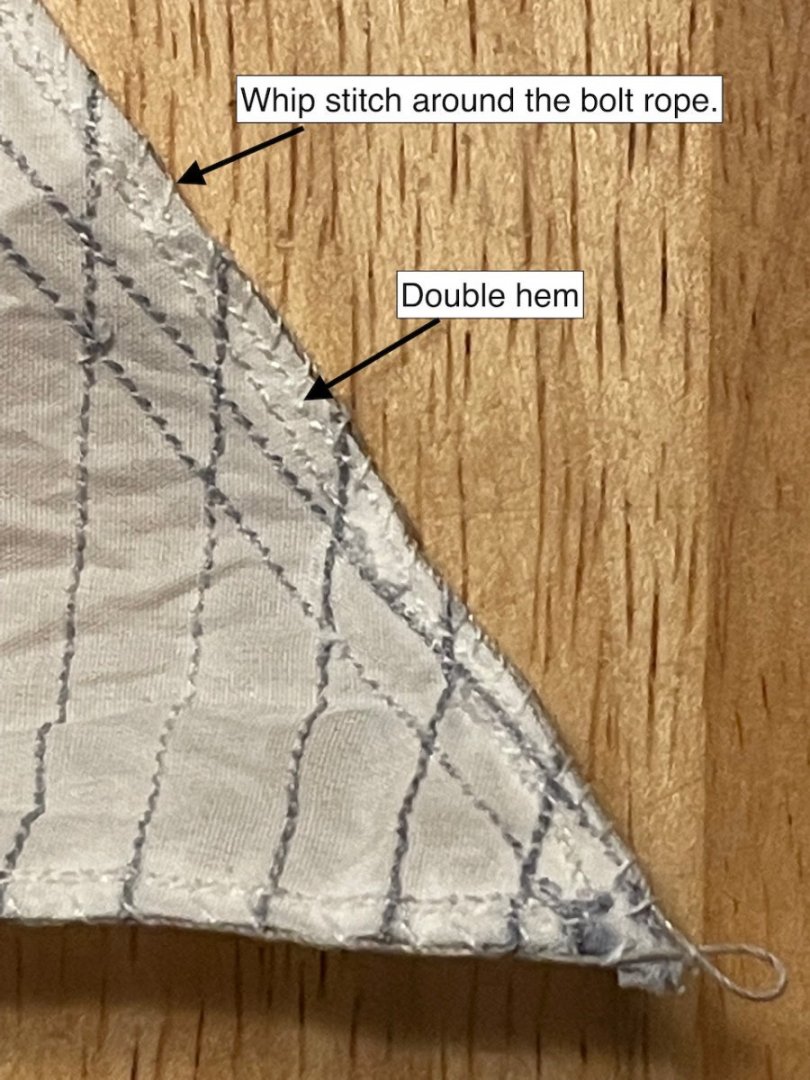
A bit more progress to report. Most importantly, I have now finished the sails! Before this week, all that I had left to do was sew on the bolt ropes. After a bit of research, it seemed like the best way to do this was a whip stitch, hand-sewn rather than with the machine. I'm not quite sure how long it took to do this...it really helped to get into a zen kind of space in which I completely lost track of time. The whip stitch is very simple, but it was really repetitive—a stitch every 2.5-3mm around two sails whose perimeters add up to about 140cm. However, I'm really pleased with how these turned out, especially since they're the first sails that I've made from scratch! I've hand-washed them, crumpled them, and then let them air dry. My other big accomplishment has been to assemble the mast. After studying tkay11's Allège d'Arles build and the Ancre plans, I decided to kitbash this a bit. I cut a couple grooves for the shrouds. Then, I added a calcet, mounted to the top of the mast and reinforced with the shaft of a brass pin whose head I had removed. Finally, I installed the flagstaff. In the kit, the flagstaff is simply attached to the flat top of the mast. But in all of the paintings and other plans that I've seen, the flagstaff is mounted on the side of the calcet. After considering some options, I decided to use a couple spare pieces of brass strip to mount the flagstaff onto the calcet. The eyebolt at the top will be for the flag's halyard. Next steps: attach the mainsail to the antenne, step the mast, and start on the rigging.

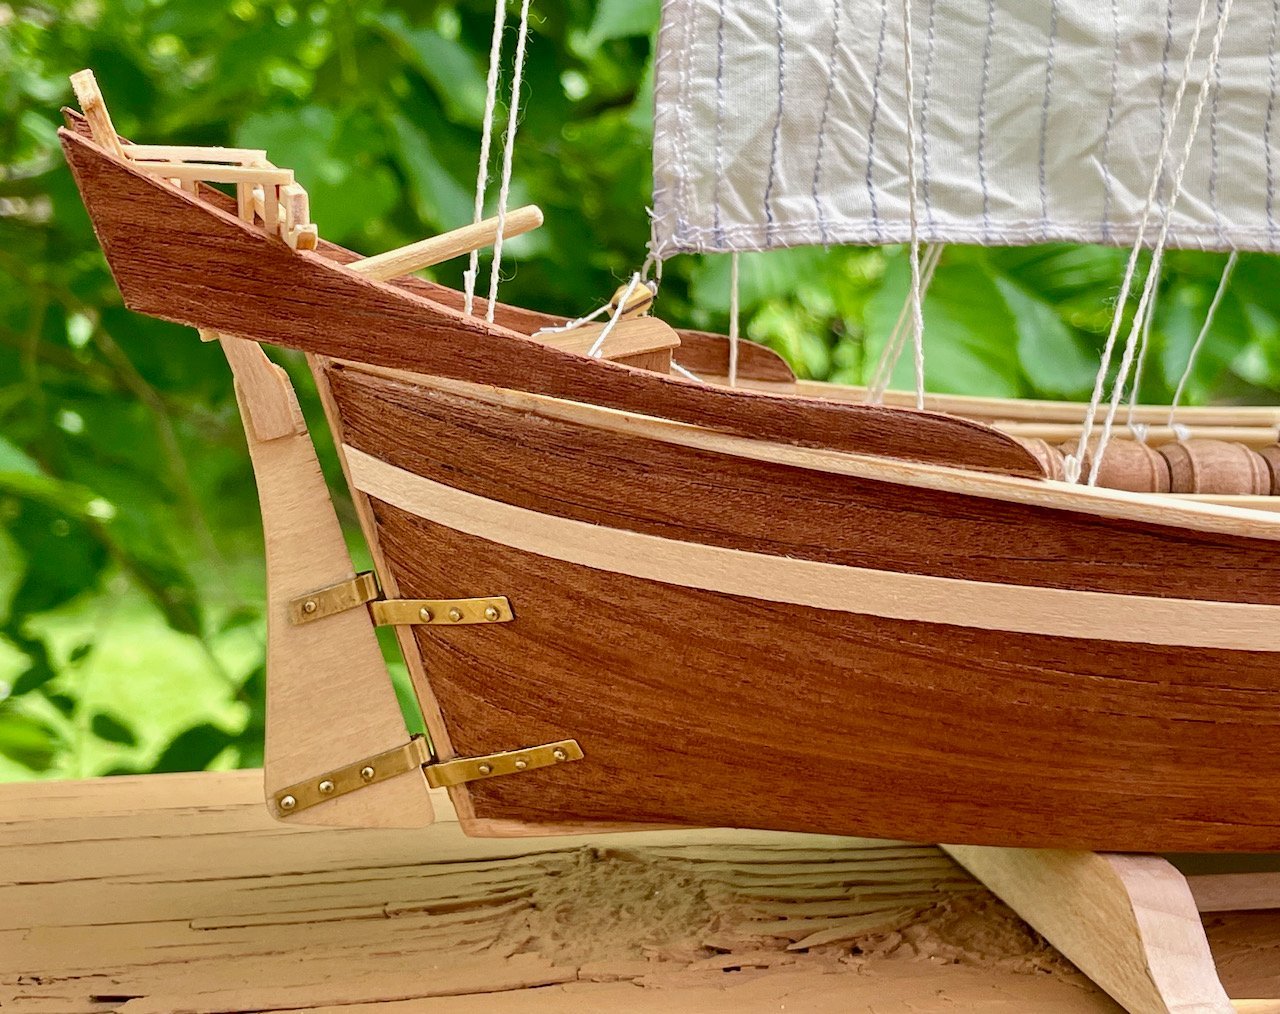
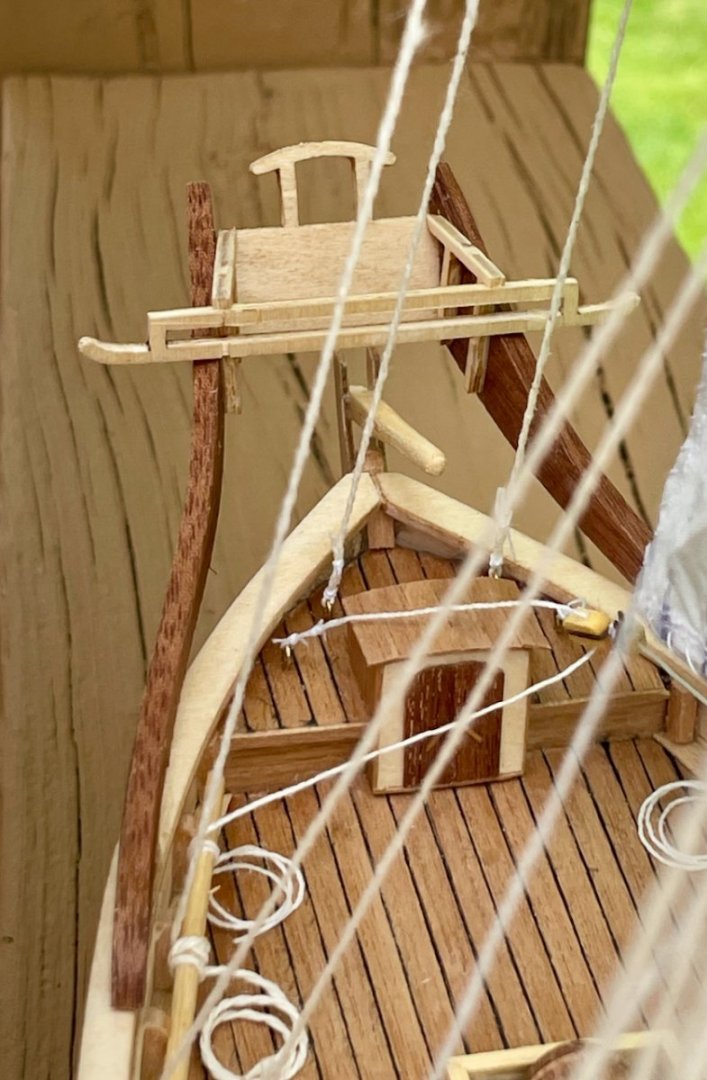
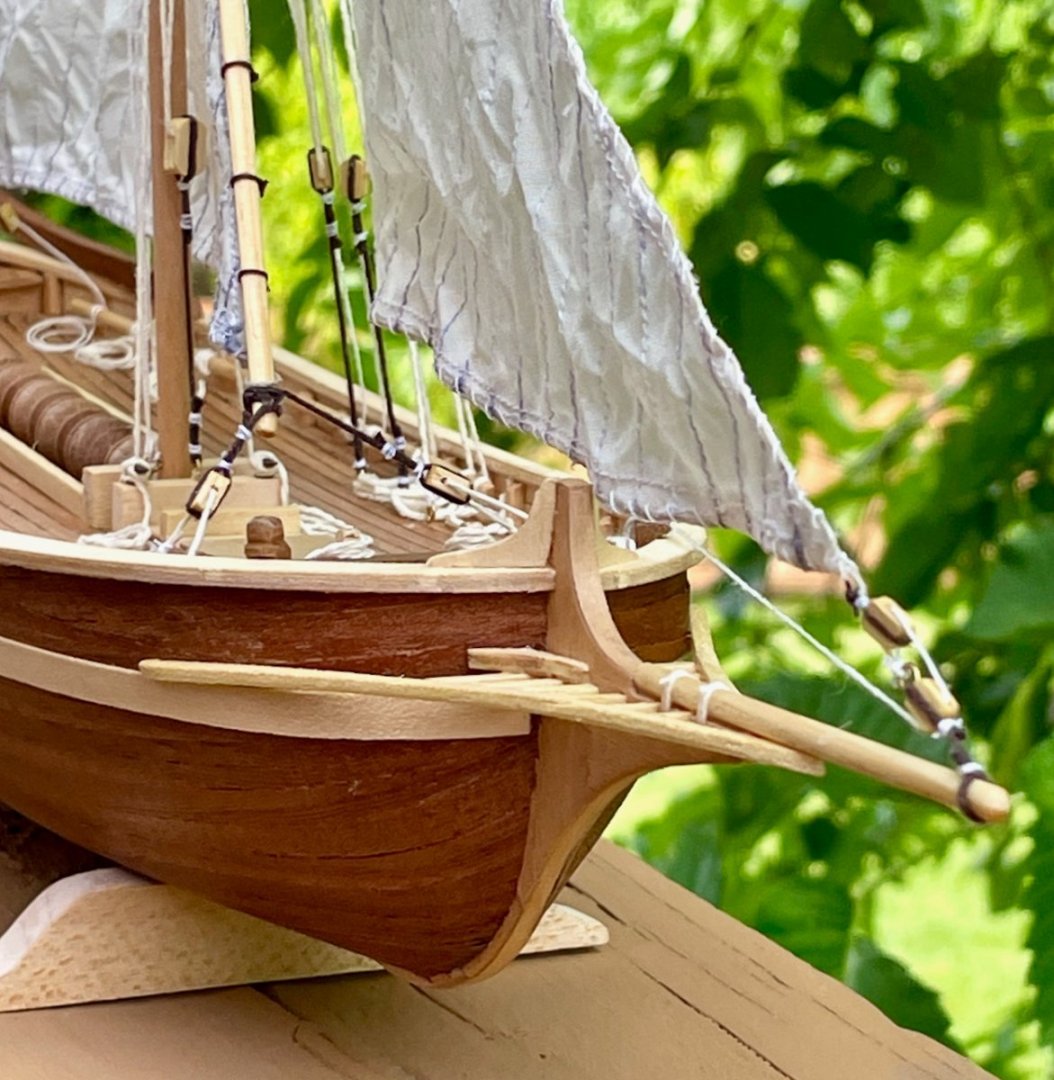
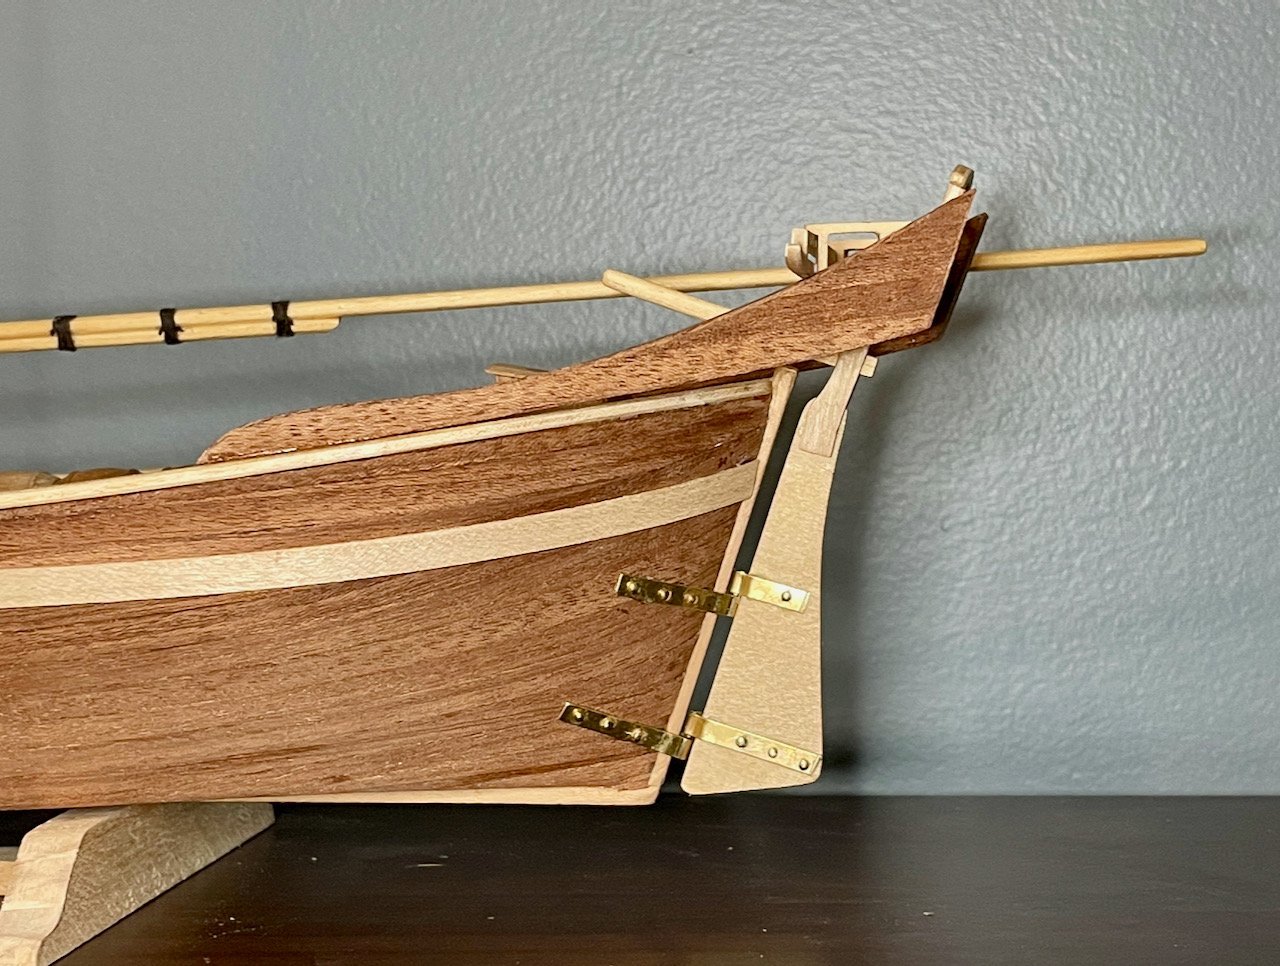
-
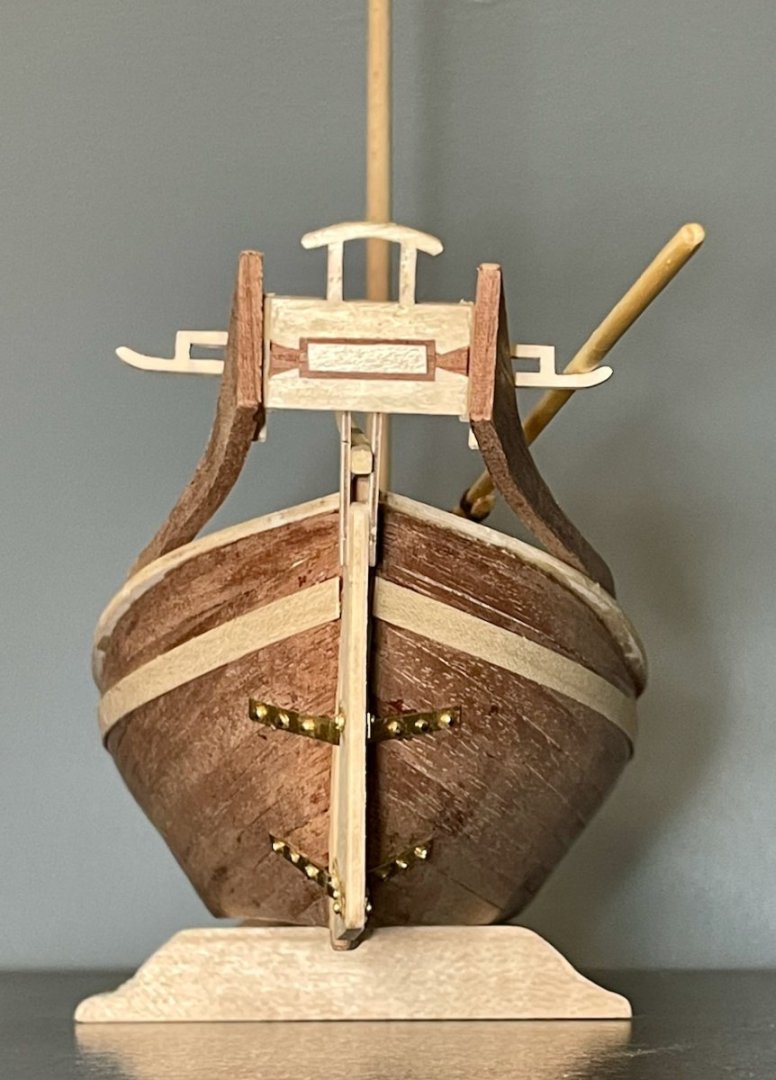
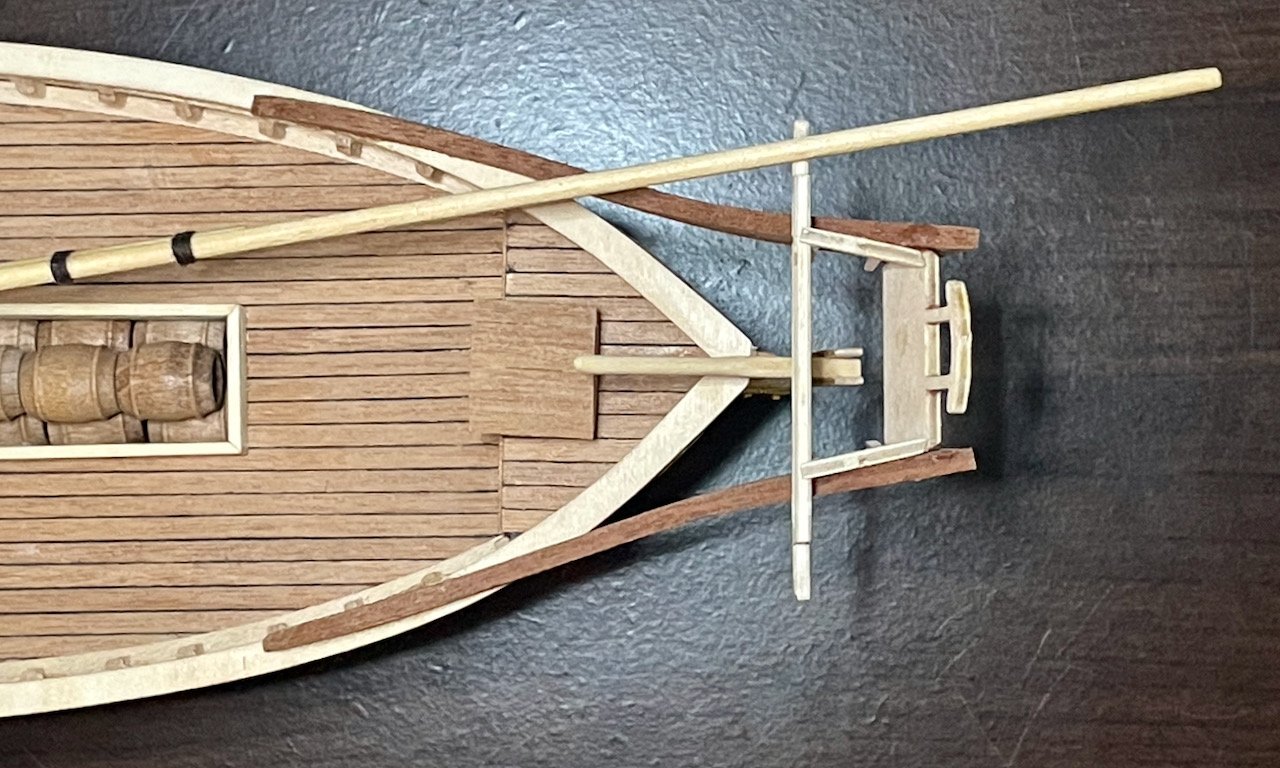
My rudder hinges arrived early! With those, I was able to finish up and install the rudder. And then I got on a roll and finished installing the superstructure on the stern. From the time I began researching these allèges, I was baffled by that superstructure. I knew it had to have a function, but I just couldn't imagine what it was. As you'll notice in the photos, I think I've figured it out! I think it's an elaborate cradle for the antenne. At scale, the antenne would be about 30 meters long (almost 100 feet), whereas the deck would only be about 22 meters (almost 75 feet). The superstructure extends the length of the ship and would provide a more stable resting place when the antenne isn't in use. Anyhow, some photos, since the assembly of the hull, deck fittings, and superstructure are now complete. First, the overall impression. Now, some shots of the superstructure. The wings were a special challenge, since they are thick plywood pieces that need to be bent with some challenging curves. After I was satisfied with the curves, I lined them with sapele. On the upper transom, I ended up deciding to use a blank piece of birch on the scroll, without any writing; I just wasn't satisfied with my penmanship, even after several attempts. The superstructure as a whole was a real pain to assemble and the alignment is a little wonky. In hindsight, I should have thought to use pins to mount the wings on the cap rail and to attach the upper transom to the wings. CA glue is getting the job done, but there are some blemishes. Hopefully my carelessness will be a good reminder for others building the ship! Finally, a close-up of the antenne. After shaping the two yards to fit snugly into each other, I glued them together. Then, I attached bindings using common whipping knots. The yards are supposed to overlap to a much longer extent, but I'm not sure that I actually received enough 3mm wood dowels. I ended up using one from the kit and one that I had in my woodstock. The long binding rests against the mast. Next steps: apply finish to everything I've built so far; finish the bolt ropes on the sails; finish working out my rigging plan. The rigging plan in the instructions seems mostly fine, but I am reversing it, since I'm planning to display my ship going the opposite direction. In addition, I've been studying how tkay11 did the rigging on his Allège d'Arles and I'm starting to get ideas again...
- 59 replies
-
- 4
-
-
-
- Billing Boats
- Le Martegaou
- (and 1 more)
-
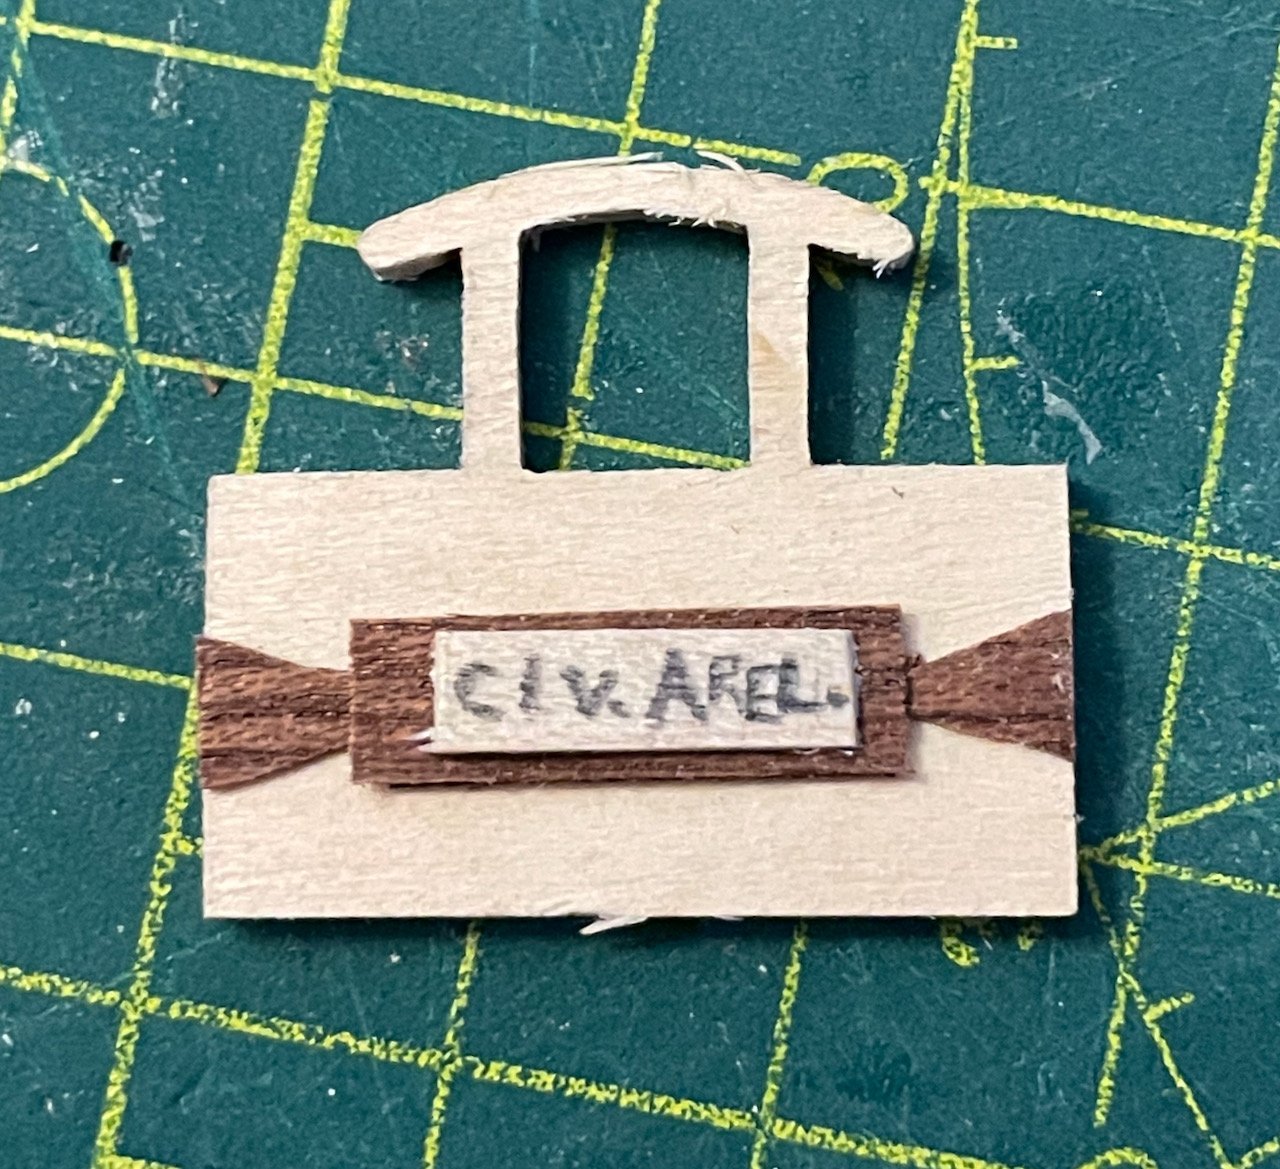
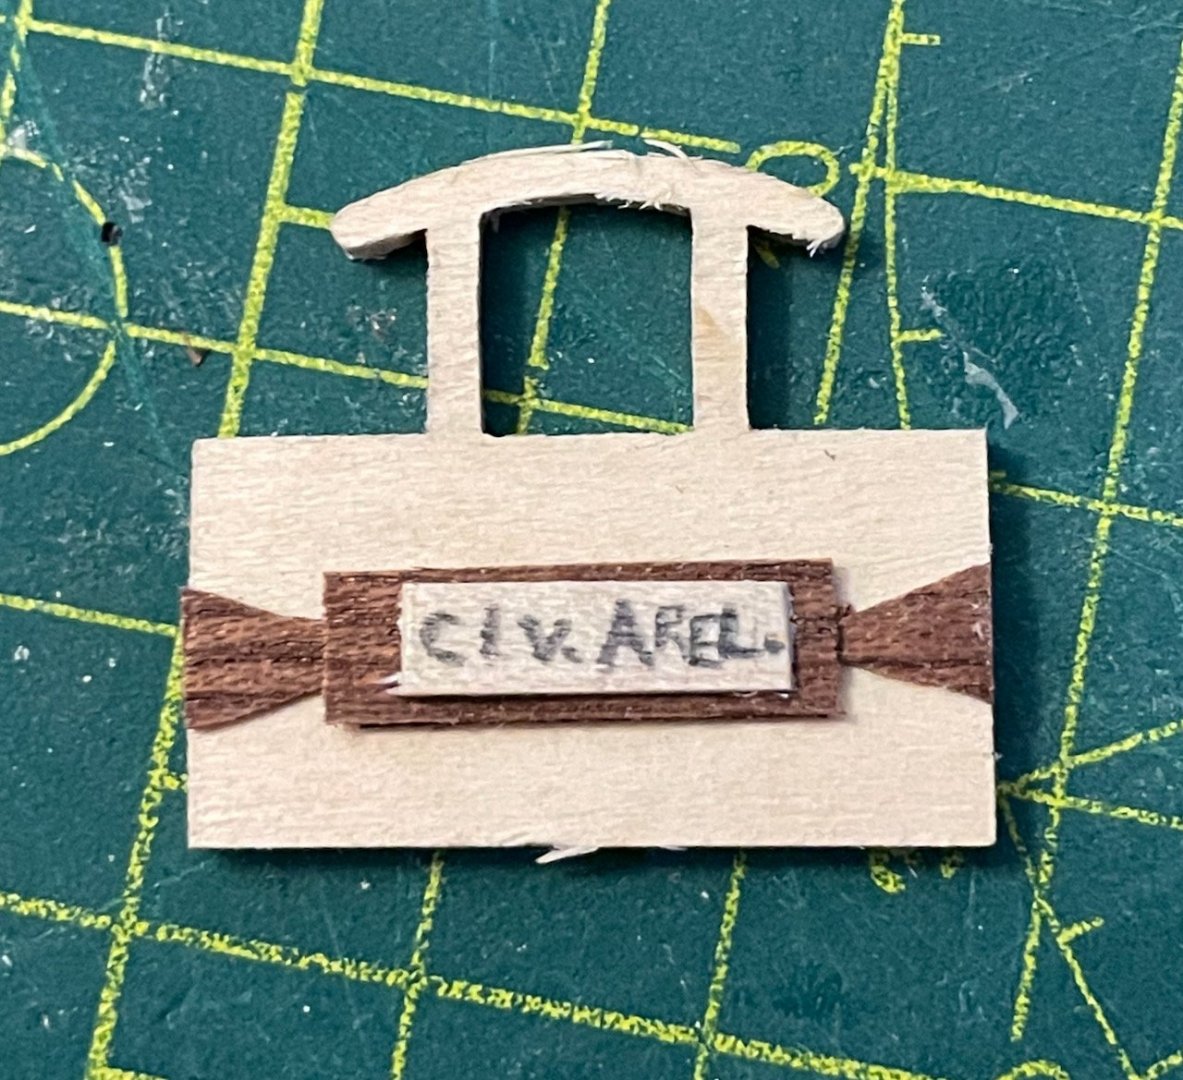
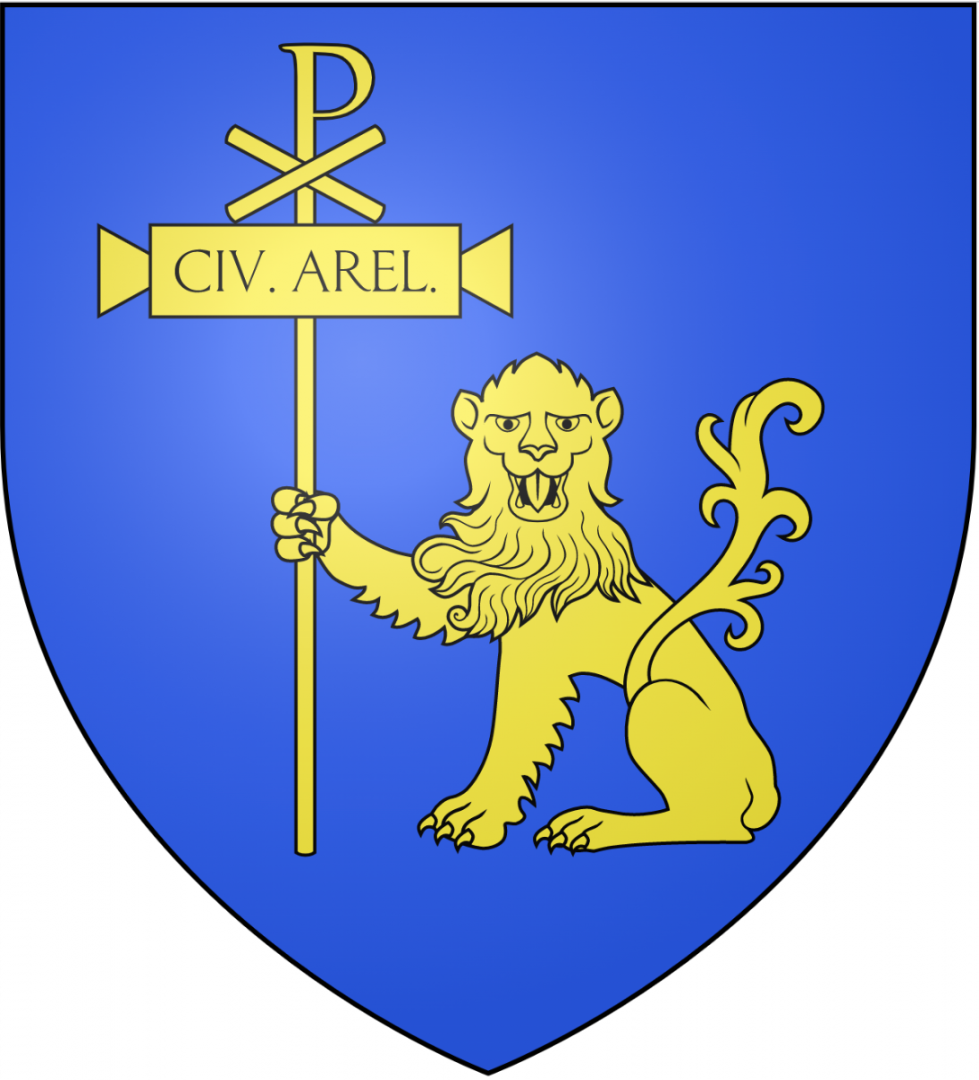
I'm doing a bit of thinking aloud in this post, so would definitely welcome some feedback. While I'm still waiting on the rudder hinges to arrive (two more days!), I've continued tinkering away a bit. I've built the antenne and am applying finish before adding the ties and the sails. I've also started cleaning up the pieces for the stern superstructure. While studying Baugean's woodcut of "Une Allège d'Arles descendant le Rhône," I noticed that the upper transom seemed to bear a version of the city's coat of arms. Here's a detail of the woodcut and the version of the coat of arms that I pulled from Wikipedia. In the woodcut, I think that I see the lion of Arles below a banner that presumably reads either "CIV. AREL." (abbreviation for Civitas Arelatensis) or "AB IRA LEONIS" (the city's motto, "From the anger of the lion"). Ambitiously, I'm trying to do something a little bit similar on my upper transom. My plan involves three-layers of wood lining to recreate the banner on the city's coat of arms. The bottom layer of sepele has been cut so that triangles stick out on the sides. The middle layer is also sapele and is just a simple rectangle. The top layer is birch (I think...leftover wood from another kit and I'm not certain); I'm trimming it to be a smaller rectangle framed by the middle layer. I tried writing "CIV. AREL." in very fine point Sharpie, but it looked terrible since the ink bled. My best attempt so far has been to write that in pencil...but I'm not convinced that it adds anything more than a blank piece of wood would do. Any thoughts or advice on this? Am I trying to do too much here? Is there a better technique for writing on wood? At the very least, I would need to take another stab at writing the city's name more neatly.
- 59 replies
-
- 1
-
-
- Billing Boats
- Le Martegaou
- (and 1 more)
-
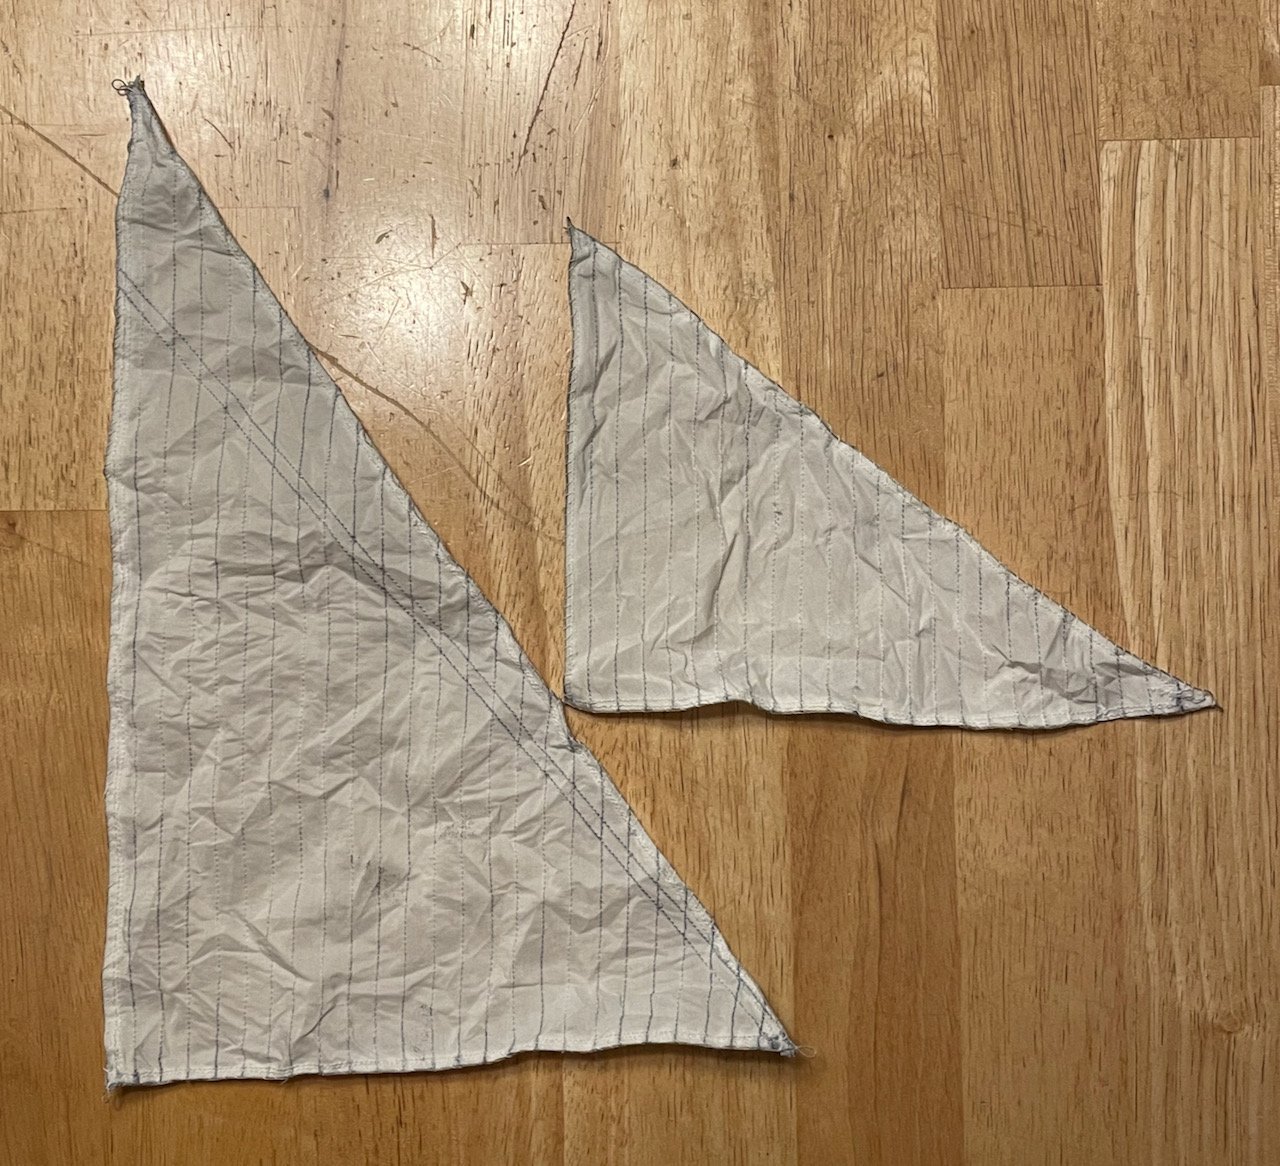
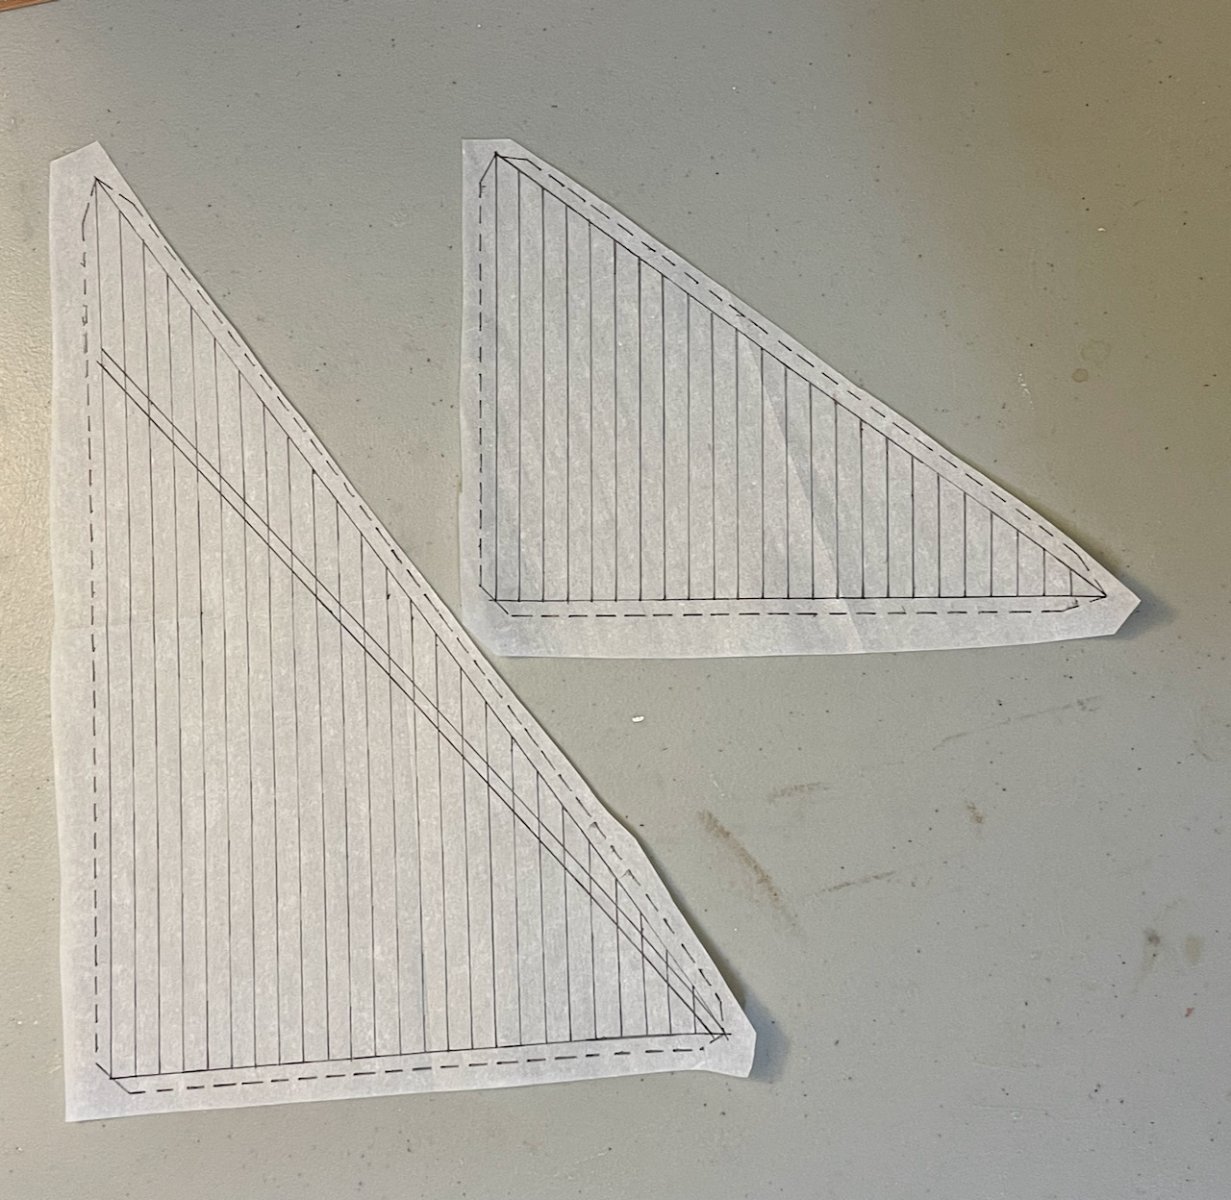
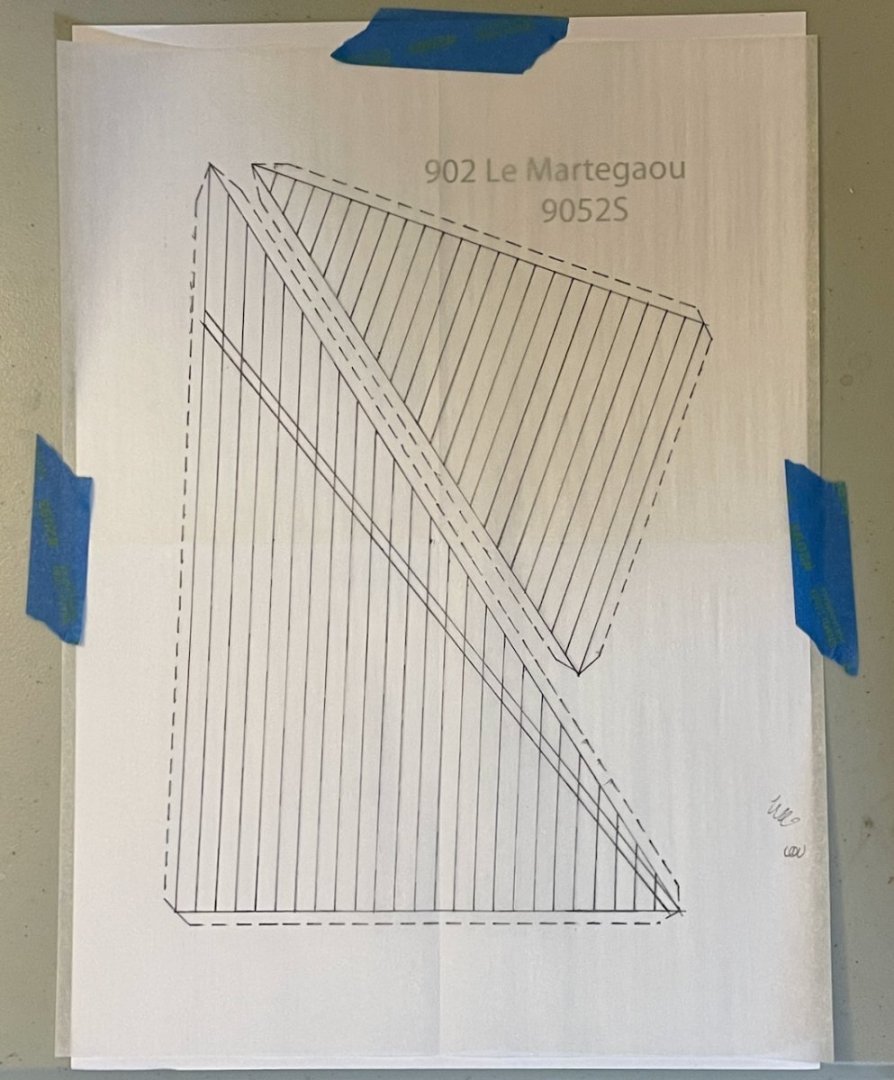
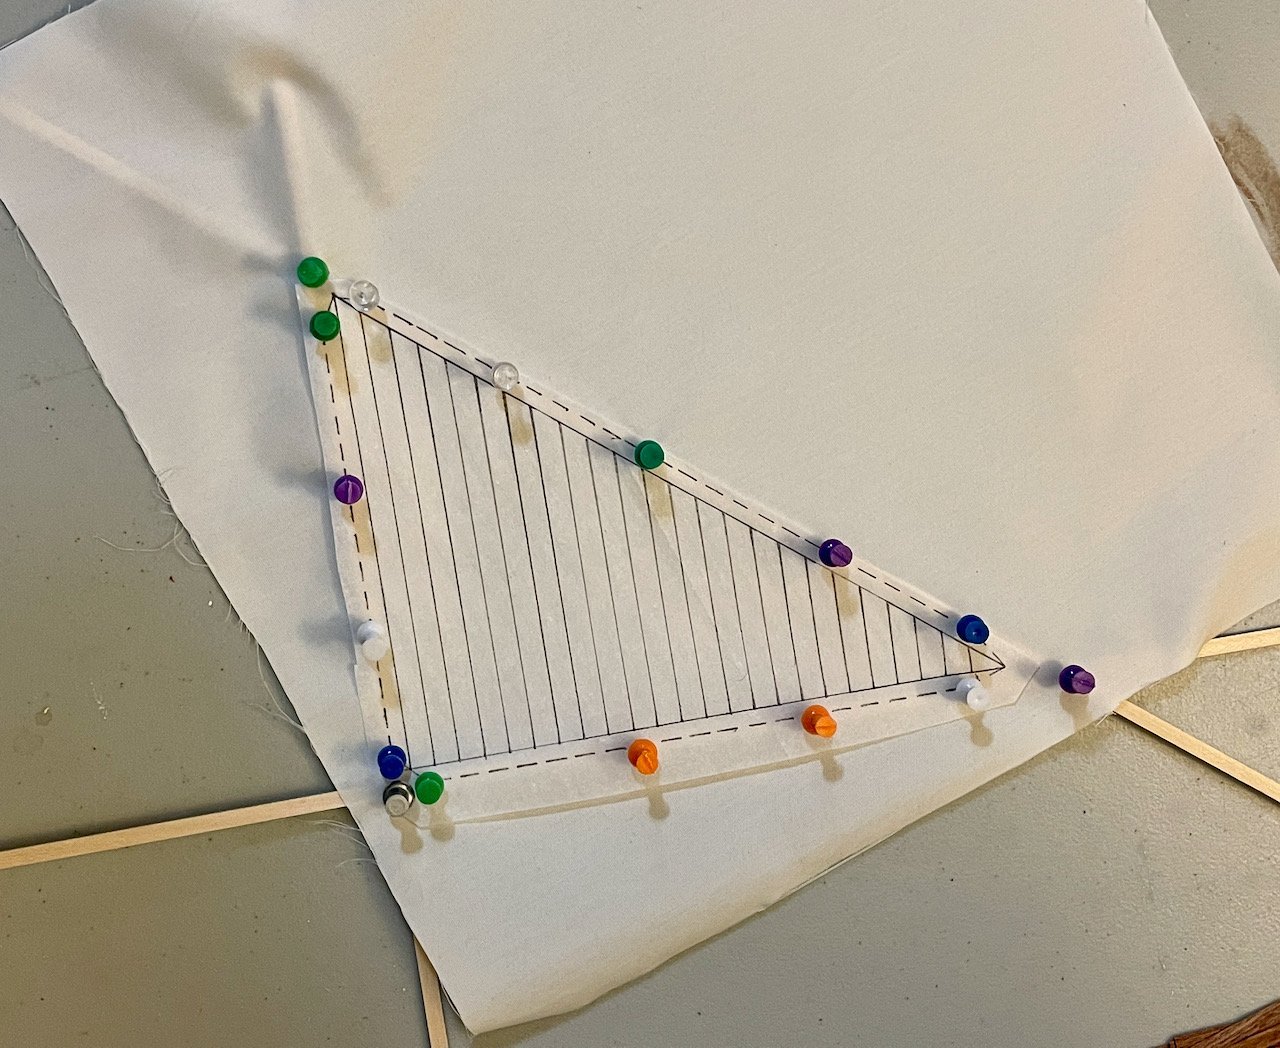
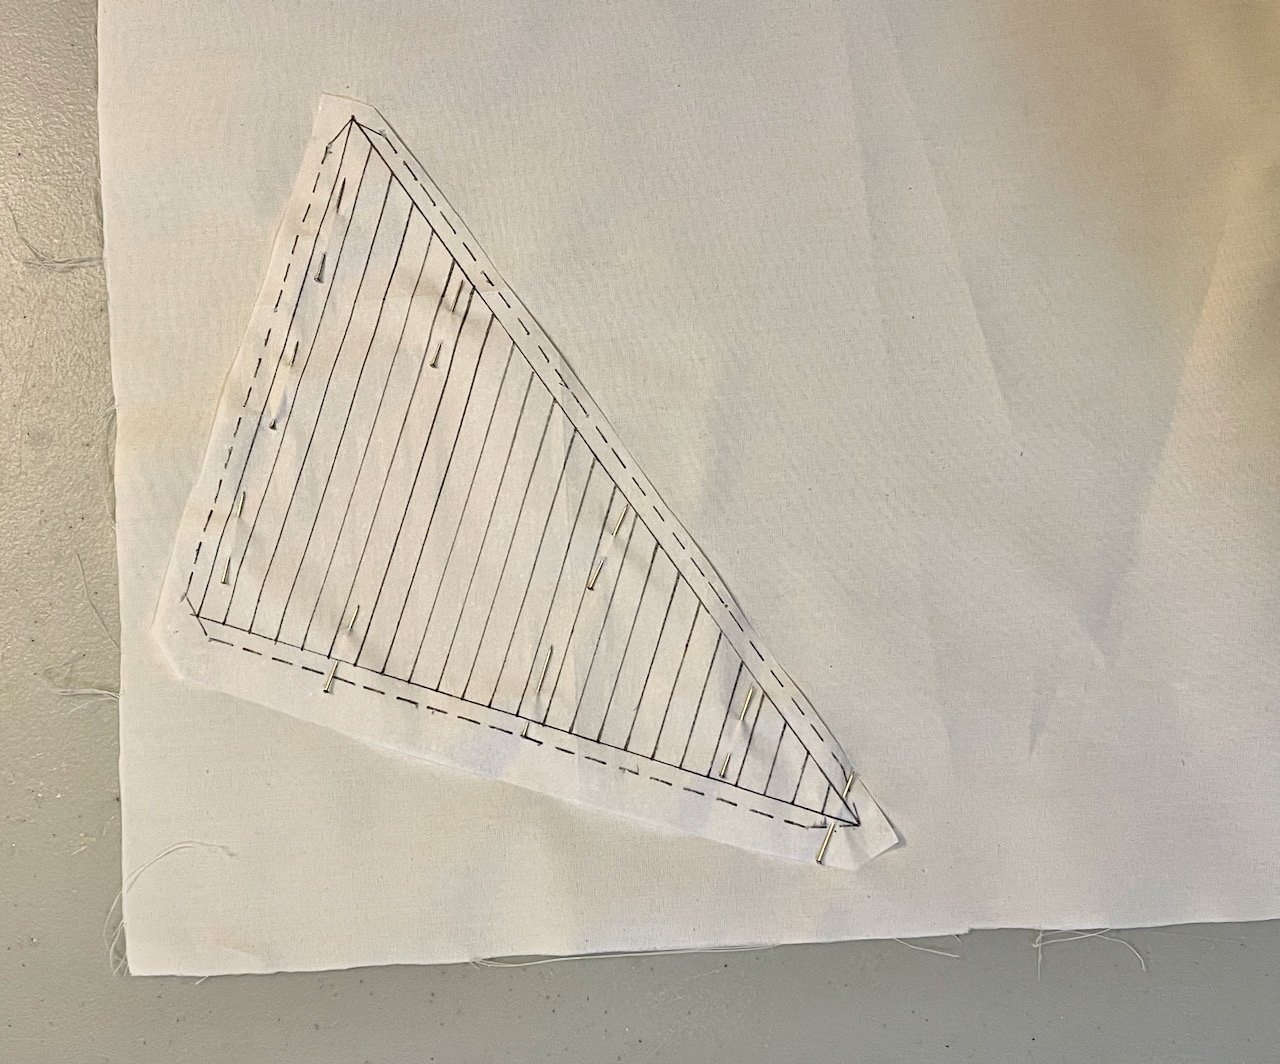
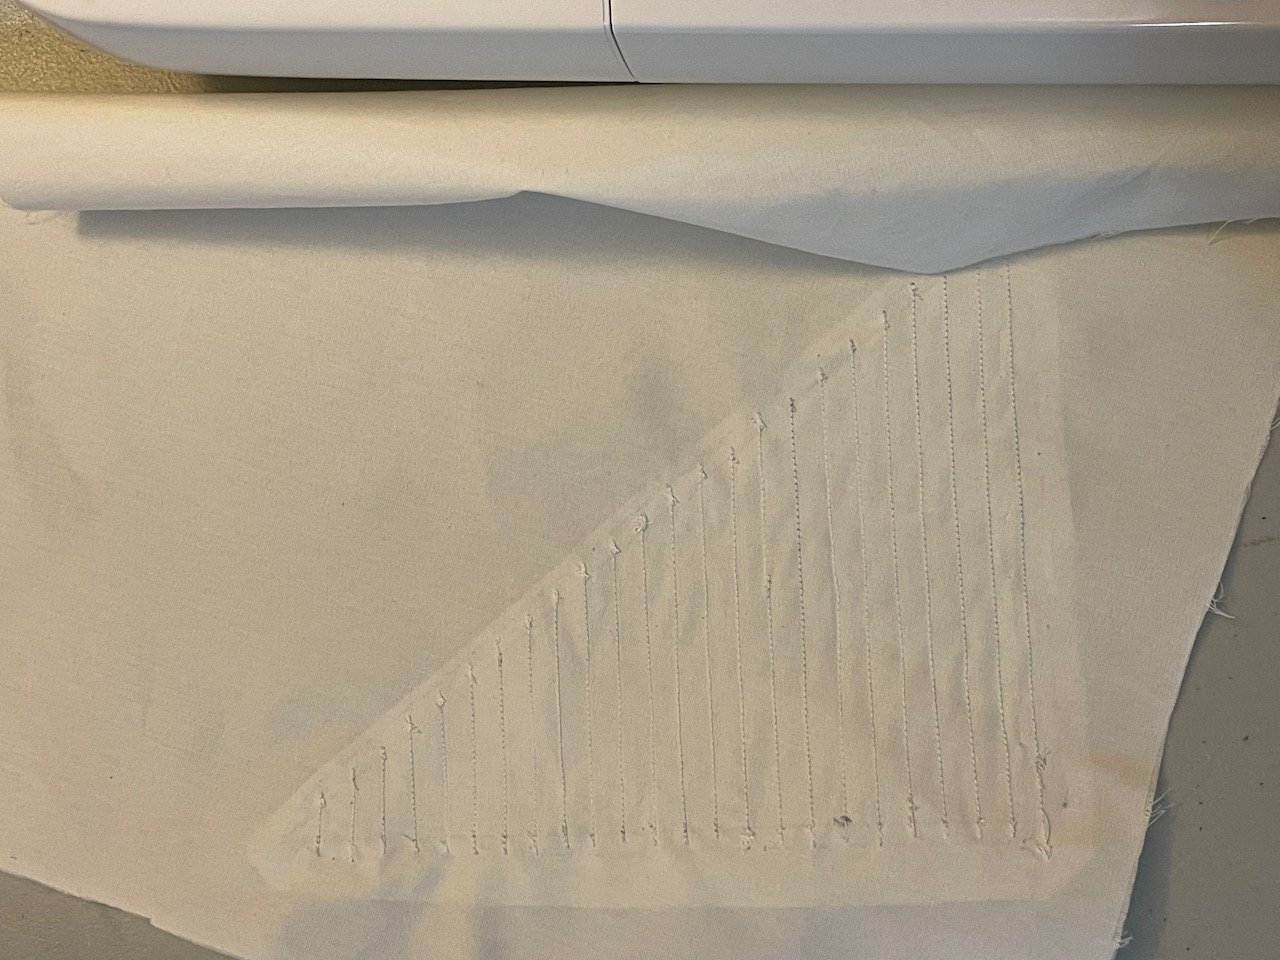
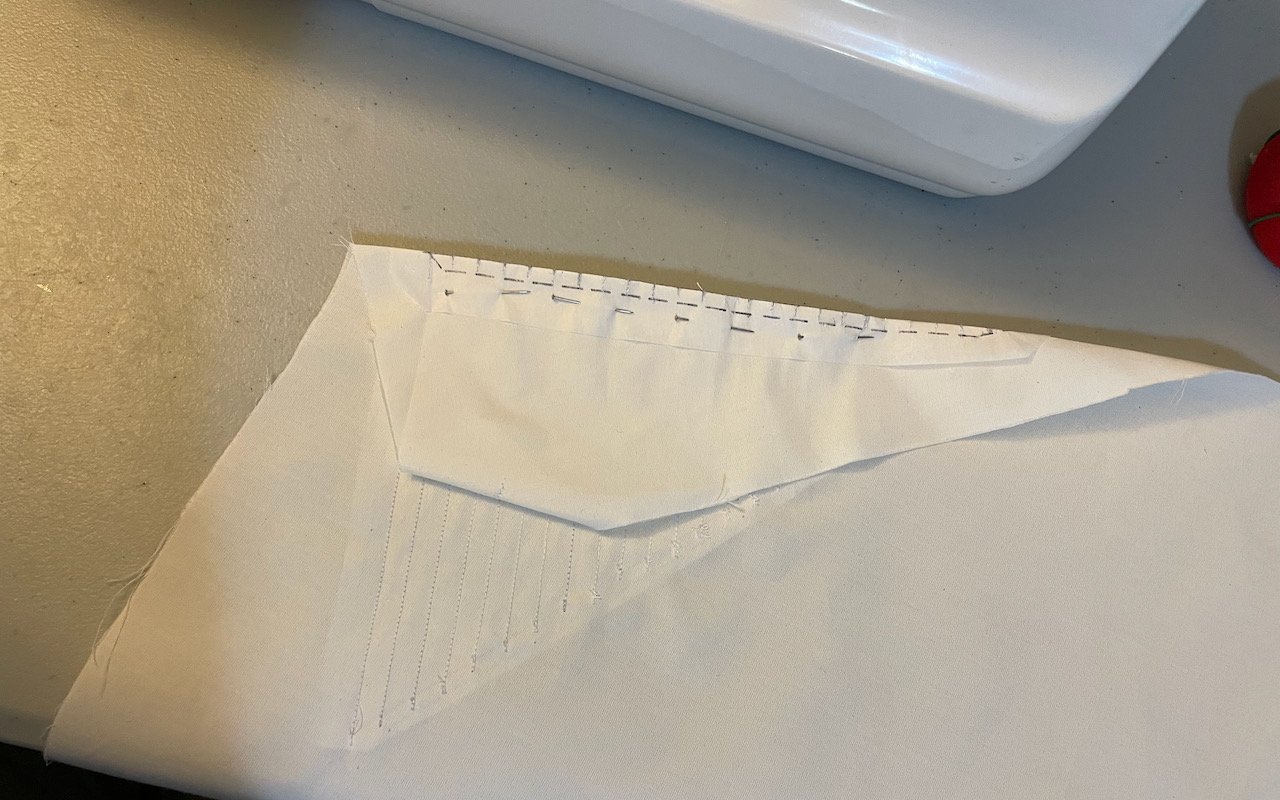
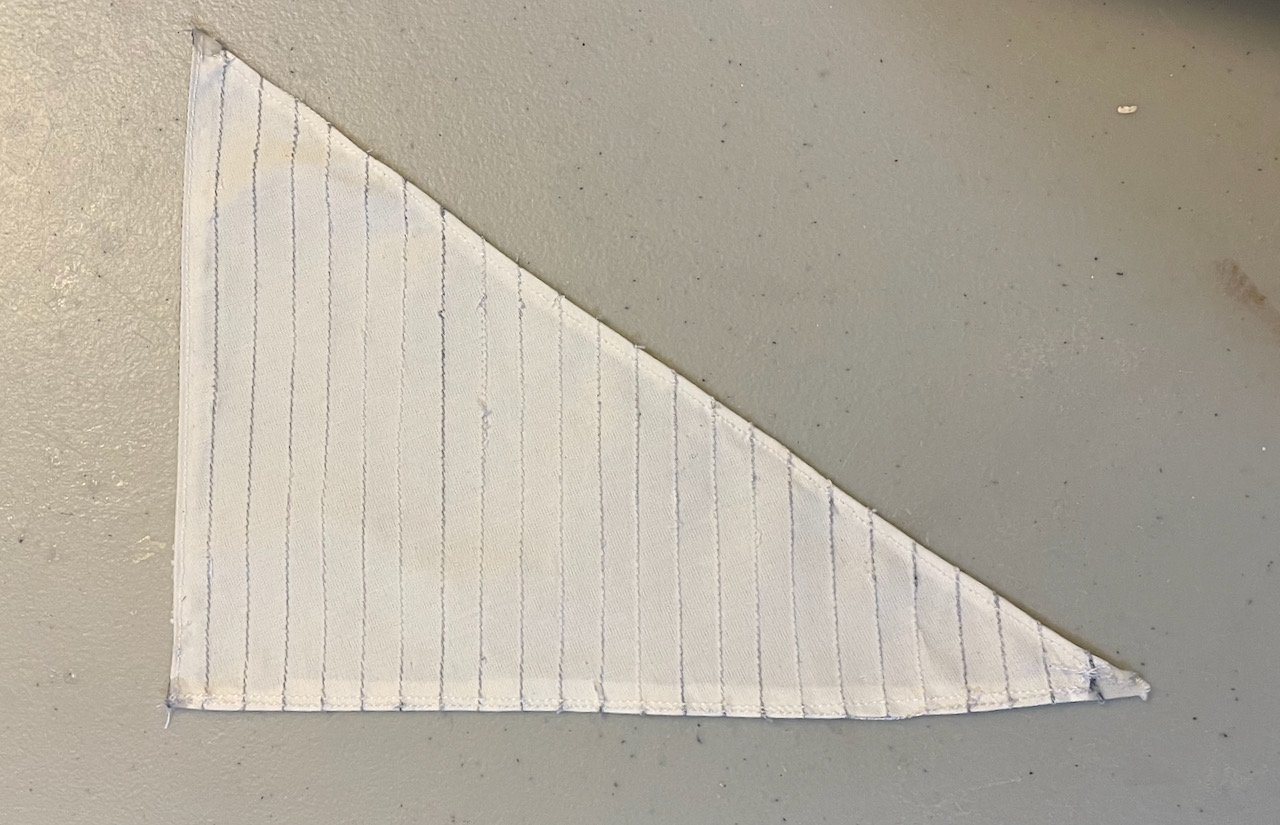
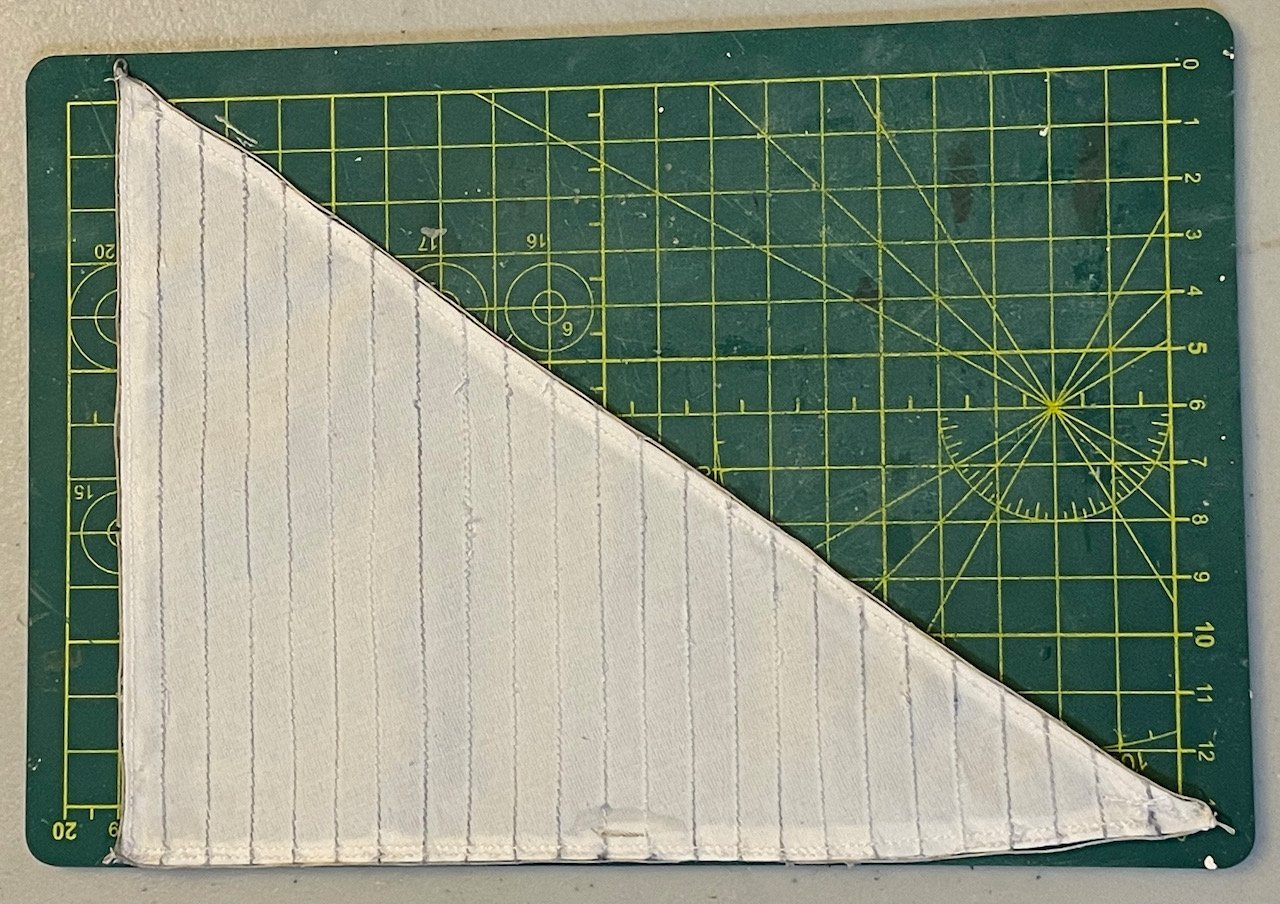
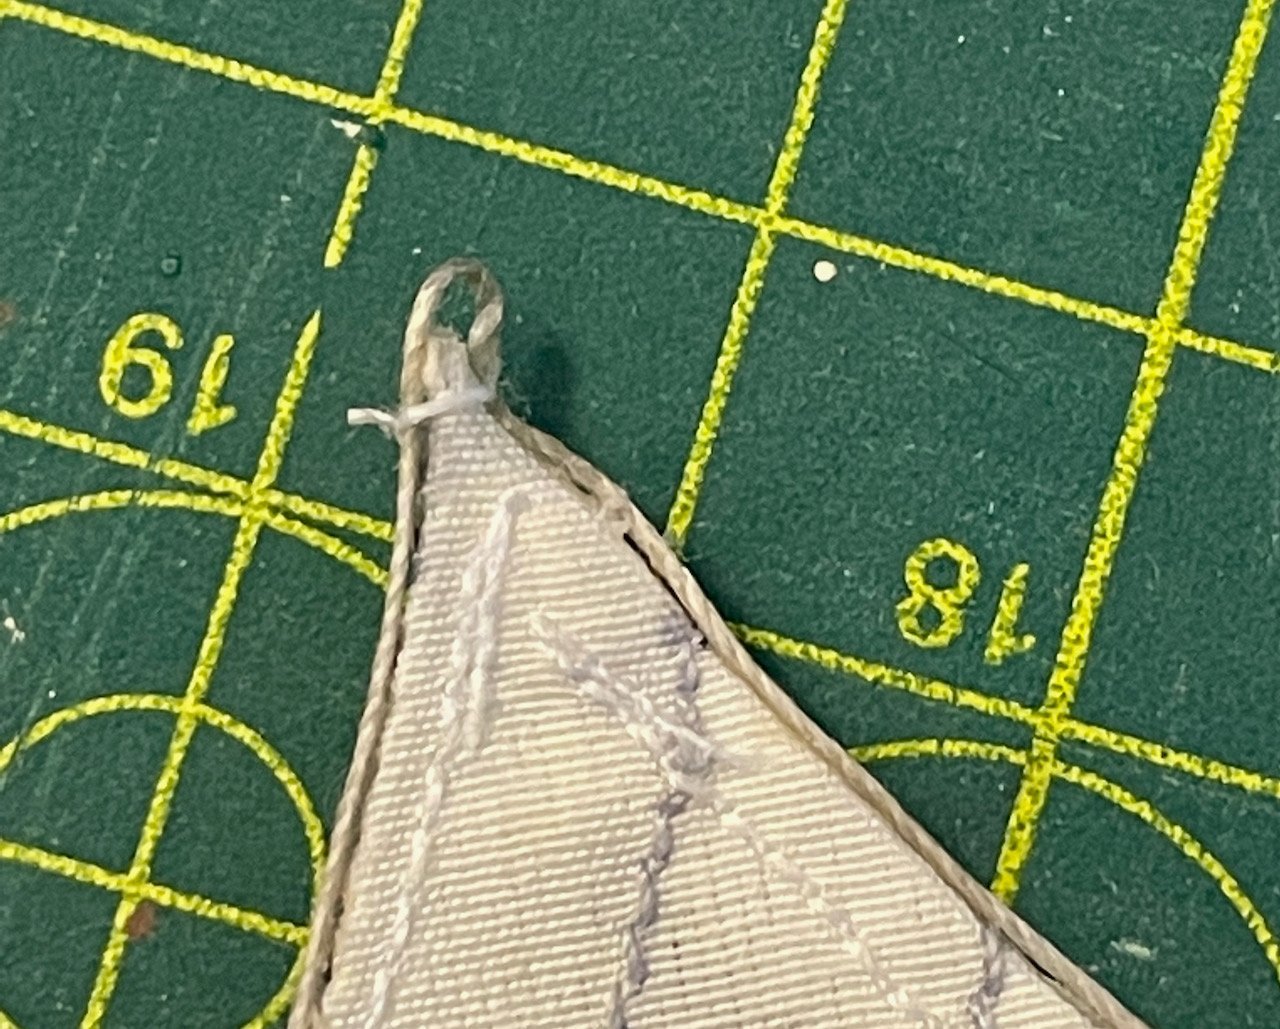
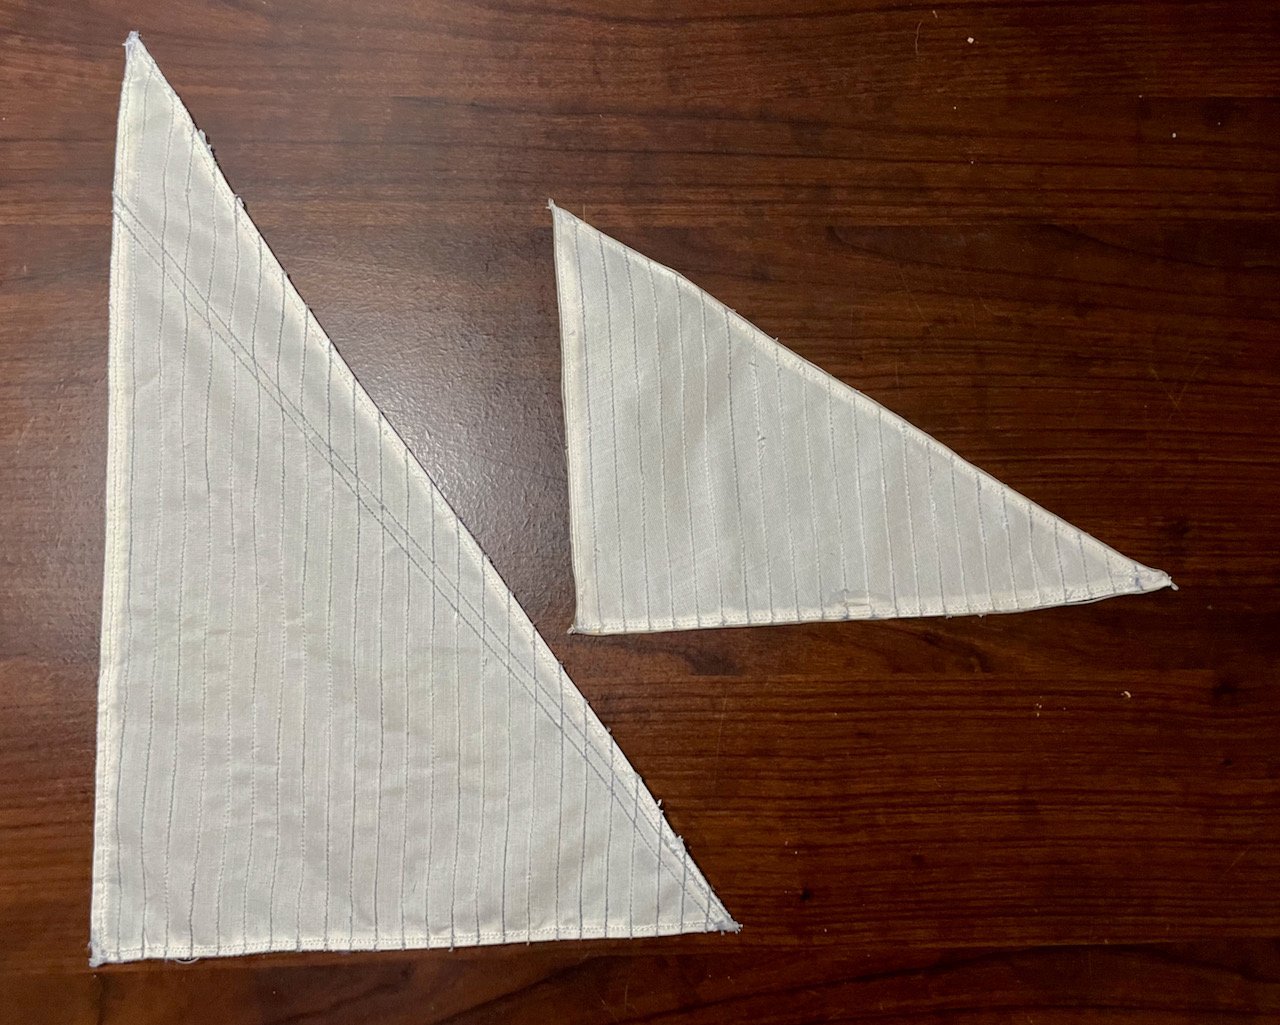
One of the new challenges for me is that the Martegaou kit does not come with pre-made sails. Since I'm still waiting on the rudder hinges to arrive, last week I started researching how to make sails out of the bolt of sailcloth that came in the box. Surprisingly, I didn't find as much on MSW as I had hoped (though I didn't search the buildlogs as deeply as I could have), but I did find a very helpful tutorial on YouTube by Davao Ship Modeller. Since I made a couple adaptations to Davao's process, I thought I'd go into some detail here. First, I taped down a piece of parchment paper on top of the diagram that came in the instructions. Then, I traced all of the lines with a very fine point Sharpie. After cutting out my new templates, I was ready to roll. Next, I needed to pin the template onto the sailcloth. In Davao's video, they had some larger pieces of wood that clearly worked really well. With my wood stock, however, I had to go with something considerably more light weight, some 2x5mm planks. They did the job, but it definitely took some finagling to get adequate tension on both the parchment paper and the sailcloth. Once I had satisfactory tension, I attached the template to the fabric with straight pins and then removed the wooden frame. Now, I was ready for the sewing machine. My daughter and I are the only ones in the family who know how to sew, so I've been able to lay claim to the machine for the past week. However, my machine sewing has been VERY limited; as a kid, my mom taught me needlecrafts, but I never used a machine until a few years ago. Since I had only ever used the machine to sew on Scout patches, these two sails were going to be my most ambitious project by far. With some trepidation, I set to work on the seams of the staysail...I started with the smaller sail just in case things went horribly wrong. In the end, it turned out okay. Definitely not perfect, but good enough. It's a bit hard to see in the photo, but this is the back side of what I was sewing, showing the seams on the sailcloth, with the template side facing down. Next up, the part I was most concerned about: hemming the sail. I've only hemmed things once and my mom was standing over me to ensure that I got it right. I was definitely in over my head on this part, but I managed to make a simple hem. Not a good one, but I think good enough and I definitely learned how to do it better on the next ones. The first photo here shows me folding and pinning the first hem. The second shows the staysail after I had hemmed all three sides and pulled off the parchment paper. (There was still a bit of Dritz Fray Check drying on the corners, which is why they look off color here.) Finally, I added the bolt rope, leaving a bit of thread at the corners for loops to use as attachment points. Following Davao's model, I used some diluted PVA glue for this task. I'm planning to sew them more securely into place...but I need to find the manual for the sewing machine so I can figure out the right setting for that task. After spending most of the week figuring out how to do the staysail, the mainsail went much more quickly and turned out better. The mainsail still needs its bolt rope, but otherwise, I think these are pretty well set for now. For a first attempt at making sails, I'm really pleased with how these turned out! There are definitely some imperfections and some simplifications. I'm not in a rush to make more sails, but at least I know I can if I need to. Toward the end of the Davao video (beginning at 4:08), they show a method of making the sail appear as if it has caught the wind. I like the look of that and so may do that, but if so, I'll wait until I'm closer to the point of actually hanging the sails. For now, they'll just sit off to the side, though I might build the antenne and attach the mainsail while I wait on the rudder hinges to arrive.

- 59 replies
-
- 3
-
-
- Billing Boats
- Le Martegaou
- (and 1 more)
-
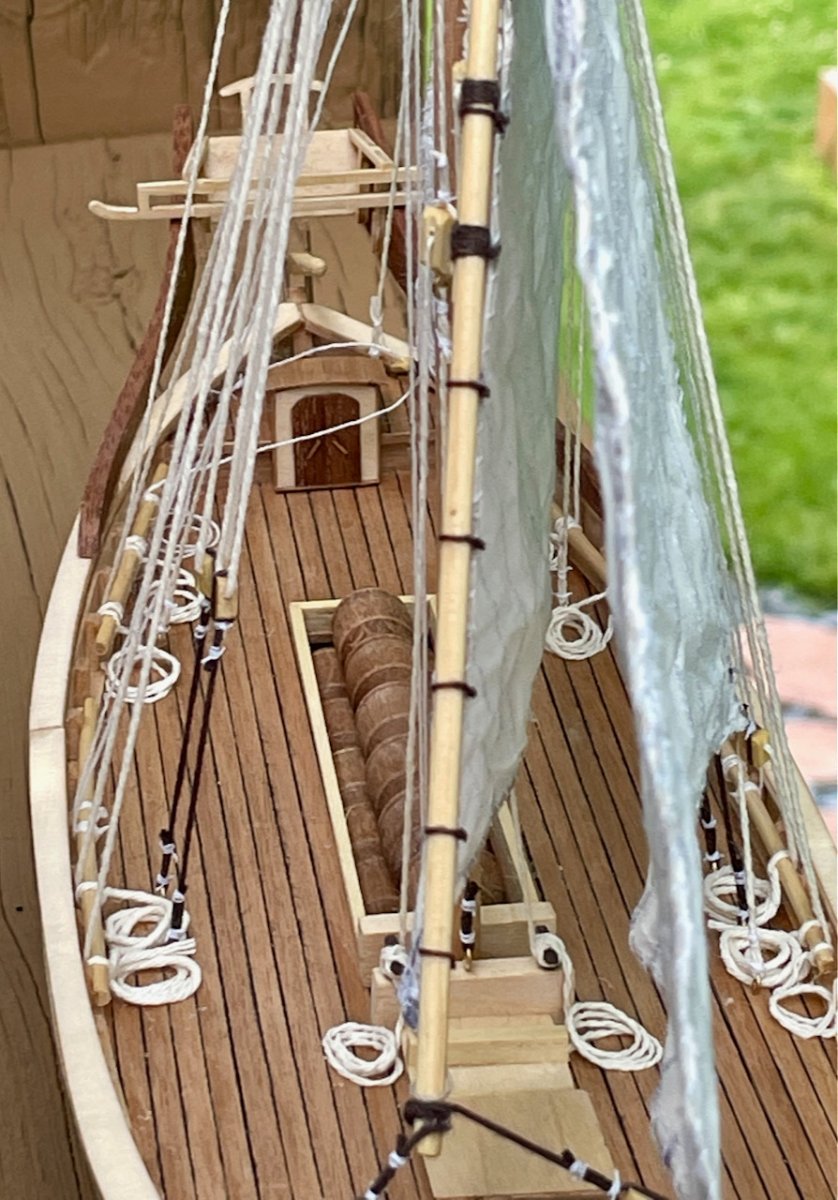
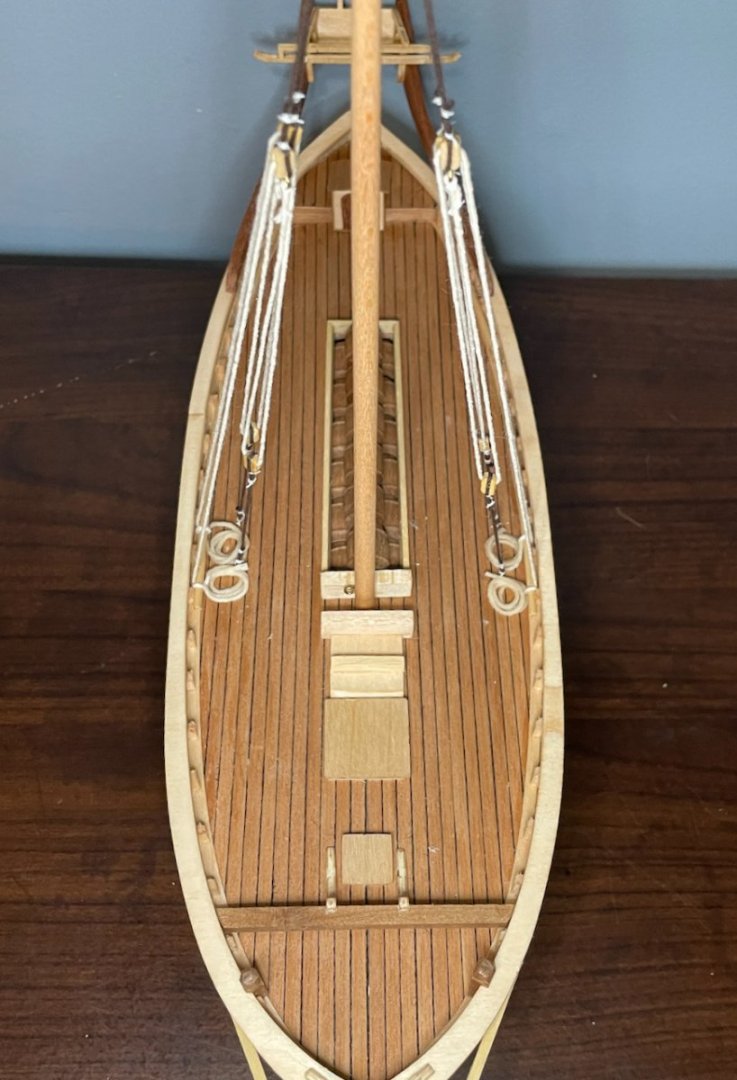
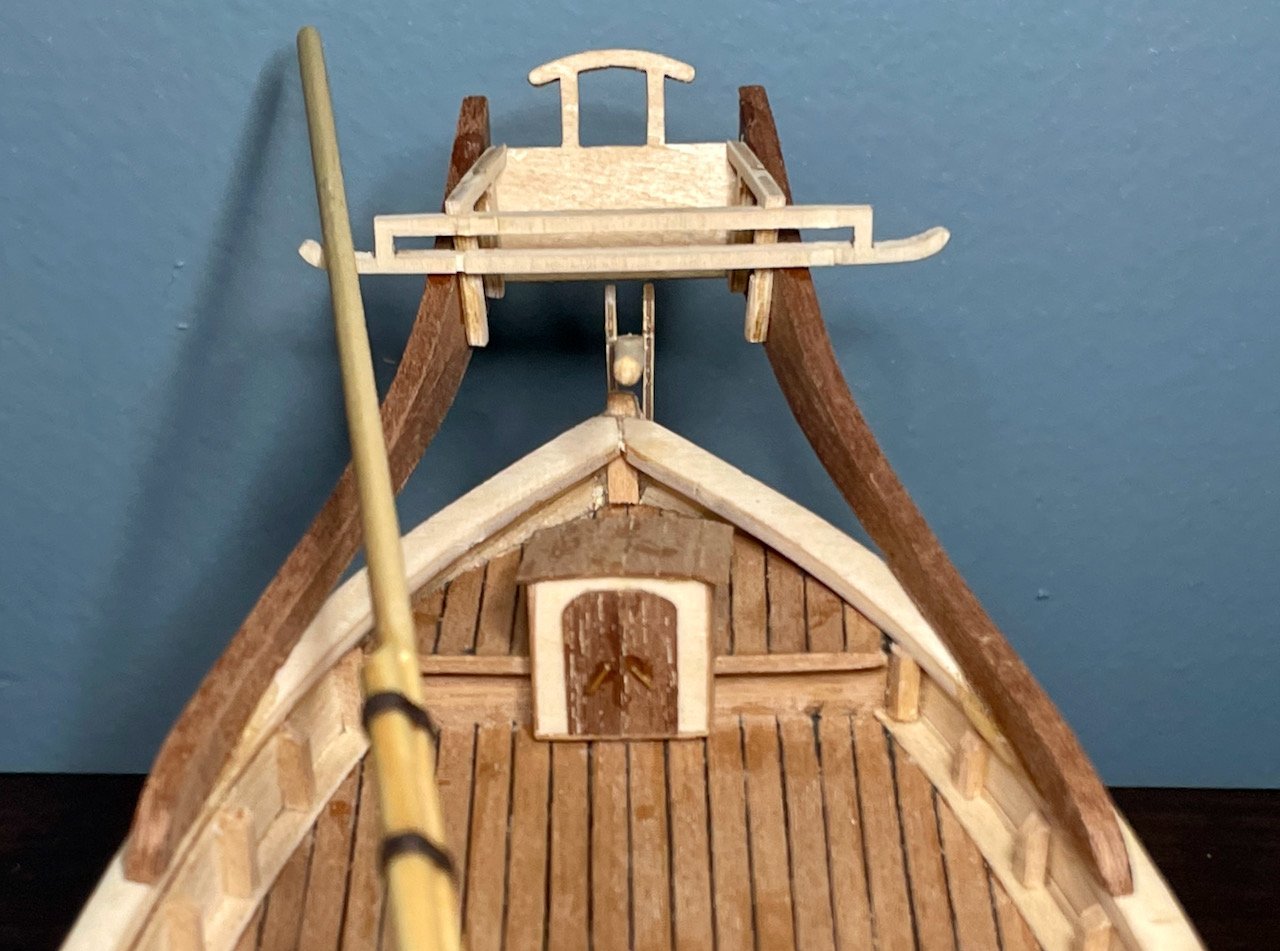
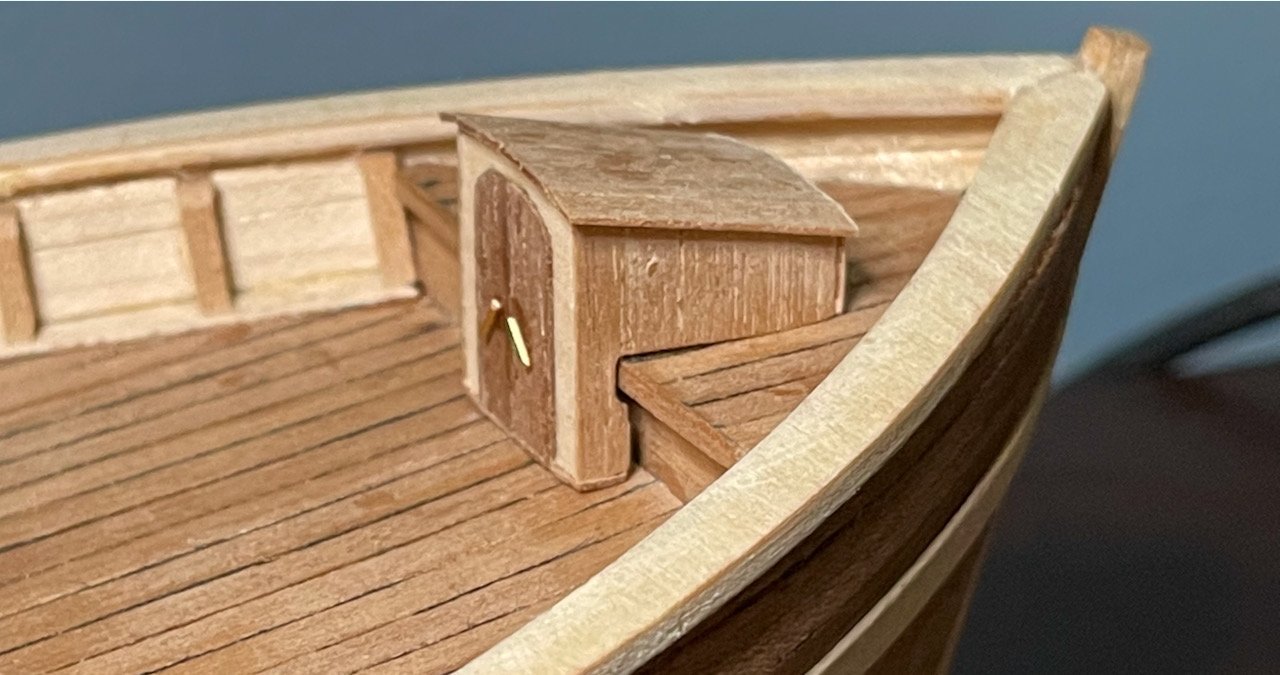
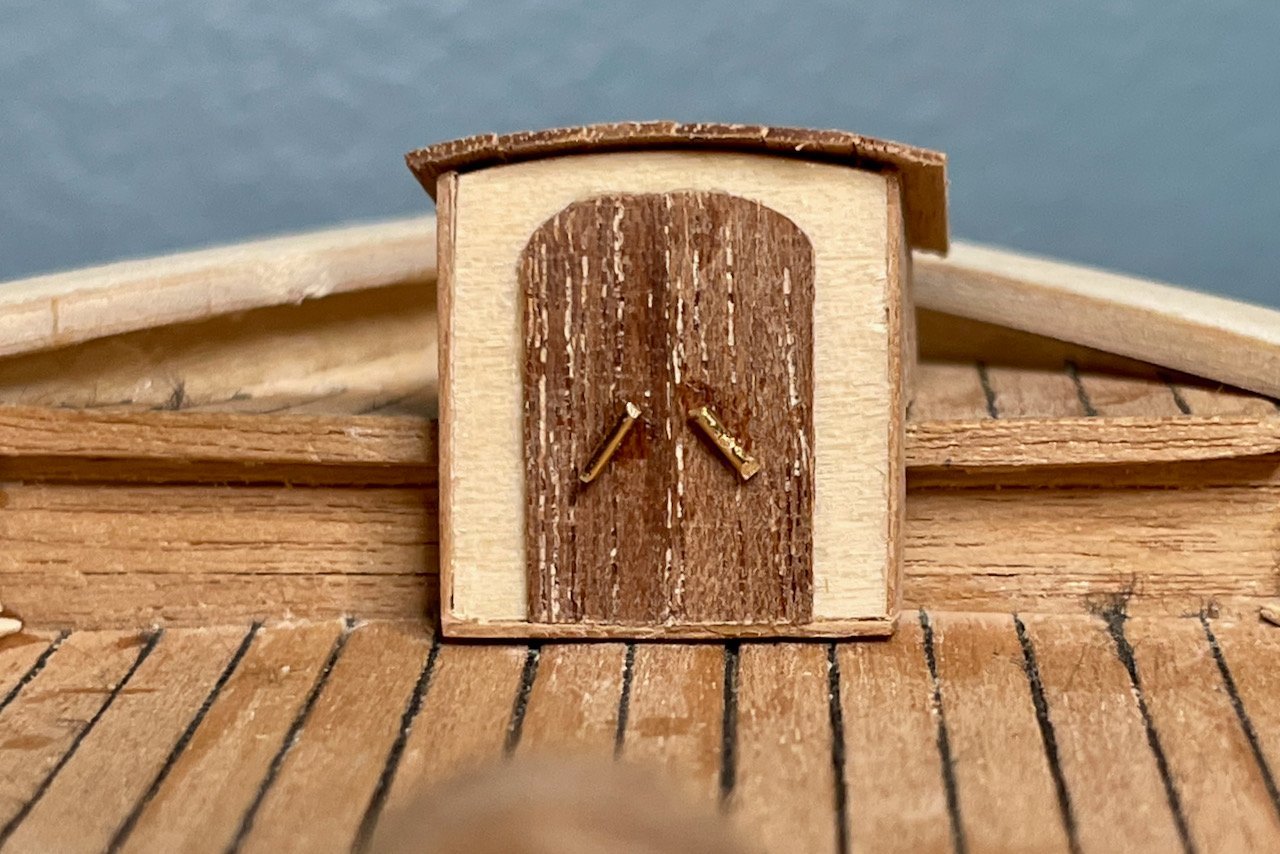
Thanks, Bob! I decided to cut out the pieces that will be installed around the aftdeck, just so I'd have them ready when I was. Then, as I laid them out, I realized that these are installed in two groups: a companionway along with a superstructure that is built on the cap rail and over the rudder. And then I couldn't stop myself and dove into the companionway. According to the plans, the companionway is built from five pieces of pre-cut plywood. Once I had the four walls assembled, I couldn't help but think that it looked really plain and that the edges of the plywood didn't look right. So, I made two doors out of sapele, adding door handles made from brass wire. Then, I used some leftover decking planks to line the other three walls. I was planning to just use the plywood roof piece, but had trouble getting it to curve appropriately, so I replaced it with some more leftover decking planks. I didn't think to take photos of the process, but here are a few photos of the completed companionway. Not installed yet; it's just sitting in place for now. There's still a bit of clean-up to do, too. Next steps: installing the rudder and the stern superstructure. I ended up deciding to order some rudder hinges; since the rudder has to be installed next, there won't be any significant progress until those arrive.
- 59 replies
-
- 3
-
-
- Billing Boats
- Le Martegaou
- (and 1 more)
-
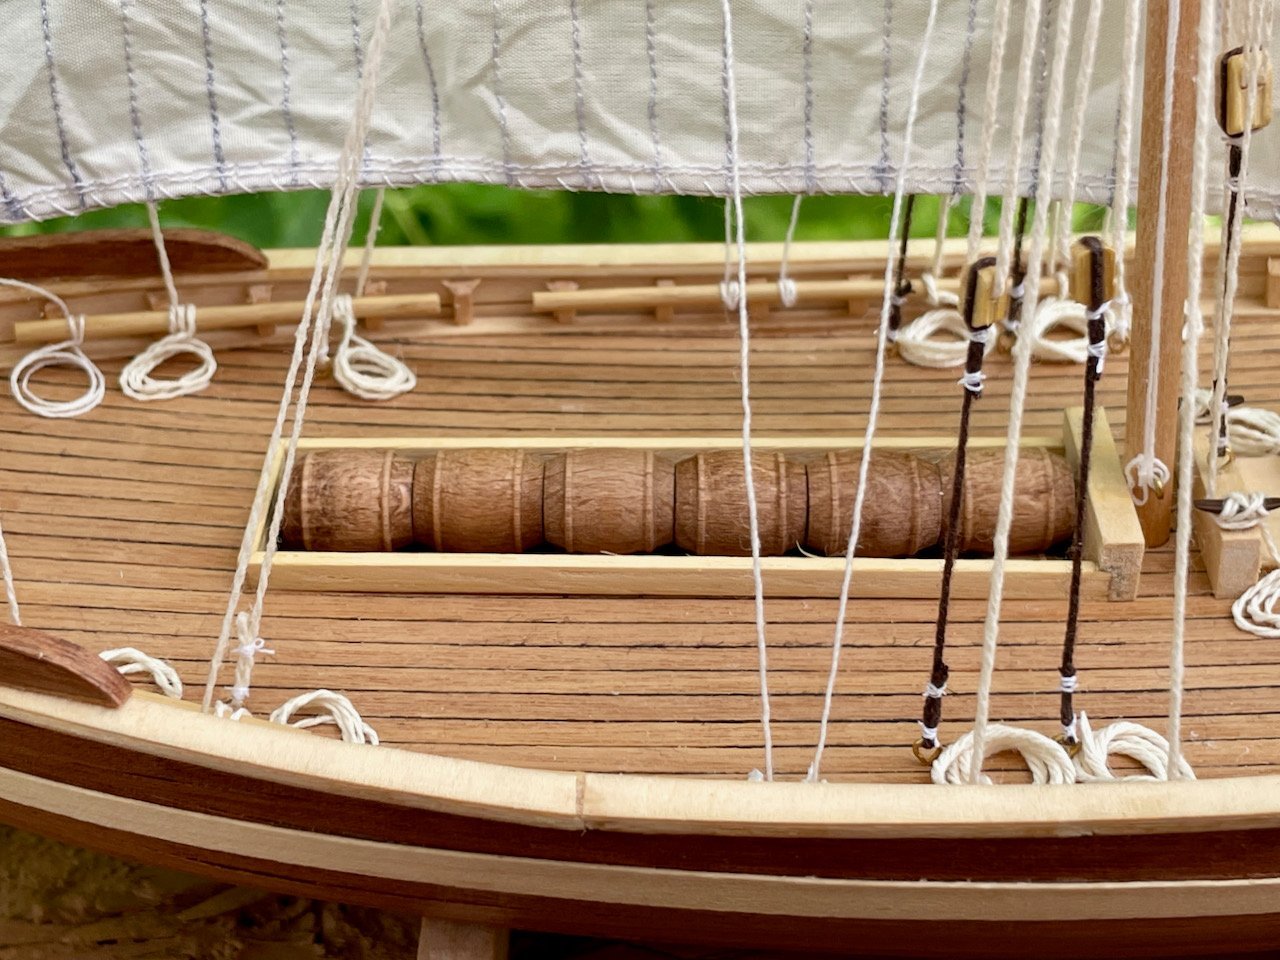
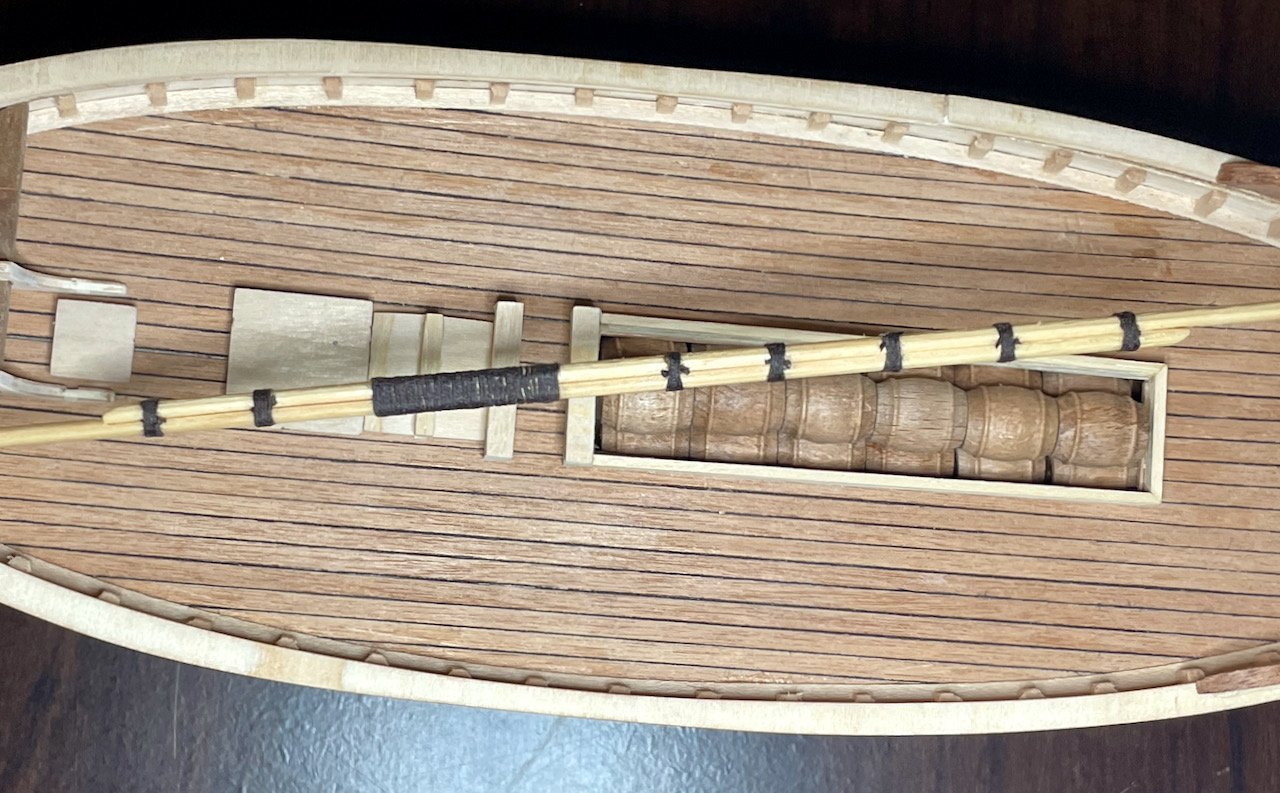
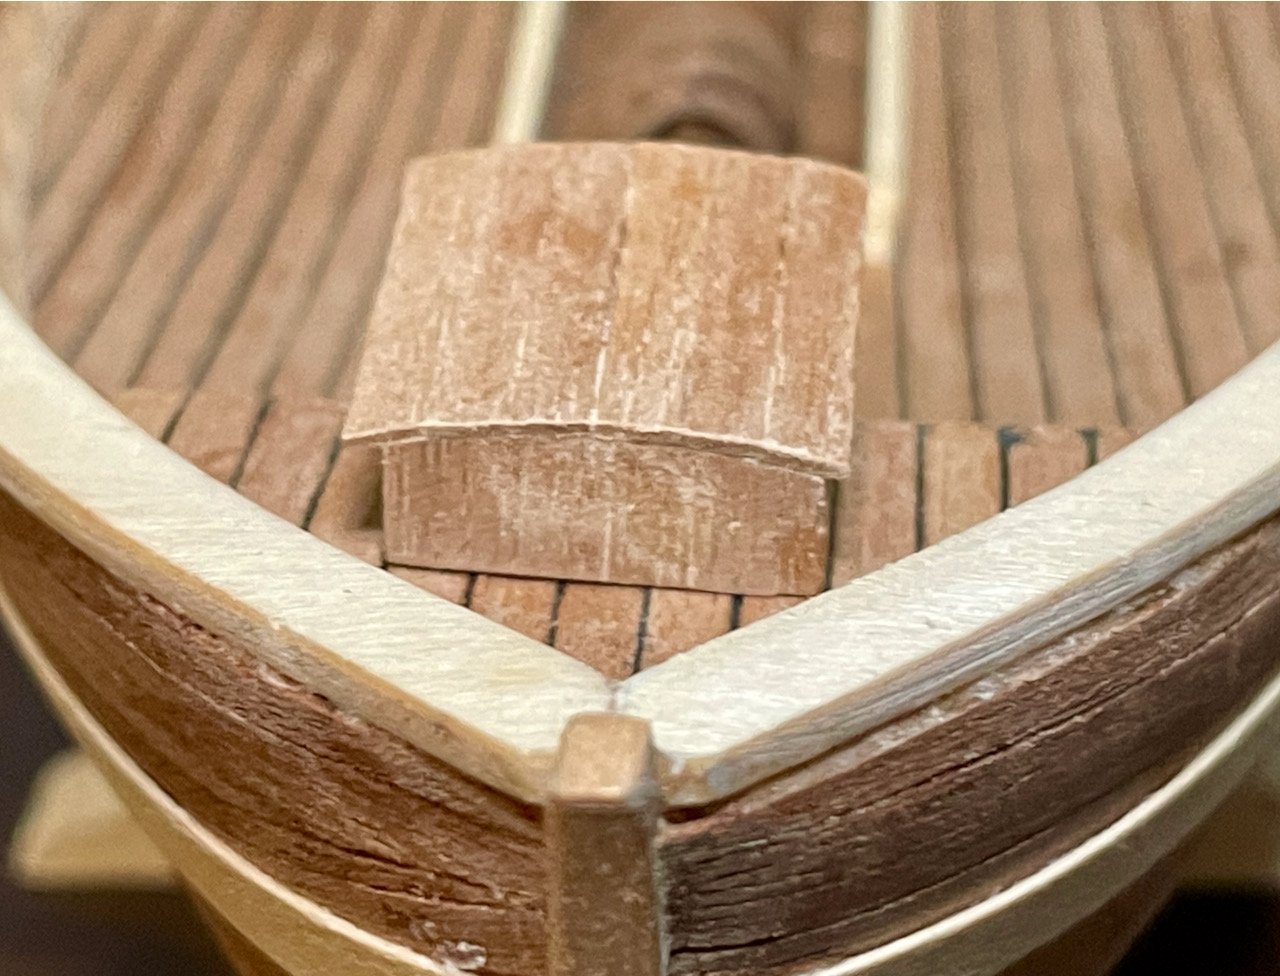
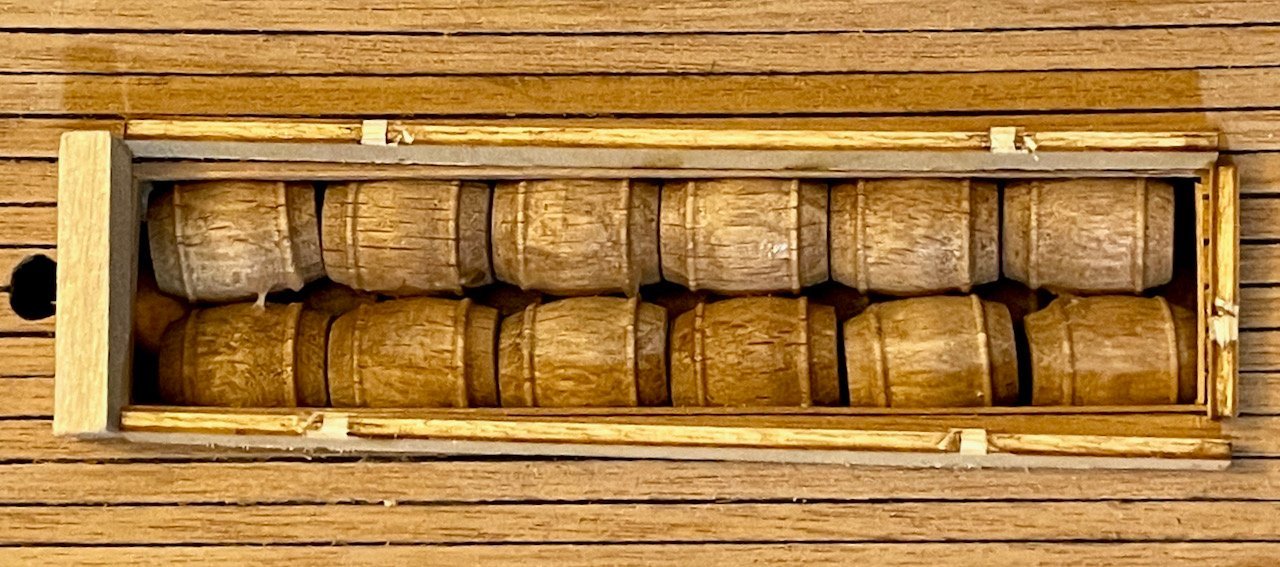
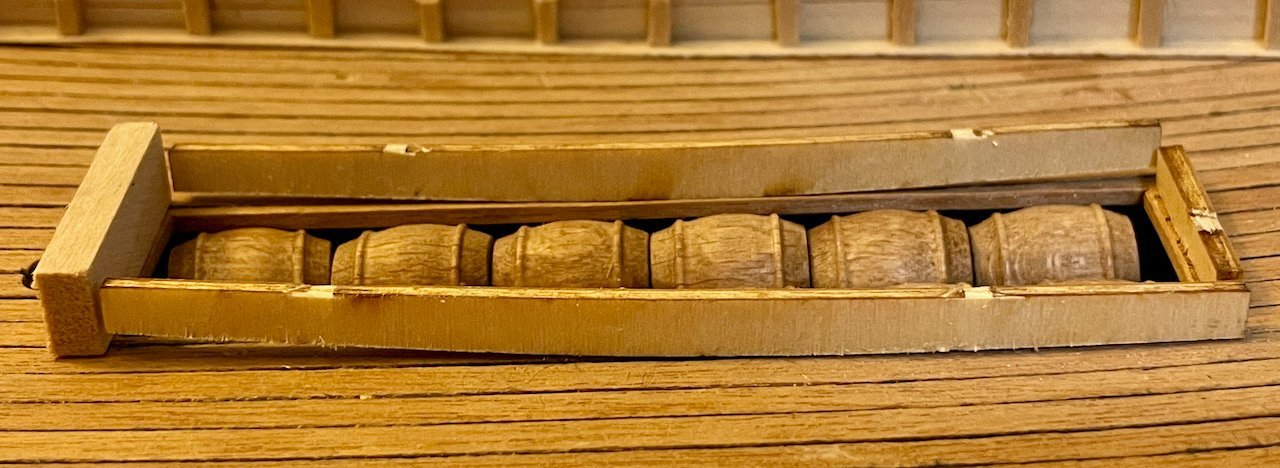
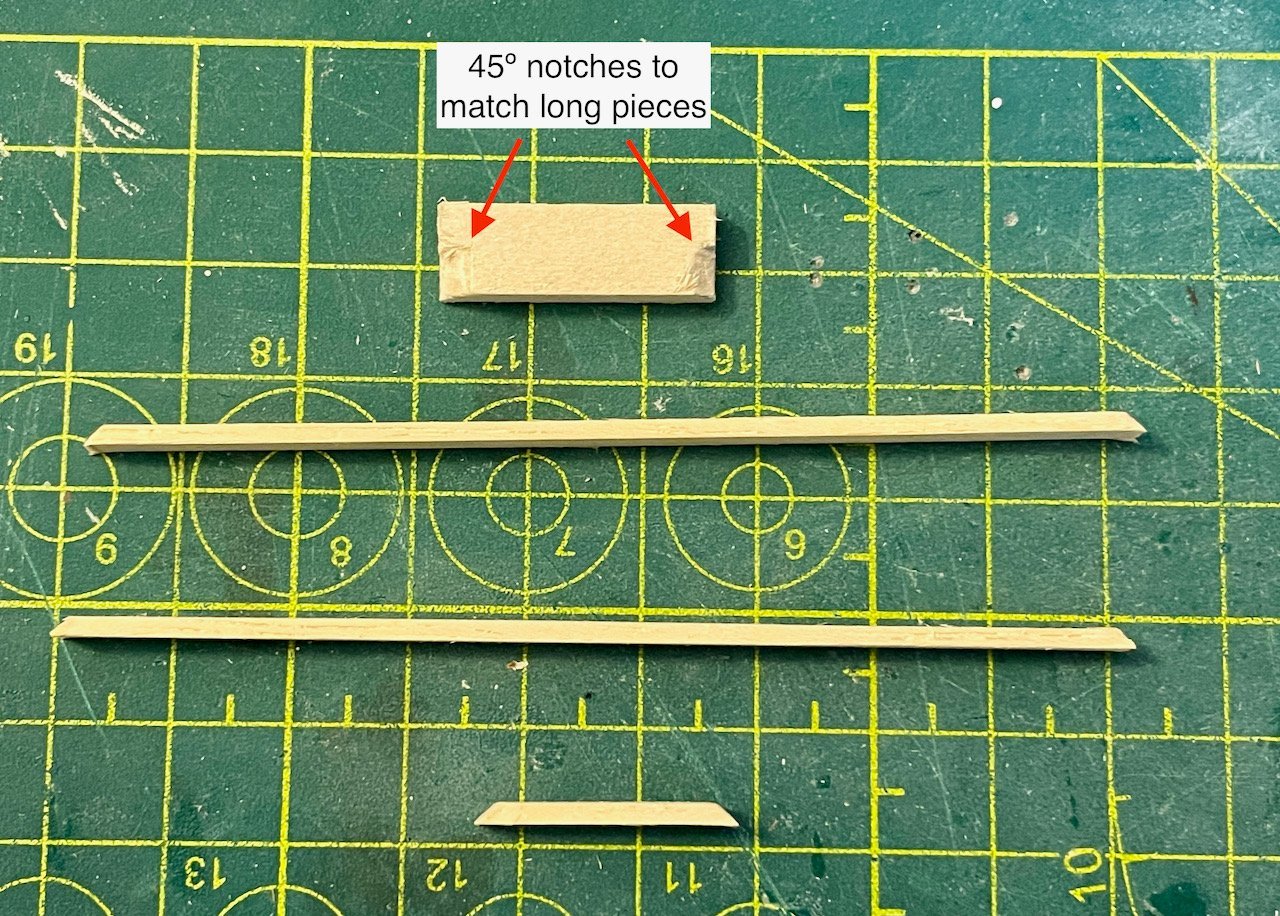
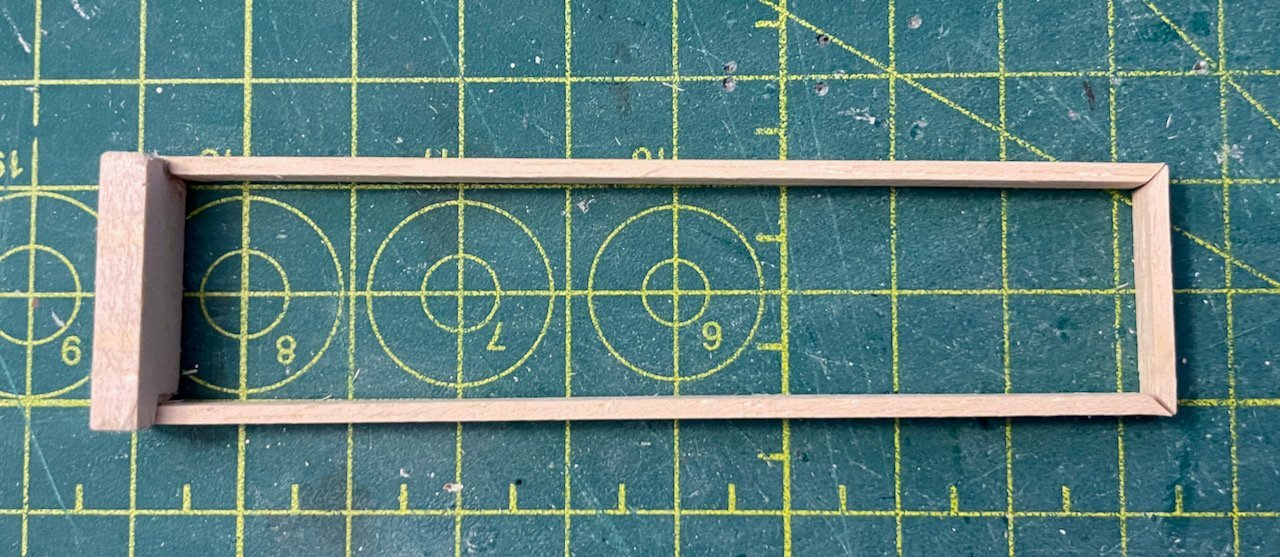
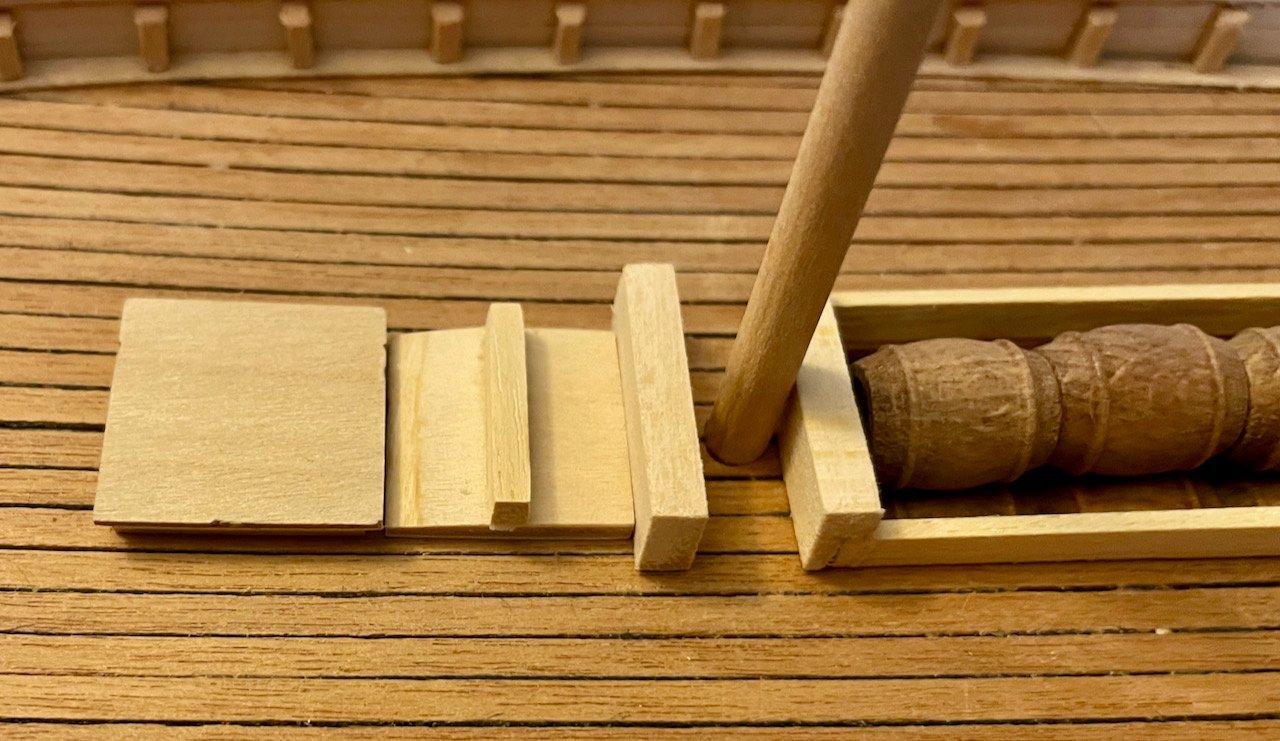
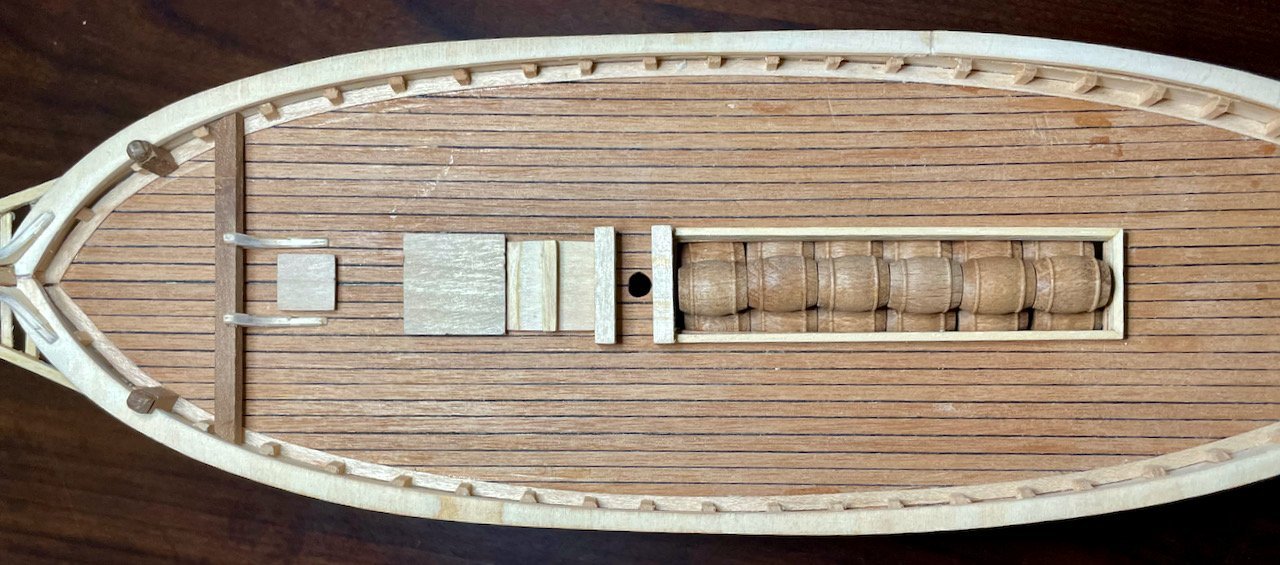
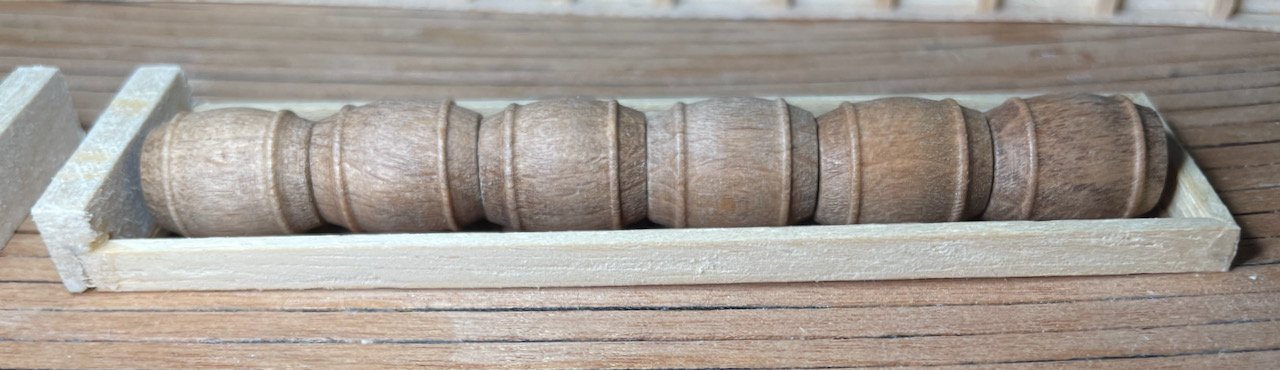
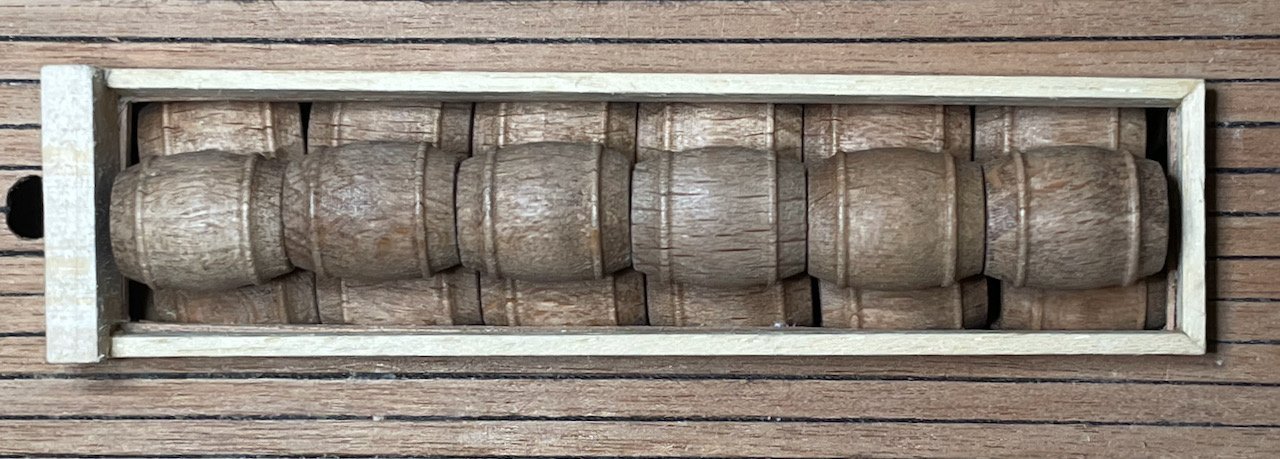
Thanks, RDDP! I've ended up doing a bit more kitbashing than I originally intended...maybe I should adjust the title of this log. The risk of increasing knowledge and skills, I guess, when I can see a better solution for the boat in my hands! This evening, our living room was in disarray for some carpet repairs. While the rest of the family went off to their bedrooms, I slipped into the basement and had a very productive session working on the midships deck fittings. As I cut out the preformed plywood pieces, I quickly noticed a problem—the coaming for the cargo hatch was not going to look good. I'm not sure if the issue is errors in the manufacturing process or errors in my build. But the curvature of the side pieces was nowhere near the curvature of my deck and I was not convinced that they would line up quite right with my hatch. You can see some of this in this rough fit of the pieces below. I also found it weird to have one side of the coaming be obechi and the other three be plywood (this would be less weird if I were following Billing's recommendations for painting). So, I decided to make the other three out of obechi. Thankfully, Billing was generous with the 2x4mm obechi strips intended for the hull, so I had plenty of woodstock that would match. Since I was bashing this coaming, I figured I would also eliminate the butt joints. Mitre joints look much nicer and are pretty easy for me to pull off since I have a pair of mitre shears. The key challenge was the forward joints, where the 2x4 pieces meet the 4x8 block. These two were harder mitre joints than I've ever done! The first one (on the left in the photo) was a smidge too big, but I did much better on the second. Here are a few photos of the blocks as I cut them and then dry fit on my cutting mat. Once I installed the coaming, I went ahead and finally added the top layer of wine barrels. The plans call for a plastic lifeboat to be sitting on cradles that straddle the cargo hatch; I'm leaving all of that off. With the hard part done, I turned to the pieces on the forward side of the mast. Apart from the hatch, I'm really not sure what the function of the other pieces is, so I won't spend any time describing them. But, a low-angle and a high-angle shot of them, with the mast in place. And one final shot of the deck as it is coming together. Next steps: solving the problem of installing the rudder and then adding everything for the aftdeck and stern. That portion will be significantly more complicated than the deck fittings that I've already done; definitely not a project for a single evening as the forward and midships portions both were.

- 59 replies
-
- 3
-
-
-
- Billing Boats
- Le Martegaou
- (and 1 more)