HOLIDAY DONATION DRIVE - SUPPORT MSW - DO YOUR PART TO KEEP THIS GREAT FORUM GOING! (Only 13 donations so far - C'mon guys!)
×


Jeff59
-
Posts
593 -
Joined
-
Last visited
Content Type
Profiles
Forums
Gallery
Events
Everything posted by Jeff59
-
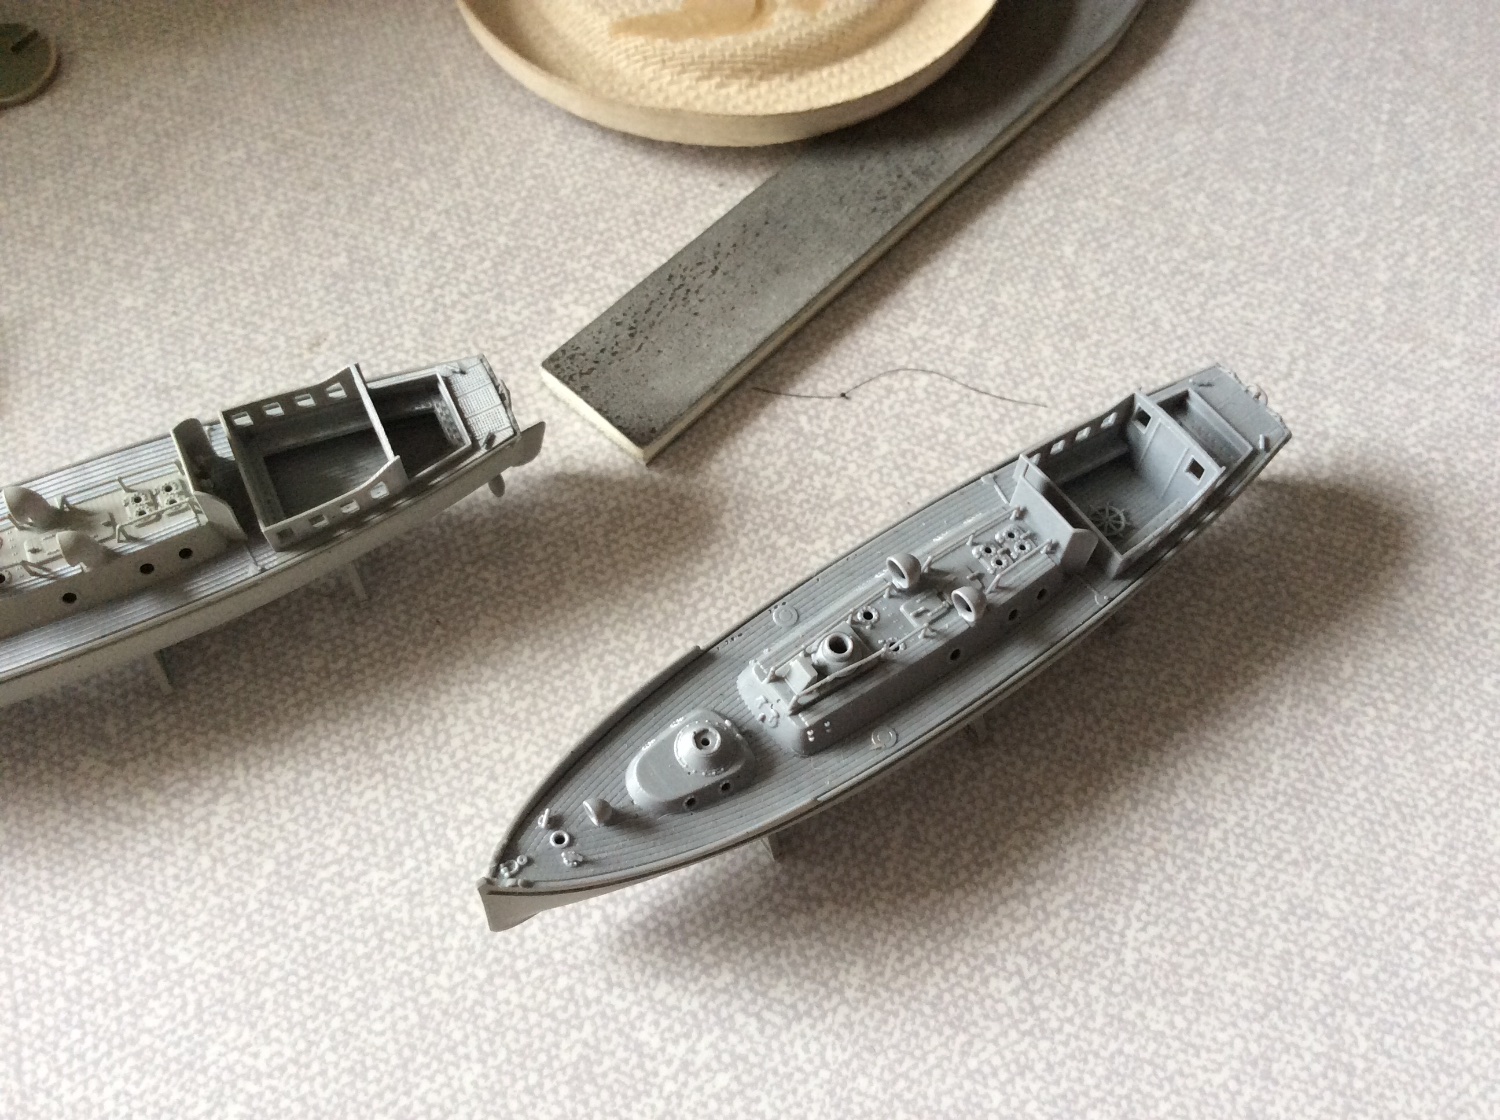
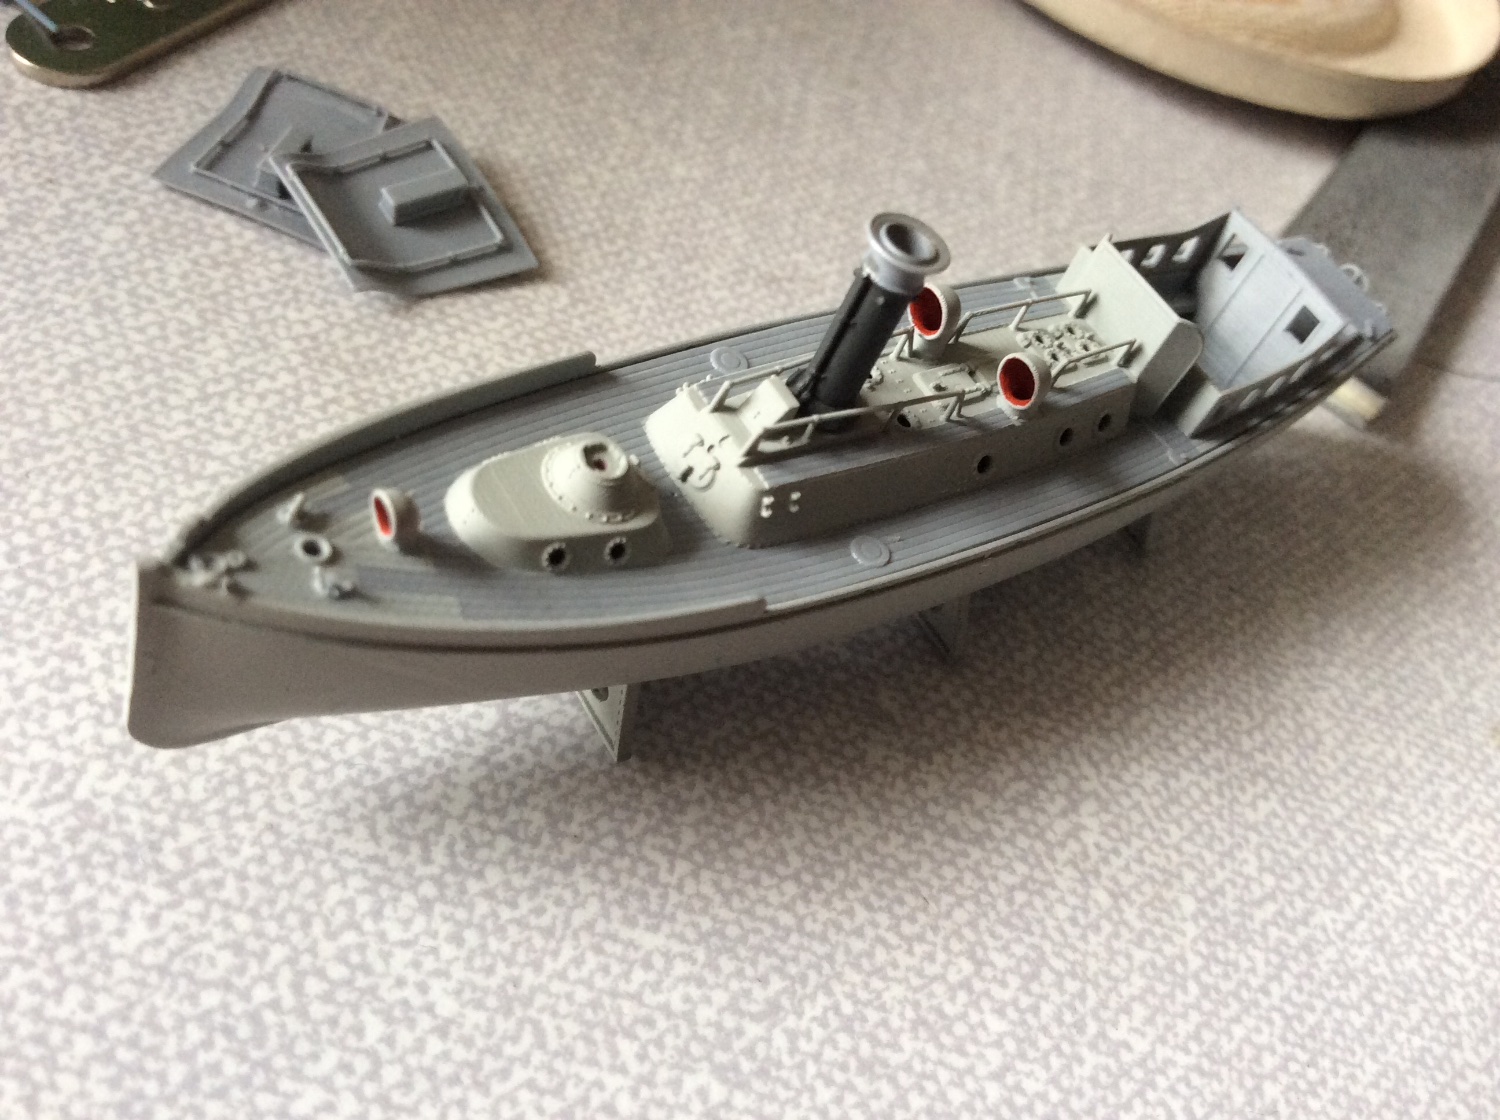
Glad to have you on board and thanks for the compliment 🤛 Regarding the ships boats from Micro Master they are bit expensive but trust me if you like quality and detail well worth it, they are very very delicate though, better to buy extra so you learn what not to do 😂 Another learning curve I’d say. They do have these boats in a range of scales including 1/700 I’m totally sold on them, by the way you ought to see some of the weapons armaments, superb. 👍
-
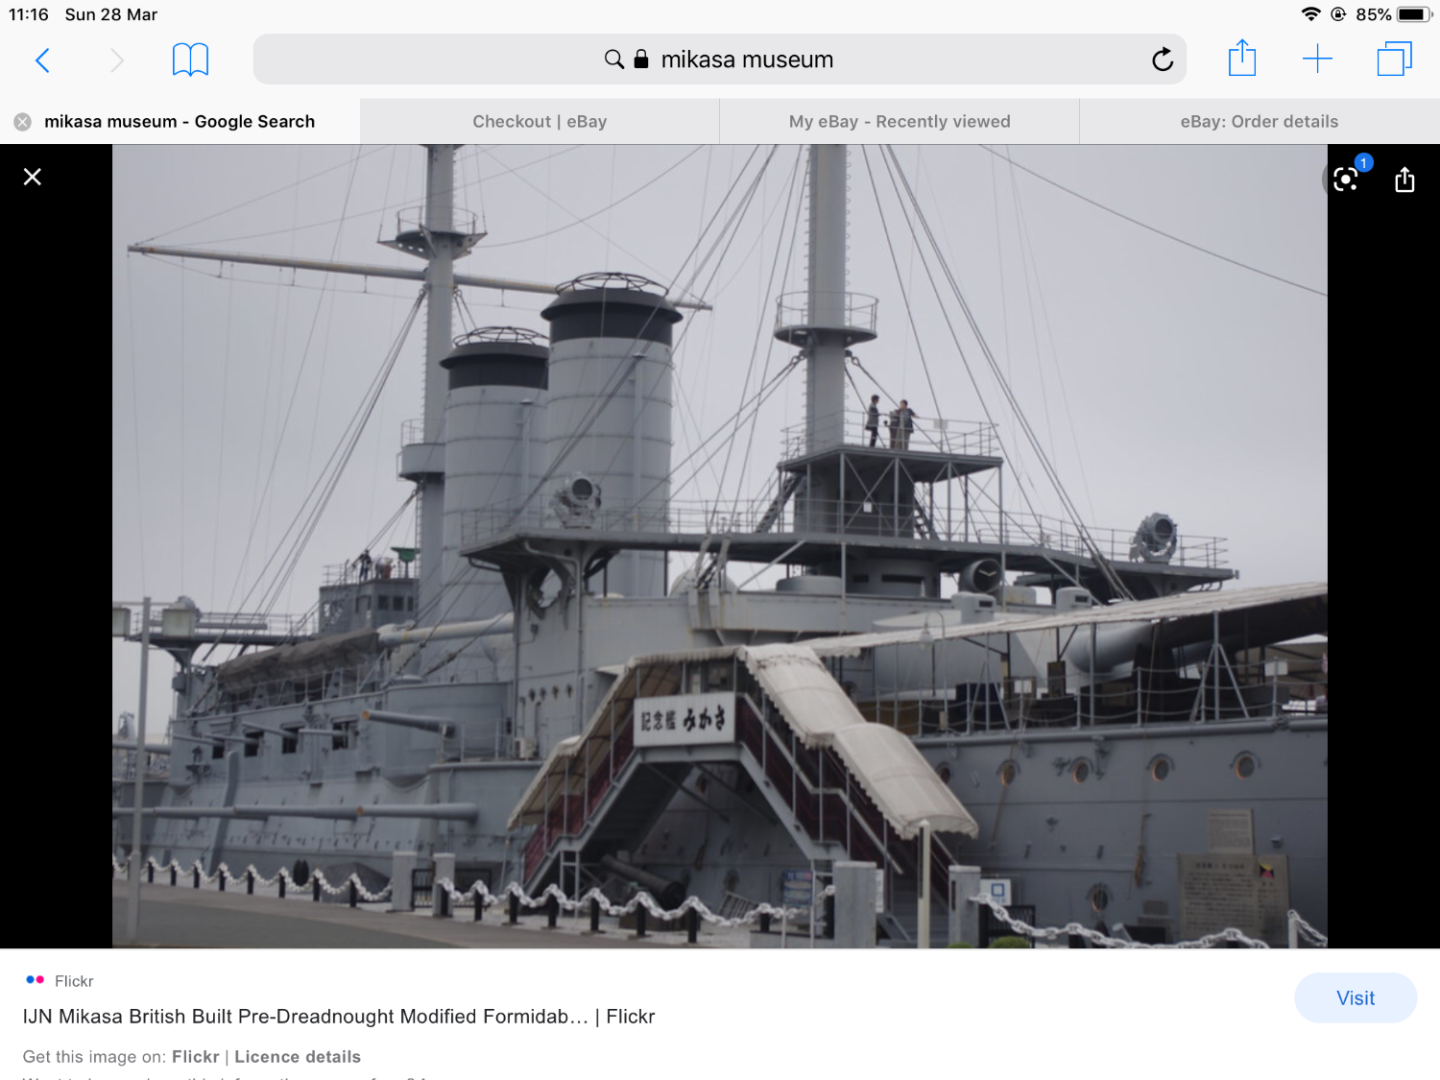
My queue is longer and my time shorter 😂 give you a laugh I have Bismarck, Titanic, Hornet, Hood, Iowa and an Arizona not started, considering buying Yamato Scharnhorst and Rodney and this is just in 1/200 scale and I kid you not there are hundreds of other models some of them serious, even want to buy the x wingnut wings 1/32 Lancaster, have been building Mikasa for two years past, what do you think my chances are, and don’t say asylum 😂
-
Hi Ed, first of me starting to look at other build logs, your Mikasa build log and CDW’s got me hooked on doing Mikasa, I bet without realising it was such a challenge, that’ll teach me for biting of something to big, love your workmanship and can only aspire to keep trying. Your lack of glue is baffling 😂 And I do like the tool you purchased for forming curves, can I ask were you purchase this cause I can instantly see the need for this ? By the way I also have the Hood to build, still to buy Pontos set for it though, so I shall start working my way through your excellent build log and enjoy looking I bet. Thanks.
-
Extremely precise photo etch work here, love it looking forward to working through your build log, still can’t believe we’re the glue marks have gone 😂 just jealous. 👍
-
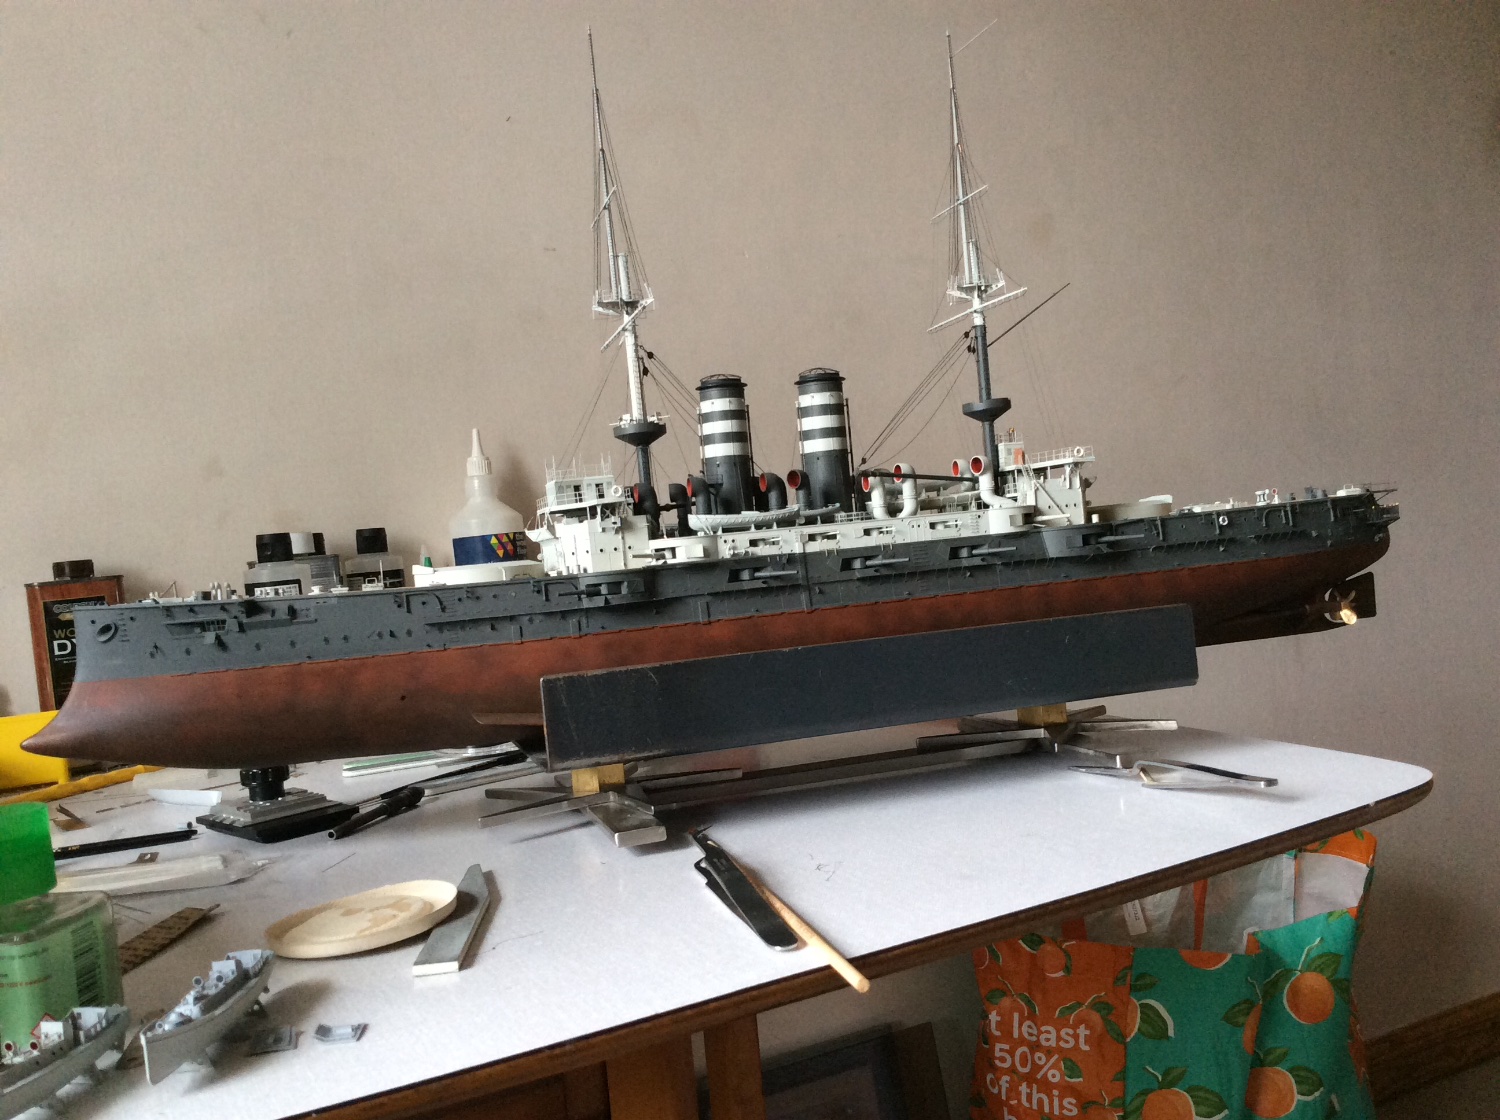
Thanks Yves, it’s been quite a journey to get here, but have to say this part of the build is the most pleasurable, just seeing it coming together, never thought I could achieve this, think Jacqueline is surprised as well, especially if I finish it 😂 a wee bit to go yet though but it will all add up in the end. 🤛 thanks again 👍It will feel strange to actually start on the Bismarck when the time comes, but I do feel it shall be a less stressful build, fingers 🤞
-
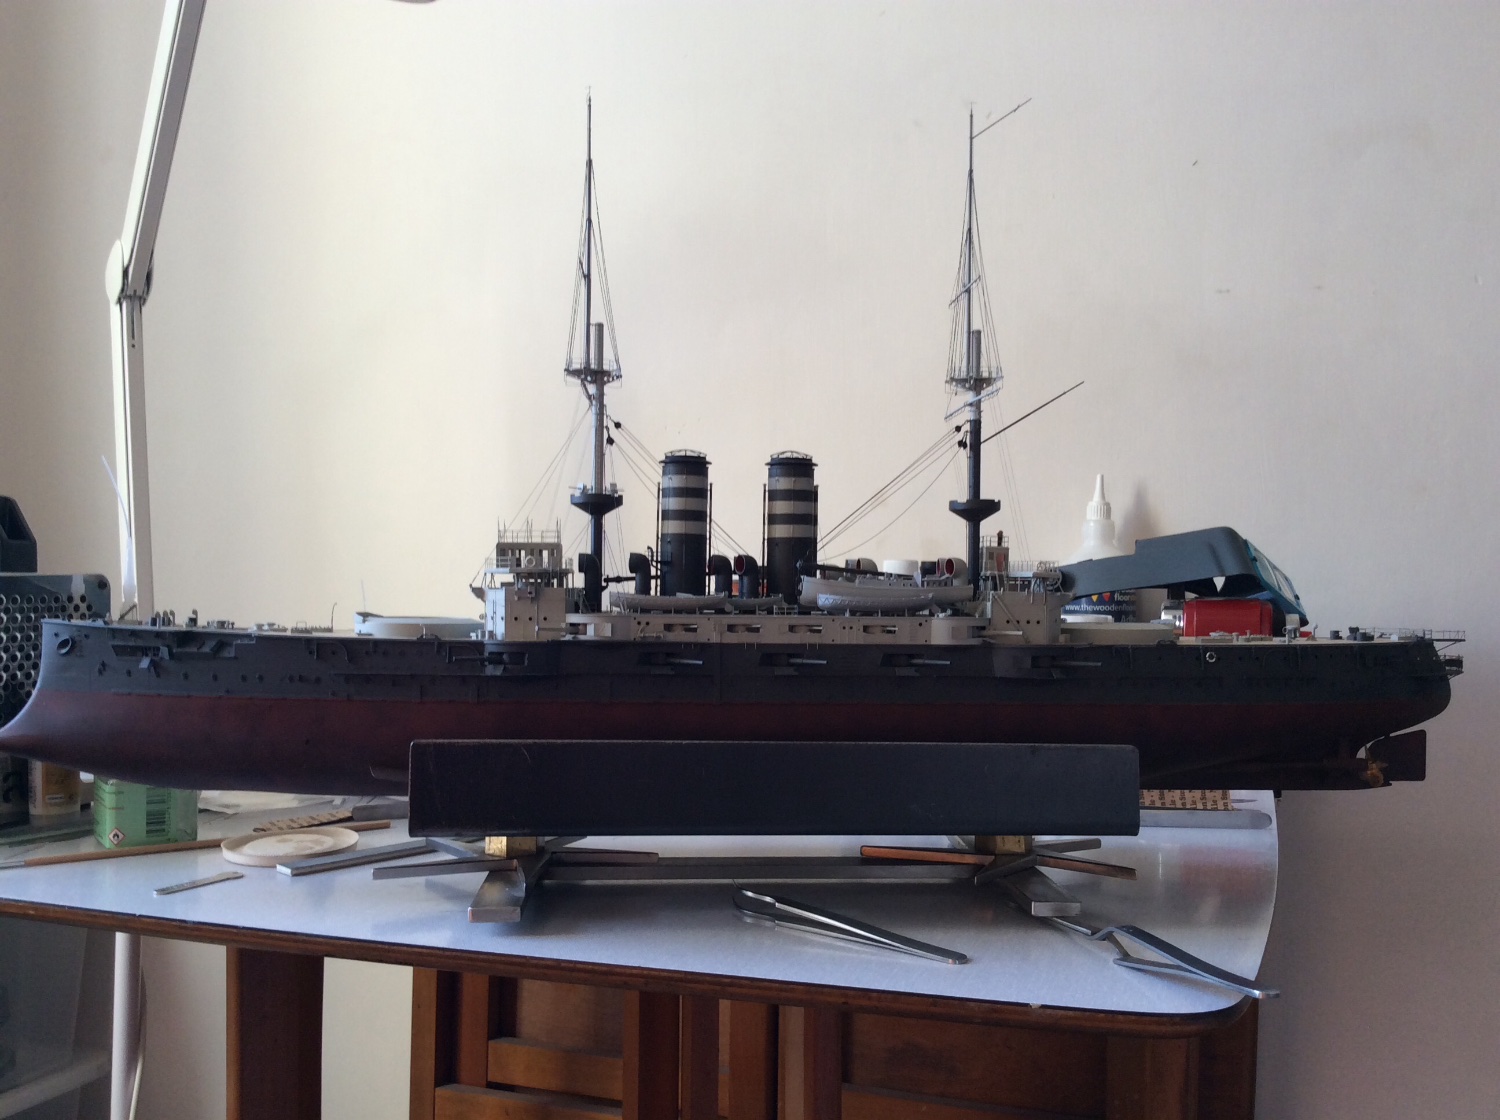
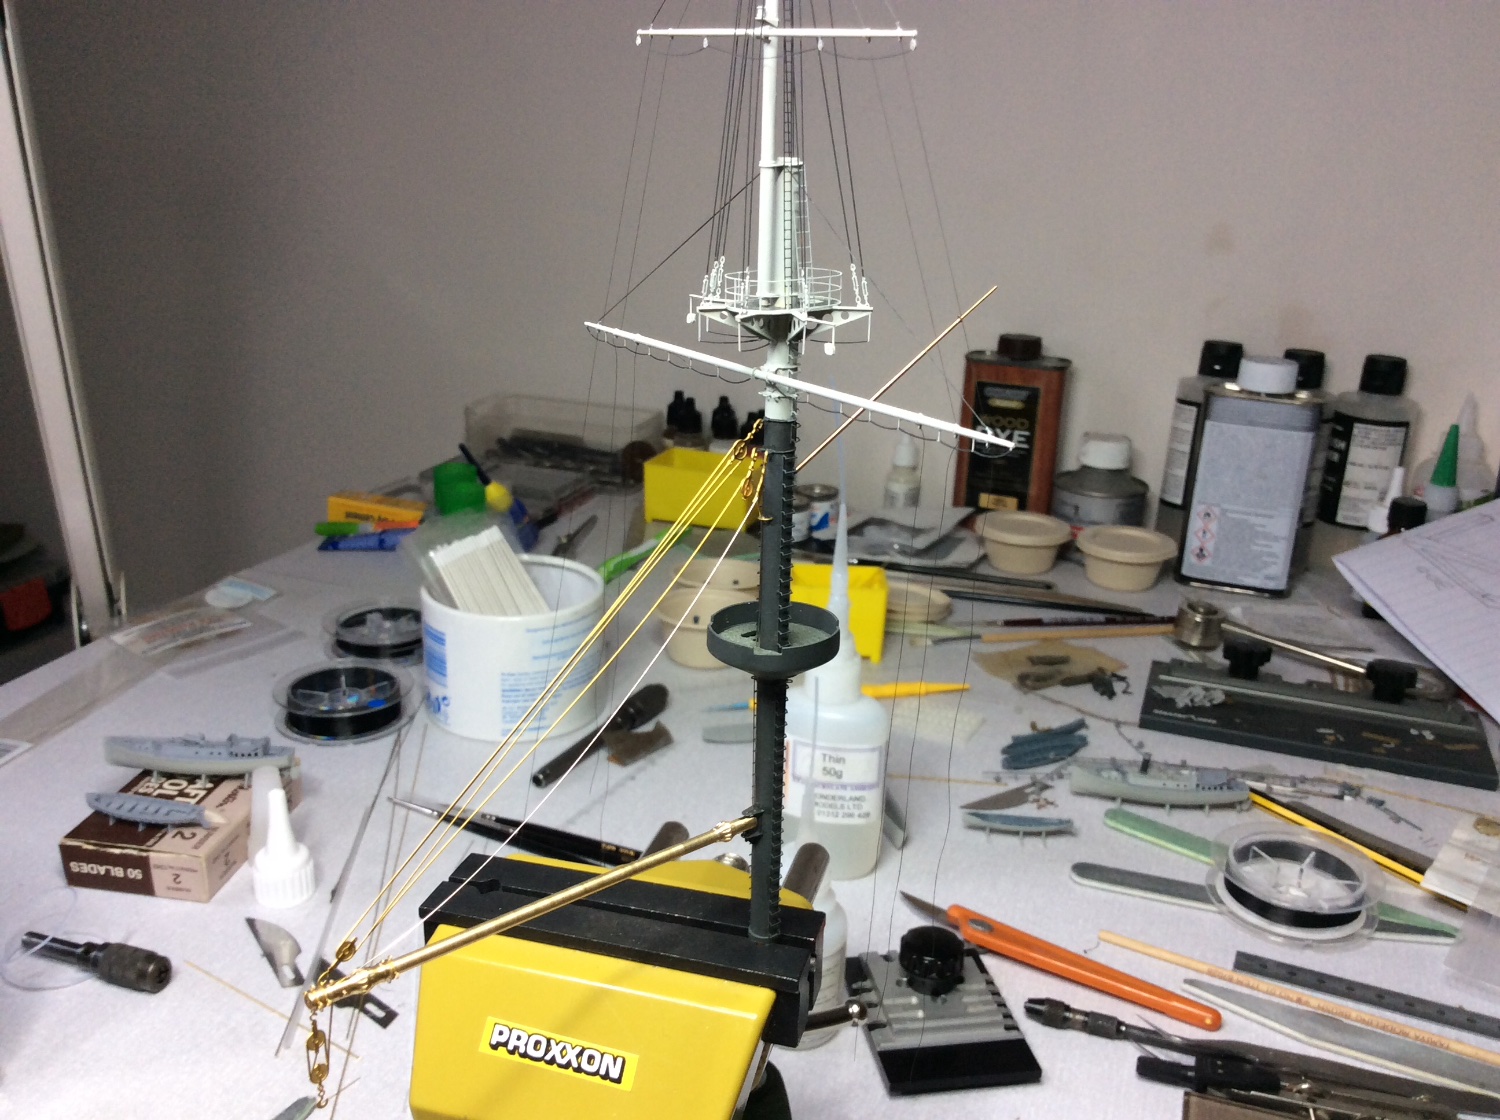
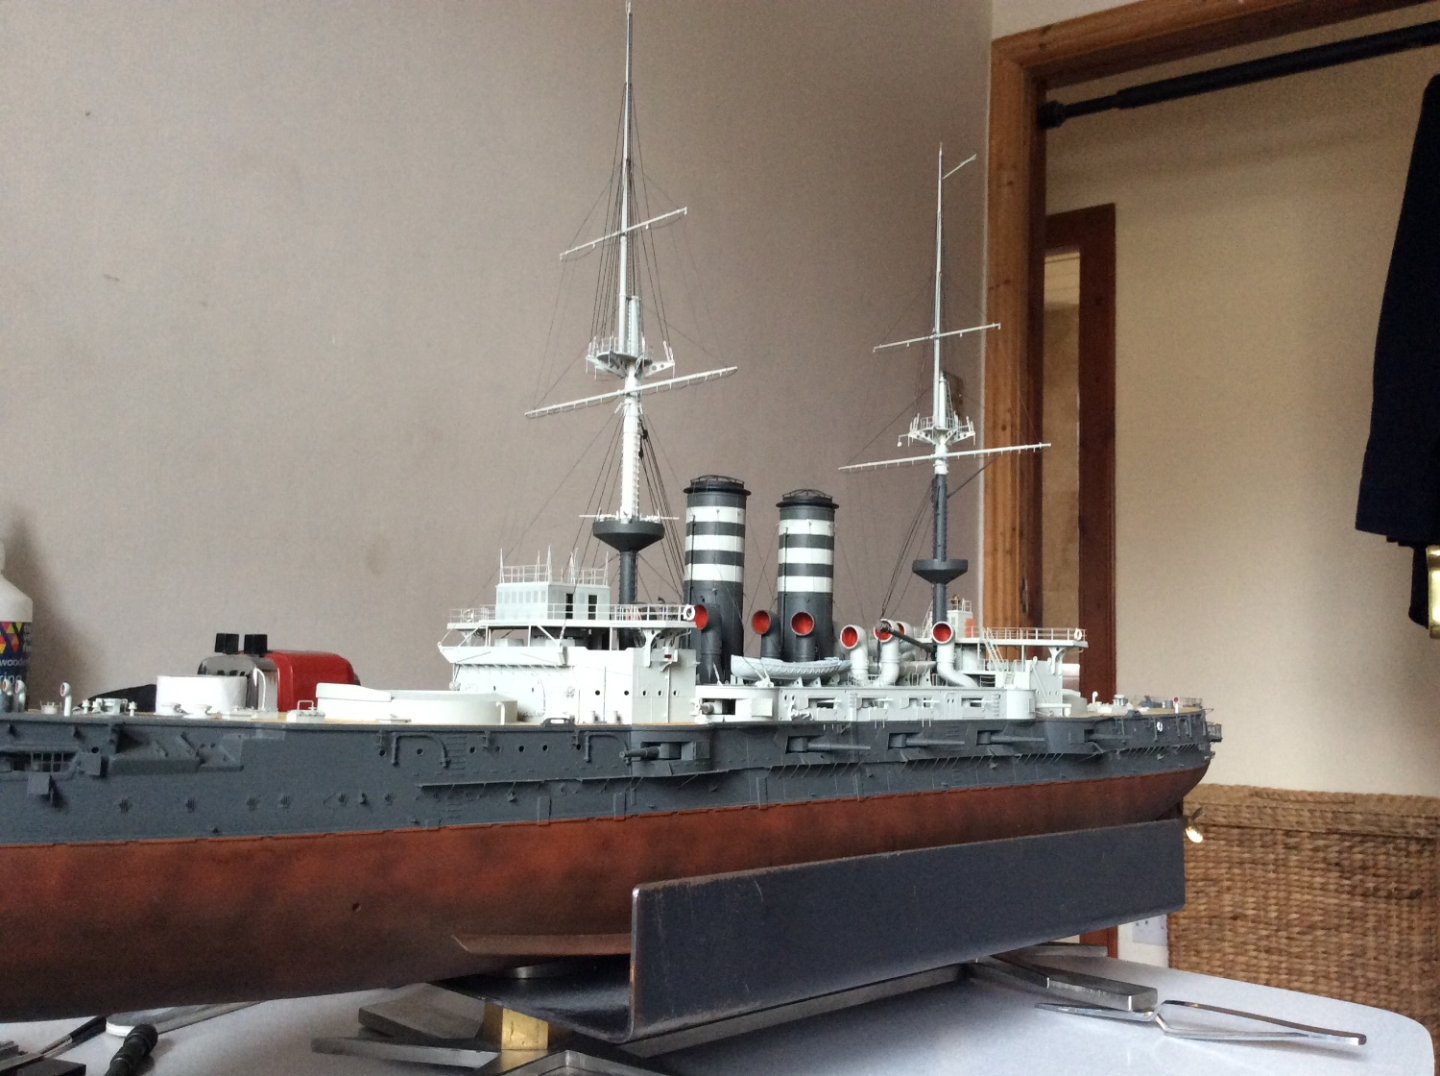
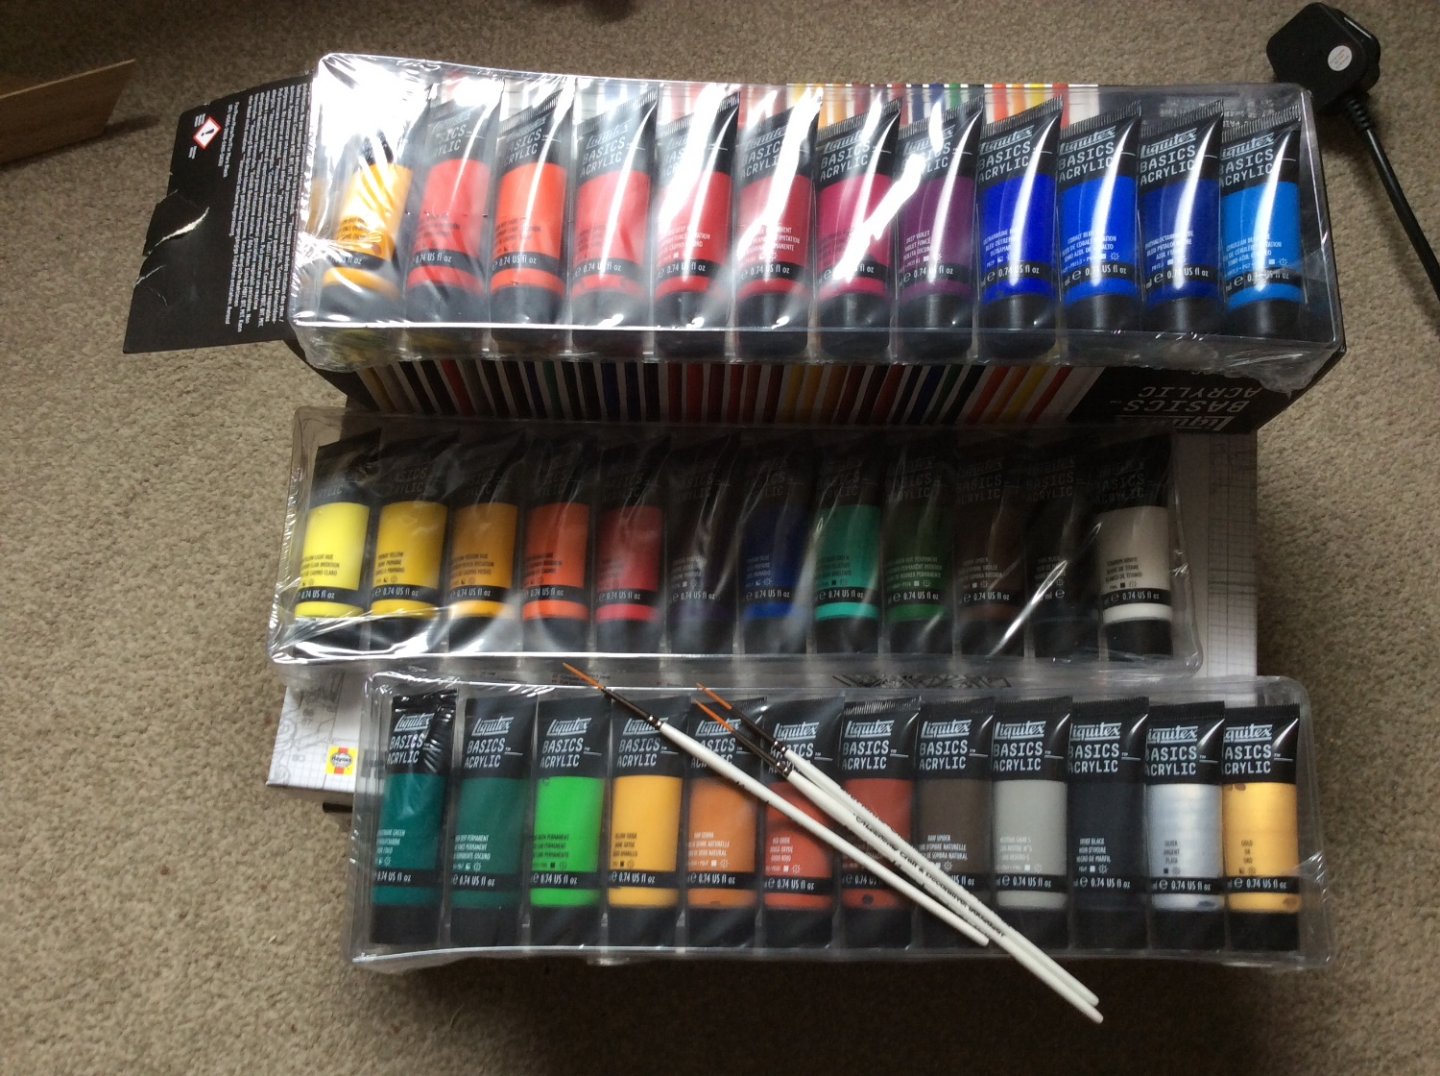
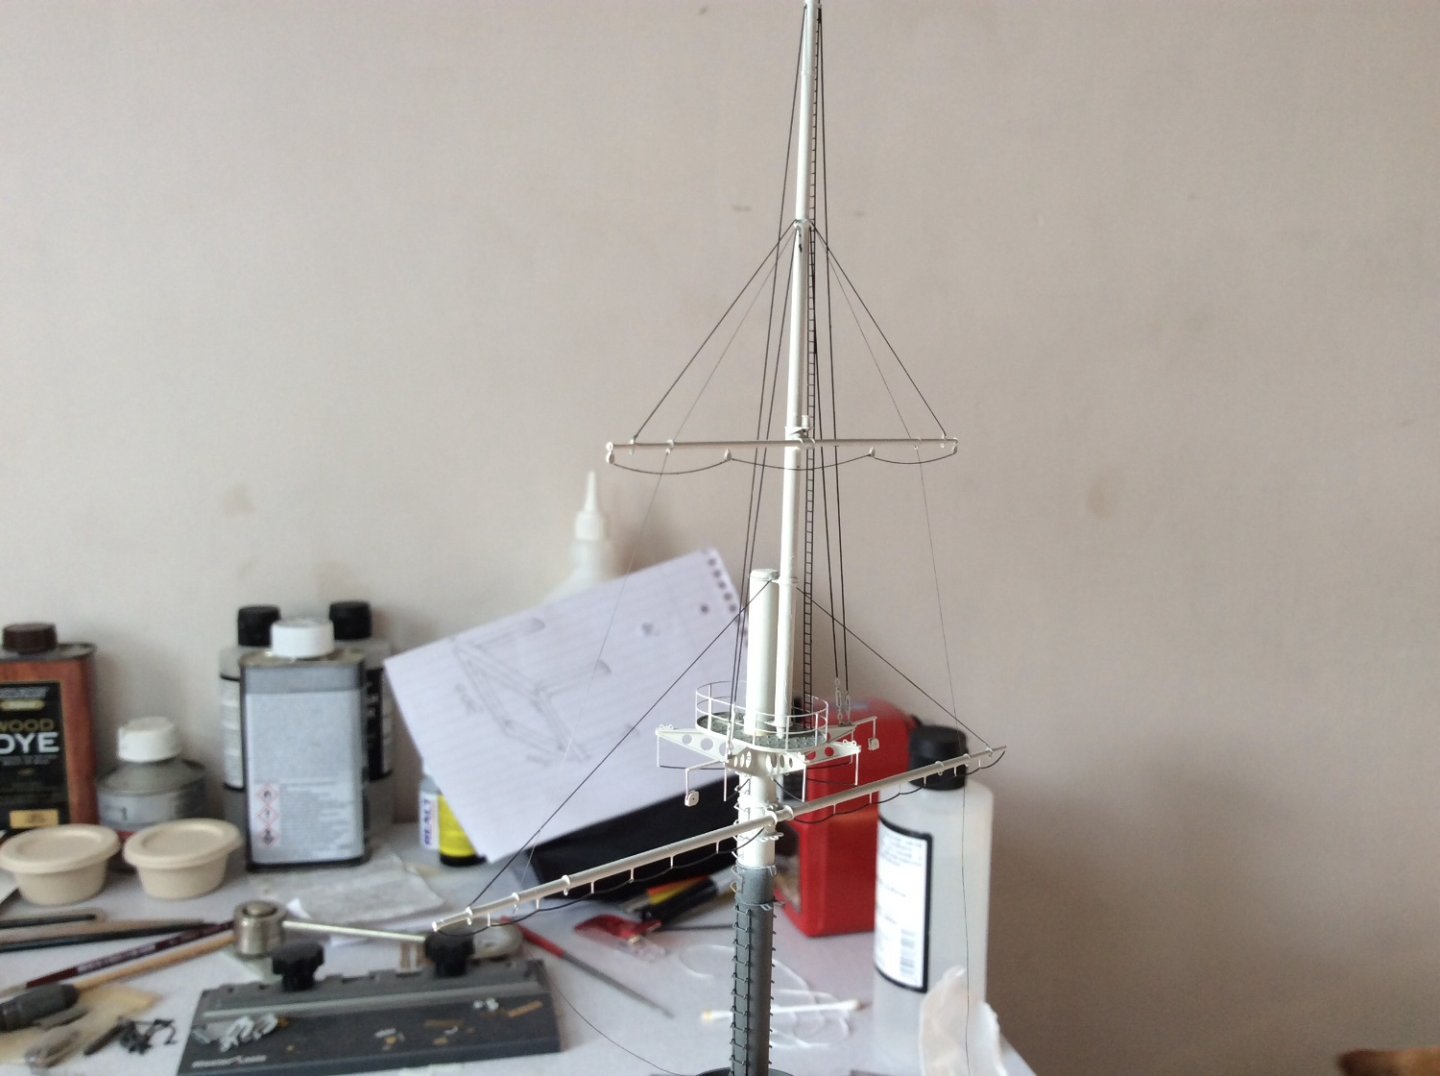
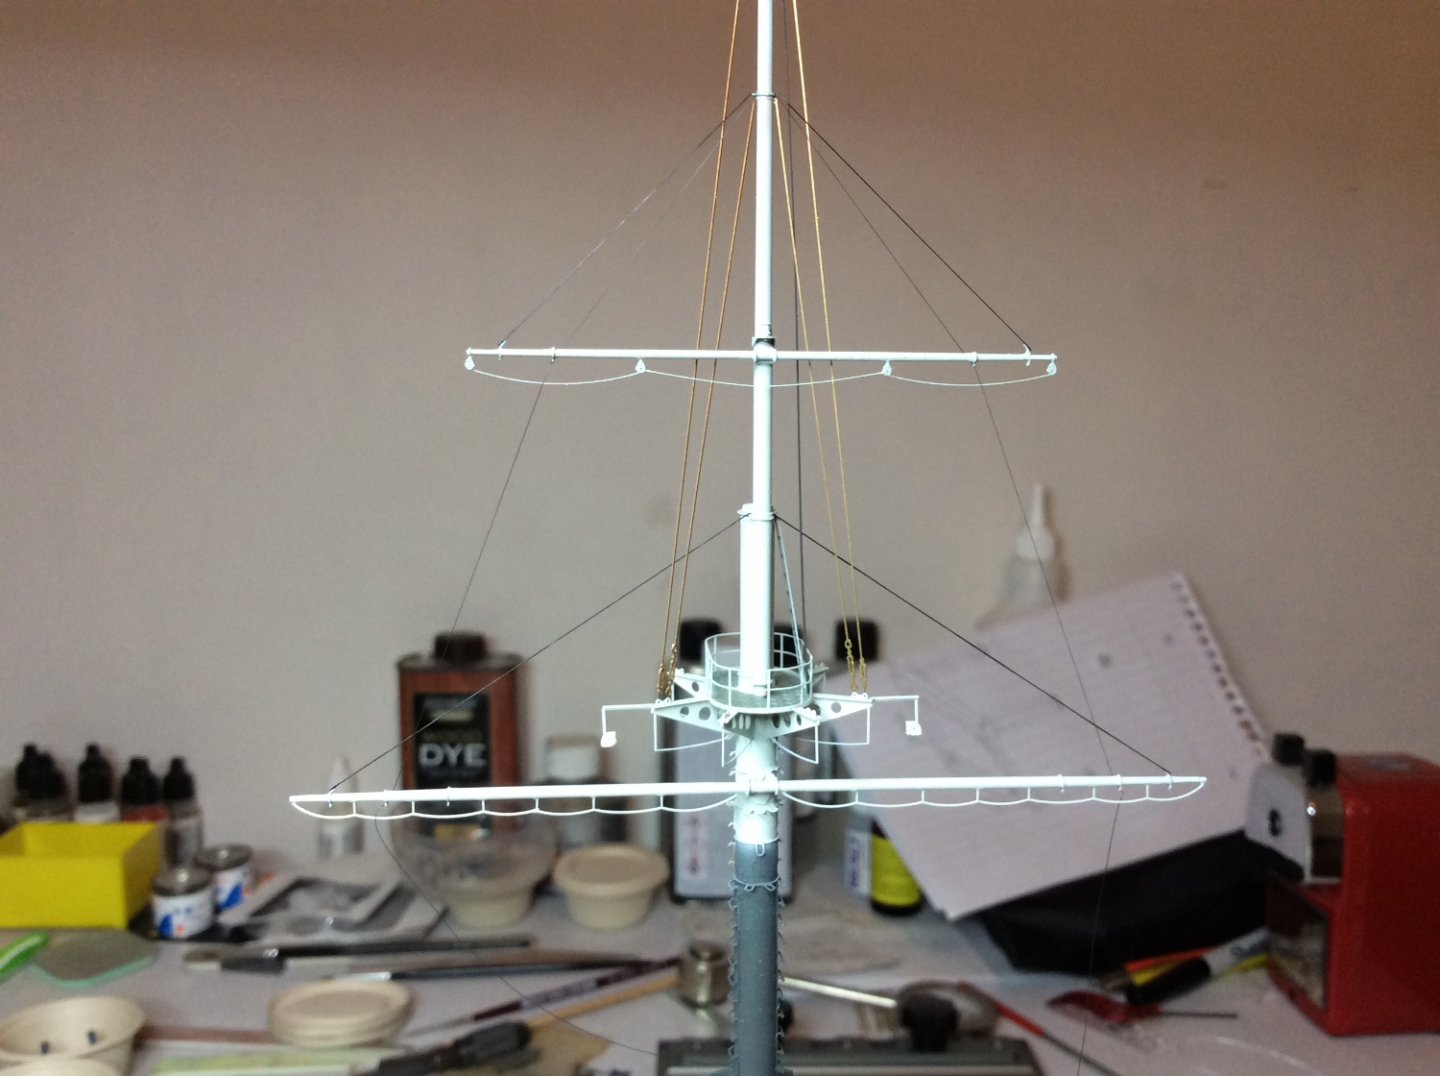
It’s hello again from Jeff, some acrylic paints and brushes arrived today for me to experiment painting some detailing on ships boats so fortunately I have some extra boats for practice work, so going to dive in the deep end and see if I can swim. 🤪 took some more photos in a better light as my camera skills are zero. Still trying to tweak the masts slightly, might just manage to steal a little bit I hope, no pain no gain as they say. 🤞


-
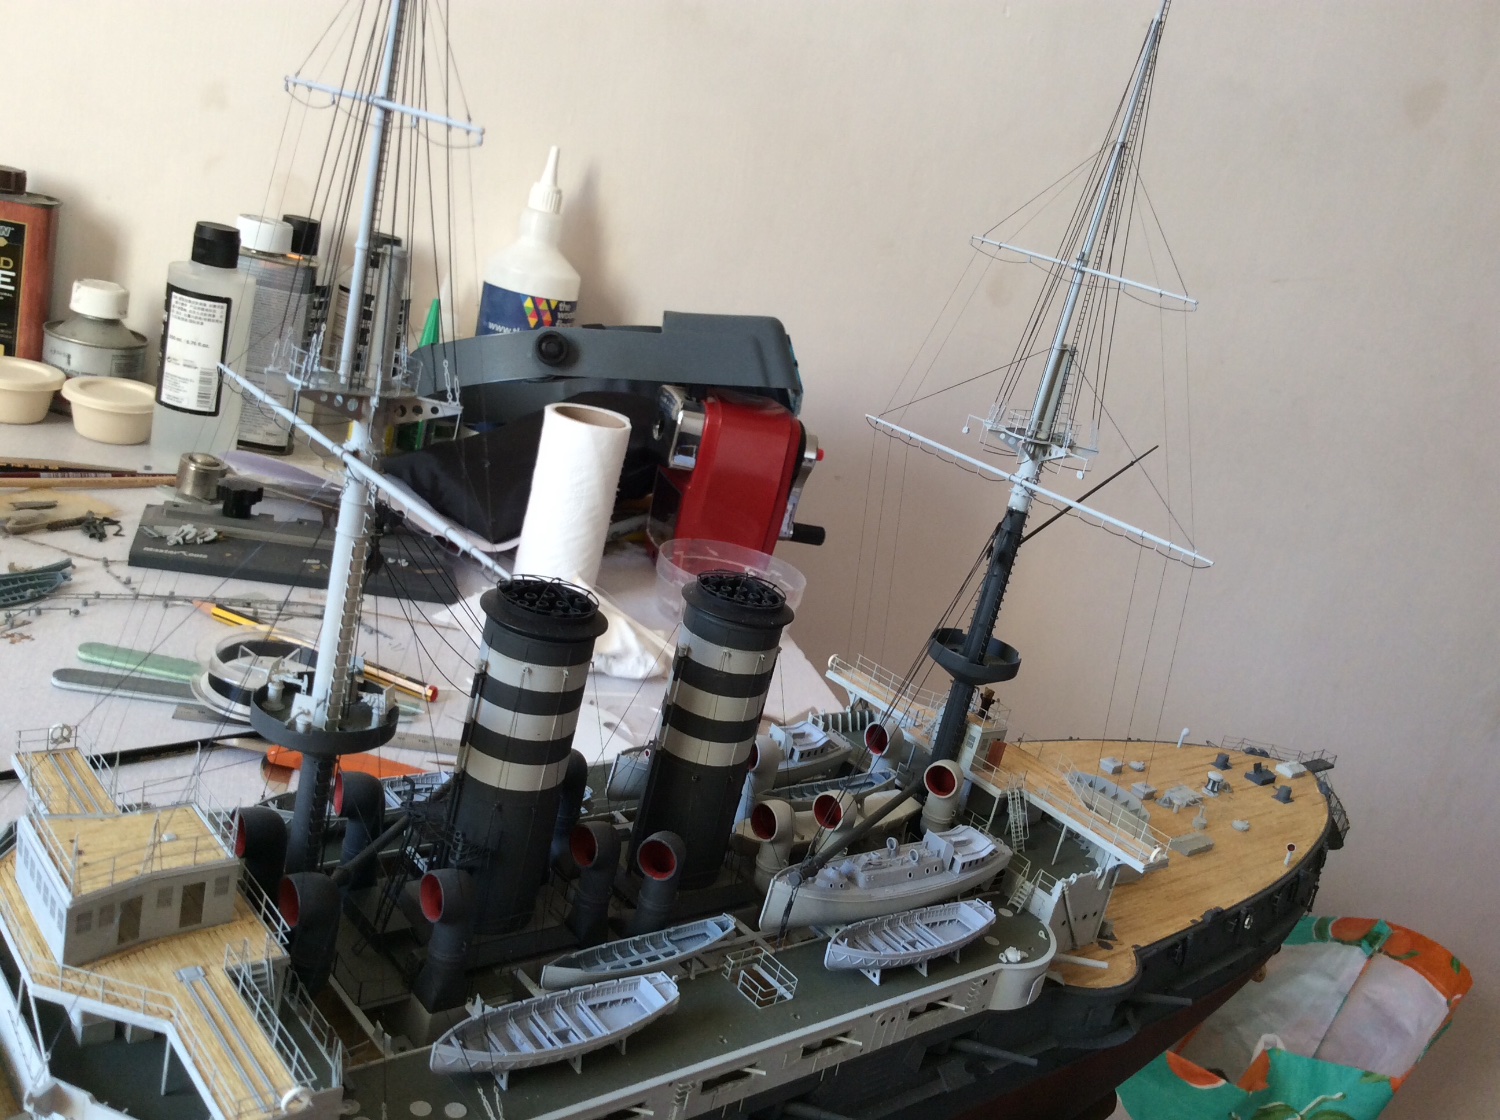
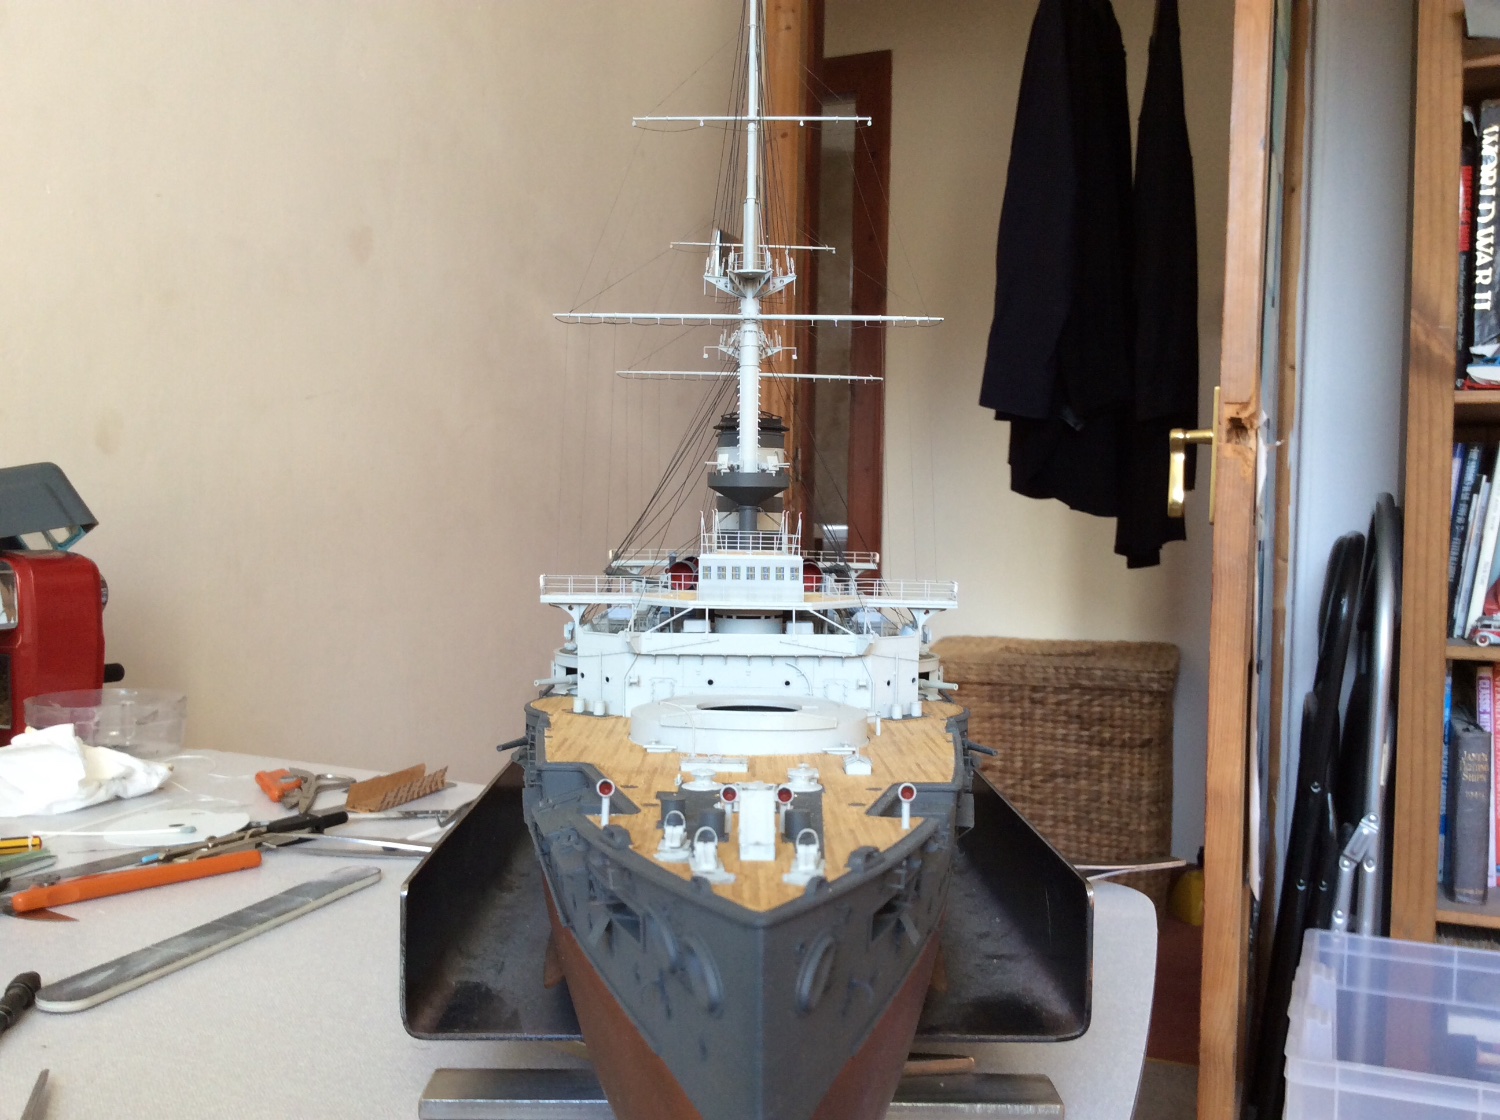
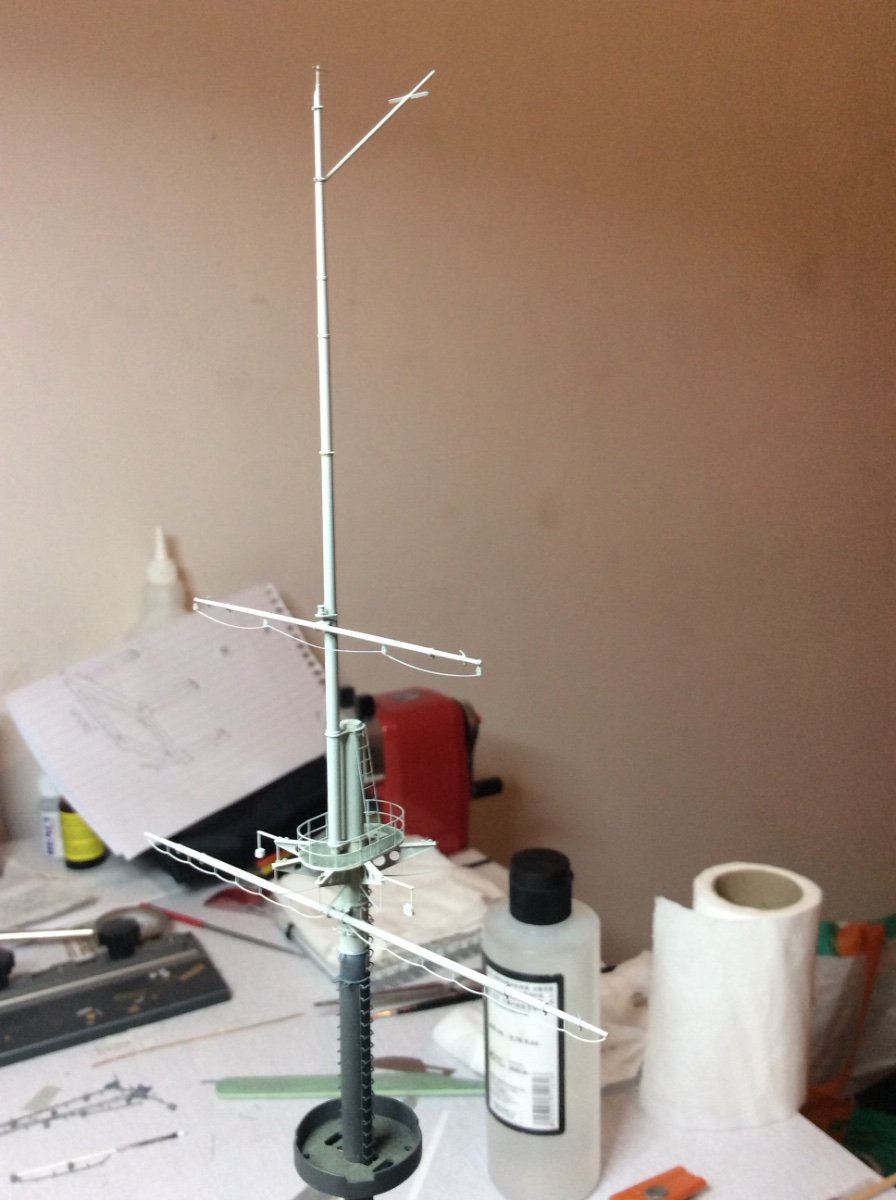
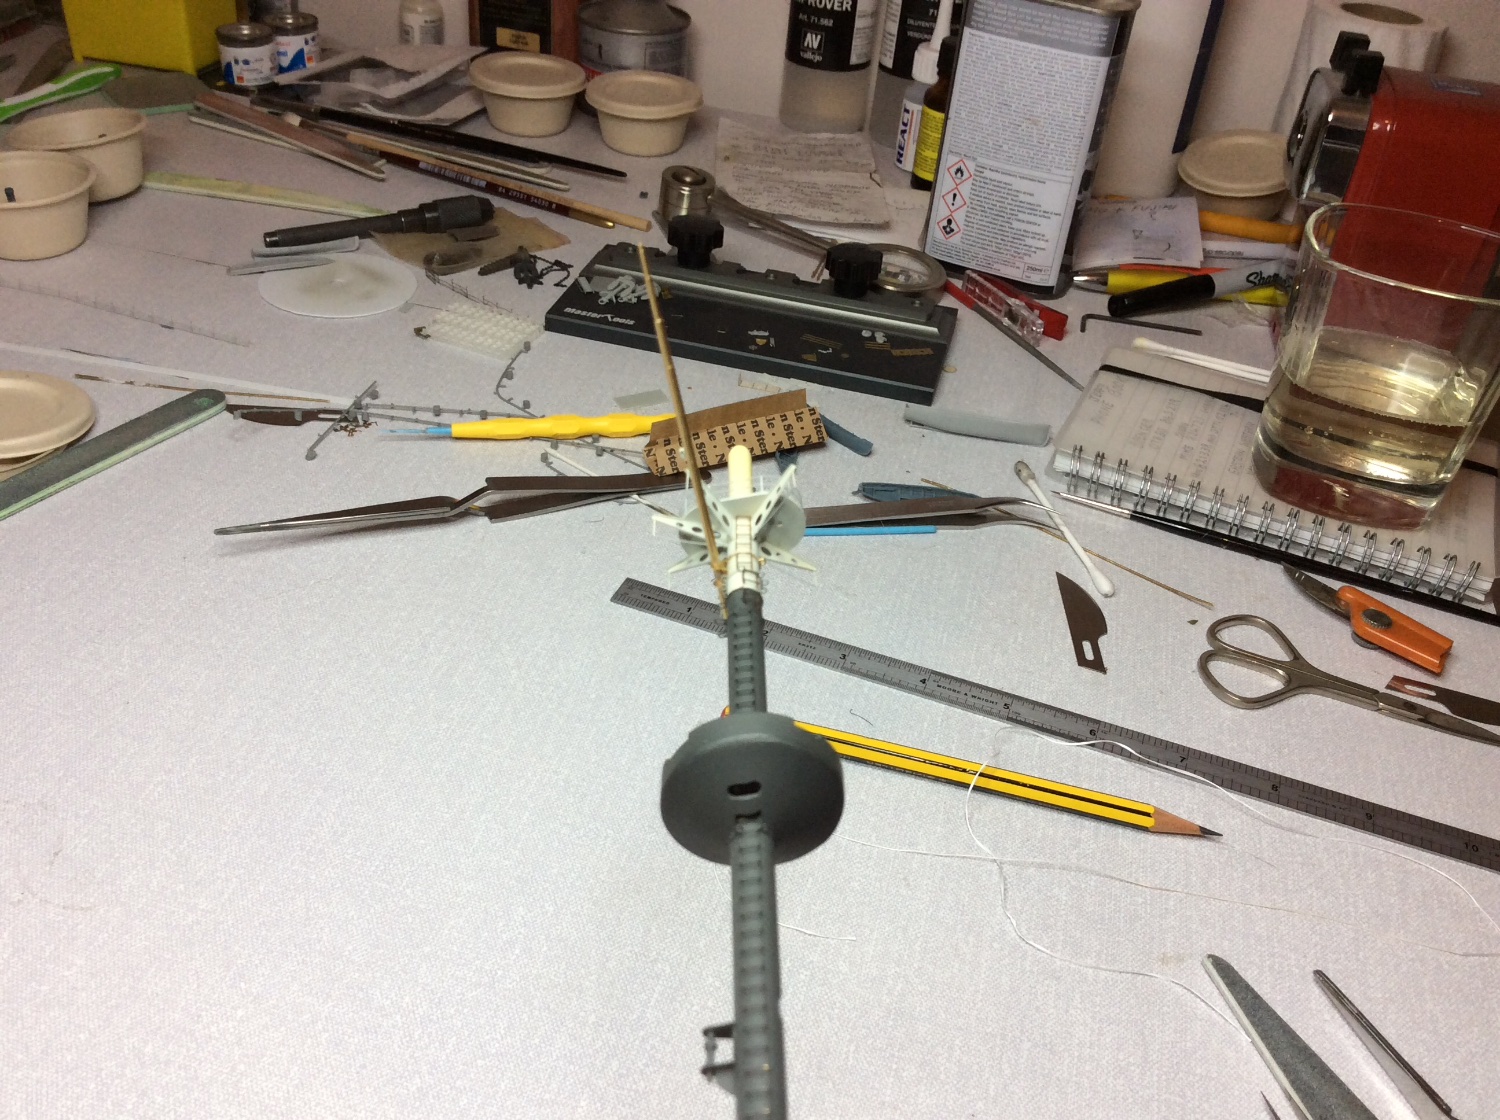
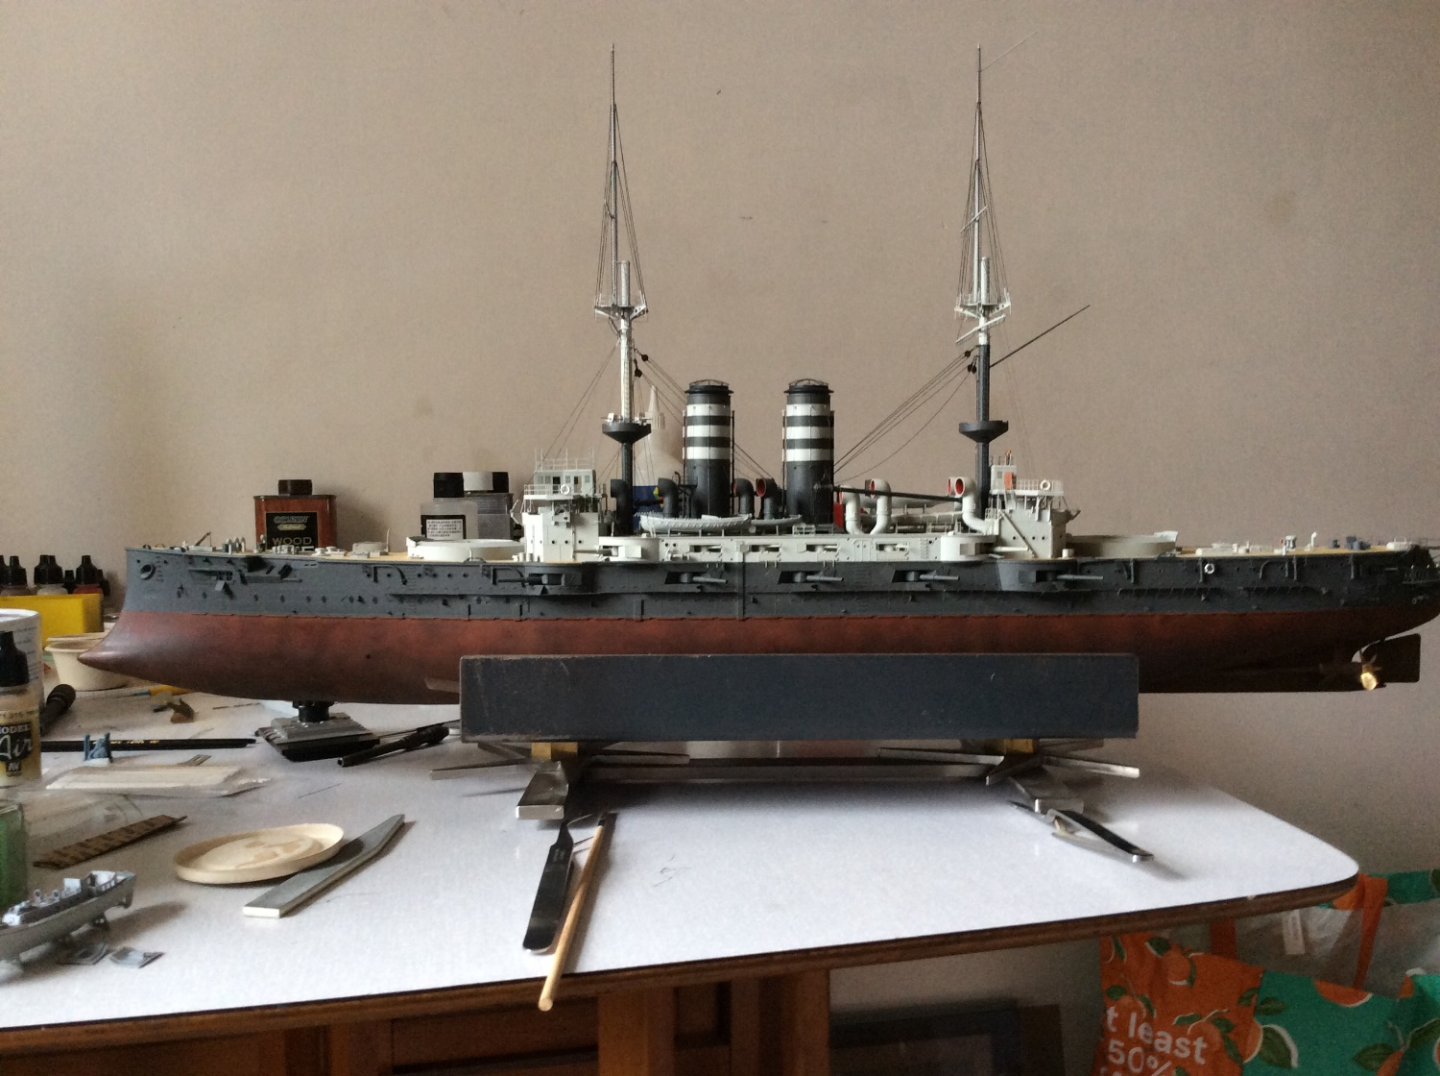
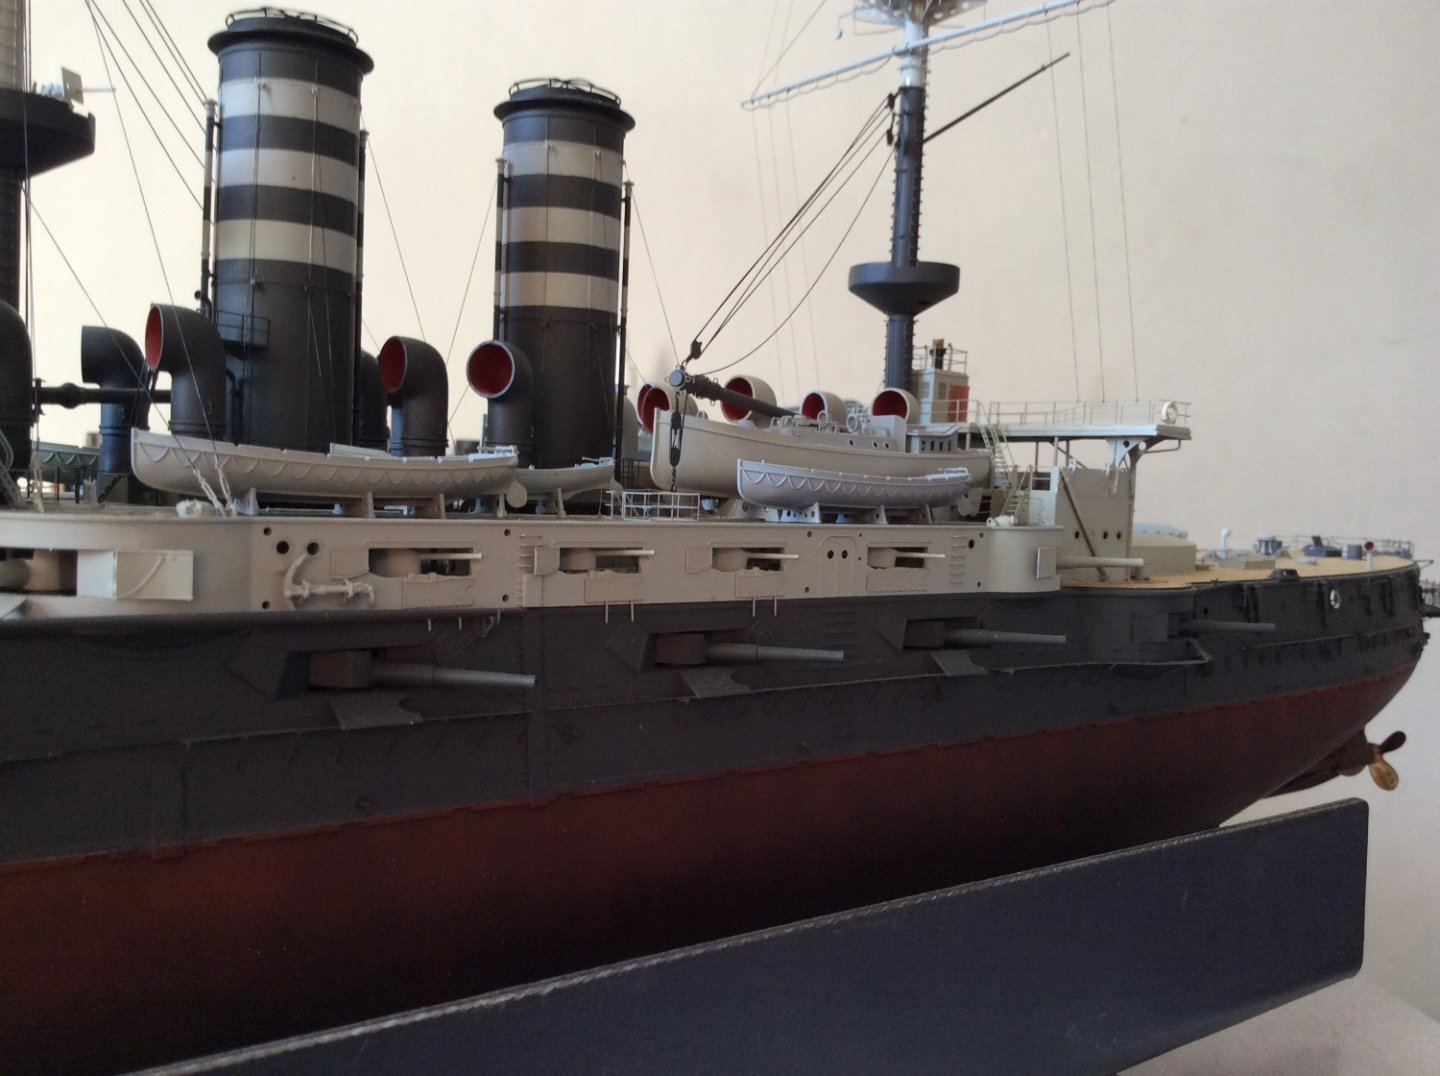
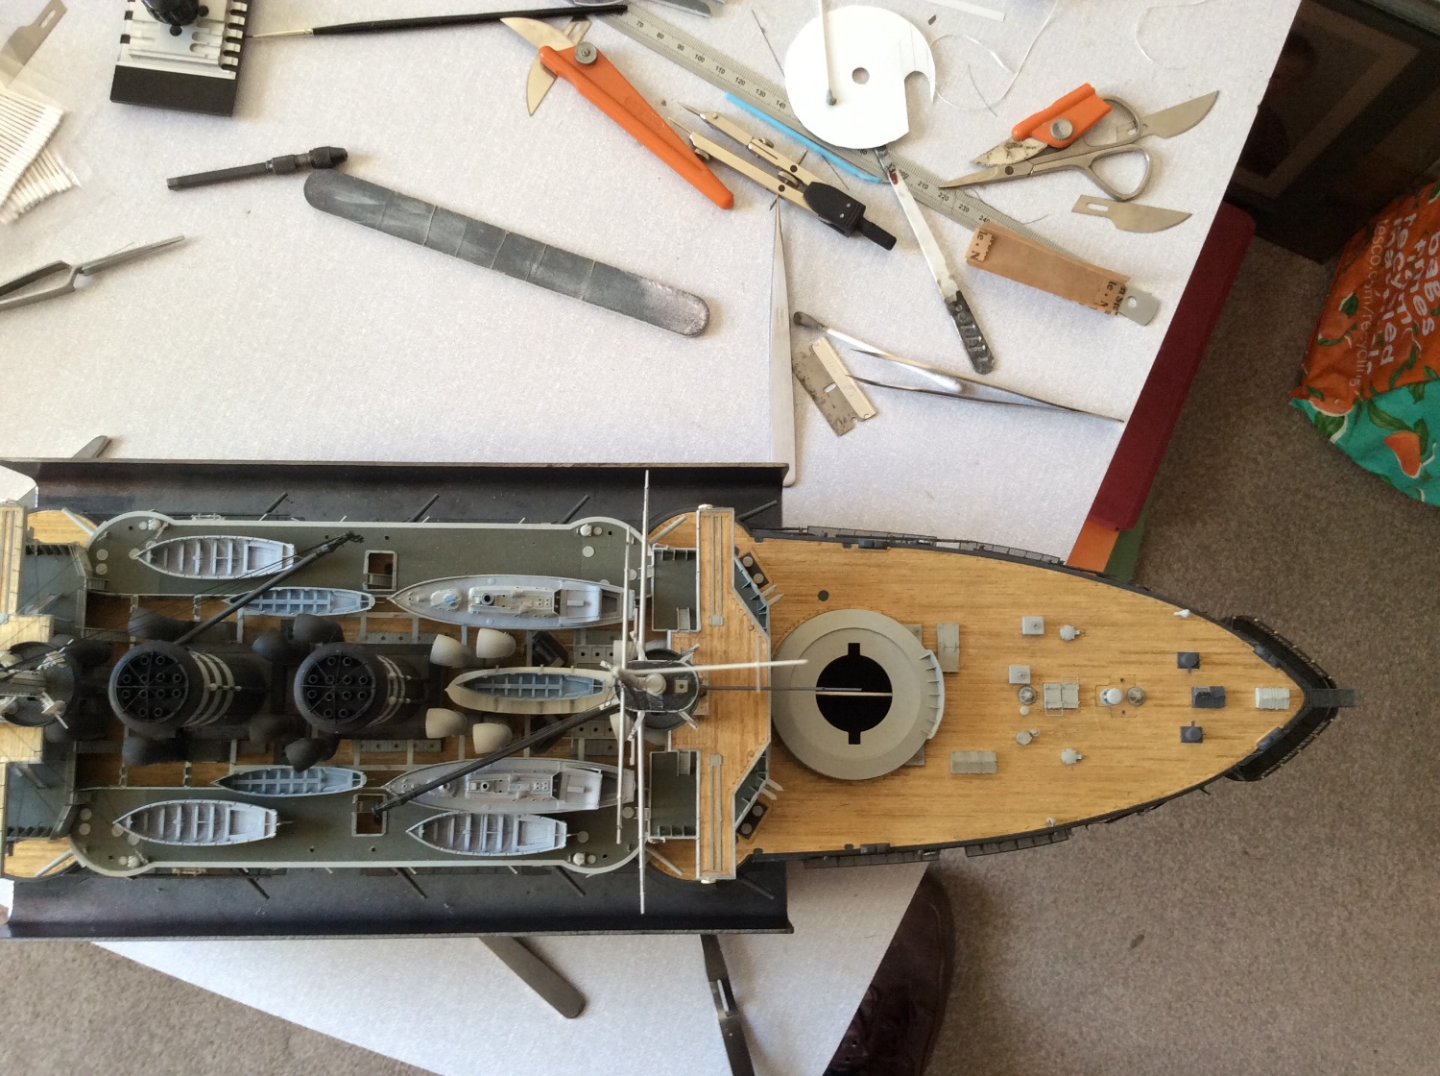
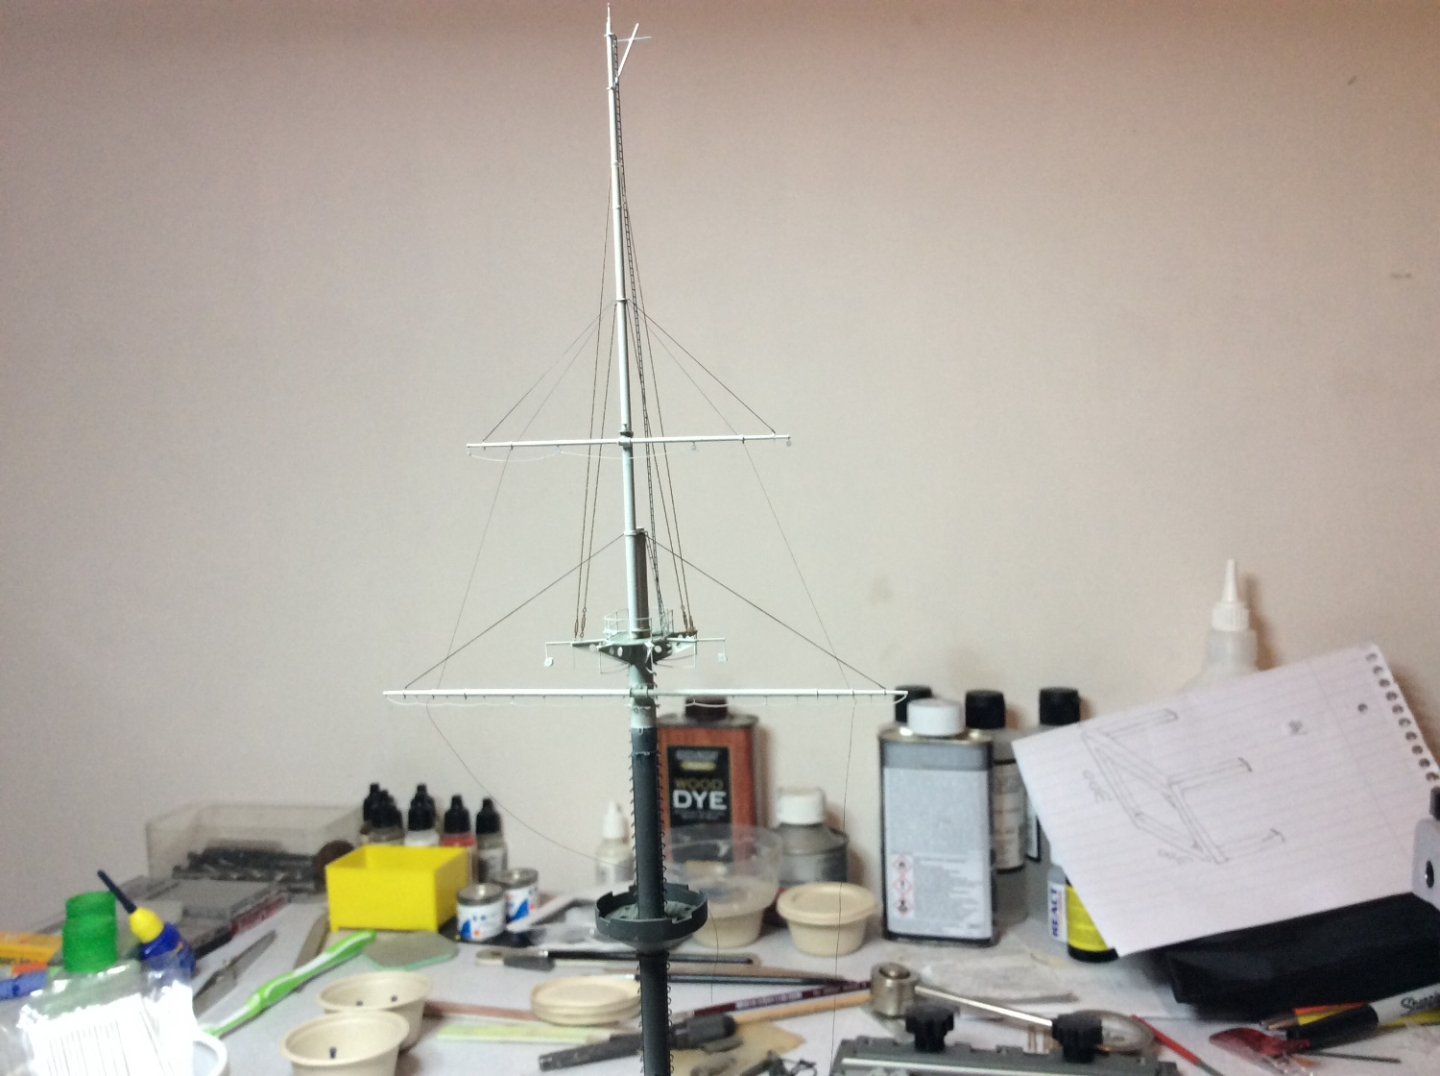
Hi guys still trying to get to end of build, fitted the main mast, almost managed to get it right with the gorilla glue, just slightly out of being vertically true by a couple of millimetres, just have to live with it you ain’t moving this mast now 🙄 certainly a challenge when your trying to get it level in two planes, spars ninety degrees across deck and jib at a certain angle across to boat deck, in ten seconds 😂 Sod’s law when I tried cold fit I managed to locate mast in hole in deck almost right away, but not when I had applied the glue, must have taken about three precious seconds, could feel the panic rising 😂 but just managed or at least I thought I had, a well I’ll live with it. That’s some glue 10 seconds and solid. Tied in a few bits of rigging. My next goal is work on those lovely boats from Micro Master and continue with rigging as in fore mast. Does look more like a Mikasa now though. 👍 Put a few pictures up to show progress 🤛


-
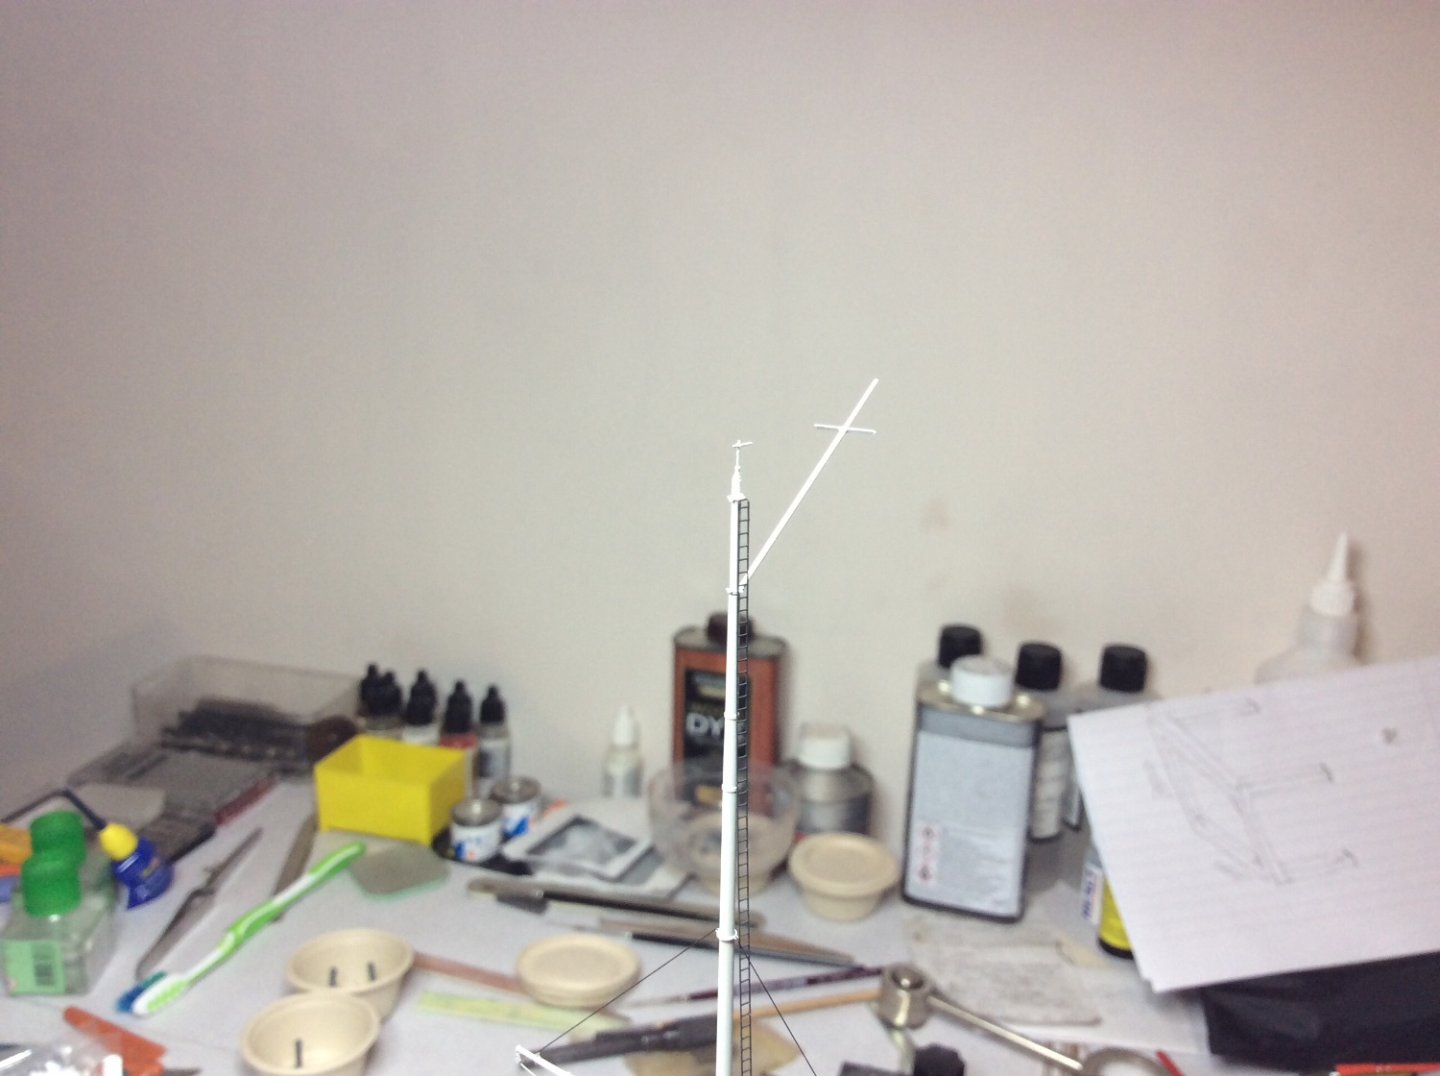
Next stage is to fit mast to model and change its appearance forever. 👍 fingers x I’ll be back on the 10 second gorilla glue. 😳
-
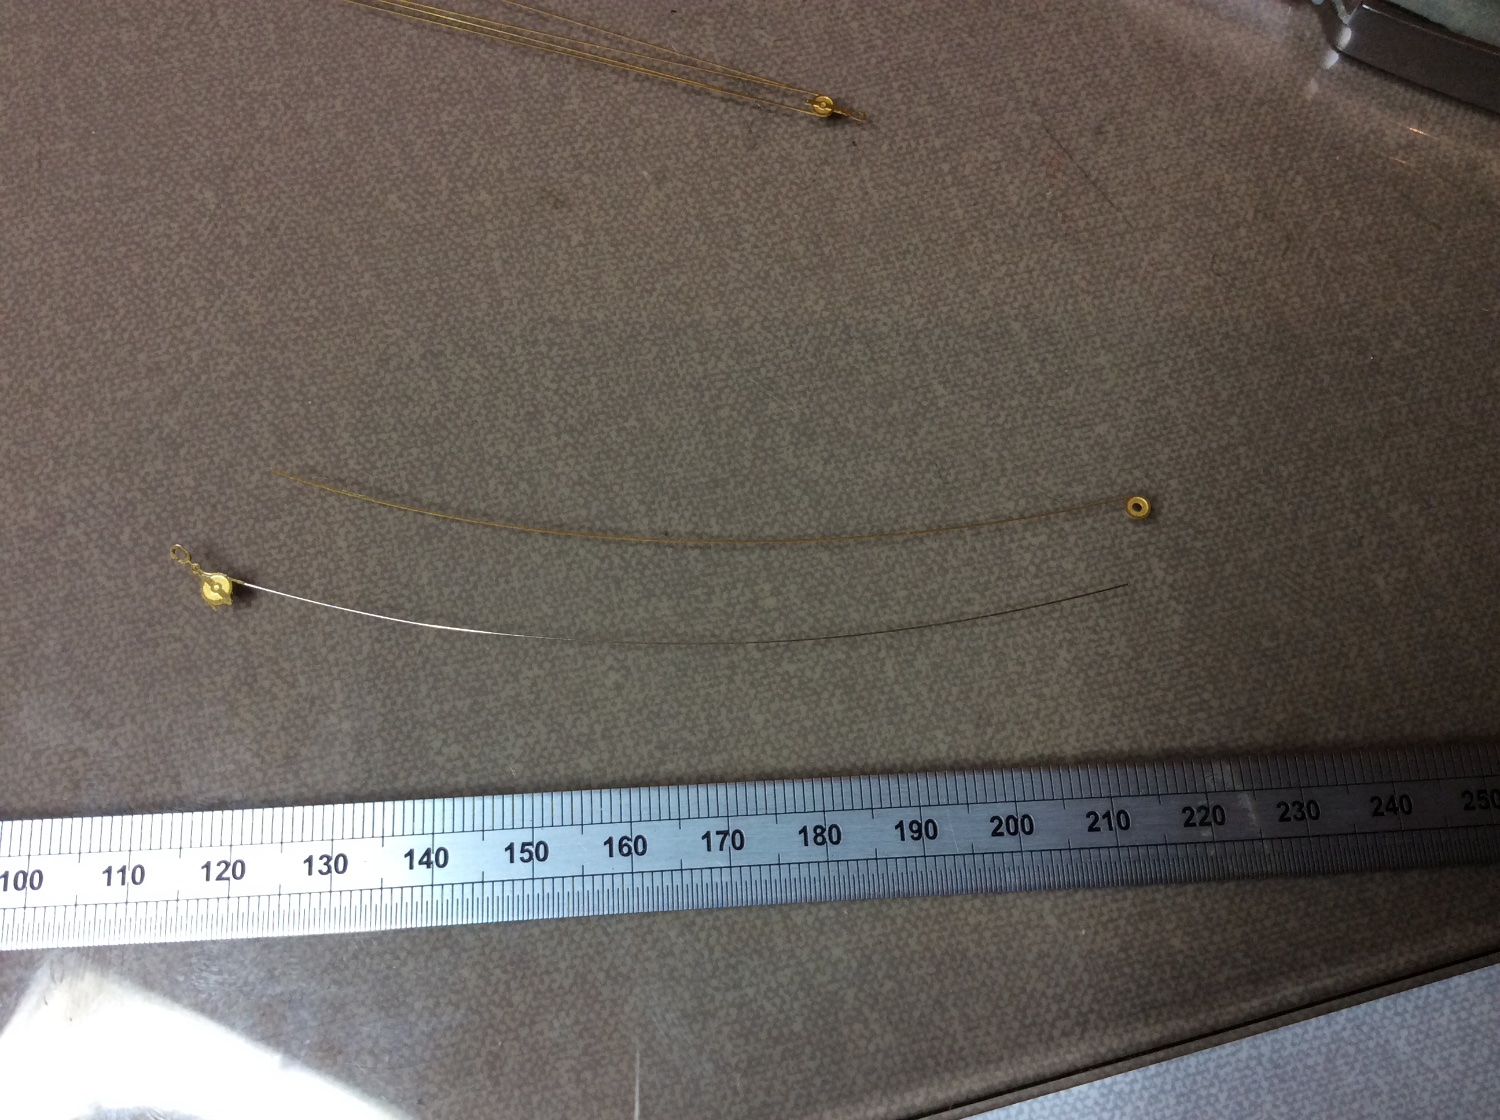
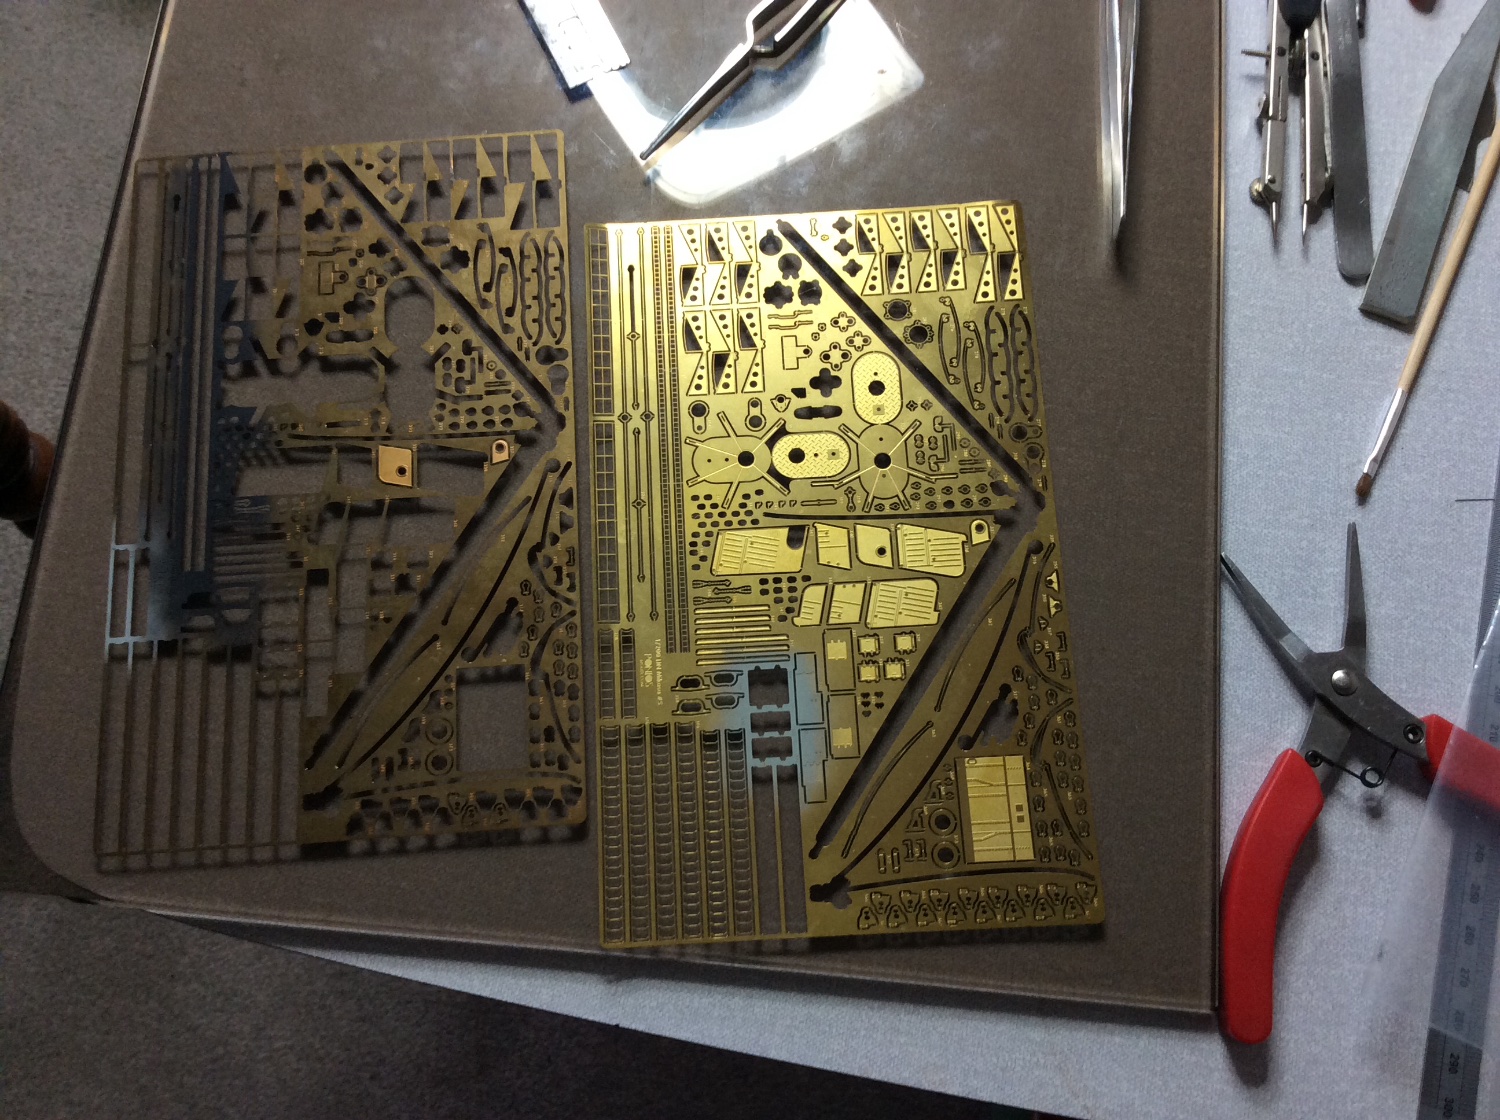
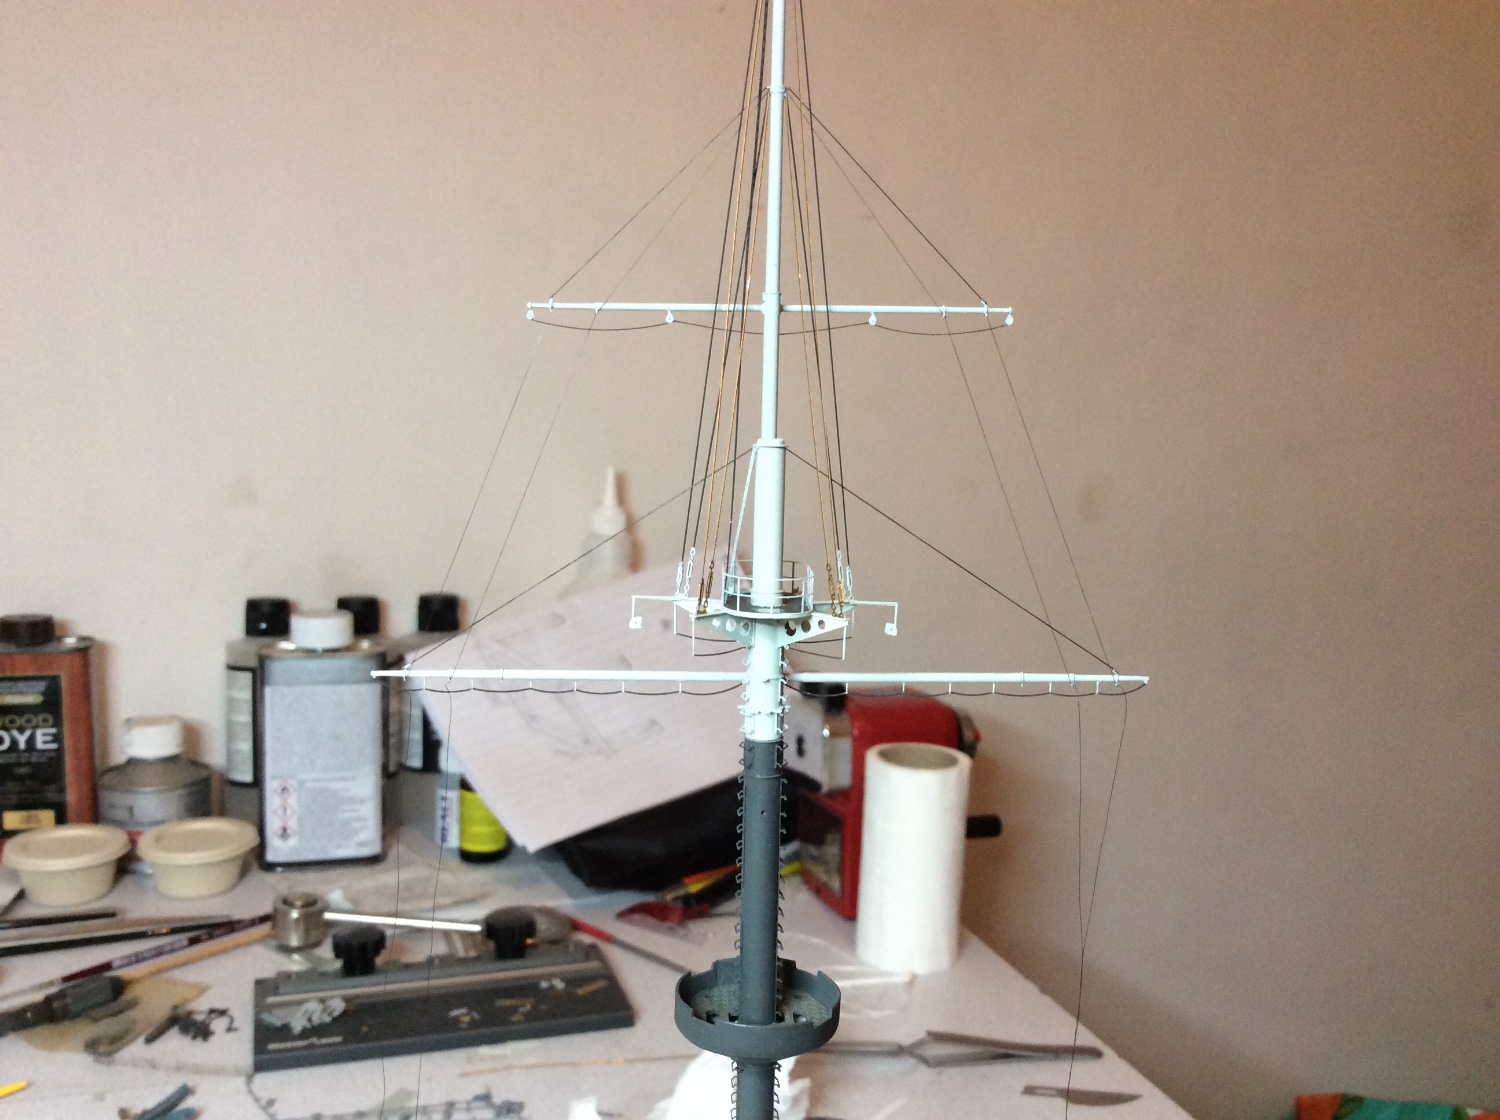
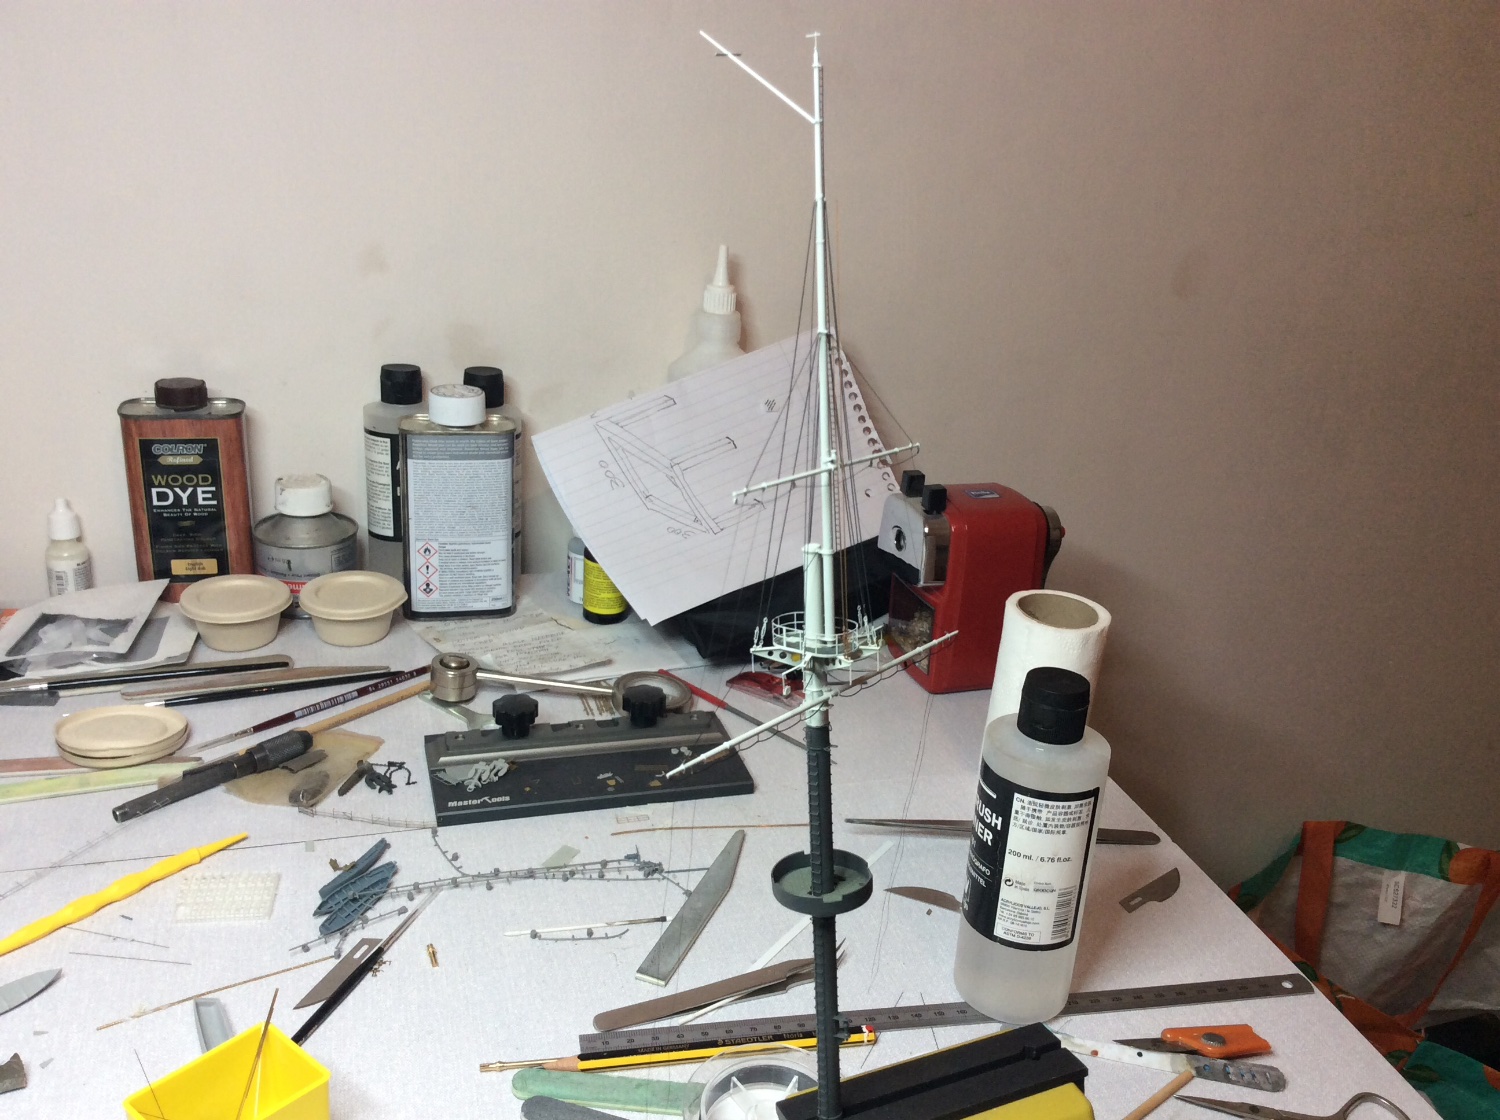
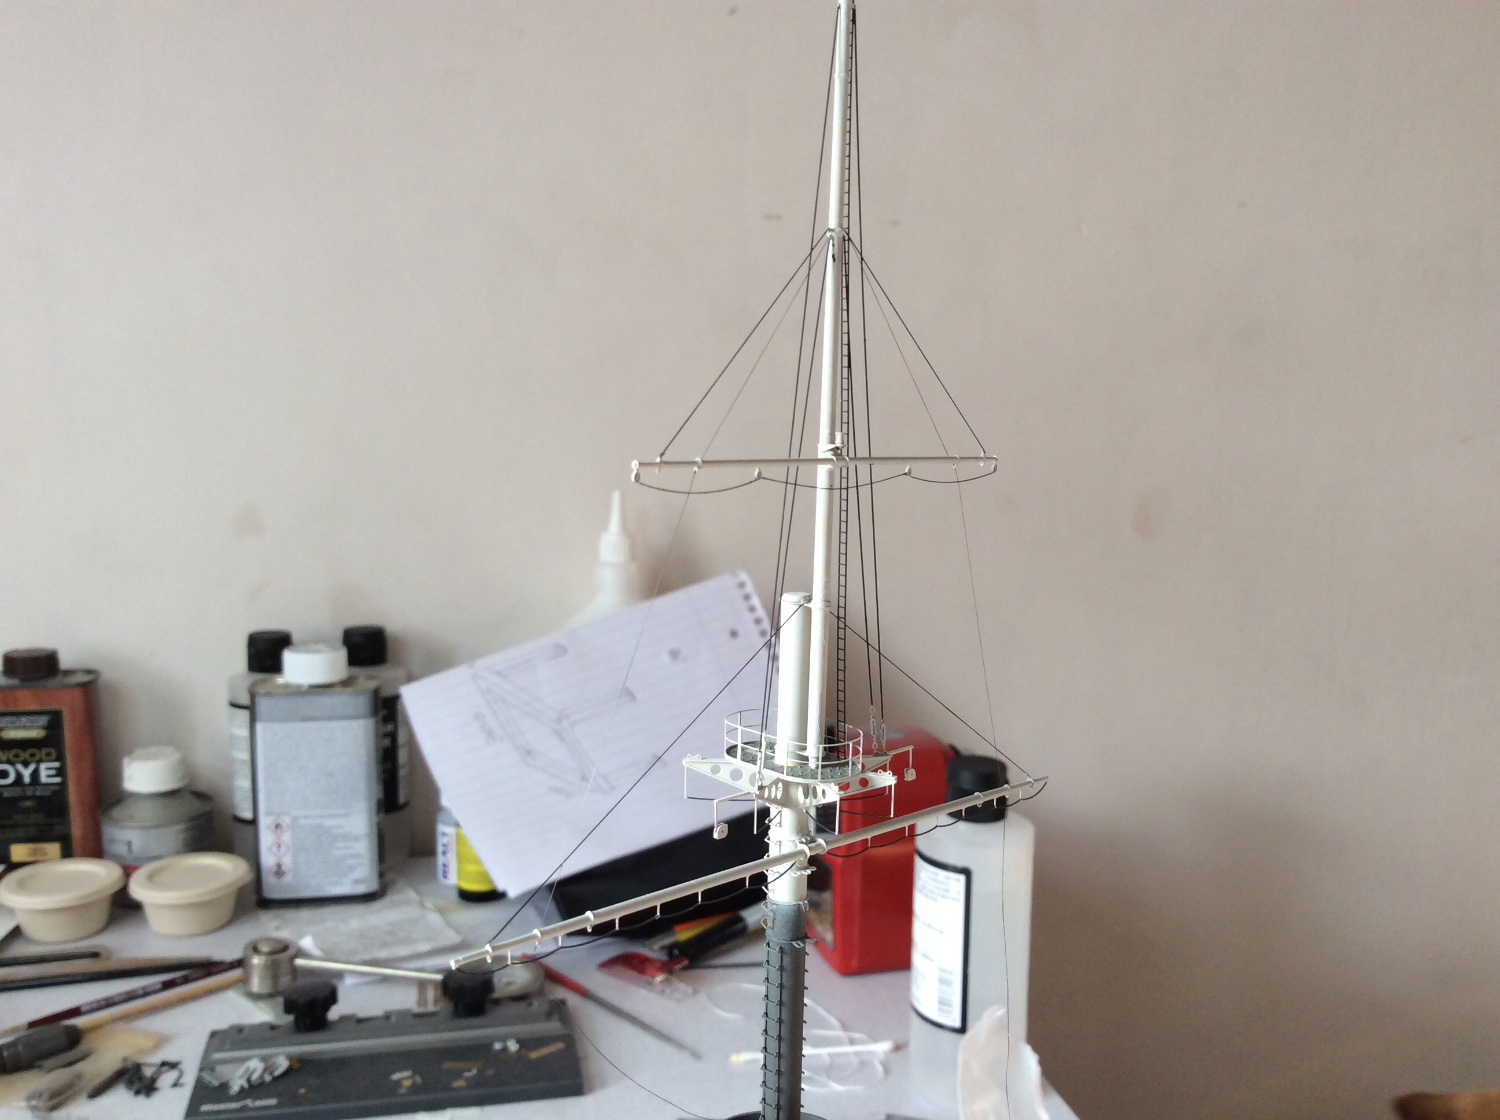
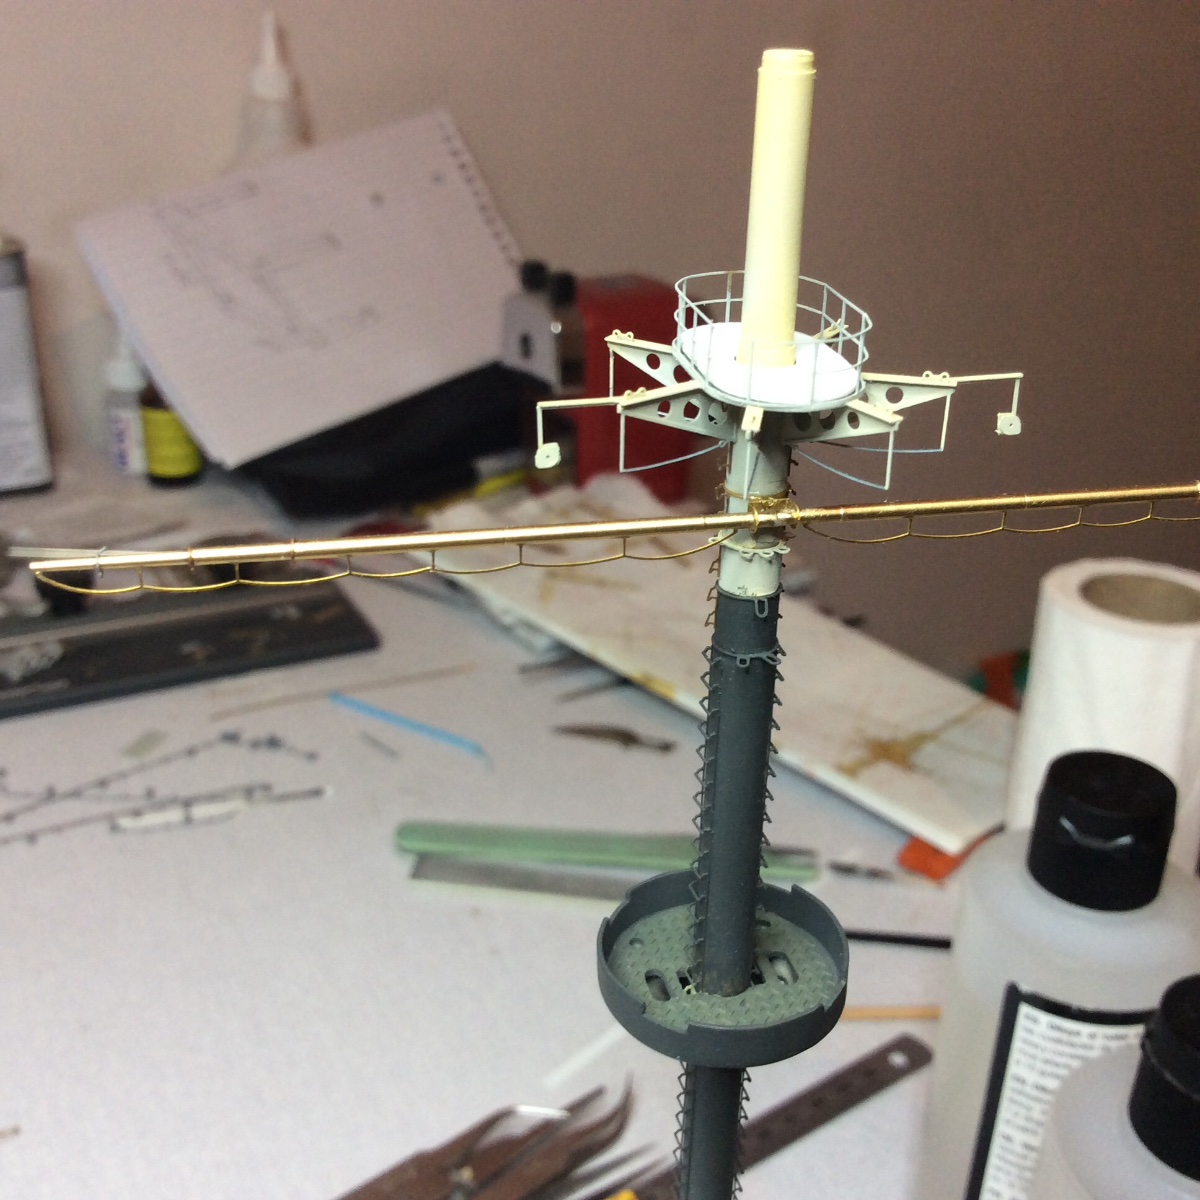
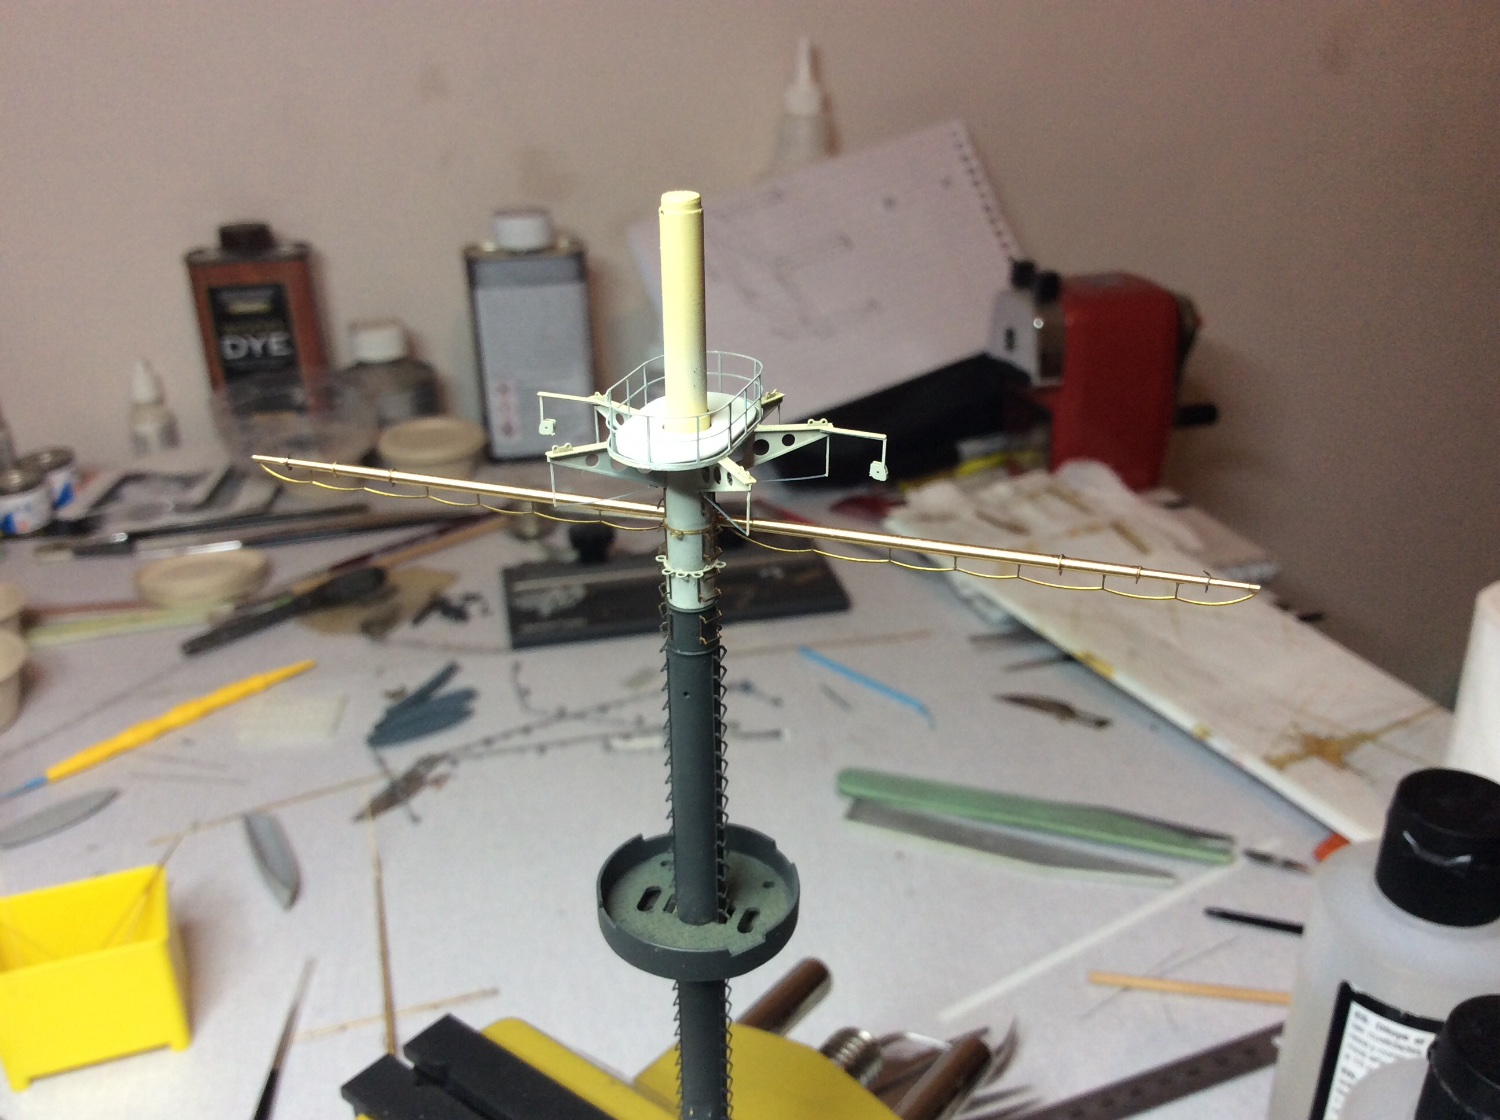
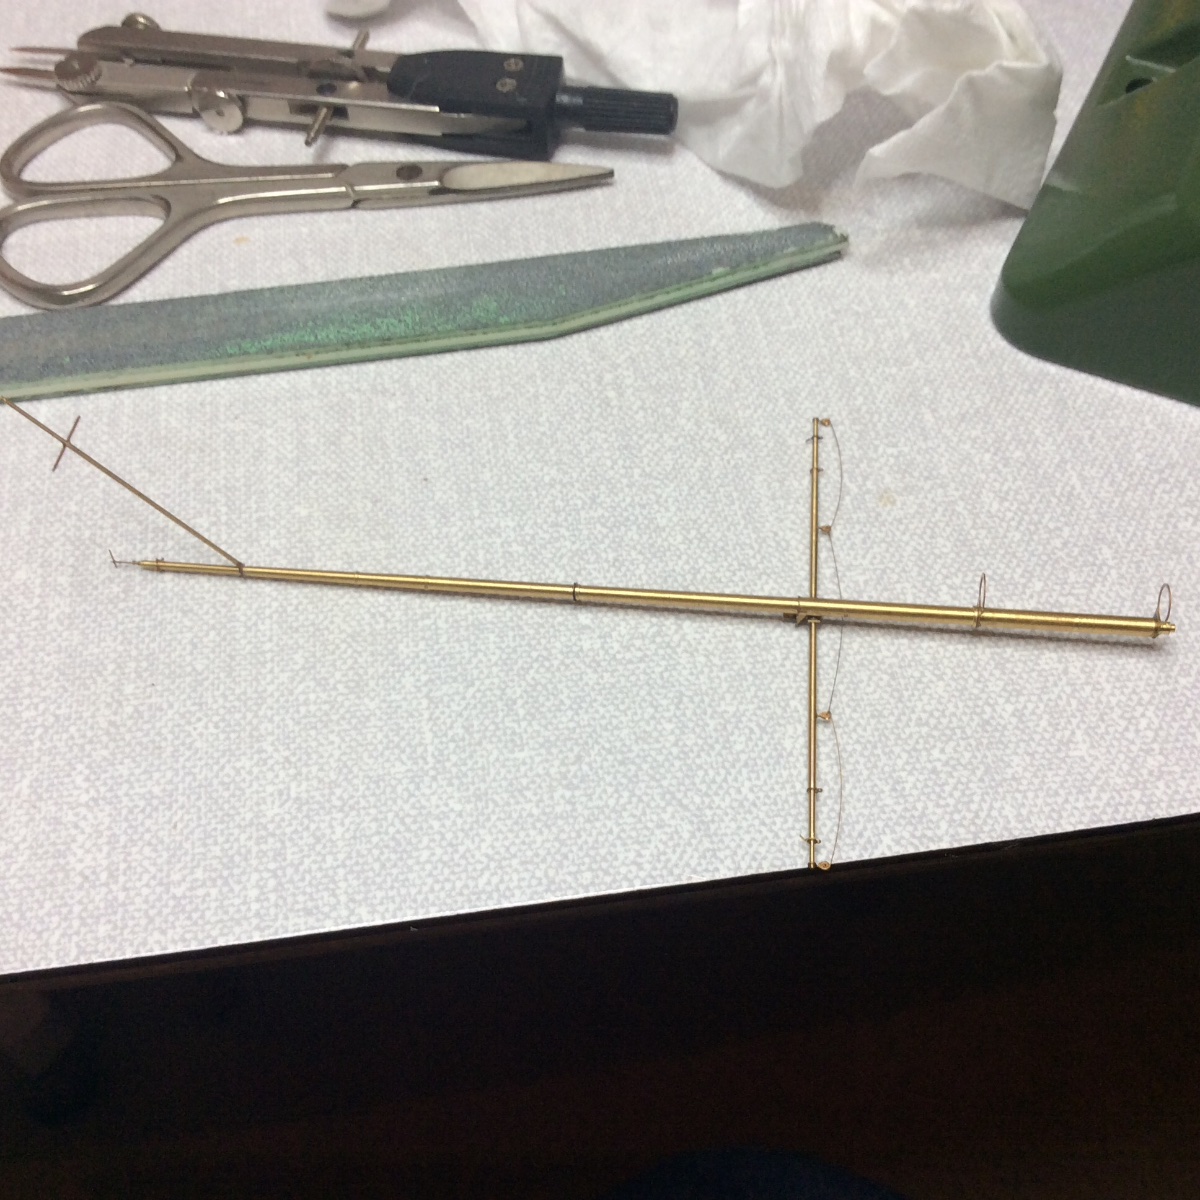
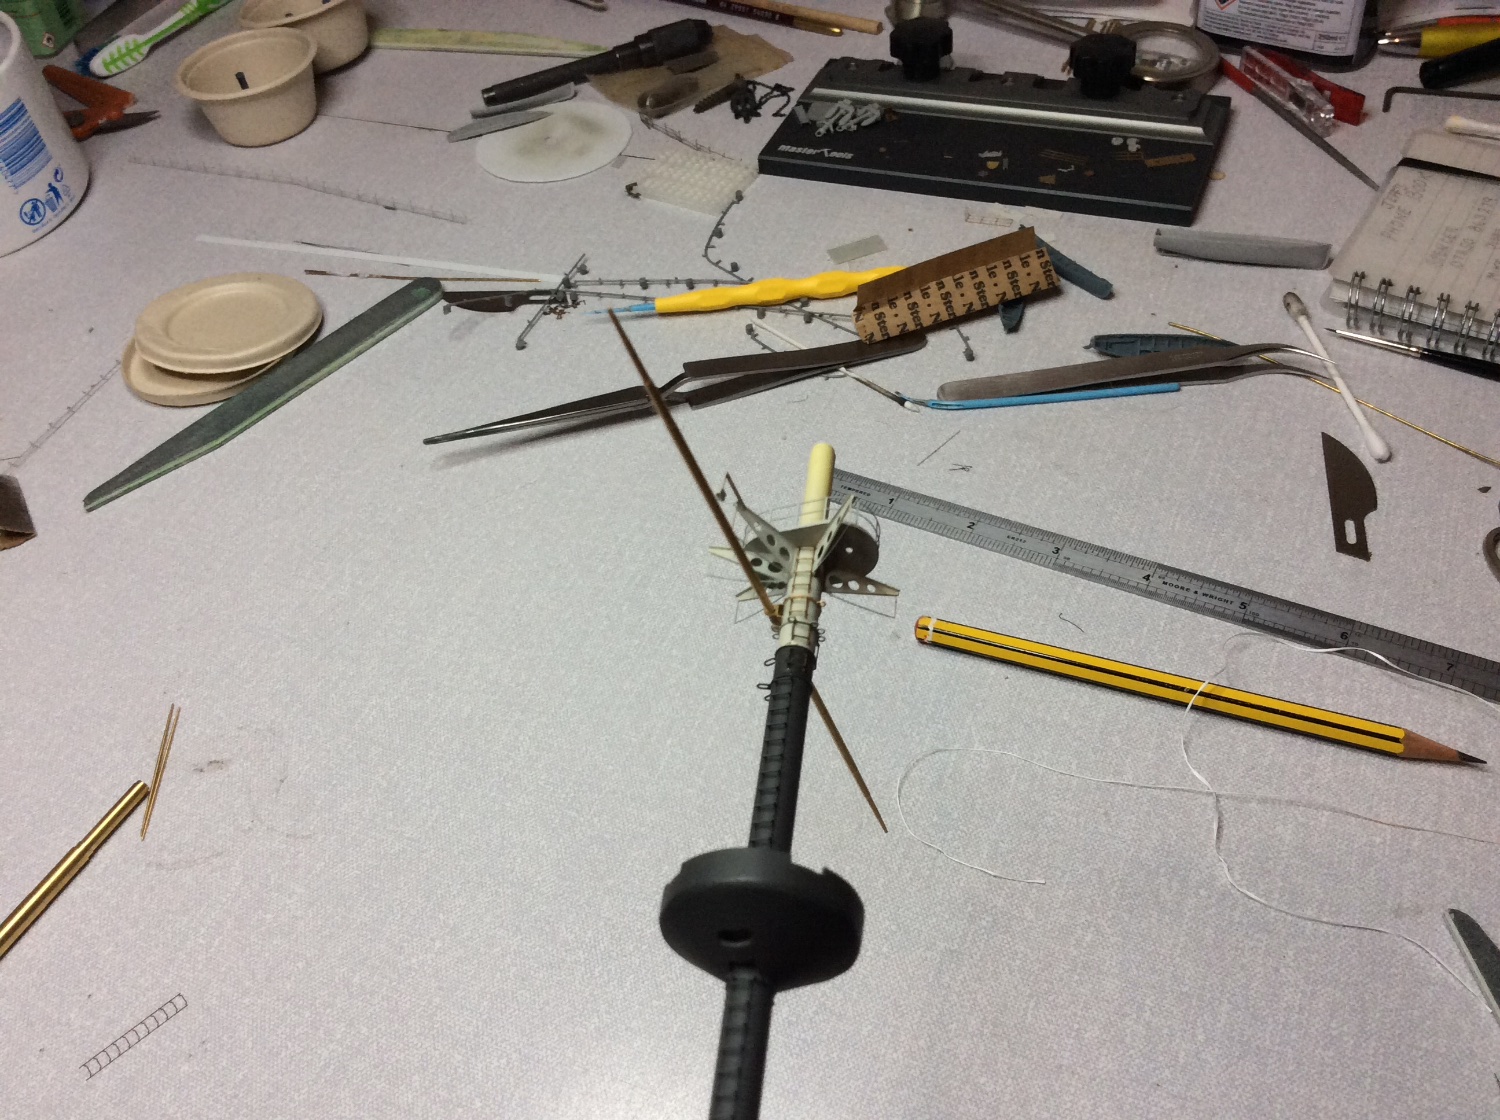
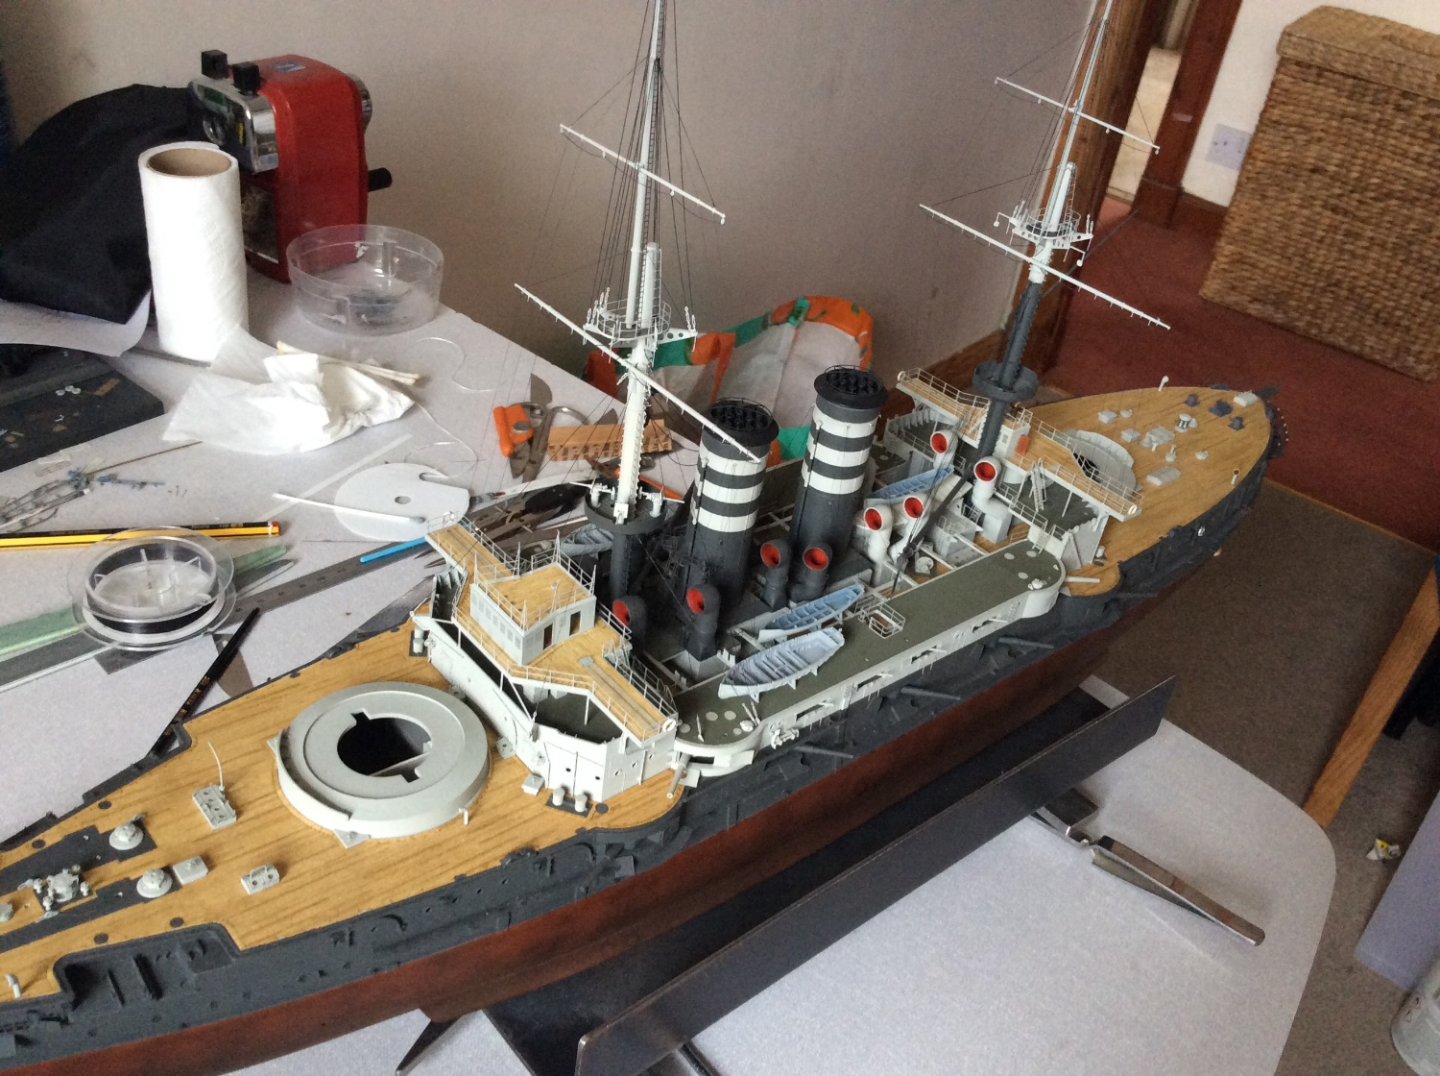
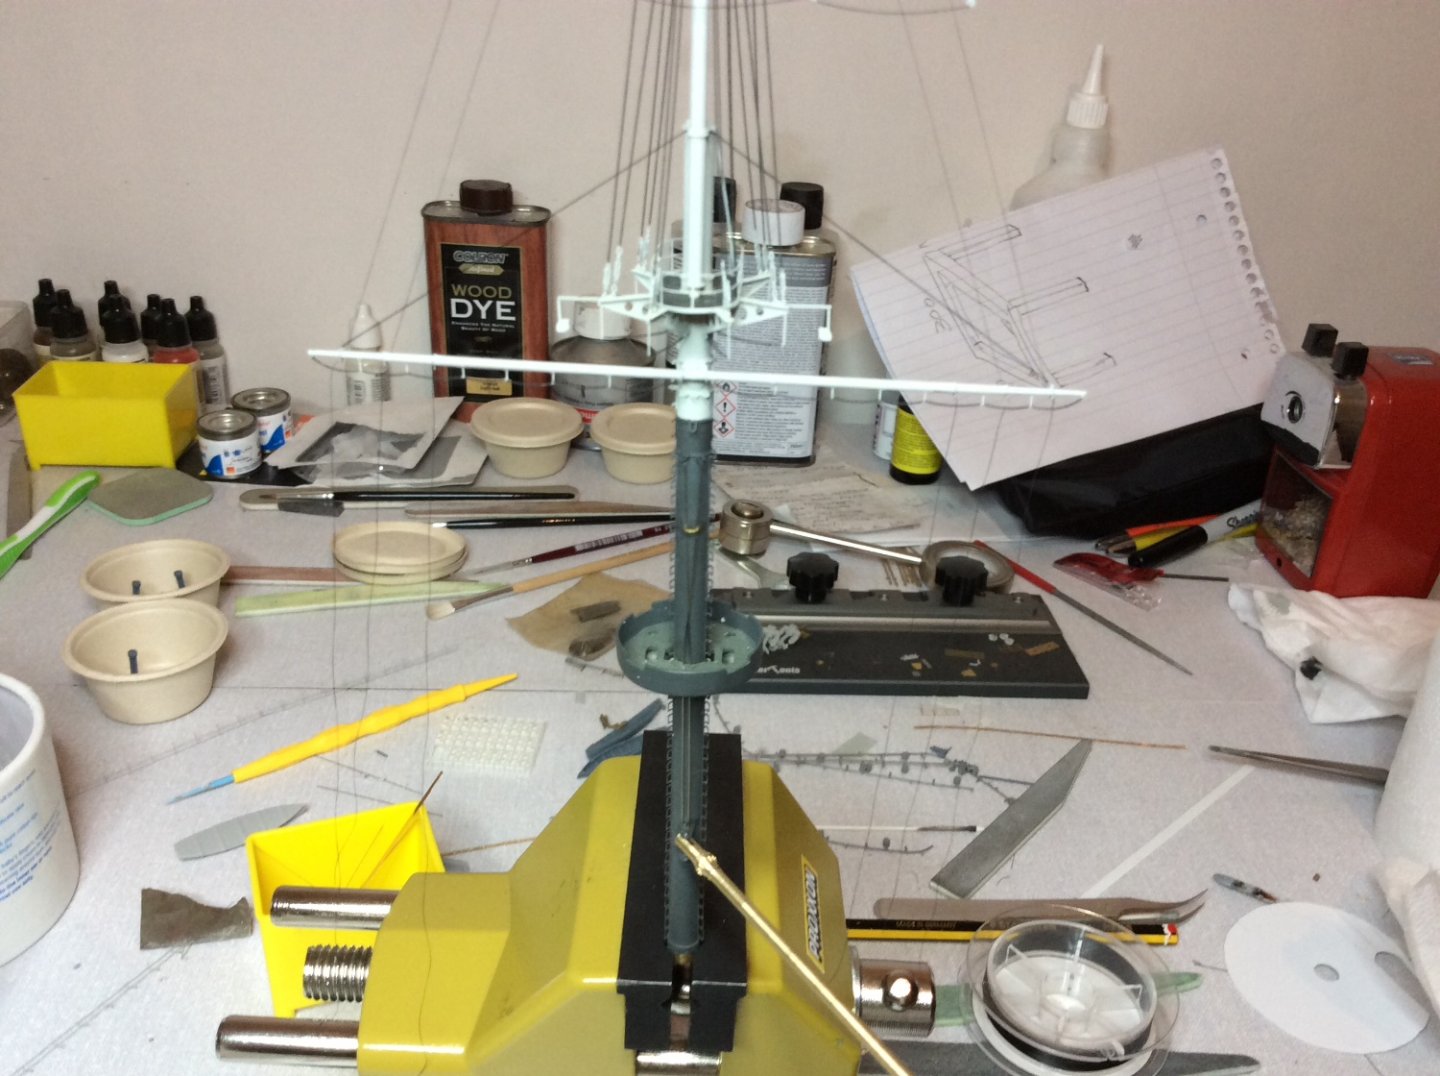
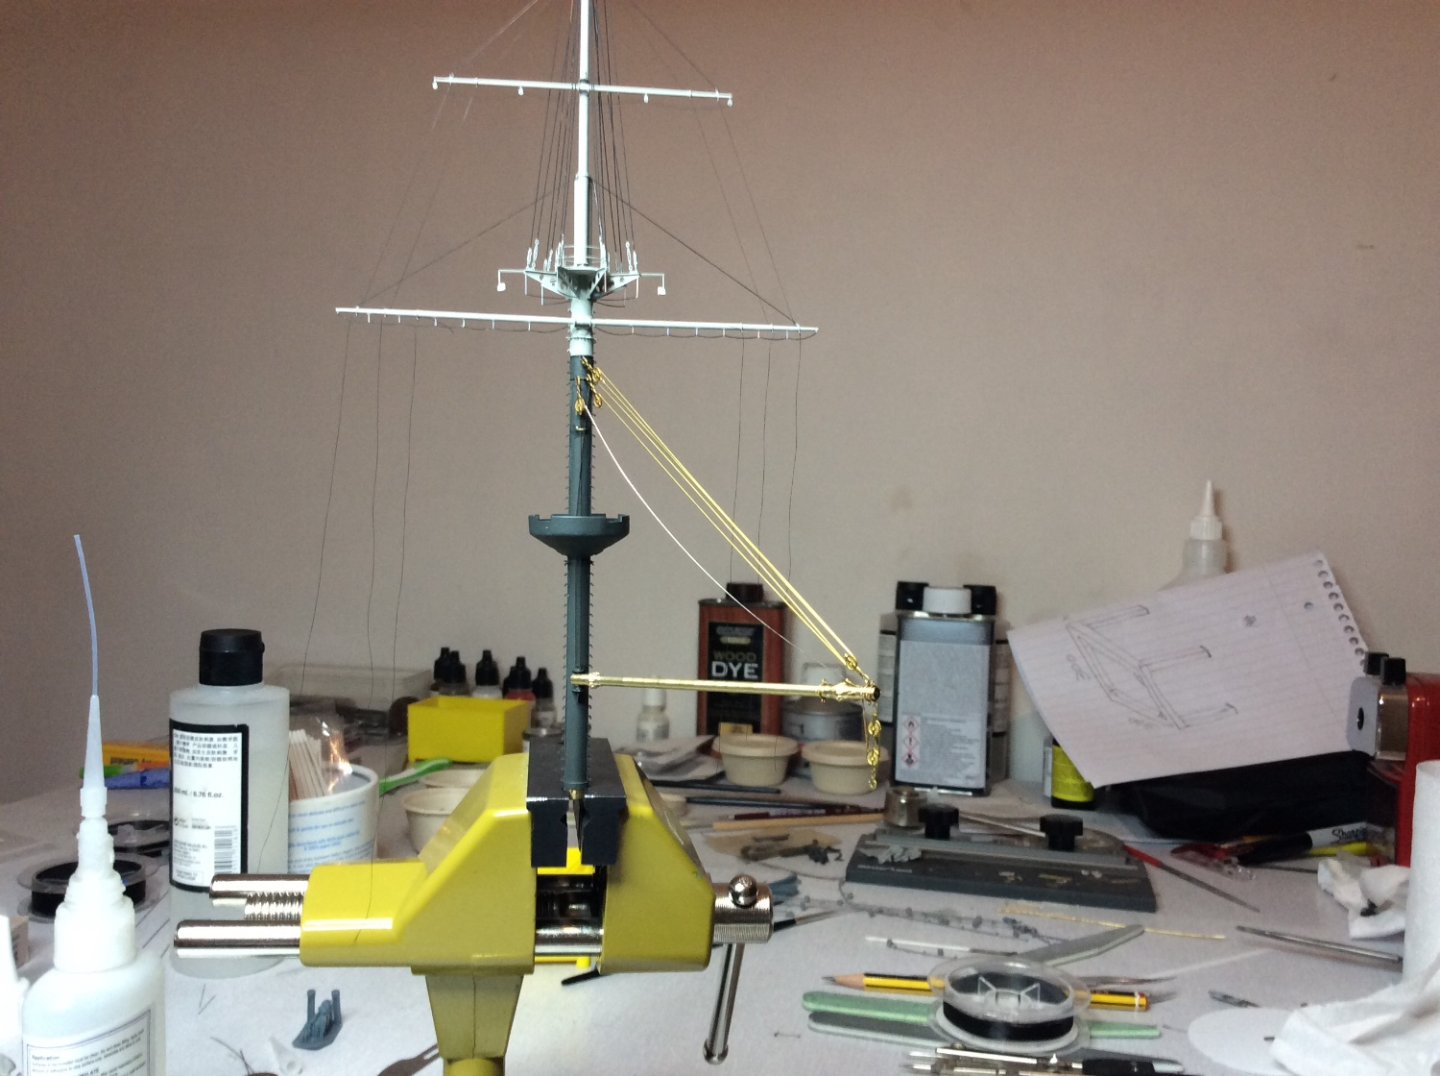
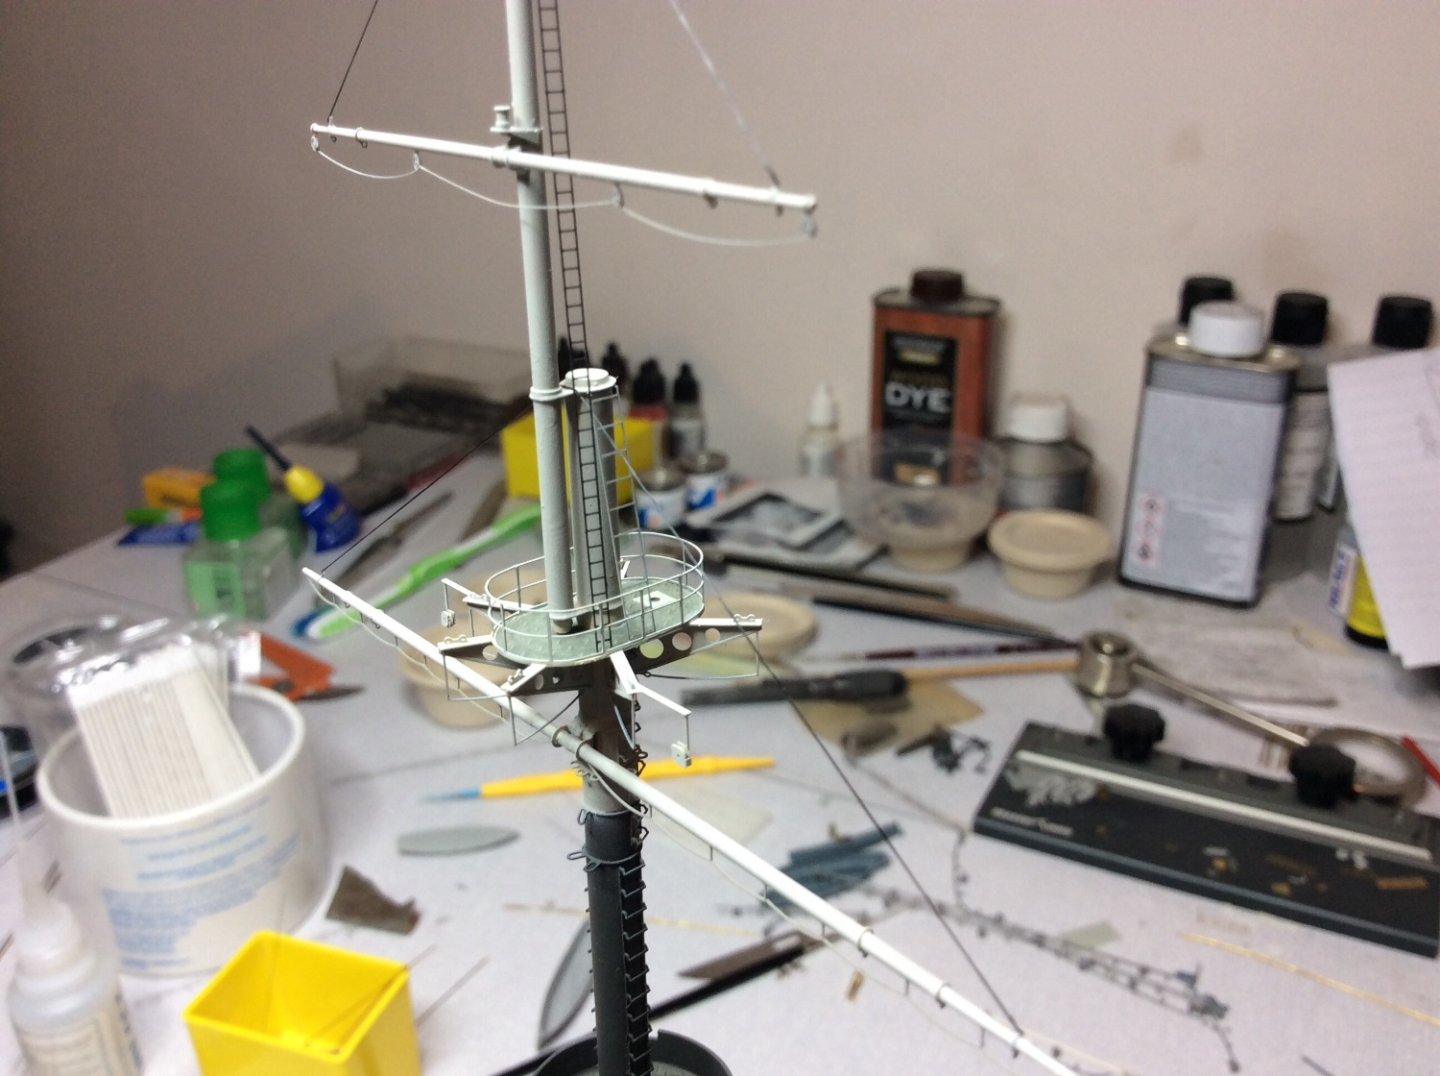
Started on fitting the jib to this mast had to make some minor alterations because of gun tub position, the wire etch running down to jib support had to be rethought and reworked ie passing through the gun tub. My answer is total speculation as there’s no information as to where the cables run to, Pontos just stop the etch at the jib support to the mast, they must have gave up as well, I would have thought the winches on main deck were for the jib, but can’t even remotely see how it might work, plus no winches on forward mast so I’m just burying my head in sand on this one. 😂 also altered some of etch from pulleys on mast as deemed them a little heavy, so cut of and replaced with 0.2 wire, did this on fore mast as well, much cussing and swearing trying to get this all to work, have came to the conclusion that metal etch rigging can be a bitch. 😳


-
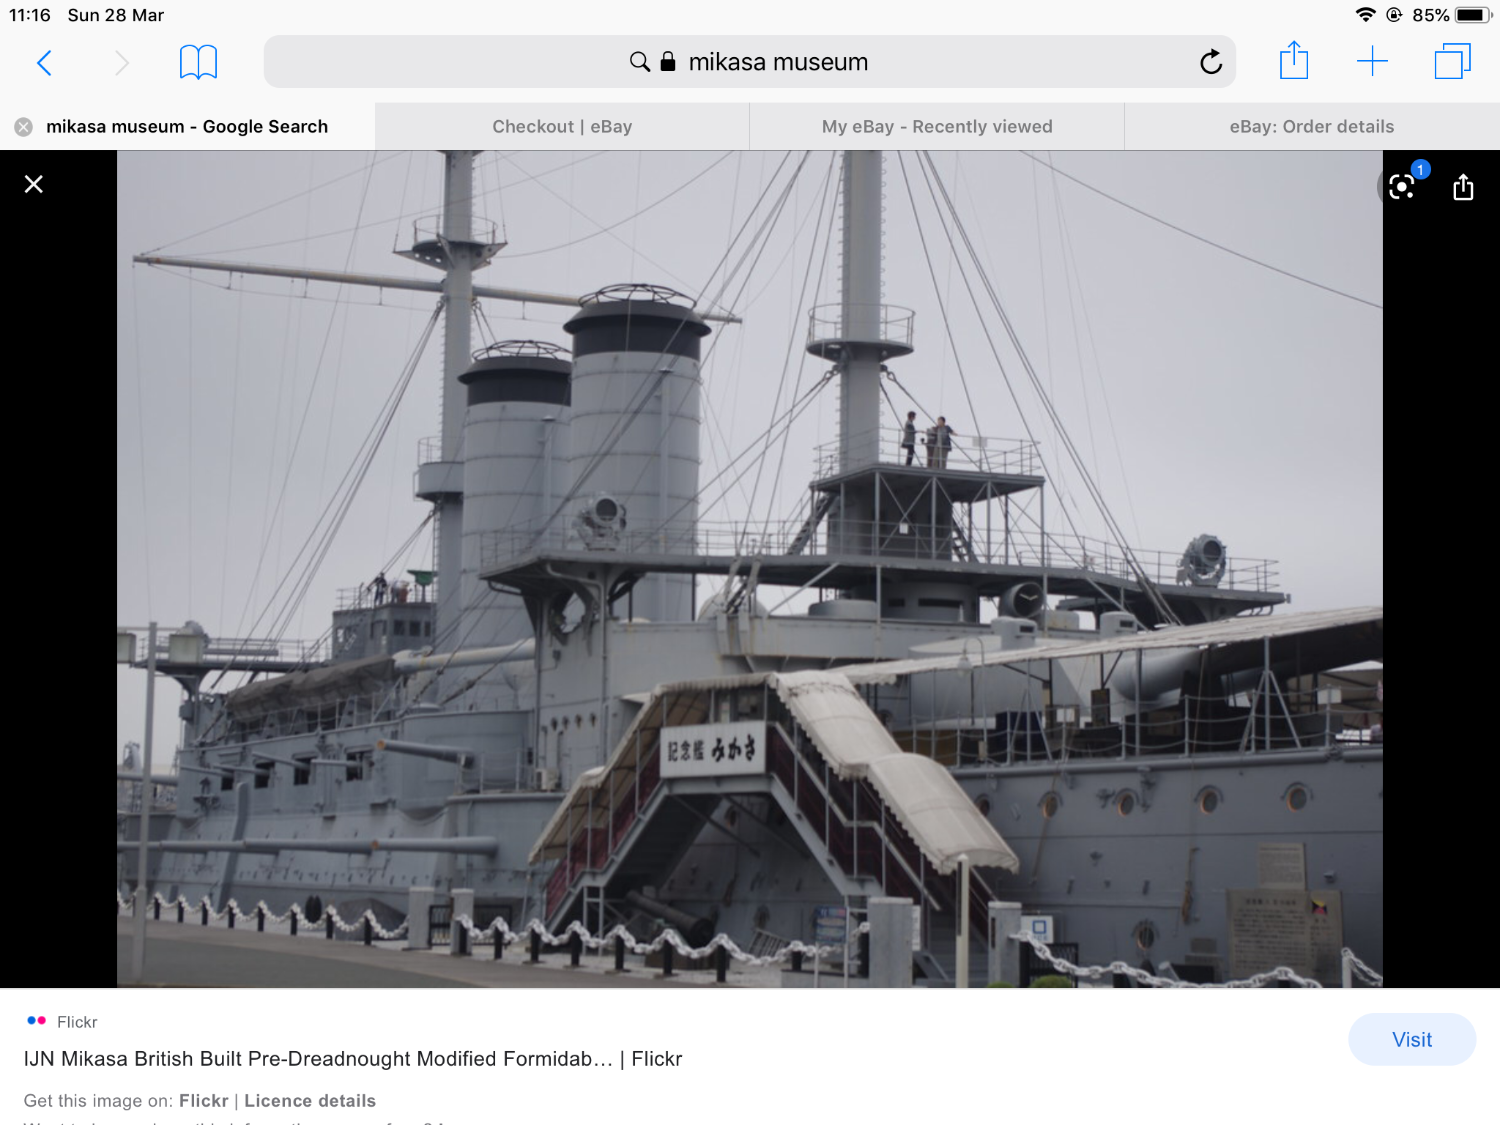
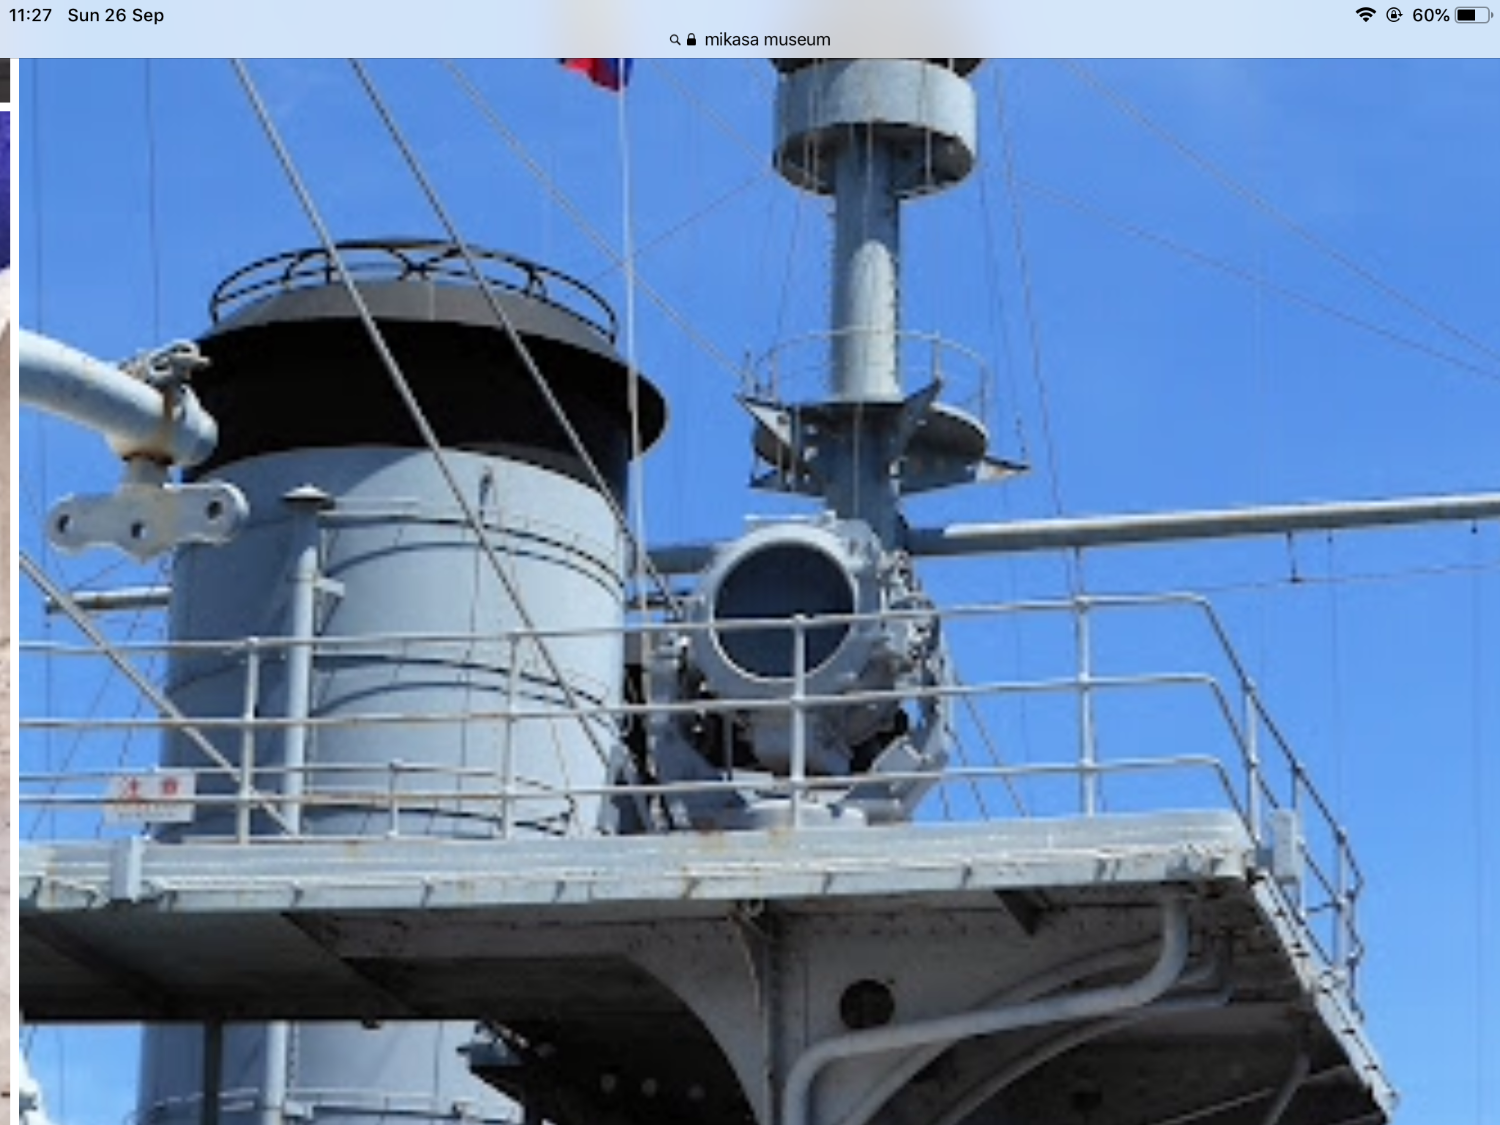
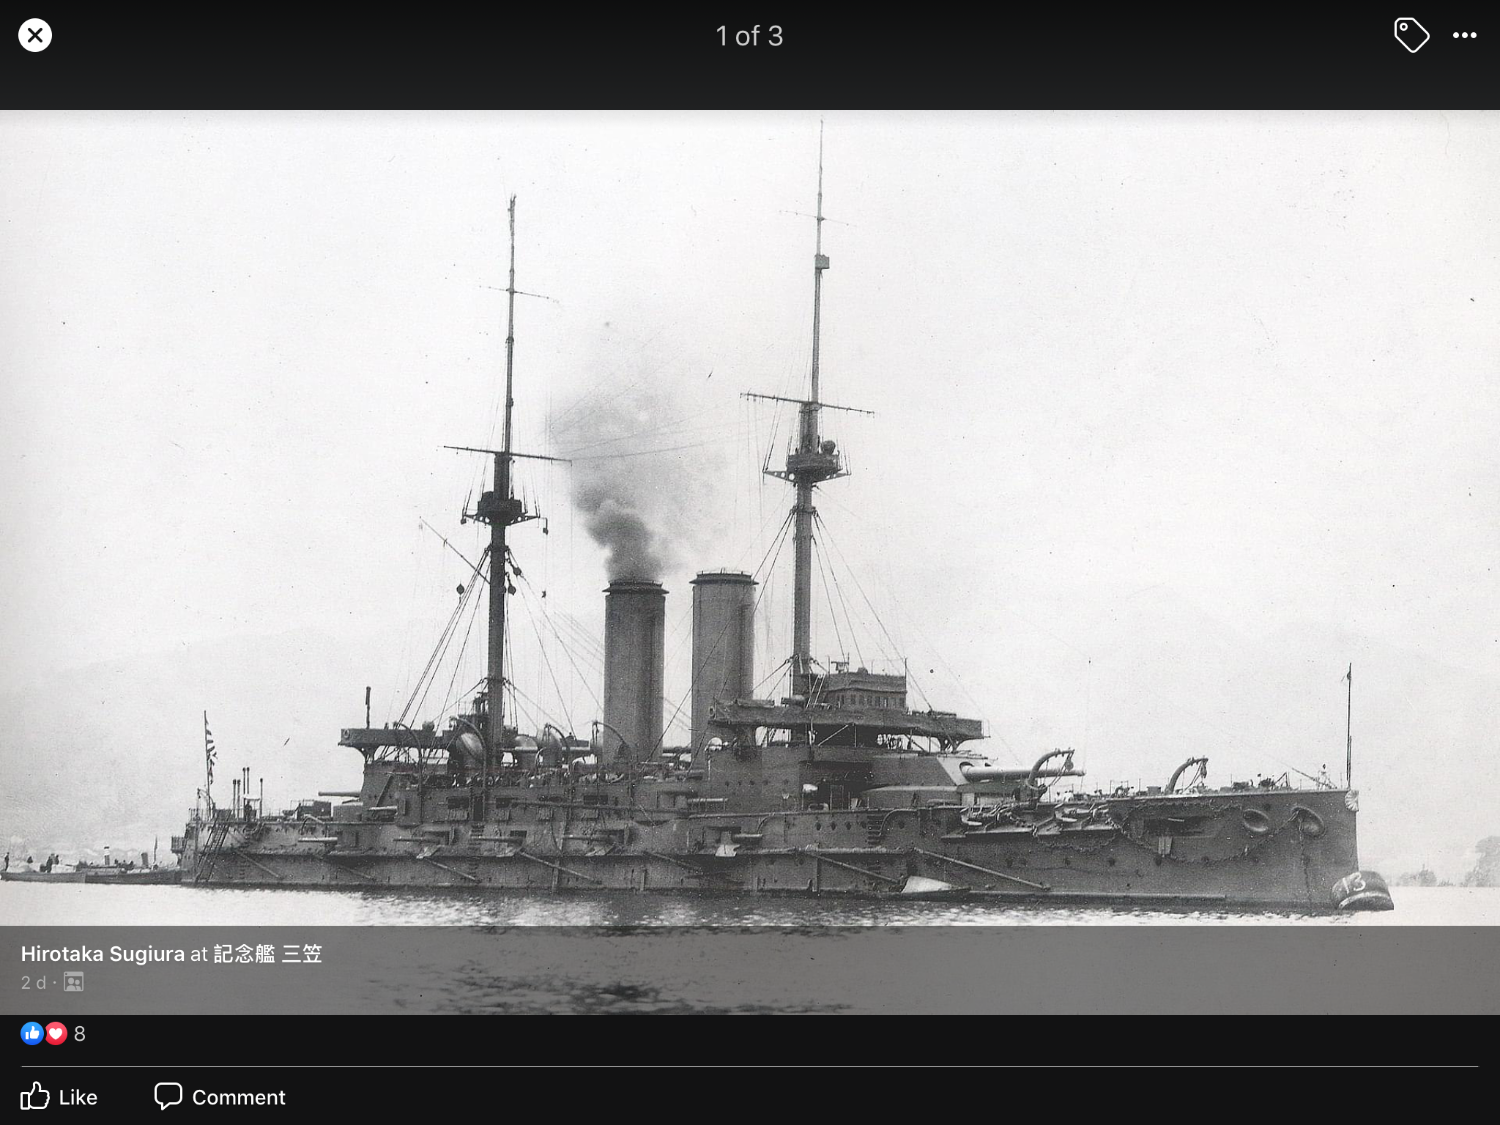
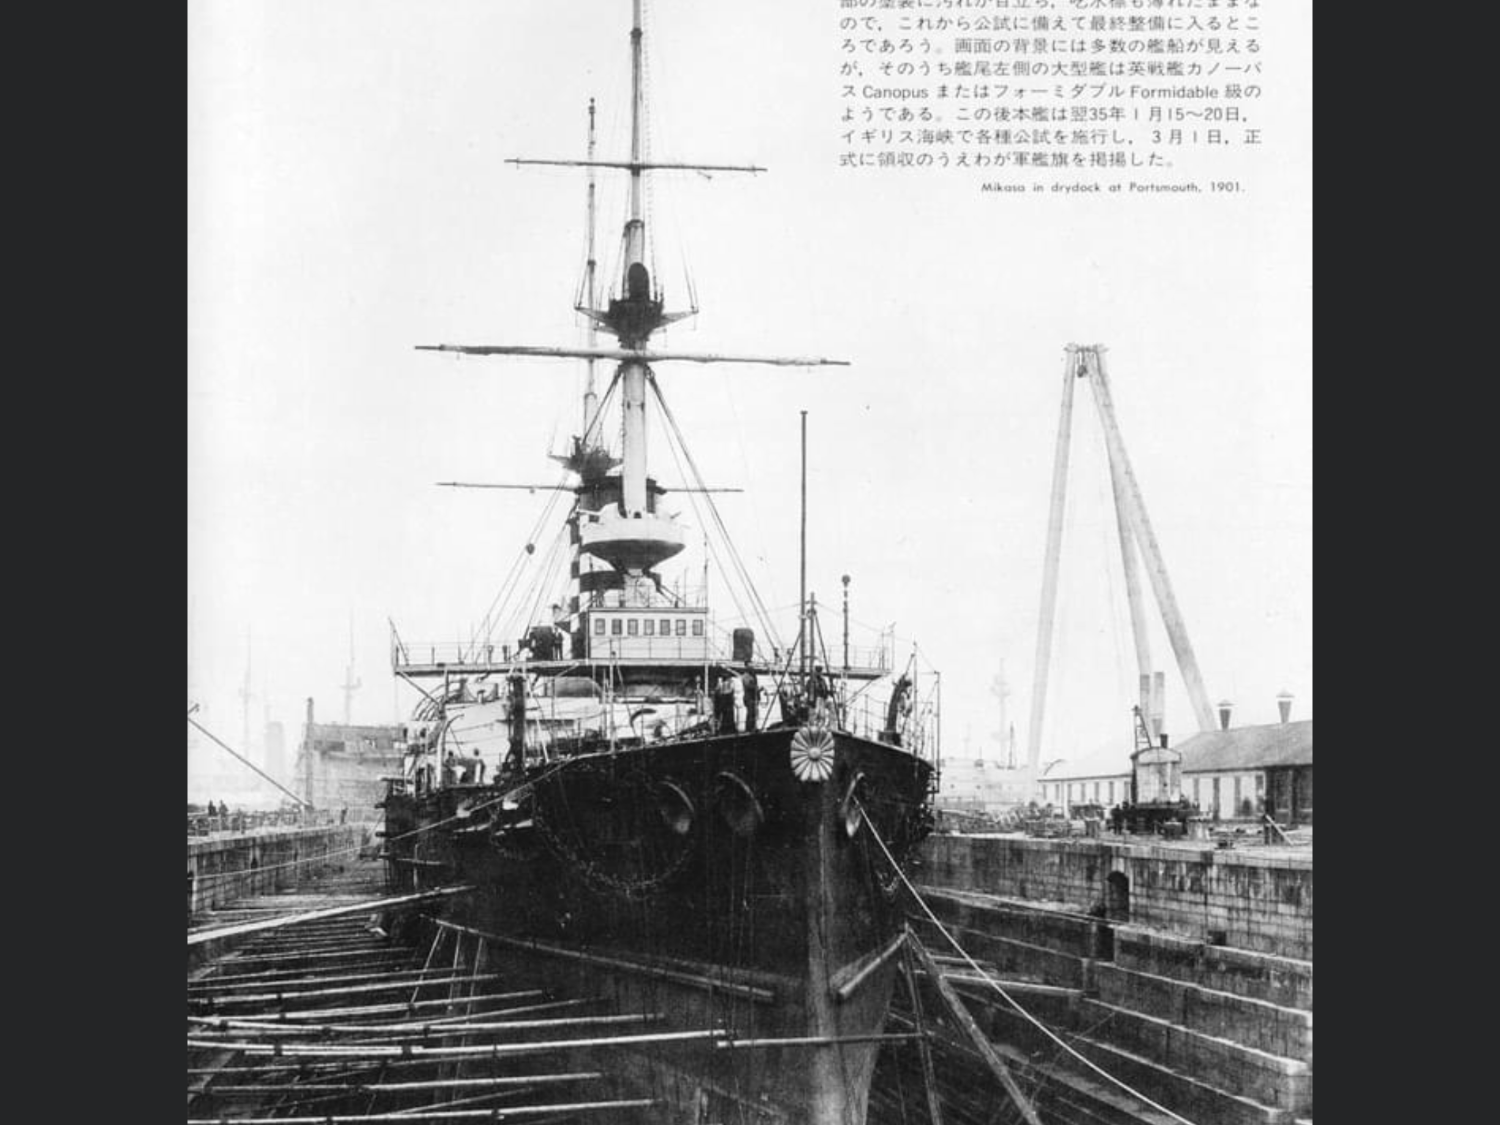
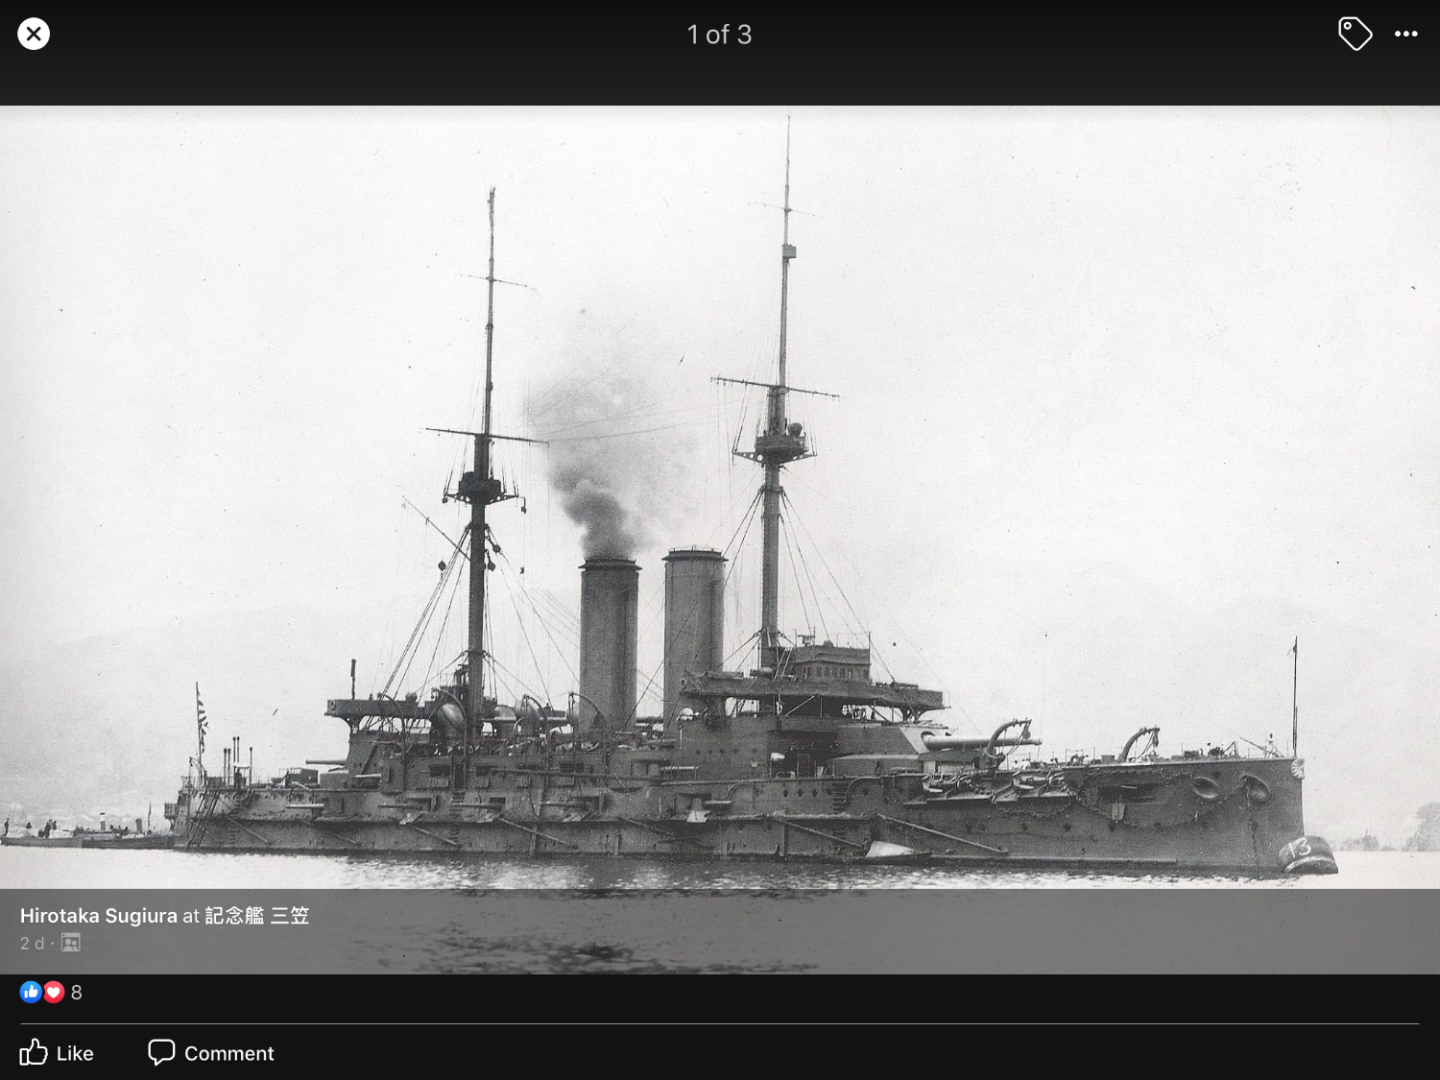
Whilst on the subject of Mikasa mast spars being wrong, I’m not correct in this assumption, they are right for the 1905 version but wrong for the 1902 version. But I don’t know what period they are displaying present day? Show some photos for reference.


-
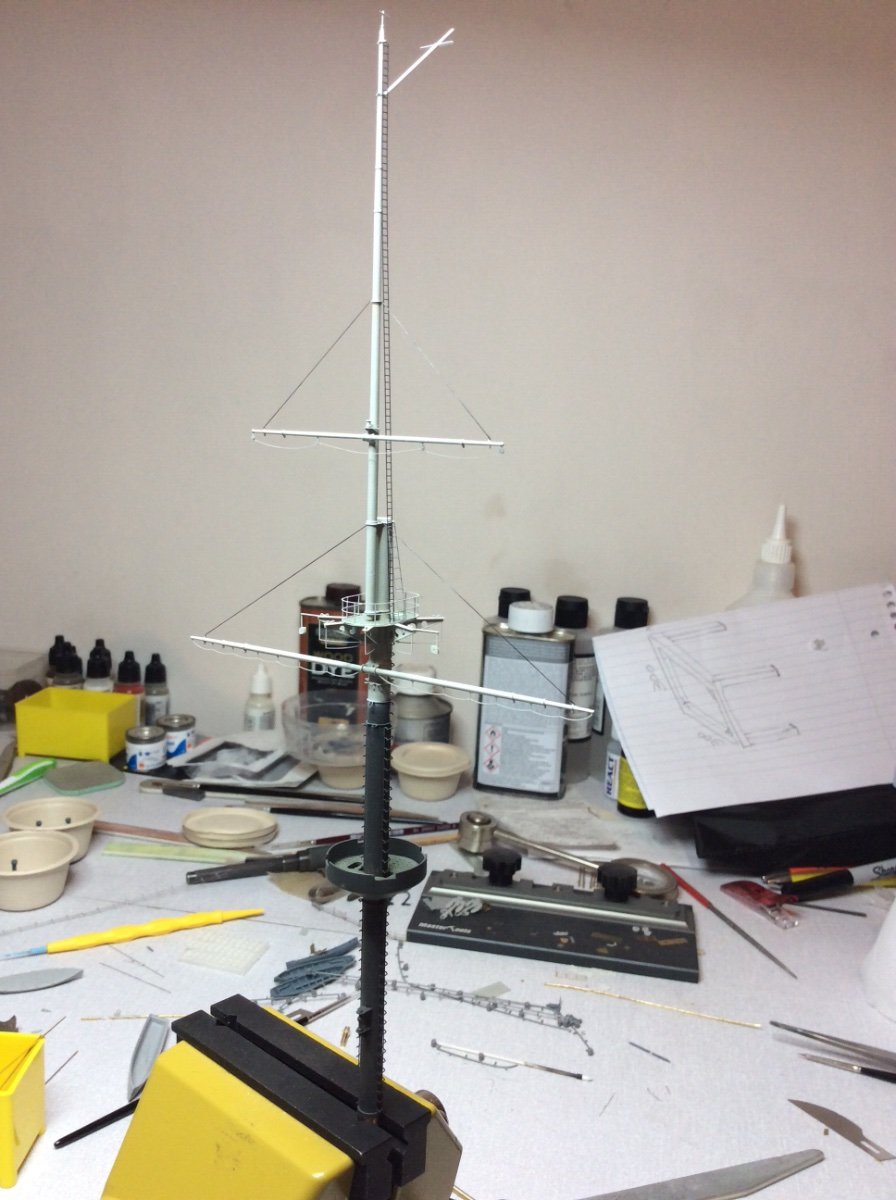
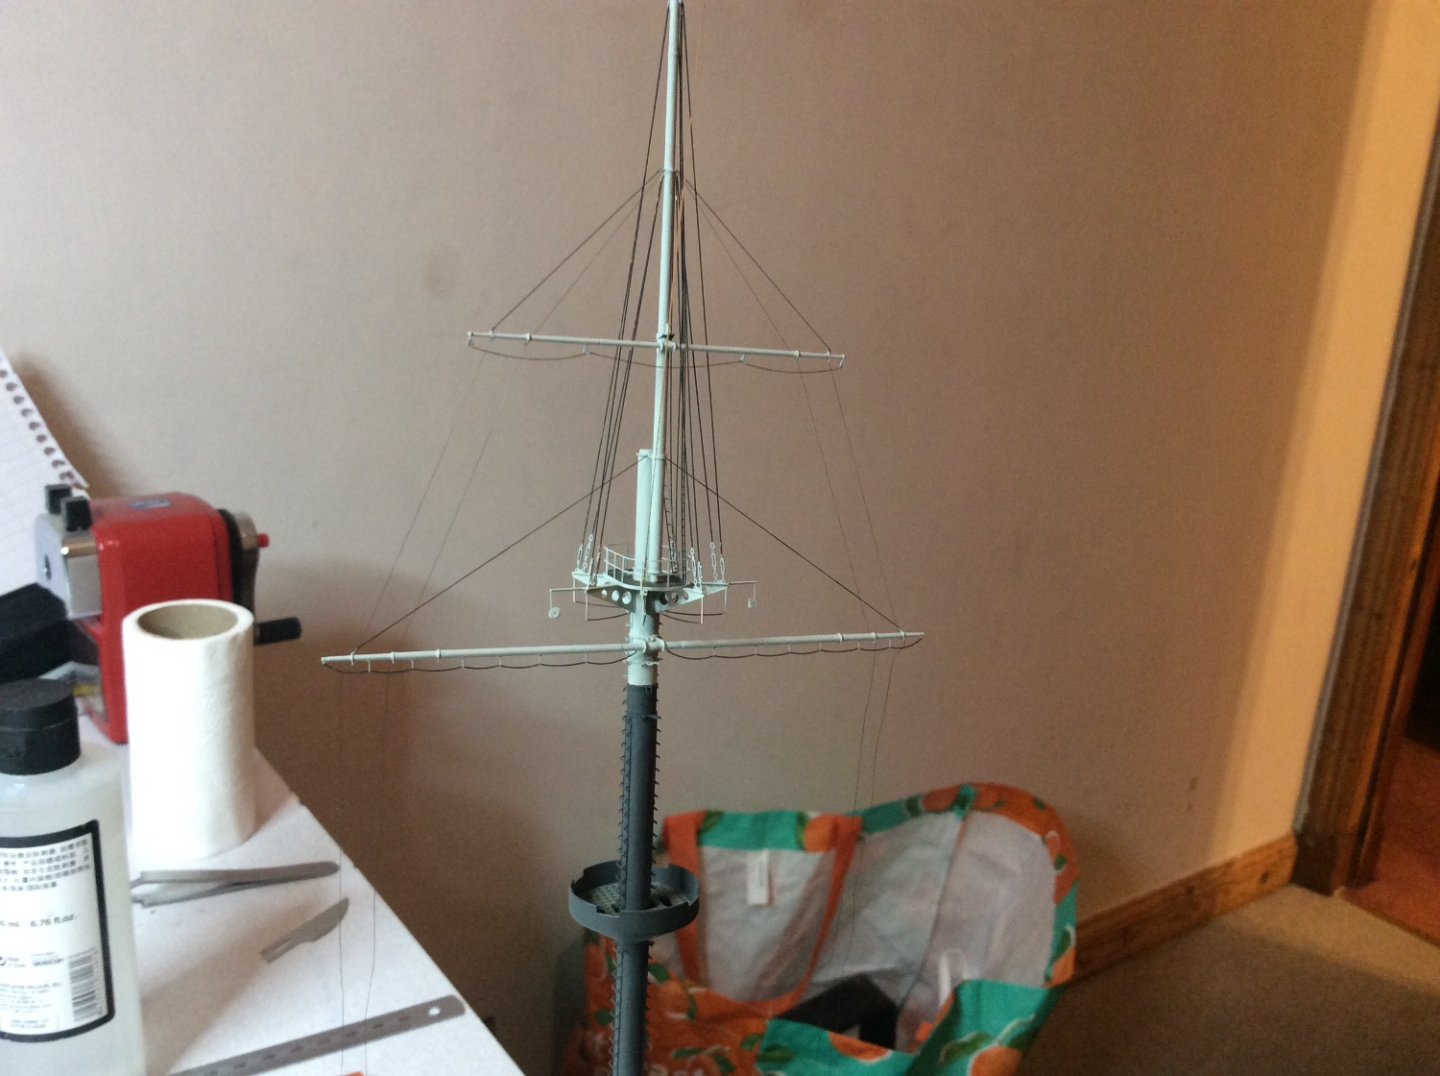
Hi guys, a quick update on my Mikasa build. Still on the mast, have added more rigging and etch.


-
Short post just to highlight a point in the mast build, have decided to fit photo etch rigging two pieces at a time this time as painting all six fitted at once was a nightmare to hand paint, honestly I was like Clarence the cross-eyed lion from the series Daktari for those old enough to remember this. 😂

-
Thanks Alan, have to say I’ll be a happy man to get past this part of build, everything is extremely fragile and I feel like a bull in a china shop 🙄
-
Next goal was to mask of for painting, and paint. Then it was assembly top mast and do some rigging then fit etch ladders. Next stage is to fit more etch and more rigging and start working on the jib, but feeling when I get this mast fitted onto model I will have turned the last big corner. 🤞Take some photos and post, next time the mast shall be on ship and rigged. 😊 Then I’ll be a happy bunny. 🤛

- 543 replies
-
- 10
-

-
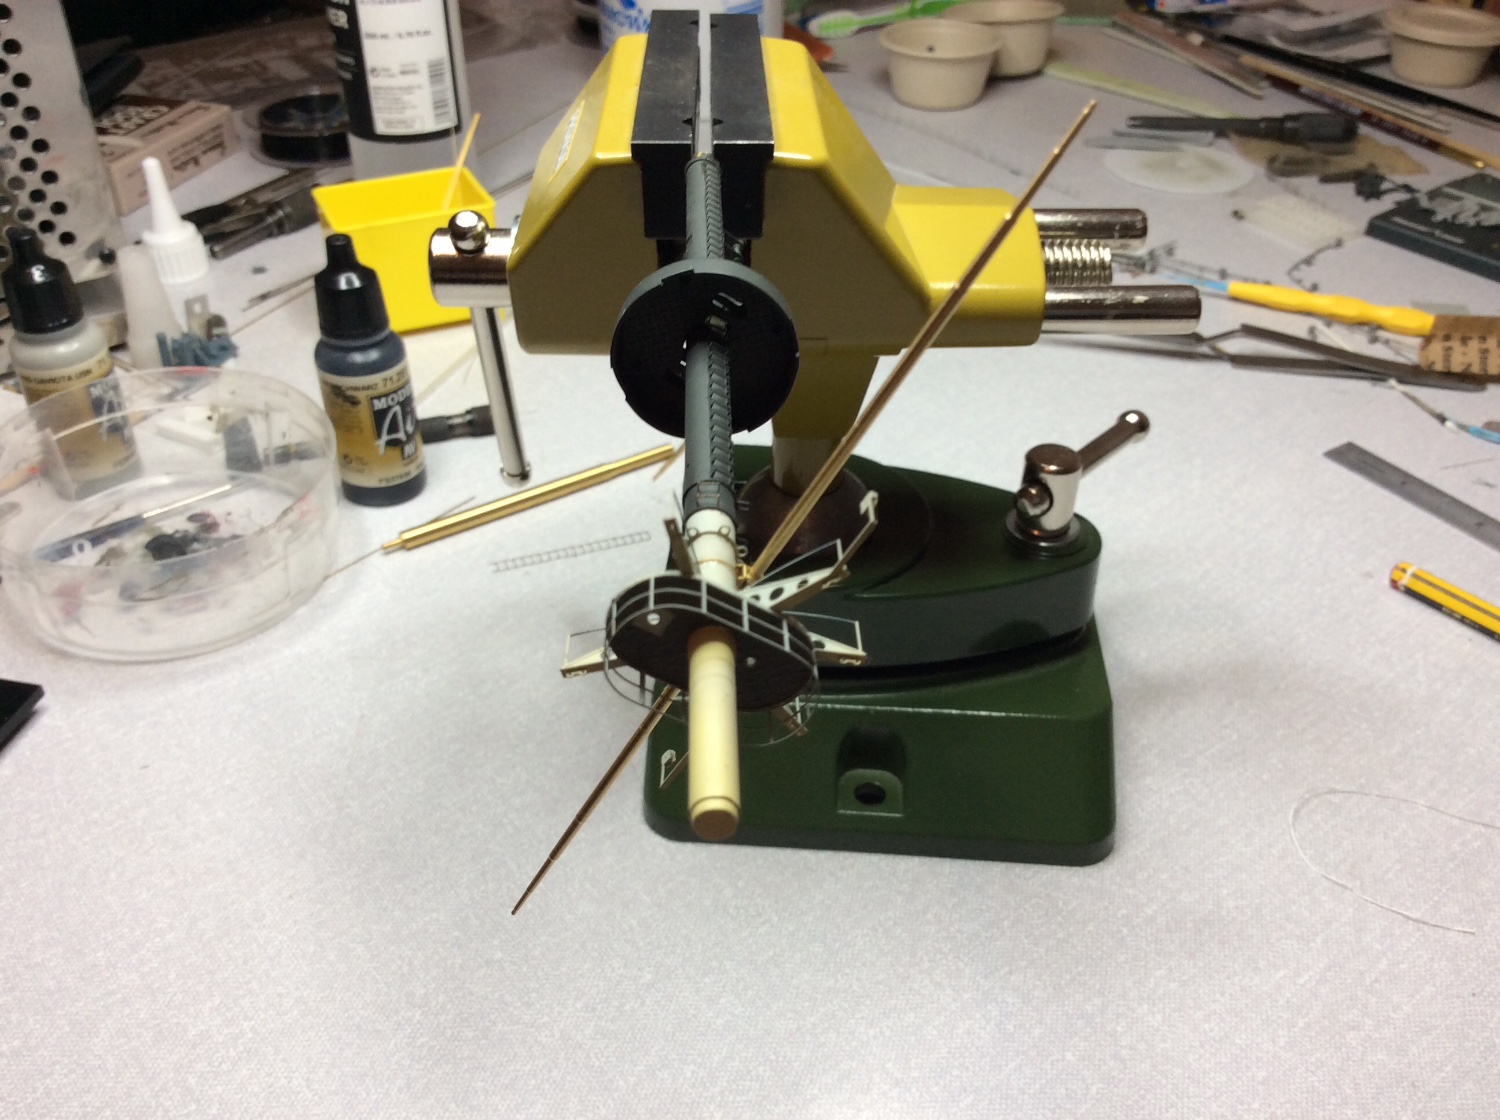
Evening guys, been held up by lack of enthusiasm and other jobs but have kicked myself back into action 🙄 Shall start with a small update on the little I have achieved. With the spars fitted to the main mast the next issue is keeping them there as the slightest touch dislodges them as I can testify, bet everyone is the same at this stage of the build, can’t wait to see it in a protective display case, ie stop breaking it and stop having to dust it. 😂 Anyway, fitted the tiny eyelets to spars, min glue is the secret here because you don’t want to block the even tinnier holes for the rigging, and yes, they are needed.😂 I had to doctor some of the etch for my own ends, the actual etch rigging for the spars had to remove apart from a tiny part, this I used for glueing my Lycra rigging to. Also had to add additional wire and etch for walking ropes underneath the spars whatever the terminology is for this, but it’s all fiddly. Shall put some photos up shortly, got to go for my tea. 😂
-
Have fitted the last parts on this side, you can see how I’m thinking this works, anyway that’s me for the night.


-
You can see that the first two rungs are turned on the mast to line up between the rigging eyelets, also trying to keep the rung spacing the same, again a tiny amount of thin supper glue is the goal here, sometimes this is not easy. Best approach is go really slow 👍