ortho85
-
Posts
148 -
Joined
-
Last visited
Content Type
Profiles
Forums
Gallery
Events
Everything posted by ortho85
-
 Hi Jaques, Welcome - and well done in finding the Forum before starting assembling. In reverse order of your questions: Start a build log and ask for help at every step. I didn't realise how slowly it all proceeds, but ask twice, cut once! If it's the new kit there are enough planks. Two things - plank the deck after gluing it on; consider cutting or marking the planks in shorter lengths for realism. I don't think most people use the nails. You can simulate them with a pencil mark - use the search bar for this. The model comes with double planking. You make the mistakes with the first layer, use wood filler, then cover it up with the better looking second layer (with fewer mistakes, we hope!). I mostly used the white glue (PVA). Apparently you can buy faster setting PVA, and experts are good with CA. One of my mistakes was thinking CA stood for "Contact Adhesive" - it's really CyanoAcrylate! Read http://modelshipworld.com/index.php?/topic/1894-glue-recommendations/?hl=glue Final comment (for now) - don't believe the instructions, and don't trust the sizes they pre-cut, close but not 100%. Enjoy! Brett
- 28 replies
-
- 1
-

-
- swift
- artesania latina
- (and 1 more)
-
I chose this for my second build, because there seemed to be plenty of information on the Forum. I didn't realise so many logs had been lost - and some of the existing logs have been recreated without some of the (I gather) original details. So, before I start anything with this model, I want to ask a couple of linked questions, please: Is it better to follow the instructions and glue the keel, stem and sternpost first? What is the best way to cut the rabbett? Follow the Instruction Manual like this or follow the method in the LSS Practicum I'm trying to follow the advice of reading everything before cutting anything! I realise it's a small difference, but I screwed up my first model by not asking enough questions. Thanks, Brett


-
Sorry - dumb Q alert! Do you just use the magnets to hold each plank to the adjacent plank? I.E. the magnet is not holding the plank to the bulkhead/frame directly? Thank, Brett
-
Hi Antony, How's the West in Winter? Did you buy or make your keel clamp? I like the idea of the board with false masts - thanks for that. Cheers, Brett
-
Hi All, I'm about to start my second kit, and want to avoid some of the disasters of the first one. Last time I just got some balsa blocks to rest the upside-down carcass on during construction, but surely there's a better option? What is your preferred method of supporting the model when planking? Thanks - and Merry Xmas! Brett
-
As you can see, I'm not the only one unimpressed by my first build The reason I'm finally posting this is that I'm about to take the plunge again. Having spent a couple of months reading and researching, I ordered the Model Shipways Armed Virginia Sloop - it arrived today. I intend to: Keep a better build log. RTFM Ask for help Also, I have planned my work area better, and stocked up on some tools etc as recommended in the articles on this site. So, farewell to this mess, thanks for all the fish, and Excelsior!

- 28 replies
-
- 2
-
-
- swift
- artesania latina
- (and 1 more)
-
And that was when we went away for a few weeks - Rome, Florence, Milan, Nice, Glasgow, London - tough life? After that I stopped taking photos, and just wanted to get some sort of ending. I didn't realise how much was left to do after I finished the timber parts. Also, the instructions for all the fine detailing of rigging etc are along the lines of "here's a picture, copy this". So, here are a few "finished" photos I took recently - please note the high quality stand I made!


- 28 replies
-
- 2
-
-
- swift
- artesania latina
- (and 1 more)
-
And so it continued - mistake after mistake. I have no photos of adding the second planking layer, or most other things. Here I made the same mistake as Jared - put the hatch comings flat to the deck, instead of edge on. And I ran out of the correct timber! And a side view so far (this was taken on 11th May)


- 28 replies
-
- 1
-
-
- swift
- artesania latina
- (and 1 more)
-
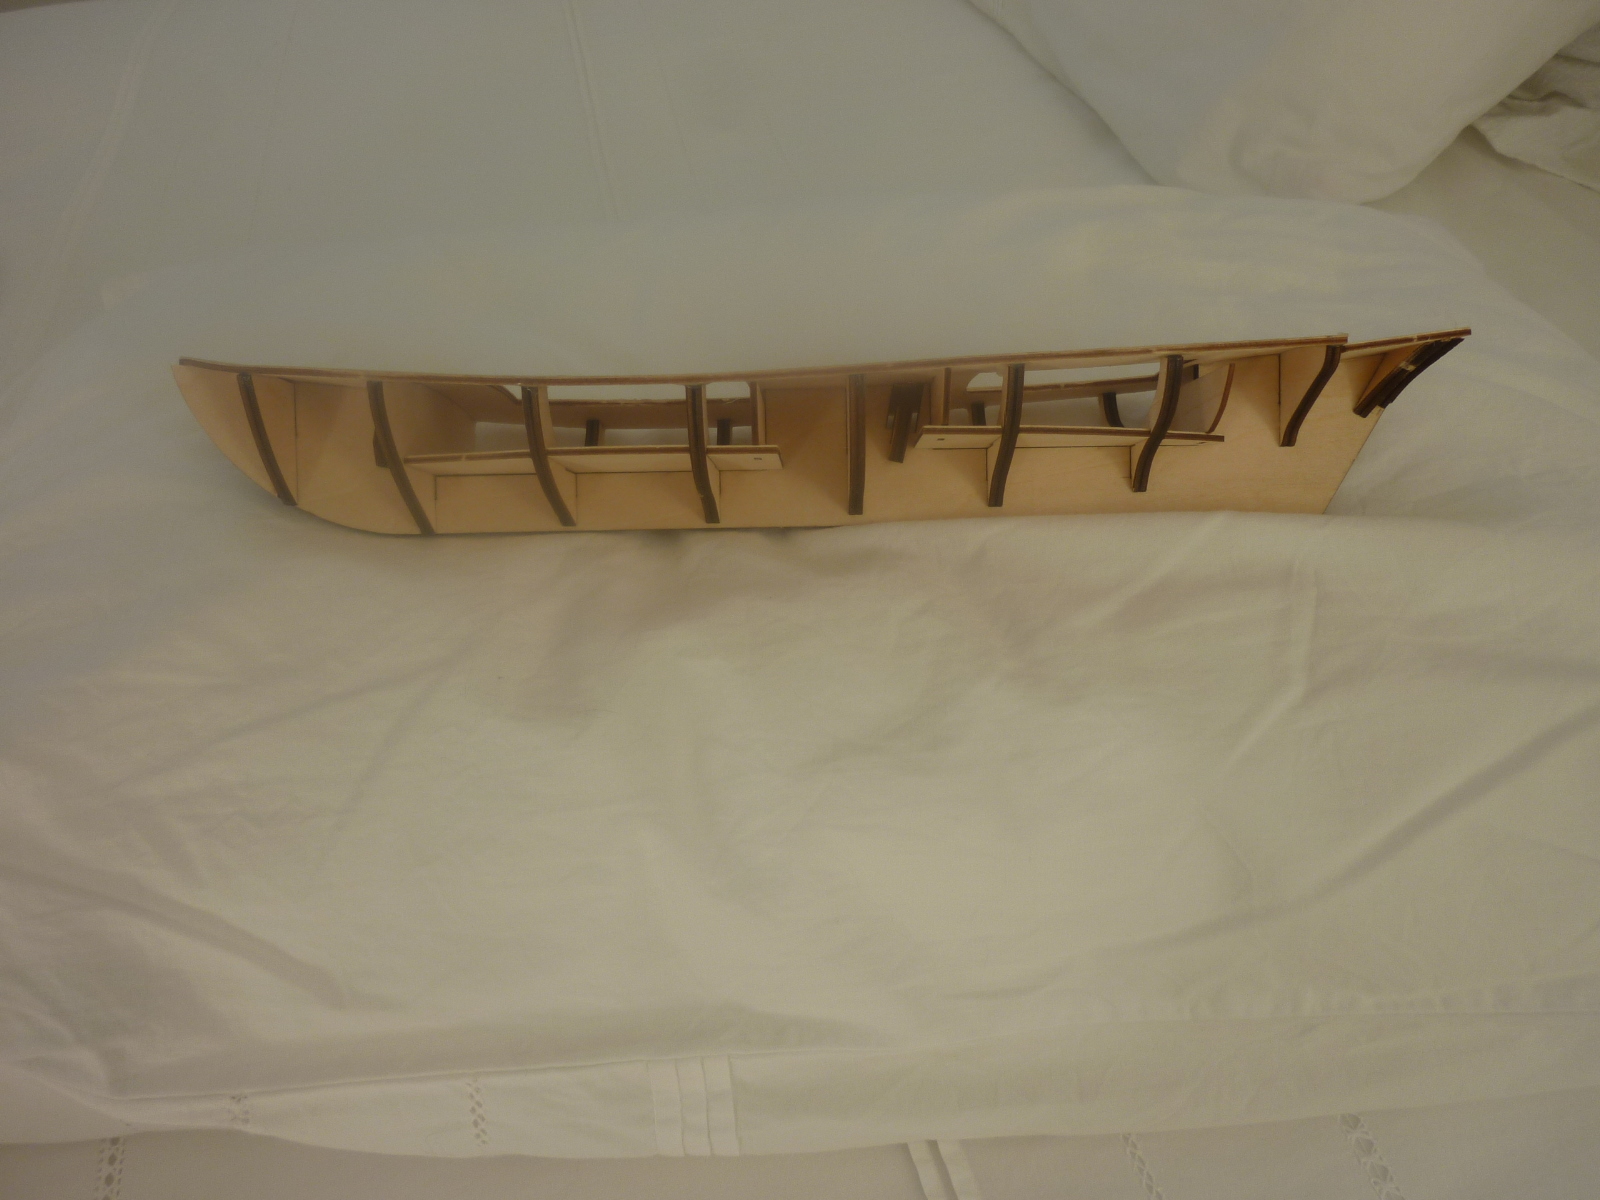
Apologies for the lack of posts. I was away, then lost interest for a while, and just wanted to get it finished in some fashion. I didn't take many progress photos, and I can't remember ALL the mistakes I made. My biggest mistake, though, was not seeking advice before rushing in. Here are a few photos - apologies for poor photography, and general mess! Start of planking - I didn't understand shaping the bulkheads, and, as you can see, didn't even remove some of the laser burns: How the hell do you clamp in 3 dimensions? Well, I finally got the first layer of planking on. I realise now I should have shaved down (rabbeted?) the thickness of the keel to allow for the plank thickness? But I persisted in assuming the moron who wrote the instructions realised that they were writing for morons like me!


- 28 replies
-
- 1
-
-
- swift
- artesania latina
- (and 1 more)
-
I was cruising the forum for tips on glues, and found this thread (among many!). The mention of new glues made me hit Google. I'm an orthodontist, and started back in the 70s when we were searching for ways to stick braces on teeth. We tried CAs, but they had short lifespans under oral conditions. We now (for the past 35 years) use a composite resin. However, one glue tested back then was that produced by mussels to stick themselves to rocks. As I recall, it was too strong for use on humans. My point? Here's a new(ish) glue for you all to "beat up on" - http://sciencenordic.com/synthetic-mussel-adhesive-sticks-anything Cheers! Brett
-
Thanks for this info. Anyone know if I can I buy Model Shipways or Blue Jacket in Australia?
-
I'm about 1/4 way through my first build - AL Swift, labelled "14+"! In retrospect I would not have chosen this as a starting point because the seemingly extensive instructions turned out to be severely lacking (for a beginner). I plan to continue with this hobby, but need better printed guidance. So, which similar kit manufacturers have good instructions? Or are they all as bad? Cheers
-
Thanks guys. themadchemist, I've bought some balsawood, so that's a start! I wish you'd hurry up with your build, so I can see how you handle fitting the keel! Can't see you hurrying, though - you're creating a work of art! Cheers, Brett
-
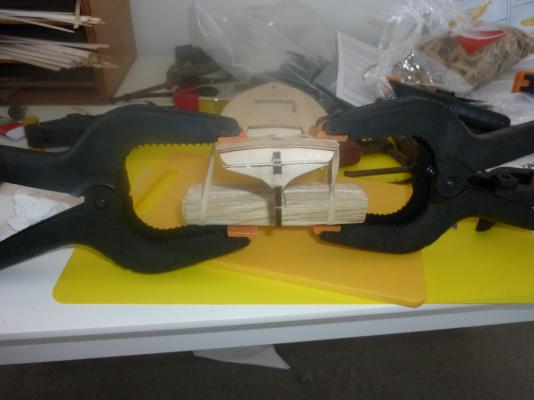
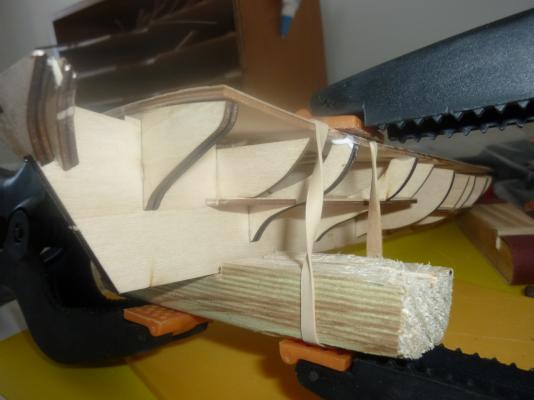
It seems the actual construction is the quick bit - it takes soooooo long to figure out how to do each step. Right from the start I was having problems with shaping the deck in 3 dimensions. After managing to roughly curve it from stem to stern, I settled on BF&I for the lateral curvature - that's brute force and ignorance if the TLA is new to you! So, one by one I applied PVA glue and clamps to each frame. I solved the clamping dilemma by sawing slots along a scrap of pine, so the keel and frames could locate in the slots without stress. Elastics held the brace while I applied the two clamps simultaneously: After about 100 years I had beaten the deck into submission: As you can see, I had to sand back the frames on the starboard side, as they stuck out beyond the deck. It was only when I began planning the planking that I realised that I had to sand down the deck itself on the port side, for a similar reason! And now I'm at the scary planking stage, playing around with pre-bending, clamps, etc. And one plank at a time may mean it will be a while before I finish this stage!
-
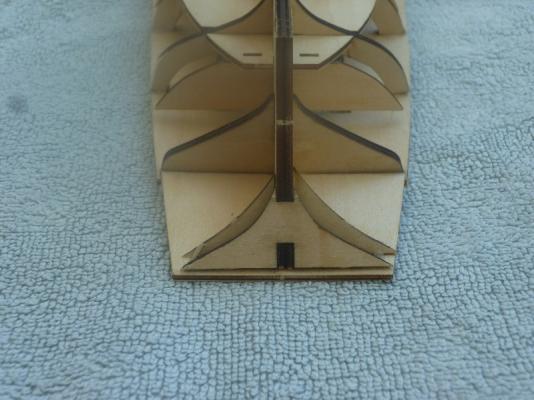
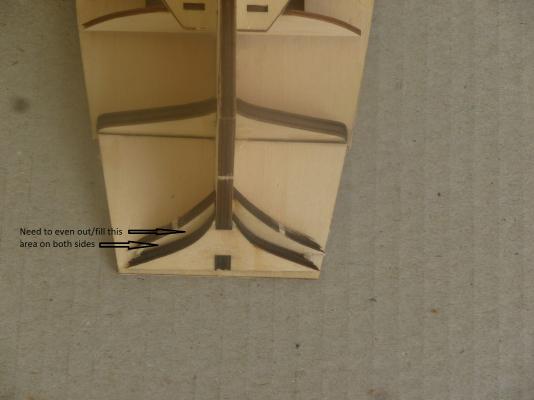
Yup, that's the section I'm stressing over before diving in. The current instructions call them a stiffener and frame. I can't see how to use balsa since the bit I need to pad out is really just the edges of these 2 "frames", and that's a thin irregular shape. I hope this photo will show where I'm thinking some form of putty might help: I can see it would be easy enough to use balsa in the larger voids, but this one looks too awkward. Any hints out there? Thanks
-
Kevin, that's good to know that you didn't need the fillers. Sarah, Plastic Wood is like a putty - http://www.selleys.com.au/fillers/rigid-filler/ready-to-use/plastic-wood is one version (although I avoid Selley's wherever possible!). I reckon I just need to bulk out and reshape those 2 stern frames - the others I can sand/trim down, but these need adding to. Thanks!
-
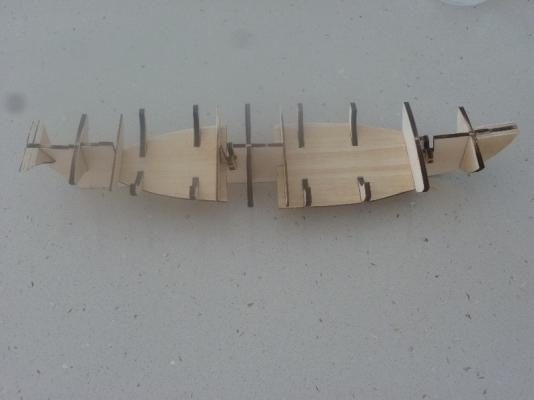
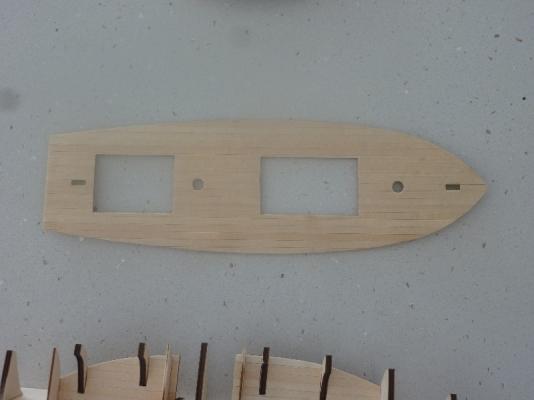
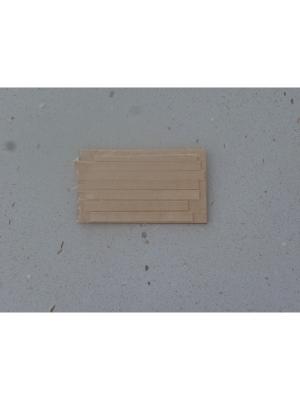
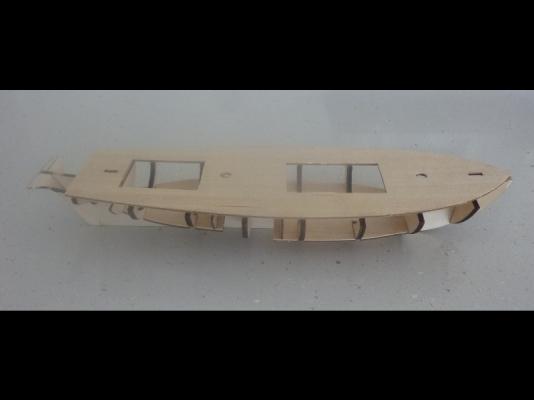
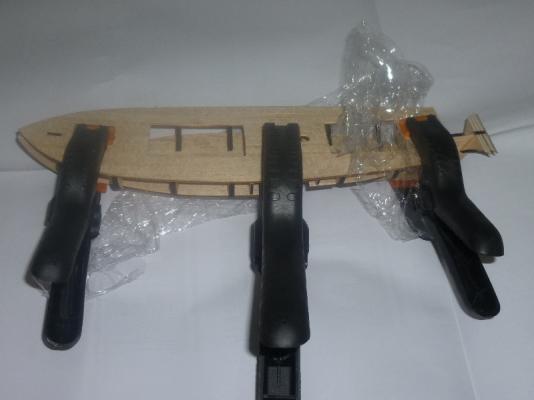
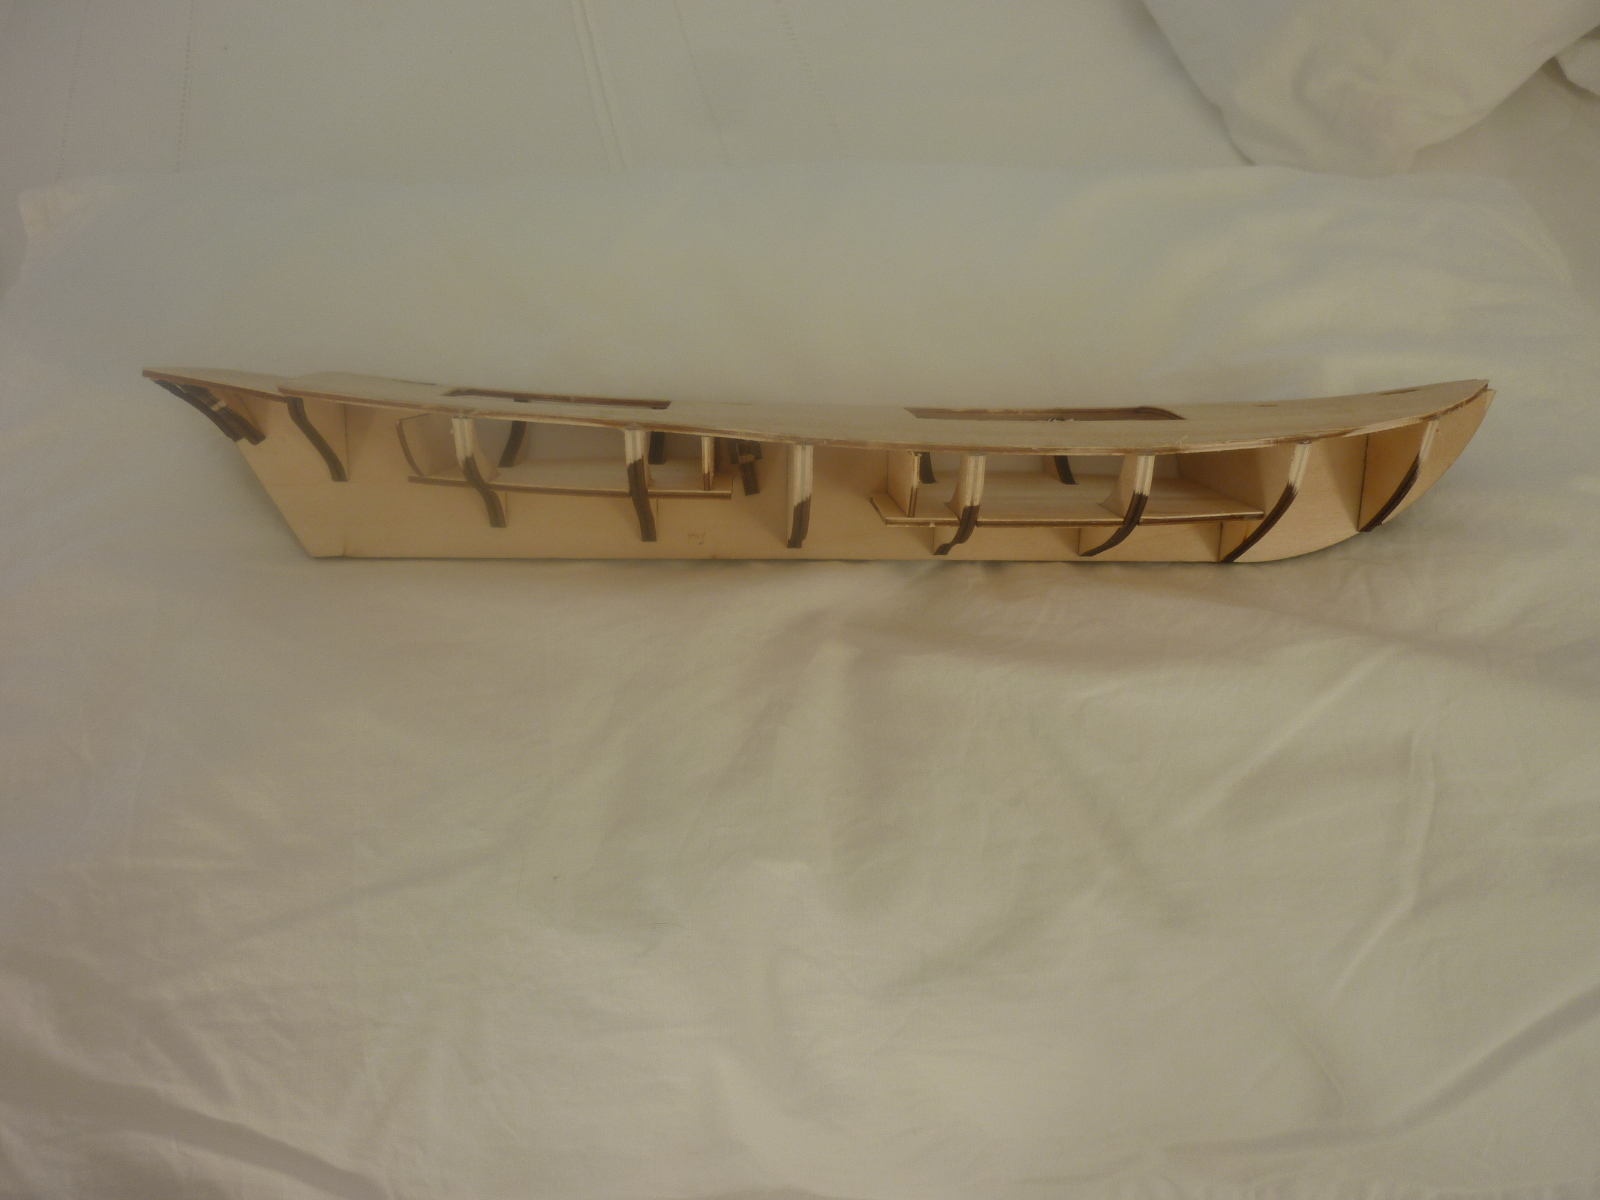
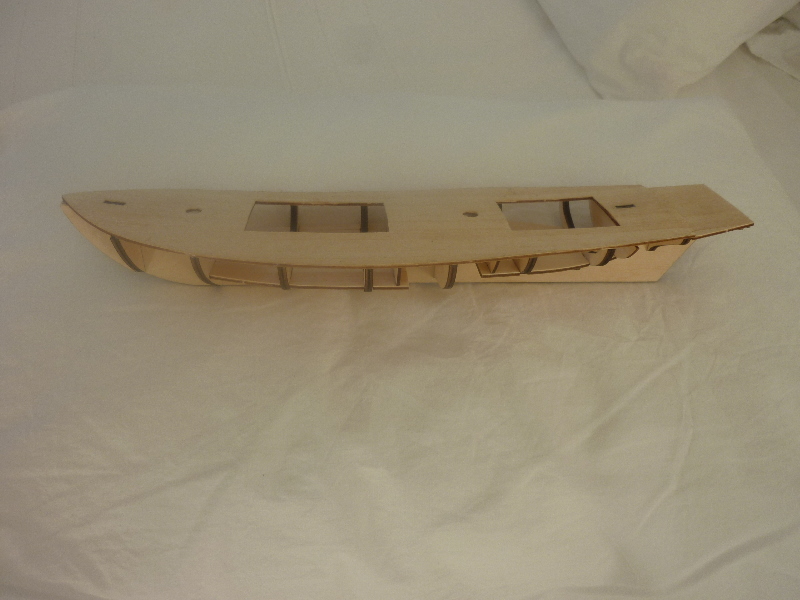
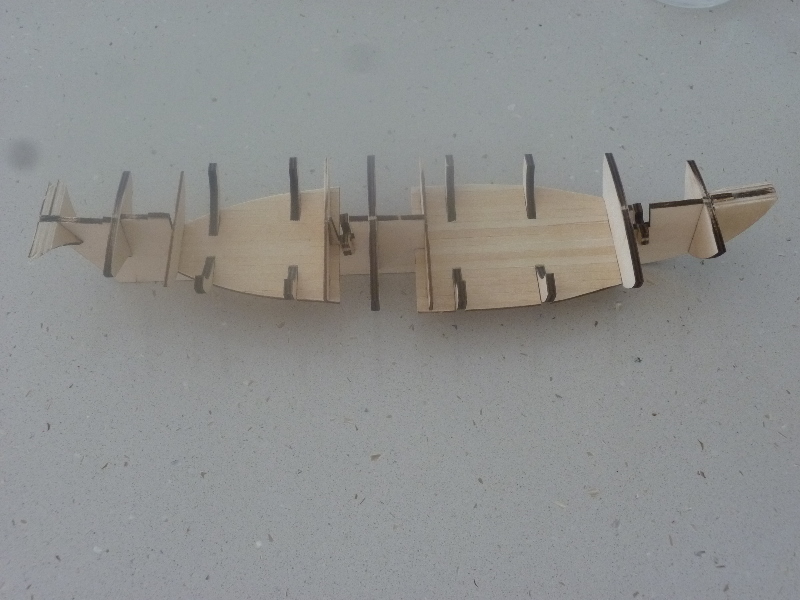
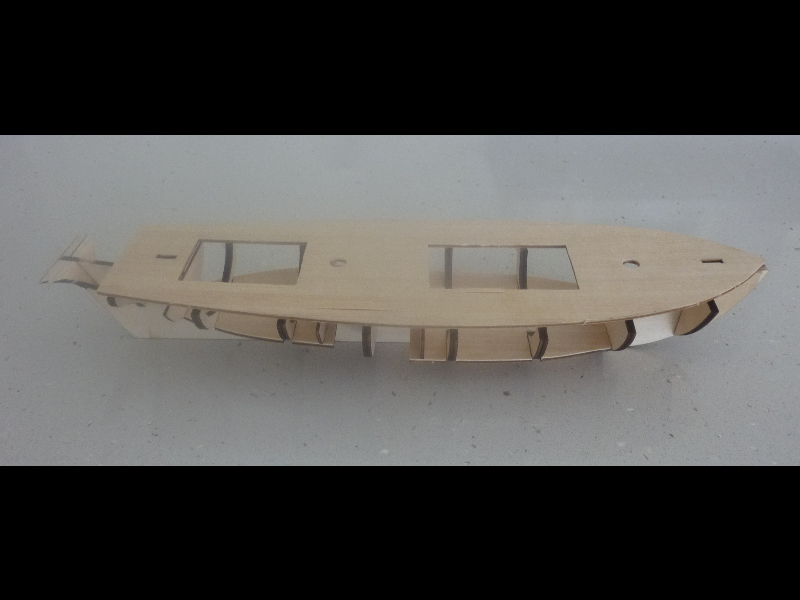
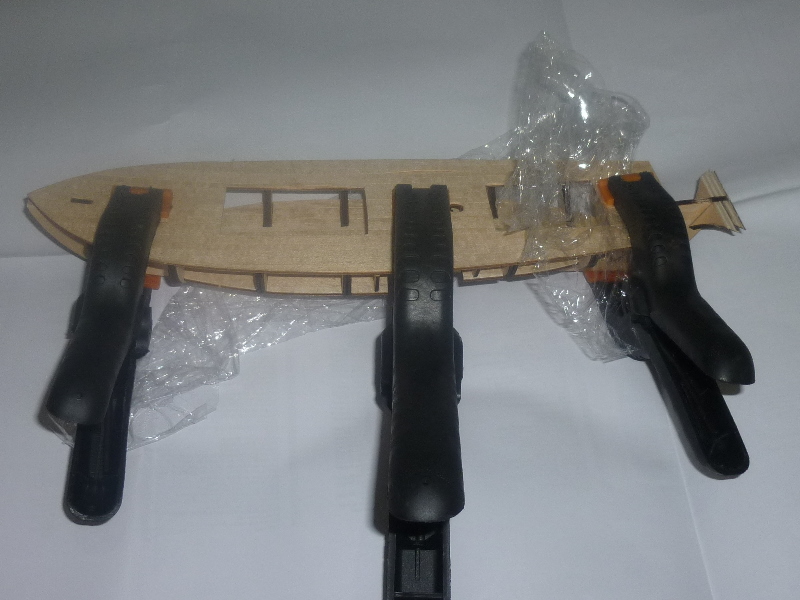
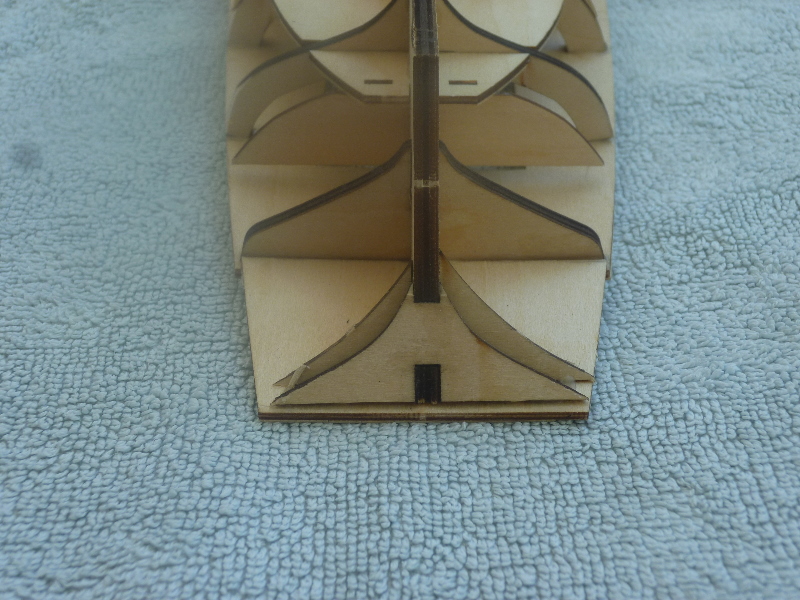
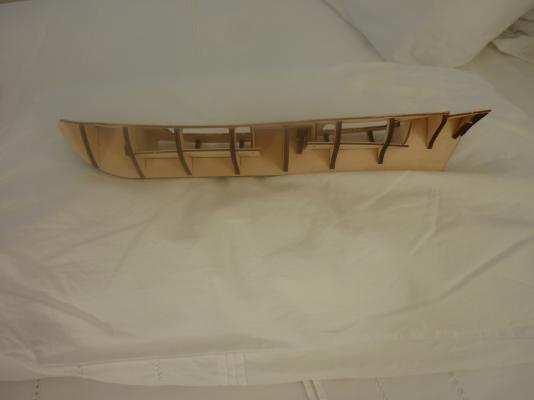
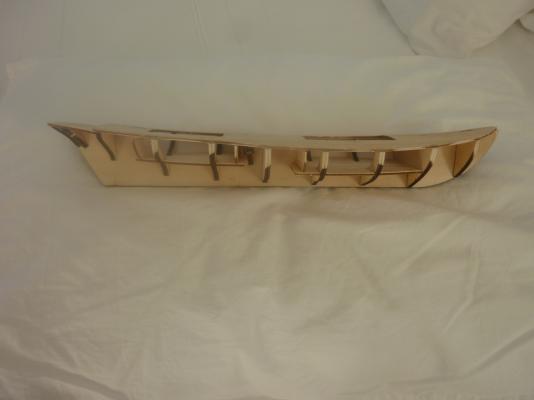
Well, I started building this before I discovered MSW, unfortunately. Now I will take it (even) slower, and research each step. This is where I'm up to, as I write: The story so far - I visited the local Hobbyrama, looking for something relatively simple, but still interesting. I was surprised to see that most of the customers were not young any more (like me). I settled on this Swift, as it looked to fit my needs. On opening it, I was impressed by the number and quality of the parts and instructions. Silly me! I soon found out that the instructions (despite saying it's for 14+) assume you have made hundreds of these things before. Like a fool, I believed they made sense, and tried my best. I assembled the keel and frames etc., and started in planking the decks. My first big mistake - the instructions said to use 0.6x5x85mm planks, but there were only 400mm planks in the kit. The illustration did not clarify the situation, so I just stuck them on whole, and trimmed off the ends! After I glued in the interior decks I had this mess: At this point I was up to #2 of 32 instructional illustrations. Step 3 was were I almost gave up - trying to make the flat deck bend in 3 dimensions to fit the frames seemed impossible. I Googled, and there I found MSW. My introduction allowed me to ask questions, gave me answers, and hence I started taking photos. As well as failing to make small planks, I also learned that it is easier to plank AFTER warping and gluing in the deck. Too late! I was told how to shape the deck and how to unglue, so I made a test piece: but neither a bit of soaking nor isopropyl alcohol loosened the 3 day old glue - so far I've only used PVA for all joins. I managed to shape the deck after moistening and microwaving sufficiently to get it to fit lengthwise, and glued it in with the aid of some cheap clamps from Bunnings: That's my typing finger worn out for today, but I have a question before I go. In the older kits I see people made balsa add-ons to fill sections where the planks need more support. I think this newer kit may not need that (???) but I do need to add something to fill in at the stern. As I hope you can see in the next photo, I think I need to pack out the stiffener and stern frame nearest the camera, to widen and recontour them. I know it's not professional, but can I use some sort of plastic wood? Thanks, Brett