HOLIDAY DONATION DRIVE - SUPPORT MSW - DO YOUR PART TO KEEP THIS GREAT FORUM GOING! (Only 64 donations so far out of 49,000 members - C'mon guys!)
×


ortho85
-
Posts
148 -
Joined
-
Last visited
Content Type
Profiles
Forums
Gallery
Events
Everything posted by ortho85
-
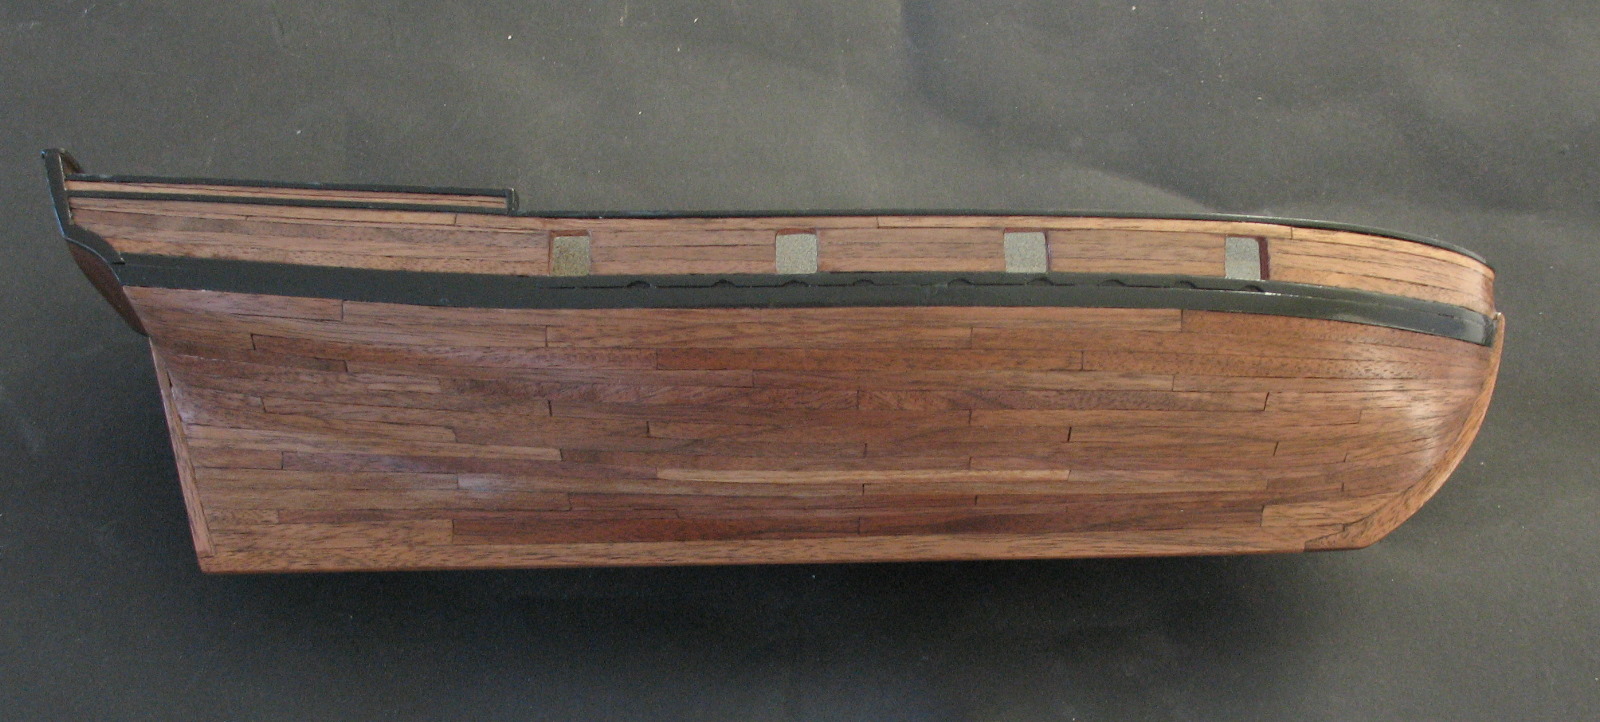
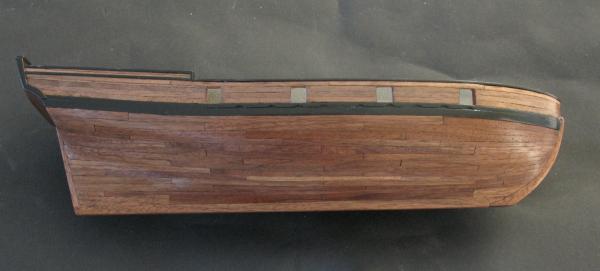
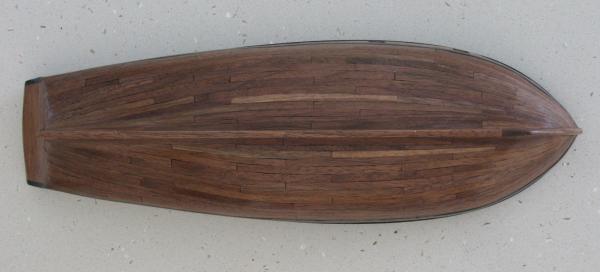
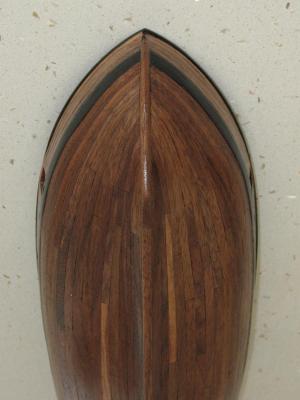
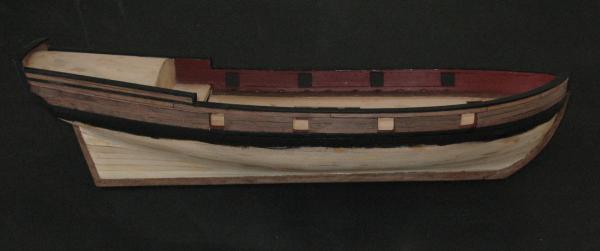
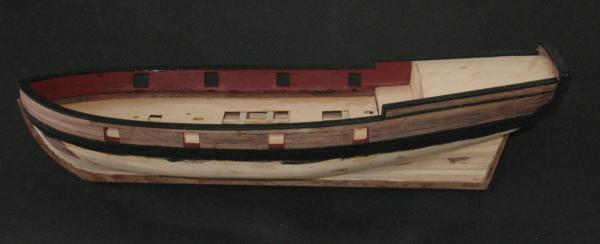
 Ken obviously has a different definition of 'light sanding'! It took me several hours. Despite careful application of masking tape, I still will have to retouch a couple of bits of the black paint. After sanding, I applied 2 coats of Minwax Wipe-on-Poly Gloss. I bought this accidentally, but was later unable to find the Satin version. Recently I managed to get Feast Watson Satin Wipe-on-Poly, and these photos show the model with 1 more coat of that. I plan to rub down and apply several more satin coats later: For anyone starting this model, a hint. The practicum leaves the oar sweeps until this stage. It would be better to cut/drill them before sanding/painting/sealing. I have just started making these and it is messing up my earlier sanding and artistry. Here are a few different views. I still think I am going to stick with sealed rather than painted. The colour looks different with differing light conditions: It's the middle of winter here in Brisbane. Only 21.4 degrees. That's Celsius! For those from foreign parts, I think it equals about 70.5F. We got it tough! Cheers, Brett 4 weeks to freedom.
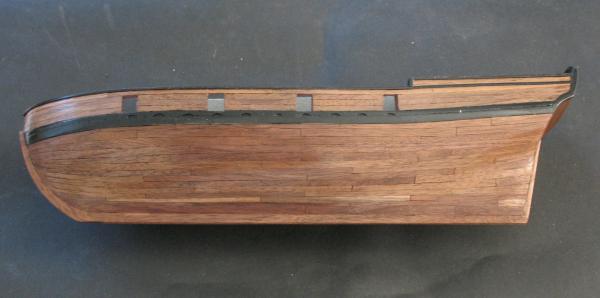

- 129 replies
-
- 5
-

-
- armed virginia sloop
- model shipways
- (and 1 more)
-
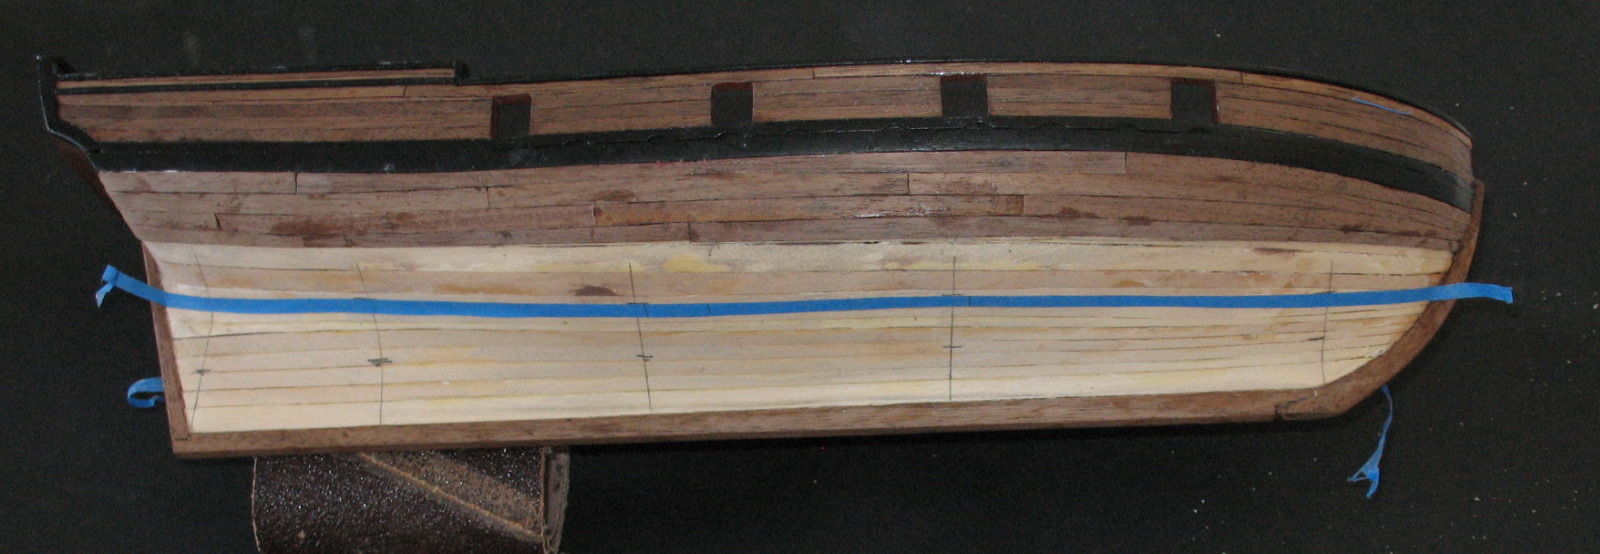
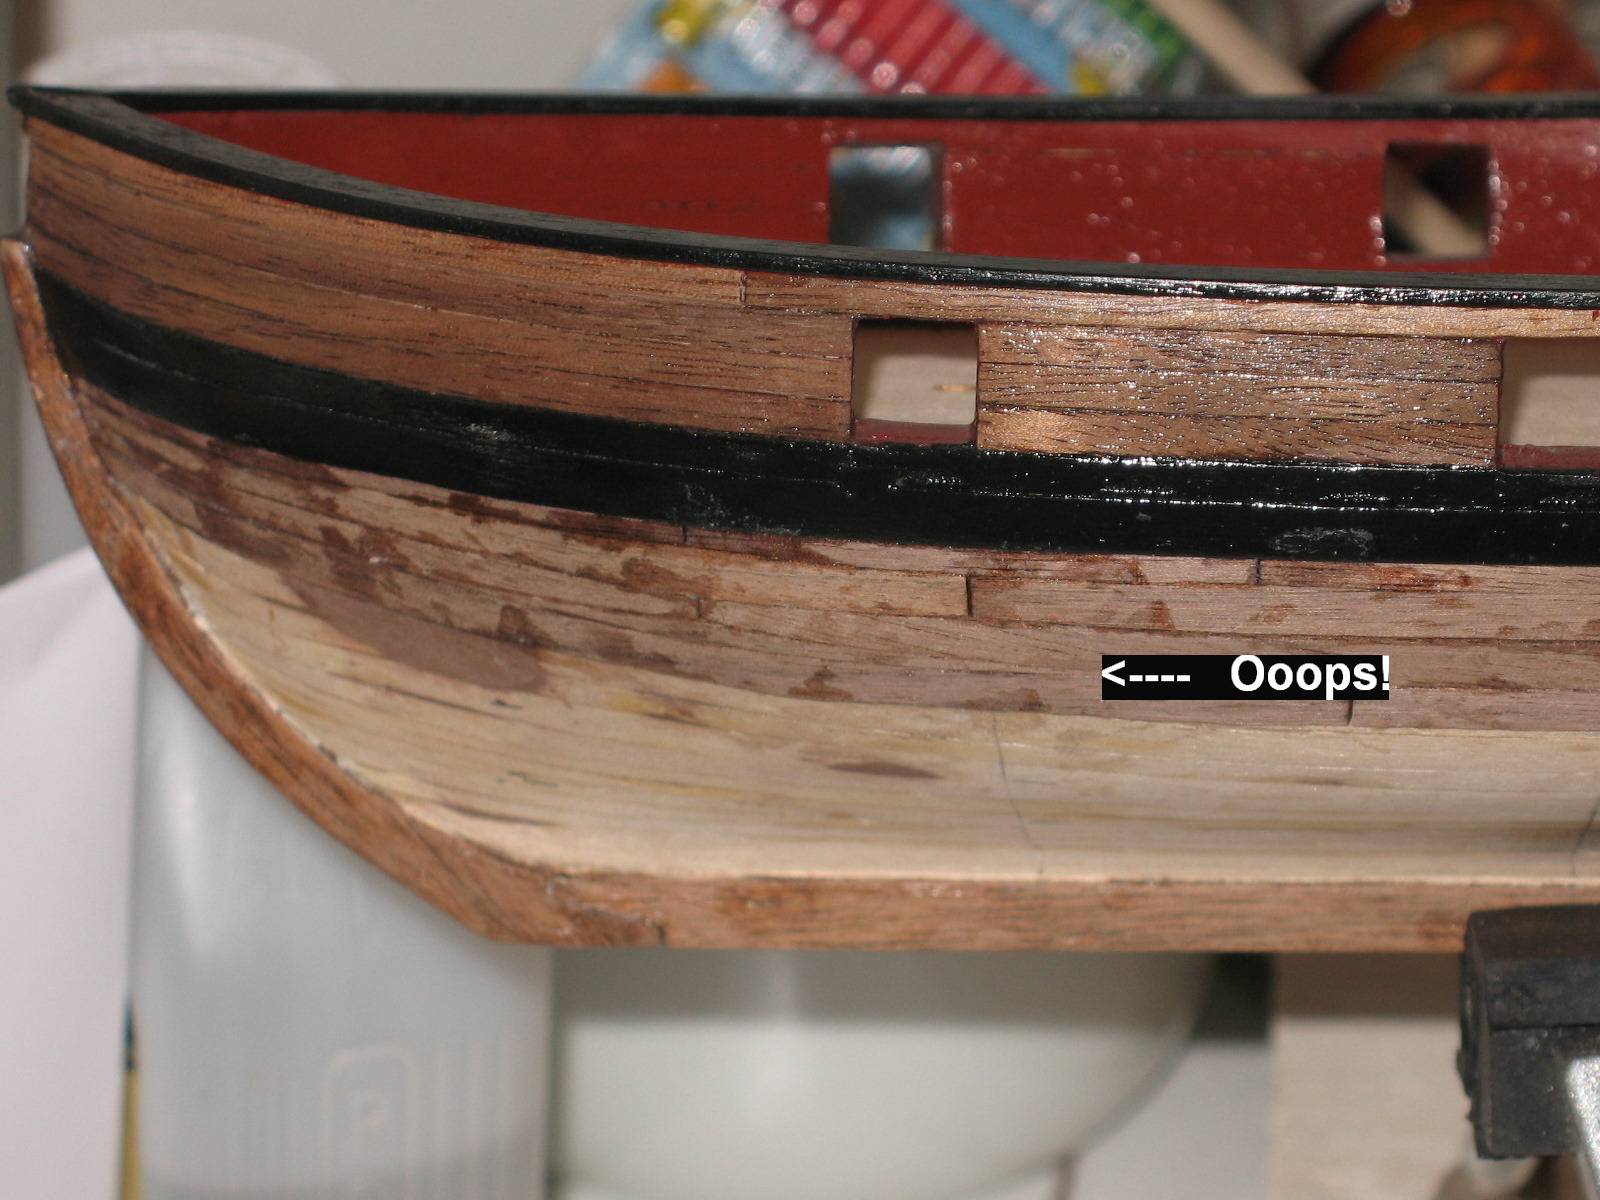
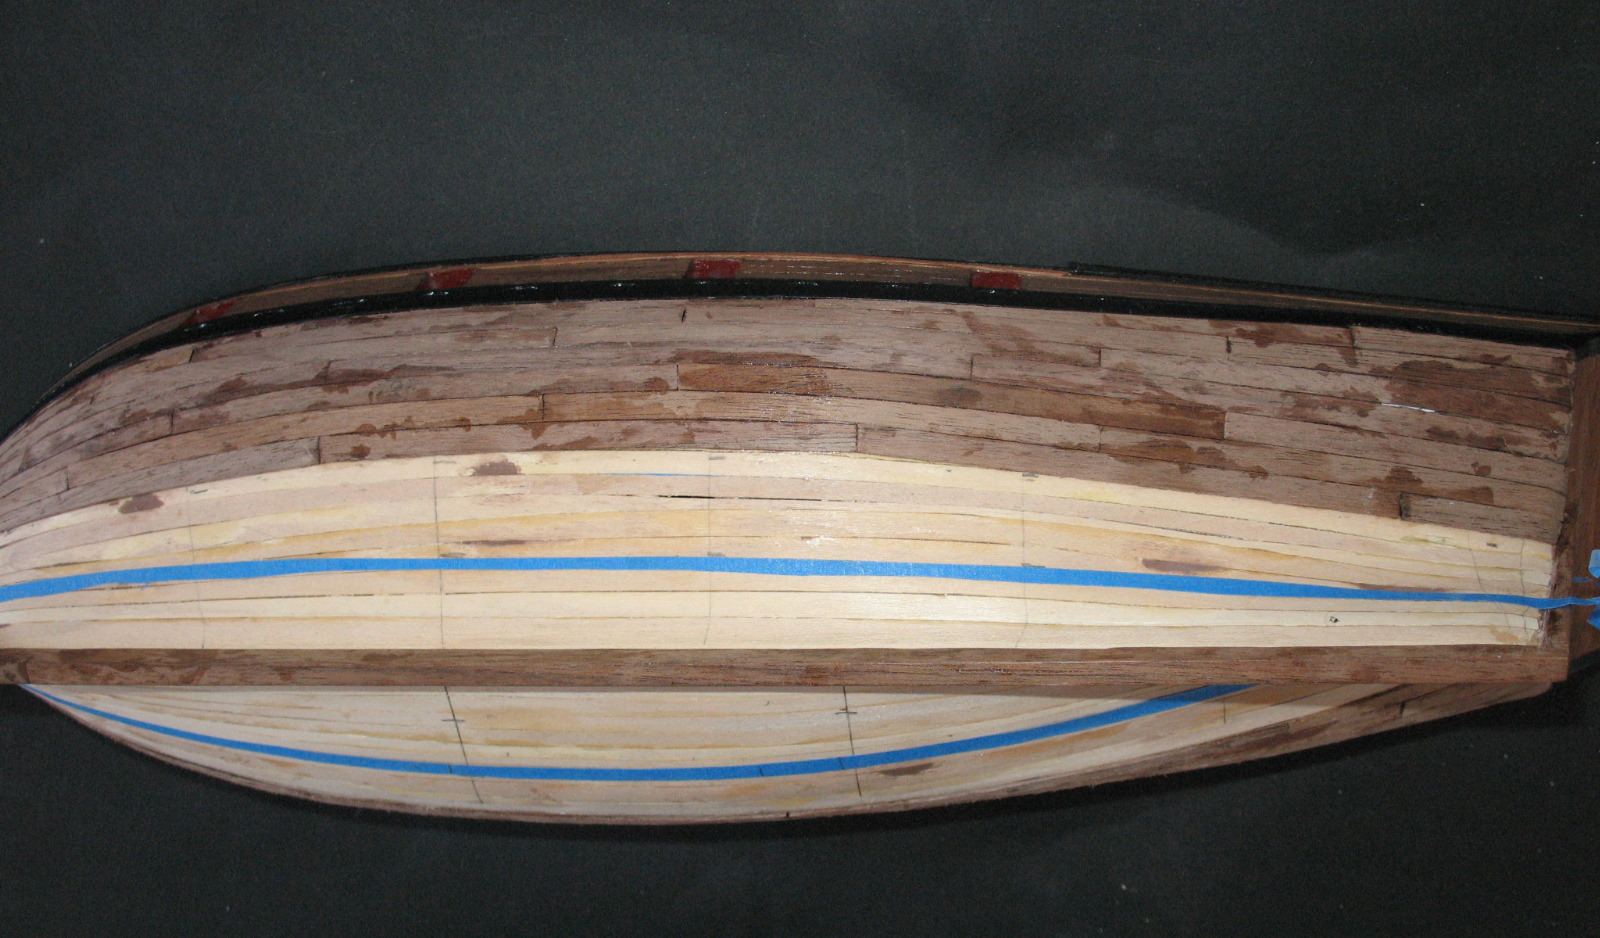
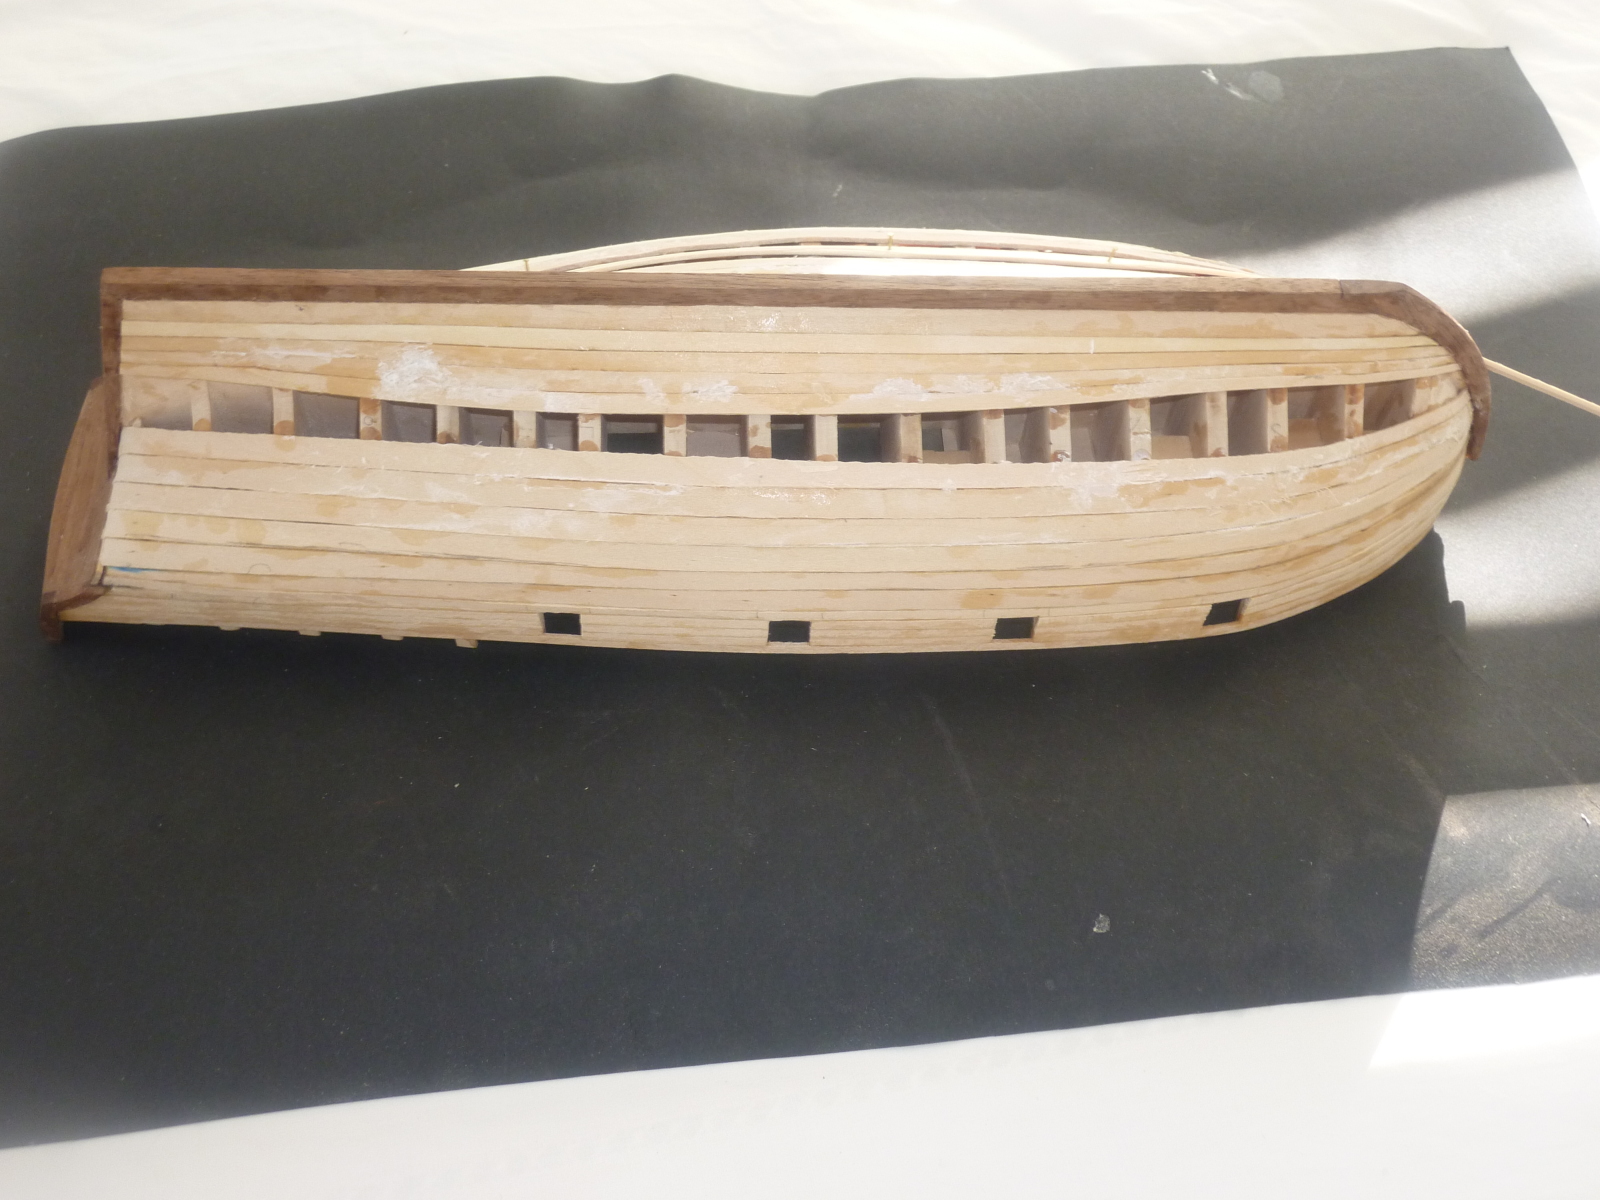
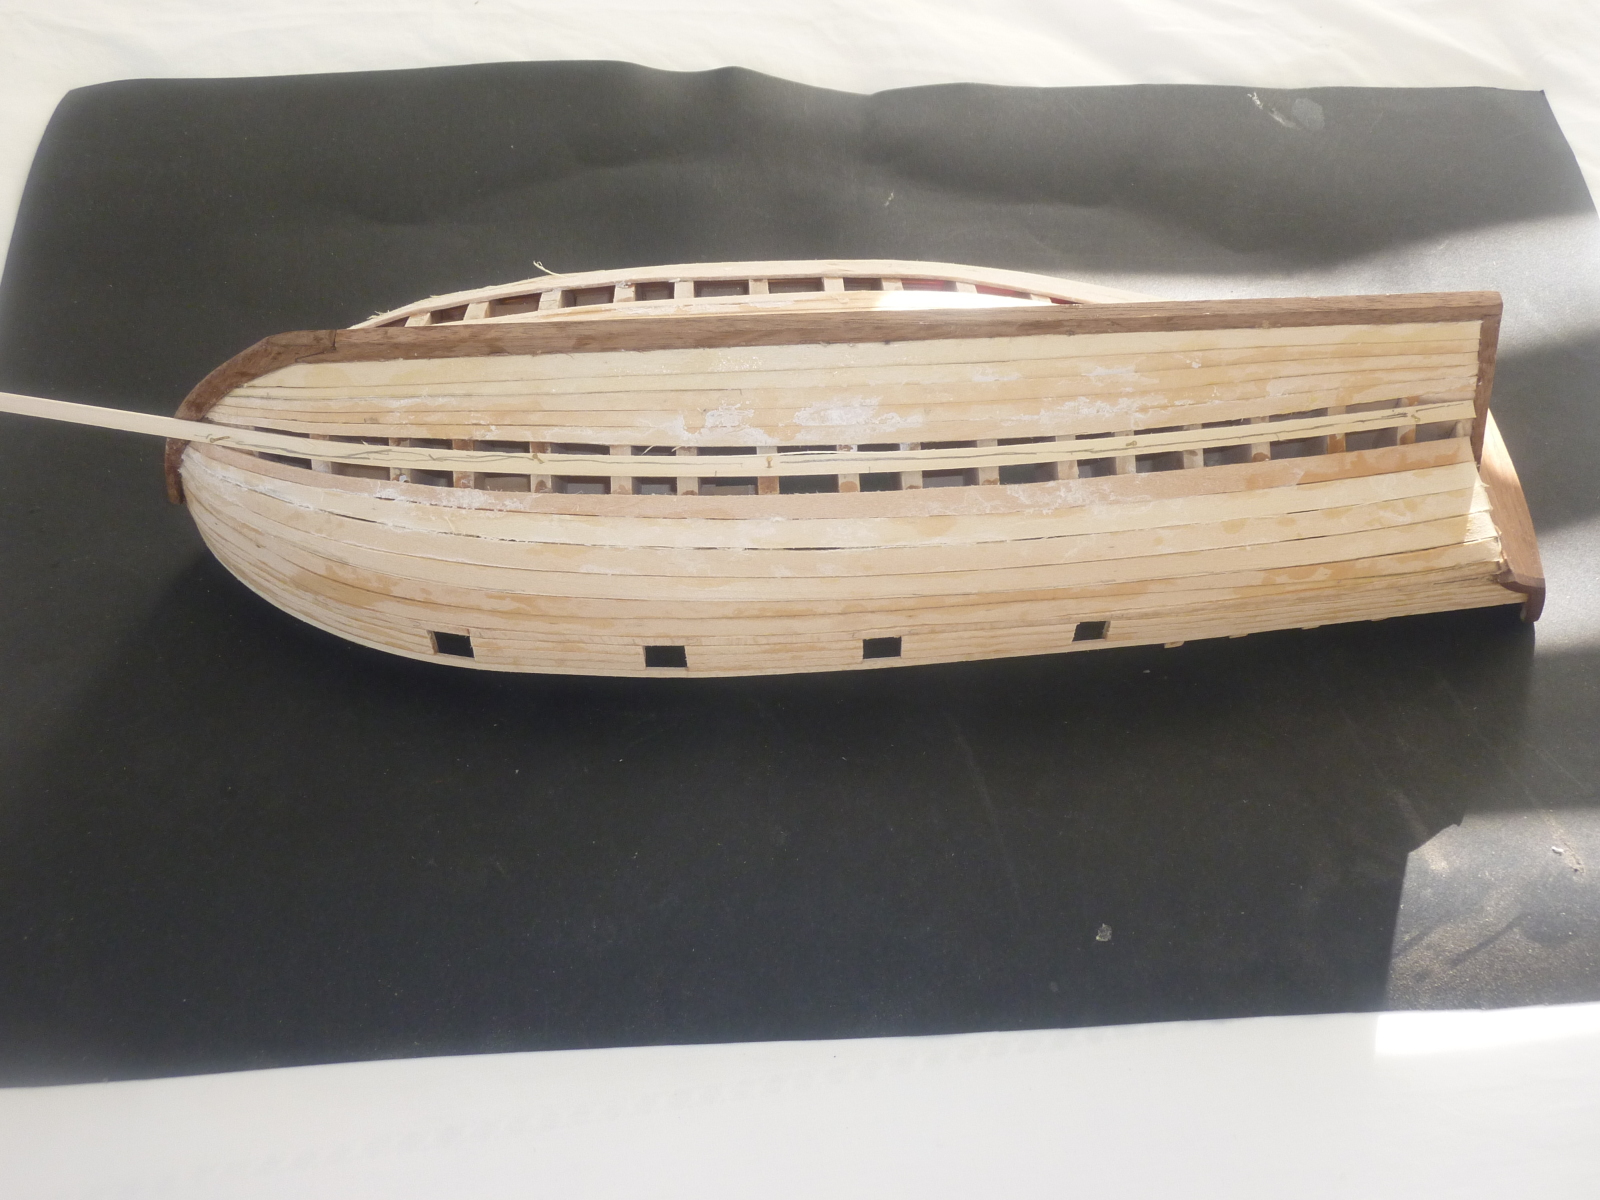
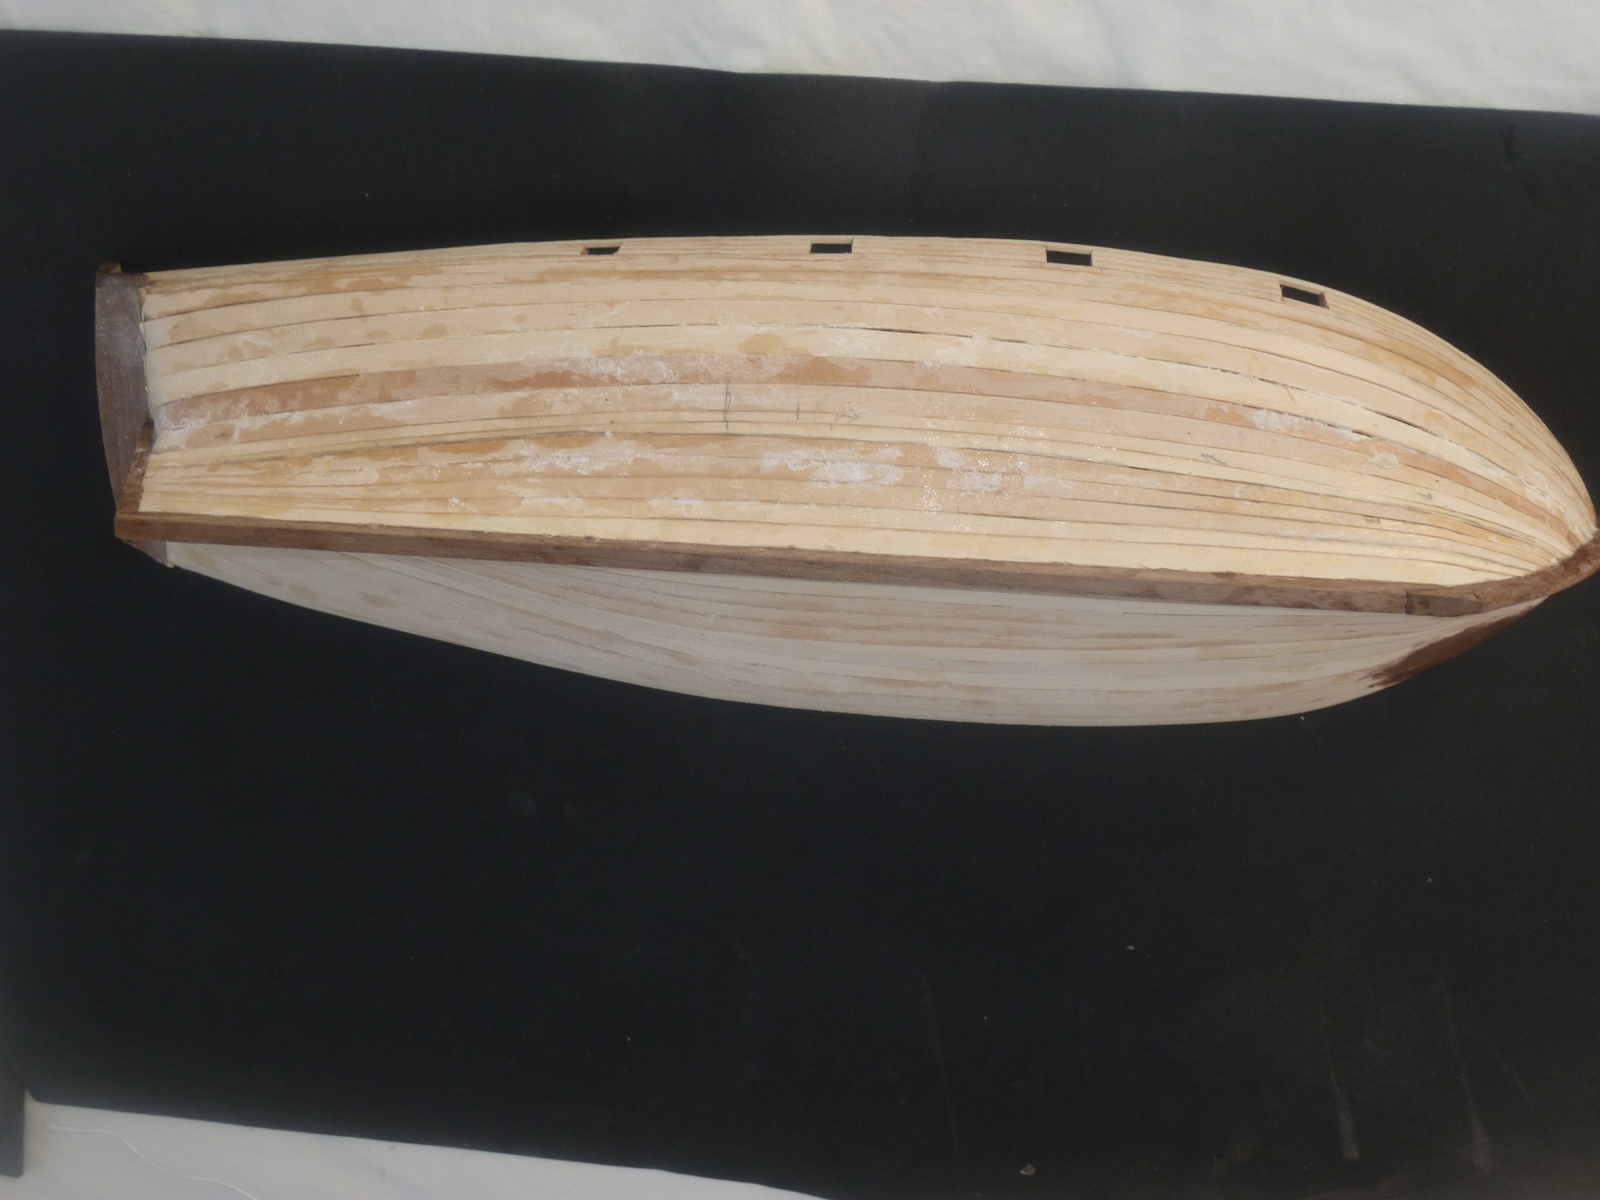
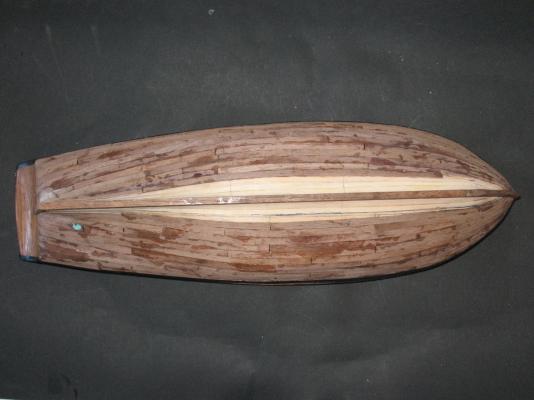
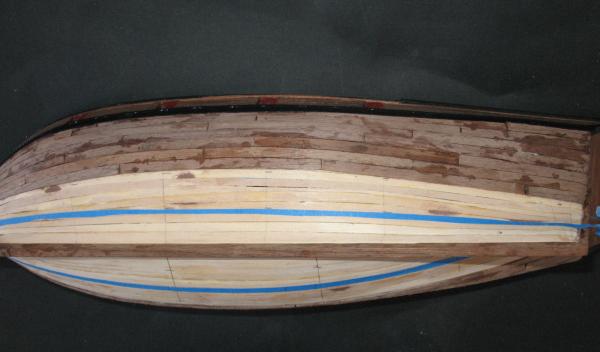
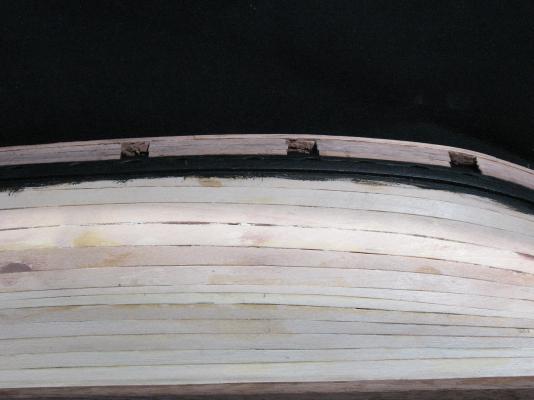
Ah, well Bindy, if the blue planks worried you, wait until you see my artificial seaweed attempts! BTW, if you're serious about not seeing my oops, just click on the image, and you'll get a large view, that will reveal all! This was the situation approaching the final belts of planks: As the practicum suggested, I next used a 1/4" plank at the keel (others were 3/16" up to now). I was left with space for 3 rows of planks. Because I was staggering the joins every third row, it was simple to line up this row: I managed to avoid any stealers at the stern, by occasionally cheating and cutting down a 1/4" plank, instead of 3/16" ones. Again, this resulted in a couple of skinny areas, but I got there: The green bits are vinyl glove remnants that pulled off with the CA I was using. Not seaweed. Tip for Australians - Parfix CA sticks badly to vinyl gloves (don't bother with latex!!!!). The home brand CA from Woolies is more forgiving. And don't use the runny Reject Shop $2 packs, either. Now it's time to sand and see. Cheers, Brett 5 weeks to retirement, but who's counting?


- 129 replies
-
- 7
-
-
- armed virginia sloop
- model shipways
- (and 1 more)
-
I thought the debonder was just acetone? Or is it different? I have had no luck with straight acetone in ungluing CA. Cheers, Brett
-
Hi Alistair, No issues - just looking for any decent tips or tutorials to hone my planking skills. I've actually finished the hull planking, but wanted to break my posting. The deck planking awaits, but that won't need the same techniques, I guess. Thanks, Brett
-
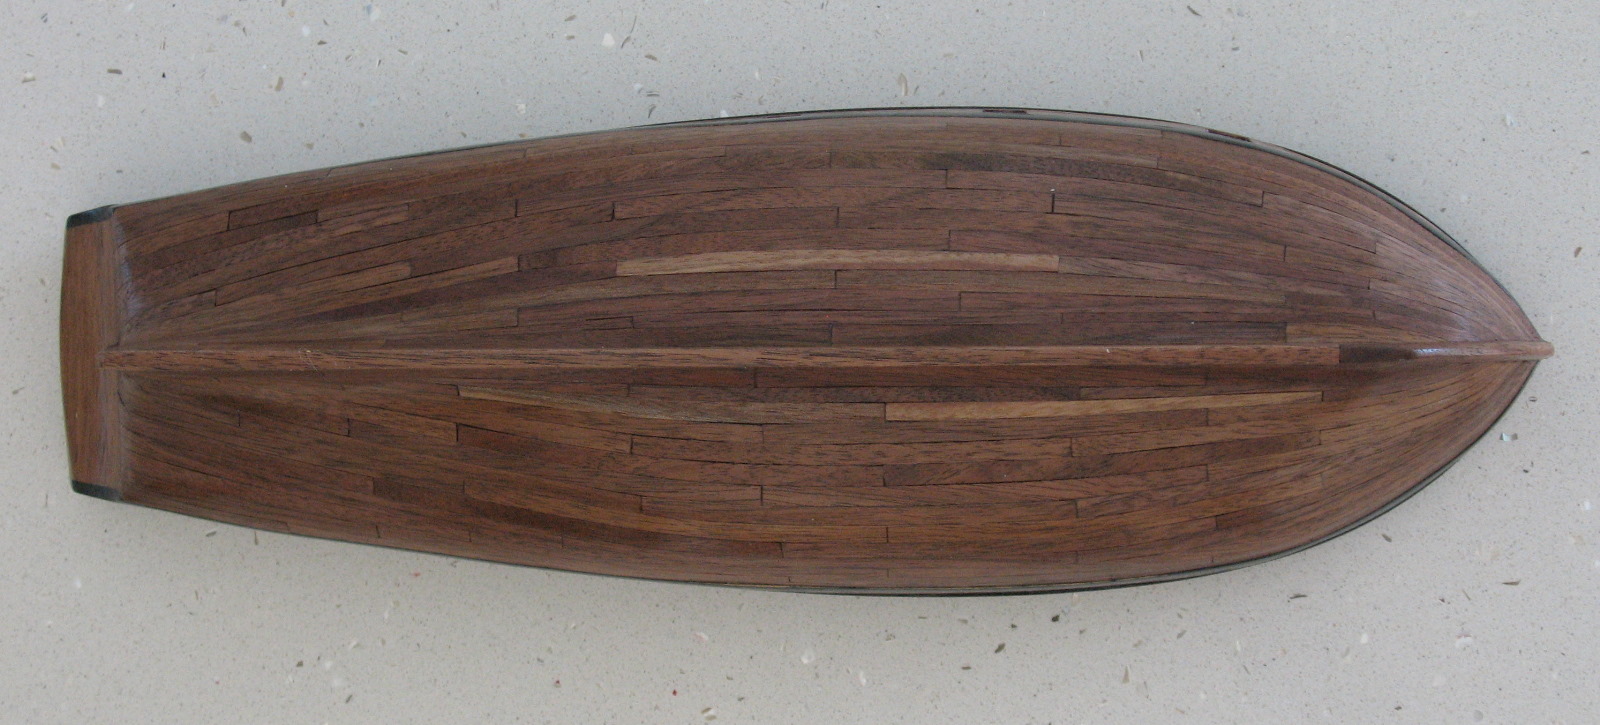
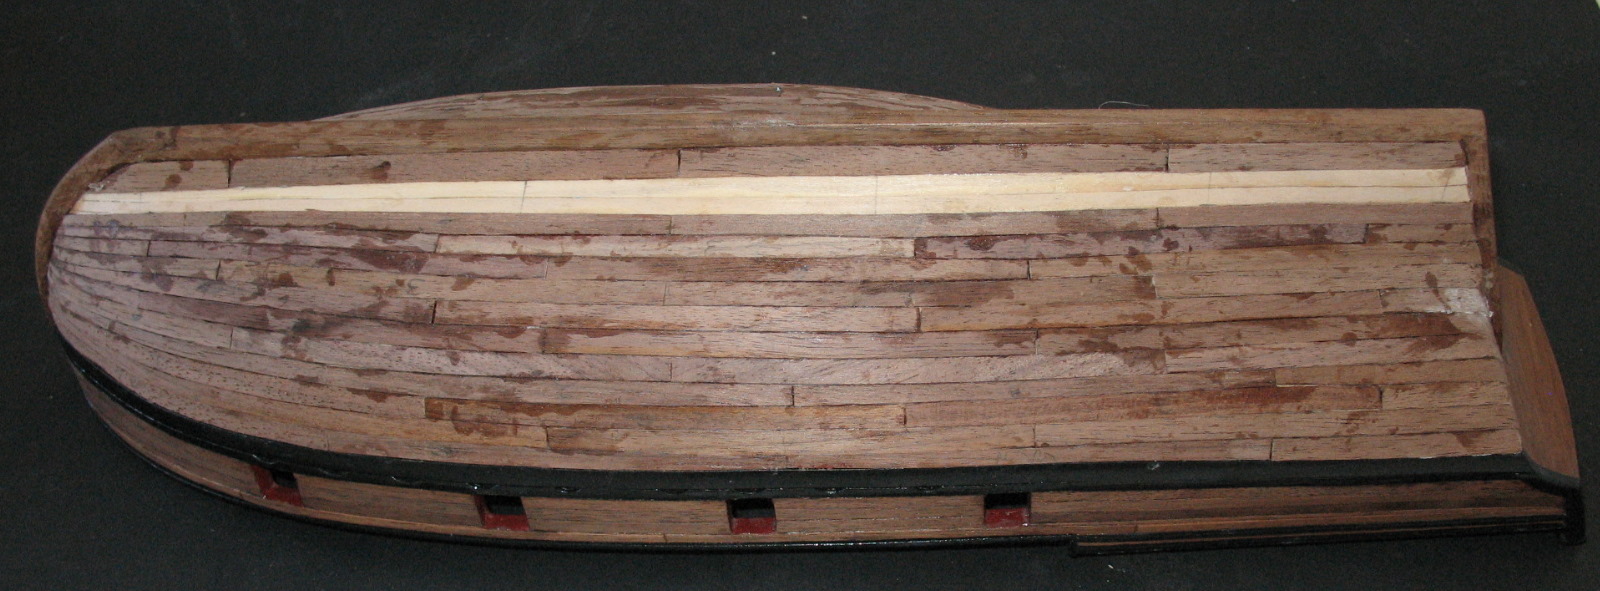
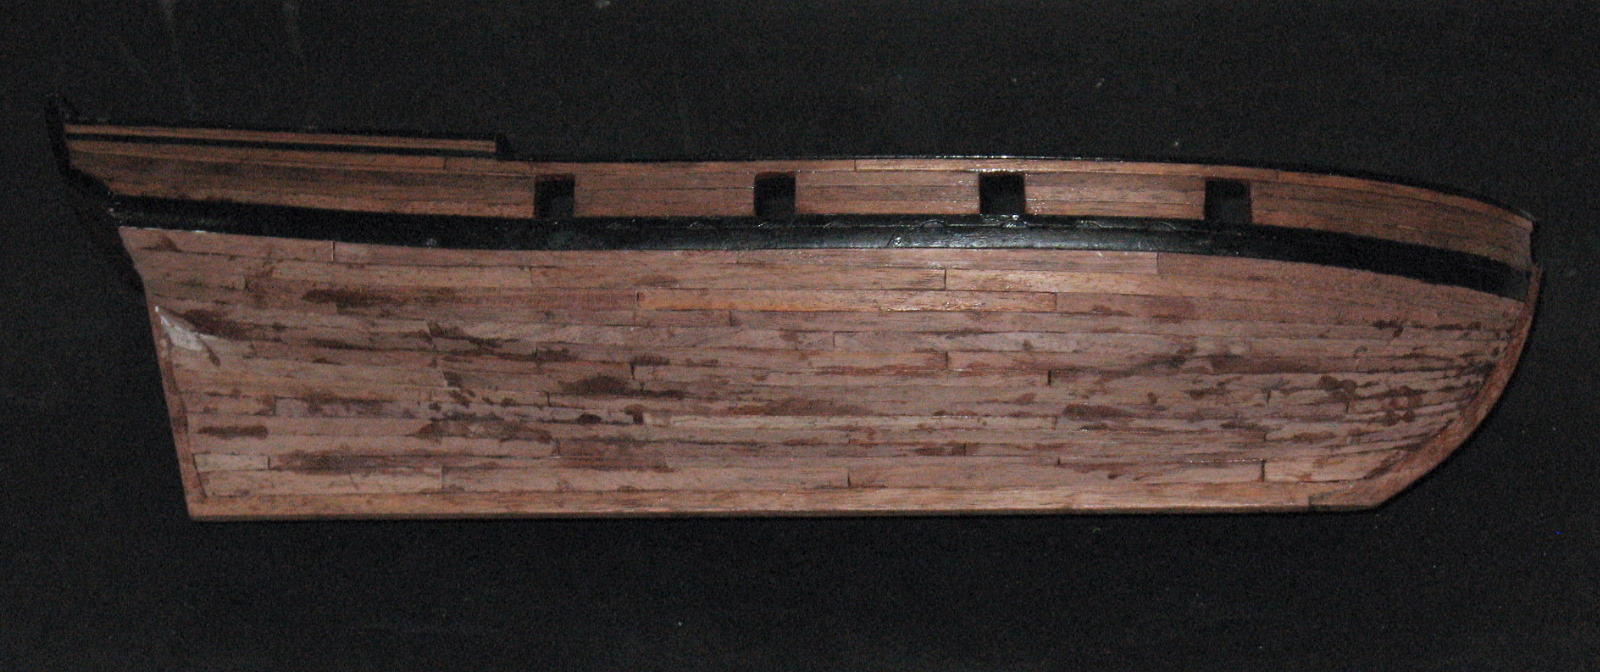
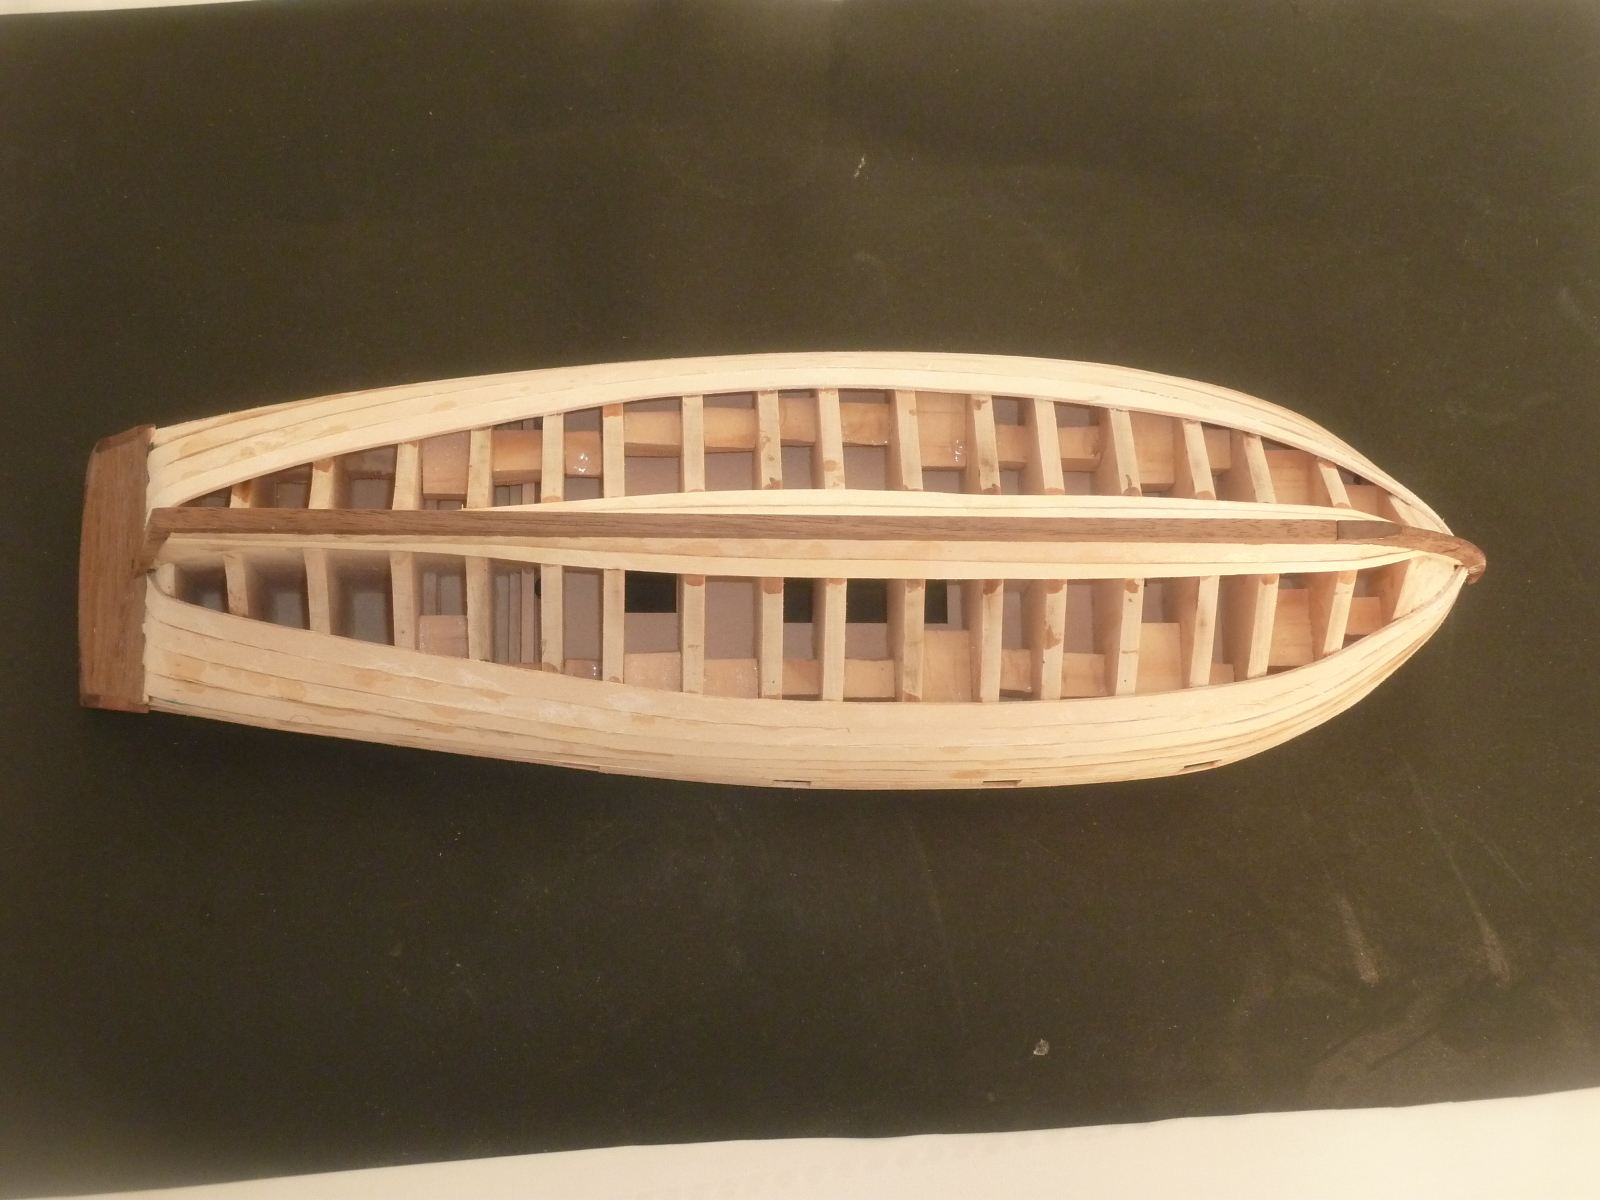
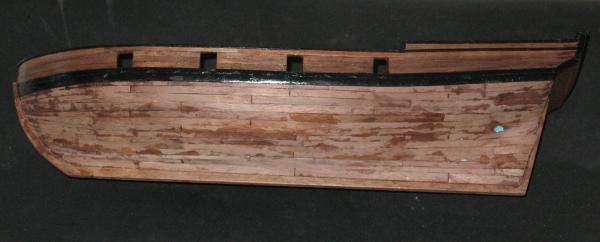
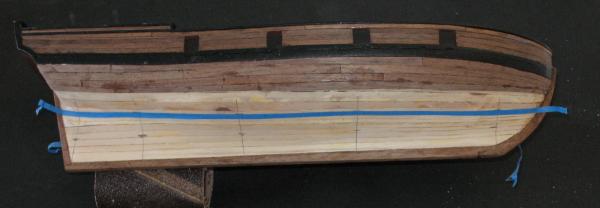
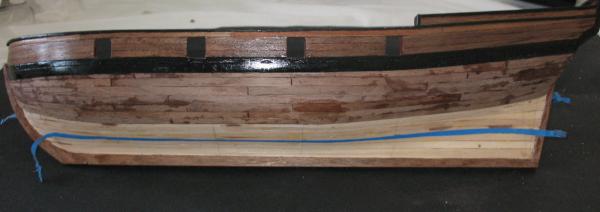
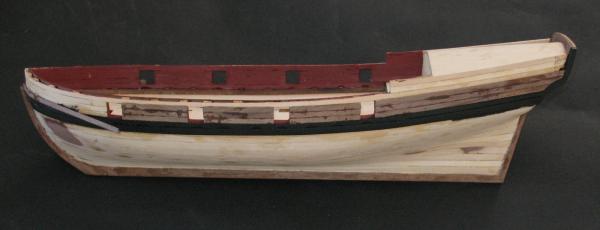
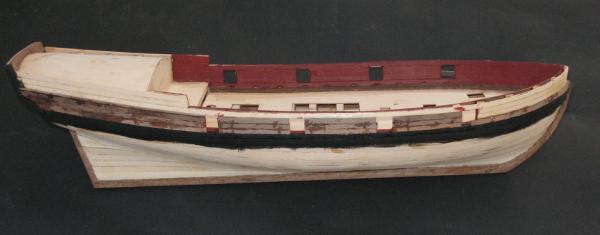
And so began the lower hull planking - or not! I spent a long time trying to understand the multitude of tutorials, videos, PDFs, etc about planking, but failed to get a grasp of the concept. As with most things, I felt I could only learn by plunging in. As usual, I learnt by my mistakes, and hope to do better in my next model! I am following Bob Hunt's practicum, and at that stage I wished I had not. In his version, the first layer of planking is done with full length strips, leaving the fun to the outer, walnut planking, done with more realistic length planks. Oh, how I wished I had been smart enough to practice my planking skills with the basswood first layer - then my outer layer would have been better. The first step was the hardest. After much procrastinating I realised that the overarching concept was to break the lower hull into sections, and plank each section as an entity. I drew vertical lines at several strategic parts of the hull. I marked the length of each line on card. I then divided each into quarters, and transferred the 3 marks back on to the hull. Joining the marks with blue tape allowed me to visualise each band/belt. Here is the first belt planked and the tape moved down ready for the next: The instructions talked about staggering the joins of the planks, suggesting that they should line up every 4 rows of planks. I couldn't get this to work with my model, so settled for every 3 rows. Then messed that up! Although I thought I was following instructions carefully, I realised that I had made a big boo-boo. There was an awful angle at the join of 2 planks. Because I was using CA glue, I was stuck (sorry!). I thought of trying to grind them off, but chickened out. In the end I decided to "bodge" it, and do better on the starboard side. So, I stuck in a thin triangular section of plank as seen here: On I plodded, deciding to settle for planks that were thinned out at one end, and full width at the other. I didn't want to try stealing. This "stealing" sounded like calculus to me - something I will learn when I absolutely can't avoid it. Here is the second belt on the port side completed: I was working on both sides of the hull, one belt at a time. After my dramas with the misshaped joint, I decided to use PVA glue on the starboard side. That lasted one row of planks, before I gave up and went back to CA. Here we are with 2 belts each side done, and 2 to go each side: Time for a break. I really would appreciate any advice/criticism about planking. Or anything! Cheers, Brett

- 129 replies
-
- 2
-
-
- armed virginia sloop
- model shipways
- (and 1 more)
-
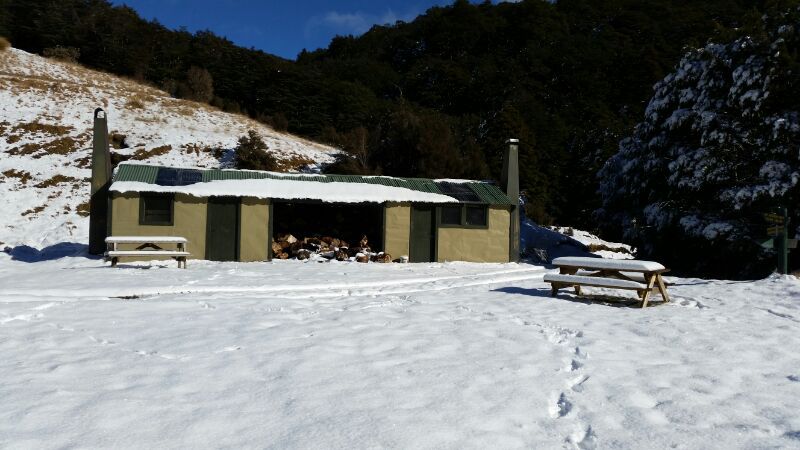
Yes, Alistair, I admire the painted vessels, but I'm gunna try unpainted first. May even take someone's idea of painting just one side and turning the model occasionally. Sunny Wellington, eh? Snowy Woodstock this afternoon (from my son): Cheers, Brett

- 129 replies
-
- 1
-
-
- armed virginia sloop
- model shipways
- (and 1 more)
-
Hi Alistair, They are there, but the outer walnut planks are 0.030" (0.76mm in the civilised world), and that strake is 3/64" (1.19mm). The difference is so slight I can't really see it. I wish I had used a thicker strake, and I may veneer it with an 0.020" strip later. In the instructions they paint the "sheer" strake blue, but I plan to leave the walnut unpainted (you know what is said about plans). BTW, my oldest son is currently around Nelson, enjoying the snow at Woodstock! Cheers, Brett
-
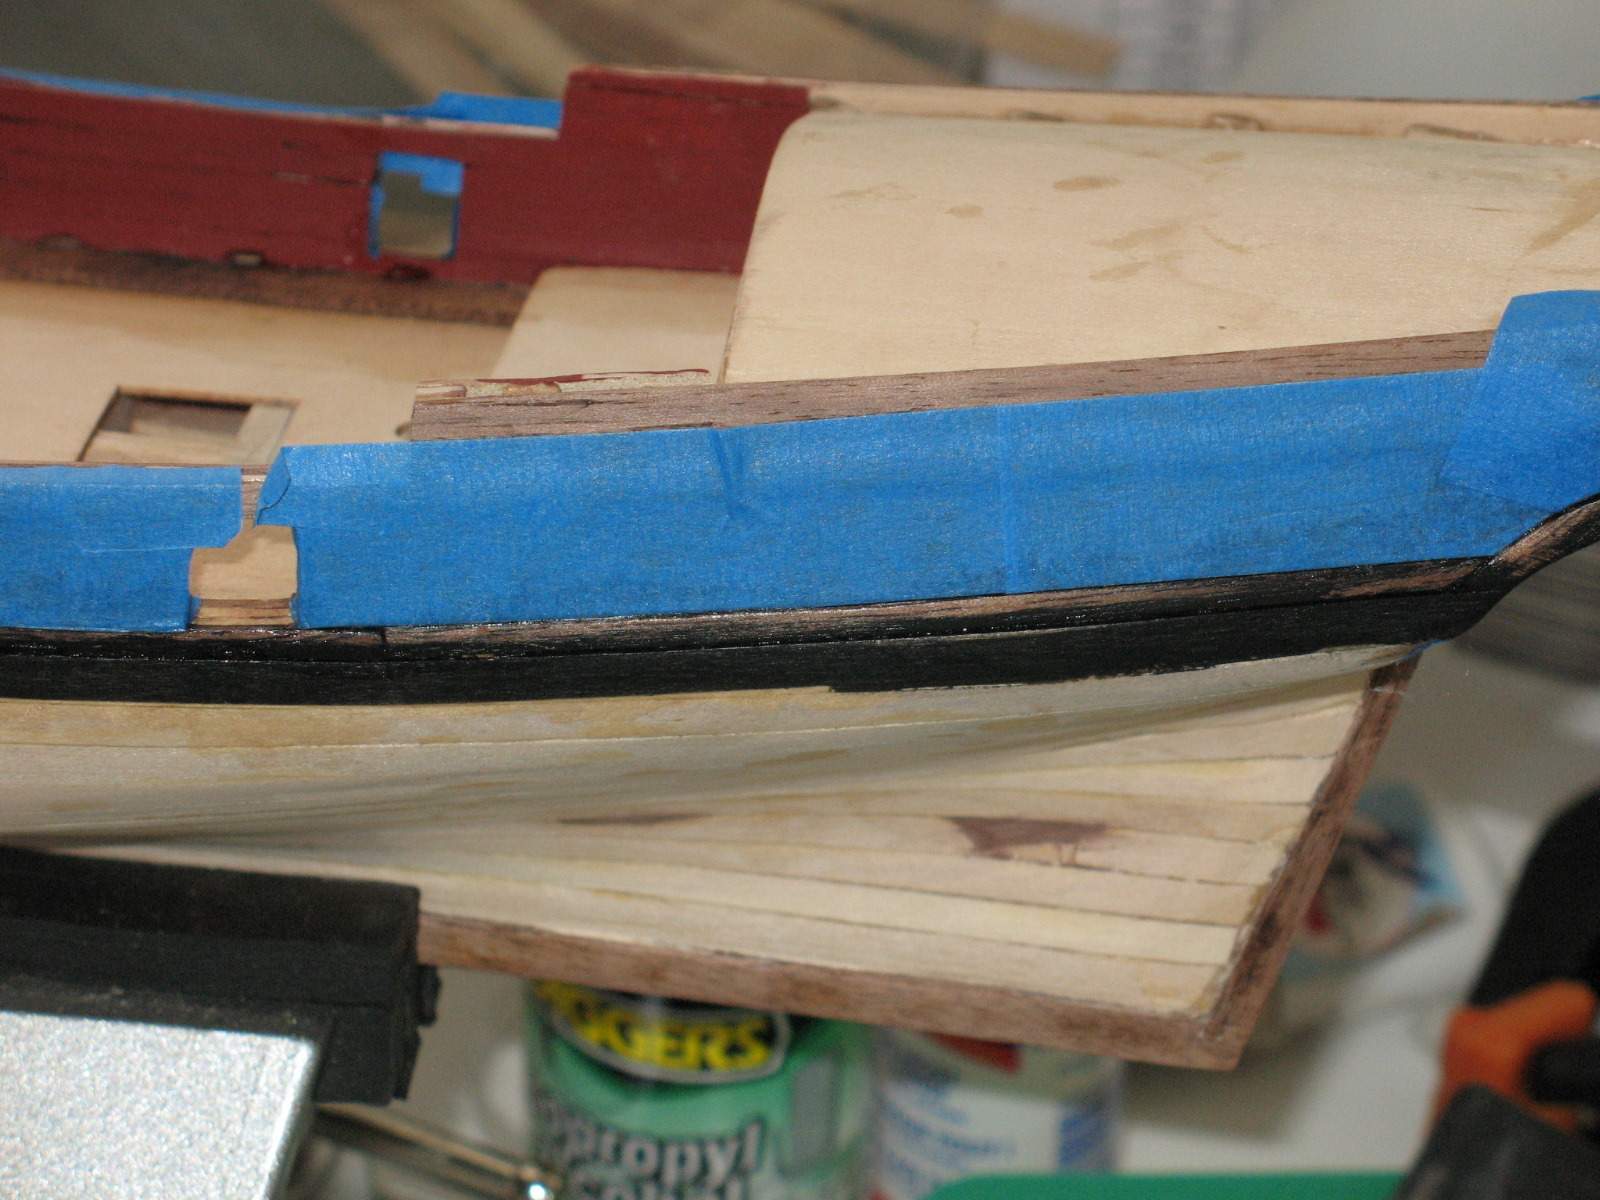
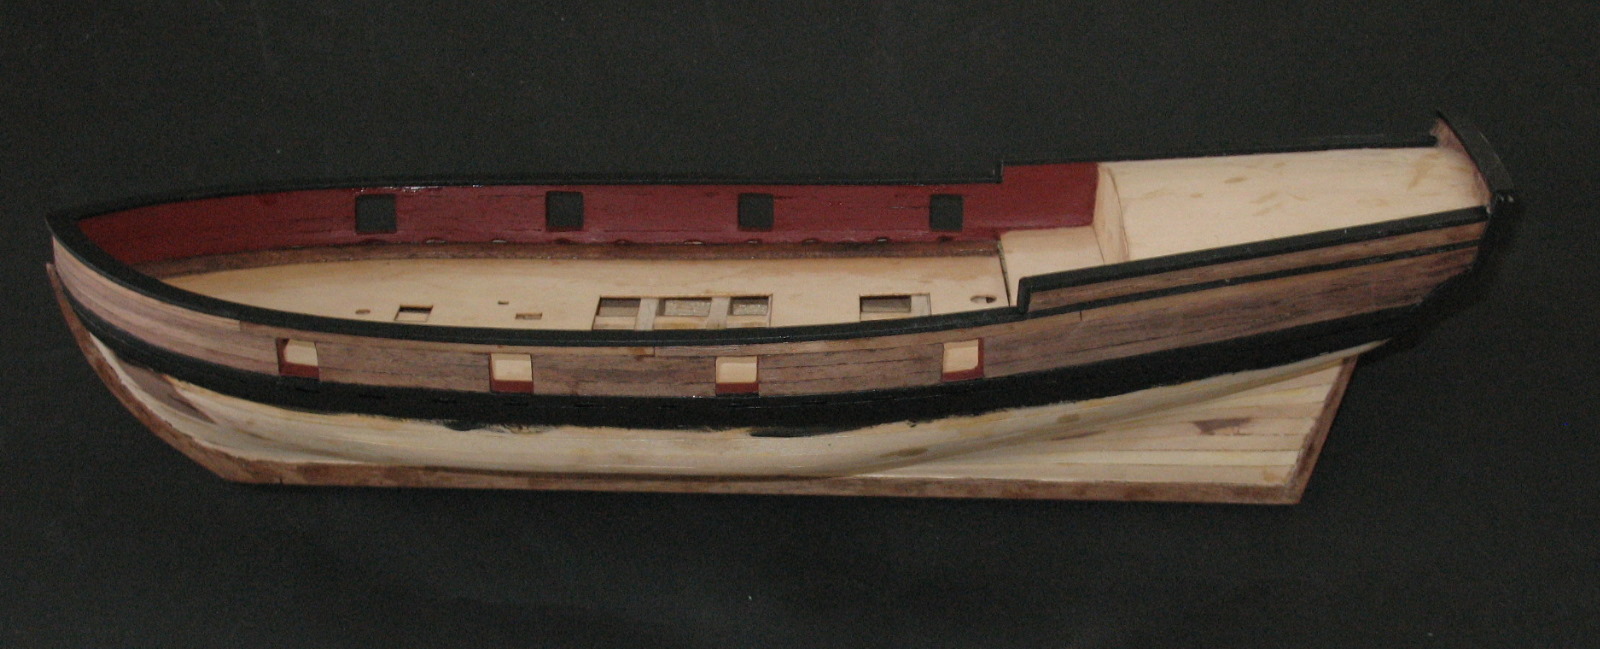
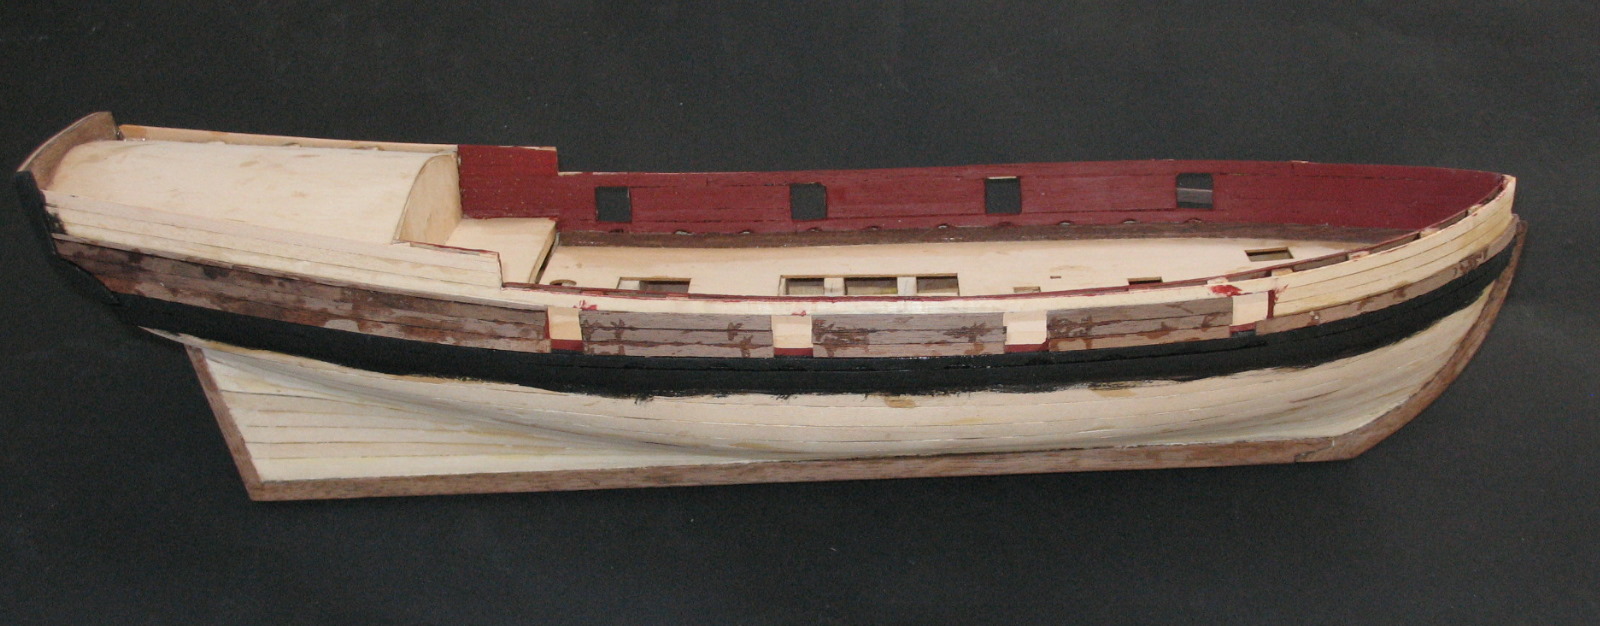
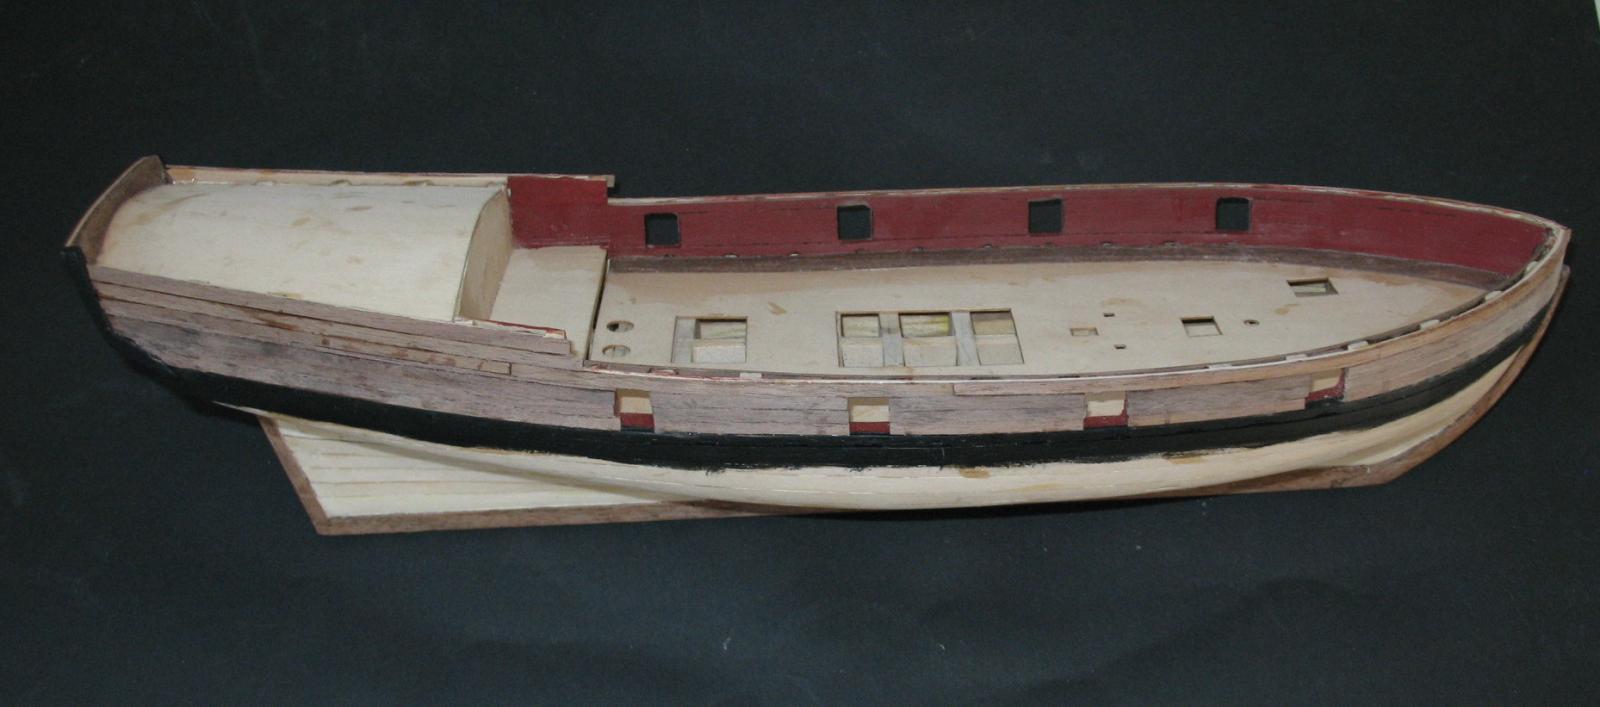
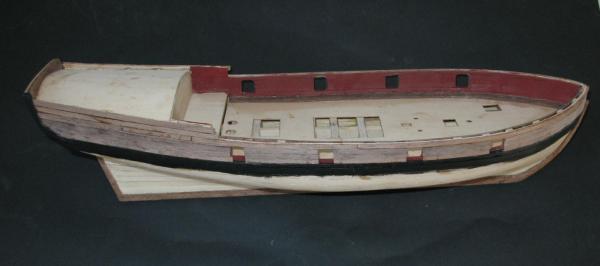
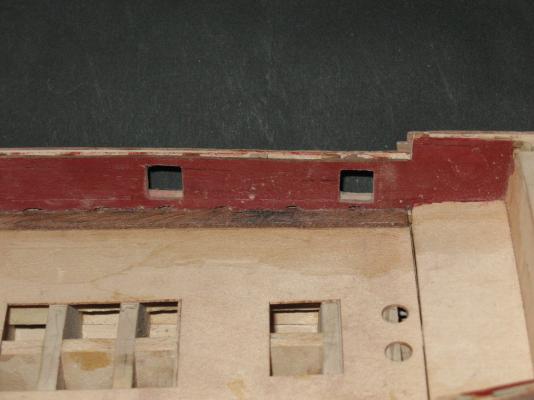
All the reshaping of gunports and sanding the upper outer planking meant I had to redo the black paint on the wales and black strake. I bought some decent quality 3M masking tape, and applied it carefully, then sealed it with clear sealant: After that I redid the gunports and inner plank painting: According to the instructions, next would be the cap rails. As I stated before, I had trouble trying to figure out how these would work on the cabin area. I knew I would have to cut down the planking there, as mentioned on 4th May, but I couldn't find any exact levels anywhere. Finally I decided that the planks on the cabin deck would need to butt up to the inner edge of the cap rail there. So I tacked a couple of pieces of scrap basswood to simulate the future planking: Then cut down the planking, while constantly checking with my cap rail timber: After much fairing, shaping, and tweaking, the cap rails and taffrail were ready. This time I realised they should be painted before being glued. And here they are: Next will be the stress of the lower planking. Cheers, Brett


- 129 replies
-
- 5
-
-
- armed virginia sloop
- model shipways
- (and 1 more)
-
Thanks for the replies - but I'm more confused than ever (and that's saying something!). I guess I'll take MOG's advice, and test a few methods. I'm mainly looking to seal and finish over bare or painted top layers of walnut, so the glue is not a concern. Off to experiment! Cheers, Brett
-
Minwax Wipe on Poly is often recommended as a sealant. I bought some but picked up gloss by mistake. When I went back to get satin, I realised that the product sold in Bunnings (Australia) is oil based. I'm trying to avoid painting the hull. Do you advise oil or water based for sealing walnut? Thanks, Brett
-
Thanks for that info, Ken and Blue Pilot (do you have a real name?). Ken, the current kit has outer planks that are 0.030" thick. A bit more to play with when sanding than the old 0.020". Cheers, Brett
-
Thanks, Alistair. I'm just off to buy some better masking tape! I currently plan to just seal the lower planking, and see how that looks. I'm not convinced about the look of the painted ones, but I will paint if the unpainted looks wrong. Brett
-
Thanks guys. Alistair, one of the things I find difficult is the tiny differences between timber sizes. It make the junction of two supposedly different pieces very blurred - even more so after you sand. It's worse now, because the walnut planks (0.020" in the original practicum) are now 0.030". So they don't stand out much from the spirketing or sheer strake. Ken, I thought about pre-painting, and will in future. I worry I would still need to touch them up after planking and sanding. Question - should the walnut planks be left rough? If not, is there any secret to sanding them without damaging adjacent timber, especially the painted parts? Cheers, Brett
-
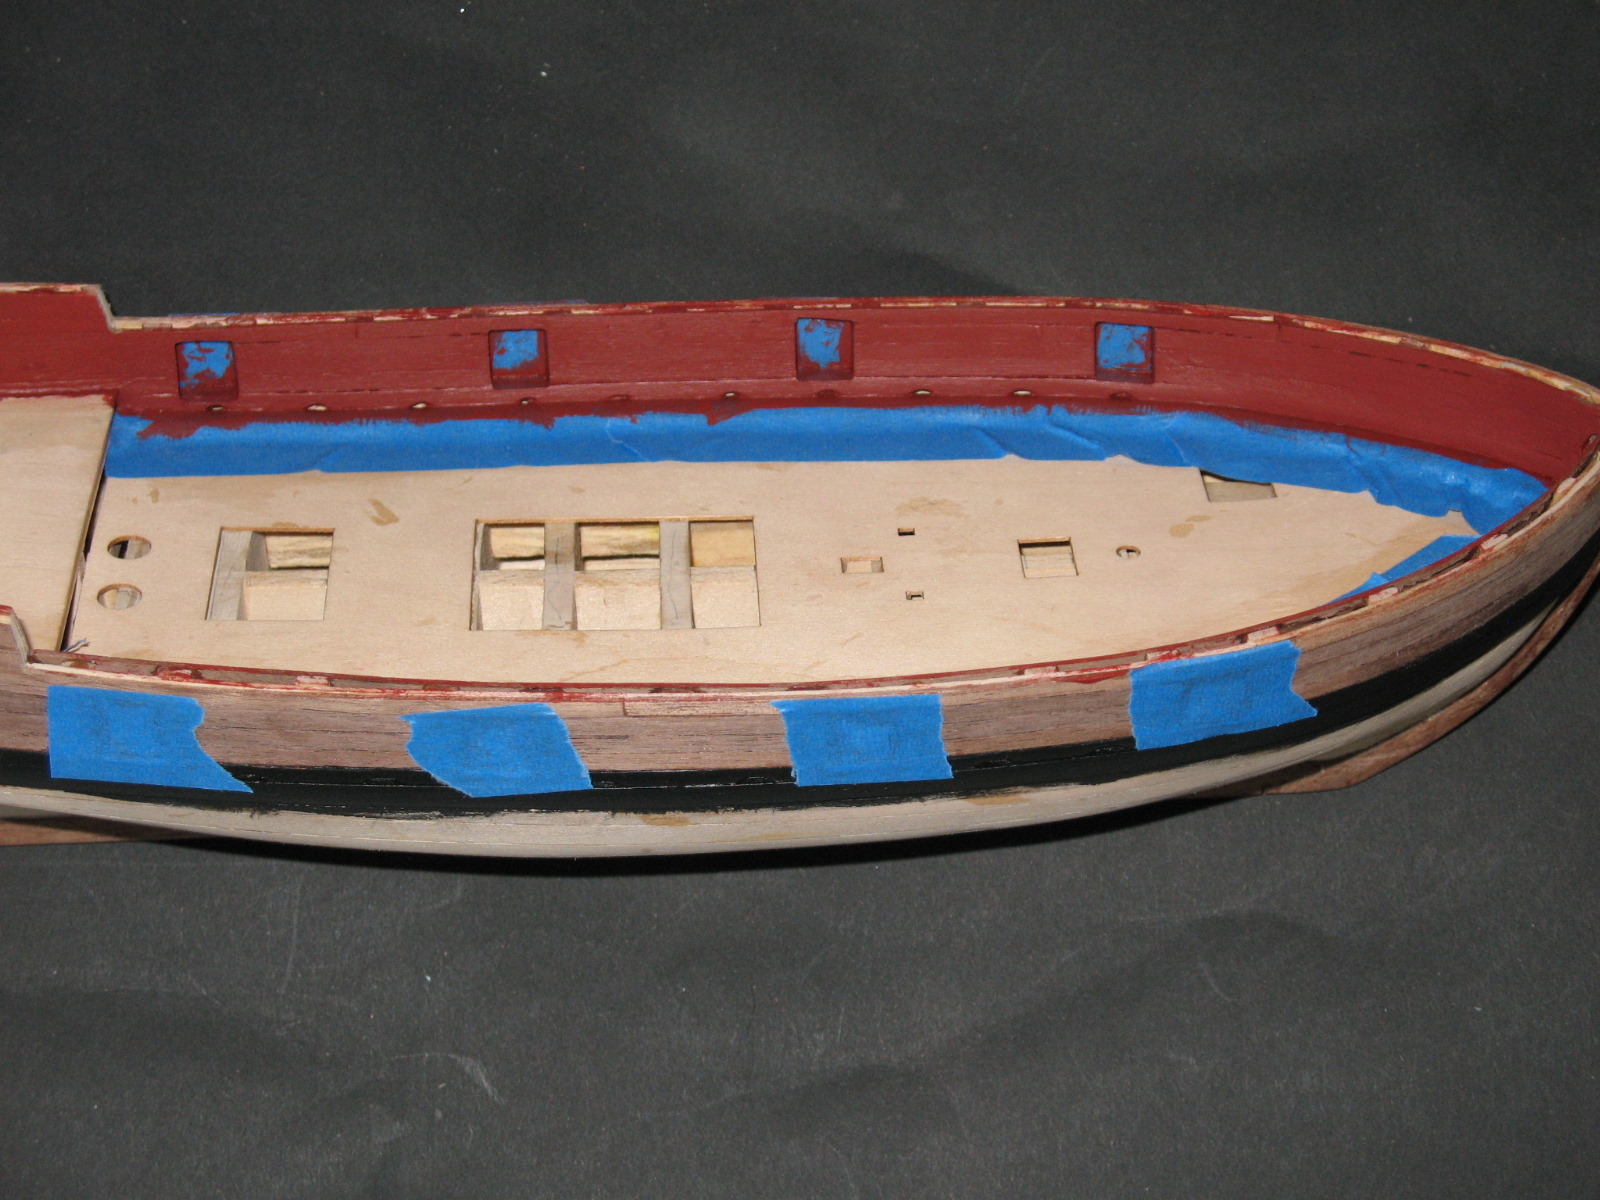
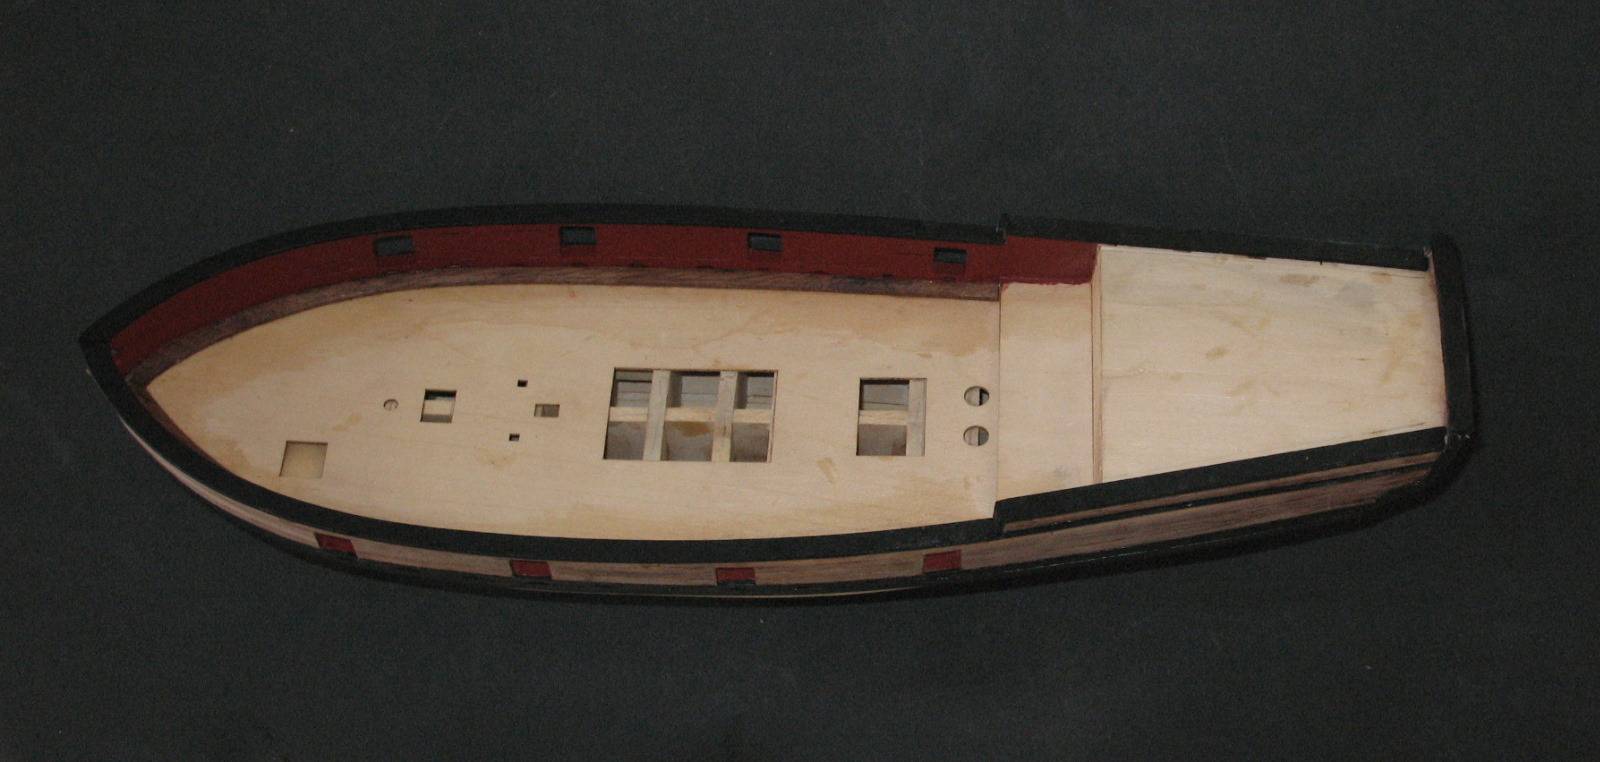
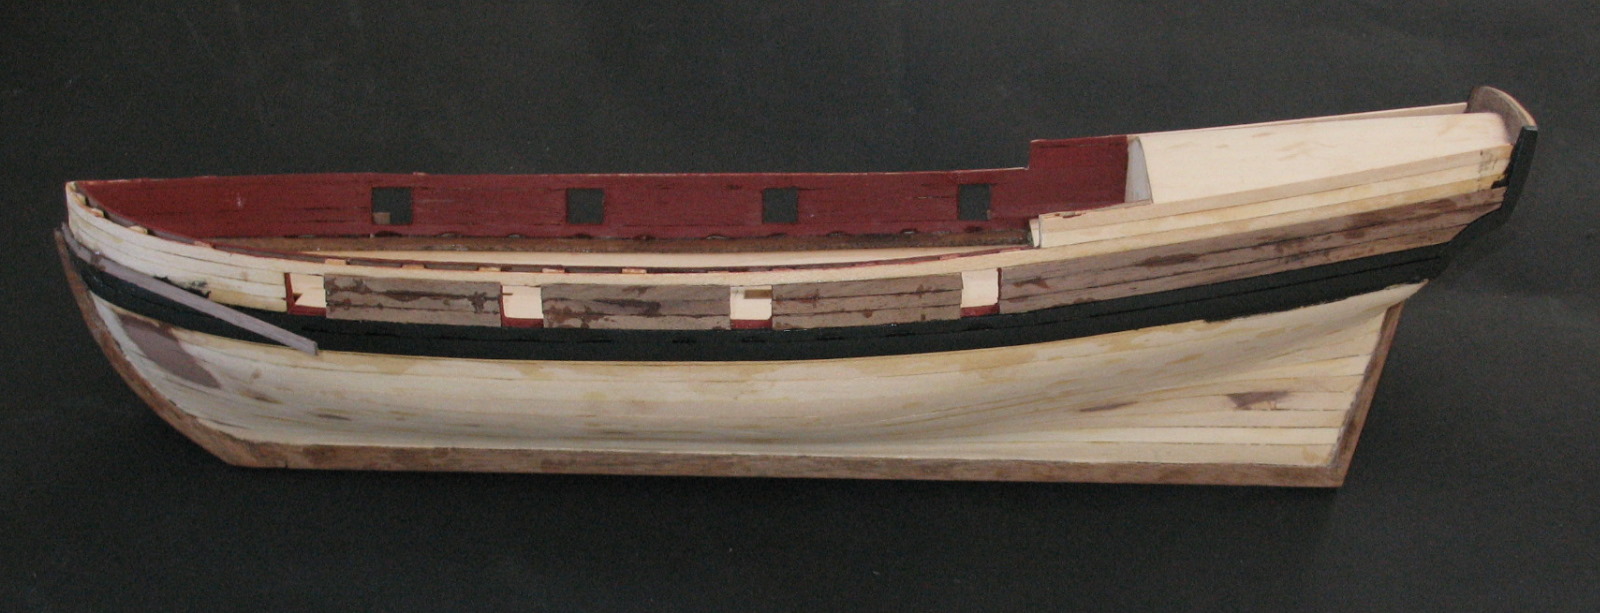
I planked the inside - believe it not, the three small planks above the quarterdeck are really walnut! Very pale, but they are to be painted anyway. Also fitted the wale and the black strake. Painted those, and placed simple masking tape ready for painting the inner planking. Here again I failed to research enough. For those newbies painting, read this about masking tape - http://modelshipworld.com/index.php?/topic/2223-masking-tape/ I particularly like the advice to seal the edge of the masking tape with clear sealant. Next time! Painted the inner, and started planking the upper exterior. As I started cutting back the planking around the gunports I realised I had missed the bit in the practicum where I should have placed upper sills in the gunports. So, I tried to carve some filler blocks, but soon gave up, and grabbed the wood filler! I then realised my gunports were less than neat, so I filed them to a better shape, accepting that I will need plenty of repainting. In fact, I will also have to repaint the wales and strakes, after I finish removing all the excess glue. More is not better with CA! Cheers, Brett


- 129 replies
-
- 5
-
-
- armed virginia sloop
- model shipways
- (and 1 more)
-
Hi Grayarea, I had the same question! After a bit of research and experimentation, I now use "Timbermate". If you're in Australia, Bunnings sell it - http://www.bunnings.com.au/timbermate-250g-walnut-wood-filler_p1560708 Cheers, Brett
- 129 replies
-
- 1
-
-
- armed virginia sloop
- model shipways
- (and 1 more)
-
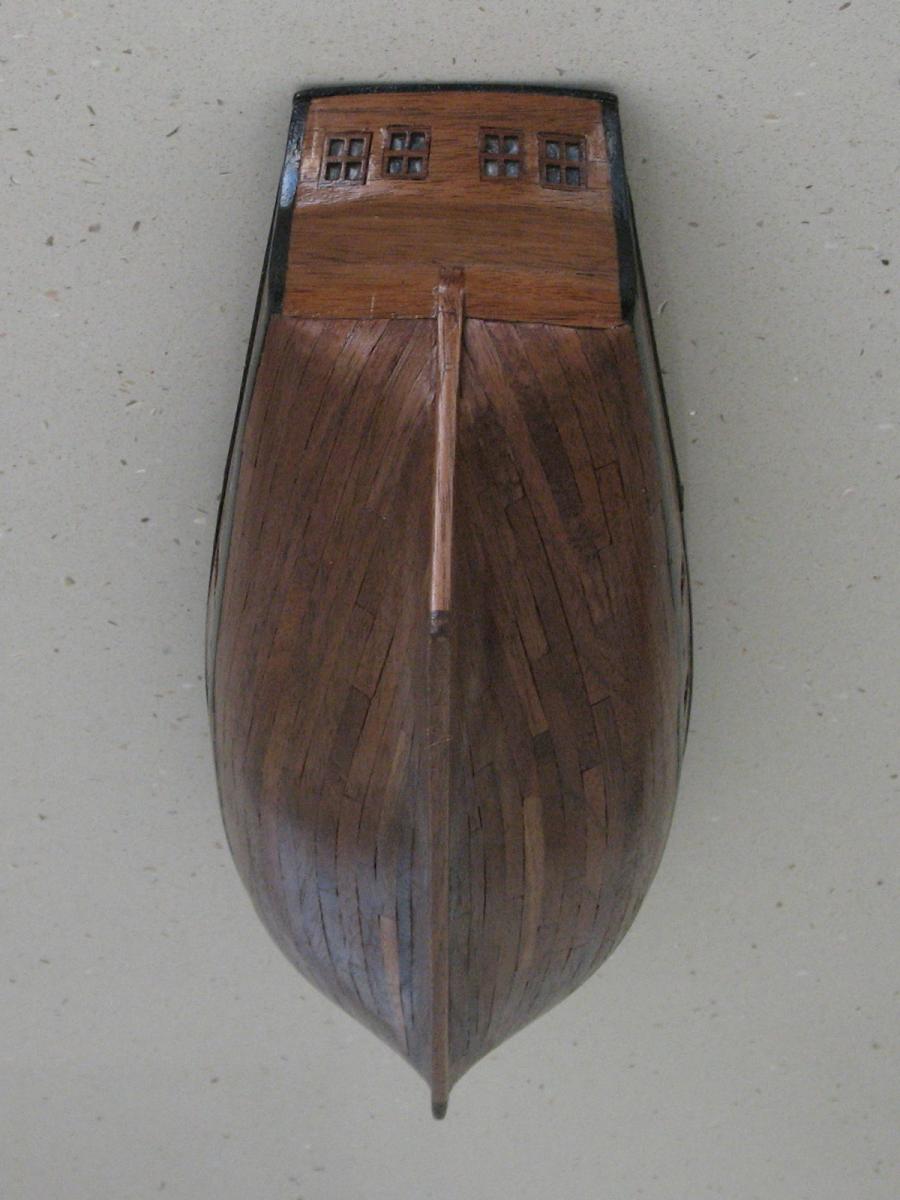
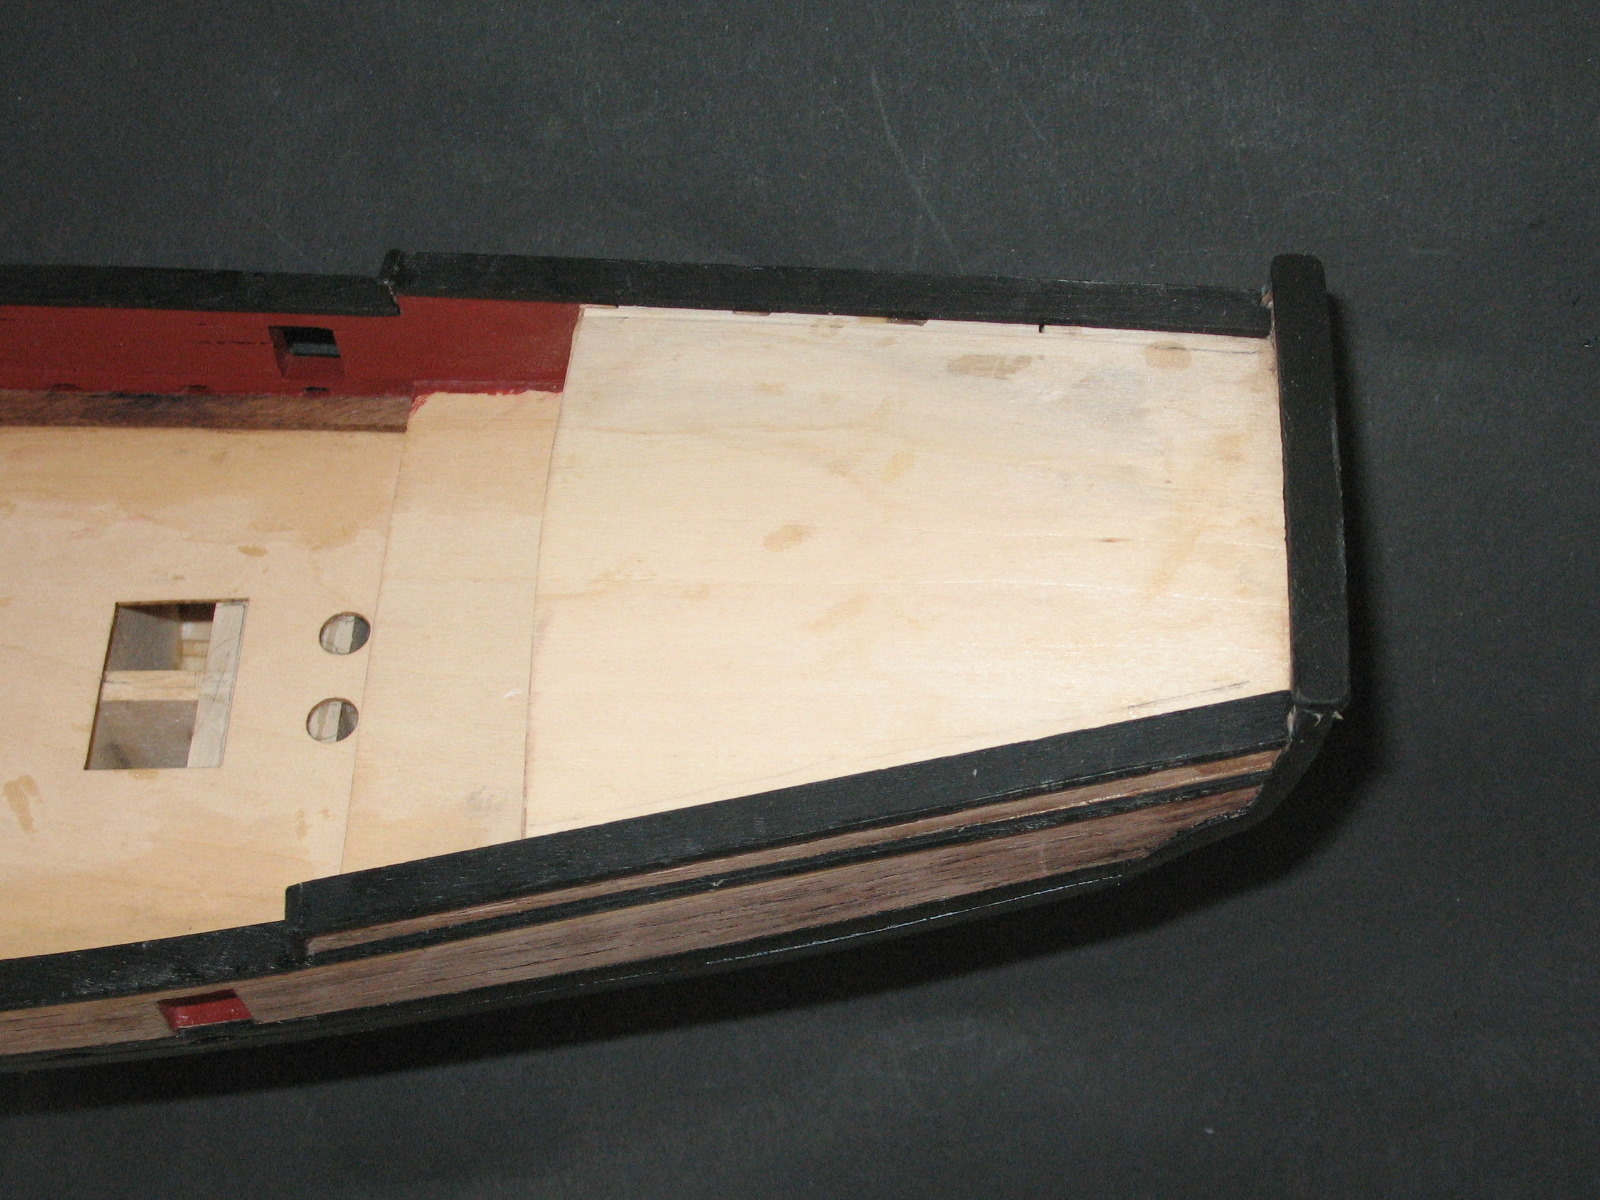
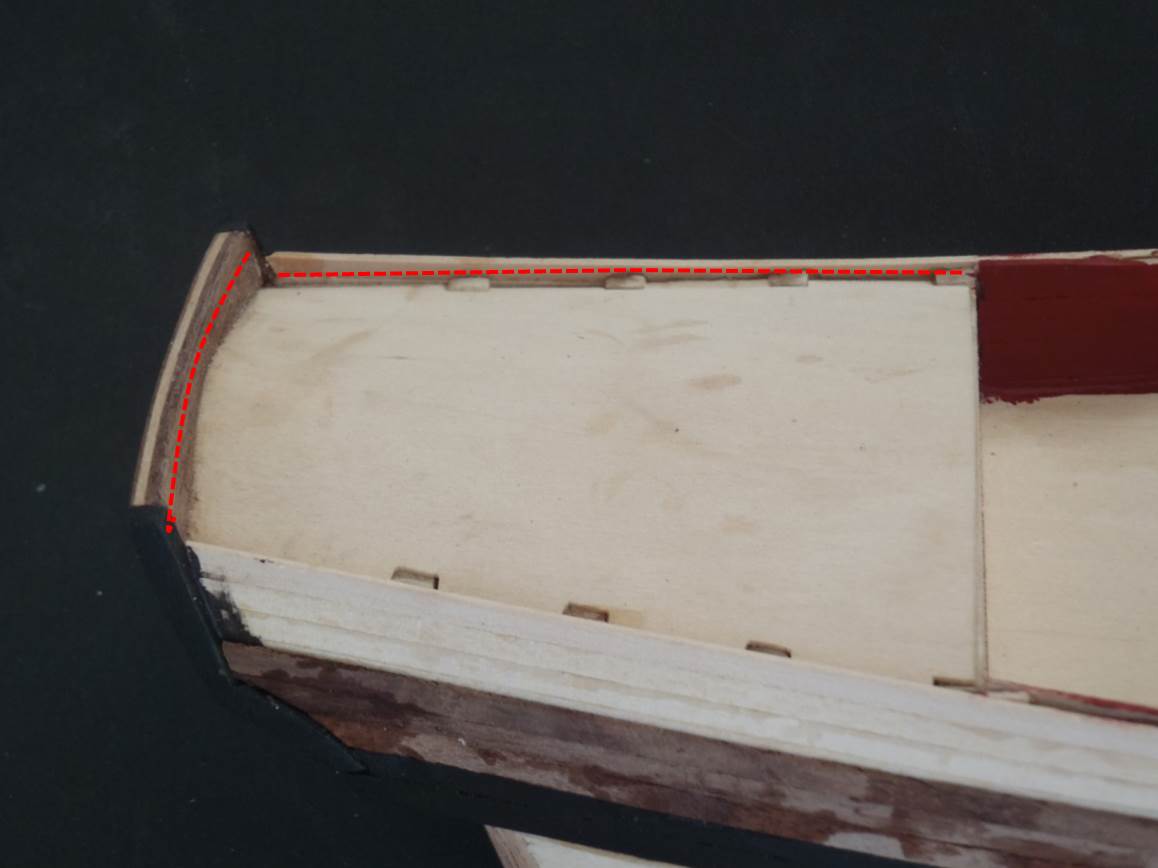
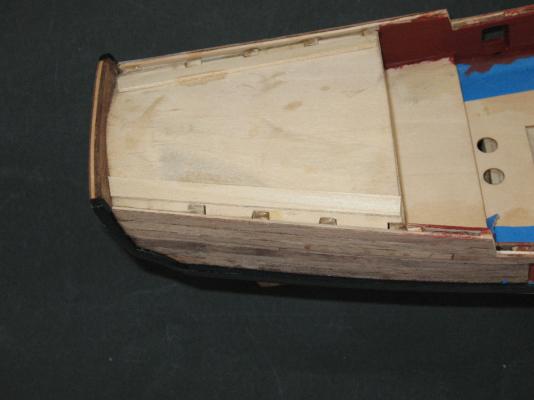
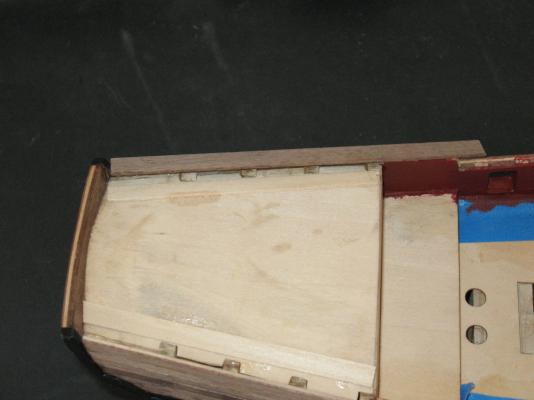
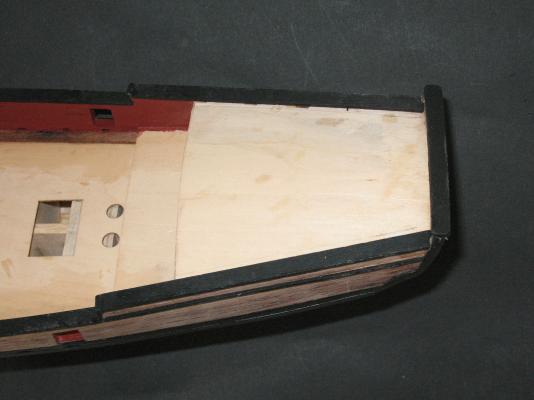
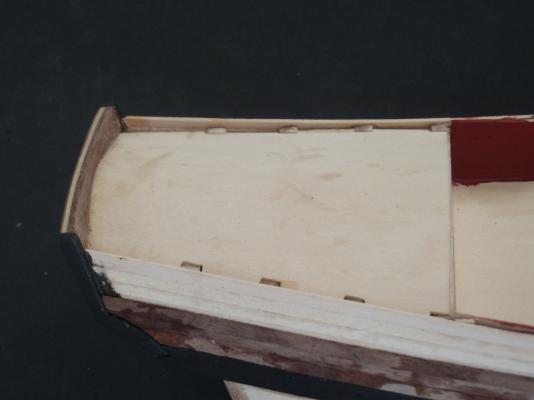
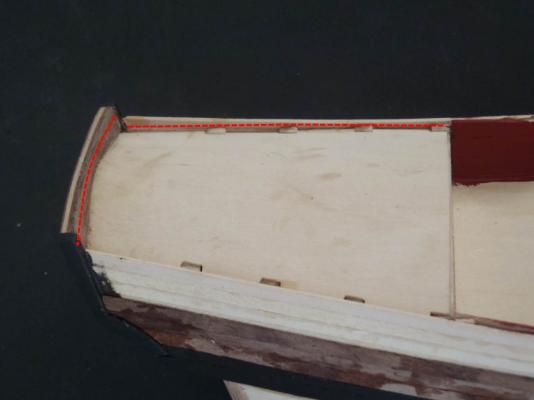
Question for the experts! In the first layer of outer planking I overbuilt at the cabin/poop deck (as per the practicum). Currently it looks like this: Before I do the walnut outer planking, do you think I should reduce that overhang to near the subdeck level? And should I trim back the height of the transom? Something like this??? Cut along dotted line? Thanks, Brett
-
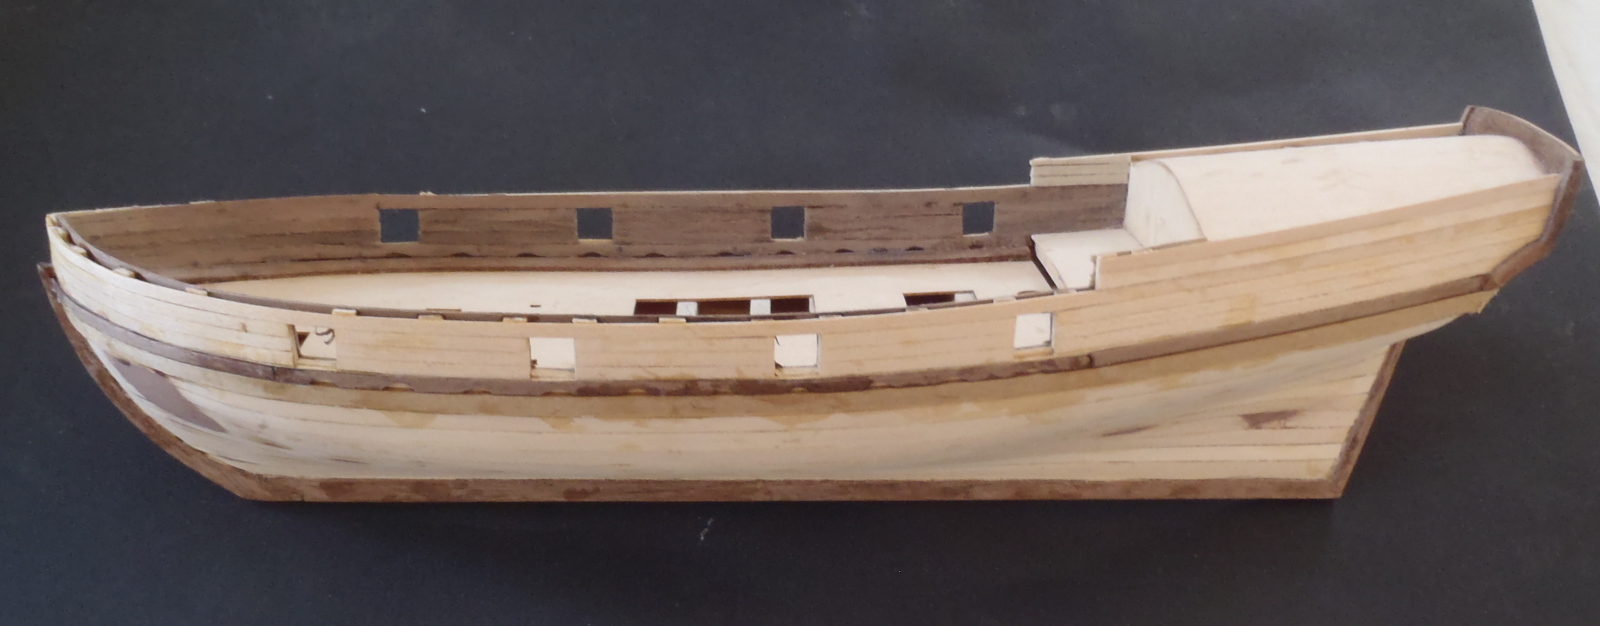
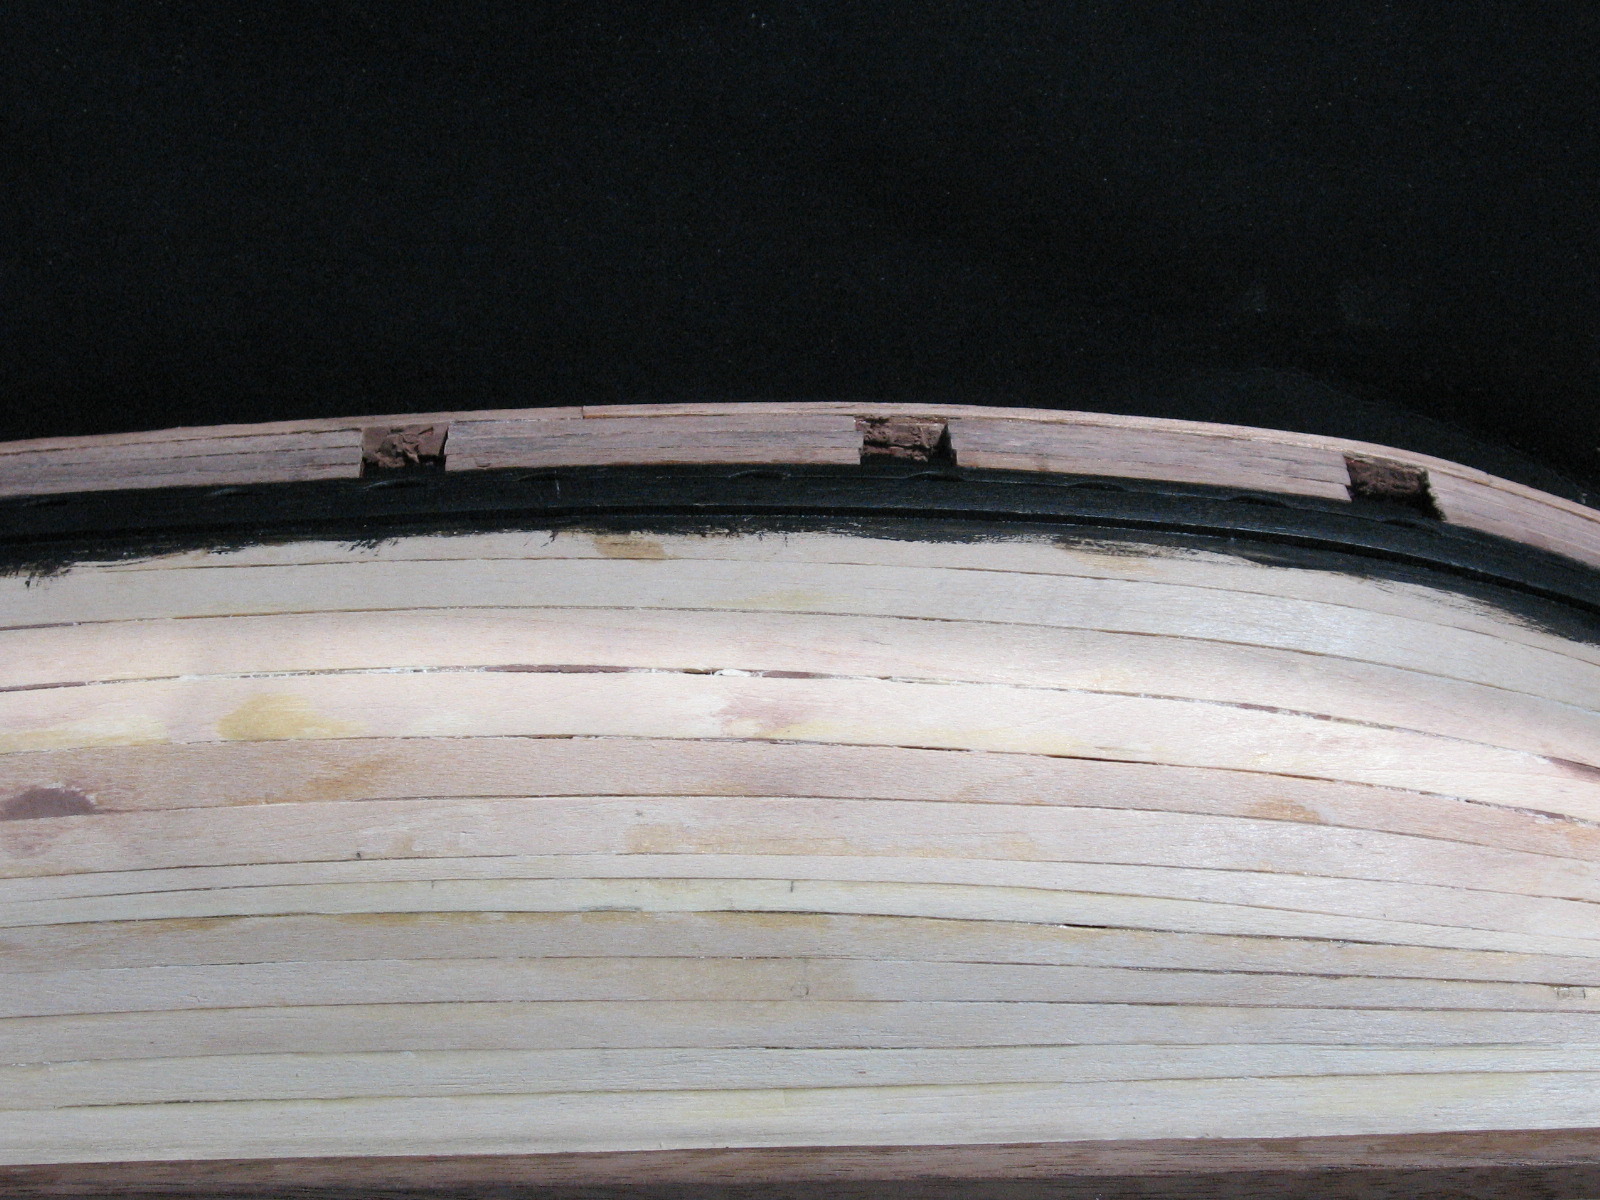
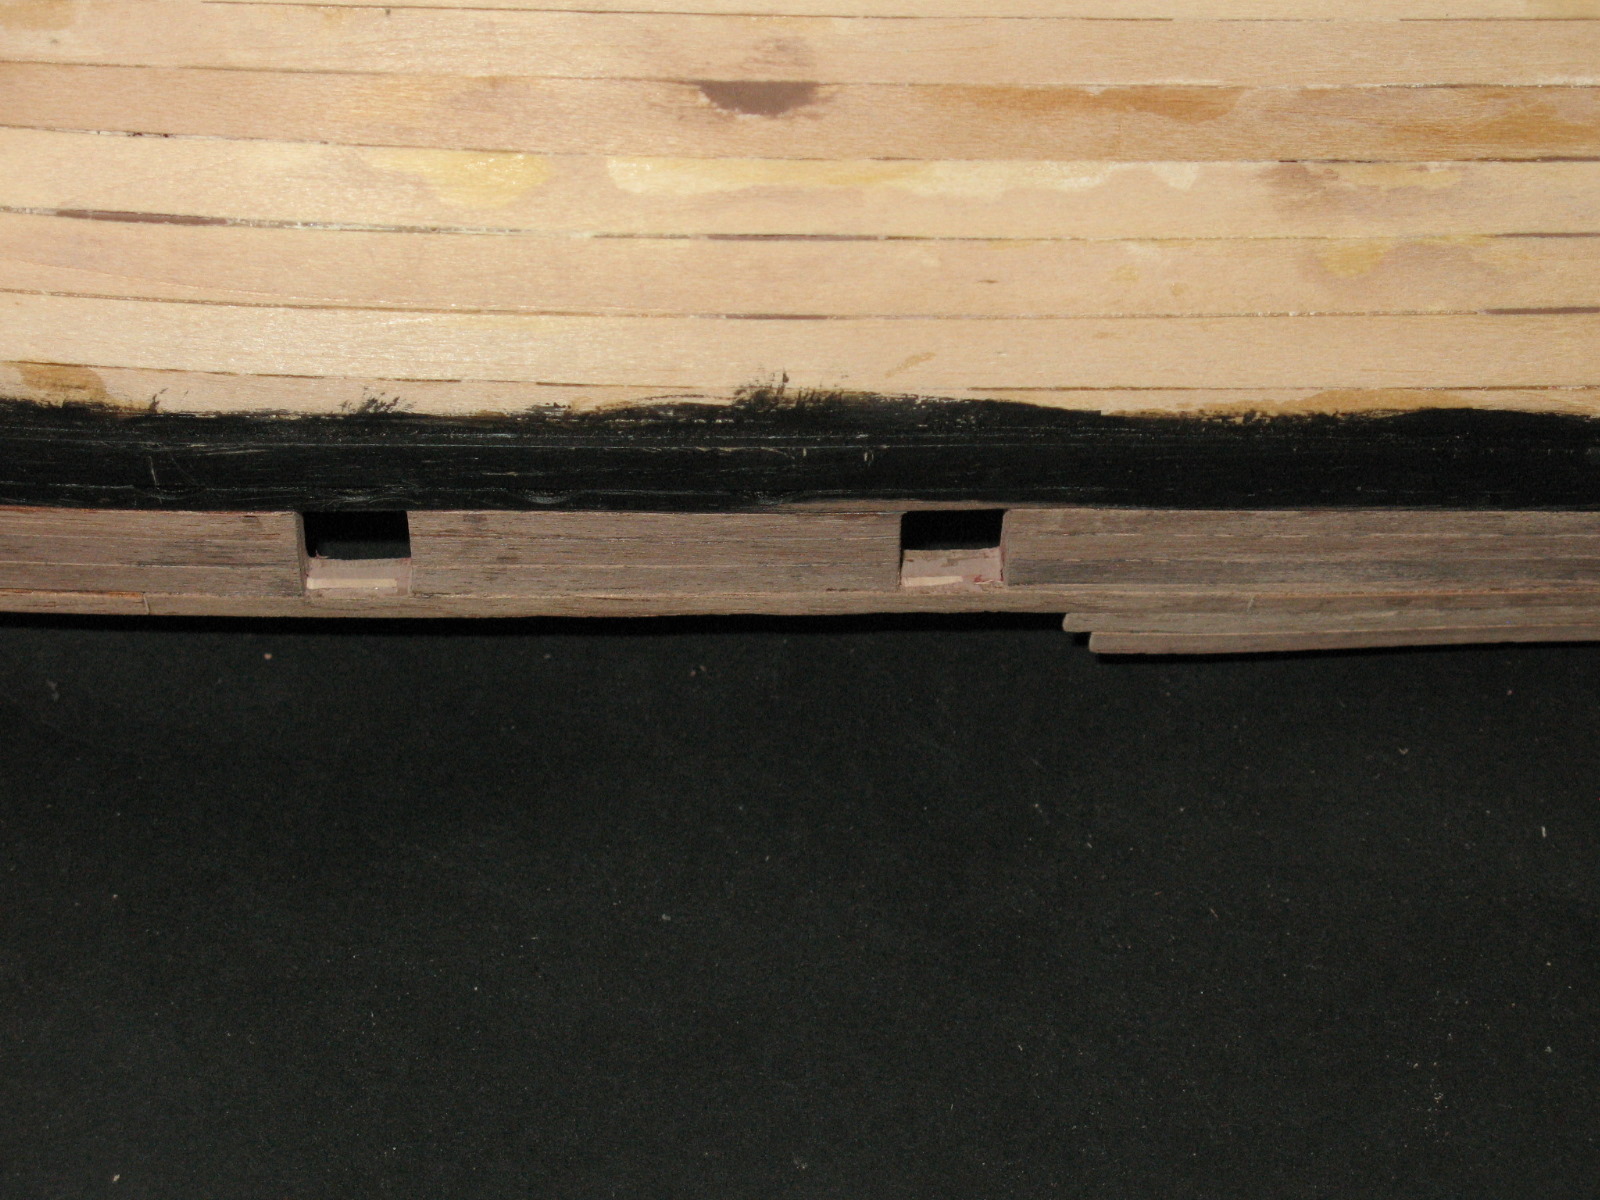
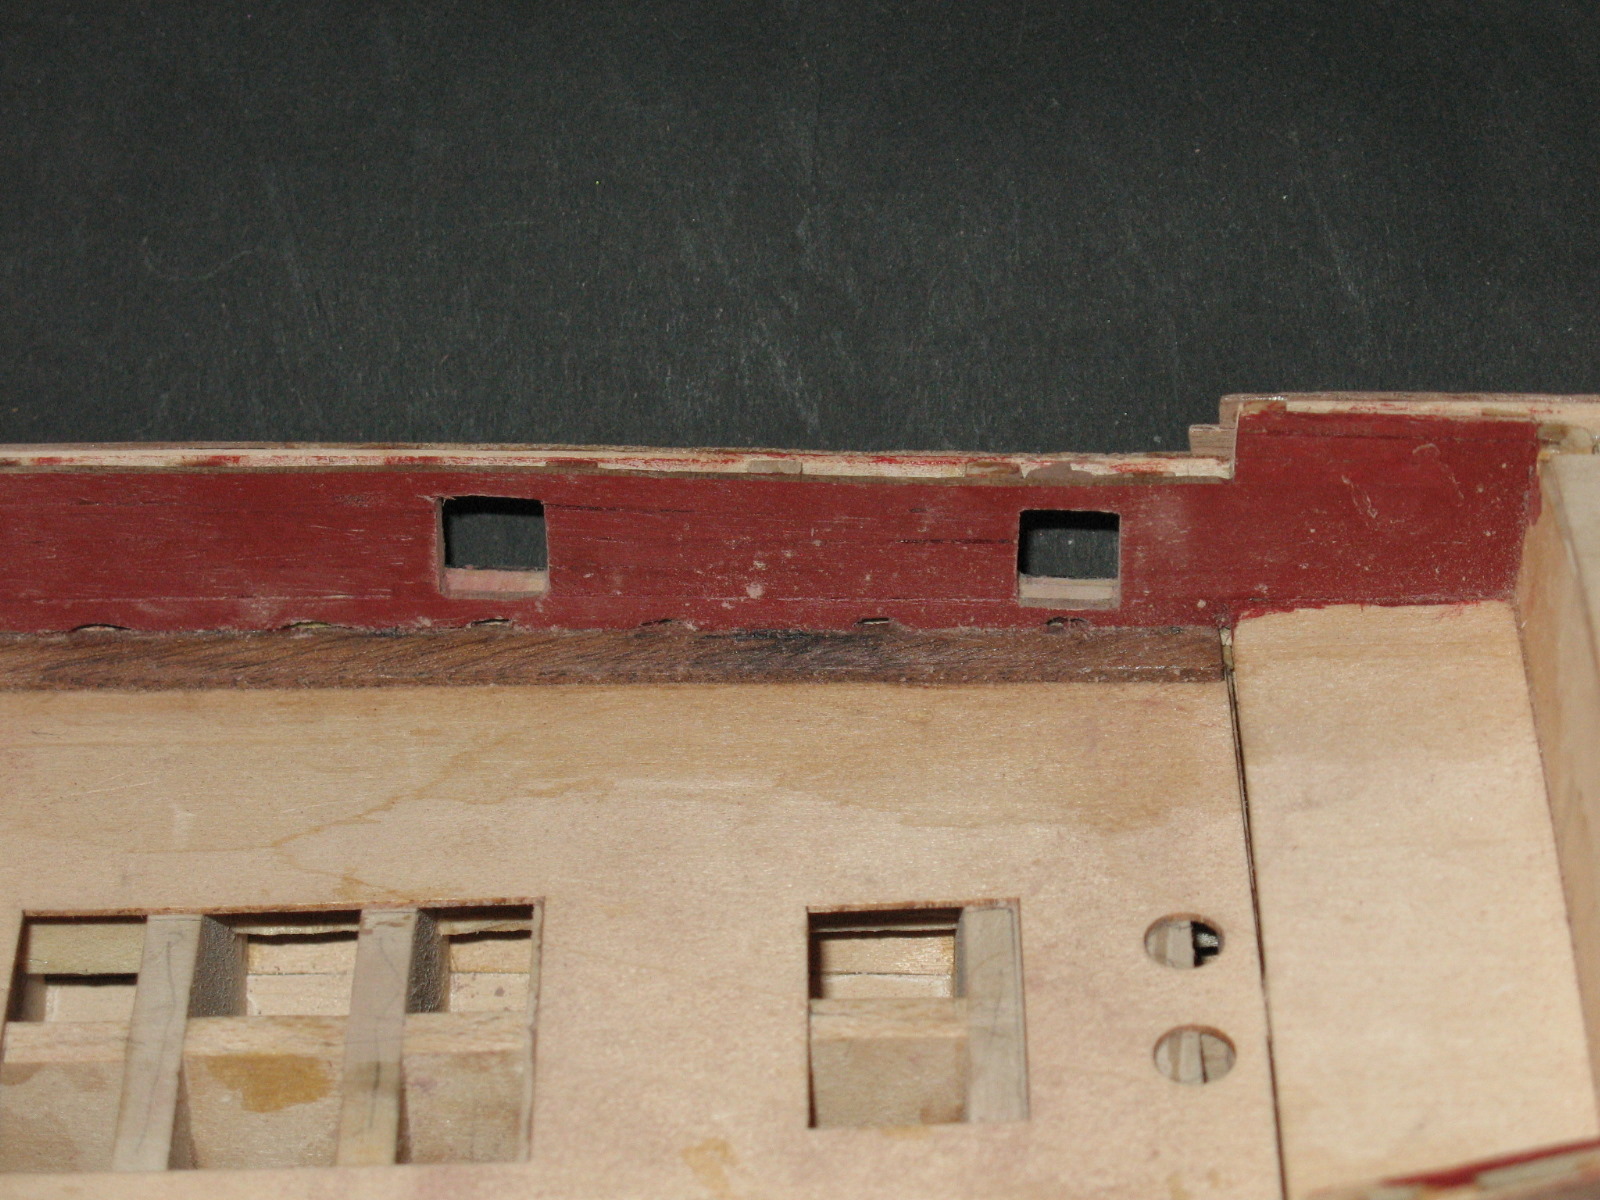
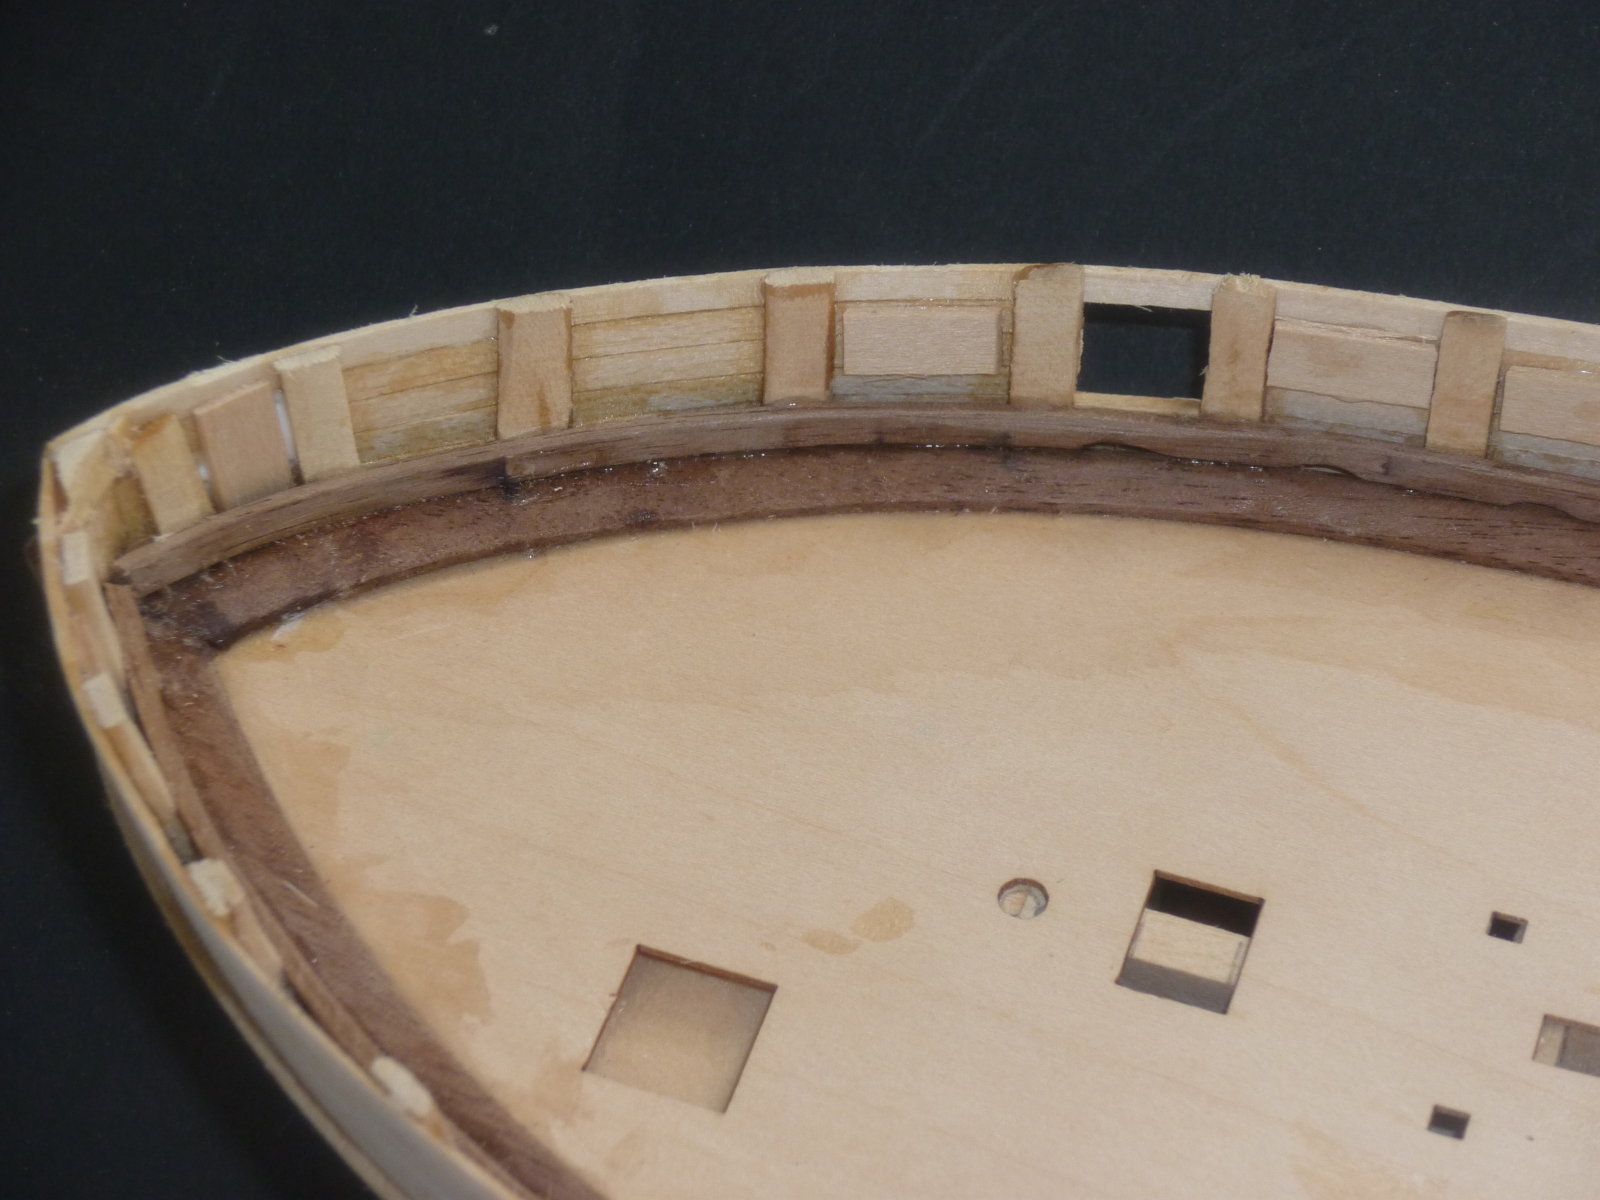
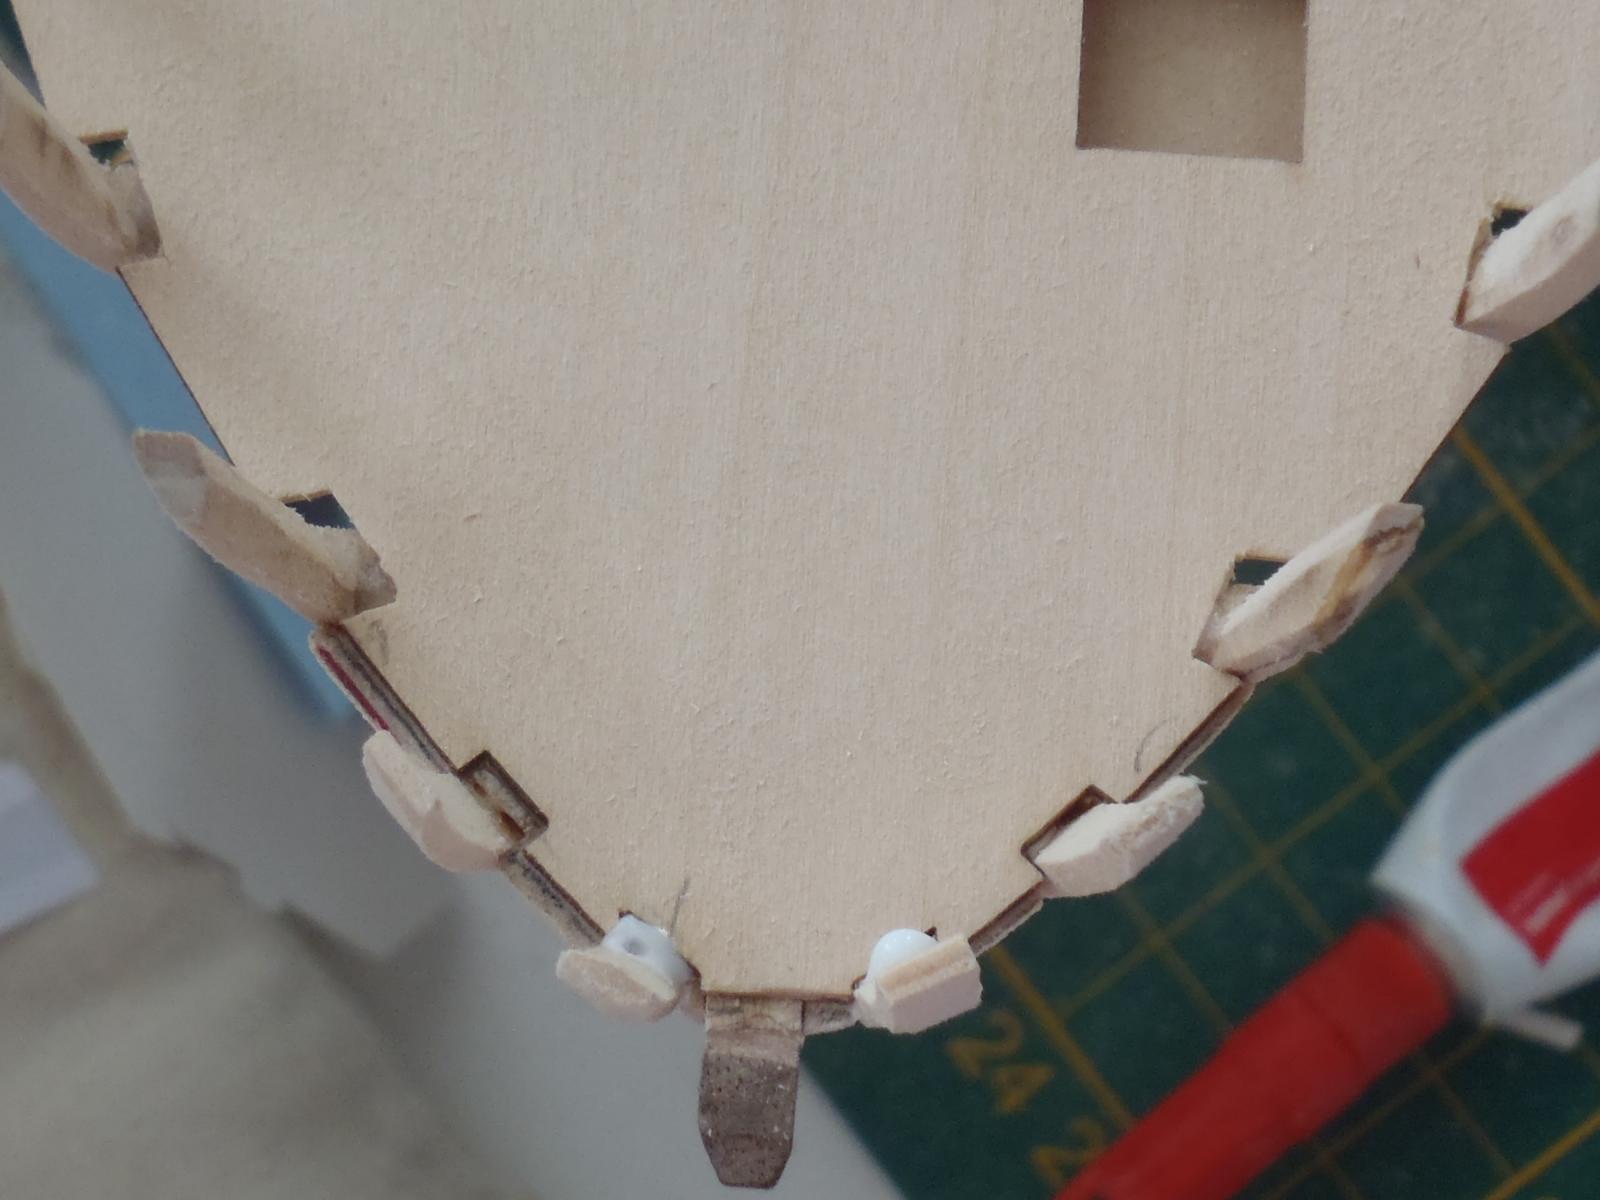
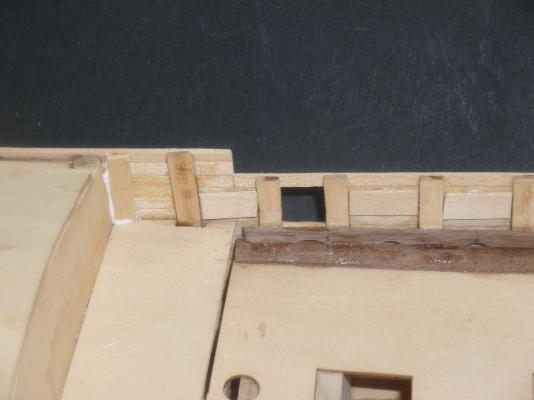
Alistair, I wish I had realised that earlier! I hope it will now be in my memory bank, allow to dry before gluing! While sanding I noted a concavity in the hull, and several other small defects. I filled these and continued sanding: At that time I also cleaned up the rabbett joint to allow a better future fit of the top layer of walnut planks. Next were the gunport sills and spirketing planks. I cut the scuppers with a dental laboratory drill, and rounded them with a curved file. Two more errors - I made the scuppers too shallow, and I allowed them to be partially blocked with glue: I plan to clean these up with another type of dental drill! As you can see, I also placed reinforcements for the oar sweep ports, and to provide support for hawse ports at the bow and planking at the quarterdeck. I think it's hilarious - I keep using such terms, but I have to keep looking them up. Maybe by model #10 I will understand/remember them! Cheers, Brett


- 129 replies
-
- 6
-
-
- armed virginia sloop
- model shipways
- (and 1 more)
-
Sorry - I just realised this has been asked several times. I have asked the Mods to delete it. Cheers, Brett
-
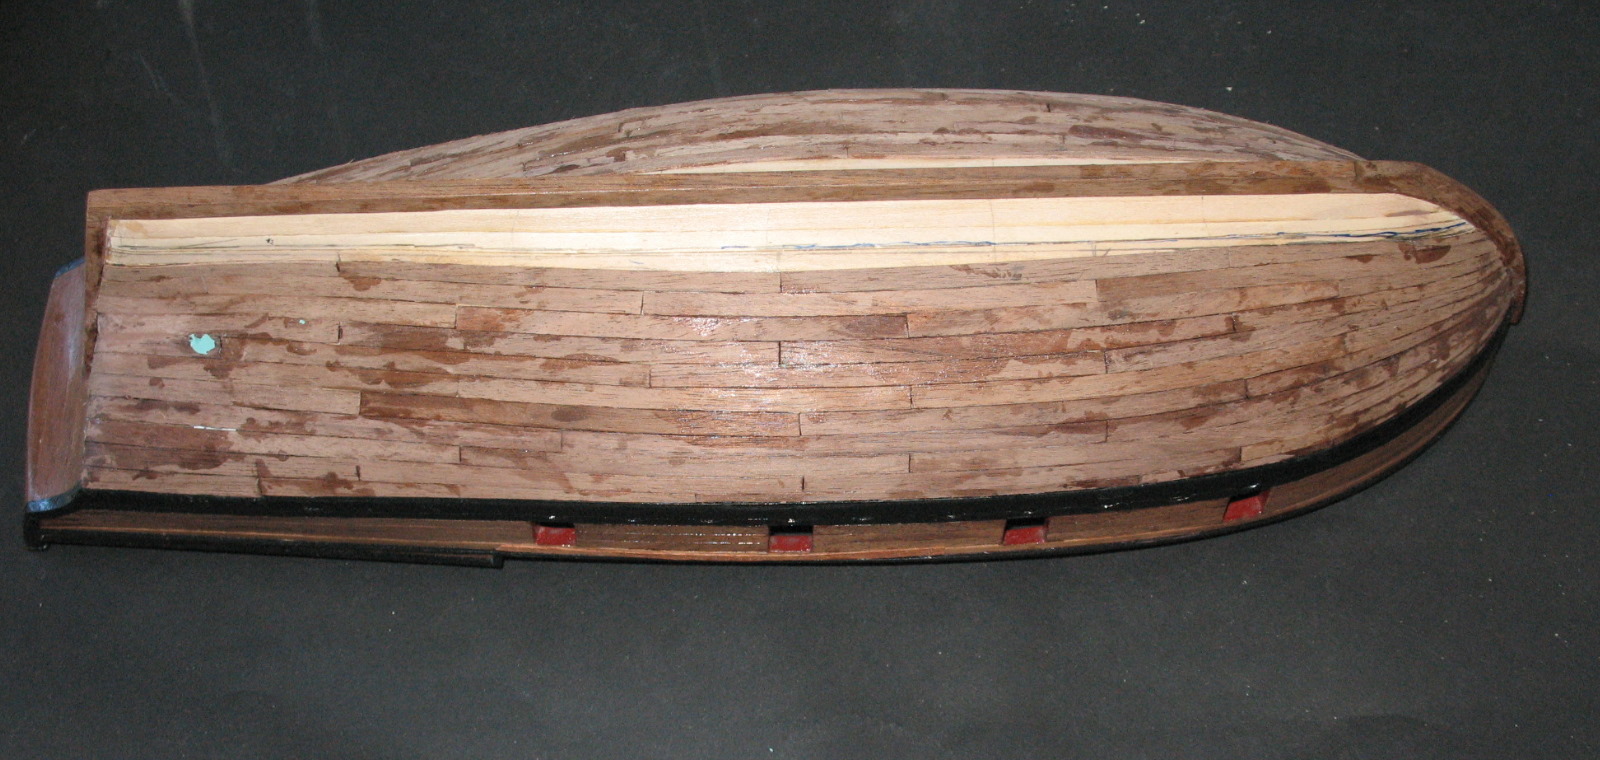
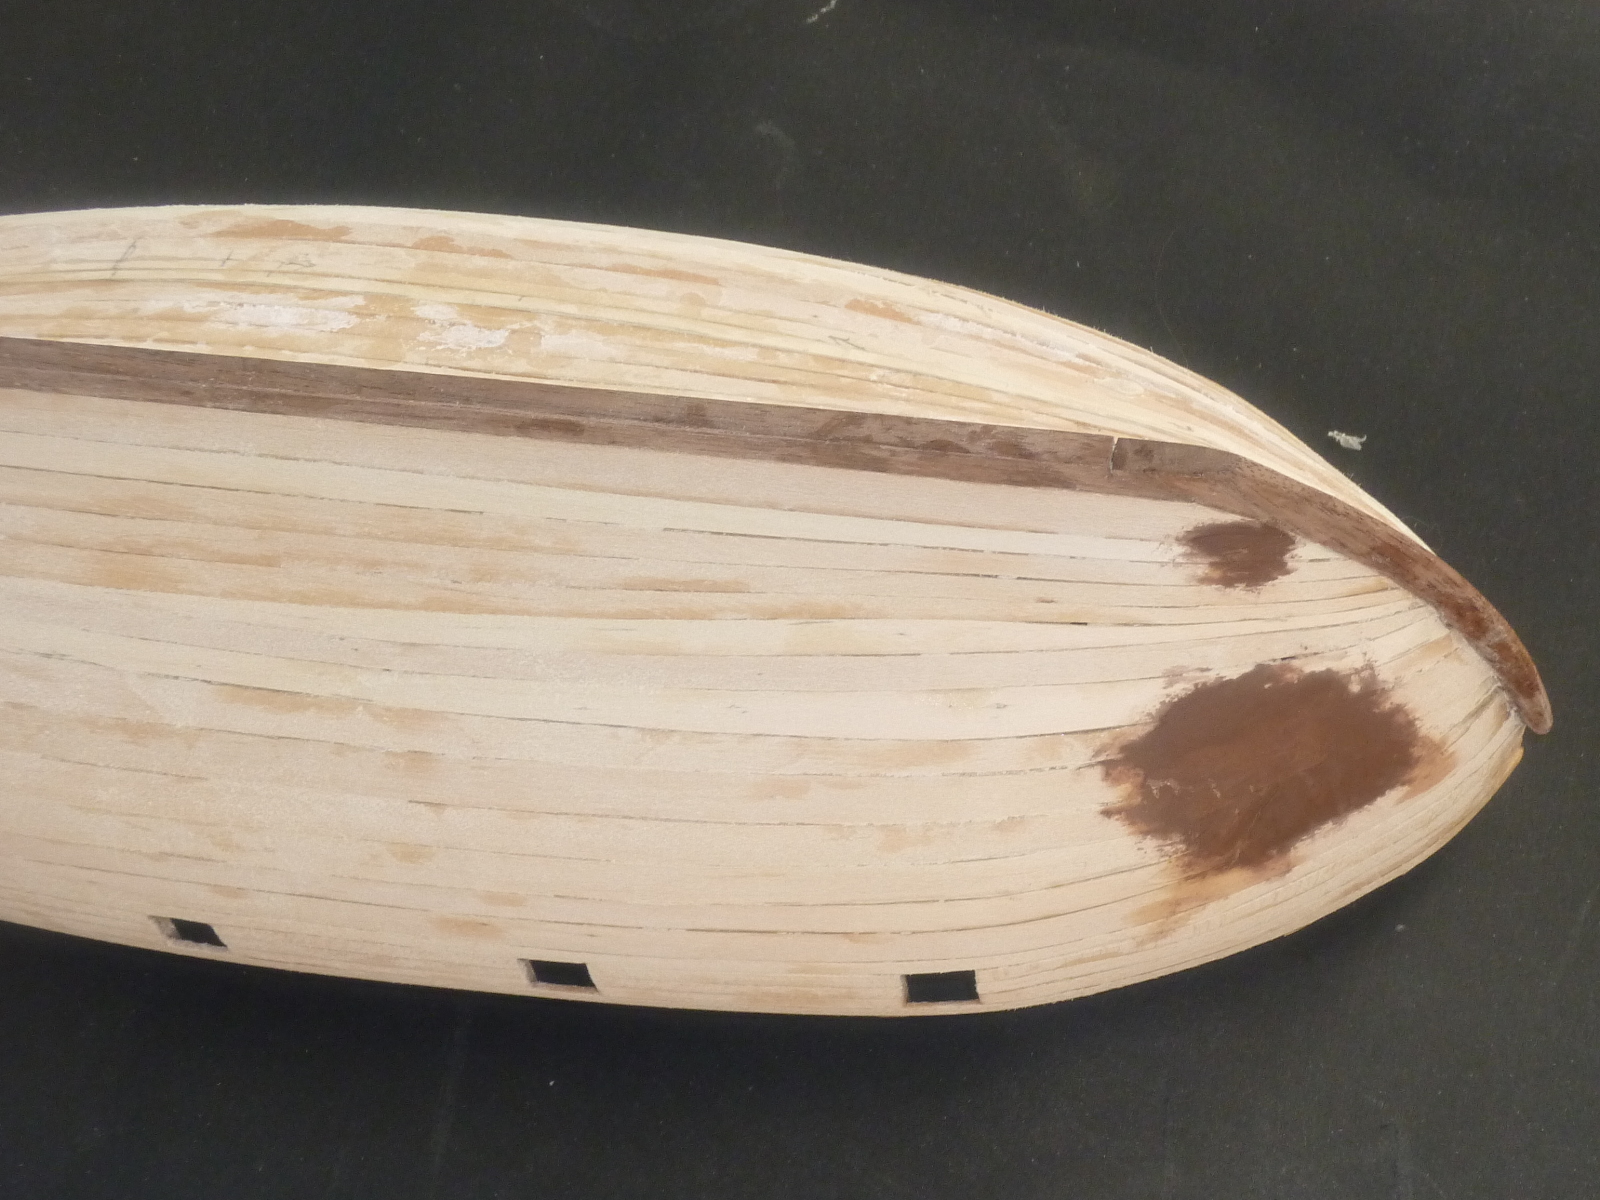
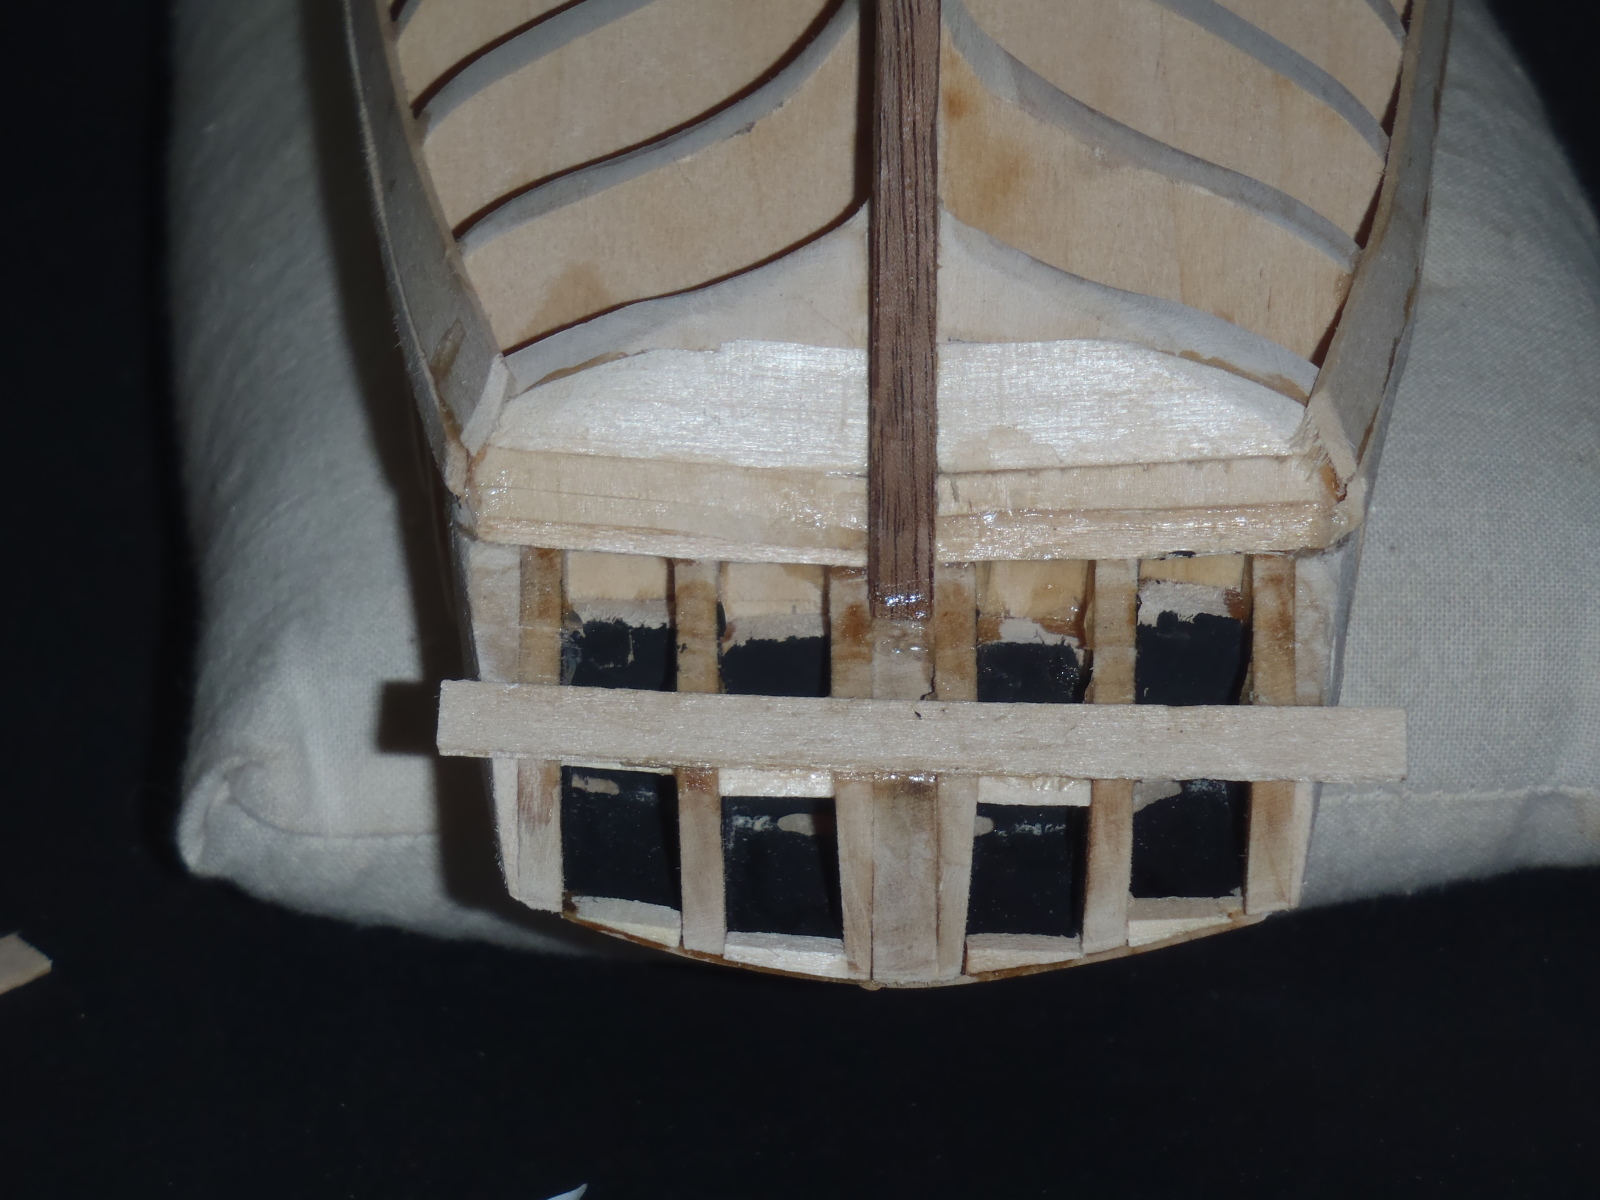
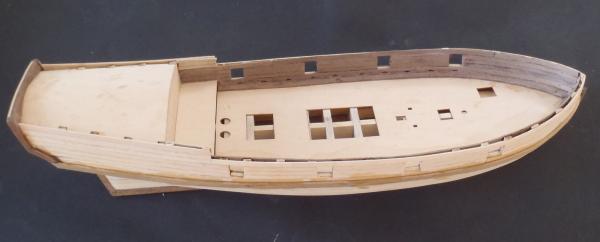
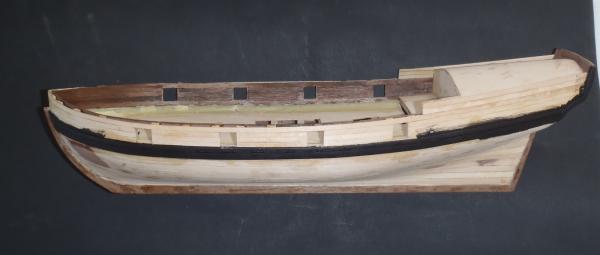
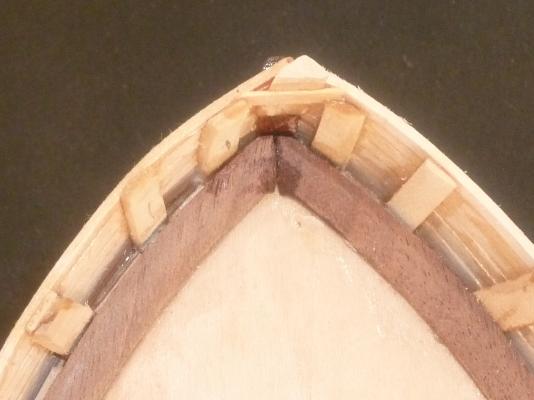
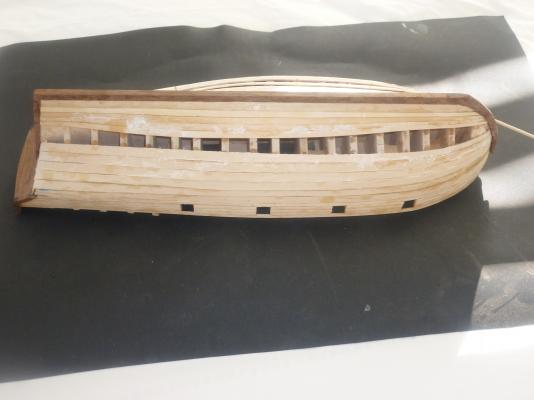
Planking began easily - the practicum suggested making a reinforcing support at the bow, which I did: Then simple 1/8" planks above the wale: Later I roughly trimmed out the gunports, and added another plank to the top of those, plus 2 more layers of short planks (very suitable!) at the aft - you'll see those in subsequent photos. Next came 4 planks (1/4") below the wale, with that awkward curve/bend at the stern. Here my daughter's spare hair-curler came in very useful, as a steam bender: These were spiled as instructed, to be narrower at the bow. Next was the Garboard Strake (who thought these stupid names up?). Here I could not understand the practicum, and anyway I had made a mess of my rabbeting at the very beginning. So I just used a full 1/4" plank to cover some of my sins. Note to anyone starting this model - if I did it again I would definitely follow the practicum advice NOT the pathetic instructions that come with the kit. I.E. cut the rabbet before gluing on the keel etc. I was worried that I would not be able to properly align the keel etc with the false keel, and that the glued joint would be too thin to survive. In hindsight, I think it would have been strong enough, and simply laying the pieces on a flat surface would have aligned them. For my first model ship I used wood glue (PVA) almost exclusively. This time around I'm using a lot more cyanoacrylate for the planks. And I do mean a lot! Hint - vinyl gloves stick less to CA than latex gloves or skin do! Here you can see the first couple of planks at the keel: The practicum has you using full length planks for this first layer. I had planned to try proper planking, but decided to follow Alistair's advice, and go with Bob Hunt's plans. After a few more planks you are left with an irregular shape to close off: A bit of spiling to plug the gaps: And it's time to start filling and sanding: The last photo points out another mistake I made. The practicum suggests soaking difficult planks for two hours before bending. I soaked for one hour - still waaaaay too long. You can see how they had swollen then shrunk after gluing. 10 mins would be enough for basswood, I think! Cheers, Brett


- 129 replies
-
- 4
-
-
- armed virginia sloop
- model shipways
- (and 1 more)
-
Hi Alistair, If you get bored some time you should consider reconstructing your log. The photos are great, but need a thousand words!!!!! BTW, we loved Wellington, even though we caught the tail of Cyclone Lusi during our 2 days there! Cheers, Brett
-
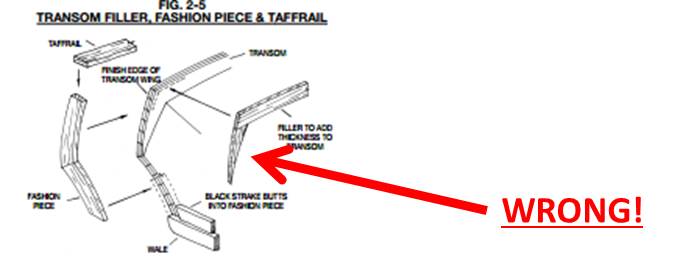
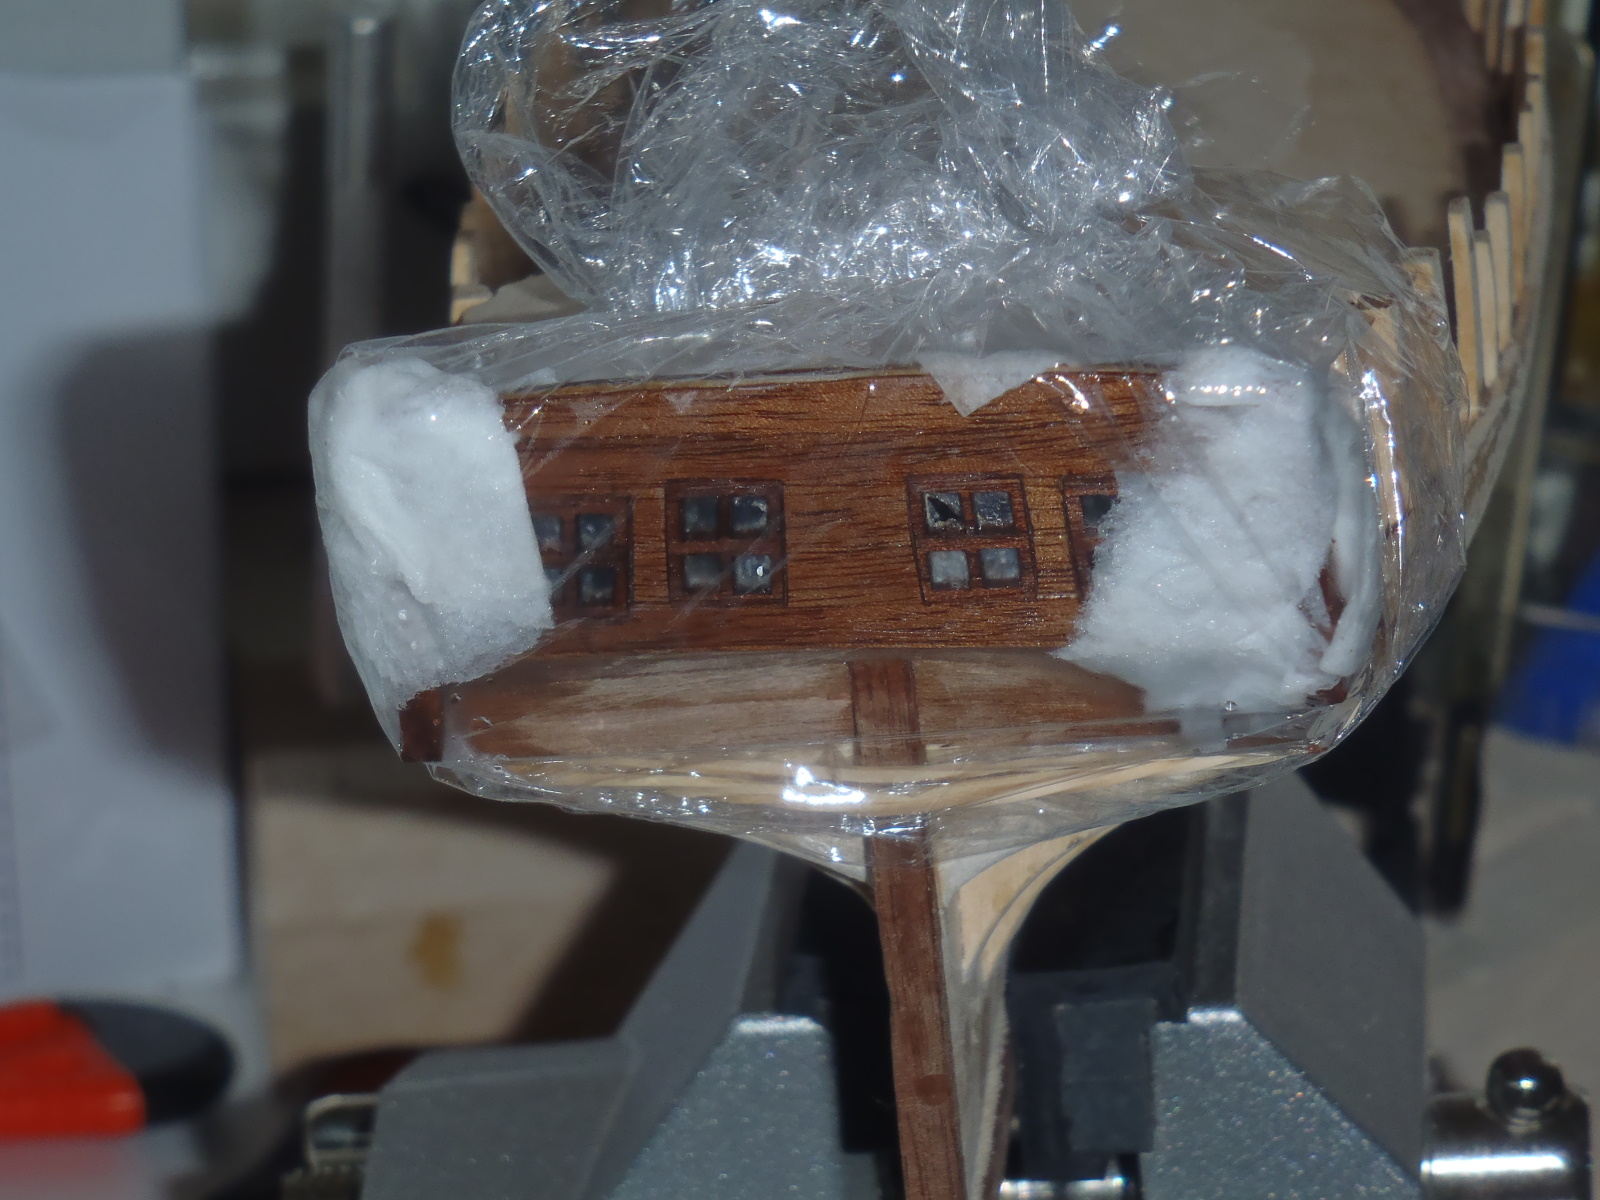
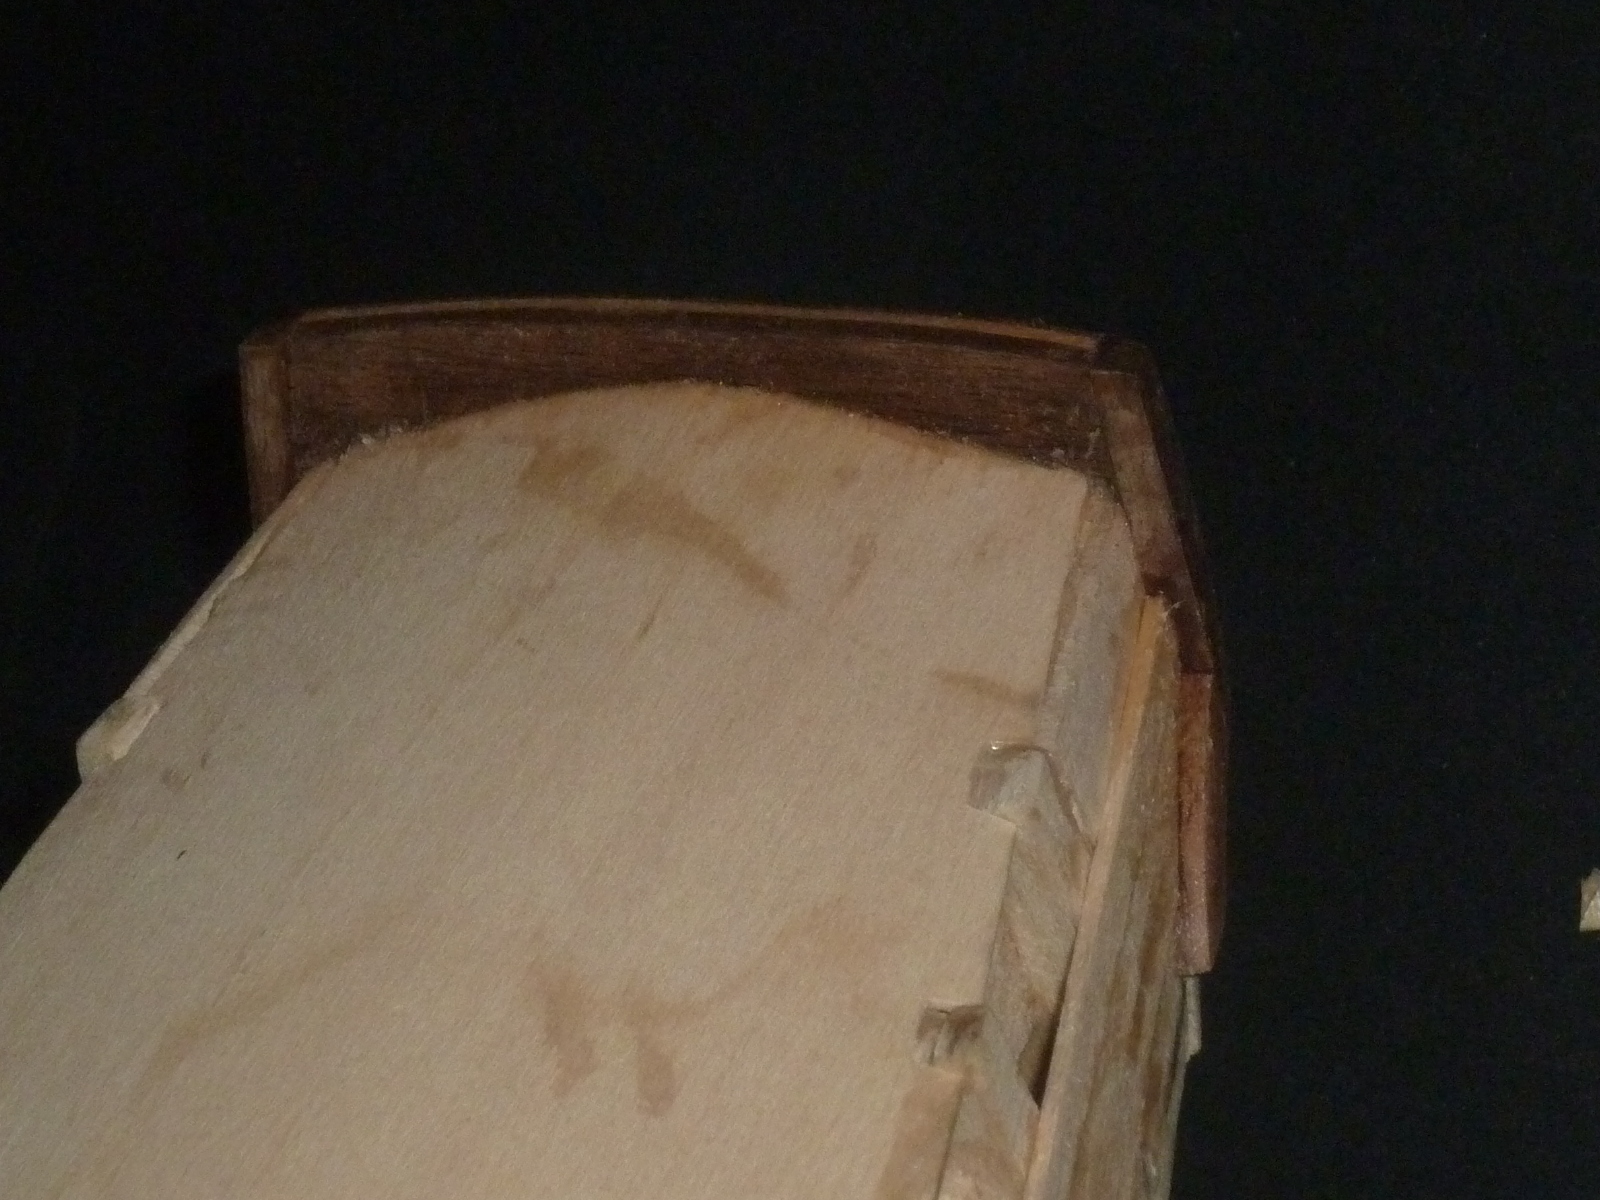
OK - Errata time! At this stage I realised I had misinterpreted a couple of (probably) important areas. I decided to fix them instead of ploughing on. Firstly I had not curved the planks up enough at the stern. The Practicum said to follow the deck line forward, then begin the curve upwards at Bulkhead N, but I did not realise just how much curve this needed. So, instead of the bottom of the lower plank finishing as shown in this Practicum image: I had not put enough curve in. I shimmed the upper part, then marked and trimmed off the lower. This shows the state before I trimmed. You can see I shimmed twice before I got enough improvement: Then I realised that my Fashion pieces should have been flush with the filler blocks. I tried and tried to work this out, but nothing gave me the close up detail I needed. So, like an idiot (sorry Alistair!) I looked at the instructions! They definitely showed a filler going in next to the Fashion piece: So that's what you can see in the last photo in my last post. Only small, but enough to matter. Especially now I'm becoming more fussy like the rest of you! So, it was unglue time (AGAIN!): Cut the transom back flush, and replace the Fashion pieces: That last photo was 6th April. Planking has begun, and will be documented RSN. Happy Easter to all, Brett


- 129 replies
-
- 2
-
-
- armed virginia sloop
- model shipways
- (and 1 more)
-
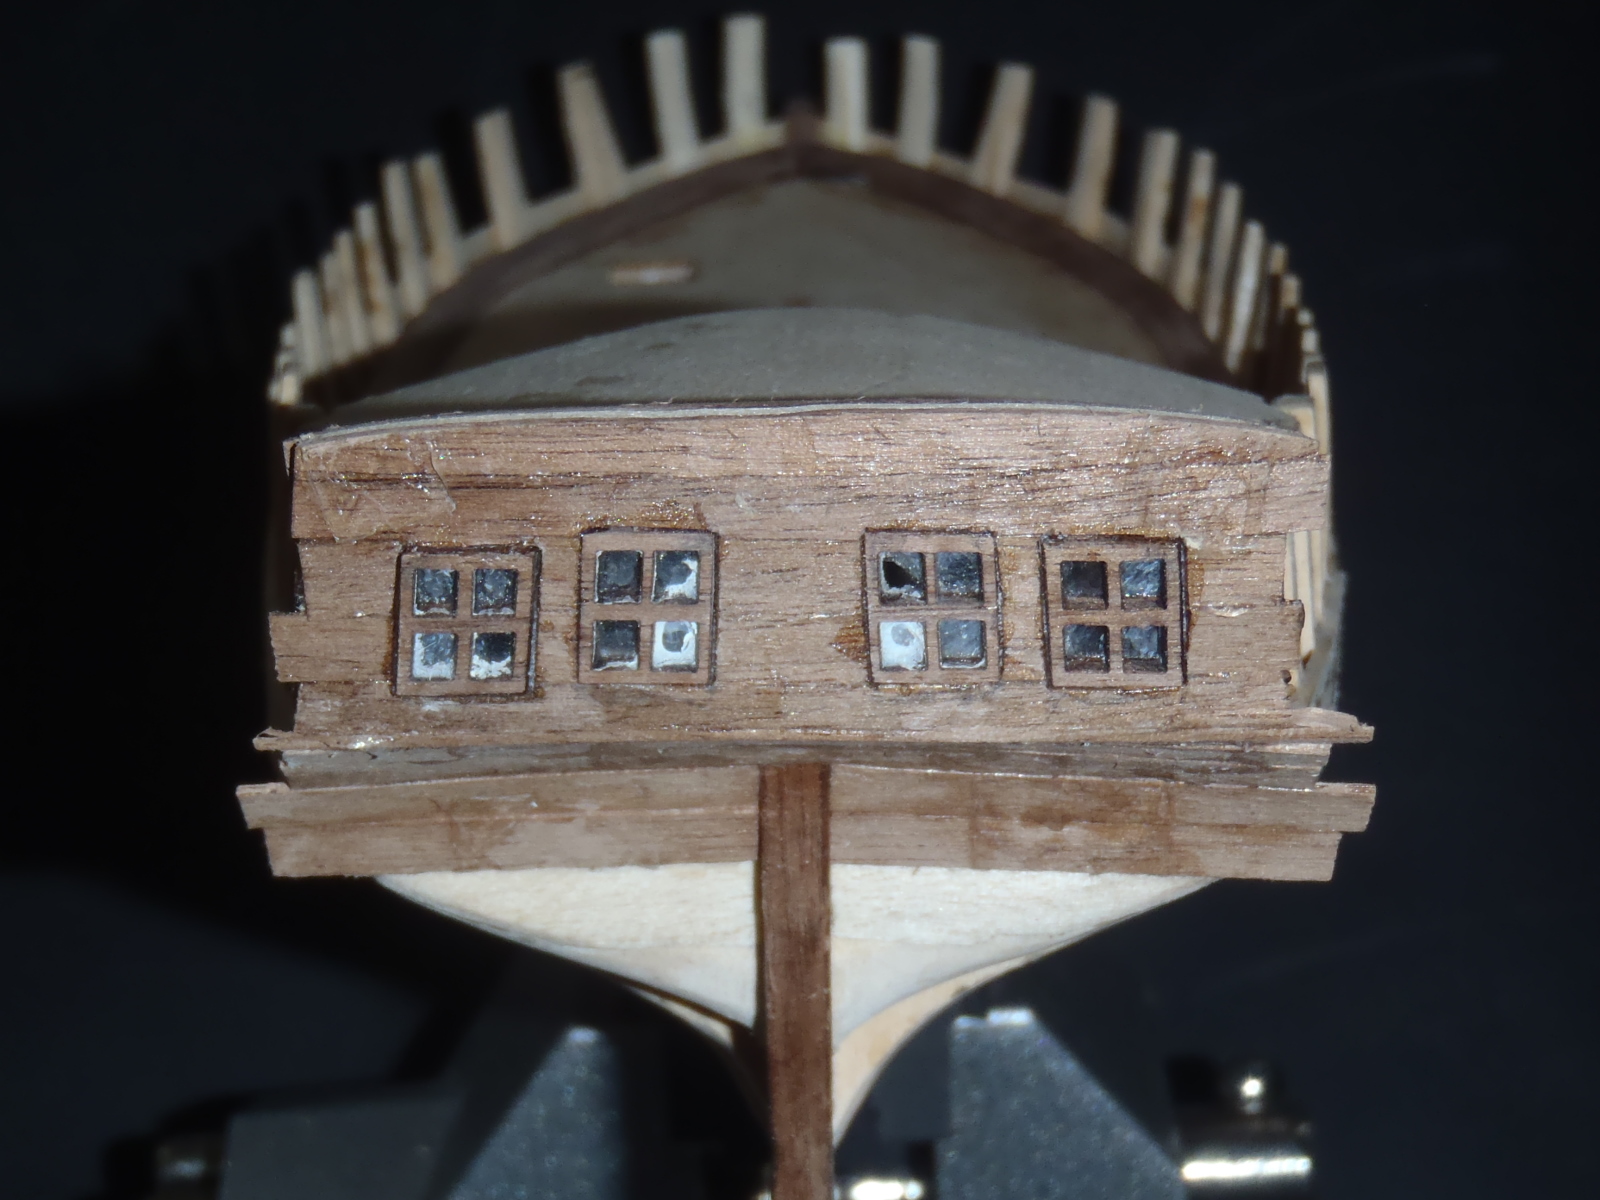
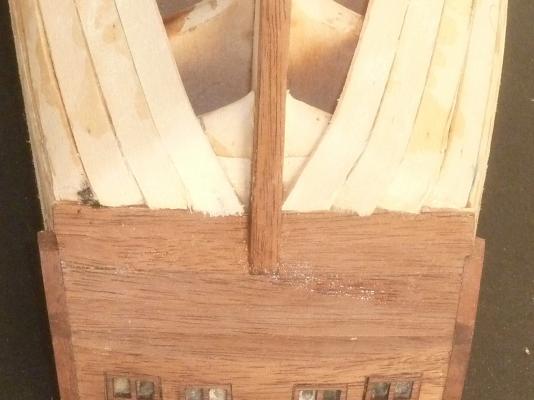
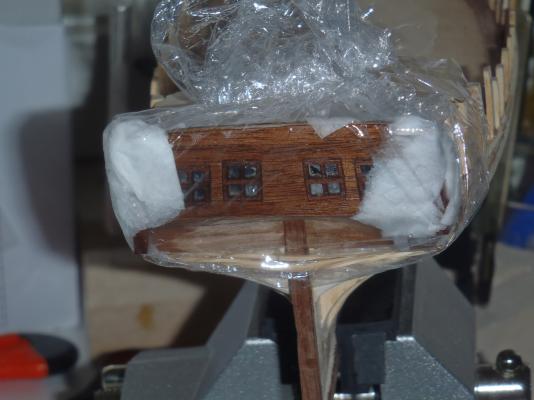
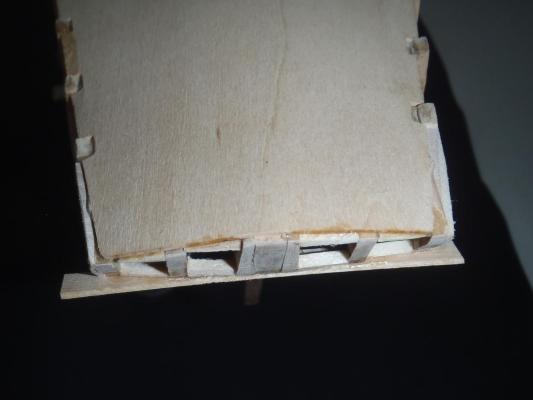
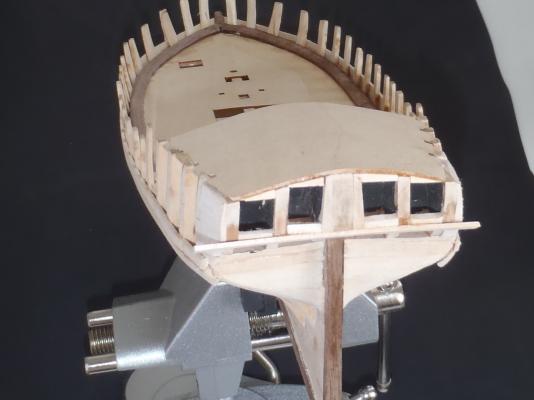
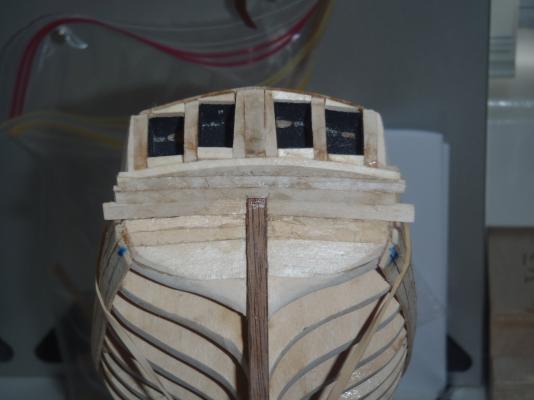
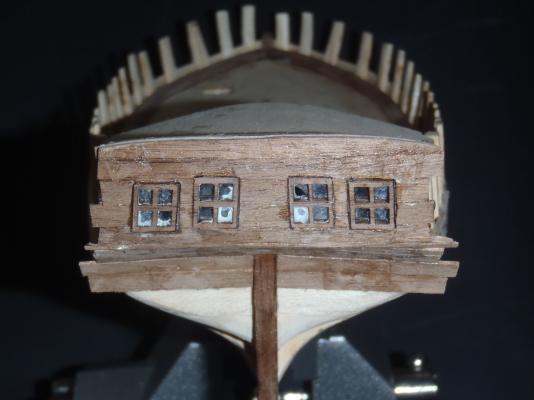
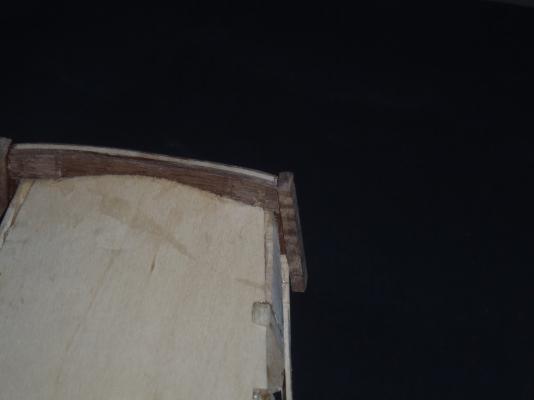
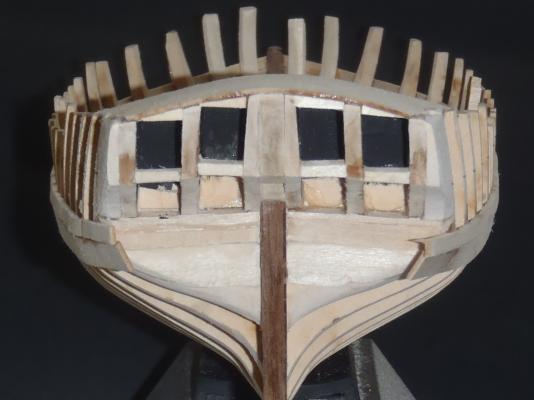
The next step in the Practicum is the Counter. Again, I found my previous efforts with the window frames had given a less than perfect edge. I'm trying to show fine detail, because I hope that will help others. Small images led me to some errors I will show in the next post. So, here's the first plank from three angles And here's the first layer of Counter planking: Then the walnut planks and windows glued in: Added some walnut to reinforce the forward surface of the transom planks, and started fitting the fashion pieces: Next post I will confess my errors. Each step involves me in much agonising and stress! I try to figure out from the practicums, plans, and logs, but often don't fully understand until it's time for that D'oh moment!

- 129 replies
-
- 1
-
-
- armed virginia sloop
- model shipways
- (and 1 more)
-
Hi grayarea, I hadn't seen your log until you posted on mine. It will be good to keep learning from each other. You're racing away! Well done. Cheers, Brett
-
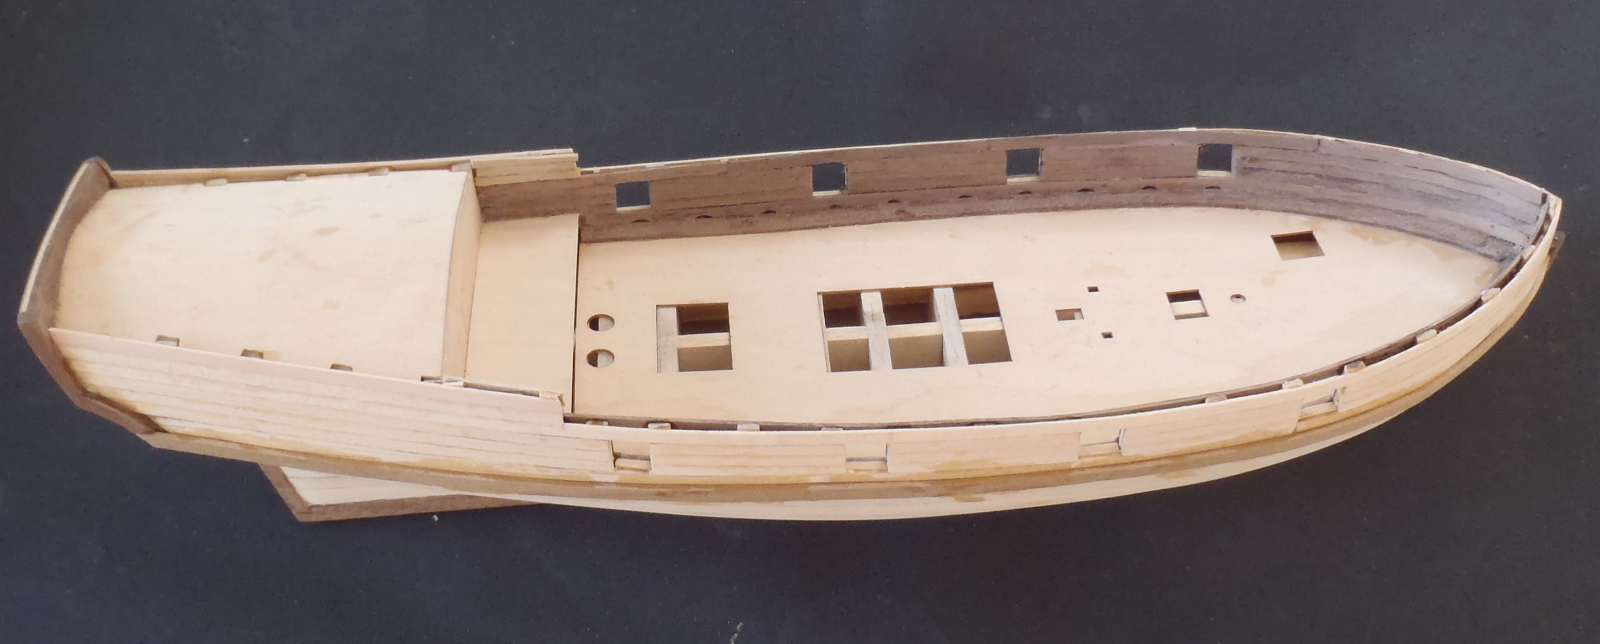
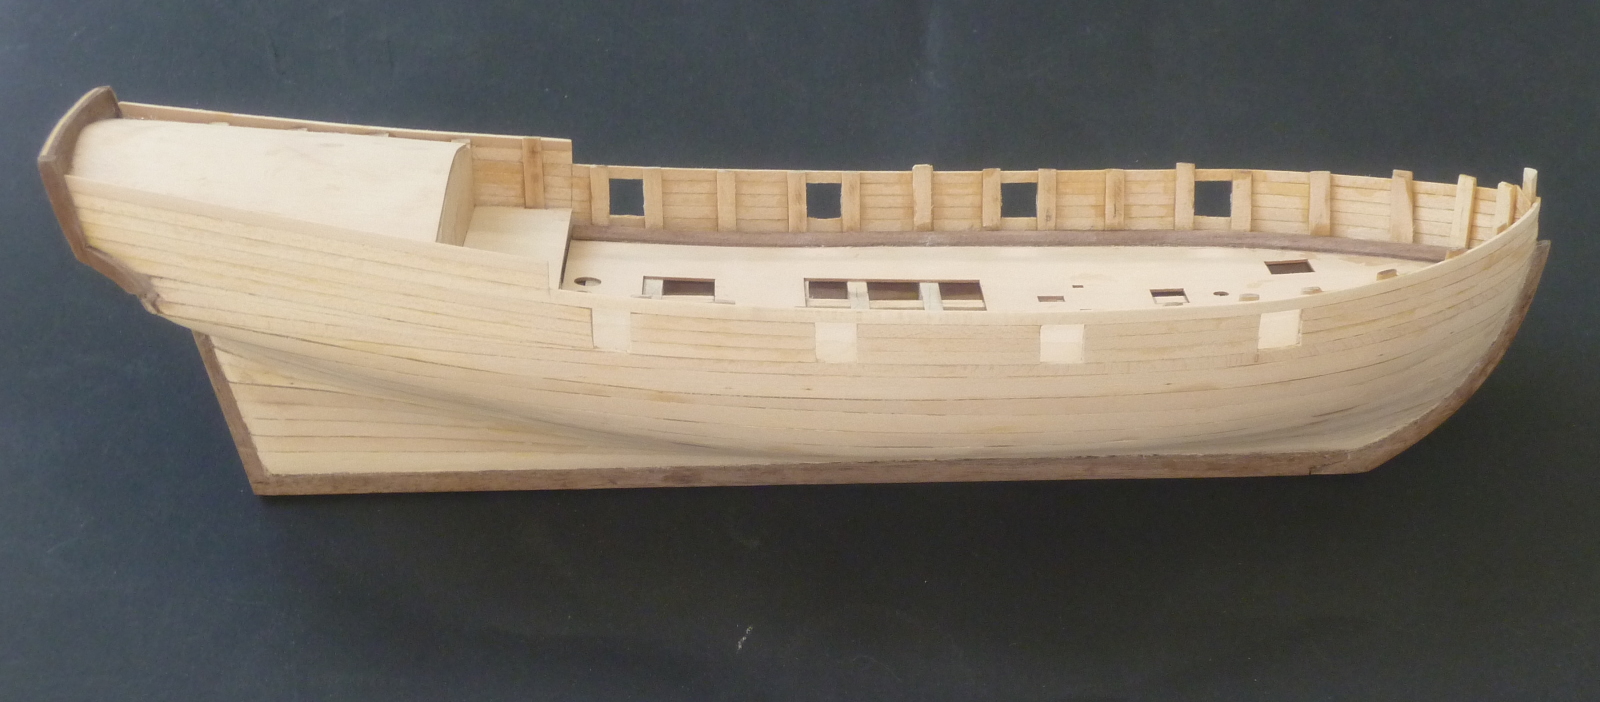
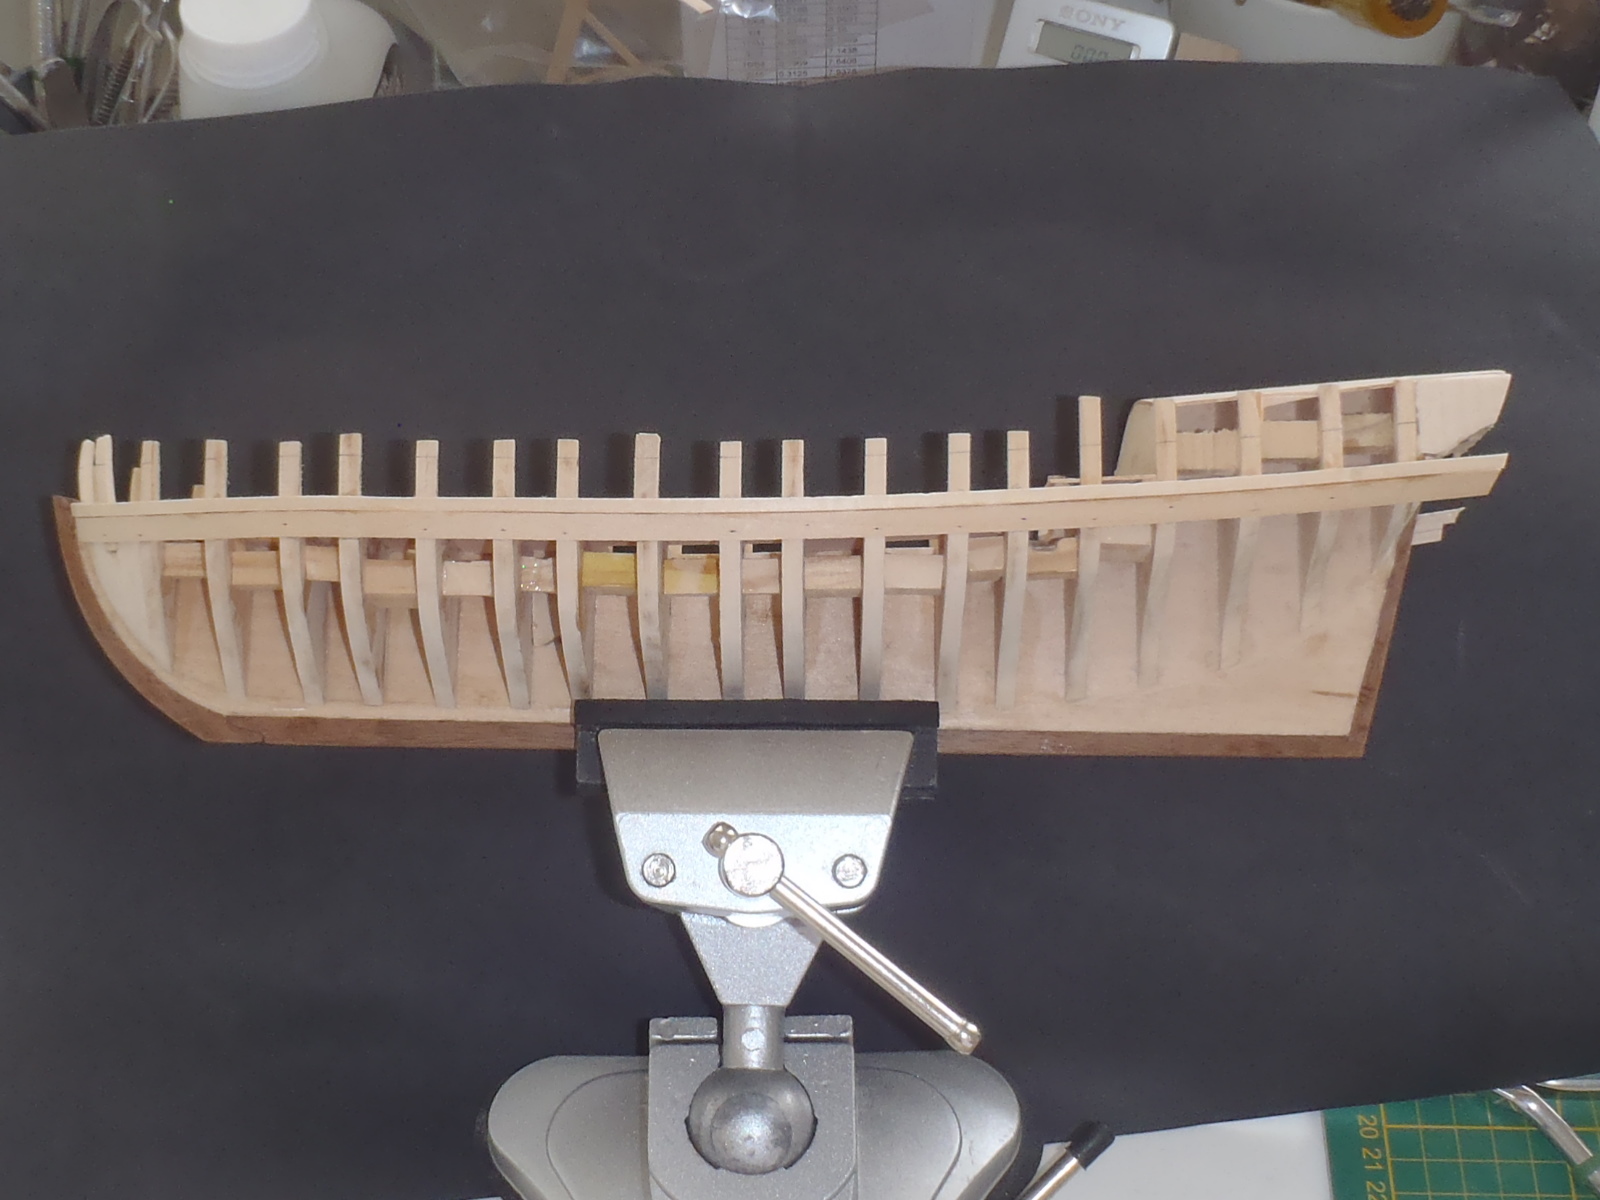
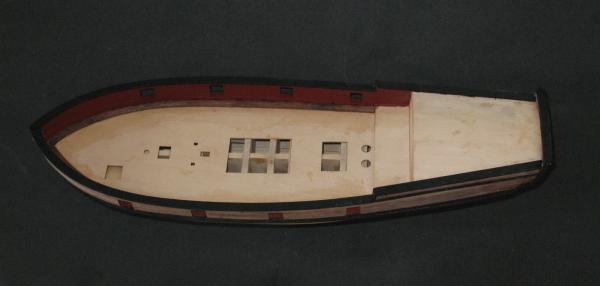
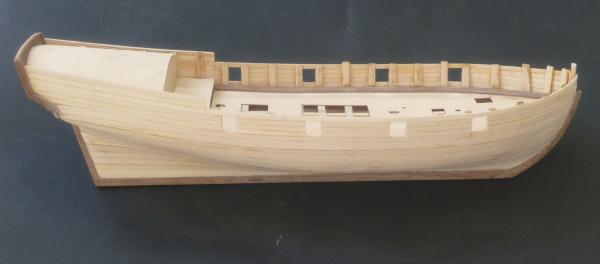
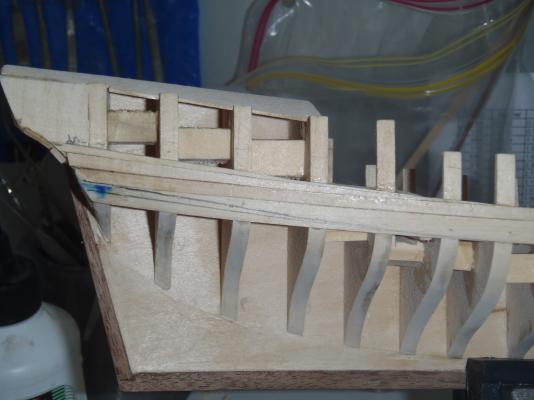
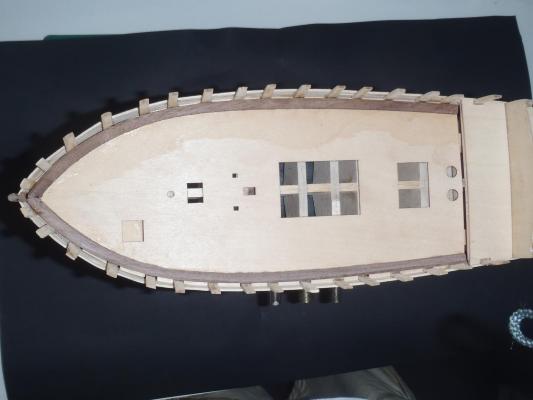
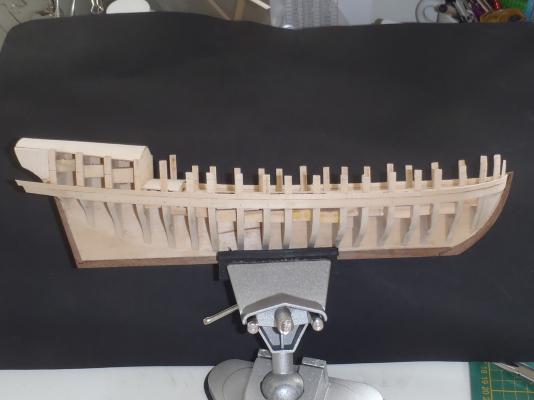
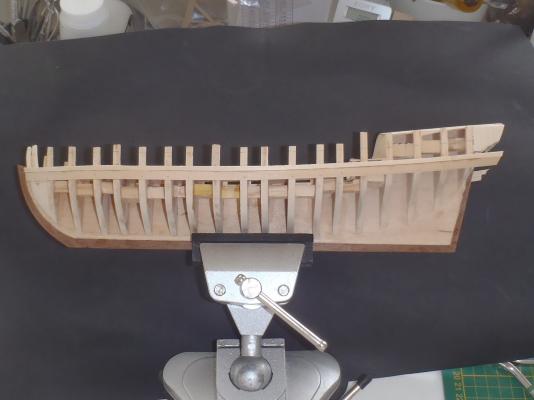
So, where was I? Too long between posts! Just looking over my photos, and realising how much has happened. I'm currently planking, but have fallen way behind in my log. So here we are in small posts. So, Knightheads and Timberheads fitted, and bulkheads (so I thought) faired: As per the Practicum, deckline planks installed - WRONGLY! More on this later, but here's what I thought was correct: Waterways installed: In the next post I will explain what I had done wrongly. I really am learning a lot from my mess-ups!

- 129 replies
-
- 3
-
-
- armed virginia sloop
- model shipways
- (and 1 more)
-
Hi Ken, Great work - but I'm not pleased! I bought this model because it didn't have sails, making it easier. Now you've raised the bar. I'll fit an outboard to mine! Cheers, Brett
- 110 replies
-
- 1
-
-
- armed virginia sloop
- model shipways
- (and 2 more)