ortho85
-
Posts
148 -
Joined
-
Last visited
Content Type
Profiles
Forums
Gallery
Events
Everything posted by ortho85
-
I think the Syren may be a little too small for the space SWMBO has in mind. I fear the same may be true of Snake and Cruiser. However, I am currently assembling some photos for a line-up! Based purely on size, I'm wondering about Bounty, Vanguard, Constitution, or Confederacy? I know size isn't everything, but try telling my wife that! Cheers, Brett
-
Thanks CharlieZardoz and Ken. My current build is M/S, and I'm unimpressed by the quality of the plans/instructions. I have already bought the Practicums, so I'm hoping to use them again, sometime. Any comments on the Jotika plans/instructions? Cheers, Brett
-
I'm nearing the end of my second model (Armed Virginia Sloop), so it's time to look for the next project. I have received instructions from The Boss that she needs a model to display - my first 2 models are for me to see, only! So, any advice to fit the following criteria: Large-ish. I'm thinking above 36"/90cm. Interesting to build, but not too complicated. I need to finish it this year! Either one covered by Bob Hunt's Practicums, or with extremely good instructions available. Preferably easy to get in Australia. Good Forum support. Not much to ask? Cheers, and Happy New Year, Brett
-
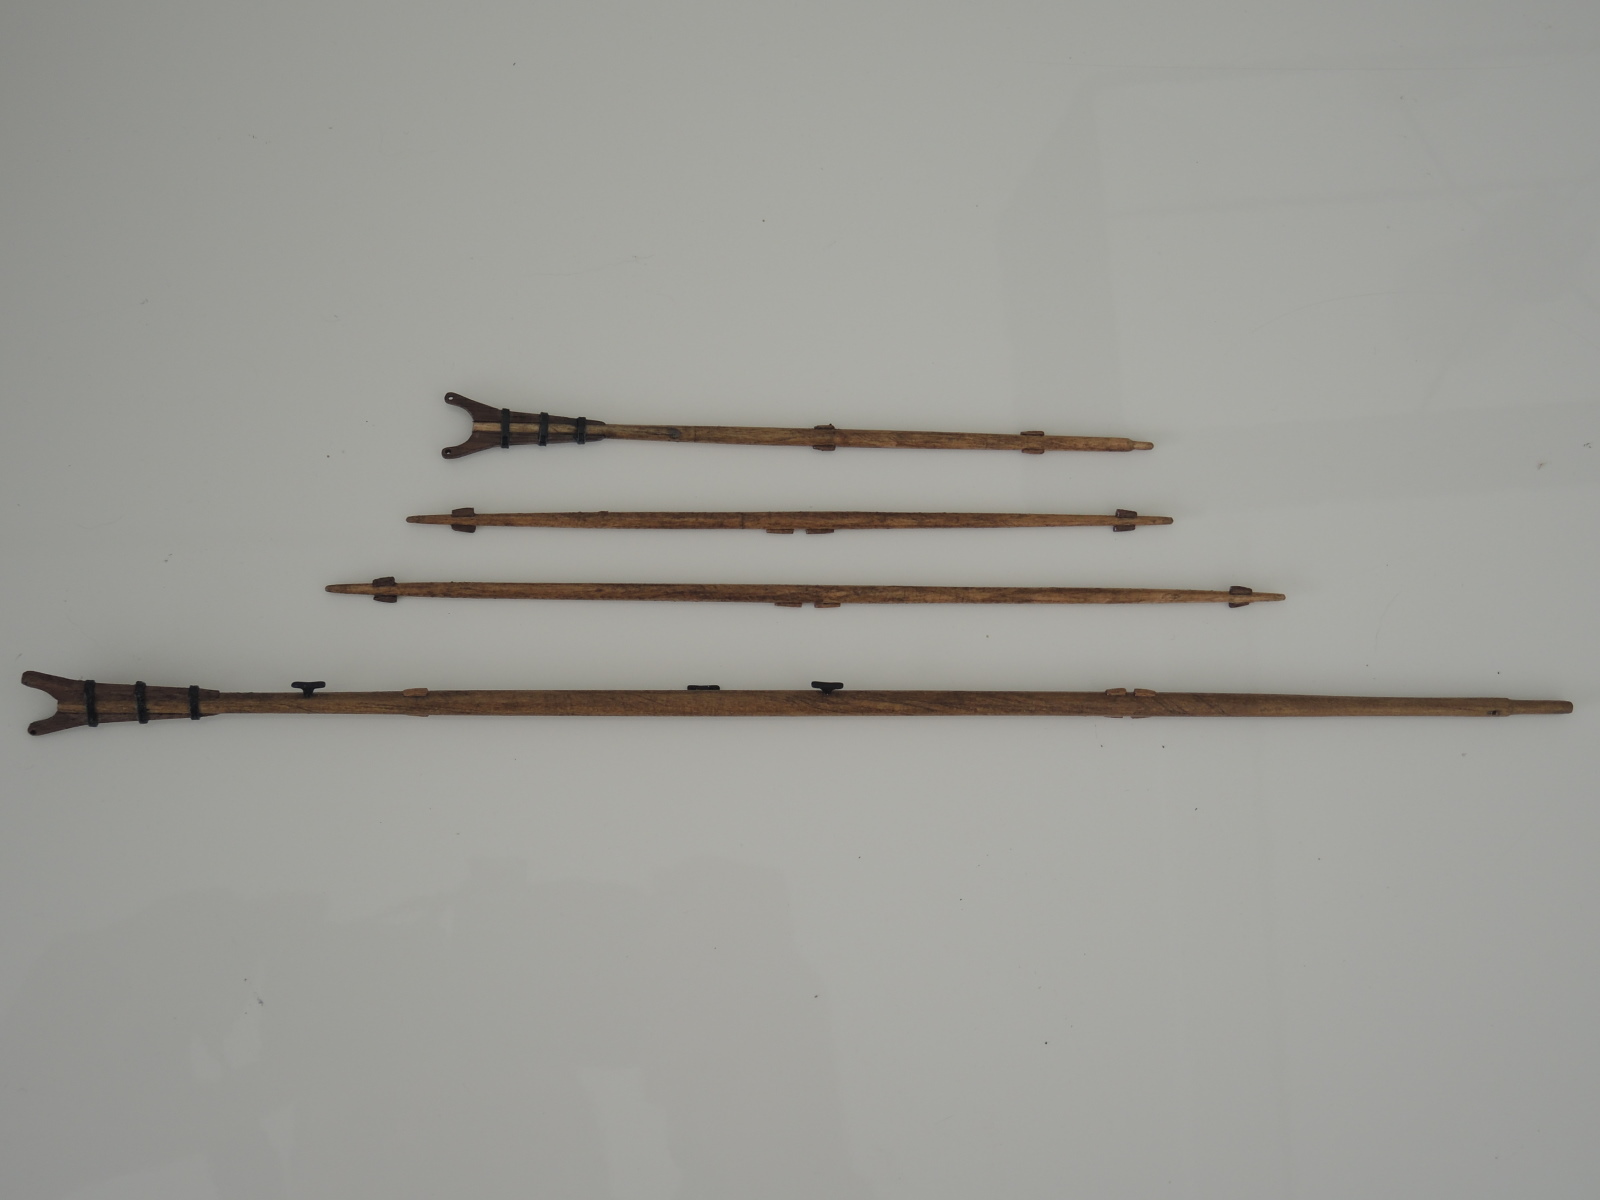
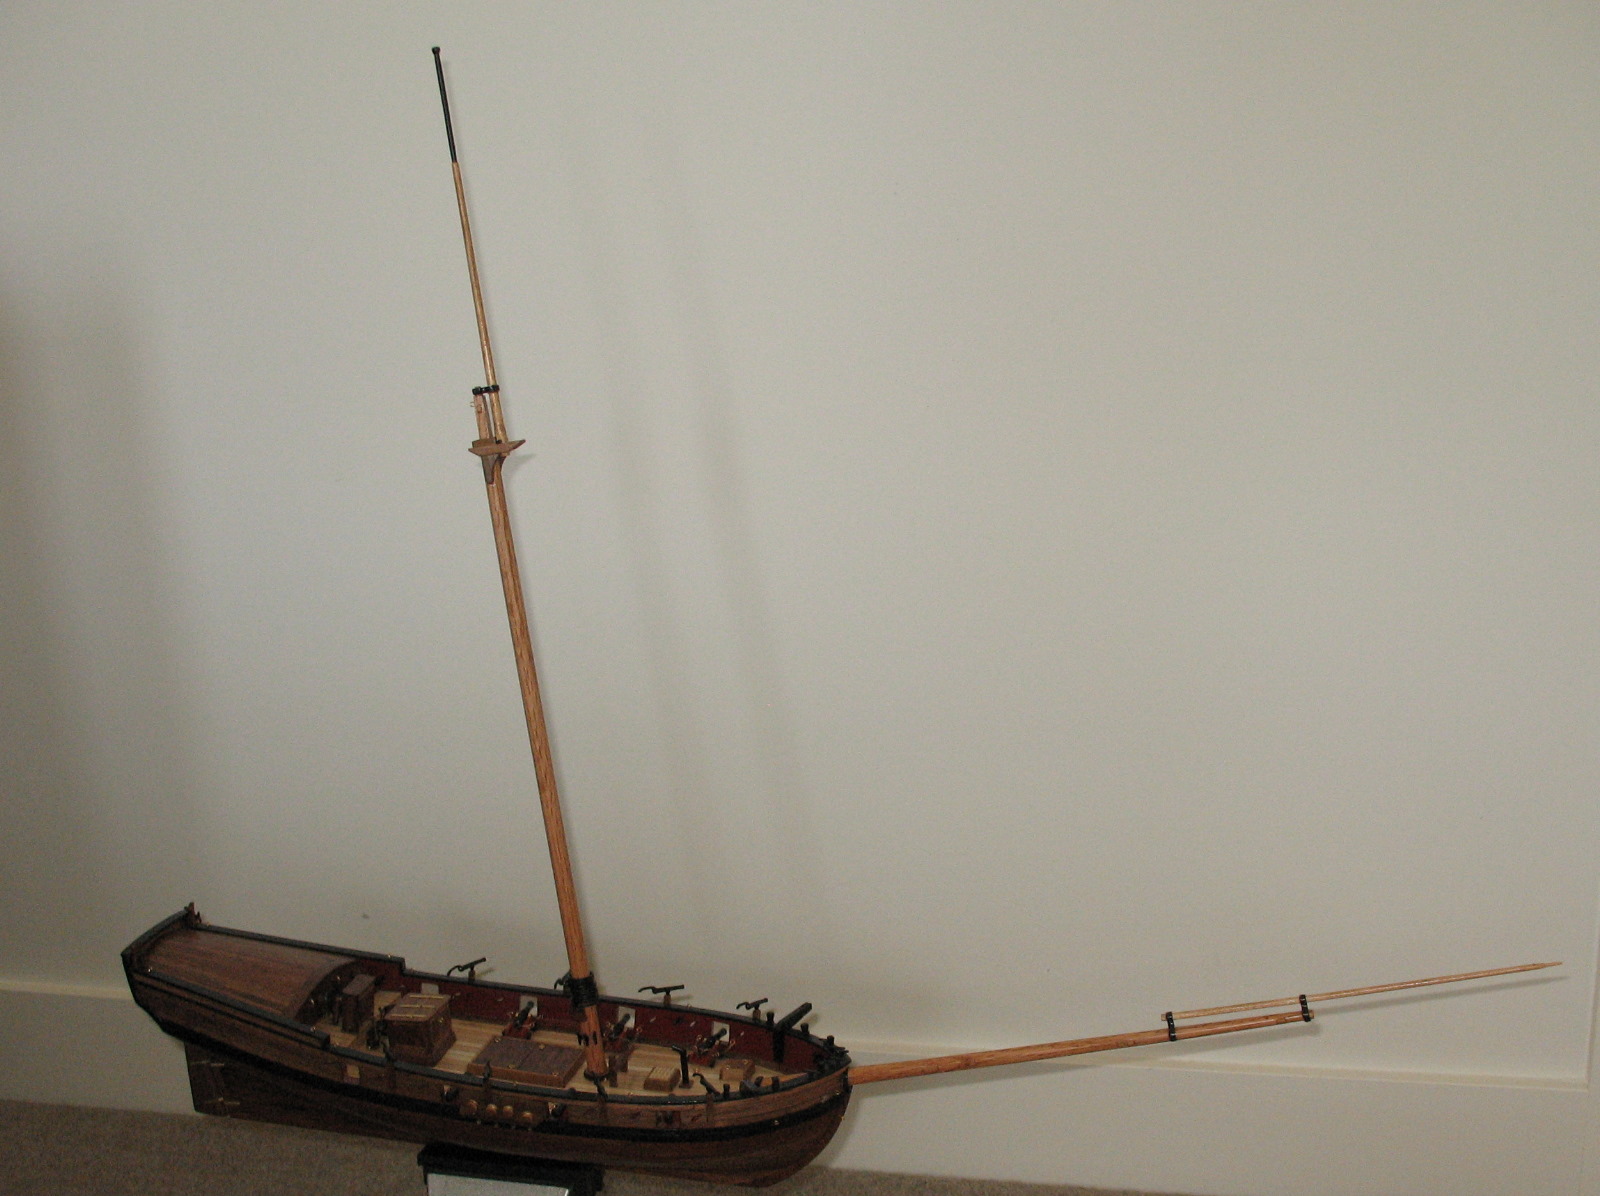
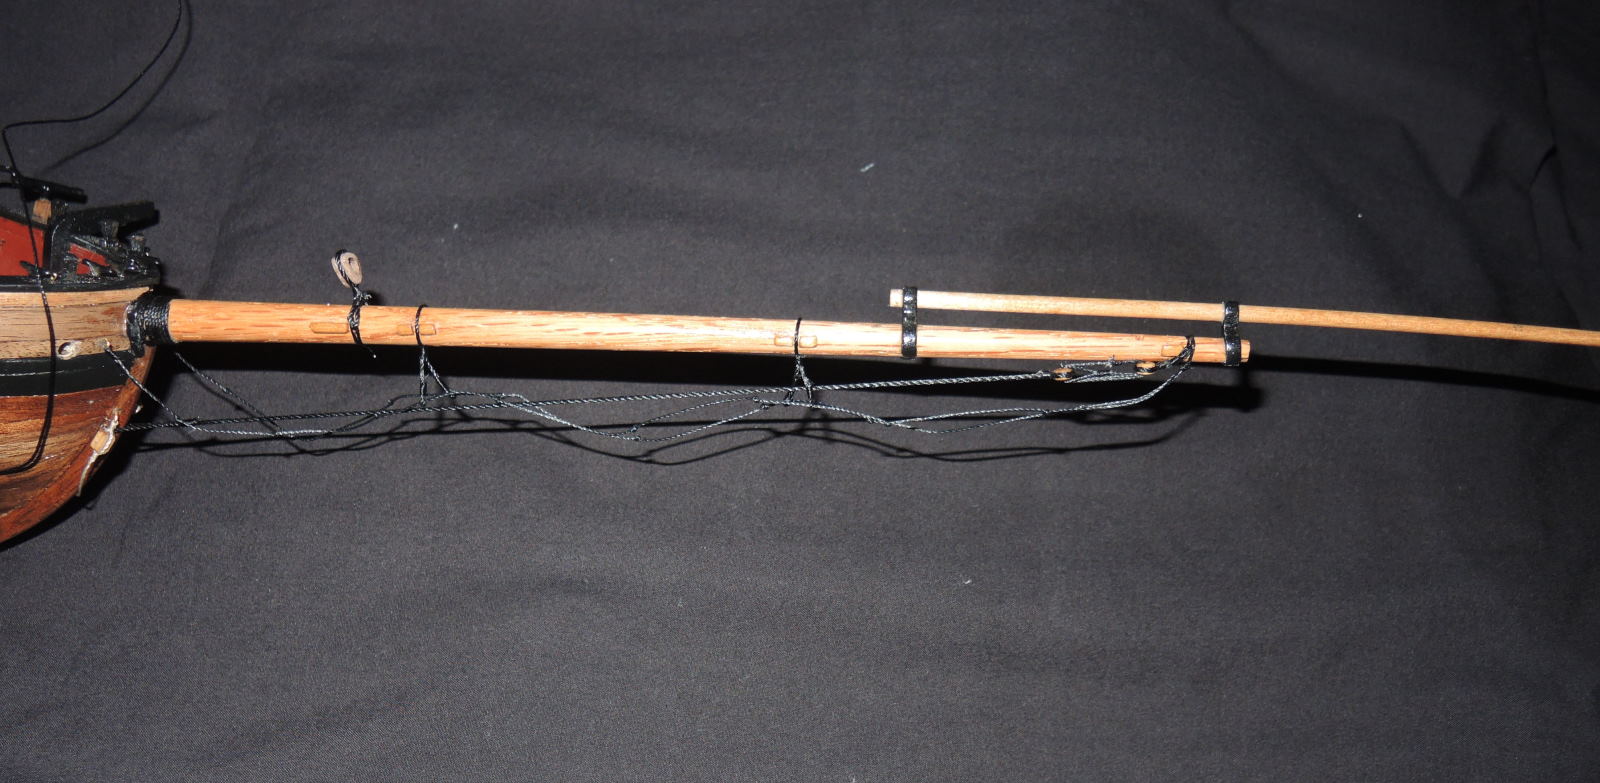
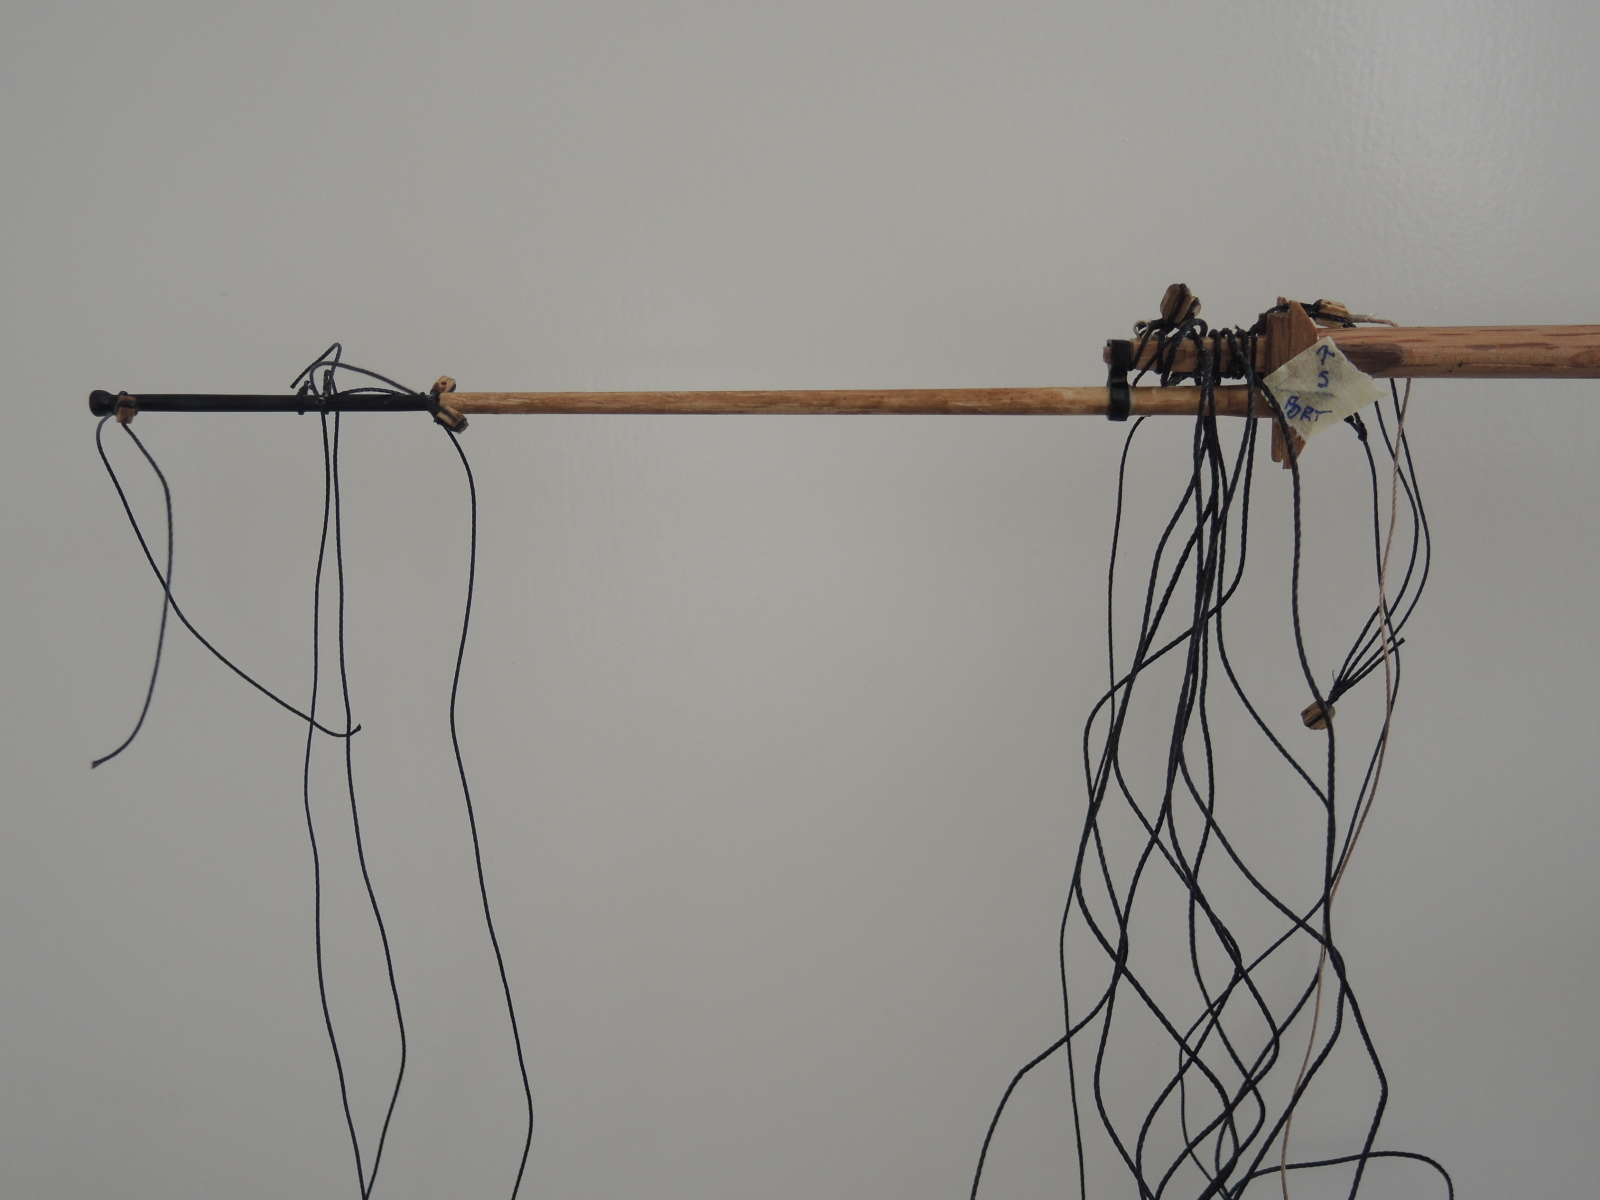
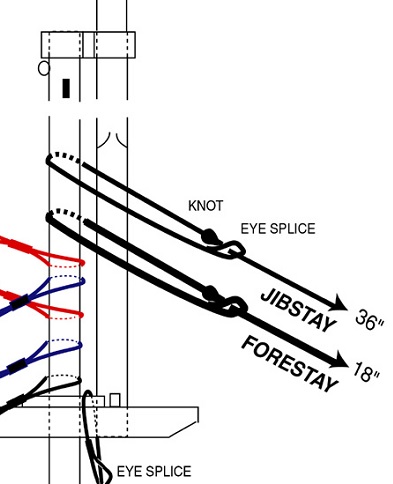
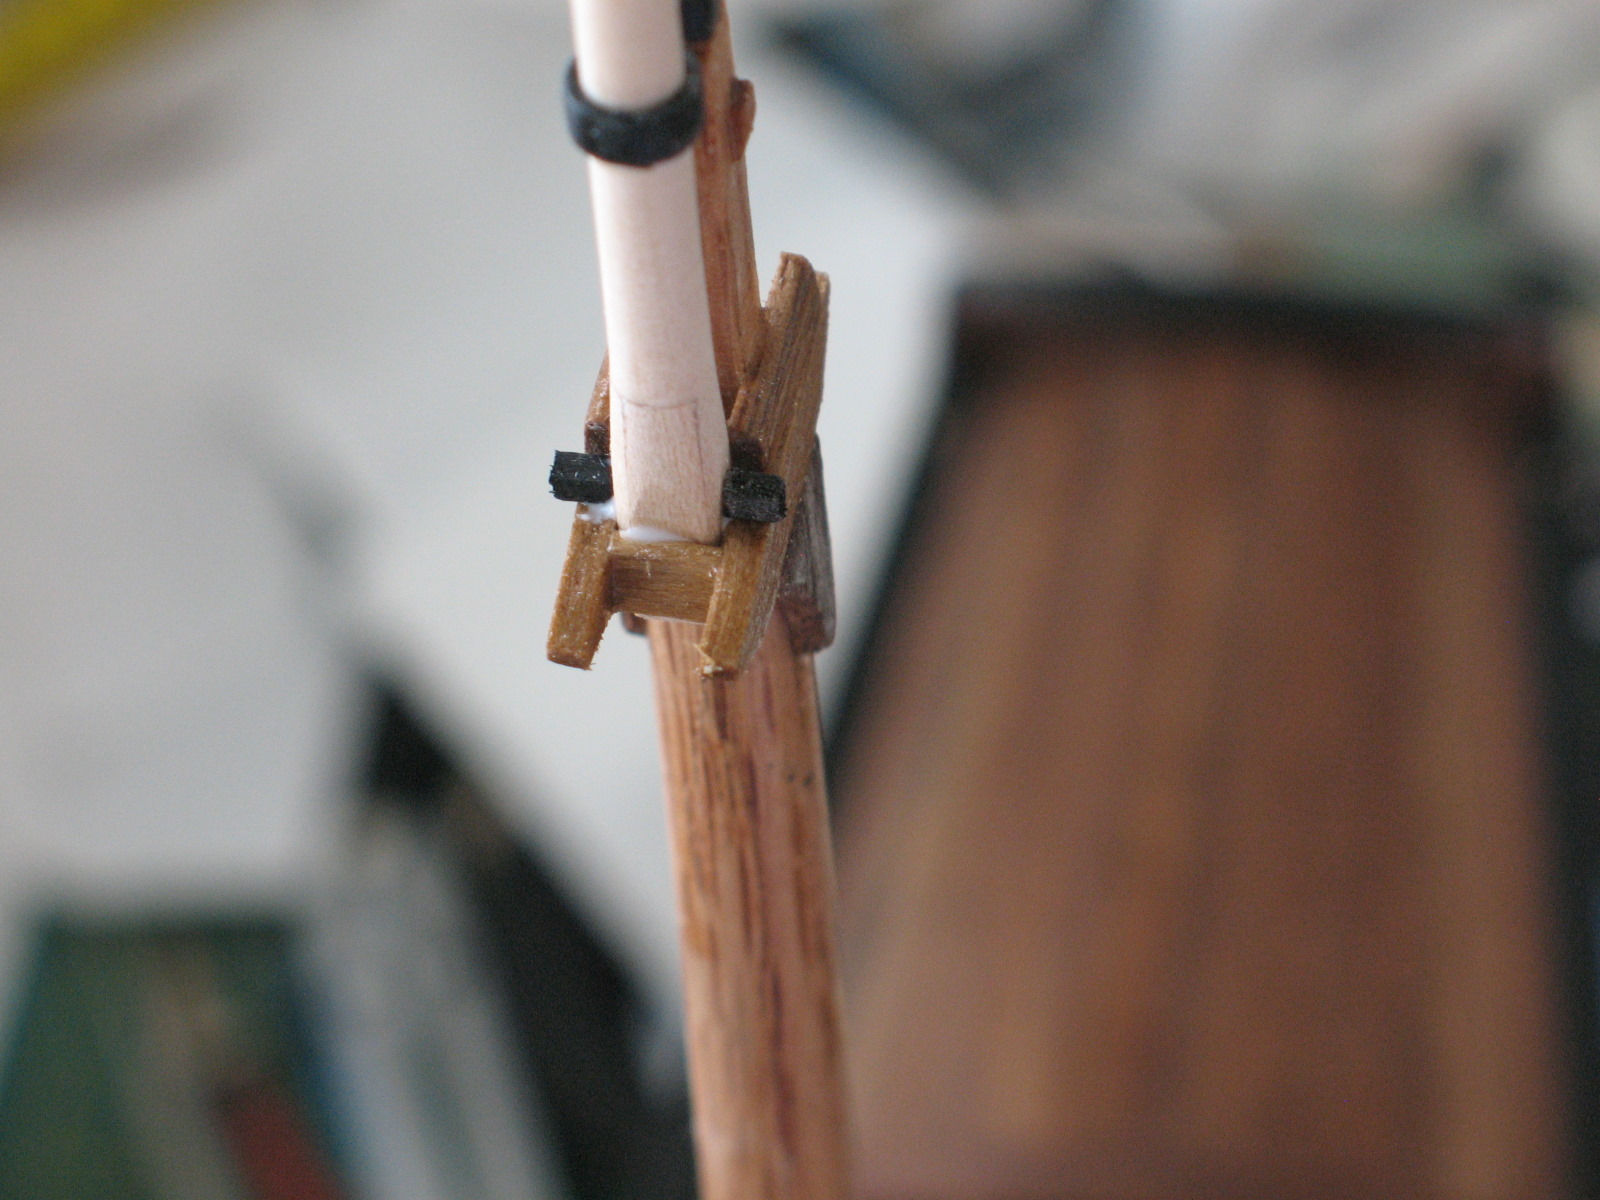
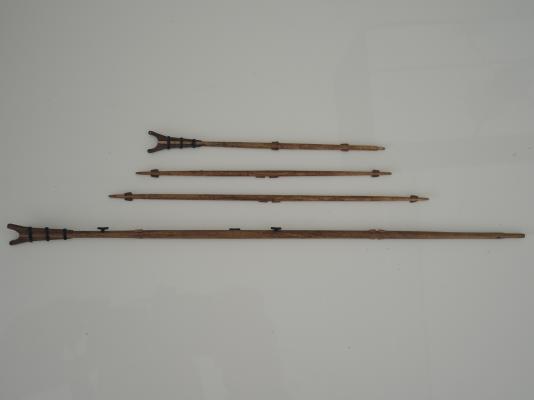
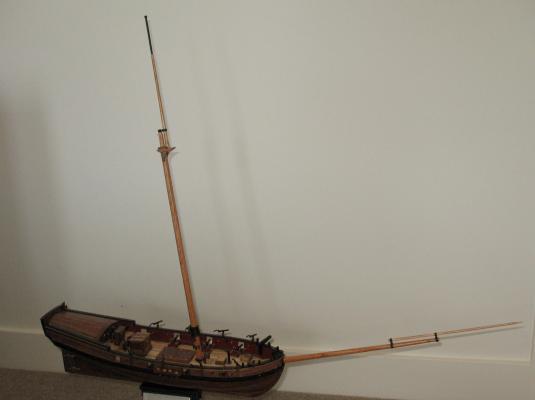
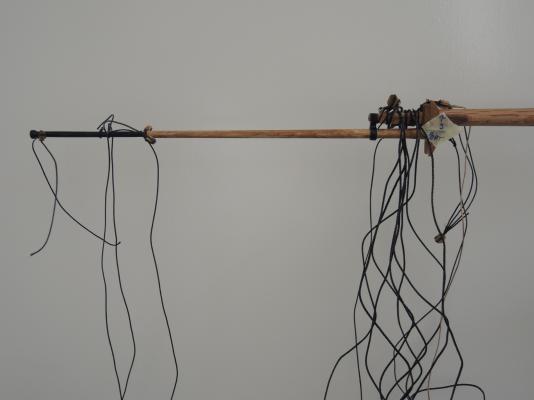
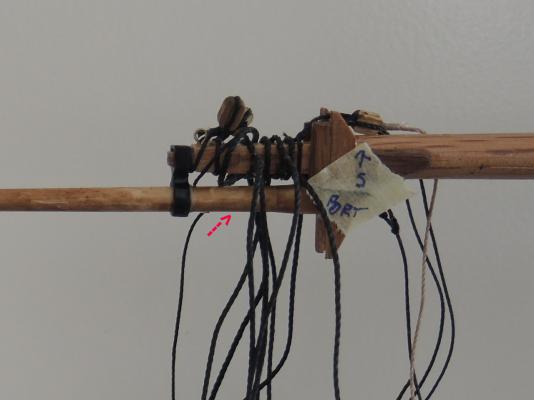
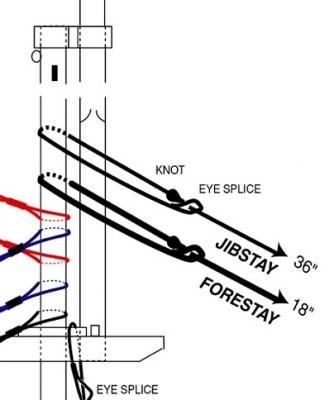
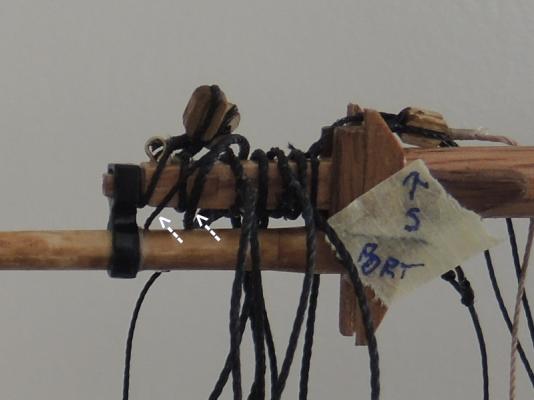
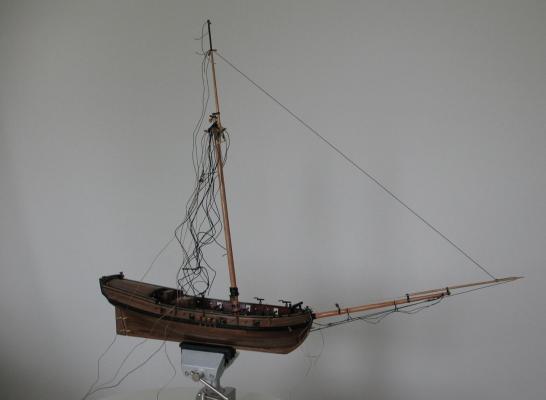
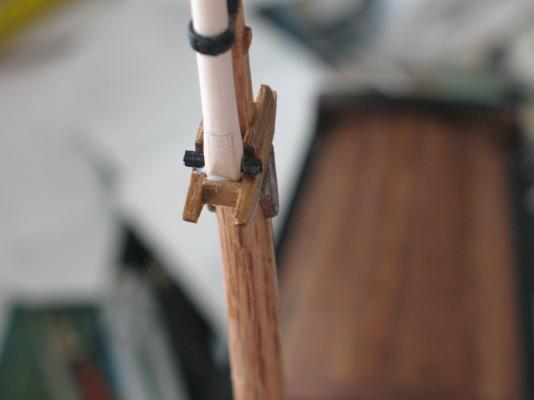
 Here's the mast resting in place. It's not glued until some rigging is done. Here's a view of the whole thing: Somewhere around this time the practicum has you make the gaff, boom, and yardarms. To me they look like versions of implements used by our indigenous hunters! Now we're on to the rigging, with the bowsprit first up. Here you can see the footropes and bobstay: I'm still experimenting to try to find a good photographic setup! Next on to the birds nest of mast rigging. Here (again!) I found new ways to screw up. The topmast went reasonably well, but I found the lower mast confusing. I pored over the plans, instructions, practicum, and build logs, then dived in to the jungle of jibstays, forestays, spreader yard horses - and on the foreign language went, leaving me following blindly astern. At last I had attached all the carefully crafted rigging to the masts. Then I tried it on the boat, and my stupidity smacked me in the face. I had put all the ropes round the bottom of the topmast, instead of the top of the lower mast! Time to swear a lot, and fix up my errors. Here are the masts after my (first) corrections: Just to clarify (because many logs have too small images), initially I had fitted the ropes to the round section of the topmast, as shown by the red arrow: You will note that I took no chances this time, and labelled the masts! I was then instructed to glue the mast in place and begin connecting the rigging. Unfortunately, at this time I realised ANOTHER stupid error. In my defence, none of the documentation or logs show the detail clearly, but still I has misunderstood the positioning of the jibstay and forestay. This is cut from the practicum, and makes it look like these ropes go around the top of the lower mast only, not the bottom of the topmast as well: So that is what I had done, as you can see in this close up - the arrows point to the jibstay and forestay: I can tell you it is NOT easy seizing ropes in tight corners, but I managed to reposition these two without totally disassembling. And here's how the mess looks now: Cats are no longer welcome in the room! Cheers, Brett
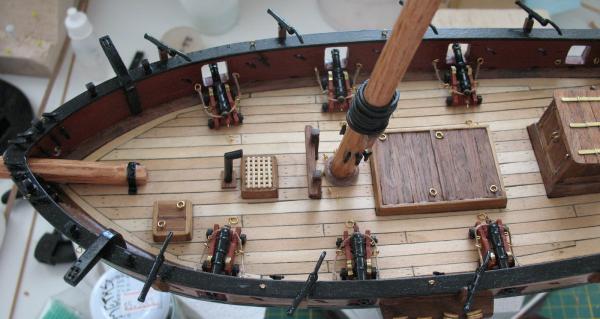

- 129 replies
-
- 3
-

-
- armed virginia sloop
- model shipways
- (and 1 more)
-
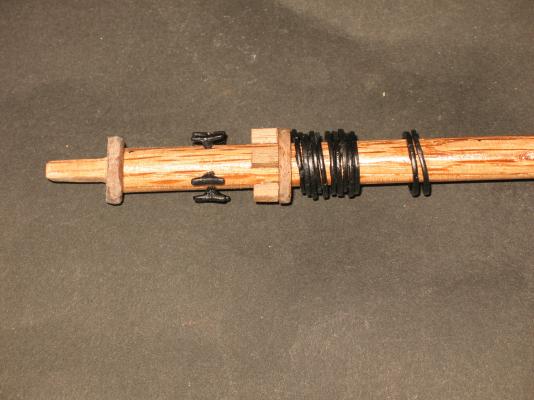
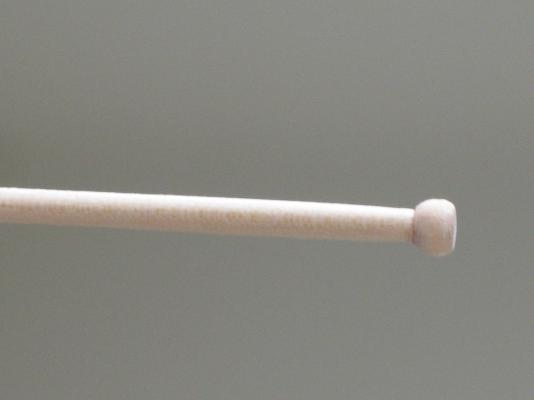
And the weeks have slipped by! Next came the mast. Quite a complicated piece. Well, pieces, really, as there are top and lower masts. And plenty to screw up! I shaped the lower mast reasonably easily - even though I kept forgetting which way it went (forrard or stern, not top or bottom!). Here is the bottom of the lower mast, with its various bits and pieces: And the top, with trestle trees etc. I had to reposition the trees - again I was glad I used PVA glue: The topmast caused some difficulties. I missed the bit about leaving a bead at the top, so glued one on after. In retrospect, that's actually a good option. Glued, unshaped: Rounded: The bottom of the top mast, after squaring: Then it's time to join the two. In the above photo you can see little "fids", painted black, supposedly resting on the trestle trees. The instructions say to make a hole through the top mast for a single fid. WHY???? Far easier to make 2 dummy fids, and glue them either side of the topmast. Finally, I think I'm getting the hang of this! Cheers, Brett

- 129 replies
-
- 5
-
-
- armed virginia sloop
- model shipways
- (and 1 more)
-
There are several discrepancies between the plans, the list, and the actual sizes included. Fortunately (unlike the Swift I tried first) the AVS seems to include plenty of spare timber. Plus, you can easily source additional/different wood - something very difficult here in Oz. Cheers! Brett
- 164 replies
-
- 1
-
-
- model shipways
- armed virginia sloop
- (and 2 more)
-
That's because it's time these 'Murrican plans switched to metric! Imagine how hard it is for us? :piratetongueor4:
- 164 replies
-
- 1
-
-
- model shipways
- armed virginia sloop
- (and 2 more)
-
Not sure if you realise, most of us are lazy and make pretend scuppers inside and out, not connected through. Others have said that takes too much work - and sawdust! Cheers, Brett
- 164 replies
-
- 1
-
-
- model shipways
- armed virginia sloop
- (and 2 more)
-
As another amateur in planking, I found the first layer good training for the walnut layer. Not full training, but a start! All the faults in planks (but not curves) get hidden by the second layer. You can fill any gaps or dents with woodfiller, and no-one knows - unless you post pics here! Where possible, I like PVA glue for planking. Allows me to redo my mistakes. Yup, that's probably correct - I do redo my mistakes sometimes! Stick with it! Cheers, Brett
- 164 replies
-
- 1
-
-
- model shipways
- armed virginia sloop
- (and 2 more)
-
Storing Wipe-on-Poly
ortho85 replied to ortho85's topic in Painting, finishing and weathering products and techniques
Thanks all - time to test these ideas! Cheers, Brett -
I bought a 1 litre can of Satin Wipe-on-Poly. Any tips on how best to keep it fresh? It's awkward trying to use it directly from the can, and the plastic spout on this worries me every time I unscrew it. I have tried dispensing it into small glass jars (old mustard jars etc), but the seal is not good, so it dries out or goes everywhere when you shake it up. What do you guys do? Cheers, Brett
-
Hi Brian, I'm not adding all the rest of the cannon rigging - I started to, but found it too "busy". It would have made sense to leave the bowsprit etc. to later, but I am not renowned for my sense! That will be put in the "next time, Gadget" memory bank. I am using the Nuremberg defence - pretty strictly following what General Hunt says in the practicum. I tried reading ahead, but quickly revert to just doing it. That is why I am using PVA glue wherever possible - easier to remove and redo. Rinse and repeat! Cheers, Brett
-
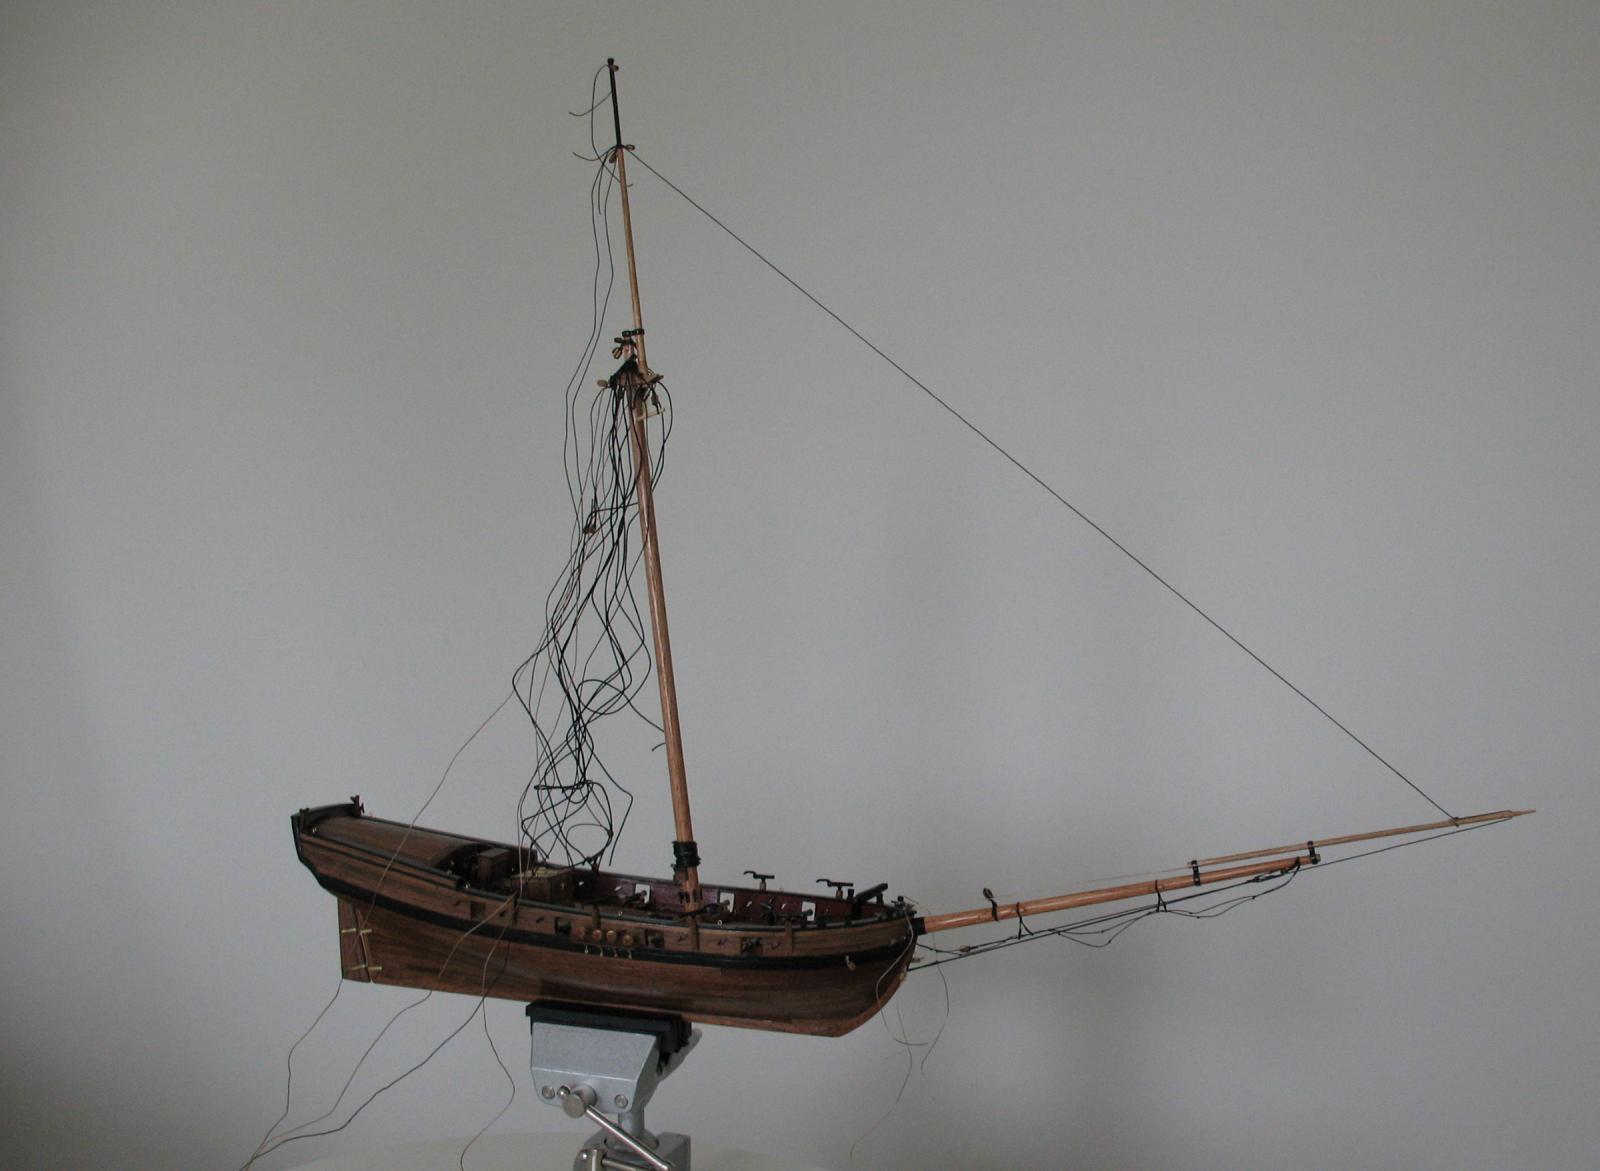
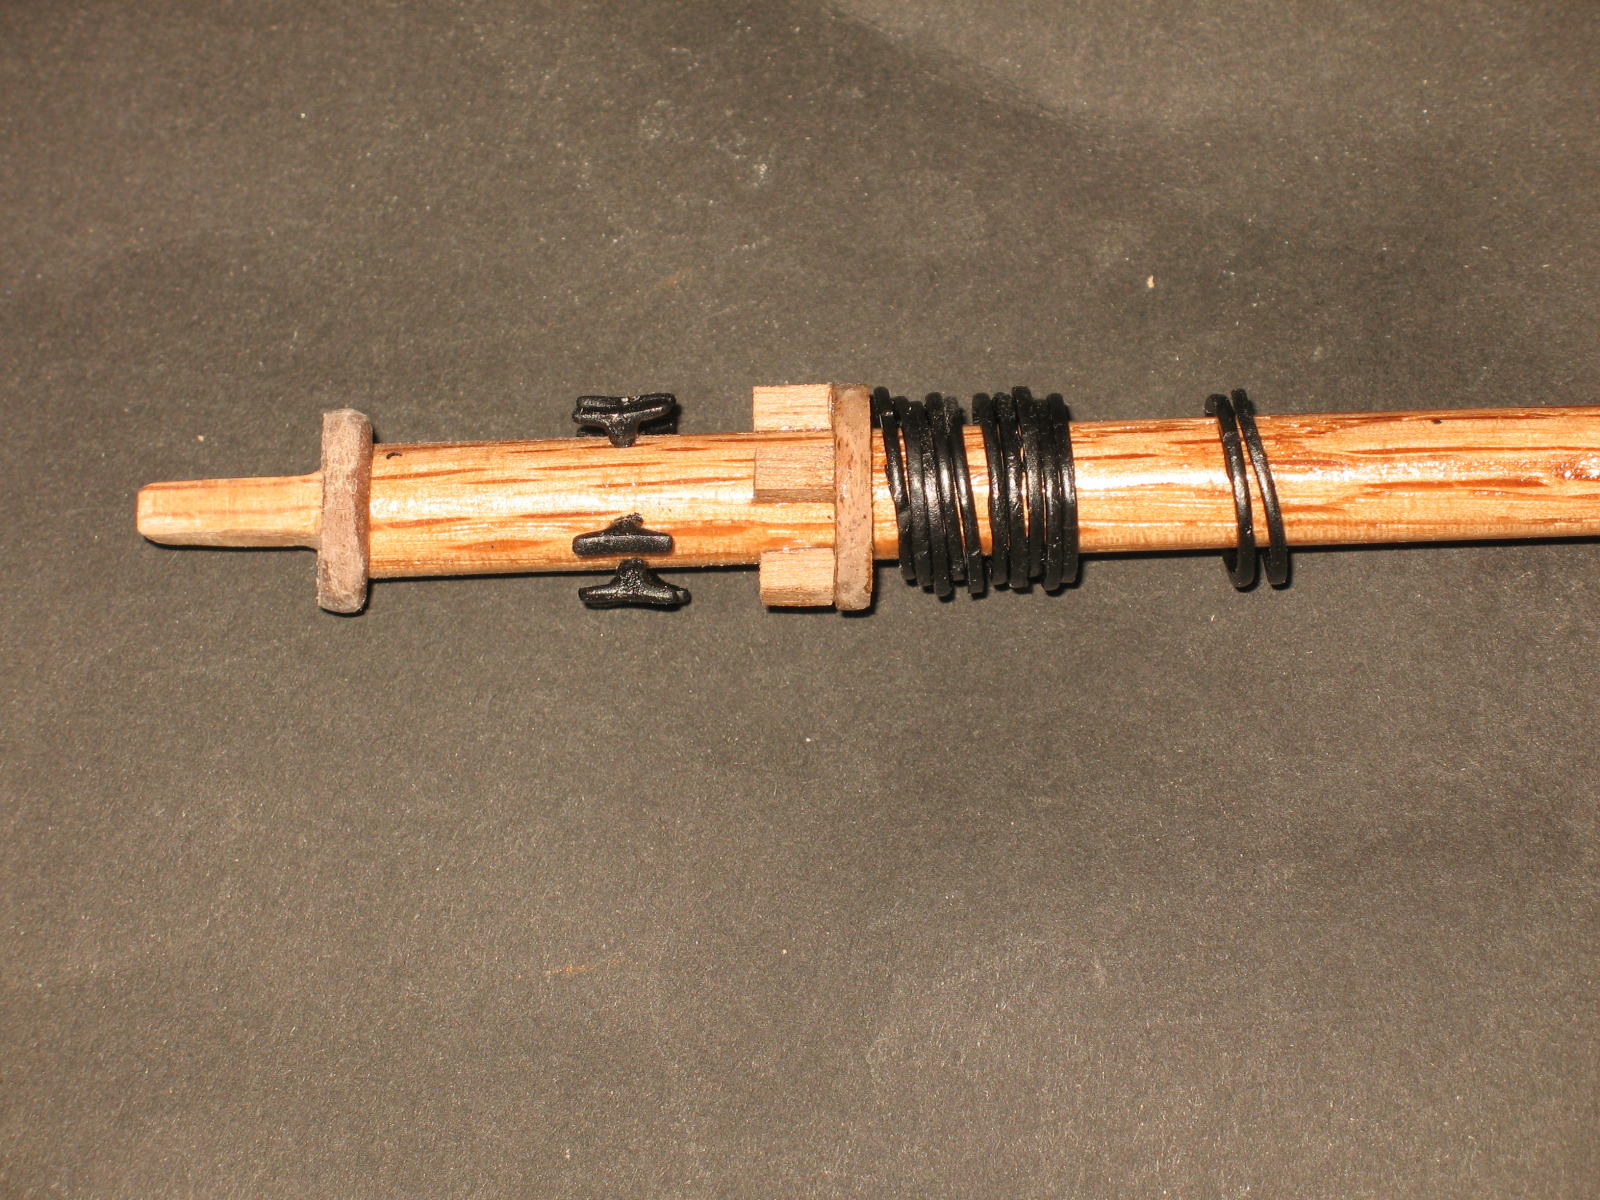
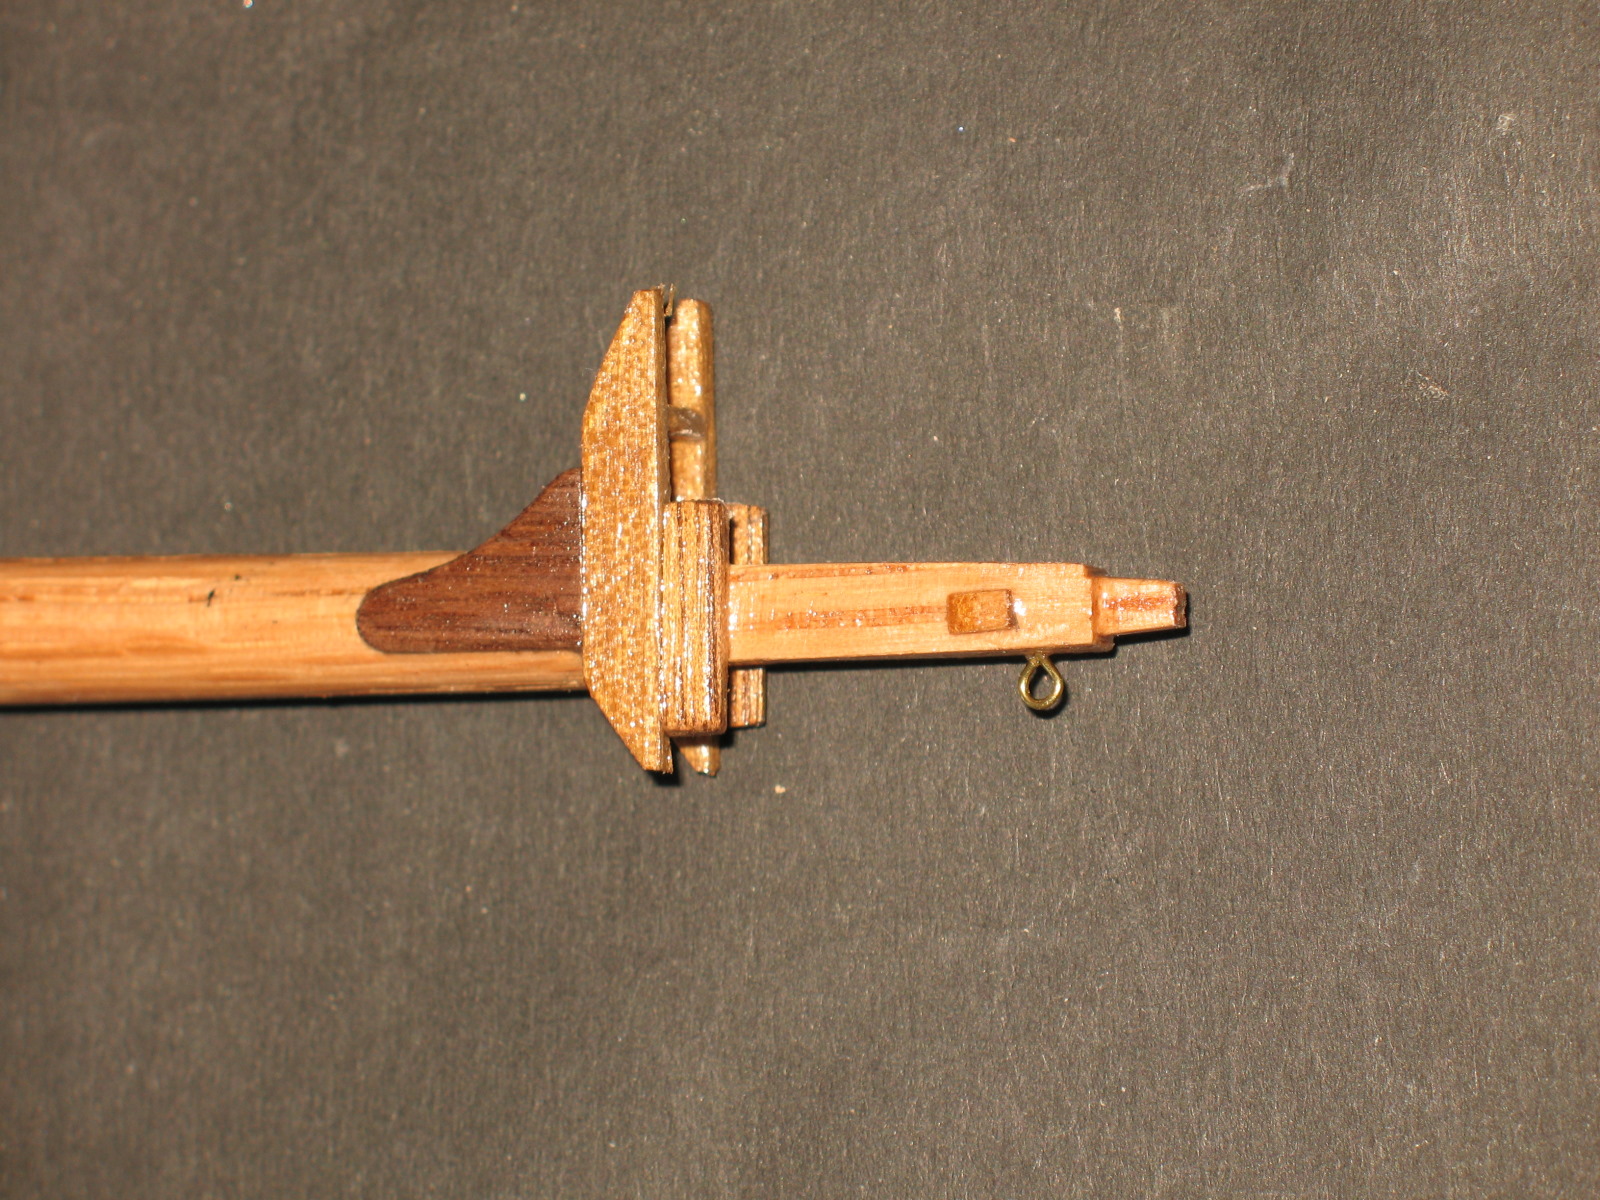
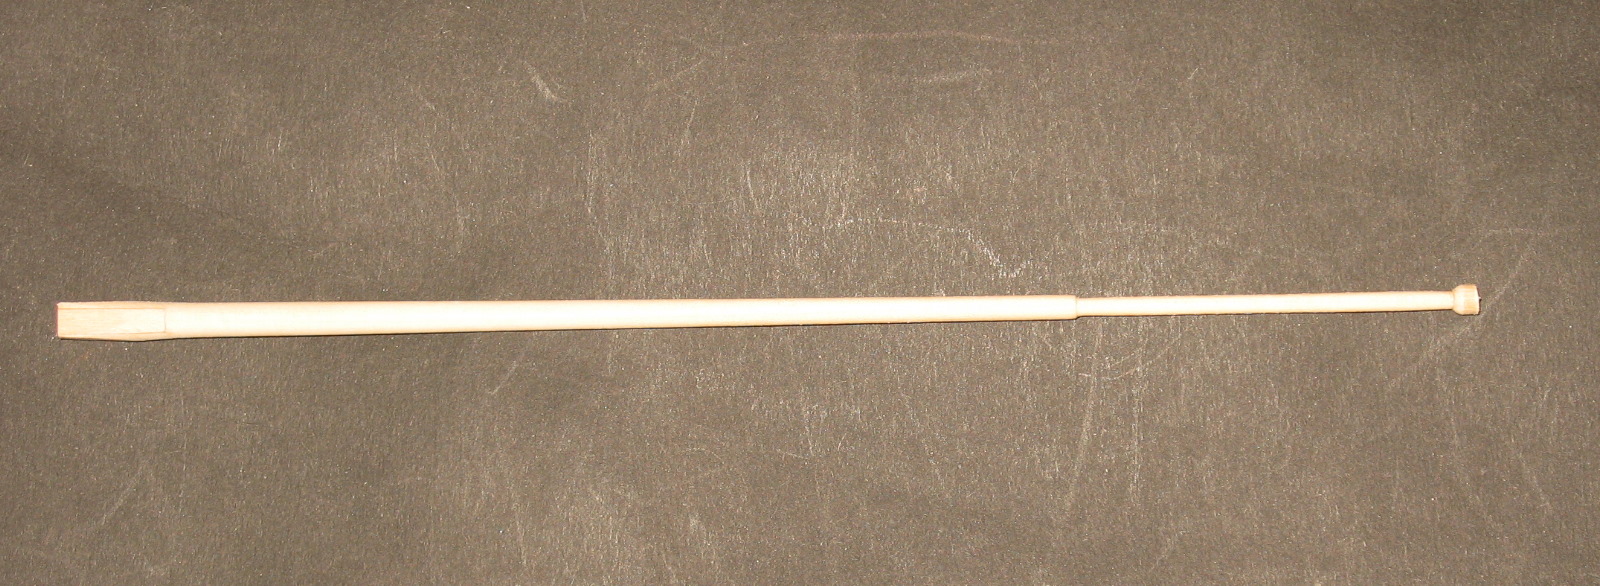
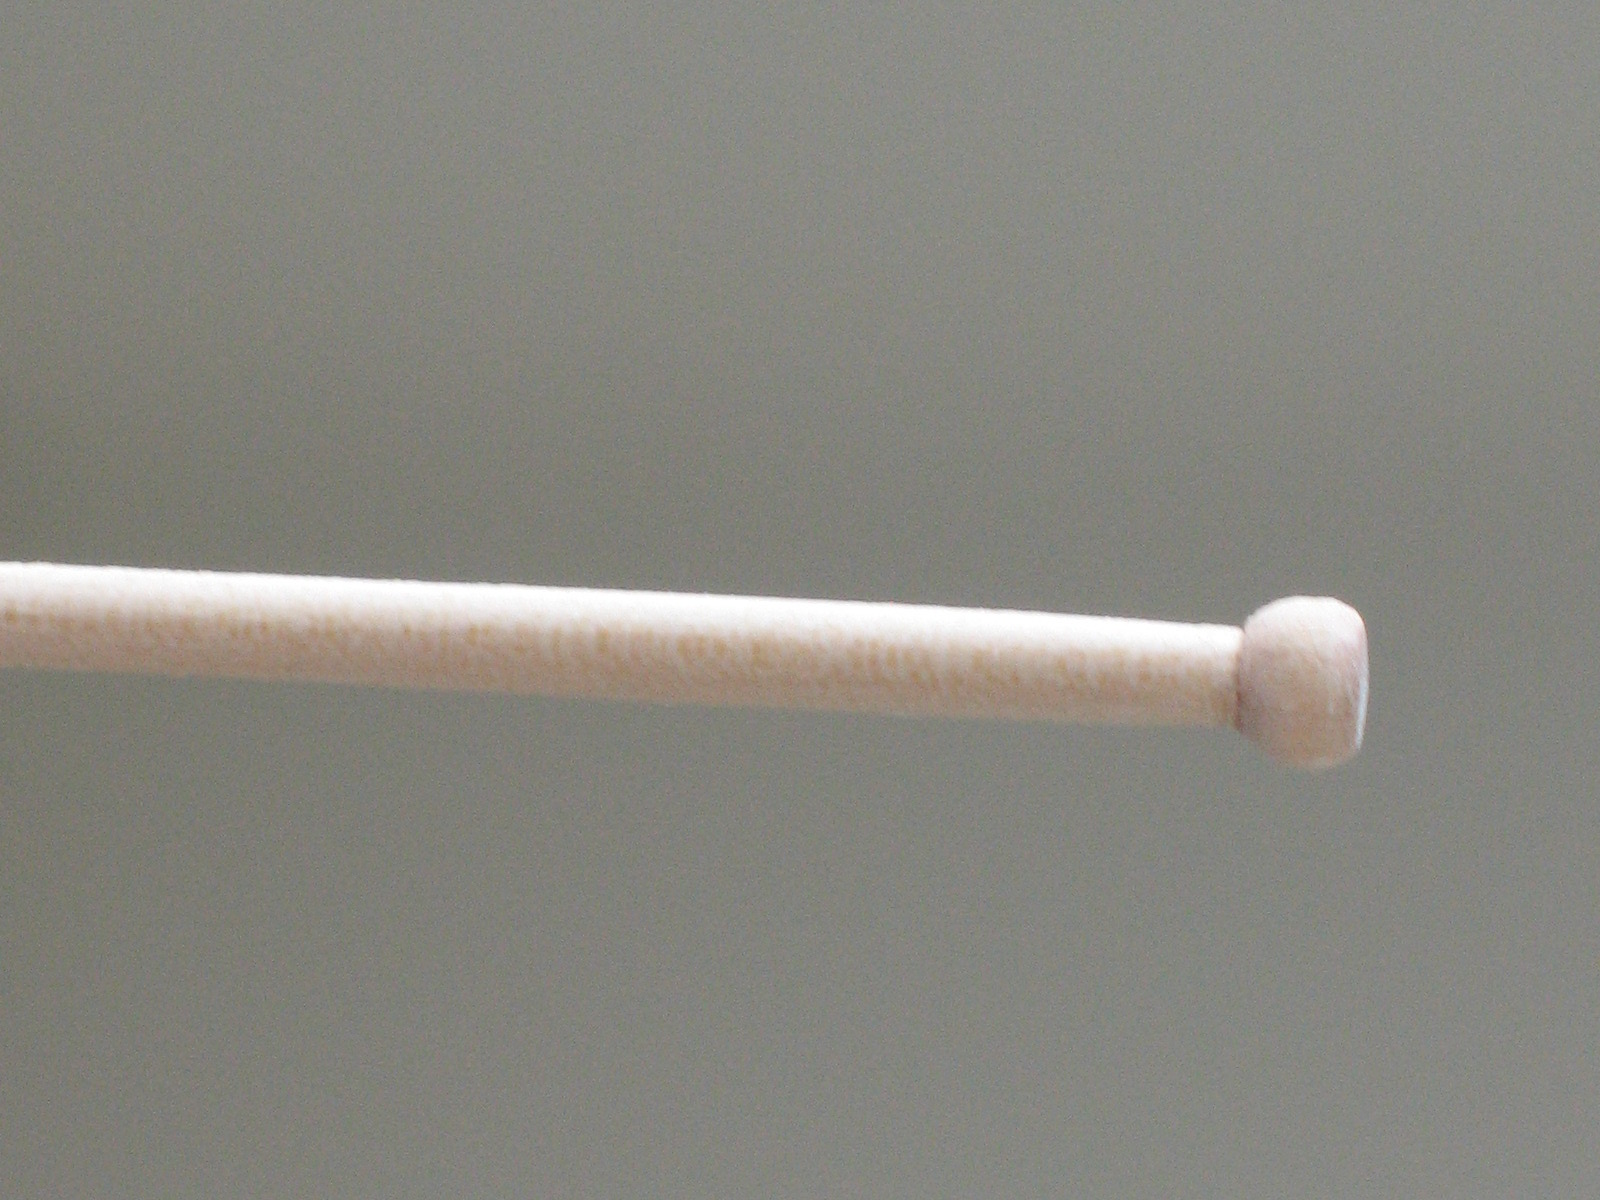
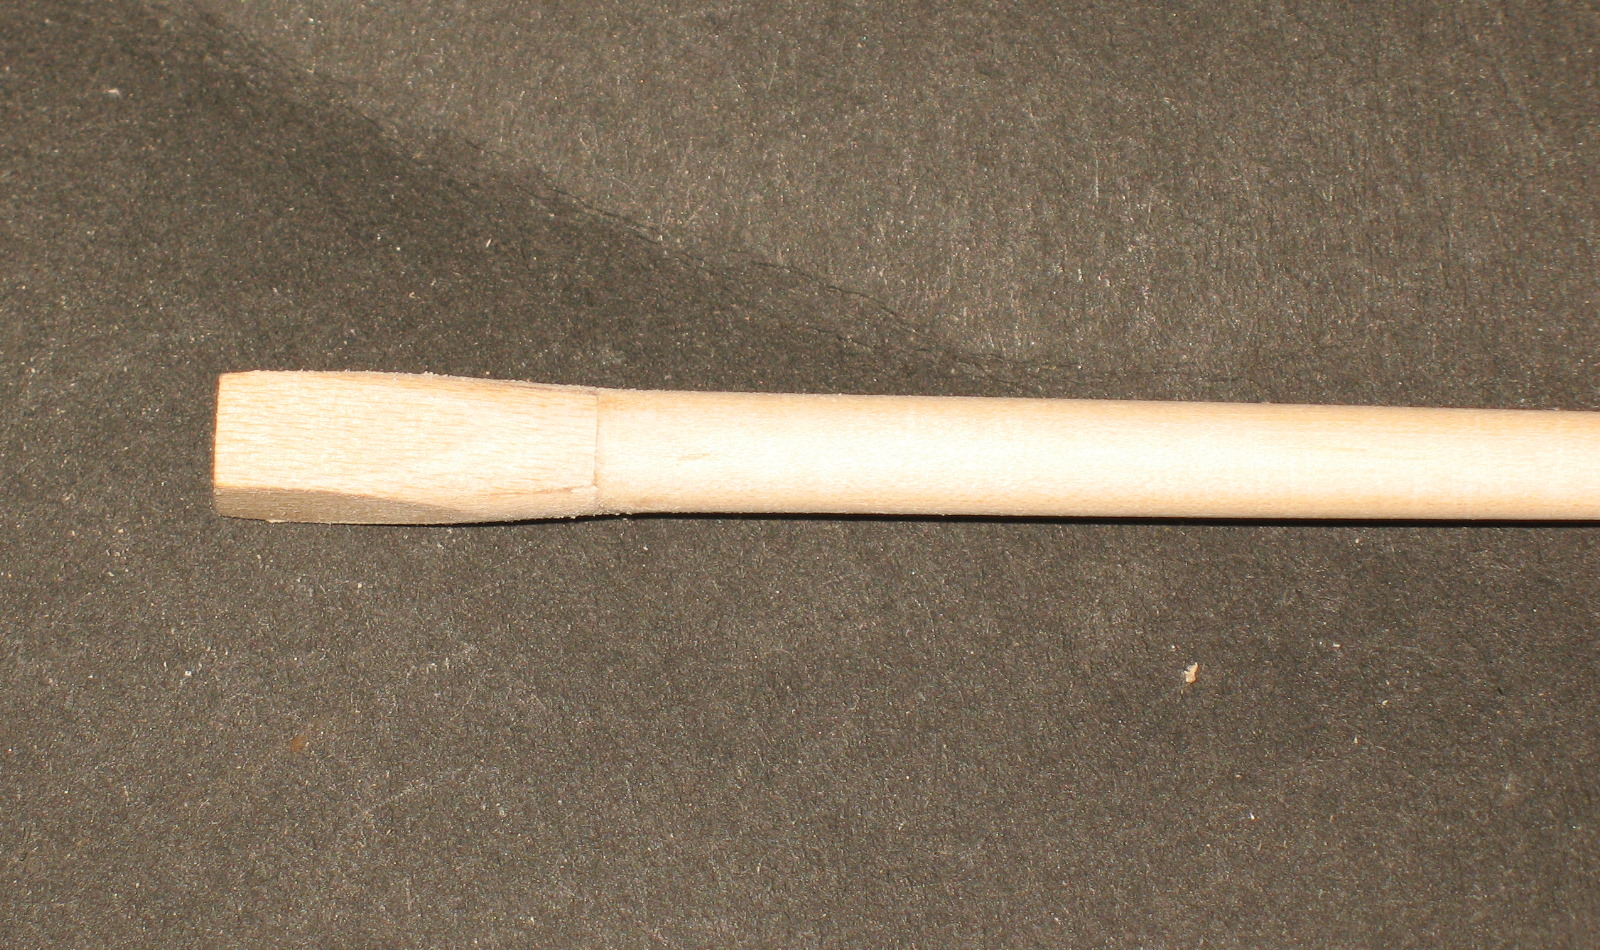
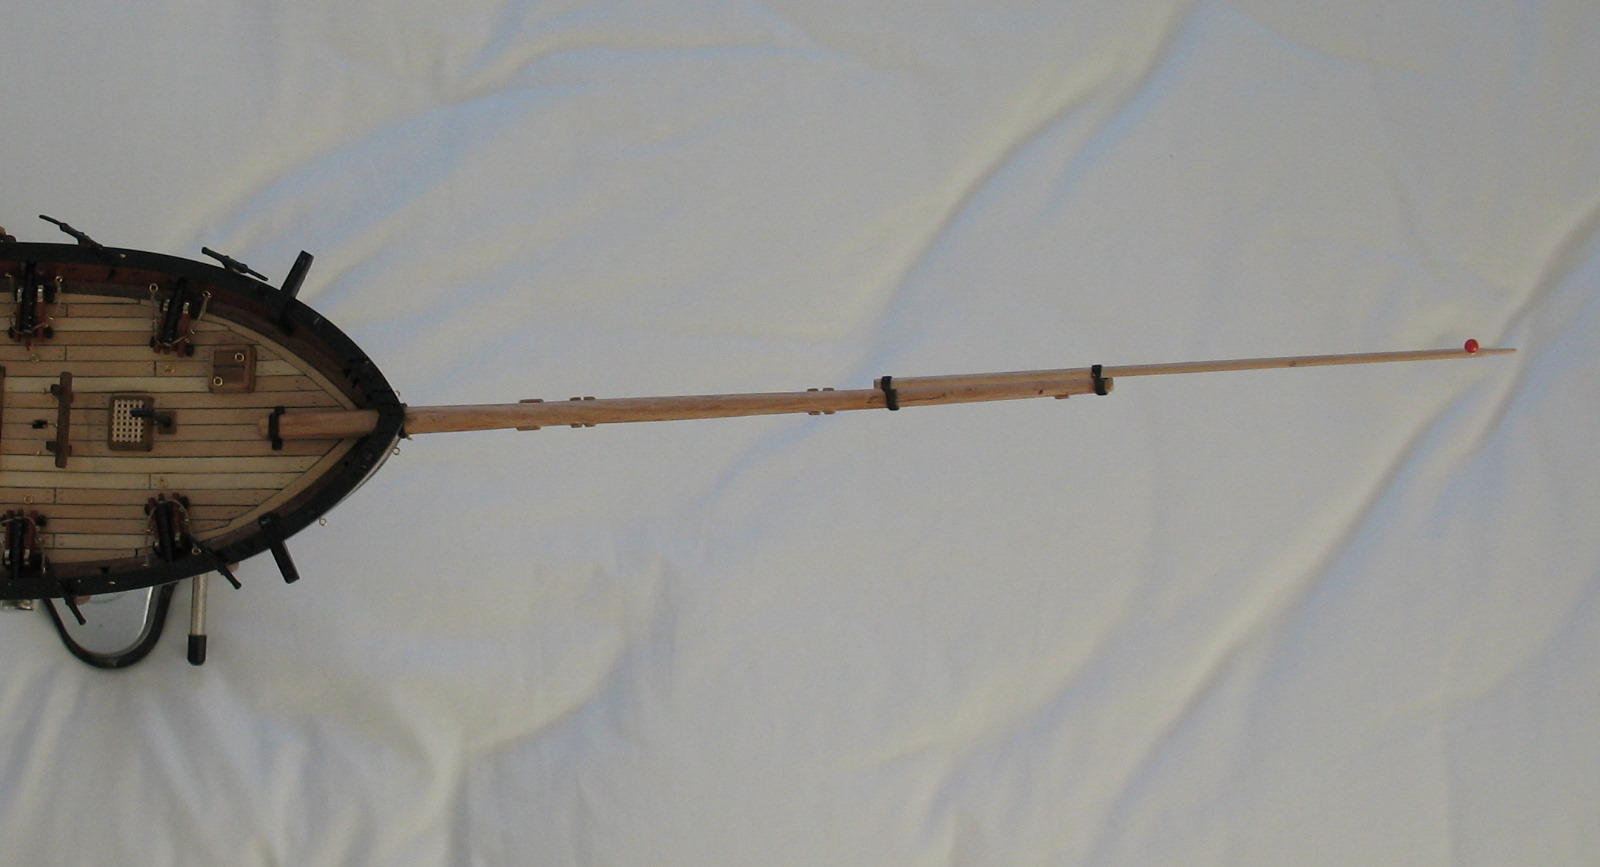
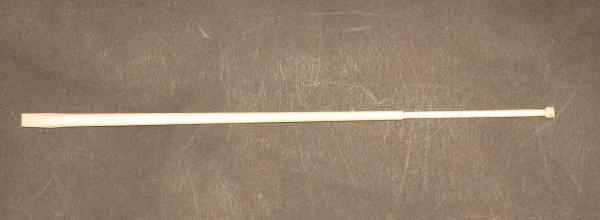
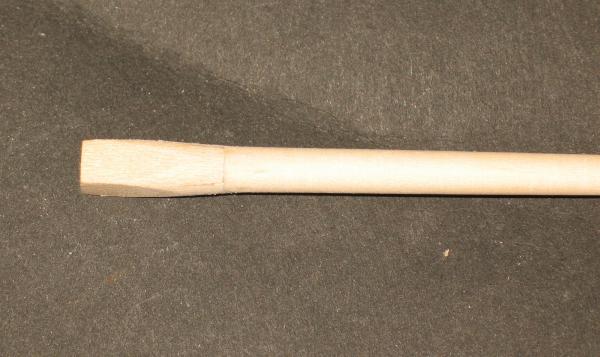
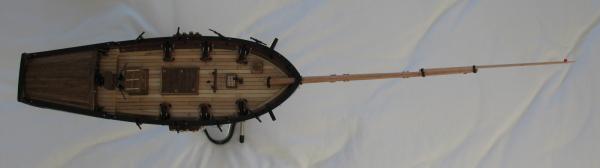
Just a couple of views of the bowsprit and jibboom. Once again I started following the practicum, without thinking ahead! The suggestion is to square off the deck end of the bowsprit, then worry about tapering it. This is wrong, if, like me, you fasten the dowel in a drill to sand it down. Taper it first then cut the deck end. Ditto, of course, for any other items such as the mast and jibboom. The red thing at the tip of the jibboom is just the head of a pin, put in to help me orient things while gluing. At this stage these are not sealed, and I am still unsure what I will paint. Cheers, Brett

- 129 replies
-
- 3
-
-
- armed virginia sloop
- model shipways
- (and 1 more)
-
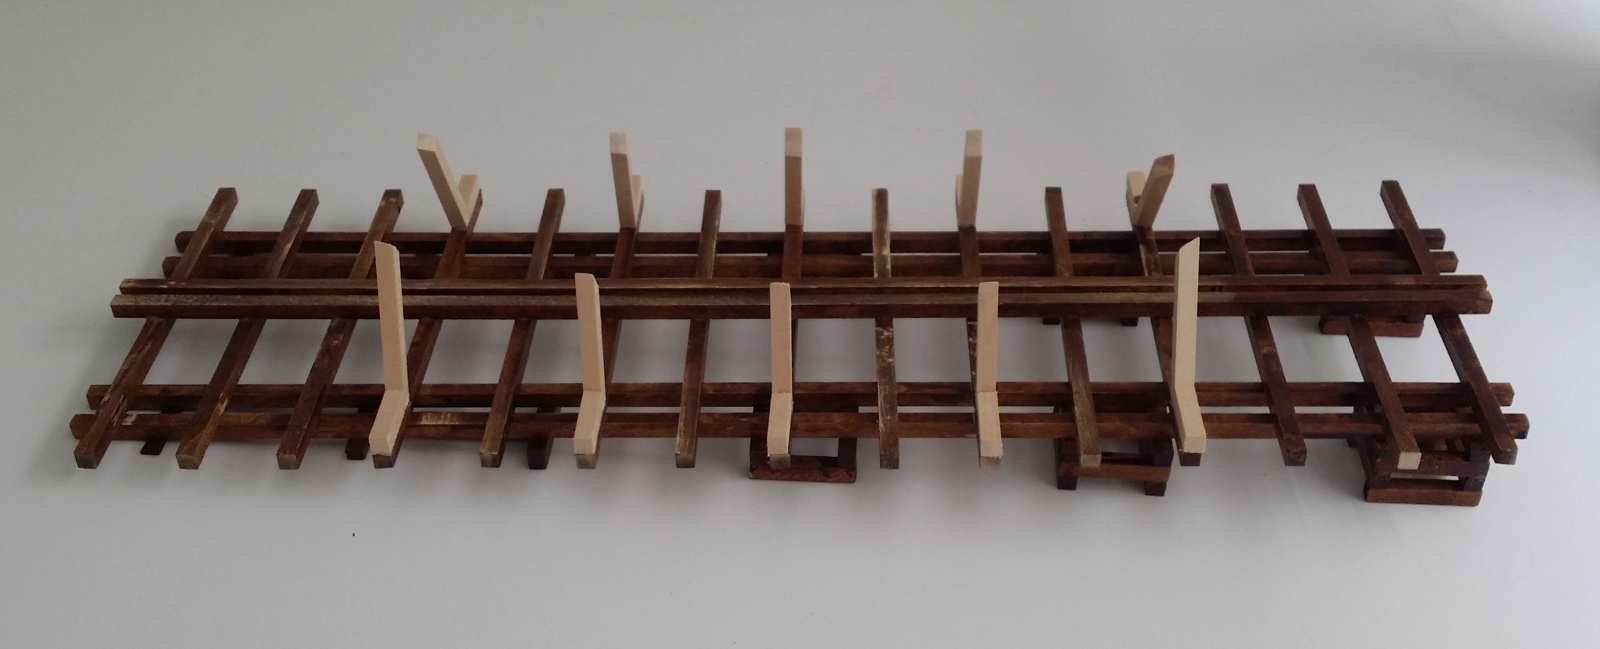
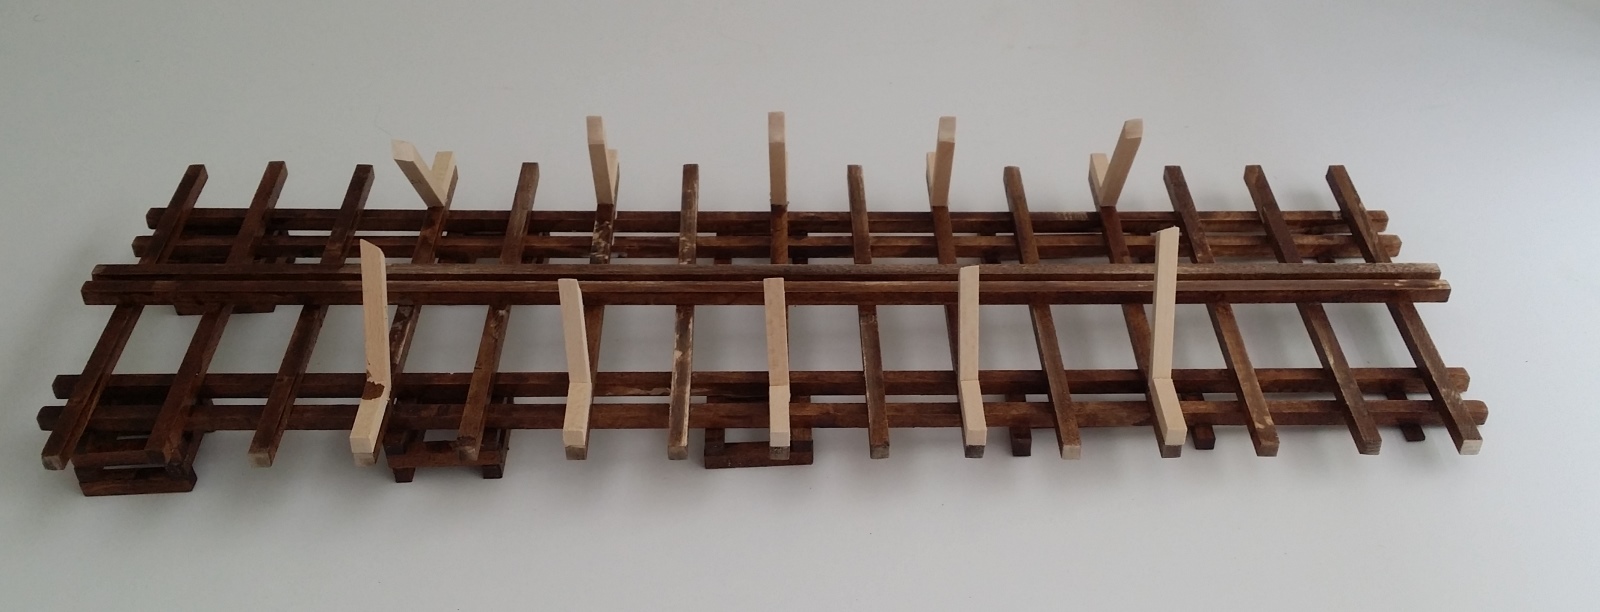
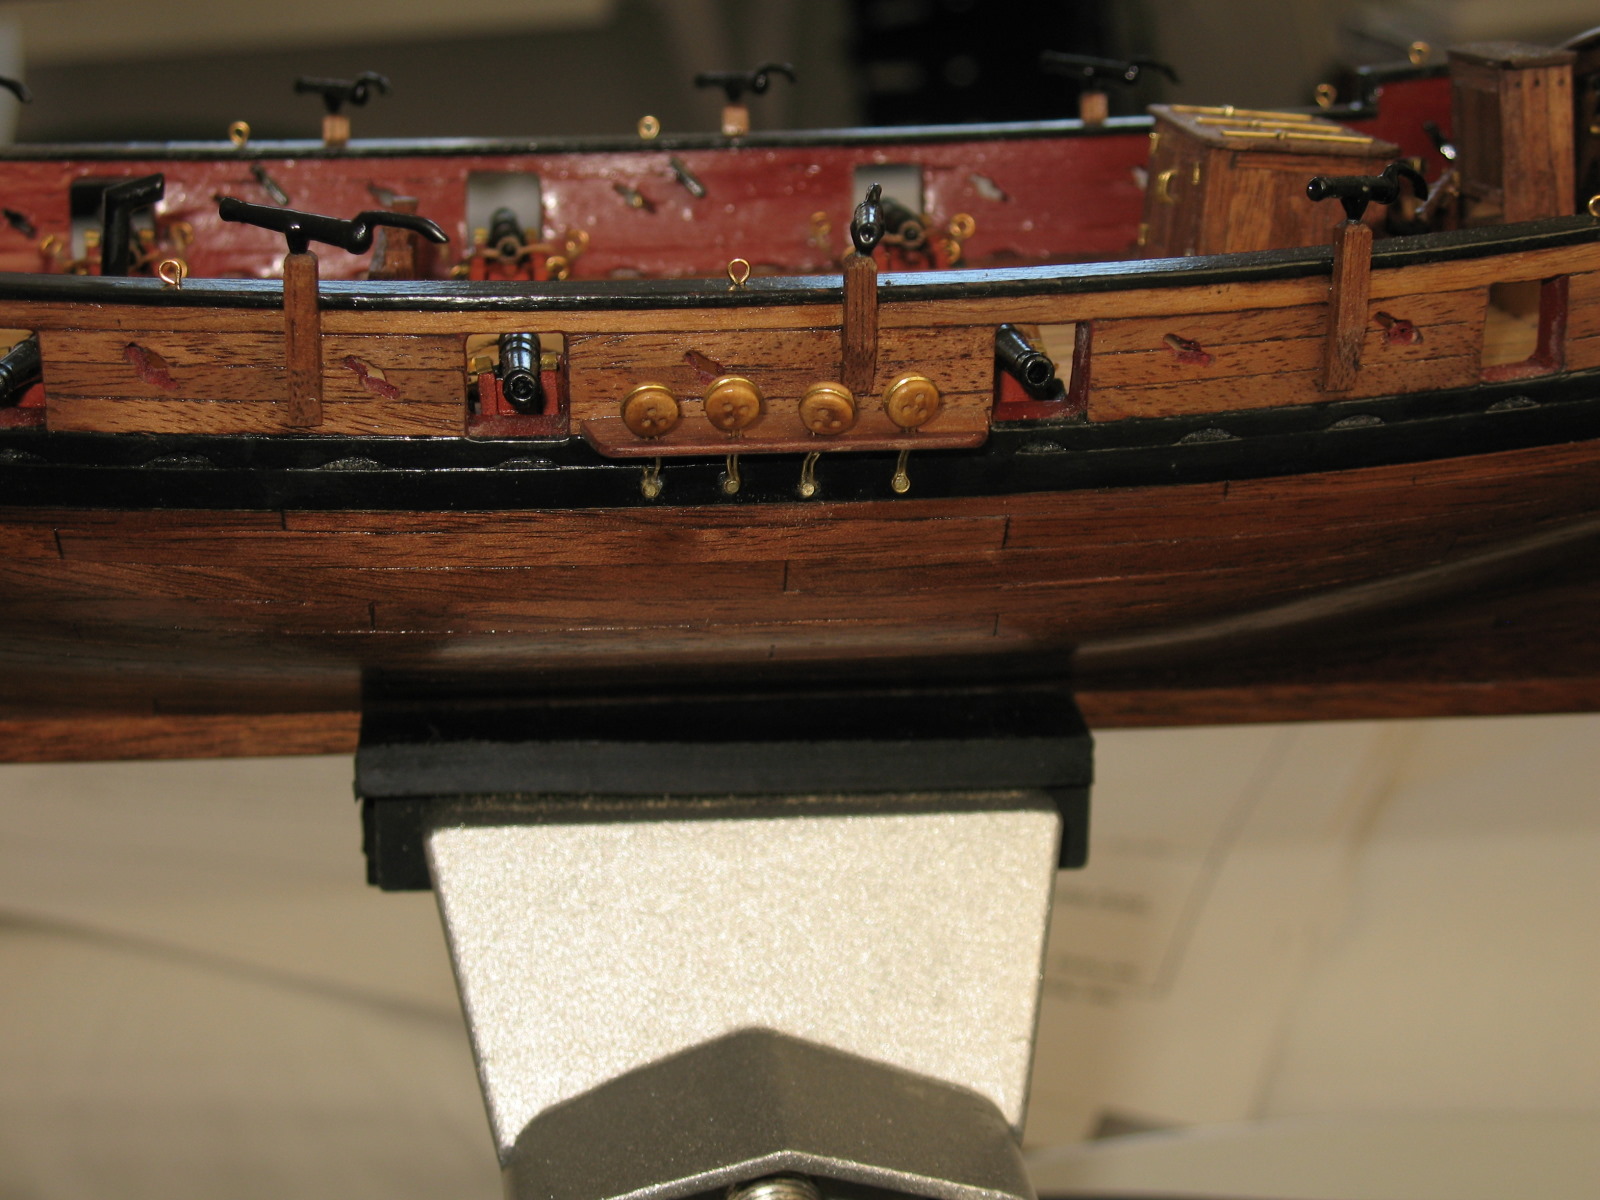
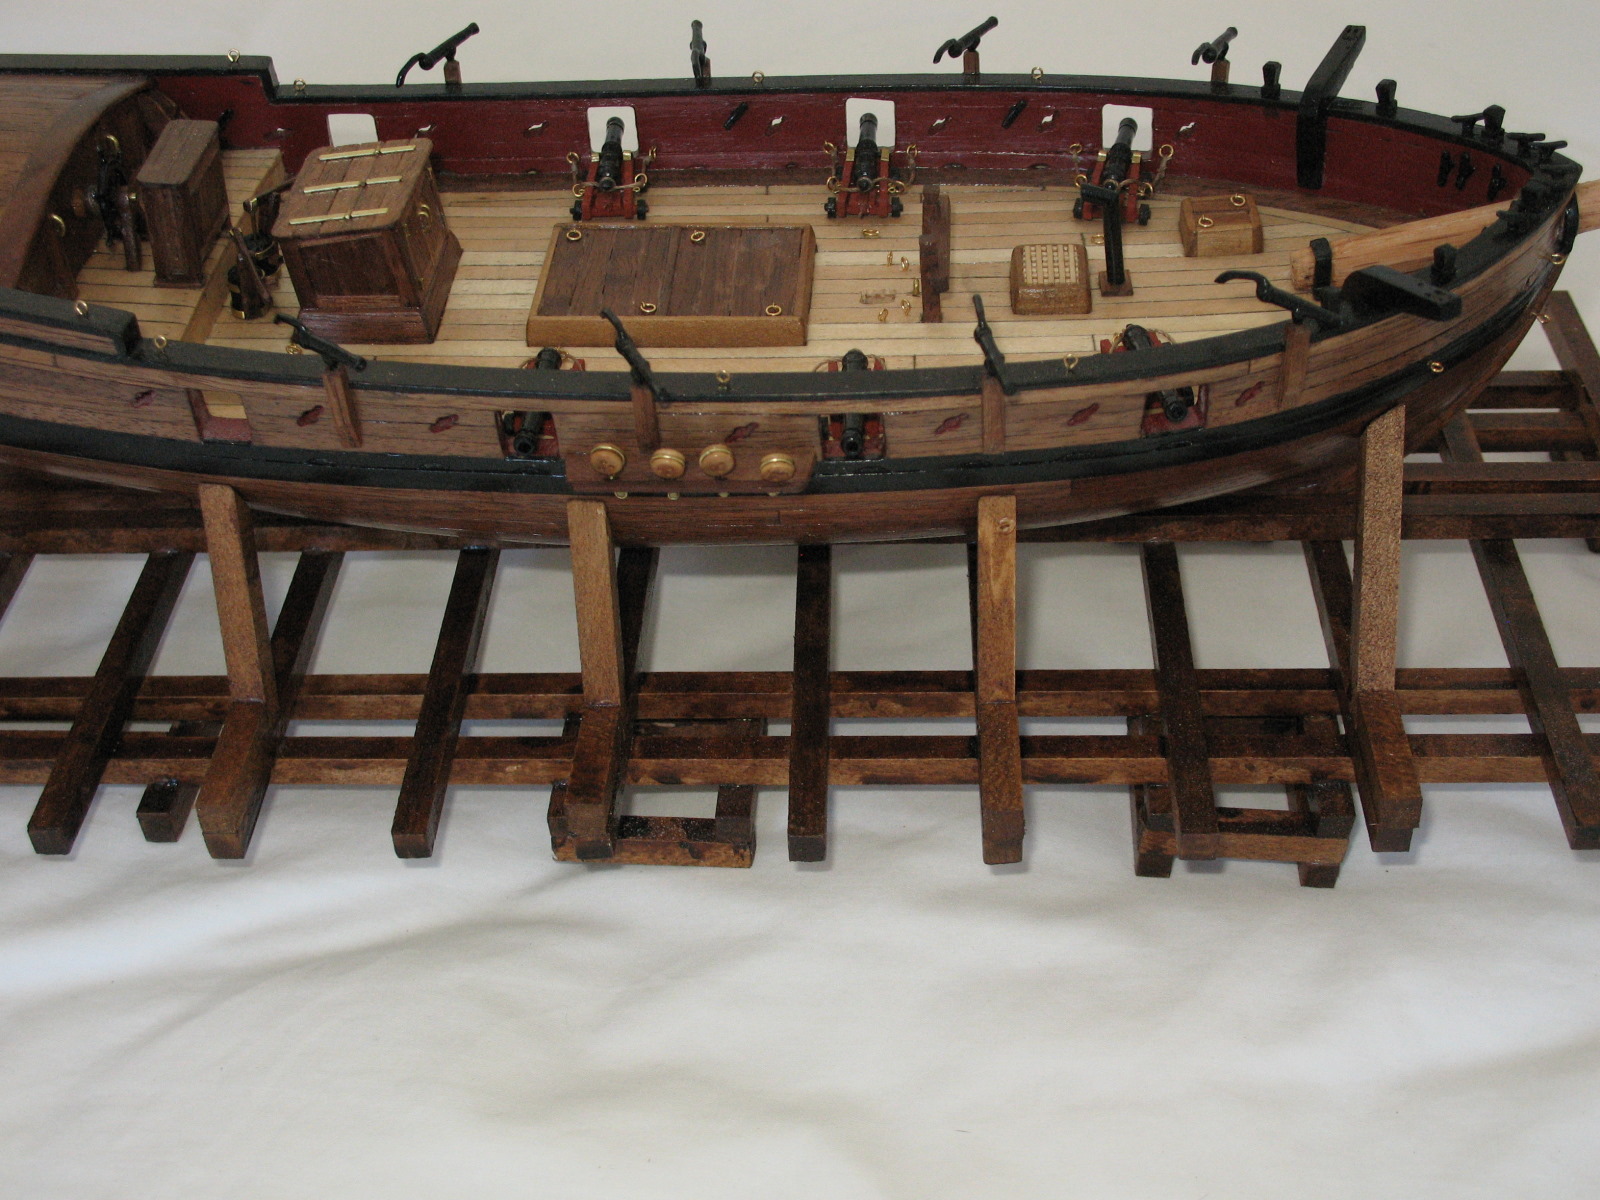
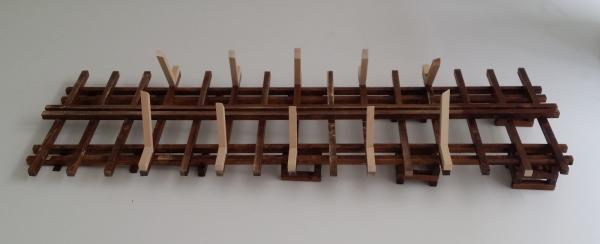
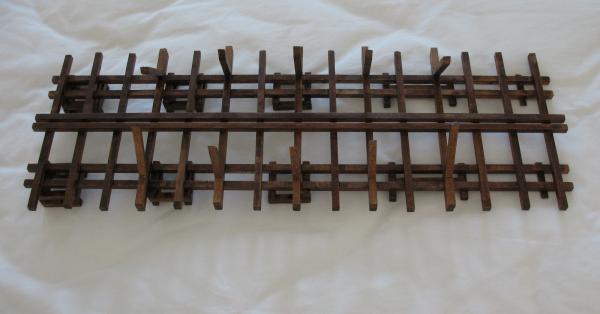
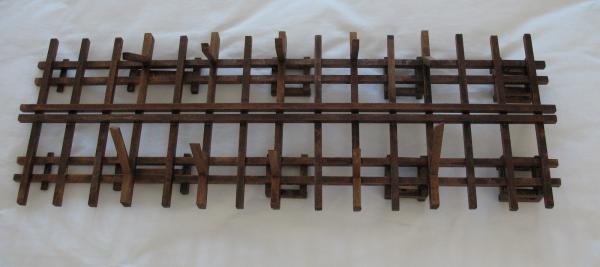
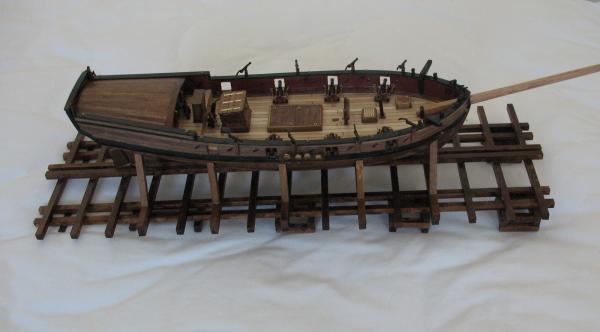
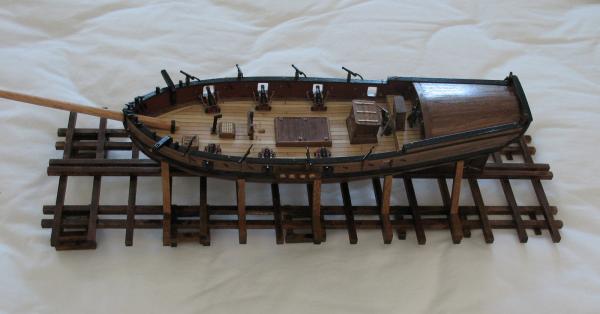
Next step - the slipway. There is nothing useful in the included plans/instructions for this. Yet another fault. As I've said, I'm using Bob Hunt's practicum, so I followed his instructions. I haven't got progress photos, as it's pretty straightforward. One tip, ignore the suggestion to paint/stain the timber before assembling. It seems obvious in hindsight that the glue sticks better to unsealed timber. Here we are after adding the supports for the boat: And after more staining and tidying: Next came the channels and chain plates. Another hint for those who come behind - don't waste time hunting for pre-cast chain plates in your kit. They ain't there! You have to bend them from brass wire. This is where it helps to have the right pliers for the job! Even with my years of wire-bending, I could not get them perfect: So, here's the AVS sitting on its slipway, as I get into the bowsprit and jibboom: Model ship building seems to be taking up less of my time these days. Too much to do, now that I'm retired! Cheers, Brett


- 129 replies
-
- 4
-
-
- armed virginia sloop
- model shipways
- (and 1 more)
-
Hi Gunther, I like your thinking about how to get the bulkheads down to the bearding line. I didn't think of cutting the grooves deeper, and shimming the deck surface, but it makes so much sense! Couple of traps I wish I had known: It's easier to cut the rabbet before gluing the keel. I did it the other way round, thinking the rabbeted centre keel would not glue well to the keel, stem etc. Unlike my first model attempt ( an Artesania Latina) this model comes with plenty of spare timber for remakes. There are no plans for the slipway that is shown on the box. I've just reached the stage involving "chainplates". I searched for a long while before I noted the tiny note saying they were not available, so make your own! Getting there is half the fun! Cheers, Brett
- 831 replies
-
- 2
-
-
- Armed Virginia Sloop
- Model Shipways
- (and 1 more)
-
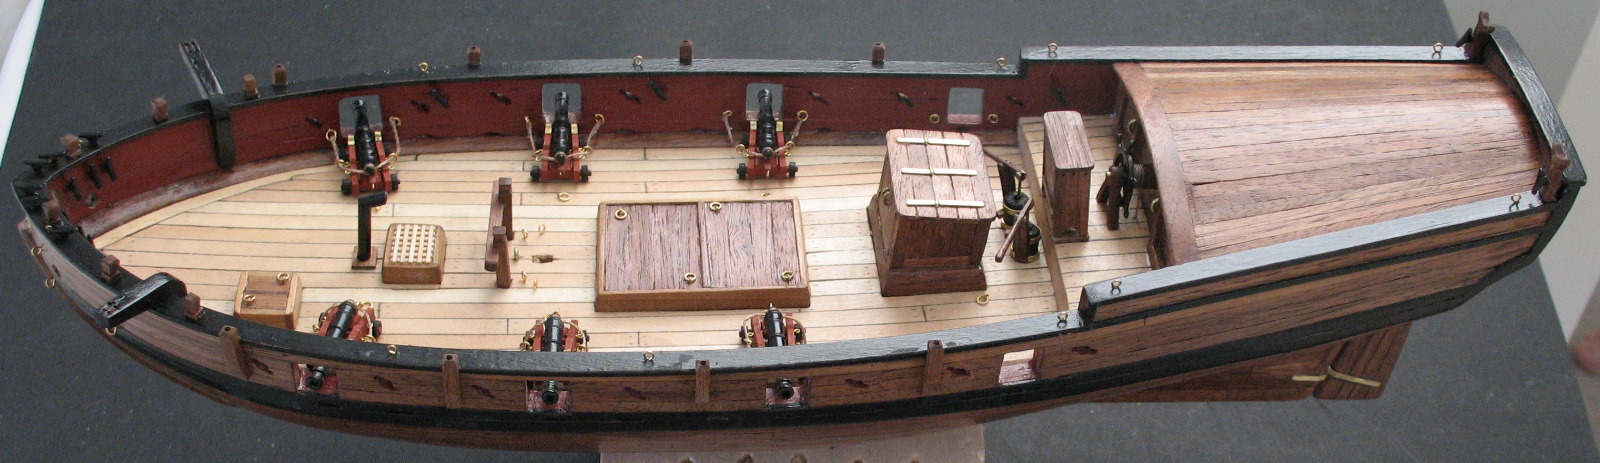
Ken, interestingly that rudder is made from only 2 pieces, with grooves as necessary to simulate the planks! I've spent ages fiddling with the next few bits - the joys of retirement! Following someone's advice, I didn't fit the hand cannons until I had finished other fittings. At first I thought I would leave the new timber unpainted: I made up a test ladder, and decided I could live with the scale, without redoing the doors. So I made both ladders in finer timber than the practicum/plans suggested, and I think they look OK: Then I decided to paint just the timberheads, leaving the cannon mountings just sealed. I've placed the swivel cannons in, but saw no point in gluing them. They swivel just fine: And now I'm making the slipway or stand or whatever it's called. Cheers, Brett


- 129 replies
-
- 5
-
-
- armed virginia sloop
- model shipways
- (and 1 more)
-
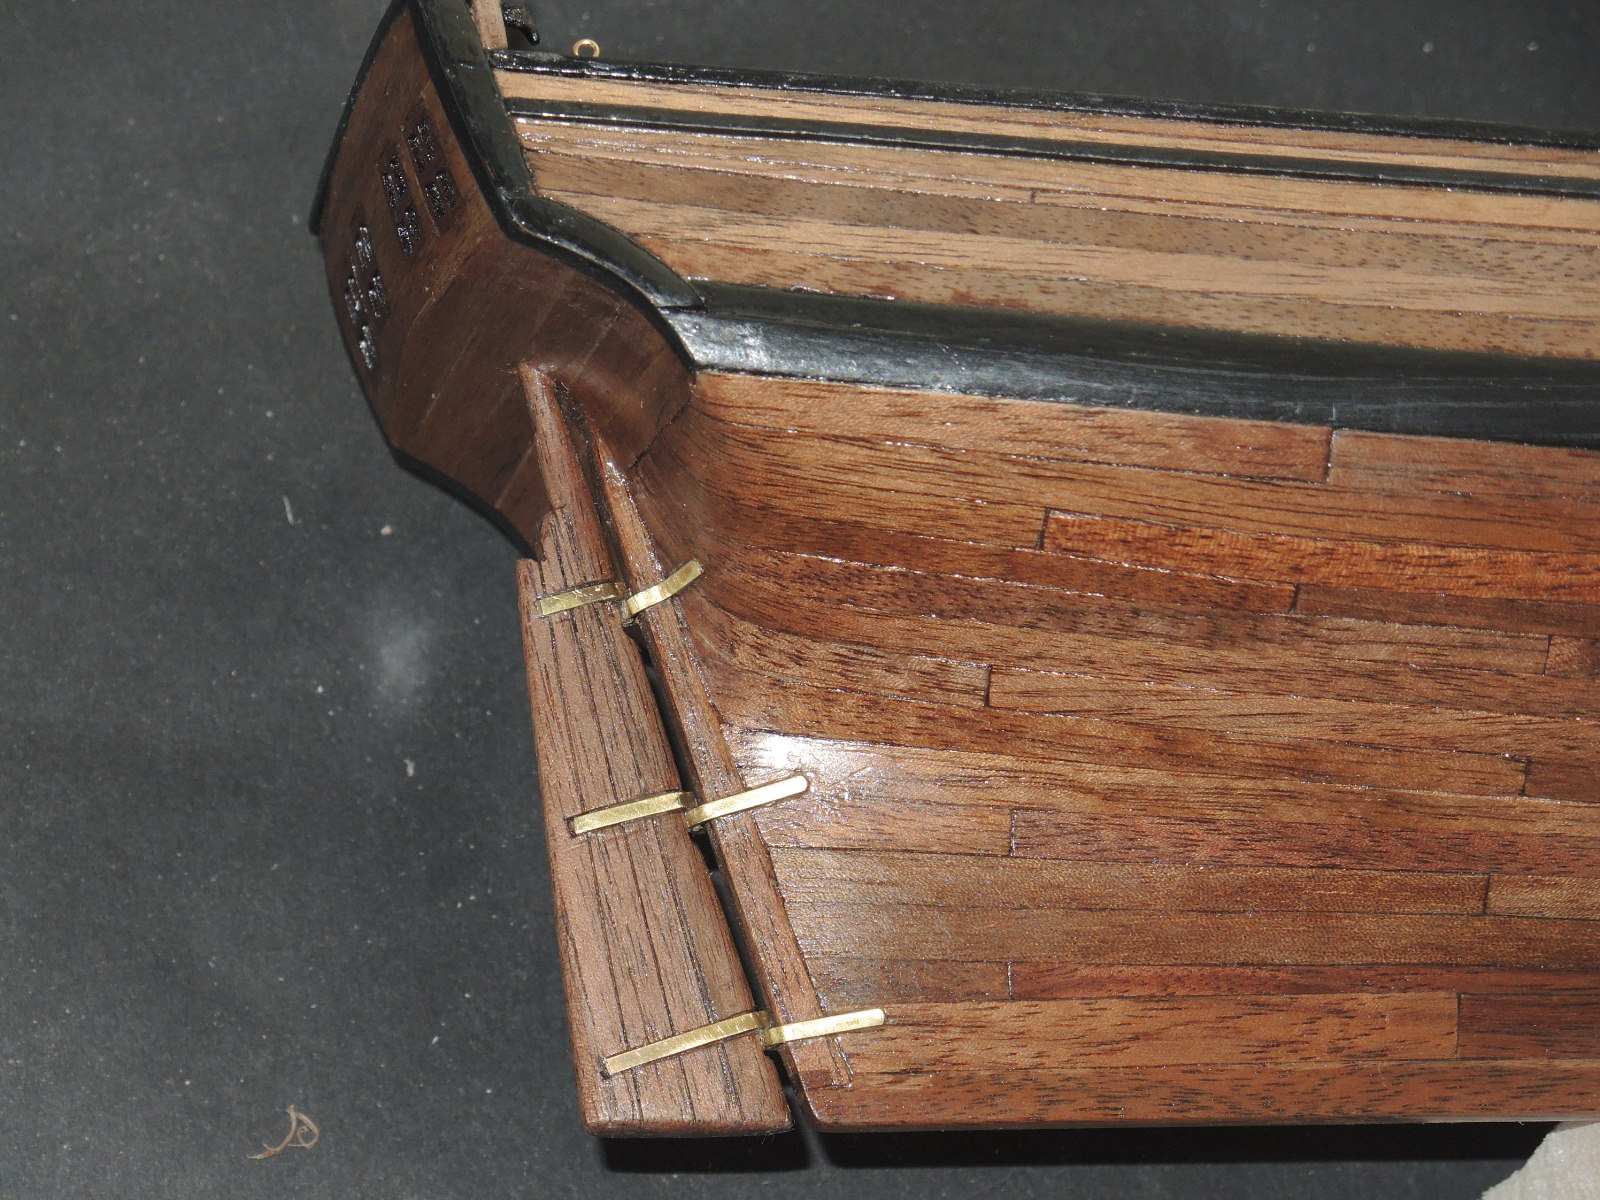
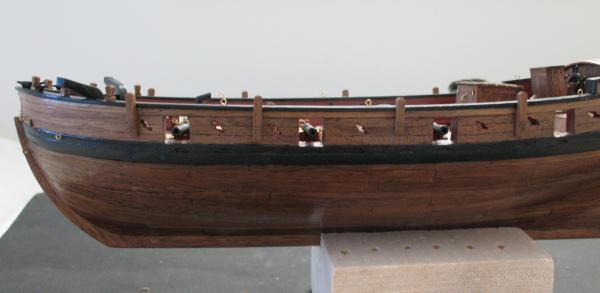
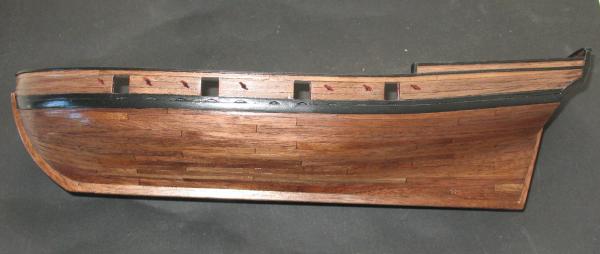
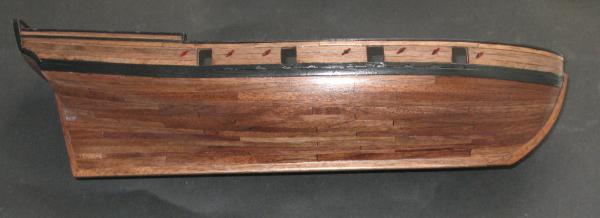
Between making the cannon trucks and rigging them, the practicum has you fit the rudder. Aaaaarrrggghhh! Somewhere in the dim and distant past (probably about 3 months ago, during planking) I removed the rudder from the walnut sheet. Then put it somewhere safe until I needed it. It will probably turn up when my model building room returns to its correct usage as a spare bedroom - one day. I've searched and searched, but no laser-cut rudder! So, I had to make a new rudder from scraps. This was my result: I found it very hard to cut the rebates in the rudder for the "pintle straps". And harder to get the "gudgeons" to stick to the hull. Seems wrong to cut rabbetts on the rudder but not on the hull, too. However, it was not something I was going to try. Cheers, Brett

- 129 replies
-
- 5
-
-
- armed virginia sloop
- model shipways
- (and 1 more)
-
Hi Eamonn, I am considering redoing the doors. I will test the difficulty vs benefit. On the other hand, by my measurement I still have room for a normal ladder width. It scales to about 400mm wide, so I might make up a ladder to test it. Hi Alistair, rigging is not my favourite sport! I enjoy working with wood, but not little fiddly blocks and ropes. I think my next model might be a power boat, or a canoe? Cheers, Brett
- 129 replies
-
- 1
-
-
- armed virginia sloop
- model shipways
- (and 1 more)
-
Thanks, Brian. I just looked at your Carmen log. Amazingly fast work. I will be interested to see how fast your AVS is! I (and others) will be happy to help a fellow sufferer. Cheers, Brett
-
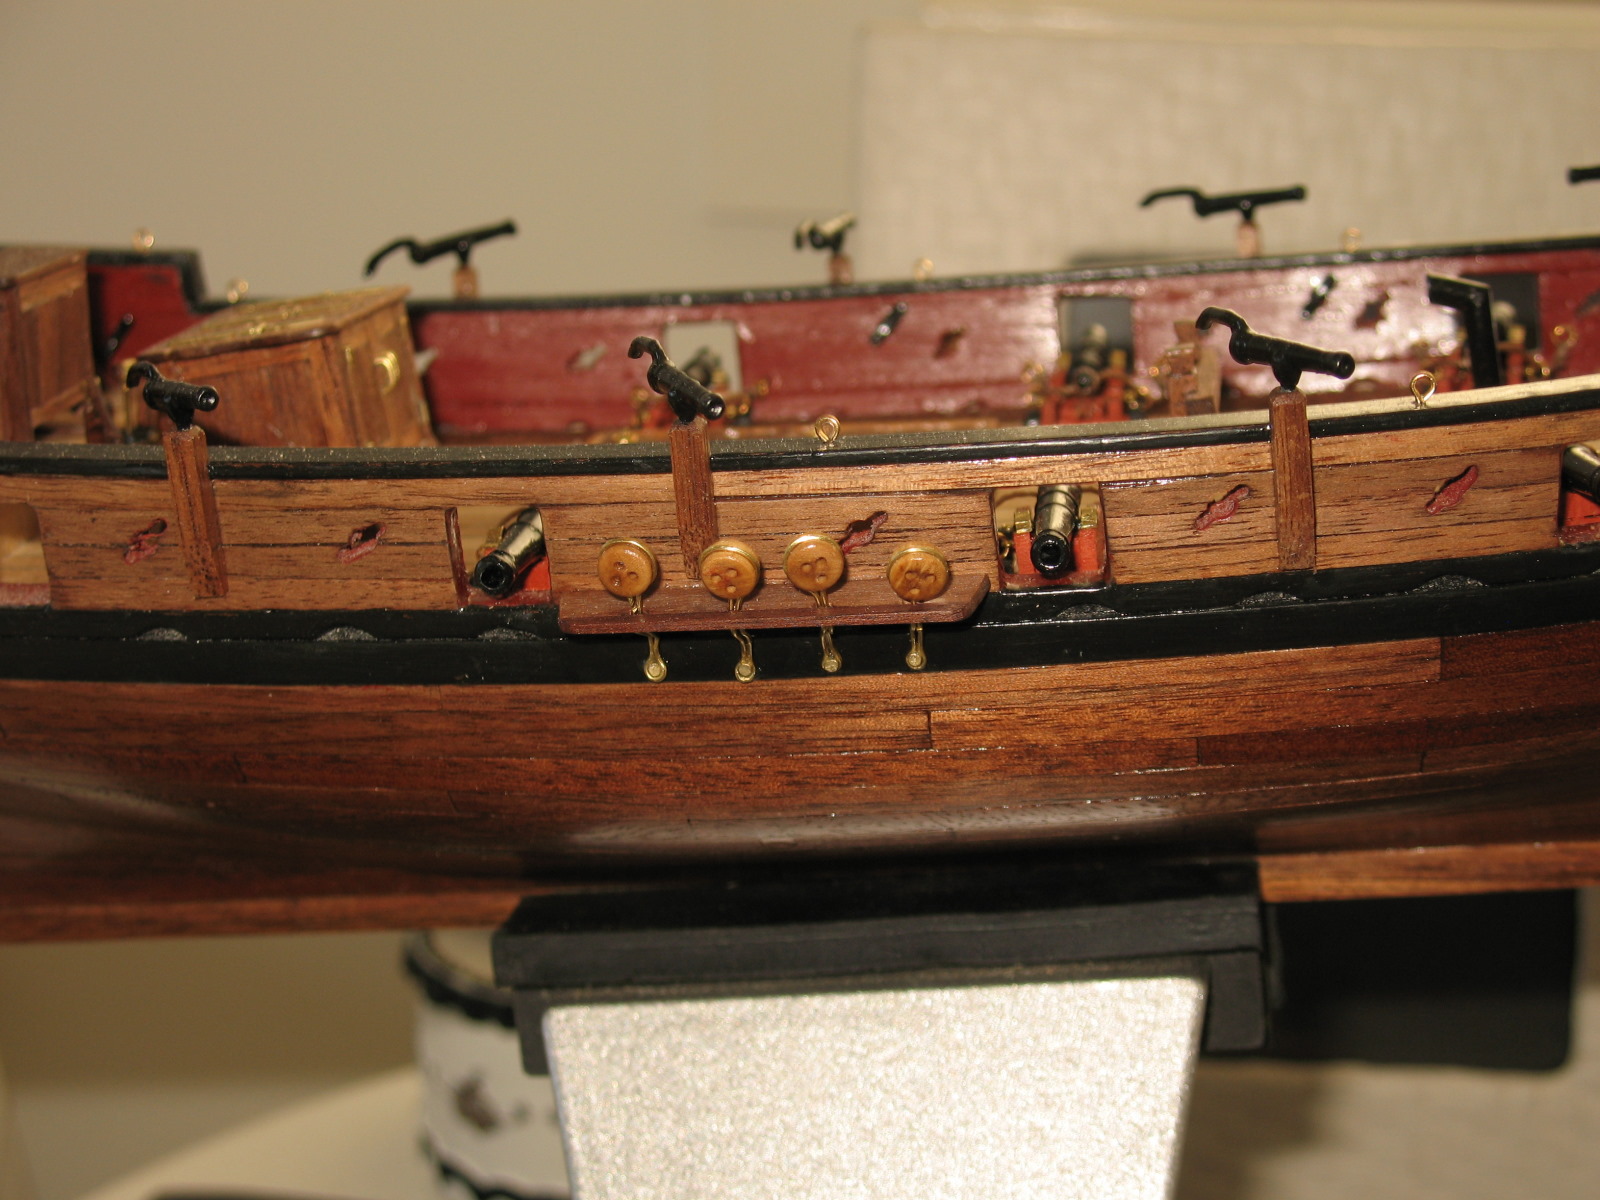
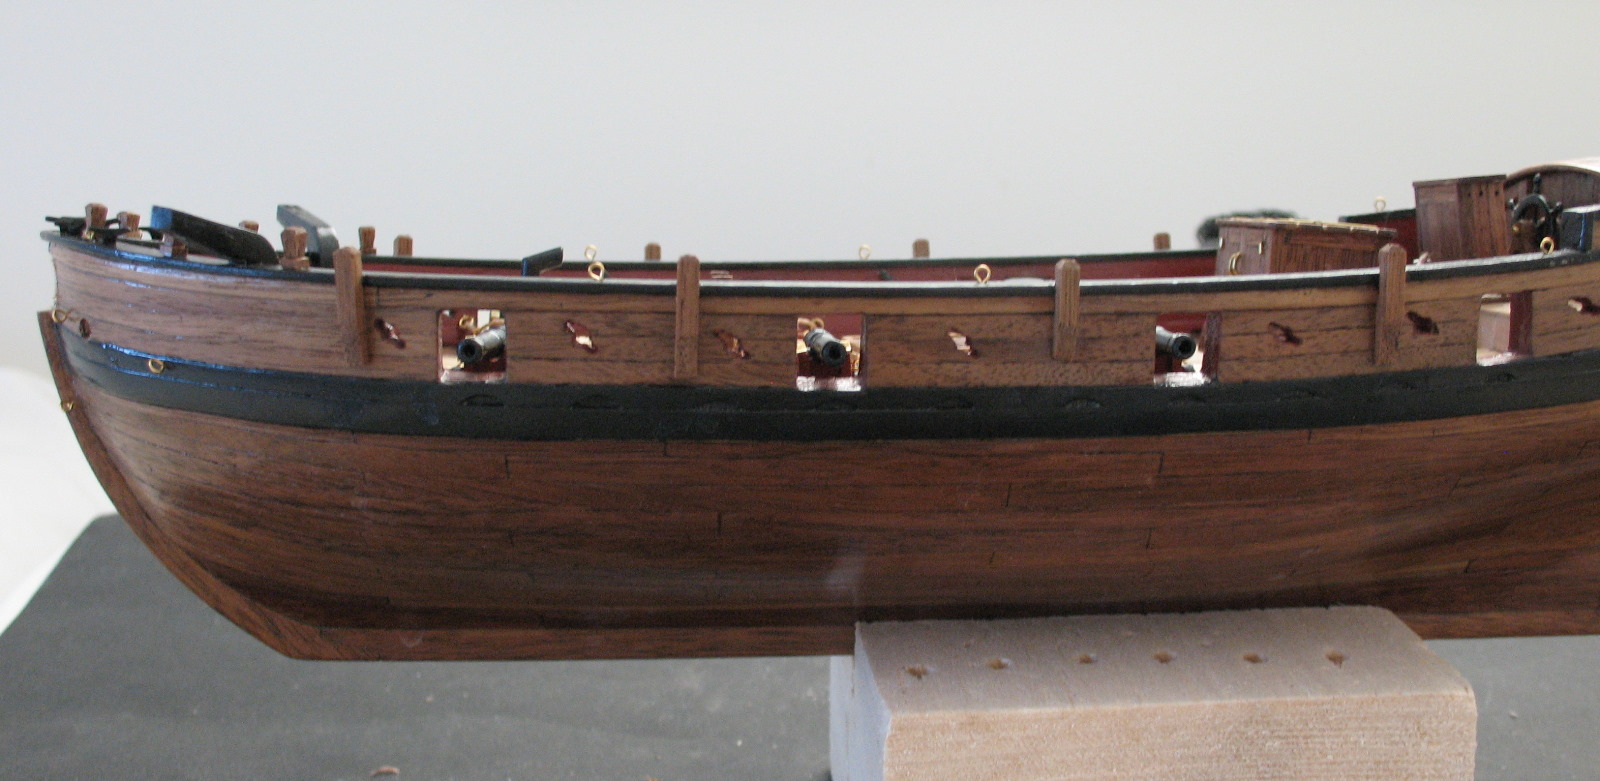
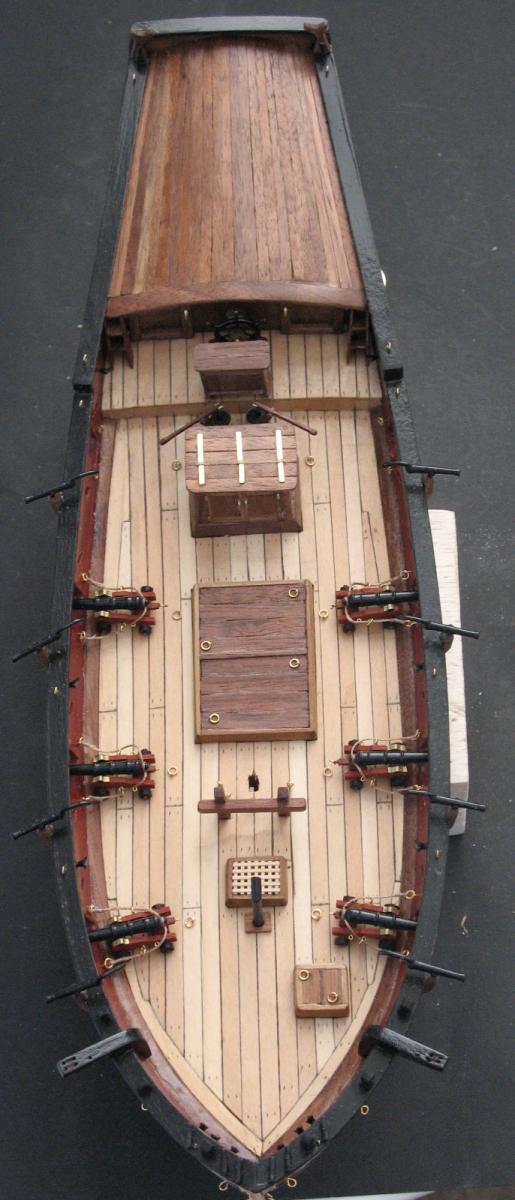
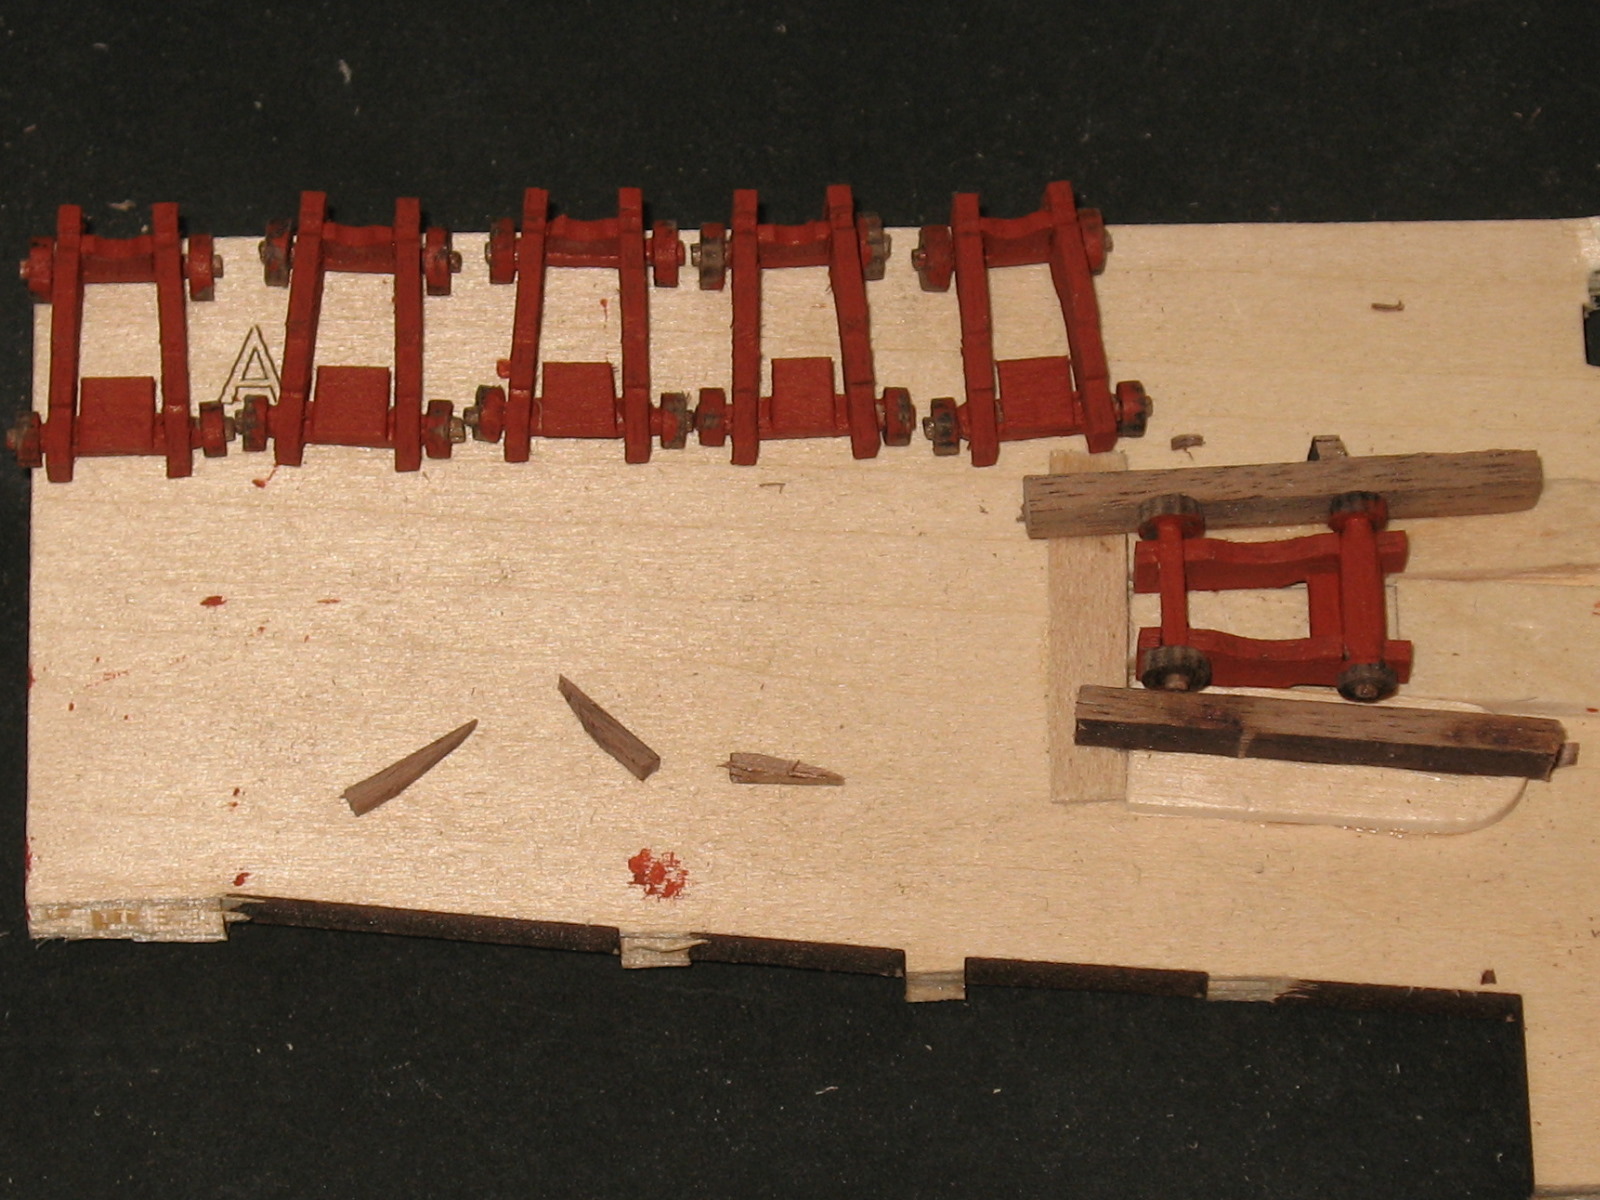
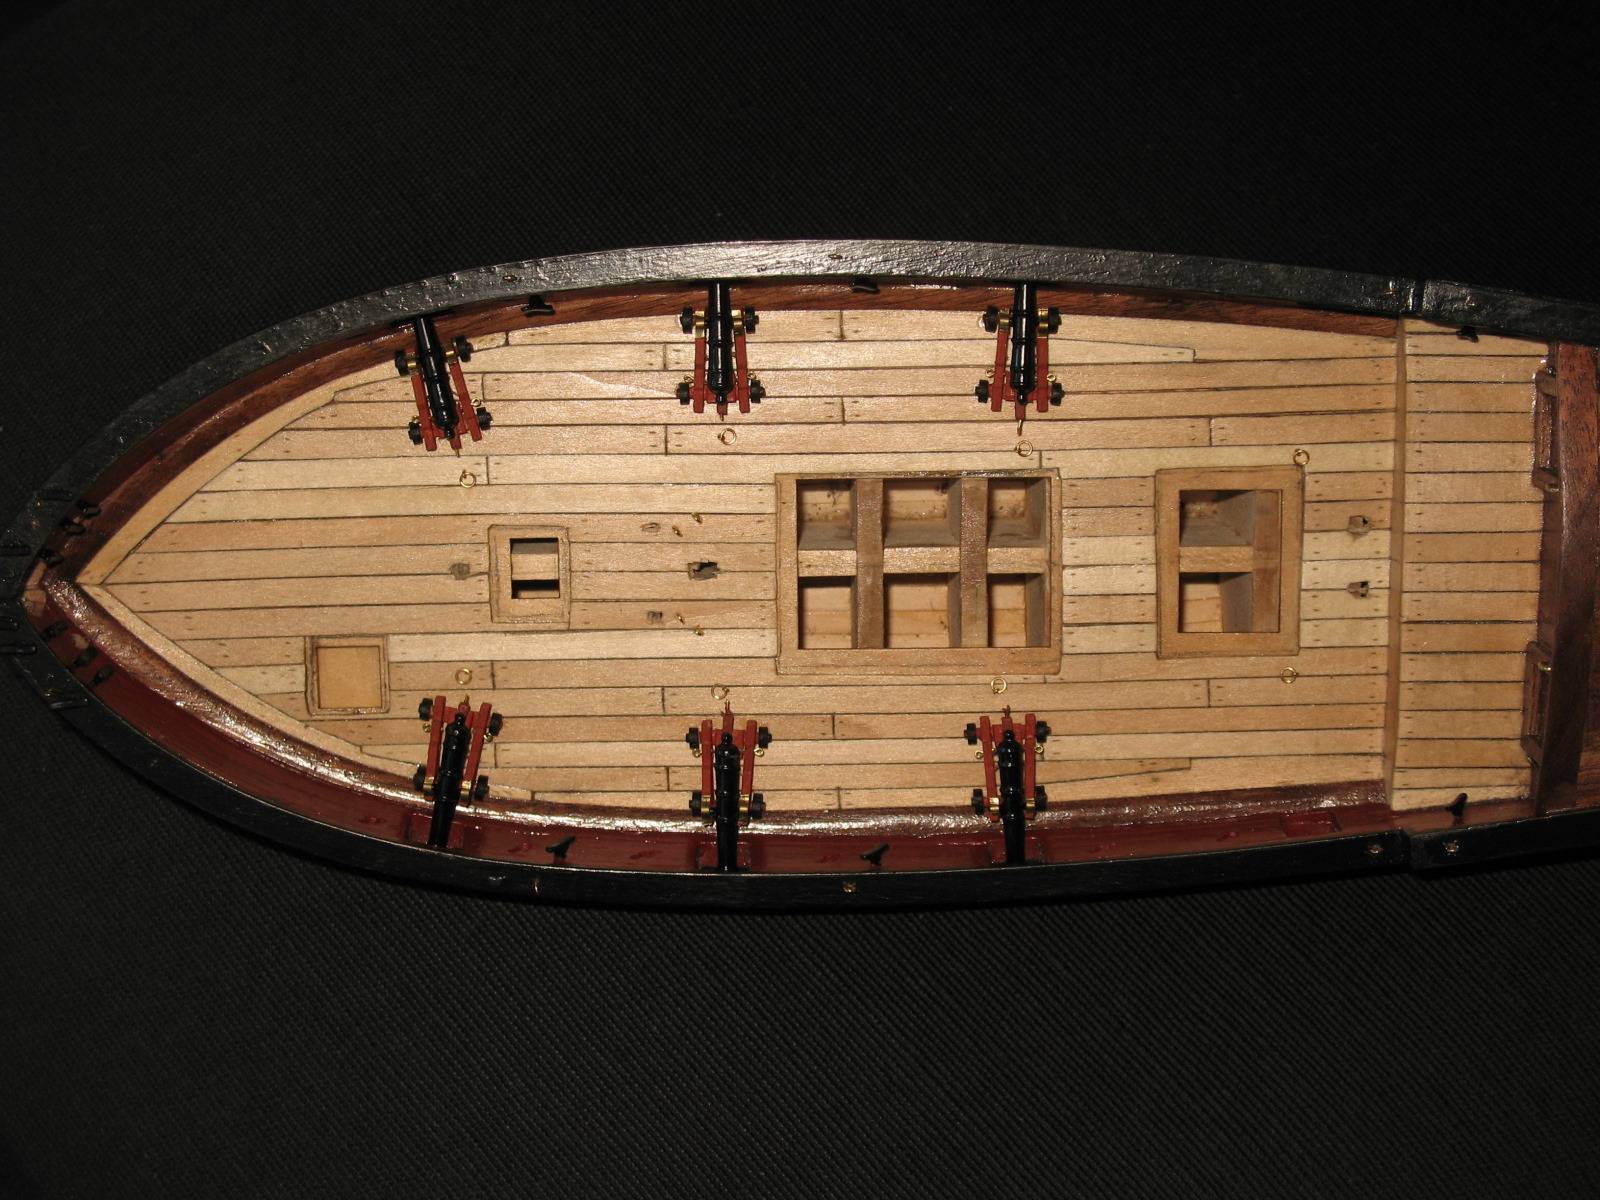
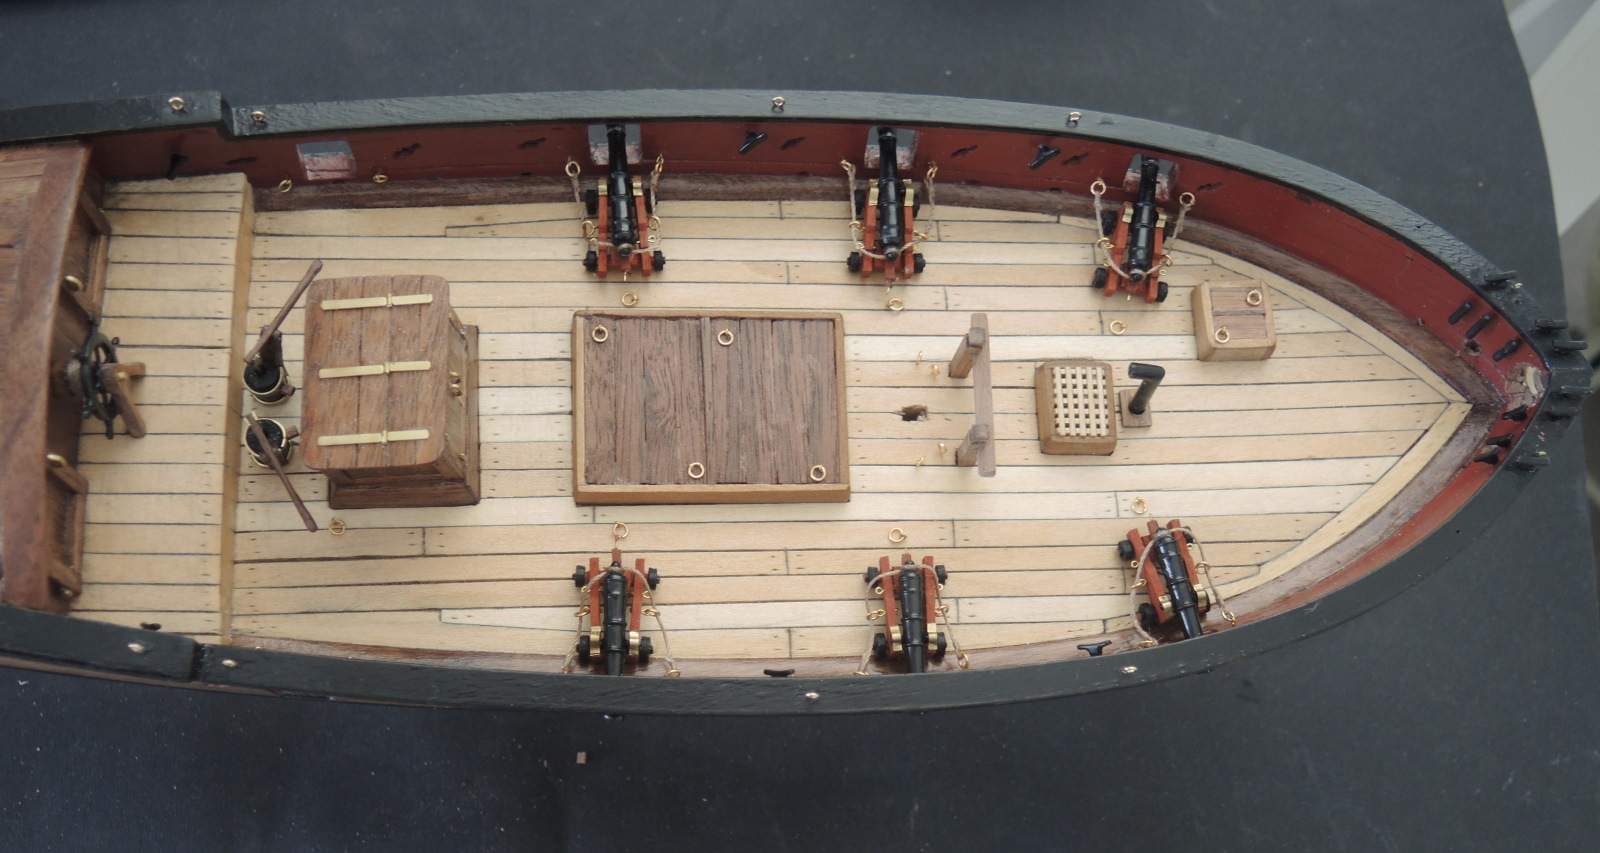
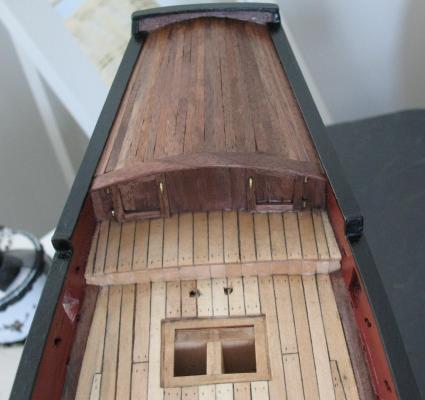
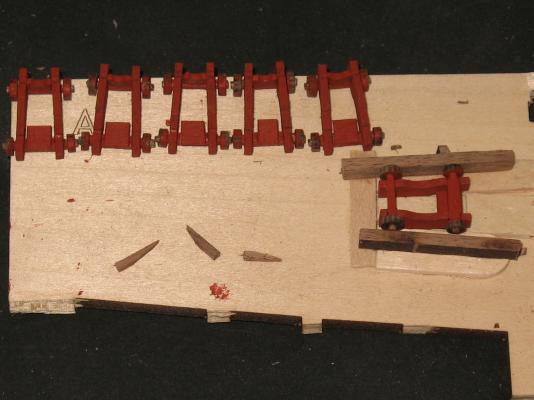
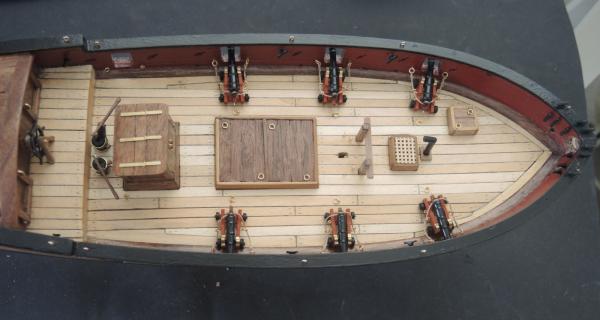
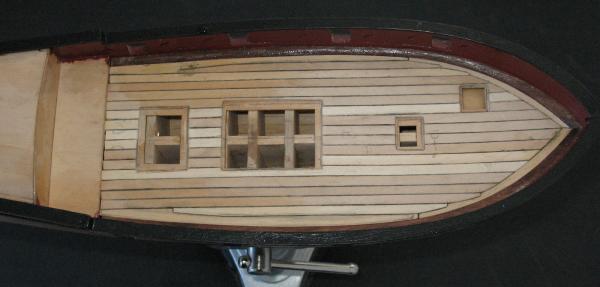
I decided to fake the planks, and scribe cuts, enhanced with pencil marks. Made small holes to represent nails, but realised too late that these split the grain a little - too late! Then it was on to the step and quarterdeck planking. Didn't seem too difficult - but wait! Without flash: With flash shows different colours: After adding the mock doors, hinges and handles: It was later I noticed that there should be space to the sides of the doors for ladders. My ladders are going to be very narrow! The problem is, as a real amateur, I follow orders without question. When the practicum said to use 5 planks in the centre, then make the door trims a specific size, I blindly followed. Unfortunately my planks are a little wider than spec, whereas I think Mr Hunts were a bit narrower than they claimed. Oh well - if only it was possible to read and understand (and remember) the entire construction before beginning a build! Next the cannons. How time consuming and fiddly are they? I think I got the idea of a jig from Ken's log. These were the carriages part way through, with the jig, and a few attempted quoins: And assembled and in place but not yet finished or glued: As I began the cannon rigging, I soon decided to leave out the blocks etc. Just too damned hard and fussy. I think they look complete with just the basic rigging (that's my excuse!): As you can see, at this stage I have also added some ringbolts, the smoke stack, riding bitts, and other deck stuff: There is some painting/sealing etc needed, but I still think I'm going to keep much of the walnut unpainted. It is only my second build, and I'm still feeling my way with finishes. And starting to figure what I should build next! Cheers, Brett


- 129 replies
-
- 4
-
-
- armed virginia sloop
- model shipways
- (and 1 more)
-
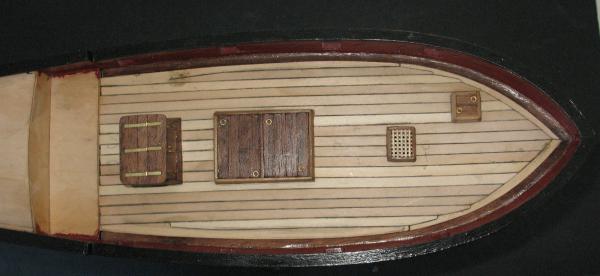
Hi Alistair, I checked the grating - that's the way the practicum and the current plans show them running. As you say, it's minor. I agree that the frame needs more tapering. I will chamfer a bit off so that it tapers to a finer edge. I saw your layout. It looks good, but some of the planks look as though they would scale up to about 24' long - would that have been what they would have used on such a vessel? I'm considering shorter lengths - very fitting for me to use short planks, according to my kids! Cheers, Brett
-
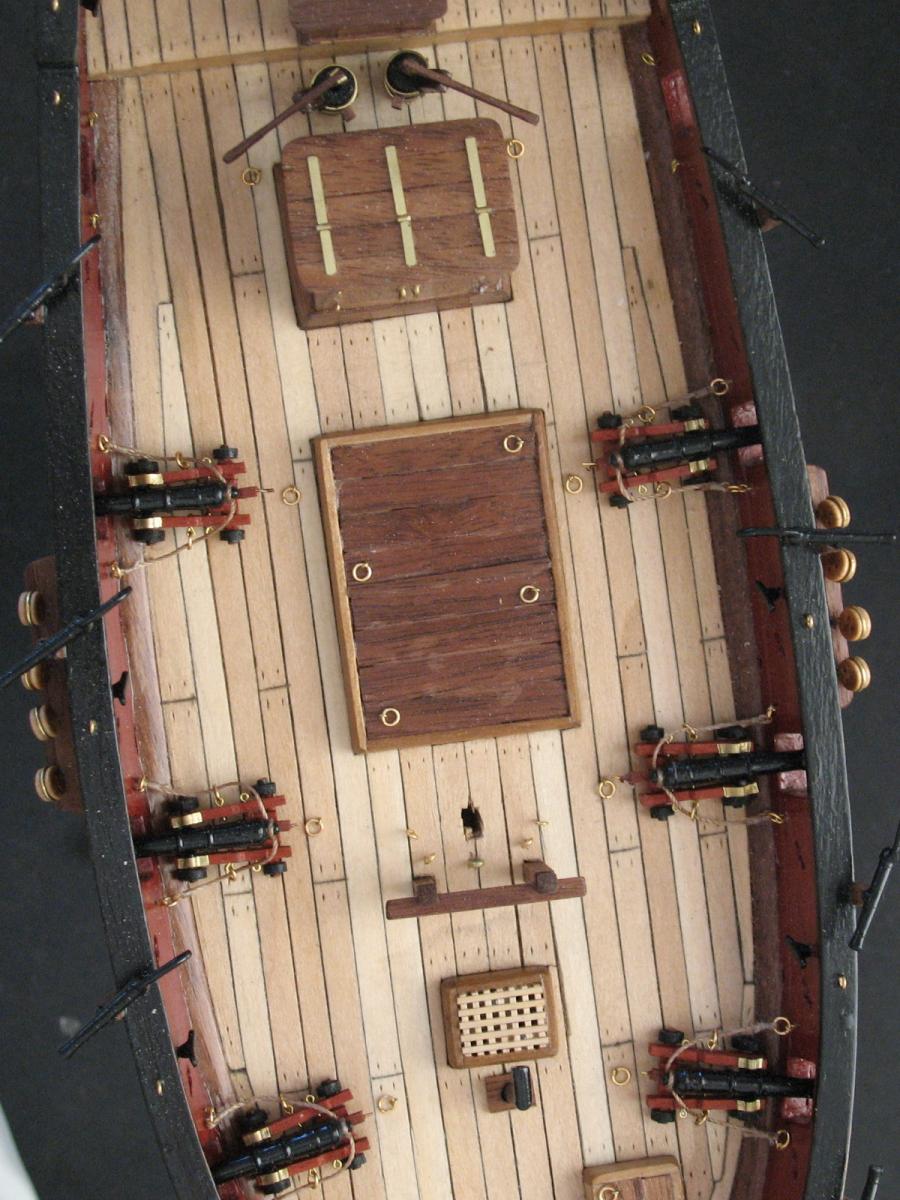
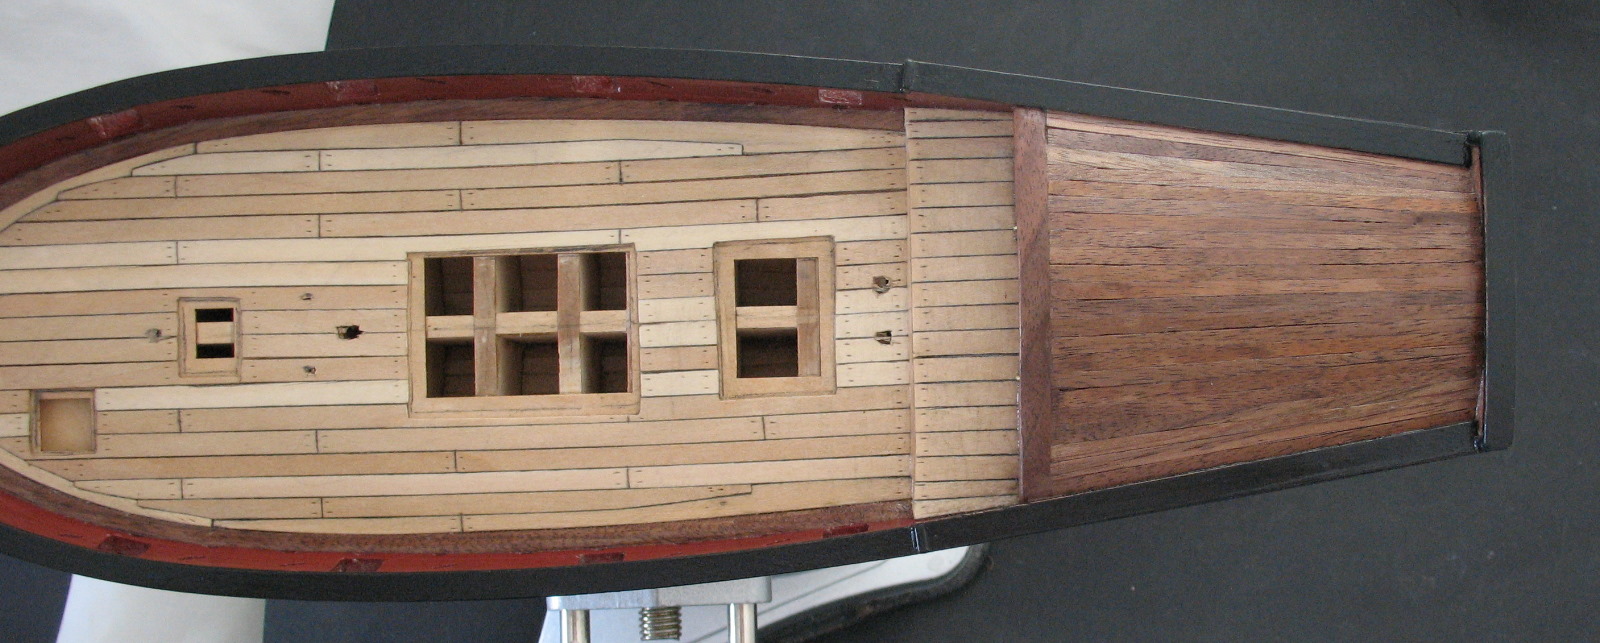
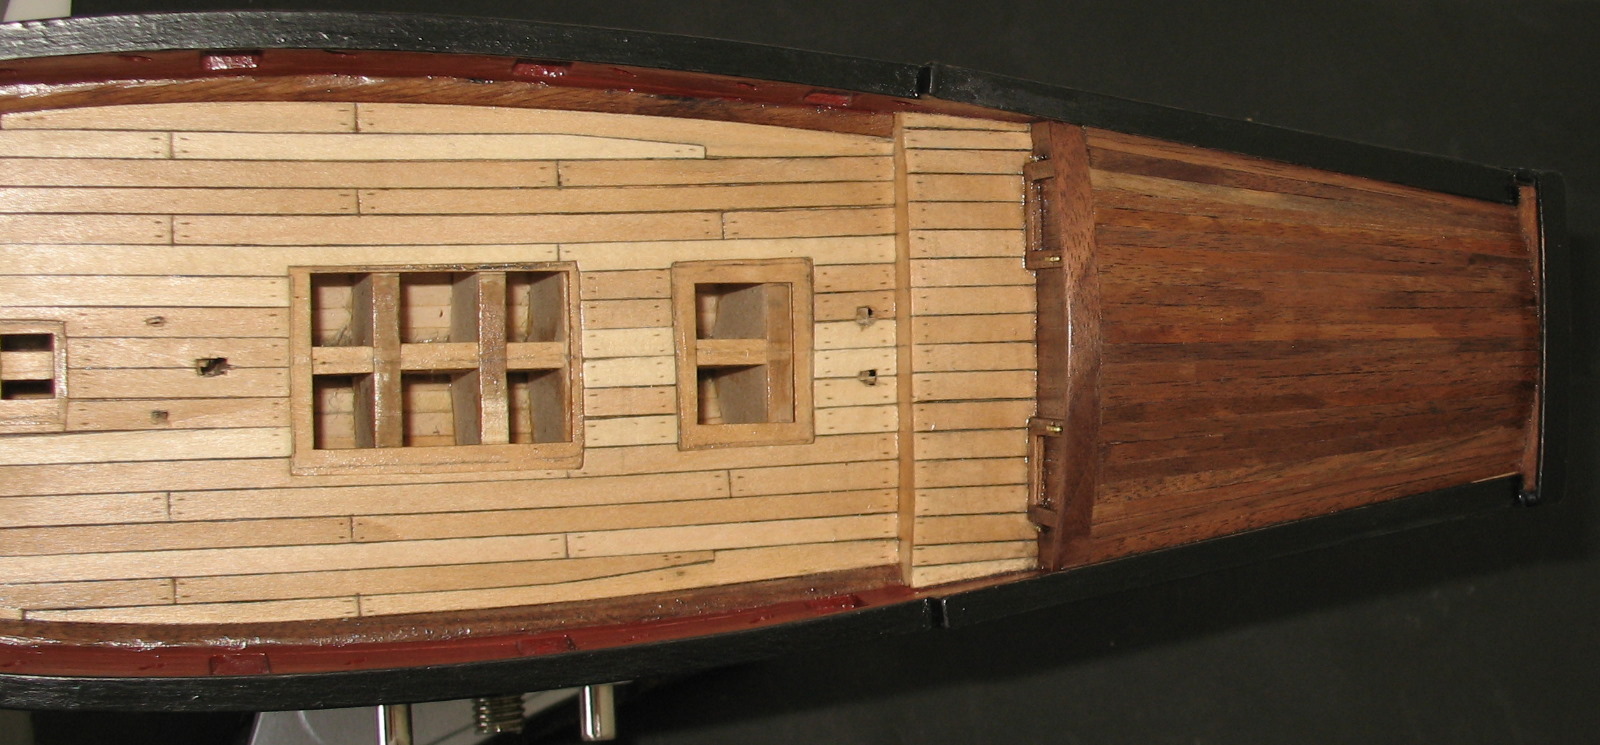
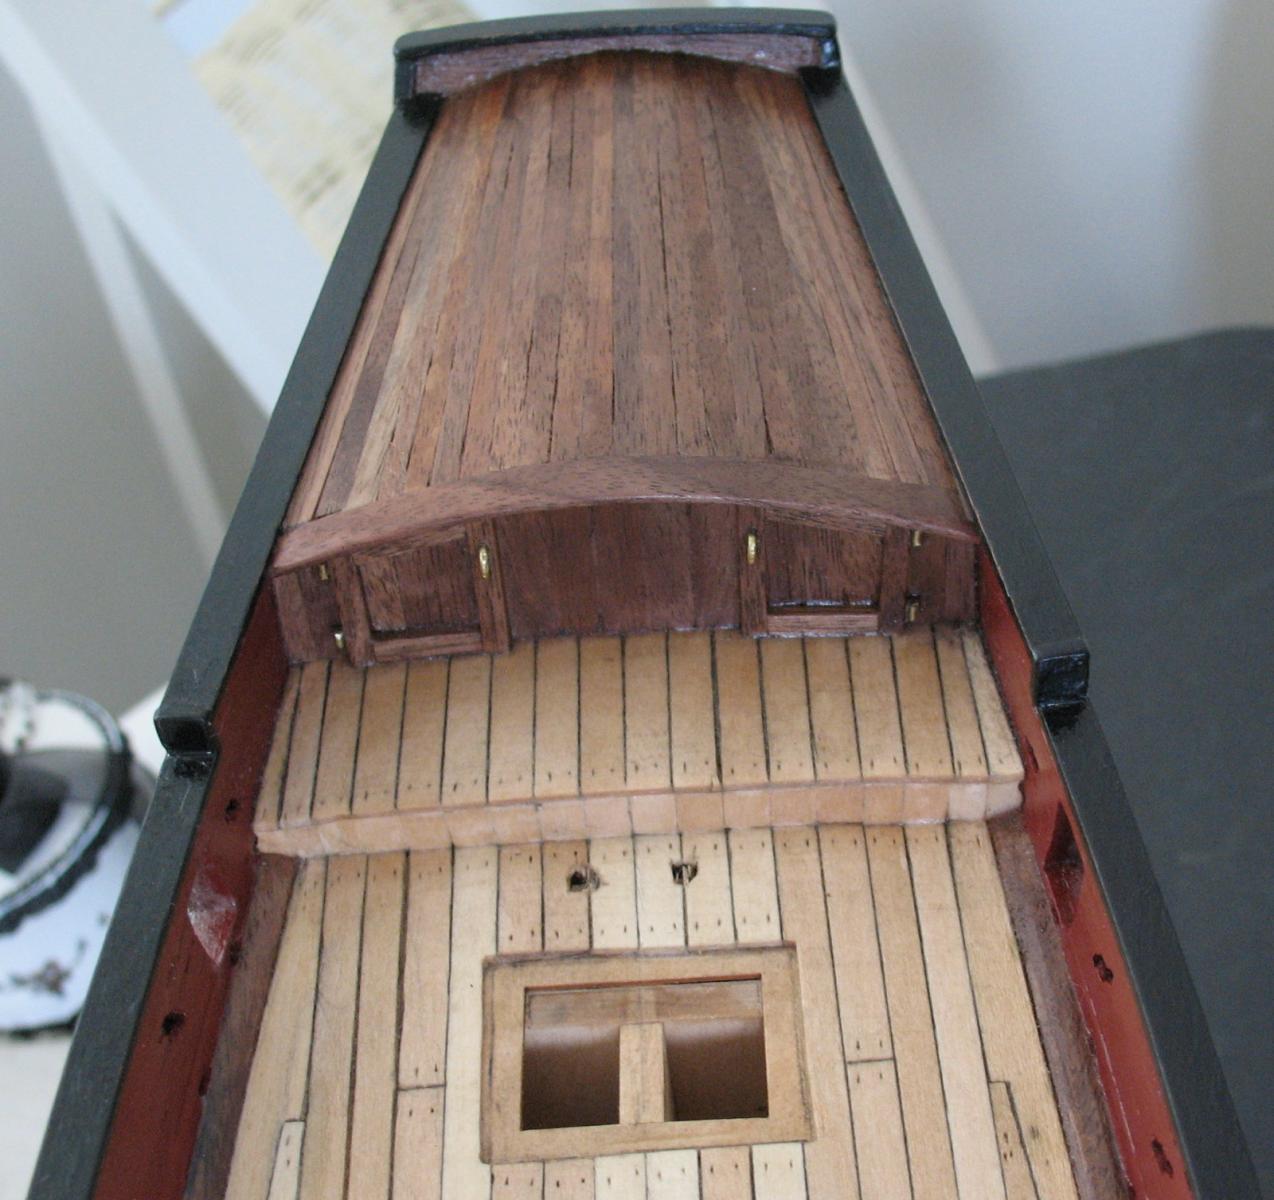
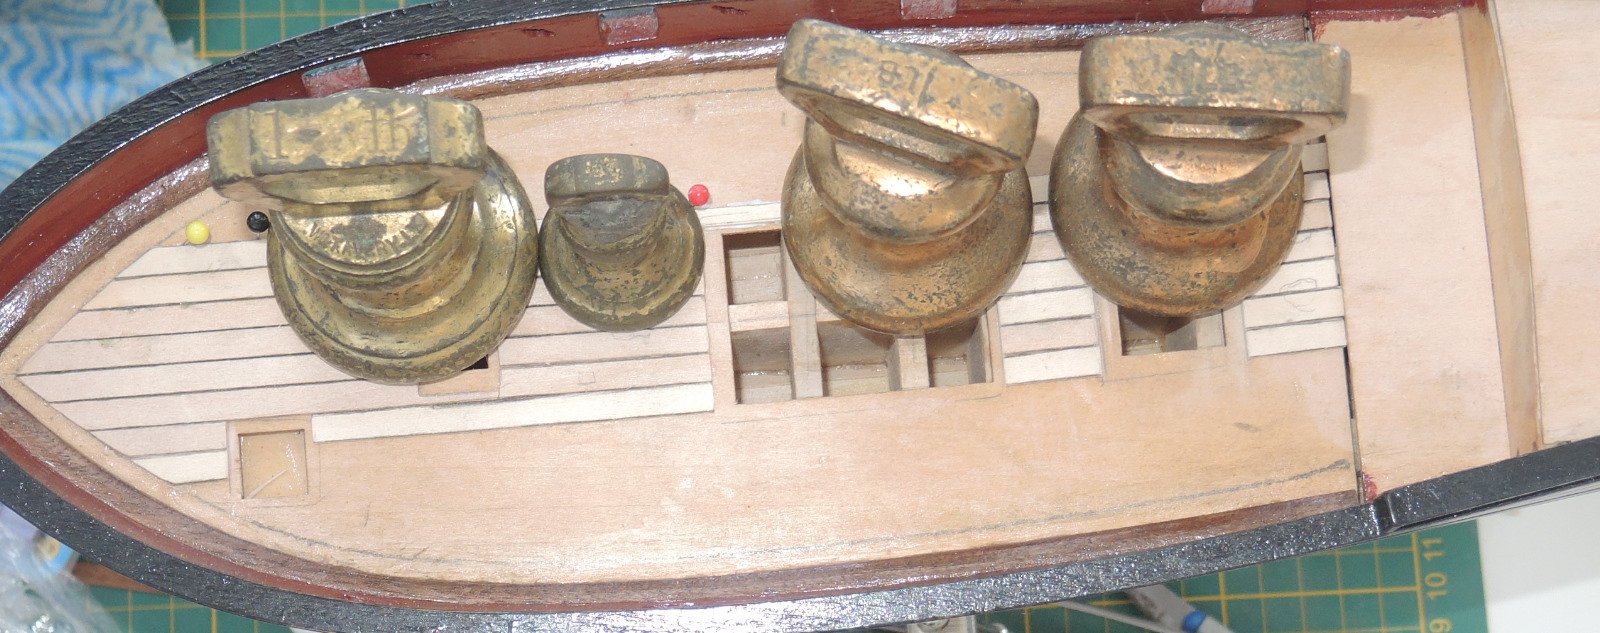
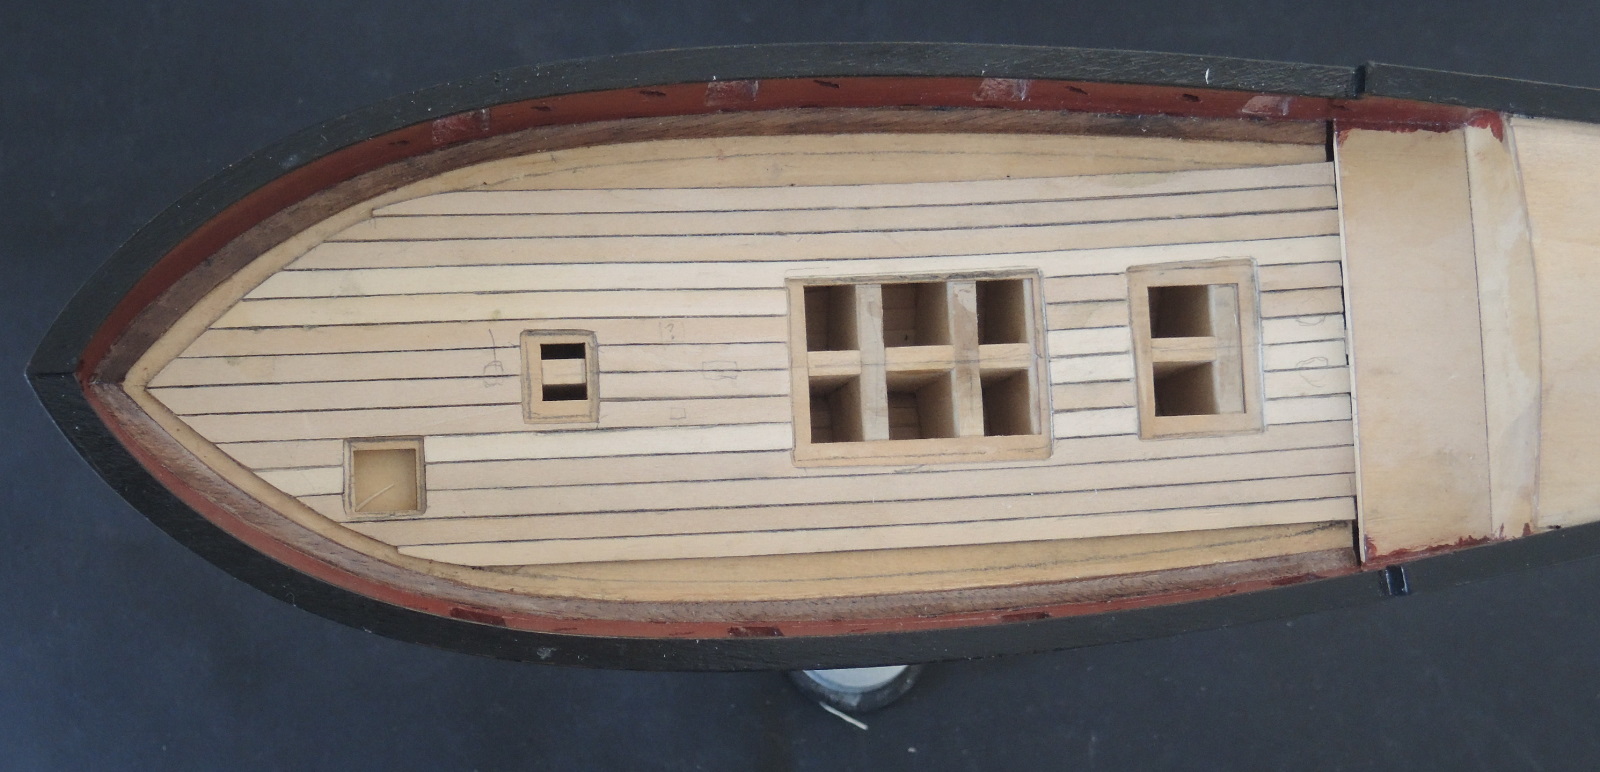
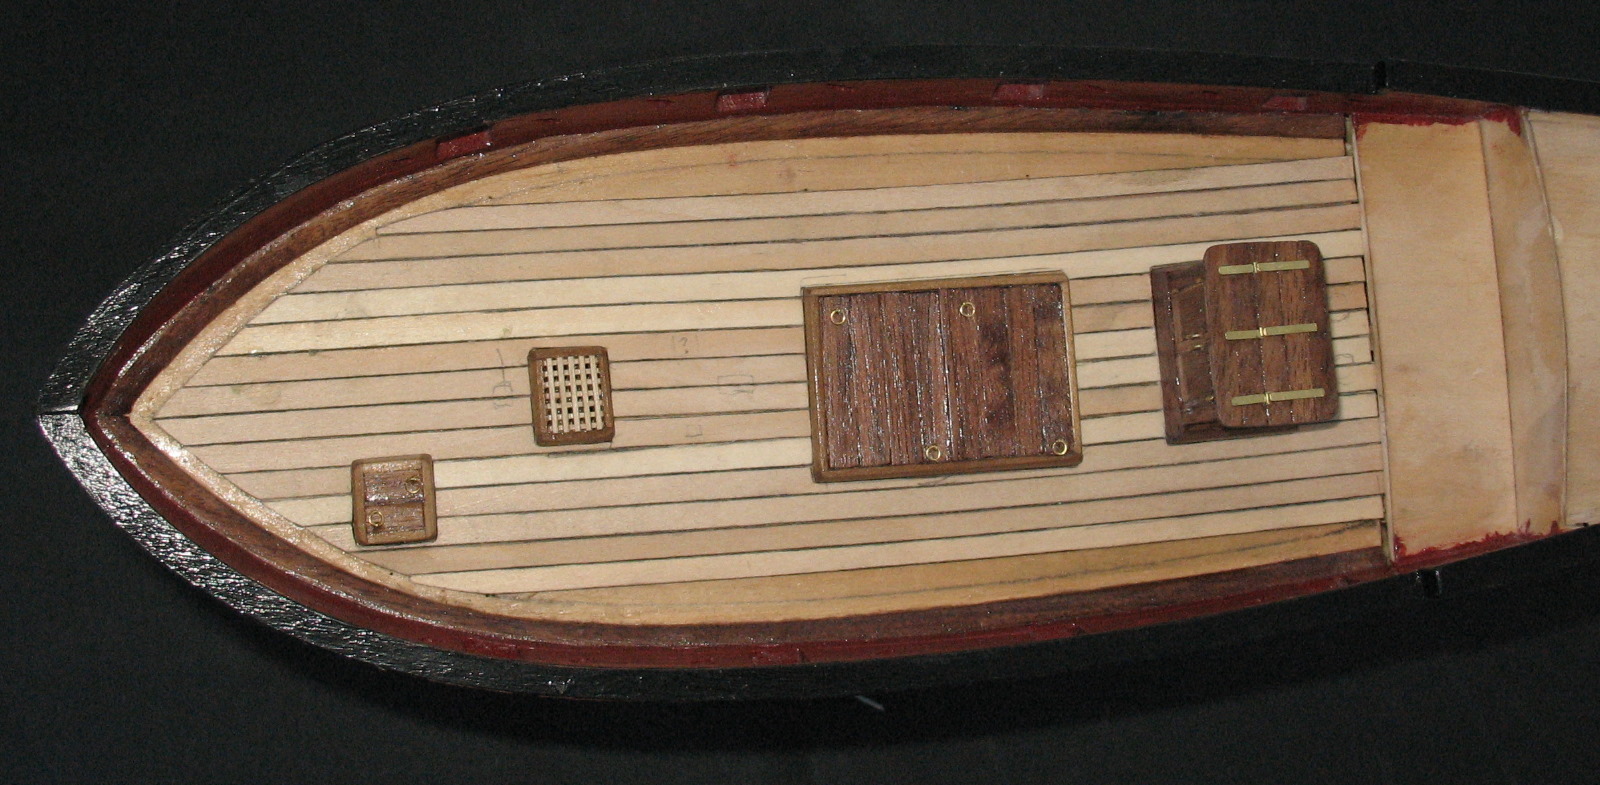
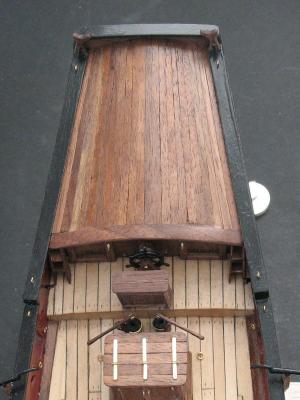
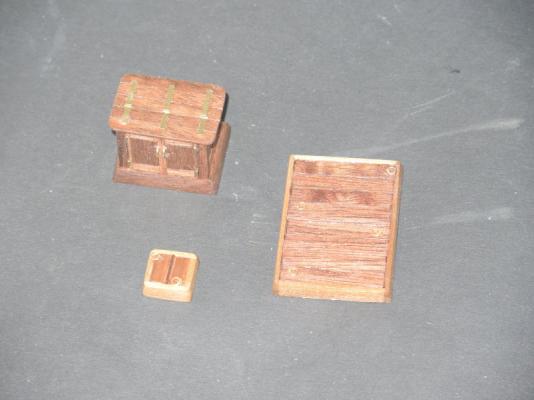
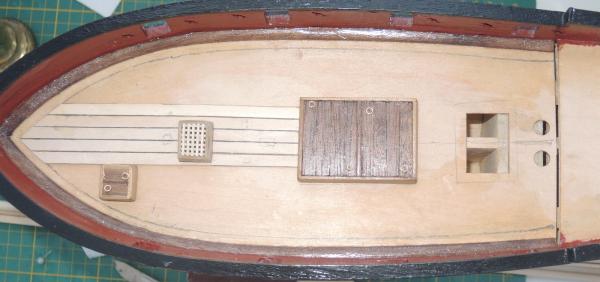
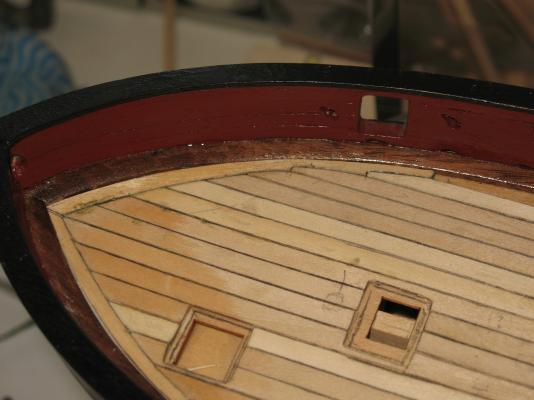
It's been a while, but I've been busy with the act of retiring! I have been working on the model, but with fiddly bits. Alert - expert help wanted - there's a question at the end of this post. So, I assumed that the next step was planking the deck - wrong! First you have to make some deck fixtures. The practicum is very helpful, but does not explain or point you to the "whys" of each step, just the "hows". Days were spent making hatches and so on: The practicum method is to position these, then trim your planks around them. I decided to use the basswood provided, in the absence of a simple source of better: The planks needed a little persuasion, and I wanted to use PVA glue: I couldn't see the point of the little steps out on the seventh planks from the midline. I put them in, removed them, then finally put them back in: For some reason, my centreline did not exactly match the centre of the keel. I didn't register this until too late, but I think the furniture lines up pretty well with the whole shape: For the margin planks, I tried to follow the instructions, but (once again) they seemed like gibberish. So I fell back on simply what I understand is spiling, tracing along the area to be filled with my compass on to a section of the 1/2" plank. I then trimmed the outer edge carefully until it fitted the waterway, then worked my way along the inner edge, fitting to the existing planks. Here's the forward half of the plank in situ: And here are the finished margin planks before sanding: And again, with the bits and pieces resting in place: Now it's time for steps etc to be planked, but first, the question. Part way through I realised that some of these deck planks are overly long. I see considerable variations in the decking plank lengths and nailing on other models. What would you advise for me to make my deck look the best? What length of plank, and how to to simulate this and the nails? Thanks, Brett


- 129 replies
-
- 2
-
-
- armed virginia sloop
- model shipways
- (and 1 more)
-
Thanks, Alistair. Do you recall what timber you used for the deck? Looks good on your build log, and I would like to copy it. Which means another question - any good sources for buying timber in Australia or online, anyone? Cheers, Brett
-
Oar sweeps drilled out, and trimmed using dental drills, needle files, and sandpaper. Not easy to photograph - sorry for the flash glare! And after painting inside the sweeps, then two coats of satin poly: Now to the decking. Here's a question, in the hopes someone knows. The practicum and instructions refer to making parts of the main hatch coamings out of 3/32" by 1/4" walnut. This does not exist in the supplied timber. There are 4 lengths of 5/64" by 15/64" walnut, which are the closest I can see, but I'm always afraid of running out at a later step if I use the wrong timber. Anyone hit this difference before, or any thoughts? Thanks, Brett


- 129 replies
-
- 7
-
-
- armed virginia sloop
- model shipways
- (and 1 more)
-
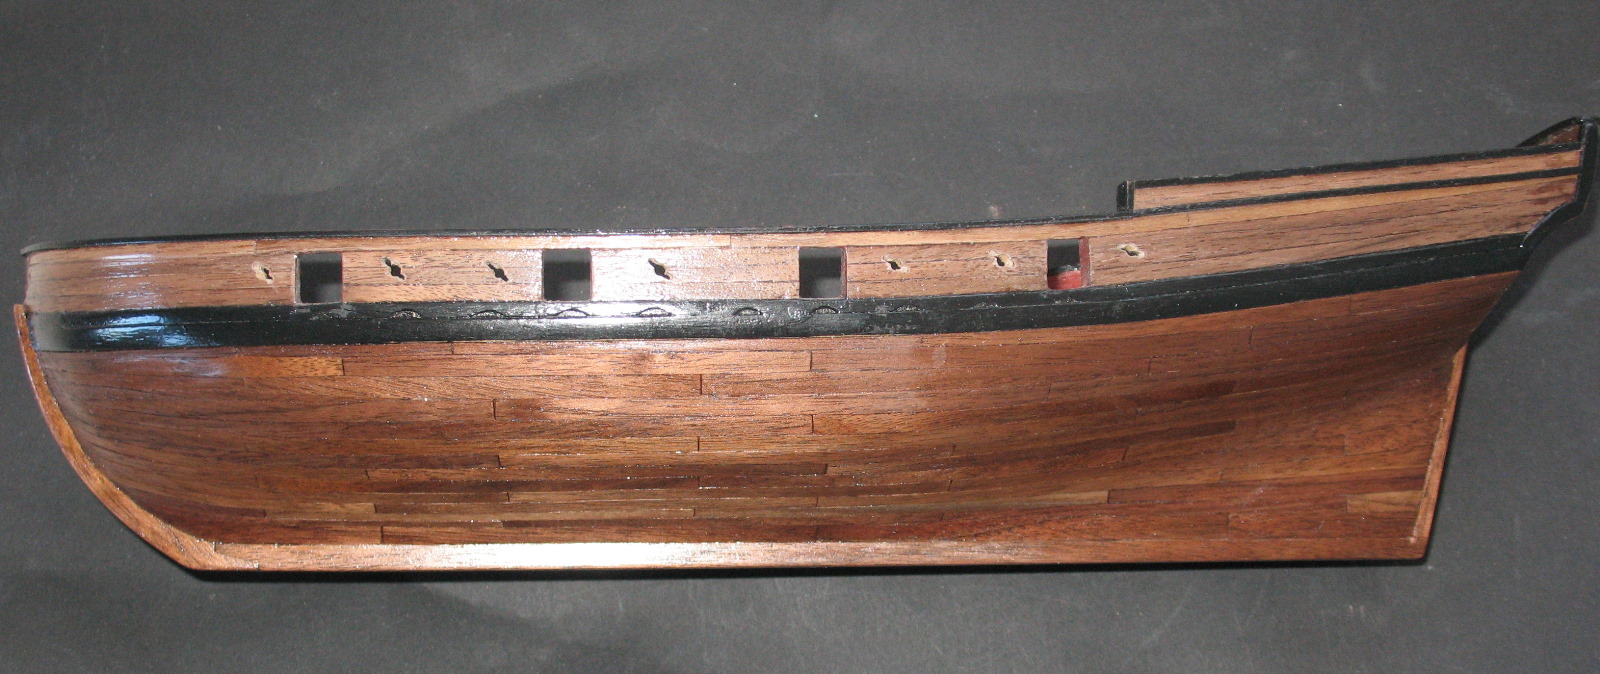
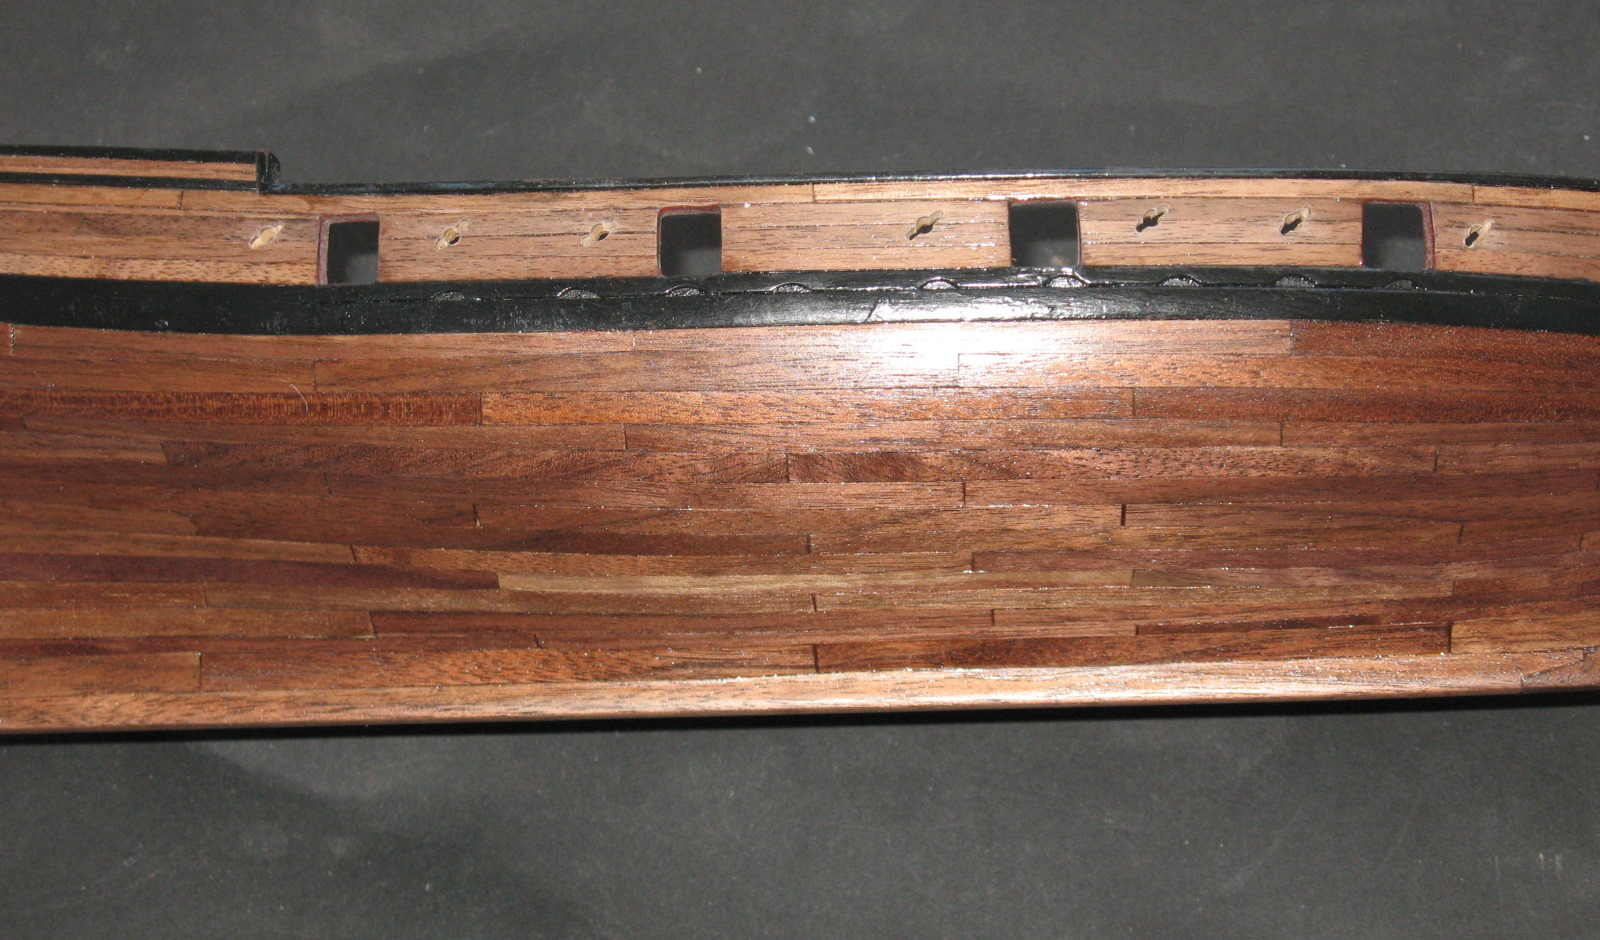
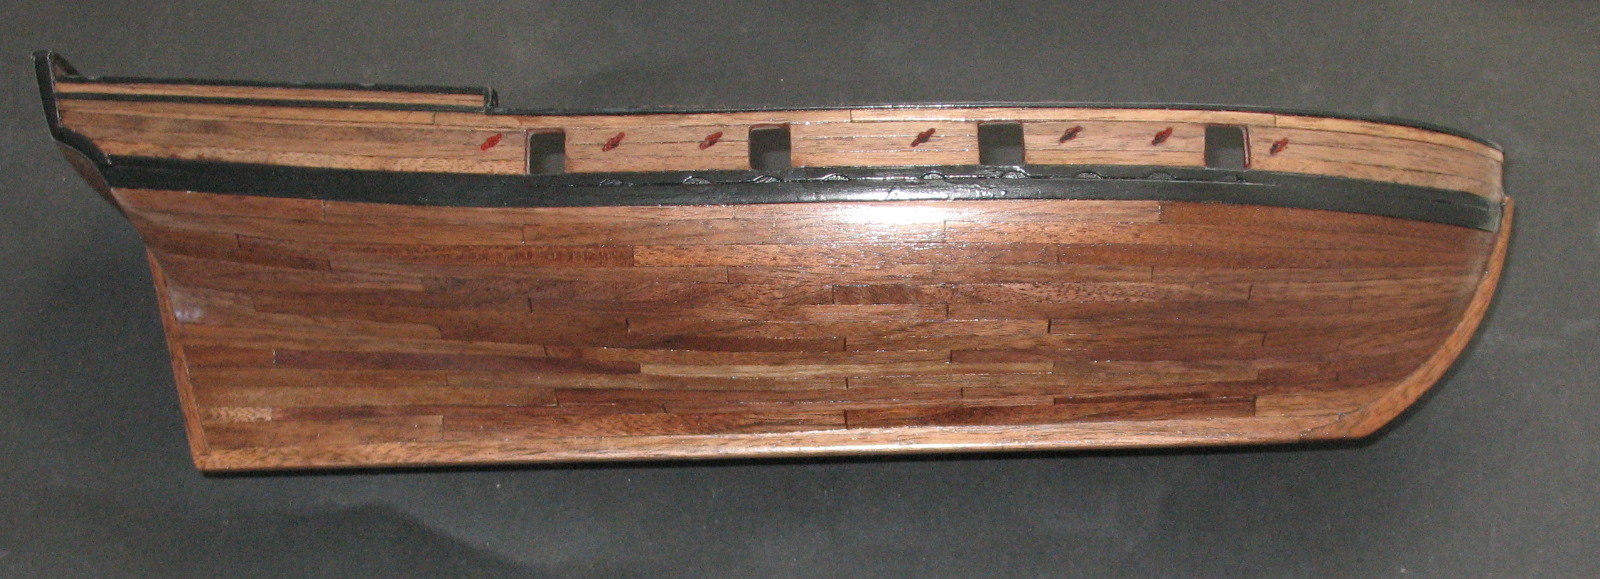
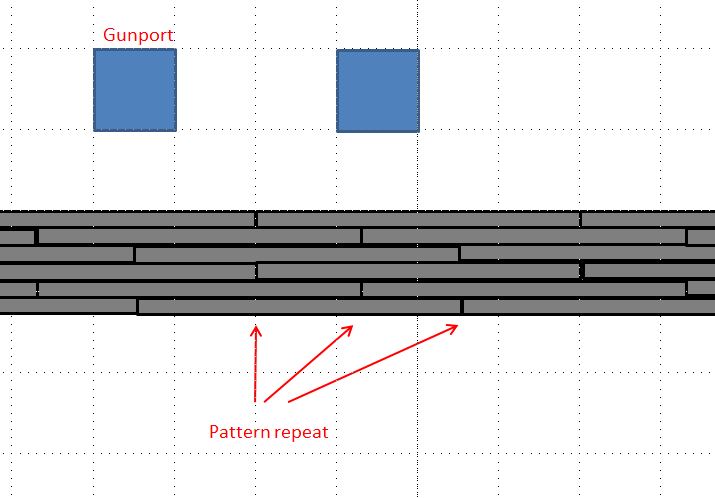
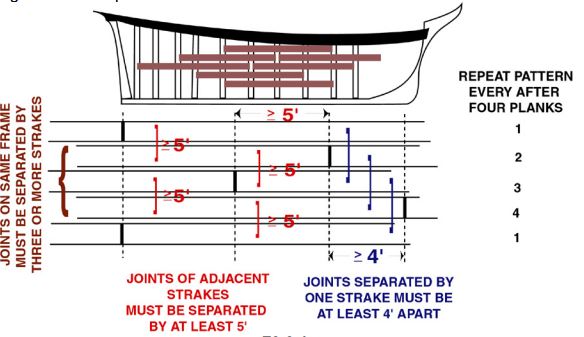
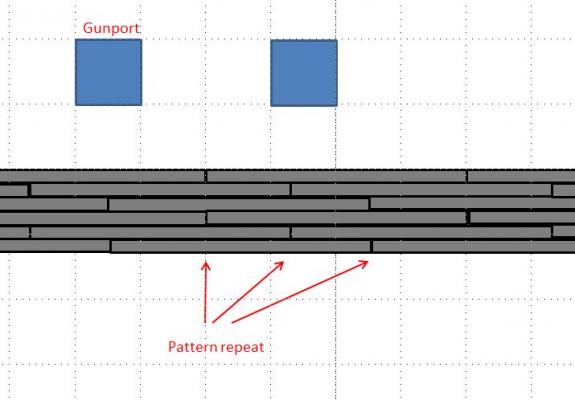
Ken - I wish I had thought of that. I marked the positions using a paper template, then drilled the holes freehand. My dentistry training helped, but I'm still not happy with a couple of them. A jig would have been much better! I will post photos after I have repainted and resealed around the sweeps. Tyler - I am following Bob Hunt's practicum, which suggested 4" planks - I believe that equates to 16' on the full size boat. Some needed to be a little longer, and plenty were shorter, but that became my standard length. The pattern really confused me. Here is a diagram from the instructions: I hope you have better luck understanding it than I did! I decided to pick a starting point between the first and second gunports, then stagger the ends of the planks about 1.25" for each row. I then repeated the pattern every 3 rows. This might show what I mean: My first build was the Swift. I think it would have looked better in short planks. Cheers, Brett 3 weeks to retirement - too long!
- 129 replies
-
- 3
-
-
- armed virginia sloop
- model shipways
- (and 1 more)