MORE HANDBOOKS ARE ON THEIR WAY! We will let you know when they get here.
×


PeterB010
-
Posts
80 -
Joined
-
Last visited
Content Type
Profiles
Forums
Gallery
Events
Everything posted by PeterB010
-
 Sjors, Put everything in a box together with the instructions and let me know when you come my way. Peter
 -
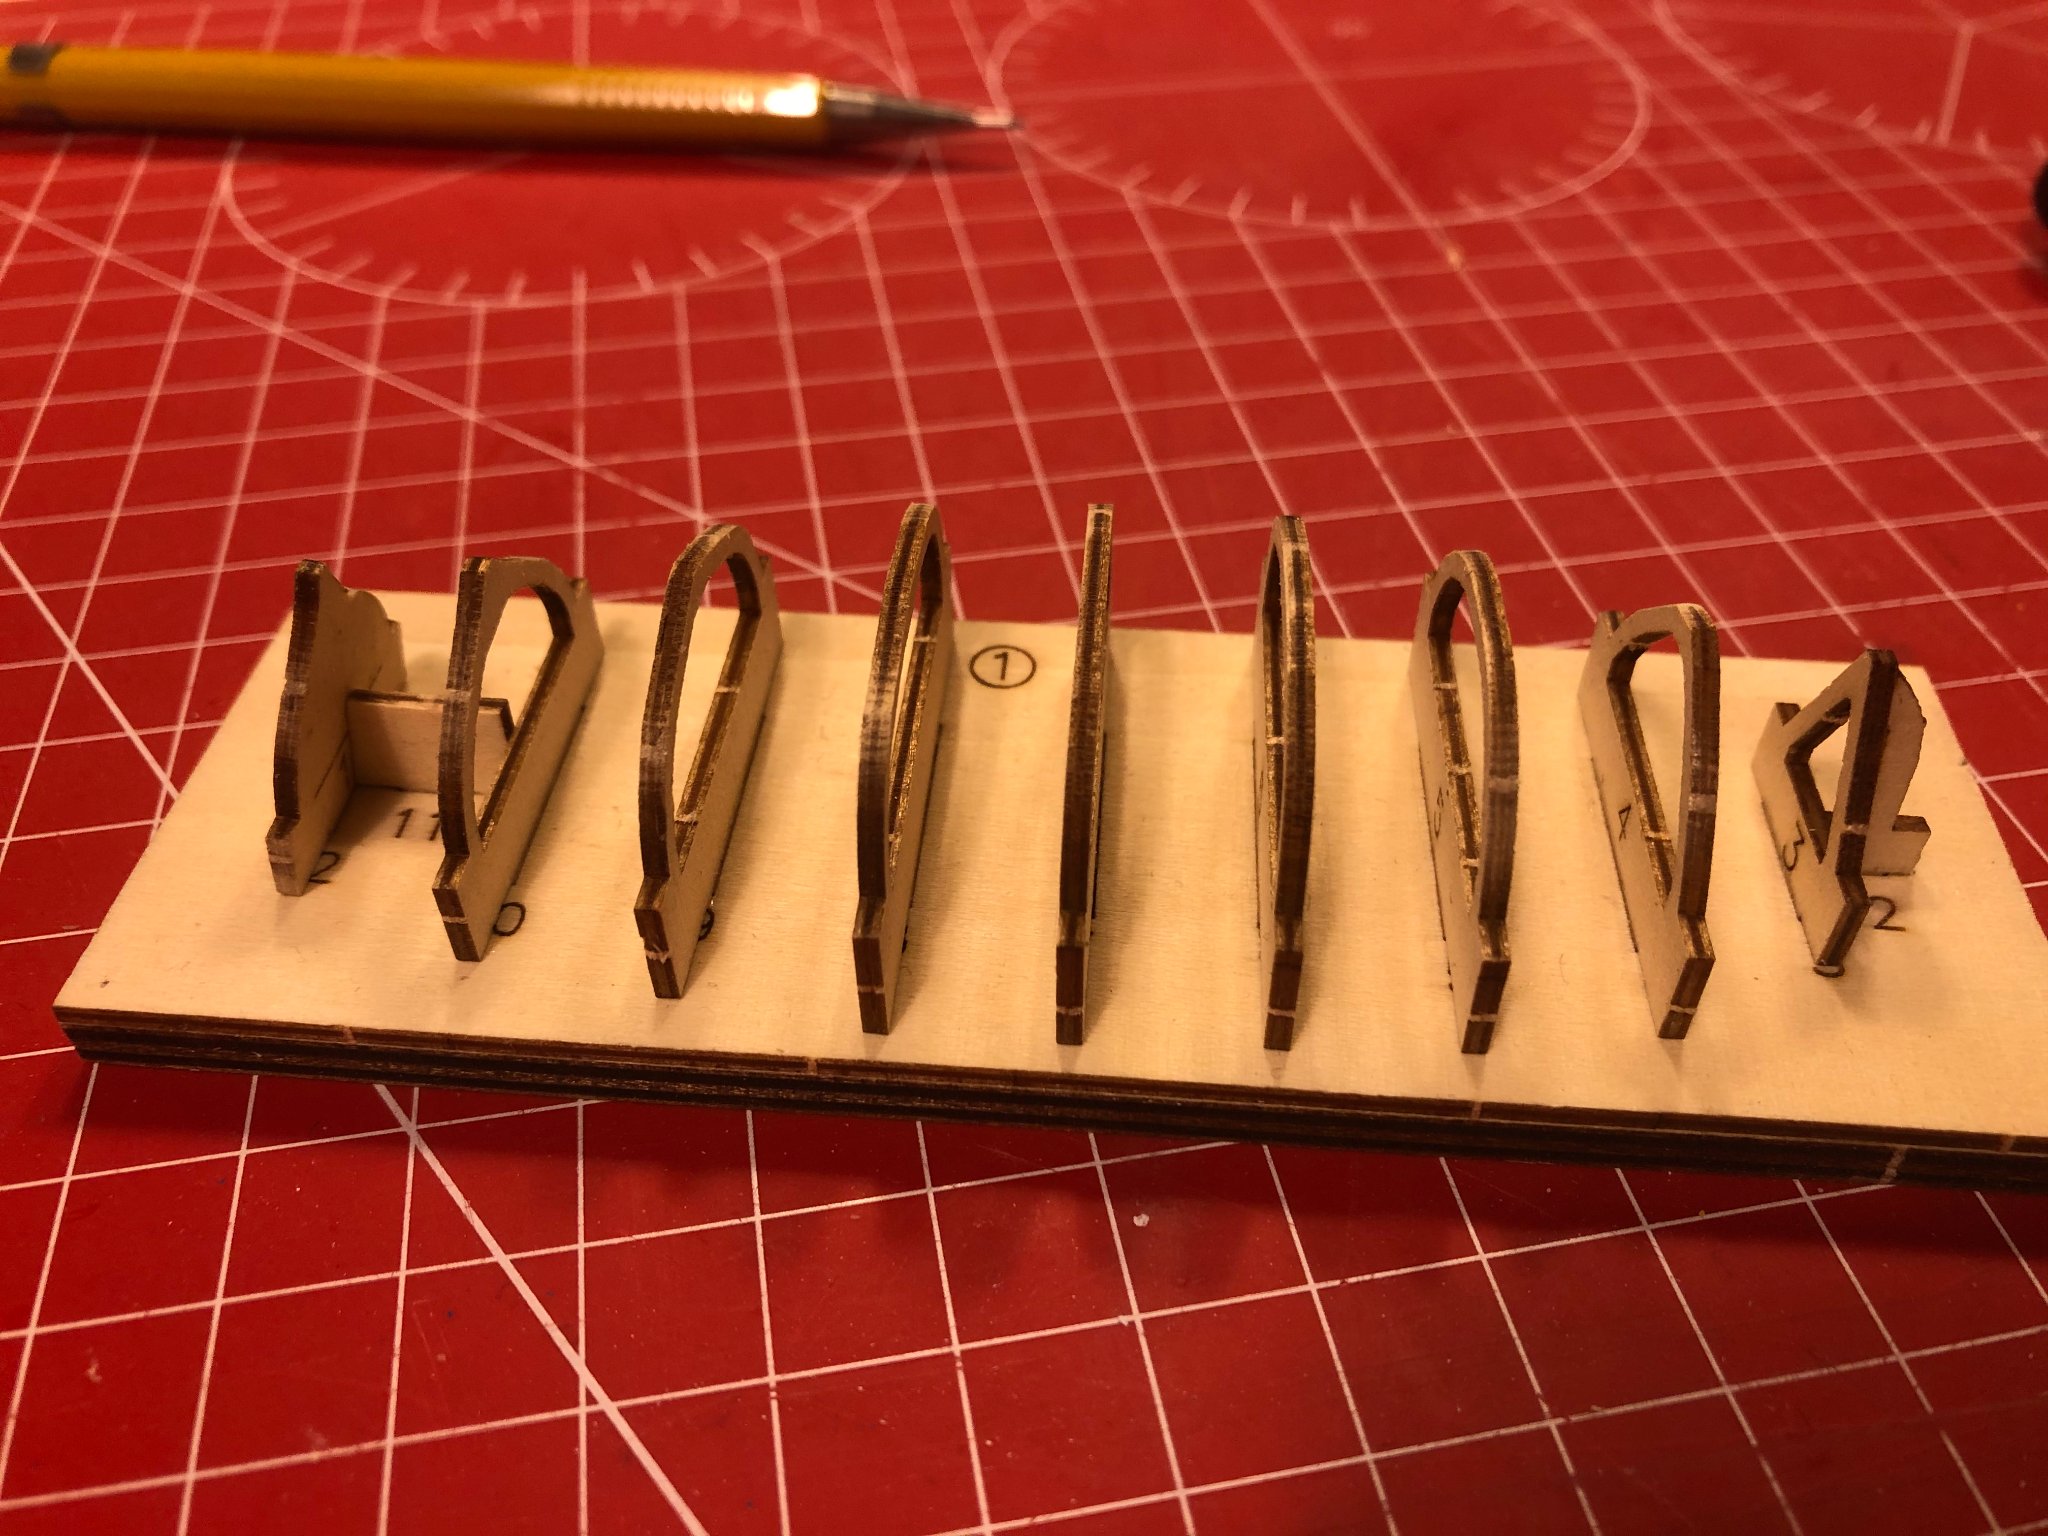
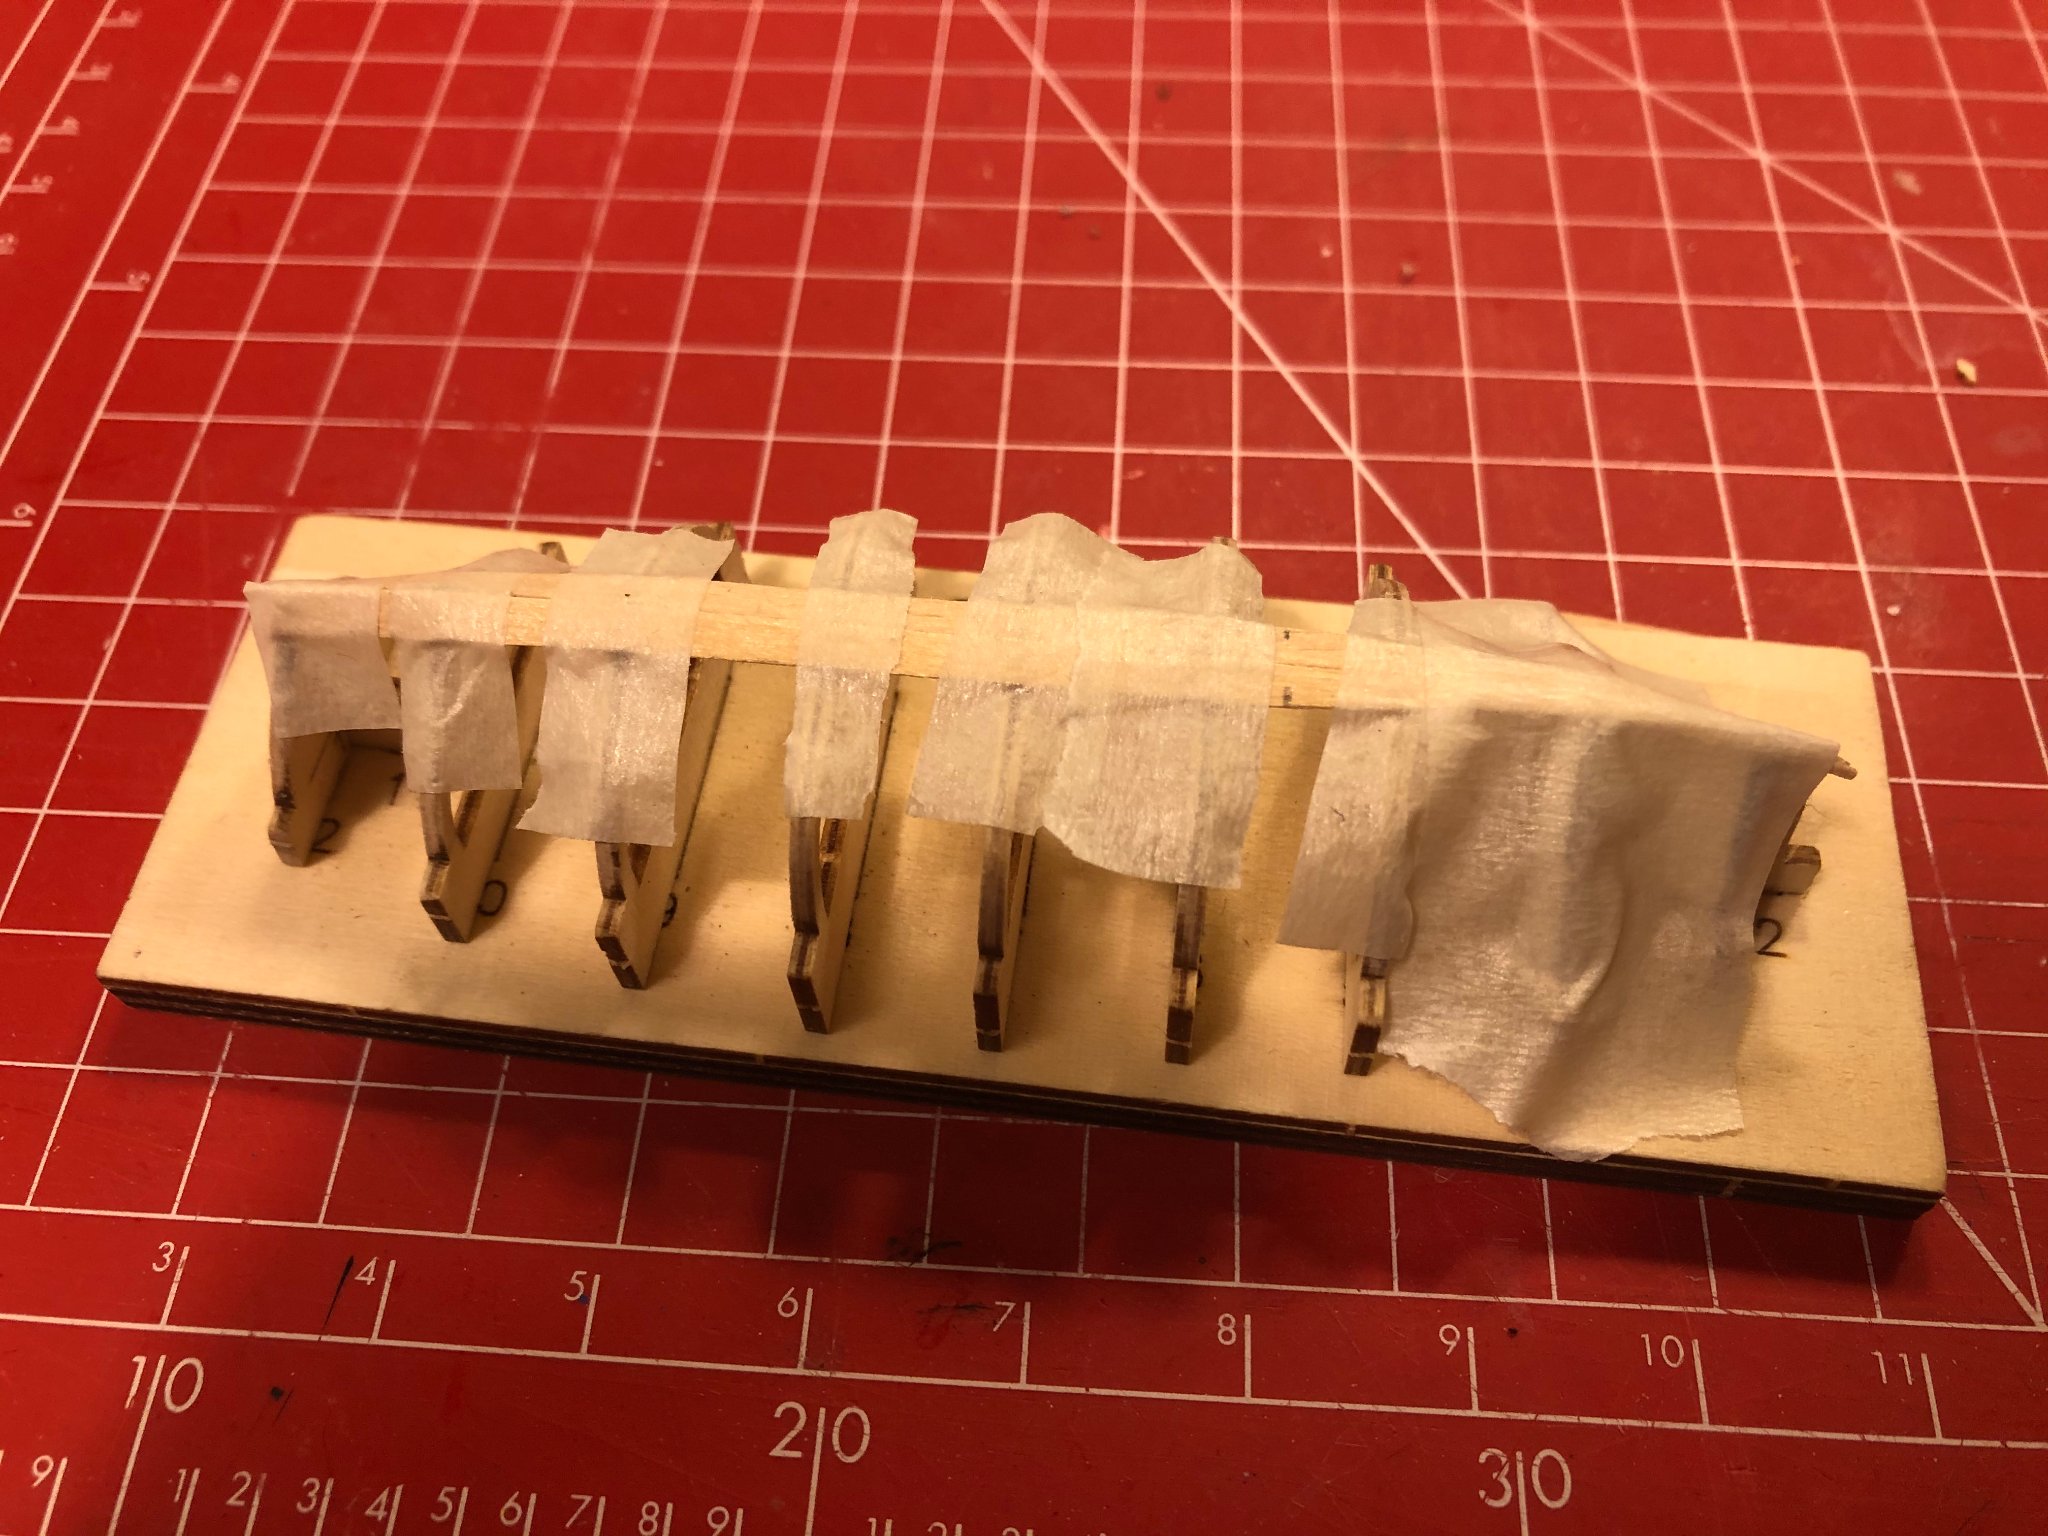
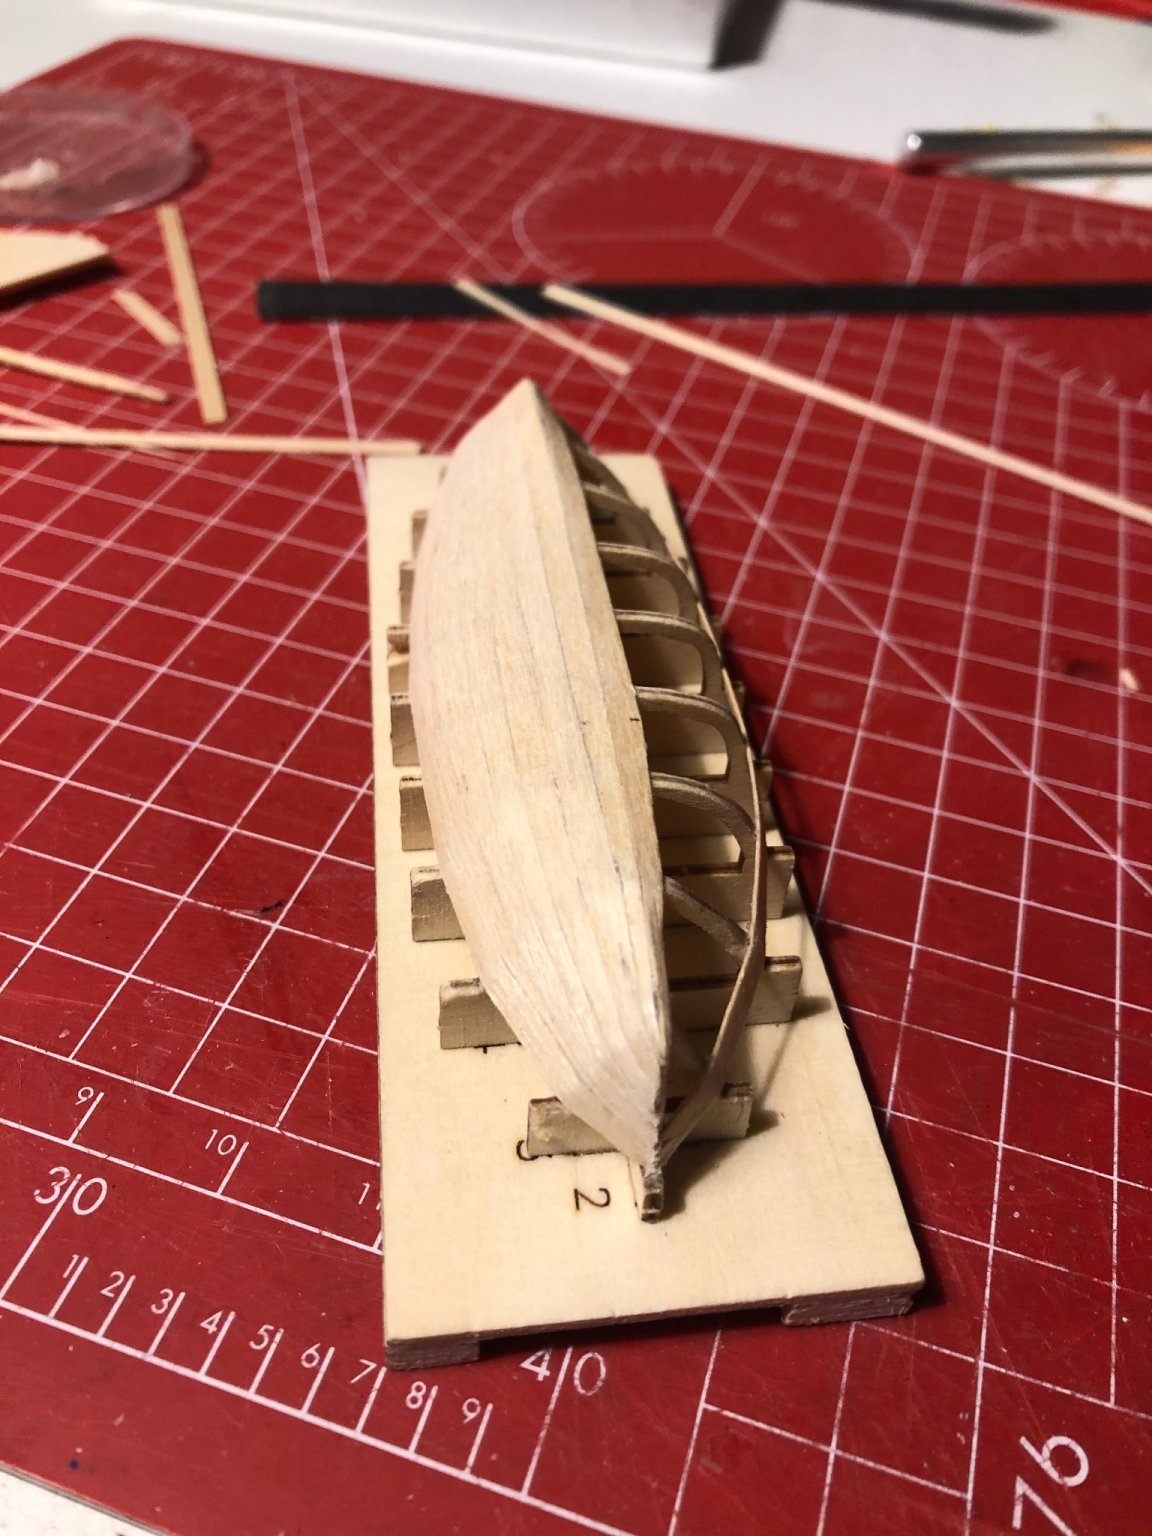
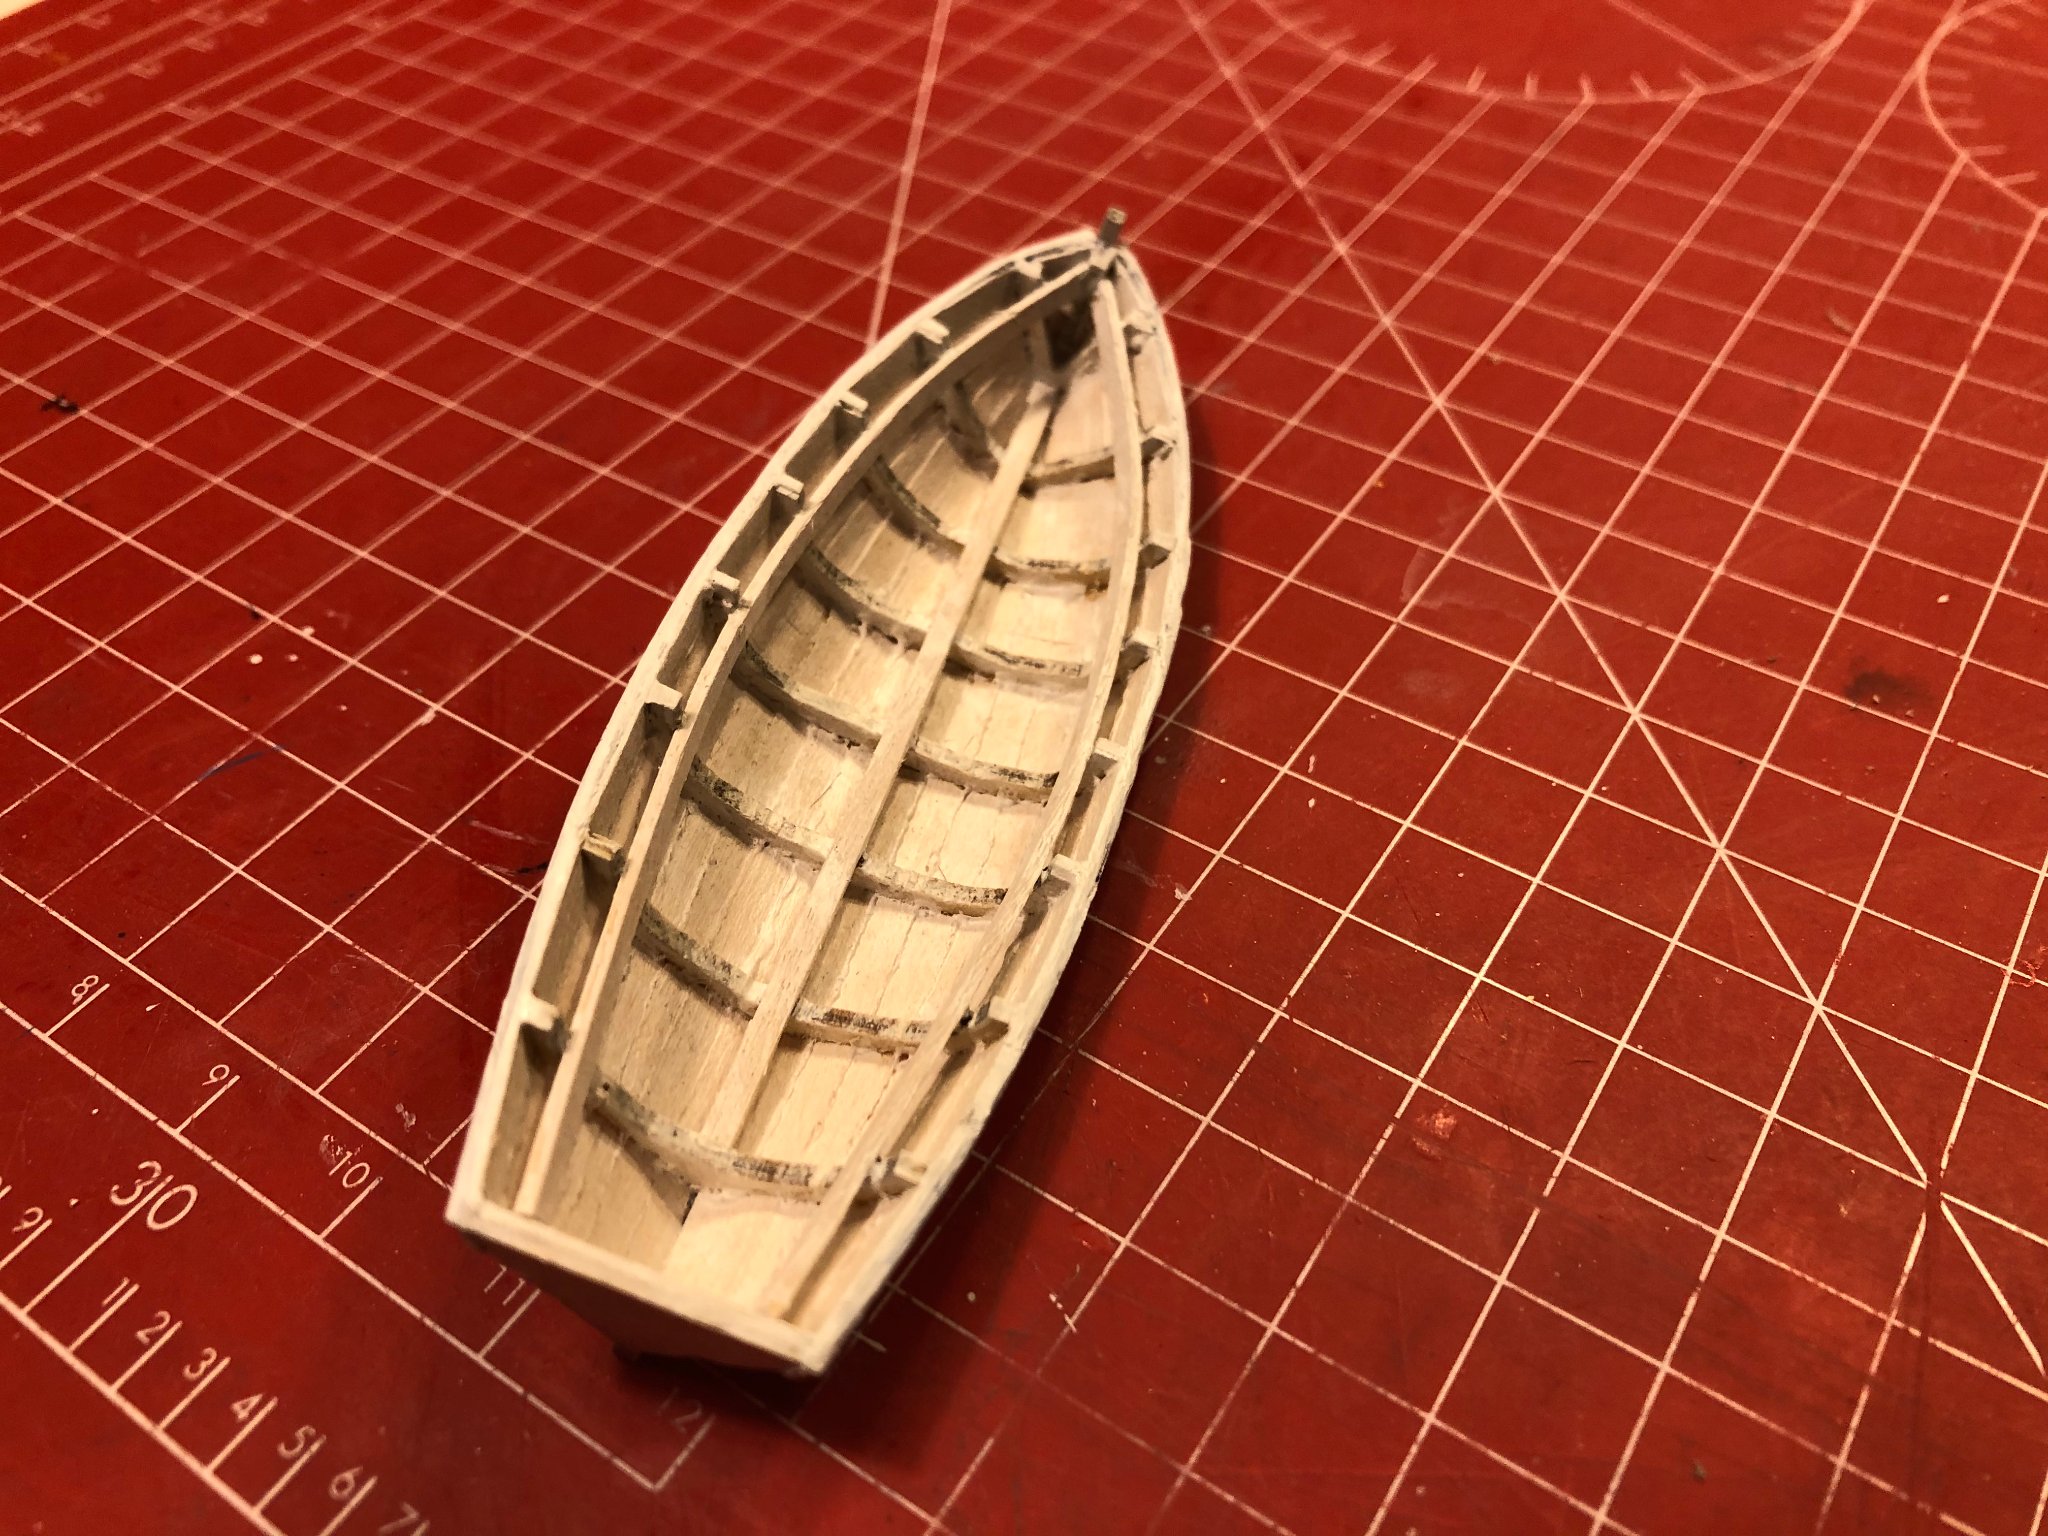
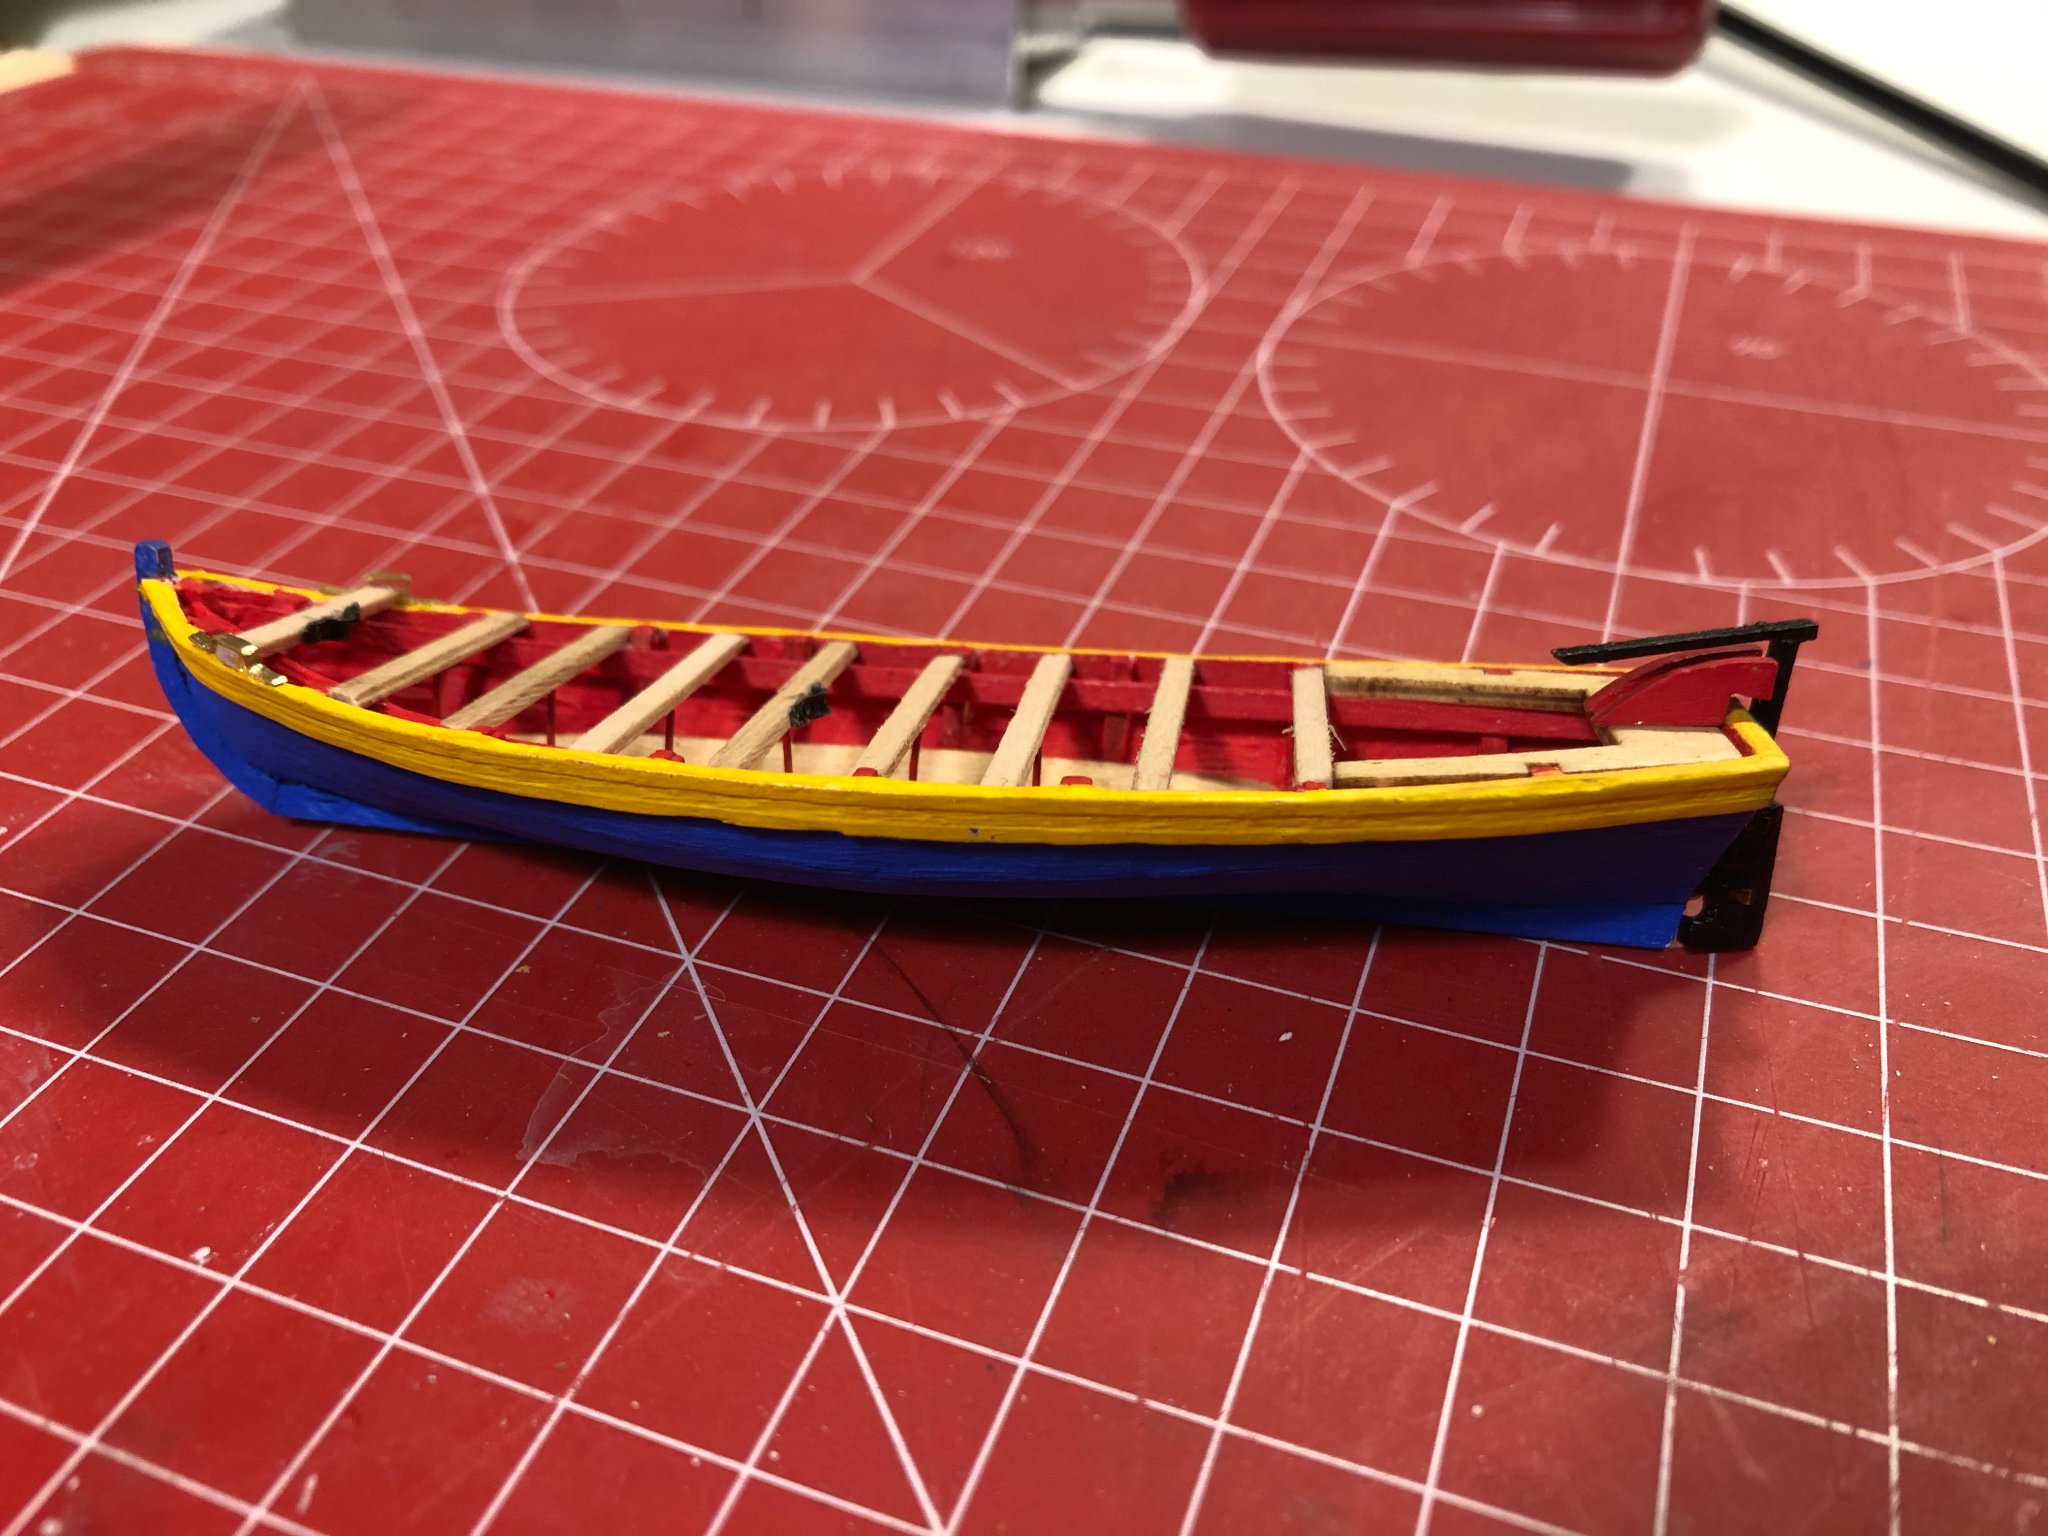
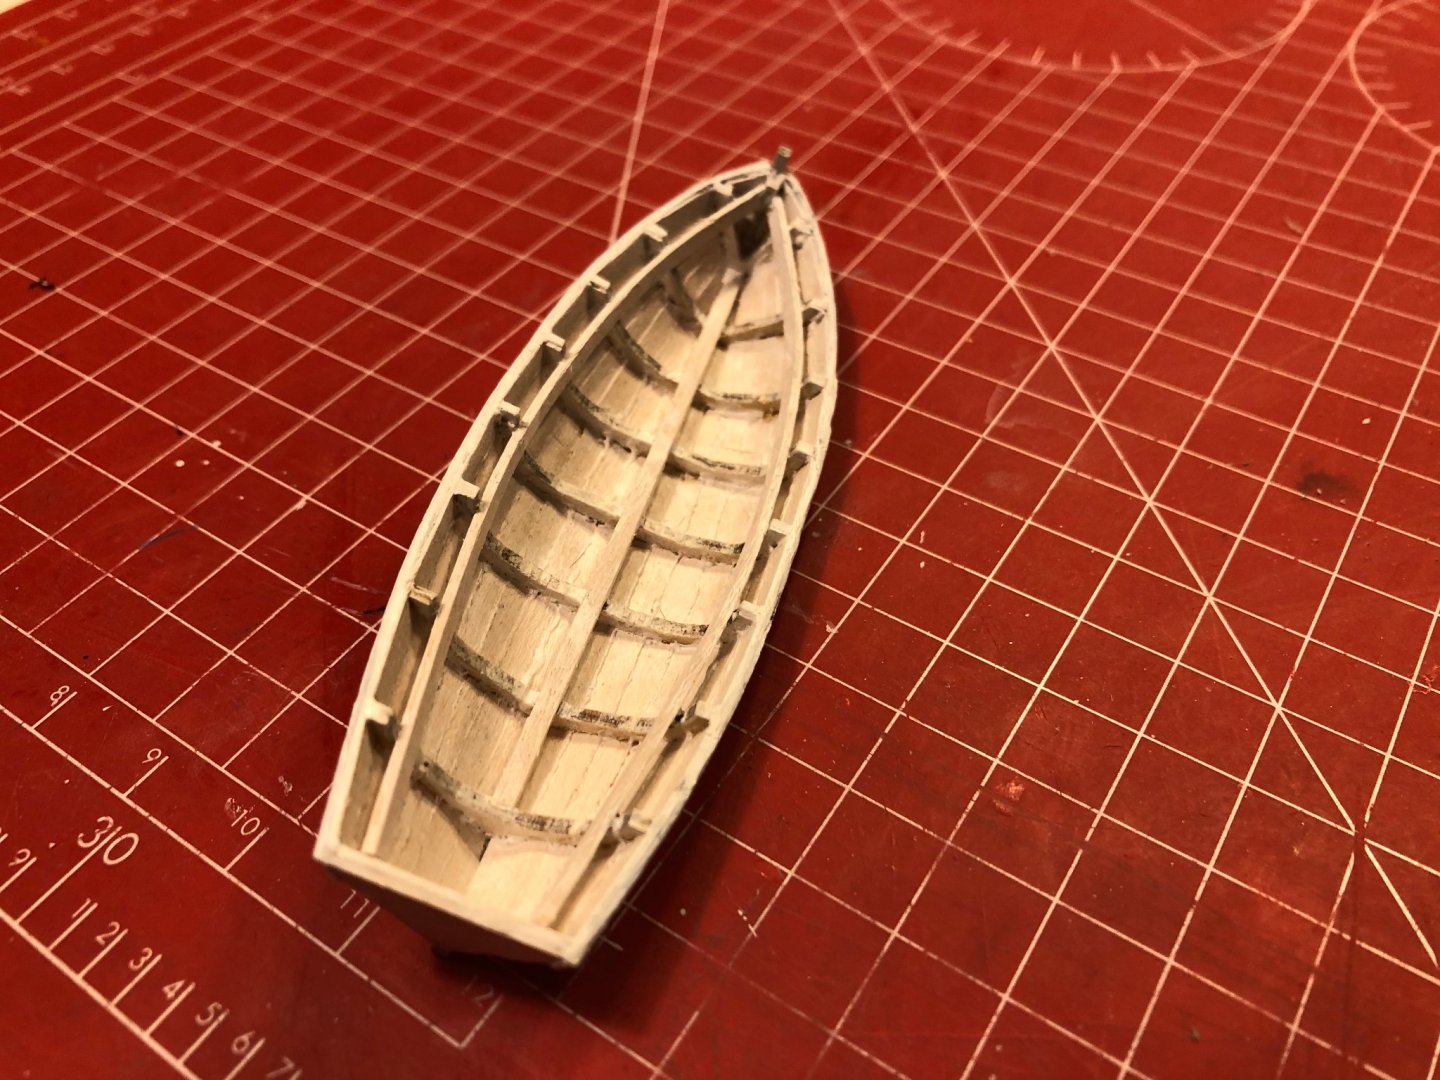
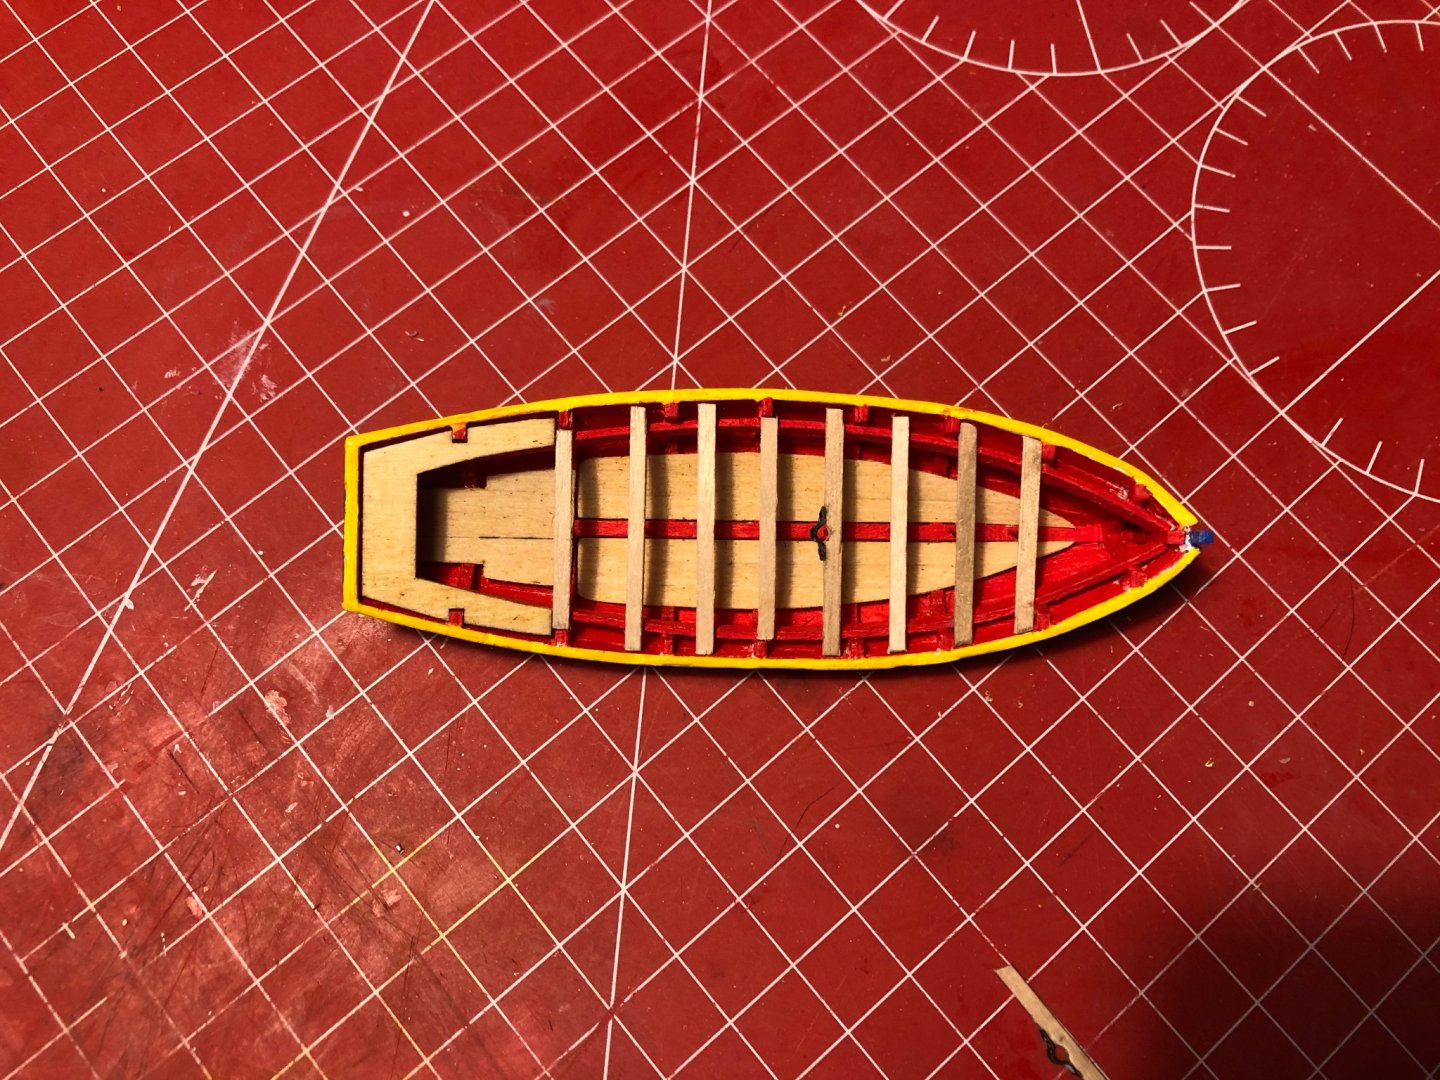
Hi Sjors, Thanks for the compliment. Question: Are you patient enough to let me build your lifeboats. This lifeboat was the first one I made and took me about a week. 😁 Kind regards, Peter
-
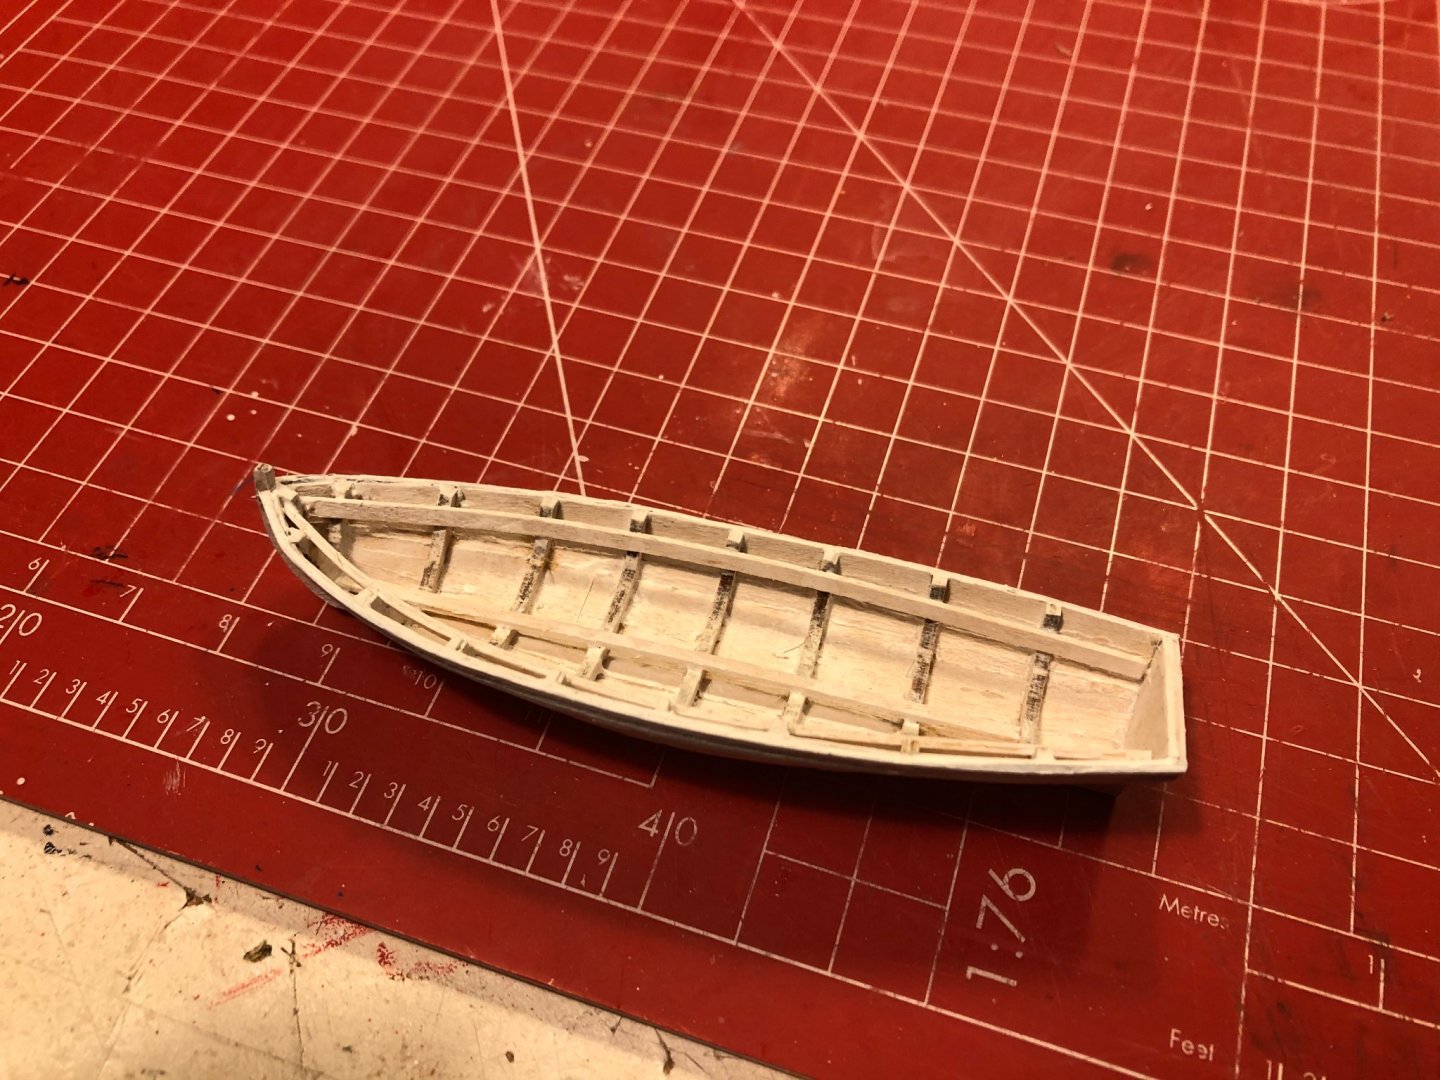
Hi all, Time for a little update! While waiting for a delivery of materials for the rigging of the guns i spend some time on the rudder and the first life boat. Although the lifeboat is not quite ready yet, I am reasonably satisfied with the result. Yesterday the material arrived by courier and I can continue to rig the guns. Up to the next update. Regards Peter


-
Hi Sjors, It's seems like you are finished before Christmas. Great rigging so far. Regards Peter
- 164 replies
-
- 1
-

-
- vanguard models
- flirt
- (and 1 more)
-
Thank you Sjors, Your drill standard is working perfect with the Dremel. (Thanks for it) Peter
-
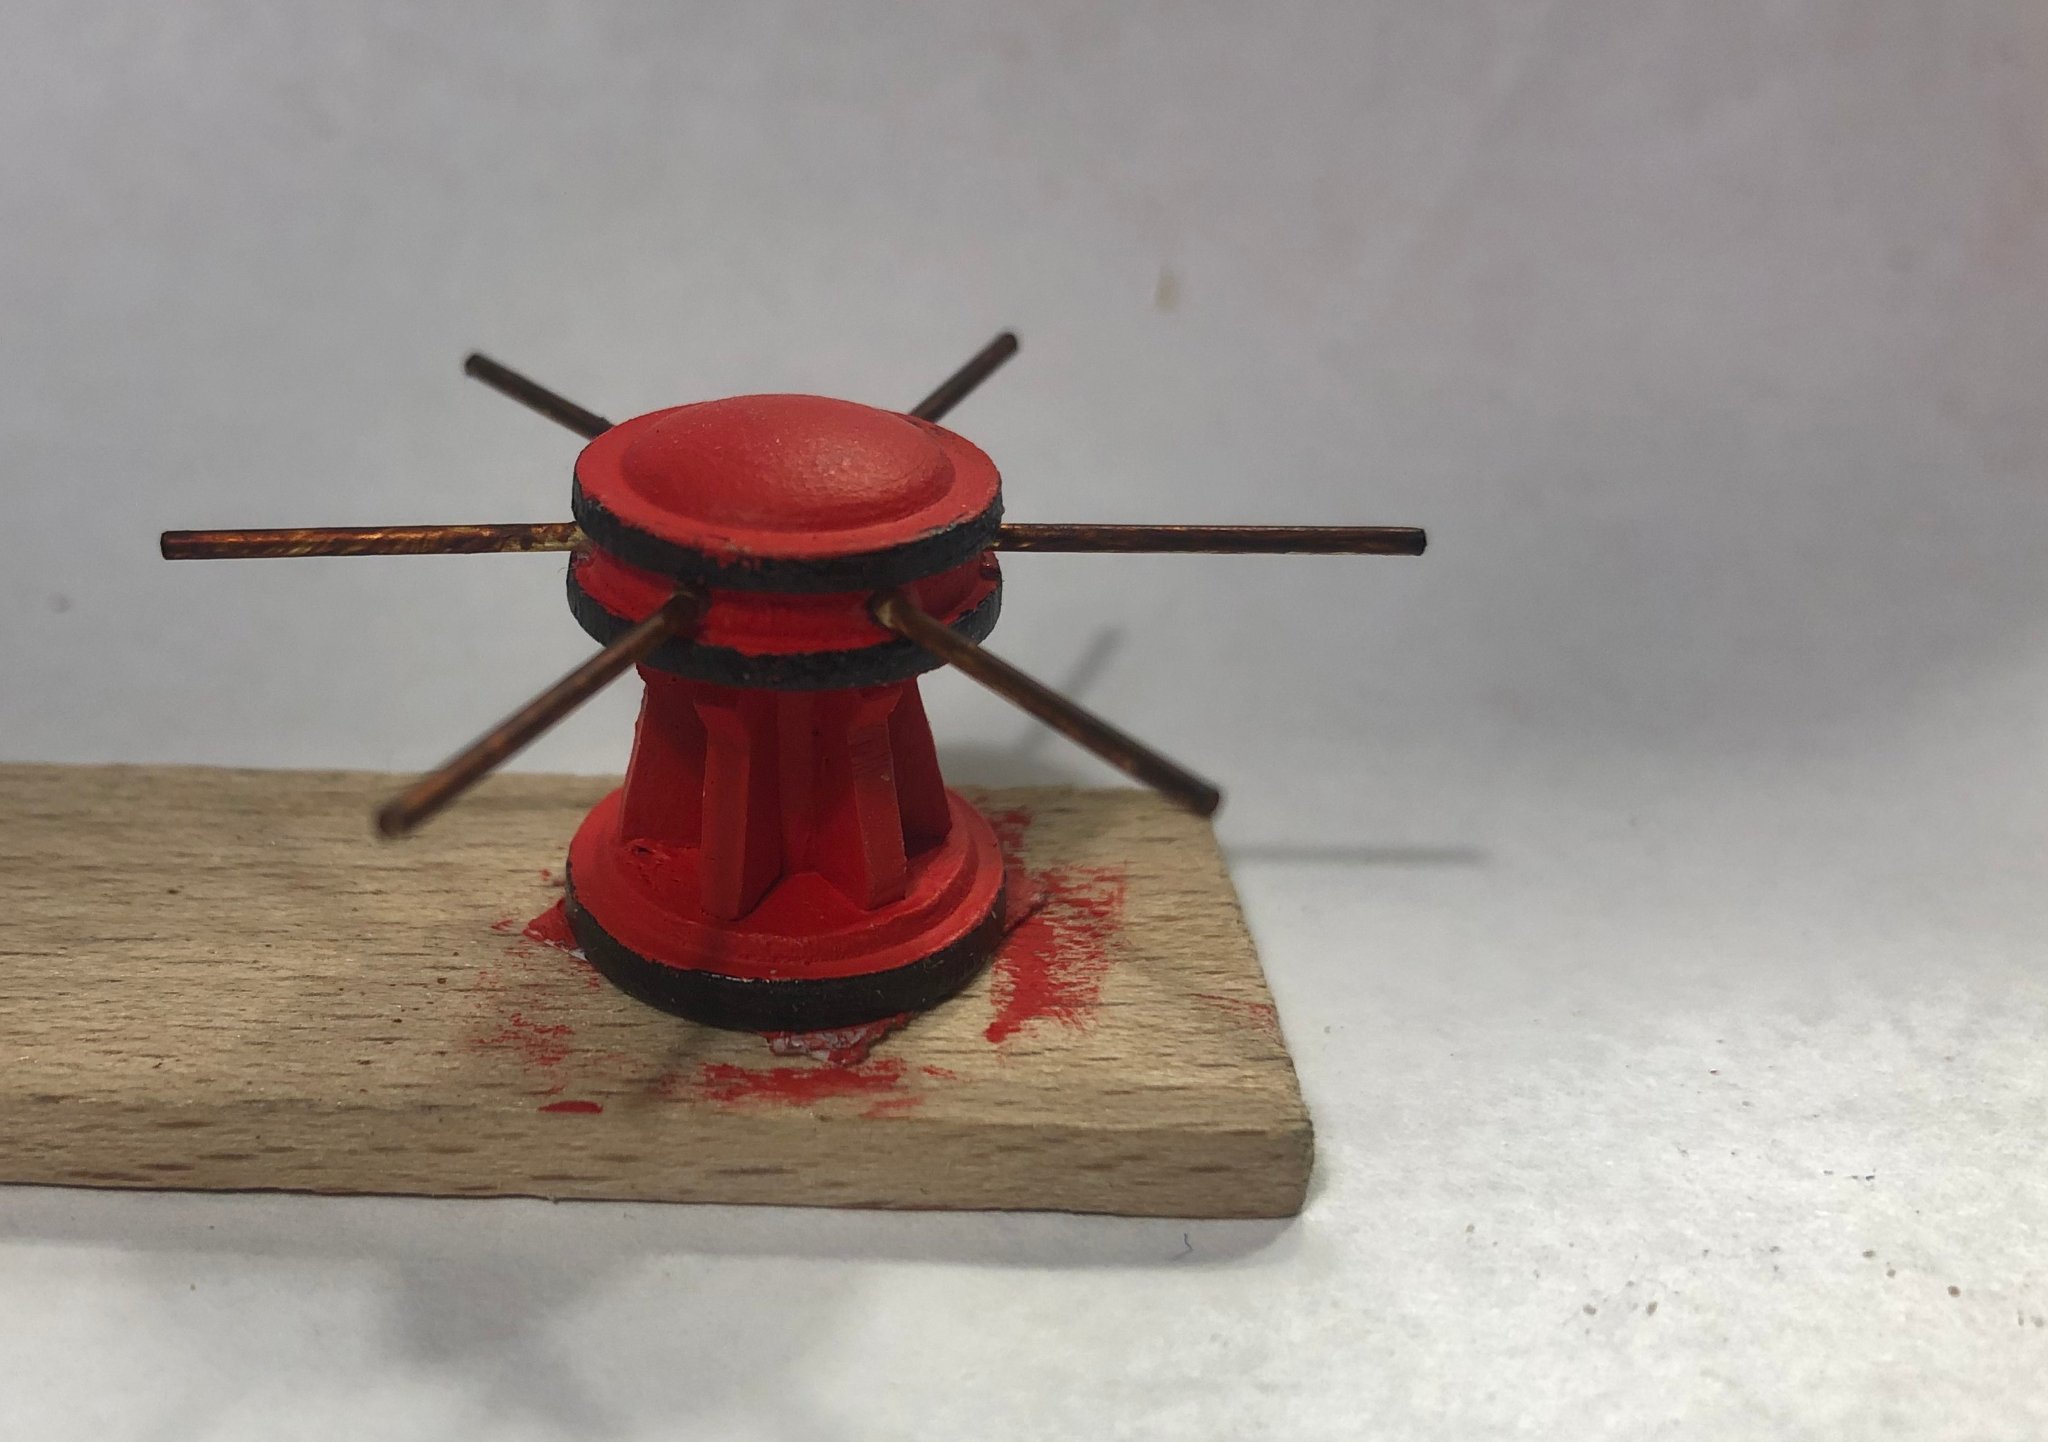
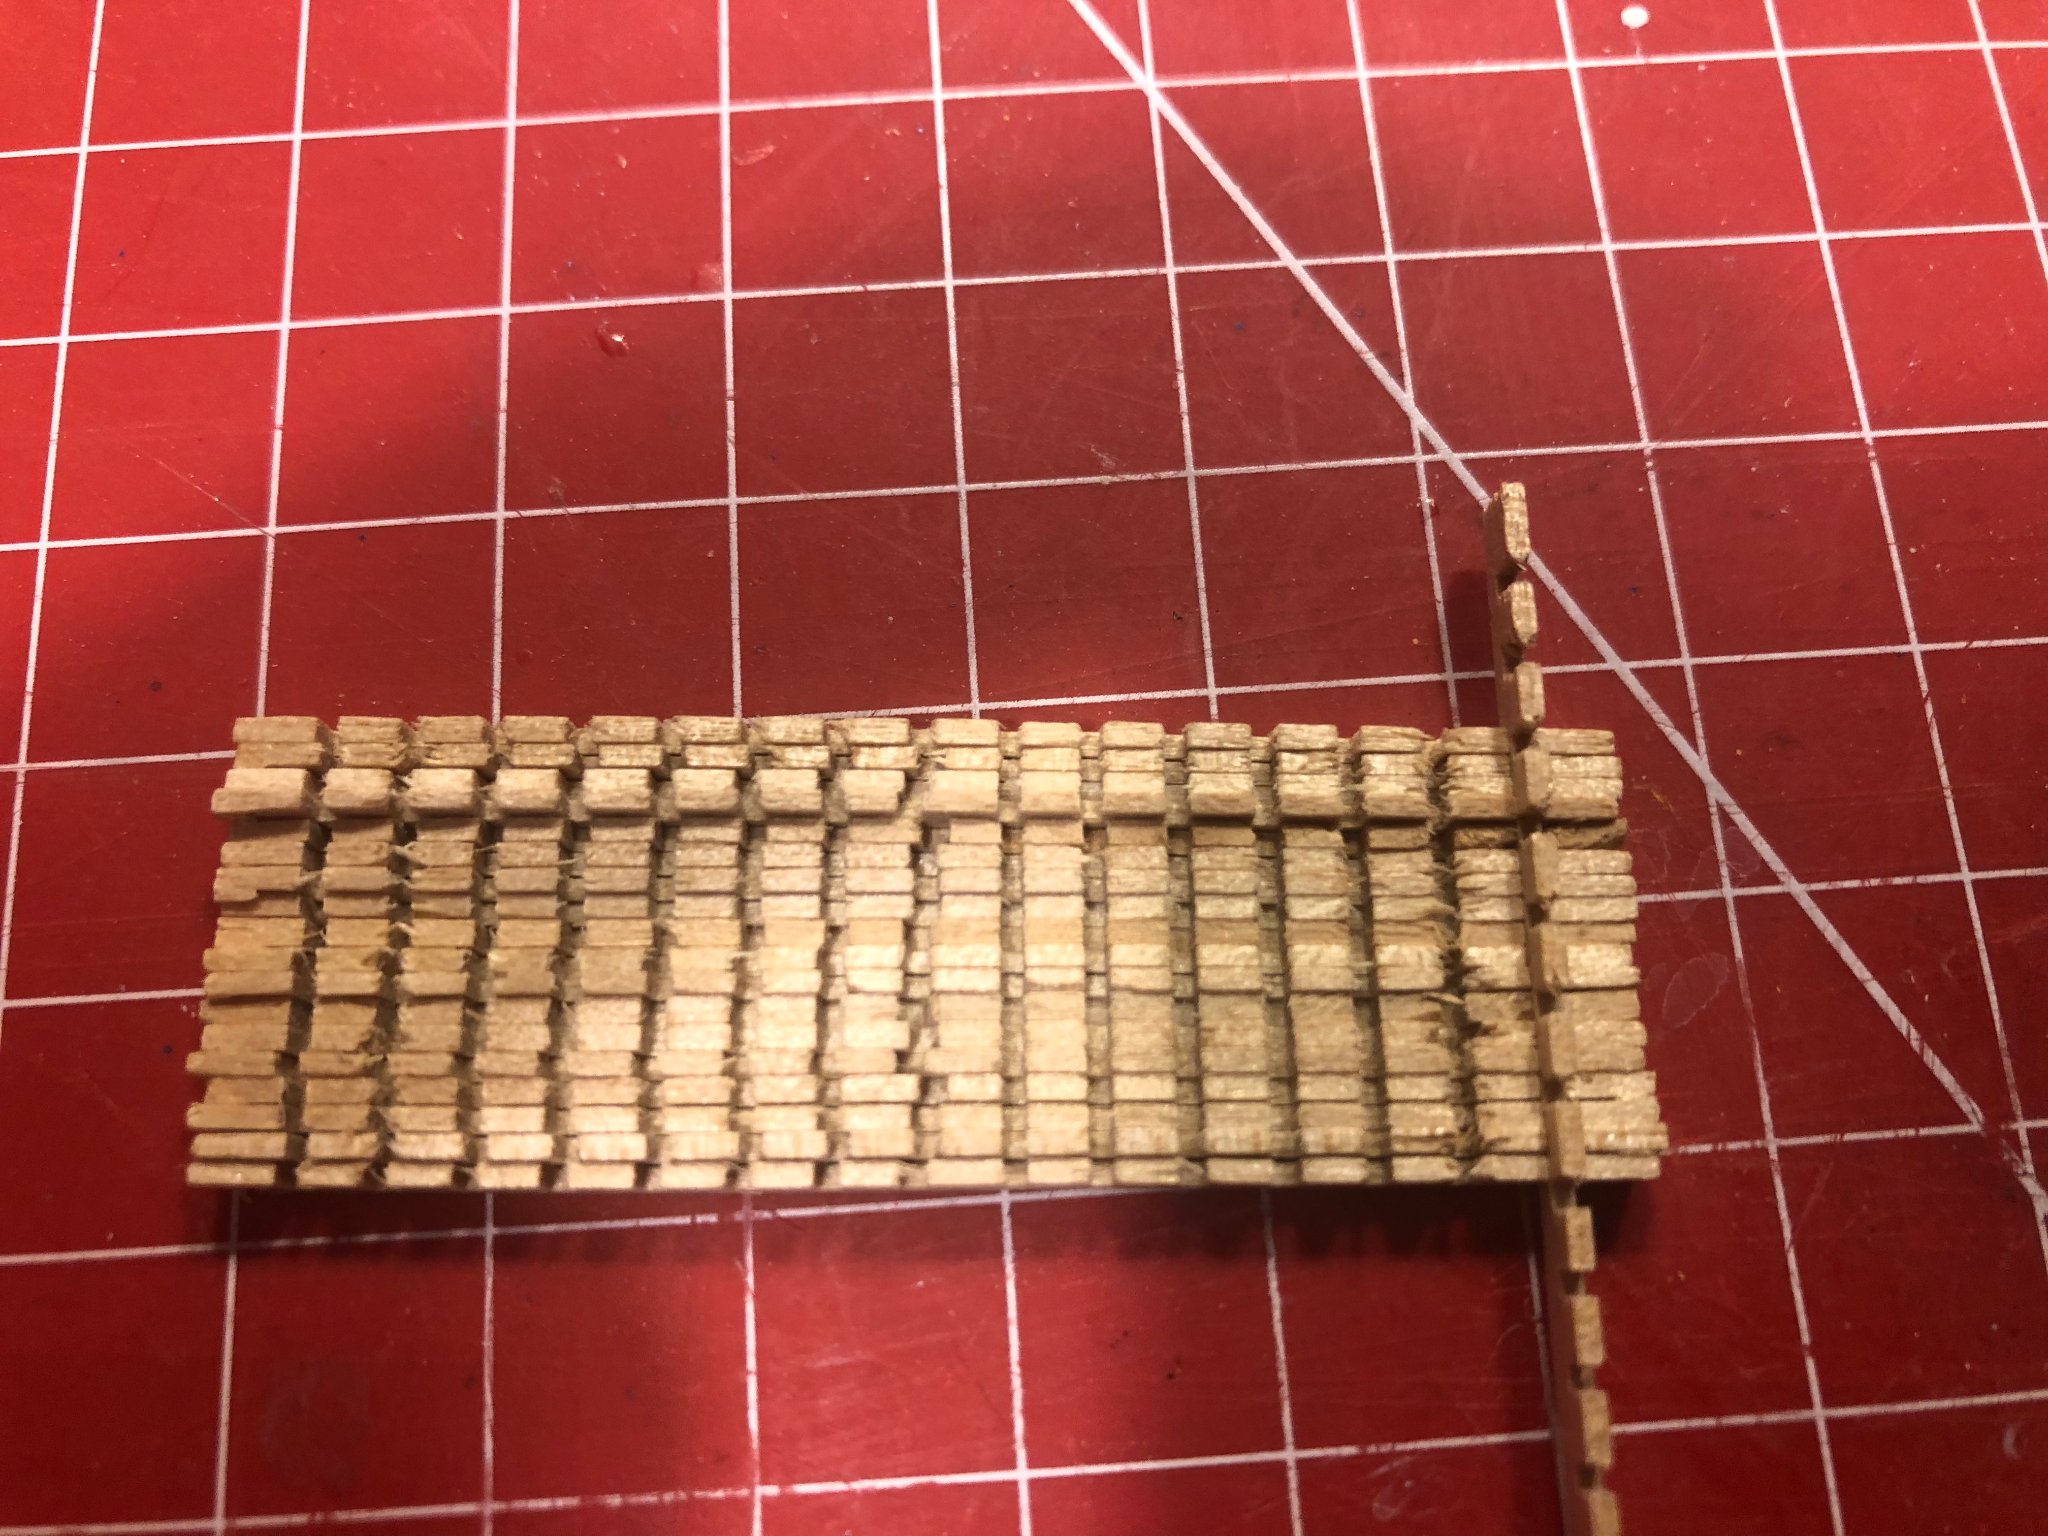
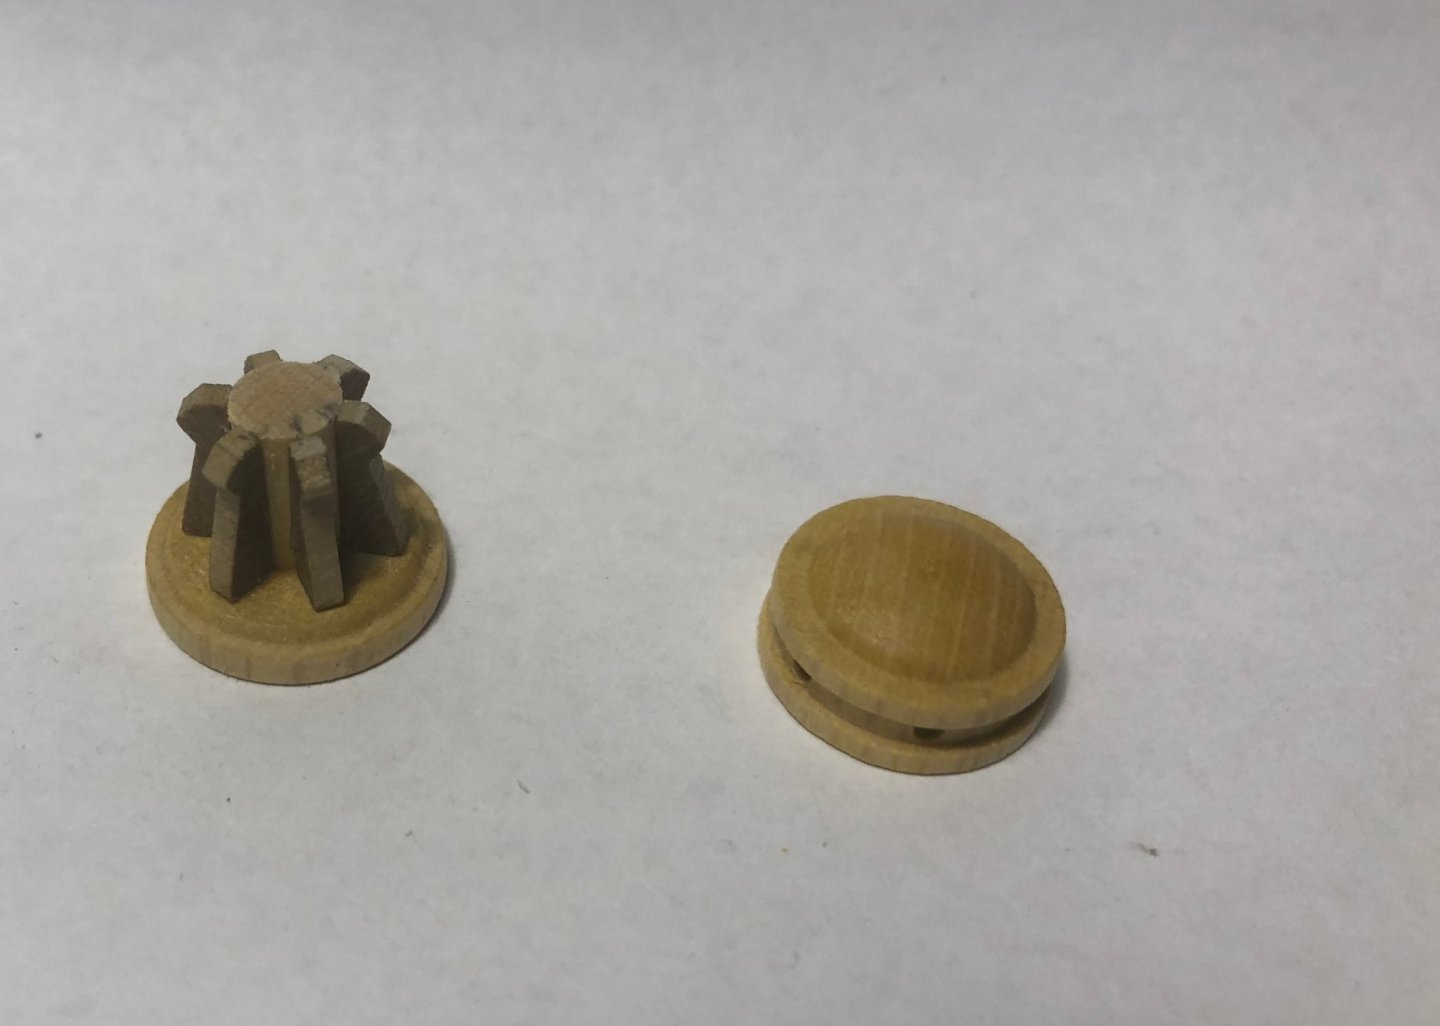
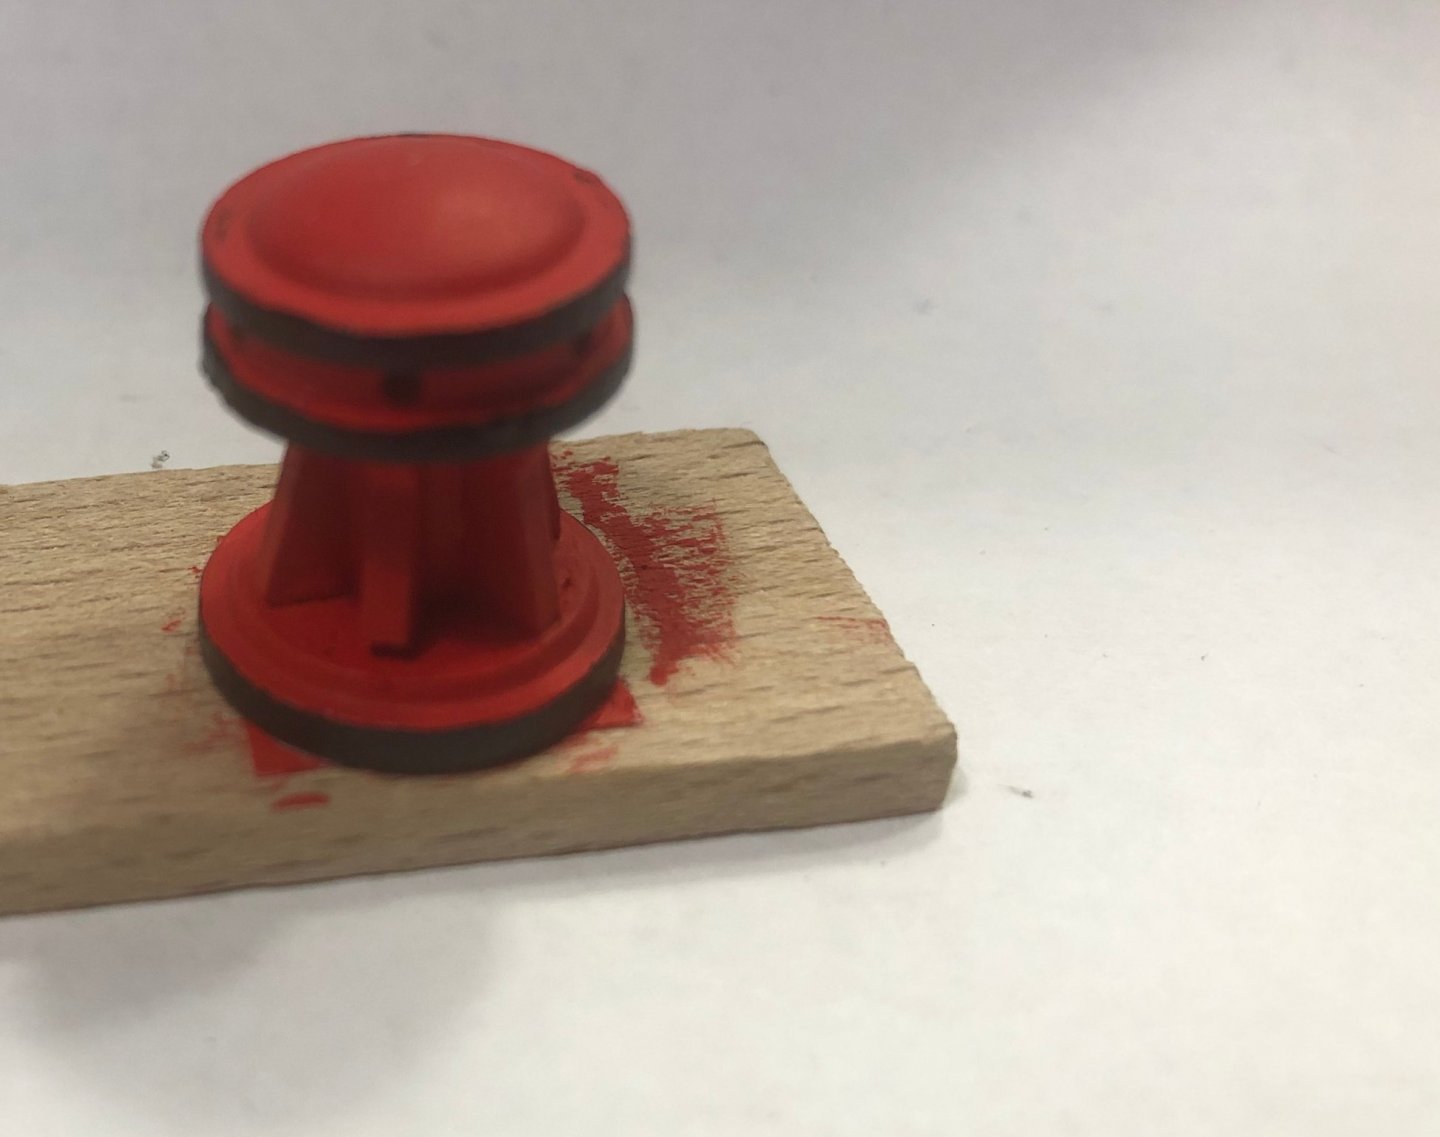
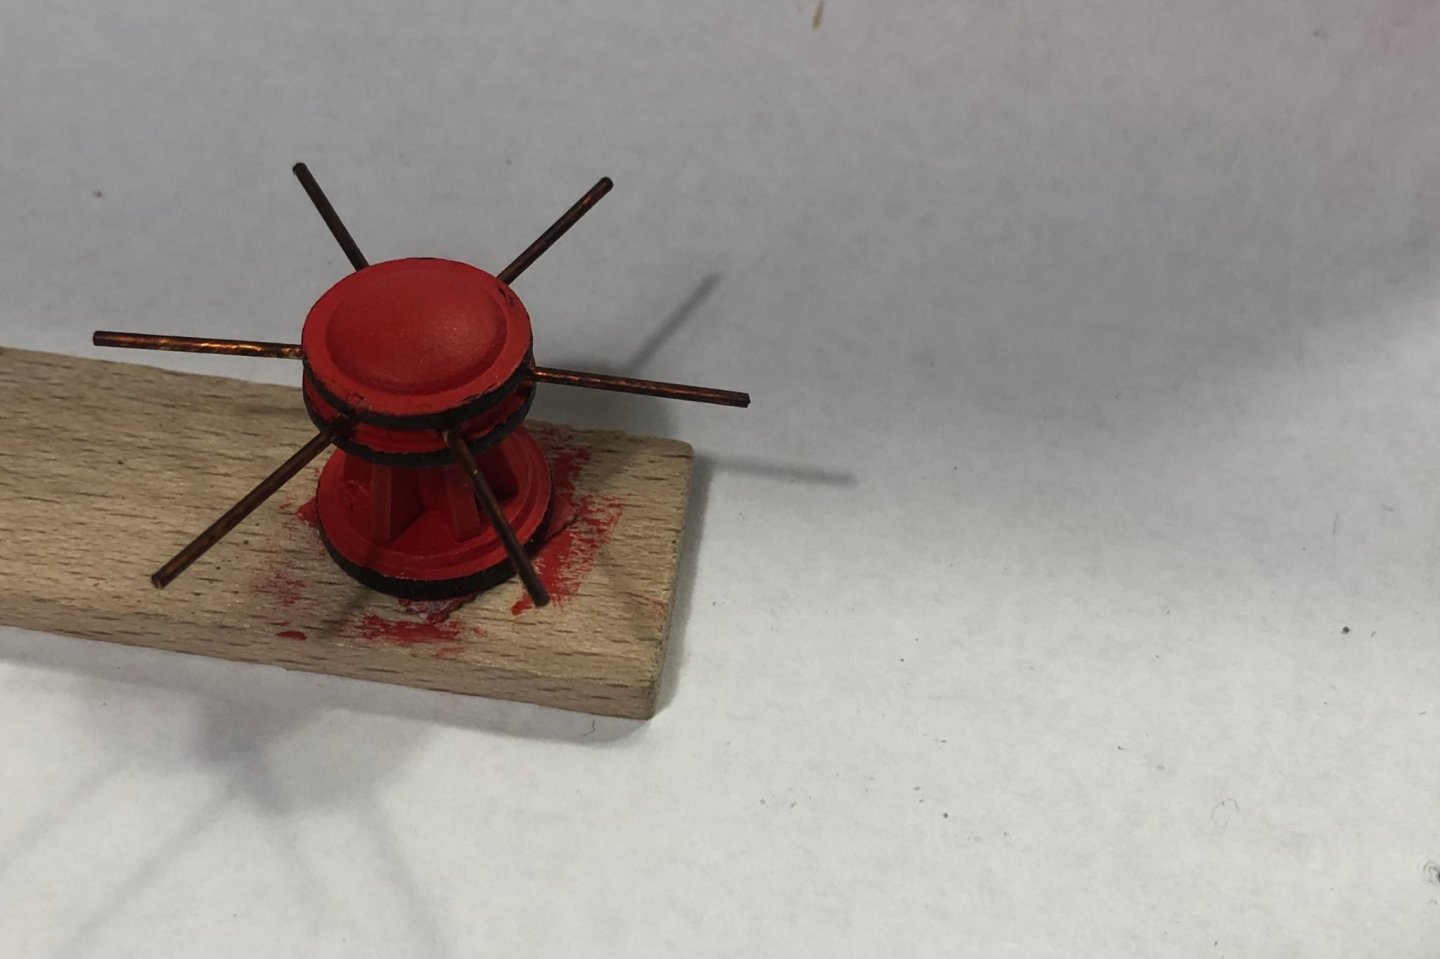
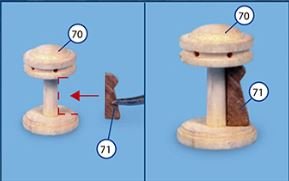
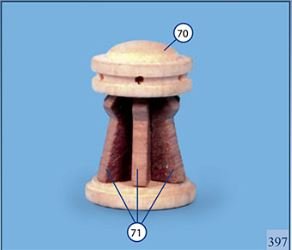
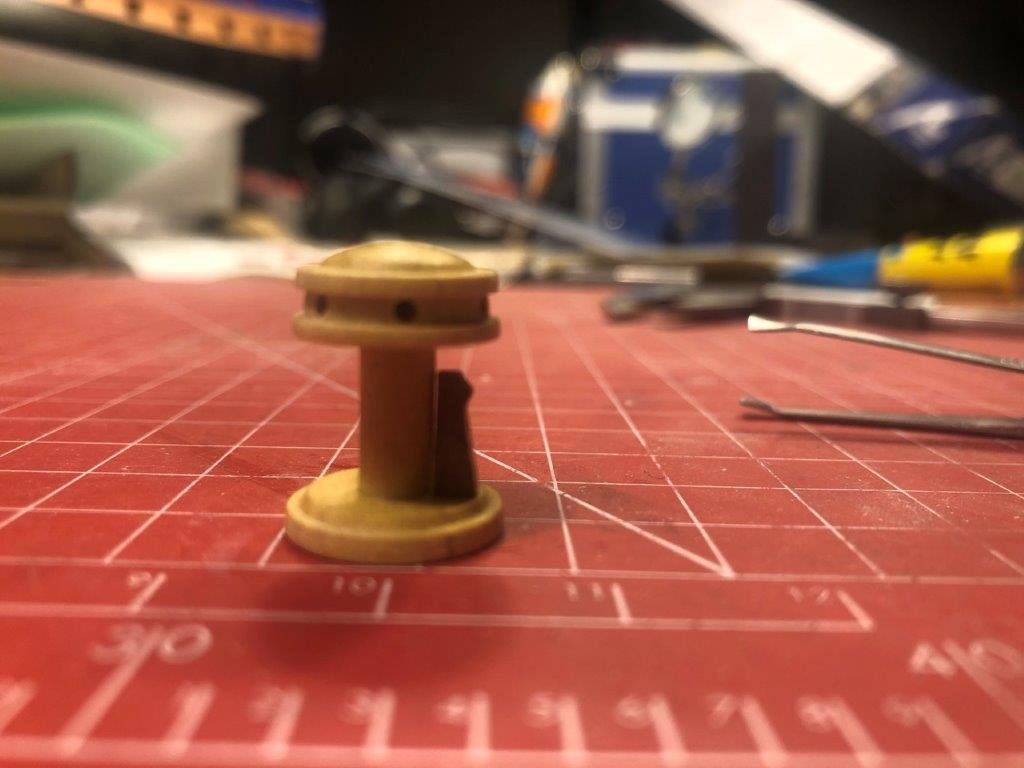
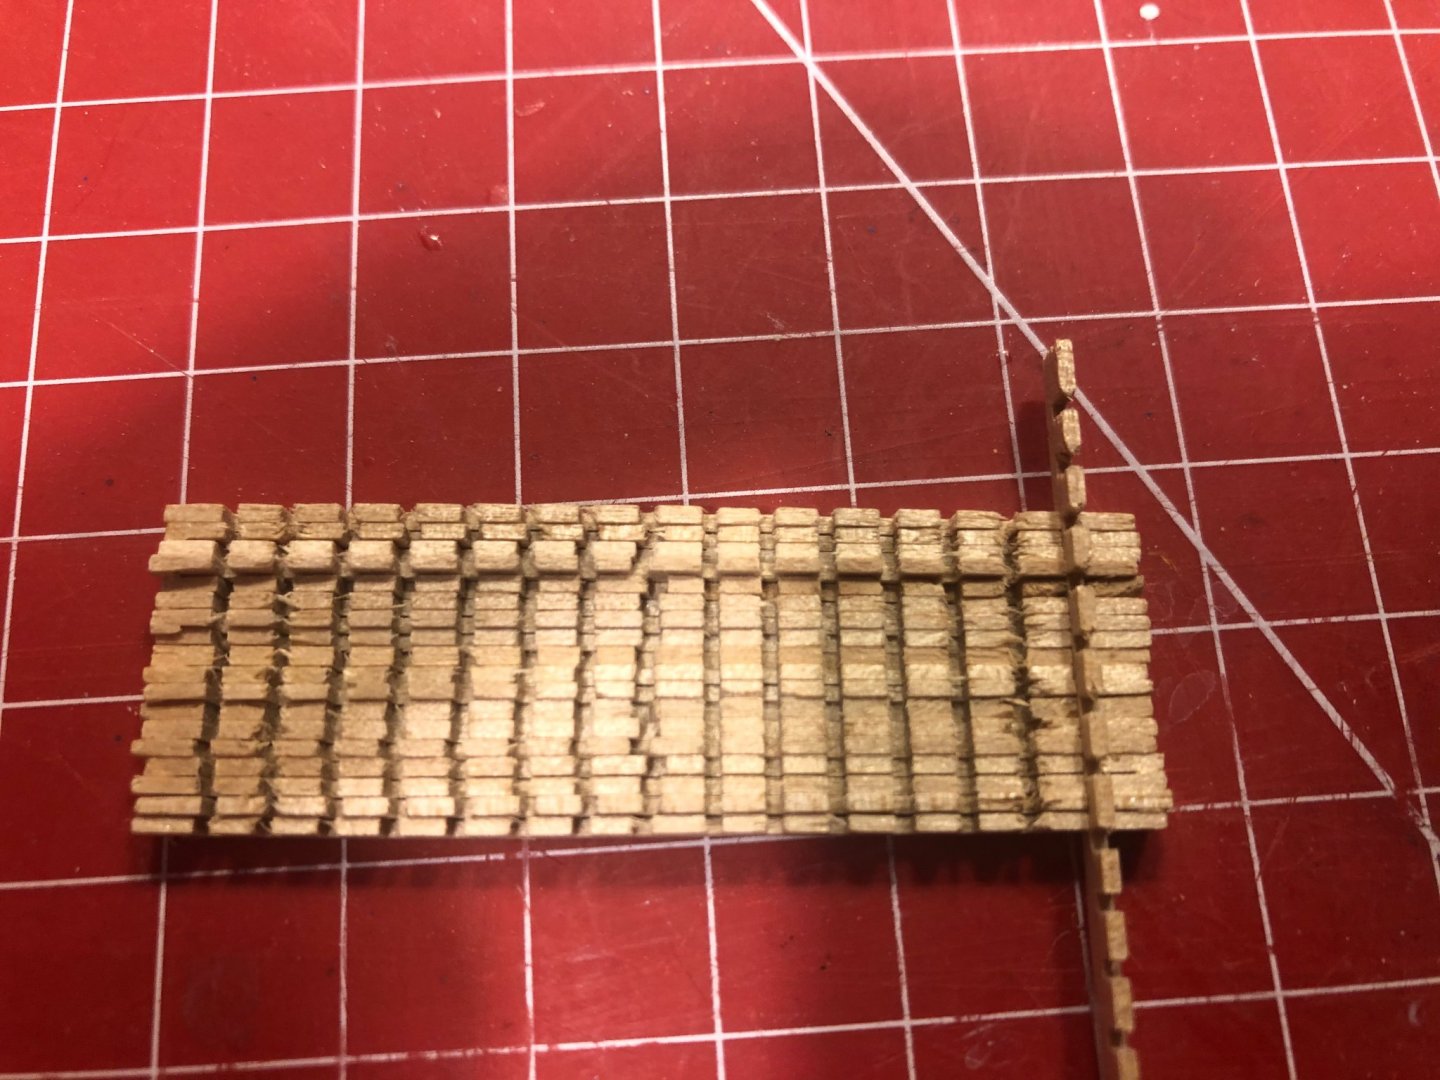
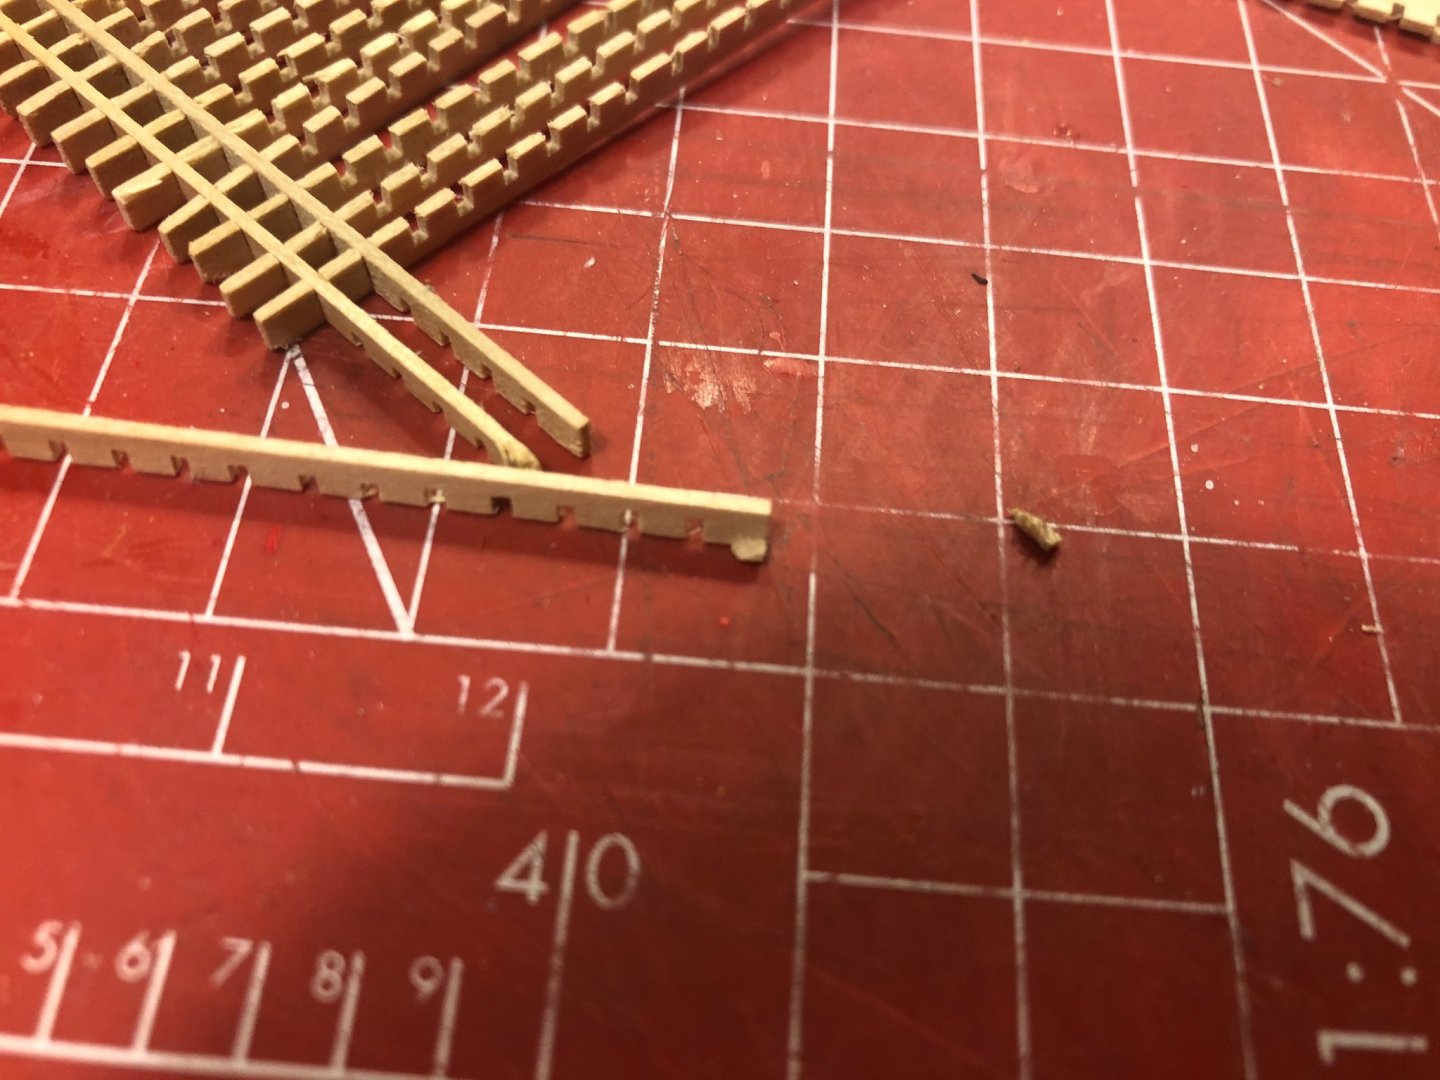
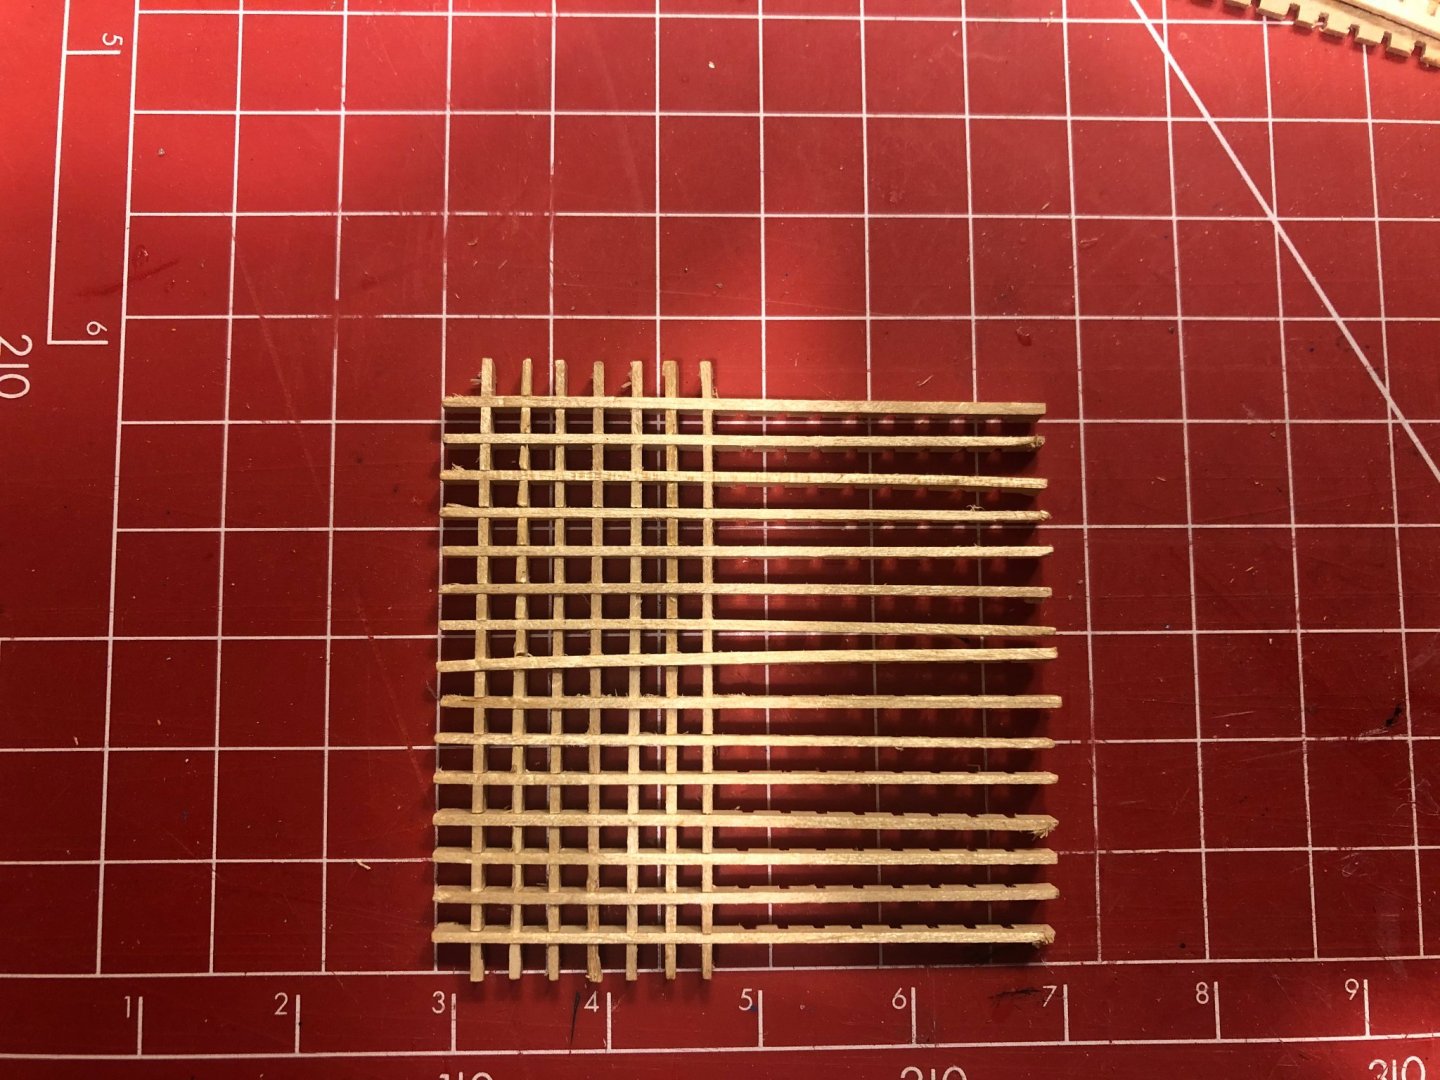
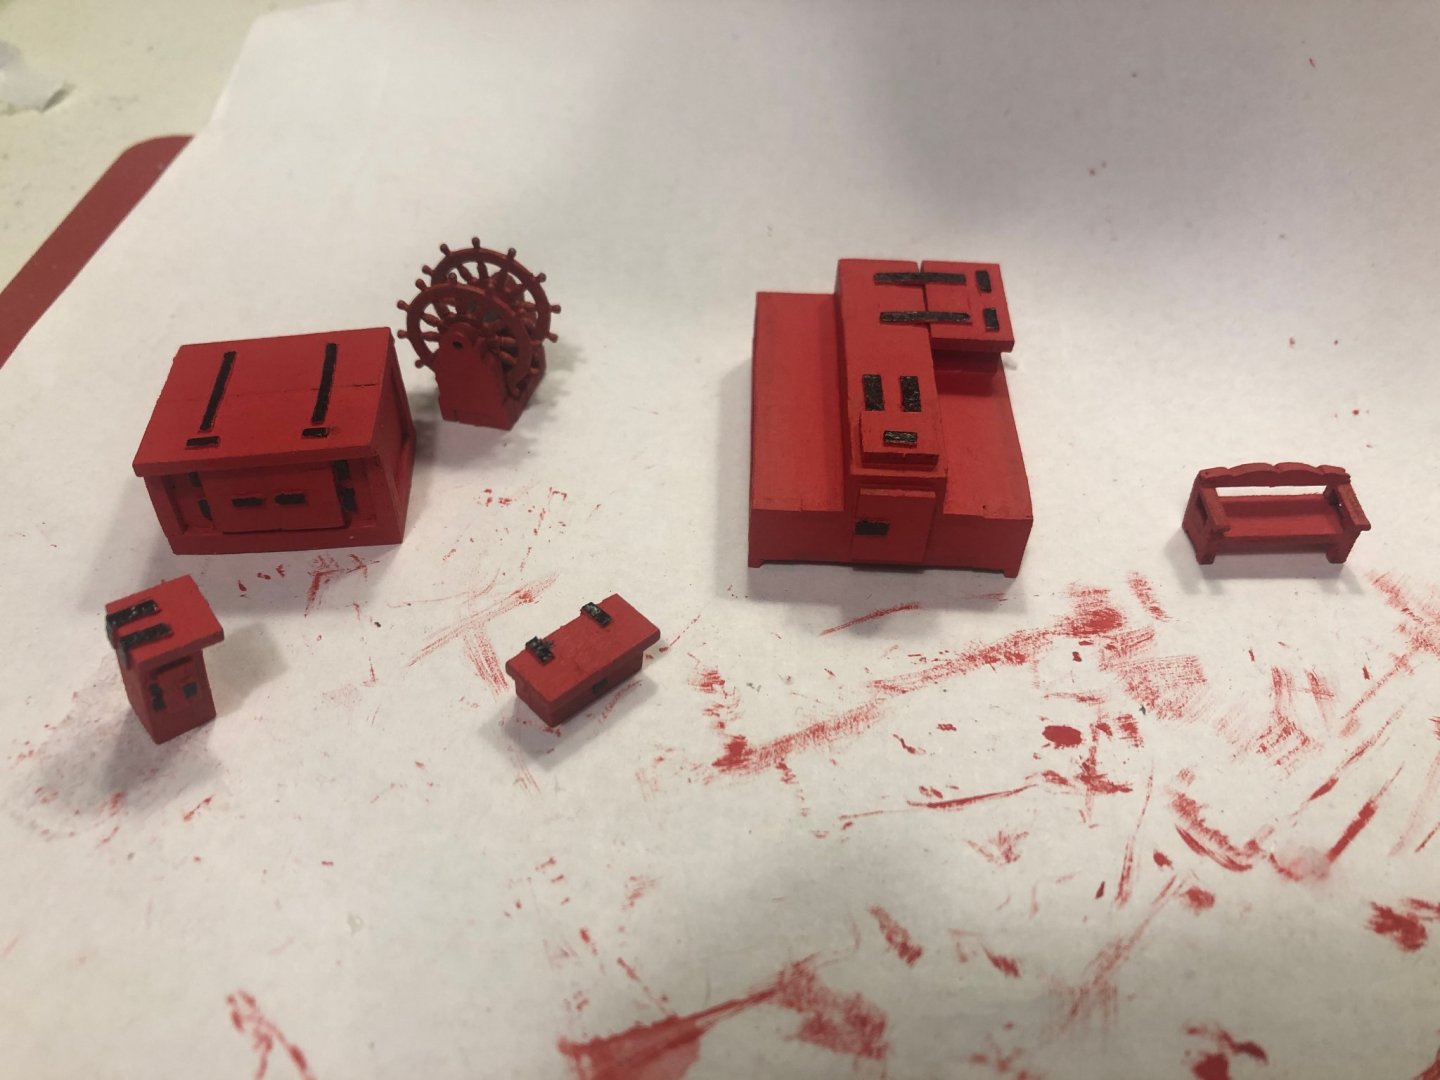
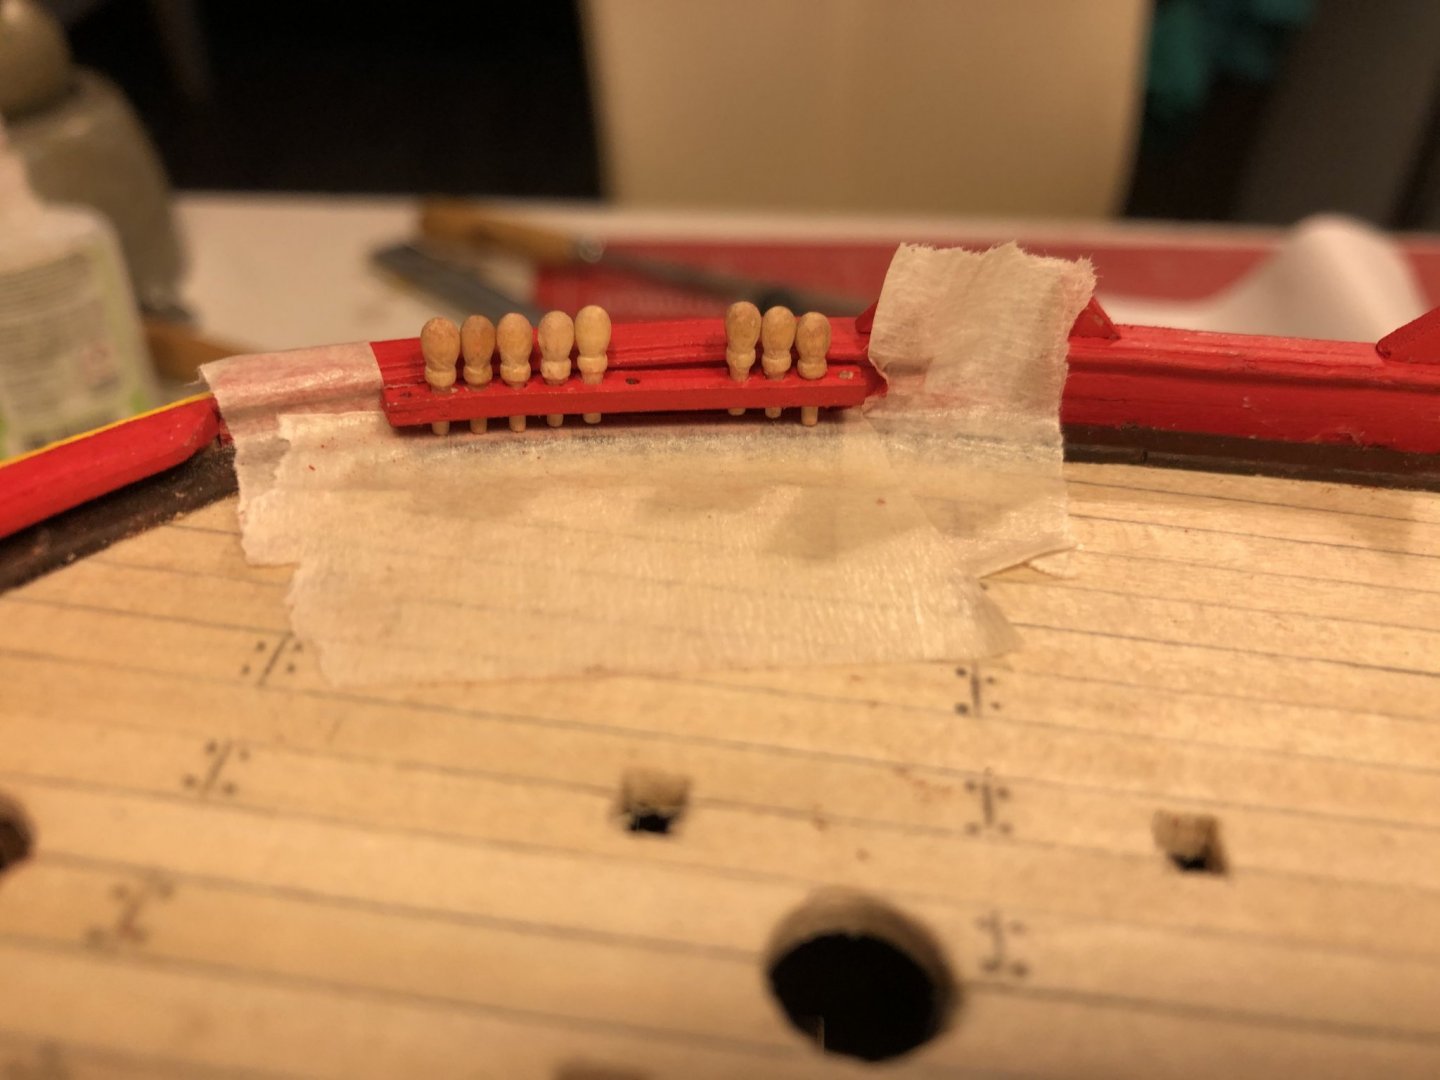
Hi all, The capstan is sawn through, shortened and glued together. After some puzzling, sawing and sanding this is what I was able to make of the gratings. RussR, you're right for what you can make of it with a different mindset.😏 Finally, all the pin rails are made, drilled, painted and trimmed with belaying pins. Regards Peter


-
Sjors, Thanks for the tip. I just found their site on the internet but I think they specialize in model trains, I'll call the store. Peter
-
Hi RussR, thanks for the compliment and most likely my capstan will undergo the same adjustment as yours! By time-consuming I meant the delivery time of products you order on the internet. Since Covid-19 everyone seems to have a hobby, so the delivery time is sometimes more than a month. I'm not in a rush to finish the Hermione as soon as possible. But in the meantime while I'm can't go on, I pick-up my guitar and play the blues. 😁 You are right about the flaws and viewers that are looking at it. They don't see! 😁 (sorry but I'm a little pleasantly disturbed) The updates will keep coming till the day I'm finishing Hermione! PeterB
-
Hi Matt, It's certainly annoying, I didn't had that much trouble with build of the President. (Sergal kit) unfortunately there are no scale drawings of any part included with the Artesania Latina Kit. Only a CD with instructions and photo's. The only possibility I can think of is to send a PM to one fellow builders here on MSW who also builds the Hermione. I still have a lot of scraps from my previous build (President) to make from scratch. But first i need the dimensions of the capstan. anyway all, those flaws are really time consuming🤐
-
I wouldn't dare. With their 1.85 they are just a bit too big at the moment. I know my limitations, so I know better.😁 Peter
-
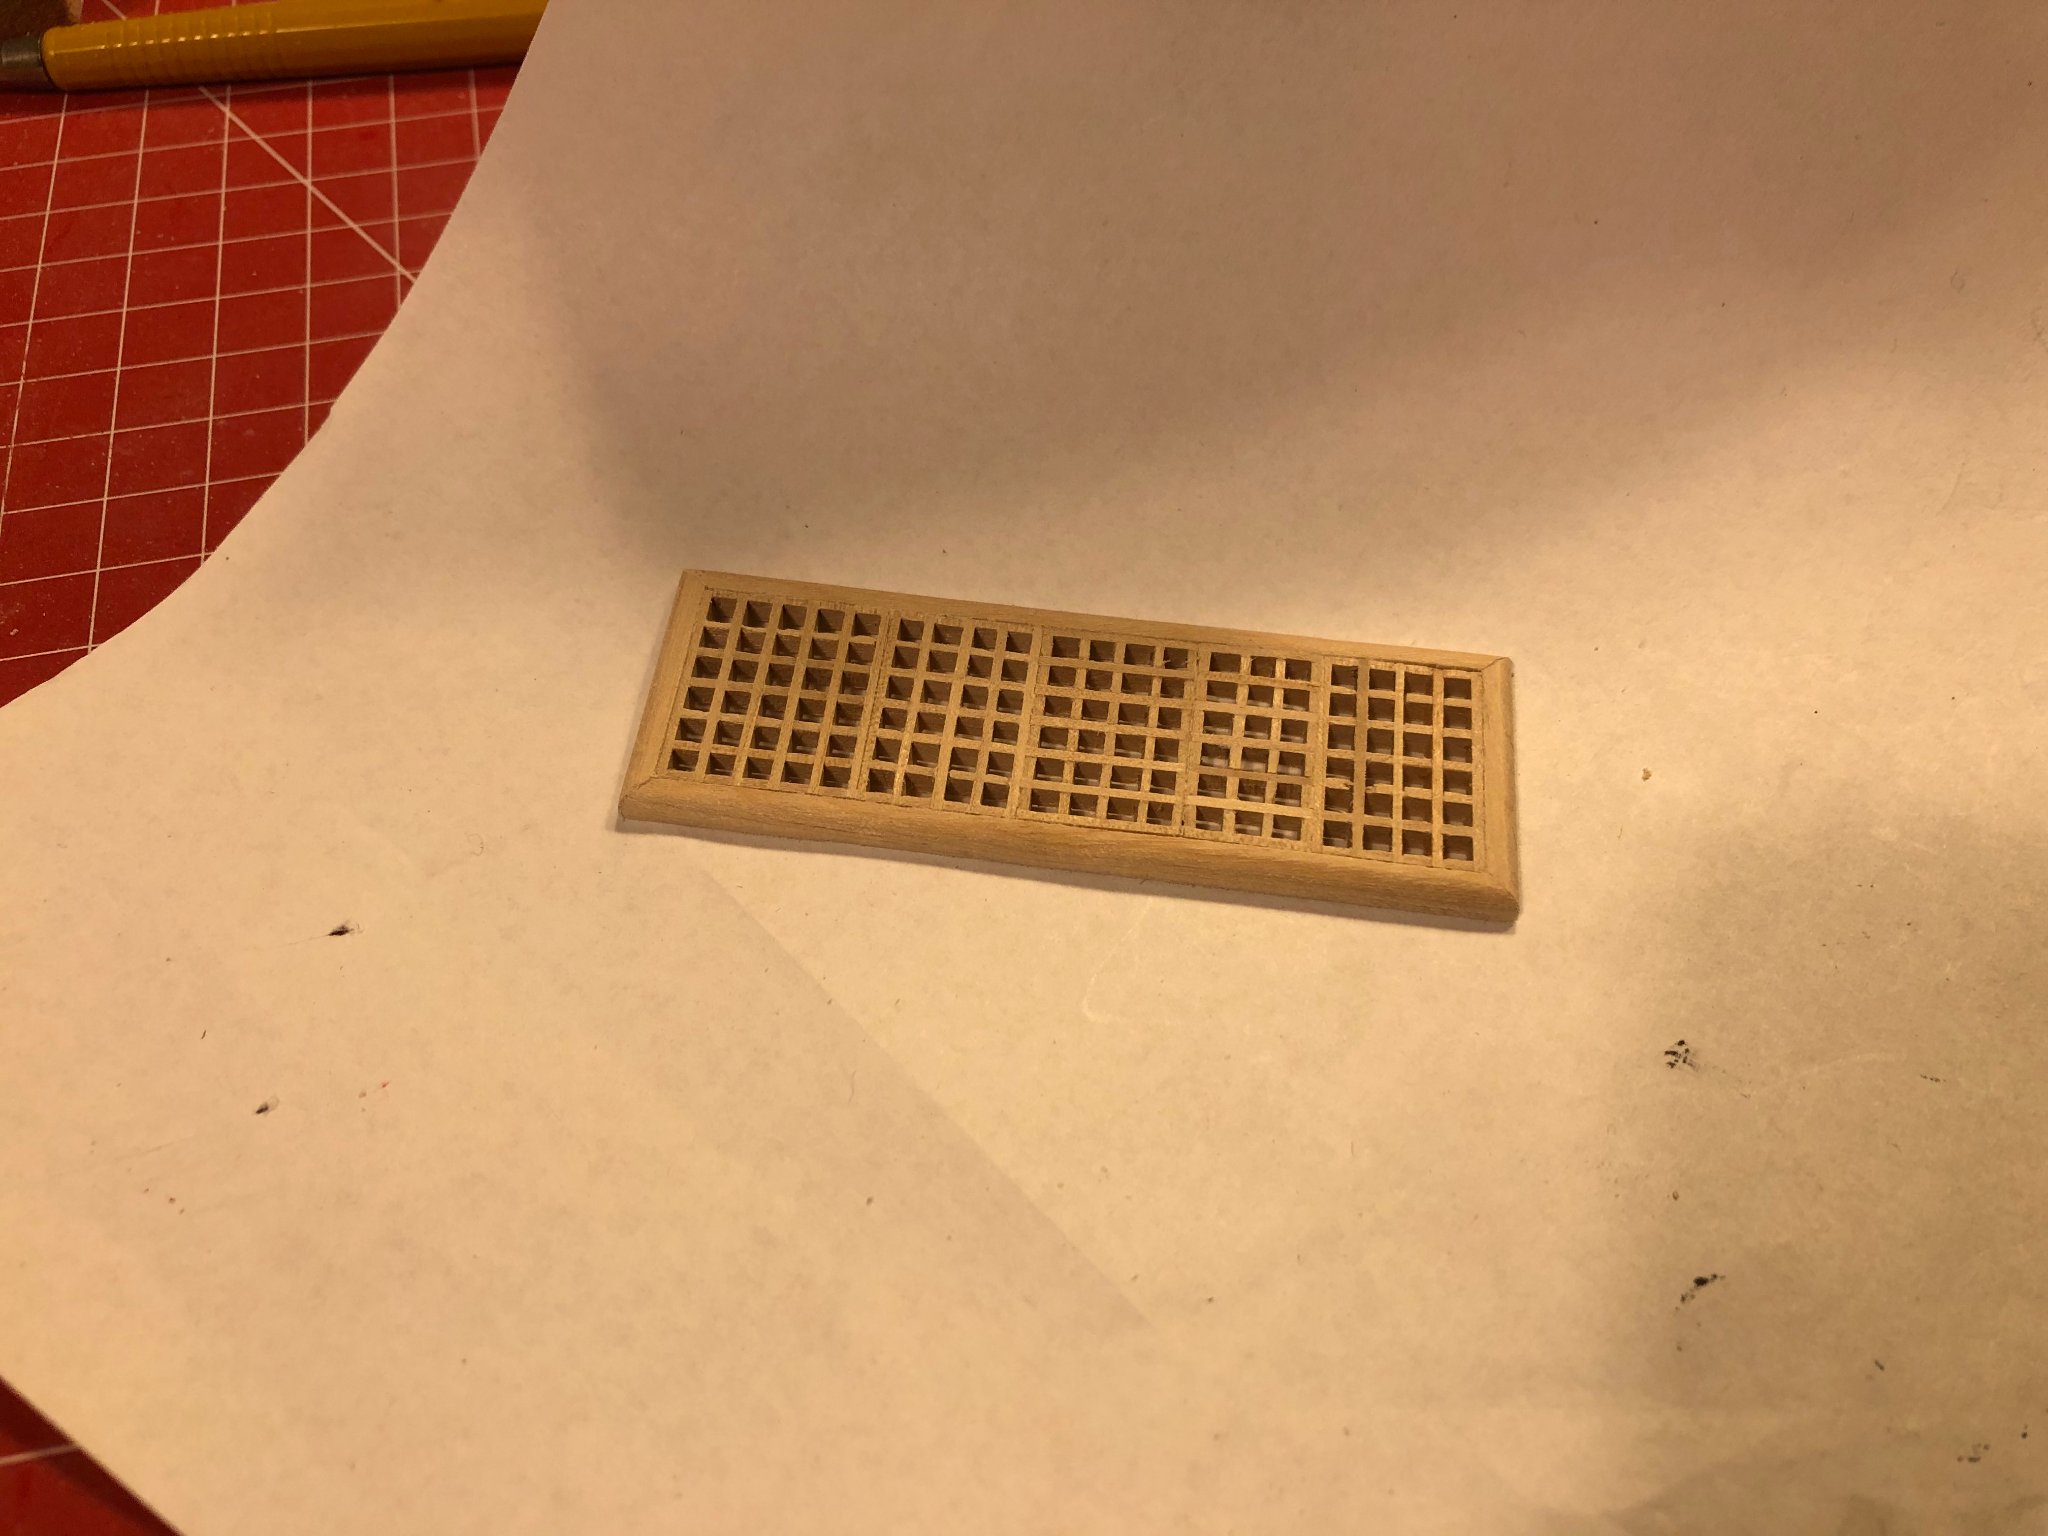
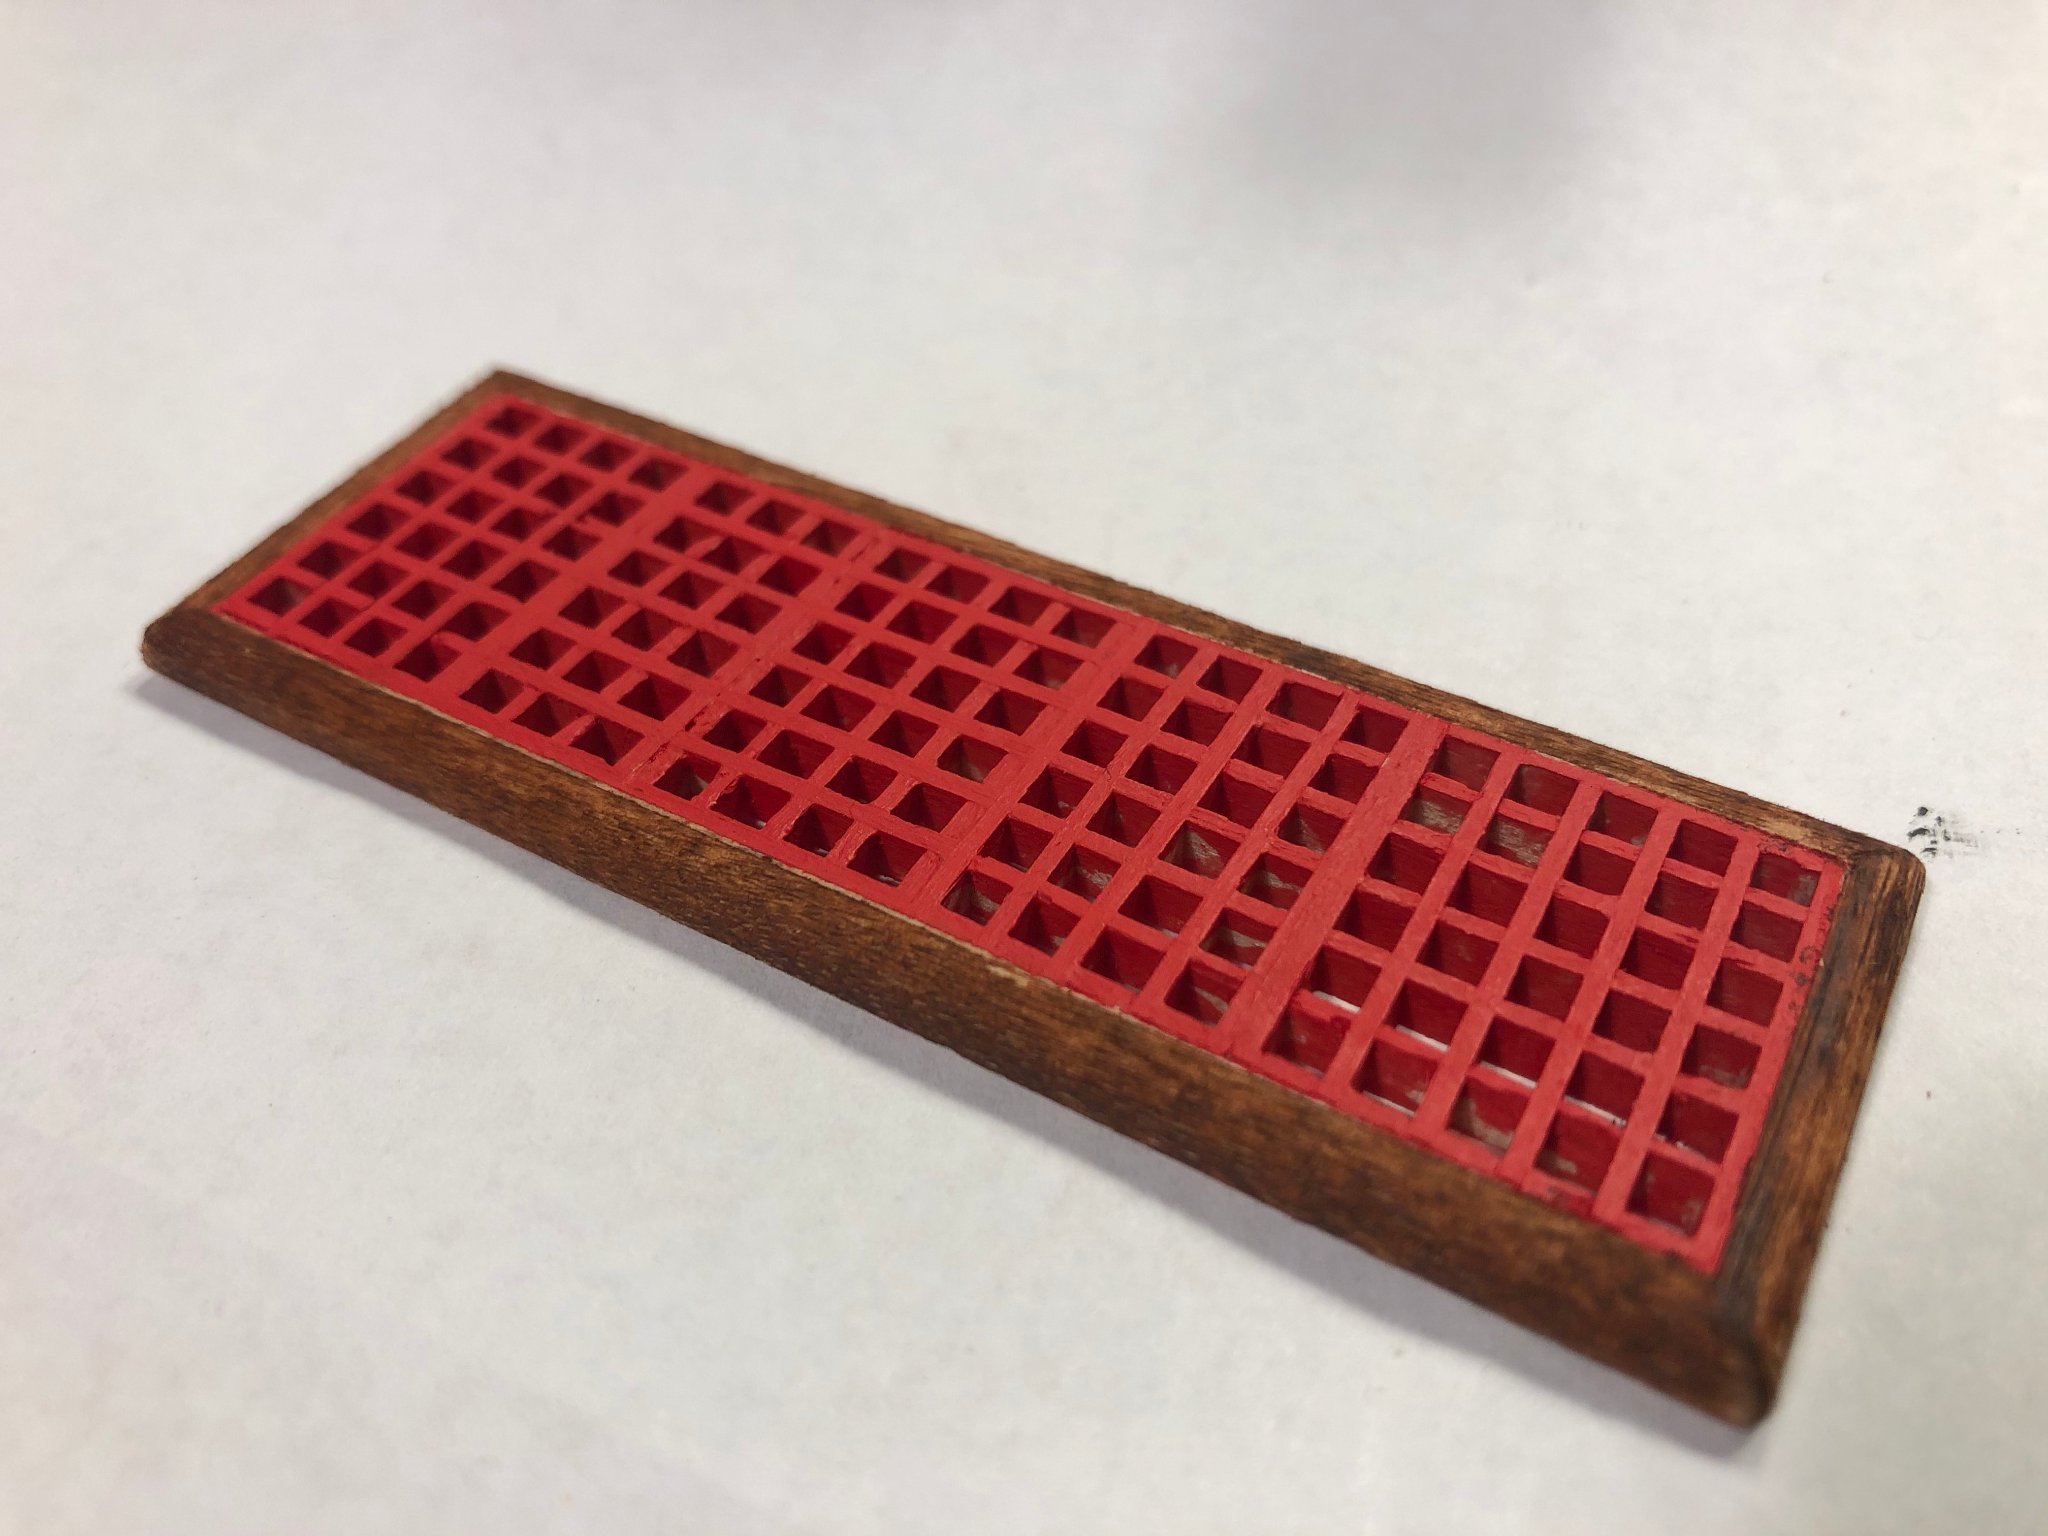
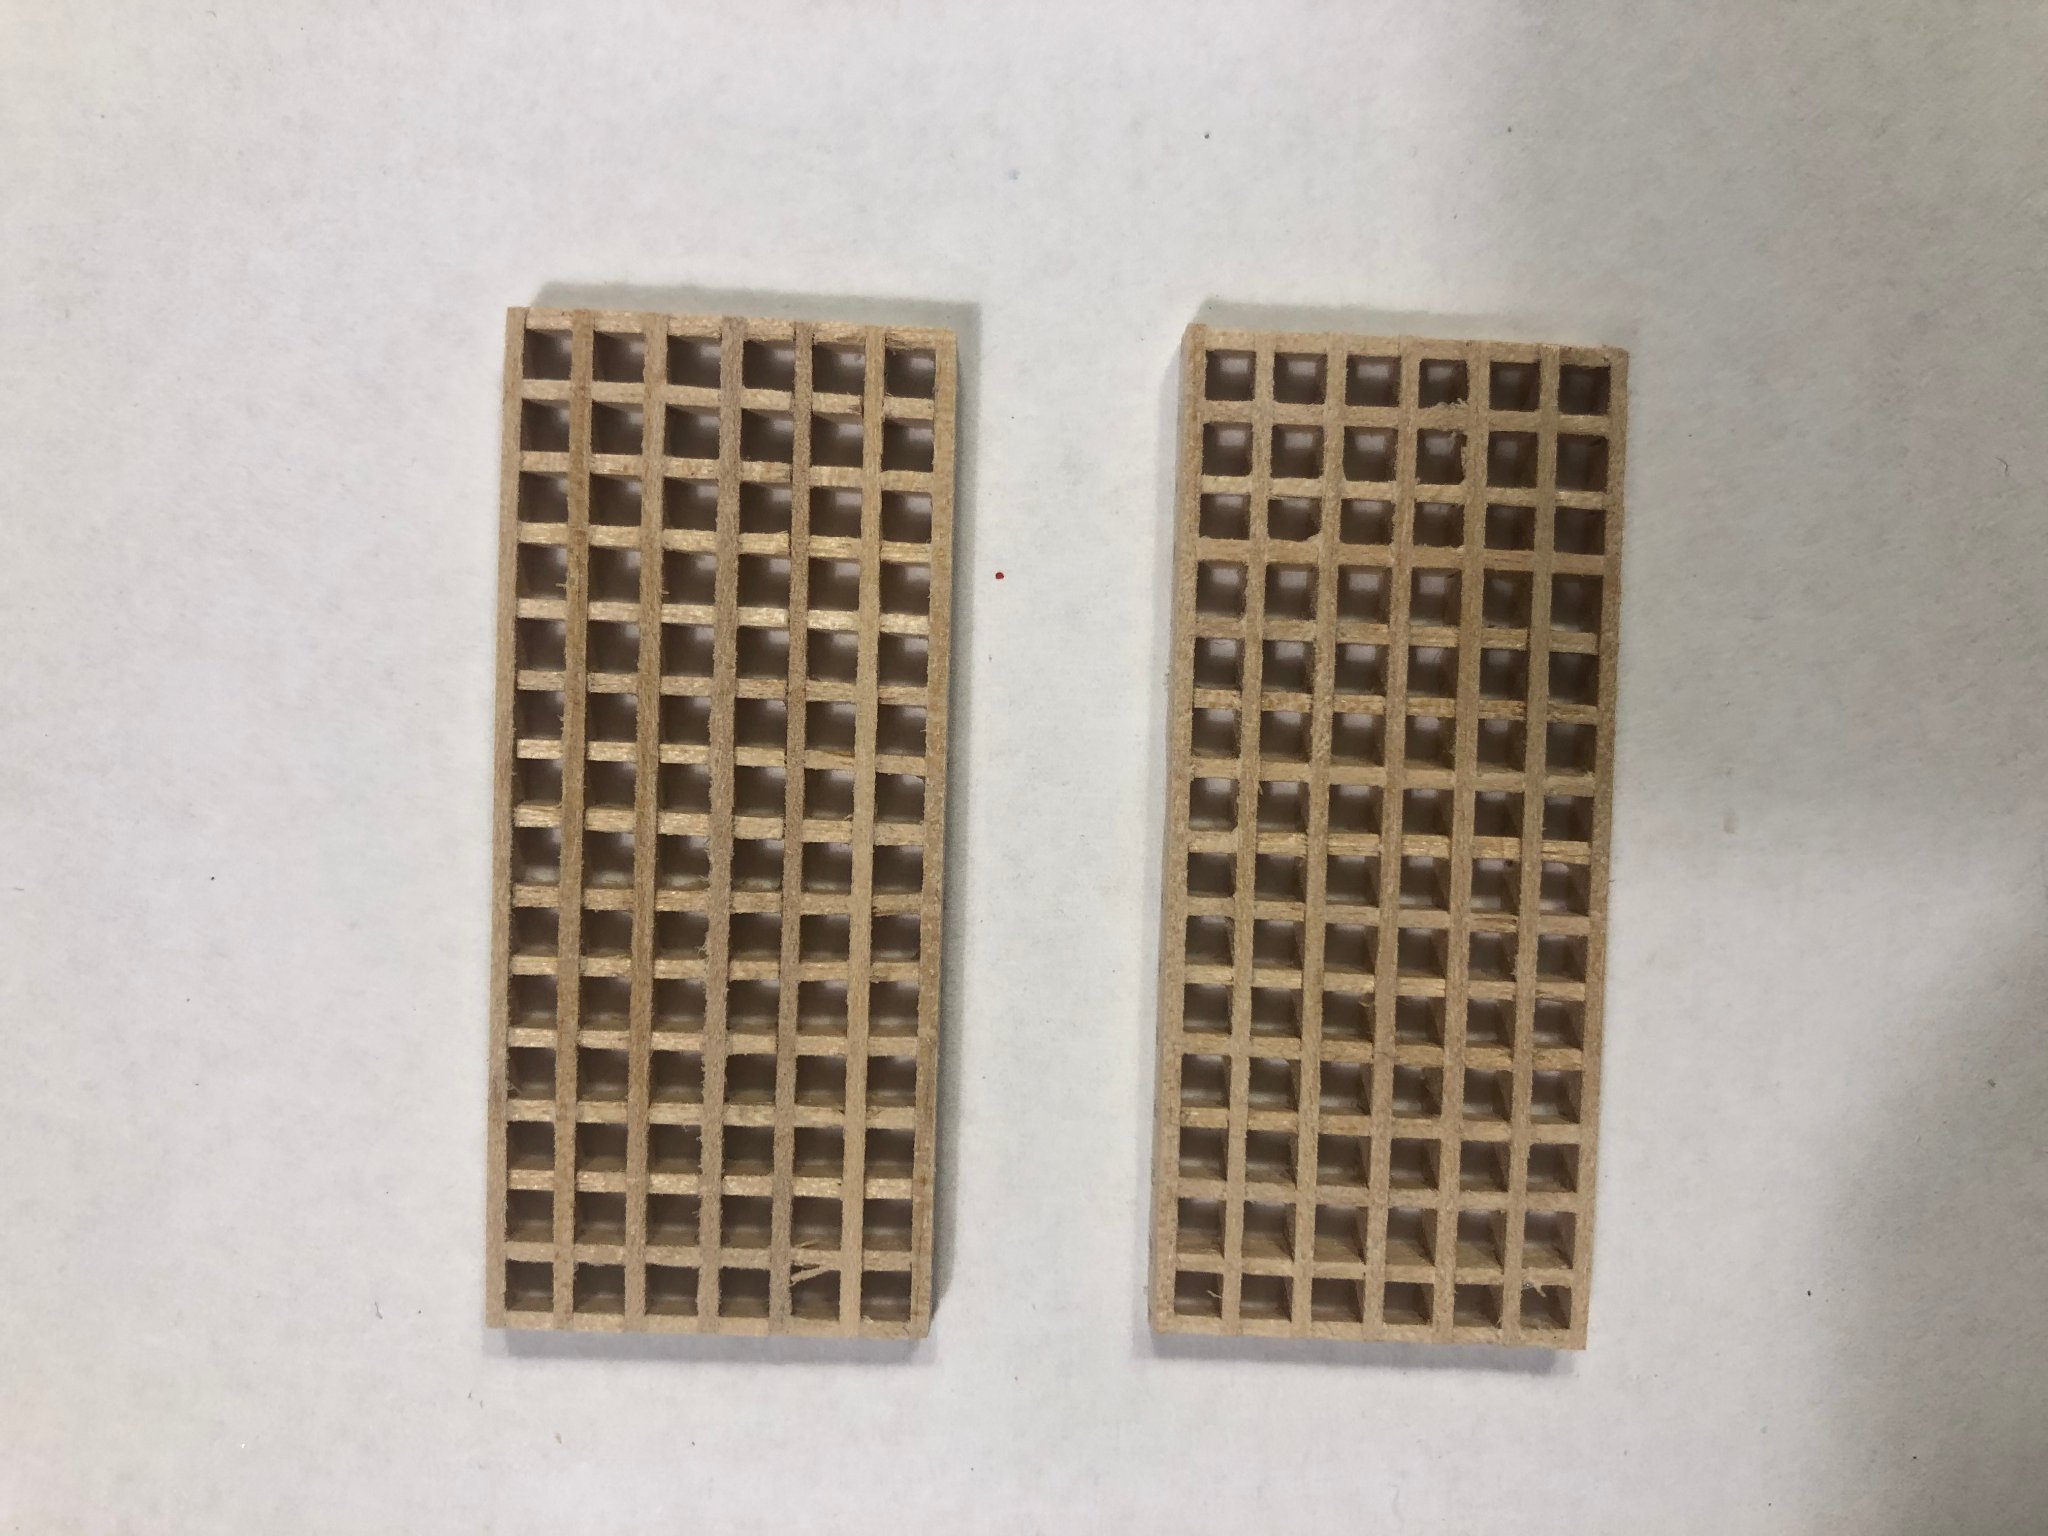
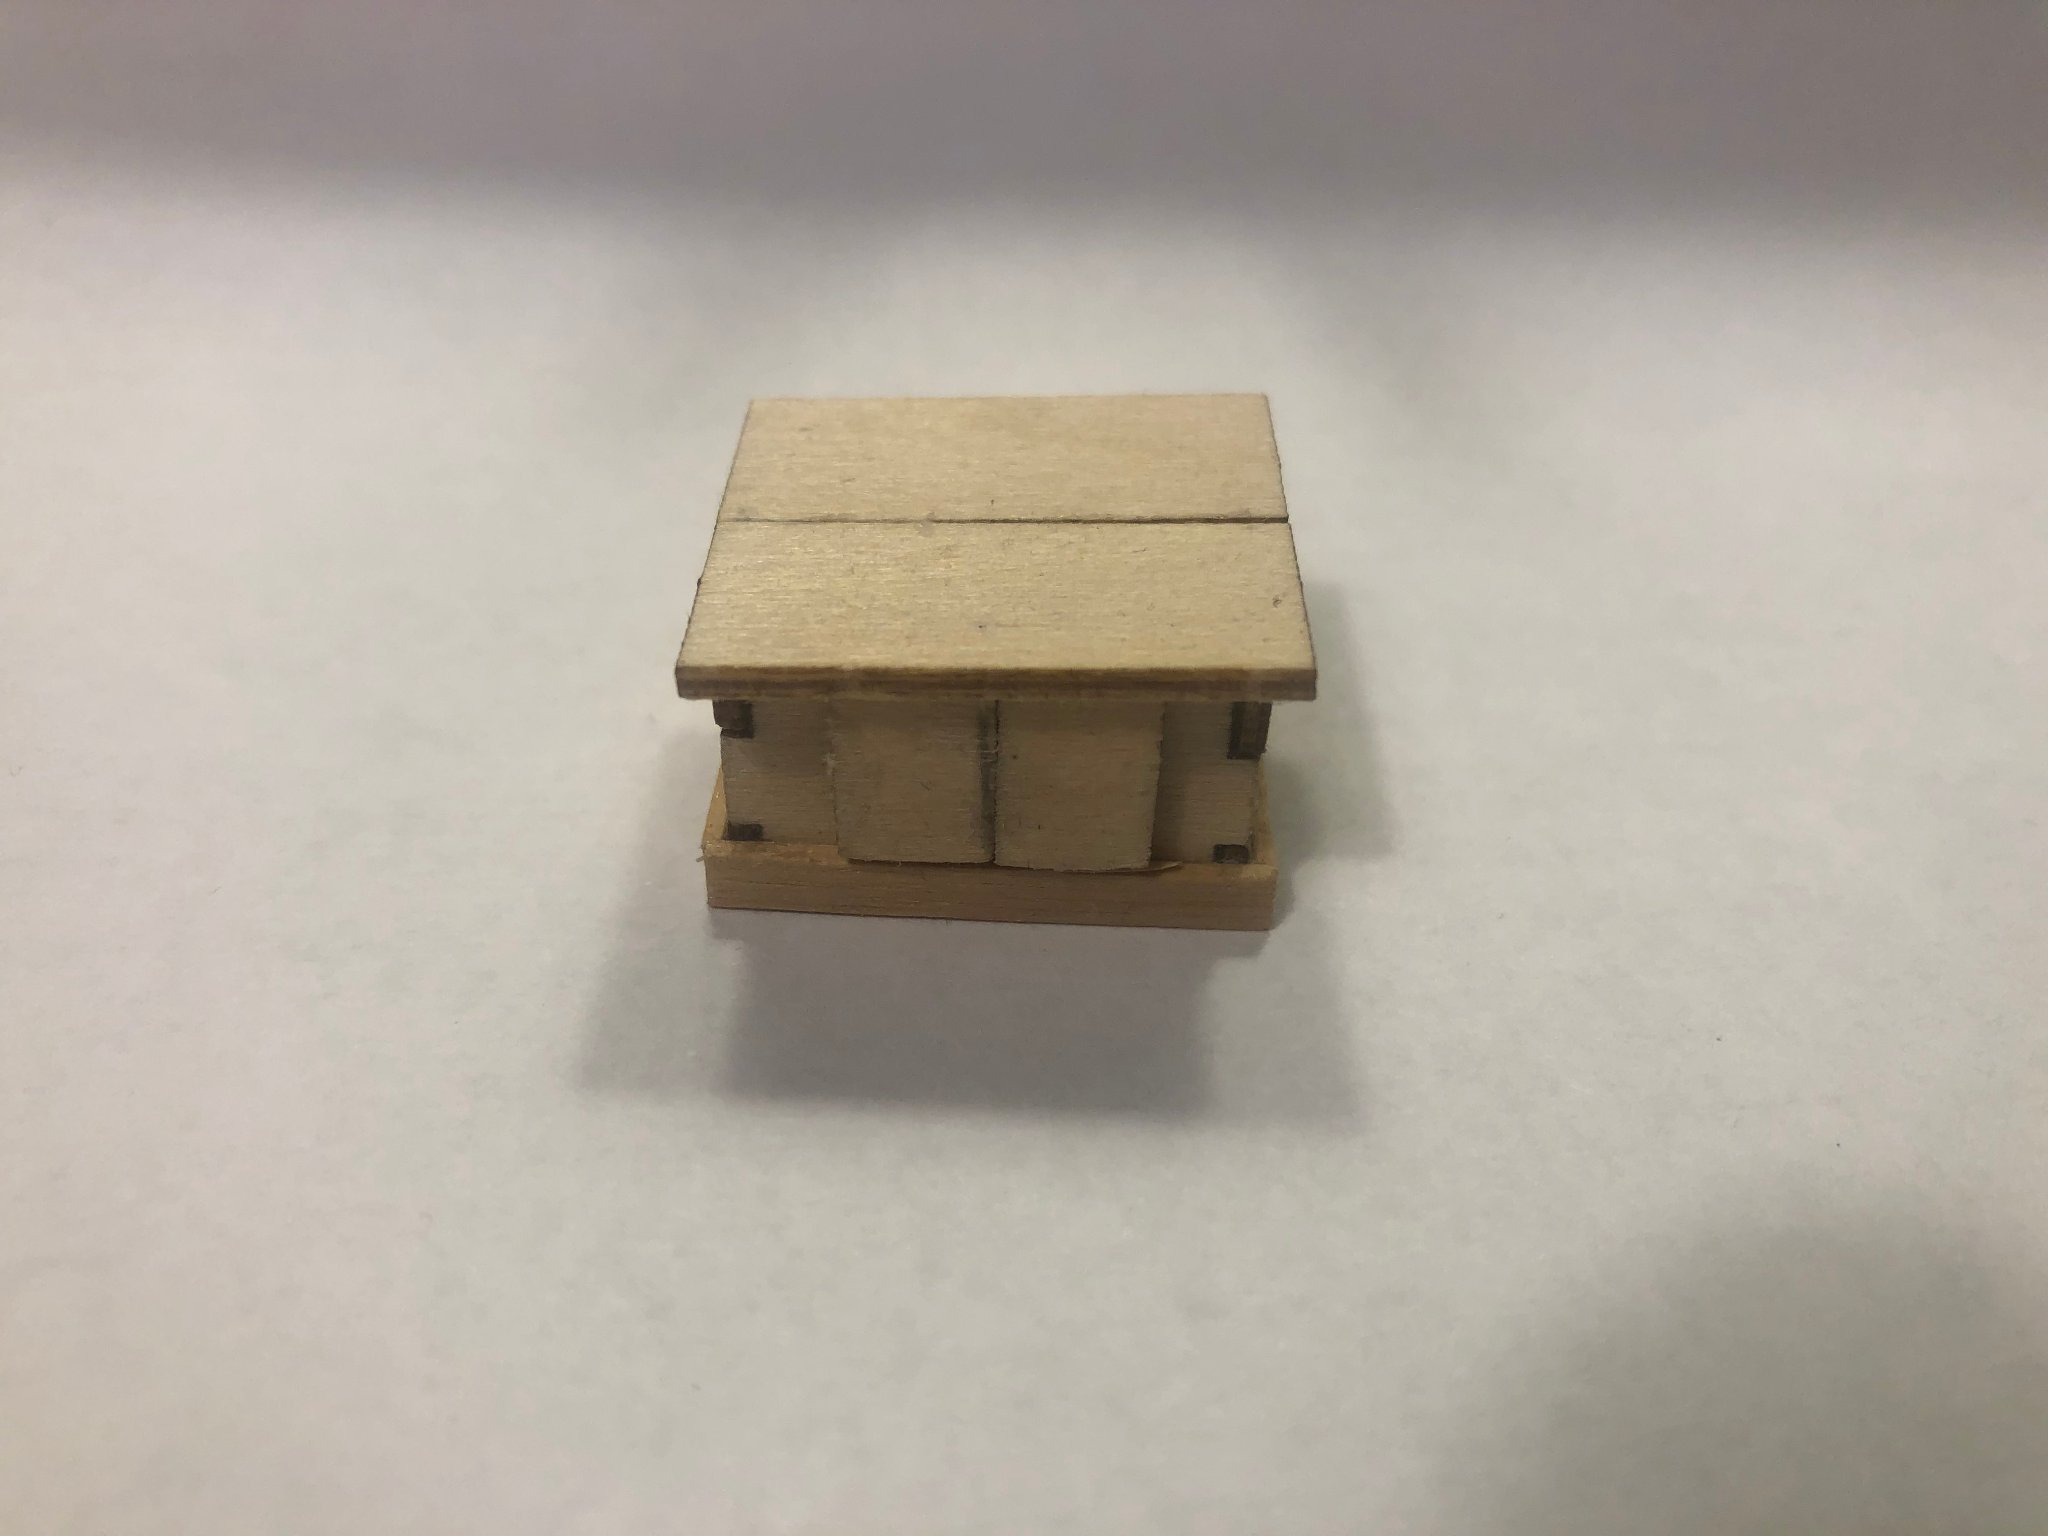
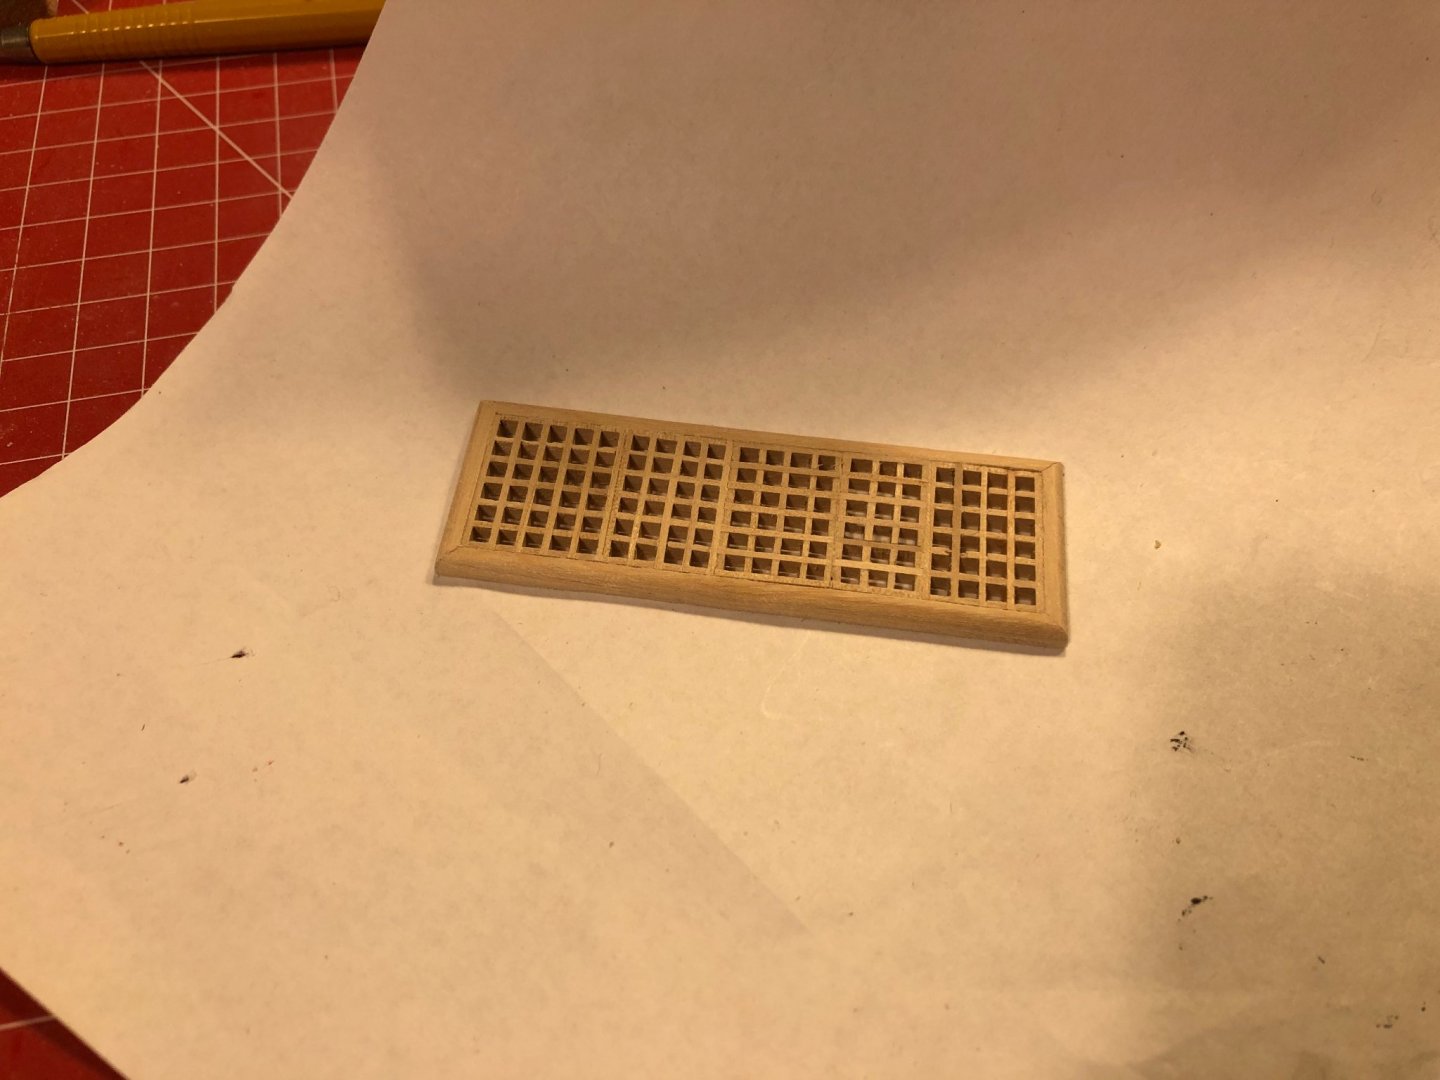
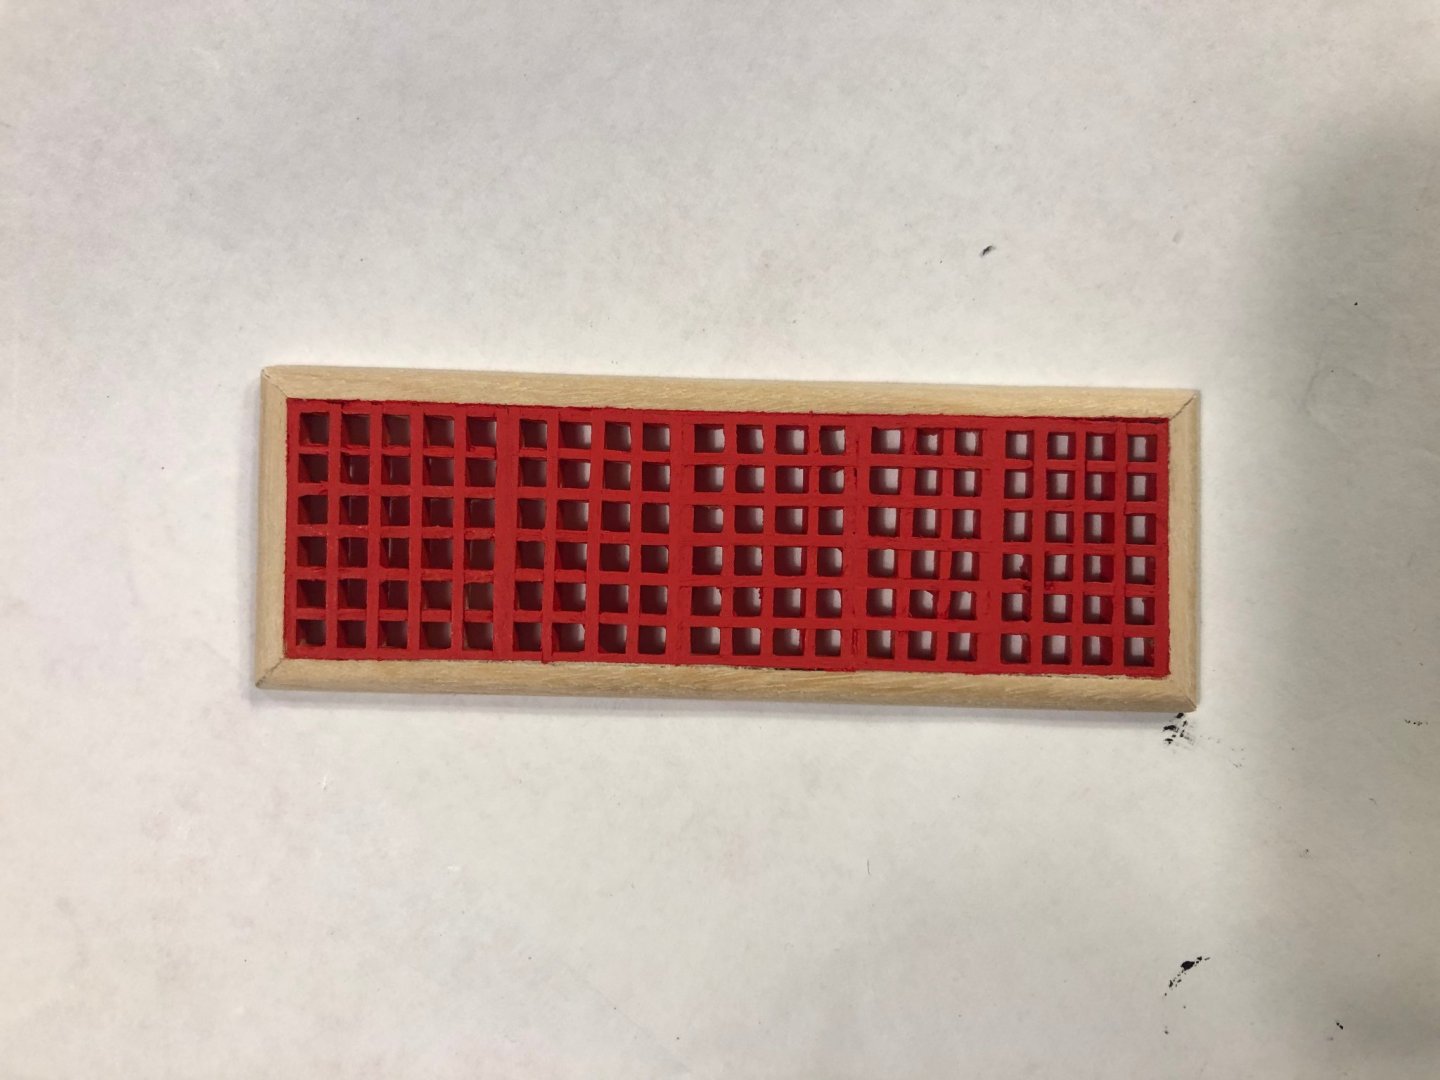
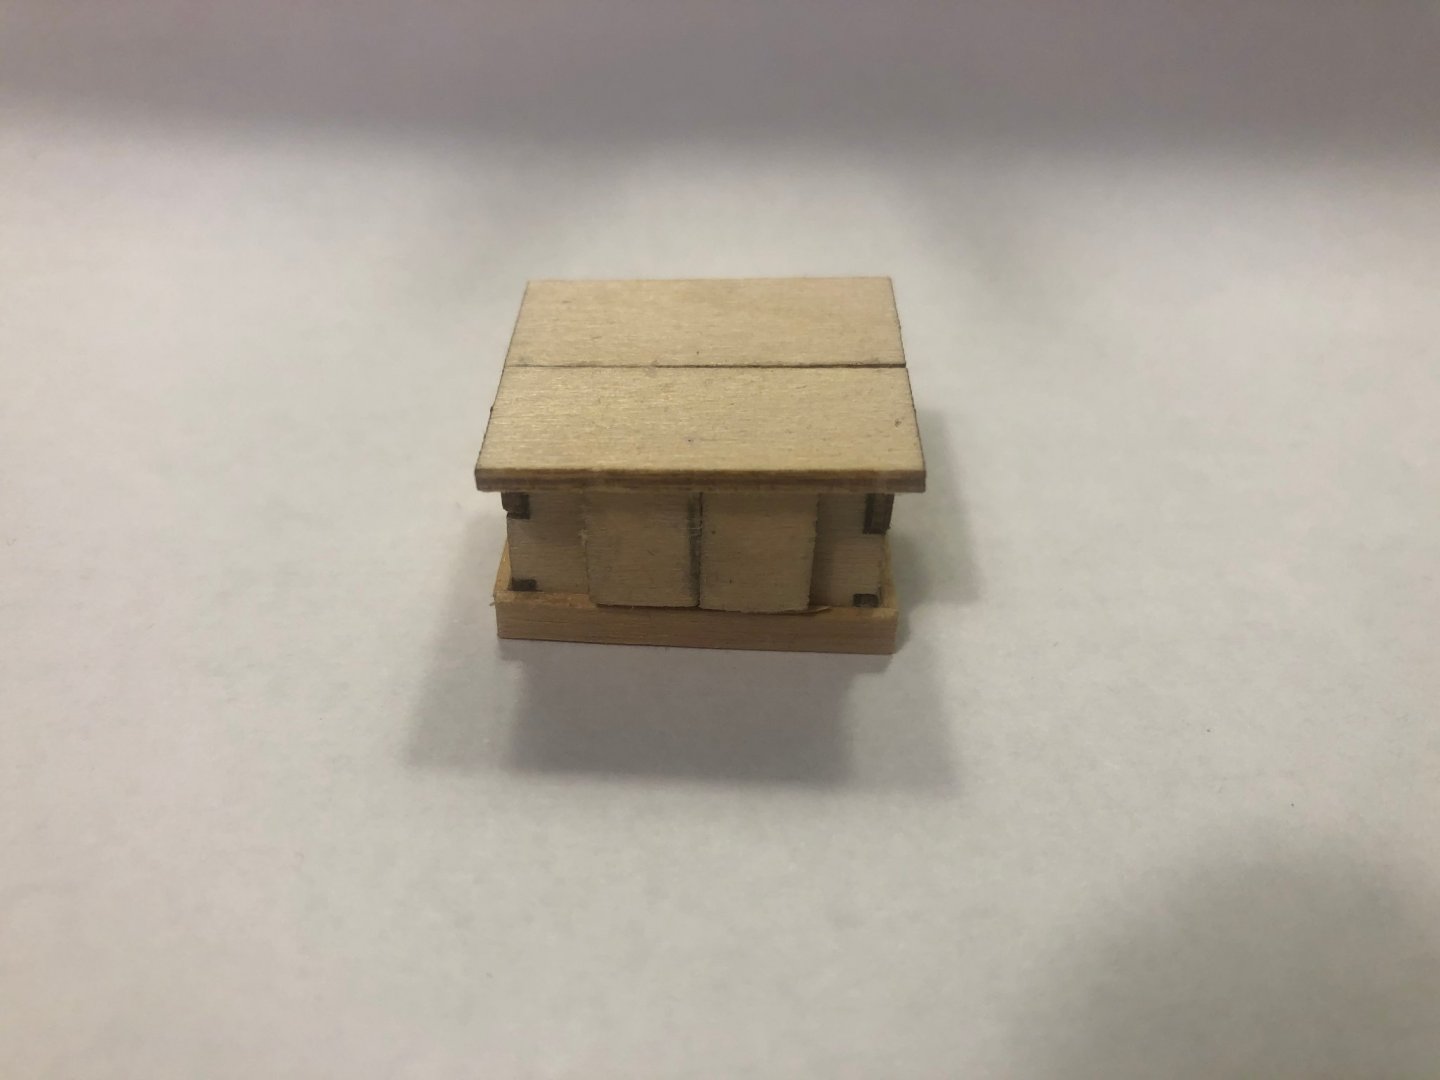
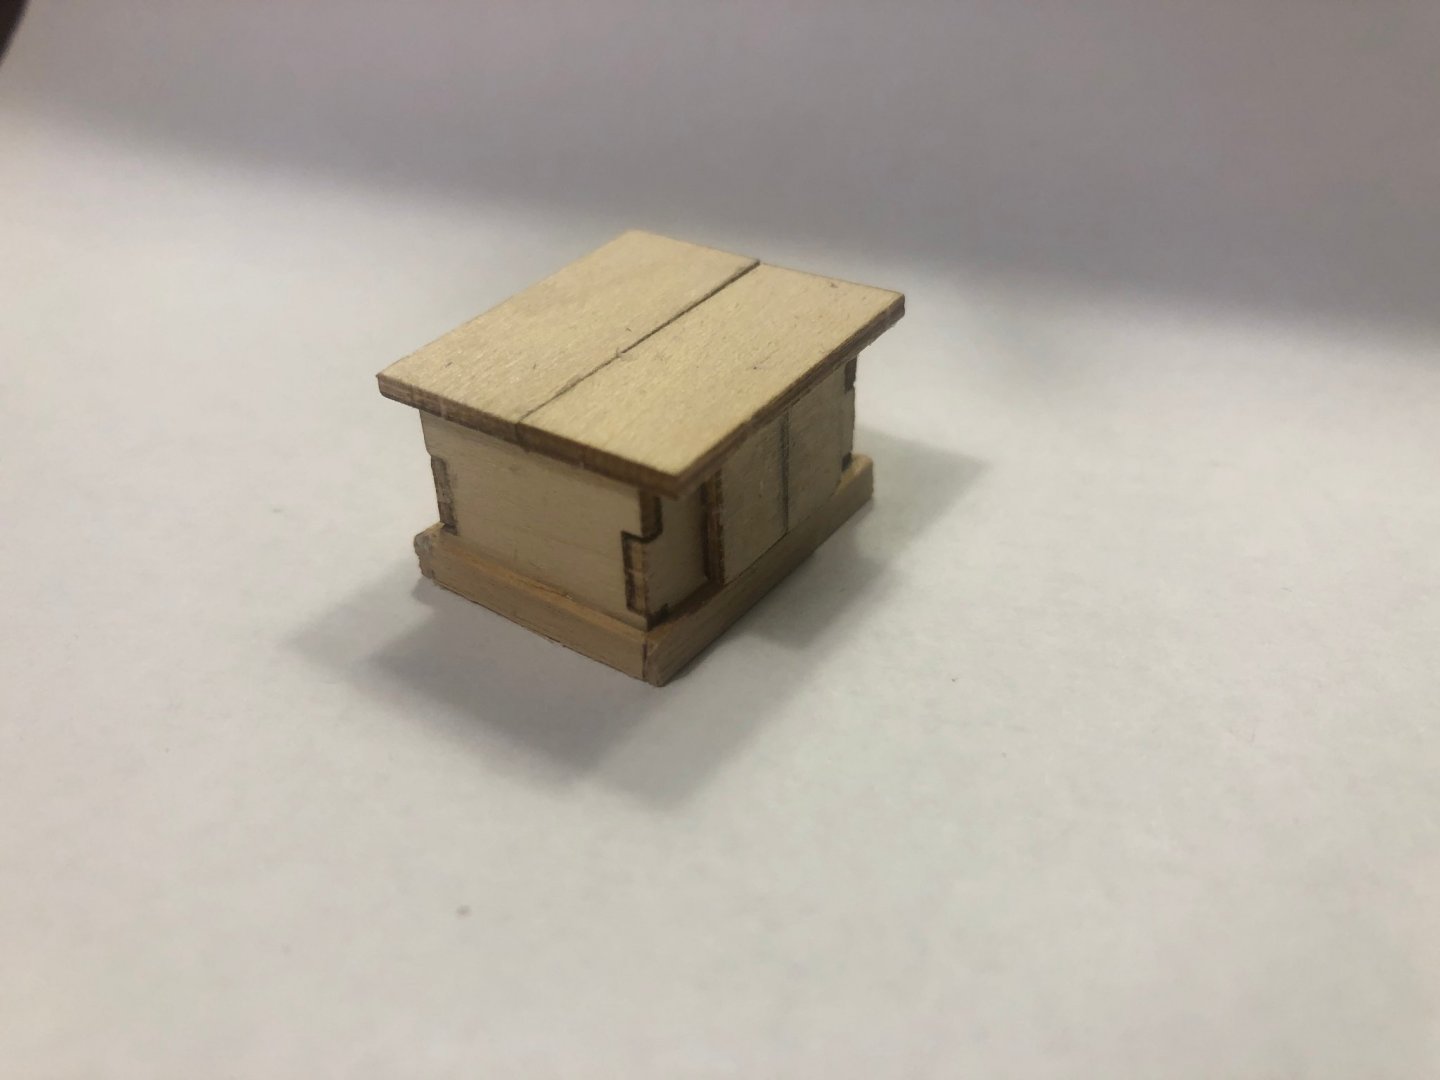
Hi all, @ Matt D and Dutchman thanks for the kind words. Yes I feel a lot better already, so I can't complain. @ Dutchman, the running rigging has to wait for a later moment. First i have to rig the guns on the main deck. Today I wanted to continue with the assembly of the capstan and the deck grating. Correct me if I'm wrong, but just as with the ladders, something went wrong at the production line and quality control of AL. (look and decide for yourself) After some sanding this is the best I've been able to make of it. In the Netherlands we have a saying for someone who is not easily satisfied. It has something to do with ants ....., but I won't mention that any further.😁 I decided to order the ladders as well as the gratings over the internet. As i mentioned above; i will start with the rigging of the guns. (main deck) Regards Peter
-
Hi All, Back on the boat yard and having a little update! It's not much but it's good to build again! Regards Peter

-
Hi Sjors, I'm Fine, thanks for asking. I started this week and made some progression. I will post an update tonight when I'm finished with painting the parts. Regards Peter
- 164 replies
-
- 2
-
-
- vanguard models
- flirt
- (and 1 more)
-
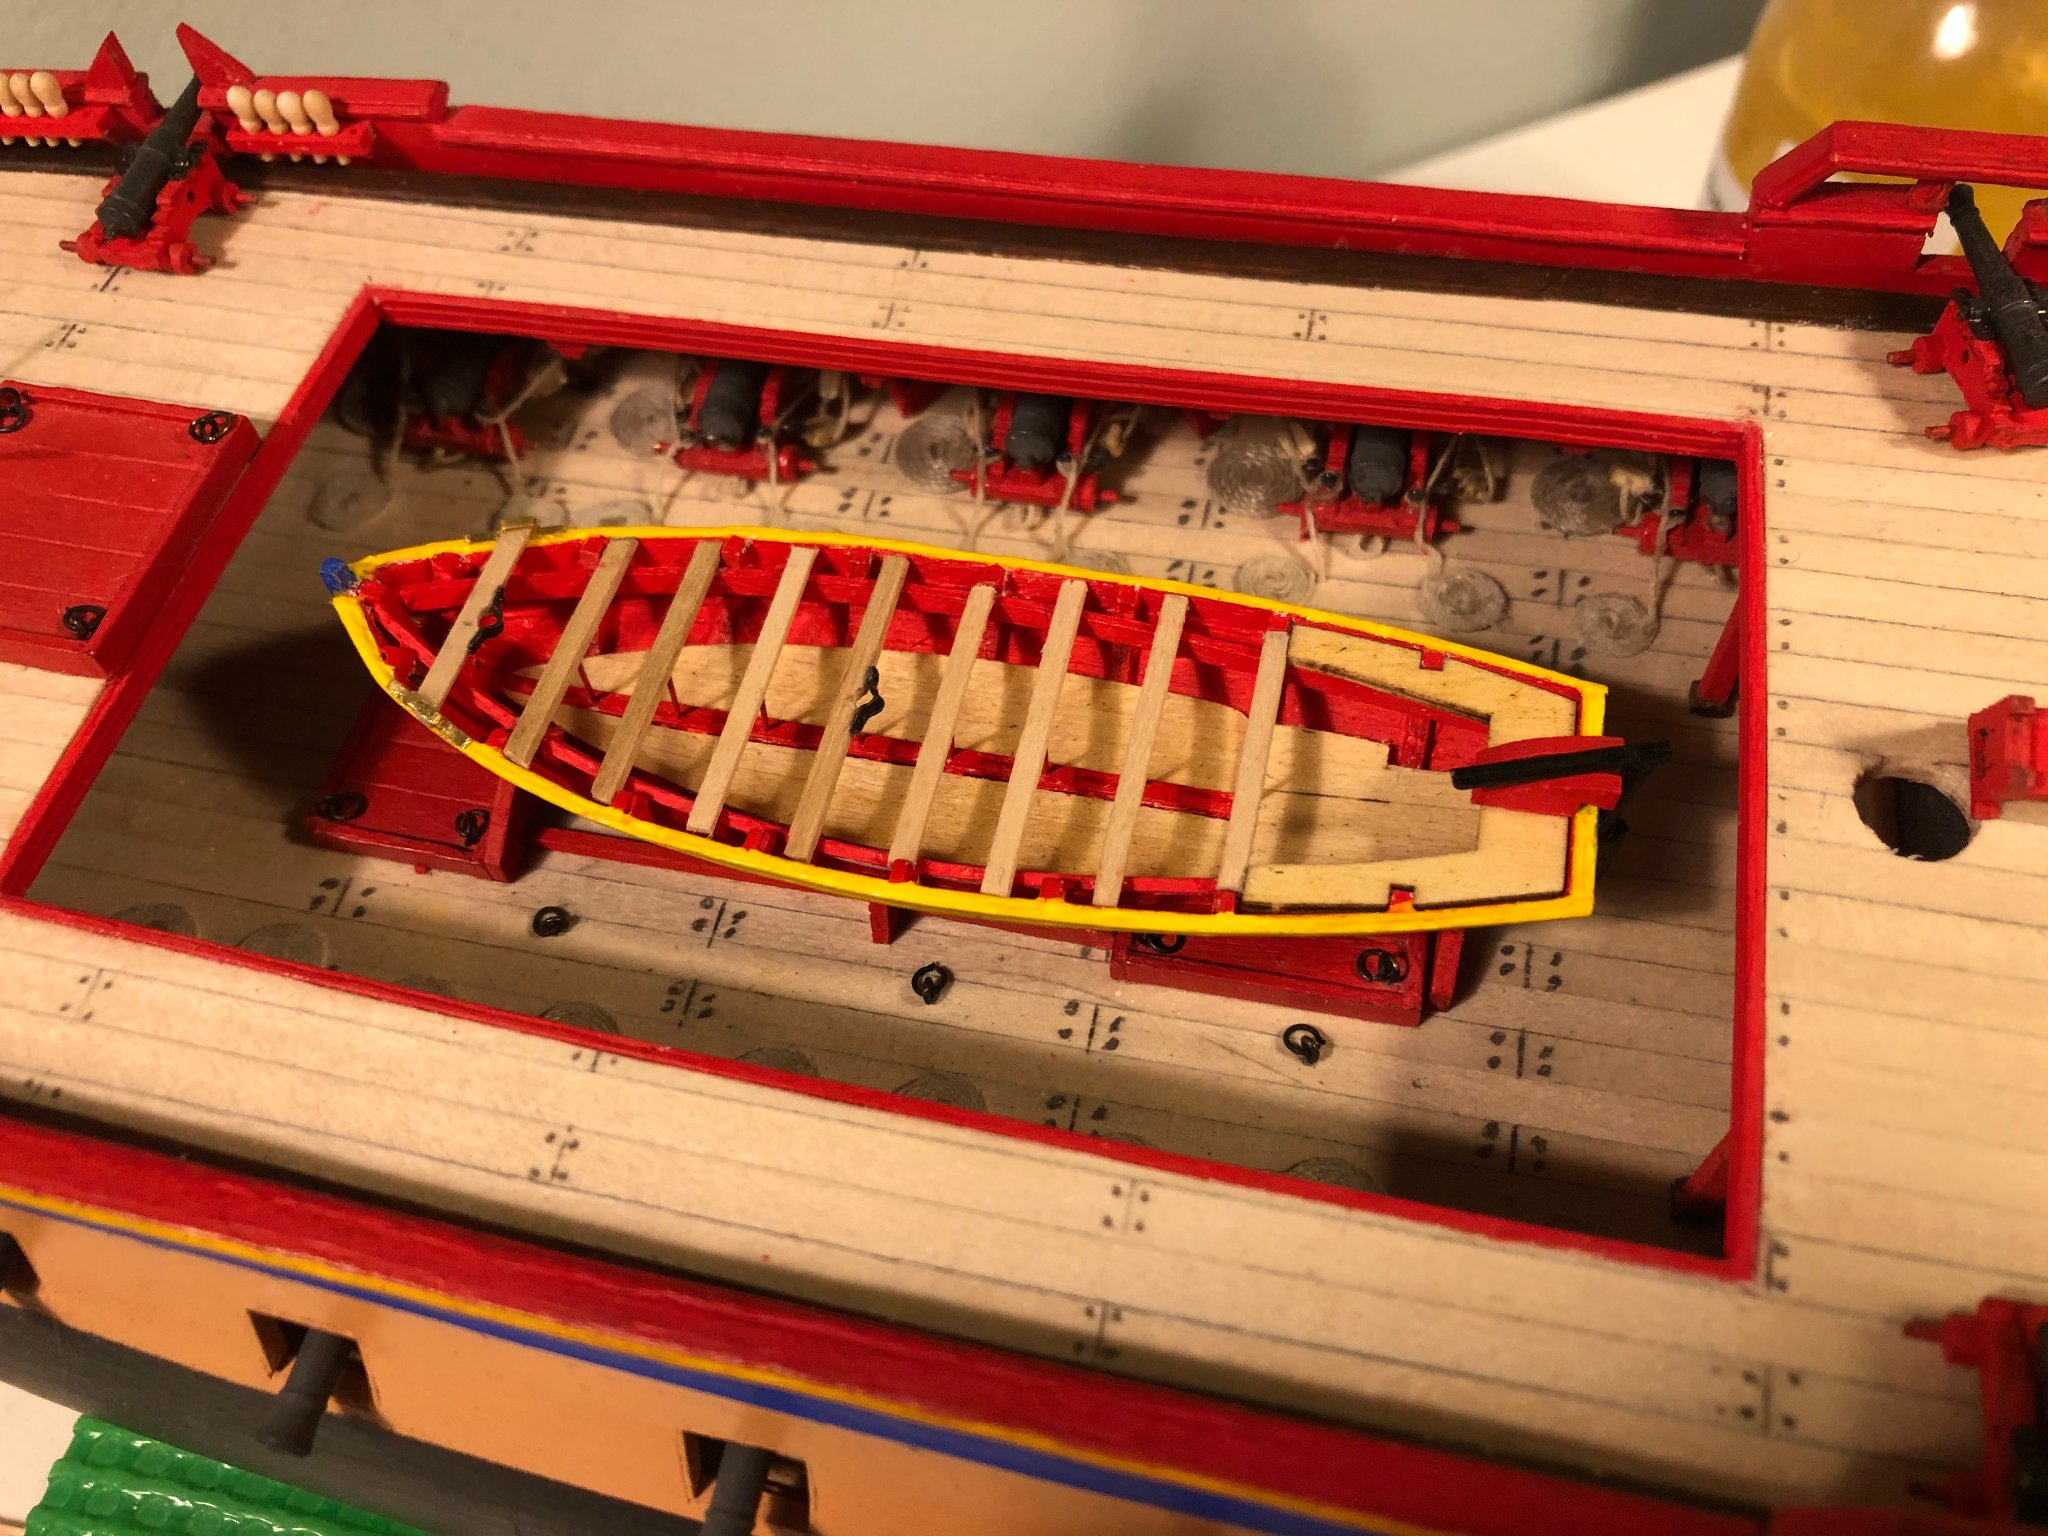
Despite the smaller size of this boat, the satisfaction will be just as great. Doing a great job Sjors Regards Peter
- 164 replies
-
- 2
-
-
- vanguard models
- flirt
- (and 1 more)
-
Hi Udo, Nice start so far, i will follow your progress with interest. Regards, Peter
-
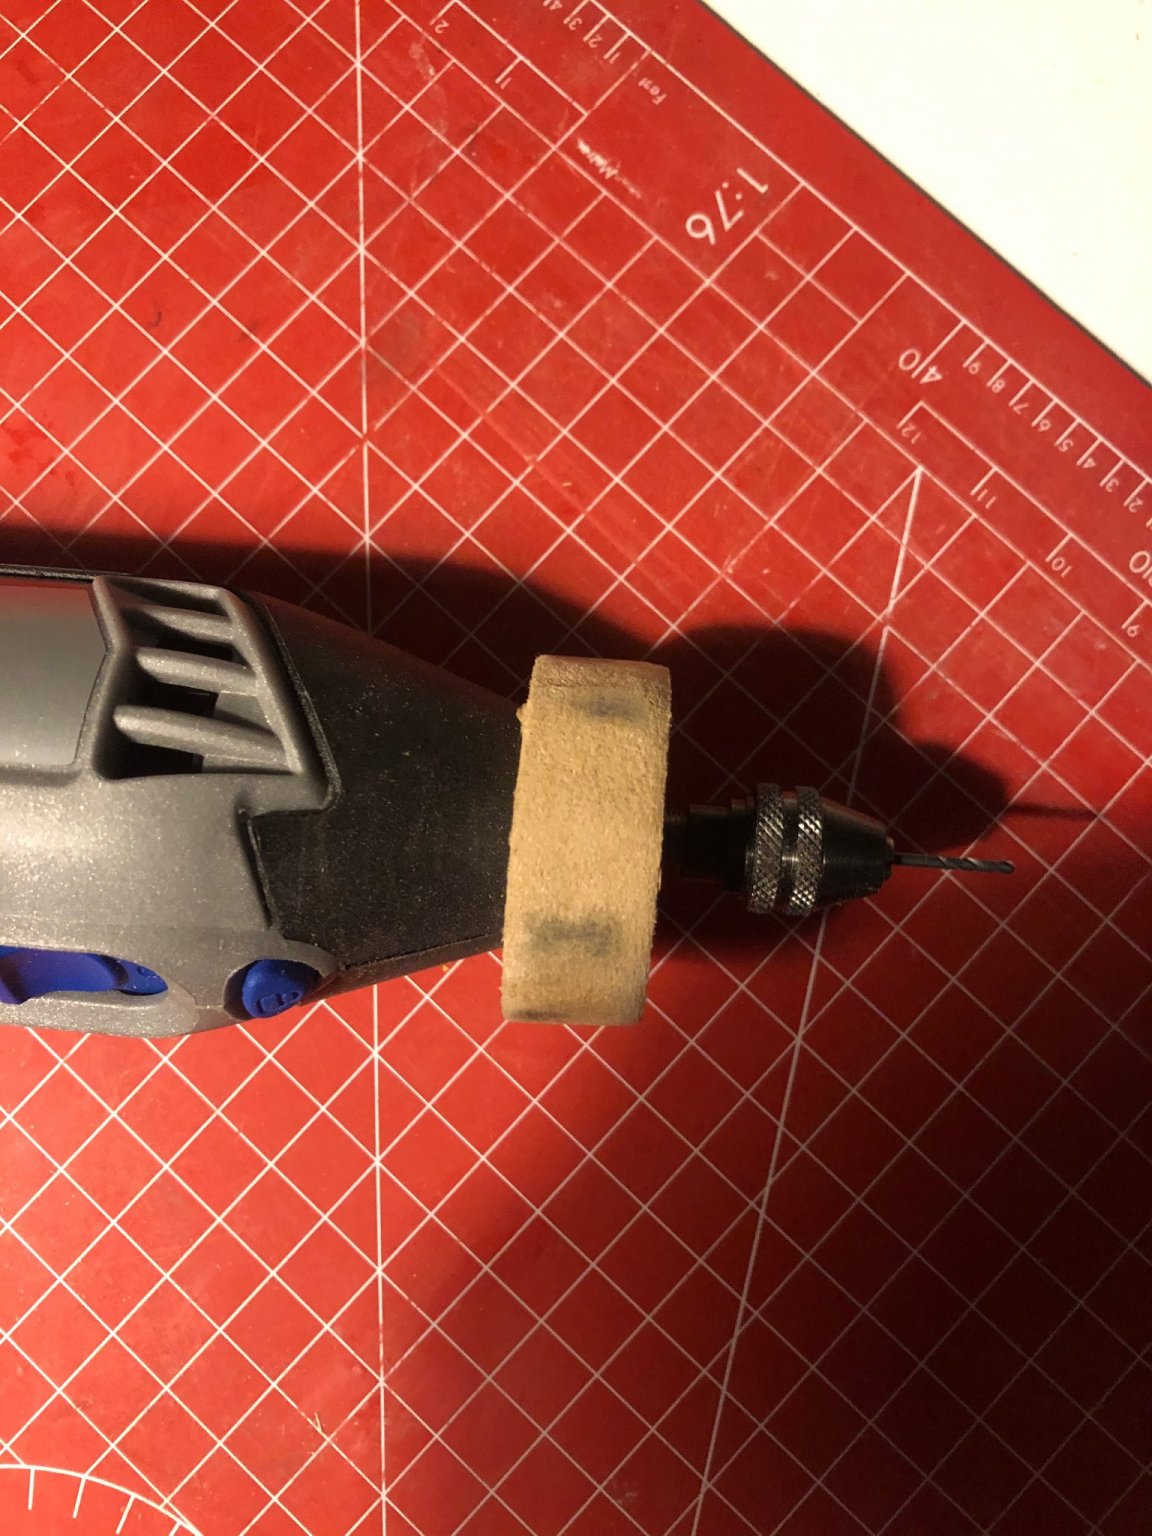
Hi Sjors, Yes I'm also glad happy that I'm back at home just before the second Corona wave. Getting slowly fitter every day, who know I'm running the marathon next year🤪 Just kidding, starting back at the work will be fine enough for me. About the Proxxon standard, Can you tell me what the inner diameter is? The Dremel is approx 20 mm. Regards Peter
-
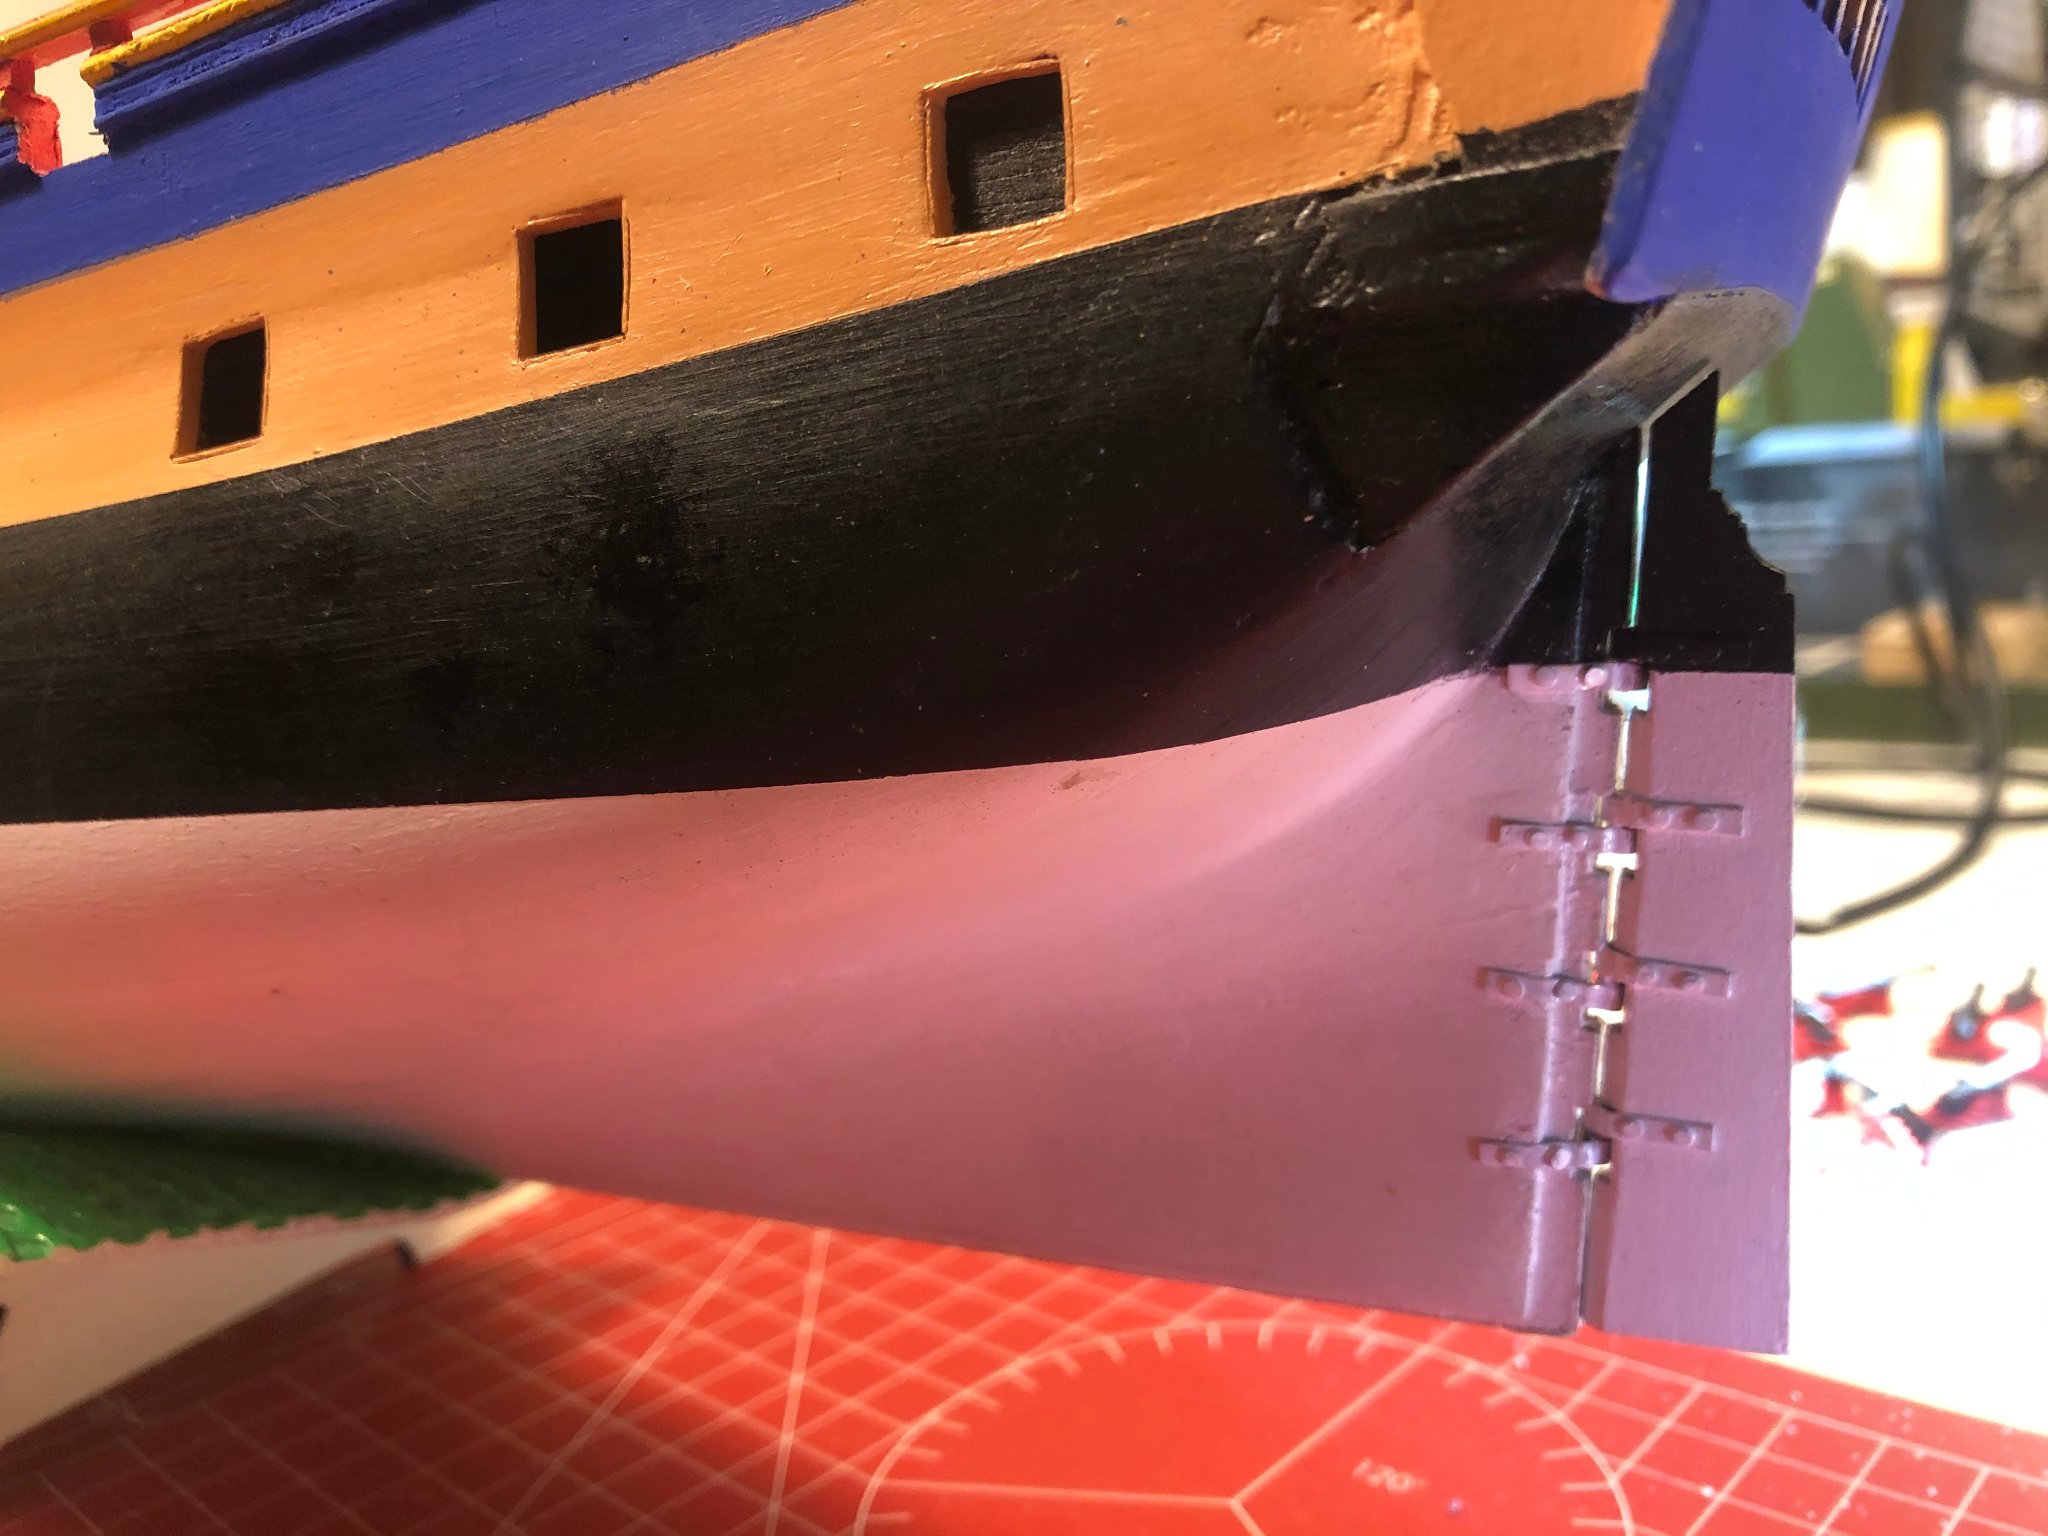
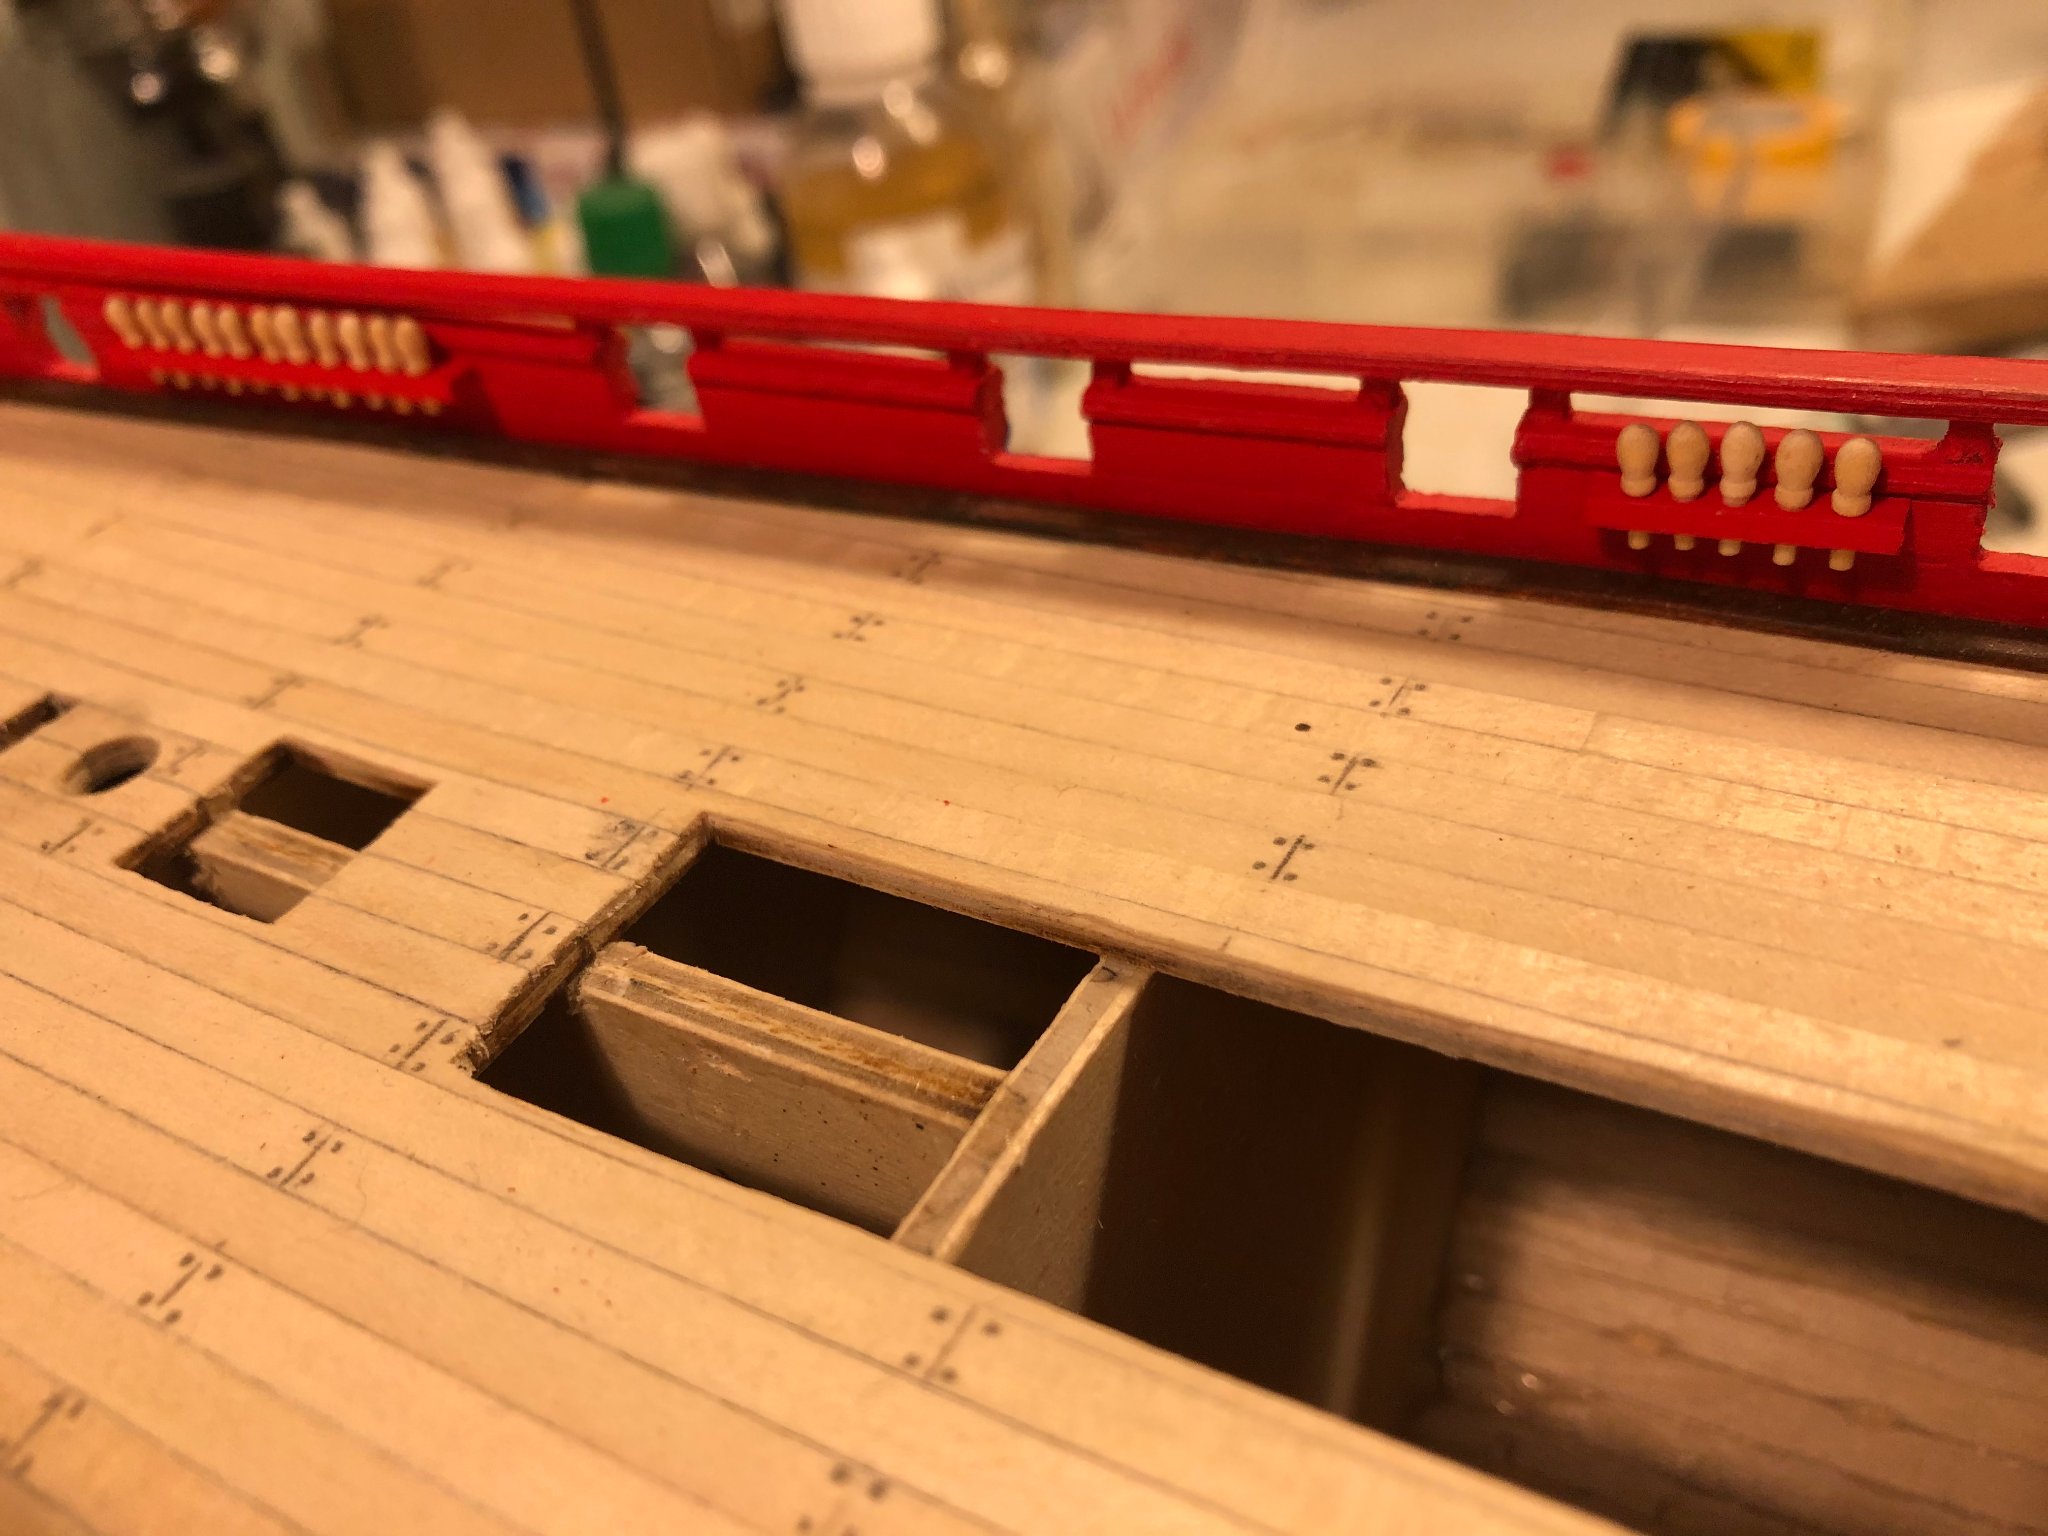
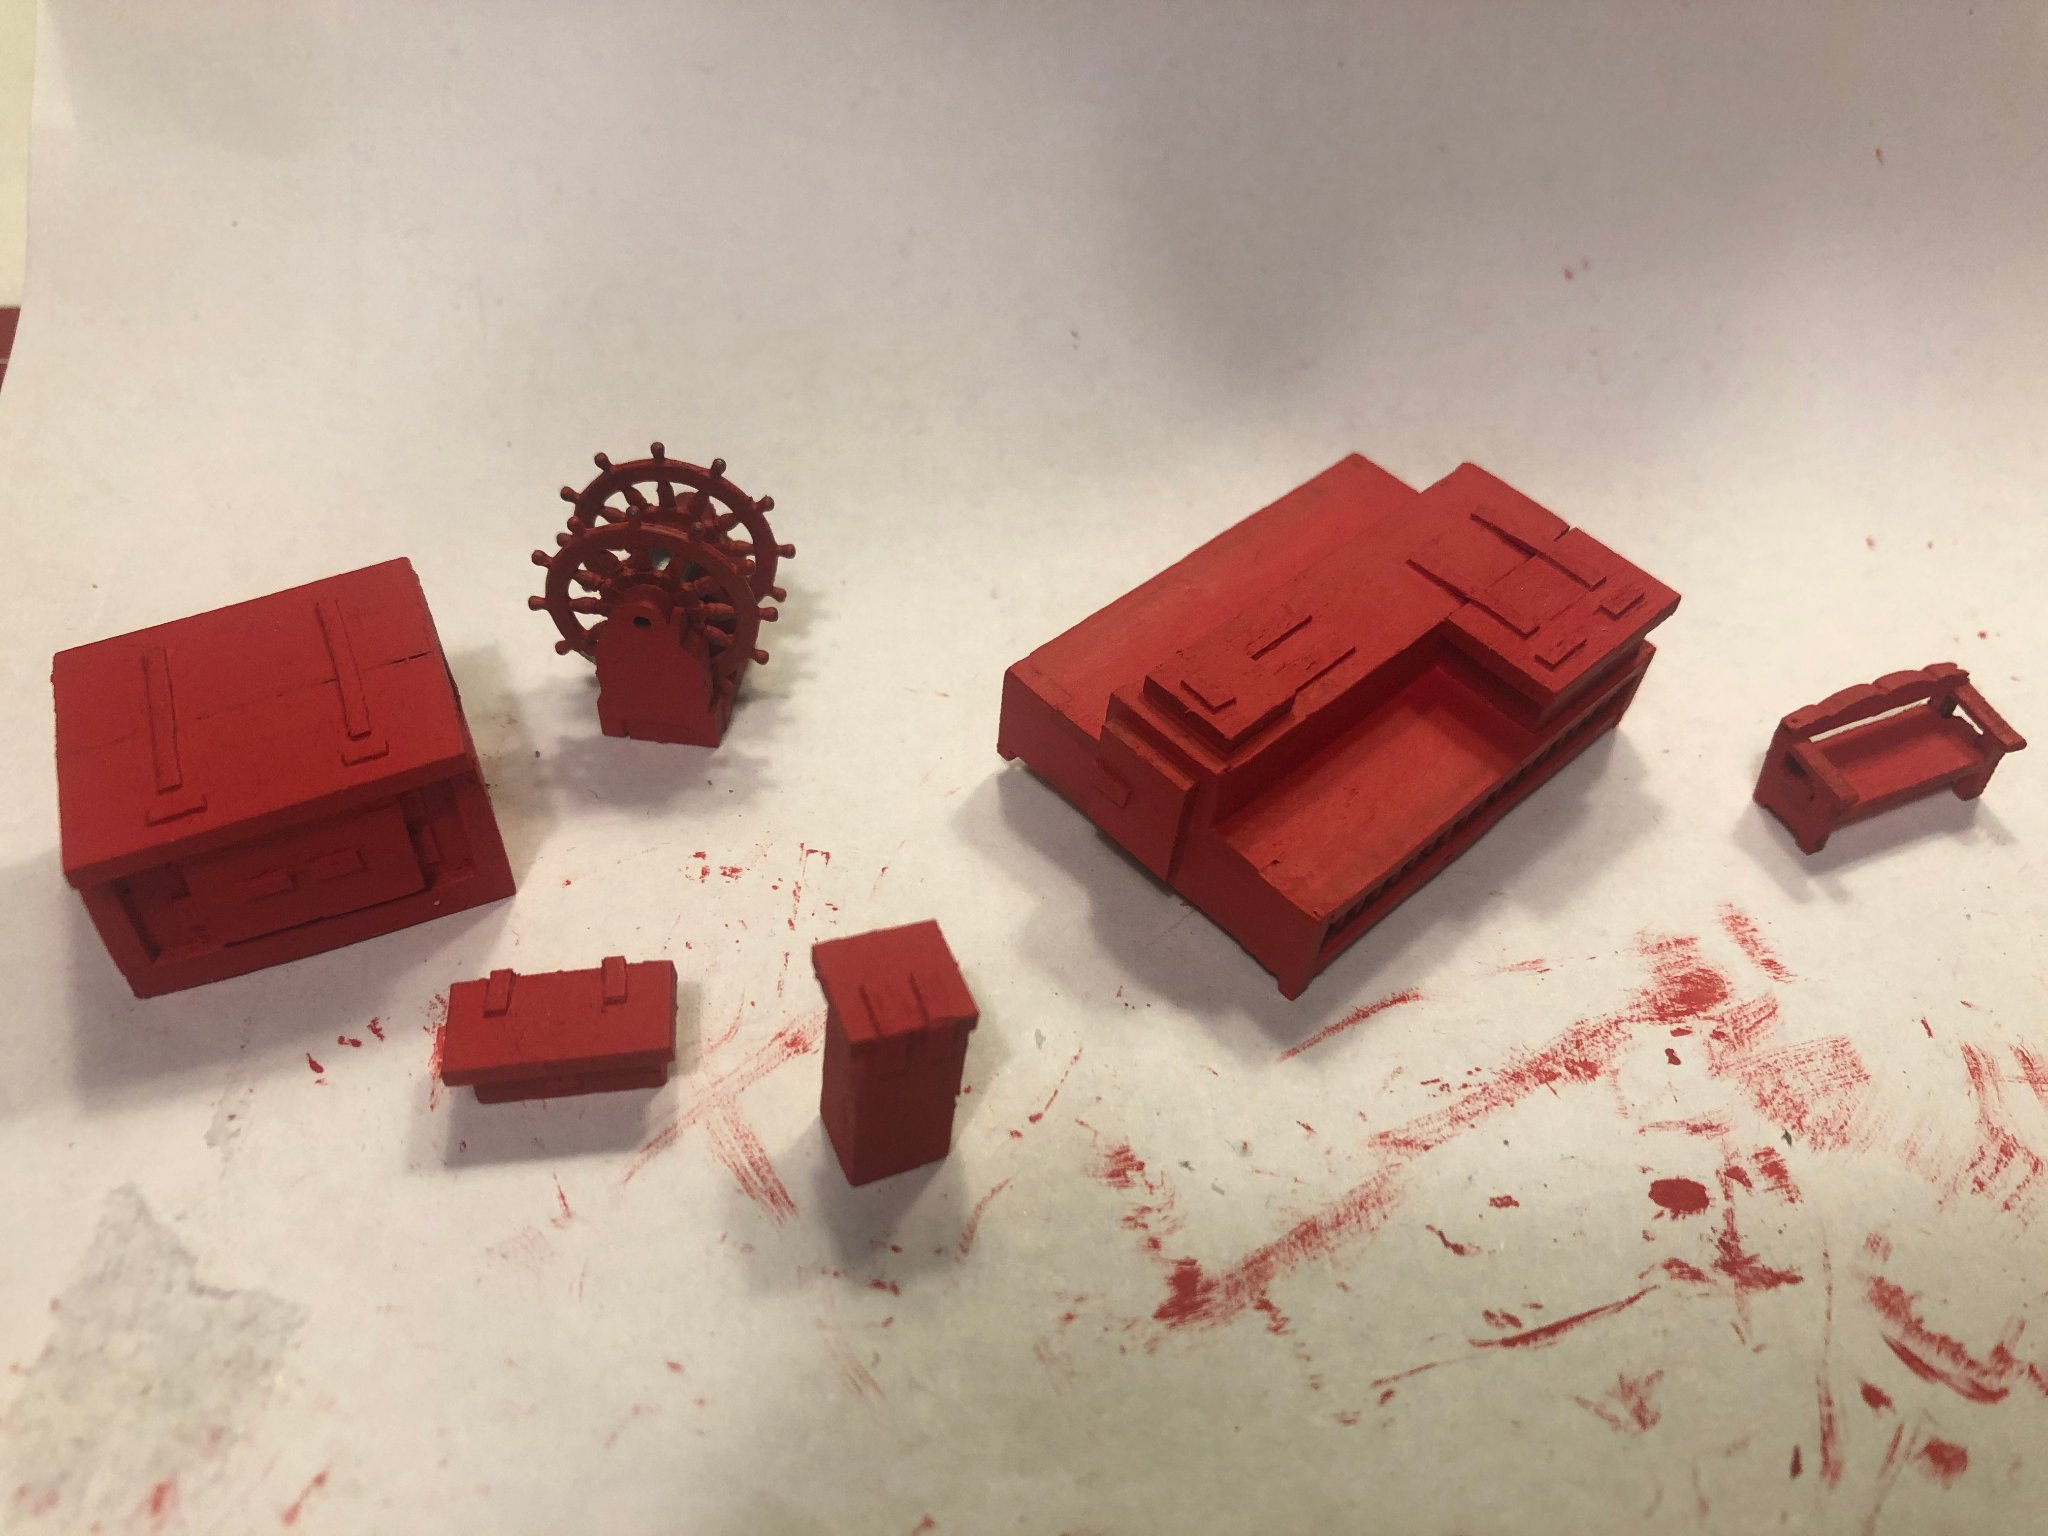
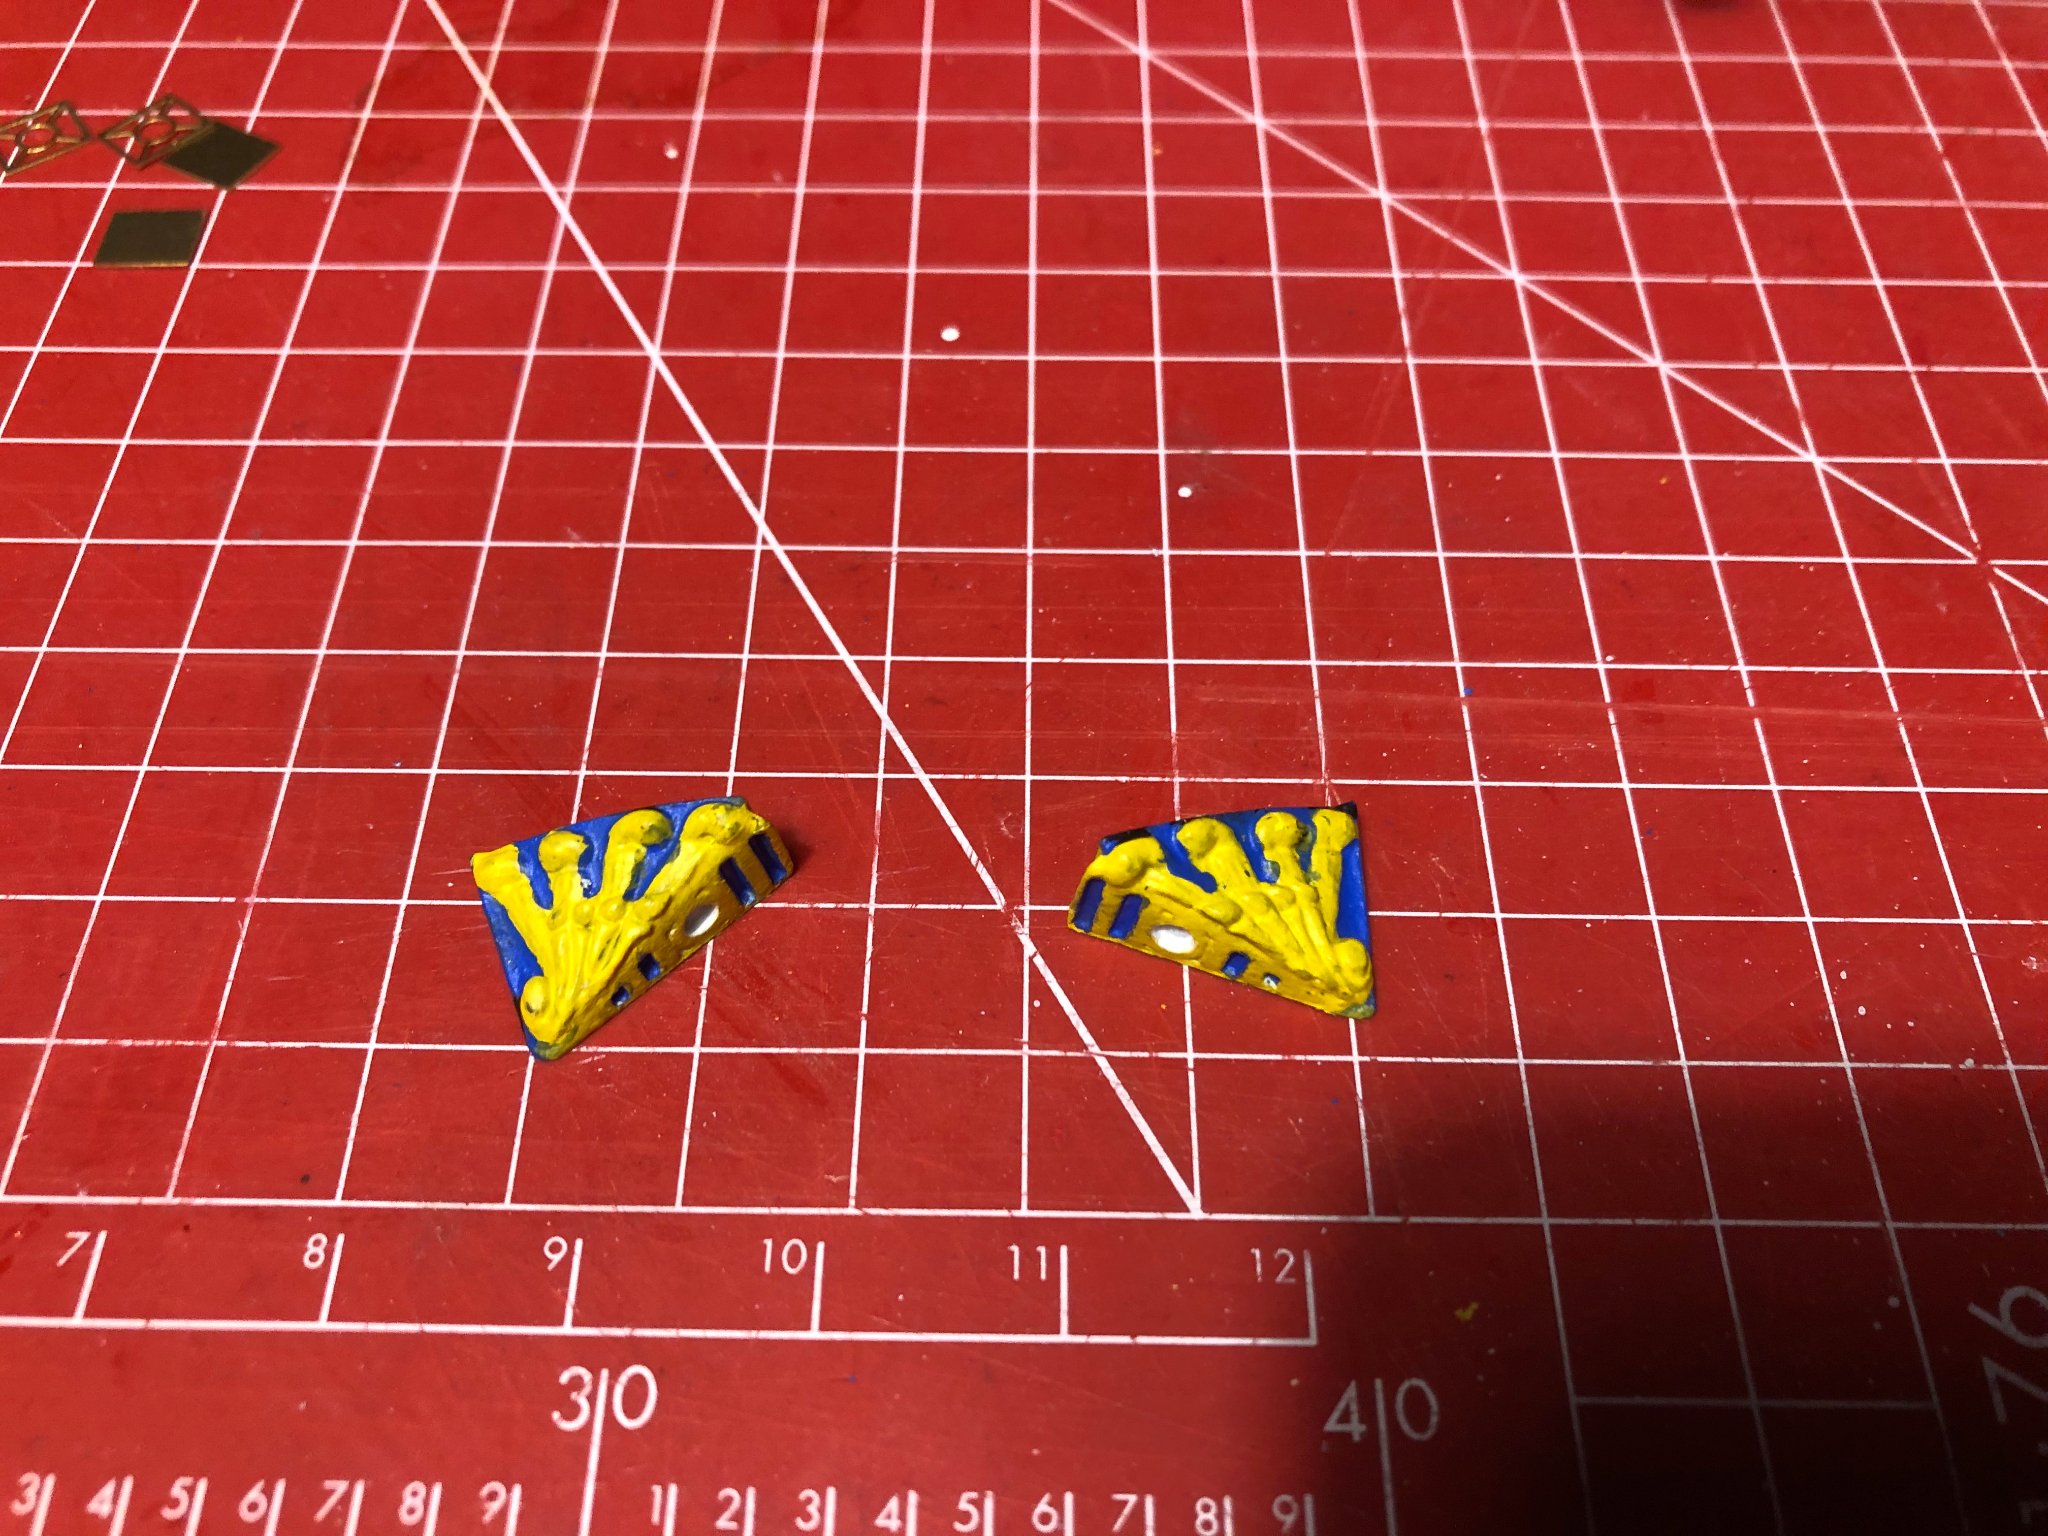
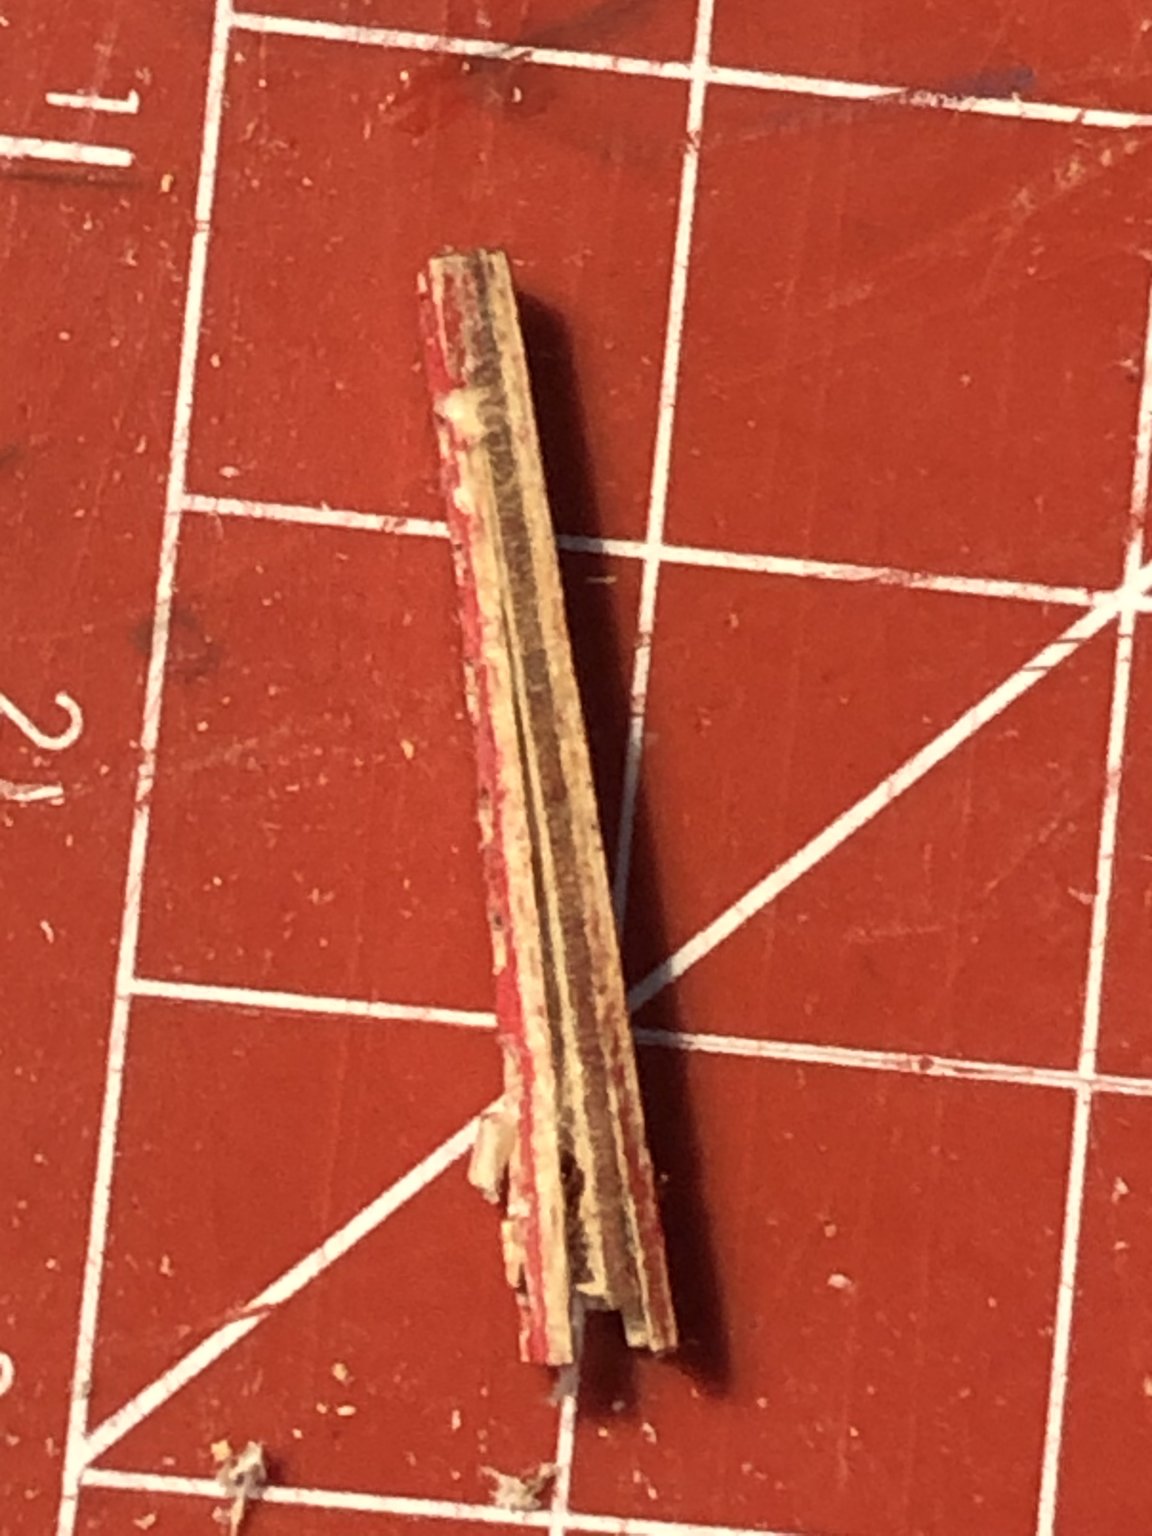
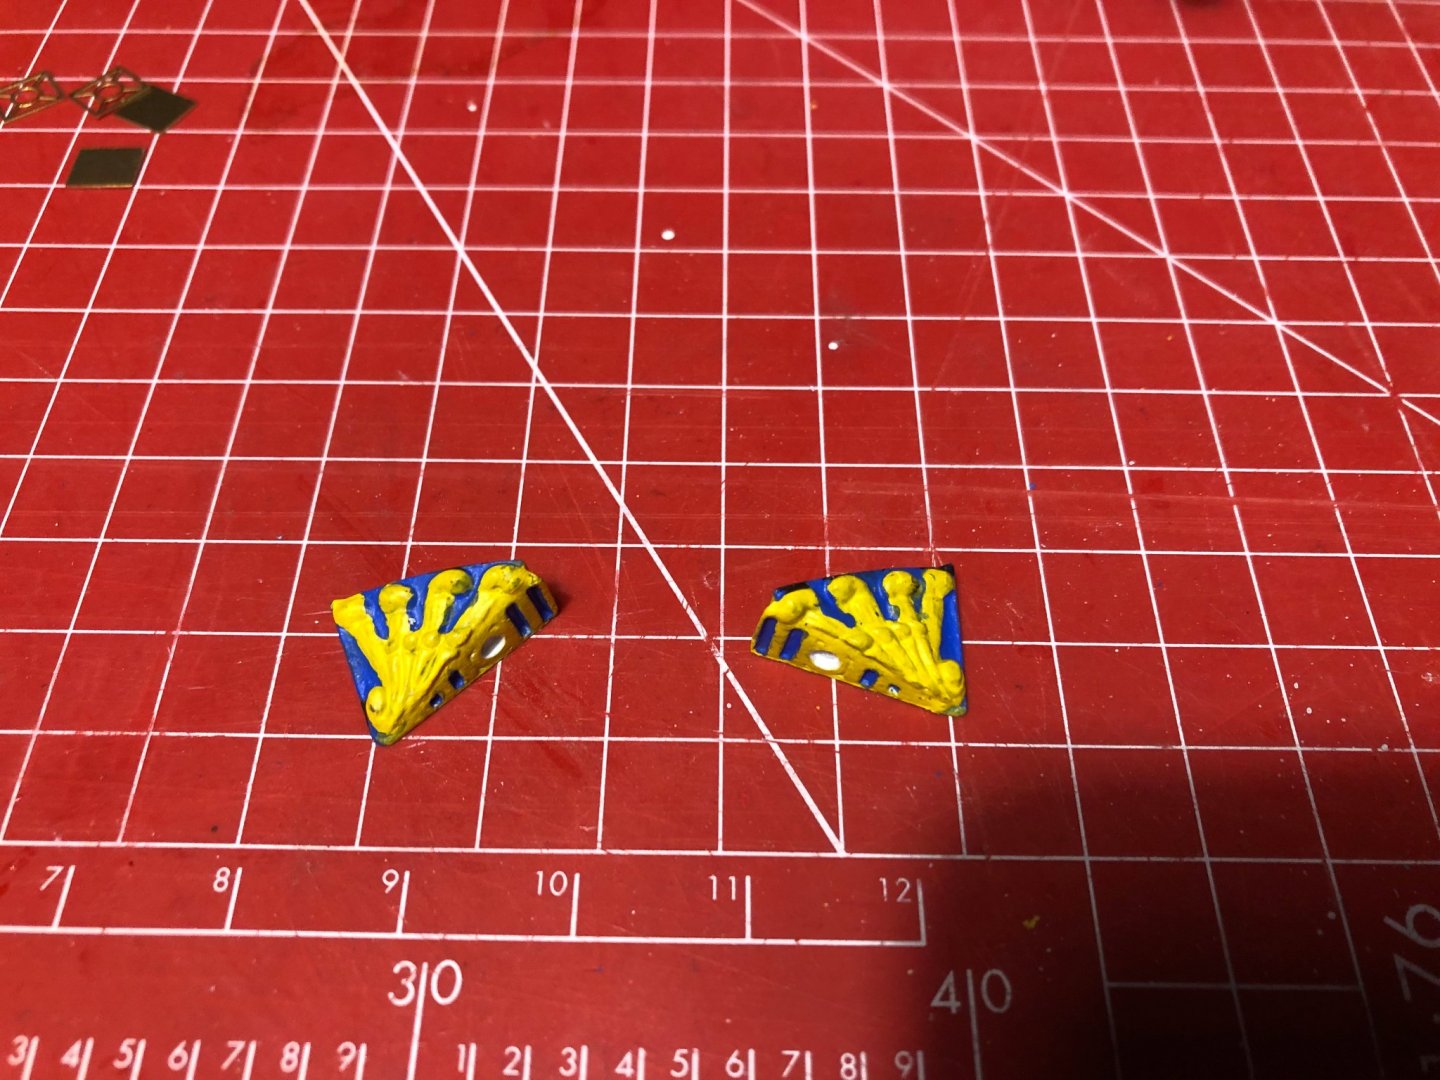
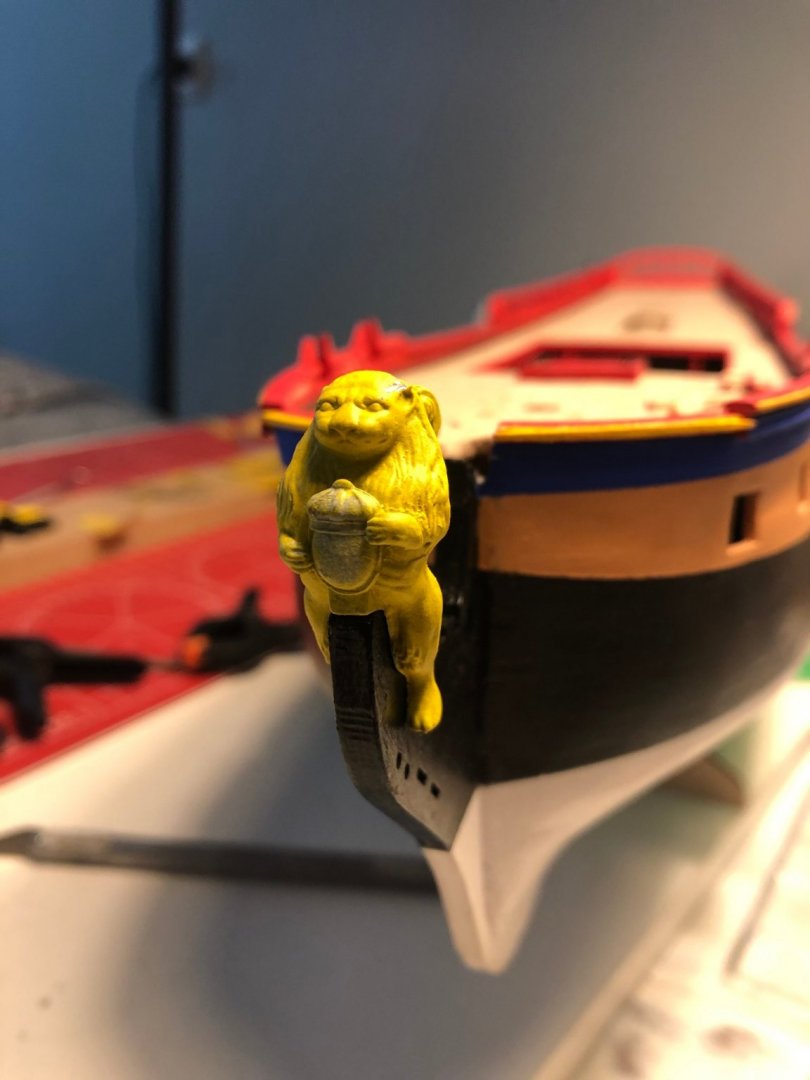
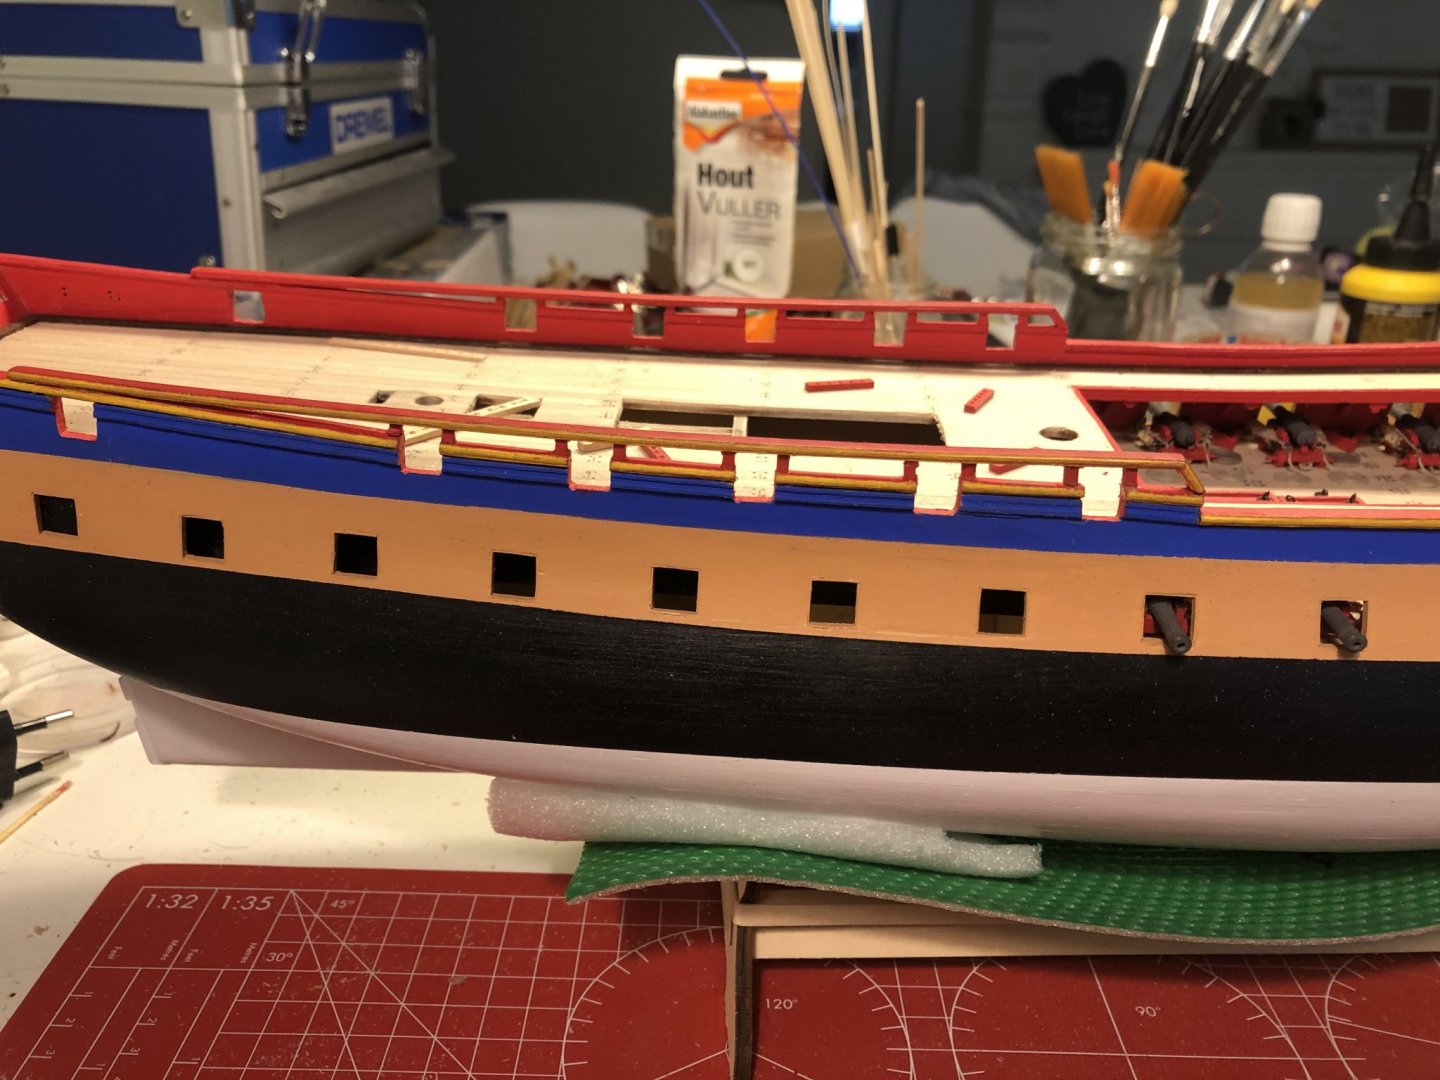
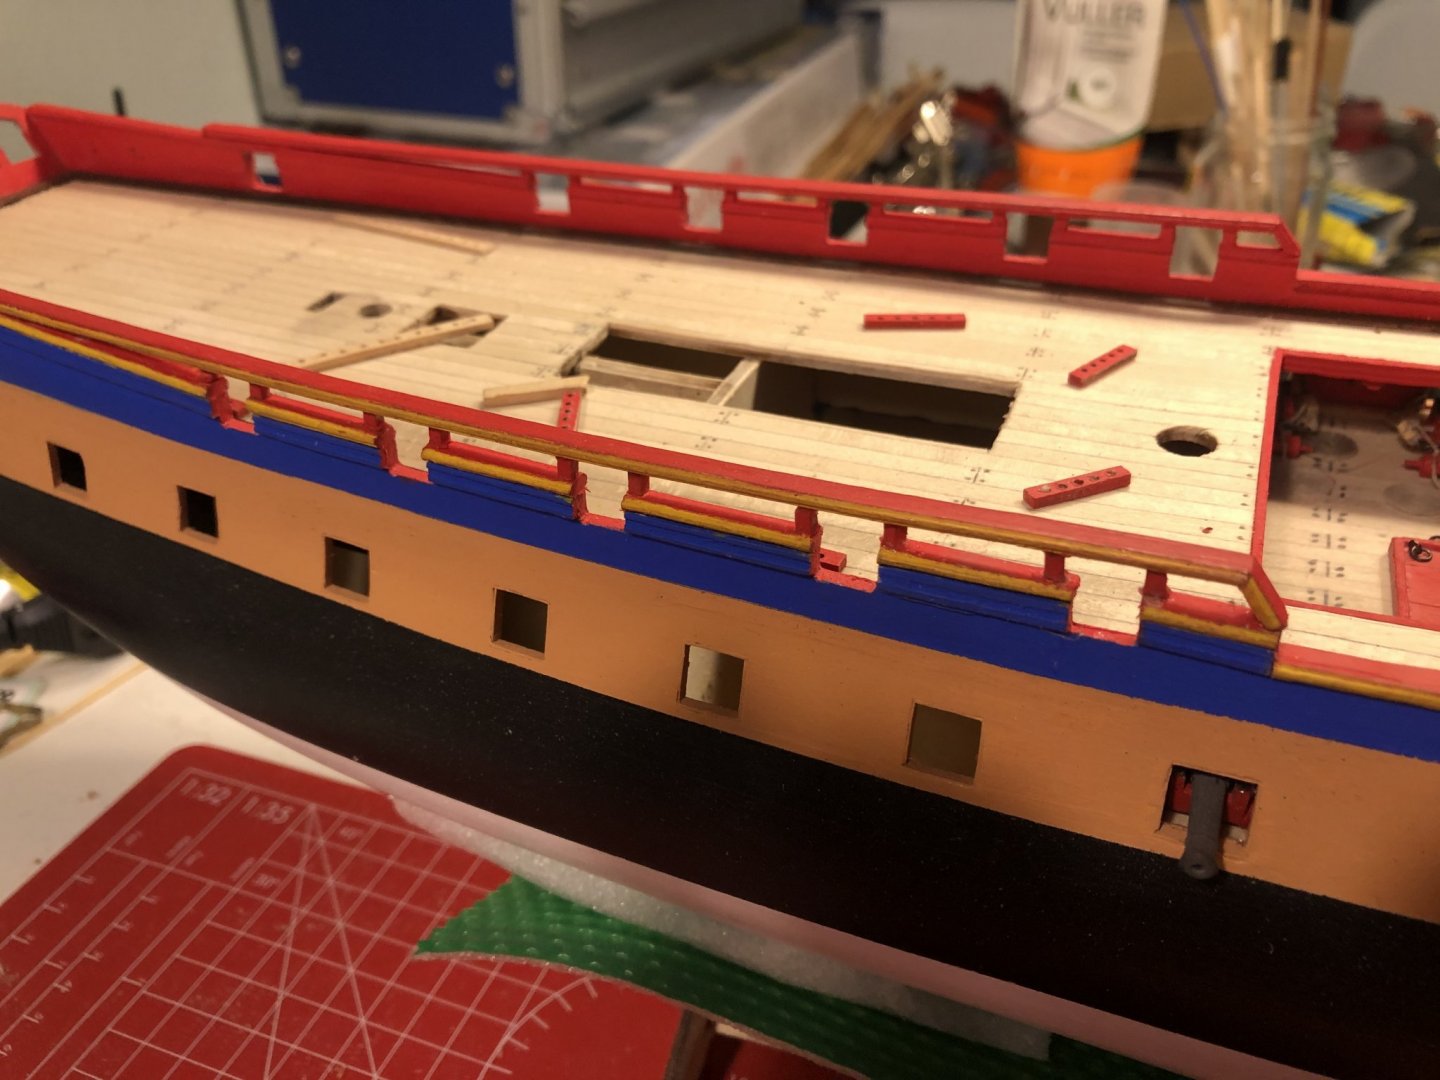
HI All, @RussR; Thank you for the compliment on the hull. Choosing for the belaying pins created already a challenge on it's own. The plywood of the pin-rails is breaking during boring out the holes from 0.8 up to 1 mm. I decided the replace the fragile plywood for real wood and make the pin-rails for scrap. The drill and drill press i used wasn't what i expected from it so i had to find a solution for it, which i did and it's working perfectly for the moment. @Sjors, Yes I'm back from the hospital. The operation was successful so that I can now focus on the recovery. I shouldn't put too much strain on my upper body during the first 6 weeks, so I still have 3 more weeks to go. I have reduced my building activities to painting the figurehead and ornaments, which also does not go too smoothly. Despite sanding, degreasing and the use of a primer, the paint does not stick to the surface and damages quite easily. I think I'm going to use a different kind of paint for the figurehead. I've started over 3 times and still it's not to my liking. (see the damage on the right ear) Because of this my motivation ebbs away a bit, if you know what I mean. Kind regards Peter


-
Hi Auger, that's a nice and energetic start! Count me in for a seat at the front. Regards Peter
-
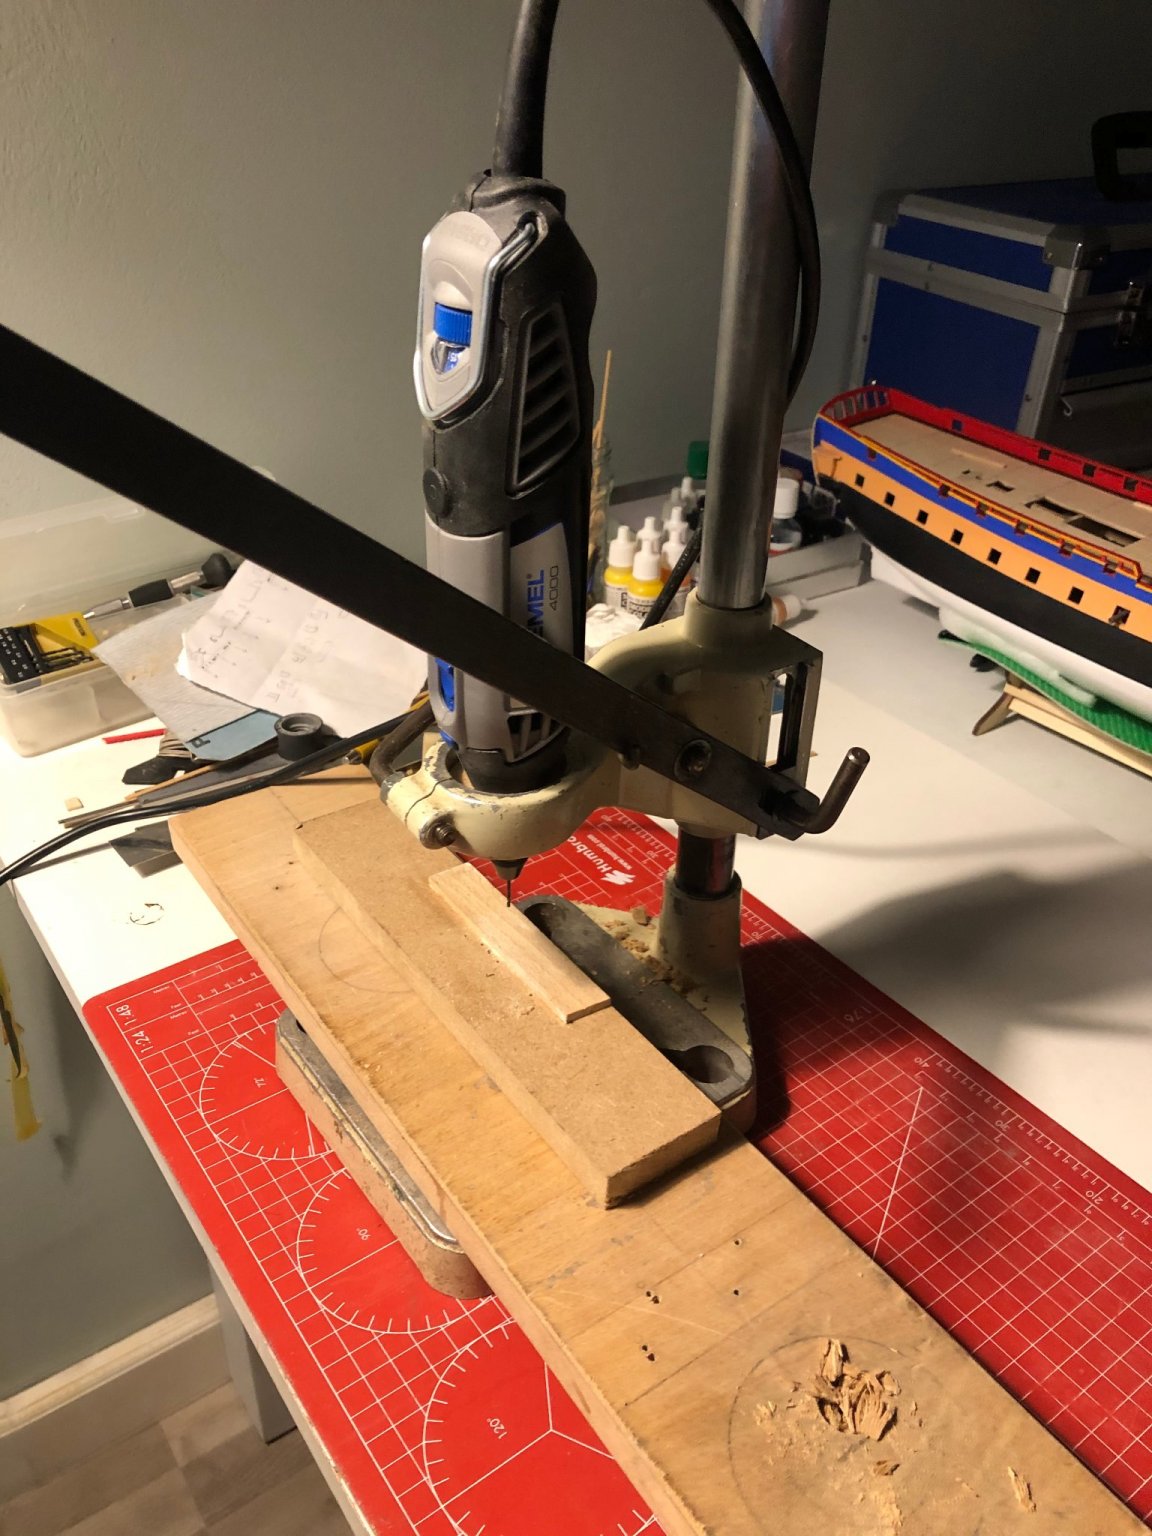
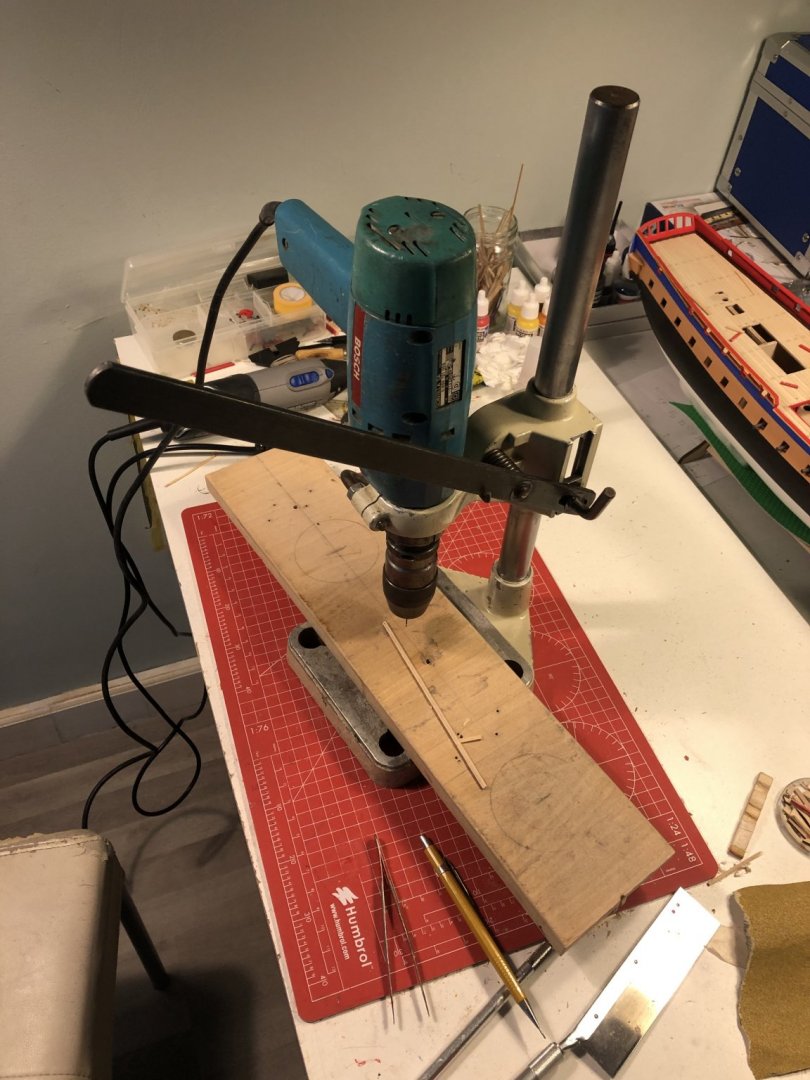
I remembered that I had a drill stand in the basement including a Bosch drill that goes with it. Without any problems, the 0.3 mm fitted into the drill head. It's not perfect but it will do for the moment. I placed the drill standard on the table, placed it wrong and before i knew what happened the standard fell on the Hermione. Me stupido! Fortunately the damage was not too bad afterwards and easy to restore. Tomorrow I will start drilling the holes in the pin rails again. Peter


-
Thank you Sjors for the nice words. I appreciate that! SFG, not too serious I hope. Can you imagine the looks on the faces when they see us waving in front of the window. They probably send us straight to the Delta hospital in Rhoon where we can talk about shipbuilding and models while enjoying a cup of coffee. Kind regards, Peter
-
HI Sjors, I want to buy one in the future as well, but at the moment I have been home sick for a year now, which has cost me quite some money. But, What's in the barrel doesn't acidify. 😁 Next Thursday I will be admitted to the Erasmus Hospital for a recovery operation on my heart valve. The operation and recovery is my first priority, after that I'll see. Peter
-
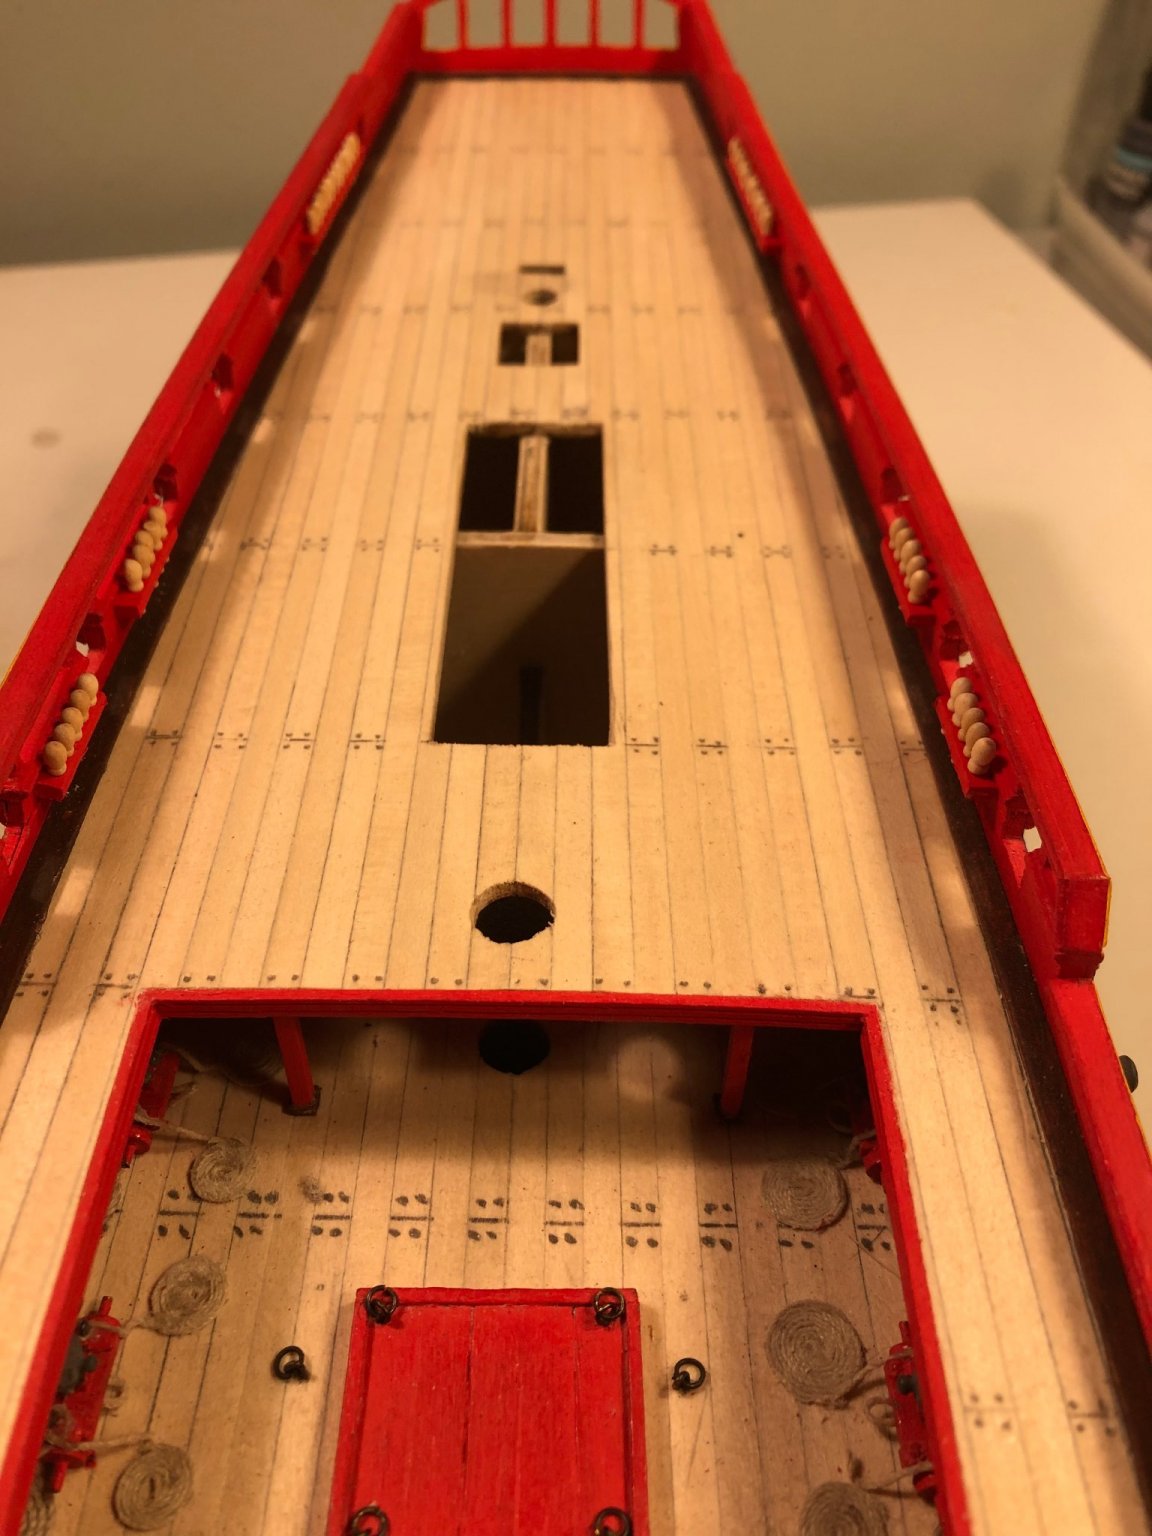
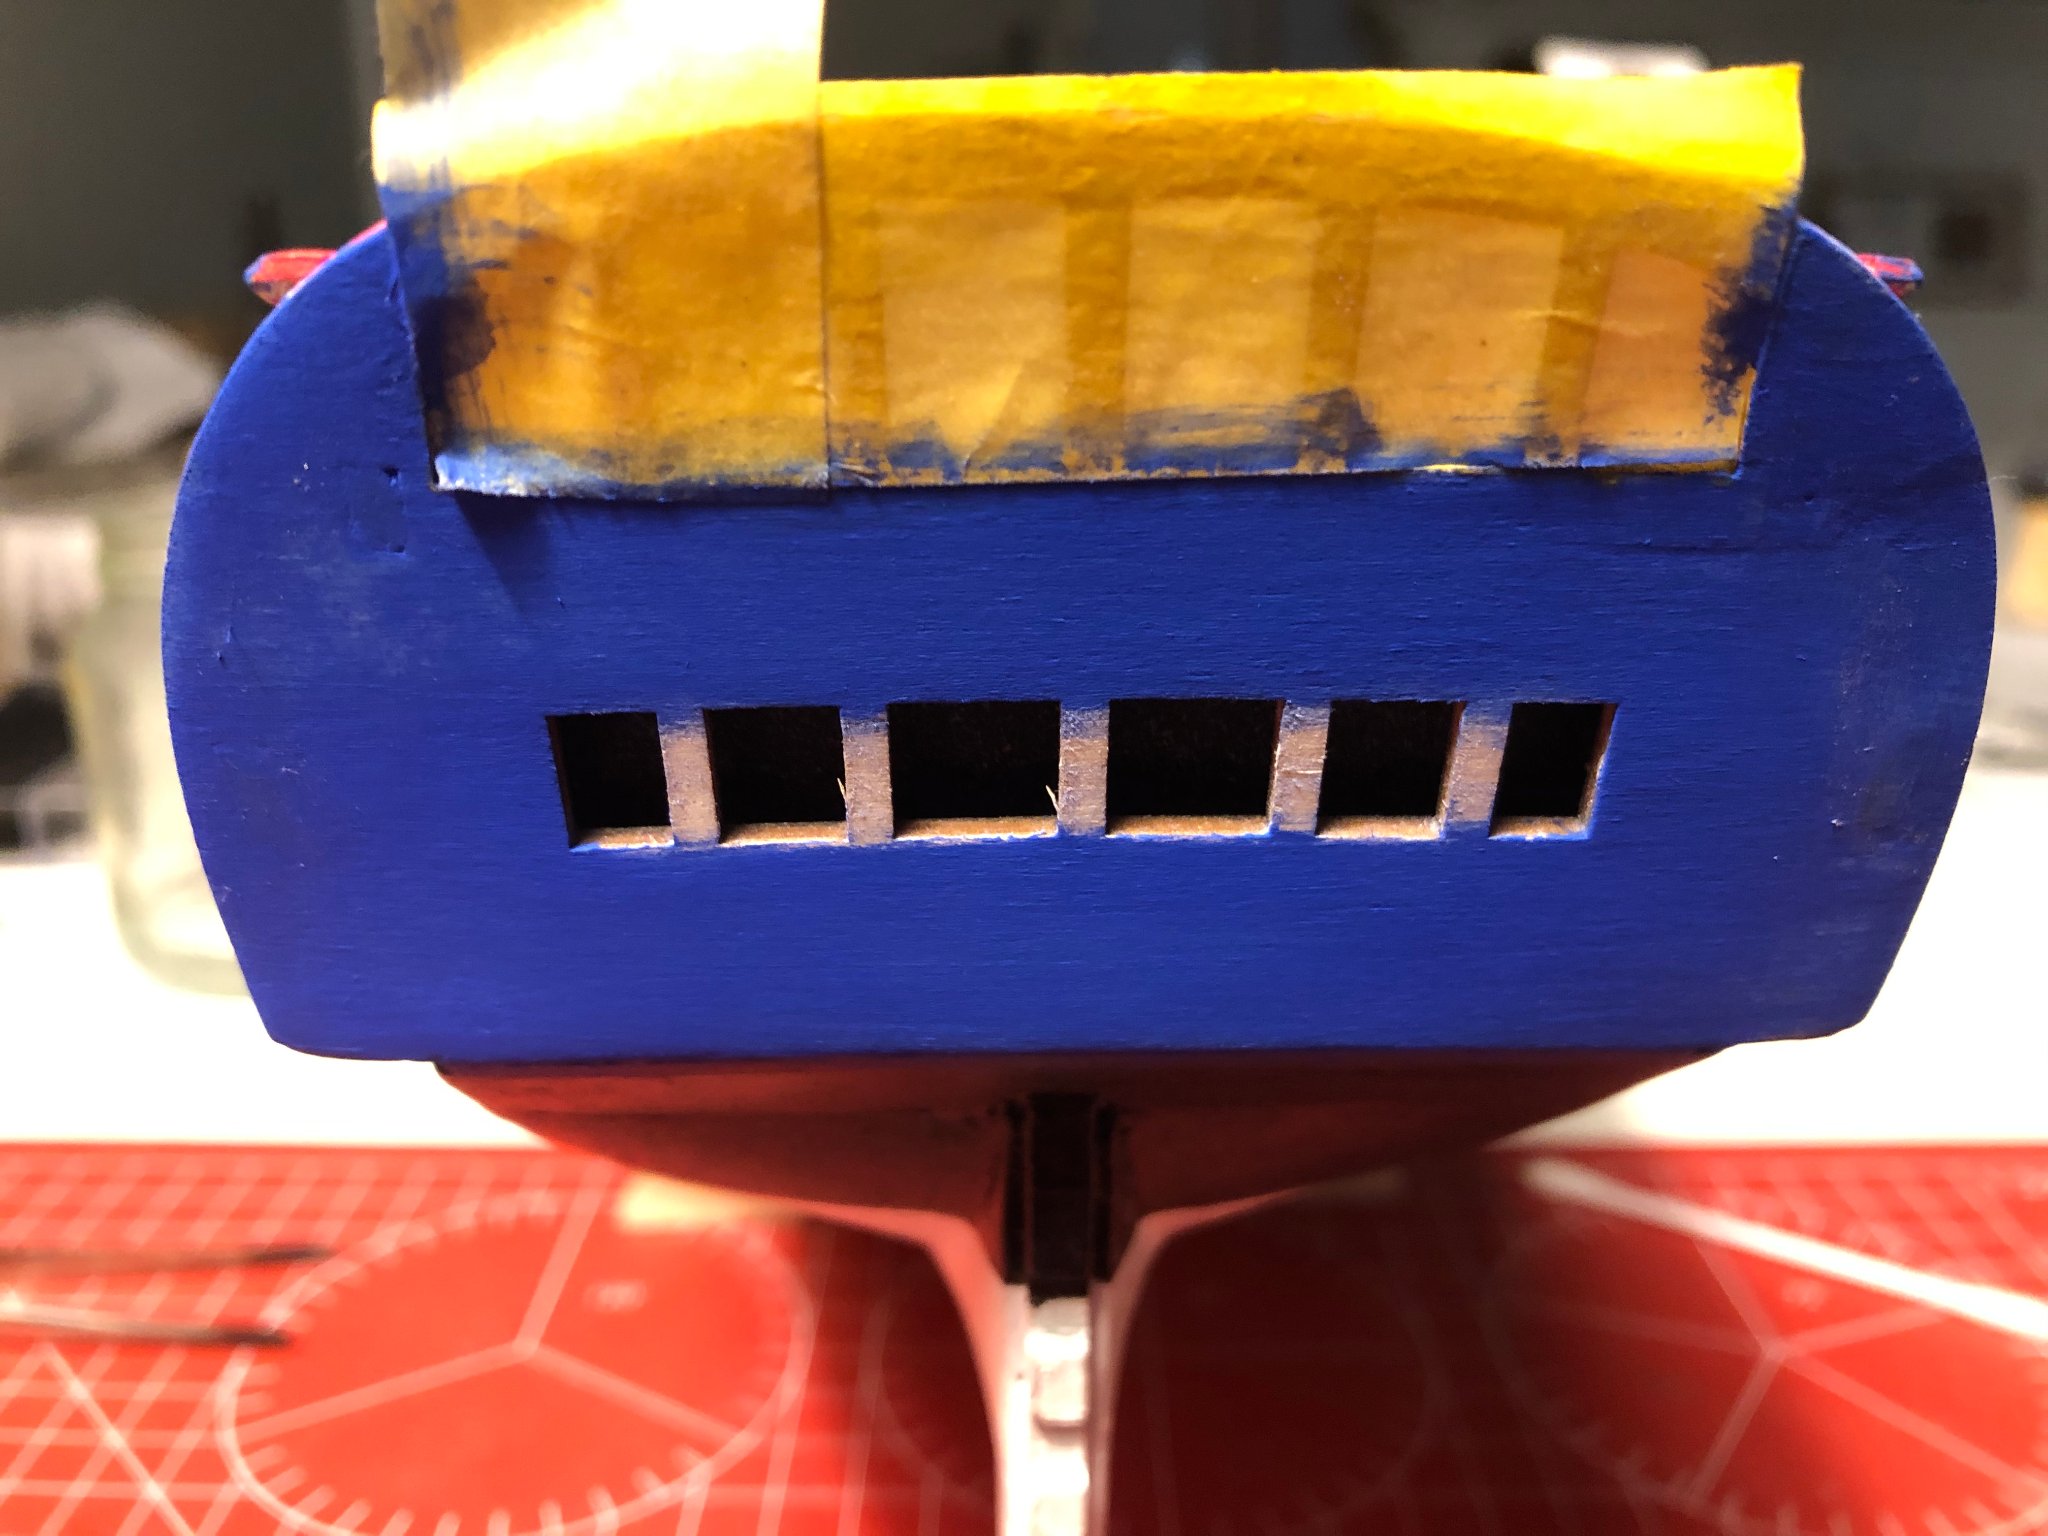
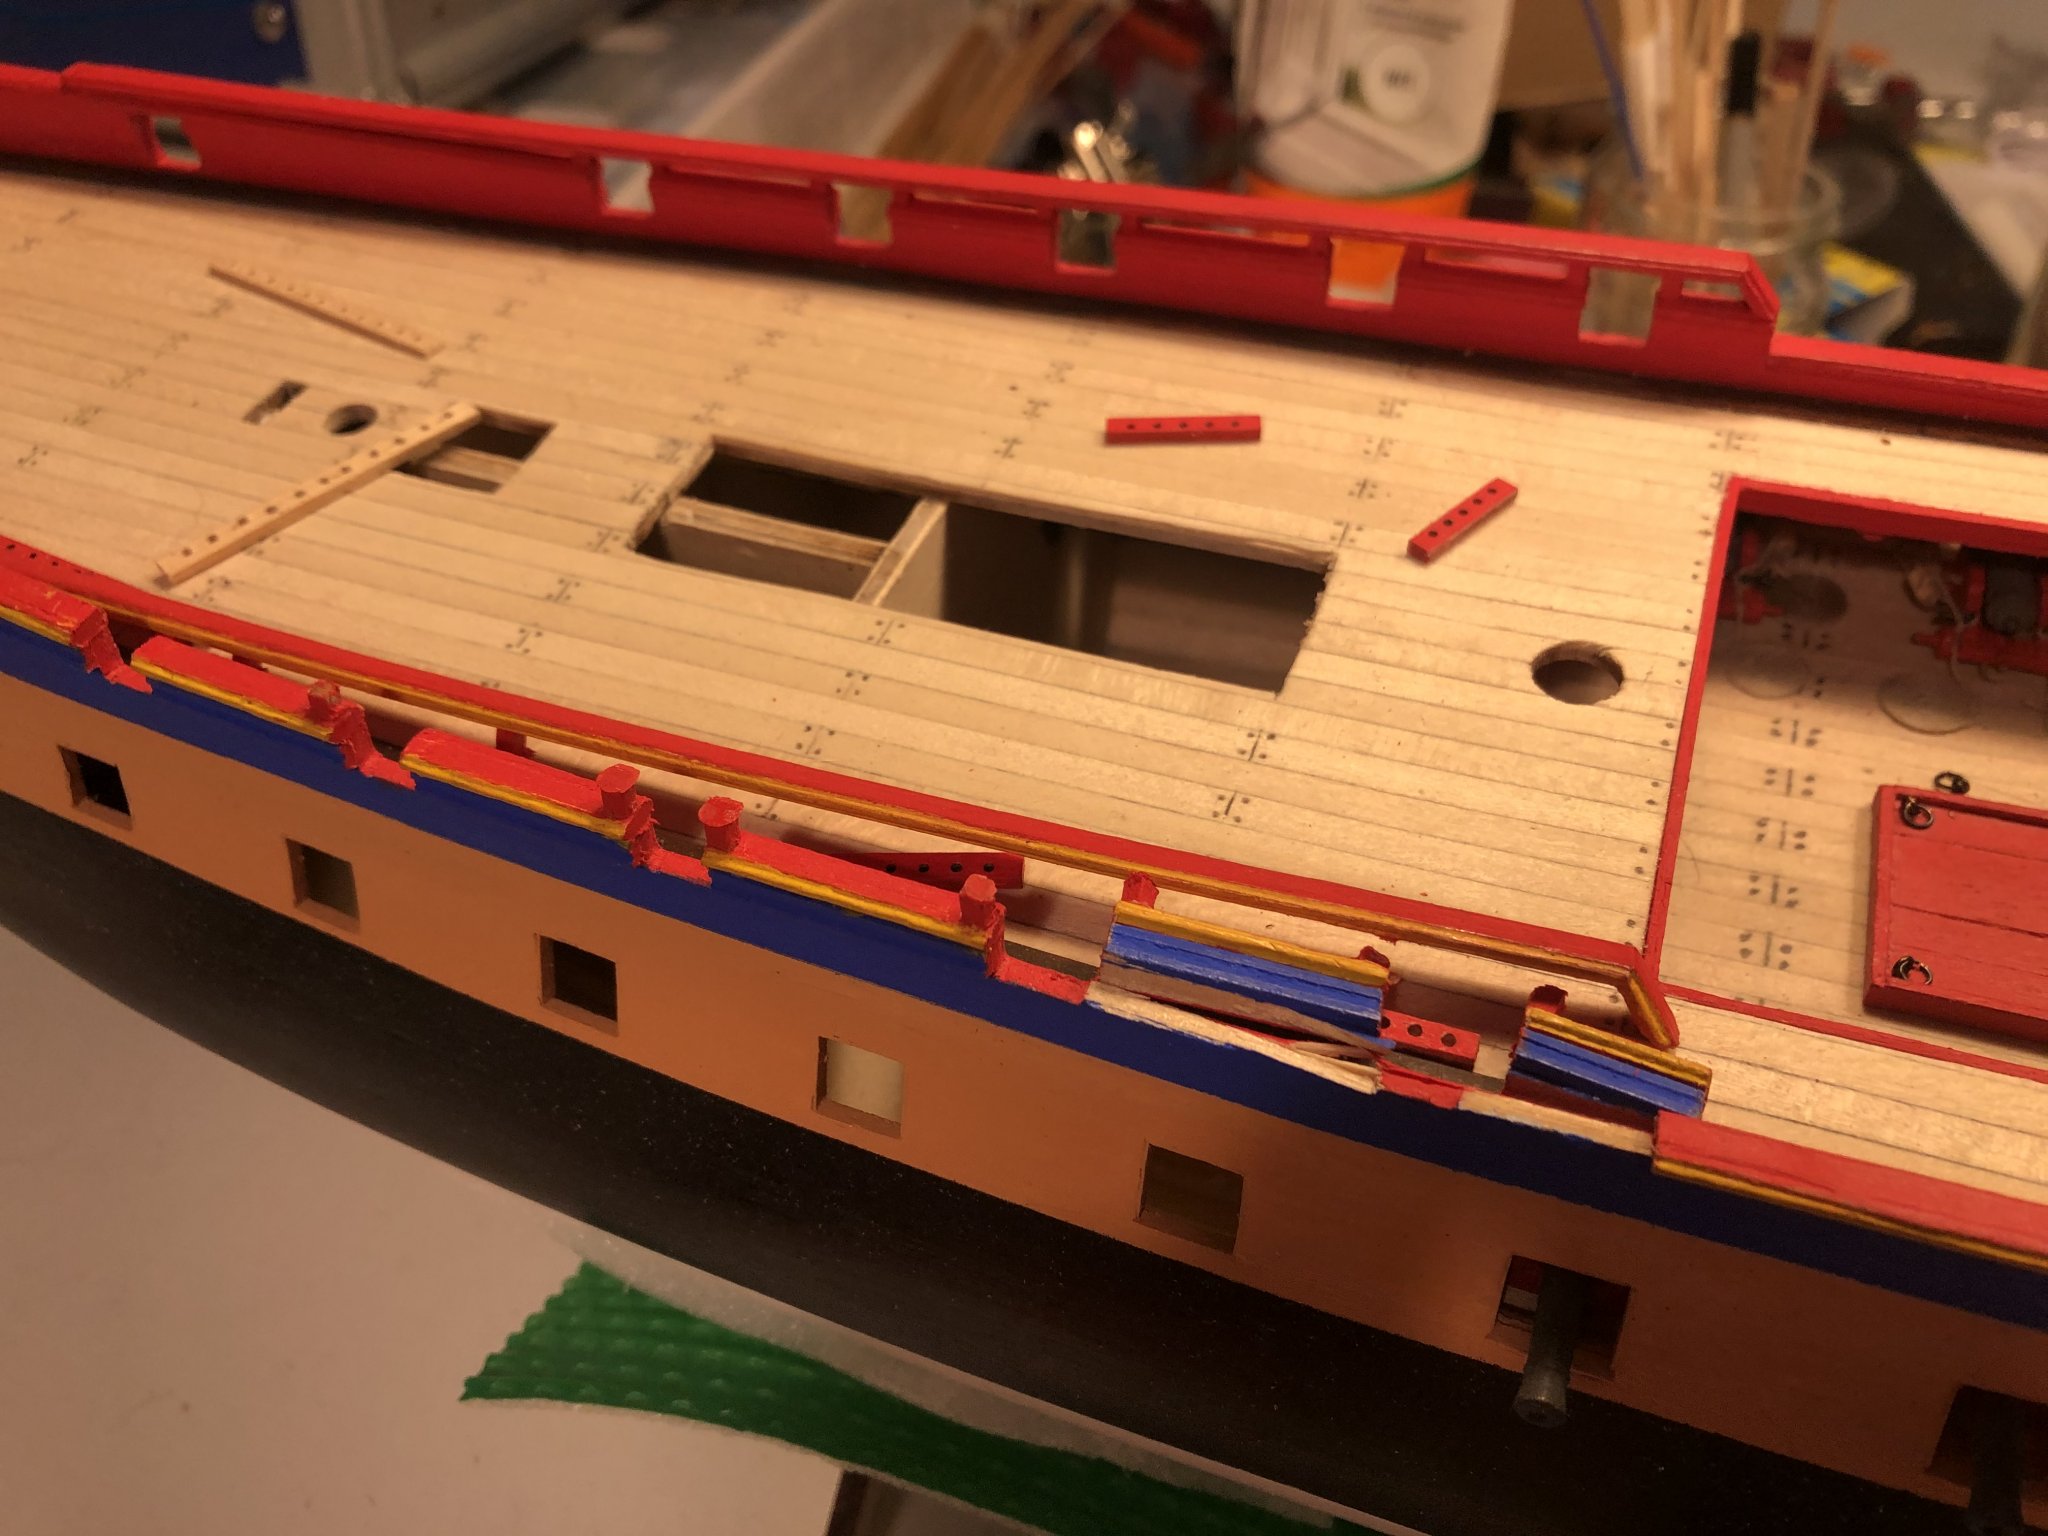
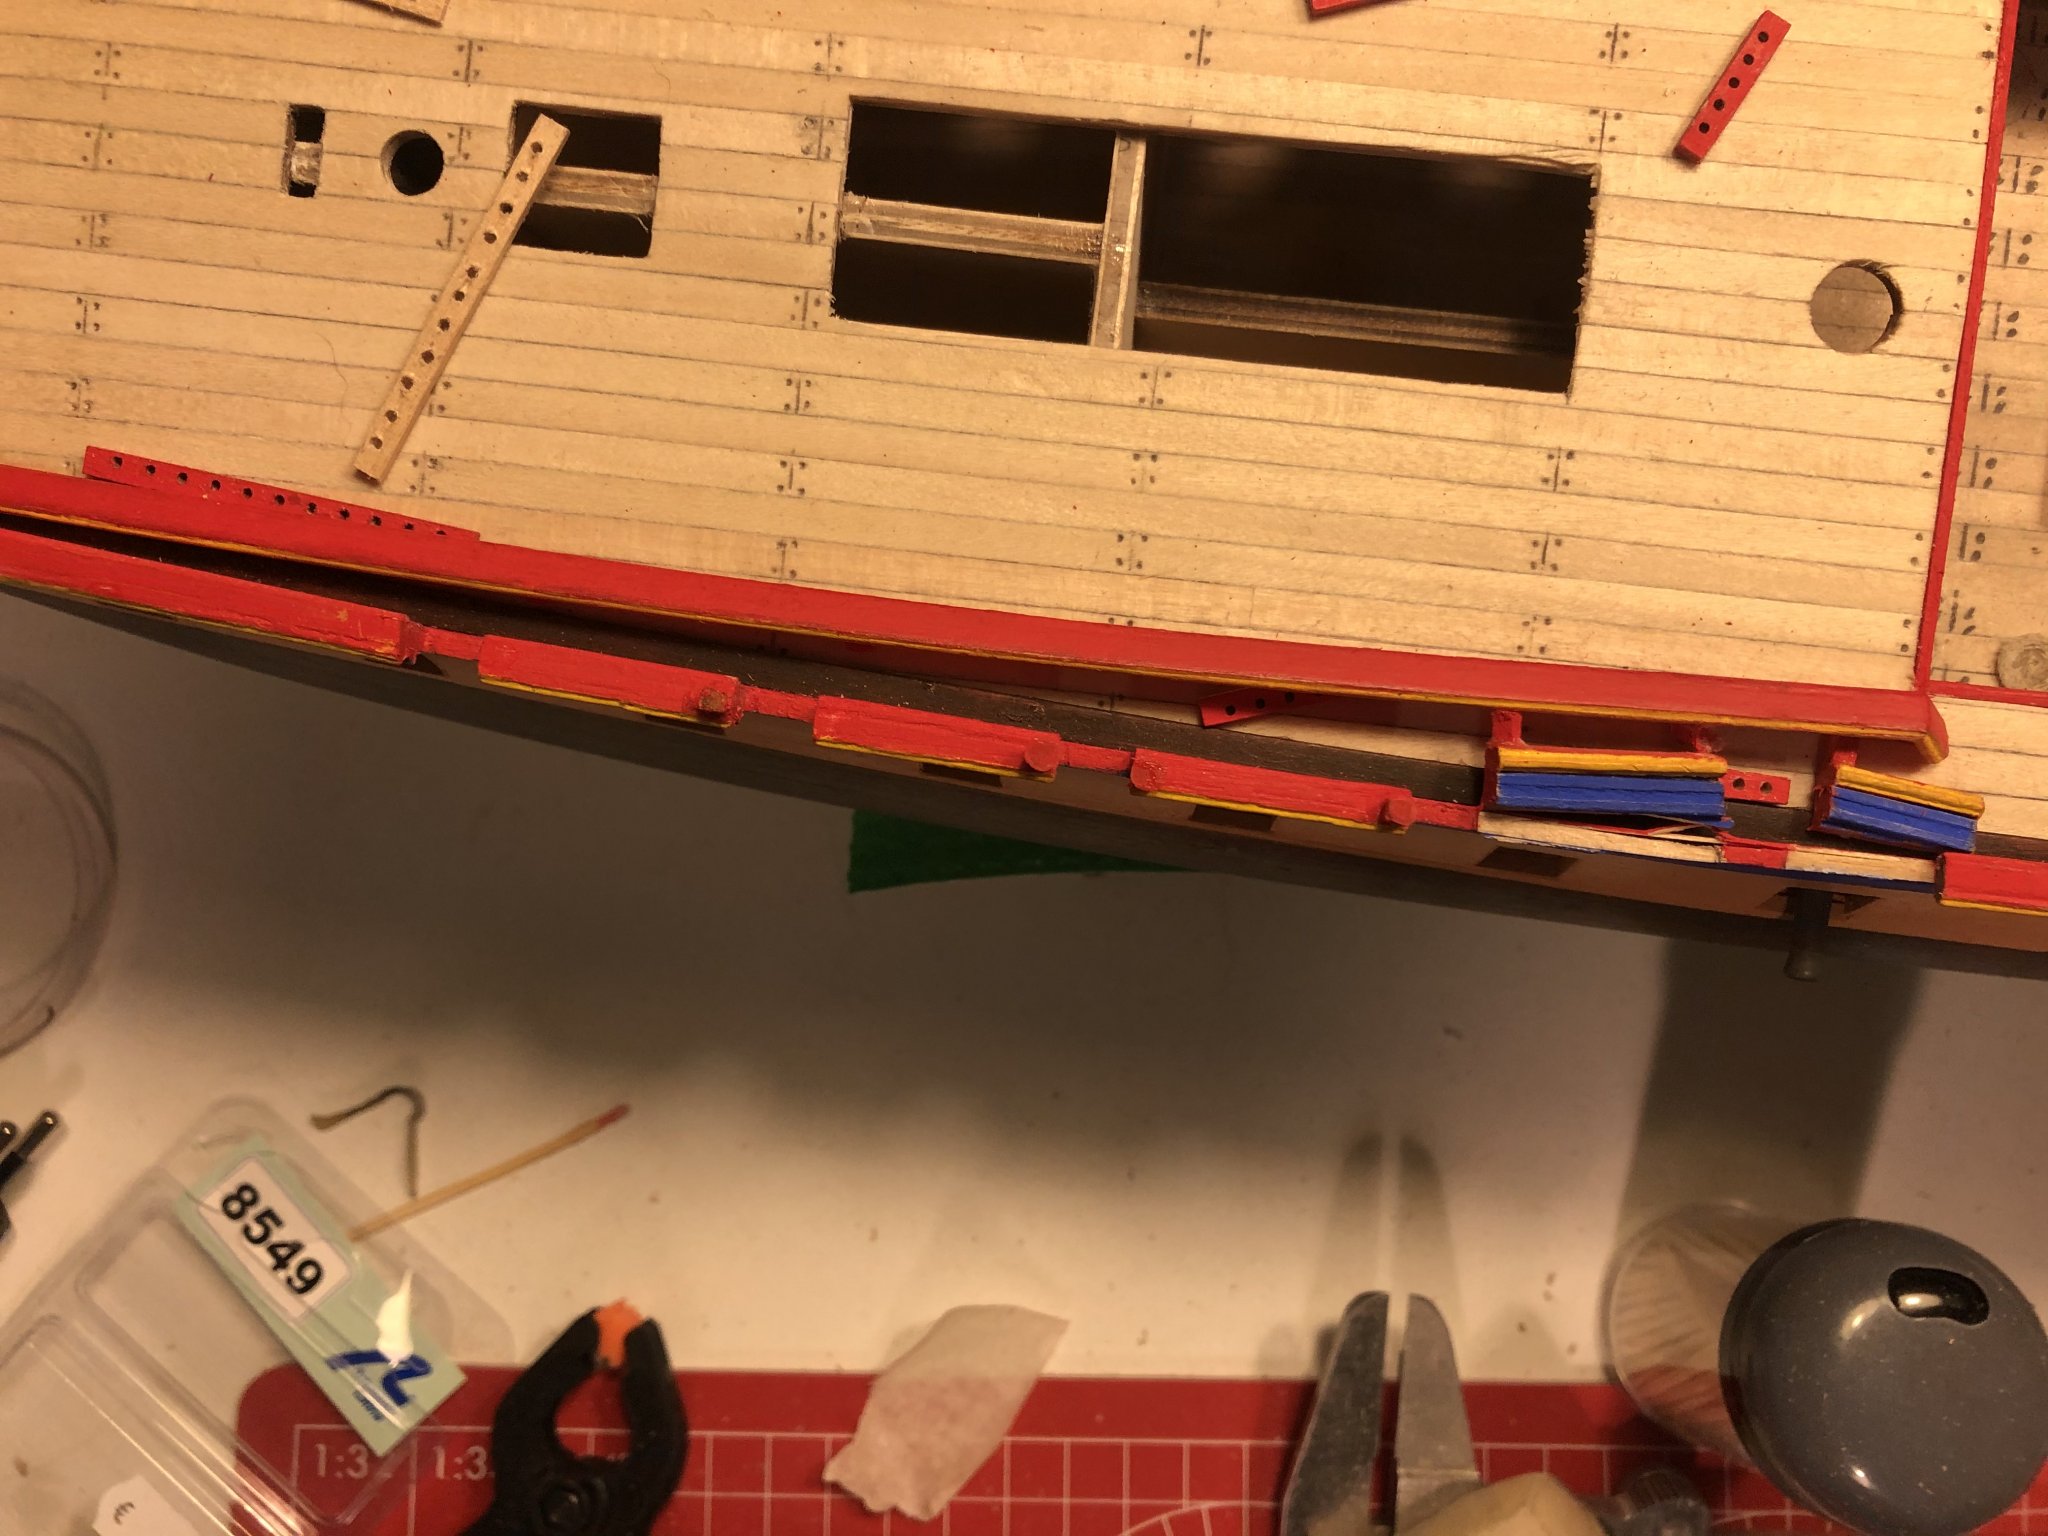
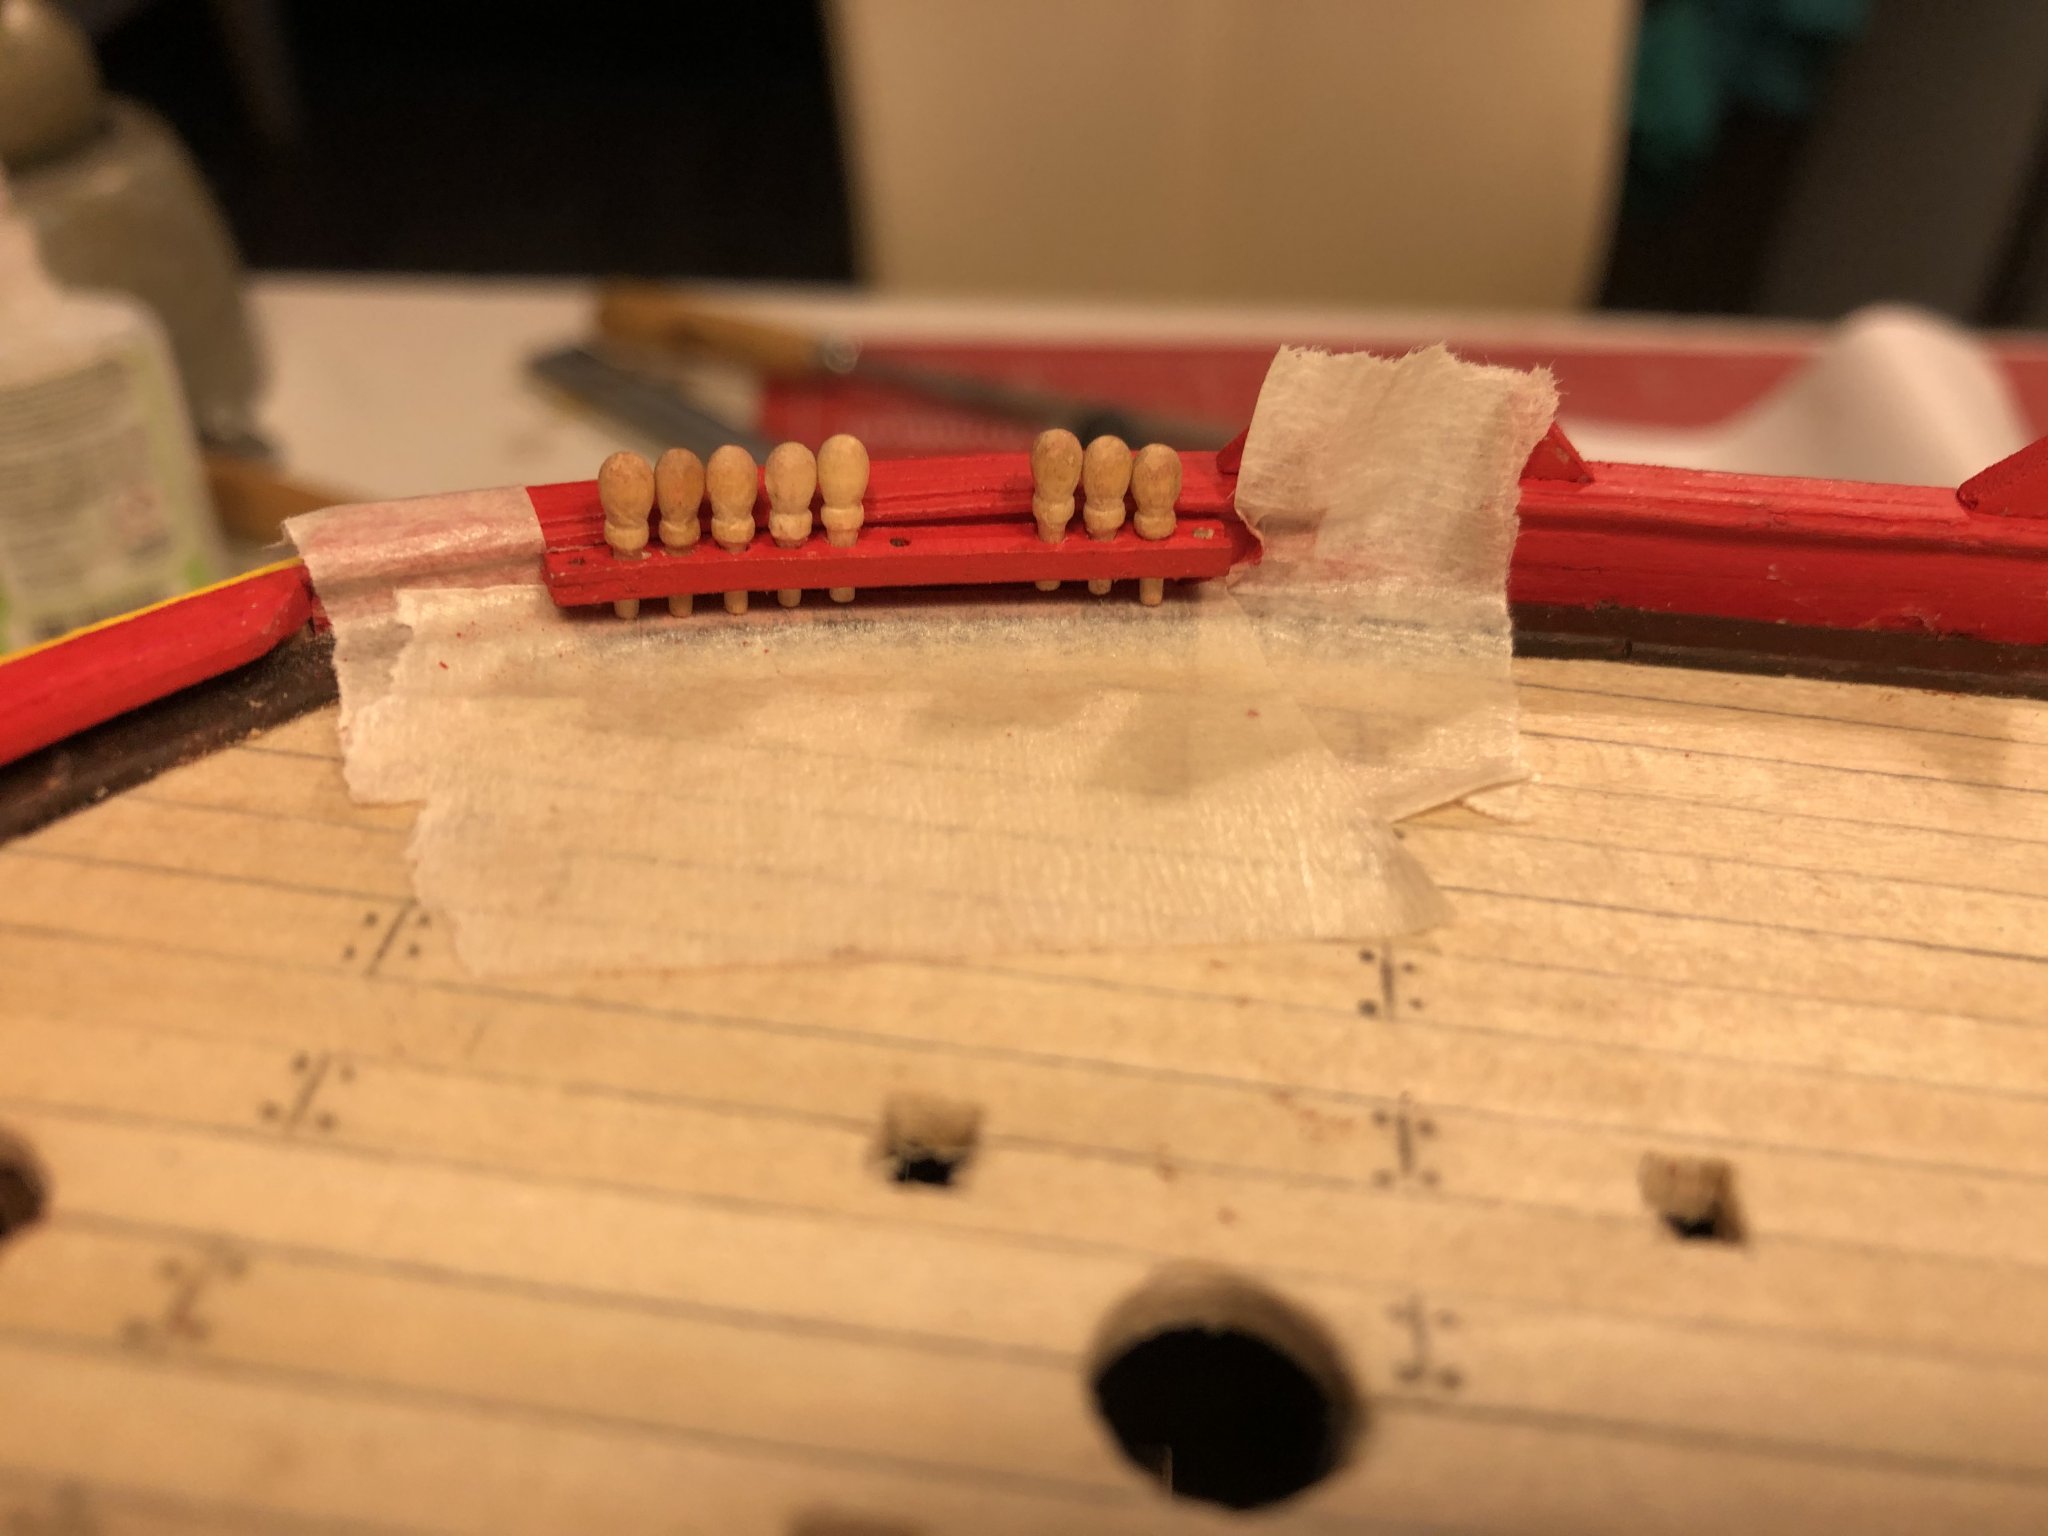
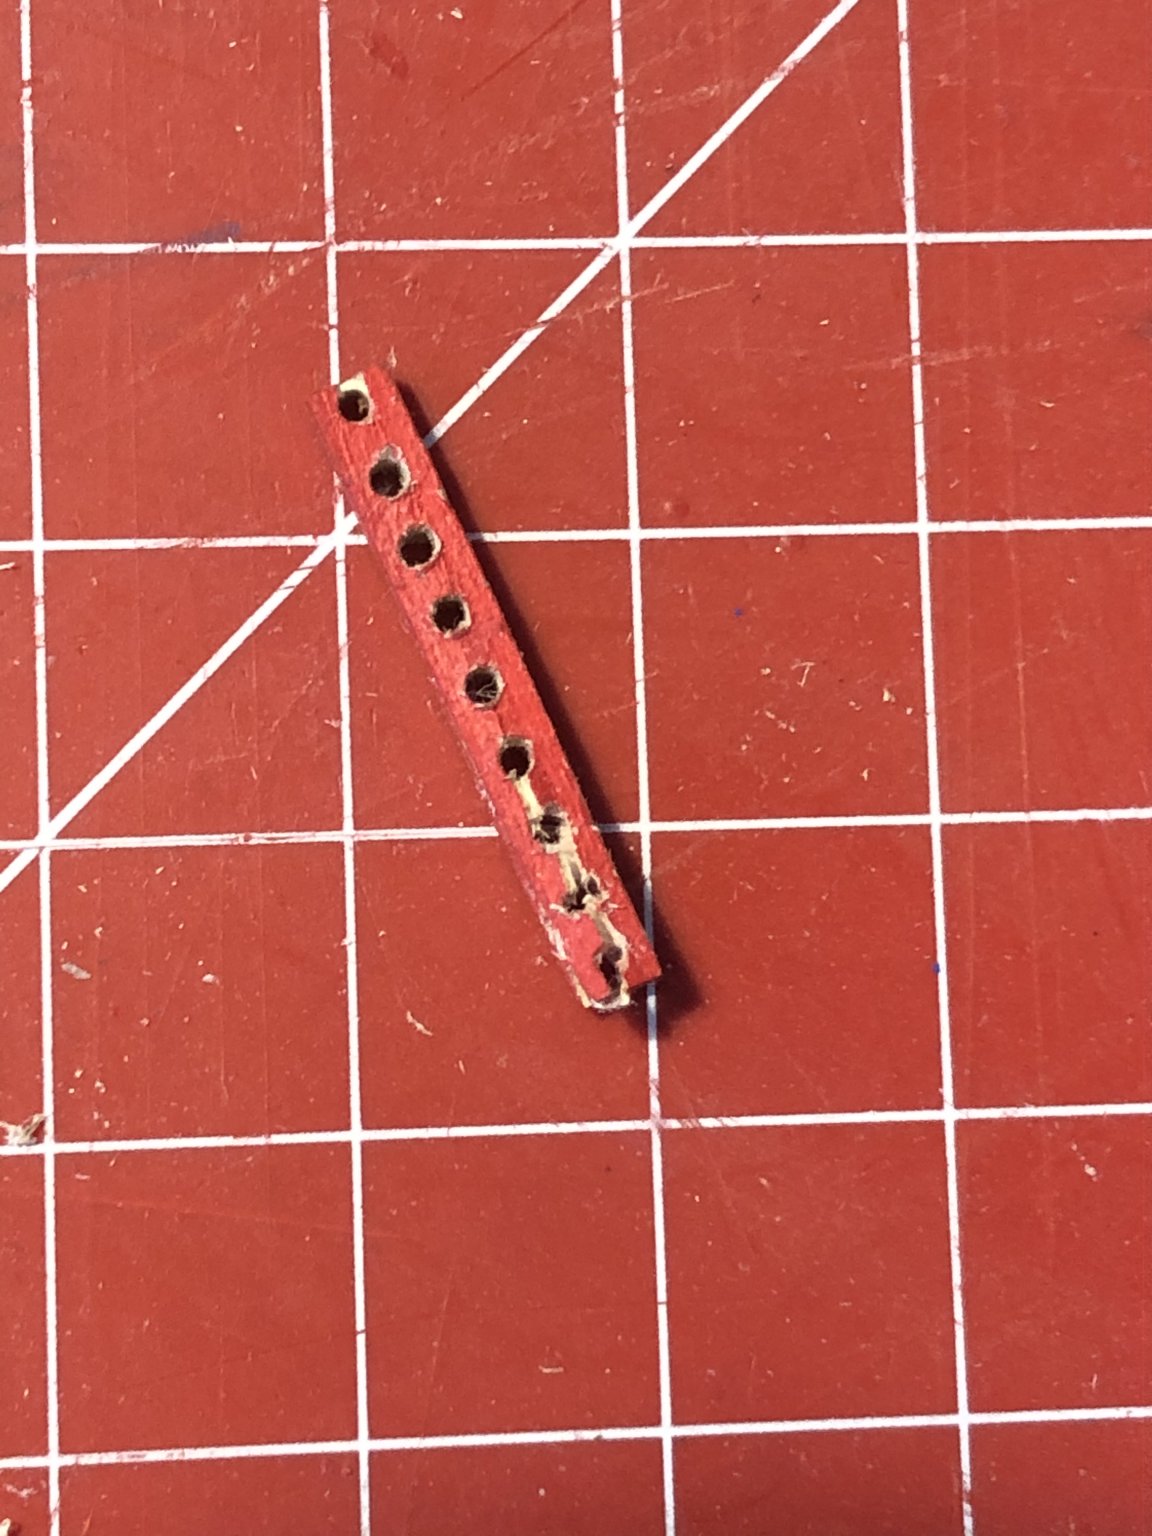
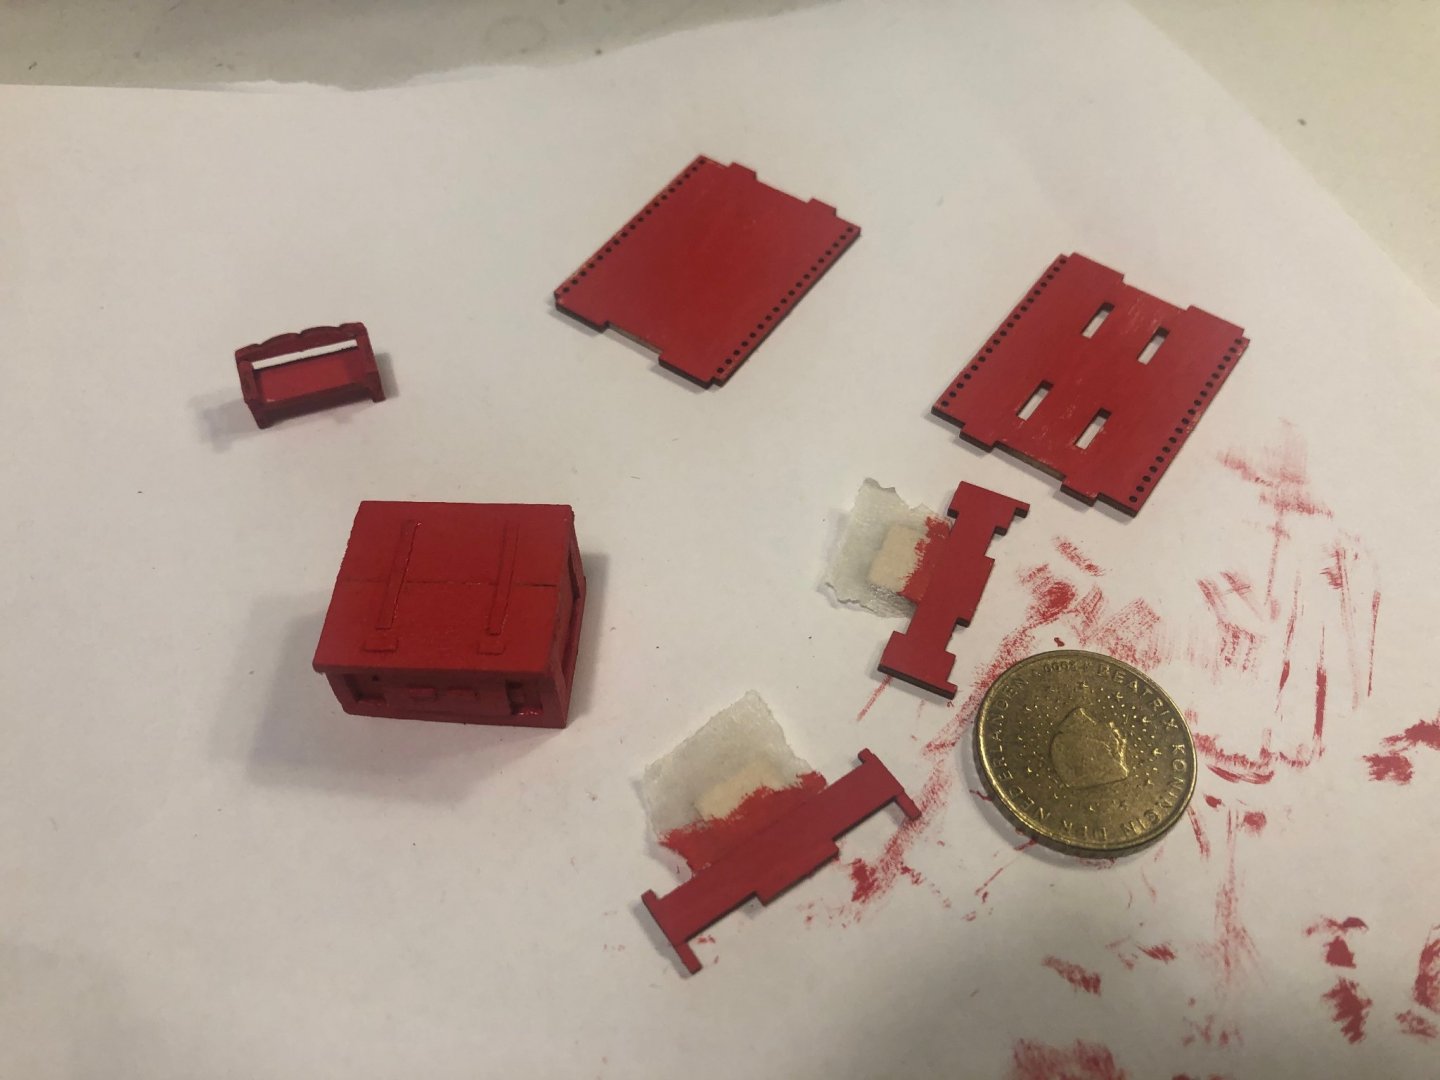
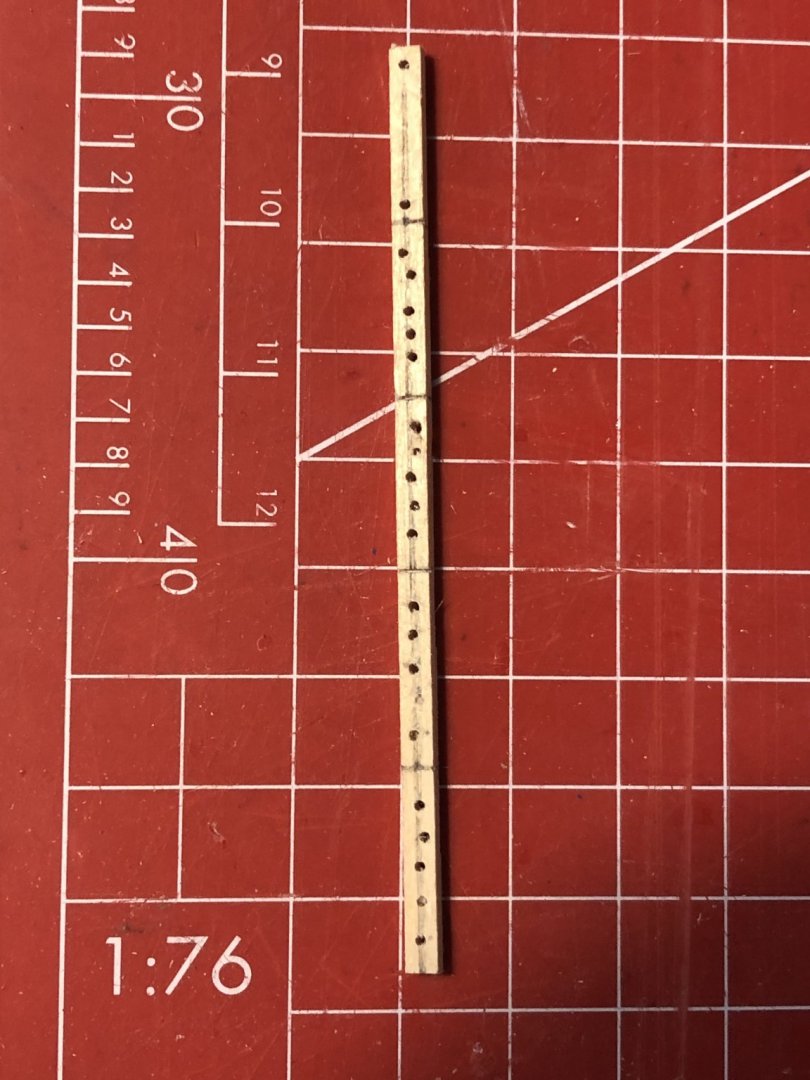
Hi all, A tiny update: I started to install the pin rials onto the bulwark's. From the start of the build i decided to replace the by AL kit included belaying pins, (brass or coper wire) which is looking cheap and crappy. During the assembly of the pin rails and fitting the belaying pins it appeared that the pin holes were too narrow. Because of this I had to drill the pin holes as well as adjusting the thickness of belaying pins. Drilling the first pin rail wasn't a problem but from the second pin rail it wend wrong, Again it happened that the fragile plywood split in two. (This had nothing to do with too much pressure during drilling) The laser cuts are fine and detailed but the quality of the plywood is real crappy. I started to make them out of scrap. I understand the concessions AL did to keep the Kit cheap and affordable but I don't understand the choice for a poor quality of wood. In addition, in some cases the building instructions are unclear and confusing, which can be frustrating for a novice builder with the chance that the boat never will be finished. The only problem is that i have no drill press, which makes it difficult to drill the holes perfectly in line. Will be continued.... Cheers from a sunny Netherlands Peter


-
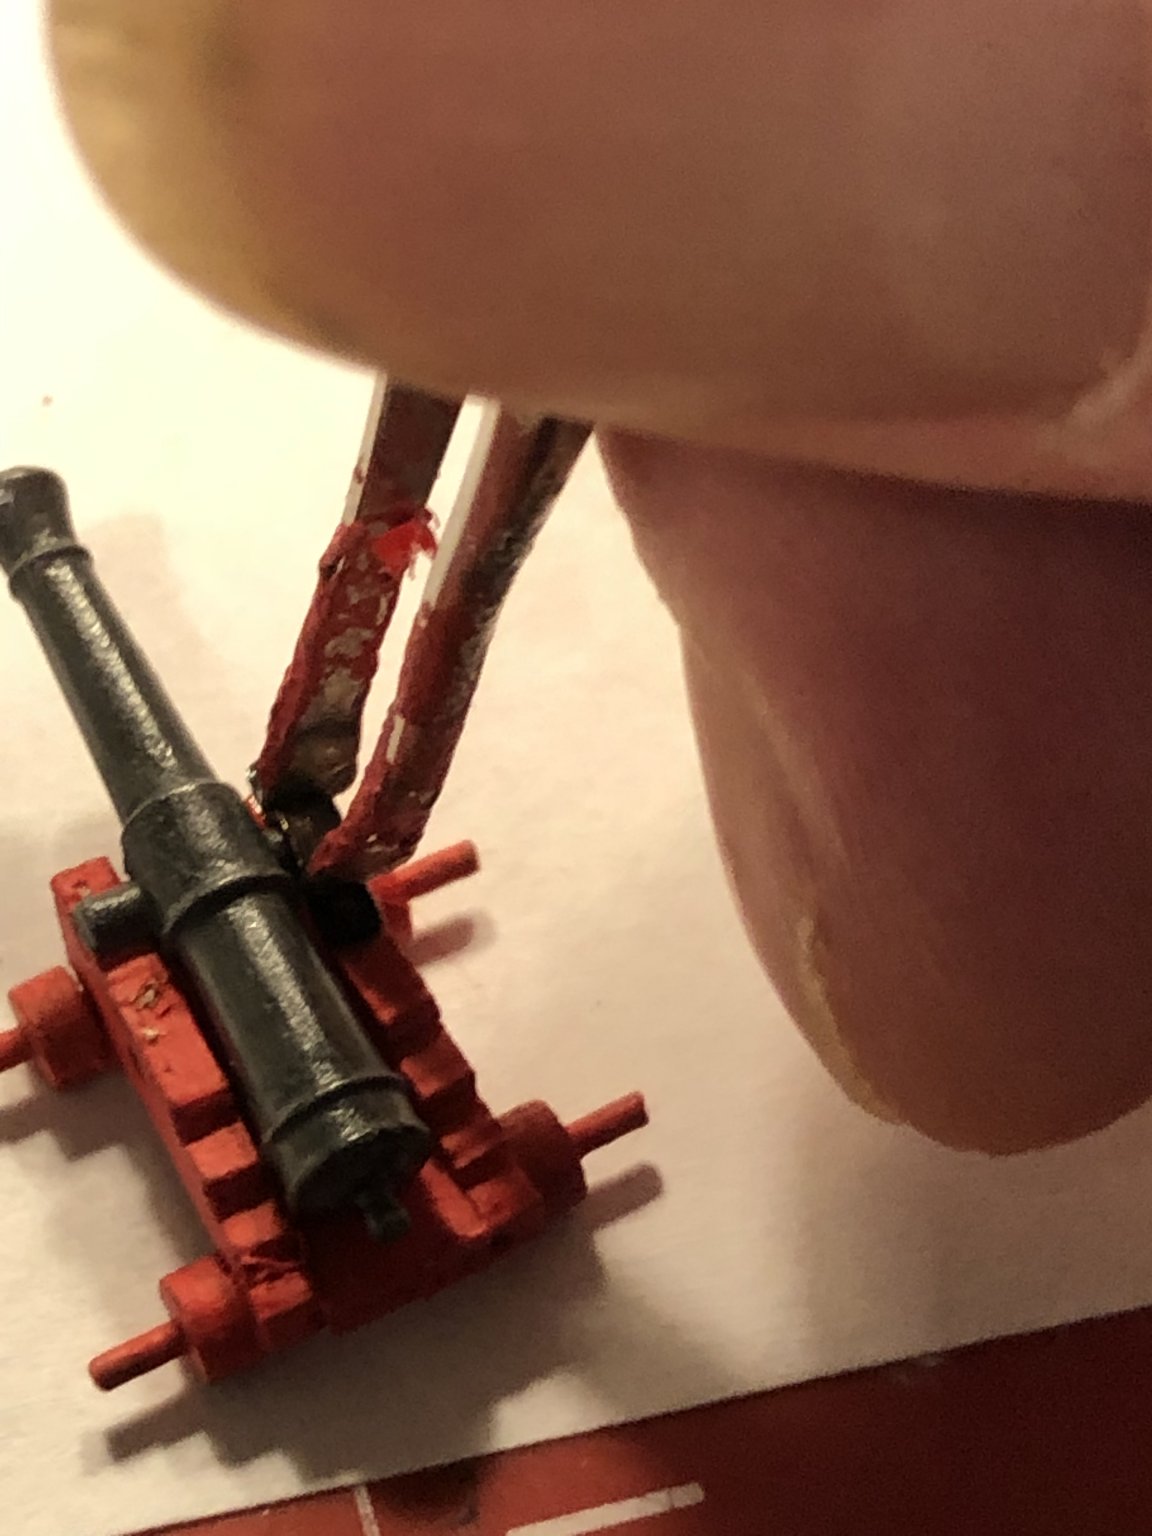
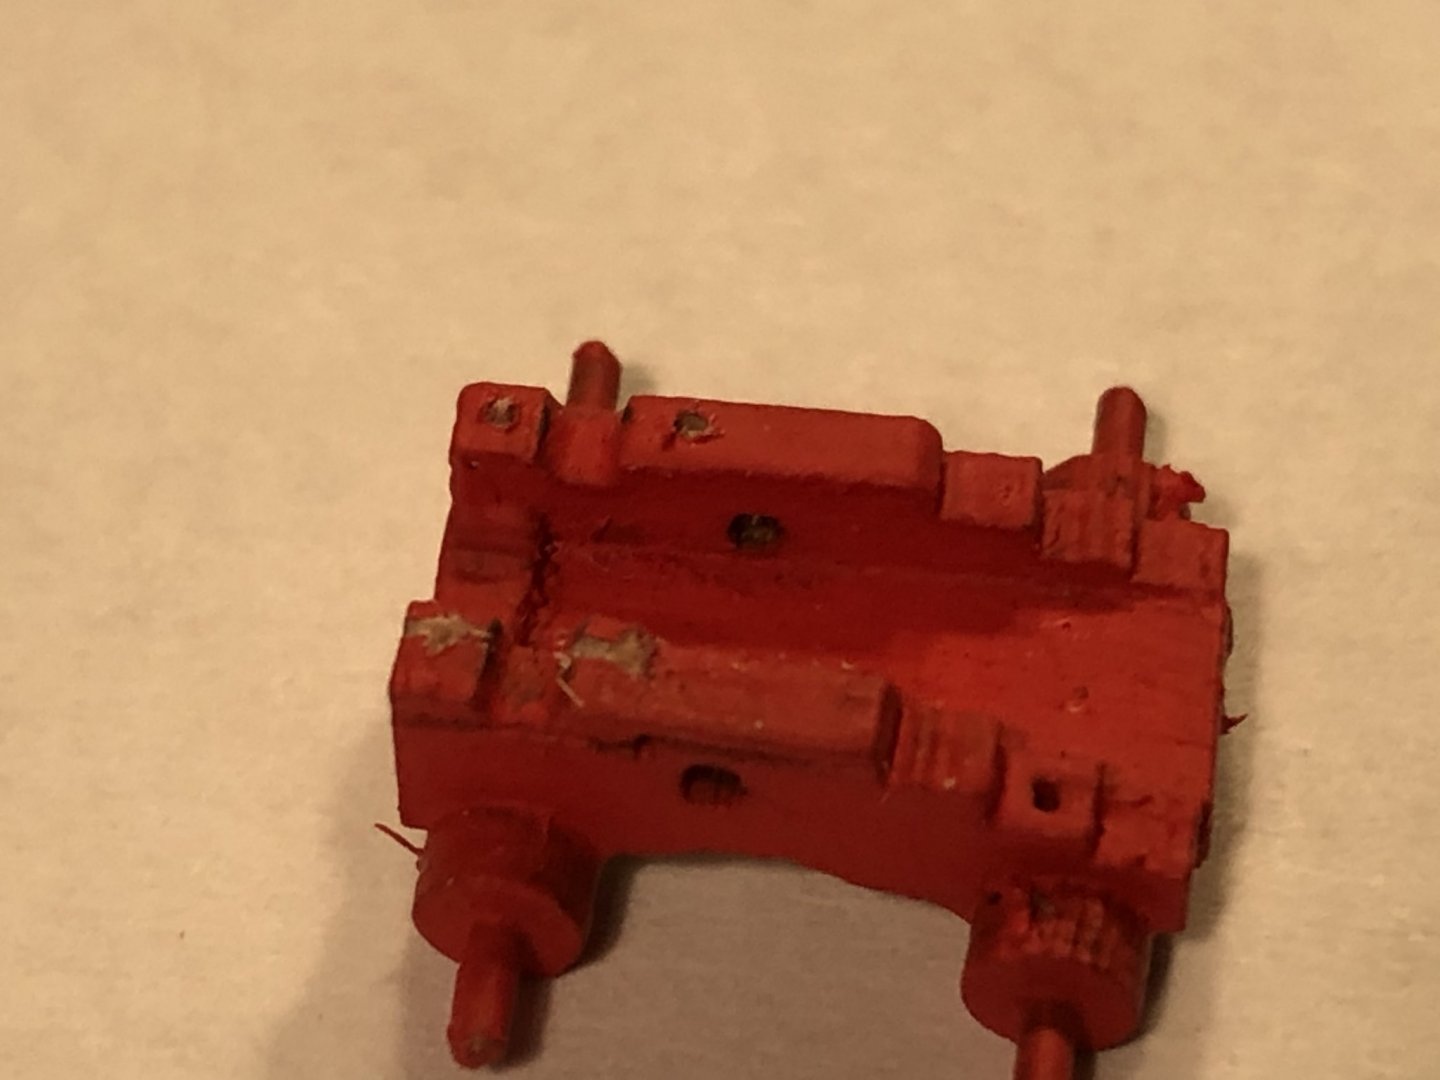
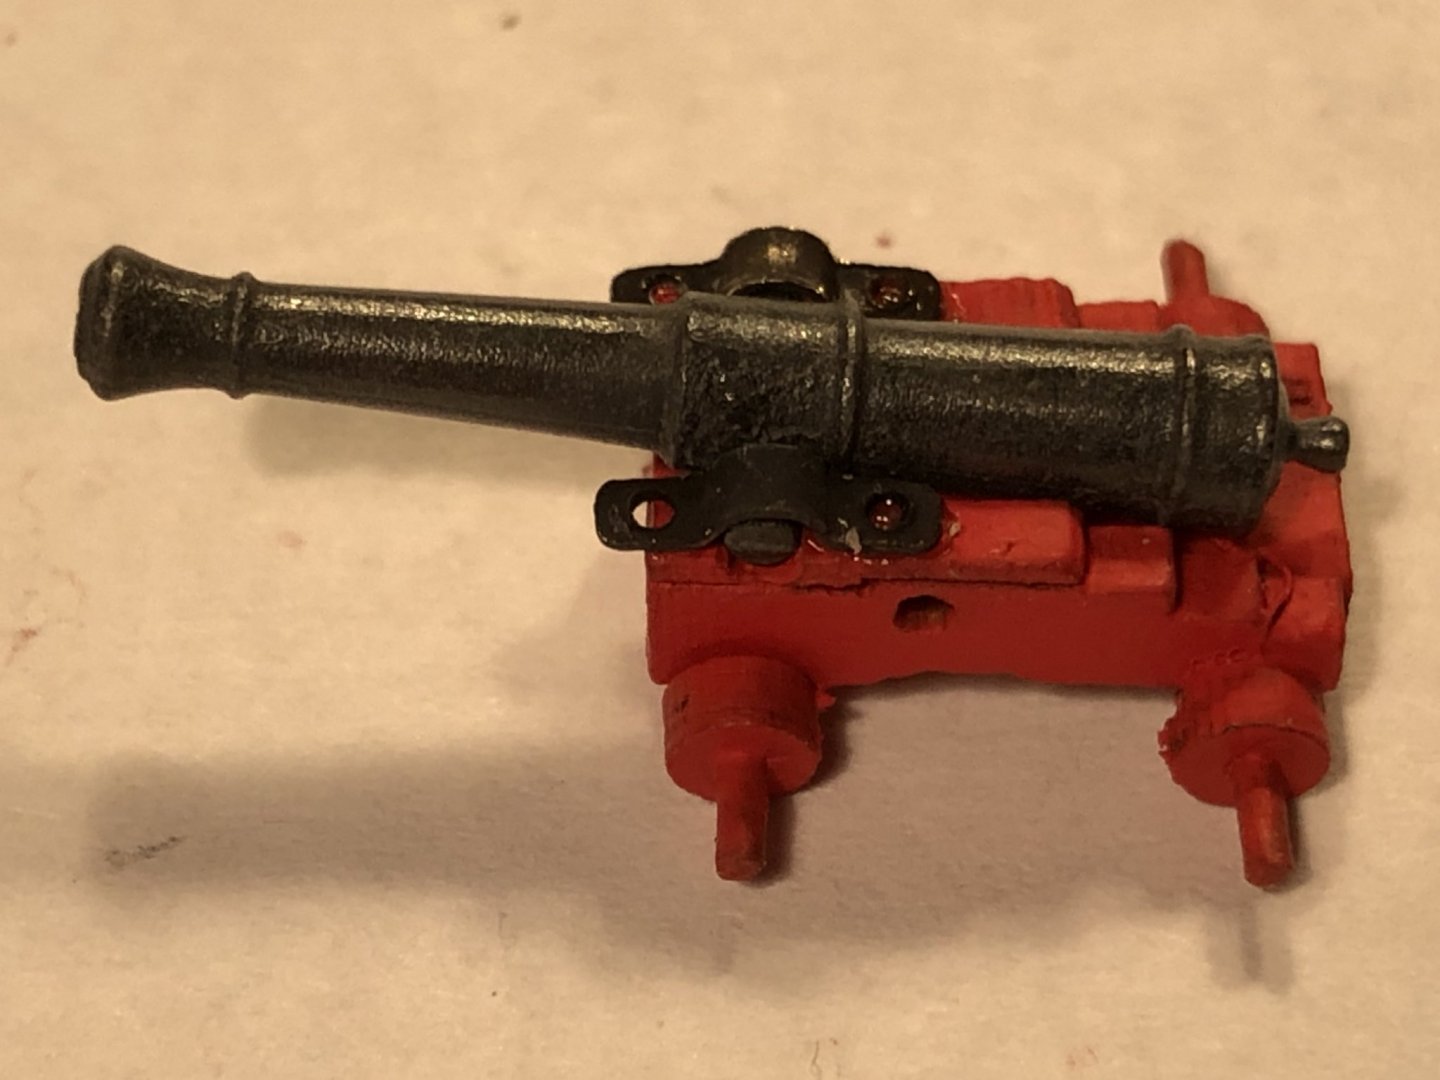
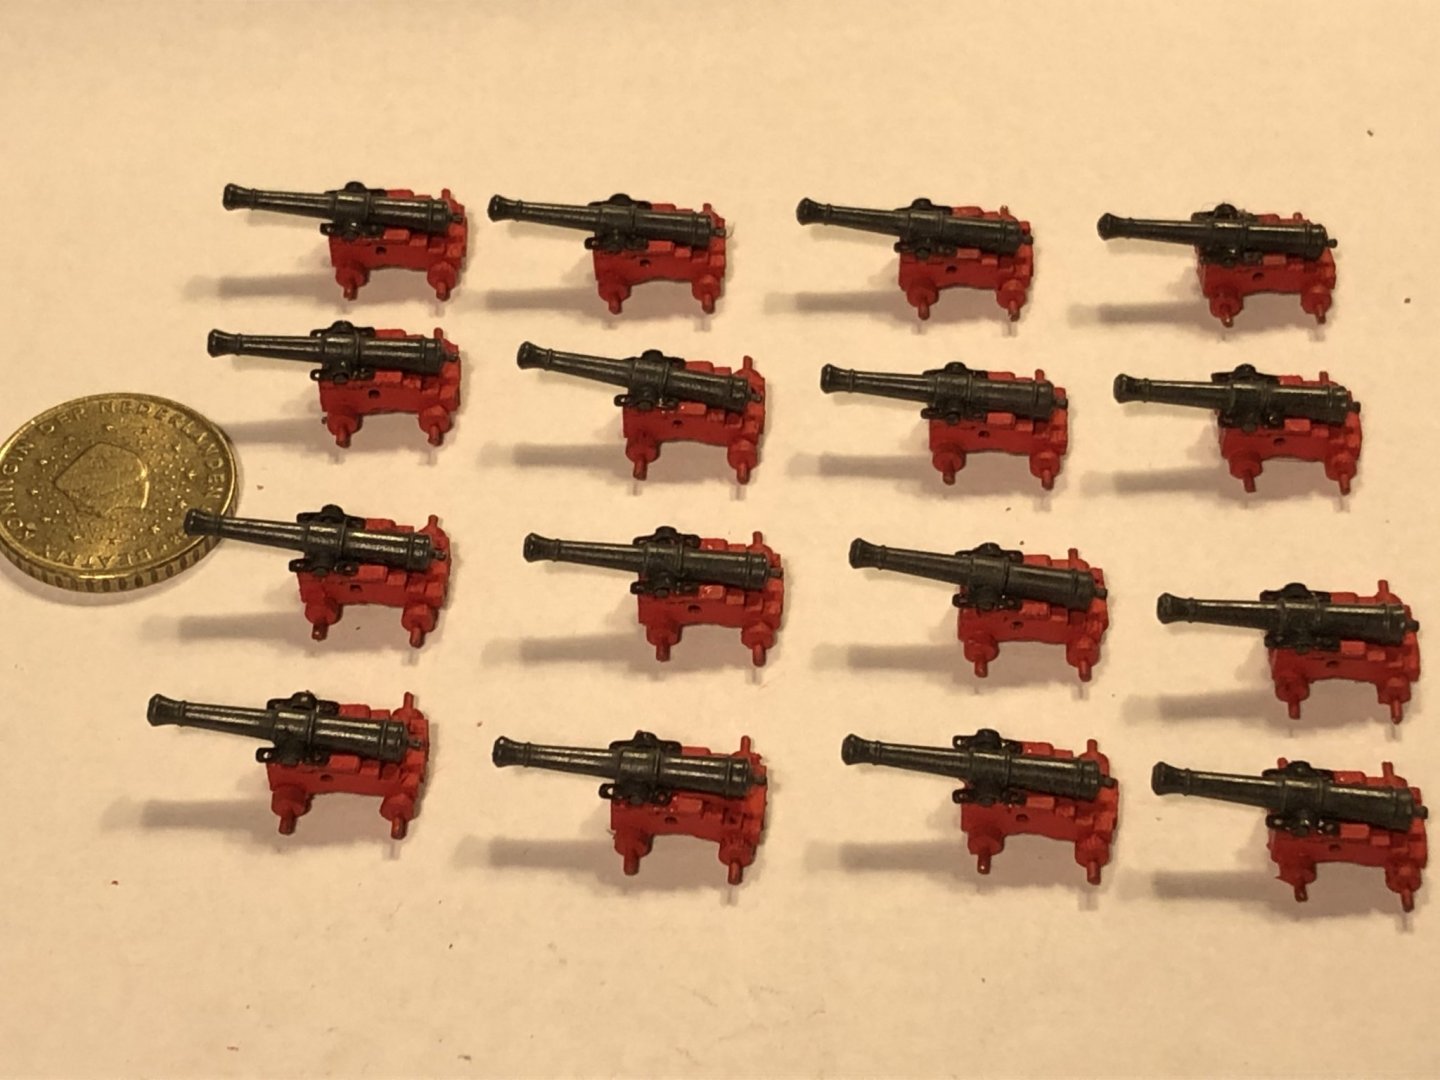
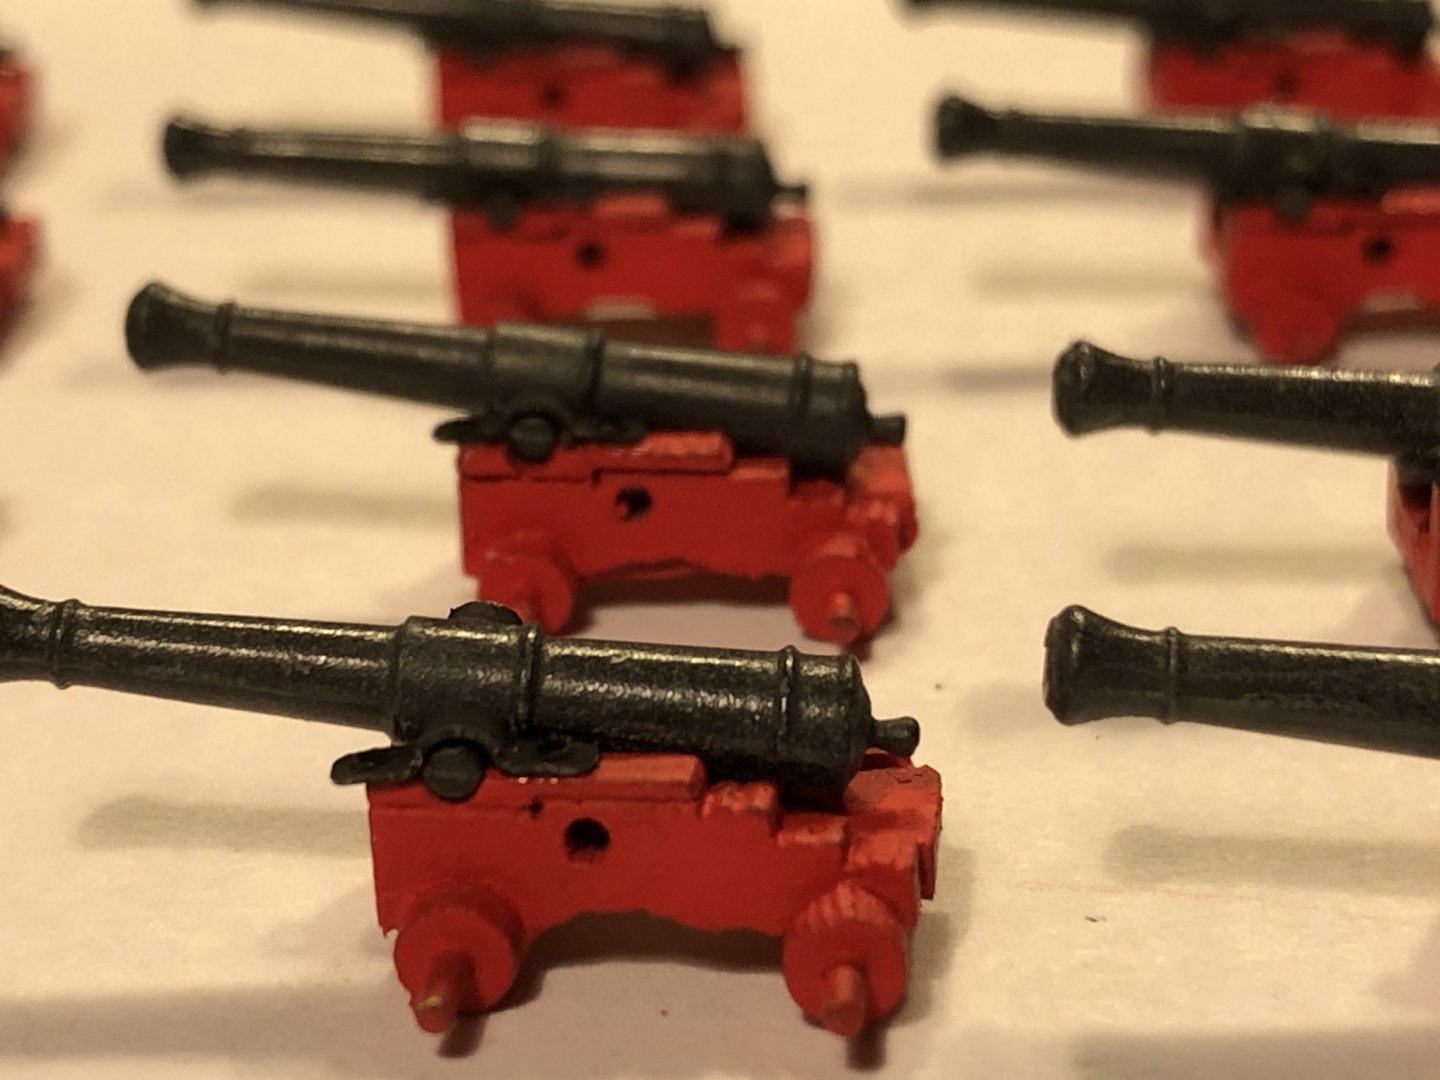
Hi all, and welcome, Today it was time to assemble the guns when the Admiral asked me if the guns could be coated with a layer of varnish for a soft sheen. Instead I used the Dremel (felt disc and a brush) to remove the dull layer. Although I liked the dull layer I have to admit that the result was great. There are many more details visible making the guns seem more authentic. During the assembly of the first group of guns i had allot of problems glueing on the plates that locking the guns onto the gun carriage. The locking plates released again and again with a chip of the paint because the glue (CA) had no contact surface with the wood. By drilling 4 small holes (0.3 mm) the glue could be applied with a needle and flow into the holes after which the closing plate could be applied with tweezers. Because of this I need to remove less excess glue afterwards and I'm got rid of the shiny spots. What took me a lot of time and effort was now done in a short while and fun to do. Thanks for the views and thumbs up! Regards Peter

-
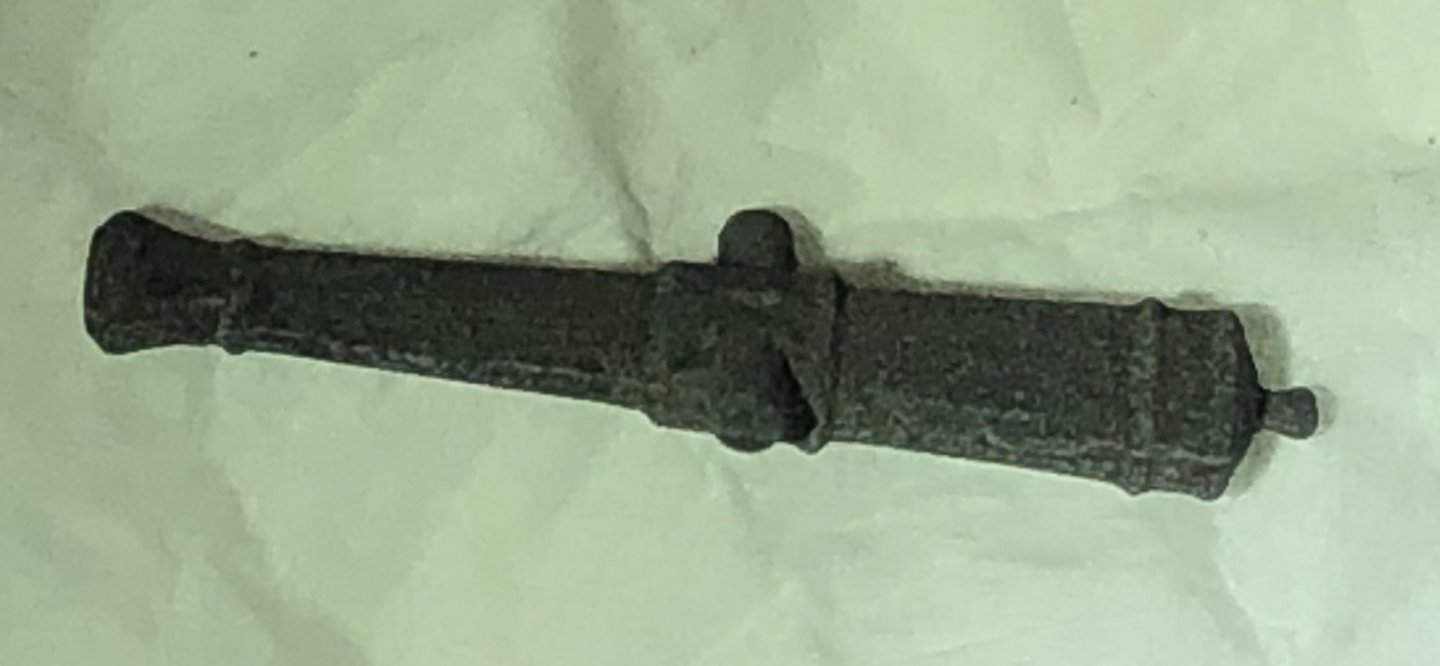
Hi Matt, This liquid is often used in shooting sports, where one applies the liquid with a cotton ball to the barrel of (for example) an air rifle. The liquid colours the metal deep black again. You can also use it for messing and silver. For blackening coper i use Ballistol Nerofor. Same principle and result. Regards Peter