Jonathan_219
-
Posts
176 -
Joined
-
Last visited
Content Type
Profiles
Forums
Gallery
Events
Everything posted by Jonathan_219
-
 Thanks Steven, I'm sure the pieces at the right angle will show that way once stain is applied but I'm hoping that the Hawes? coverings over the anchor holes will cover that up. I can't find in the instructions where it tells me to put them on or which pieces they might be but they're clearly visible in the pictures of that area. Hopefully I'll get lucky and it will cover my mistake.
 -
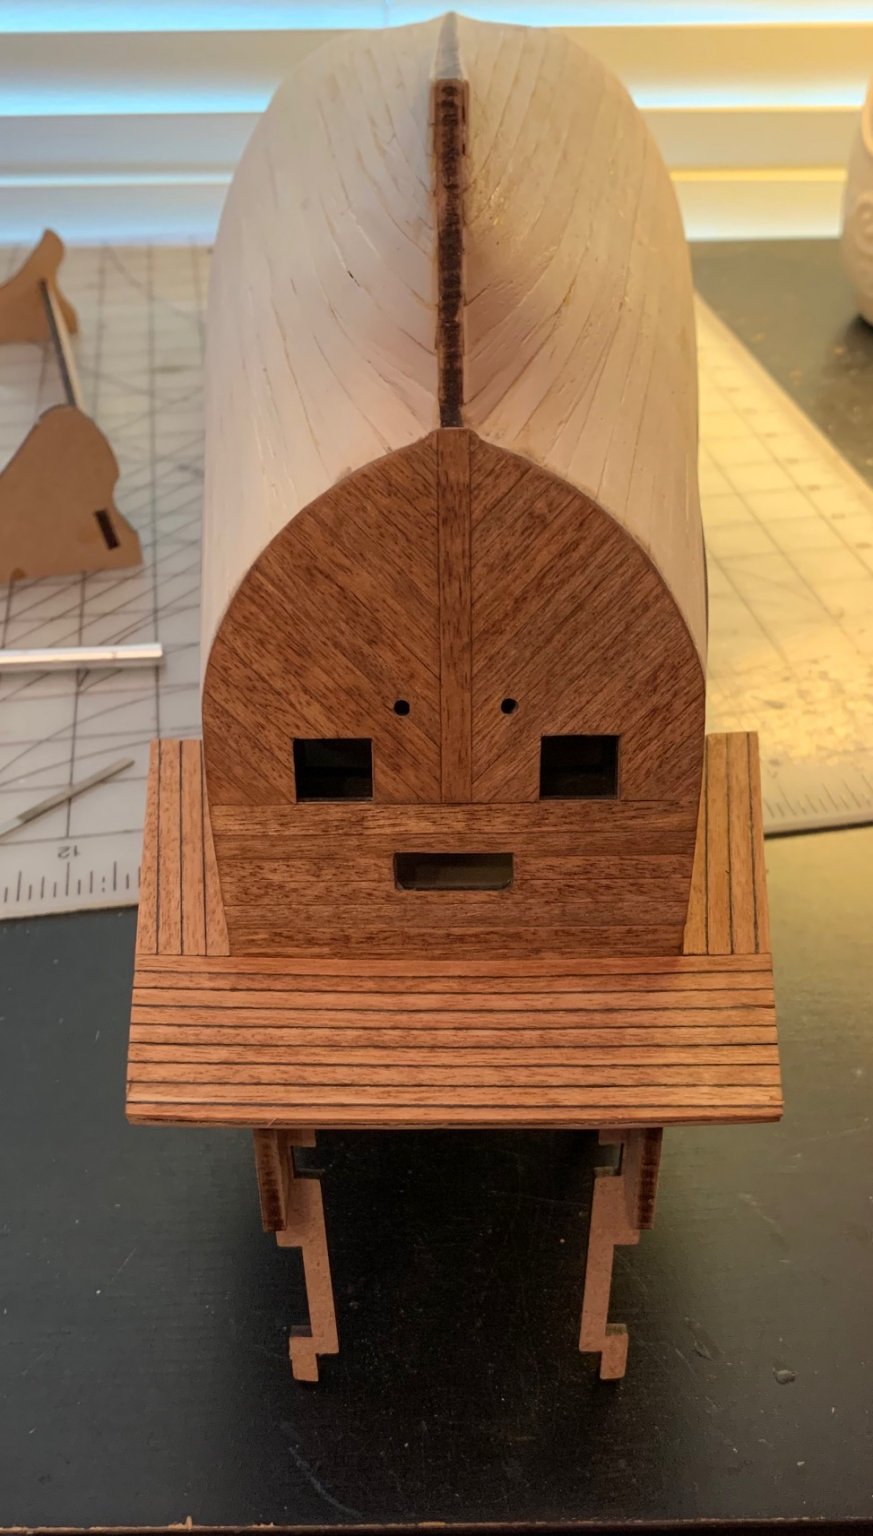
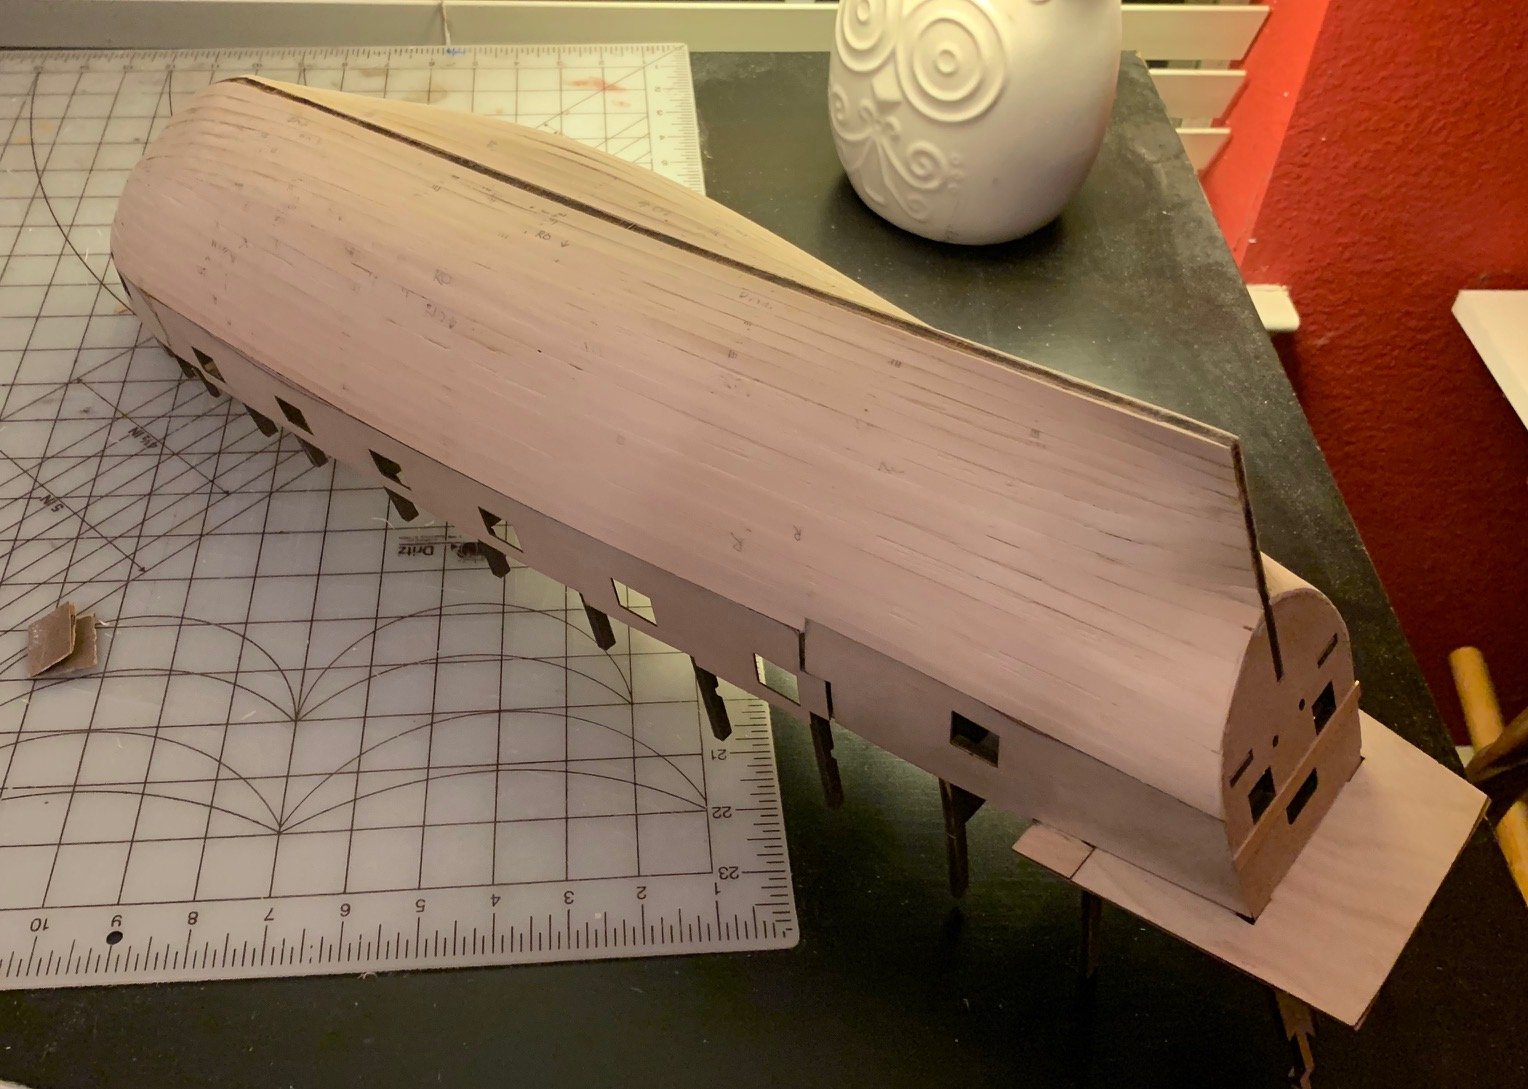
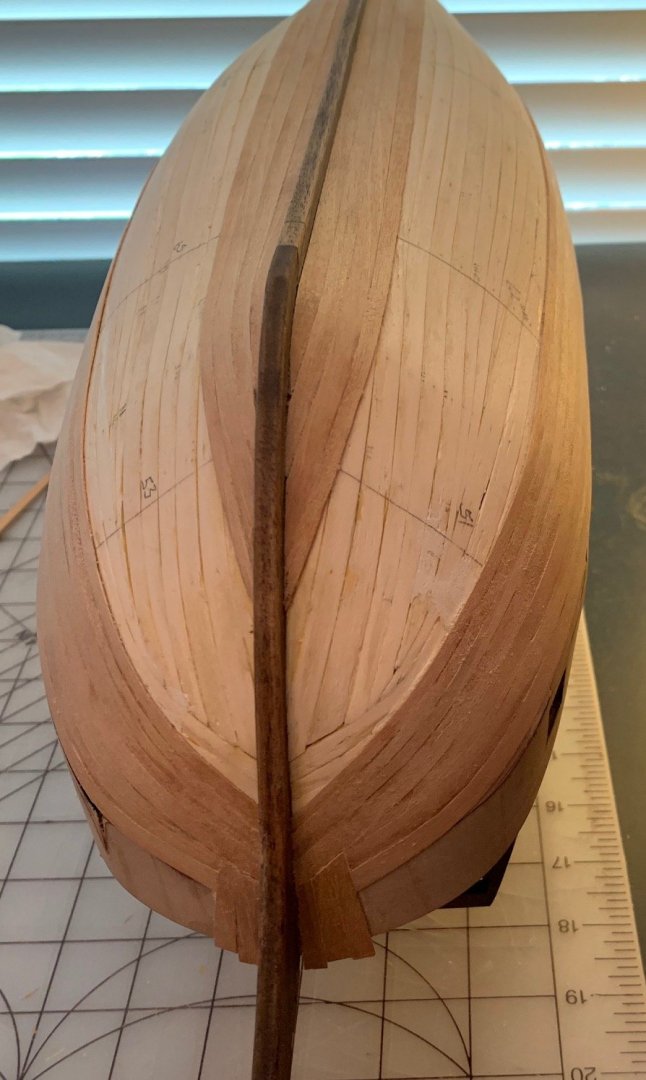
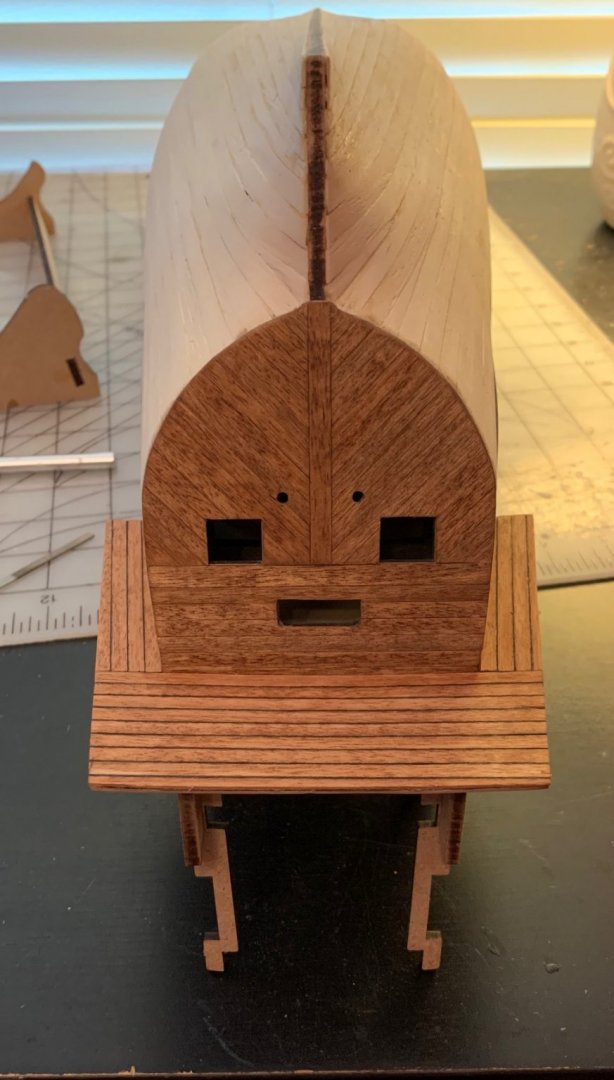
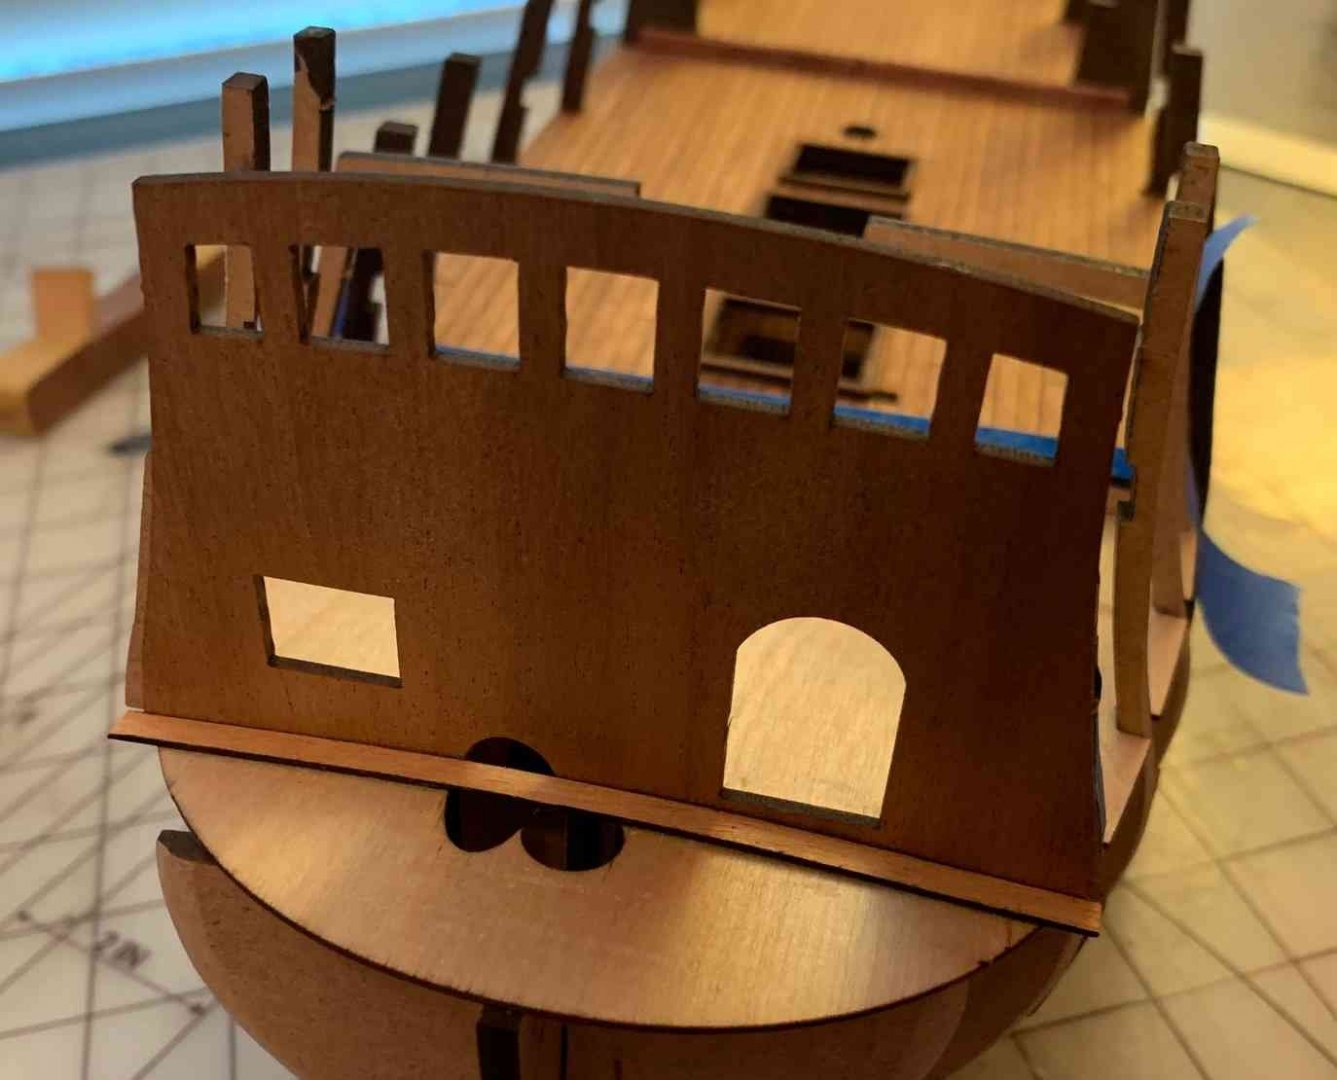
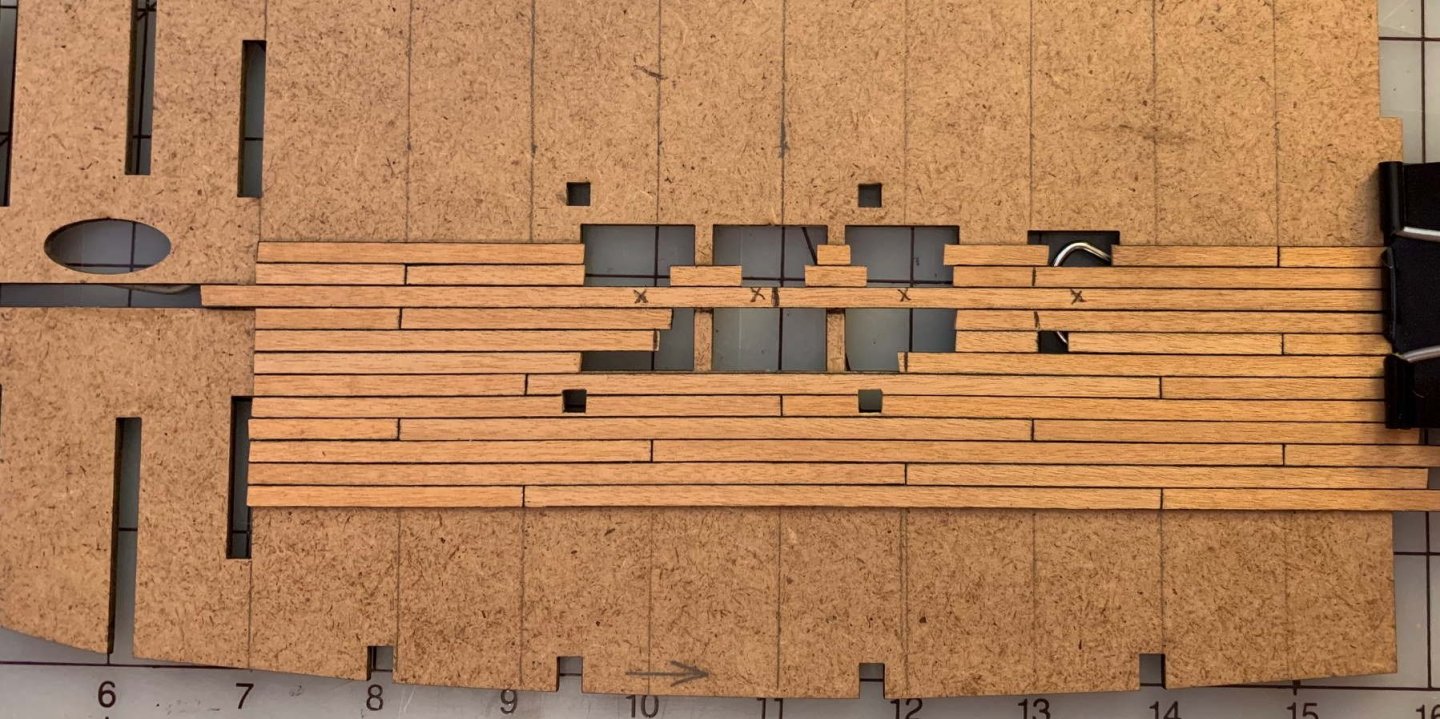
Picture of the bow planking at the bottom. The bow planking has certainly been the most difficult to get right. Adding to this difficulty was that the plank did not reach all the way to the keel on my first second plank (lower wale plank). I decided not to try and splice but to add a couple of pieces at a 90° angle to the planking, I thought I had seen something similar to this somewhere but I'm not too sure about it after it's all done. I haven't trimmed these pieces yet as I'm not sure exactly where they'll stop since I probably need to add a piece to cover up a small gap between the deck planking and the hull. I think I'm too far in now to change much now but hopefully the rest will fall in place as I work to the bottom. As you can see from the picture the second planking is going ok. It's not as perfect as I'd like but I think when I do a final sand and stain it'll be acceptable. There are still times when as I'm adding the plank I just can't get it to completely butt against the previous plank leaving a slight space between the planks. I've been gluing the first 15-20 mm at the bow starting where the plank touches the keel and then working back to the stern in 100mm or so sections. I built a small rig to try and help cut the tapers on the planks as trying to cut smoothly just hand holding a ruler was pretty much impossible for me. I used some of the wood from the kit to create a channel that the plank would lay in to keep it from moving side to side and then I clamp the plank strip and the ruler. I also added a couple stops for the ruler to rest against to create the same taper on each piece. I calculated the taper by measuring the distance between the top and bottom areas of planking at the widest spot and several spots moving to the bow. Even with the rig cutting a smooth taper is not easy and I'm sure some of the issues I'm having with meeting the previous plank perfectly are from imperfect cuts. I do try to sand any waves out of the cut and trim and sand the back corners to help get that tight fit of each plank. The instructions say to carefully fill any spots before painting as painting is a lot less forgiving than staining and I hope that's true since I'm planning on staining and I'm sure there will be some spots that have tiny gaps even after final sanding. At this point I'm continuing to work on finishing the second planking on the hull and then work up to all the parts I can do for now.
-
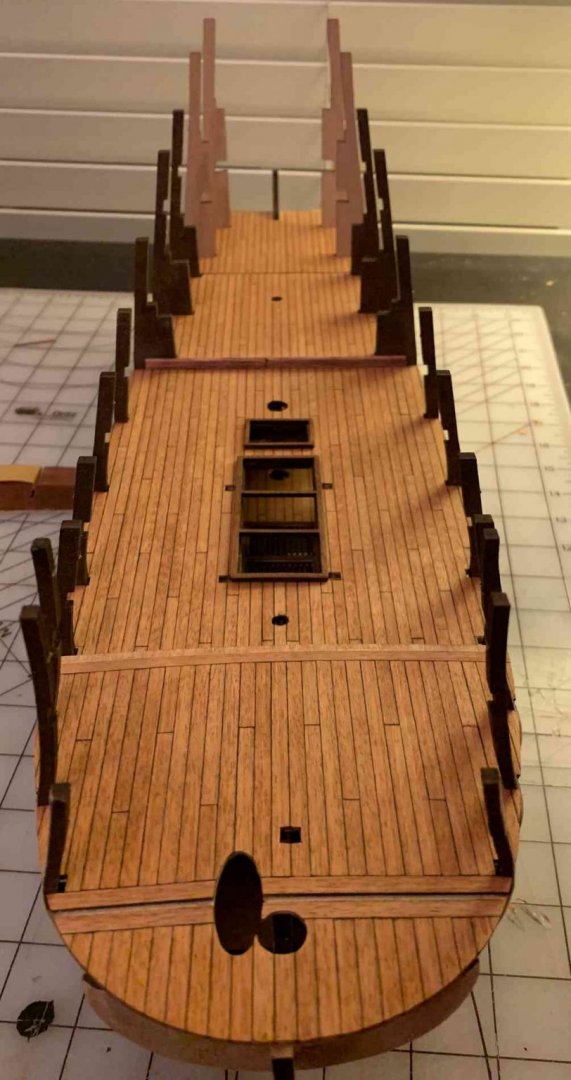
I'm going ahead and starting the second planking even though I don't really have a complete plan for where each plank will go. I prefer to have everything worked out before I start but I just can't get my head around how everything will work out, especially at the bow. I've started with the plank under the wale at the top and also at the bottom with the garboard plank and will start working both up and down mirroring sides and always doing the matching plank on the second side after placing the first one. Once I get a couple of planks down I'll start working out how many planks will fit in the center and where they will all go and how much tapering will need to be done using methods that I've read in multiple resources. I went back and added the gunport frames on the gun deck as I had skipped that earlier. Nothing special but I did use my small file to try and take off as much of the carbon as I could and then I stained the frame and the corresponding cutout in the side panel so no raw wood will show. I also added the keel before starting the planking and that was very straightforward as well except when I finished the first piece which was the bow piece about 8-10mm of the triangle join at the end had broken off. I looked everywhere for it but it was gone so I wen't to the piece that the keel was cut from and made a replacement from it and sanded and stained it in, looks good and if I didn't know it was there I would probably never notice it. Working through the second planking will be slow as I trim the back corners of each plank and hand fit every piece until it lays up against the previous piece with no gap showing. I'm using some medium flow and drying CA glue for this second planking except sometimes at the very ends if there's a curve in the end then it seems like it takes wood glue to hold that piece down. So far I haven't had to soak the wood and I'm trying to avoid that as I don't want the wood to swell a bit and then shrink down as it dries and have it leave a gap between the planks. I will see how this works as I get deeper into it.
- 166 replies
-
- 12
-

-
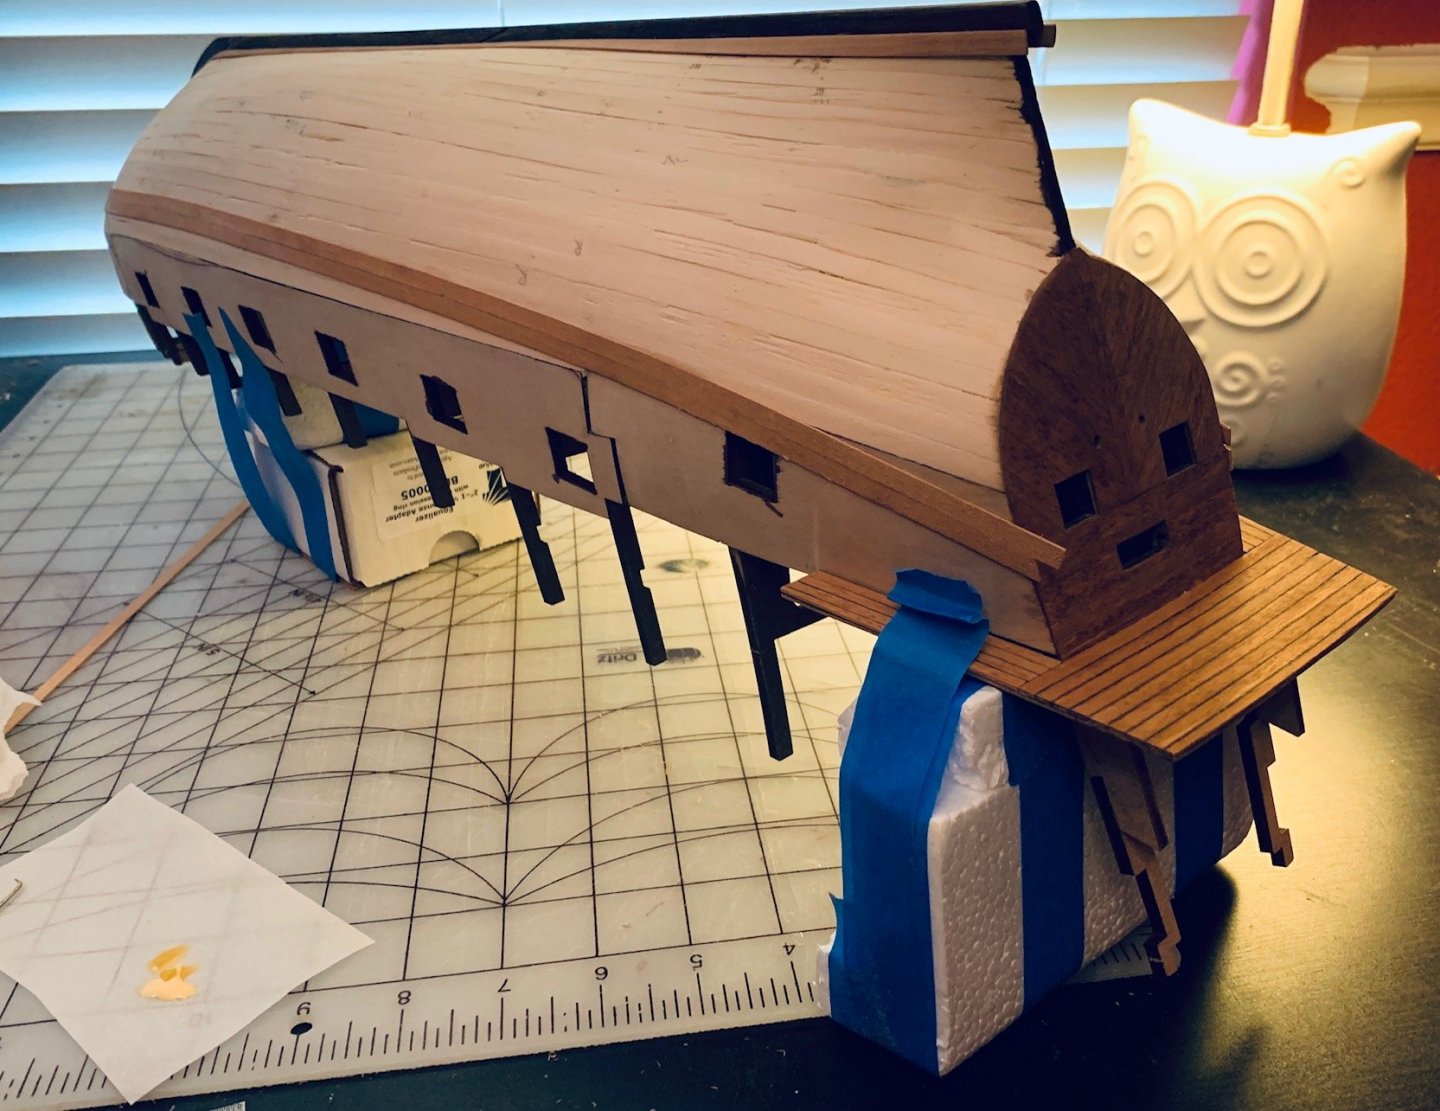
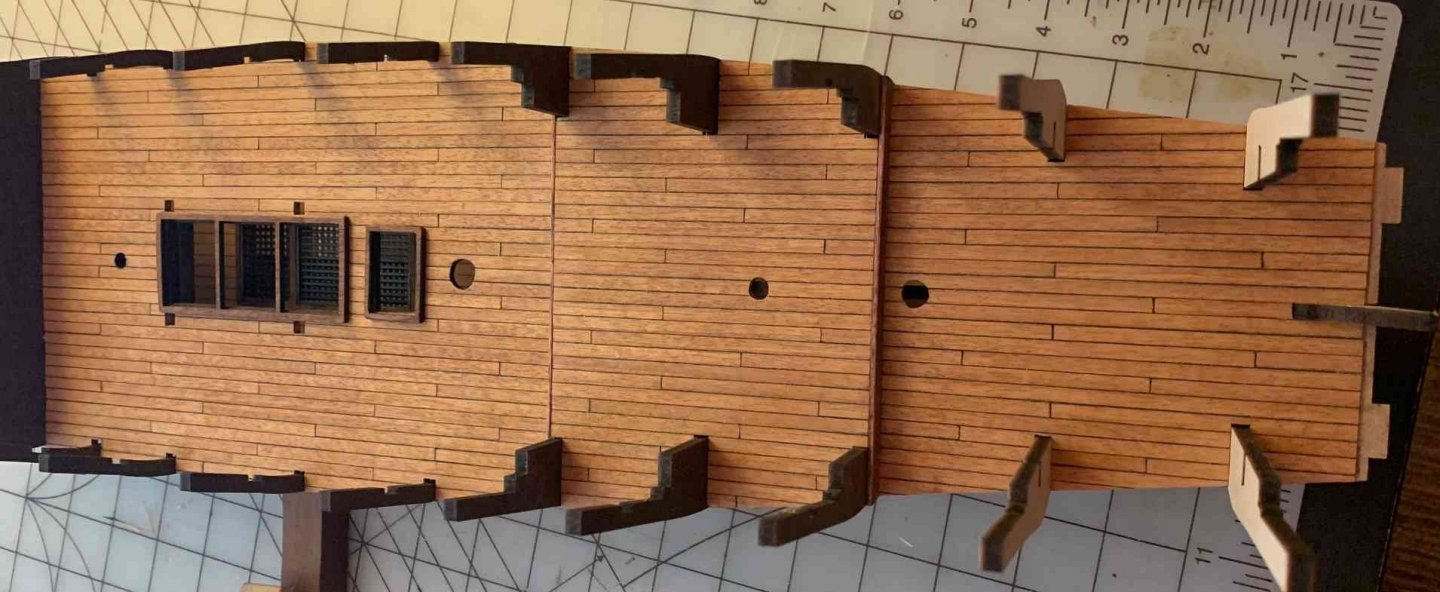
While I research and consider how I'm going to do the second planking I've gone ahead and finished the stern planking and bottom of the deck that sticks out over the sides. I think I remember somewhere in the instructions reading that the bottom could be planked and I can't stand the thought of that sitting there with no covering. This also gave me a chance to test the colors I plan to use on the hull on a slightly larger area than just a single plank. I'm using the Minwax Wood Finish Penetrating Stain and I've been using Ipswich Pine 221 for the decking and I used Special Walnut 224 on the hull as a test. It took two coats but I got the shade I was hoping for and I believe this will do for the rest of the hull. I could decide I want a slightly darker result and do one more coat but I think I'll look at this for a while and see if I like it. On my monitor at least both colors have a little bit more of a reddish tint than they do in real life, YMMV.
- 166 replies
-
- 11
-
-
I use a Letraset Tria art marker that just happened to be laying around. It has a pointed tip on one end and a flat angled tip on the other end. I hold the plank and run the flat edge down the edge and then run it back the other direction, one side at a time. I found by adjusting the pressure on the plank I could somewhat manage how thick the lines were. I was just lucky one of these was laying around, the rest of my family are artists.
-
First Hull Planking: Finished the first hull planking but haven't finished with sanding or doing some of the filling I'm going to have to do. This was pretty challenging and I've been steadily doing 2-4 planks a day, alternating sides, doing a plank and then doing the corresponding plank on the other side. Fist thing that stood out to me was starting at the top and working down seemed really awkward, the other ship I build started the planking at the bottom and worked up which made more sense to me. I ended up with some pretty unusual shapes near the keel and had to force some of the planks into unnatural positions. I've seen where some people do the second planing working from both the top and bottom and meeting in the middle and I think that's what I'll probably do but I'm going to be going though a lot more information before I start so I could change my mind. I understand why you have to start at the top to make the flow of the planks match the wales but that seems to make the bottom pretty problematic, it certainly did on my first planking. The bow on this ship also seems like a challenge as as the planks go around the curve they naturally tend to go up since the top of the plank has a slightly longer path than the bottom. I also felt that the lime strips used for the first planking were very "splintery" and largish splinters would often try to come up when bending even after an extended soaking and pre-bending to get them flexible. The bow is where I'm going to have to do more sanding and filling to get everything ready for the second planking. My goal was to get more experience and to have a good smooth surface for the second planking and I think once I fill a couple of spots and finish sanding I'll have that. I'm going to have to completely rethink the pattern of the planks, especially near the bow. One thing I have decided is that if I do another bulkhead planking, and I hope I get that chance, that I'm going to get some hull clamps, I've seen several different types and there has to be a better way than the tacks and tape. The tacks help keep pieces you're gluing from moving side to side but don't stop the plank from having one edge twist up. I'm pretty sure some of my issues were inexperience and trying to force the wood to do something it didn't really want to do but I think sometimes you're just going to have to do that. I'm pretty cautious about the second planking after reading the other build logs and seeing some of the issues others have had with it. Since I hope to stain and varnish the entire hull I really need to have a good clean surface when I'm done. I've ordered some medium drying CA glue in hopes that I can hand form and fit each piece first and then CA glue it into place, wood glue seems like it will take too long to dry but the CA glue requires that everything go in place right the first time. The wood in my kit for the second planking is Tanganyca, same as the decking, and I'm not sure how it's going to take some of the extreme curves required near the bow. I've been reading the challenges John Maguire had in his build and hoping to learn from what he did to get the wood flexible enough to go where I need without coming apart. So far planking the hull has been the least enjoyable part for me, mostly due to how concerned I am that I'm getting it right, sometimes it seems like you don't realize that things are going in a direction where you're going to have a problem further down the line and honestly I'll be glad when the second planking is done to satisfaction, I'll feel like I've passed a milestone. It seems like planking the hull is the place where my inexperience is hitting me the most but I'll get through it and move on.

- 166 replies
-
- 16
-
-
After much sanding, shaping, fitting and re-fitting I've managed to get the three lower side pieces onto each side of the hull. This has been the trickiest part so far for me, especially the bow piece. It didn't want to lay flat across the curve of the deck and bulkheads and I had a heck of a time getting it in place. The biggest problem for me was holding it in place while the glue dried, the pins didn't seem to do much to keep them from moving and while I could use some clamps and tape to hold the two side pieces down there just wasn't much place for that on the bow section. I ended up just gluing one or two bulkhead points at the top first and then just gluing one more spot on the top at a time and letting it's glue dry before moving to the next point and then doing the same on the bottom, just holding it in place however I could; hands, tape, binder clips, whatever. It came out ok but the bottom of the bow piece right next to the keel pushes out more than I would like, I'm going to see where the first planking sits in relation to it and then decide what to do about it, there's not much to glue to there so I might need to put a block or two in to give the planks something to sit against, I'll just have to see. Next comes the planking which is the scariest part for me, I do like the fact that it's double planked so it gives me some more practice and the second layer should always have something inside it to glue to. At this point I'm pretty sure that I will not paint the hull but stain and varnish it so I'll need for the application to be very good to give it the look I want.
- 166 replies
-
- 10
-
-
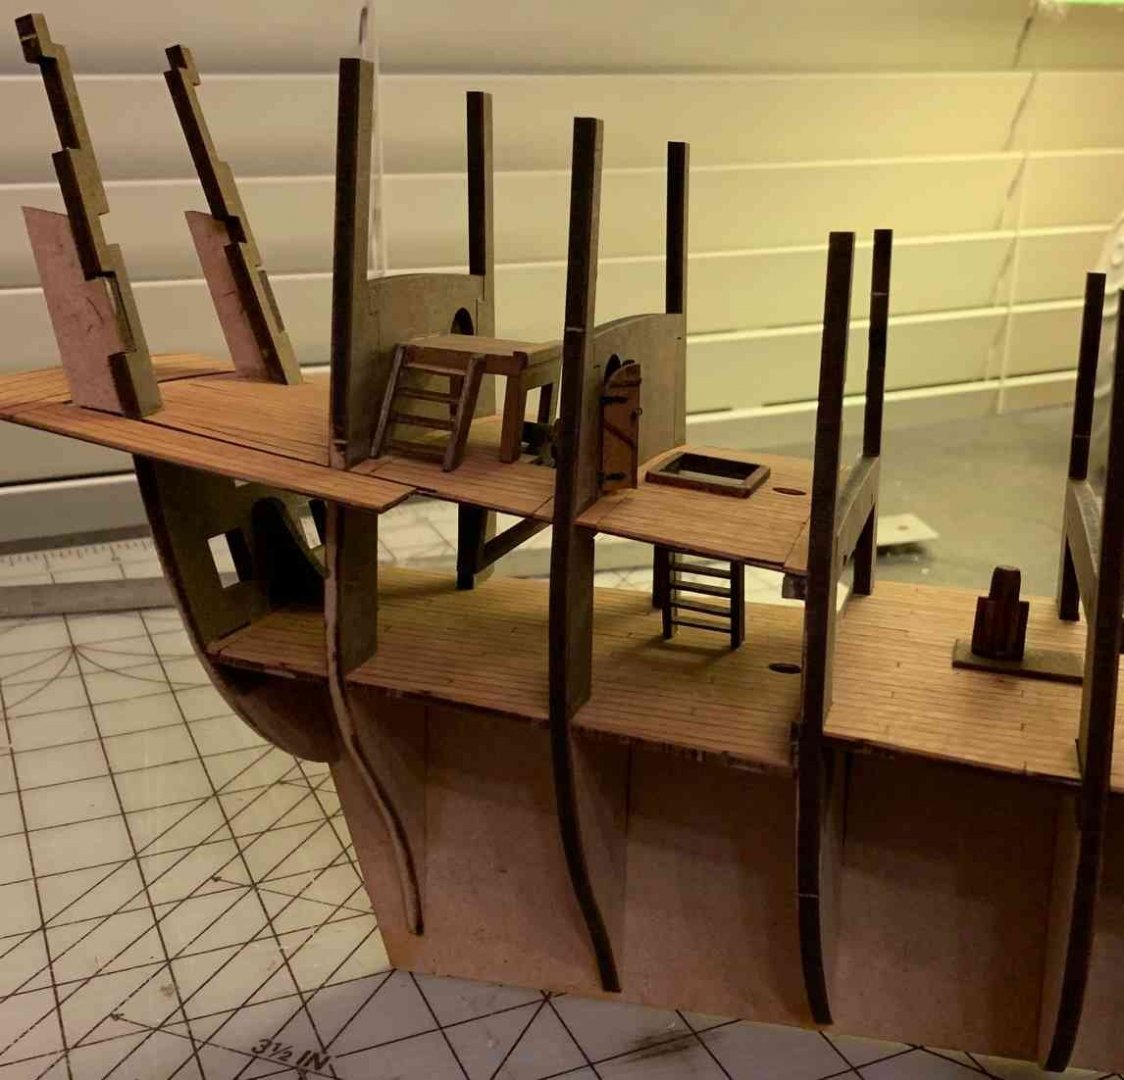
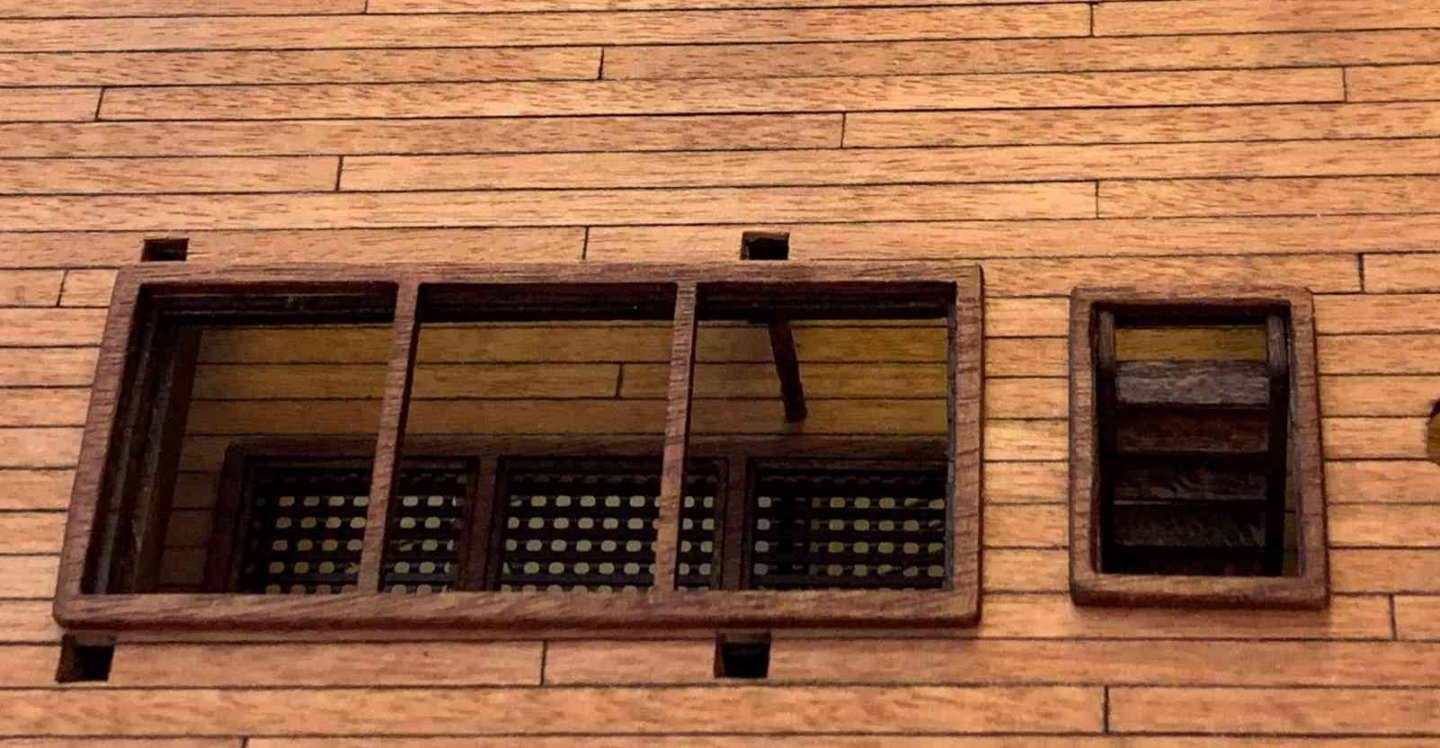
Rear Gallery Deck, Ladders, Helmsman Platform, Doors: Everything here was pretty straightforward. I did feel that the doors looked a little plain so I added some additional detail. I took some 1mm Balsa sheet and cut it as thin as I could and then sanded it down to make planking to go on the doors (picture below) and for the helmsmans platform I ended up planking all the external surfaces with 2mm walnut and then staining it before installing it. I did touch up the doors after the picture was taken where the black paint had come off while working with them and exposed the brass. Of the 4 eyelets (pieces 227) I lost 2 and had to replace them, I hope there are enough spares or I stop losing things. I glued everything in place and set the forecastle deck in place in preparation for starting to shape the bulkheads, I feel like this is going to take some time and I know that the better I get the shape now the easier the hull planking will be so I'll be taking my time and trying to get this as good as possible before moving on.

-
Rear Gallery Deck Decking: This deck was considerably more challenging to lay down the decking compared to the earlier decks, it's on the ship which complicates things and there are all kinds of angles and tiny pieces to work with. I also had to leave a channel for the sides (parts 51) to sit in later which brought about the biggest decision I had to make. When placed on the ship the two sides extend about 3mm beyond the stern window pattern (part 118) and there's nothing indicating whether or not to extend the channel for that 3mm extension. The instruction pictures don't seem to show a channel there and double checking the positions of the sides as closely as I can it seems that they are in the right place and do extend. My first thought was to make a channel for the sides to the length of the part in the kit but I finally decided to go with the picture in the instructions and have the first transverse deck plank cover up that space, I'm hoping that when I go to place the sides if they still extend I can remove a little at the bottom over that plank so it will sit down firmly in the channel and if for some reason the sides don't extend then I don't have a channel in the decking that isn't filled in with a wall. From looking at the pictures I started out thinking this decking would take 2-3 times as long as the previous decks but it was probably closer to 8-10 times as long but I enjoyed working though all the challenges that popped up. I still have to make the ladder to finish up this step and then on to the bulkheads and doors.
- 166 replies
-
- 12
-
-
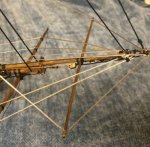
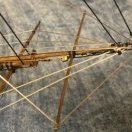
Thanks Jeff, that makes sense. I have left the whipstaff free or at least the long piece that will eventually come up from the rudder. I tried looking it up and I'm not sure if "whipstaff" refers to just that piece coming up from the tiller or it includes the pivot box that holds it in place as well, doesn't matter in the big picture but it's nice to understand the terminology and know I'm referring to the same thing as someone else. To that point the shafts I was worried about falling out were the two shafts made of 2mm dowel that hold the pivot box in place and allow it to swivel back and forth and I didn't make that clear. The instructions say to glue the round pieces to the end of them but there's nothing I could find that prevents those two pieces of dowel and the end caps from just falling out. I ended up gluing them so hopefully that will be ok. It's amazing how much your picture looks like what I have right now and I've gotten a lot of great information from reading your log. I hope I can make my kit look half as good as yours.
-
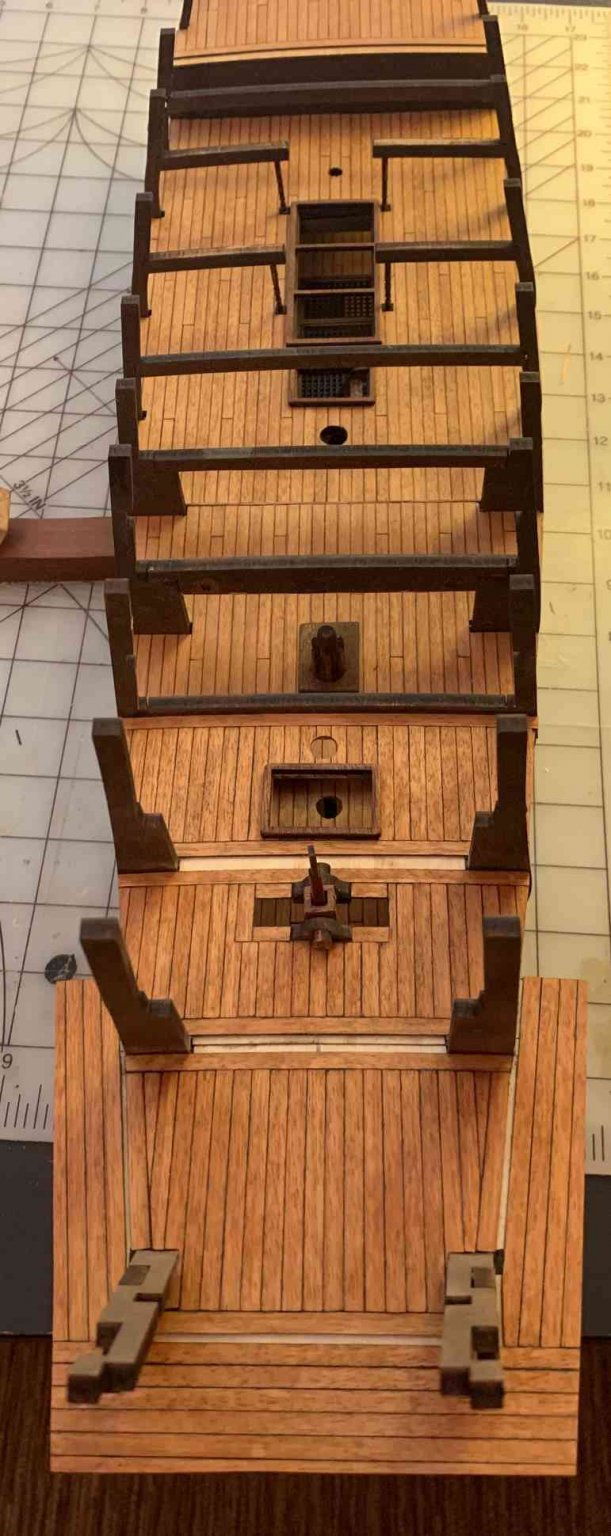
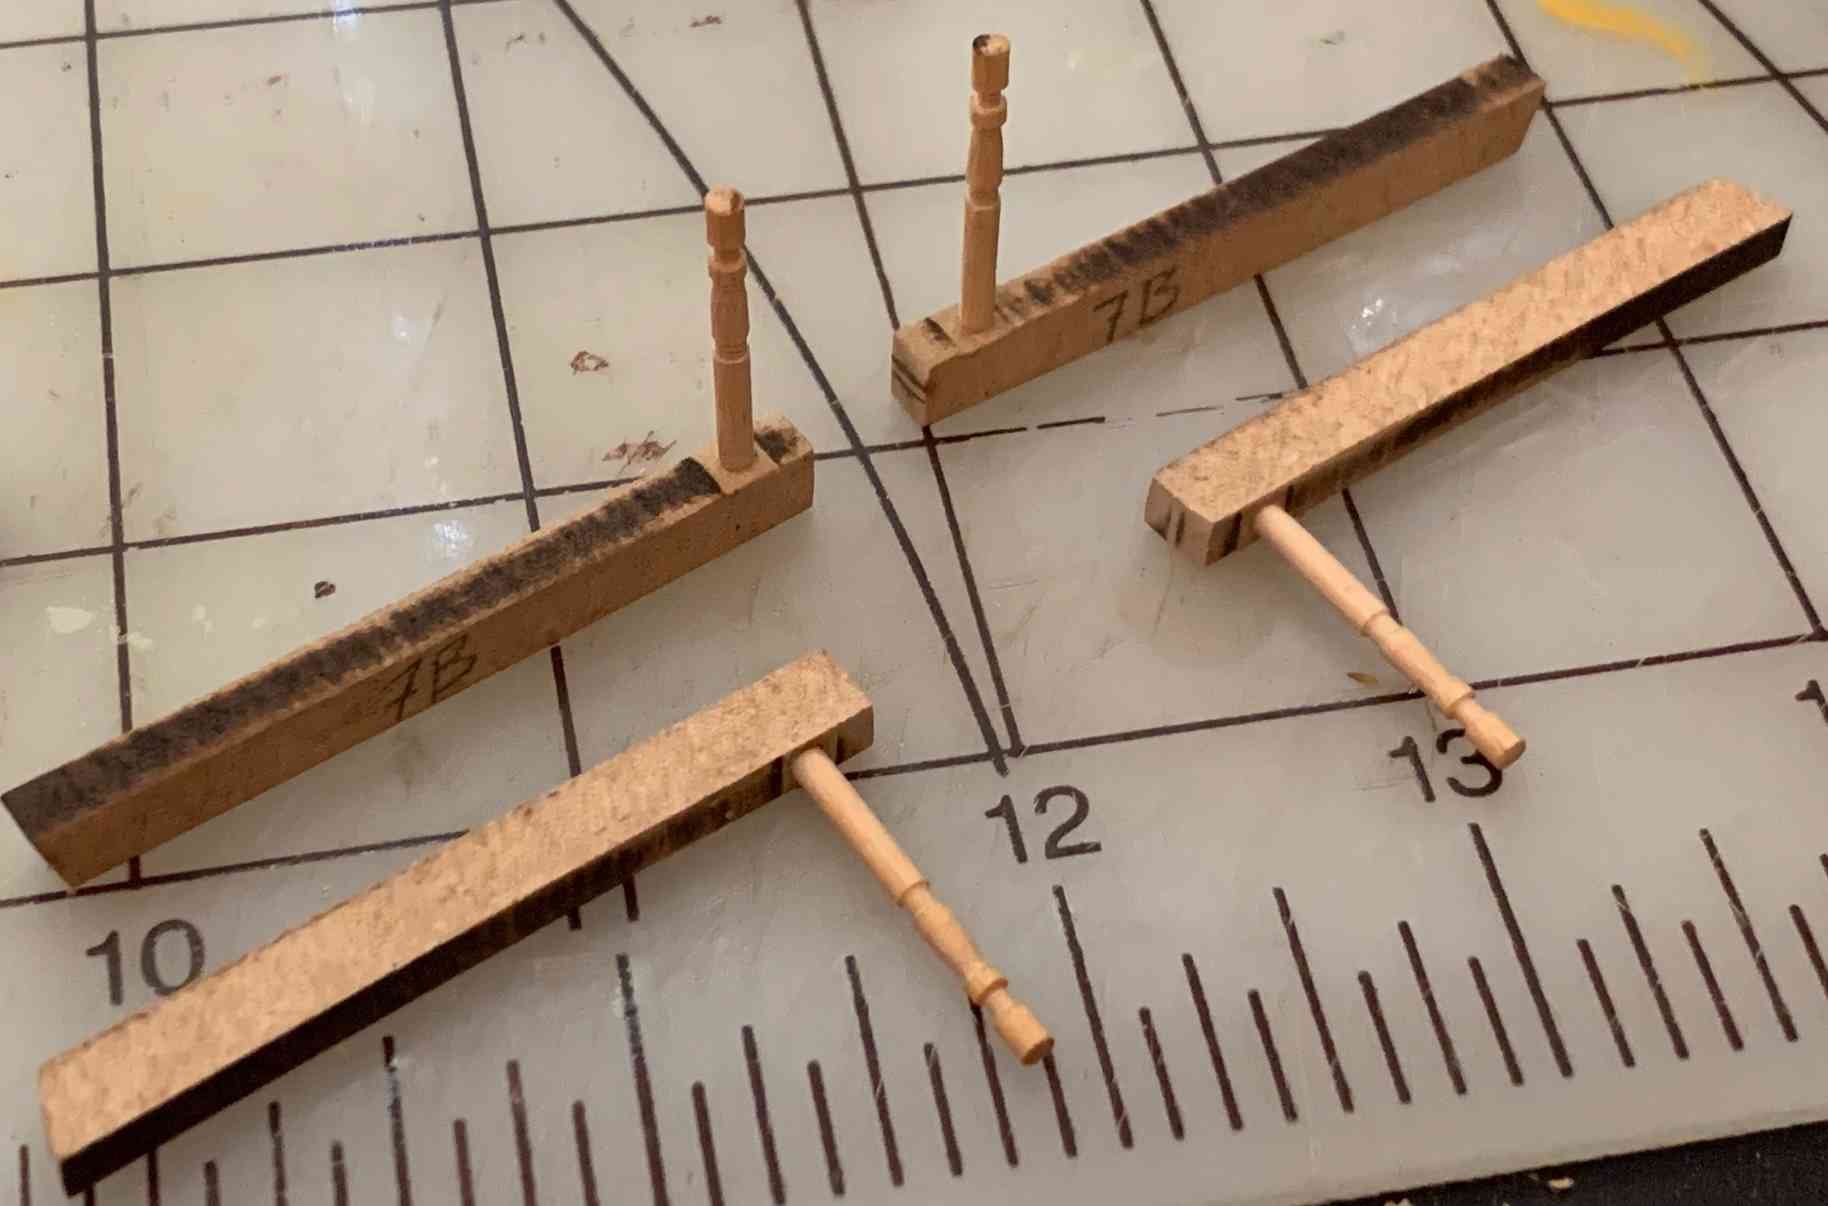
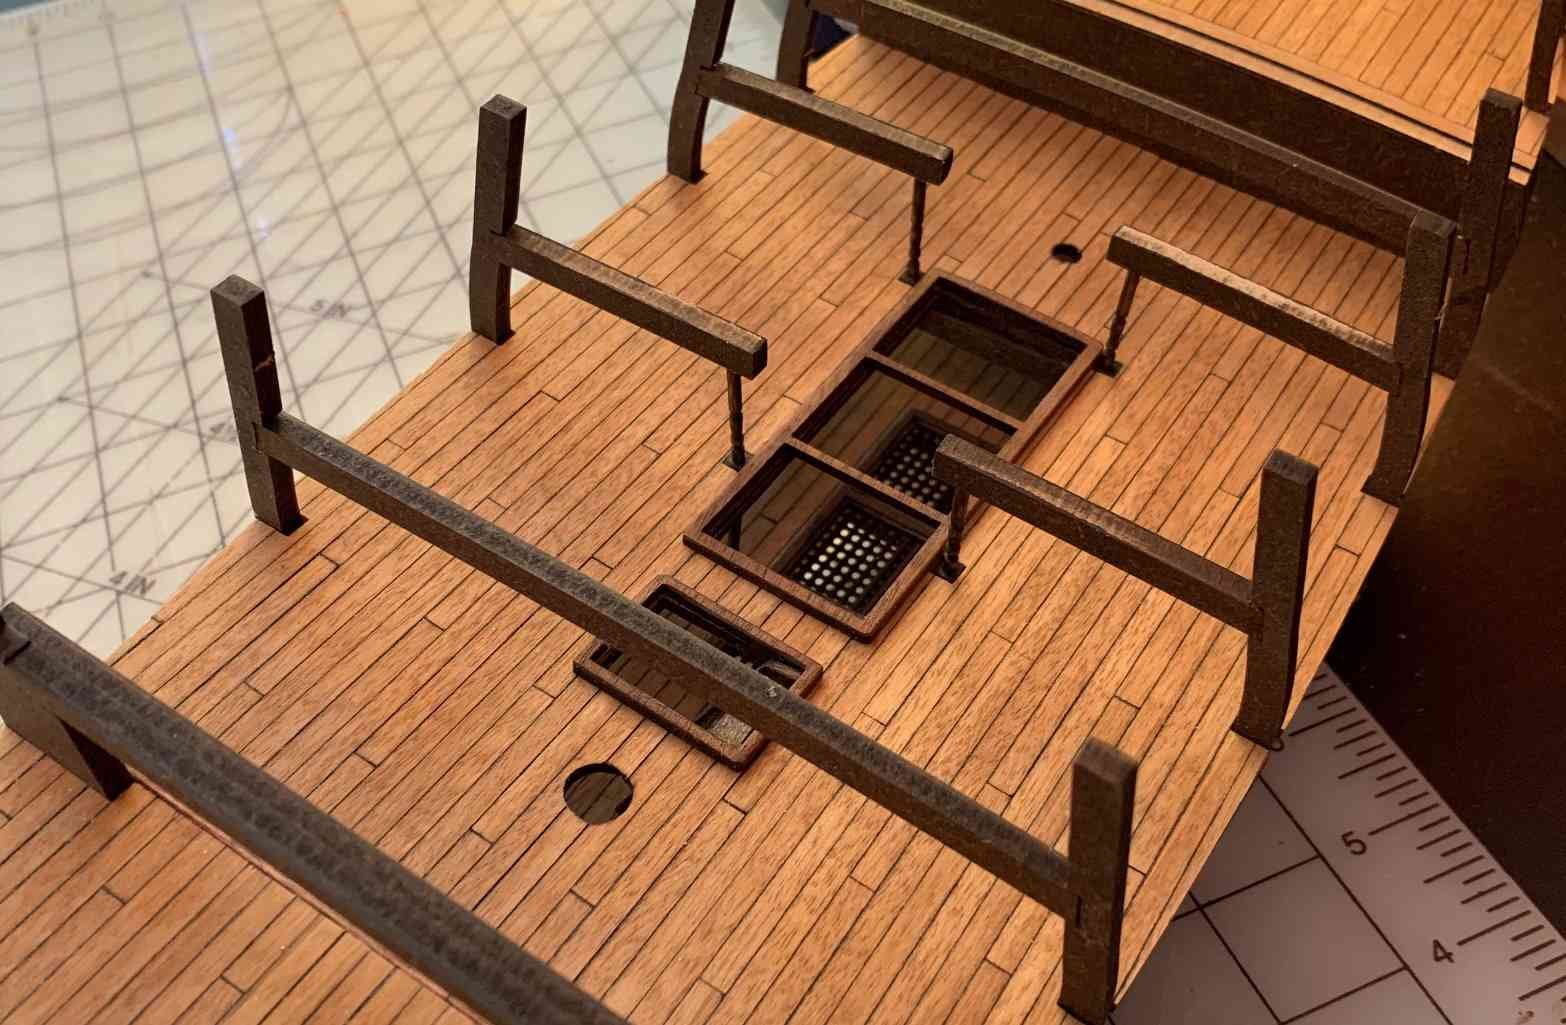
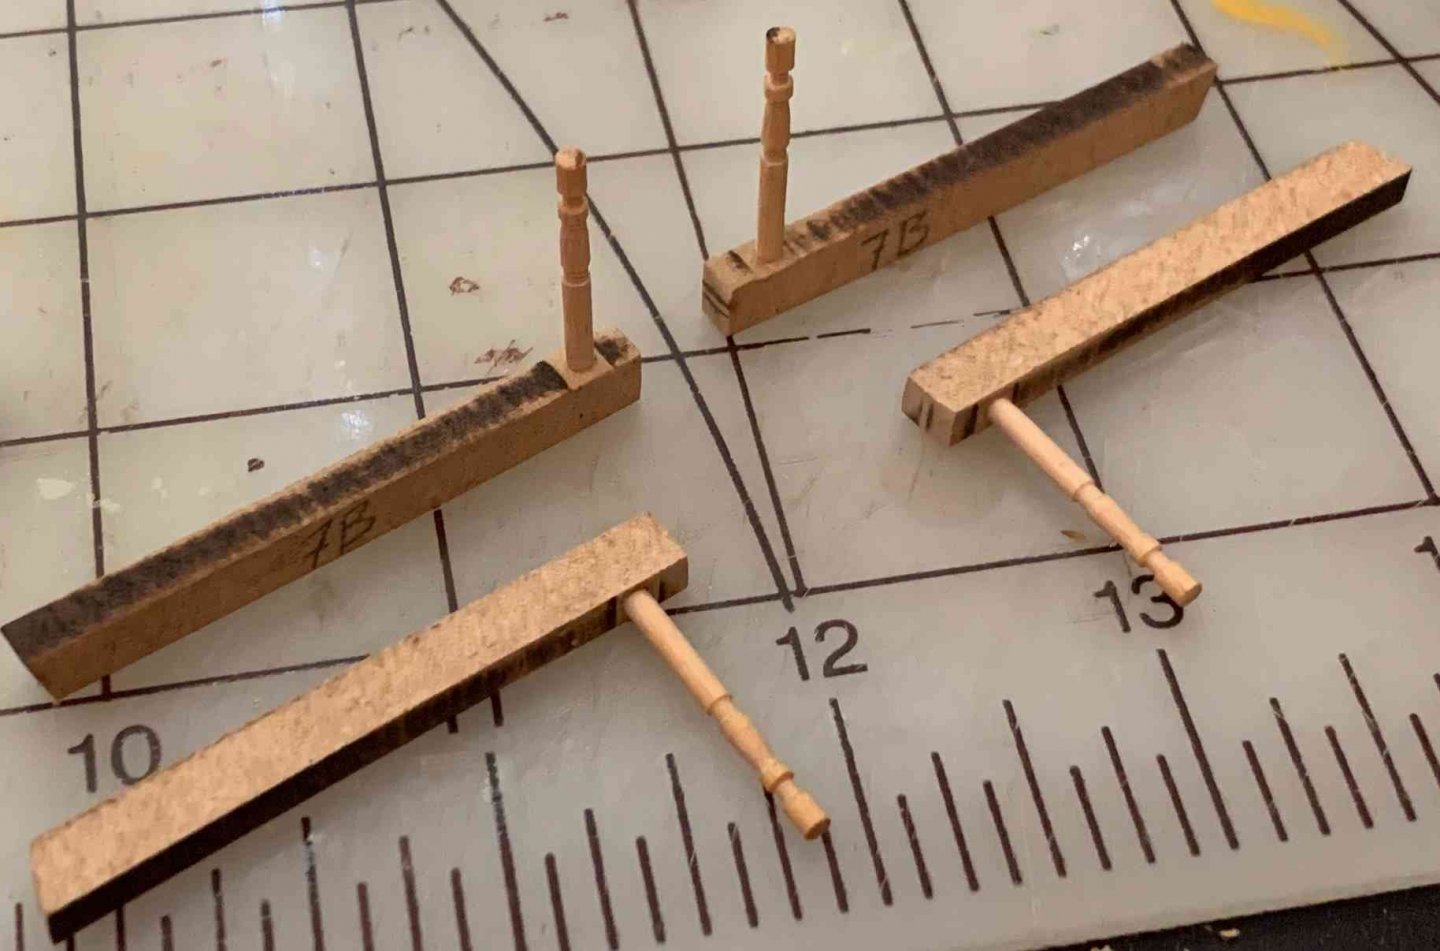
Deck Supports and Whipstaff: The deck supports, parts 6A,6B,7A and 7B just didn't look very good when hand fit into place on my ship. They look pretty good in the instruction pictures so I'm not sure why the bottom didn't line up correctly for me but there was a huge gap between the support column and the decking. I felt like I had a good replacement for the columns in my toothpicks but the hole in the deck was still a problem. Luckily I found an old balsa square piece of 4mm x4mm x 20 inches laying around that almost exactly fit the hole in the deck. So I took the balsa and pushed in in the hole and marked it. Cut it off and with a little shaping I had a piece that would sit exactly flush with the deck and fill the hole. Stained the balsa dark because I felt if I tried to match the deck it would never match so I just thought of it as part of the column. With the holes plugged I moved forward with the toothpick columns. When I used the toothpick columns on the deck below I had a hard time getting them positioned since there's so little contact so I decided to drill a hole in the support beam for the column. Once that was done I just cut the toothpicks and then hand placed the support beam and made sure I had the column the correct height to make a flat deck using a straight edge. One all four were made I just stained and glued in place. Parts of the whipstaff instruction were confusing to me. I don't understand what would keep the shafts from falling out. The instructions are very precise saying on put glue on the shaft and the dowel or shaft so there's nothing to keep the shaft from falling out and the whipstaff falling down so I put a very tiny amount of glue on part 92 to keep the shaft from falling out, I'm hoping that if it has to come out I can get in there with an exacto and cut it loose easily. With that done the rest of the assembly was straightforward.


-
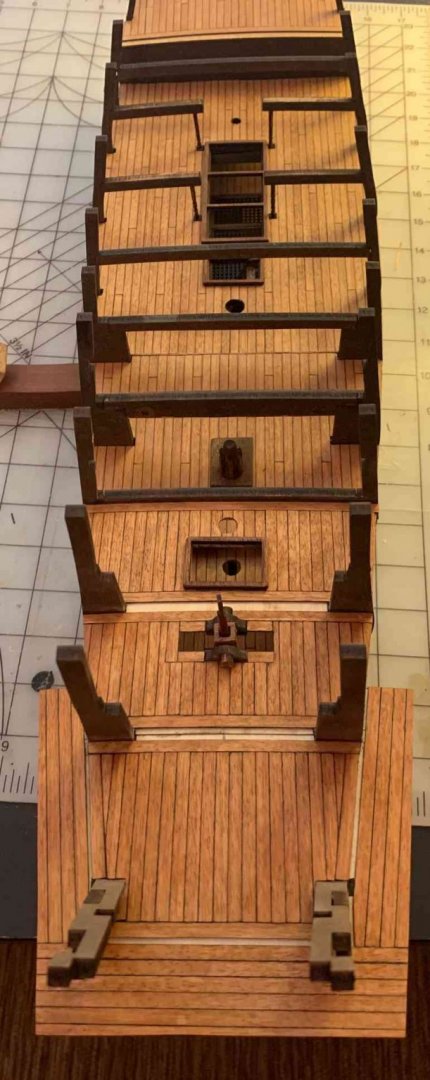
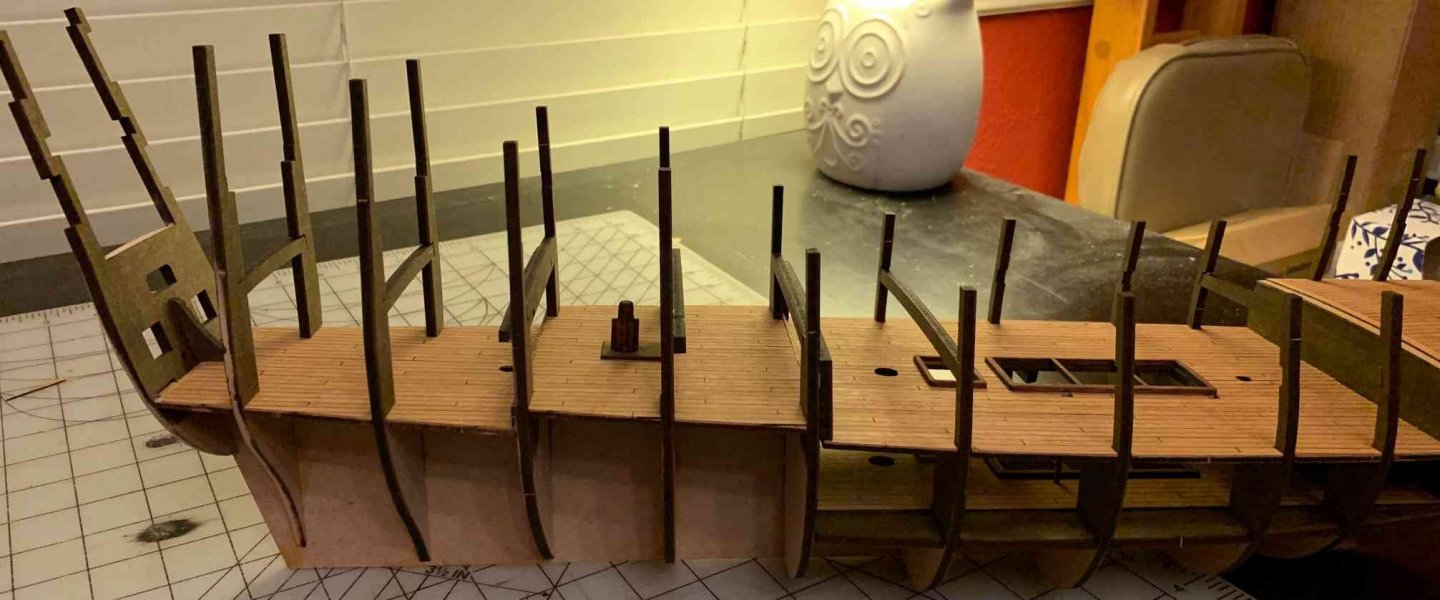
Structure, Ladder and Capstan: Still working through the instructions and have installed some of the pieces below the deck to add support for the hull planking and also added the frames for the next deck to sit on. Everything went as the instructions said they would. I used the Dremel to make the bevels where needed and that probably saved me about two days of hand sanding. I do have to be careful as with the rough rotary sander bit in it can really grab the wood and take off so slow is good. Slow with the Dremel is still about 100 times faster than by hand. I made two capstans and installed the one on the lower deck and saved the other one. I then made the ladder that goes from the gun deck to the lower deck. Measuring the ladder pieces I knew that it was going to be about .75mm too wide to fit through the opening like it shows in the instructions but I didn't worry about that because I had decided that I was going to attach the ladder to the bottom of the gun deck instead of fitting it through the hatch but once I hand placed it like that I didn't like the look so had to sand it down to fit through the hatch and install it like the instructions show. .75mm doesn't sound like a lot but I was getting nowhere fast by hand so I outfitted the Dremel with the fine rotary sander and made short work of it. Next up is the two center deck supports with the column supports. I'm still trying to decide how I'm going to do those, the base cut looks a little clunky to me, they also don't fit the holes in the deck that well so I will have to see what I'm going to do with that. Pictures so far.
- 166 replies
-
- 12
-
-
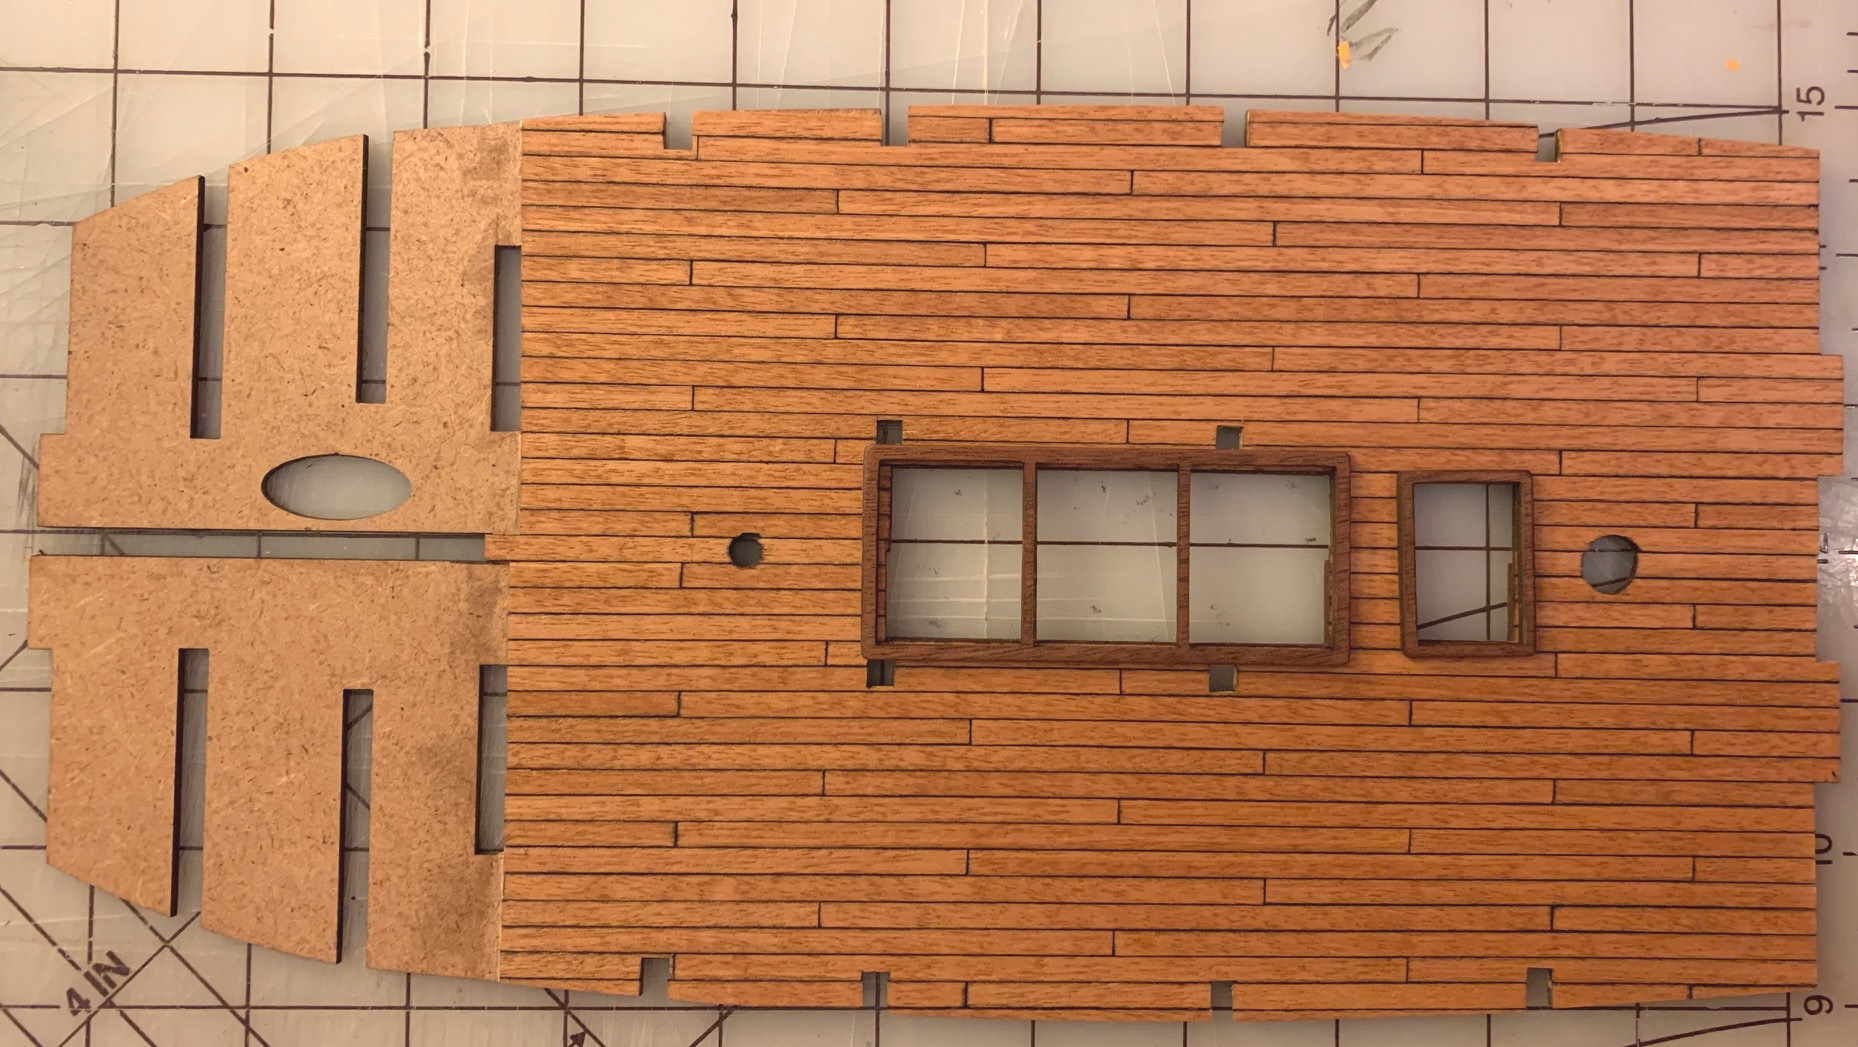
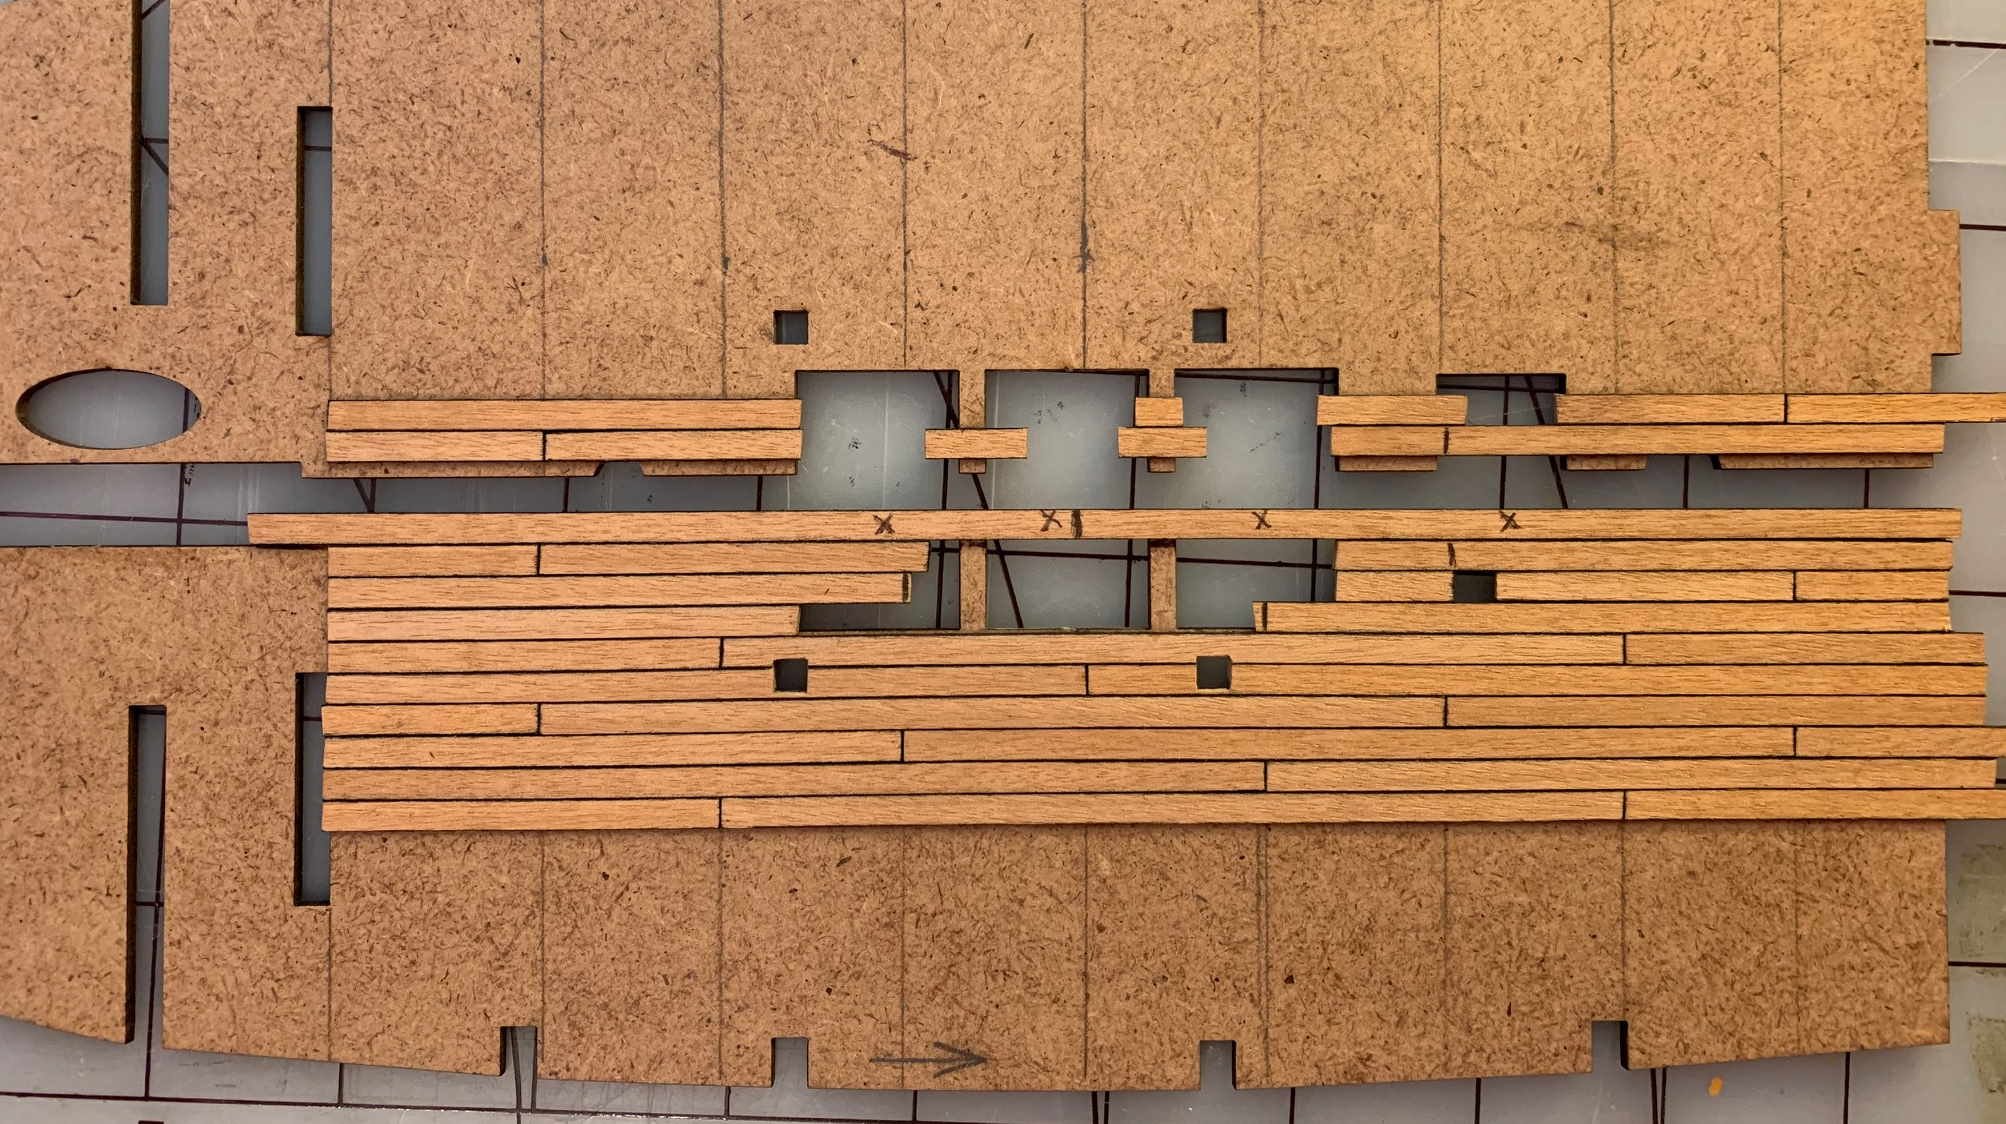
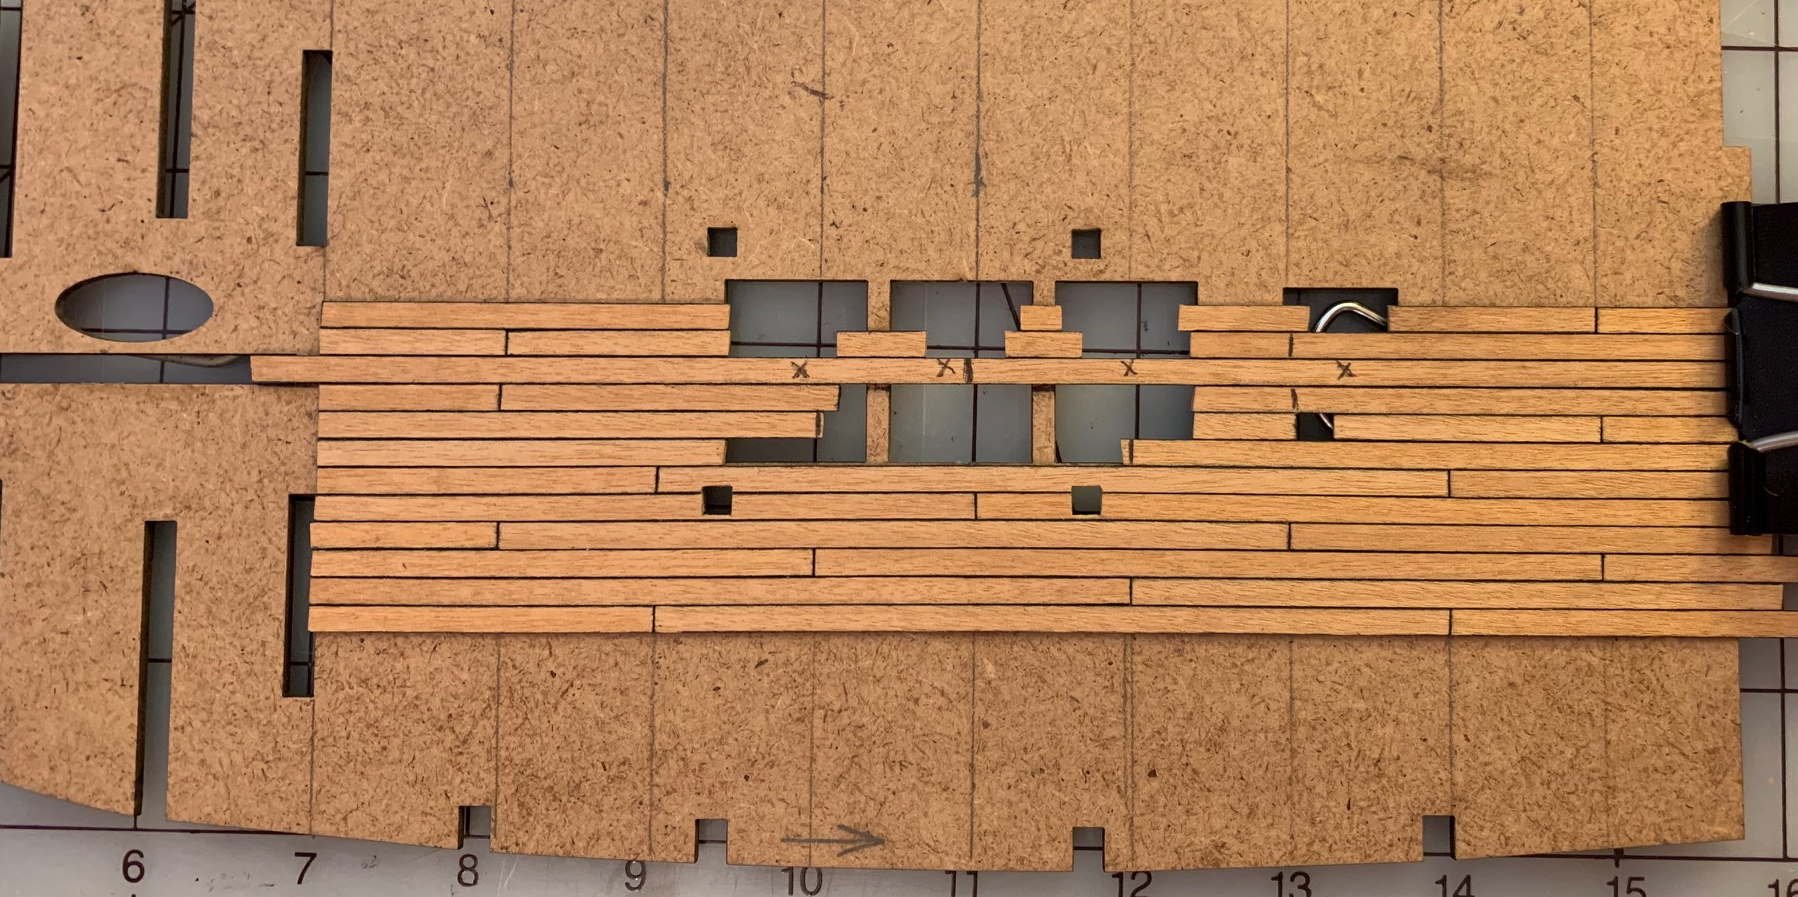
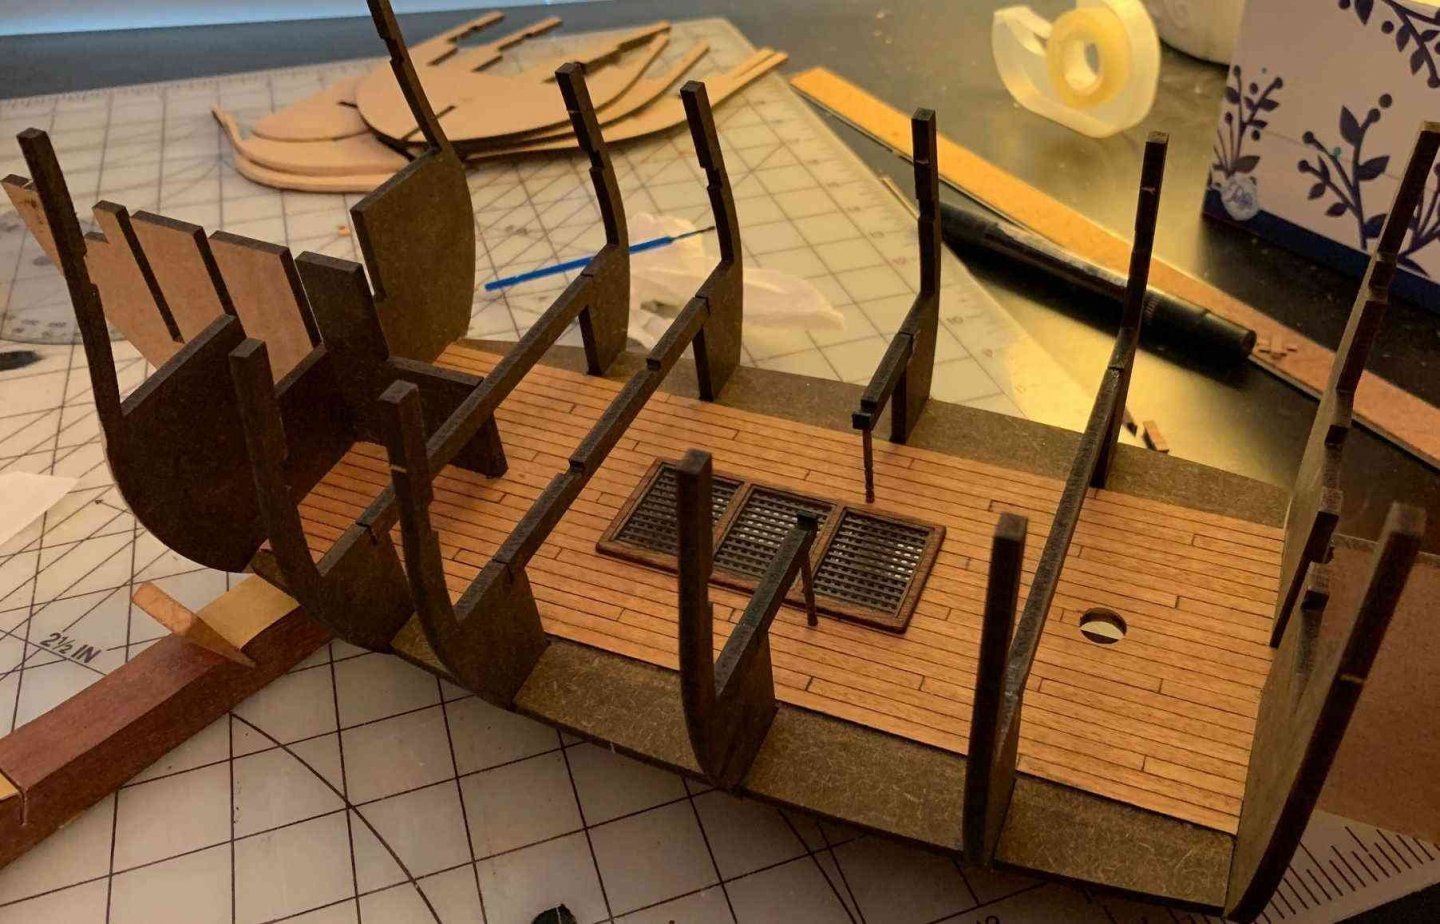
Bow Deck: Didn't trust myself to get the transverse planks positioned exactly correct just by drawing lines so my solution was to tape the deck and parts that the transverse planks butt against in place and glue one plank in place touching the particular part (picture below). Since part 114 has a plank on each side of it I let the glue on the first two planks dry and then took the bow deck and parts off and then put part 114 in place while sitting on my table. Then I could position the transverse plank of the other side of 114 and wait for it to dry. Once those three transverse planks were in place I just used my normal planking procedure to finish the bow deck. I used a knife to cut the elliptical hole pretty close and then used sandpaper wrapped around a small circular file handle to clean it up. Putting the bow deck back in place was a nail biter as it really does feel like something is going to snap as you try and bend it enough to get it in place, but it all stayed together and went in. Used some painters tape to hold it down on the bulkheads as best I could. I really like the way it's looking so far, I can see my mistakes but will try to clean things up as I continue on and get more practice.
-
Next Two Decks: Decked the Rear Lower Deck and the Raised Lower Deck and nothing really changed on them except that I noticed that I didn't like the look of two deck plank seams in the same position separated by only one plank. This can only happen next to the center plank, because of reversing the pattern, so I planned ahead and made sure that the place where that would happen is either in a hatch opening or off the front and aft of the deck. This was easy to do on these two decks since they were both less than 120mm long and that is the length of my planks so just started with the two planks on either side of the center and set their position and then worked back from there. As others have mentioned the instructions are clear about what wood to use for the two steps that close the ends of the raised deck. It gives dimensions but not the type of wood so I just found some scrap and made the steps out of them. I did tape the piece that the front step has to fit between in place and used that as a guide for it's length. Stained the steps and glued them in place. Looking ahead to the bow deck I can't really get it in position without bending the deck so much I'm afraid it will break. I can't imagine getting it in there after it's been planked so I'm am looking at my options there and will figure something out. Not crazy about planking it in place but that may be the best option. That deck has a lot going on there and the pictures aren't making it clear to me so I will keep looking and testing and try to come up with something.
-
Thanks, that's what I suspected. It wouldn't make any sense to put a beam there. Looking ahead to the next deck I notice that the beams stop across the opening of that hatch. I have to think for the model the lower deck just wasn't visible enough to put that detail in but I like the look of the open hatch and it would have bothered me even if it wasn't visible.
-
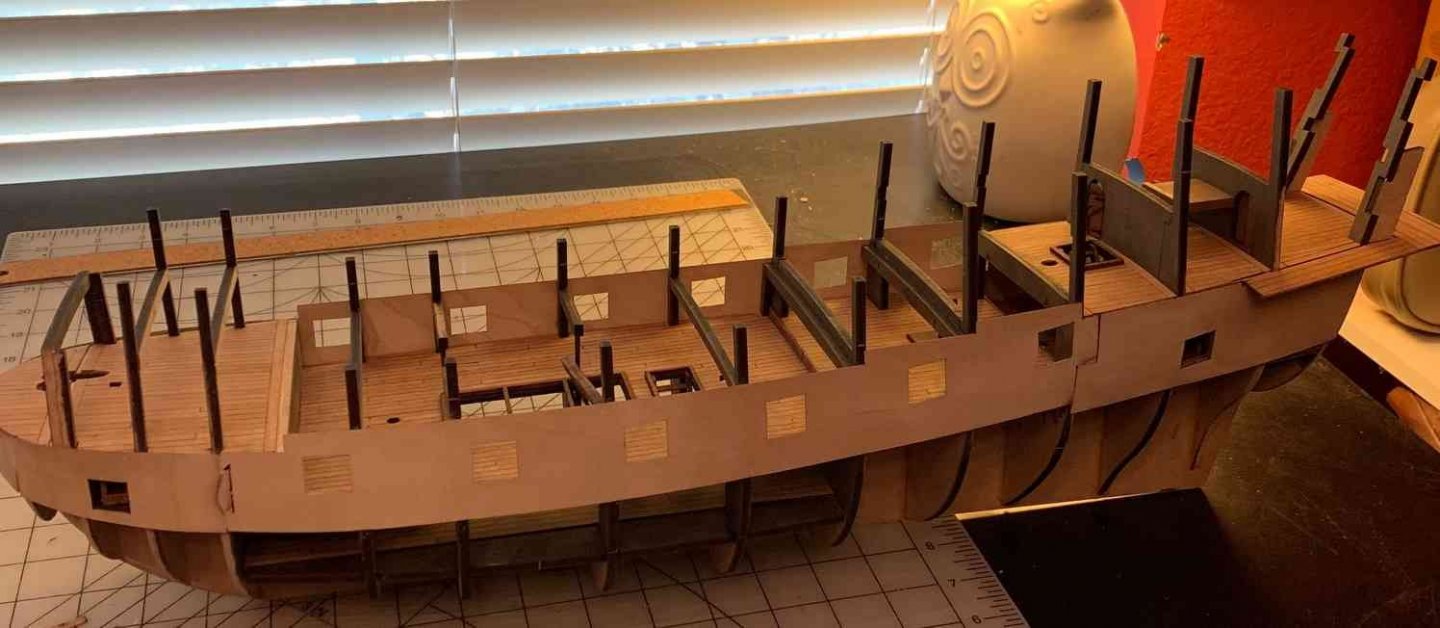
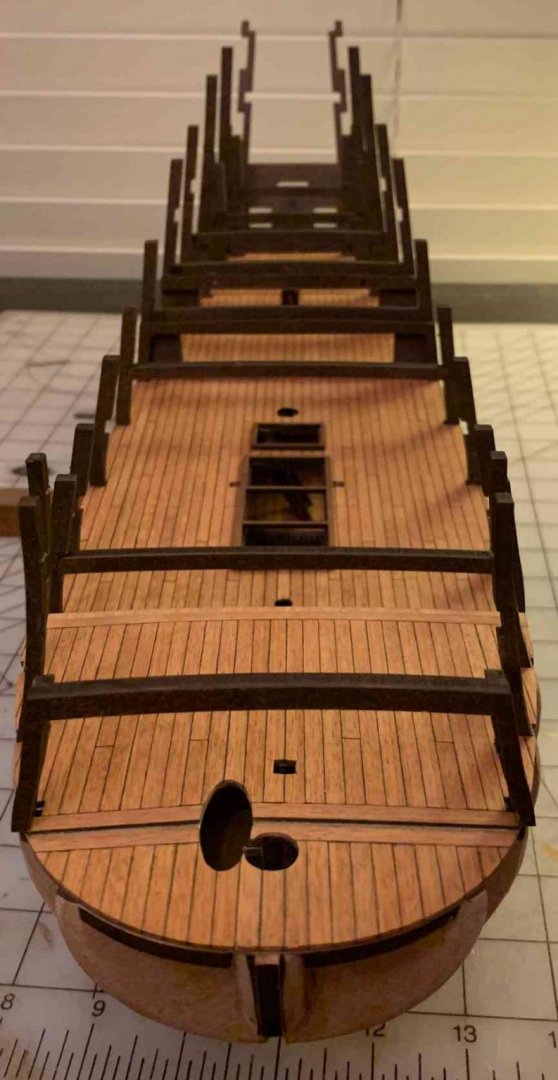
First Bulkheads with lower and gun deck installed: One of the things that surprised me about the kit was how loosely the bulkheads fit on the false keel. The other builds have commented on how precise and tight they were but mine had a lot of slop and the bulkheads had a ton of wiggle when installed. Therefore I decided to install the bulkheads at the same time as decks to ensure that they would all line up together. I used the new Dremel to shape the forward and rear bulkheads and the initial results on the Dremel are very encouraging as I was able to shape much faster than by hand and with a little practice I feel like it will be an easy thing to control. Test fitted the bulkheads that touched the main deck and the deck several times and then went ahead and glued them all together. Everything fit like it should. Next the instructions call for placement of several support beams across where the main gun deck is above the lower deck. One of these goes right through the open hatch area and I really didn't like the look of that going across the open hatch, I'm sure there wouldn't be anything blocking the hatch like that on a ship so I decided to remove the part that went across the hatch. That left the ends unsupported so I installed a pillar on each end, I used a stained decorative toothpick cut to the right length and it seems to be ok. Not being sure how much of the interior of the lower and main gun decks will be seen (I suspect none) I went ahead and stained the bulkheads just in case. I then added the main gun deck and two more bulkheads that touch it and glued everything together. On to the next deck.
- 166 replies
-
- 10
-
-
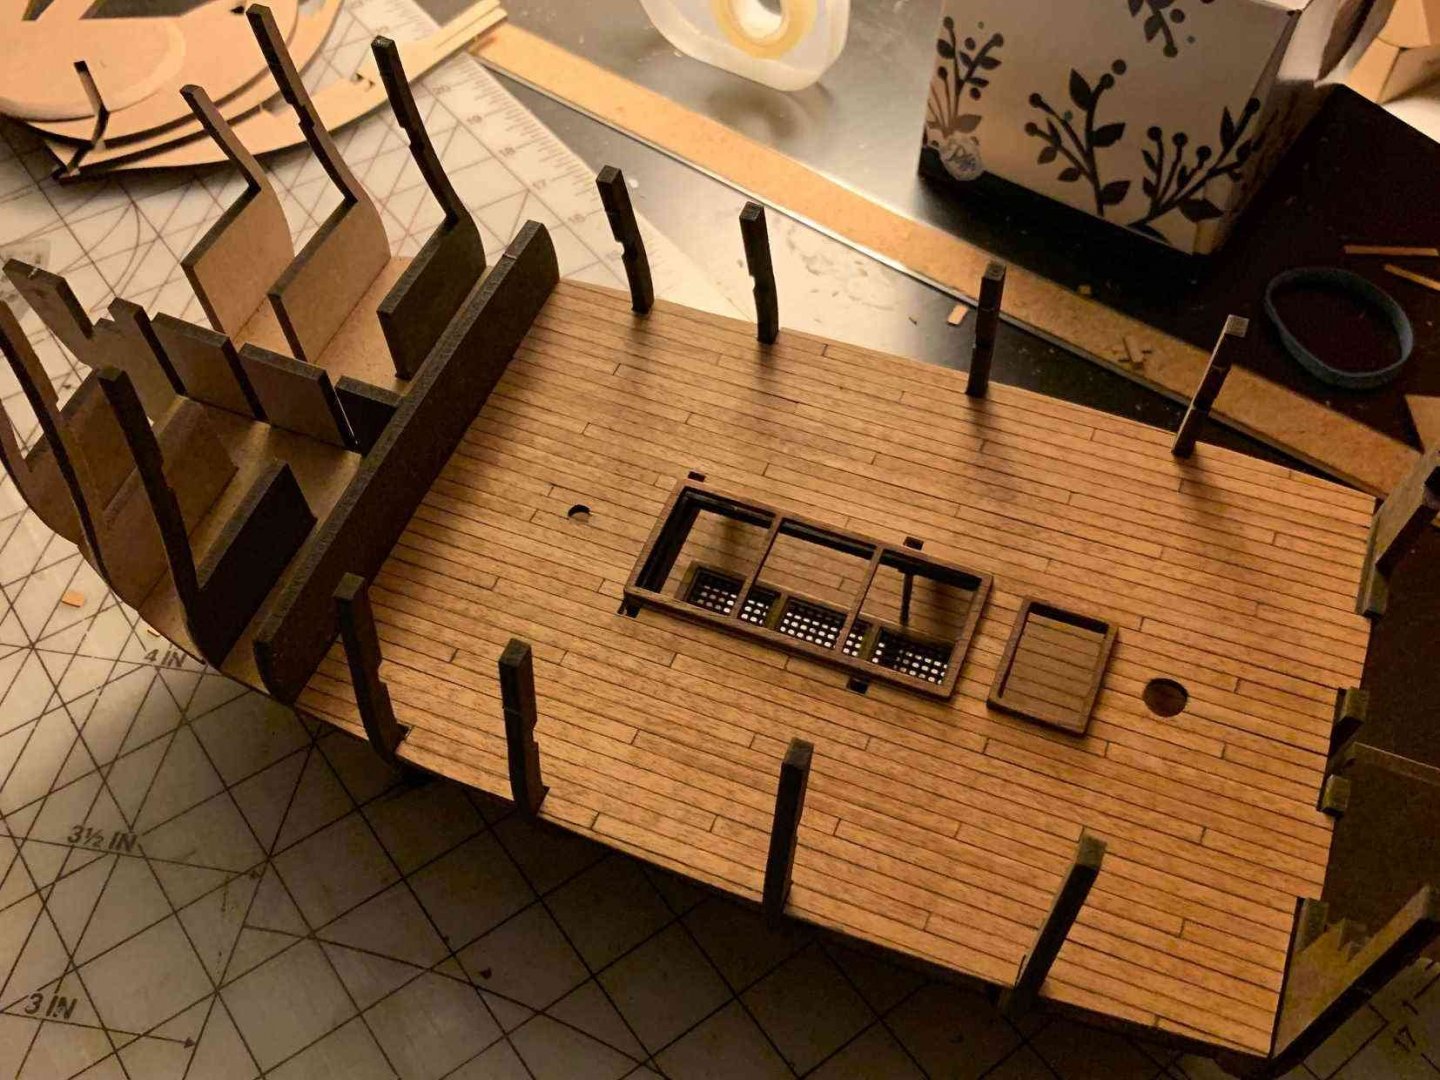
Main Gun Deck - decking done and a minor change I've finished the decking on the main gun deck and decided I didn't like the deck pieces under the hatch frame center pieces. They were quite a bit wider than the hatch frame so they stuck out from under the frame and every time I looked at them with the hatch frame in place it just didn't look right to me so I decided to remove them. I still have some of the deck showing out from under the inside of the deck frame and I don't like that either but I haven't decided what to do with it yet. It's too much to sand or file, still thinking about it, I may see if the Dremel can safely remove that back to where nothing sticks out from below the frame. Picture is just hand placed together, nothing glued and it's still in two pieces of course since I couldn't find a way to get it inside the frame with it together. Stained deck and hatch frame and any edges below the hatch opening to improve the look. Next I'll start shaping the bulkheads and glue the bulkheads and two completed decks in place.

-
Main Gun Deck, in Progress: While waiting on my Dremel to arrive I started work on the main gun deck. I wanted to continue my same 5 plank, reverse in middle that I did on the first deck but since this deck has to go in the model in two pieces I had to come up with a slightly different way of doing that. I've seen that some people have decked after installing it in the ship but I didn't really trust myself working in there and not breaking something. I noticed how the deck in the instruction manual has a pretty significant gap between the two halves and wanted to avoid that if possible. My solution was to deck the halves before installing but to still use a center plank and glue in only to one side and let it hang over and then leave the gap on the other side where everything will hopefully fit together when I install and glue it together. Marked the deck as before every 24mm for the 5 plank spacing and then held both halves together while only gluing half the center plank down. Also held the halves in place to lay down the first row on the other side pushing them against the center plank to remove any space. It seems to have worked but I won't know for sure until I put them in place. In the pictures everything looks a mess, but wanted to show the progress picture. Some of the black lines over the hatches are just drawn on the plank to help me keep track of the pattern. I marked the center plank with an X where I knew I'd be removing it for the same reason, just to help me keep track of where everything is. Halves separated and then together.

-
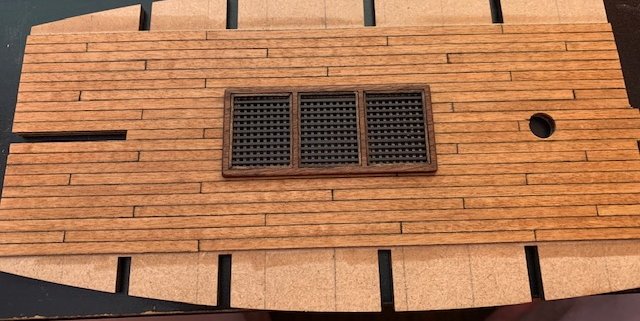
Lower Deck and Hatch covers: For decking after reading several tutorials I decided to go with a 5 plank spacing but to reverse the pattern at the center plank. I did this because I wanted to have the joints symmertrically balanced, I'm not totally sure why it just seemed like a good idea. I used 120mm planks and used my trusty protractor to draw perpendicular lines every 24mm where the joints would be and then started decking at the center and worked my way out. I used a Prismacolor artist marker to blacken the edges and found a technique that produces fairly even results. I'm making this deck my practice deck anyway since it's fairly buried in the model and shouldn't be seen that much. I like the look of the Tanginaka, especially after staining but quickly found out that you have to be really careful at the ends. Trimming, even with a fresh xacto blade, is very difficult to do without splintering the wood, the center strips between the hatch covers were especially hard to trim without having a sliver pop up and come loose. Most could be glued back down and they're covered by the hatch covers here anyway but I'll need to come up with a better technique for trimming if I want to show one of the top deck covers open, which I believe I do. Stained the deck hatch frame and the frames I made for the brass covers and bought some dark brown spray paint for the brass. Was worried that I would lose some detail on the hatches spray paining, but used several very light coats and it seemed to be fine. Stained the deck and placed the hatches on top for the picture, not glued yet. I'm debating whether to add some varnish to the deck and since this is my practice deck I probably should but it looks pretty good with just the stain.
- 166 replies
-
- 10
-
-
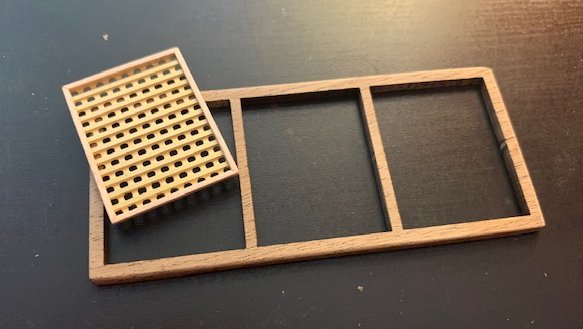
Lower Deck Start: Glued the two halves of the lower deck, just like everyone else had said it came in two pieces even though the instructions act like it's one piece, it made no difference, easy to glue together. Hand fit the bulkheads in place to start to check how everything will fit together. Started looking at the hatch assembly for the lower deck and even though I said I wasn't going to make many changes I've already decided to make my first one. Like others I'm not sold on the look of the hatch coverings but for me it wasn't that the holes were round it was that the whole thing just set too flat so I decided to make a small frame to attach to the cover. Made the frame from a scrap of balsa laying around and even though it will be hard to see on this deck I want to practice for the move visible ones so they'll look good. I'll probably stain the frame and then glue it to the hatch cover after it's painted. I plan to repeat this for all the hatch covers if it looks good when painted/stained. As you may be able to tell from the photo the tabs where the wood is attached to the frame is a bear to sand clean where it can't be seen anymore. It's not really a problem here but I'm sure there are areas where those marks will have to be sanded clean to get a nice stain. I'm not sure how much wood I can take off to get down to unblemished wood and still have things fit properly, that probably depends on the piece involved so I'll be checking fit a lot as I figure out how much cushion I have.

-
Unpacking and first steps: Kit arrived today and it surprised me how big the box was. I’ve unpacked the box and looked through the contents but haven’t done a full inventory yet. As everyone has mentioned the materials look first class and I’m excited to get started. I will go through though the manual and plans first to familiarize myself with them. A few of the laser cut pieces had already come loose from the board and I’ll need to identify them but that looks easy. I can’t see any reason not to number the pieces that aren’t exposed with a pencil to help keep track of them, there are a lot of pieces and I’ll try to keep them on the board till I’m ready to use them. The parts of the manual I’ve looked at seem very detailed and the photos of each step seem like they’ll be a big help. The Dremel I ordered isn’t due till Friday so any shaping I do until then will have to be done by hand but I’m eager to get started so that won’t hold me back. I’ll want to get into the Dremel slowly anyway as I’m not too sure what I will and won’t be able to do with it but I’m hoping it will make some of the shaping much quicker as it took me a really long time by hand on my previous model. I’ll try to add some pictures to my next post as I start to dry fit some of the early steps and check how things go together.
-
Intro: Recently retired I have decided to attempt my second ship build. My first was the Model Shipways Rattlesnake and it went fairly well with the body 100% completed but I ran into some issues with rigging due to not planning the sequence out well and putting myself in a position where some of the rigging was pretty much impossible to do without tearing down some of the existing rigging and I was never able to bring myself to do that so it’s still slightly unfinished. I hope to avoid such mistakes on my second build with that experience under my belt. I still consider myself very much a novice at this art and plan to stick to the instructions pretty closely unless I see a significant reason for deviating from them. I picked the 1577 Revenge because I've always thought the ships of this period were particularly beautiful and I was looking for a kit that was detailed and included high quality parts and the reviews and build logs seem to indicate that is the case with this kit. I also liked that fact that it is 1/64, I like that size. All reviews of this kit have seemed quite favorable and I'm hoping I can produce a nice looking ship. I’ve also picked up a Dremel 8050 hoping that it will make some of the shaping and sanding operations a little less time consuming. Since there are several really excellent build logs on this kit here already I’m not sure what I can add but I’ll show my progress and ask for help when I get stuck. I've read through the existing build logs and I'm sure I will be referring to them frequently as I progress through the build. I ordered my kit from Ages of Sail and I'll try to add whatever I can to the body of knowledge on this kit and focus on any unique issues that arise or if I do something different than the existing logs. I am looking forward to the process and working through the issues that will inevitably arise when doing something this complex.