Jonathan_219
-
Posts
176 -
Joined
-
Last visited
Content Type
Profiles
Forums
Gallery
Events
Everything posted by Jonathan_219
-
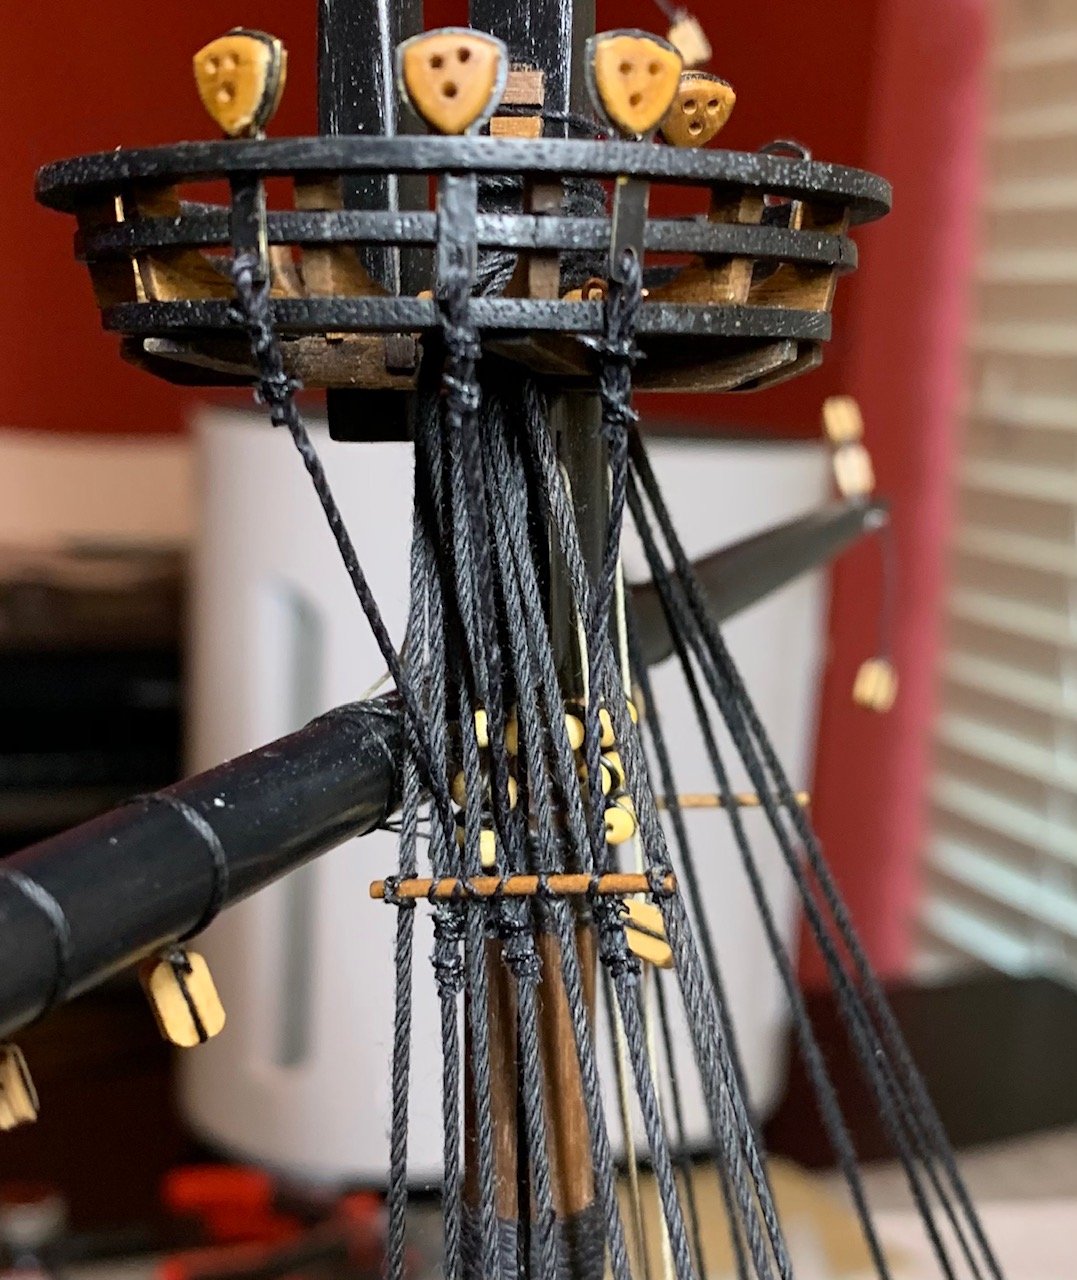
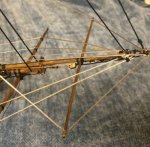
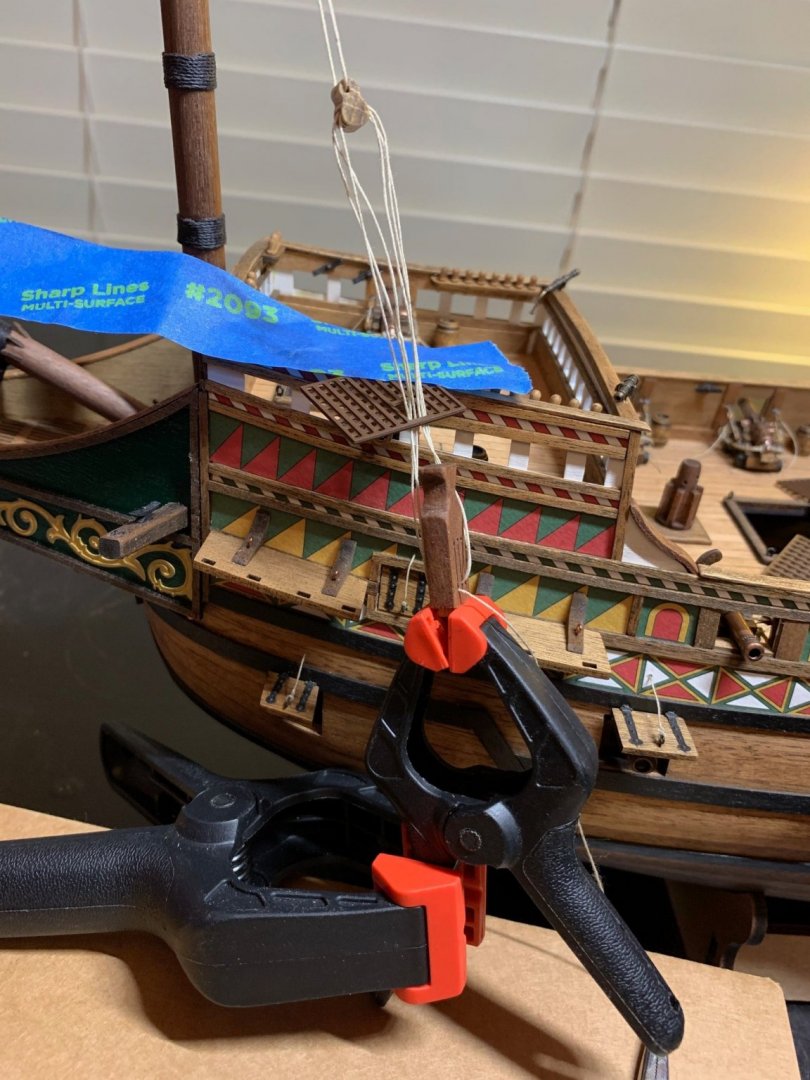
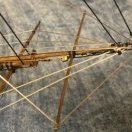 Futtock Shrouds? Moving forward to what I think is called the futtock shrouds. This has been a pretty tricky area as I just haven't been able to visualize exactly how everything is going to go together at the end so I just started and am seeing what I can get. The first issue that gave me pause was the bar that goes across the upper part of the main shrouds, the instructions say to use the 1mm wire but no matter how much I straightened or worked it with my pliers I just couldn't get it straight enough to look right to me so I decided to use a piece of wood instead. Just trimmed the corners off a 1x1mm strip and then sanded round, considered painting it black but decided to go with just staining it instead. My fairly shallow stab at researching whether these were made from wood or iron in the 16th century didn't turn up anything and I felt black just blended into everything else black there. First step was to glue the piece to the shrouds and I lightly taped a piece of paper to the shrouds to use as both a height and straightness guide which seemed to work ok. Just used a dab of wood glue on each shroud where I wanted it to go and then used tweesers to push it in place and then held it in place as long as I could to let it set enough to hold while the glue finished drying. With 7 main shrouds and 3 upper shrouds I decided to alternate shrouds to tie the upper shroud to and took the intersection of each shroud that wasn't going to have an upper shroud tied to it and tie the wood piece to the shroud with an X showing in the front. Some of my X's look ok and some of them are a bit pinched as can be seen in the picture. Then tied the three upper shrouds to the main shroud and pushed the knot right up under the piece of wood (really wish I knew what to call that). The instructions seem to show the upper shroud wrapping around the wood piece before continuing up to the deadeye but every why I tried to do that just didn't look right to my eye so I just passed the upper shroud behind the wood piece and after it was attached to the deadeye I tied a knot across it to hold everything in place. One of the upper shrouds is a bit loose now but I don't think I'll have a problem once I add the tension from the back, and if it's still loose the upper shroud should pull any last looseness out of it. Working in this area makes my eyes go a bit crazy with all the black threads in that area and I really have to concentrate to keep focus on which thread is which and not pull or trim the wrong thing. Once I finish the other side I'll add the tensioning rigging between the two sides and see how that all worked before moving on the the main mast.
-
Main and Foremast Shrouds: No significant issues putting these shrouds on. I did my best to keep everything straight and level. Only thing I changed from the first two shrouds I did on the mizzen and bonadventure mast were on those first two after adding the shrouds on the masts I attached and tightened the deadeyes alternating sides 1-2-2-2-1 where there four on each side and I switched to doing two at a time, always doing the two that had the shrouds lowest on the mast so I wouldn't be pulling them tight over a rope that hadn't been pulled down yet. This just made more sense to me, not sure it made any real difference in how things laid together where all the shrouds come together. At first I thought I'd be doing the ratlines on these lower shrouds but after looking closer I believe that it would be best to go ahead and install the upper shrouds first and get what I think is called the futtock shroud rigging in place first. I've looked at how the metal bar will go across the shrouds and then get pulled together slightly and I'm still working out exactly how I'm going to do that. It seems like there's a lot of potiential to screw things up with that so I'll try to be slow and careful. The plans don't show exactly how the bar is attached to the shrouds so I'll be doing a bit of research there and see what others have done. Everything has been easier than anticipated so far thanks to the quality of the kit and instructions. A lot of learning to do but very enjoyable.
- 166 replies
-
- 10
-

-
Mizzen and Bonadventure Shrouds: As I prepared to start the shrouds there were two things I really didn't know how I was going to do; get the correct angle on the chainplates and get the deadeyes even when rigged. I read bunches of build logs of Revenge and other ships and both ended up to be much easier than I thought. For the chainplates I went ahead and put the shrouds on the mast and then just help the shroud where the center of the hold for the deadeye was and then marked where it continued on the wale, that seemed the best way to ensure that the chainplate continued in a straight line from the shroud and seemed to work well. After marking I drilled a very small hole for the pin so as not to split the wale when placing the pin. One minor issue that popped up was that the chainplate was pulling away from the wale when tensioned with the shroud so I had to apply a tiny drop of CA glue behind the pin and chainplate and then hold the chainplate against the wale as it dried, this seems to have stopped the issue but I'll need to keep checking. I'll probably add that glue as I install the chainplate from now on just as a safety precaution. To keep the upper deadeyes even I just installed the first one at the height I wanted and for subsequent shrouds I went ahead and put the first siezing on the shroud and then was able to manually adjust the height of the deadeye by either pulling up the loose end or grabbing it and pulling it sown a little. This let me set the height very precisely and when I thought I had it right I would lock it in place by clamping the shroud with hemostats and then double check, if everything was right then a spot of glue went on the knot and everything was finalized, i tried to leave them just a little bit higher than where I thought it should go anticipating that the tension would lower it a bit. The additional seizings were then added and the two deadeyes rigged together. At first my shroud seizings were pretty ugly but I finally got where I could make them look decent, still getting better at that. Thinking about the way the seizings got better as I went along made me decide to do all the shrouds before starting the ratlines. It seems that if I do one thing then at least the result is more consistent as opposed to switching back and forth. I think the ratlines may get a bit tedious but I'll just put on some music and plow through them when I get there.
-
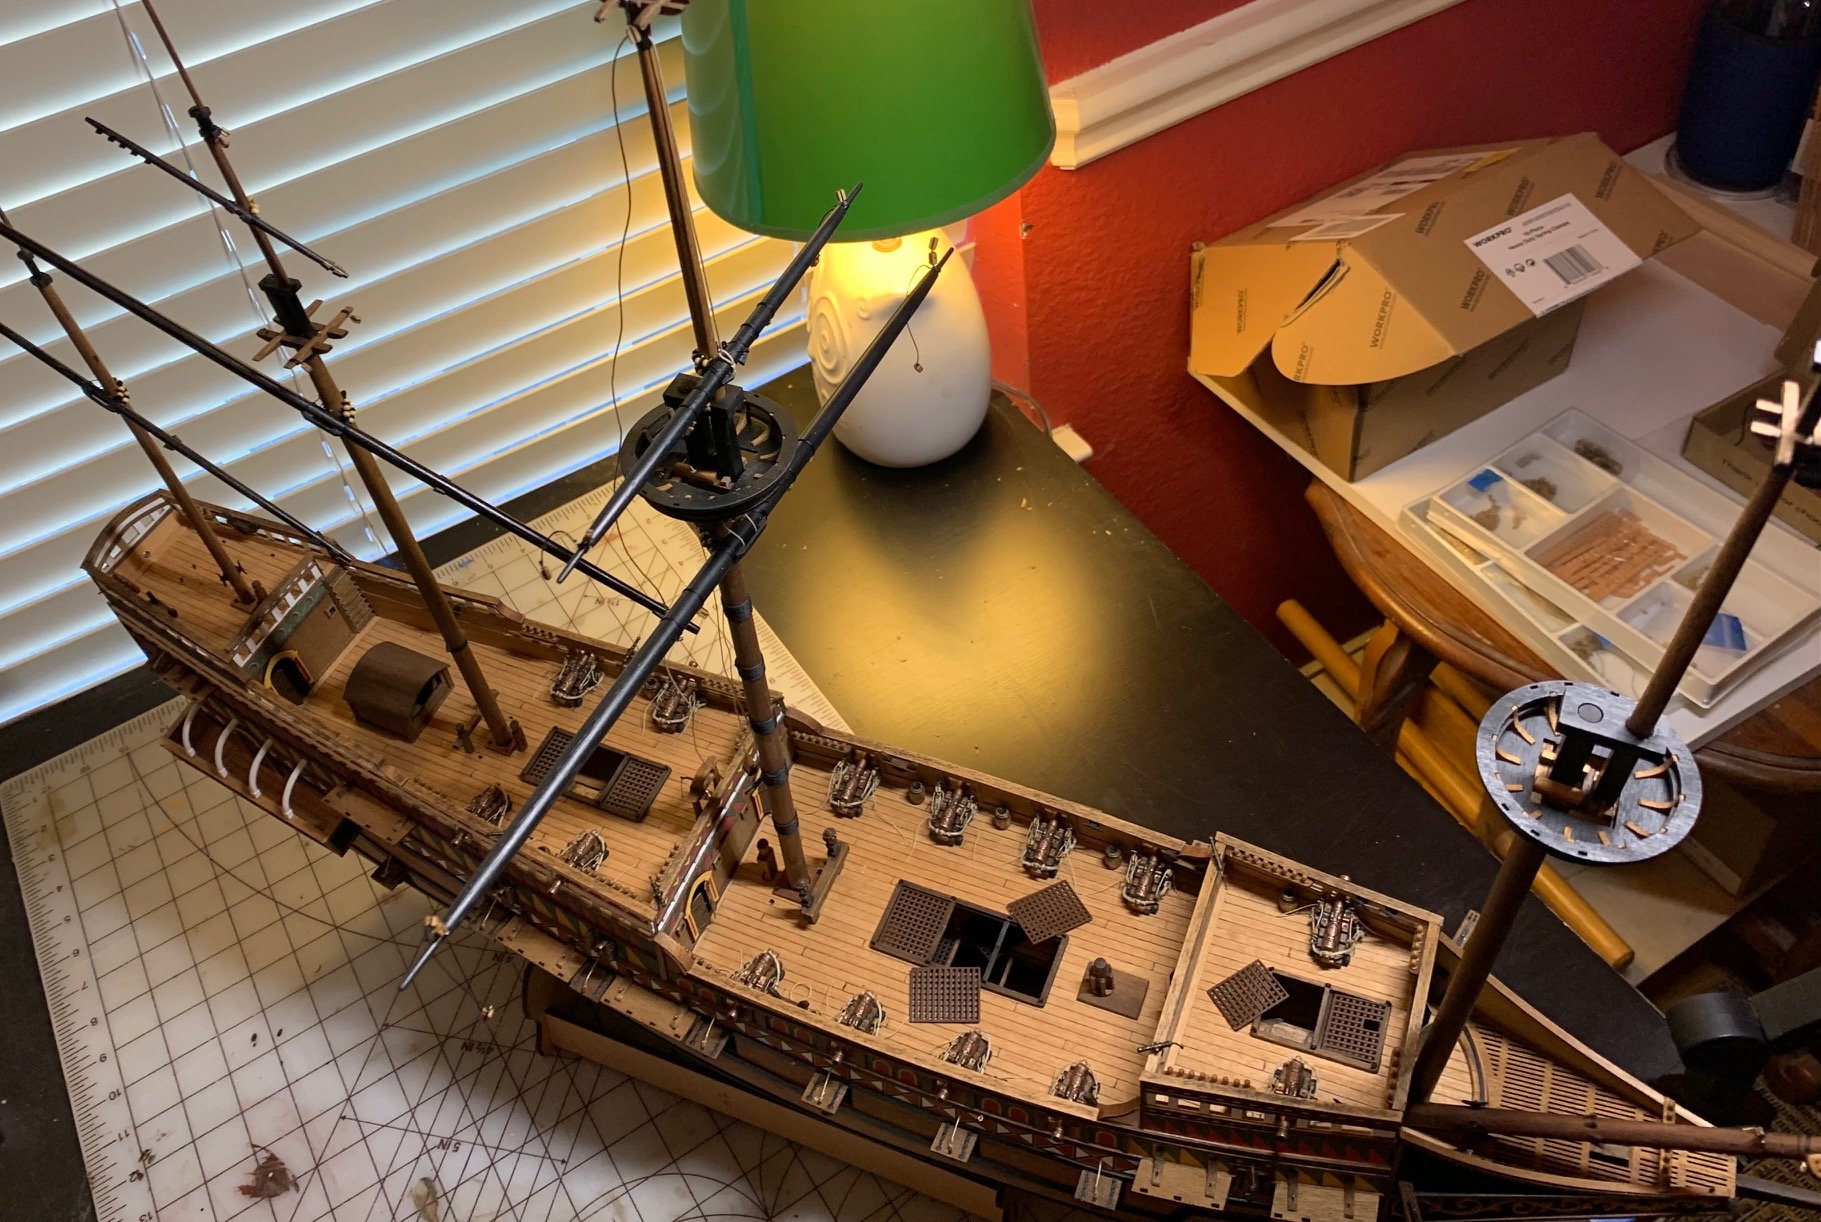
Stage 1 Rigging - Mast Tackle: Full speed into the rigging and the first step is the mast tackle. Pretty straightforward except I didn't understand how the lines were attached to the mast at the top but I posted in the Masting, Rigging and Sails forum and got a great answer very quickly which was that they are done just like the shrouds so I could proceed and get them done. I feel like this will be the easiest stage of the rigging to do as there is still wide open spaces to move around my hands and not a ton of ropes. Everything went well and it's great to finally see this part start to take shape. Forgot to take a picture until I had done the first shroud and deadeye pair. This will probably be a long step with all the shrouds and ratlines to do. I'm considering doing one mast at a time to break up the ratlines as much as possible, but I'll have to see how things go before I know if that will be possible. I did rig the main yard lift after doing the fore yard, it just seemed like there was so much more space now so it's finished as well.

-
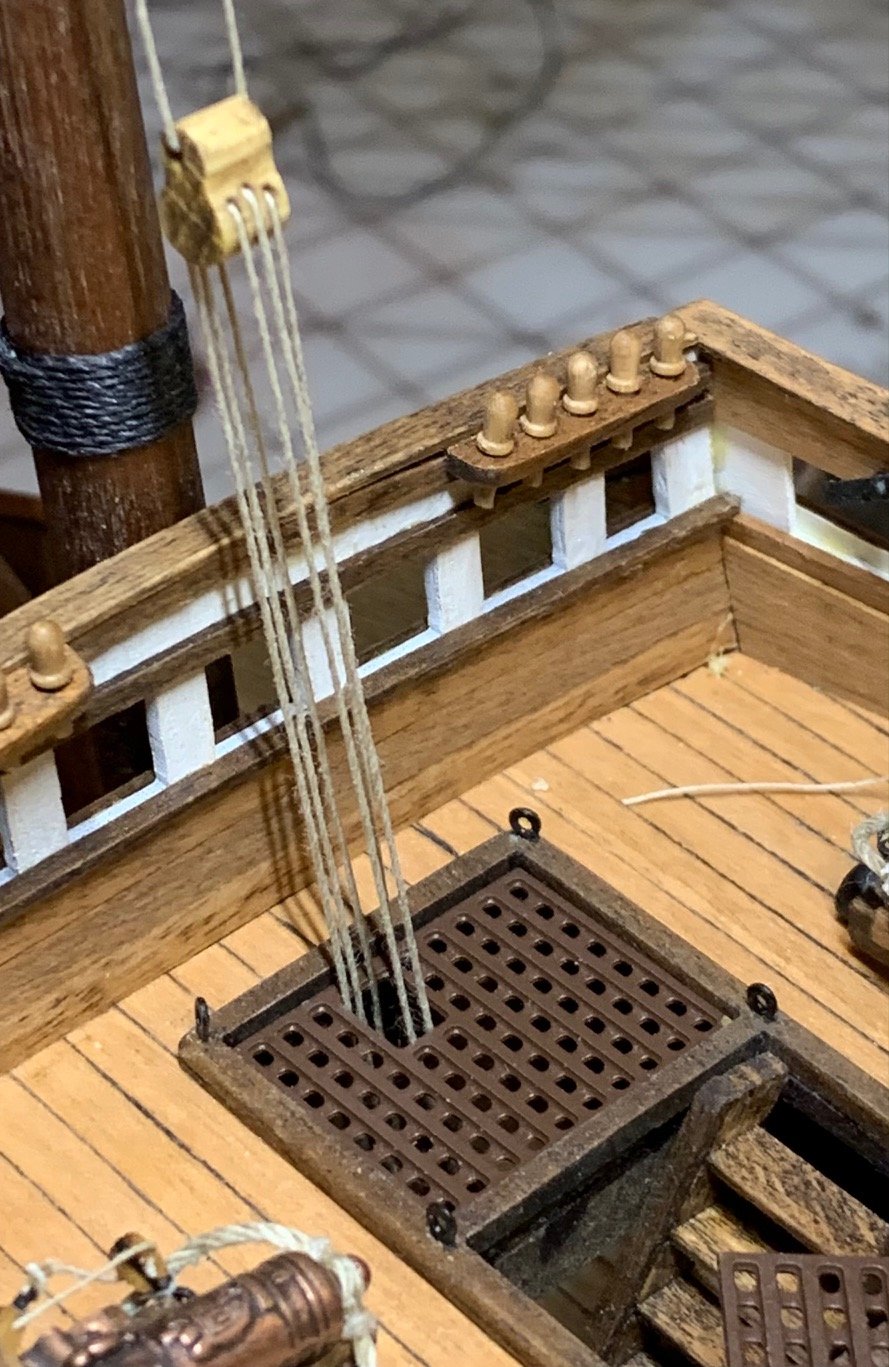
Mast Tackle and Foreyard Lift: Started on Stage One of the rigging which is the mast tackles. Seems pretty straightforward so far but as I was working on one side I began to look at some of the things that would be inside this rigging and could become more difficult with it in place. Specifically the main and foreyard lifts, especially the foreyard lift. I wanted to get the foreyard lift done since it goes through the opening in the grate and my plan has always been to rig it to the knighthead out of the ship inside the hole in the grate and then glue the knighthead in place but I know that sometimes plans don't always work that way in reality so I wanted as much space as I could get to do that. First attempt at rigging the lift rope to the block and knighthead was just holding the knighthead in my hand and during the times when I had to let go of it it much have twisted or something as when I finished all the rope was tangled up and not in the proper places so I realized I was going to have to hold it in place while I threaded the rope. Used a couple of clamps and set those on a small box to get it close to the proper height and then was able to thread everything and keep it straight. Then holding the knighthead in my pliers I was able to glue it in place. I was a little concerned that the friction in the knighthead would be too much to pull the slack out but once the glue had dried I was able to slowly pull out the slack one bit at a time. I kept the end taught by clamping a hemostat at the end and letting gravity keep tension on the end as I slowly worked out the slack. One tight I was able to tie and glue the end and place the grate in place and it appears to be fine. It's nice when what you planed on three months ago actually works. I'll probably go ahead and do the main yard lift although it should be much easier since the knighthead is out where it can be worked and then finish the mast tackles. After that will be the shrouds and deadeyes which should be interesting.


-
Mast Tackle top - Revenge 1577
Jonathan_219 replied to Jonathan_219's topic in Masting, rigging and sails
Wonderful, thank you so much. -
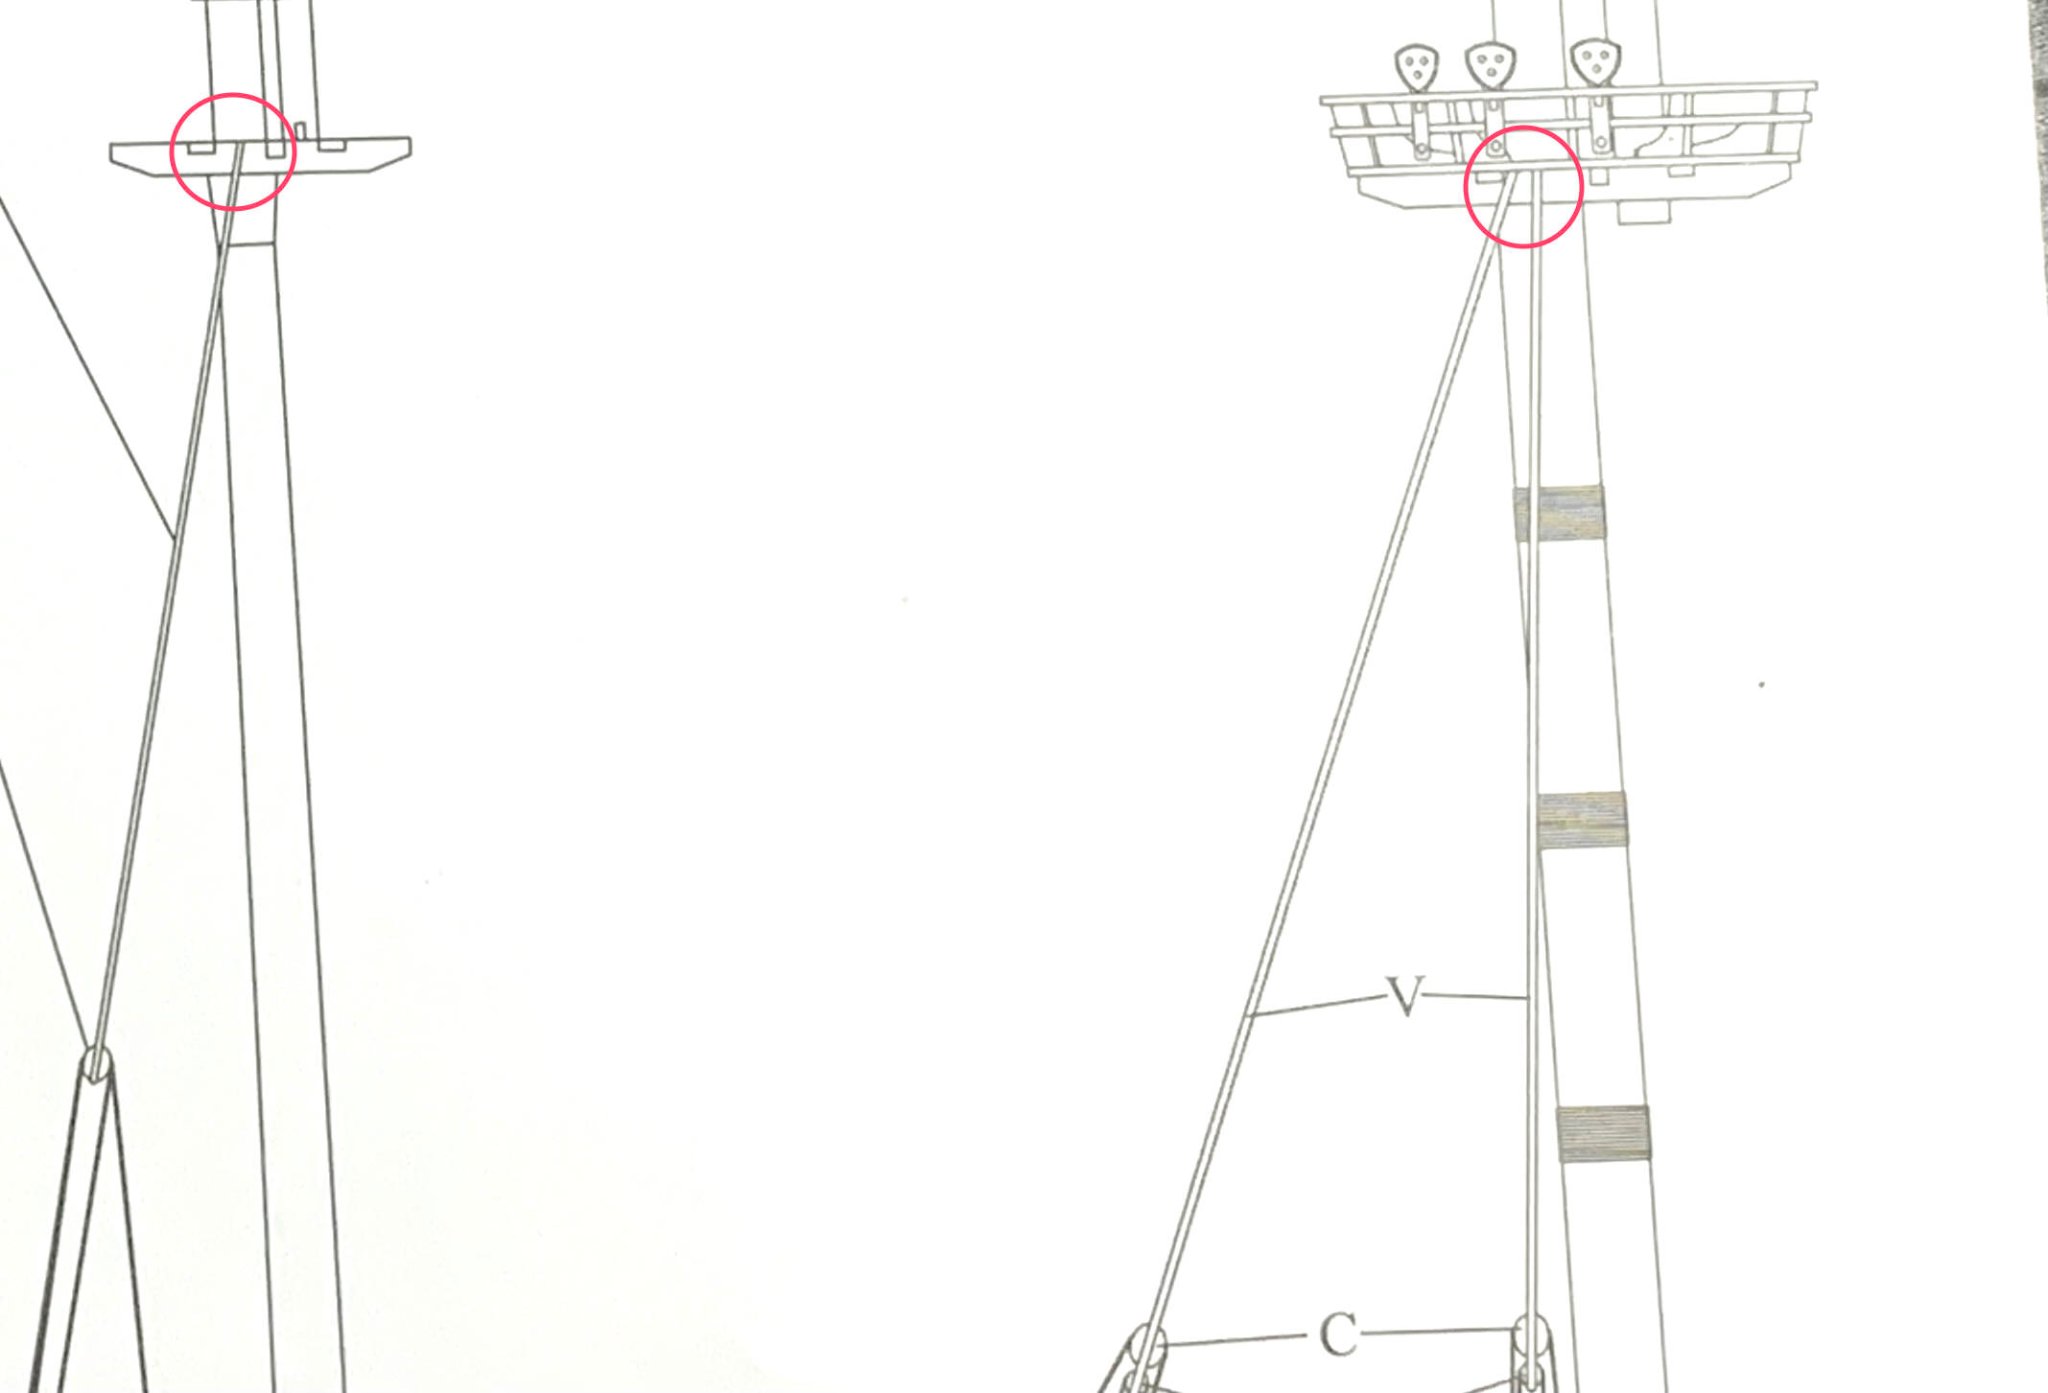
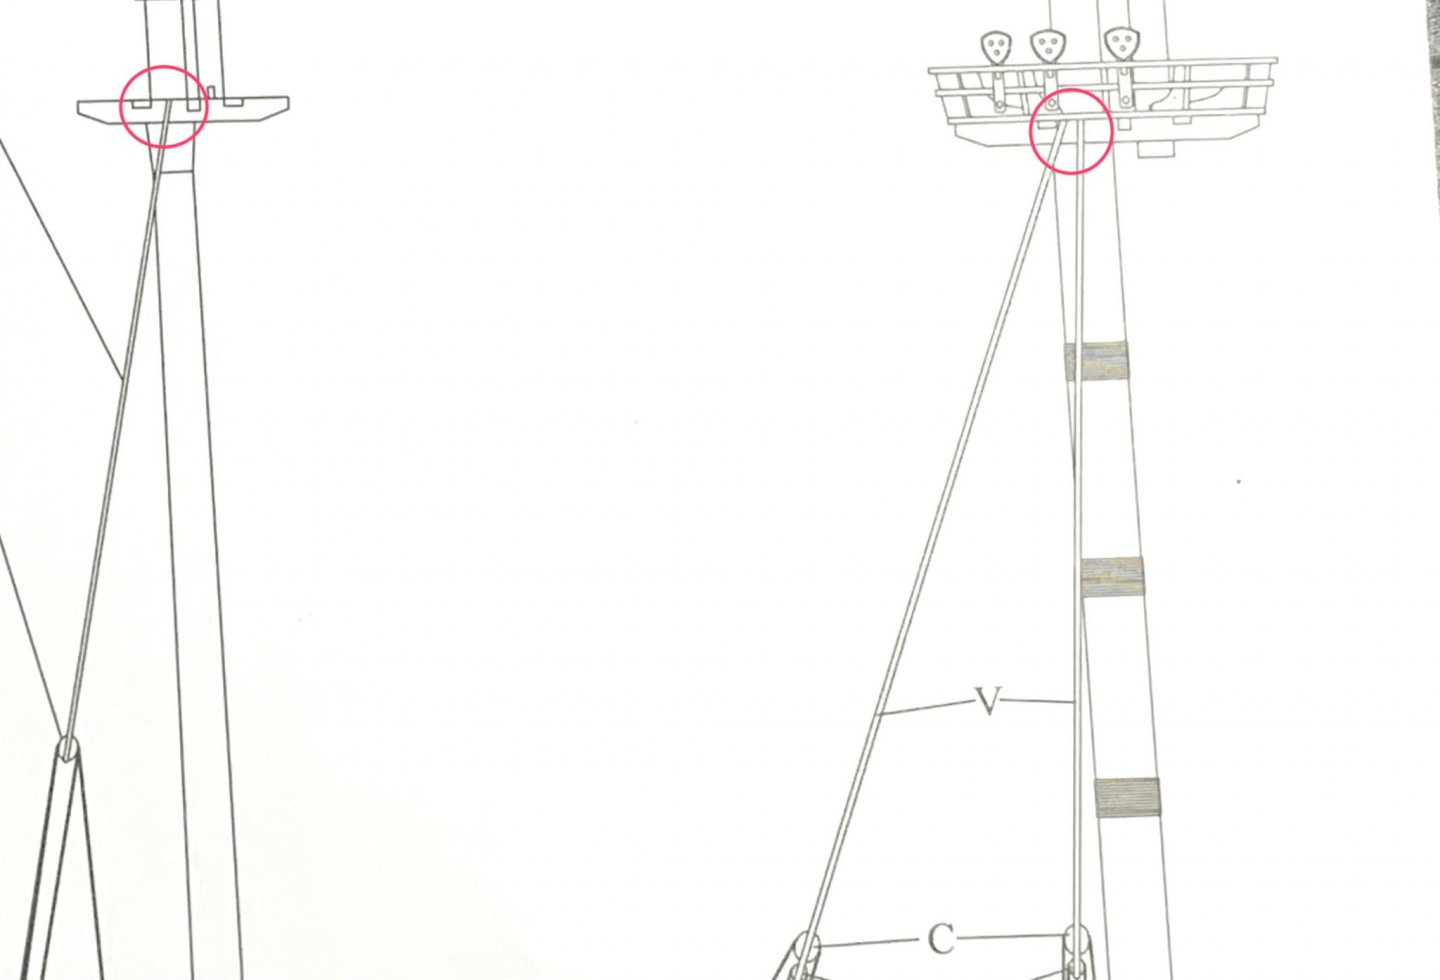
I'm looking at the plans for the mast tackle rigging (picture included) and I'm not sure what happens to them where they meet the mast (red circles). Do they cross over and continue to the other side or is each side tied off independently at the mast. If each side is independent would they be looped over the mast or tied at an eyebolt? I'd also like to understand what function they have since the shrouds seem to be the main support of the mast there.
-
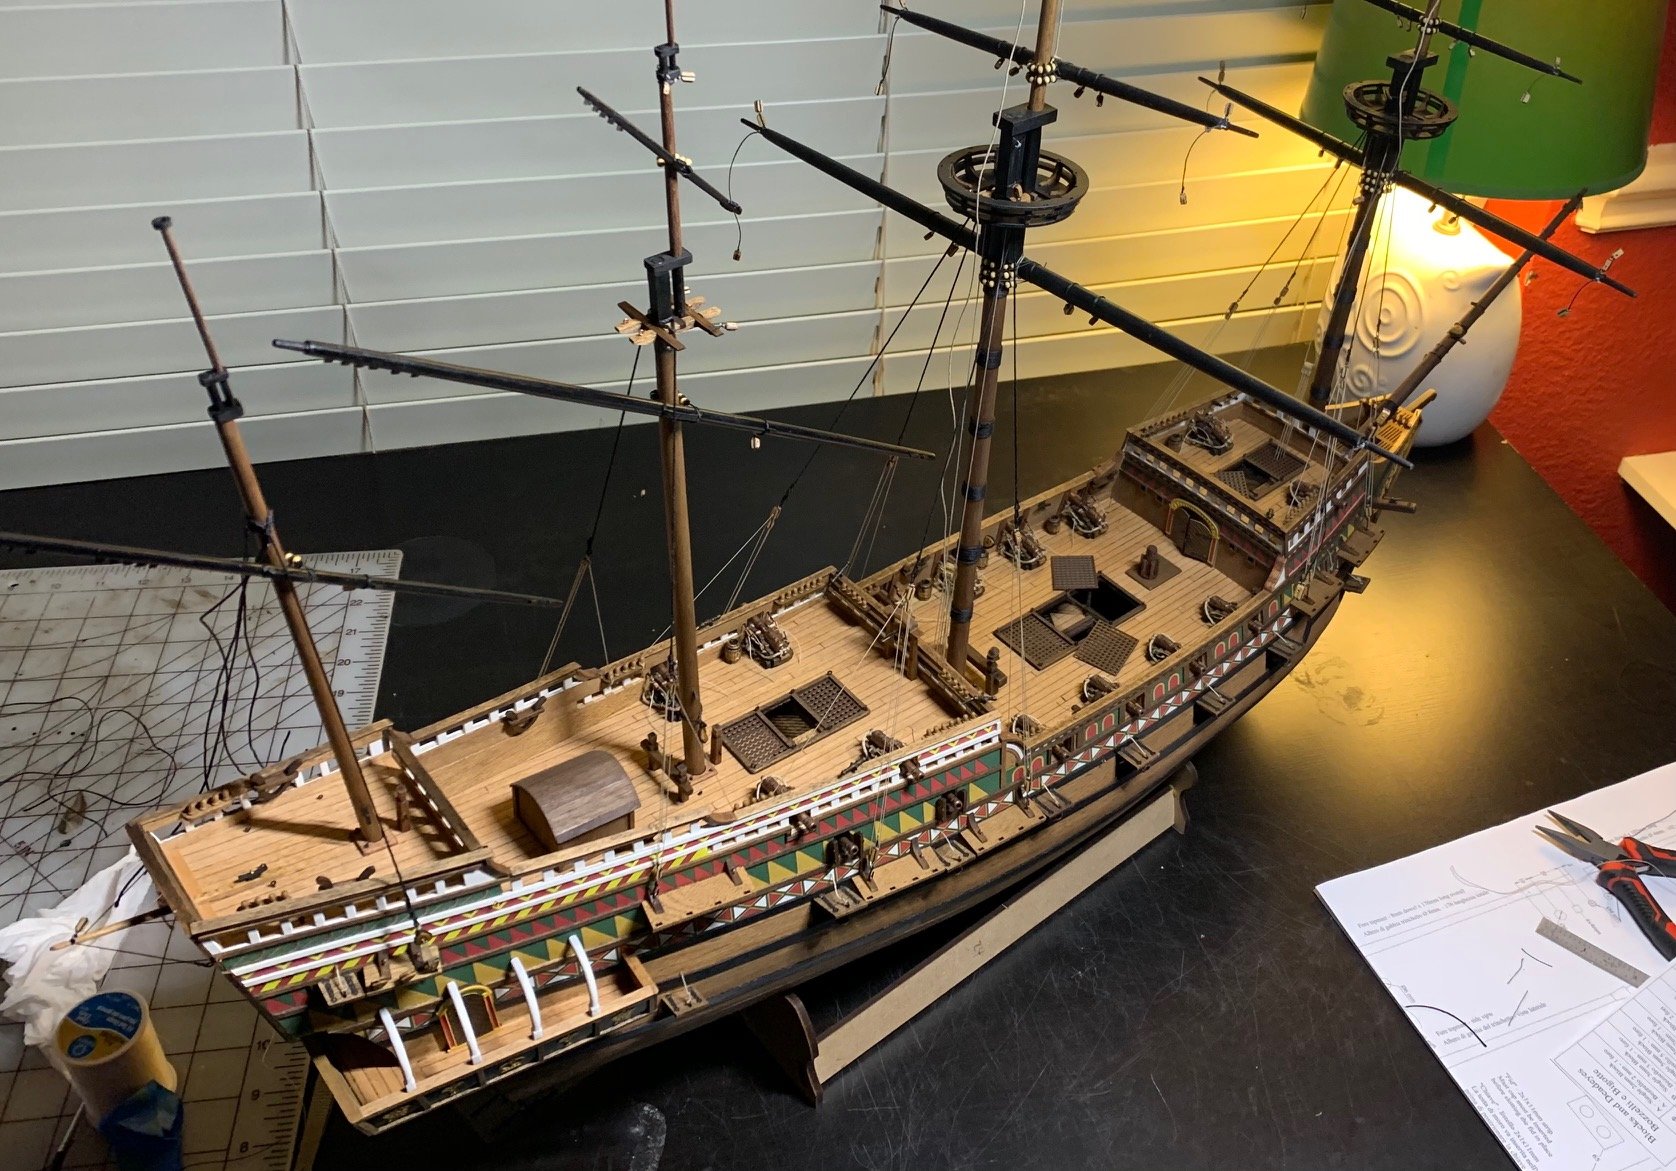
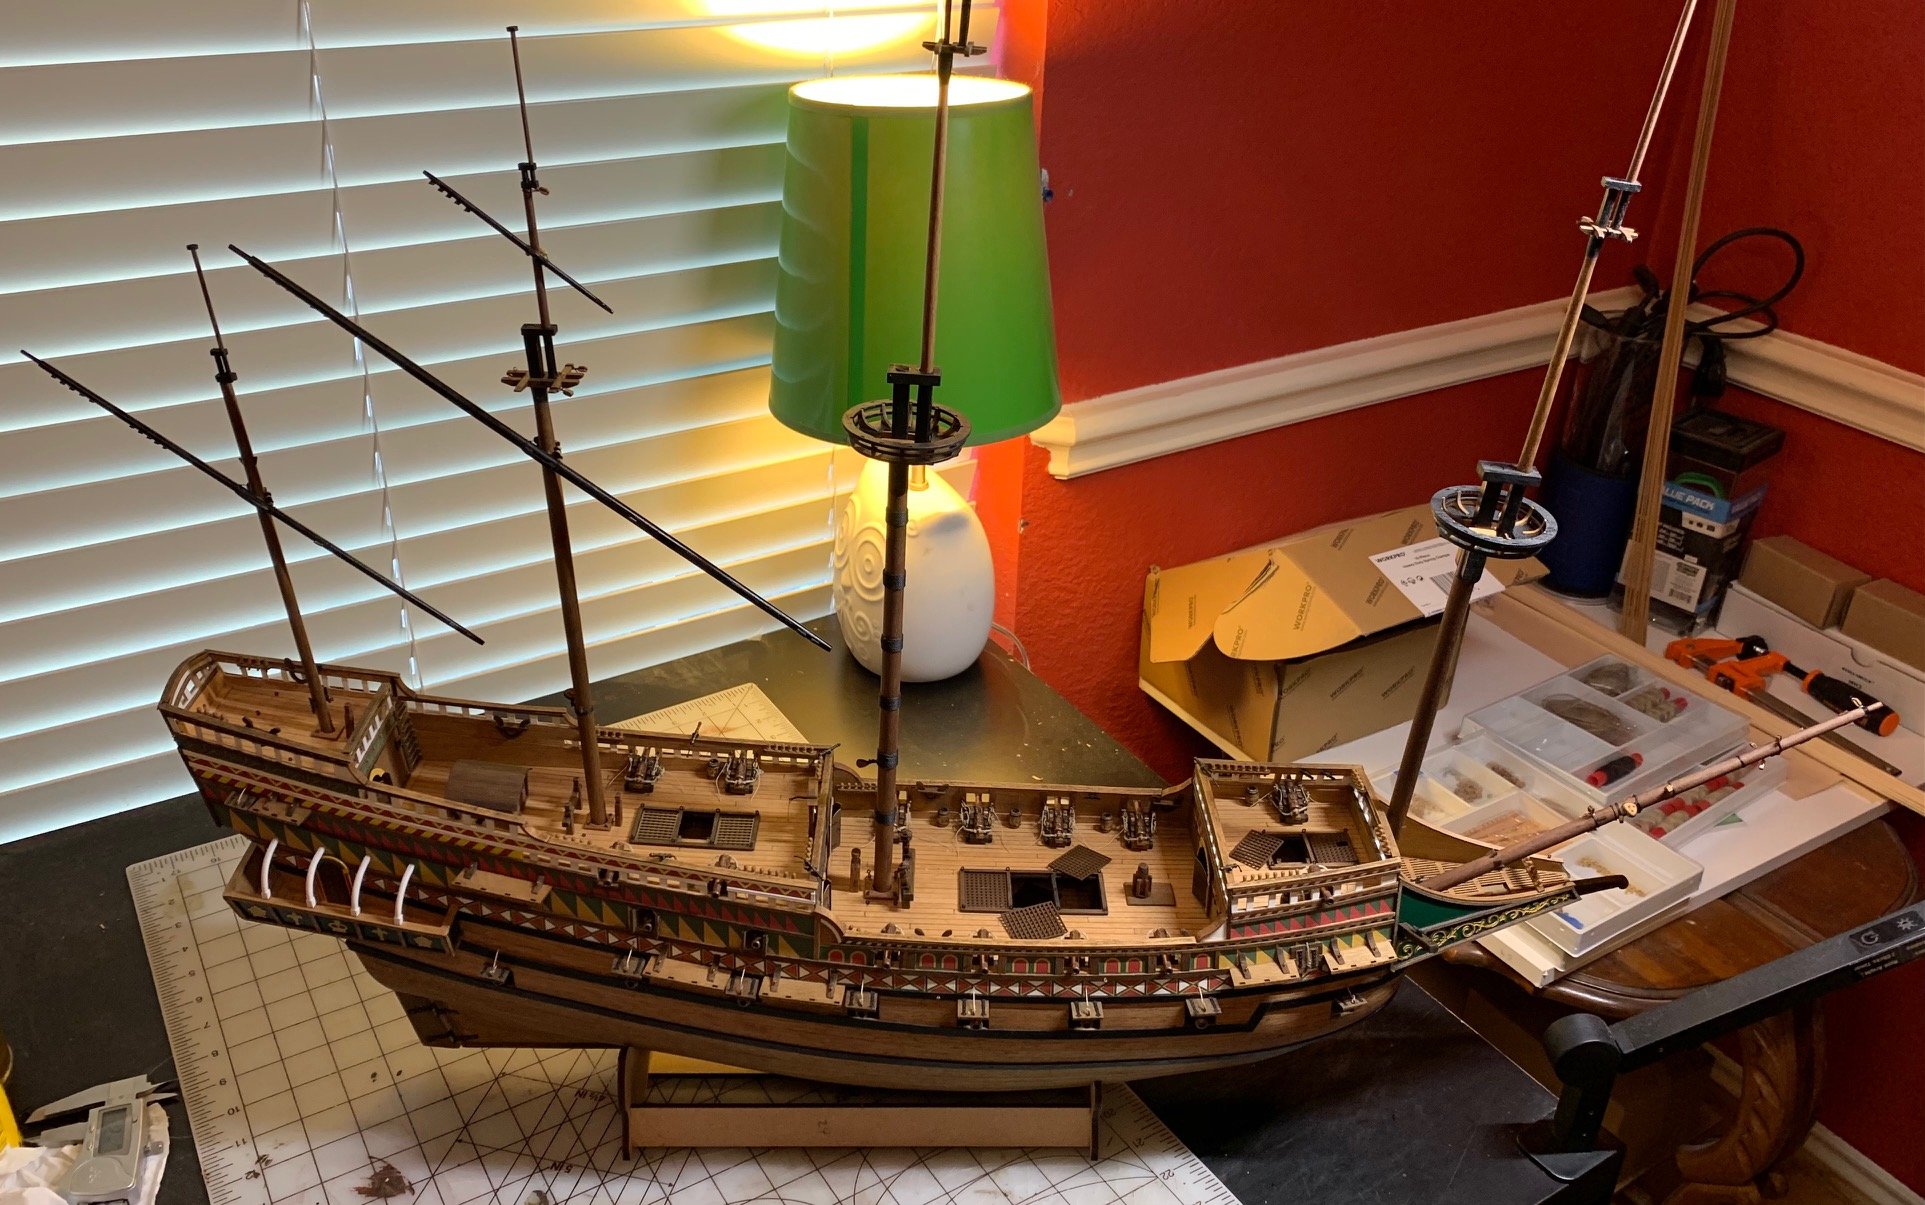
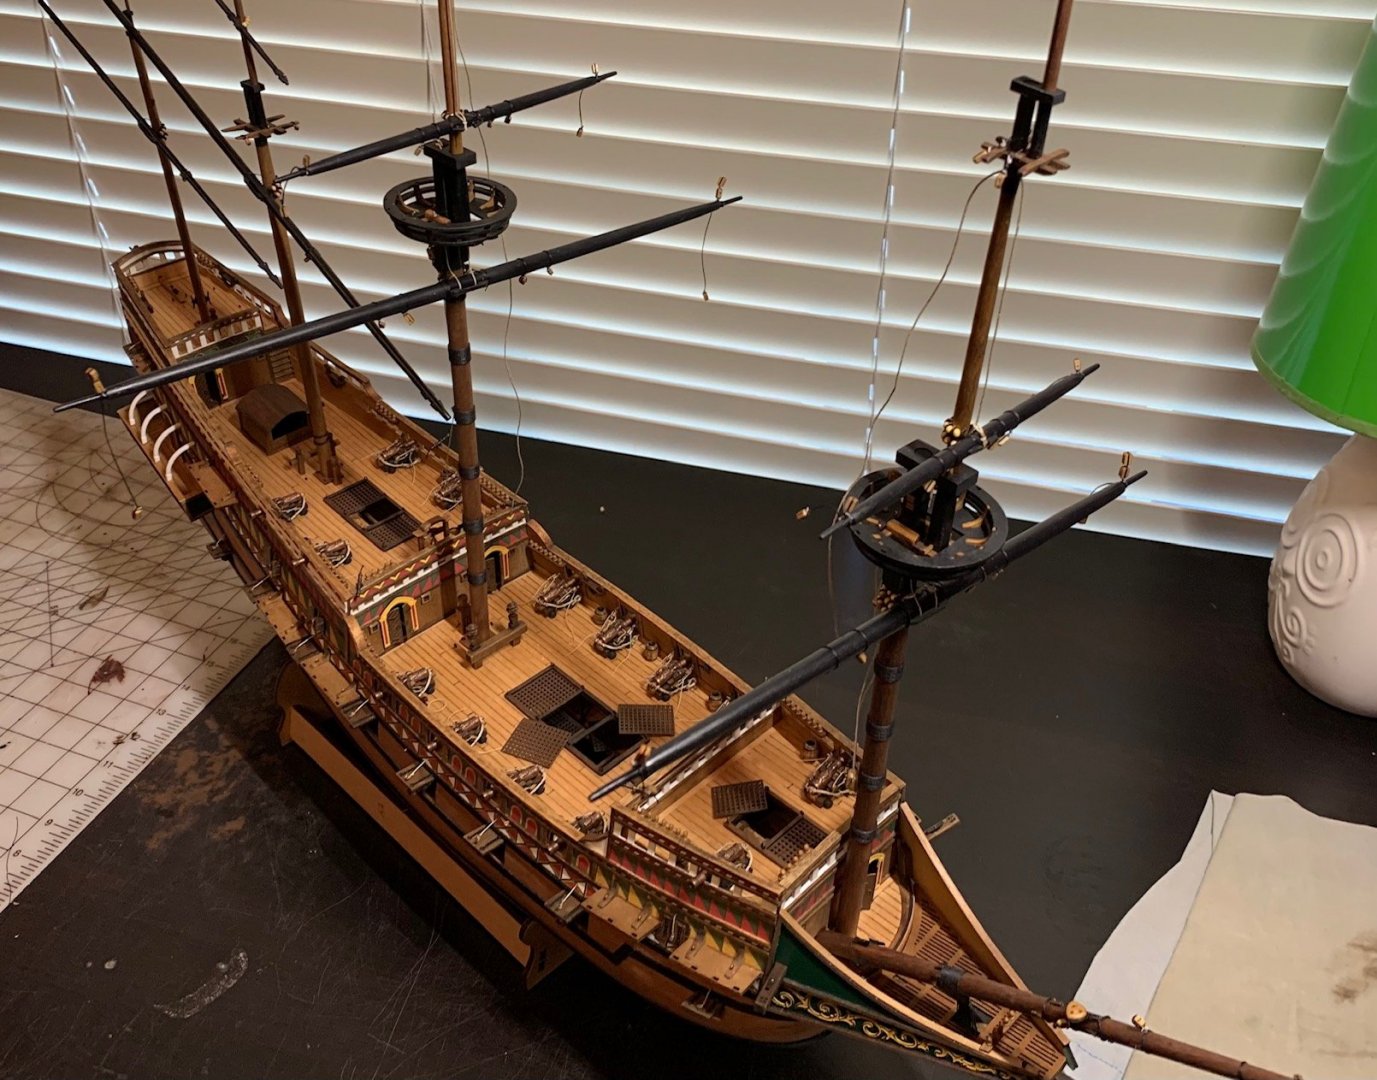
Ready for Rigging: Finished up all the yards and masts with the blocks attached. I've spent a lot of time going over the rigging plans trying to visualize how each step will be done and if it can be done with the yards in place or if I should remove the yards and try to attach them later and I've decided to try to move forward with the rigging with the yards attached, I may regret this later but feel I can remove them if I have to. I'm having a really hard time imagining how I'd attach the yards using the parrel assembly while the mast is on the ship so that has influenced my decision. I'm hoping that my visualization conclusion is correct which is that proceeding with the yards attached will result in more but less severe issues than if they were removed. Since I'm past the point I reached on my first model attempt it's all guesswork. It does seem like either way will make some things harder and some things easier so it's just picking one and seeing how it goes. I'm very grateful that the rigging plans in this kit are so clear it's really helping as I prepare to move forward.
-
Jeff, another good catch. I've been trying to put the blocks in the way you describe but it does appear that a couple of them turned around on me when I wasn't looking. I debated whether to place the yards on the masts now or later and decided to go ahead and attach them now. I'll probably try to continue and if I run into an issue that I can't get around I can always release them and re-attach later. This is where more experience would really help and I really appreciate people taking the time to point things out. I've already learned so much and still feel like I'm just starting down that road.
-
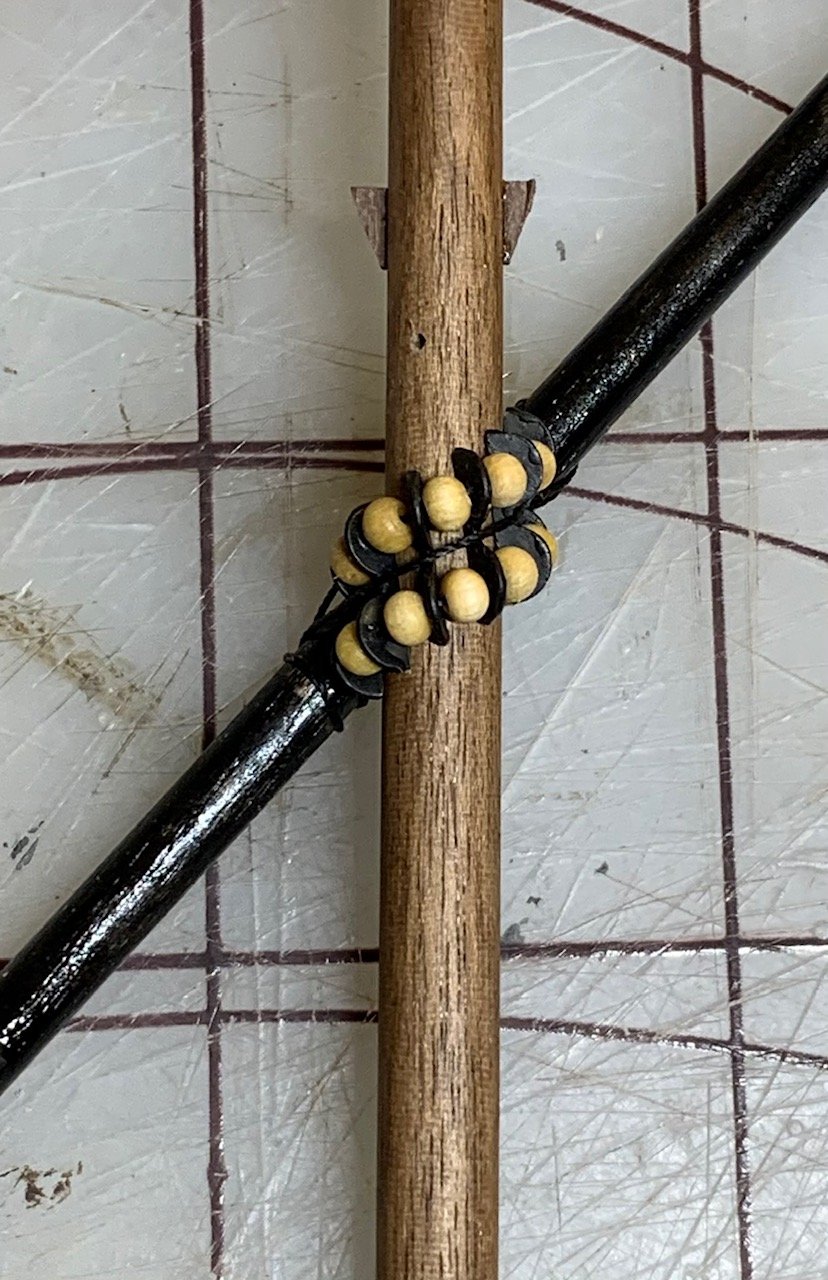
Main Mast Yards: Everything was pretty smooth shaping, painting and assembling the two yards for the mainmast. Getting in a bit of a flow with it and it looks like things are continuing to come together. I have added all the blocks for these two yards before attaching to the mast and it seems like that's the way to go. For the parrel on the main yard with three strings of beads I still used a single piece of thread. Strung the line through the first two sets of ribs and beads and then brought the loop from that line over the yard and placed the assembly in the approximate position on the mast. Looped one end of the thread over the yard opposite the loop from the first two sets and threaded it back through the ribs and additional beads. The ends of the threads were on opposite sides of the mast so then just looped each end one more time over the yard and then back to the other side using the channels in the ribs. Then just tied the ends to the yard making sure everything was nice and snug. Onward to the fore mast. I did add the yard lifts while I was in this area, I wasn't sure if the parrel assemblies would make that more challenging or not after they were on so I just went ahead and put them in first. Used some painters tape to hold them out of the way while assembling the parrels.


-
Good catch, I am planning to get all the blocks done before permanently putting everything in place but after your note I went back and realized I had missed a few on the bonadventure yard. Getting those done now will save me lots of hassle later. Thanks again.
-
Mizzen Latten Yard and Upper Lateen Yard: Finished the two mizzen yards and mounted them. Everything seems to be pretty straightforward now that I've got the painting and parrels figured out. Can't imagine trying to attach the yards to the masts with the masts on the ship. Laying the mast down flat and putting the yard across it and letting gravity hold it in place while tying the parrel assembly just seems the way to go. As with the bonadventure mast I put a small pin in the mast and yard to hold it in place, no glue, but the pin along with the parrel assembly keeps it in place. It can pivot a bit on the pin but I think that's good as it should allow me to align all the yards with the rigging.

- 166 replies
-
- 12
-
-
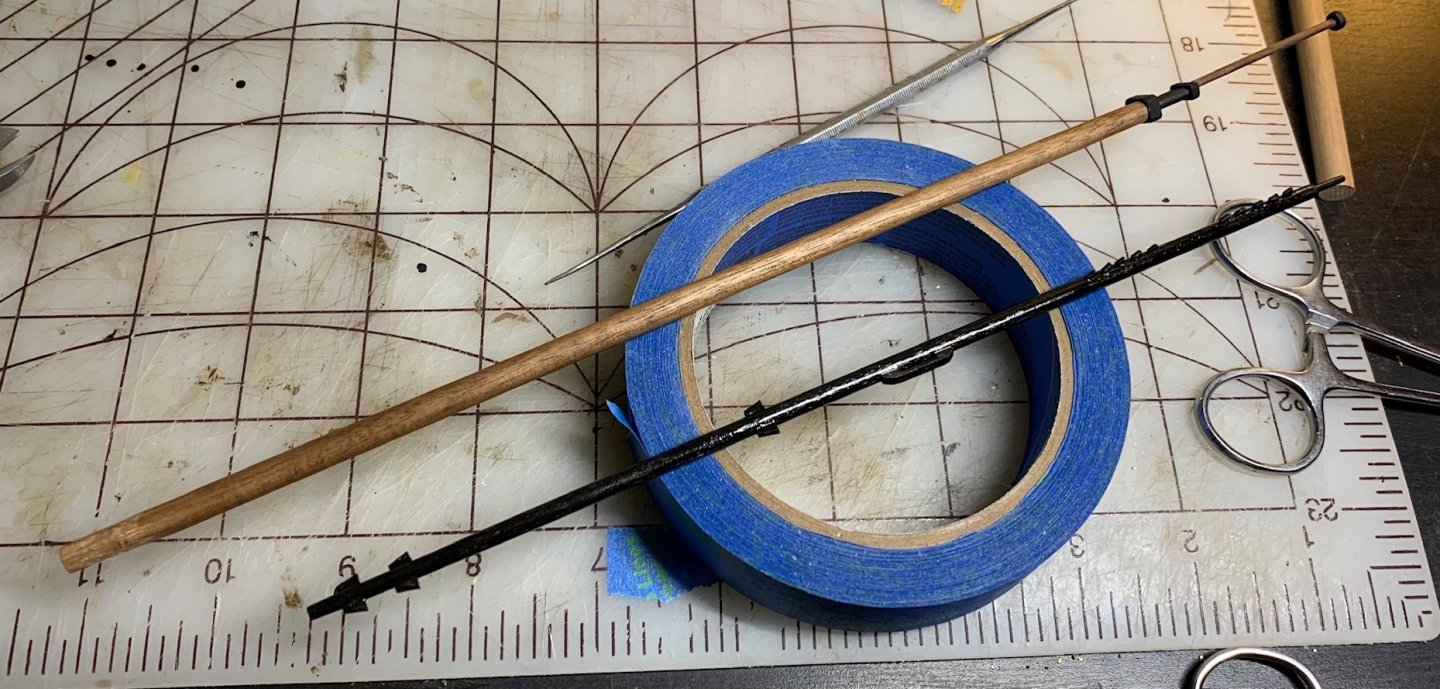
Redoing the Bonadventure Lateen Yard: After looking at my completed Bonadventure mast and yard for a while I decided the paint job on the yard just couldn't stay. It didn't look neat, and even after three days it was still very sticky and showed no signs of completely drying out. Getting the paint off was a challenge, it was so gummy that sandpaper did next to nothing so I took out the exacto and just started scraping it off. It took a while but finally got 98% of it off and was able to clean up the last bits with sandpaper getting back to pretty much raw wood. I looked for the paint that Jeff recommended but my local hobby mart had every color except flat black and I called their customer service number to see if I could buy some and have it sent to the store so I wouldn't have to pay $8 shipping on a $3.99 item and they told me that their warehouse was out as well. I tried a couple more stores but it seems to be out everywhere that's close to me. I looked at the mast sections that I had spray painted black before and decided that I'd try that again. I worked slowly, spraying very light coats and letting them dry before applying any more, surprisingly it looked really good, smooth and it even and had the semi-gloss look I wanted so I guess I should have done that at first but nothing ventured nothing learned. Of course the parrel assembly had to come apart and be rebuilt but now that I have a plan for that it wasn't hard the second time. Tried to take a photo to show the difference with the first paint job but couldn't really see much difference in the photo, in person it's a massive difference. I'm really glad that I took the time to go back and undo the paint. Sometimes, especially as I'm learning, it seems like I'm just going to try something that doesn't work well and you hope it's a pretty easy fix like this was. On to the rest of the yards.
-
After realizing that the rope binding the parrel together is a single piece I took another stab at it and I think I've got something that works. Took the rope through the parrel ribs and beads, used 6 ribs and 5 beads on top and bottom for this yard, and then left a loop and went back through the other direction on the other side. Slid the loop over the yard and brought it up into position and put the assembly under the mast. I kept one of both ends of the thread clamped with hemostats so it couldn't come apart while moving things around. I then looped one loose end over the yard and brought it back around the mast in the channel in the ribs so I had one end of the rope on each side of the mast. Went around the yard one more time on each end and the put a square knot in the rope and trimmed. I considered adding another rib and pair of beads to force everything tighter together but I'm a little worried about running out. I would calculate how many I need but I don't think I can really determine that until I start to put the others together. All in all I think I have a process that works on the two set parrel assemblies and I think on the threes I'll just bring each rope back across the channel and they'll be in the right place for knotting, at least I think it will.

-
Jeff, do you mind telling me what brand of acrylic you use, I've been looking around and would appreciate any tips. I did find that picture of the parrel in my research but was wondering where the two lines you marked ended up. Seemed obvious they get tied off somewhere but I didn't catch that it is one continuous line which makes a ton more sense now that I realize that. I'm going to take a shot at it with the new knowledge and see how it works.
-
Finishing the masts and Bonadventure Lateen Yard: Finished the 4 masts and started on the Bonadventure Lateen Yard, the masts were pretty straightforward but the lateen yard has been a bit of a challenge. I've had a hard time getting the yard cleats consistent enough in size to not look very ragged on the mast. I've tried different stocks and sizes of wood to start with and finally decided to use stock where the width of the stock was equal to the length of the cleat to try and get a consistent length. Since the cleats are 2 and 4mm long I have stock already that width but I'm still struggling getting every cleat to be consistent enough. They're just so tiny that any differences really stand out and look fairly bad to my eyes. I think I've managed to get an acceptable look by trimming some of them once they're glued on the yard. I just took any of them that stood out as too tall or big and very very gently used an exacto to take some off and bring them down to the size needed to match the others. A few of them popped off but I just glued them back on and continued. With the cleats attached I moved to painting the yard. I haven't been totally happy with the look of spray paint on larger areas of the mast so I decided to try hand painting and tested both a flat and gloss black enamel on a piece of scrap. I decided to go with the gloss black and thinned down the enamel quite a bit before applying but the look still isn't great. It's also been 36 hours since I applied the paint and it still has a slight tack to it that I'm hoping will eventually disappear. I've been reading through the forum painting posts and tutorials and I'd really like to be able to improve my technique painting. I'd like to try air brushing but a compressor is out of the question for my work area so I'd have to use canned air and it seems like that's a less than ideal situation so I'll probably experiment with hand painting some more and see if I can get better results. I'm probably going to need to get some higher quality paint, I've just been using Testors enamel bought at the local hobby store and thinning it down but I'm sure there are probably better solutions for wood. While fiddling with the paint I've also started working on the parrel bead assembly and how to attach the yard to the mast. I've looked through every build and diagram I can find but can't totally decipher where the ropes tie off. I think I'll probably pin the yard to the mast to make sure it doesn't go anywhere and then attach the parrels. It also appears that I should go ahead and make sure all the yards have all the necessary rigging attached and get them attached to the masts before I start with the actual rigging, I can't imaging trying to get the yards attached while working around existing rigging. I'm attaching a picture of the Bonadventure mast and yard, not sure it's a good representation of the pain job but it was the best picture I could get. Black is hard to photograph.
-
Mainmast: I've finished shaping the mainmast sections and put the mainmast together. The main topmast requires a lot of wood to be removed and has several different areas with different shapes but I continued to work with a knife and now I'm able to do most of the shaping with a knife. That plus a file and sandpaper got it where it needed to be. The wood for the topmast is different than the wood for the mainmast and seemed to be a bit easier to work with being a little softer and less likely to gouge into the grain. I also learned to use my exacto more like a plane and taking only a tiny sliver off each stroke down the piece of wood. I marked the sections where I was working with painters tape to make sure I staying working on the right area and could visualize where the sections started and stopped. I believe I assembled the topmast mast top incorrectly. The instructions seem to show one way but the cutouts in the wood for the cross pieces are definitely cut for turning the pieces on their side and it didn't seem to fit correctly when assembled the way the instructions show. I looked and looked at the results of both ways and decided to go with assembling it the way the wood was cut but when I went to install it on the mast the gap where the top of the topmast slides through and above is quite a bit smaller than the instructions indicate to trim that piece. In probably another mistake I decided to trim the top of the mast to fit through and it all works and goes together but this piece of the mast looks too small to my eyes. I'd have to completely rebuild the topmast or try and splice a new top on the existing mast and it doesn't bother me that much. I'll have to see if I'm going to do the same thing on the foremast for consistency or do it what I now believe to be correct. Everything else has been pretty straightforward, just lots of time with the knife and sandpaper shaping pieces.
-
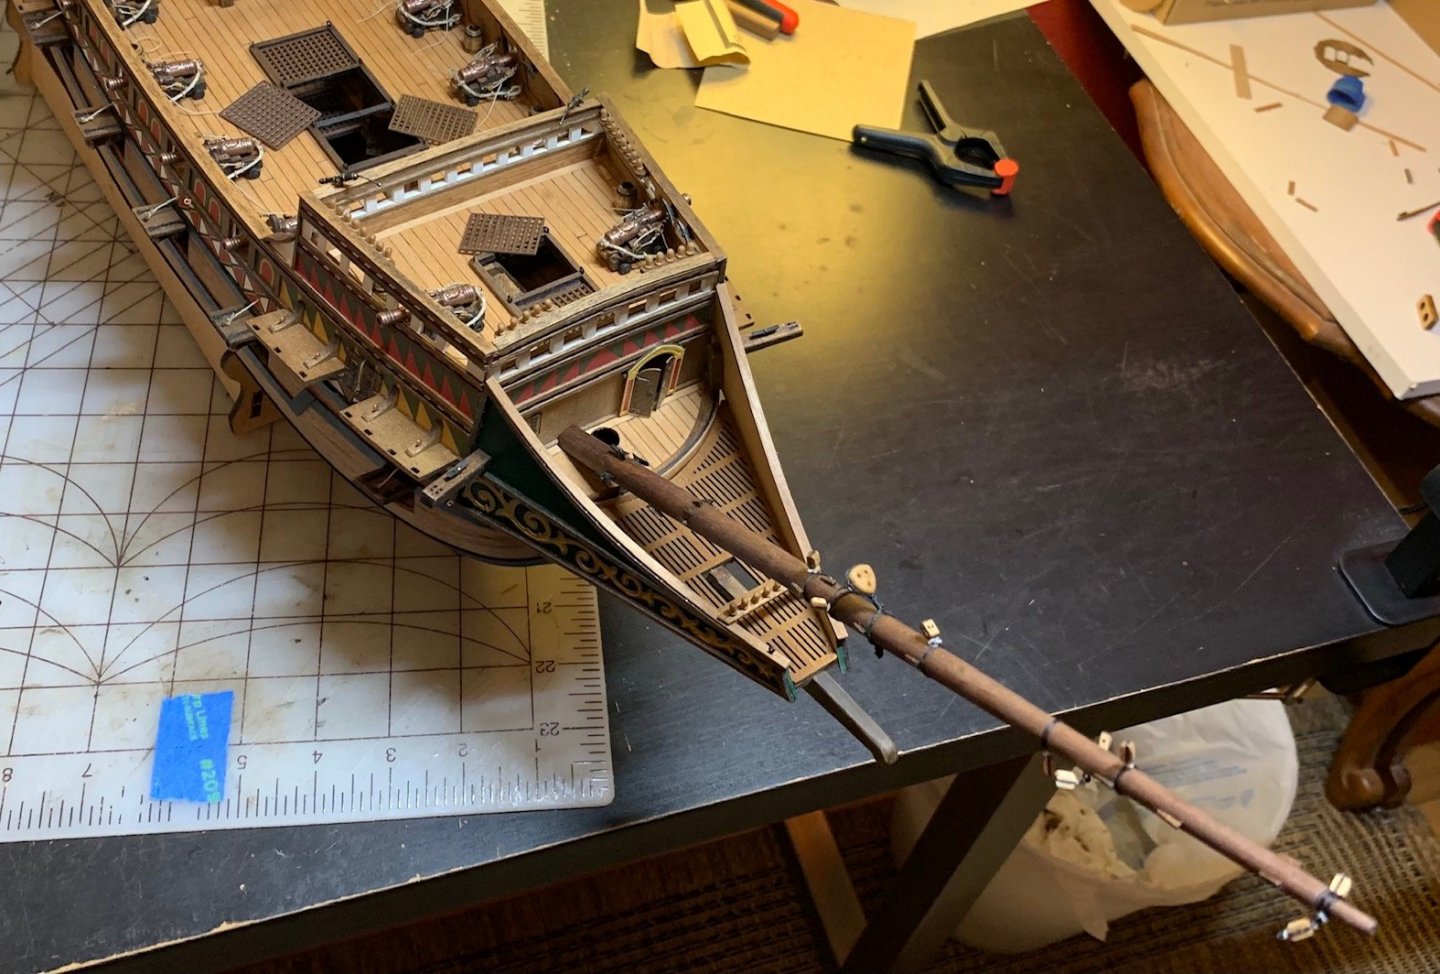
Masts Staring Mainmast and Bowsprit: I shaped and added the cheeks on the mainmast and as I starting looking at the main topmast I realized it has a pretty complex shape with a lot of wood to remove and I thought I wanted to get a little practice with something simpler first so after looking at all the masts I decided to tackle the bowsprit next. I picked it because the shape was pretty simple and it only had one piece so just simpler all around. I still found shaping the bowsprit challenging, not so much because of the difficulty but just because it took so much time to take off so little wood. I have tried using my exacto knife, sanding with the Dremel, and hand sanding. All of these methods have their challenges. The knife would be the quickest and seems to work well for blocking out small areas but if I try to do longer sections I'm constantly getting caught in the grain and taking out a bigger chunk that I want. Even if the chunk is going to be removed by subsequent actions it still prevents further knife work in that area which threatens to get me off center. I'm going to continue to experiment as some of the pieces have so much wood to be removed that sanding even with the Dremel would take a really really long time. I don't really have a place to set up a drill or a drill that would be able to hold a 10mm piece of wood. I think the masts are just going to be a lot of Dremel and hand sanding. Everything I've looked up for shaping the masts I've either tried or isn't practical in my setup. Once shaped, the bowsprit was pretty easy to configure with cleats and blocks. I did end up cutting out the cleats that the instructions say to use 1x 1mm wood strip for out of 1 x 2 strip and just cutting to the correct size. My clumsy hands kept splitting the 1 x 1 wood. I wasn't sure how the blocks are attached to the masts (and yards later) but it seem they're just seized on the mast. I found an interesting video showing how to use one seize to create the loop for both the block and mast but for this mast at least I seized the block first and then seized the lines right next to the seizing for the block after wrapping the two arms of rope around the mast once. The results in a little more stand off from the mast and two ropes around the mast, but I don't see an issue with that for now, hope I don't find it later. Here's a picture of the bowsprit just hand placed in the ship to see how it's looking.
-
Thanks for the information and the heads up on the bonaventure mast, I could have easily missed that as I was preparing the masts and had to do it over. It's starting to come together for me, I just have to realize that sometimes it takes information from multiple pages of the plans to get the specific measurement I want.
-
Revenge 1577 Mainmast questions
Jonathan_219 replied to Jonathan_219's topic in Masting, rigging and sails
Thanks for the information and diagram. It really helps to understand the usage from a real ship as I try to put the model together. I'm still amazed that the fid is the only thing preventing the topmast from dropping down, I would have though it would have been iron instead of wood at least but I'm sure they knew what would work and what wouldn't. -
I'm starting to build the masts for my Revenge and I've already run into a couple of questions, I'm including a picture of the mainmast top to help clarify my question. Since the opening the mainmast comes through is 10mm x 8mm and the mast is 7mm x 7mm where it comes through the mast top allows the top some flexibility in position, a couple mm forward or back. I suspect that most of this position will be determined by correct placement of the main topmast where the mast cap determines the spacing between the two masts and the topmast should sit in the center of the hole outlined by the blue square but I'm hoping to get confirmation of the correct positioning of the two. The topmast is 6mm square there and the opening is 8mm square. There's still a millimeter or two of flexibility in the position of the topmast if it's not centered in the opening. I can't find anything in the plans or instruction that indicate how to position these pieces. My gut is telling me to center the topmast in the opening and let everything follow that. My second question is about the fid in the main topmast. In a real ship is at all that would be preventing the topmast from dropping down? It just seems like a huge amount of stress in a tiny area, it also seems like there would be something preventing it (and the bottom of the mast) from sliding back and forth but in the kit it seems it just sits on the mast top supports freely (glued of course). In a model it's going to be fine but I'm curious and if there's a more accurate assembly I'd be interested to know what that is. I've tried to do some research on how these things go but information on 16th century English masting isn't something I've come across yet.

-
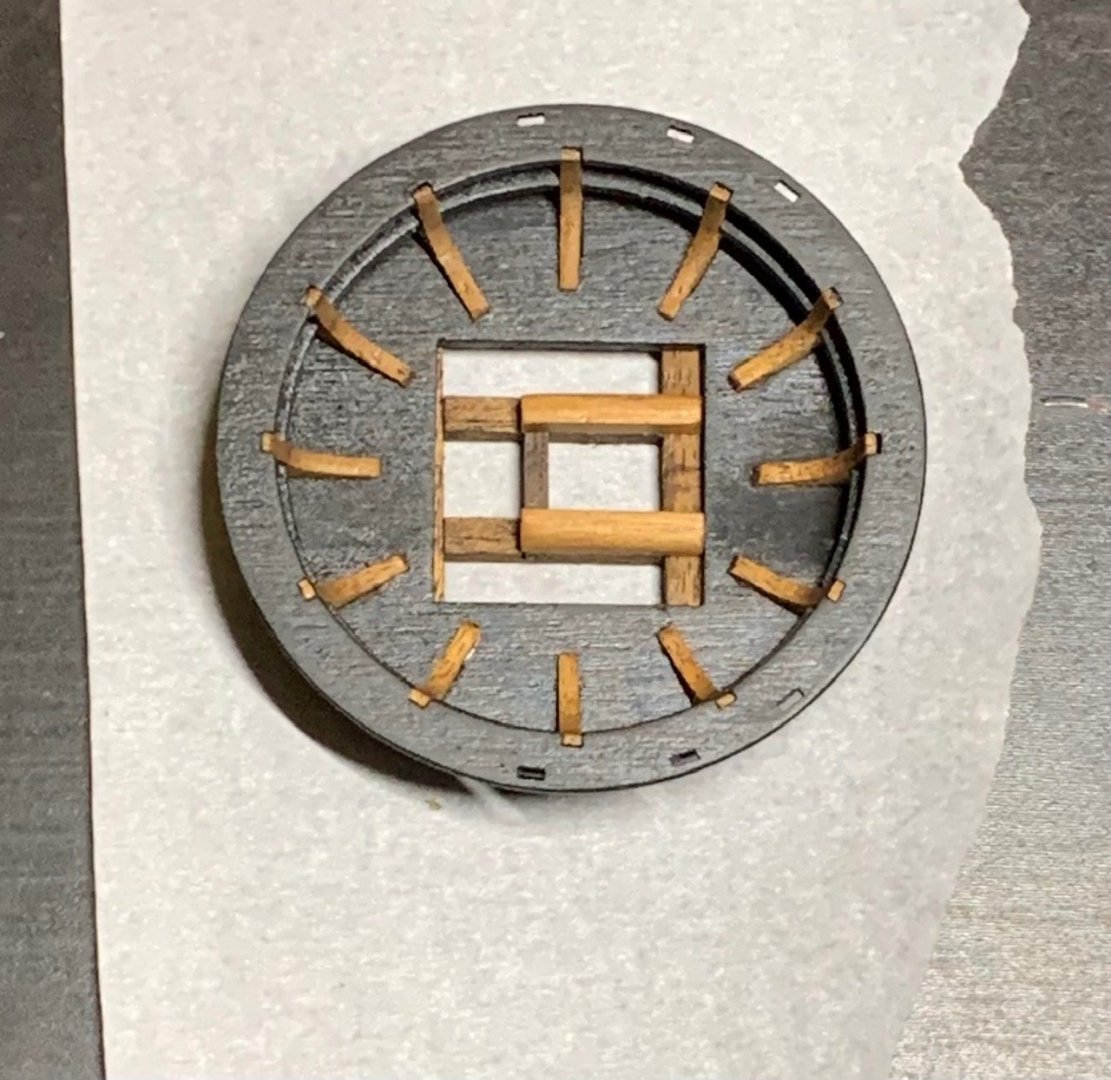
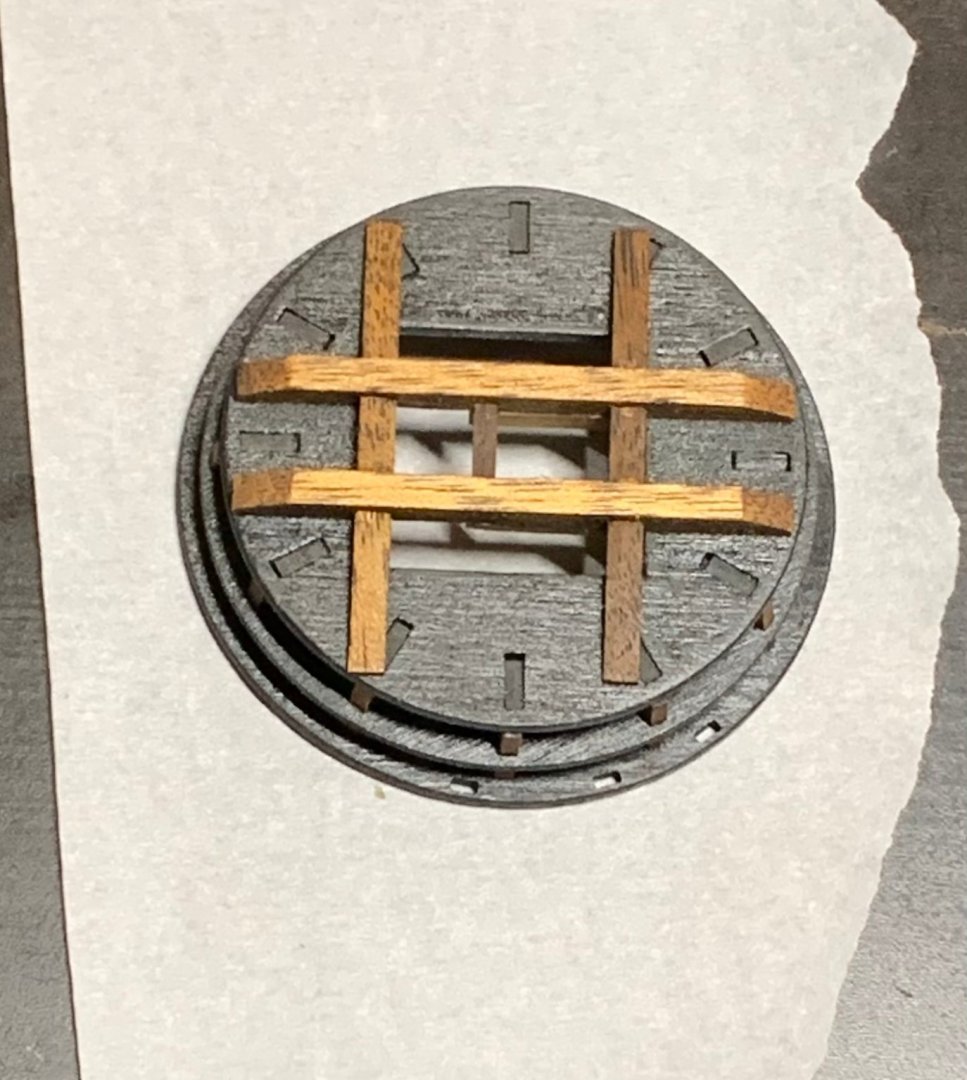
I finished pretty much everything on the ship body, channels, deck grates, etc and I'm ready to move on to the masting for now. I have spent quite a bit of time studying the plans for the mainmast just trying to get in my head exactly what is going on with it and I think I've figured that out but I'm not really sure how I'm going to get there yet but then that's the fun and challenge. I went ahead and built the first mainmast crowsnest (instructions never call this out by name so I'm guessing here). Like others have mentioned in their build logs I used a slightly different method to put all the pieces in. I glued the first support to the bottom and then the middle ring to a second support and then glued that support to the bottom and the first support 180° from the first support already glued in. That gave me the ring supported on two sides and then I just added the other supports one at a time until all were in, some of the final ones were tight but I found I could just position the braces for the ring on the ring and then push the bottom with tweezers until it popped into the slot in the bottom. I haven't added the eyebolts yet which brings me to my one tiny quibble with this kit which is the number of eyebolts supplied, parts 227 and 228. The instruction book states that it supplies 178 of part 227 and 36 of 228 and that's nowhere near enough. It's surprising because all the other materials in the kit are so generous, I have extras of almost everything but I ran out of part 227 and 228 ages ago and still need lots more. I've been using the copper eyelets in their place (200 included) but I'm not sure that I won't run out of them when I find what they're required for. Honestly double the number of parts 227 and 228 would have been nice. I'm sure I used up a lot of those adding outhaul tackle to the cannons, at 8 eyelets per cannon that's 112 of them used up right there, but that's even listed in the instructions as an option. It's an extremely minor issue with a wonderful kit though just be aware that you'll run out if you rig the cannons. When finishing up the crowsnest I couldn't bring myself to paint everything black, I just feel that I want to help my eyes see the details and everything flat black just didn't work for me so I left the supports and the crossties natural. If it starts to bother me then it's easy enough to paint those pieces black. One question about the plans has popped up though, when you look at the mainmast plans there's nothing on them that shows where the main deck line should be, I'm assuming that it's length is set to go through the holes in the main and gun deck and rest on the bottom of the kit but it would be nice to have confirmation of how high above the main deck line things are. Is that typical? All in all things are going very well, I expected some slowdown here as I shift gears to the masts and rigging as there's a lot going on here that needs to be done correctly to avoid issues later.
-
Thanks, for some reason I though the word was coop, since the person making the barrels is called a cooper, but after looking it up hoop is the correct word. I should look first but appreciate the correct information.
-
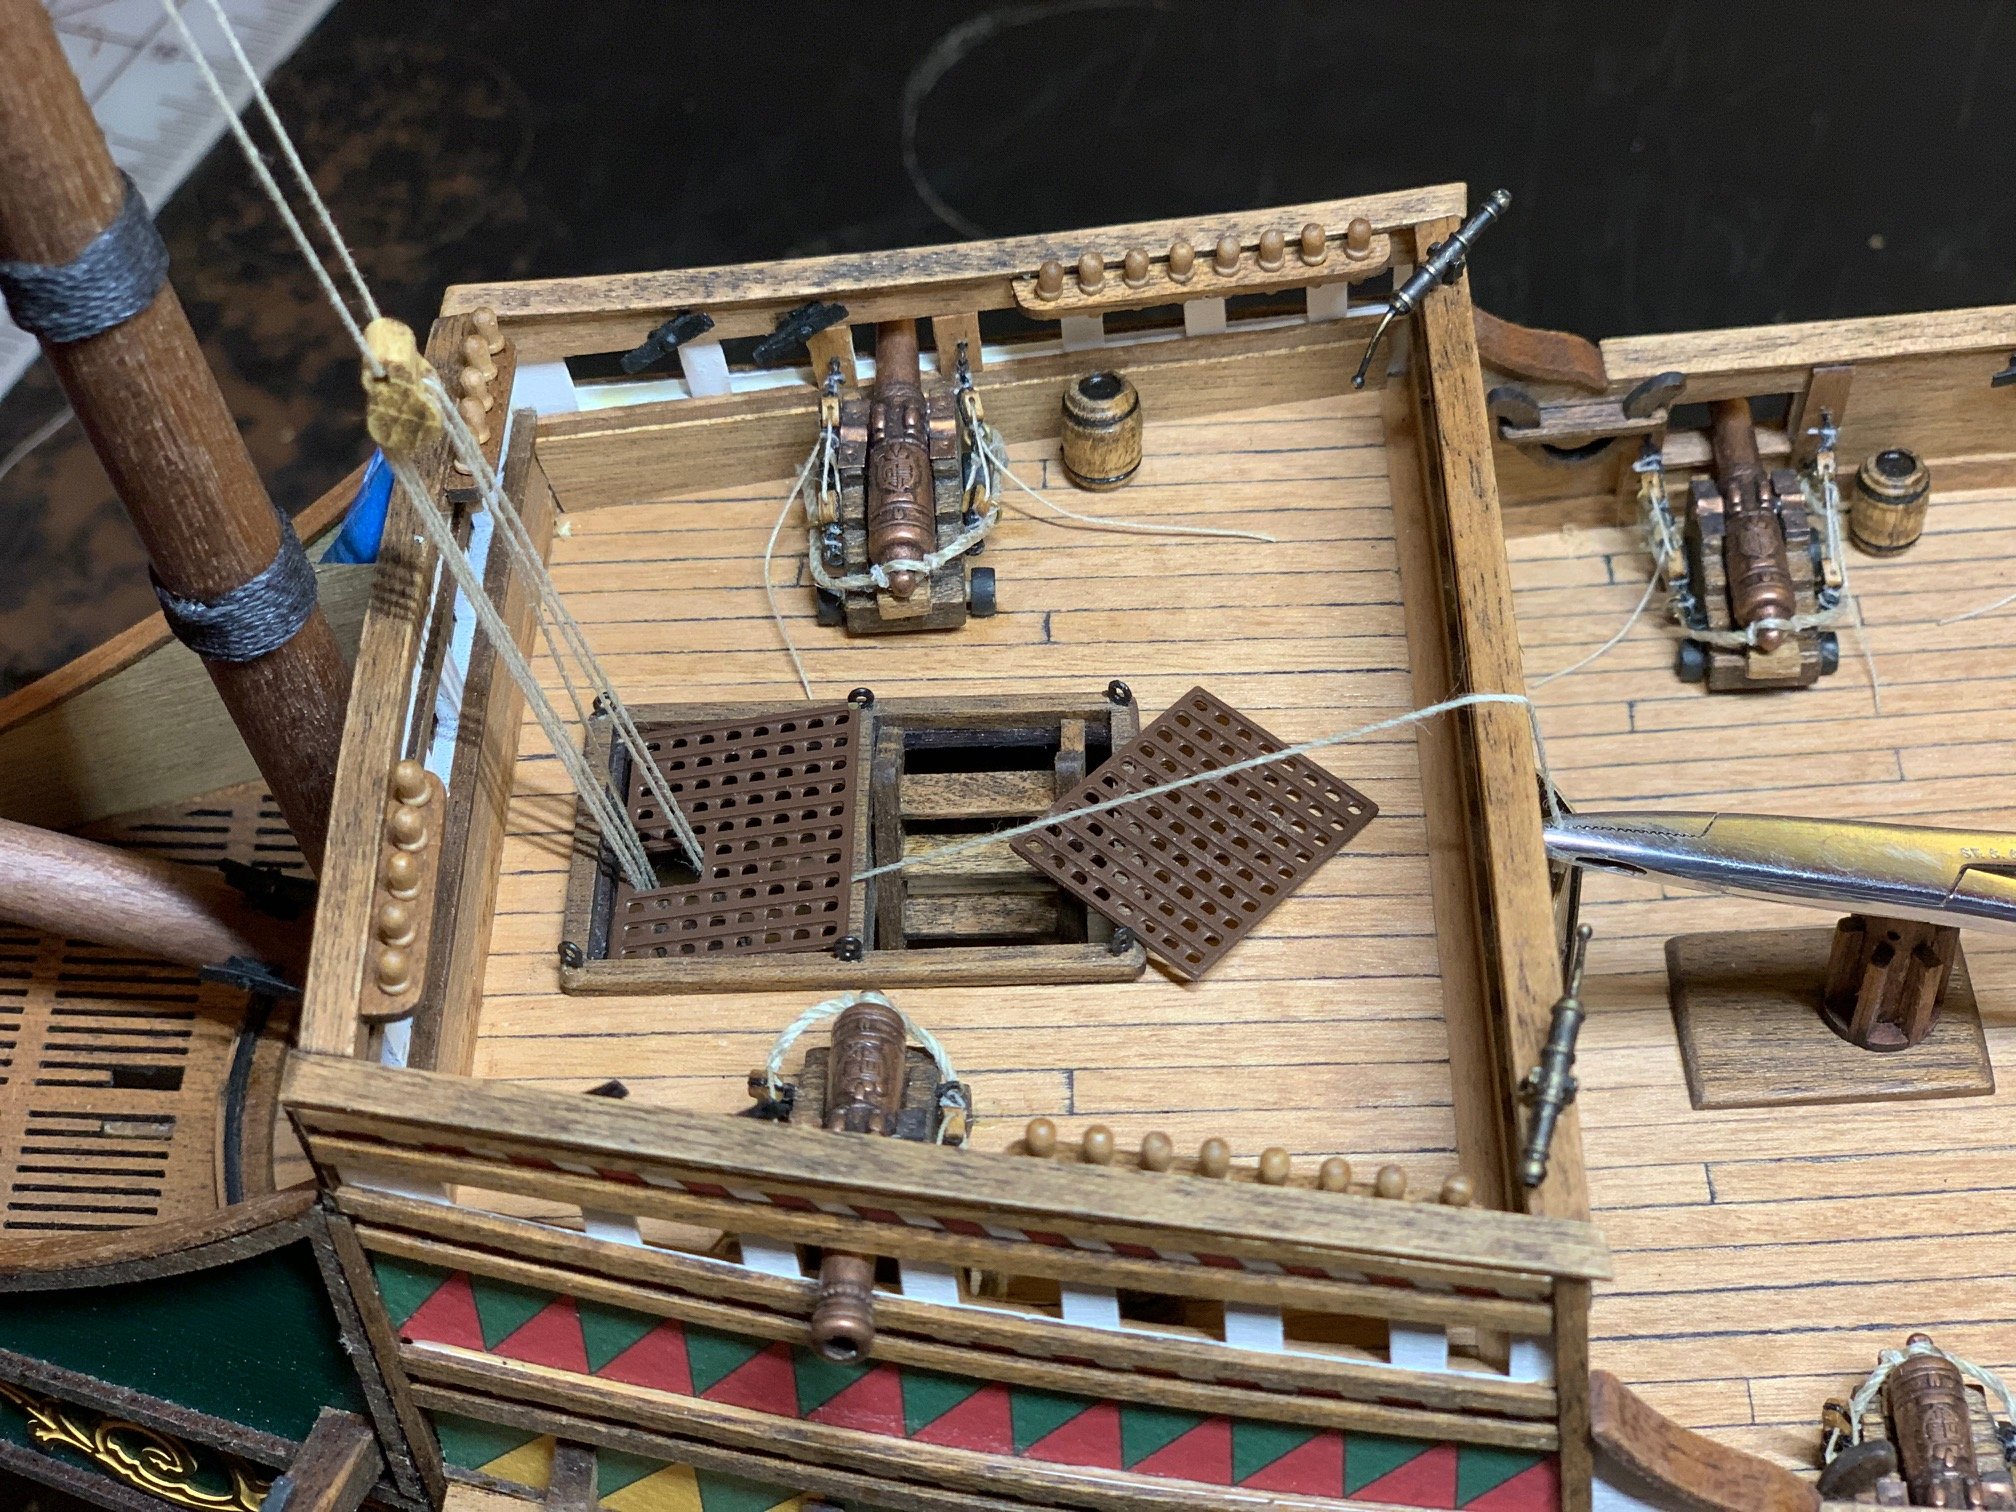
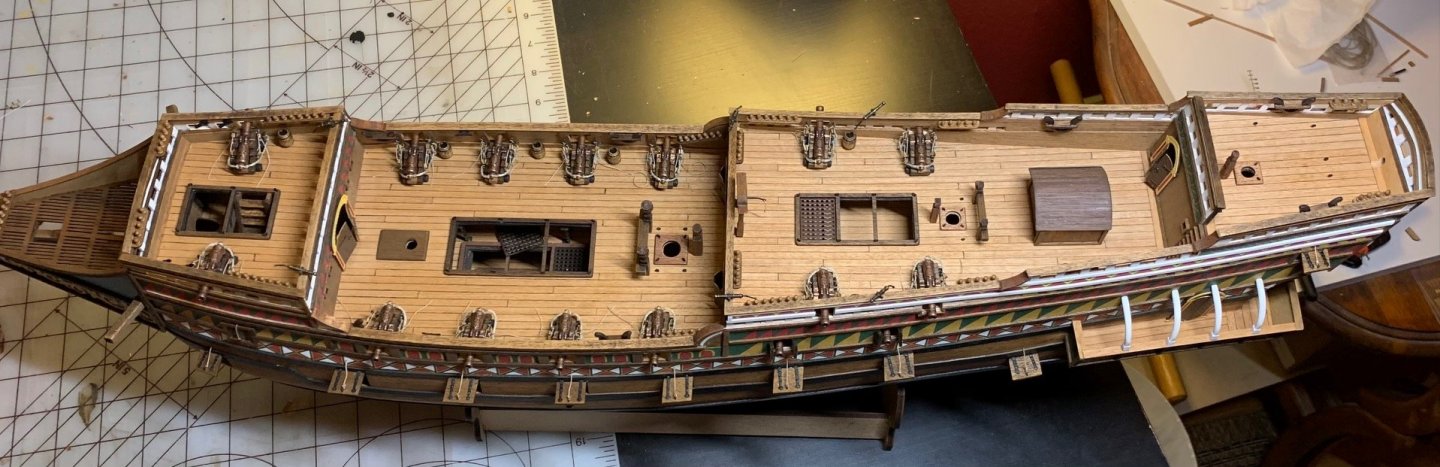
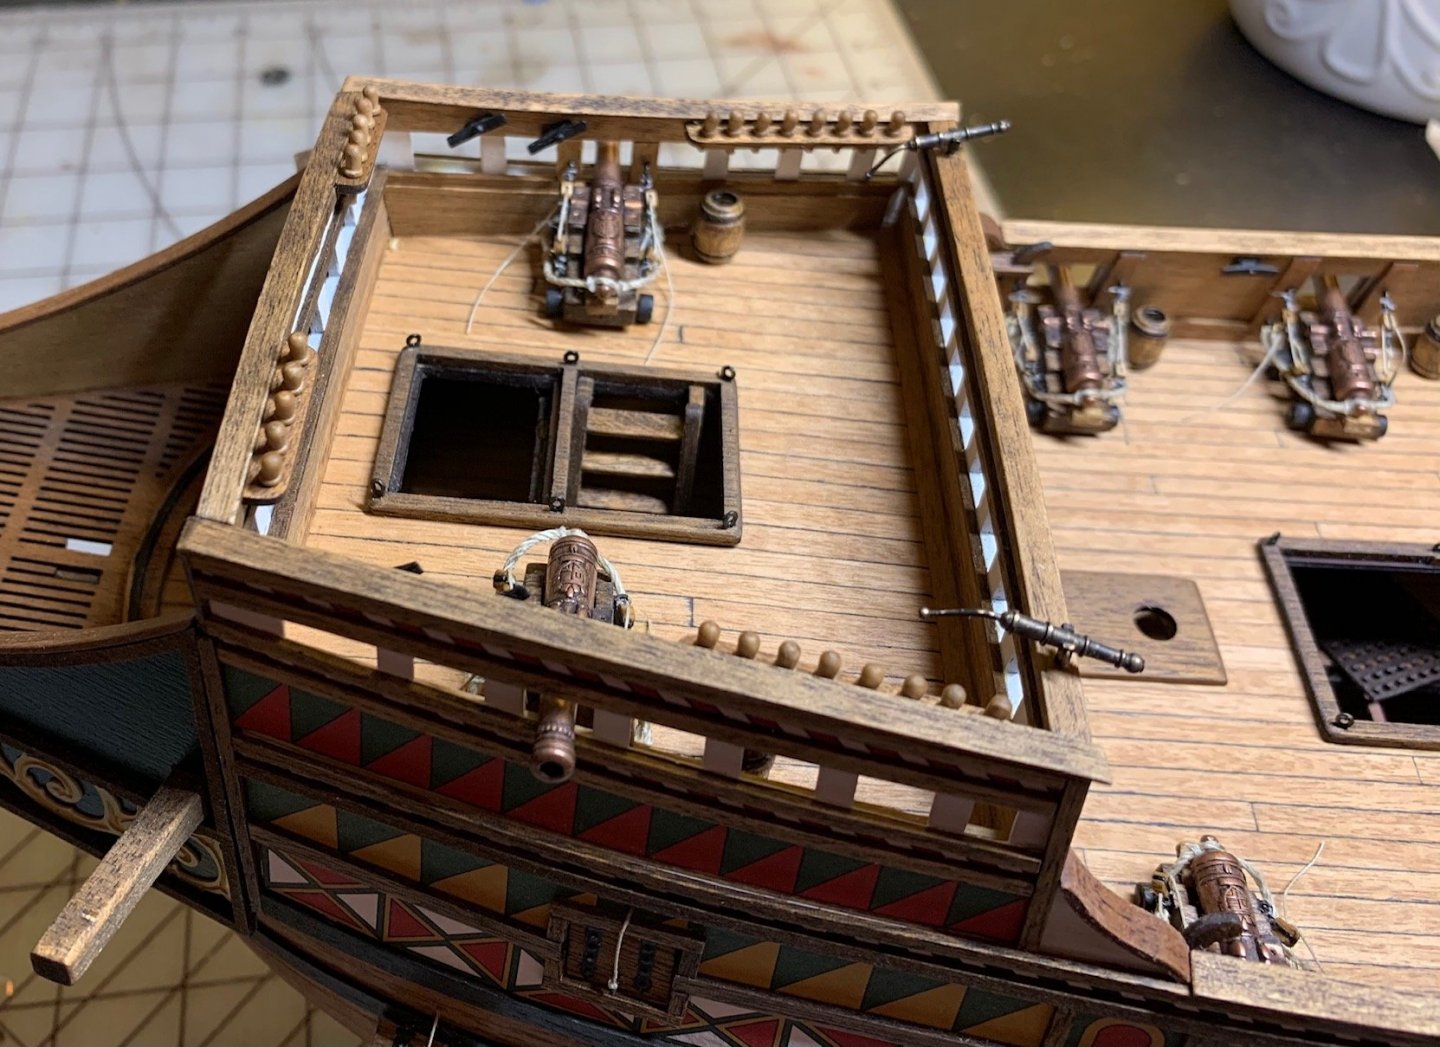
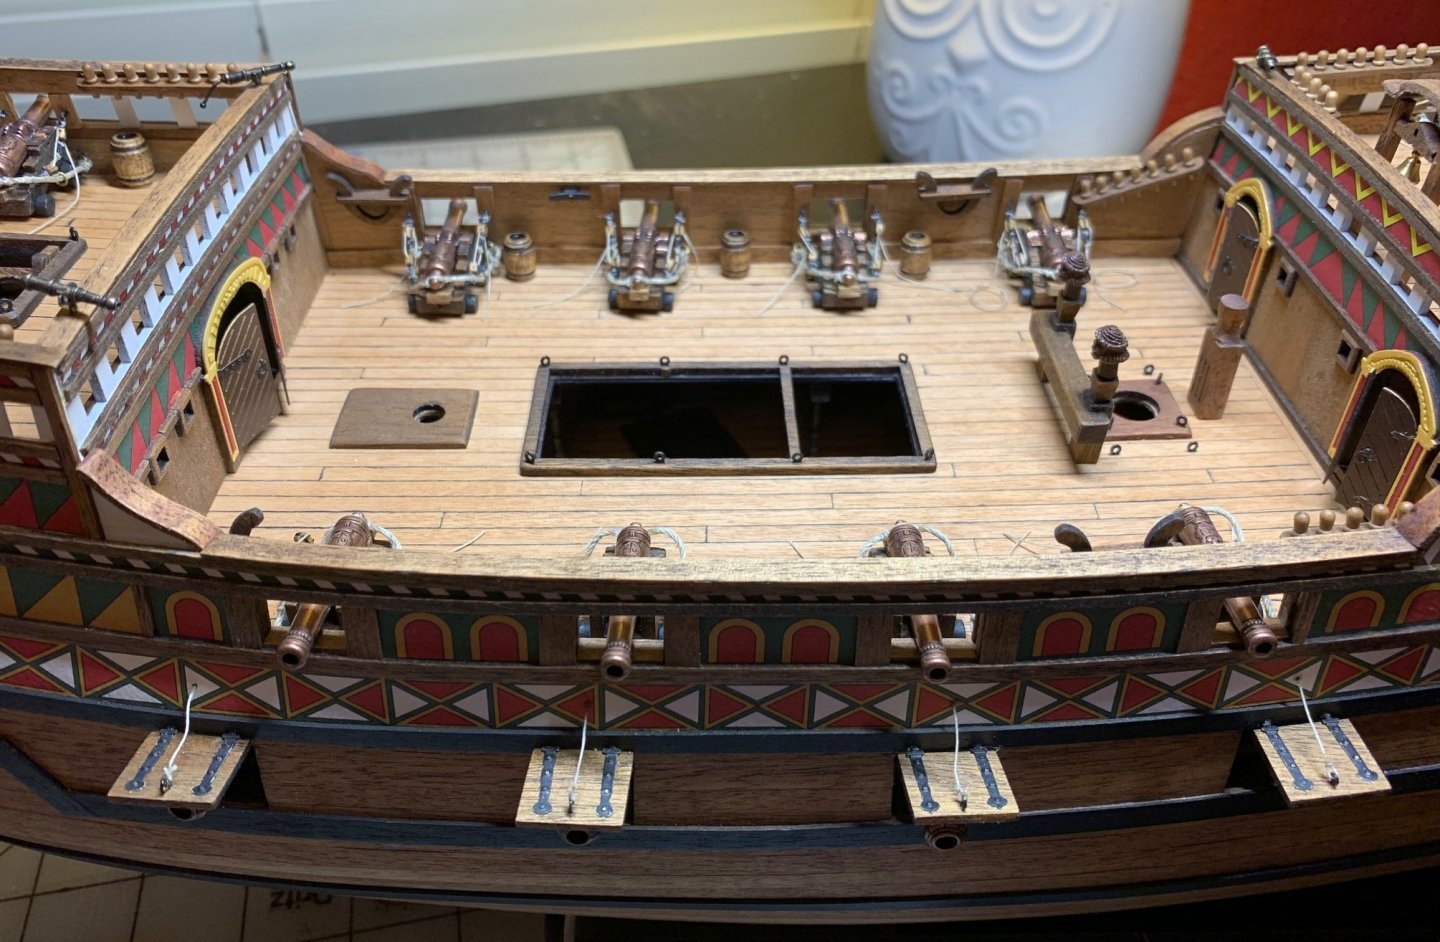
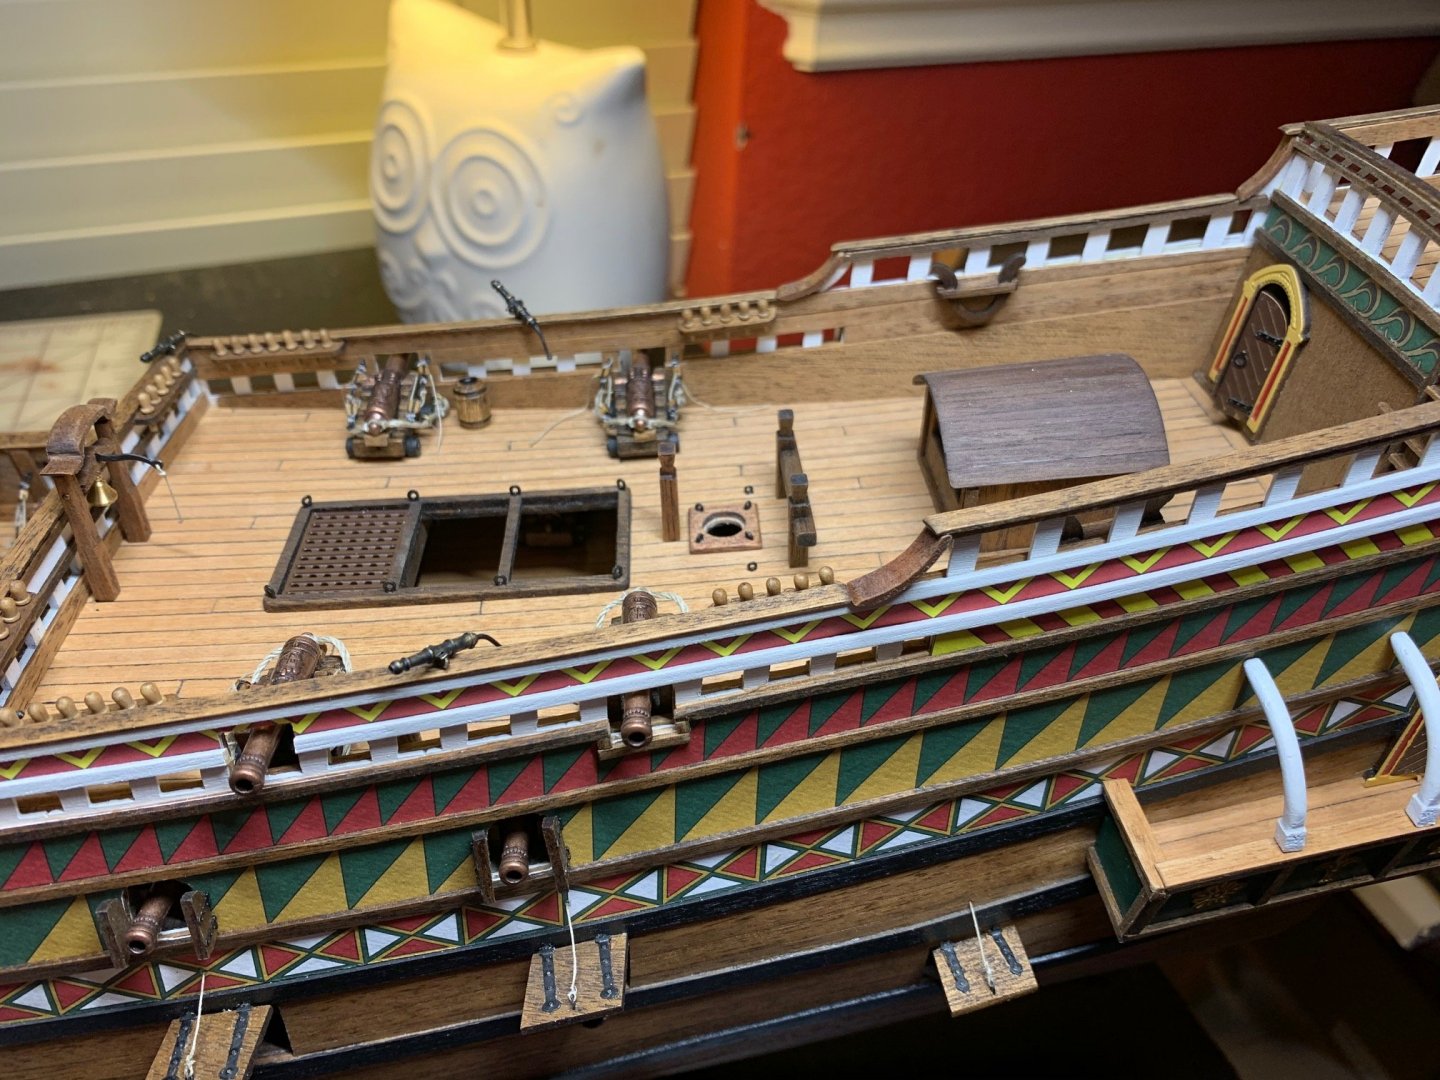
Finishing Cannons and Gunports: All the cannons are in place and rigged, lots of tiny pieces in those but it all came out fine. I just need to finish one side gunports and I'll be ready for the channels. I found some barrels in the kit and couldn't find any mention of them in the kit so I'm assuming they're there if I want to use them and I like that. I decided to make them gunpowder barrels and place them around the cannons. I stained them dark brown and I simulated coops (I think that's the word) on the barrels using thread and just CA glued black thread in two grooves that already existed on the barrels, and then painted the tops of the barrels black to give them some definition. I believe everything that goes on the deck is there now exception masts and rope of course. Some of it is still just hand placed and not glued but I'll probably get to the point of gluing the rest soon.
- 166 replies
-
- 13
-