Bill97
-
Posts
2,731 -
Joined
-
Last visited
Content Type
Profiles
Forums
Gallery
Events
Everything posted by Bill97
-
Robert how would you compare the size of the Wasa to the Golden Hind?
-
After seeing the pictures and reading your comments I did a little online search. There is a 13 part build video of the Soleli Royal you have. That is an impressive ship to build! You will enjoy it. Kind of expensive brand new on line and sold out on eBay. I also really like the Airfix Wasa. I have found it available and am going to add that to my Christmas. I can’t remember the scale of it now. What is your’s? Going to look for the Prince also.
-
Wow Robert that is an impressive stash! Why don’t you mail a couple of them to this poor guy! 😀
- 165 replies
-
- 1
-

-
- english galleon
- revell
- (and 2 more)
-
Pretty much the same situation here Robert. Building these models is what has gotten me through this covid-19 shut in. Just go back to my building area, sometimes with a bit if bourbon, and tinker away. We also have a room filled with grandkid stuff that may someday free up some display space. I just assumed since you had all those great pictures and information about galleons you had built them and had them in your home.
-
Robert have you built all my the ships you referred to? If so, do you have them displayed all throughout your house? My wife kind of “nicely” requests I keep all of mine in the “ ship room”. Afraid that is eventually going to come down to a battle! 😀. Maybe at that point it may be better if I do have some smaller ones. If the Victory is as big as you say it is really going to eat up space in my ship room. How many do you have? Once I get the Victory and Golden Hind built I will have 5.
-
Oh sorry Kevin I just saw your comment. Thanks for the compliment. My next build is the Heller 1/100 HMS Victory.
- 165 replies
-
- 2
-

-
- english galleon
- revell
- (and 2 more)
-
Very good Robert. Thanks. In your stand alone pictures I would have believed they were similar size! I guess there is pretty good architecture in a smaller ship. Like you said I won’t really be able to tell by the advertised scale of the model how big, or small it actually is. If curious I guess I can always research a particular model to get it’s dimensions. I was thinking one good thing about building smaller models is I can more easily find places to display them in my house. I checked eBay after your earlier comment and found several of the ones you recommended. I am going to end up with more kits than I will have space. Working on Man O War. Getting Heller’s 1:100 HMS Victory for Christmas and probably the Airfix 1/72 Golden Hind as well. Would love to pick up a couple more of the galleons you recommended. That should keep me busy for a couple years. 😊
- 165 replies
-
- 1
-
-
- english galleon
- revell
- (and 2 more)
-
Ok Robert thanks. I have not seen a smaller one completed. Like you say the architecture is the most important. I just wondered if the small ones looked as impressive or just looked like a kids toy? Your’s looks good. So I may be wrong in my thinking.
-
Thanks Robert this is very helpful. My main curiosity reference the scale is the actual size of the finished model. I really like the finished size (regardless of scale) of the Man O War you and I did. Big enough for good detail and just looking at in the case. My USS Constitution and Cutty Sark both are a little over 30 inches (76 cm) long, and I am guessing the Man O War will be around that same length. The Revell HMS Victory 1/225 I am helping my grandsons build will be around 40 cm long. It seems a bit to small for what I enjoy more. Could you guess at the size of the ones you listed above? I hope I am not asking to much. I included a picture of my grandson’s in progress 1/225 HMS Victory next to my in progress Man O War. Definitely much smaller.
- 165 replies
-
- 3
-
-
- english galleon
- revell
- (and 2 more)
-
Guys I also meant to ask what scale are most of these? What scale do you enjoy most? I have only worked with 1/96 and 1/100 until getting the Revell 1:225 Victory for my grandsons. It is definitely different than working on the bigger ones.
-
Thanks guys. I am going to write down all these names and search for them online. In my search for other models on the few sites I am aware of (Amazon, Hobbylinc, etc.) I can’t find much on galleons. Where do you find them that trust ordering or do you buy them somewhere off the shelf at a hobby store type place? As I have mentioned I have the 1/100 Heller Victory as a future Christmas gift and have mentioned the Airfix 1/72 Golden Hind on my wish list. Love all the ones pictured above, if I could just find them.
-
Bosco are you making your own ratlines? If so, is that by choice or a part of the Airfix build? That is something I have not tried before. What issue are you having with the glue?
-
That is incredible Bosco. No wonder you have such great memories! I guess you lived, and maybe still do, live somewhere near where it is docked? I have a number of YouTube videos of the Victory I look at often. Have to say I am envious of your experience.
-
Kirill4 what is this model and where did you find it? No way I could replicate your excellent work, but if I could do have as well I would be satisfied. Looking to add a galleon to my future build list. This would for sure be at the top of my hunting list.
- 228 replies
-
- 1
-
-
- spanish galleon
- lee
- (and 1 more)
-
Thanks Robert. It did take some work but I think it came out alright as well. When I add the standing rigging I will fine tune a bit more as necessary. Hope I don’t “BITE” off to much! I will get my jacket too. In an earlier post I think I remember you saying you pretty much stuck with galleons. Is that correct? Since I am enjoying the Man O War so much I am looking for a recommendation for another one. I like your’s and Bosco’s pictures of the Golden Hind. I really enjoy models that take a while to build and have a lot of detail. Other than the Golden Hind, do you have any other recommendations?
-
That is a really nice memory for you Bosco. What is your personal meaning with the Victory? I am old enough to have several grandsons. Two enjoy helping me build the model ships. I purchased the Revell 1/225 Victory for them and am helping them build it. I hope they continue to have interest in these ships.
-
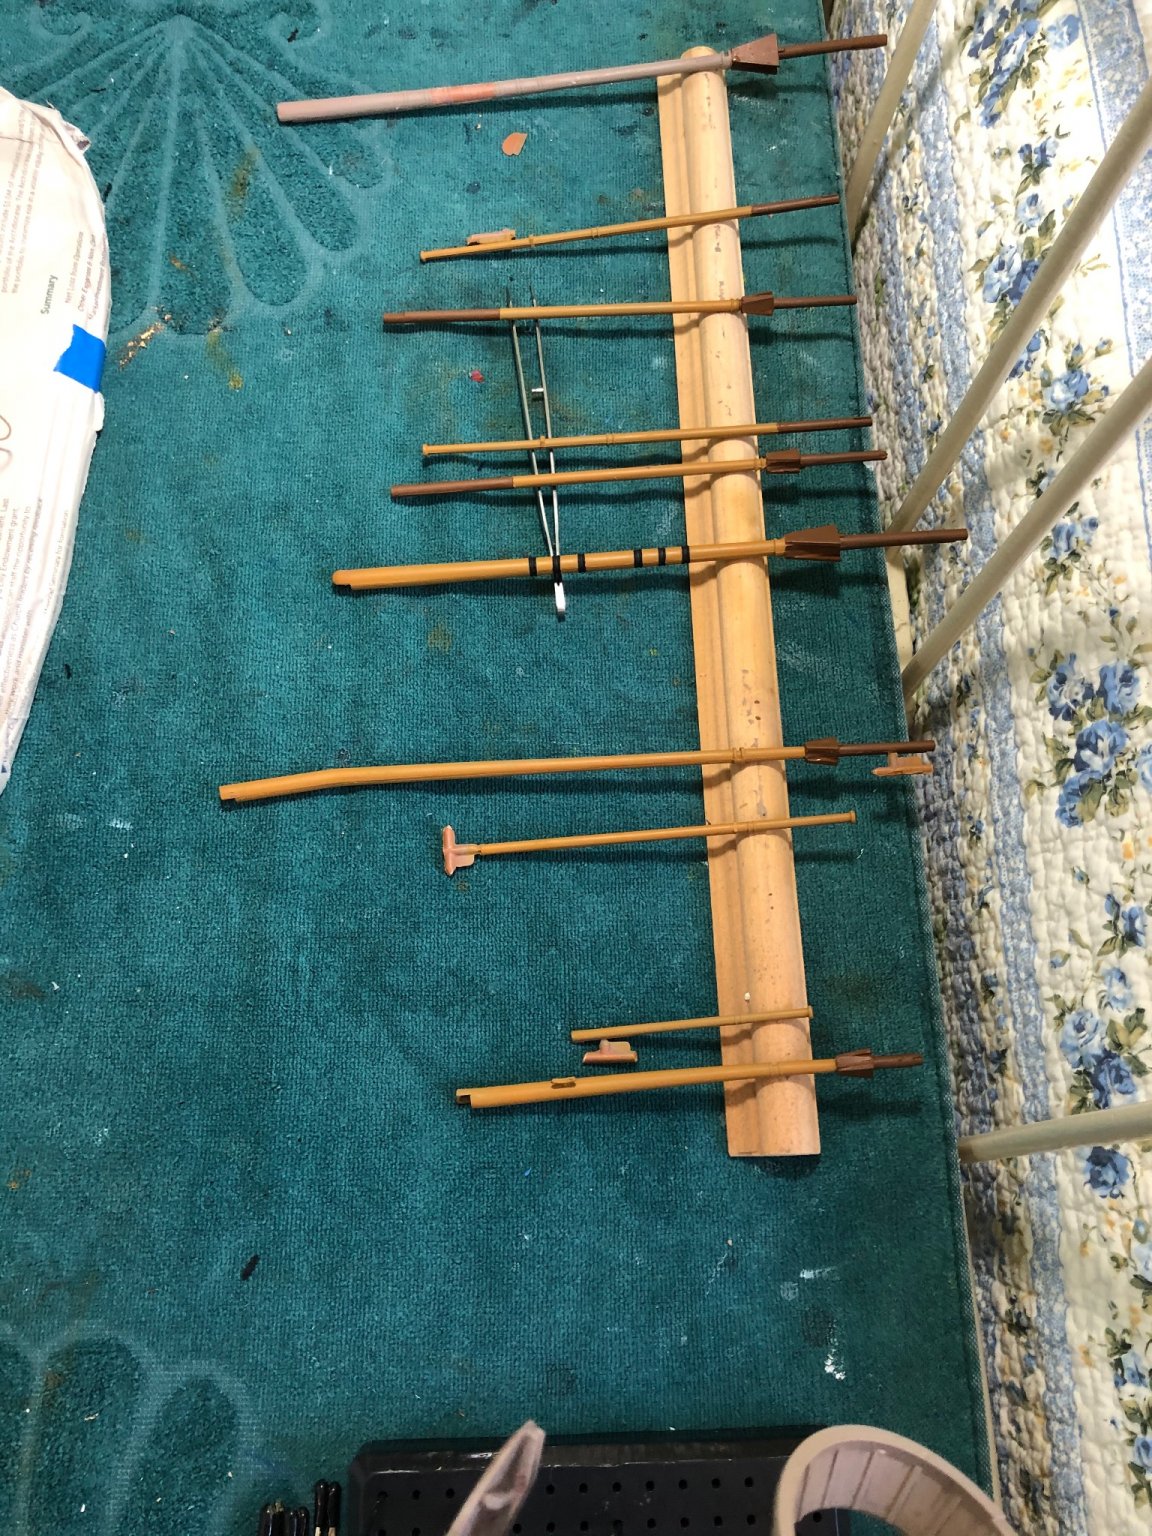
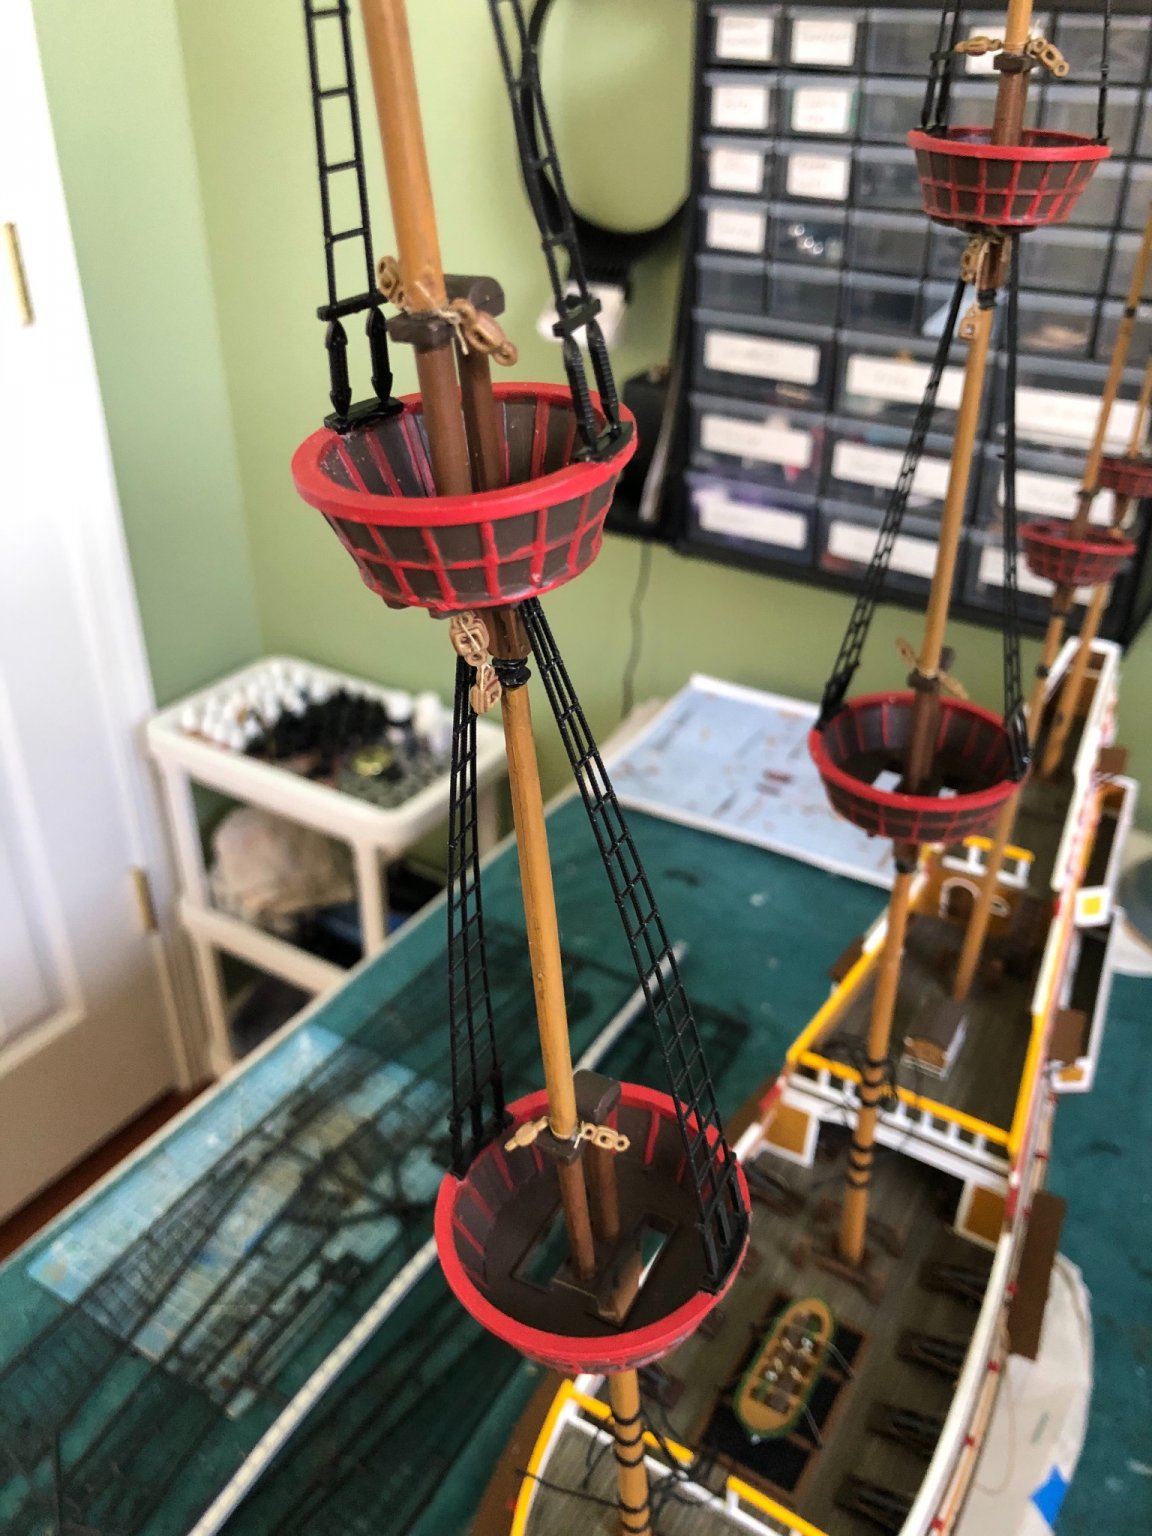
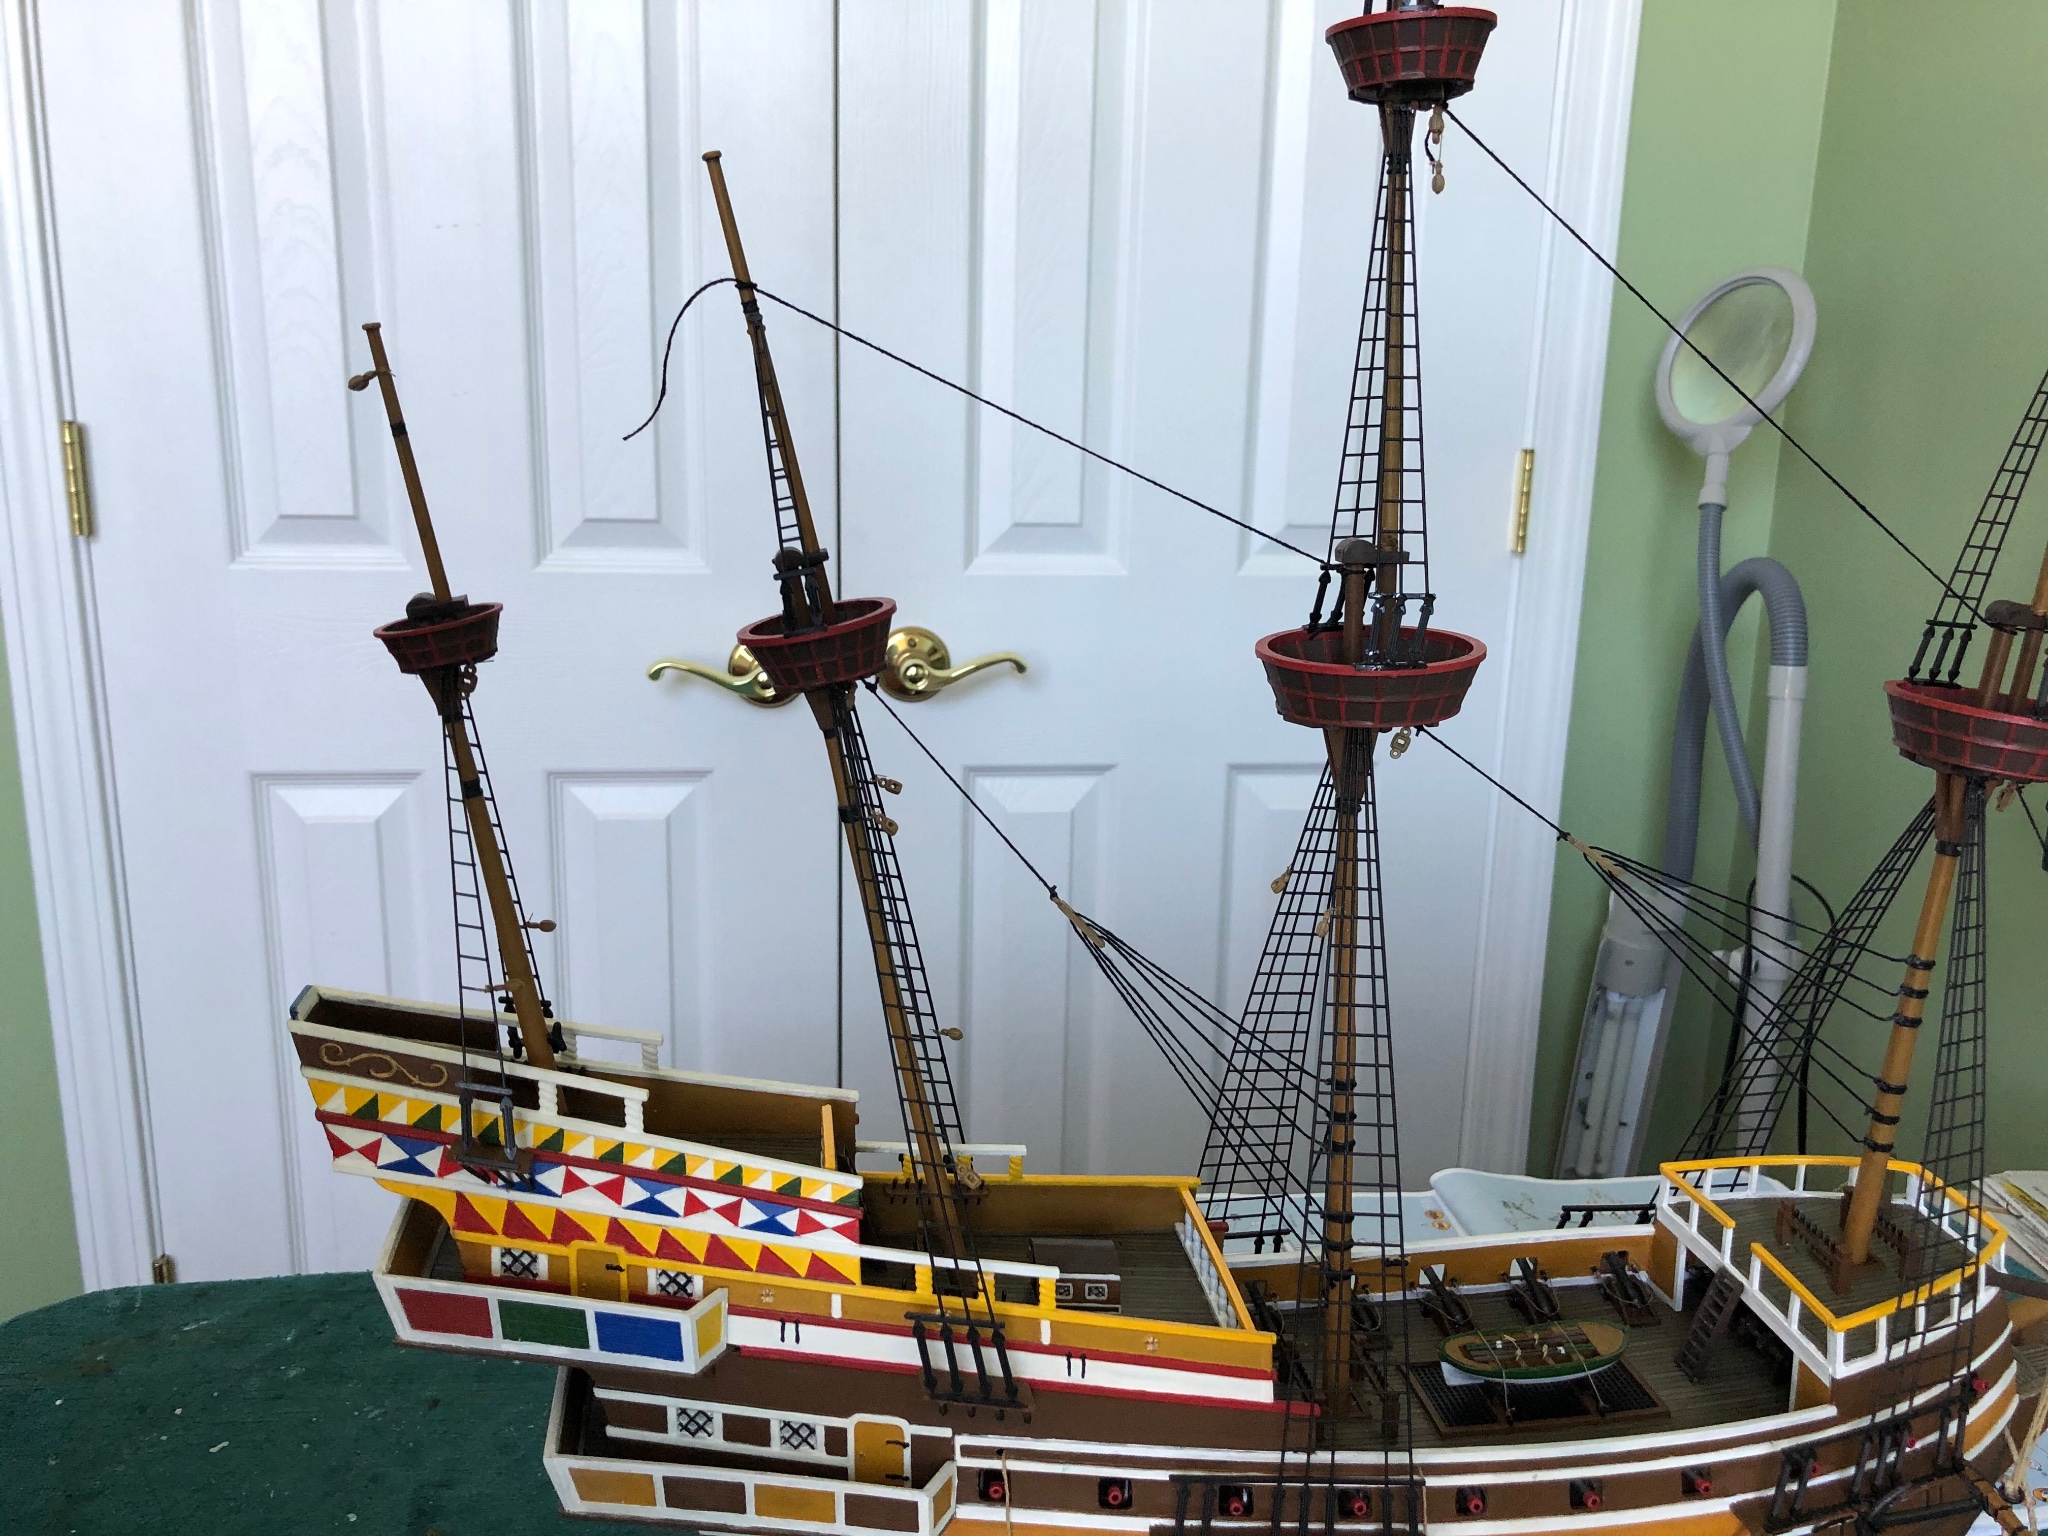
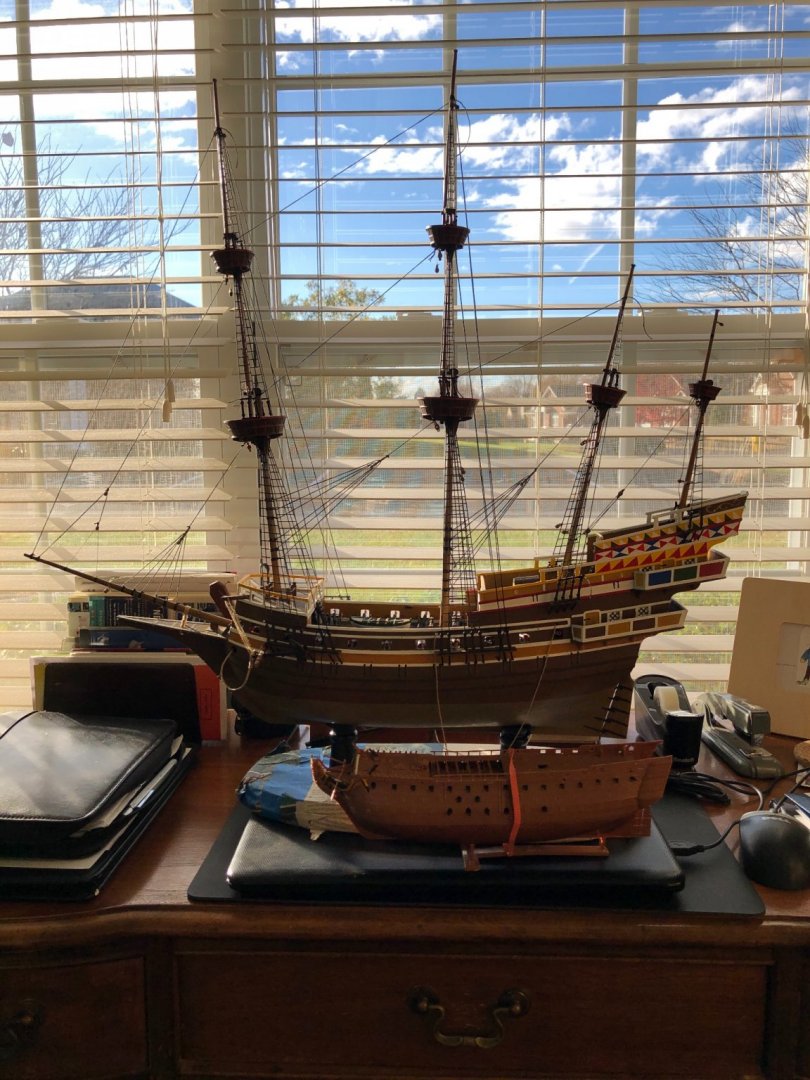
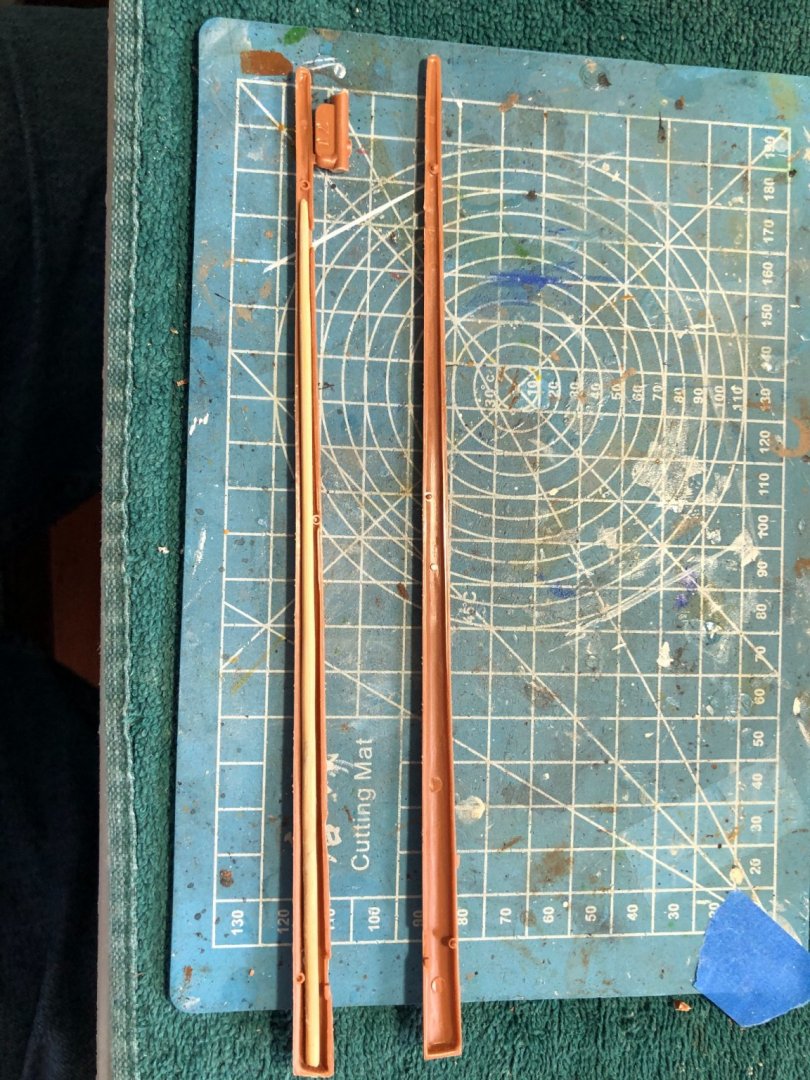
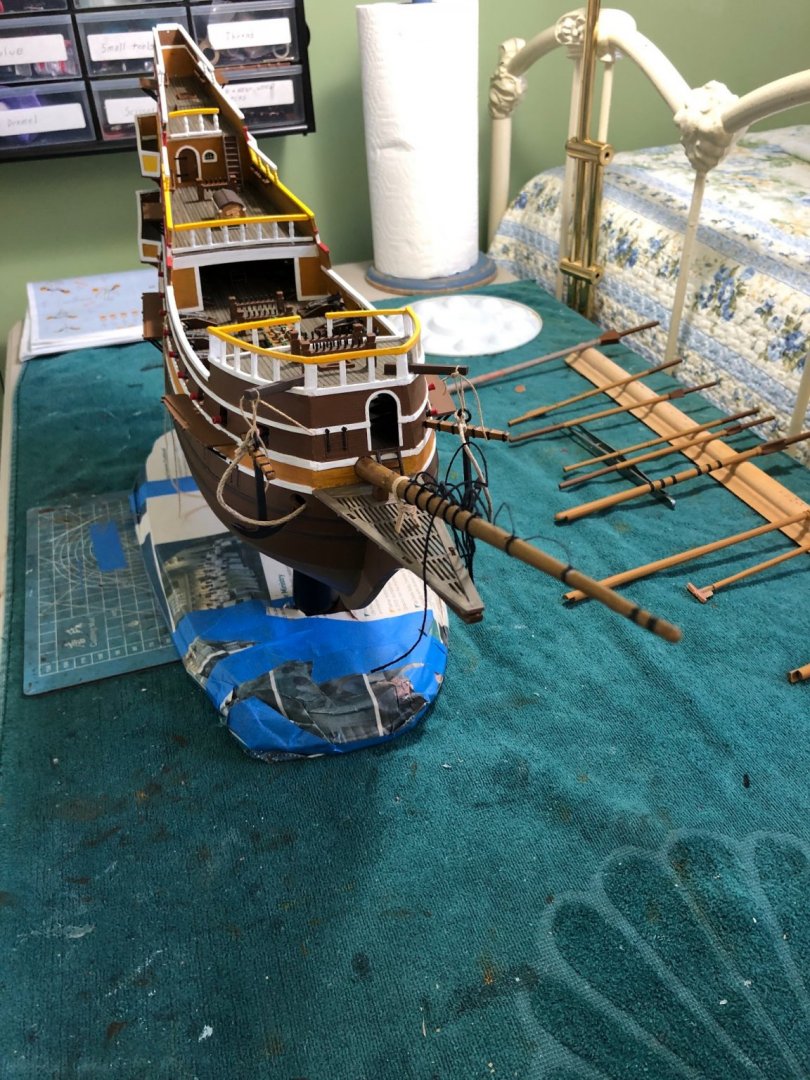
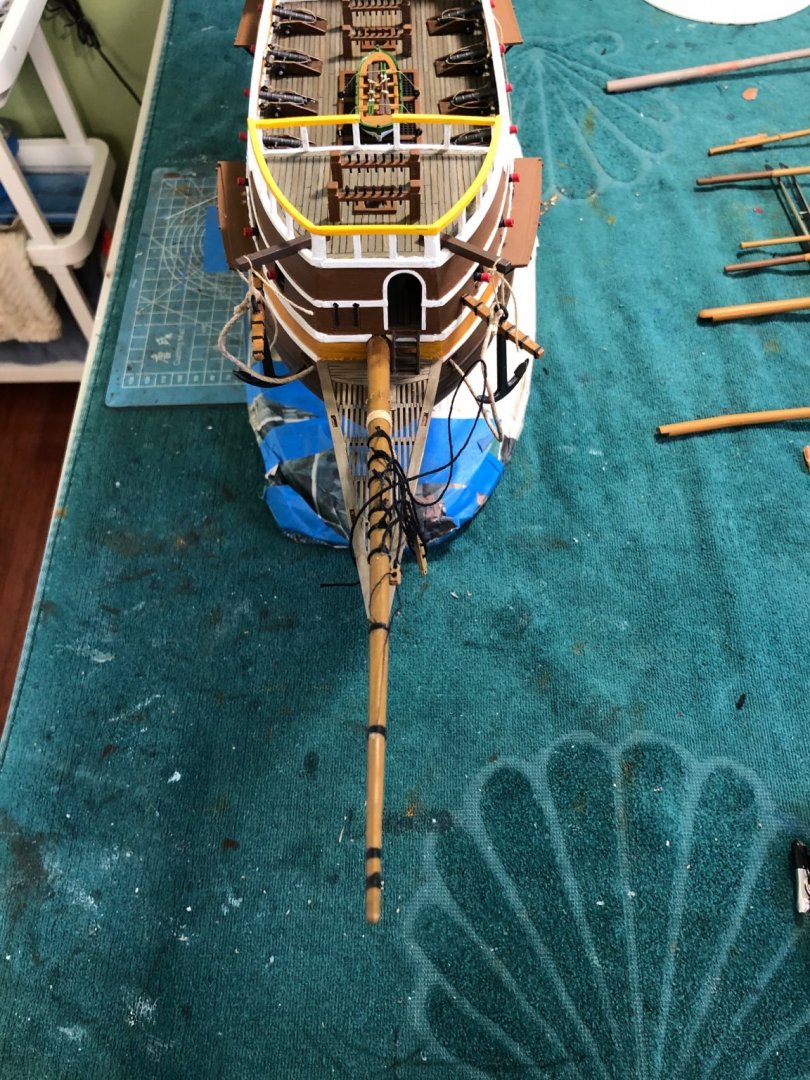
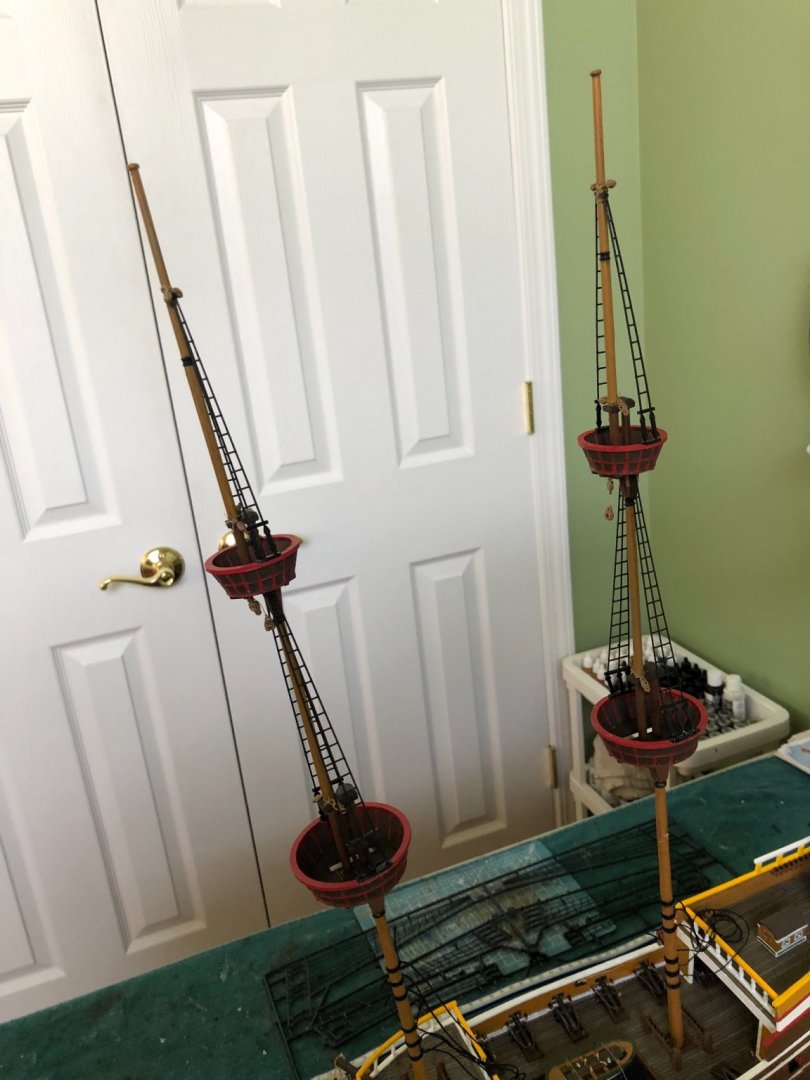
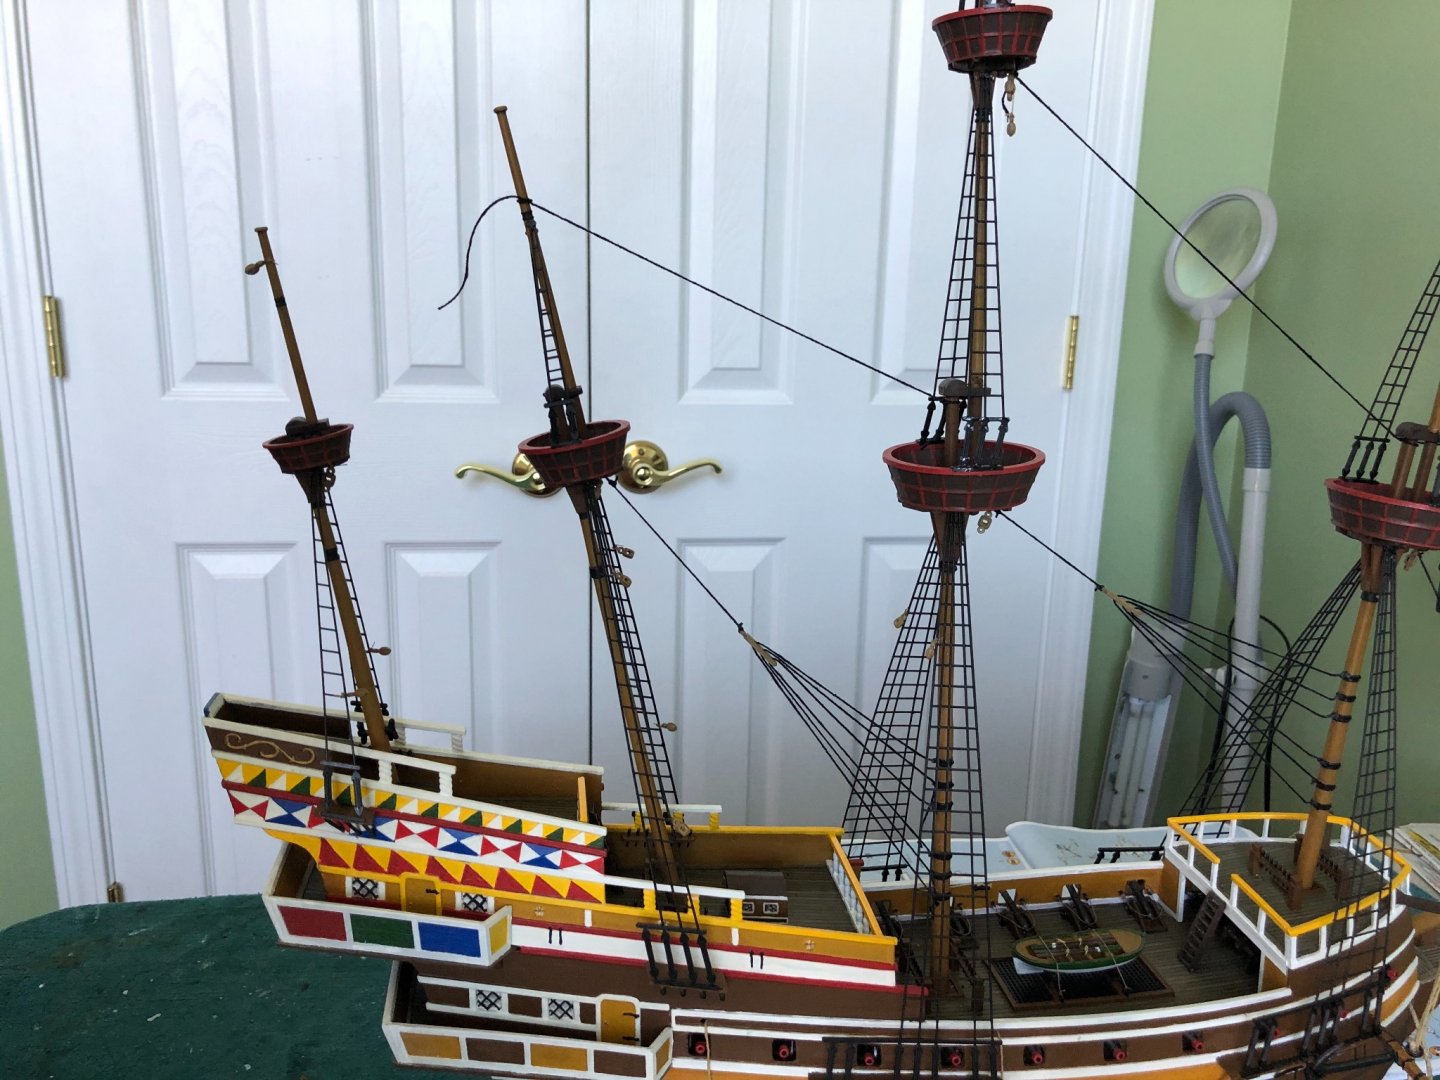
Devoted a good amount of time recently to building the masts and installing them. I have accidentally broken my bowsprit on two of my previous builds and had to carefully repair it. This time I borrowed an idea from fellow builder Robert Taylor and added reinforcement between the halves before gluing together. Being this was my first galleon I was initially concerned about the fact that my mizzenmast and boniventure mast were not vertical. I was sure something was wrong but could not figure out what it was. Thanks to help from other builders on this site I found out they are supposed to be “raked” toward the back of the ship. Also learned why that was the case. I tried a couple different color pallets for the masts and the crows nests. Decided on the scheme in the photos that I like. Installed the masts, the pre formed ratlines, and have begun some of the standing rigging.


- 35 replies
-
- 6
-
-
- english man o war
- revell
- (and 2 more)
-
It is actually a Christmas gift I know in advance I am getting in advance. So I won’t get to start it until after Christmas. Give me plenty of time to devote to finishing the Man O War and building it’s display case. Have a lot of reference material as well but will certainly reach out to you for advice.
-
I have the Heller 1/100 HMS Victory up next. From what I understand it could be this time next year before I finish it.
- 265 replies
-
- 1
-
-
- Golden Hind
- Airfix
- (and 1 more)
-
Bosco have you done the 1/96 Revell Constitution? That will take you a while! Took me a good 6-8 months!
- 265 replies
-
- 1
-
-
- Golden Hind
- Airfix
- (and 1 more)
-
Just noticed autocorrect typed premolars! 😀 no idea what that is. I typed pre formed.
-
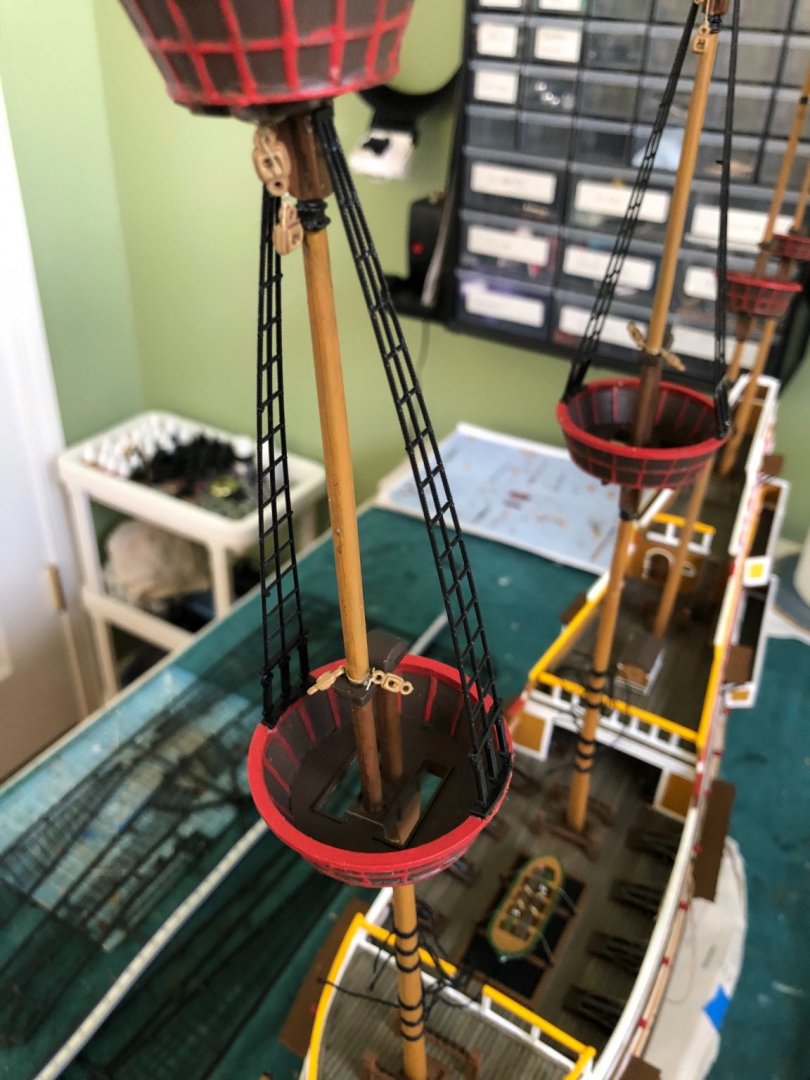
Thanks Robert and Louie. Robert I made the cases my self from a design I found on YouTube. Went with plexiglass instead of glass for weight, cost, and safety. Louie I wondered about the rake as well but the tops of the premolars ratlines lined up perfectly with the connection points on the mast so I guess they are right.
- 165 replies
-
- 1
-
-
- english galleon
- revell
- (and 2 more)
-
Thanks Bosco. So it is not that big. My Cutty Sark and Constitution are over 30” long and over 20” tall at 1/96 scale. I was concerned this model might be near the 40” length at 1/72. I guess the “actual” ship was much smaller than those ships.
- 265 replies
-
- 1
-
-
- Golden Hind
- Airfix
- (and 1 more)
-
Hello Bosco72. I am looking at purchasing this model for my next build. Could you tell me your estimate of what the finished ship’s size will be? I pretty much do 1/96 and 1/100 scale. Never did a1/72 like this Golden Hind. Wonder just how big it is and if I will have a space to display it when finished. Also the information I found on the kit says it has just a little over a 100 parts. Is that correct? It looks more complicated than that.