Bill97
-
Posts
2,731 -
Joined
-
Last visited
Content Type
Profiles
Forums
Gallery
Events
Everything posted by Bill97
-
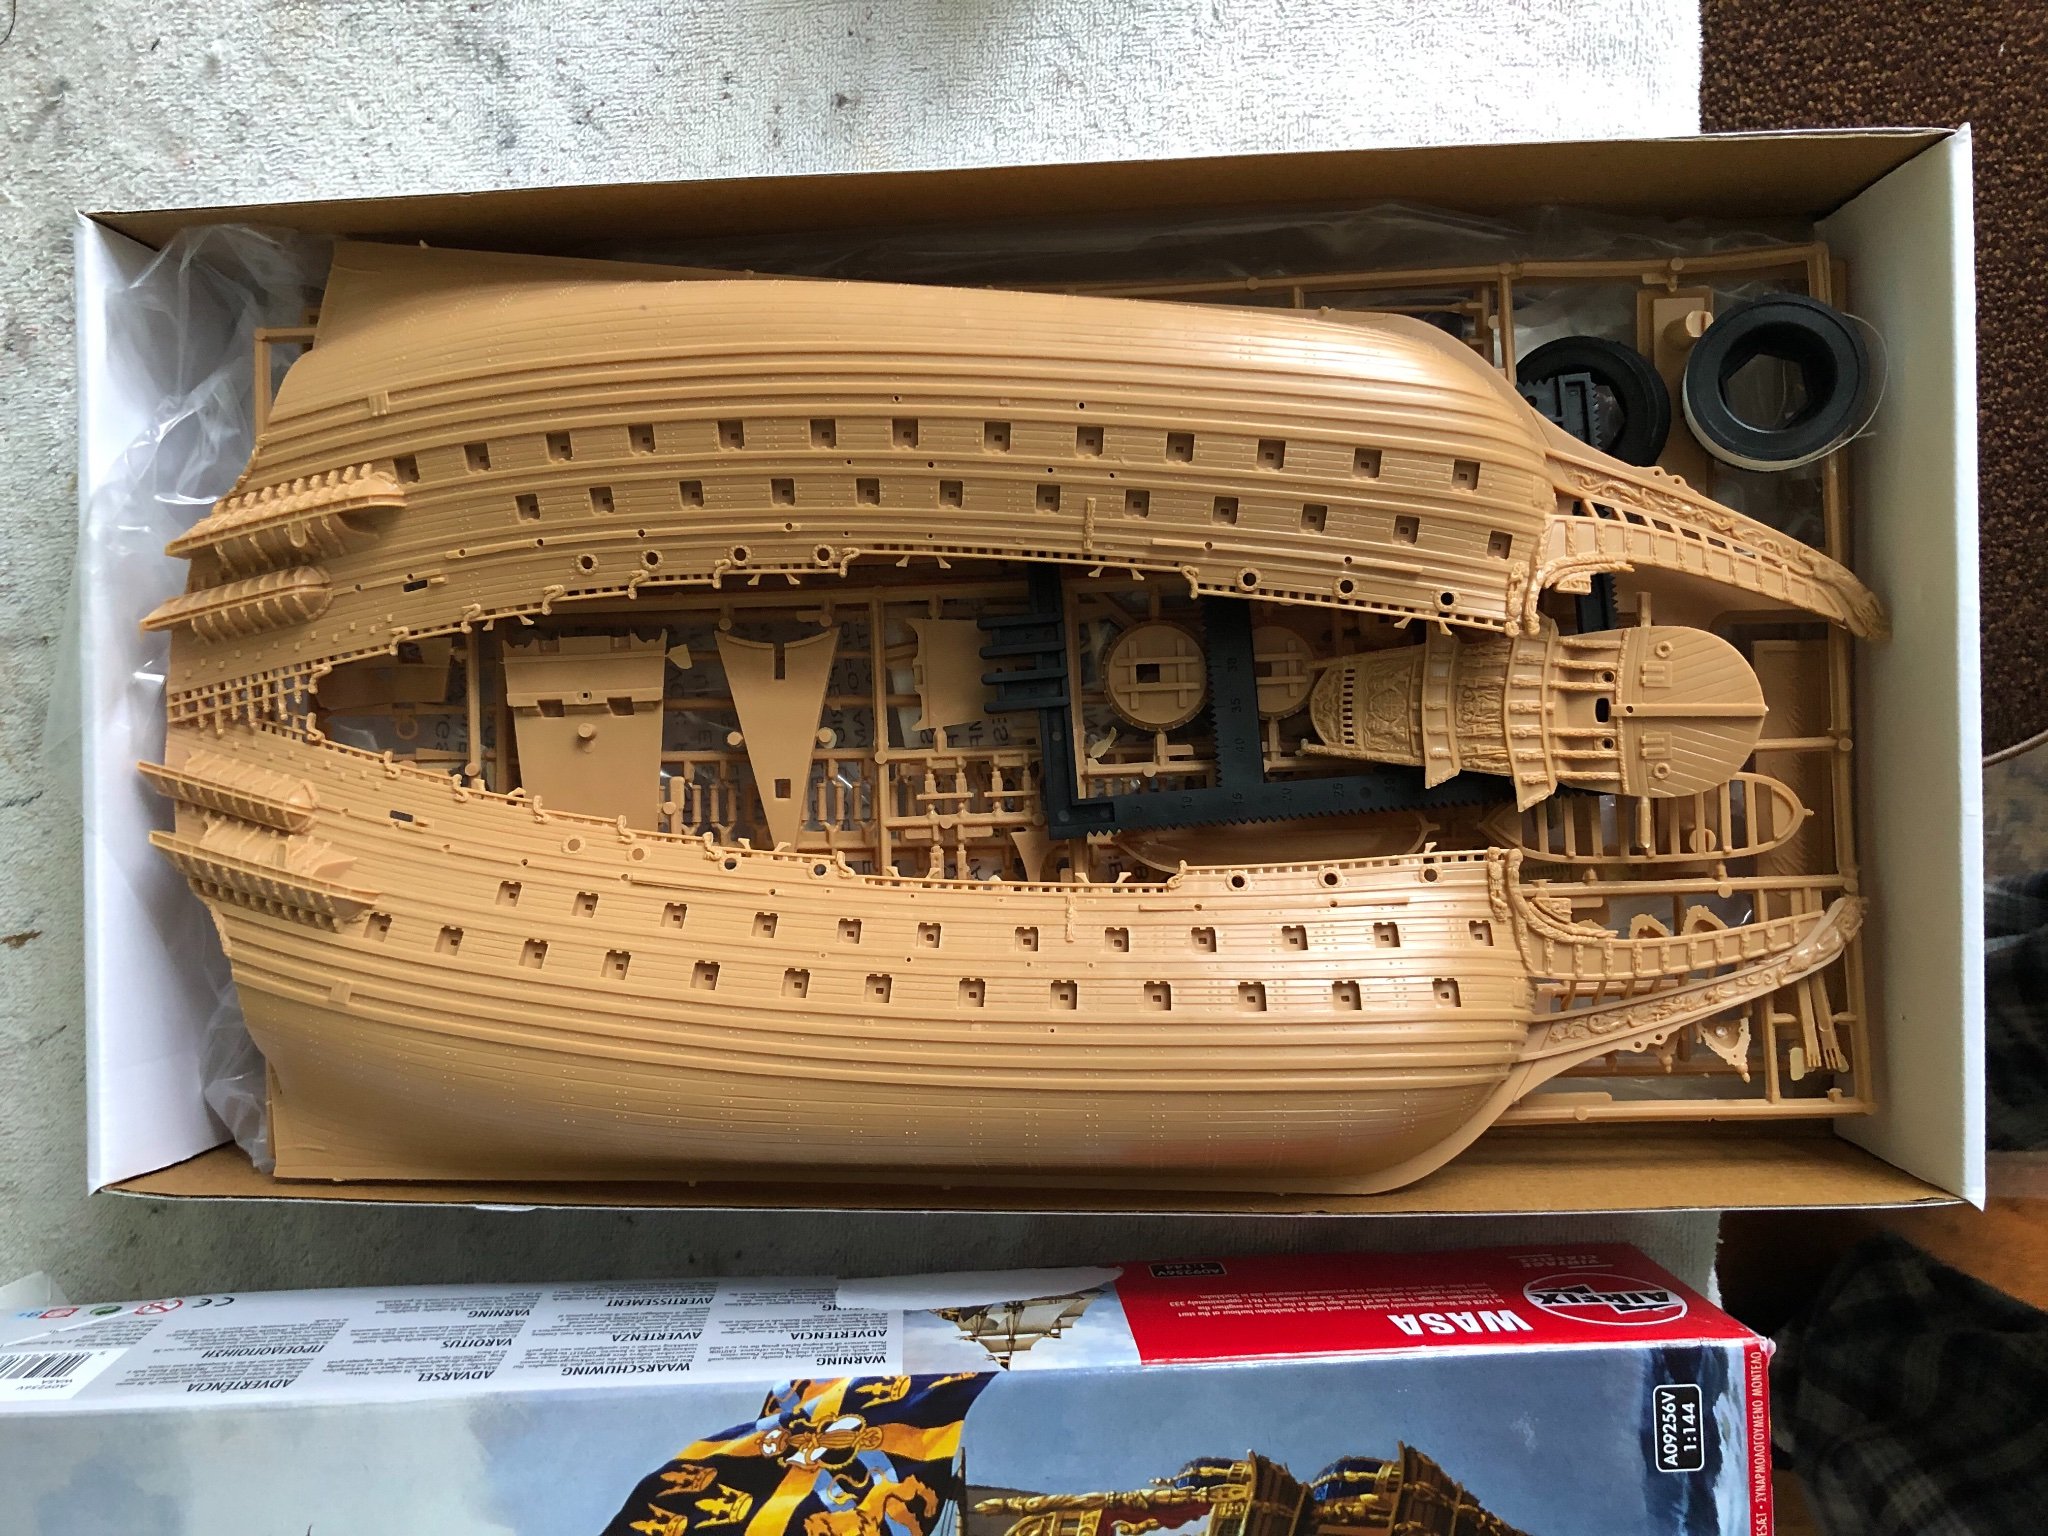
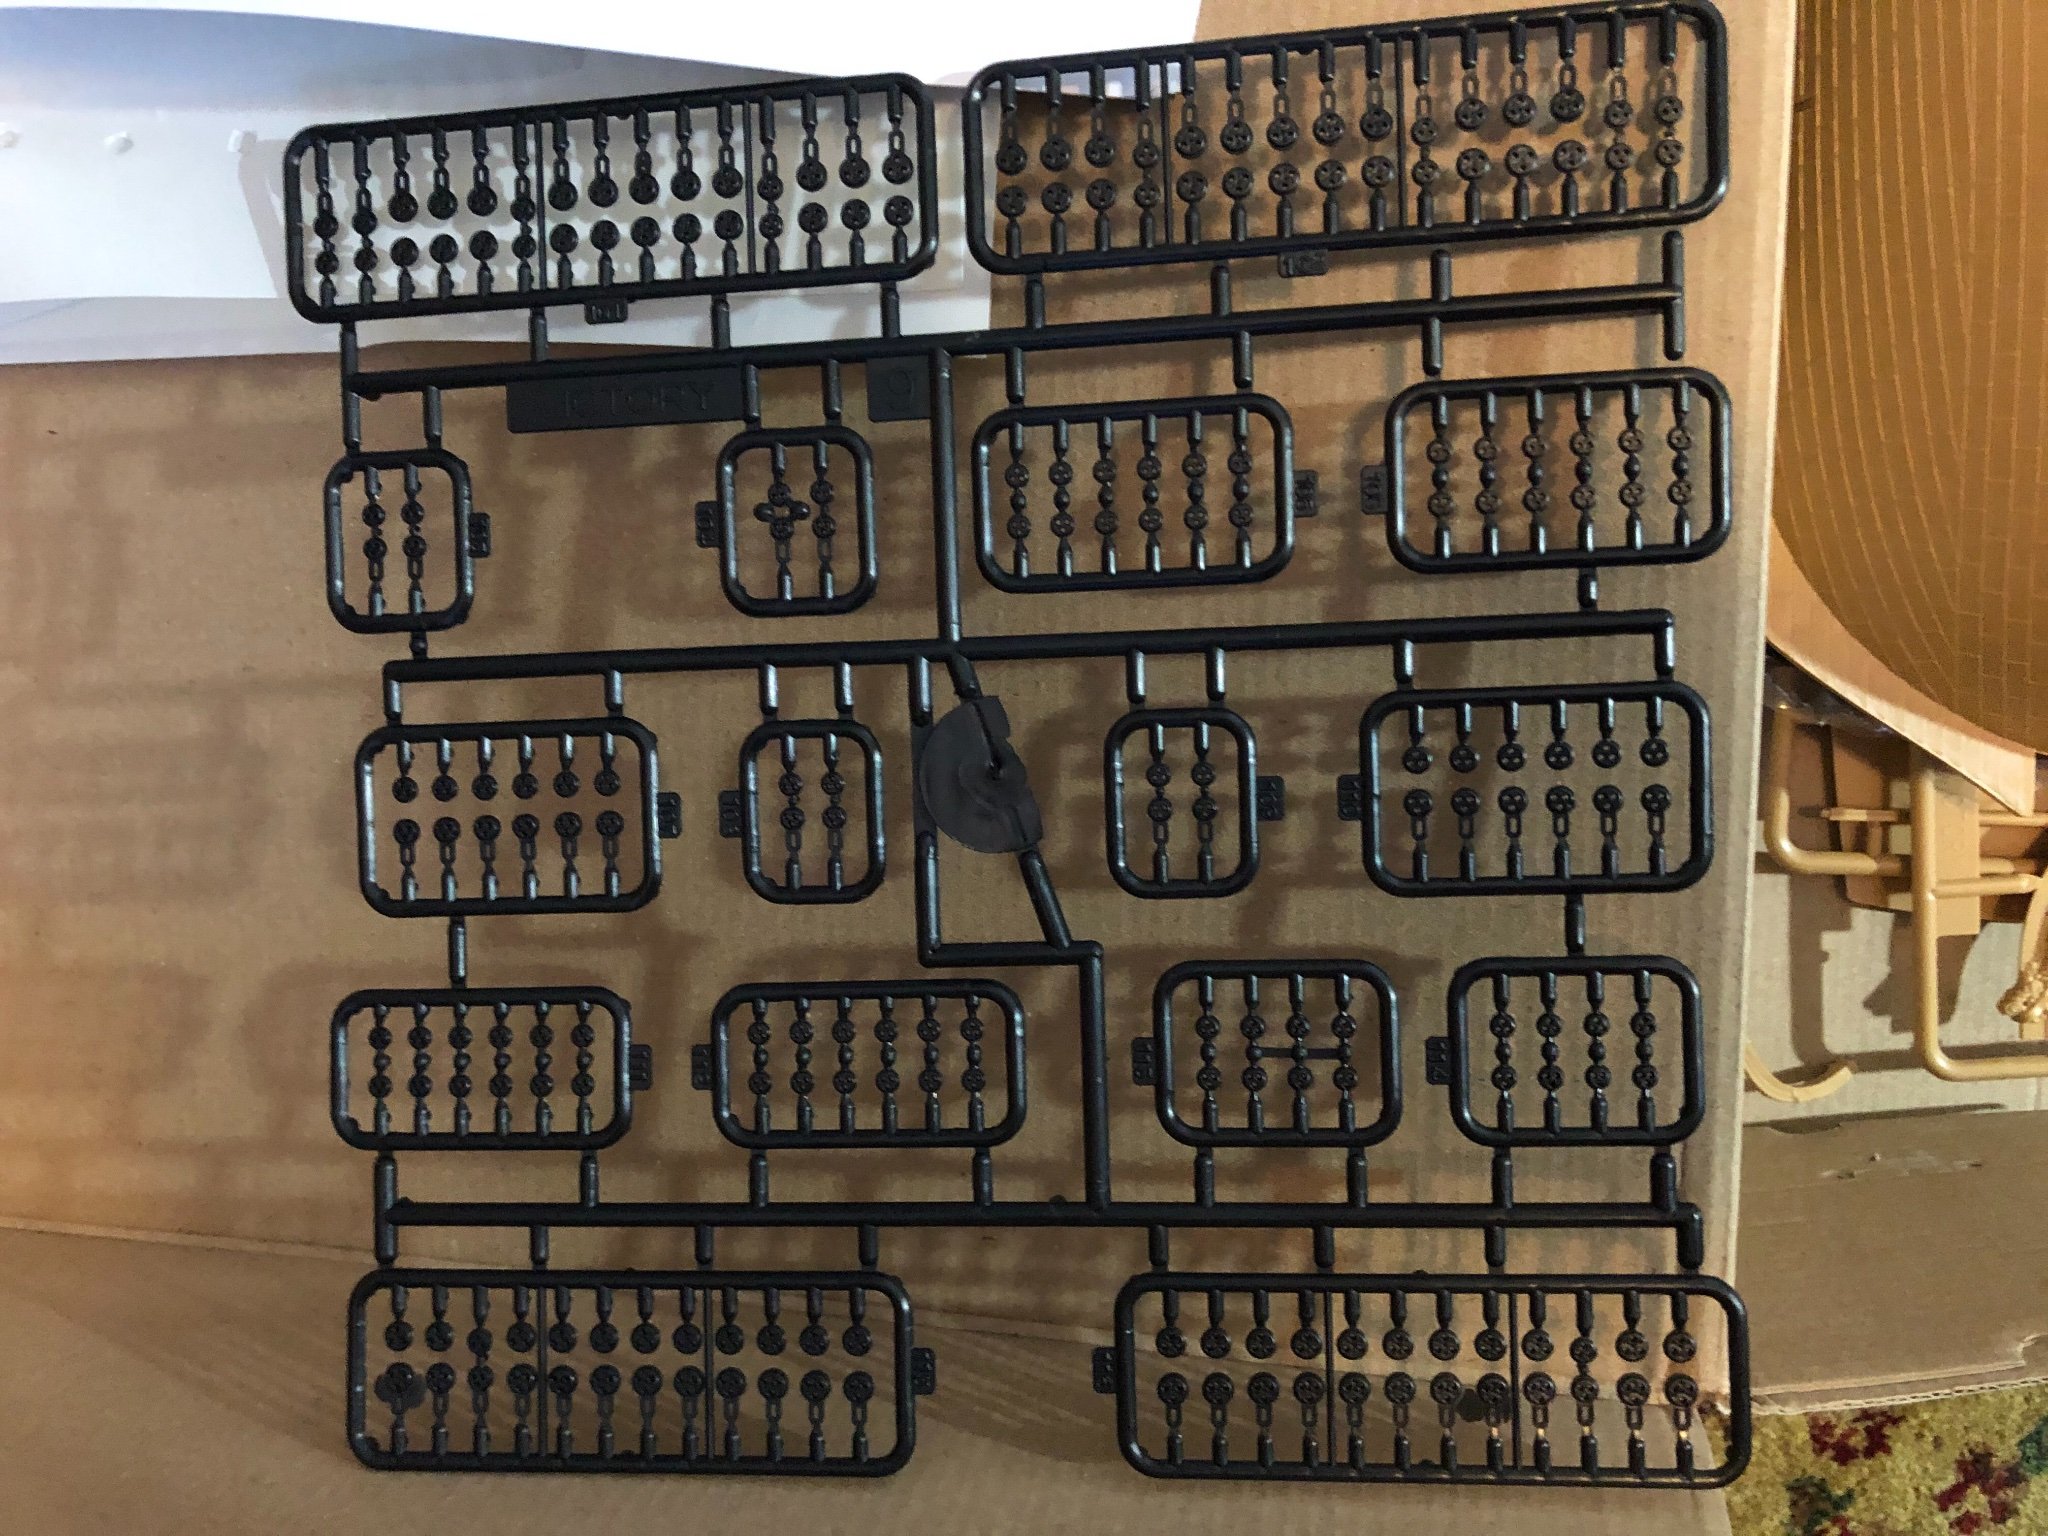
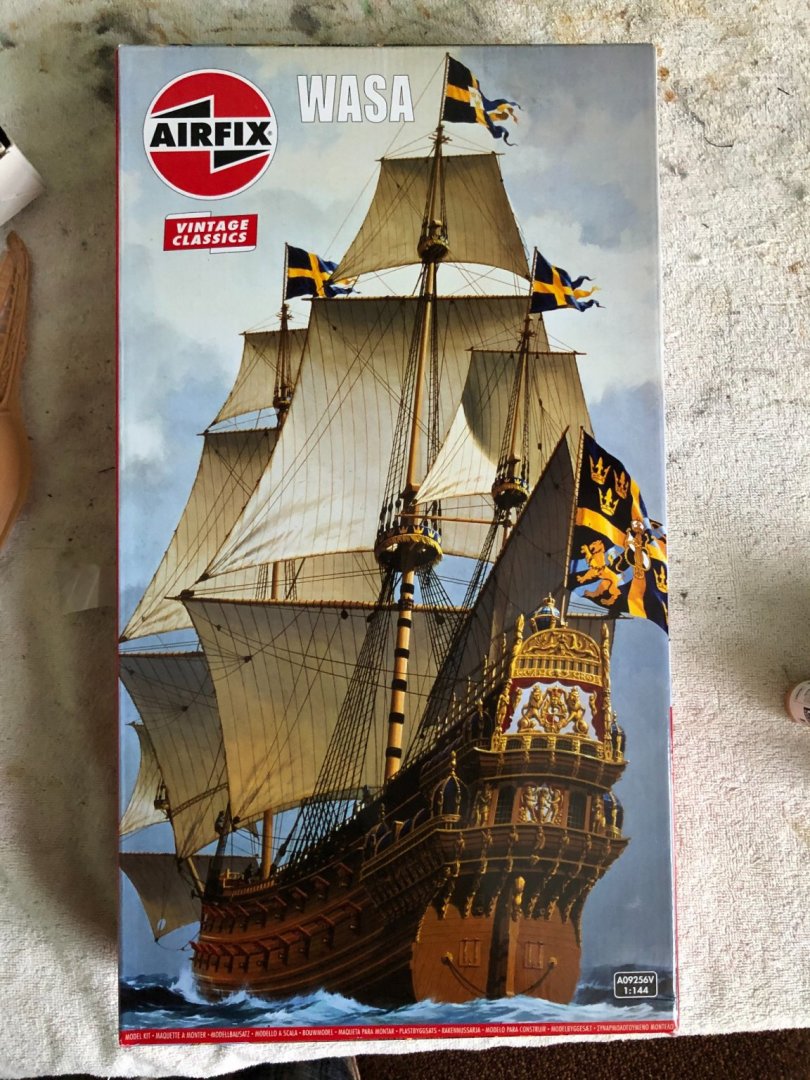
Opened my next build! The Airfix 1/144 Wasa. I find the history of this ship to be fascinating. This will be the smallest scale I have tried. Looking to really hone my skills and techniques on very small features, especially painting the stern. Pictures I have seen show it to be beautiful and I hope mine will reach that level when complete. I checked the MSW index and only see one build of this Airfix kit and that is by kpnuts. Fantastic job! I really like the ocean effects and the displaying of the ship lesning over before it eventually sank. Numerous other builds of other kit manufacturers. Will read through several before starting mine. One thing I have already determined is that is debate over if the stern end of the ship was primarily red or blue. The kit shows it as being painted red but several builders an articles I have read say it was actually blue. Will need to make my first education decision right off the bat. If there are any MSW members currently building, or previously built, any version of the Wasa please share any advice or suggestions you may have. I thoroughly enjoy this site and sharing with other builders.

-
kpnuts I am getting ready to start the build of this Airfix model. I looked through the MSW index and it looks as if you are the only listed builder of the 1/144 Airfix. Numerous builders of other brands. Per chance you see this a couple years after you completed your build, is there any advice you care to share? I am really looking forward to the small scale painting on the stern. Looking at all your photos and many more I am finding on line to try to get a clear color scheme. I find your ocean simulation very realistic. How did you do it?
-
Ian in my build up to starting the Victory (not to soon yet) you mentioned “enough other problems to overcome”. There are many build logs on MSW for the Victory. I have read through several and plan to many more of them. Would you care to share problems you had to overcome?
-
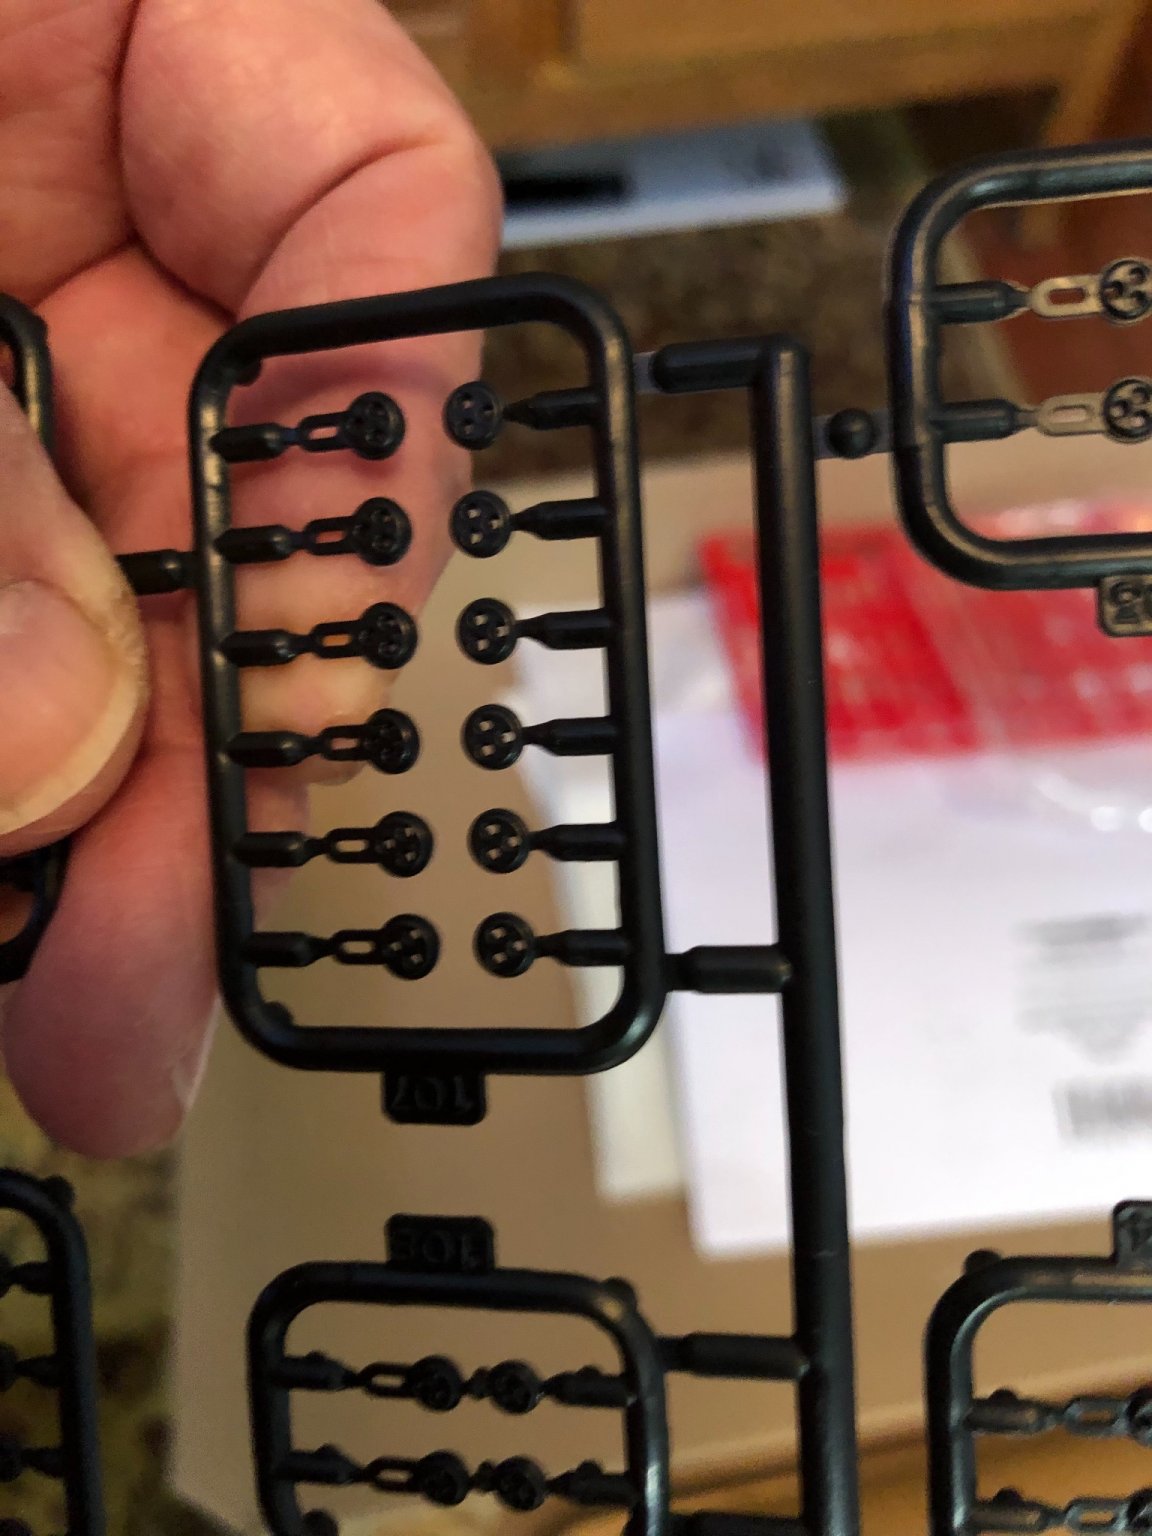
Thanks Ian. Building these ships is what has kept me sane during Covid. I am retired so if I did not have a hobby to keep me busy my wife would probably run me off by now. My Mayflower will go on another wall in the same room. I have two smaller scale ships to build as well that will go with the Mayflower in time. The Airfix Wasa and Golden Hind. I will take your advice on the deadeyes for the Victory. I just now looked at them and see what you are talking about. Did you purchase new deadeyes for your Victory build? Is your’s the Heller 1/100? If so, what size (mm) deadeyes did you get? With each ship build I try to learn a little more before I approach the Victory and I expect it to take quite some time. I tease that it will be my shipbuilding PhD thesis.


-
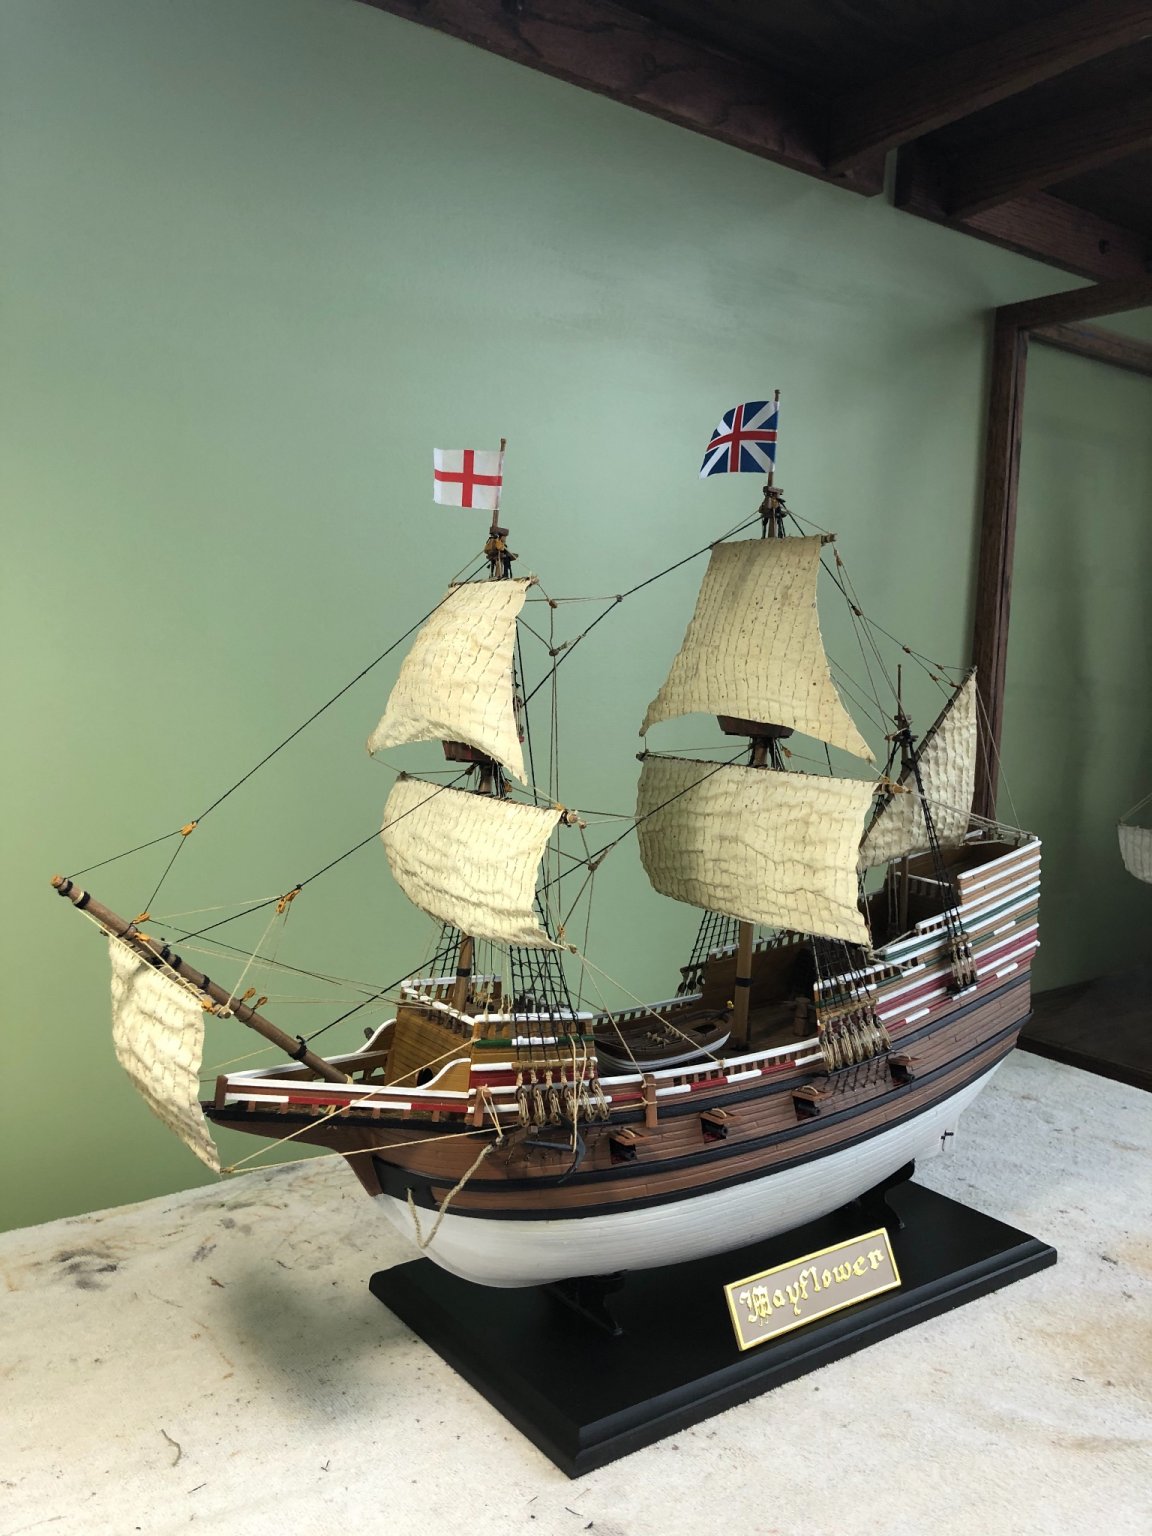
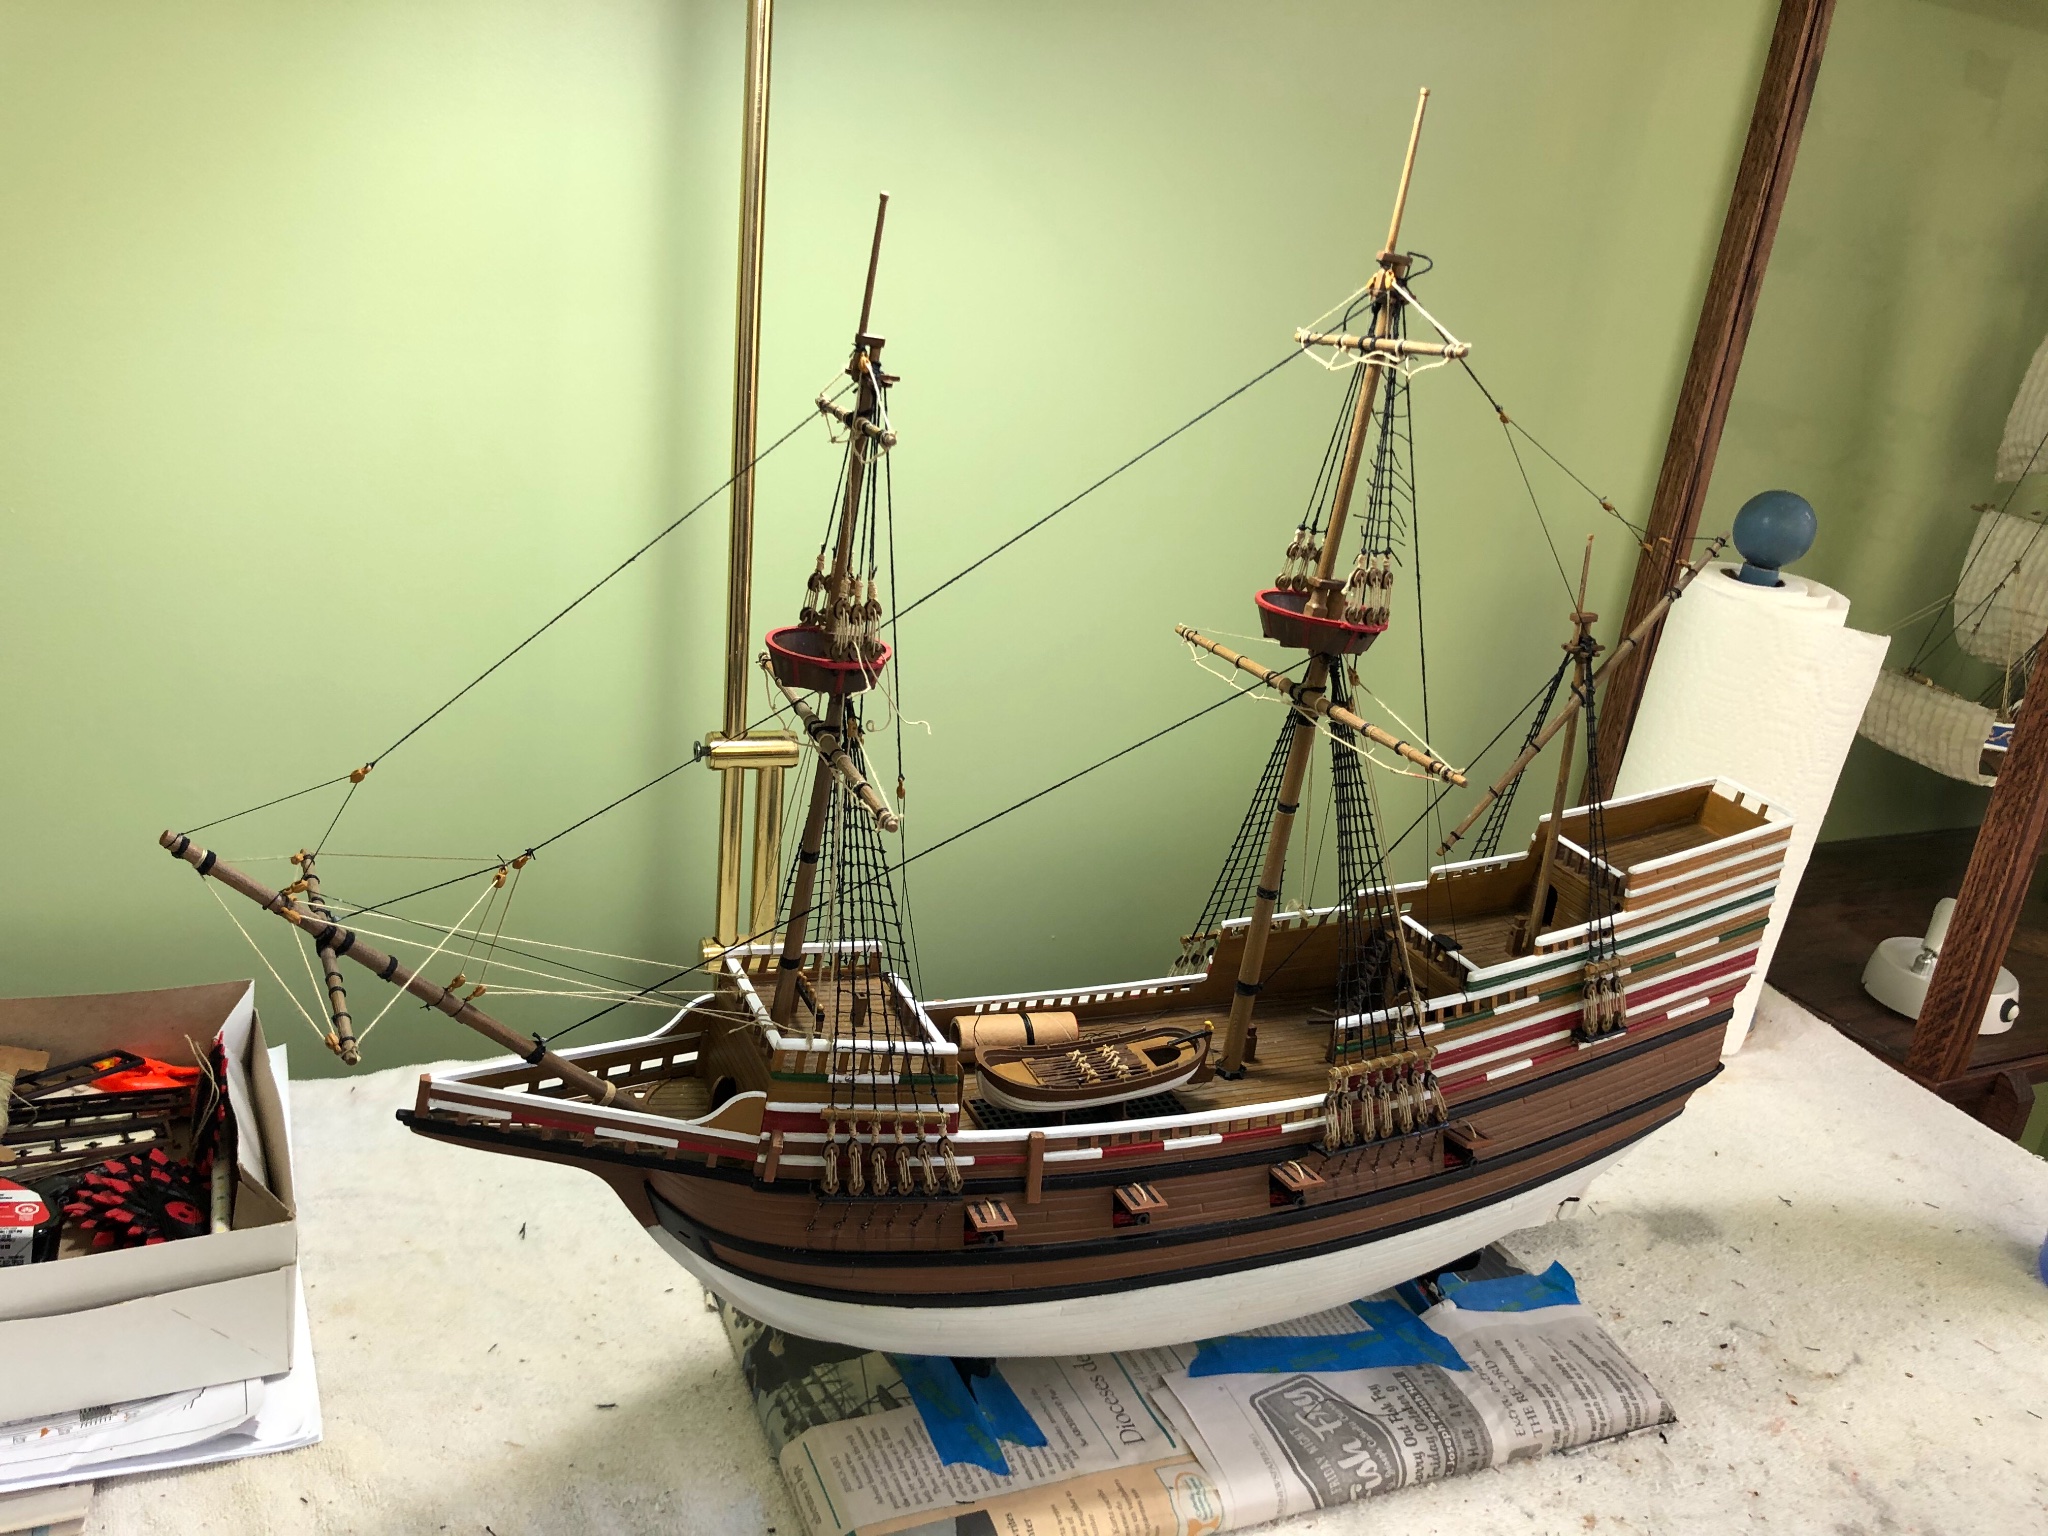
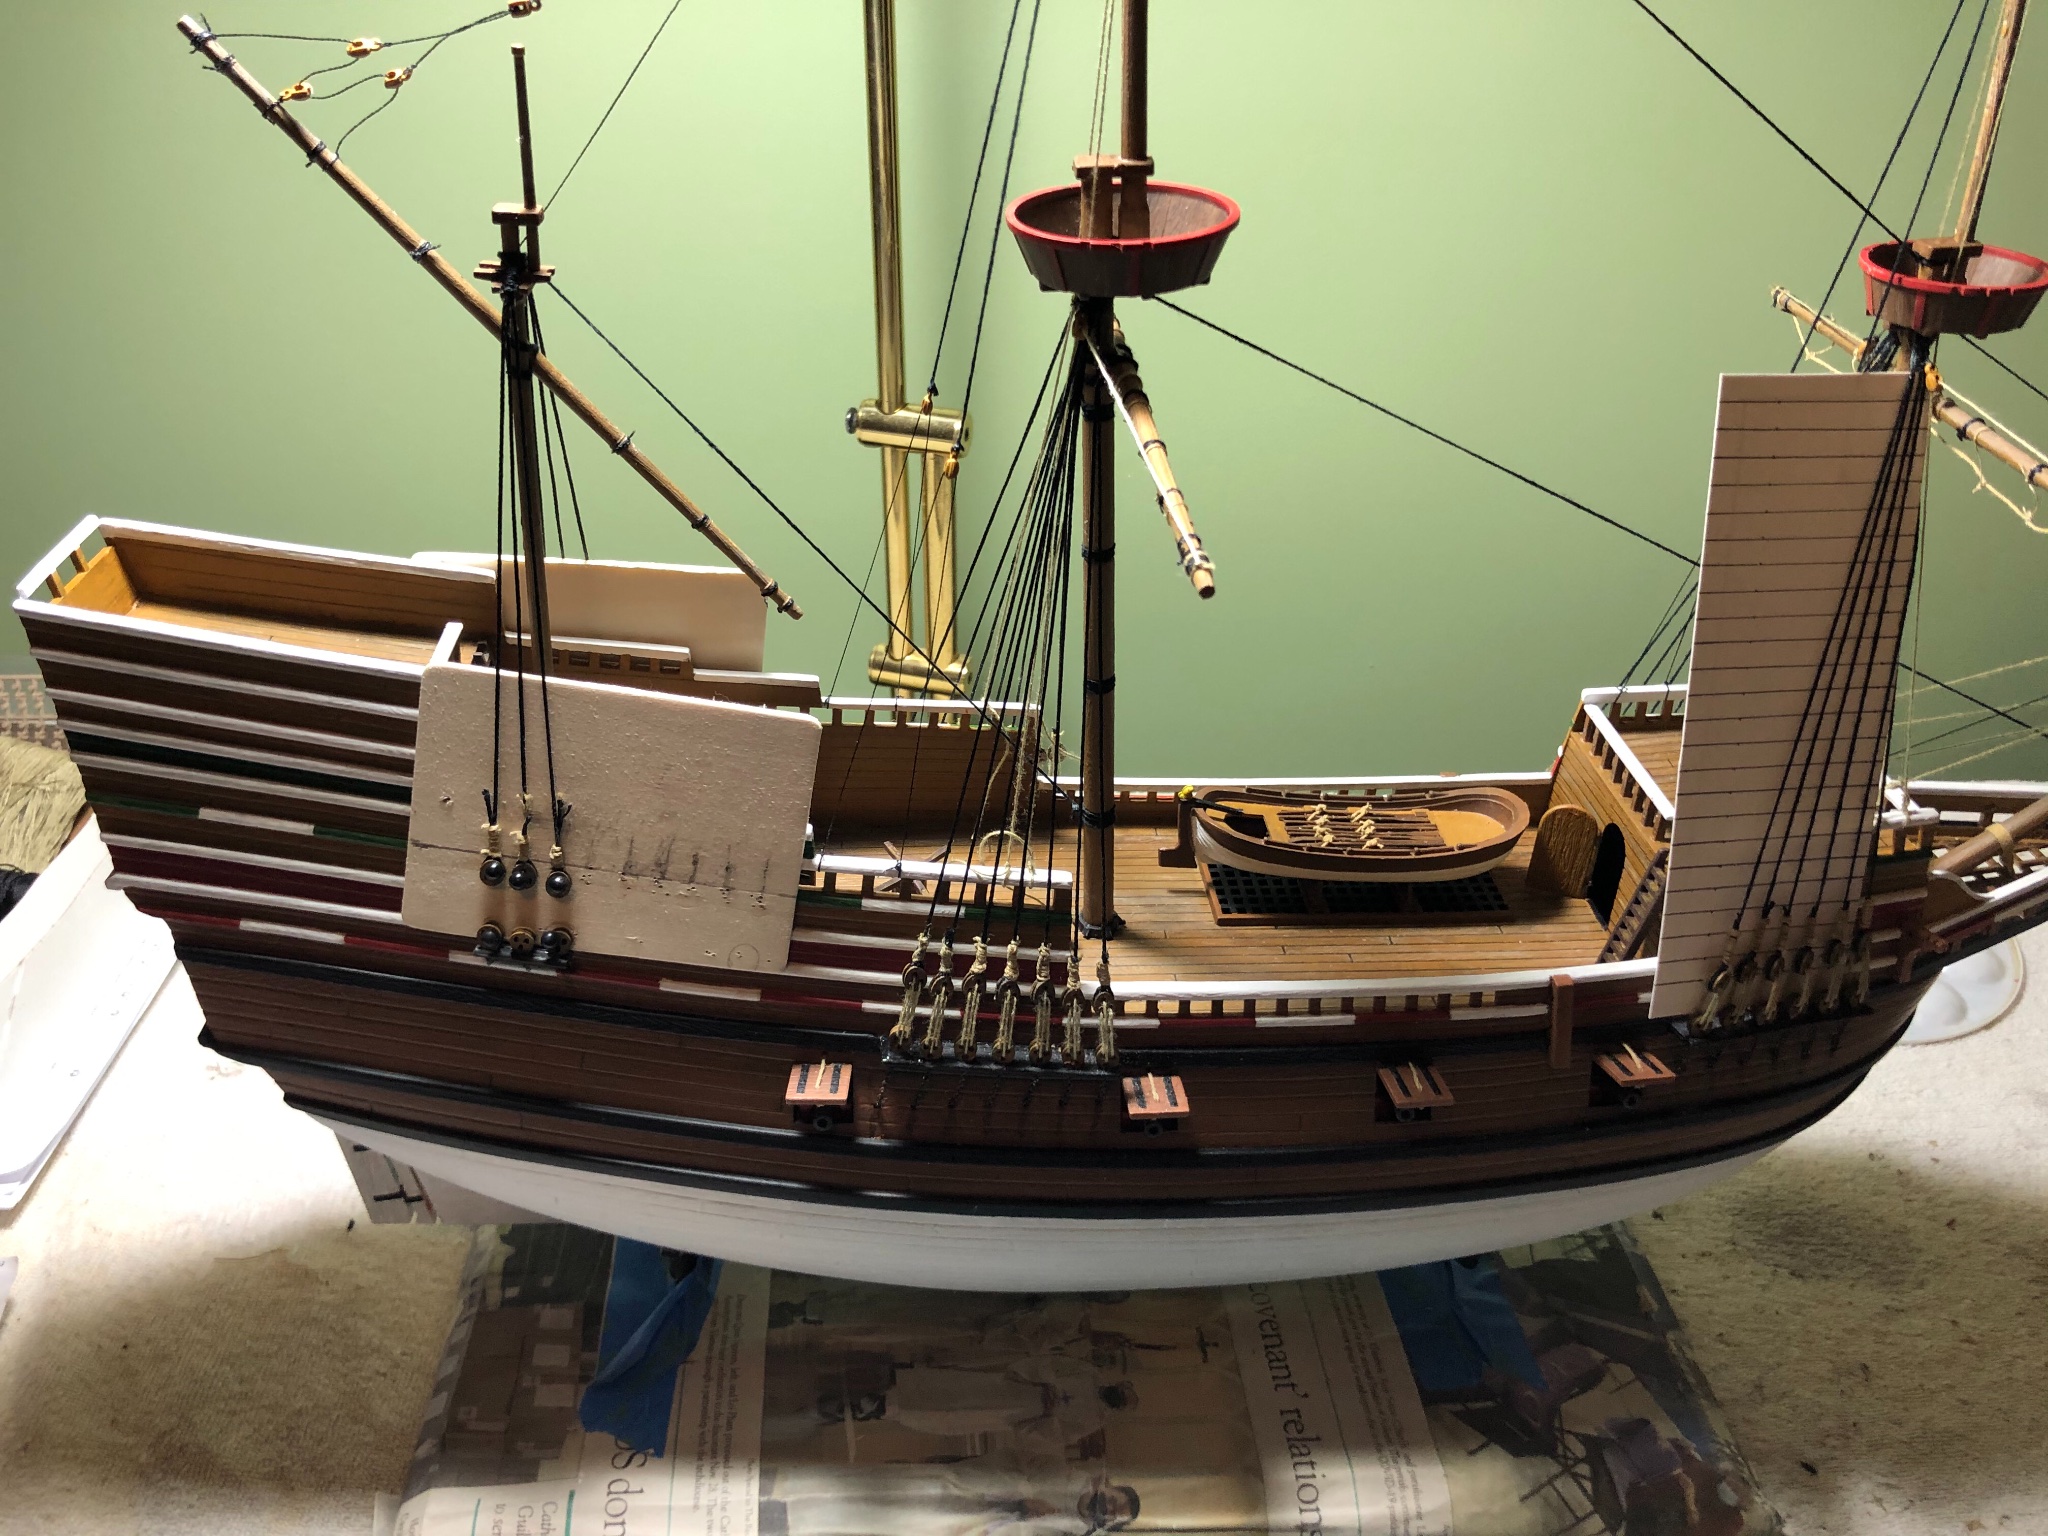
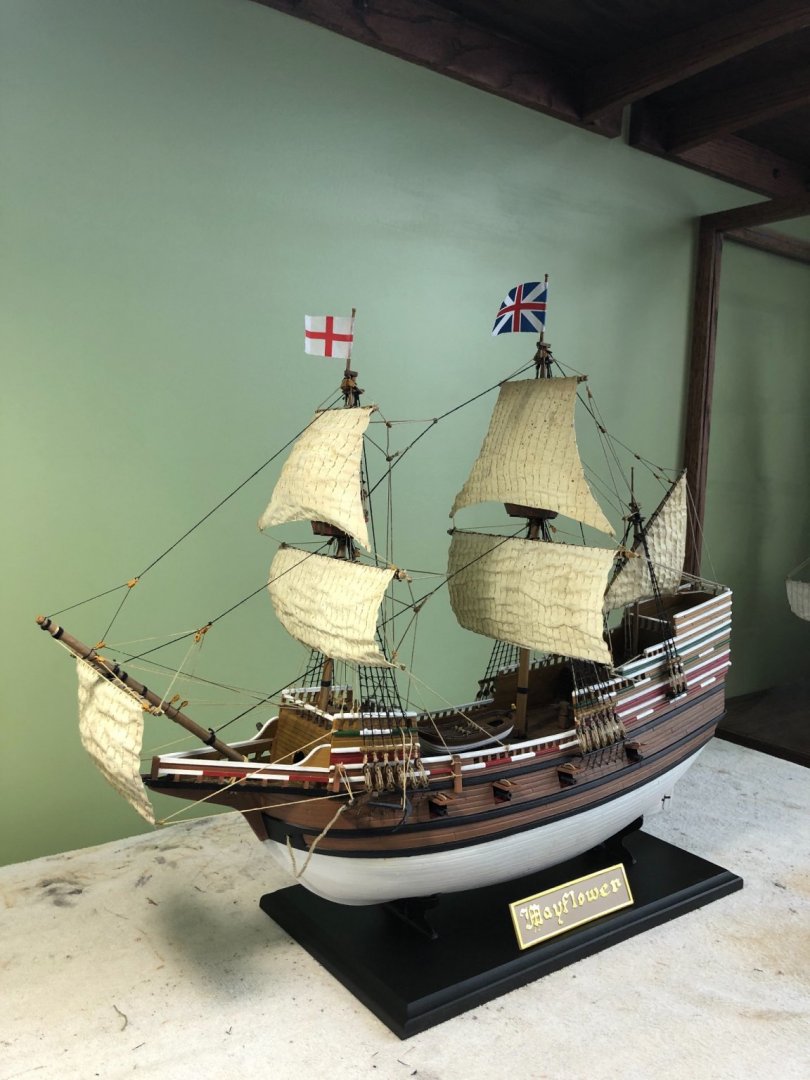
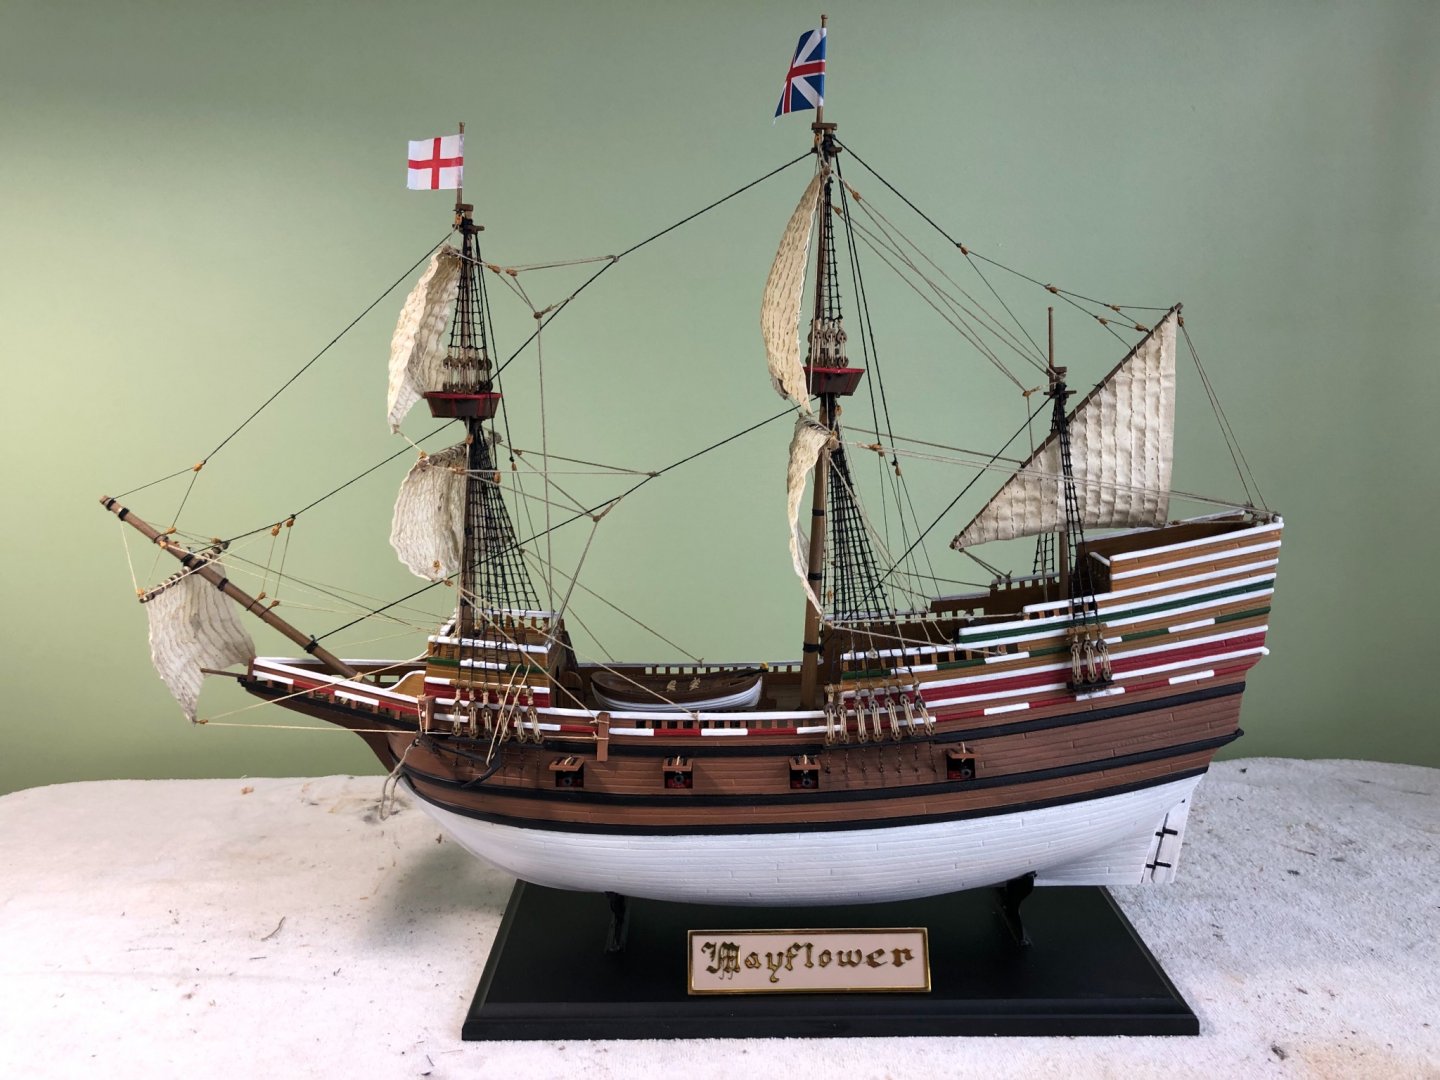
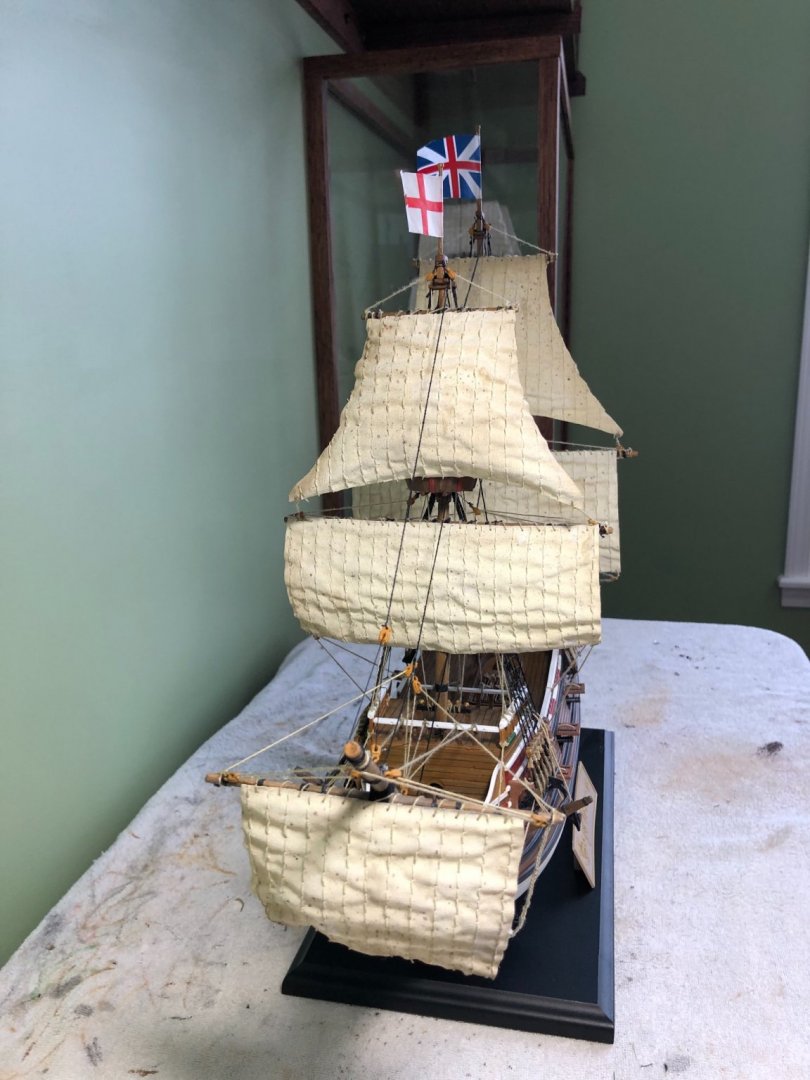
The Trumpeter Mayflower is FINISHED! Thanks to everyone who provided input and advice, especially Krill4 and Bosco. I learned so much during this build that I will use in future builds. Making my own shrouds and ratlines was the biggest new endeavor. Some things I learned were the result of what I thought were short comings of the model that required improvising, some were personal experiments, and a number were recommendations from MSW members. I have no doubt there are a number of items about my build that are not authentic, but I am pleased with it. Authenticity of the rigging is probably the biggest area. The Trumpeter rigging instructions were limited so based on MSW recommendations I combined the rigging instructions from Trumpeter with the instructions I have from my English Man O’ War. I also primarily used the thread that came with the kit even though I expect all of it is not authentic scale size. I may paint and add a few figures here and there on the deck. Have some from a Revell 1/96 kit that I will check to see if the scale looks close enough. Next build my display case in which I plan to include a great stone I found. Give it the Plymouth Rock touch! Then on to my next build! Again thanks to all the MSW members who followed along.


-
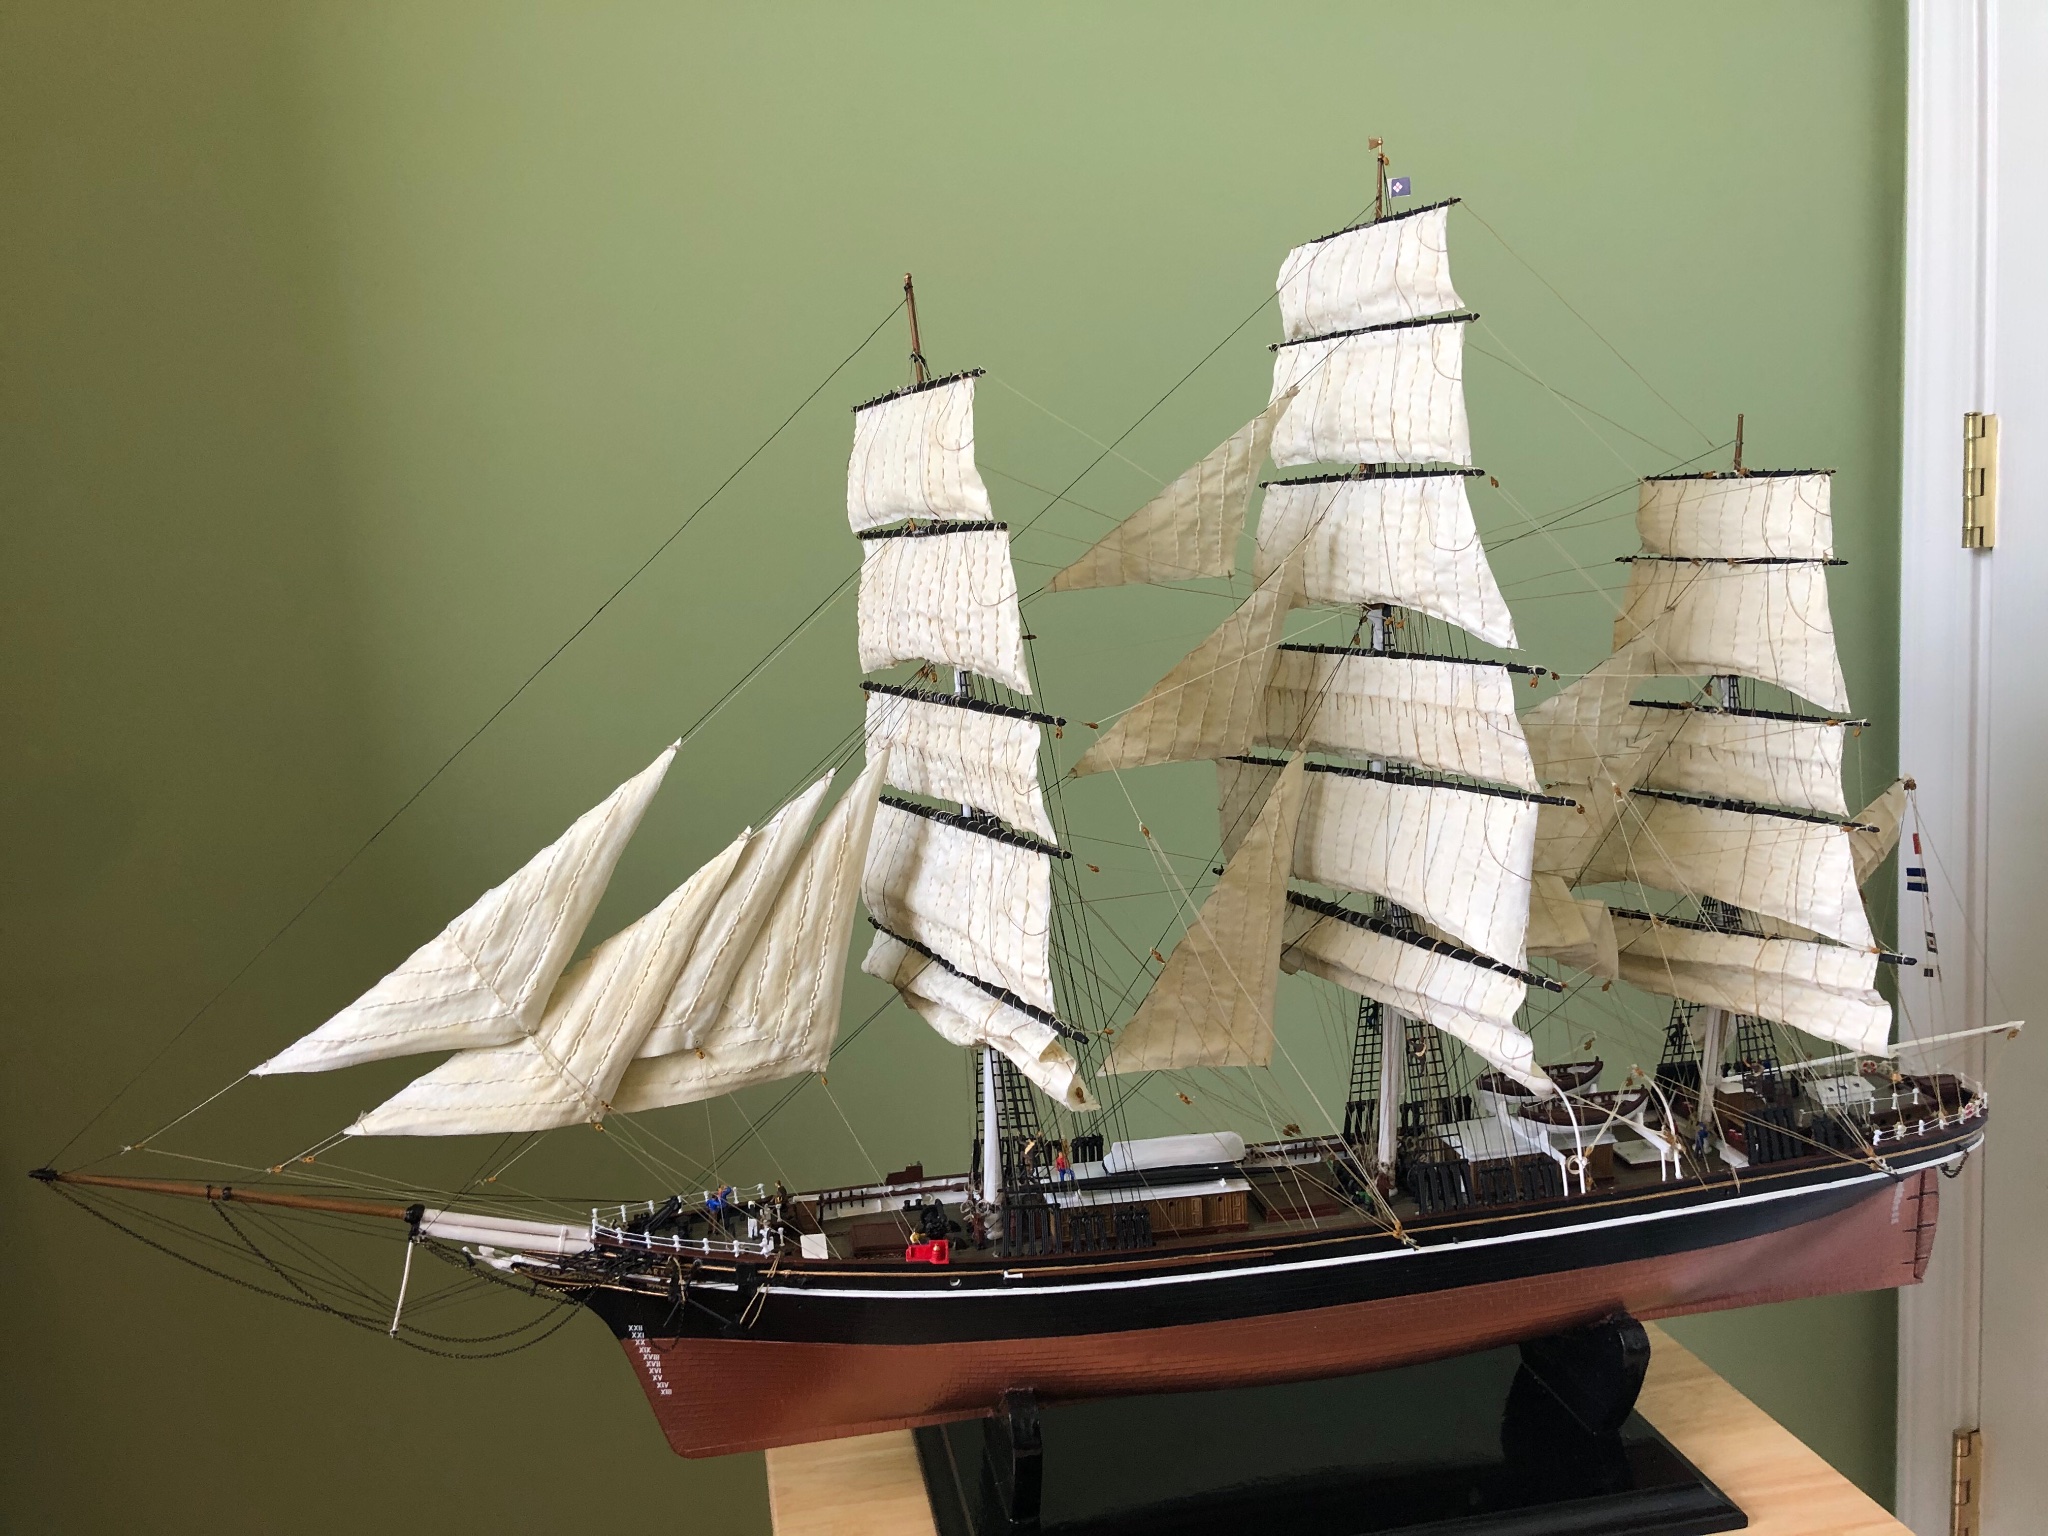
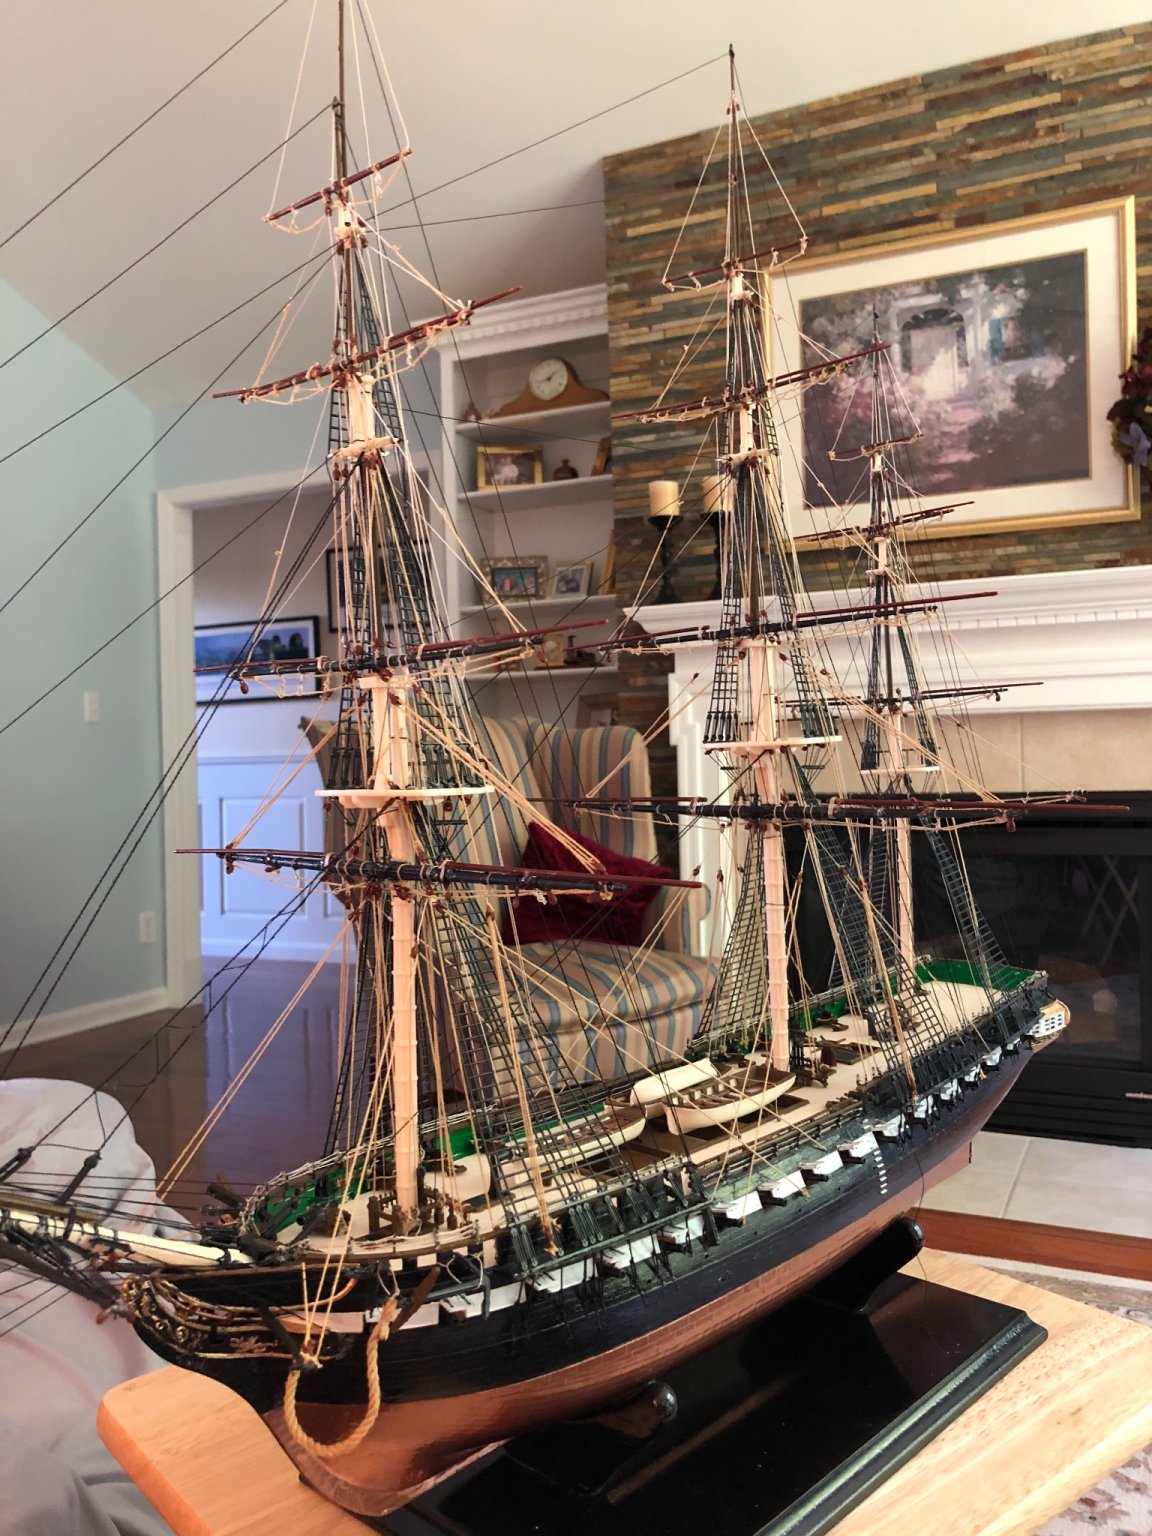
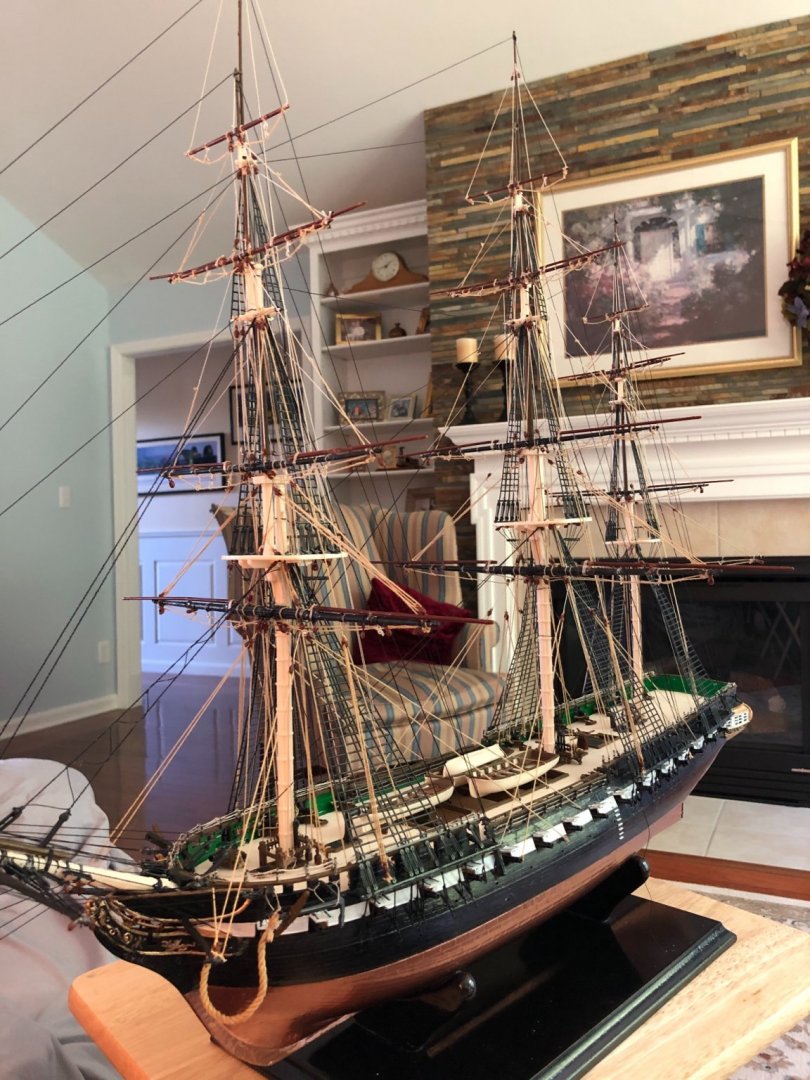
I agree with you on this subject as well. In fact a while back I started a discussion here on MSW about this subject. Add sails or not. There was a wide range of opinions. When I built my USS Constitution I left the sails off because I really liked being able to see the extensive amount of rigging. On my Cutty Sark I furrowed the bottom sails so I could see through. Definitely an aesthetic preference.

-
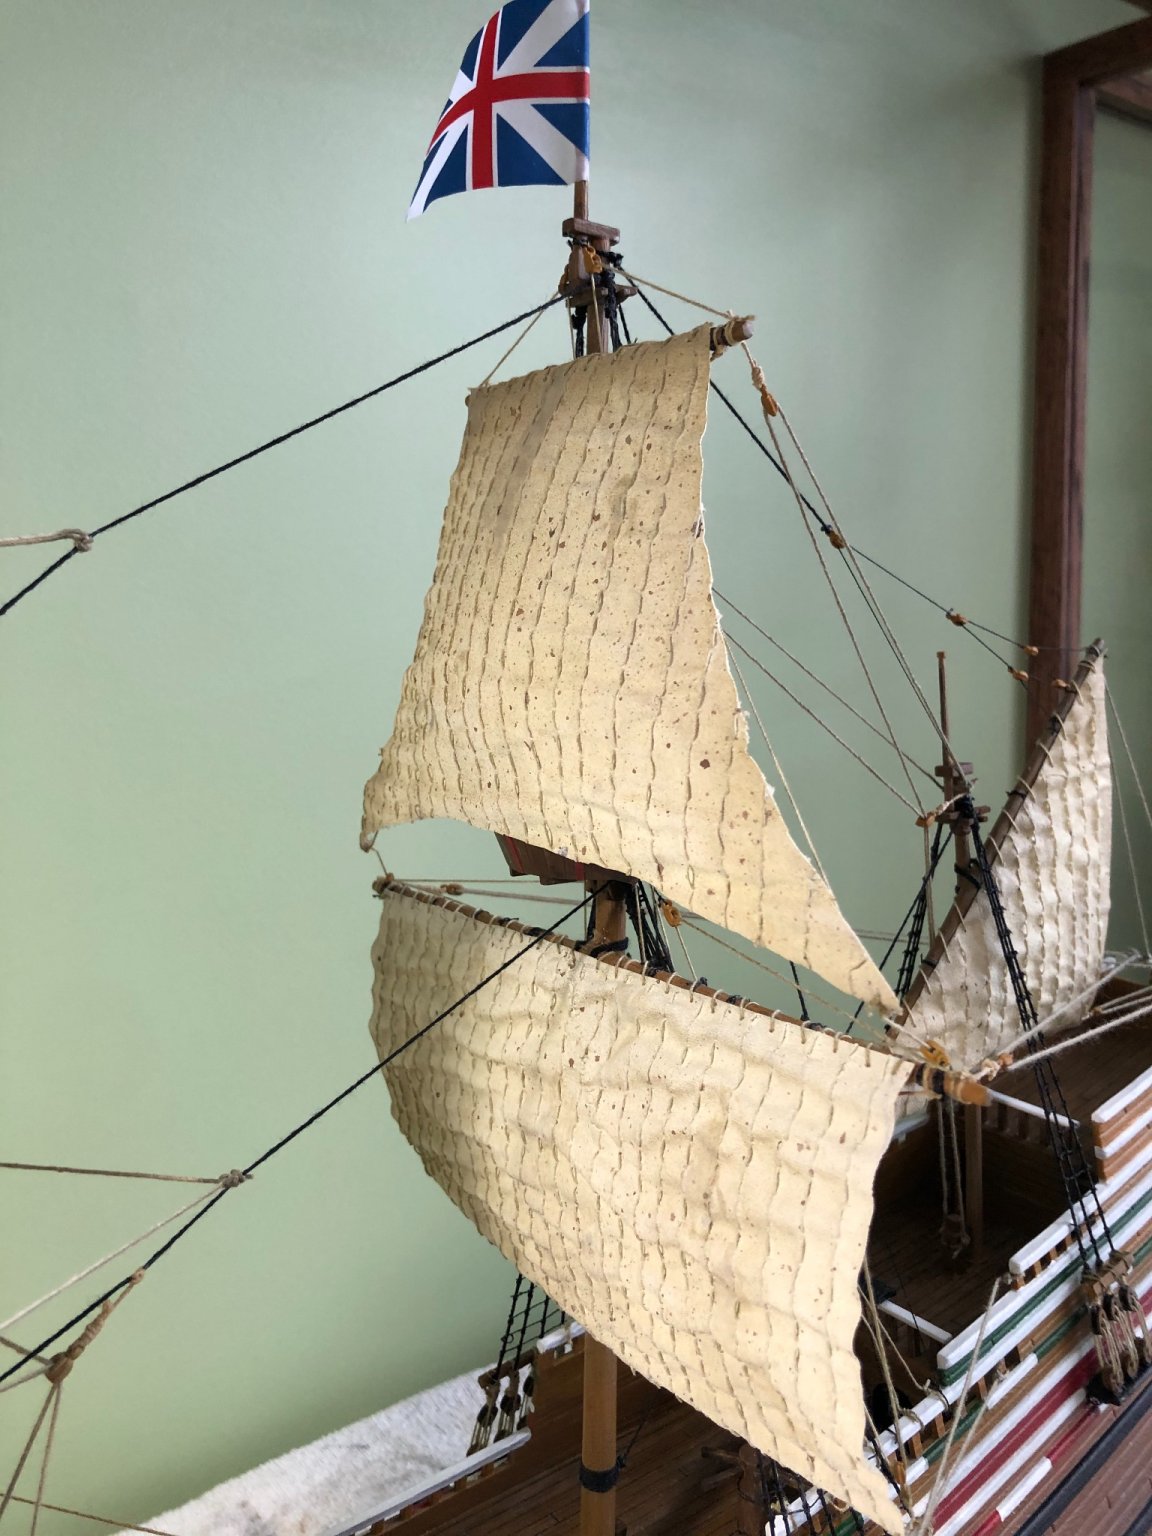
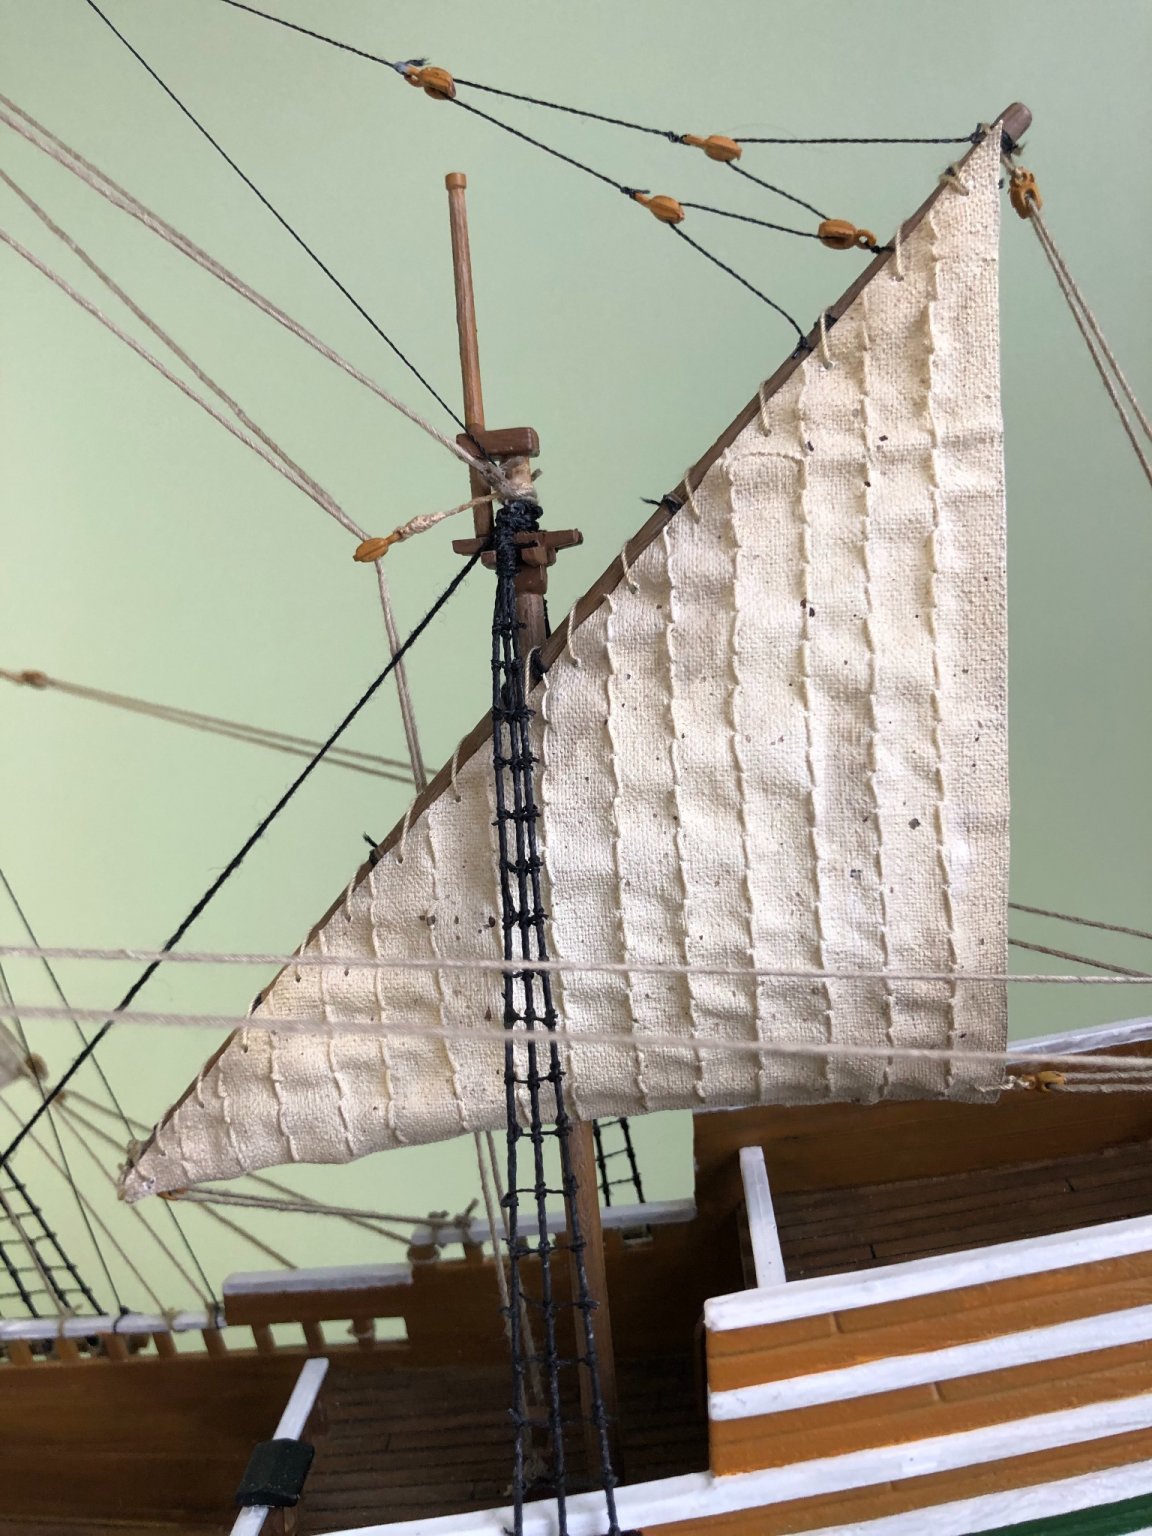
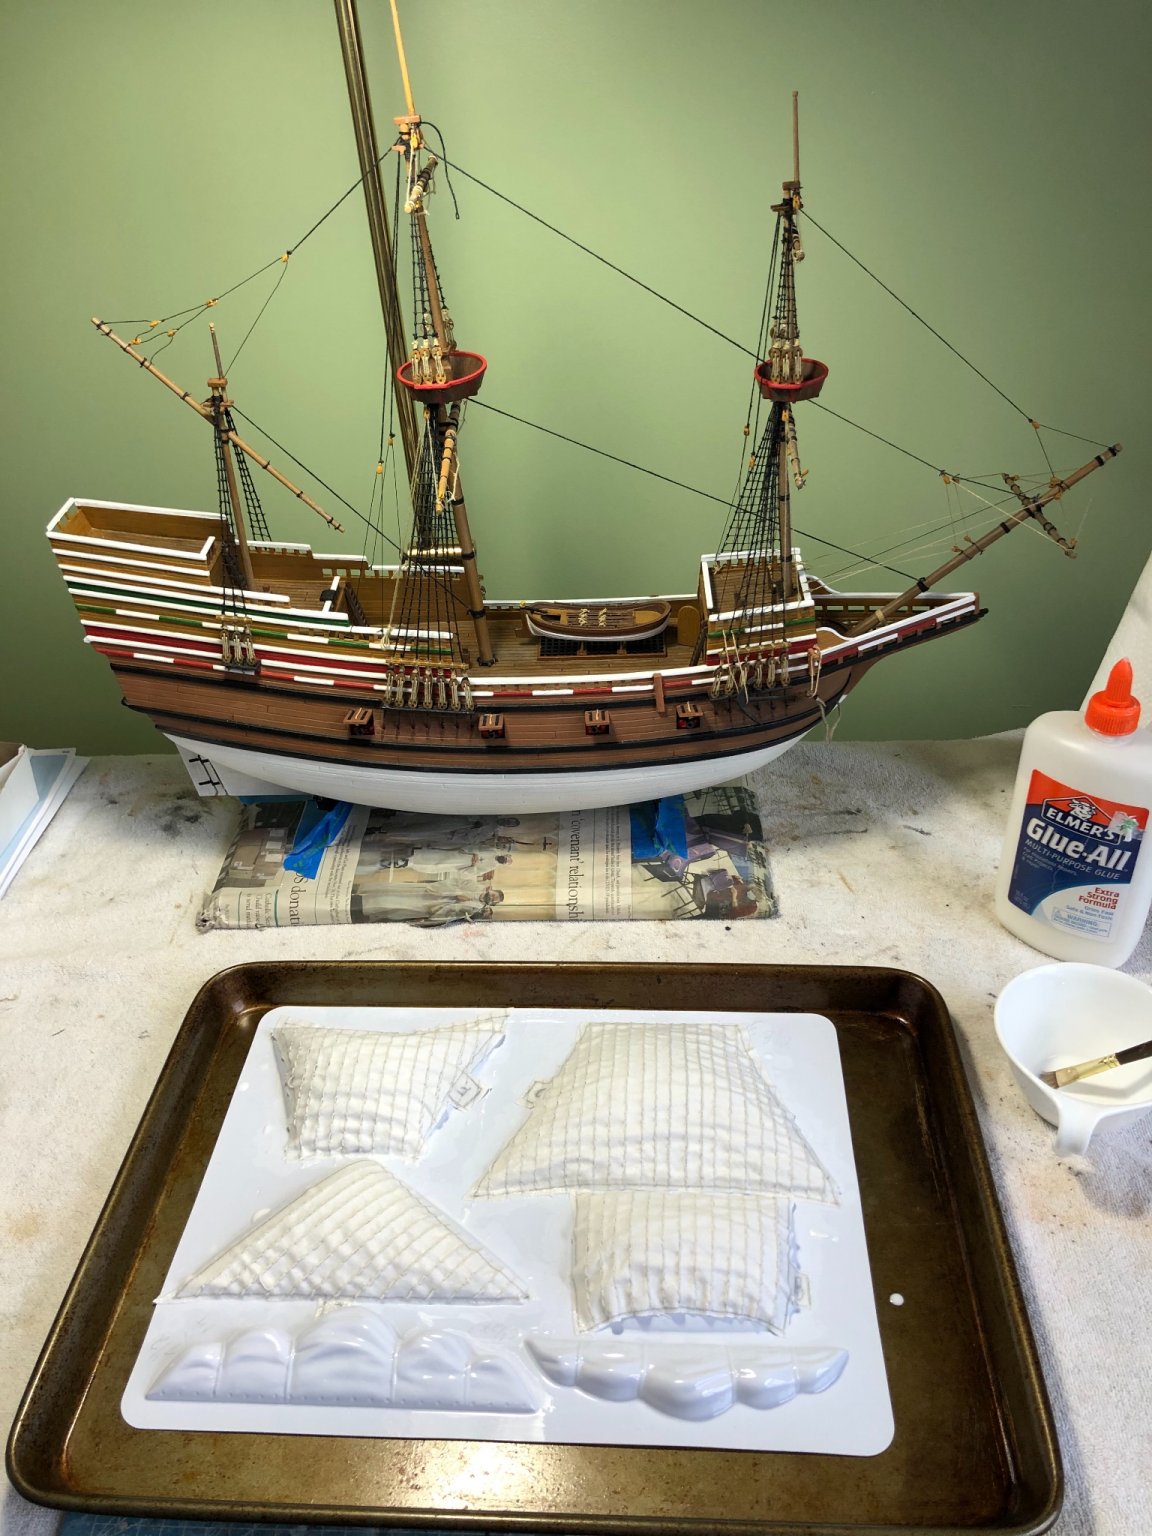
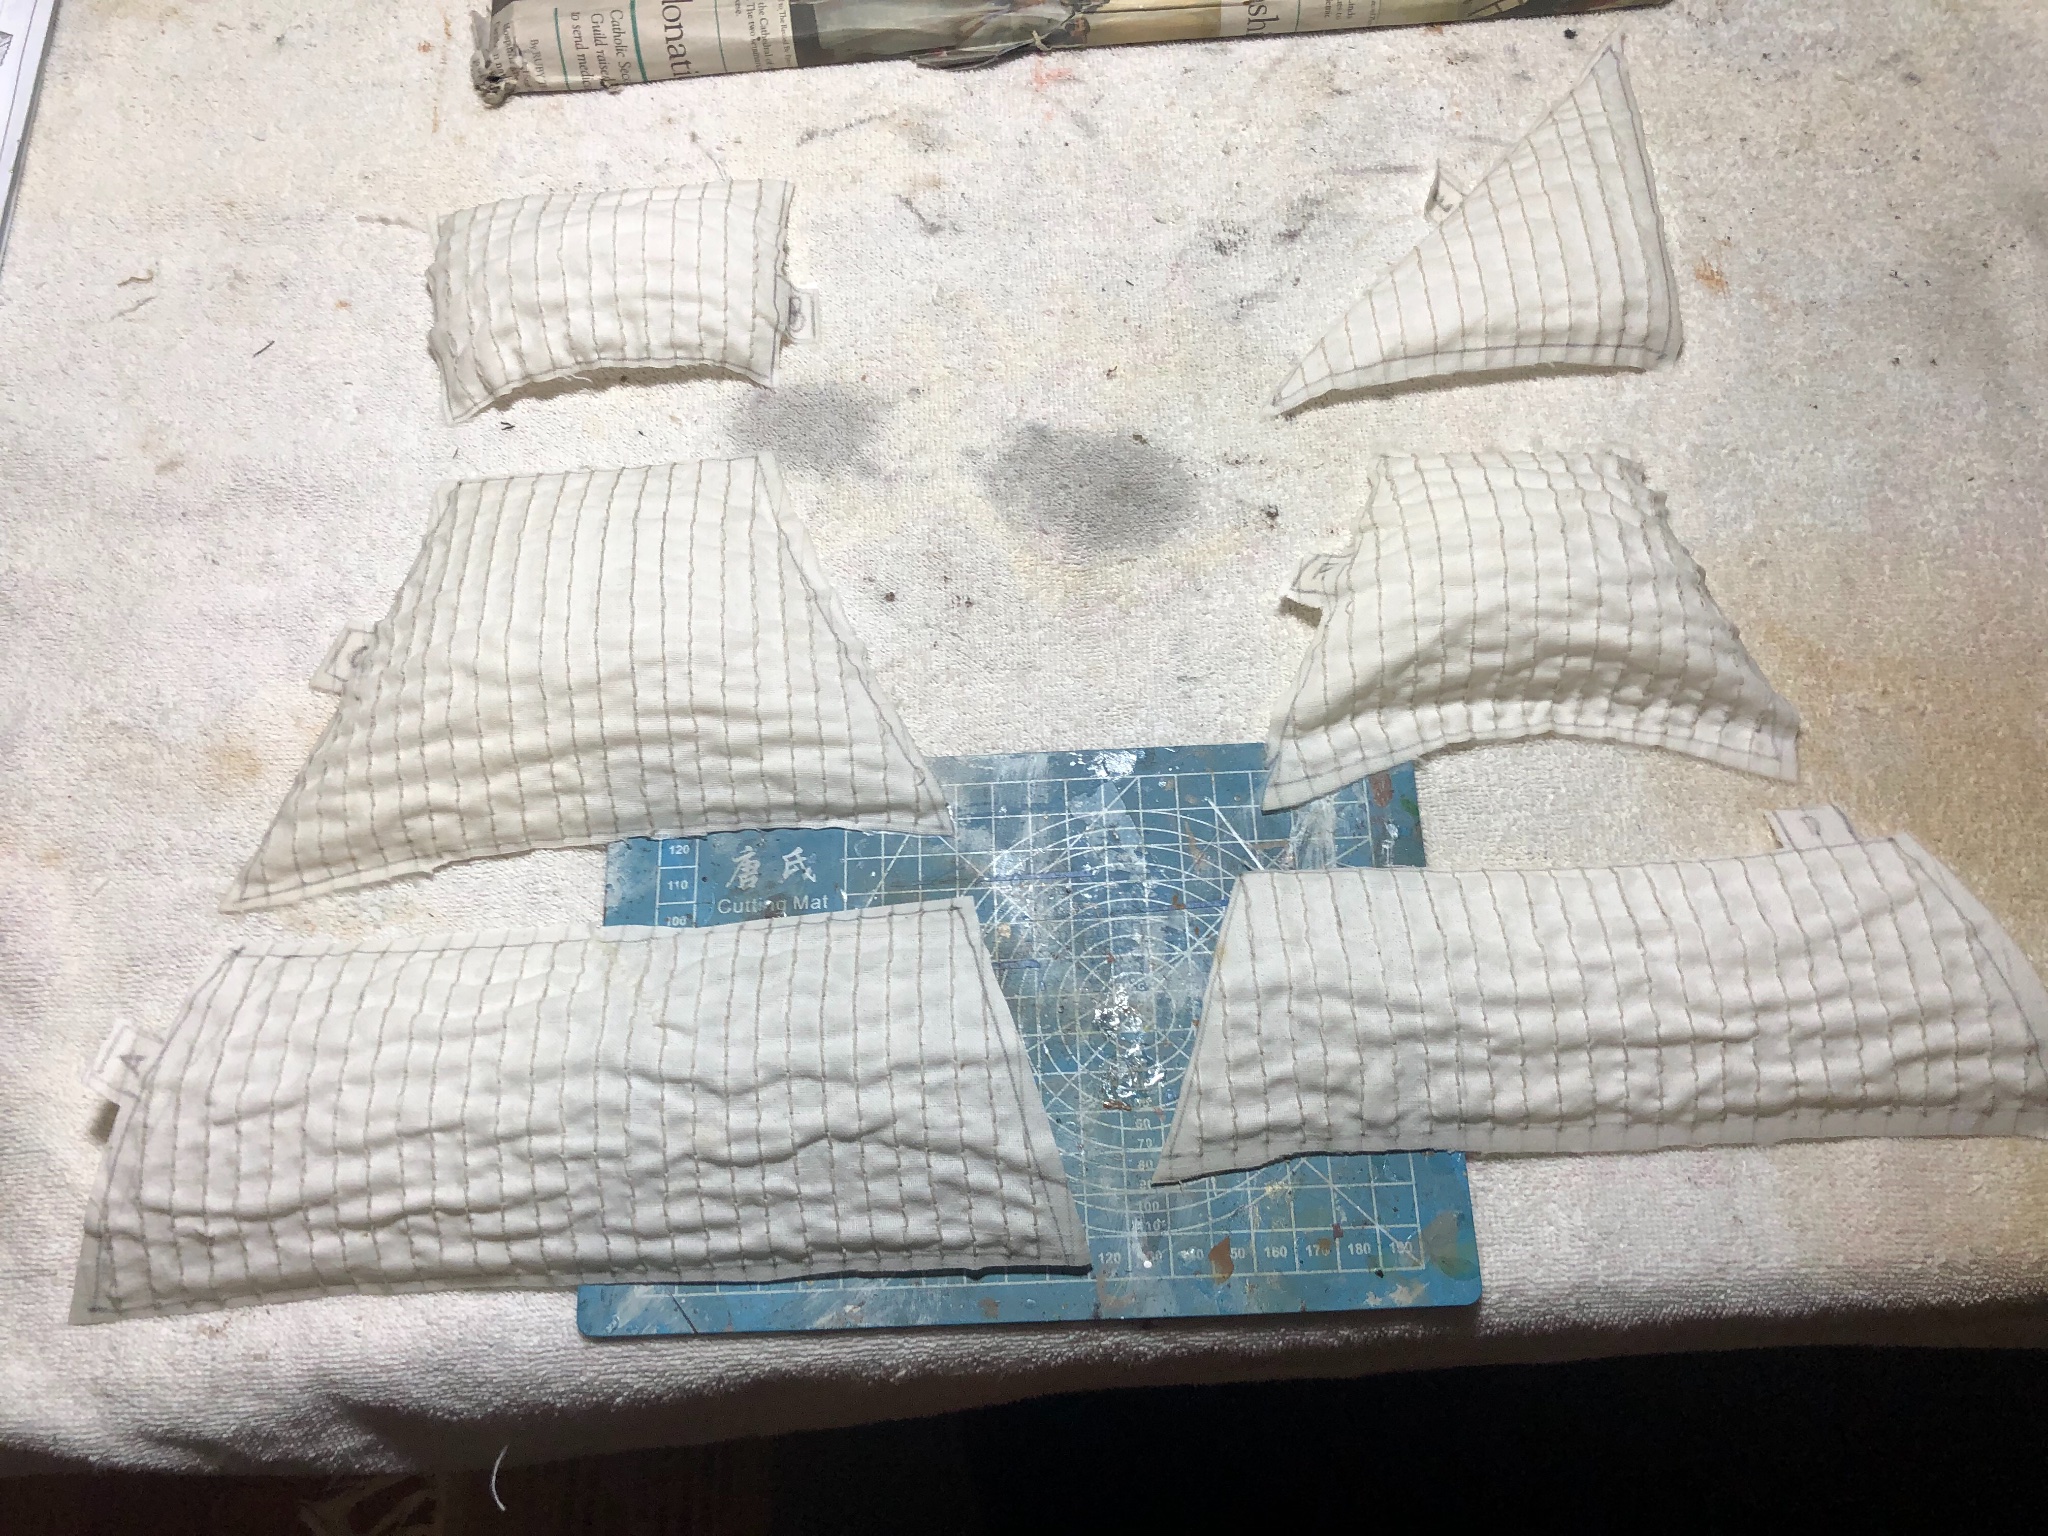
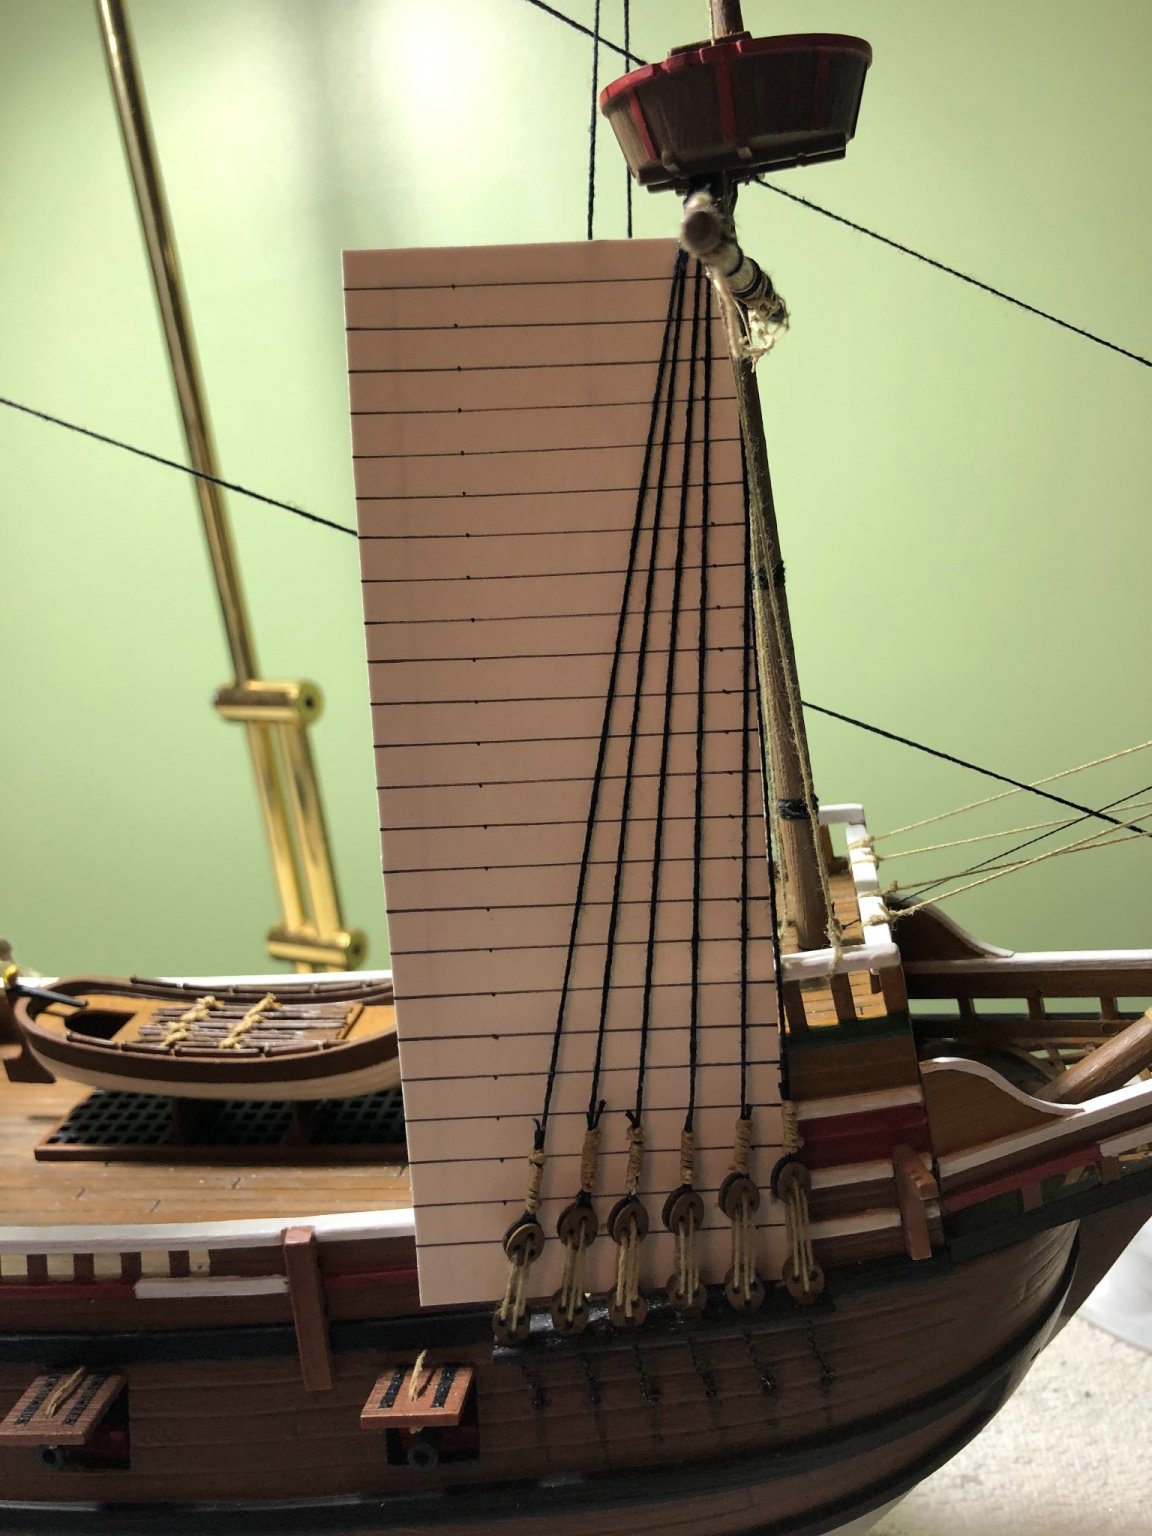
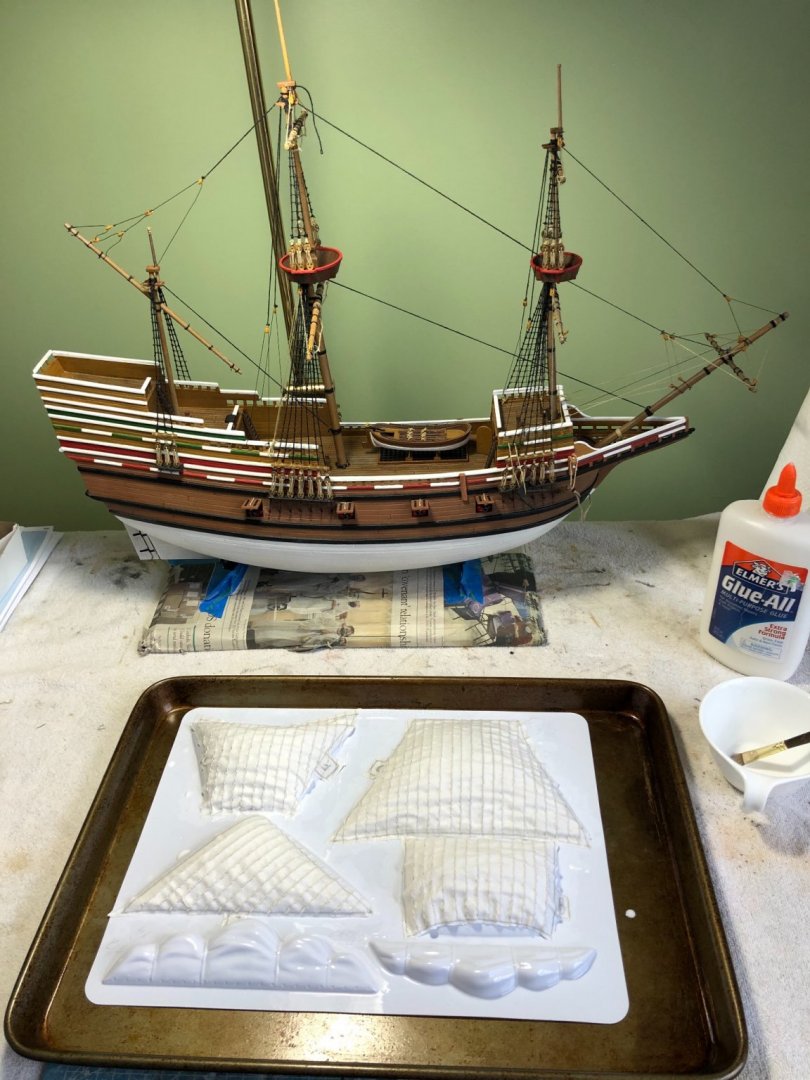
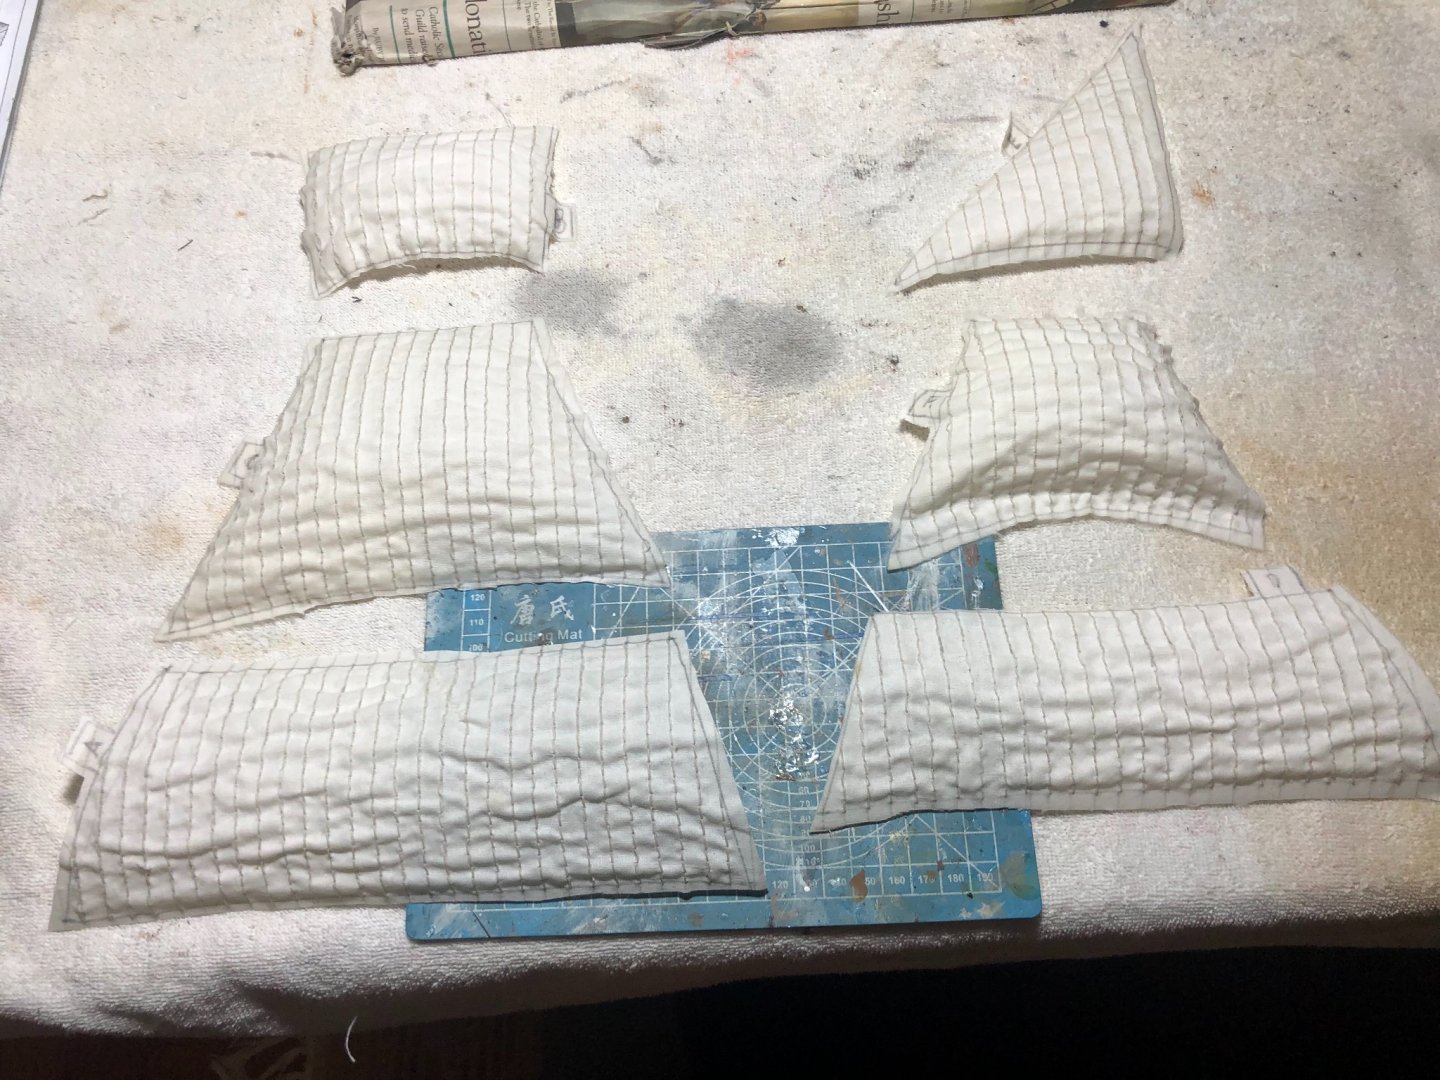
Started making the sails for my Mayflower. Using the same process I have on my other builds. Since I don’t really like the plastic molded sails that come with the kit I like to make my own. I use an antique white cloth and hand stitch the lines matching the width on the plastic sails. Then using the plastic sails as a mold and a 50/50 mixture of white glue and water, I paint the sails wet and form them over the molds. Once they fully dry I will trim them to shape and antique them with some airbrush work.
-
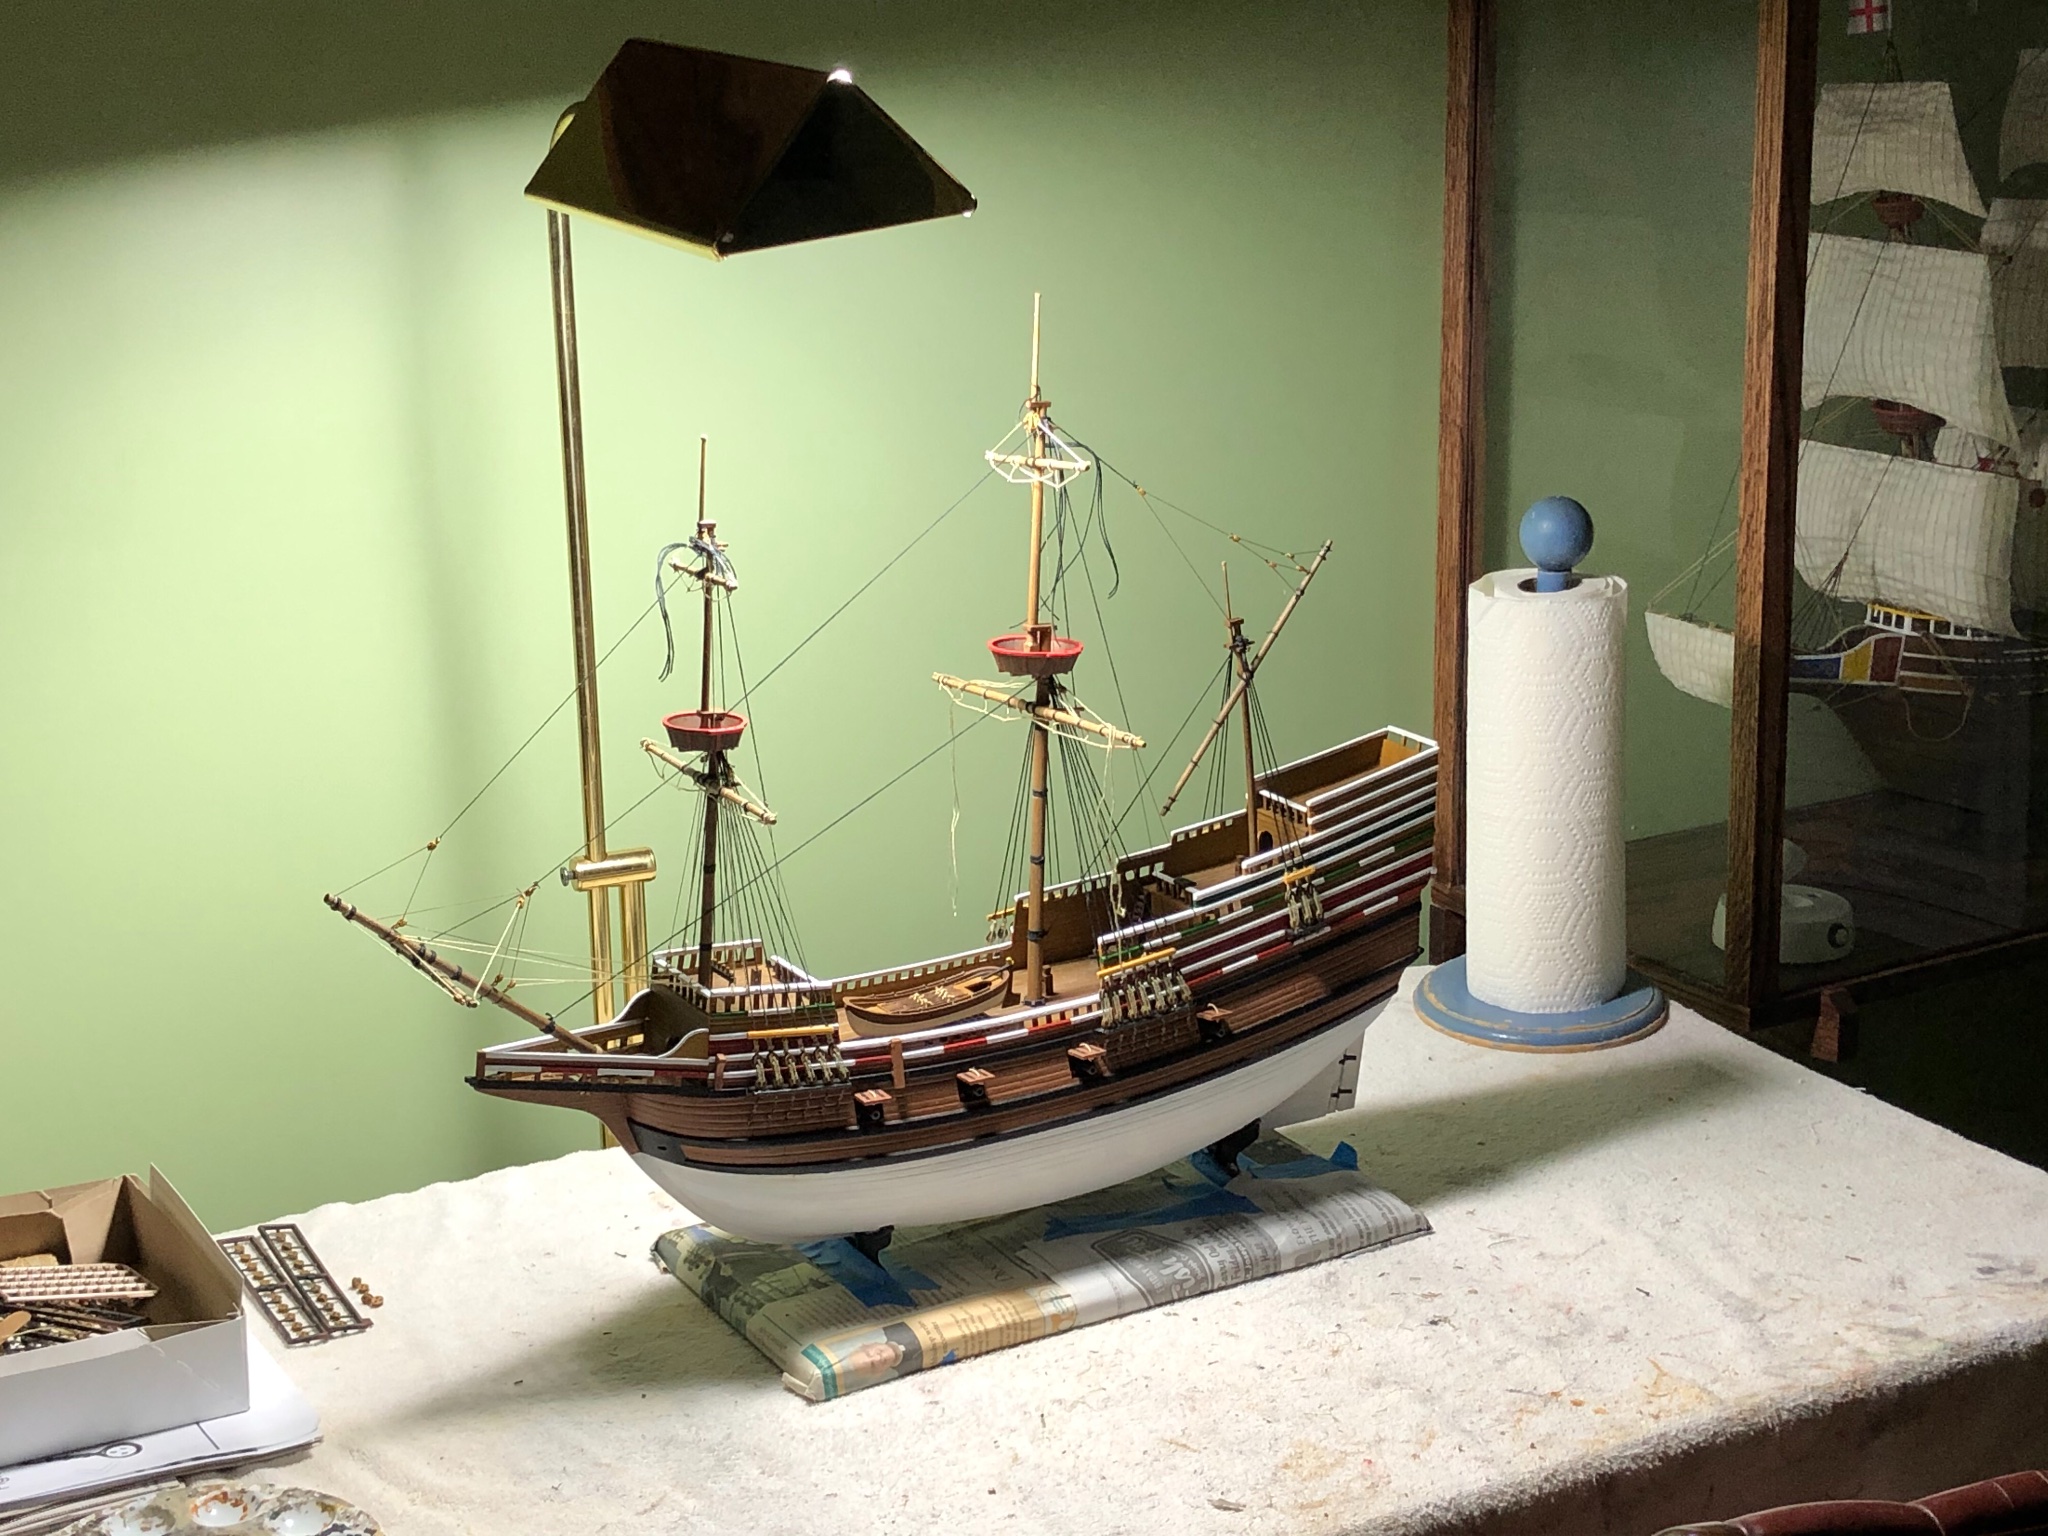
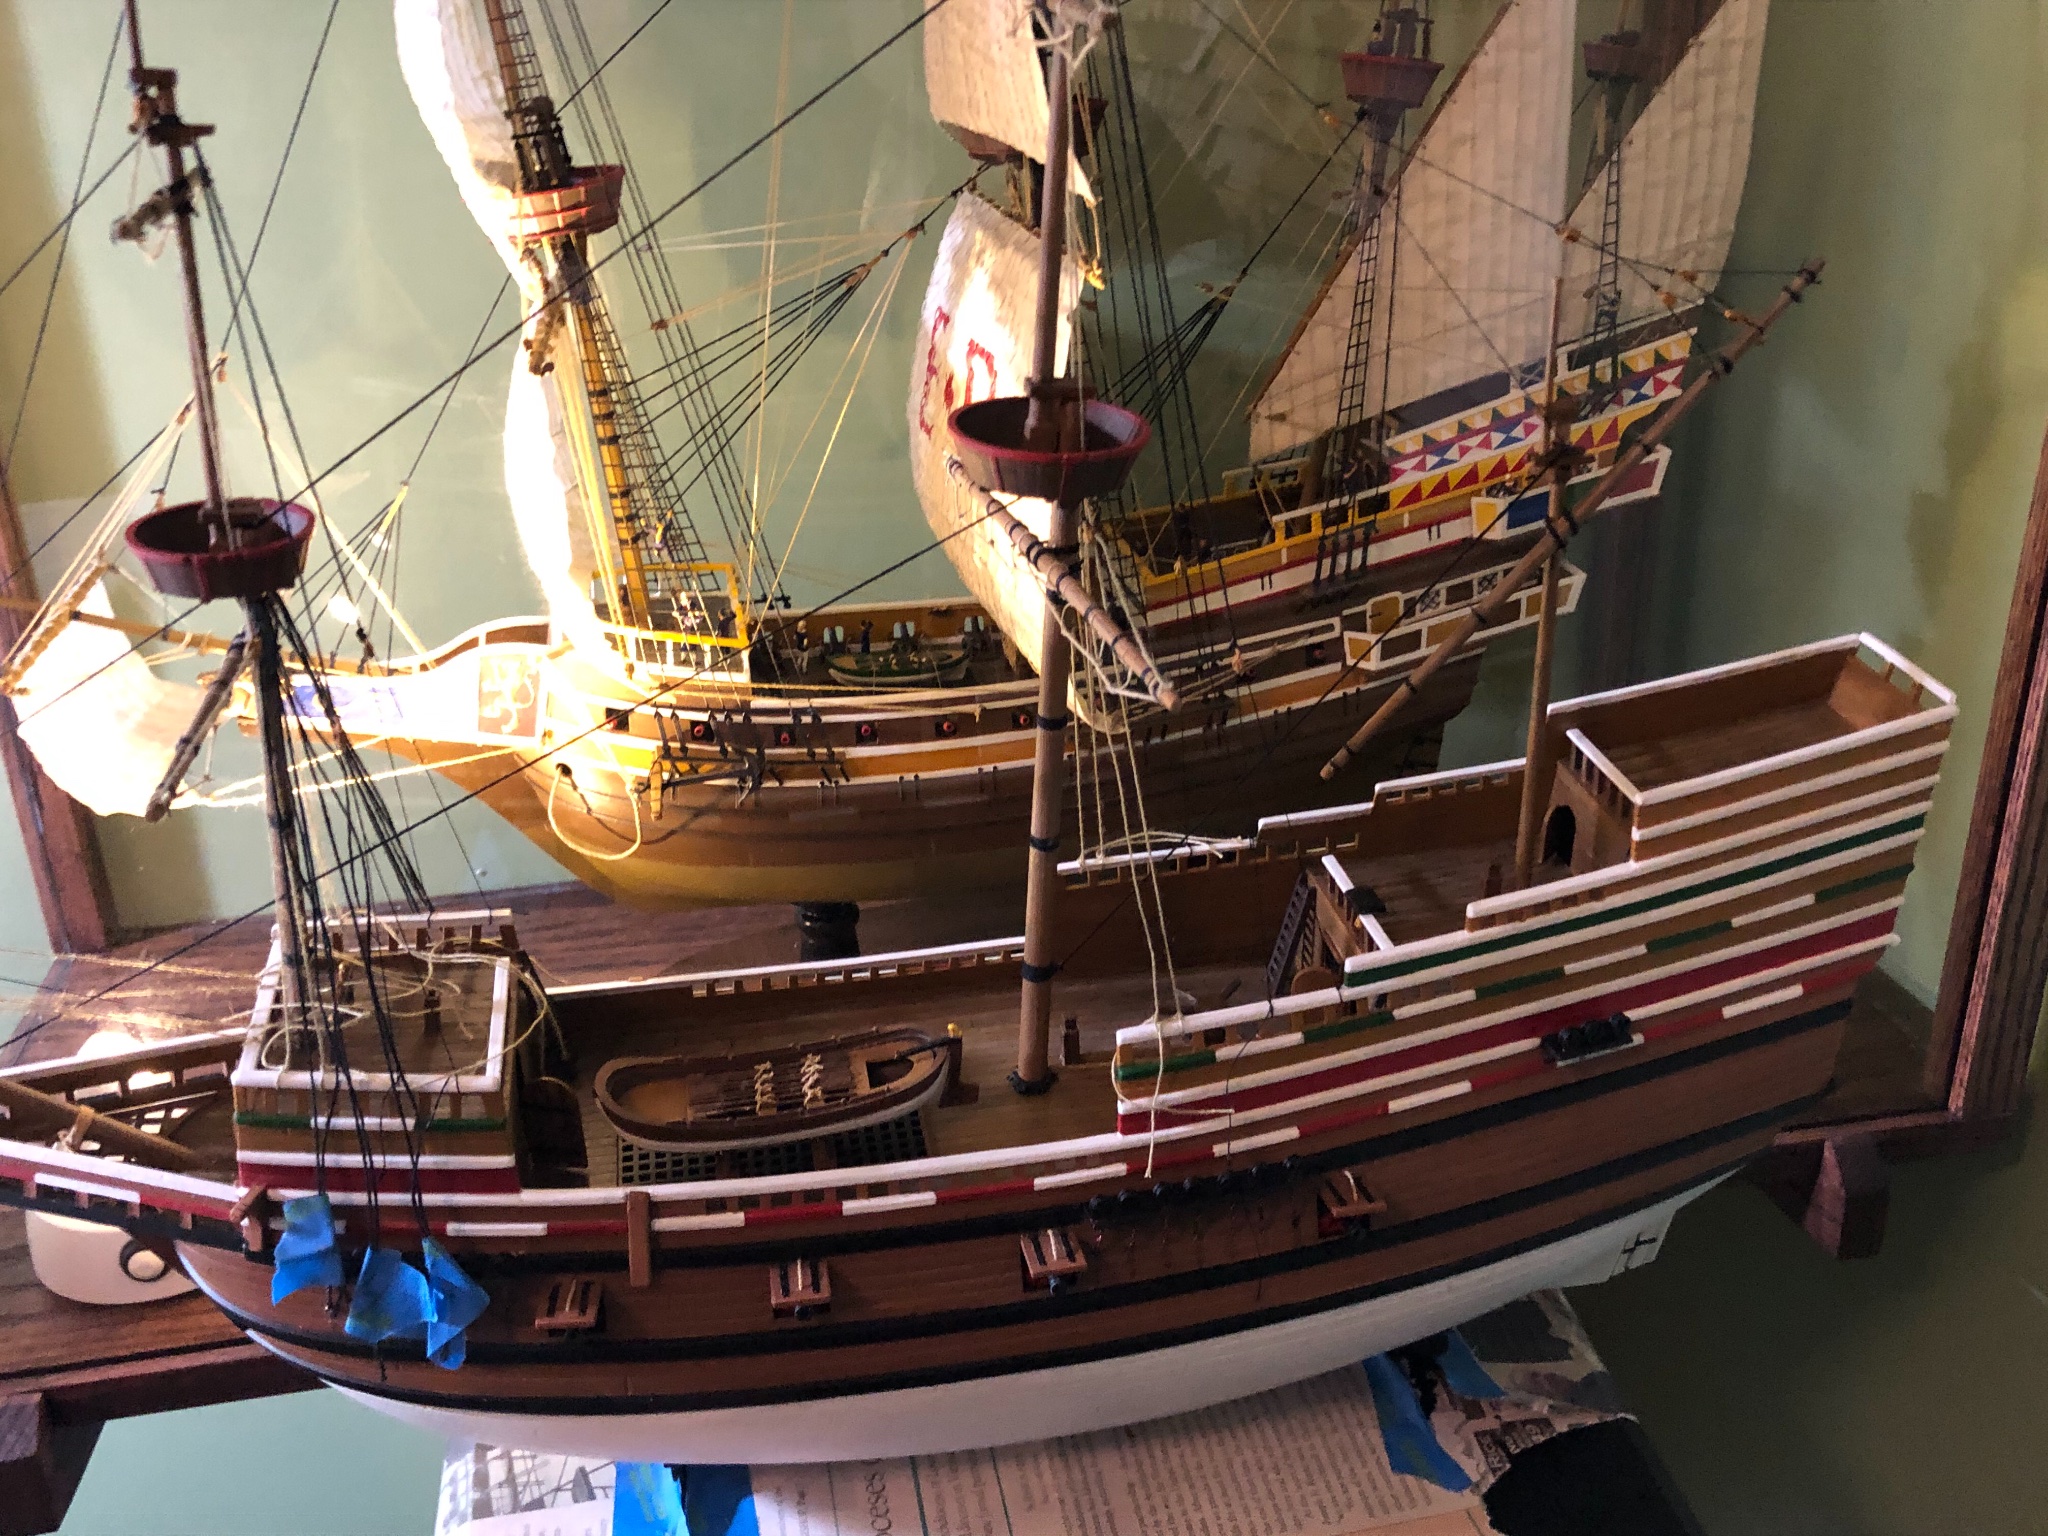
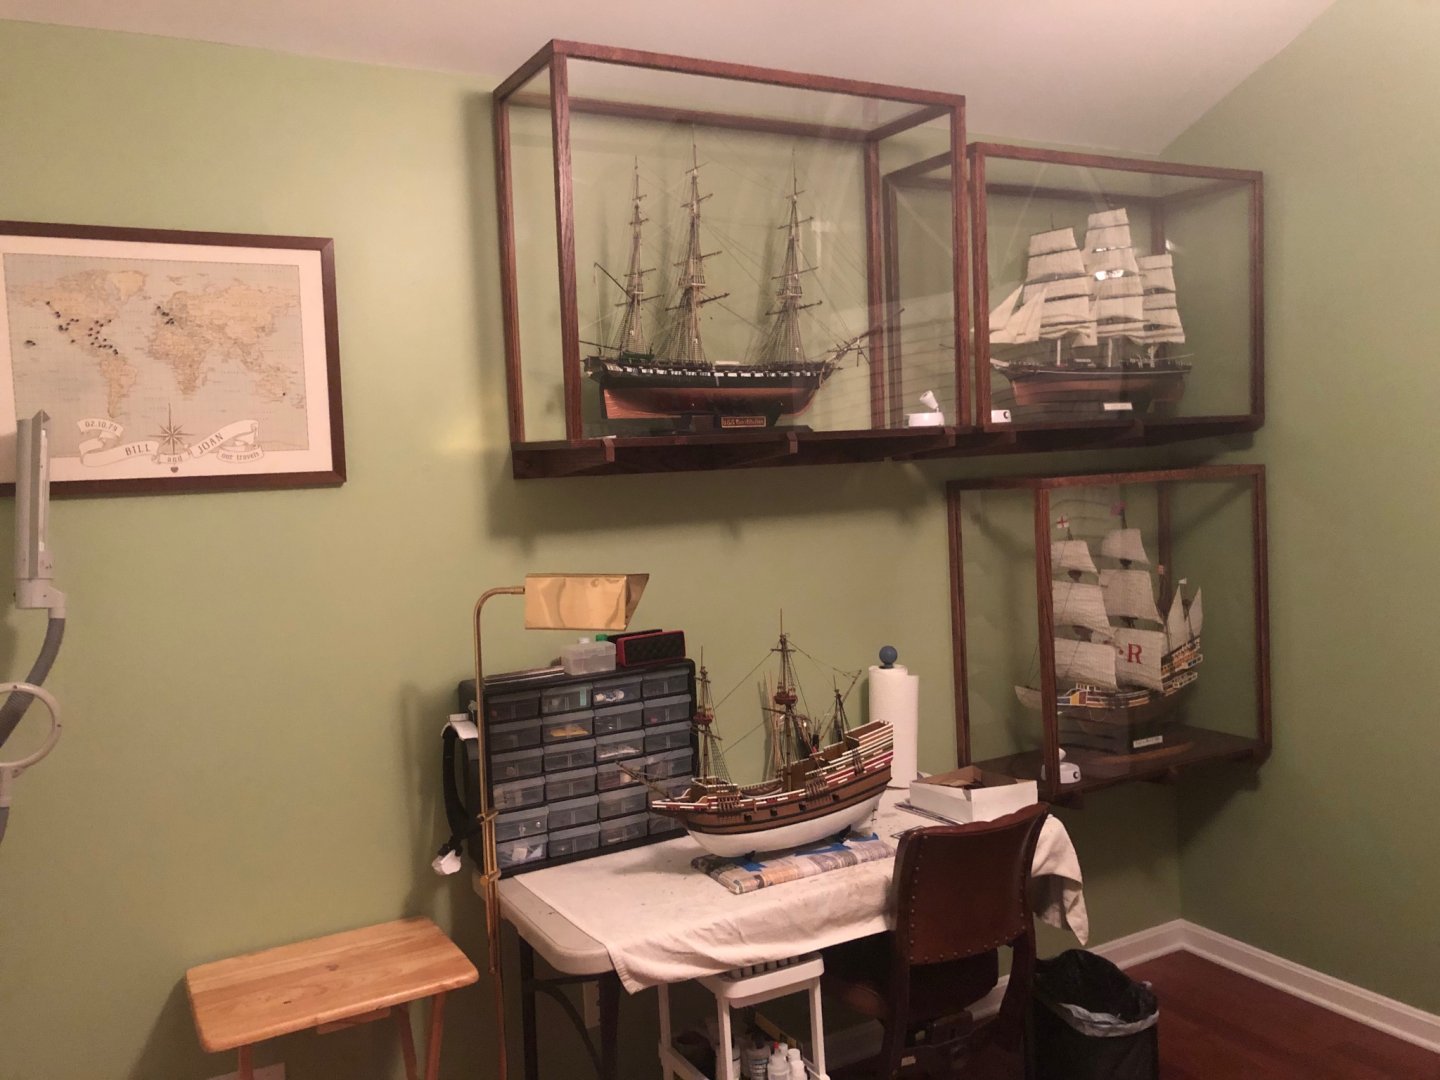
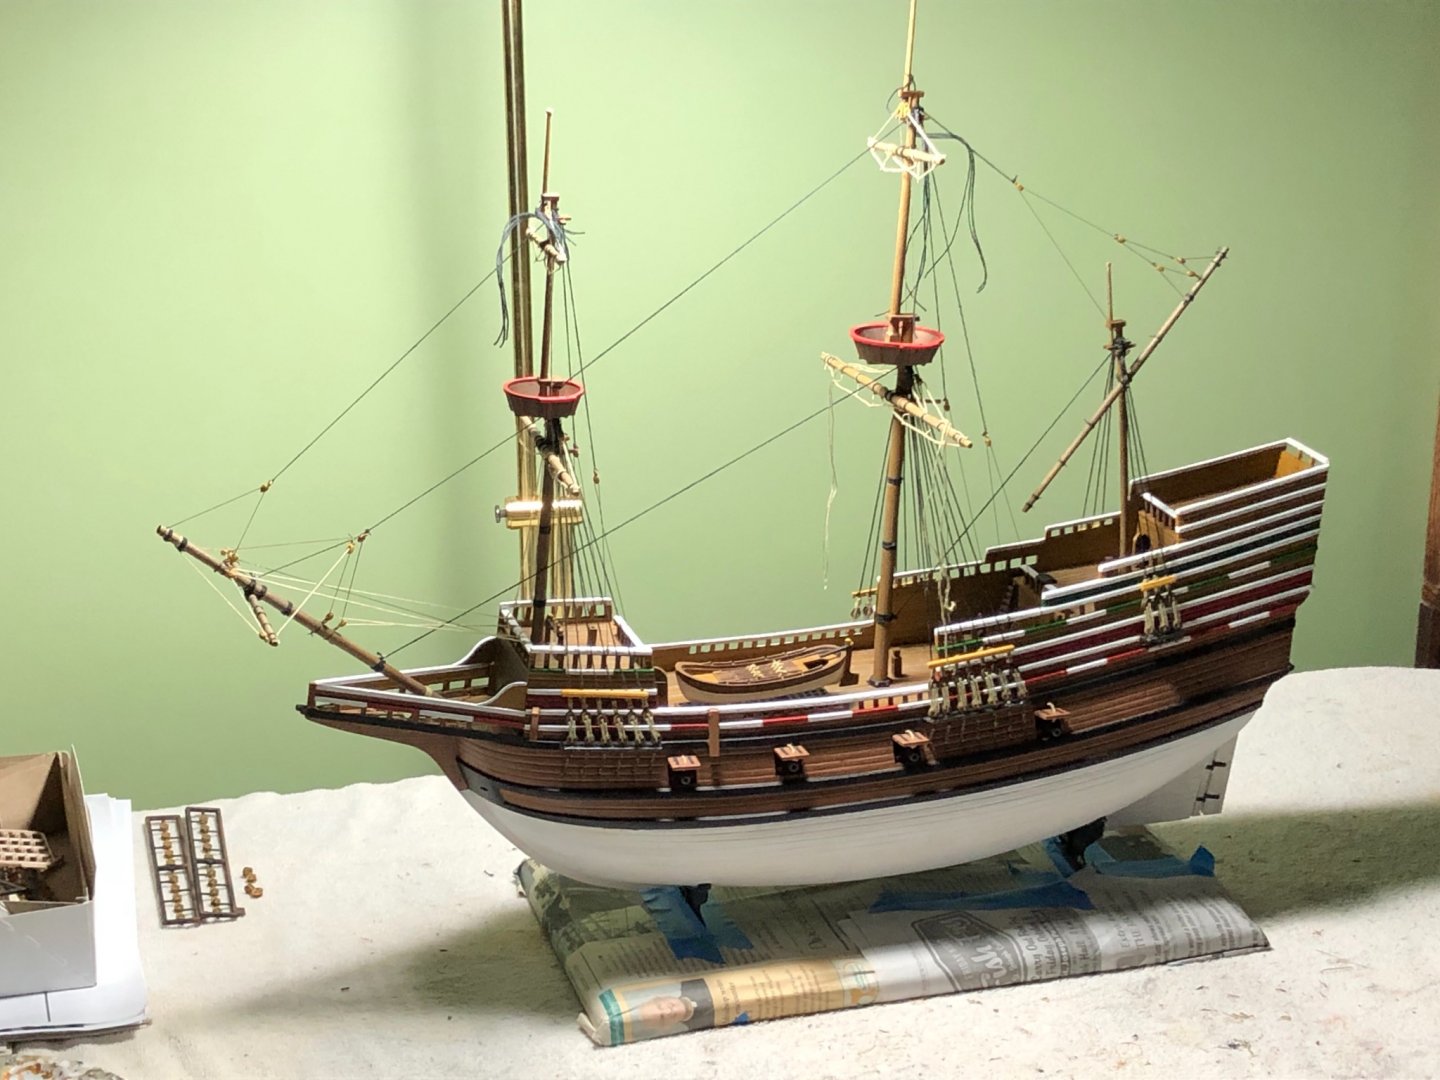
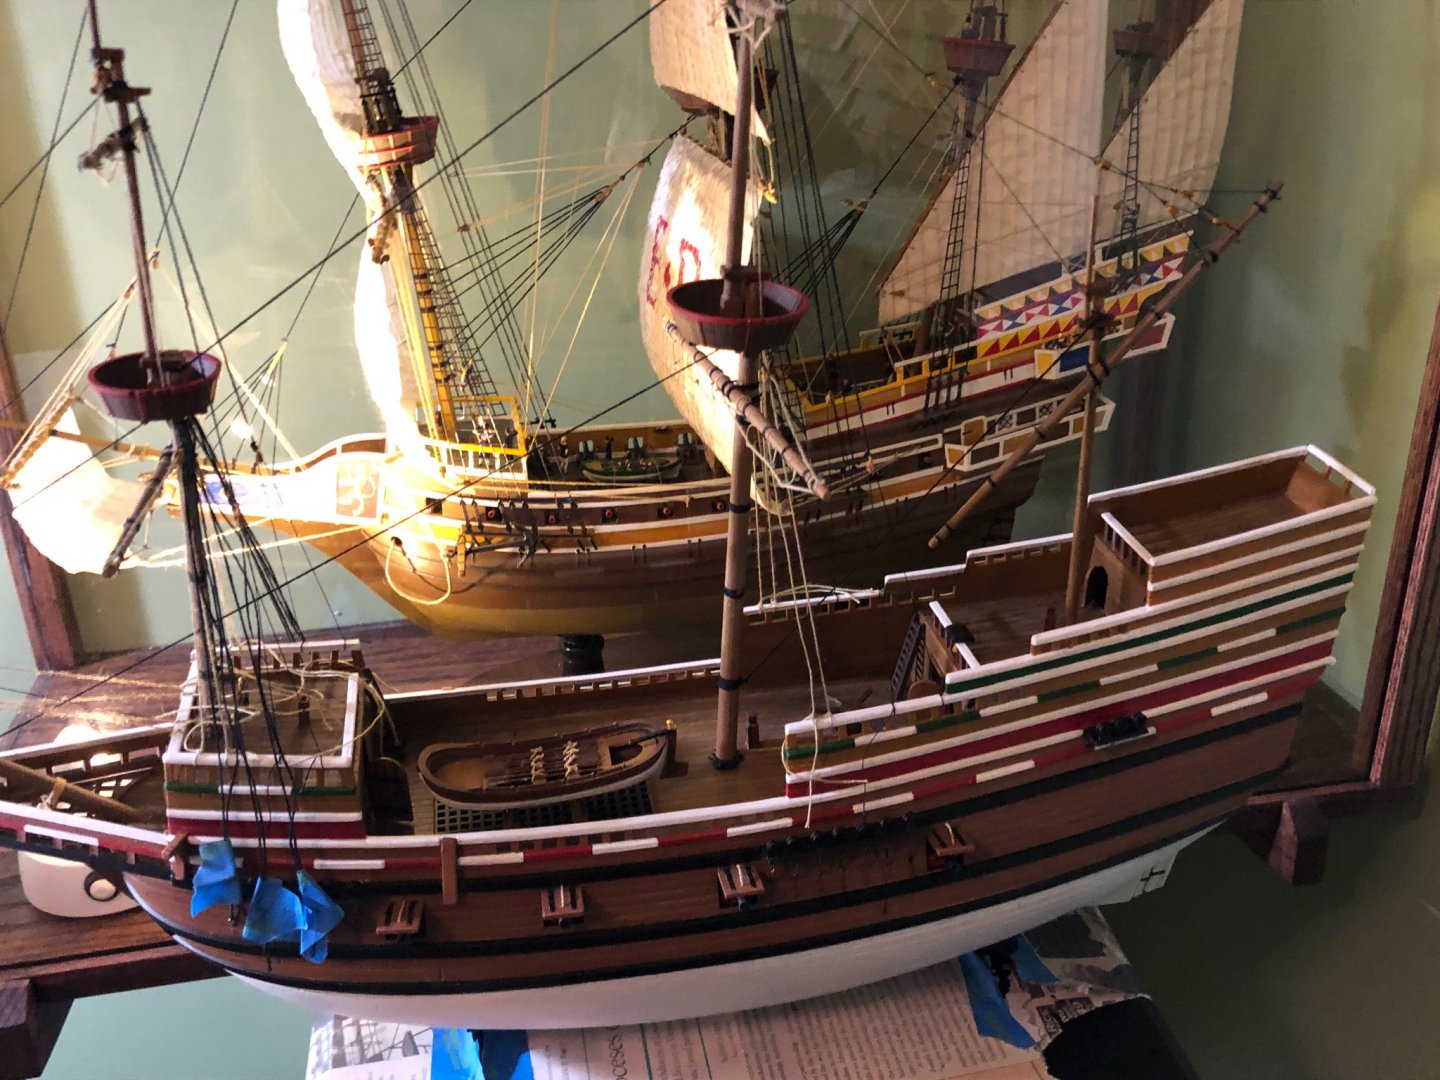
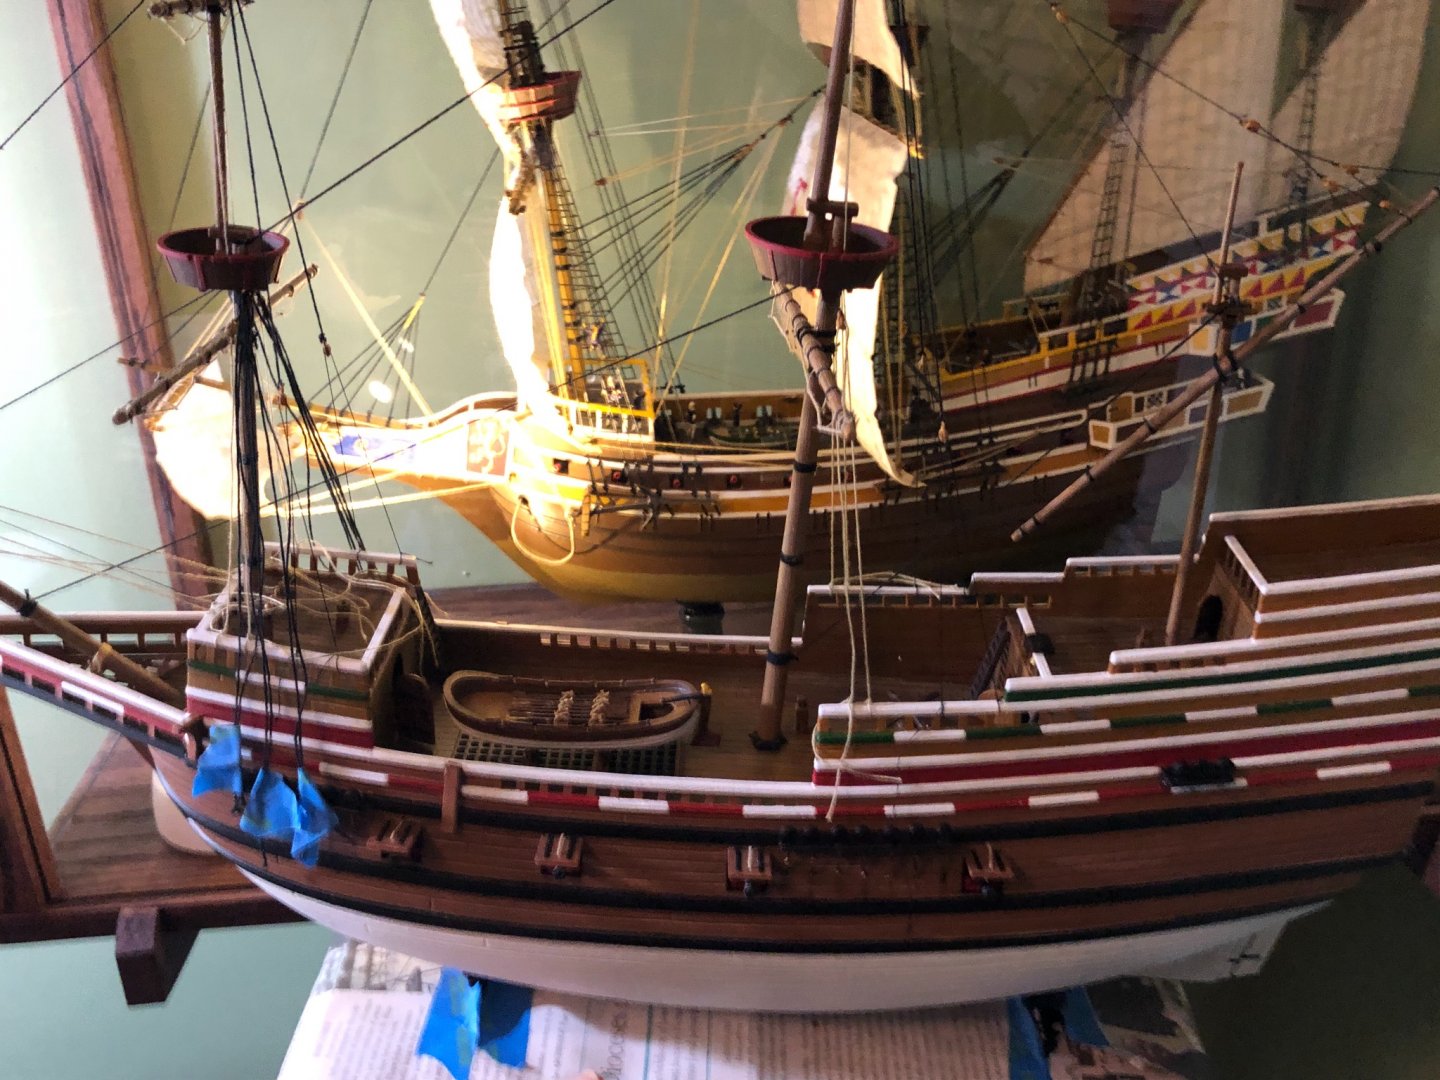
Began working on the ratlines on the lower he upper shrouds on the main mast. Coming right along. Bosco you asked earlier in this life how the Mayflower compared in size to the Man O War. I included a picture of my work area where you can see the Mayflower on my table and the Man O War in it’s case side by side. As you can see, they are about the same size. The Man O War does have taller mast.


-
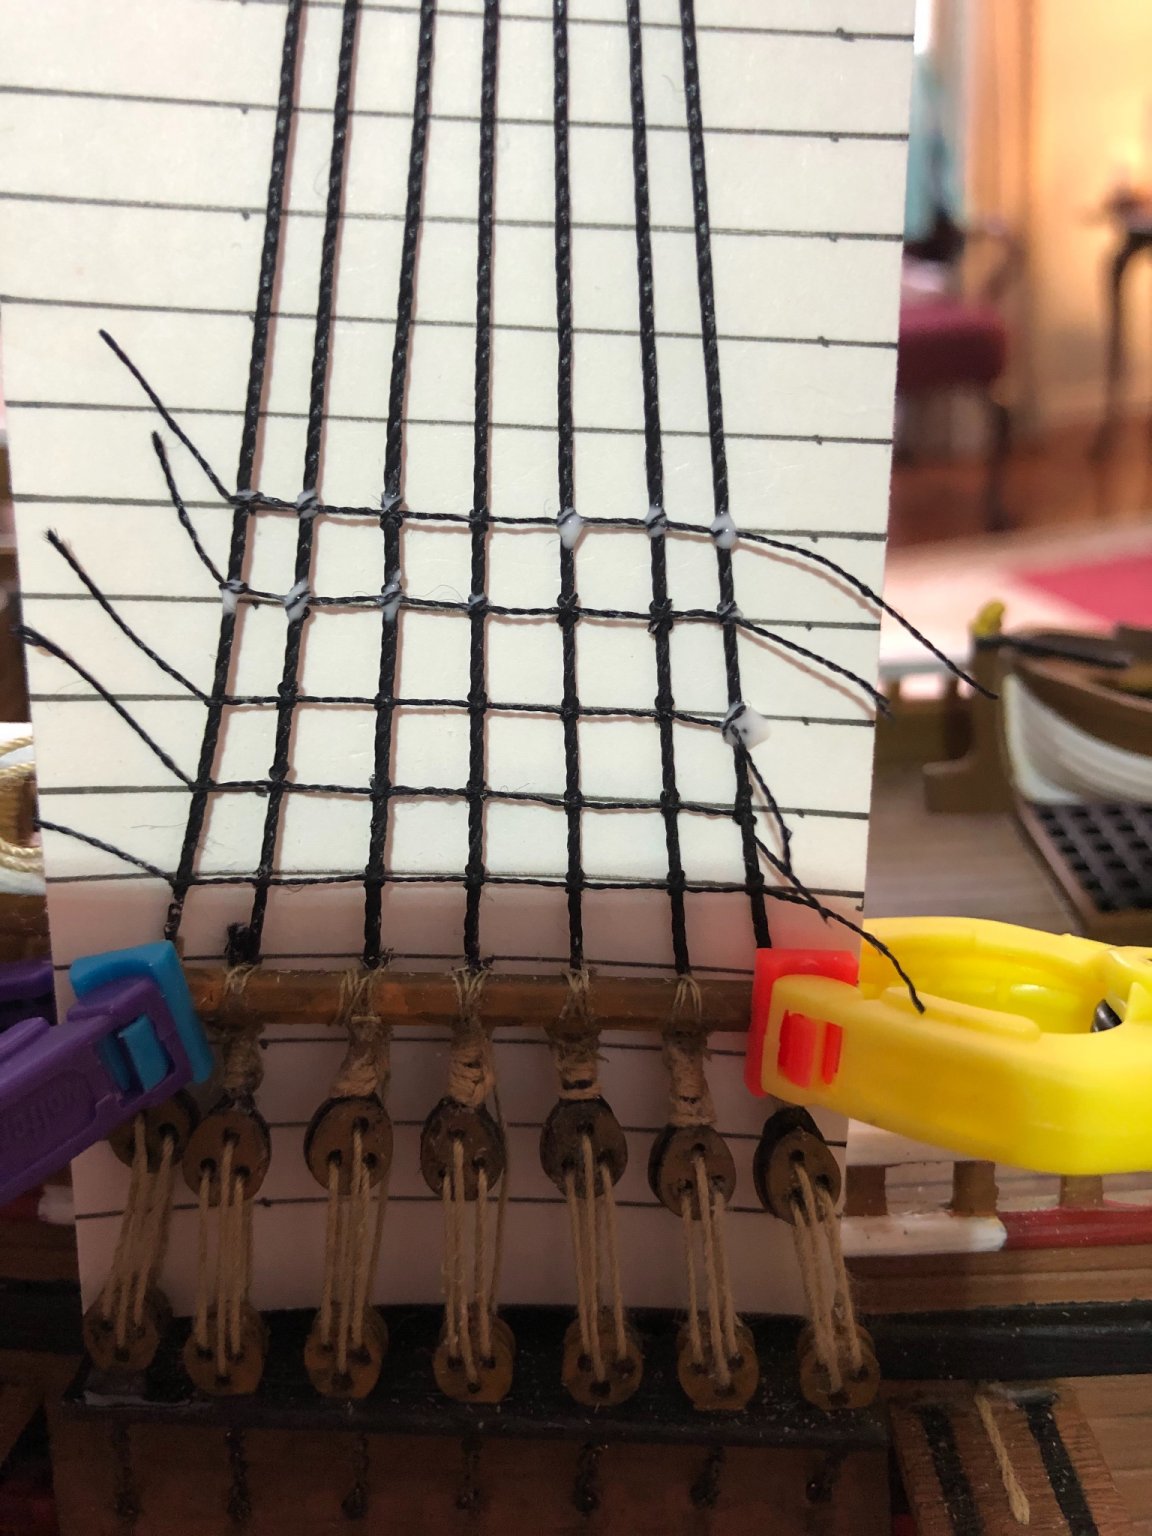
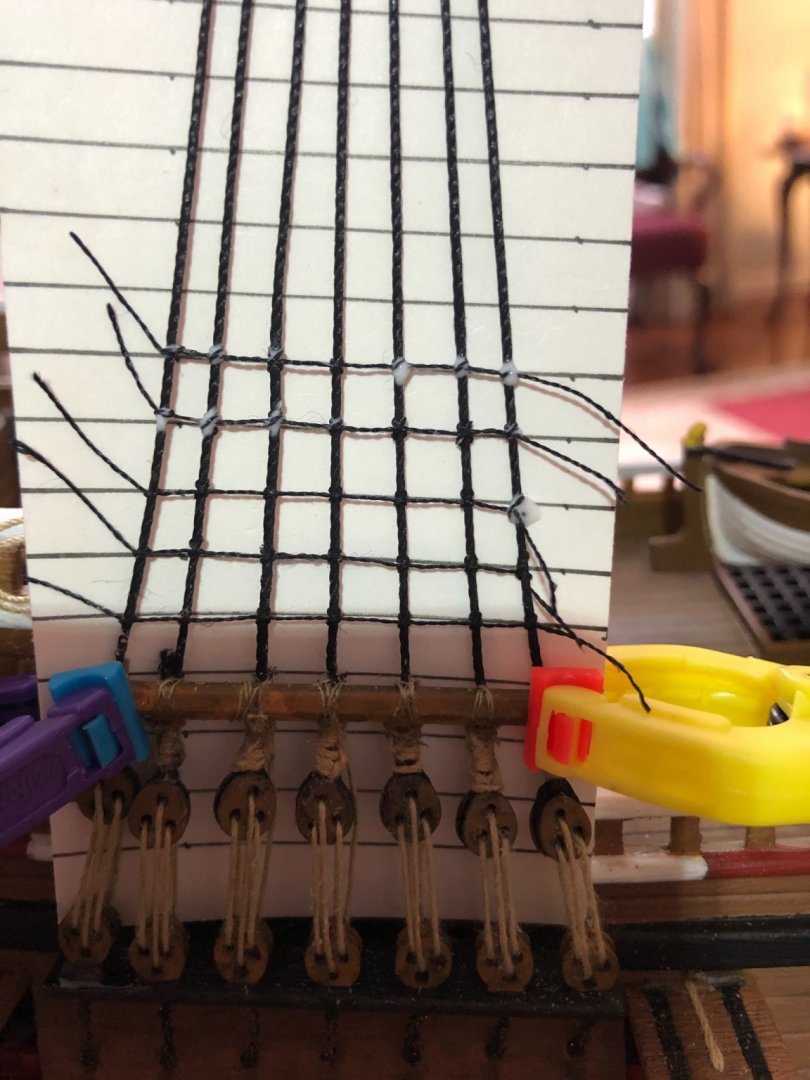
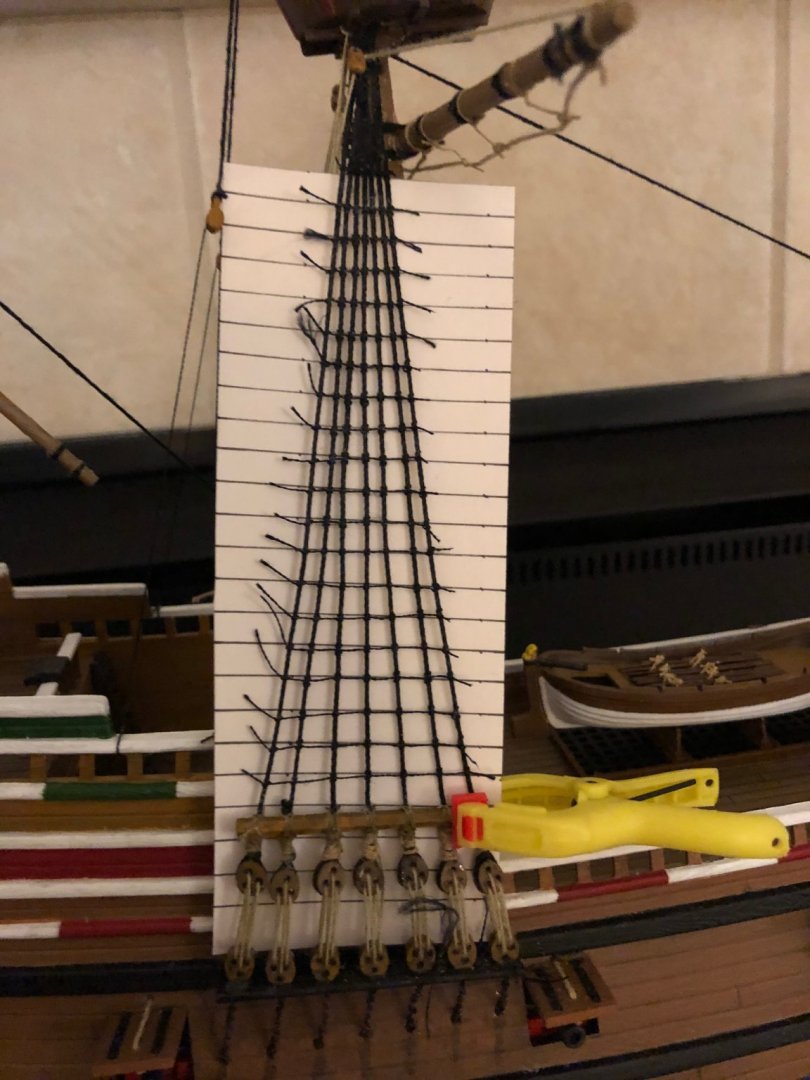
Continued working on the ratlines on the lower shrouds. As I experimented with different ideas to keep the shrouds straighter I have determined that if I start my first ratline knot on a center shroud and then work to the left and or right out to the first and last shrouds, I am more successful in keeping the lines straighter. Not pulling on them as much.


-
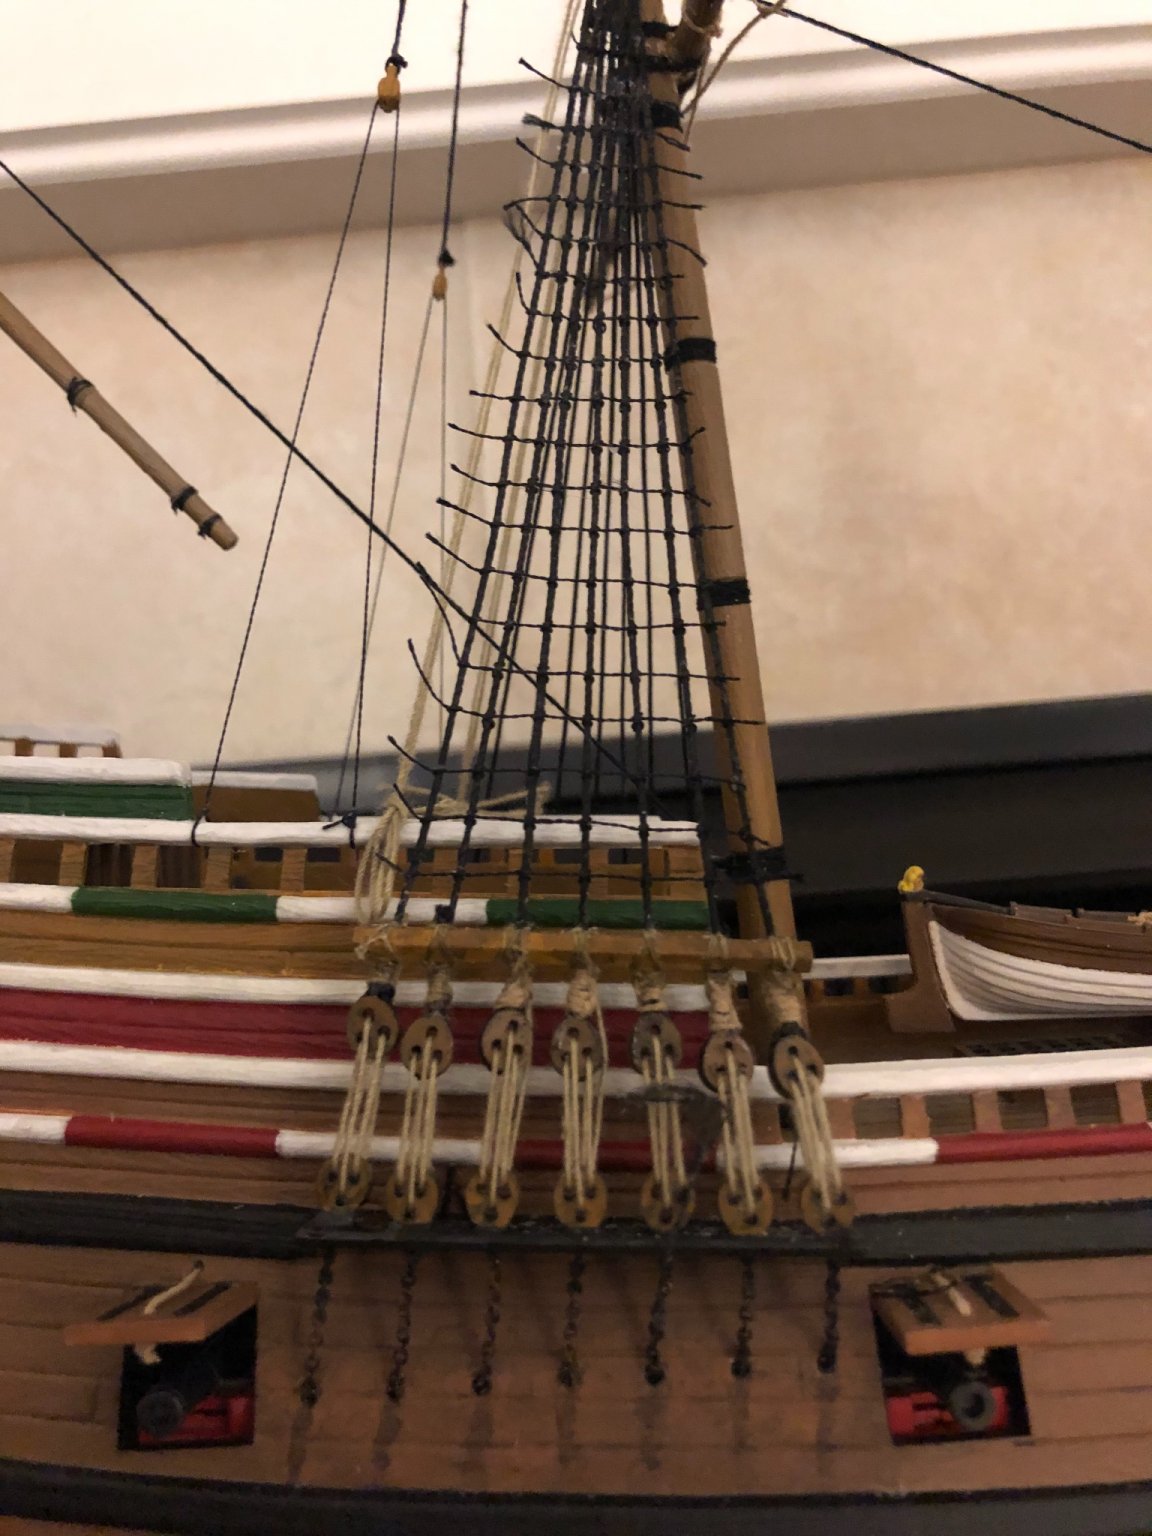
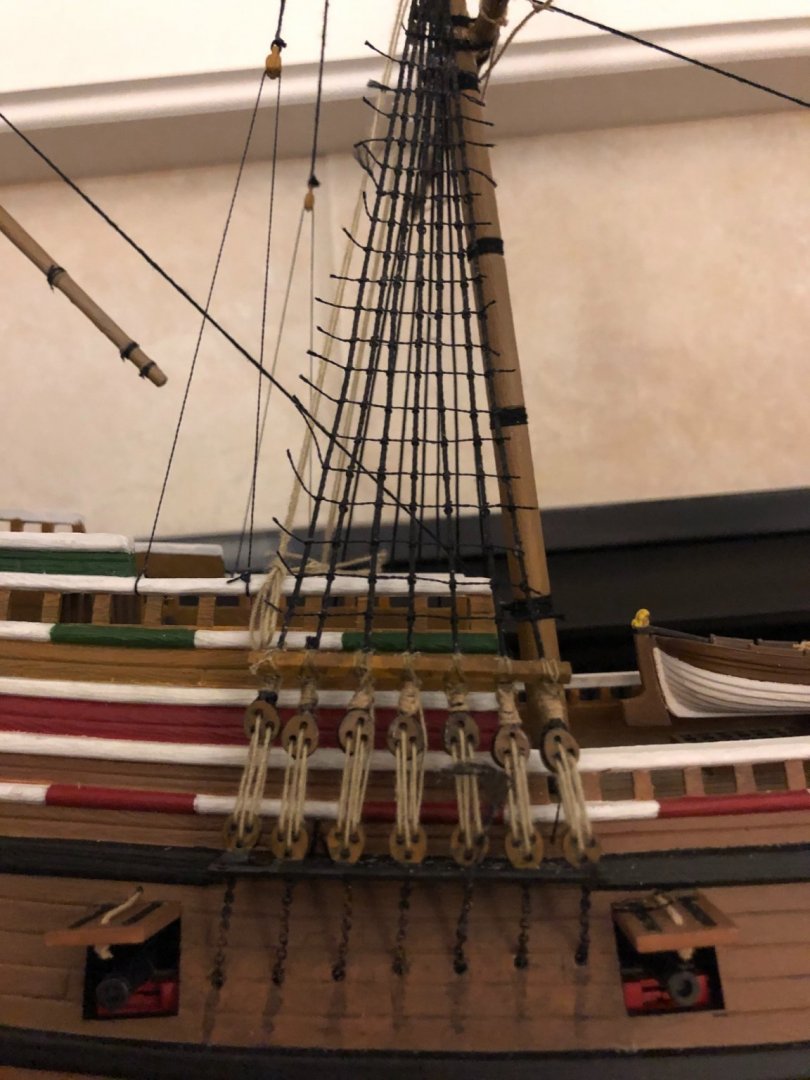
Finished the ratlines on the lower shrouds of the mainmast on the right side of the ship. Again I found a great YouTube video that was extremely helpful. Need to trim the side threads. As I mentioned before this is my first attempt at rigging shrouds and ratlines. I actually enjoyed tying all the little knots. I need to practice so as to improve my skill and technique. I can tell I snug the back shroud a little to tight because I got a bit of a bend in it. Not a straight line from the deadeye up to the tree. However I am pleased with the outcome.

-
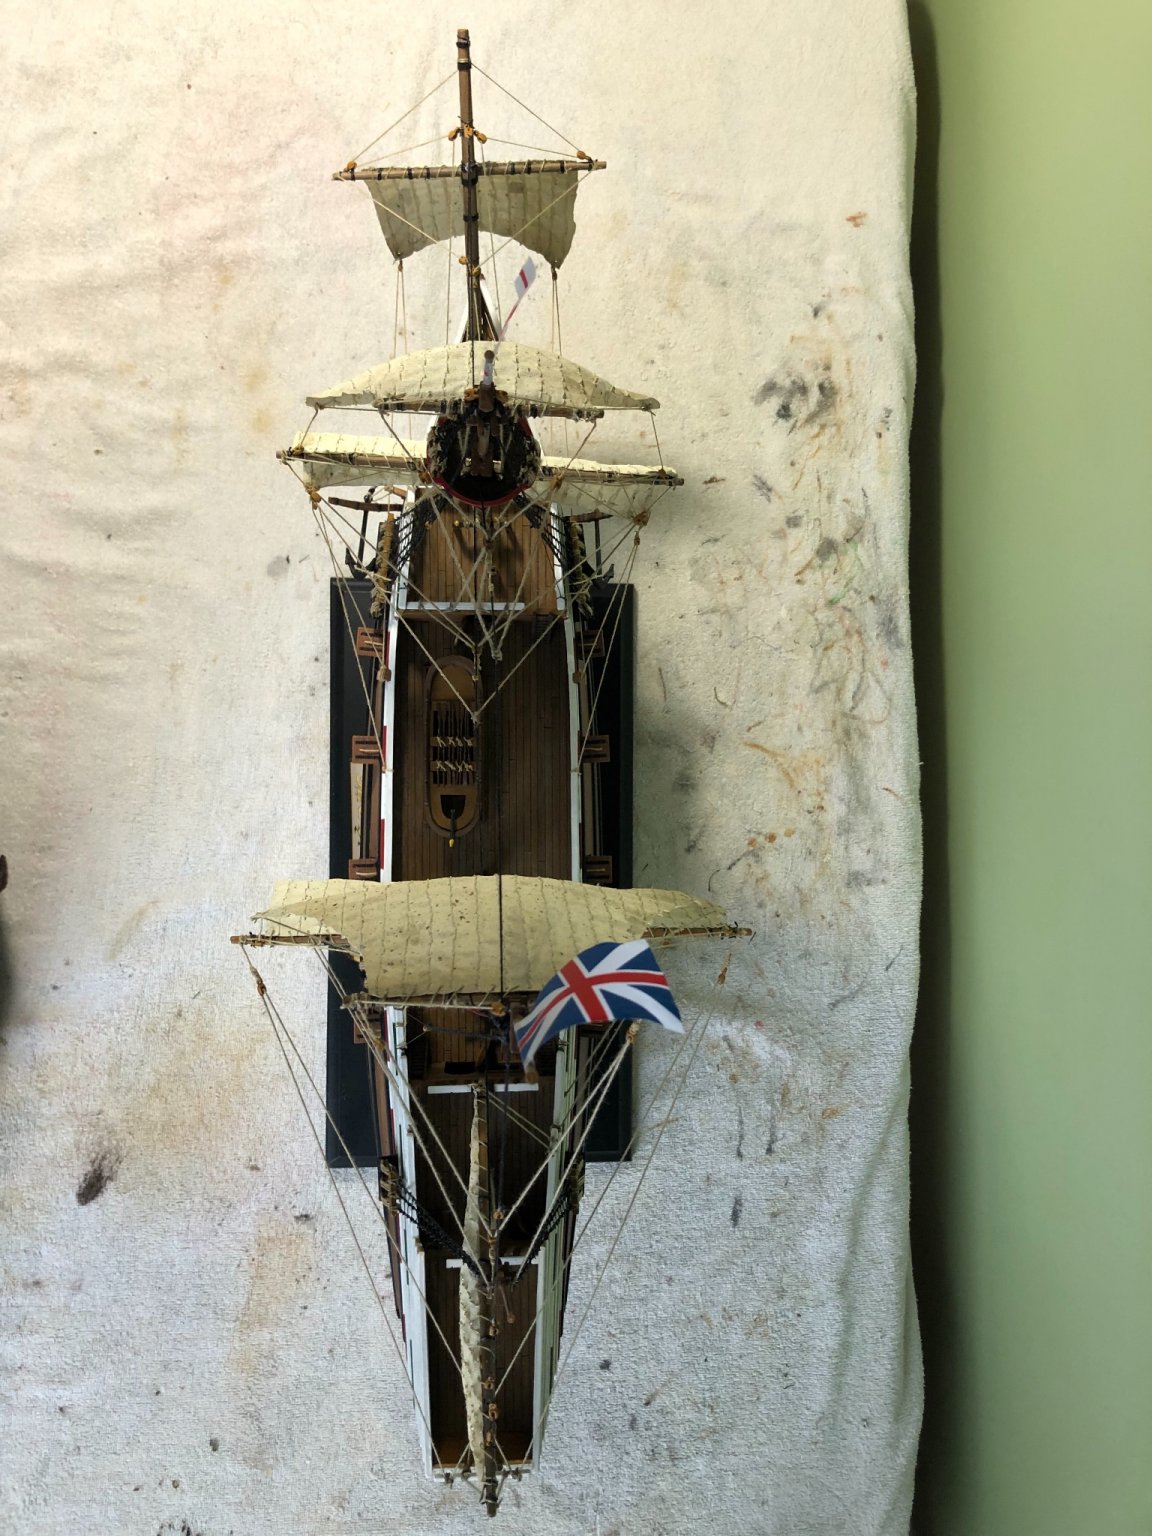
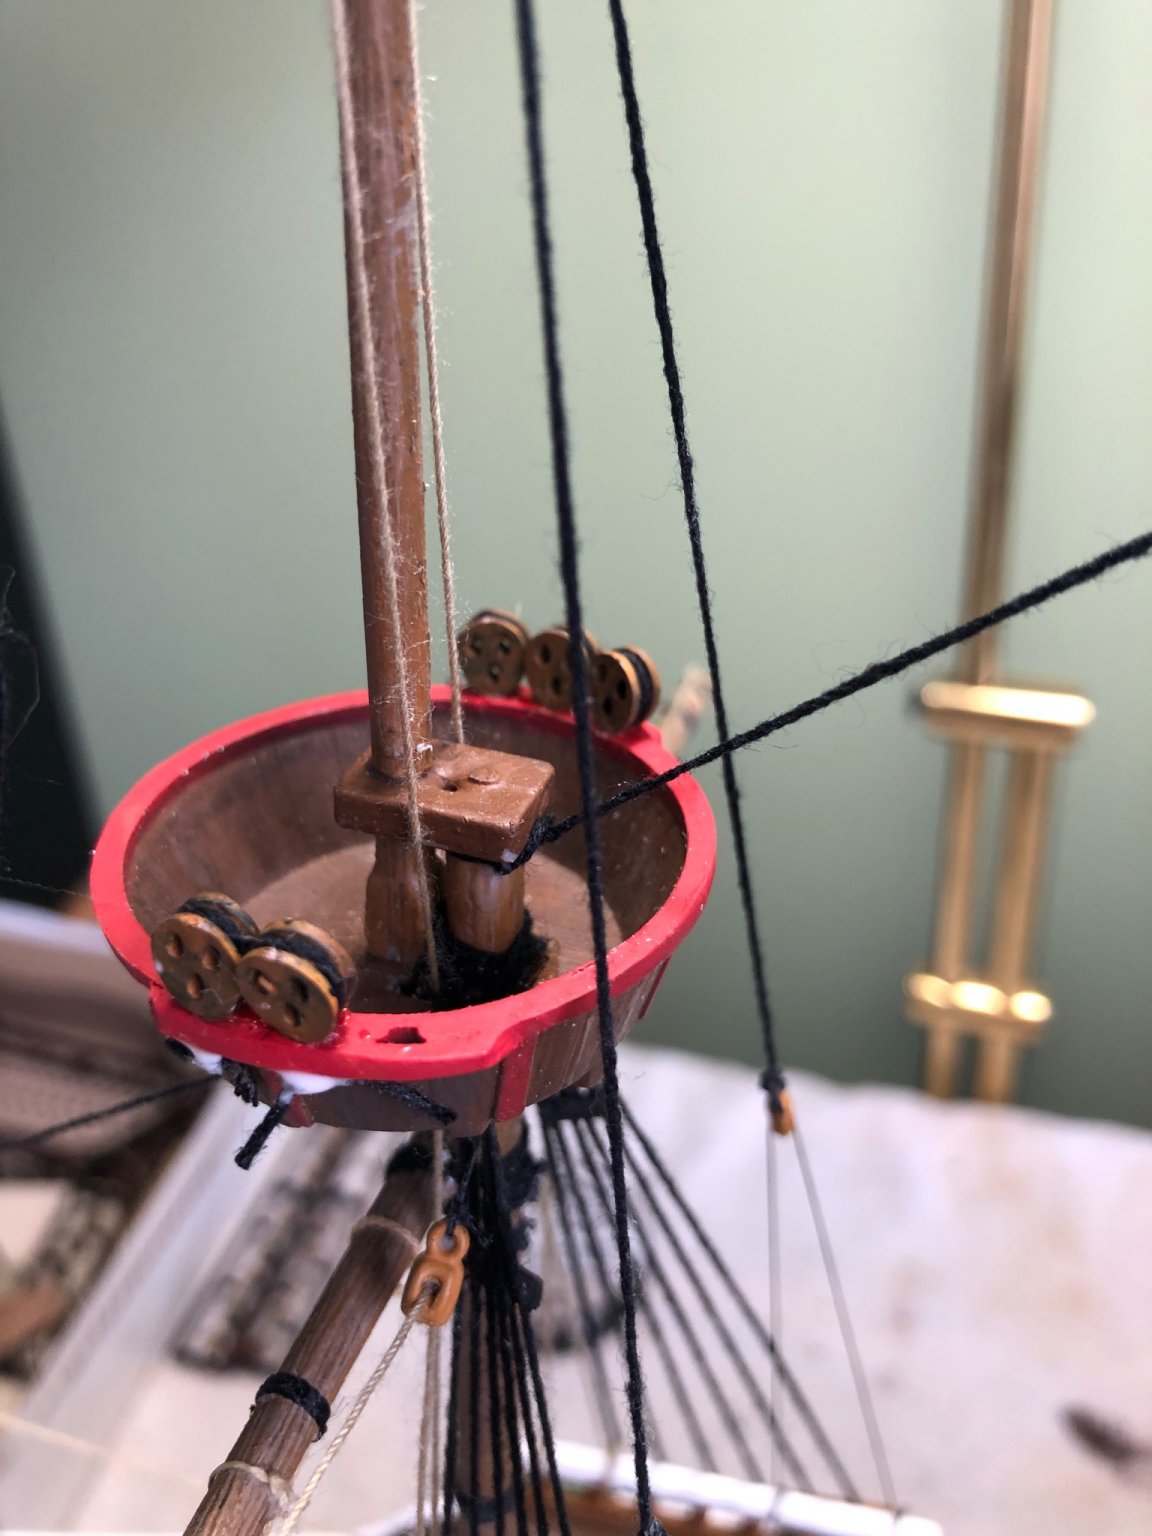
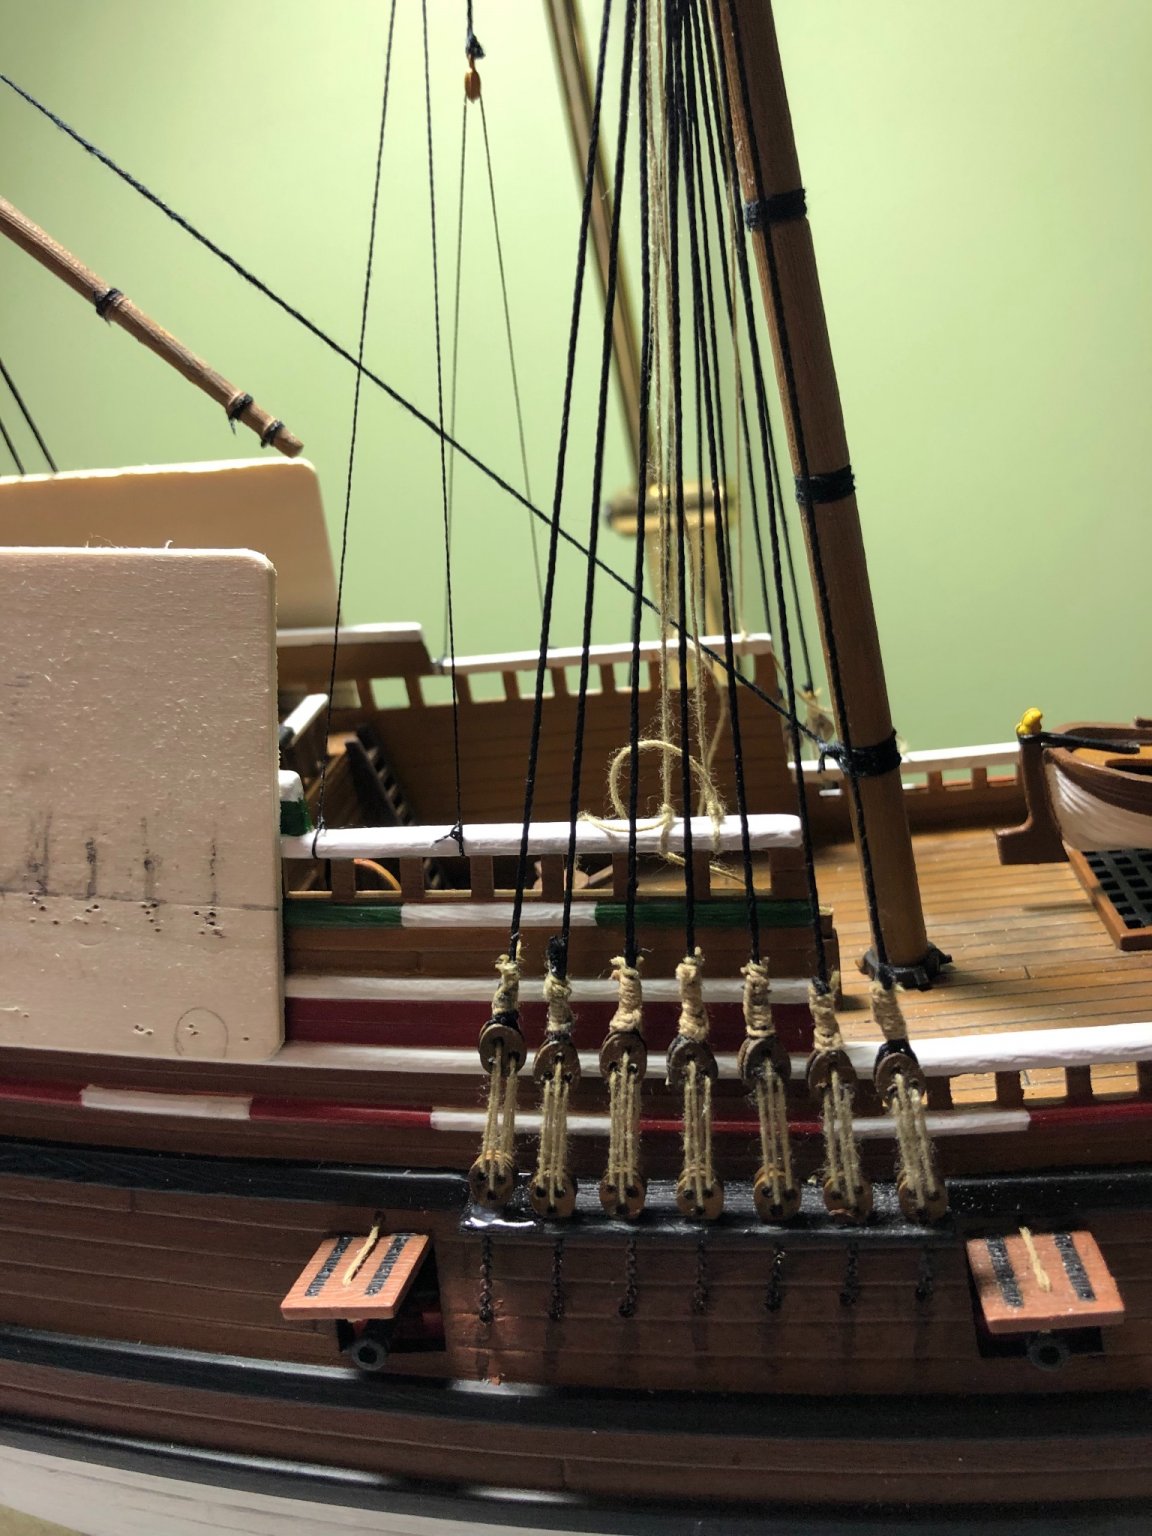
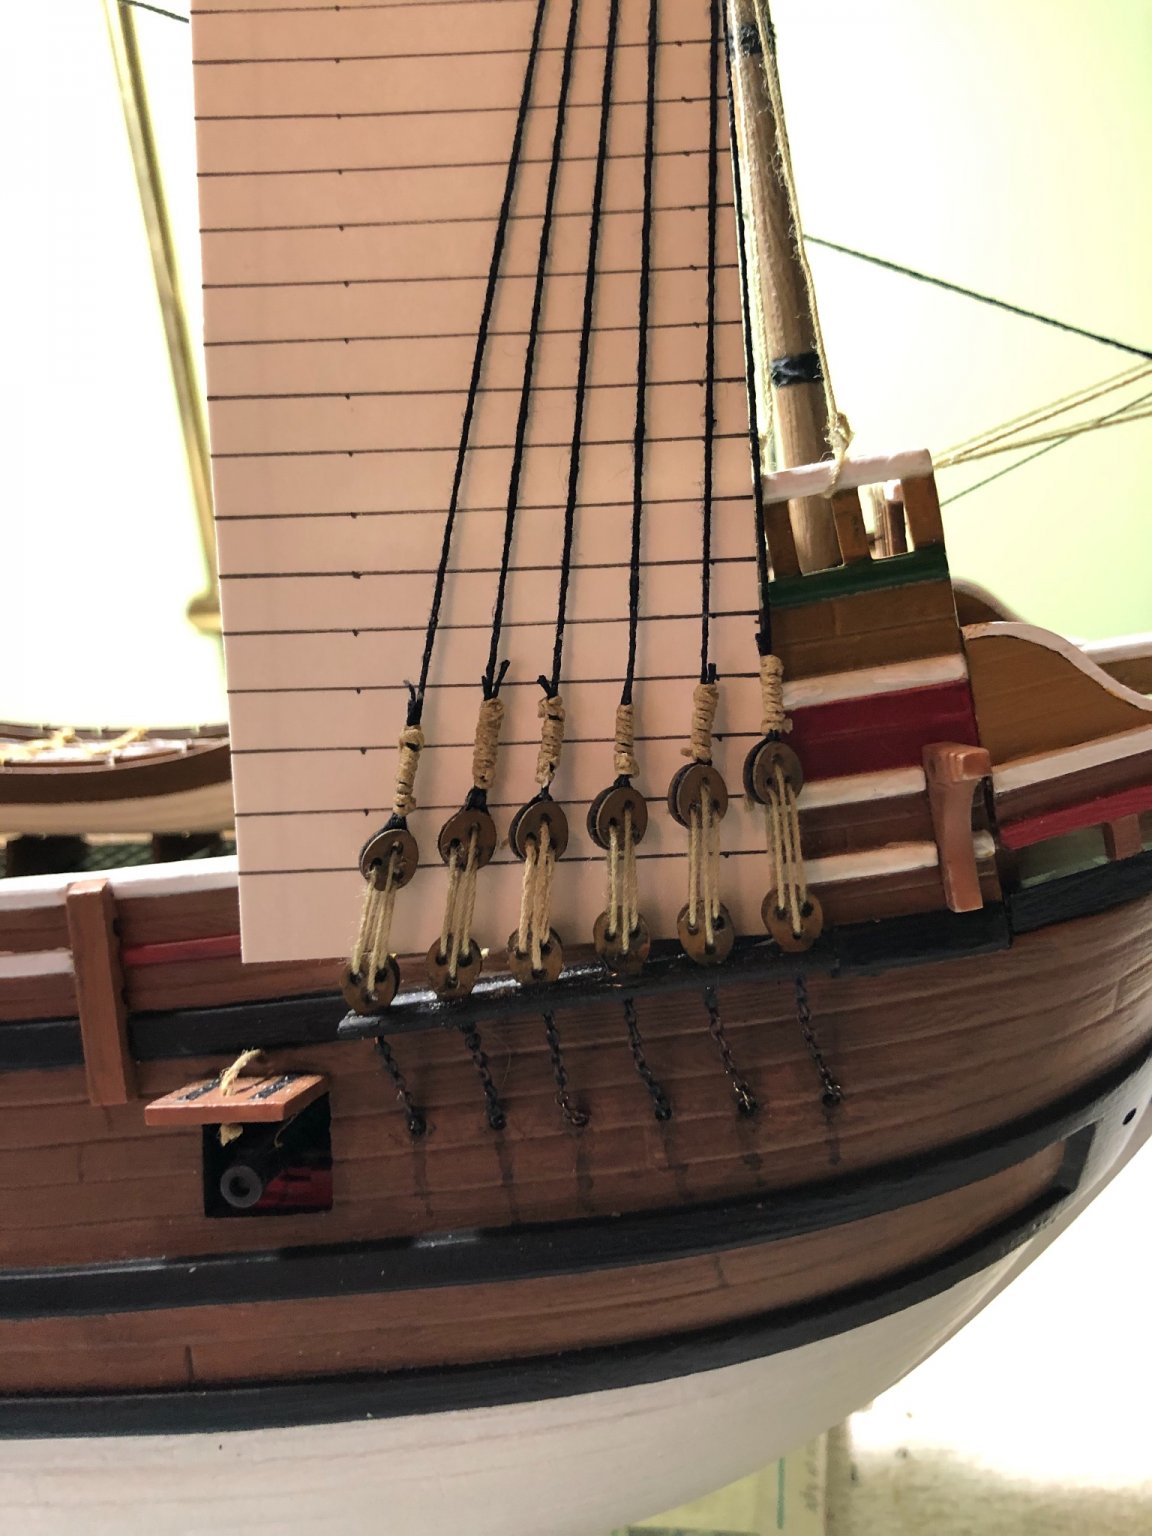
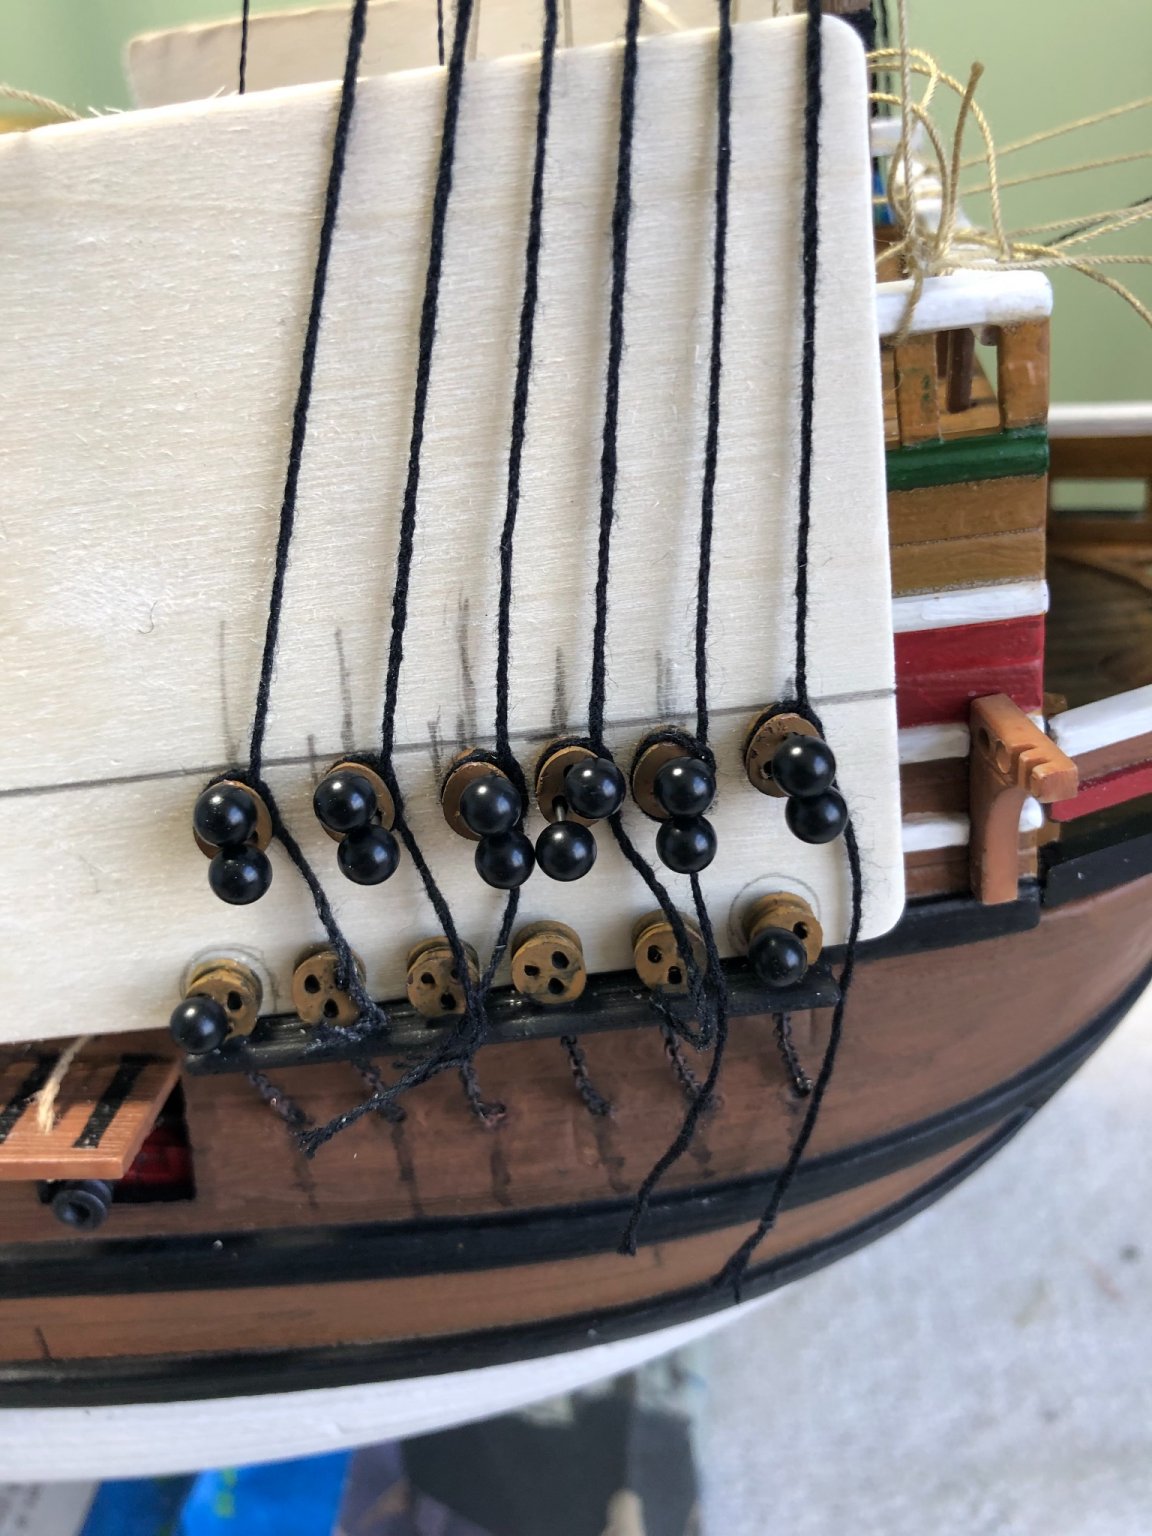
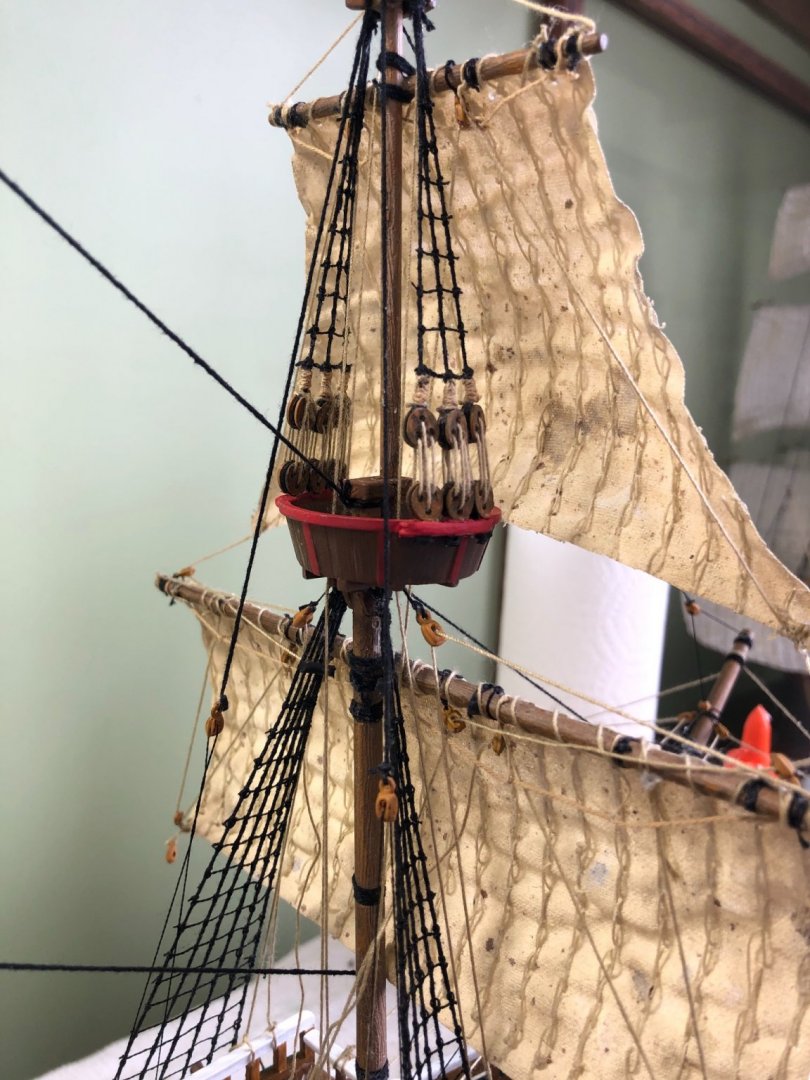
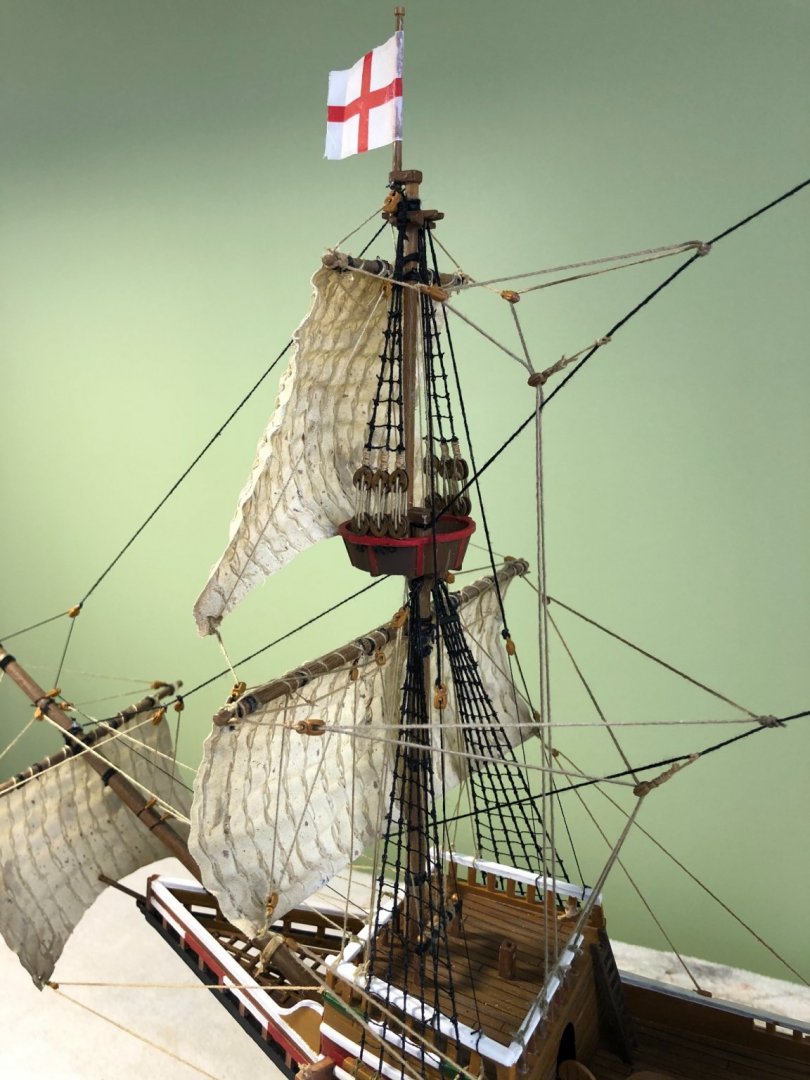
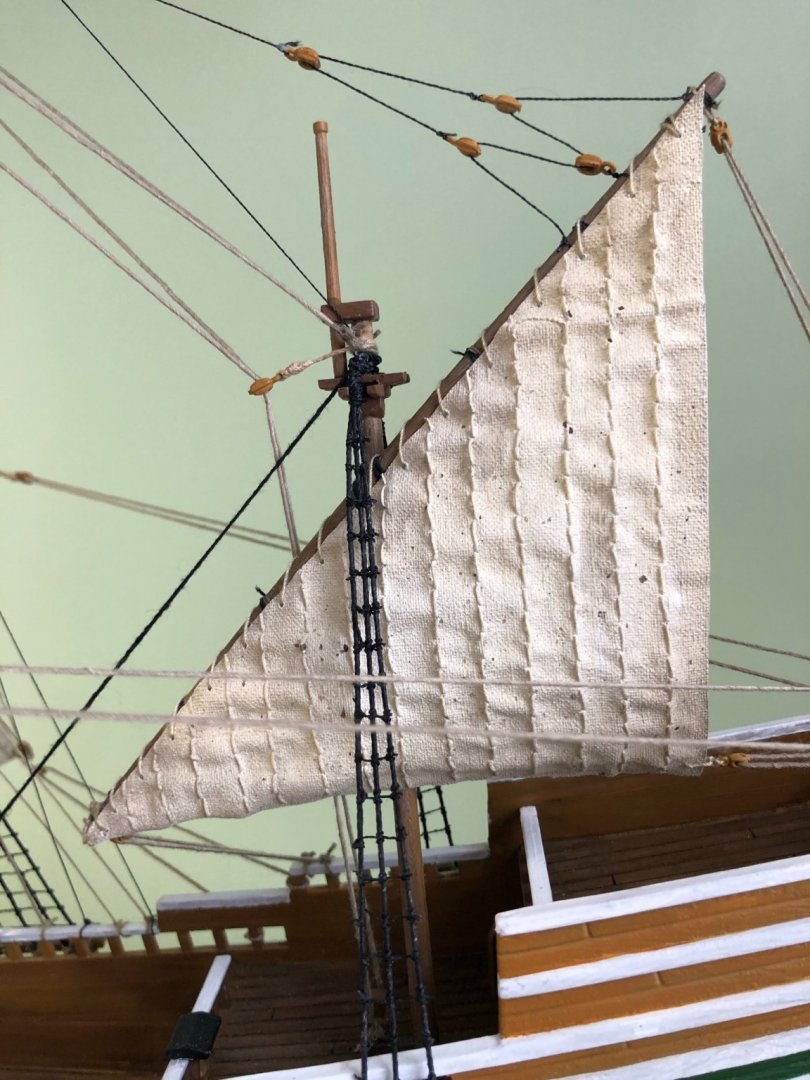
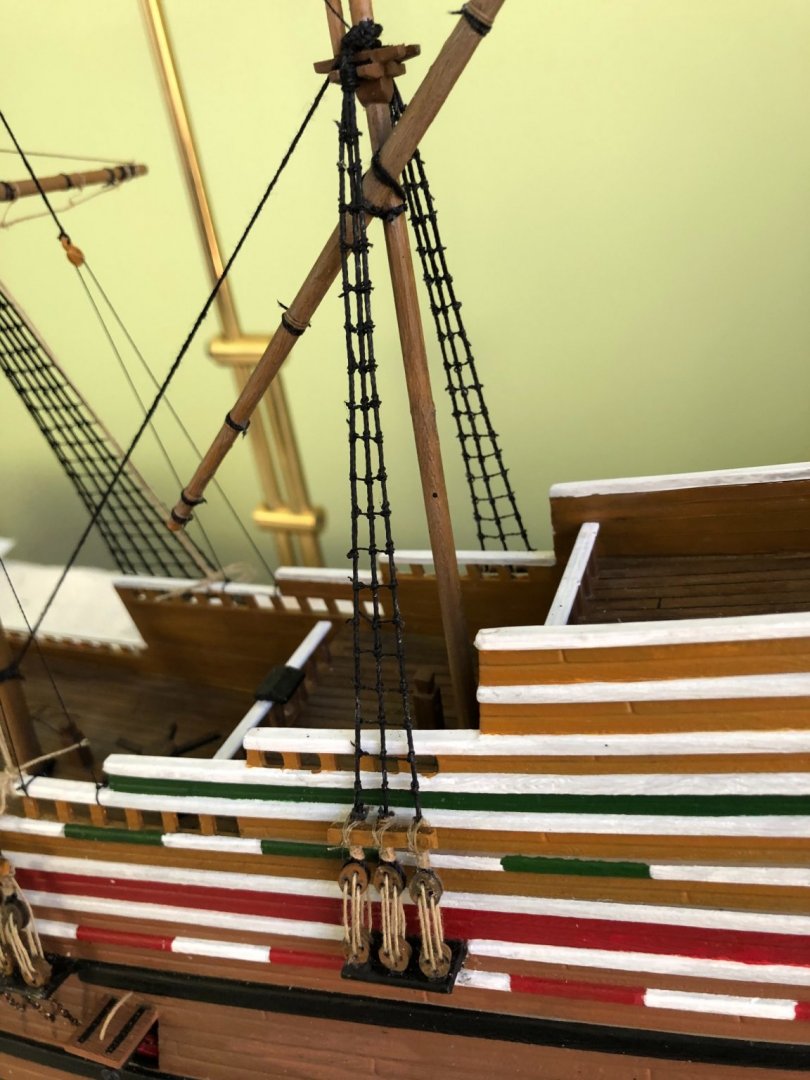
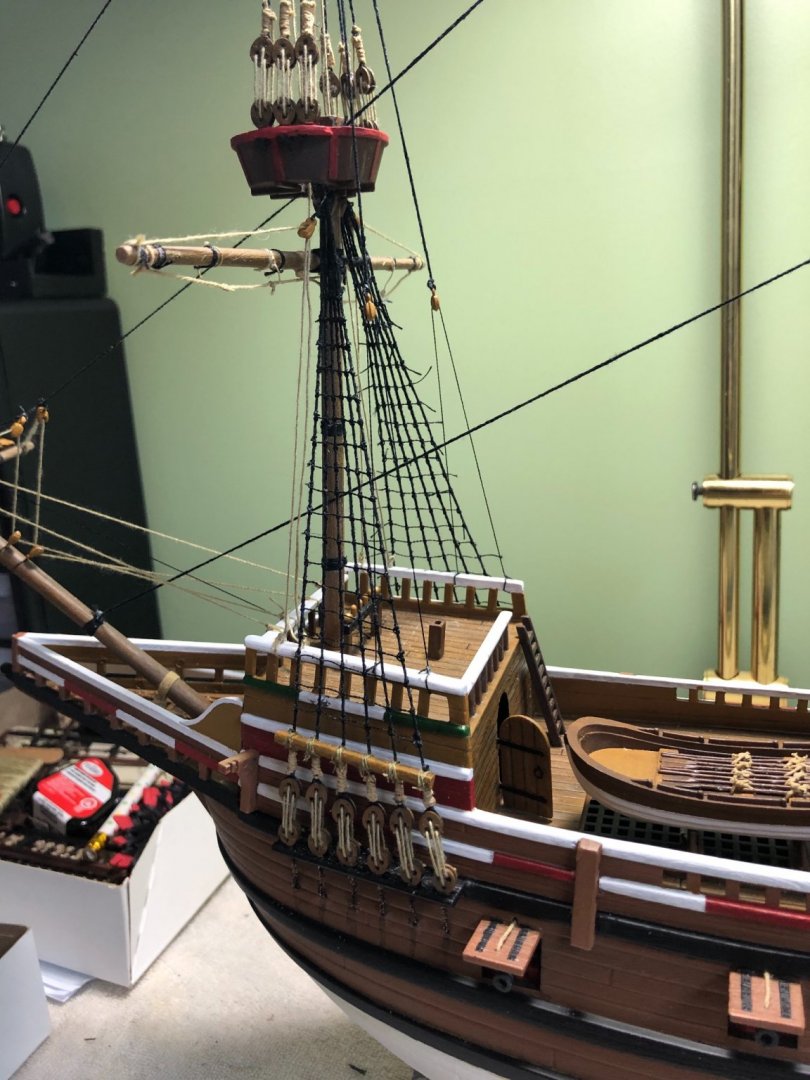
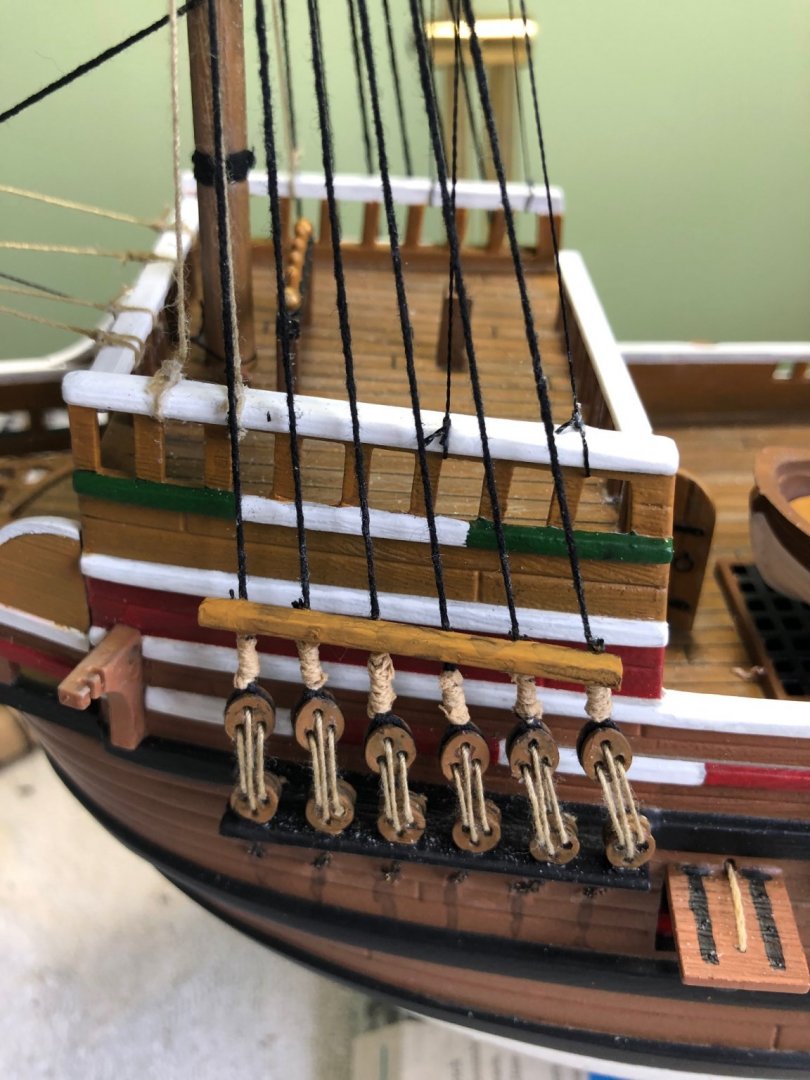
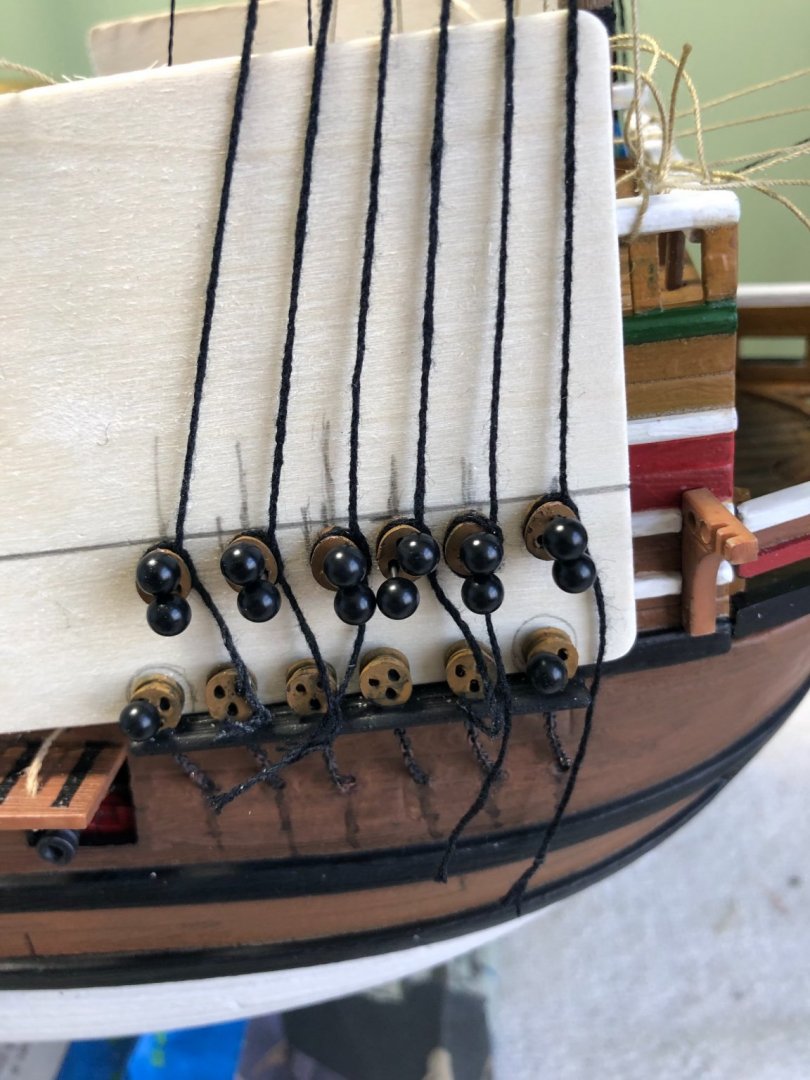
Finished the upper and lower shrouds with deadeye rigging and lanyards. Through the research I did of ships of the era I found there was not a standard consensus as to the use of a sheer pool above the top deadeyes below the ratlines. The part was not included with the kit which was not a surprise since I experienced that with other needed parts in this kit. I decided I would add sheer poles so I fabricated them and tied them to the shrouds and added some weathering. As I hone my skills and techniques I am learning a lot and discovering areas I need to work on a lot. One area for sure is consistent seizing of the shroud lines. My first try at it is not totally uniform but I am making progress. The 3 new builds I have but yet to start all require handmade shrouds so I plan to get a lot of practice.


-
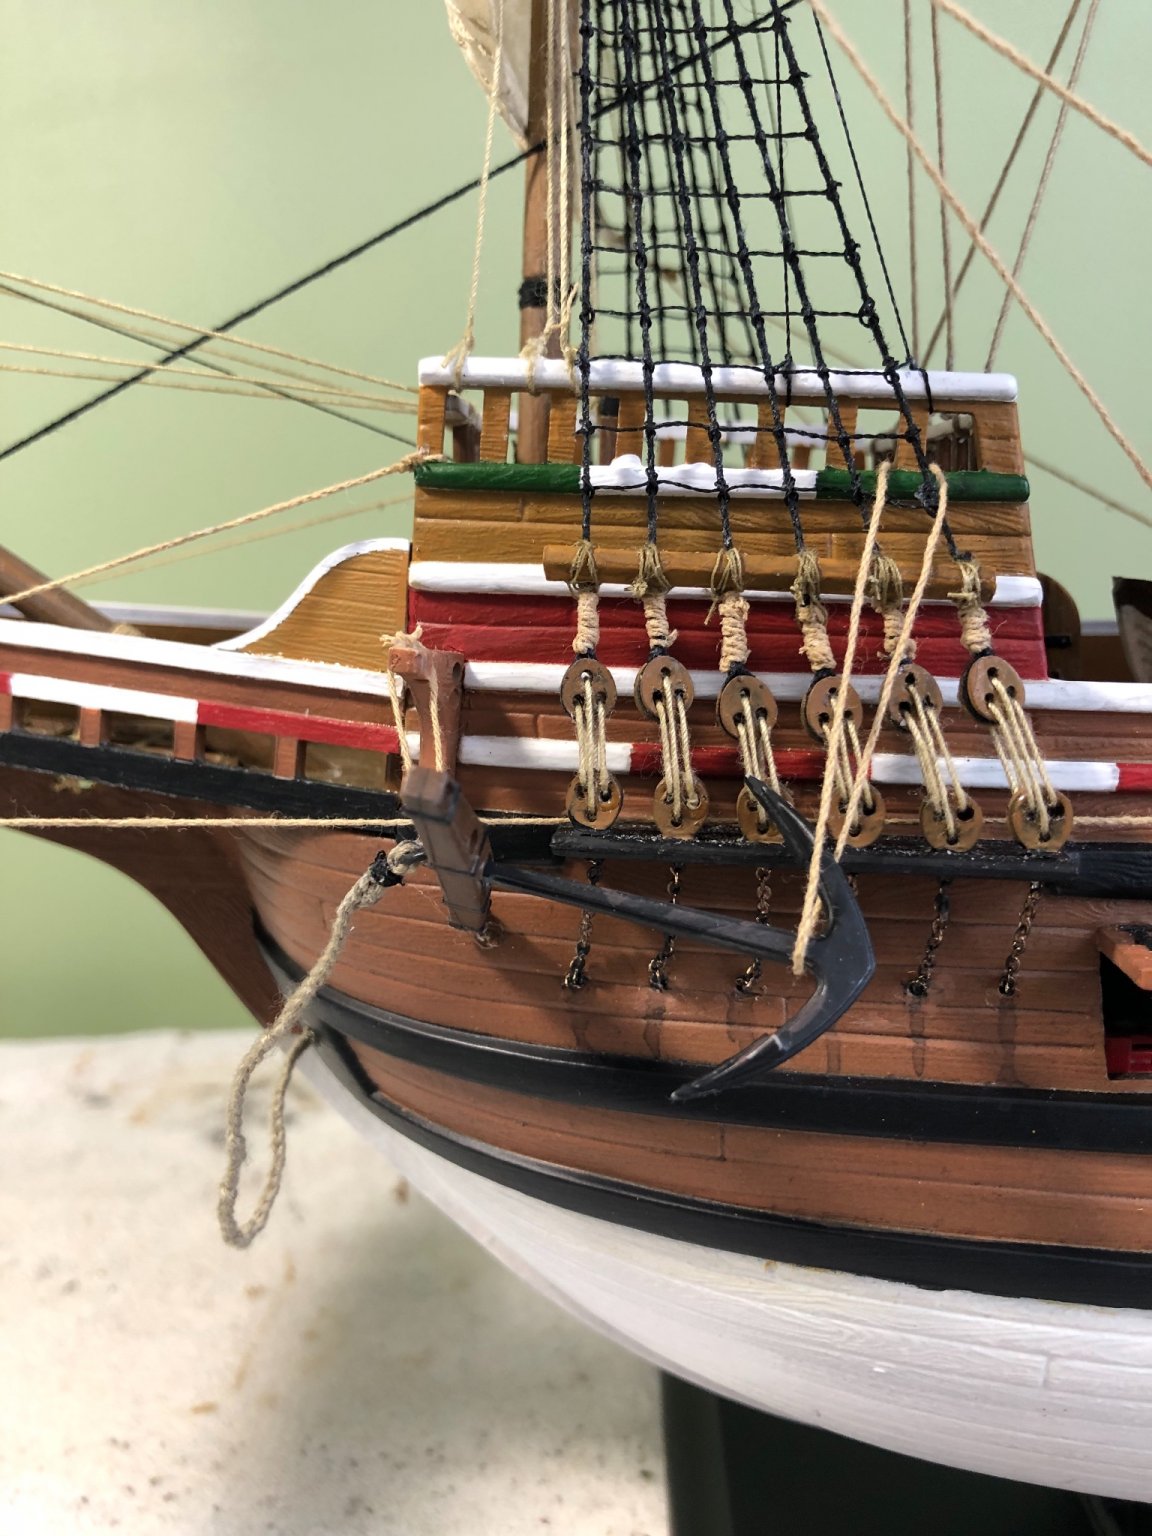
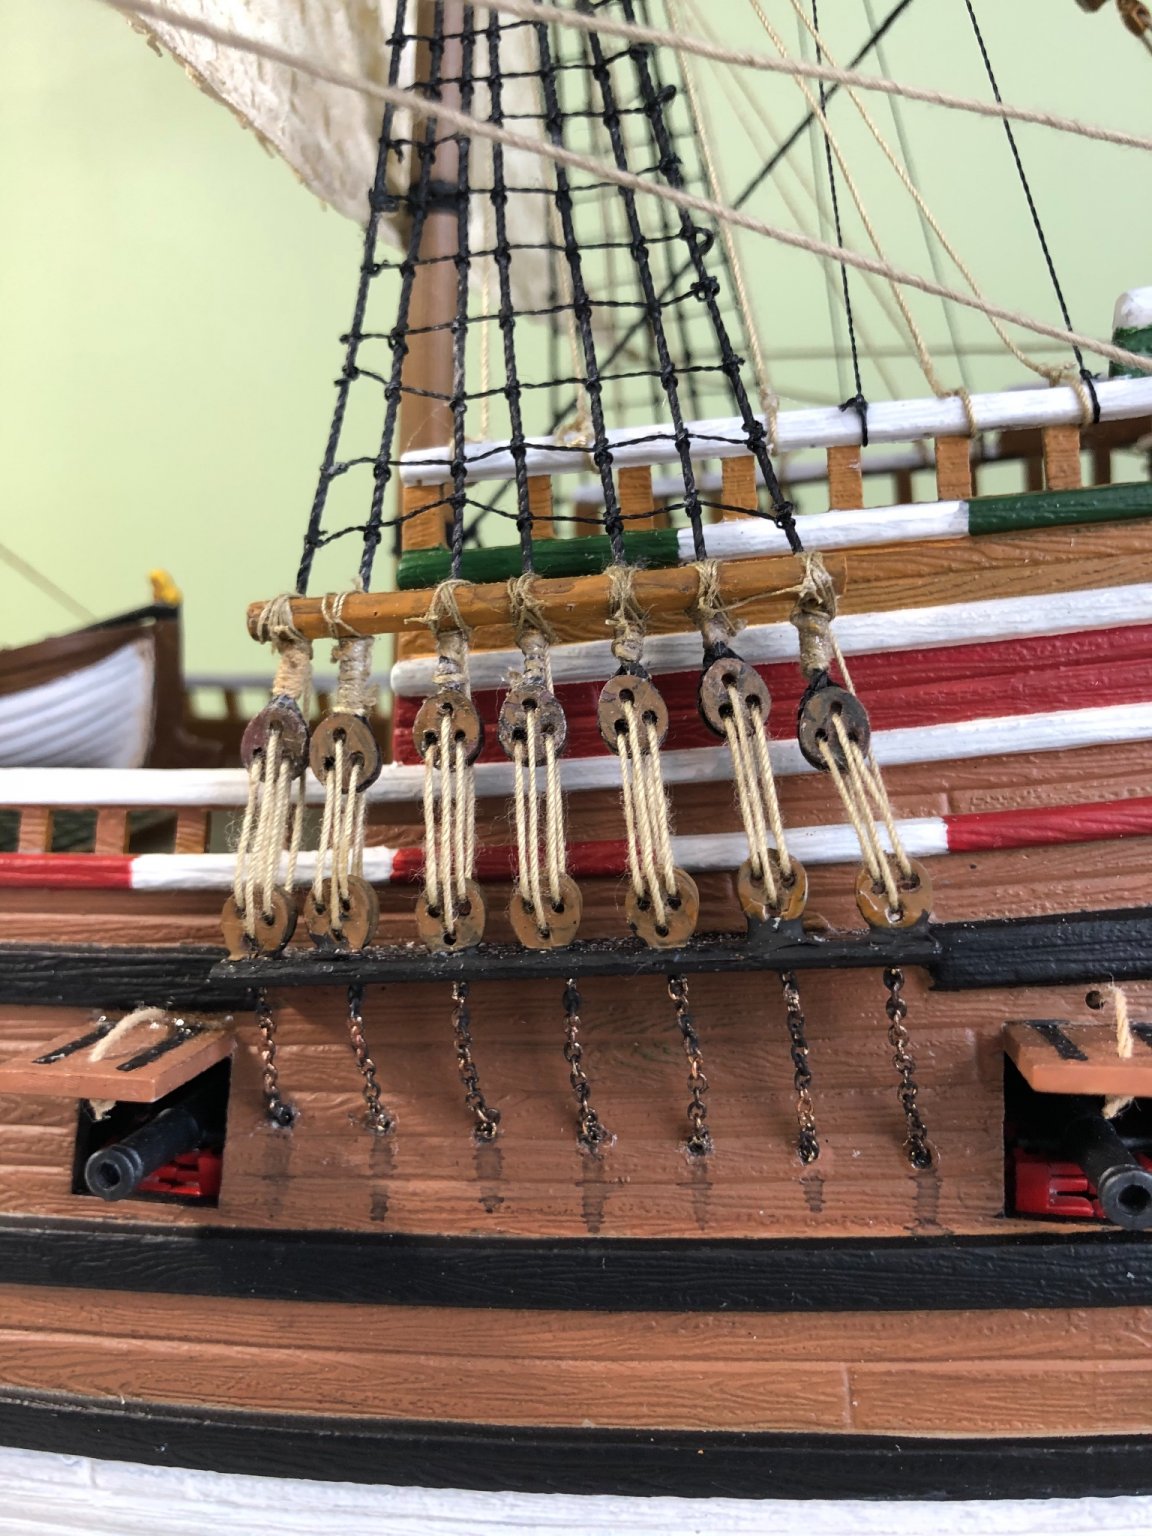
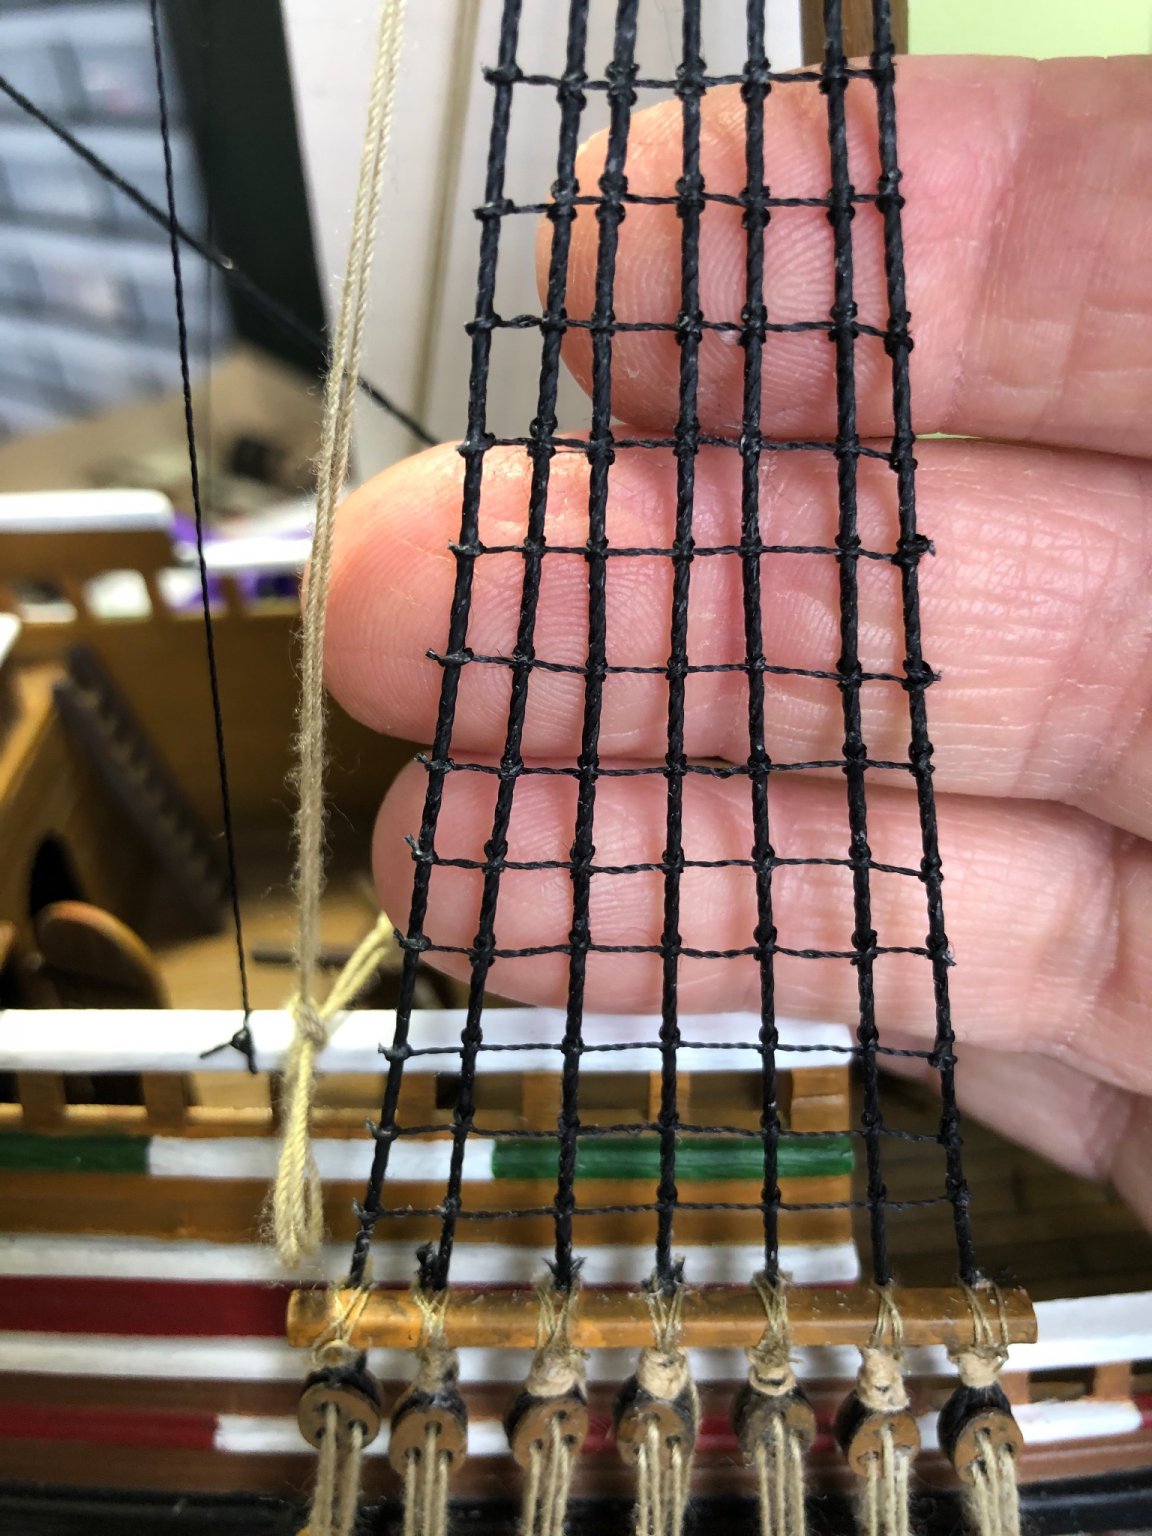
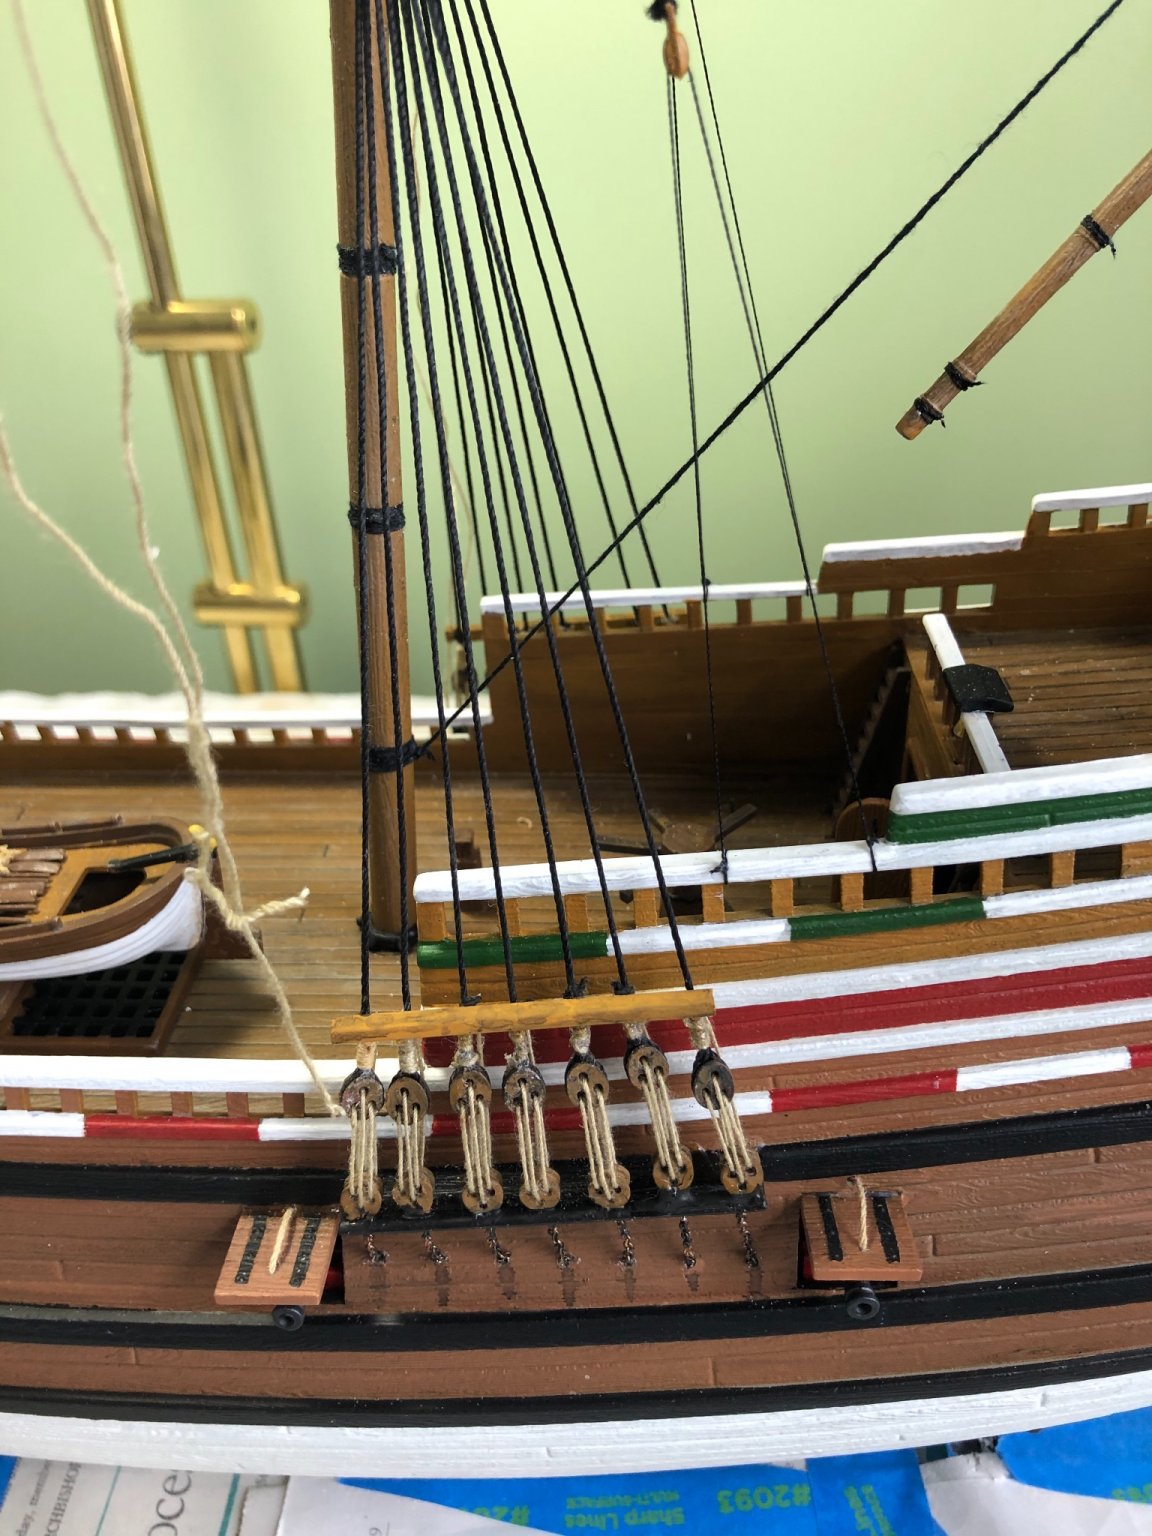
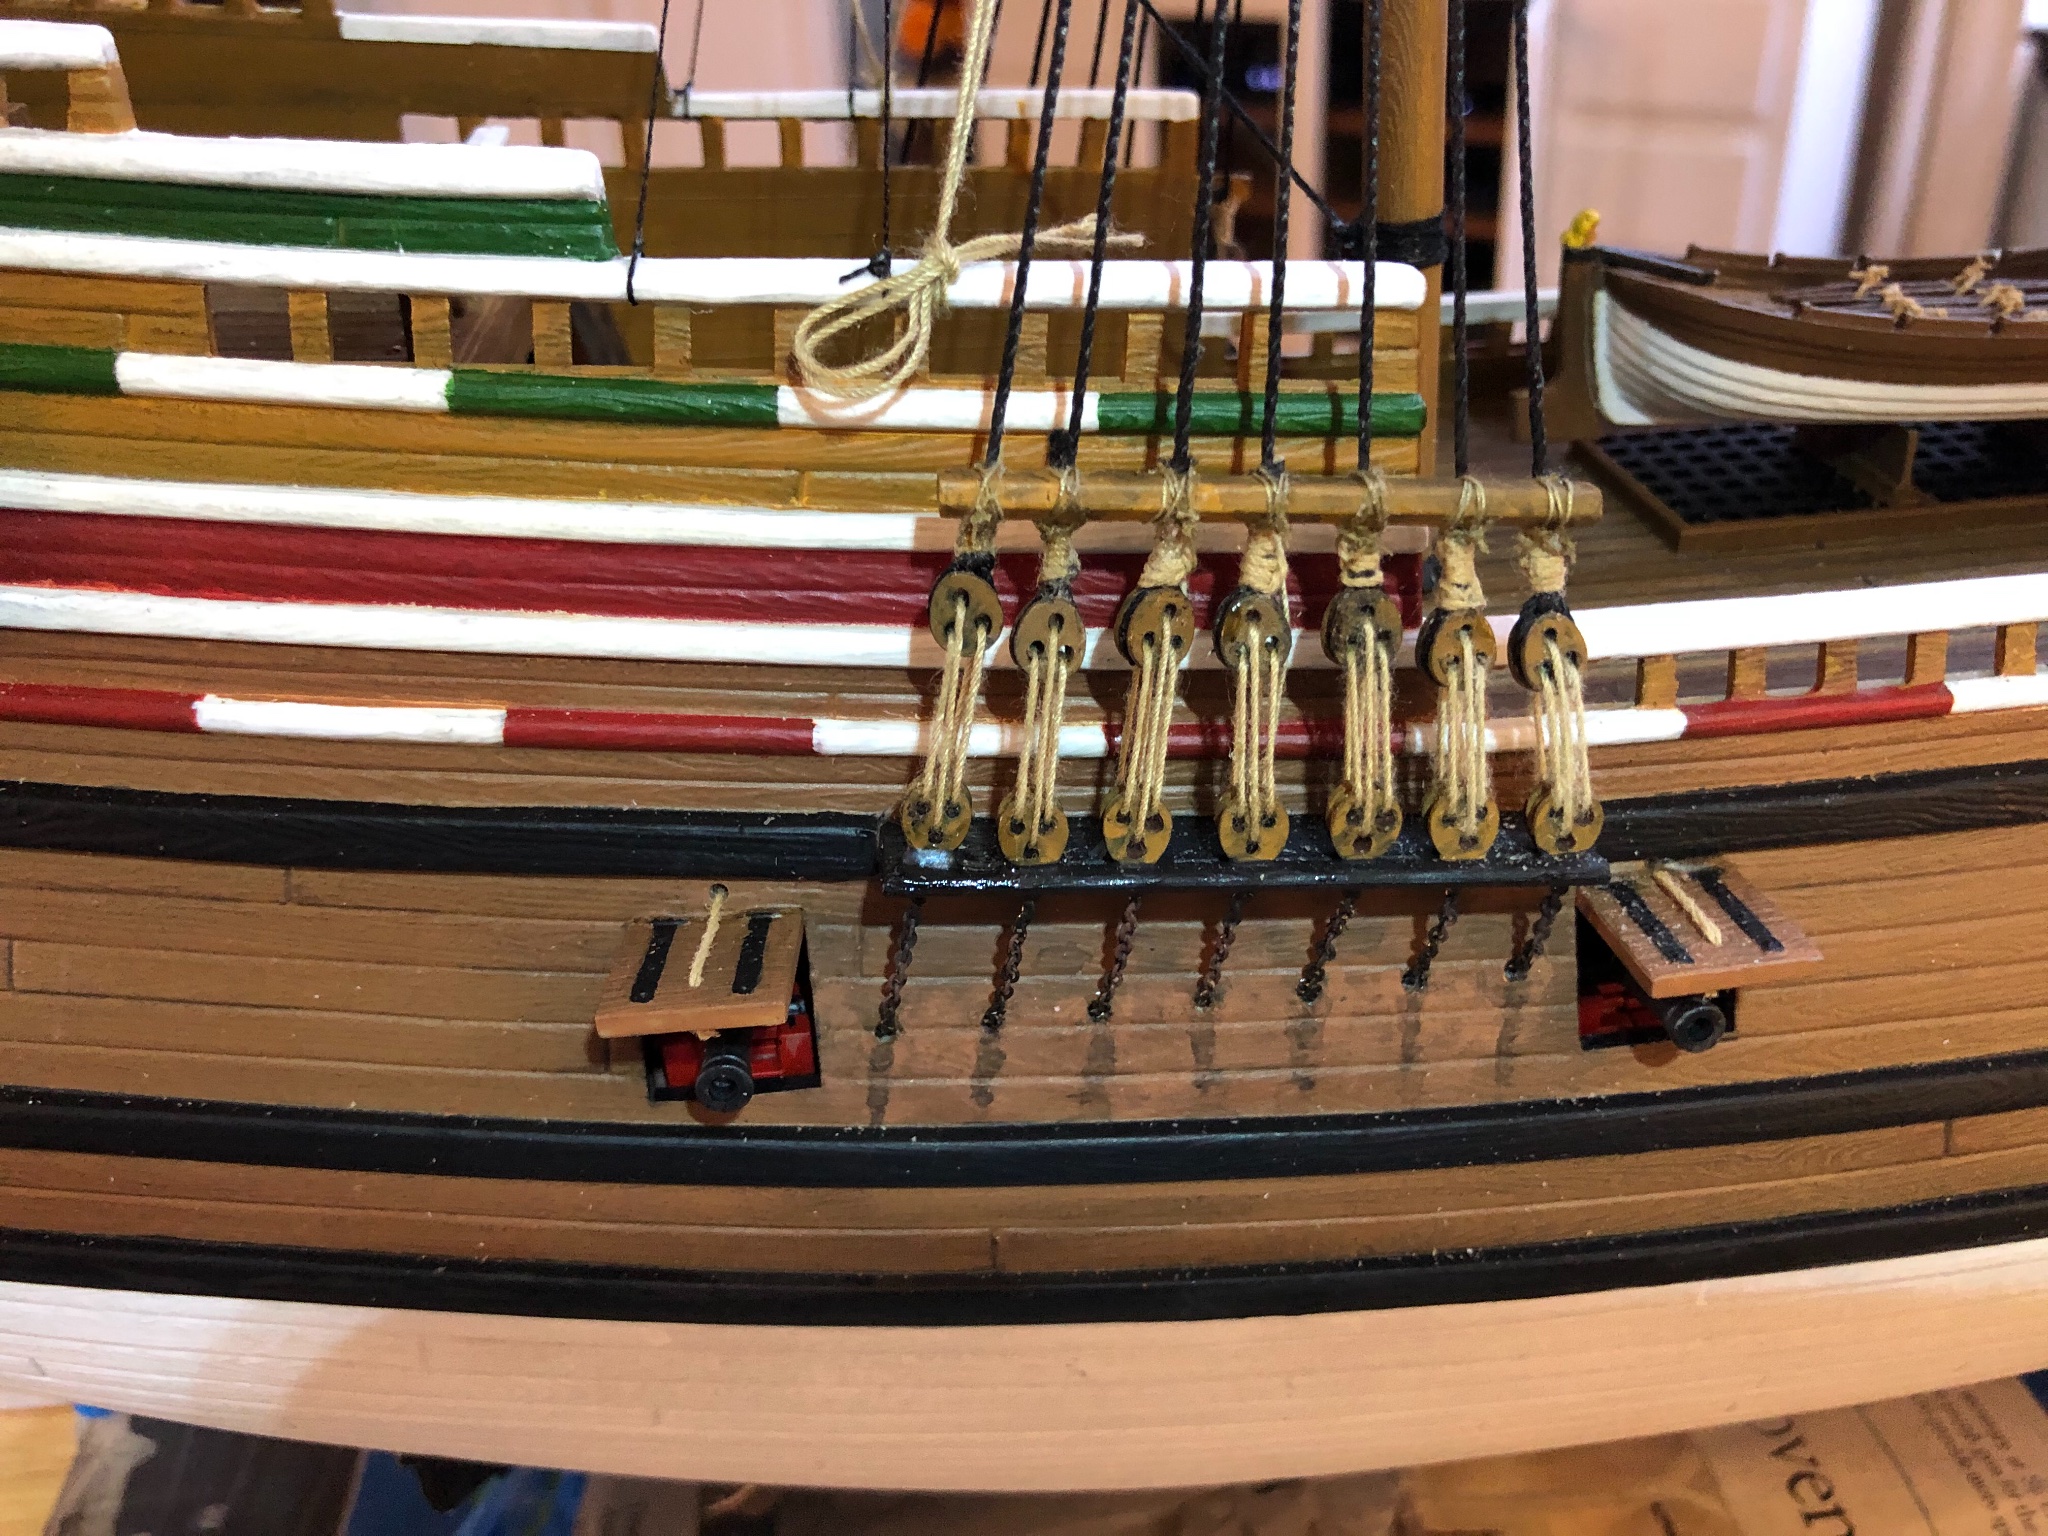
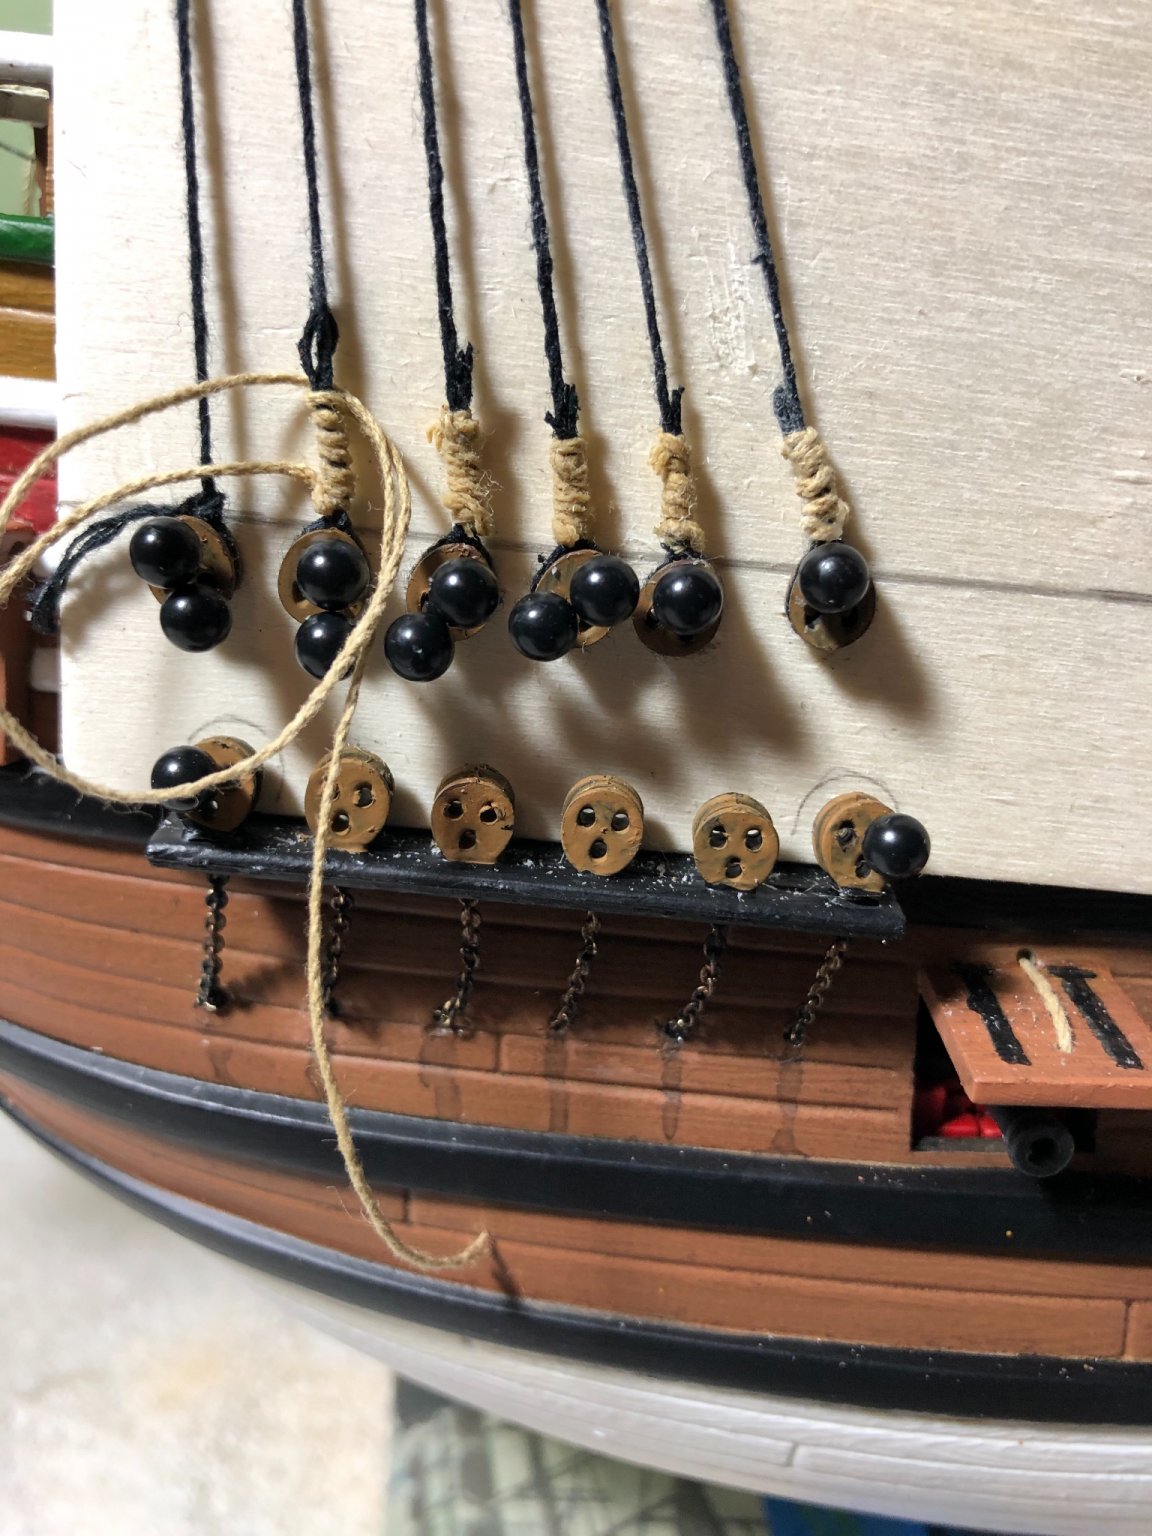
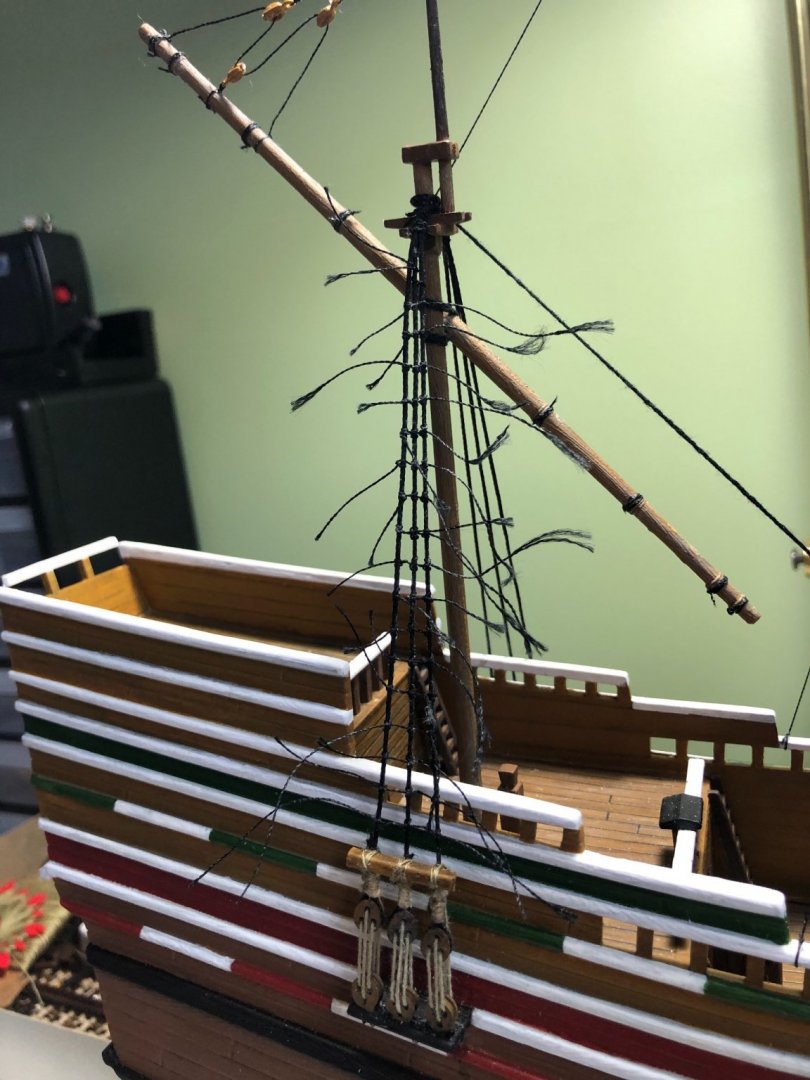
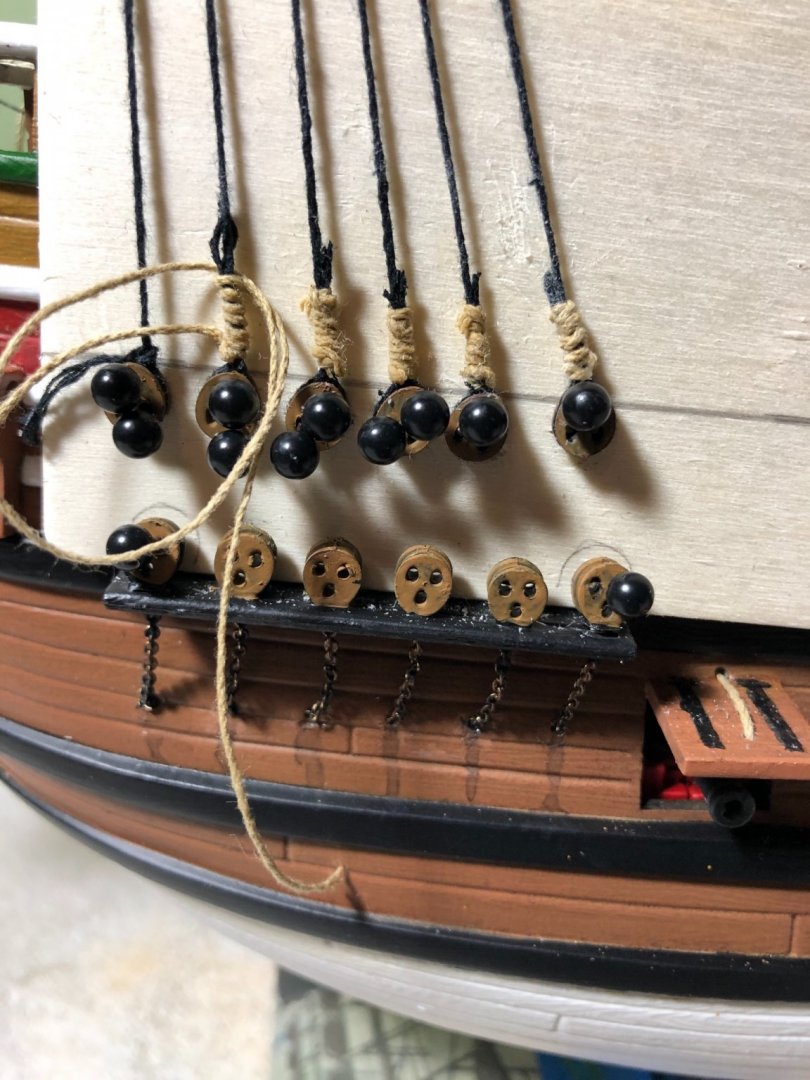
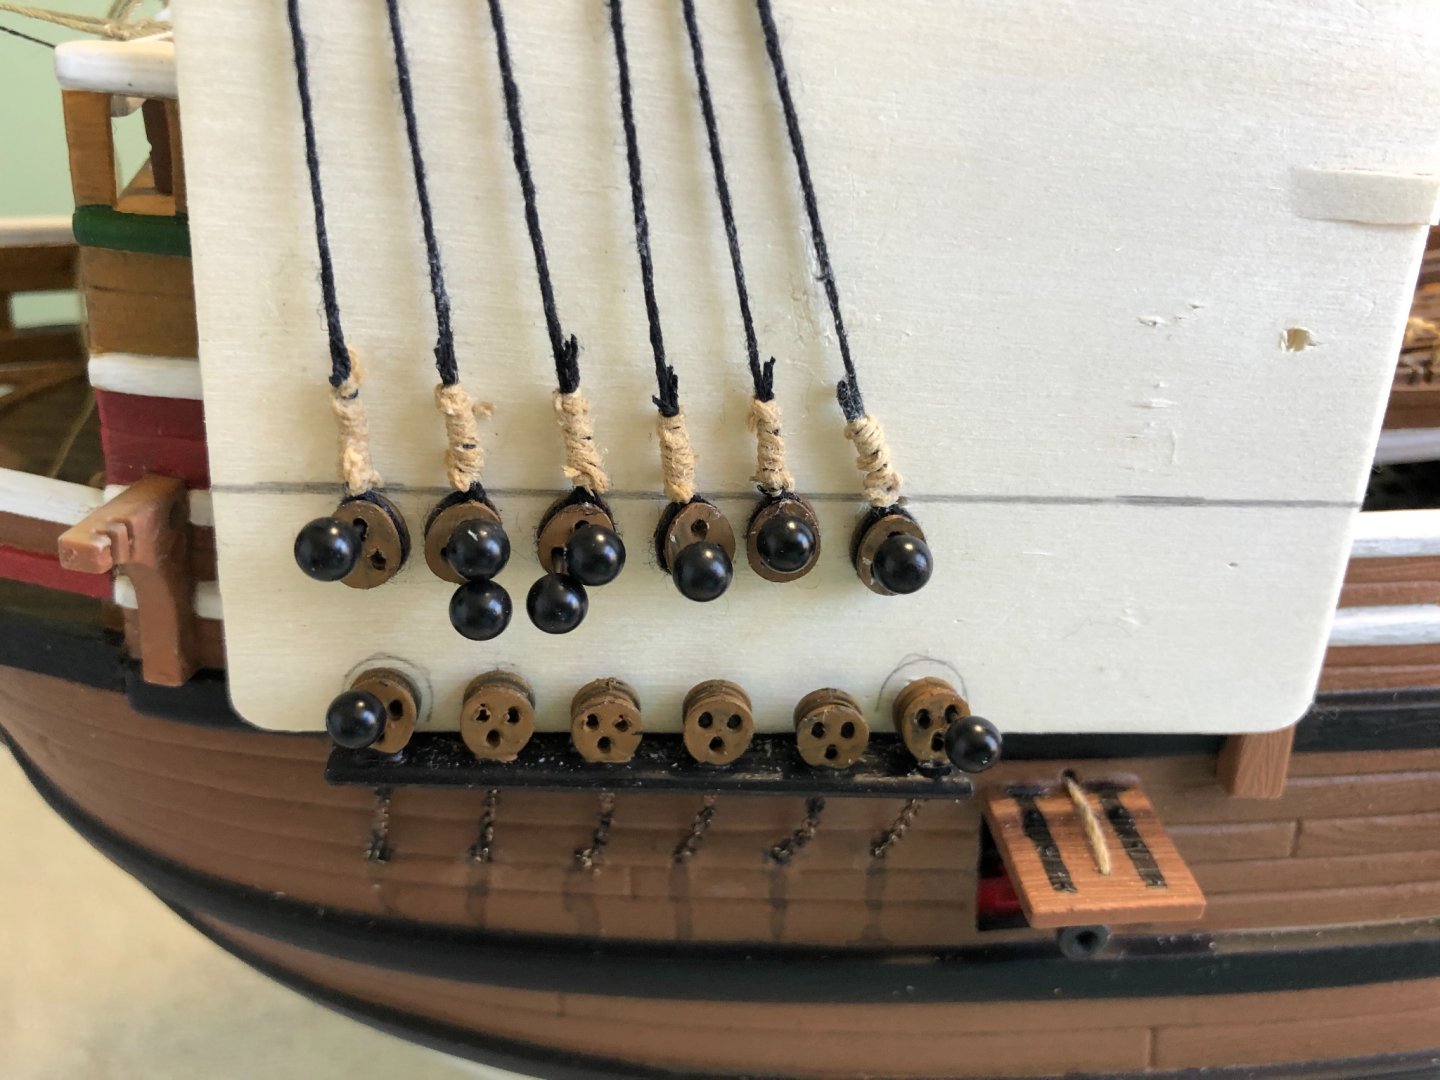
Thanks Bosco. I had to custom fit the chain plates. Did not come with the kit. I did not really notice how furry the lines were until I zoomed in on my photo. Not real obvious with naked eye just looking at the ship. Had not even given that much thought in the past builds until Kirill4 mentioned it. I did use beezwax on ends of threads to help get through holes in deadeyes. Will follow your suggestion to use on full length. Since it was my first attempt I concentrated more on developing my skills and technique. Most if not all the steps I used I found on this and other sites. Very little in assembly instructions. Hardest thing to find an answer for was what to do with the end of the lanyard thread after I passed it through the last deadeye hole. Finally found a YouTube video (in Spanish) that I was able to follow. Will be starting the ratlines soon. Either before or after I do the upper shrouds. I think I am looking forward to that. Will see.
-
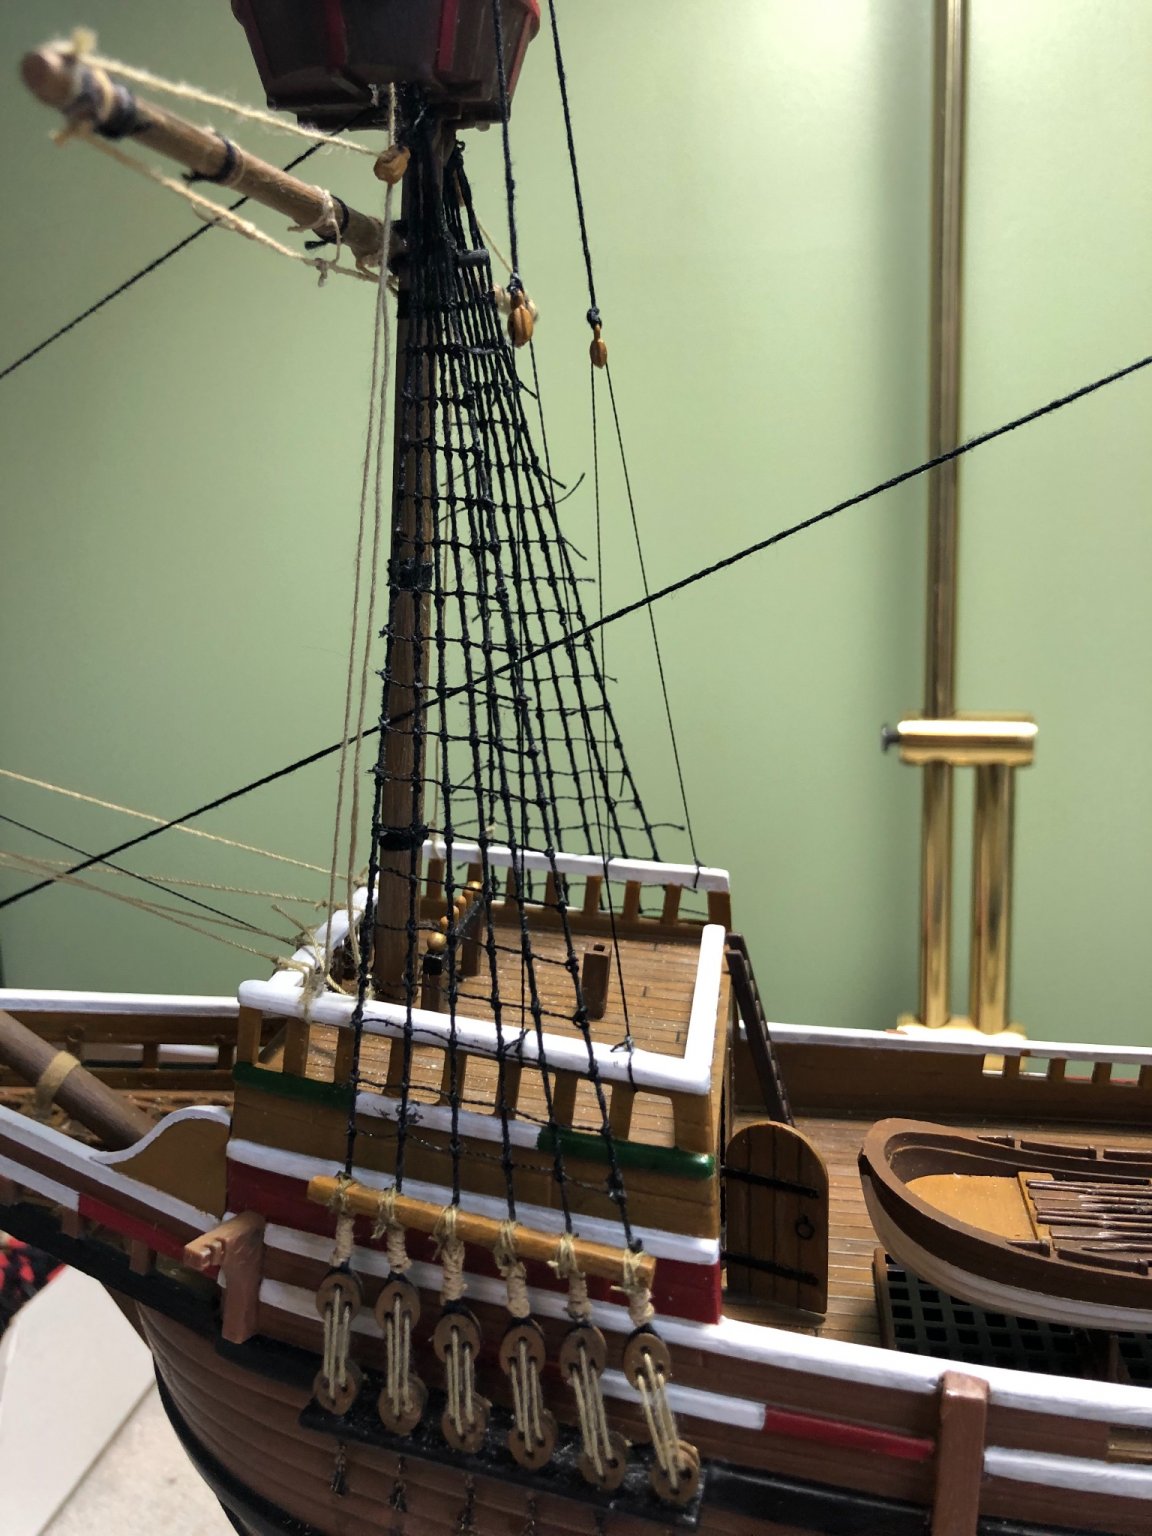
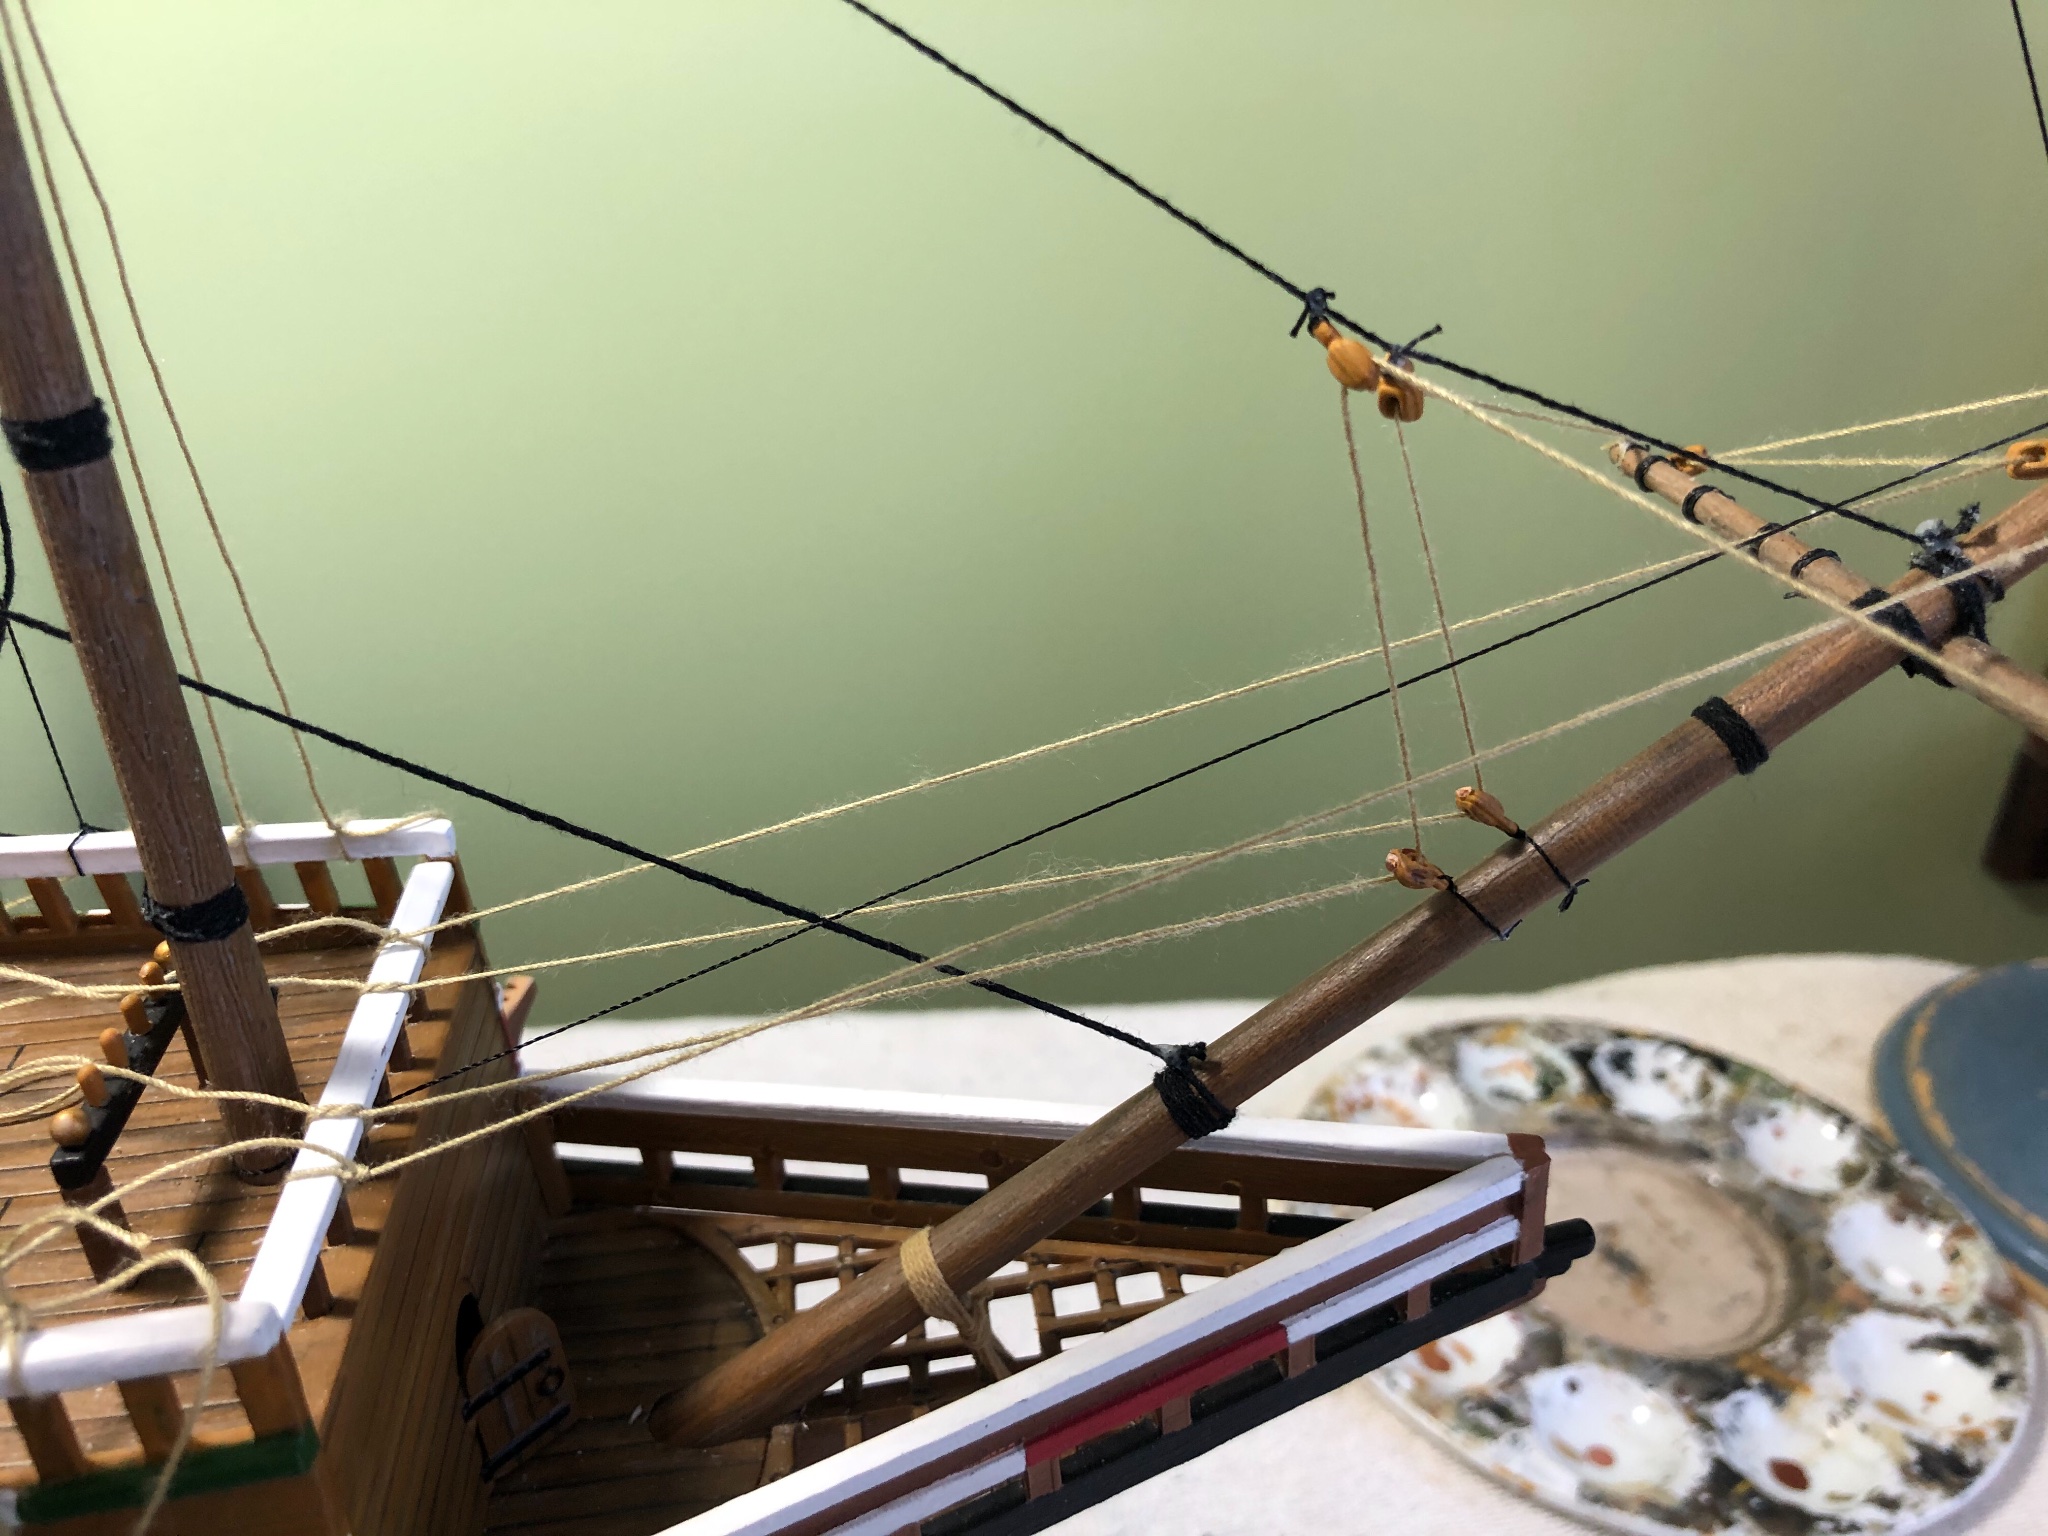
Ok guys I am making my way through my very first attempt at rigging shrouds, ratlines, deadeyes, and lanyards. For from perfect and at the level of a number of other builders, but for my first attempt I am pleased. Used the supplied thread that came with the kit so up close the lines look furry.


-
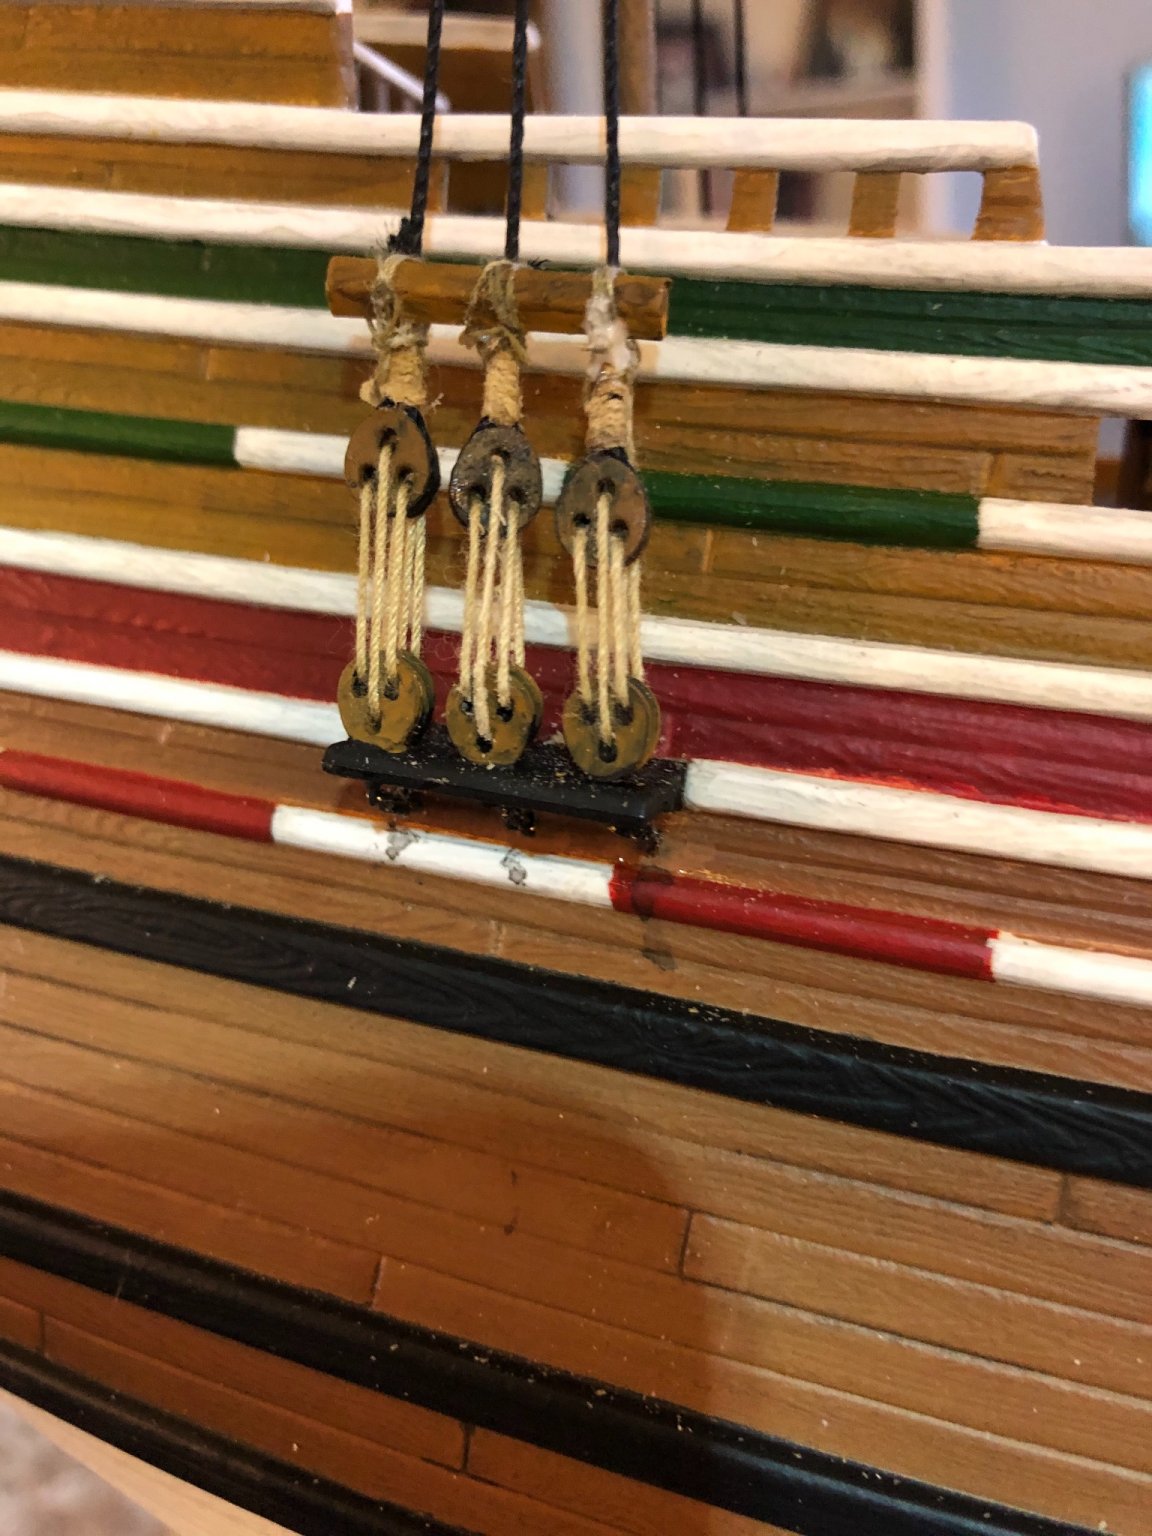
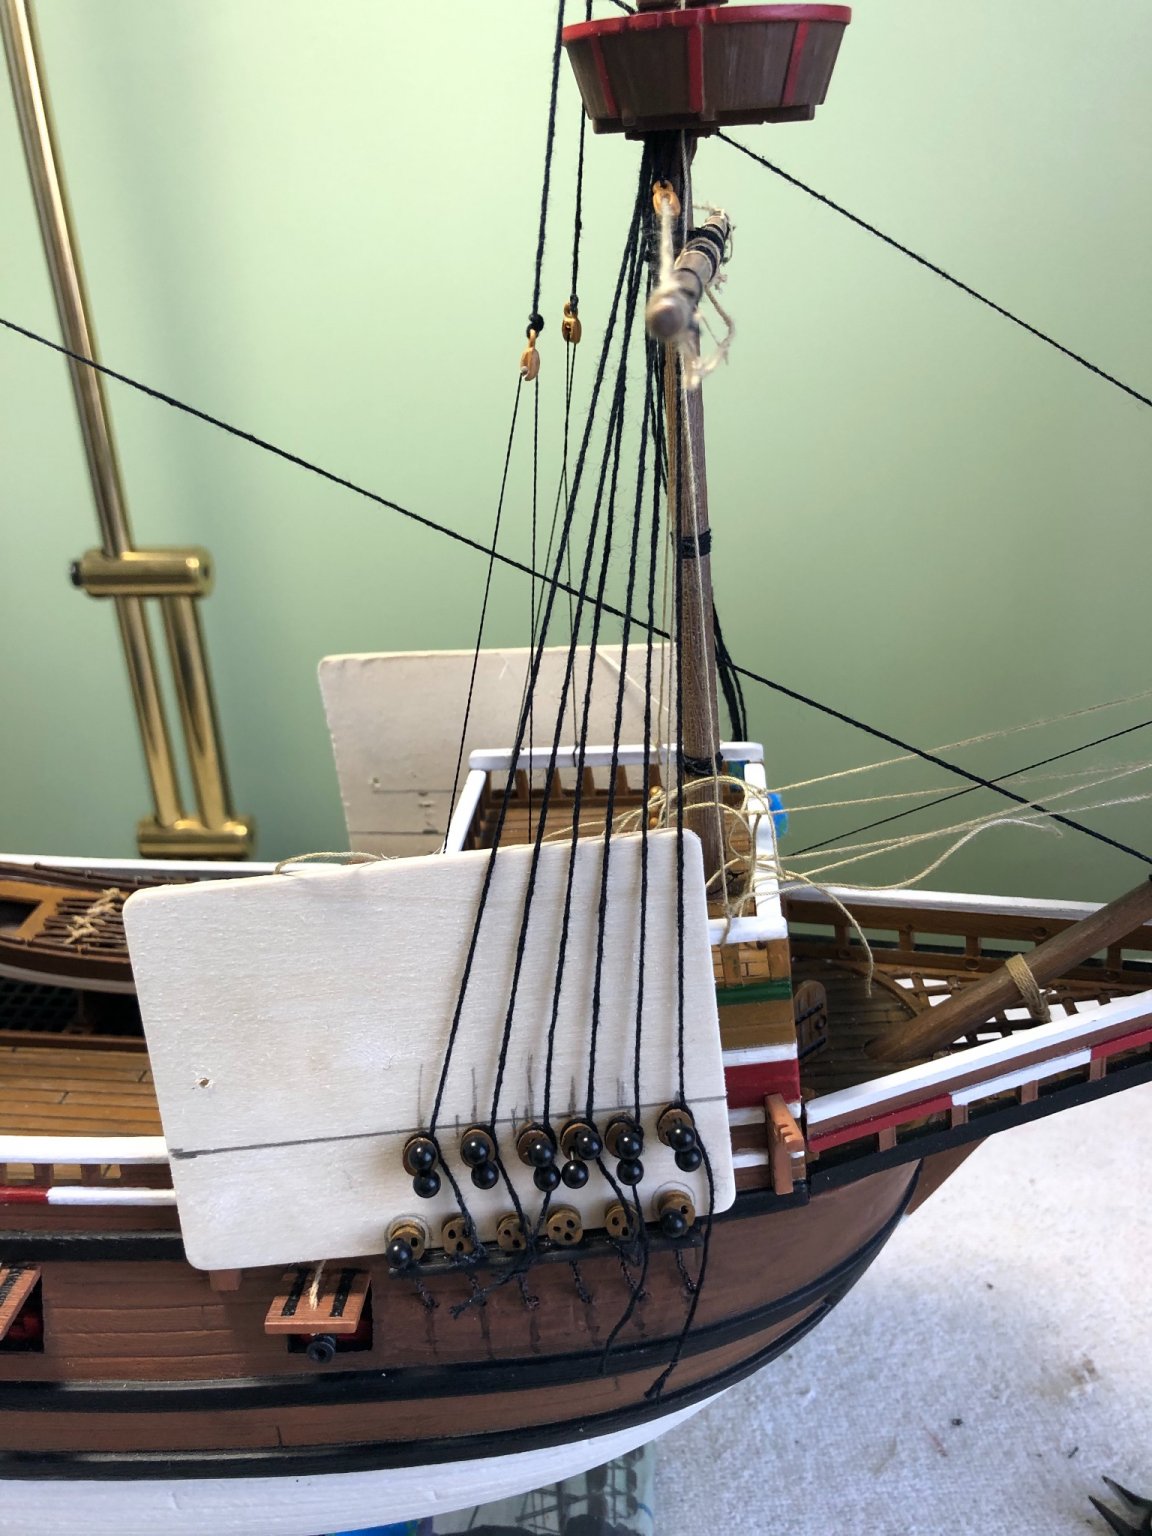
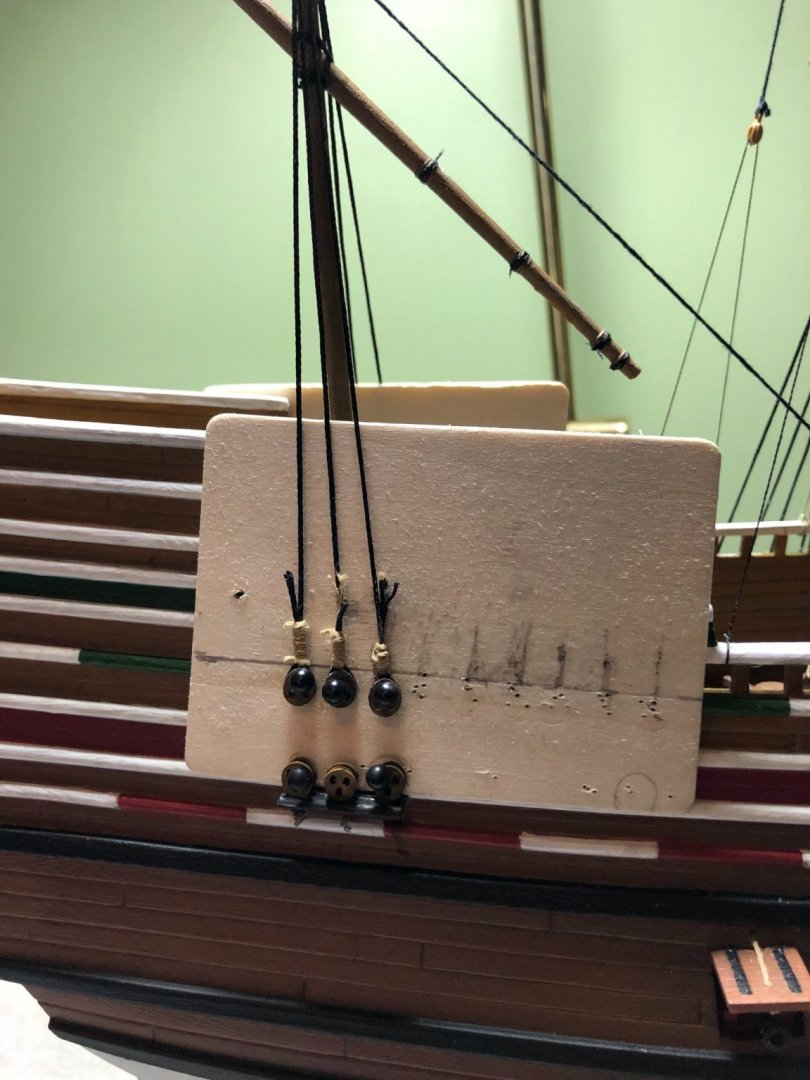
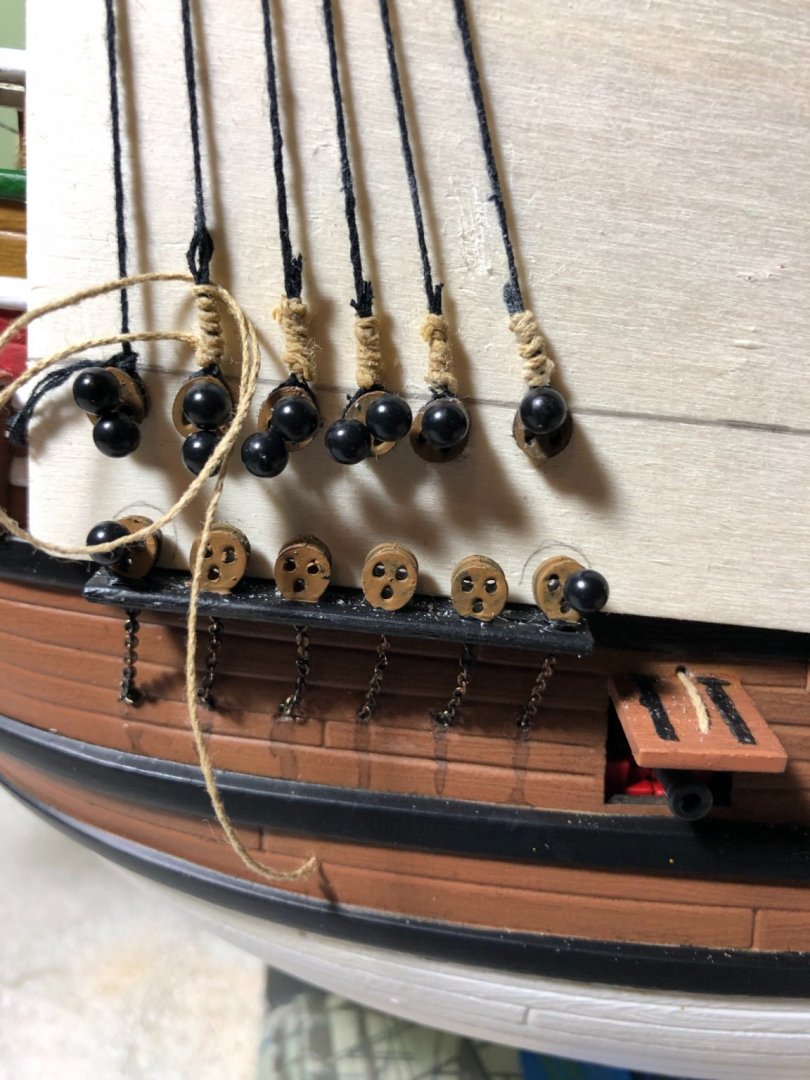
Rigged my lower shrouds for the foremast and the deadeyes that will support those shrouds. I like to use the piece of wood technique to get the appropriate length of the location on the shroud to seize the deadeyes. Once all the deadeyes are seized to the shrouds I will remove the pins and piece of wood then rig the corresponding deadeyes together.


-
Kirill4 I need another of your great diagrams/drawings over my Mayflower photo. I am trying to understand your direction on the knights at the bottom of the masts. If you would not mind draw me a diagram of lines going to them that is different from the one in my assembly instructions. Thanks
-
Yes. Robert was very helpful during that build. Much like kirill4 has been on this one. Not sure if I am at the skill level yet to be offering advice but if you have any questions please feel free to ask.
-
Your welcome bosco. I really enjoyed building the Man O War. I have a build log for it on here as well if you are interested.
-
Thanks Kirill4. Bosco72 they are virtually the same size. The photo makes the Man O War look shorter but that is just the perspective from my phone camera.
-
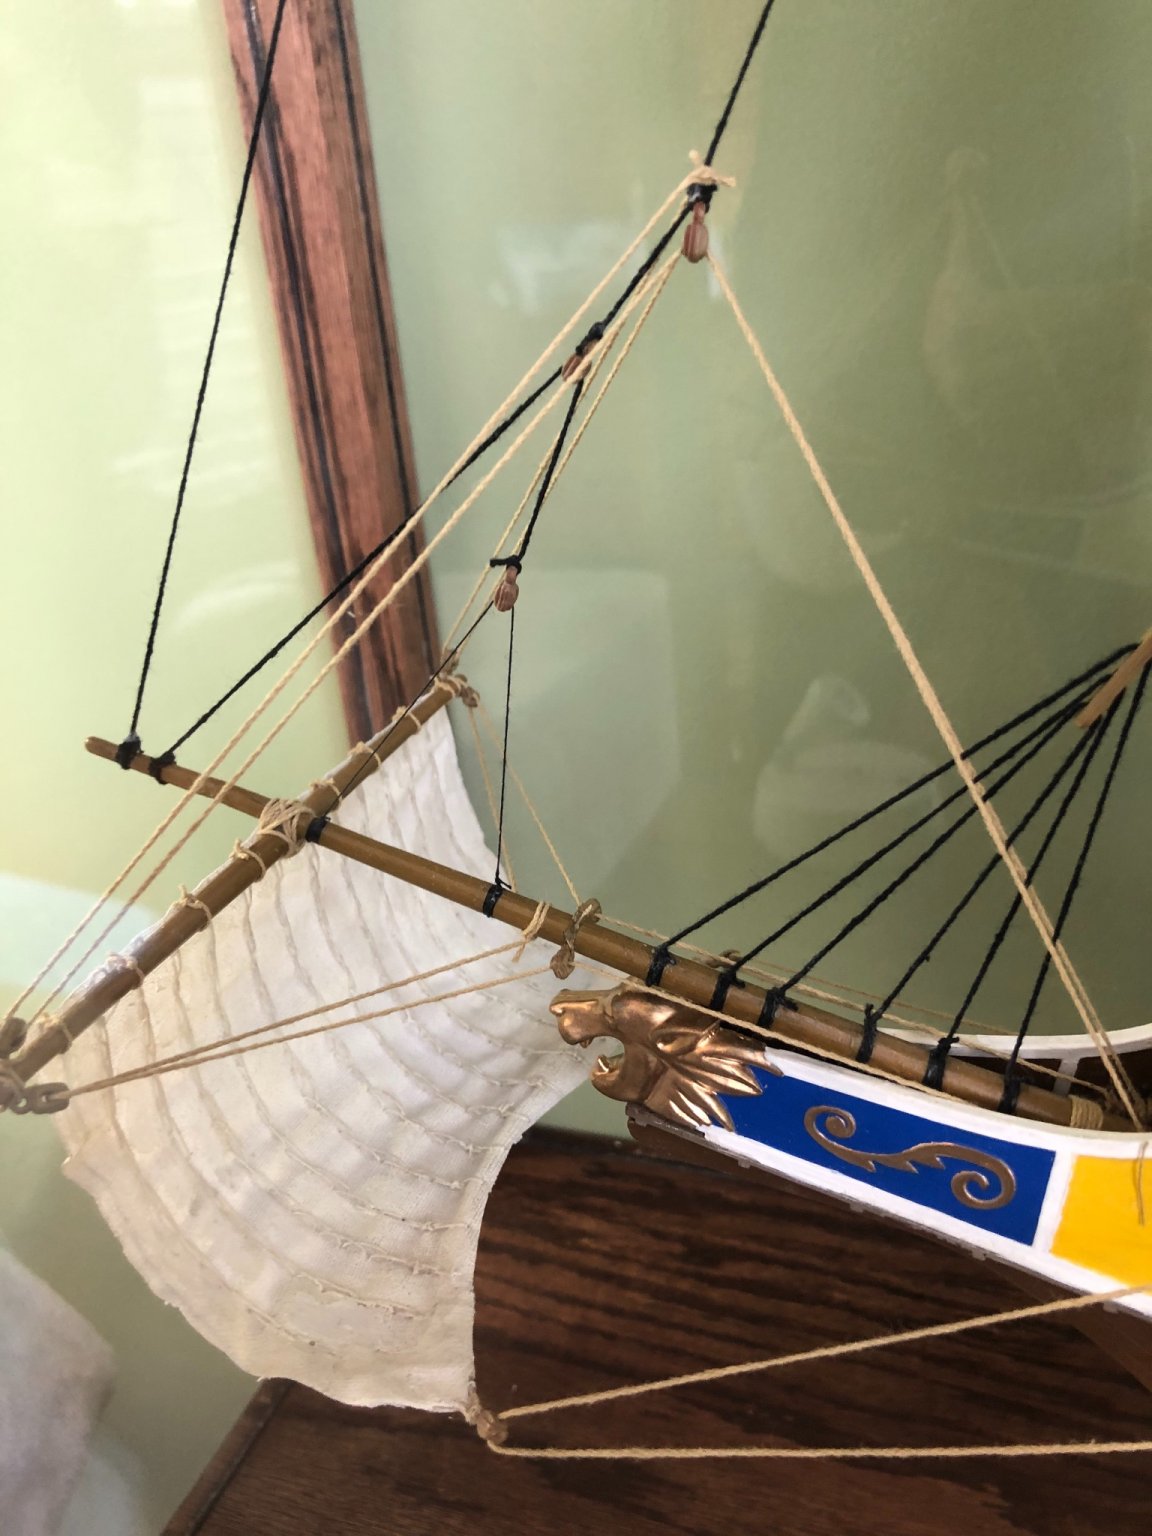
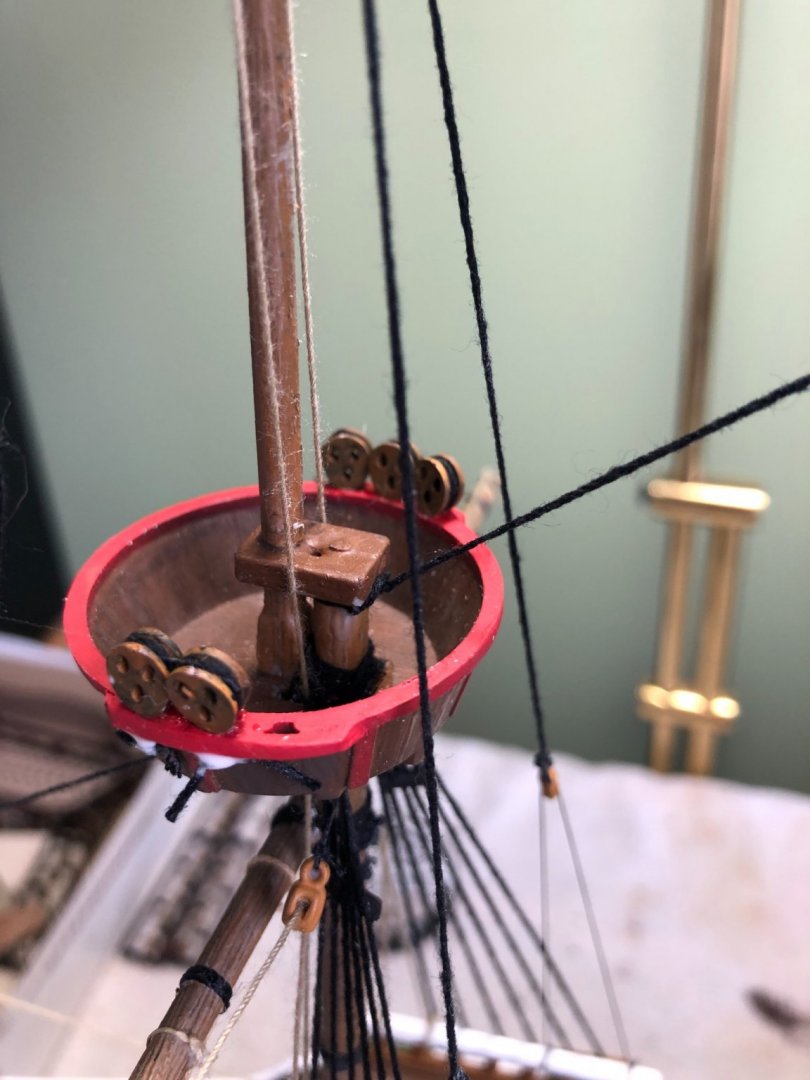
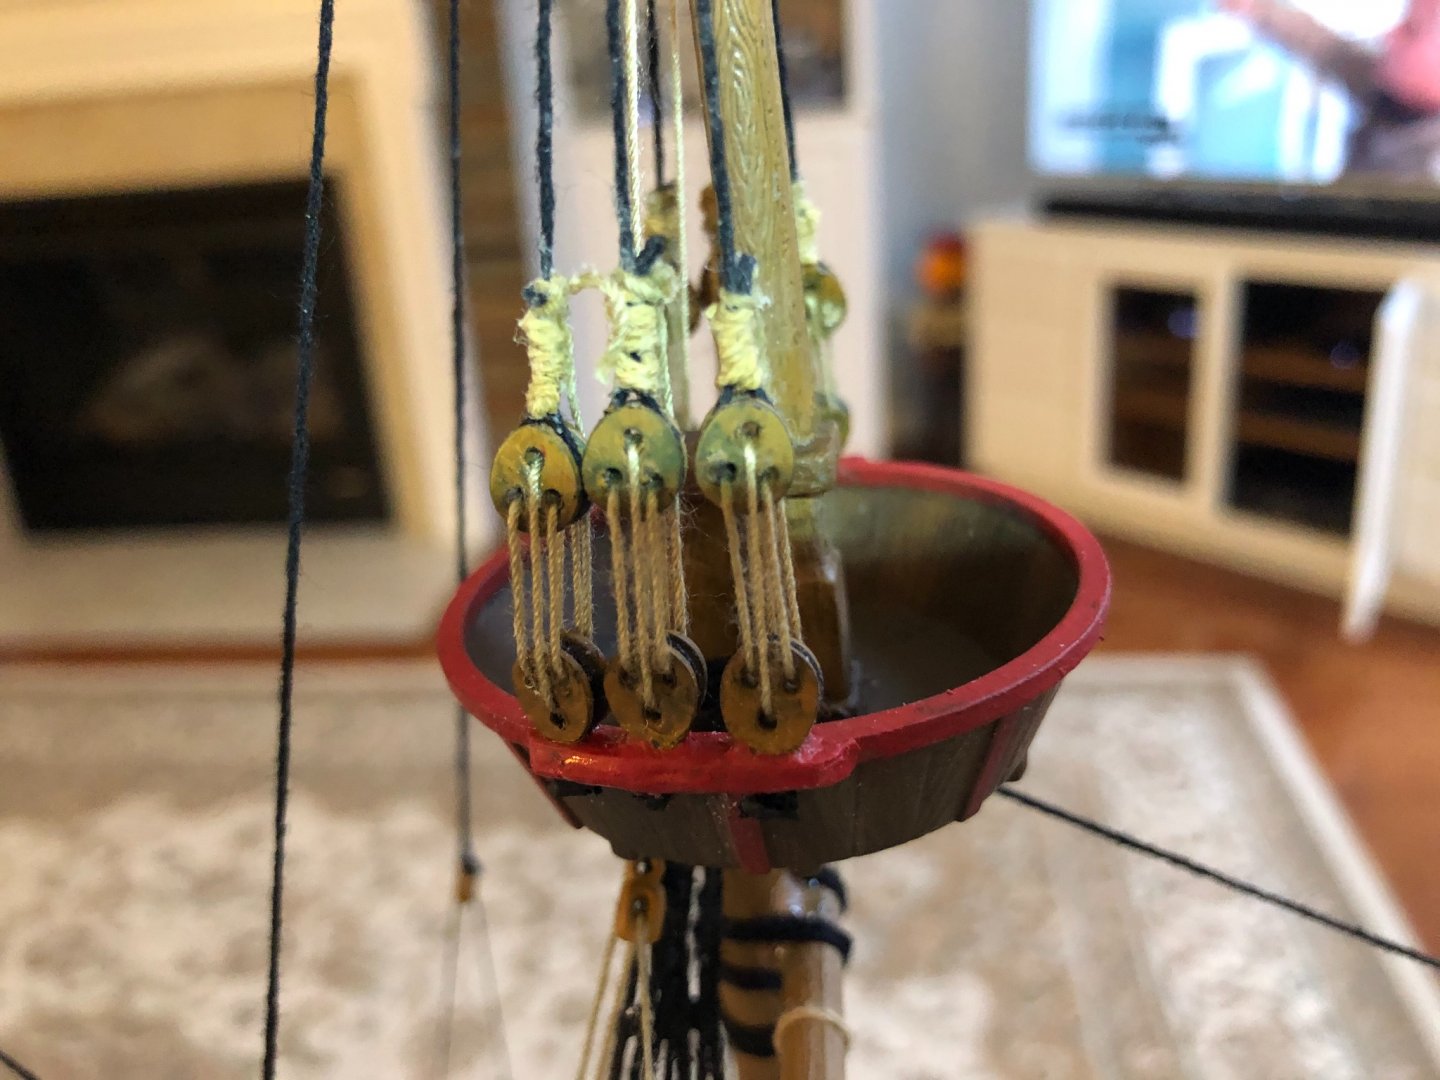
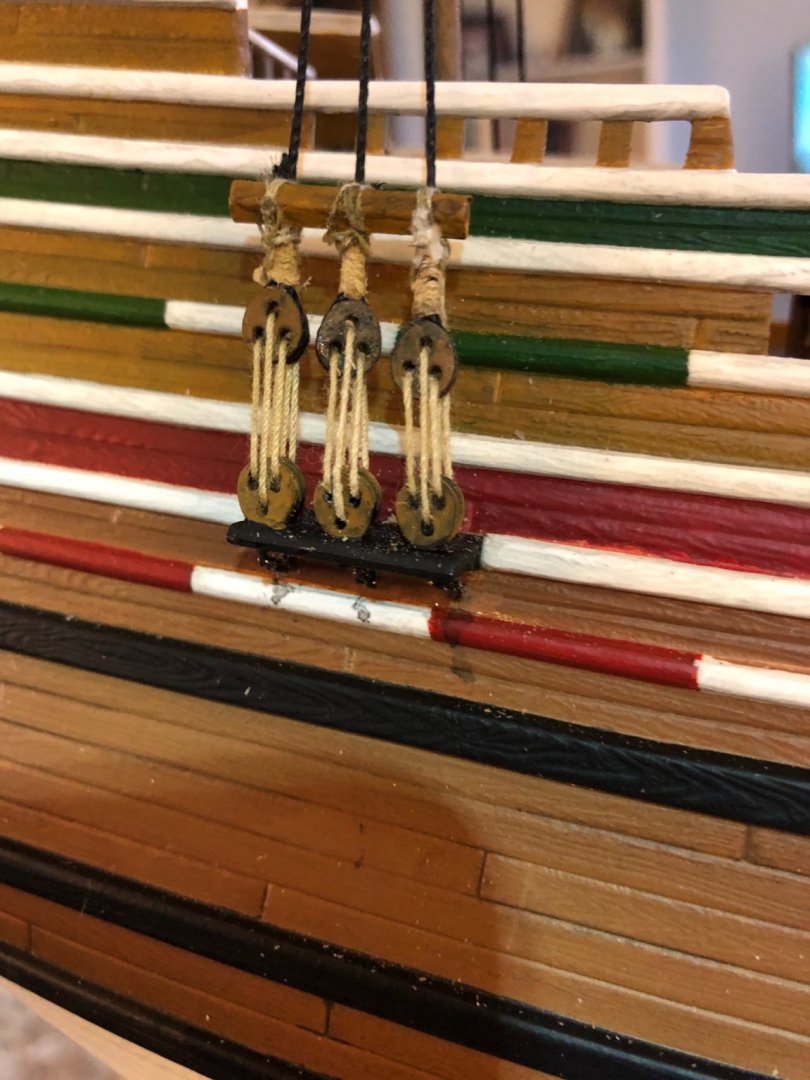
Ok Kirill4 my friend. I think I have the bowsprit rigged a way that makes much more since. I think this is how you indicated in your diagram. 👍 Now to get an understanding of these knights. 😊 Thanks again Bill


-
Yeah Kirill4 since you mentioned it I continue to look at 6 and 7 as well. I see no reason for them or what they may have thinking. I included a photo of my English man o war showing how that was done. Will also check out the correct rigging of the knights.

-
Kirill4 I do have the Heller 1/100 HMS Victory in my stash of models to build in the future as I get more and more knowledgeable. I understand it is one of the most detailed plastic model ships on the market. I will definitely employ many of your techniques in that build someday in the distant future!
-
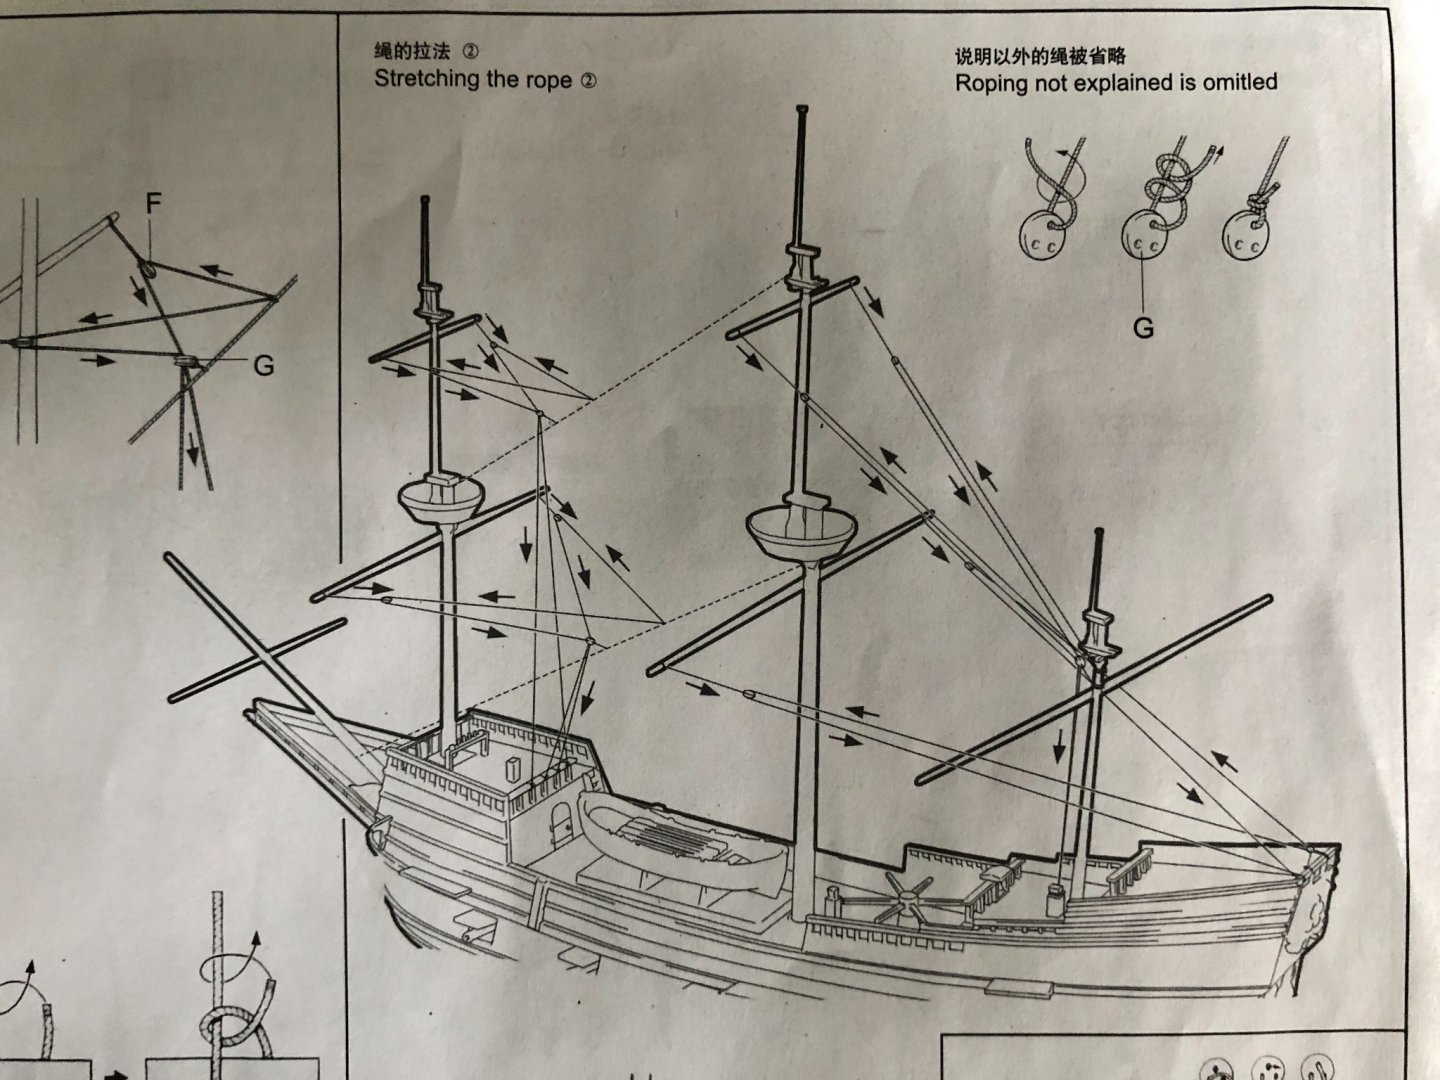
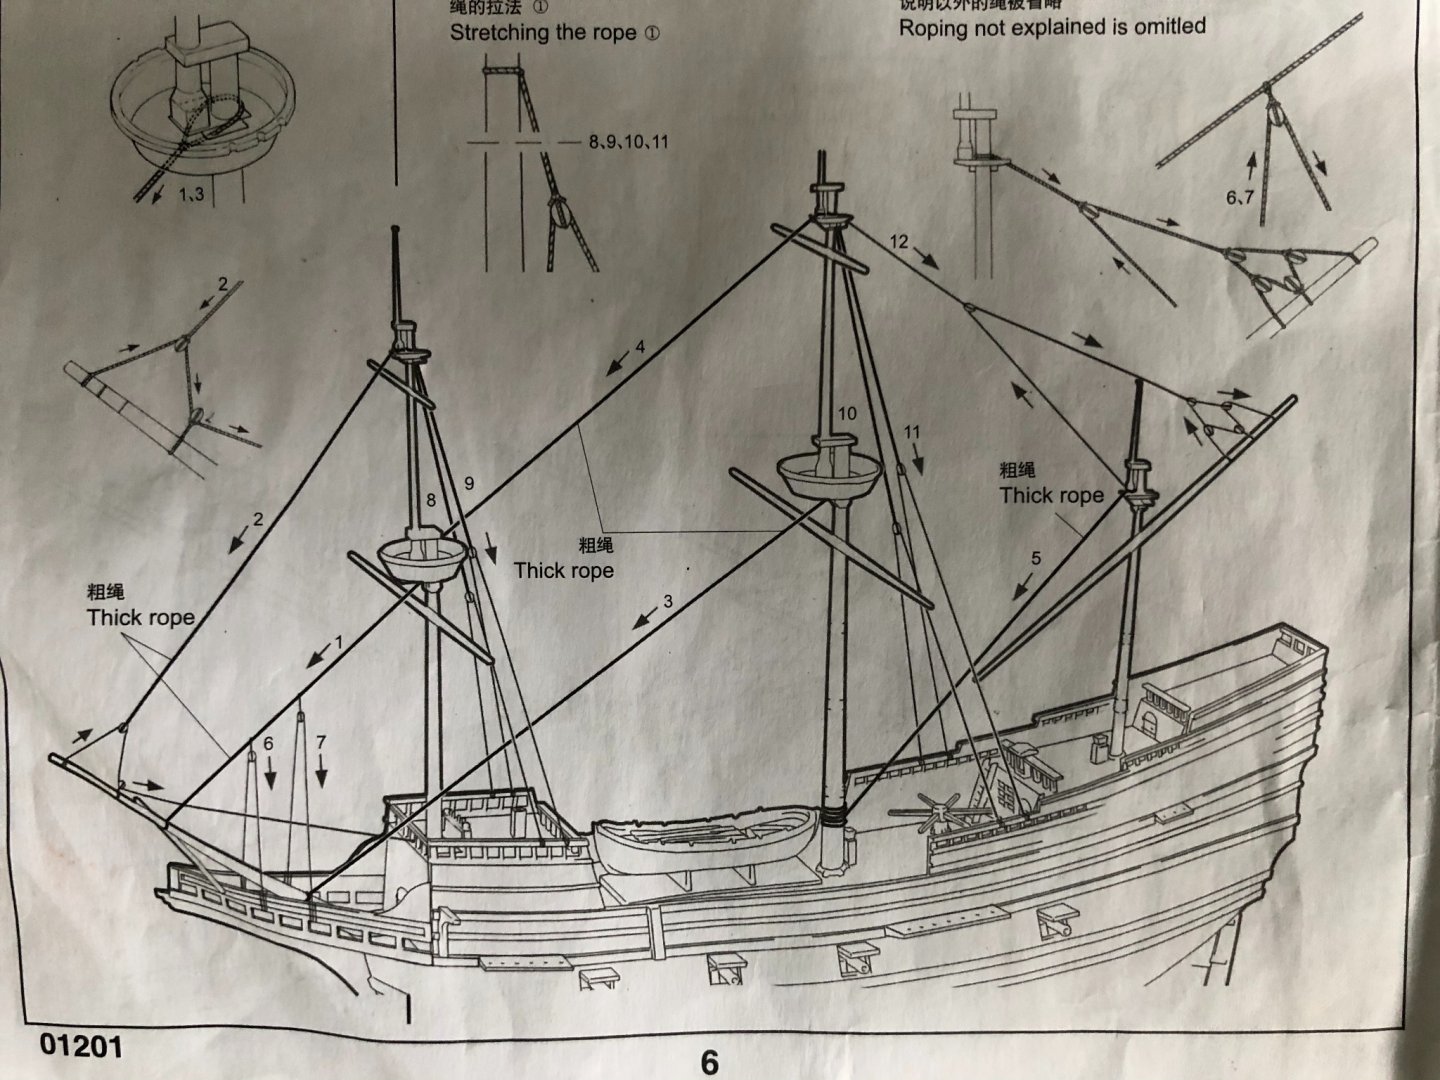
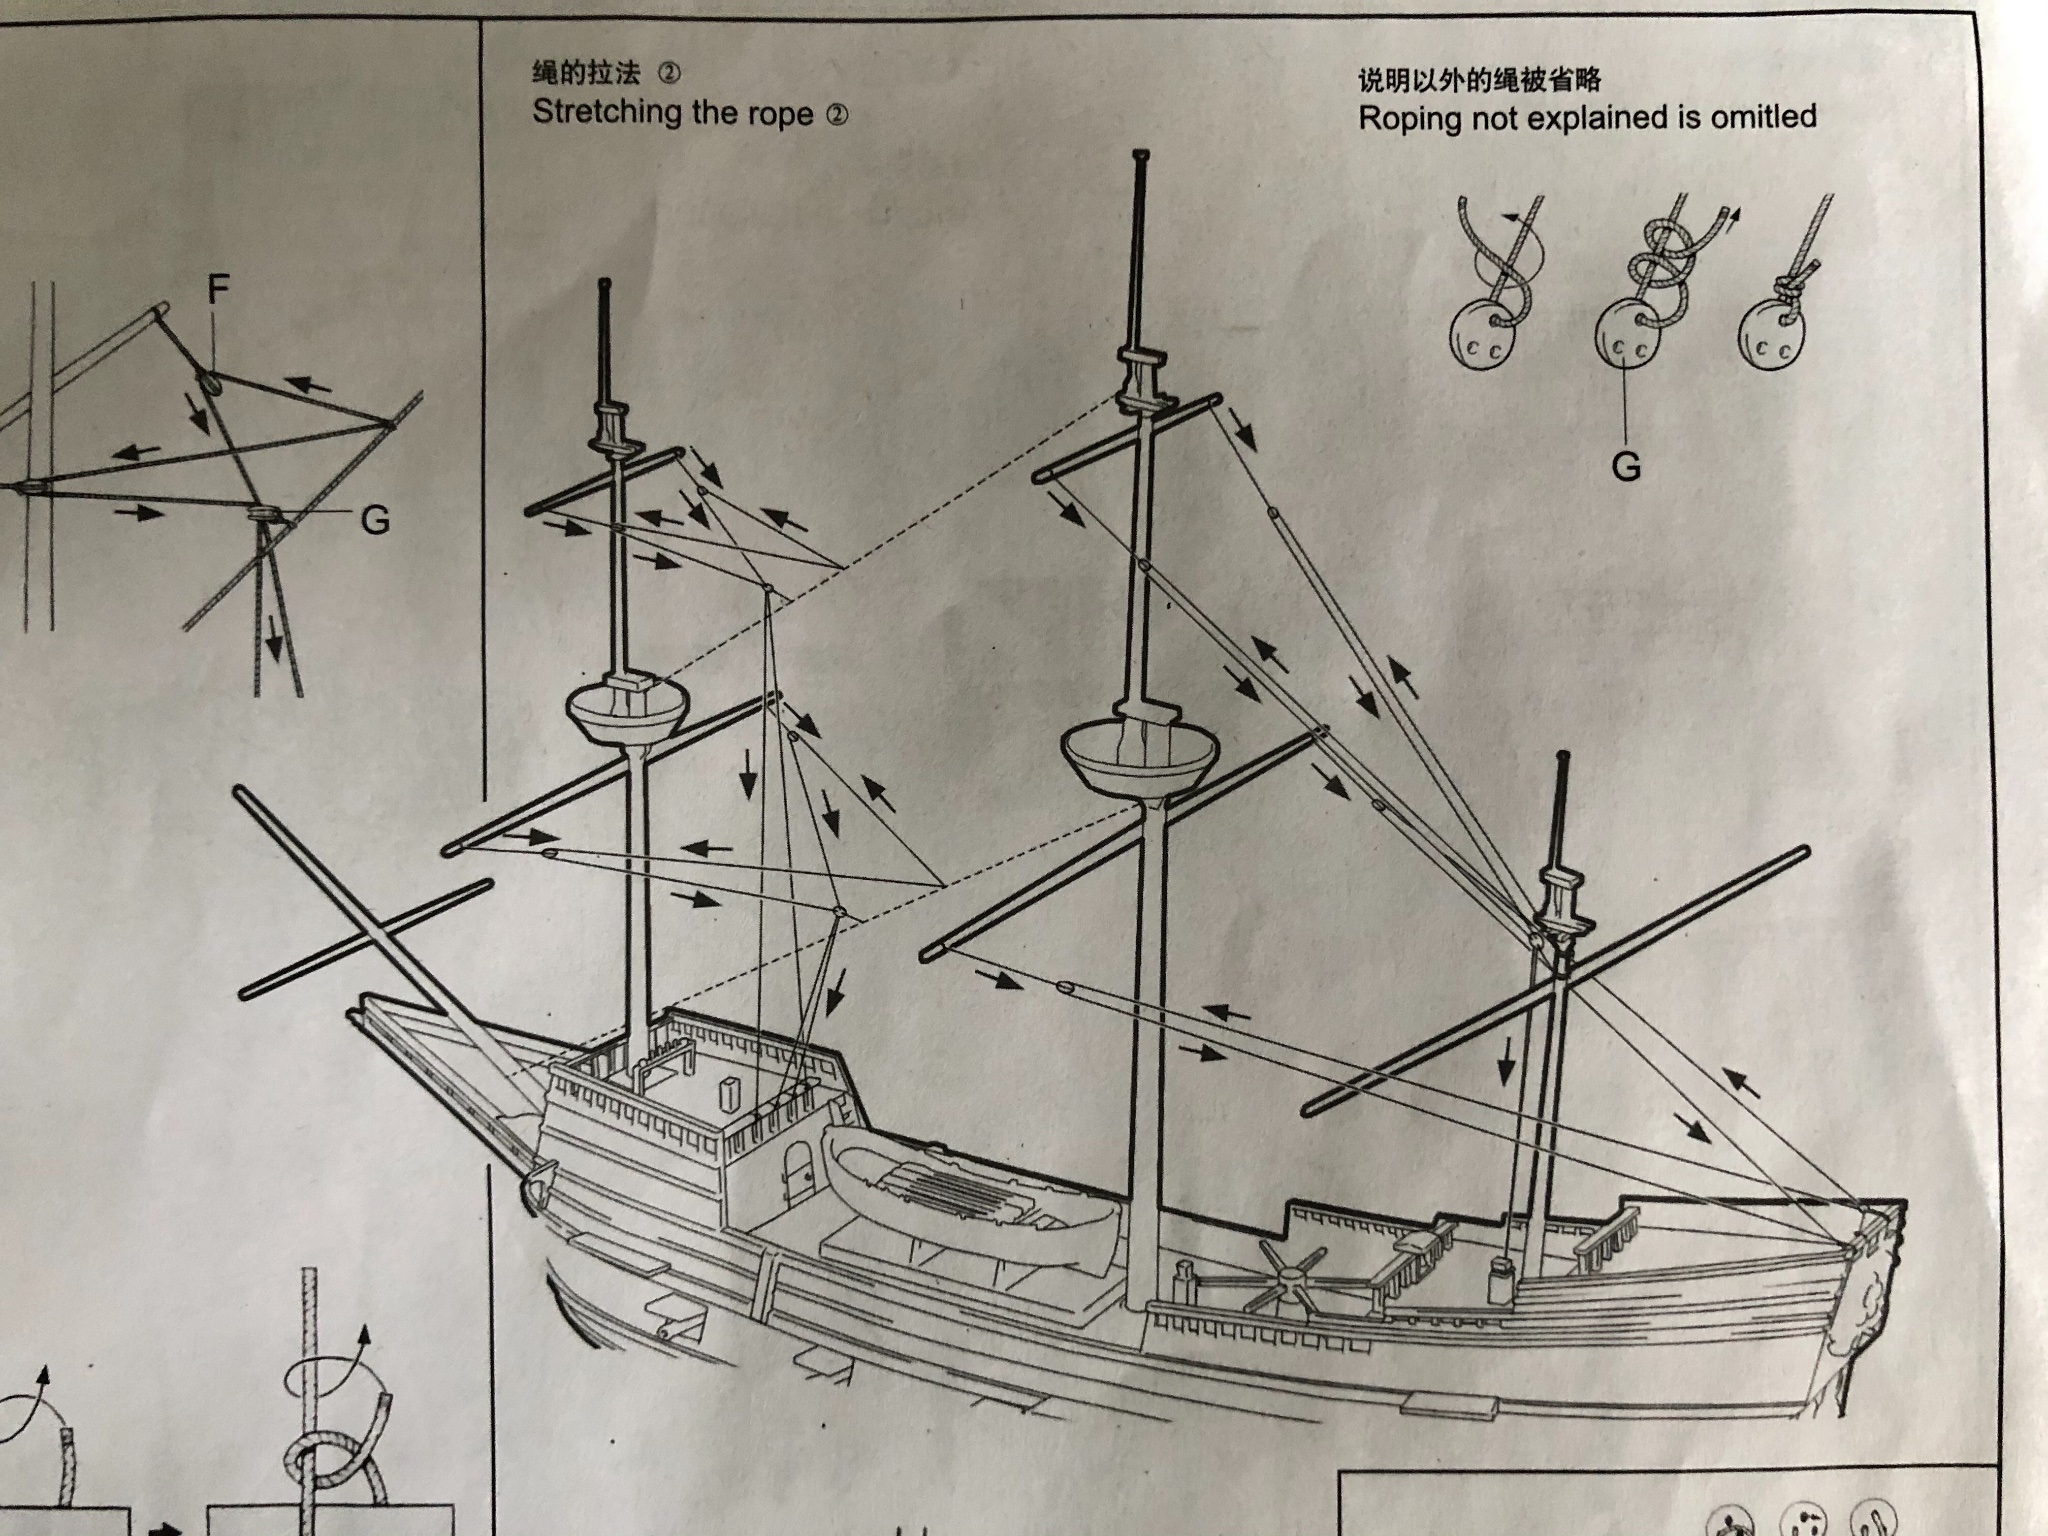
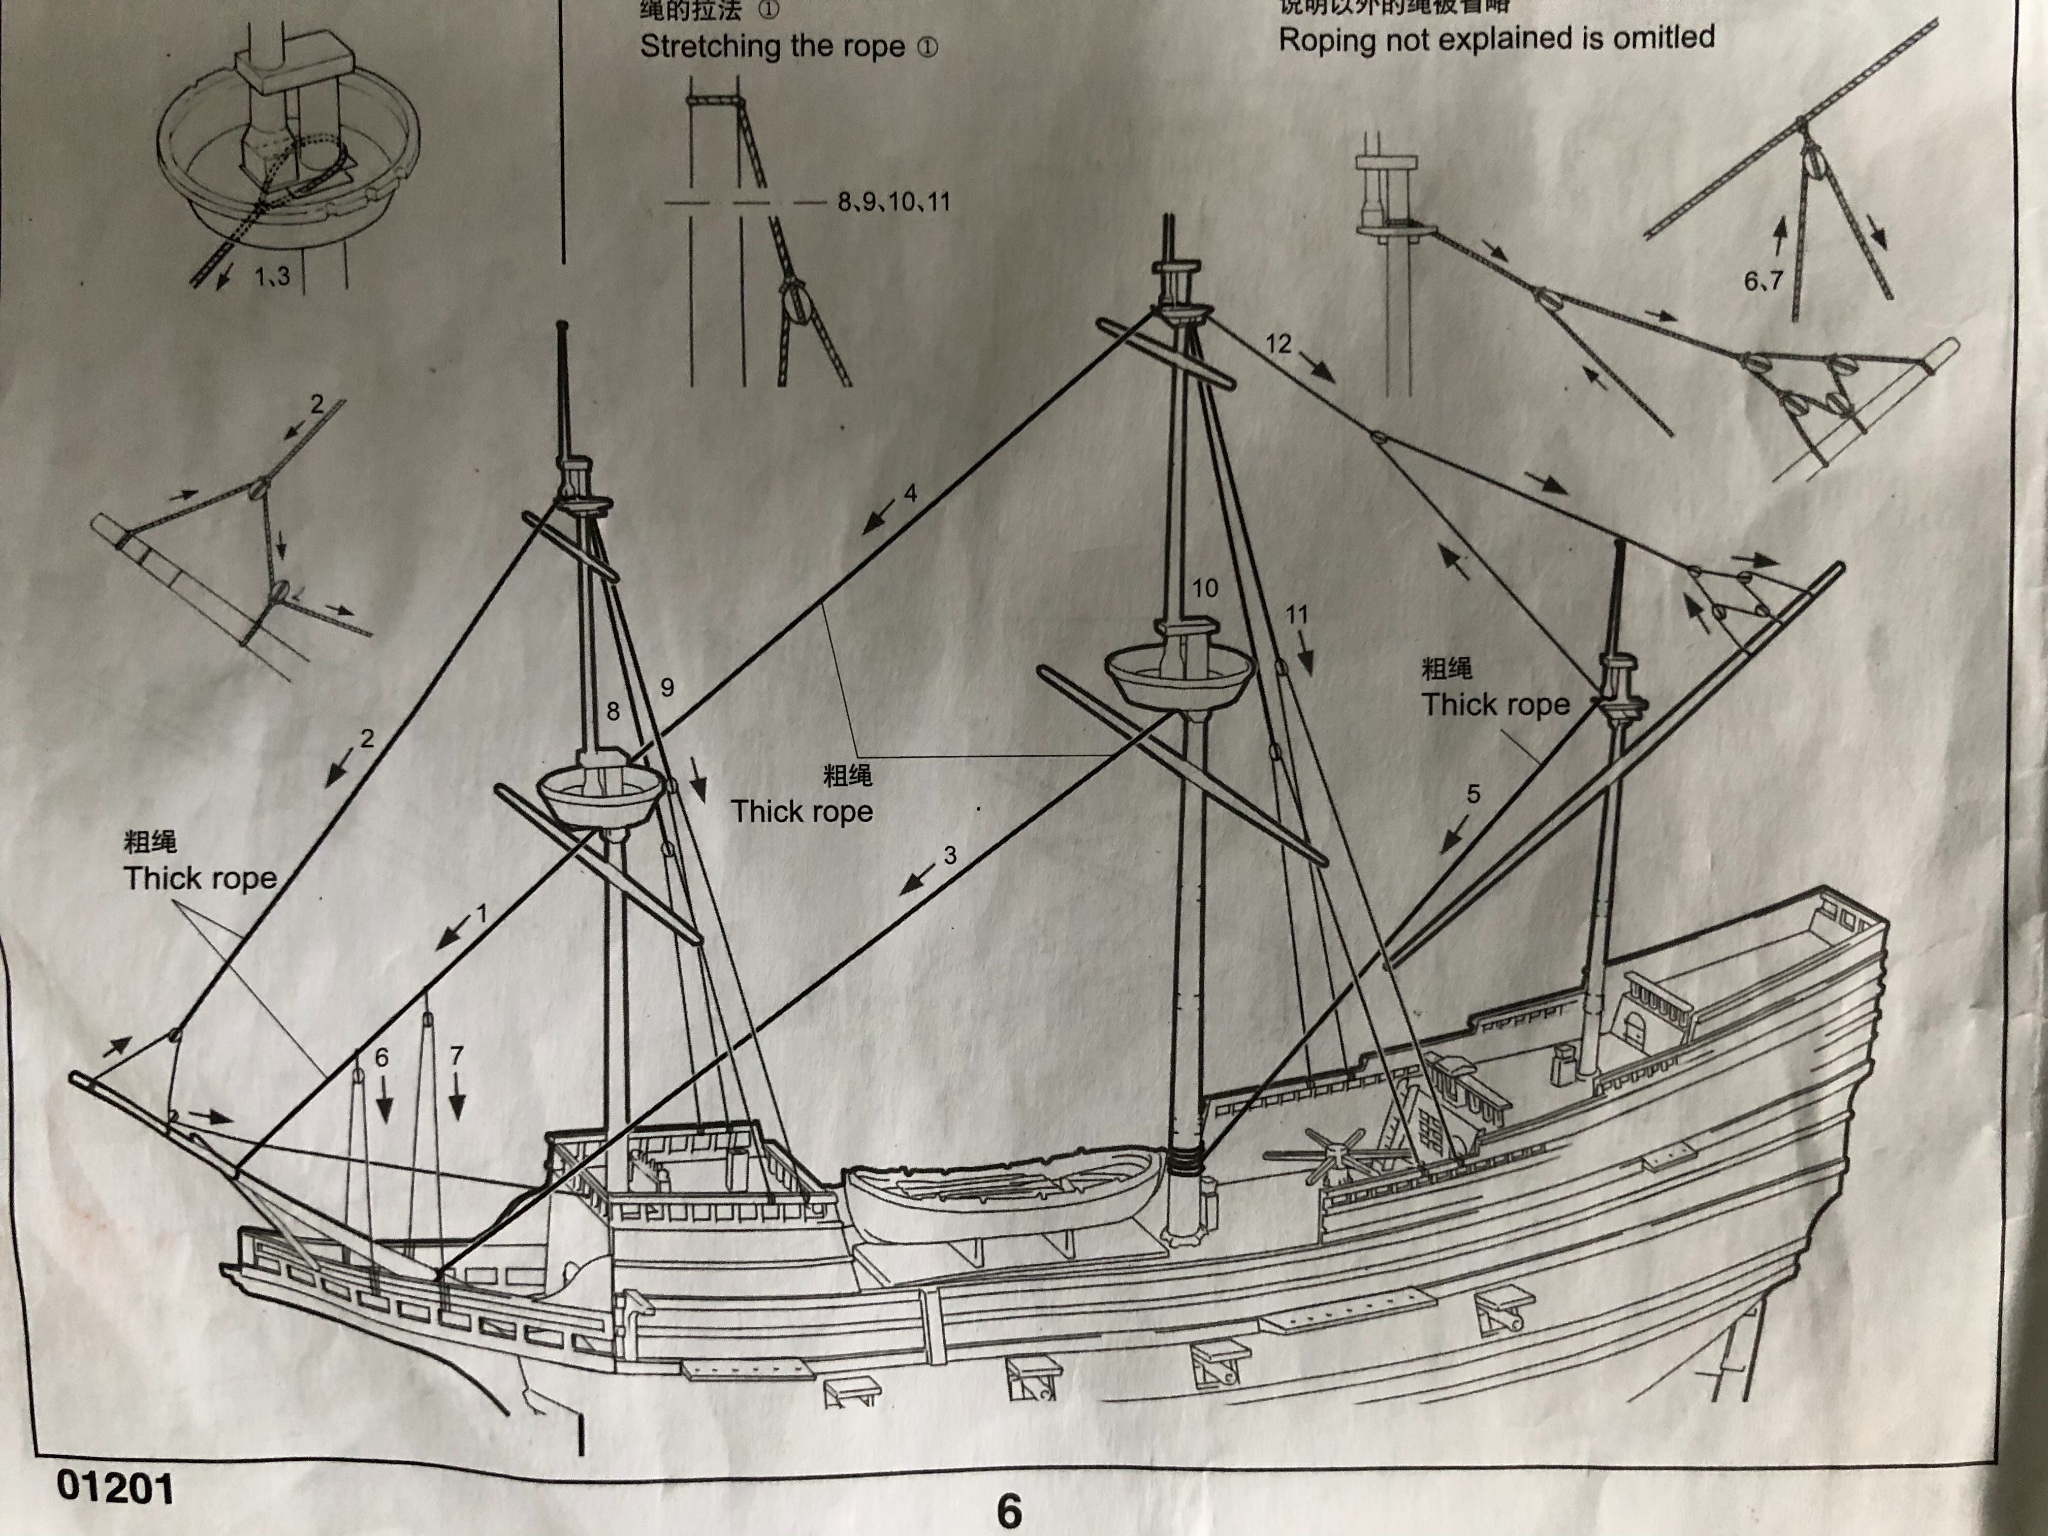
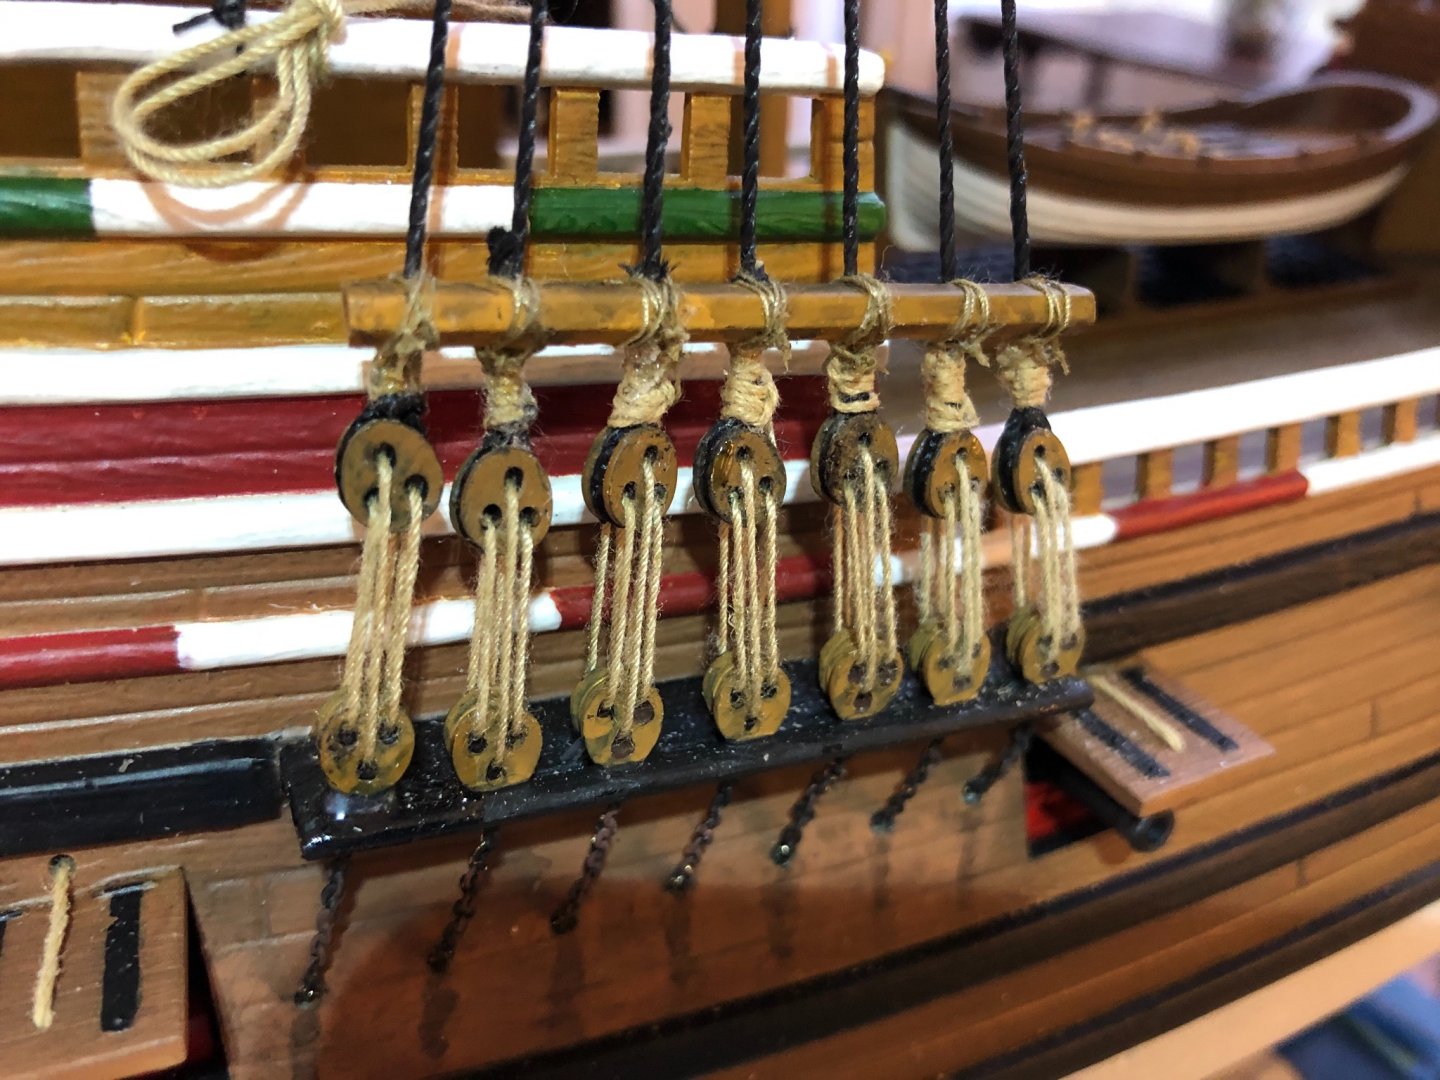
Thank you again Kirill4 for the information and advice. The rigging in the photo is as shown in the assembly instructions that I followed. See the picture of the instructions below. I have to say I probably build my models with a combination of out of the box instructions (both building and rigging) using the supplied materials refined to correct for some authenticity where obviously needed. Case in point being fixing the dramatic angle of the bowsprit. I like the pleasure of building my ships to be inviting displays for me to enjoy looking at. I also enjoy for other people to admire and enjoying seeing them. People who don’t know a thing about rigging. People who don’t know a shroud from a lanyard, or a mainstay from a ratlines. People who just like seeing the detail work without knowing or caring if it is 100% accurate. I am more about the relaxing enjoyment of spending time lost in my little world of building a beautiful ship than I am in adding the stress and anxiety over wanting to make sure every line, block and piece or of the authentic size, color, and scale. I think the work you do is incredible and I so much appreciate your advice and guidance. Please keep it coming. I am learning a lot as I work through this build. I can fully understand how someone with your knowledge and skill level could be frustrated seeing a lack of authenticity in the work of others with less skill, like me. I want my hobby to stay an enjoyment and not become an obligation to authenticity that might rob me of the enjoyment. Please continue to provide your advice and information. I honestly appreciate it. Sometimes I will use it and make changes. Other times I will just leave it as the out of box instructions say. Thanks again Kirill4.