


Balclutha75
-
Posts
179 -
Joined
-
Last visited
About Balclutha75

-
 Canute reacted to a post in a topic:
zu Mondfeld Historic Ship Models - which edition to get?
Canute reacted to a post in a topic:
zu Mondfeld Historic Ship Models - which edition to get?
-
 DR. PR, thanks for the reply. I have some Brodart glue from my days as a mountaineering book collector. It's a PVA that stays clear and flexible when dry, perhaps I could proactively beef up the spine and/or keep it repaired? Guess I'll take my chances! wefalck, thanks. I'm just looking for a general introduction. I'm a kit builder who might want to make very minor changes to my build. For example on my current build (Master Korabel St. Gabriel), I'm not crazy about the kit rope and belaying pins. I don't have the skill or tools to make my own, but I "think" zu Mondfeld will get me close enough for replacement purchases. Plus, I don't have a general reference for leisurely browsing sitting around right now.
 -
Balclutha75 reacted to a post in a topic:
zu Mondfeld Historic Ship Models - which edition to get?
-
Balclutha75 reacted to a post in a topic:
zu Mondfeld Historic Ship Models - which edition to get?
-
GrandpaPhil reacted to a post in a topic:
zu Mondfeld Historic Ship Models - which edition to get?
-
Canute reacted to a post in a topic:
zu Mondfeld Historic Ship Models - which edition to get?
-
Thanks, GrandpaPhil. The 1989 seems to be common and there are some decent looking copies out there. I'll go with it. In my MSW research on the book, I'm pretty sure I saw you mention that you were on your 3rd copy!
-
Balclutha75 reacted to a post in a topic:
zu Mondfeld Historic Ship Models - which edition to get?
-
After reading numerous posts on ship model books I've decided to get zu Mondeld's as the first book in my model library. I believe it will serve my purposes as an overview reference. I've read the opinions of it's shortcomings. But it is not expensive and readily available. My question is which edition to get? I'm finding three, 1985, 1989 published by Stirling, and 2005 published by Union Square. Looks like there is a hardcover in the 1985 run. I may have missed something but that's what I've seen. Is the layer 2005 edition the one to get, because corrections have been made, or is it inferior due to type of paper, etc, used during publishing? Maybe the 1989 one is the classic sweet spot? Thanks.
-
catopower reacted to a post in a topic:
Ages of Sail - Can't Login or Contact?
-
catopower reacted to a post in a topic:
Ages of Sail - Can't Login or Contact?
-
I just called the number again, and this time I did get through to someone. We'll chalk this up to a Thanksgiving week glitch. Thanks again, catopower.
-
Thanks much for your help, catopower. Much appreciated. PM sent.
-
Balclutha75 reacted to a post in a topic:
Ages of Sail - Can't Login or Contact?
-
GrandpaPhil reacted to a post in a topic:
Ages of Sail - Can't Login or Contact?
-
Balclutha75 reacted to a post in a topic:
Ages of Sail - Can't Login or Contact?
-
Thanks GrandpaPhil. I guess it lost my save list and purchase, etc. Oh well, nothing major. I did think it weird that they didn't reply to email, and the phone call didn't go thru. They have always been very responsive. Anyway, I'll create the new account. Thanks again.
-
Last week I tried to login to Ages of Sale but it said my user/email was invalid. But it's the one I have used with them. https://www.agesofsail.com/ I sent a couple of emails, no reply after several days. Now I just tried to call the phone number on the website, (510) 889-6000, and Verizon says the call cannot be completed. This is the first time I tried to login since they did a major update to their webpage. Anyone else having trouble? Thanks.
-
Still, slowly making my way through this build. So impressive and educational! Somehow it's weirdly gratifying to know that masters of the art also do things like this. ☺️ Because of this build I was looking at the Katy Railroad Historical Society webpage last night. They have some good pages directly aimed at modelers which I'm sure you are well aware of. Are you going to the KRHS convention in Kansas City beginning on April 29?
-
Regarding posts #84 & 85, I think the Ebay seller has a profile here on MSW: https://modelshipworld.com/profile/29604-valentina/ I did make a couple of purchases, had an email exchange, and the Ebay seller has the same name, Valentina. Presumably the same person (?). Absolutely fabulous job on this model Chris. I'm working on the St. Gabriel and there are a lot of crossovers in the construction of this kit with the Gabriel. Many similarities in how things come together, or don't come together, in my case...
-
Thanks Cathead, glad to be following along. Indeed what you said, and this intersection of ships and railroads is a powerful combination. Since I described it above, a photo is worth a thousand words, hope you don't mind. The steel girder is circled in red. The mystery of grain silos.

-
I spent several hours last night and this morning savoring this thread, and I'm only on page 3! Glad you decided to share this project with us, Eric. The very early discussion about grain silo doors to nowhere sent me down a rabbit hole for a while. This was especially after I looked at my own photo, taken last month, of Big Boy 4014 steaming past a tall, circa 1915, silo in Ault, Colorado. (A Unique Little Town). Sure enough, probably 40-50 high on the south side, are two doors, one above the other, going nowhere. Closer inspection revealed a steel girder protruding from the roof directly above the doors, clearly a spot where some rigging could be hung to access them. The online discussion I found turned up several possibilities, as you guys did here, but nothing definite. Still a bit of a mystery to me. I realize this is an old hat discussion, but I found it all quite interesting. Thanks again Eric, I look forward to continuing through the log!
-
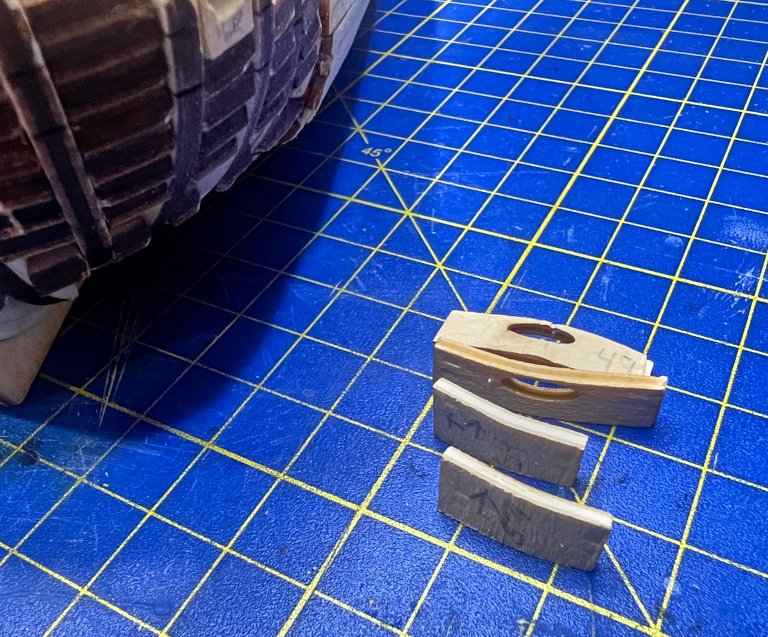
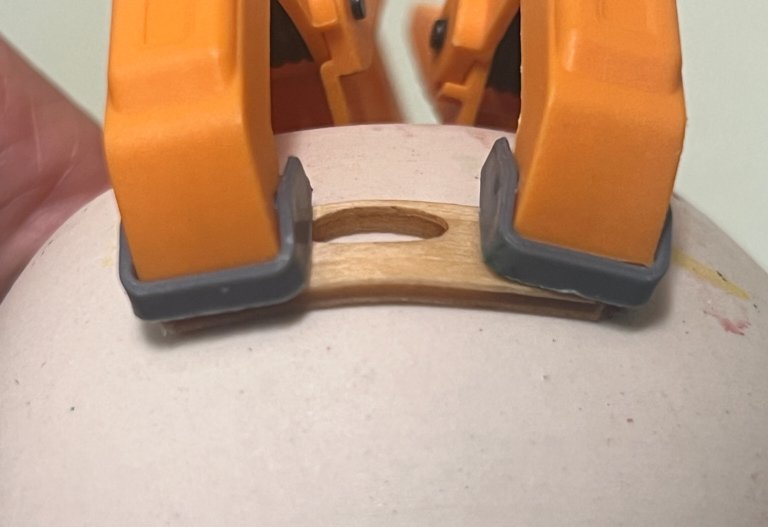
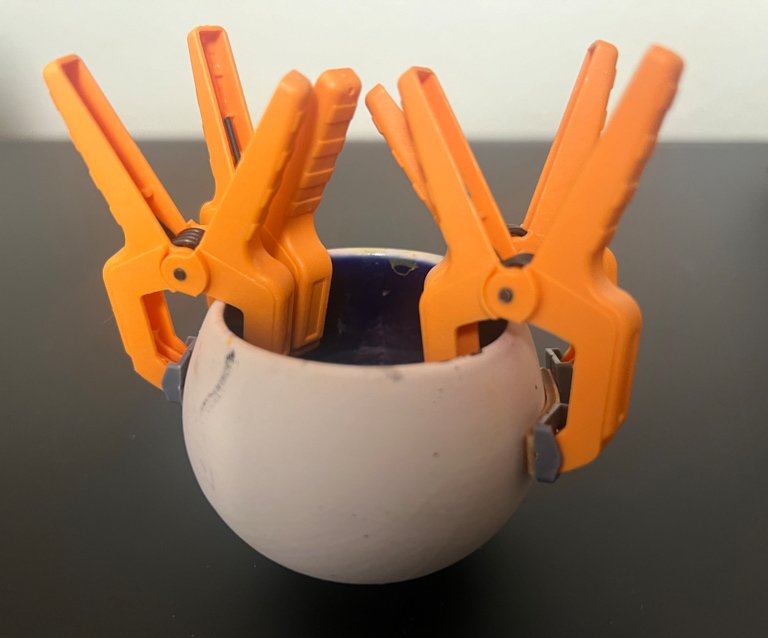
Well, it's not perfect but it looks like this will work. It certainly worked better than some of the other ideas I had before settling on this one. I guess if I had the proper tools and skill set, neither of which I possess, I could come up with a jig that has the precise curve. But this will do nicely. Onward!
- 1 reply
-
- 3
-
-
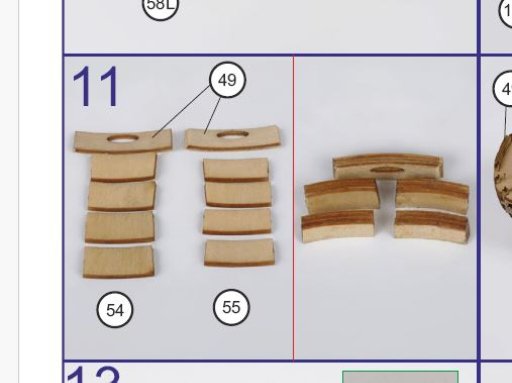
I'm working on the Master Korabel St. Gabriel and need to put a small bend in some plywood pieces. The instructions are ambiguous to me, saying, "Control the degree of bending by applying the inserts to the places of their installation". But there is nothing to clamp them to while the wood dries. Here is the photo instruction, showing the pieces already bent. This is what I came up with, after soaking the pieces in nearly boiling water for a few minutes. I used a ceramic tequila shot glass, a gift from a local liquor store. The shape of the curve is close if not precise. The wood is still wet so I don't have results yet, but wondering if you experts have better ideas? Thanks.
- 1 reply
-
- 3
-
-
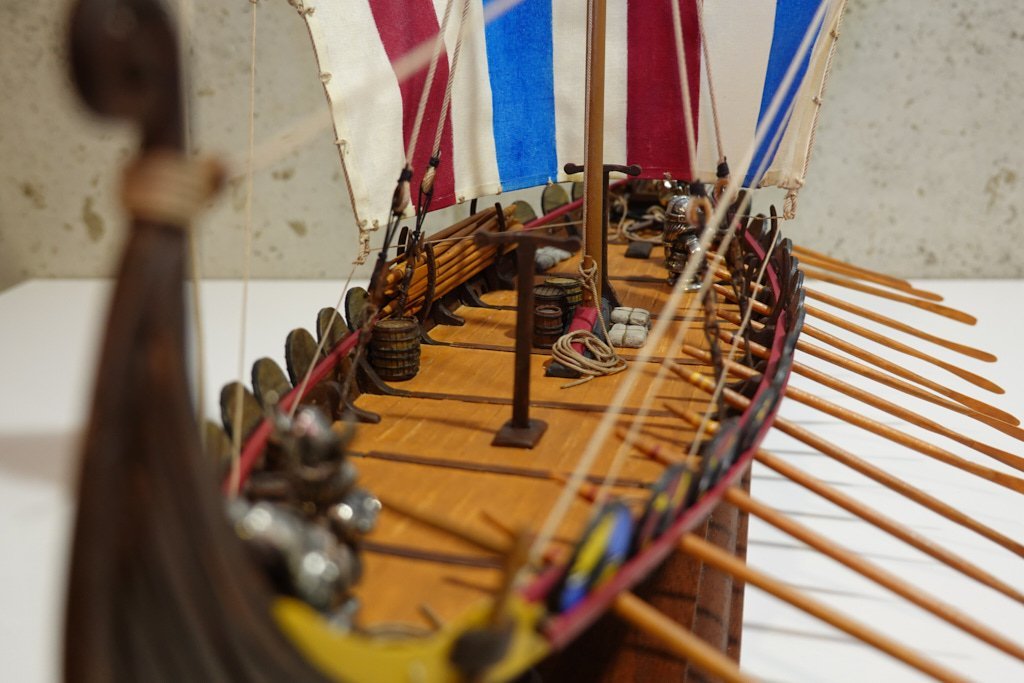
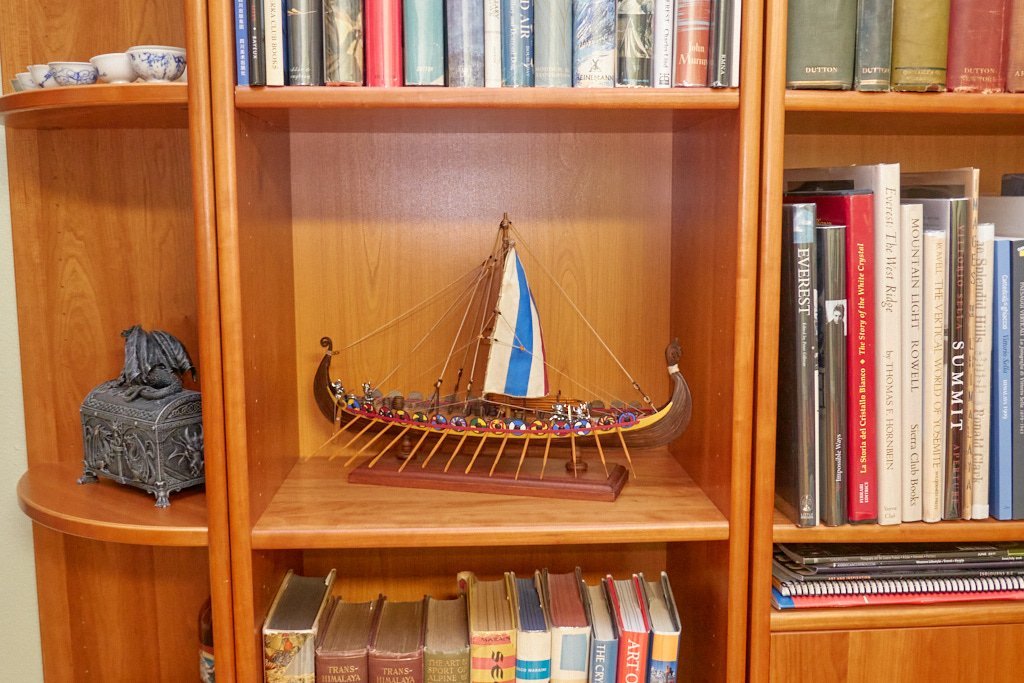
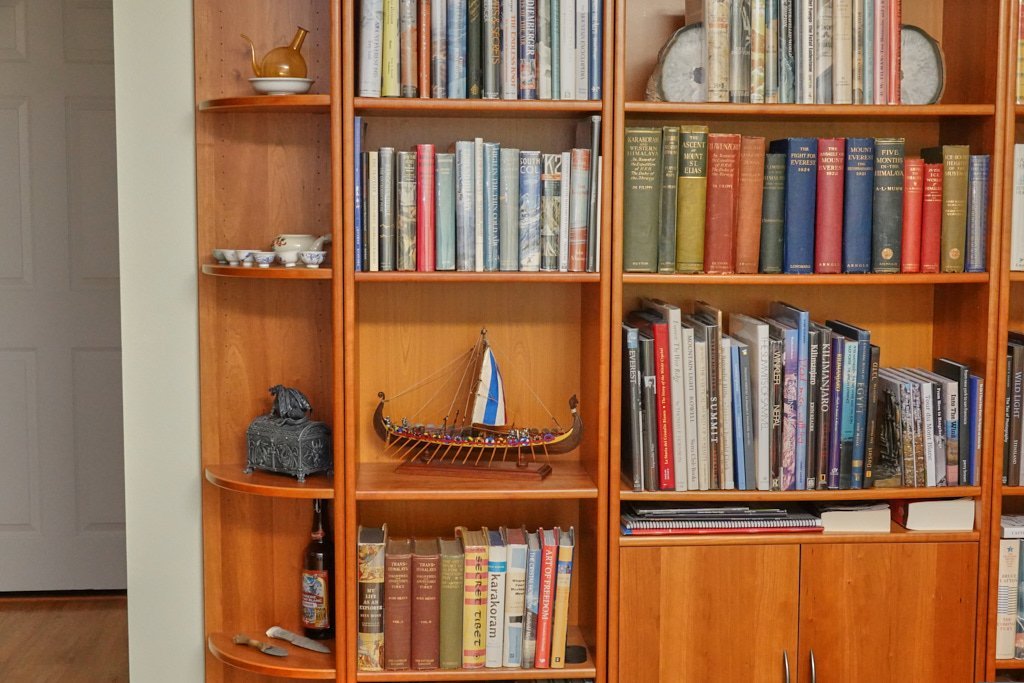
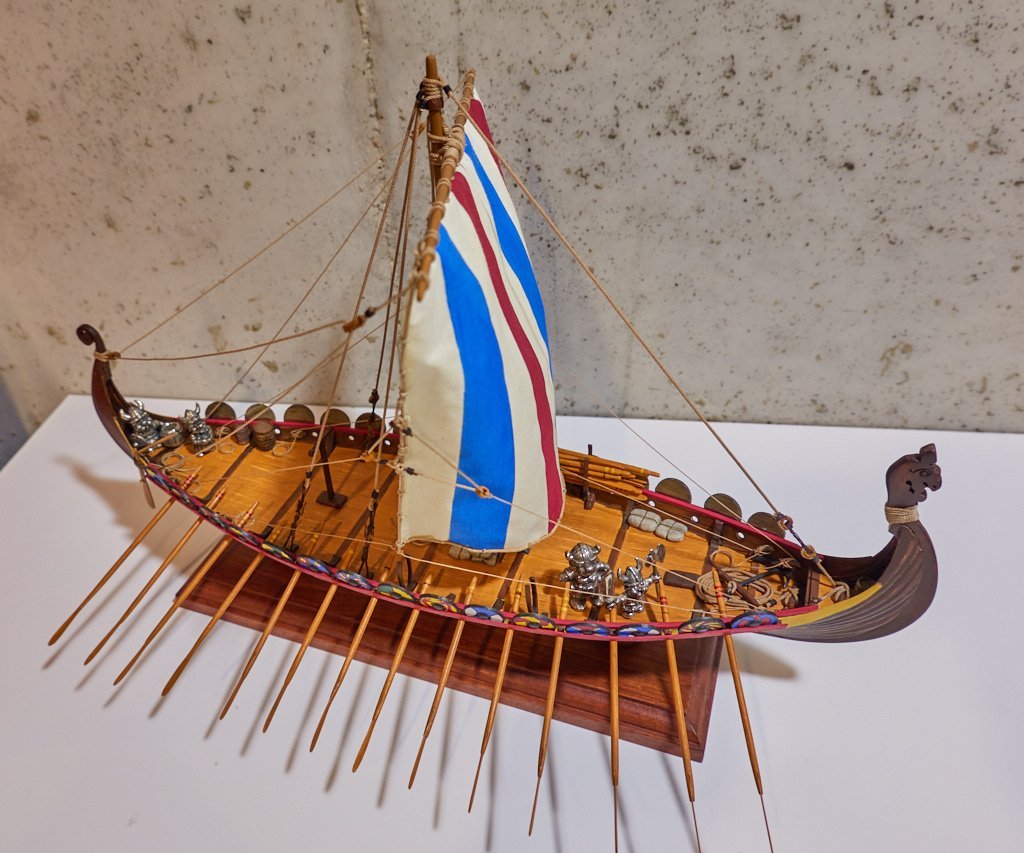
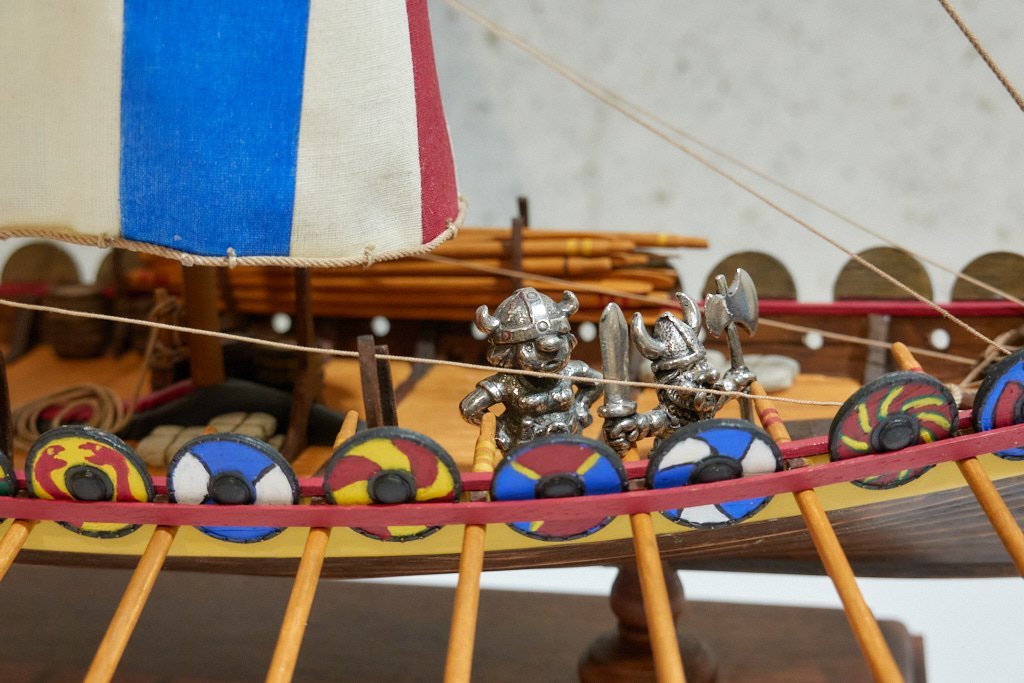
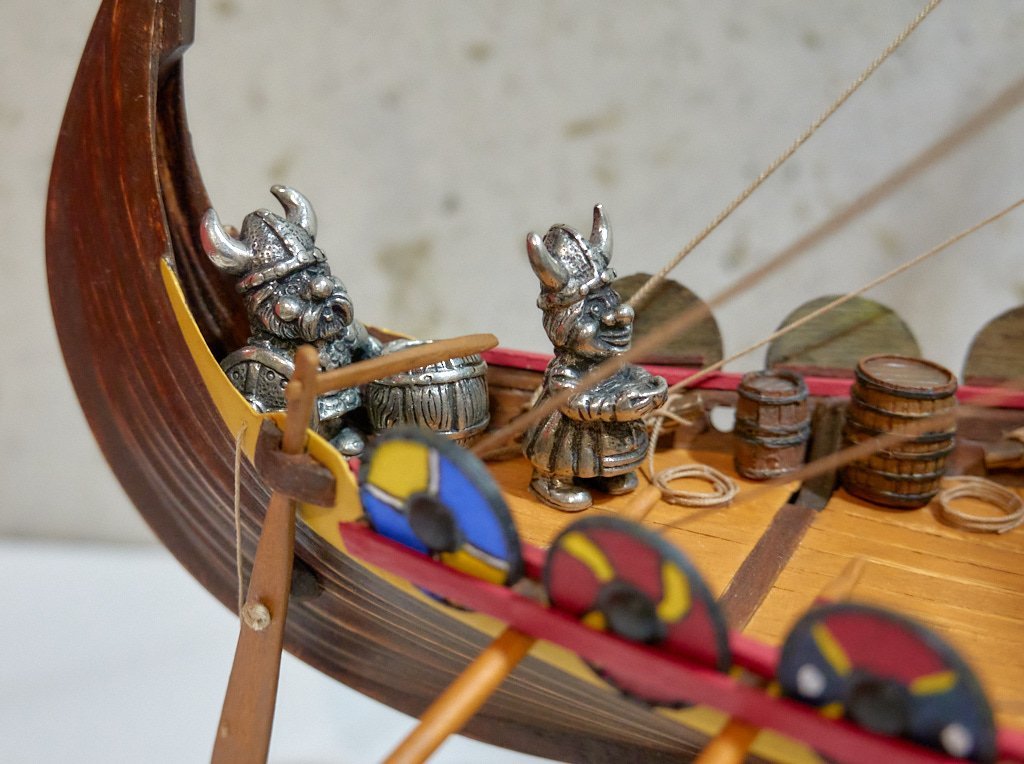
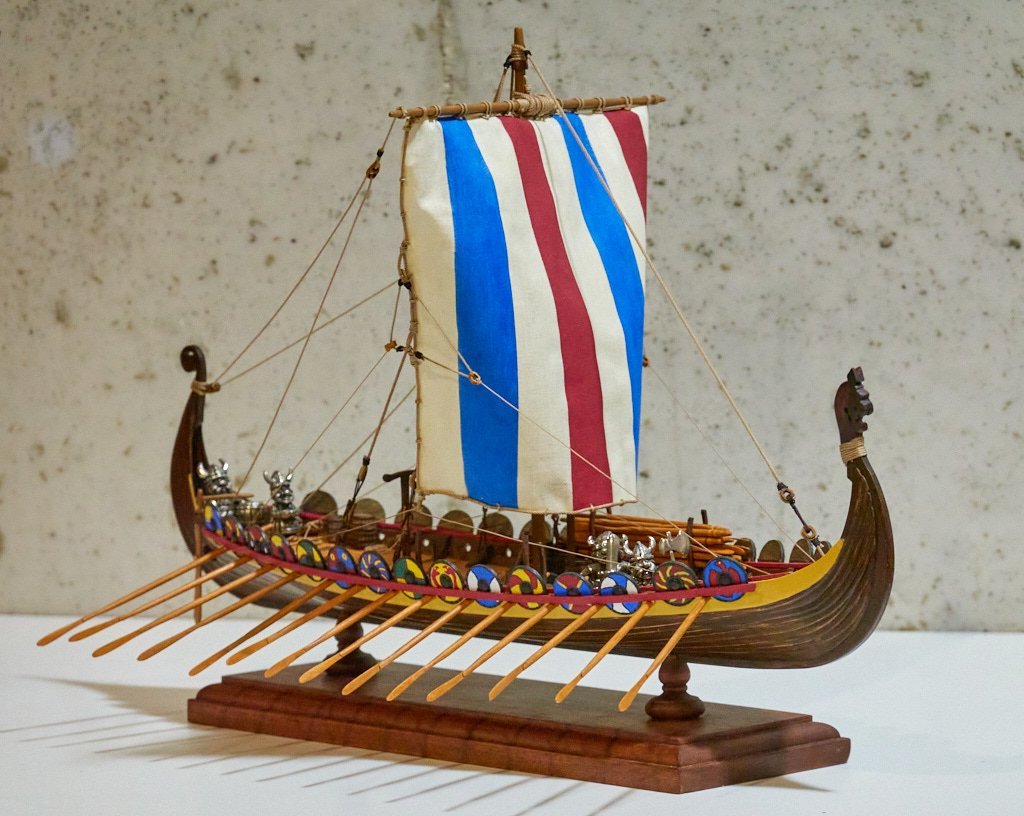
Greetings! After putting this aside for some time, I finally returned to it last week, did a small amount of work, and have deemed it FINISHED! I had optimistic thoughts of adding a bunch of benches, deck furniture and other items, but soon realized that since I had already rigged the sail, the odds of breaking something while working with tweezers through the rigging was very high. In fact it became 100% when I broke one of the oar racks and a trestle. I decided that continuing down this road was a a bad idea, and there is another kit in the queue that it's time to start on. Some time ago I had purchased a few resin barrels and bales from Artitec. This item is no longer offered by them, and I don't have a picture of it. But I painted the pieces in an attempt to make them look weathered, scattered a few on deck, added the crew members (a gift from my wife) and the ship has set sail! The crew has been patiently waiting for this day and are excited to see some action. Lindisfarne or bust. Captain Aegir at the helm. This is where the ship is displayed at home on my bookshelf. This explains why I only put the oars out on one side as it just fits nicely on the shelf, part of the original plan, going back to why this particular size kit was purchased. I'm pleased with how it looks. I'd like to thank all the folks here on MSW who have encouraged and inspired me along the way. It's been a real pleasure. I plan to be spending more time here this year and will start a new kit - Master Korabel St. Gabriel - in the next few months. Thank you!
-
Pin Vise vs. Hand Vise?
Balclutha75 replied to Balclutha75's topic in Modeling tools and Workshop Equipment
Thanks for all this detailed information, really appreciated! Overnight in thinking about how I was using this, I realized I was often going back and forth between 2 or 3 different sized bits and having to constantly change. Therefore, the set if four vises actually makes good sense. So for the price, I'll probably just order both of the items Ryland linked in post #2. This is still around 6x cheaper than the Starrett 4-piece set, which I'm sure is fabulous, but I don't think my skill level and usage warrants it. Thanks again.