Rodolfo Bigoni
-
Posts
118 -
Joined
-
Last visited
Content Type
Profiles
Forums
Gallery
Events
Everything posted by Rodolfo Bigoni
-
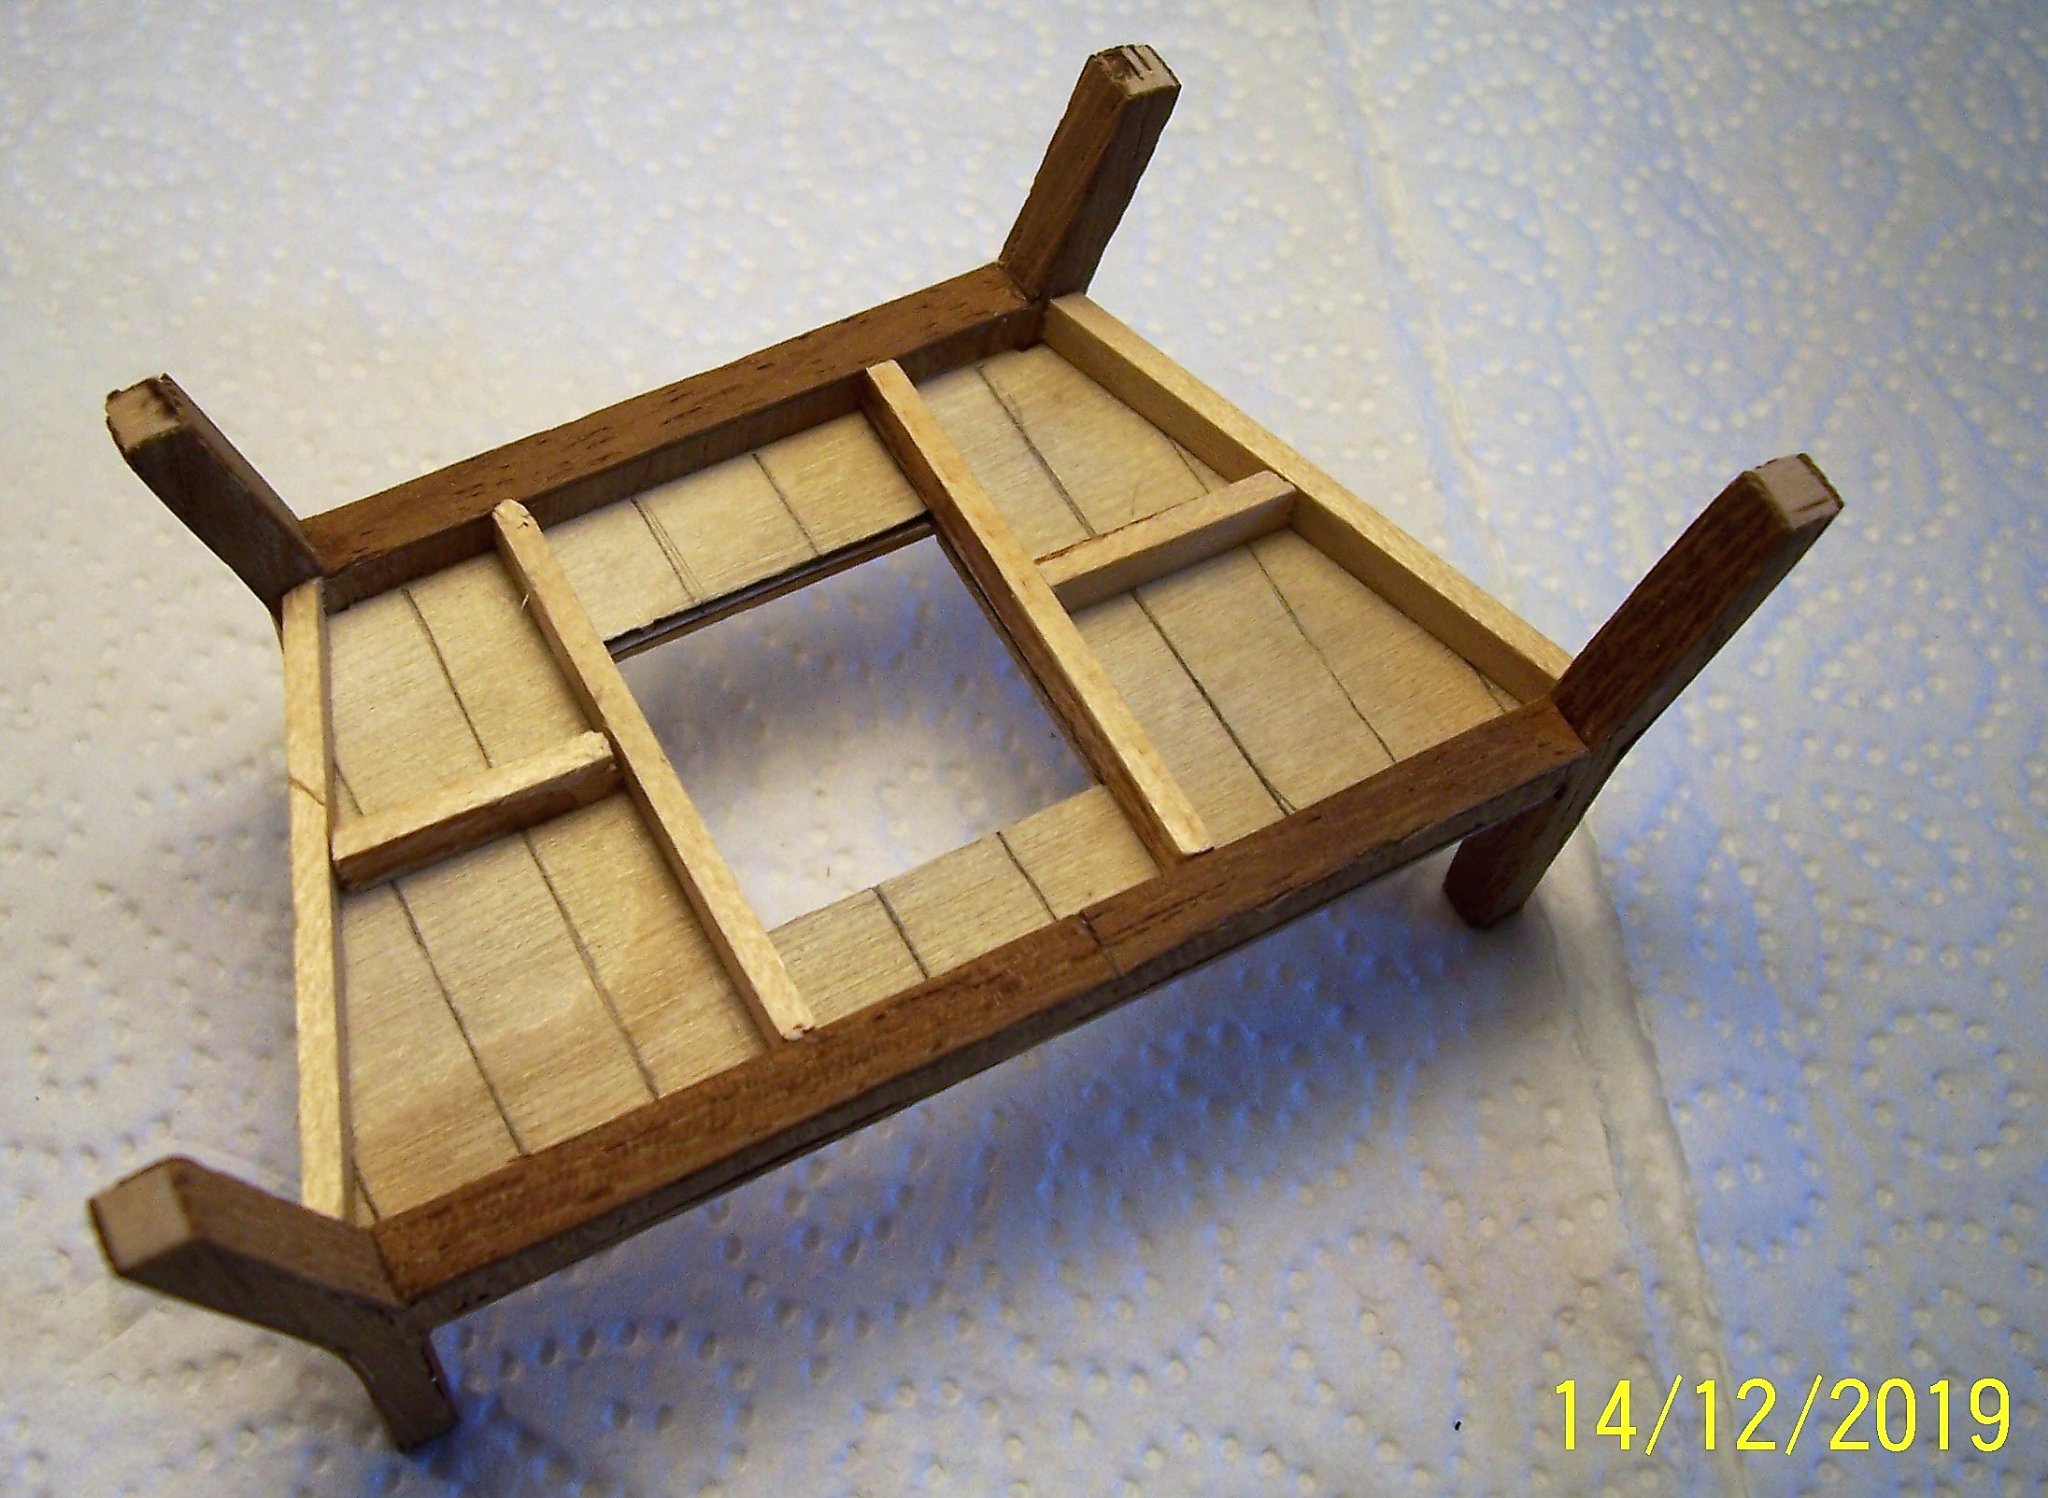
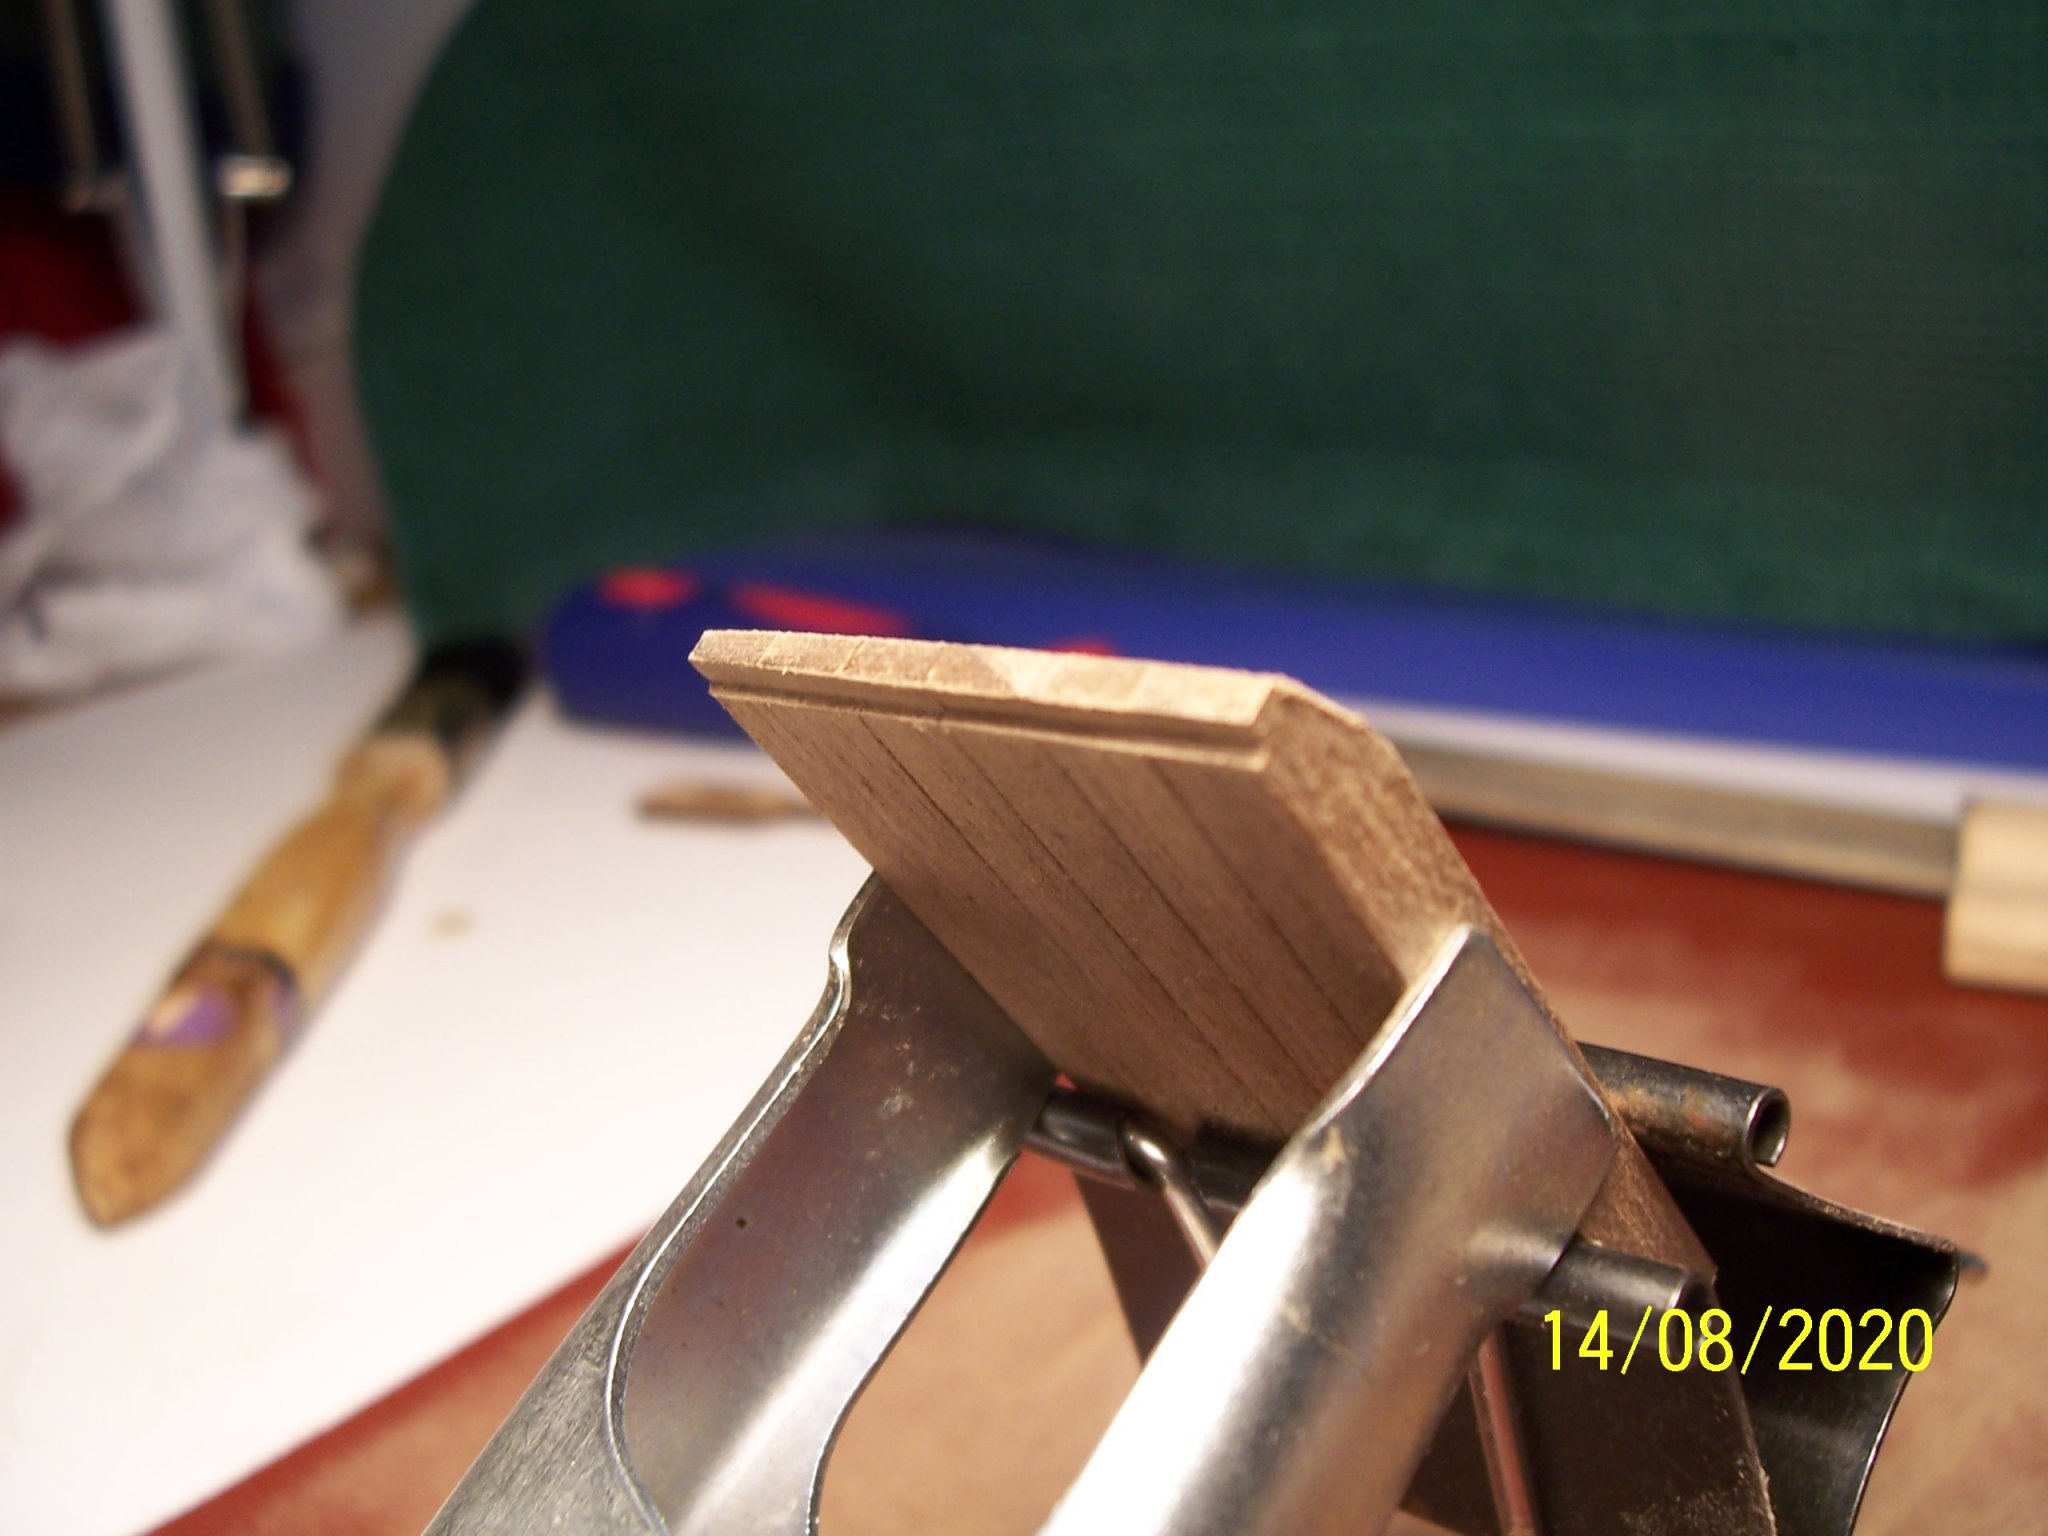
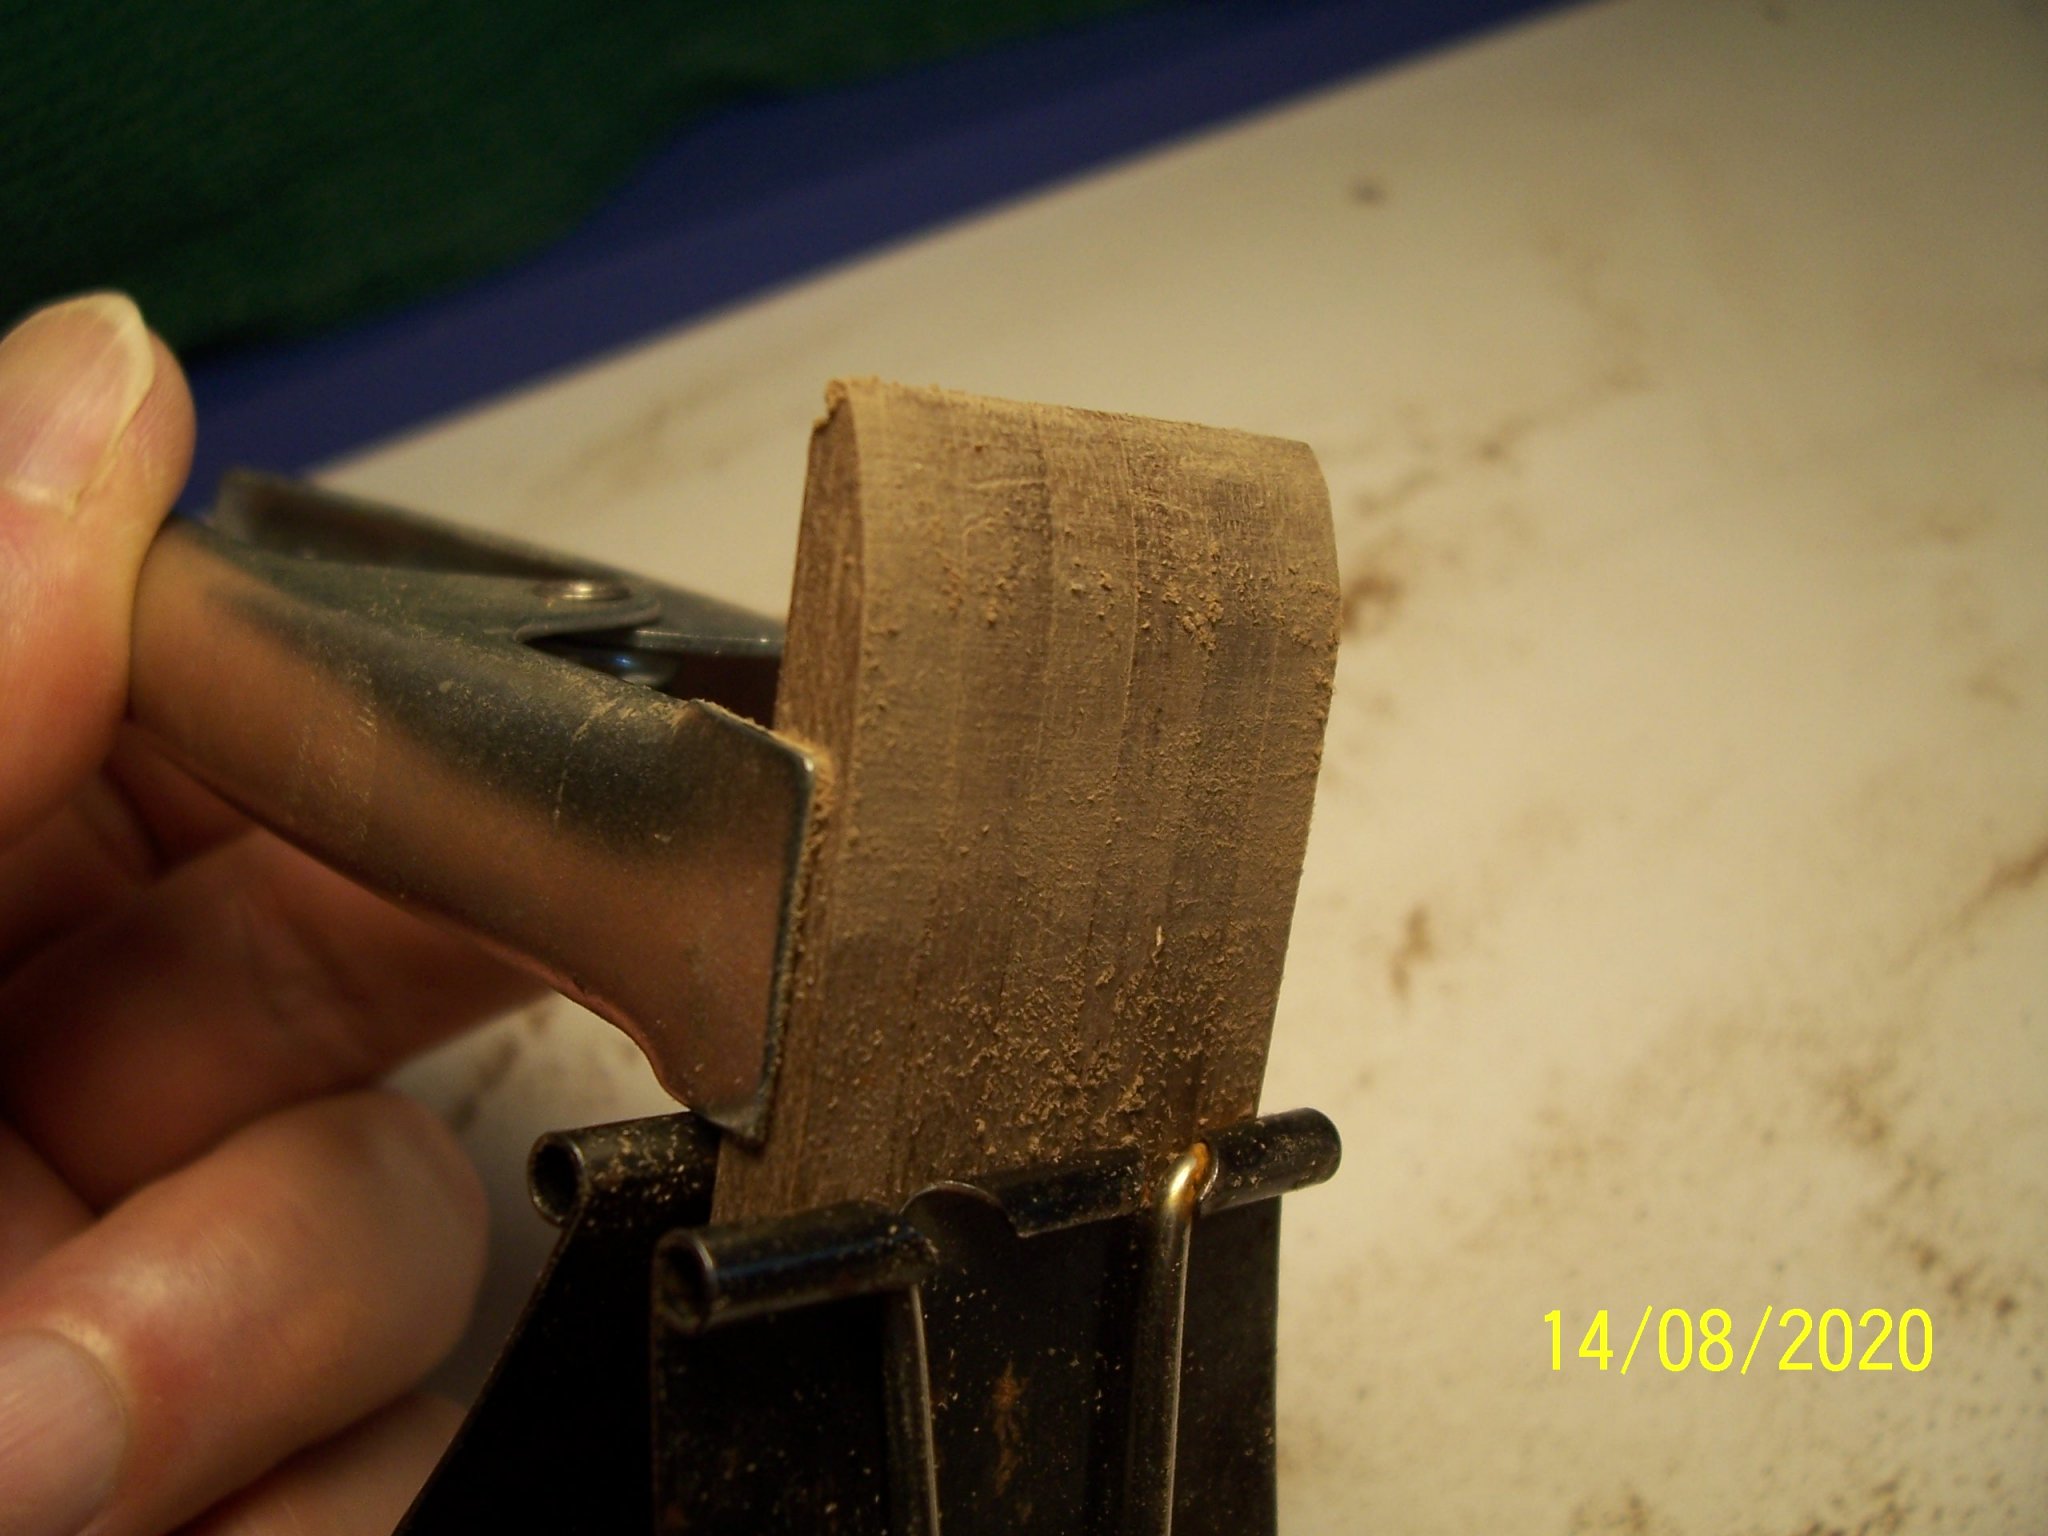
 Bye, it's very strange: in my screenshot I can see the photos. Immediately I'll put them on again. The model proposed by the supplier: Having it a trapezoidal plan, I filed the corners of the supports to create the seats for the strips: An alternative could be gluing triangular wedges on which to lay their ends. Obviously, the remaining work is equal to the one already used for the rails: Long time ago, I added some reinforcement beams on the bottom side, otherwise the structure seemed too fragile: Here are some pictures of the completed and painted structure: Now, a light passage of sandpaper and the work can be considered completed. See you later next post! Rodolfo


-
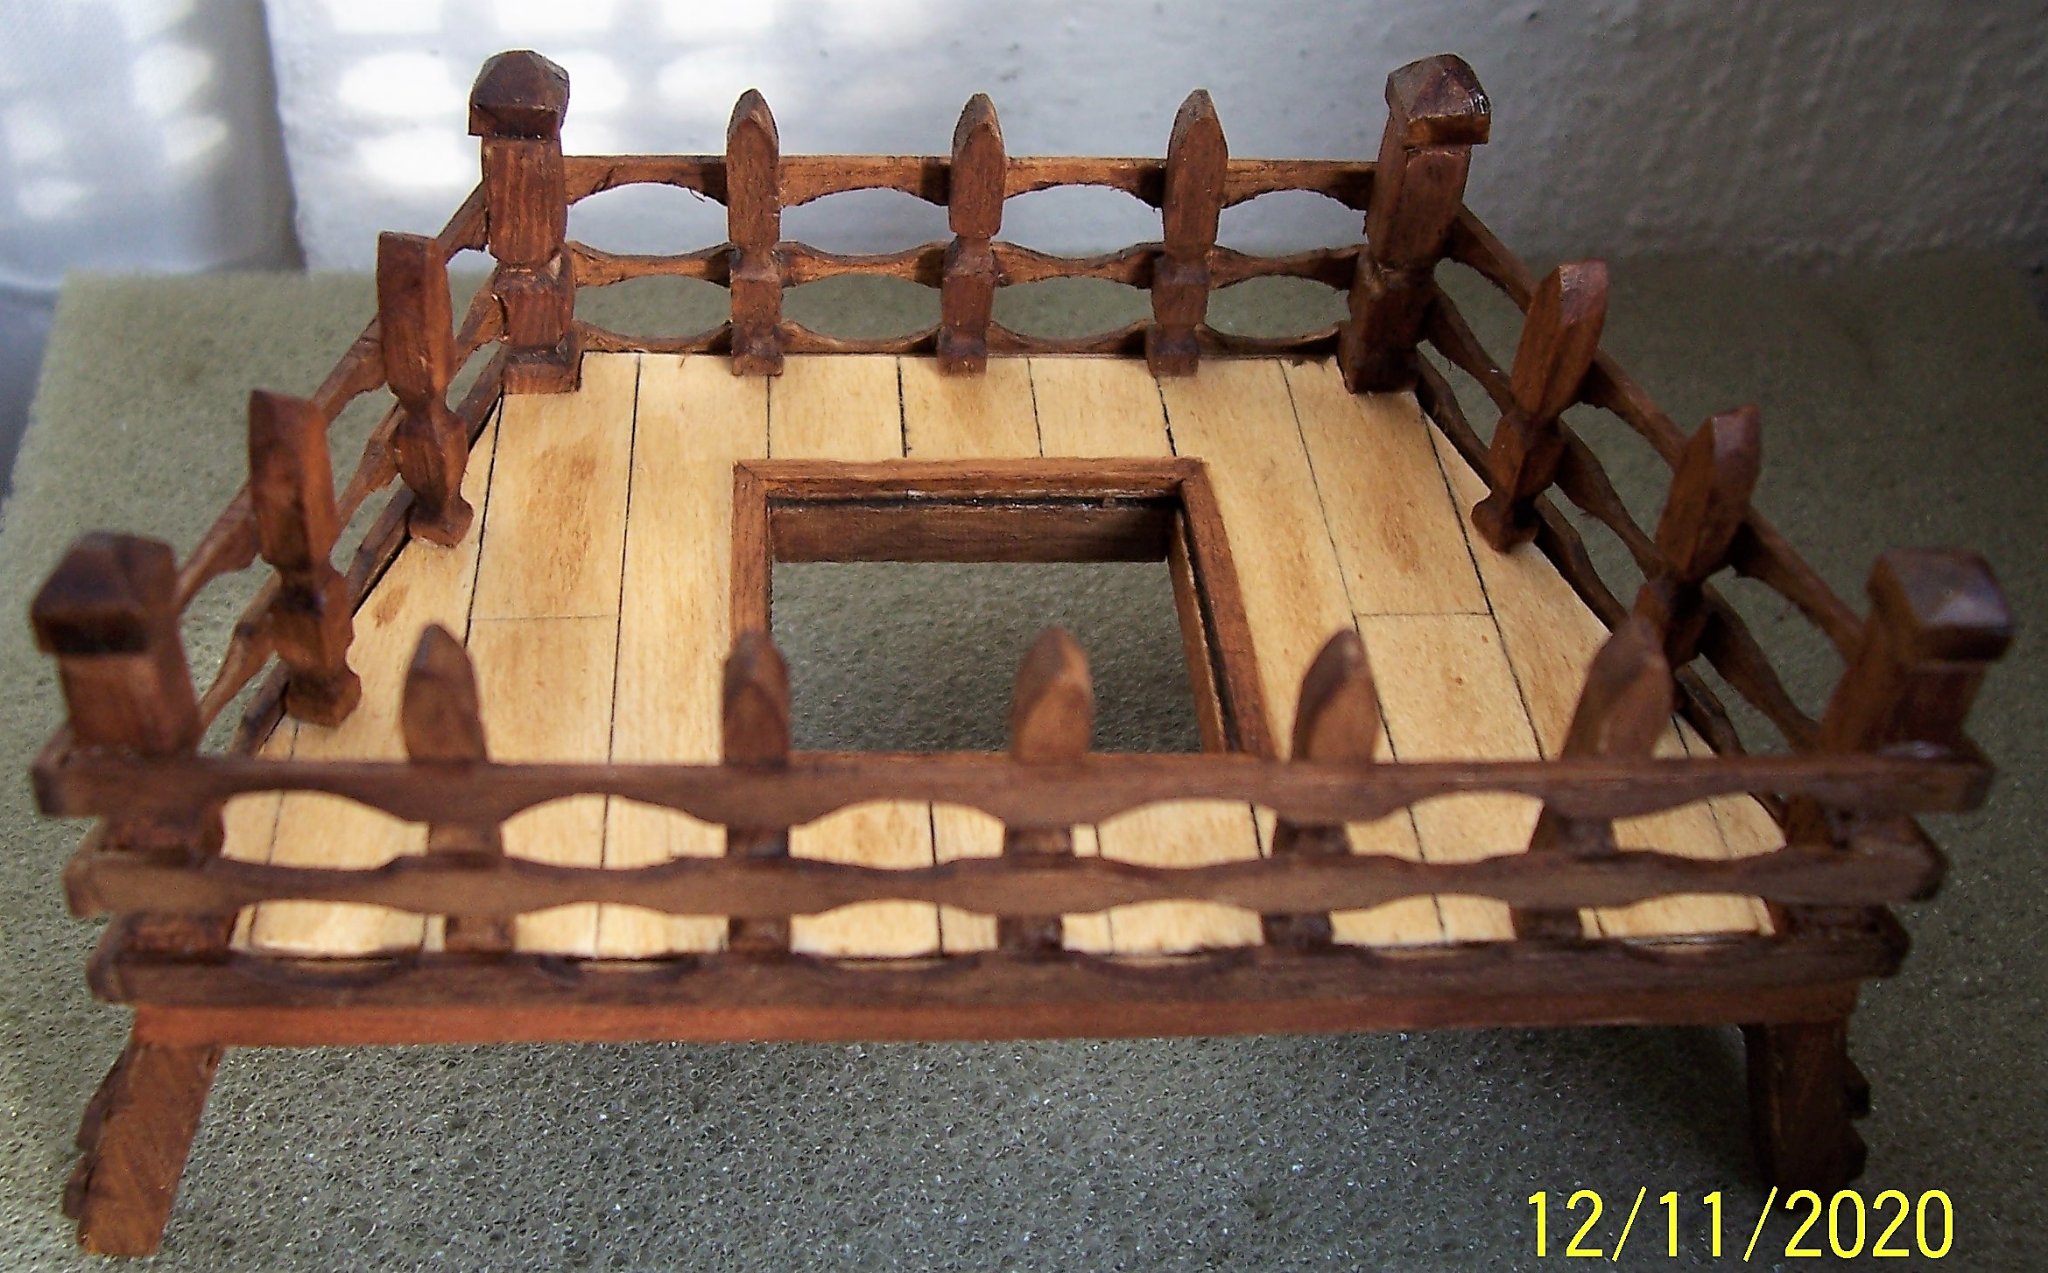
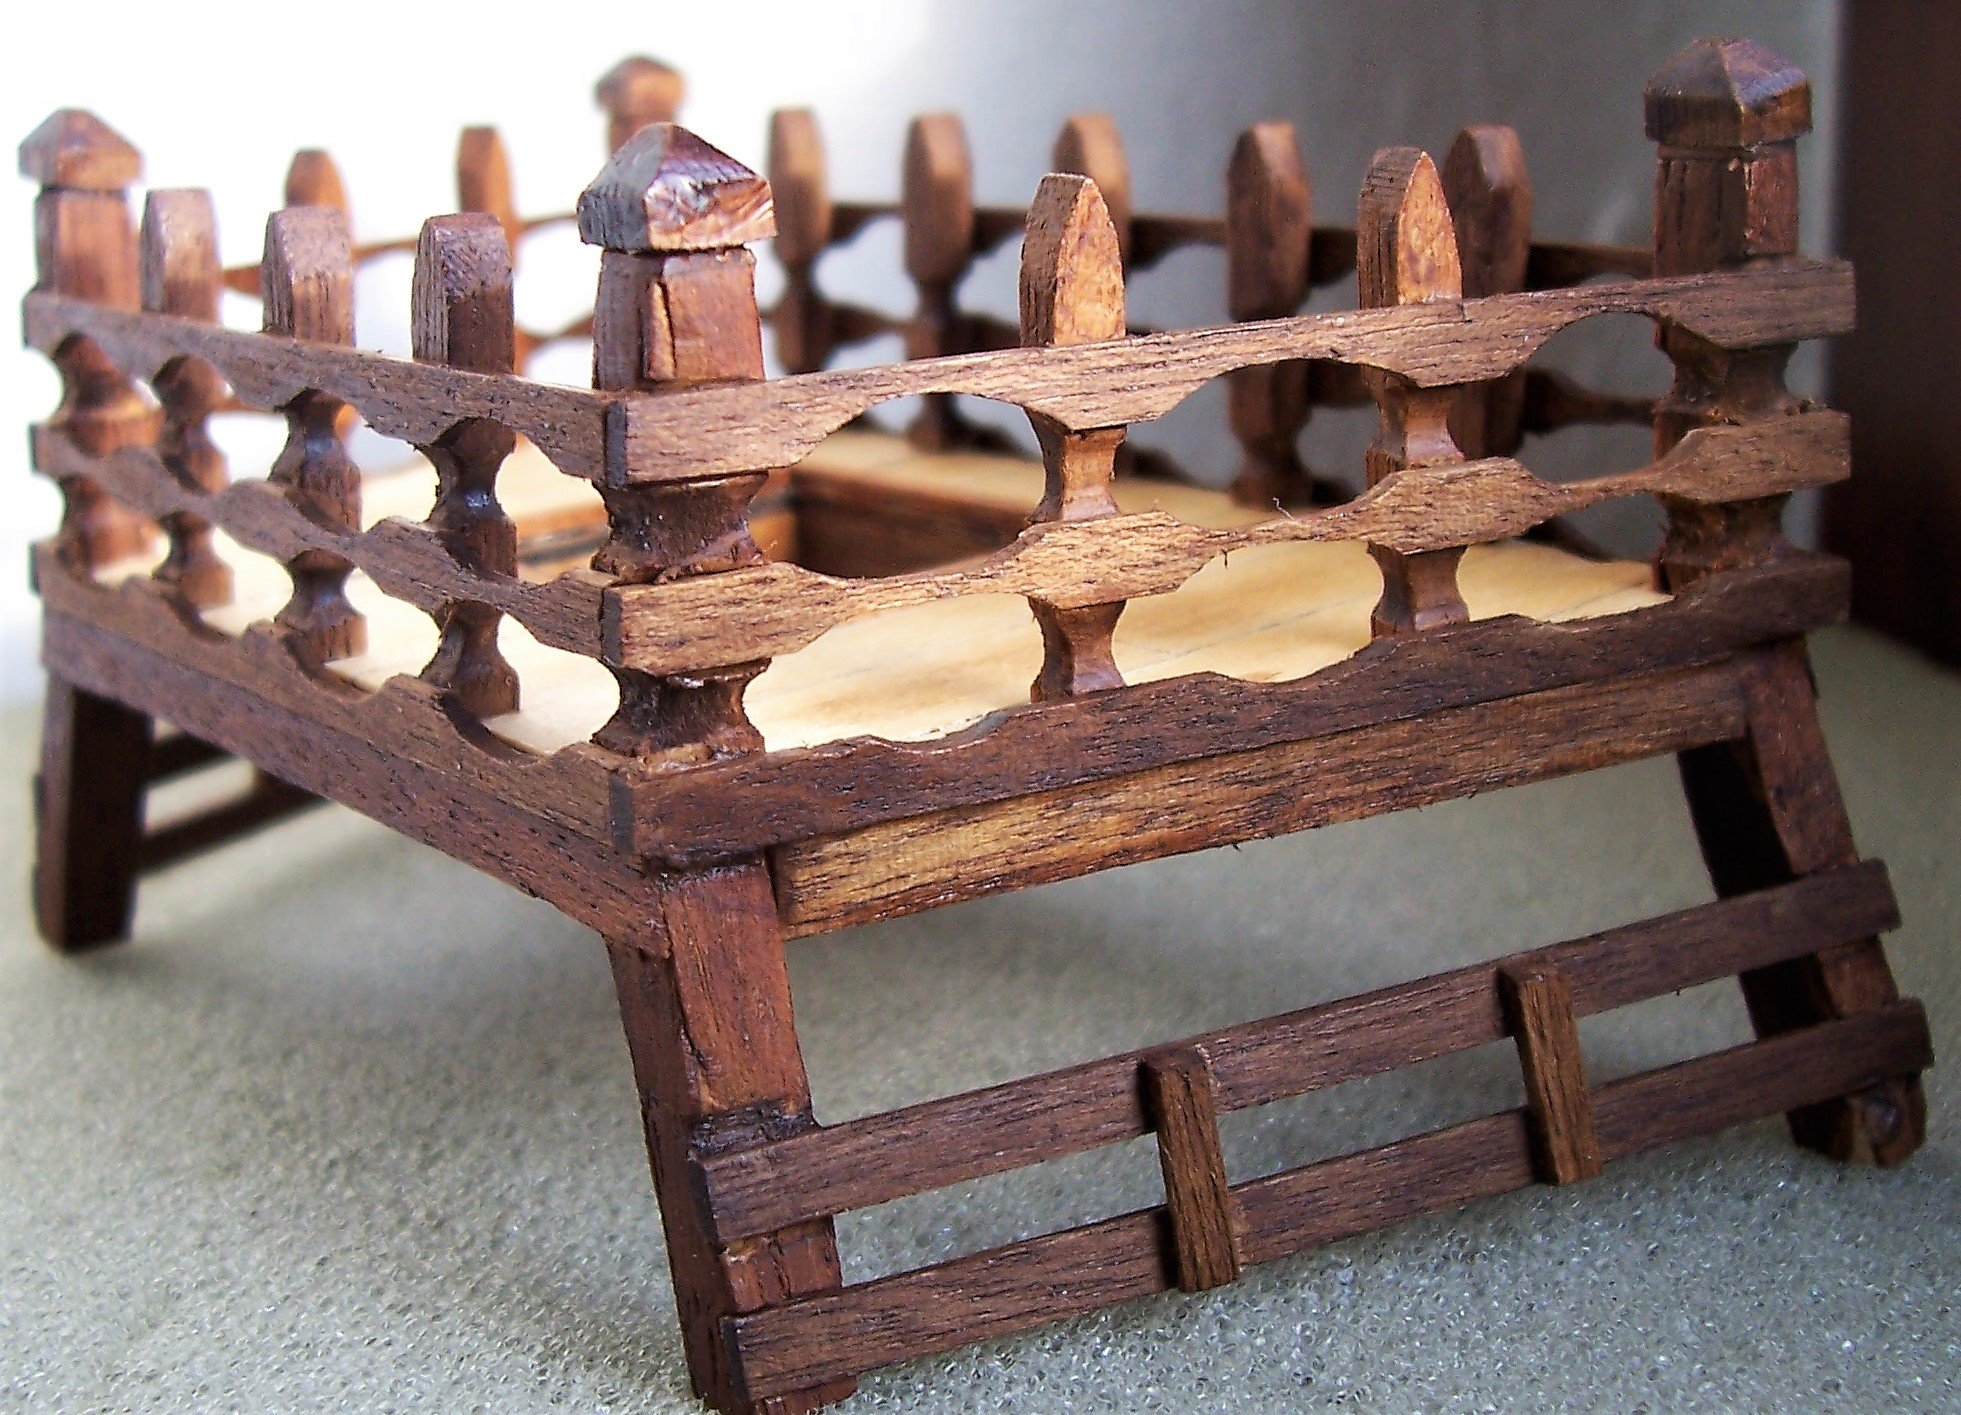
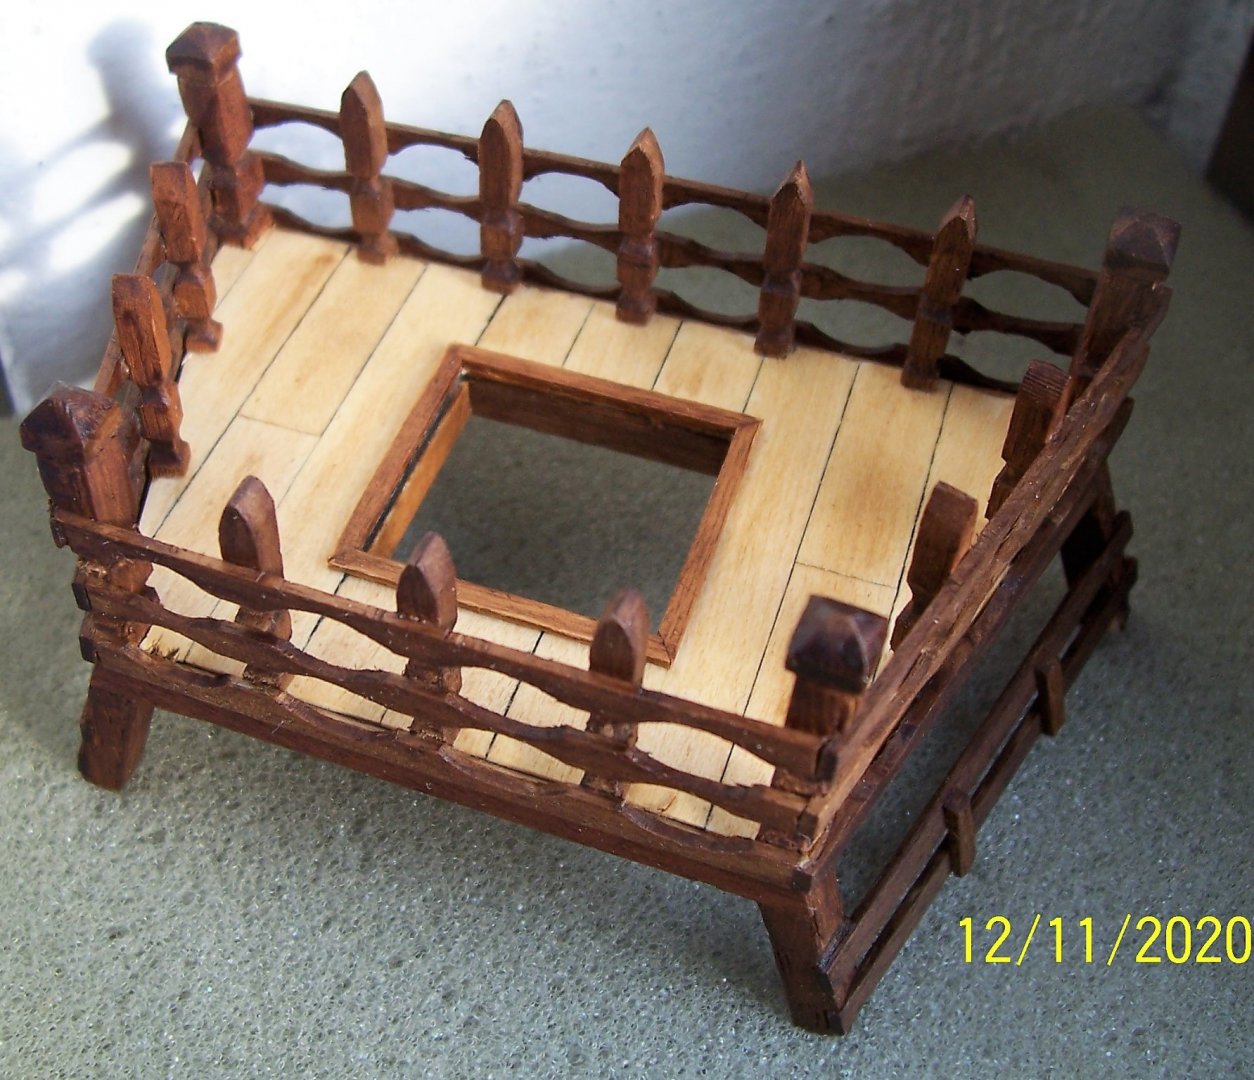
Hello, everyone, finally the little stern castle has been finished. Long time ago, I added some reinforcement beams on the bottom side, otherwise the structure seemed too fragile: Here are some pictures of the completed and painted structure: Good work to everyone and see you next post. Rodolfo
-
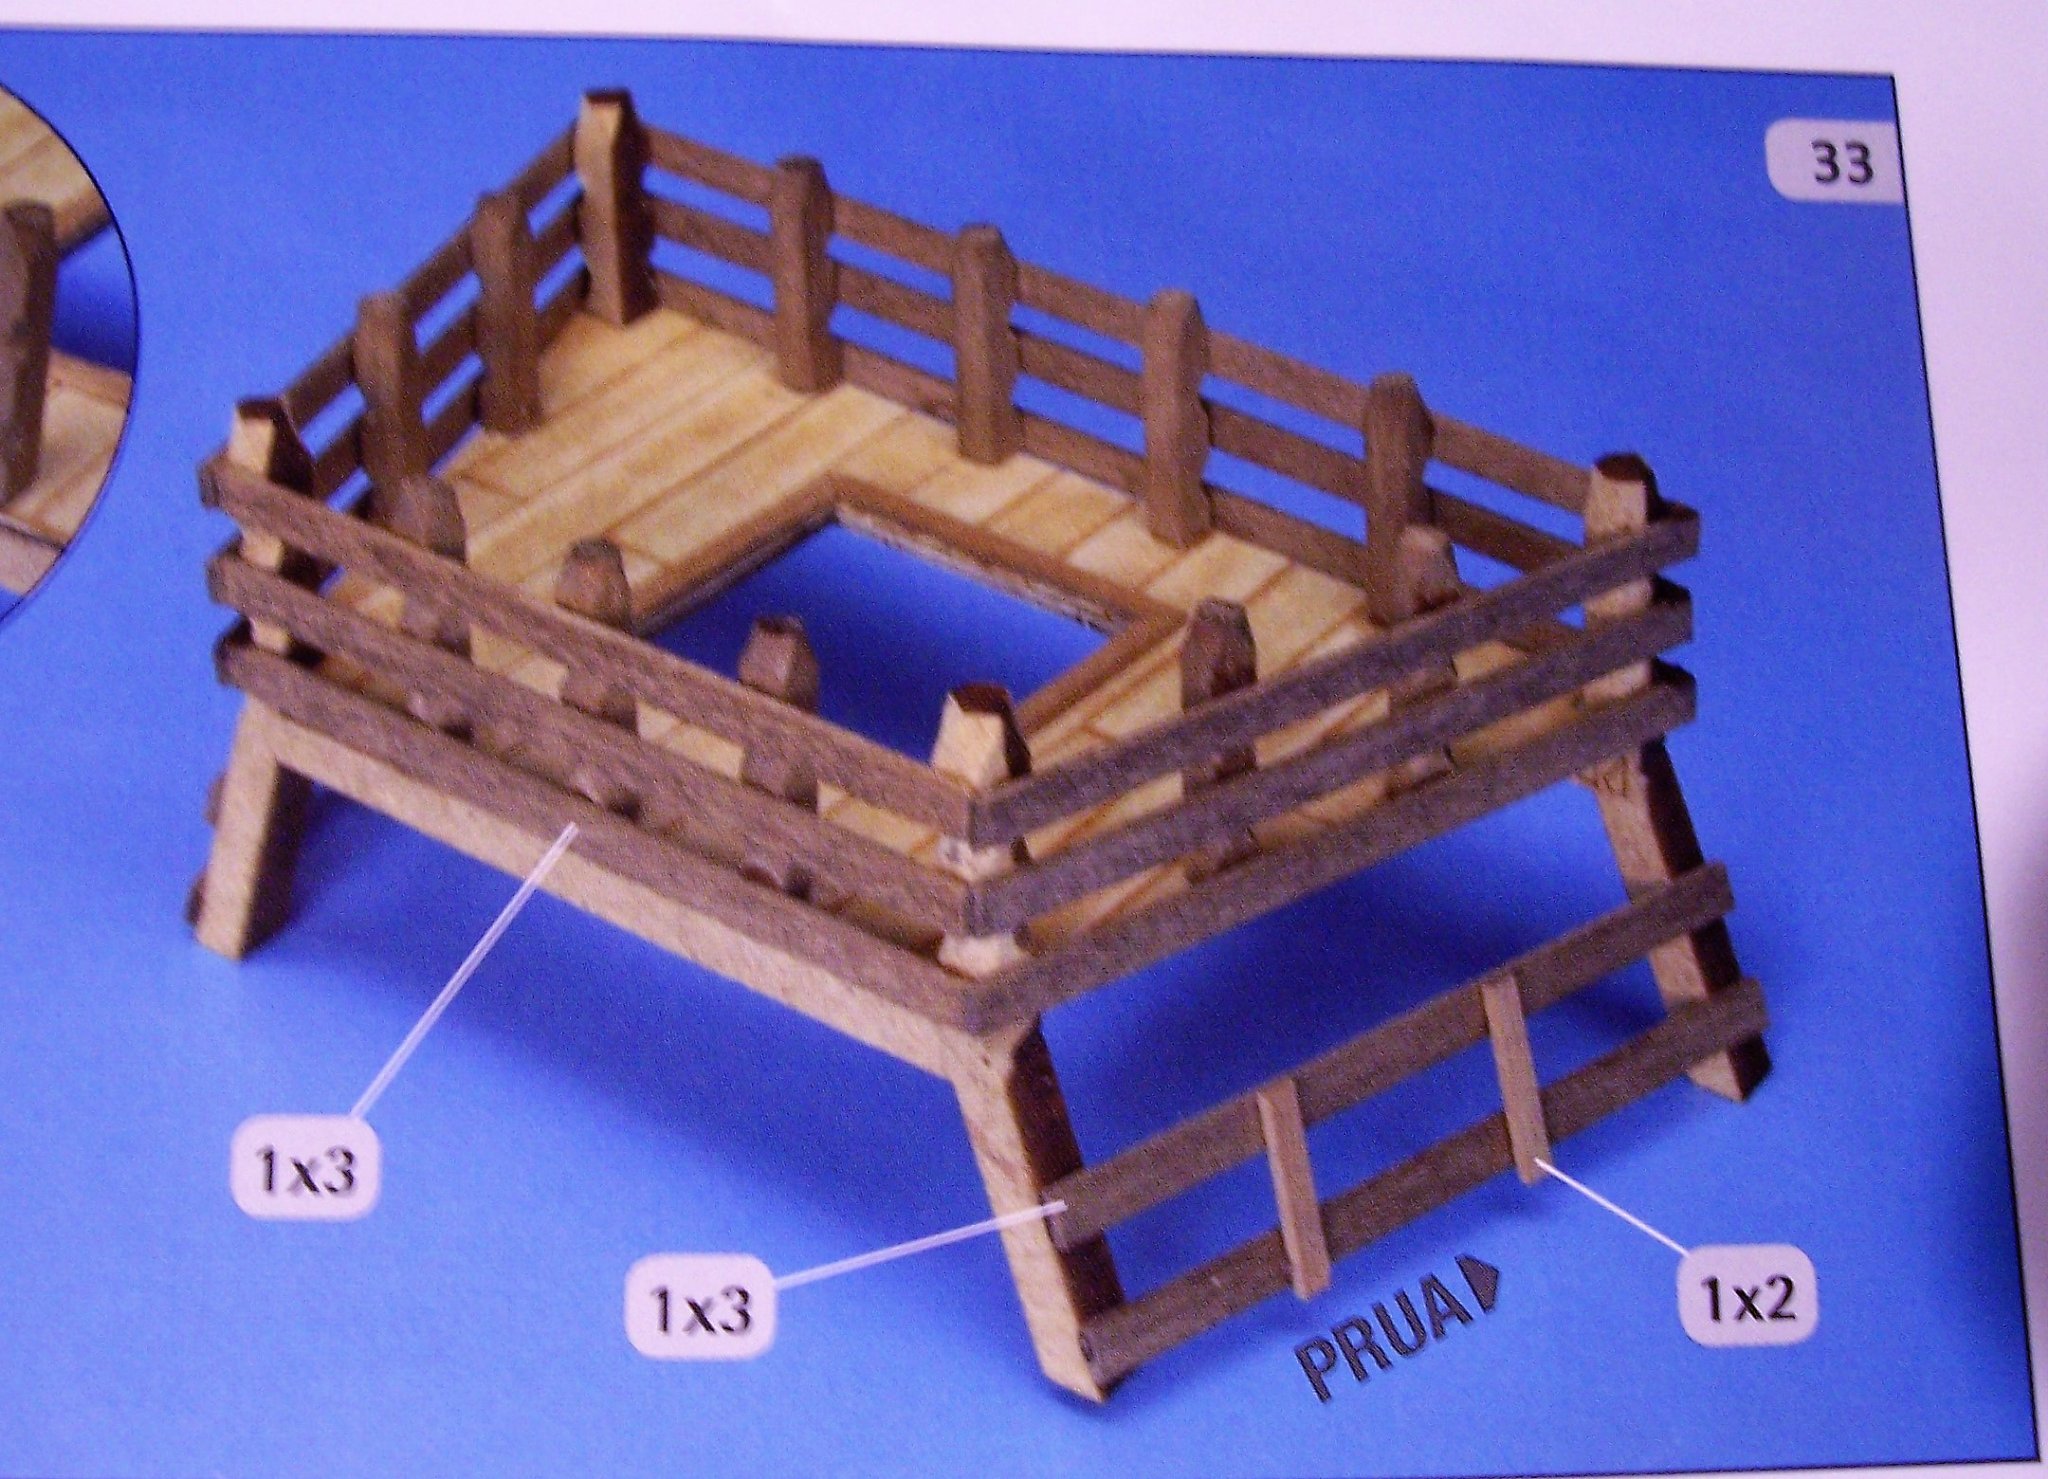
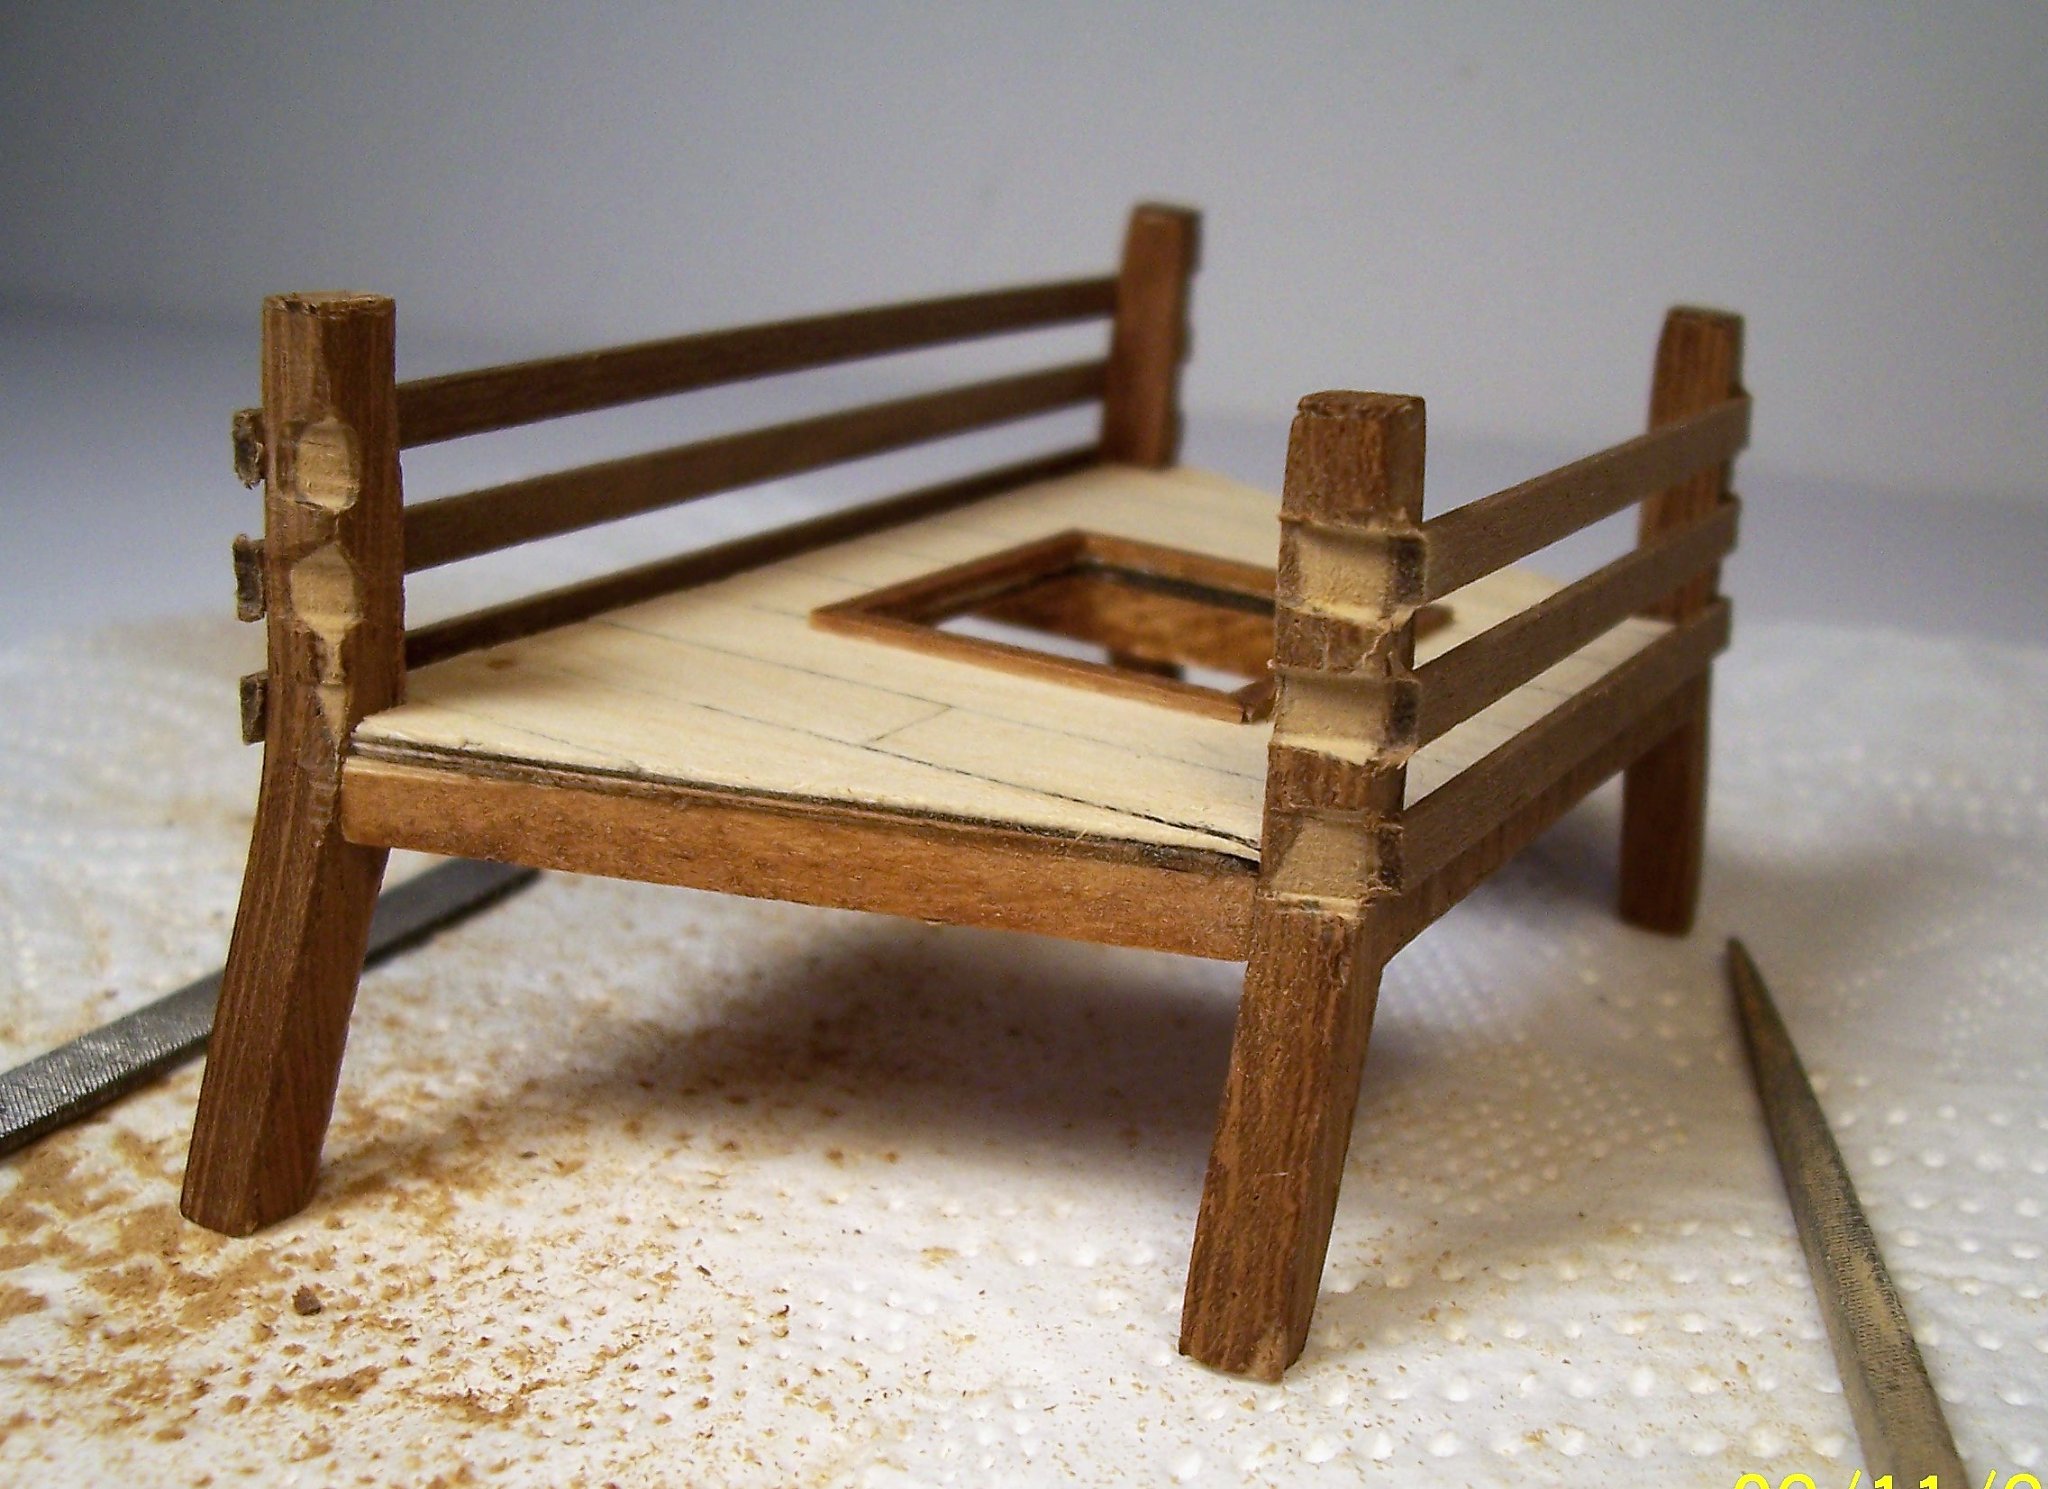
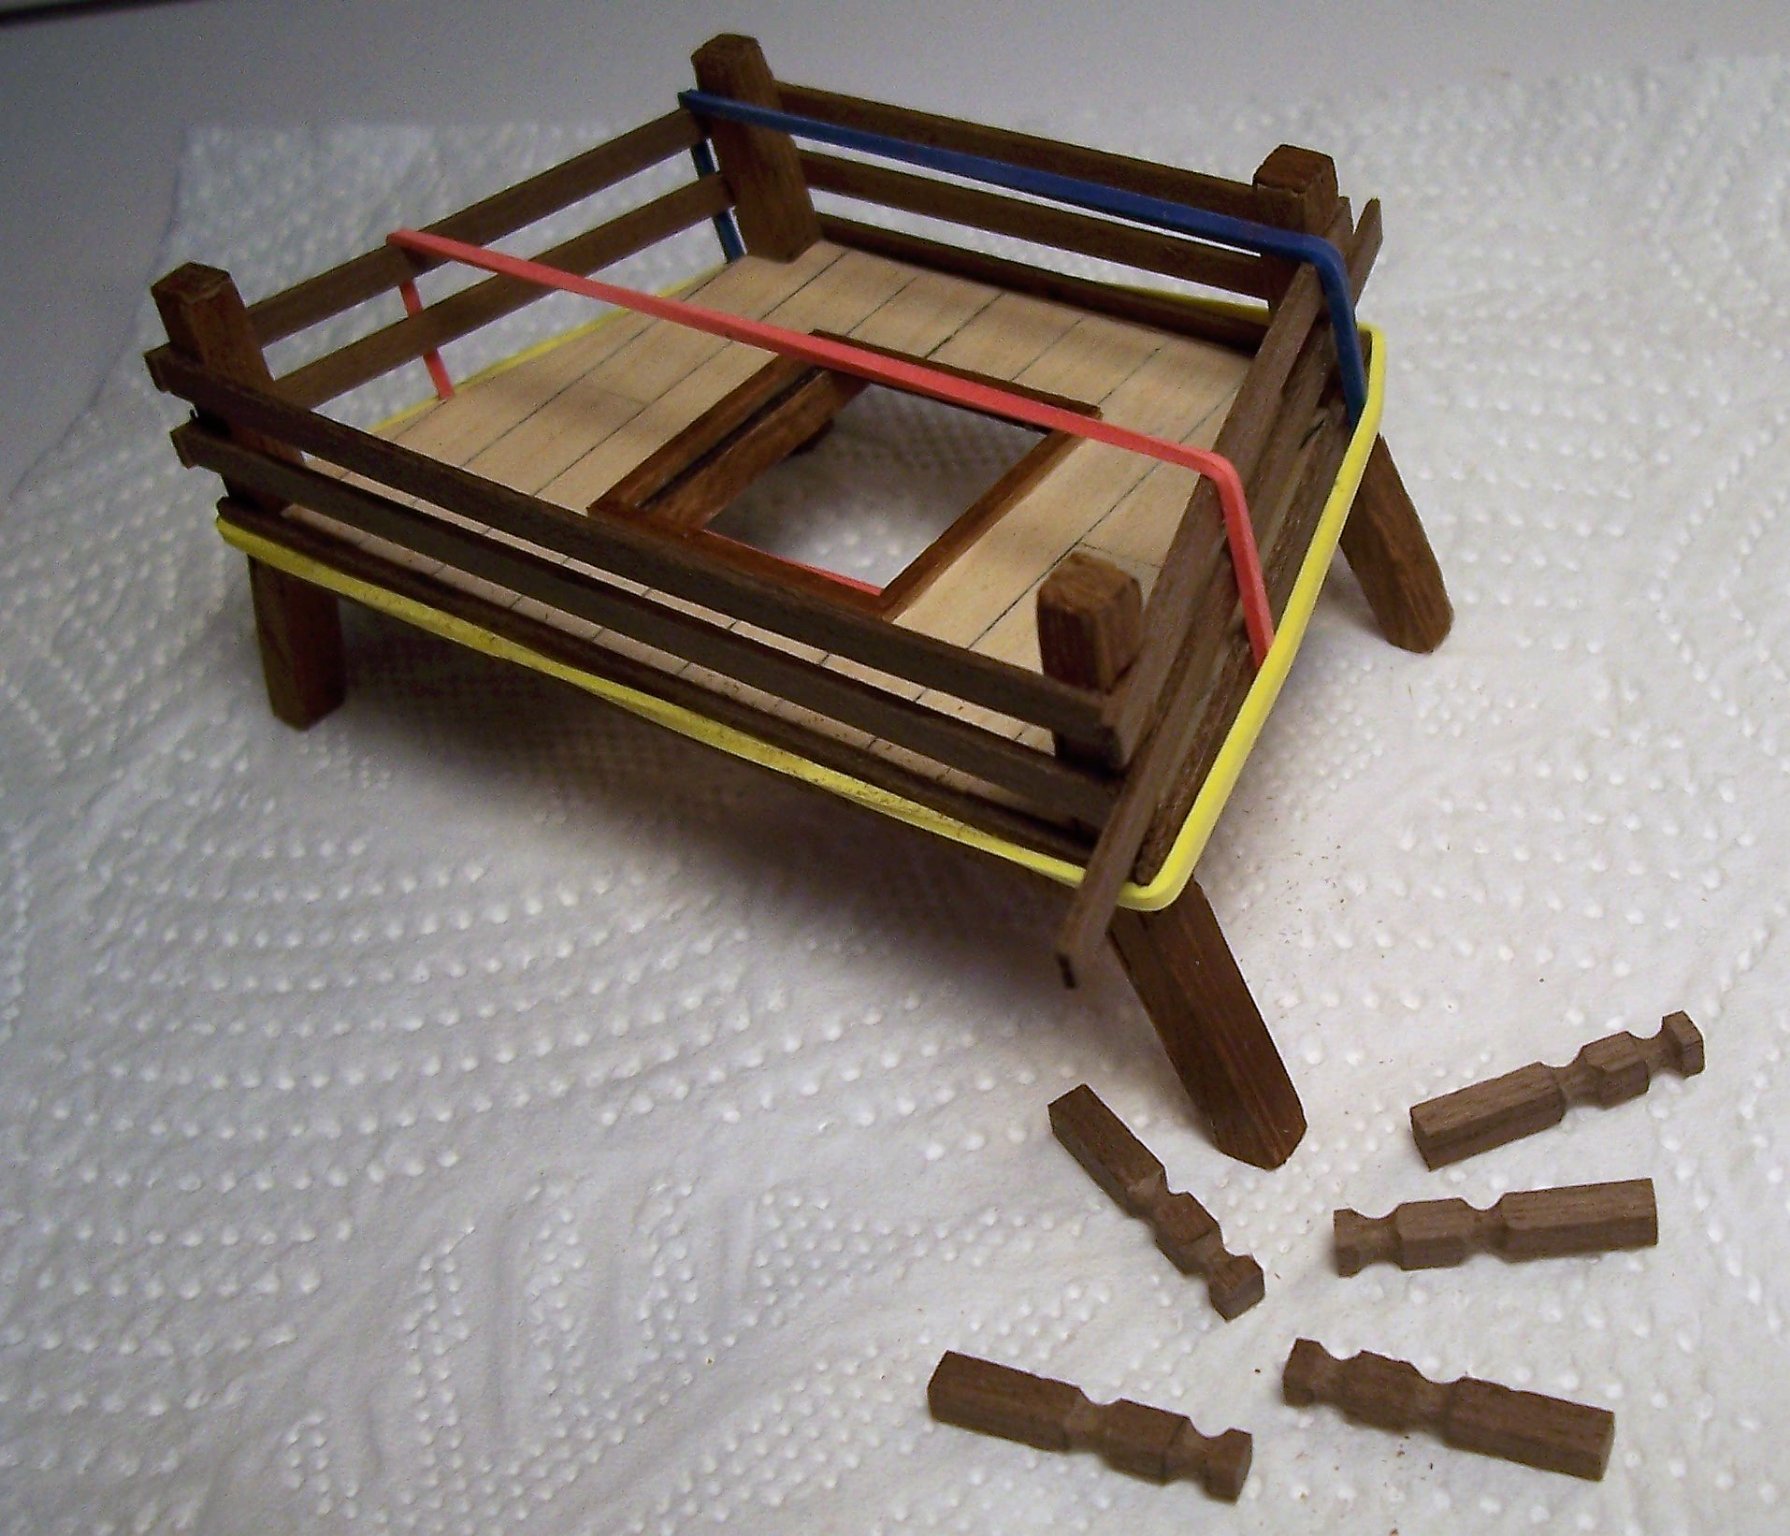
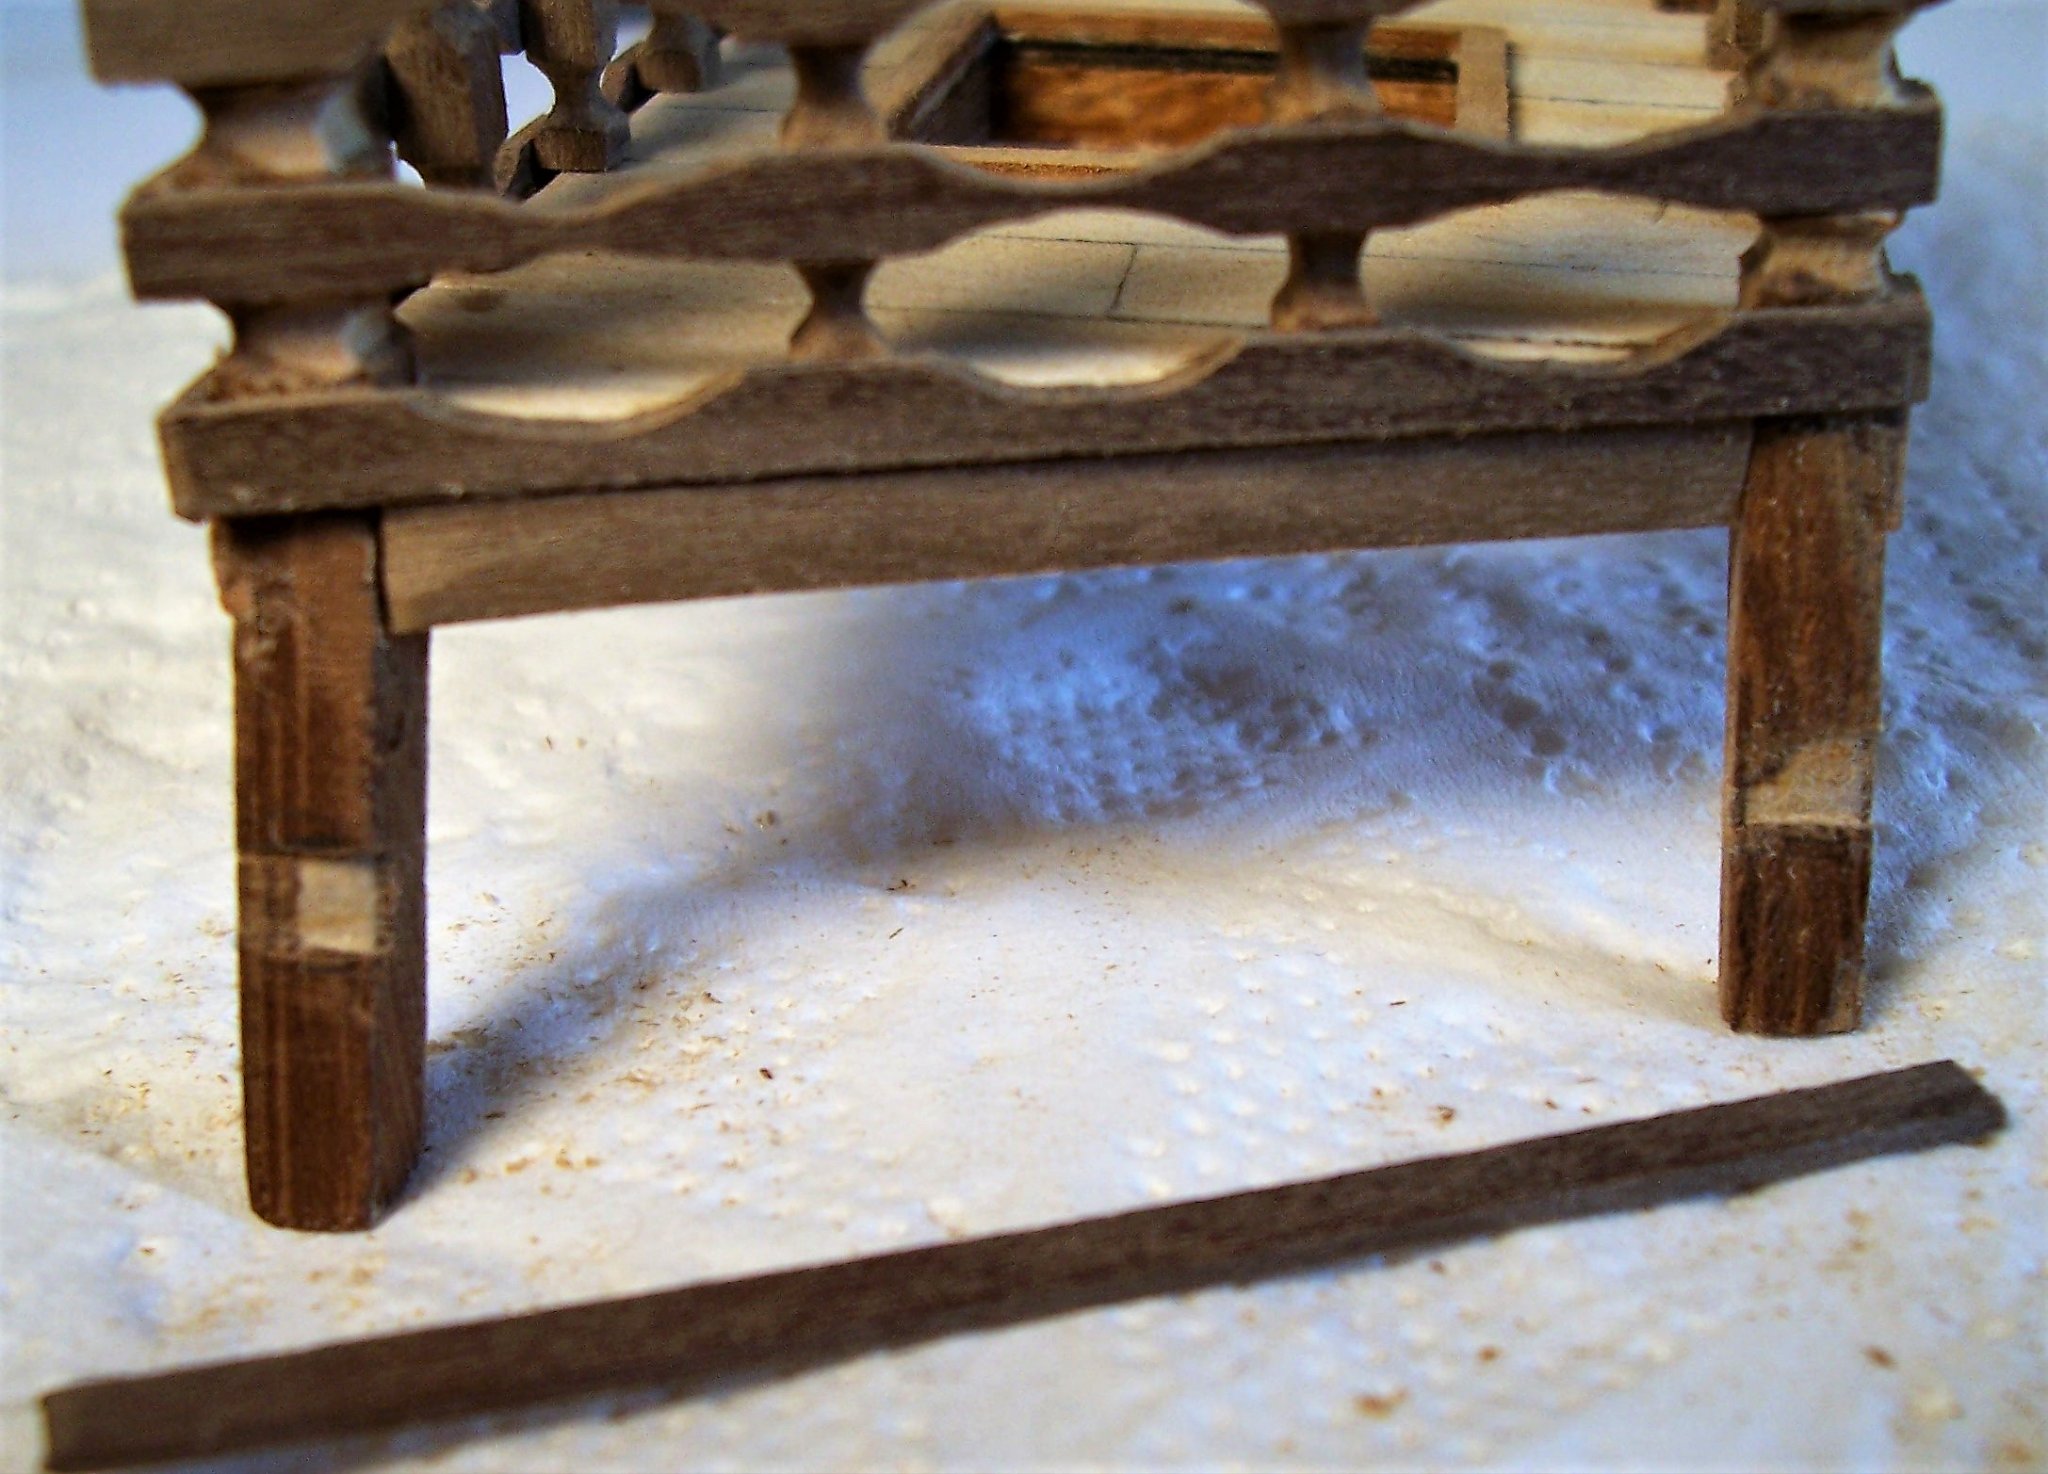
Greetings to all! I continued with the construction of the stern castle. The model proposed by the supplier is quite simple: Having it a trapezoidal plan, I filed the corners of the supports to create the seats for the strips: An alternative could be gluing triangular wedges on which to lay their ends. Obviously, the remaining work is equal to the one already used for the rails: See you later! Rodolfo
-
Well done, Amos: I like the idea to use a strip formed to line the indented edge of the upper deck. Rodolfo
-
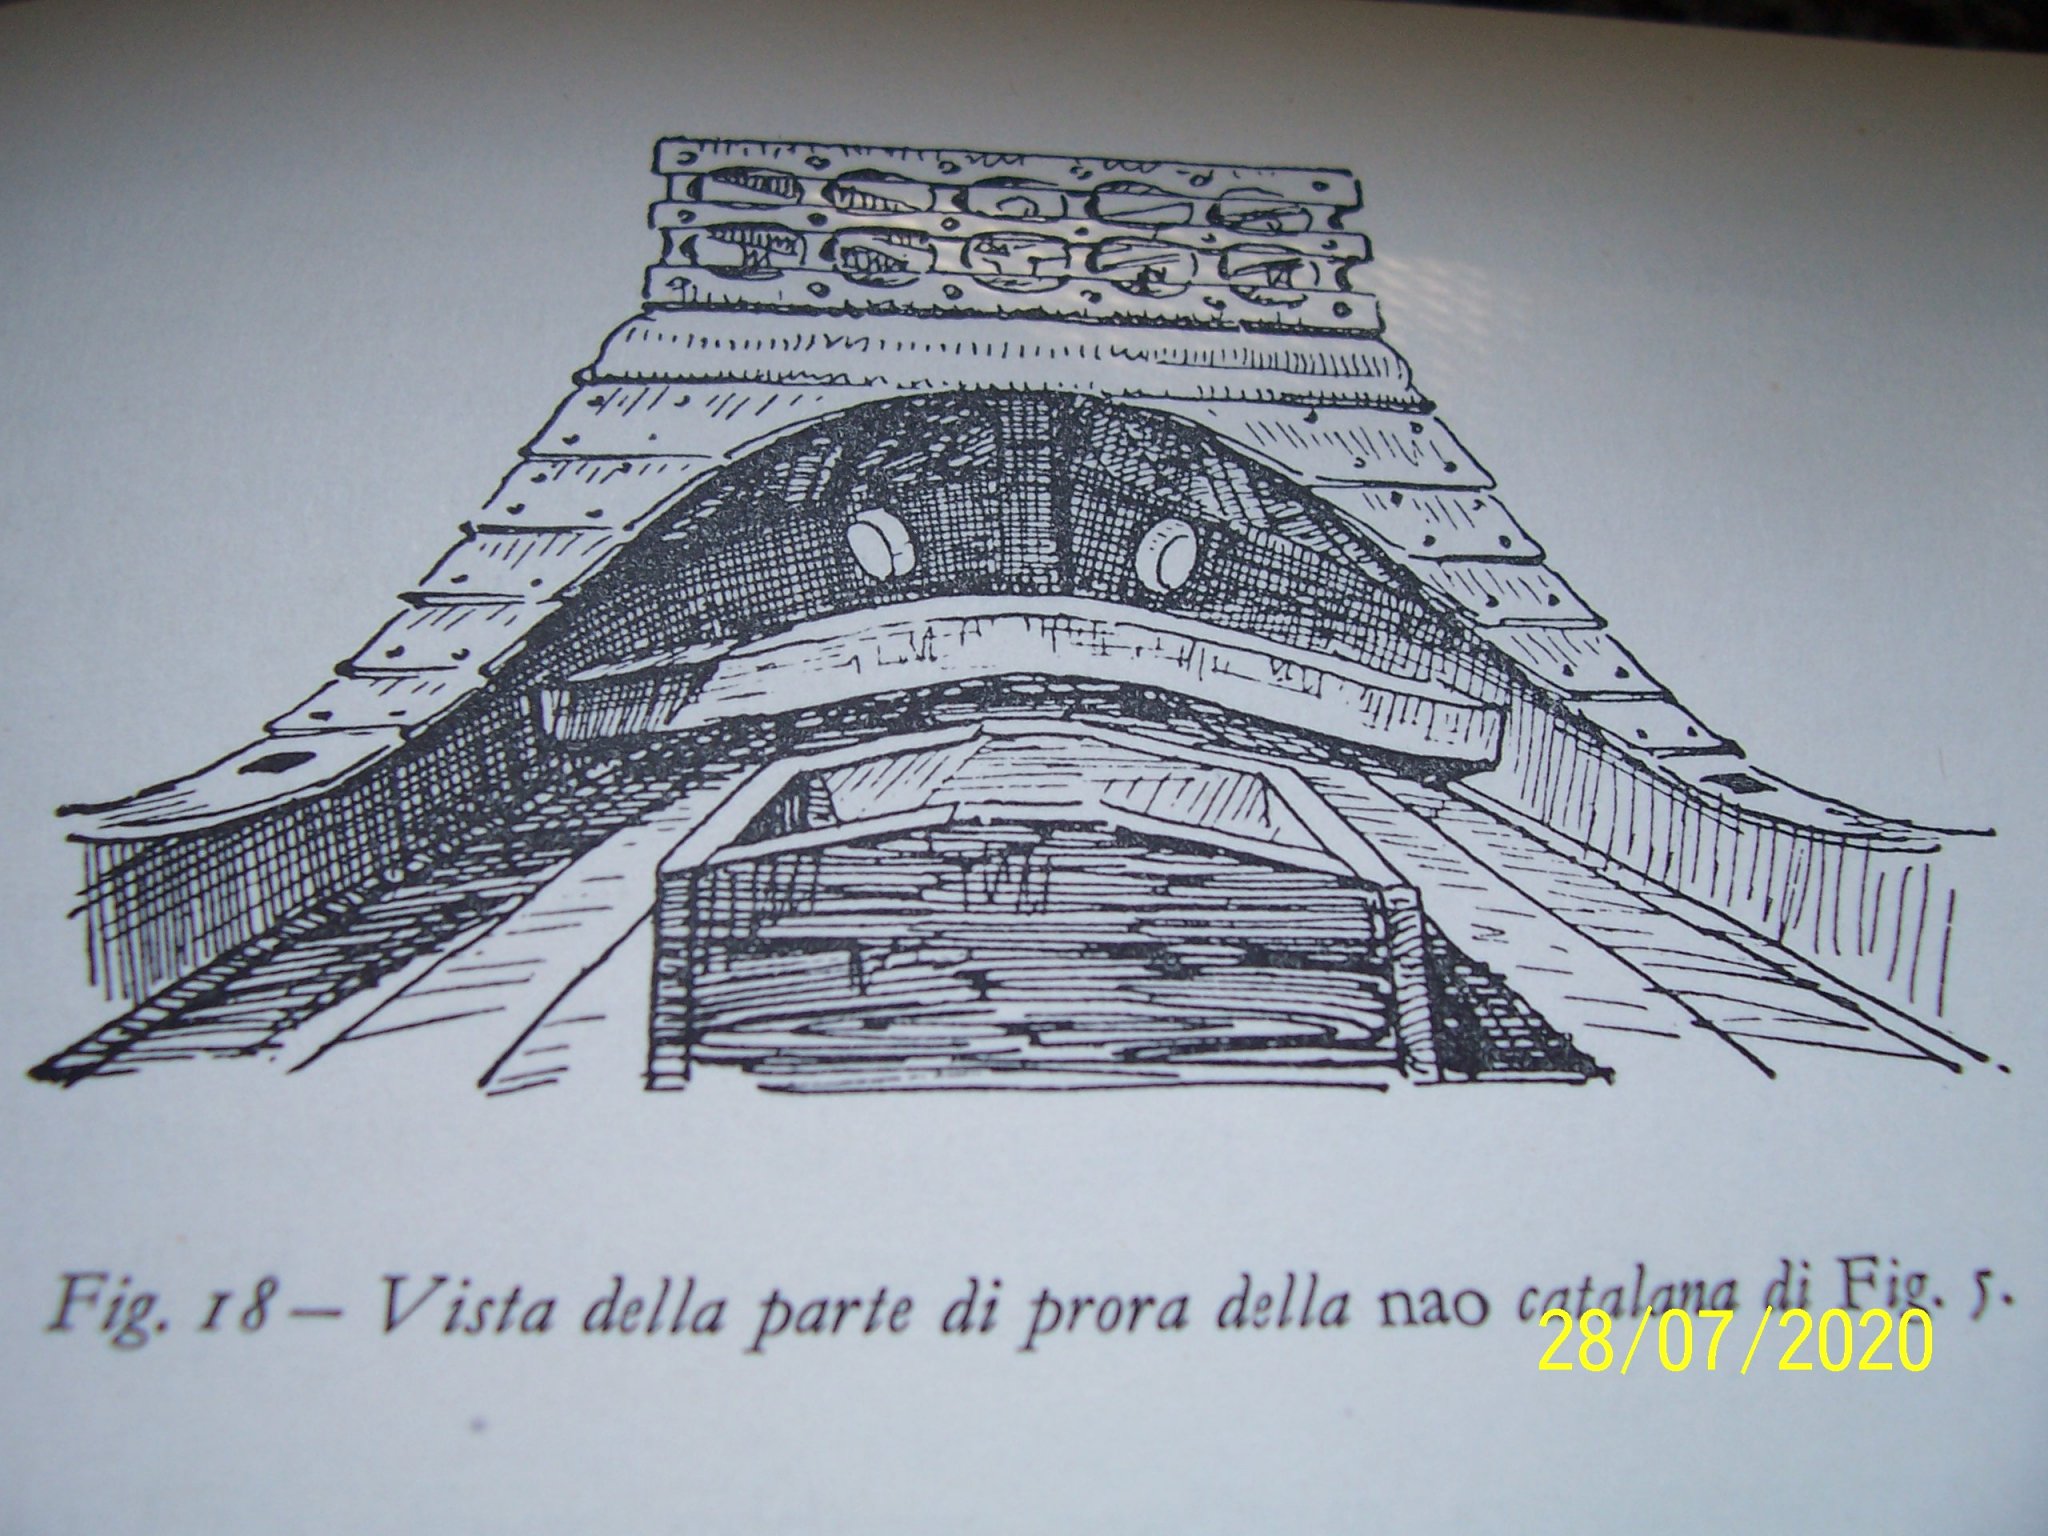
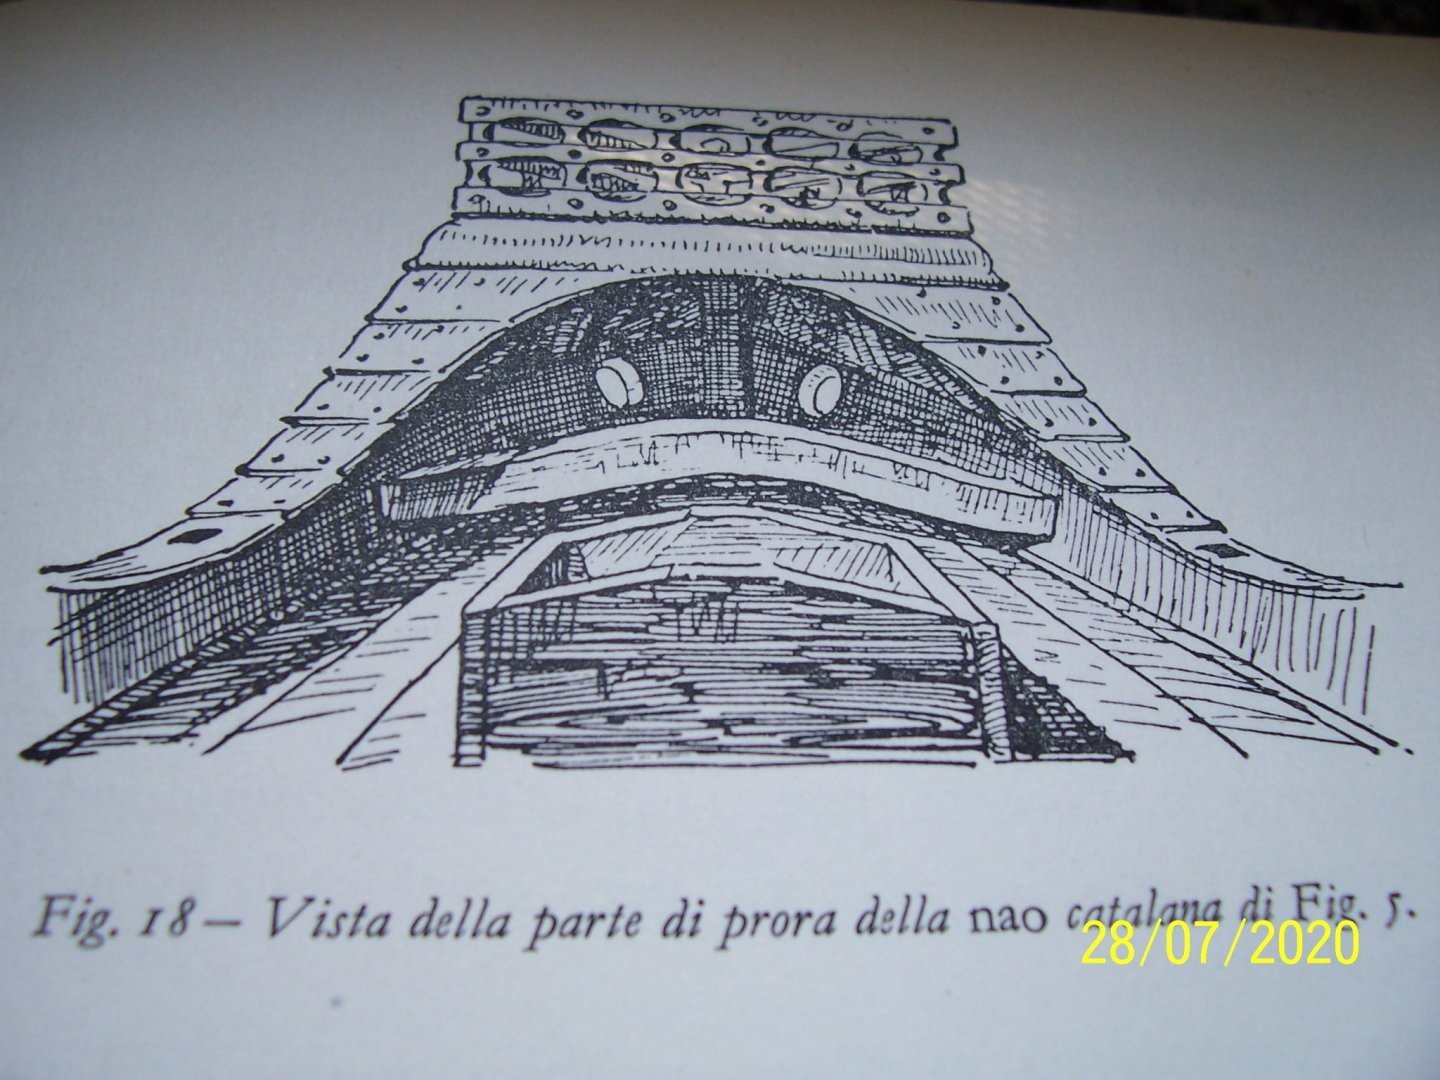
Thank Louie, the illustration is taken from a Catalan treaty of maritime law, printed in Barcelona in 1502: "Libre de Consolat dels fets maritims". Bye
-
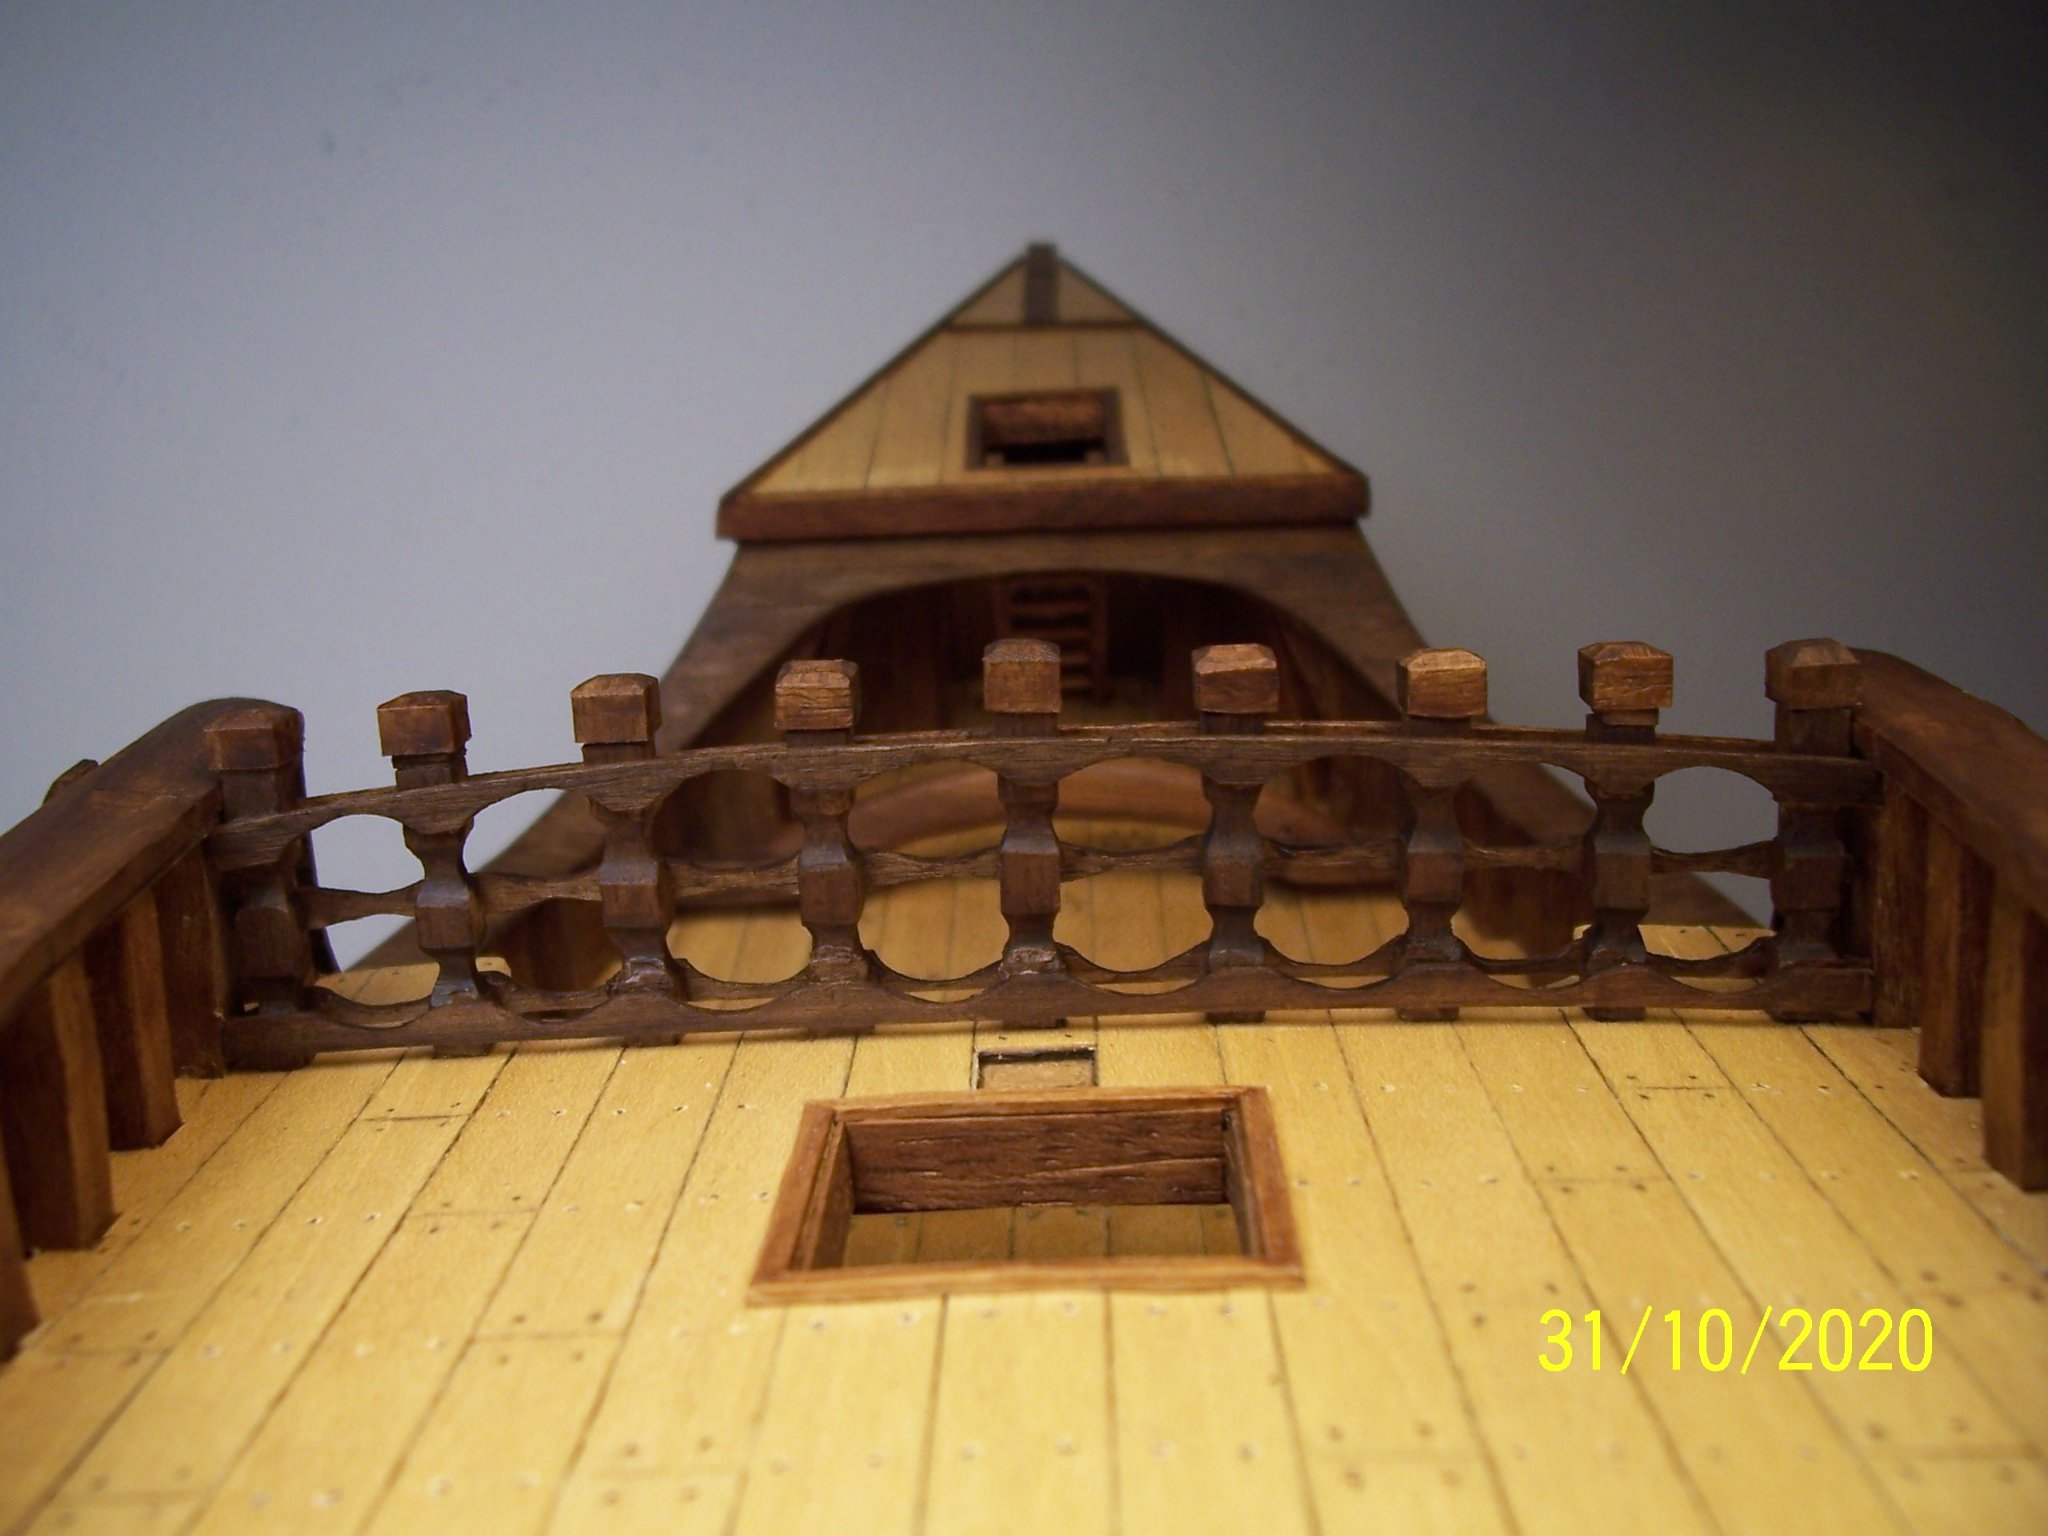
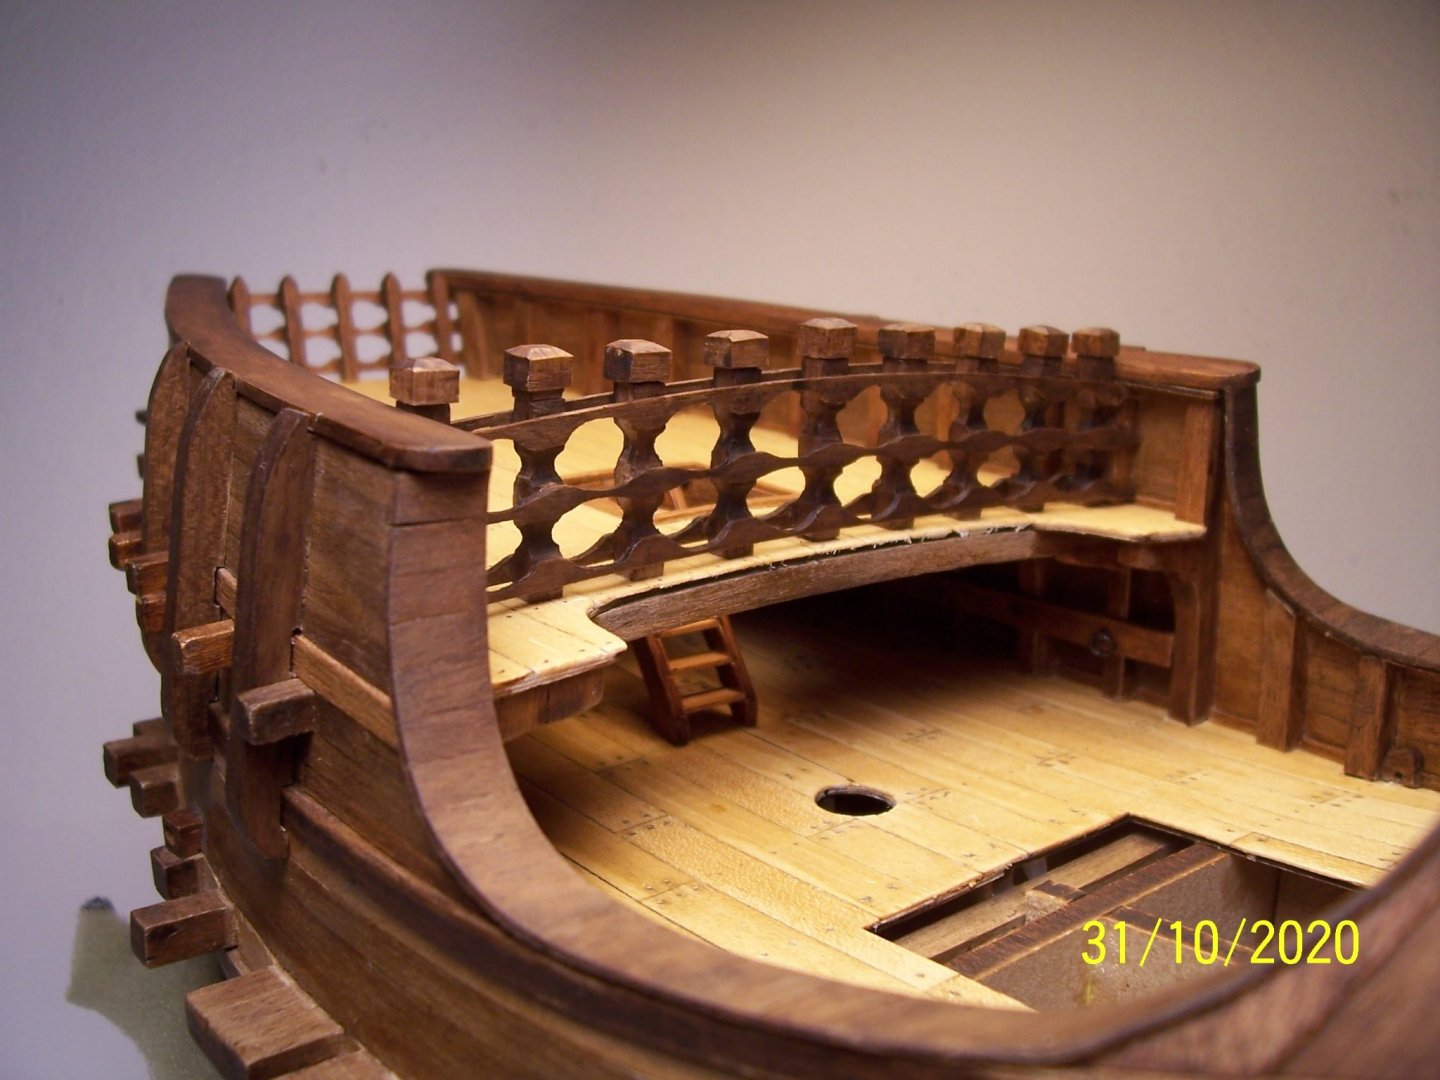
I thank you all for the kind comments that help me to continue the work. Now the quarterdeck rail has been ended and painted: See you soon with the little stern castle. Rodolfo


-
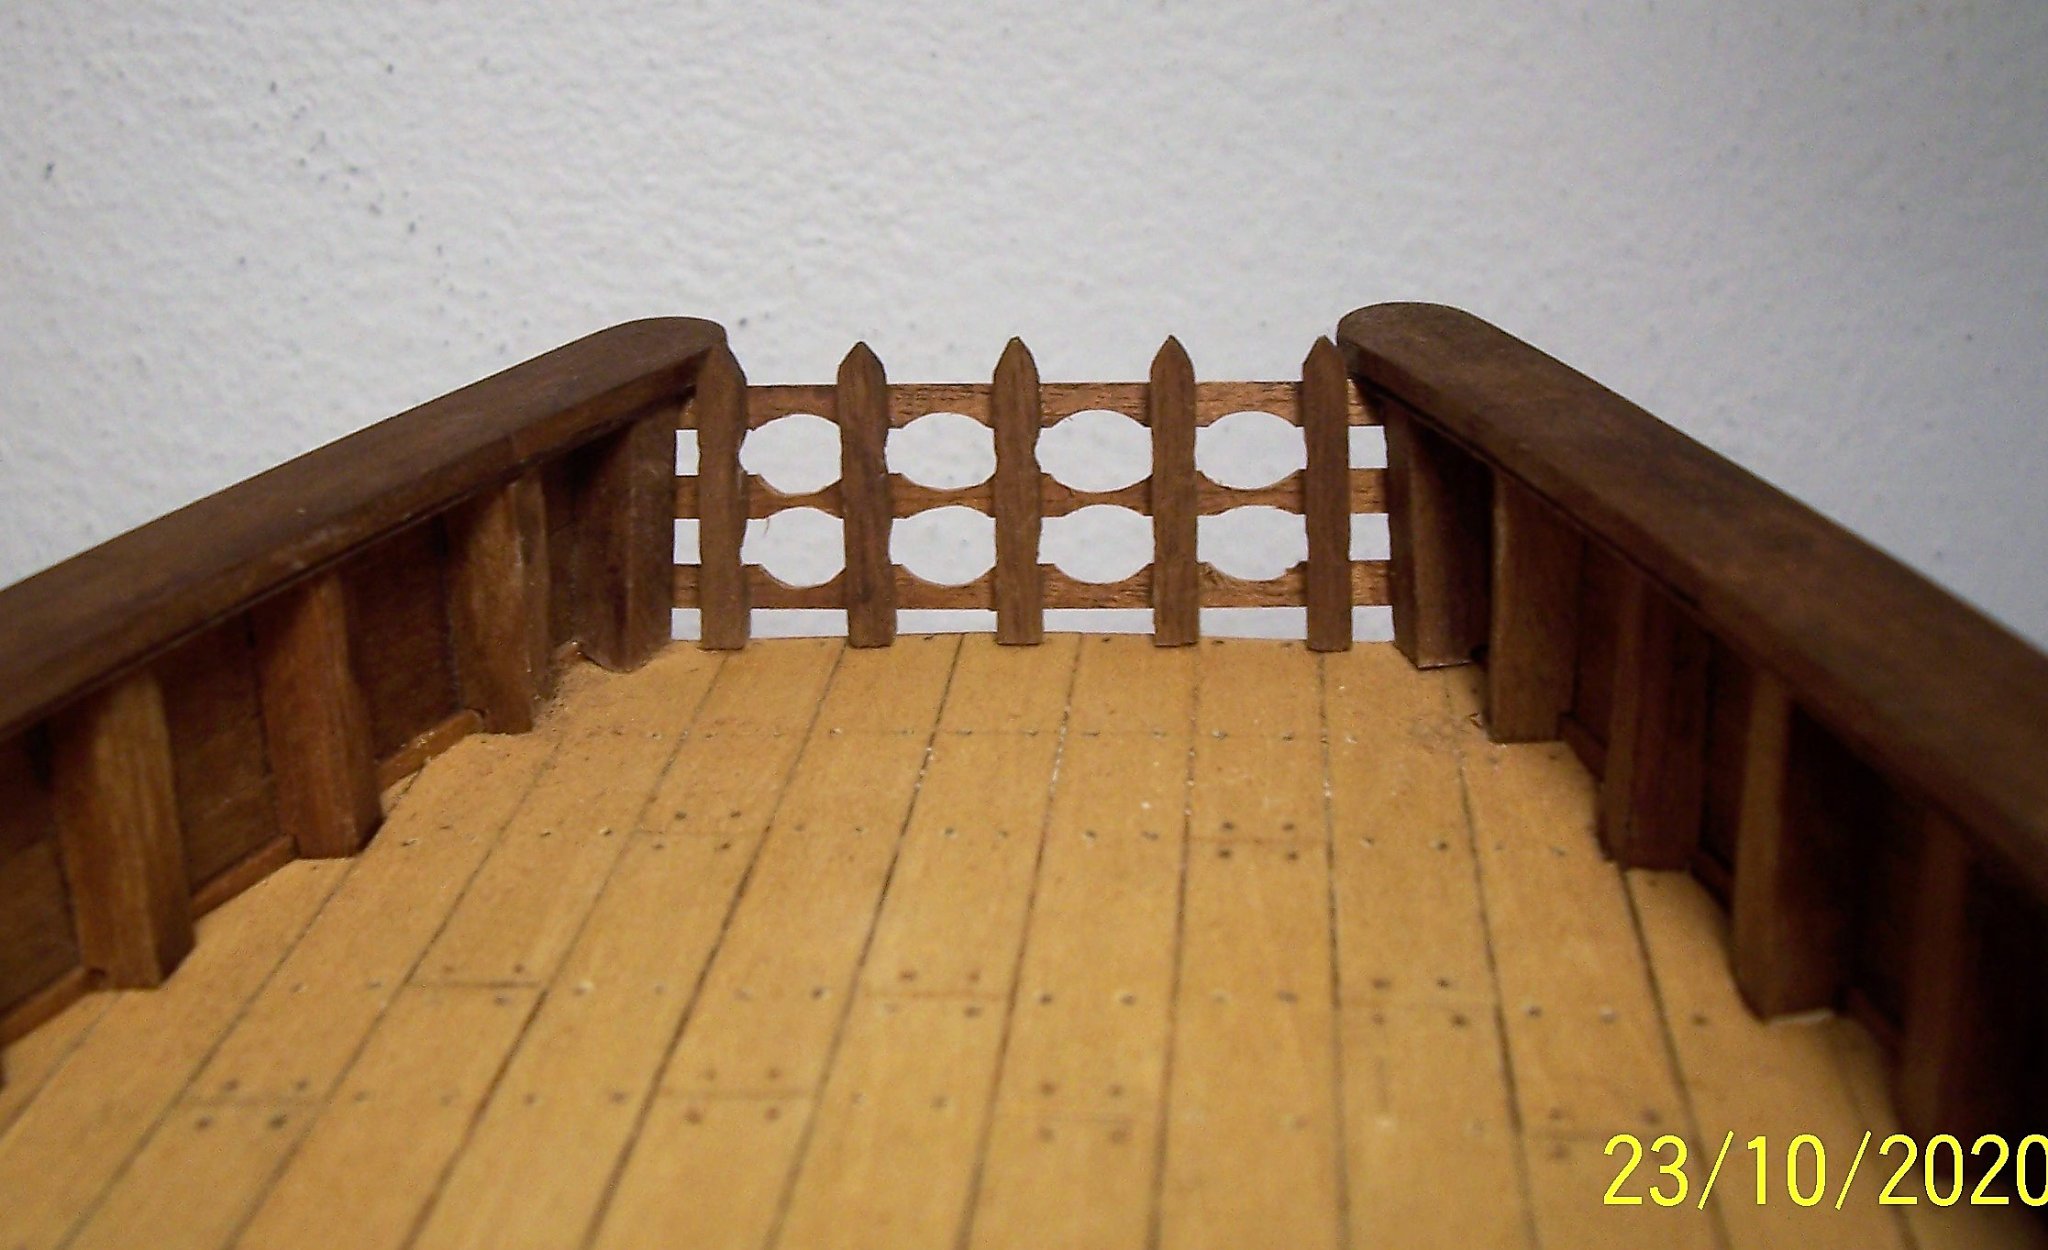
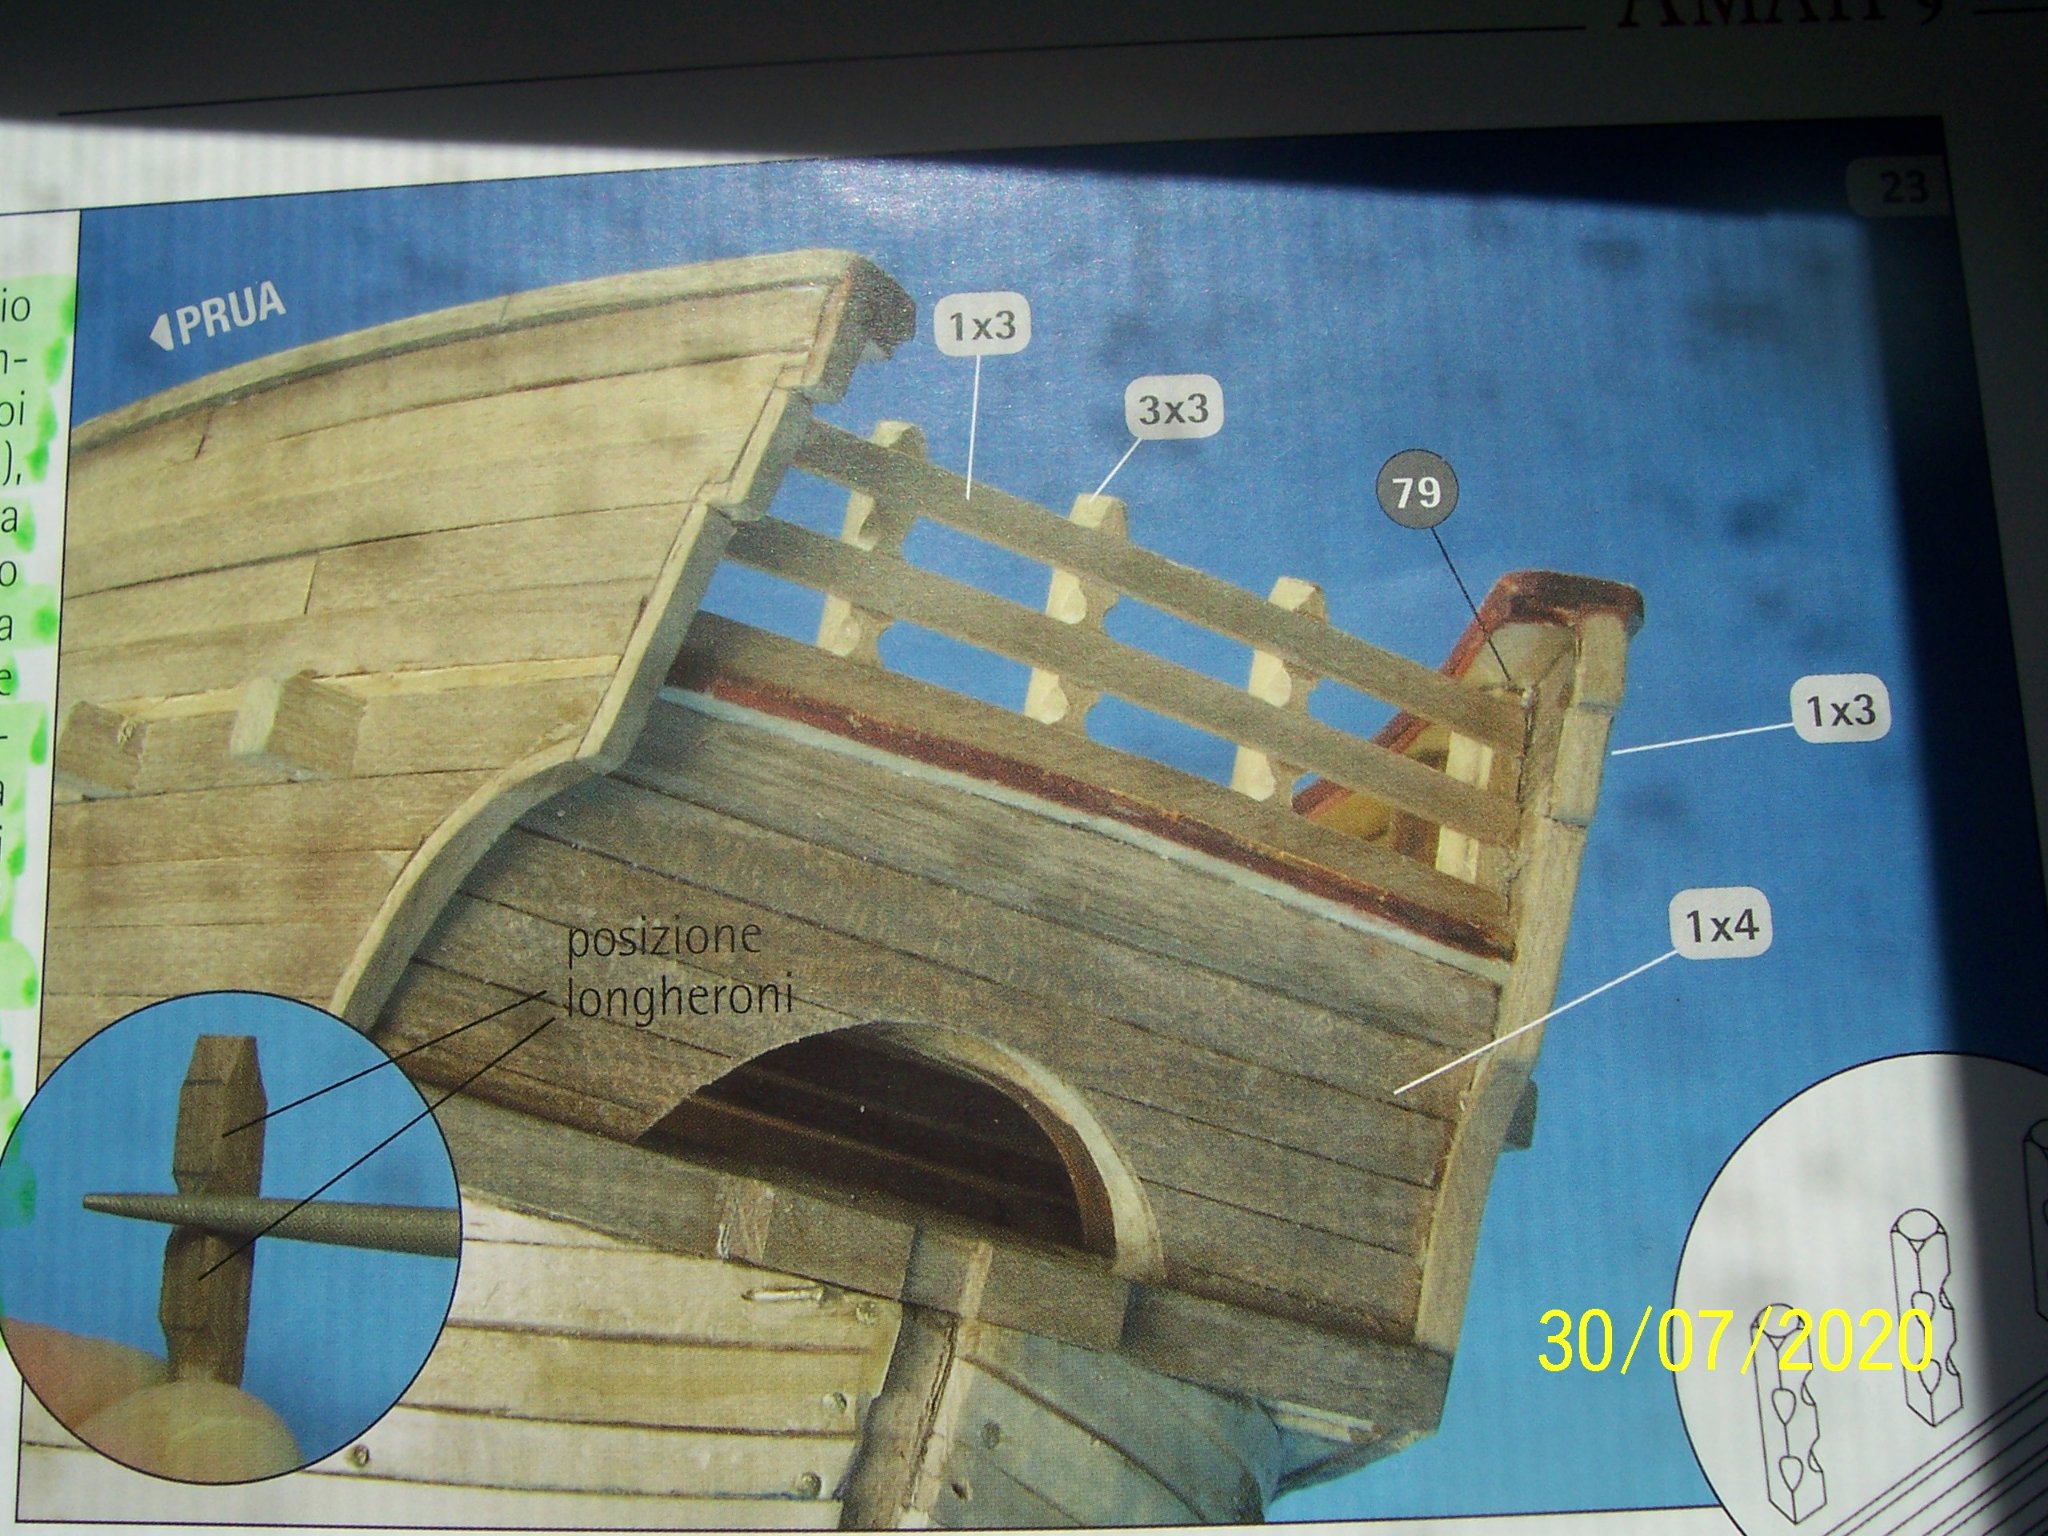
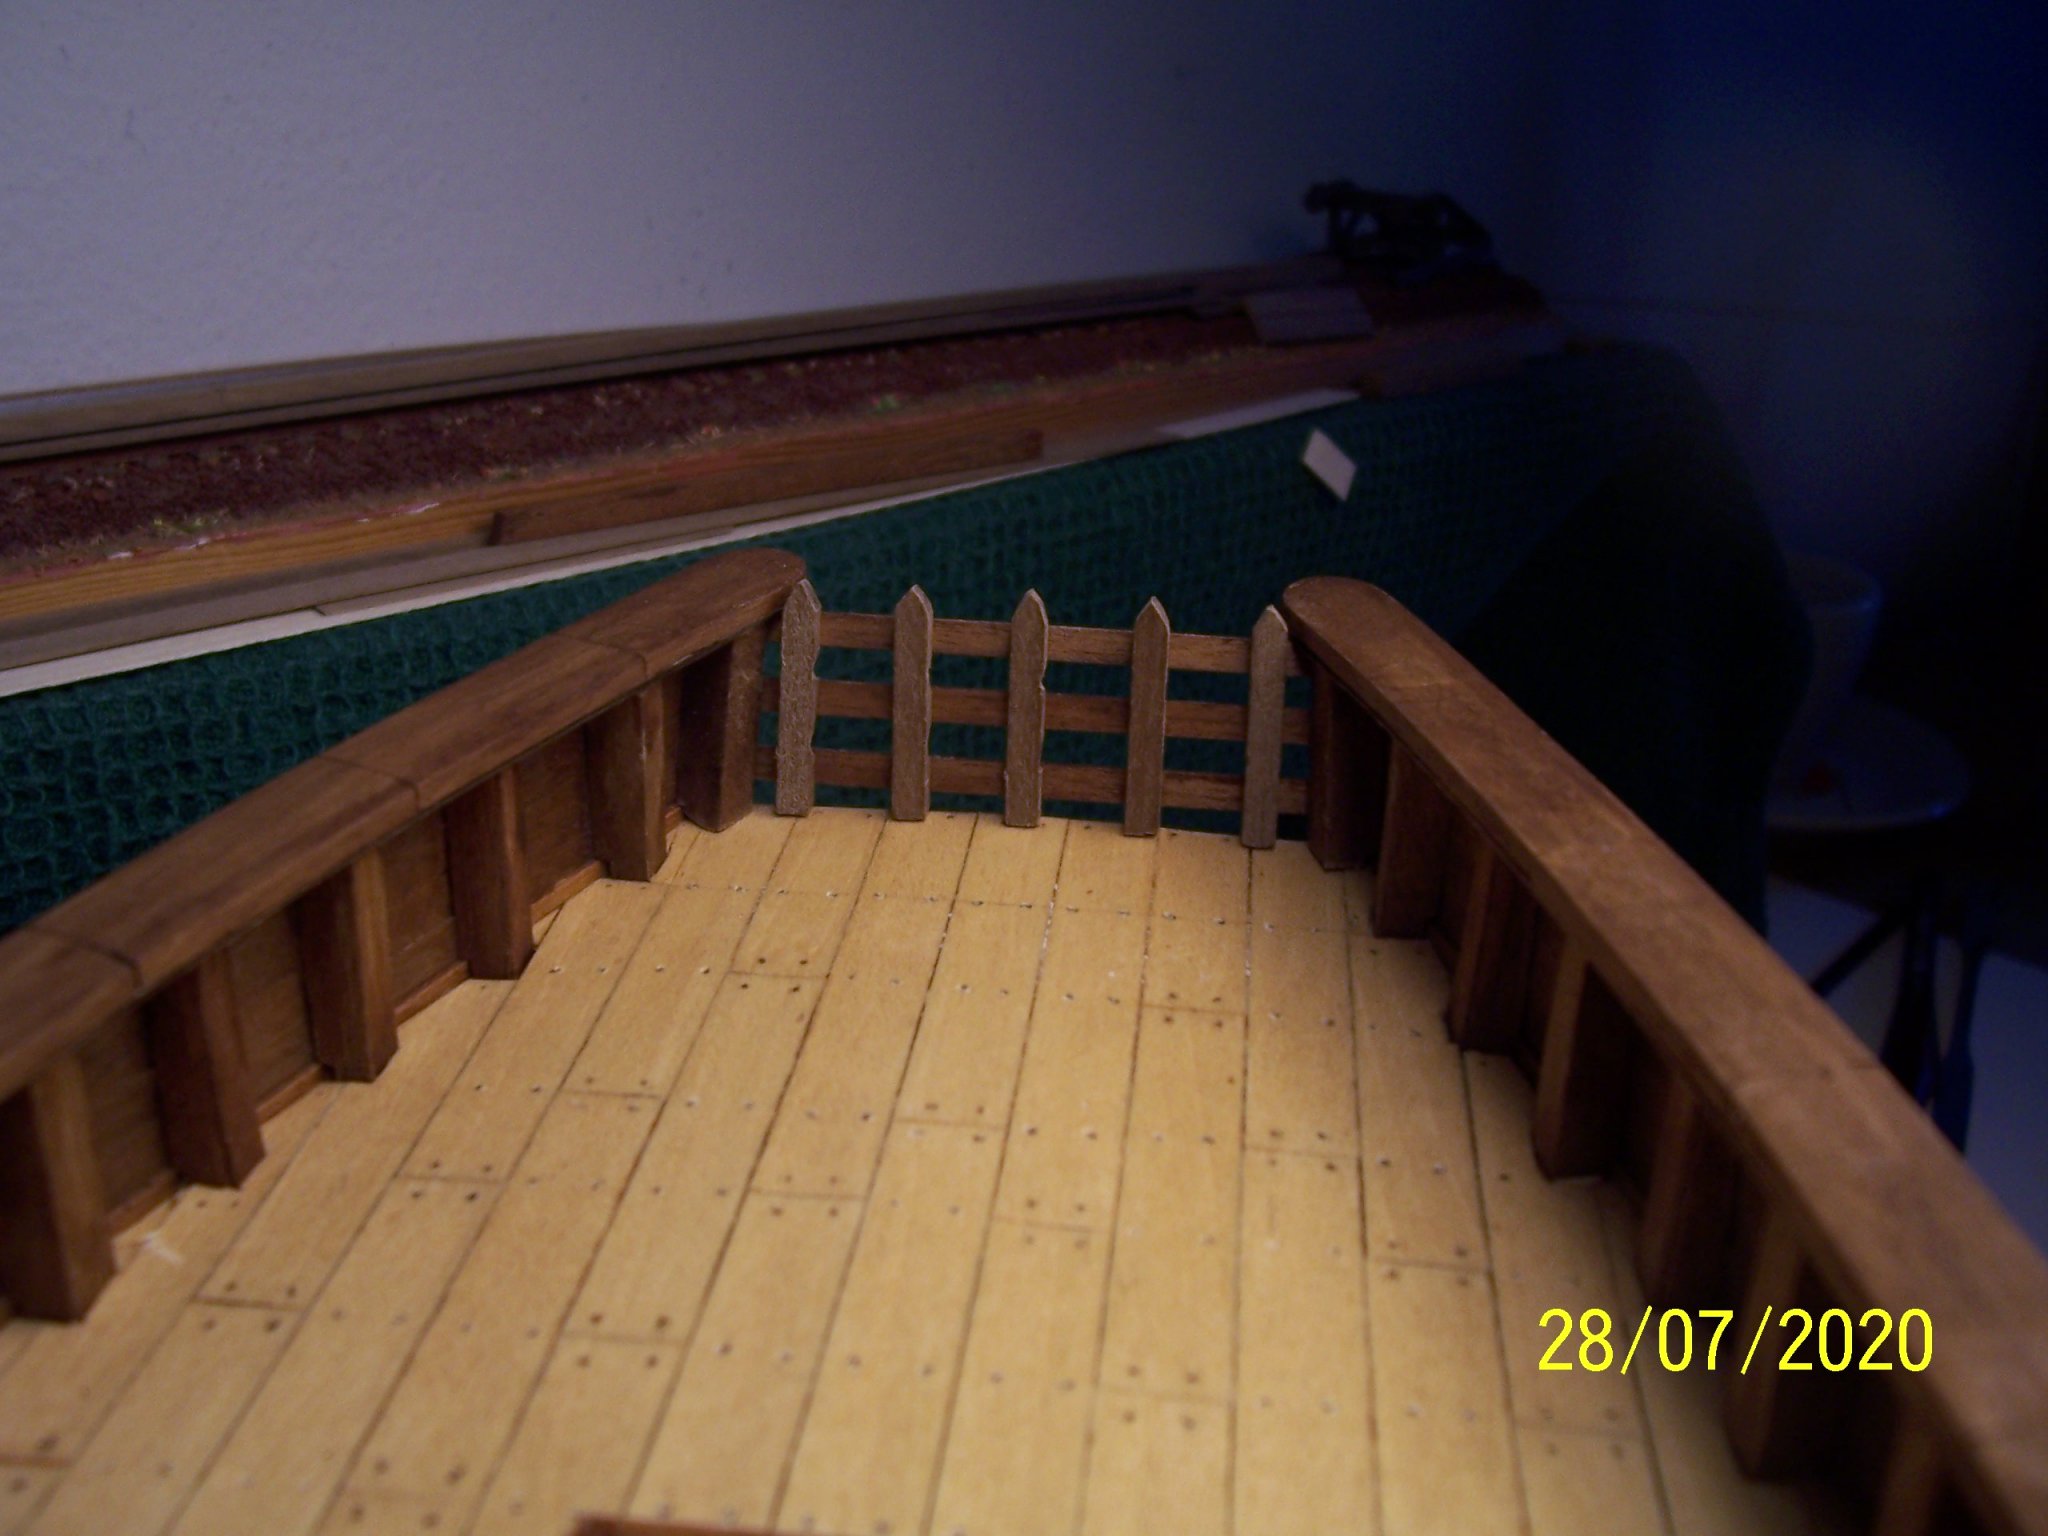
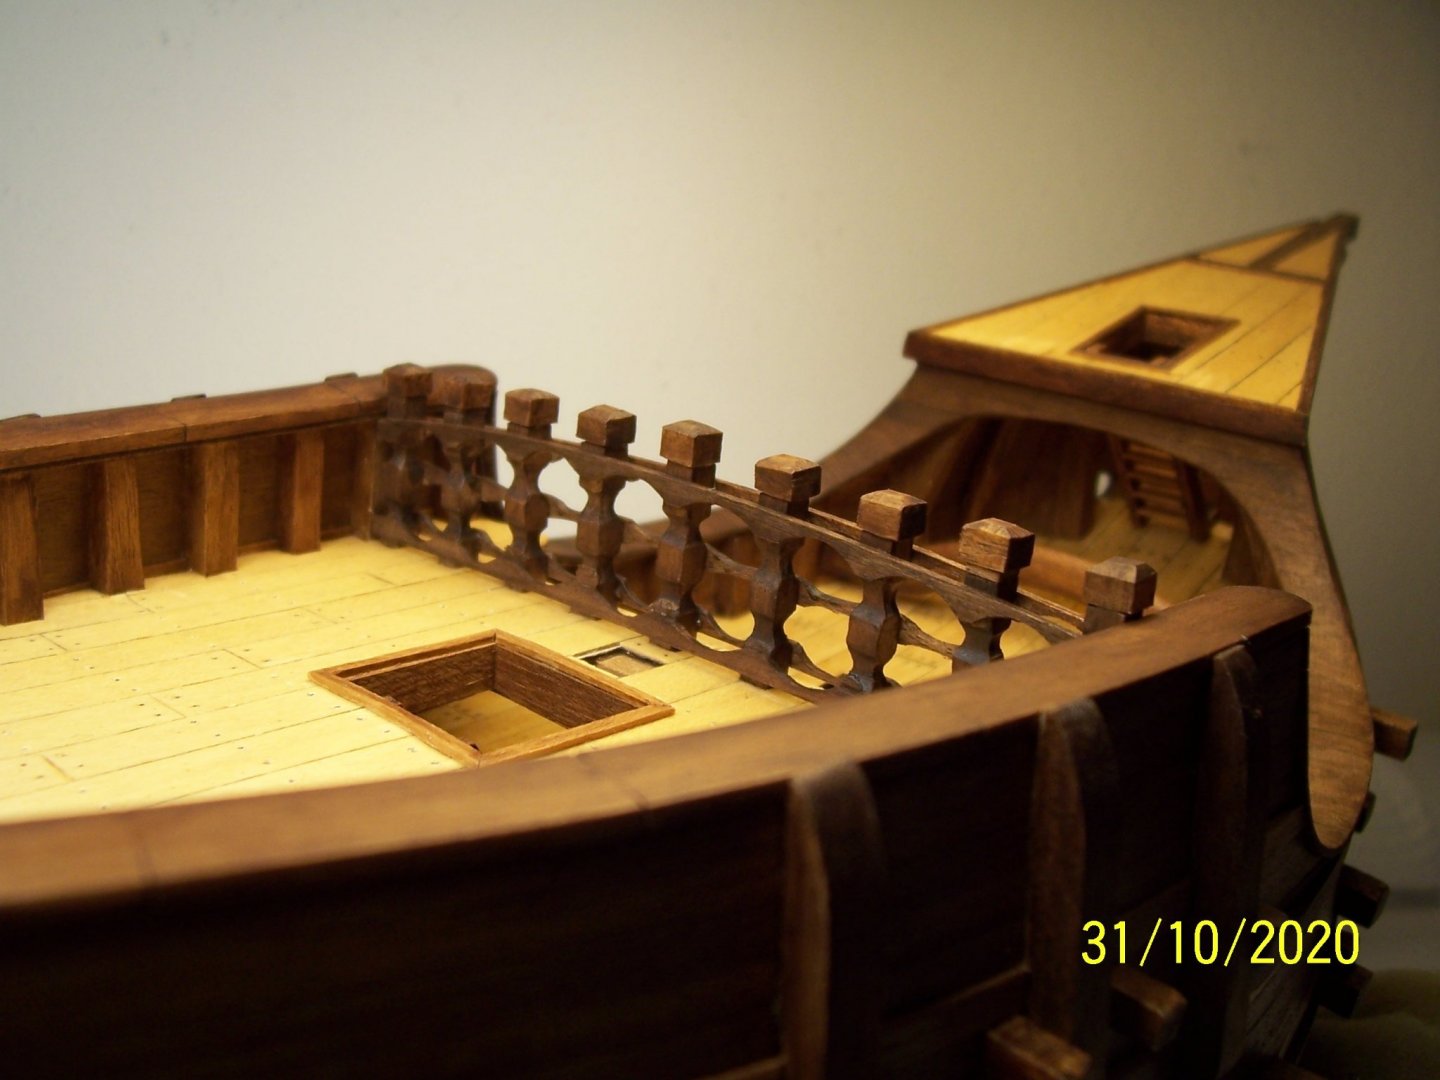
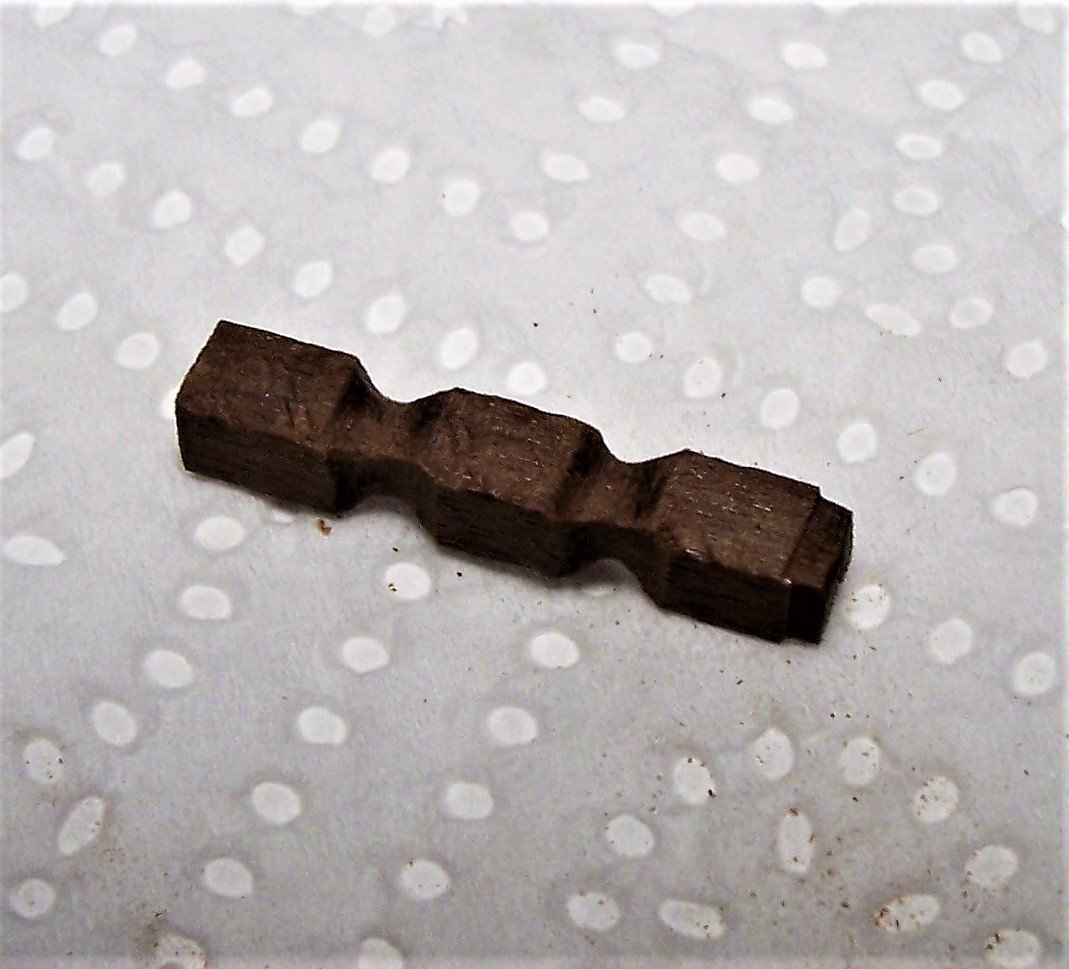
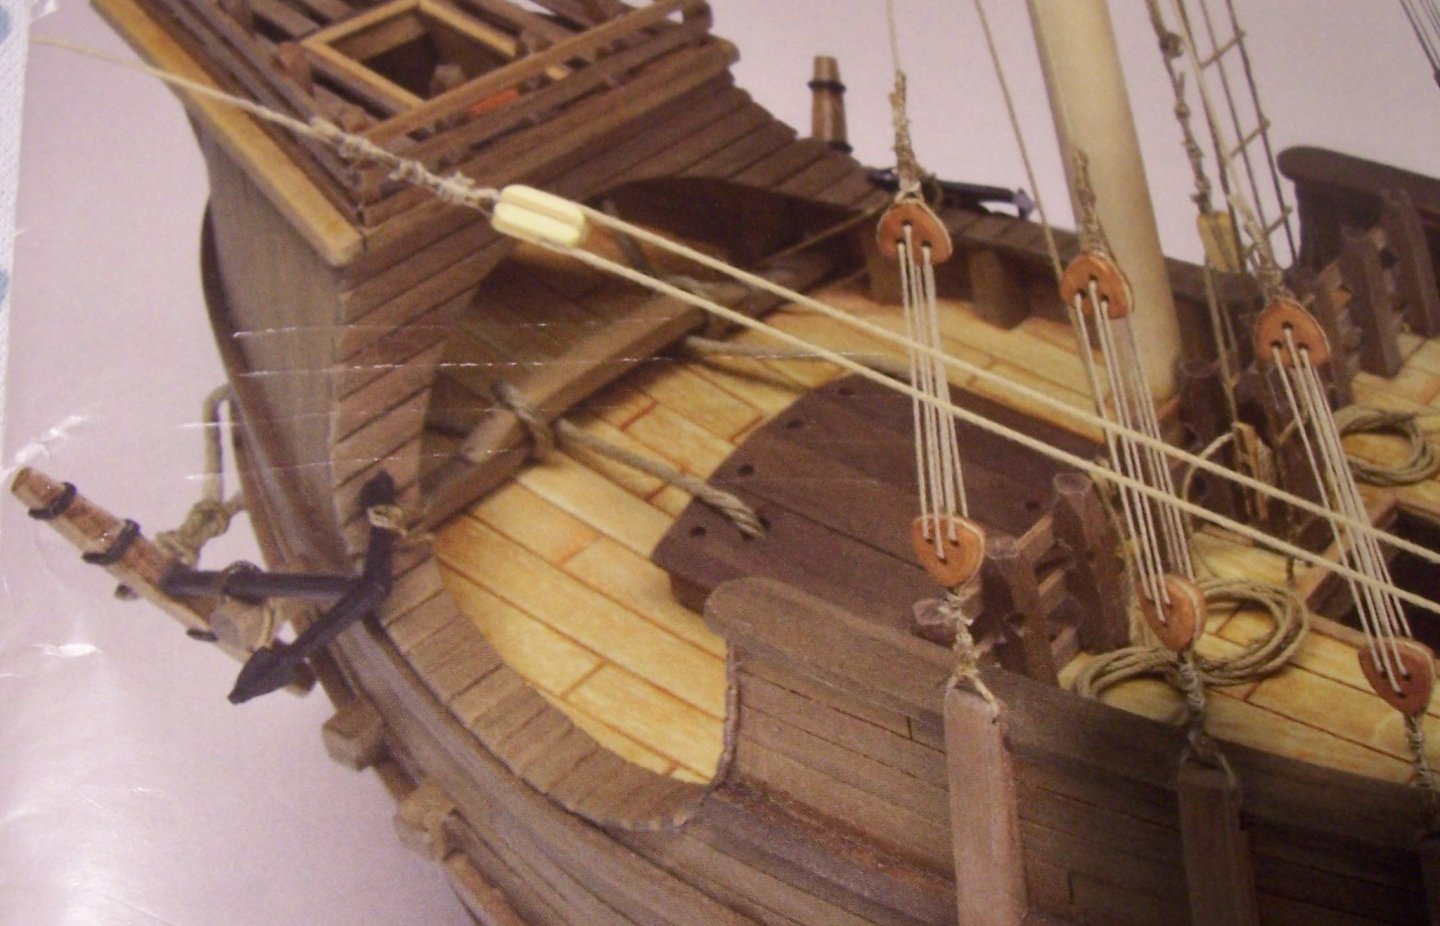
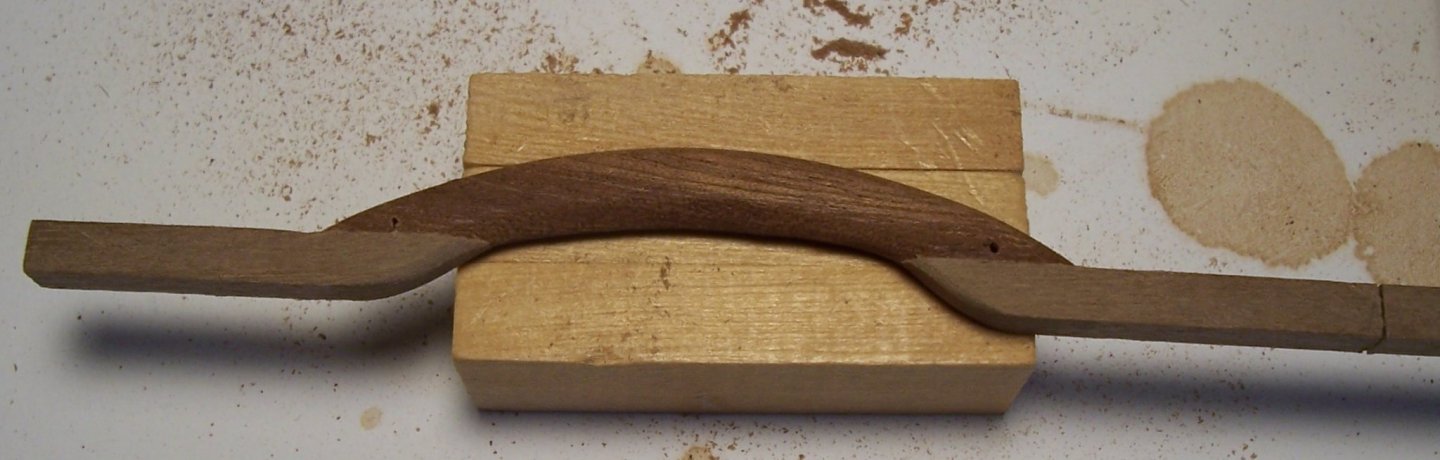
Hi Louie, thanks for the explanation; I learned something new to teach my daughter...🙂 As far as the quarterdeck rail is concerned, the AMATI's illustrations propose three simple straight strips leaning against nine small columns: The nao of Matarò had more columns and also denotes a certain stylistic refinement. I tried to find a compromise by bending the strips and shaping them together with the columns. First of all the strips are temporarily fixed with very little glue: and between them you place the columns; then with a pencil we can mark the positions where to file and shape the supports: The columns are placed in position and glued only at the base ! Now you can mark the points where you want to shape the strips: The three frontal laths are shaped: The same work has to be done on the back, but only with two strips, because the central one is absent on the Nao of Matarò: At this point the strips are glued to the columns taking care of their alignment. With the next post we'll finish the quarterdeck rail. See you soon! Rodolfo


-
Thanks Louie; you're right, it's an Italian common saying. I knew "I've shot myself in the foot", but I ignored completely the second... Hi Backer, I totally agree with you. Rodolfo
-
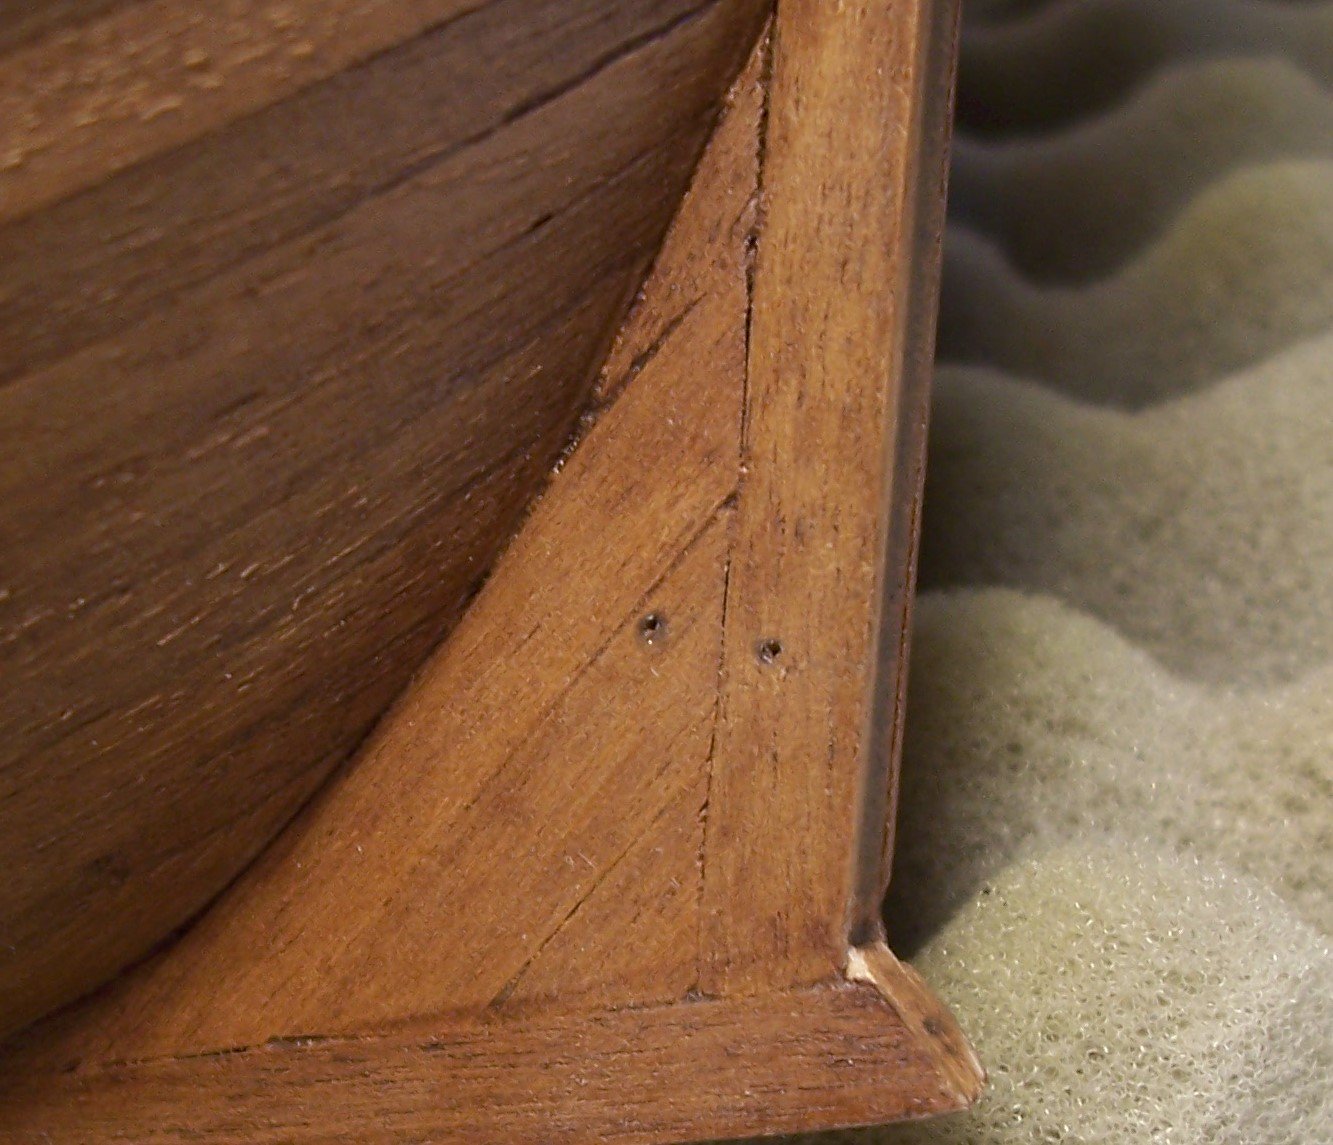
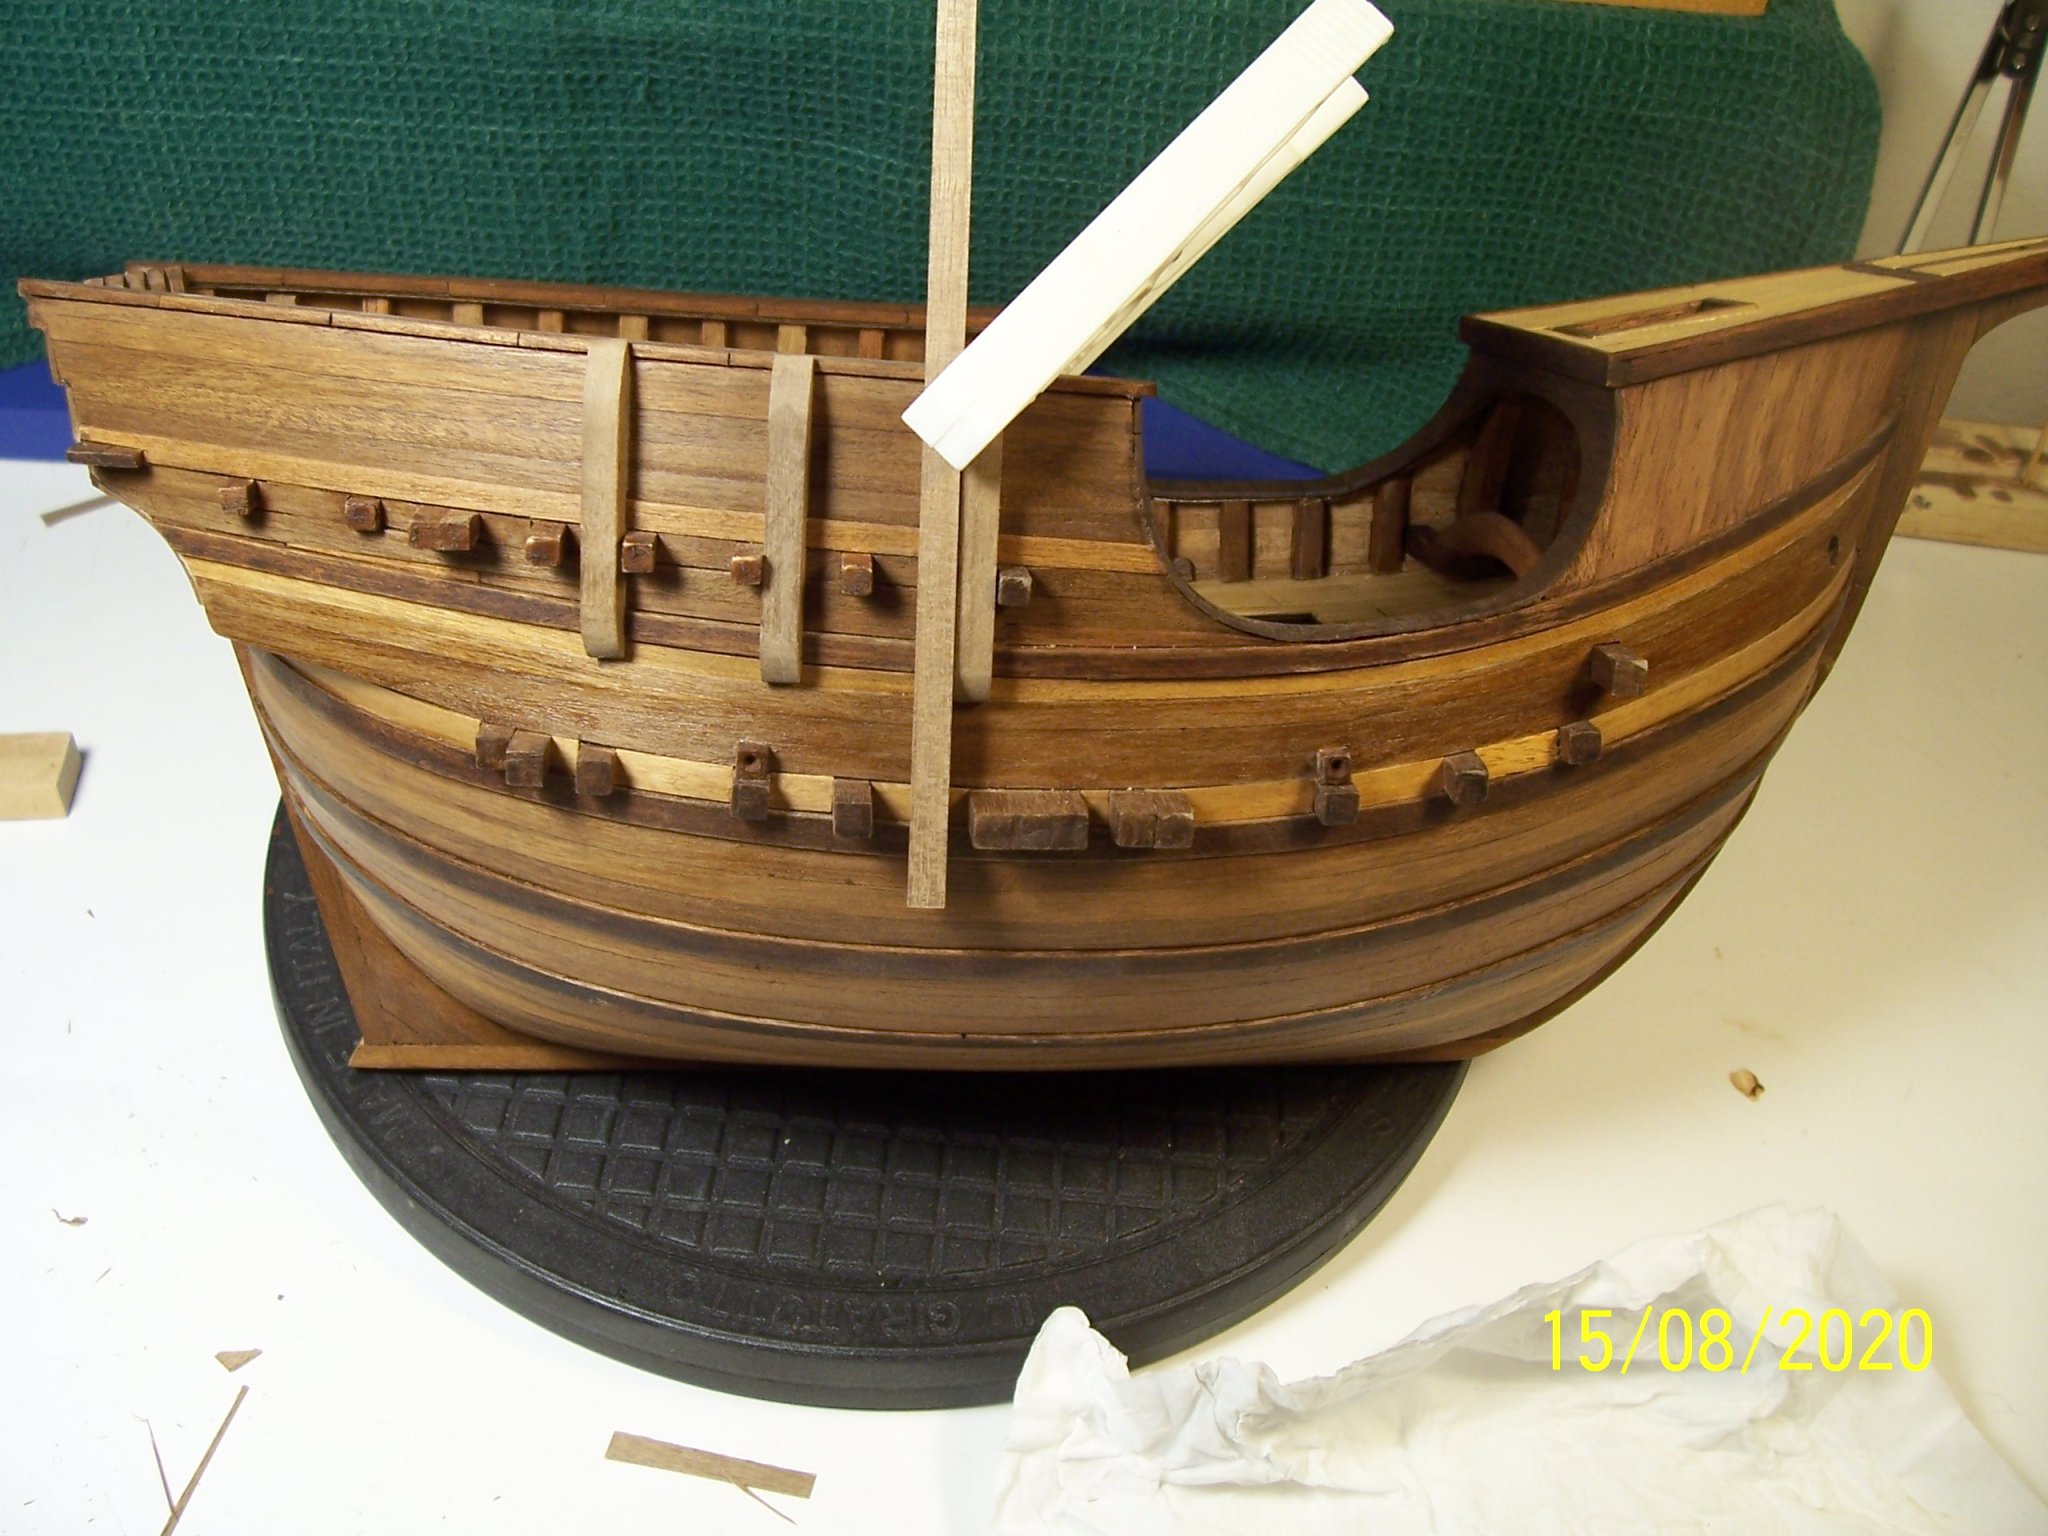
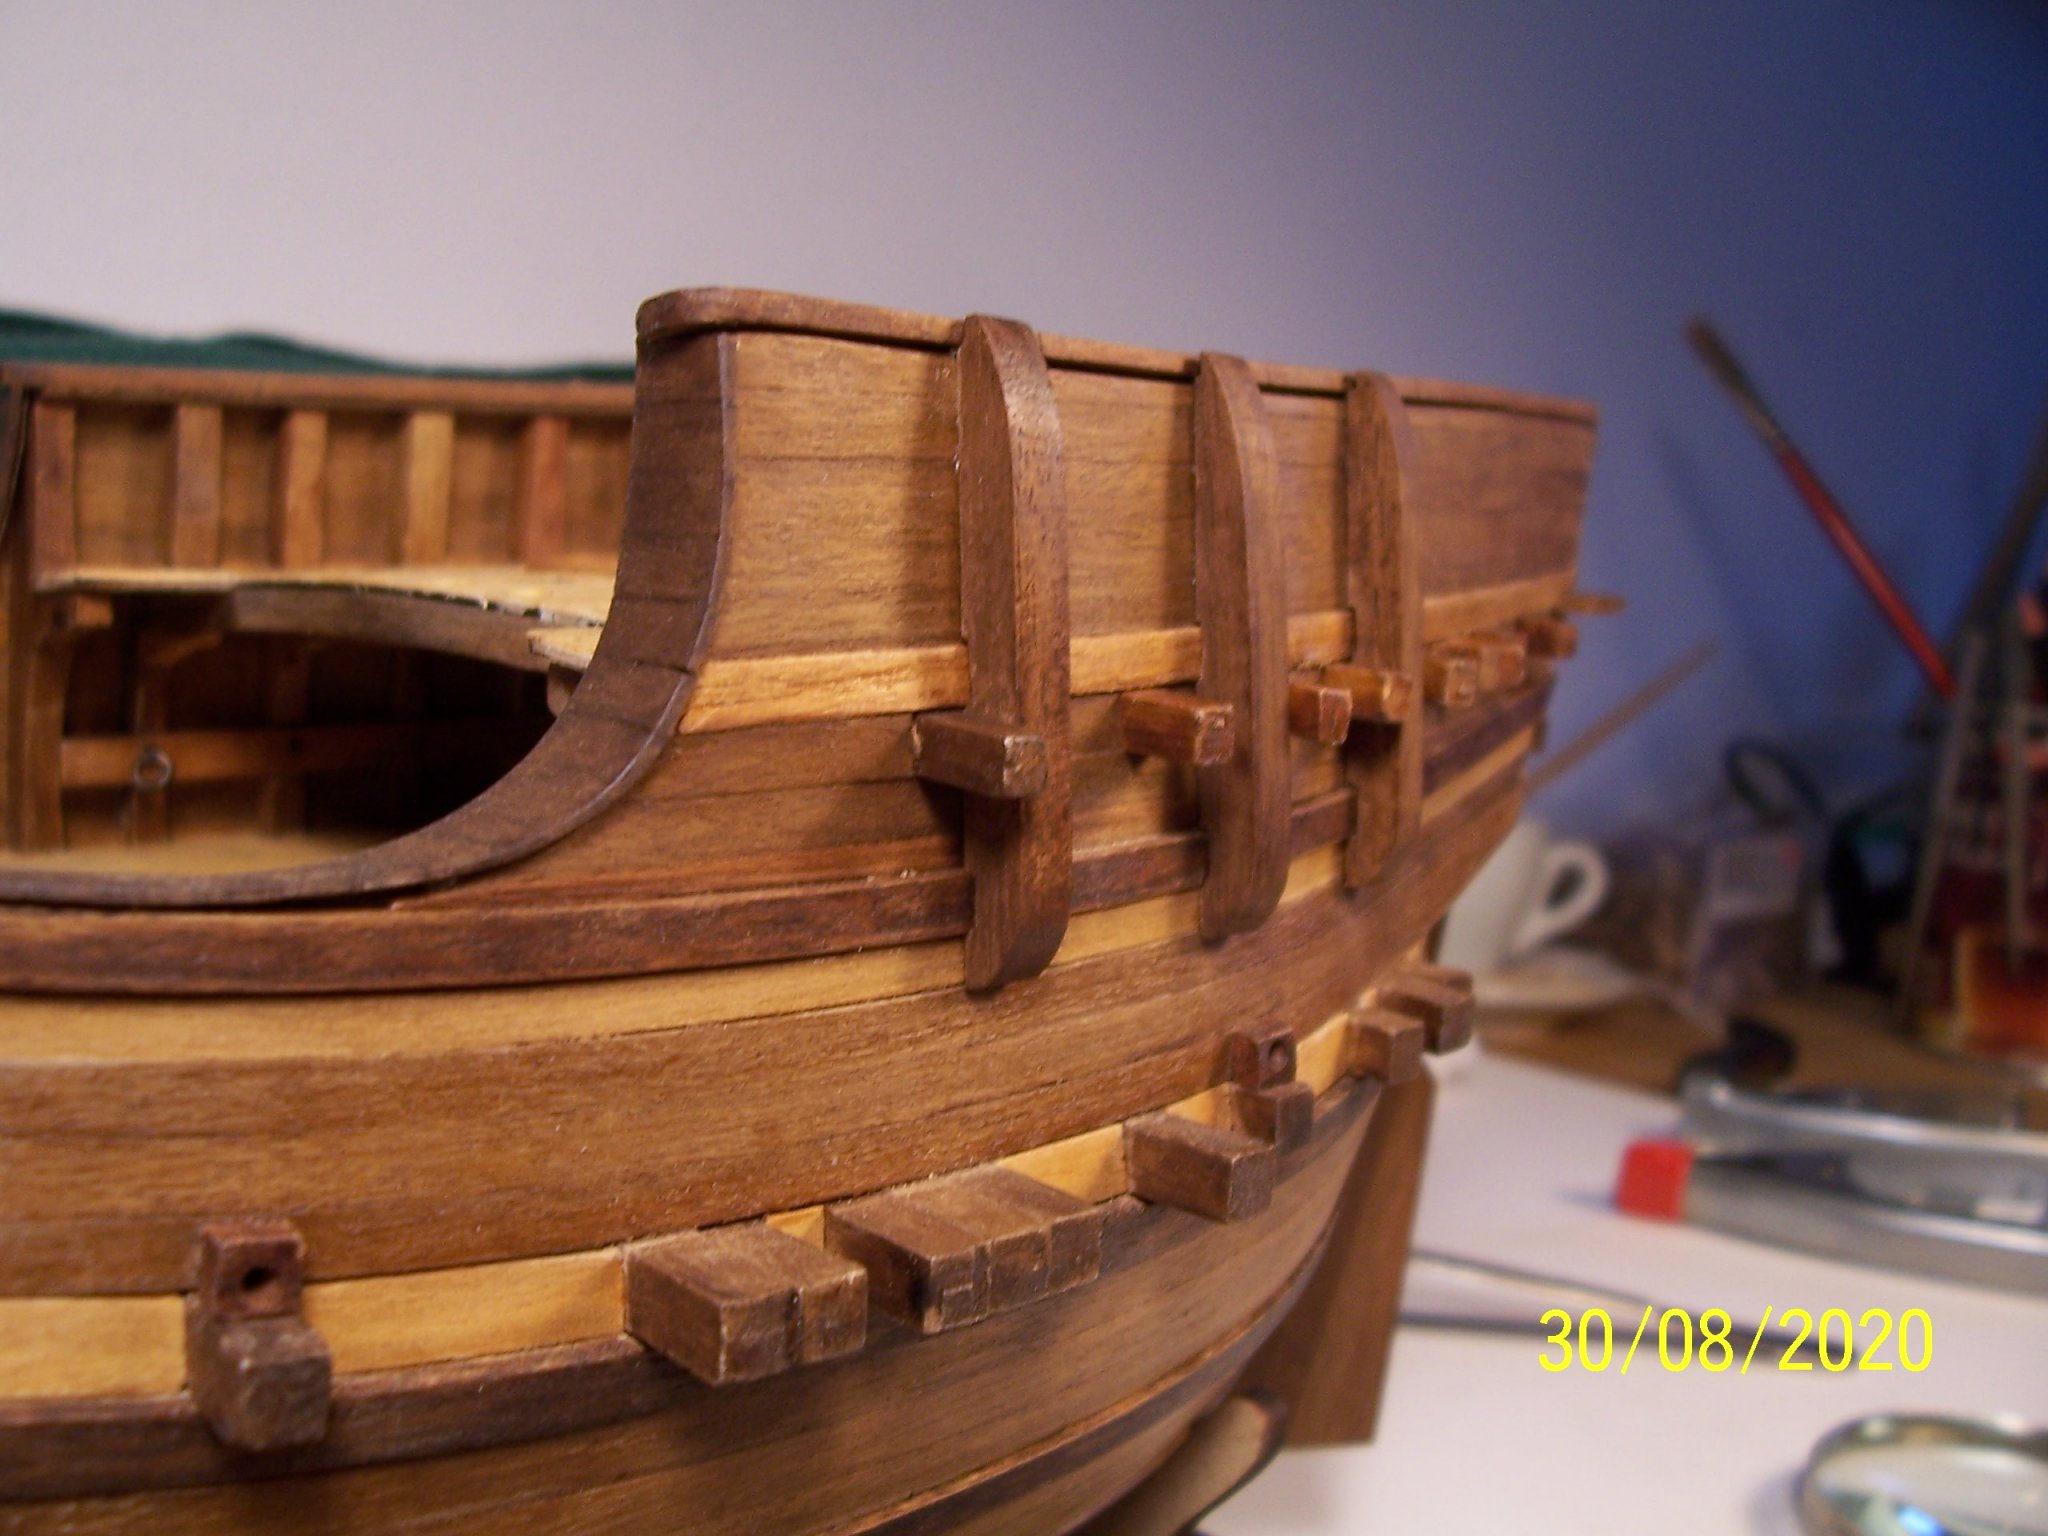
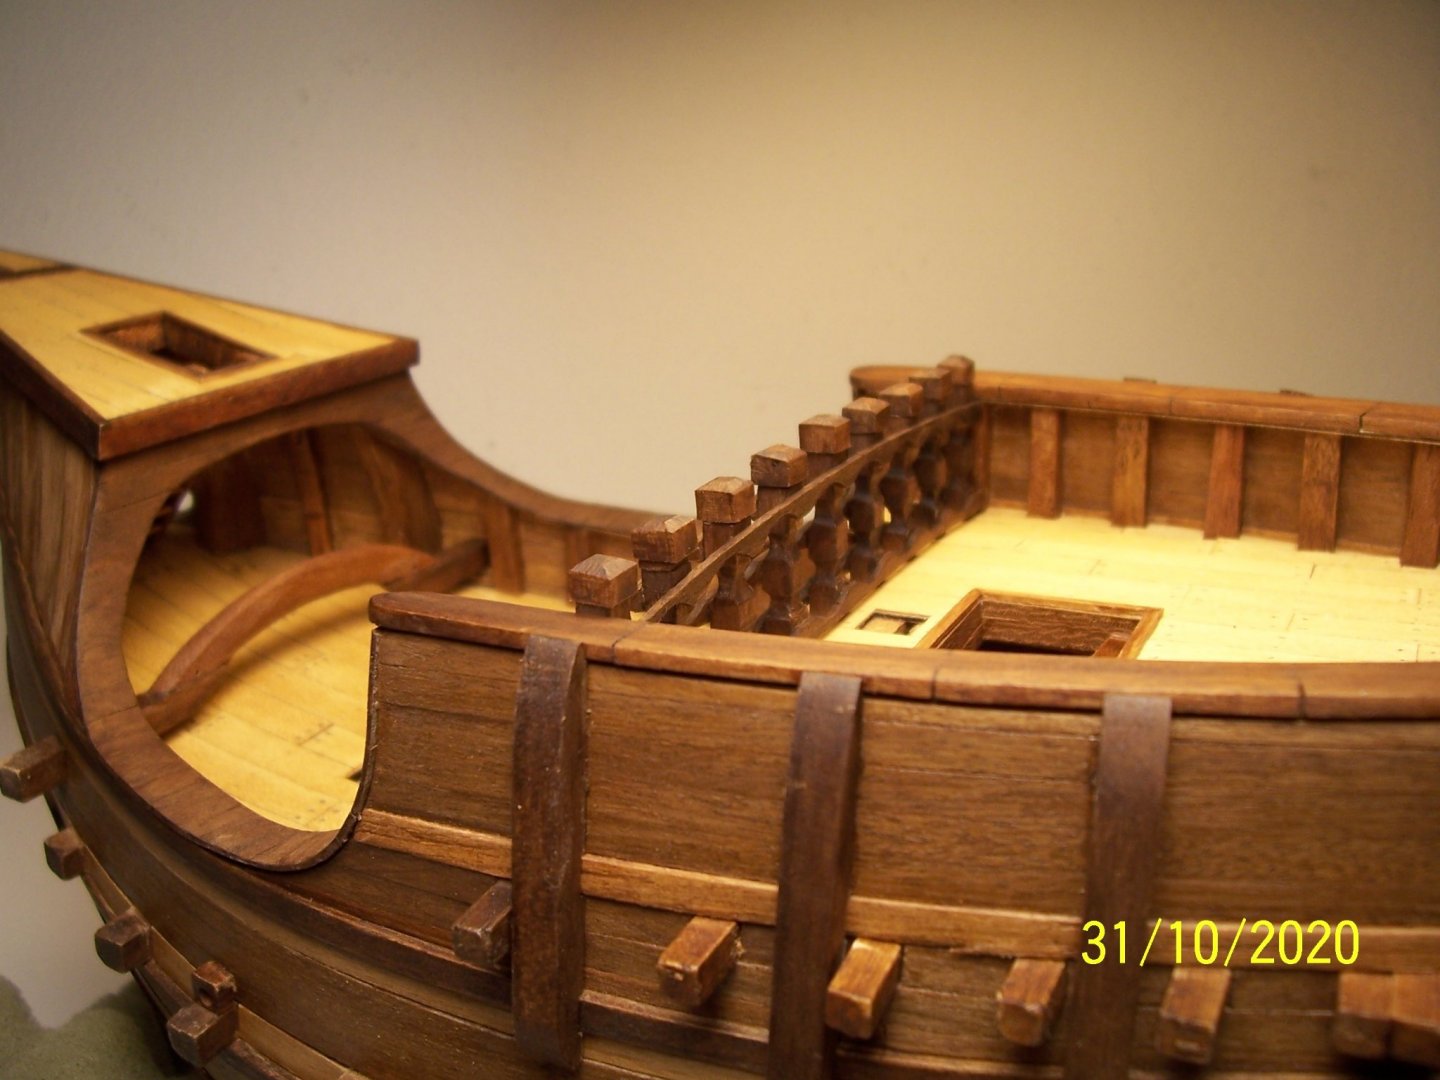
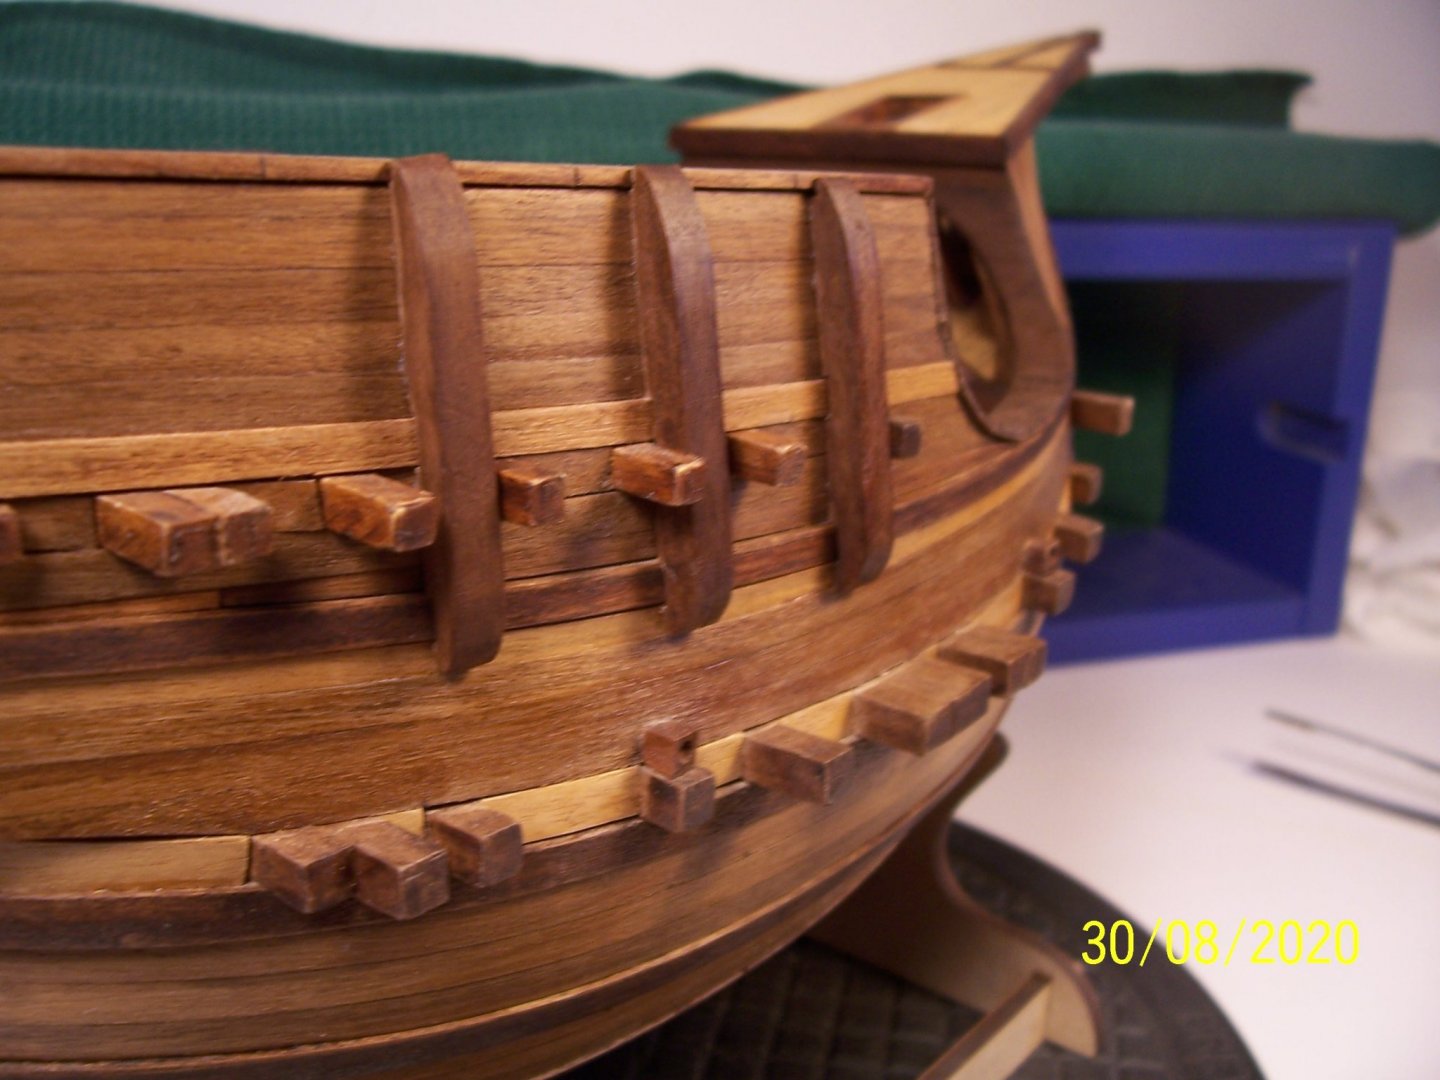
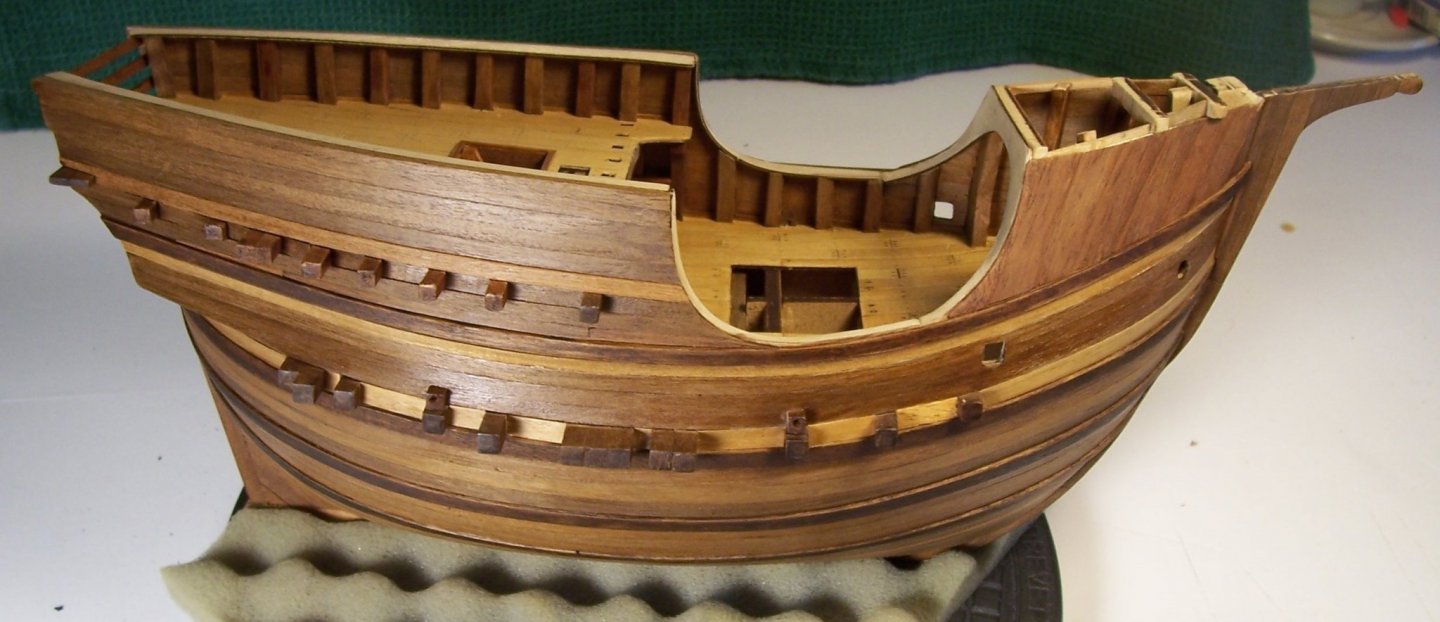
Dear friends, thank you all very much for your kind comments and encouragement to continue. Hi Bruce, the hull strips are made of lime wood and walnut, treated with fine sandpaper and painted with impregnating Oak (for lime) and National Walnut (Italian) for those in walnut. As you all certainly know, the rails of the Nao of Matarò' are not just straight boards, as described in the Building Instructions: For my laziness I simply followed instructions, but in the end I couldn't resist and I made some changes that seem to add something to the model. The photos were taken at the end of the file work, before finishing with fine sandpaper and paint: I'm aware that I've given myself the hoe on the feet, because I will have to do the same for the rails of the bow castle and the central one... Good work to everyone, Rodolfo


-
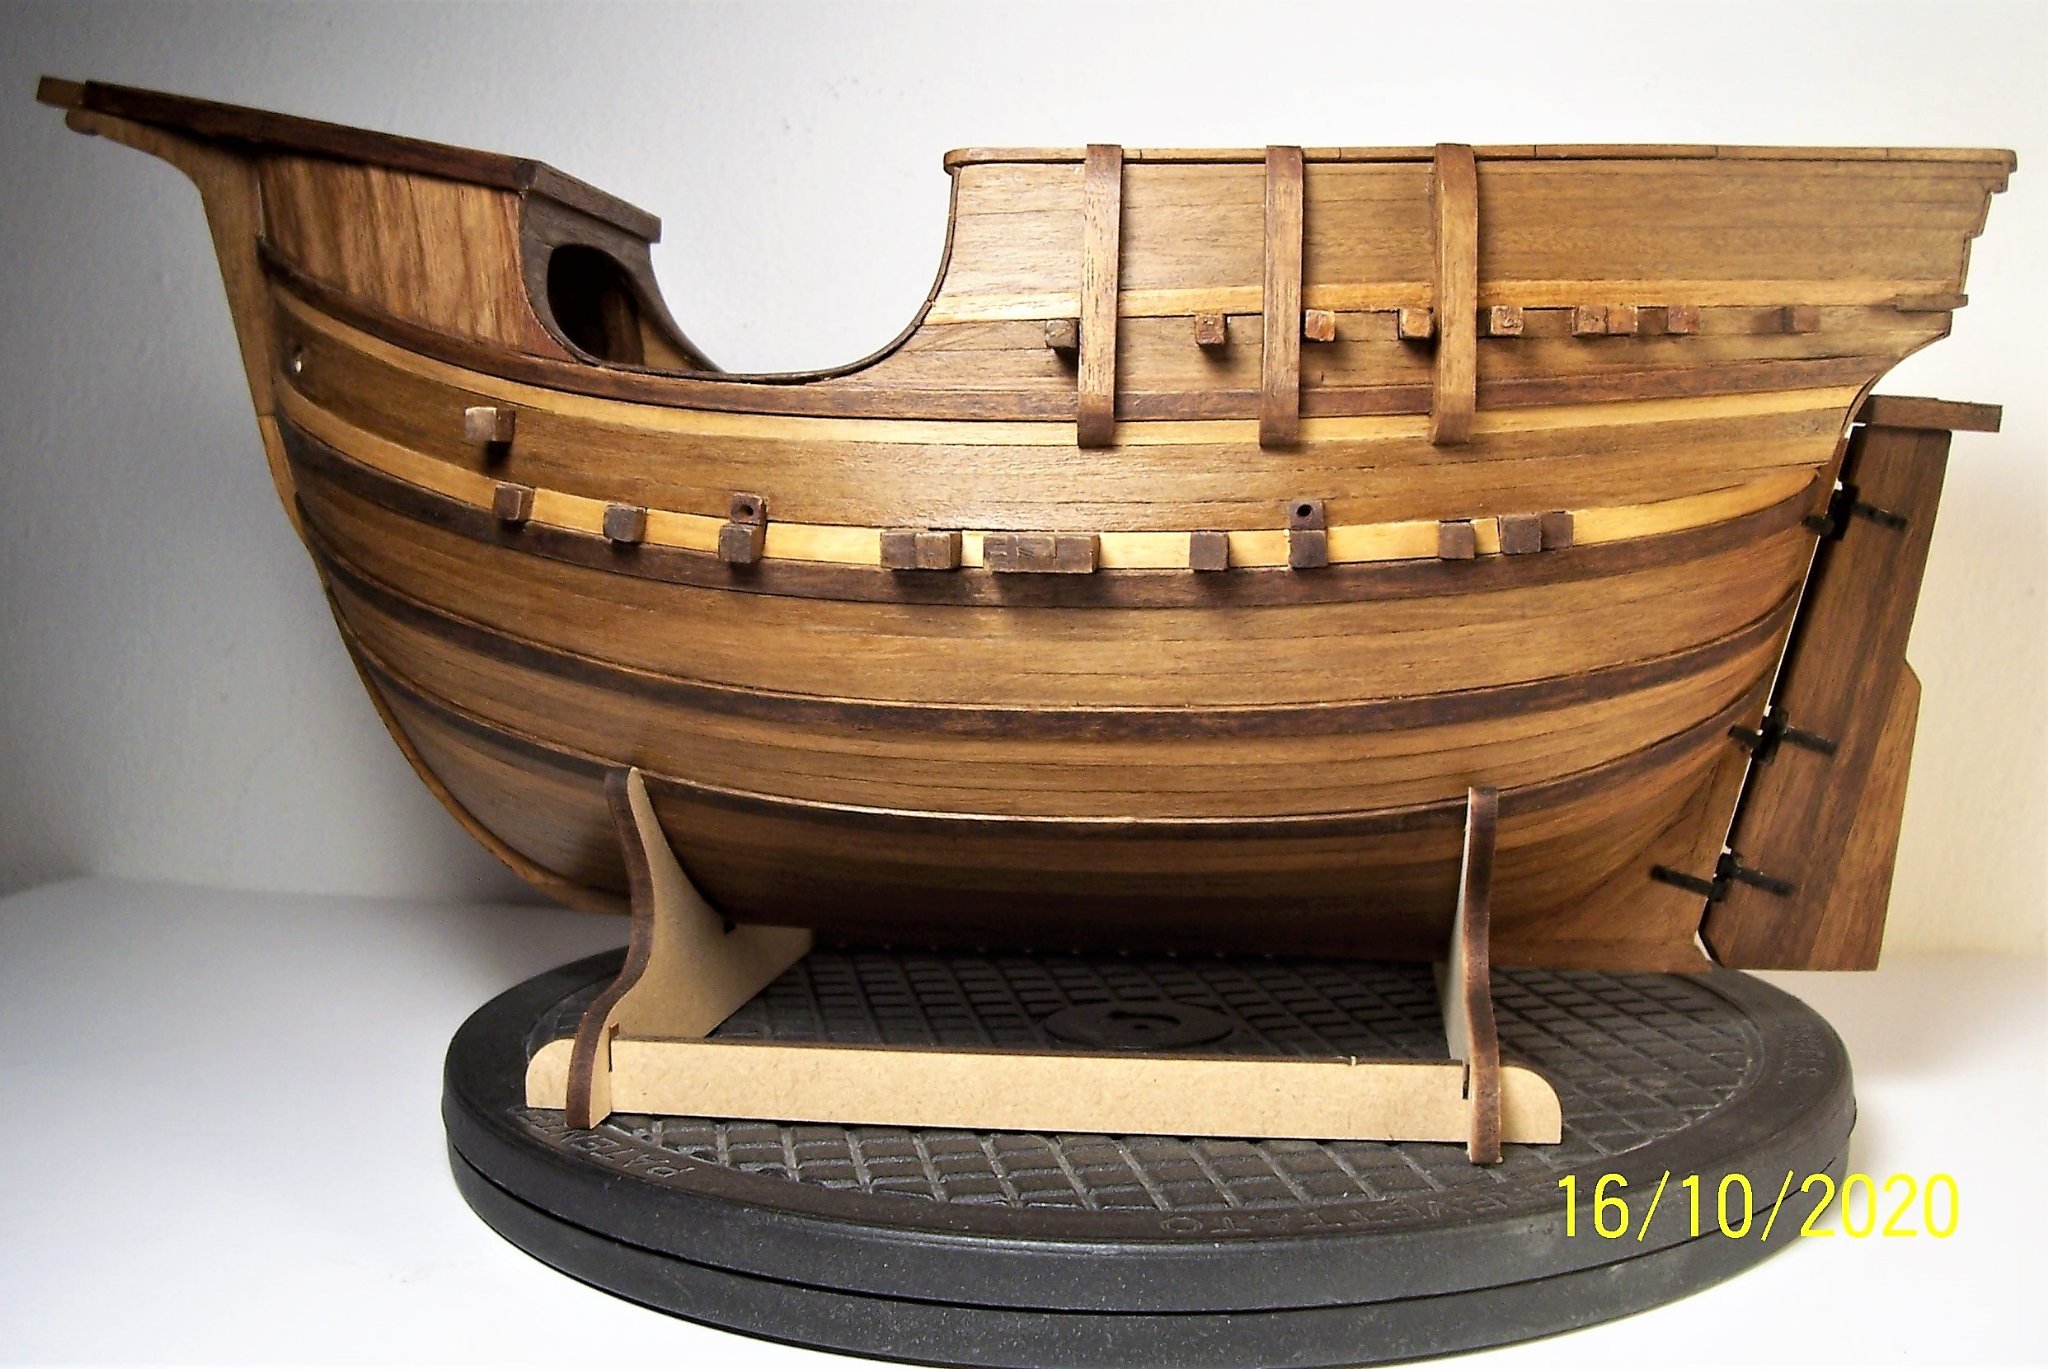
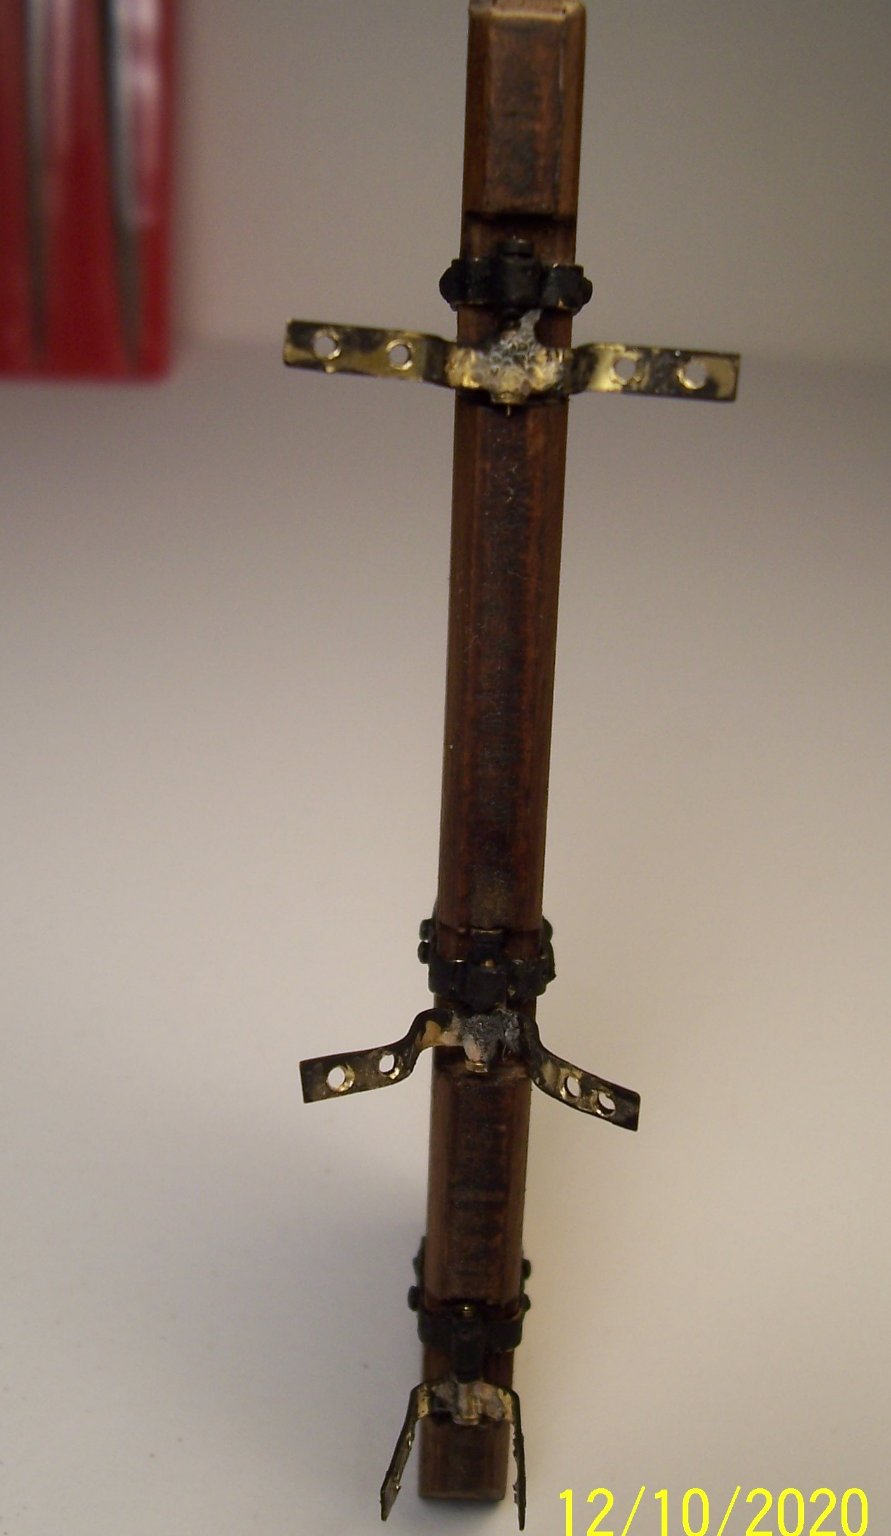
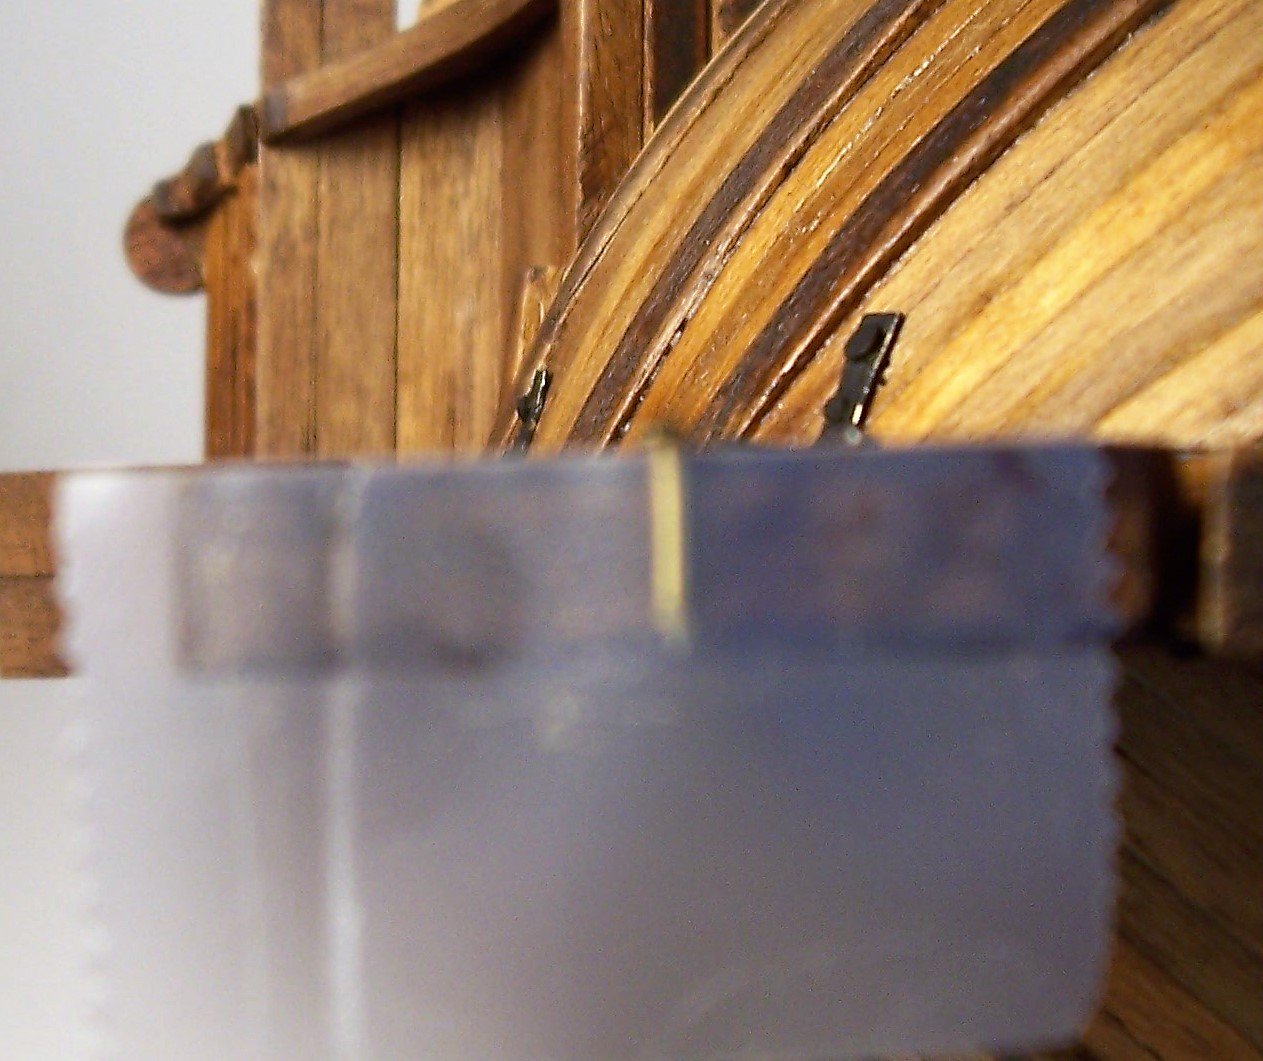
Good morning to everybody, Another problem is the nails are longer than the thickness of the keel and rudder, so they either have to be cut in about half, or they must be inserted alternately (one hole yes and one no) or we have to create sloping holes or hopefully offset by themselves by hammering. I used the first two solutions. Once the hinges are inserted on the rudder, we take the position of the nails on the keel and make the first narrow holes. It seemed more comfortable to me to gluing tiller on the rudder before fixing the hinges to the keel: After fixing the hinges to the keel, the excess holes are masked with a drop of Vinavil: For painting I used black opaque solvent enamel, given with a very thin brush. At the end, despite all the problems, I'm quite satisfied about the whole result: See you next post and good work to everyone! Rodolfo.


-
Sorry, I've forgotten to delete remaining pictures and now I don't know how to do...
-
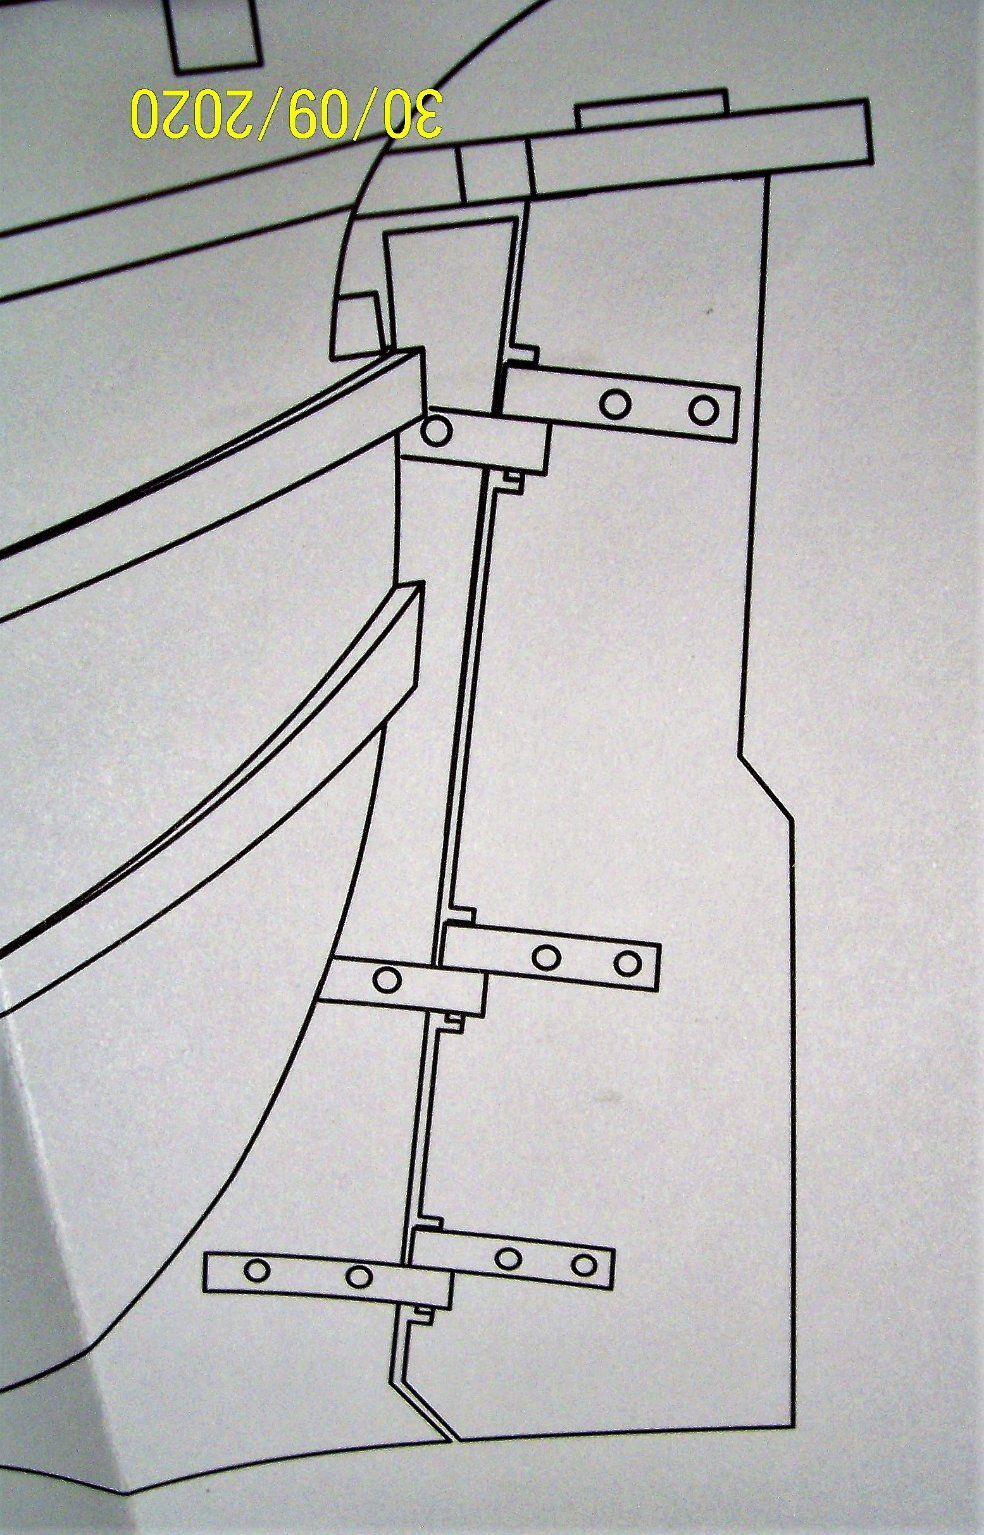
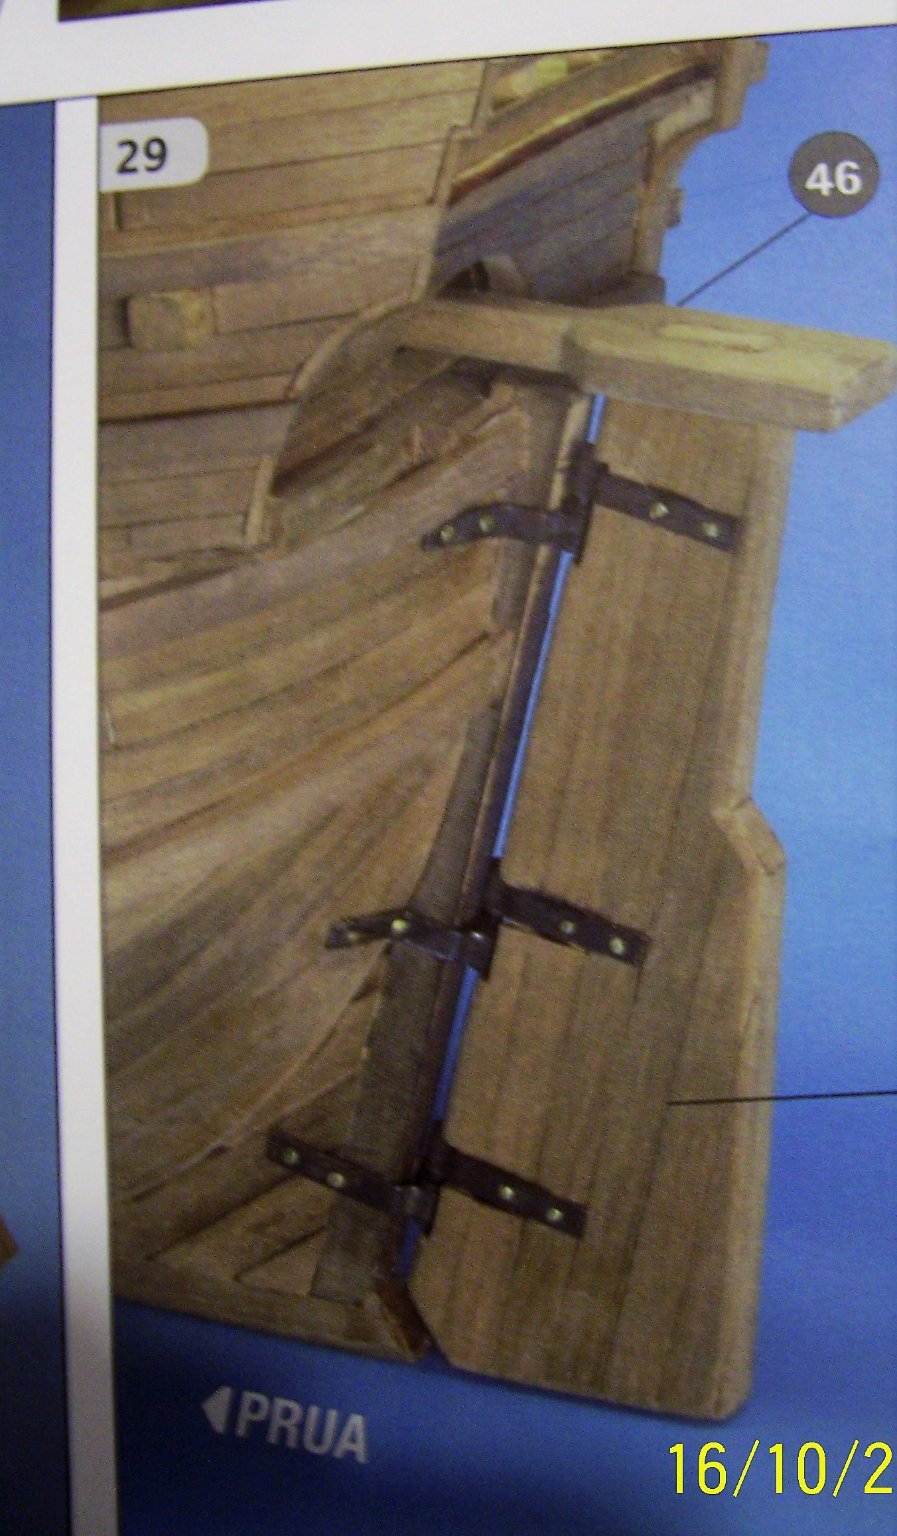
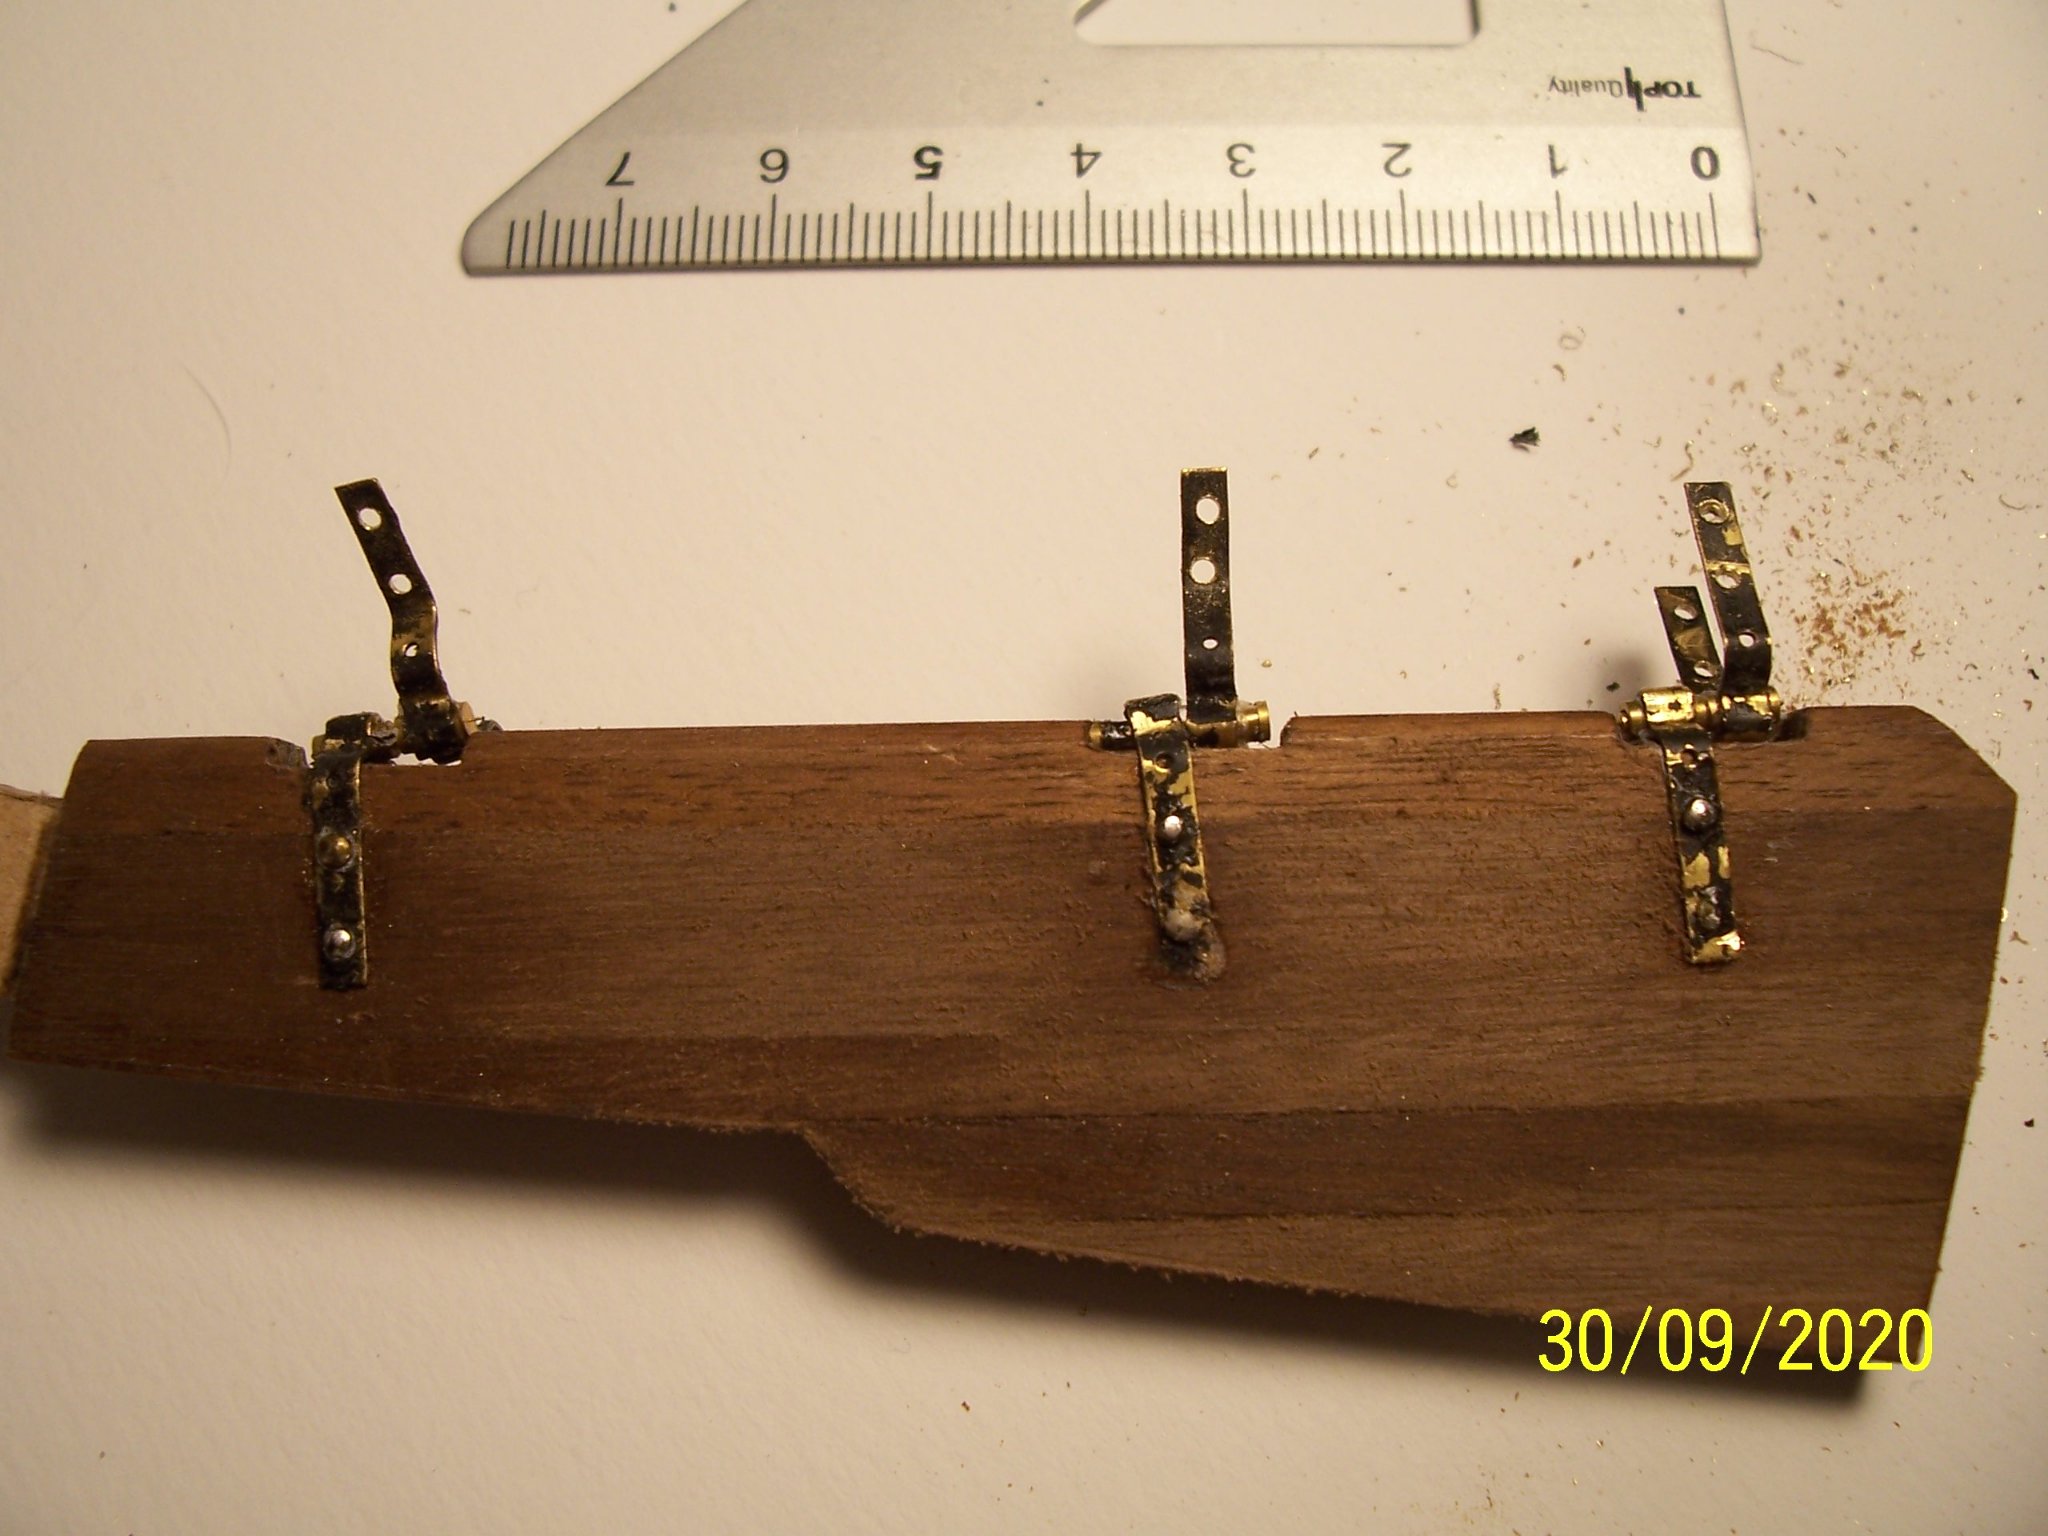
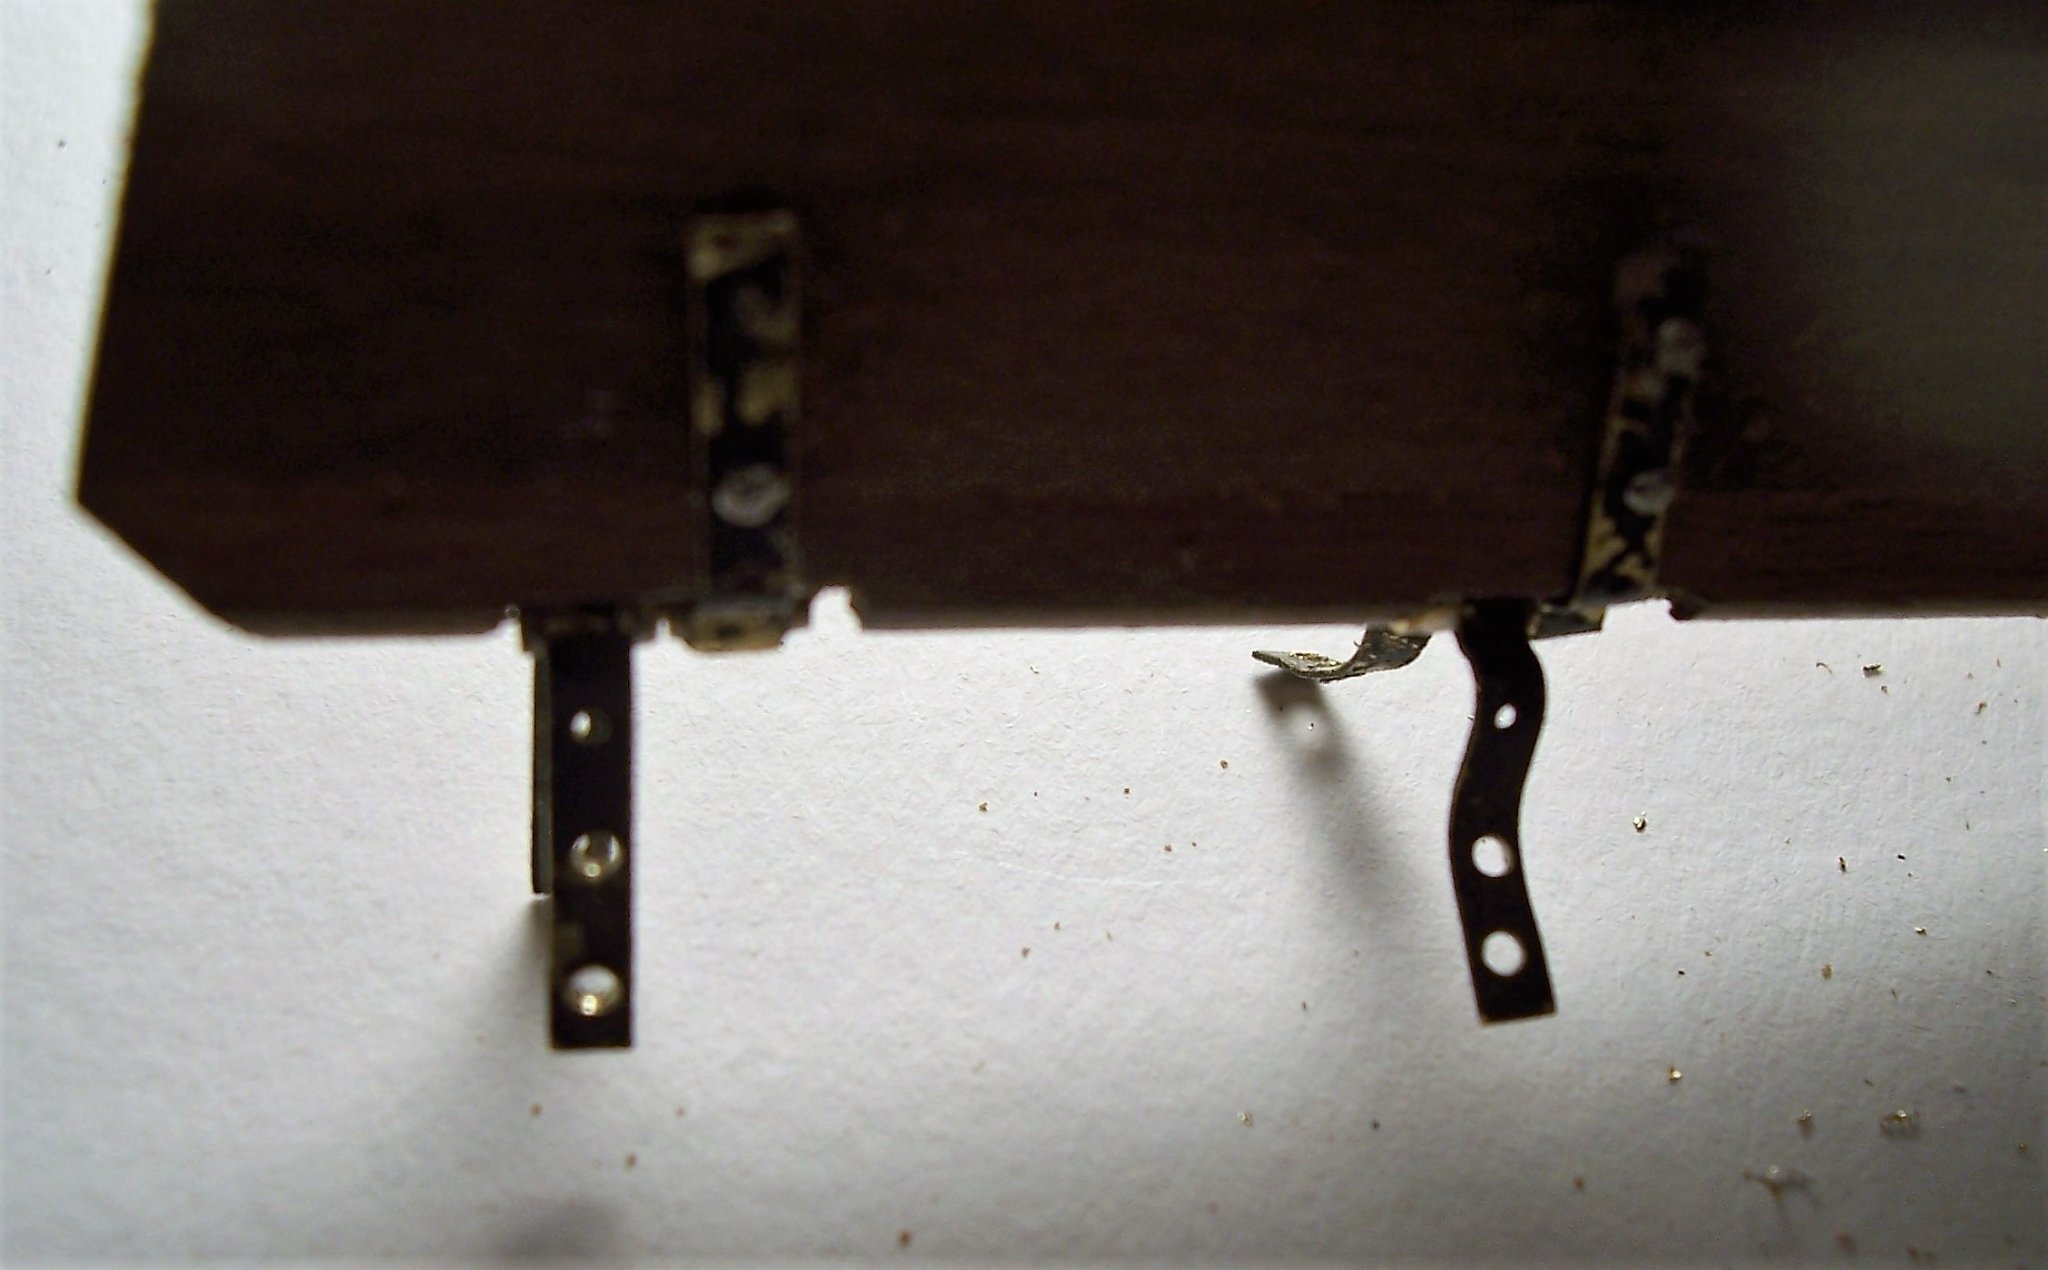
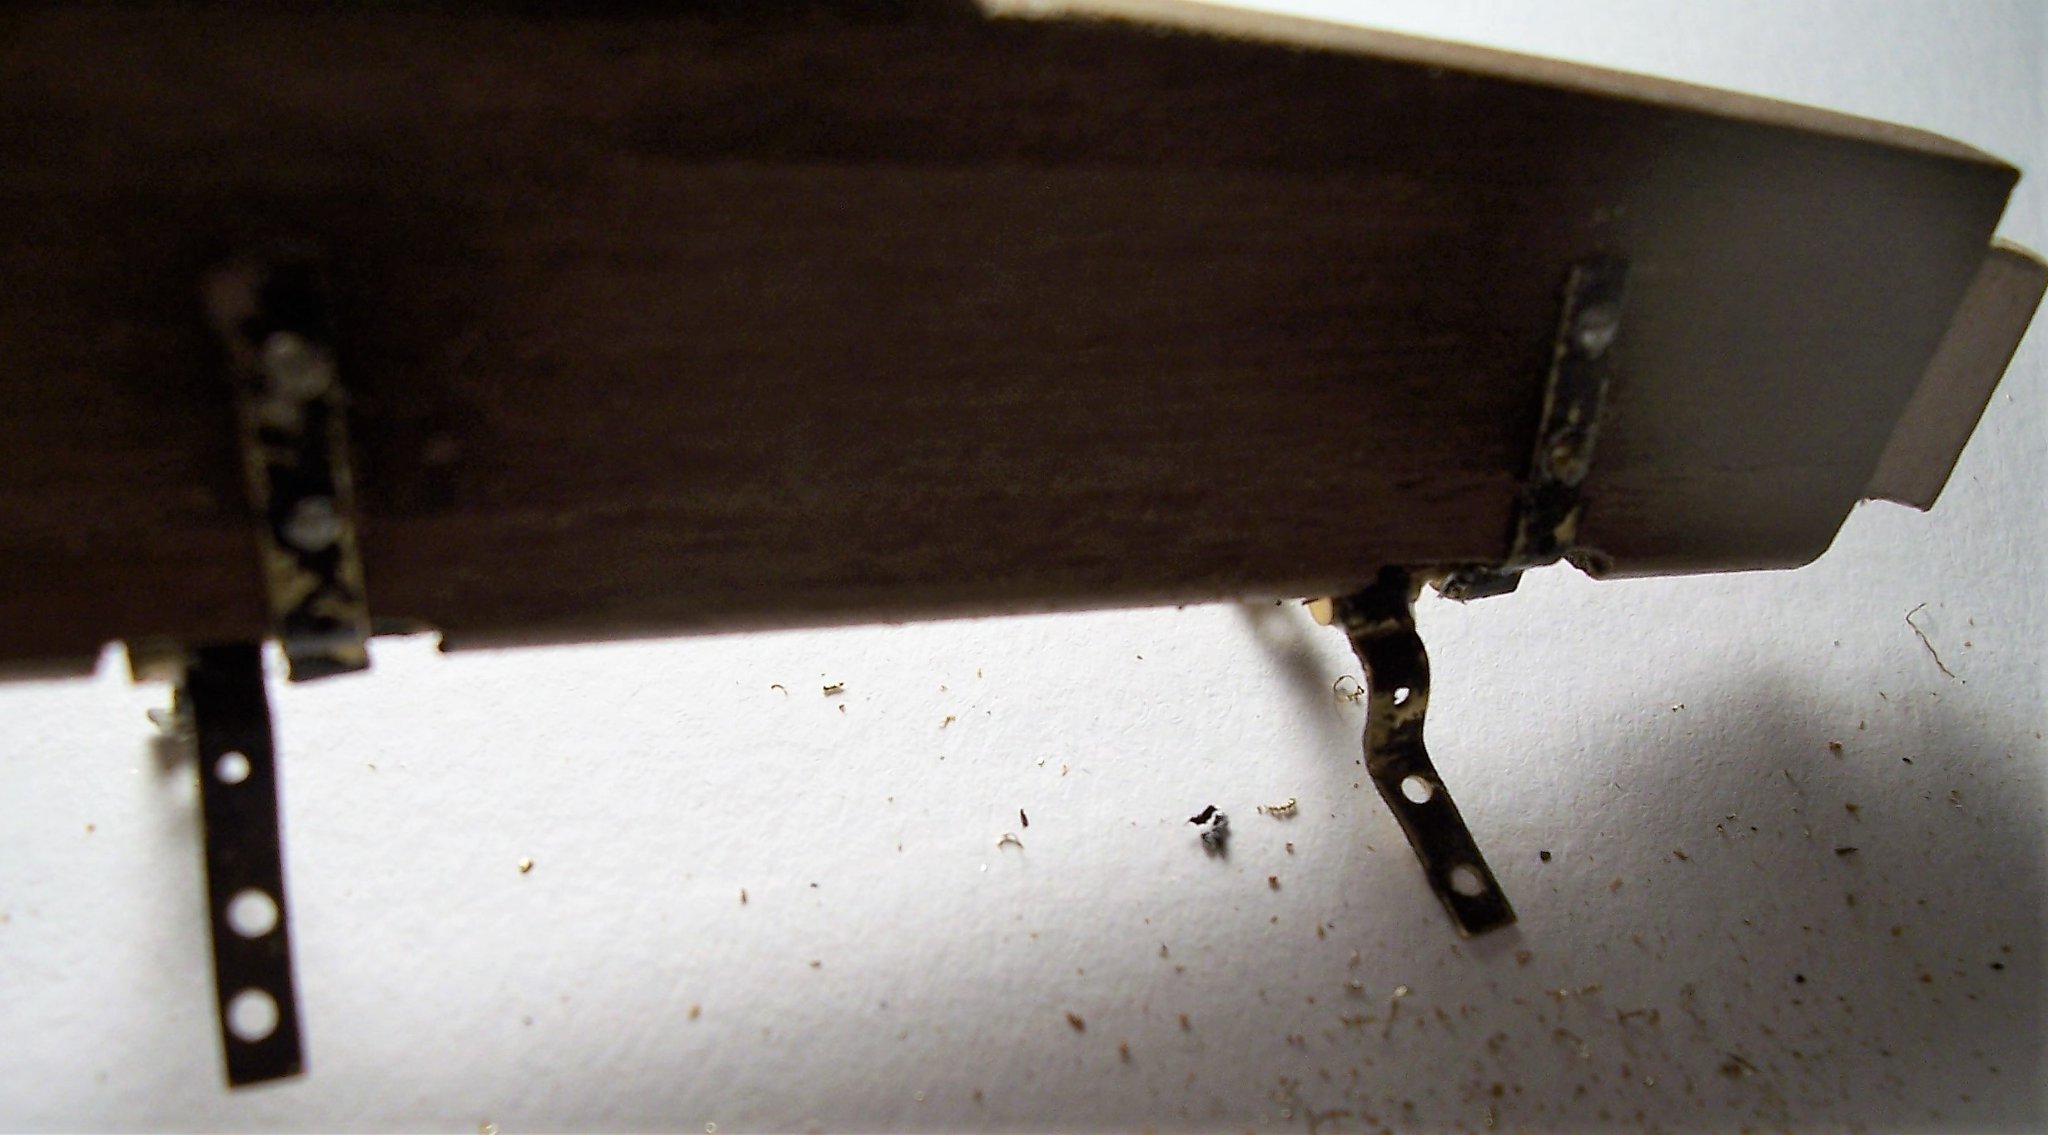
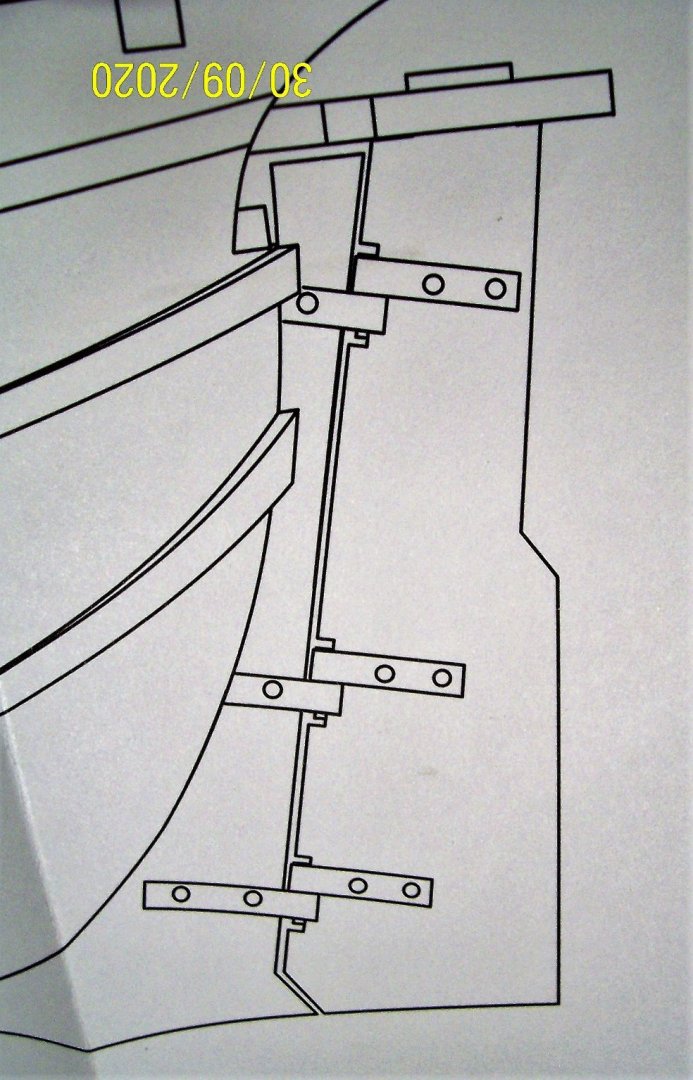
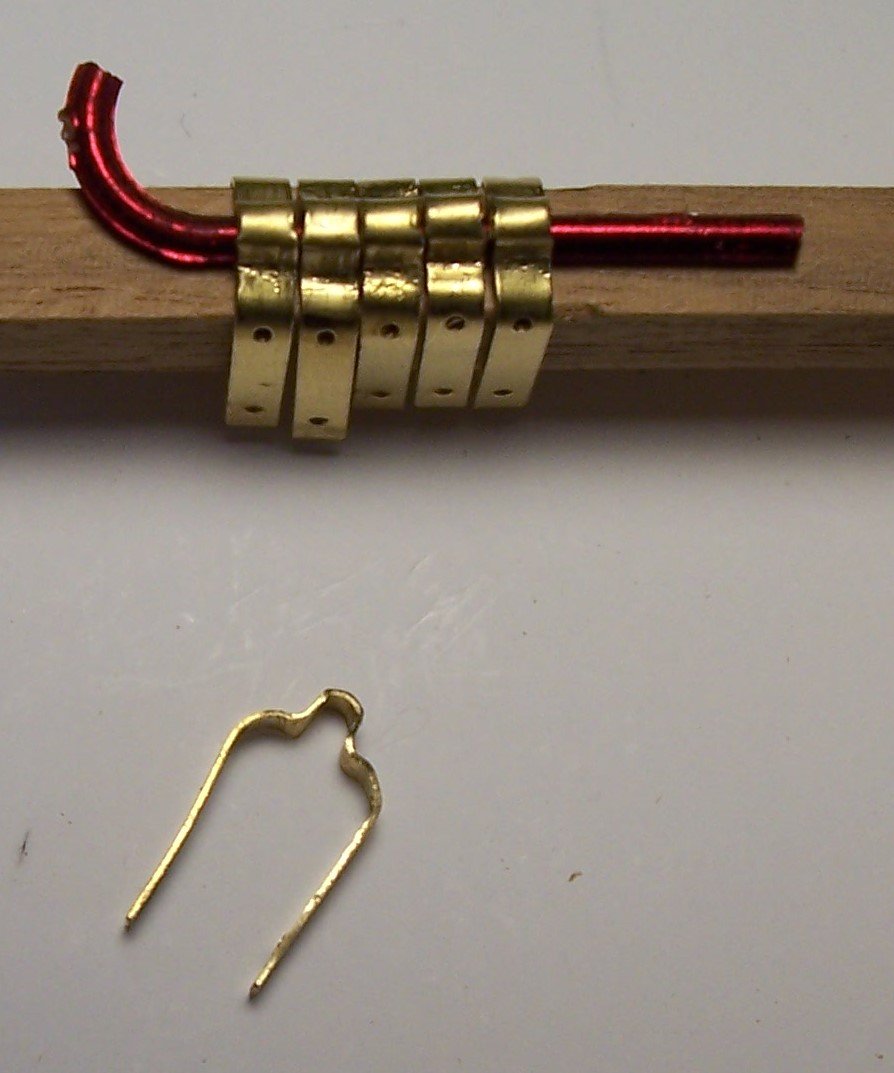
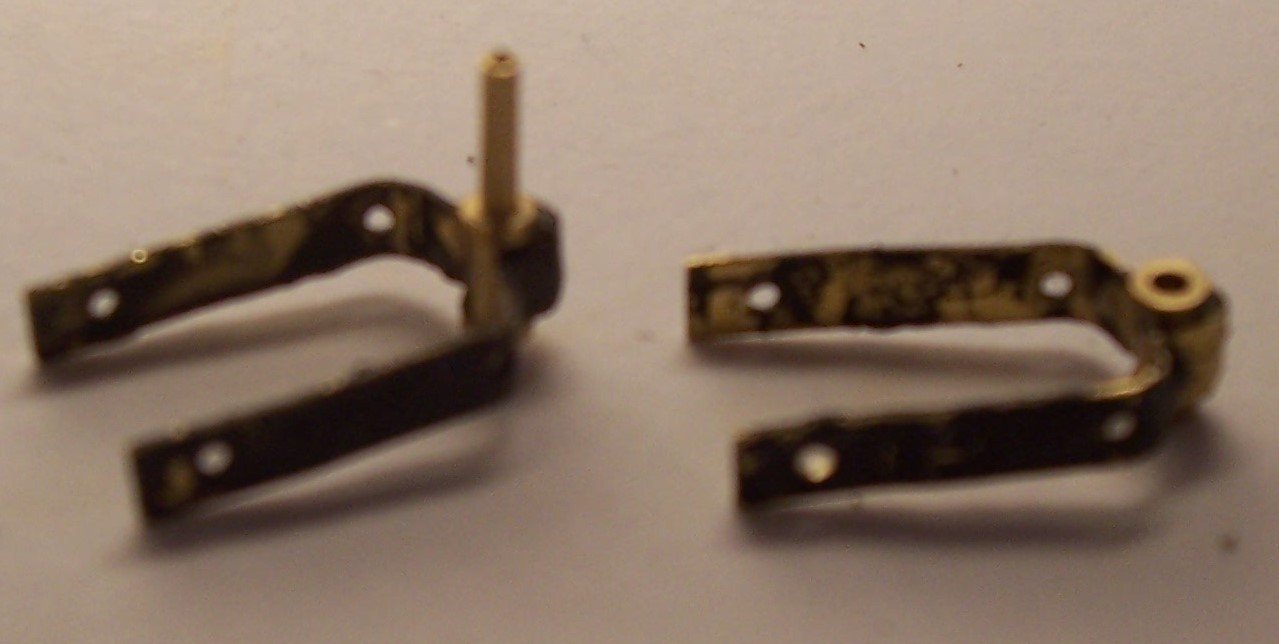
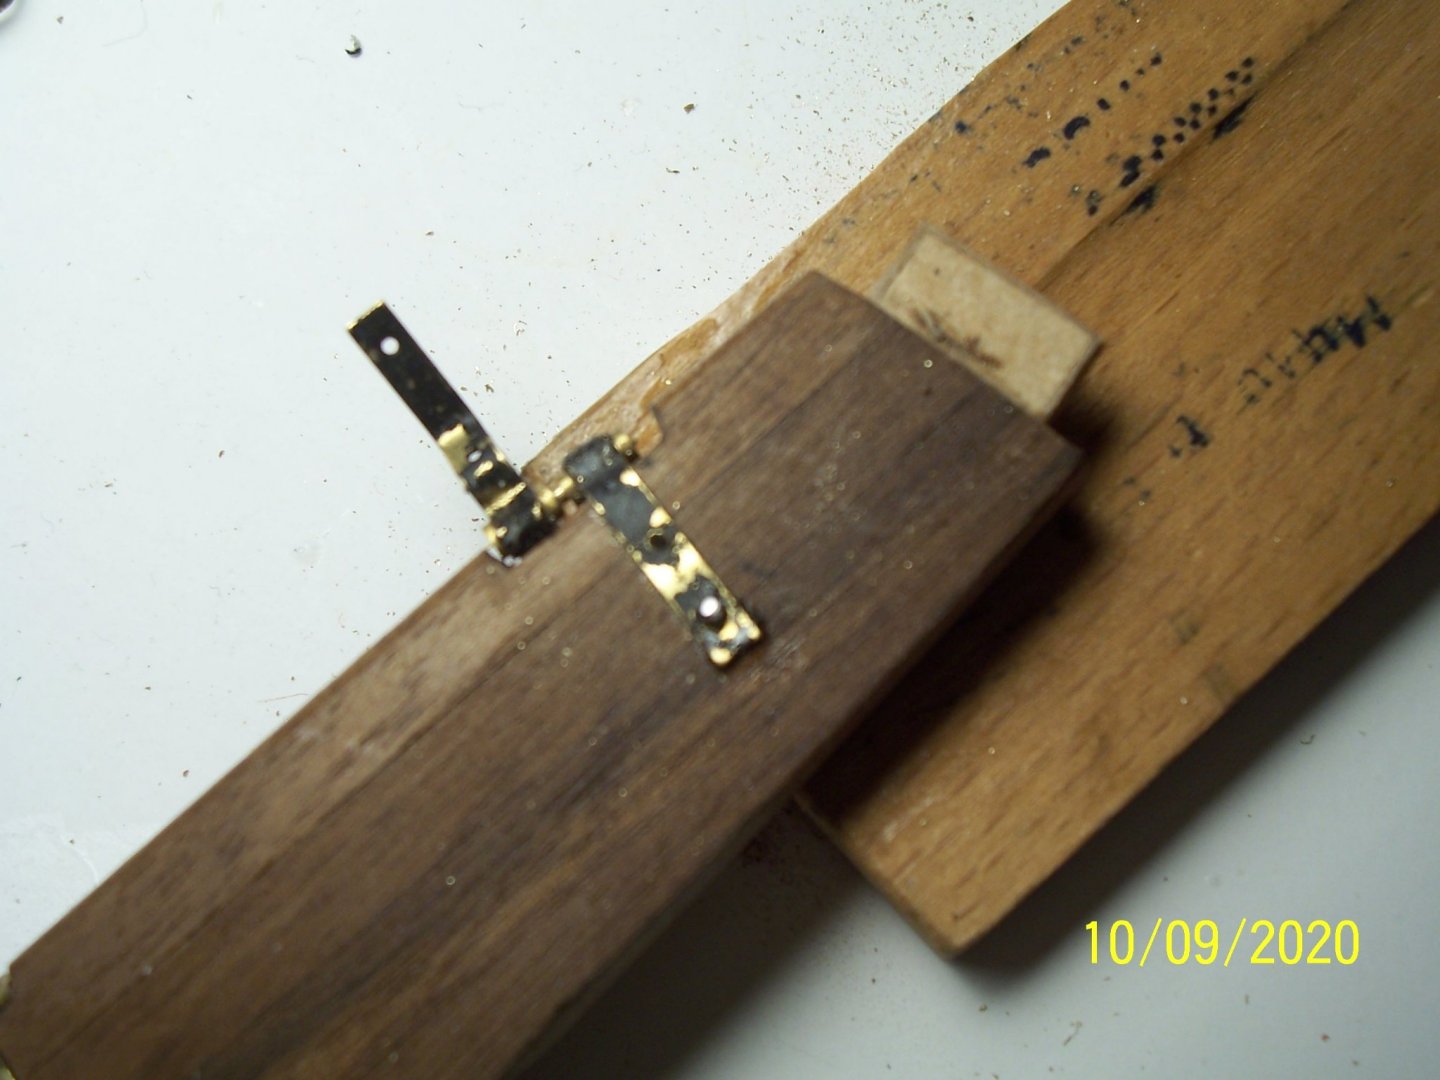
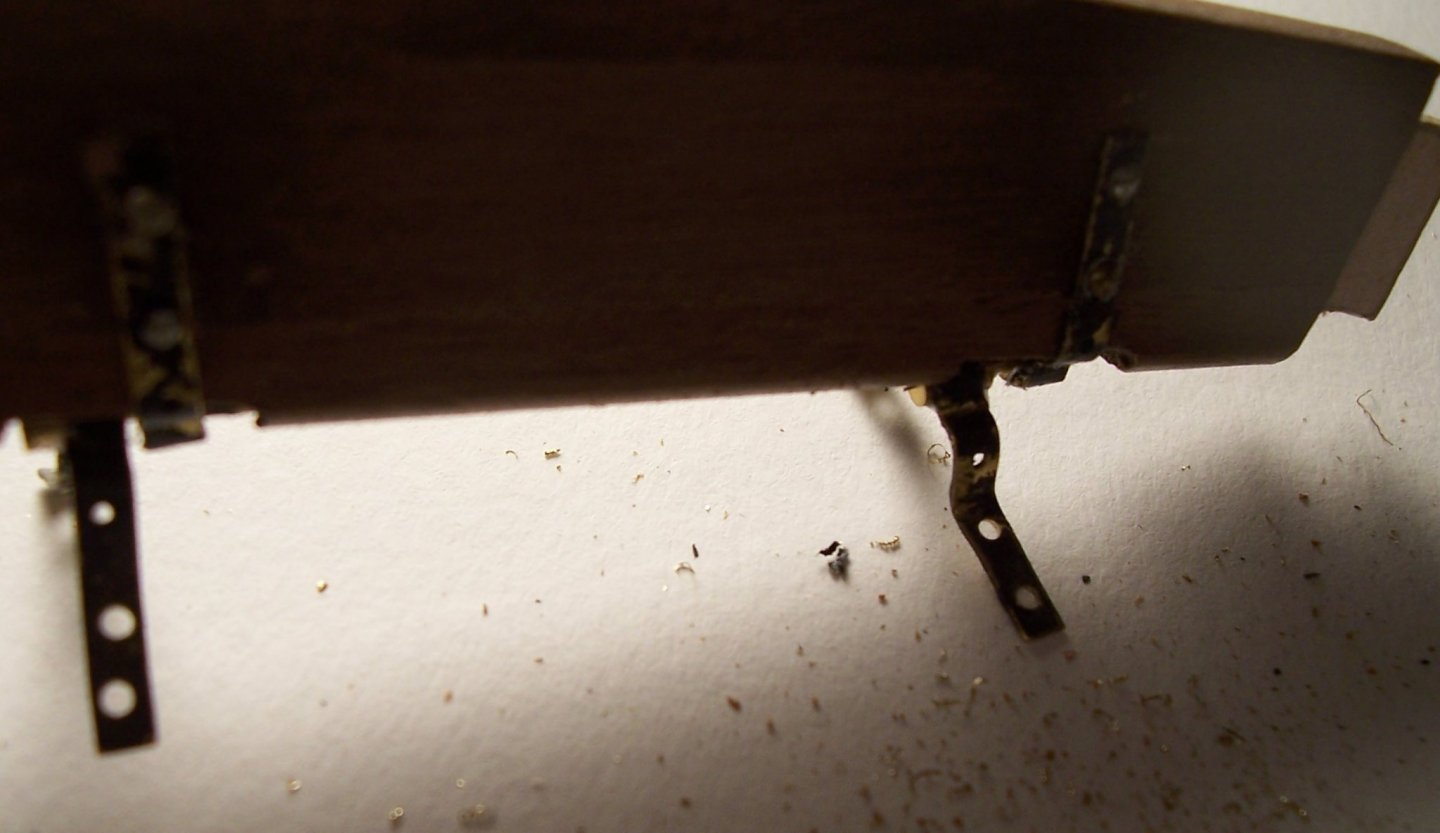
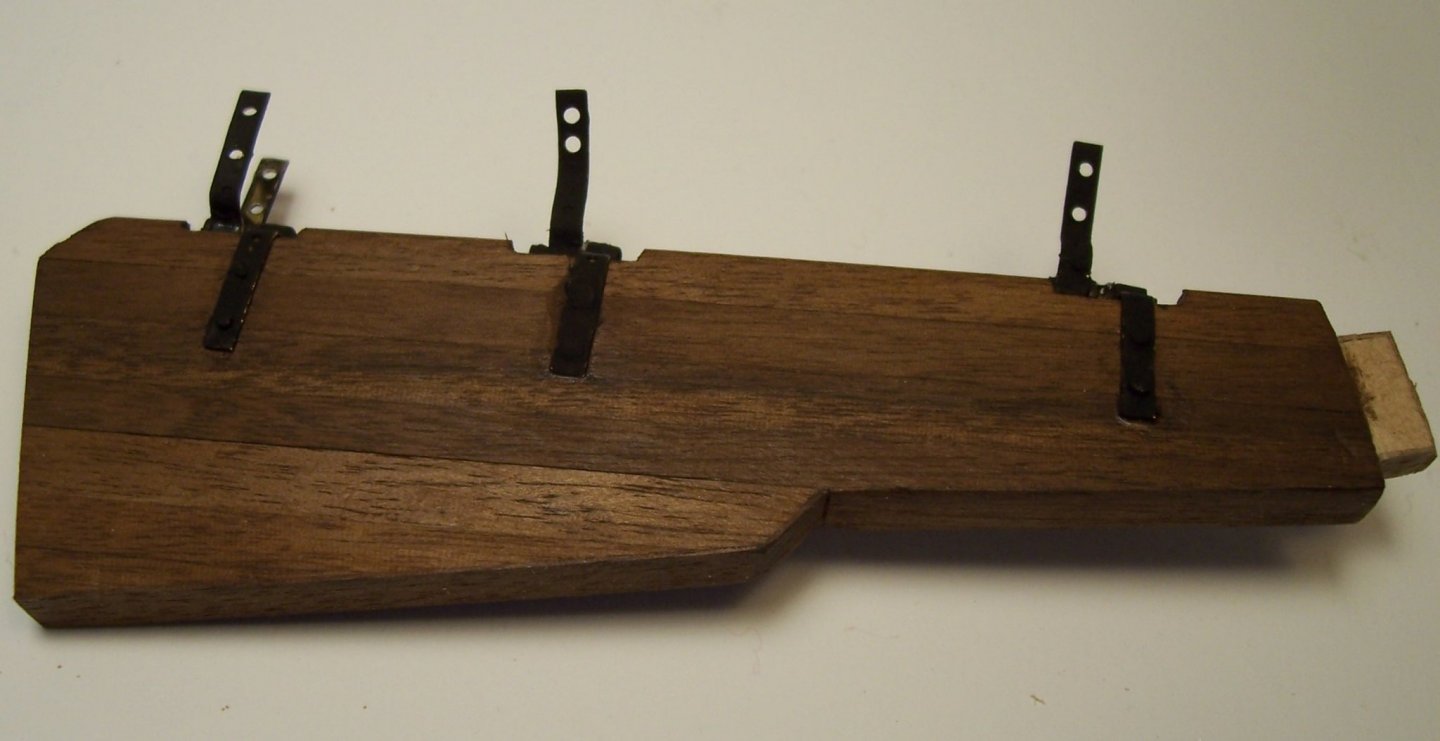
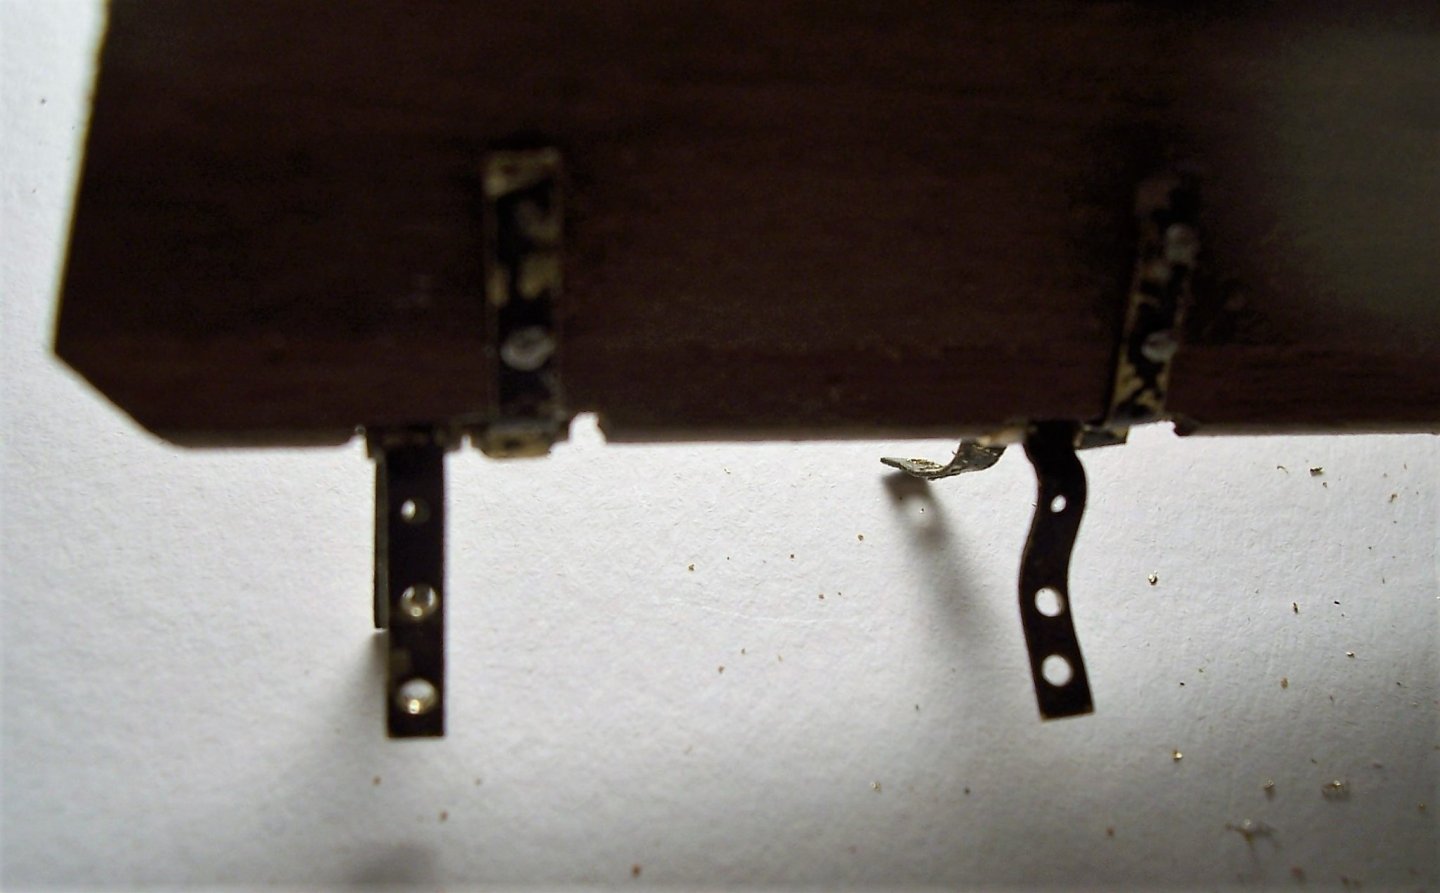
Hallo everybody! As I wrote, rudder hinges were a big problem for me. Seeing the plan and instructions, they seem to have certain dimensions: Actually the ones I found in the box are: - shorter, - perhaps narrower, - the holes are more distant, - the diameter of holes smaller than the diameter of tacks. From the photos you can clearly see the original holes in the hinges have a larger distance, which prevents the fastening of the tacks closer to the keel: Moreover the length, as you can see for the first hinge, does not reach the rudder edge, as it would seem from AMATI documentation: At this point I had to drill some intermediate holes to the existing ones and then enlarge them: Pivots and their locations have been glued with cyanoacrylate; but after I had completed this work, I've thought it would have been better to fix them with tinning: Next post the photos about fixing of the rudder to the keel. See you later! Rodolfo


-
Dear friends, thank you very much for your kind words and encouragement. Hi Louie, I had some doubts about the three external reinforcements of the sides, because I saw they usually were longer. But at the end I thought the aesthetic result would have been worse (maybe). I must say the historical and constructive work you are doing on the Byzantine Dromon is truly extraordinary. Hi Clark, welcome! I saw your post and I must say you've made a great start! Keep going! Many thanks, Chuck! Very interesting your works, also historically. By my side, I hope to continue so. One month ago I finished the rudder. I limited myself to follow the instructions of the "AMATI": Unfortunately the rudder hinges have created many problems for me, which I will describe in the next post. See you soon! Rodolfo
-
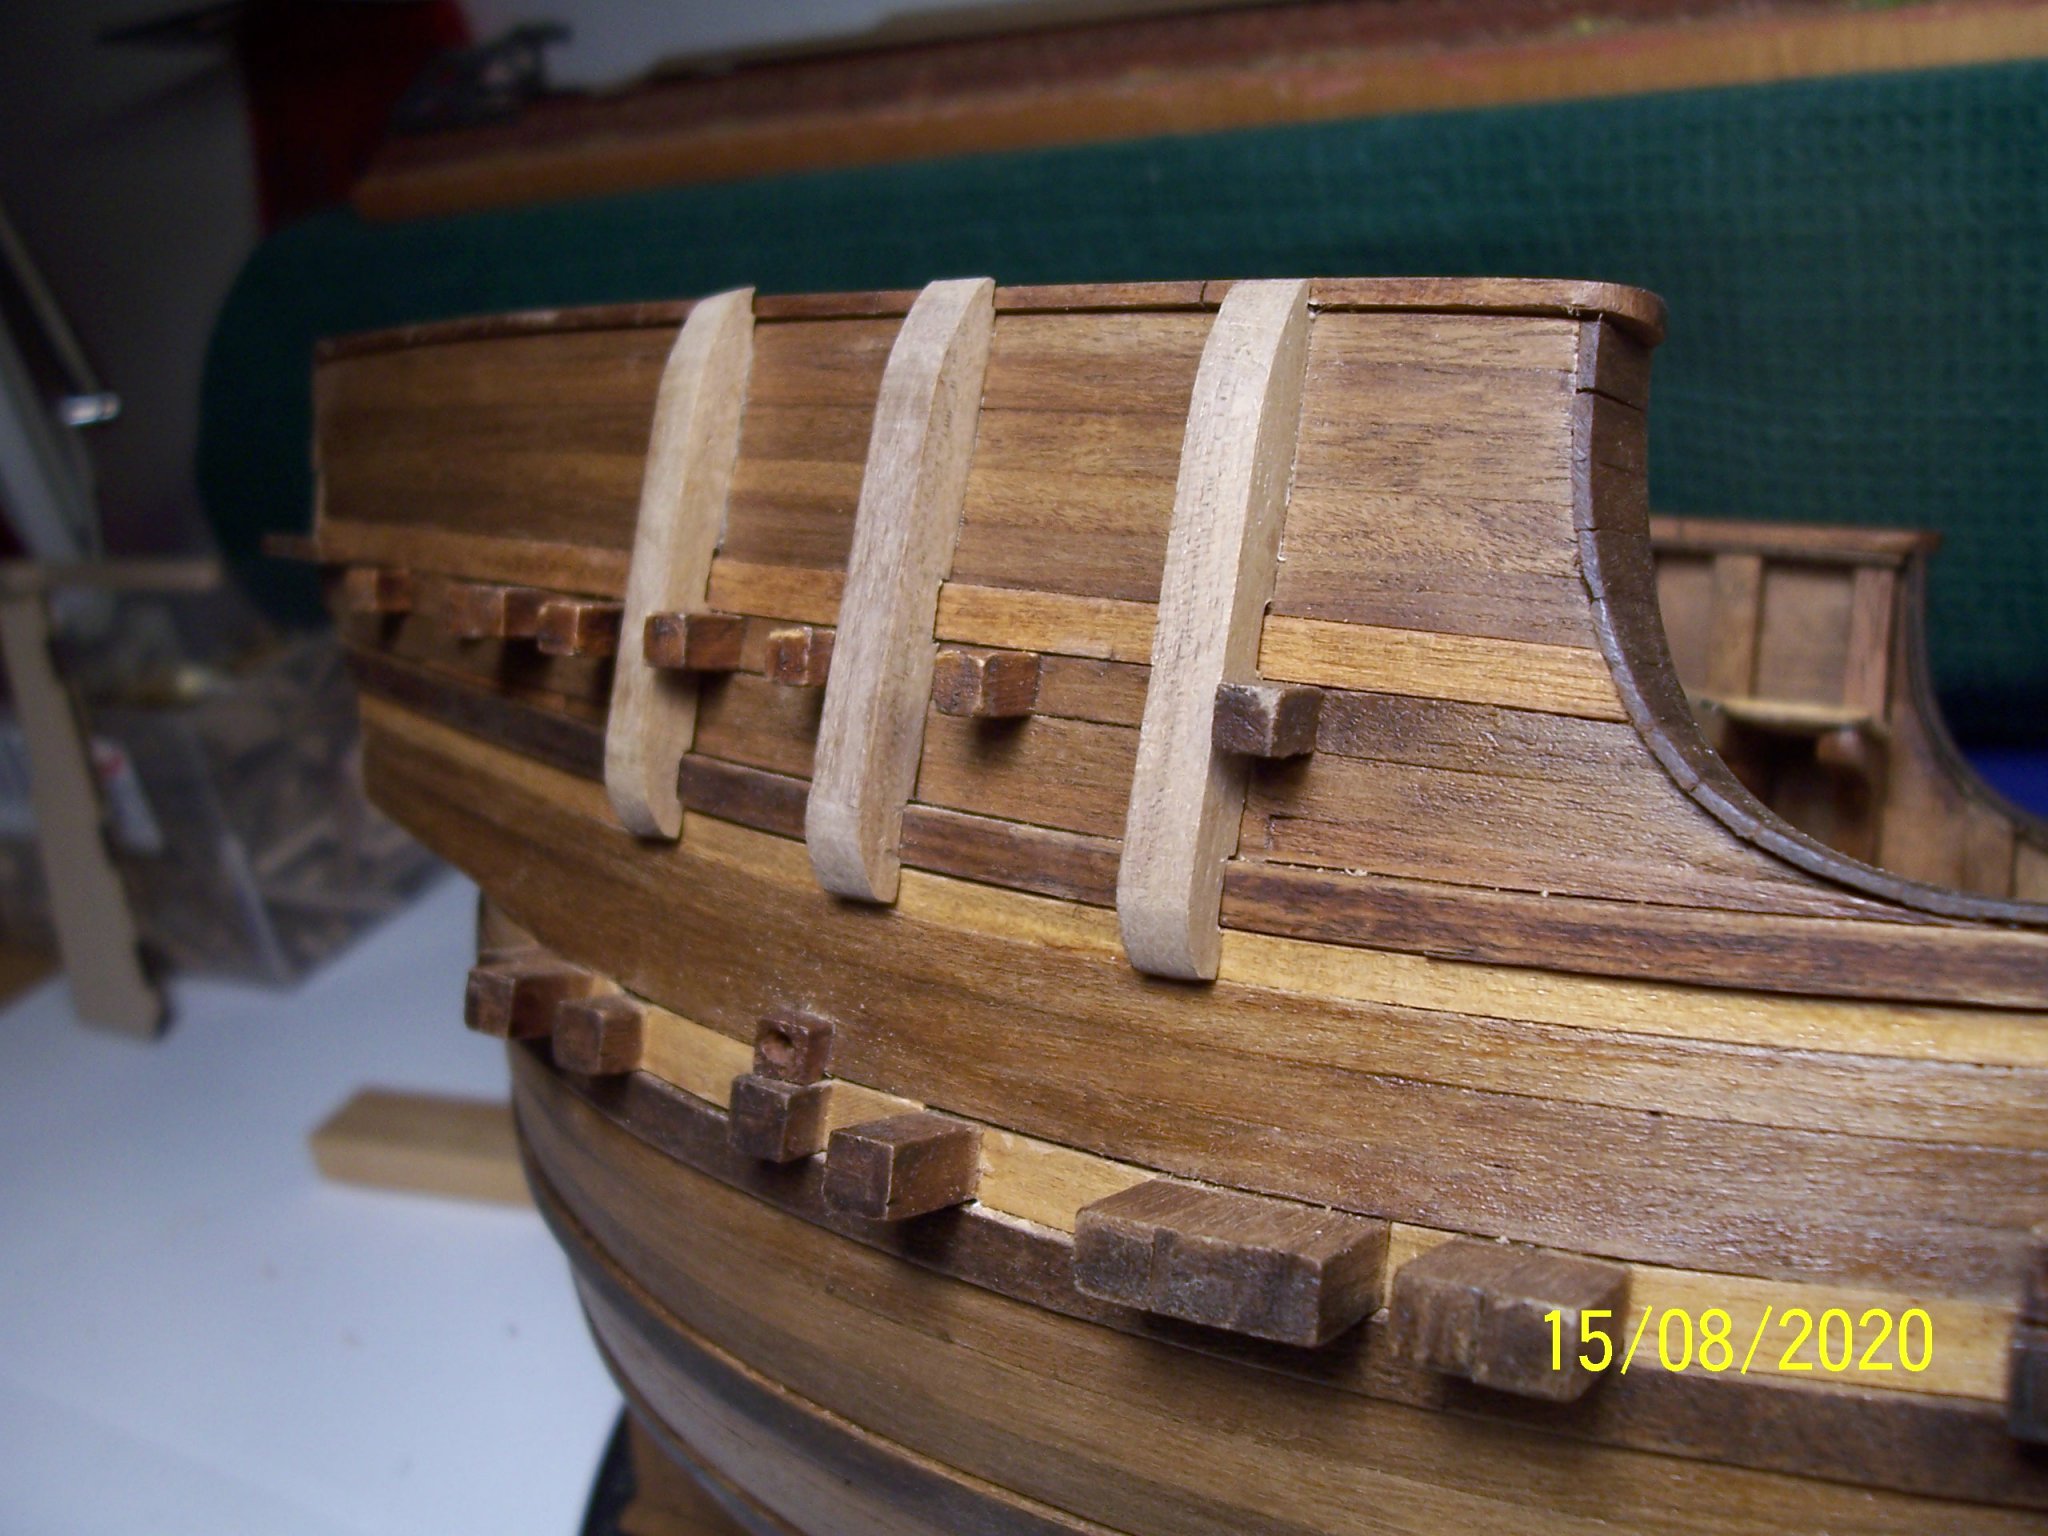
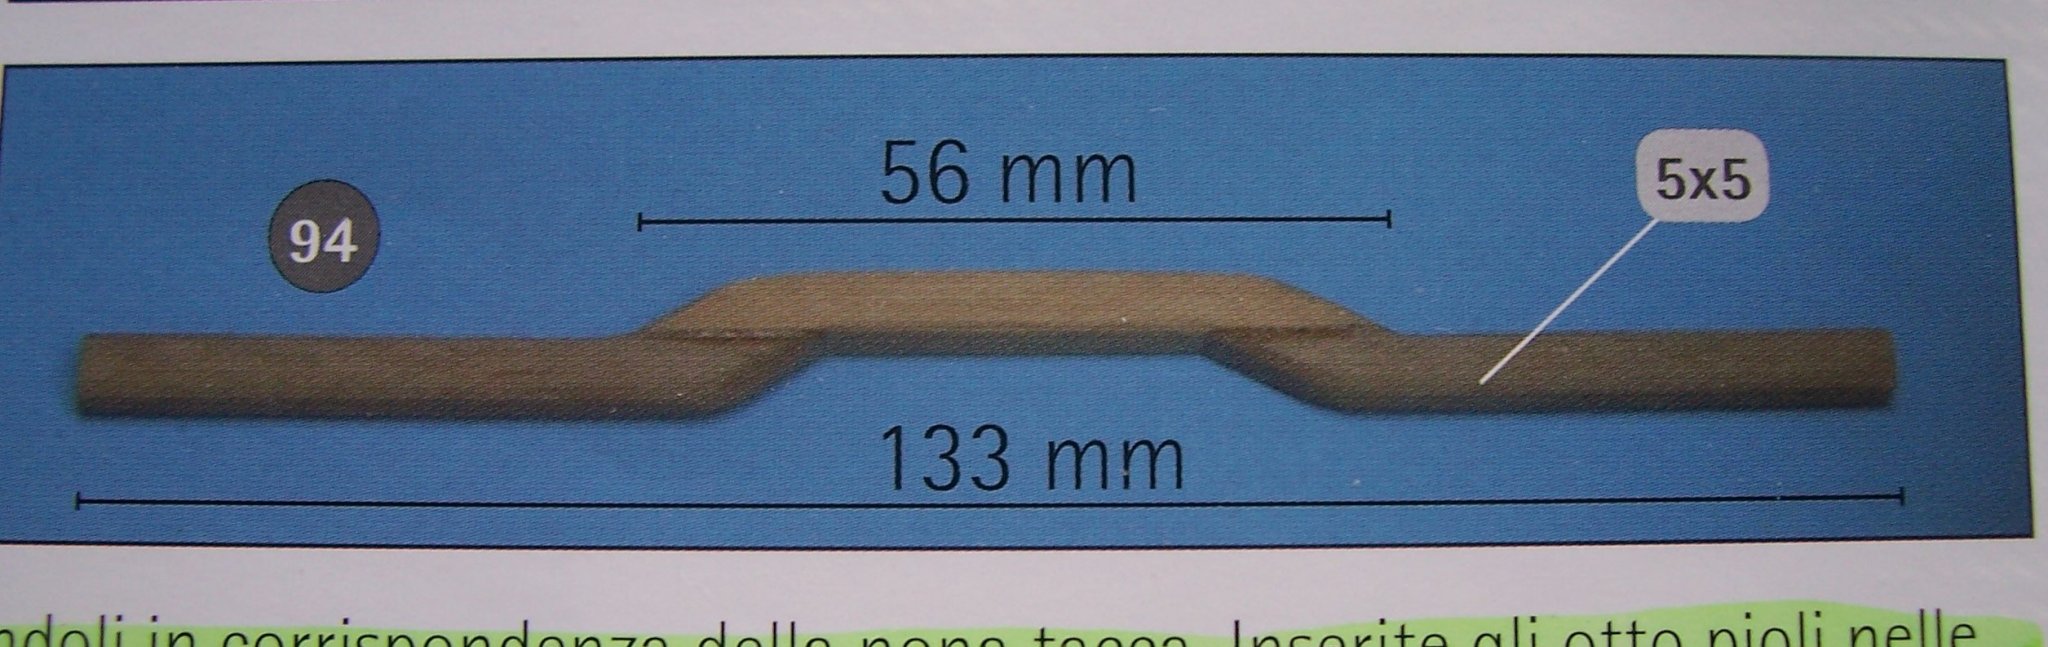
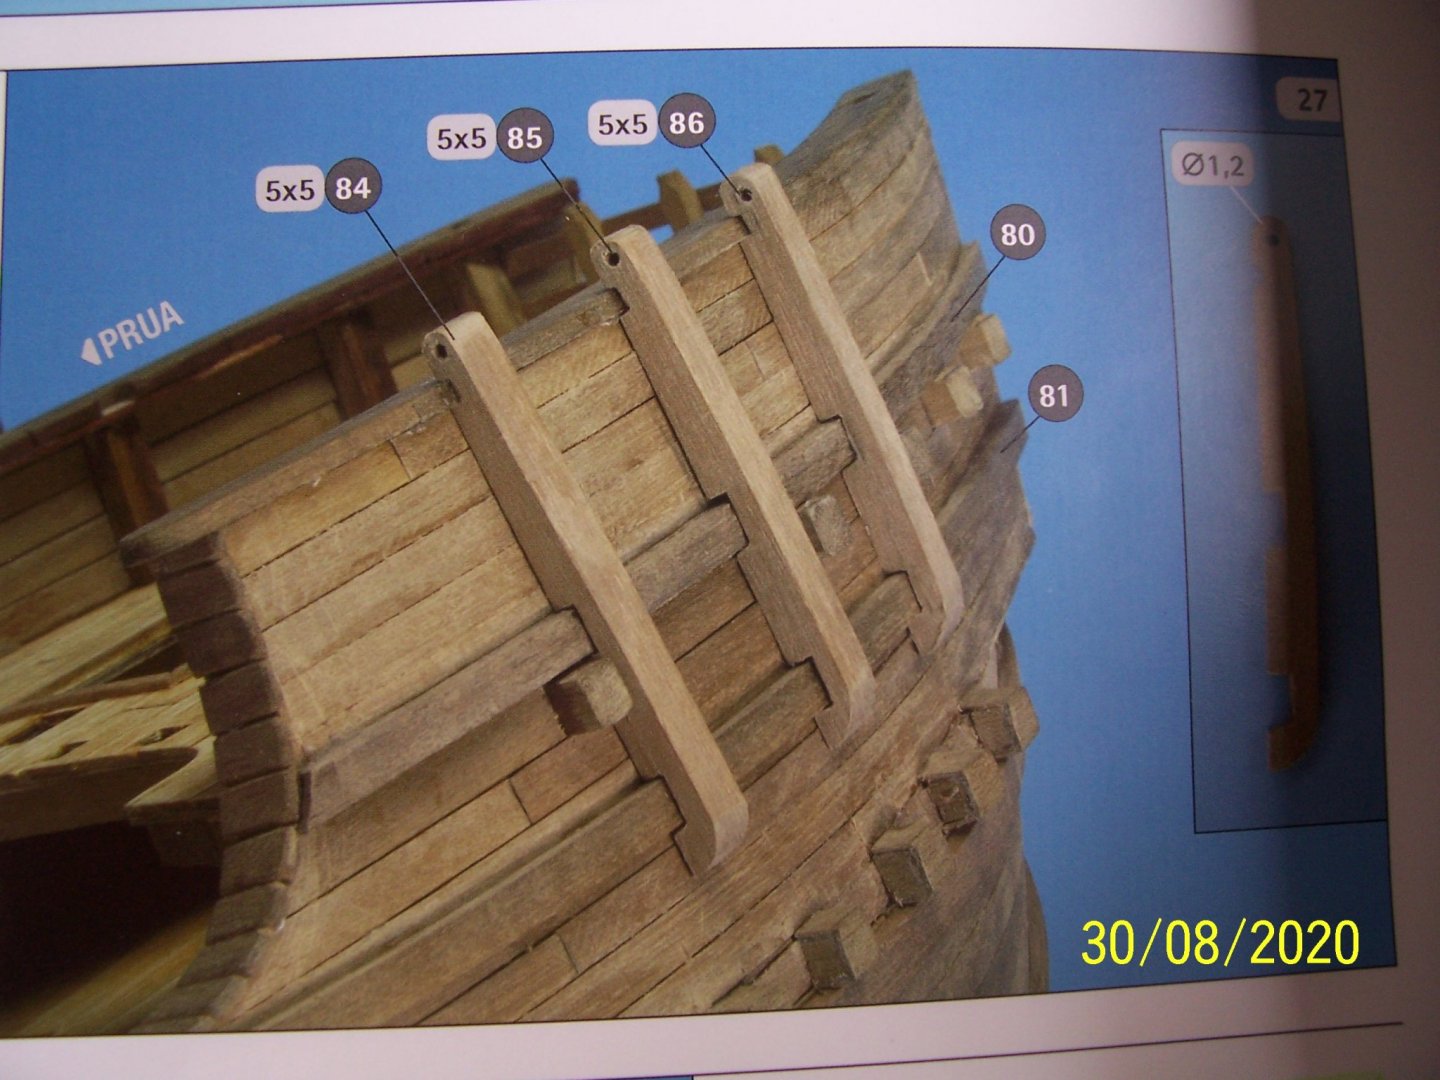
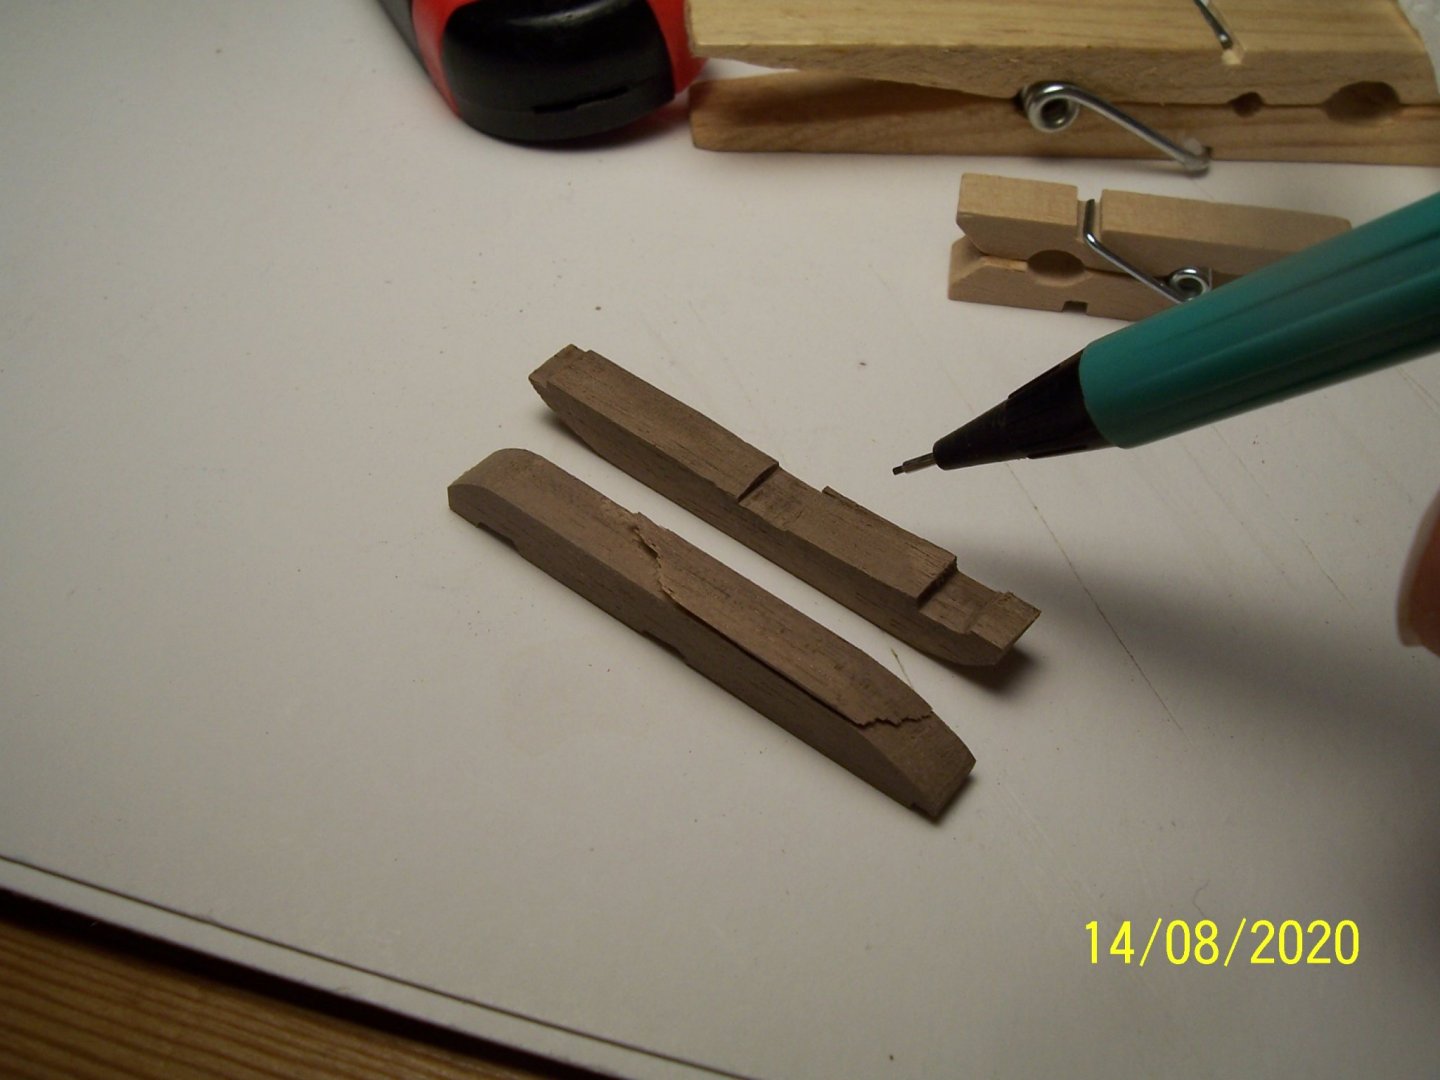
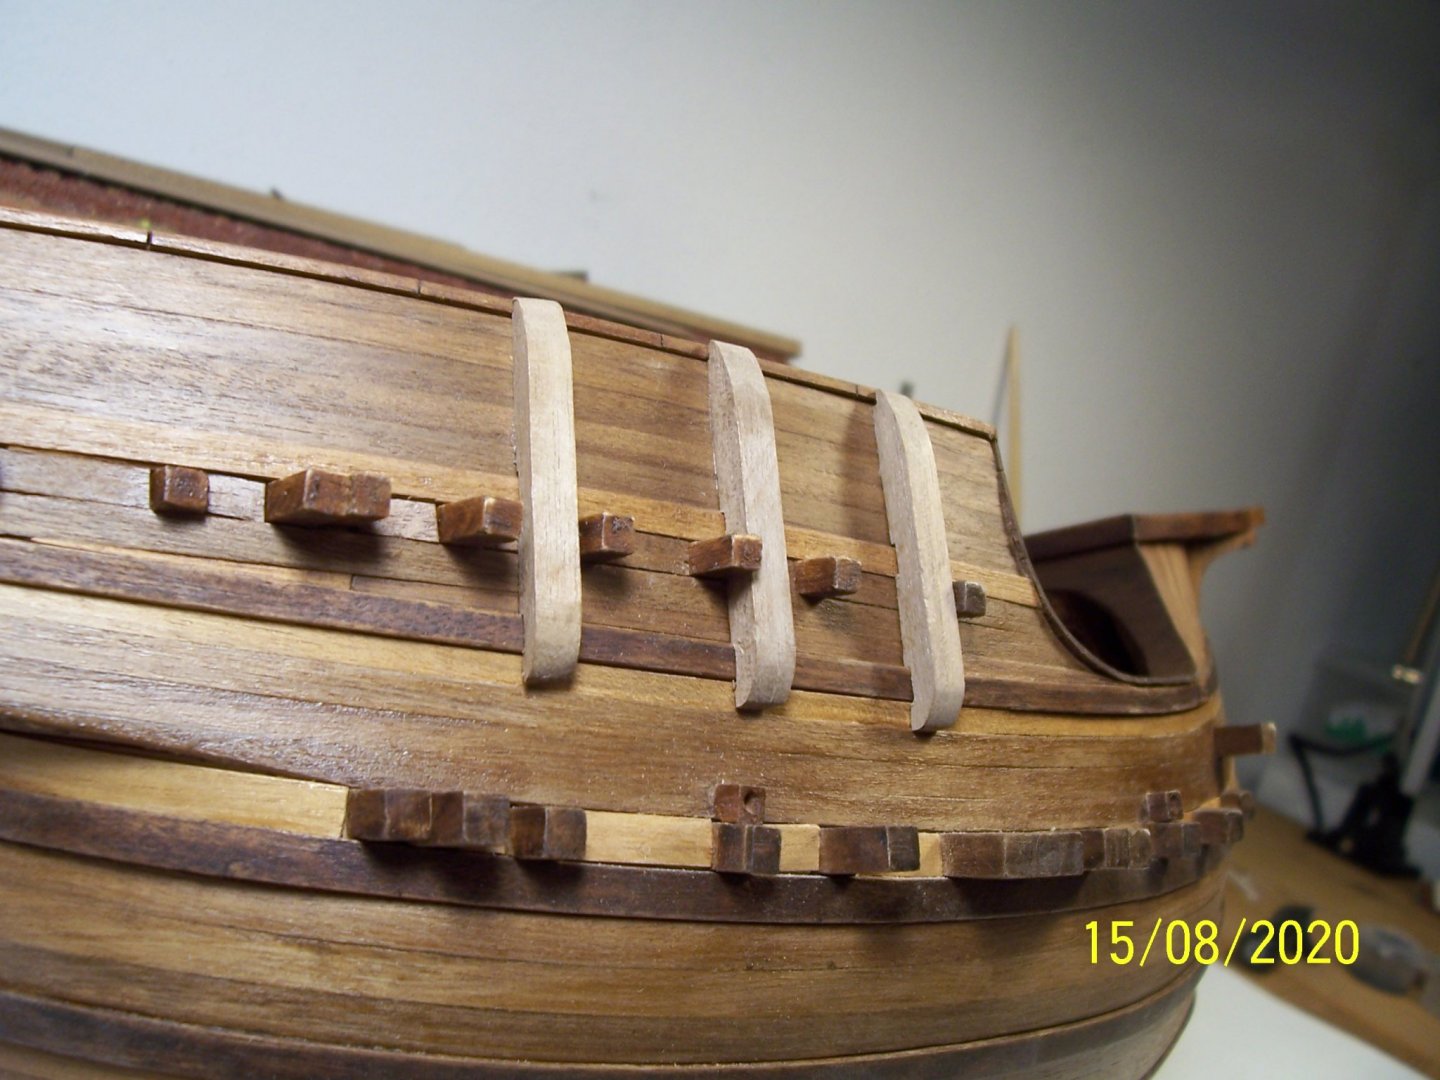
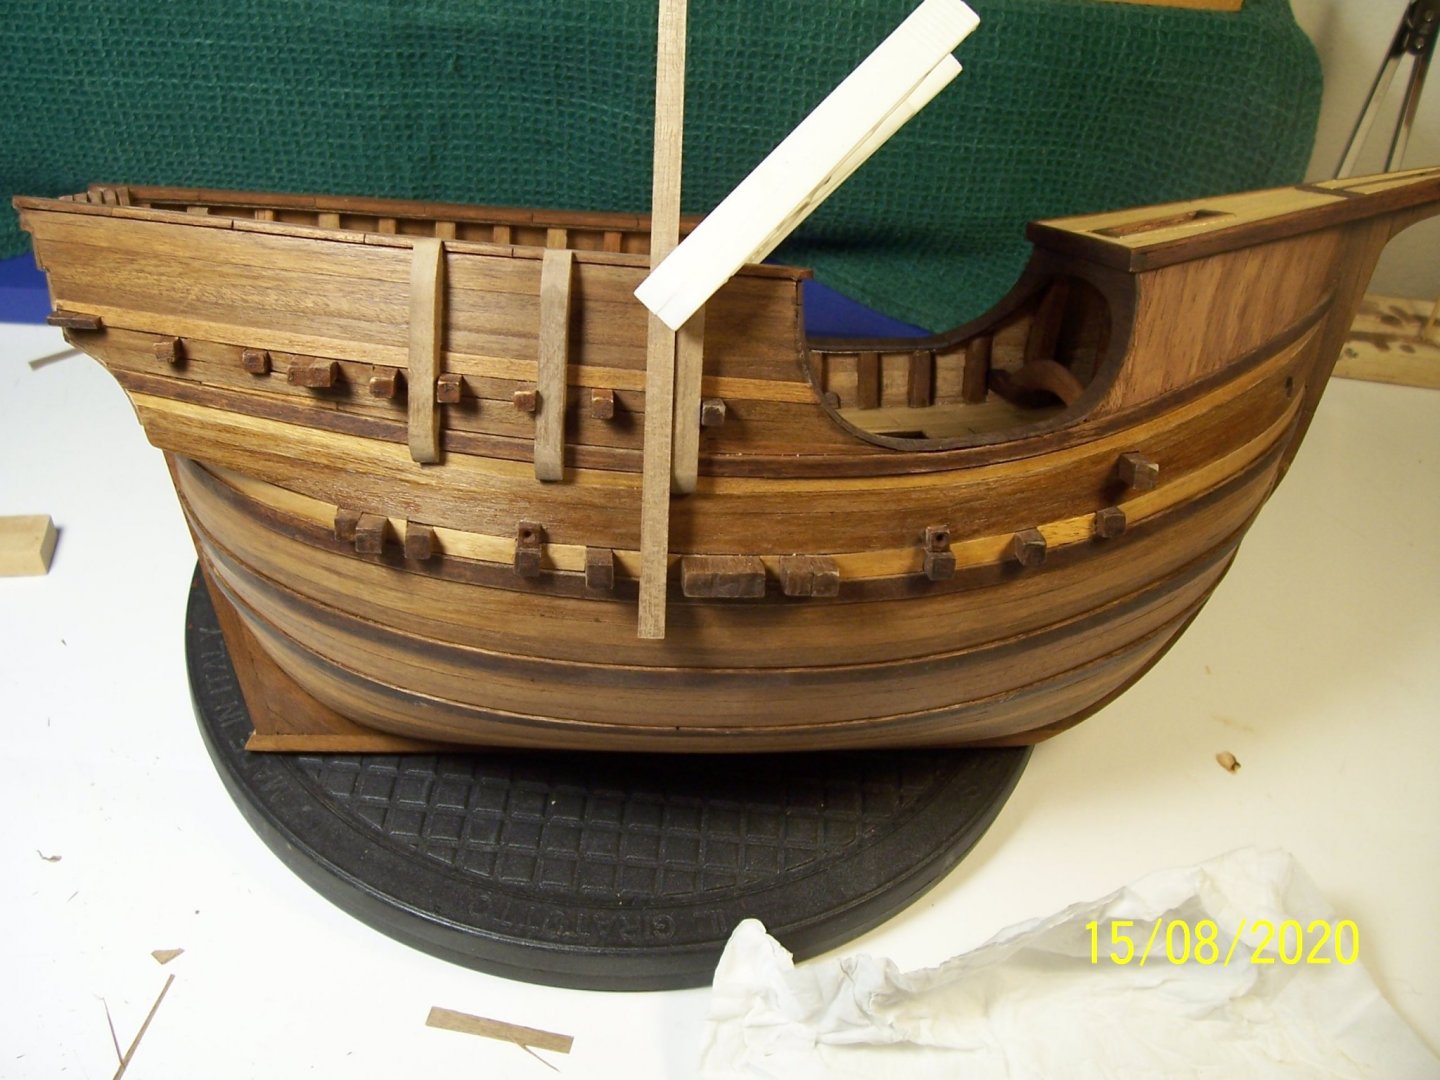
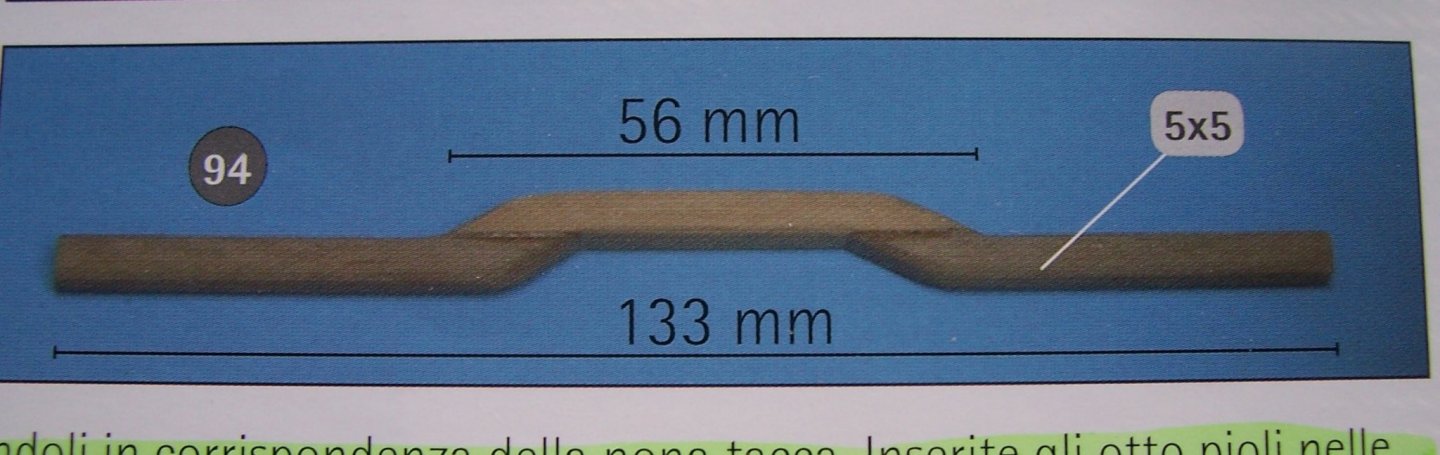
Thank you, dear friends, for your positive comments about the model! Next step will be the three reinforcements on the sides. Instructions suggest to cut strips 5x5 mm, 55 mm in length, and to drill a 1.2 mm hole in the upper end for fixing the shrouds: I never saw such a disposition of the rigging and then i cut only 45 mm in length without drilling the holes. I worked the strips in series: Attention: the strips can exfoliate: I carried out a test without glue and a squareness control: After that, glue and painting: The next step will be the rudder. See you soon! Rodolfo


-
Thanks, Steven. Being my first work, I try to do a bit better than instructions say, but I also know there are a lot of things out of my knowledge and therefore I've to study much more... The last step has been planking main deck bulwark edges using walnut strips 4x1 mm, like illustrated in the AMATI's instructions: It has been a difficult work, and I had to build some tools using abrasive paper and wood silhouettes: Perhaps, using shapes cut out of veneer instead of strips, it would have come a better job ... Now we've to build the external reinforcements (fenders) for the hull... See you soon... Rodolfo


-
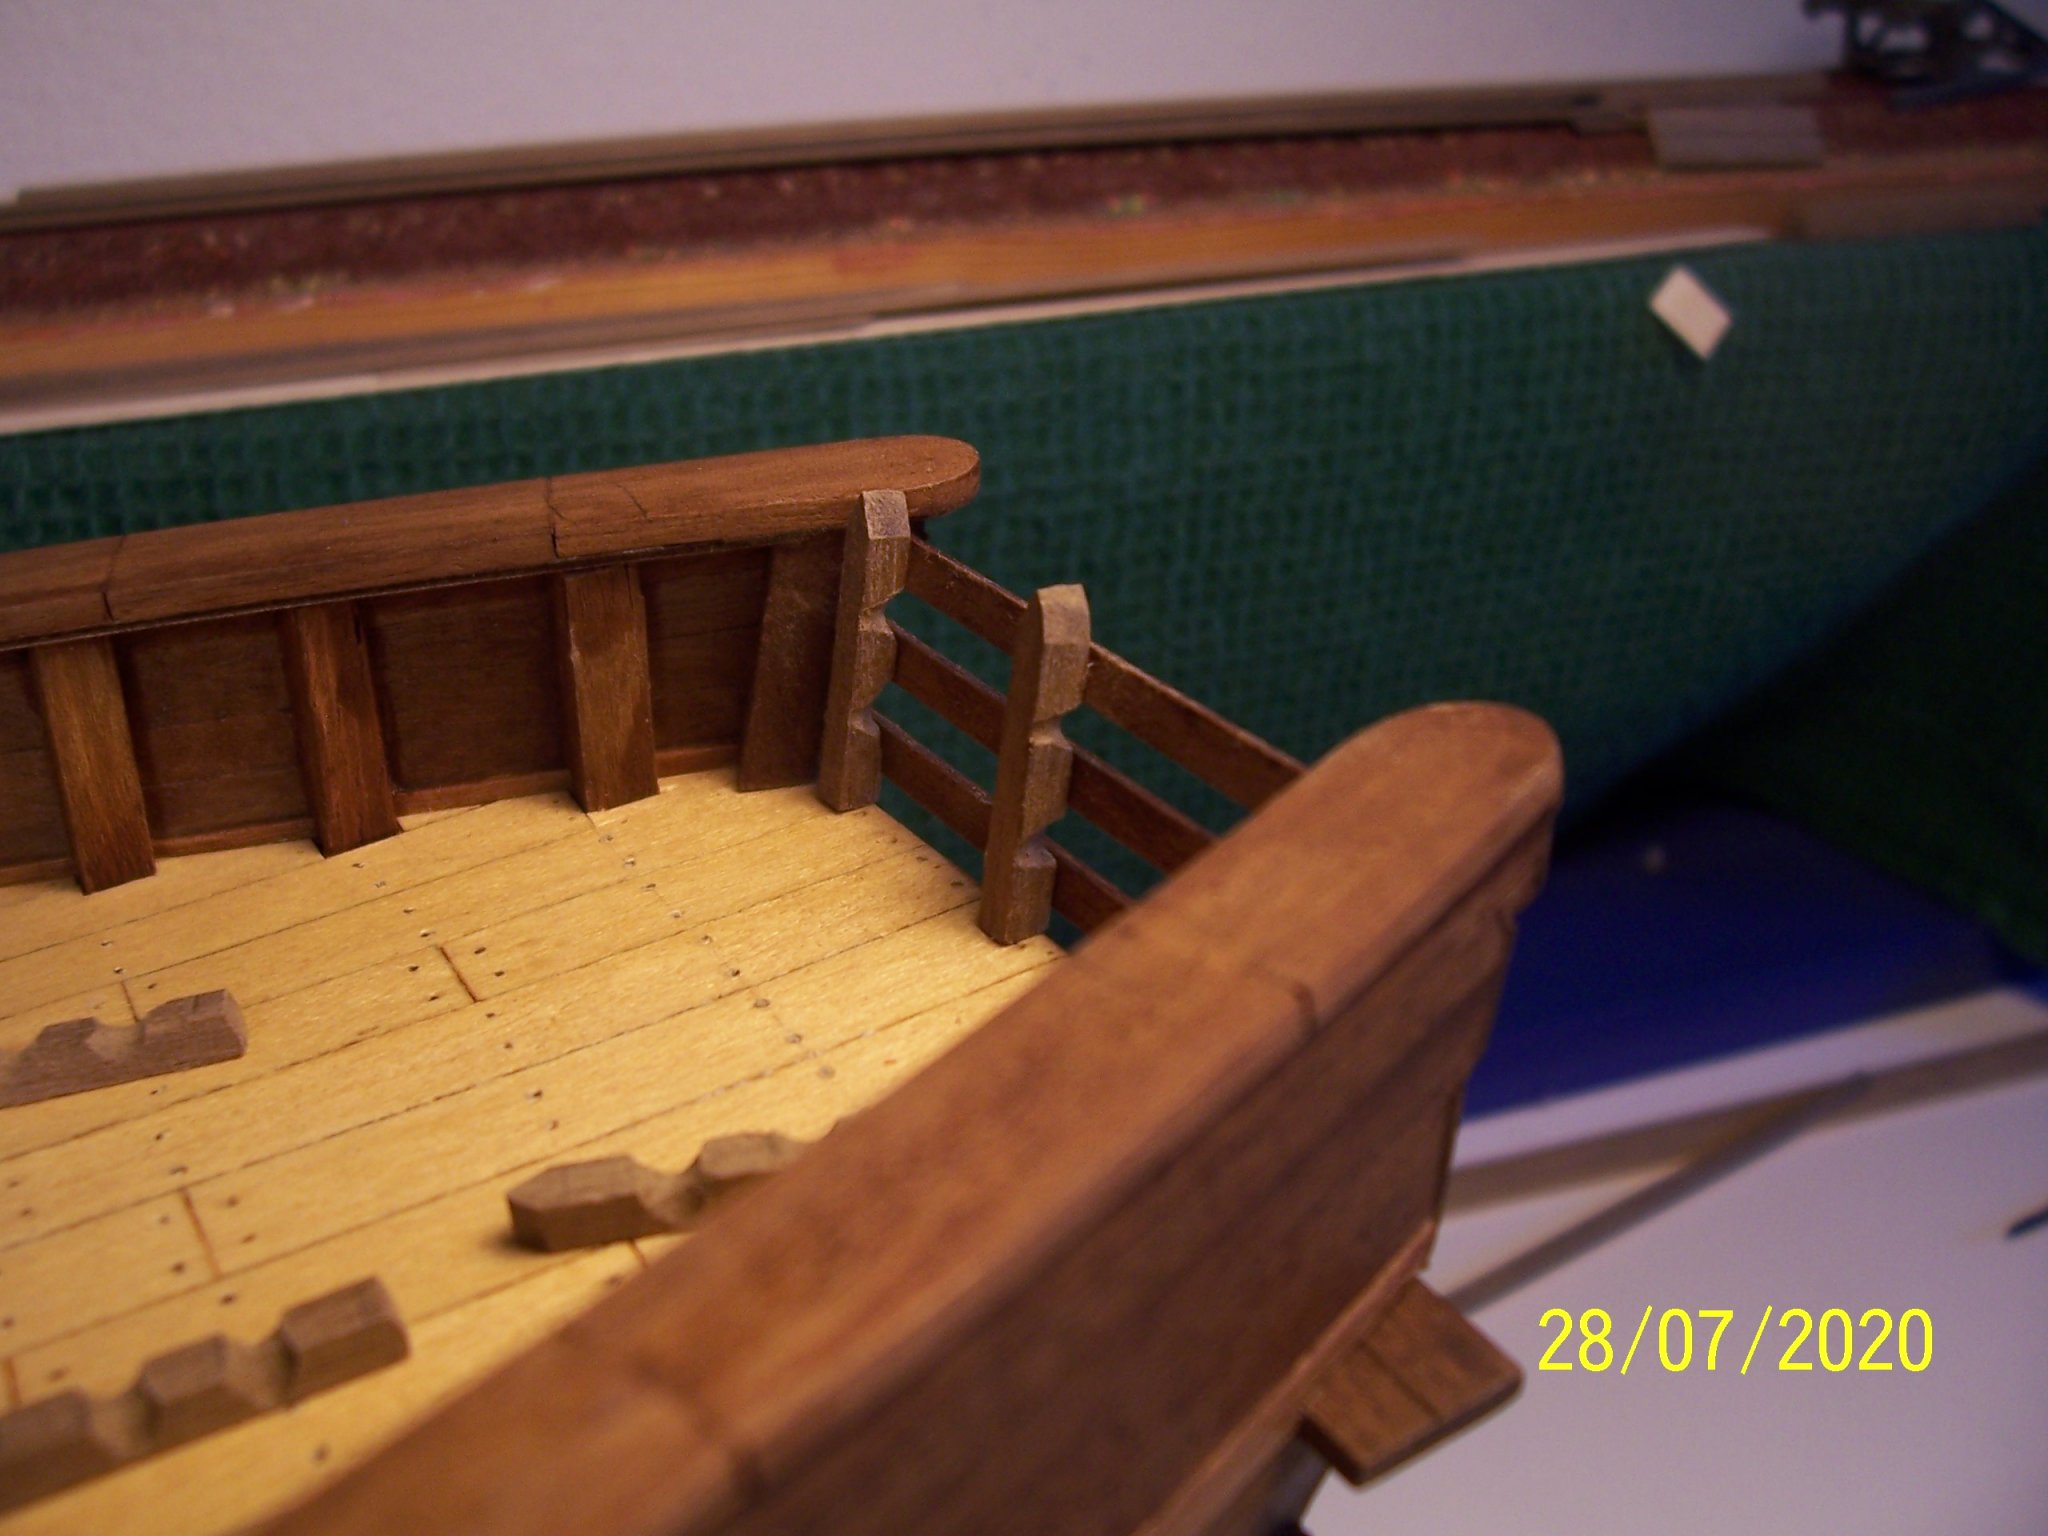
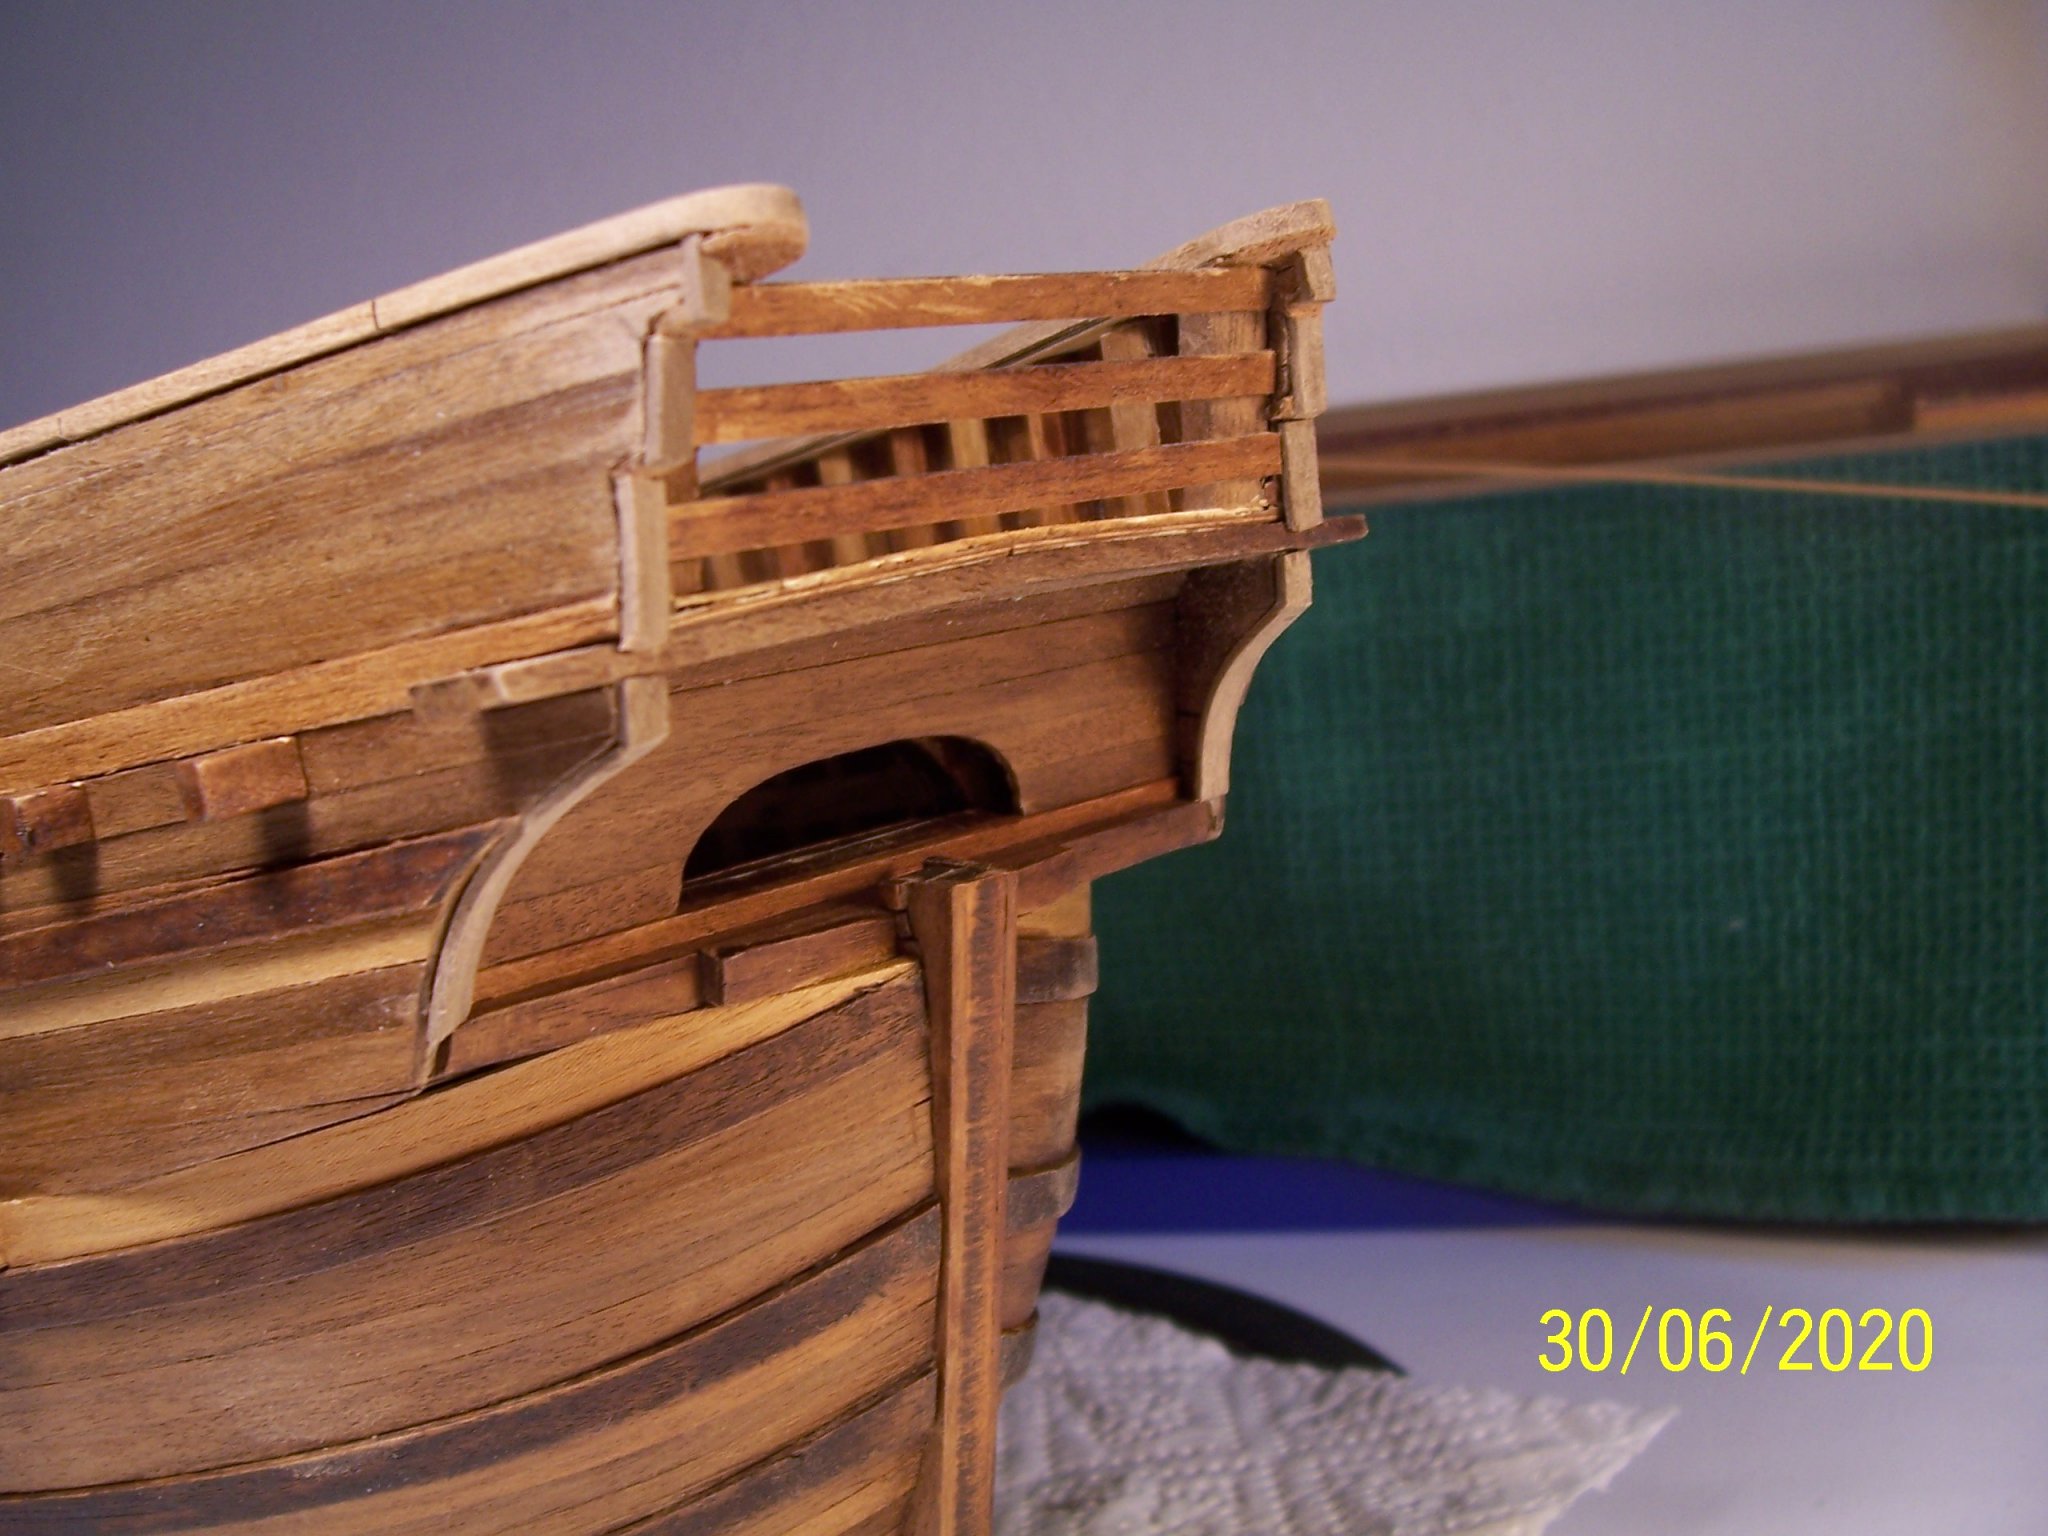
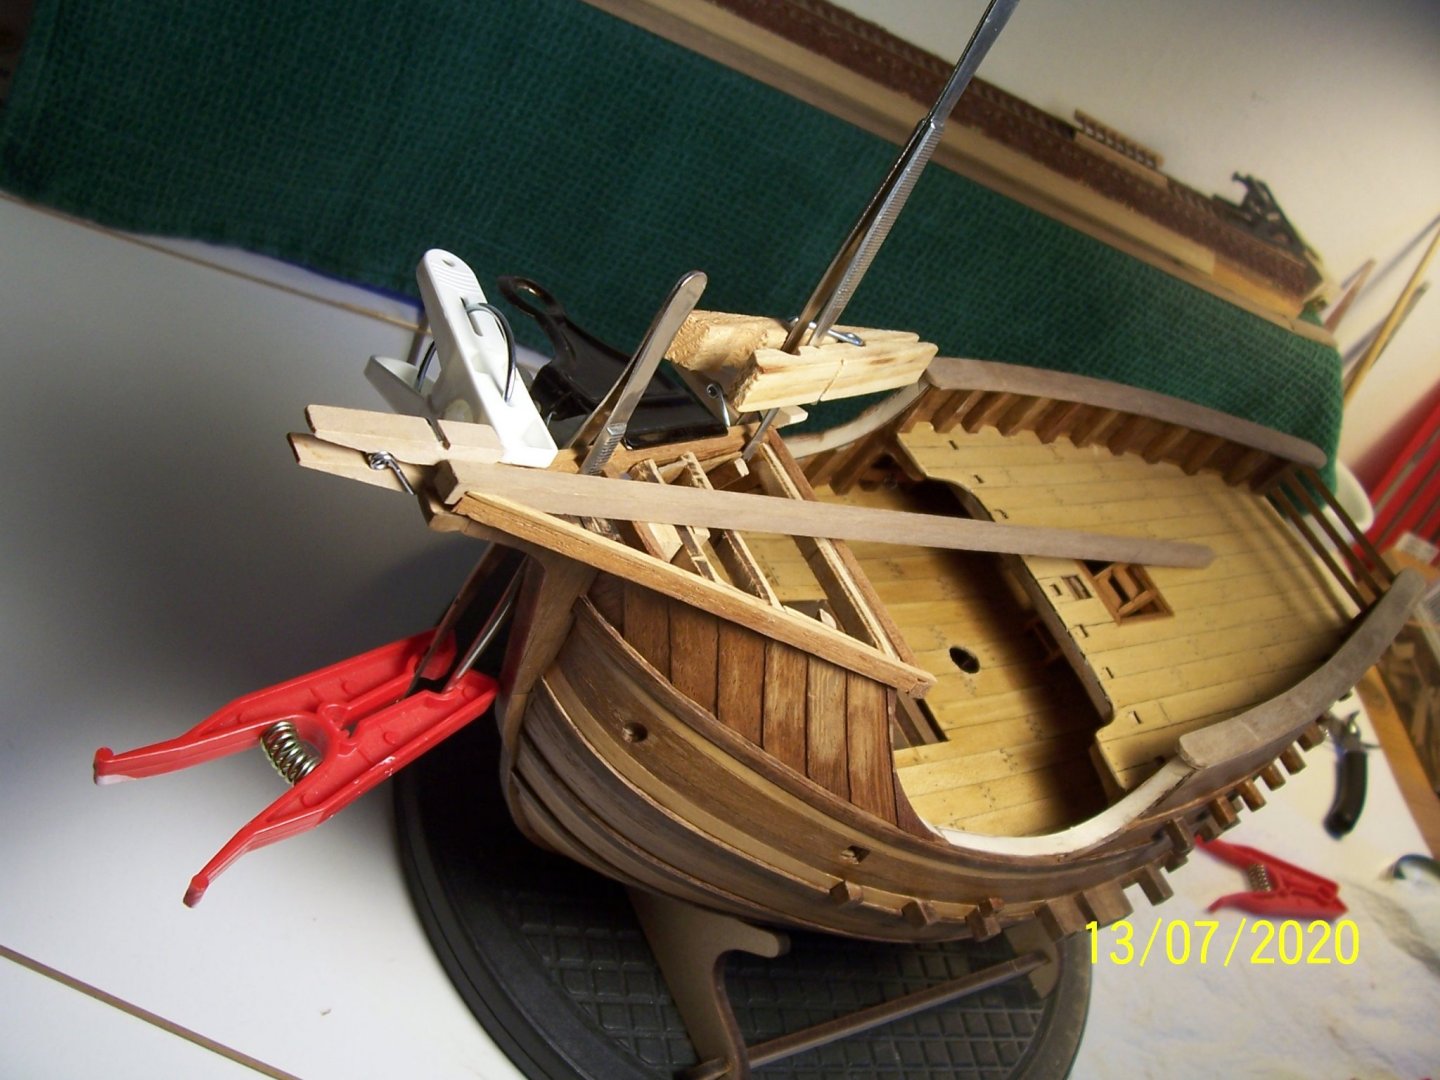
Many thanks, Patrick! The work is proceeding slowly; I didn't like the davit as described in the instructions: Really it could be straight or curved upwards (like the Matarò model): (pictures are in "Le navi di Colombo" - Heinrich Winter - Ed. MURSIA) and then I decided to make it curvilinear: After that, the rail above stern board had to be built and instruction shows only three supports. Because the model of Matarò has five, I did so: Now I've to plank the main deck bulwark edges, a slow and tedious work ... See you soon! Rodolfo


-
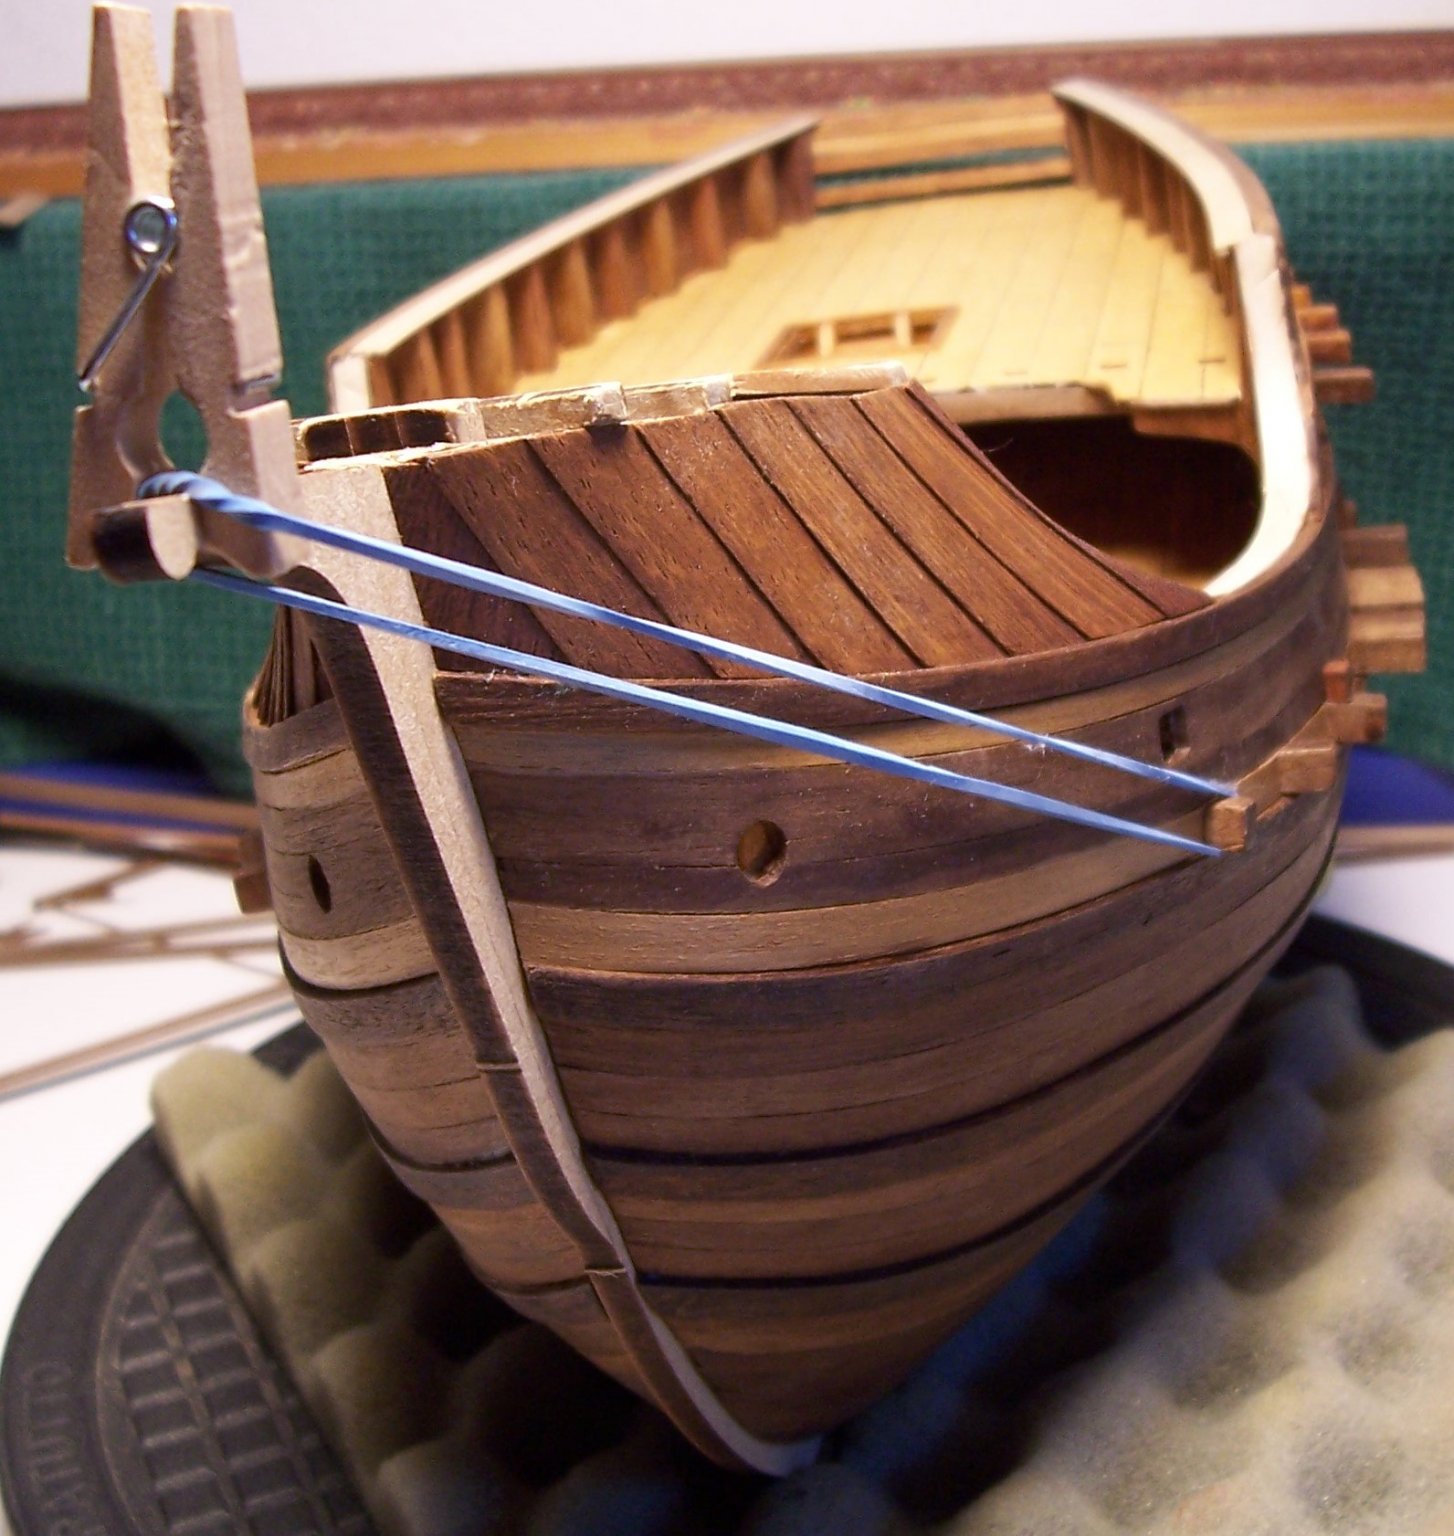
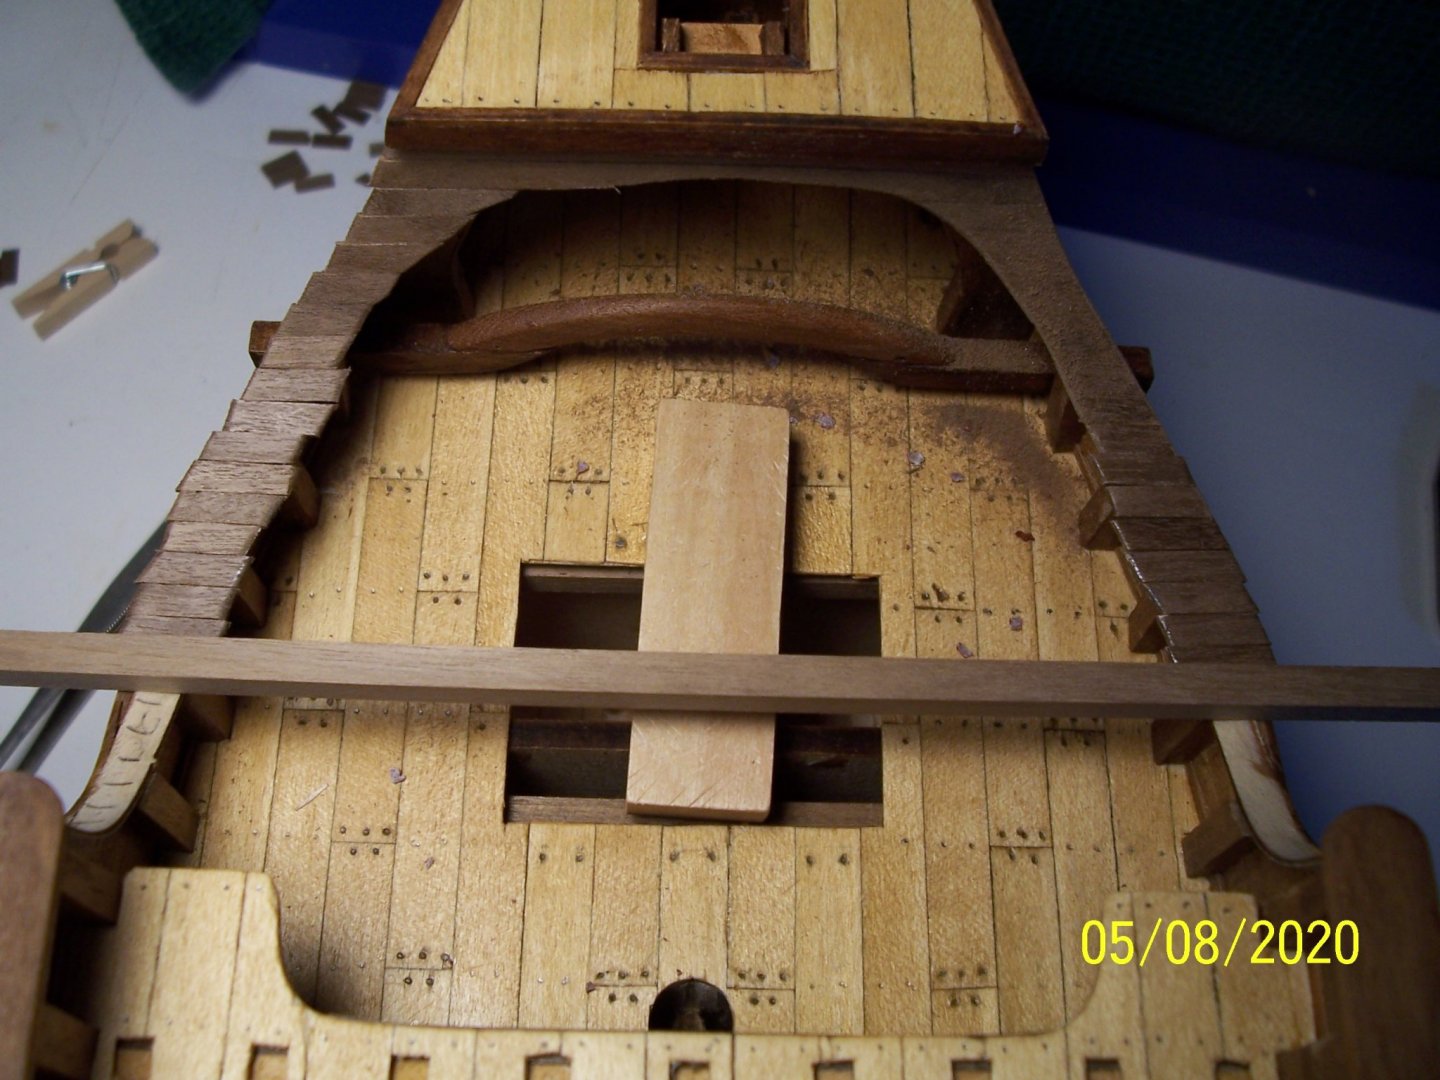
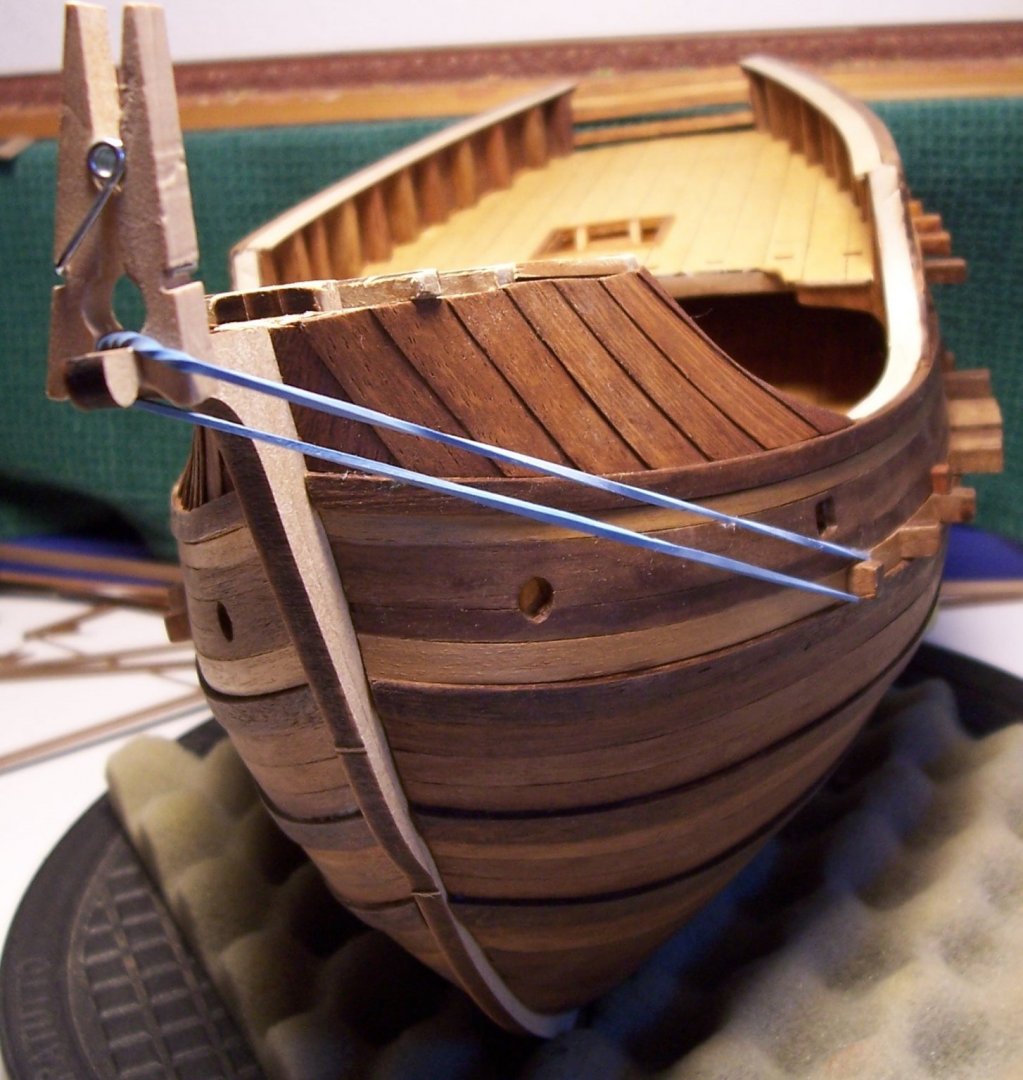
Many thanks, Backer. Your pictures solved some doubts I had about rigging. The work on the Coca has continued, ending the planking: After that, a bit of varnish: Under the deck I added a crossbar: Next step will be the anchor crossbar... See you soon! Rodolfo


-
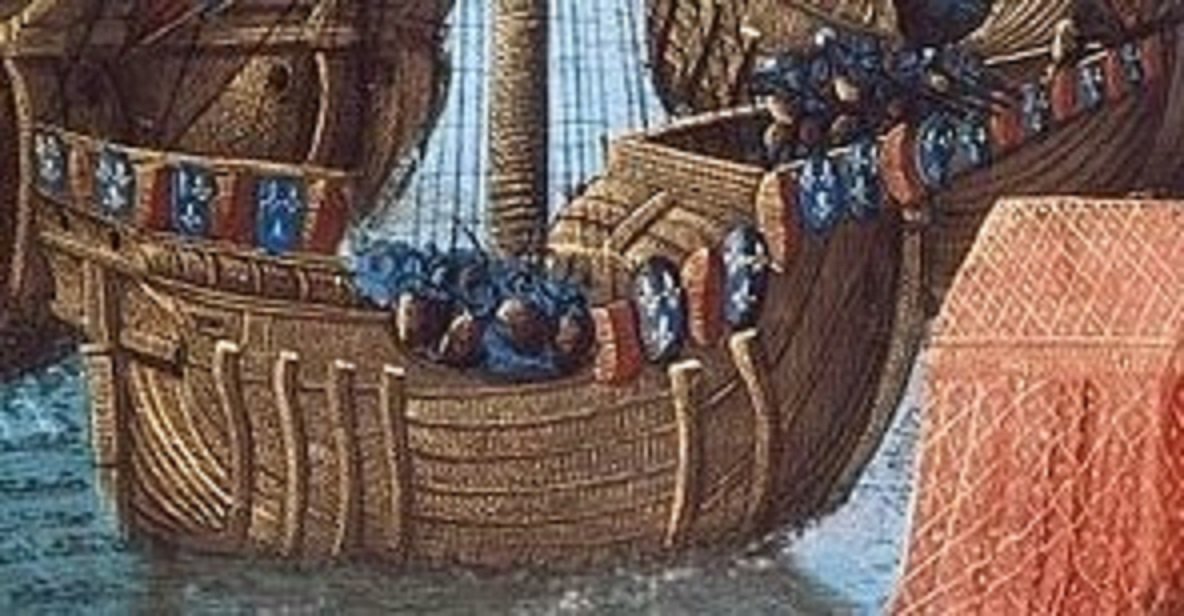
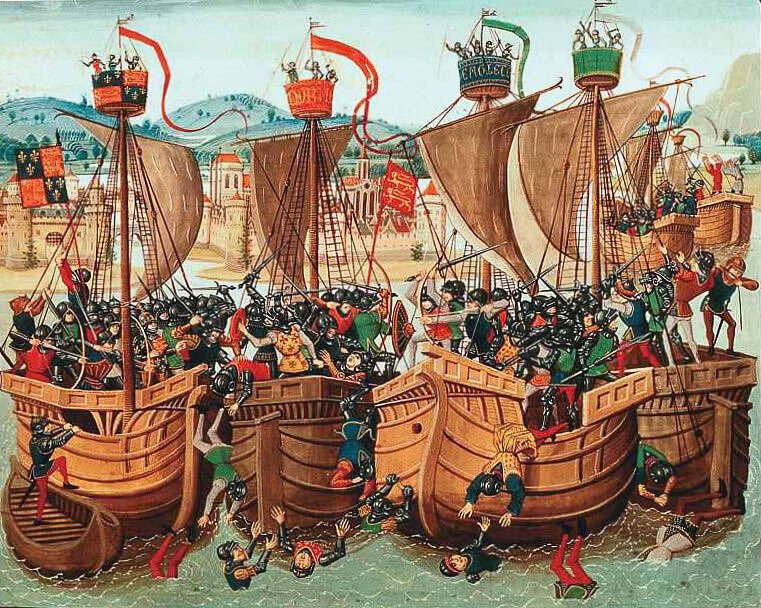
Hi Steven, I enlarged the image: it seems that red shields are divided into four parts and (perhaps) there are three English lions... Rodolfo
-
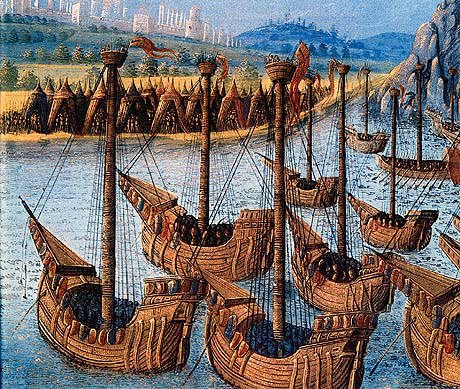
Hi Steven, I've already found it in Pinterest: "Departure of the fleet of Marshal Jean II Meingre known as Boucicaut in 1399, miniature from the Chronicles by Enguerrand de Monstrelet, France, 15th century." Hoping I've been useful, Rodolfo
-
Hi Steven, unfortunately (even before buying the kit) I've collected tons of pictures regarding medieval ships, only for doing better the work. At the beginning I never thought I would have to write a WIP and therefore I neglected the sources (usually WIKIPEDIA, PINTEREST and recently Modellismo.net in Italy, but also a couple of DVD having very old books, besides studies, thesis and so on). But now I am trying to recover the missing information and if/when I'll find it, certainly I will communicate it to you. Rodolfo
-
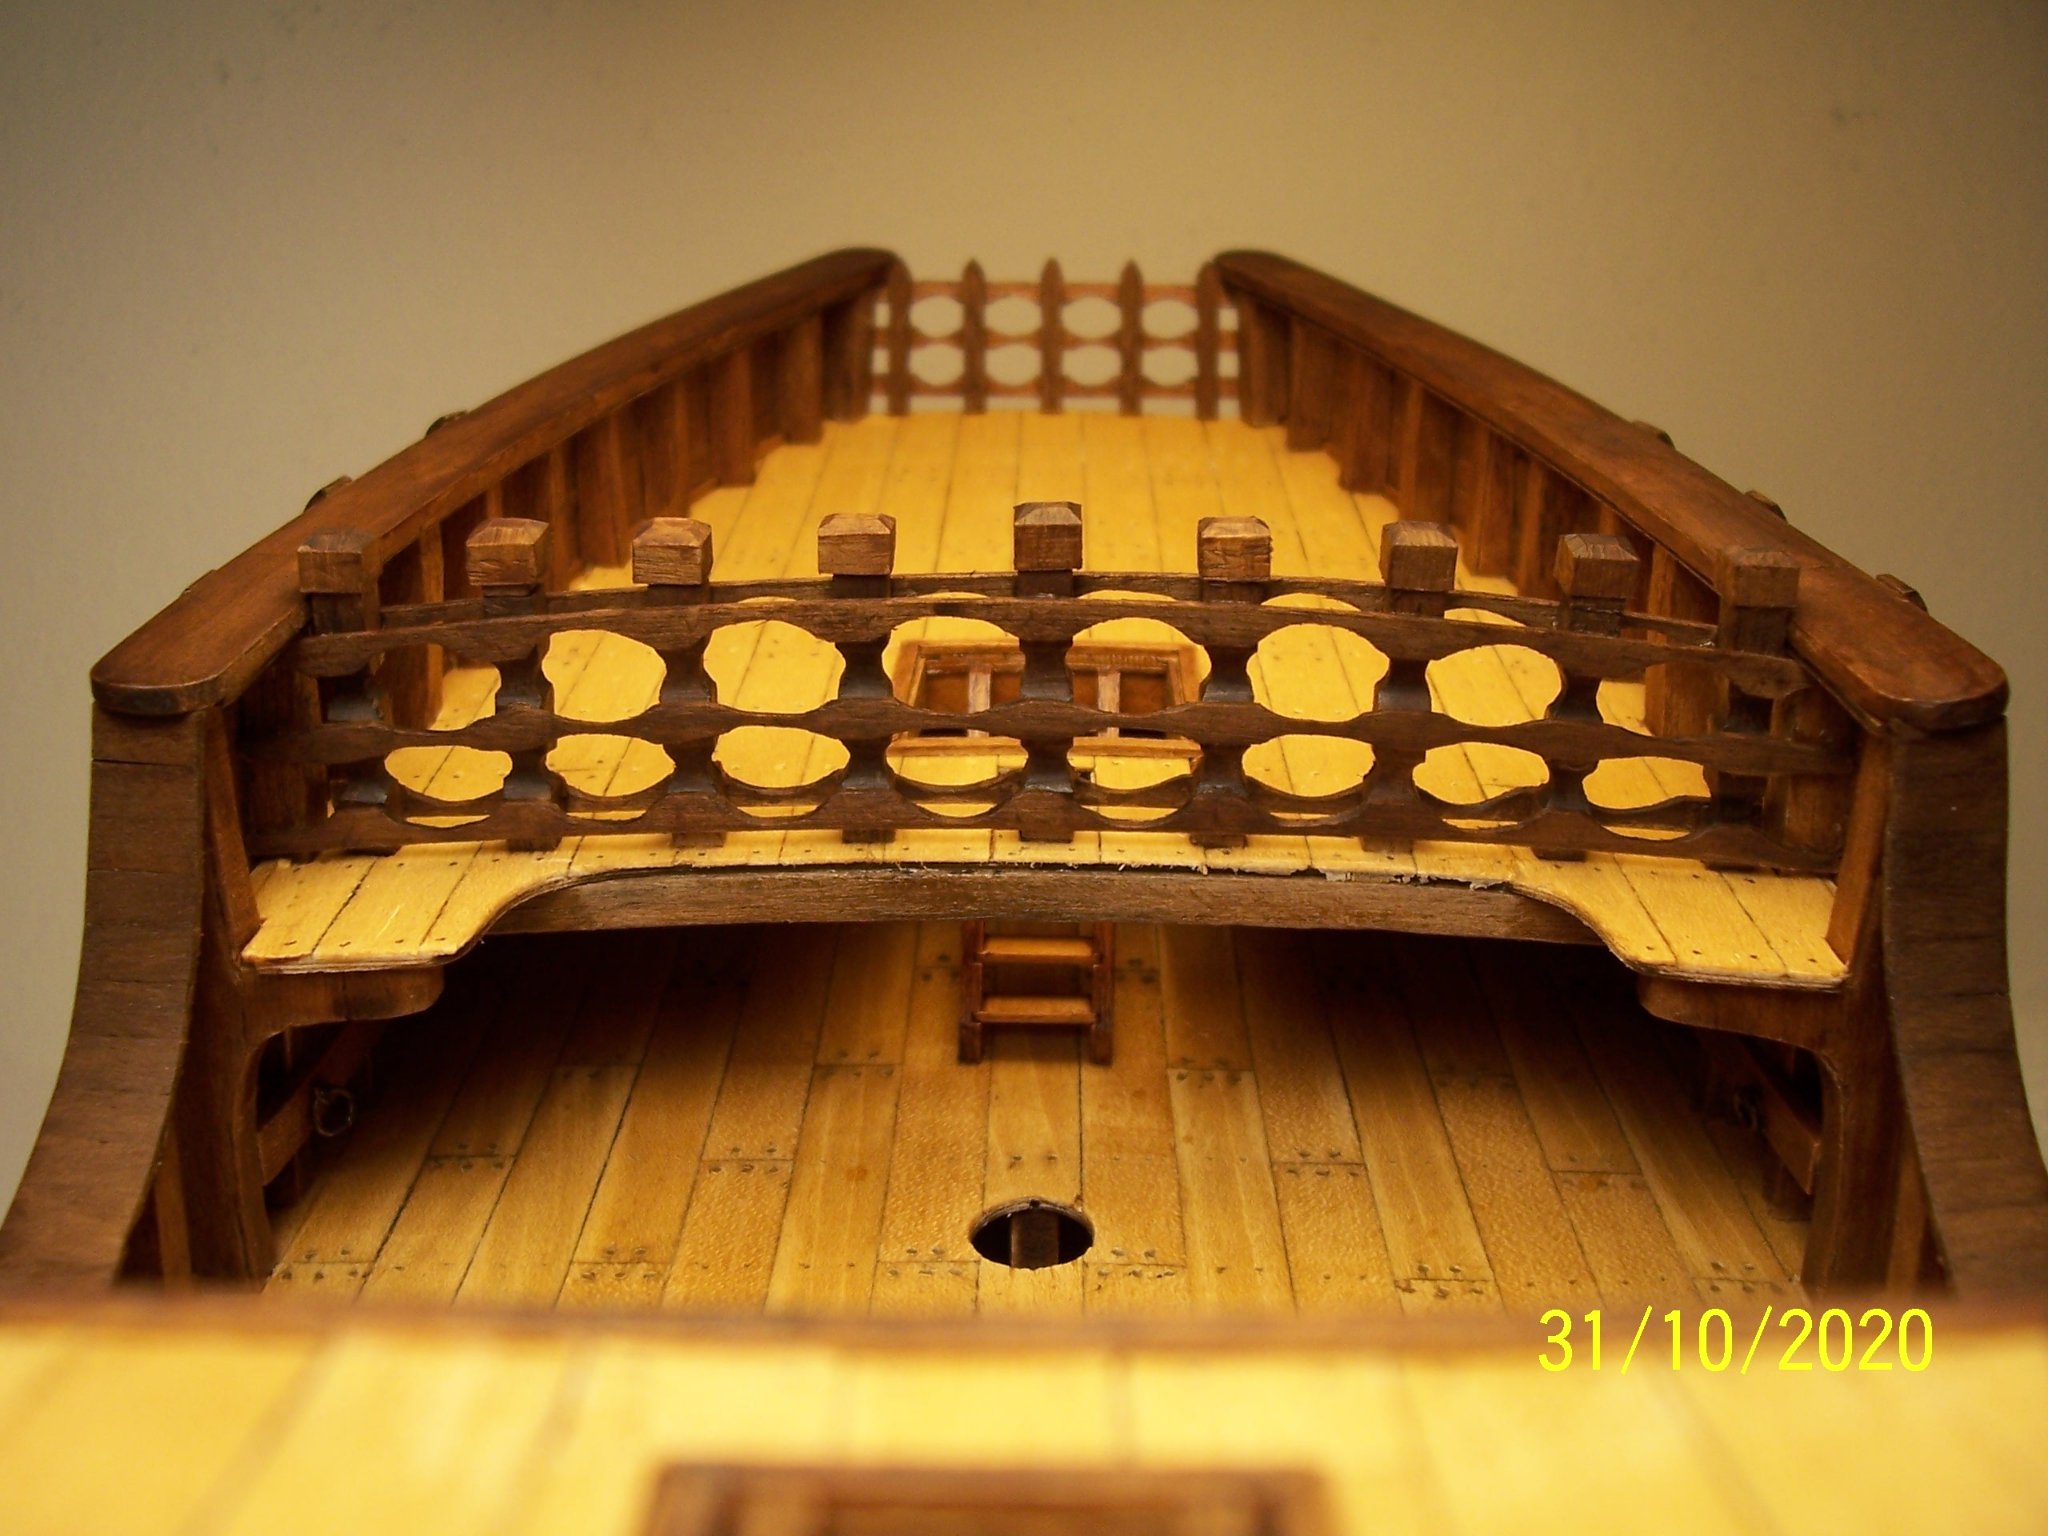
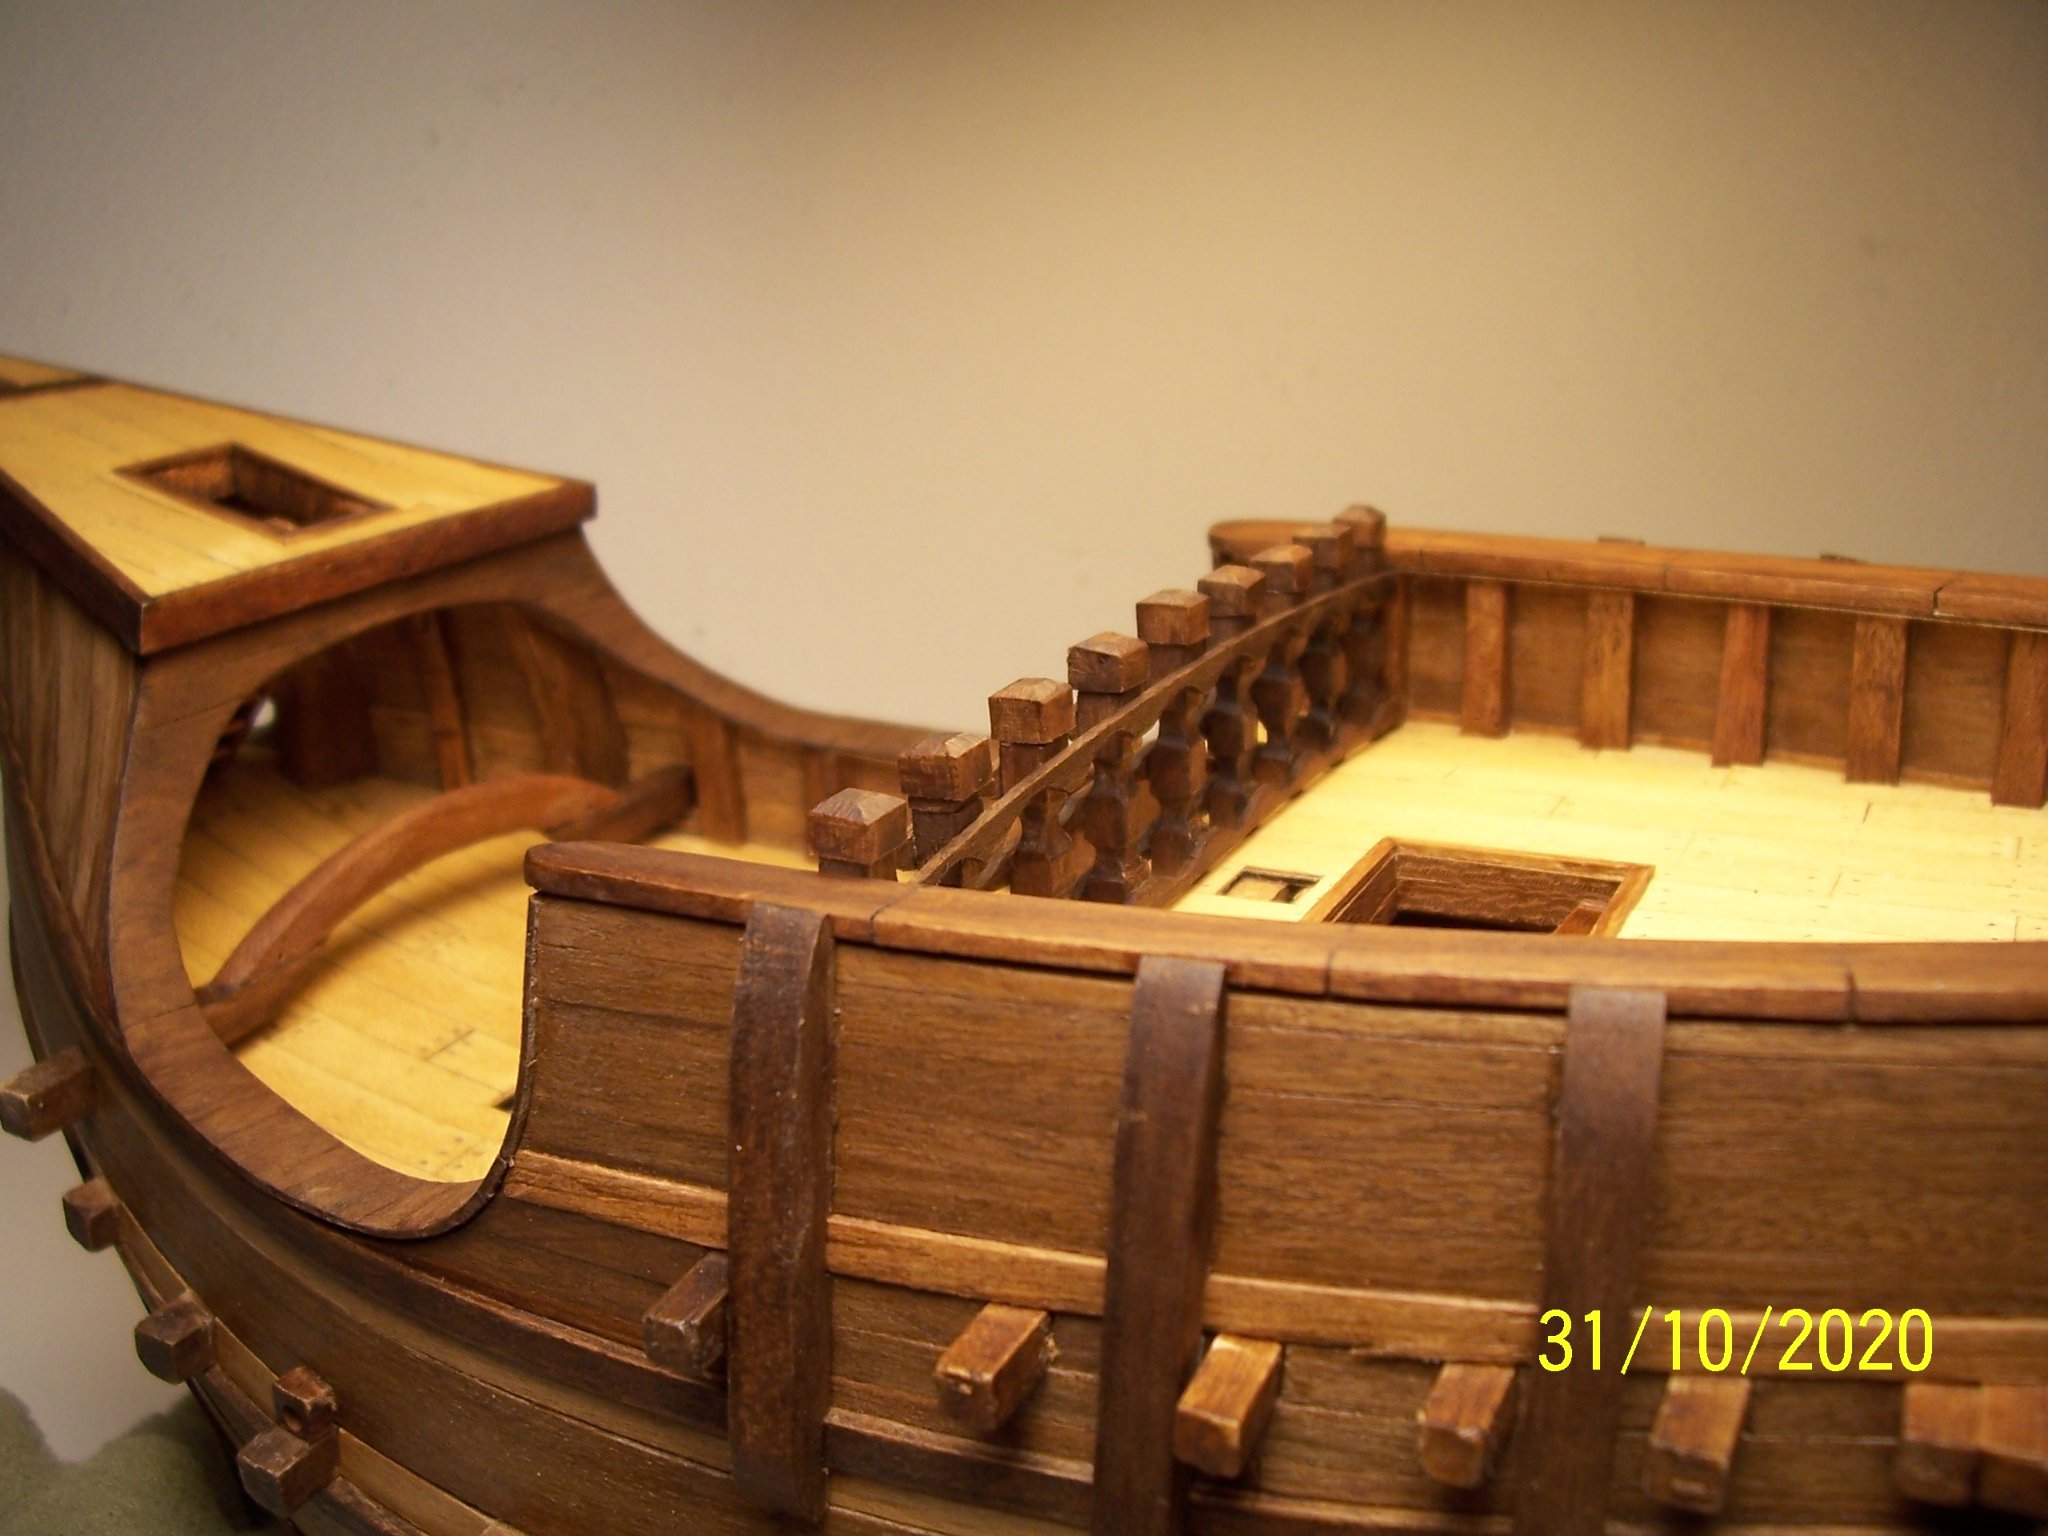
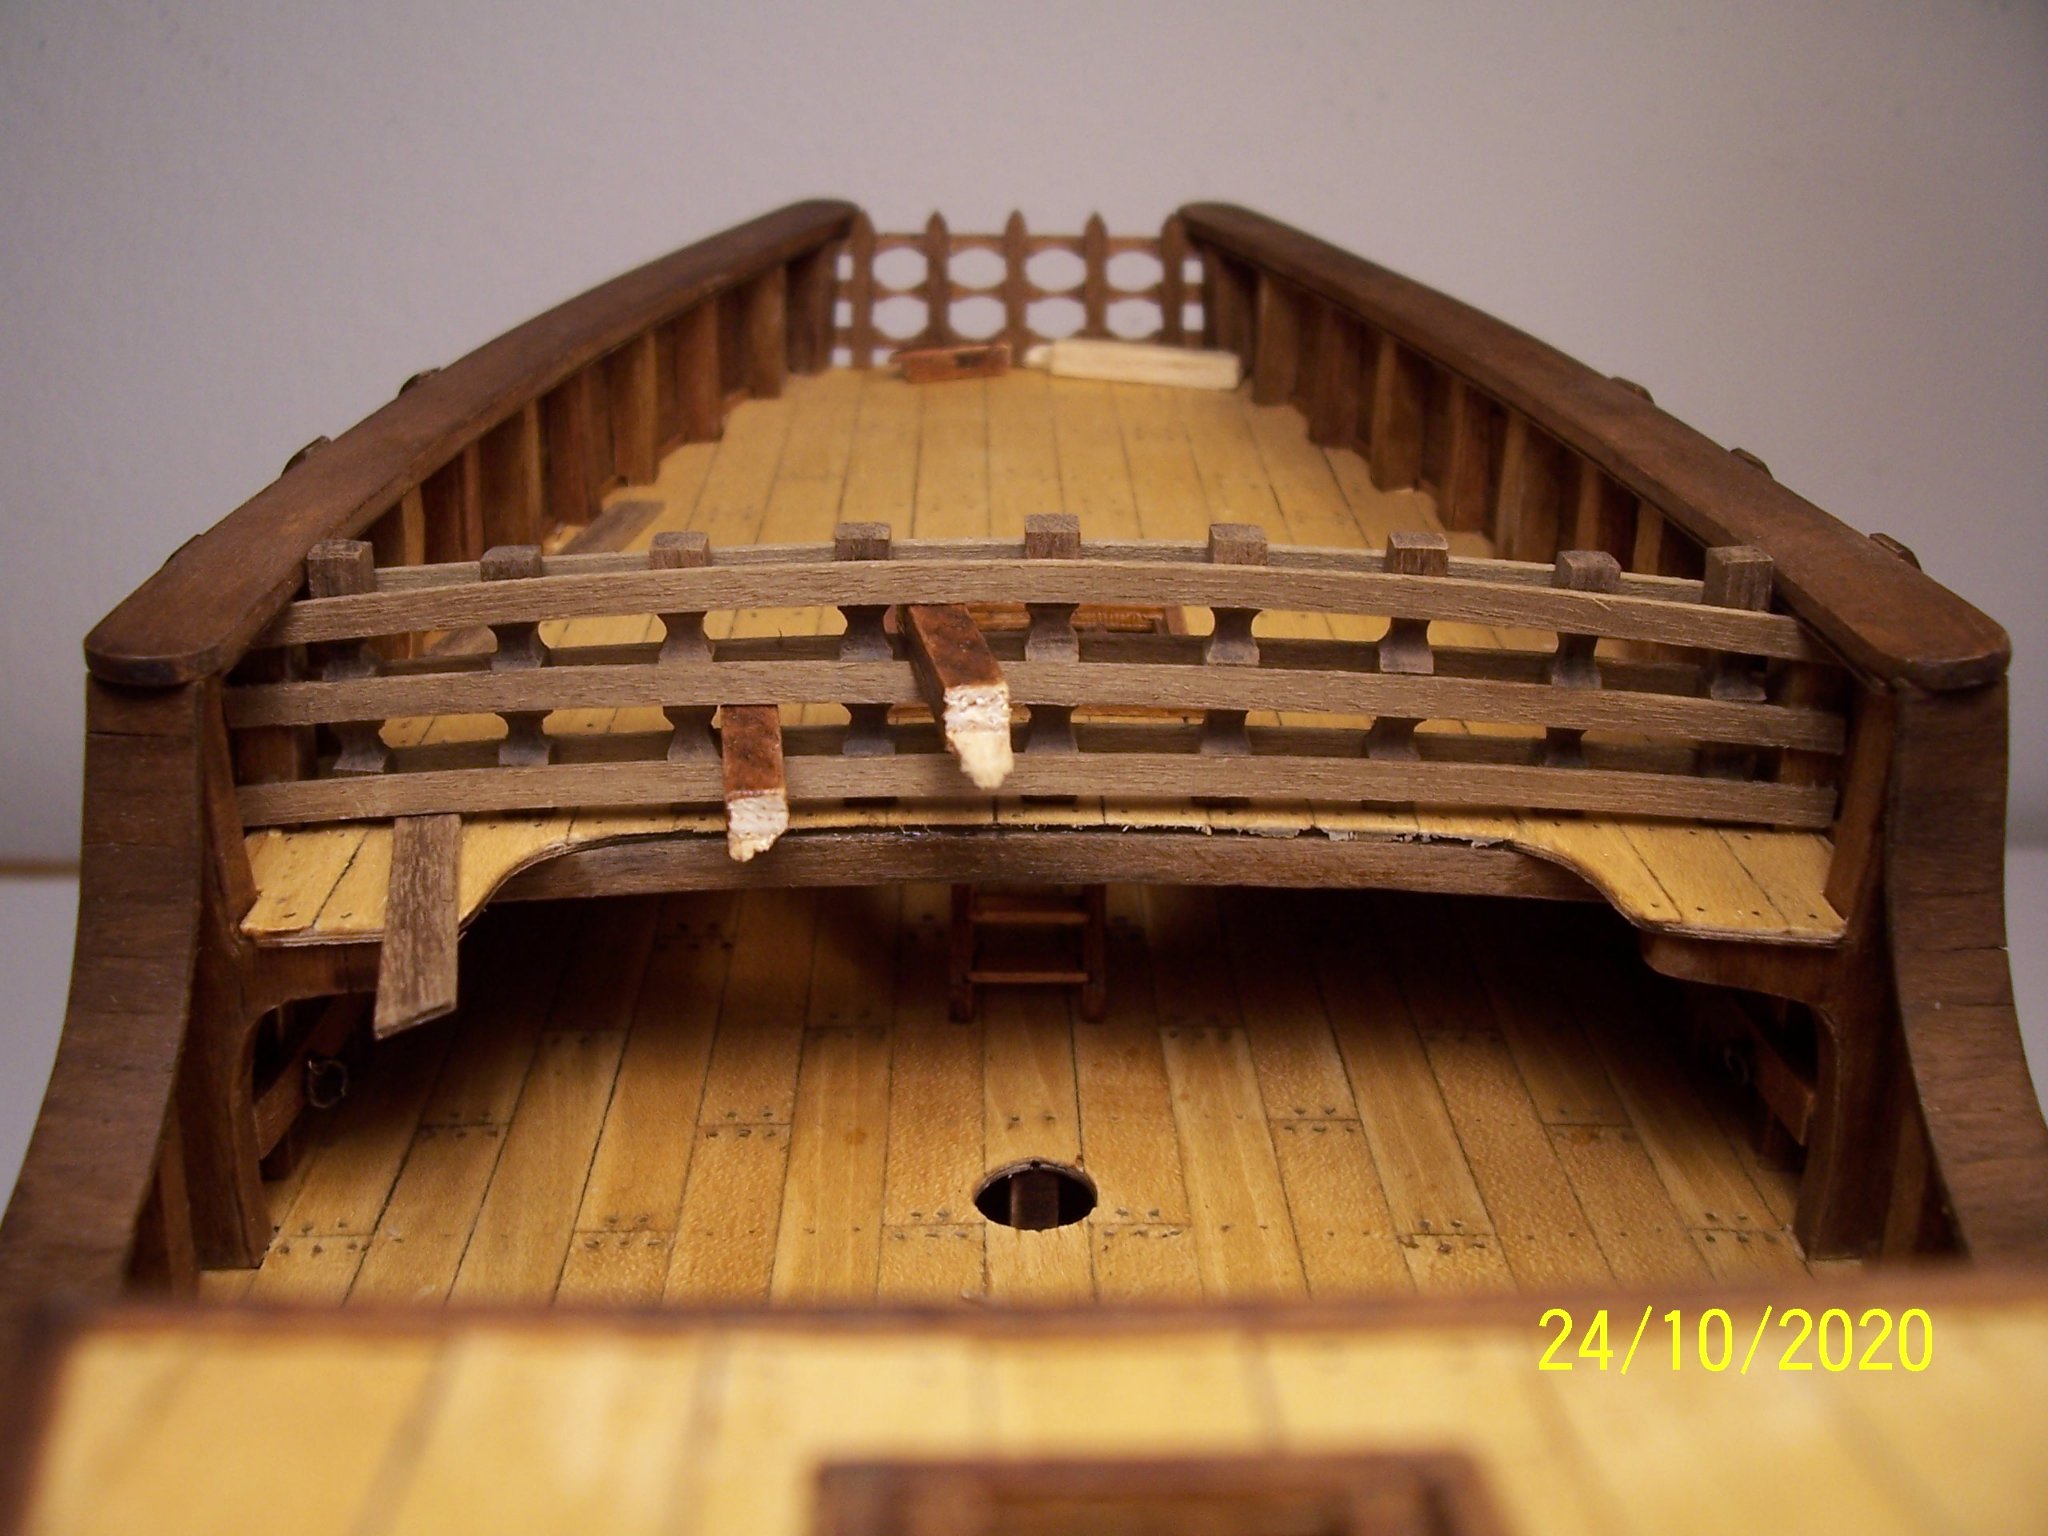
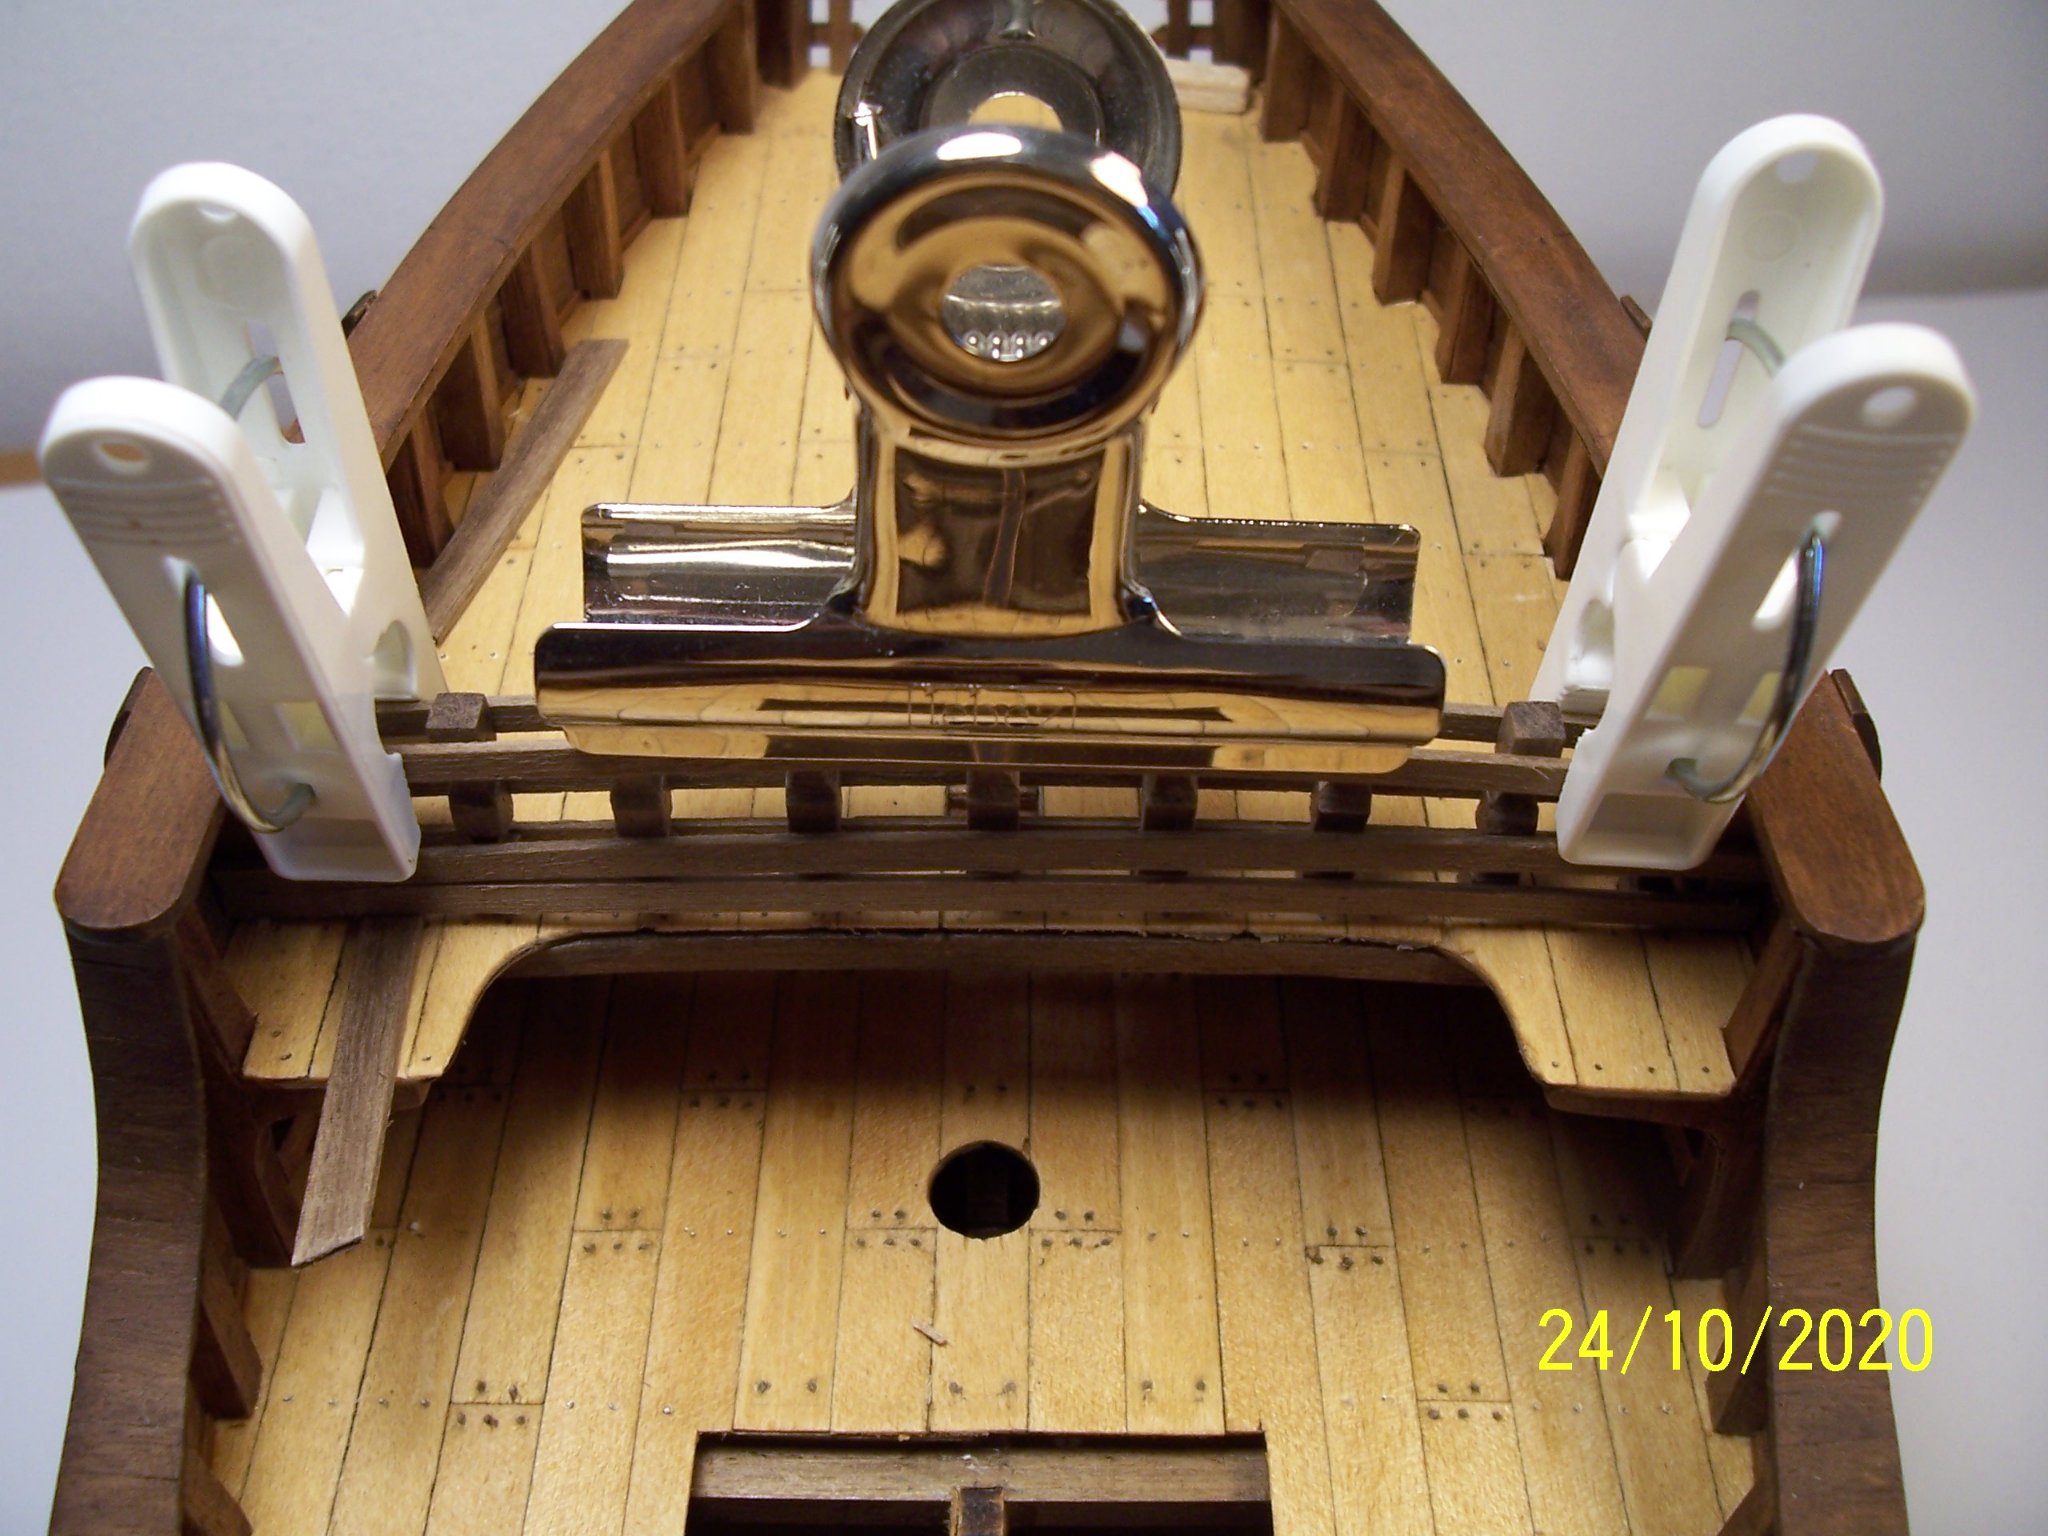
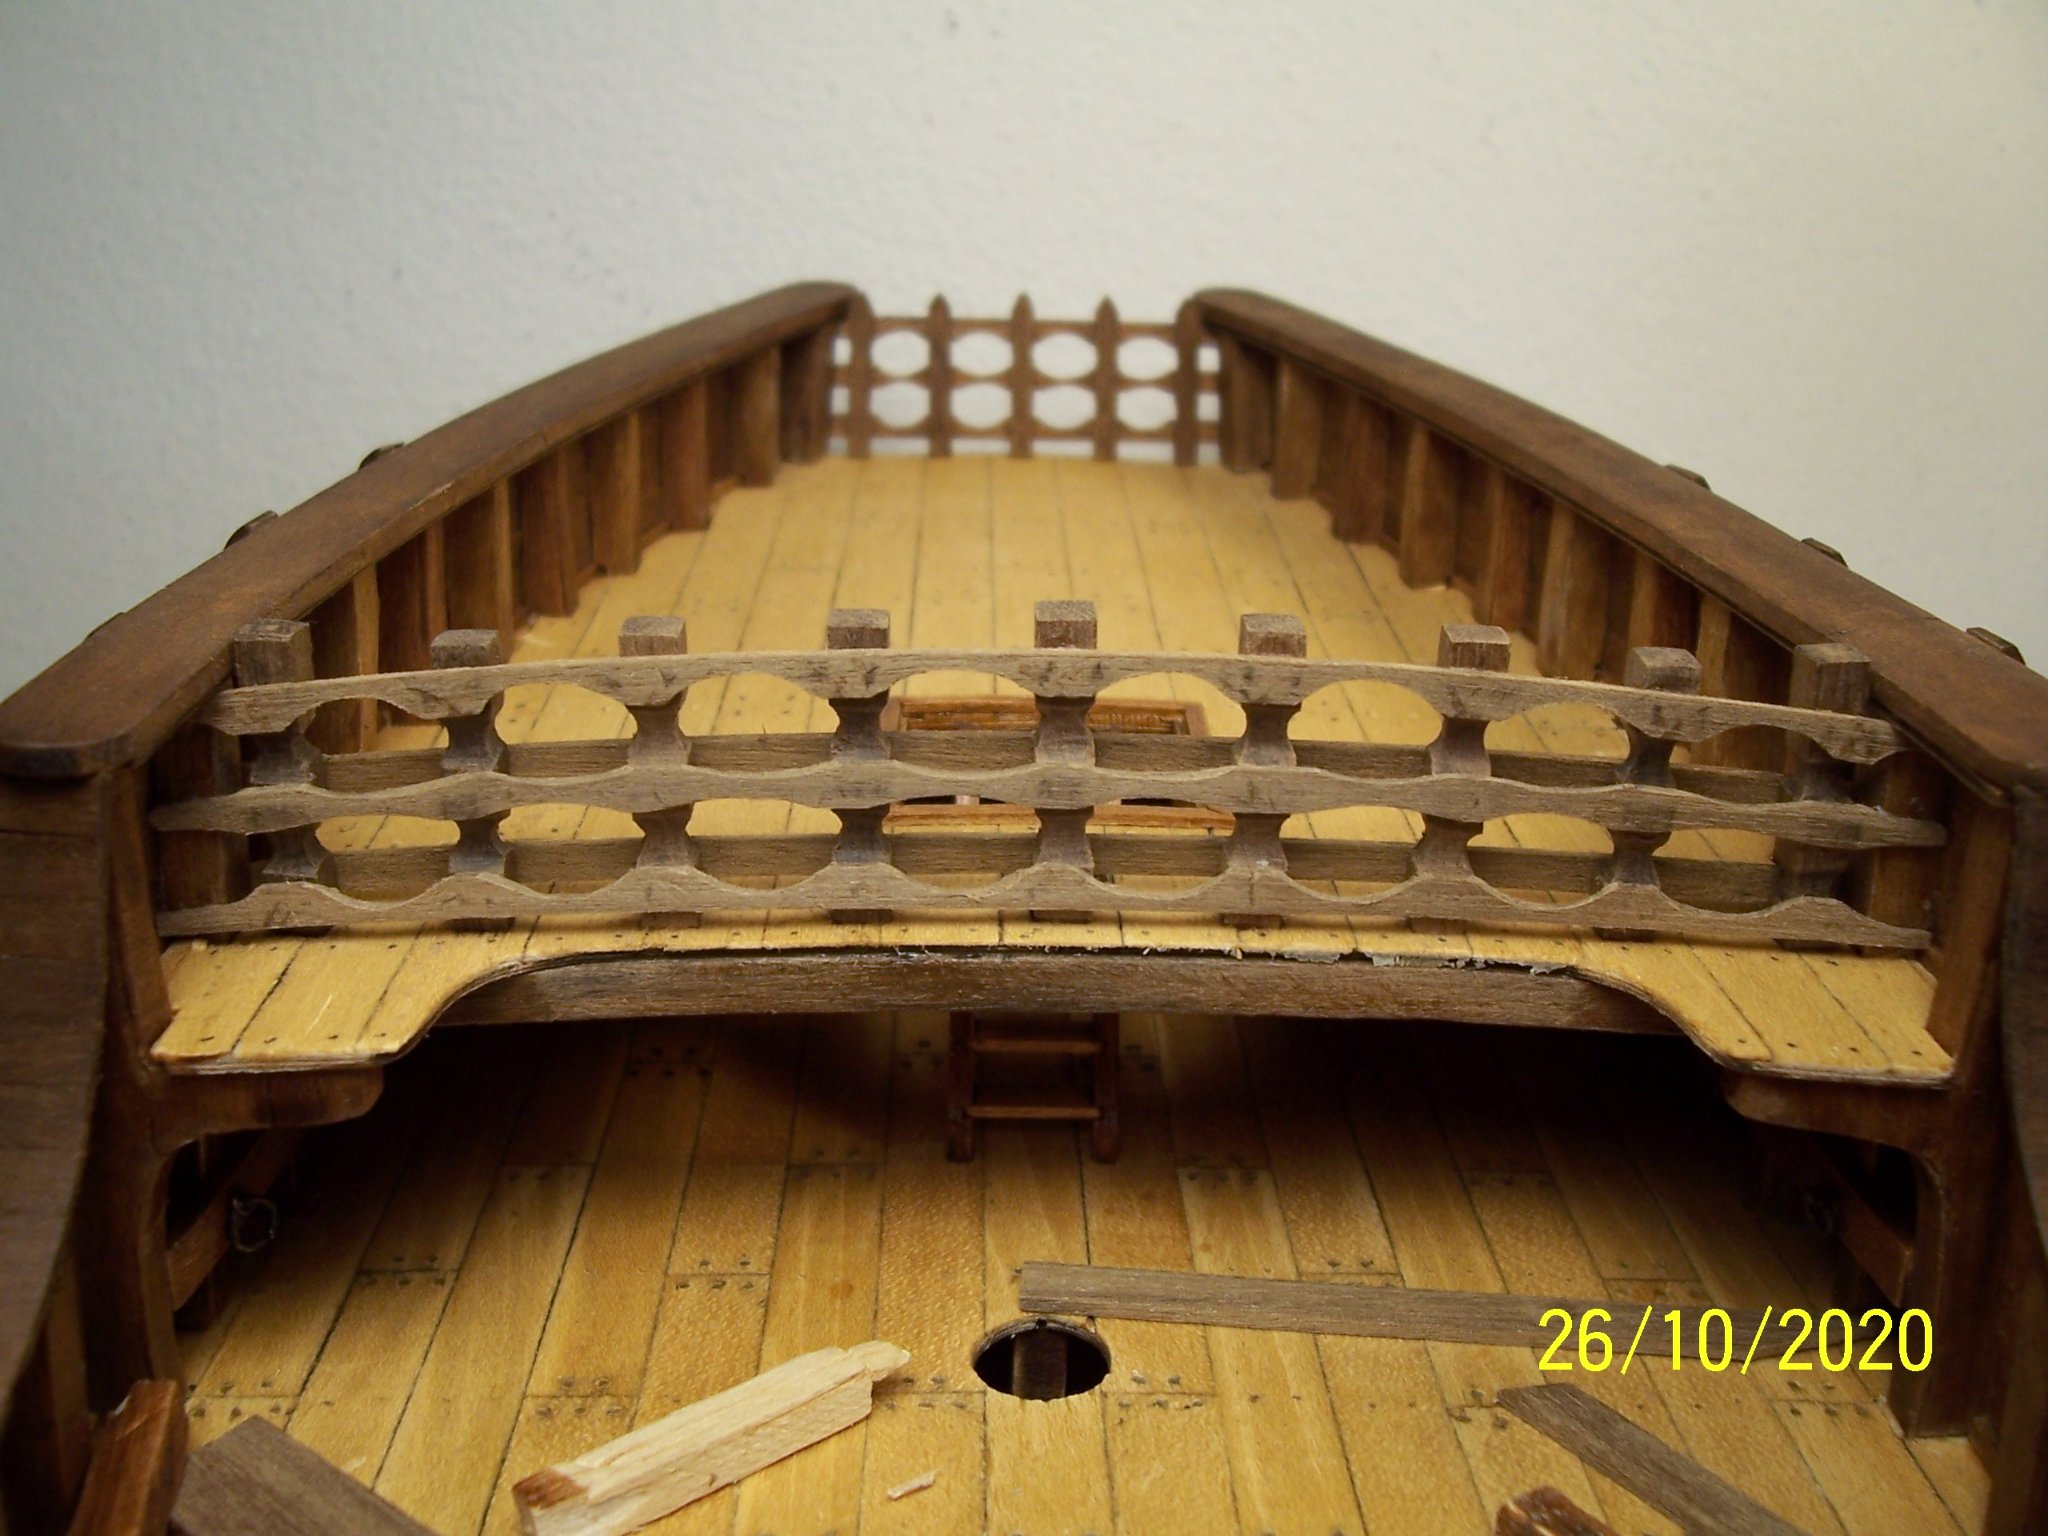
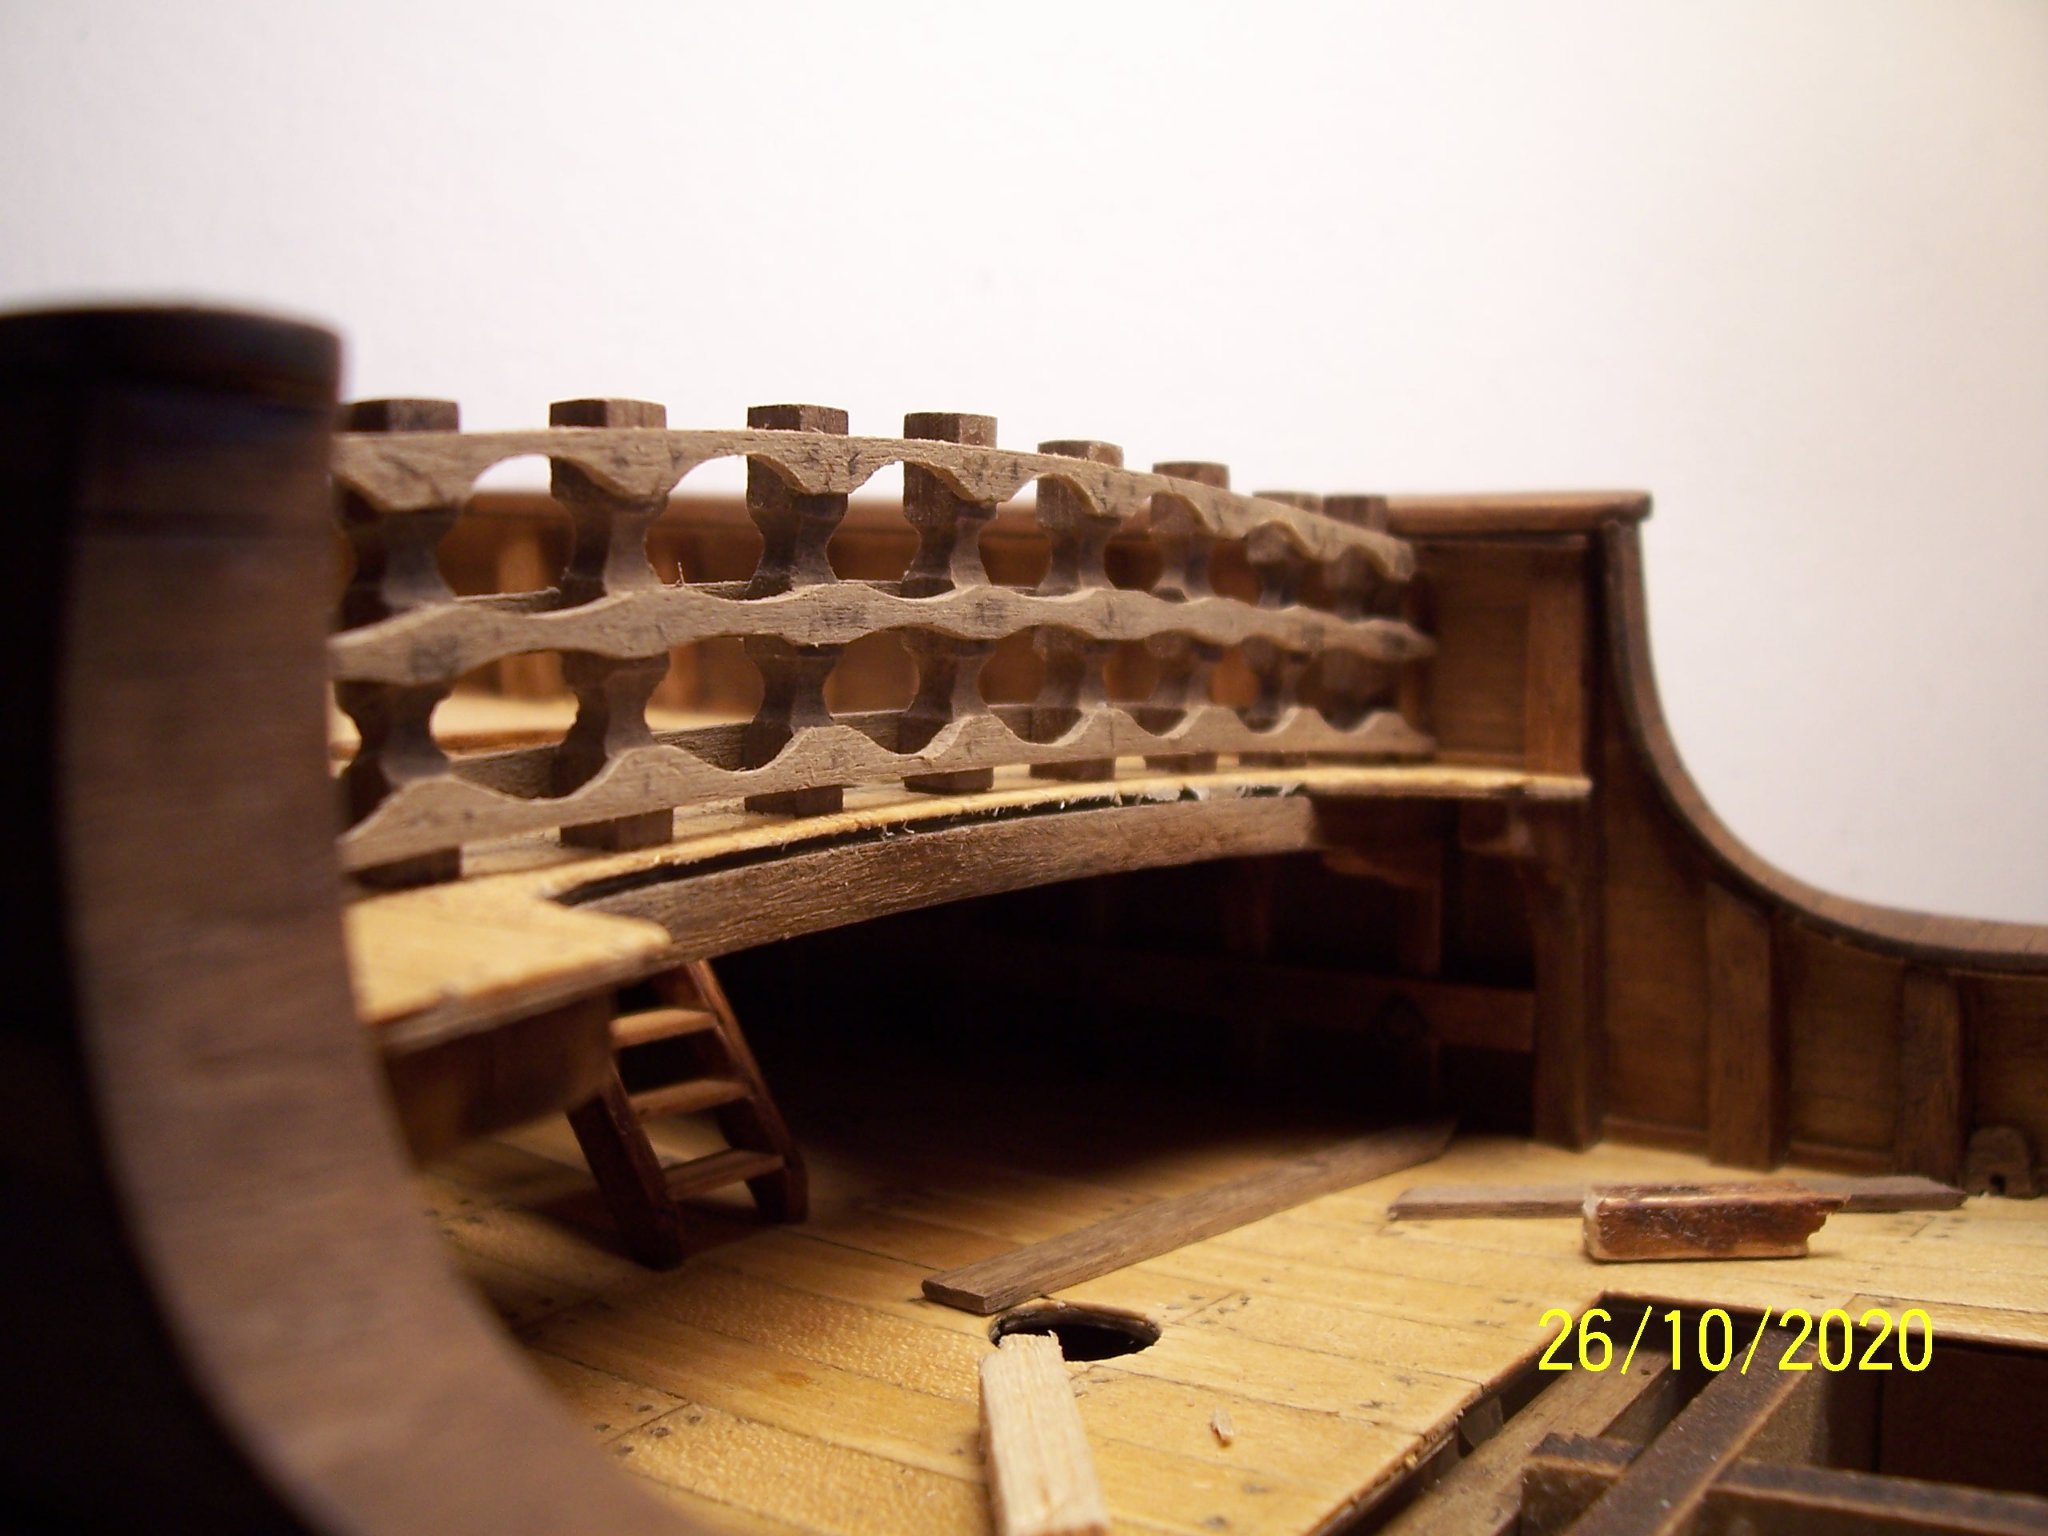
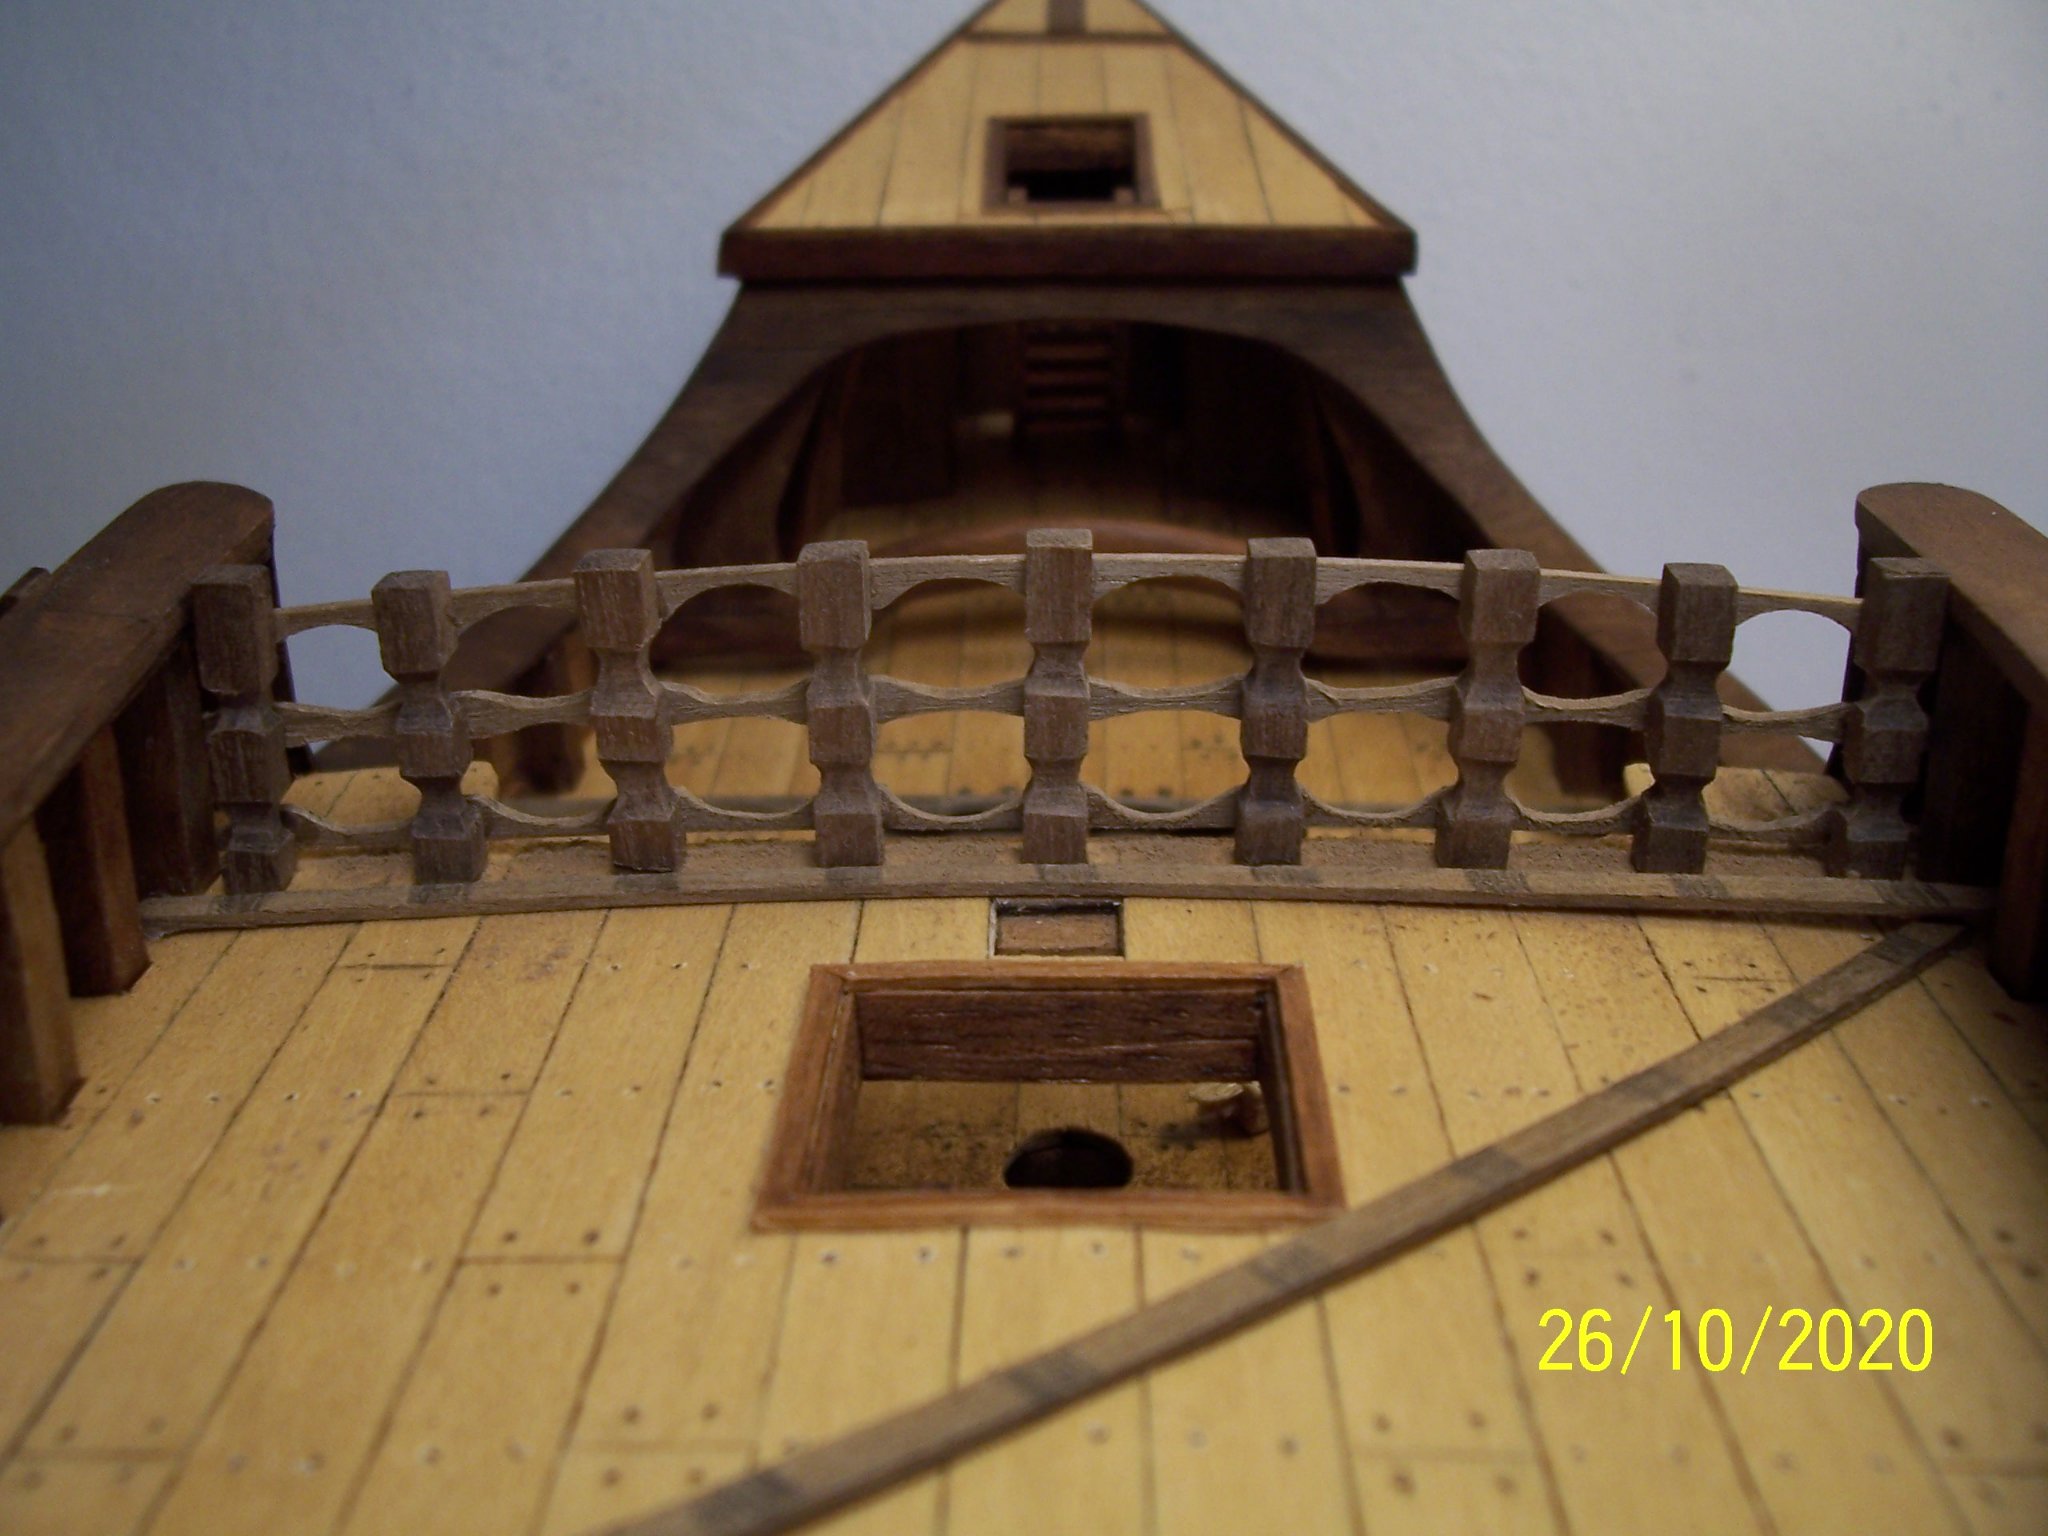
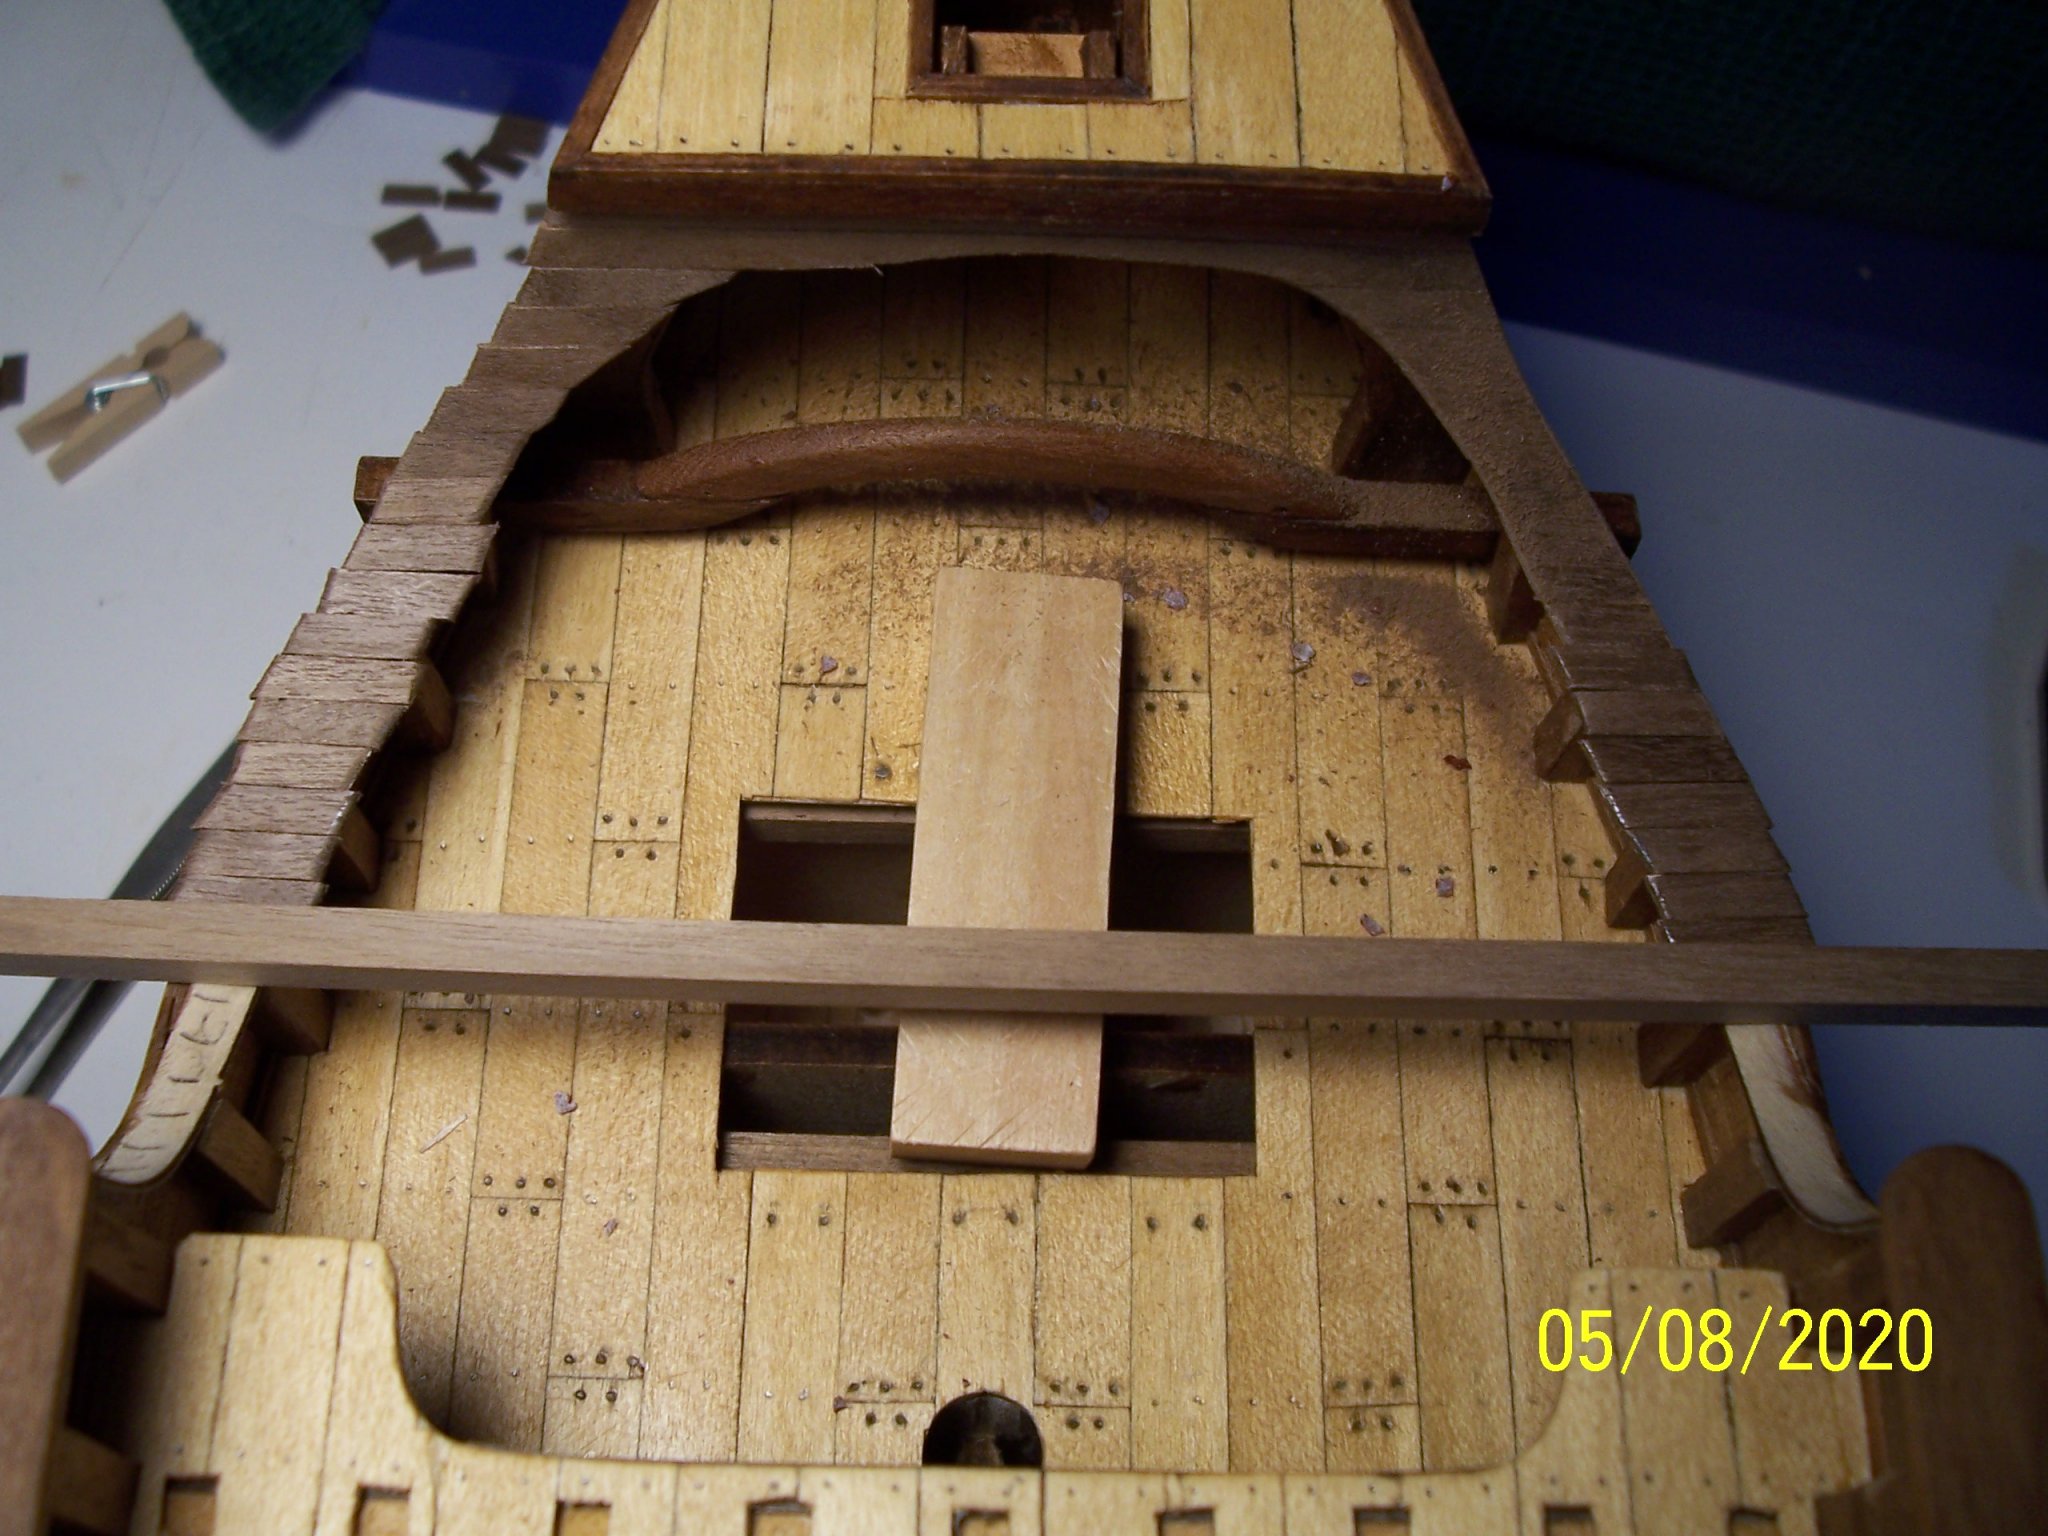
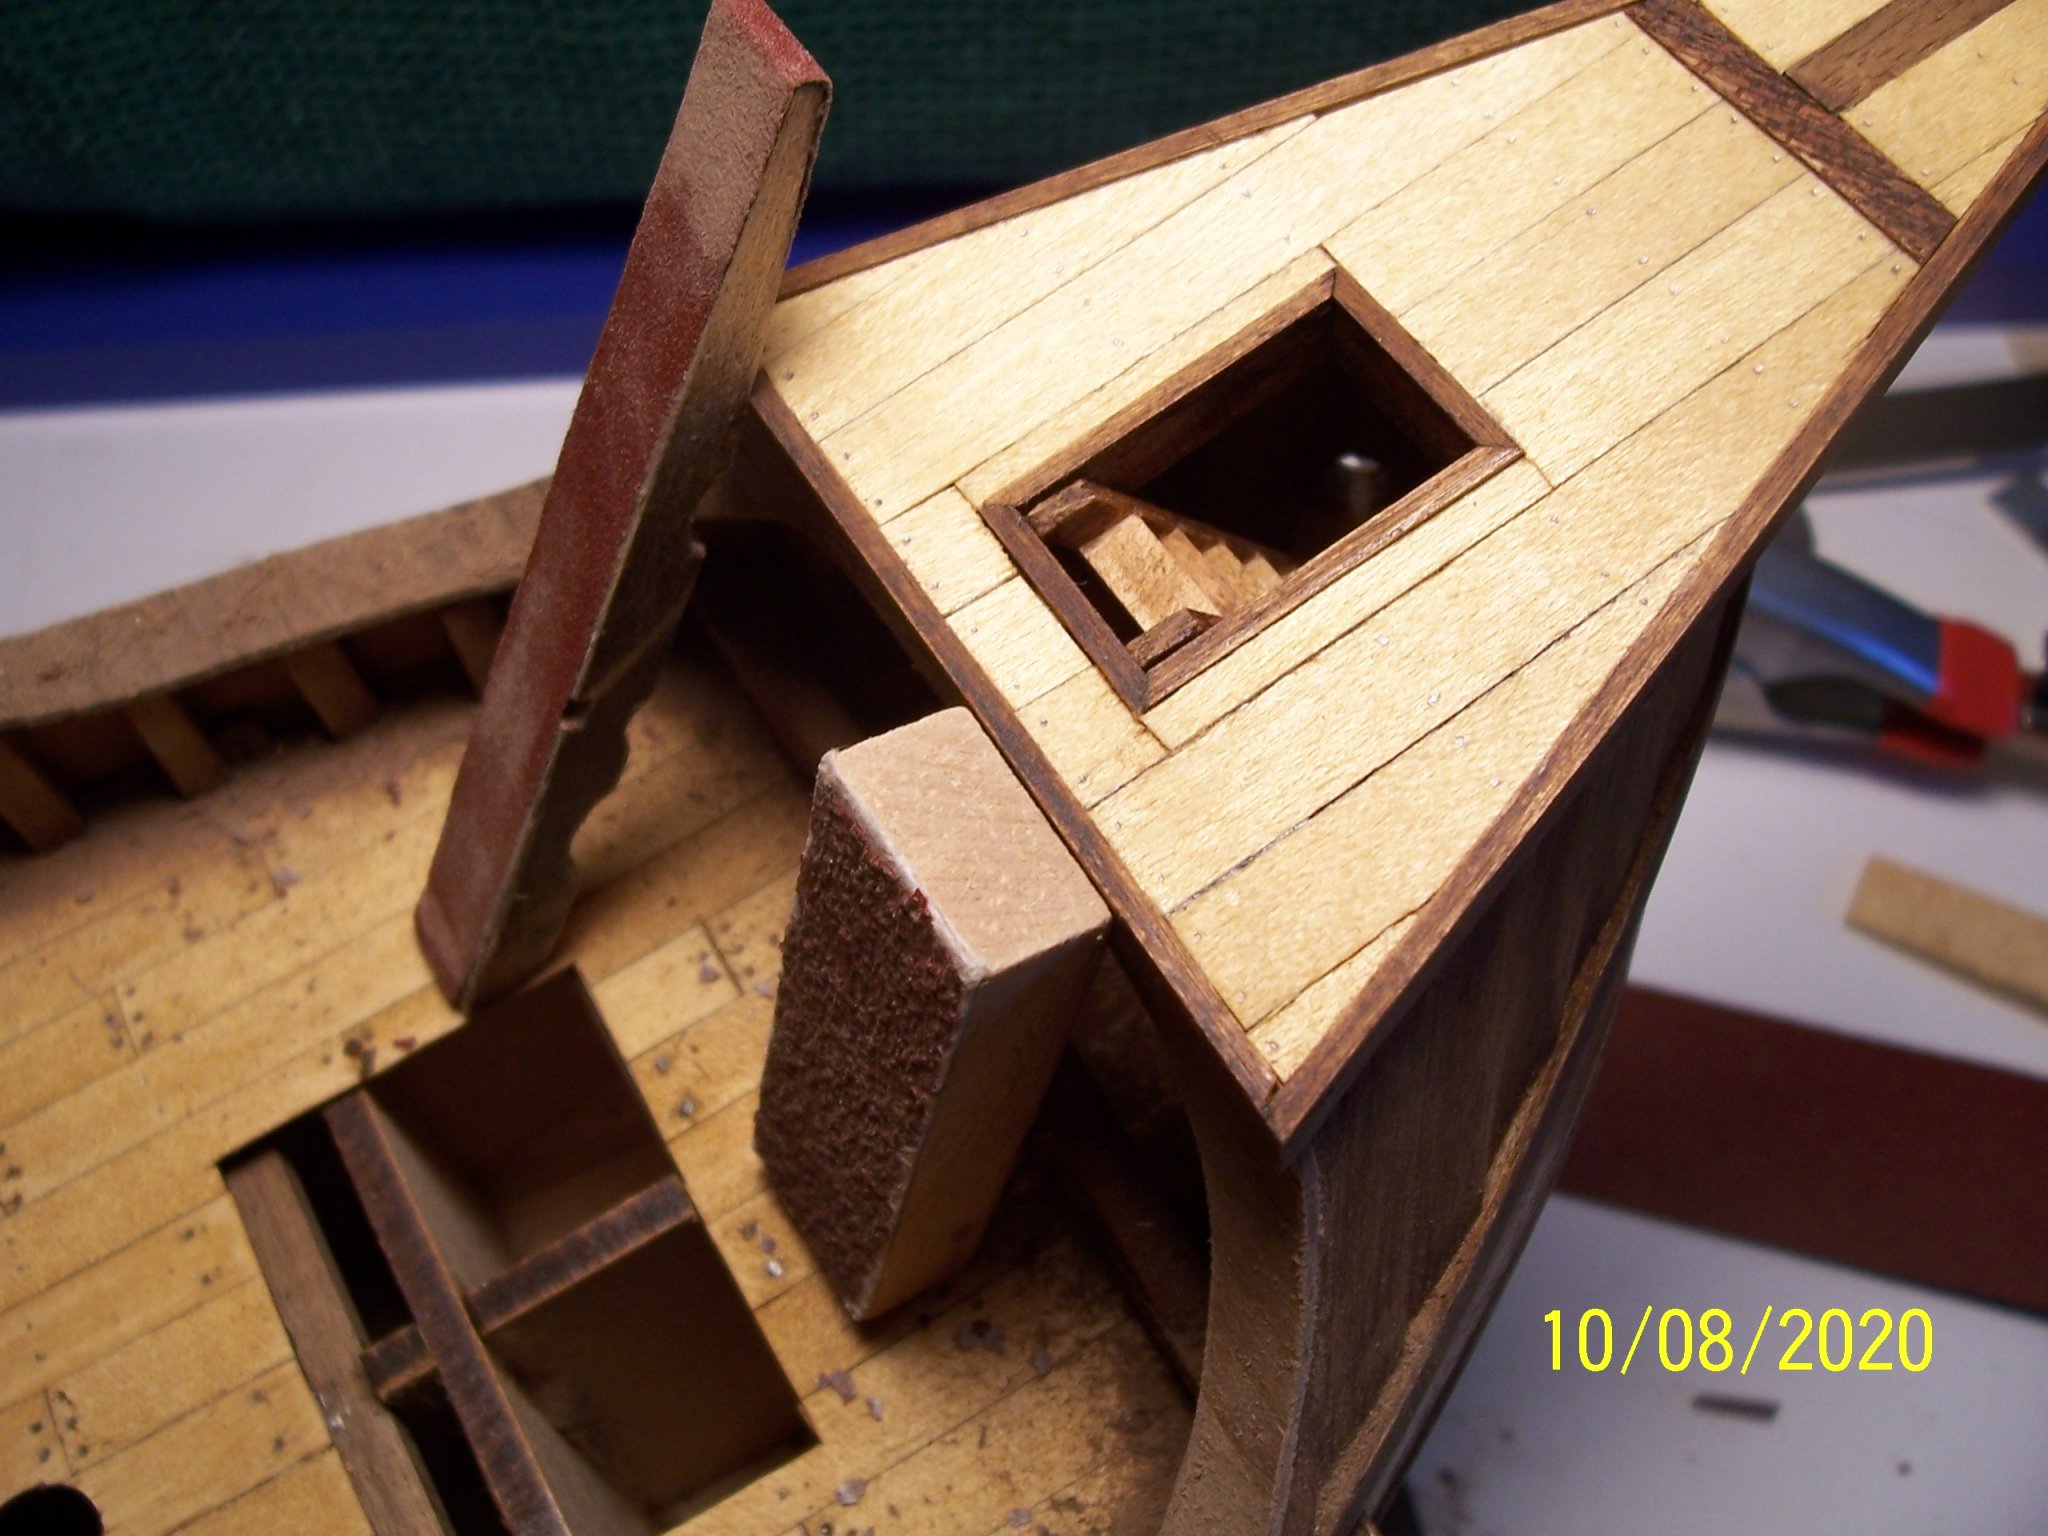
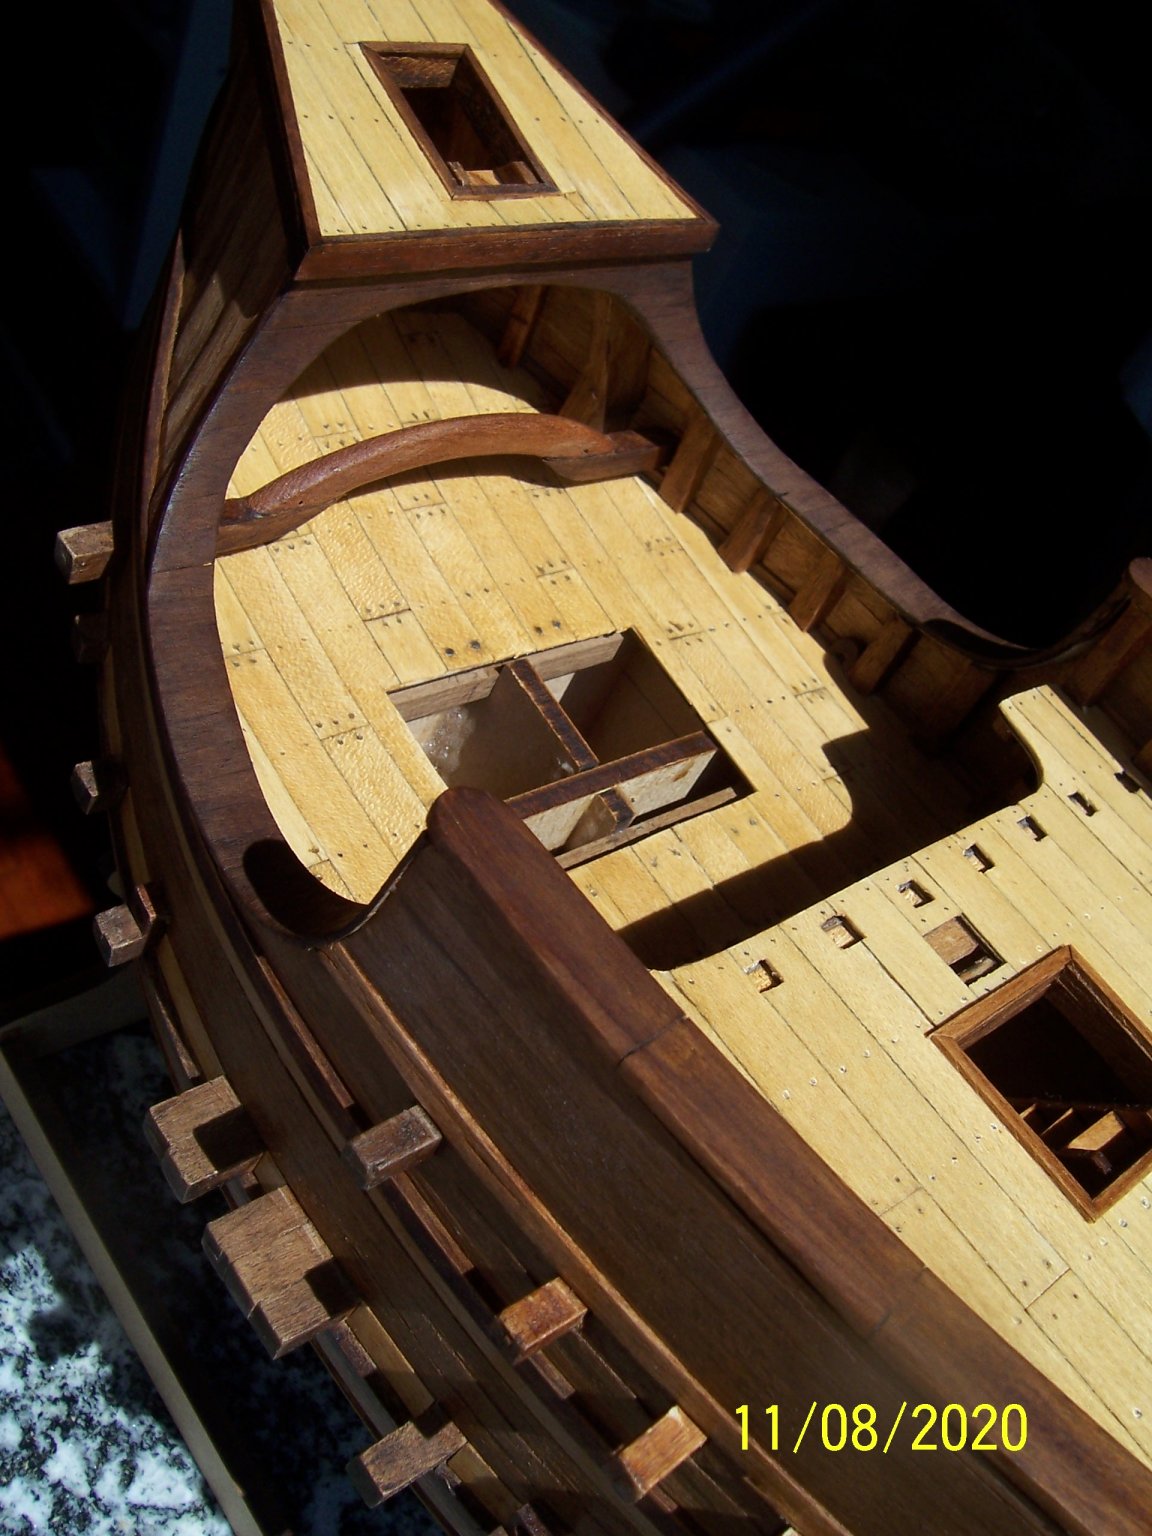
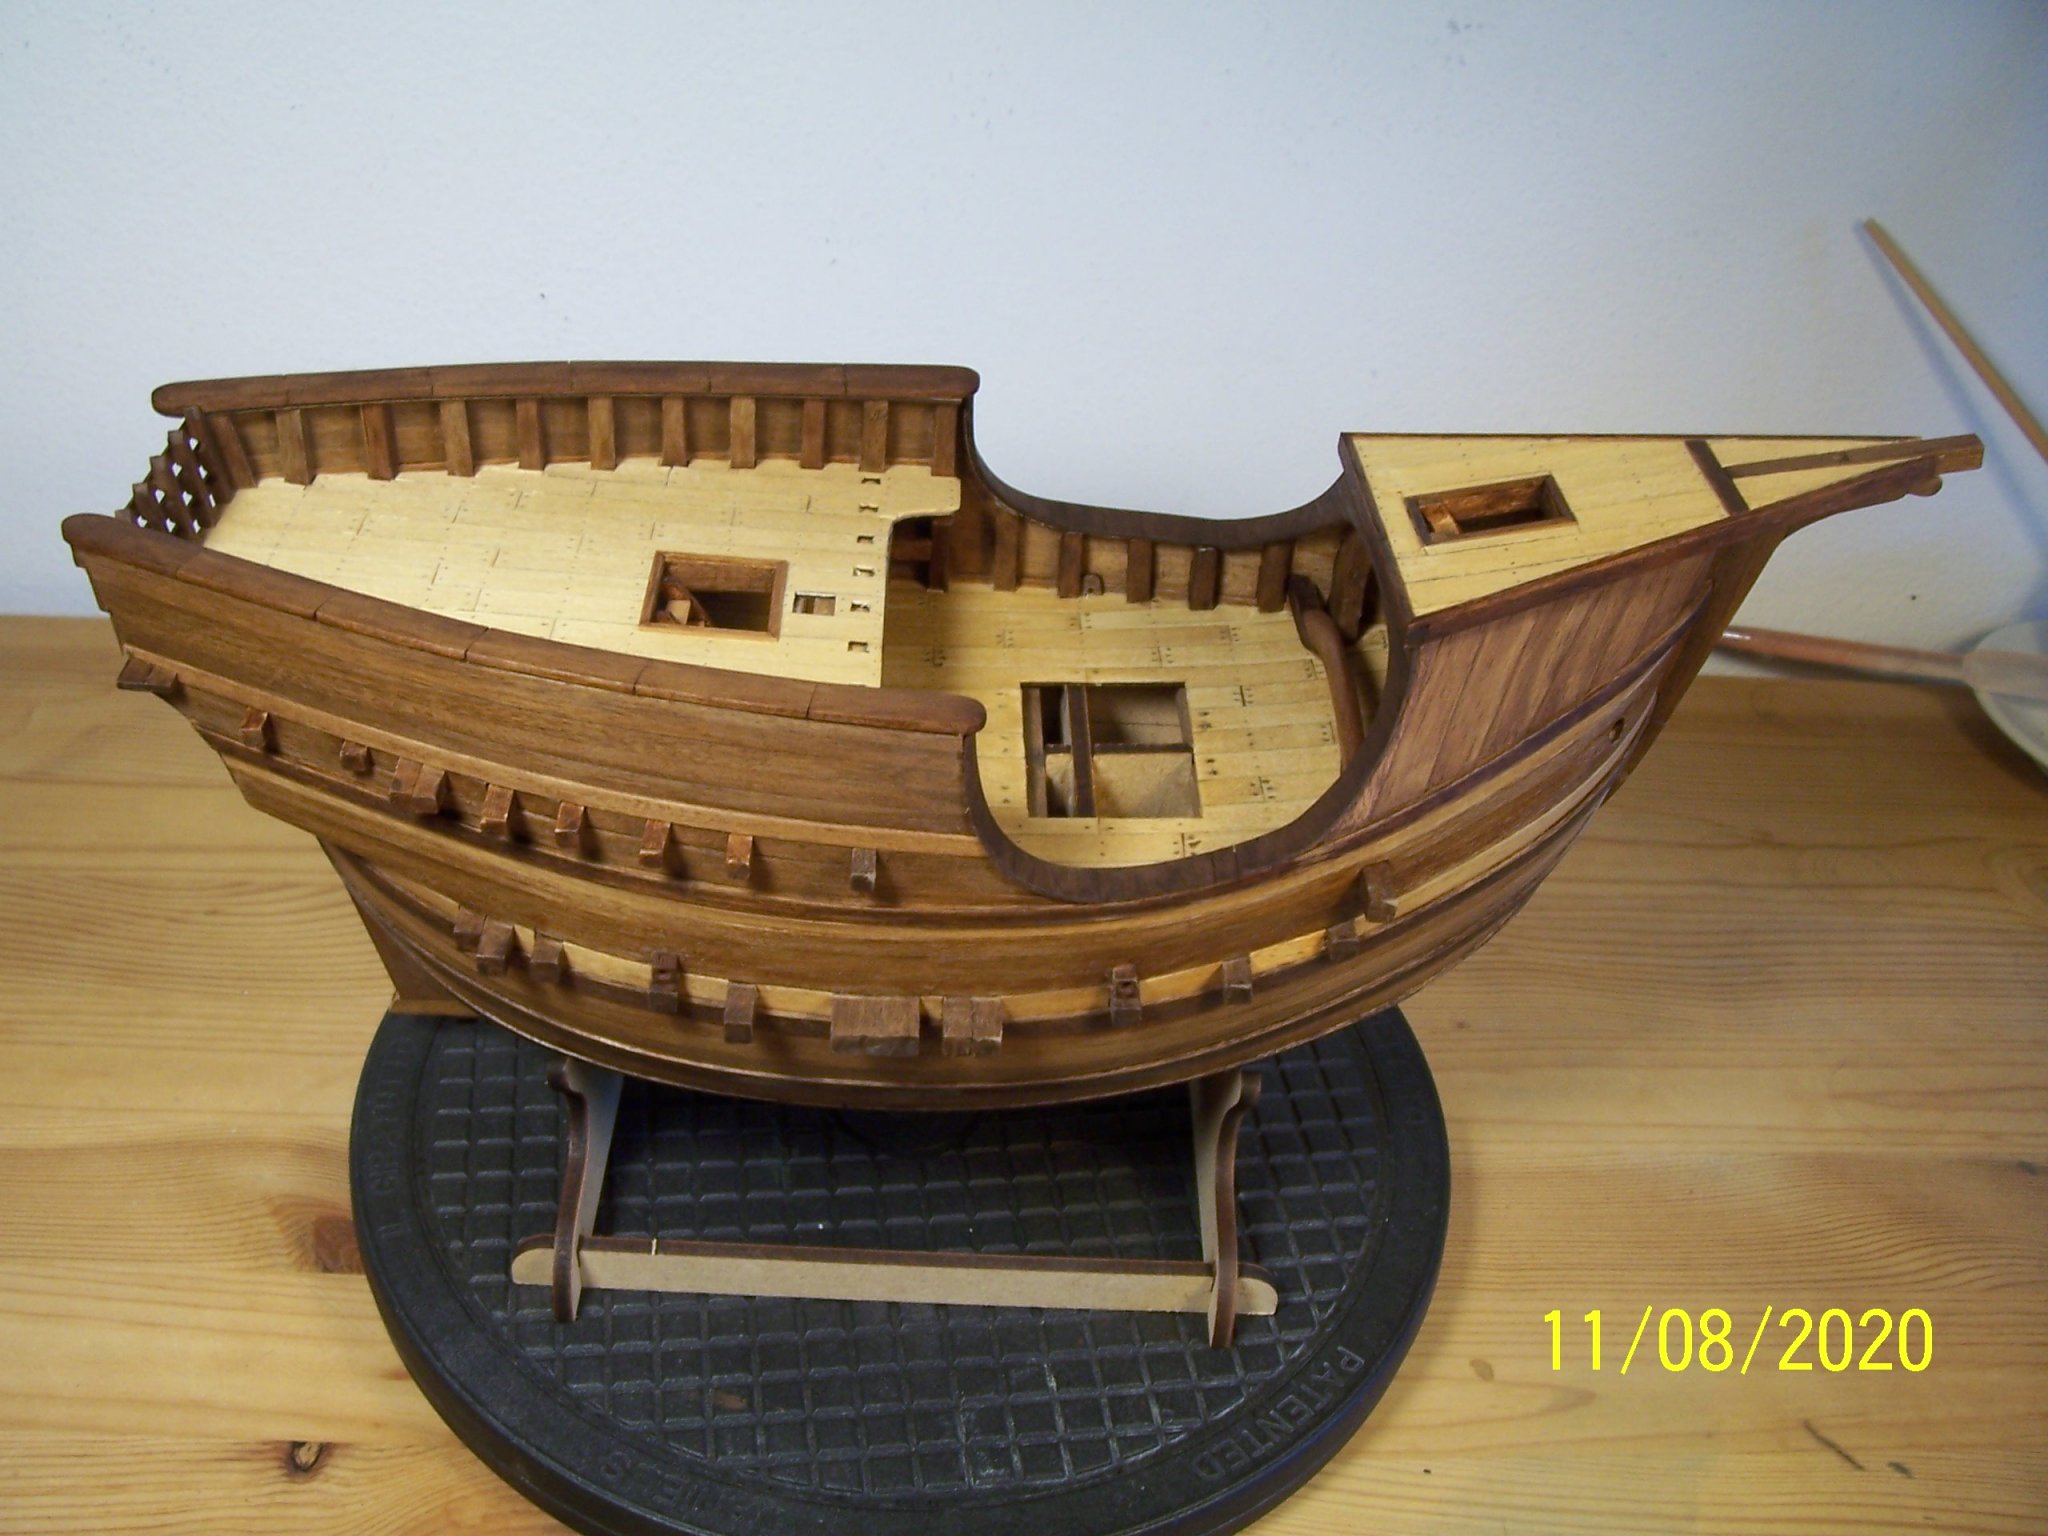
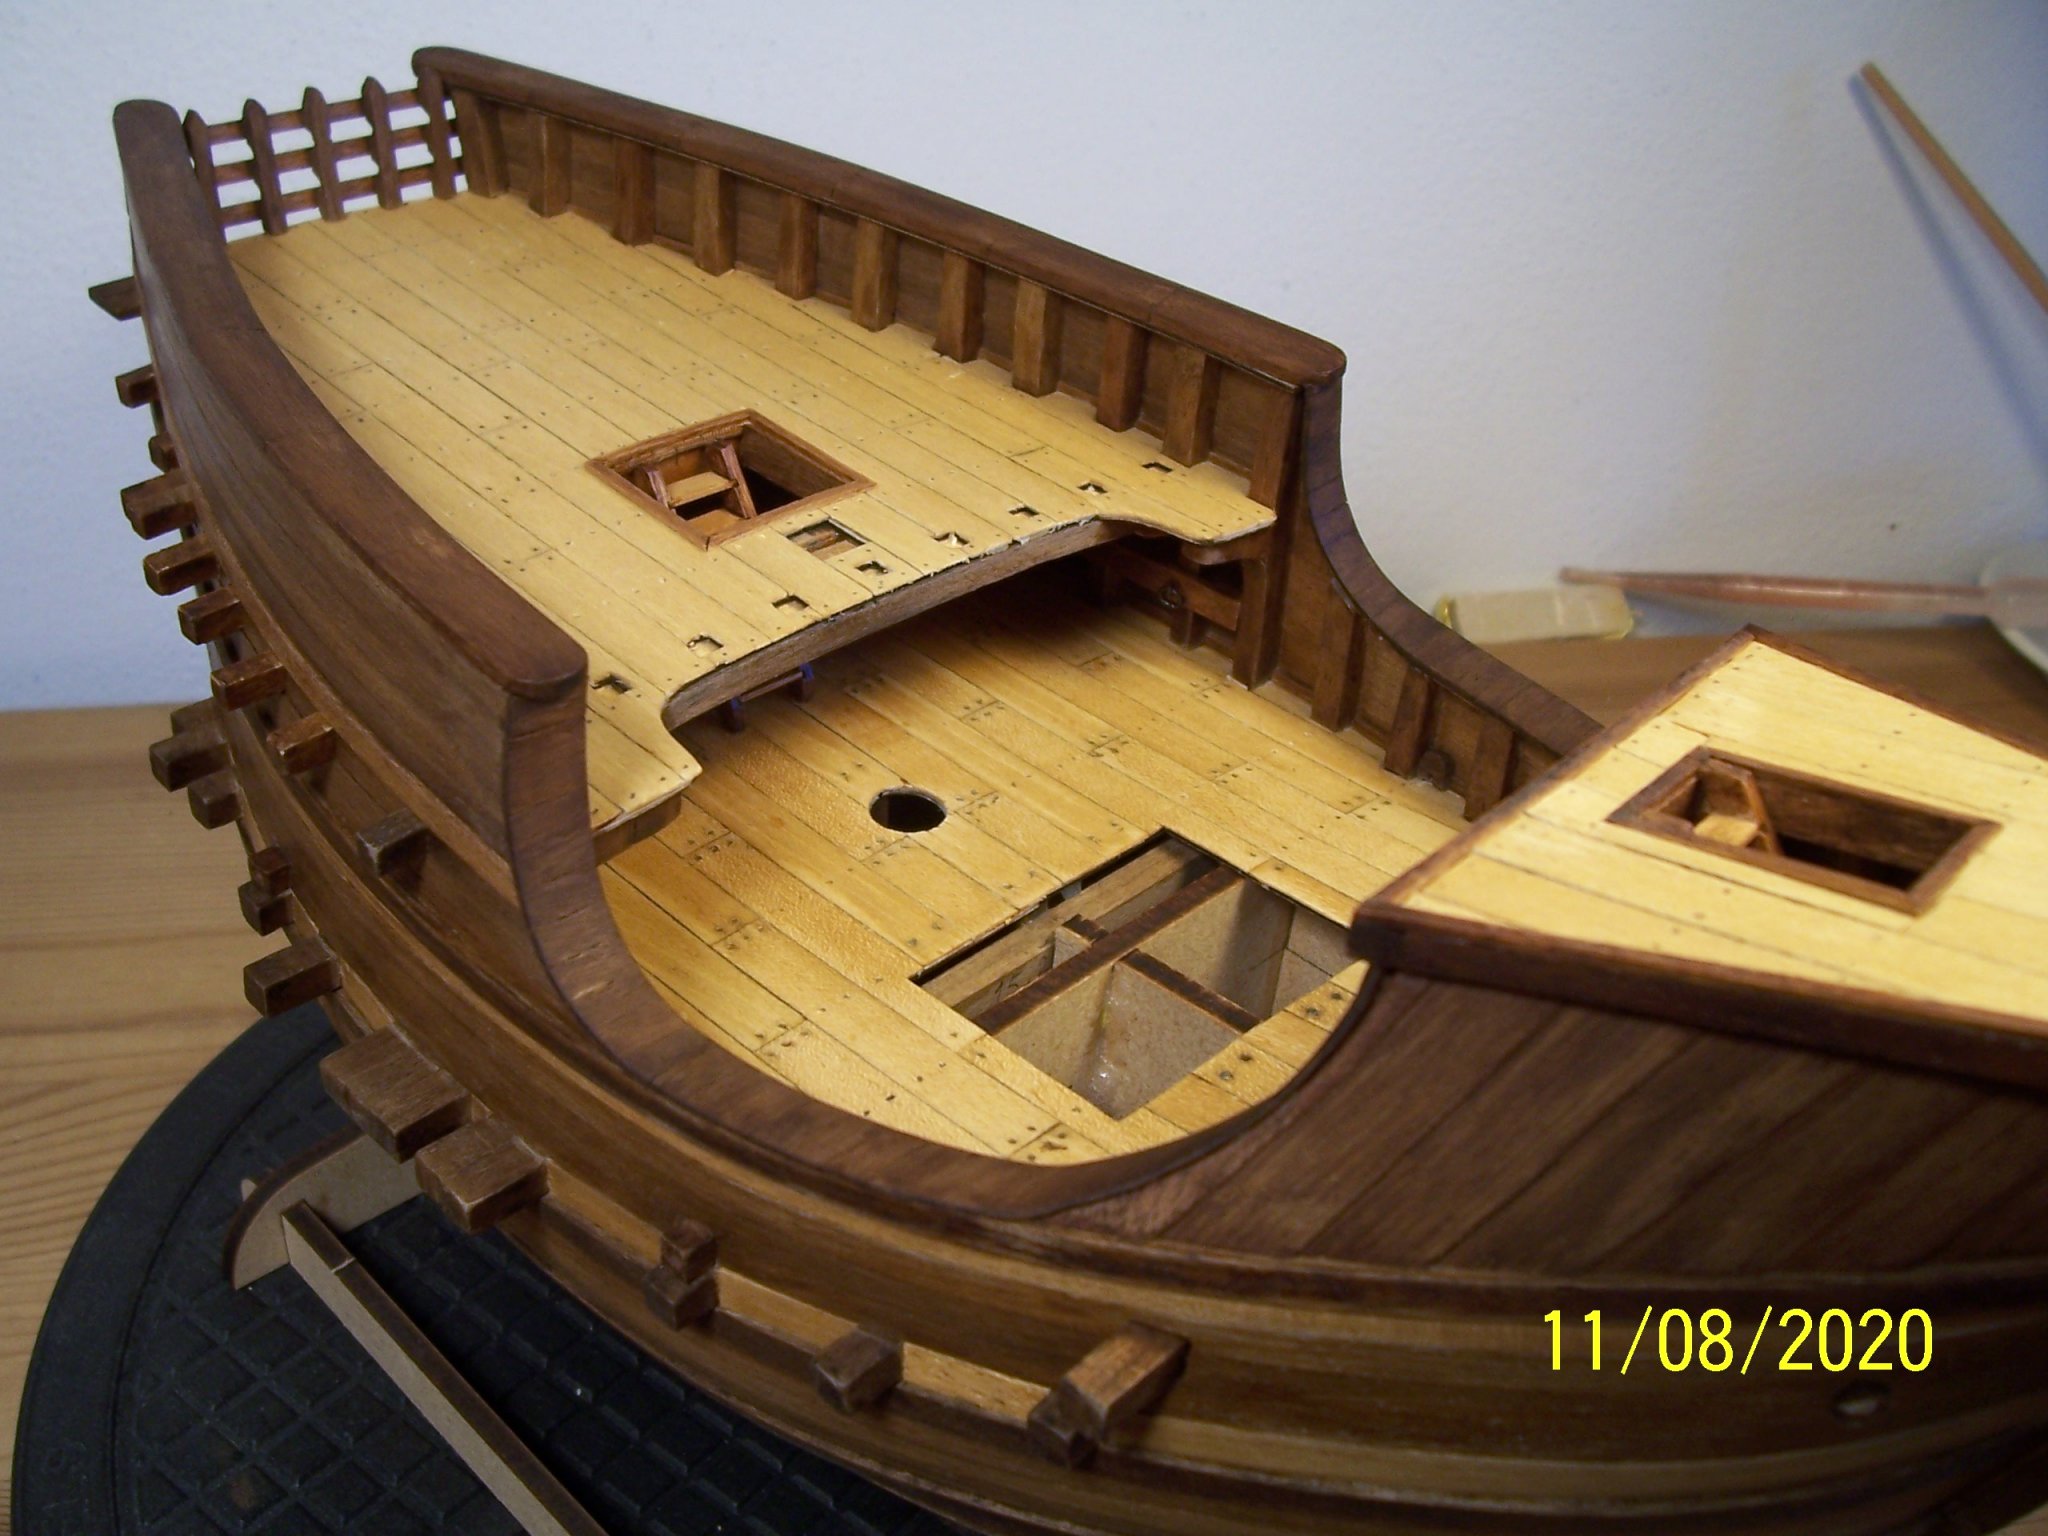
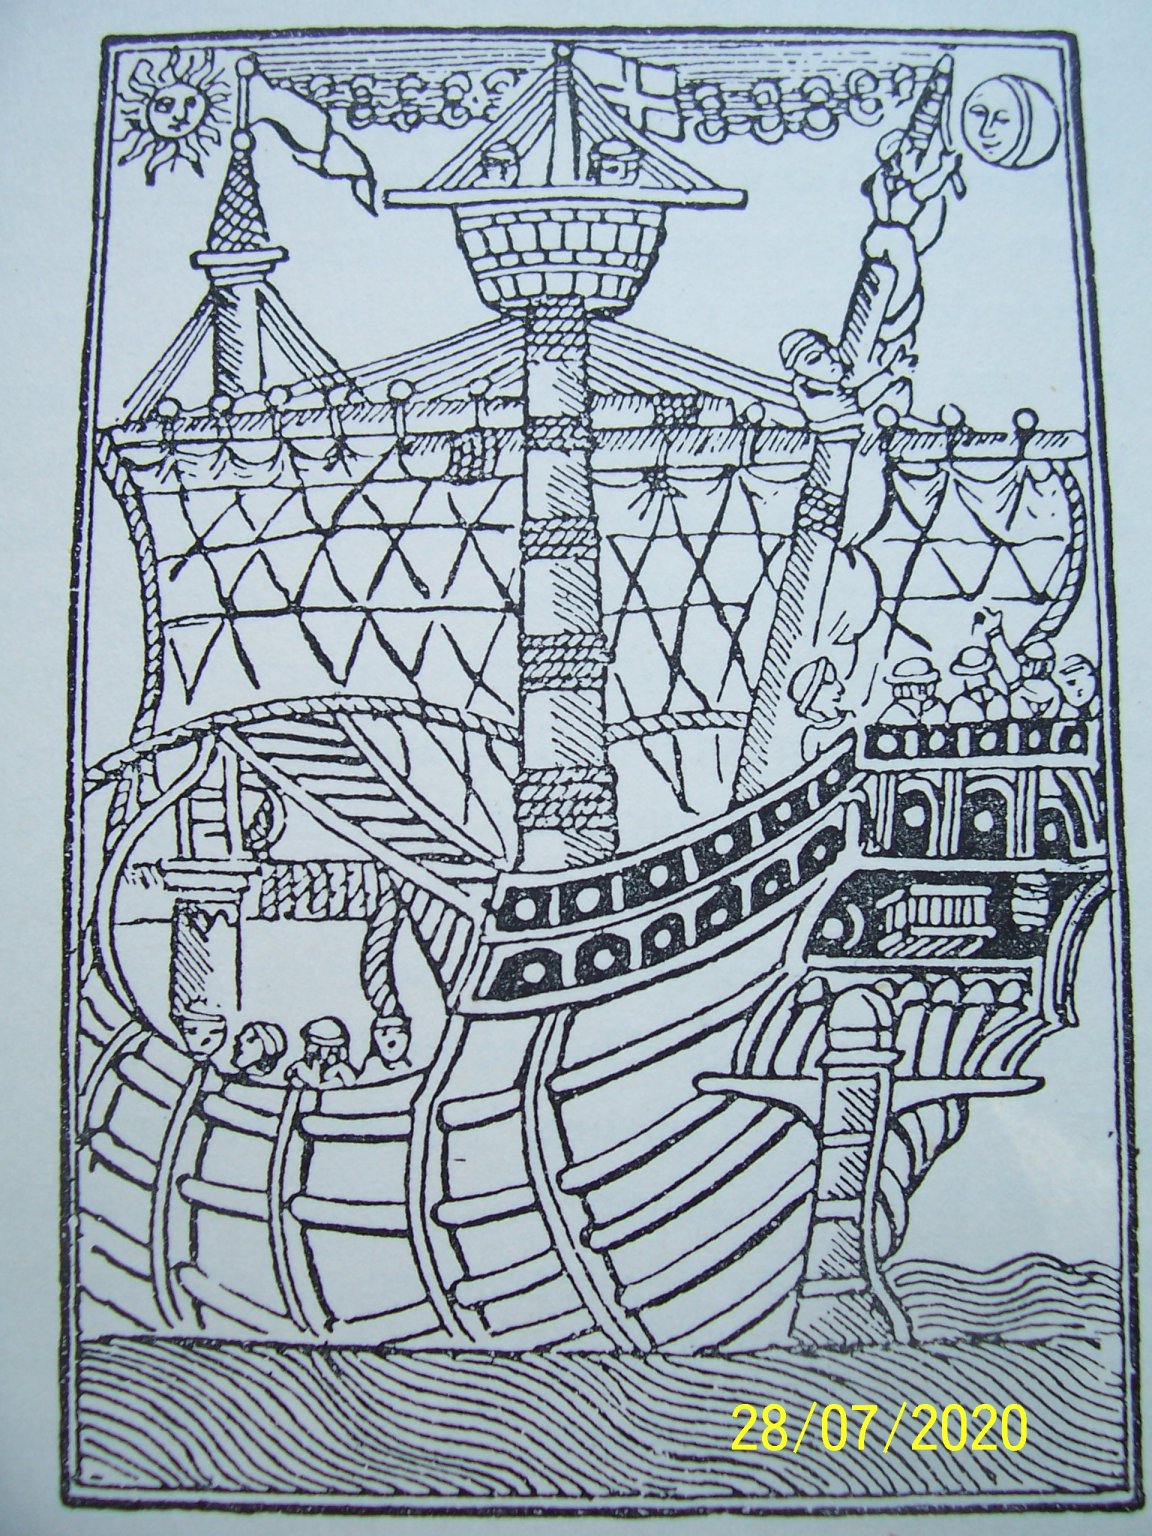
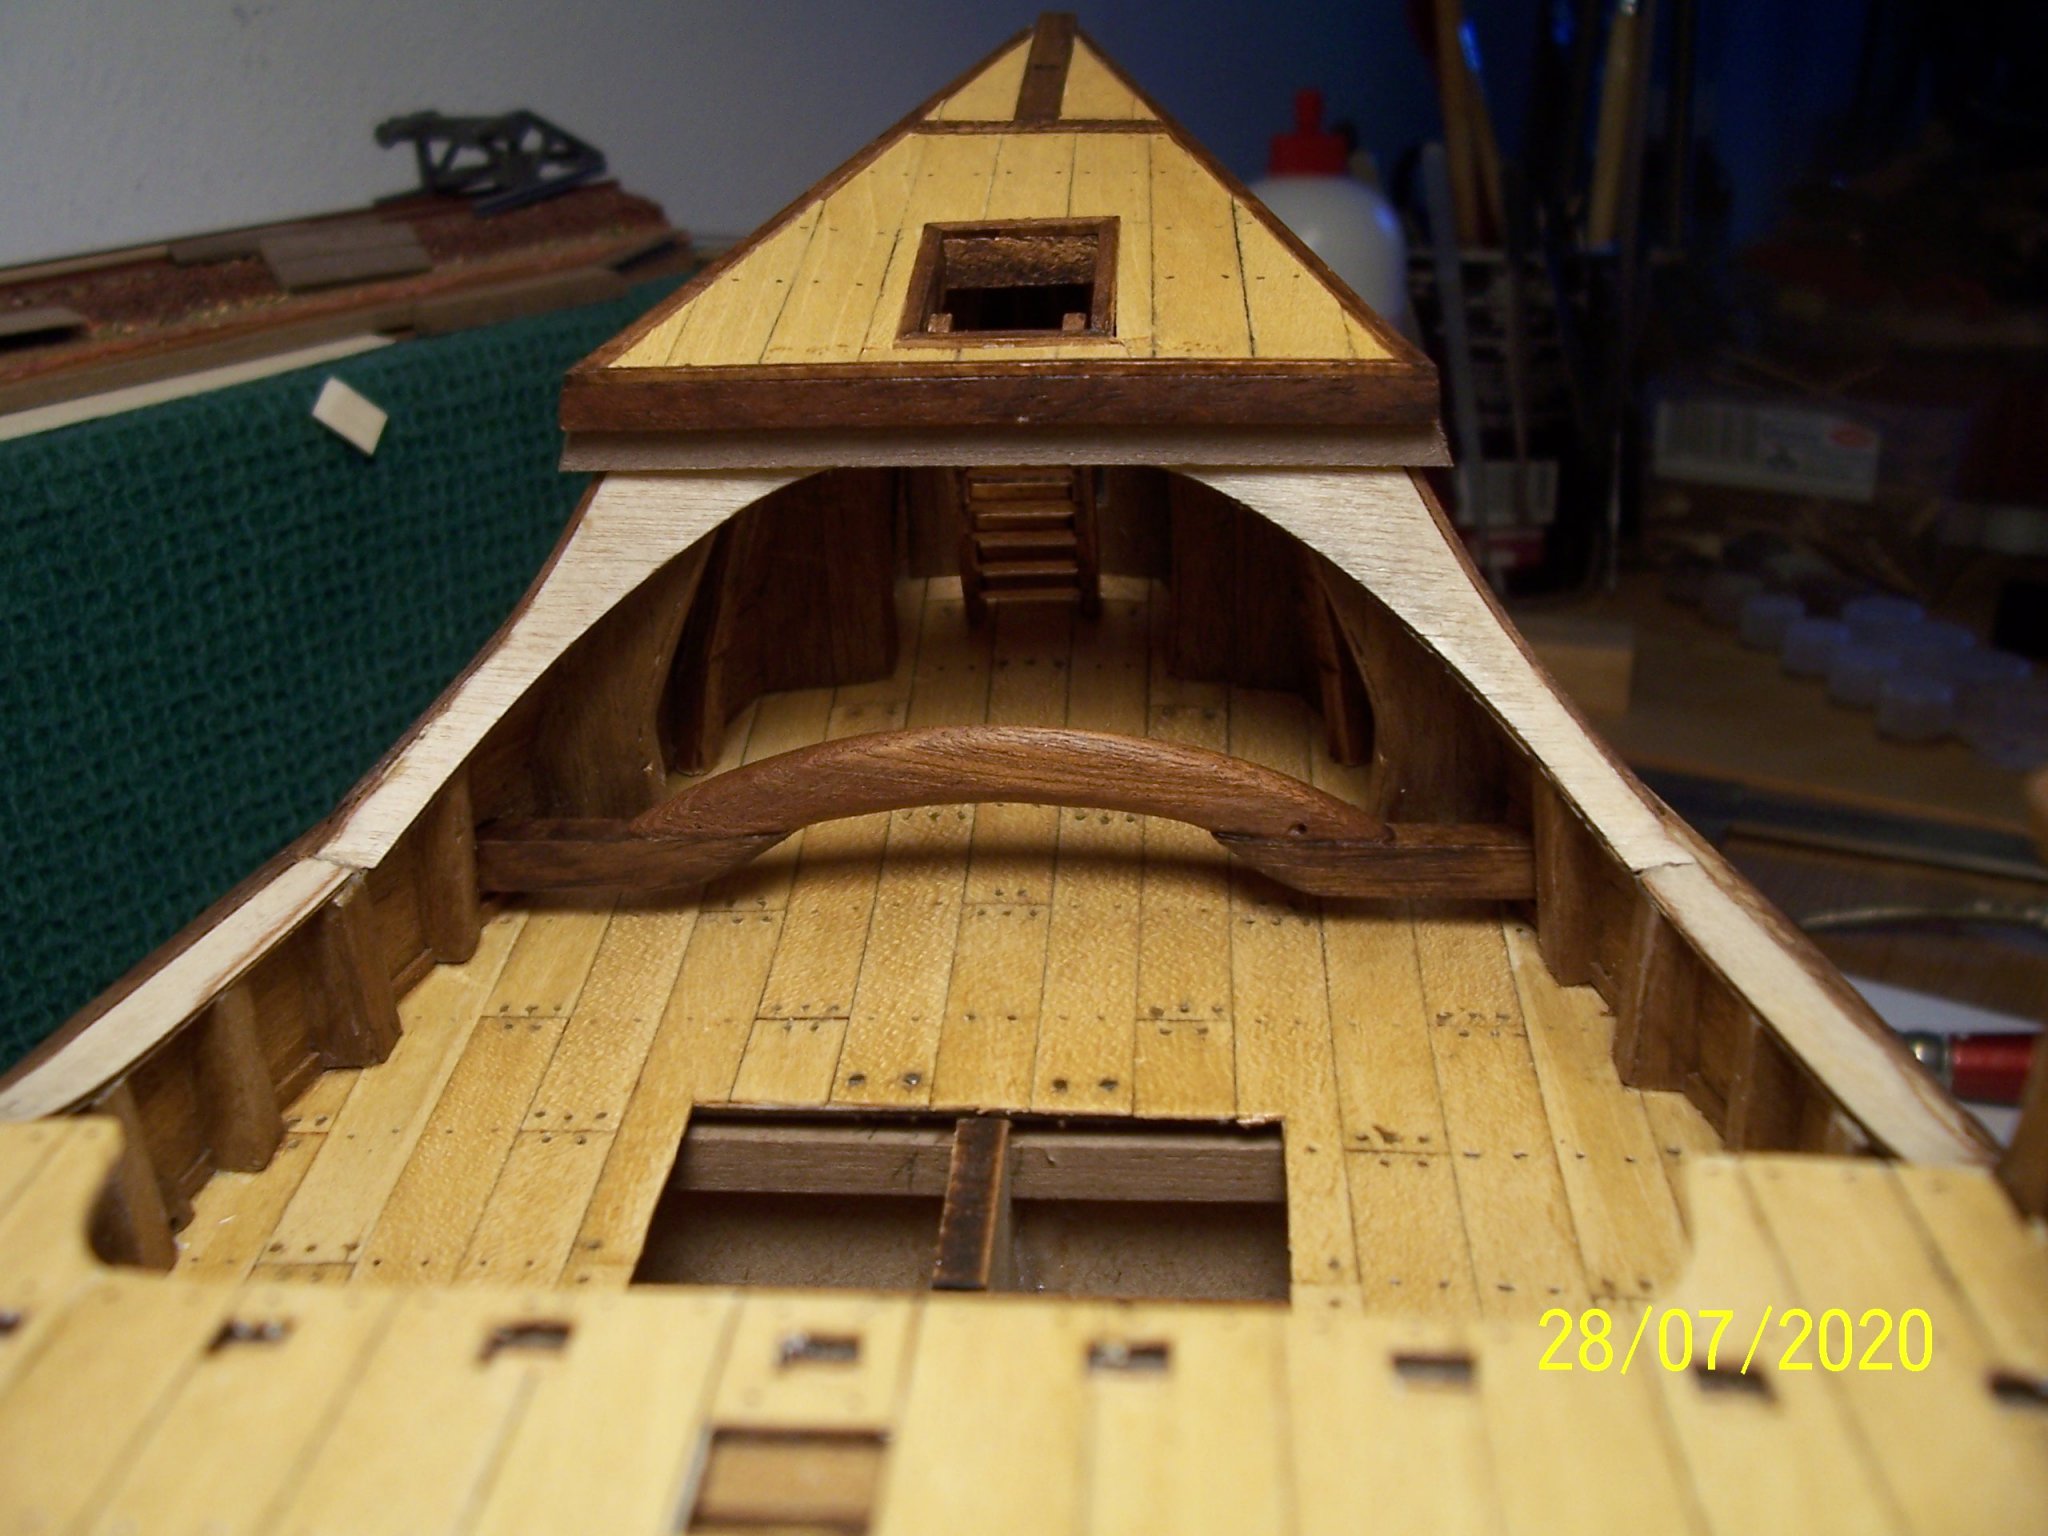
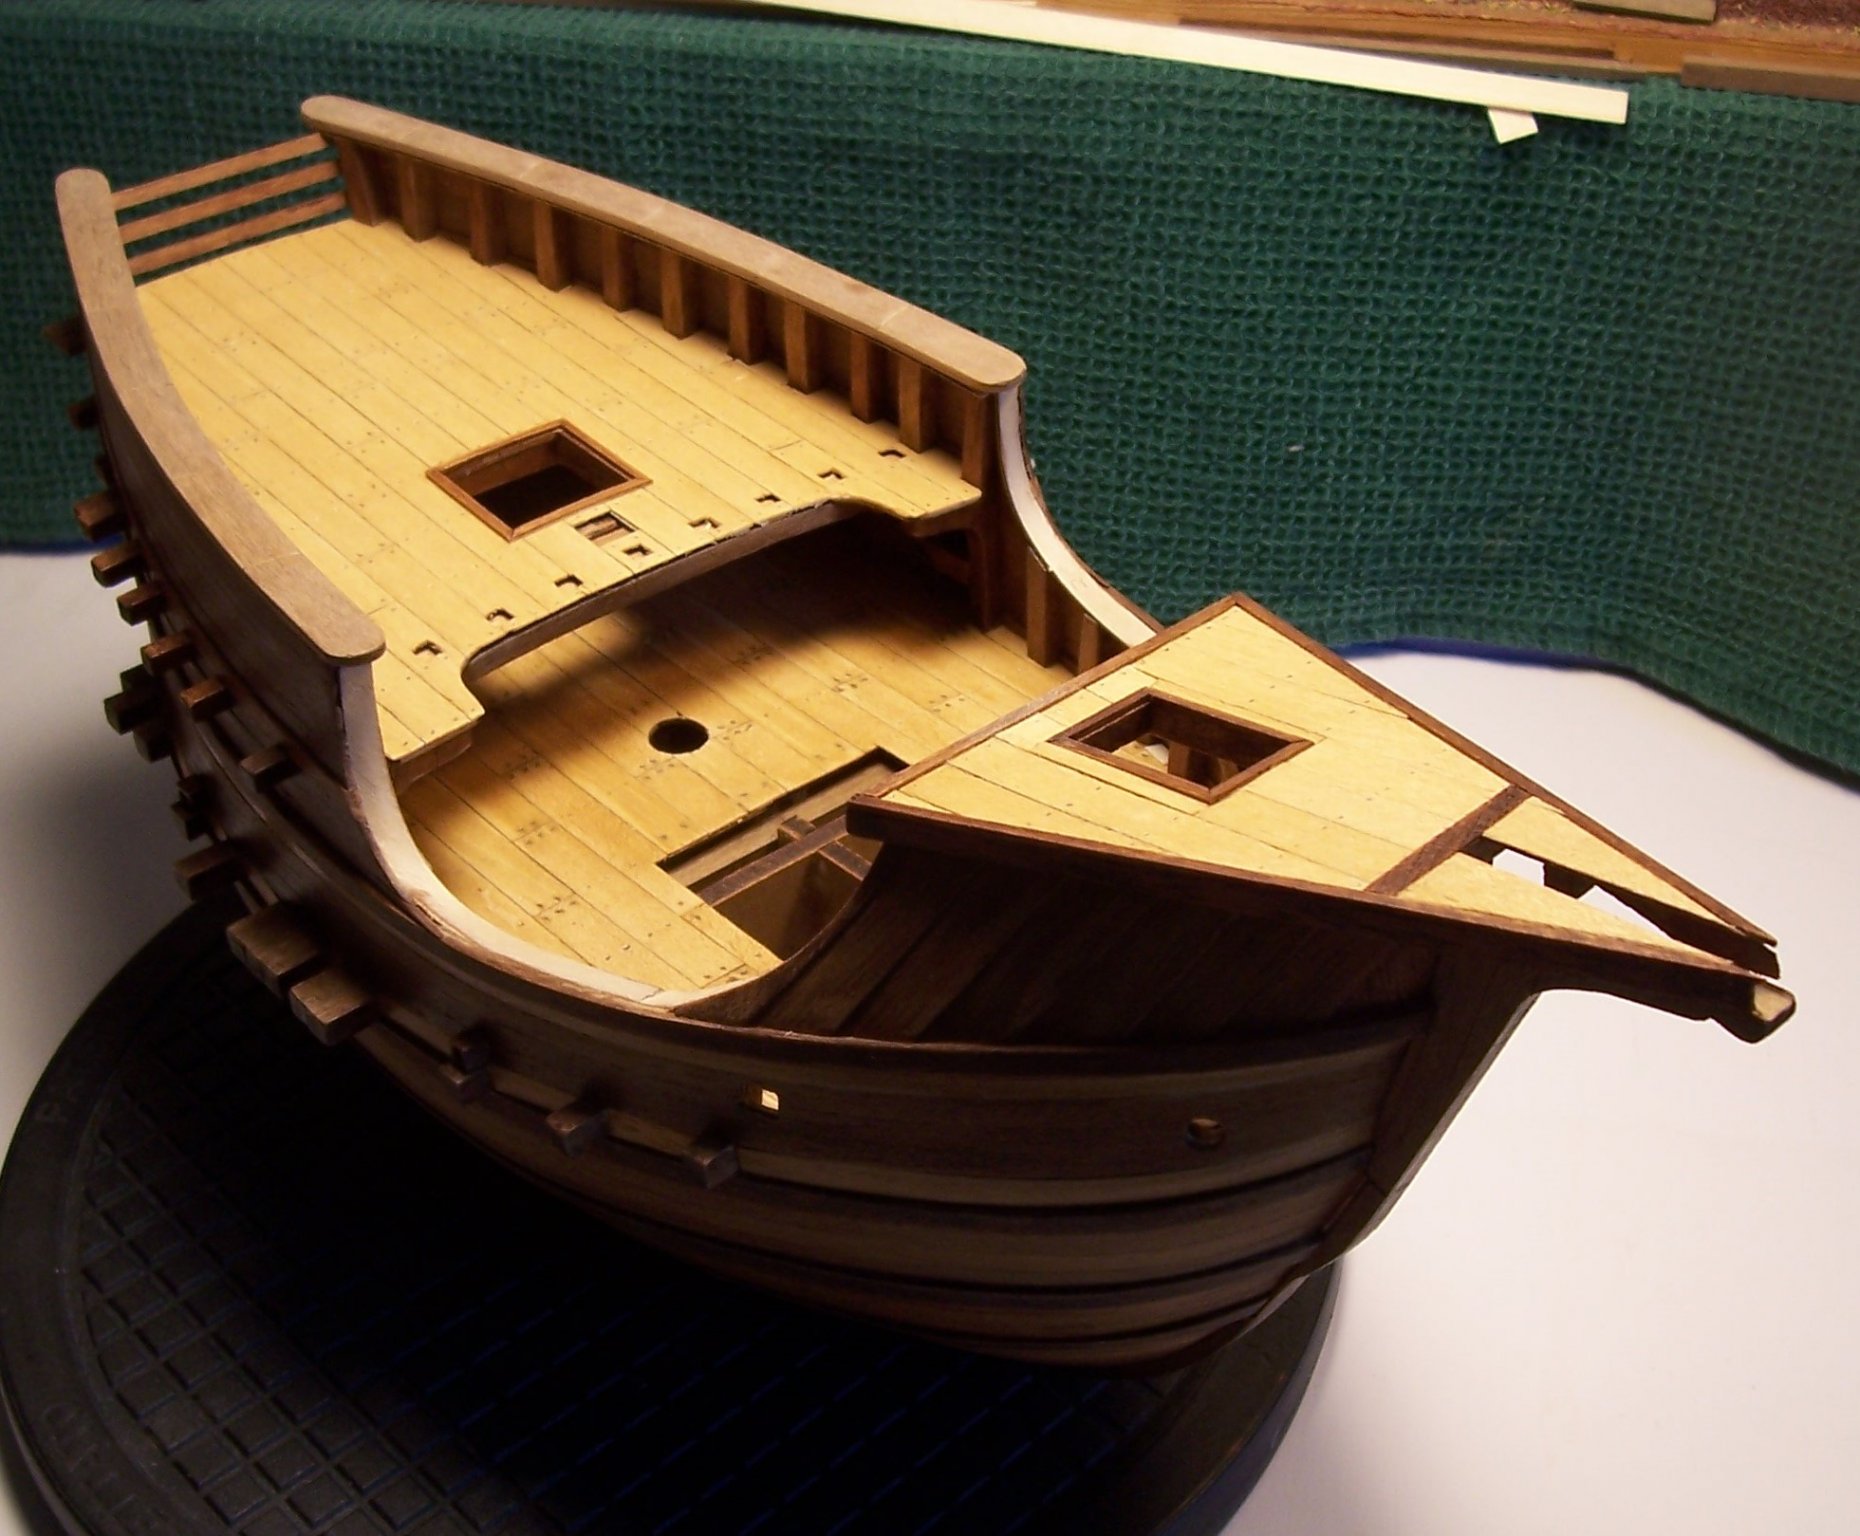
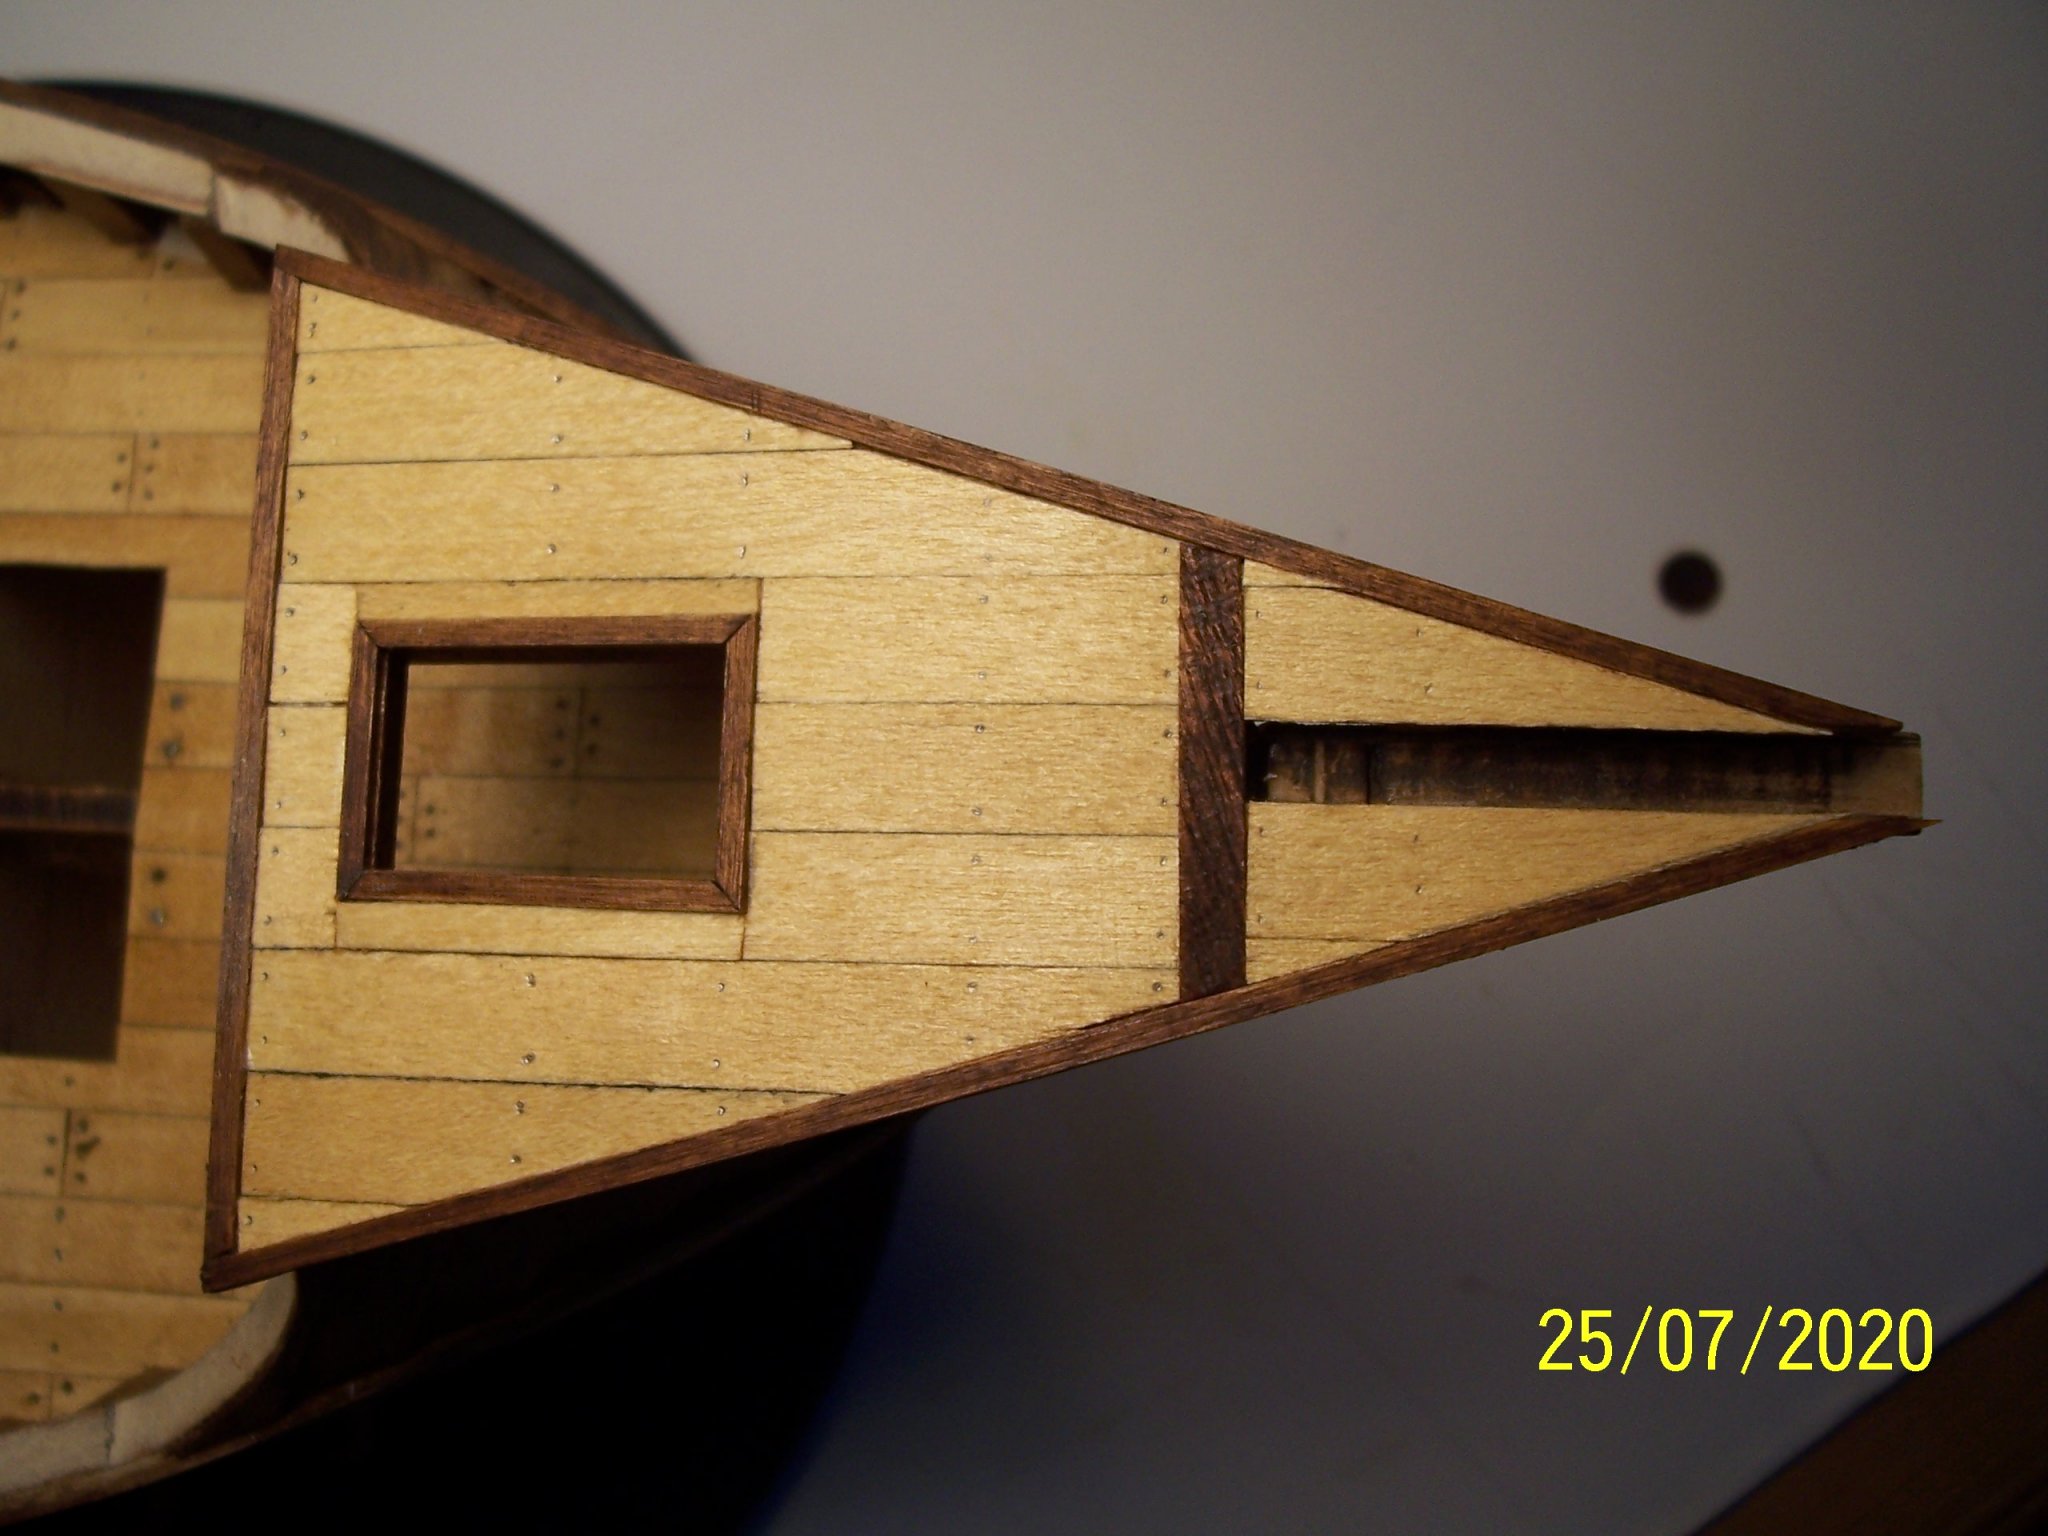
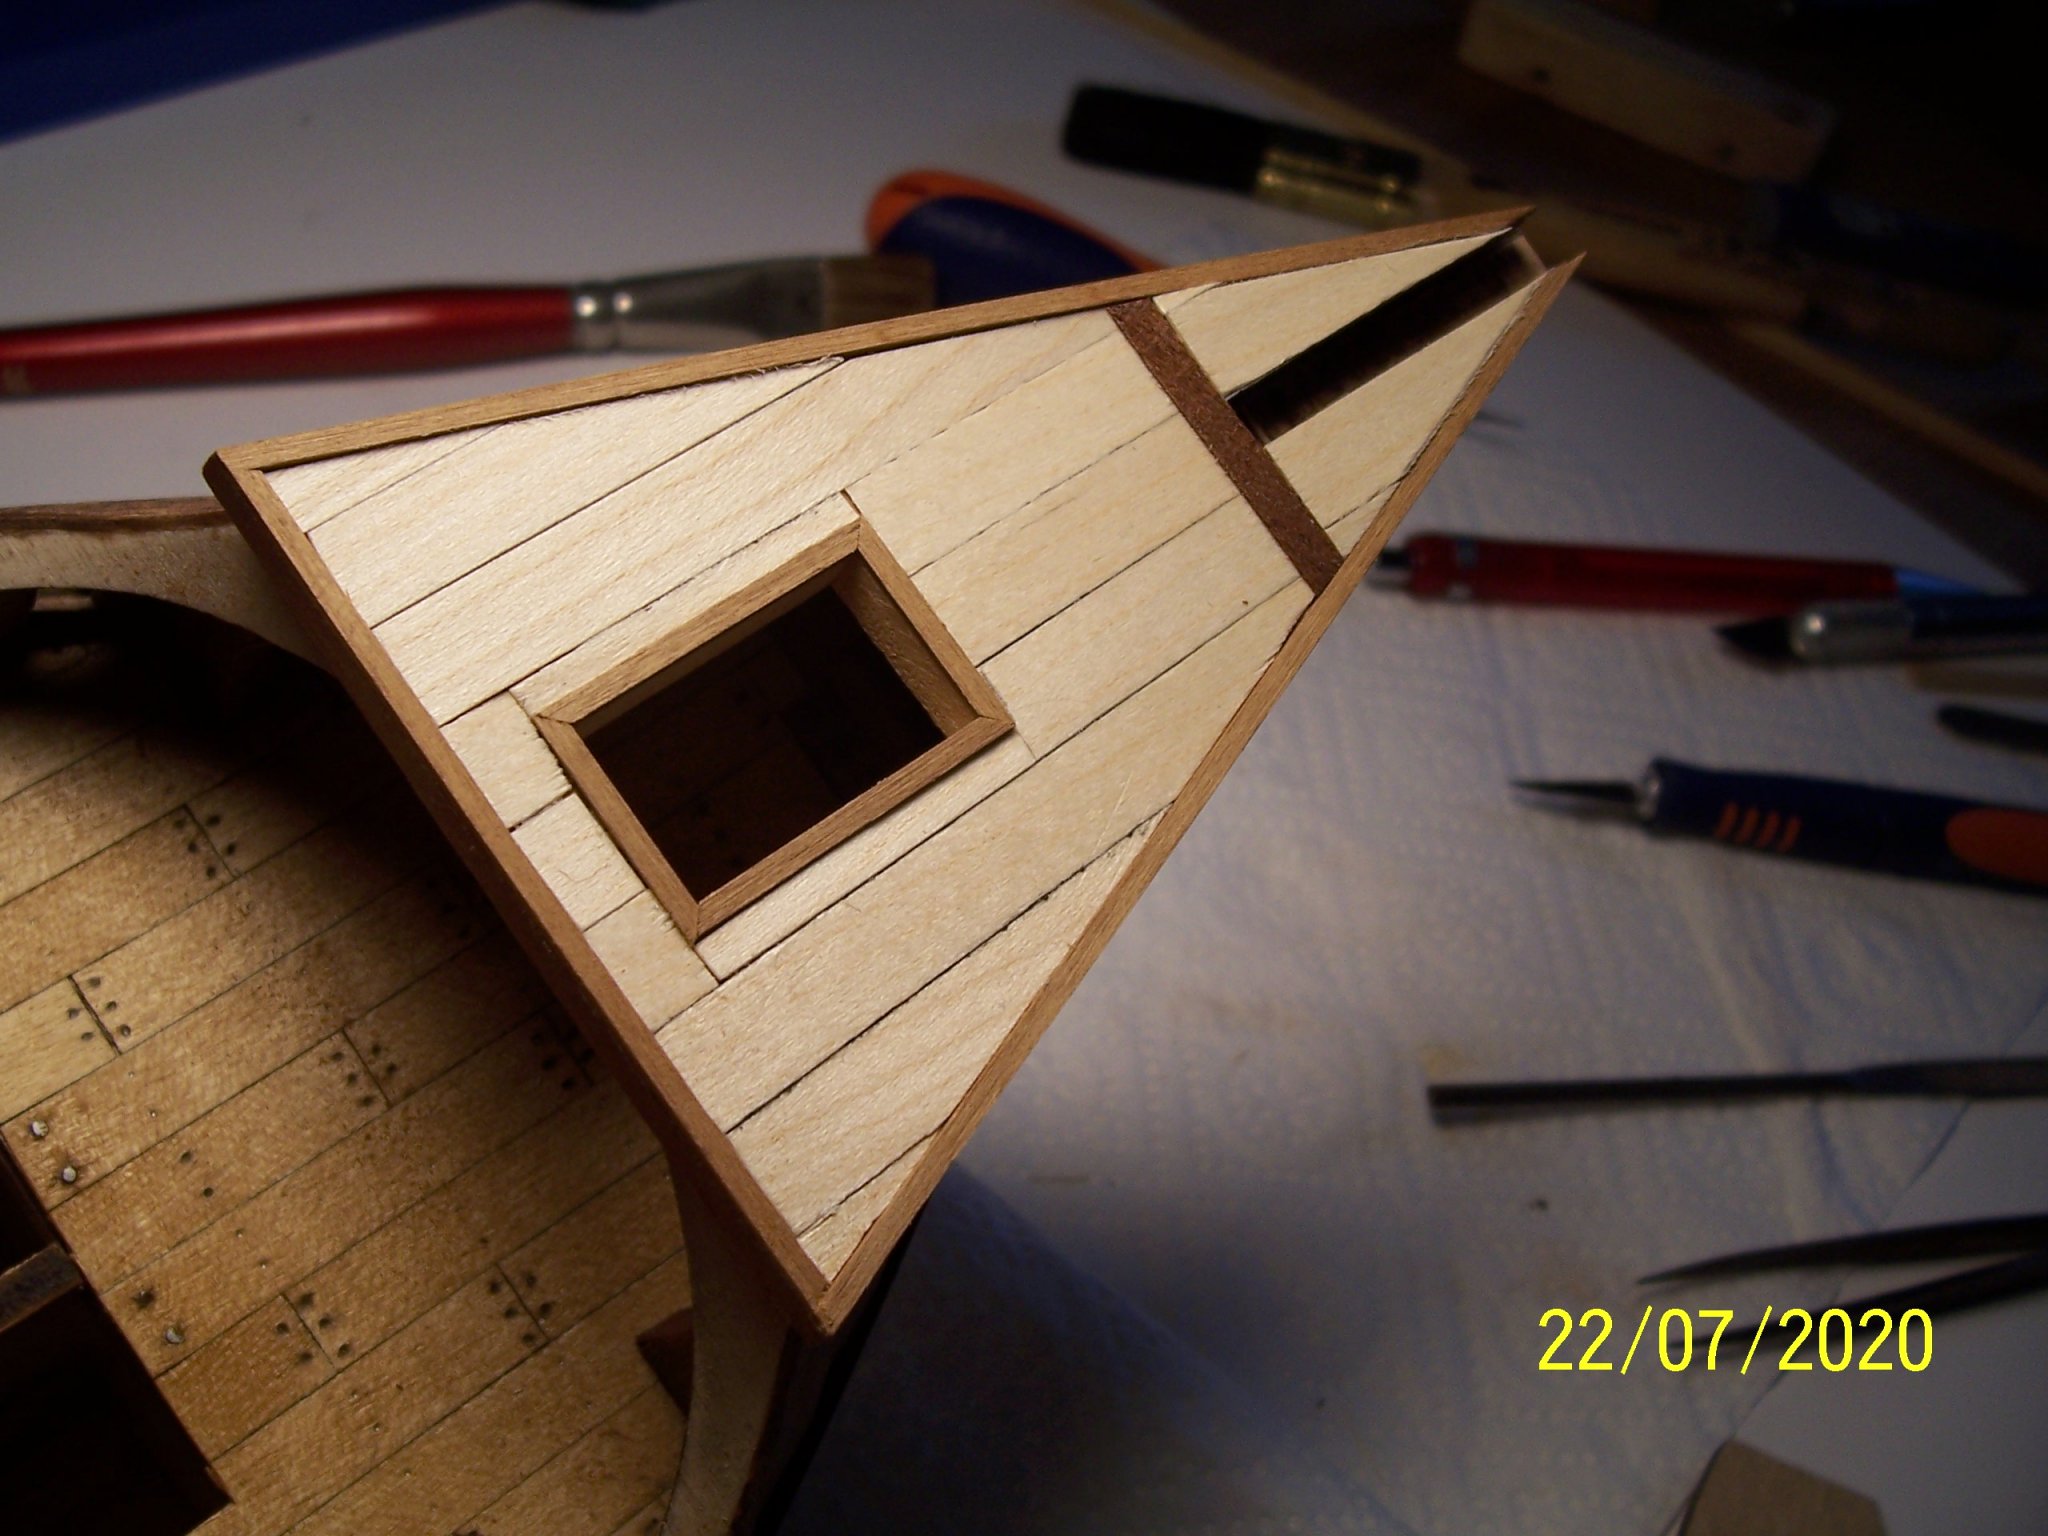
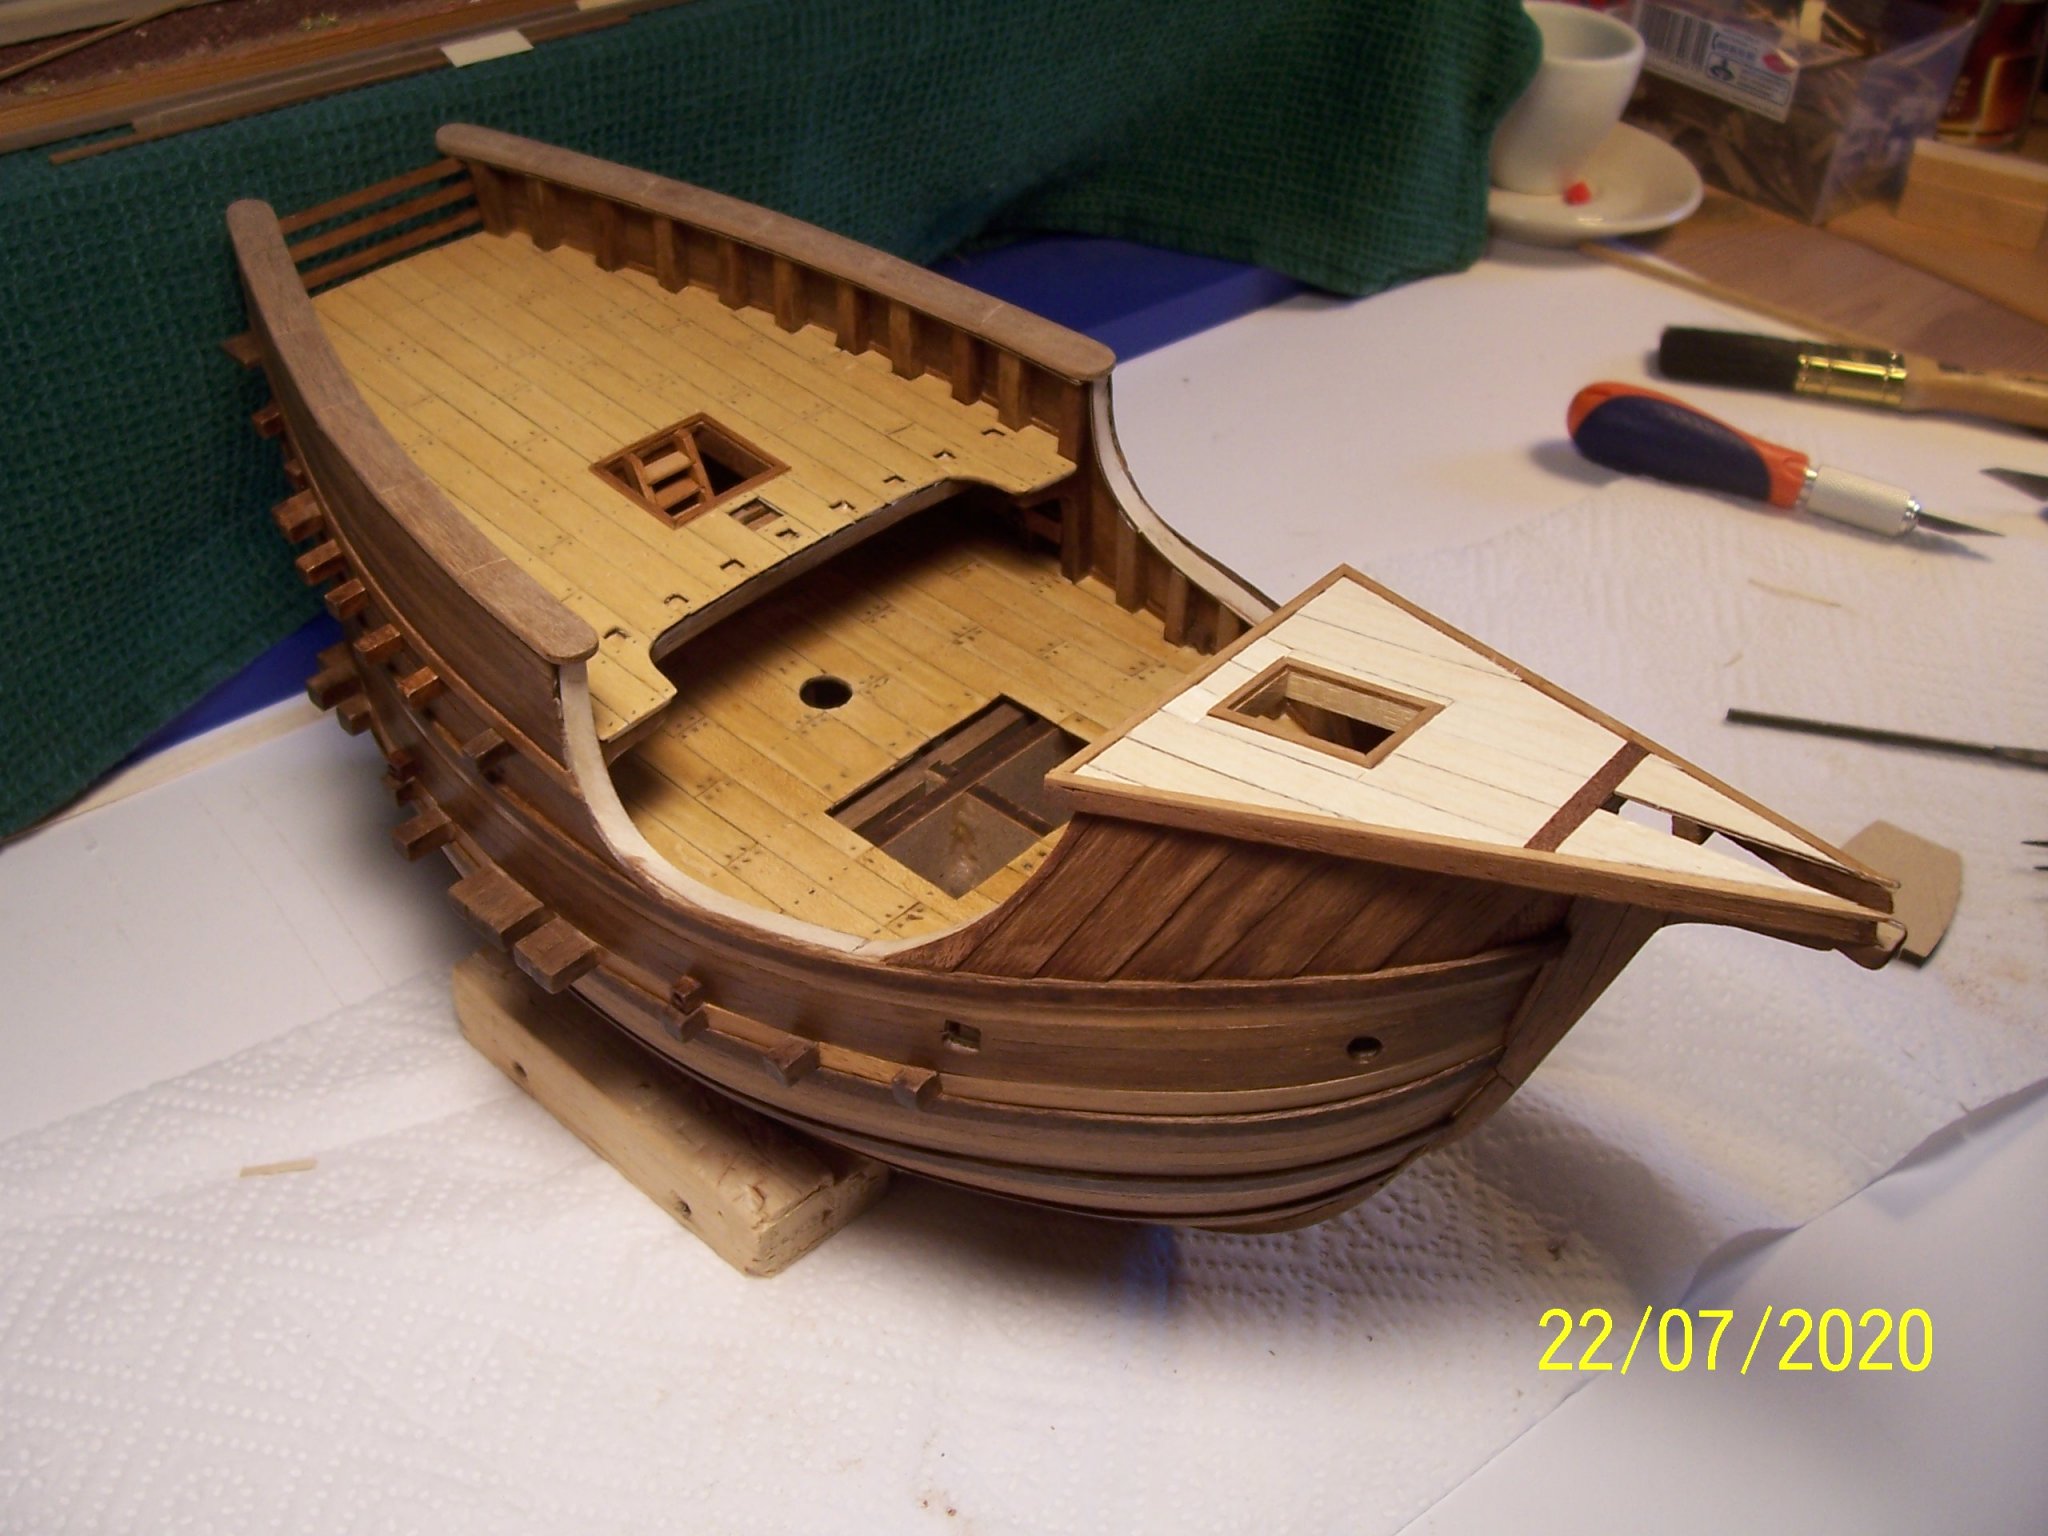
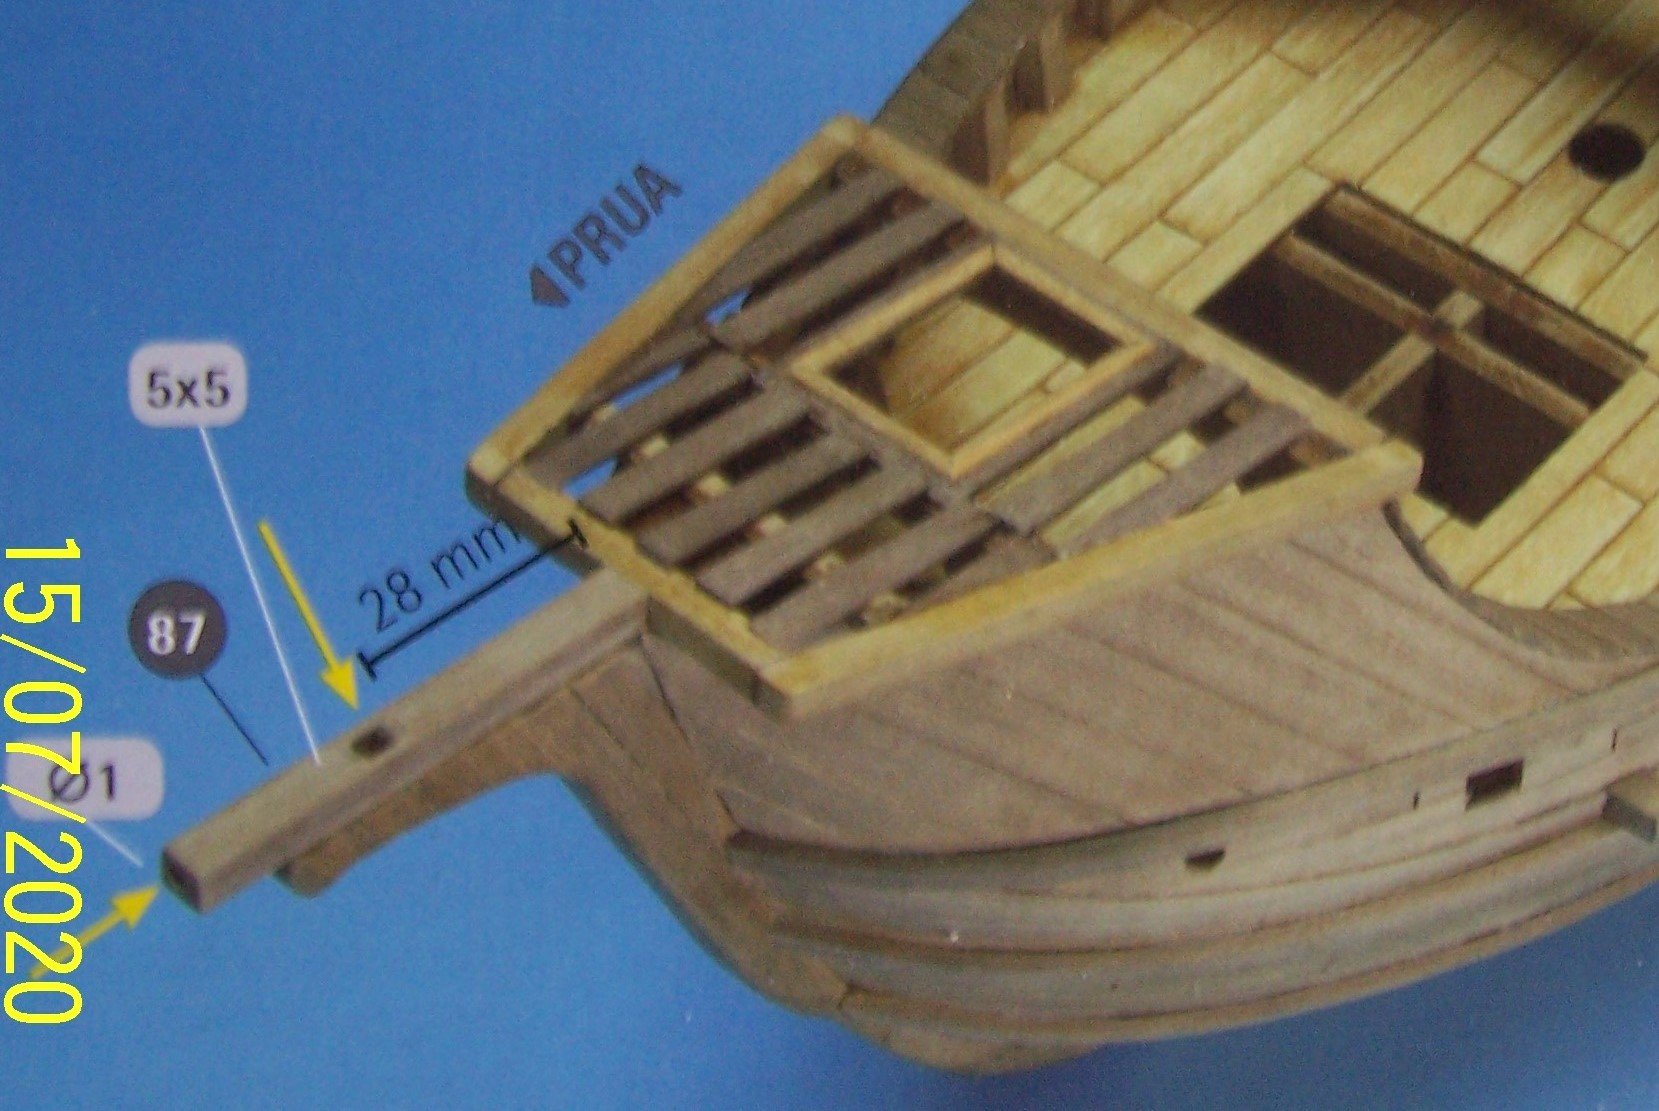
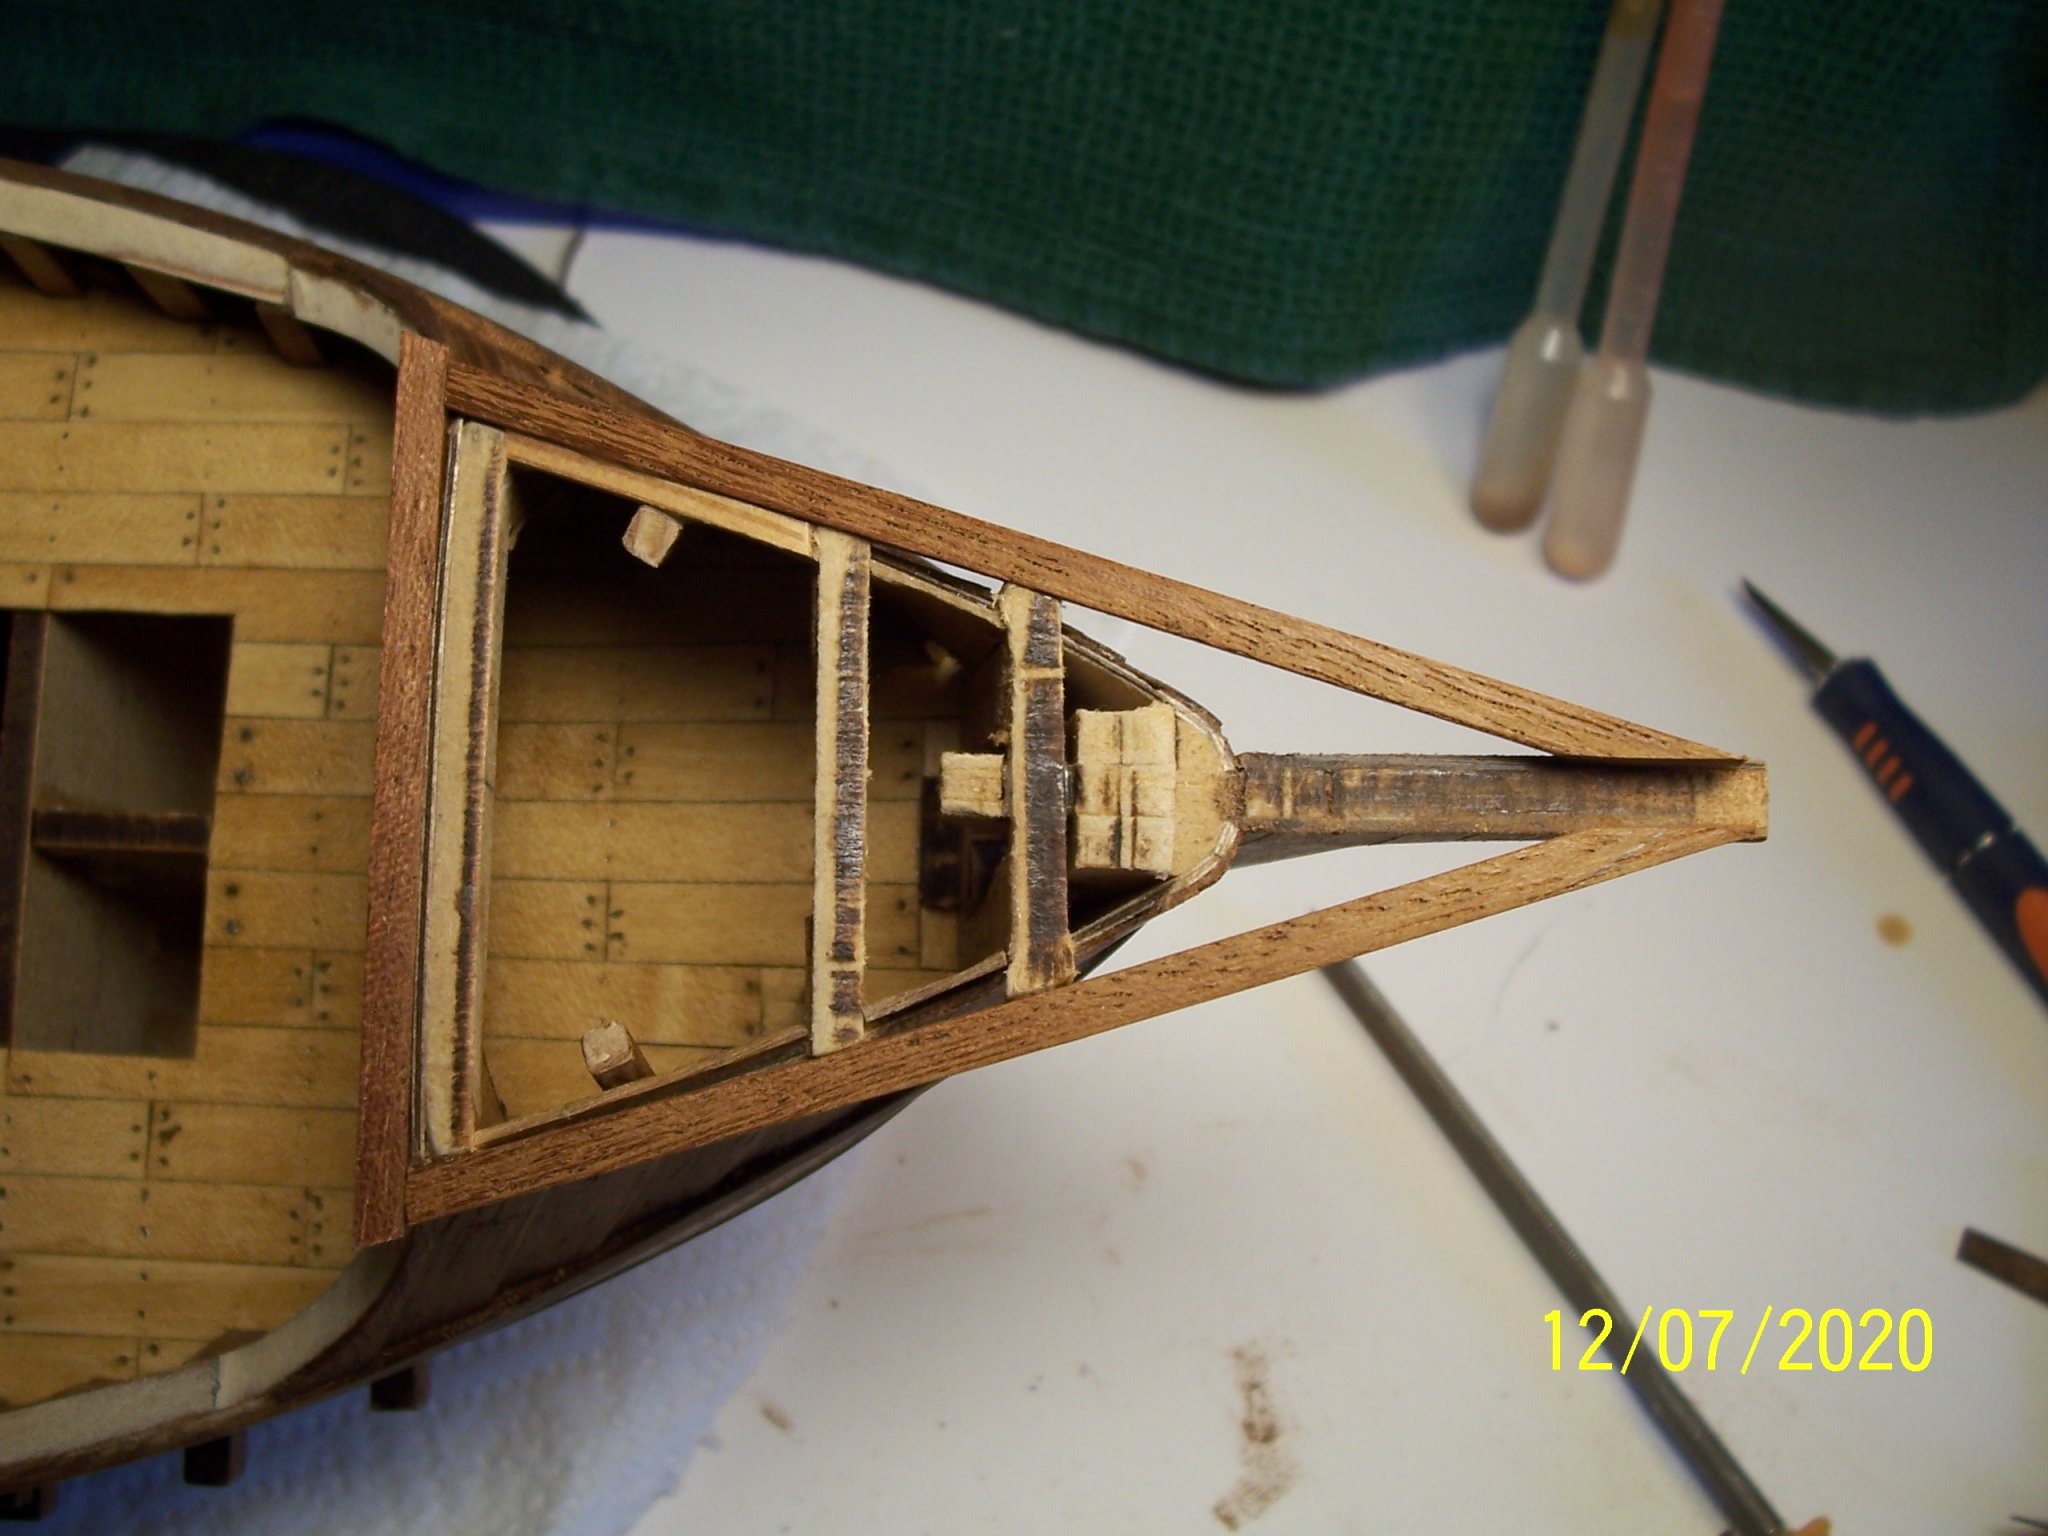
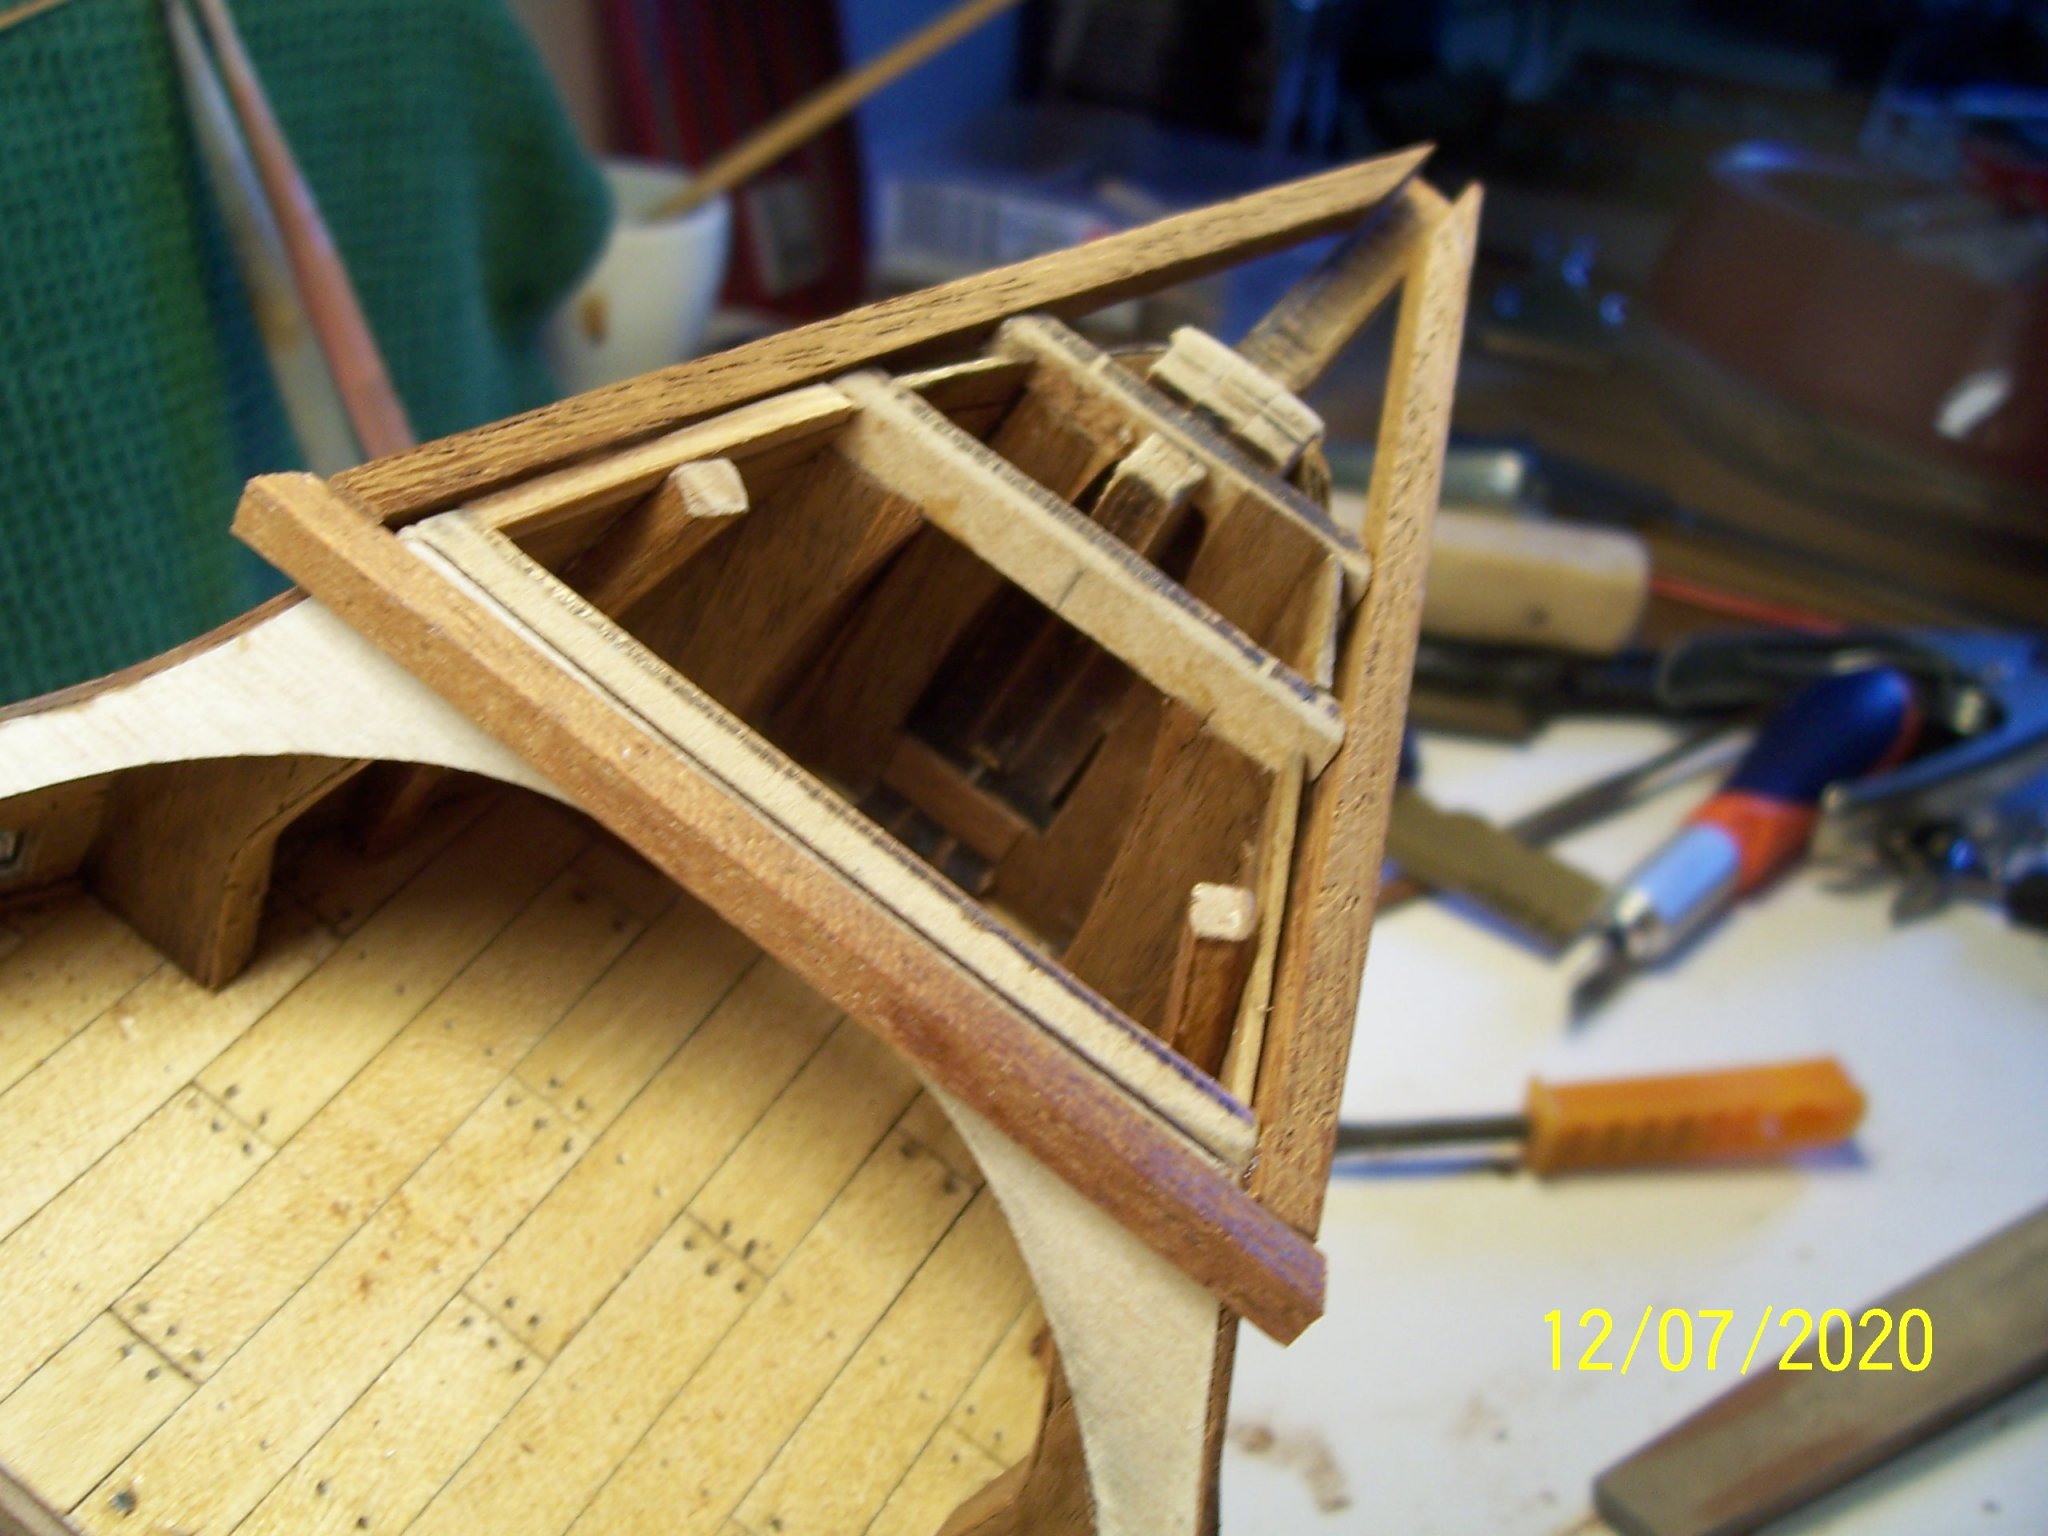
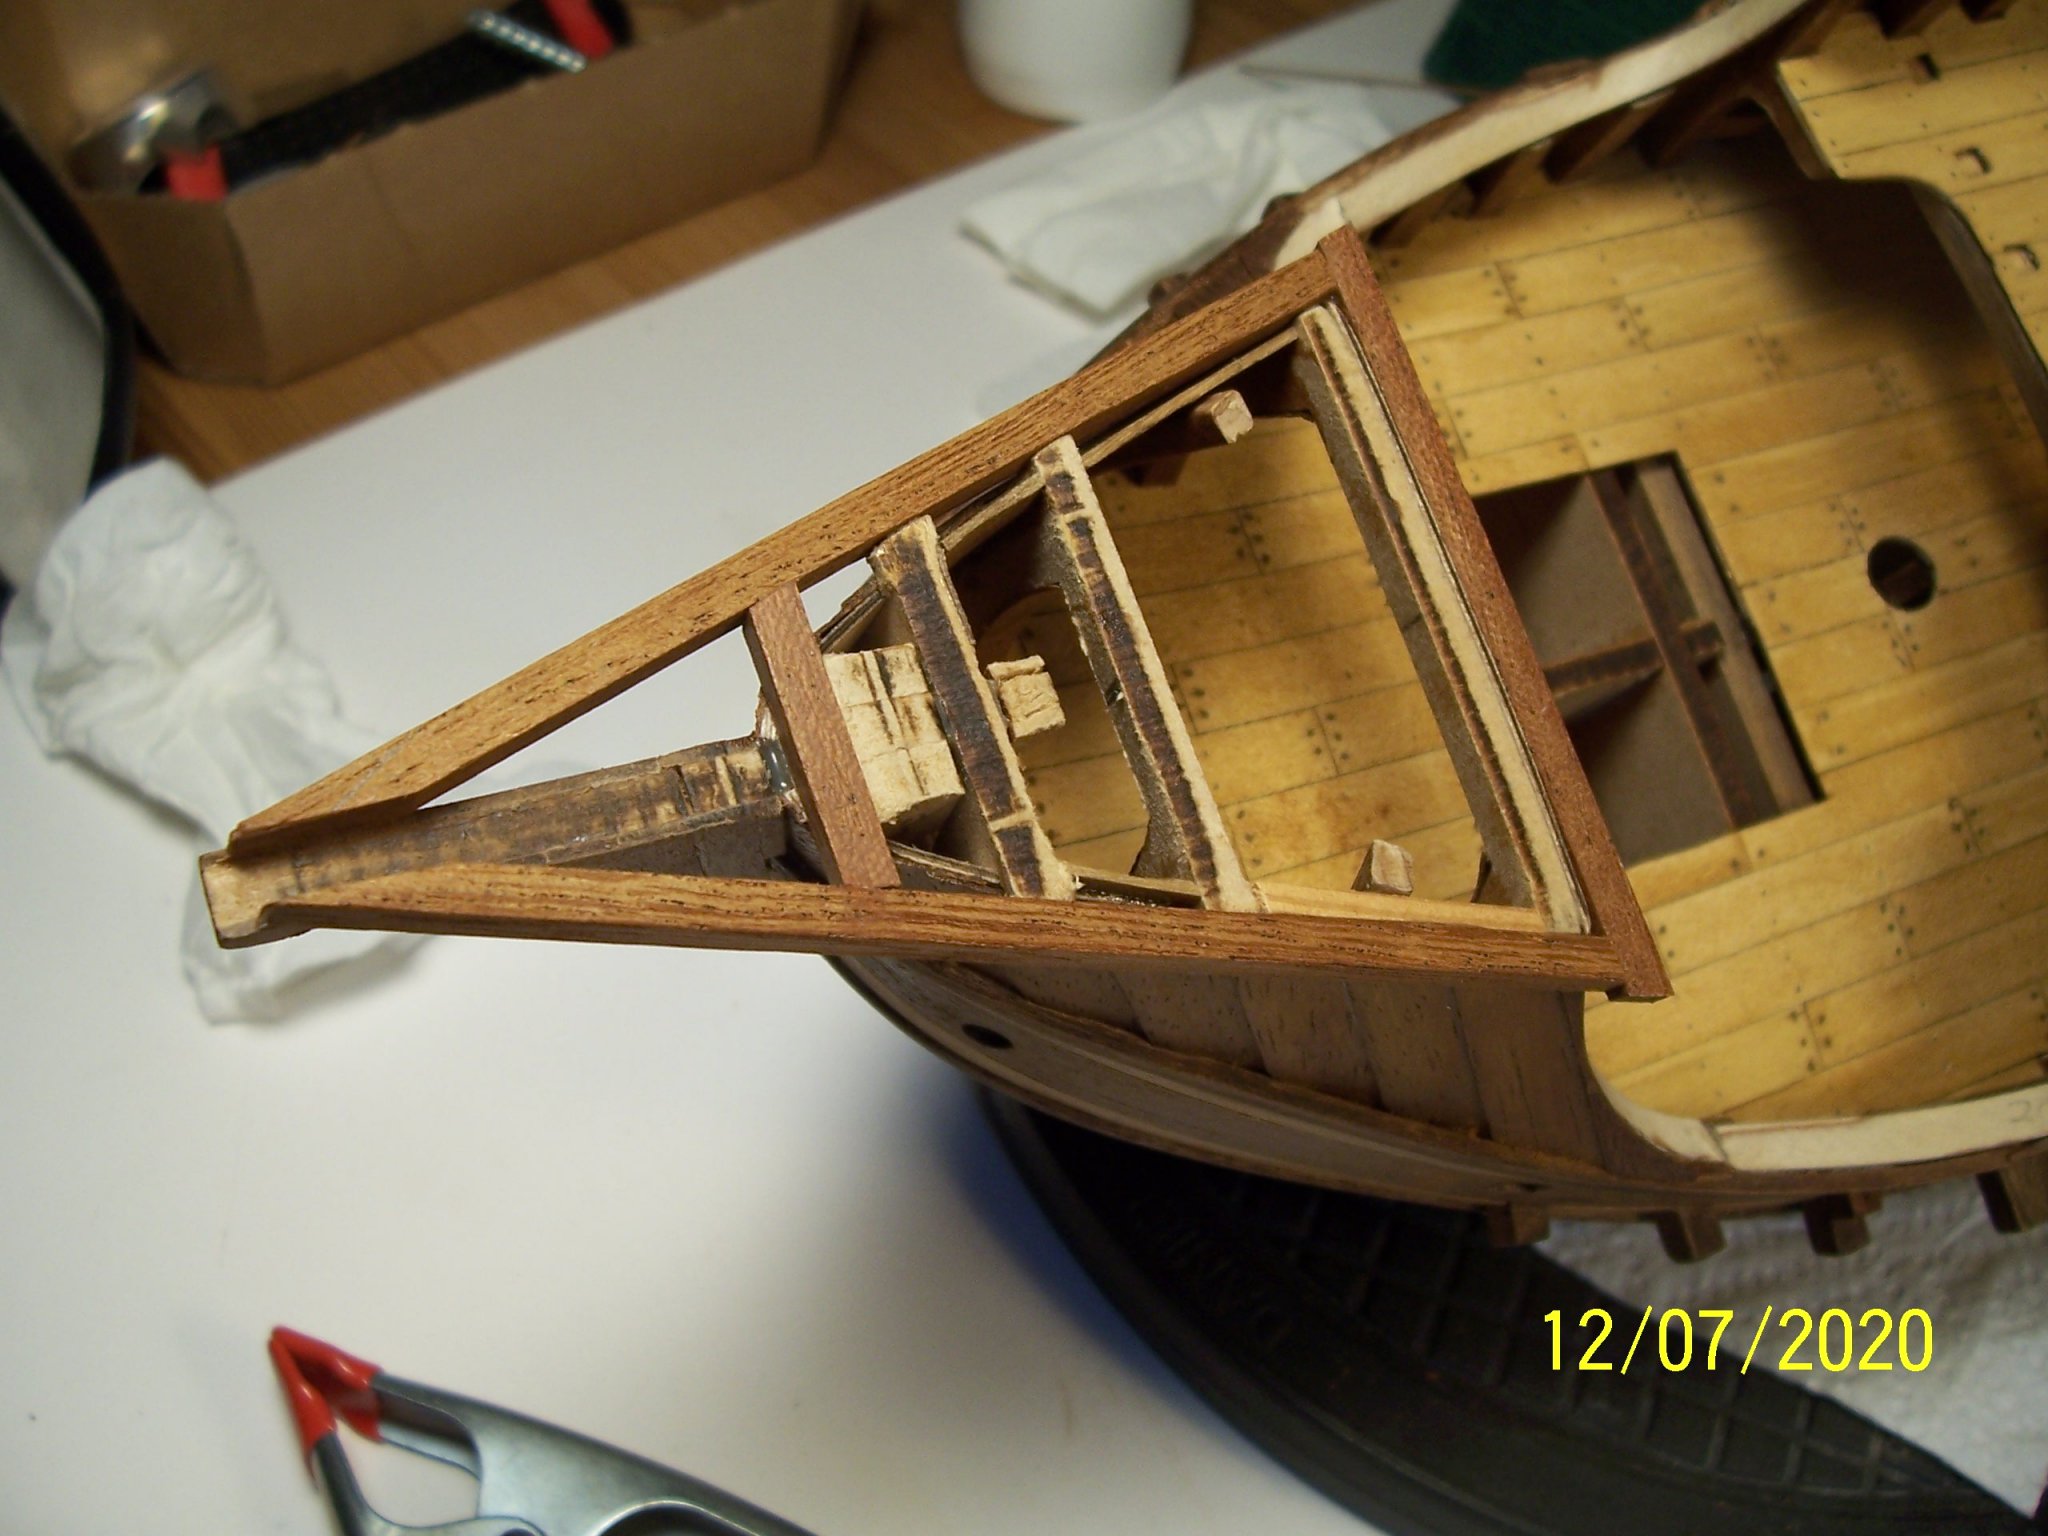
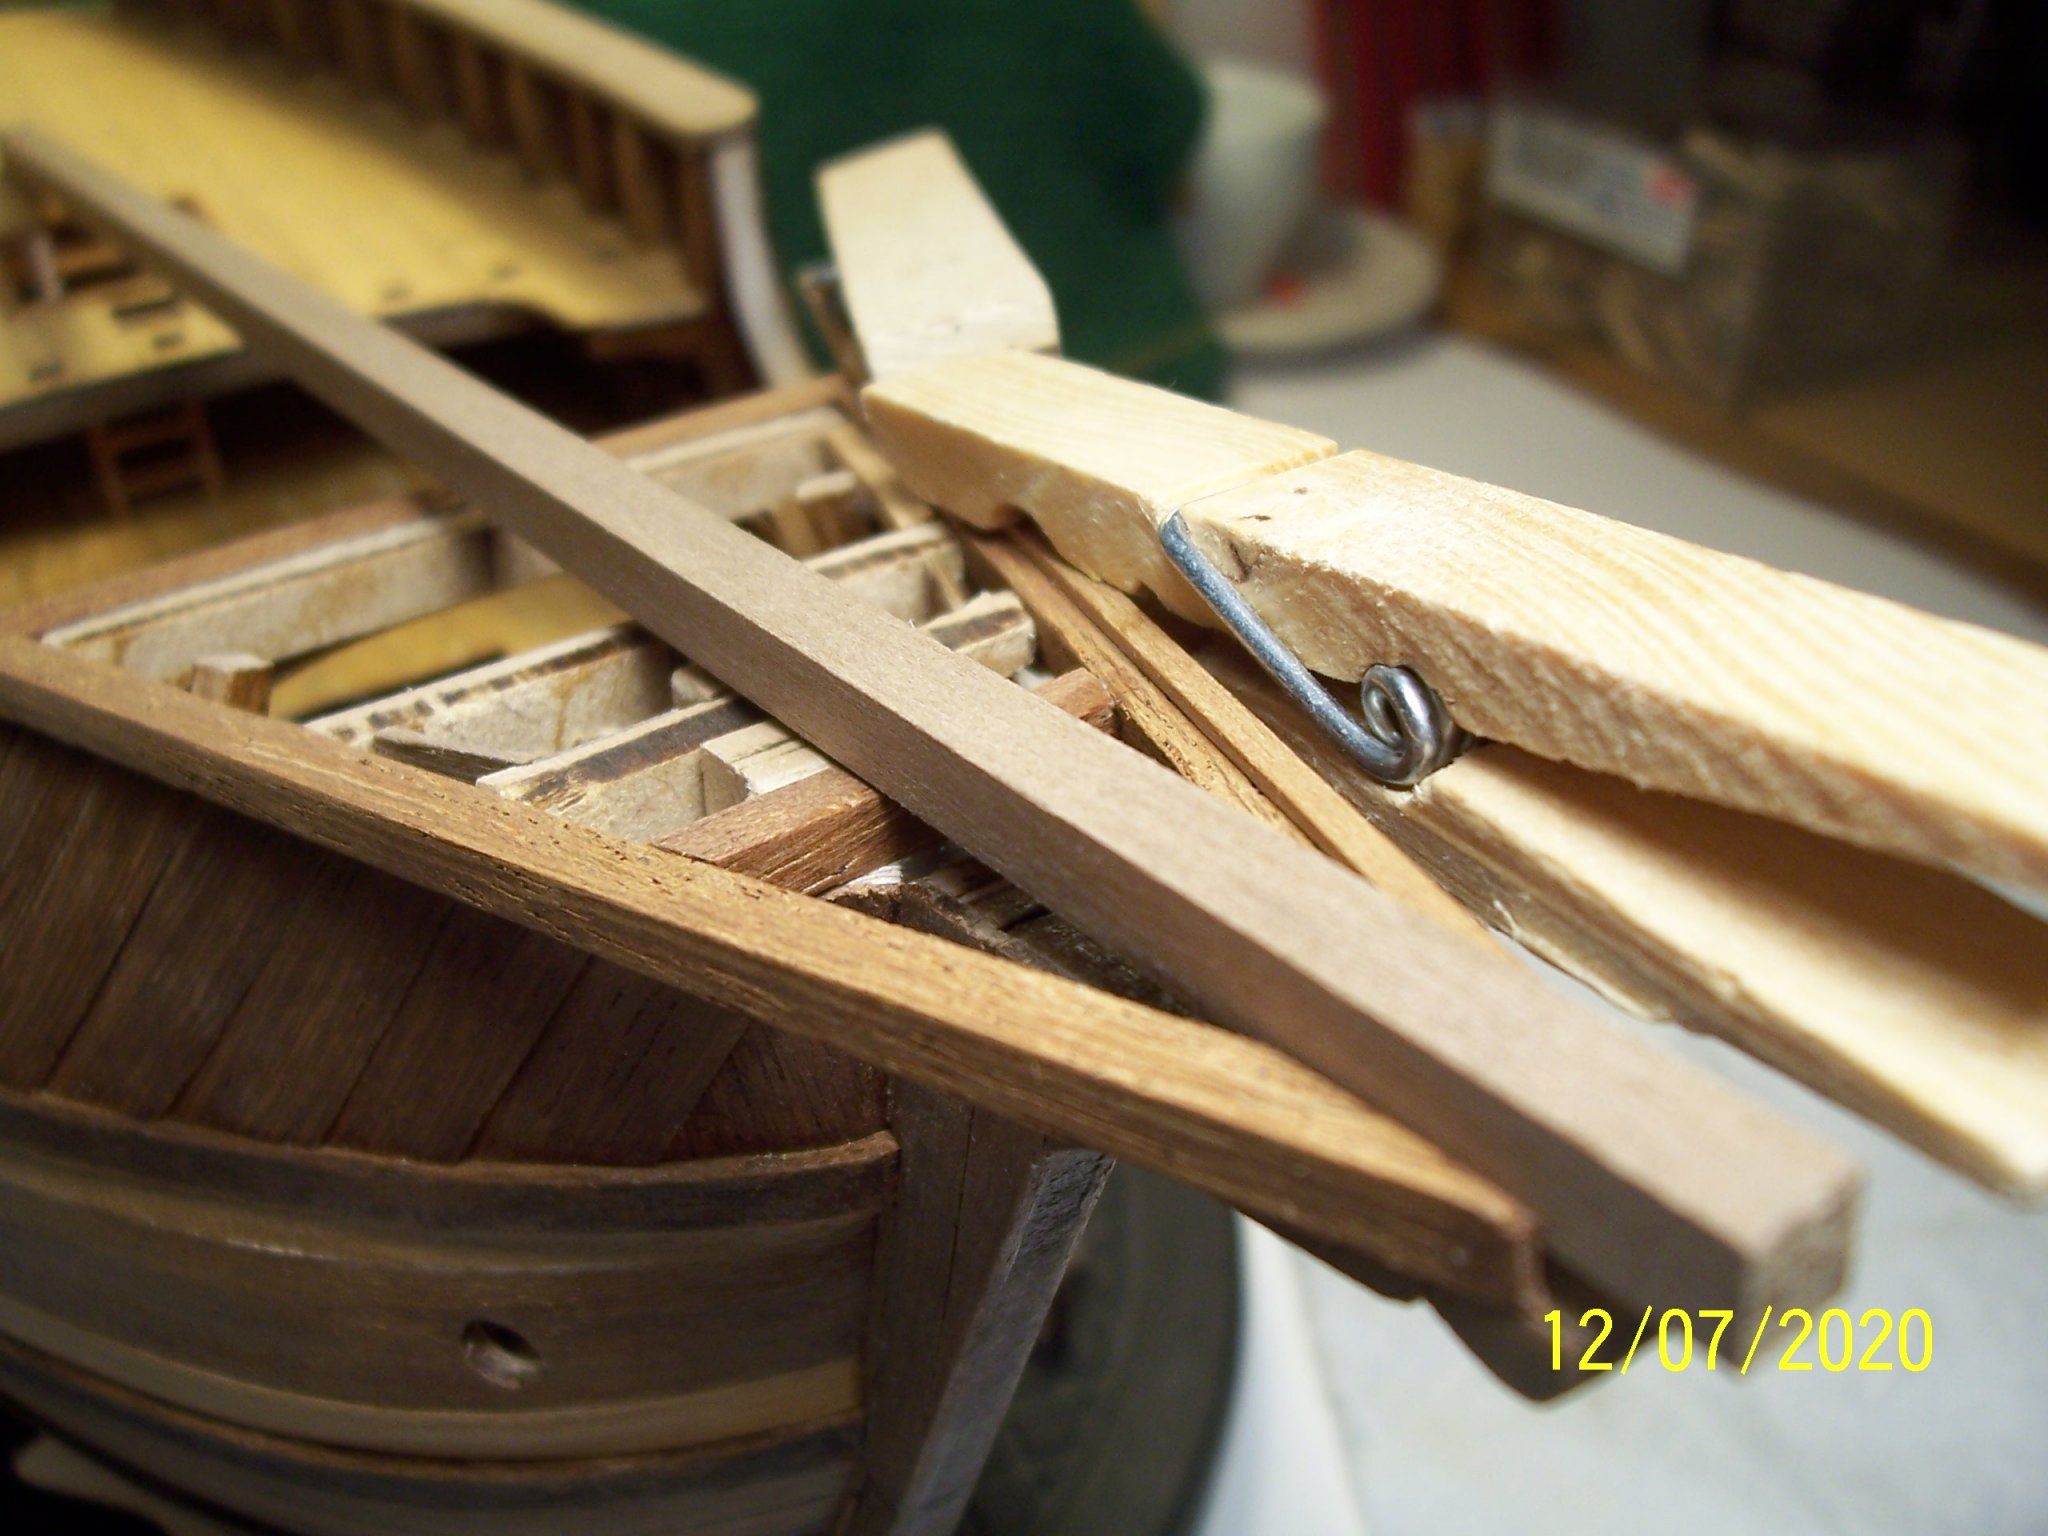
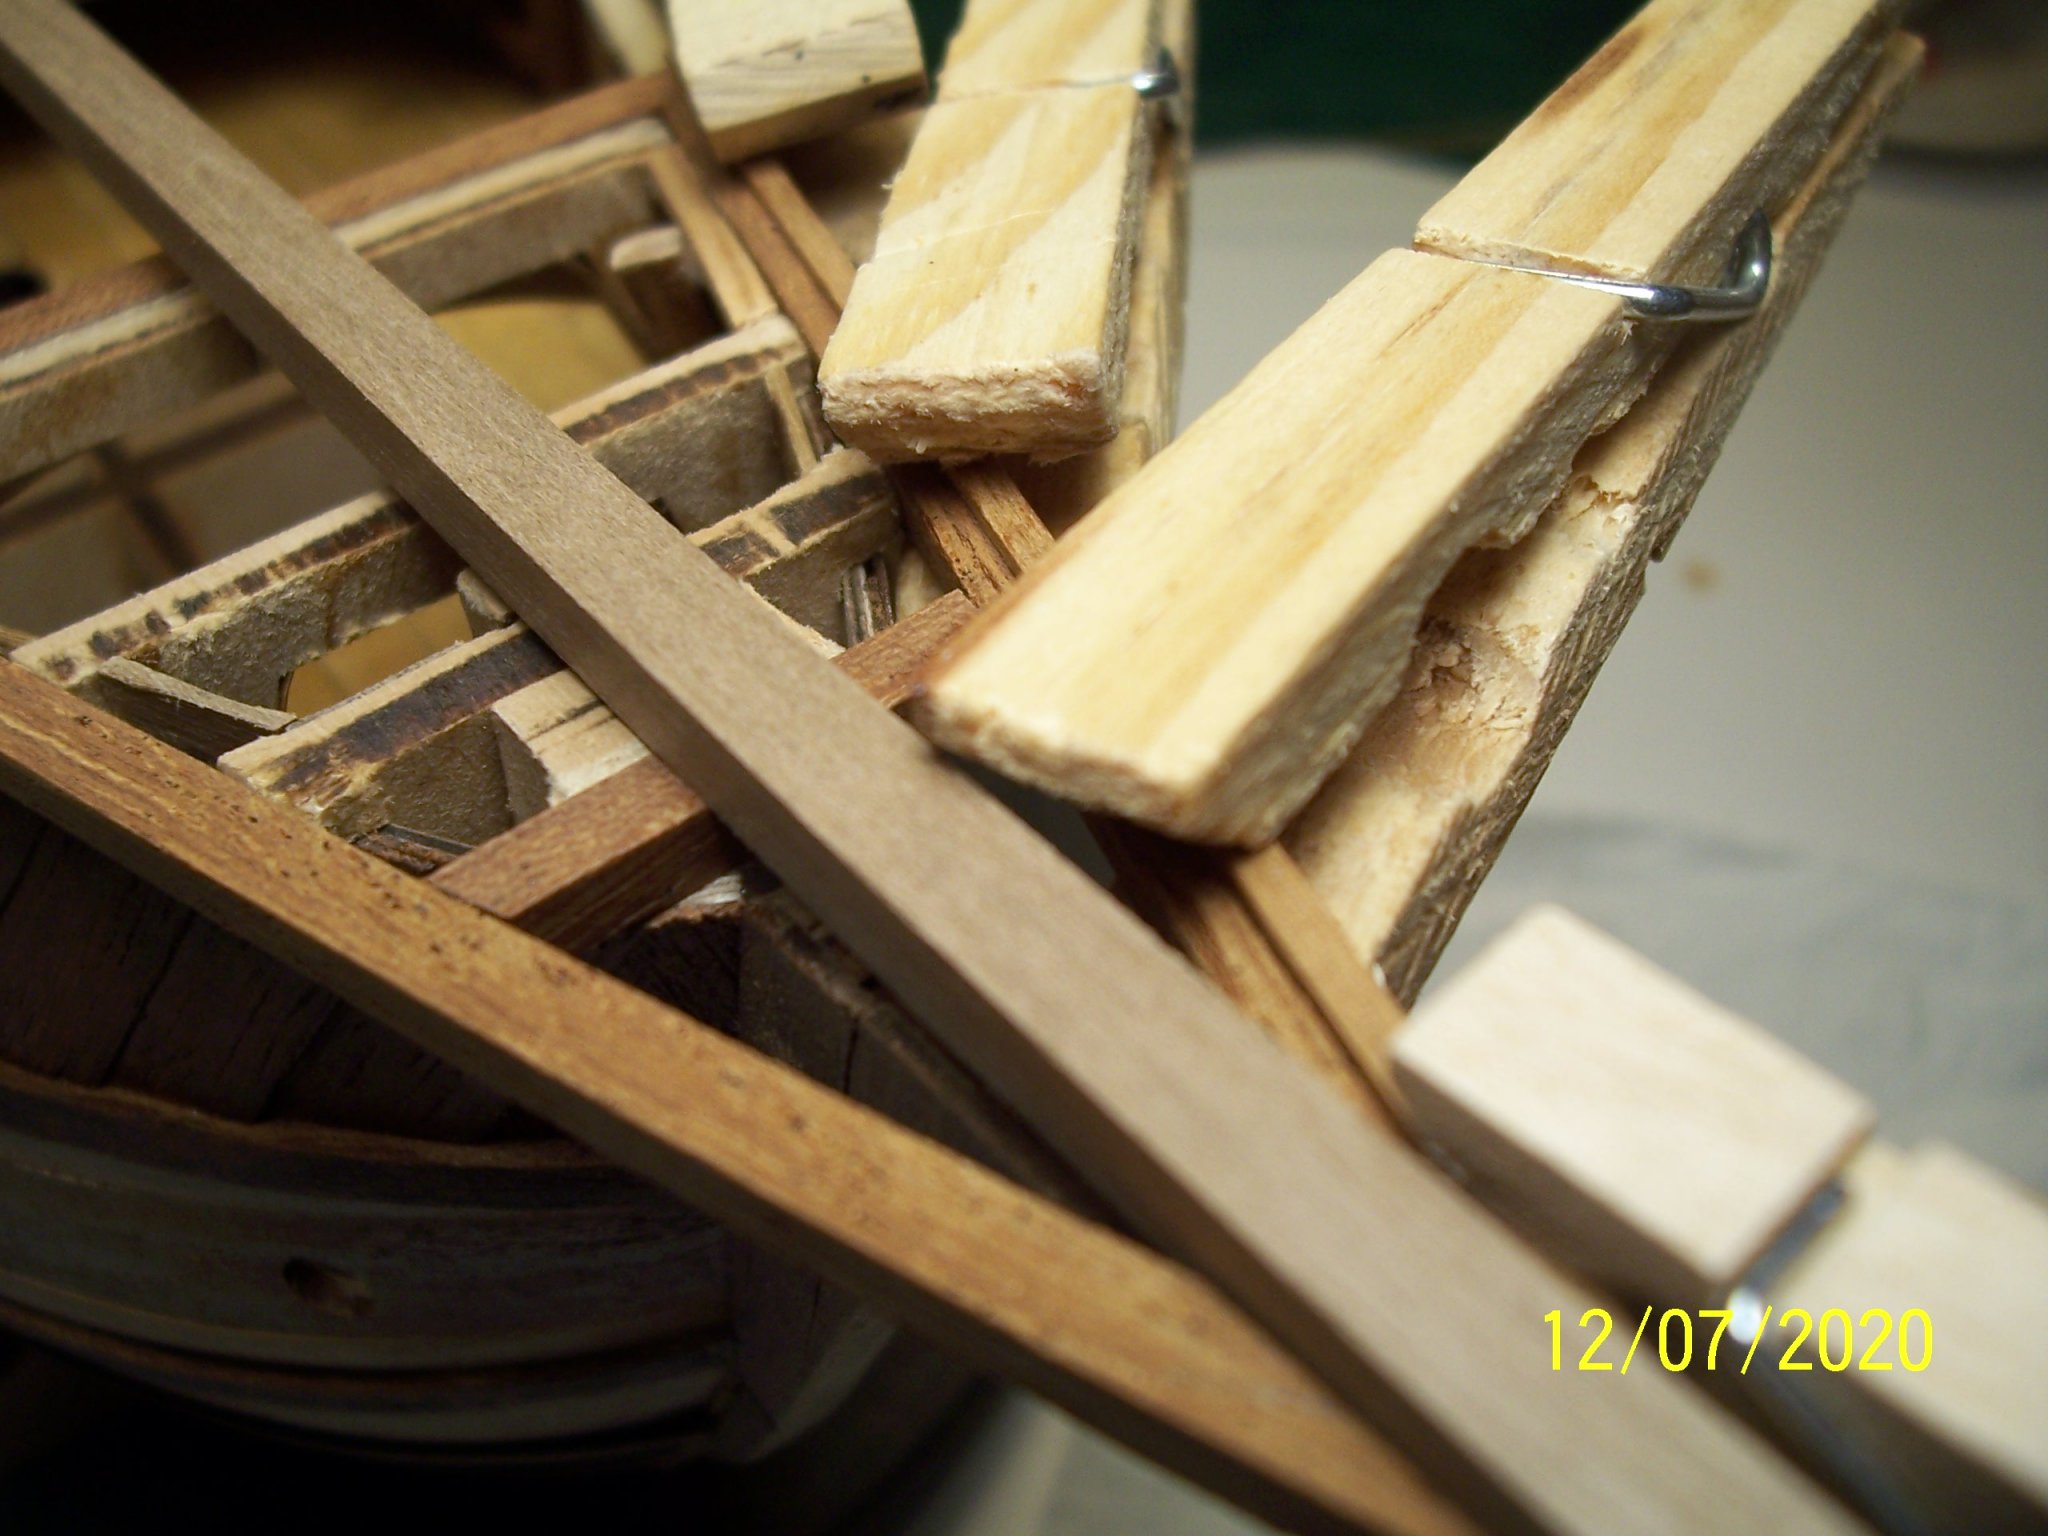
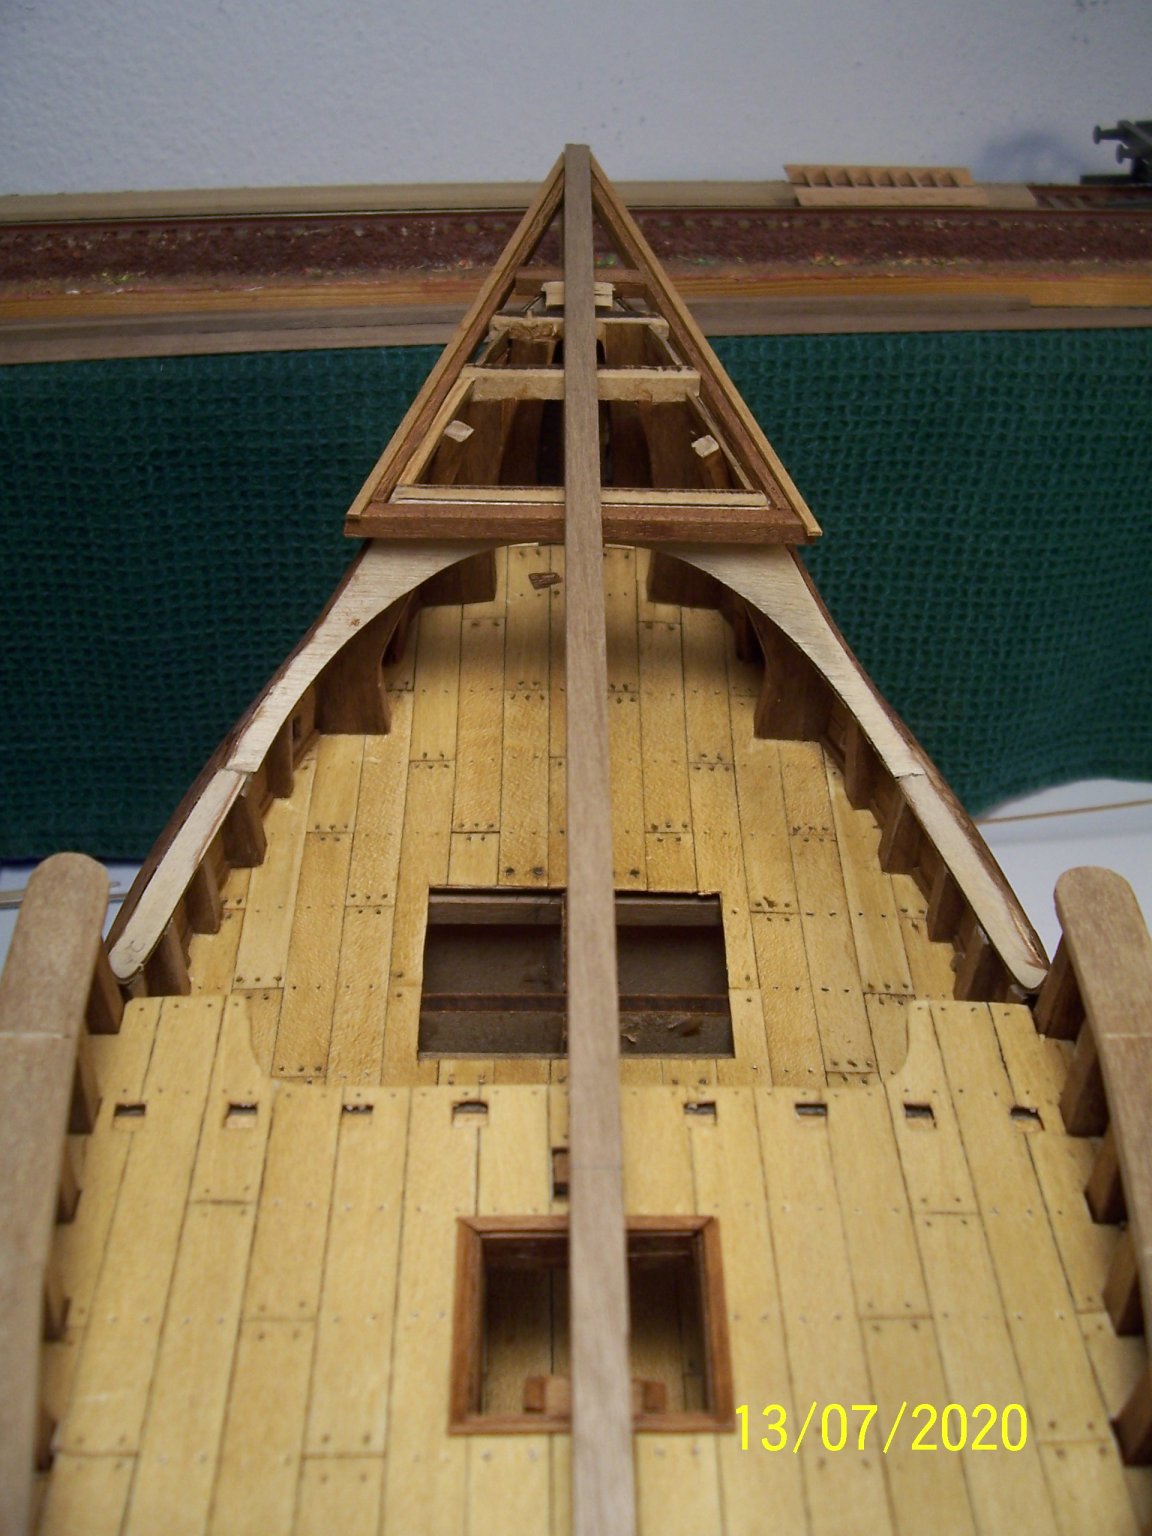
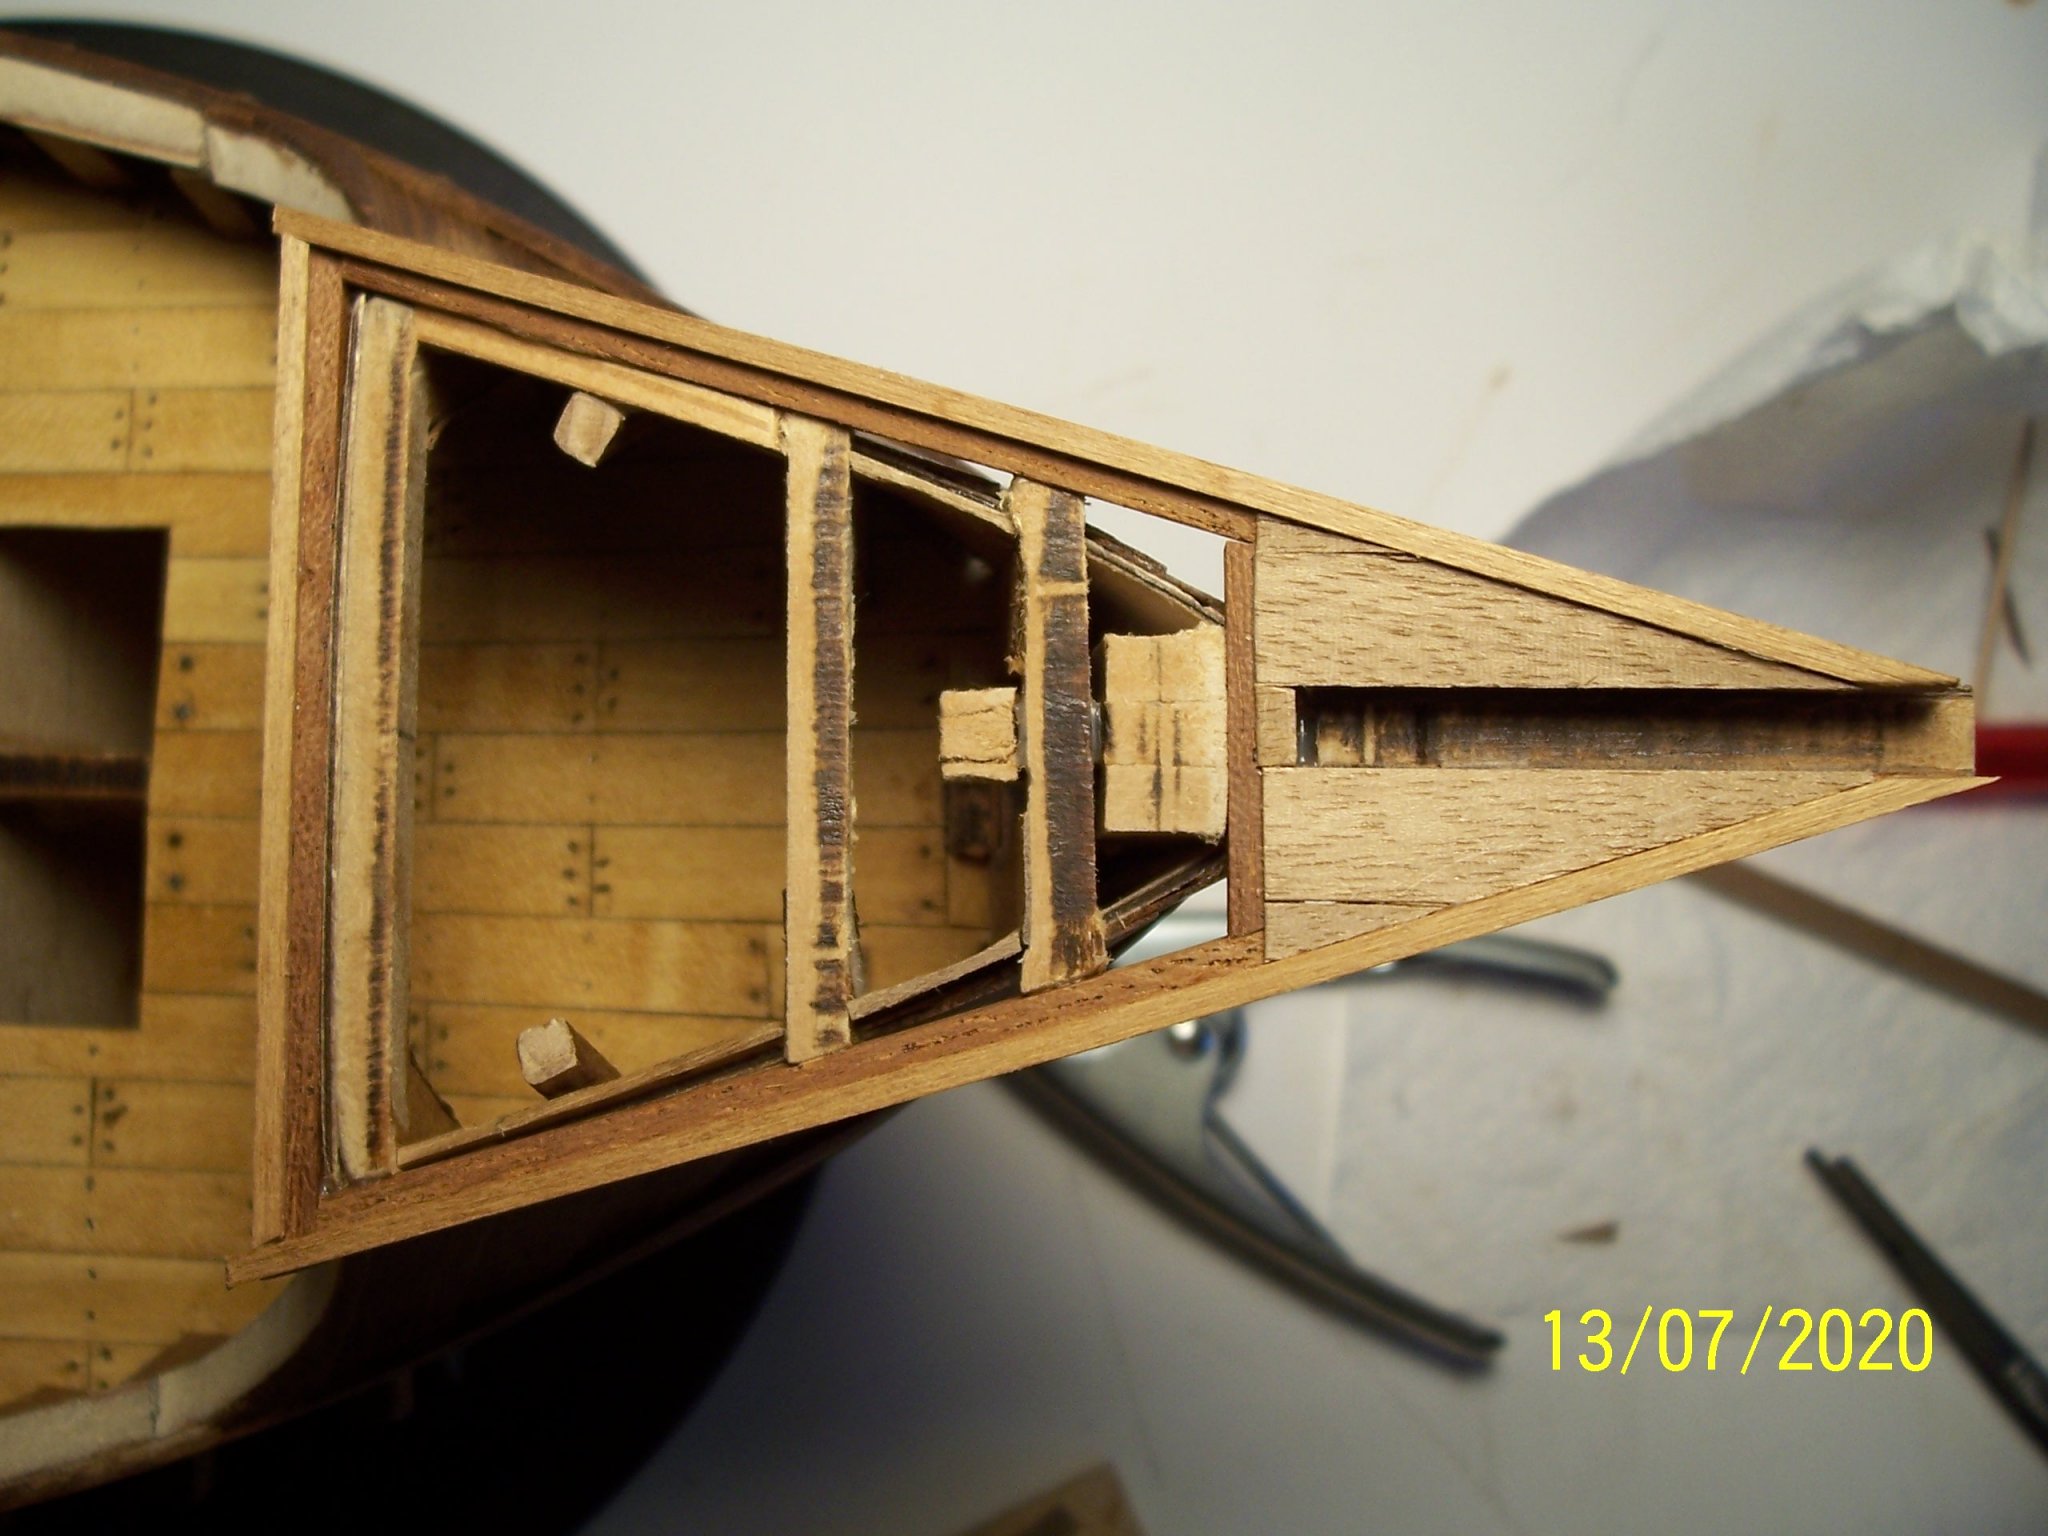
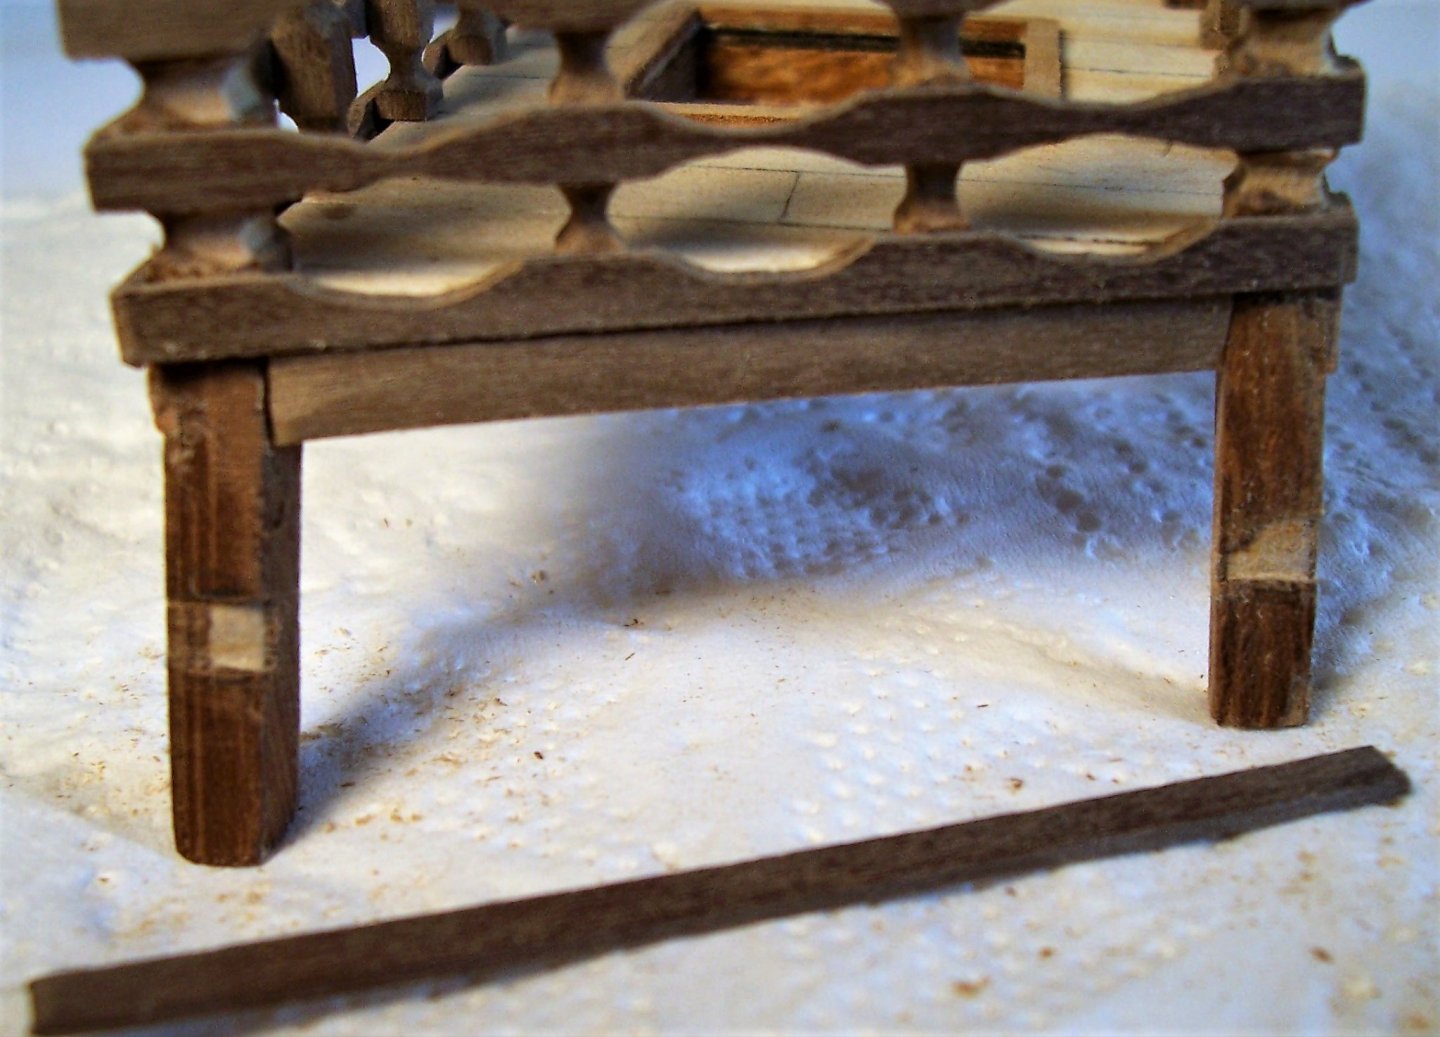
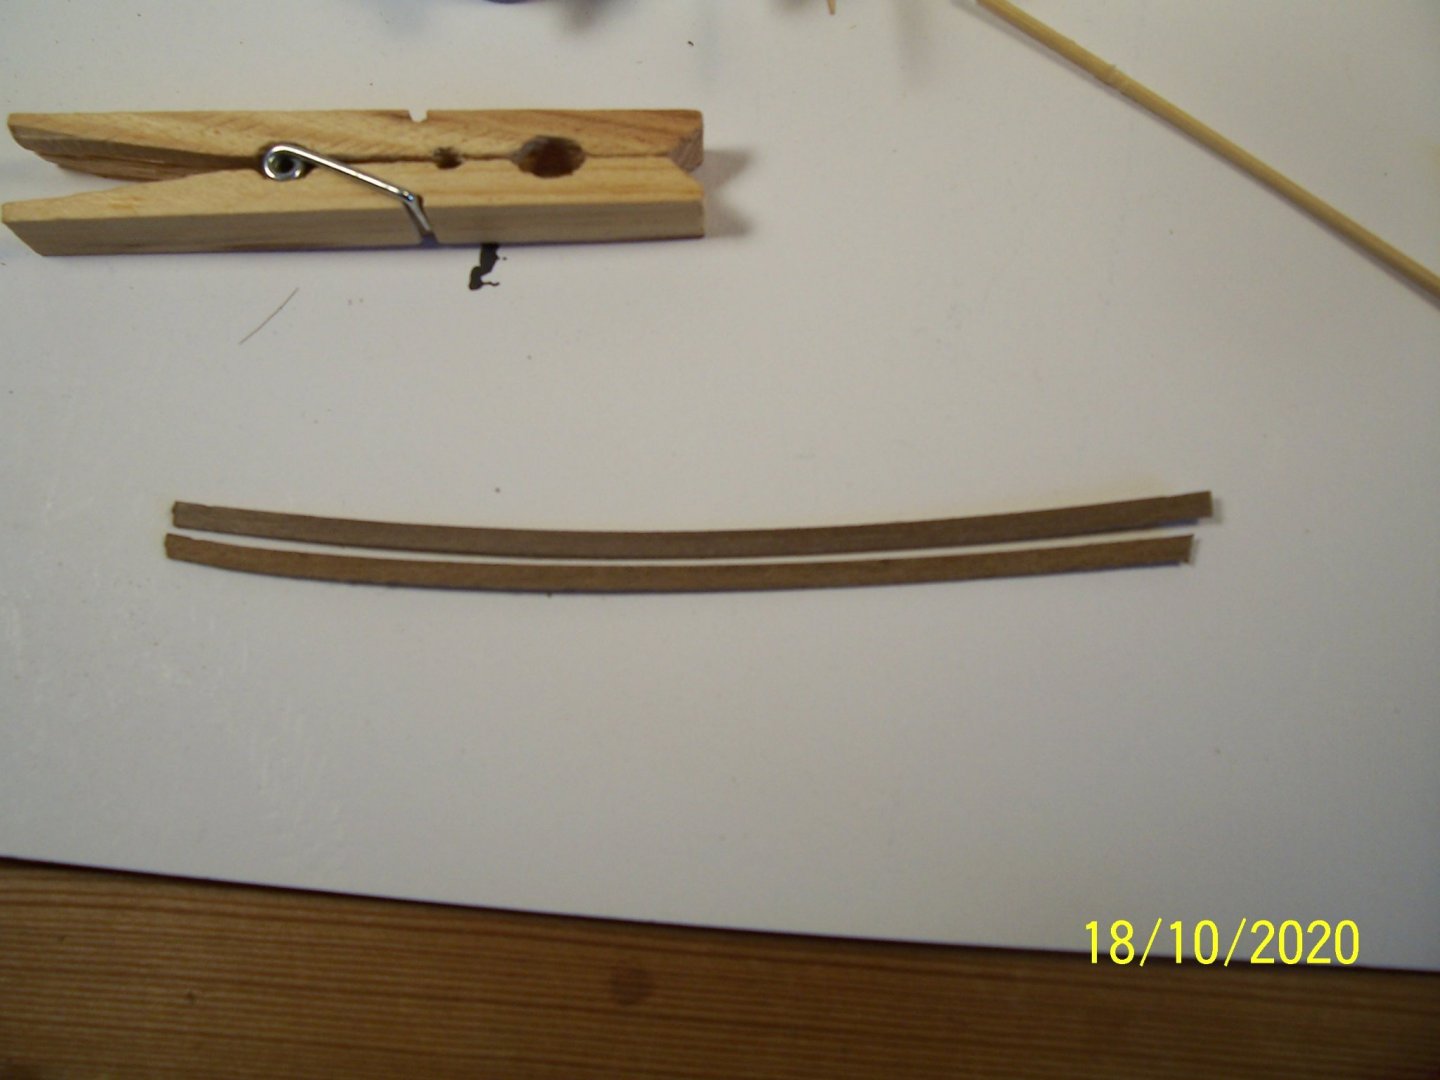
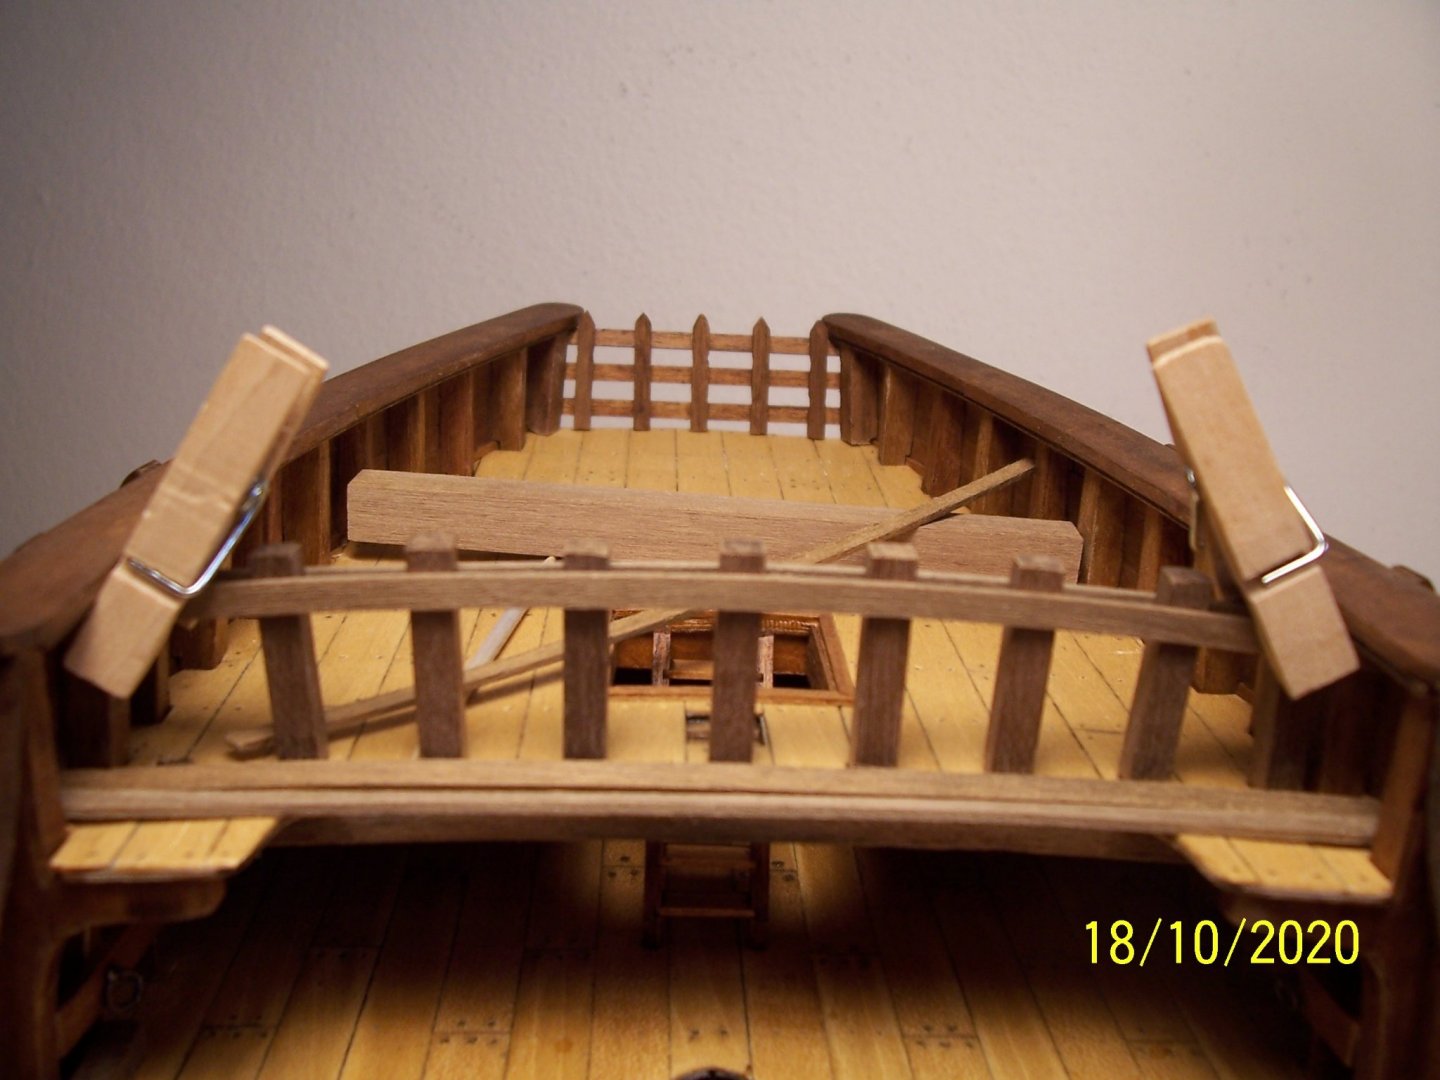
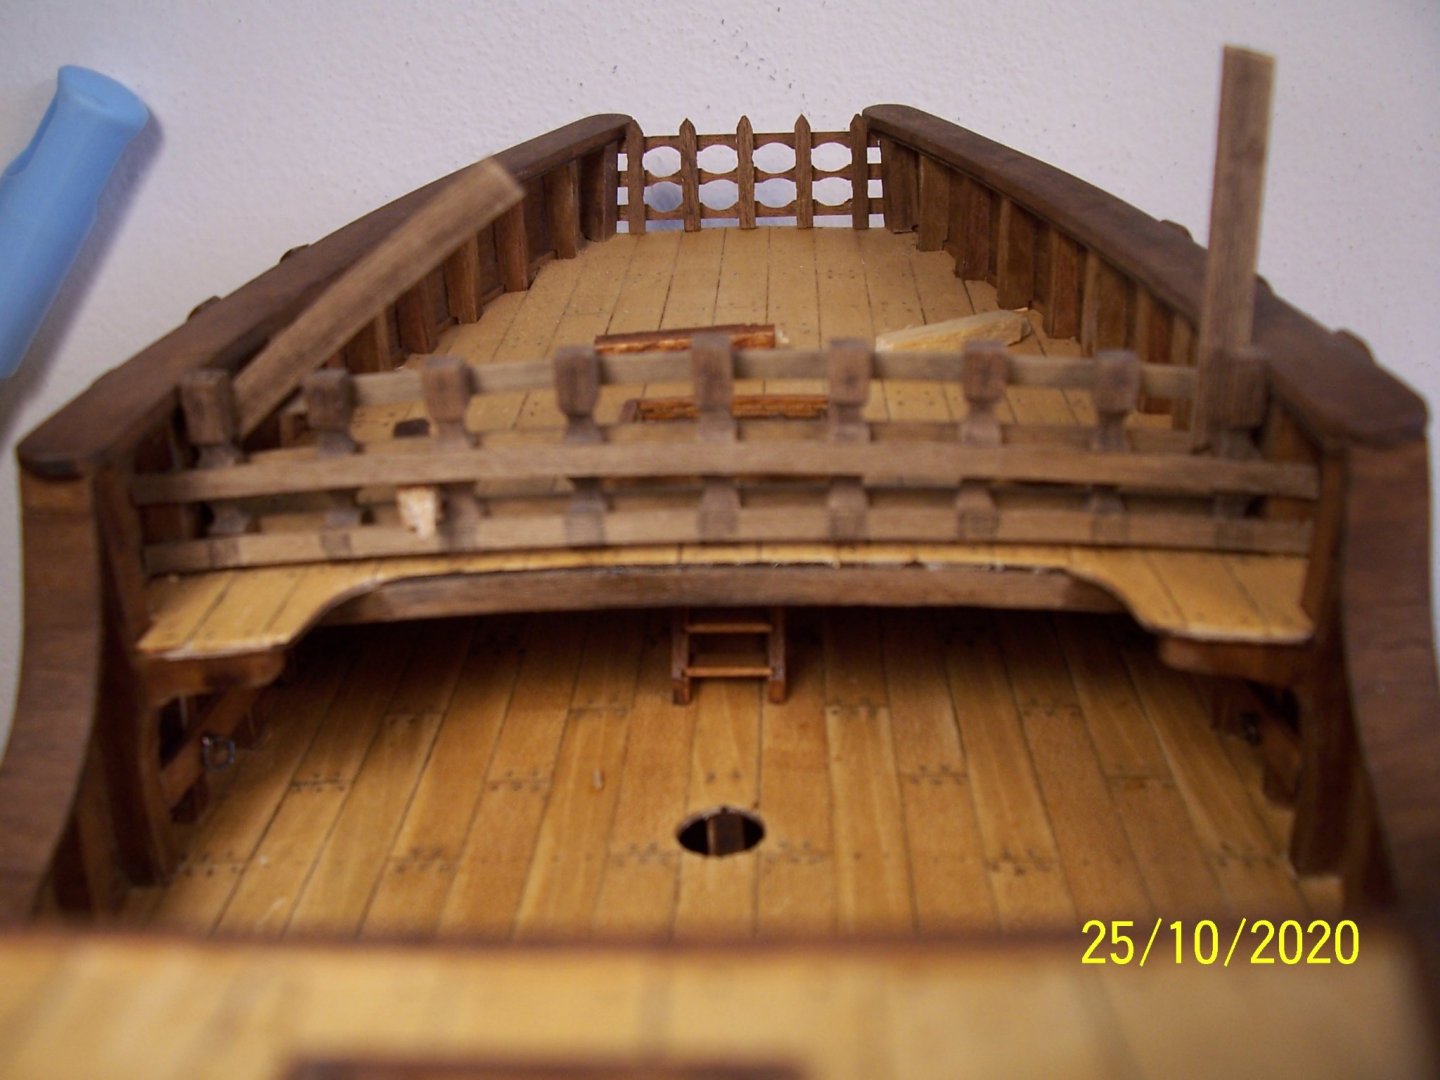
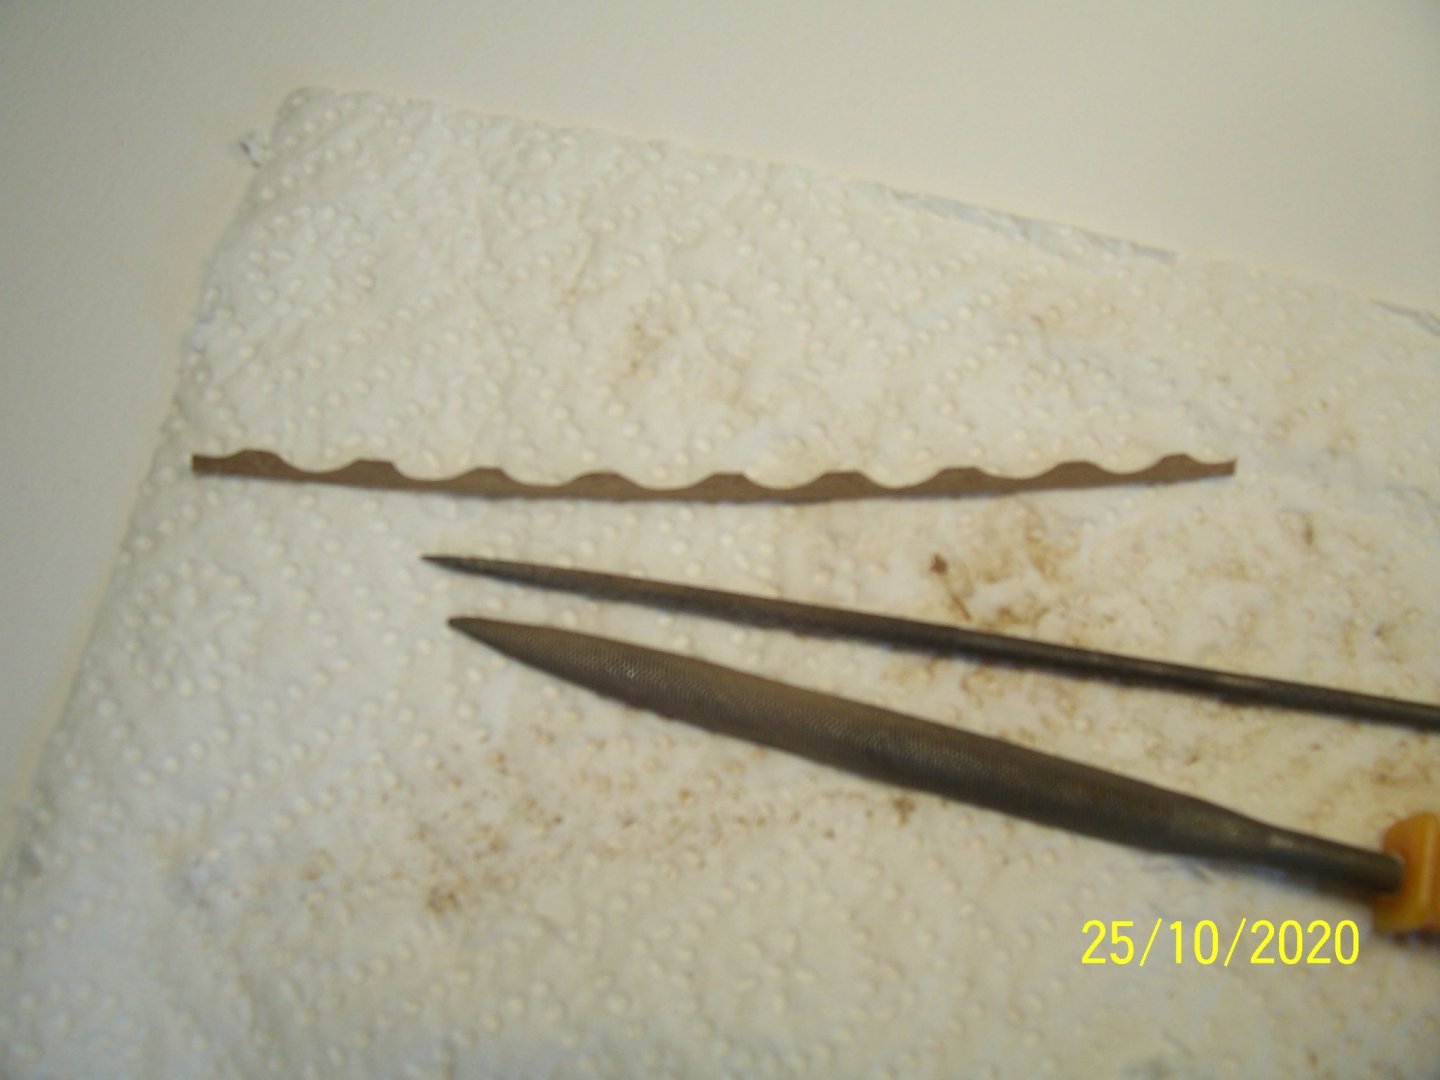
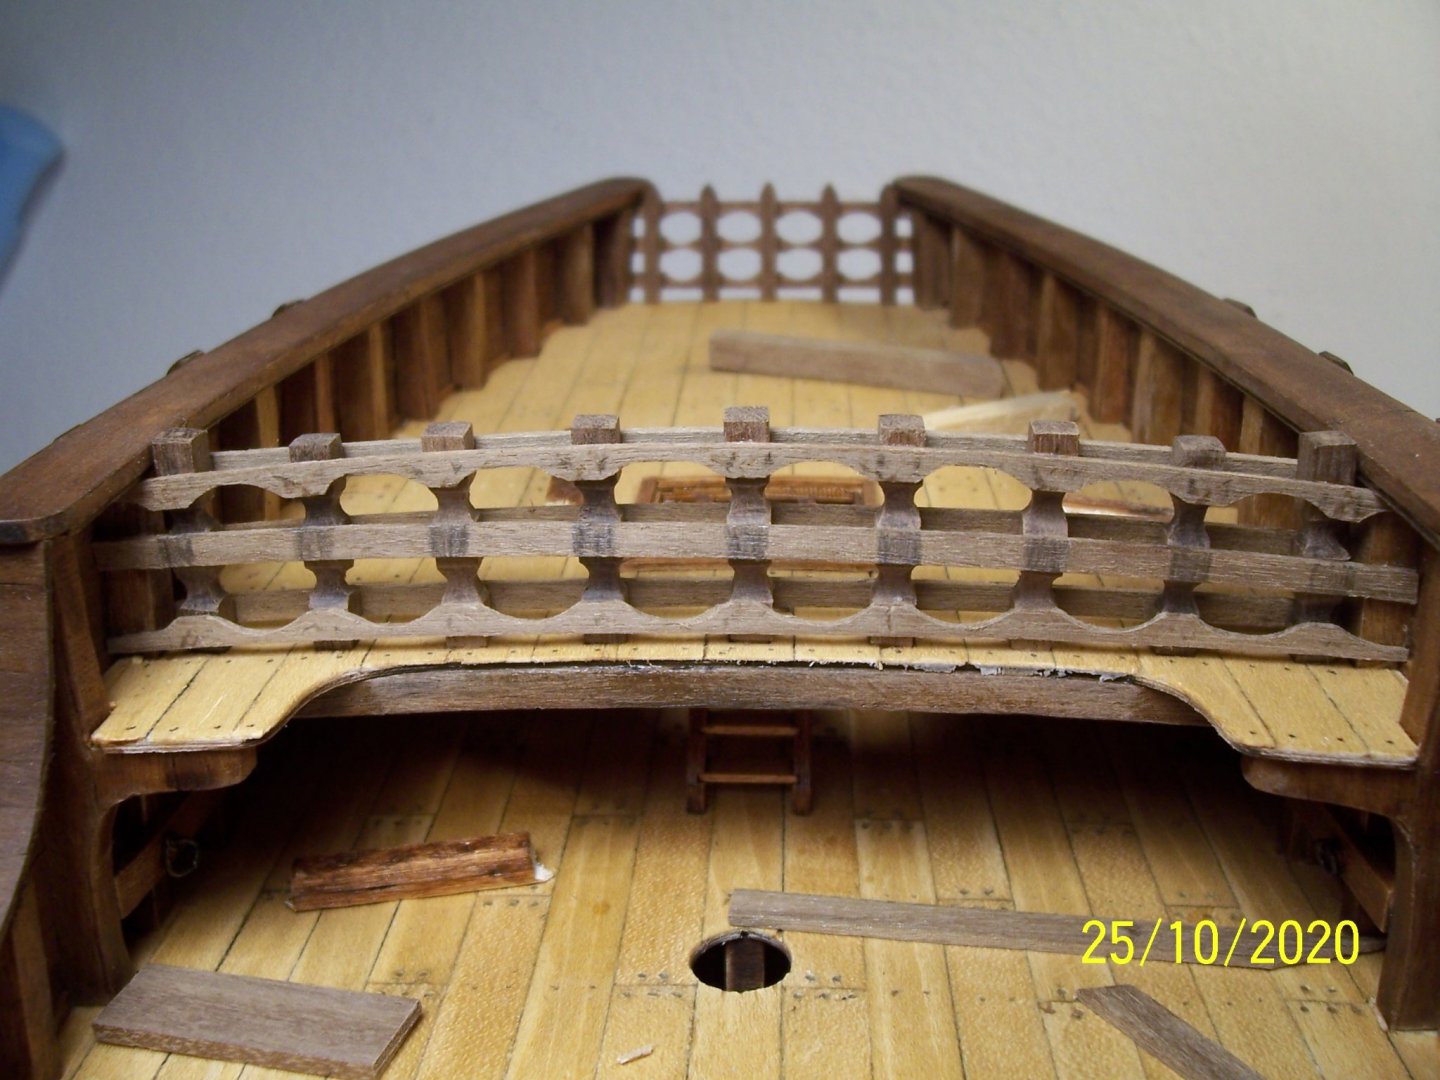
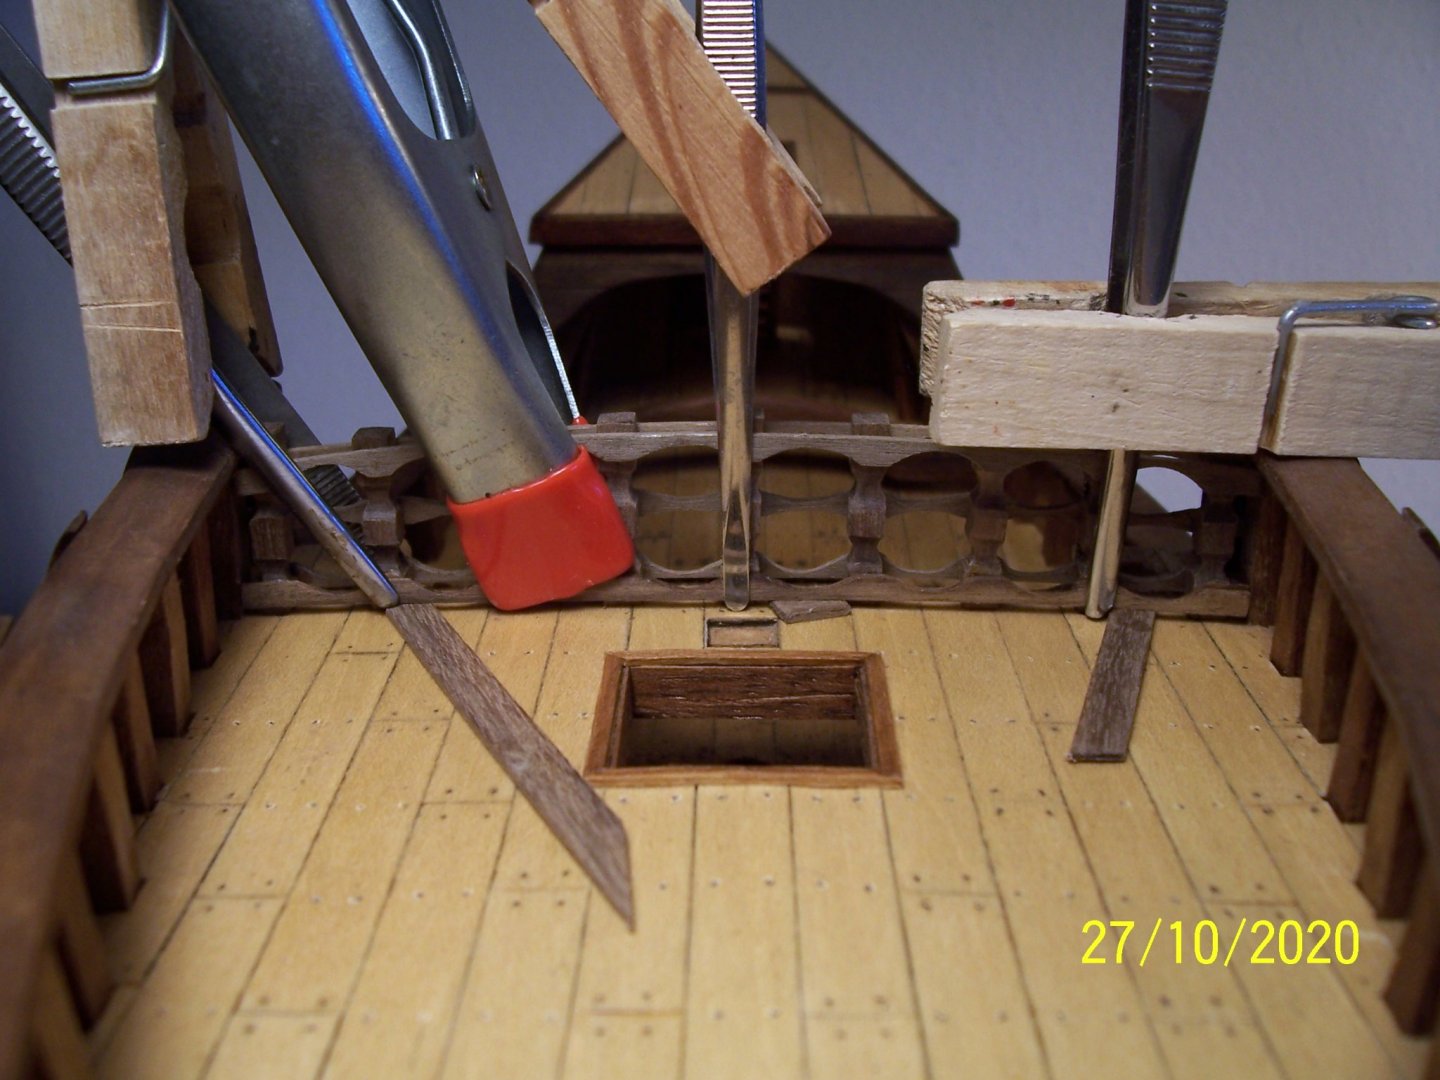
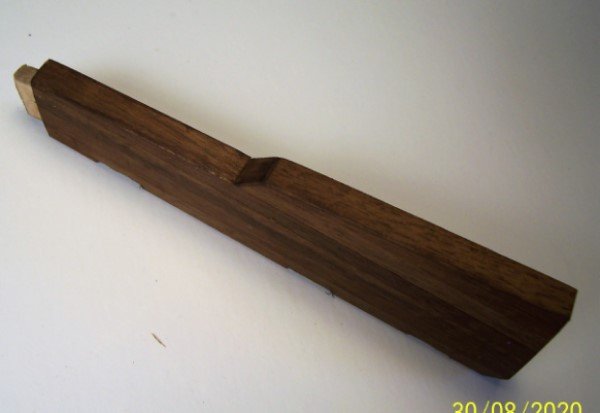
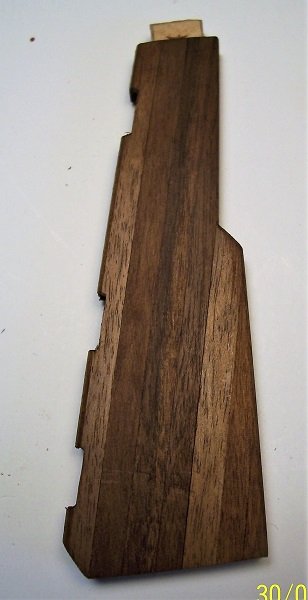
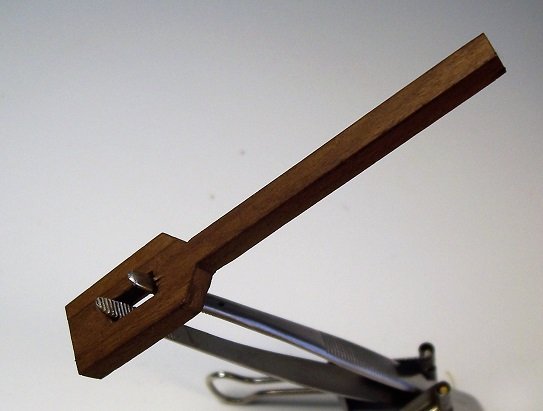
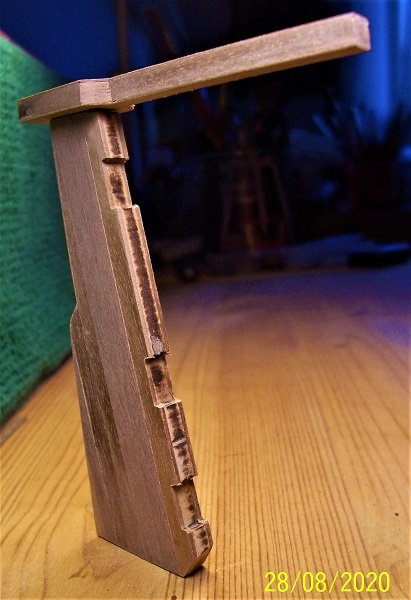
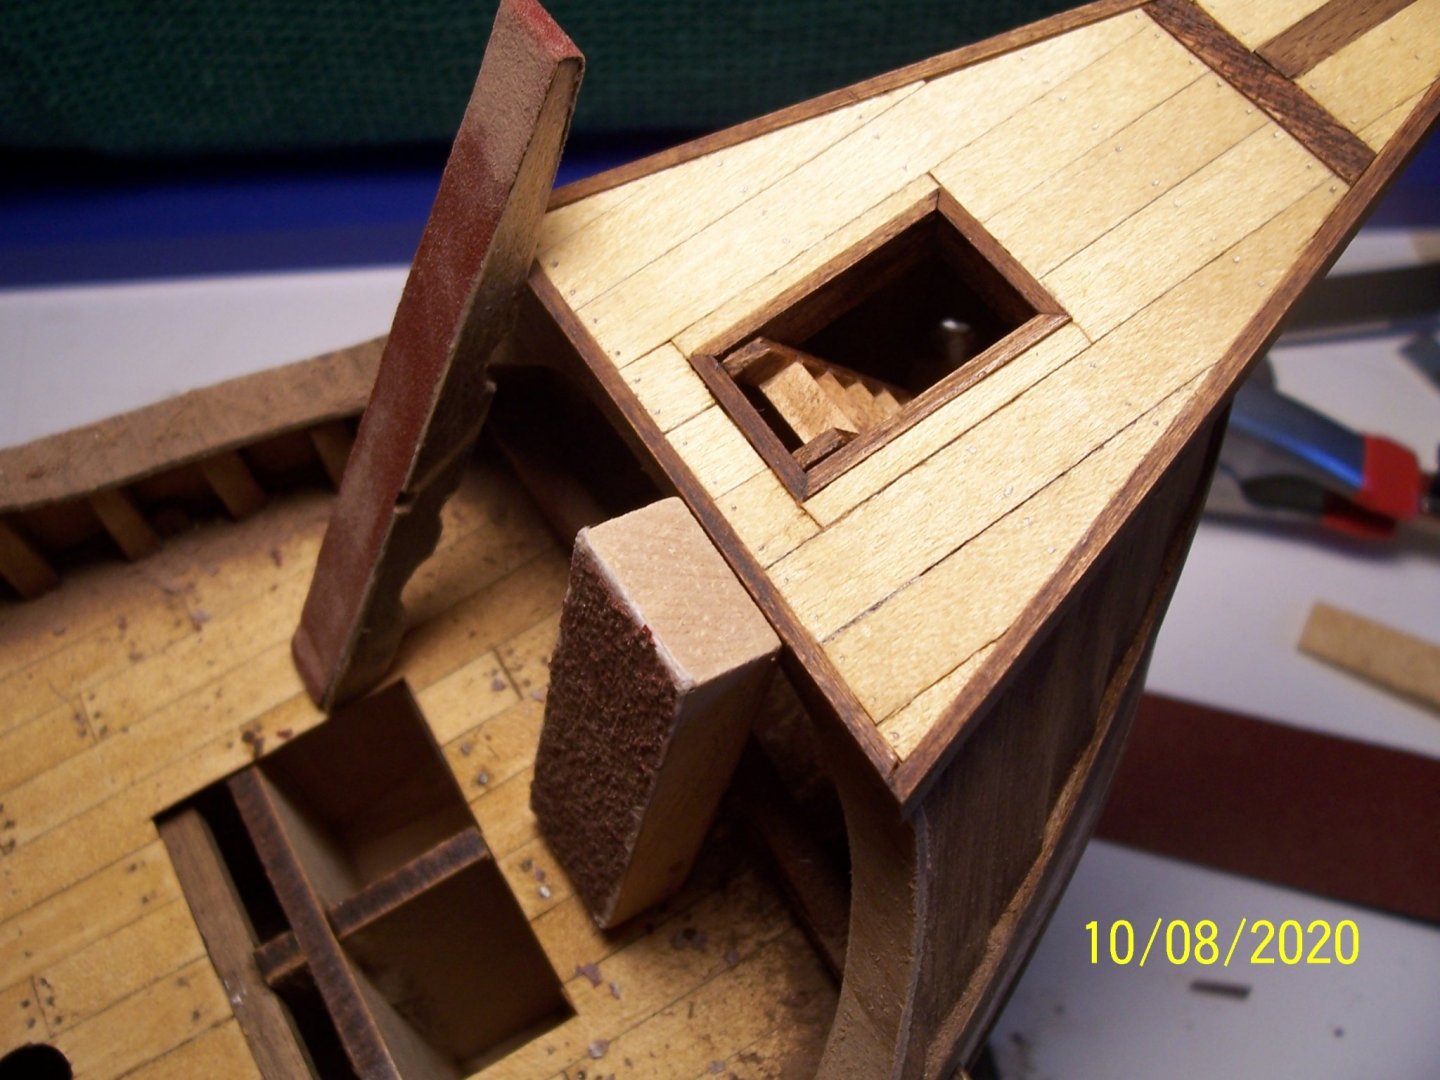
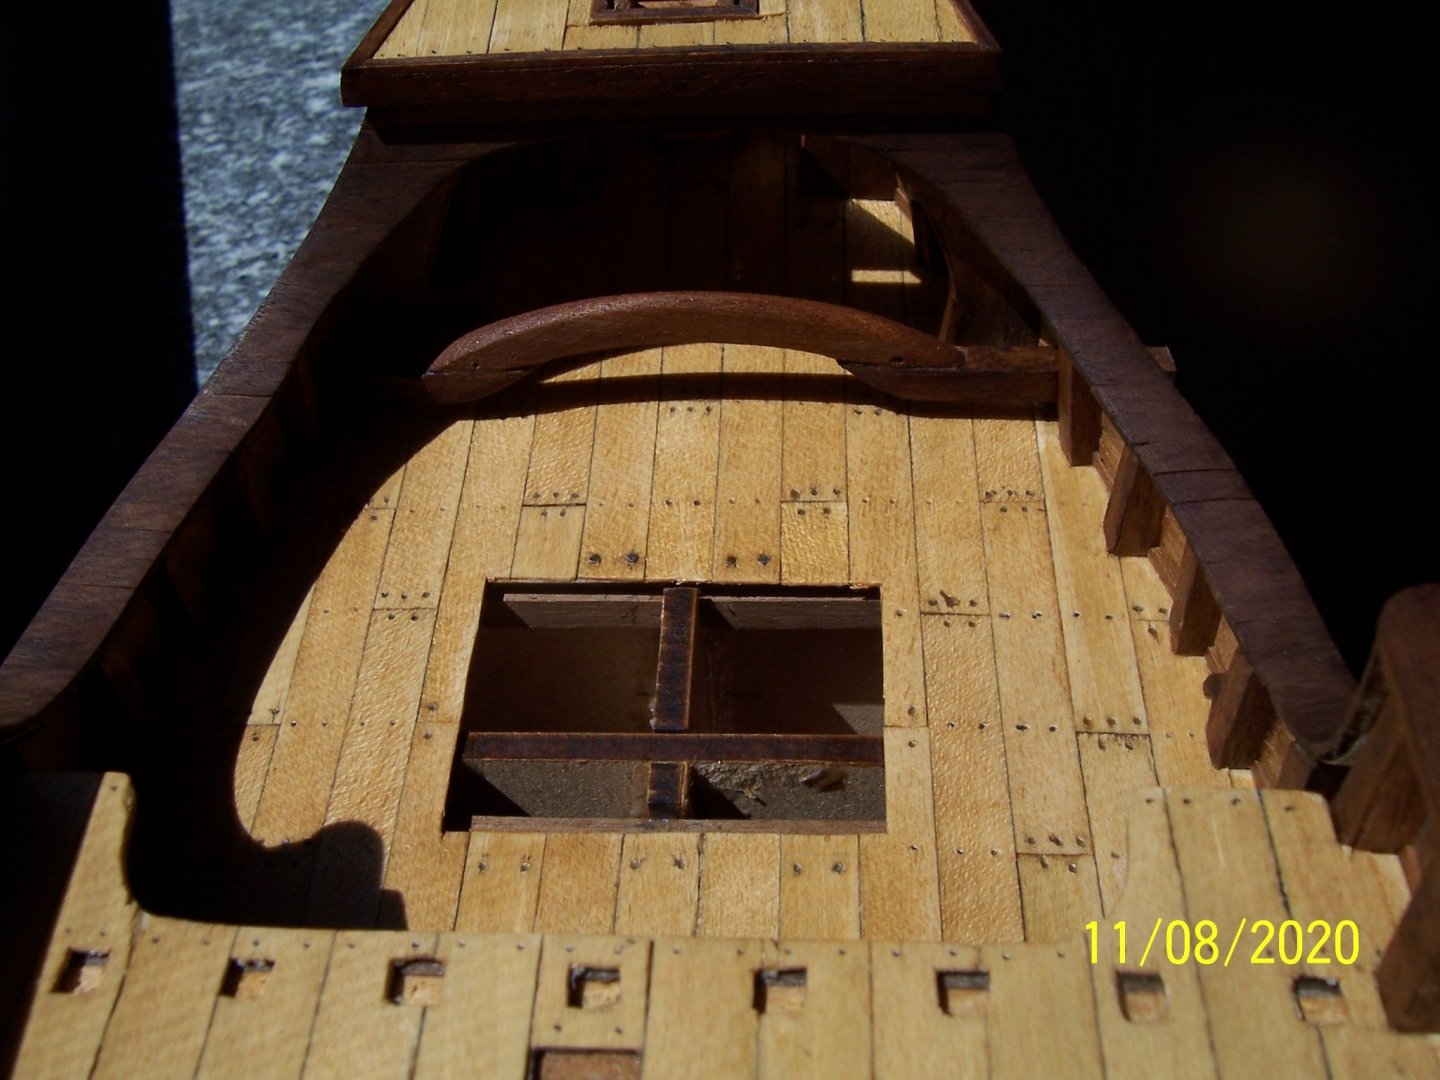
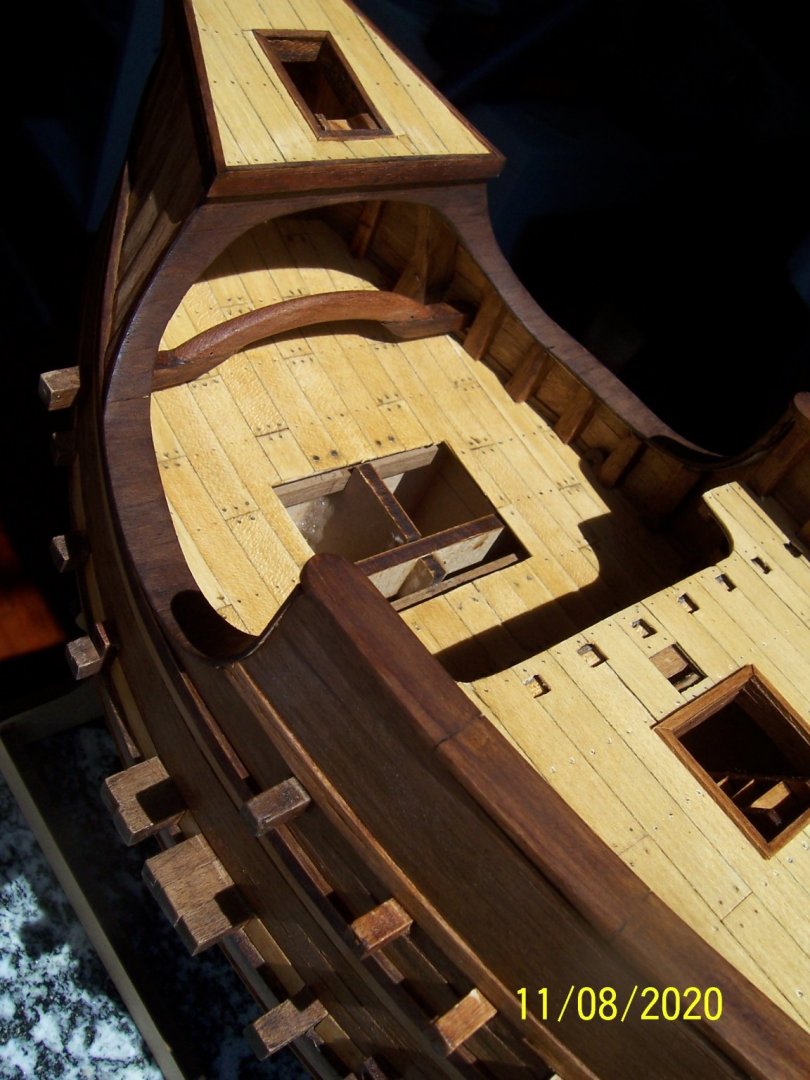
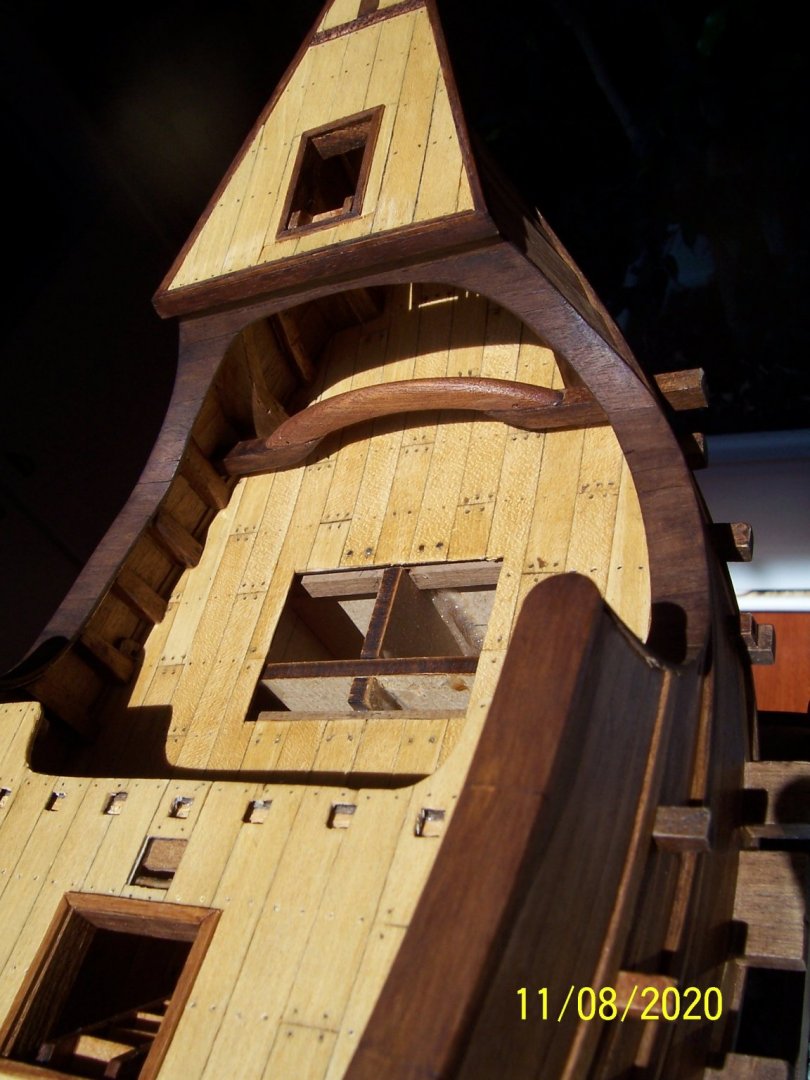
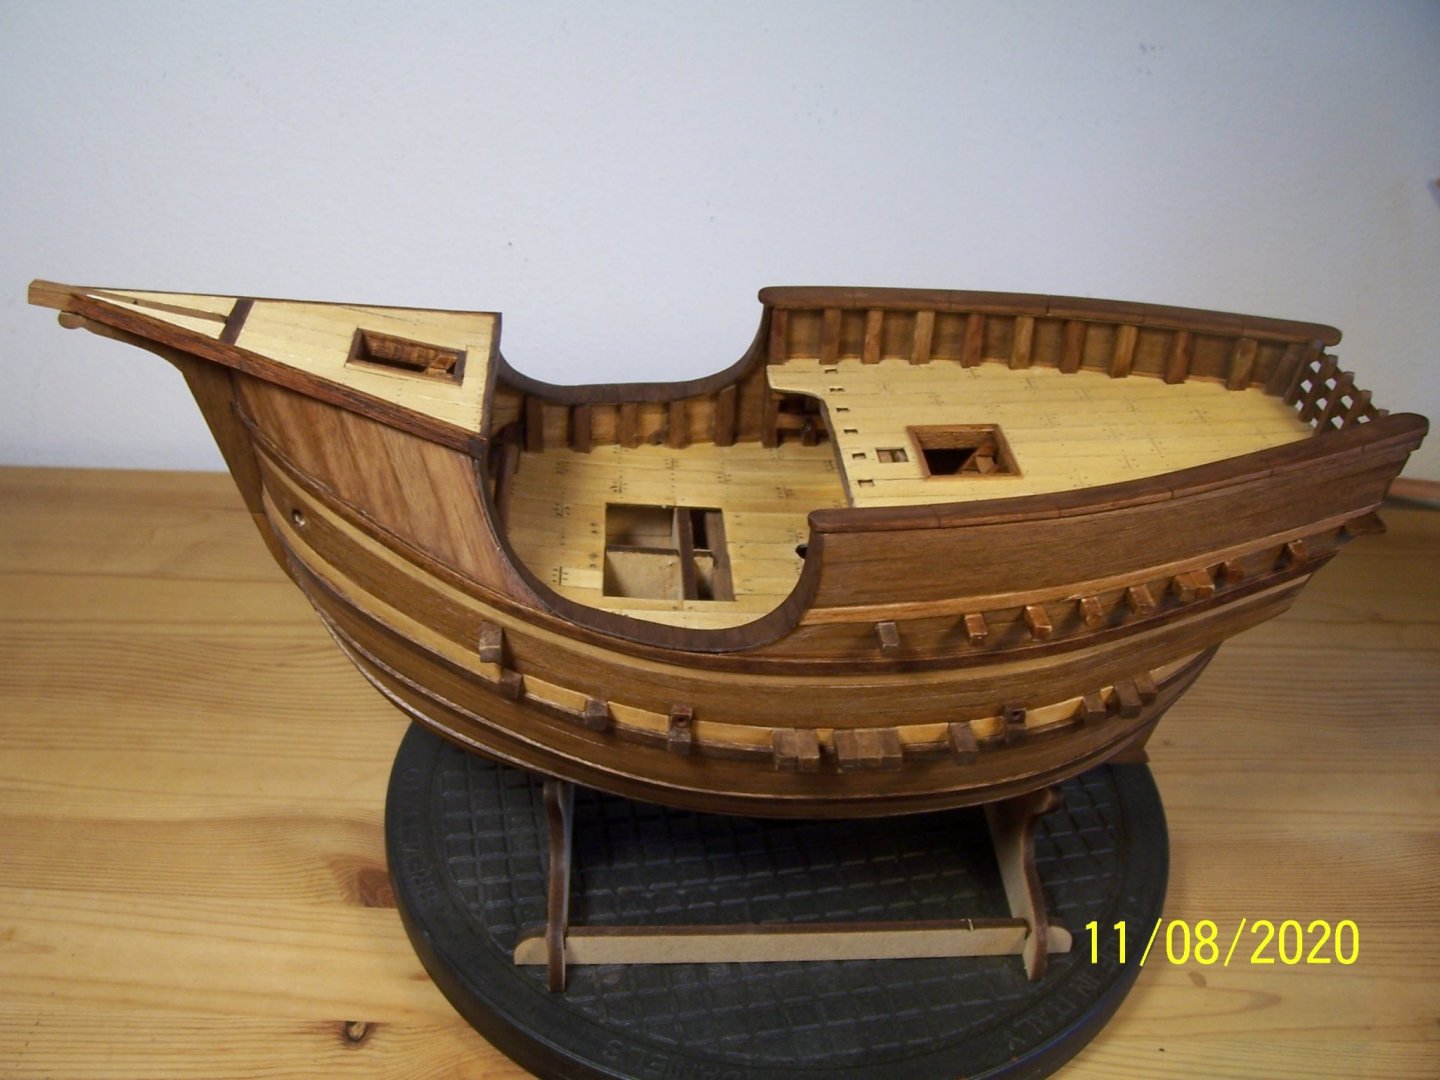
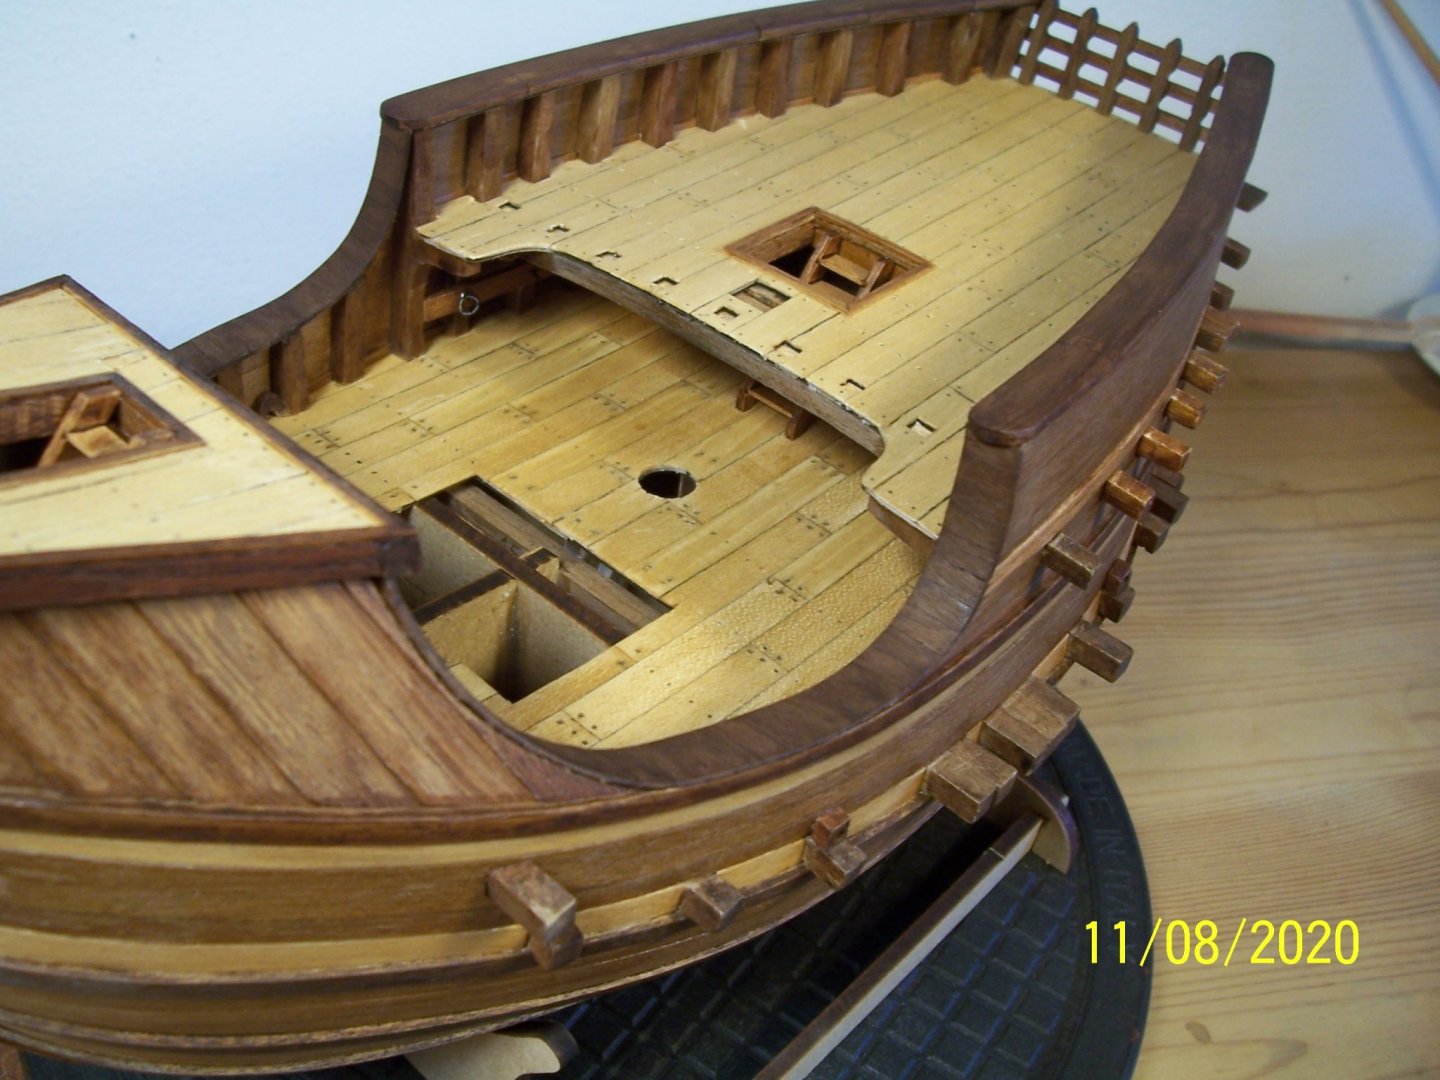
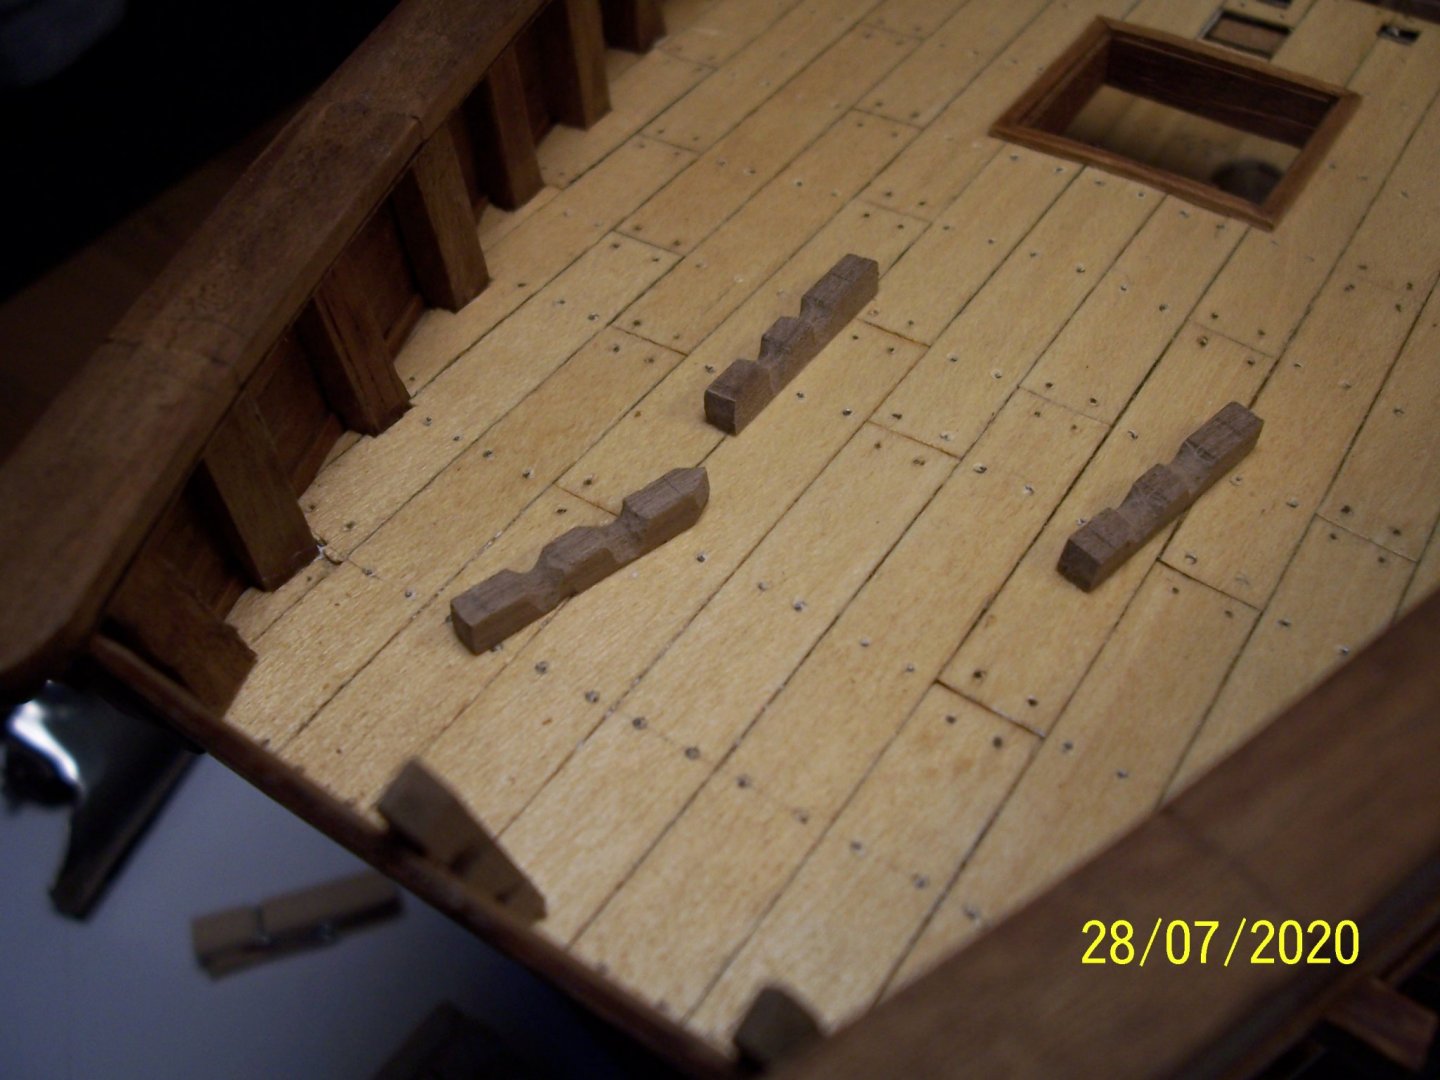
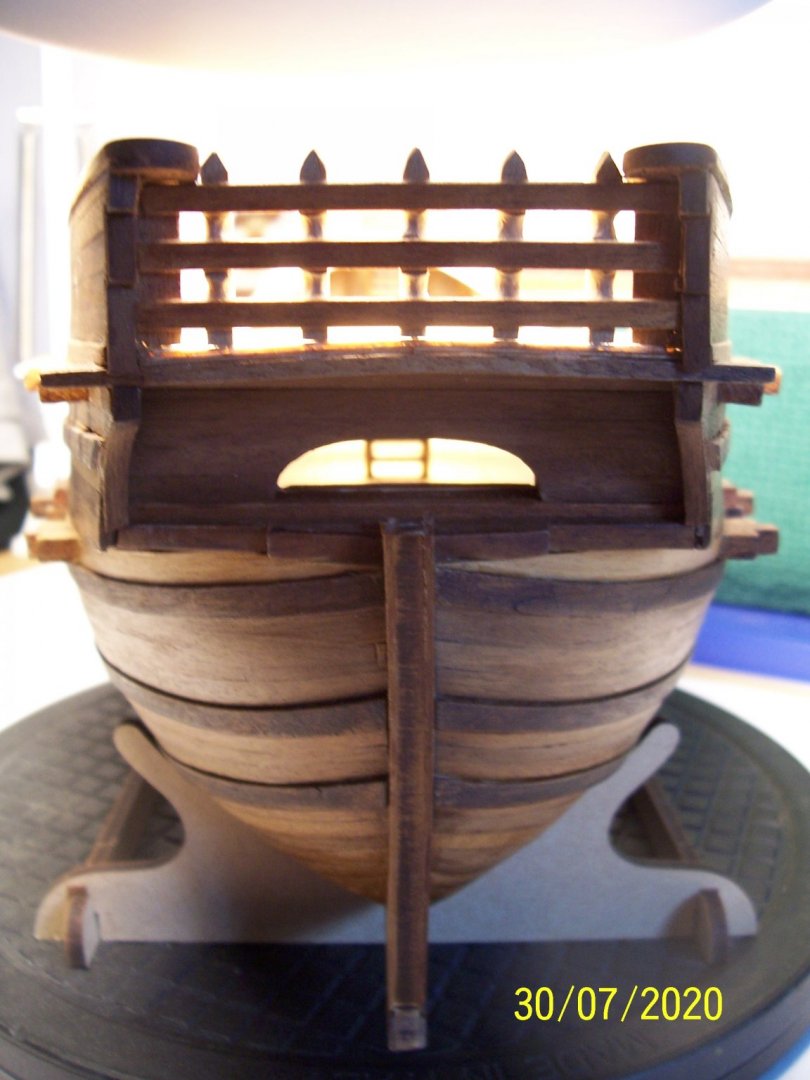
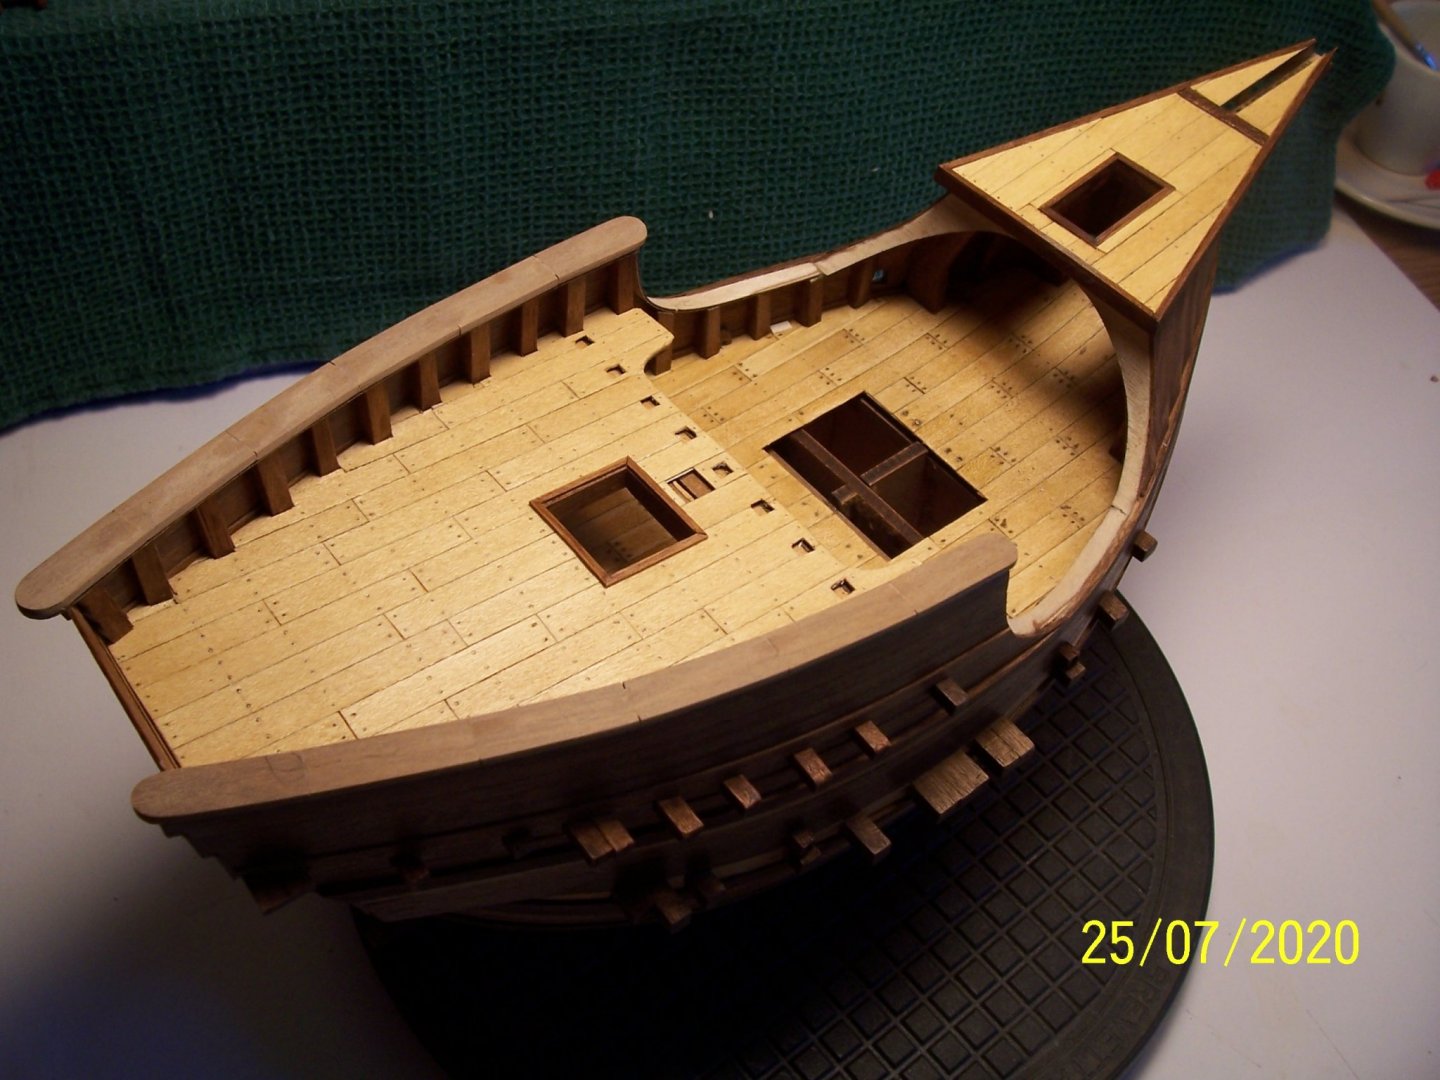
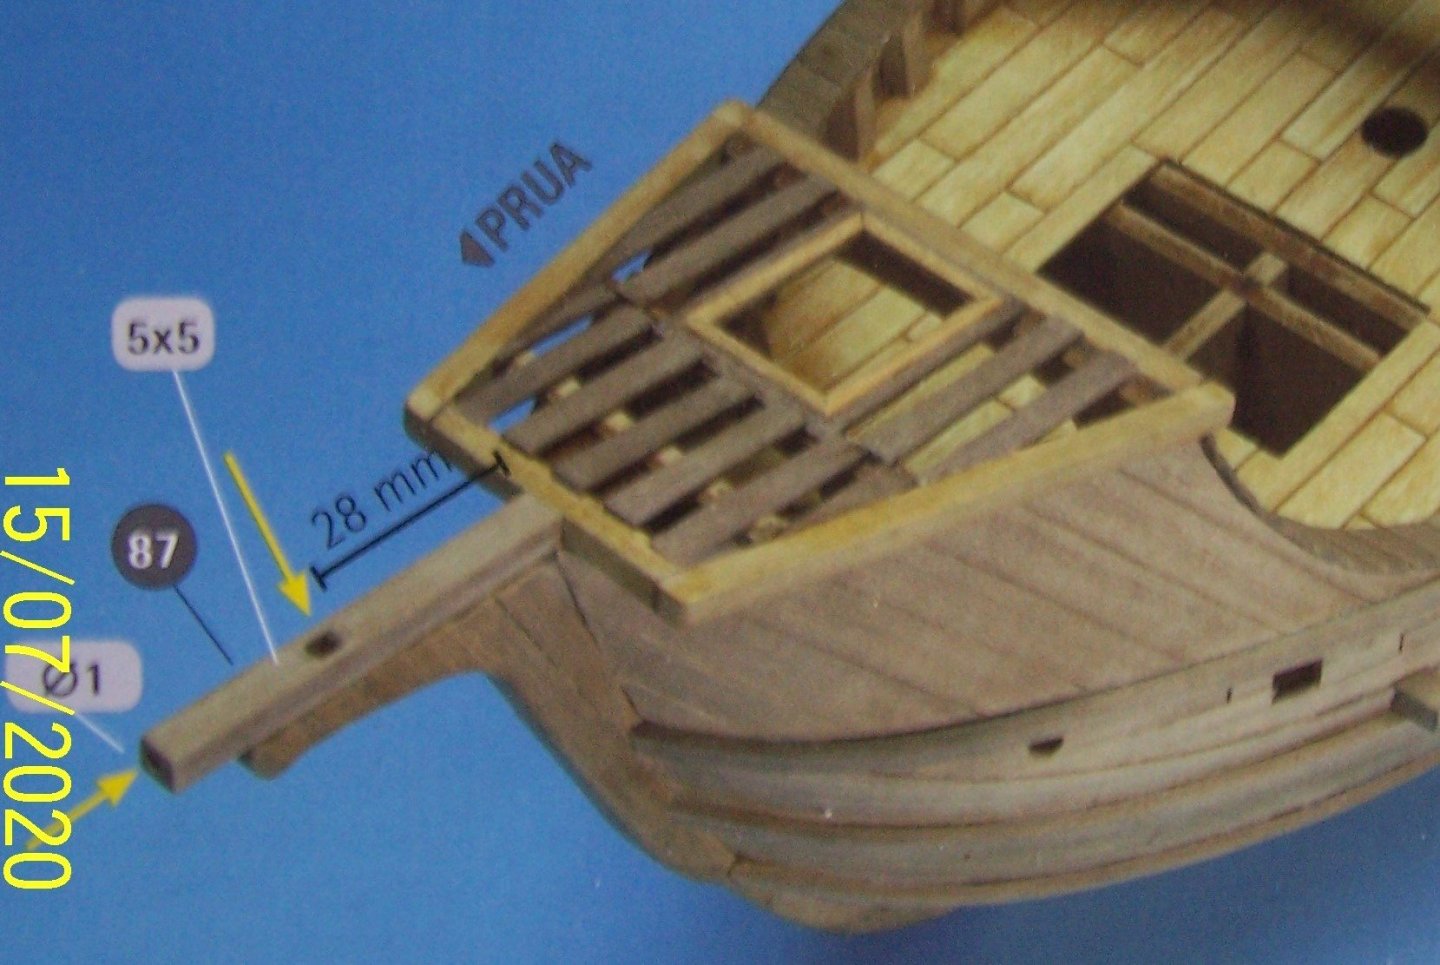
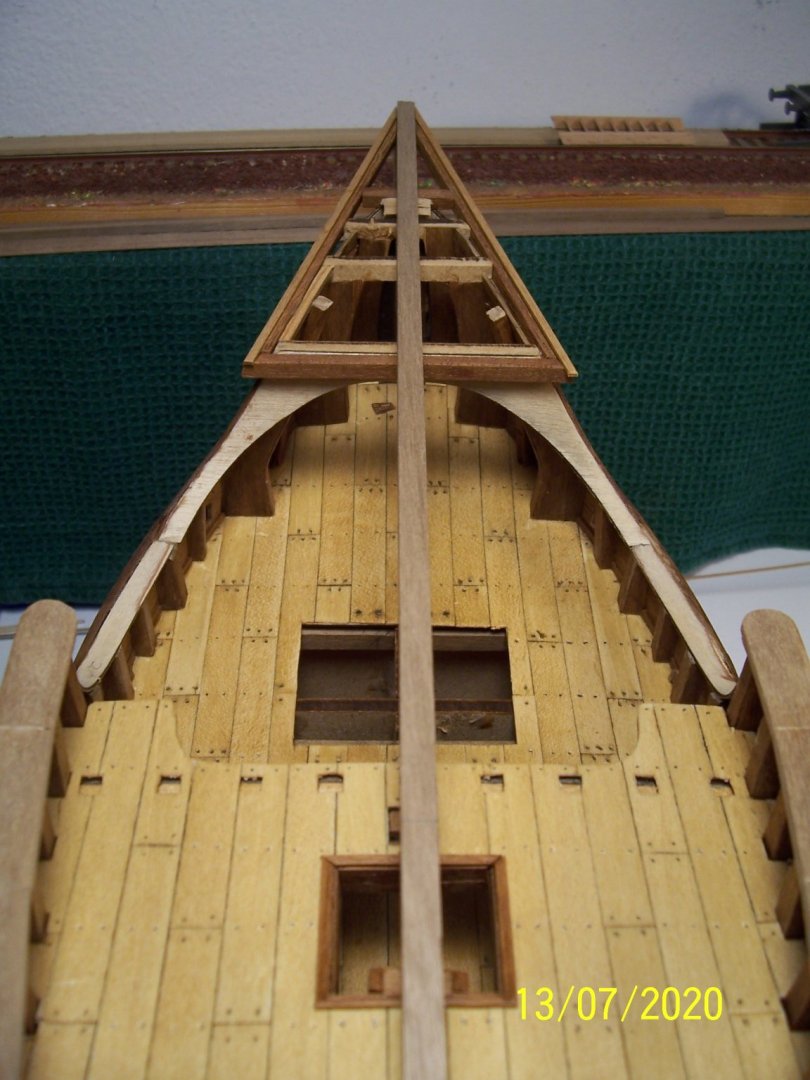
Thanks Steven, that technique has been suggested inside the instructions of the manufacturer "AMATI"; another technique would be to cut the whole mainrail after copying them on walnut plywood or larger strip (because they aren't present in the box). Now we have to work on grating at bow; instructions show a strange structure: but contemporary images show a different kind of upper bow deck: For for this reason I decided to build a triangular frame: At this stage we've to add a crossbar: In order to avoid seeing the thin clear line of the deck planking strips, I glued a thin strip that will frame the entire structure: The long square strip has been used as a check for the accuracy of the work. After that we start with planking the deck: See you soon! Rodolfo


-
Very nice work and interesting model! Perhaps a slight painting of the planking of the decks could be a further improvement... Rodolfo
-
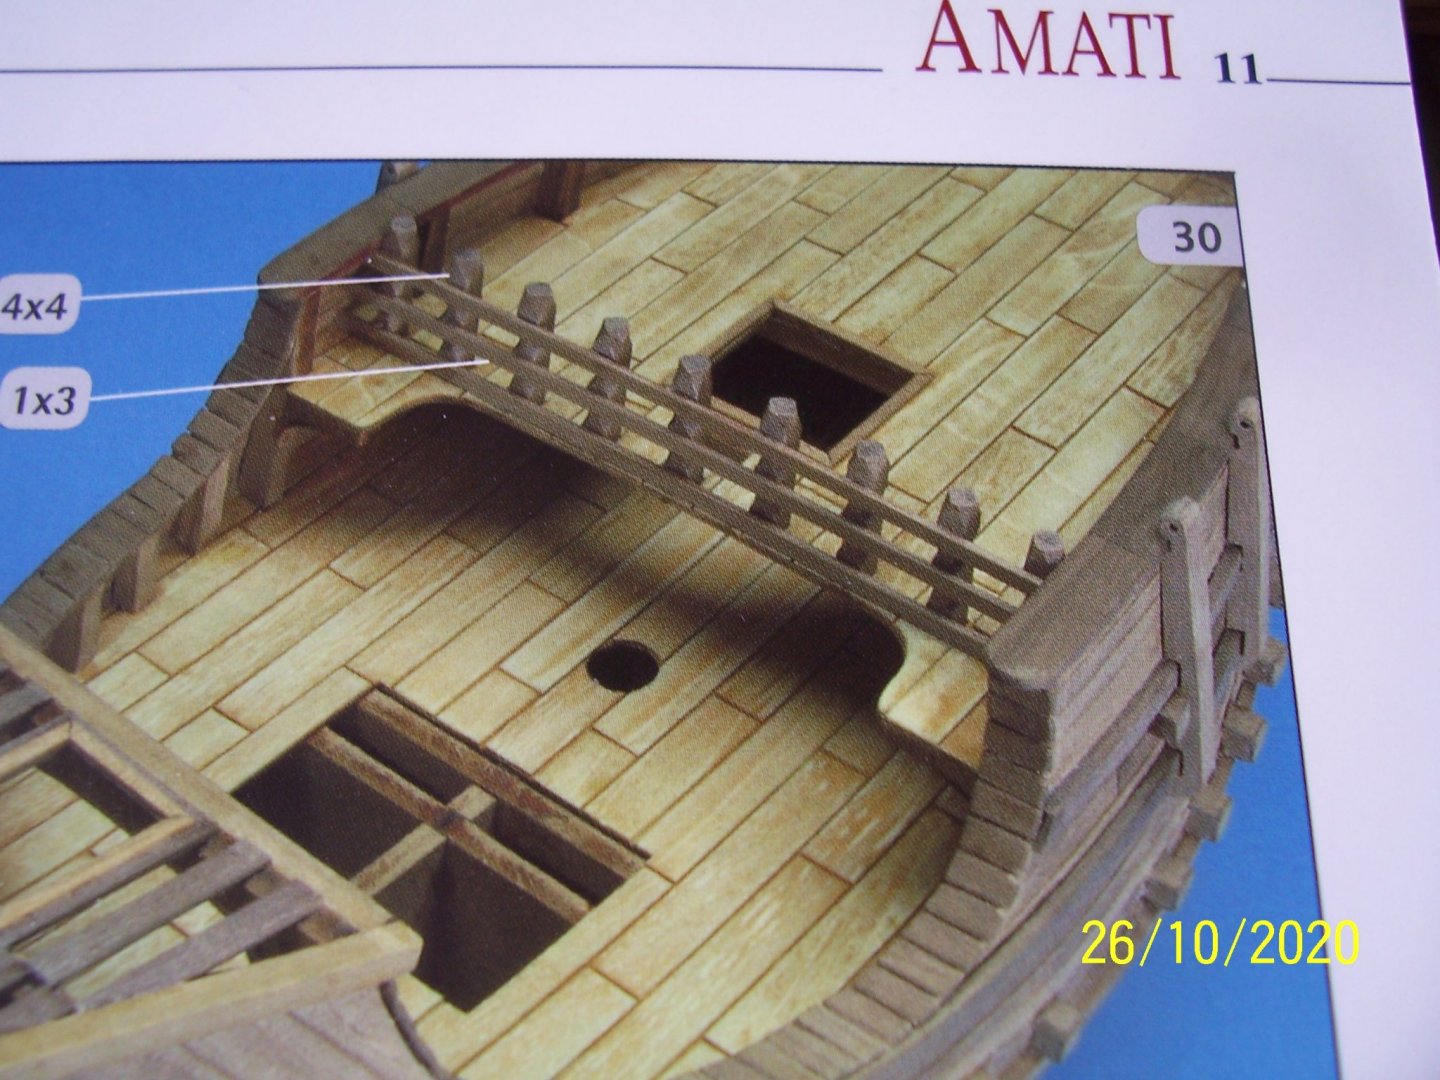
Dear all, thanks for the comments . The work continued by planking top rails upper edges of quarterback bulwarks, using walnut strips (2x10 mm), cutting parts 30 mm length glued following the bending. Moreover, the stern bulwark edges have been planked using wooden strips 1x3 mm: Next step will be the grating at bow. See you soon! Rodolfo


-
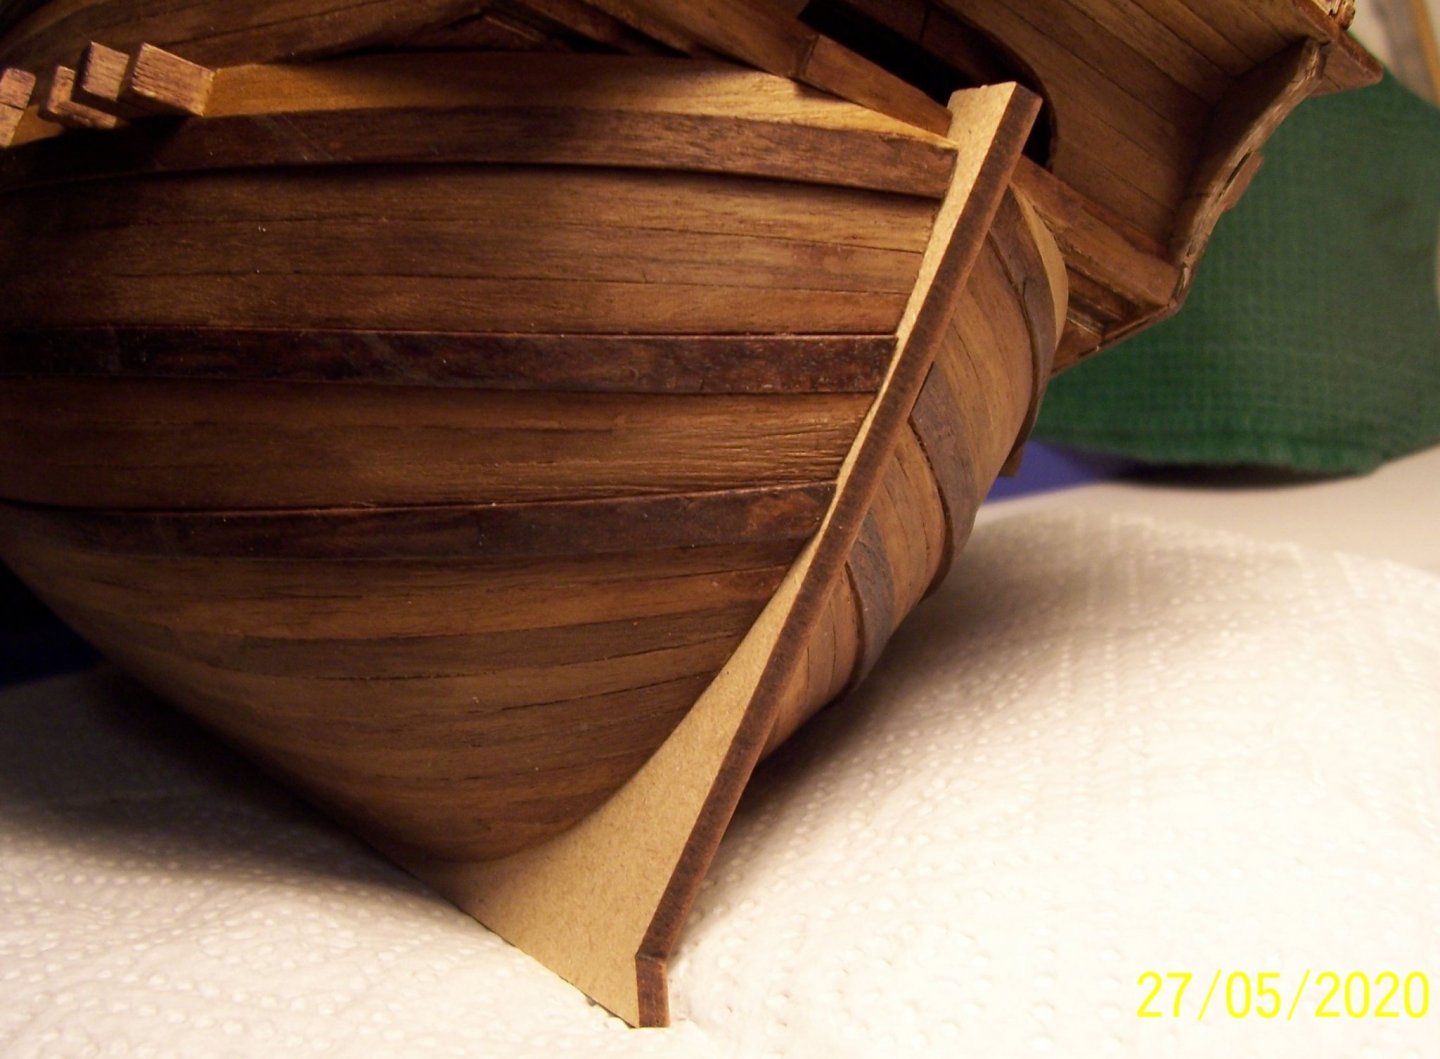
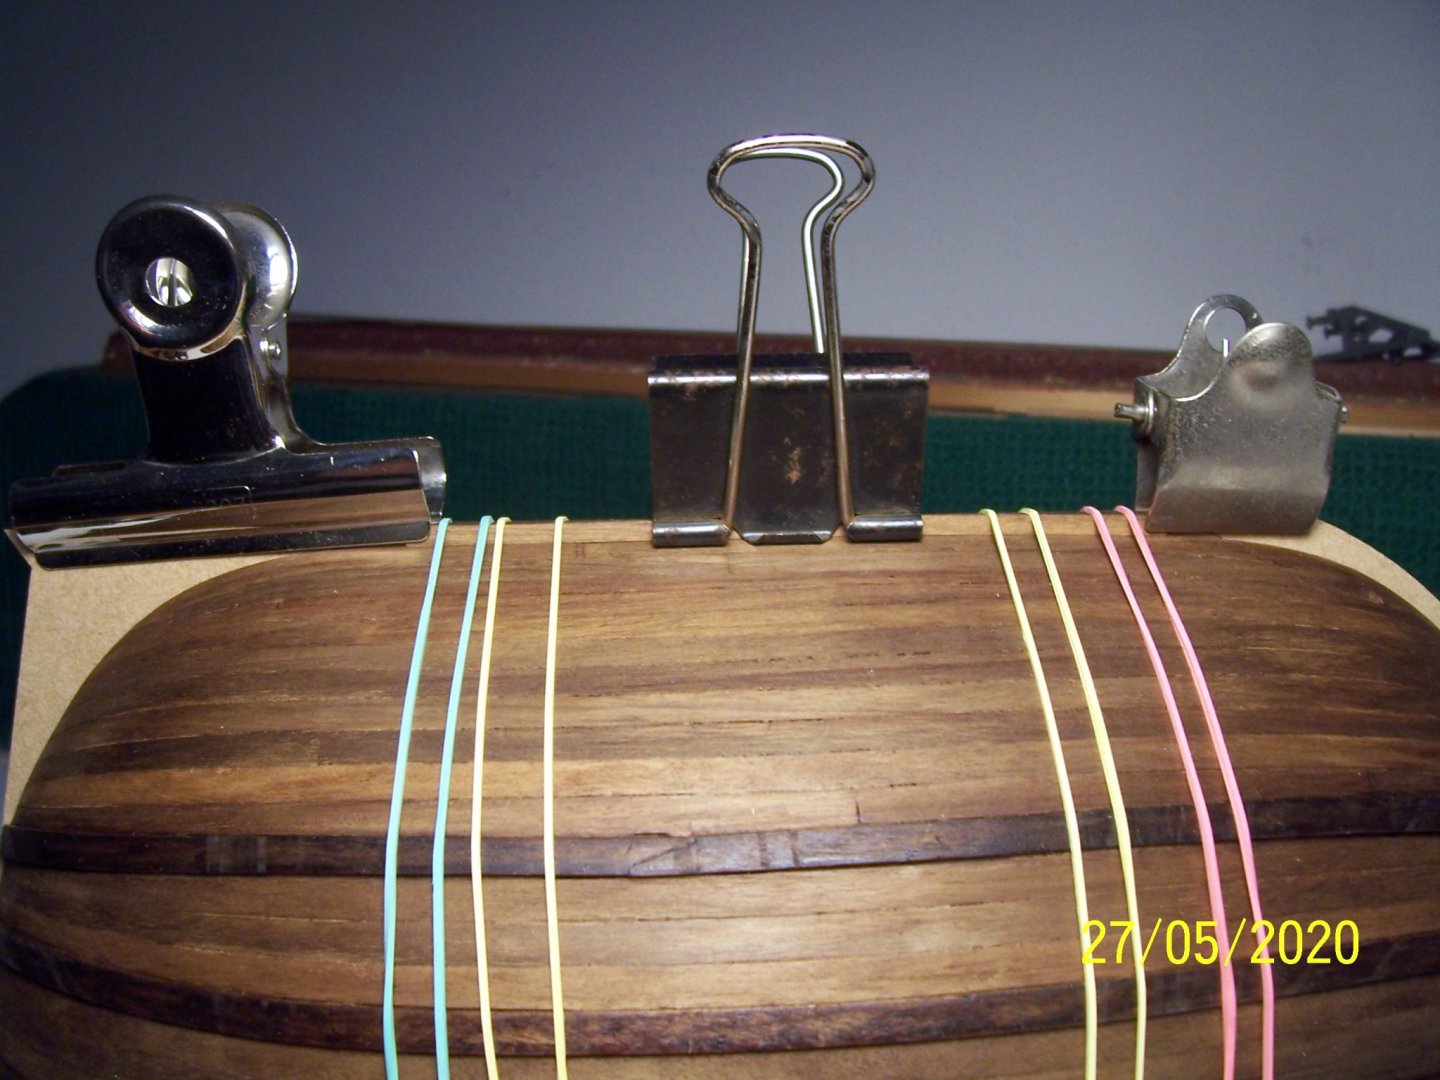
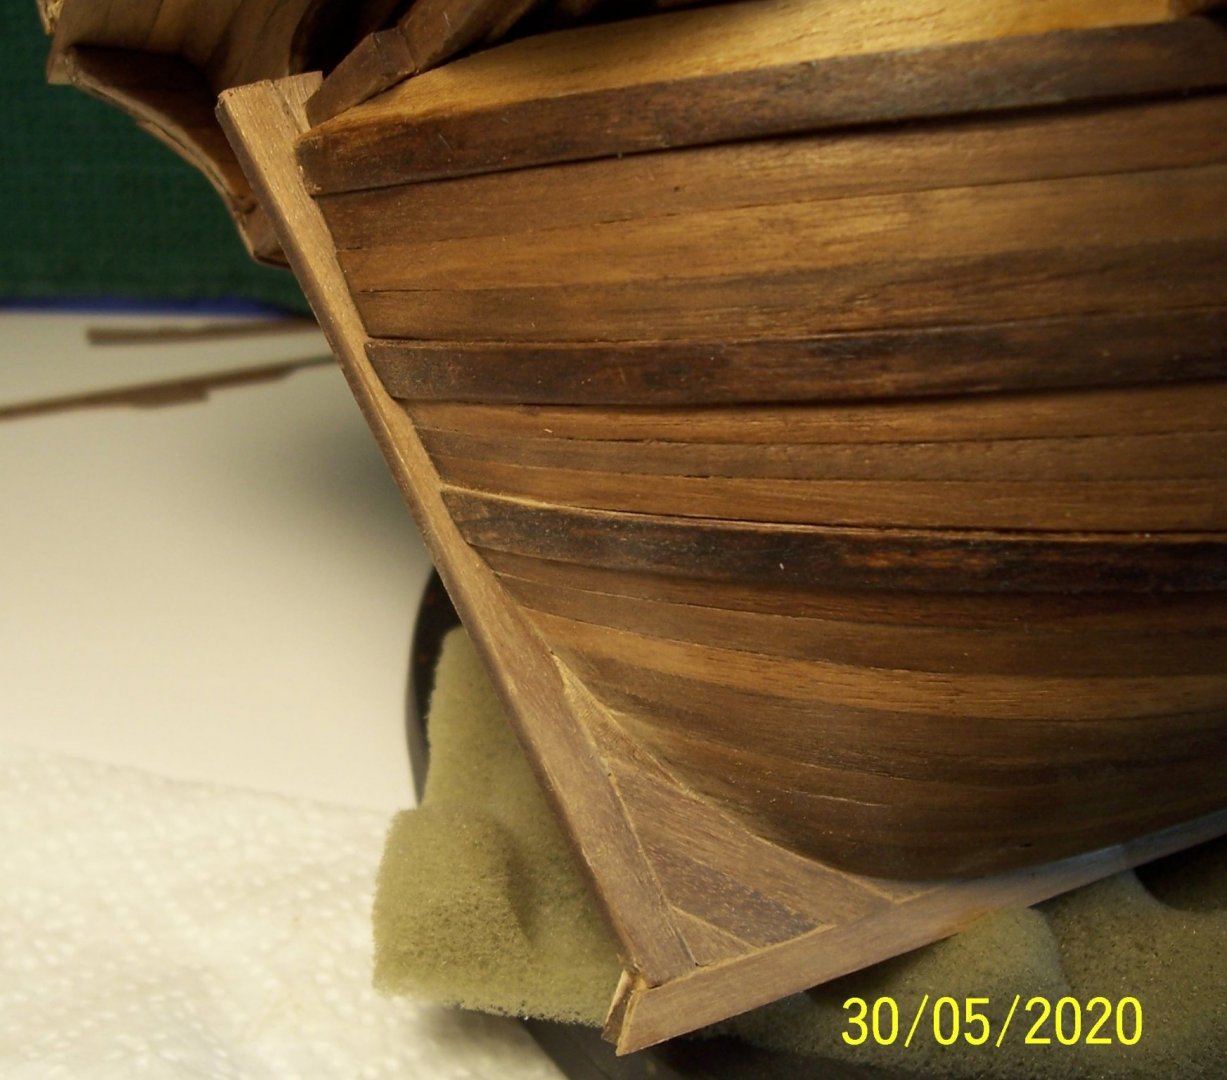
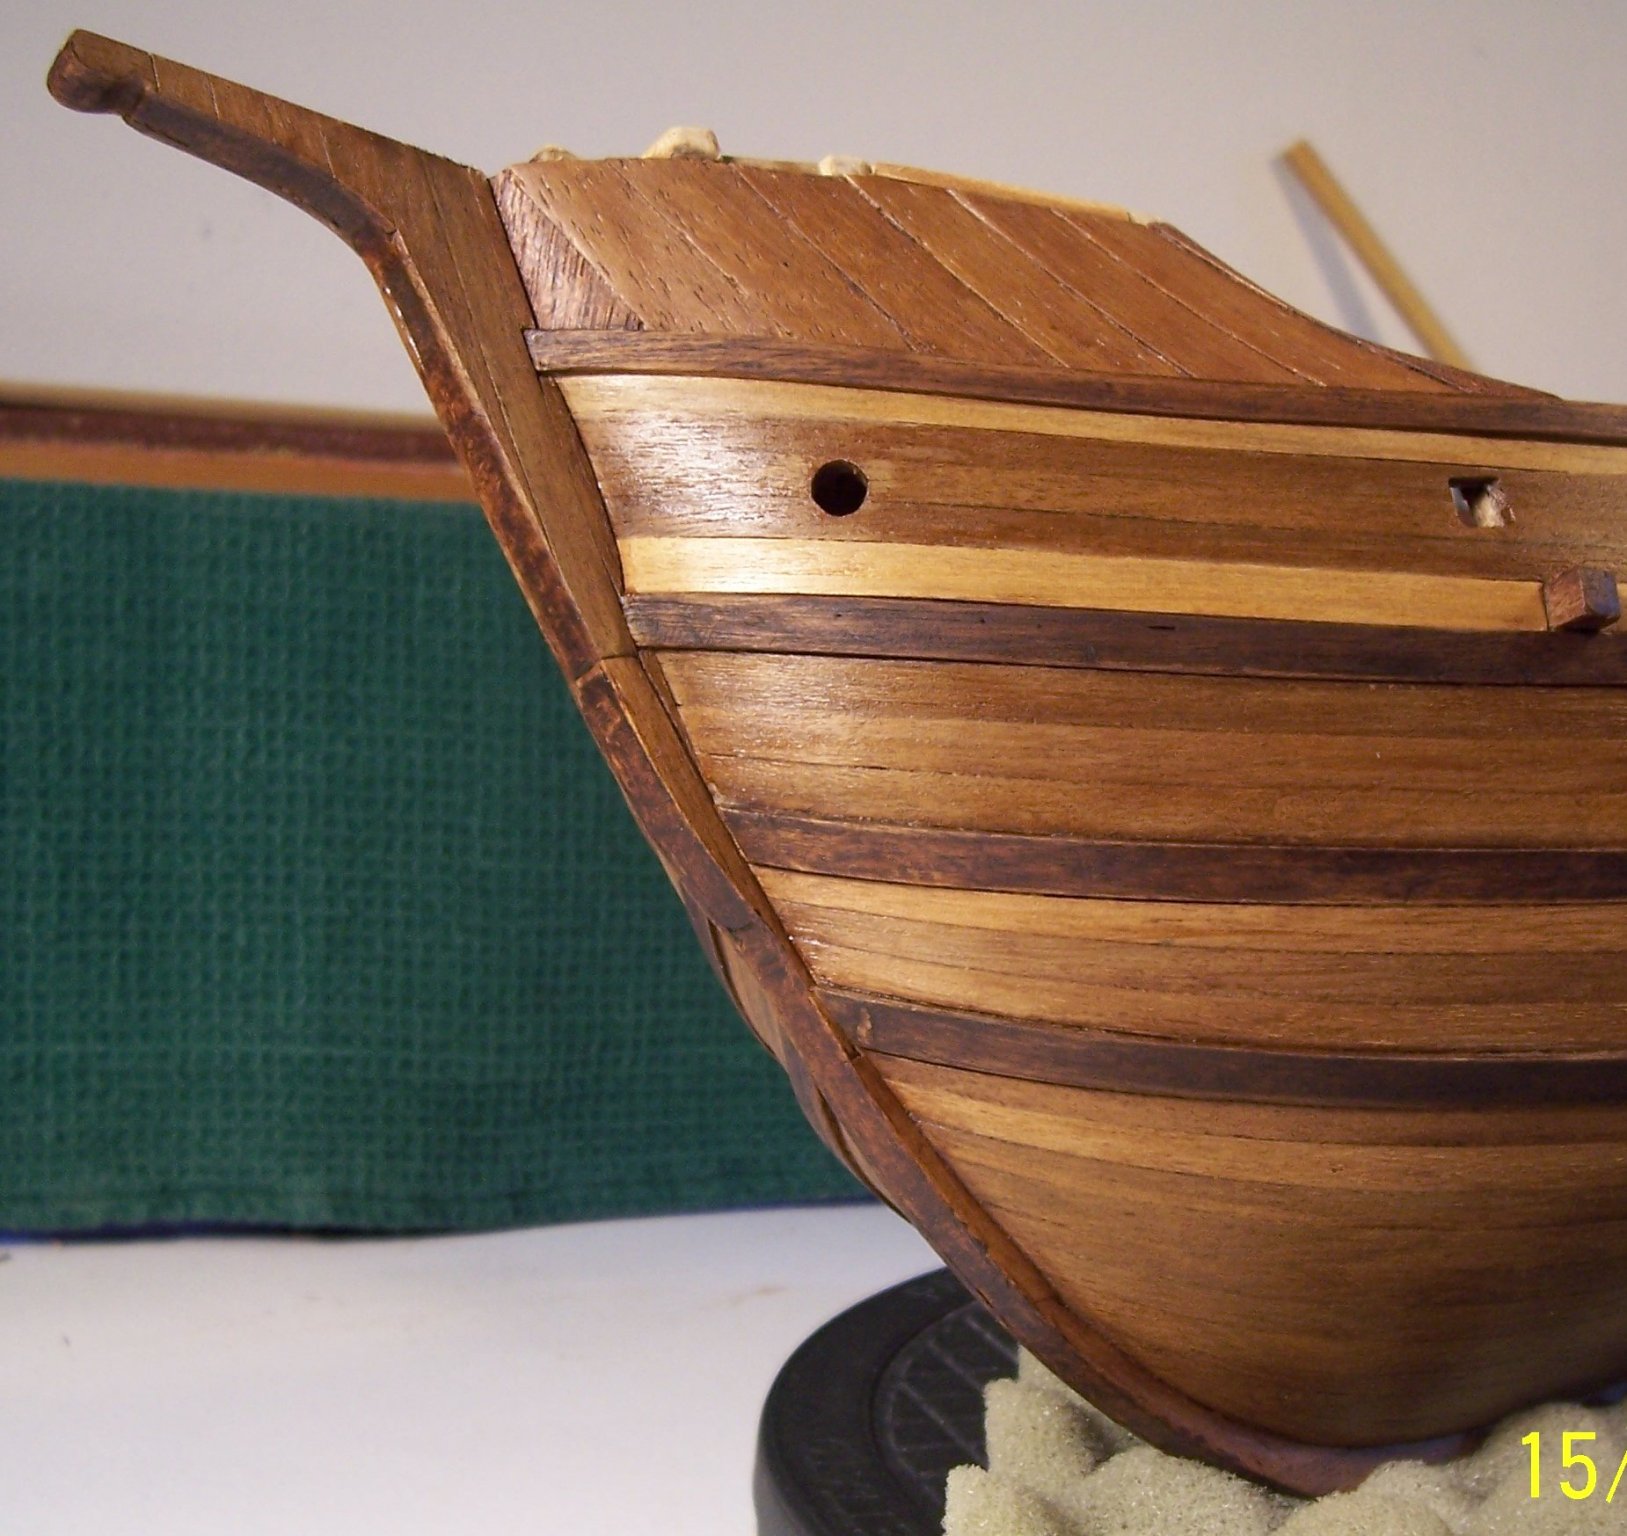
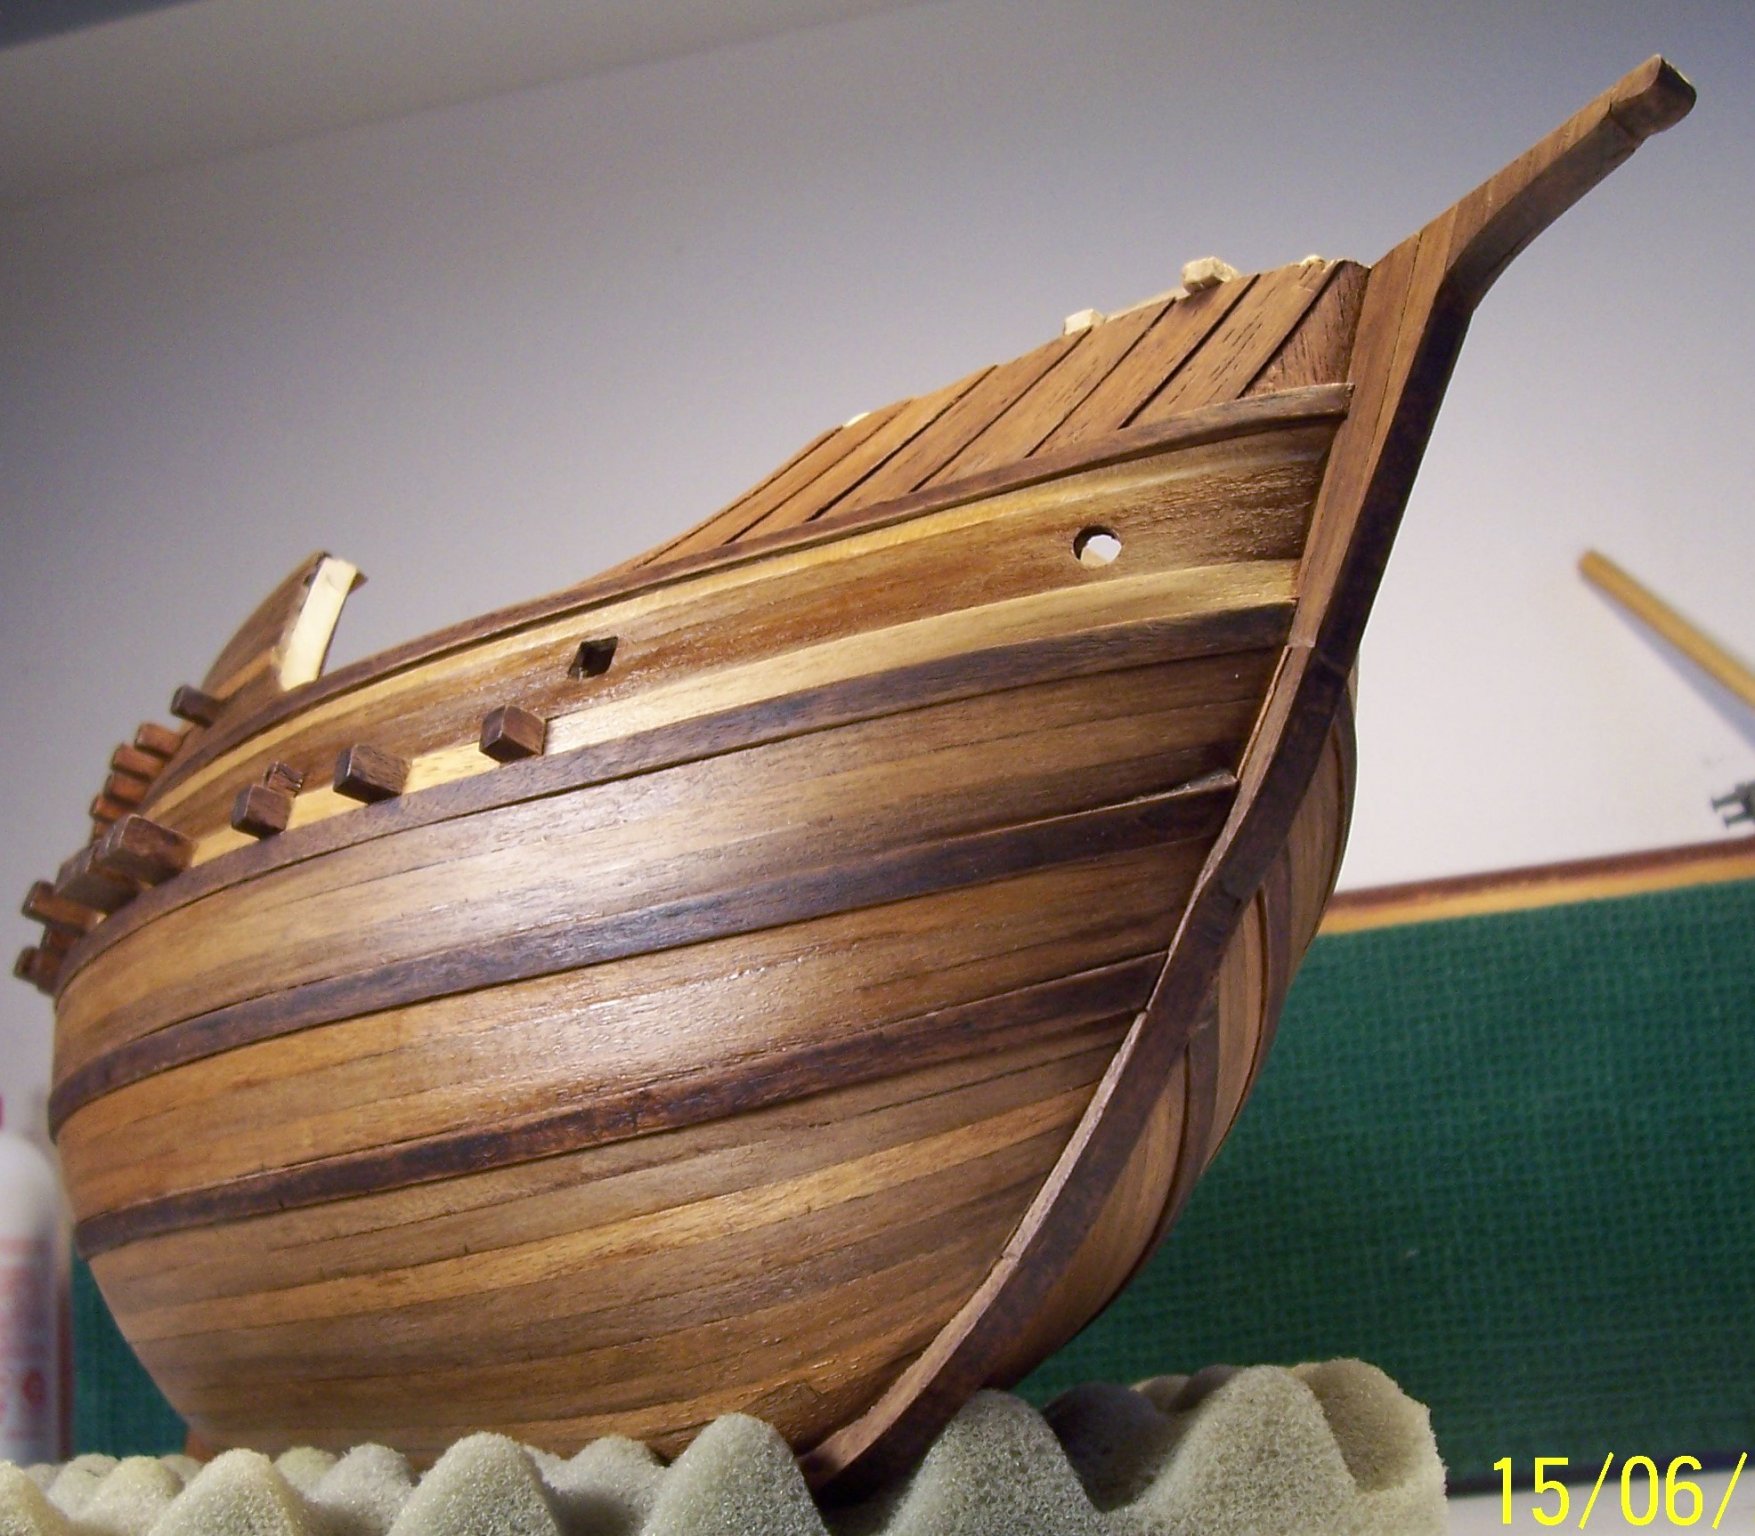
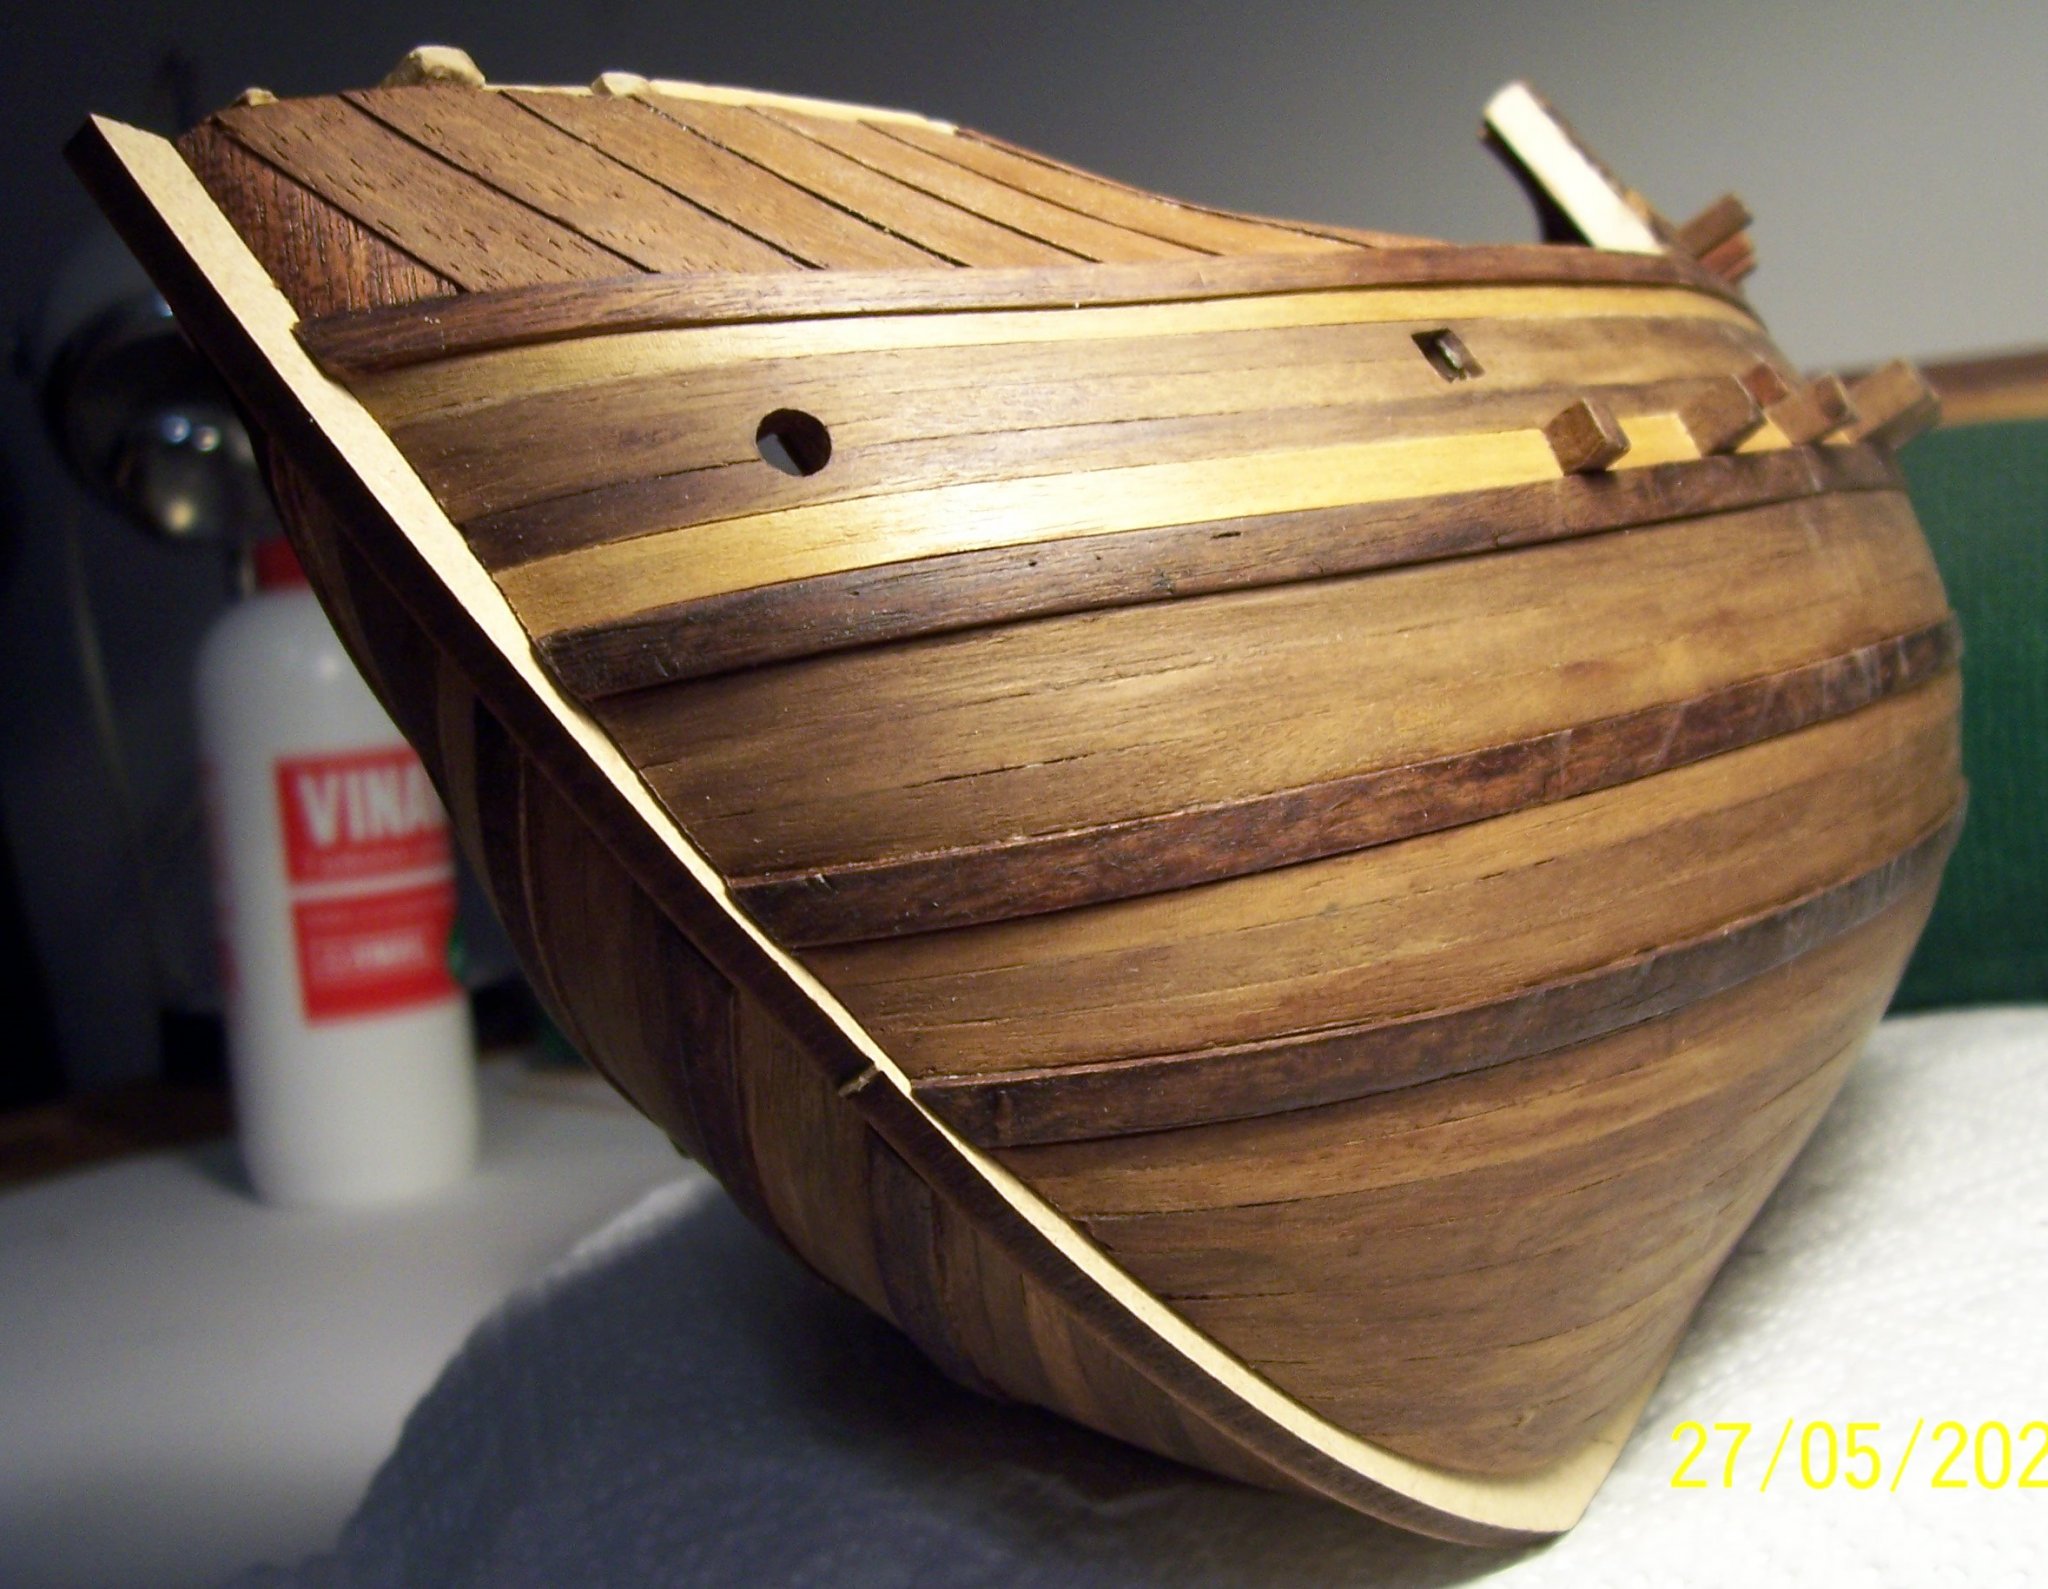
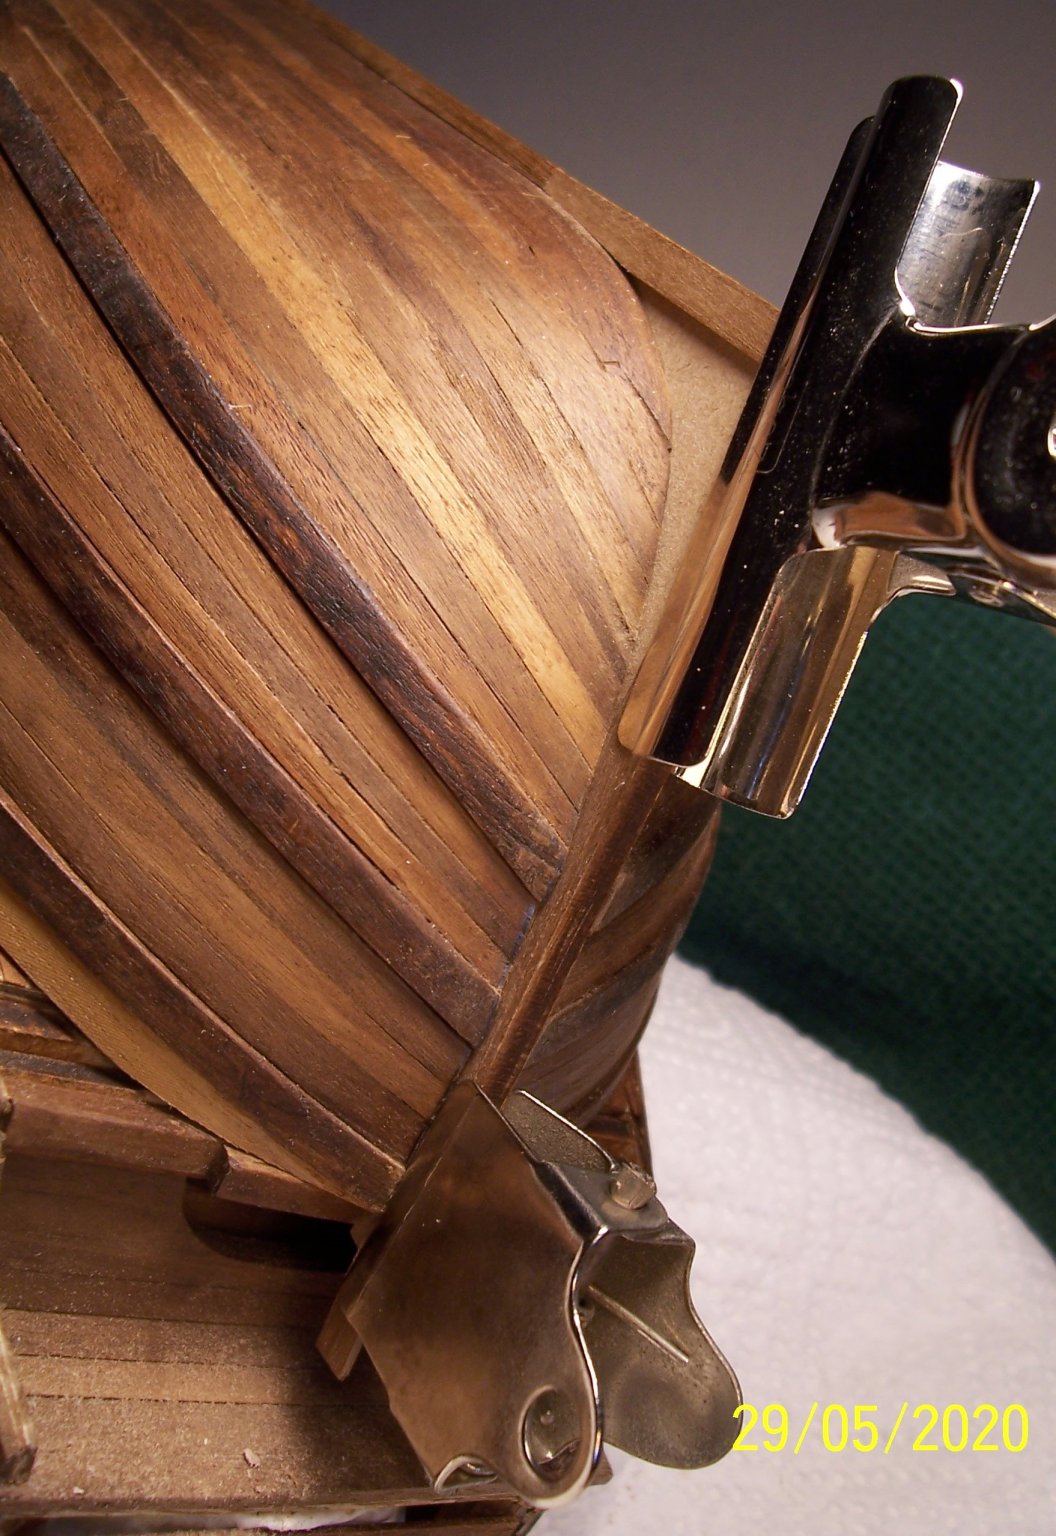
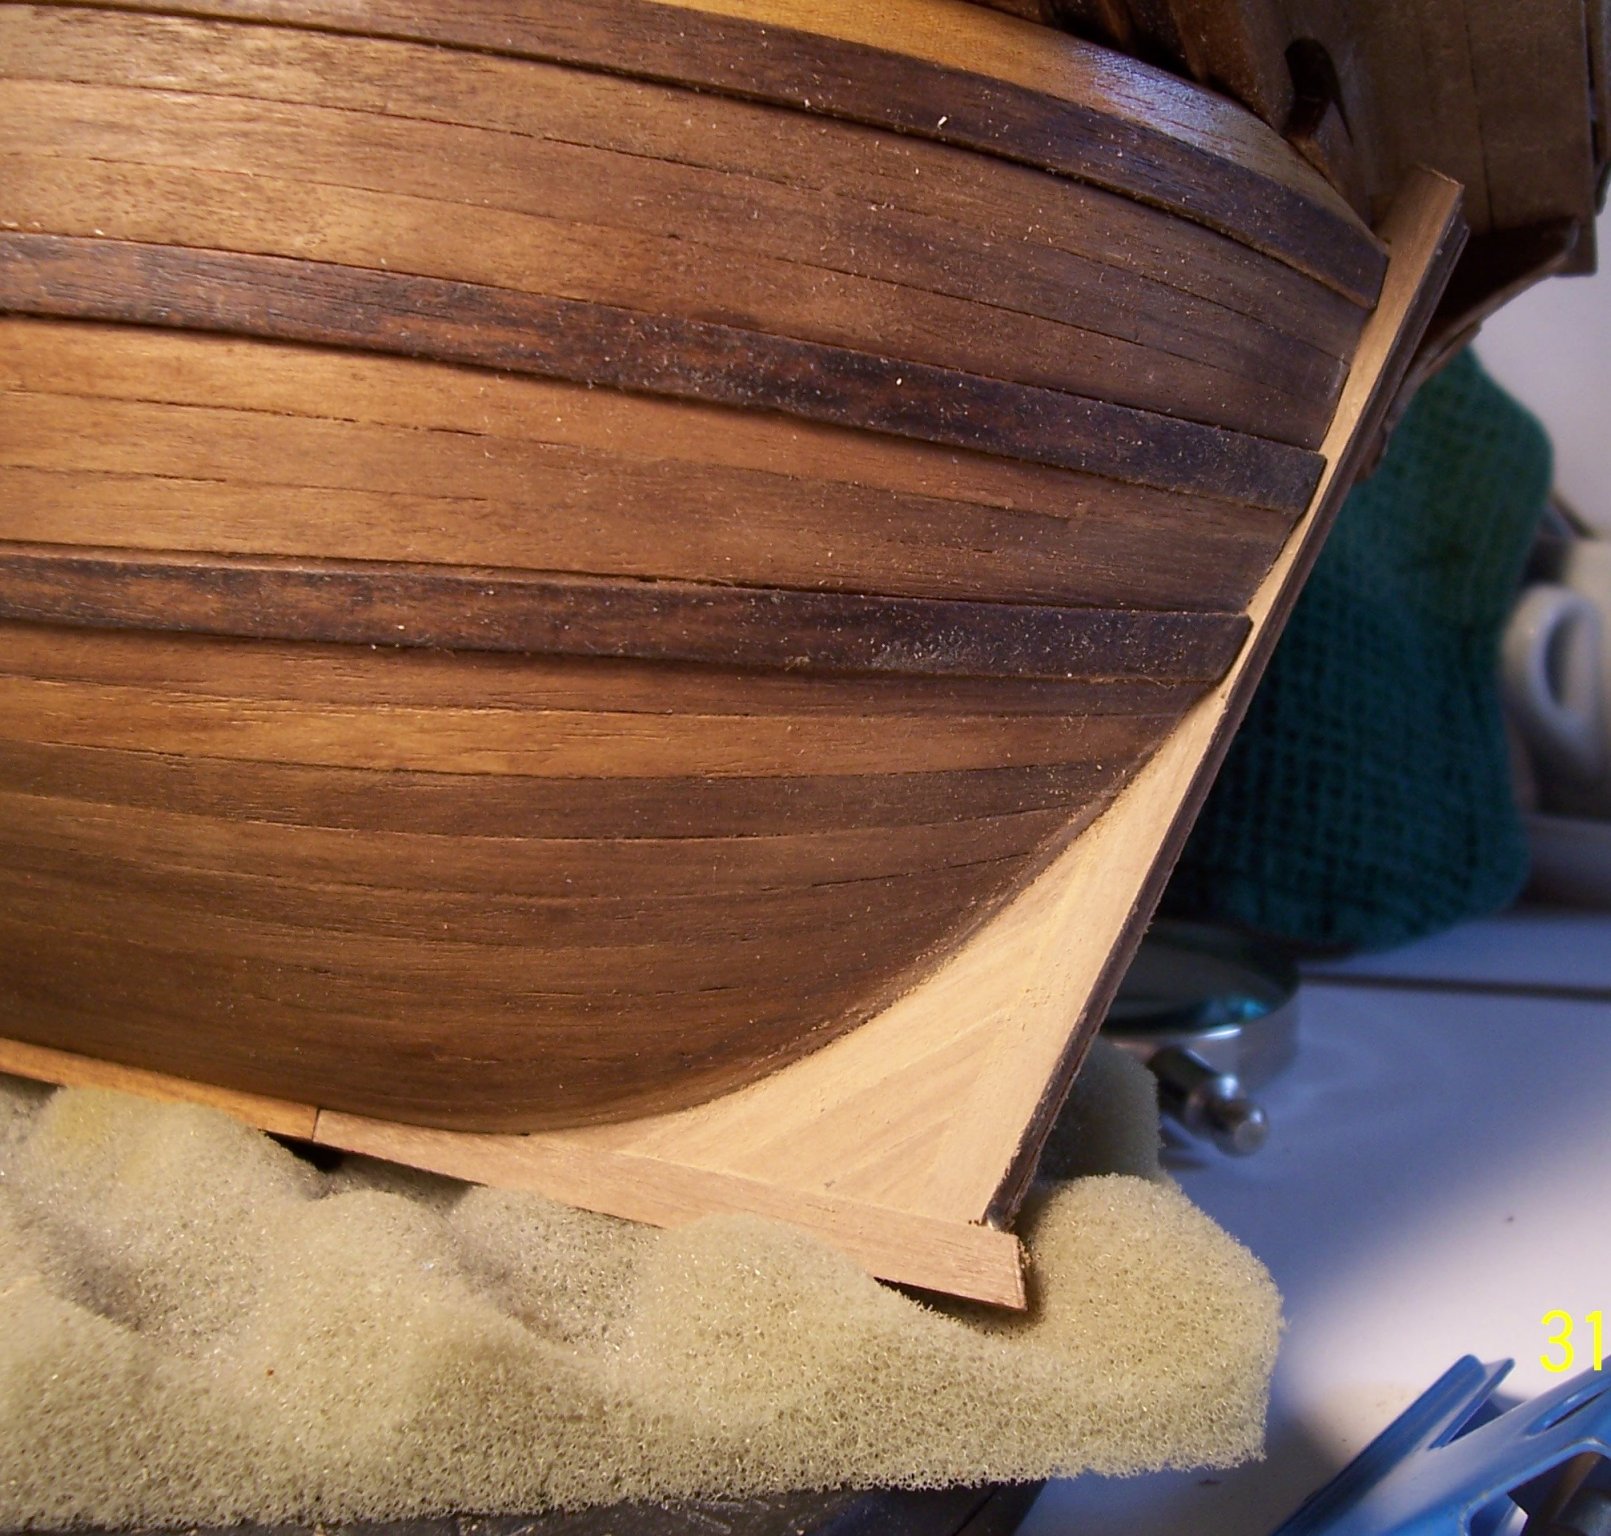
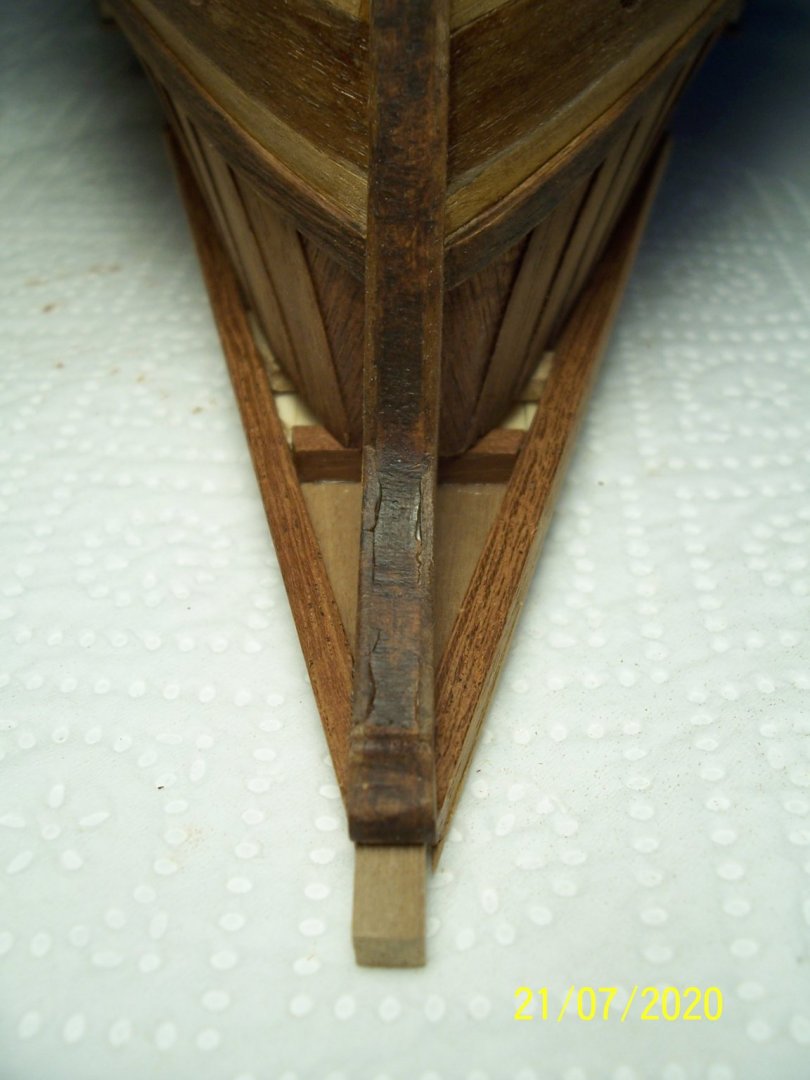
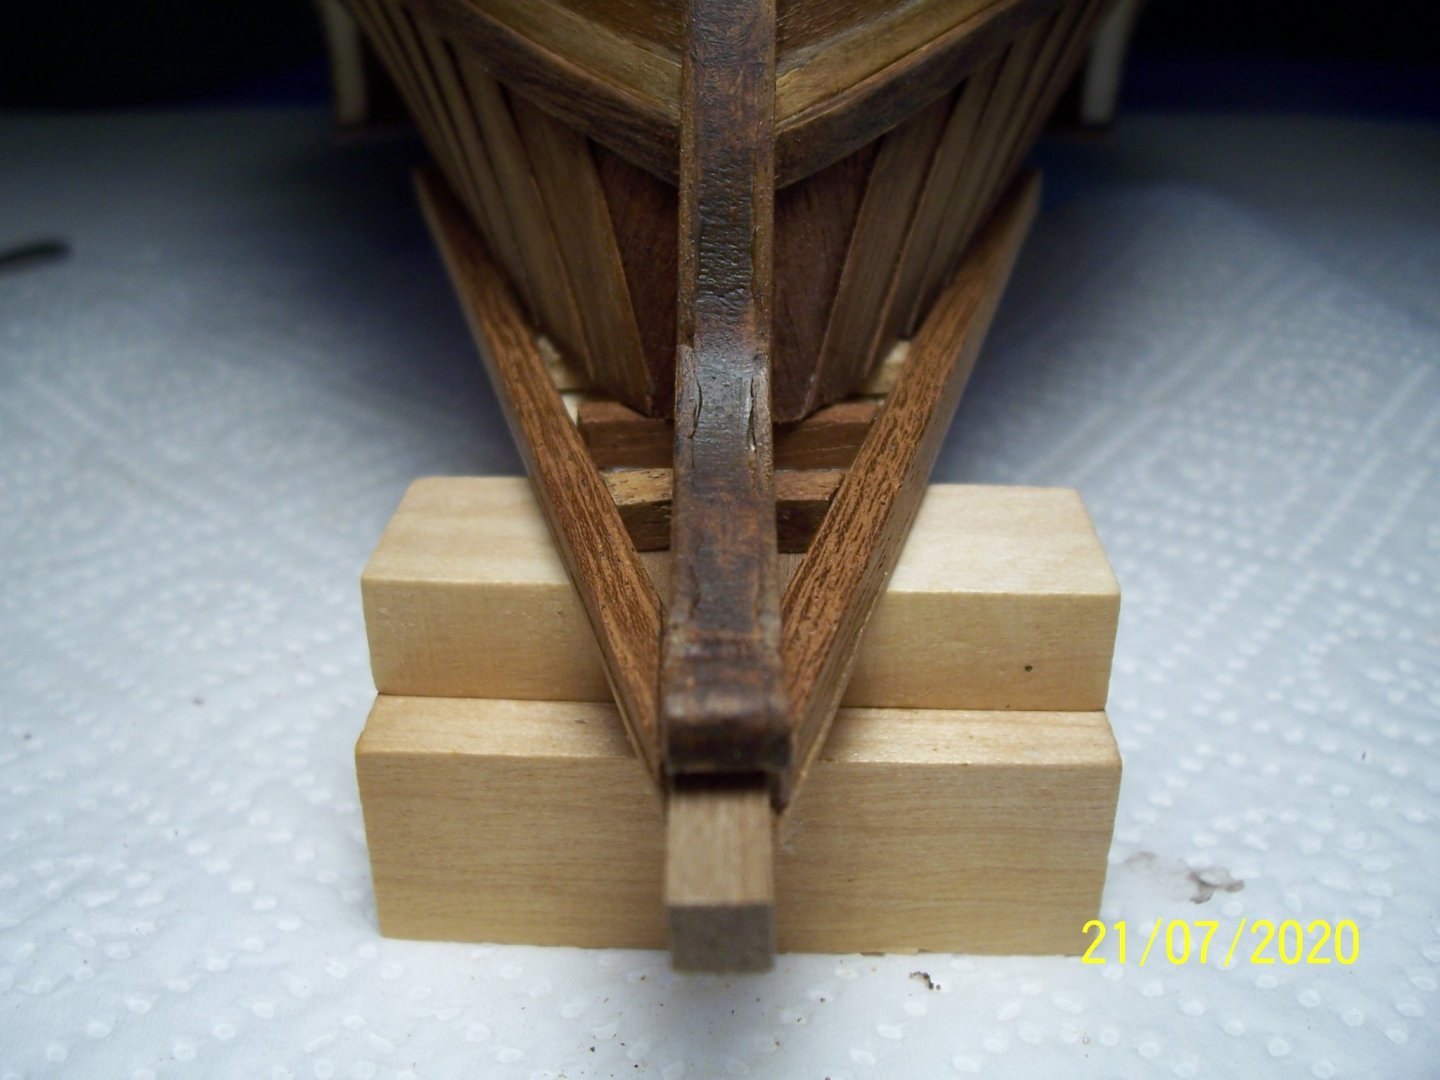
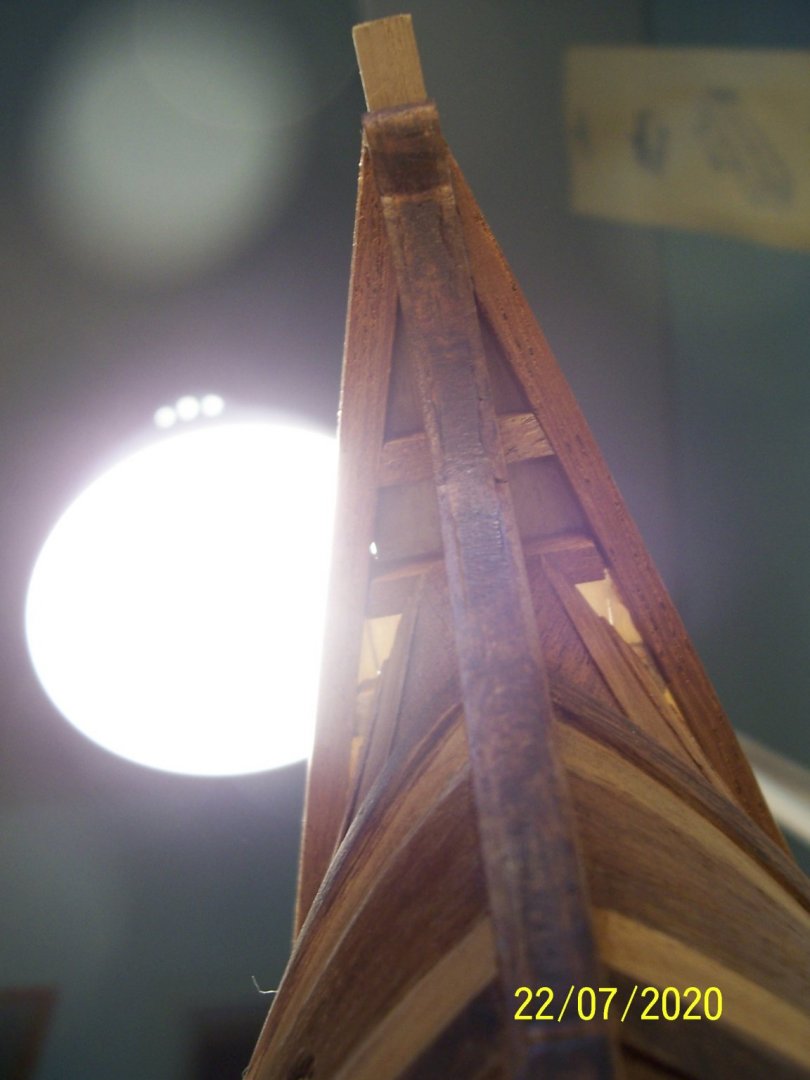
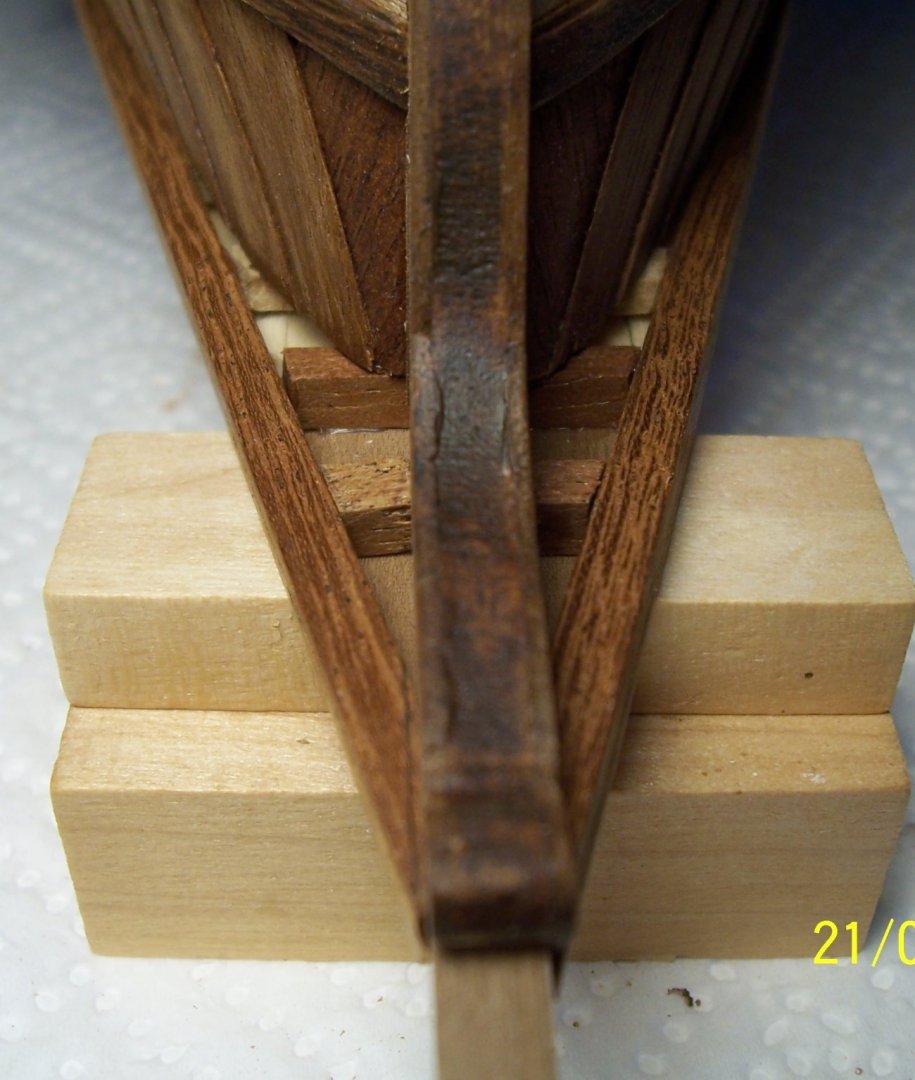
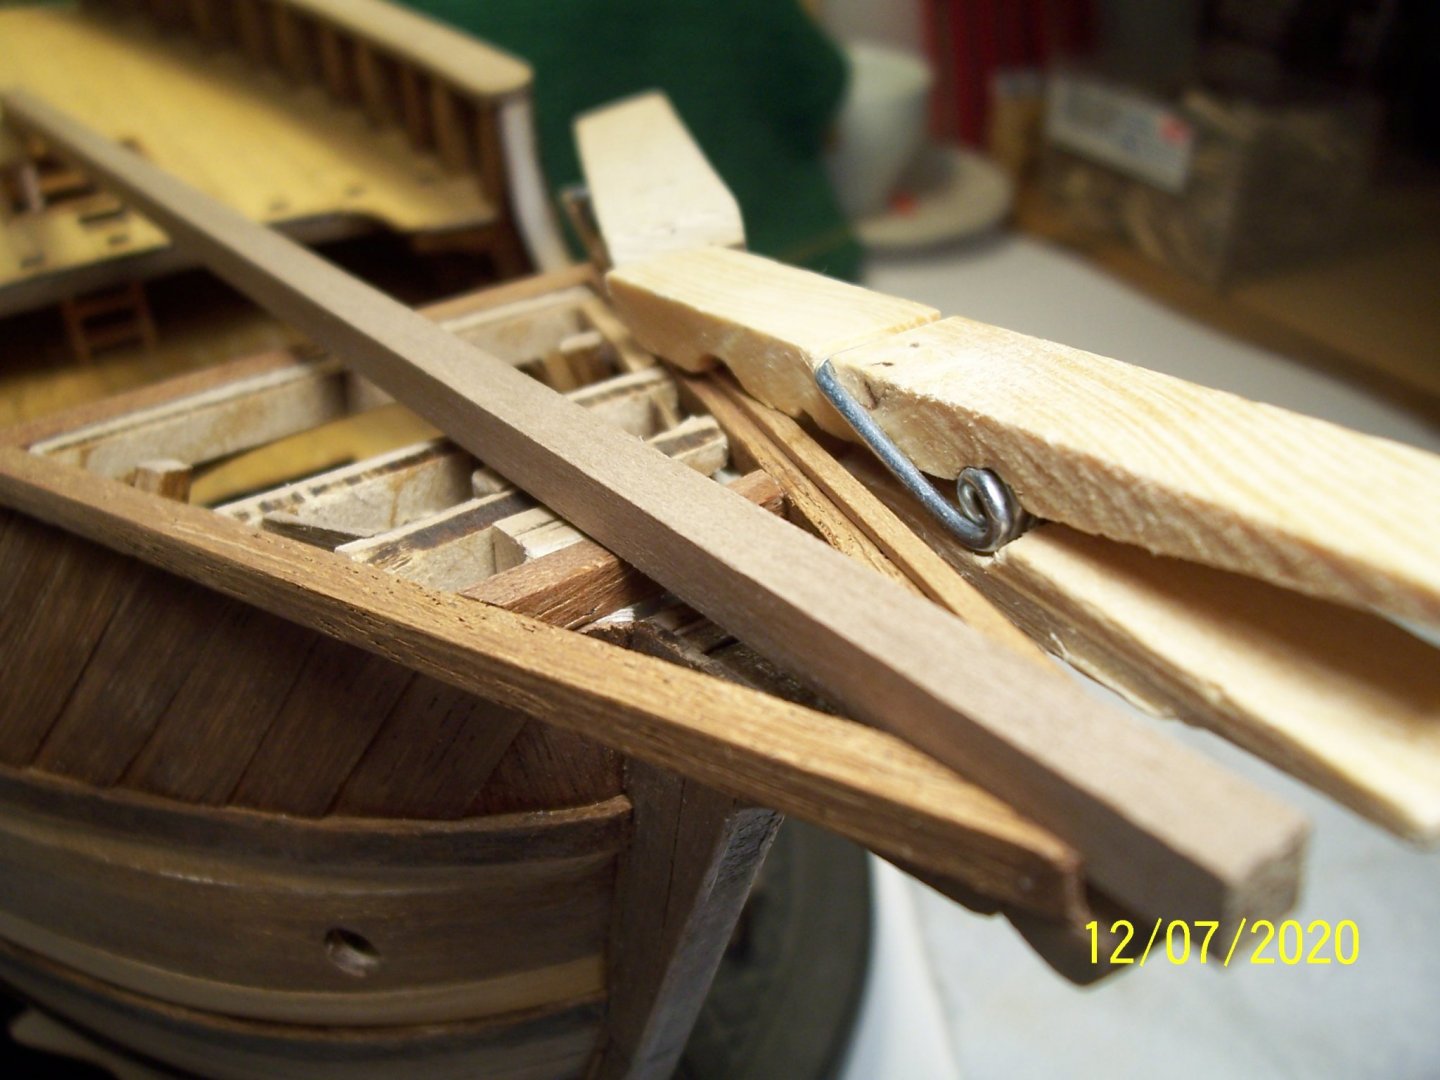
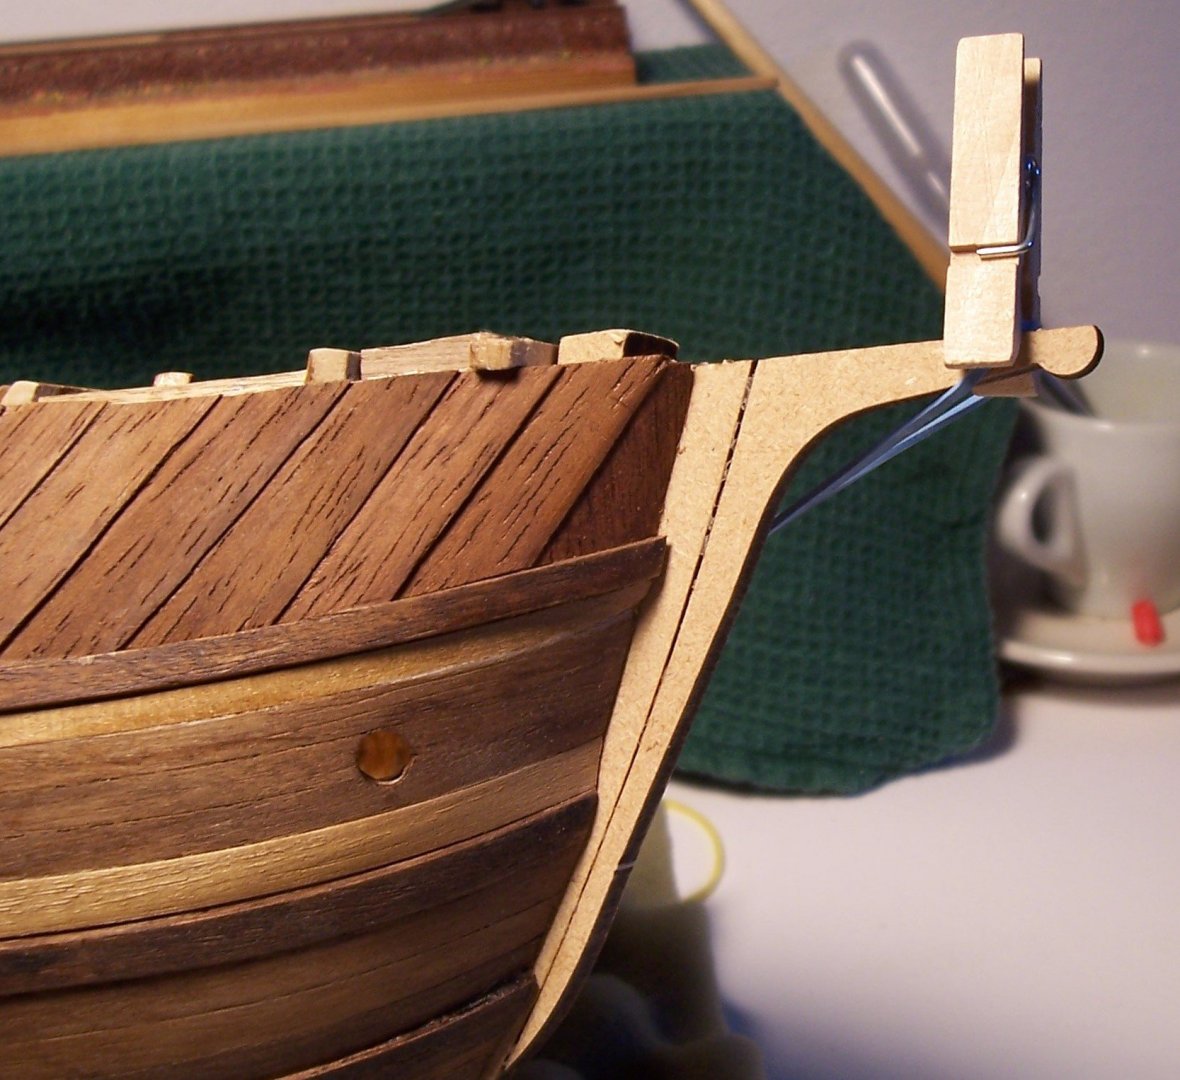
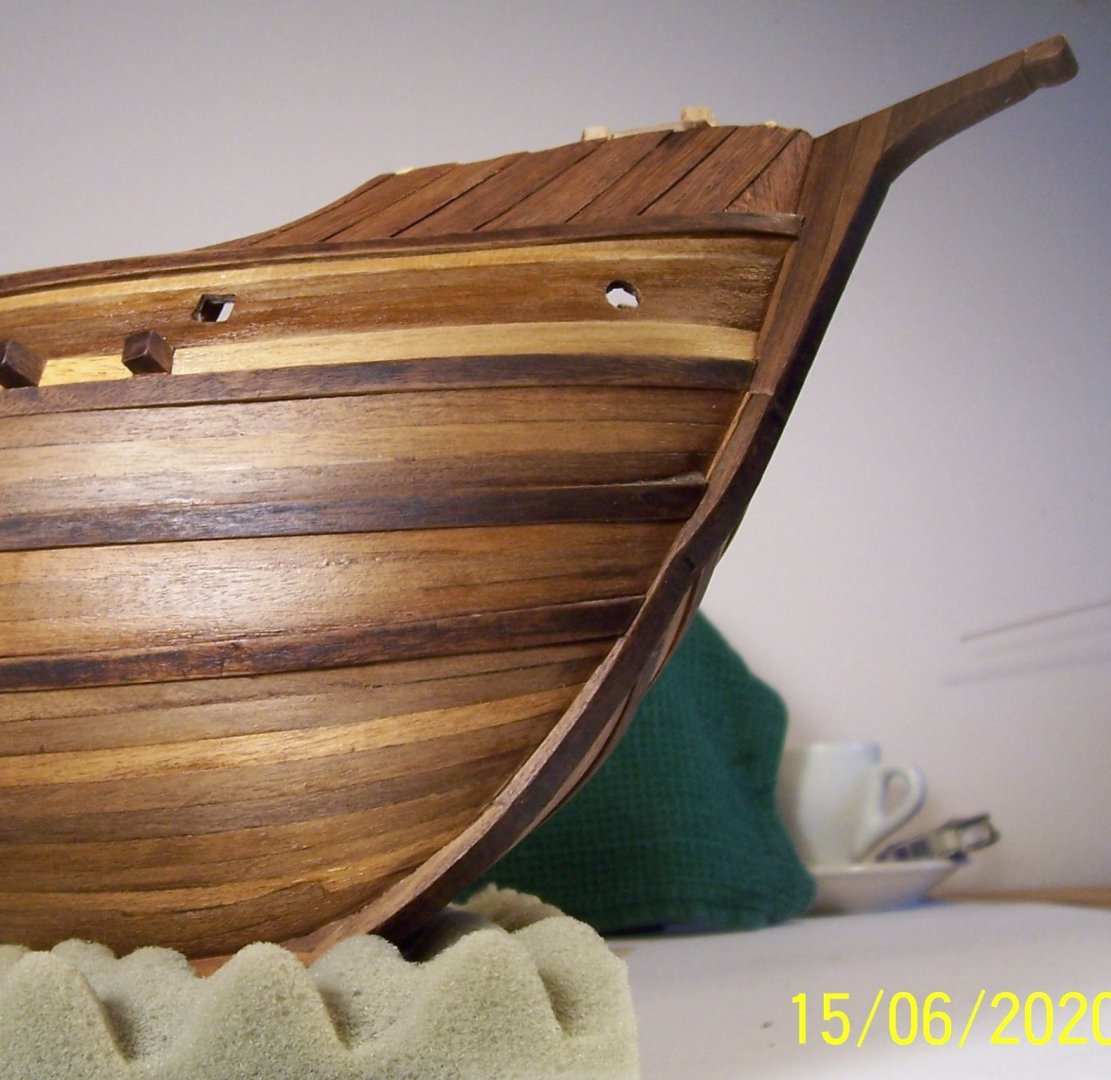
... here we are again. Before starting to cover the keel near bow, I noticed that the spur was not perfectly straight and therefore I added a little glue keeping it in tension: By the way, the ship is still perfectly balanced: For covering the remaining keel, I made 1 mm grooves in certain places and in others I have shaped the pieces of strip in a curvilinear way: And so we arrived at the current situation. Now I go back to work, see you soon! Rodolfo


-
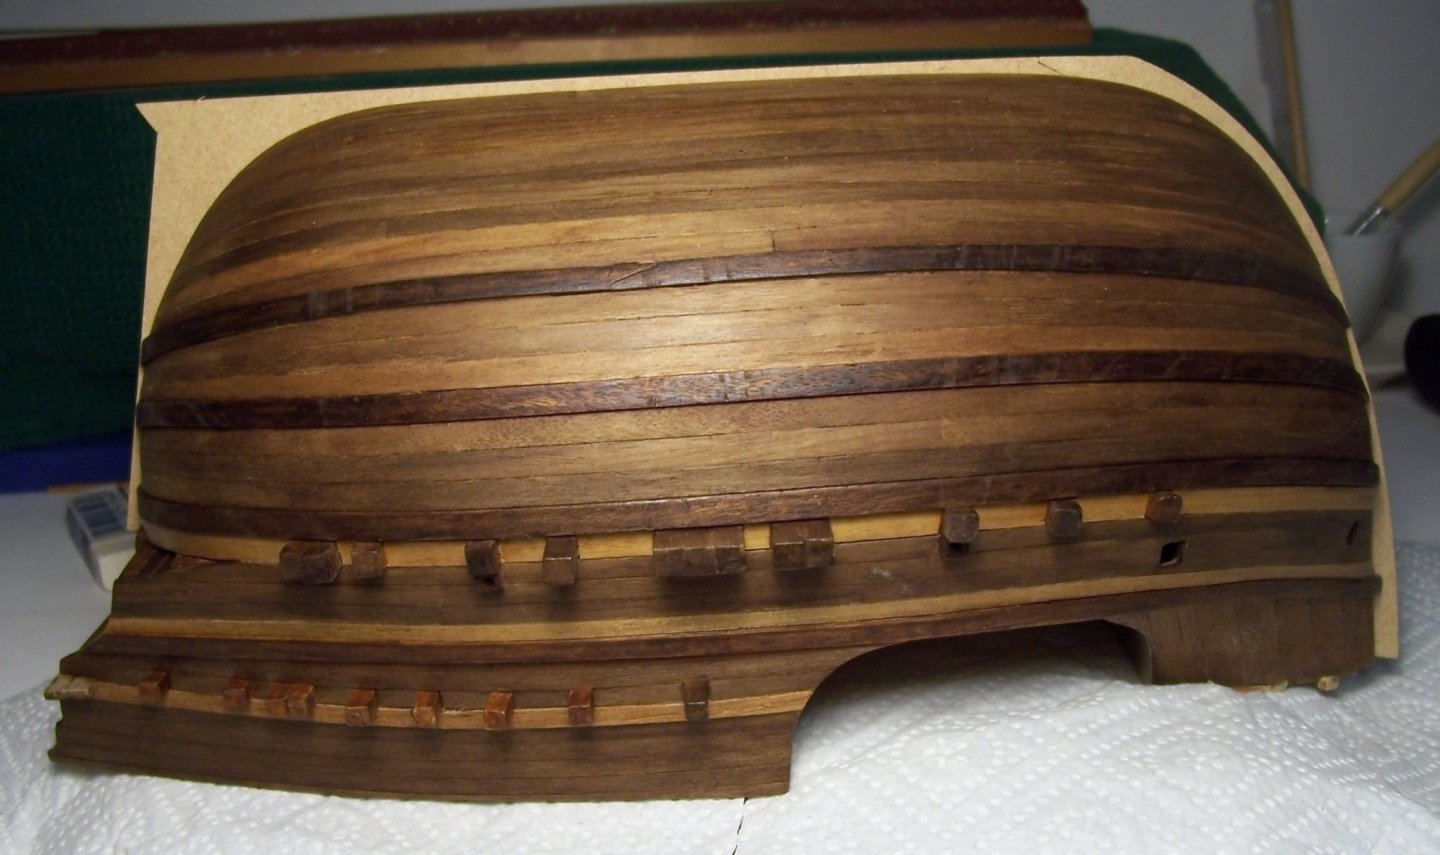
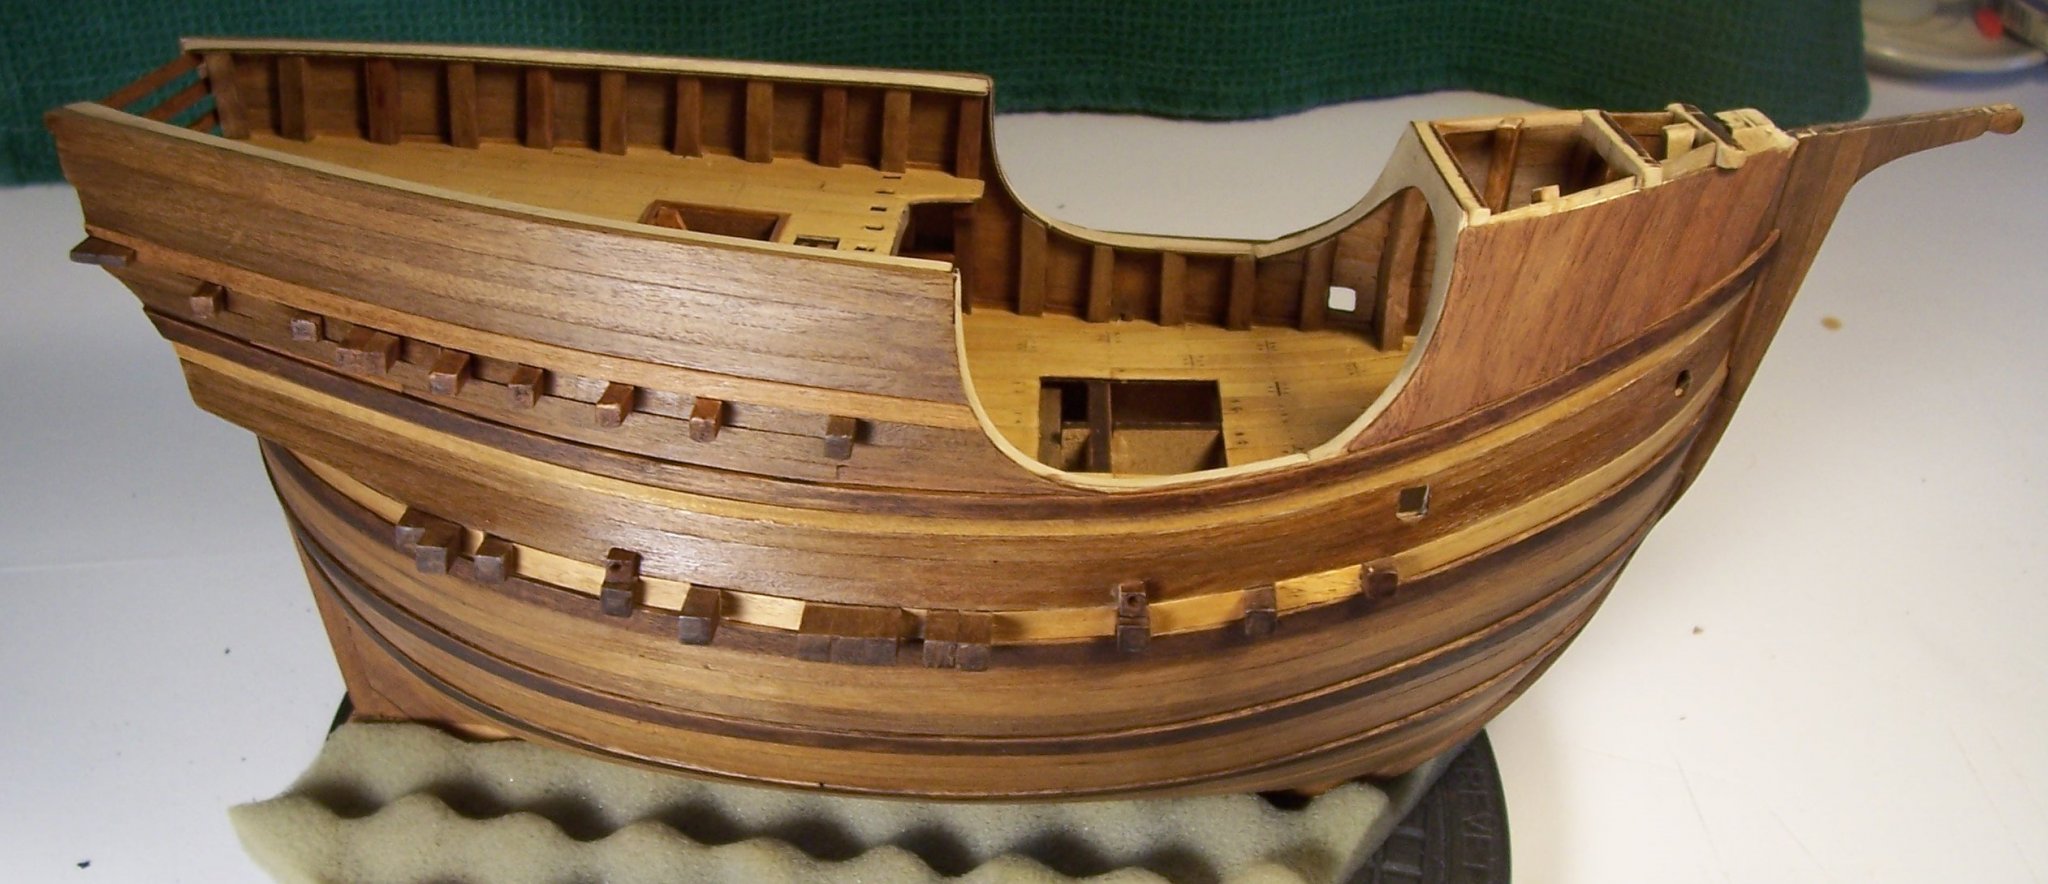
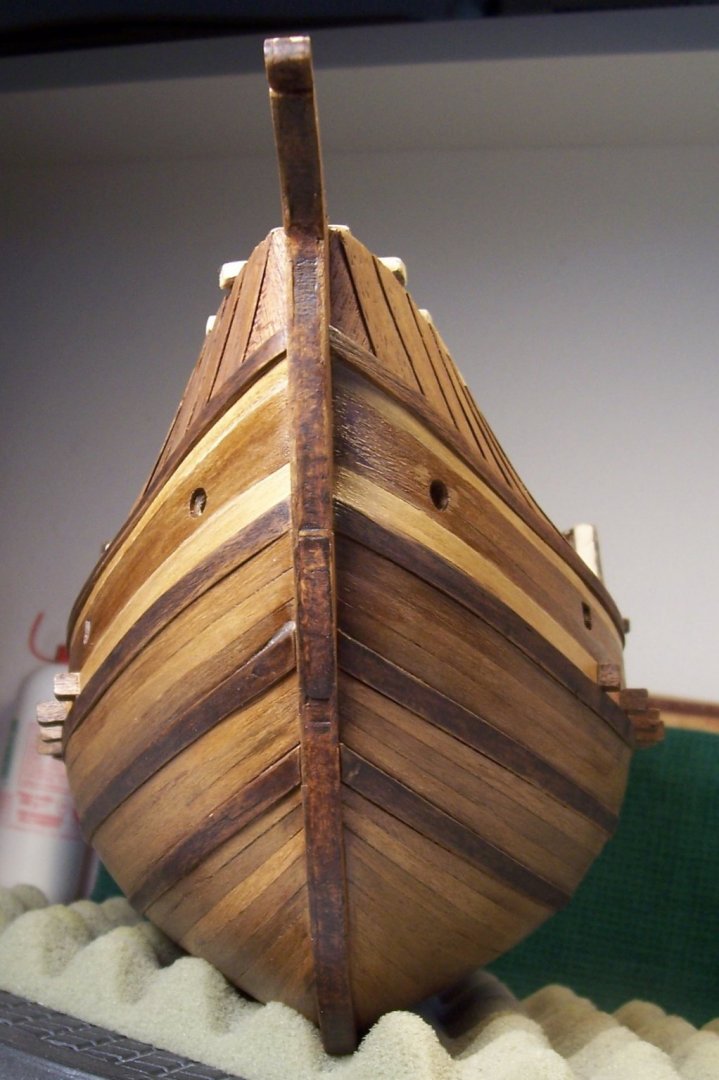
Welcome everyone! First step is checking raw keel in the groove between the two sides of the planking: After that, we start to glue straight strips of walnut on the bottom: Now it's time to go to complete the keel toward stern: In order to avoid the difficulty of shaping the strips perfectly, I made a 1mm groove to insert the strip under the planking. After that, the coverage of the free spaces with pieces of strip remains to be completed: to be continued... Rodolfo