
Clark Griswold
-
Posts
57 -
Joined
-
Last visited
About Clark Griswold

- Birthday May 24
-
 Clark Griswold reacted to a post in a topic:
Questions Before I Buy My First Ship
Clark Griswold reacted to a post in a topic:
Questions Before I Buy My First Ship
-
 Clark Griswold reacted to a post in a topic:
Questions Before I Buy My First Ship
Clark Griswold reacted to a post in a topic:
Questions Before I Buy My First Ship
-
Clark Griswold reacted to a post in a topic:
Questions Before I Buy My First Ship
-
Clark Griswold reacted to a post in a topic:
Questions Before I Buy My First Ship
-
Nirvana reacted to a post in a topic:
Questions Before I Buy My First Ship
-
mtaylor reacted to a post in a topic:
Questions Before I Buy My First Ship
-
Peanut6 reacted to a post in a topic:
Questions Before I Buy My First Ship
-
Keith Black reacted to a post in a topic:
Questions Before I Buy My First Ship
-
Questions Before I Buy My First Ship
Clark Griswold replied to Magarkus's topic in New member Introductions
I doubt you'll have reliable internet service (blessing and a curse), so you may want to invest in a some good texts as well. The NRG has a great collection and there is a thread on here of recommended books as well. Personally, I have found Historic Model Ship by Wolfram Zu Mondfeld as a great reference. Even if some of the info doesn't directly pertain to your model, it is still a good primer on ship modeling and the lexicon. It will be frustrating at times... don't justify your summer job by lighting it on fire and tossing it off the tower. 😉 -
Clark Griswold reacted to a post in a topic:
Questions Before I Buy My First Ship
-
Clark Griswold reacted to a post in a topic:
HMS Beagle by The Gimps Chimp - FINISHED - OcCre - 1:60
-
Clark Griswold reacted to a post in a topic:
HMS Beagle by The Gimps Chimp - FINISHED - OcCre - 1:60
-
Clark Griswold reacted to a post in a topic:
Lights (windows) framing material
-
Clark Griswold reacted to a post in a topic:
Lights (windows) framing material
-
Clark Griswold reacted to a post in a topic:
Flat brass bars
-
Howard_And_Olivia reacted to a post in a topic:
Need Help Identify 2 Model Sail Boats Recently Inherited From Grand-Father's Estate
-
Ryland Craze reacted to a post in a topic:
Need Help Identify 2 Model Sail Boats Recently Inherited From Grand-Father's Estate
-
mtaylor reacted to a post in a topic:
Need Help Identify 2 Model Sail Boats Recently Inherited From Grand-Father's Estate
-
The greatest value of any model is assigned by the builder by the time and love he/she put into it. Many of us only dream of a descendant caring enough to not put in a garage sale. I see this as a crossroads... you could enter the hobby and carry-on your great grandfather's ship modeling legacy with hopes of restoring the models eventually or you can put some coin down and enjoy them in their own right as family relics. There's no wrong choice here, but we'd love to have you join our ranks.
-
mtaylor reacted to a post in a topic:
Green Rope?
-
Fantasy build as if she hadn't been turned into a floating museum? I'd replace the line for its intended purpose and use it for something else (dyed darker/black or in its current state).
-
mtaylor reacted to a post in a topic:
Gluing Deck Planks to a False Deck
-
GGibson reacted to a post in a topic:
Gluing Deck Planks to a False Deck
-
I use a foam brush to "paint" the false deck with wood glue in an area I can accomplish within a few minutes time before it begins to set up. Once I'm done for the planking session I use popsicle sticks with rubber bands attaching both ends looped under the keel to hold the fast. Slight curling may still happen but not so much a good sand cannot cure it. There are likely a ton of ways to skin this cat, but this has worked for me. Good luck from a Kansas City native!
-
MicroMark has a product similar to what you are searching for... https://www.micromark.com/Ship-Decking
-
How many kits do you have on the go at the moment?
Clark Griswold replied to CaptnBirdseye's topic in Wood ship model kits
I juggle a few models at a time, but only one is a ship build. I use the others to distract me long enough (hours or days) to come back with a fresh look when I get frustrated or between steps. -
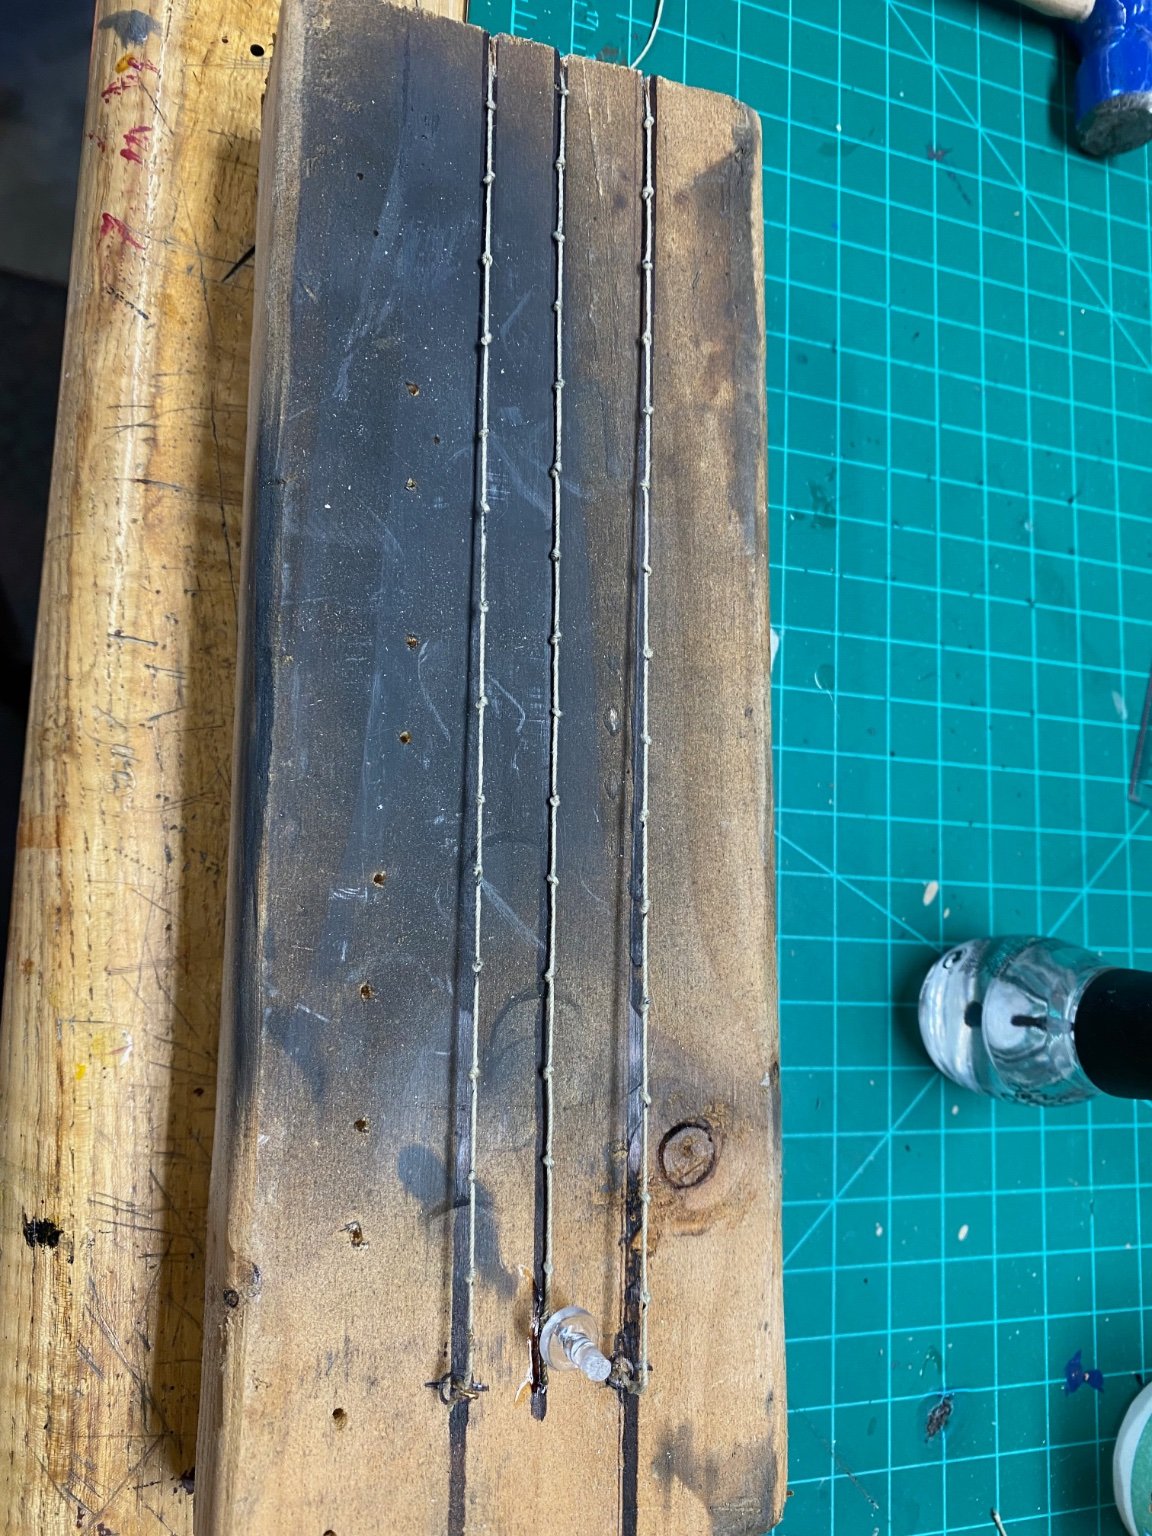
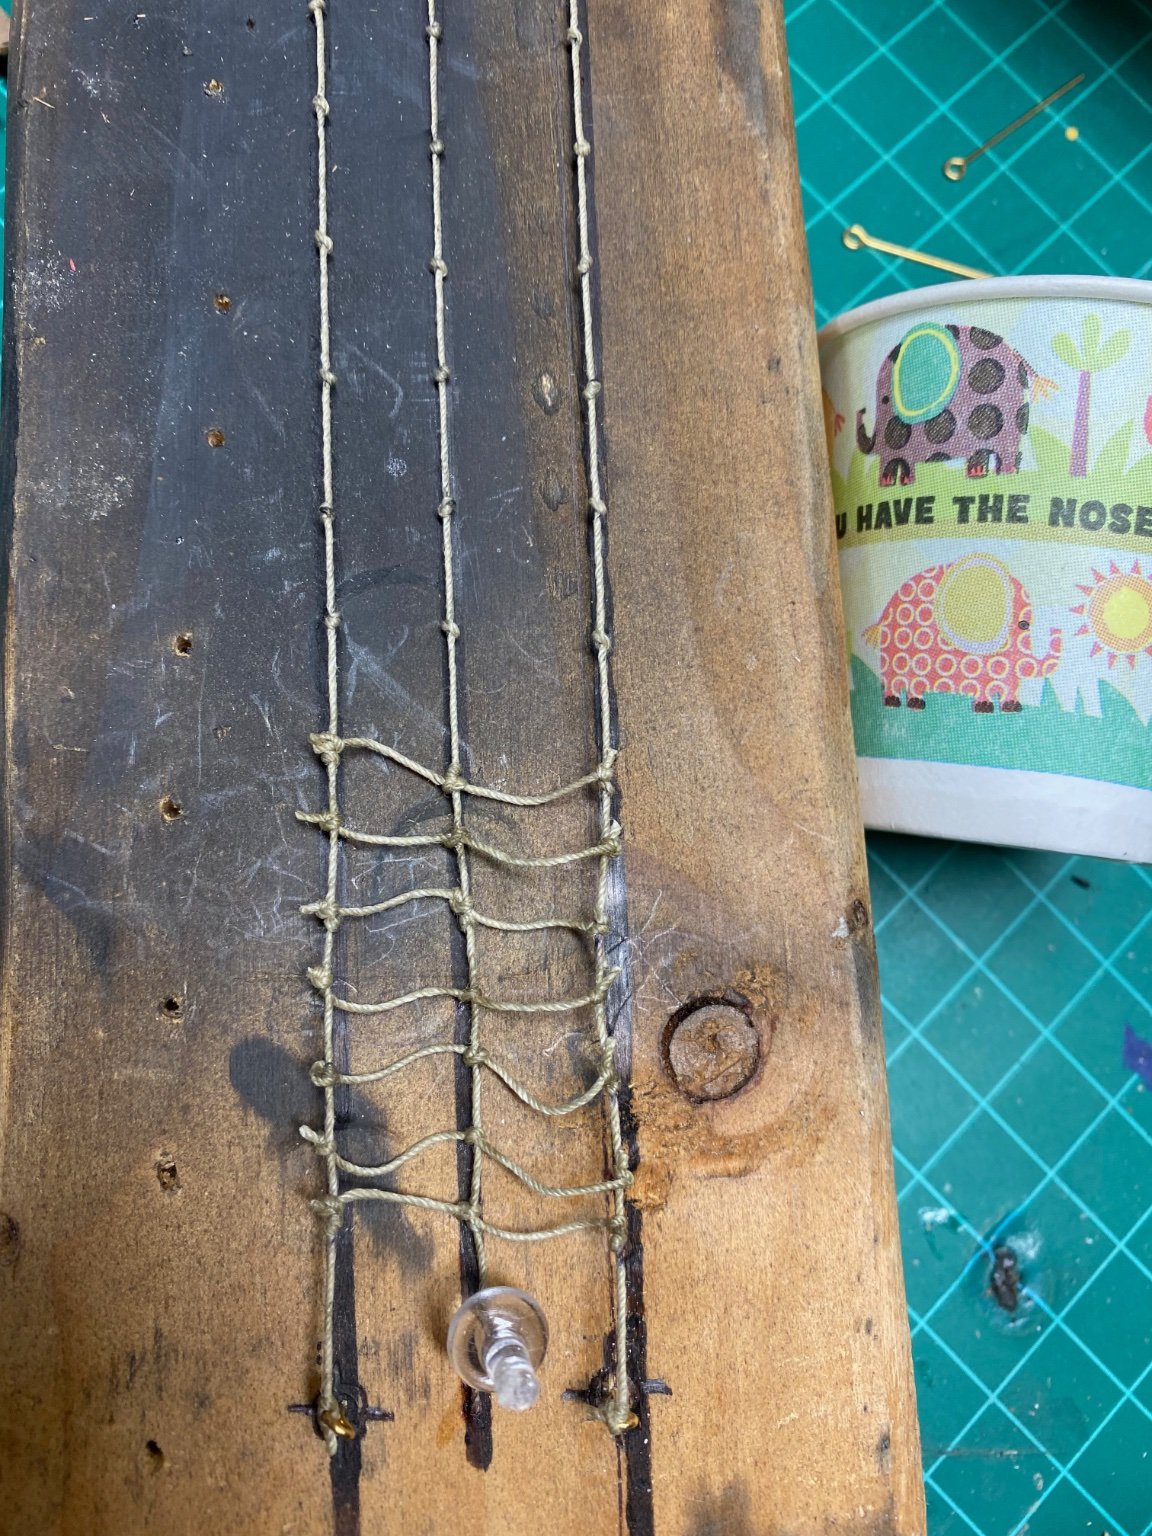
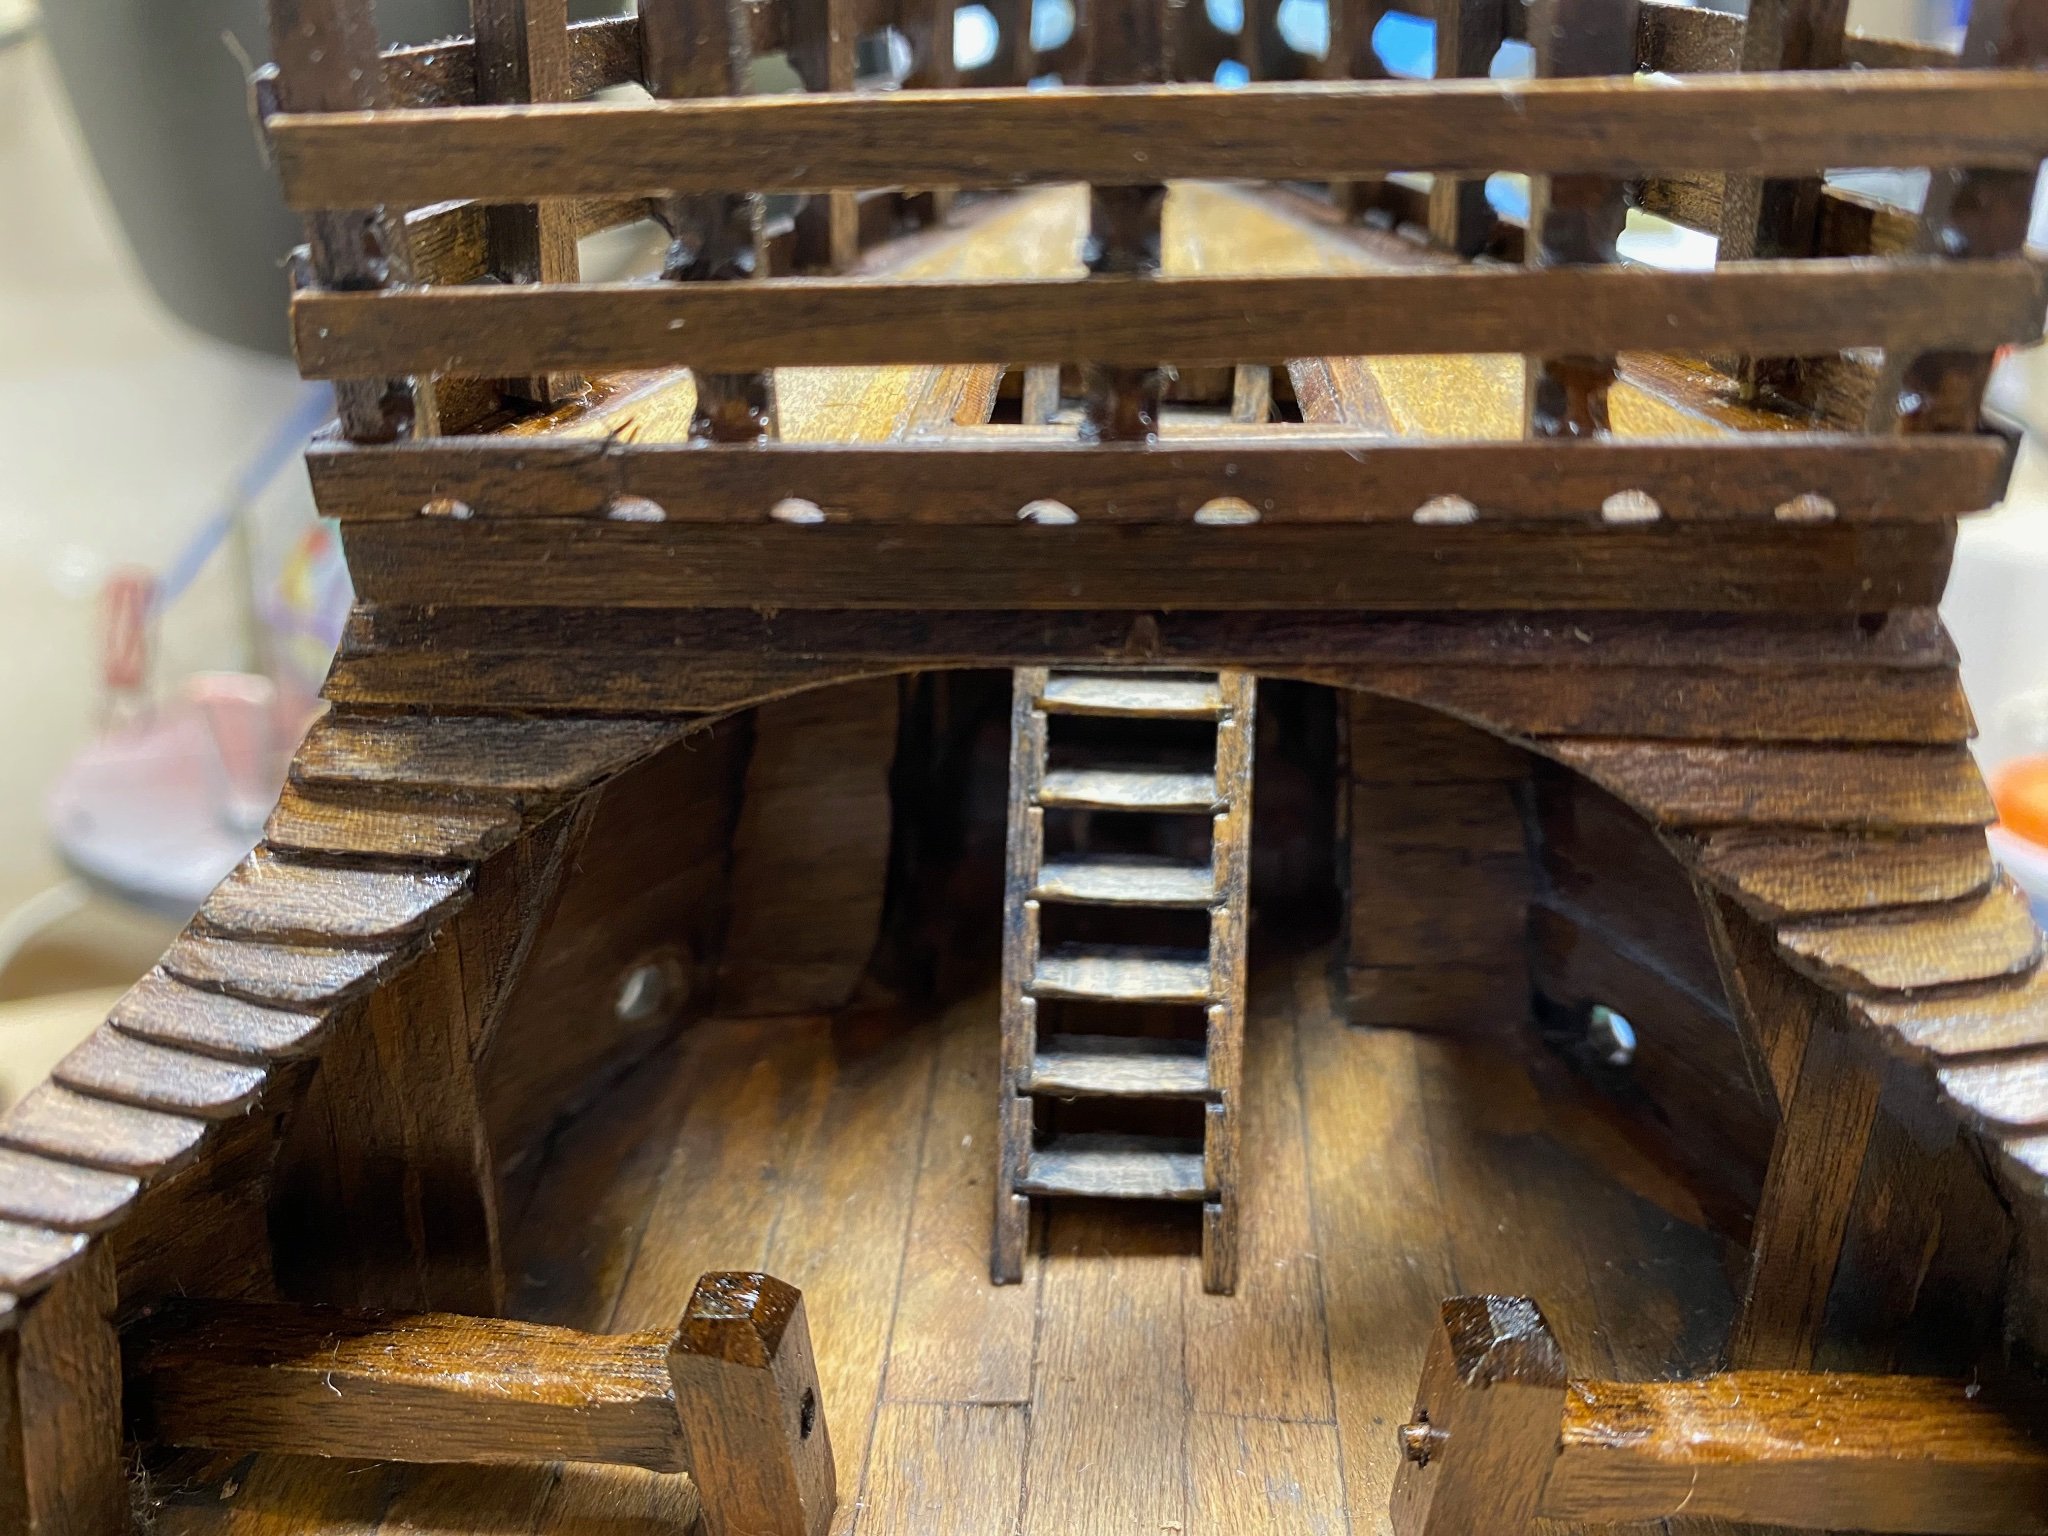
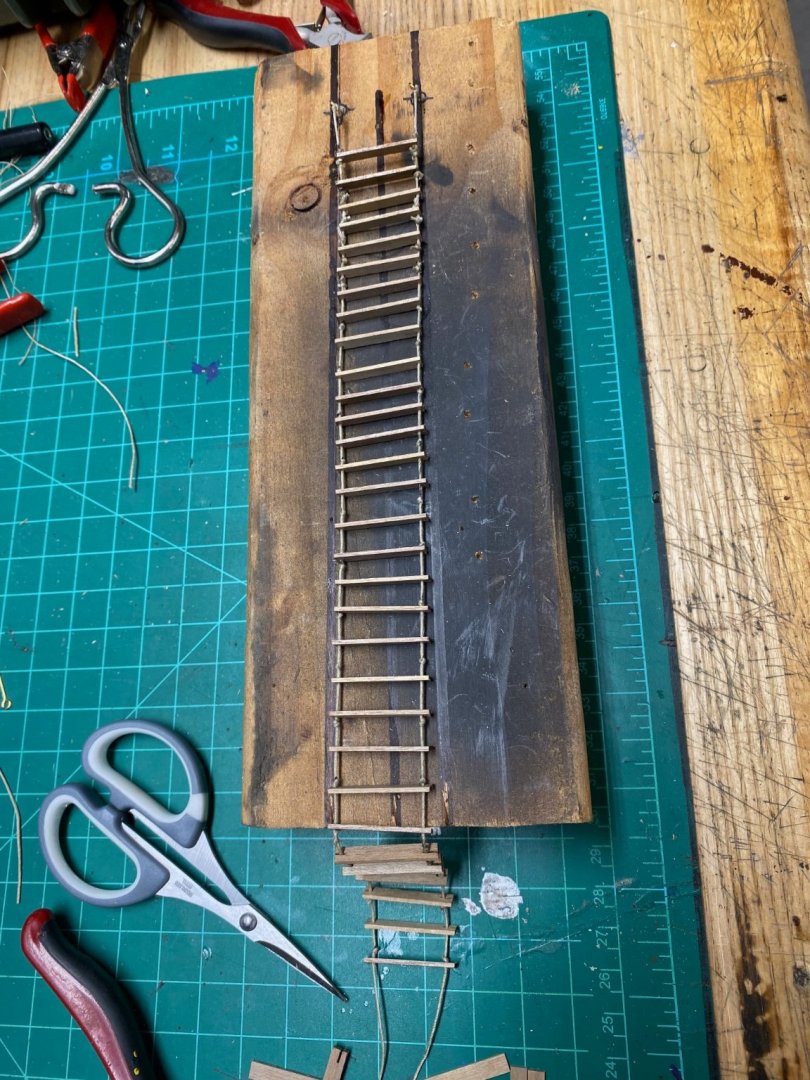
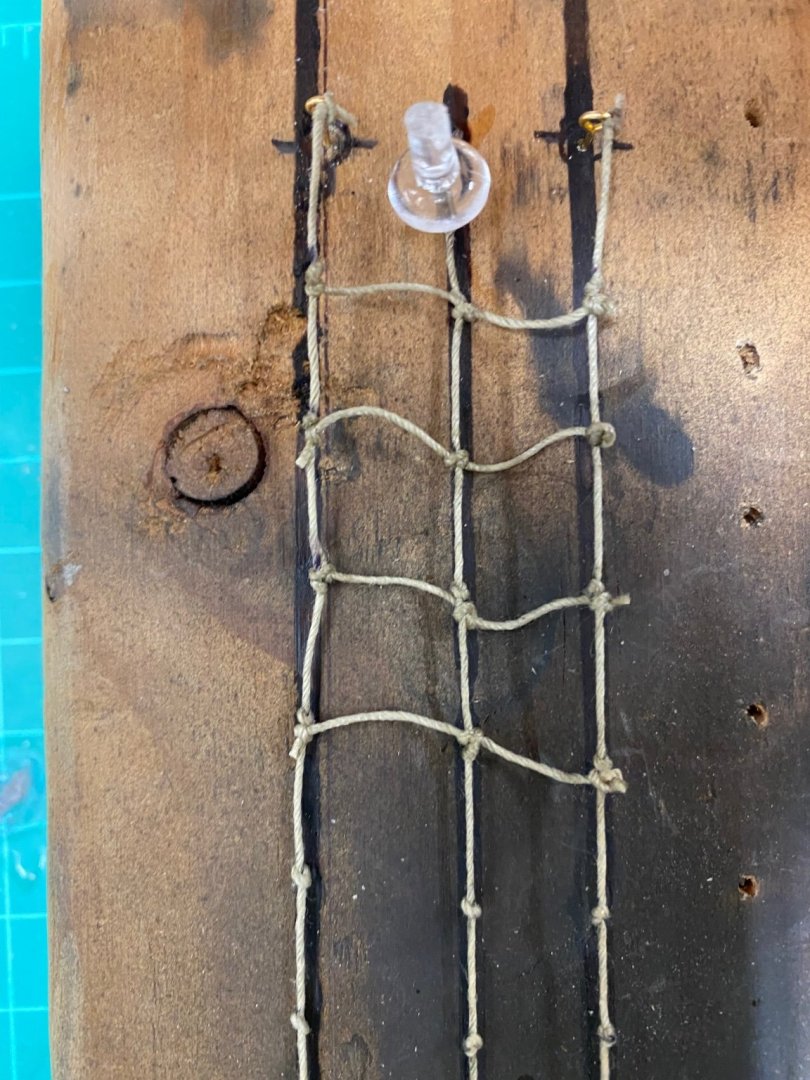
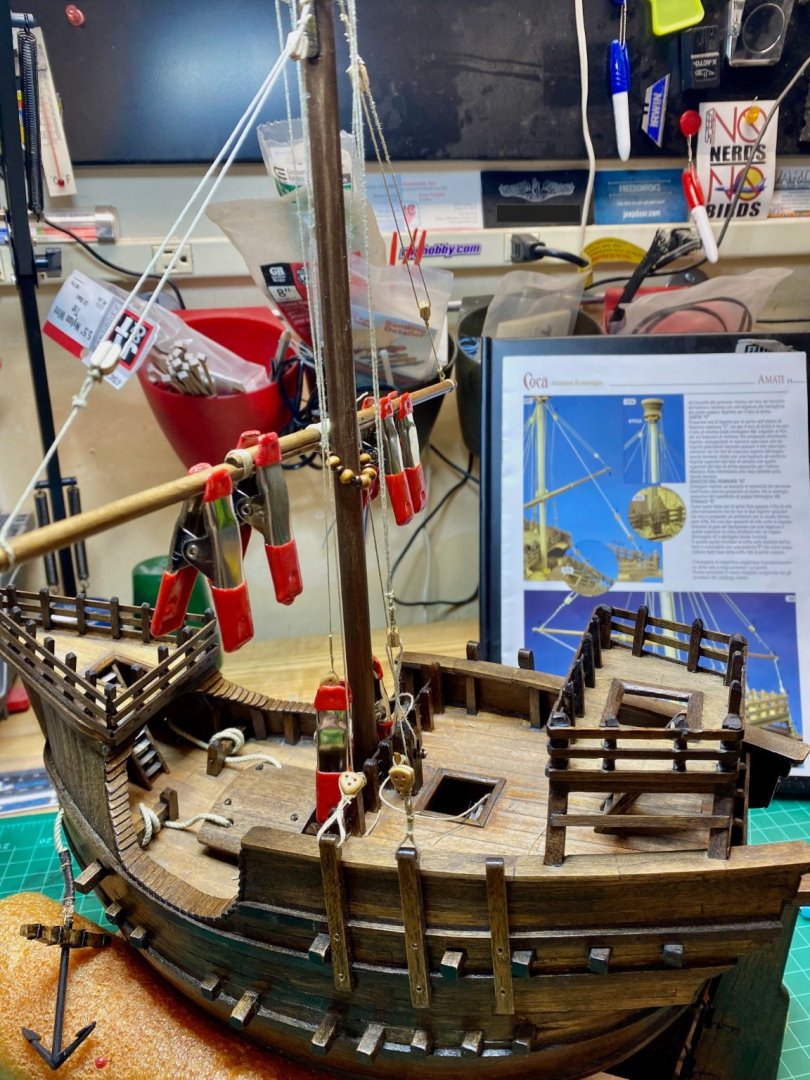
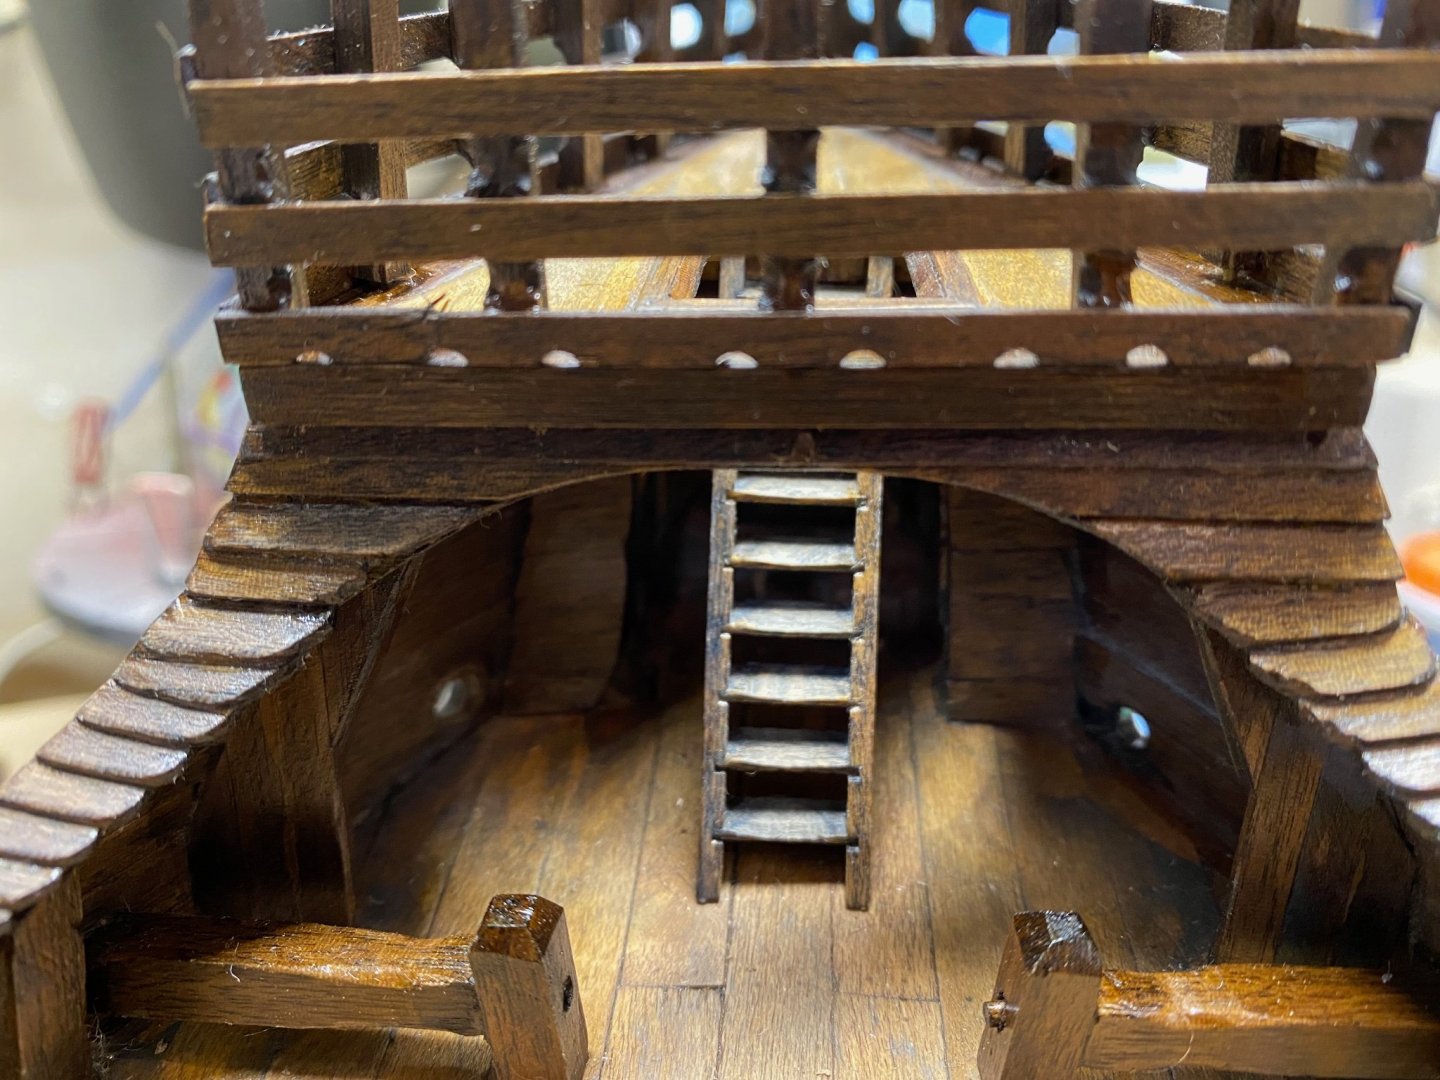
Ladders, how I loathe thee. I started off with the intent of making a rope ladder, placing knots every .5" (only to realize later they should have been placed every .25") Here is .5" spacing Here is .25" spacing. I was very unhappy with how loose the rungs were. Frustrated, I decided to go with wooden slats. I used some left over wood from the kit and slotted the ends to tightly grip the ropes. Once the ladder was complete and I was happy with the spacing, I coated the unstained rungs in shellac to seal them and "lock" them to the ropes. I am not pleased with how the sail turned out and will likely cut it off and replace it with finer cloth eventually. The fabric Amati included was heavily starched making the sagging sausage more difficult. I'm assuming they used the same fabric from kits with unfurled sails where the starch would be a boon.


-
Wooden Tugboat Model Suggestions
Clark Griswold replied to bigcreekdad's topic in Wood ship model kits
Although intended for R/C, the Dumas tugs can be built as static models. They can be somewhat of a challenge due to the subpar materials and plans but fun nevertheless. Of their tugs, I have built the Jenny Lee and Little Shelly Foss. I would recommend the Lord Nelson Victory Tug (its on my list of future builds). -
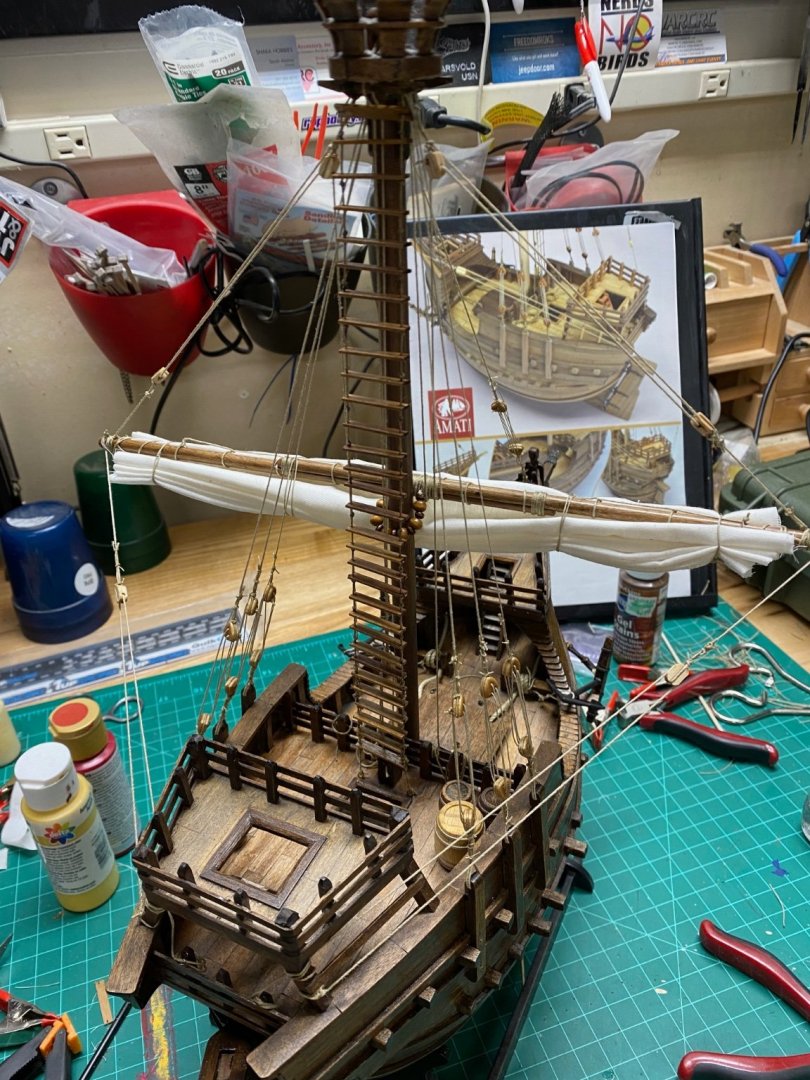
One little detail I forgot to mention is I did my own little mast stepping ceremony. I came across a package of sterling silver beads at the craft store for $5 and decided why not. I now have enough silver beads to step every ship model mast I'll ever build. I simply put the bead in my jewelers vise with the hole on the jaw face and crushed it to about .25mm. Keeping the orientation the hole correct made it quite easy to pin it to the mast base.
-
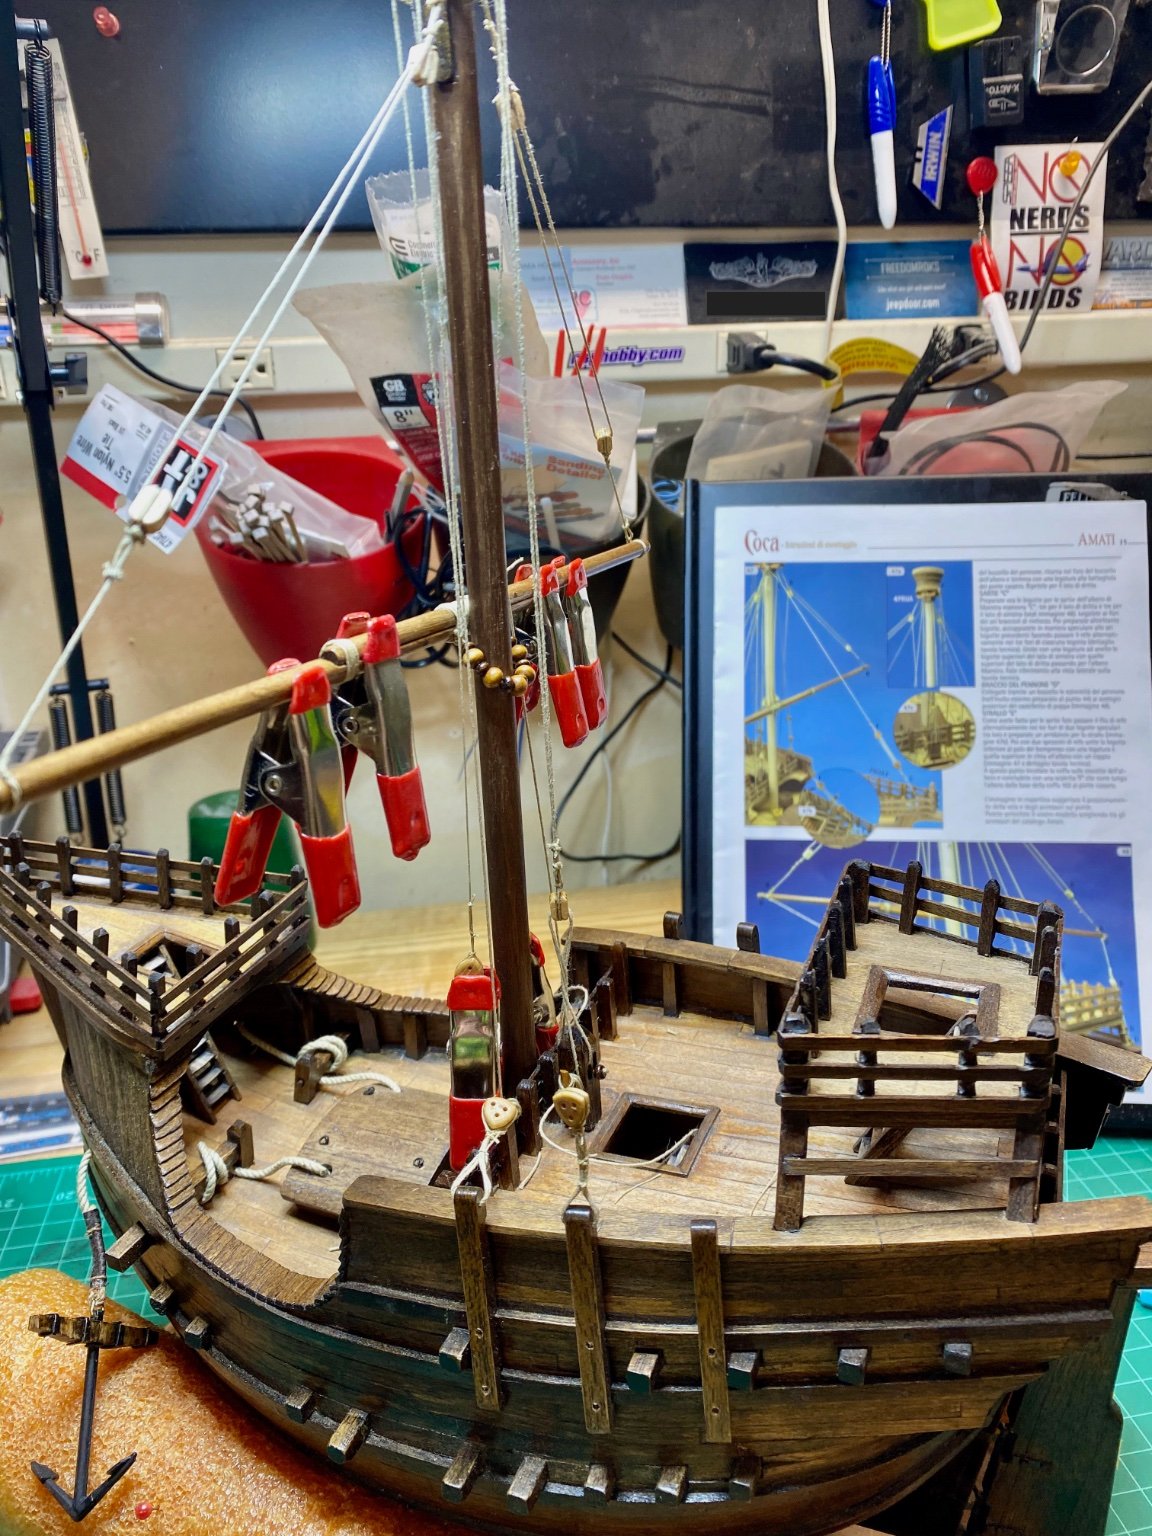
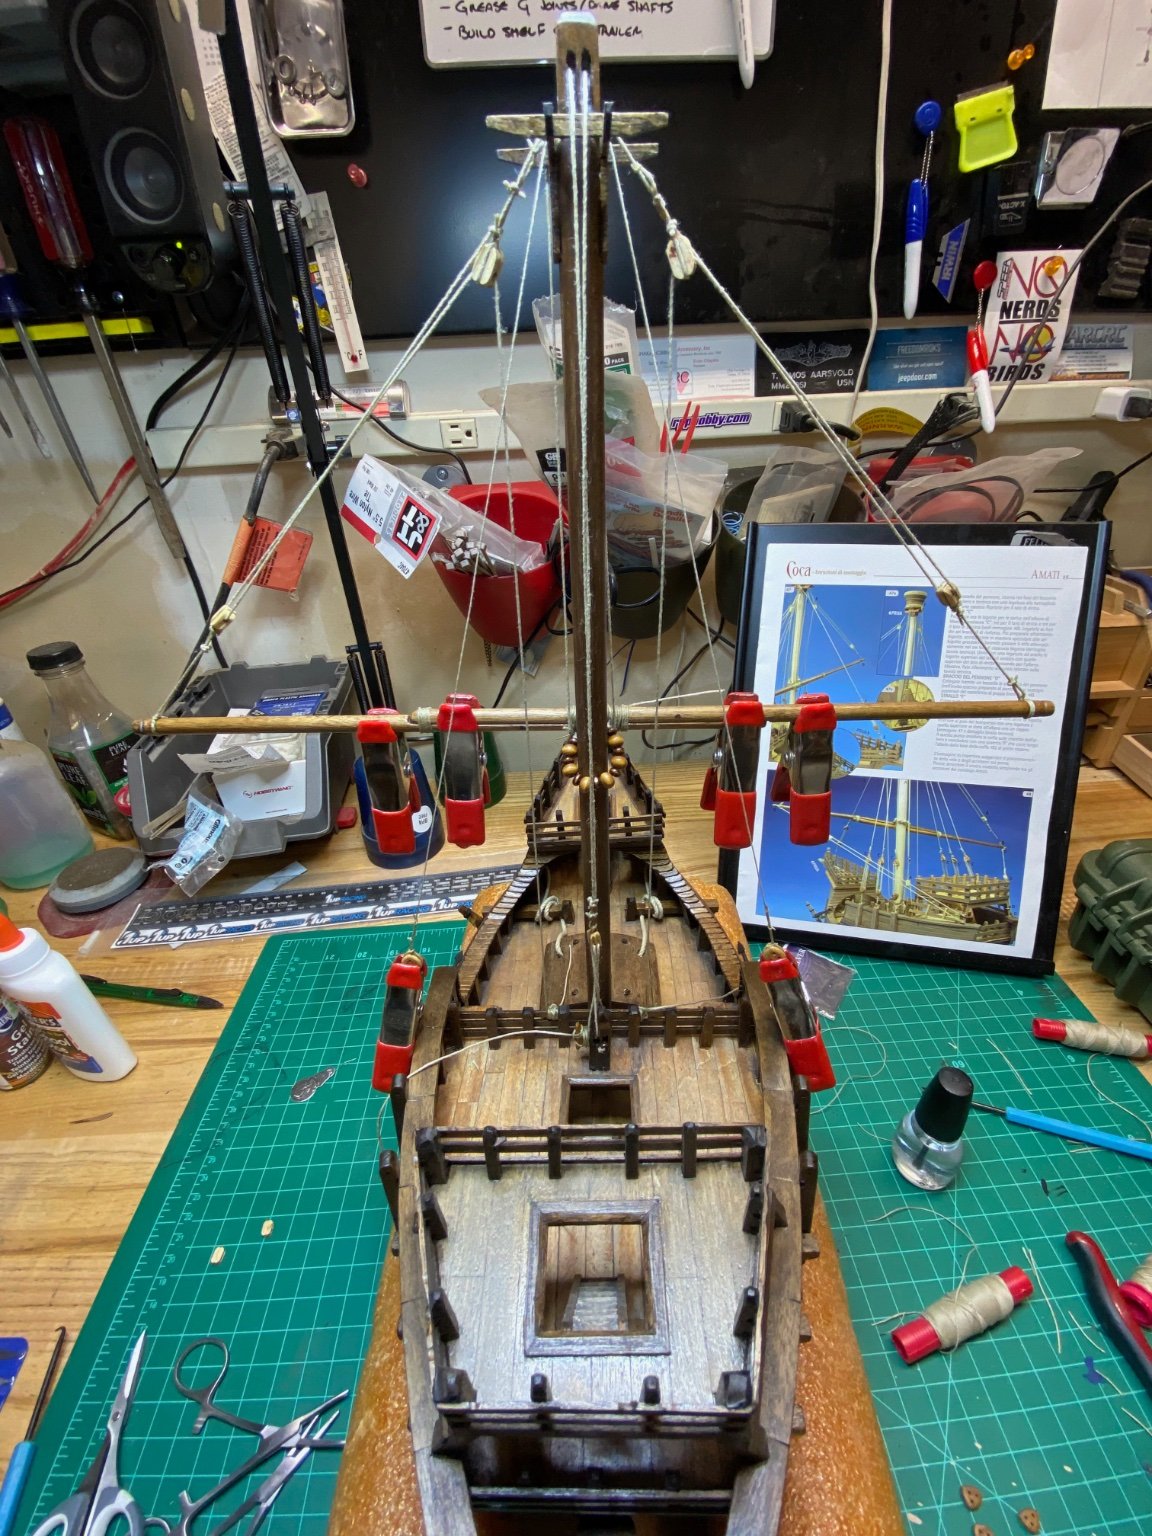
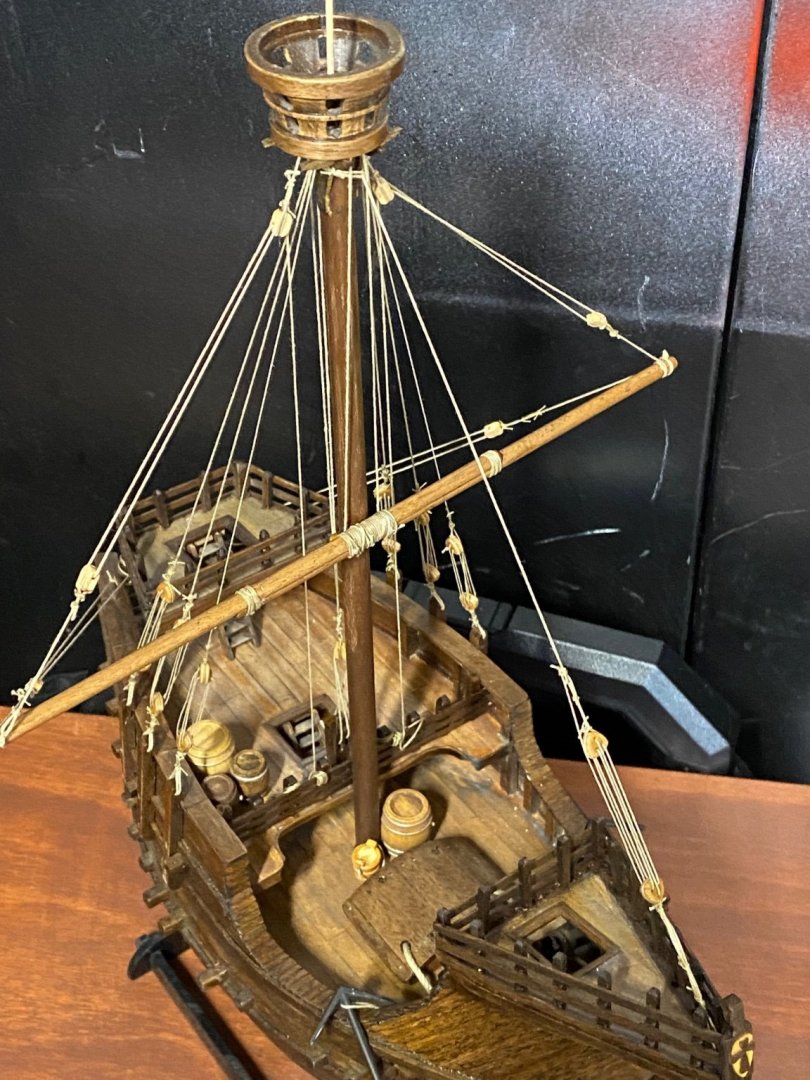
The real reason I chose this model was upon me... learning how to do rigging. It wasn't as bad as I was expecting, but it certainly had a learning curve. I'm still not convinced I achieved taut enough lines, but passable for a first effort. I used clear nail polish to help set the knots. Here is where I'm at as of this evening. All that remains is the mast ladder and sail. I find it odd Amati included the sail material but neglected any directions or mention of attaching it (same for the ladder). Is the ladder 100% composed of line or does it have boards for the rungs?

-
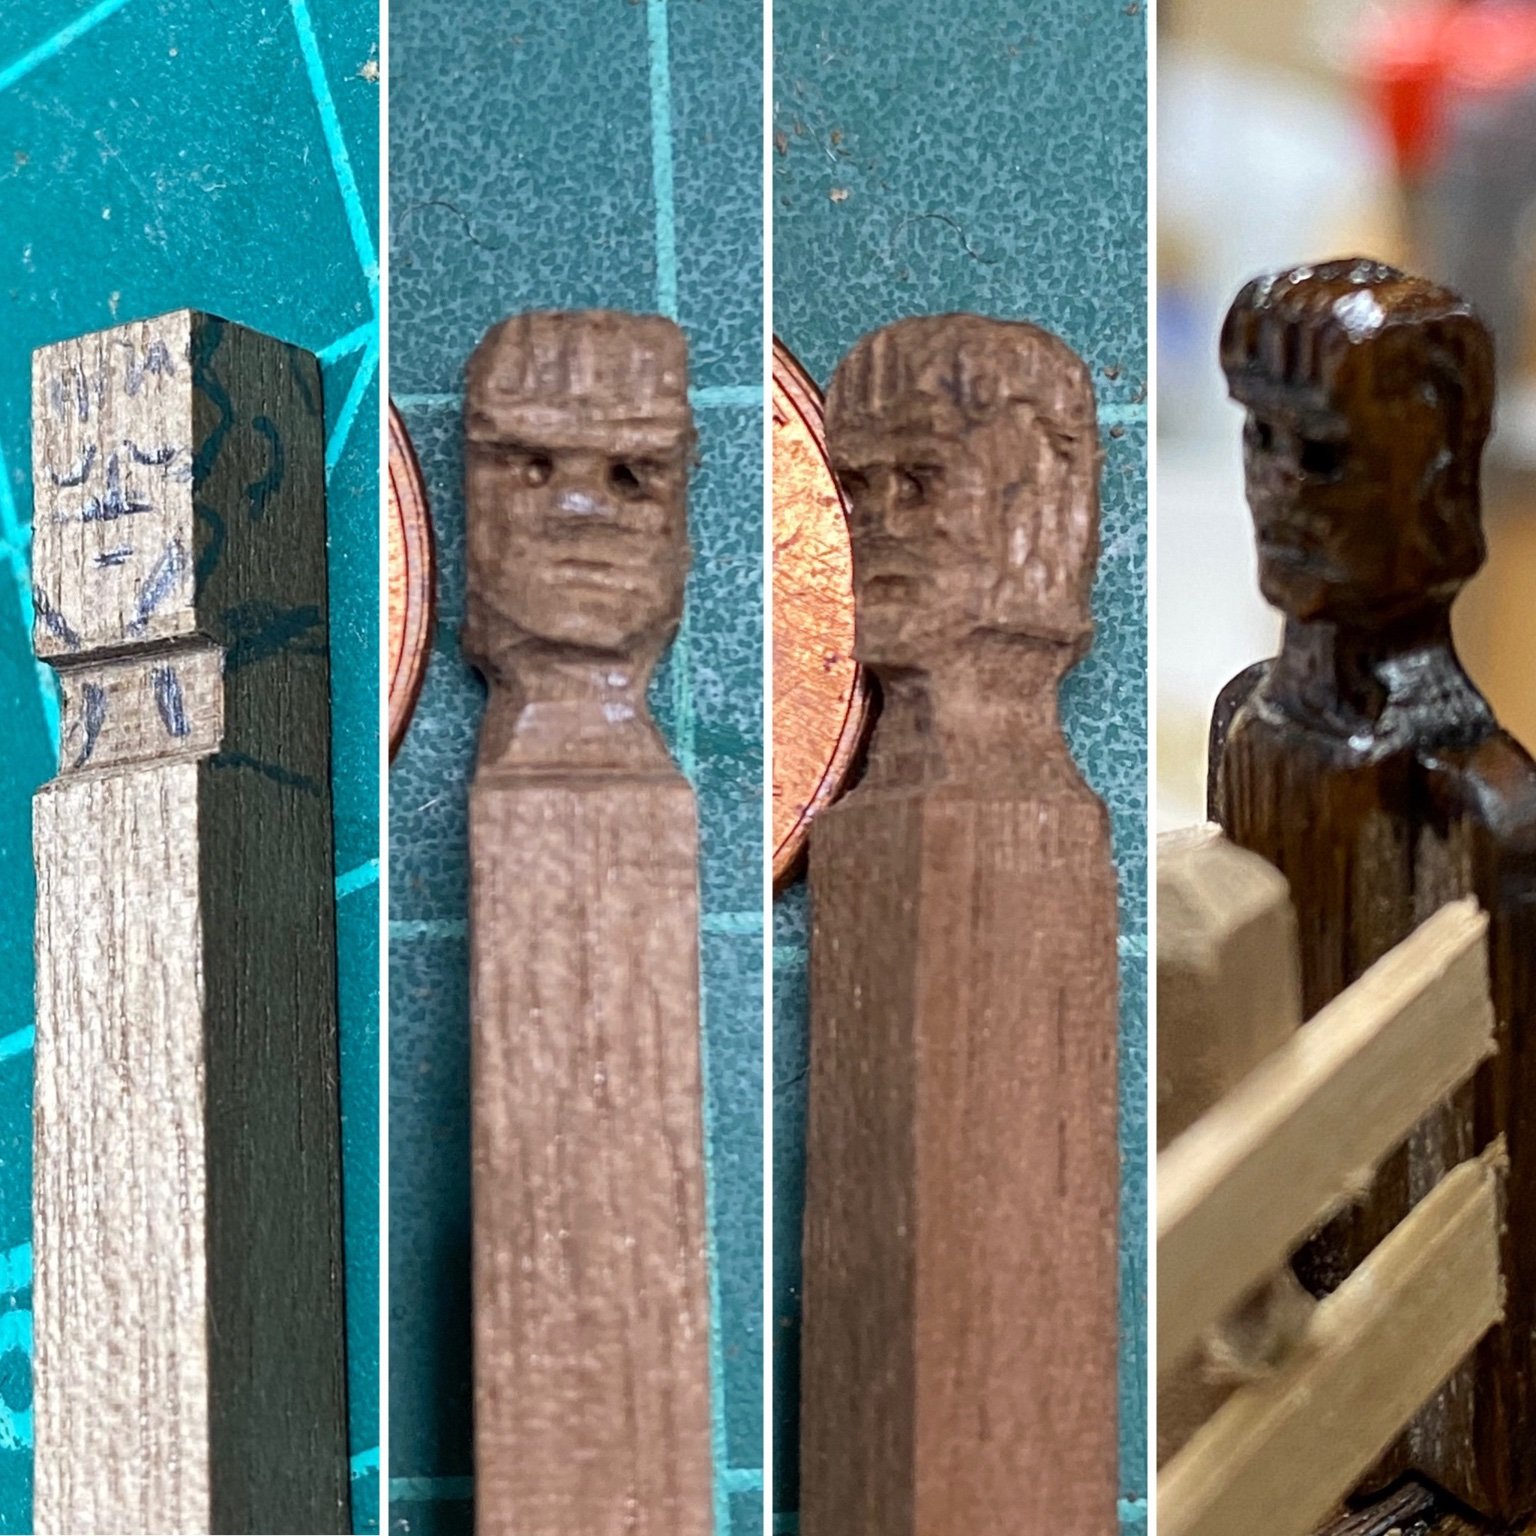
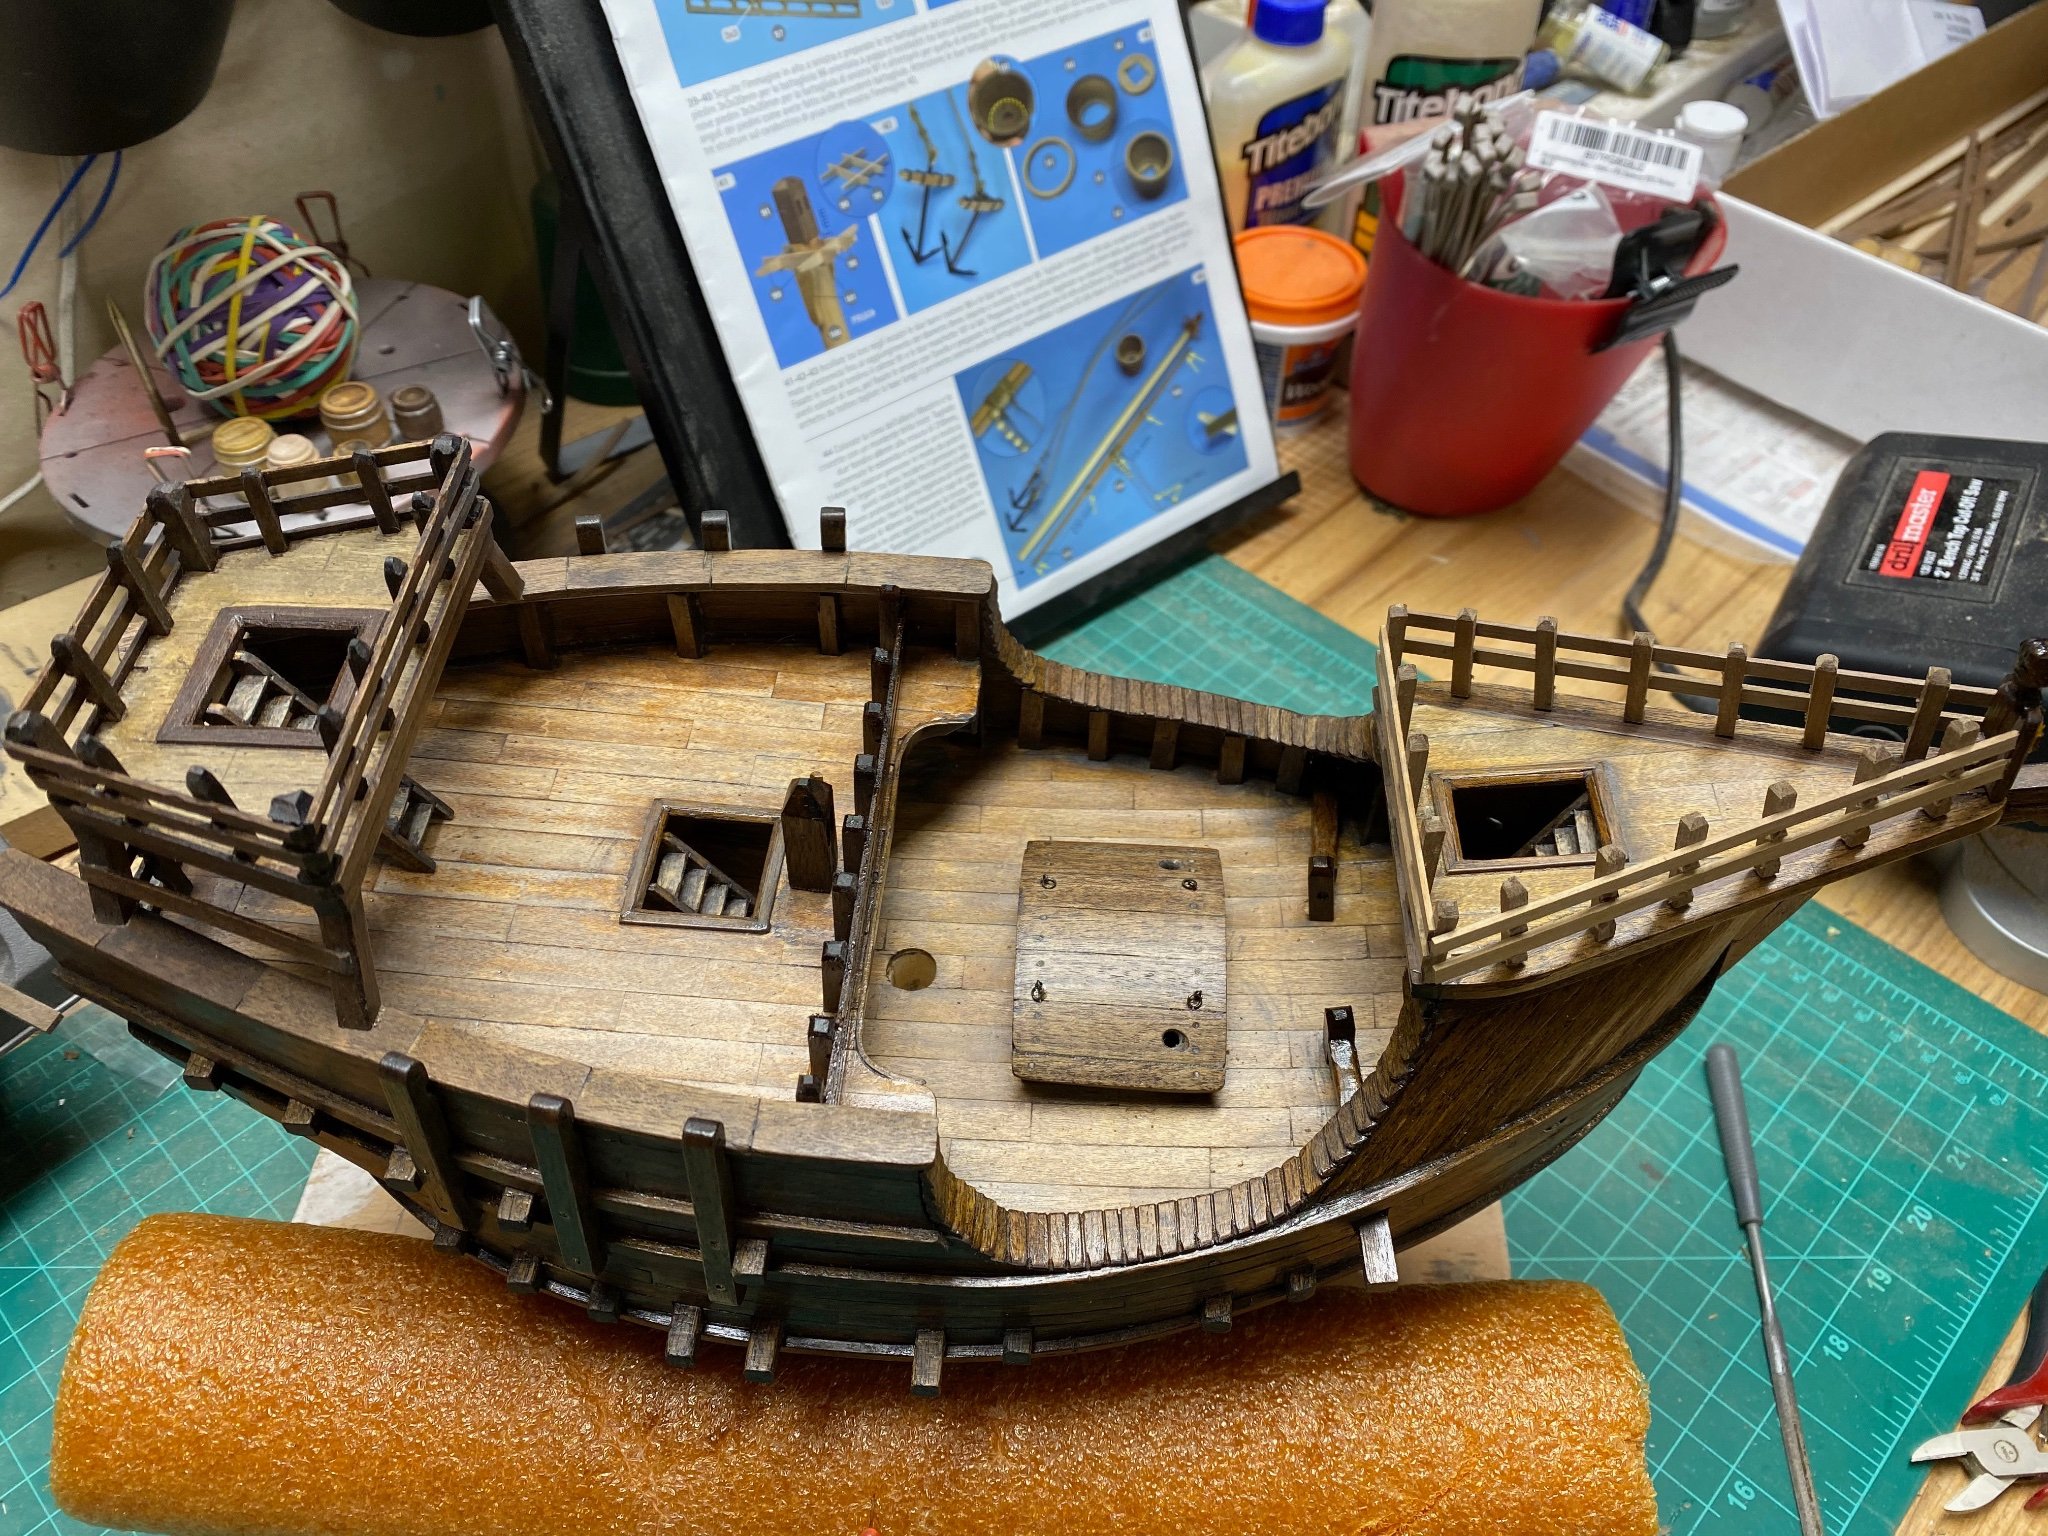
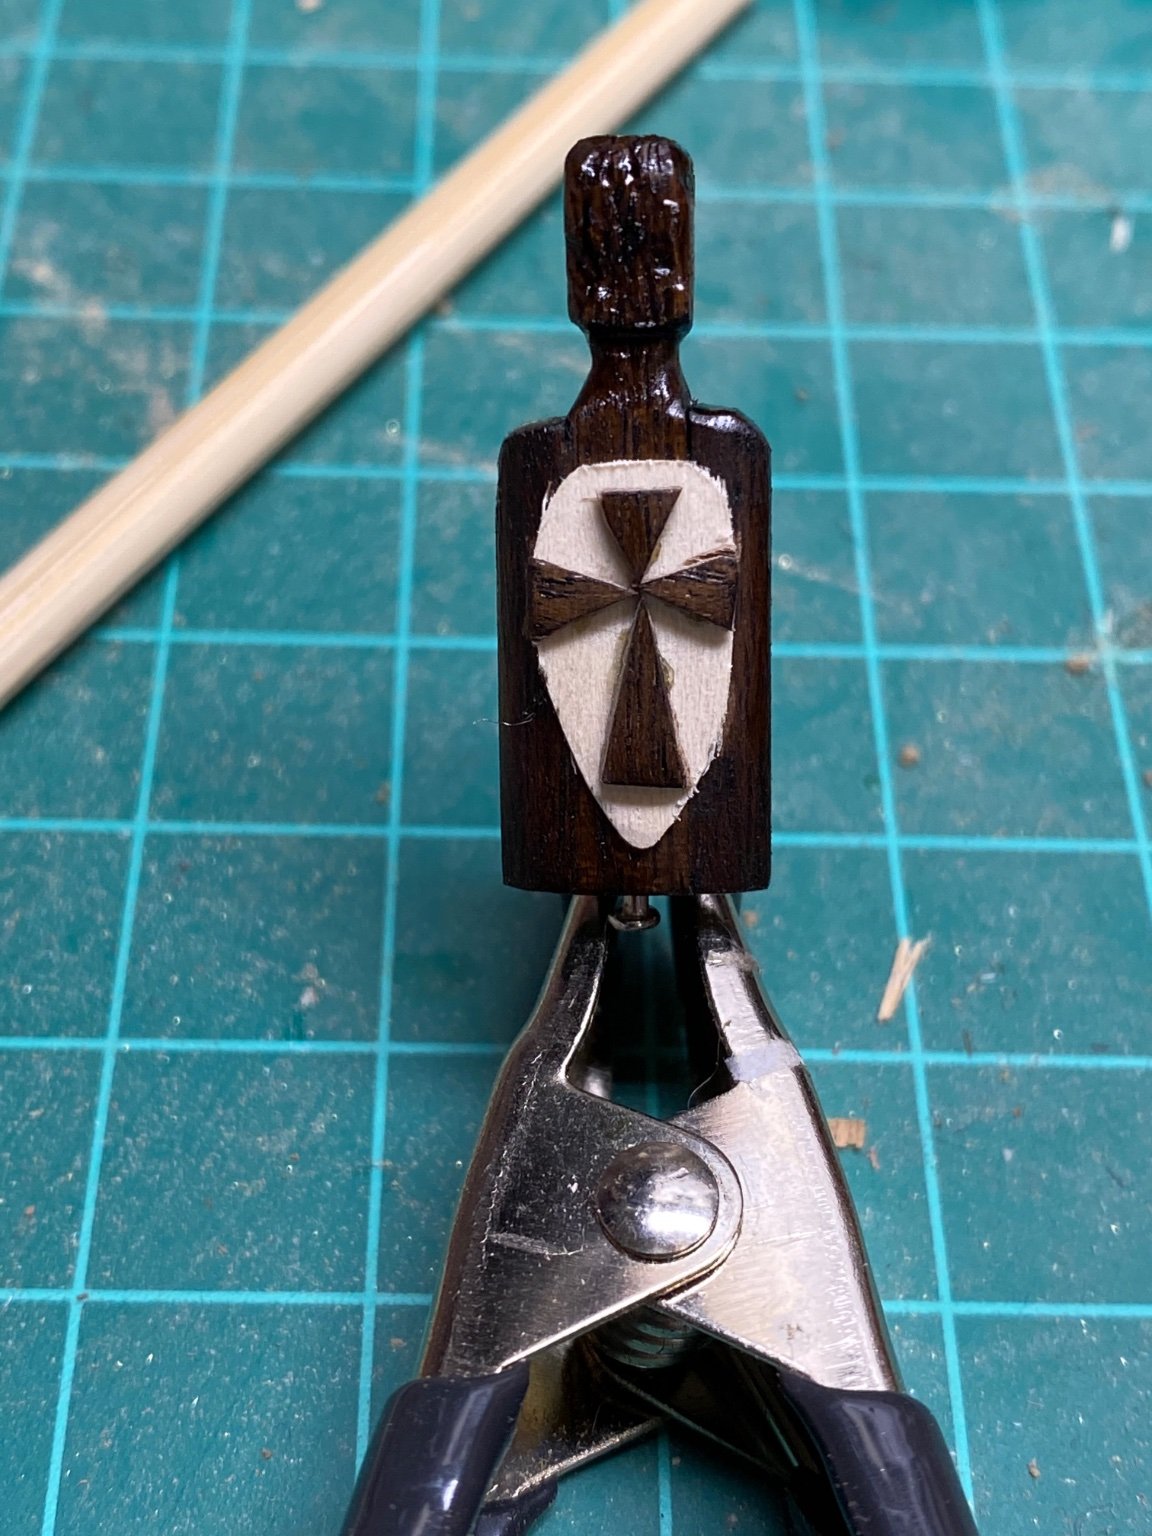
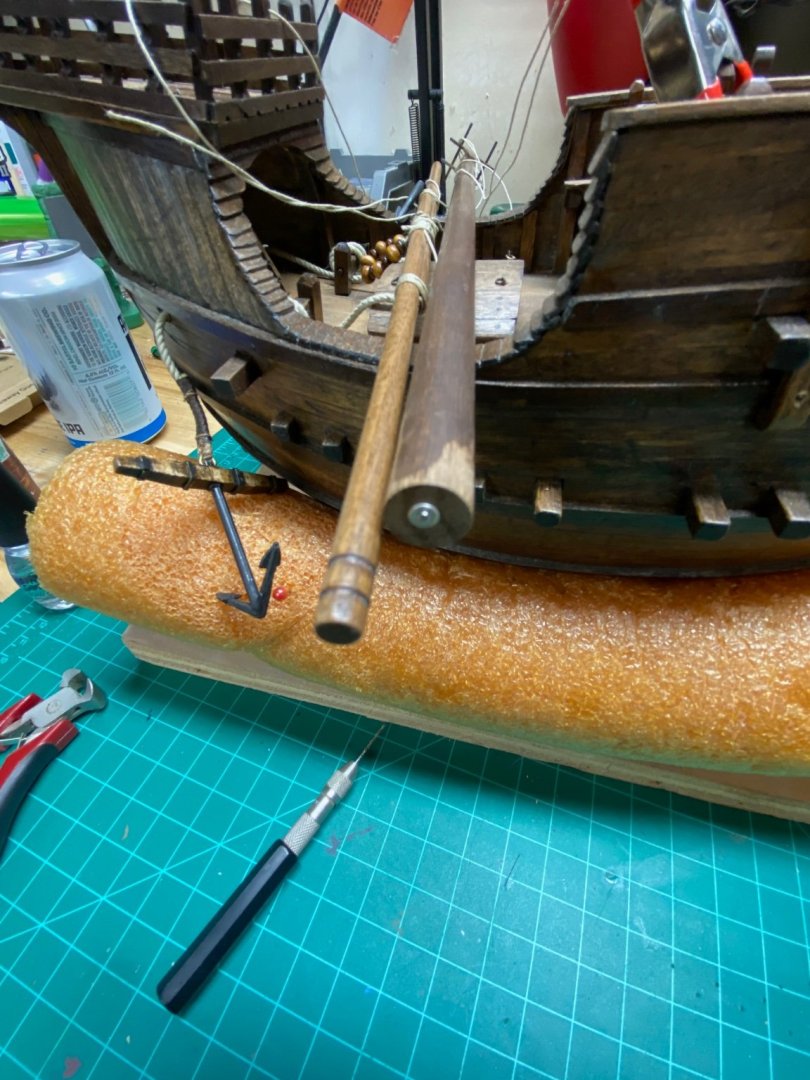
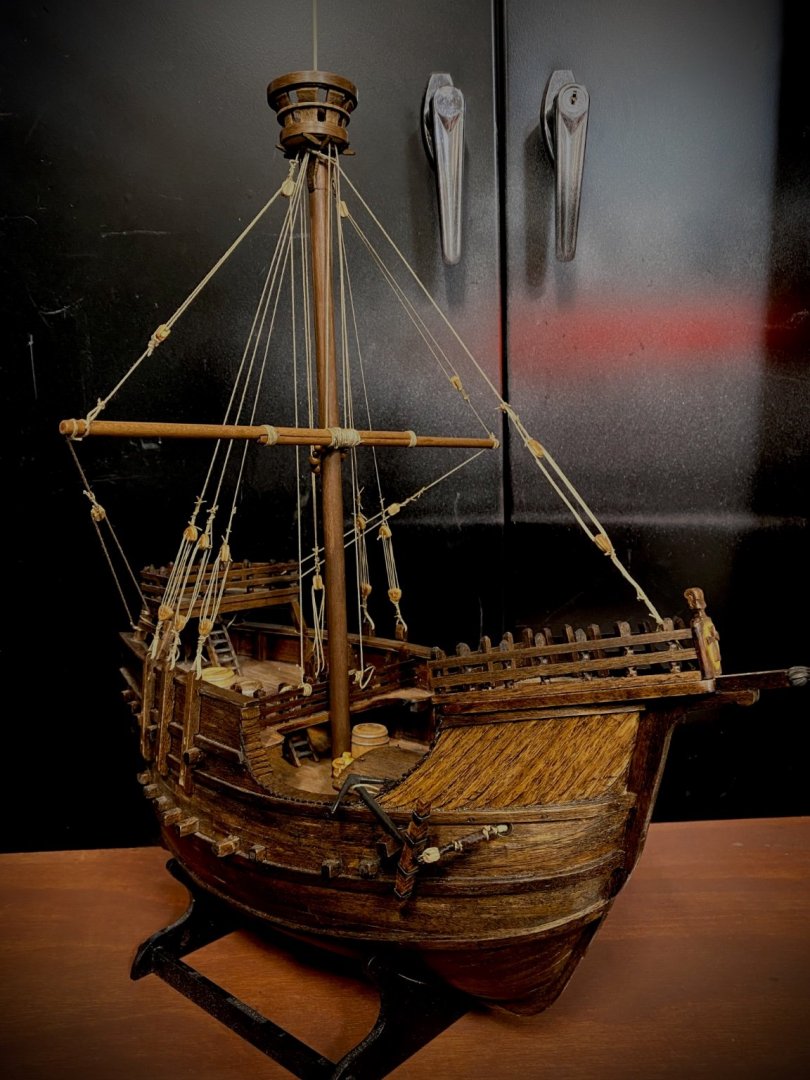
Wow, it has been awhile since I've updated this log. I took the summer off for my other hobbies but I'm back again. I've picked some of this highlights of my build since my last post... I decided to have a little bit of fun and embellished the forward-most bow post Interior pictures showing my revised anchor braces and ladder orientations from the Amati plans.


-
Need some (lots) help...
Clark Griswold replied to Moab's topic in Metal Work, Soldering and Metal Fittings
What about filing it manually first to get the desired profile and then chucking it in the Dremel to clean it up with a red scotchbrite pad? -
The challenge with our model ships is scale "brightness". High polish and shine from a distance is not the same as when viewed full scale... distance dulls it to a certain extent... even on Capt. Bligh's Bounty. Even something as large as 1:10 tends to look fake if it is too shiny. To me, a certain level of dinge adds realism.
-
New to the site and starting out my hobby here
Clark Griswold replied to Robp1025's topic in New member Introductions
Welcome to MSW! -
What were your first tools as a child?
Clark Griswold replied to FlyingFish's topic in Modeling tools and Workshop Equipment
Aside from toys... my first tool set was a hand-me-down X-acto carving set and Montgomery Ward soldering iron when I was 9 or 10yrs old. At that time I was splitting my hobby time between my model trains and plastic models. I think I pretty much stuck to the standard #2 blade but I thought it was really cool to have the other stuff that came with it. I gave the wooden case with the remaining blades and handle to my daughter when she was about the same age. She actually took them with her to art school, used the blades I never used, and keeps sharpening them (she uses them to carve wood blocks for prints).