Jamie Coleman
-
Posts
74 -
Joined
-
Last visited
Content Type
Profiles
Forums
Gallery
Events
Everything posted by Jamie Coleman
-
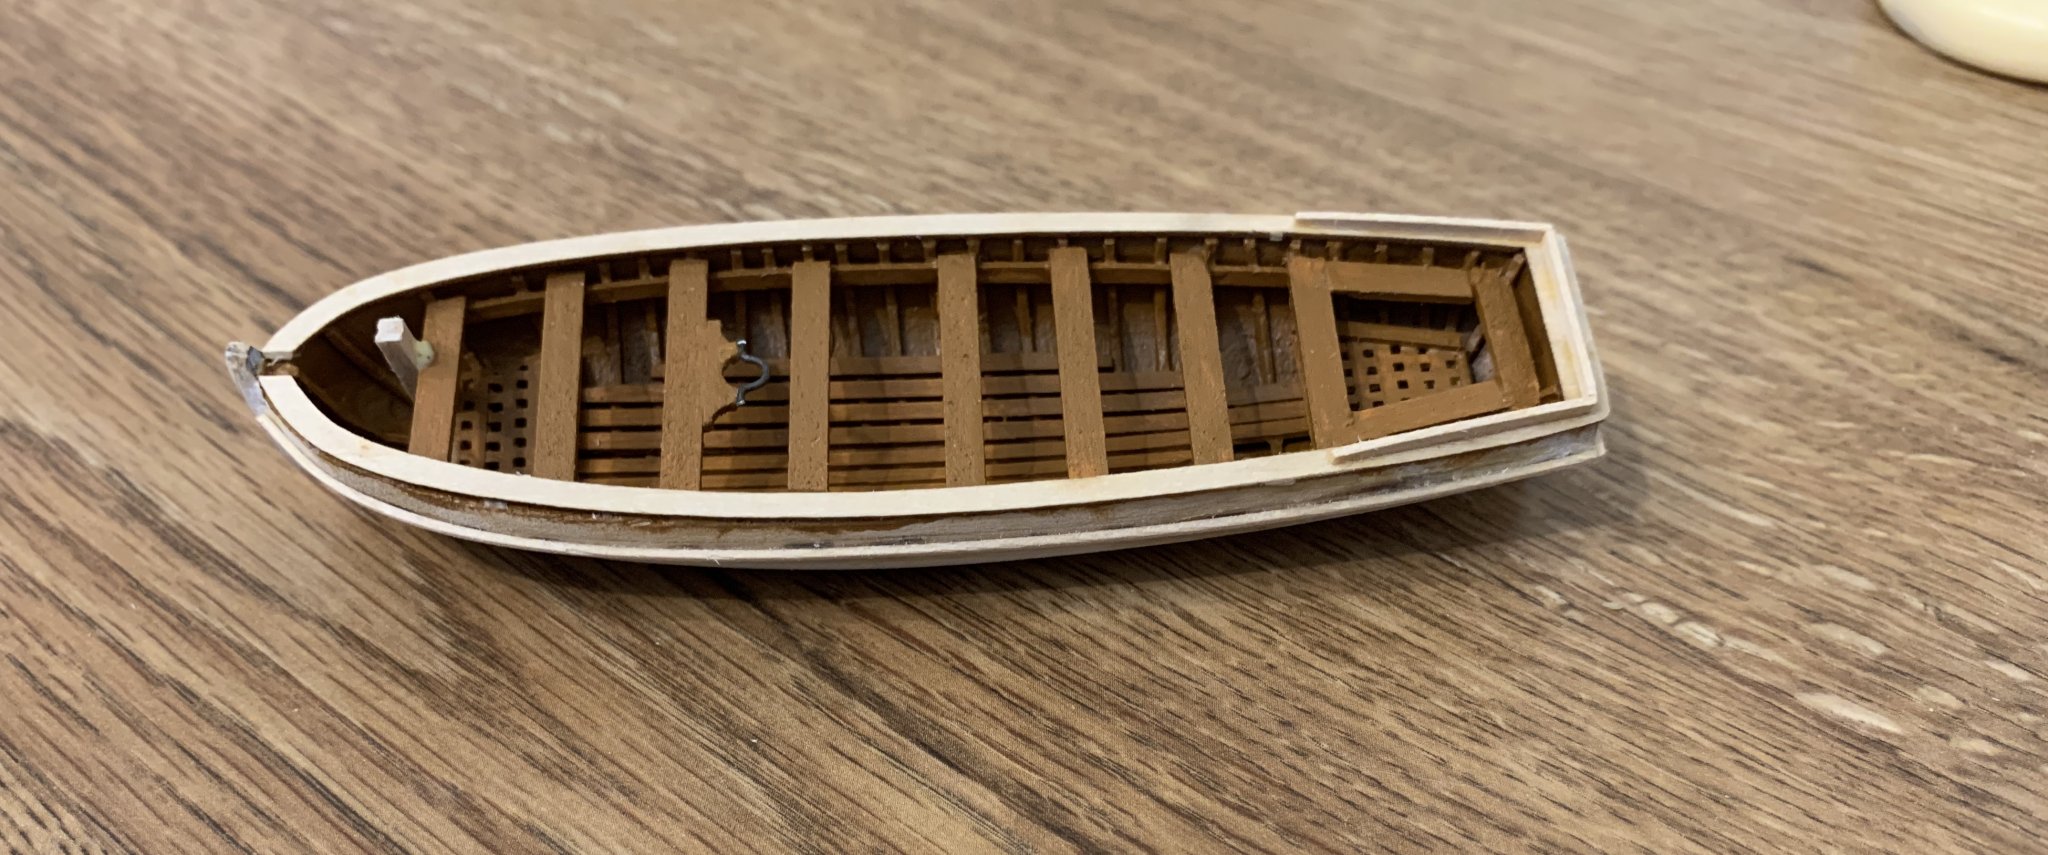
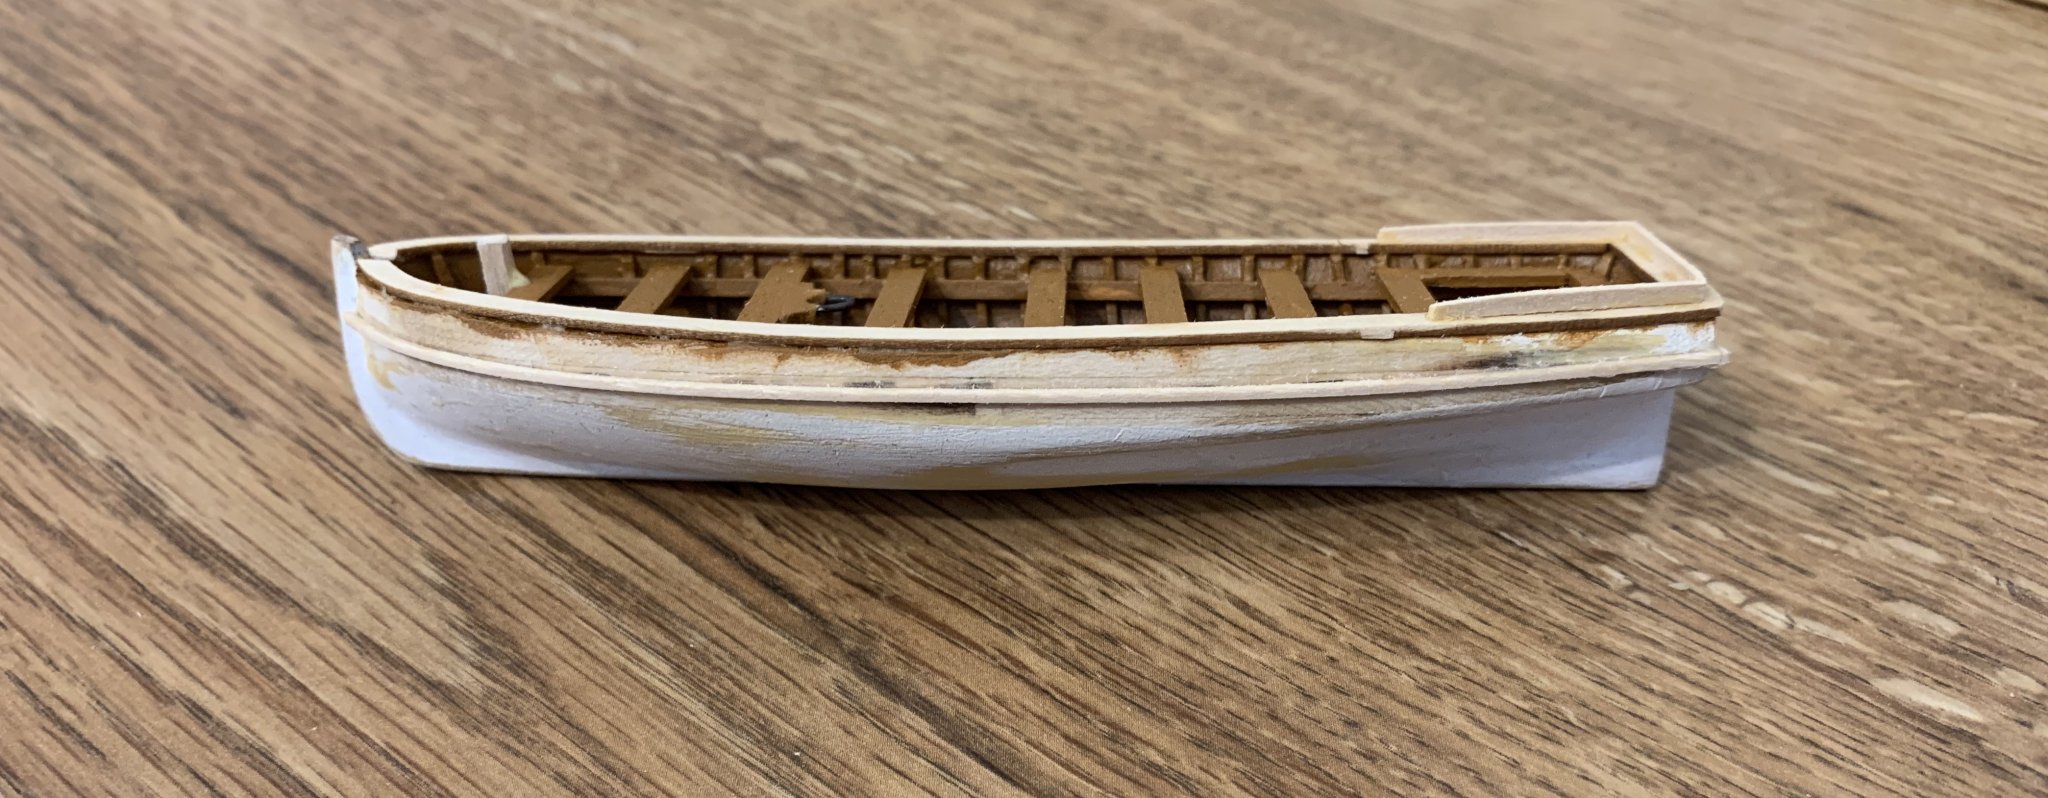
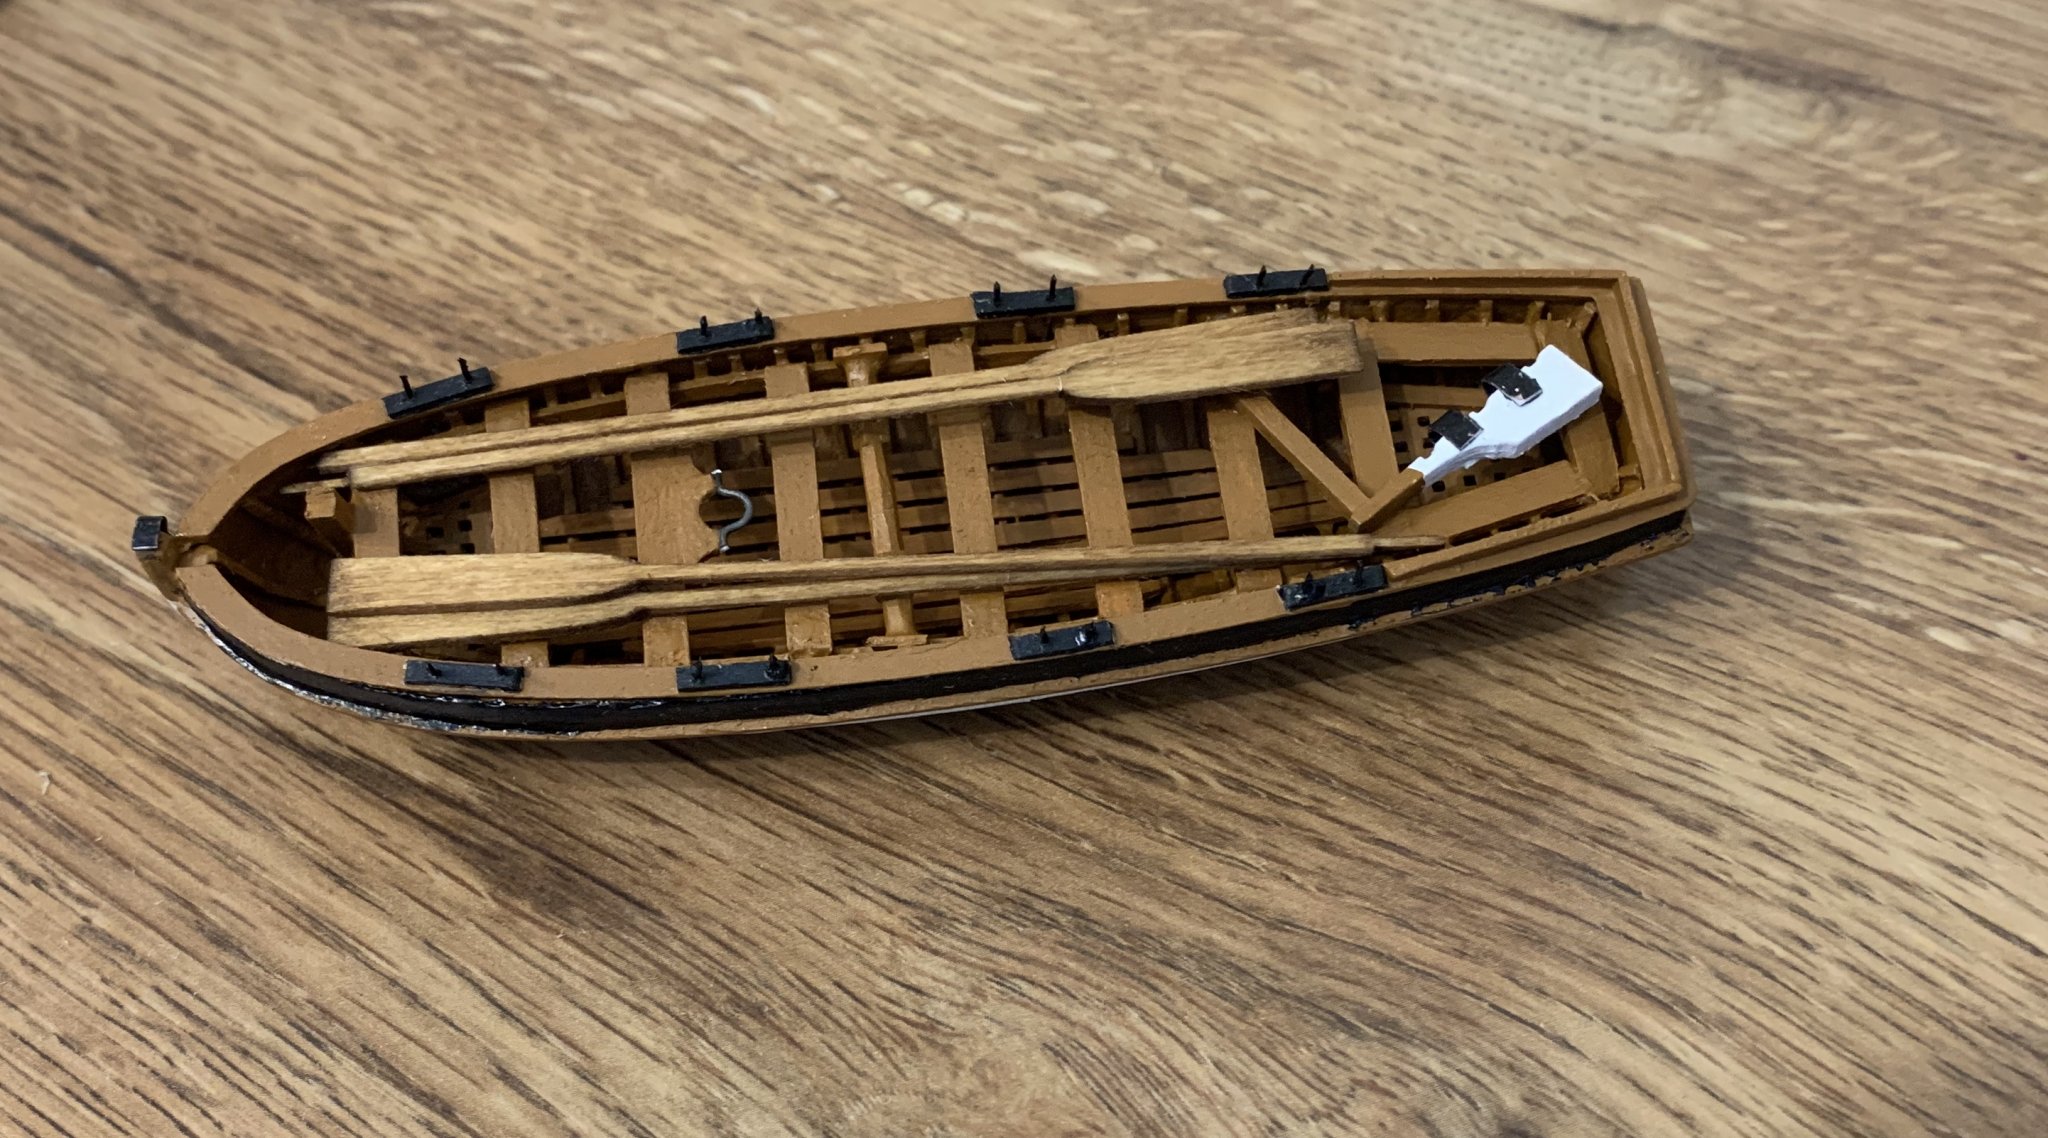
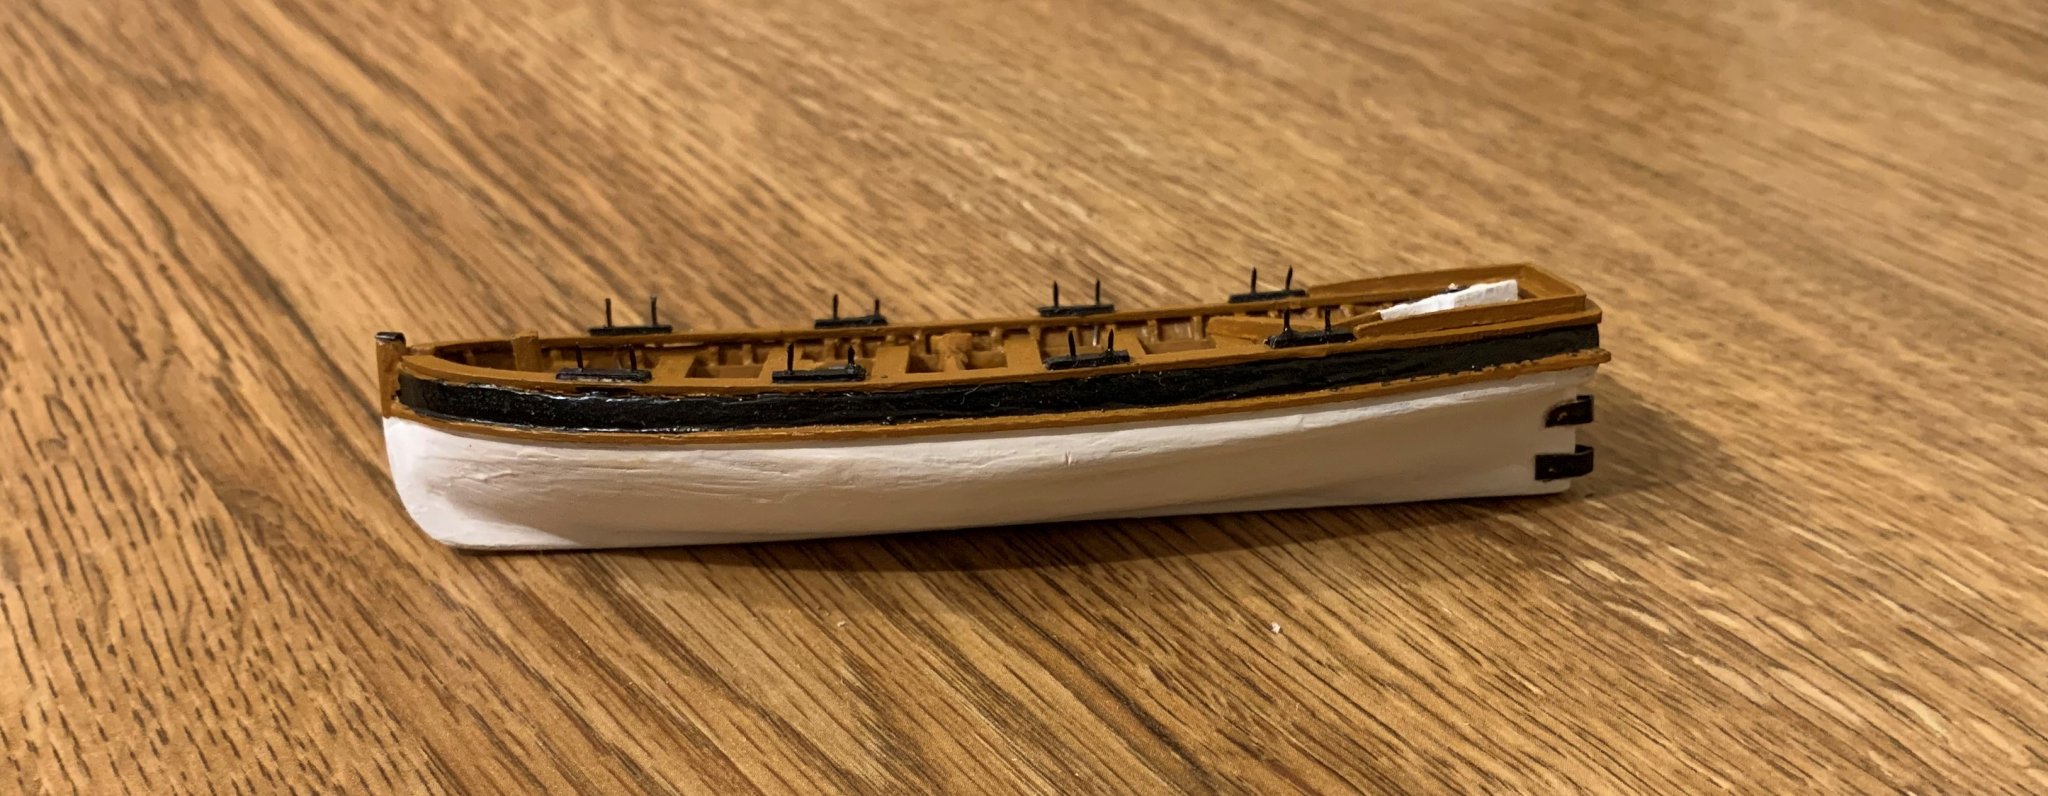
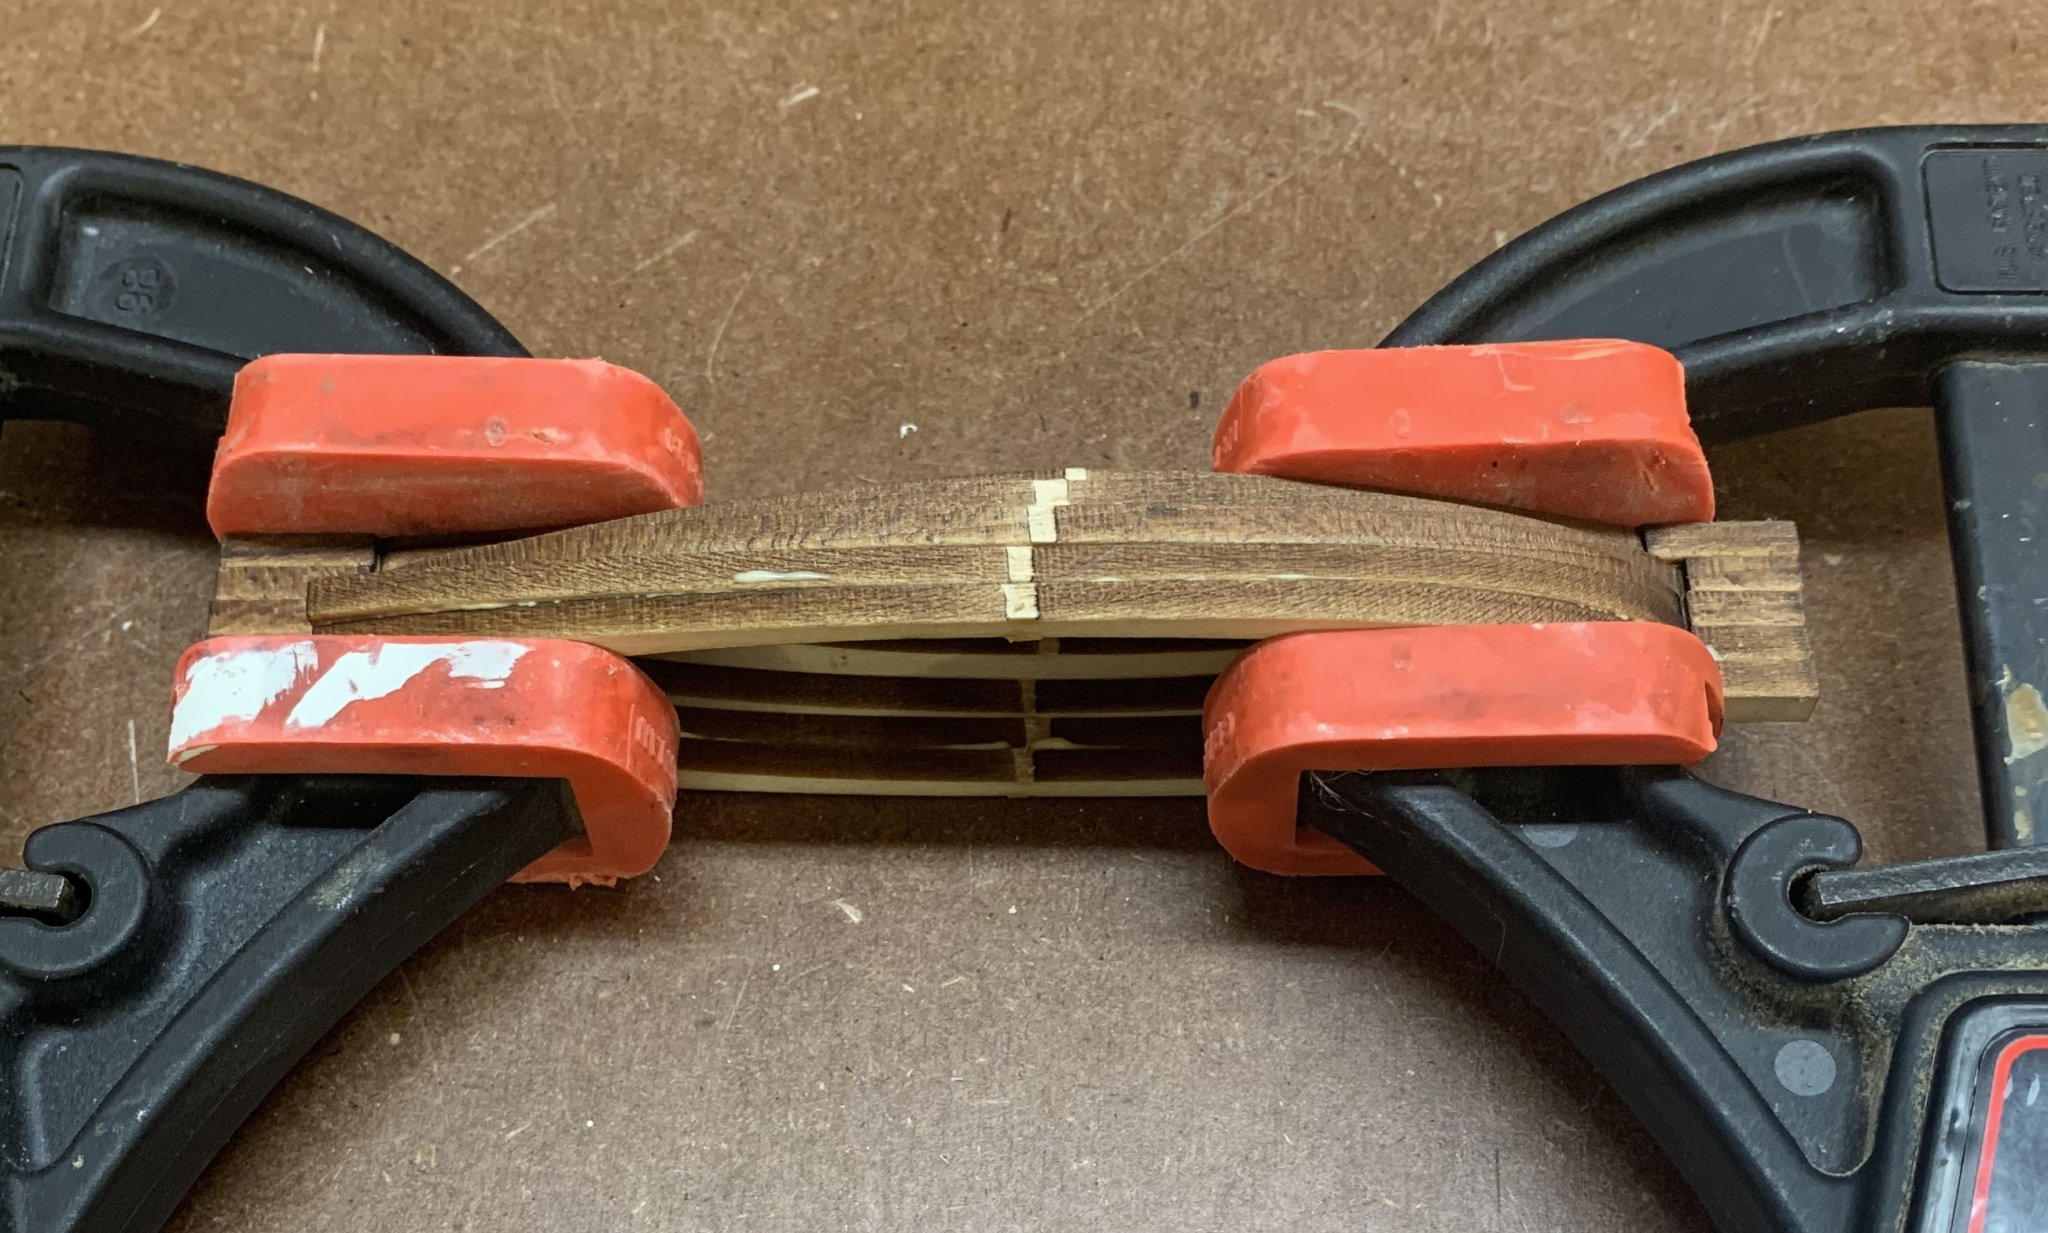
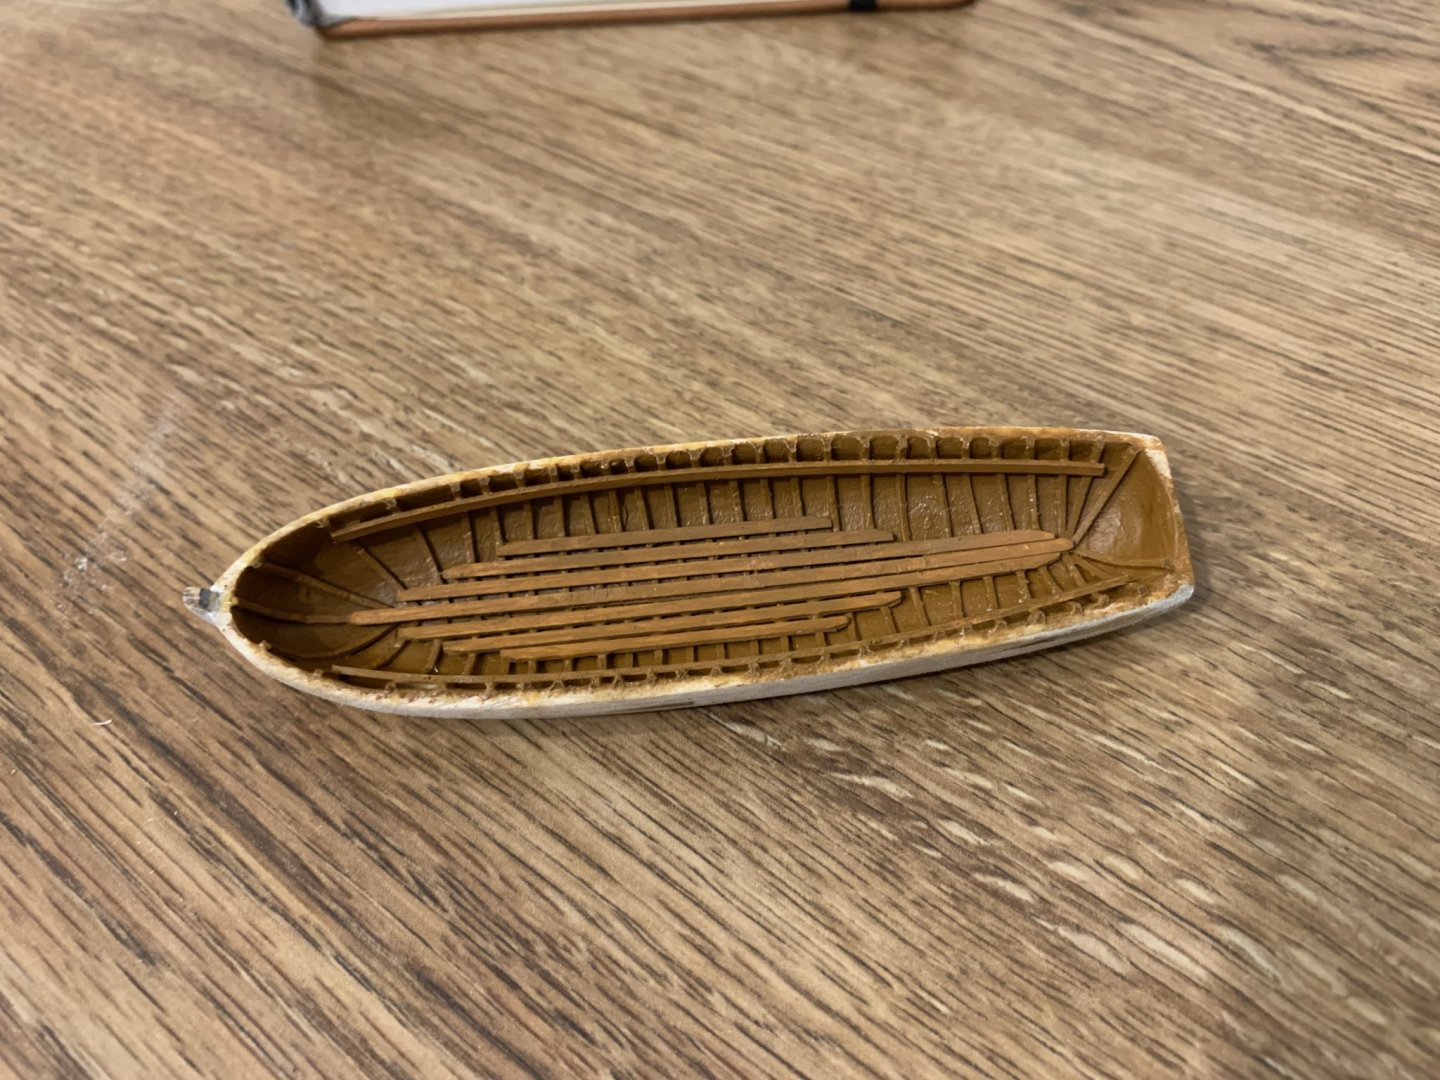
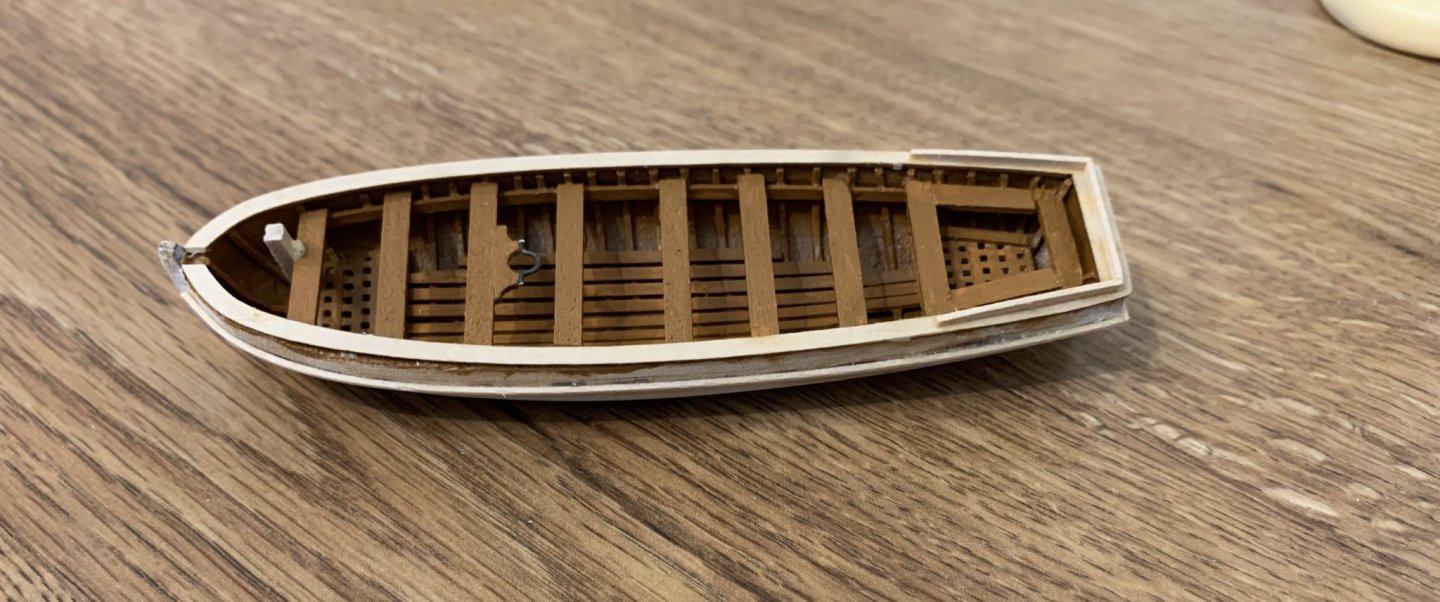
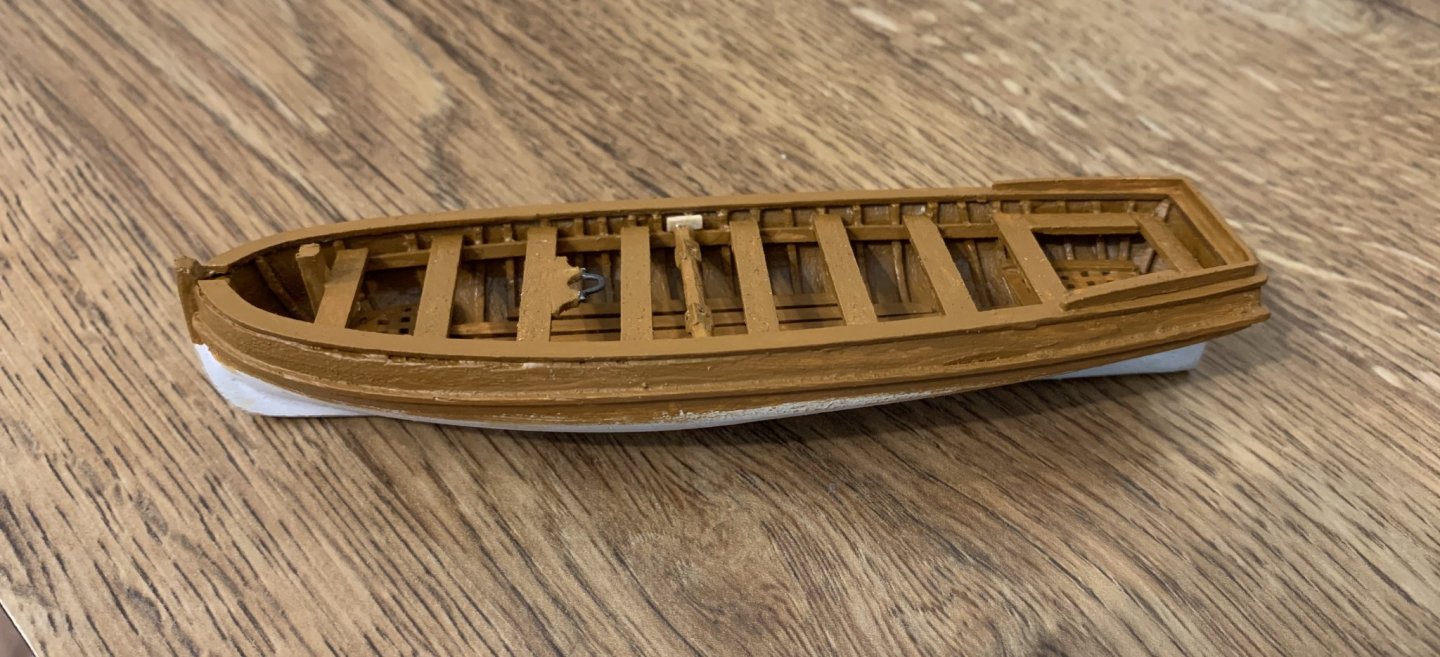
 I've been focusing on the ship's boat, and have completed it. I used some artist's tape as a guide to shaping the hull, to give it a light dip midships. Then laid in the framework, this was some fussy work, no real good way to clamp, so each one was just held in place until it dried enough to let go. The the floor boards and a coat of paint. Gratings, thwarts, cap rail, mast bracketry, splash rail and bowsprit support added next, followed by the winch (carved from a piece of square stock, not perfect, but definitely gives the impression of an octagon). Lastly, the rudder (which is stored inside the boat until needed), oar locks, oars, a few coats of black and white on the hull. So much more detail than the die cast boat from my last project, I'm really happy with the way this turned out.


-
Works been a little quiet, and I’m working from home, so I’ll make a little progress here and there during coffee breaks. Works out nice for letting glue cure between steps.
-
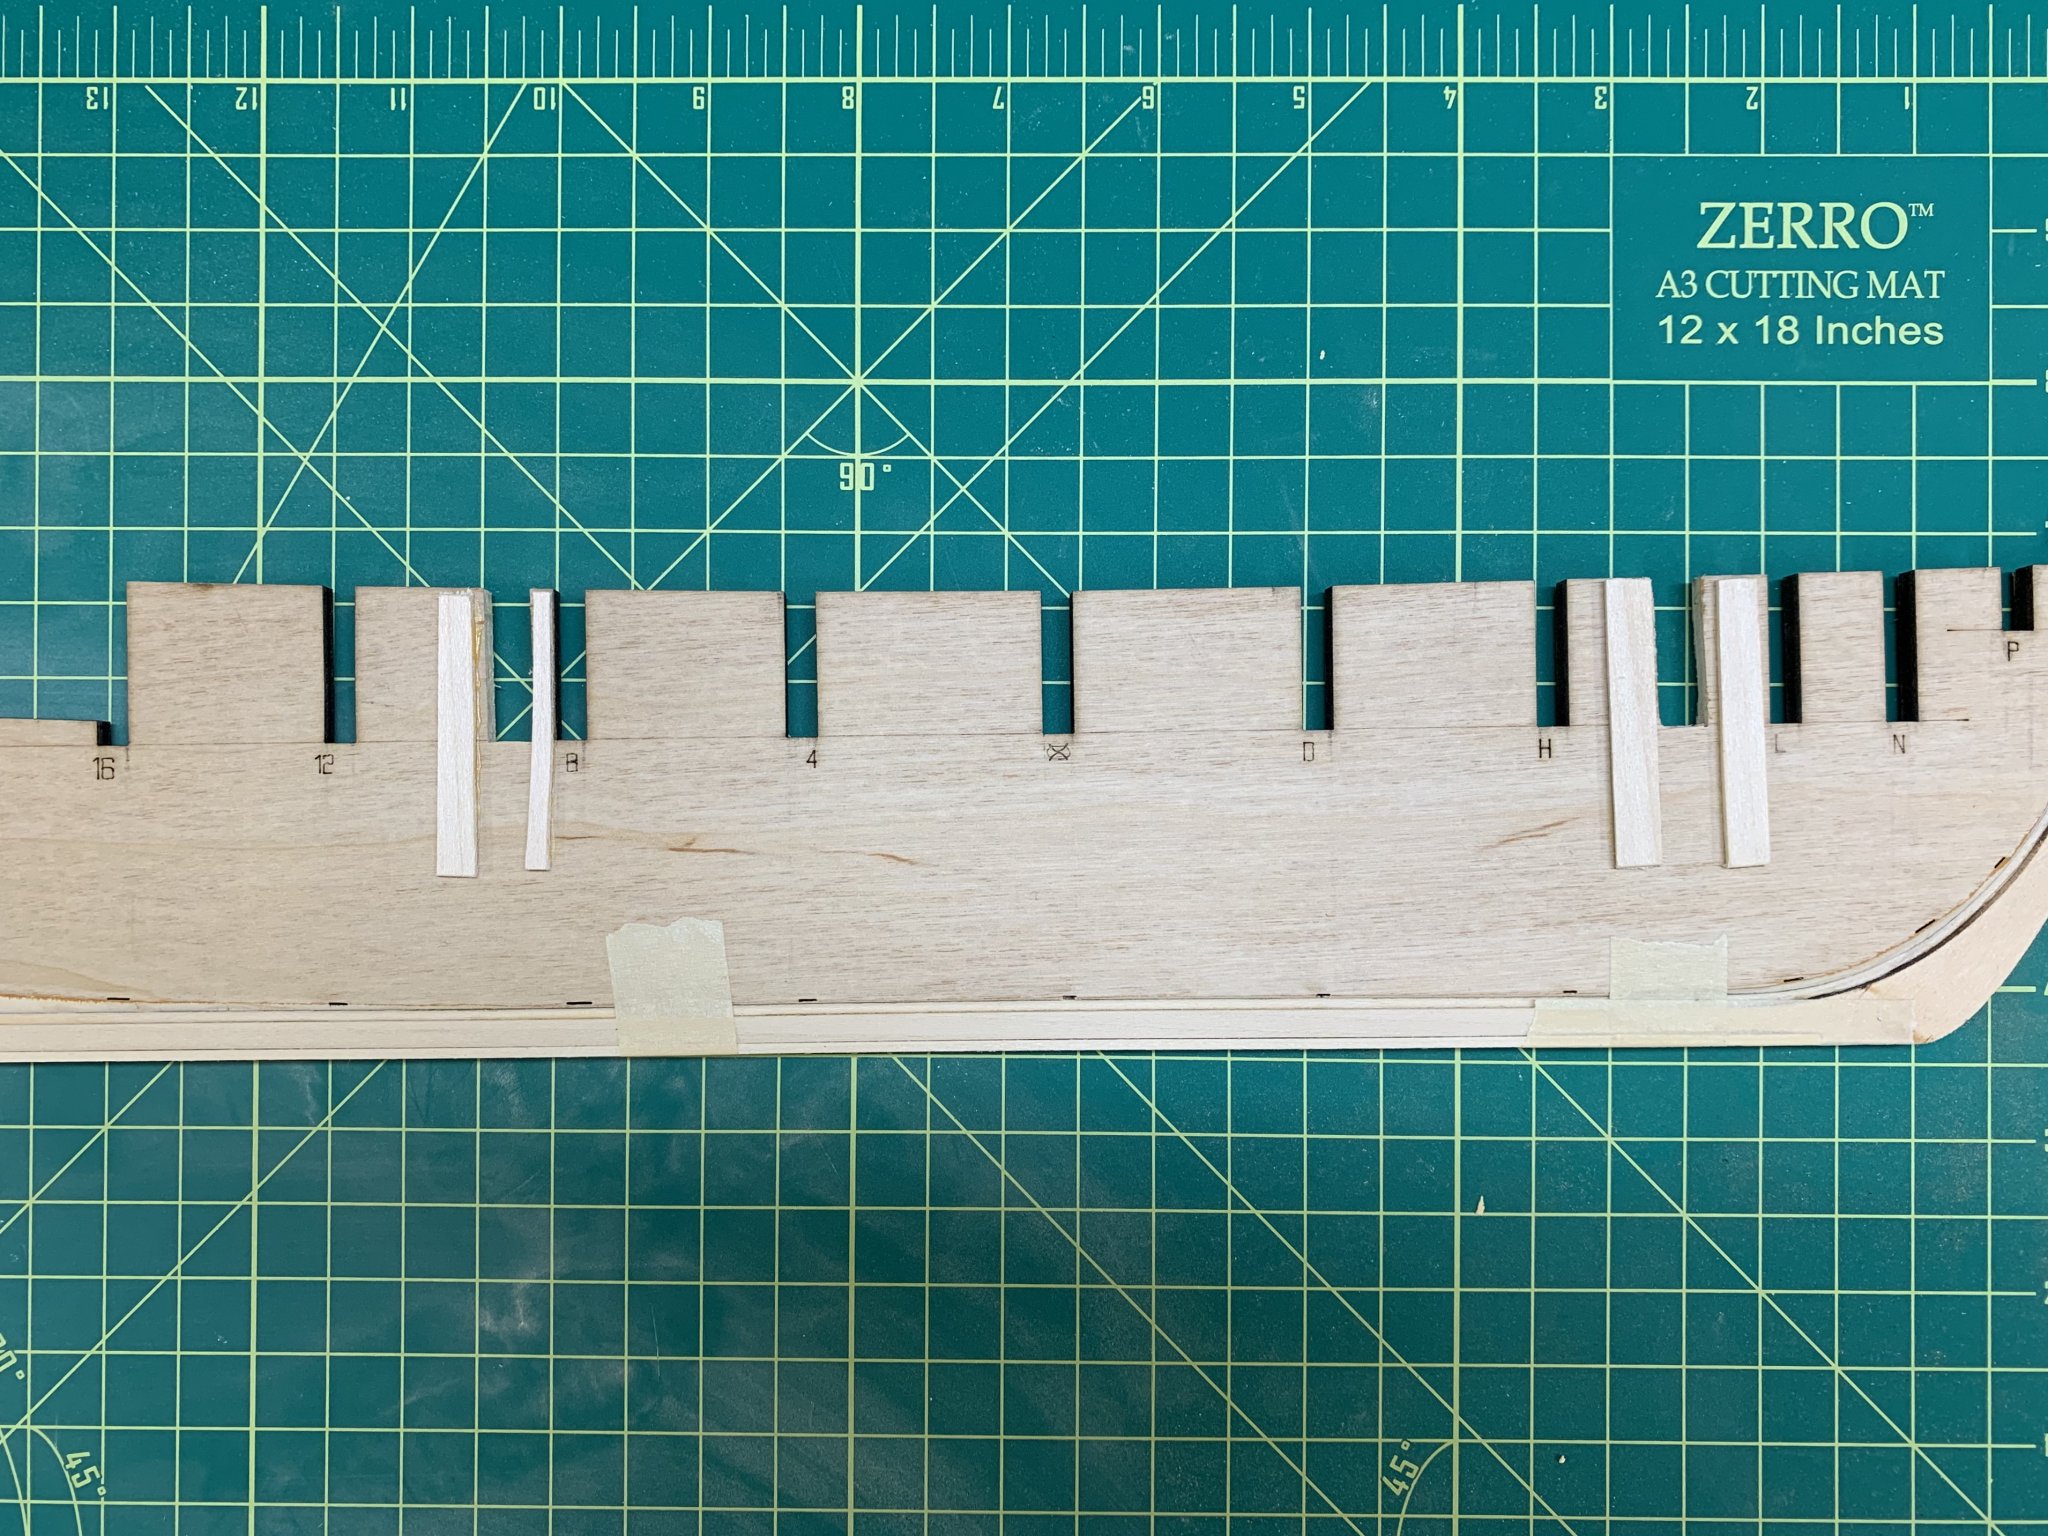
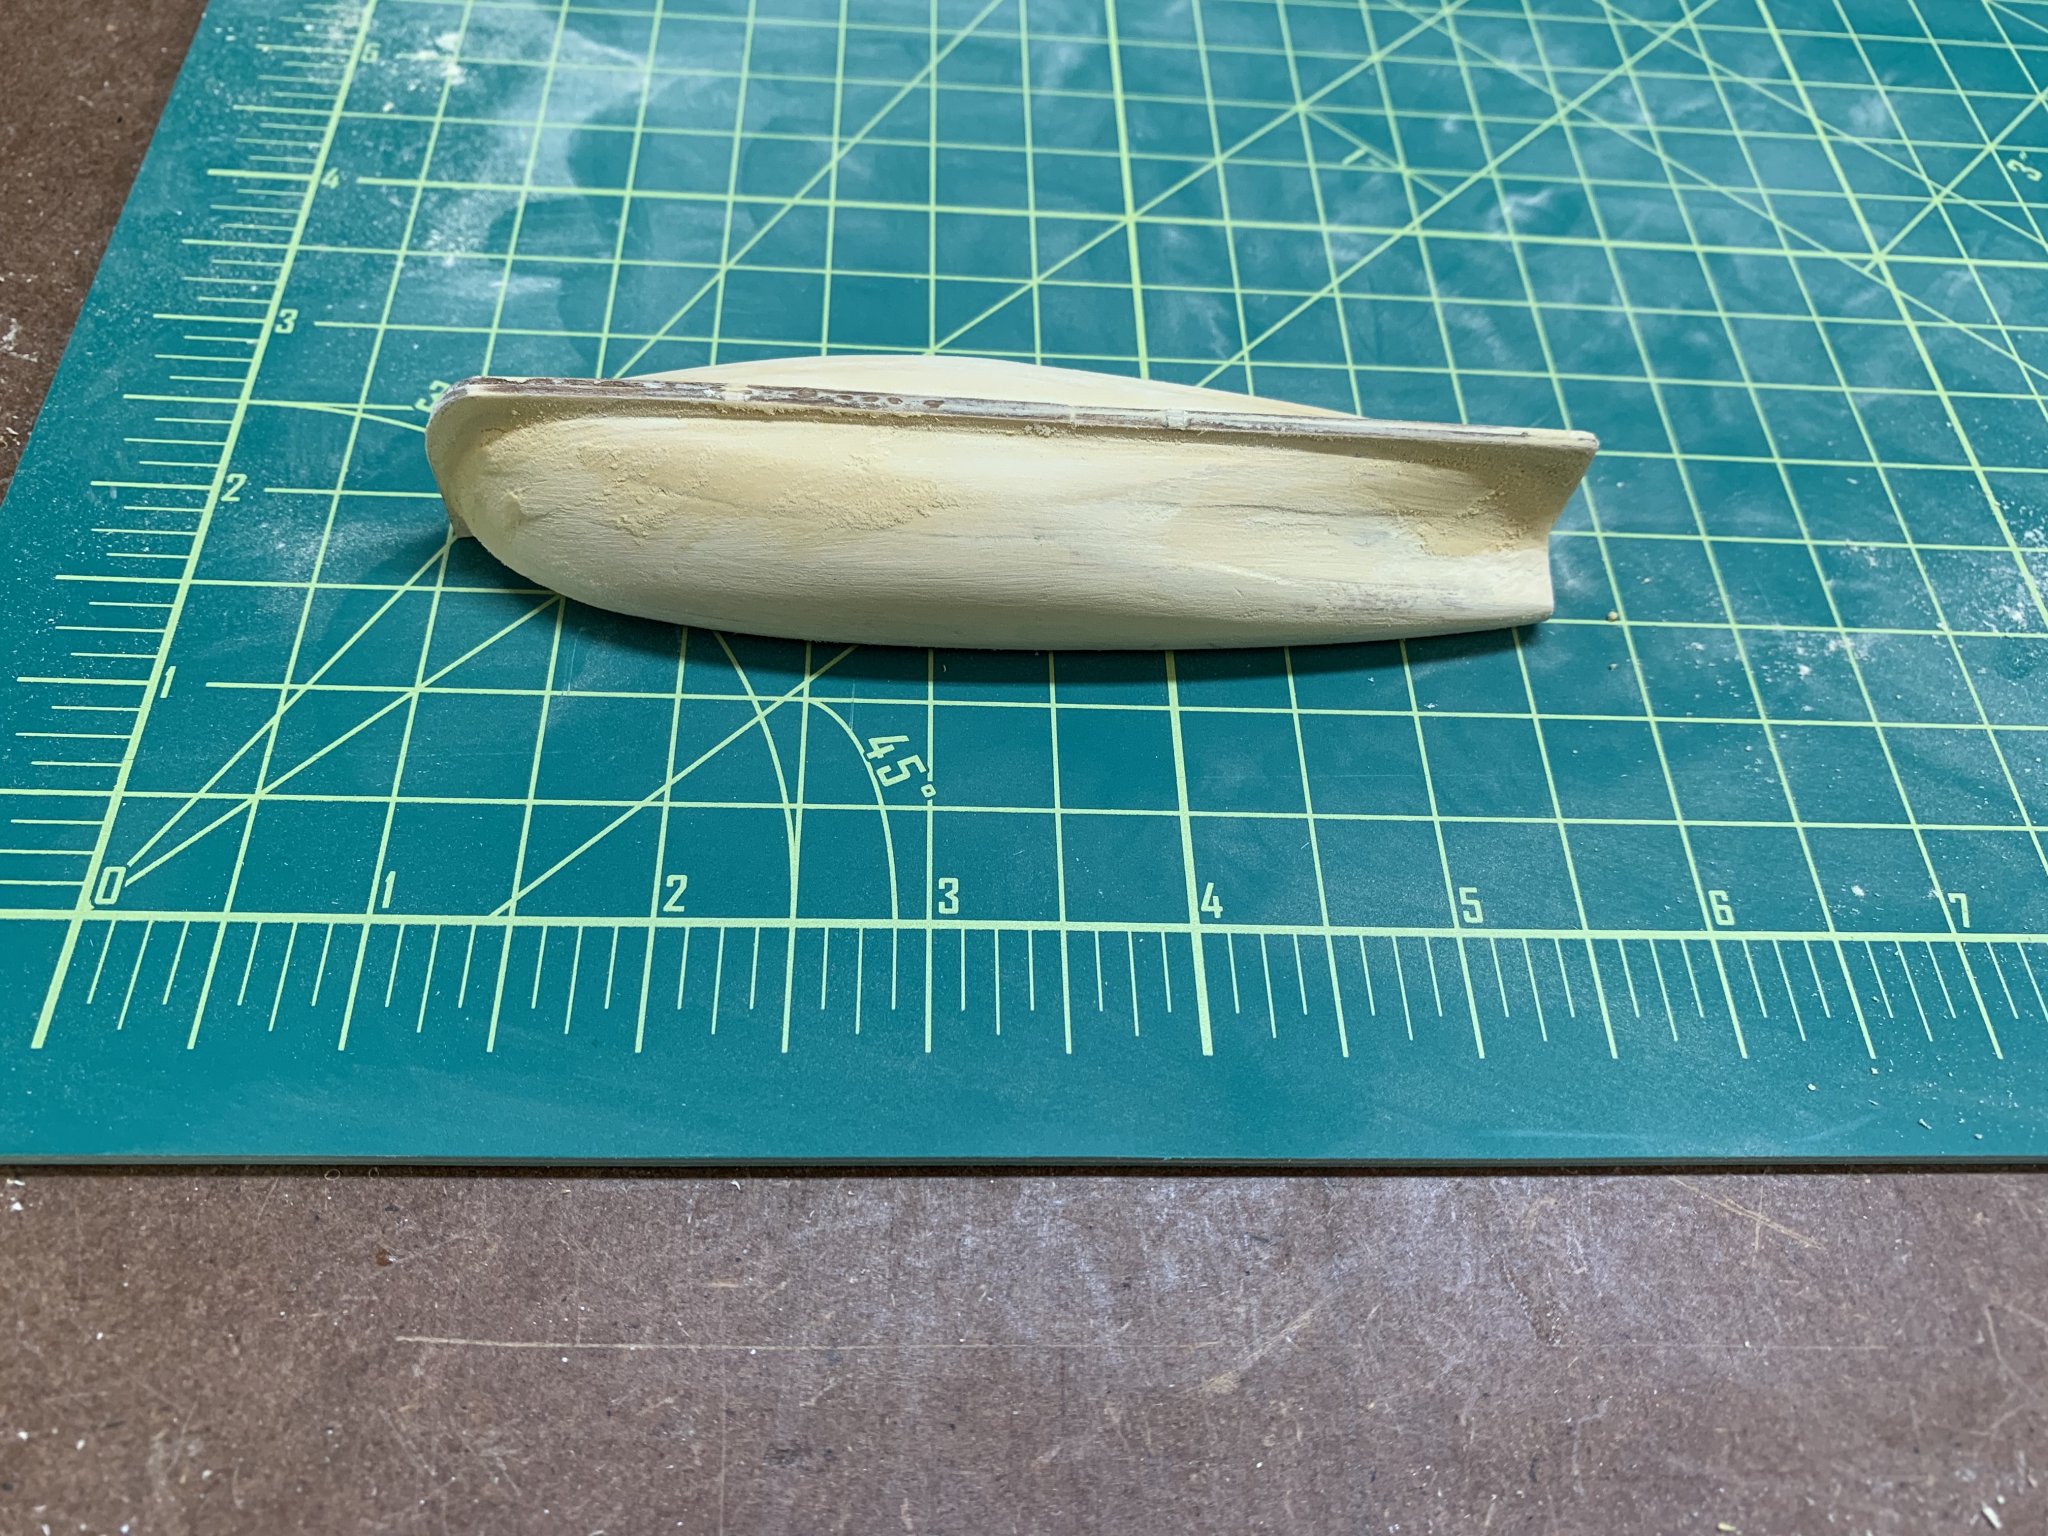
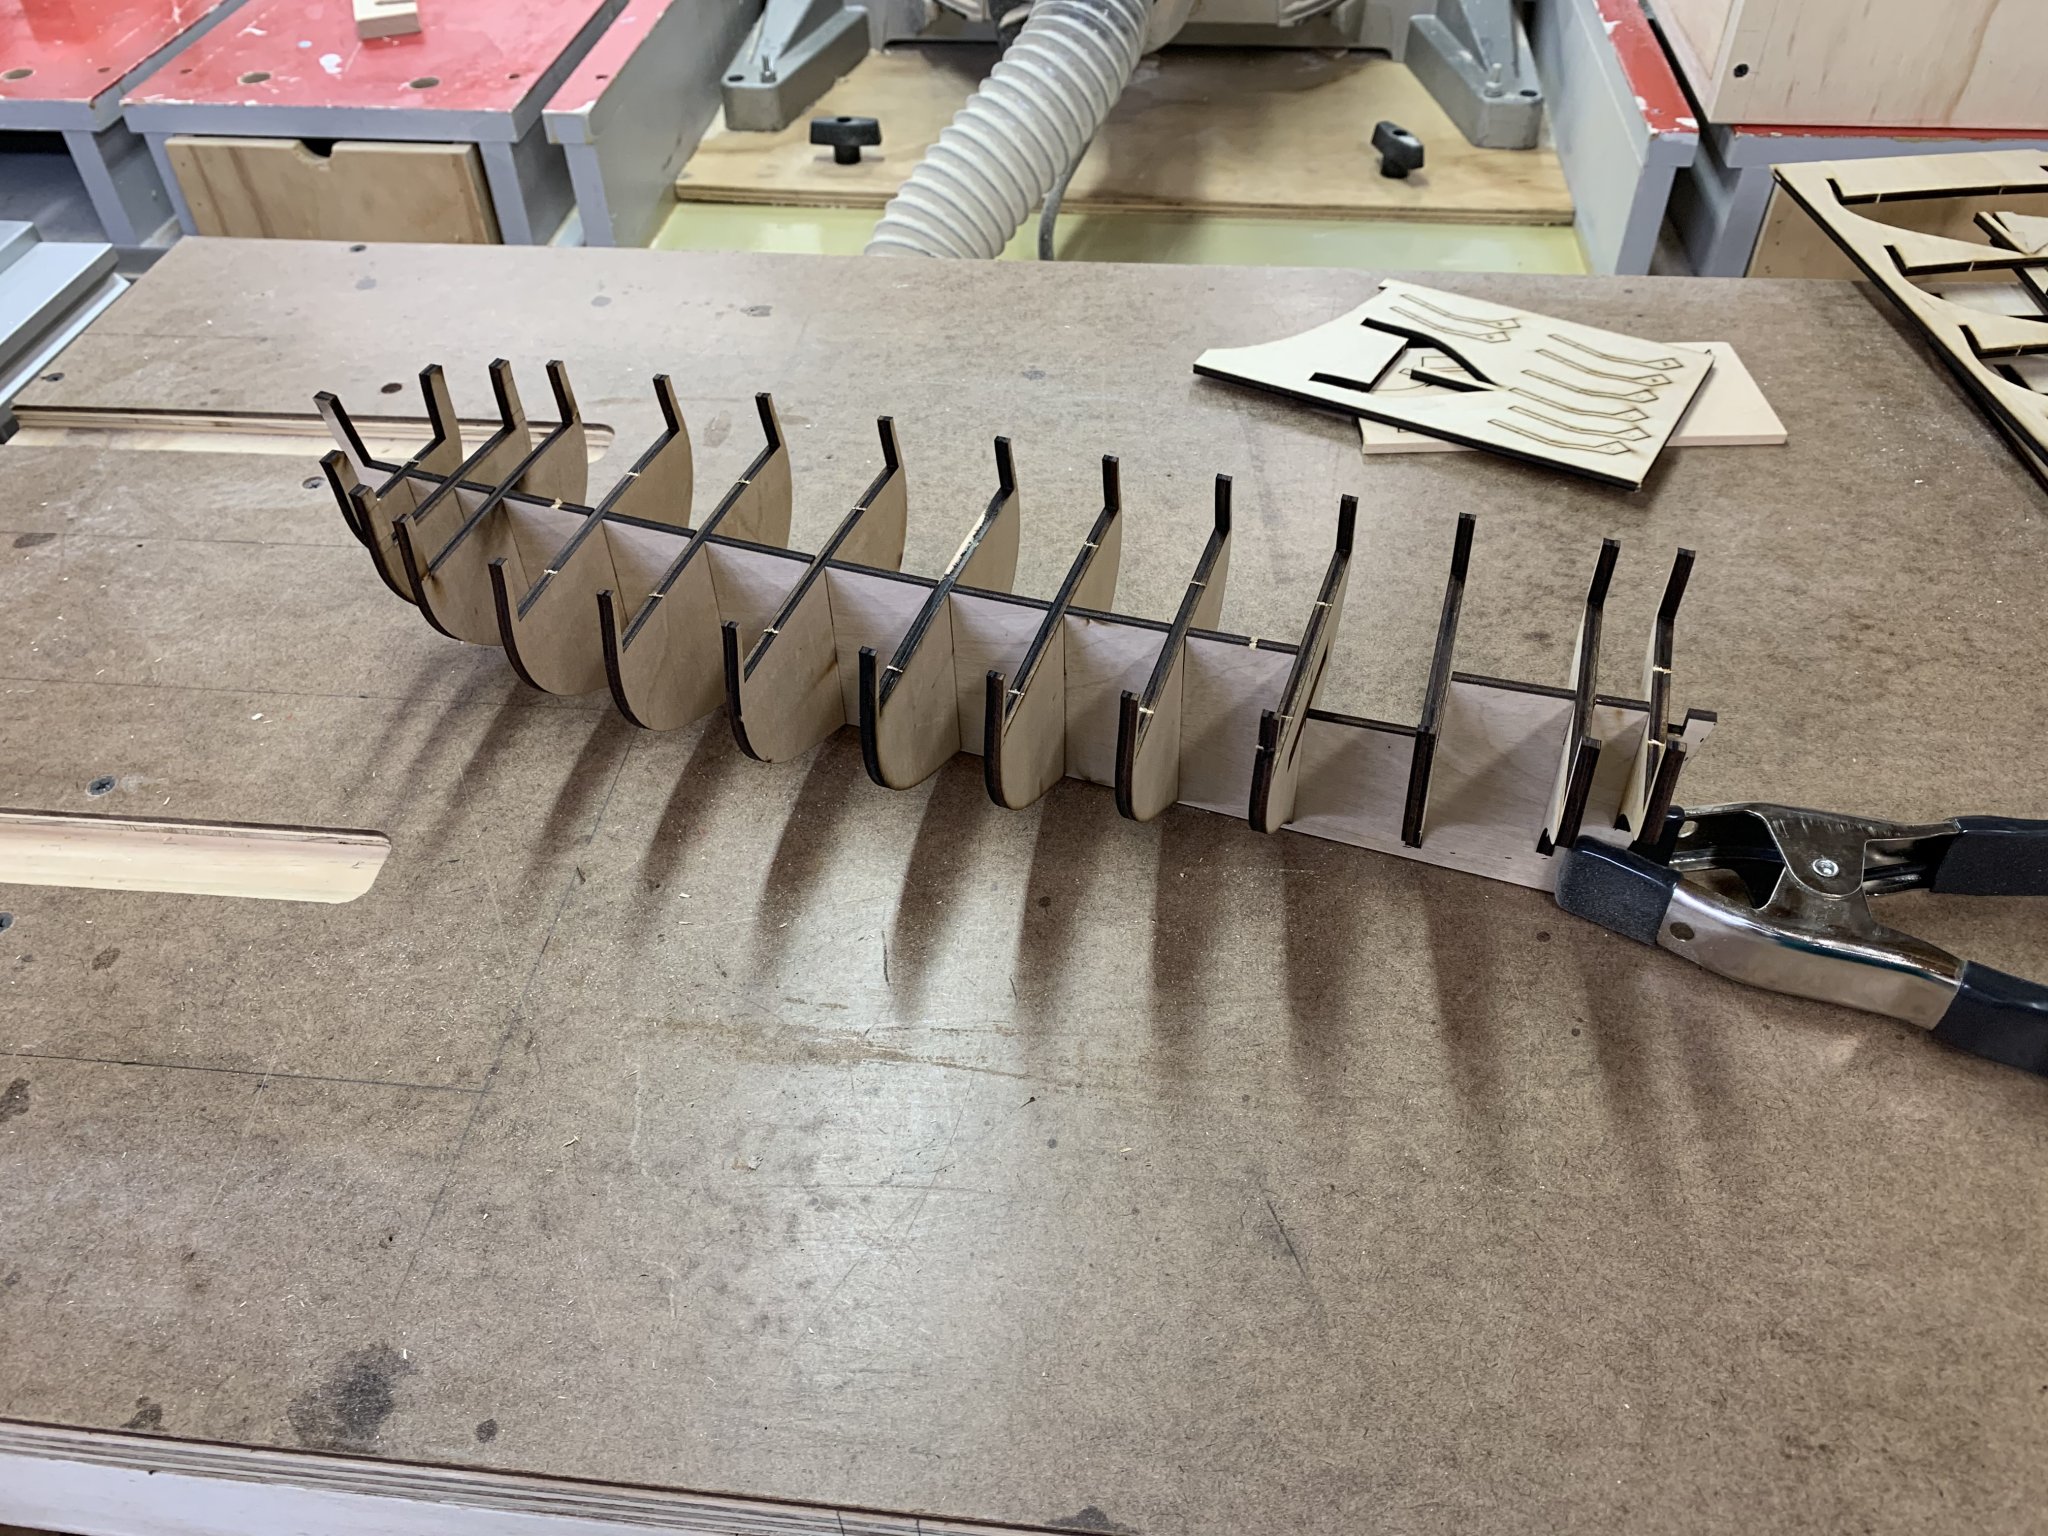
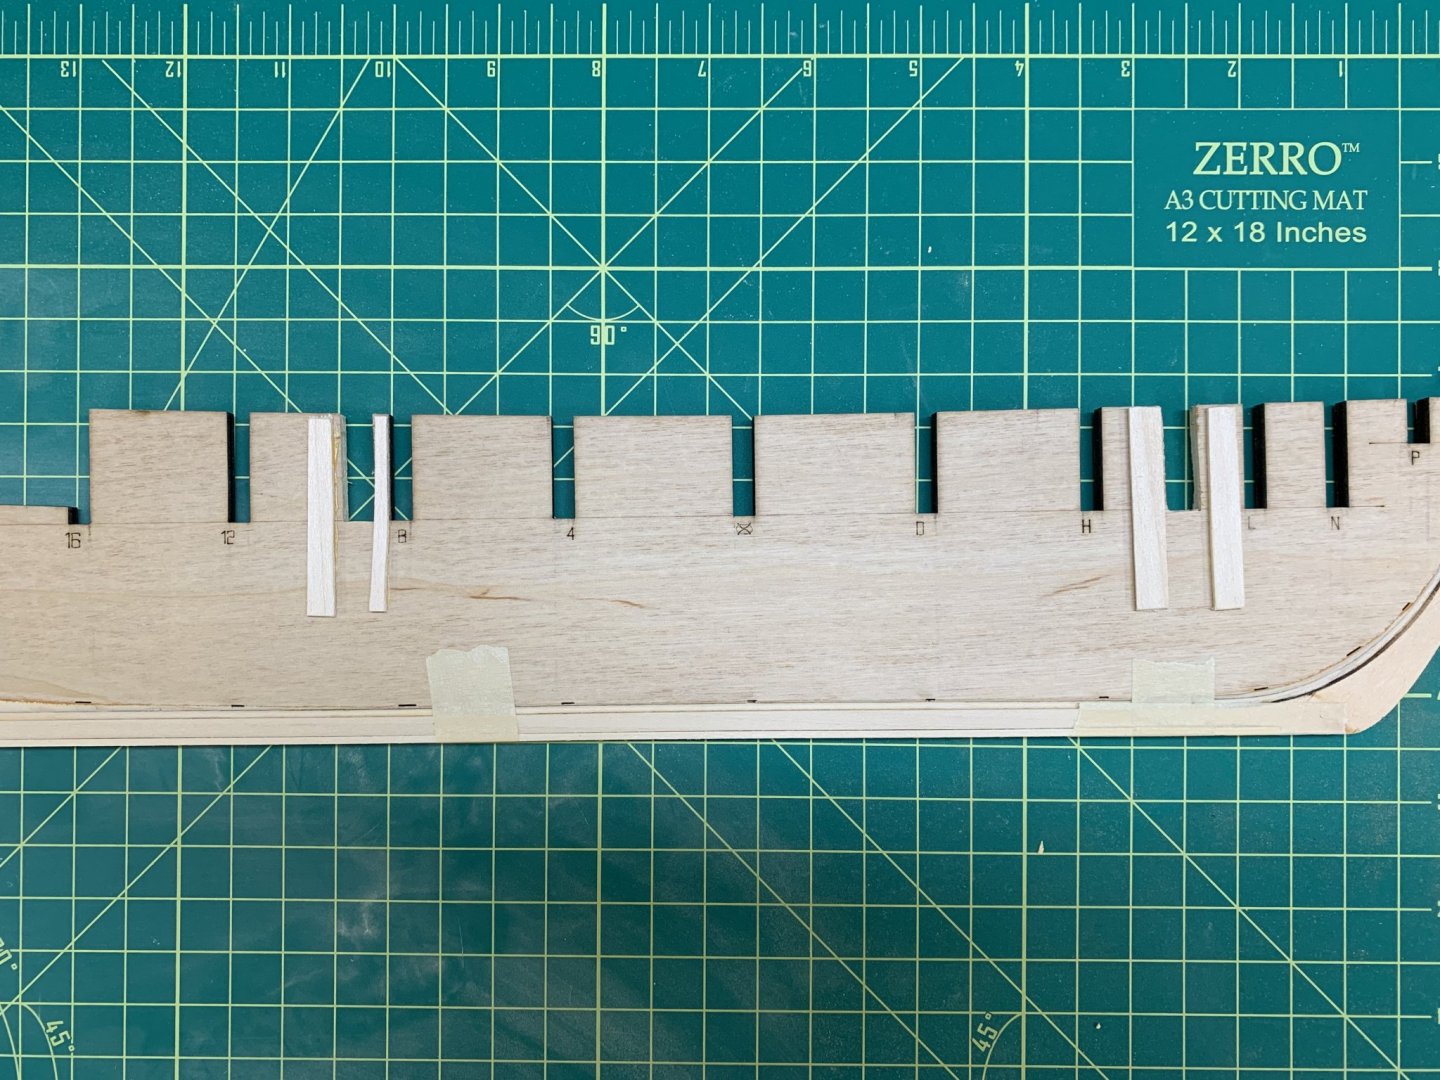
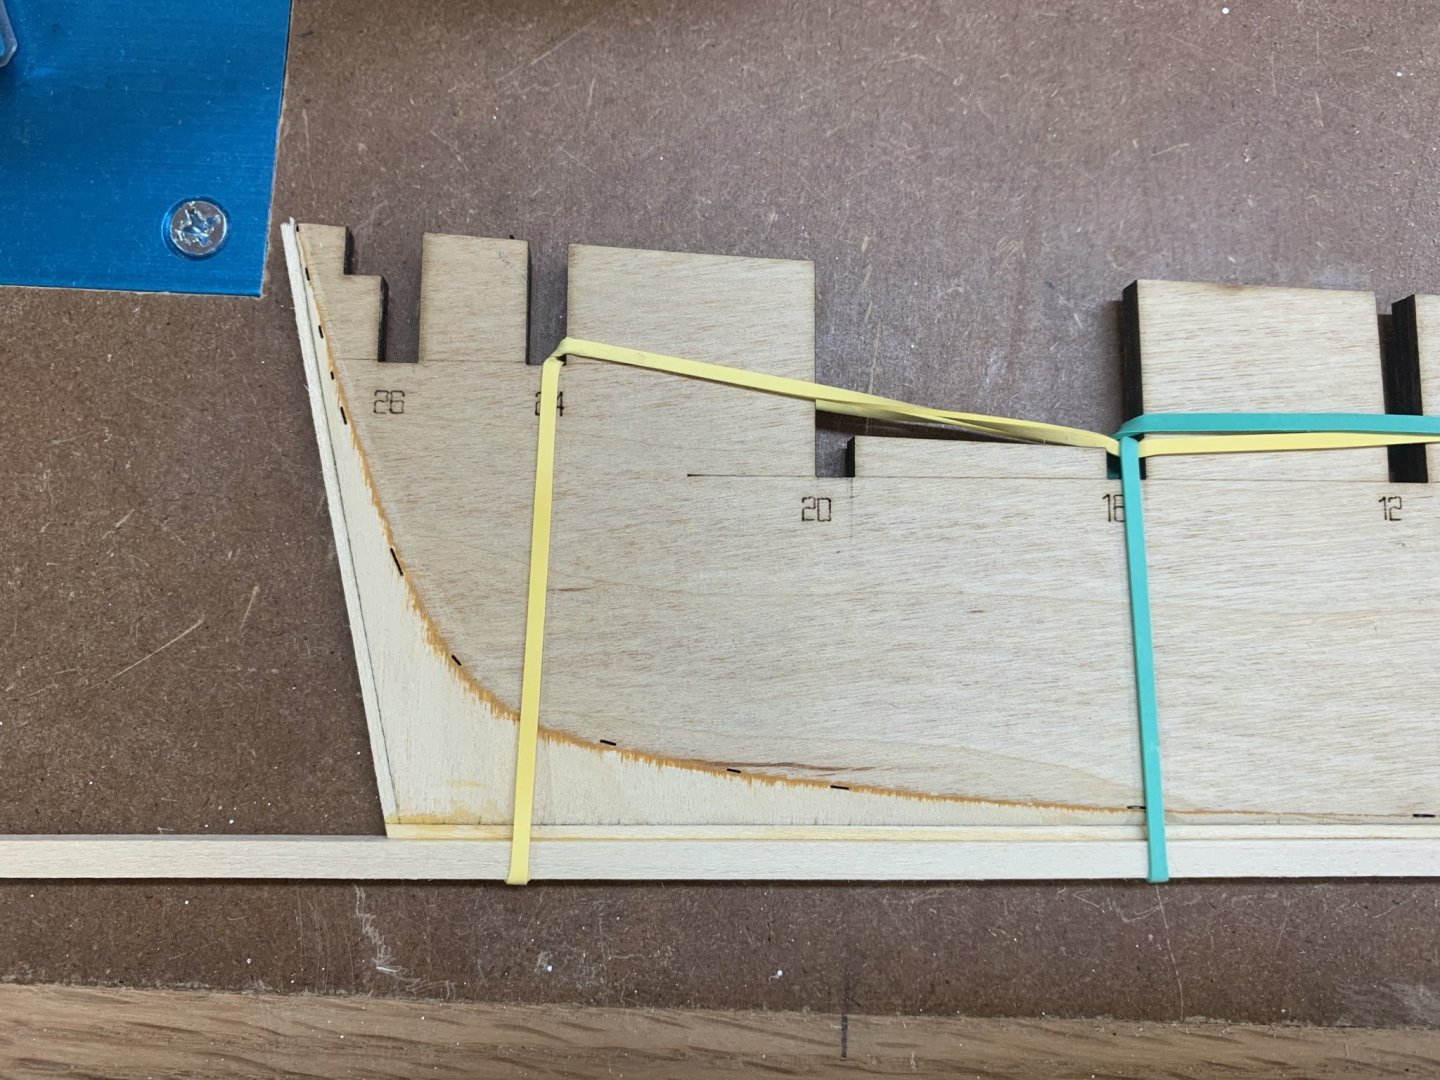
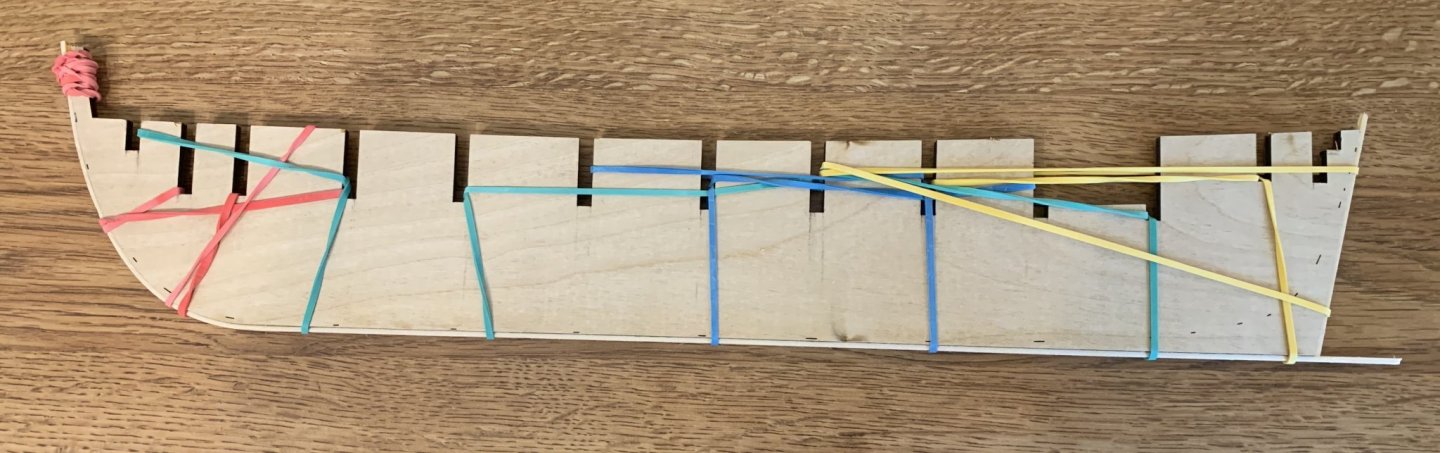
I decided to copy a few others and precut the mast holes in the keel, and then I glued a few spacer shims on, so when I glue in the blocks to support the bulkheads, it’ll leave a square for the mast to rest in. I left the spacers extra long to give a little extra support. This seemed like a relatively easy way to get the rake of the masts right, just put the framer right on the plans. I also worked on smoothing up the ship’s boat and attached the keel and stem, applied some wood filler and sanded again. Felt it needed another layer of filler in some spots, so at least one more sanding before I apply some primer.

-
It does call for them to be installed in the bulkhead former, just not glued in until done fairing. I think I’m going to deviate from the instructions and glue and block first, as you describe. There’s really nothing I can’t sand or shape just because it’s glued up.
-
Beginner question here, but I’m getting ready to install bulkheads, and the instructions say to fair the bulkheads before glueing them in or installing blocking. I would think the bulkheads are going to be moving around if not glued in and supported, leading to a poor fairing. What would be the reason for that order and what would be downside if I glued them in first?
-
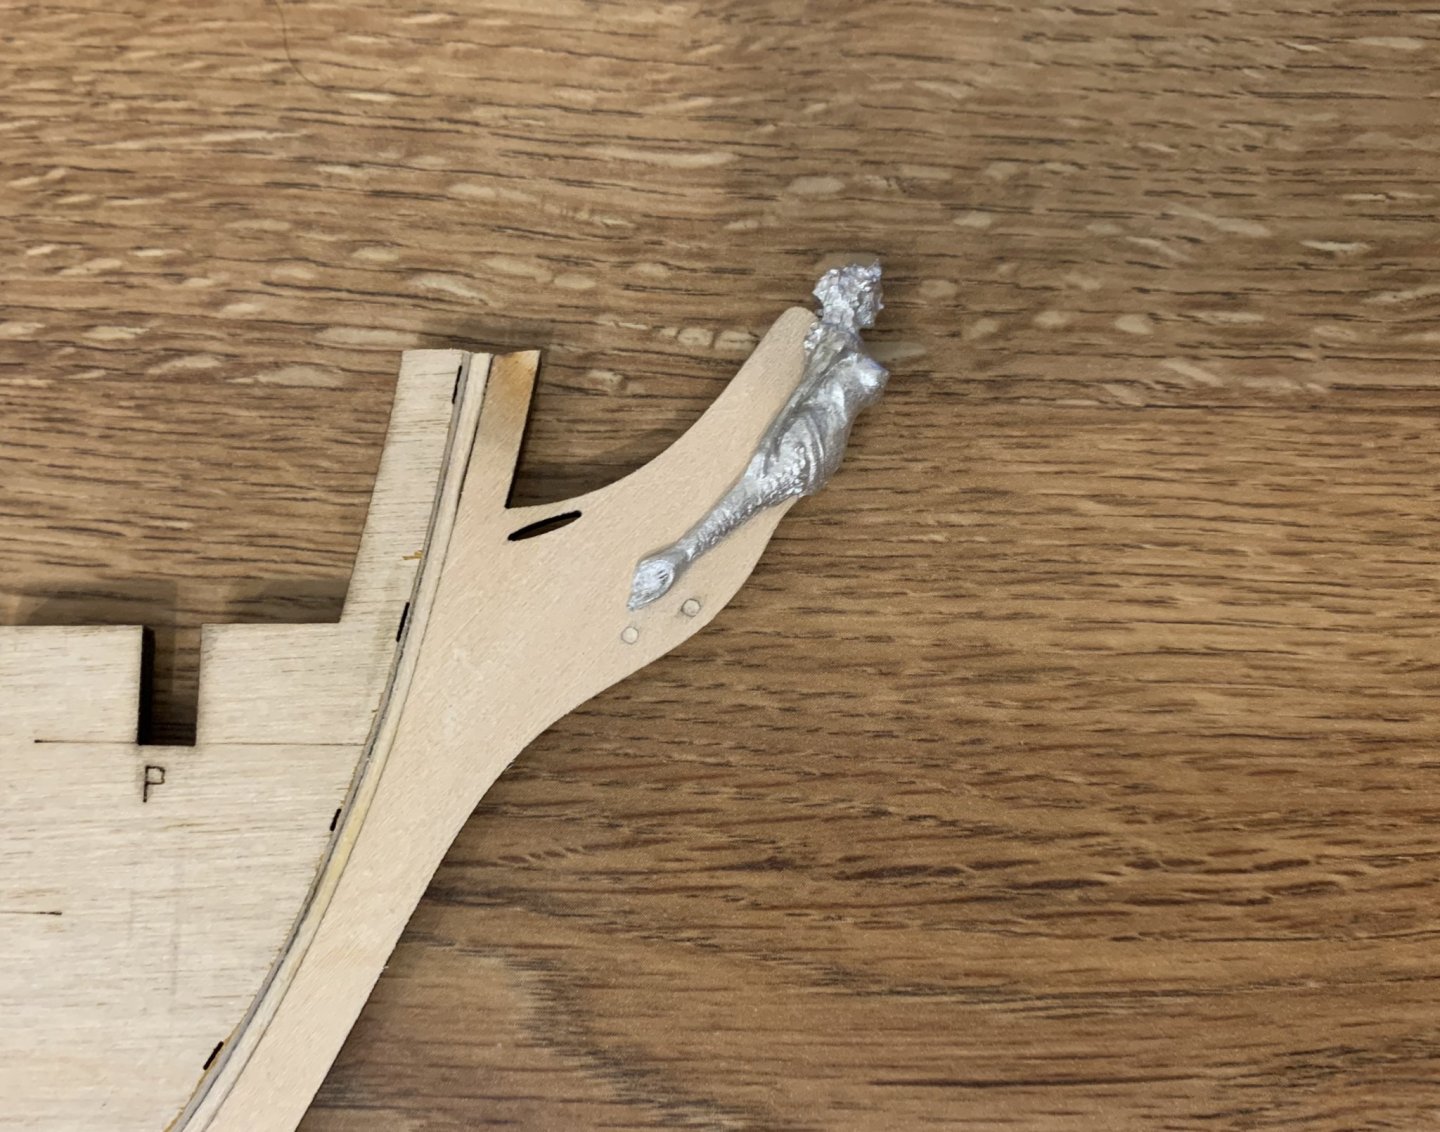
A little further along, tapered the bulkhead former from the bearding line down to the rabbet strip (mostly chisel work, followed by a light sanding), I added the stem knee, and keel. Keel was ever so slight thicker than the knee, so I took a few shavings off with a block plane. After that all had a chance to dry, I sanded the stem down to accept the figurehead. A bit fussy of a job, but just took it slow until it just fit.
-
I’m going to follow along, looks like your asking lots of questions, and I’m still pretty new, so even if I can’t help, I’m sure to be interested in the answers too. Just try to stay a step or two in front of me if you can
-
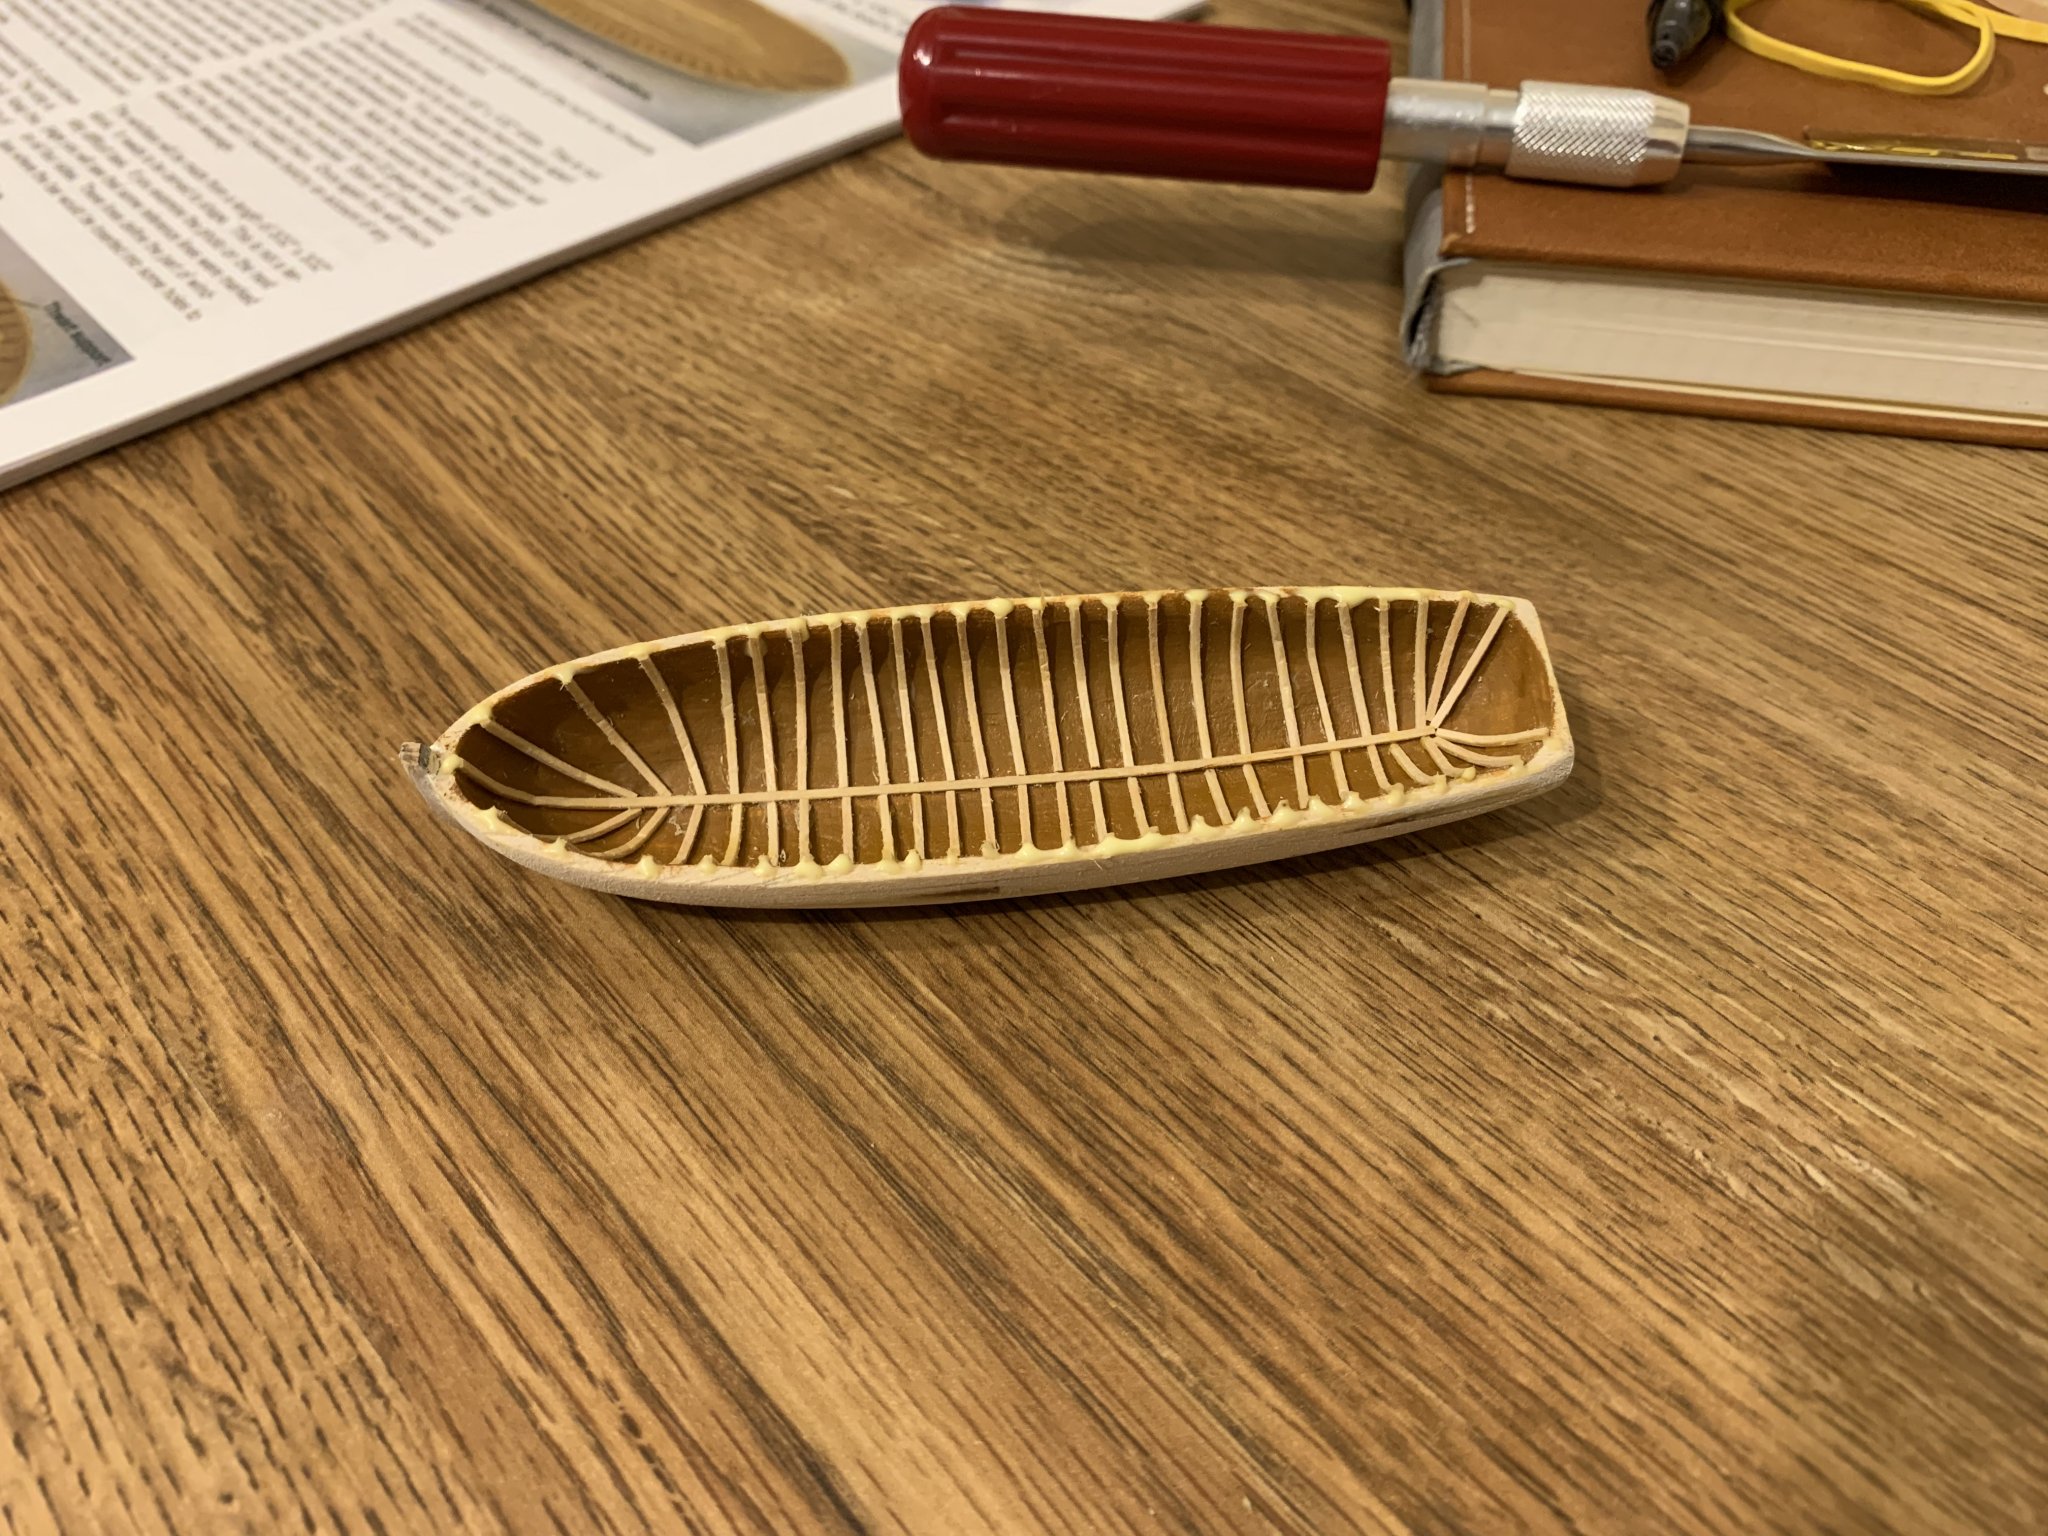
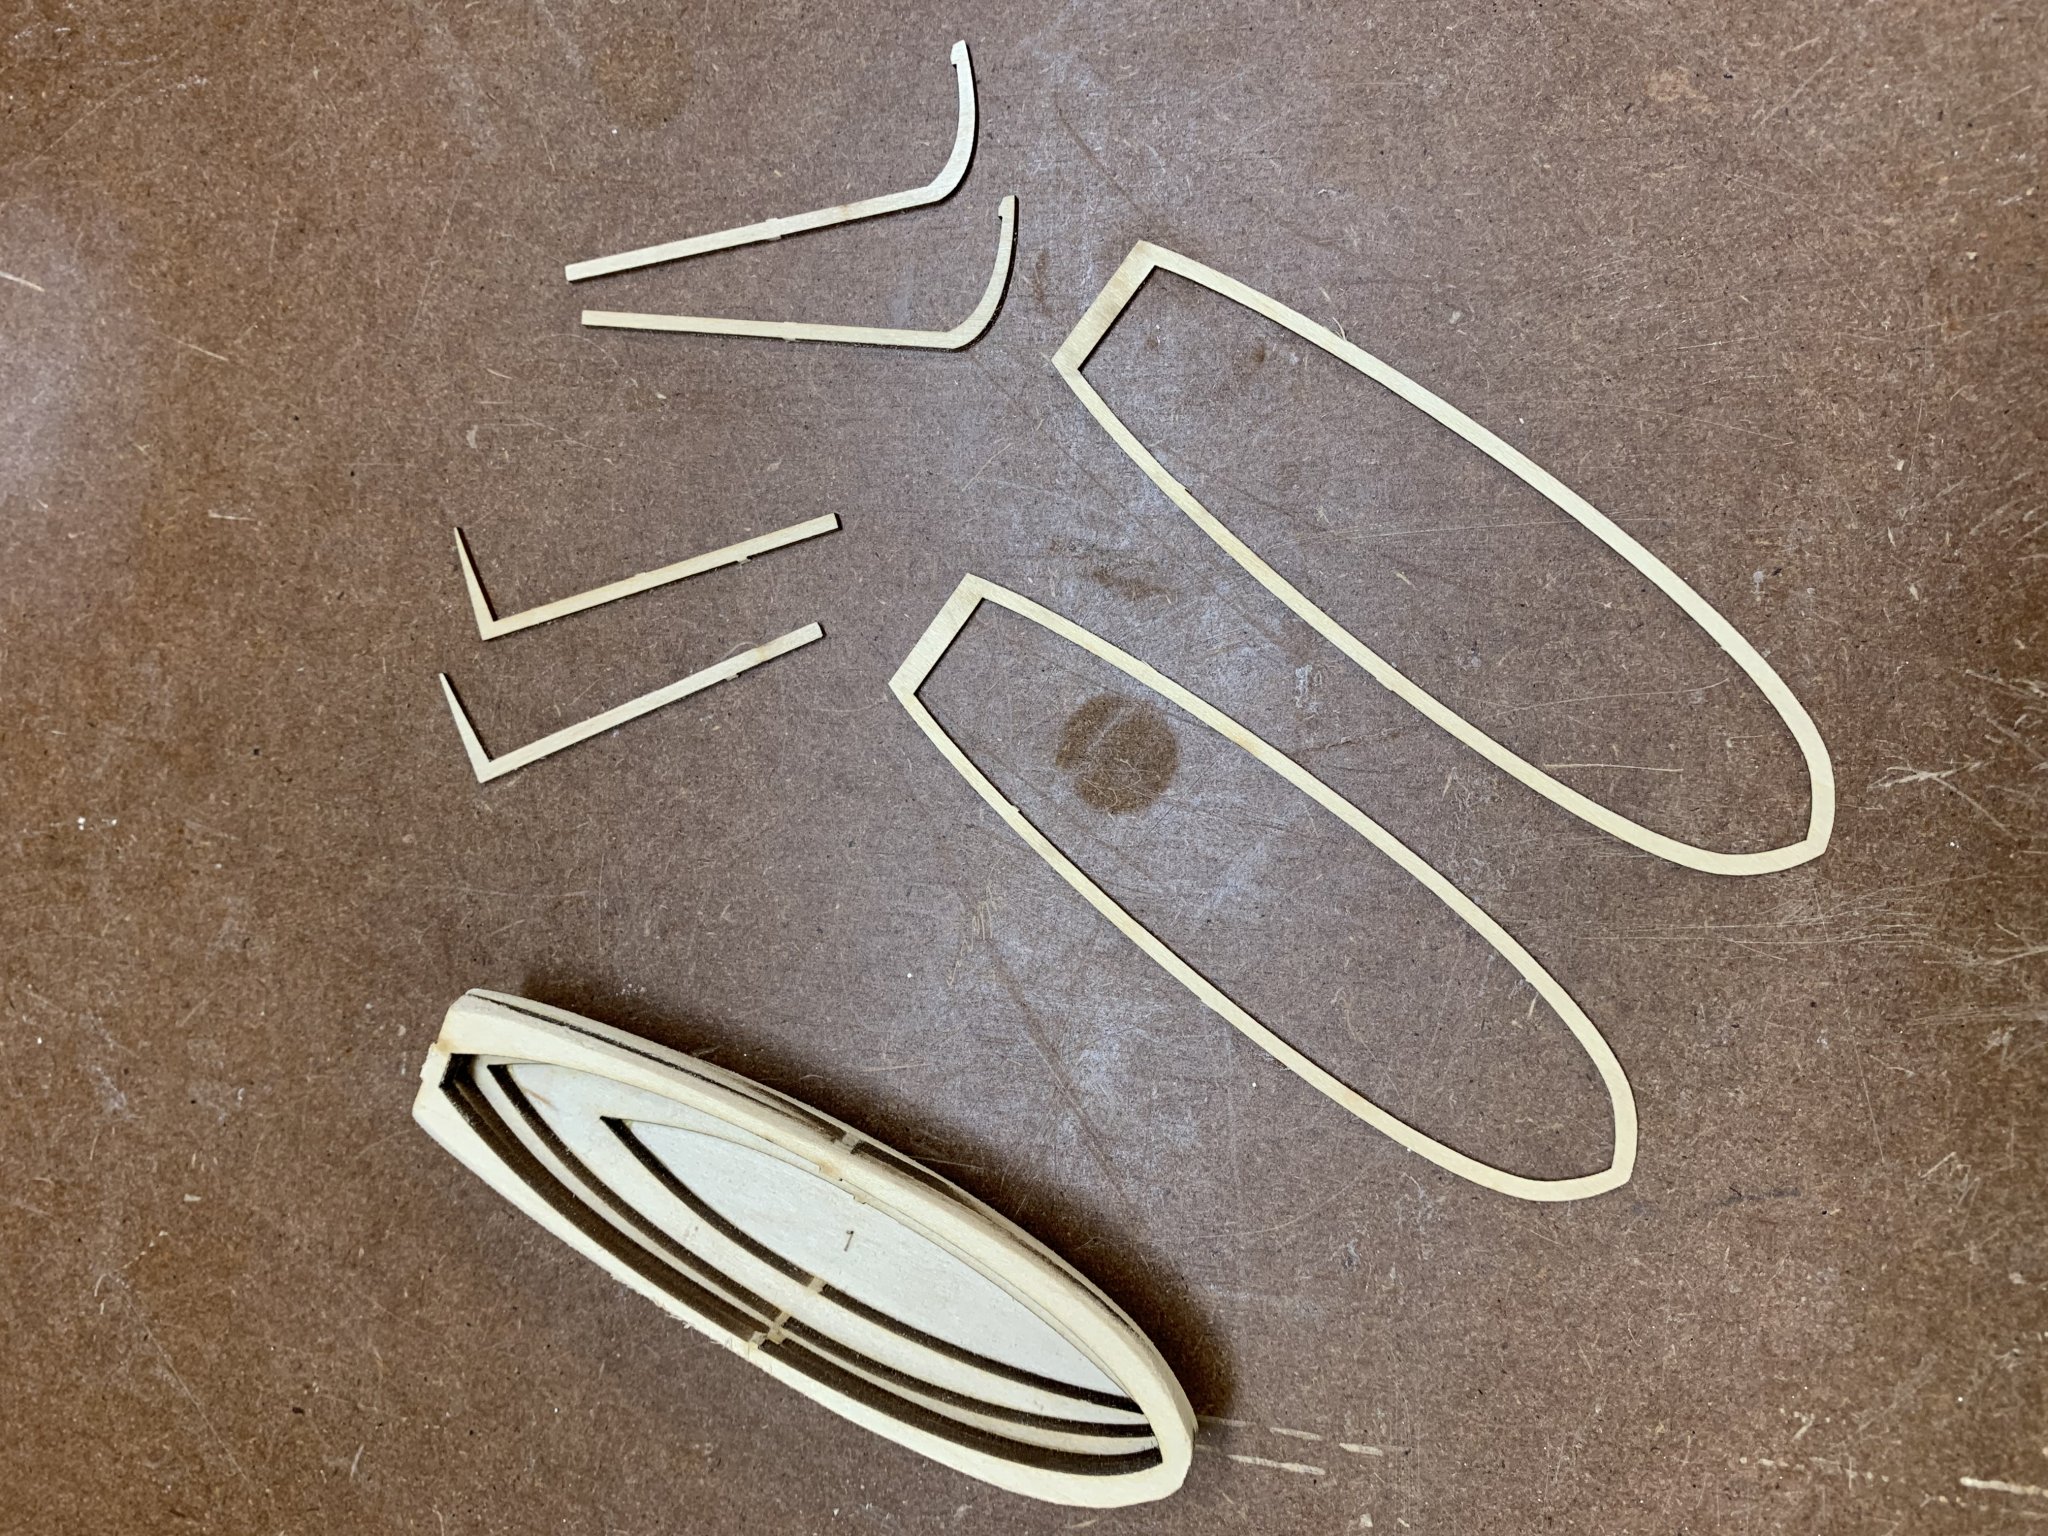
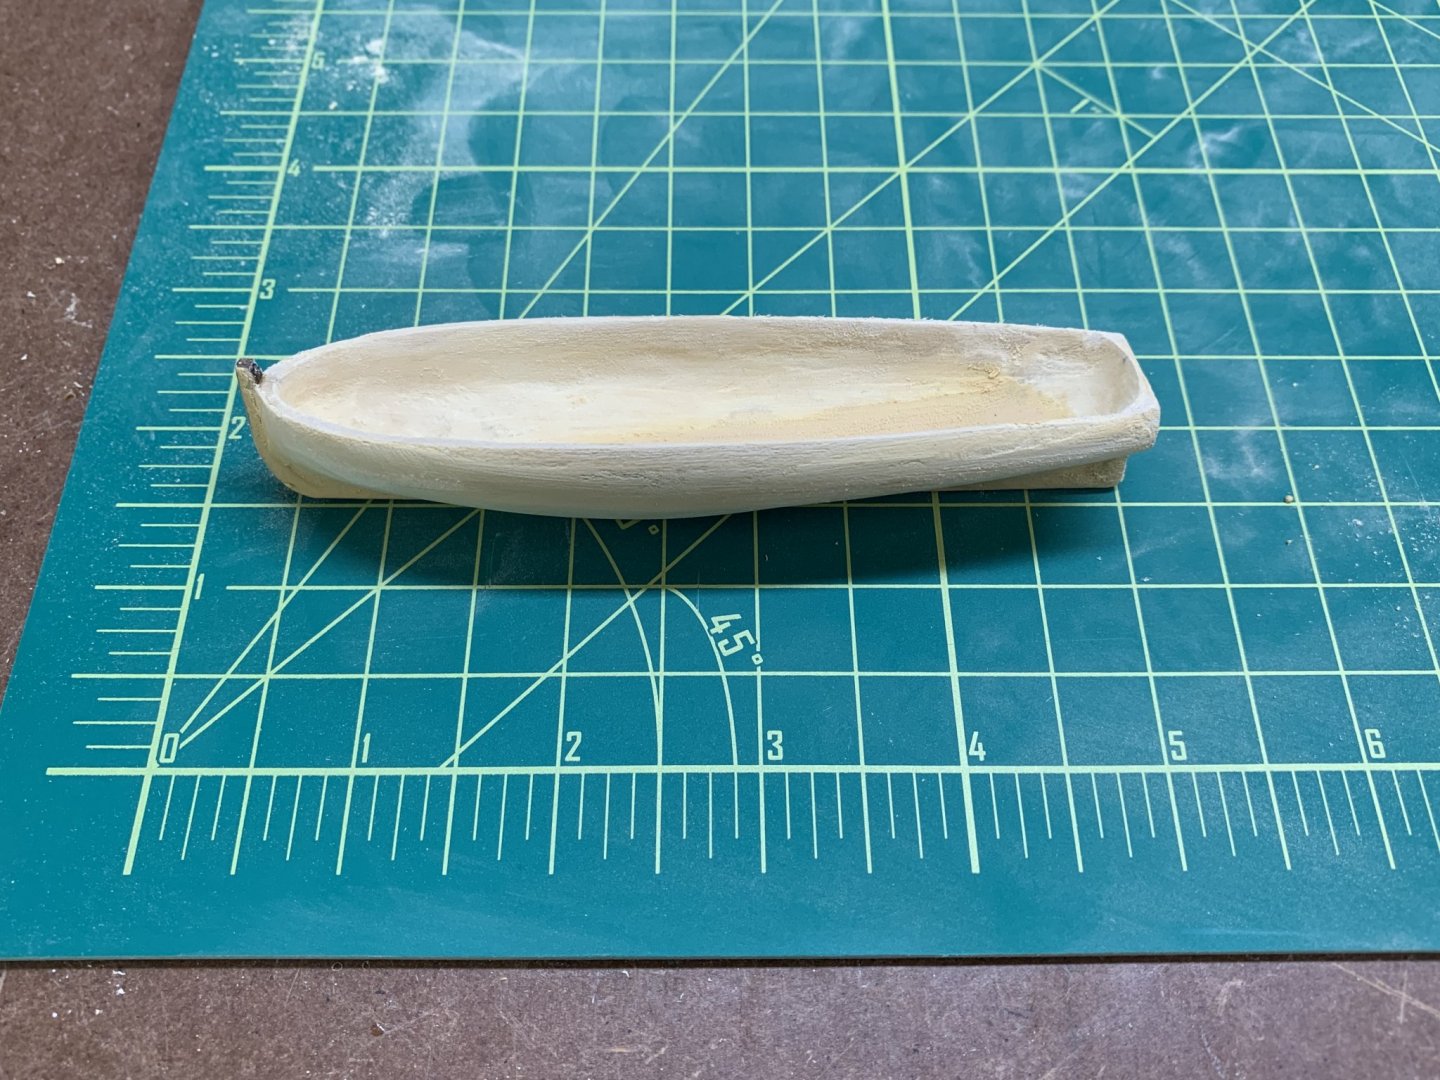
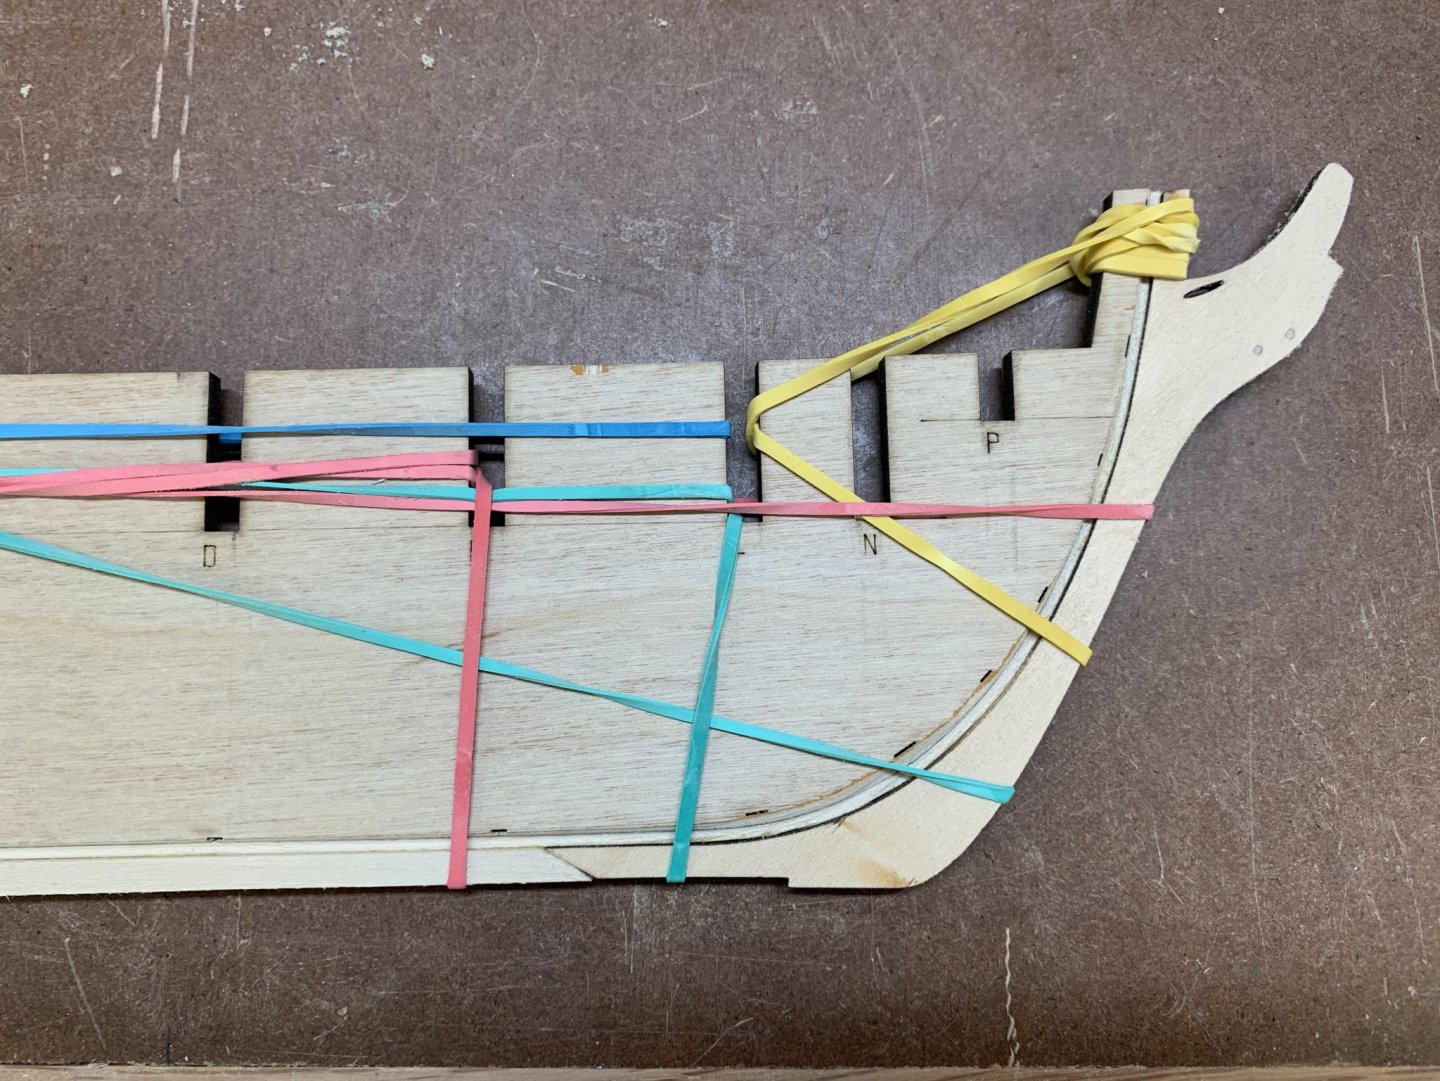
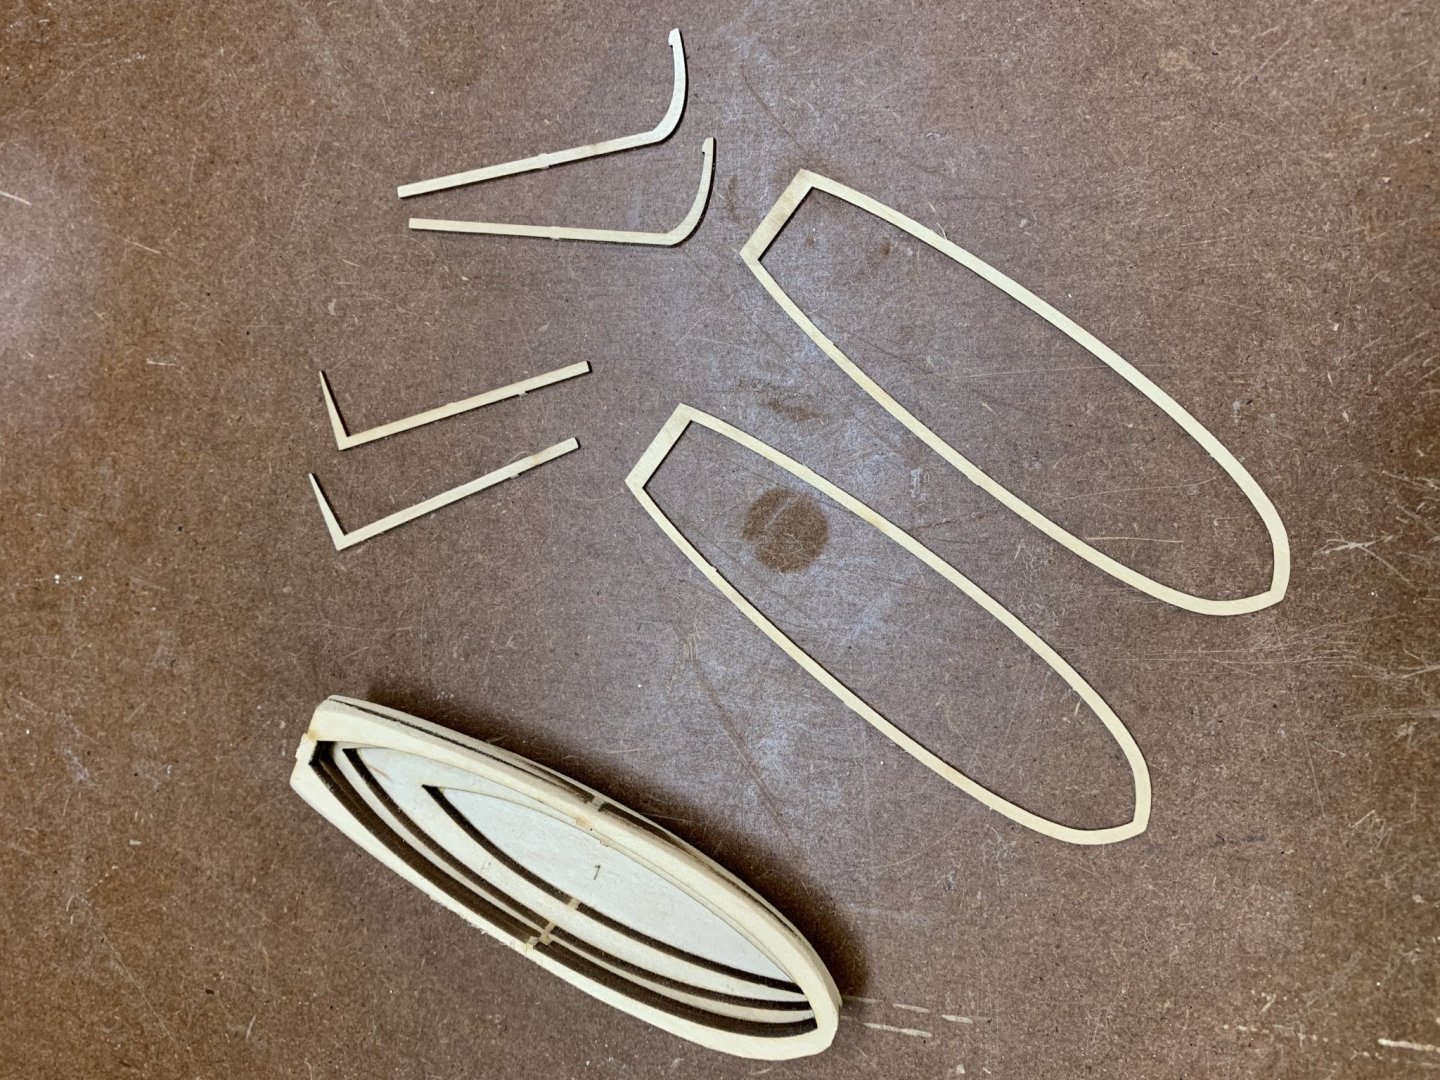
The kit has arrived! I started with an inventory, and everything looks to have been included. I decided to work on the ship’s boat as well as the main, so I’d have a side project while glue was drying, etc. I started with glueing up the lifts, then started filing and sanding the overall shape. I found a rasp to work very well for the outside shaping, followed by 80 grit. More to come on the boat. In the meantime, dry fit of the bulkheads just to make sure there were no glaring errors, looking fine so far. Nice flat/straight bulkhead former. Followed by soaking the rabbet strip, and letting it dry wrapped around the bulkhead former, then glueing it in place and “clamping” it up with some rubber bands. I did order a hobby zone building slip, and it’s on back-order, so I’ll be slow walking the build just a bit, I’d like to have it before I start glueing on the bulkheads.


-
Welcome, I think you'll find folks here helpful and encouraging. I just finished my first model, and plenty of people had advice, criticism (helpful) and even praise. It's nice to have other people appreciate the amount of effort that goes into one of these projects.
-
The different bright colored tunics are going to look fantastic with the shields once they go on. Looking really good!
-
Your fantastic instructions are the reason I chose the Syren, hoping to live up to the quality of the design.
-
Glad to have you aboard, hopefully the back orders get cleared up and Model Shipways starts shipping kits.
-
Thanks, and I do think I’m hooked, next is the Syren, and we’ll see where it goes from there.
- 41 replies
-
- 1
-

-
- thermopylae
- scientific models
- (and 3 more)
-
I ordered the kit from Model Expo, got a great deal with the Father's Day sale. Unfortunately she's back-ordered for a few weeks, but I hope to be unpacking soon! I'll be using the Syren Model Company blocks and rope, so it should be a good upgrade from my last build where I used cheap square blocks, but that'll be a ways down the road.
-
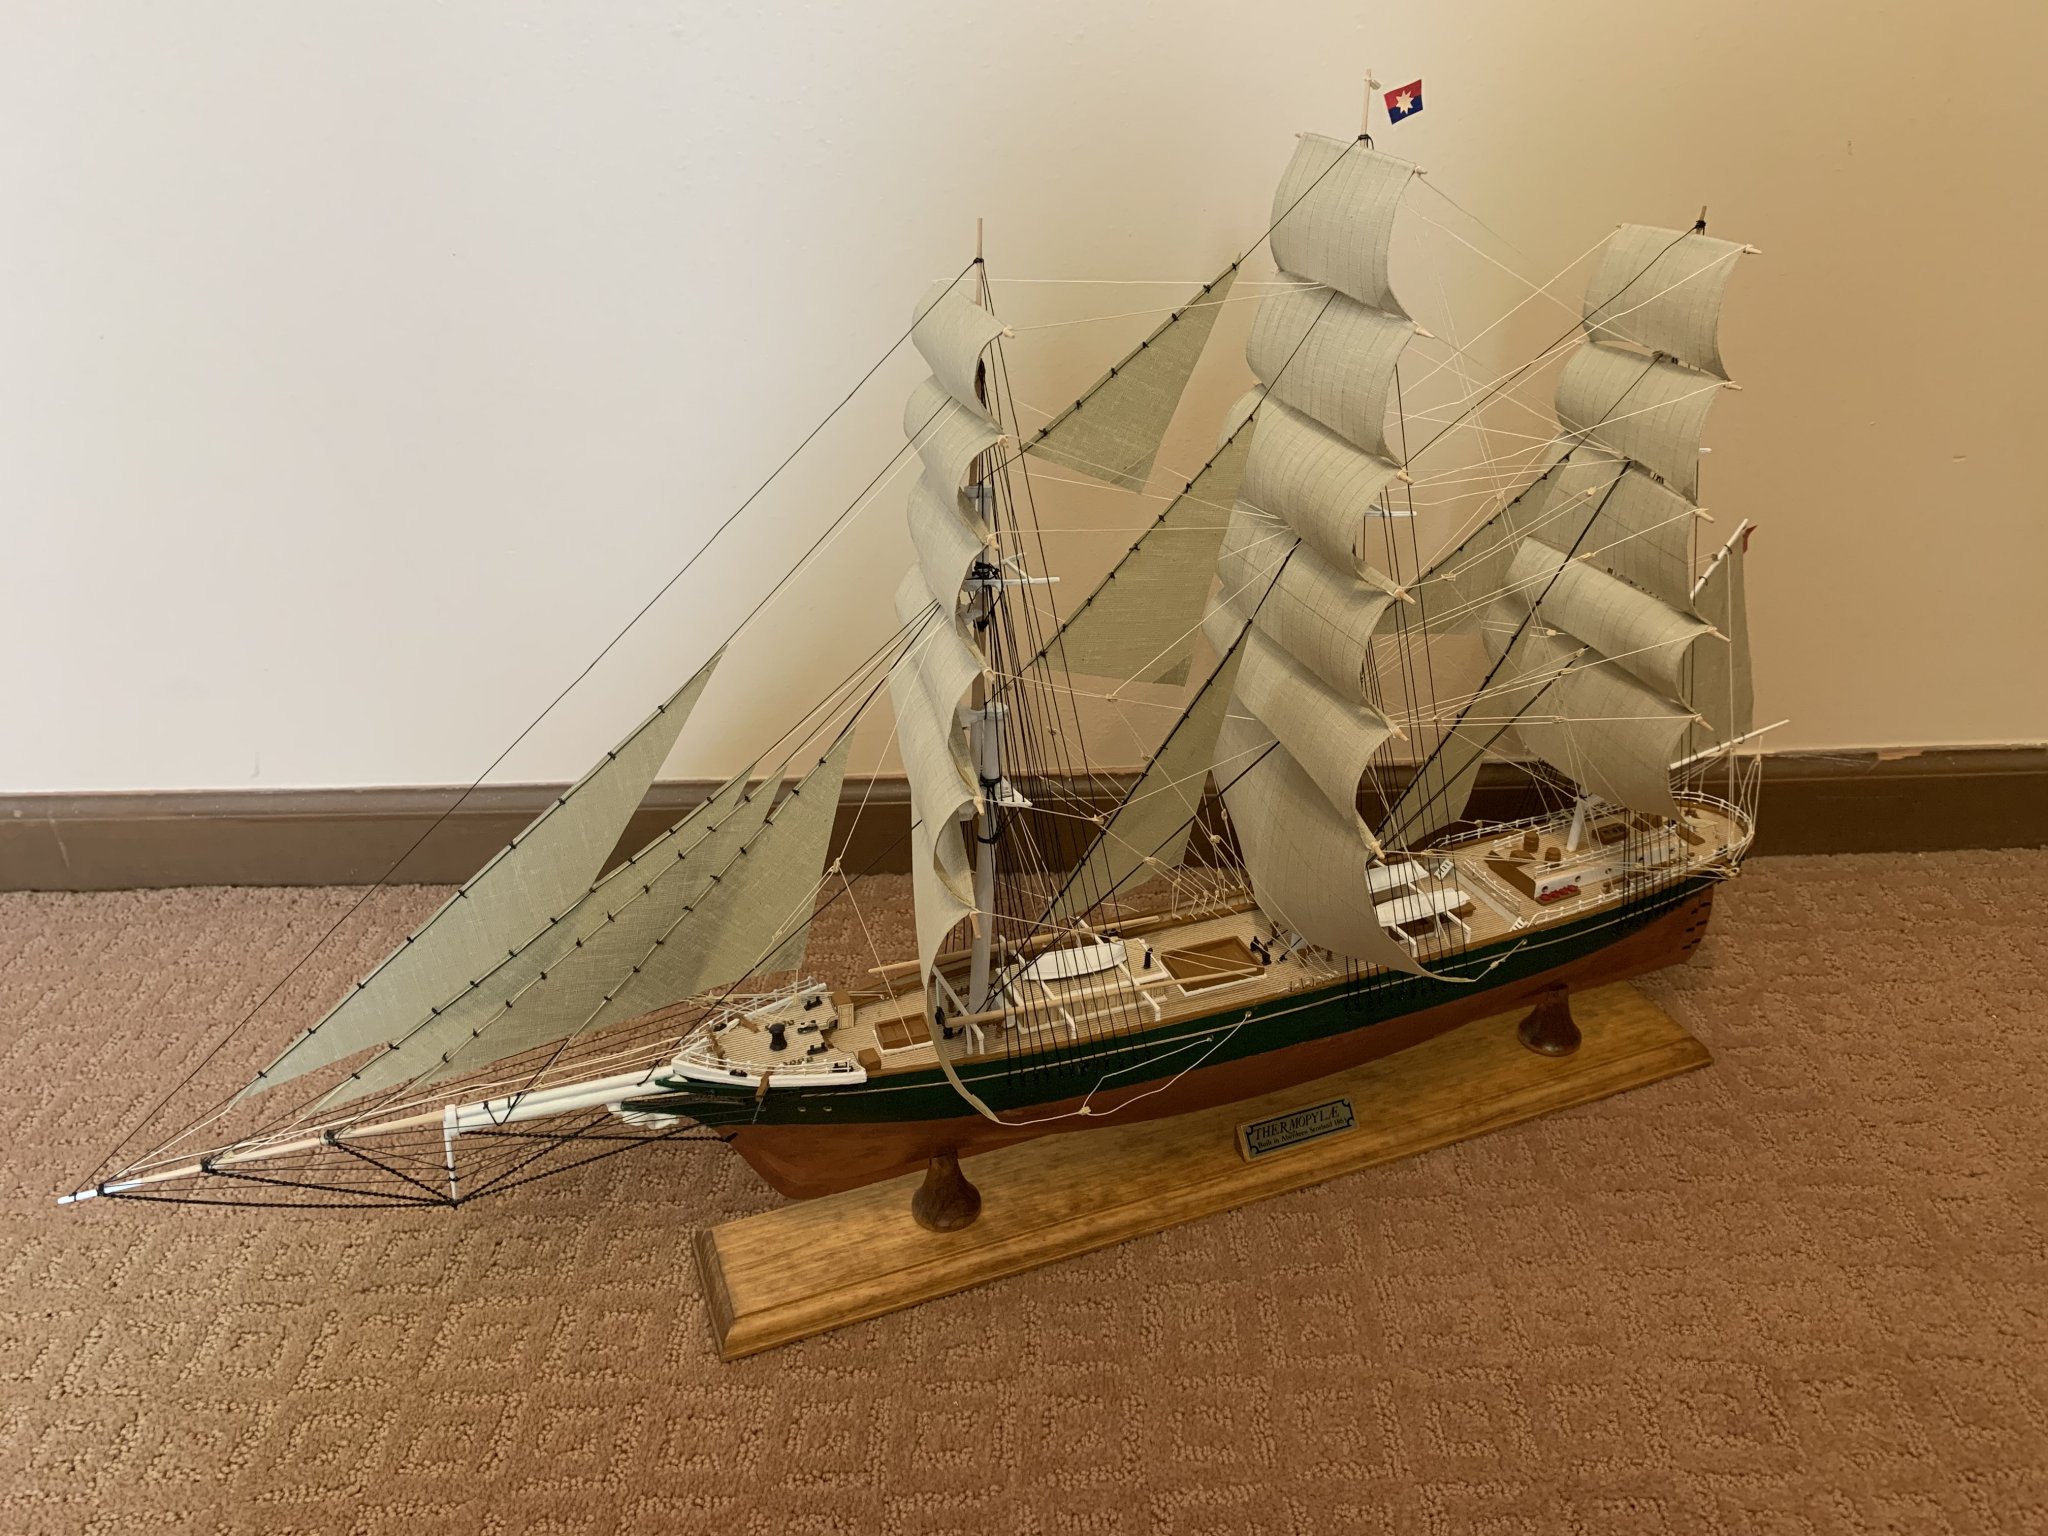
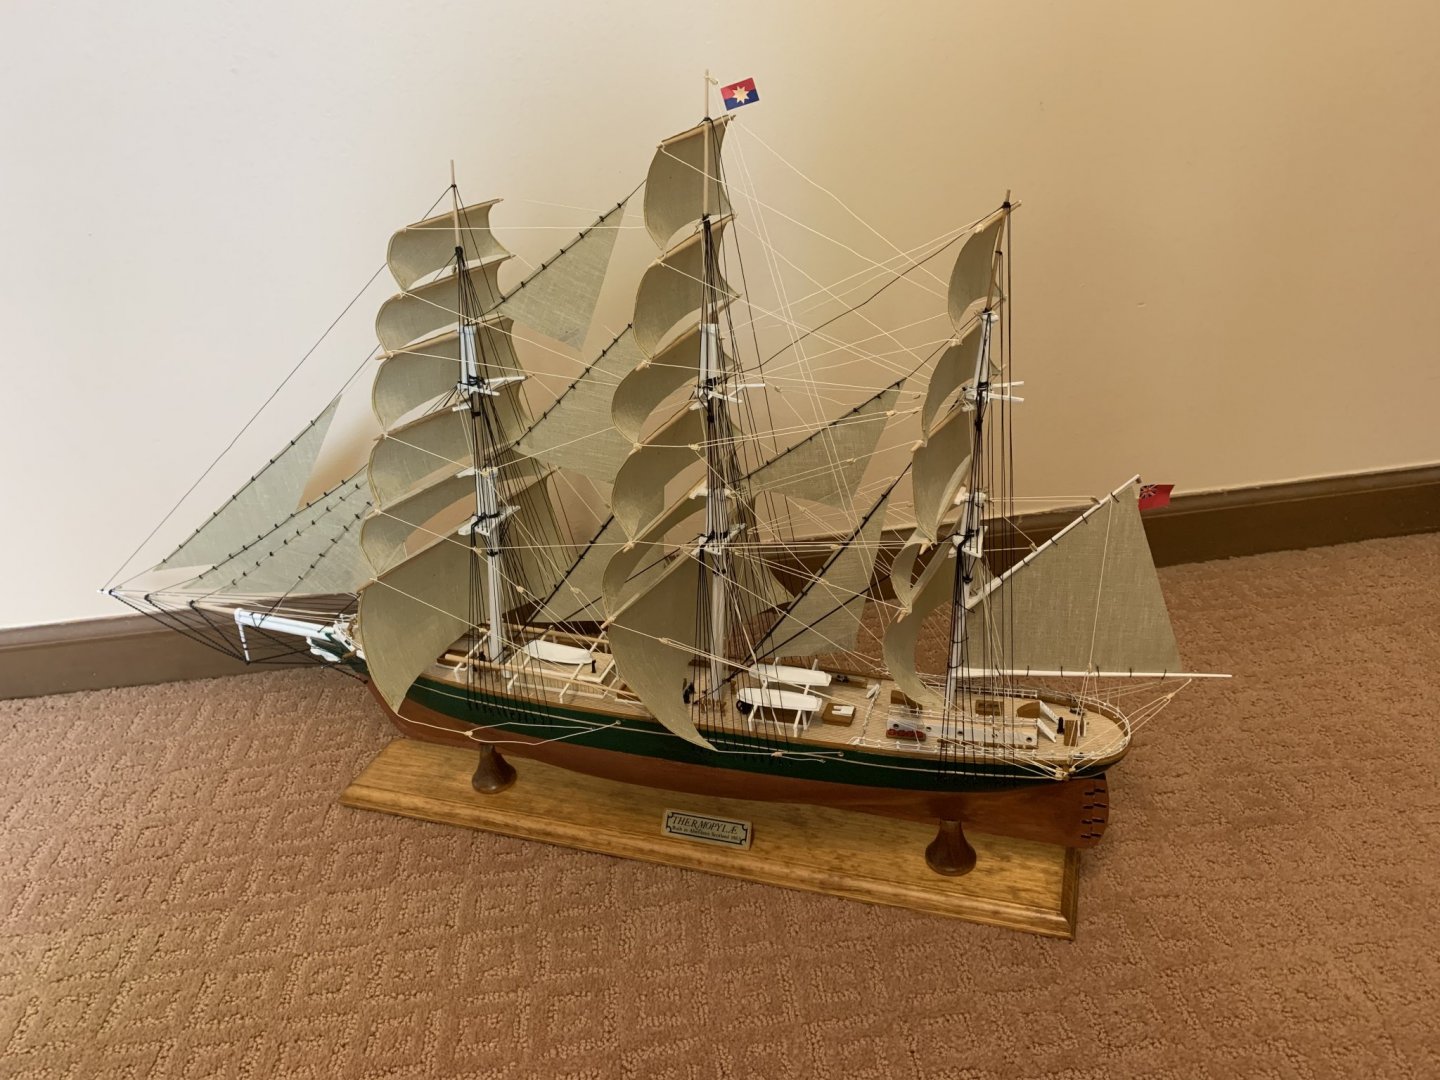
Thanks to everyone for the warm welcome and helpful comments, looking forward to sharing the next build. Put the finished shots in a gallery:
- 41 replies
-
- 7
-
-
- thermopylae
- scientific models
- (and 3 more)
-
I would think just carving a figure would be tough, but to get them all similar enough to hold a row of oars at the same angles would be quite the feat. Your first painted figure would stand alone as a model by itself, bravo.
-
Says the guy that hand carved a ship full of oarsman? I’ll take my ropes any day .
- 41 replies
-
- 2
-
-
- thermopylae
- scientific models
- (and 3 more)
-
Wow, Vlad, you’d almost think she could sail right out of your workshop, so lifelike. Your attention to detail and craftsmanship is incredible.
- 200 replies
-
- 1
-
-
- cutty sark
- clipper
- (and 1 more)
-
No hurt feelings on suggestions/critiques Bill, it’s a great way to get better. All 3 items are definitely on my list for build 2. The hull is painted copper, but strips of copper and planking the deck would have looked pretty nice. Shrouds, I just goofed up, and the deadeye shortcut on the model would have made it pretty tough to back track by the time I caught the fowl up. Chalked up to experience, unfortunately. if I had it to do over again, I would have done those items, real dead eyes, better/smaller wooden blocks, better line, and done a better job of pre-rigging blocks to the masts.
- 41 replies
-
- 3
-
-
- thermopylae
- scientific models
- (and 3 more)
-
Appreciate all the kind words, I know there are flaws if you look close (or not so close ), but I learned a lot and am already looking forward to another build. I’ve got a Model Shipways US Brig Syren on back order, so hoping it’s here by the time I finish the details on this one. I know I need some better tweezers, and I’m going to try spray painting (air brush purchase and lots of practice is on my to do), and when the time comes, I’ll be getting some of Chuck’s line and blocks.
- 41 replies
-
- 2
-
-
- thermopylae
- scientific models
- (and 3 more)
-
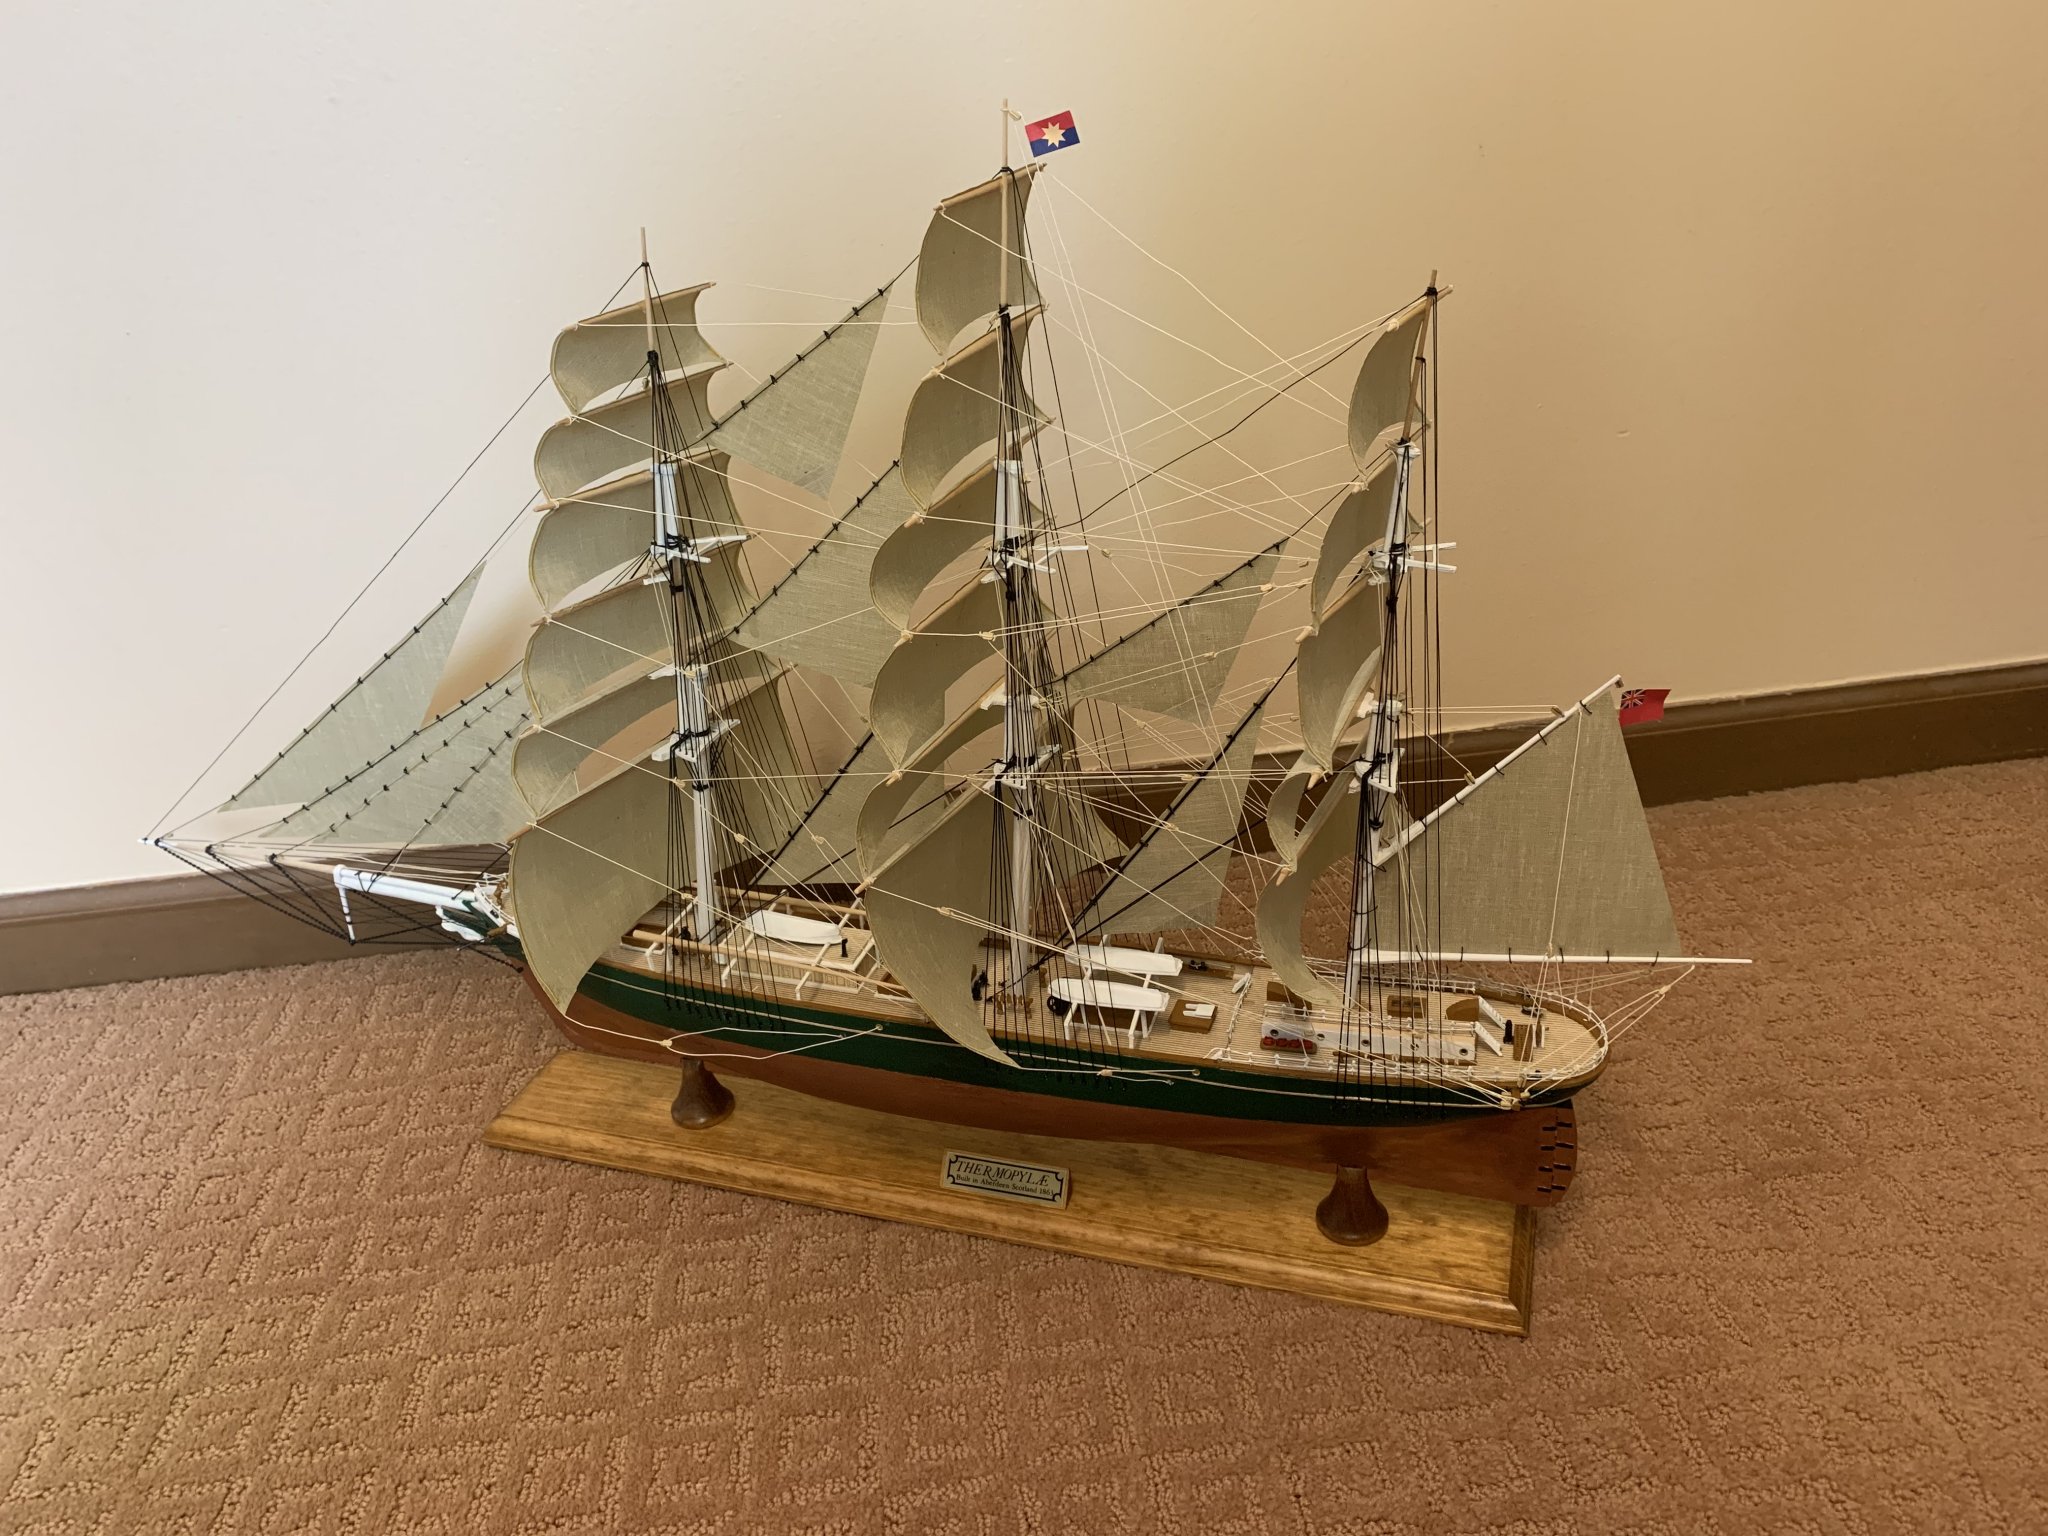
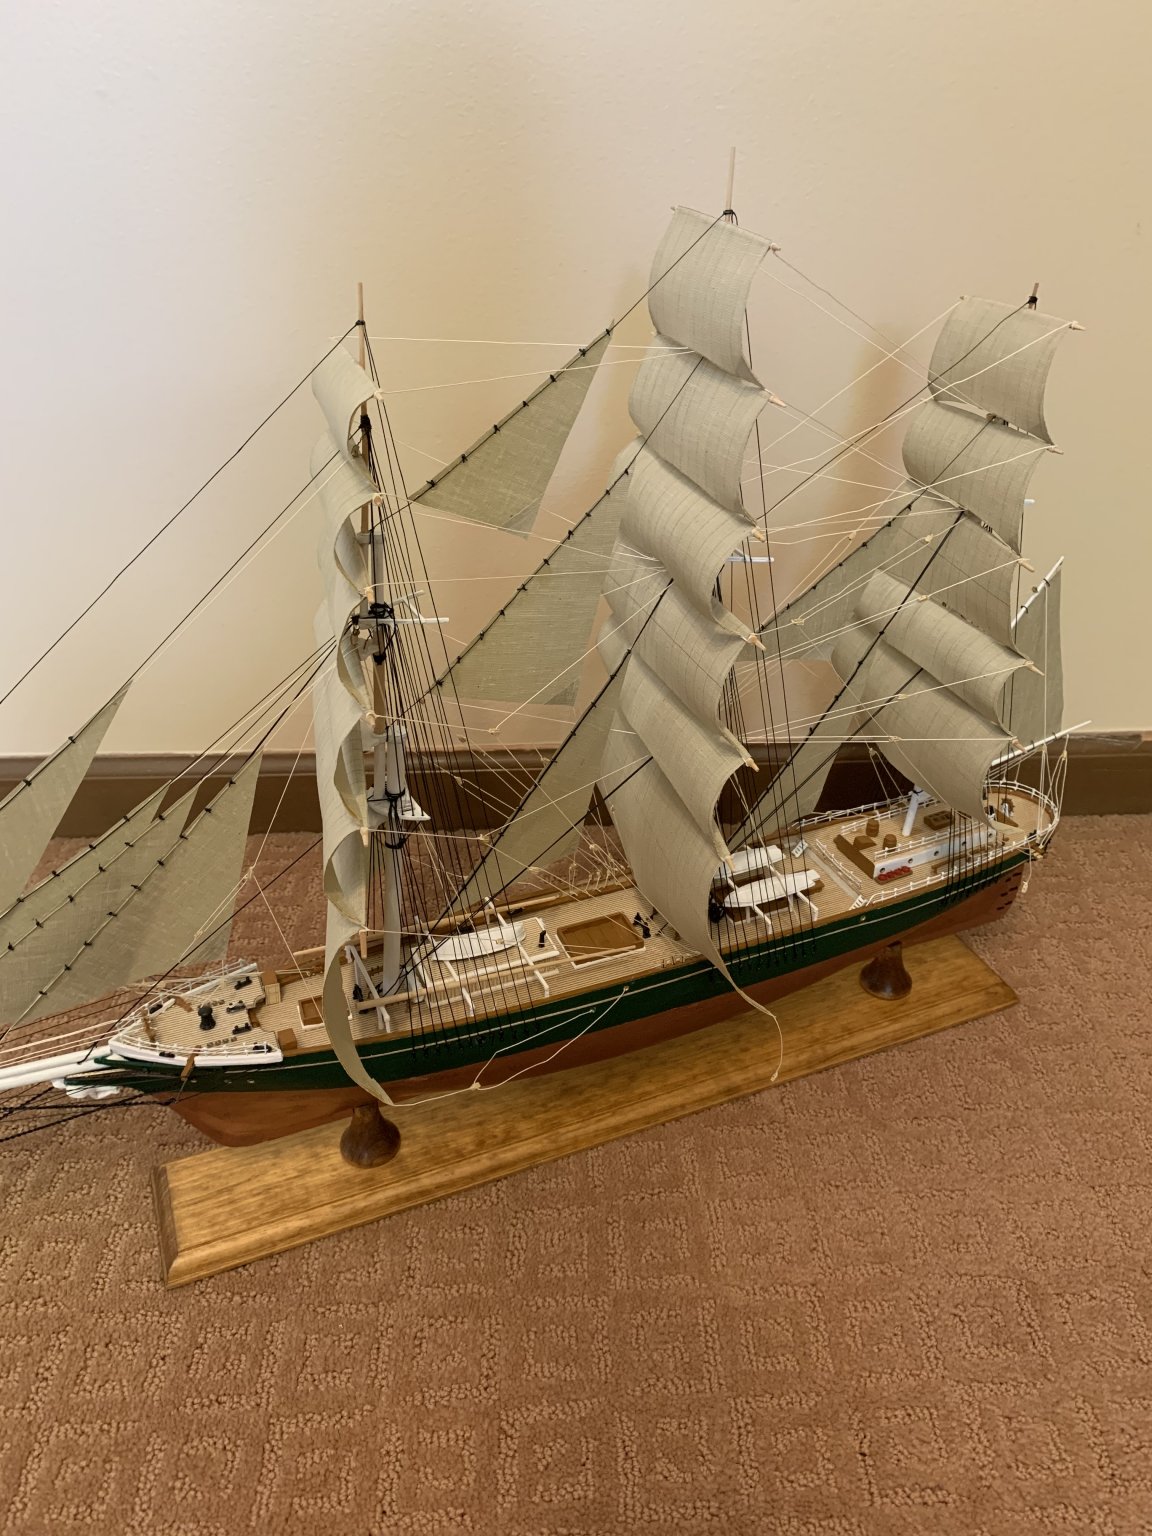
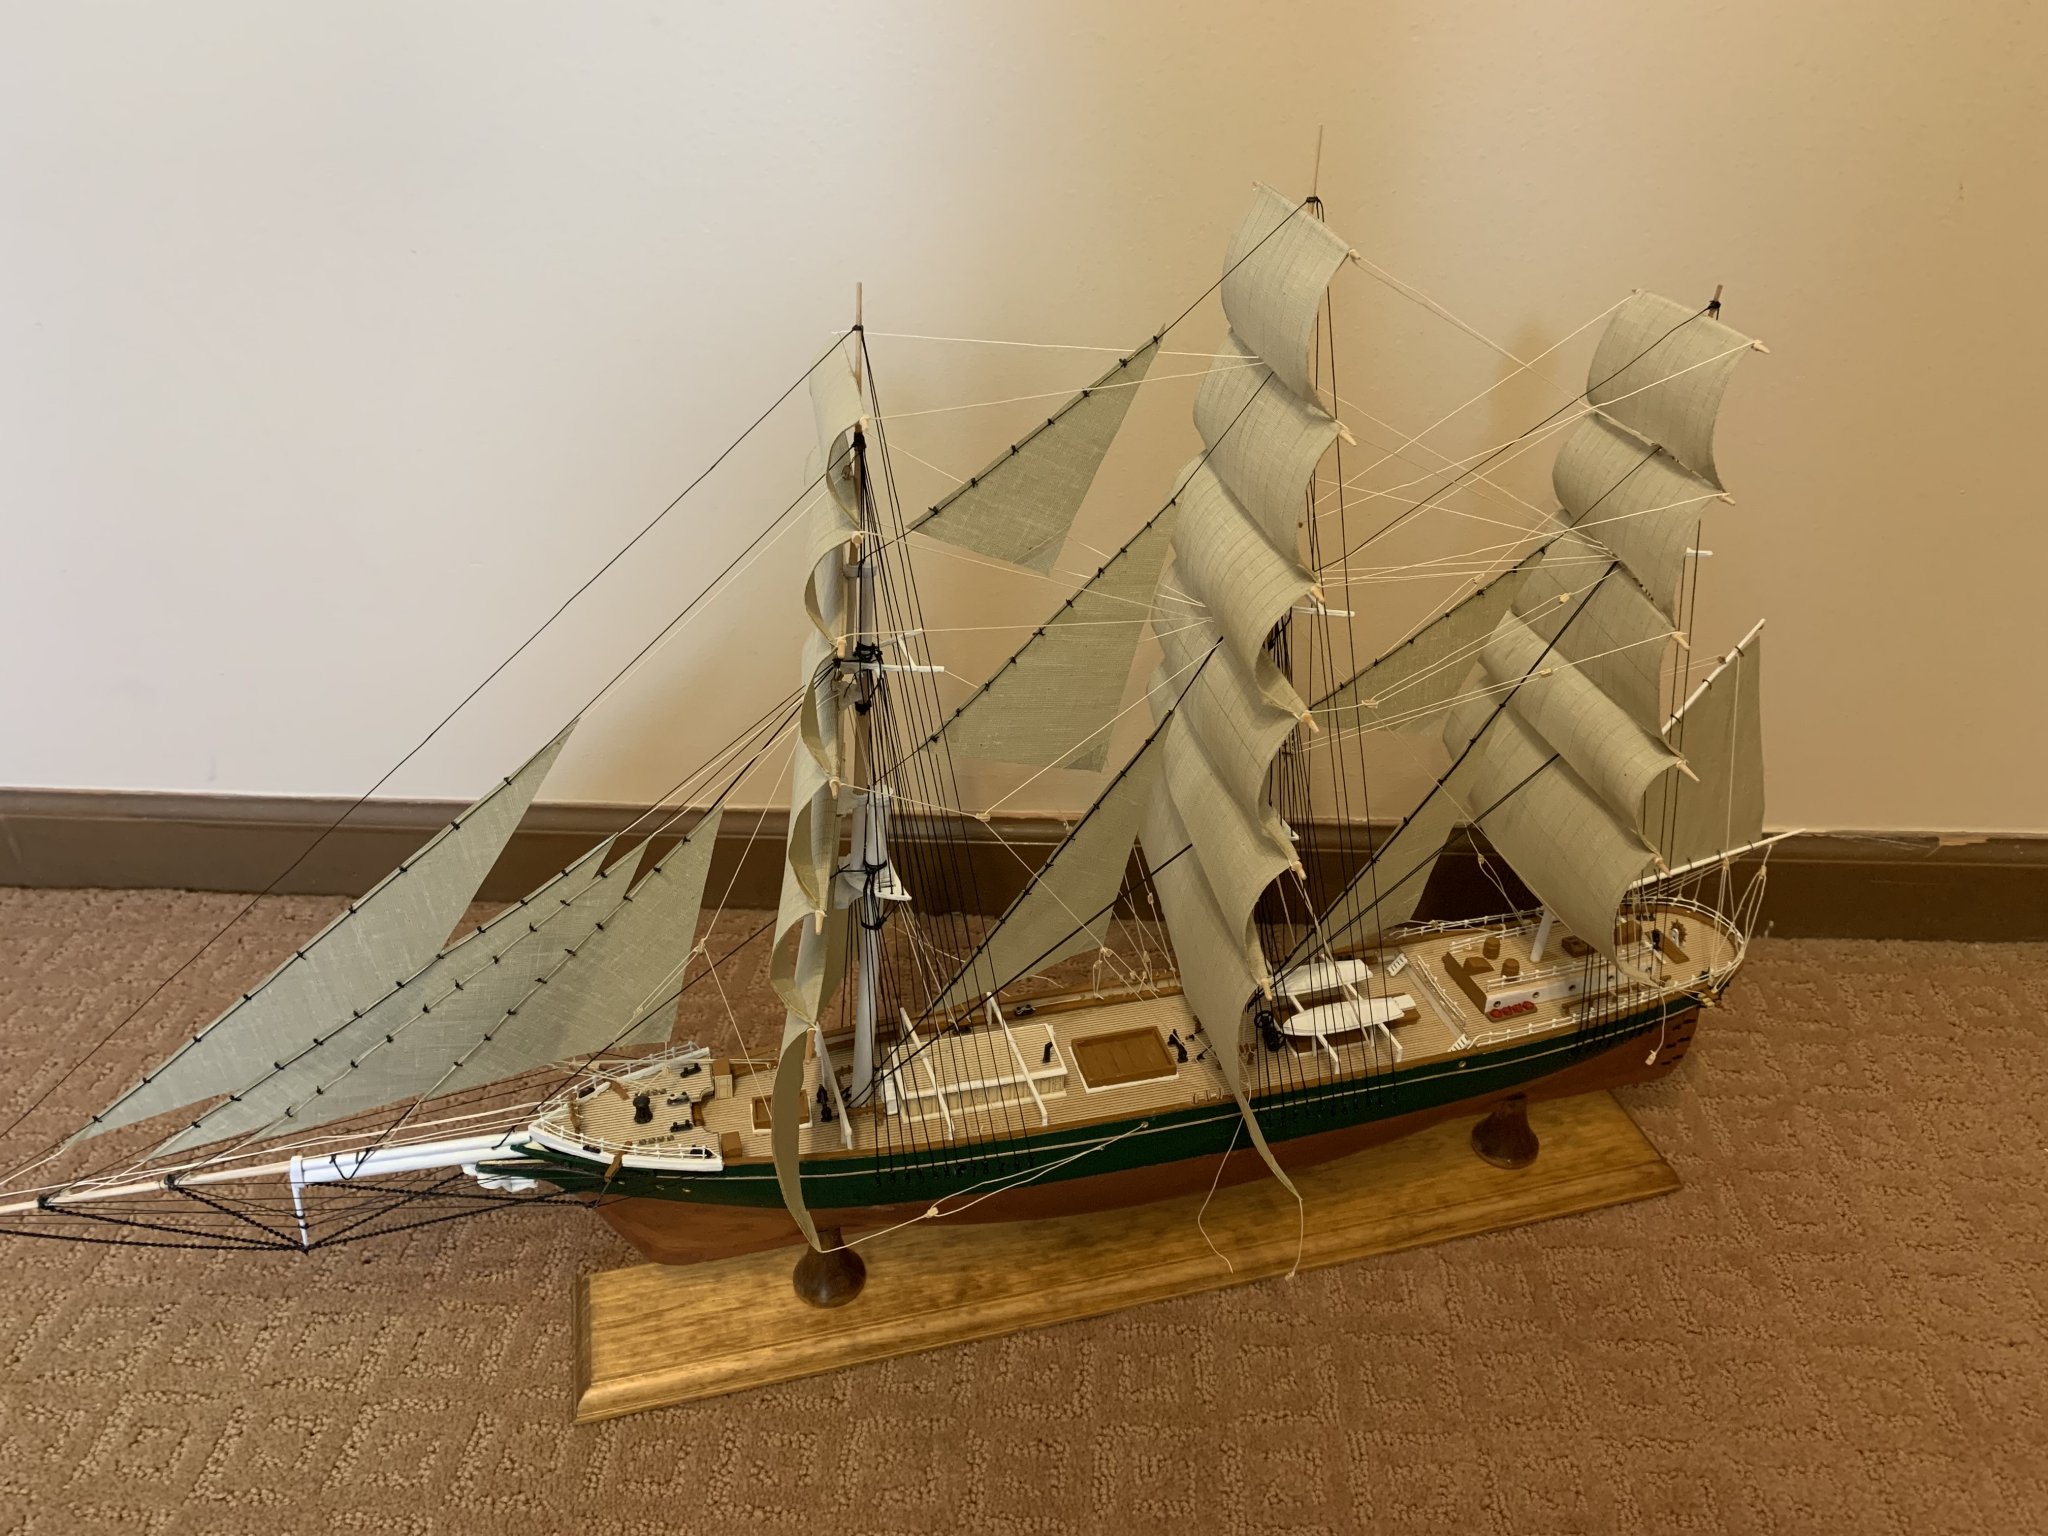
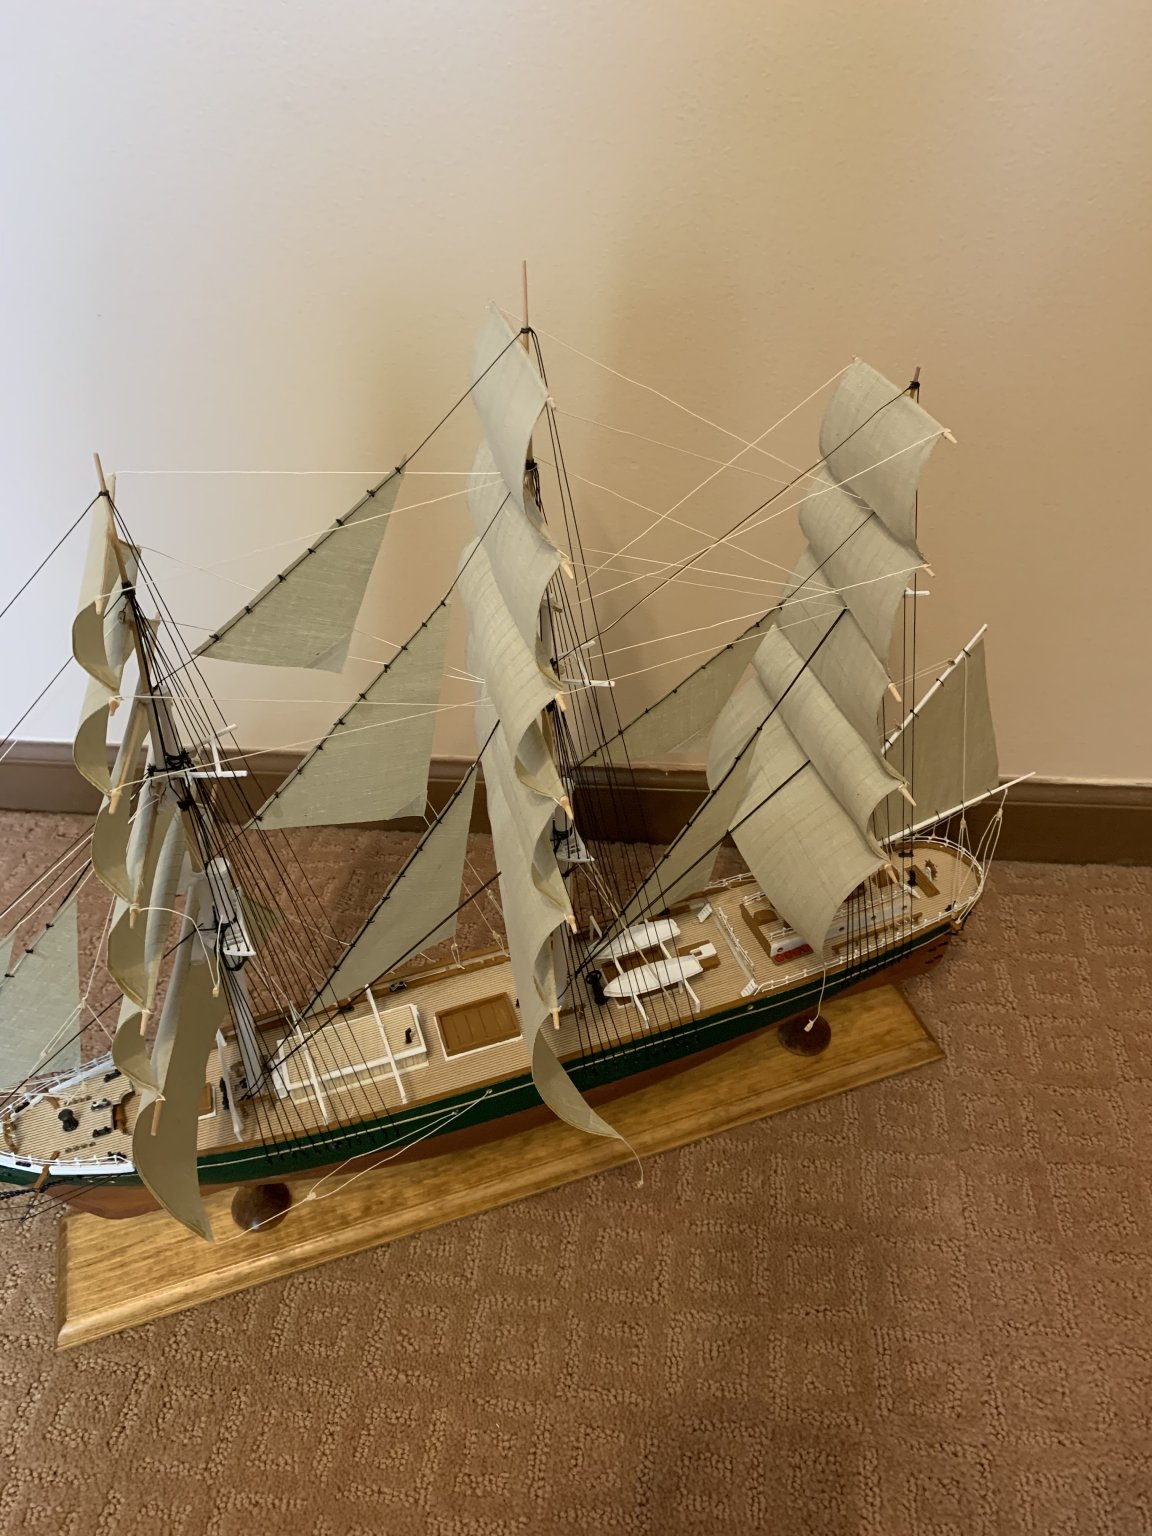
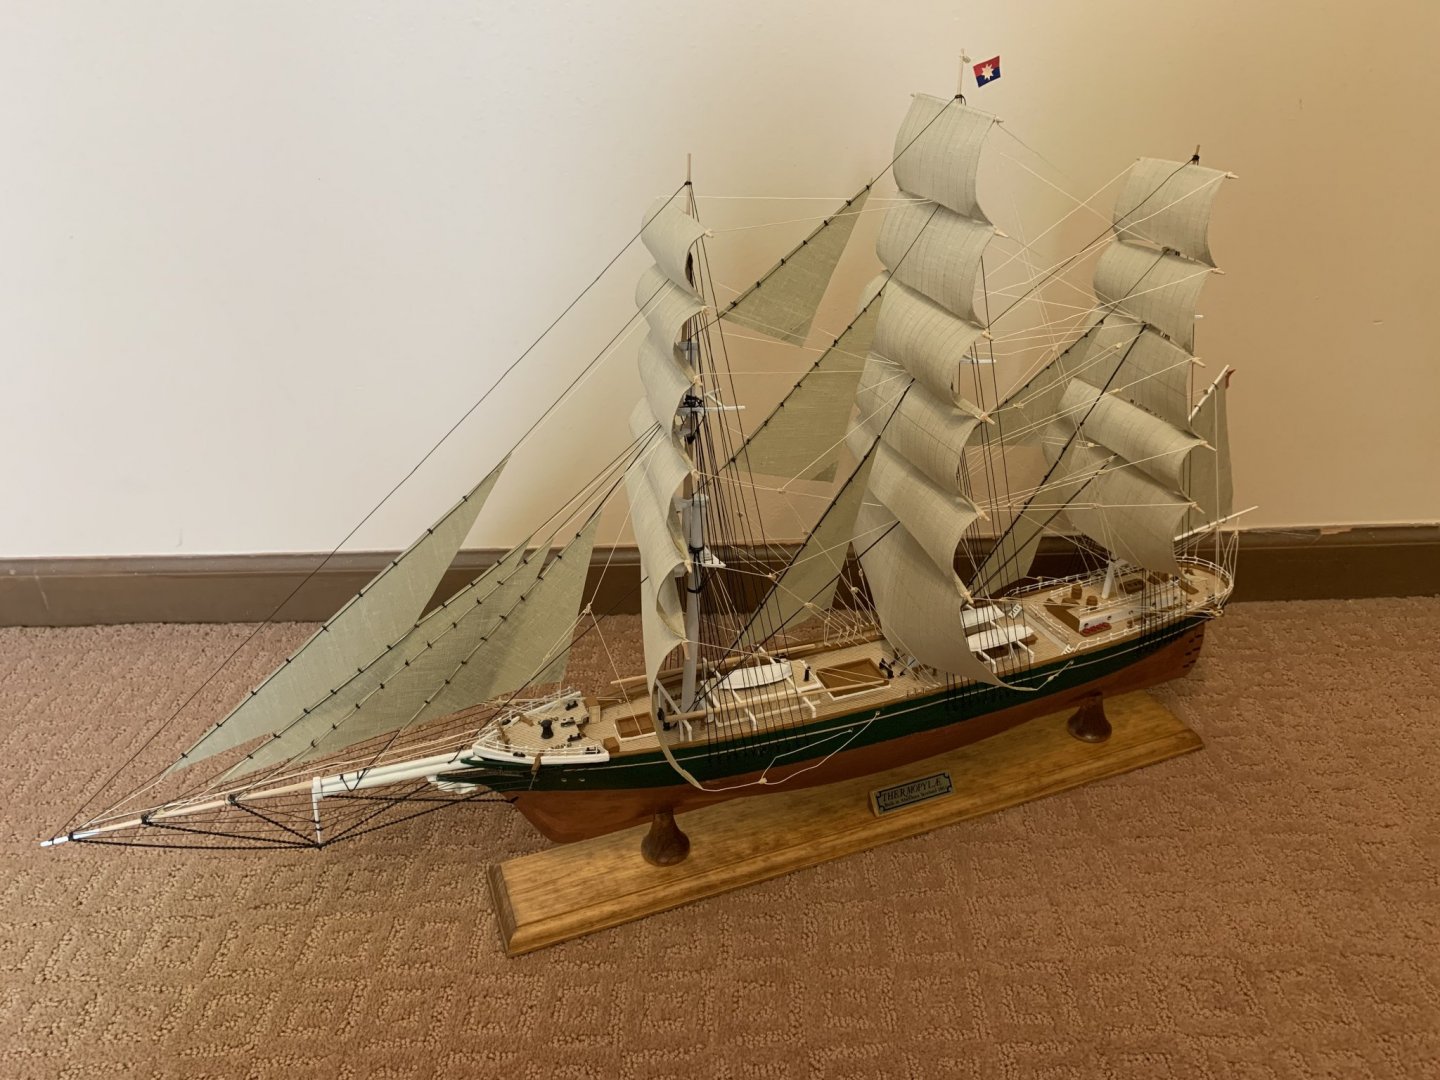
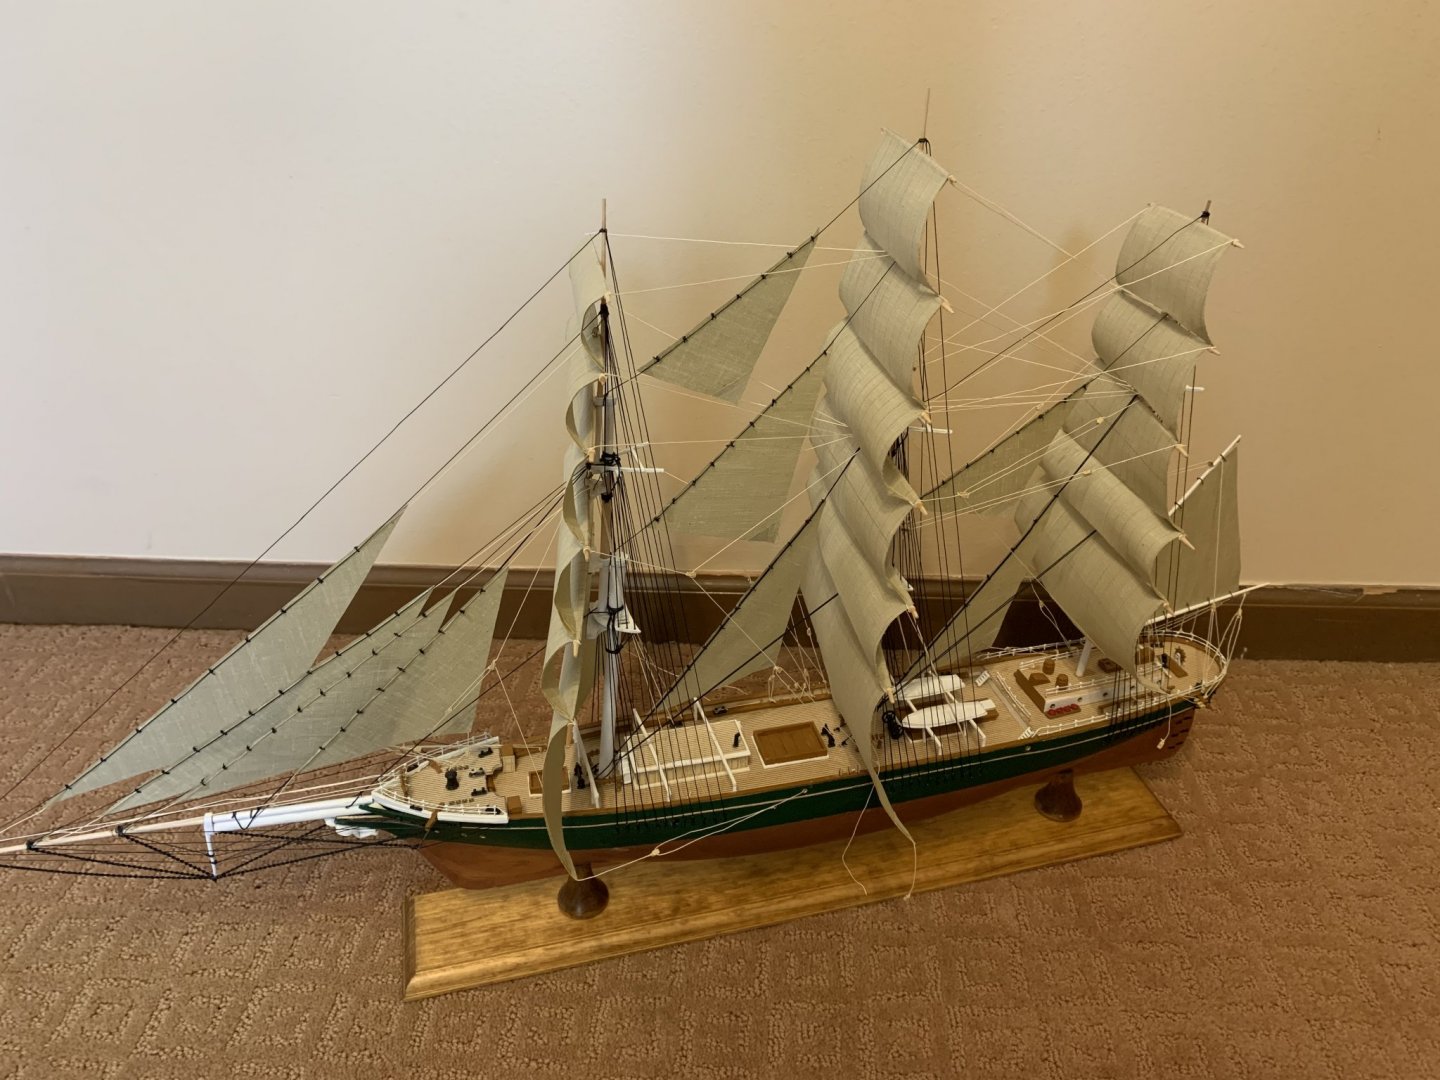
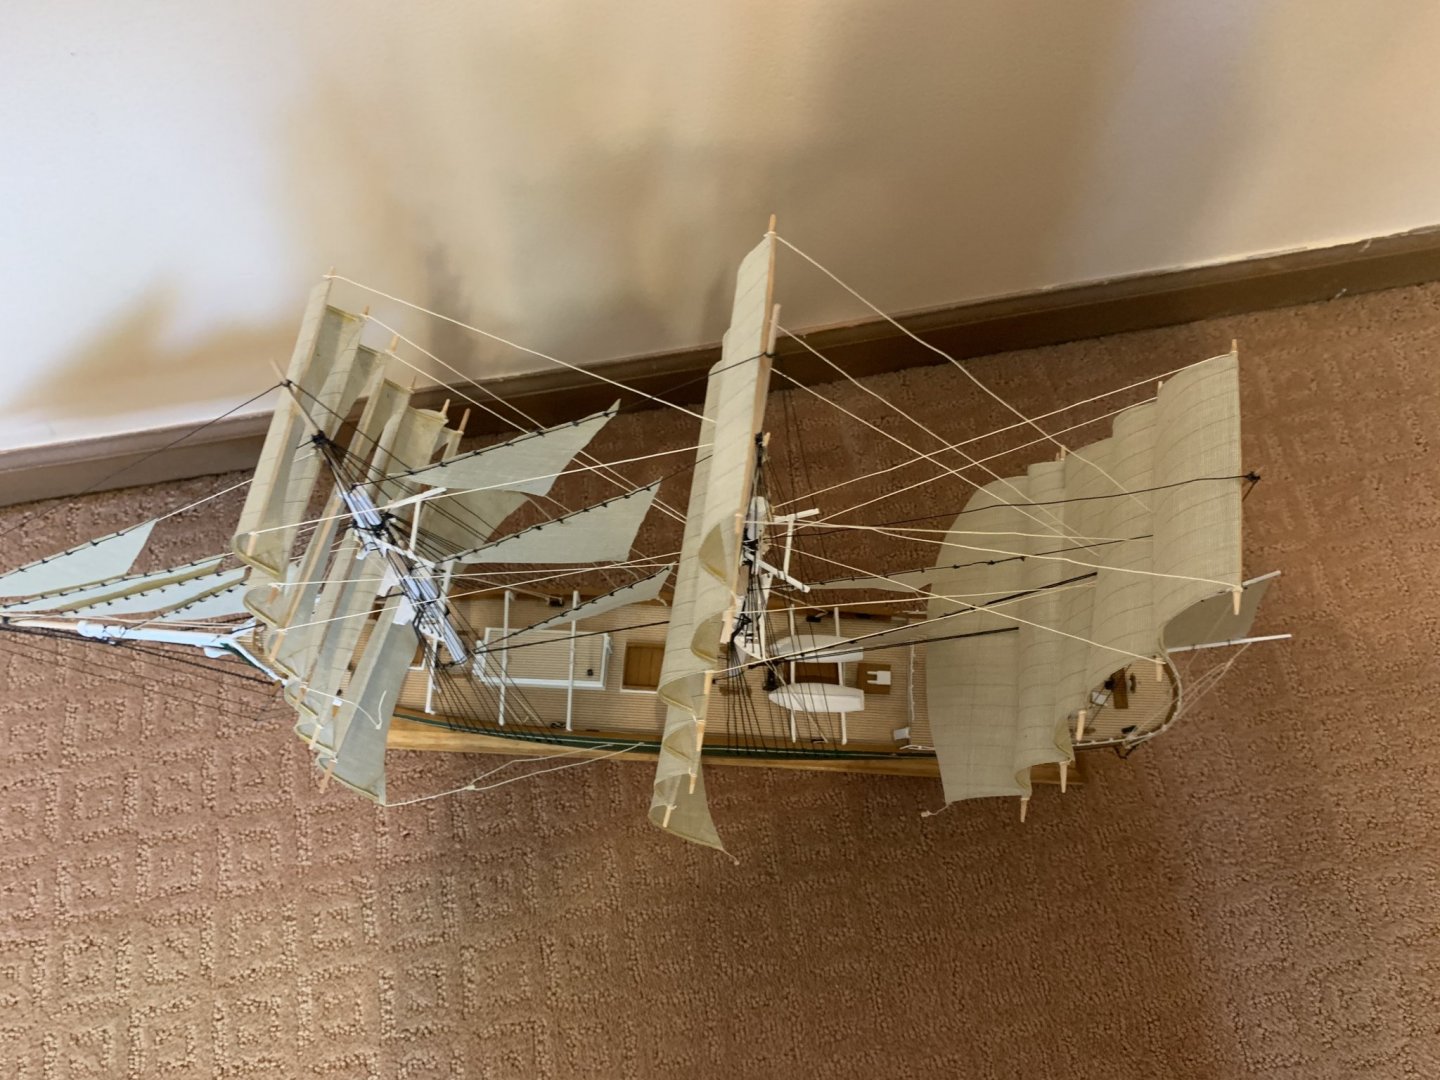
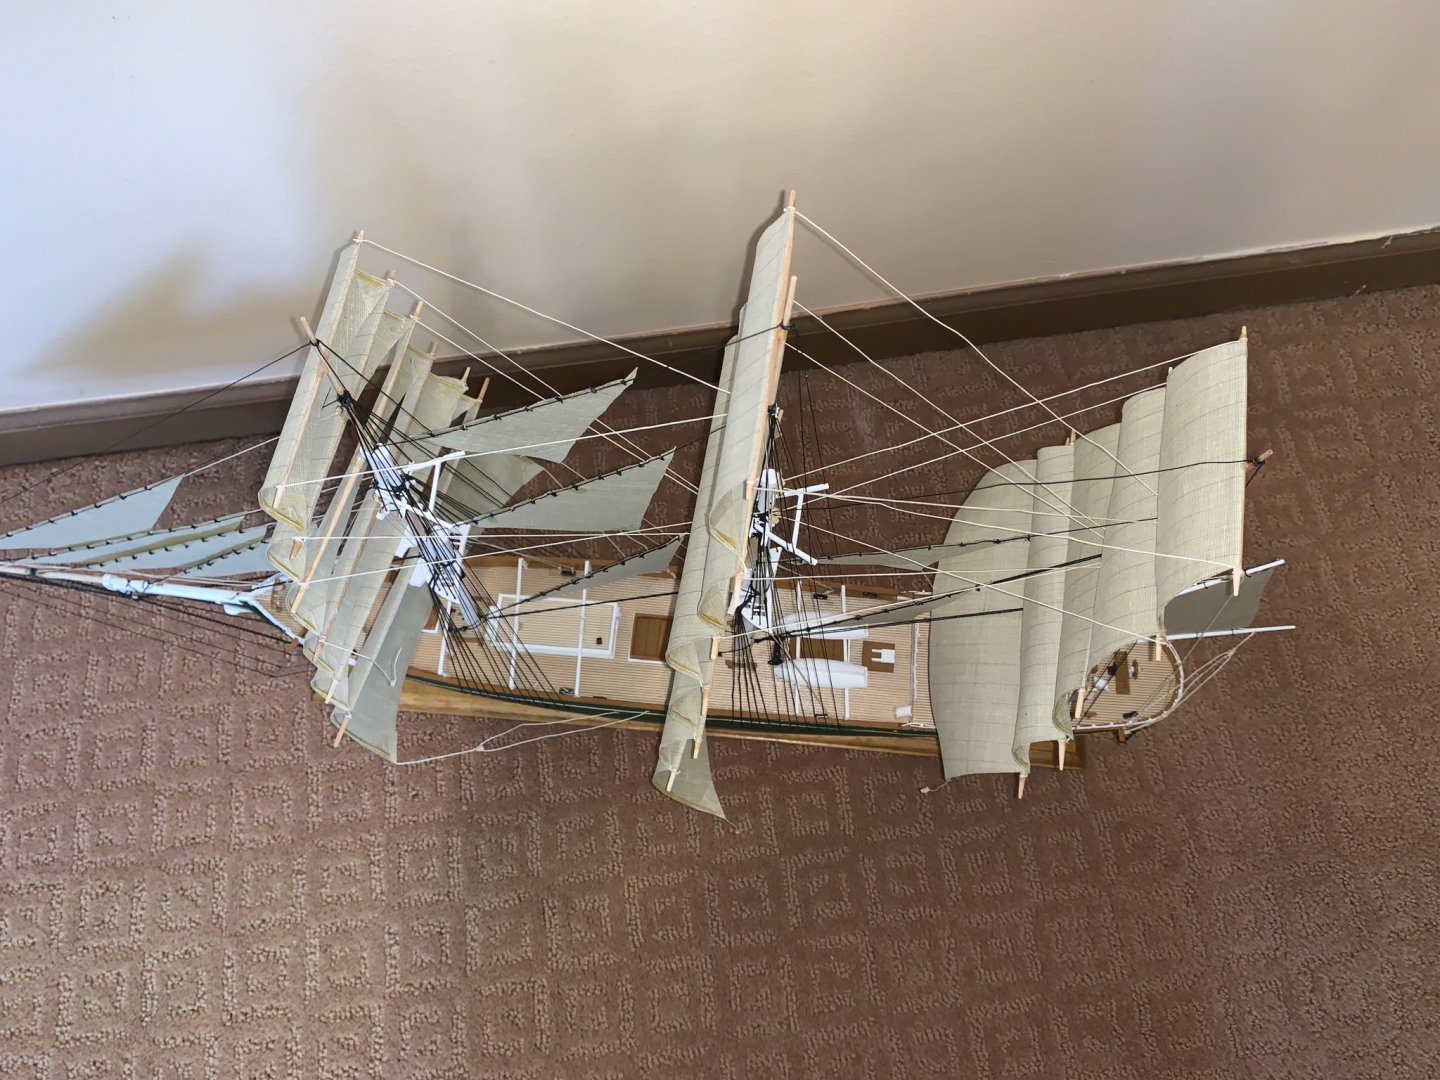
Still some details to add, but the rigging is done (still need to do something with the main sheets, still a little slack, but I'll do that after I glue on all the dead eye/lanyard castings.
- 41 replies
-
- 6
-
-
- thermopylae
- scientific models
- (and 3 more)
-
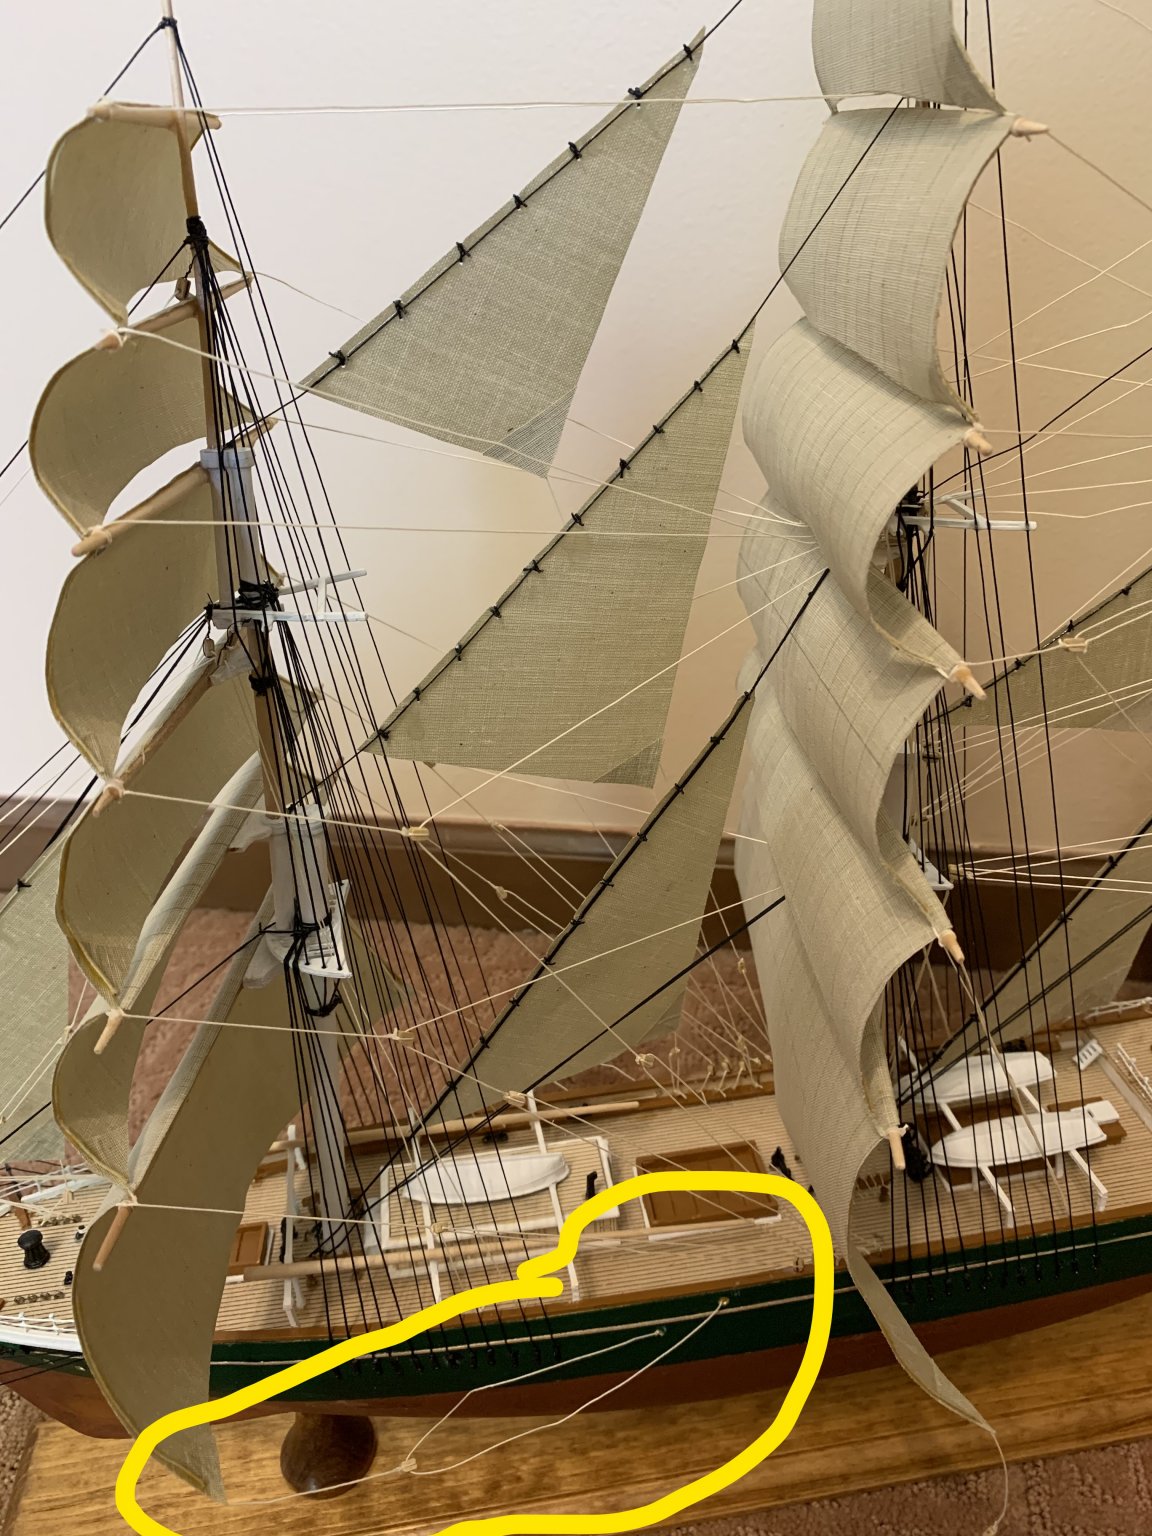
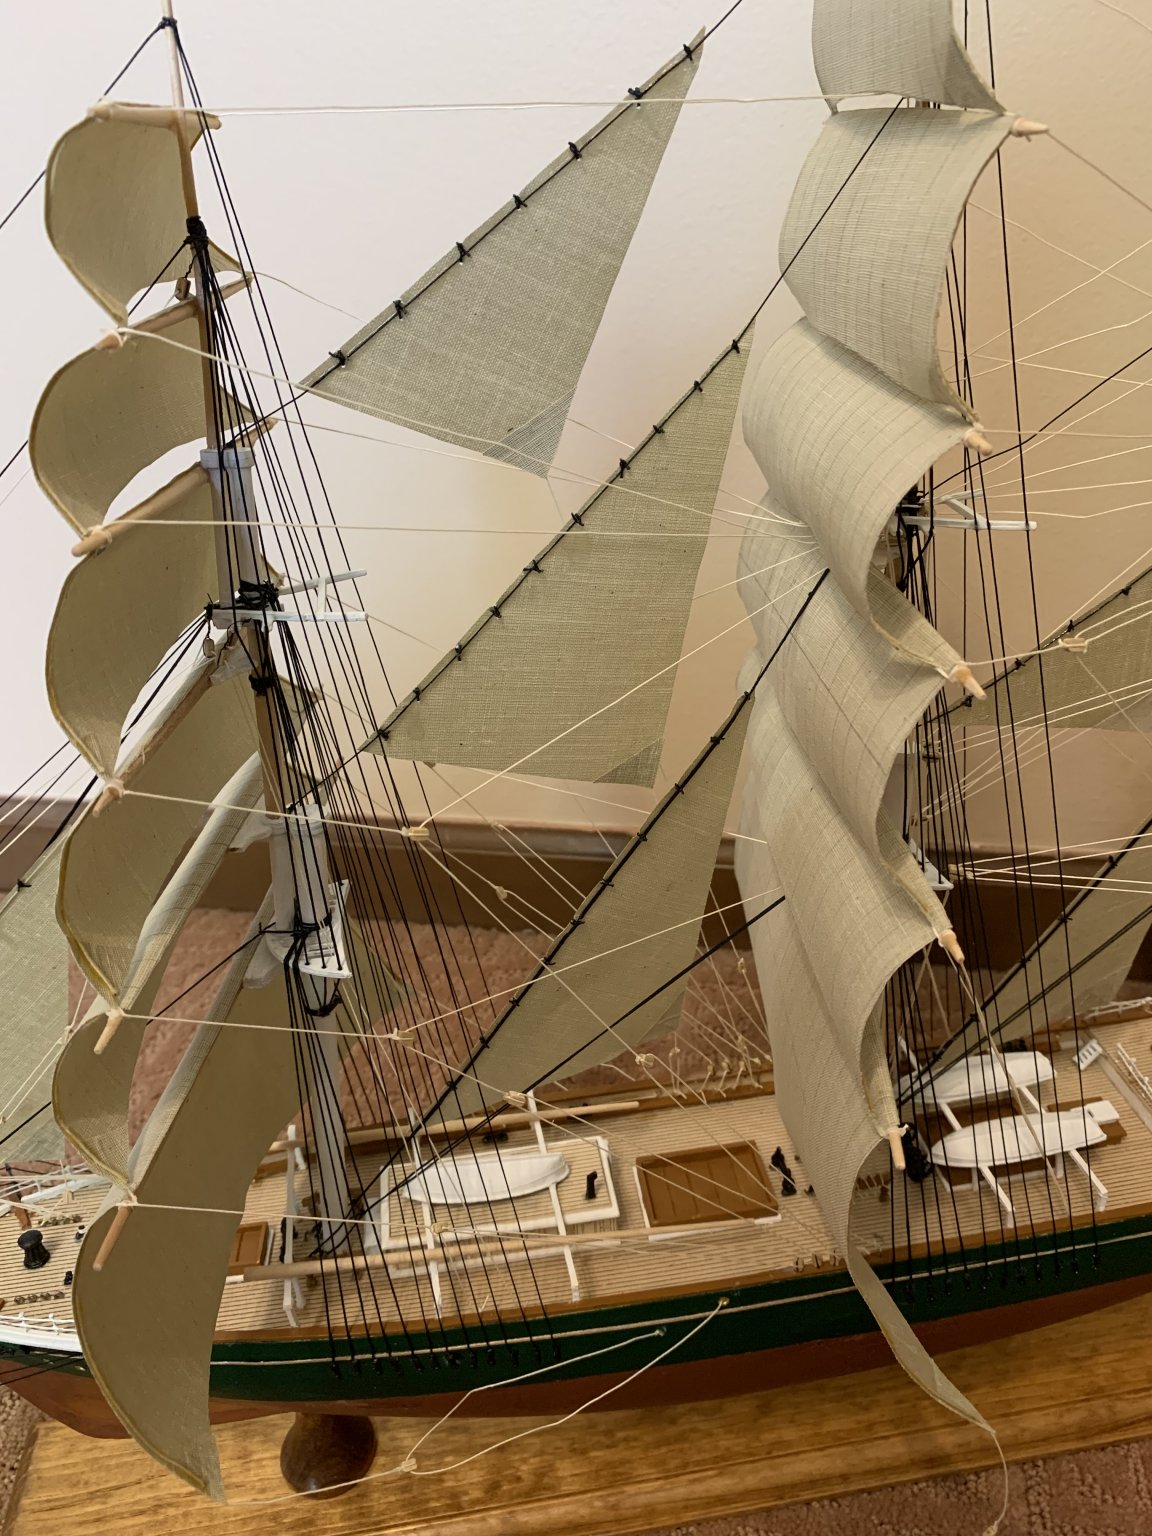
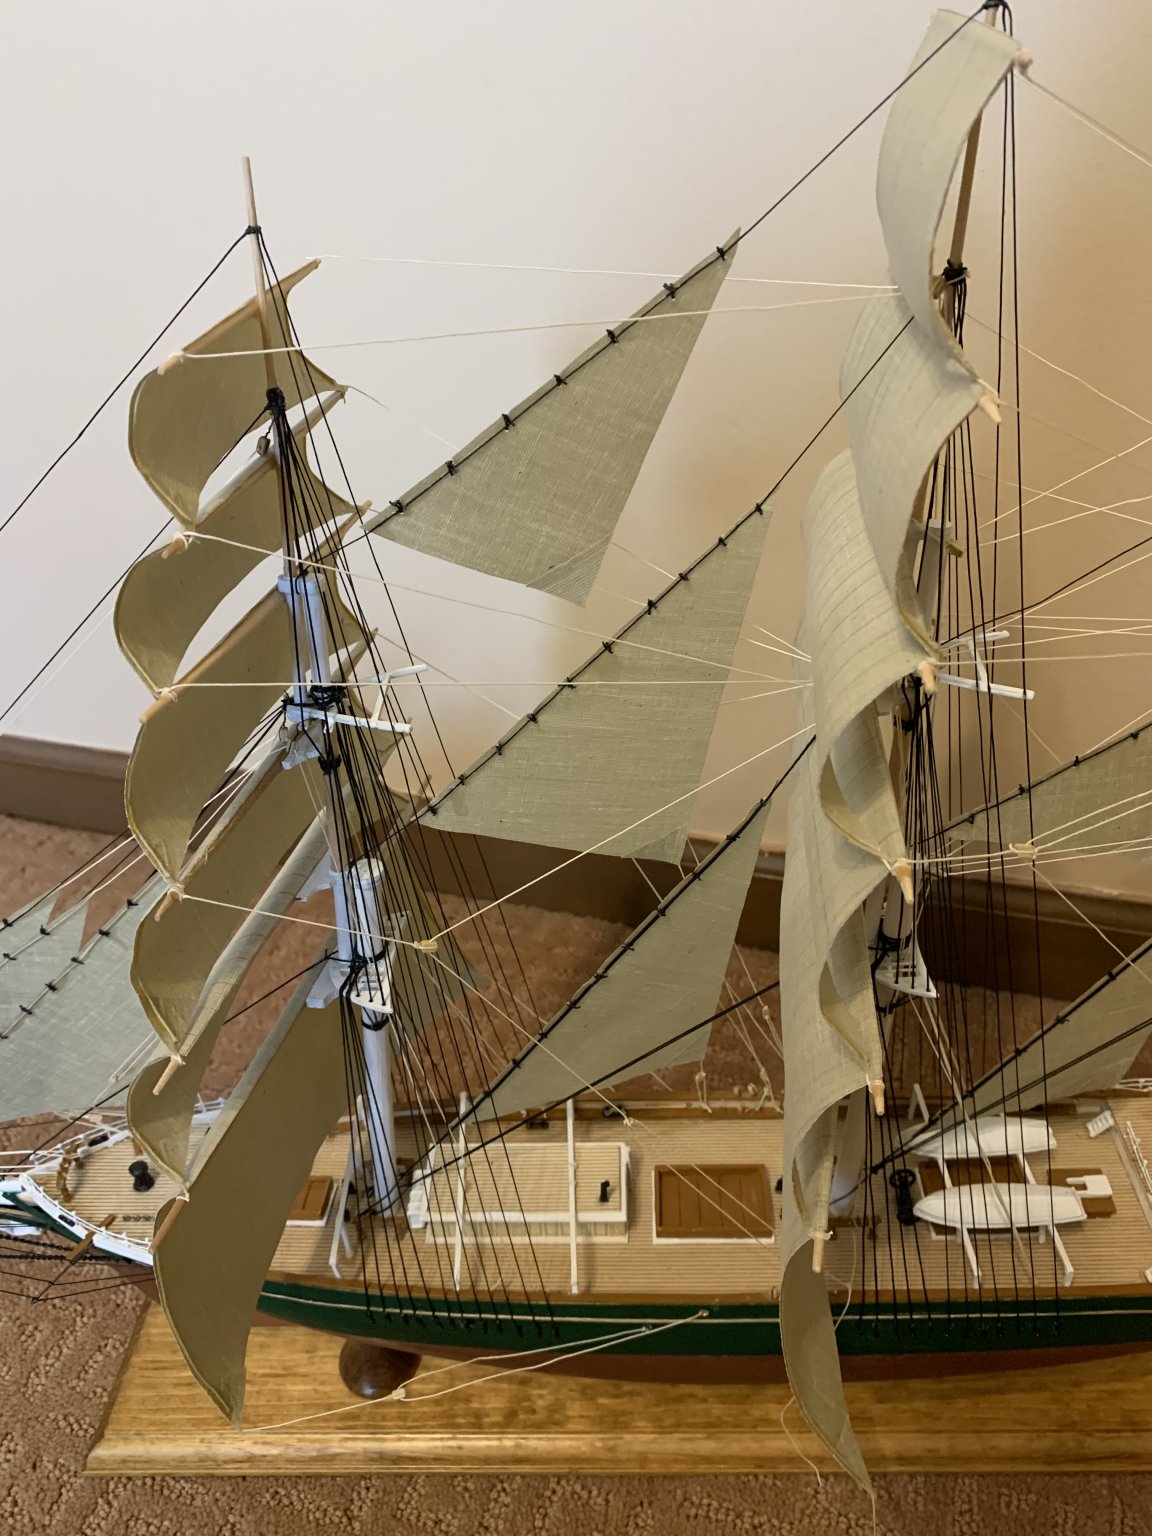
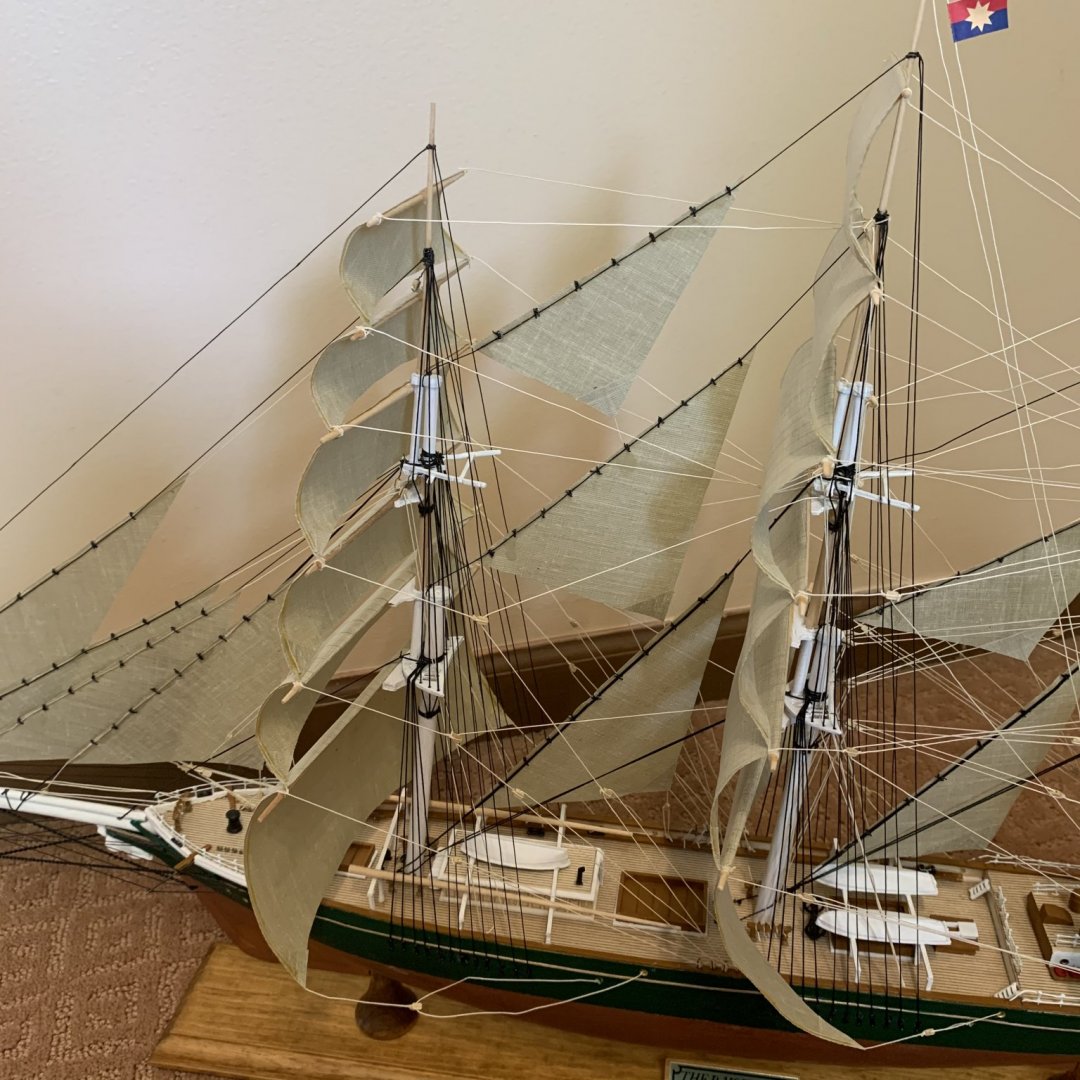
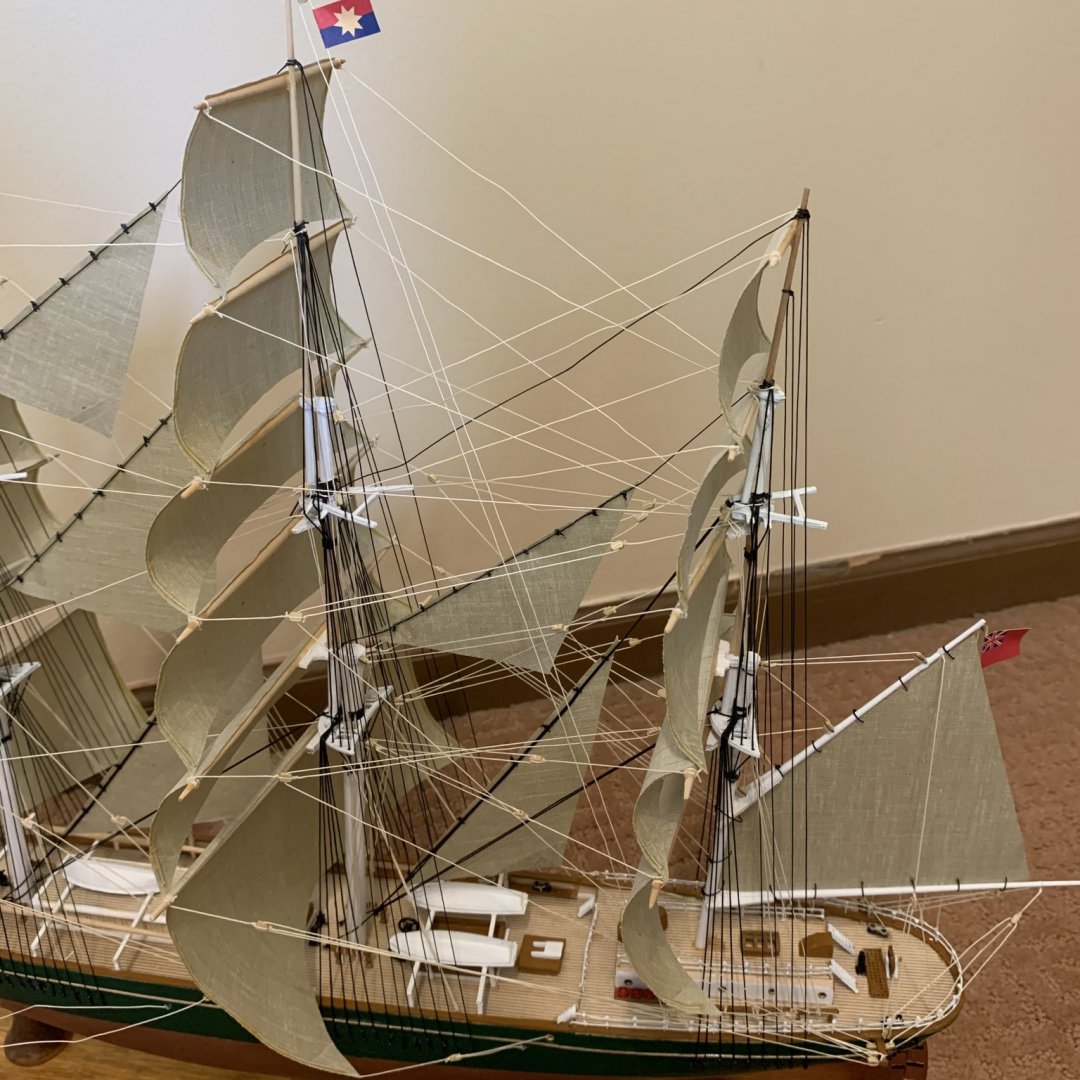
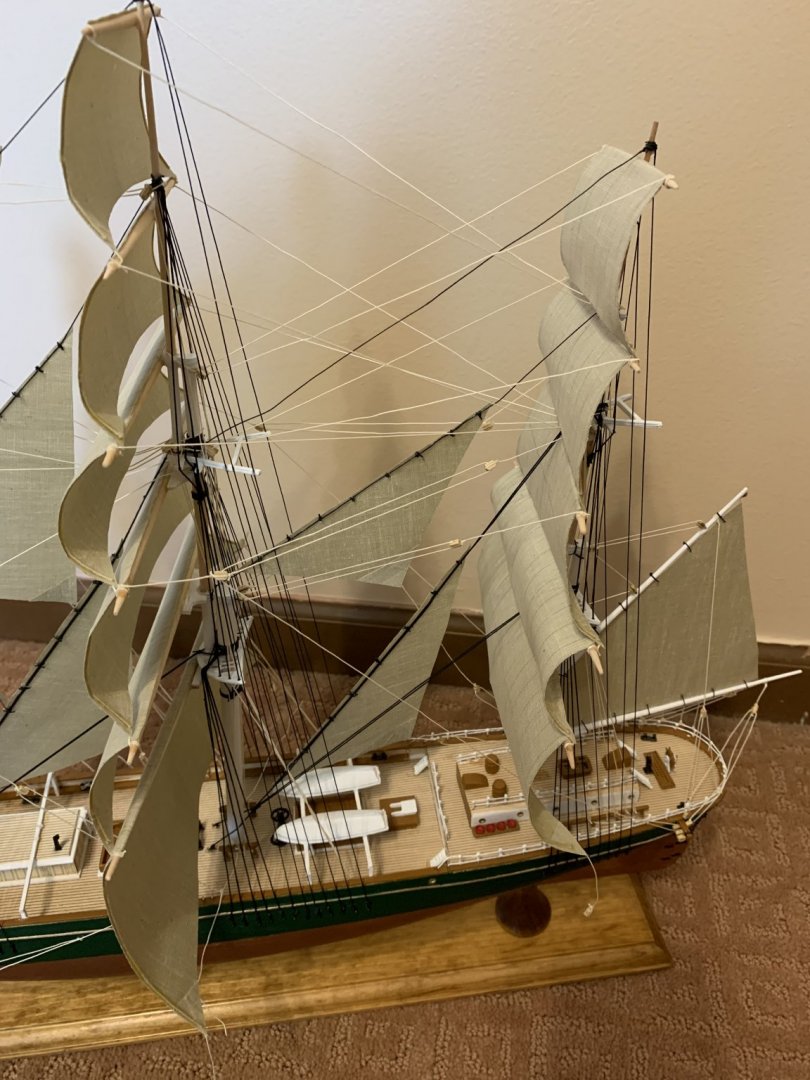
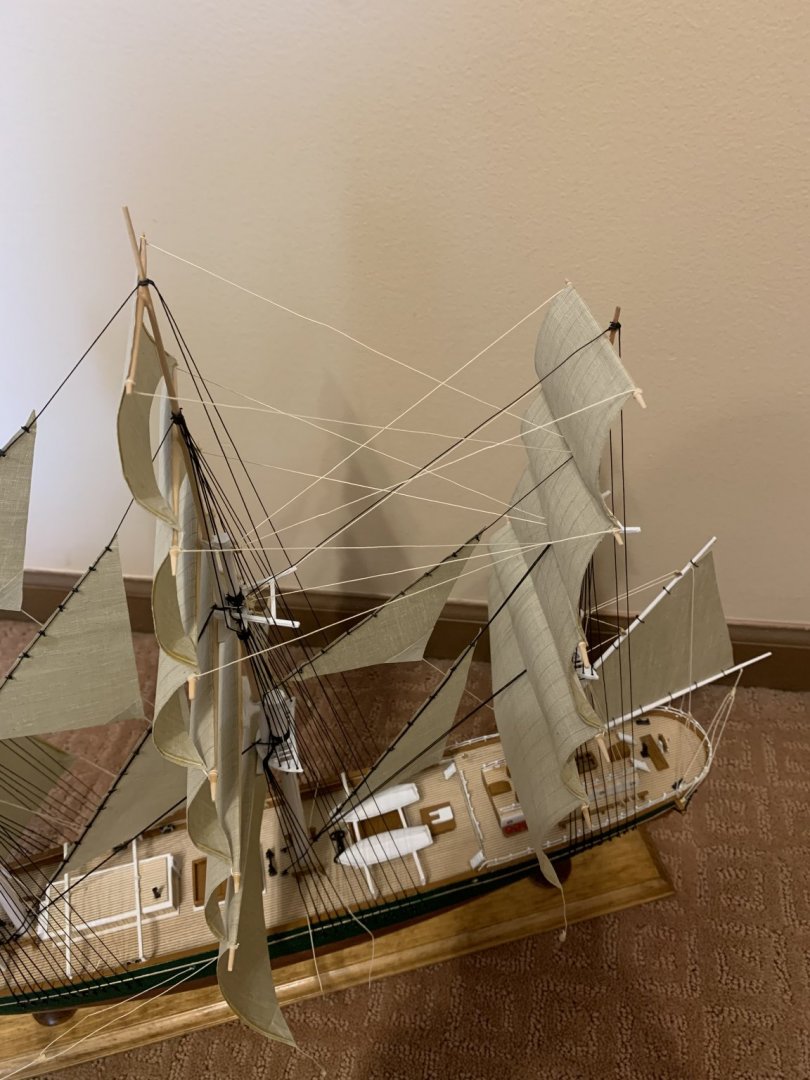
One thing I know I will struggle with shortly, all the sheets for the main sails/crojack have nothing to really pull against, the sails have small wire on the edges to help it hold it's shape, but not enough strength to straighten out the line. You can see the fore main sail sheets already, very slack. I'm thinking I may have to find either some thin/invisible fishing line and find a way to pull the corner forward, or possibly use a very thin wire to push it from behind, but I'm certainly open to ideas on this one, I can't leave it as is.

- 41 replies
-
- 5
-
-
- thermopylae
- scientific models
- (and 3 more)
-
The instruction call for all the lower top sail braces before moving on to the crojack and main braces, I opted to complete all the mizzenmast braces before the mainmast braces on these steps, because all the mizzenmast lines would be harder to reach after the main lower top sail braces.


- 41 replies
-
- 7
-
-
- thermopylae
- scientific models
- (and 3 more)
-
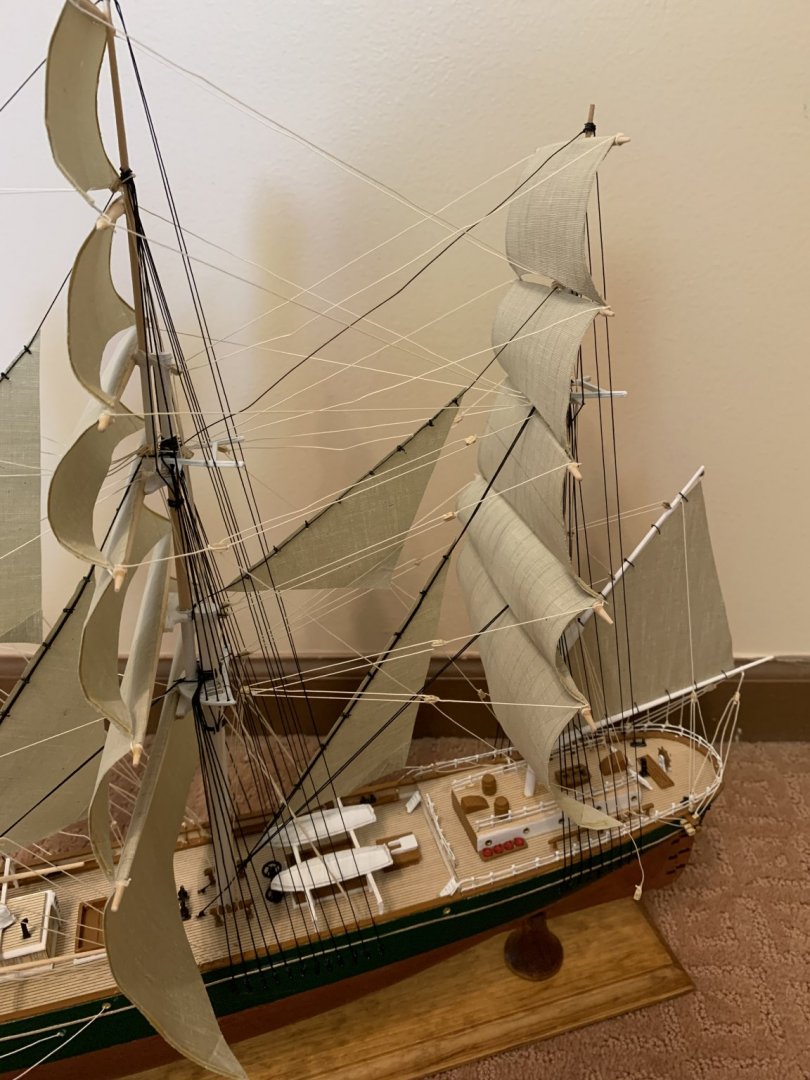
Upper top sail braces next, much more complex than the earlier braces, multiple blocks per line.

- 41 replies
-
- 5
-
-
- thermopylae
- scientific models
- (and 3 more)
-
The running rigging is broken down into several stages, first is to do the braces for the royal and top-gallant sails. This is starting to feel like one of those scenes in a mission impossible movie where the hero has to weasel his way between lasers to reach a prize. Tying knots with tweezers is definitely easier watching someone else do.


- 41 replies
-
- 6
-
-
- thermopylae
- scientific models
- (and 3 more)