Bill Gormley
-
Posts
24 -
Joined
-
Last visited
Recent Profile Visitors
826 profile views


-
 Scottish Guy reacted to a post in a topic:
For Beginners -- A Cautionary Tale
Scottish Guy reacted to a post in a topic:
For Beginners -- A Cautionary Tale
-
GrandpaPhil reacted to a post in a topic:
US Brig Syren by Bill Gormley - Model Shipways - 1:64
-
Ryland Craze reacted to a post in a topic:
US Brig Syren by Bill Gormley - Model Shipways - 1:64
-
WalrusGuy reacted to a post in a topic:
US Brig Syren by Bill Gormley - Model Shipways - 1:64
-
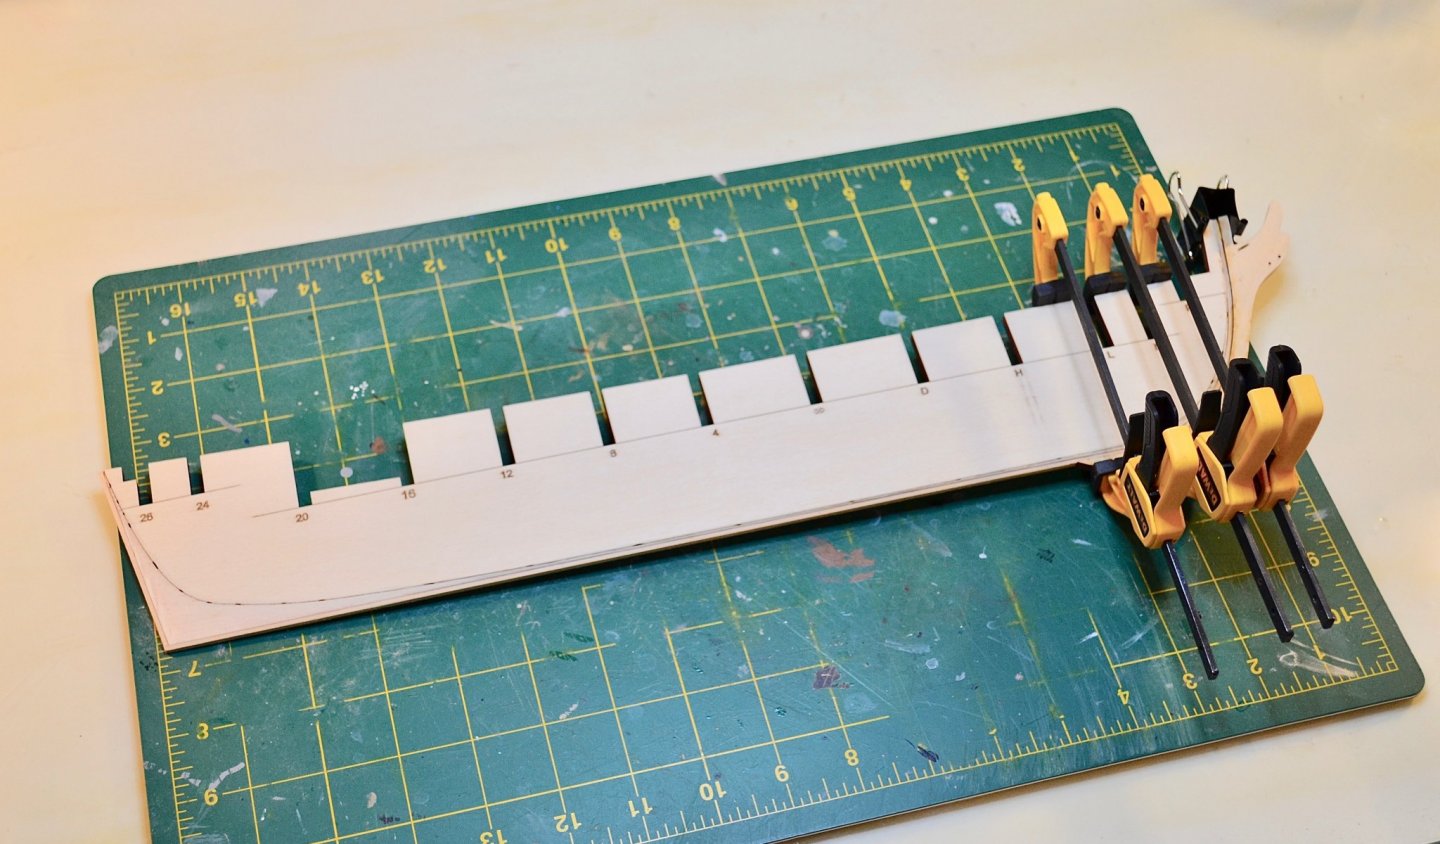
That's brilliant ... which is probably why I didn't think of simply soaking the planks then clamping them in place and letting them dry there. Thank you for the nudge there to engage my noggin. On the plus side, I did get the planks attached on one side yesterday without too much pain ... just needed to go slowly.
-
WalrusGuy reacted to a post in a topic:
US Brig Syren by WalrusGuy - FINISHED - Model Shipways - Scale 1:64 - Second wooden ship build
-
JpR62 reacted to a post in a topic:
US Brig Syren by Bill Gormley - Model Shipways - 1:64
-
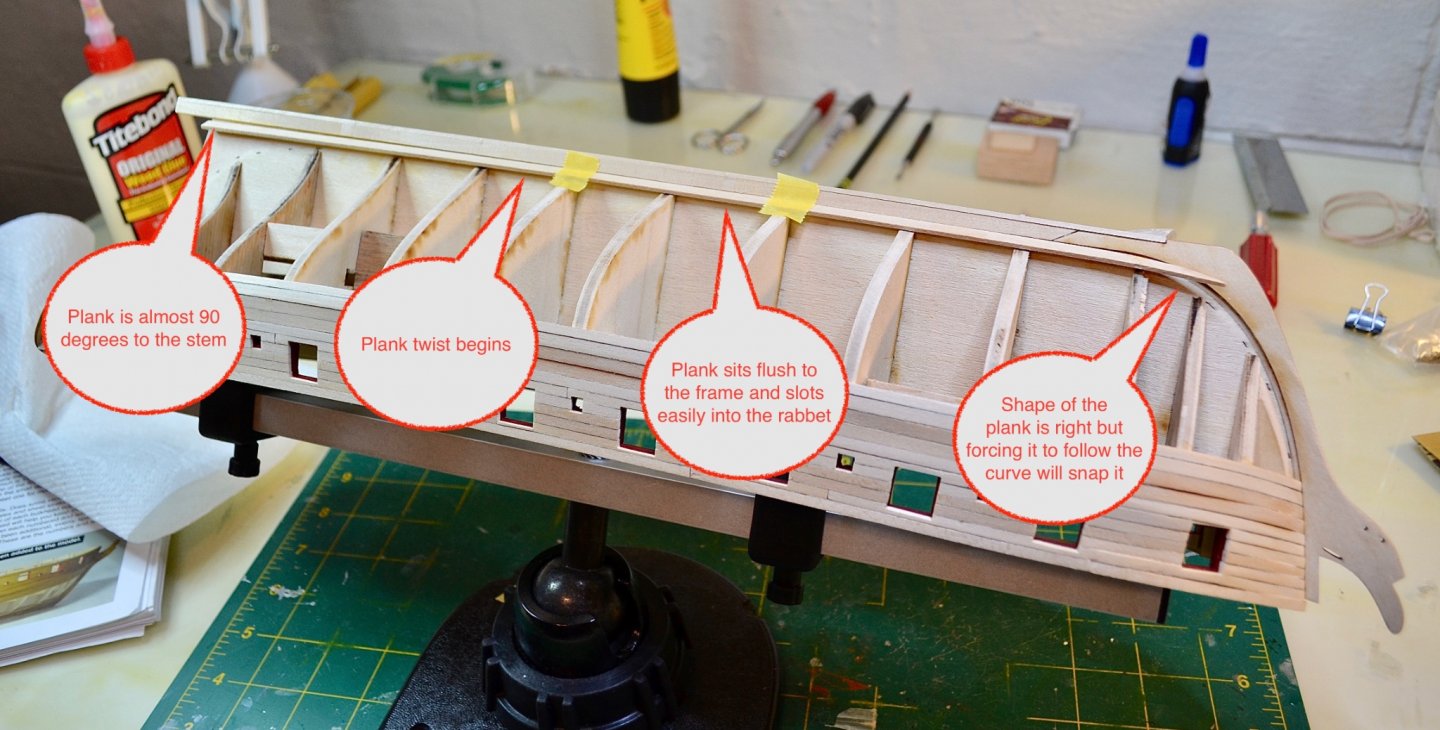
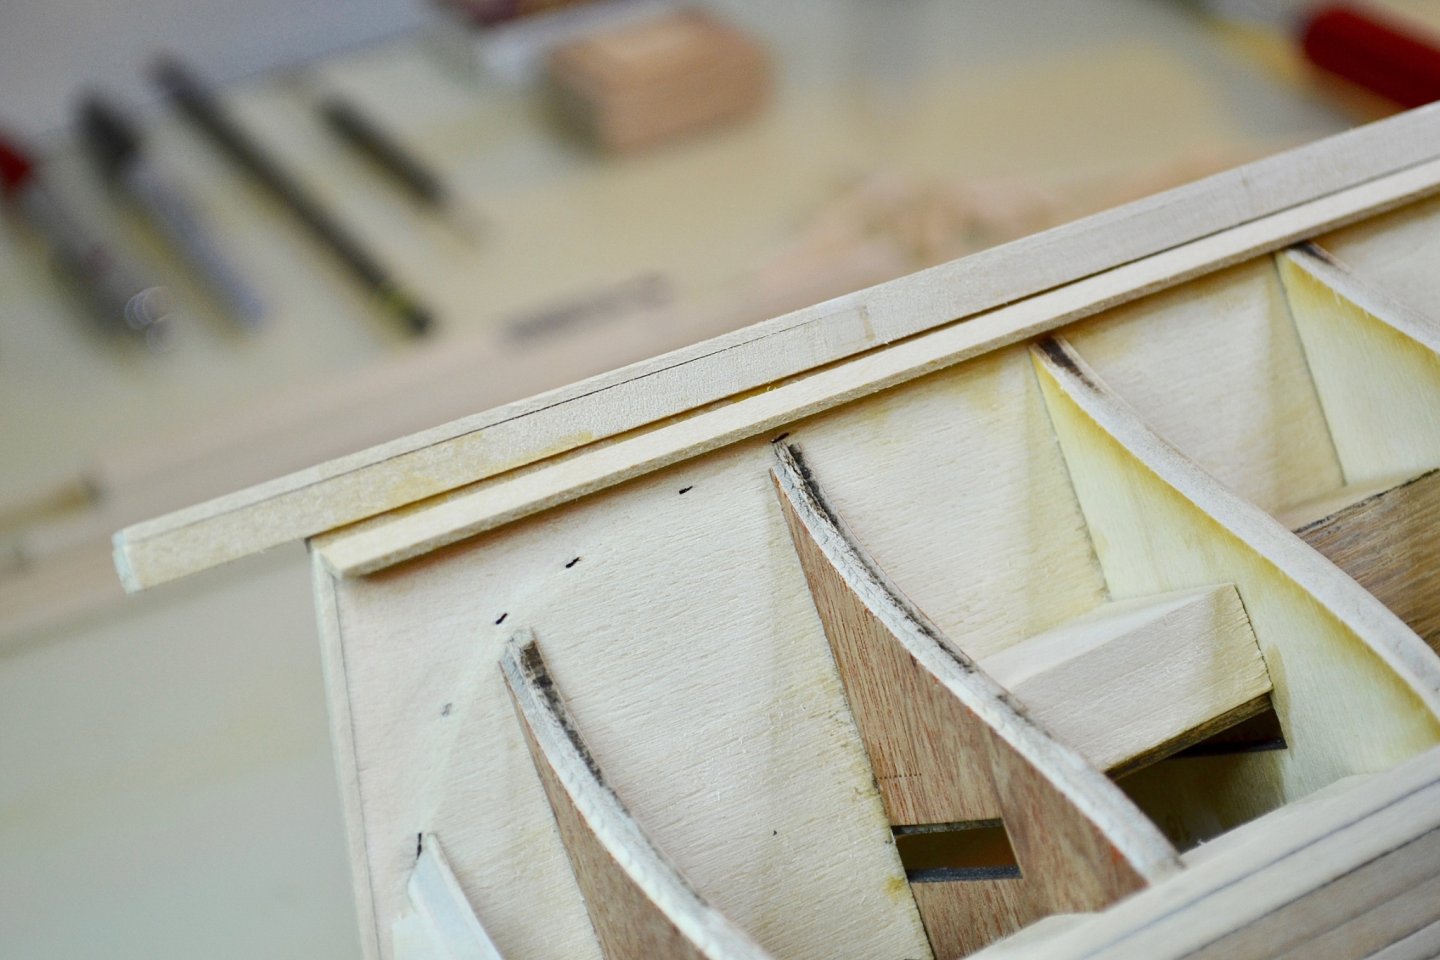
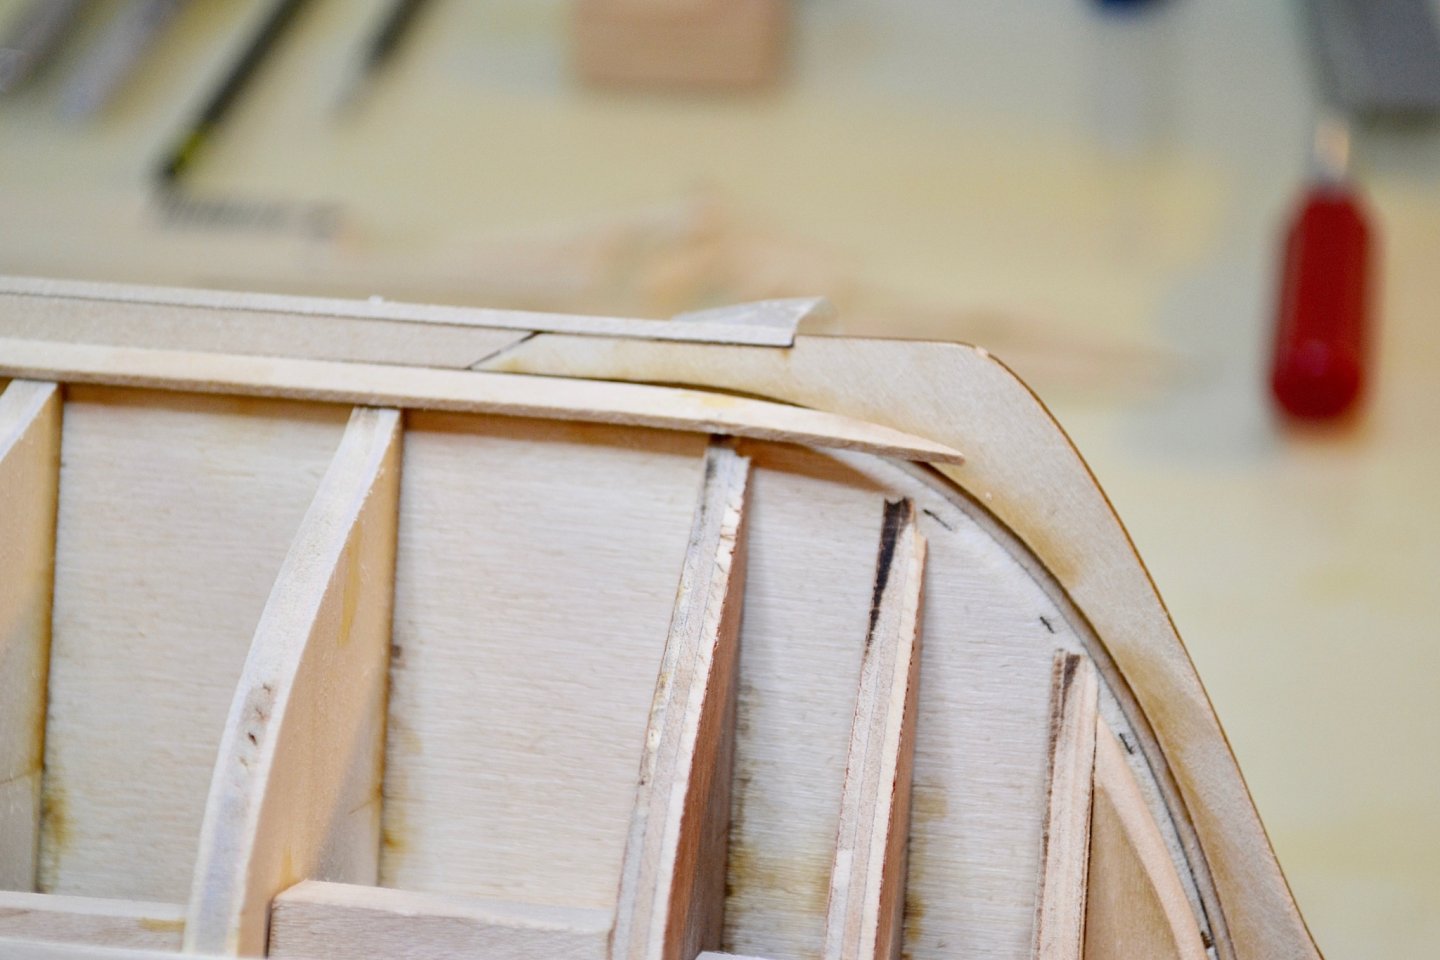
Thank you both for the advice - very much appreciated. Can I ask how you would address the situation below? Initially, I thought simply trimming / shaping the front section of the plank would do the trick. Now I am wondering whether I need to bend it as well.
-
I've been following your progress, just not commenting much. That is absolutely beautiful work and a fine goal for me to work toward with my own build.
- 950 replies
-
- 1
-
-
- syren
- model shipways
- (and 1 more)
-
WalrusGuy reacted to a post in a topic:
US Brig Syren by Bill Gormley - Model Shipways - 1:64
-
Ryland Craze reacted to a post in a topic:
US Brig Syren by Bill Gormley - Model Shipways - 1:64
-
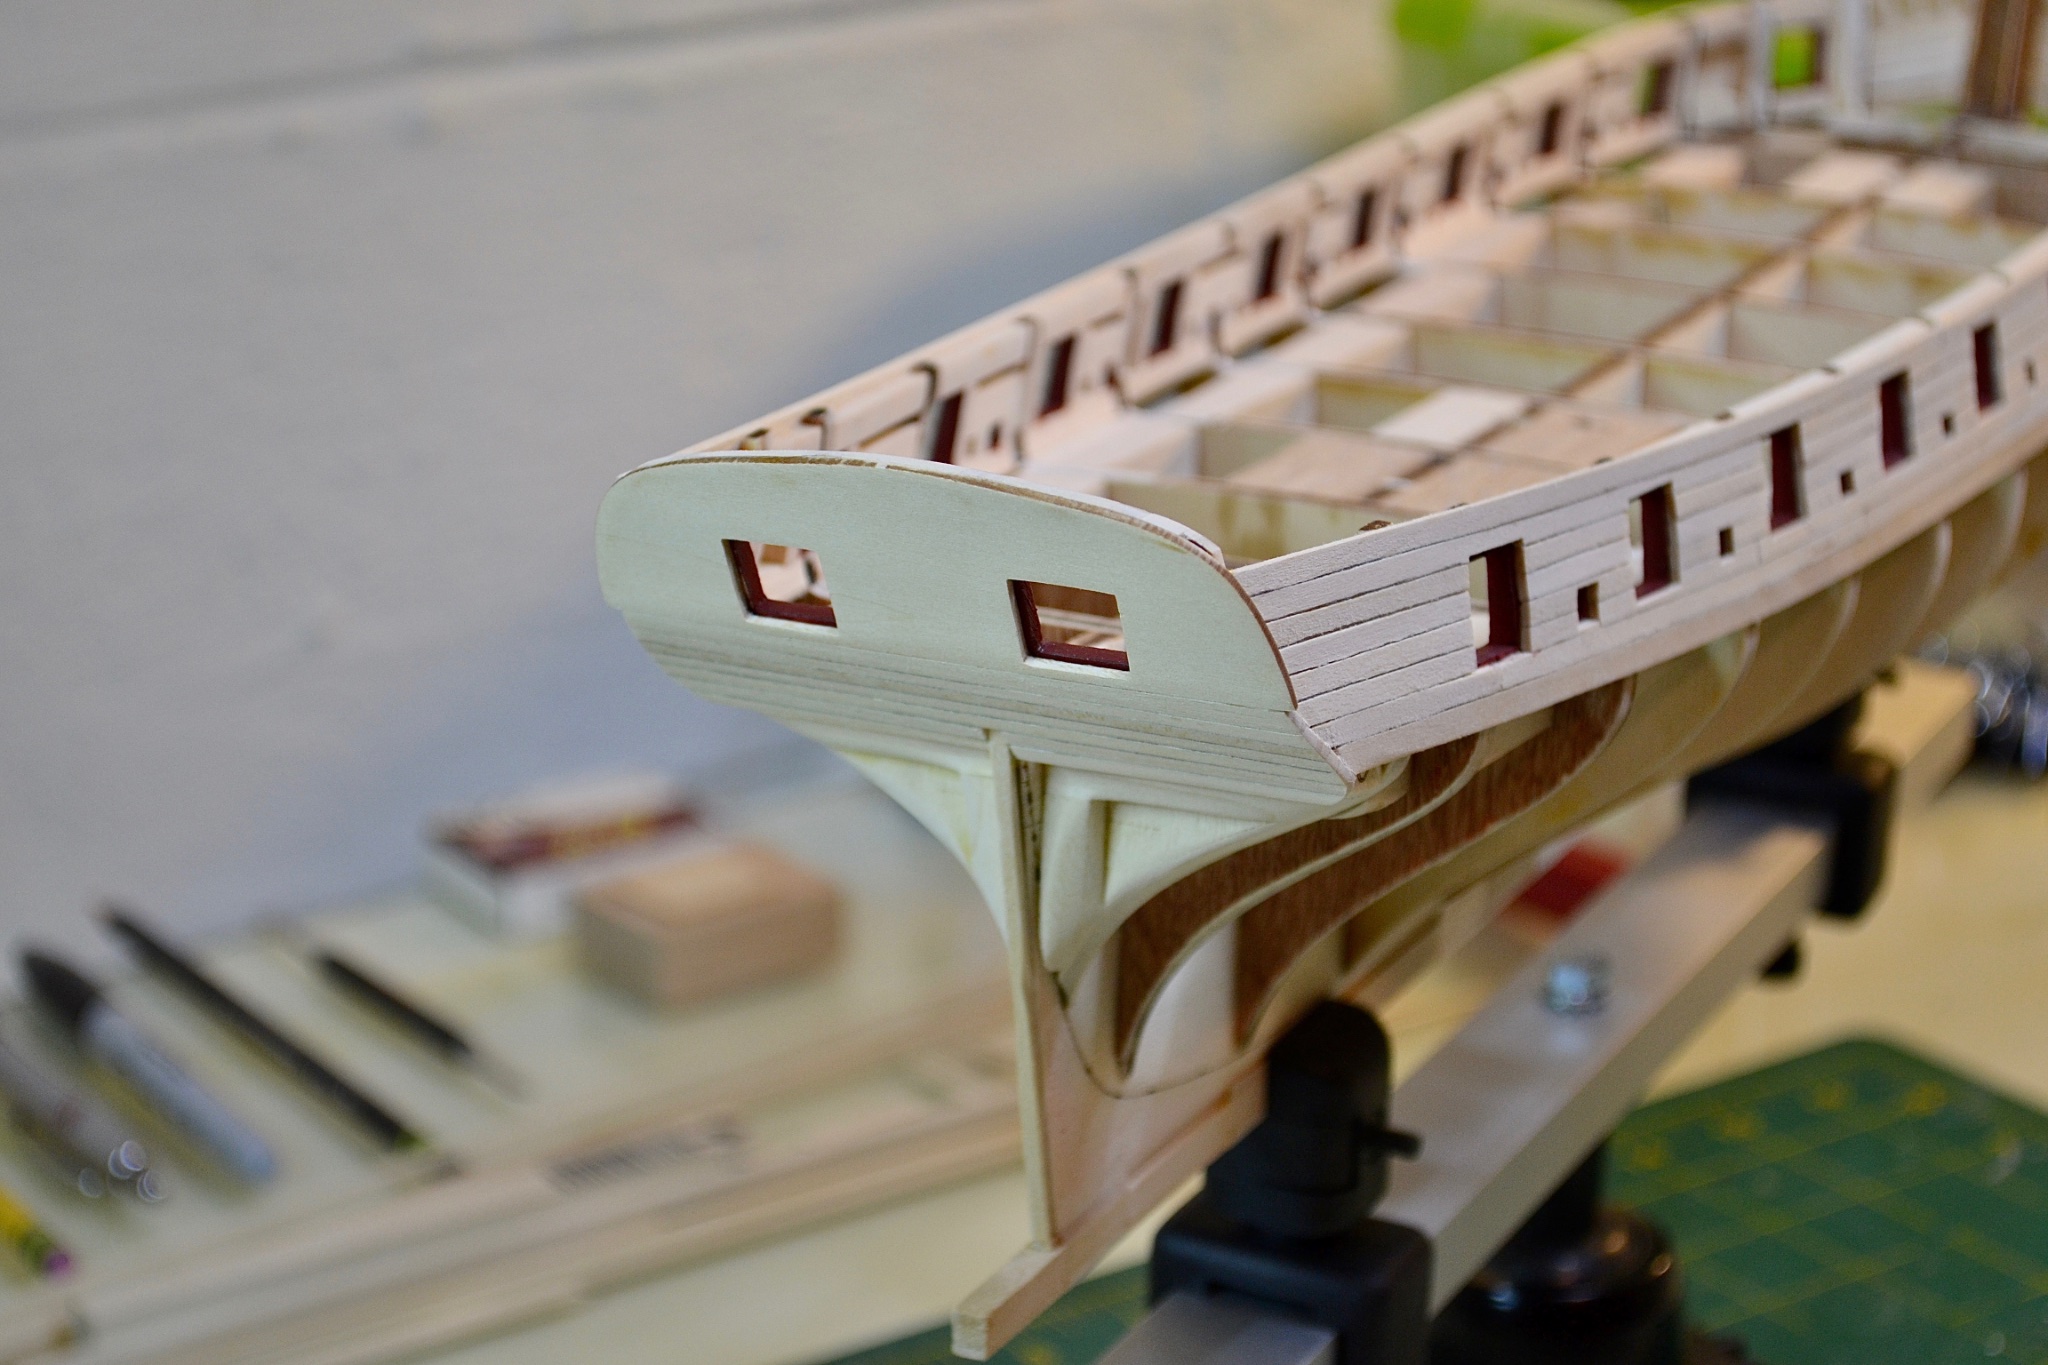
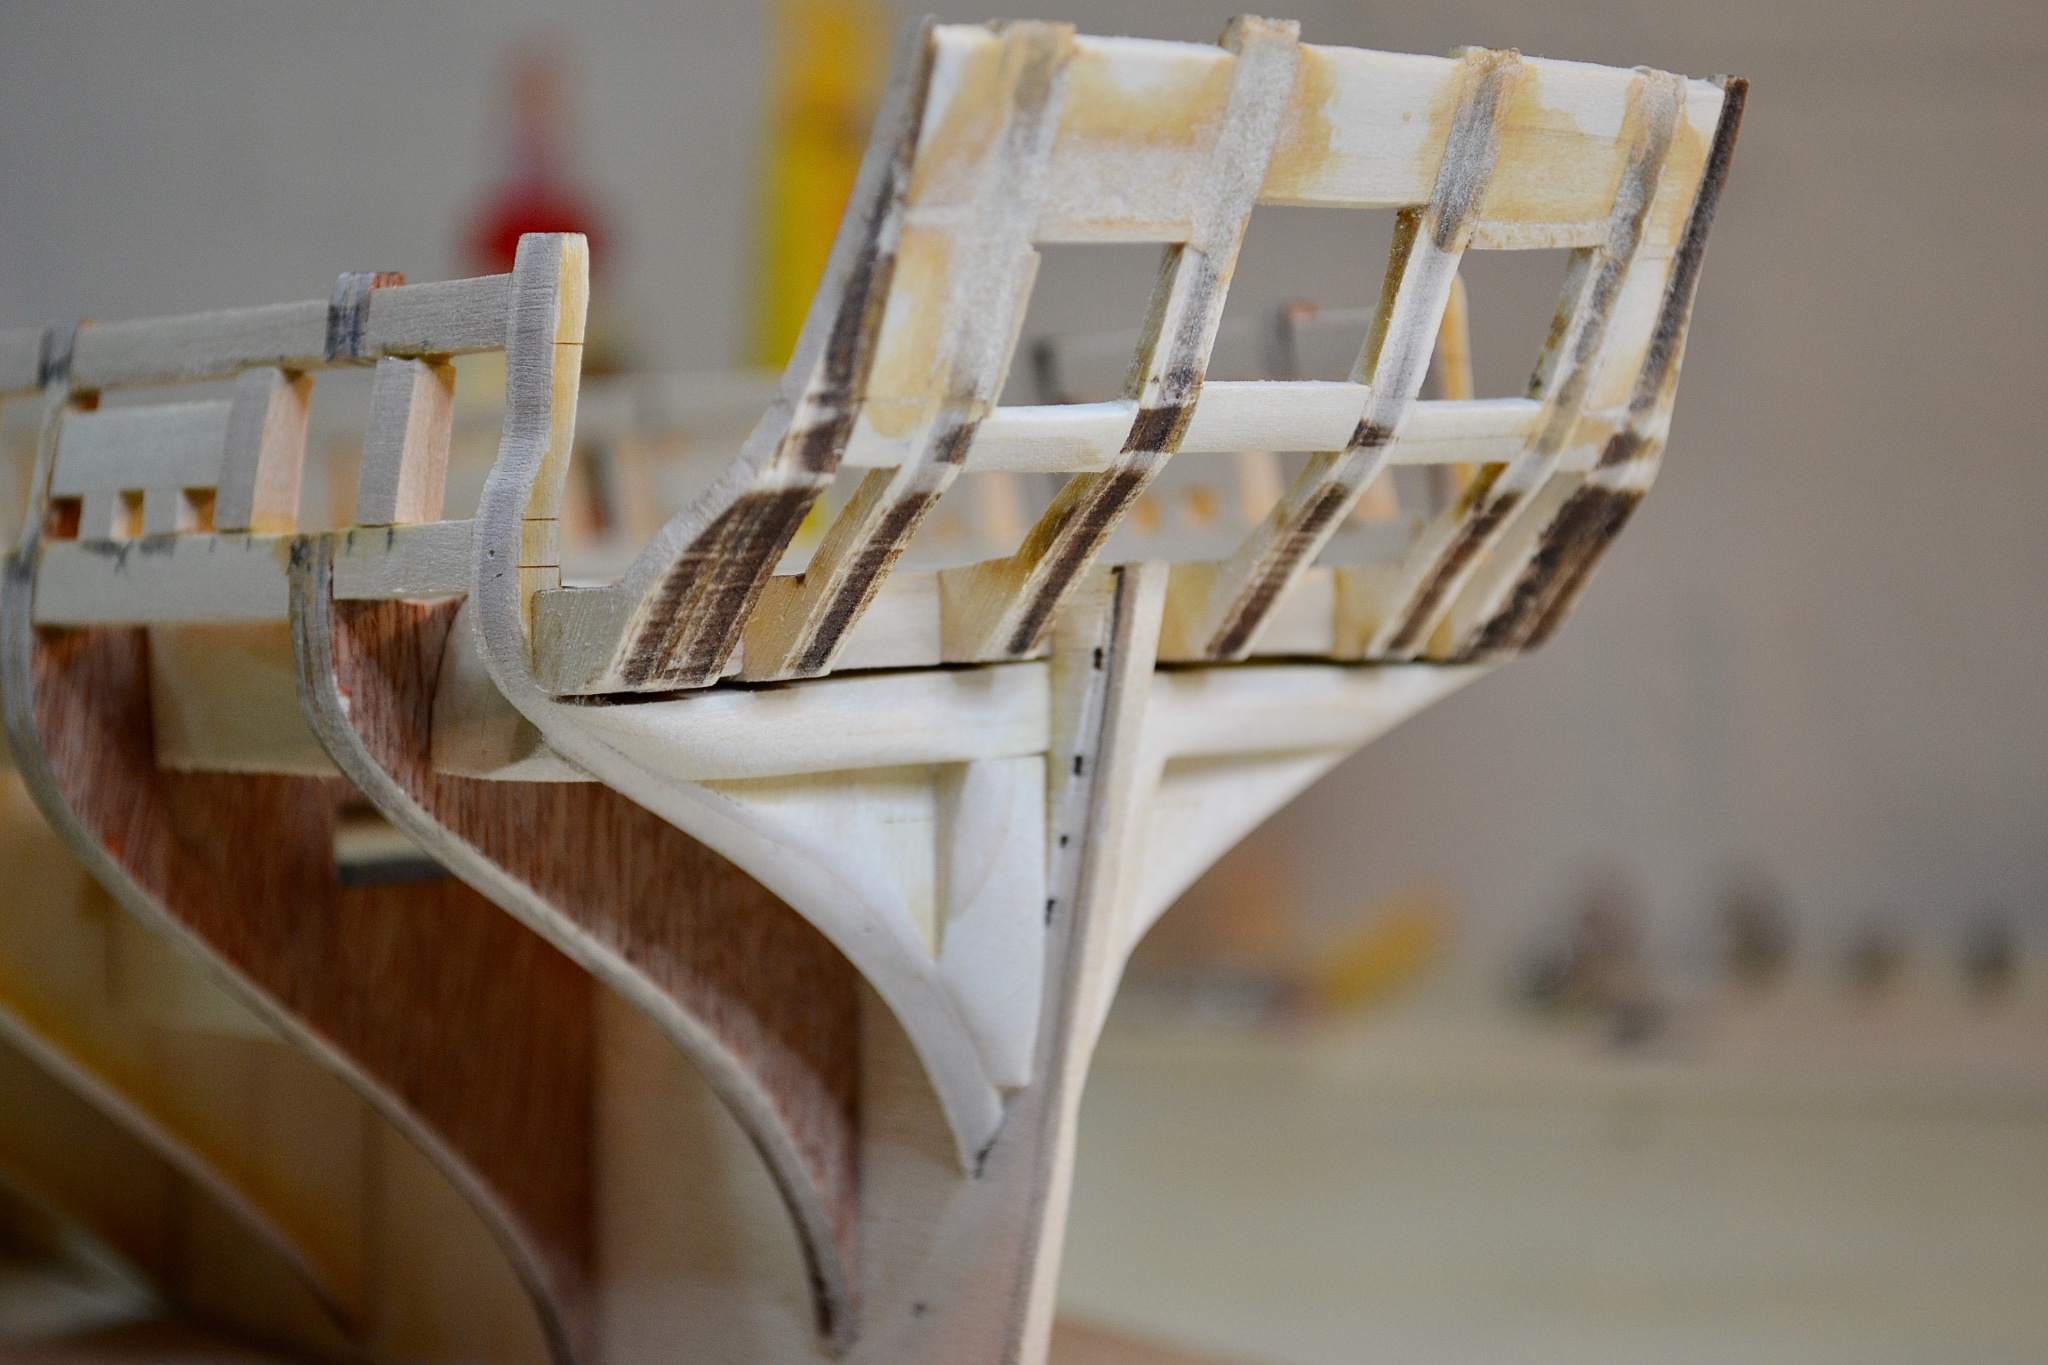
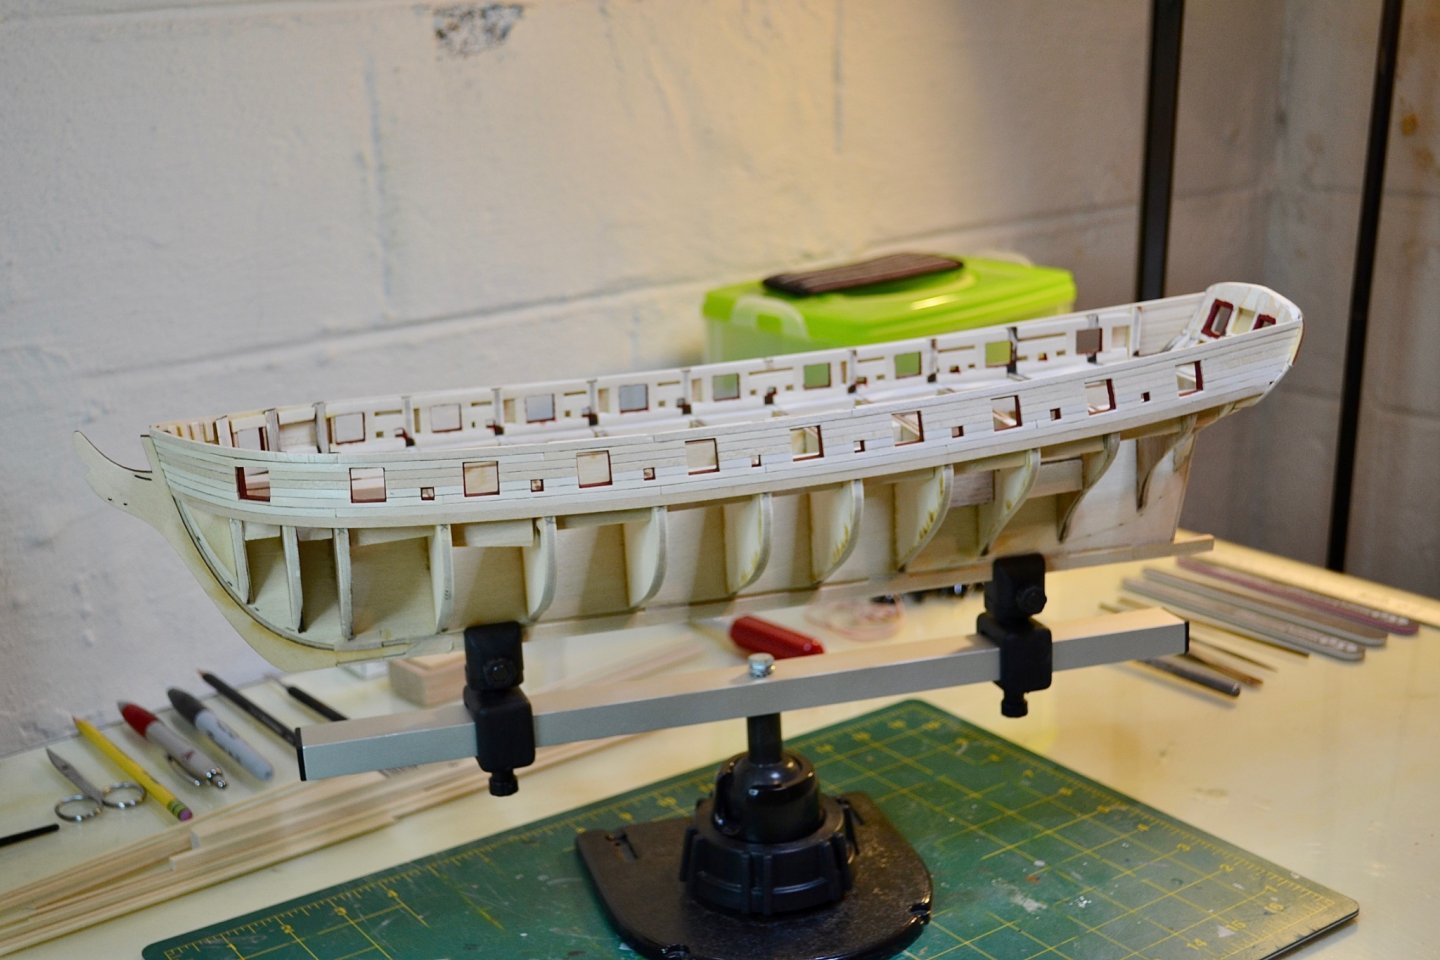
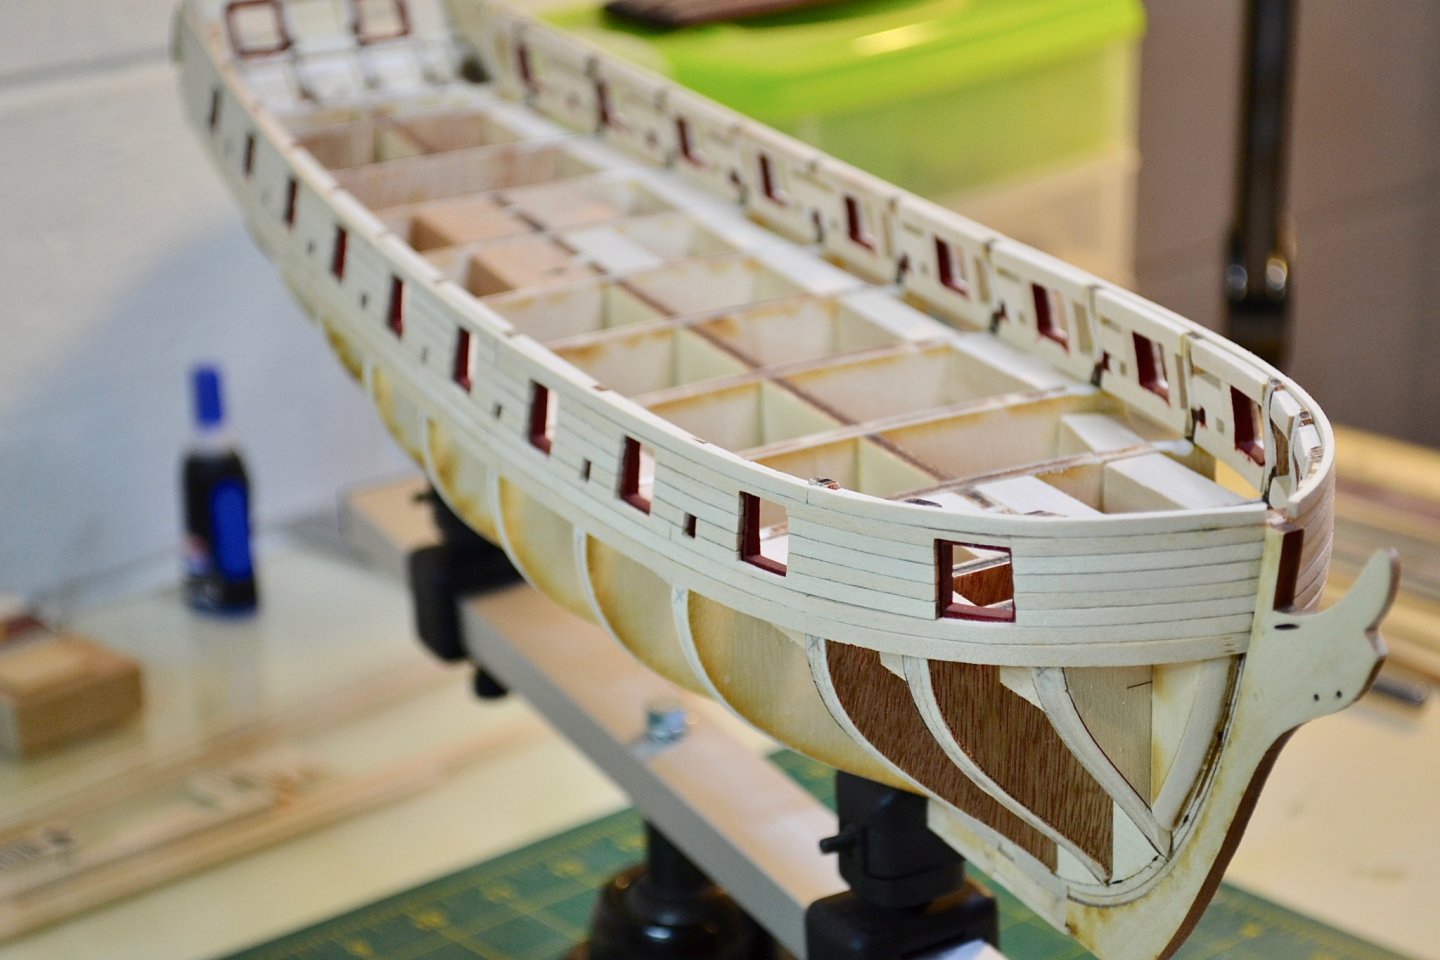
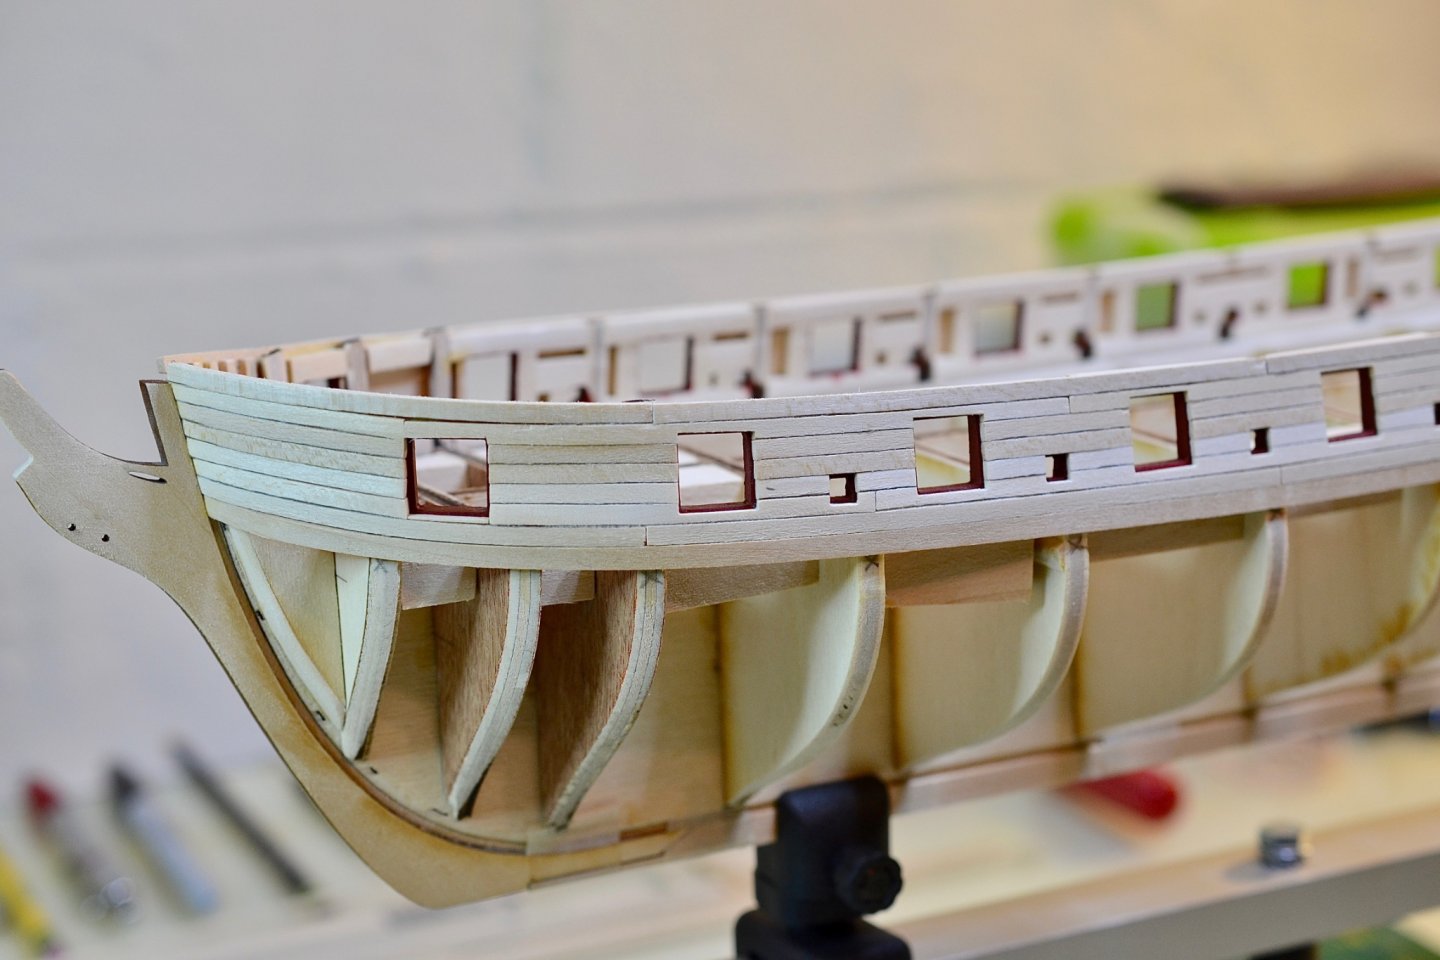
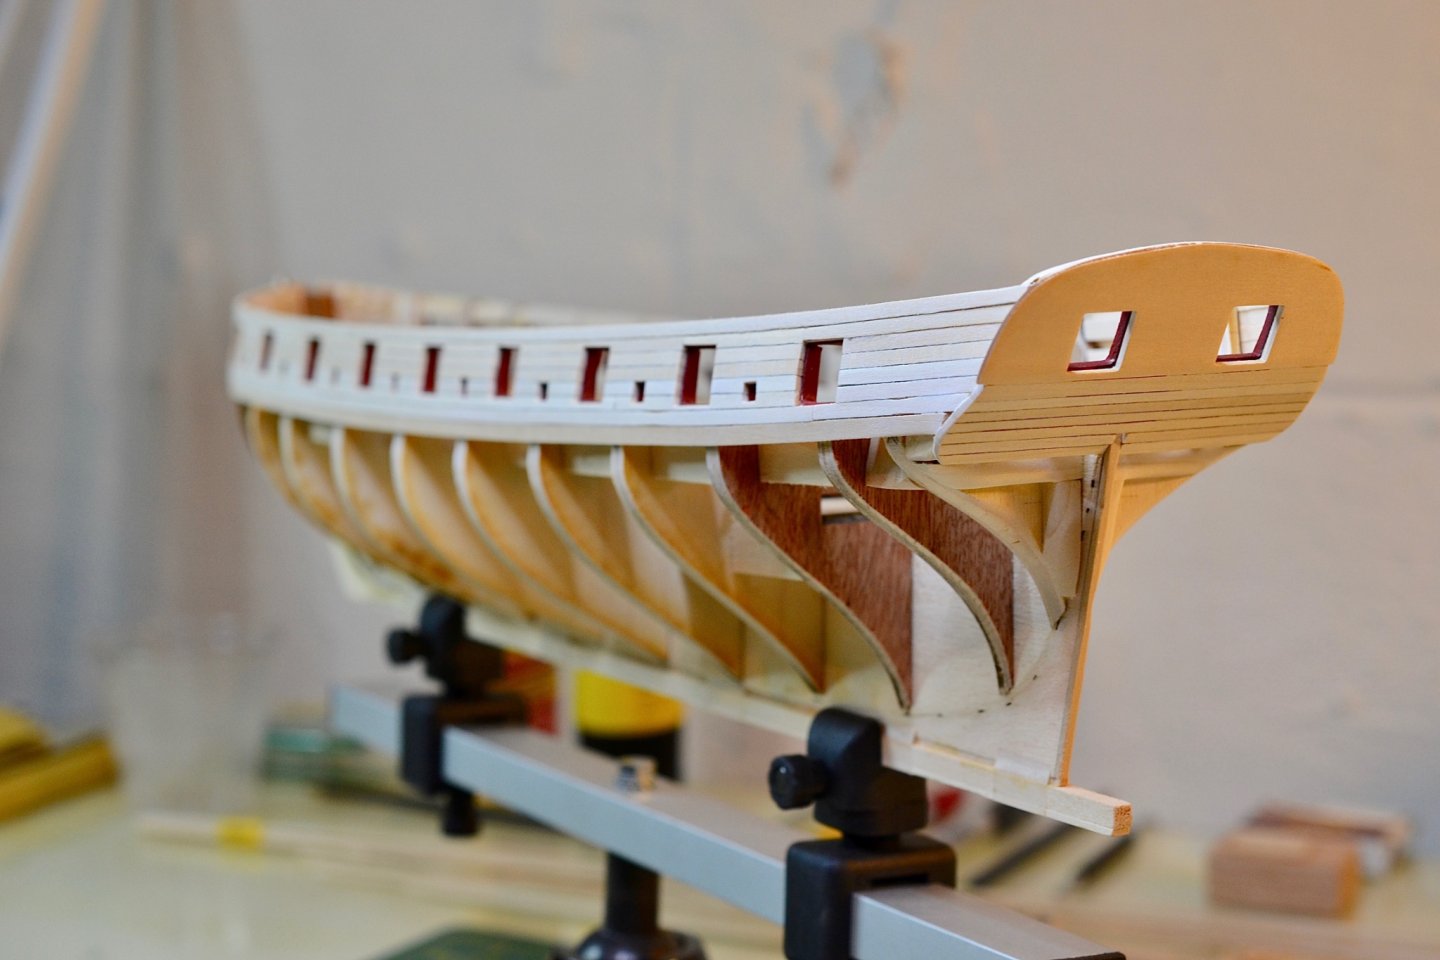
Four months since my last update ... boy, am I moving slowly. I've managed to get the initial planking above the wales done as well as the counter and transom. Progress photos and a few questions below. In the photo below, I'm thinking the counter will need to be sanded back further at the bottom left to accommodate the next three planks, but we'll see. For the Syren experts out there, did you you pre-form the planks to follow the shape of the stern - or just glue and clamp the planks? It seems like a severe shape to try to force wood to hold with just glue alone. Another question - when I add the garboard plank is it designed to sit flush where it meets the stern post? There isn't a rabbet the plank can fit into so want to check I didn't mess by not chiseling in further. Man, the camera is merciless. That gap above the first gun port looks bad but isn't so terrible under normal lighting and from a normal viewing distance. What is the best way to address that? I was thinking about taping around that gap, then pressing some diluted wood filler into place, and sanding it smooth. The edging around that first gun port is wonky ... but it was my first attempt so I'll let it slide. I was just relieved to get a fairly good fit at the bow. I dreaded adding the counter and transom but they weren't that difficult. Getting them on the model really does a lot to create the impression of a ship rather than an ugly skeleton. Looking at the planks along the rear quarter, that isn't all pencil edging to simulate caulking. The wood was really rough in some cases ... I'll live with it for my first model. And one last question ... does it matter when I stain the model? Safe to wait until all planking is done?

-
EricWilliamMarshall reacted to a post in a topic:
US Brig Syren by Bill Gormley - Model Shipways - 1:64
-
EricWilliamMarshall reacted to a post in a topic:
US Brig Syren by Bill Gormley - Model Shipways - 1:64
-
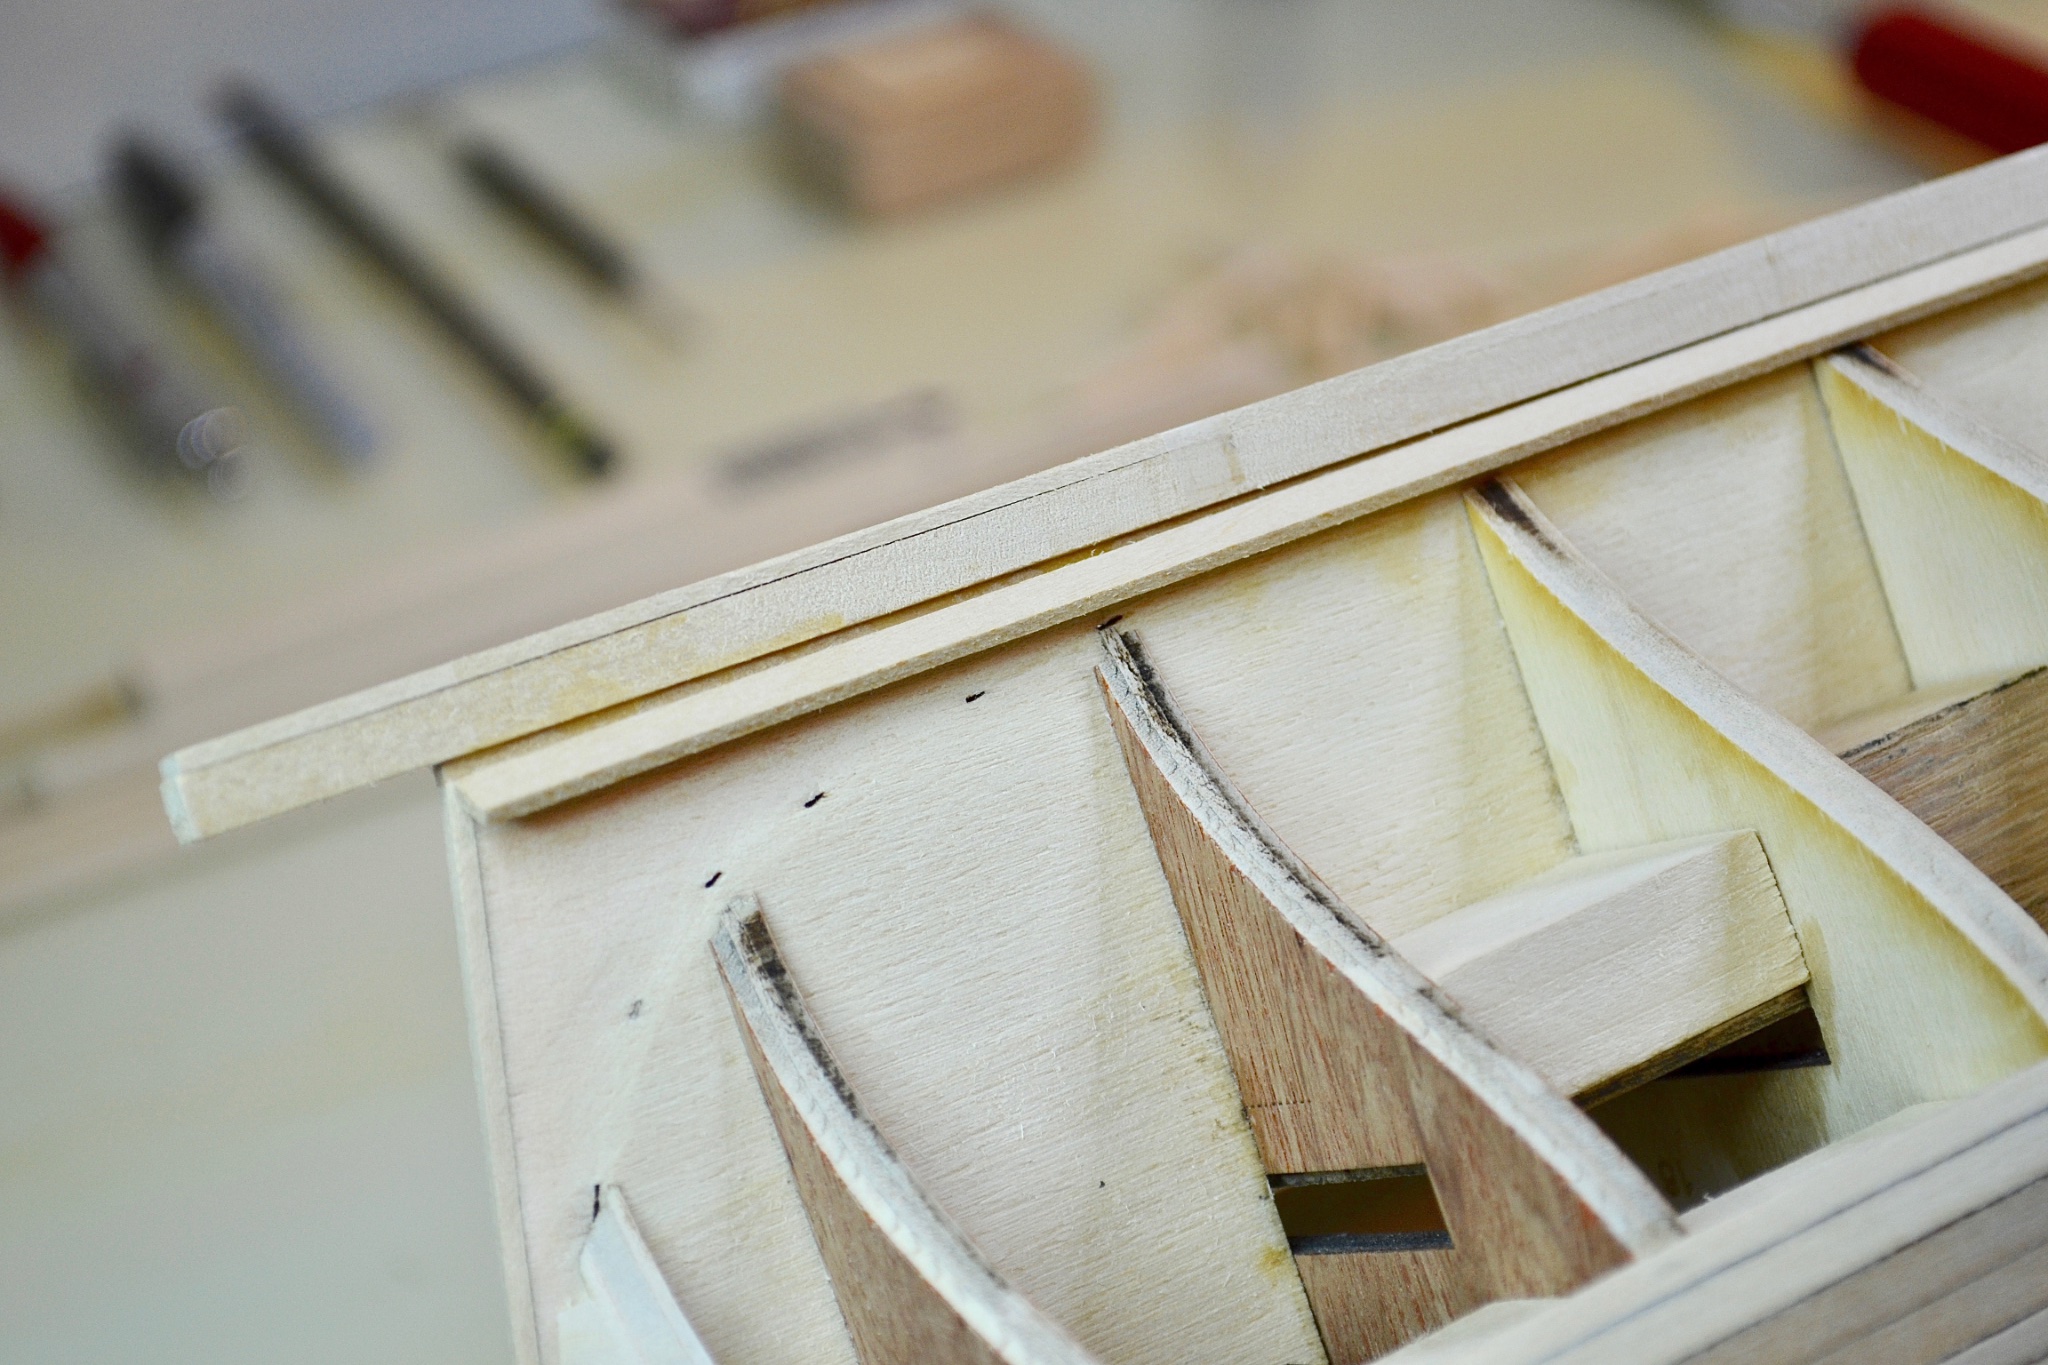
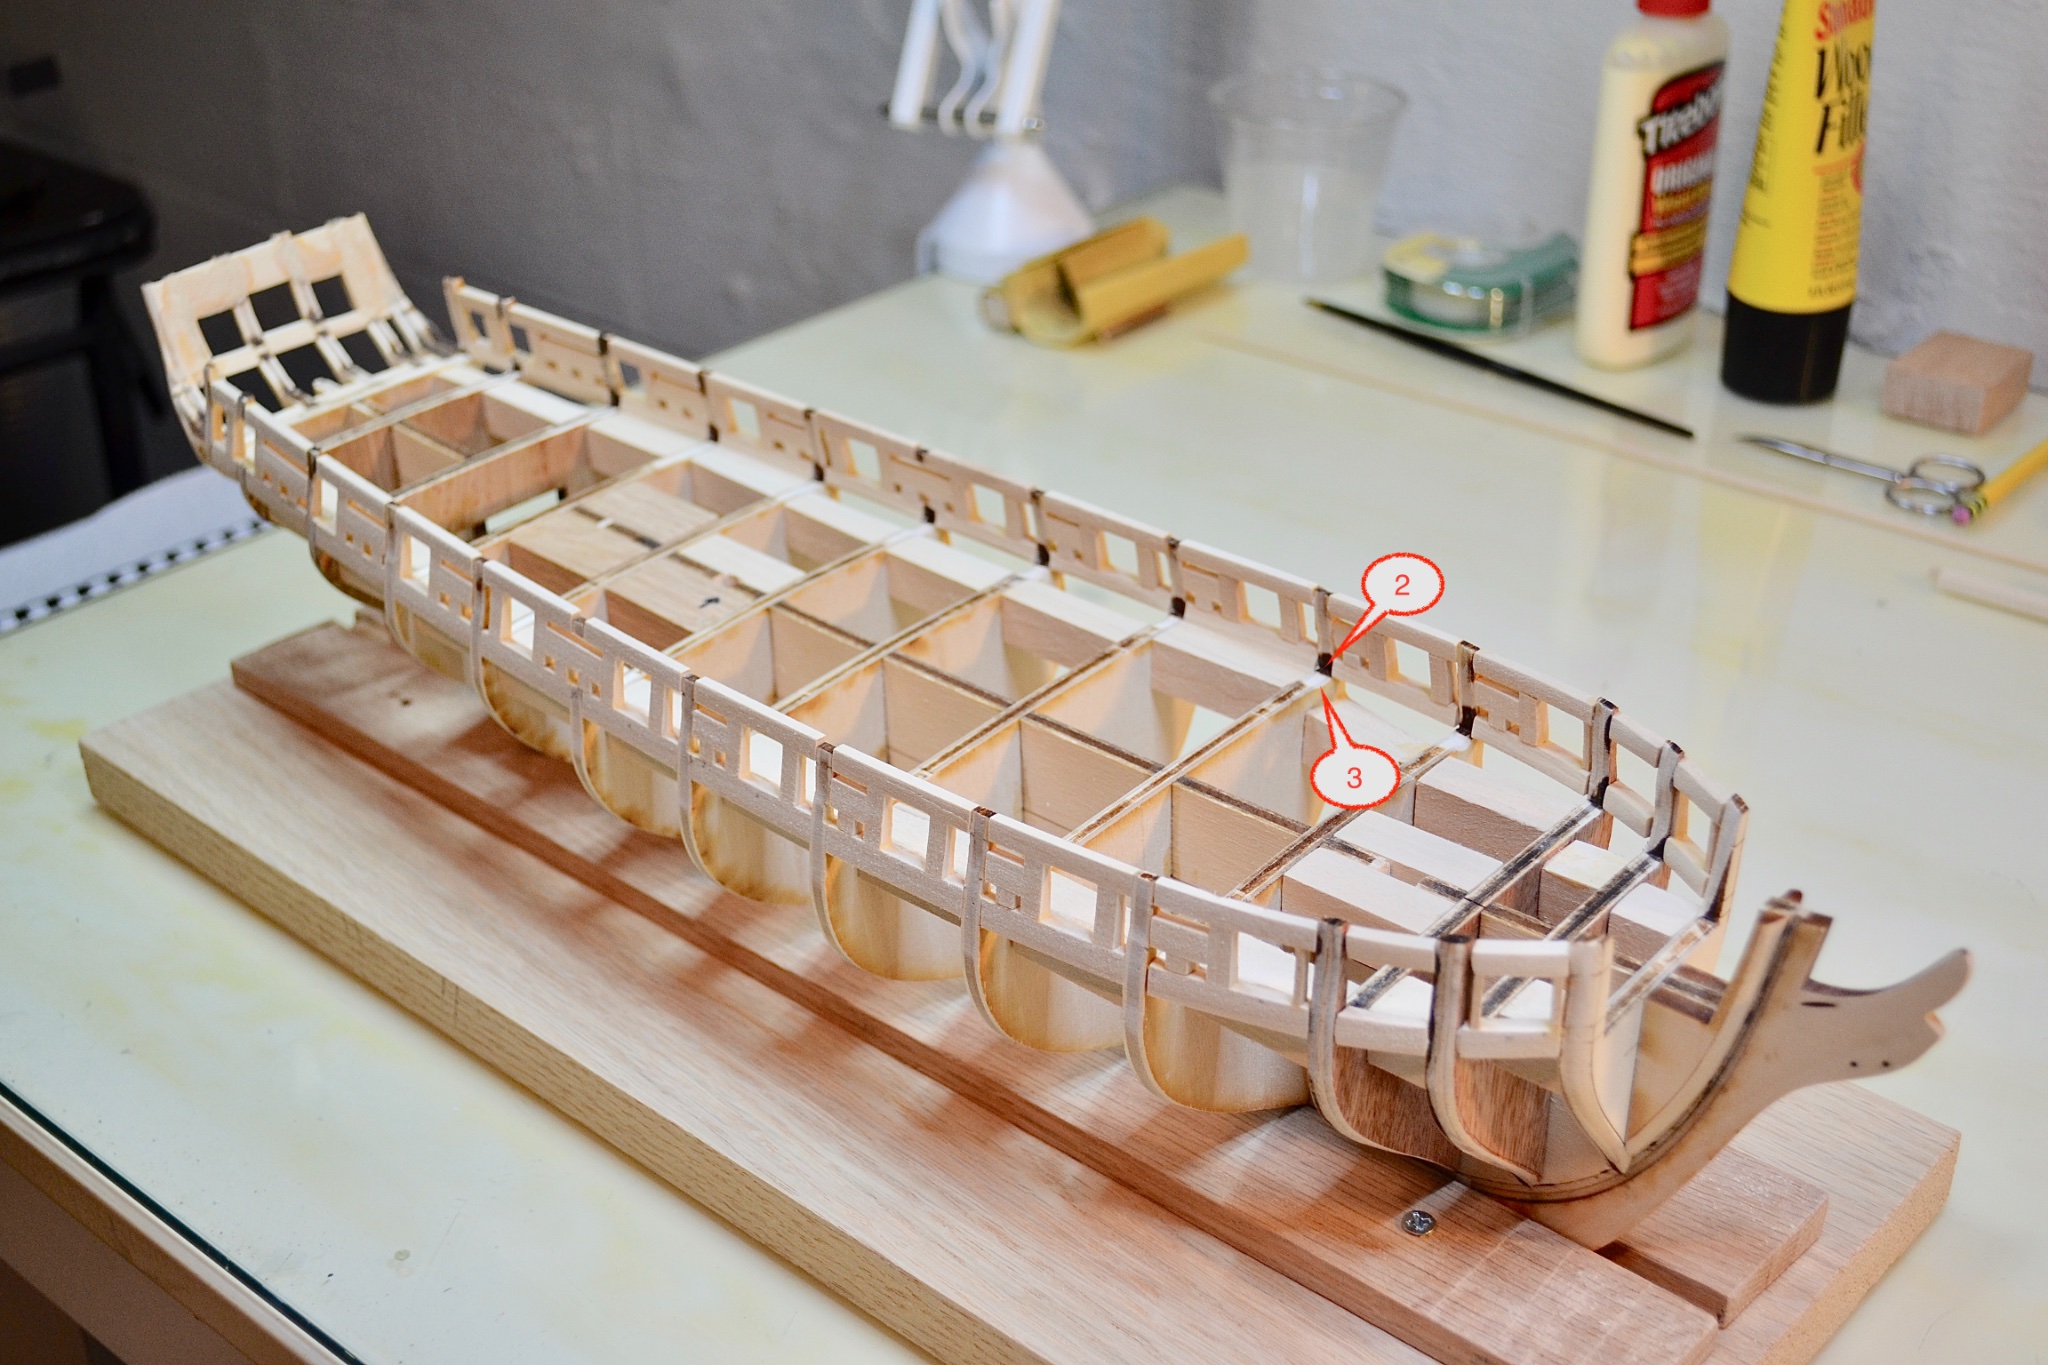
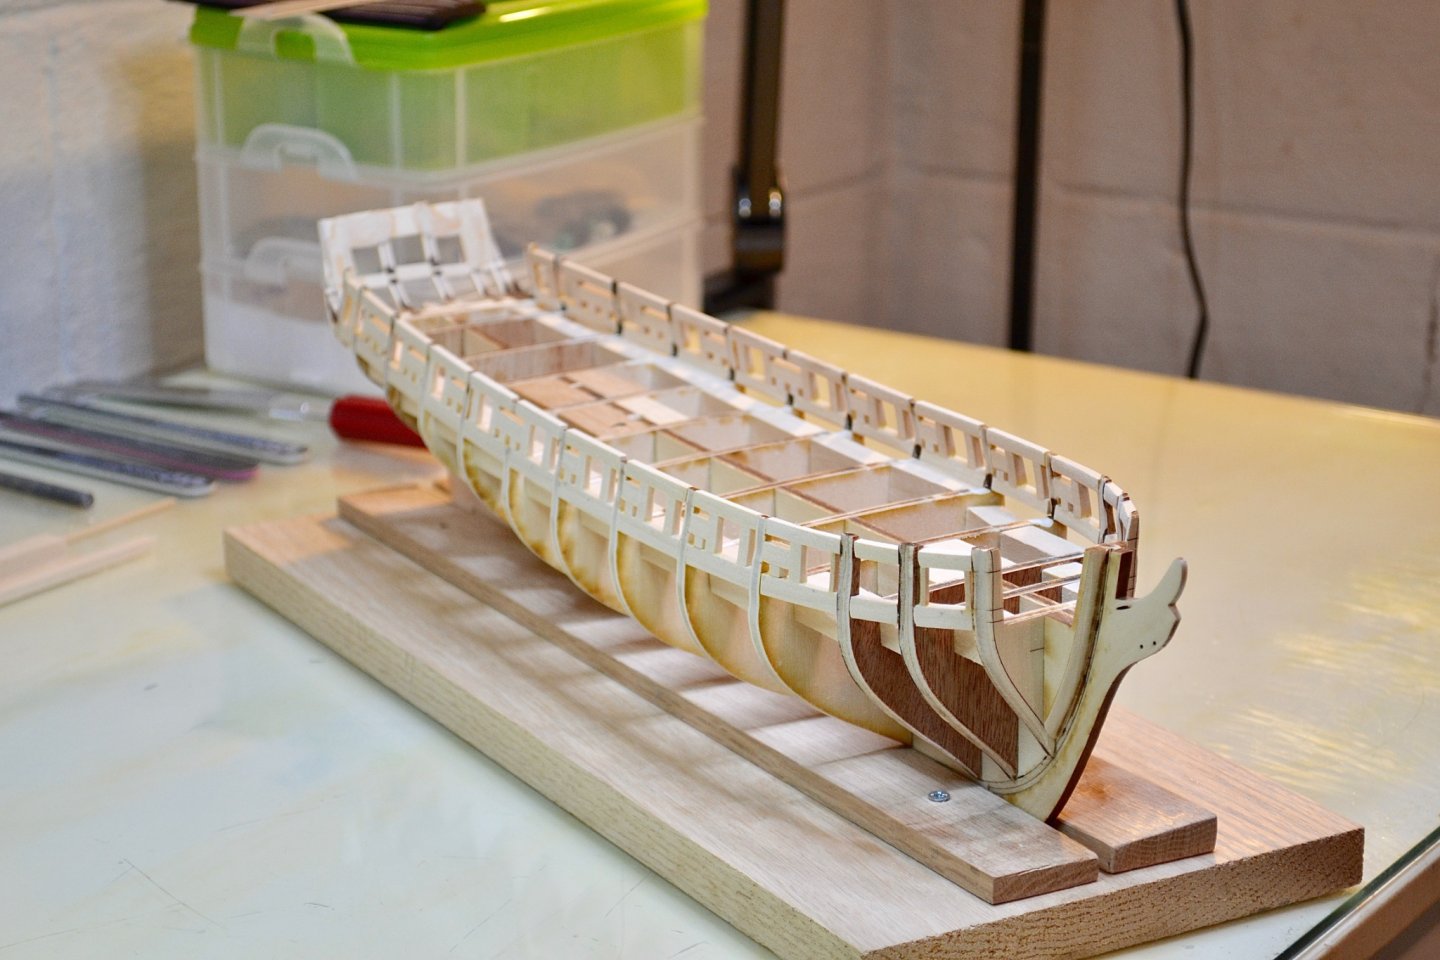
It's been months since my last update, but I'm still chugging along with my build (and enjoying it immensely). I've been watching other Syren builds in the meantime in the hopes of avoiding pitfalls. Unfortunately, I'm a zero when it comes to woodworking, so every little thing becomes a side research project. Going back to my previous update, I needed to correct the frames on one side where I had drastically over faired them. I finished that task and went on to frame the ports and sweeps and sand both sides to an equal degree. Per the instructions, I then added the stern and supporting pieces below the counter to aid in planking. Progress pictures below with a number of questions ... 1 - Should I address this or will it not really show up under a coat of paint? If it should be fixed first ... wood shim or better to use filler? 2 - Are the sills supposed to be sanded to the same thickness as the frame? What I'm showing here is my sills are a little bit wider. 3 - It's hard to see in the photo, but this is a shallow divot where I wasn't careful with my sanding stick. Should I fill and restore this divot (and others like it)? Not sure whether it will cause trouble later on when it comes time to plank the deck. And two more questions... 4 - What do you use to get nice straight cuts? I have been using a razor saw which cuts the wood easily enough ... but is there some basic technique or trick to get a straight cut? 5 - I'm about ready to paint the gun ports red and I was planning to use either Tamiya or Life Color paint from my plastic modeling stash. Do I need to prepare or seal the wood first? Thanks for reading this far ... all input and feedback welcome! Bill


-
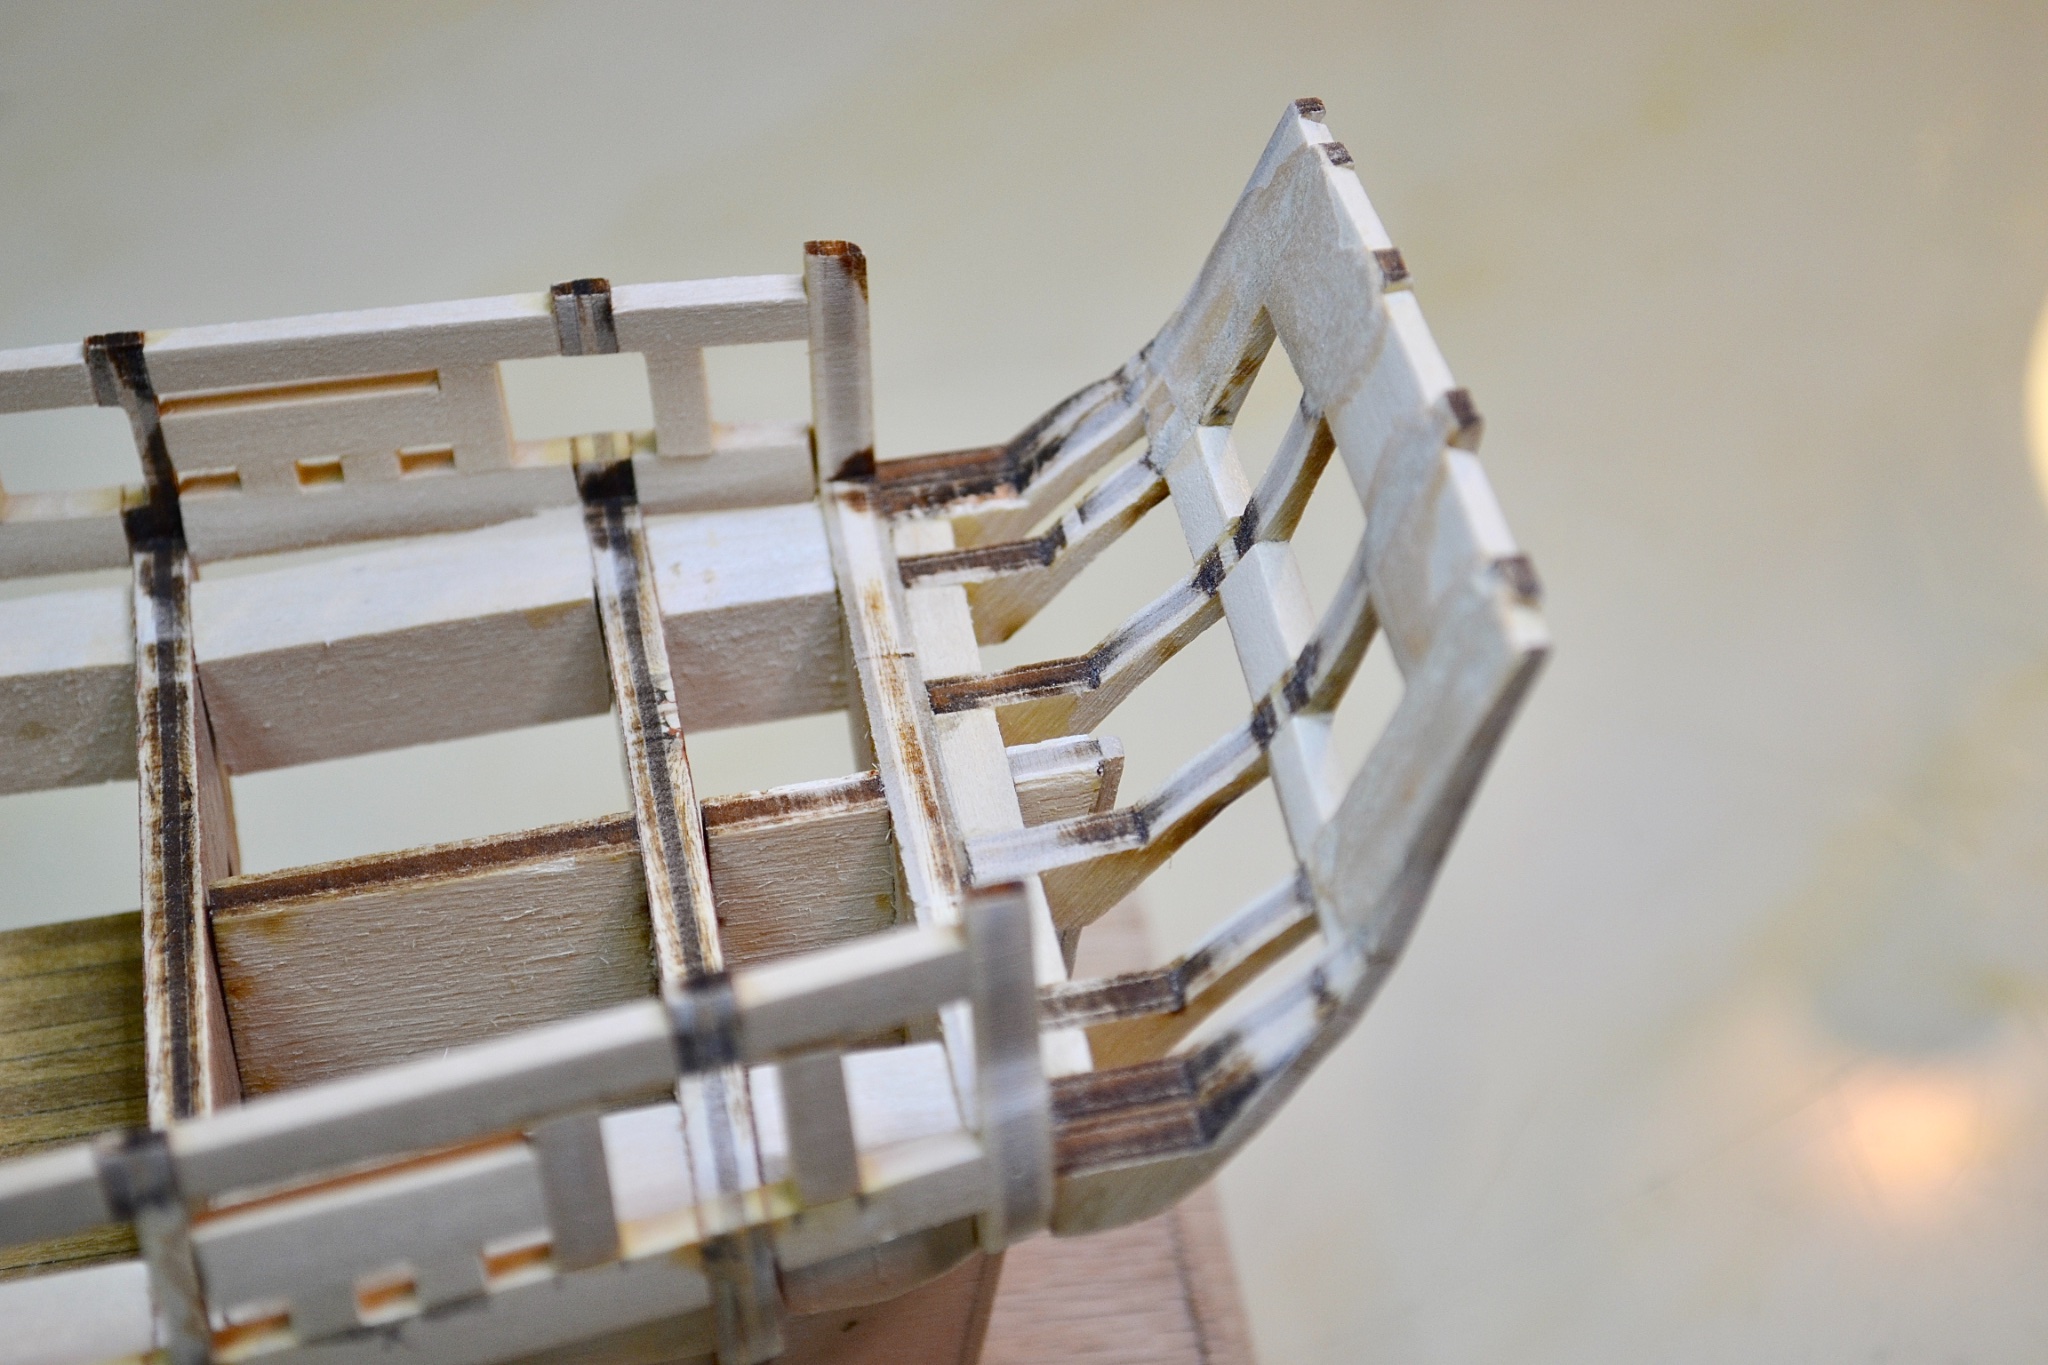
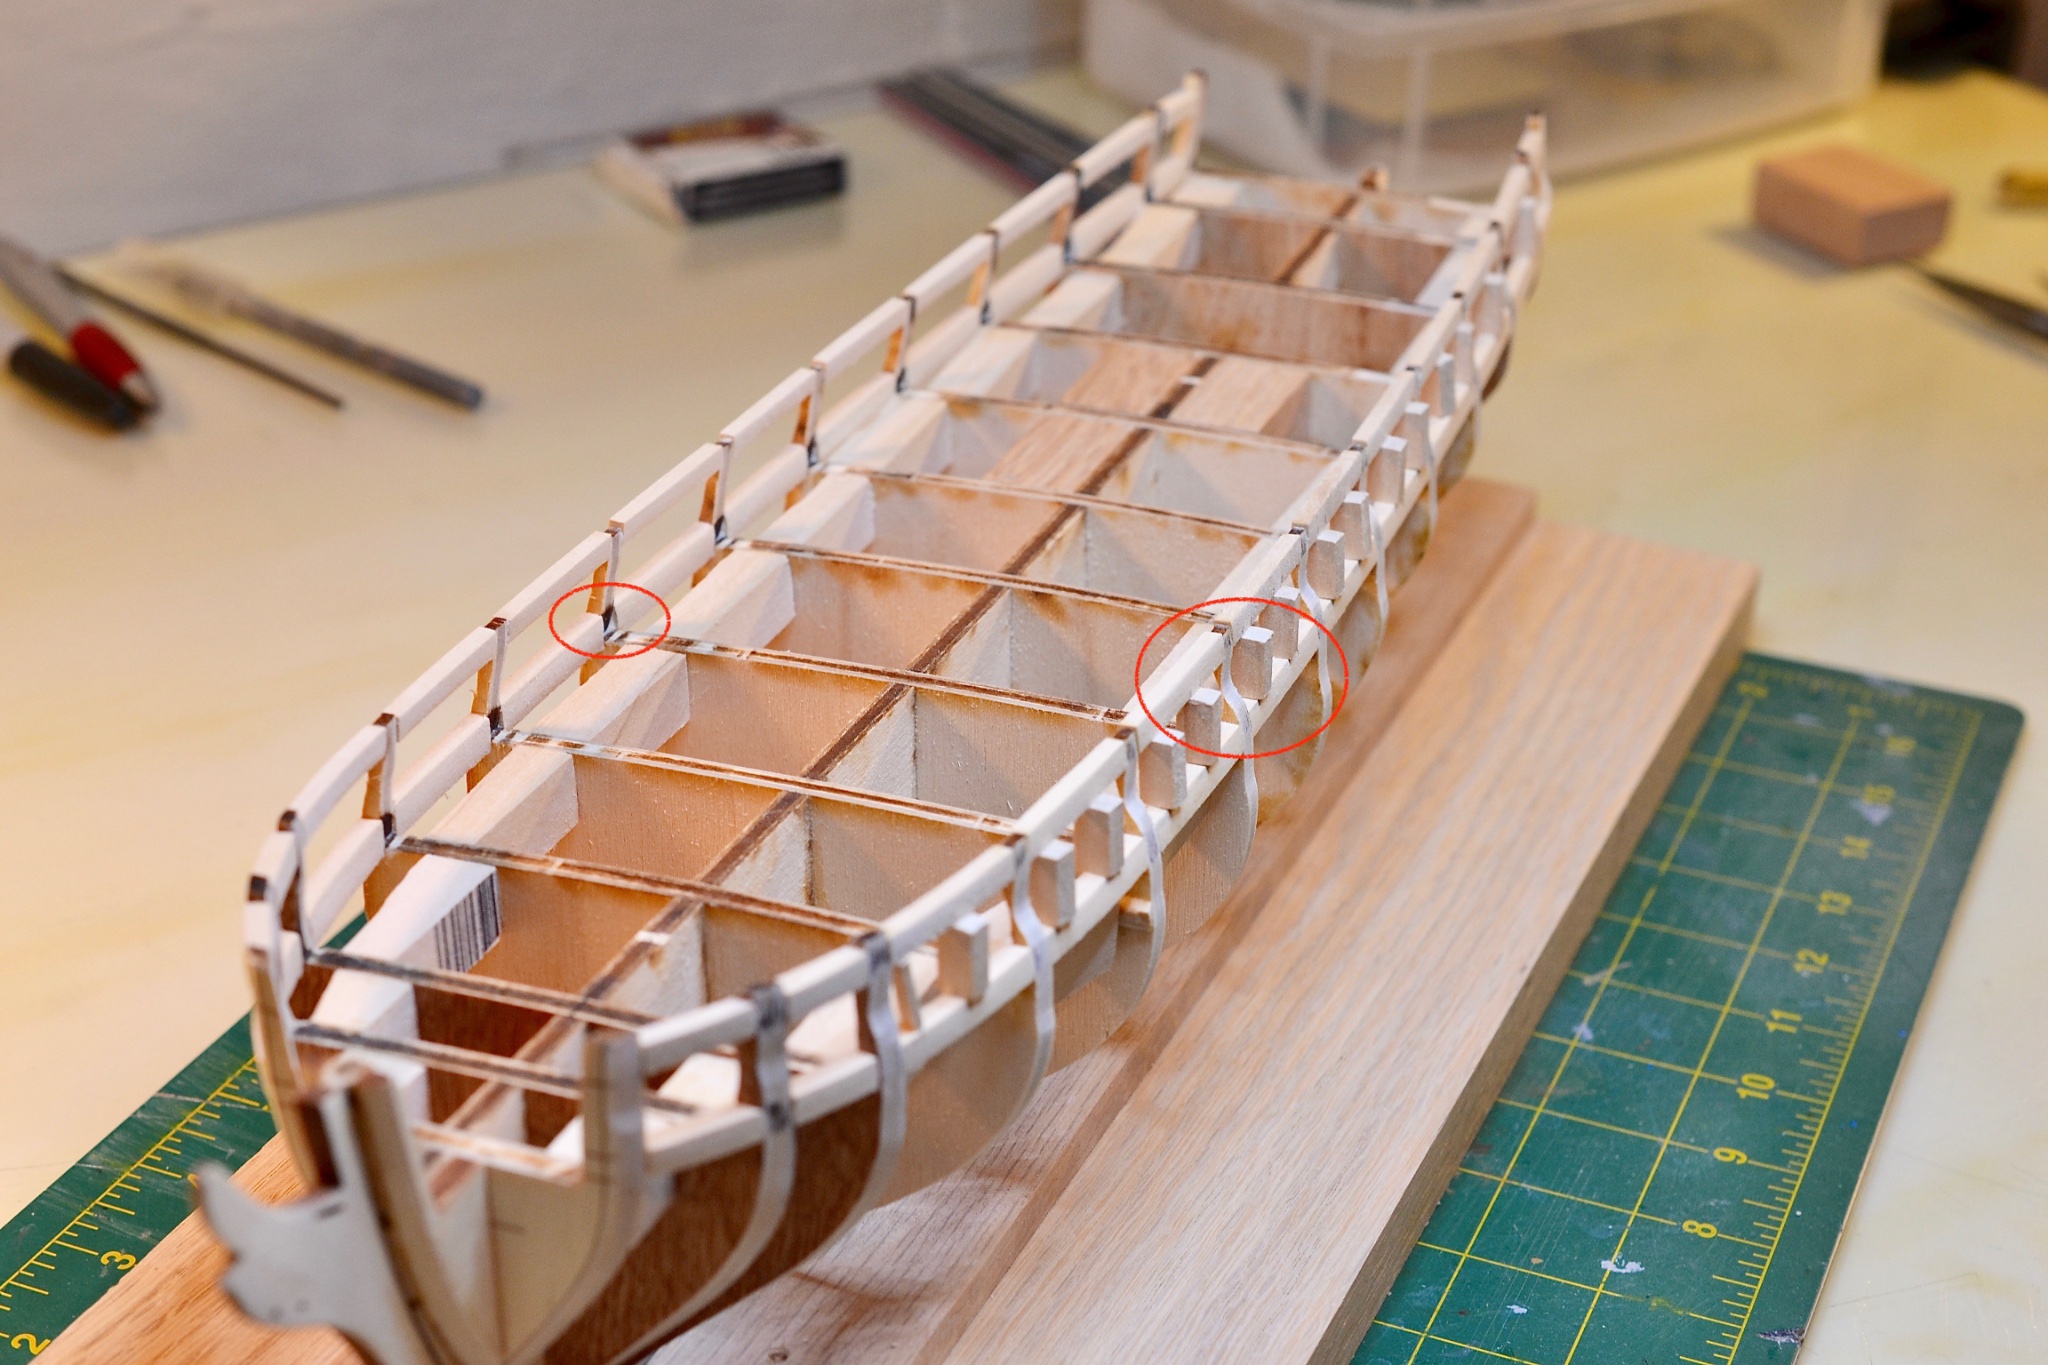
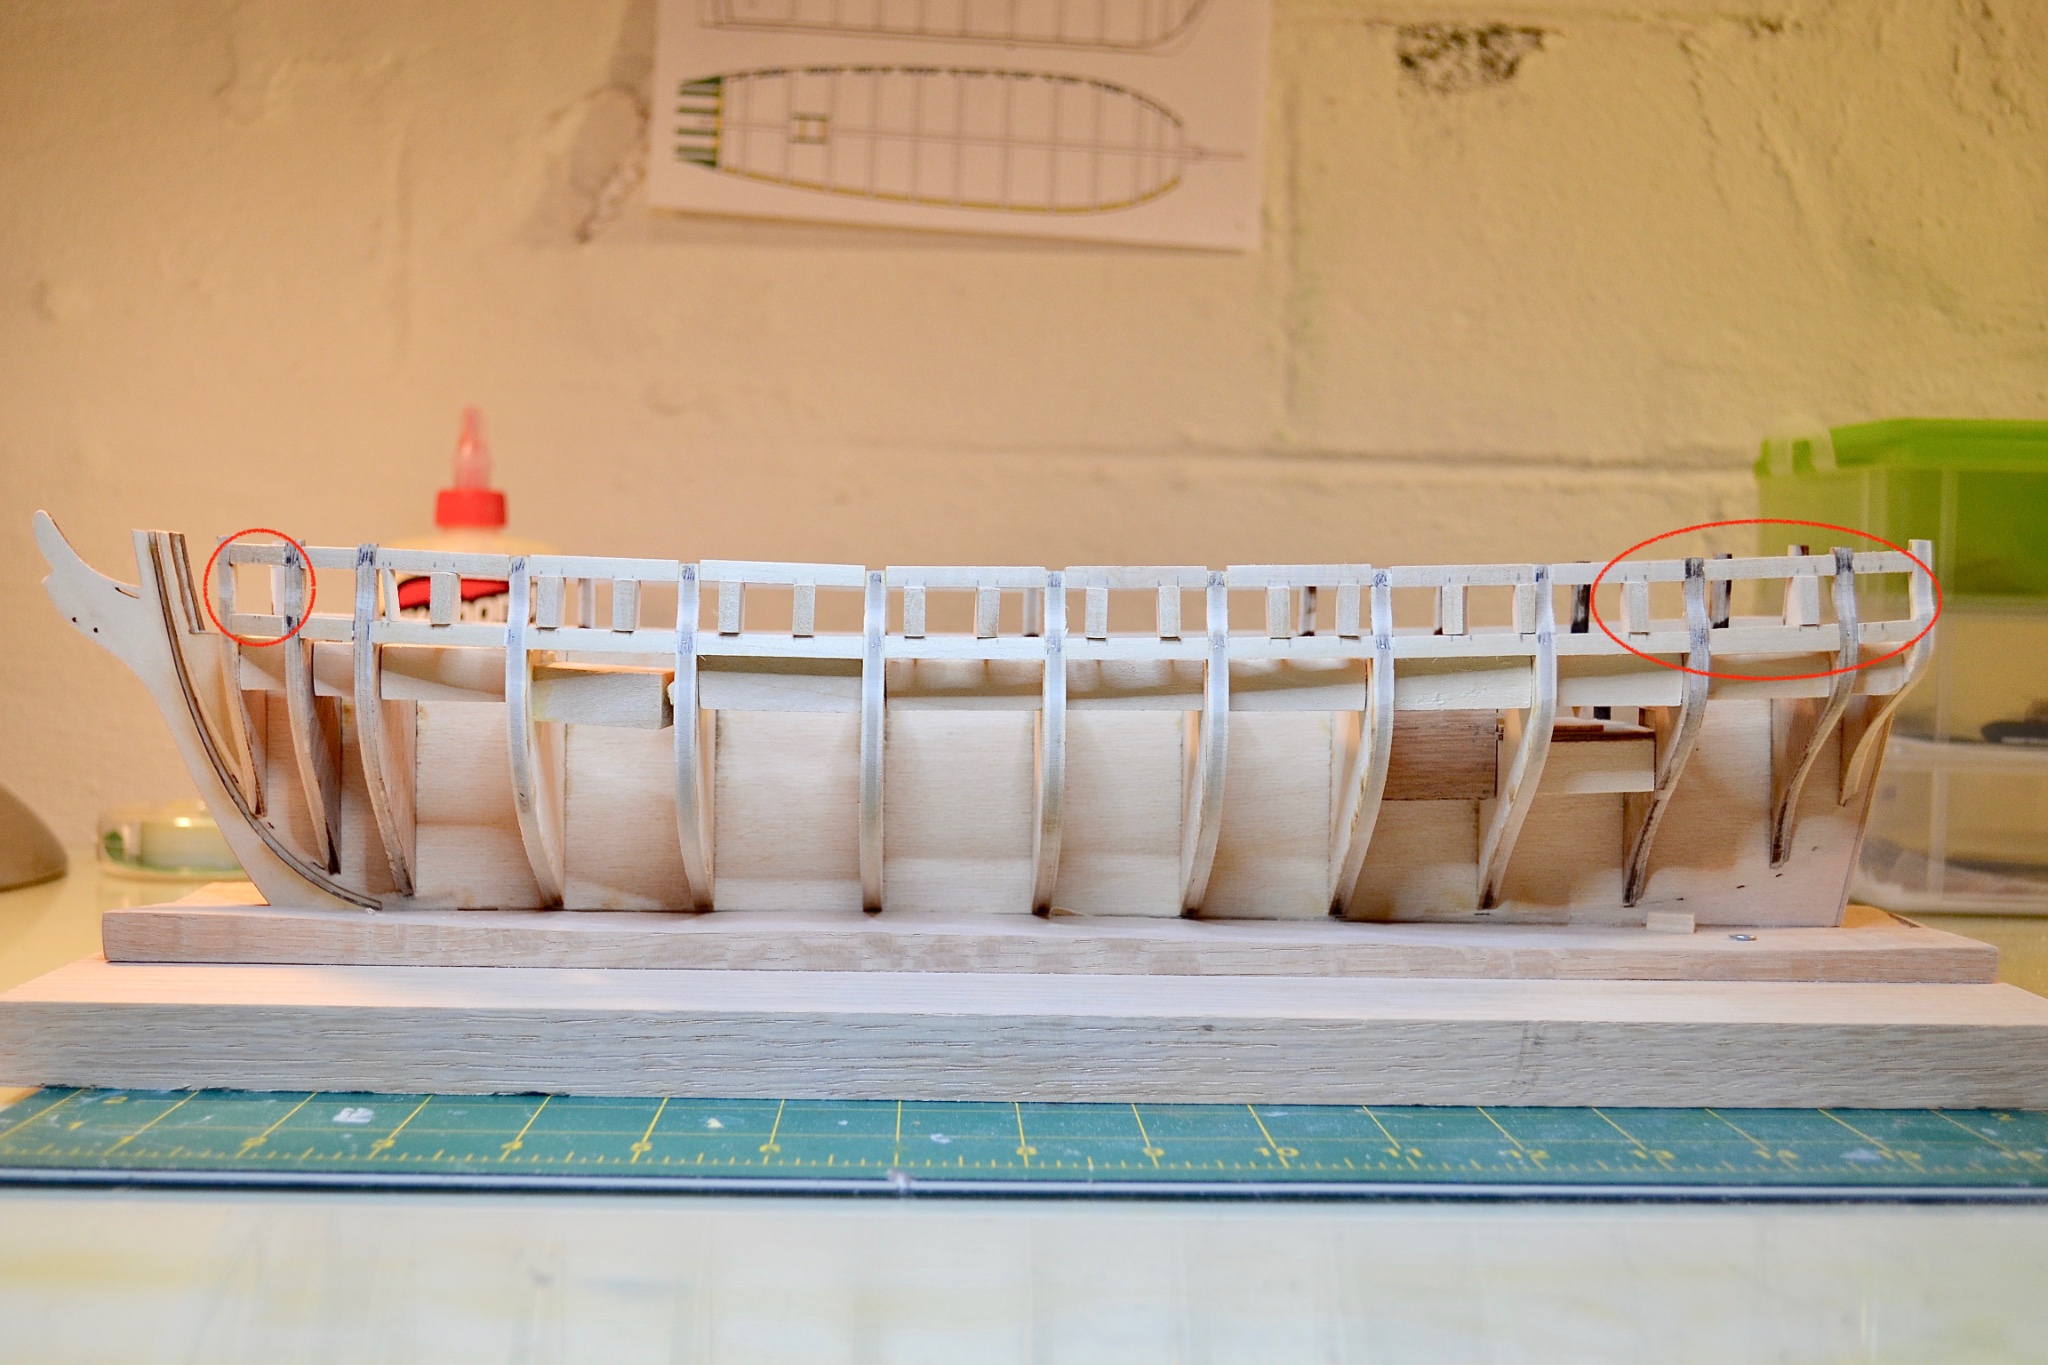
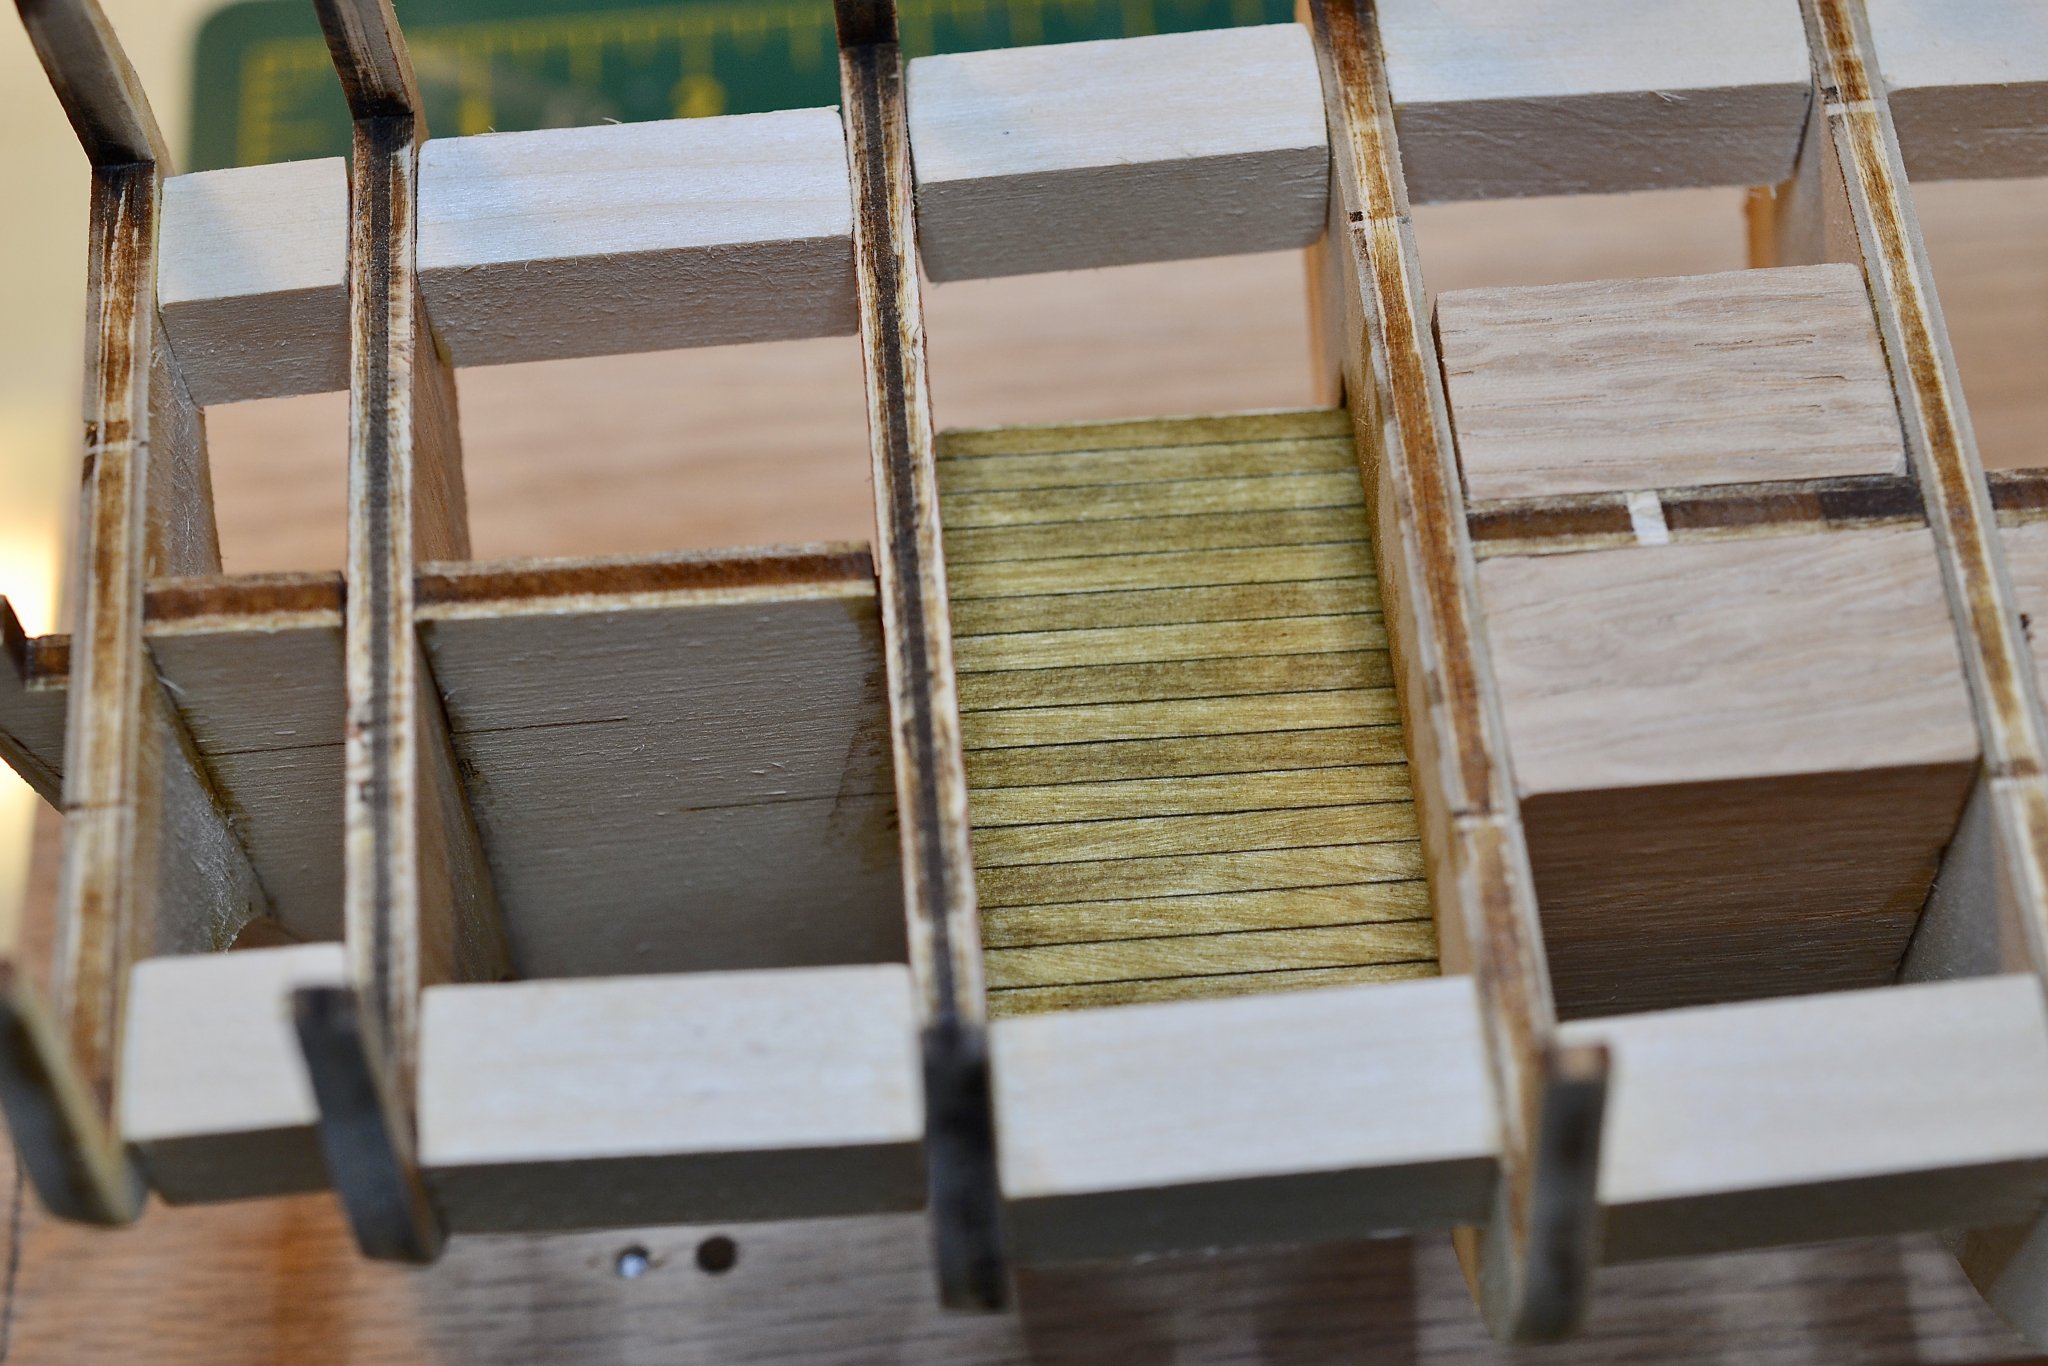
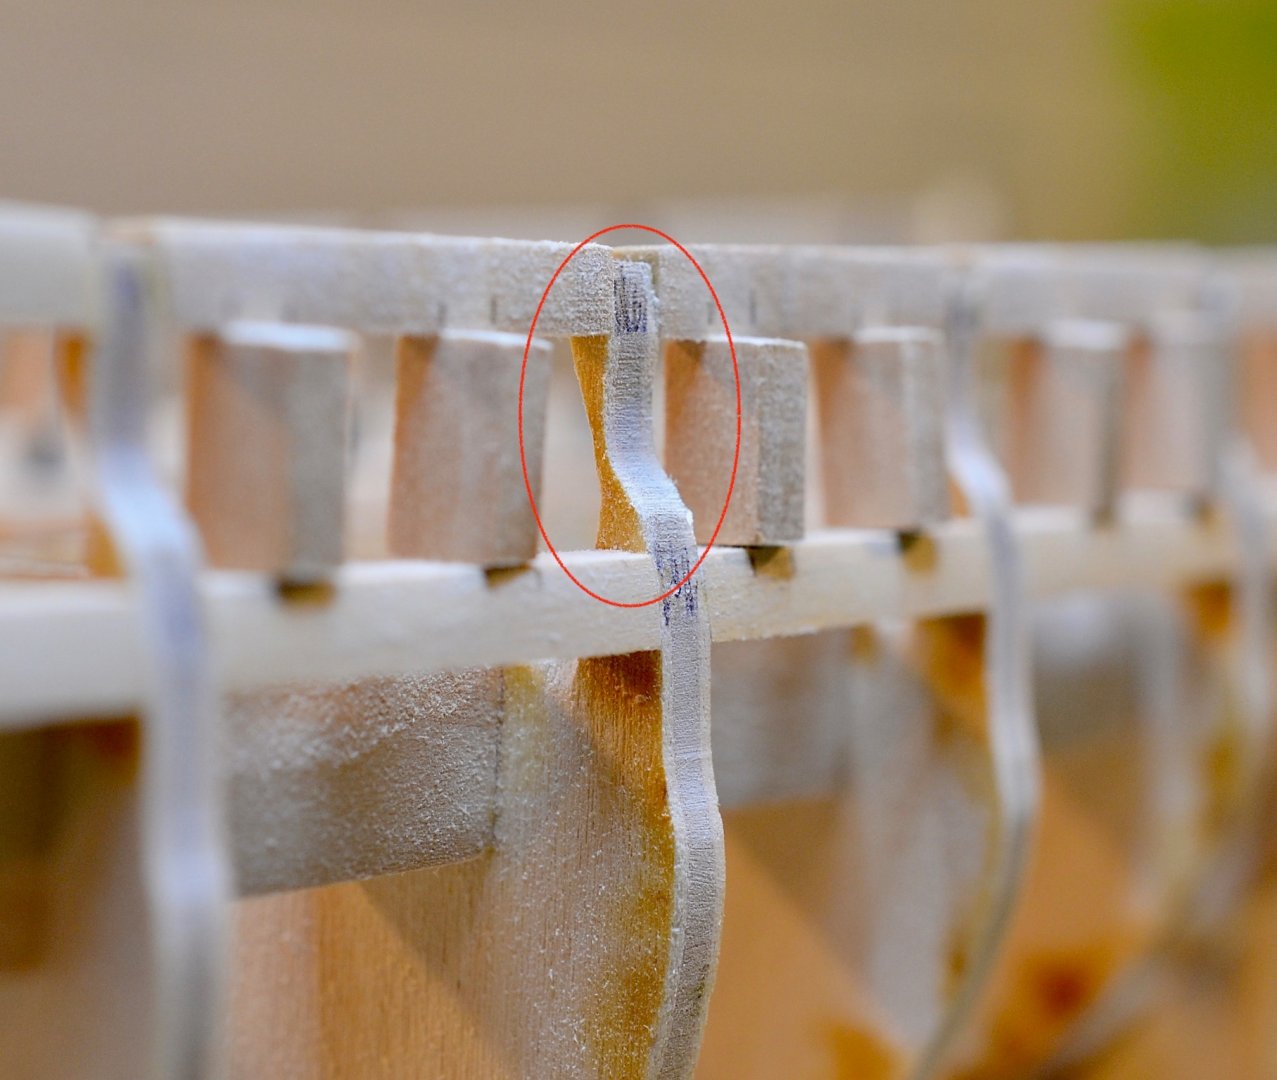
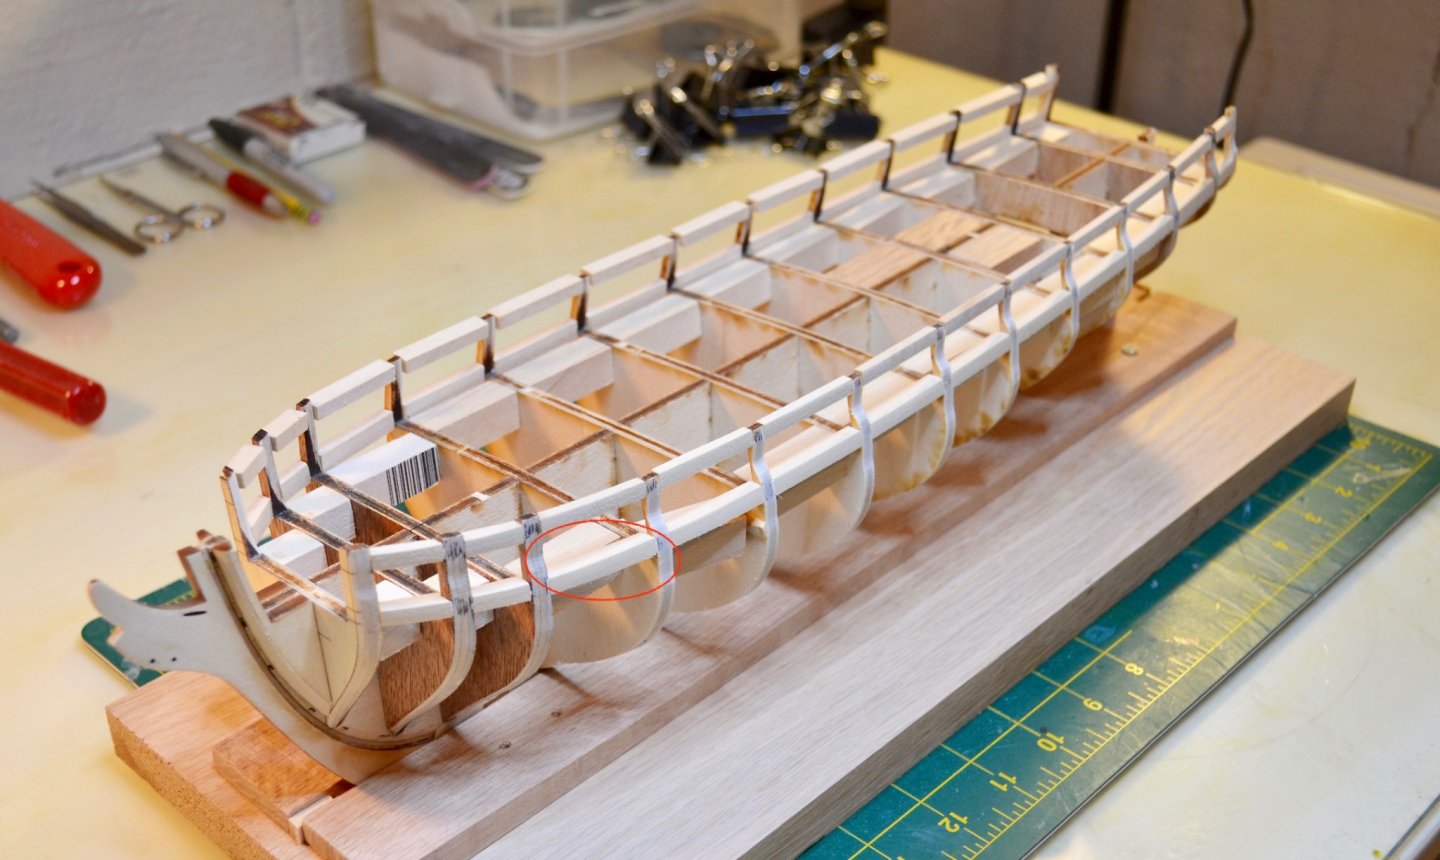
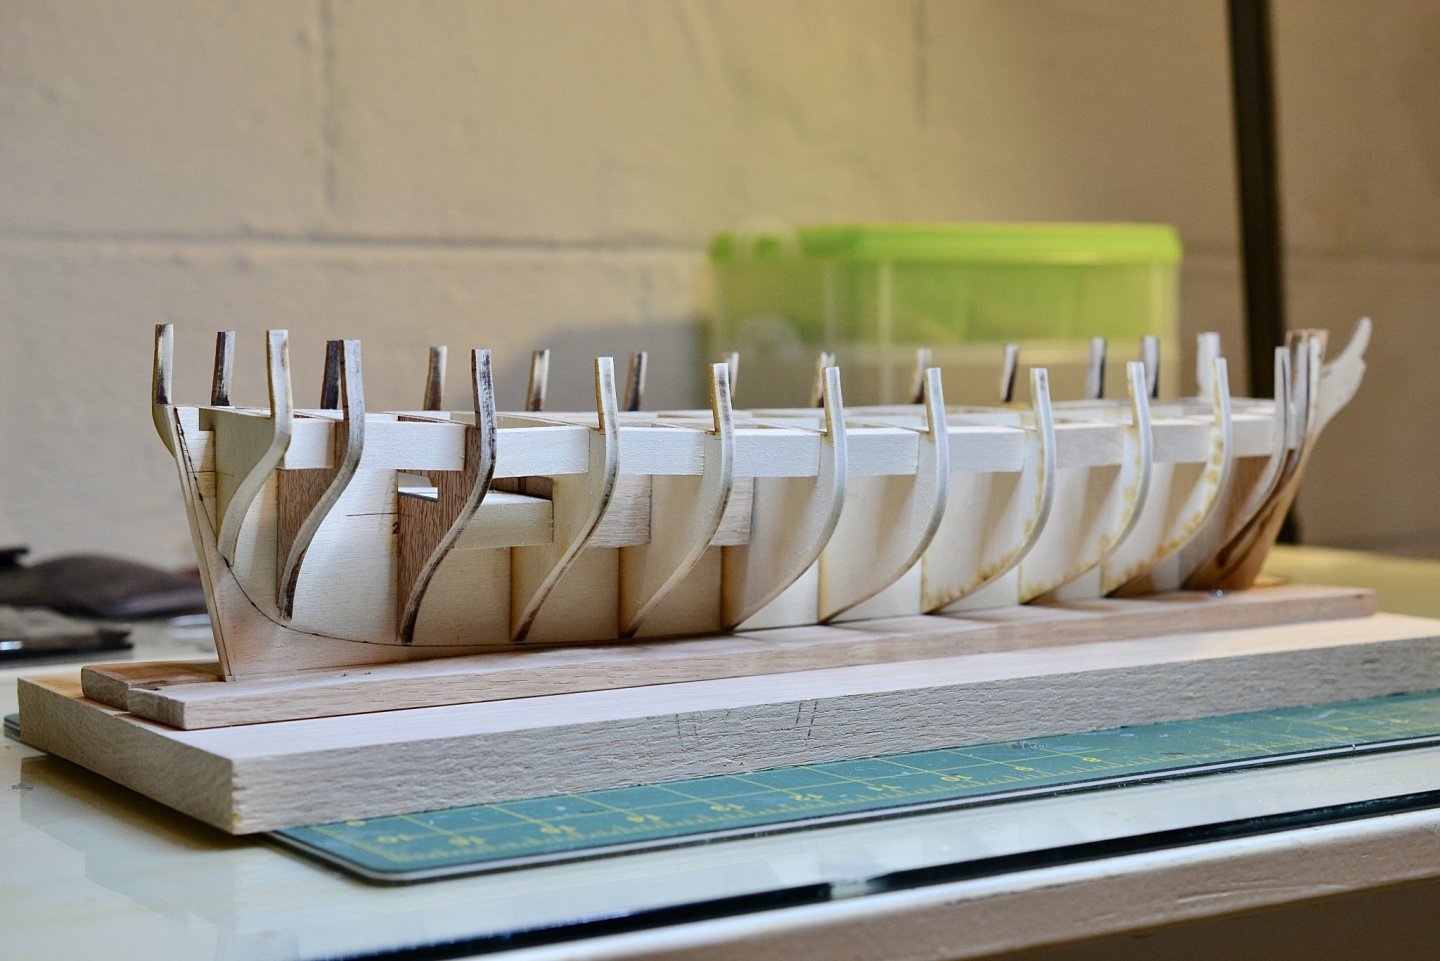
I'm back with the latest edition of the world's slowest build log. At this point I have faired the sills and lintels and cut (but not attached) the 'green' framing for the port side. As I was doing this I realized I created a problem for myself. As you can see in the photo below, I sanded some of the frames far too much. Not sure how I did this without noticing or breaking the frame, but I noticed it in time not to create the problem on the starboard side. Do I need to find a way to fill in the convex area circled in red to strengthen and restore the tumblehome shape? If so, what would be the best way to do that - saw dust plus wood glue? Wood filler? Another question is whether I have sanded the insides of the sills sufficiently for the decking later. In the photo below (red circle on the left) do I need to keep sanding the sills until they are flush with the frames? Finally, this may be a dumb question, but ... the gun ports should be perfect squares that follow the elevation of the sills, right? Meaning by the time you reach the bow and stern they will be square but at some slight angle to (not parallel with) the waterline. Am I going to have an issue at the stern? I know the instructions say to cut out one of frames, but I didn't think it was two ... and my gunports appear to cross frames in two cases.

-
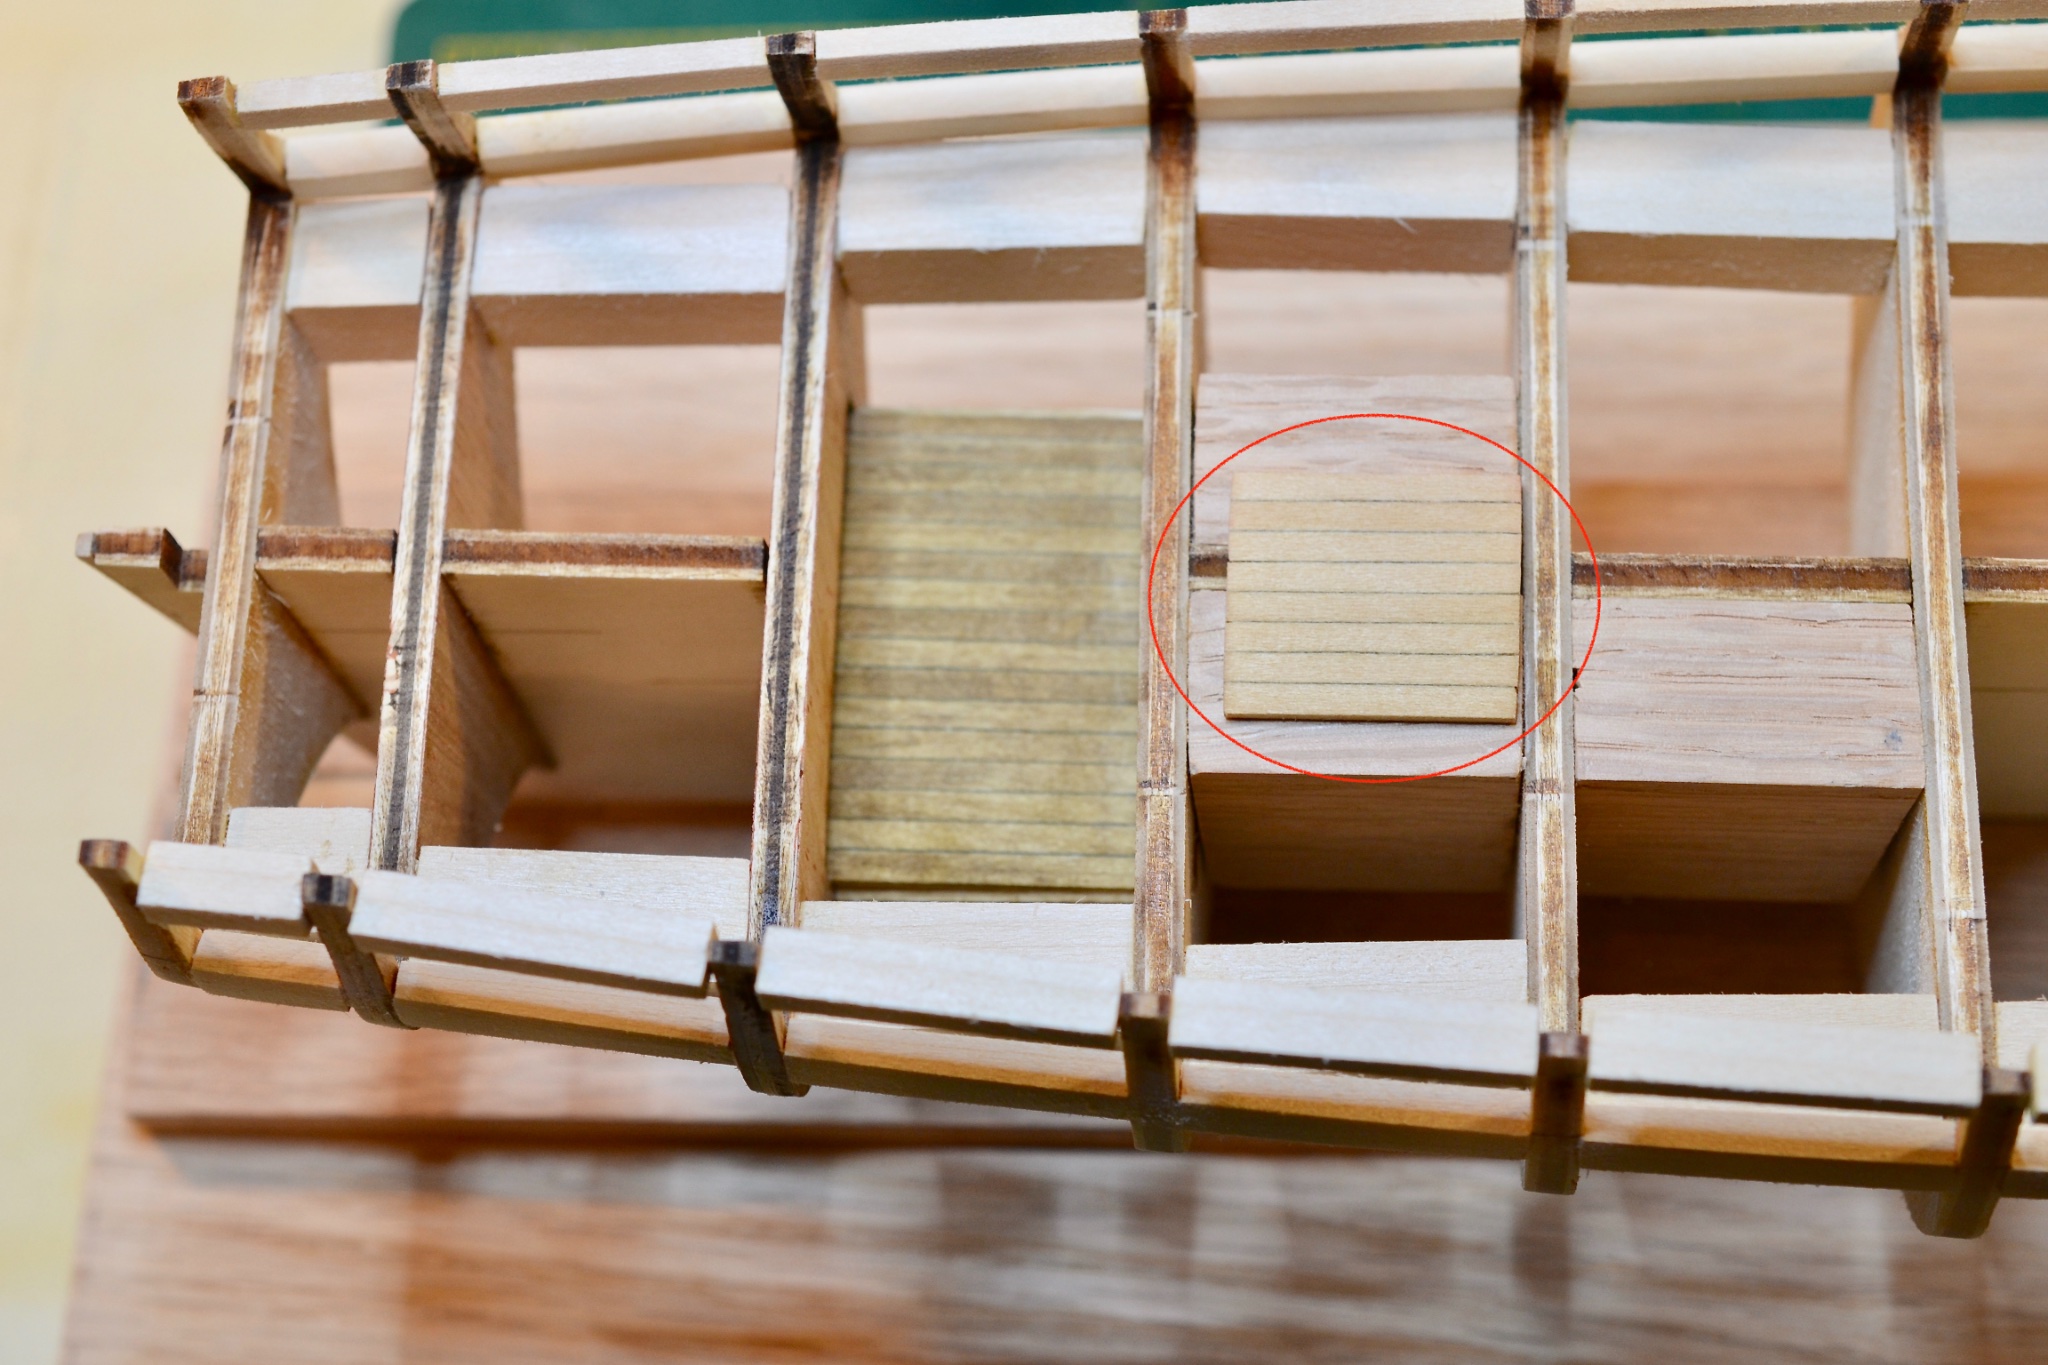
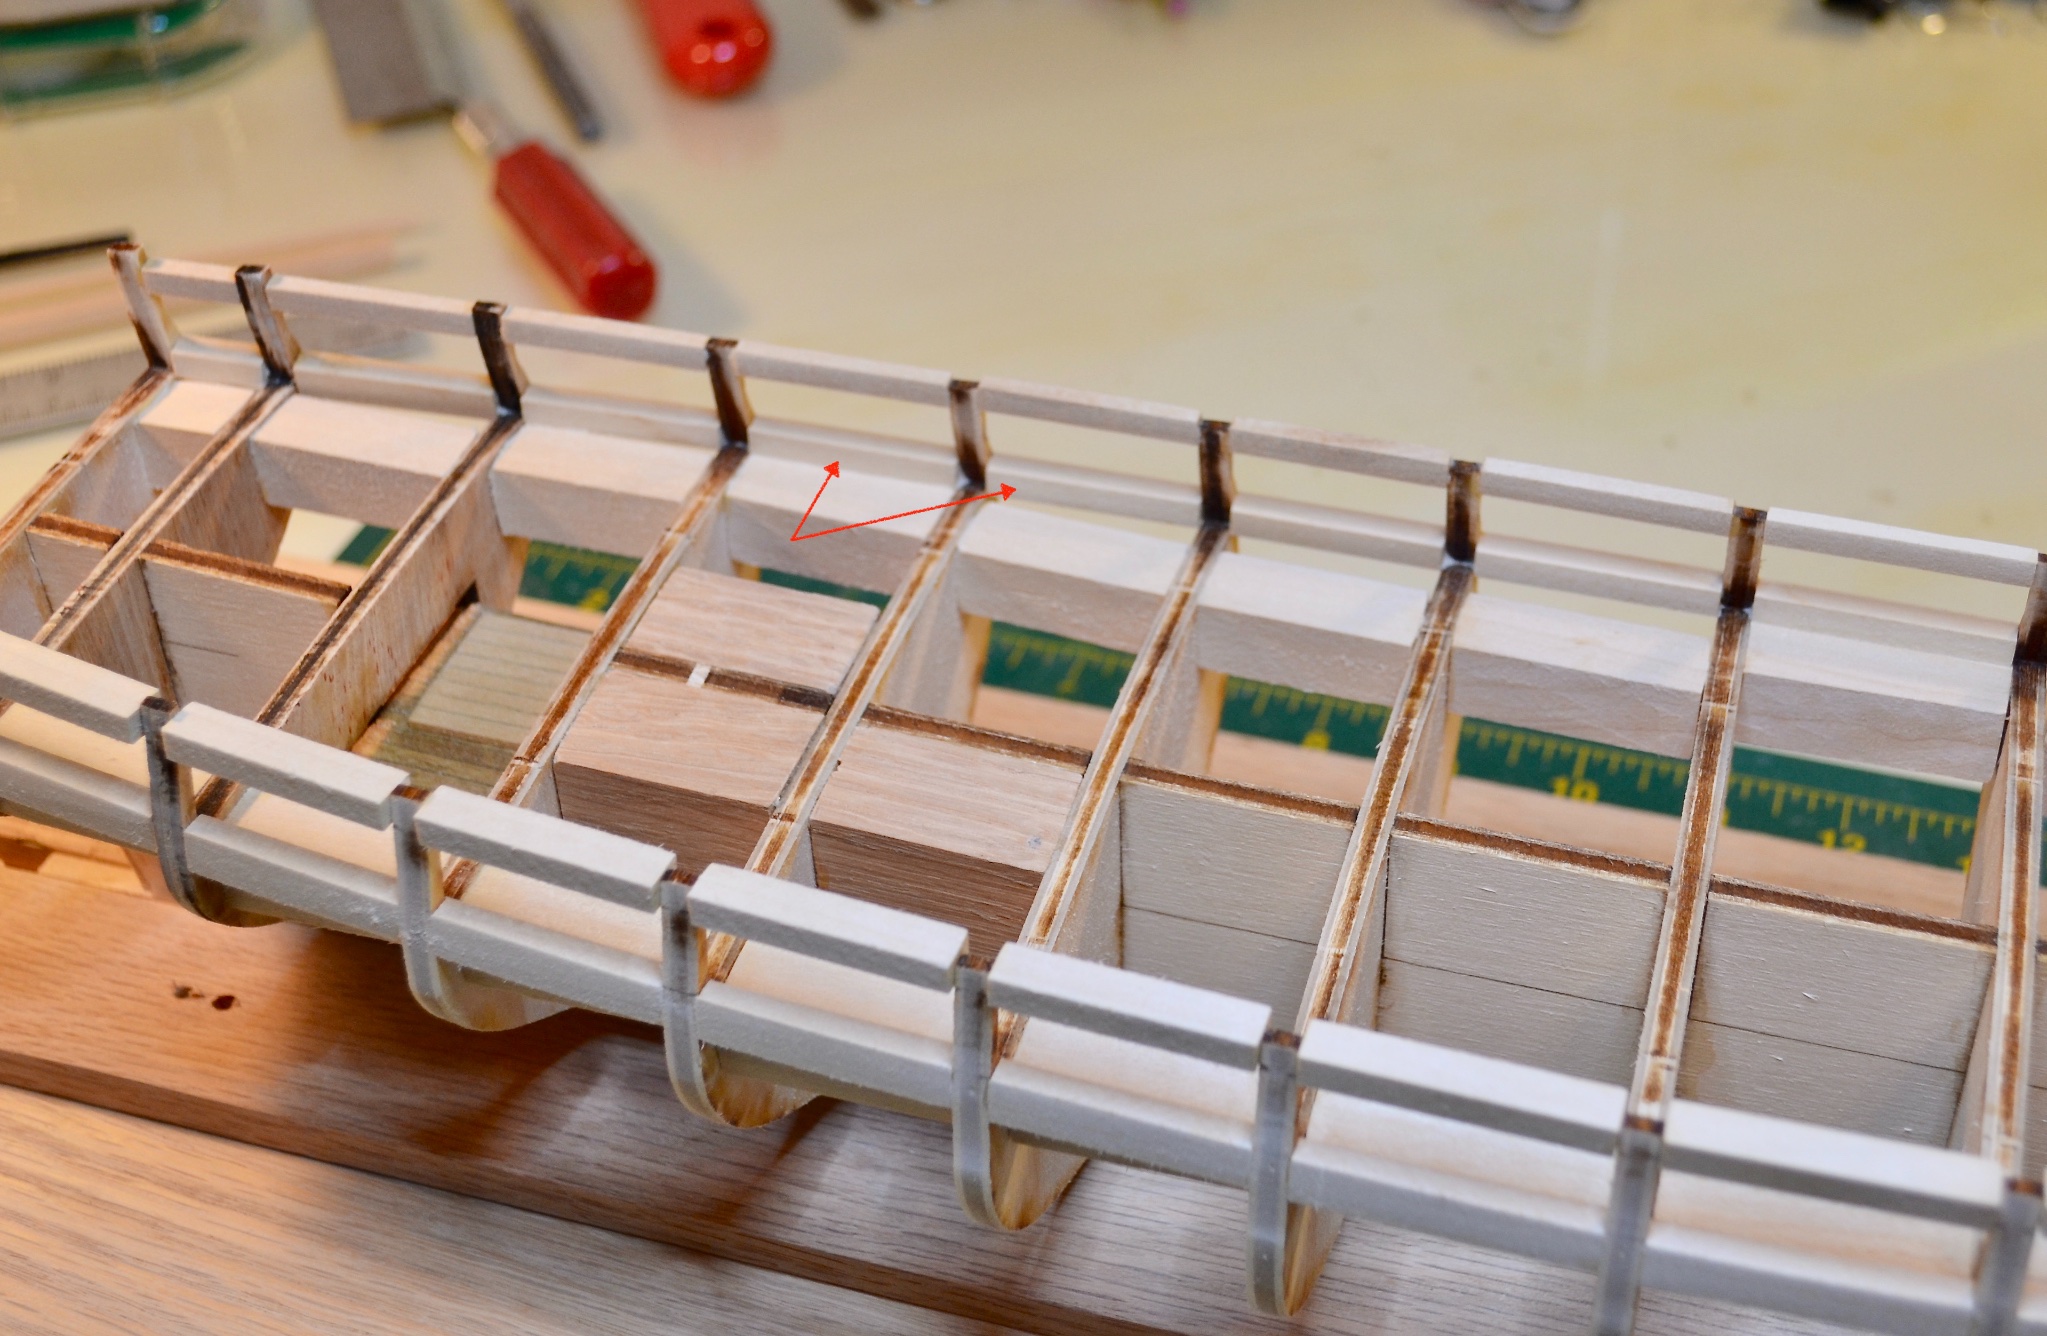
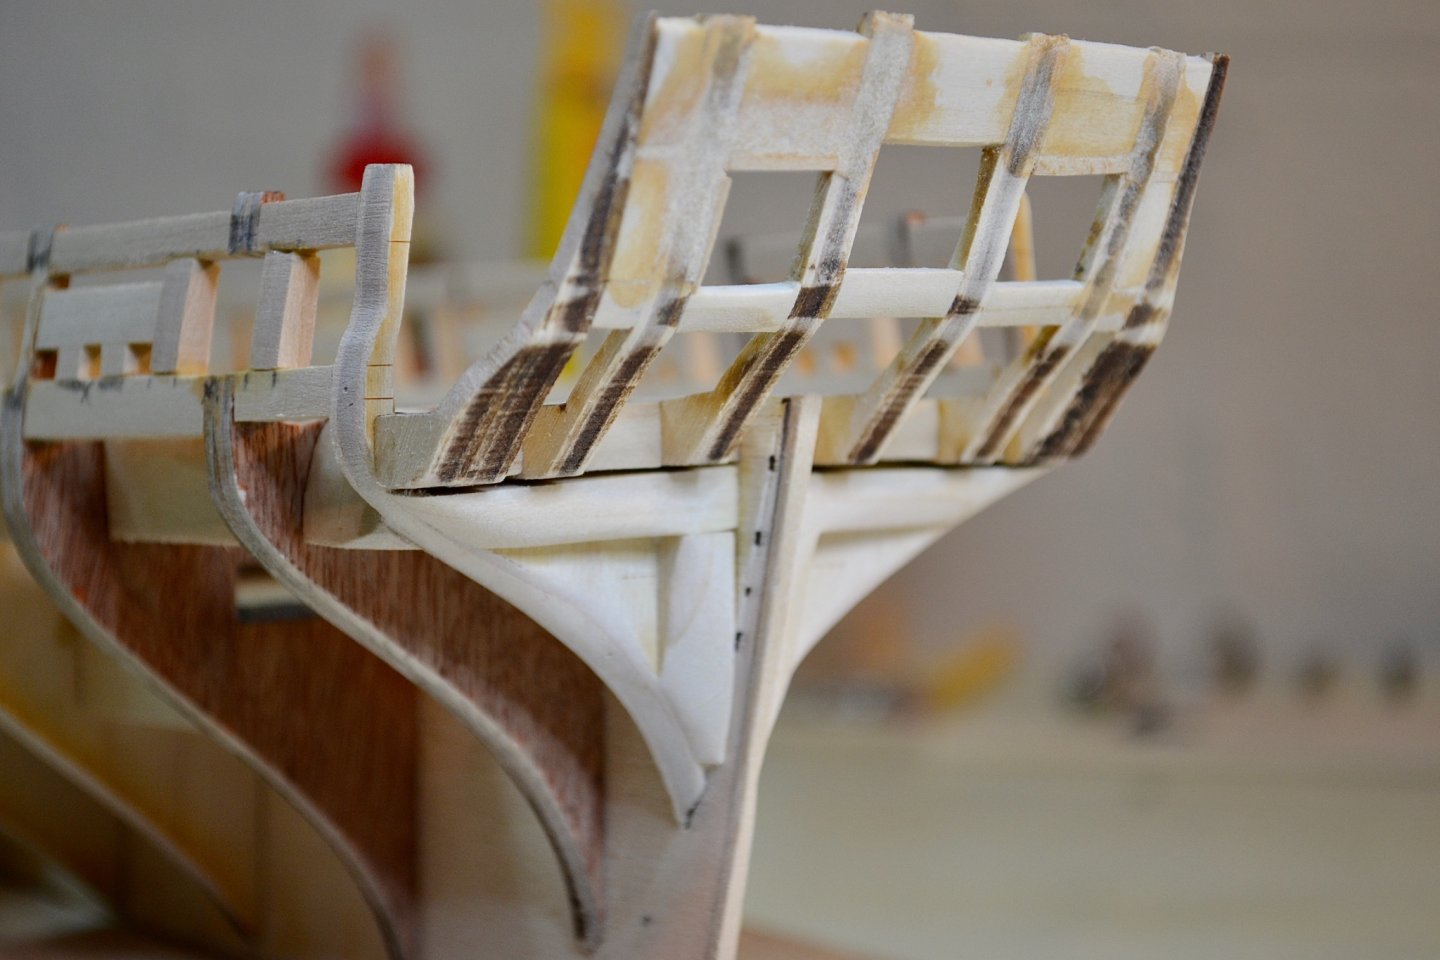
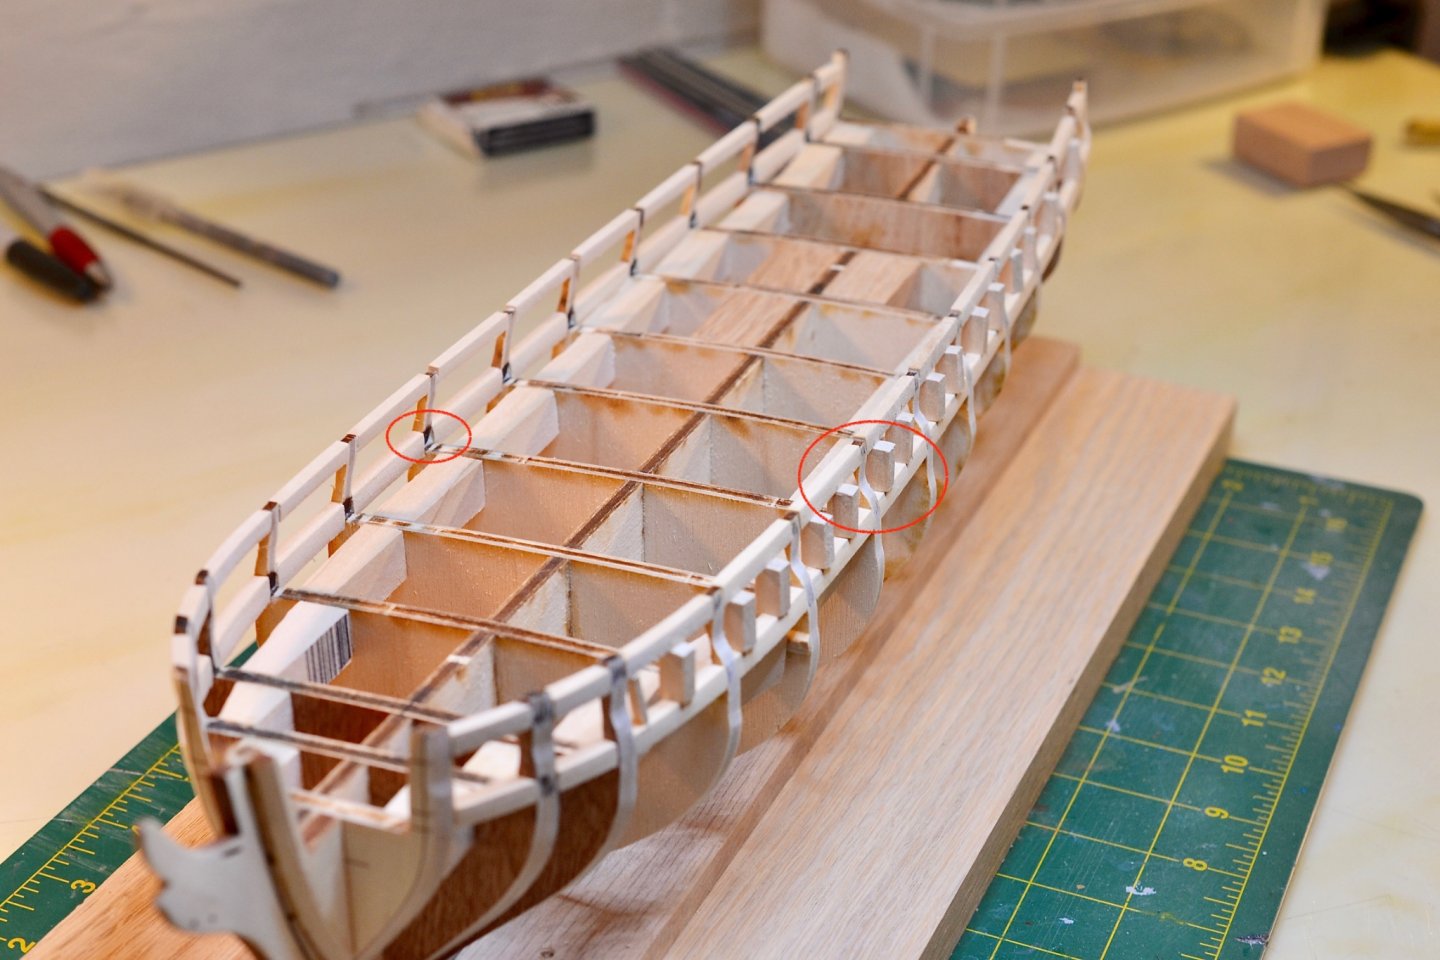
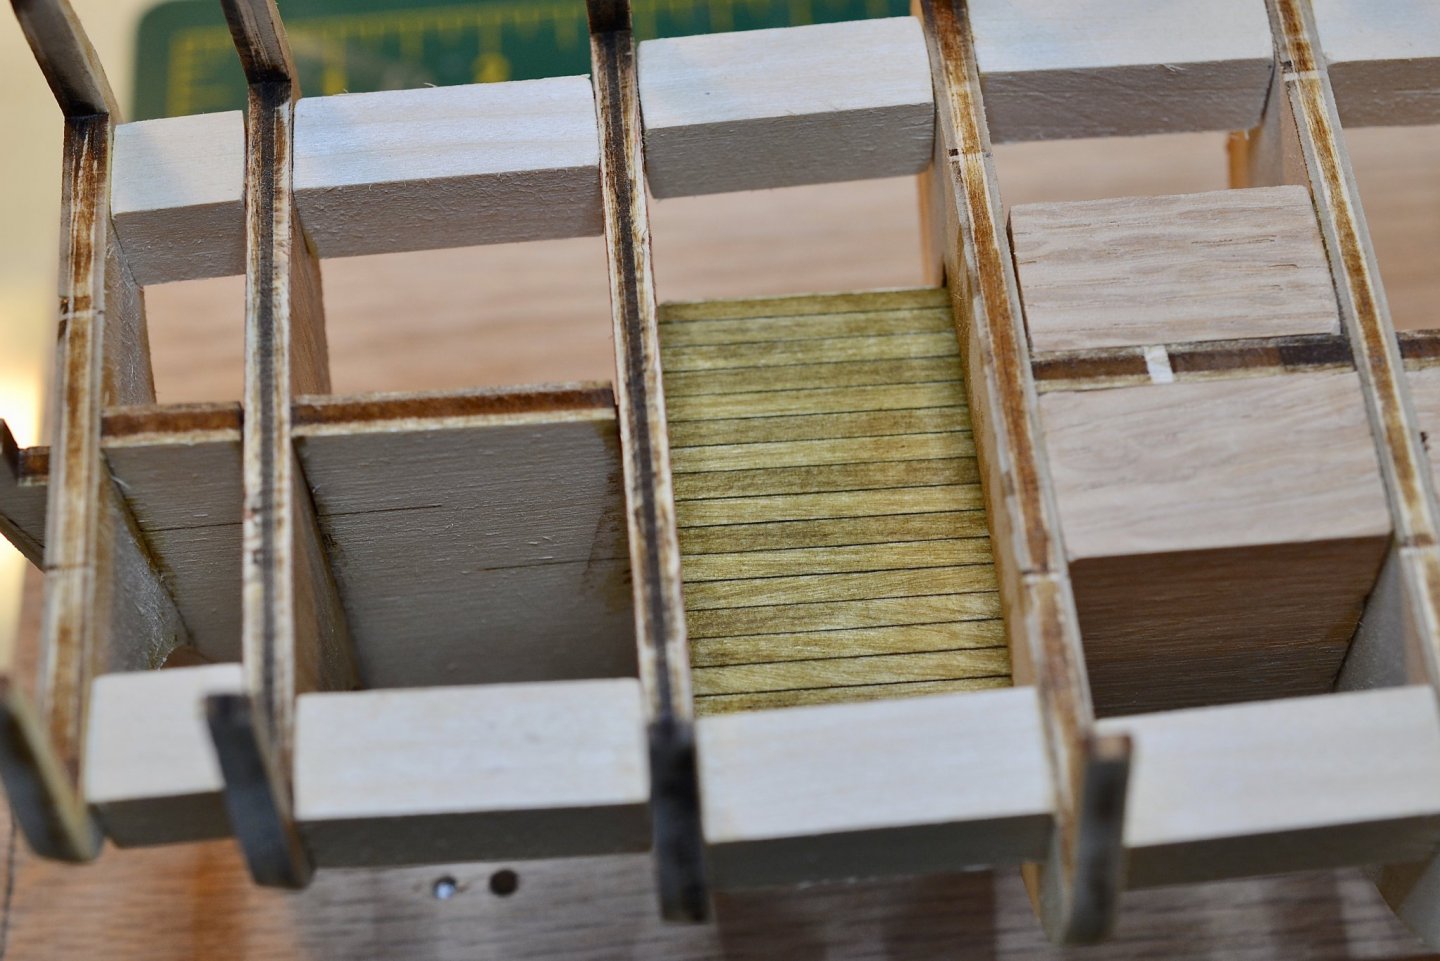
Thanks everyone for the input and tips above. I didn't respond at the time 2-4 weeks ago, but it helped me keep moving. Very much appreciate the help. Since my last post I have made a couple trips to Home Depot for stain. I wasn't happy with how the lower deck turned out using straight Minwax Golden Oak, so I mocked up a small section of planks and tried again using Minwax Pre-Stain Conditioner followed by a 3:1 mix of Minwax Natural and Golden Oak. The stain has a much more uniform appearance and the lighter color looks a lot better (at least to my eyes). I also framed the sills and lintels. Baby steps, I know, but I like how they already start to show the ship's lines. Unfortunately, as you can see in the photo below (red circle) I glued the sills in the wrong way with the narrower edge on top. For those who have gotten further with their builds, will this create a problem down the road? At this point, I have thinned the sills and lintels on one side, which you can see in the photo below. My question here is how folks thin the area the red arrows are pointing to. There just doesn't seem to be any easy way to get in there ... and given amount of material to remove and my lack of a dremel-type tool, I'm wondering whether I'll get through this step before Christmas. Seriously, though ... any input on how to get into this space?

-
What beautiful work - I could look at the photos of the hull all day. I'm seriously challenged when it comes to tying knots so I'm eager to see what (and how) you do.
- 950 replies
-
- 2
-
-
- syren
- model shipways
- (and 1 more)
-
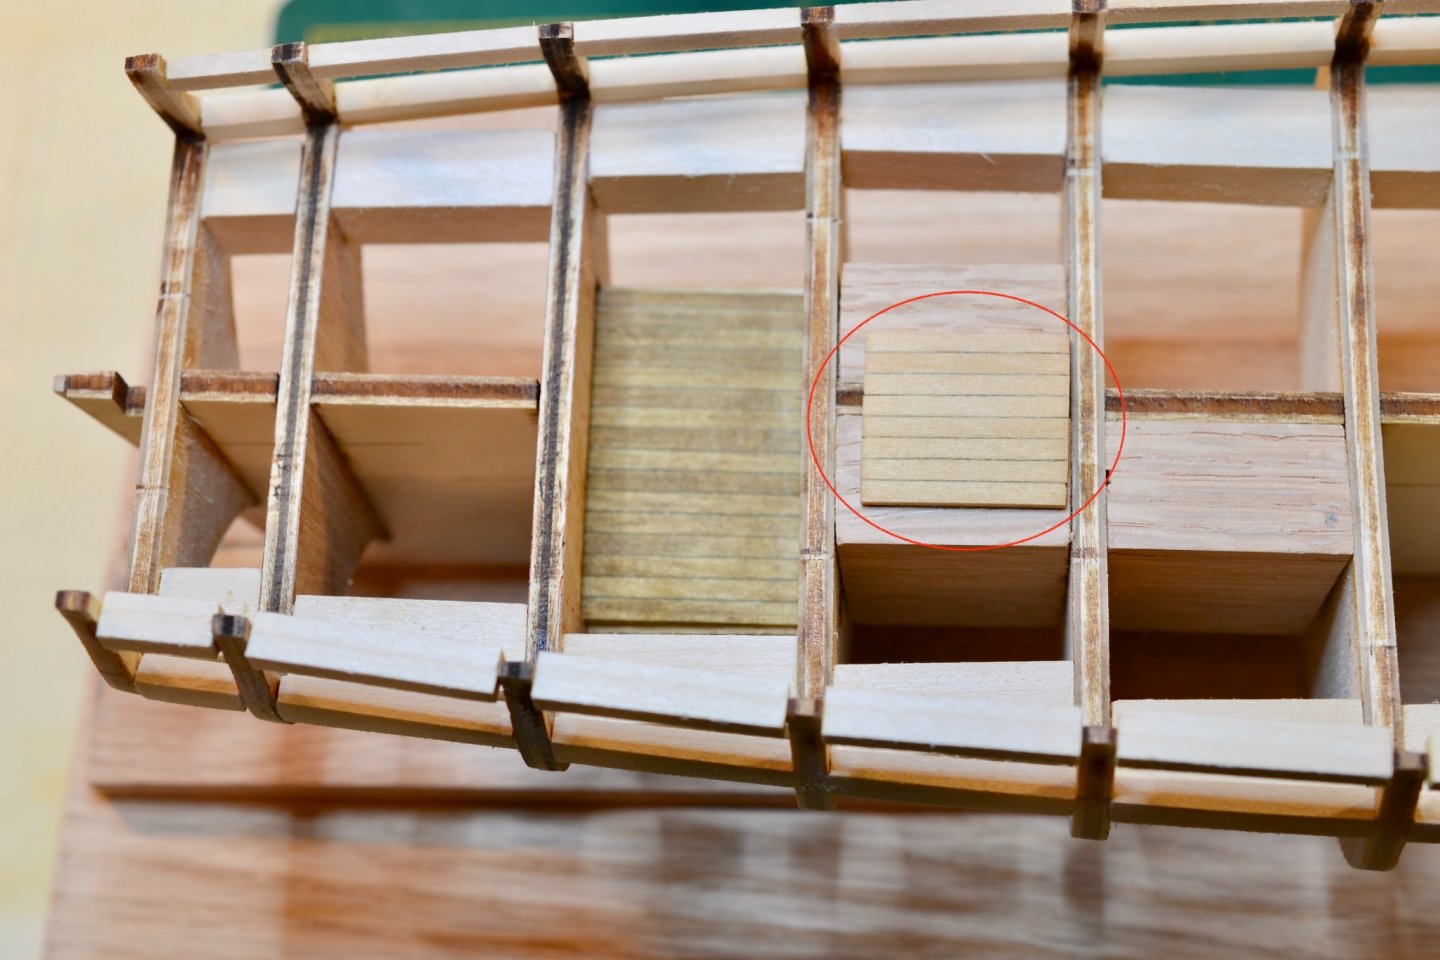
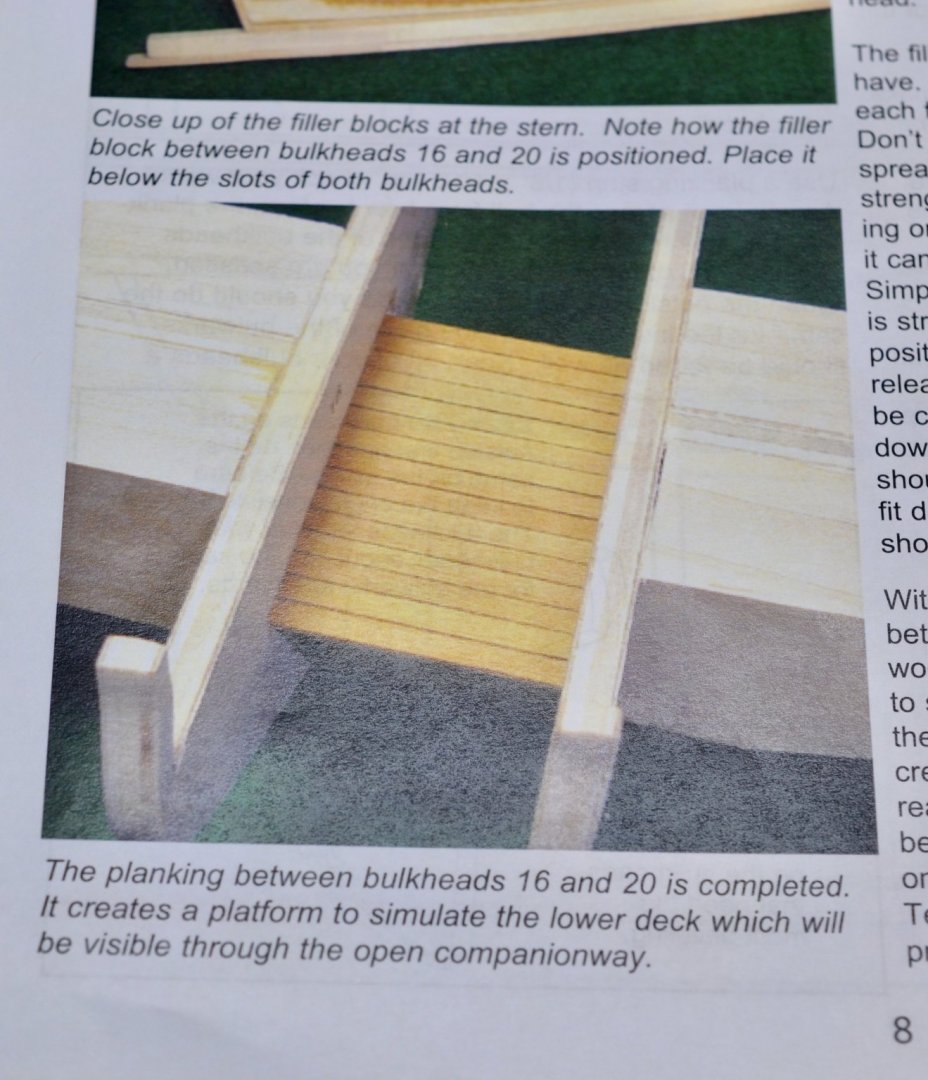
Minimal update here ... but some progress. I laid the planks for the lower deck and stained them Minwax Golden Oak. I'm not happy with the look compared to the reference photo in the instruction manual (see below). The color isn't in the same zip code and the stain penetrated very unevenly. Any thoughts or suggestions? I did not use the Minwax Pre-Stain Conditioner I mentioned in my previous post, so I may conduct a quick experiment to see if it makes a difference. Is it possible the wood in the instruction manual is a difference species than what is included in the kit? Separately, I have started reading ahead to chapter three and have one concern and a few questions. The concern is that the paper template (which I cut out very neatly) doesn't come close to lining up with some of the bulkheads. Anyone else encounter this problem? I don't think I cut out the template incorrectly and it doesn't seem possible that the bulkheads could fit in their slots and be so far off from the template. And a few questions ... What is the purpose of the paper template? The text tells you to cut it out and tape it to the model. But before telling you to do anything further the instructions tell you to remove the template and instead attach a batten. Is it just to help you picture what you will be doing and order to follow (i.e. yellow, green, red, blue)? Is a batten just a 1/16" x 1/8" inch planking strip? The instructions recommend little brass nails to attach the batten. I recall seeing something similar while doing a kit inventory. Is this where those small nails are intended for use? Thanks for all the help and input so far ... makes a world of difference.
-
Patrick and Mr. Walrus - Thank you both for the step-by-step guidance. I'll give the interior deck a go tomorrow and post progress pictures when I can. I'm trying to absorb as much as I can from all the build logs on this site, but it's like drinking from a fire hose. I climbed the same learning curve on the plastic modeling side too so I understand it's par for the course, but I feel like I could read forever. I have to keep reminding myself to stop stalling, get in the basement, and make some progress. A question about staining planks before I do that. Would you (or others following along) recommend pre-stain wood conditioner? I'll be using Minwax Golden Oak stain per the instructions and while I was in Lowes I saw Minwax sells a pre-stain conditioner that prepares the wood so the stain penetrates evenly. It is especially recommended for soft woods (which I take it the kit wood is). And a random observation. The question of "waterline" versus "full hull" comes up regularly on the plastic model sites. I'm a "full hull" kind of guy, but I realize there is broad support for both camps. Judging from the number of kits that provide both options, model manufacturers do too. How has the wood ship modeling world avoided this existential question?
-
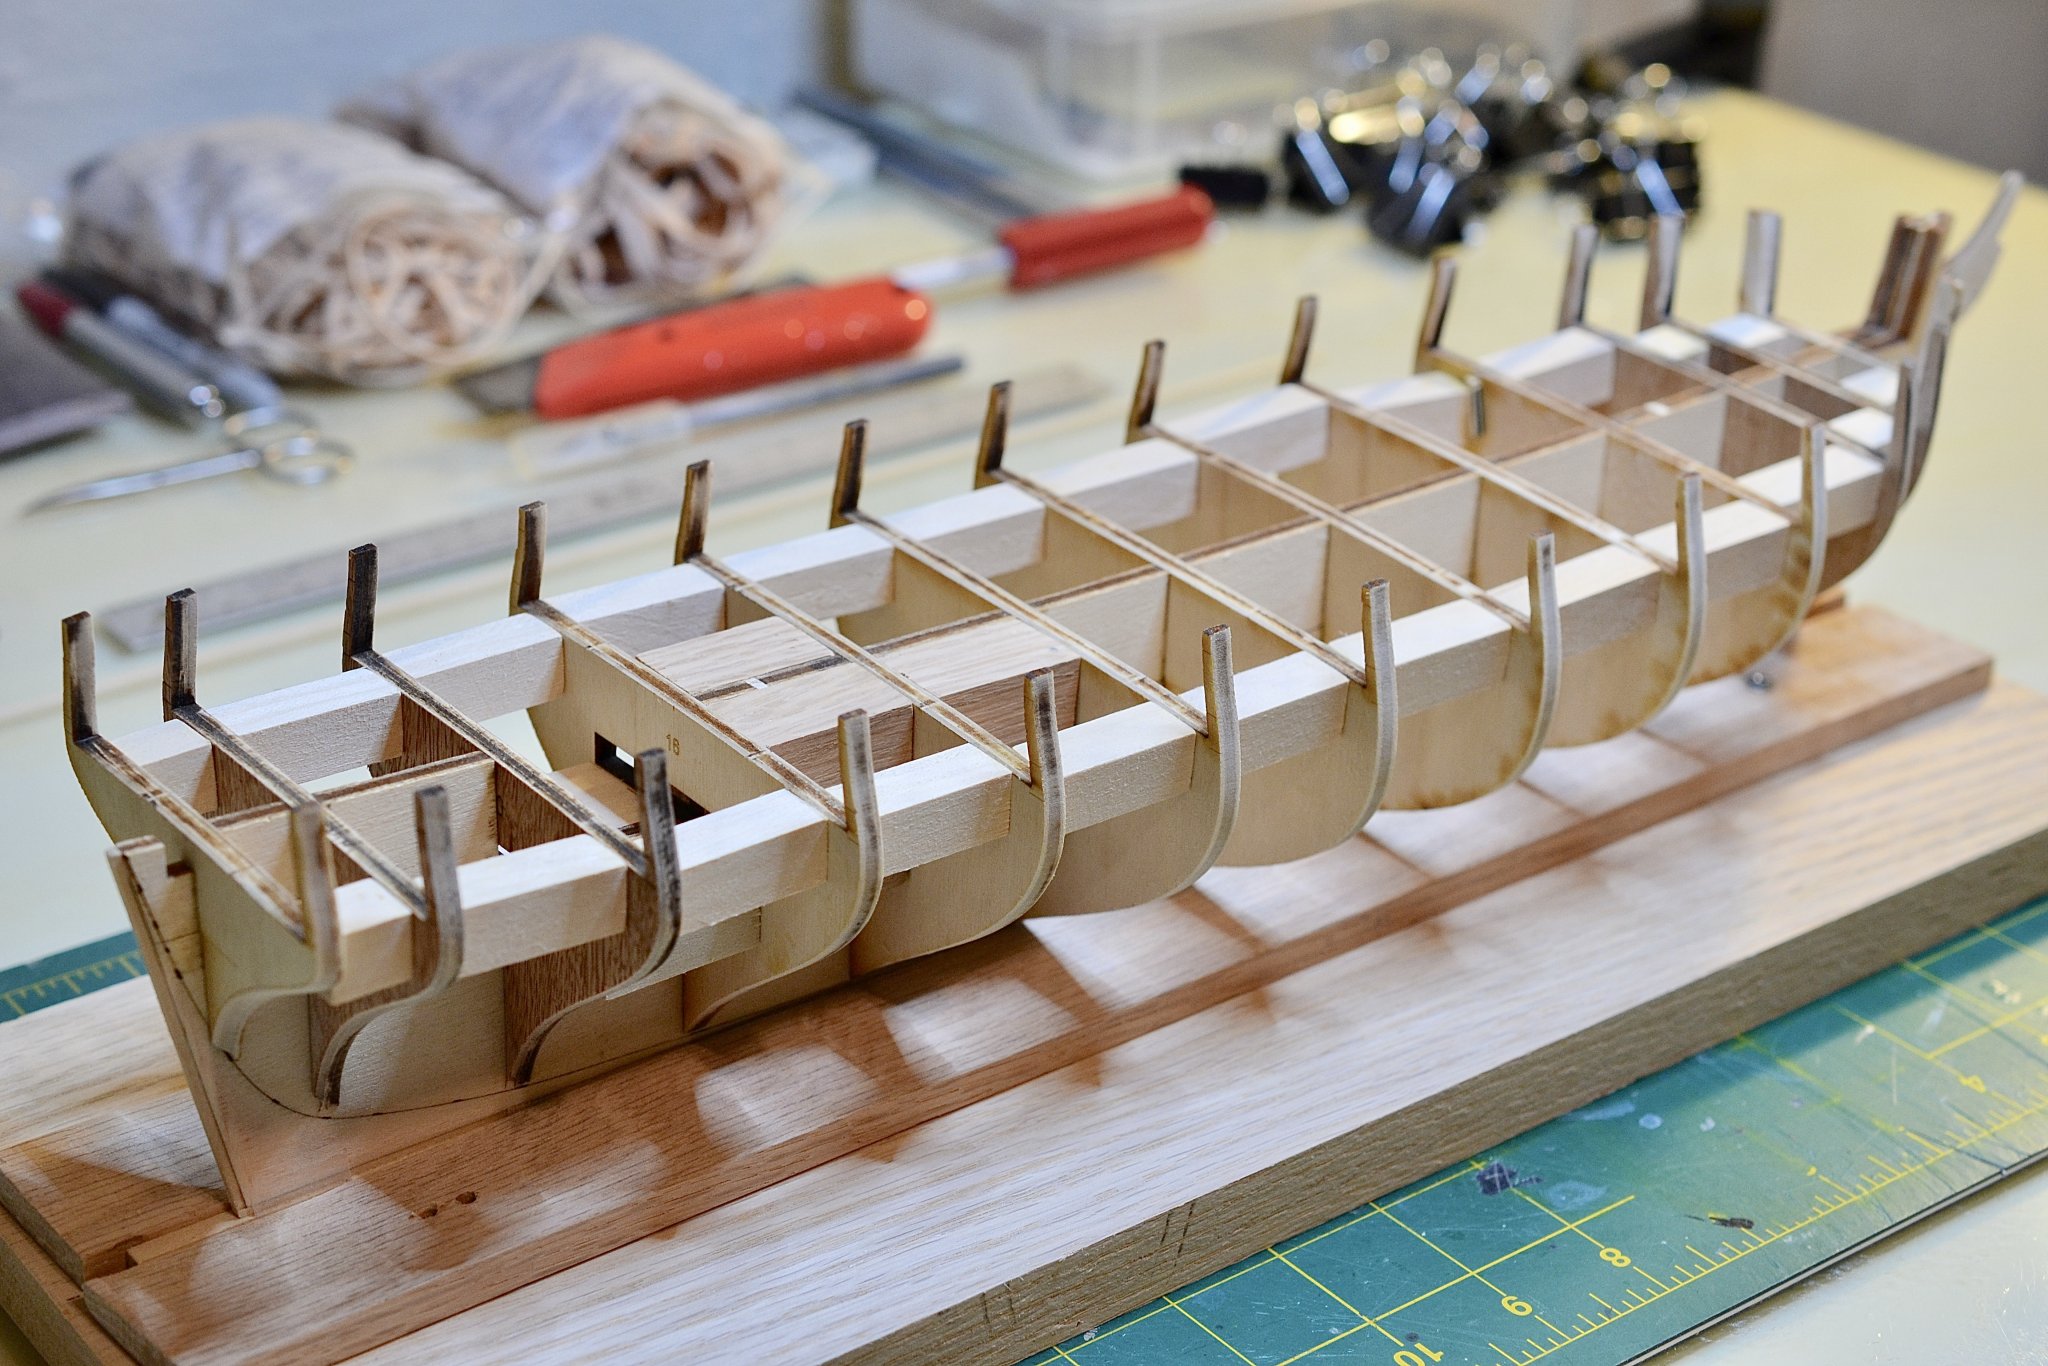
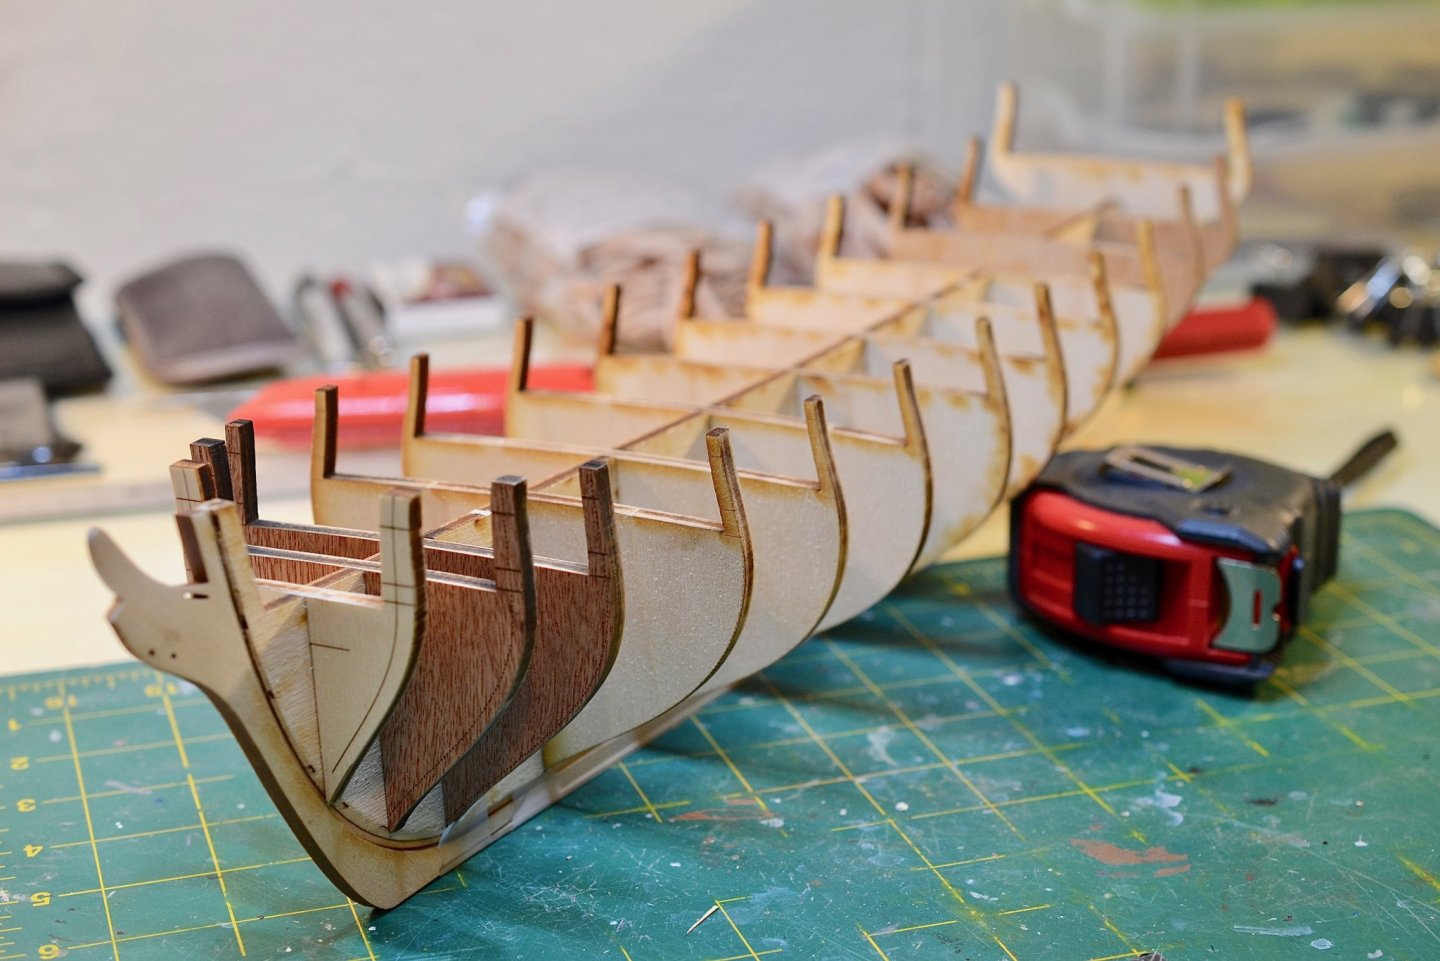
Well, it's been over a month since my last update ... I knew this would be slow going but I'm surprising even myself. It's been great fun so far and that's the point, right? I've been pleasantly surprised by how forgiving wood is as a working material. Sanding can get tedious but I like how much control you have if you take your time. Working with brass and photo etched parts and super glue in the plastic model world could get nerve wracking. Anyway, just a couple progress photos below. Major progress points are that I have created a basic building board, faired the bulkheads, and added blocks to strengthen the hull. Sanding the blocks to get the right fit took FOREVER so either I need to get more accurate with my measurements or I need to invest in a Dremel tool (or maybe both). One question as I look to finish out chapter two. The instructions suggest using a pencil to recreate the caulking between the planks of the lower level deck. What is the order of operations here? Cut, add, and stain the planks then run a pencil along gaps where the planks meet? Or is it run a pencil along the edge of each plank, add them to the model, and then stain everything?


-
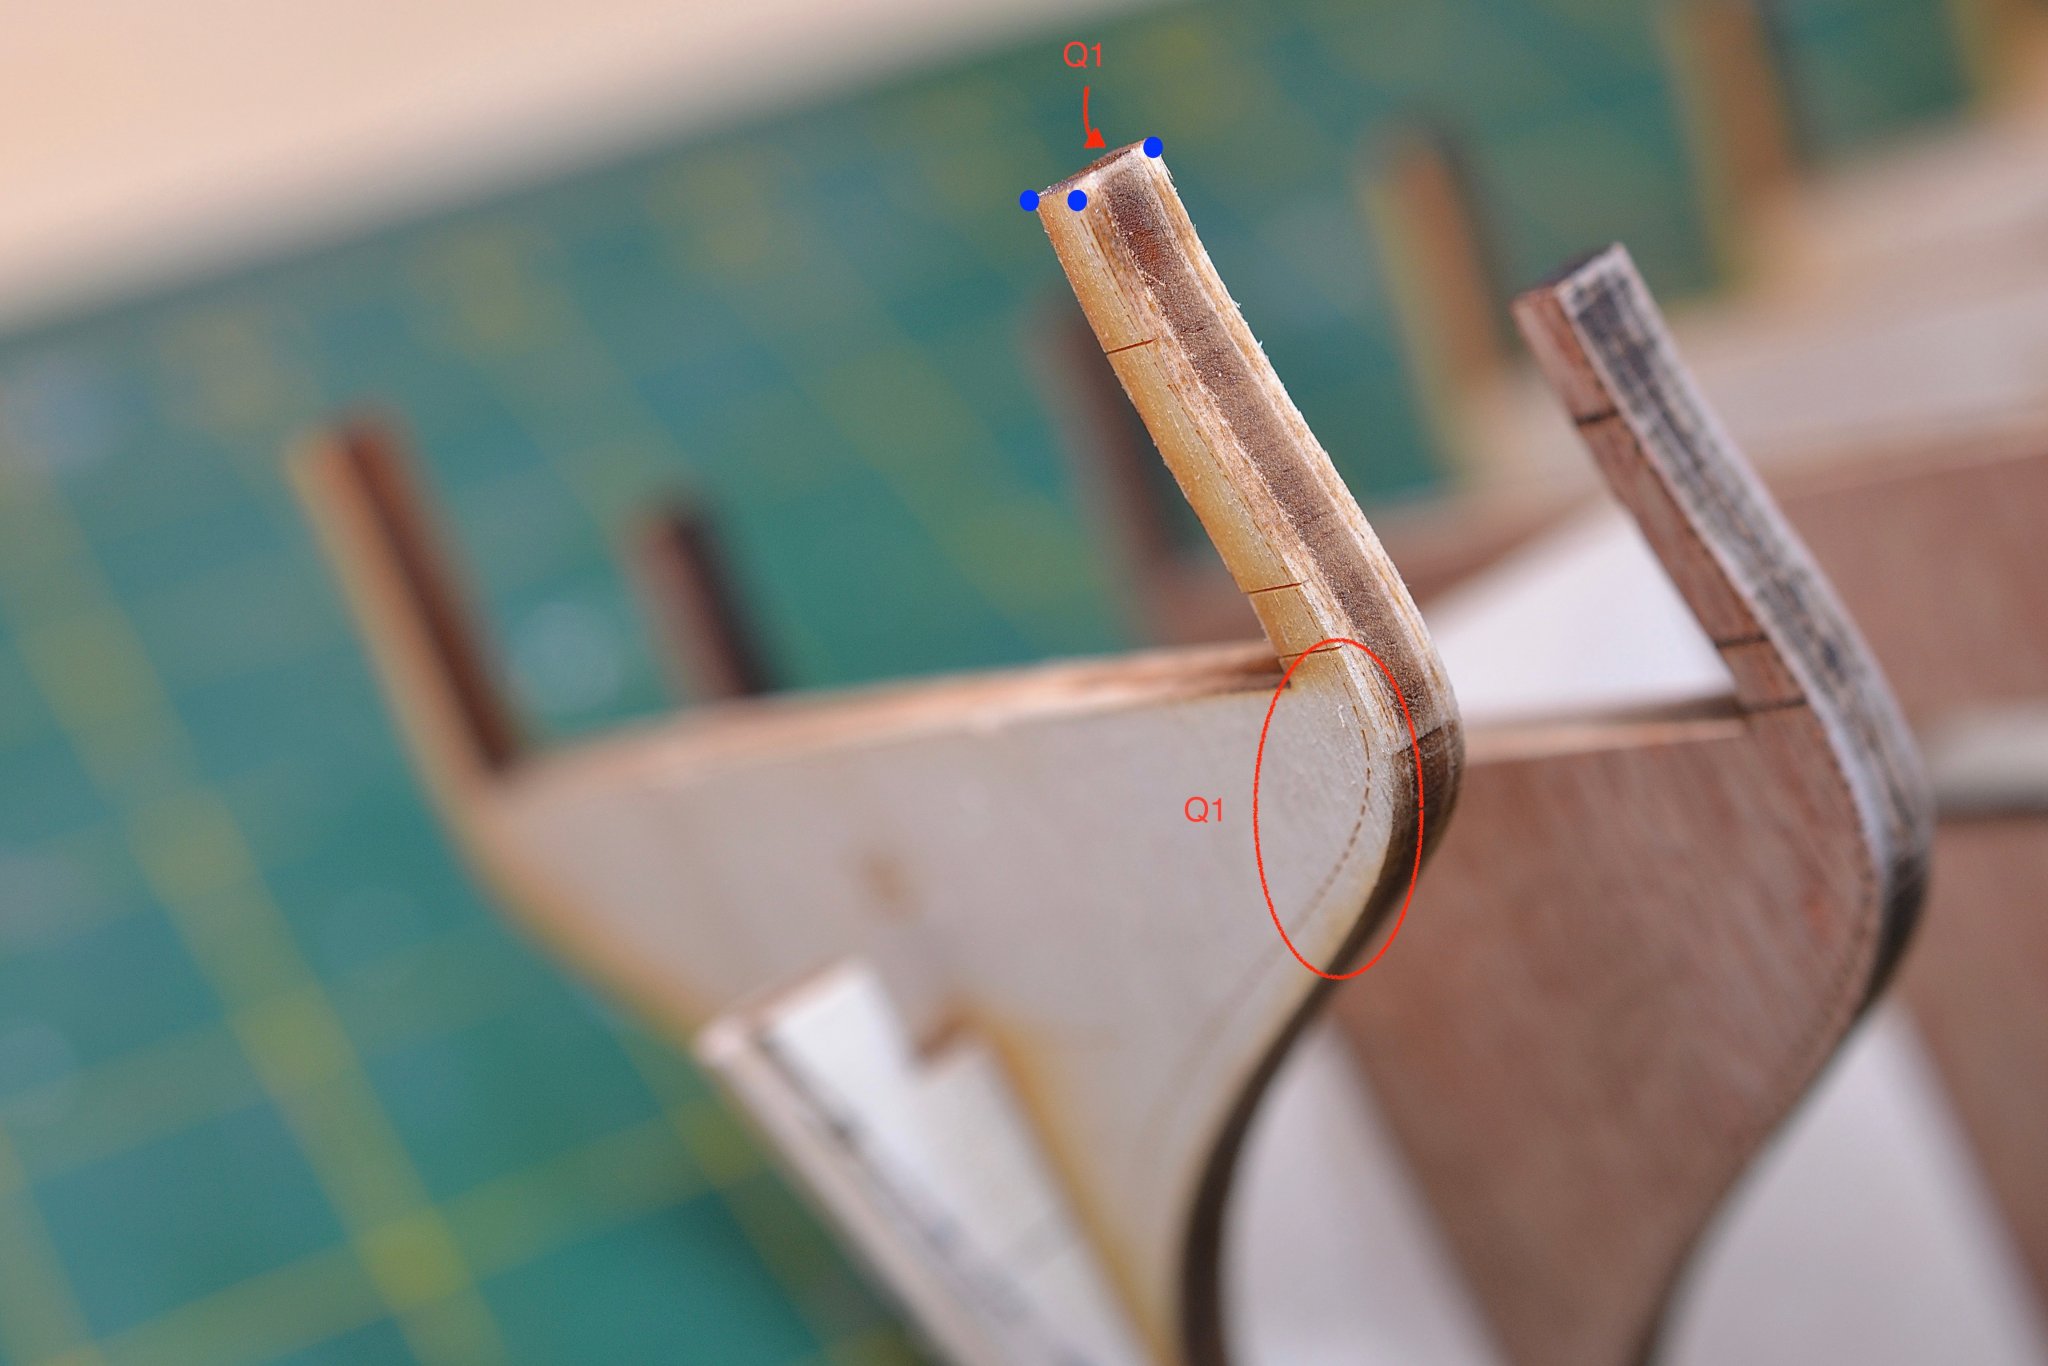
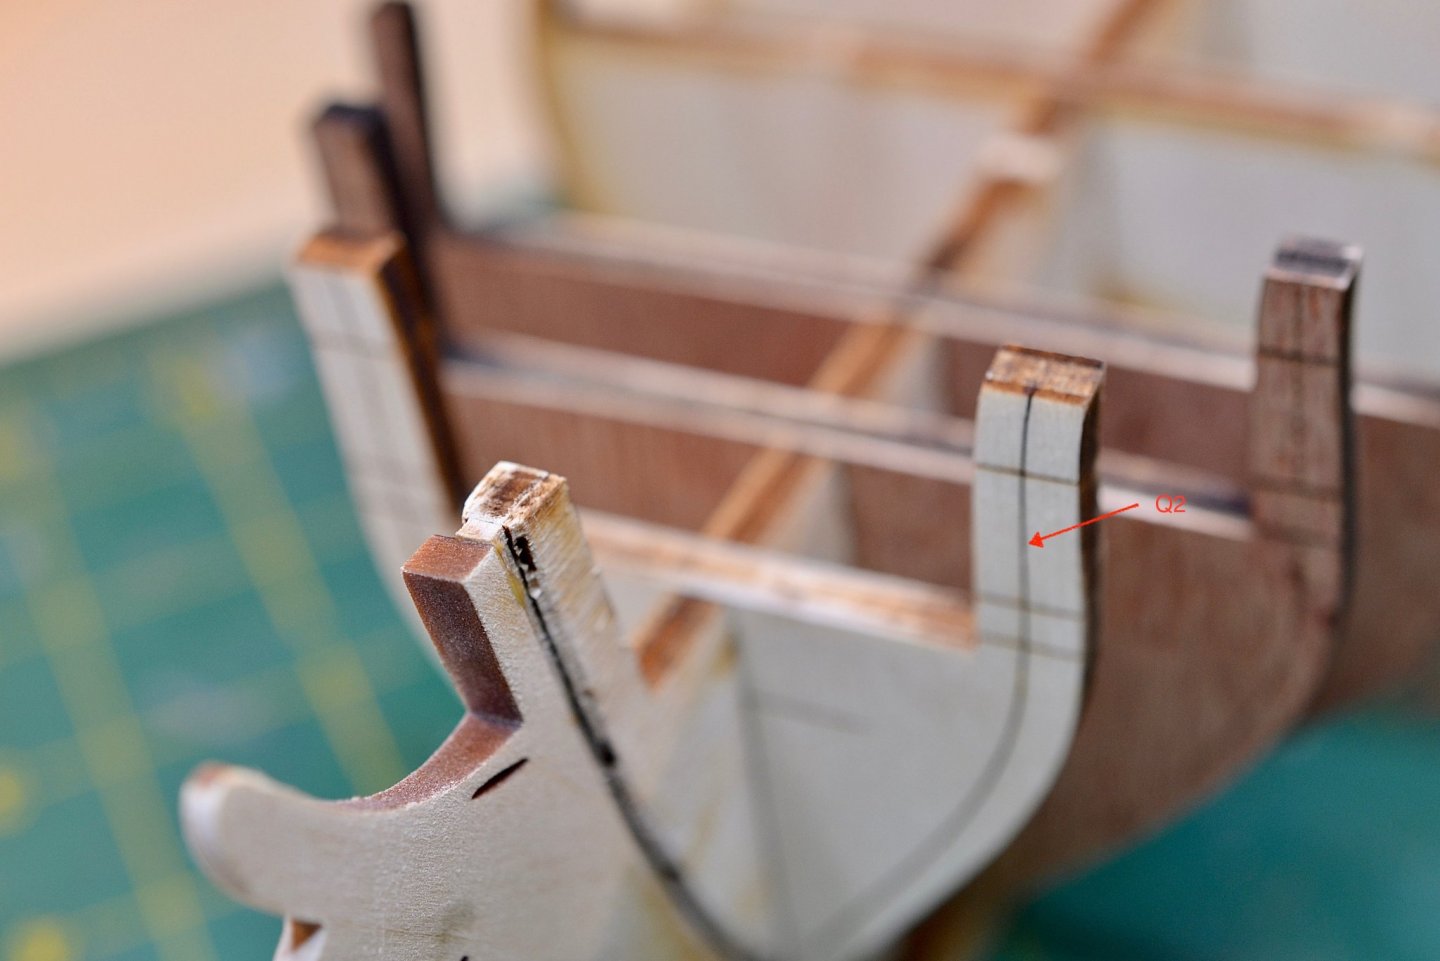
Thanks for the clear responses, Patrick! I'm going to have many more to come, I'm sure. Below a few progress photos. Apologies for the poor quality ... I should have changed the lens. Q1 - I'm at the point where I need to bevel the bulkheads. The instructions say to bevel the outer edge almost but not exactly to the dashed line. I'm clear on that. They also say to bevel the inside of the bulkhead and to keep the angle consistent. Can I confirm the red arrow is pointing to the correct area to bevel (with the blue dots highlighting the other three corners)? Also, is it fair to say that when I'm done - viewed from the top down - the bulwark frame should be a parallelogram? Q2 - Is the solid black line I'm pointing a bevel line similar to the dotted line circled with Q1? Q3 - I was going to create a building board. Is there a simple example someone can point me to? The simpler the better in my case. 😝

-
Hi Jamie - Nice start. I'll be following along as I recently started Syren as well. Good idea to work on the ship's boat a project within a project. I have been scratching my head a bit as I glue and clamp something and then have to wait 24 hours. Very different from the plastic models I'm used to where you can keep going.
-
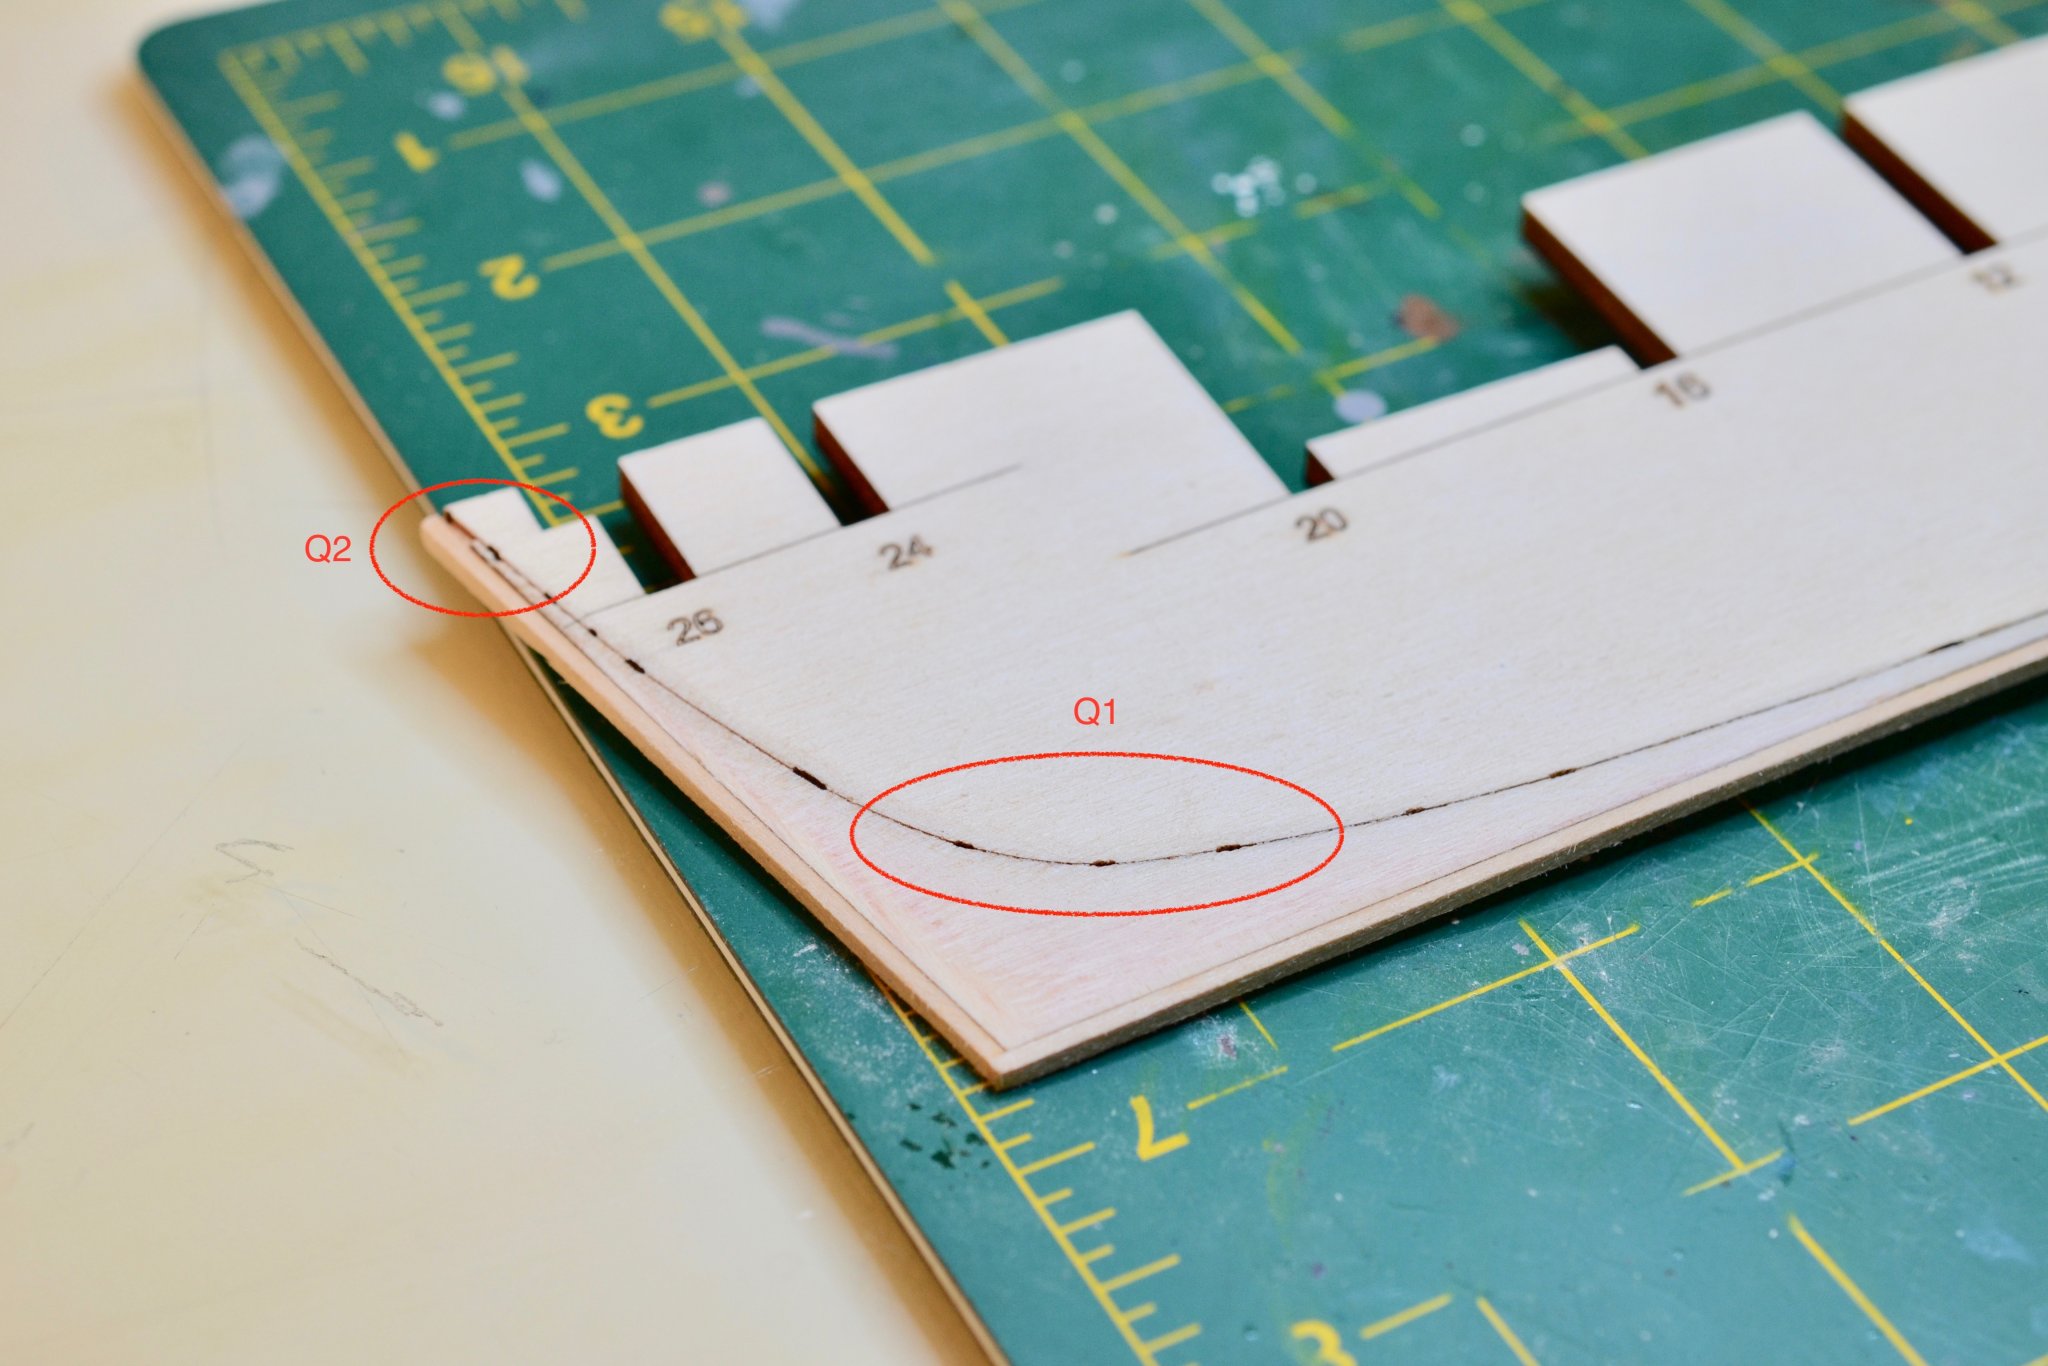
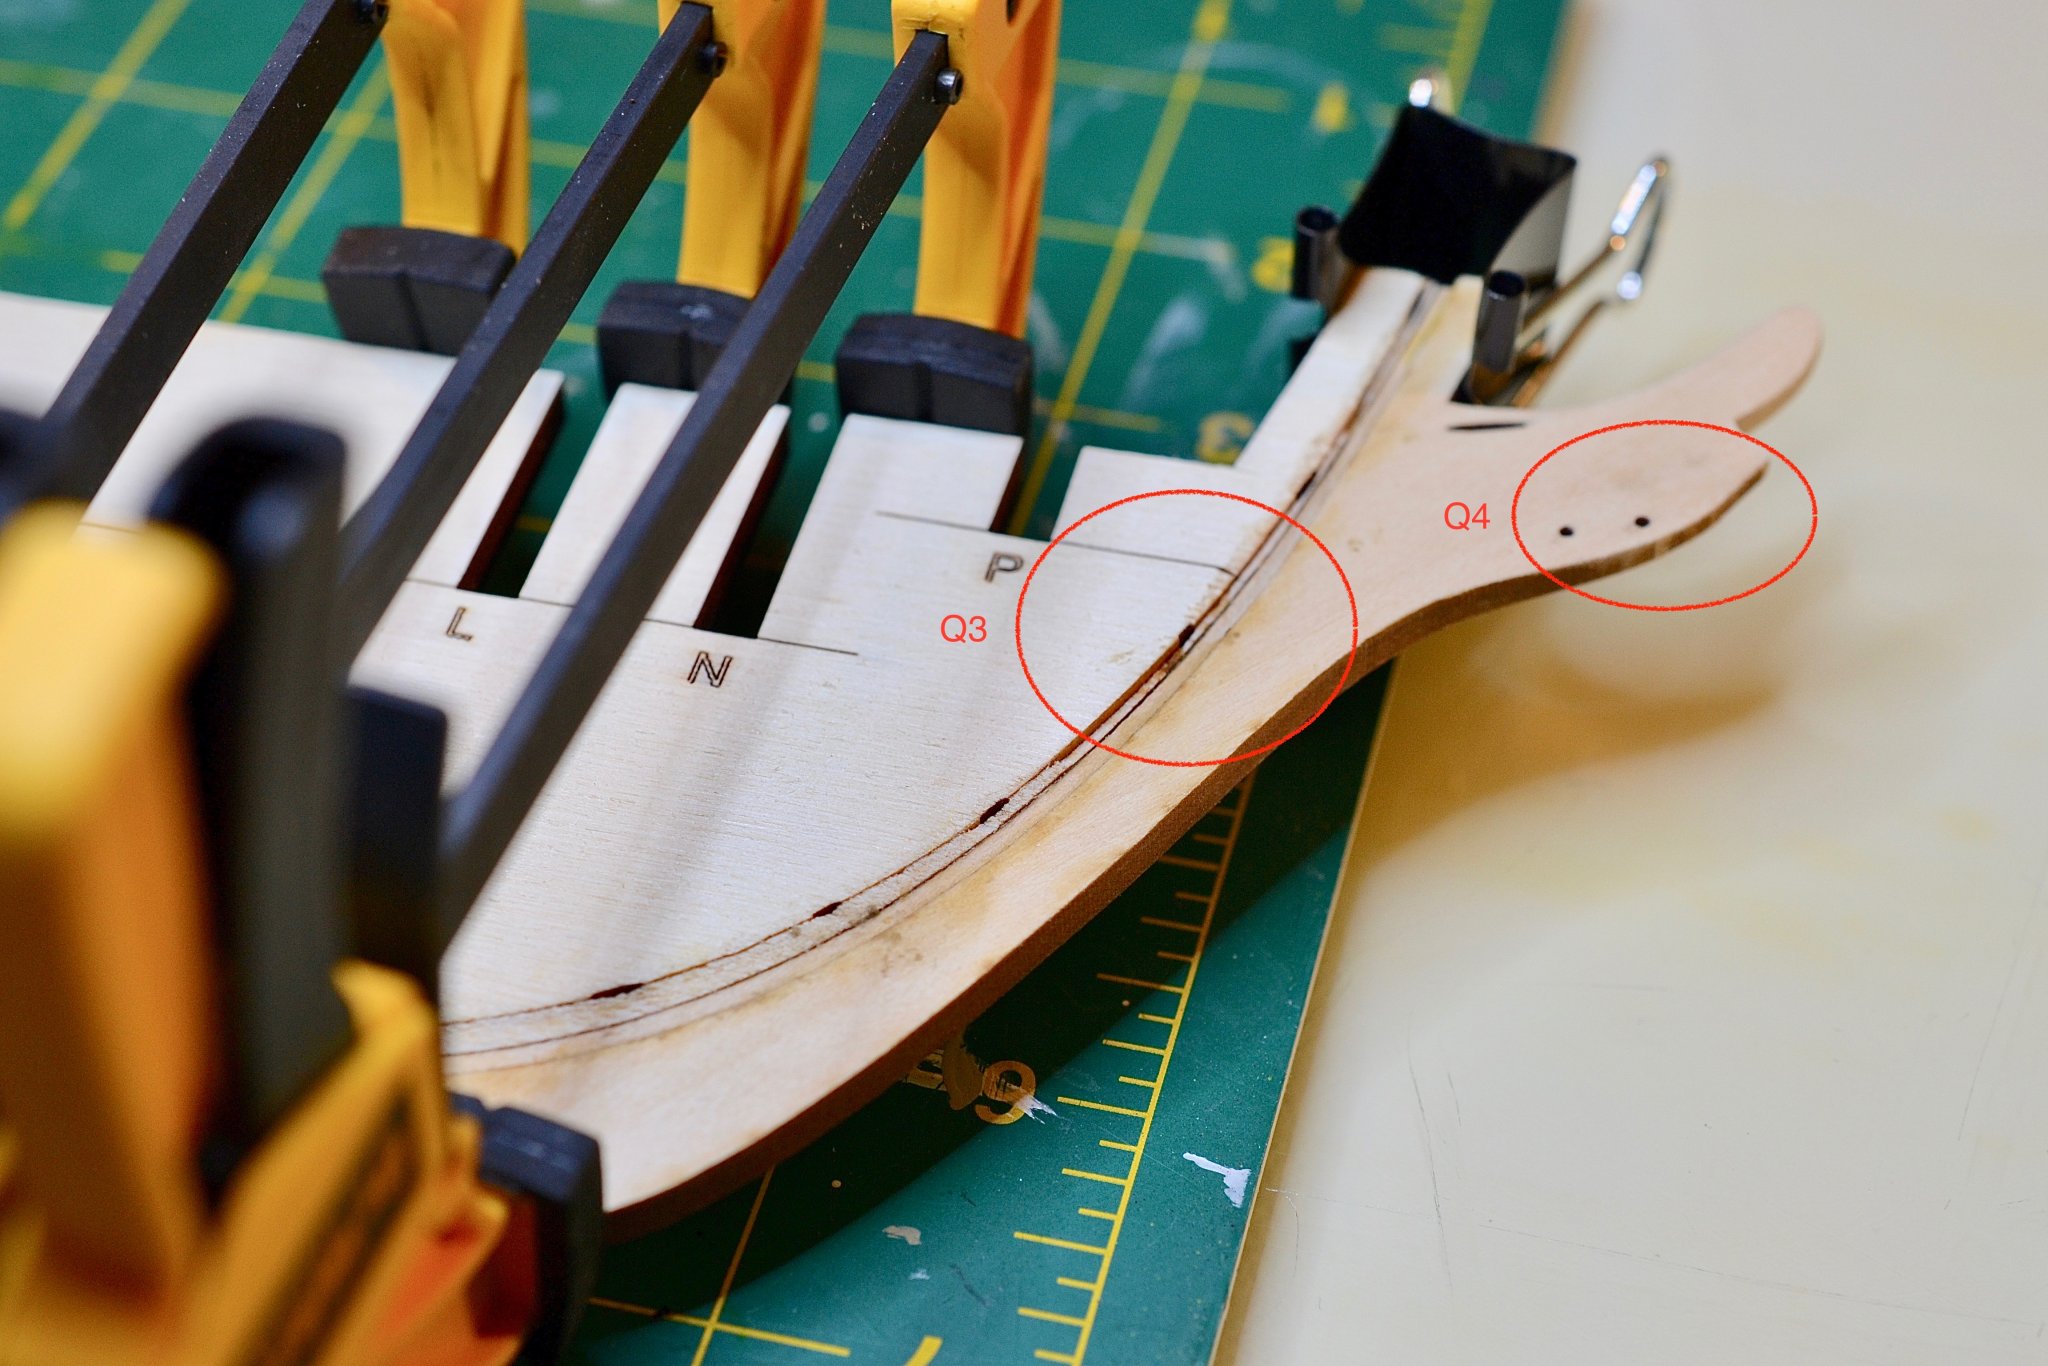
Thanks for all the input so far. I have managed to attach the rabbet strip, carve the rabbet, taper the stem knee, test fit the figurehead, and glue and clamp the stem knee to the bulkhead former. It took quite a while to taper the stem knee and get the figurehead to fit but I have thoroughly enjoyed the work thus far. Below are a few progress photos with circles where I have questions. Hopefully they post in order ... Q1 - A lot of build logs show an orange color or substance where I have circled. Any idea what that is? Also, should the bearding line still be visible once I have carved the rabbet? The picture doesn't show it well, but there is a smooth taper from the bearding line down to the rabbet. Q2 - Is this area going to pose a problem? The wood just snapped when I tried to work it. Q3 - Same question, different area. Toward the top of the circle the wood chipped and toward the bottom it came away. Q4 - Should I have sanded off the dark outer edge of the stem knee? Q5 - General question. I'm working in a basement with little in the way of ventilation. Should I be concerned about sawdust build up?


-
Thank you all for helping me push this thing out to sea. Patrick and WalrusGuy (should I call you that?), I've been eagerly catching up on both your builds. Really nice work, and motivational to see what can emerge from the pile of wood on my table. One question for the group - should I try to find a long, flat plastic container for the wood? I wouldn't characterize the basement where I am working as overly damp, but still I wonder whether the wood will warp over time.