Jamie Coleman
-
Posts
74 -
Joined
-
Last visited
Recent Profile Visitors
874 profile views


.thumb.jpg.6d6ee4bdbfaac2c58ecc77e7b80ae374.jpg)
-
 mtaylor reacted to a post in a topic:
Planking before or after transom install
mtaylor reacted to a post in a topic:
Planking before or after transom install
-
GrandpaPhil reacted to a post in a topic:
Planking before or after transom install
-
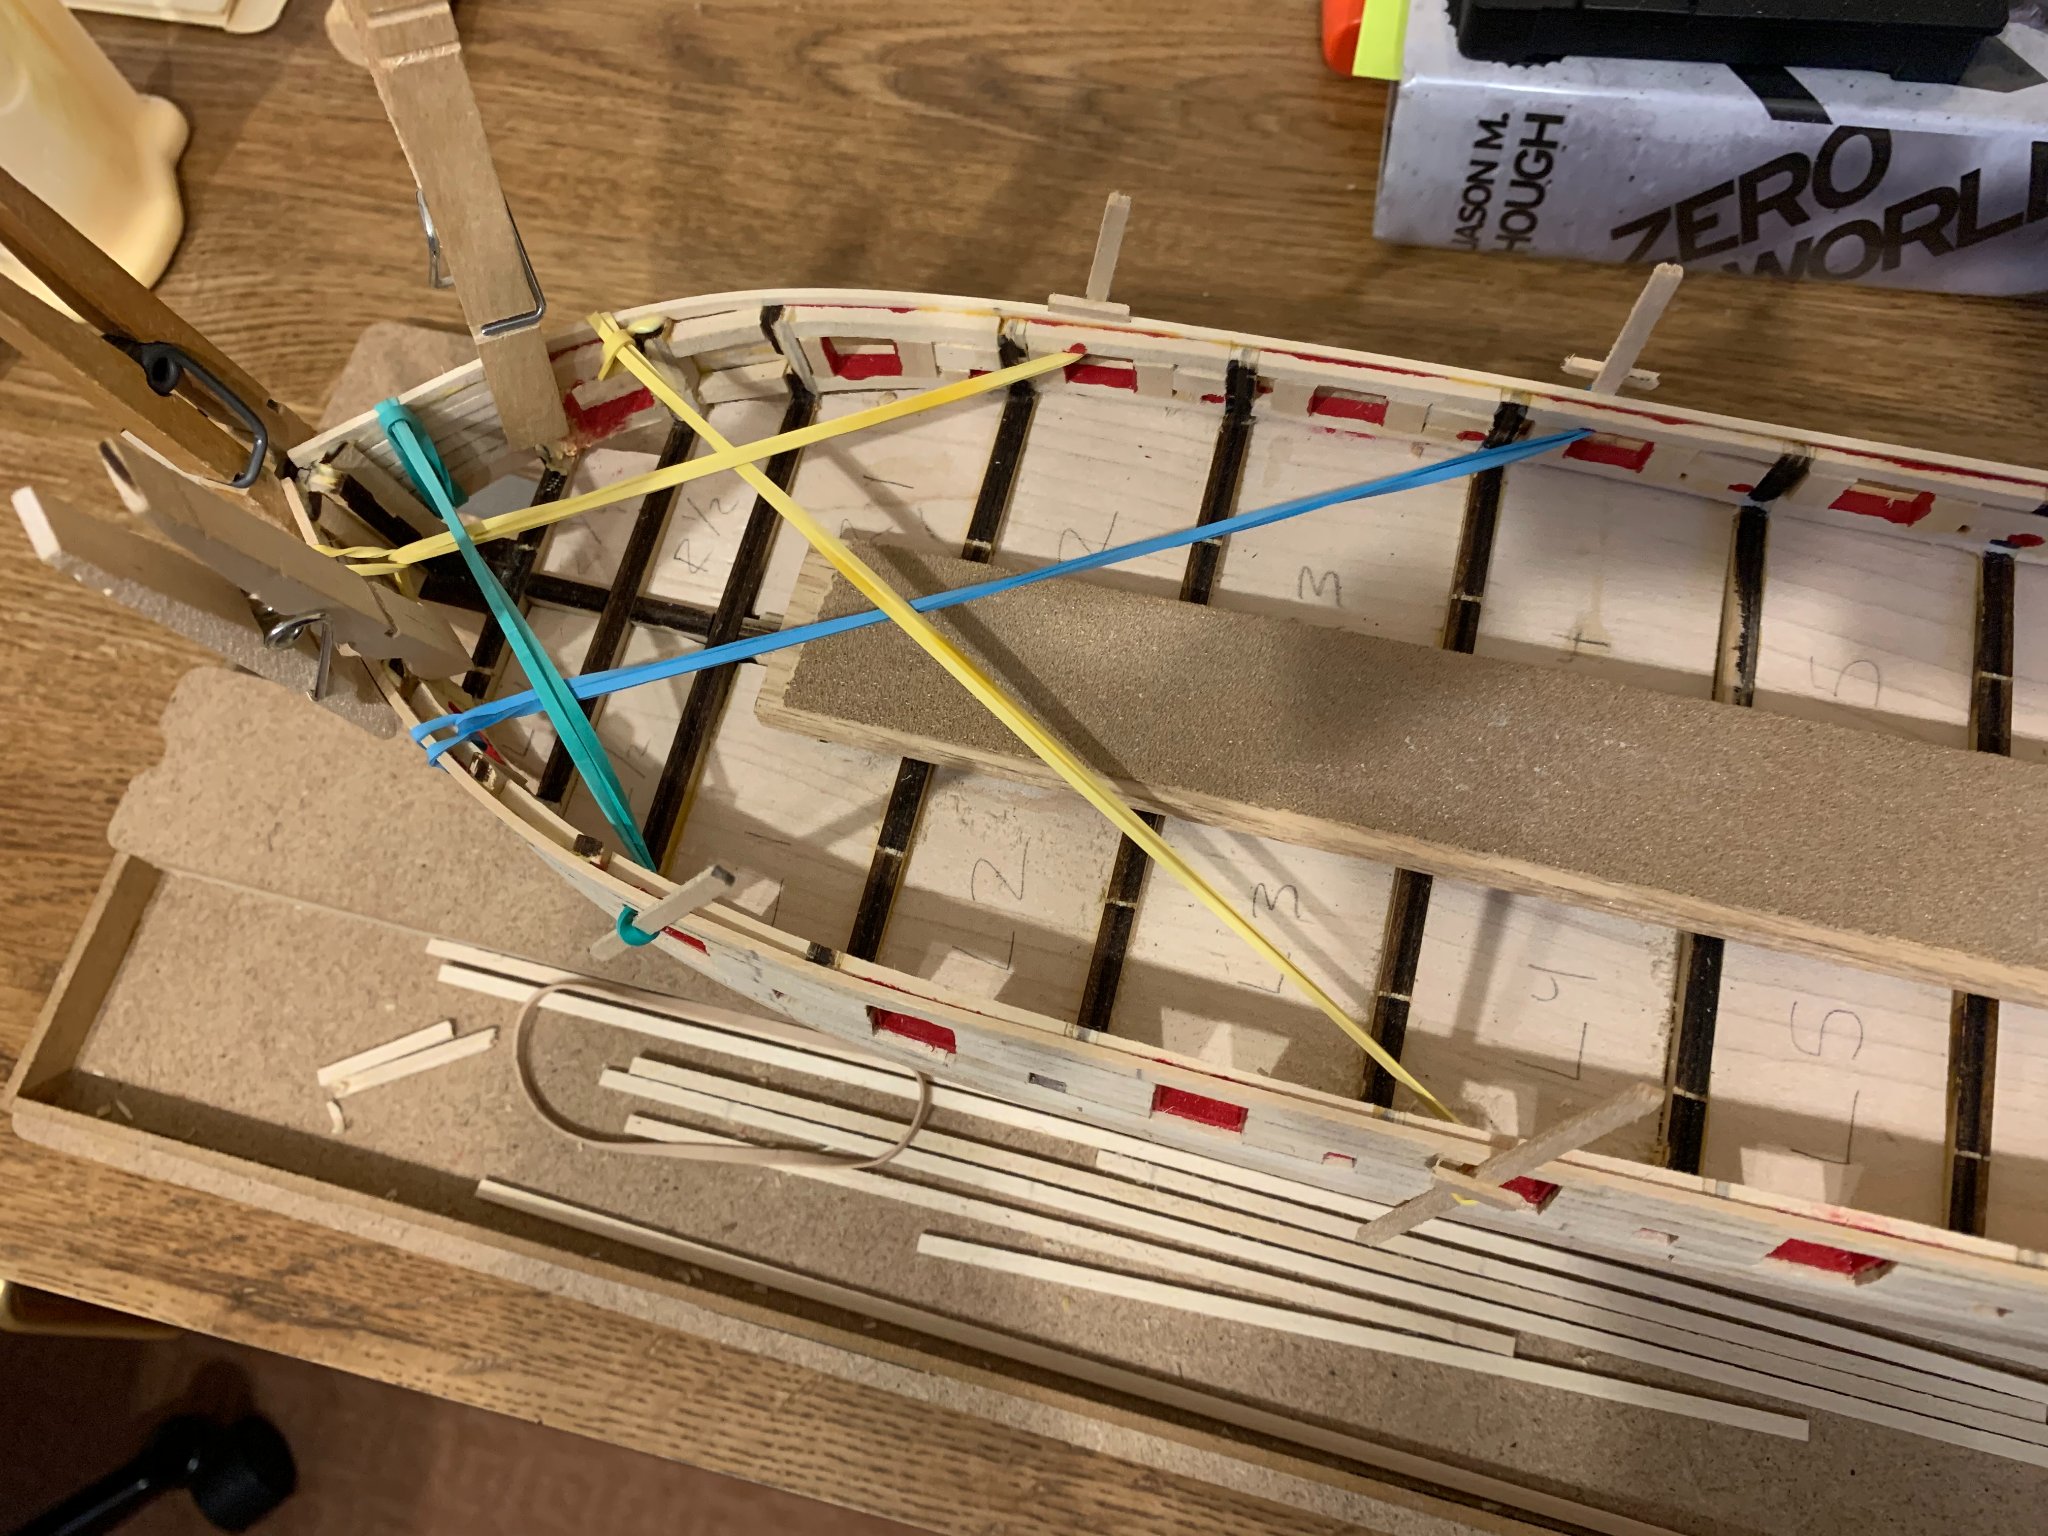
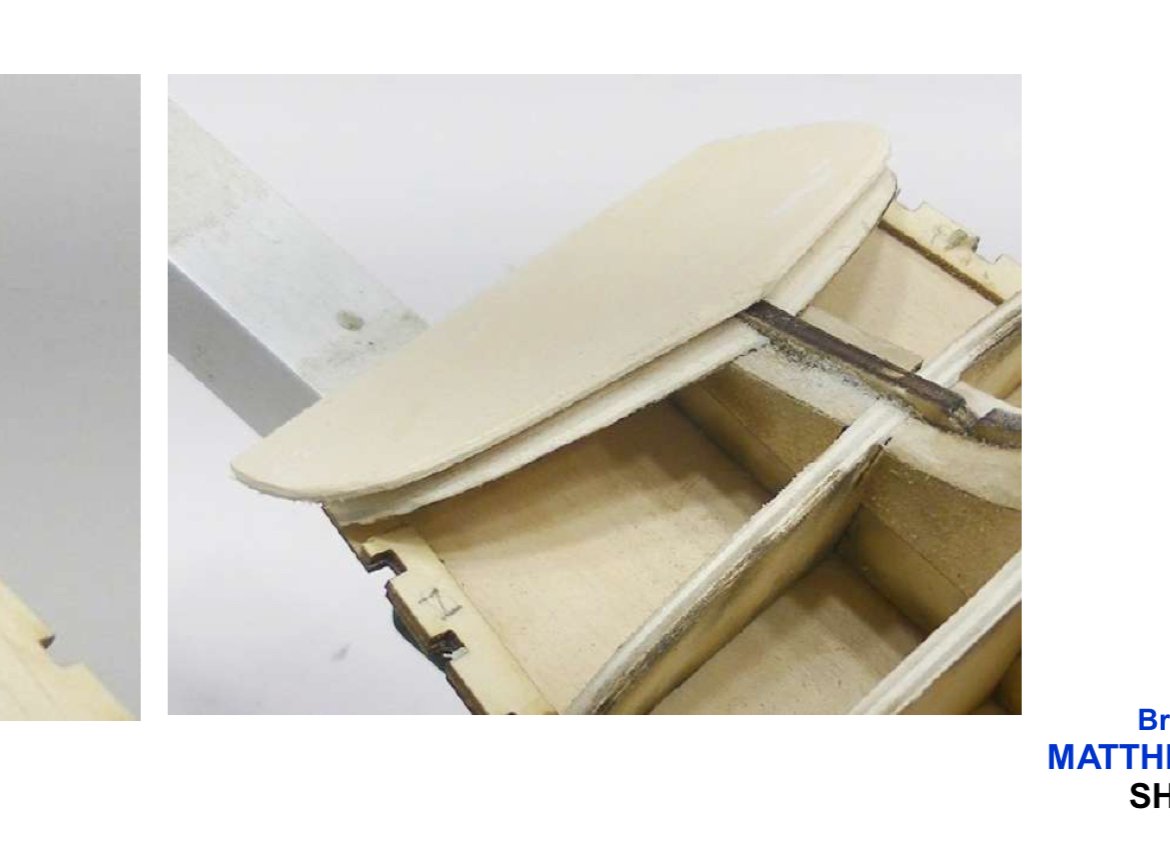
 I’m working on the modelers central Matthew turner. In the instructions it calls out installing the transom before planking. This would require fitting both ends while planking. I’m thinking I could let them run wild at the rear, trim flush with the transom support, then add the transom at the end. Am I missing something that the transom adds at this stage?
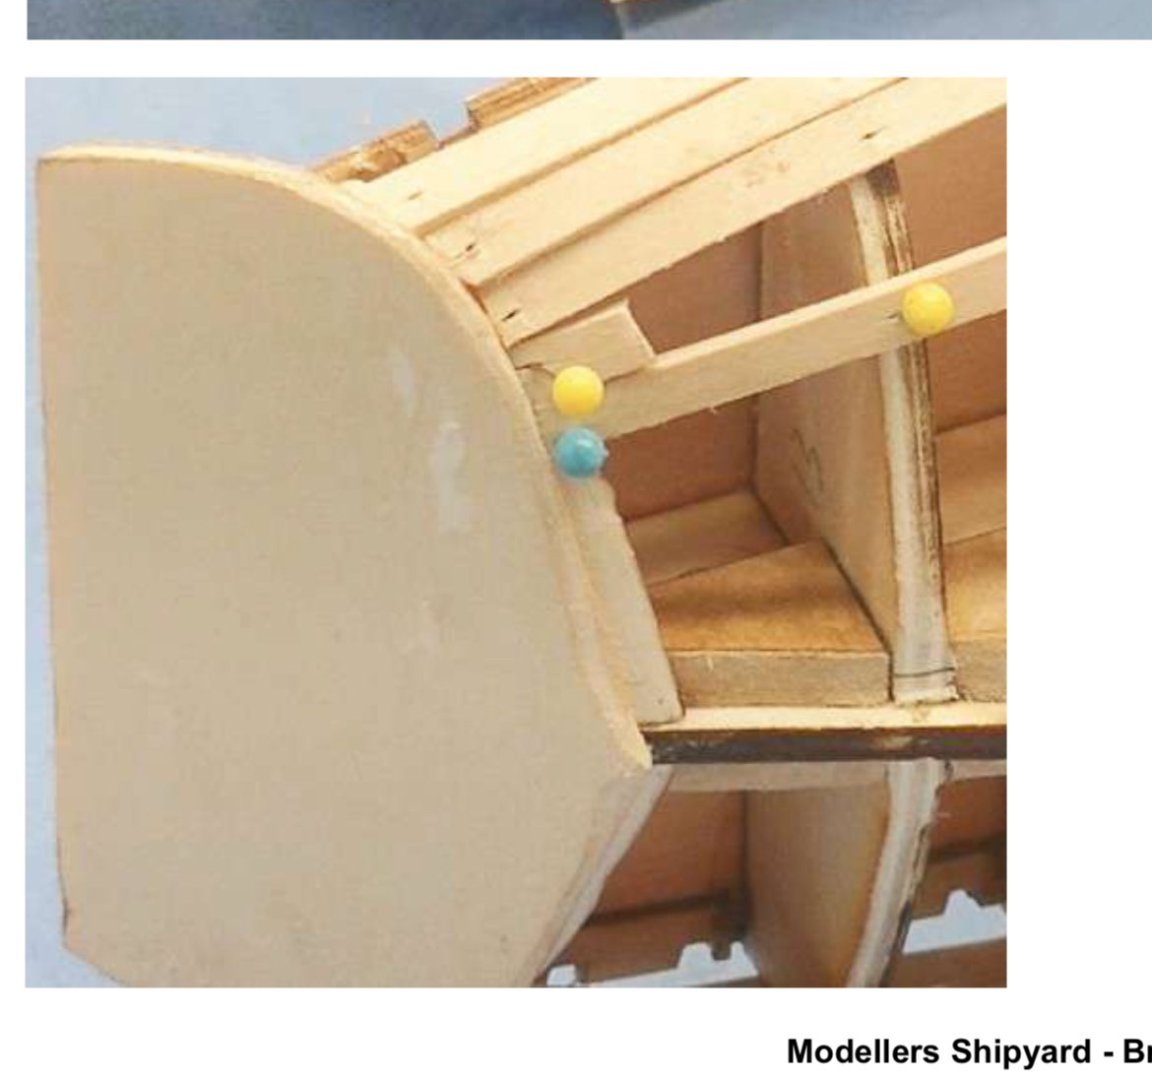
- 1 reply
-
- 2
-
-
etubino reacted to a post in a topic:
Thermopylae by Jamie Coleman - FINISHED - Scientific Models - Scale 1:96 - First ship build
-
Bill Morrison reacted to a post in a topic:
Thermopylae by Jamie Coleman - FINISHED - Scientific Models - Scale 1:96 - First ship build
-
Bill Morrison reacted to a post in a topic:
Thermopylae by Jamie Coleman - FINISHED - Scientific Models - Scale 1:96 - First ship build
-
Ian_Grant reacted to a post in a topic:
Thermopylae by Jamie Coleman - FINISHED - Scientific Models - Scale 1:96 - First ship build
-
GrandpaPhil reacted to a post in a topic:
Thermopylae by Jamie Coleman - FINISHED - Scientific Models - Scale 1:96 - First ship build
-
GrandpaPhil reacted to a post in a topic:
Thermopylae by Jamie Coleman - FINISHED - Scientific Models - Scale 1:96 - First ship build
-
GrandpaPhil reacted to a post in a topic:
Thermopylae by Jamie Coleman - FINISHED - Scientific Models - Scale 1:96 - First ship build
-
GrandpaPhil reacted to a post in a topic:
Thermopylae by Jamie Coleman - FINISHED - Scientific Models - Scale 1:96 - First ship build
-
Jamie Coleman reacted to a post in a topic:
US Brig Syren by WalrusGuy - FINISHED - Model Shipways - Scale 1:64 - Second wooden ship build
-
Hope this helps, Bill. Happy New Year!!! Hi Bill, added a few (far from expert) comments in myself, happy new year indeed.
-
Dang, that really looks clean. I’m sticking with the castings this go around, but that’s a really good idea to try next time.
-
Jamie Coleman reacted to a post in a topic:
US Brig Syren 1803 by Overworked724 – Model Shipways – Scale 1:64
-
I’m not a paint expert either, but I am reading that some polyurethanes and acrylic paints don’t play well together. If your poly goes up to where there will be black over it, you might want to look into a oil based primer after scuffing its down some.
-
Jamie Coleman reacted to a post in a topic:
US Brig Syren by WalrusGuy - FINISHED - Model Shipways - Scale 1:64 - Second wooden ship build
-
Jamie Coleman reacted to a post in a topic:
US Brig Syren by WalrusGuy - FINISHED - Model Shipways - Scale 1:64 - Second wooden ship build
-
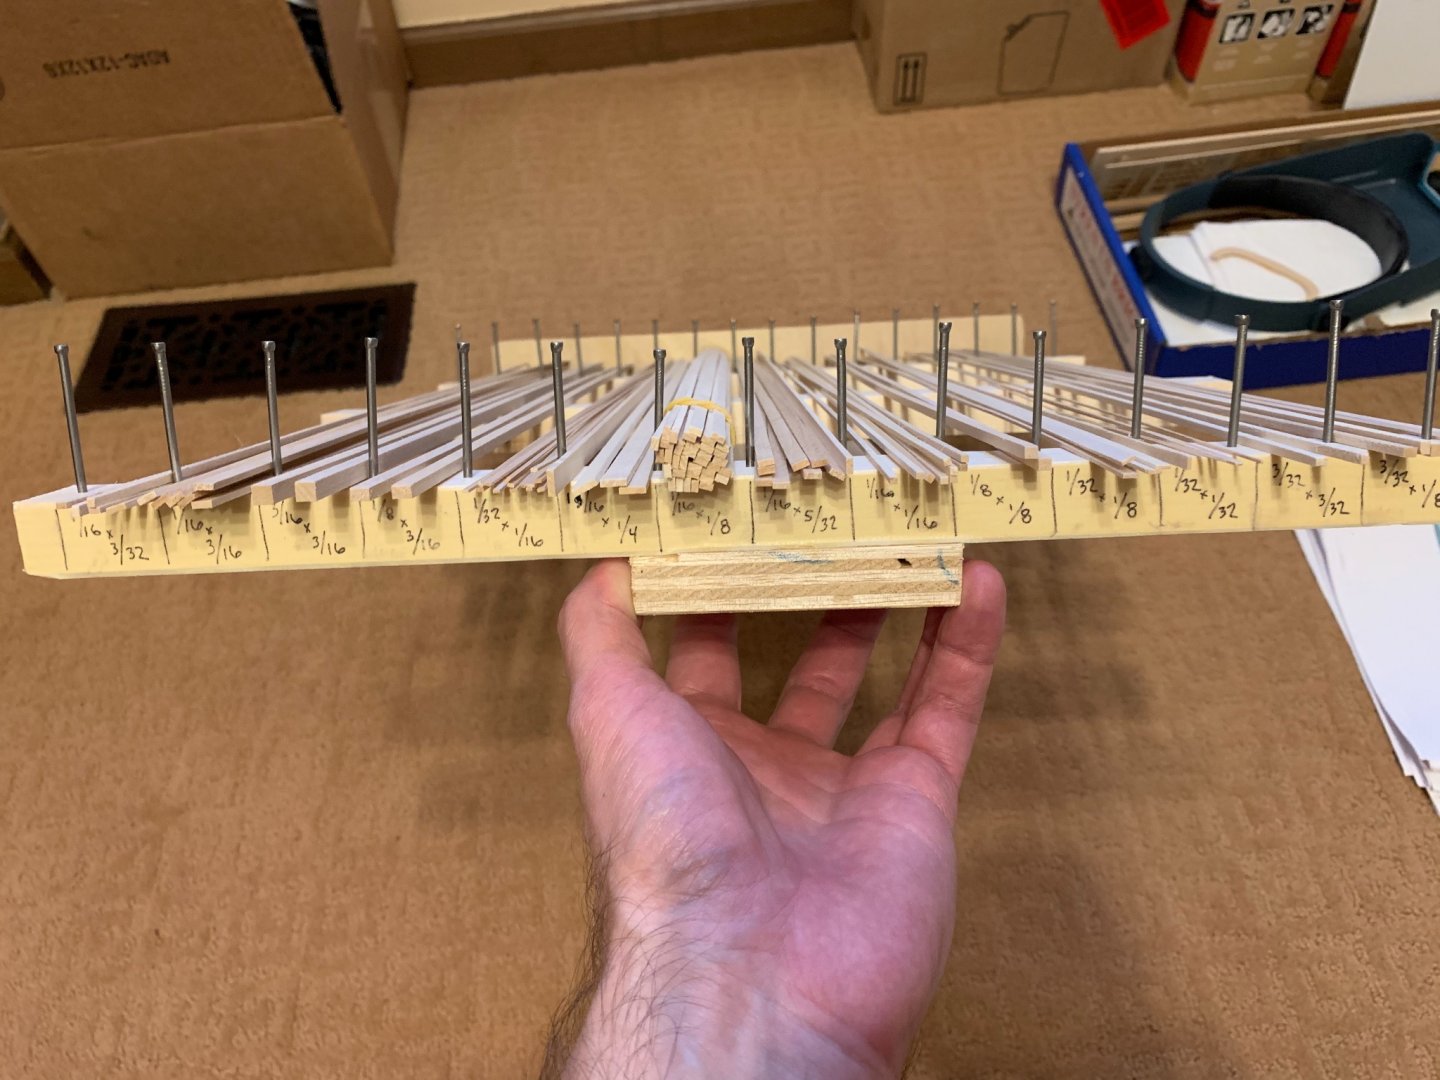
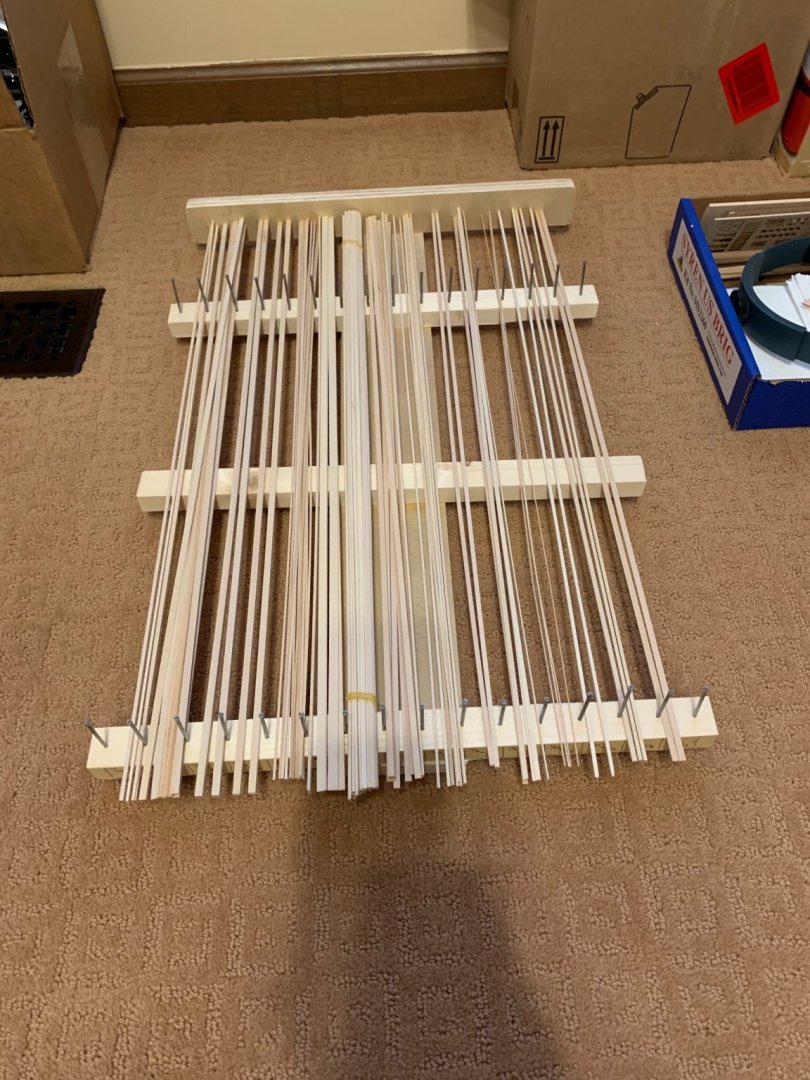
I got tired of measuring all my stock when I needed to find a size, so I finally put some organization in place, built up with some scrap from the lumber pile. Each size from the kit now has its own labeled slot.
-
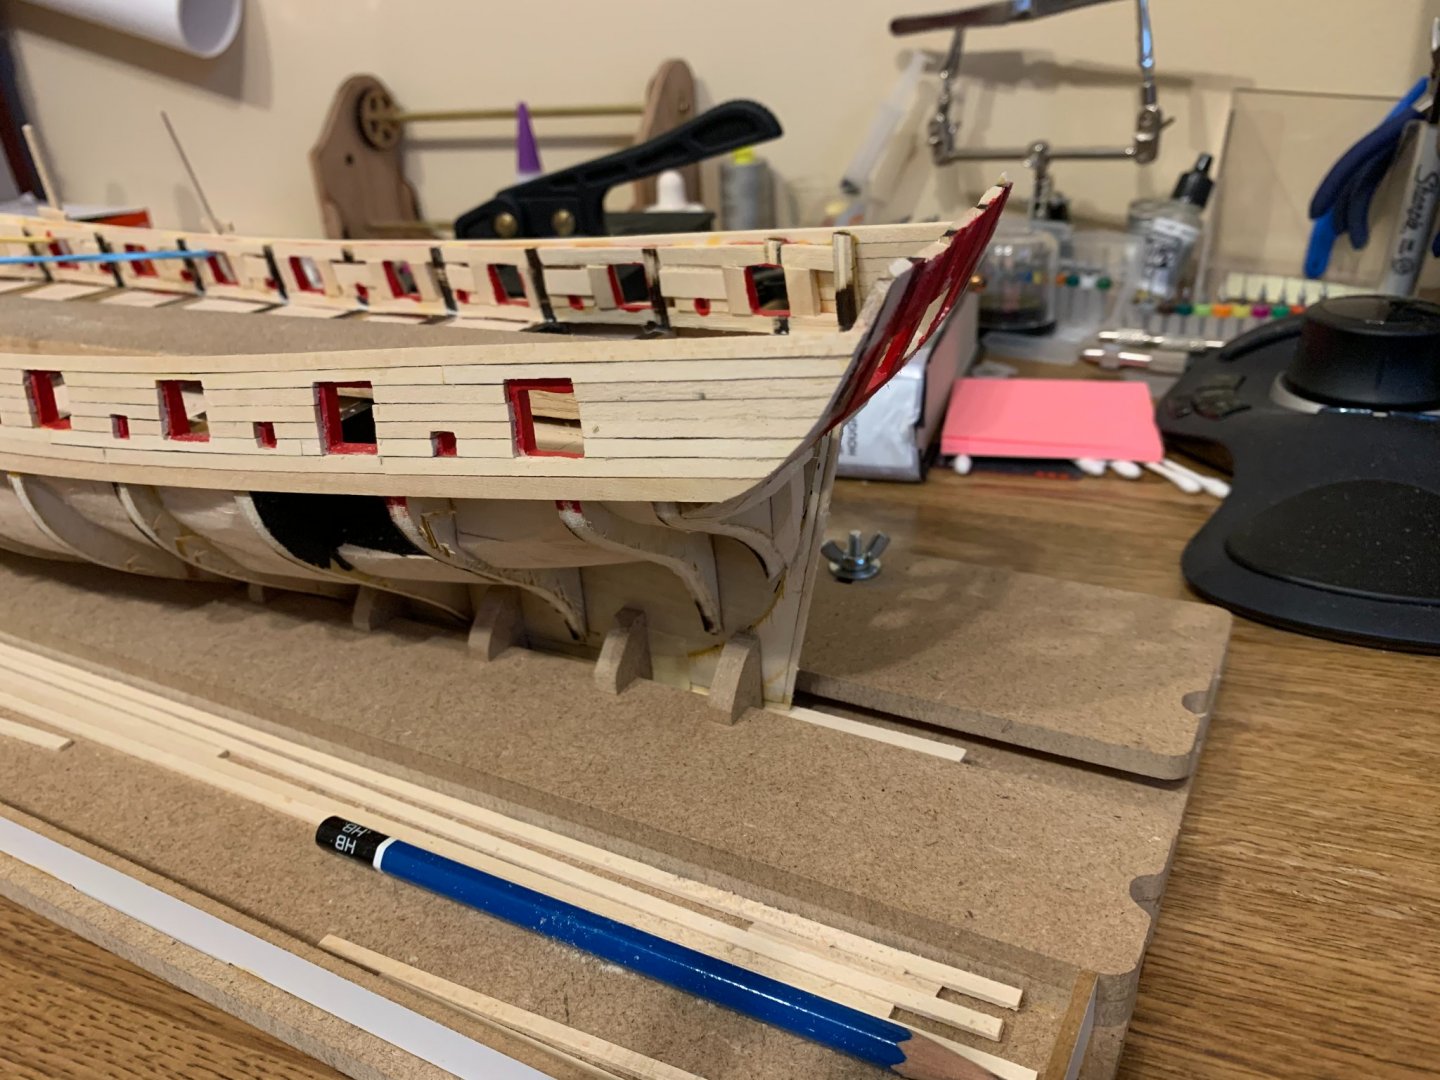
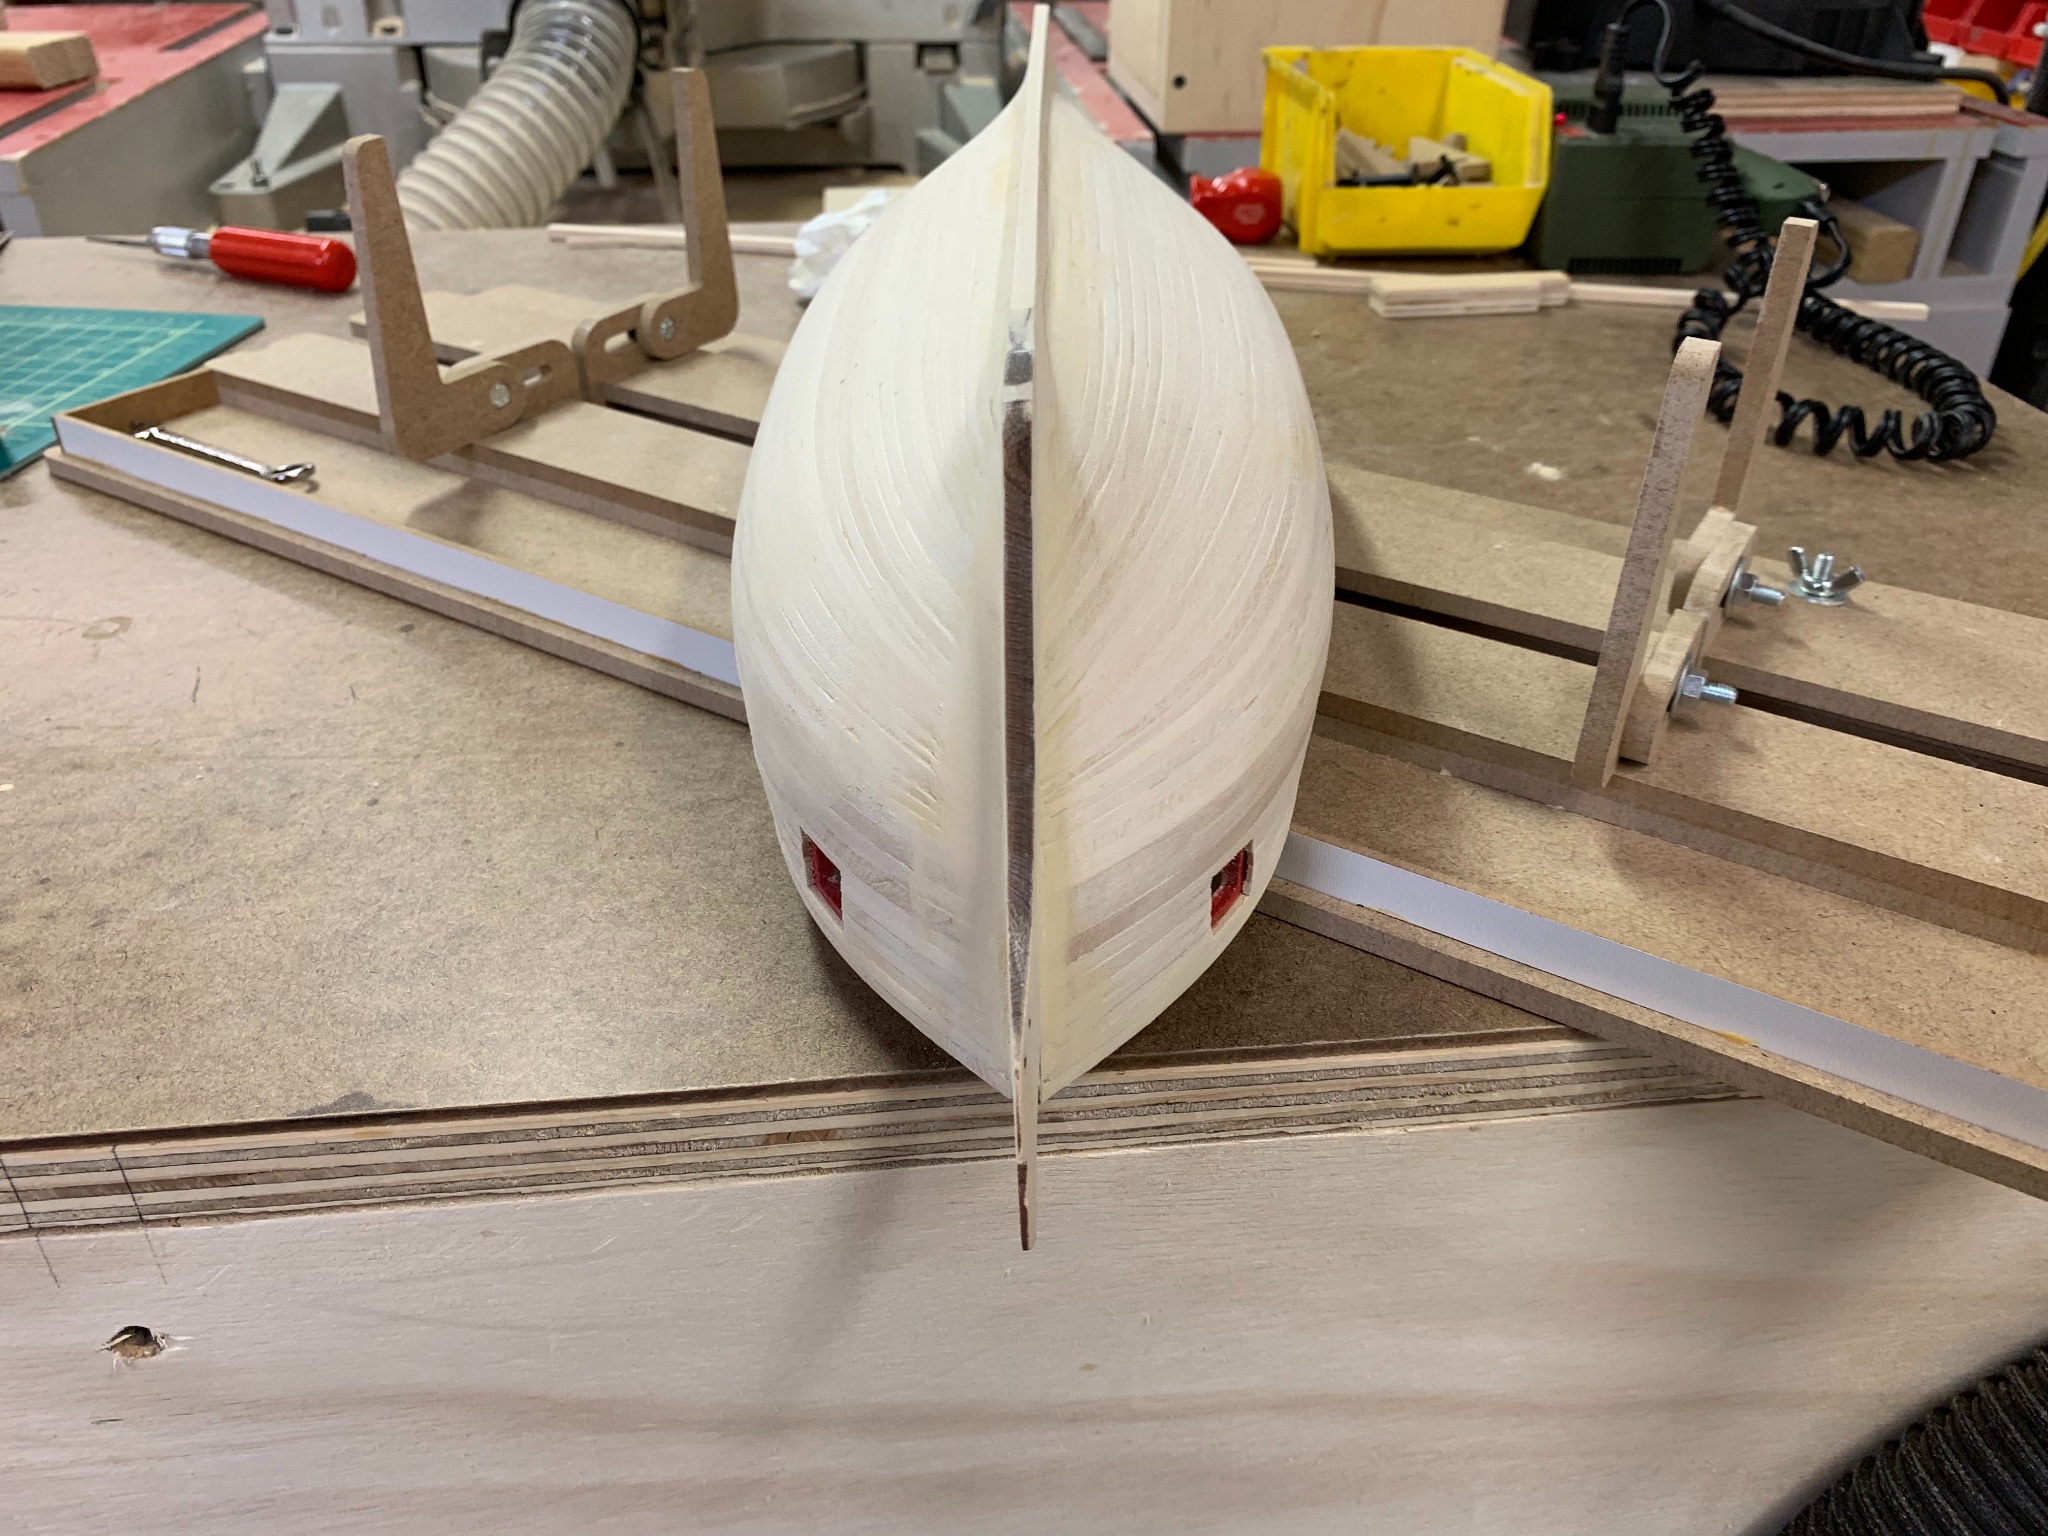
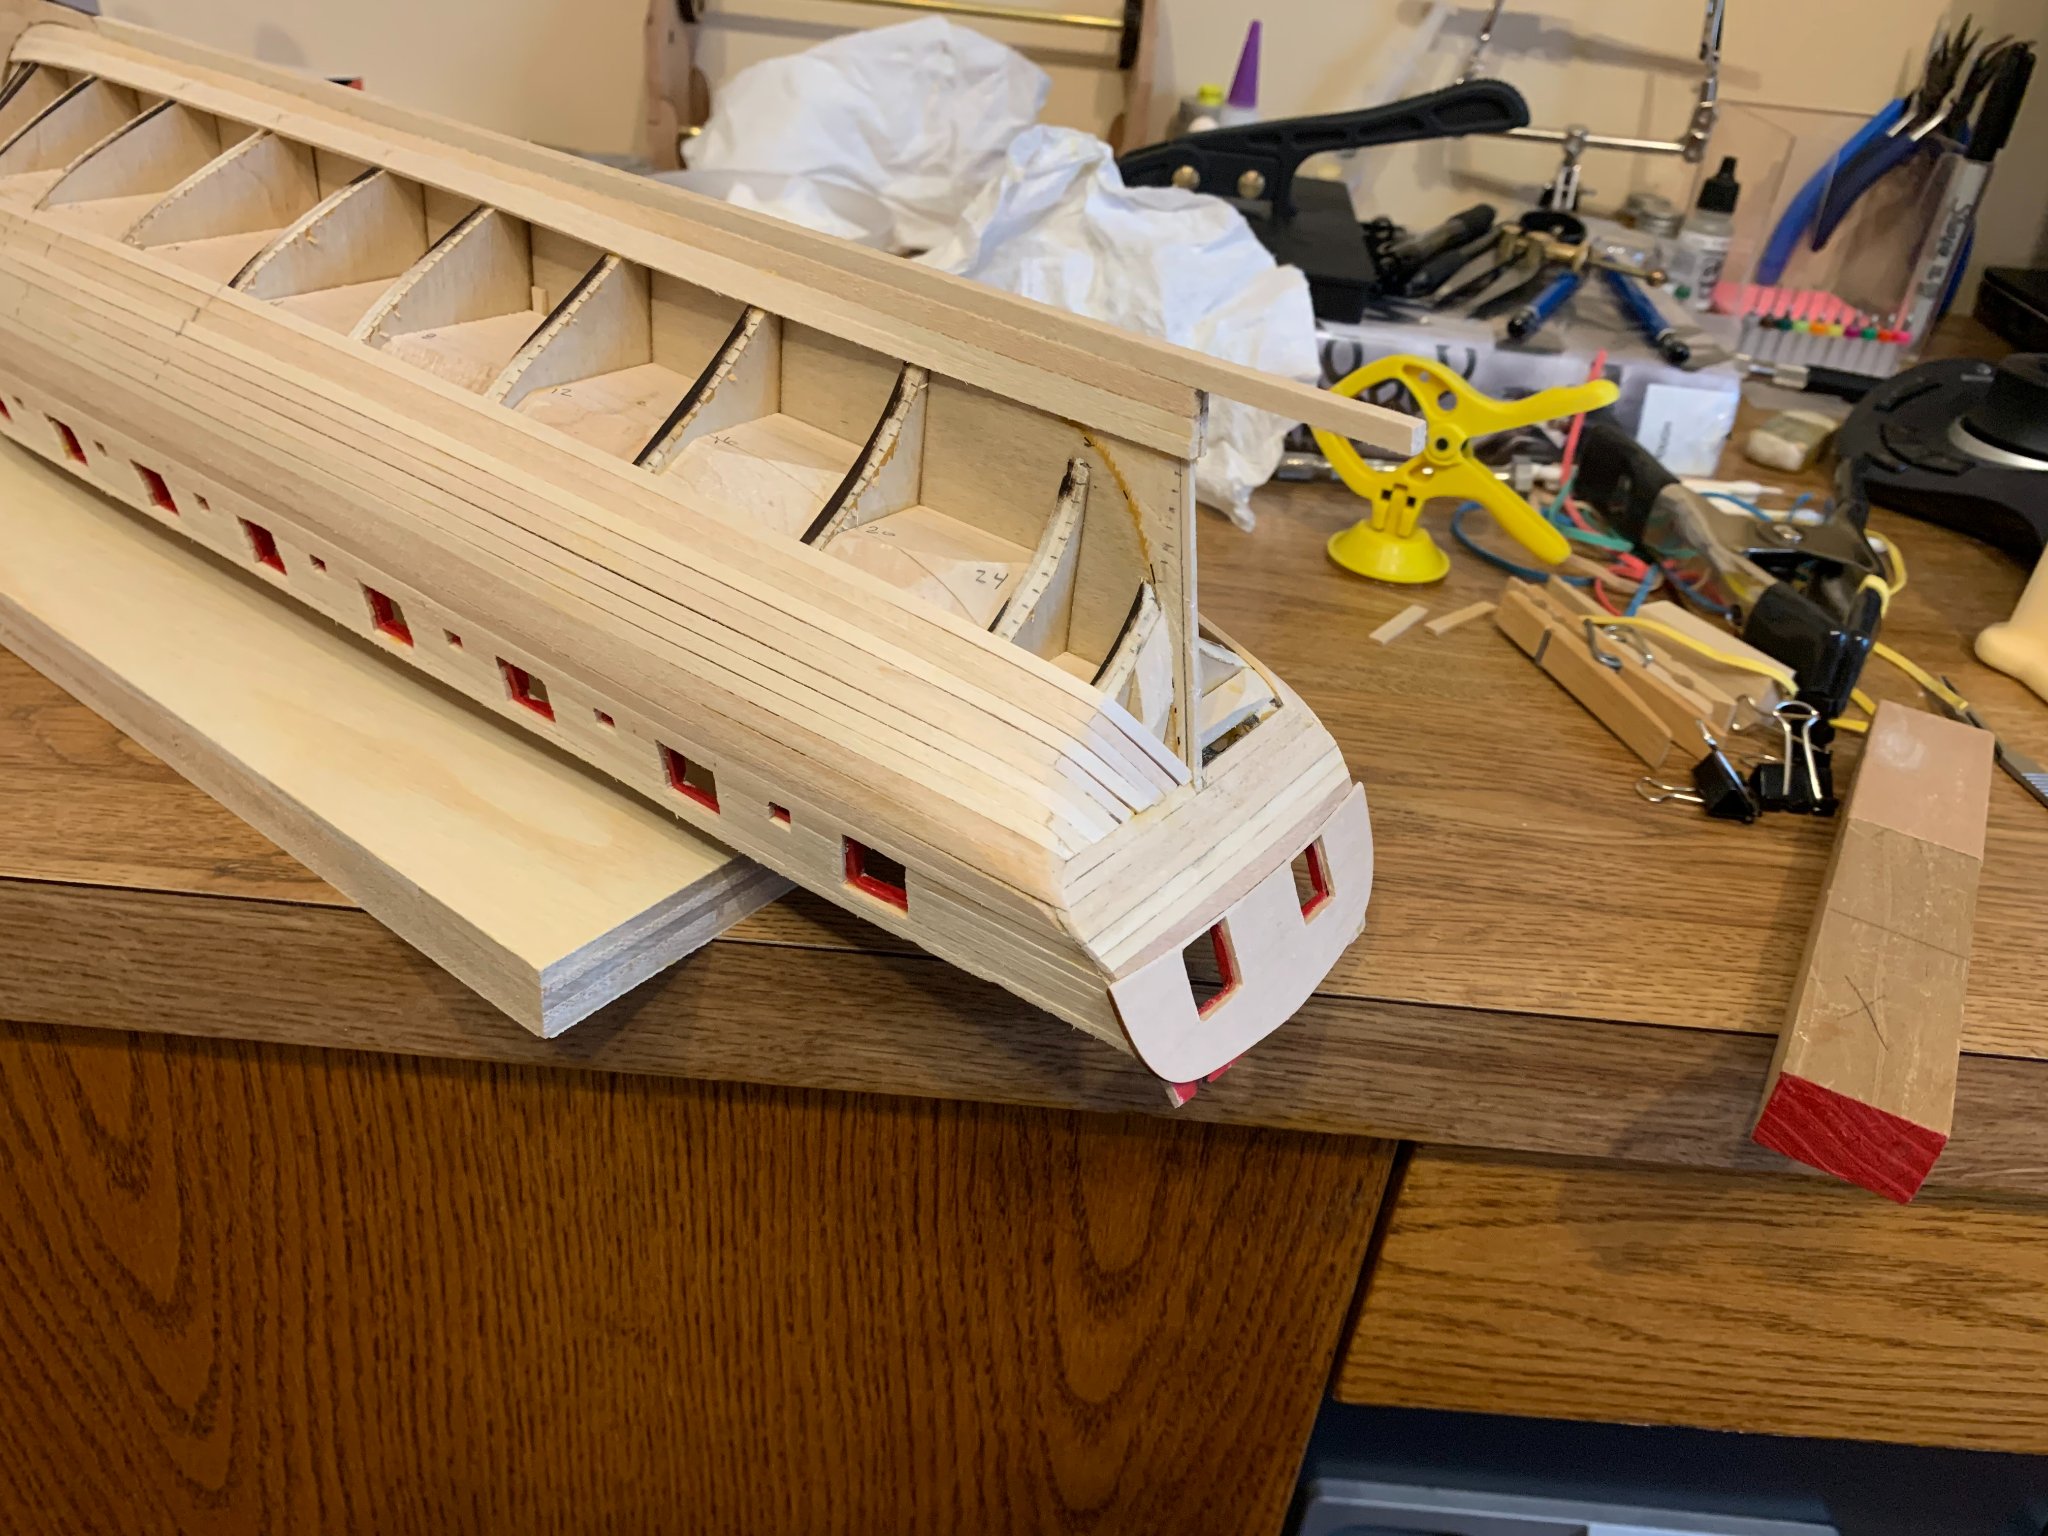
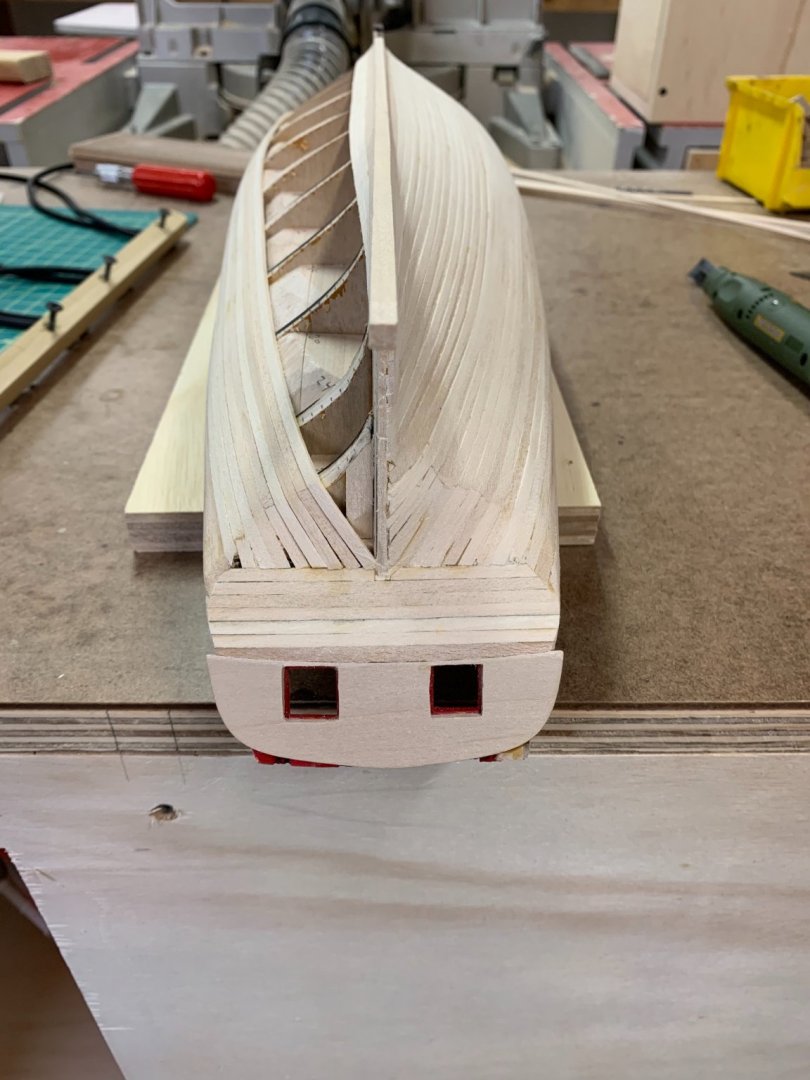
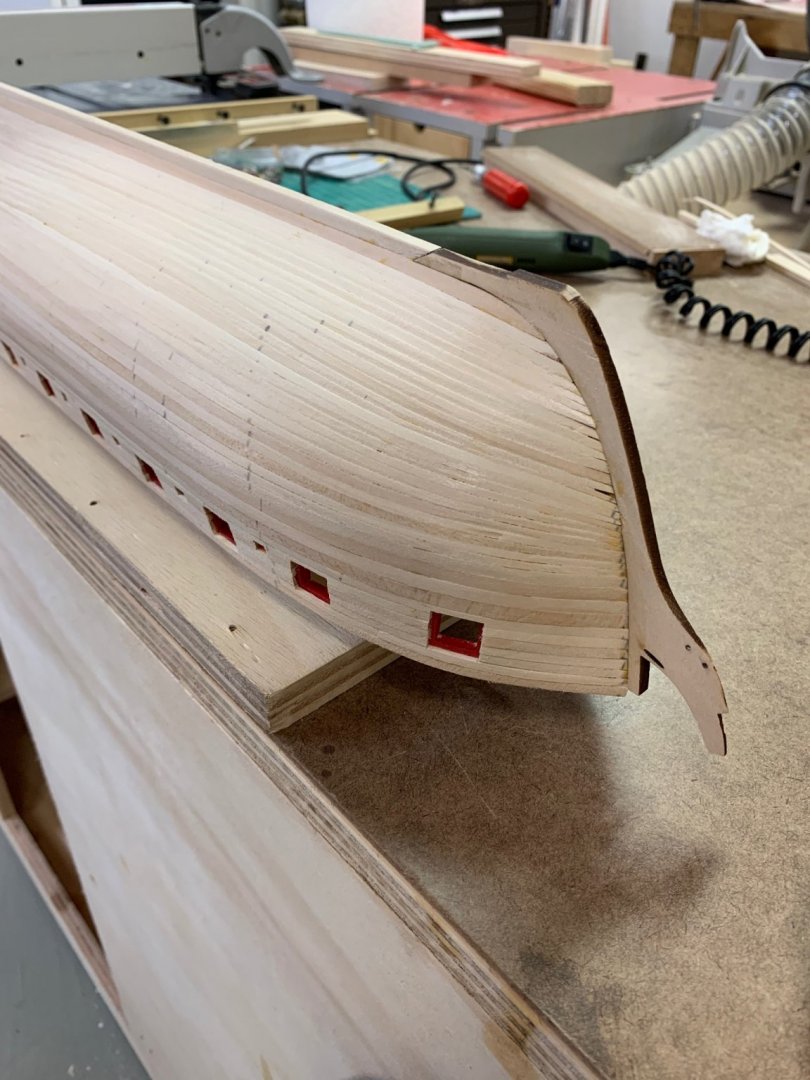
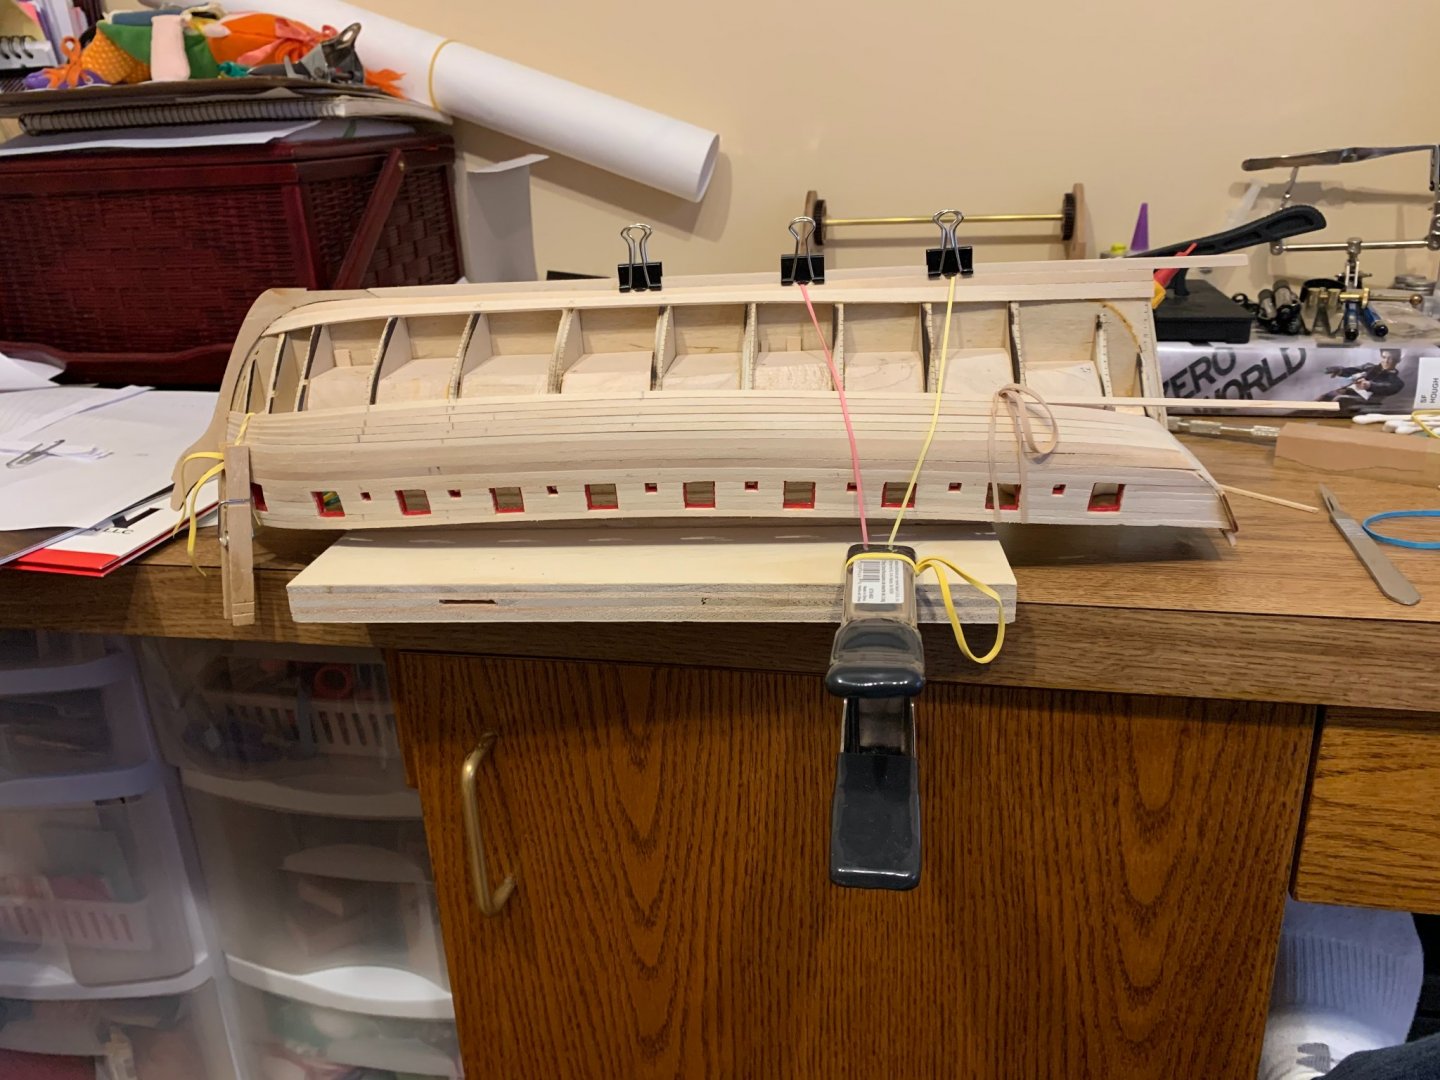
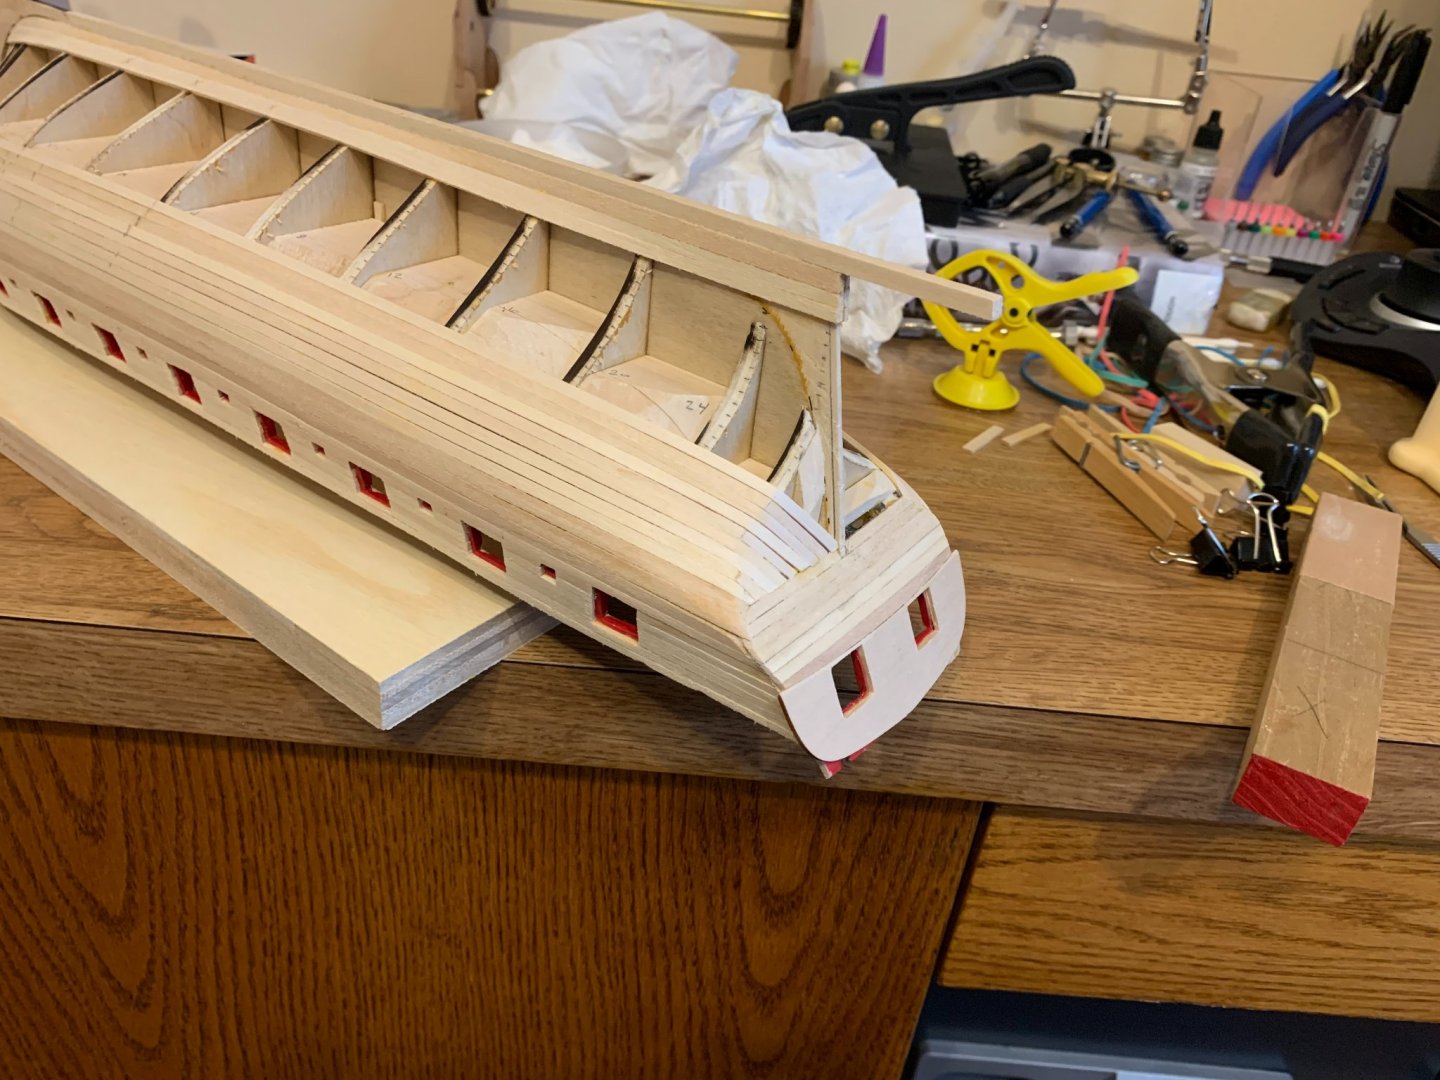
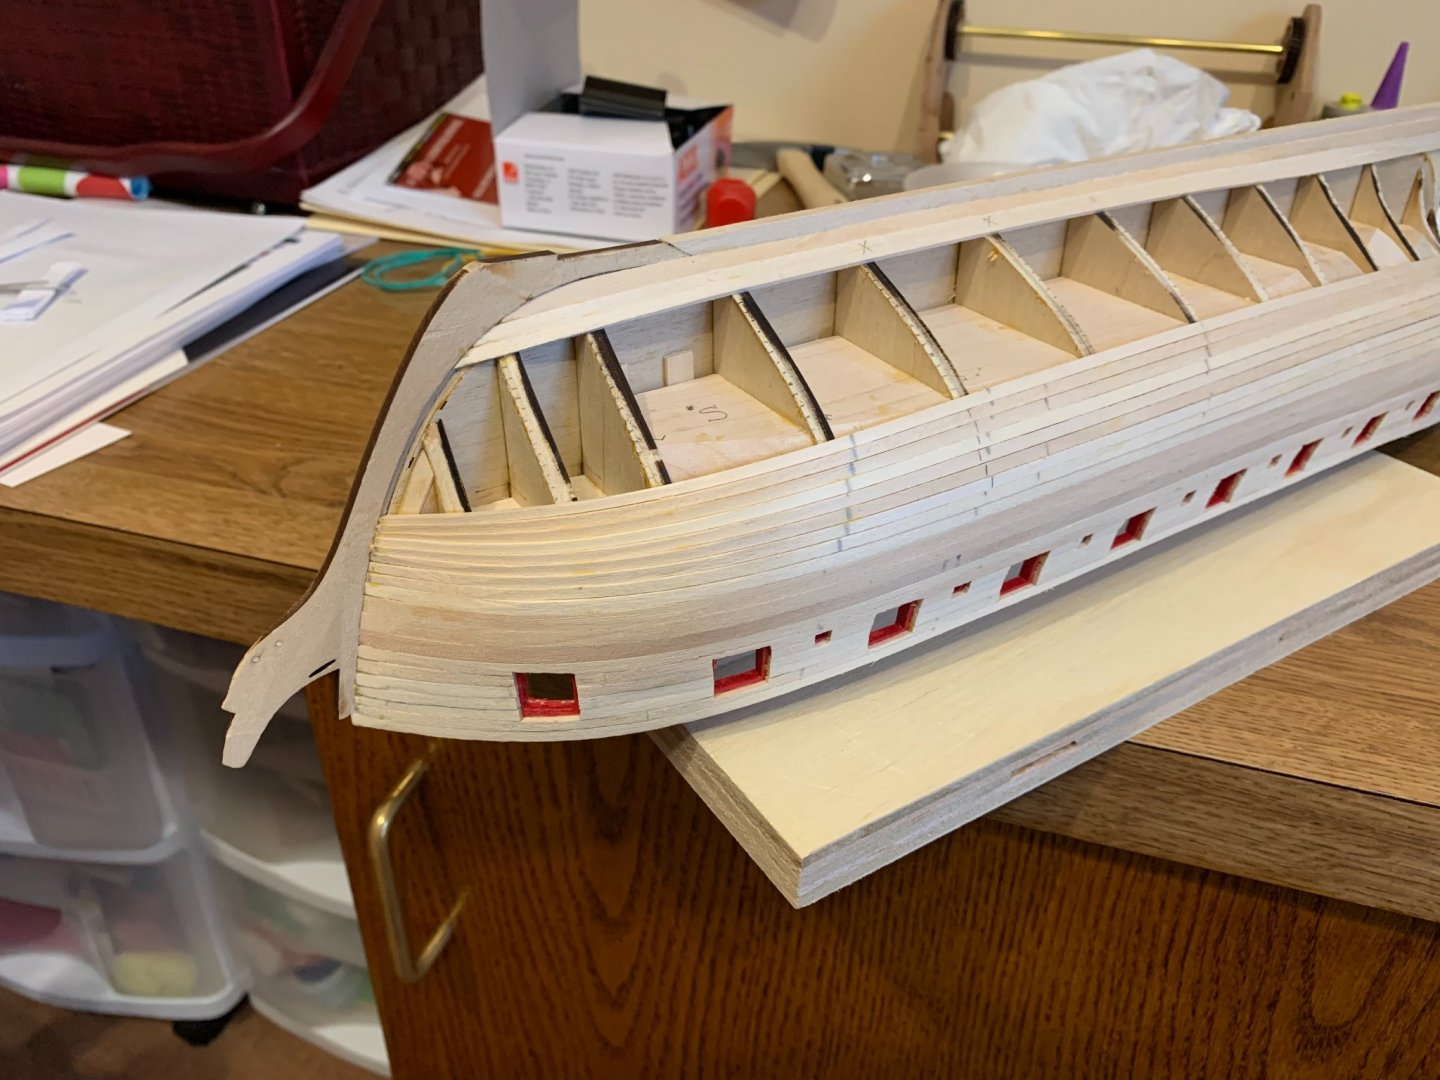
I’ve finished off the planking (except the second layer at the wales). I’ve filled and sanded a bit and it’s cleaning up. Needs a bit more filler and sanding before I move on to the wales and the stern. I was very relieved to put the stern piece on and cut the keel to length, that was just waiting to catch a shirt sleeve and wreck something. Last ship I did, I was really focused on getting to the rigging (it was a solid hull model), but I feel like building the ship with bulkheads and planks has been a lot more rewarding.
-
Jamie Coleman reacted to a post in a topic:
US Brig Syren by WalrusGuy - FINISHED - Model Shipways - Scale 1:64 - Second wooden ship build
-
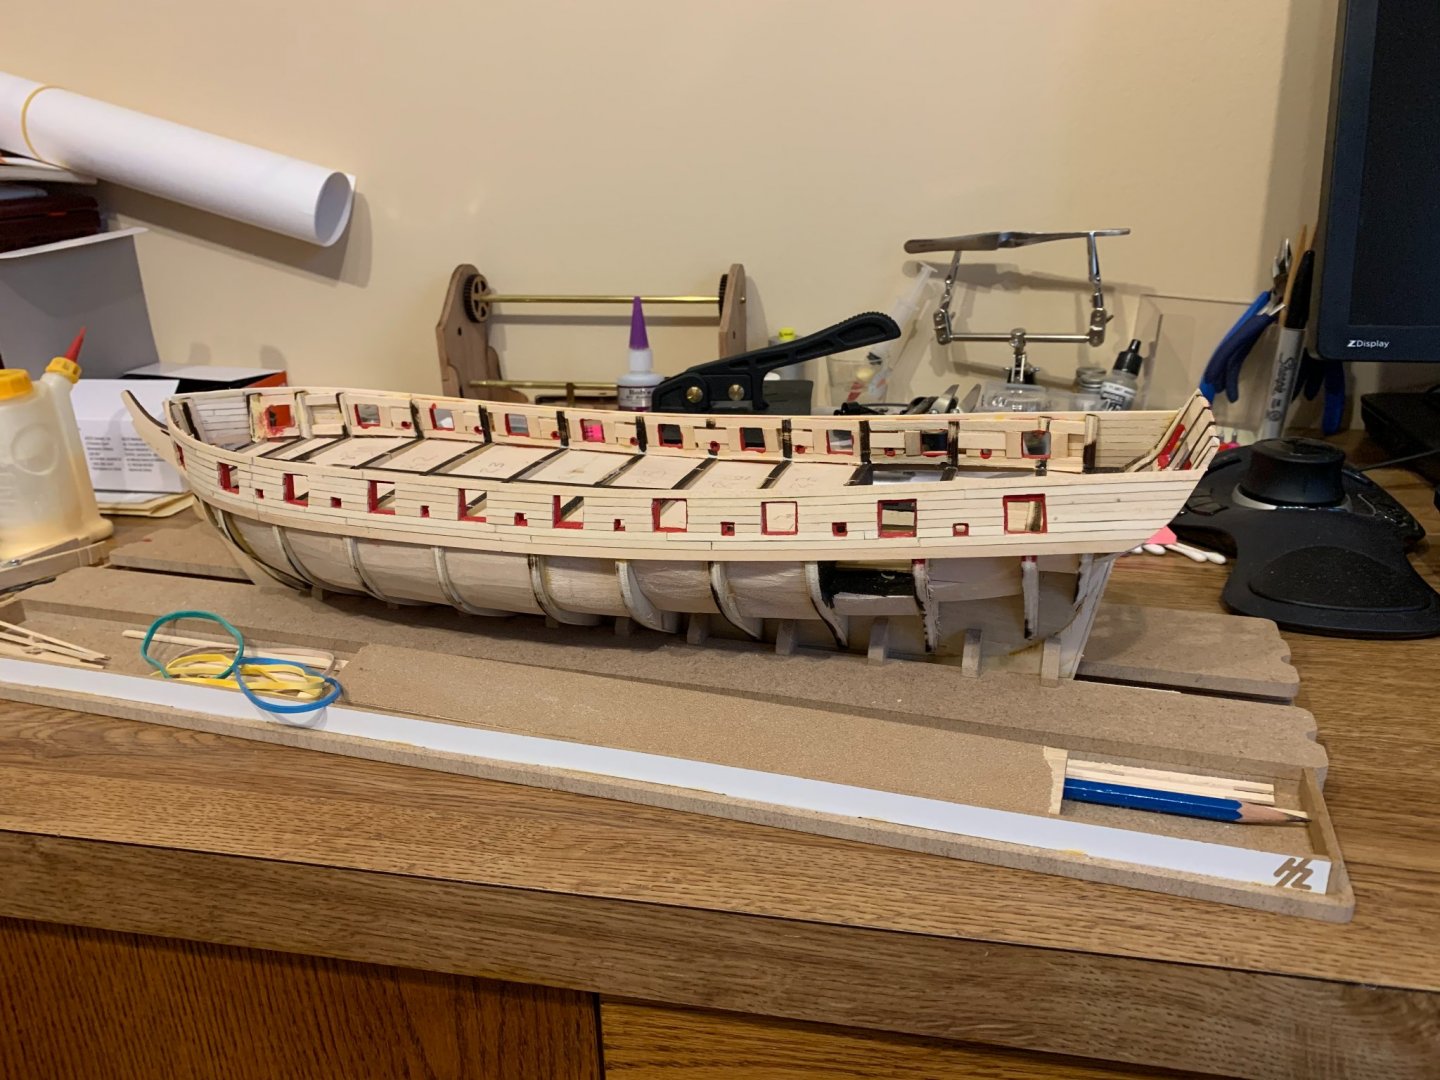
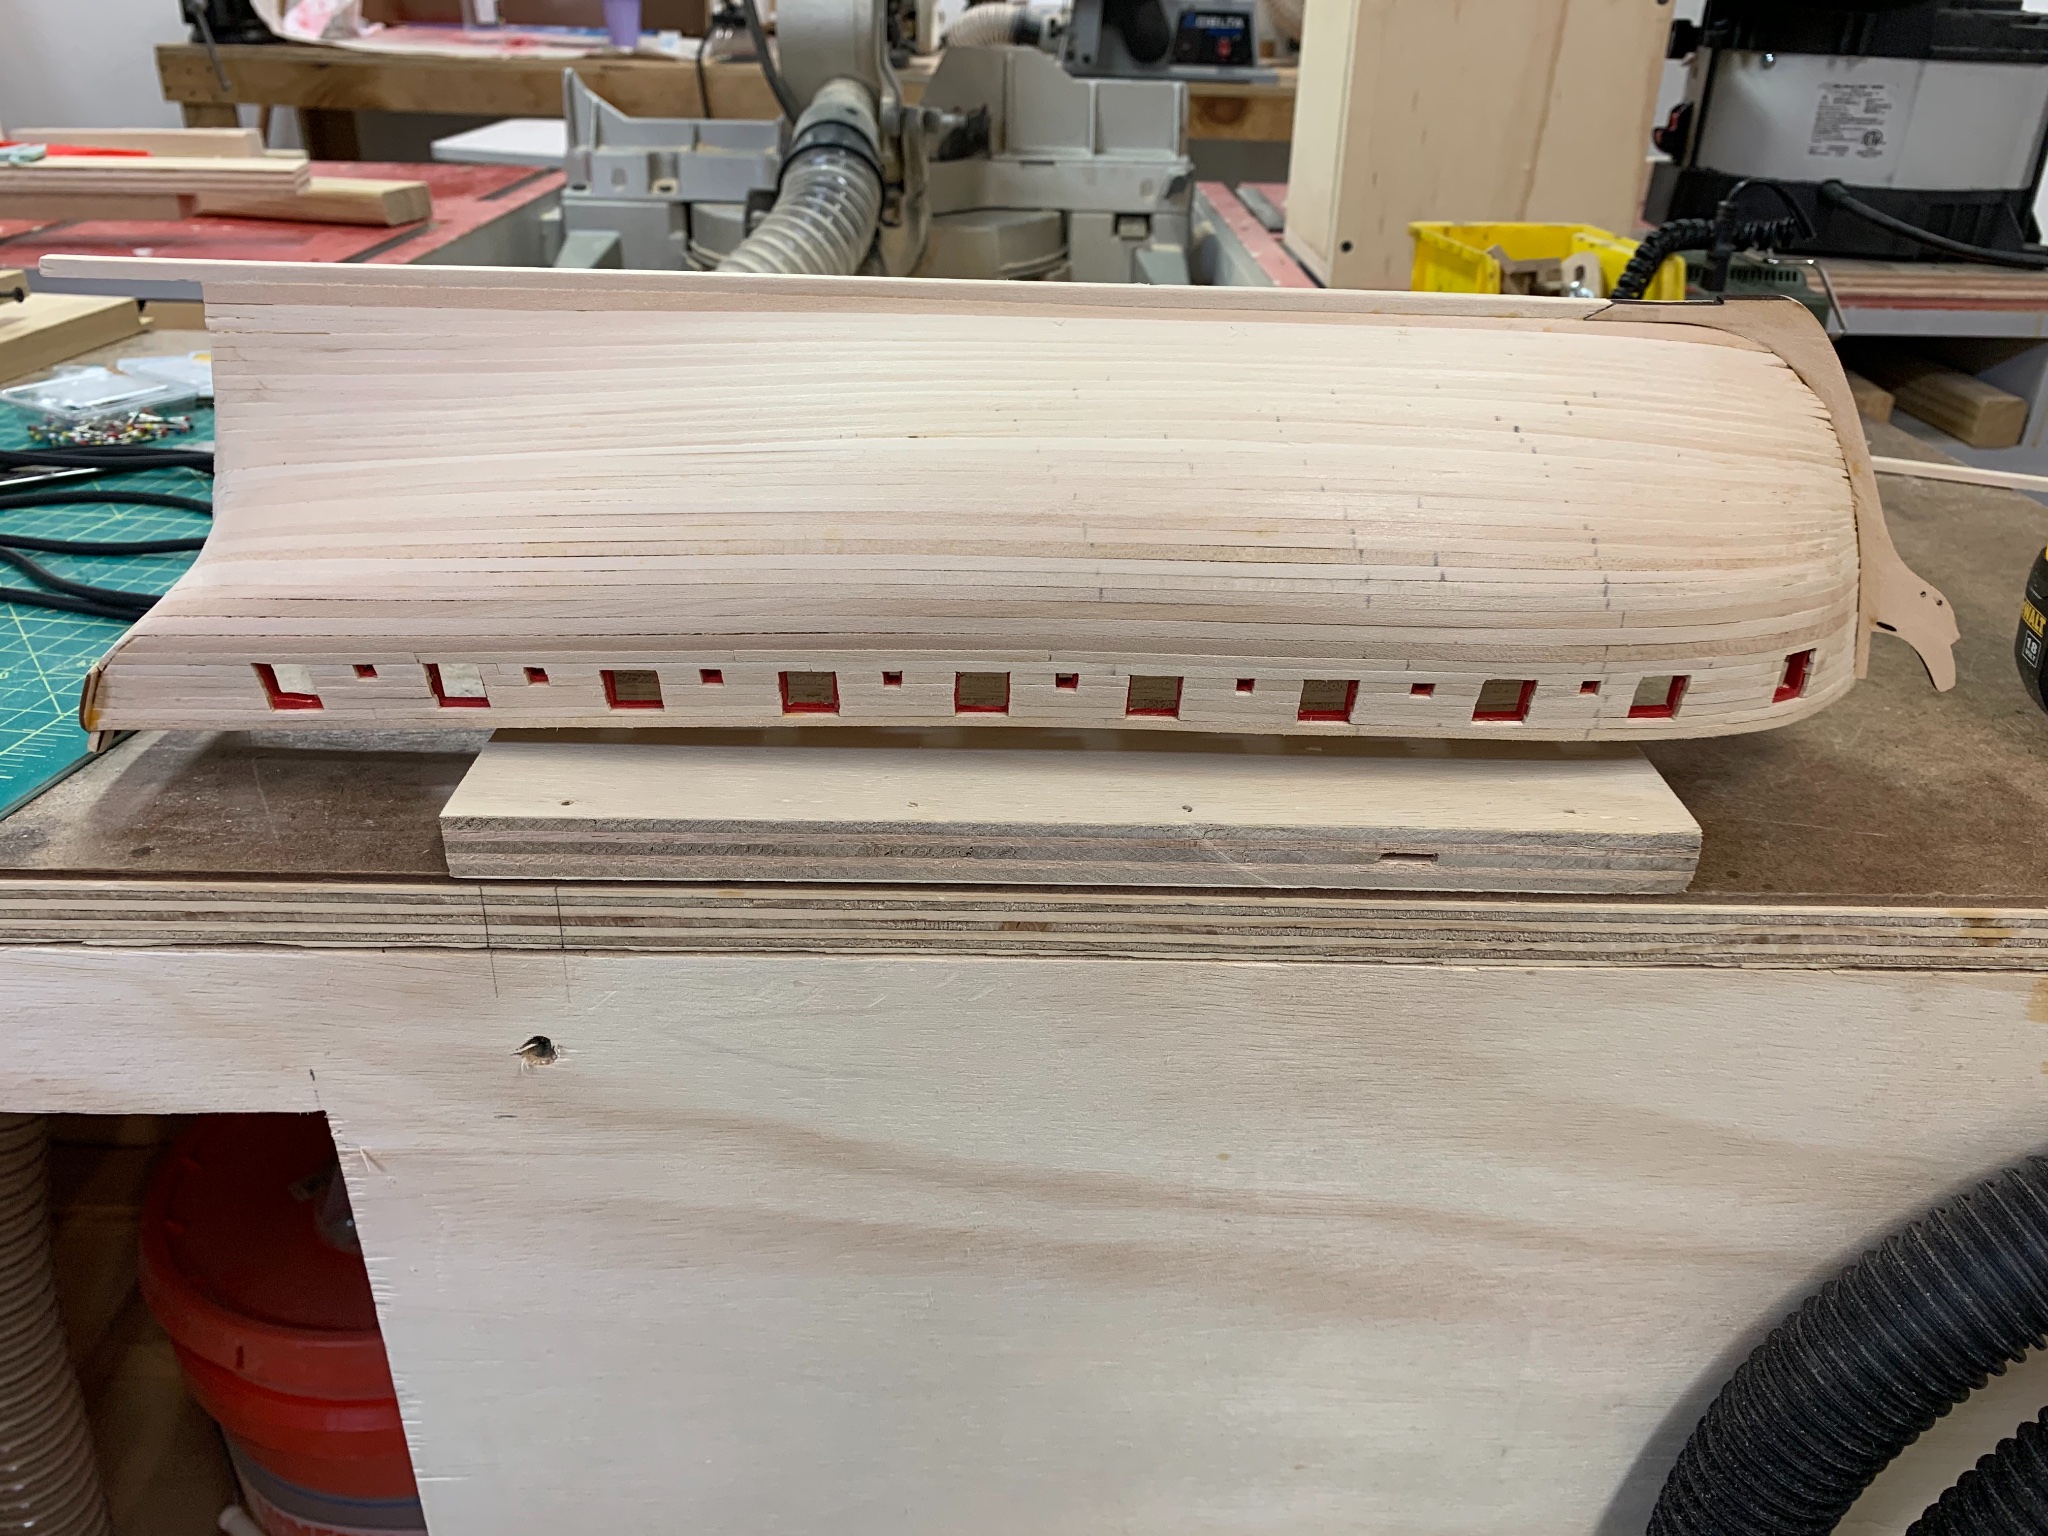
Well, port side planking is basically wrapped up. Definitely a tricky process, I ended up needing to taper a few planks quite differently than their surroundings to get the final plank to fit, and I’m going to need some filler at the stern, but overall pretty happy how it came out for a first time. I’m going to fill and sand both sides once the starboard side is complete.

-
 Jamie Coleman reacted to a post in a topic:
US Brig Syren by Jamie Coleman - Model Shipways - Scale 1:64
Jamie Coleman reacted to a post in a topic:
US Brig Syren by Jamie Coleman - Model Shipways - Scale 1:64
-
Jamie Coleman reacted to a post in a topic:
US Brig Syren 1803 by Overworked724 – Model Shipways – Scale 1:64
-
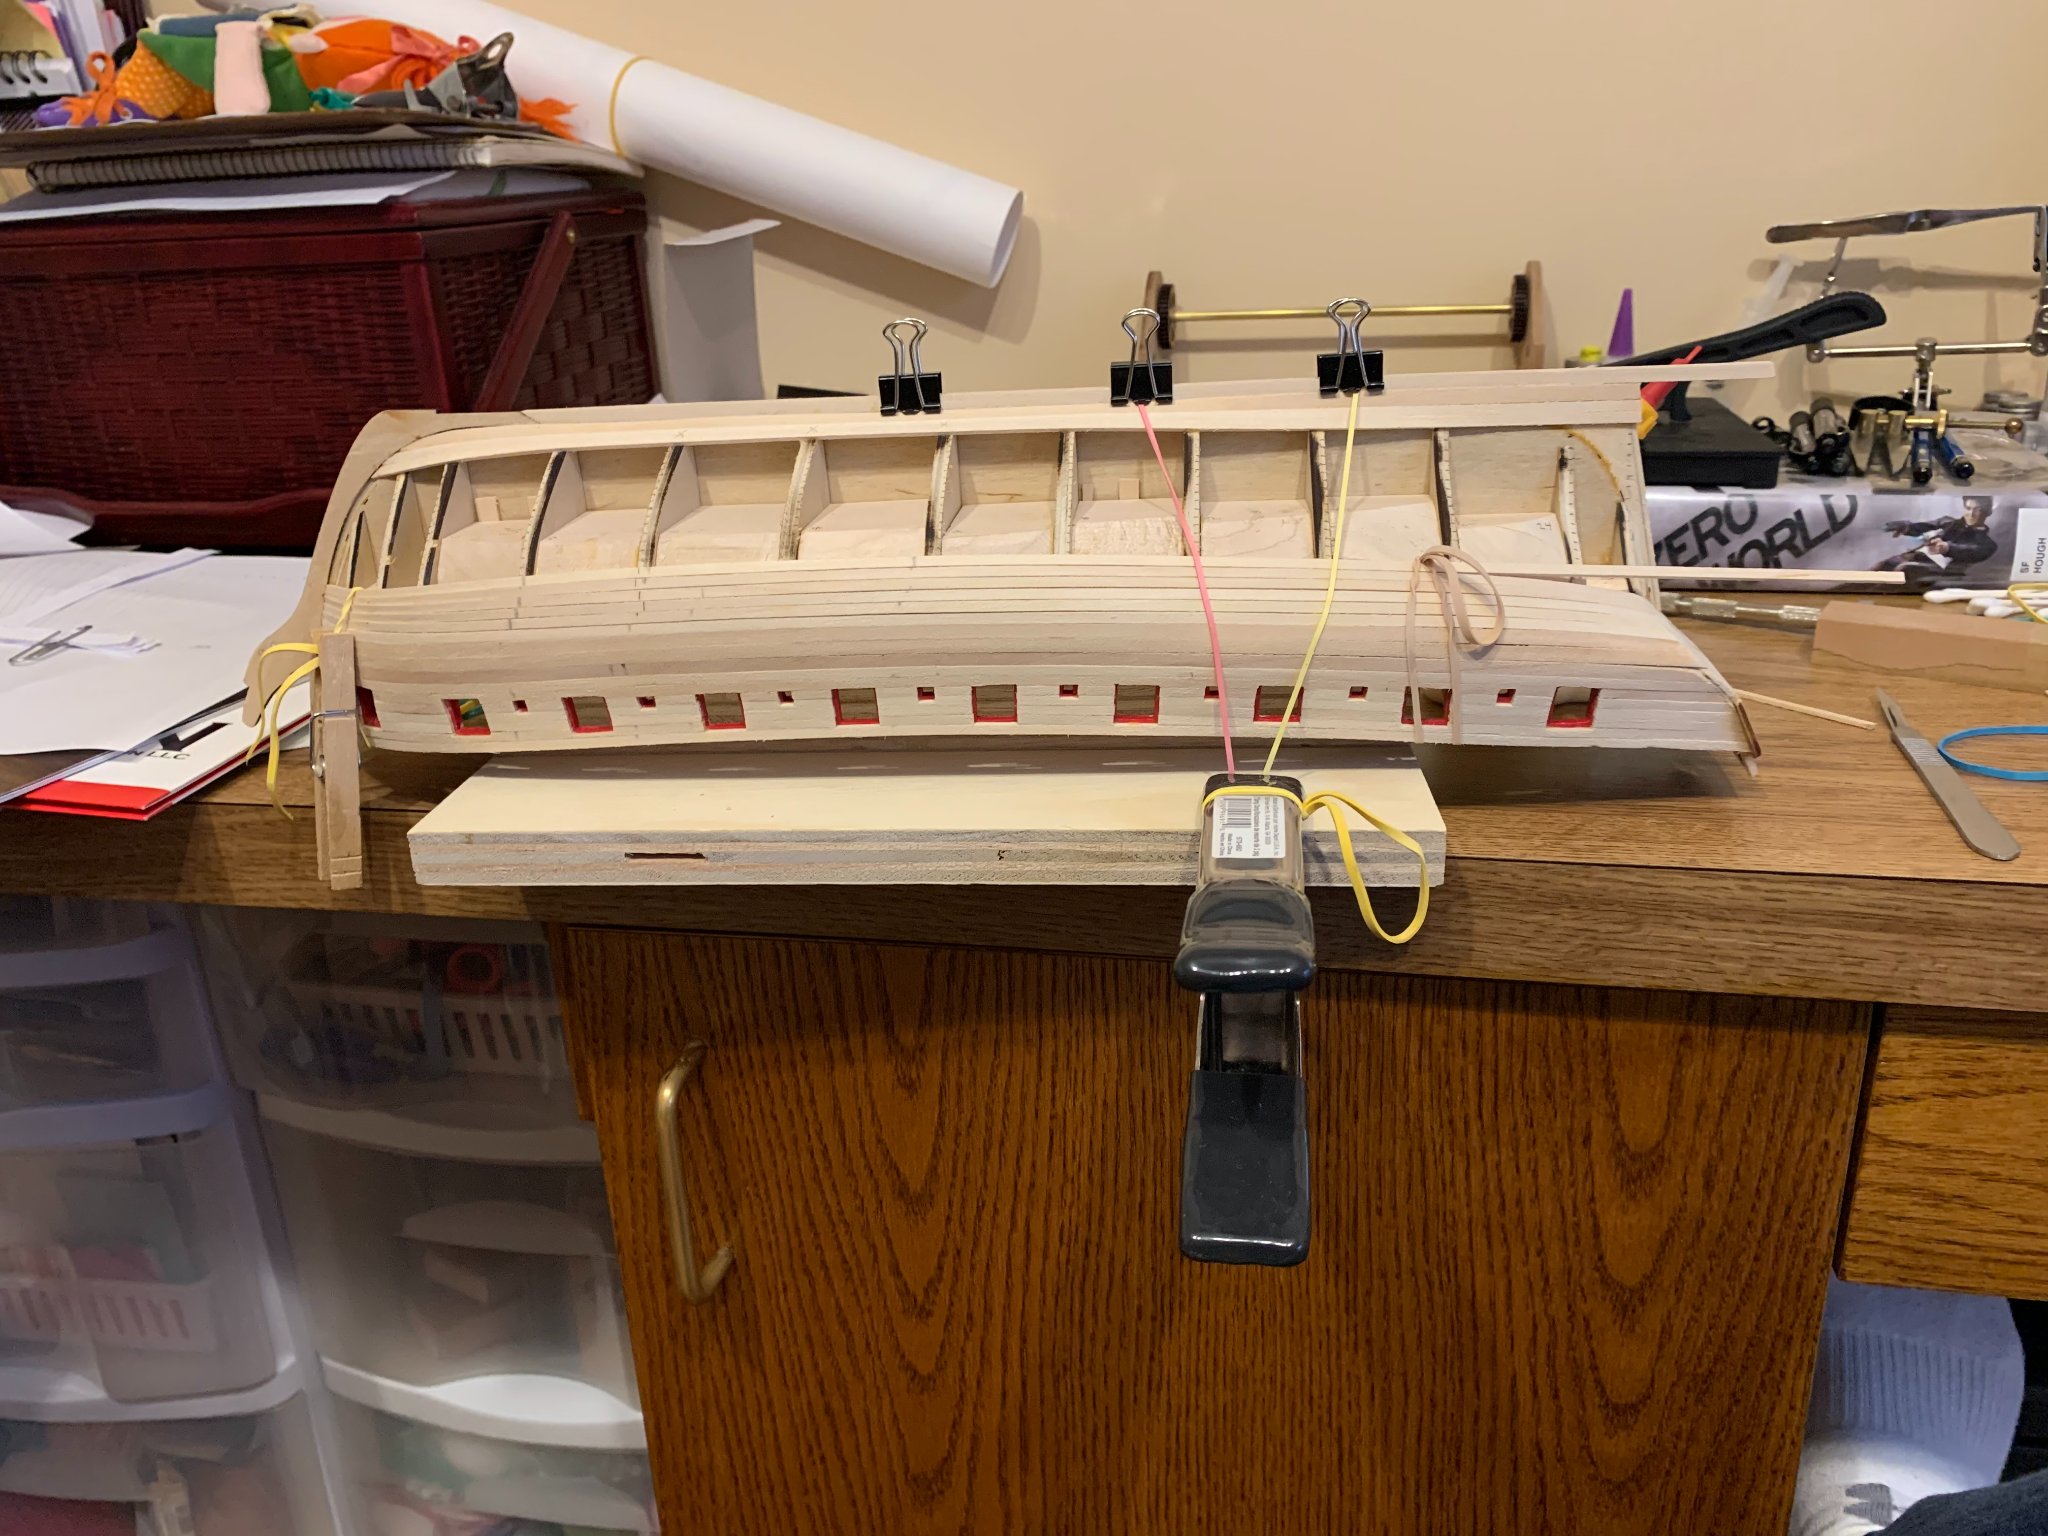
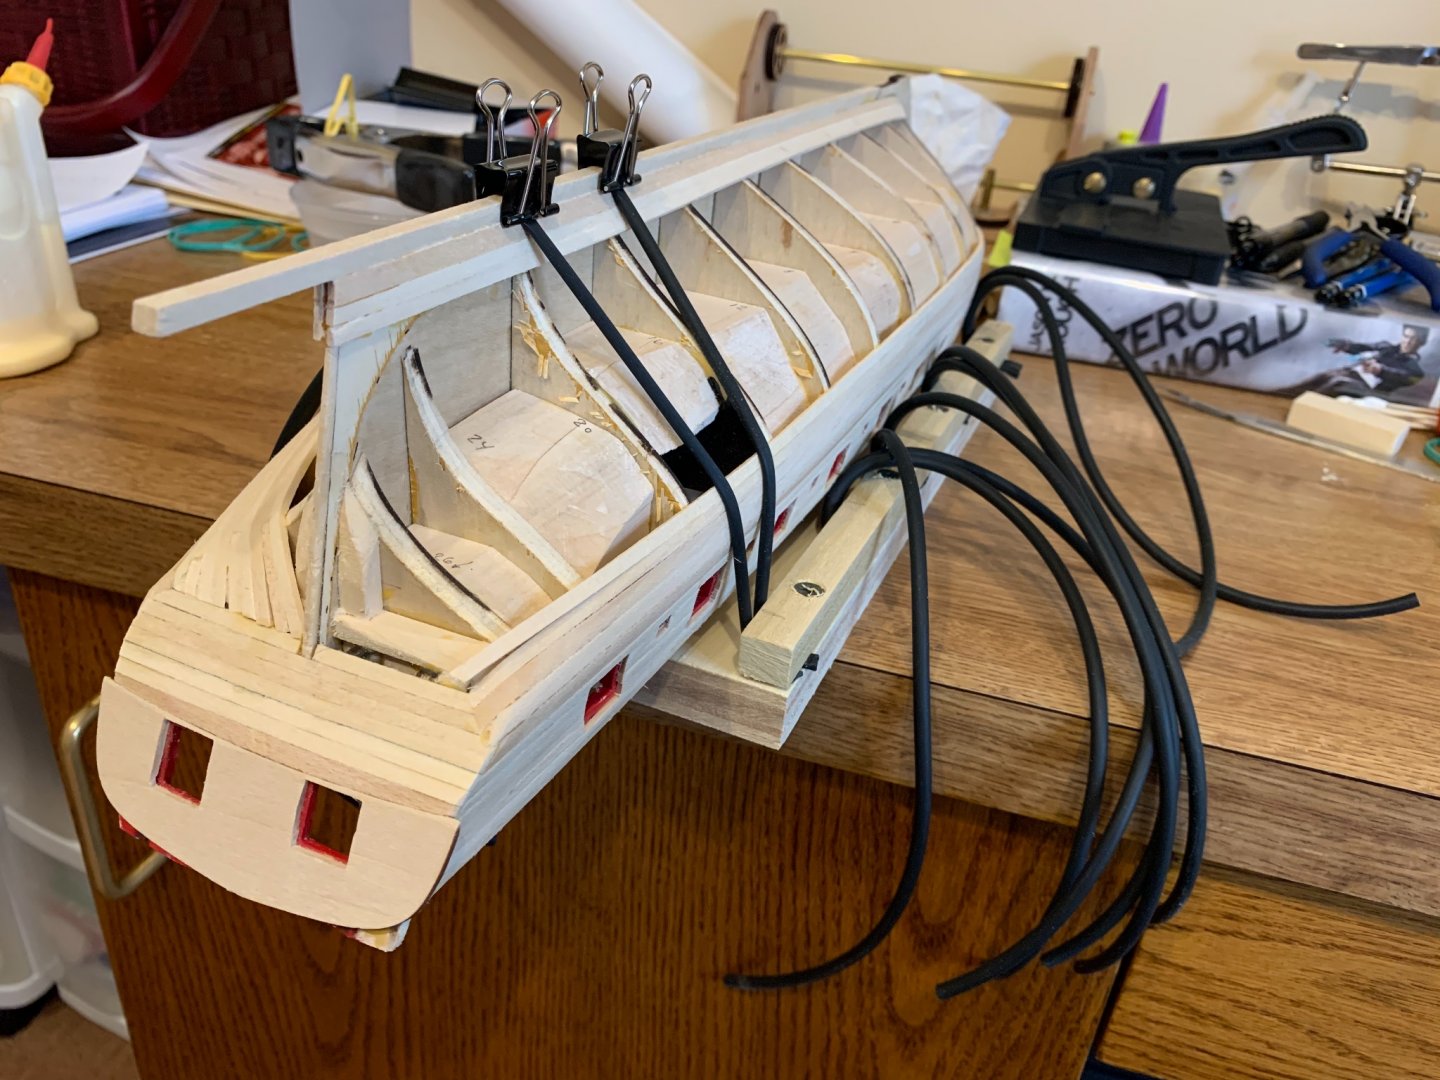
Thanks, and I sure can, it’s actually filched out of my scuba closet, 3/16 od, 1/8 id, I got it here, fantastic company to deal with: https://www.divegearexpress.com/black-surgical-tubing-50-ft-15-m-roll
-
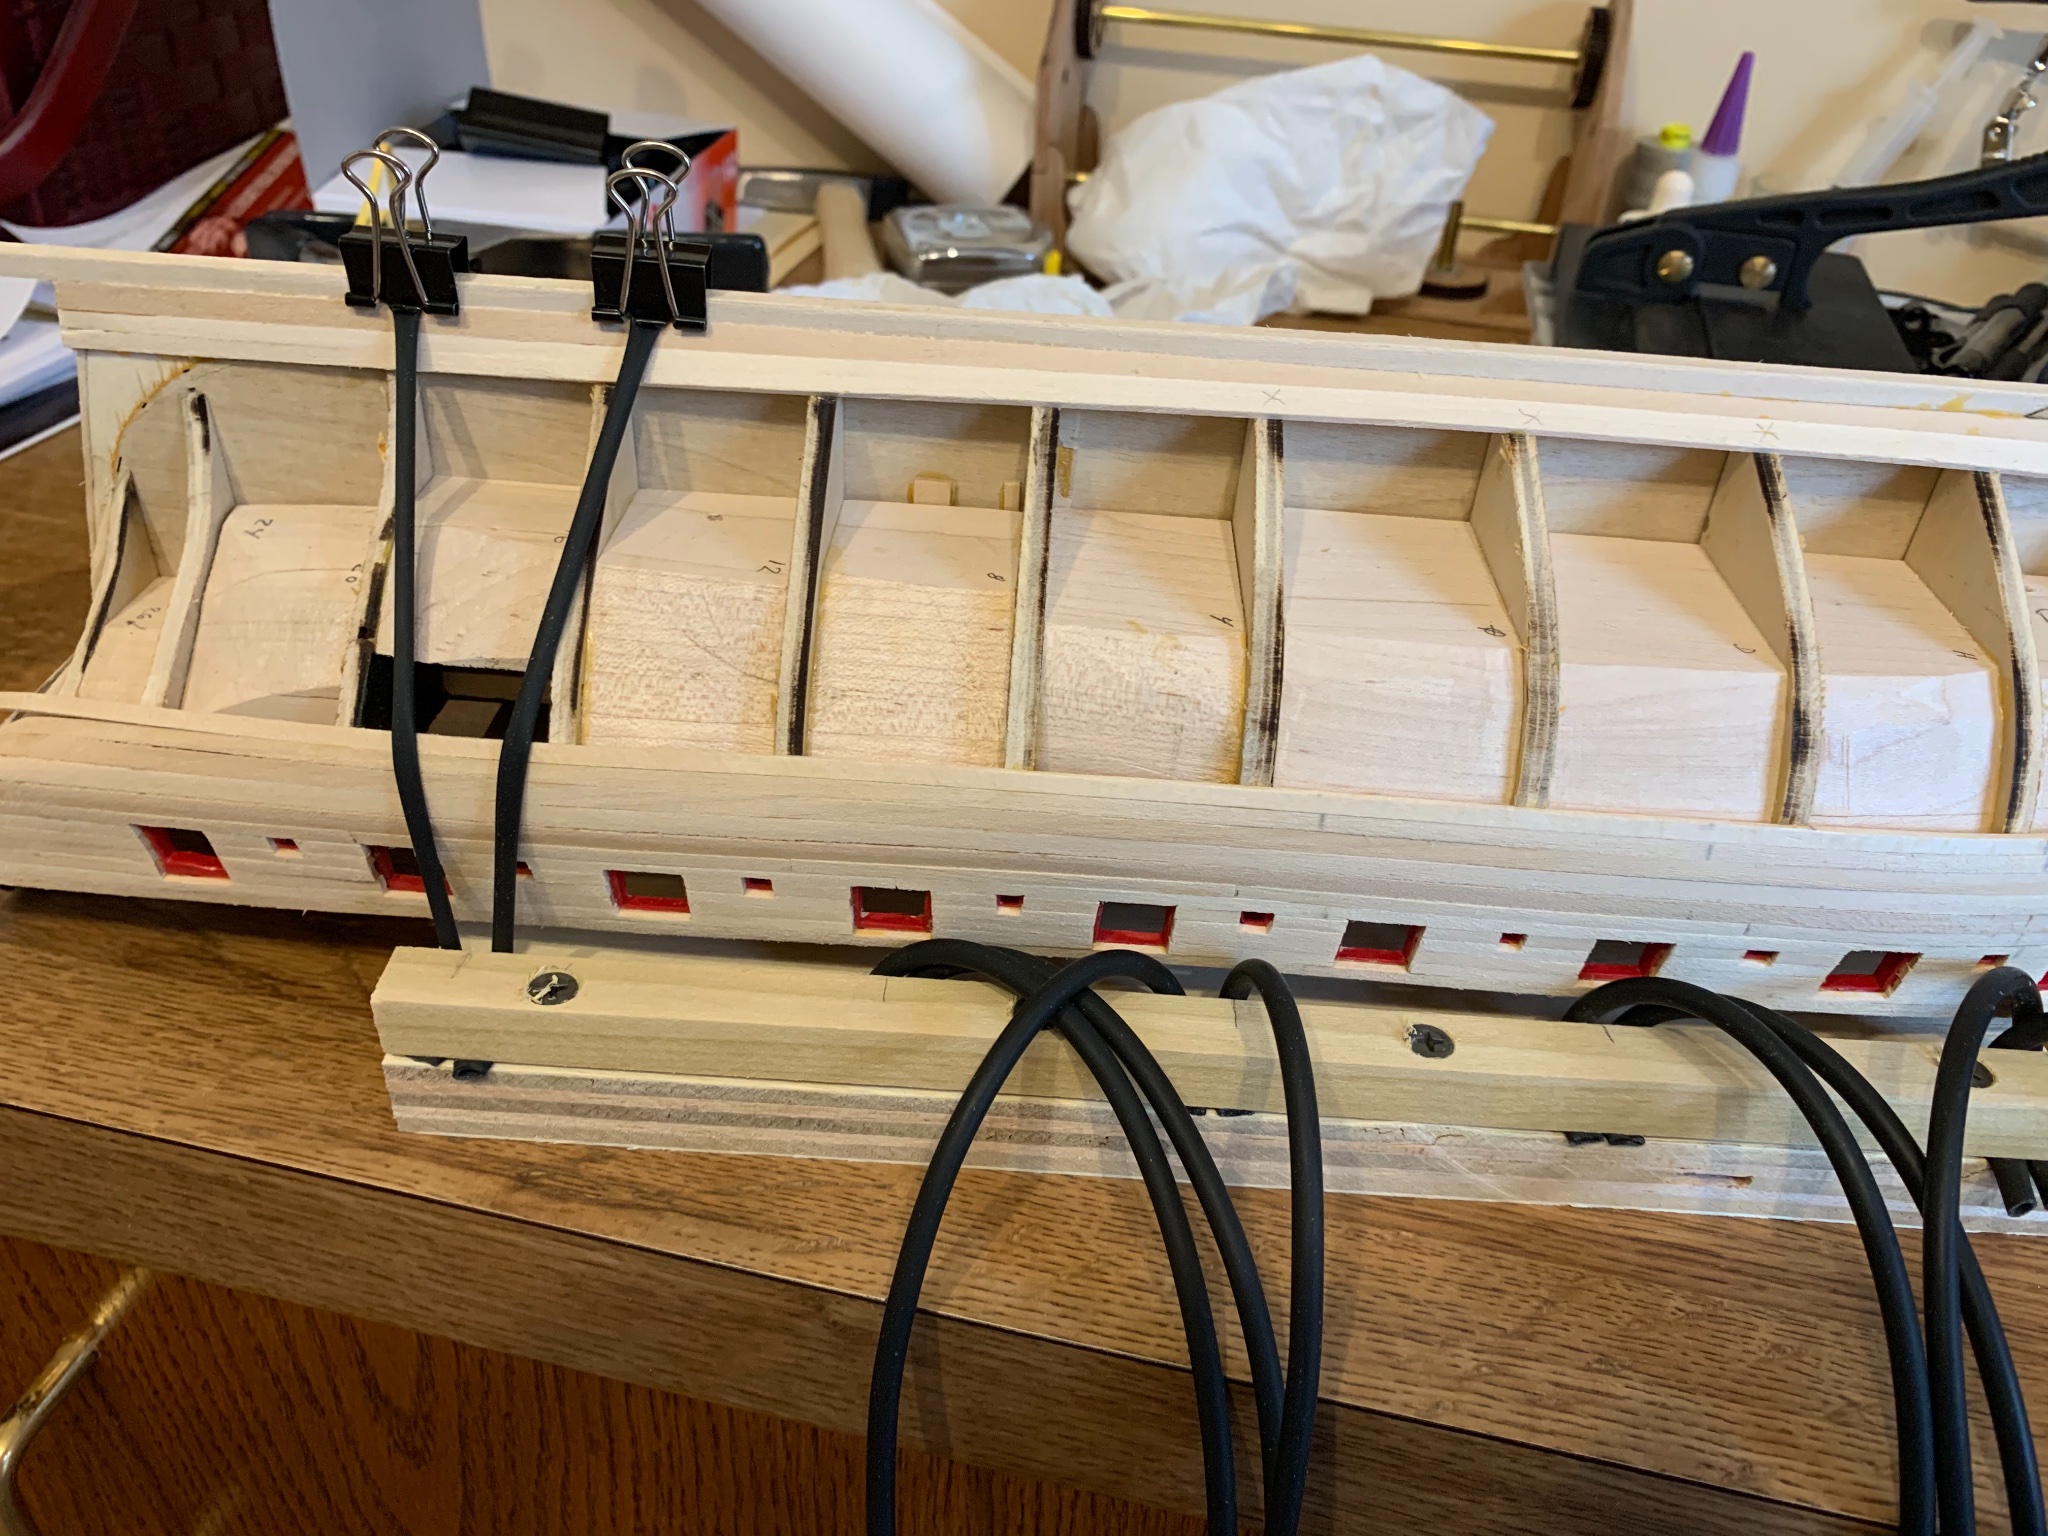
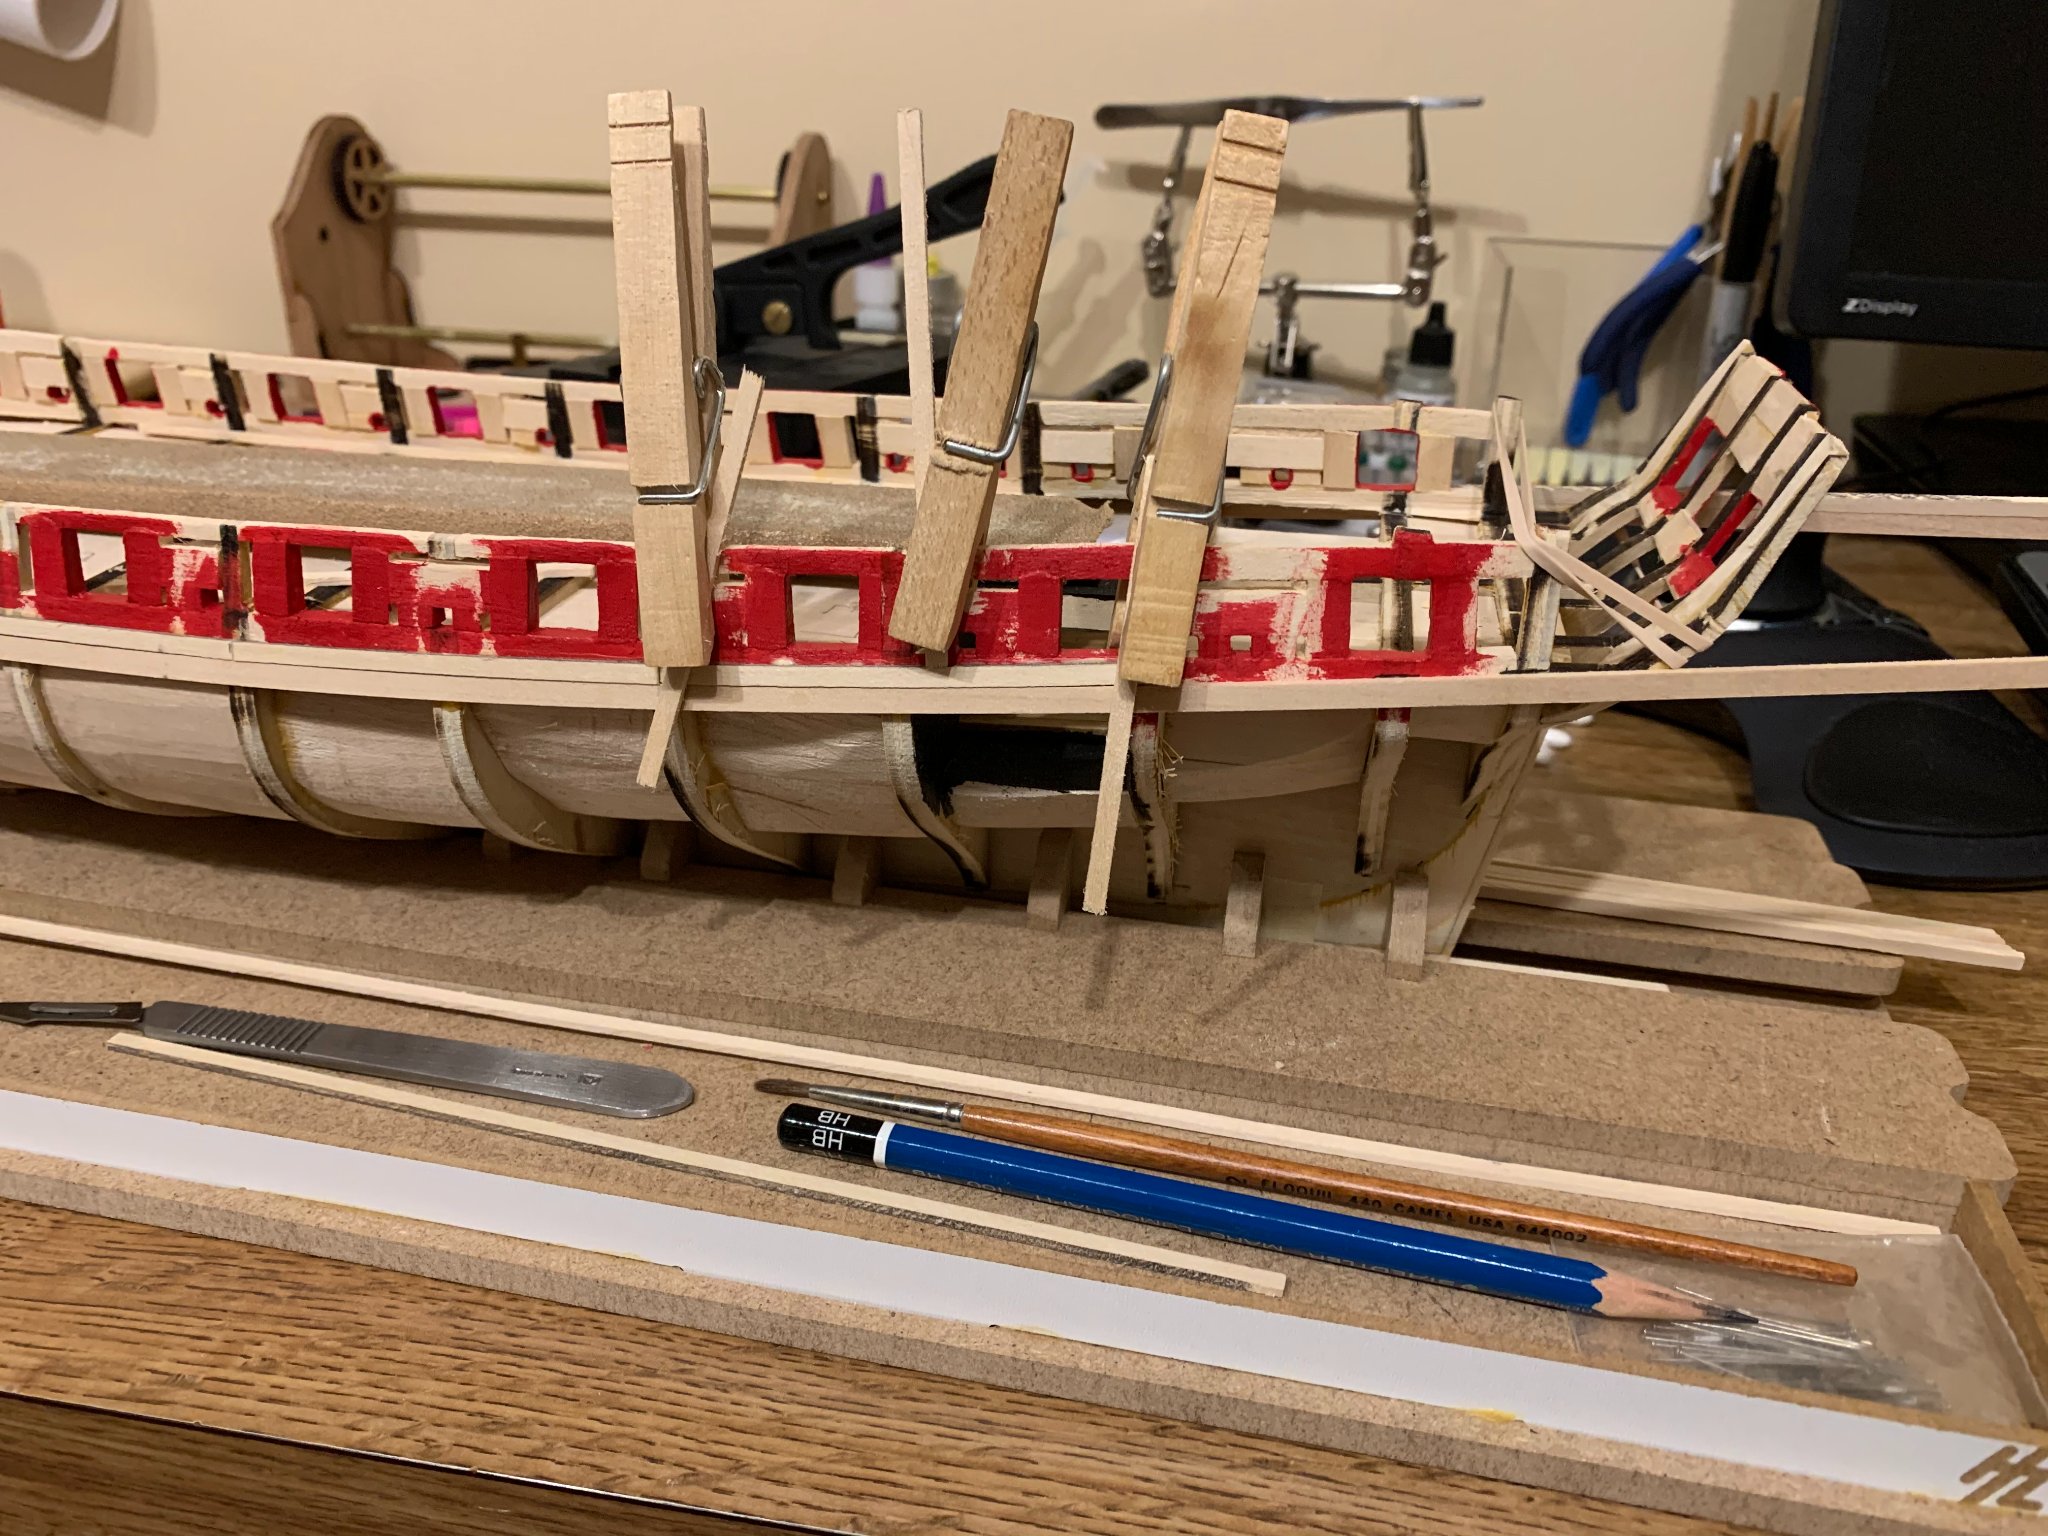
Patent pending, the Coleman Octopus is a success. Instead of clamps and rubber bands, I took a strip of wood and screwed it down over about 10 pieces of surgical tubing, now I can strap down a plank over pretty much every bulkhead at once. Probably a little overkill, but I think it’s going to work pretty nice.

-
 Jamie Coleman reacted to a post in a topic:
US Brig Syren 1803 by Overworked724 – Model Shipways – Scale 1:64
Jamie Coleman reacted to a post in a topic:
US Brig Syren 1803 by Overworked724 – Model Shipways – Scale 1:64
-
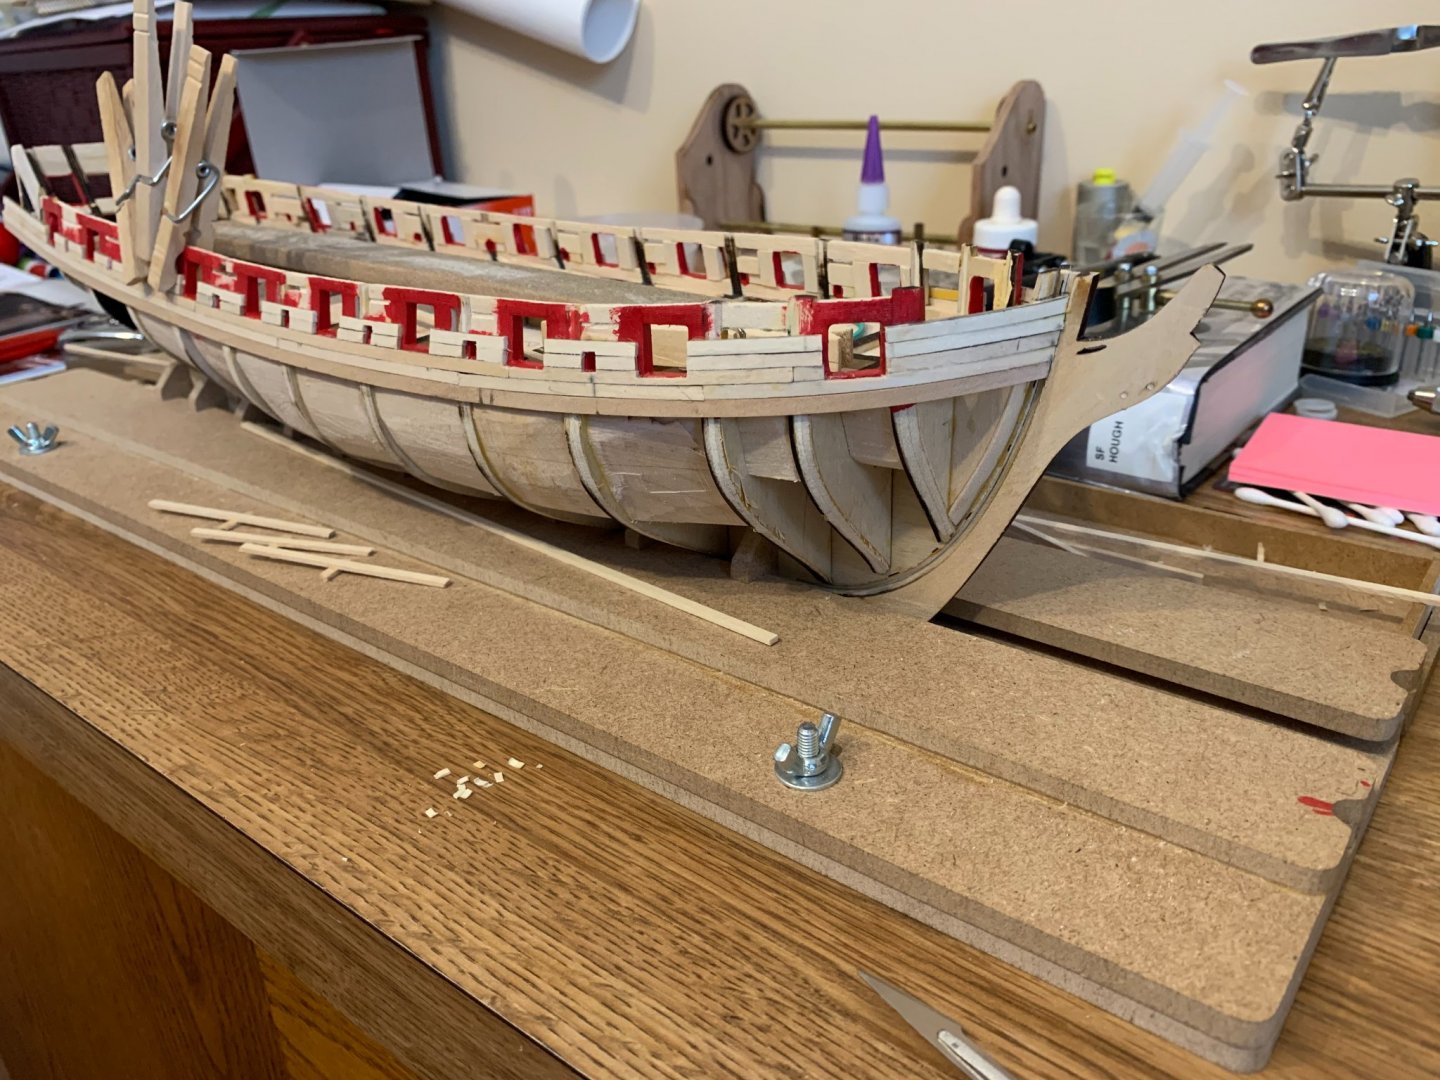
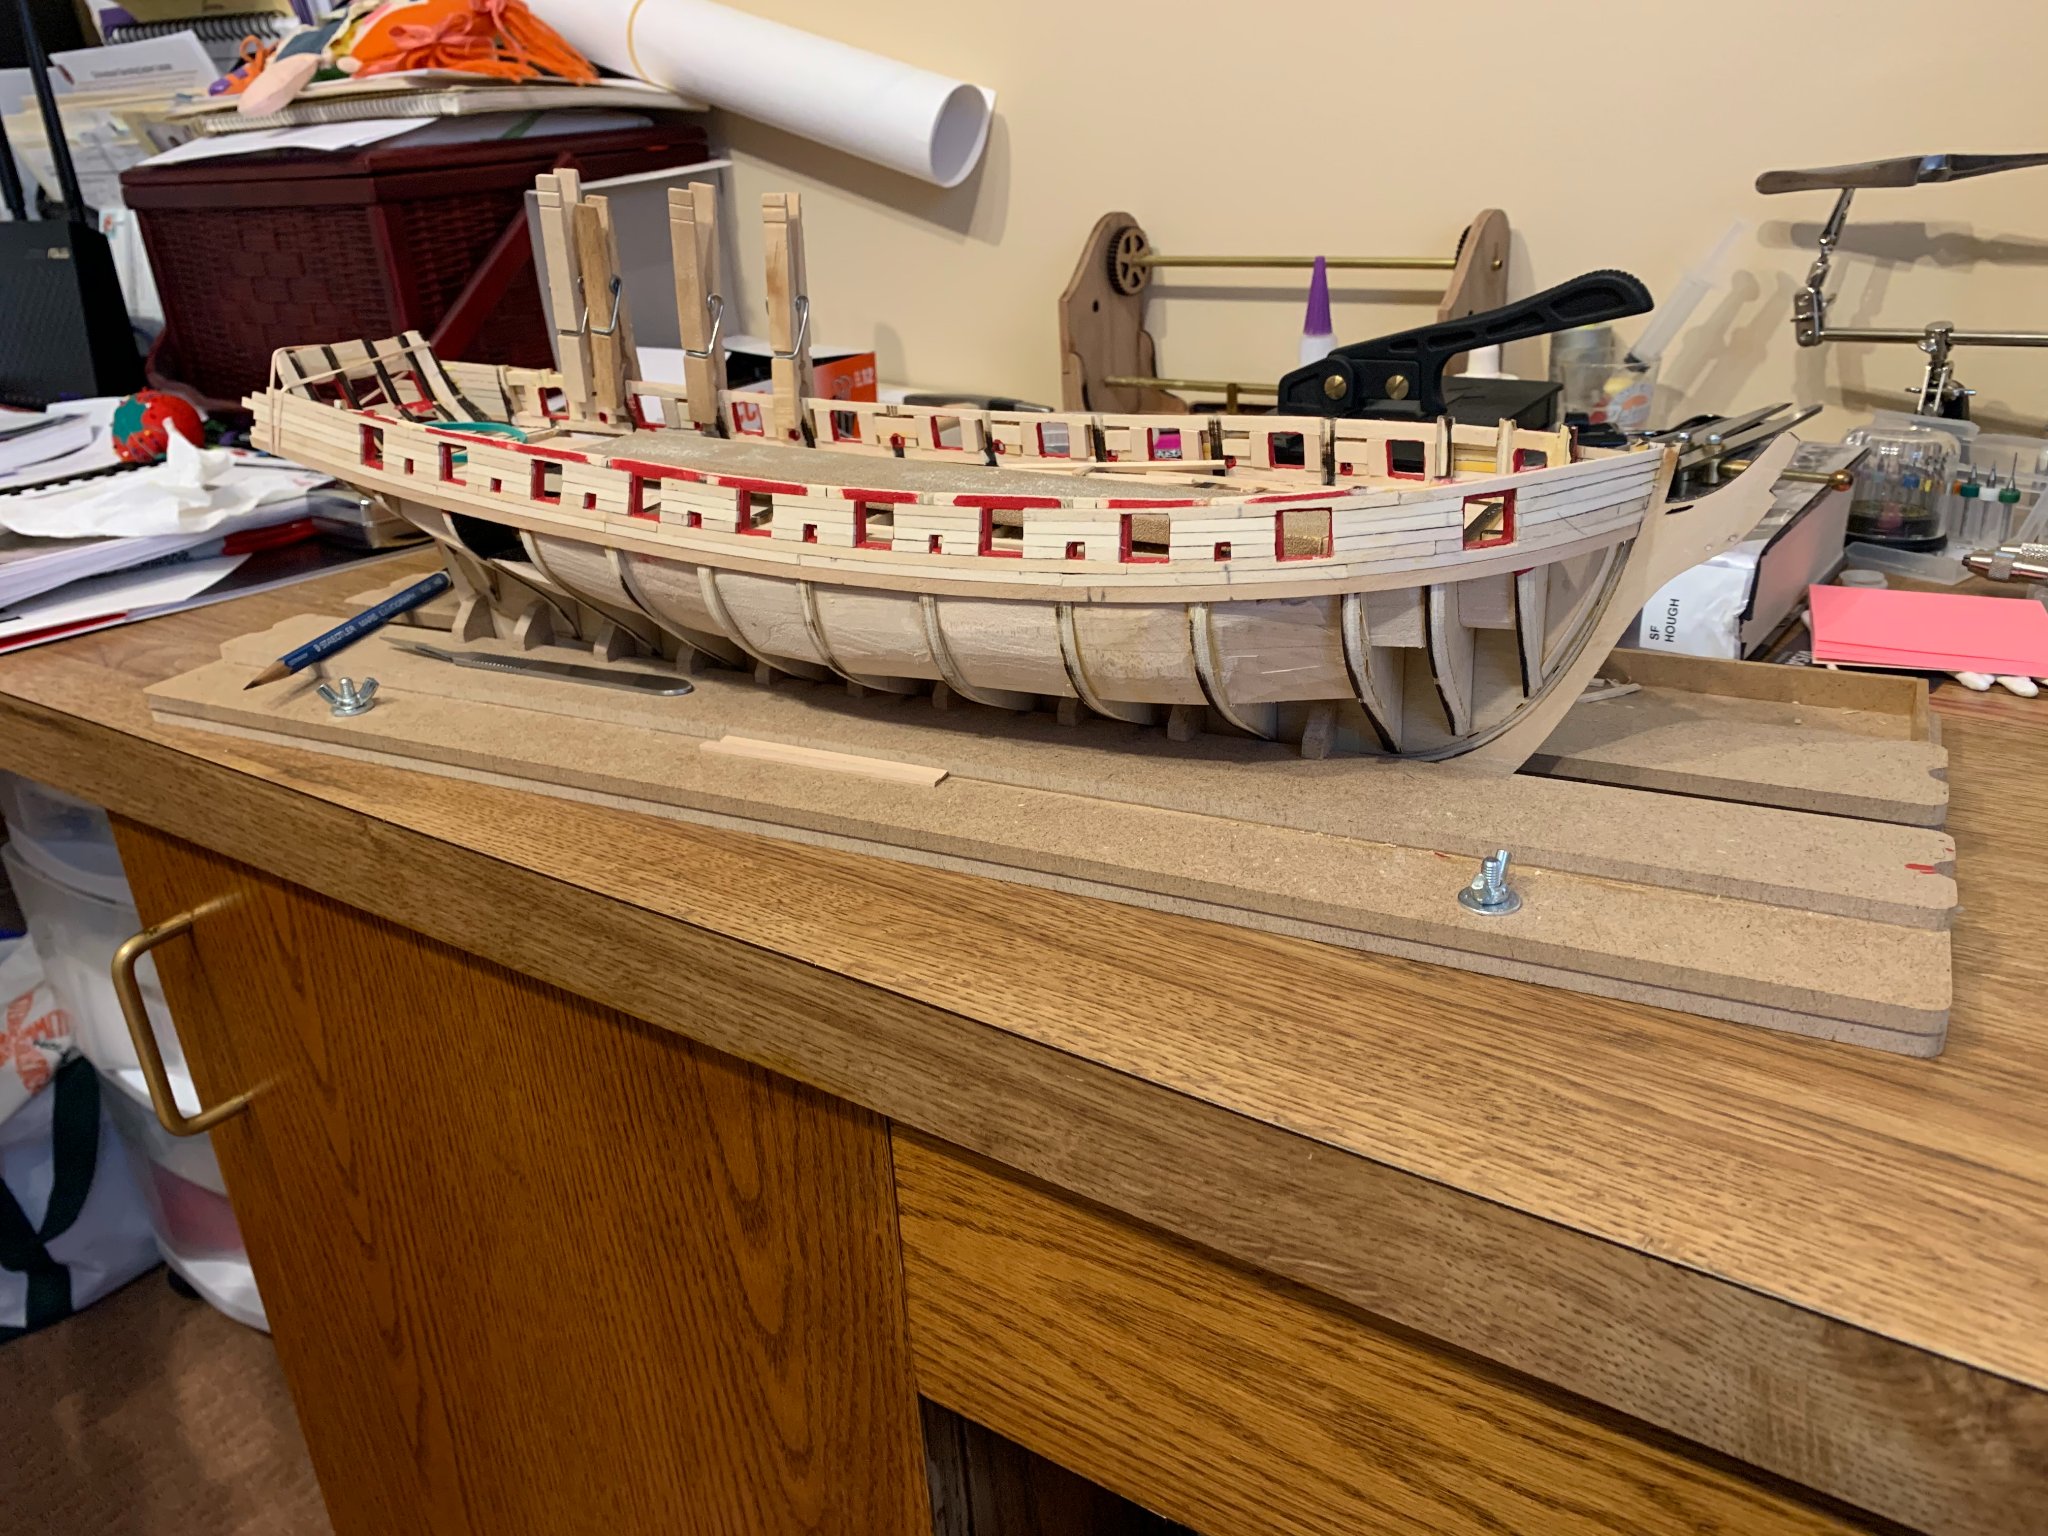
A bit more progress, starting to plank the tricky stuff. Got the garboard planks in, plus the rest of the non-tapered pieces. The I used strips of paper cut to fit the empty bulkhead areas and a planking fan to line out the bulkheads. 22 planks one side 22.5 the other, planning on 22 for both, I'm sure there'll enough gaps to take up a 1/2 plank. I'm using a lot of clamped down rubber band pieces to hold the planks in place while the glue dries, and I've been pretty happy with how that's working, kind of like a band clamp, but small and cheap. Noodling on some ideas on how to make a better fixture that executes the same idea. So, got the first batch of planks on the starboard side, basically to the centerline. I'll move back over to the port side and get the same amount of planks. After that my plan is start down at the keel and work my way up wards so I have a better idea how much room I've got for that tricky remaining corner. Going to have to do some filing and sanding, but so far so good. Definitely spots I should have beveled a bit heavier to tighten the gaps, but as this section will be copper covered, I think I can fair it out. In other news, I picked up a Lie Neilson violin makers plane, I was just not having a lot of success with a standard size block plane for the small work. This thing is tiny and perfect (well, low angle might have been nice, but I'm not doing a lot of end grain). I'm using it to taper the planks now, rather than cutting. Much like some others, I found the kit wood a bit fussy. Just start close to the end, take a few passes and keep slowly moving further back until it matches up with the lines on the bulkhead. Anyway, more to follow, thanks for watching.

-
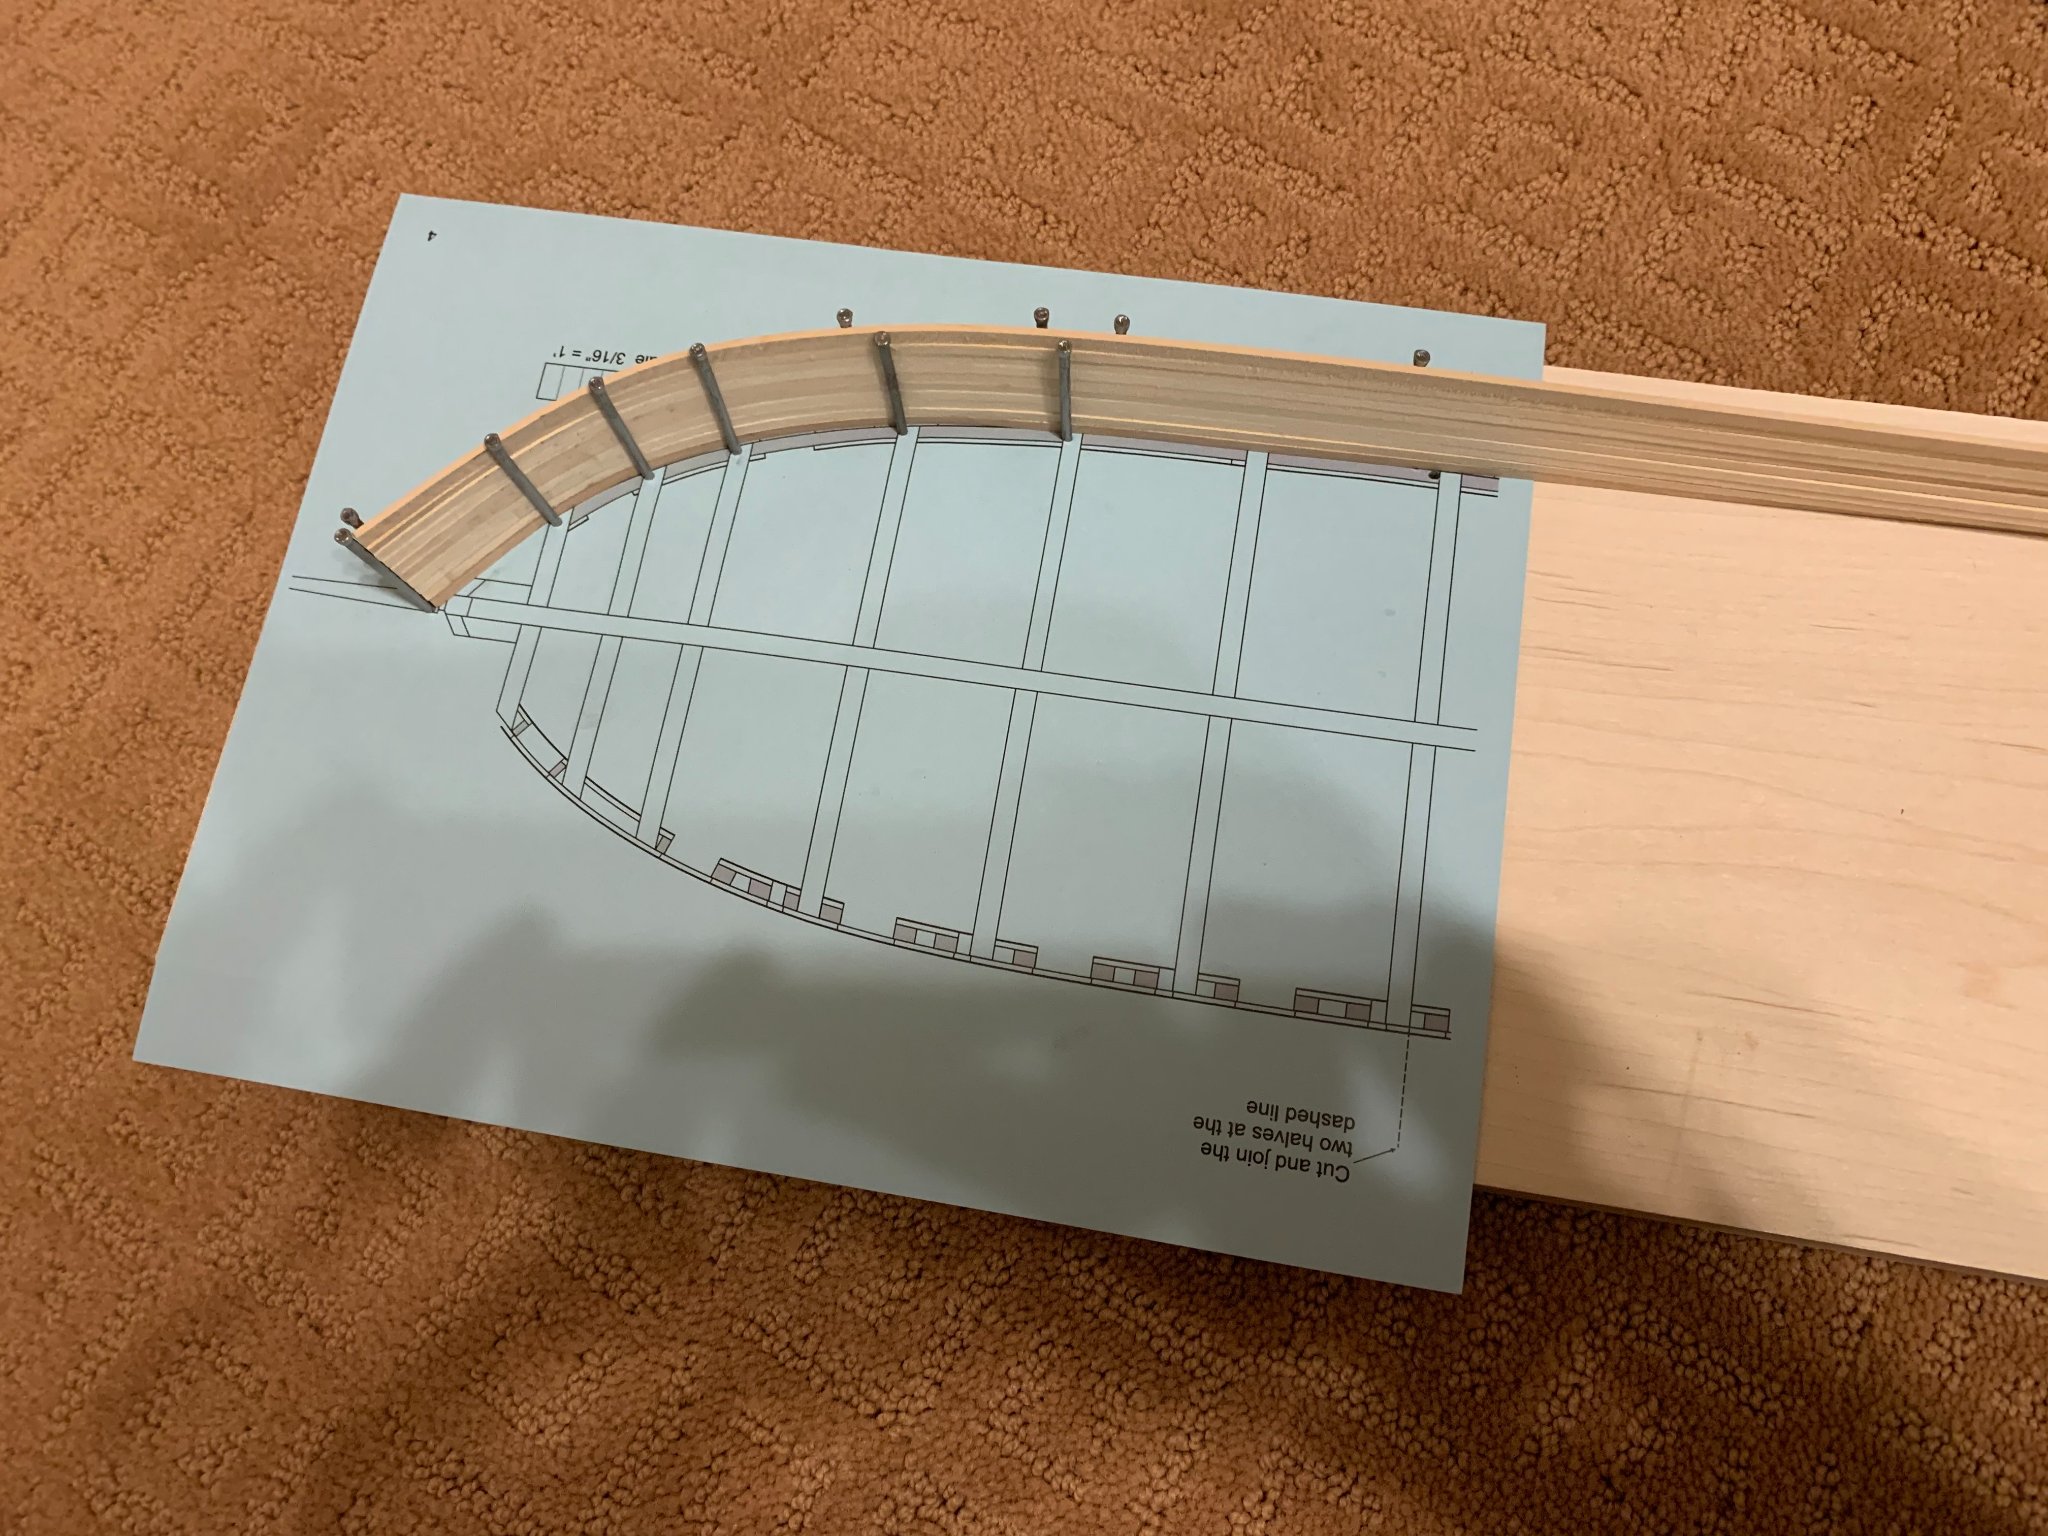
Welcome aboard, no apologies necessary, seems every time I turn around I find another Syren that I've got to take a look at. This whole covid thing got me started on a ship that had sat idle for more than a decade, and finishing that got me going on this one. For the jig, the camera angle makes it look like a compound curve, but in reality the nails are straight up and down, so just a single curve. It gave the wood enough bend to fit well at least above the wales without needing to fuss too much.
-
Jamie Coleman reacted to a post in a topic:
US Brig Syren 1803 by Overworked724 – Model Shipways – Scale 1:64
-
She truly is gorgeous, to echo a lot of others, everything is crisp and neat, love it.
- 950 replies
-
- 2
-
-
- syren
- model shipways
- (and 1 more)
-
She’s looking great! I’m glad you’re ahead of me, I’m definitely going to keep an eye on your decking. That looks like it’ll come out nice and even. Question for you, not a critique at all, is there a reason you put a joint at each bulkhead rather than one big piece?
-
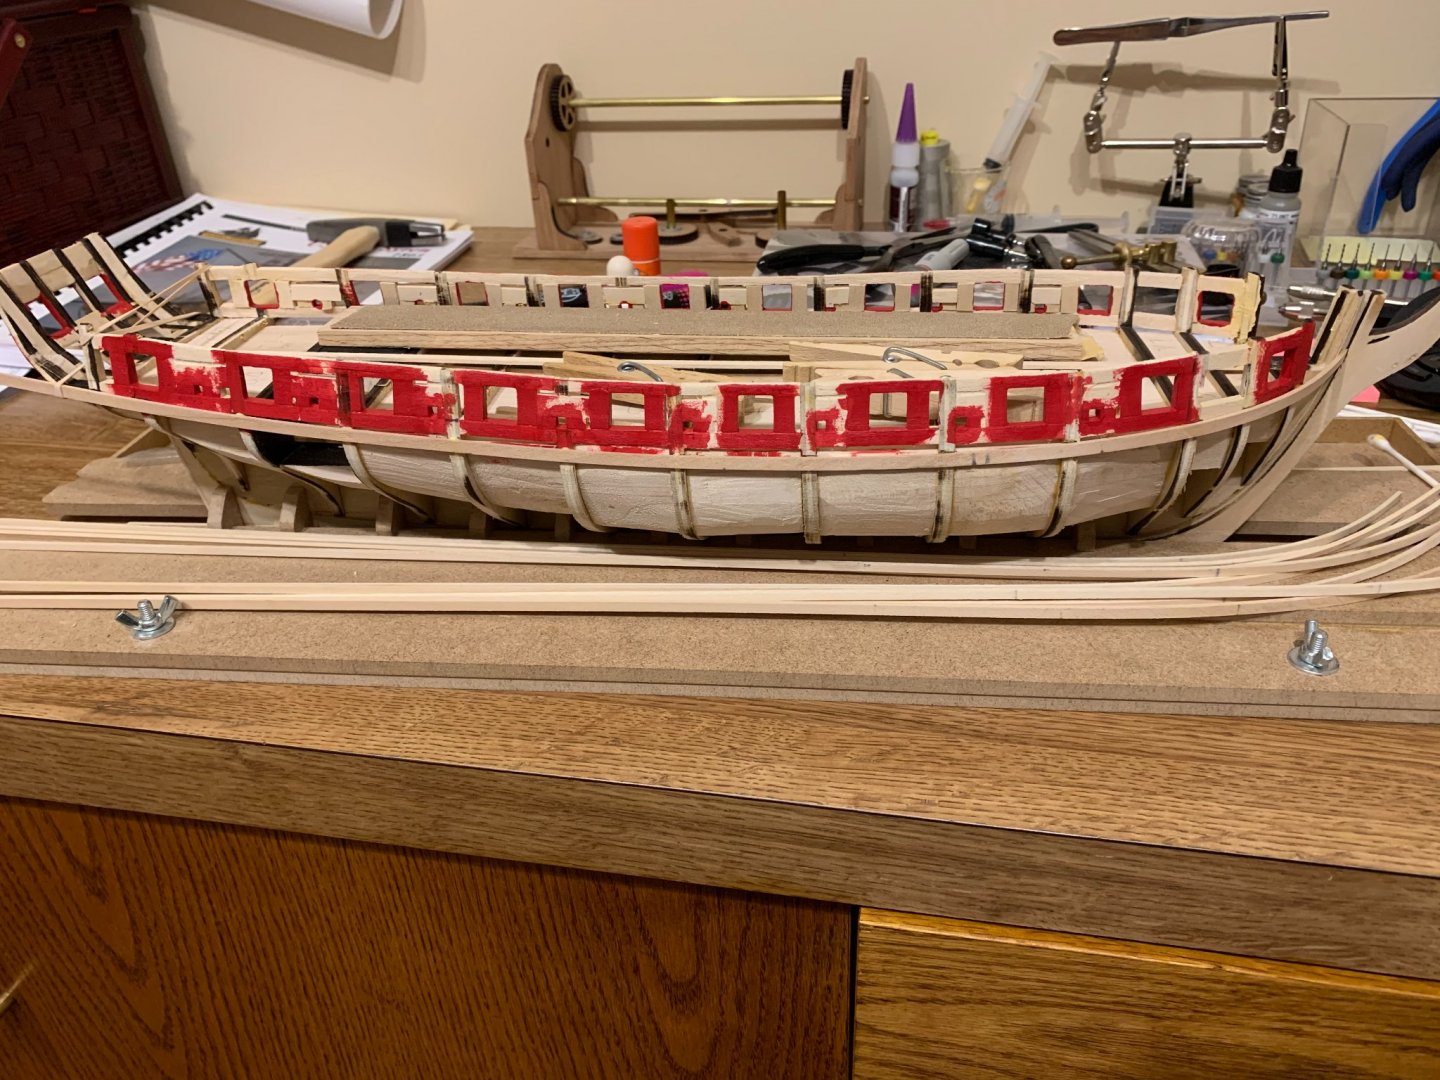
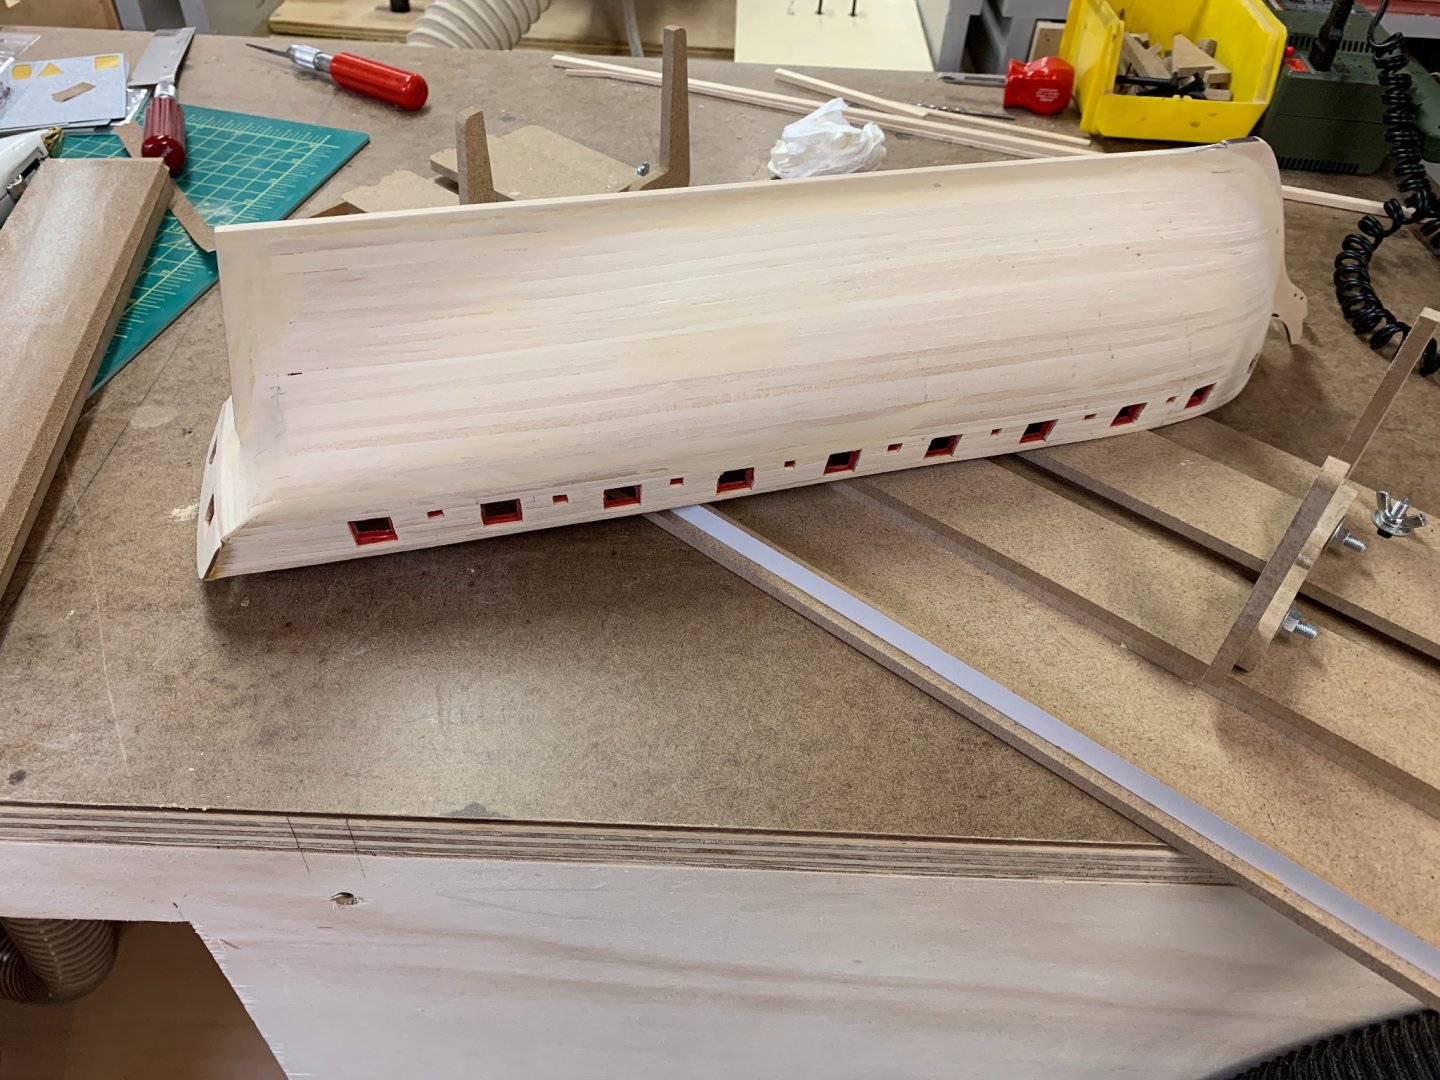
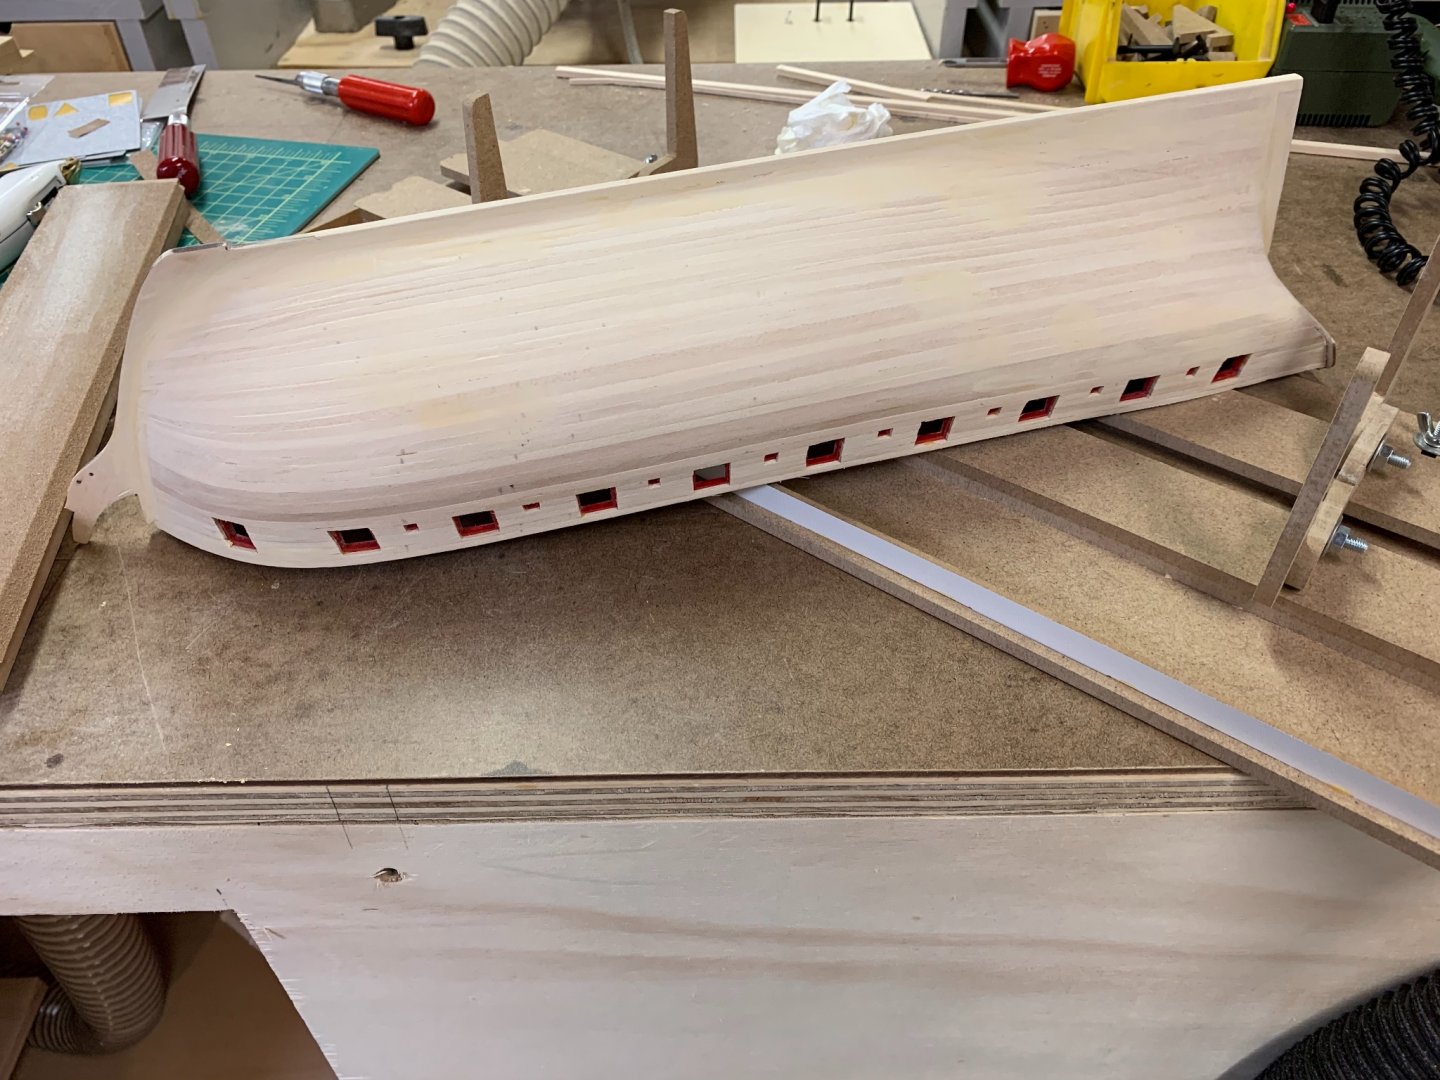
Thank you. The paint’s from model expo, it was part of the acrylic kit they sell for the Syren, there was black, red, white and a primer. The red is their MS4835 Bright Red Trim. I think it’s a nice deep red color without being too bright.
-
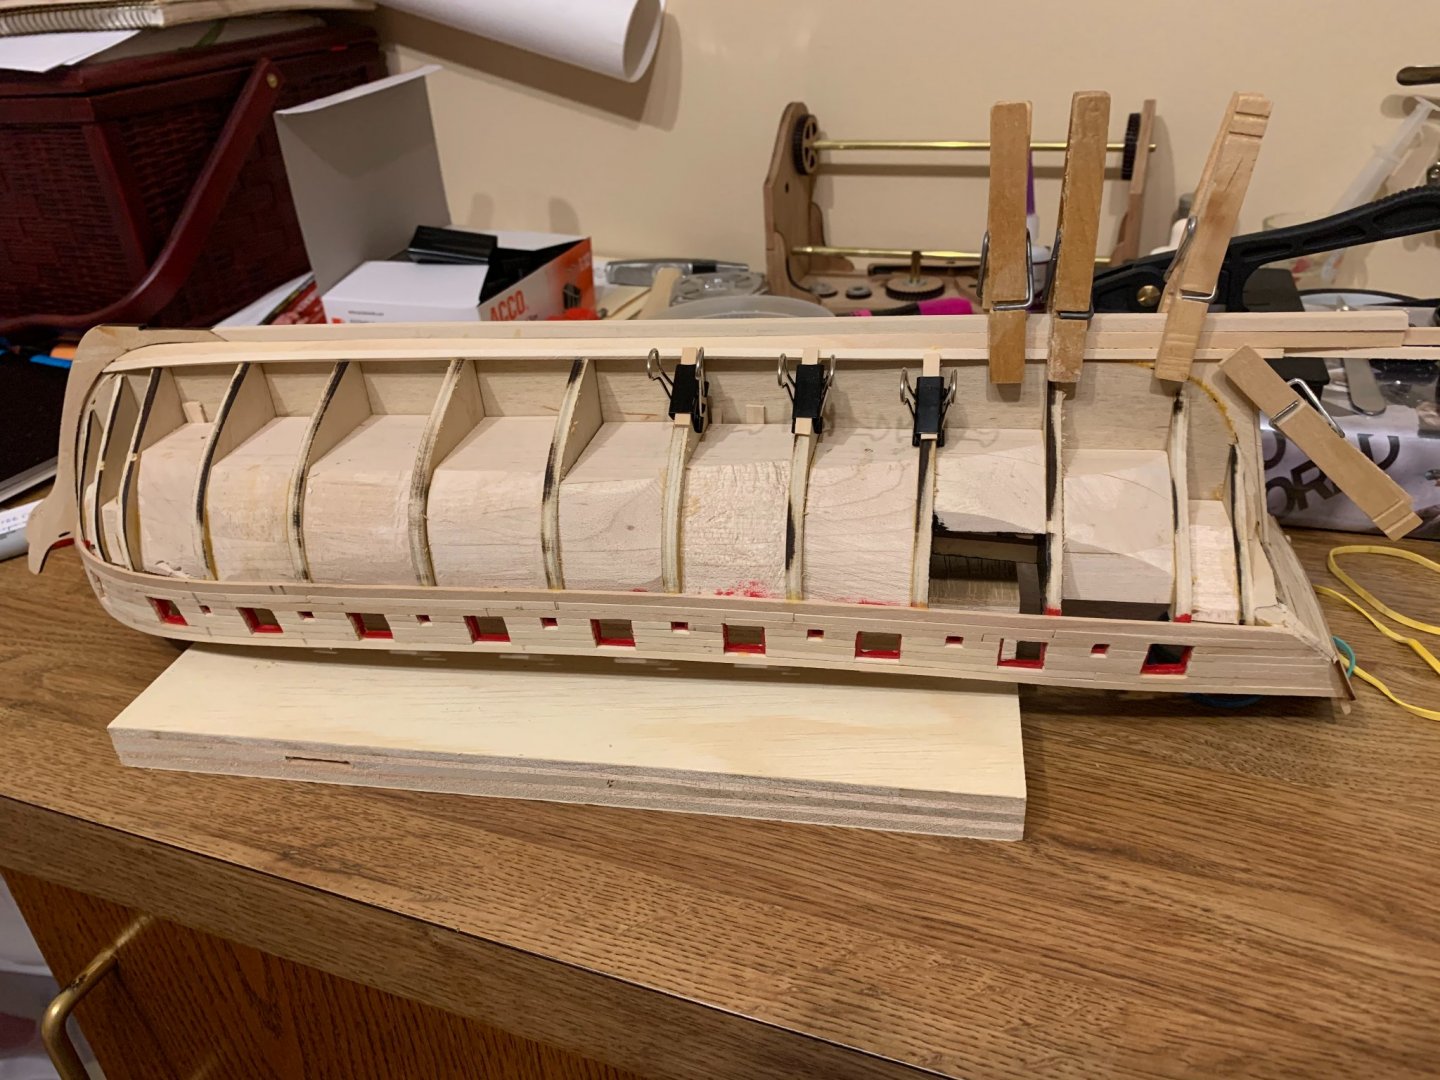
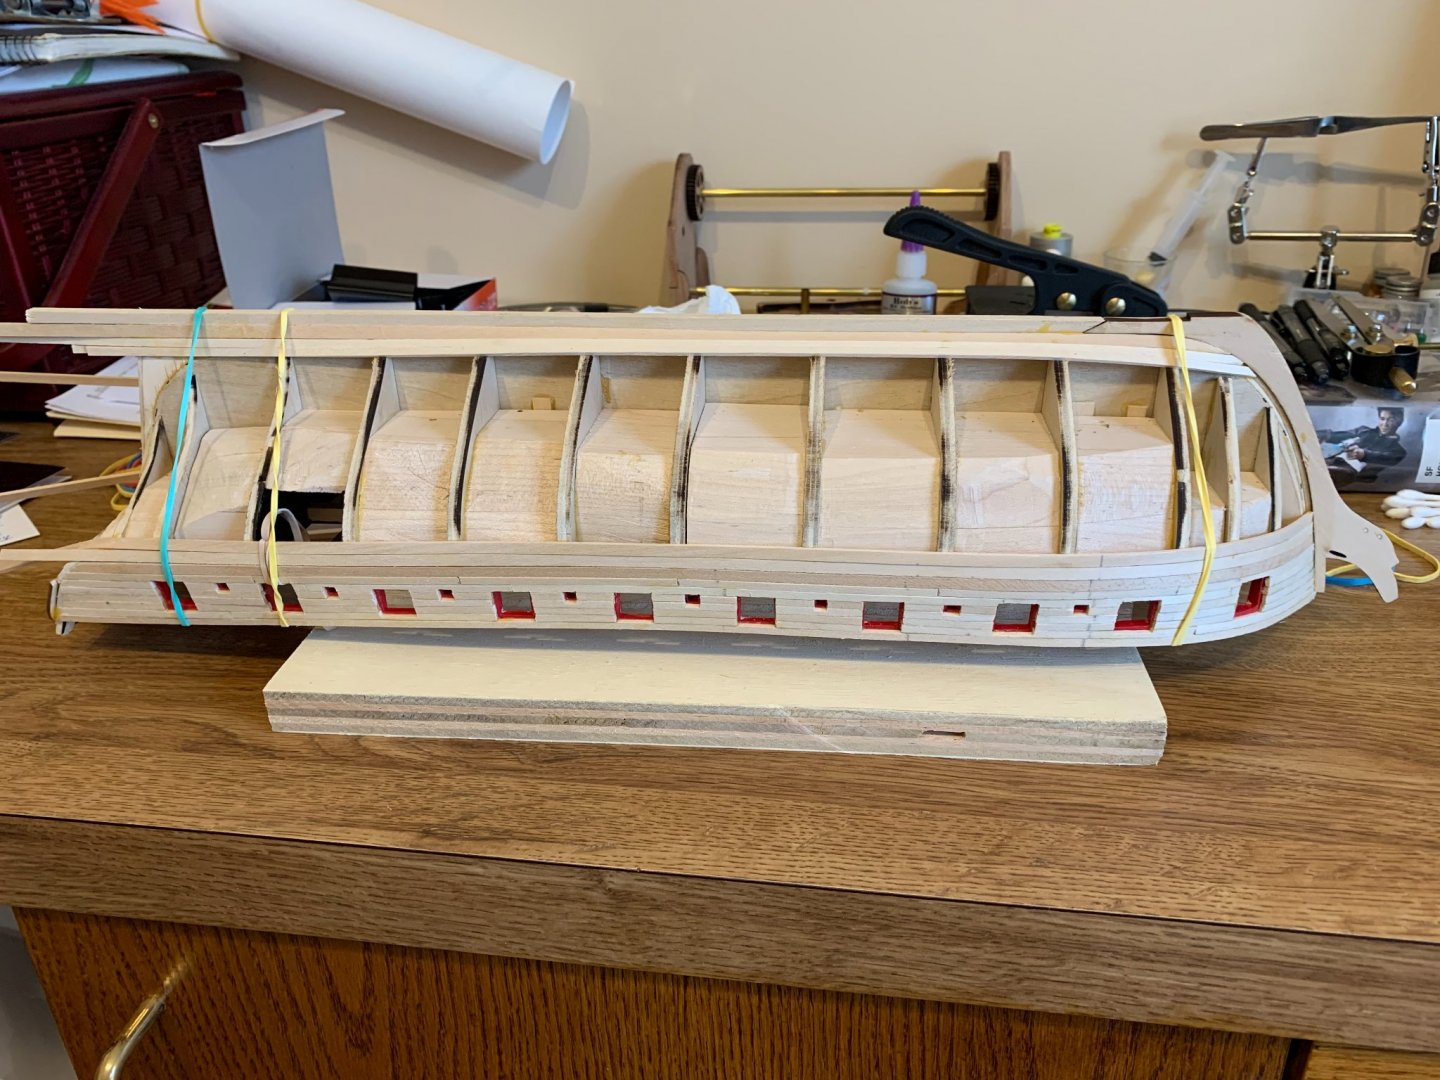
I made a jig to pre-shape the planking, and it'll hold about 8 planks at once, so I can soak and let them dry overnight. It ended up working very well, but as these were just plain steel nails, it did end up leaving a bit of a rust streak I'll have to sand out later. I painted the ports and then laid down the first plank after laying it out with some battens and pins. Continued to plank from the wales up. Clothes pins were the clamp of choice here, but I did end up using rubber bands for the final bow planks, as the were high enough the rabbet wasn't holding it inboard.