HOLIDAY DONATION DRIVE - SUPPORT MSW - DO YOUR PART TO KEEP THIS GREAT FORUM GOING! (Only 20 donations so far - C'mon guys!)
×

Salty Dog
-
Posts
236 -
Joined
-
Last visited
Content Type
Profiles
Forums
Gallery
Events
Everything posted by Salty Dog
-
 Thanks Jim. Been here most of my life and you just never get used to them. This baby was pretty freaky.
 -
Holy carp! I'm in LA and we're getting rocked with these quakes! You can never get used to them! Just had a very strong one. They're saying 7.1.
-
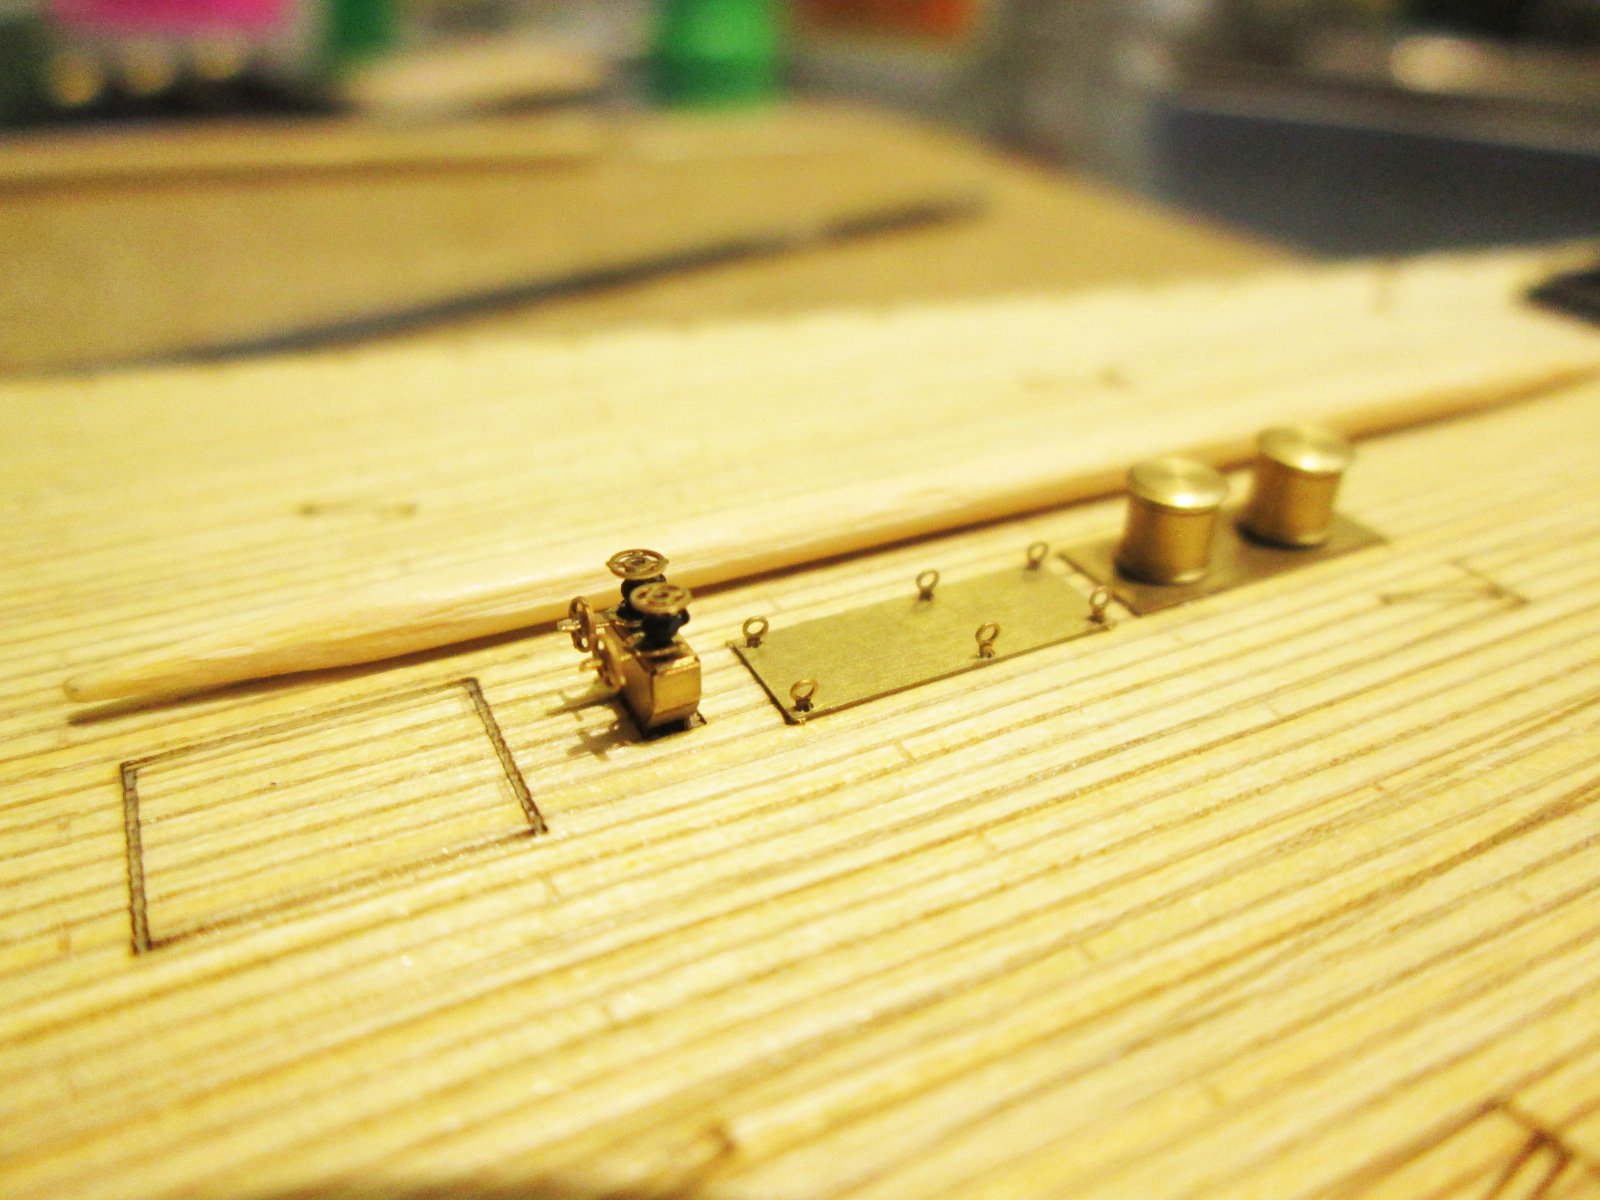
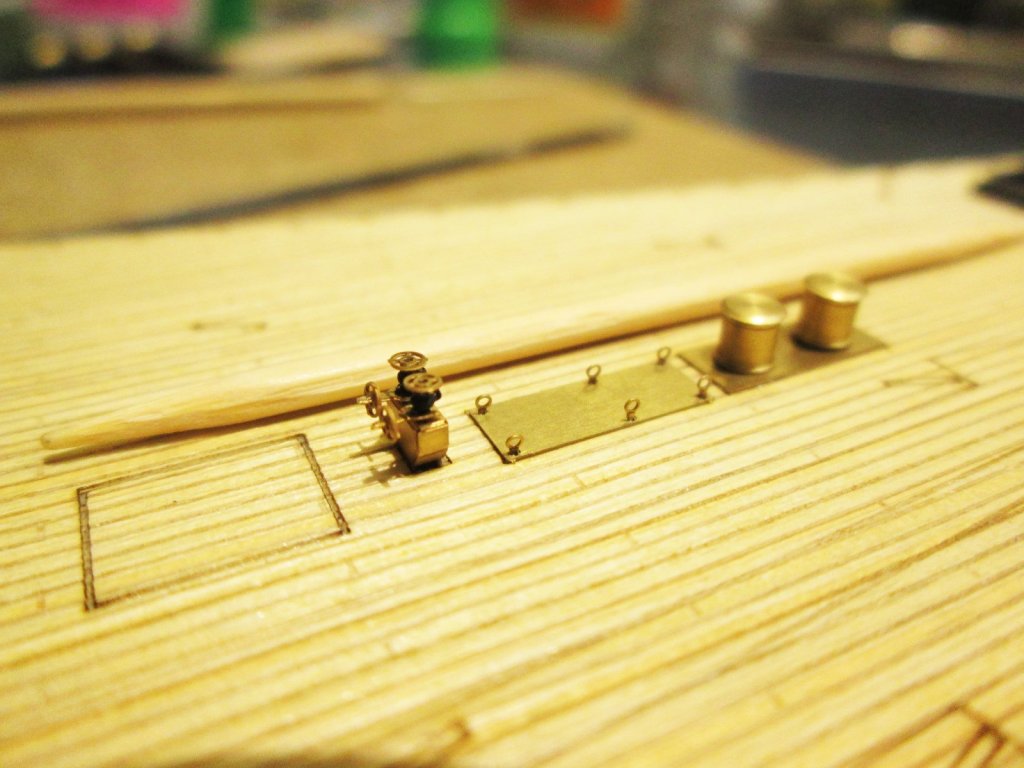
Thank you Richmond! I was right. I figured they were sighting devices. Tonight I worked on others. Lots of tiny stuff.
-
Hey Mike, Read my very first post when I started this build. I don't feel I'm representing anything but my own creativity and ideas. But most of all, I'm having fun. I have other ships lined up and also plan on "doing my thing". For instance, I have the 1/200 Iowa ready to go. I looked up some of the history and bumped into some ORIGINAL paint schemes that were proposed but never used. I am going to use one of those since the drawings exist. Again, mostly cuz I CAN. And because in my opinion is much nicer looking than your run of the mill floating correctional facility. They just look boring to me. Some like the Bismarck are fantastic due to the cammo. Some of the ships used during the "razzle dazzle" period are also interesting. Some are an eyesore! Thanks for liking the colors I'm using!
-
Thanks to all for all the nice words. I probably would have burnt out by now if it wasn't for the compliments. Very much appreciated.
-
Thanks for looking! Yep, the dreaded "tink" when something you're holding in your precision tweezers decides to go on a one way trip, never to be seen again. Really ticks me off, although I'm pretty proud of myself this time around because I've only lost a couple of parts. The only consolation is they are sooooooo small, that never in a million years would anyone notice....unless they were VERY familiar with the set! My eyes are going too. I have every kind of reading glasses and headlamps and magnifications. BUT... I can still see! I'm pretty set on using a +4 pair of glasses, but I do have to bump it up to +6 on super tiny impossible stuff. I even have some +8! But I feel like puking when I put those on haha. 🤢
-
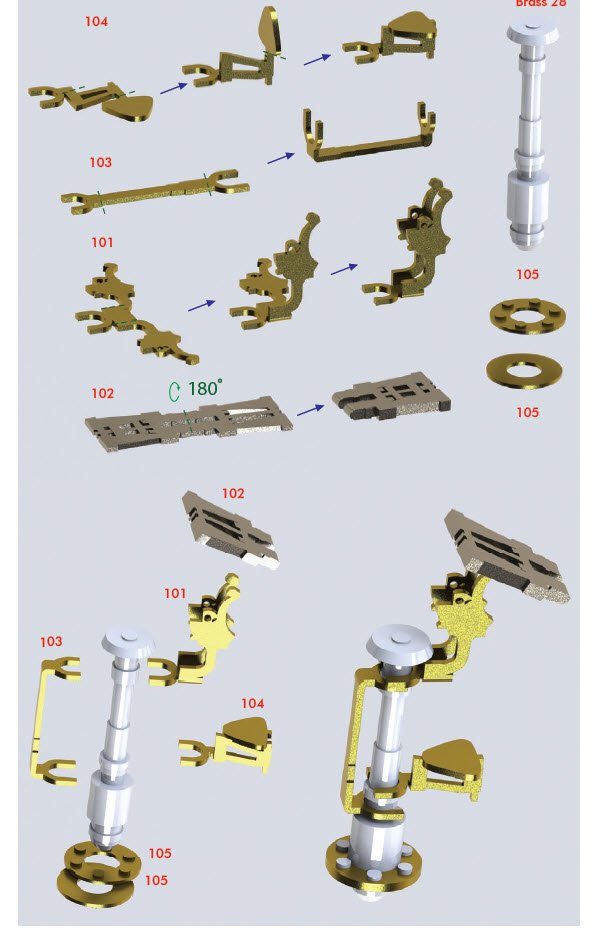
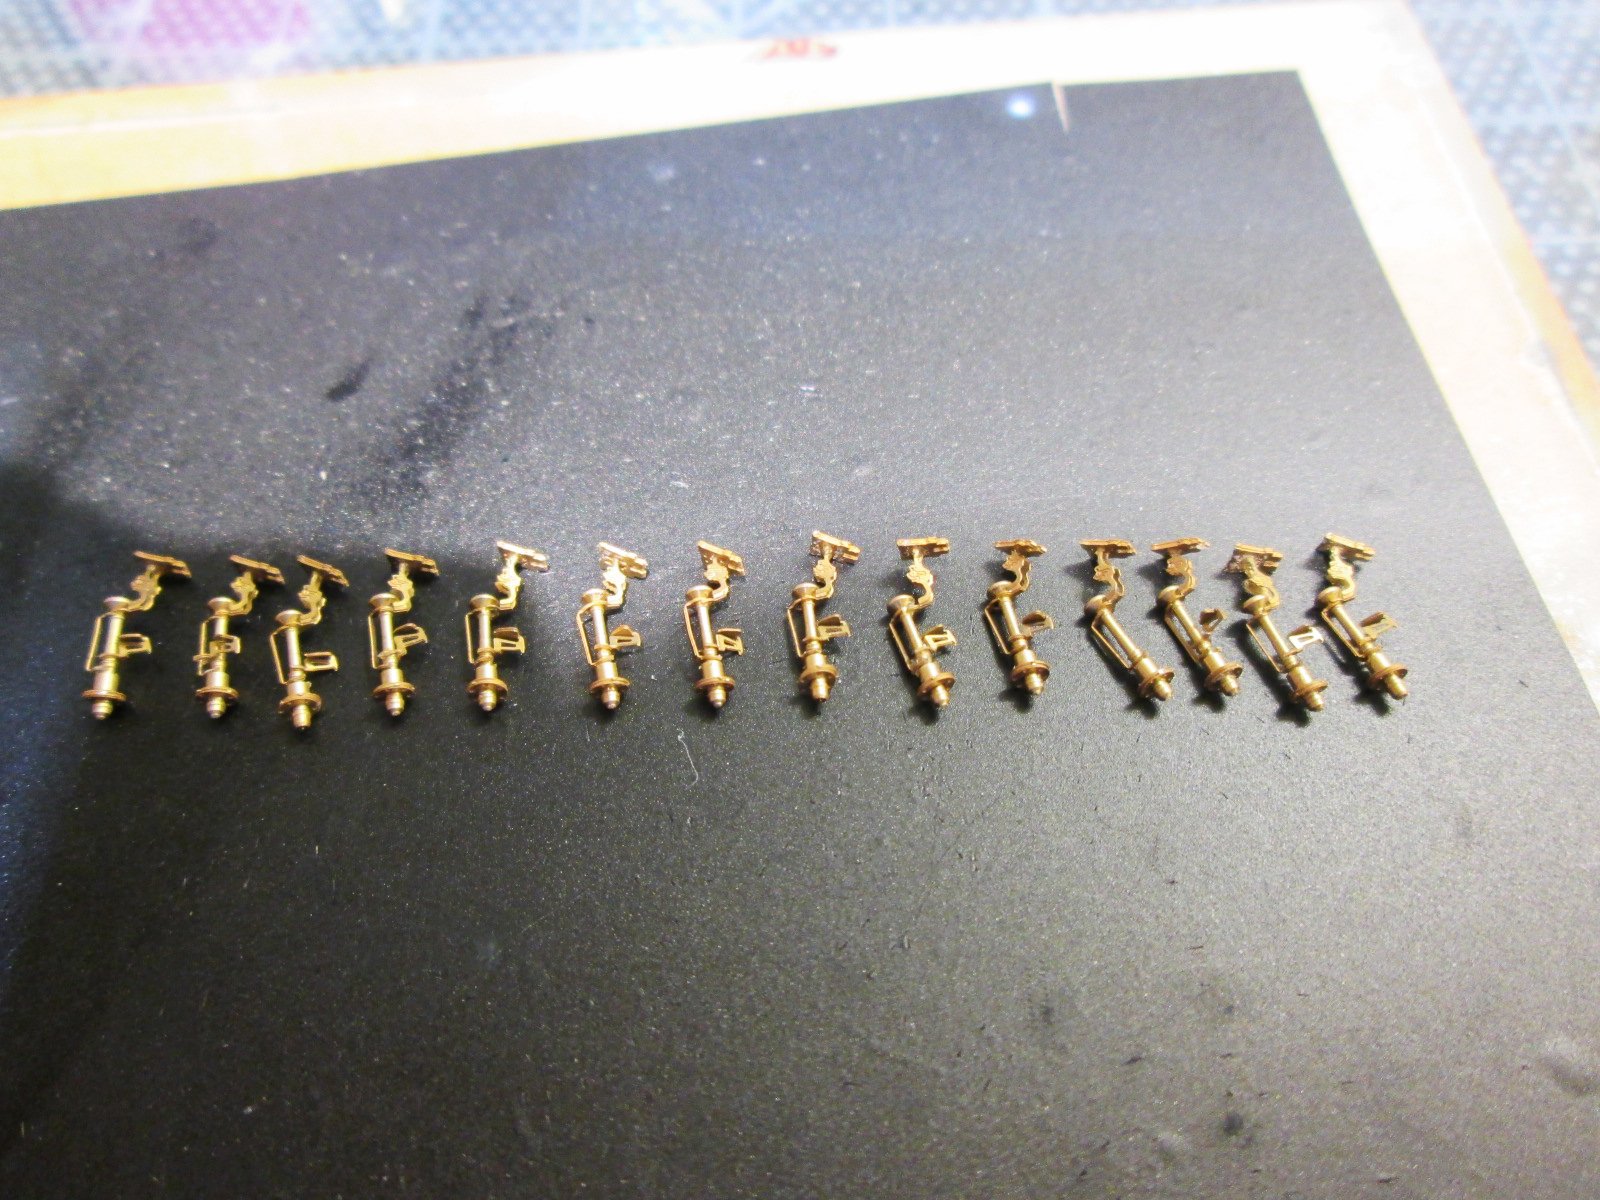
UGH! Time consuming crap night. I did get the boats done. Here's the fleet: As those of you that have been watching are aware, I'm painting my ship semi-gloss black. But when I looked at the life rafts and how some are attached to a wall and have so little PE, they basically disappear. So I decided that the rafts and the ships are going to be a dark gray. But Tamiya only makes grays in flat colors, and I really don't like flat. I think it's TOO flat for the scale, and things look like they would have a stucco coat if they were blown up to normal size. So after spraying the gray, I sprayed them all with semi-gloss clear. I feel better. And then the nightmare of gun stuff. There are things called ADO and ALO and pelorus, which I assume are all sighting devices. As usual, no mention of their purpose in the instructions: Lots of tiny little crap. So without further ADO, this is what I got done: Tomorrow I work on the Pelorus 2, whatever that is.


- 247 replies
-
- 15
-

-
Hi Harley, I don't think I've ever purchased anything from GMM. It's just not as "satisfying" to work with all these parts and not know what the hell they are. Would be nice to get educated while having fun. Thank you for watching!
-
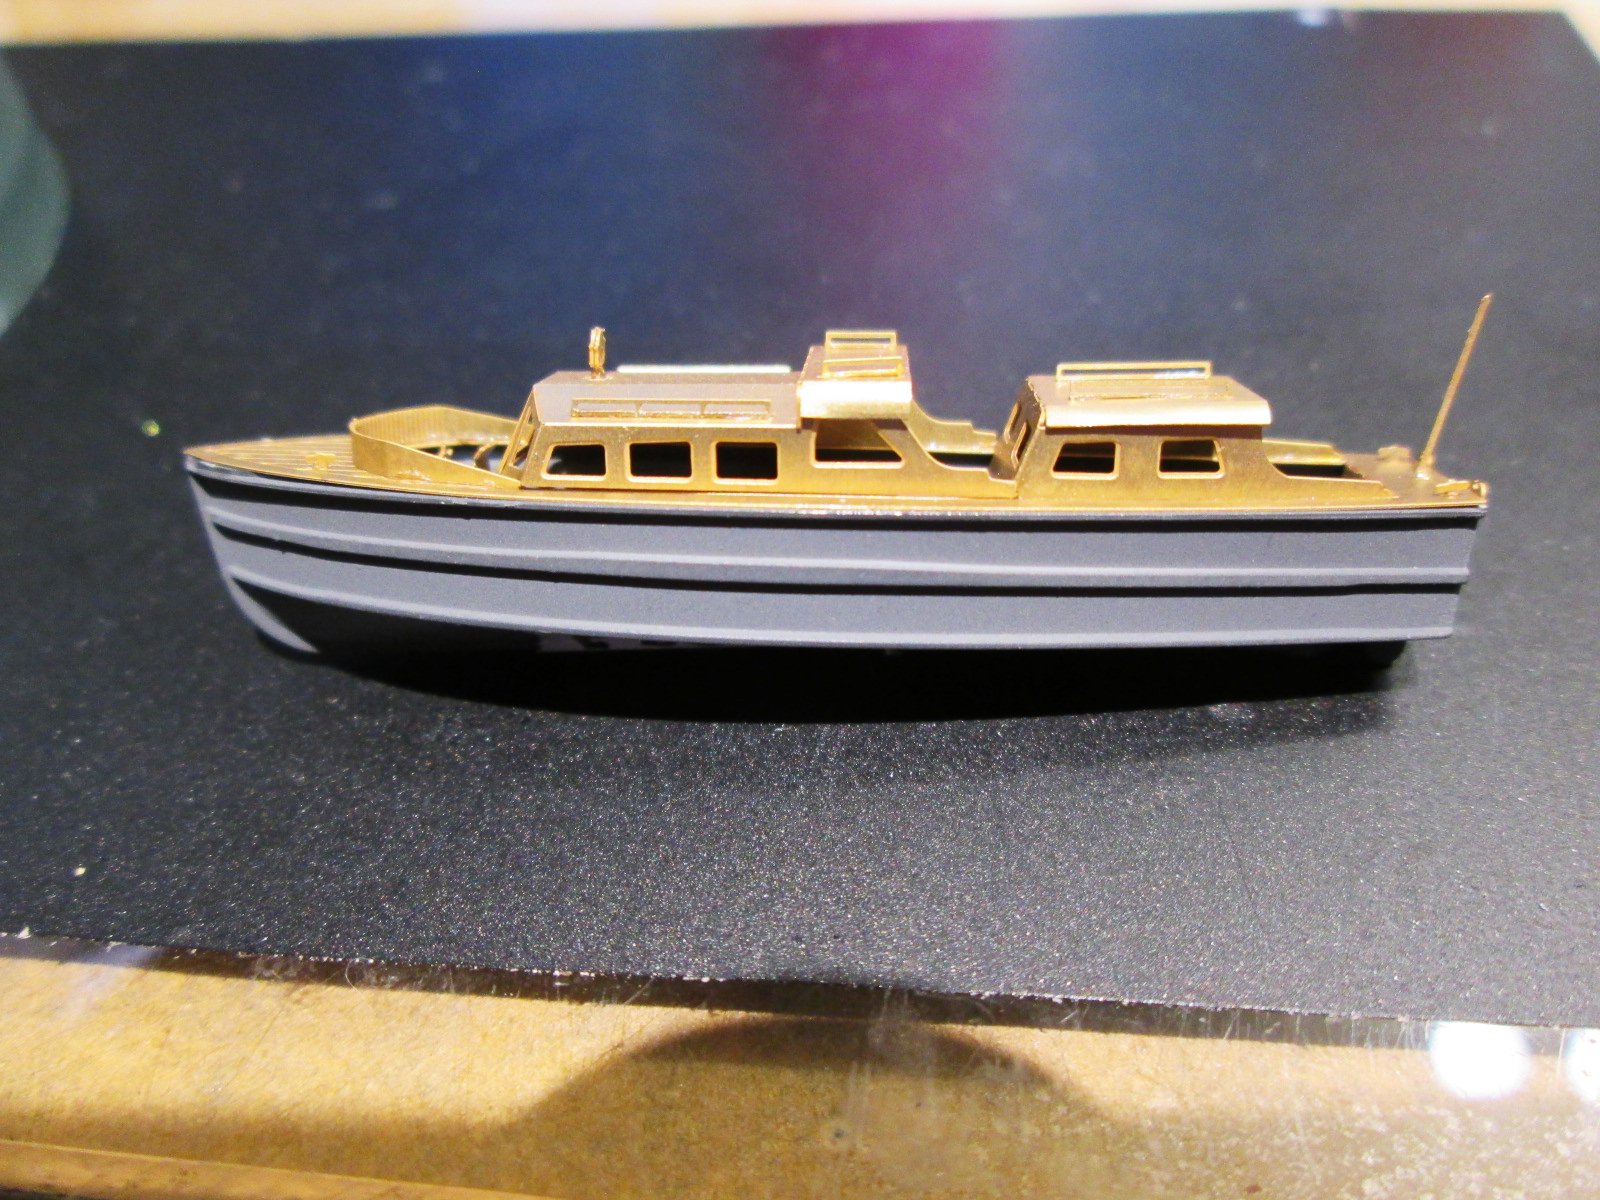
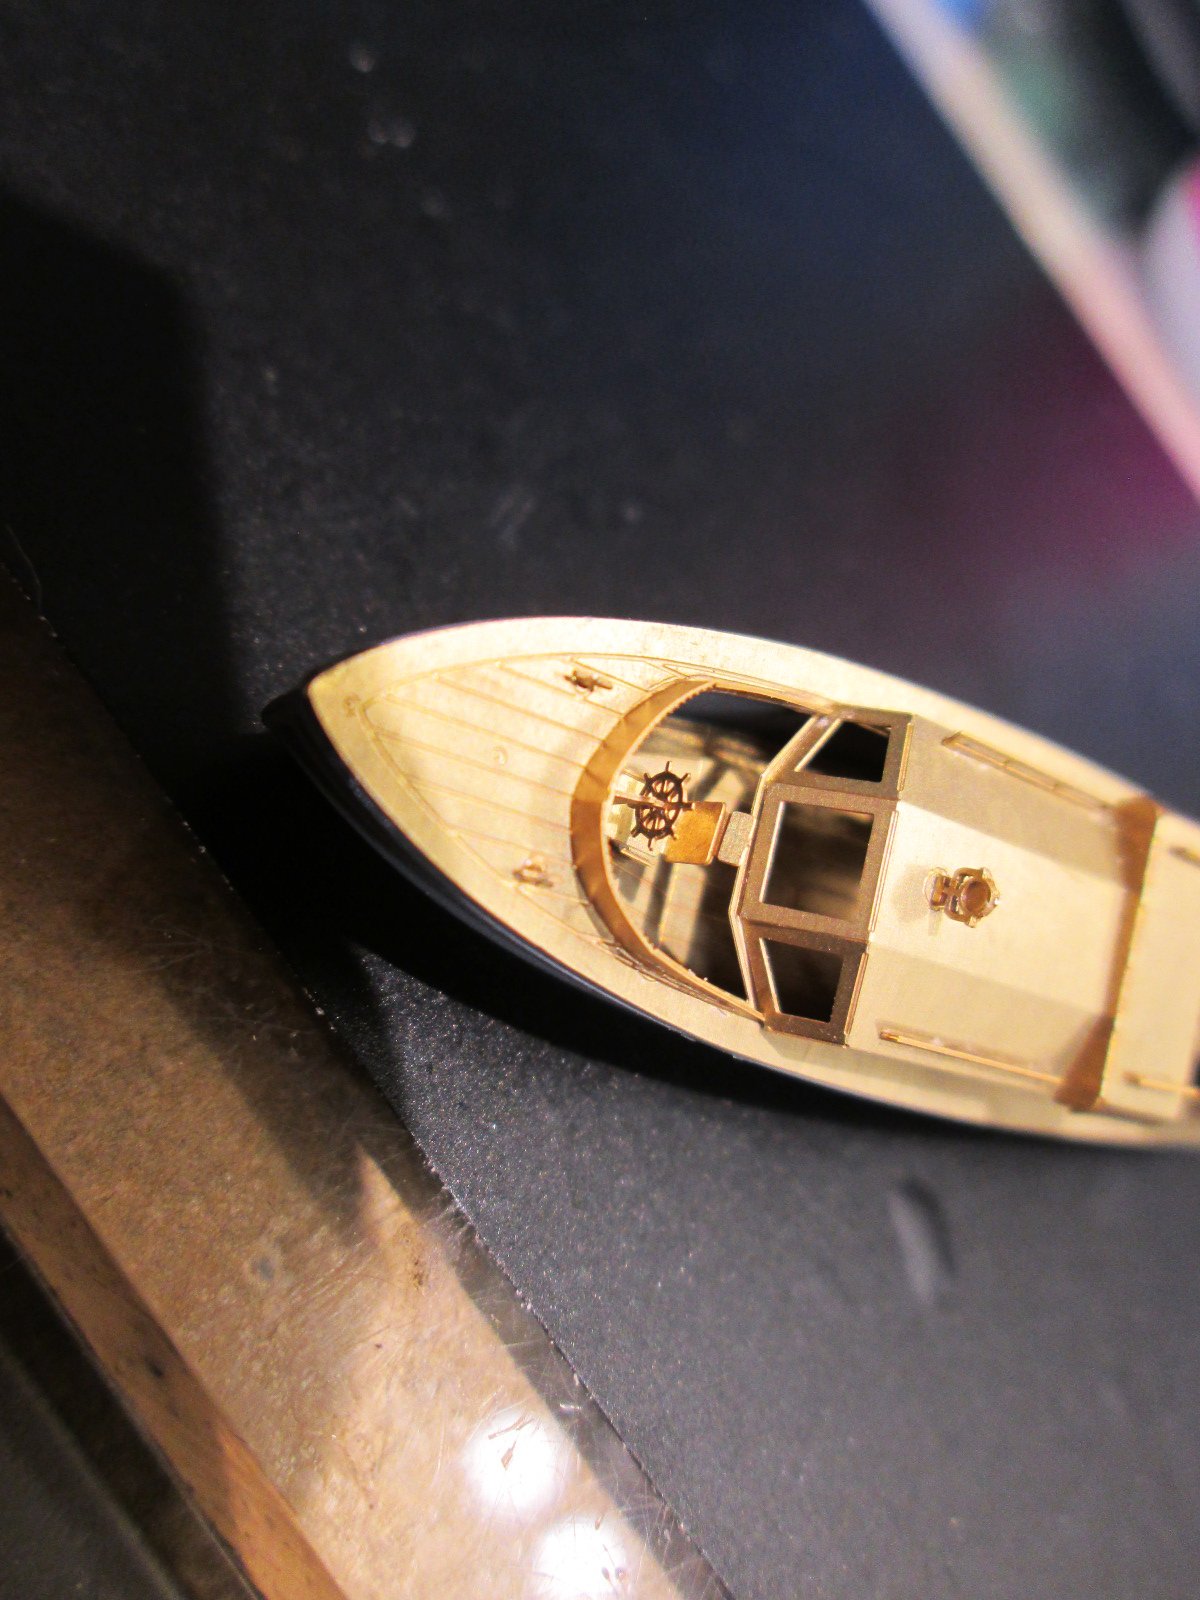
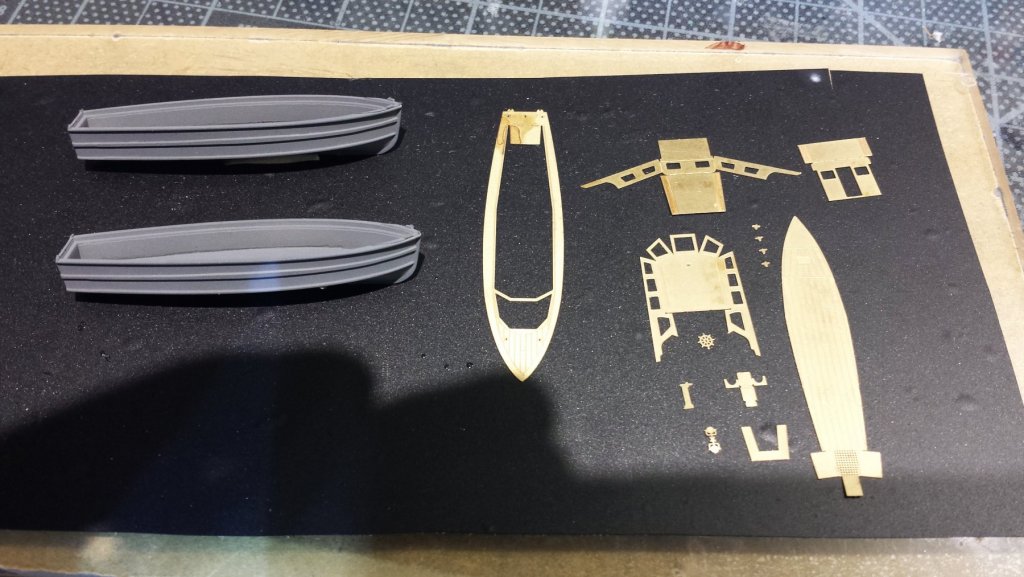
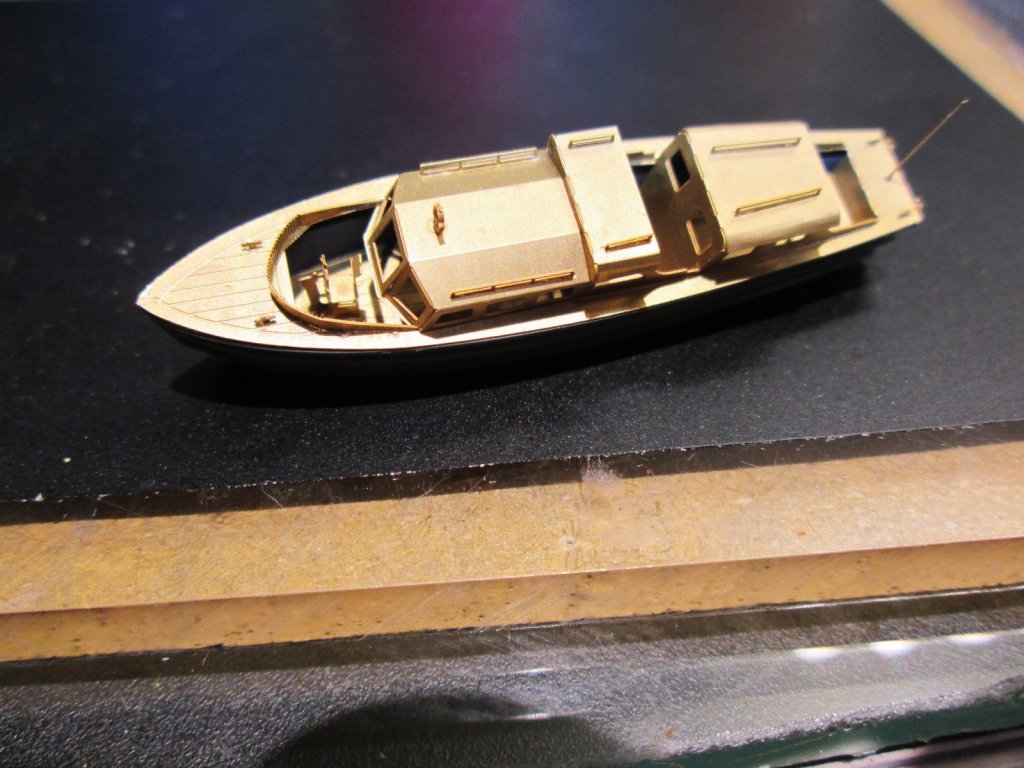
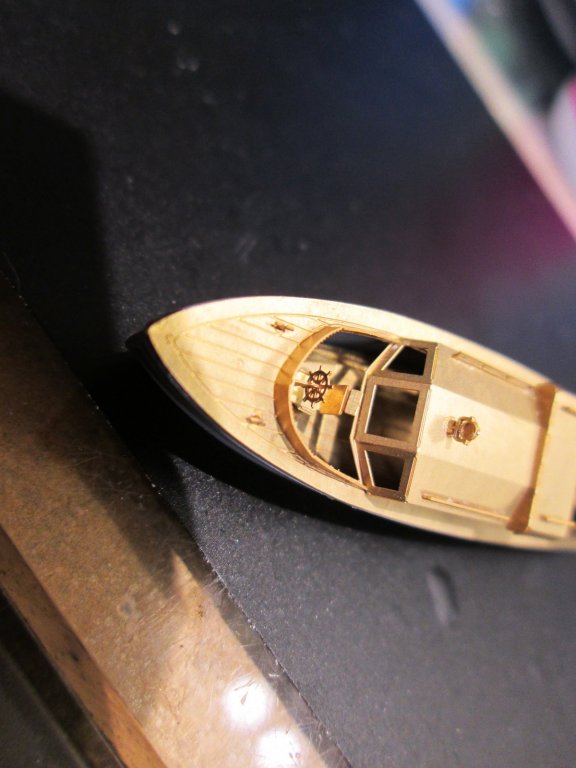
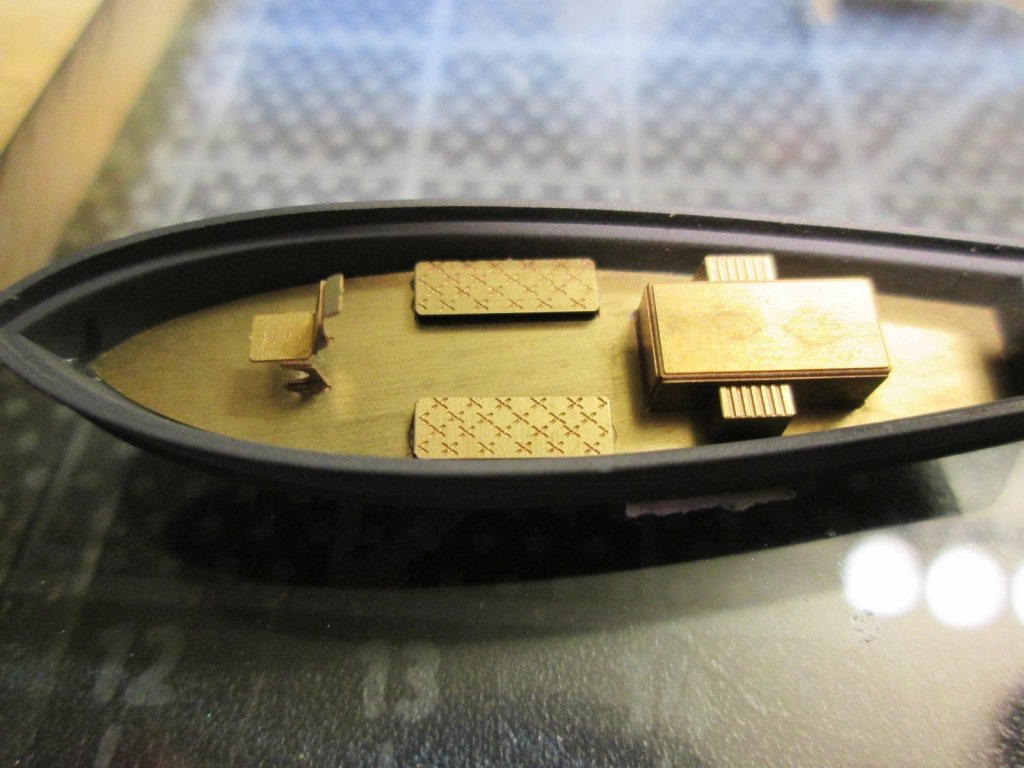
Hello again, Tonight I worked on the ship's boats. Lots of them! These are more detailed and precise than the ones on the Mikasa which I just finished. Lots of parts per ship: They turn out really nice: They have all sorts of stuff like seats and steering wheels: I have no doubt that those the design these kits do lots of research for accuracy, and they MUST know what each component is for, and therefore, an idea of what it's called. Pontos VERY rarely mentions the name of an item you are working on, much less the individual parts. It would be nice to know. Just look at these parts that they even went through the trouble of super-detailing. I wish I knew what these things are: I don't know if it's a language barrier, but that's hard to believe since with the internet, I'm sure they can find someone to translate for them. I get the feeling they just can't wait to ship the set out to start making money. The hell with the details! Let those crazy enough to even touch these things figure them out!

- 247 replies
-
- 16
-
-
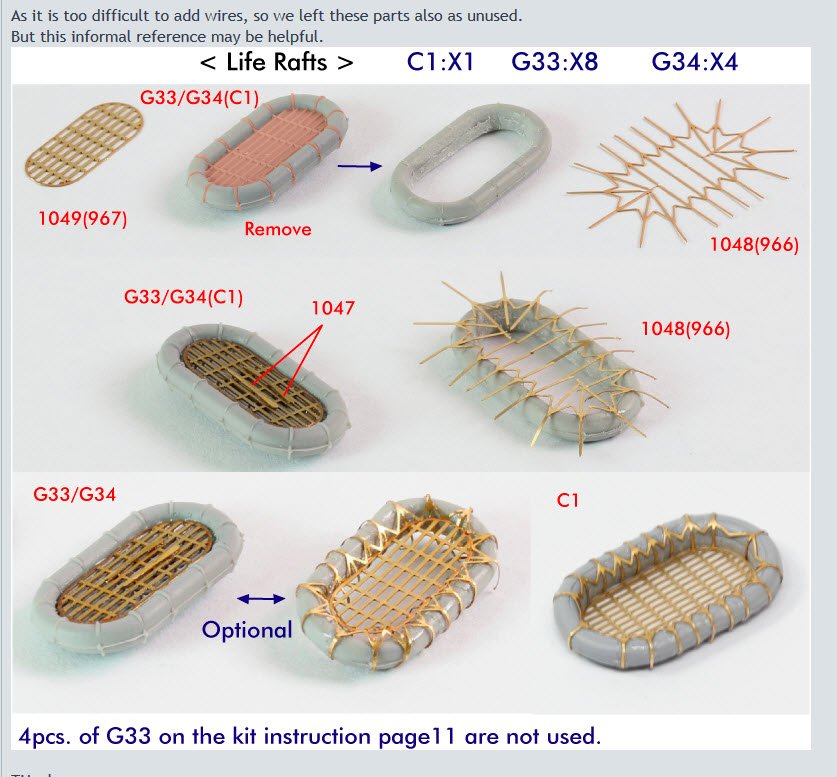
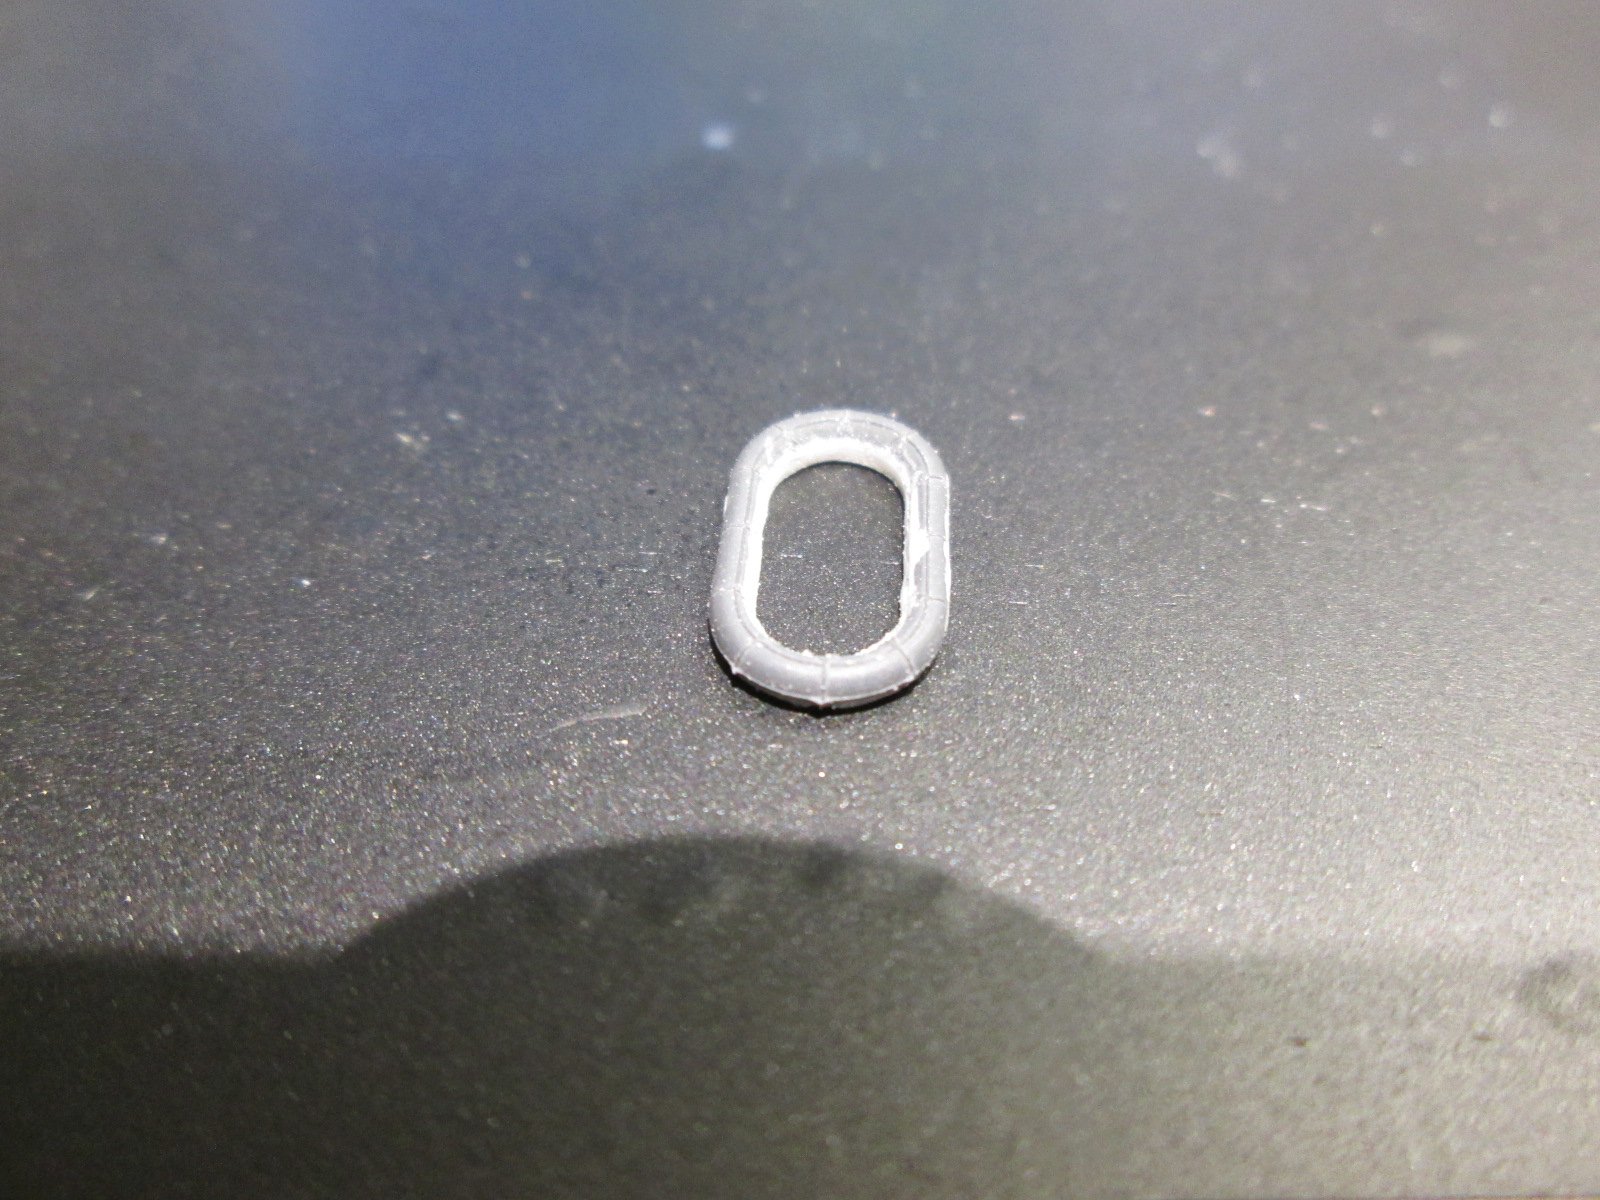
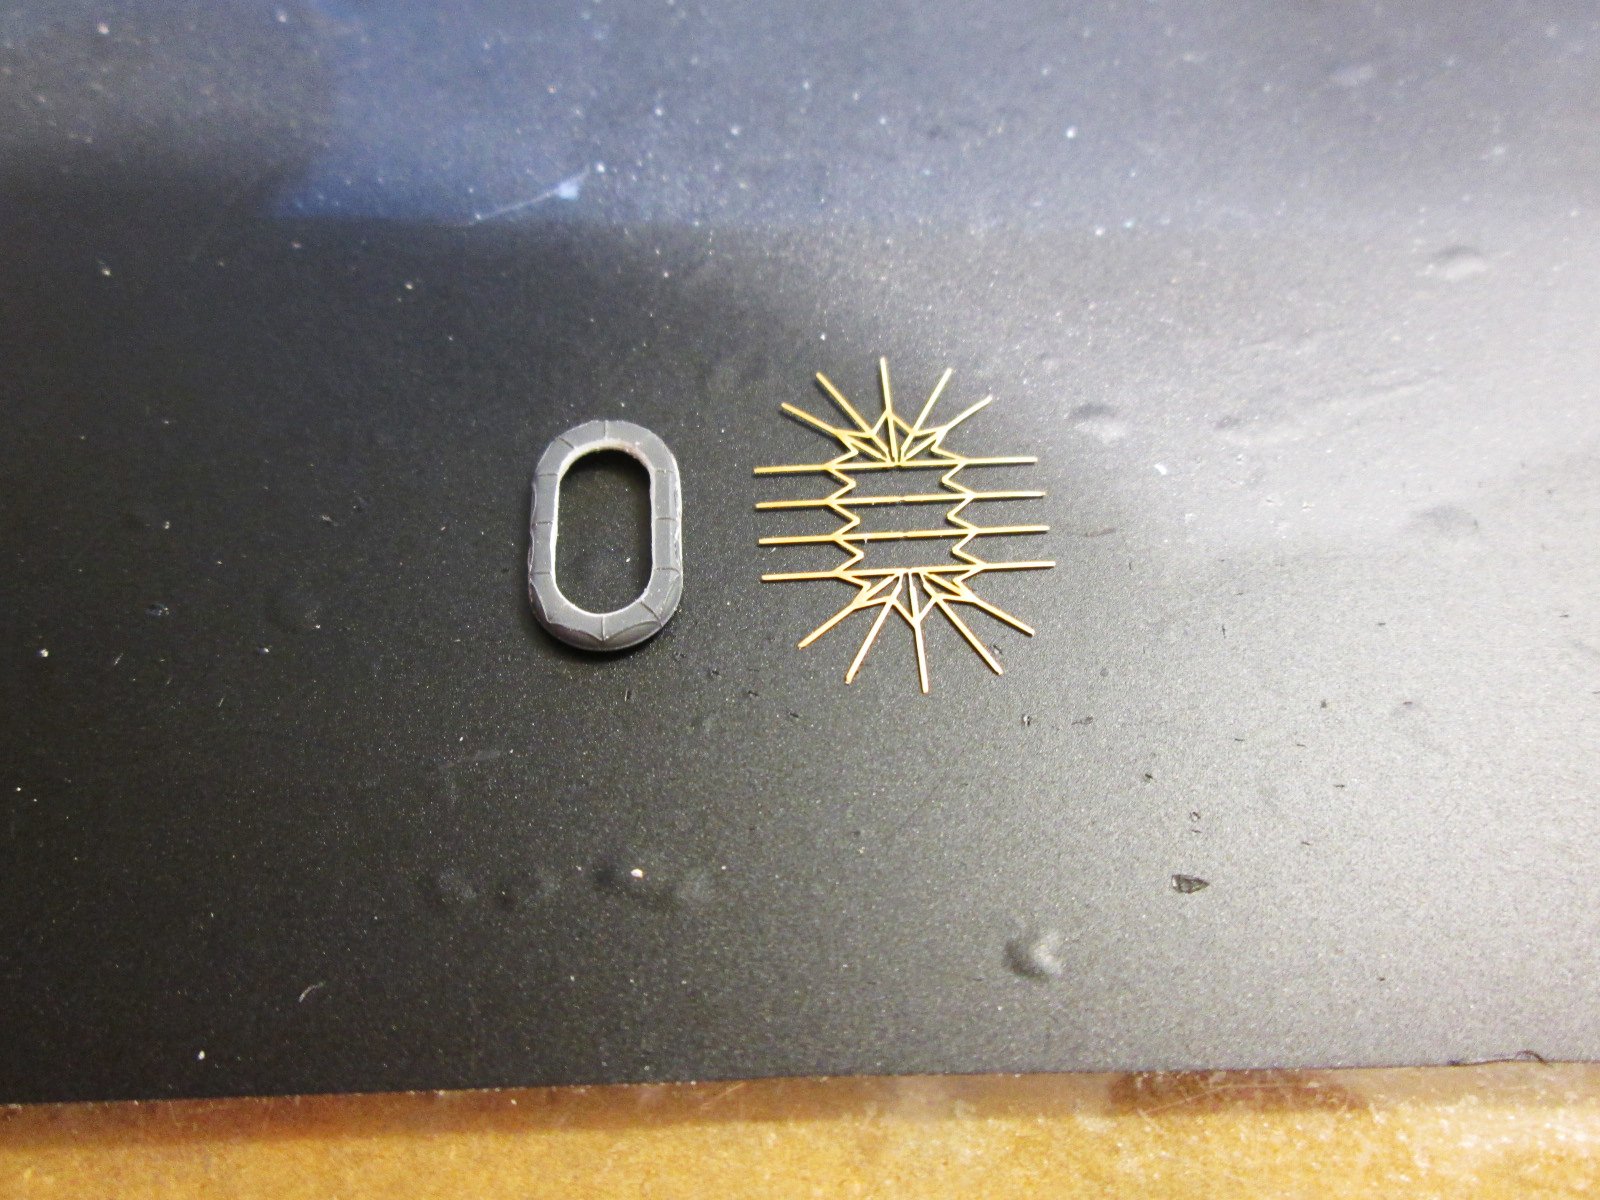
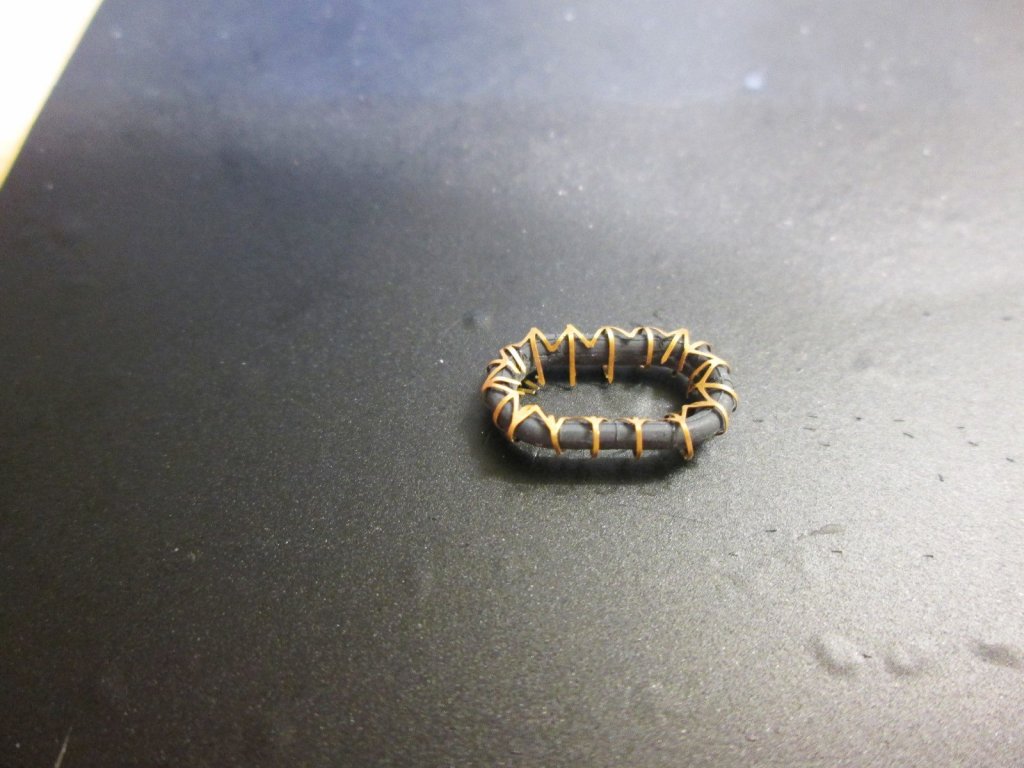
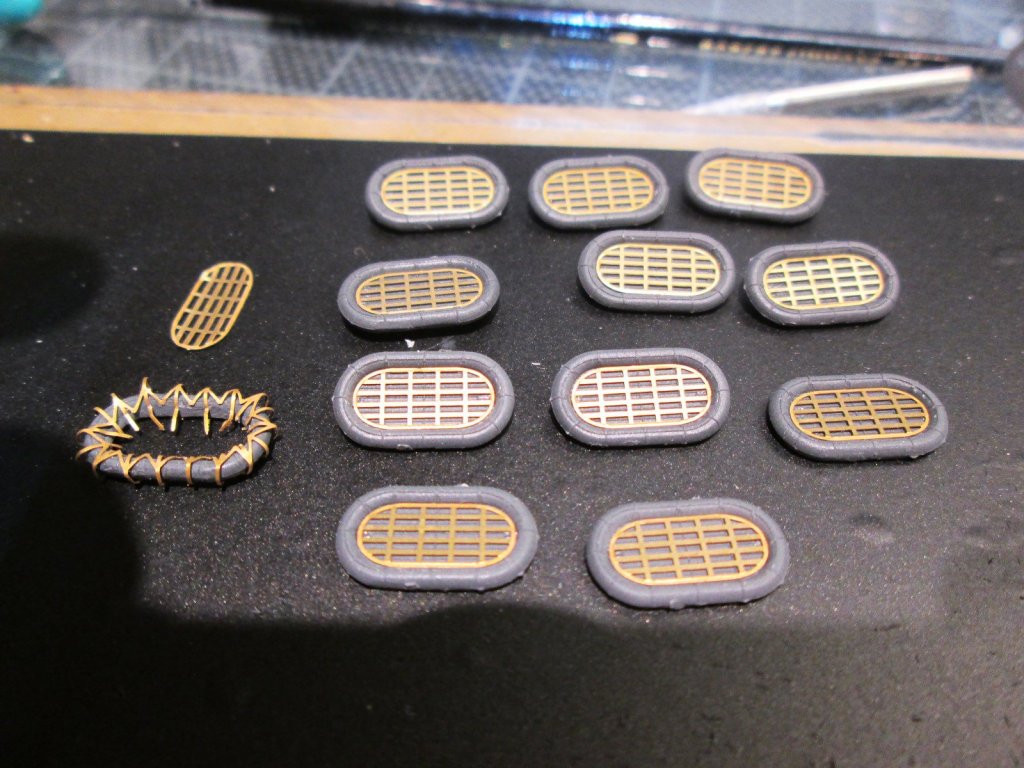
Hey, Today I decided to do some painting. I prepped the lifeboats and the boats. As I'm doing that, I remember seeing some PE that corresponded to the life rafts. I couldn't find a single mention of the parts in the entire pdf. Then I found this online. This is from Pontos themselves on another website: So I tried it. First you have to totally remove the bottoms to get just the oval tube: Then you have to very carefully remove the PE that's attached in 18 points: Then you have to very carefully wrap each one of those straps around the tube to get this: If you look carefully, none of the straps are attached and some are not even bent all the way. Imagine having to wrap those all the way around in 2 different directions, AND glue them down. AND repeat this 12 times for each raft. Not going to happen. I went with the easiest option, after spending about 45 minutes mangling that part to finally get this: Good enough for me and I still have hair.


- 247 replies
-
- 16
-
-
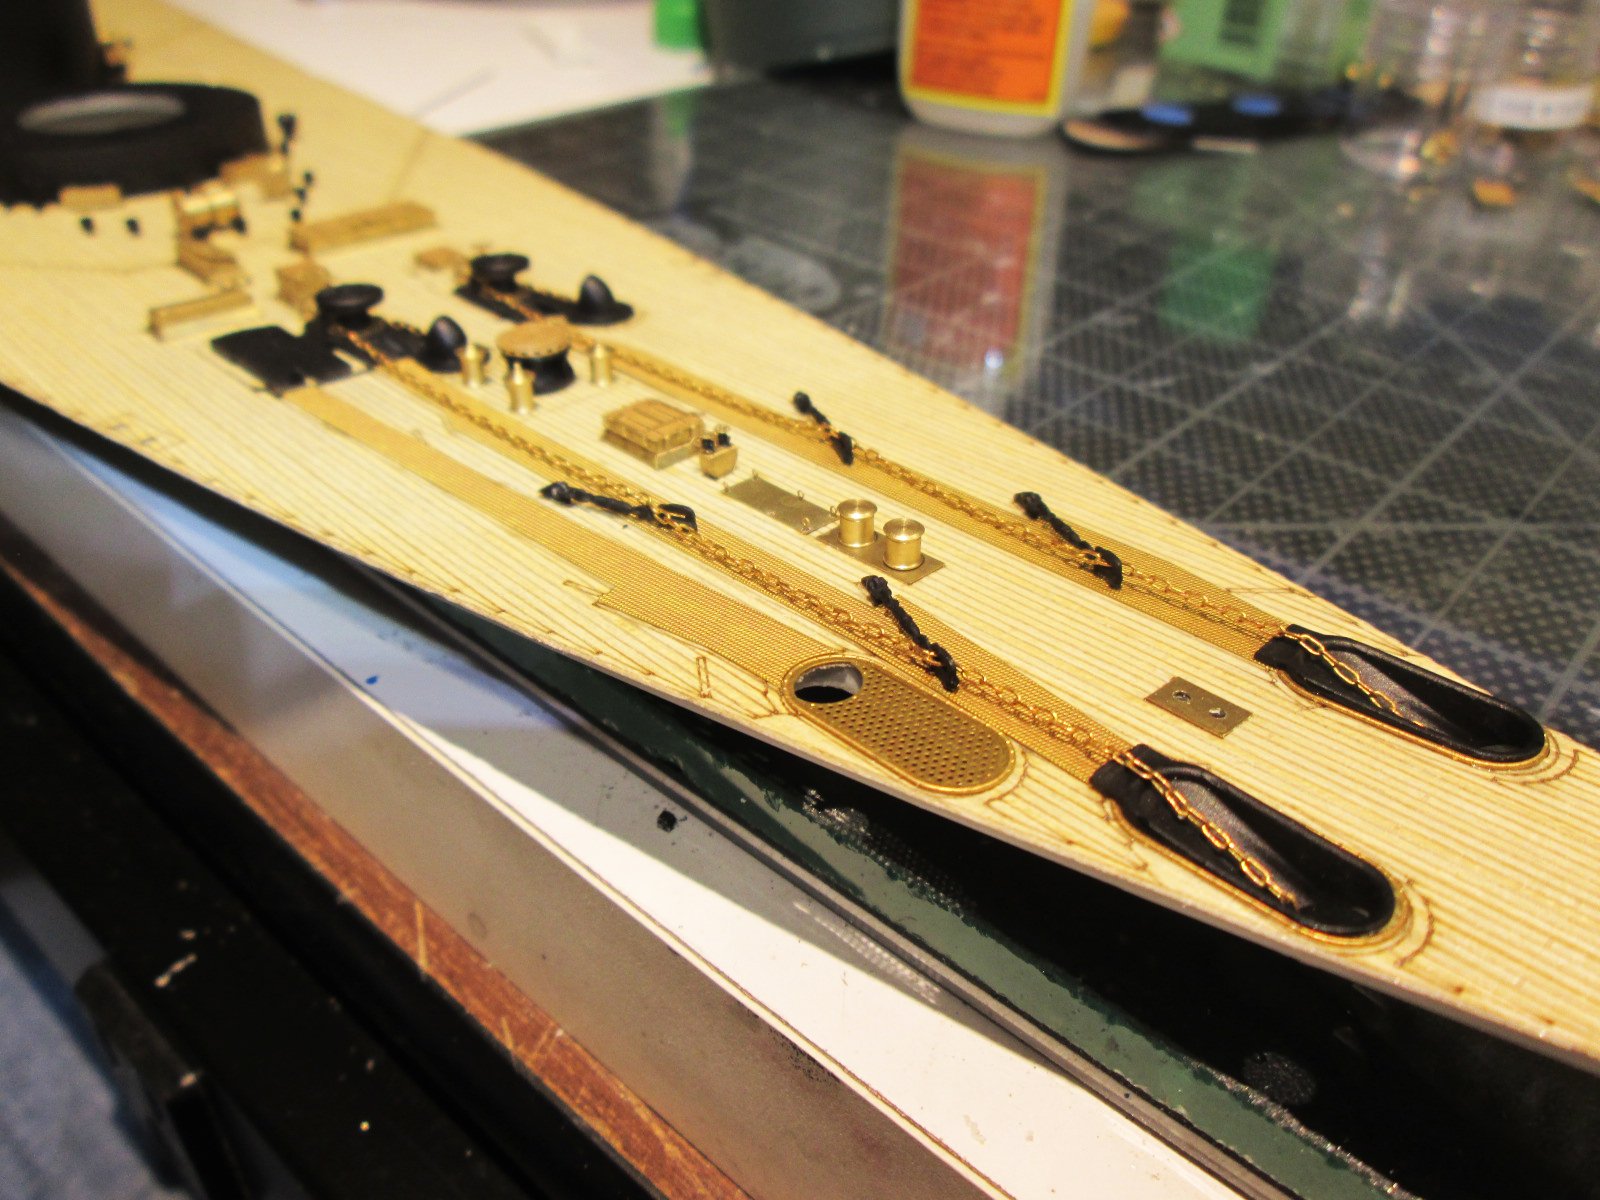
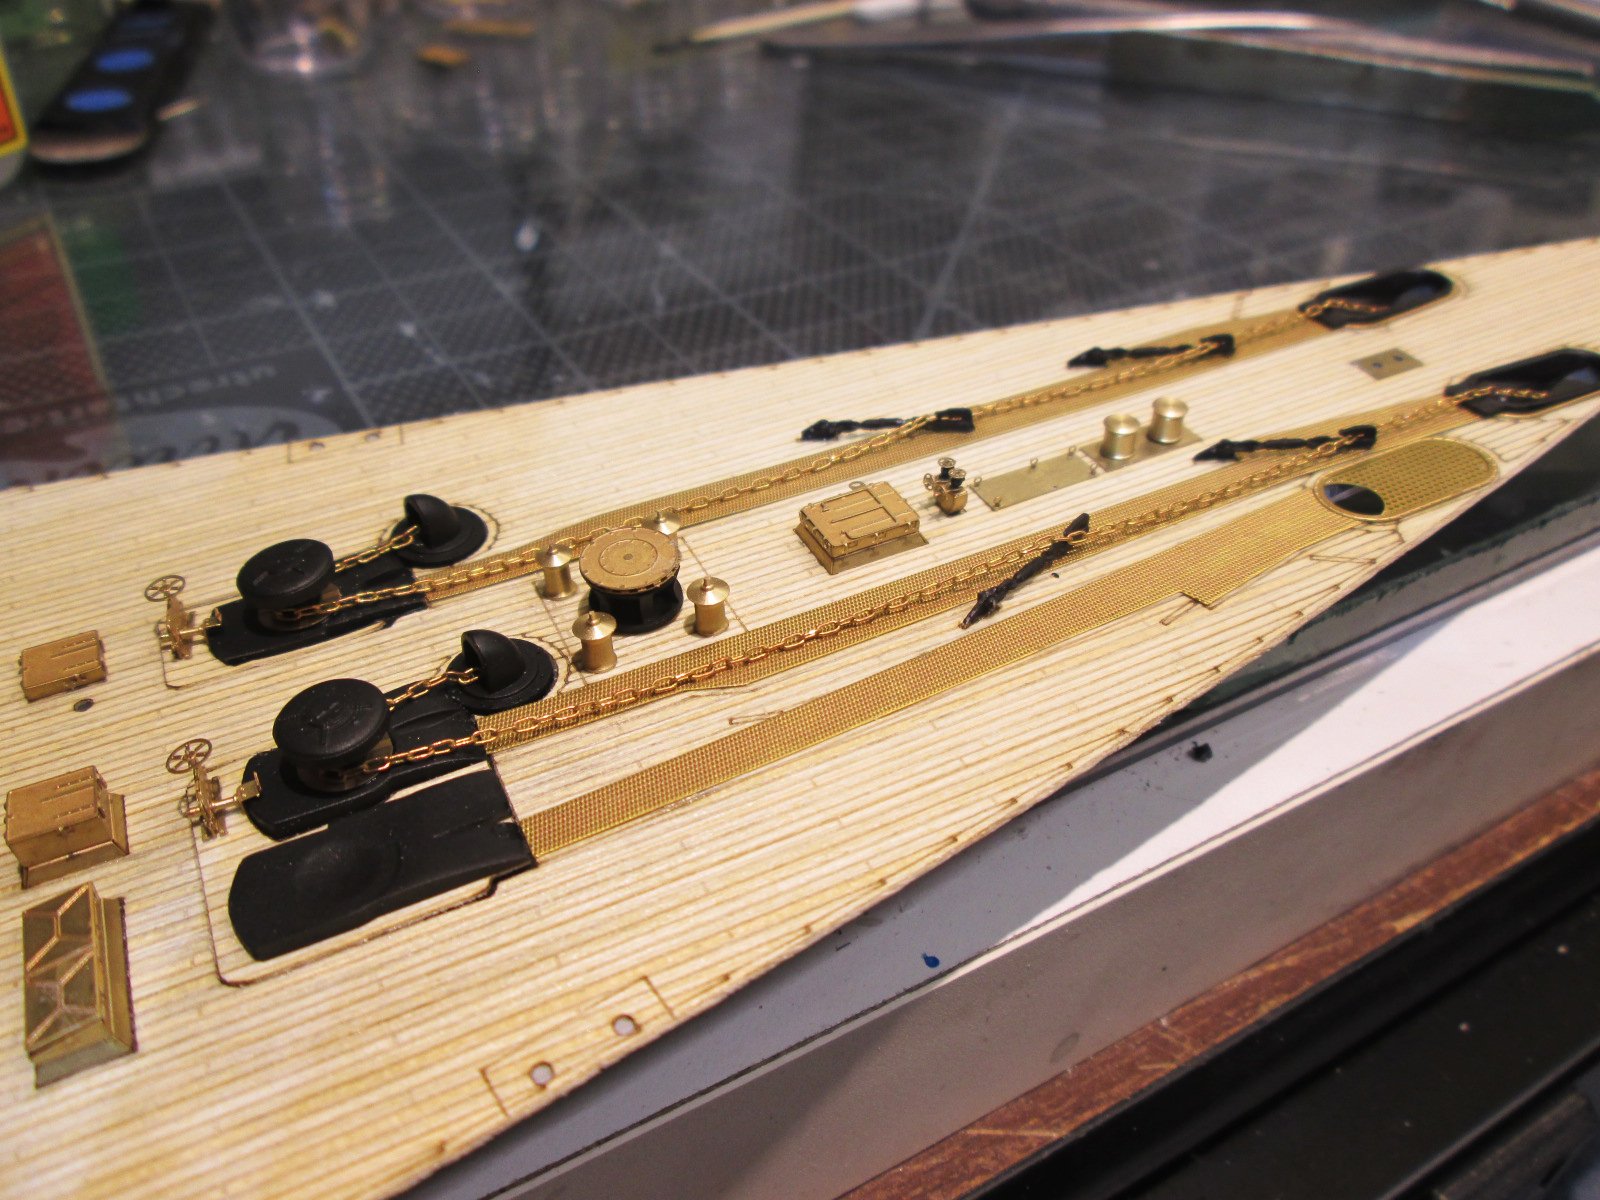
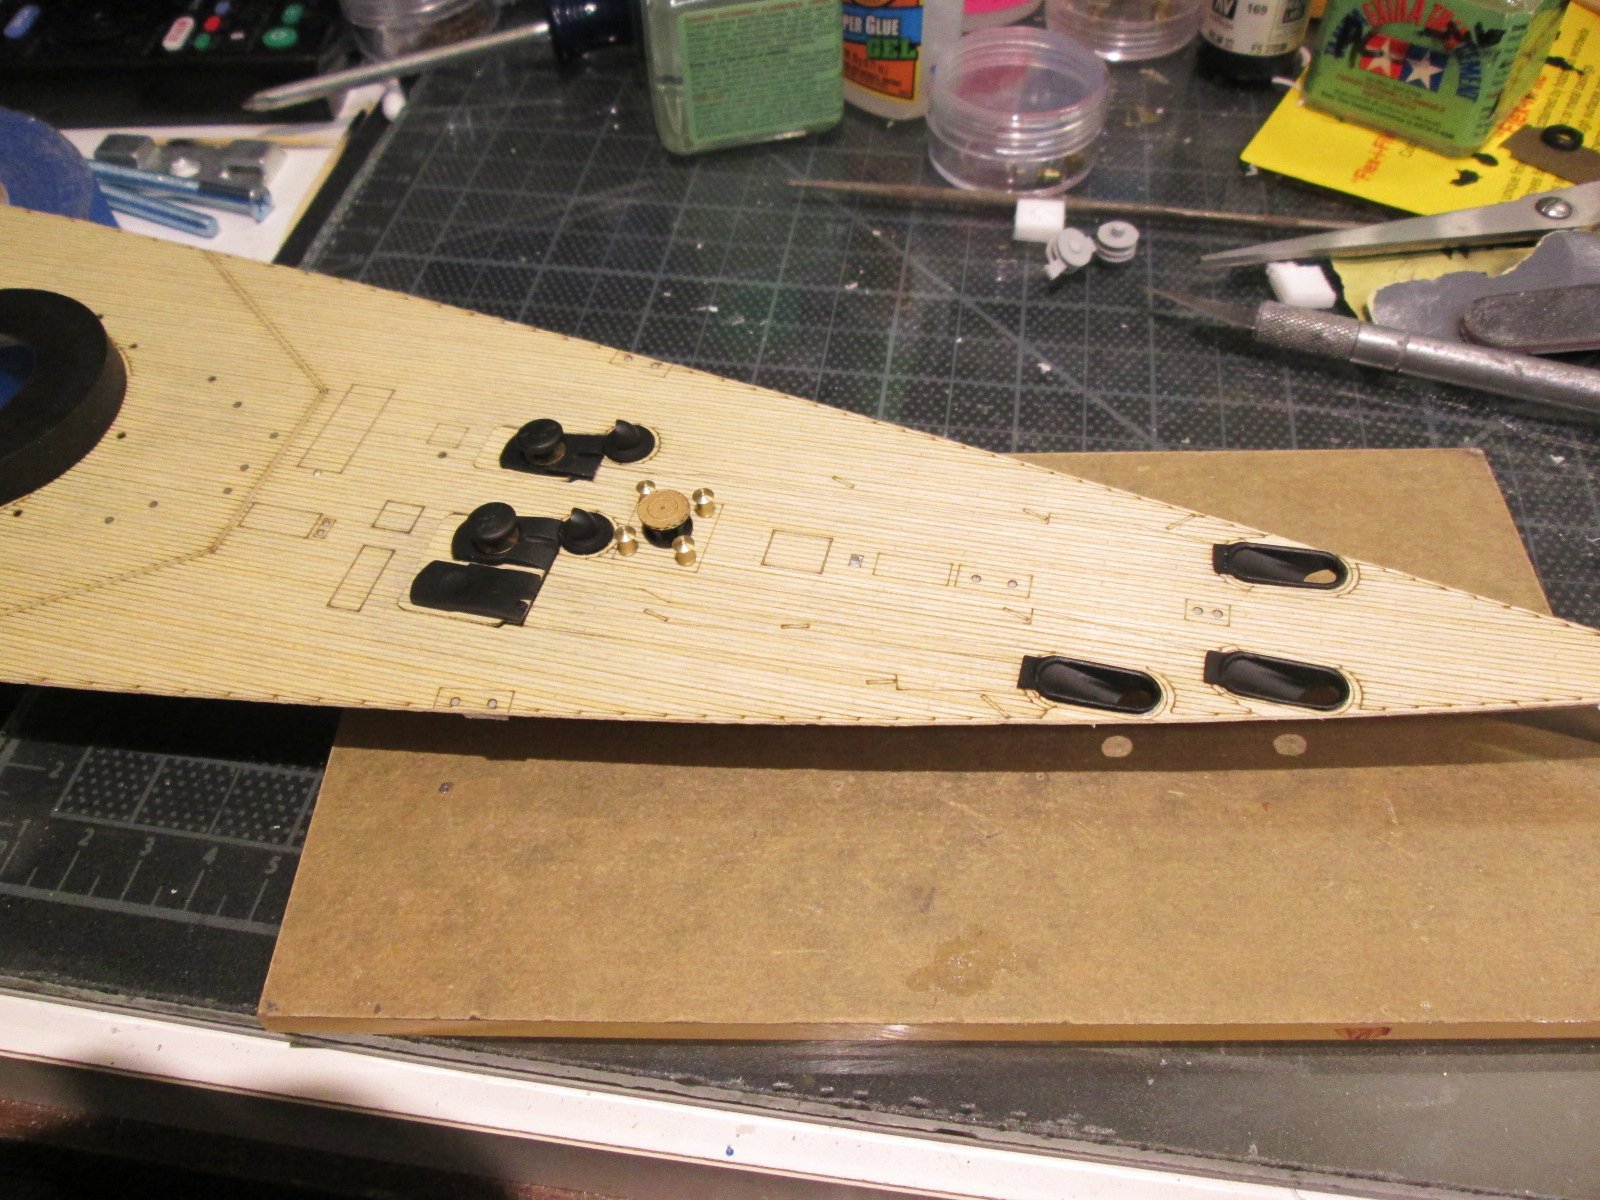
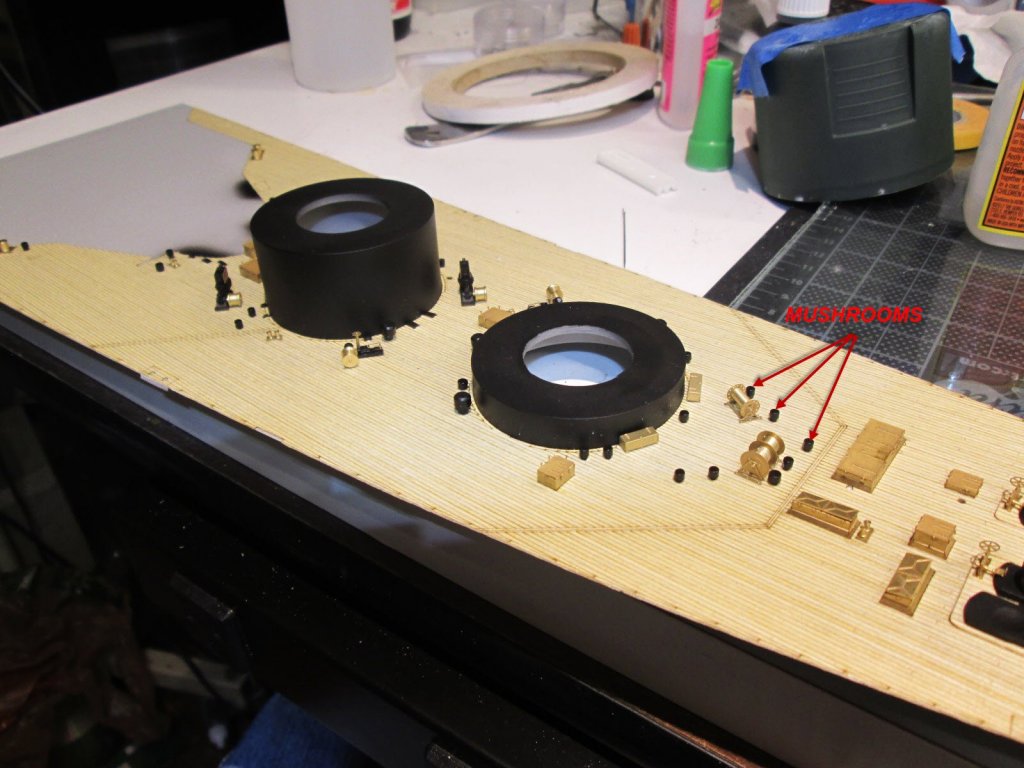
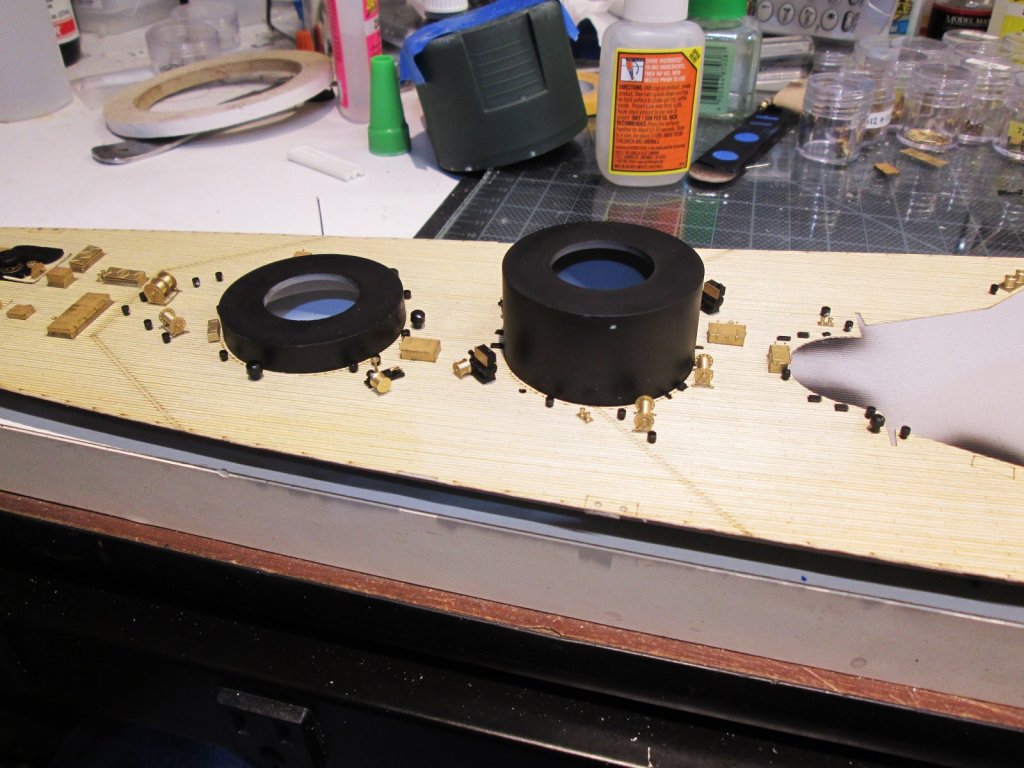
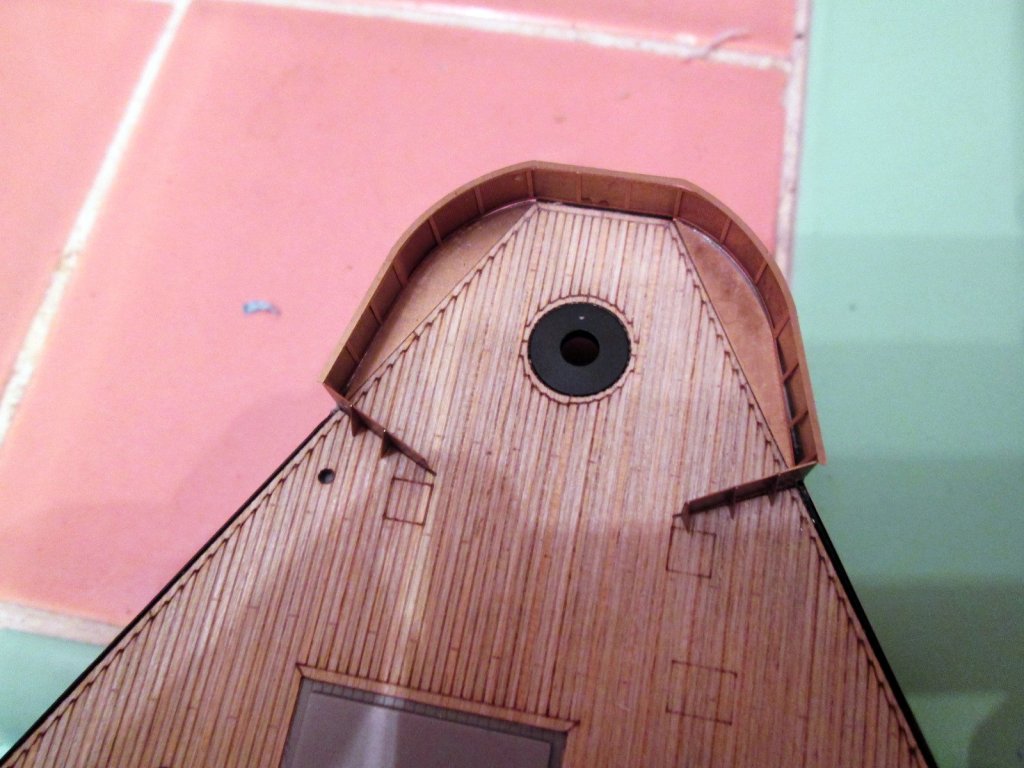
Hello again, Tonight I completed the foredeck. Lots of anchor related details. I also populated the foredeck with those little black mushroom thingies. I guess they are vents. There are lots of different sizes and scattered all over the place. They couldn't just put them on one tree. Nope, they're on Fret G, and F, and E....and not only do you have to hunting for them, but then I have to airbrush them. That's a real pain because if you take them off the frets, it's hard to place them to paint. But if you paint first, then you have to touch up the area that was attached to the fret. Hand painting just doesn't look as good as airbrushing. I've tried everything. Anyway, here's my current work:


- 247 replies
-
- 16
-
-
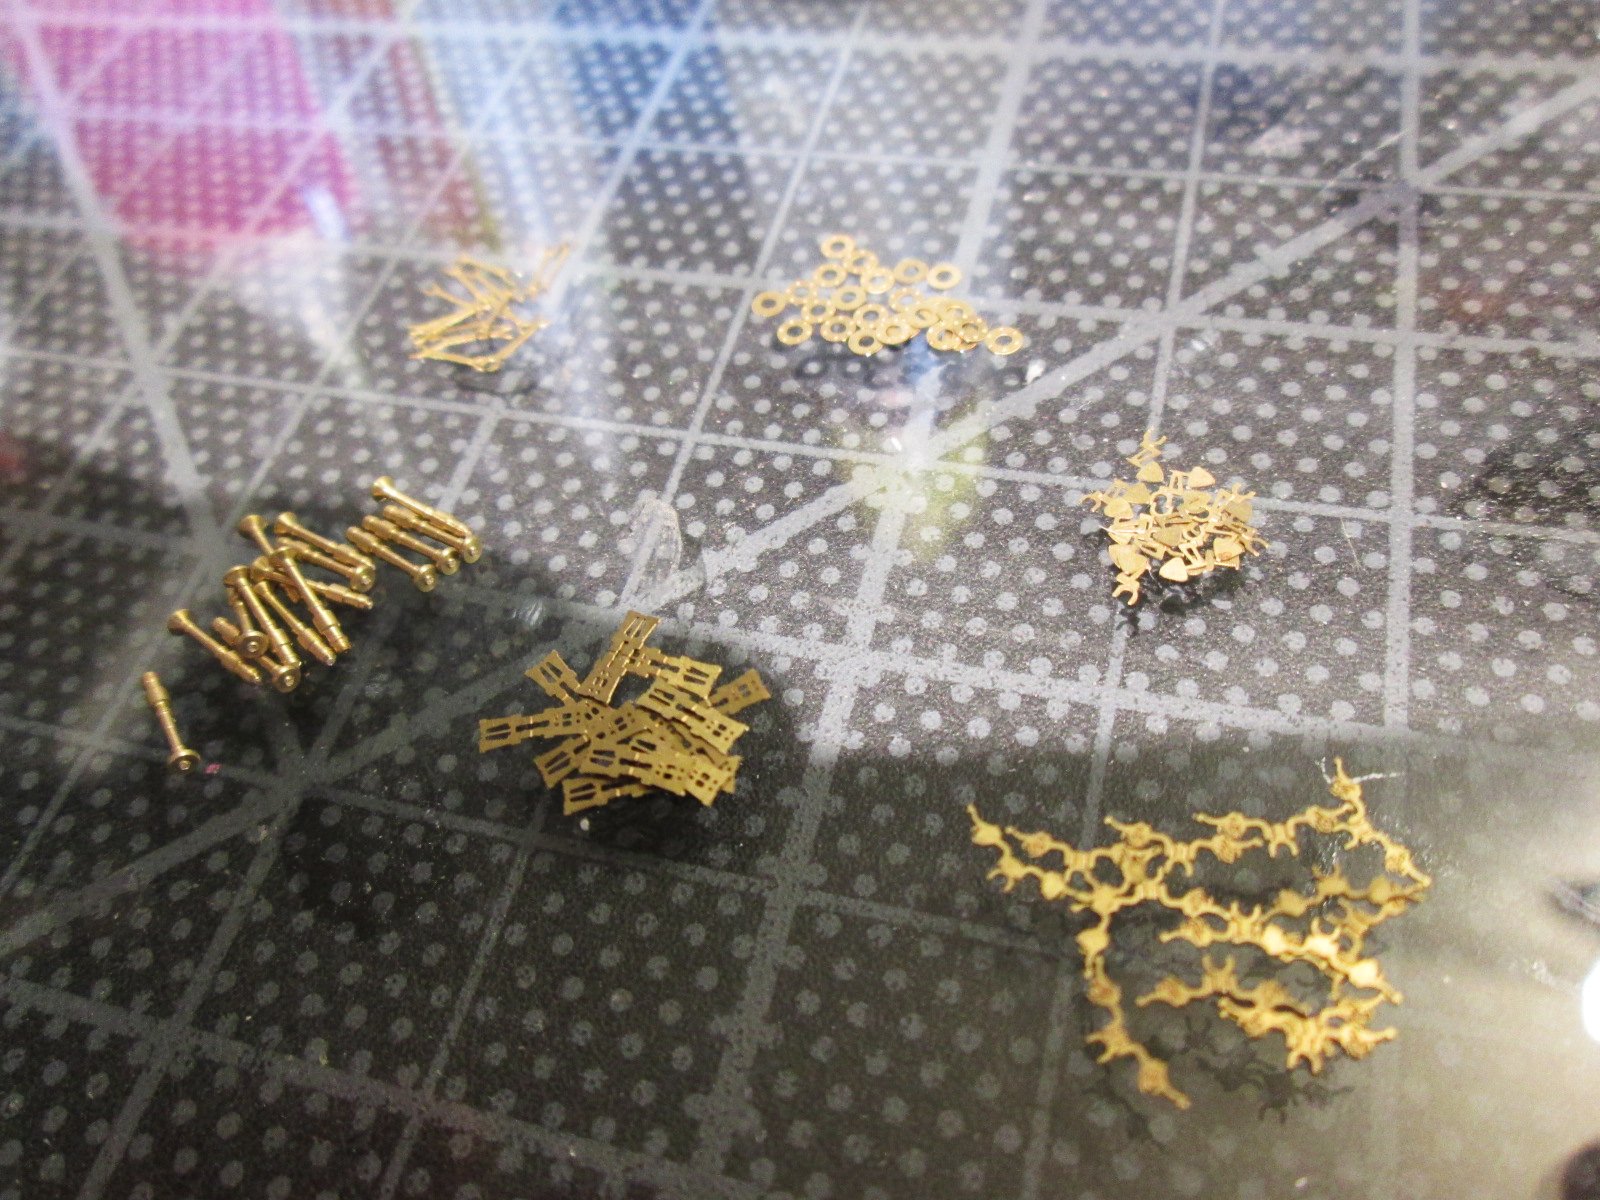
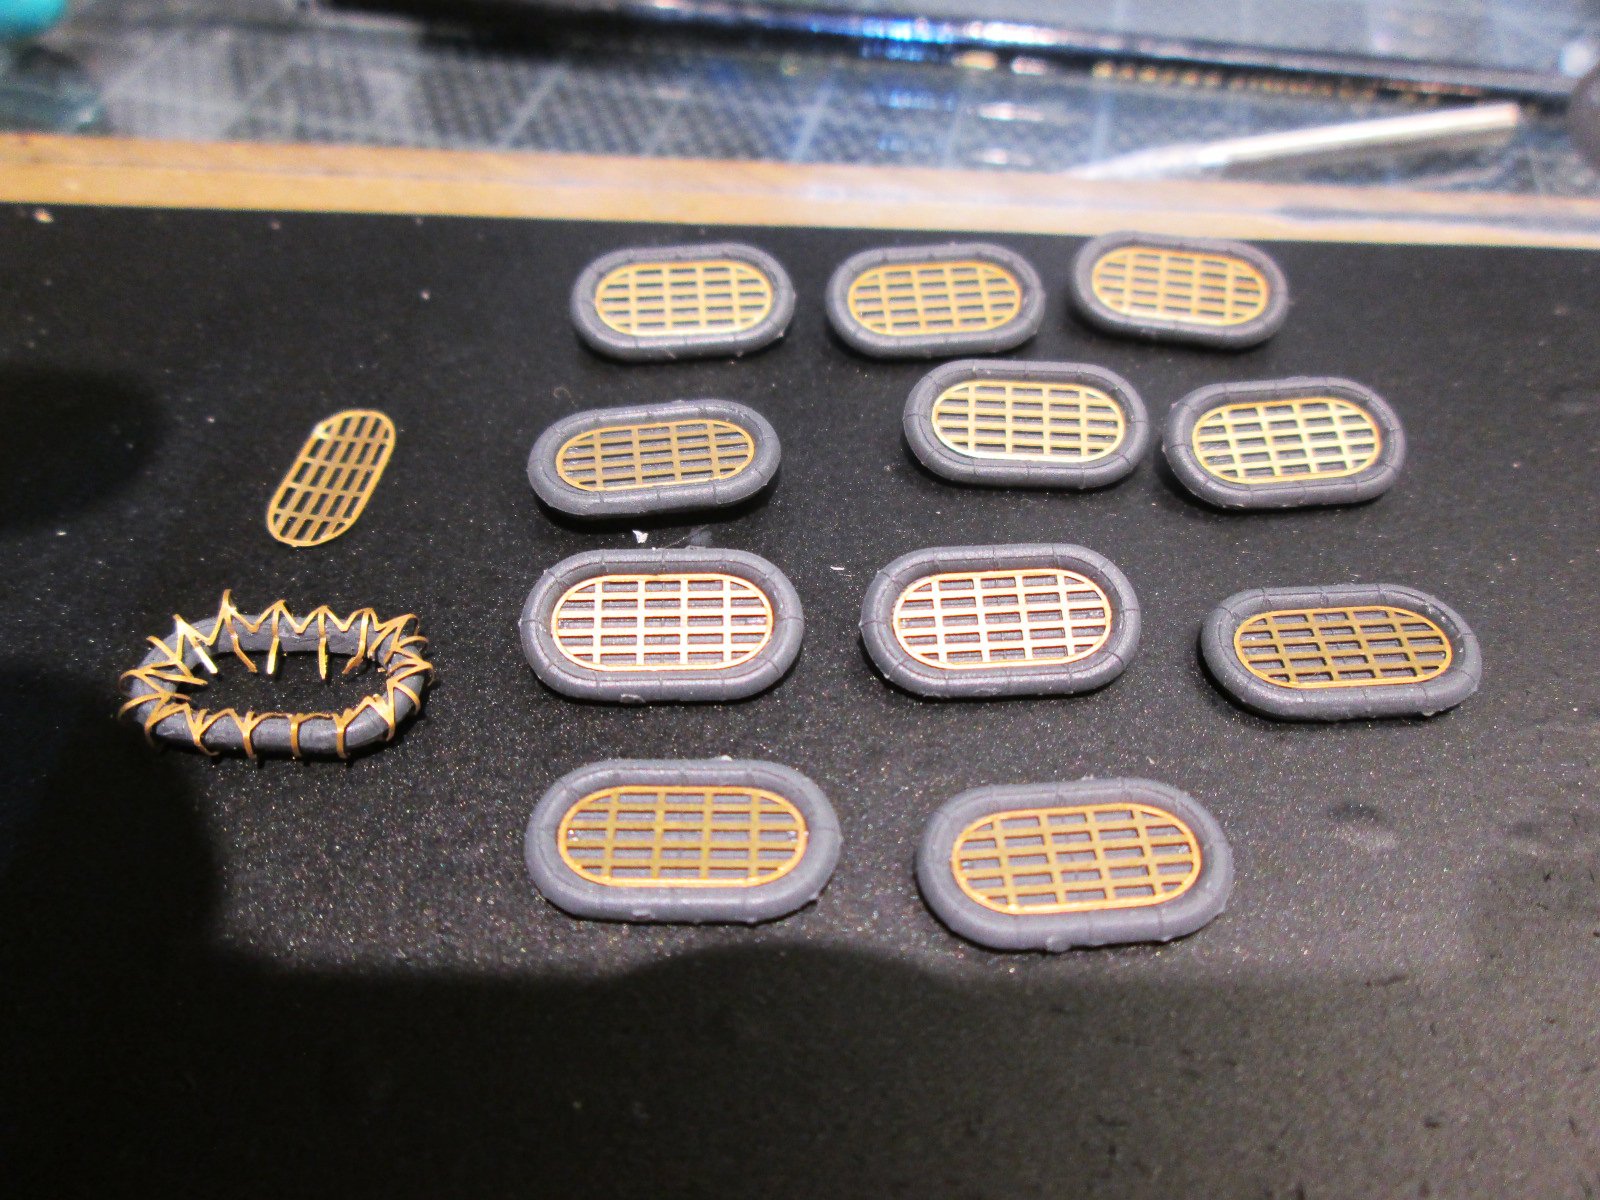
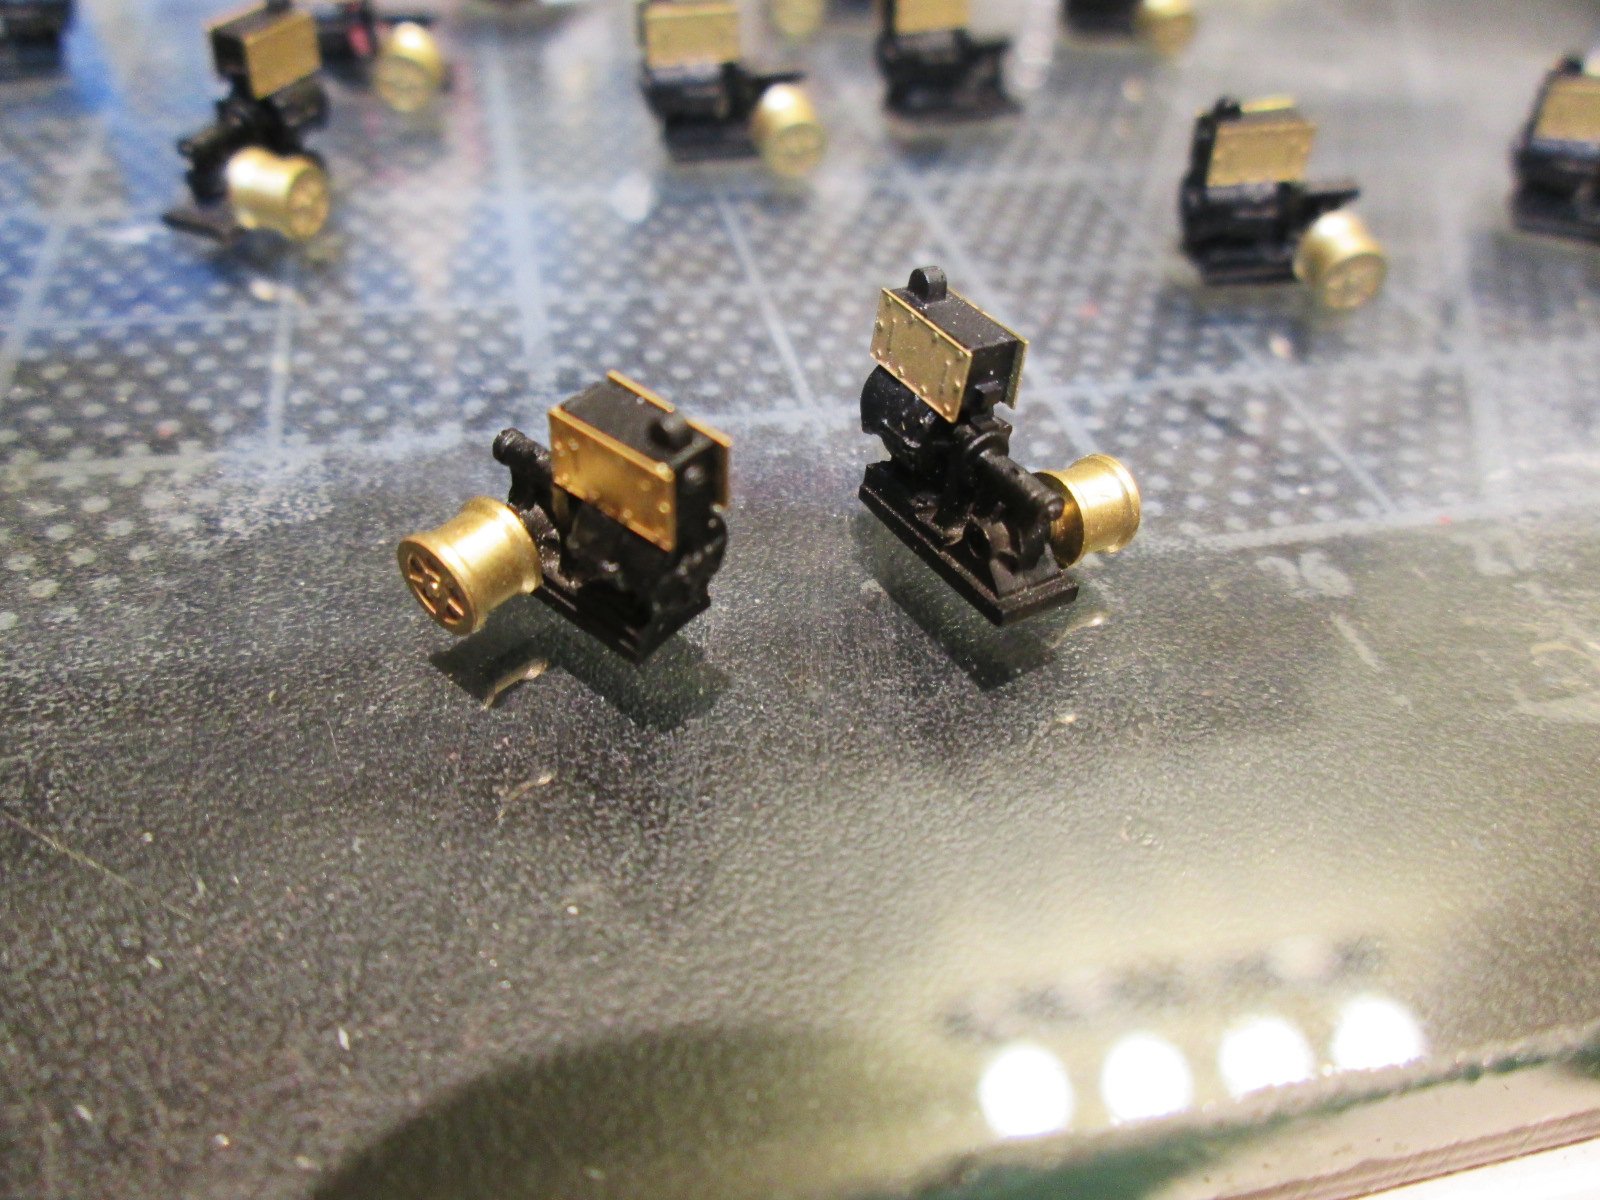
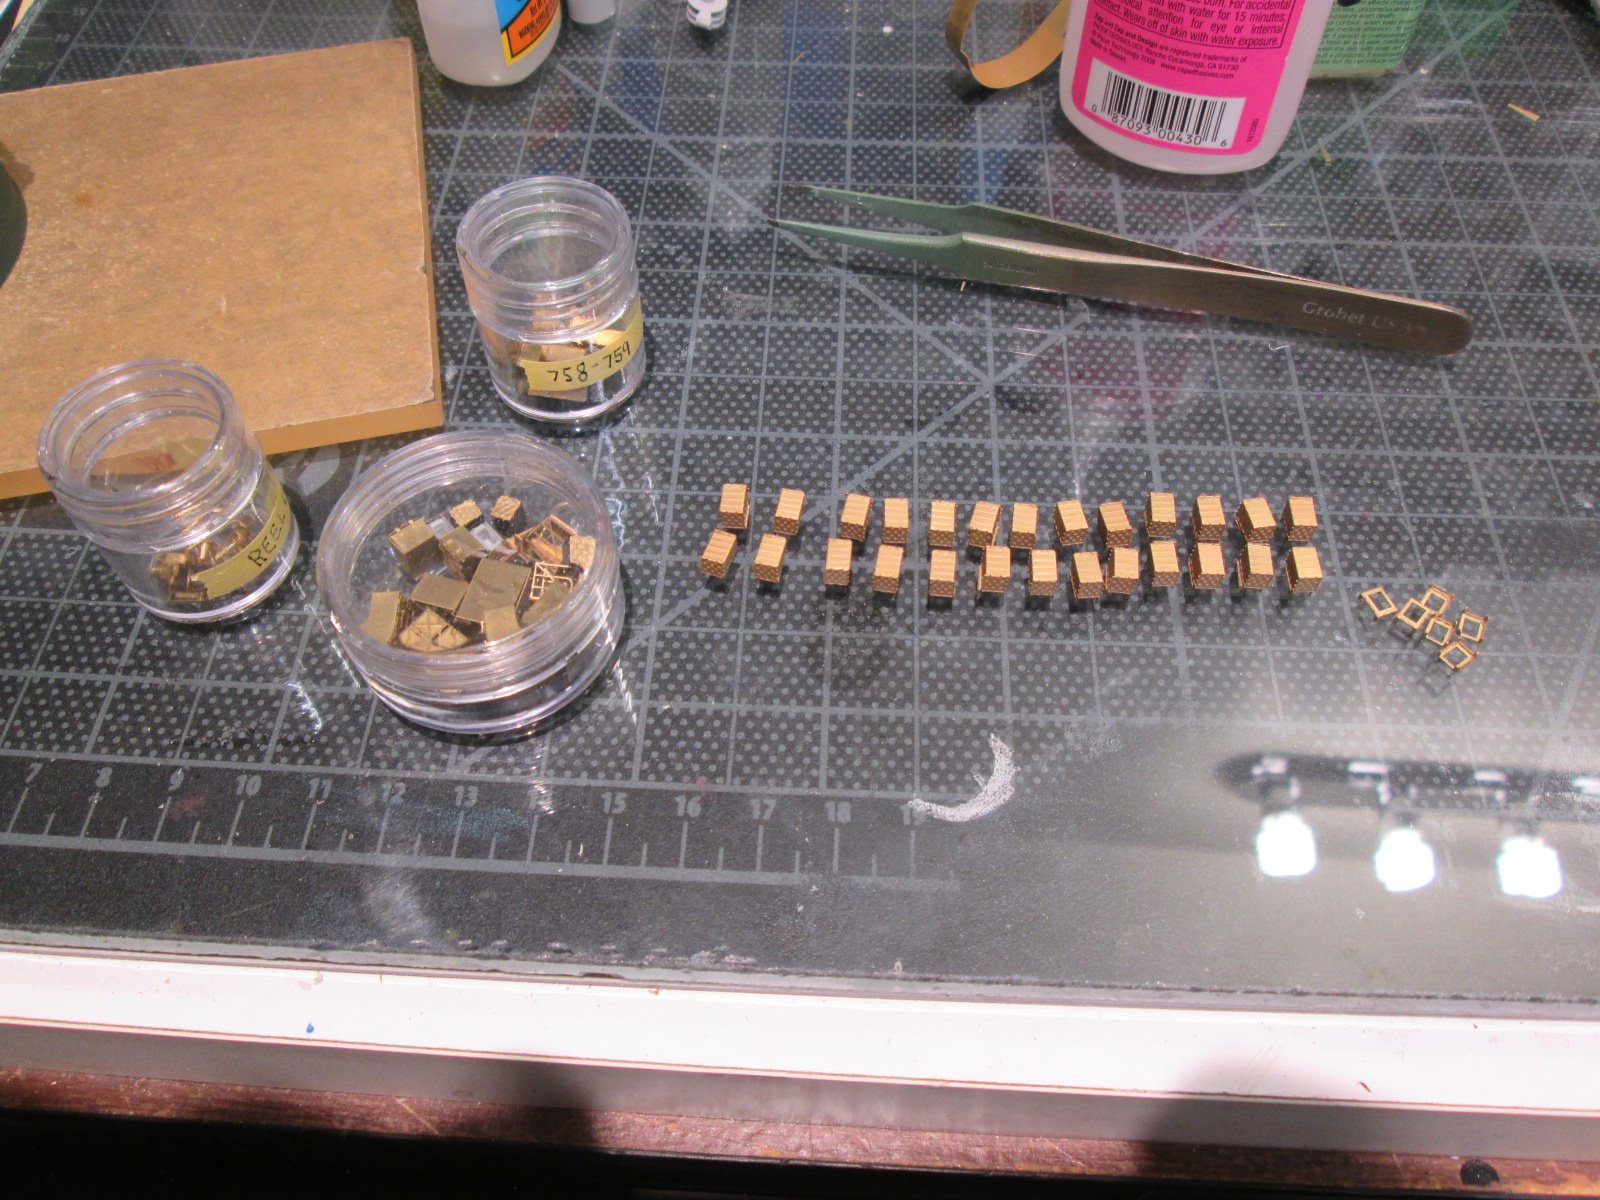
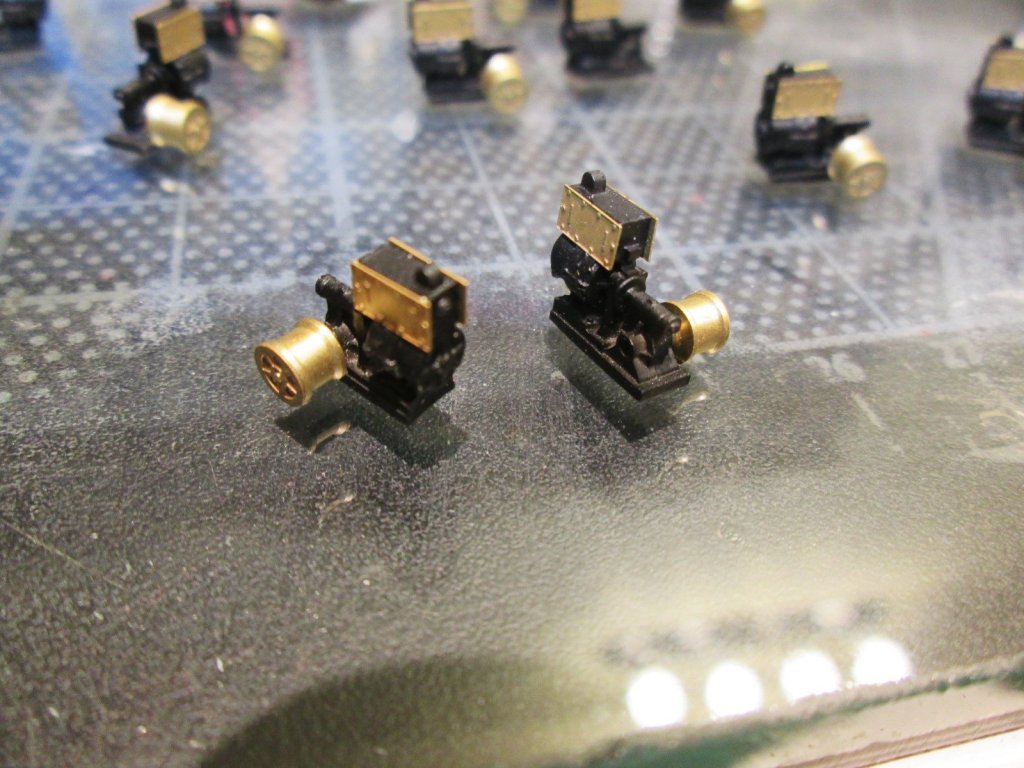
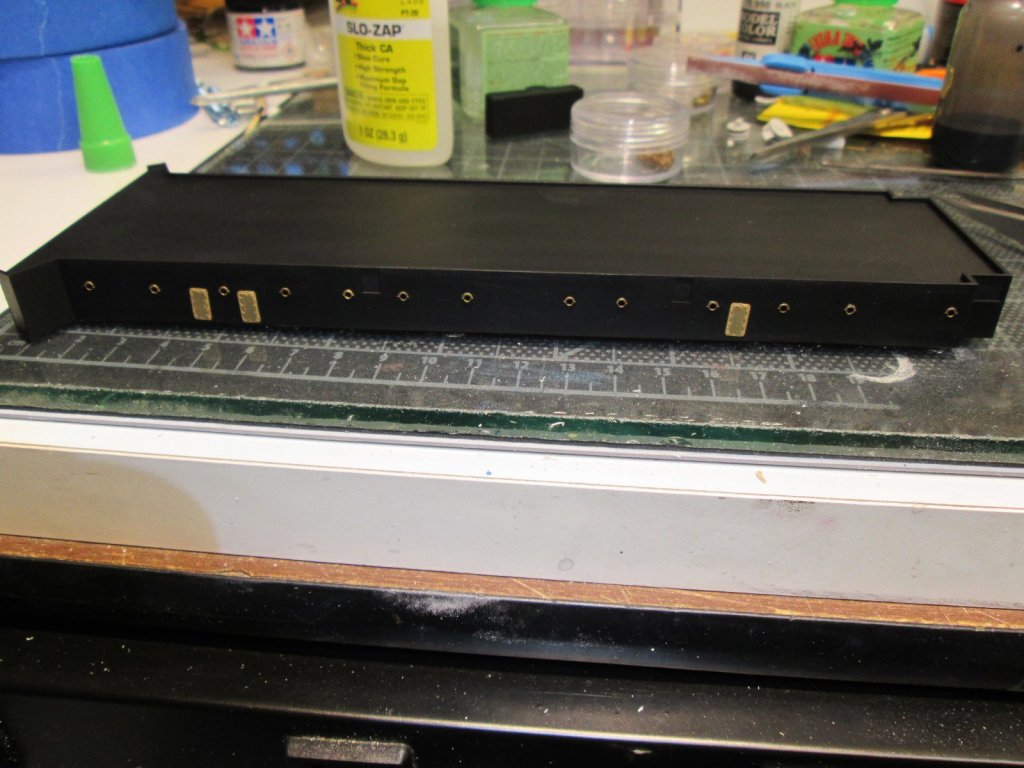
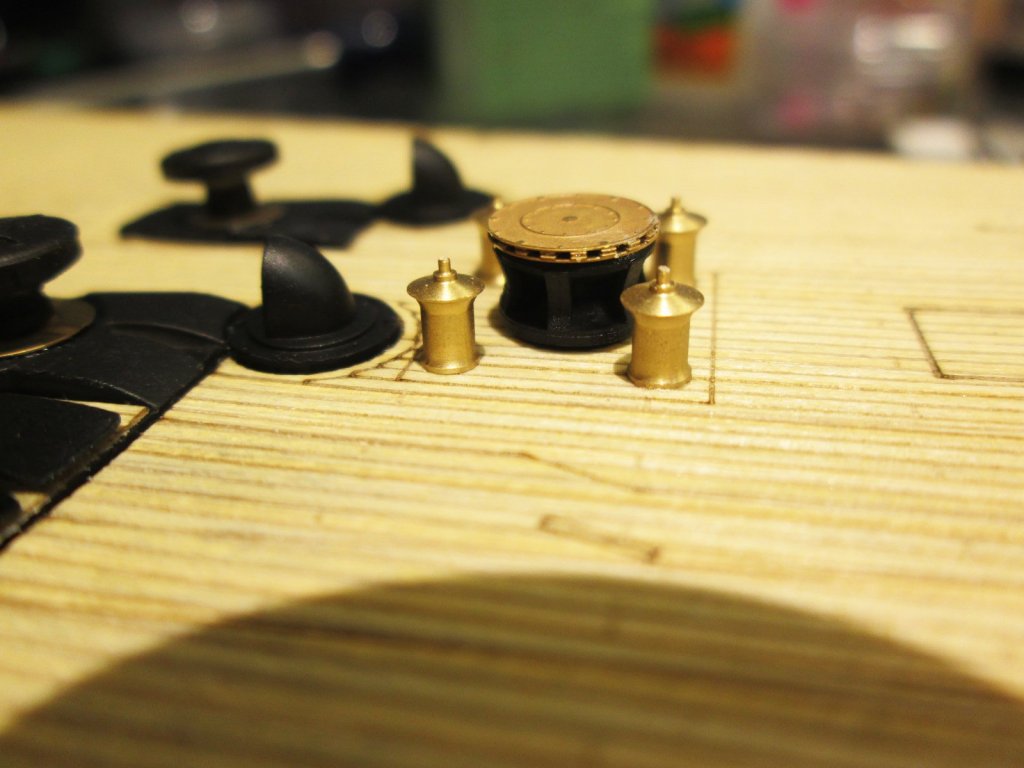
Hi everyone, I got lots of tiny stuff done today. Want to see something insane? Look: That's a toothpick in the background for reference! That "fire pump" consists of 9 parts. 2 of them are resin. Some of the smallest stuff I have ever put together. Now that hatch with the 6 eyebolts has its own story, but I'm not sure if there is anyone interested in every detail. If you are interested in things I find different or downright wrong with Pontos, let me know. I will give details. I also completed the "middle" deck by adding little goodies: I also put together a bunch of pumps like these:
- 247 replies
-
- 16
-
-
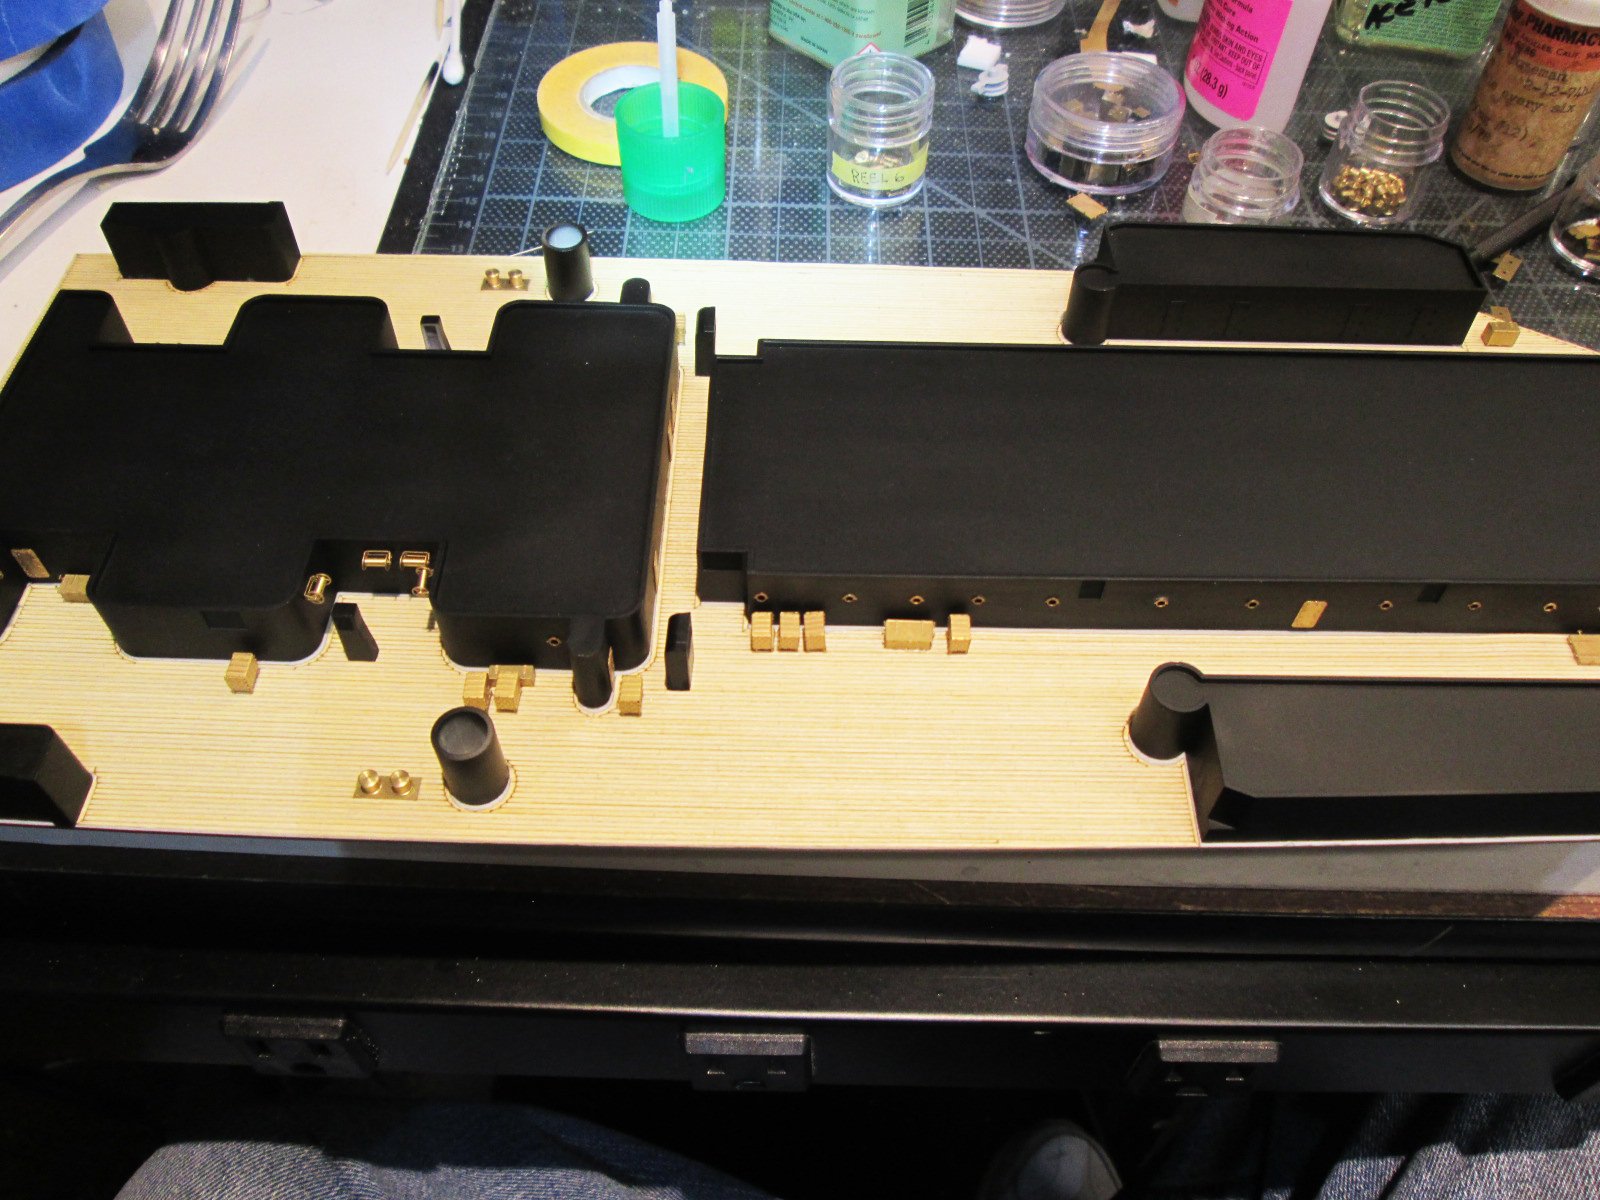
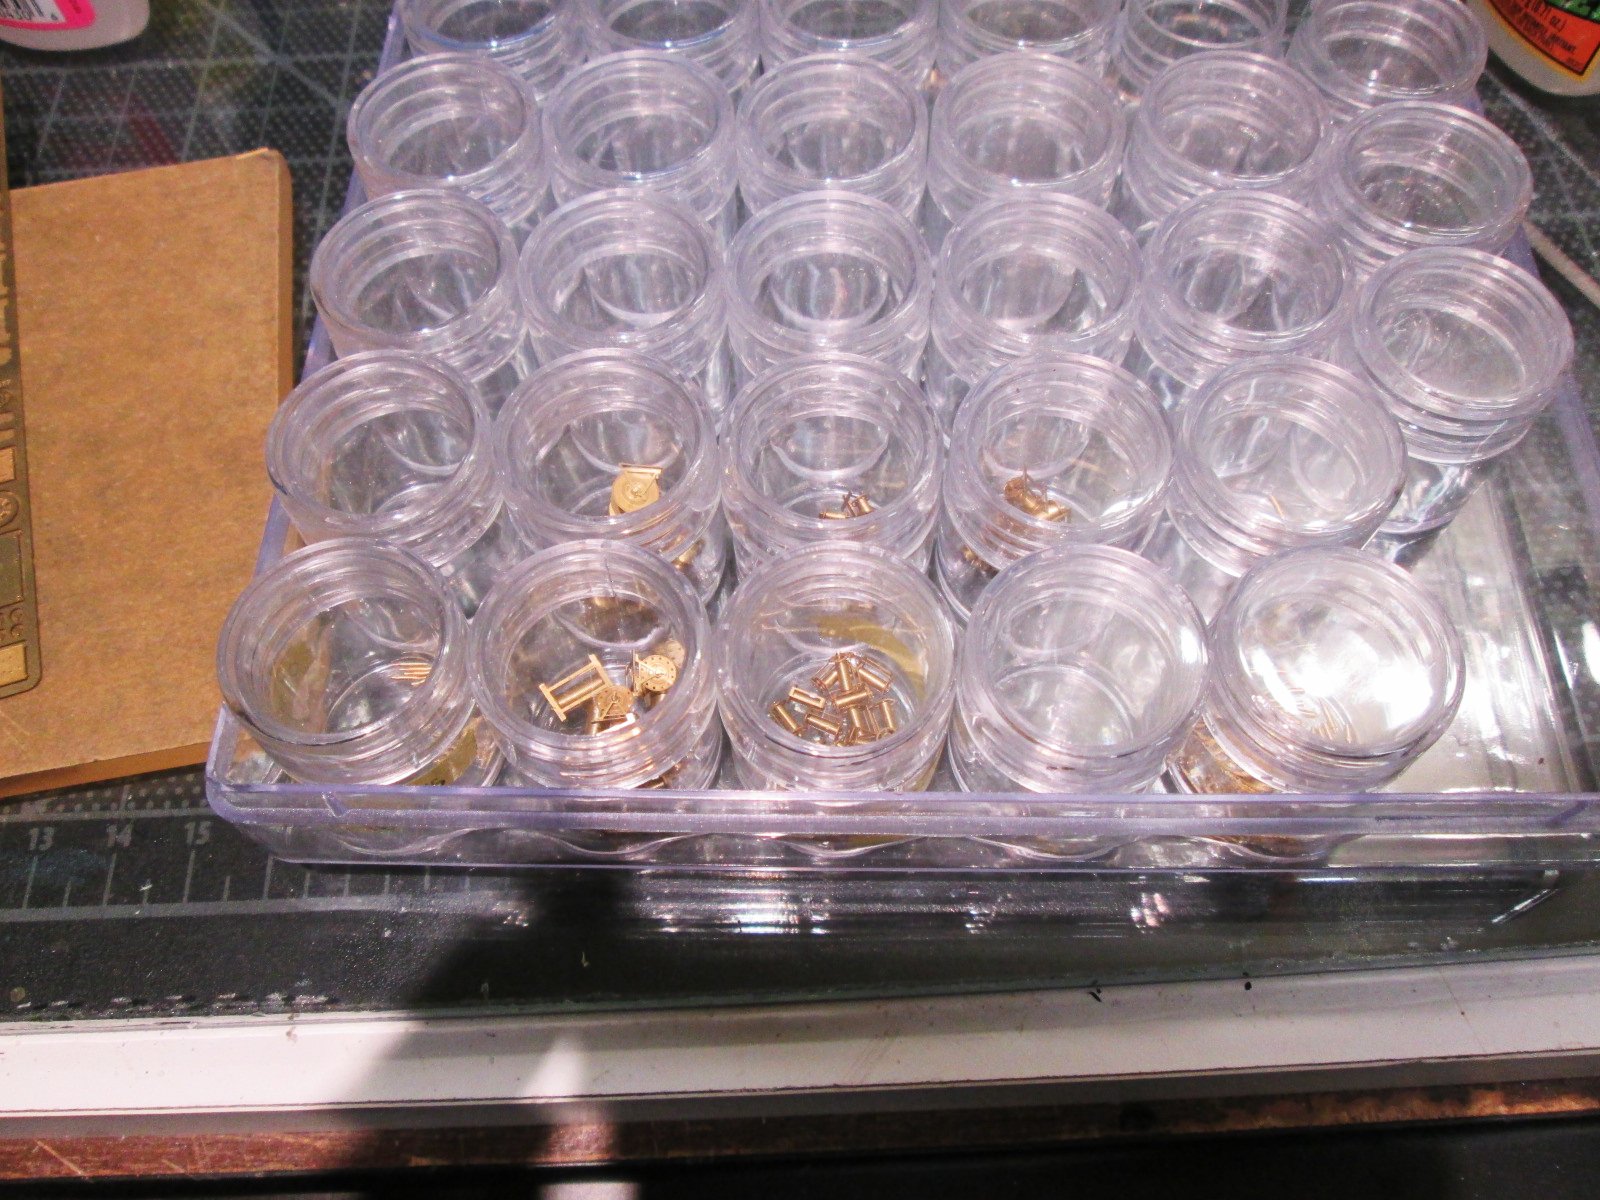
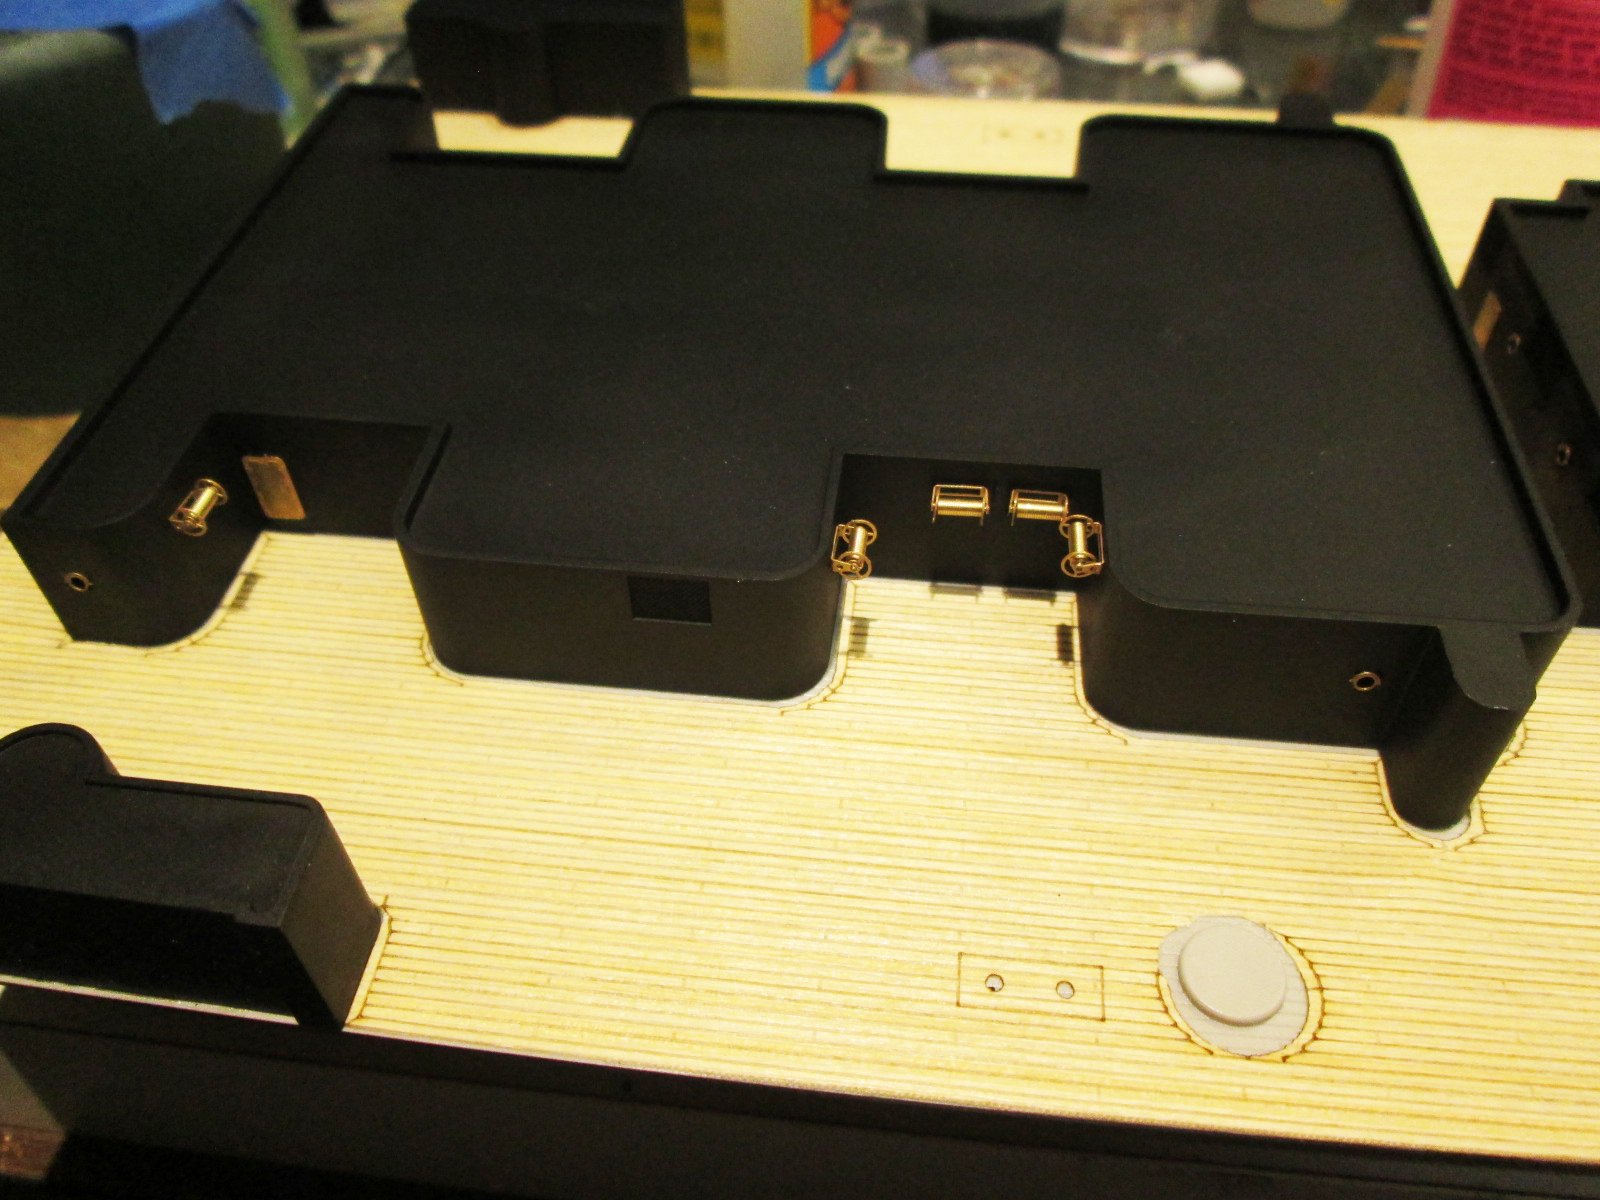
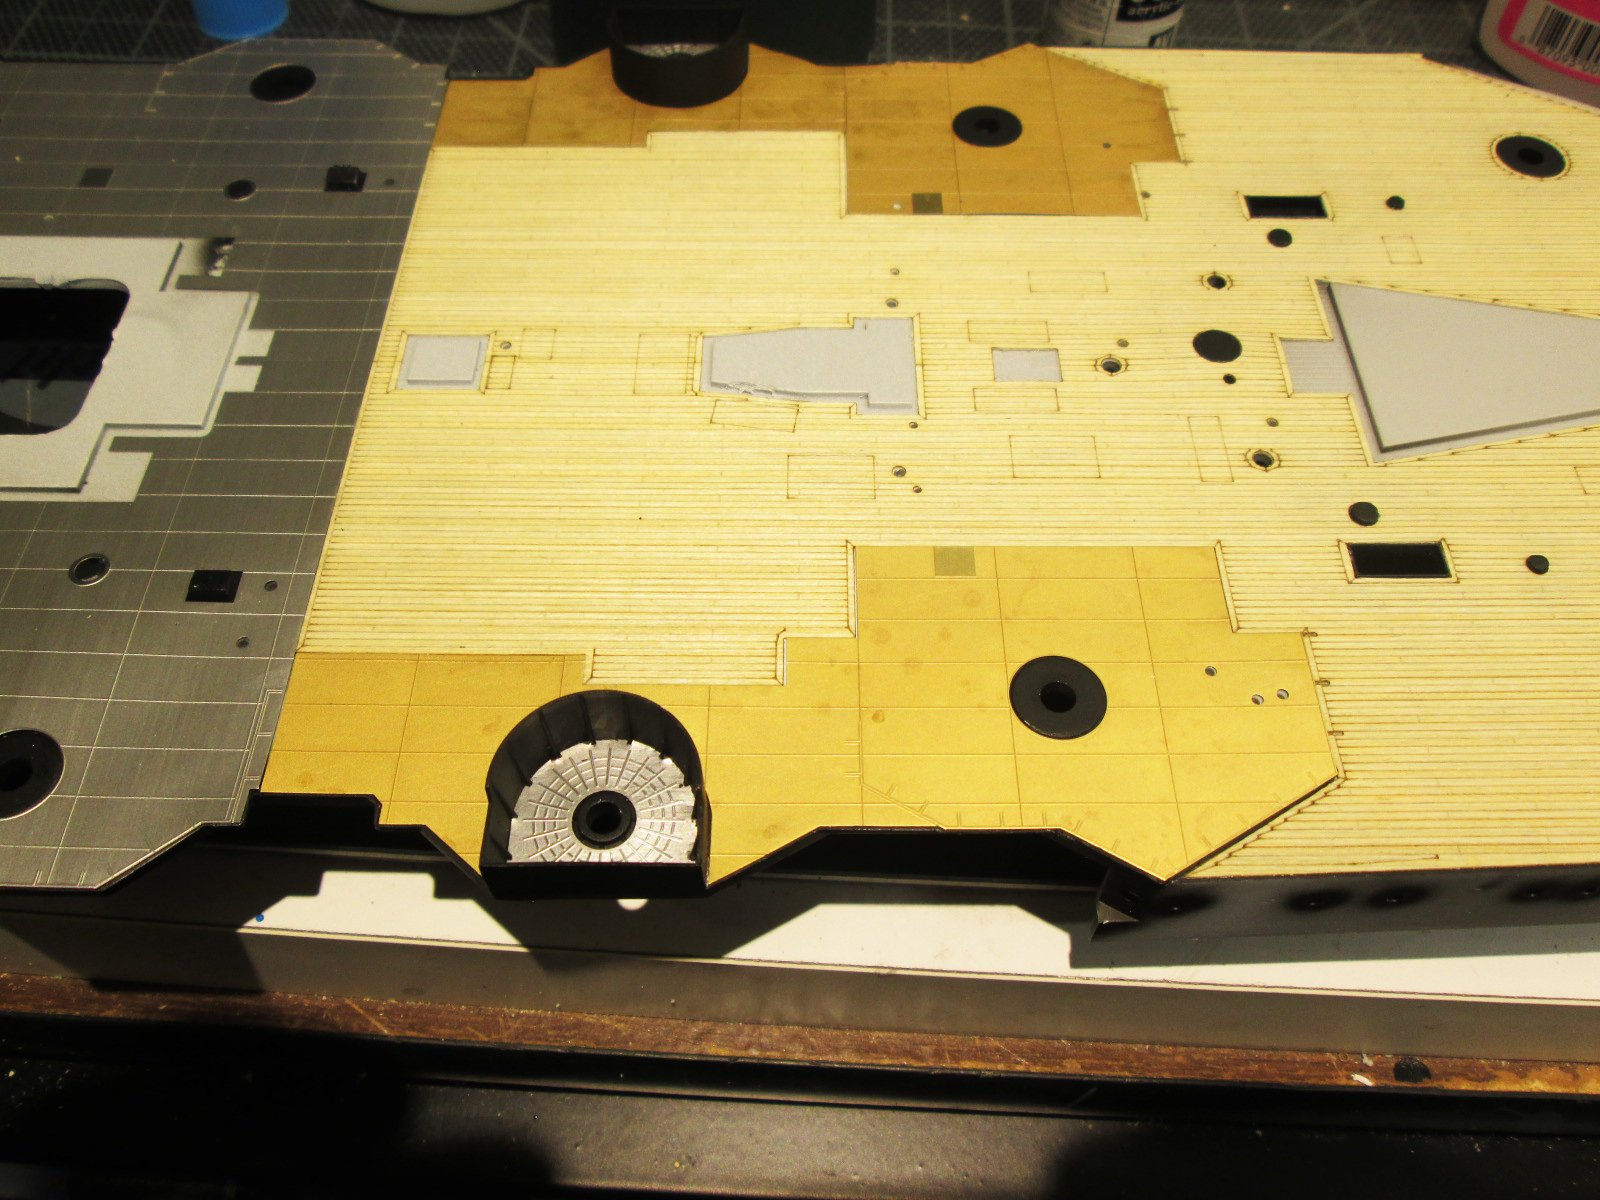
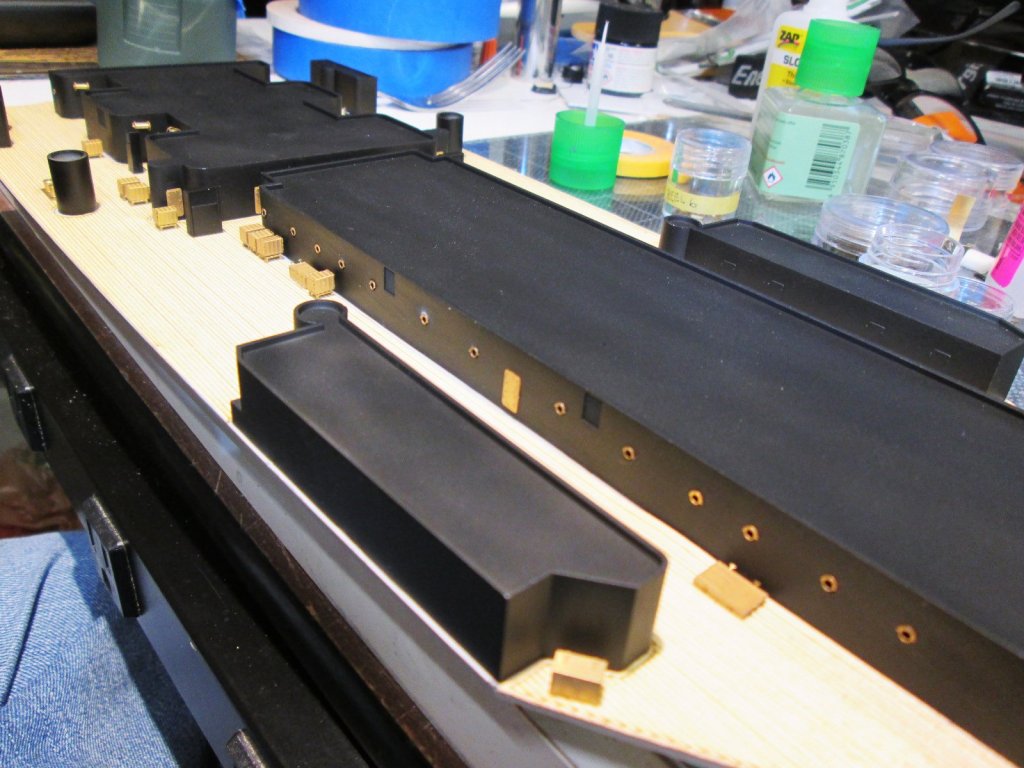
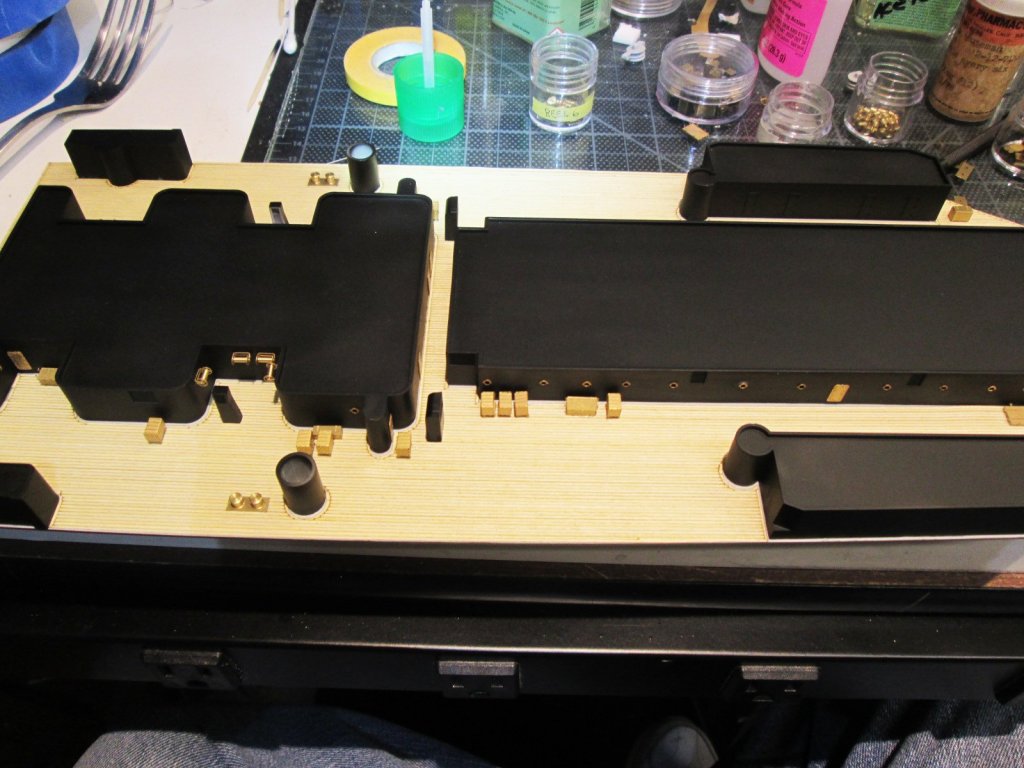
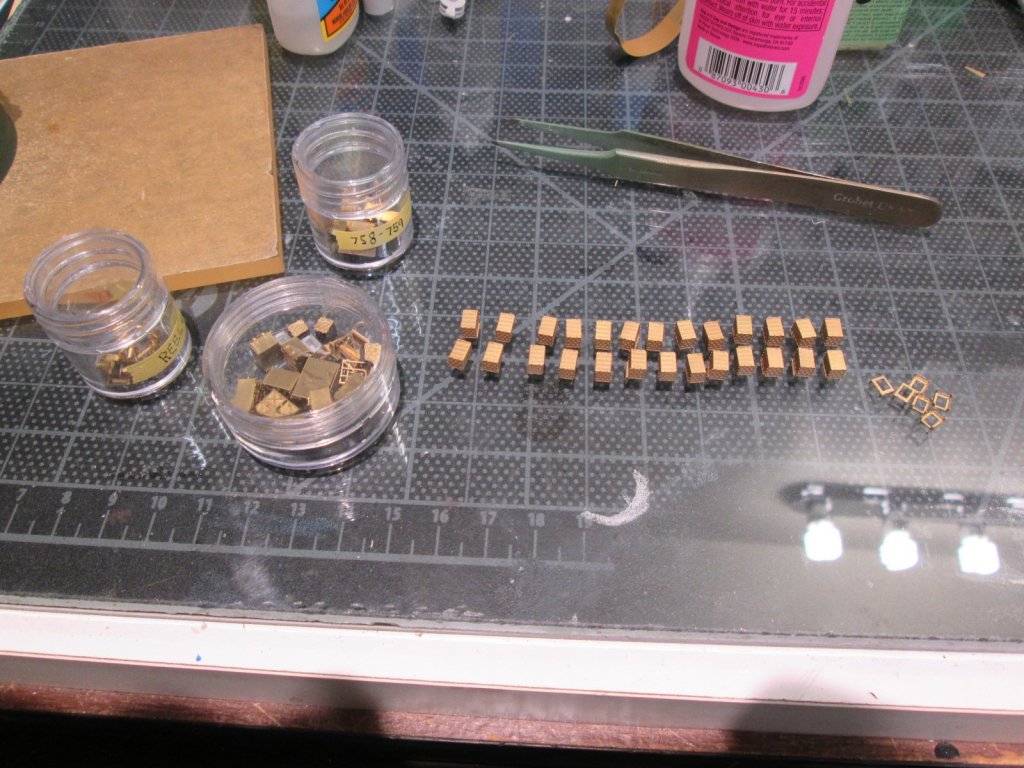
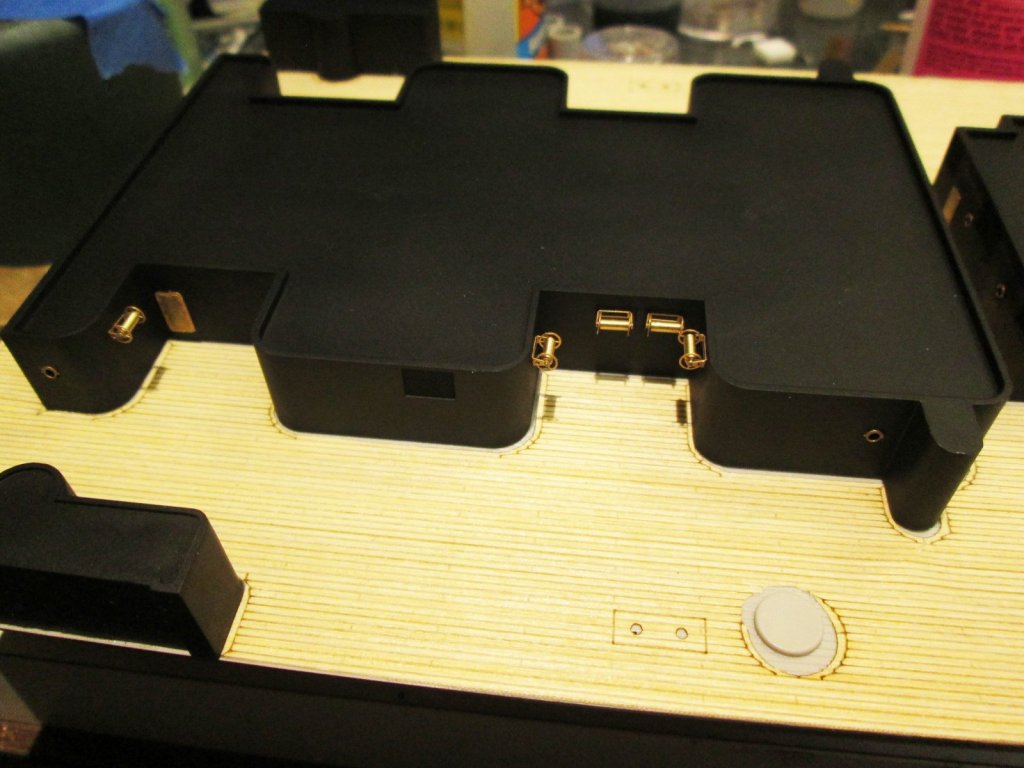
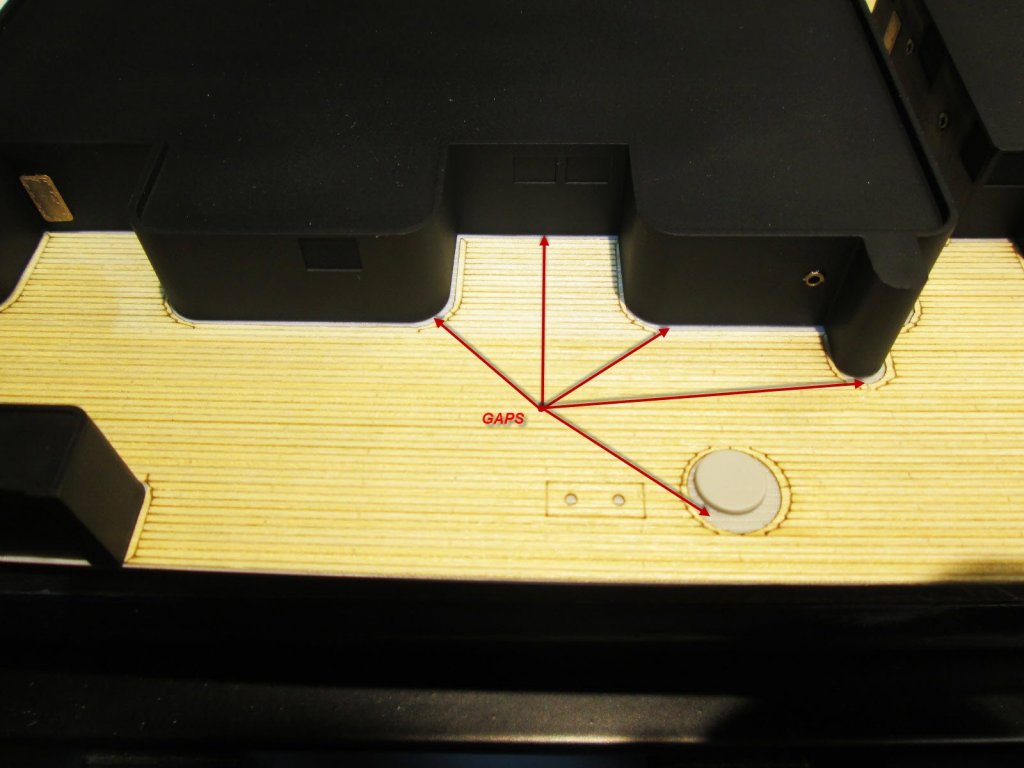
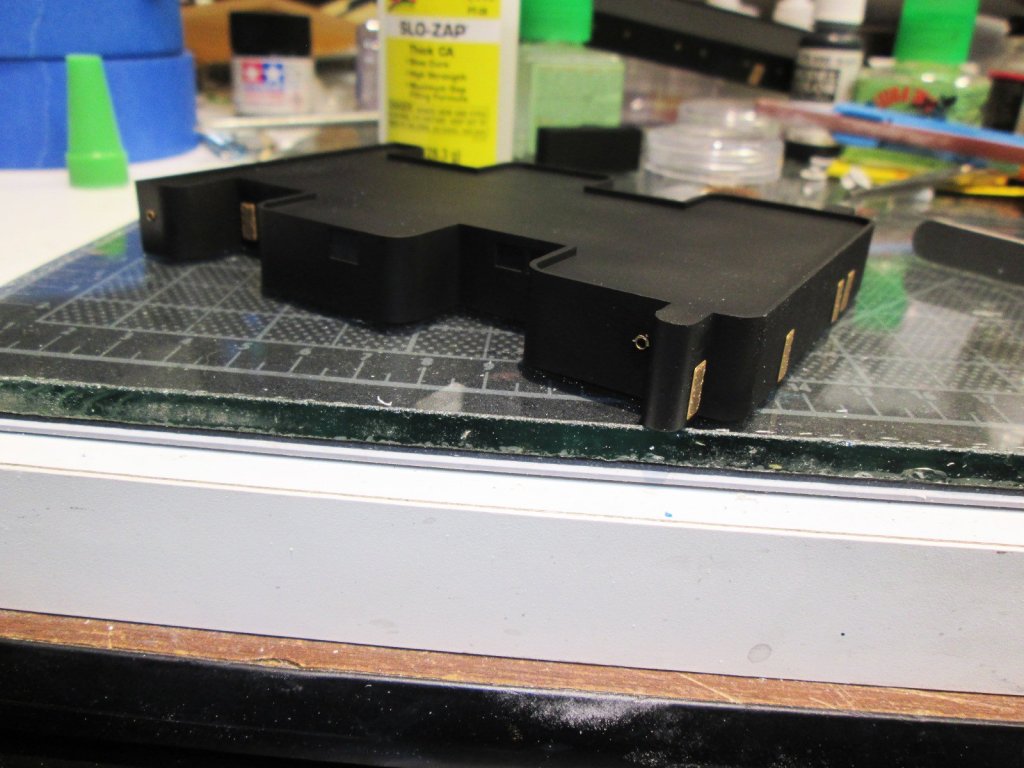
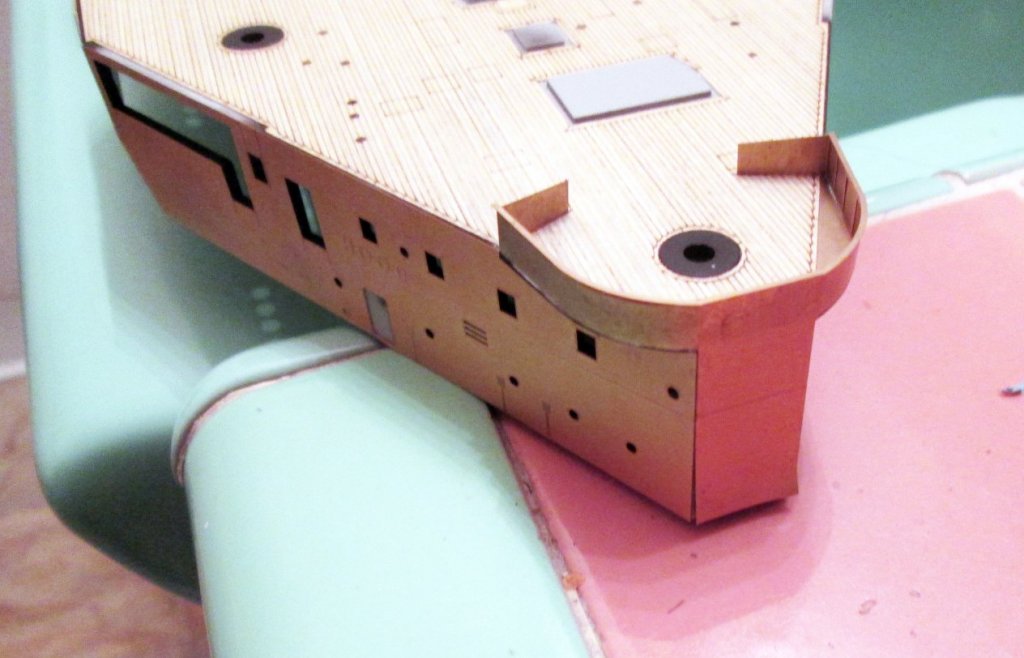
Update: More little itty bitty stuff. Thank god for storage containers! I'm going to have to start populating the first floor decks, before I put the big stuff on top. That's what all these reels and other goodies are for: The previous "wooden deck" that I applied was very nice and matched up well. This one has some very huge gaps and it's good on one side, but not on the other. Fortunately, this deck is barely visible. Otherwise I'd be pissed, to say the least! You can clearly see lots of the plastic that the "wood" is supposed to cover. Look at how offset that circular cutout is. Tomorrow I have more tiny crap to mess with!


- 247 replies
-
- 11
-
-
Hi Pop, I have only tried one Tom's PE and it was awful. But I was told that it was because it was "old tech", so it looked like it was etched at home in the sink. Not good at all. Maybe things have changed. The only instructions that I have seen that are very well illustrated are from Edward. Very clearly marked locations and instructions on how to fold the stuff. Although they don't have actual pictures in the instructions, sometimes illustrations make things much clearer. I know they make that toilet holder in chrome and brushed aluminum too, but HD doesn't even carry that model anymore.
-
Hi Greg, It just seem very counterproductive to do all that work and NOT rig it. I just recently rigged the Mikasa. Although I KNOW I didn't rig it completely, it looks much nicer than before I started to rig it. So yes, I plan on it, although I'm scared!
-
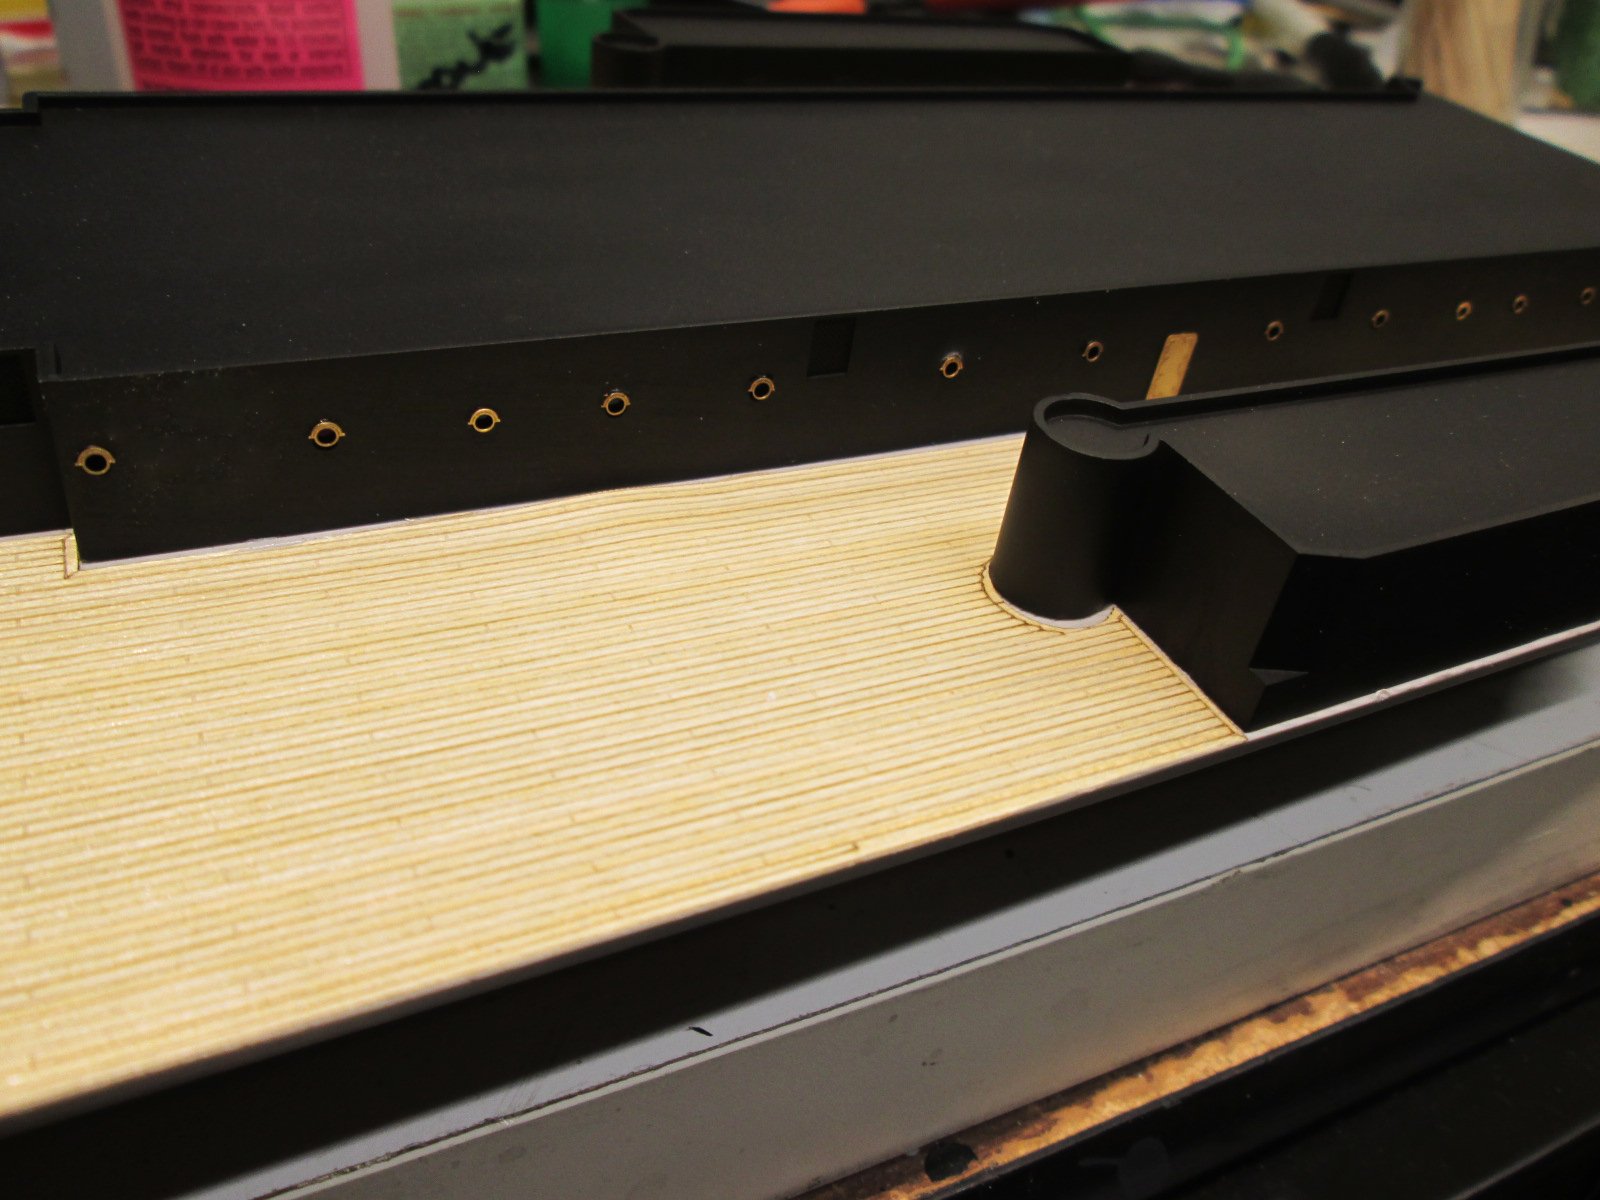
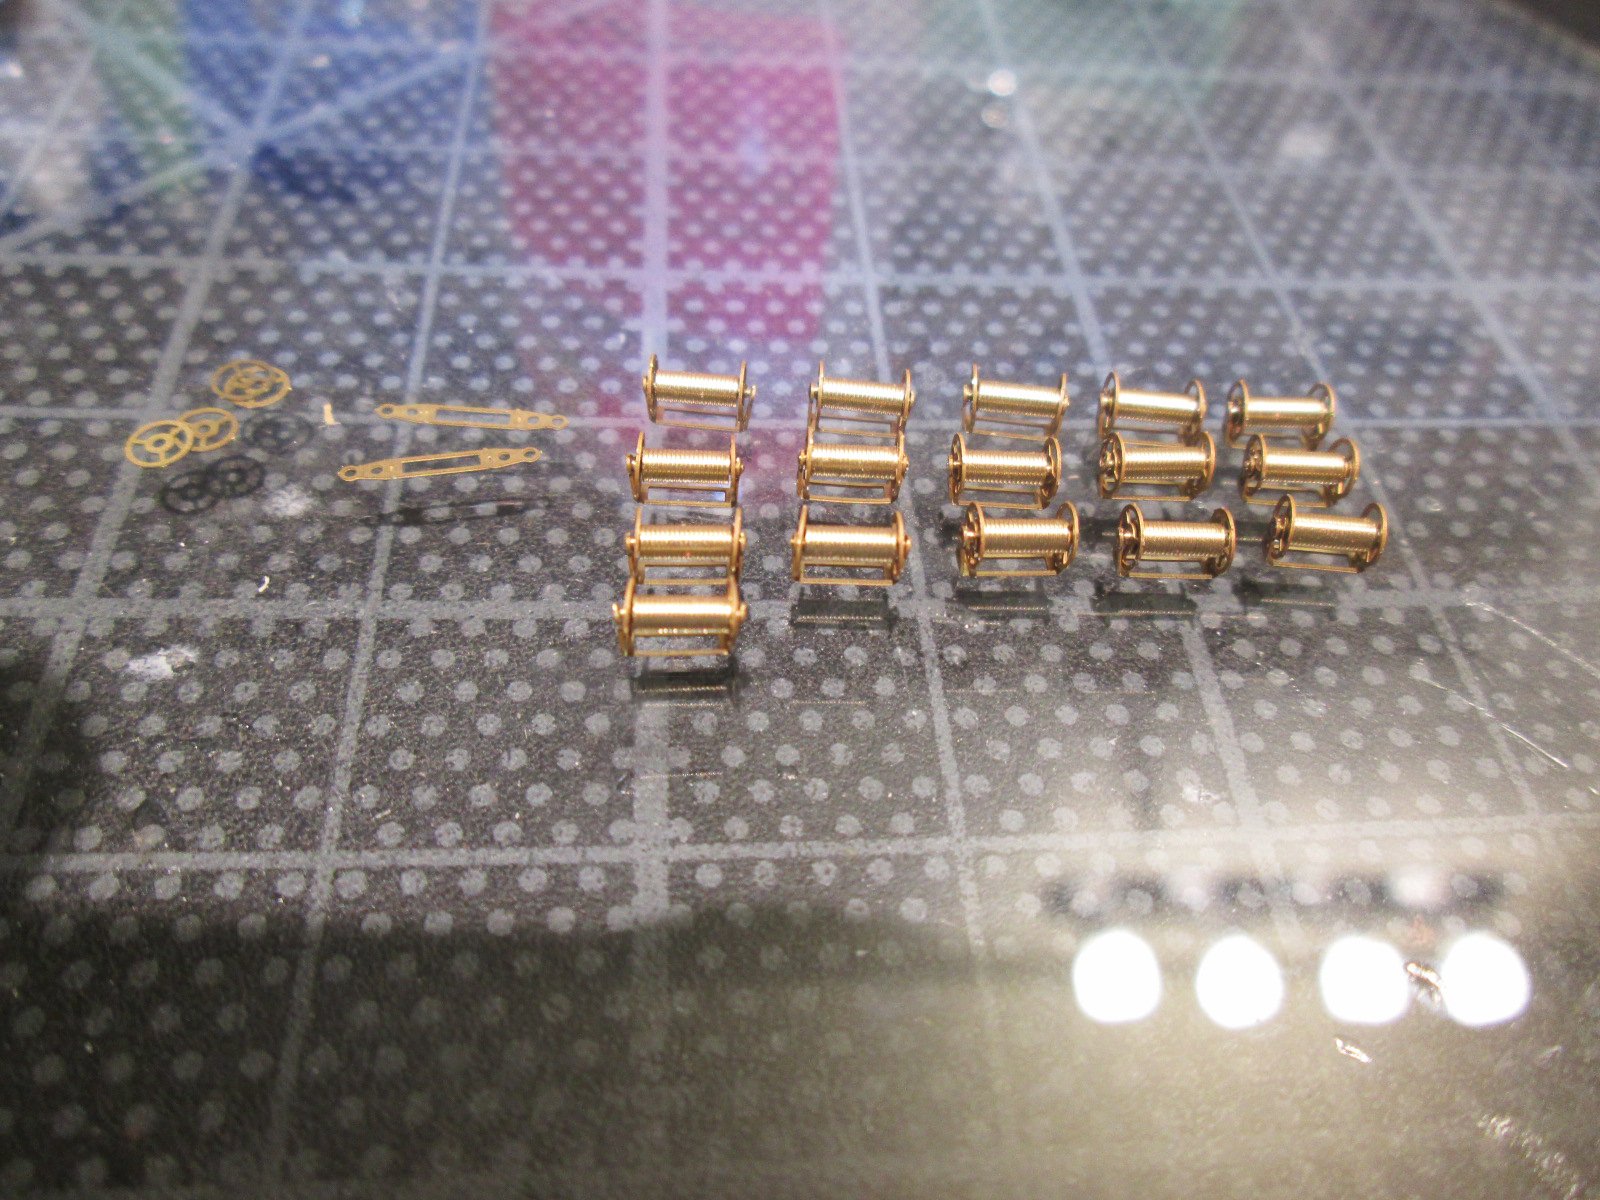
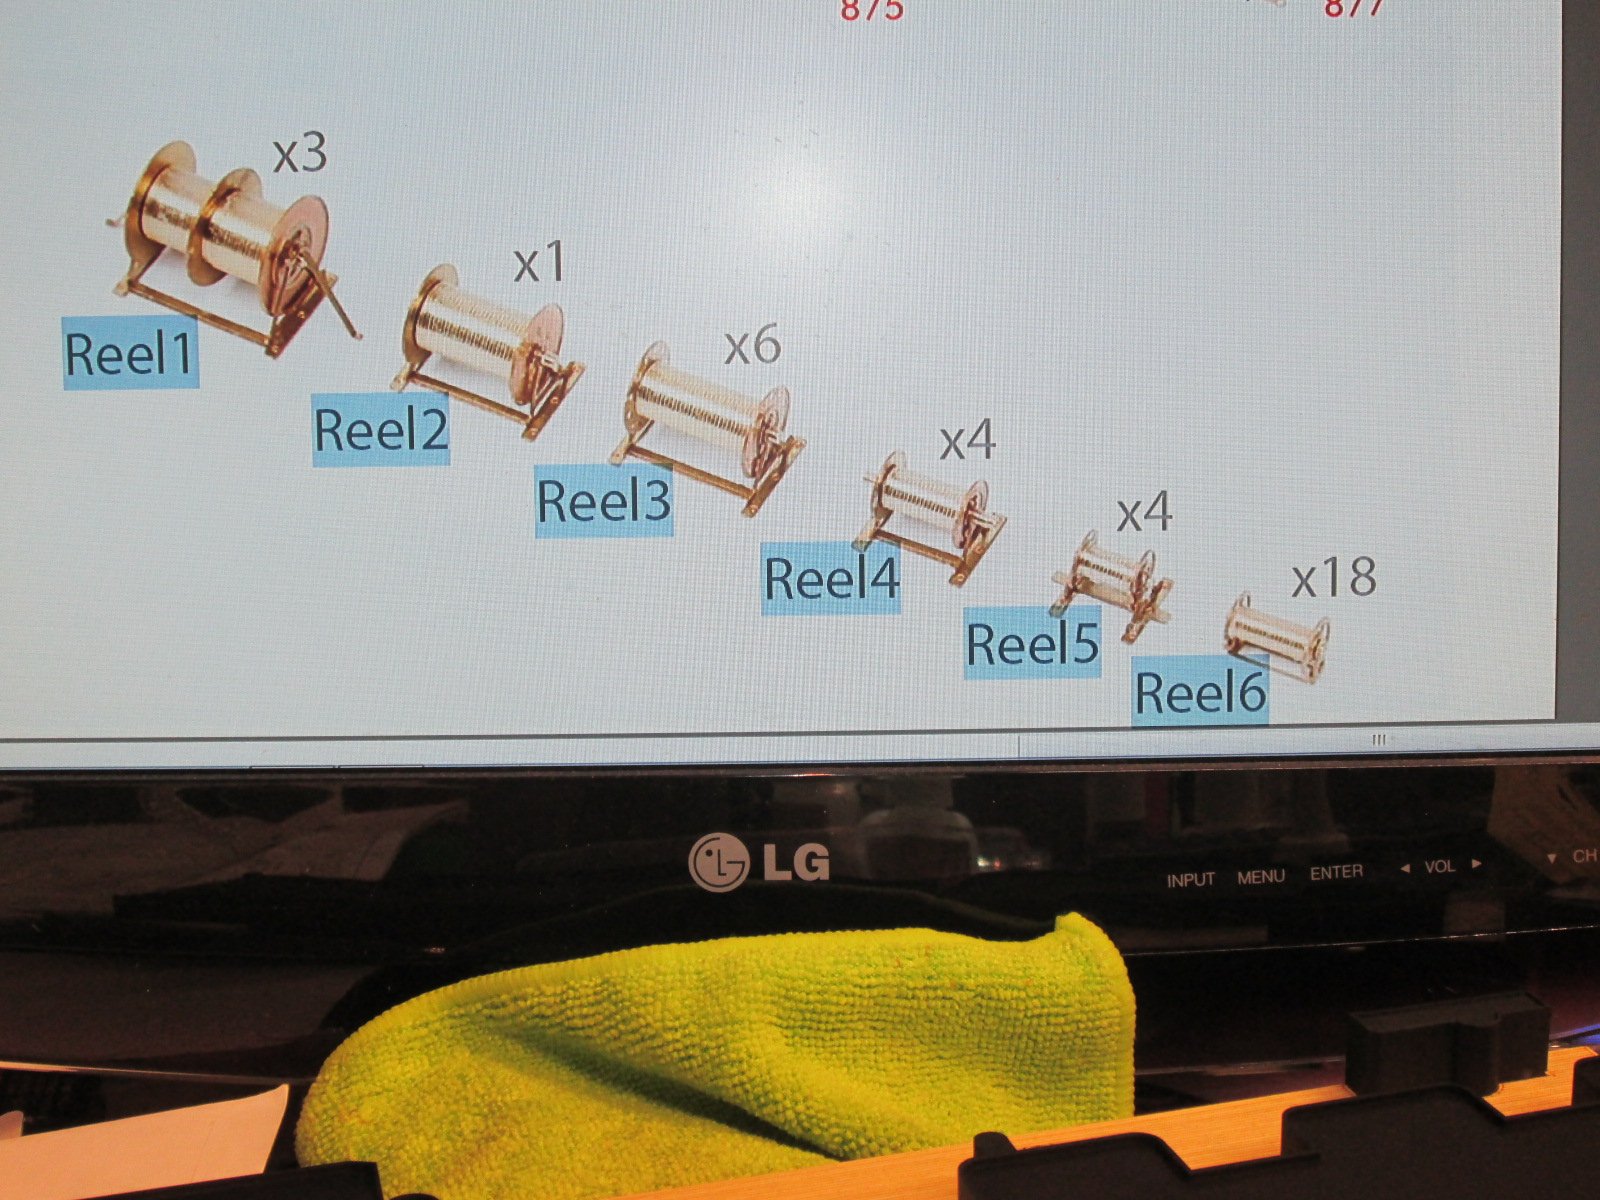
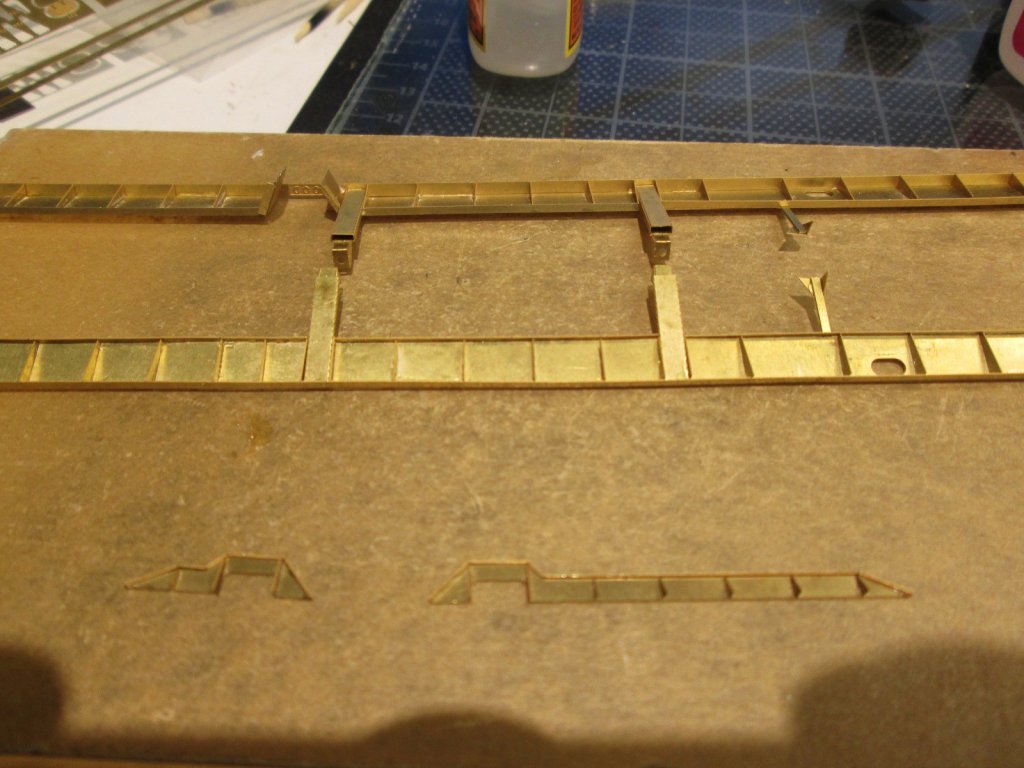
Hi all, Tonight I worked several hours and hardly have anything to show for. That's what happens when you start doing the fiddly stuff such as this: It's bad enough that they are so intricate and delicate, but when the Pontos instructions are inconsistent, it really screws things up. Notice I have 16 reals finished and parts for 2 more, but they only give you 16, although they call for 18 of the "reel 6": Wish they'd get their act together. I also worked on things that will never show because they are hidden by upper decks: Lots of little details have to be installed before you place the deck on top, including the reels that I'm working on. Very little will show, unless you take a flashlight and get up close to look inside. I have many more reels and gadgets to put together!


- 247 replies
-
- 14
-
-
Thanks guys. This is what I got: Then you cut the balls off and voila. I know, it sounds painful, but no animals were harmed in the making of this. But it's very hard metal. So have a sawzall with a new blade ready.
- 247 replies
-
- 11
-
-
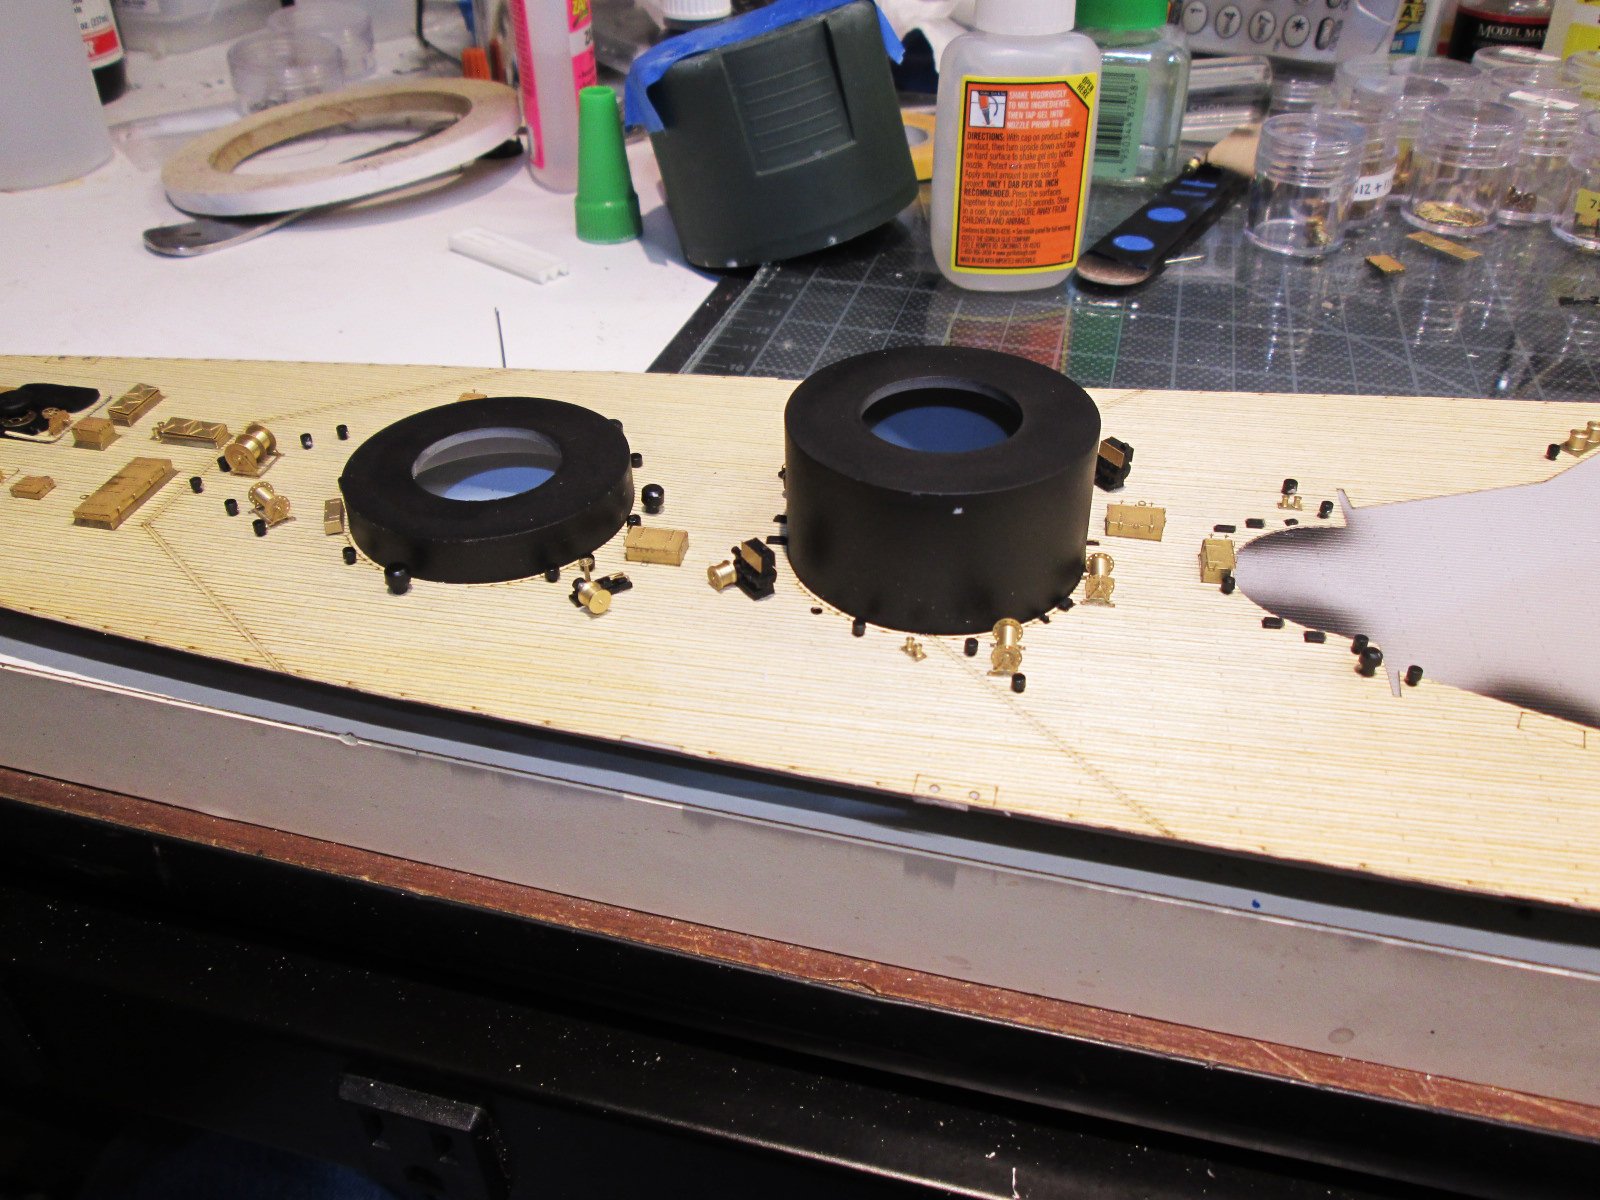
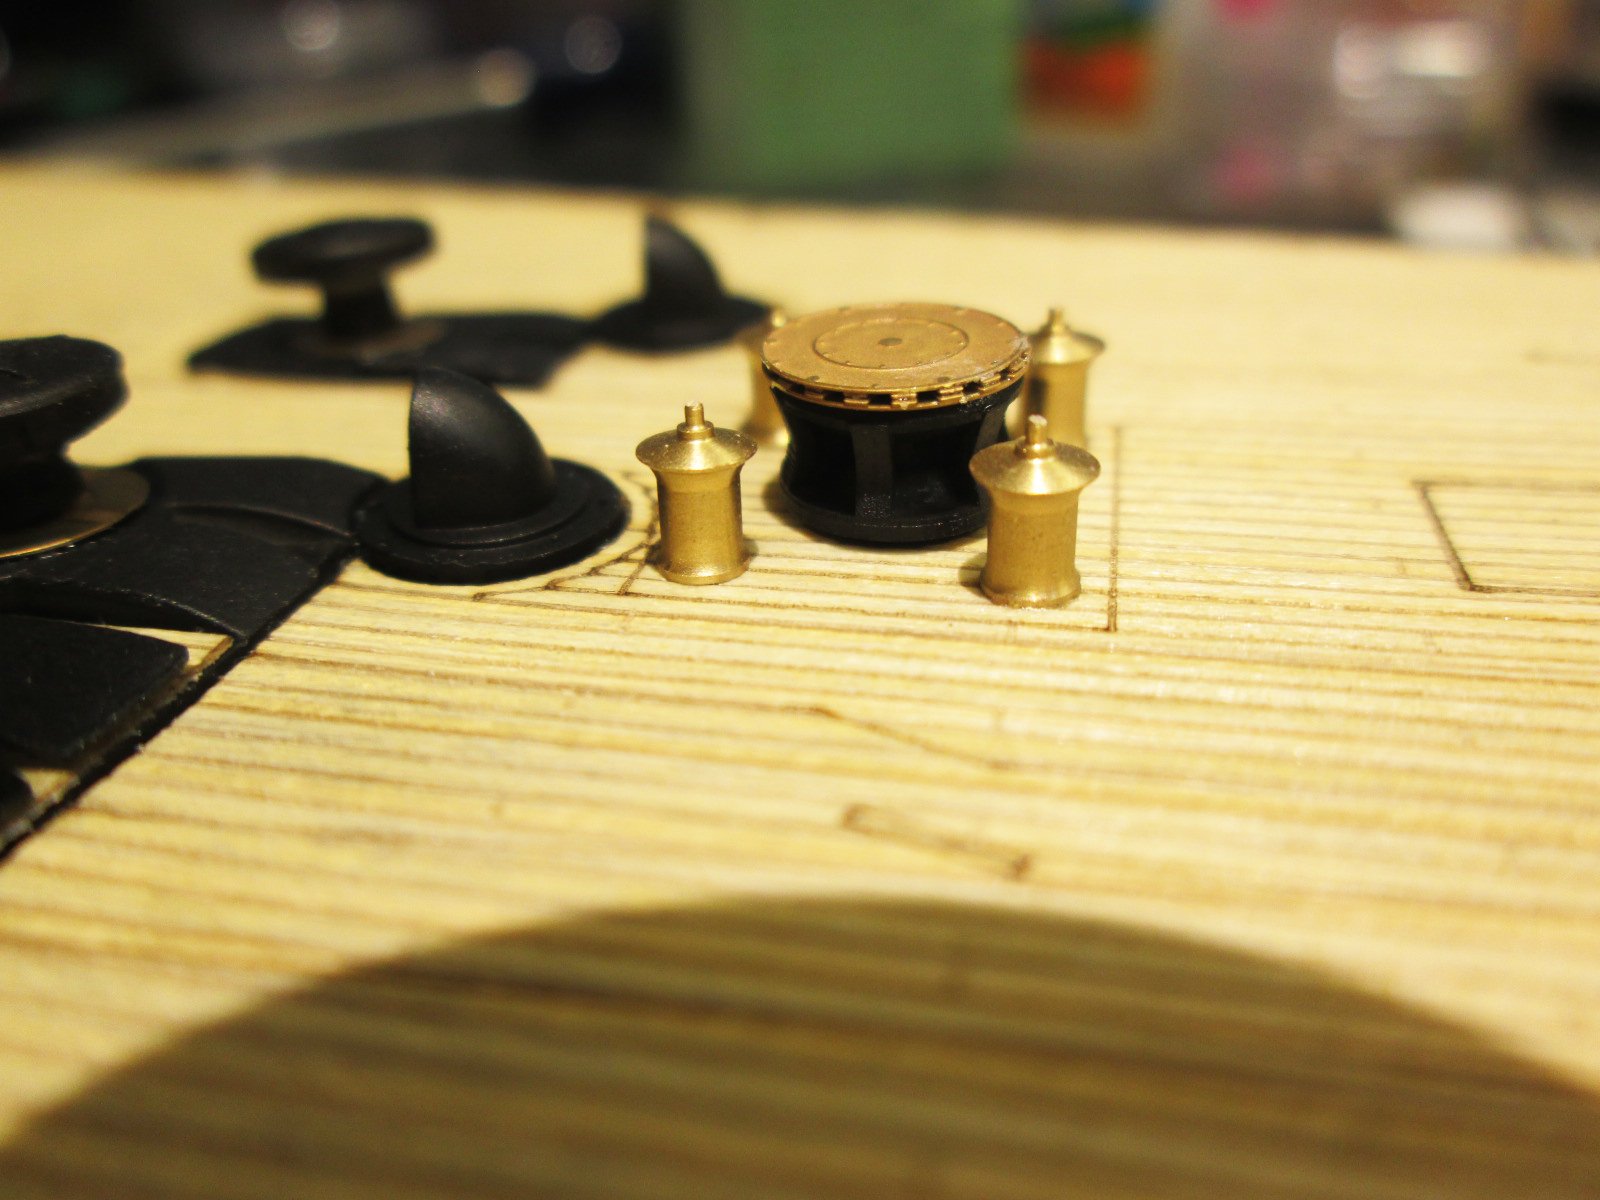
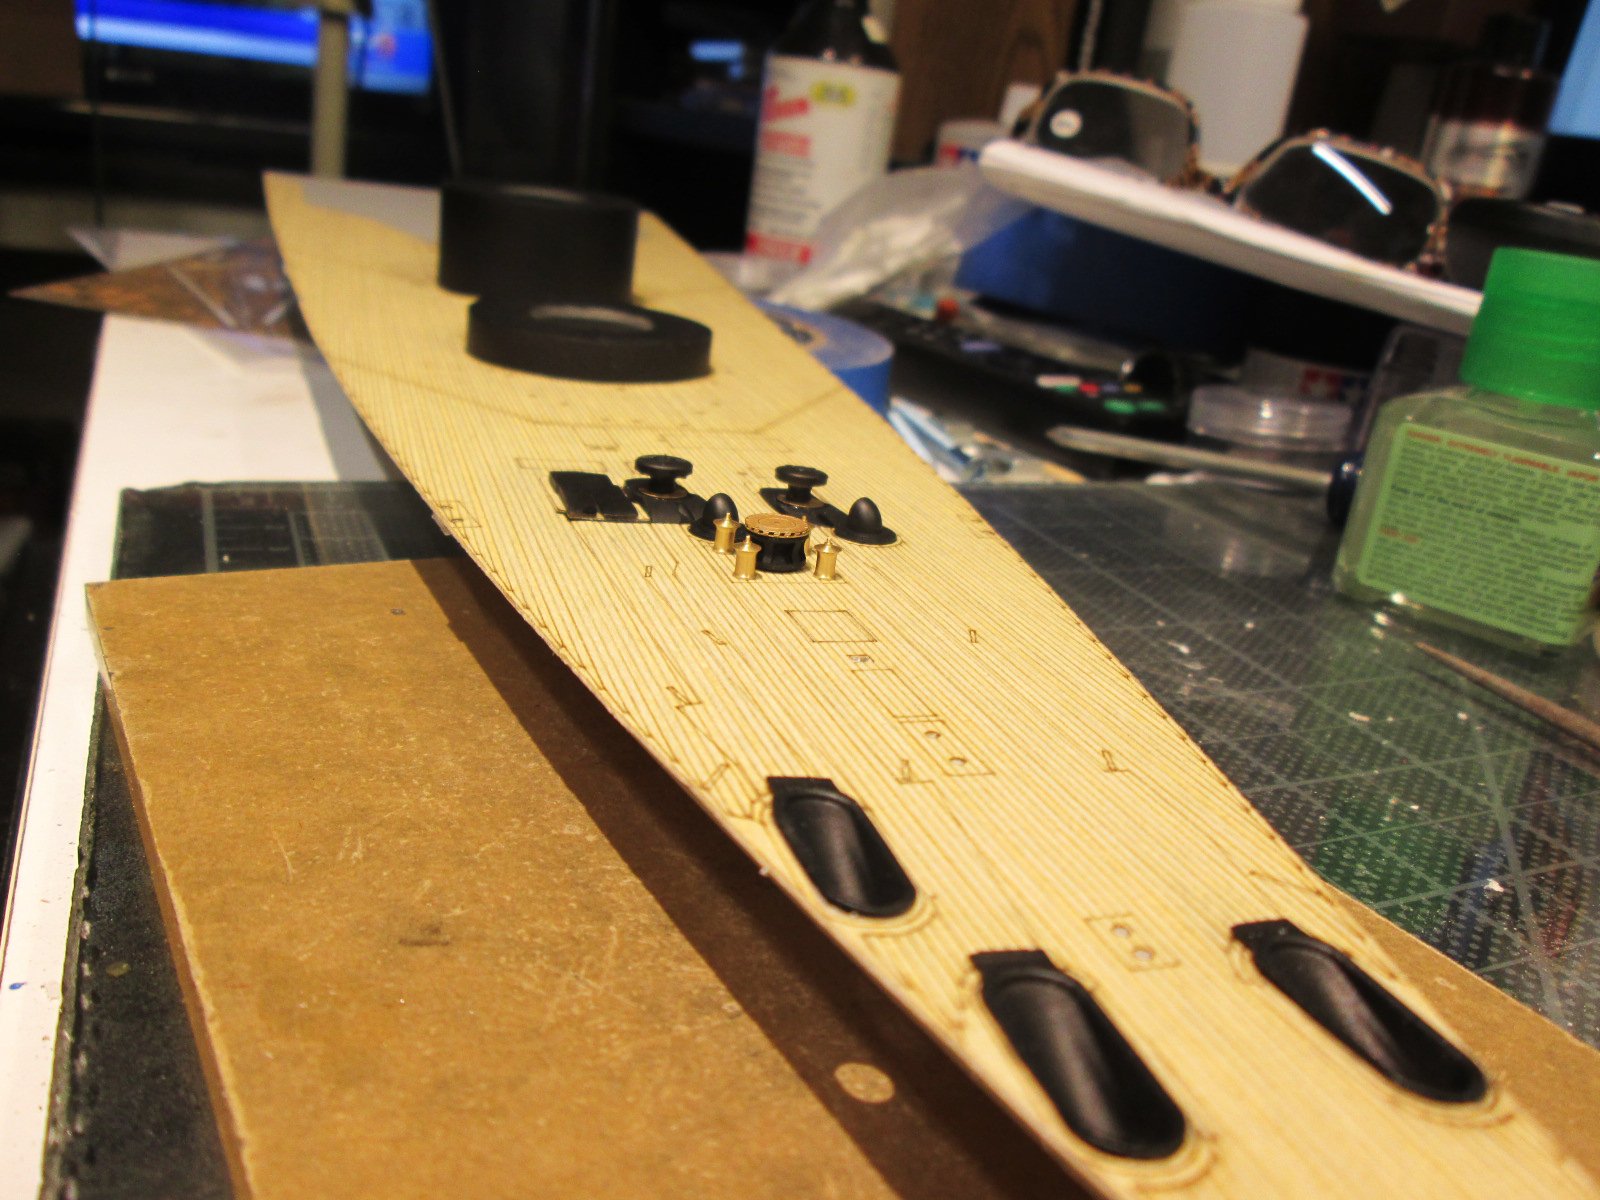
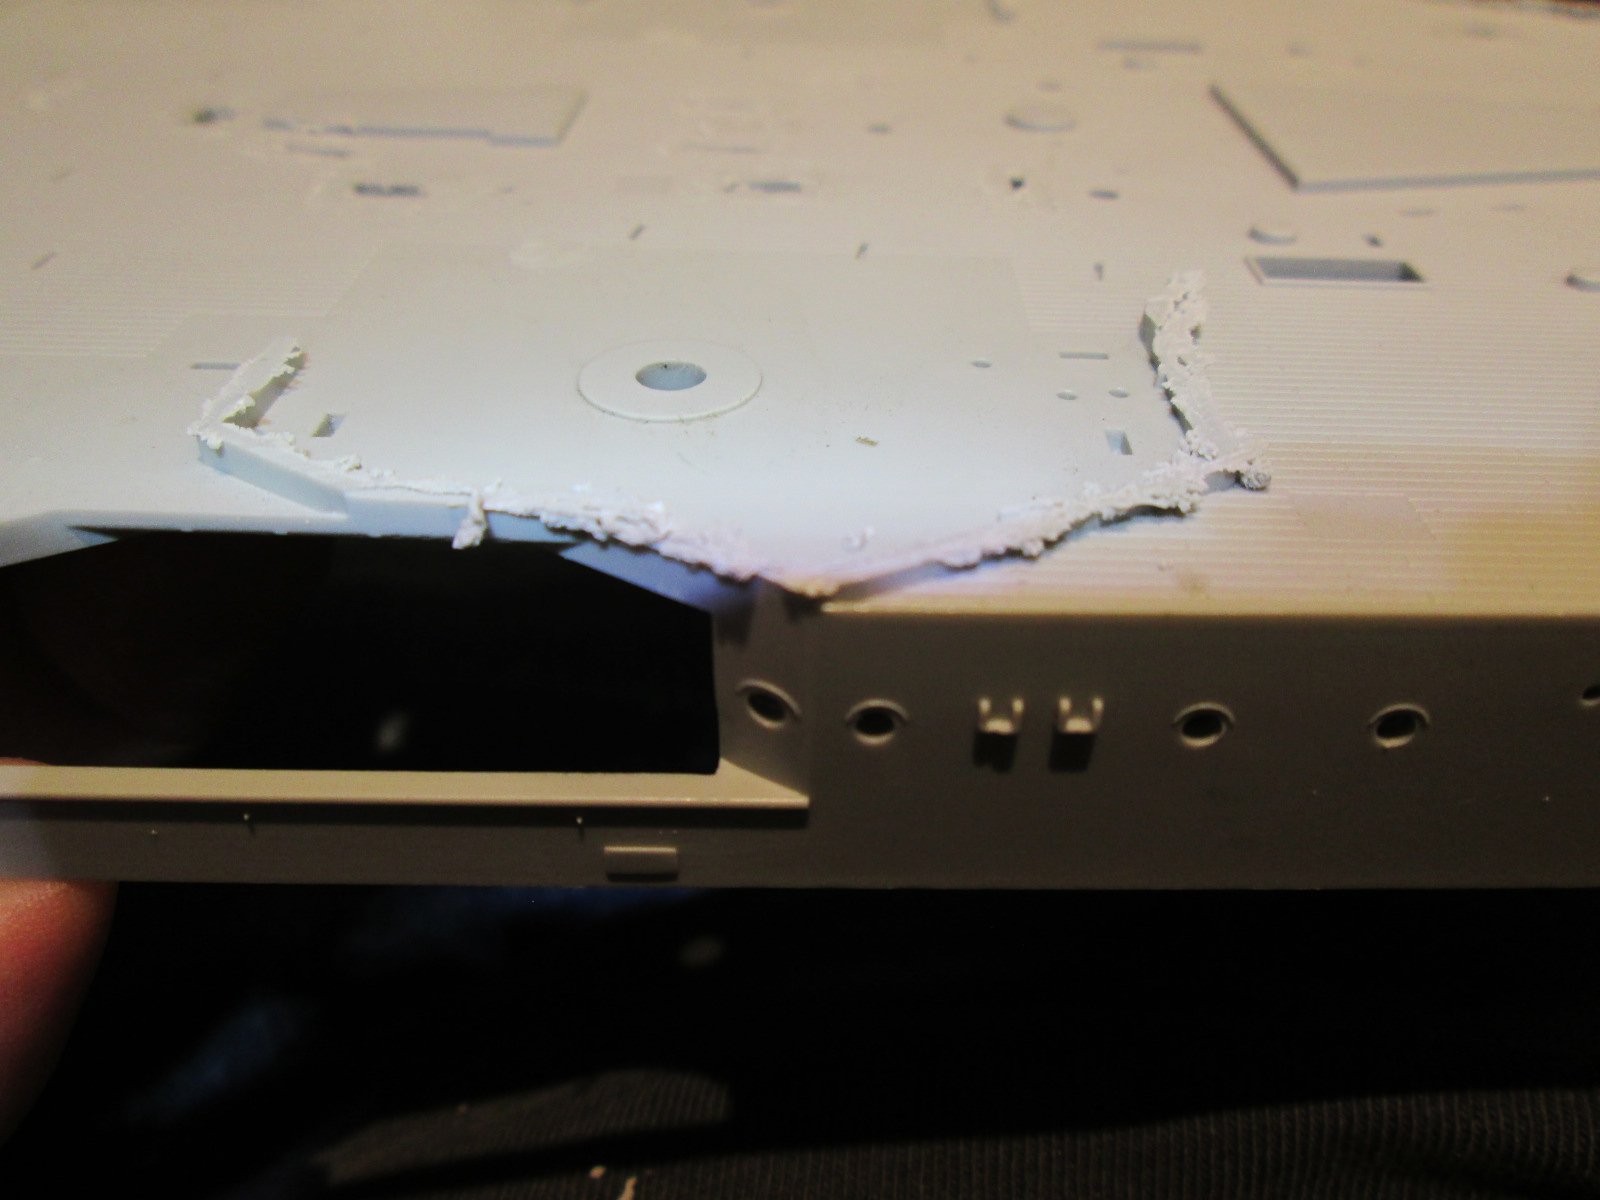
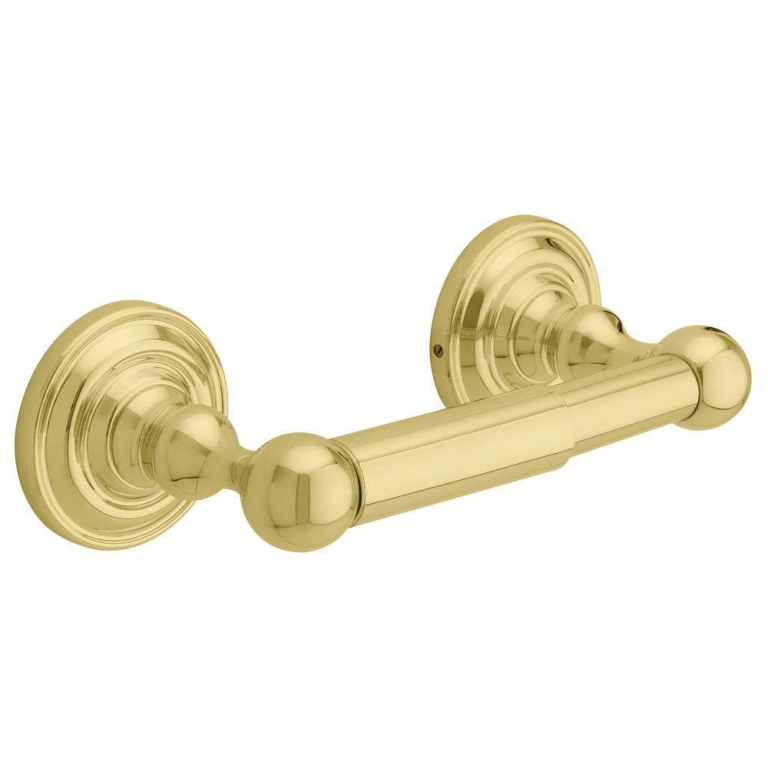
This thing is obscenely huge! Eats up my entire worktable! I have no idea what I'm going to do, but I'm going to have to figure a way to figure out how to place it so I can work on the hull. VERY awkward: By the way, see those brass "pedestals"? They are very similar to the Pontos kind, that cost about $75 bucks. But these are a toilet paper roll holder set, from Home Depot for about $10 bucks! haha I did some work on one of the deck pieces. Successfully placed the "wood". This is a very delicate step and I was able to do it on the first shot. I worked on the hawse holes??? They are resin replacements, which brings me to resin. I very rarely find it useful. I know it can be much more detailed, but most of the time, there isn't that much of a difference, and with today's tech, the plastic pieces are very detailed. Also, the resin is extremely fragile and always need work prior to installing it, with all sorts of flashing and mold pieces still stuck to it. I'm really not crazy about it. I like the smell when sanding it, but that's about it.


- 247 replies
-
- 14
-
-
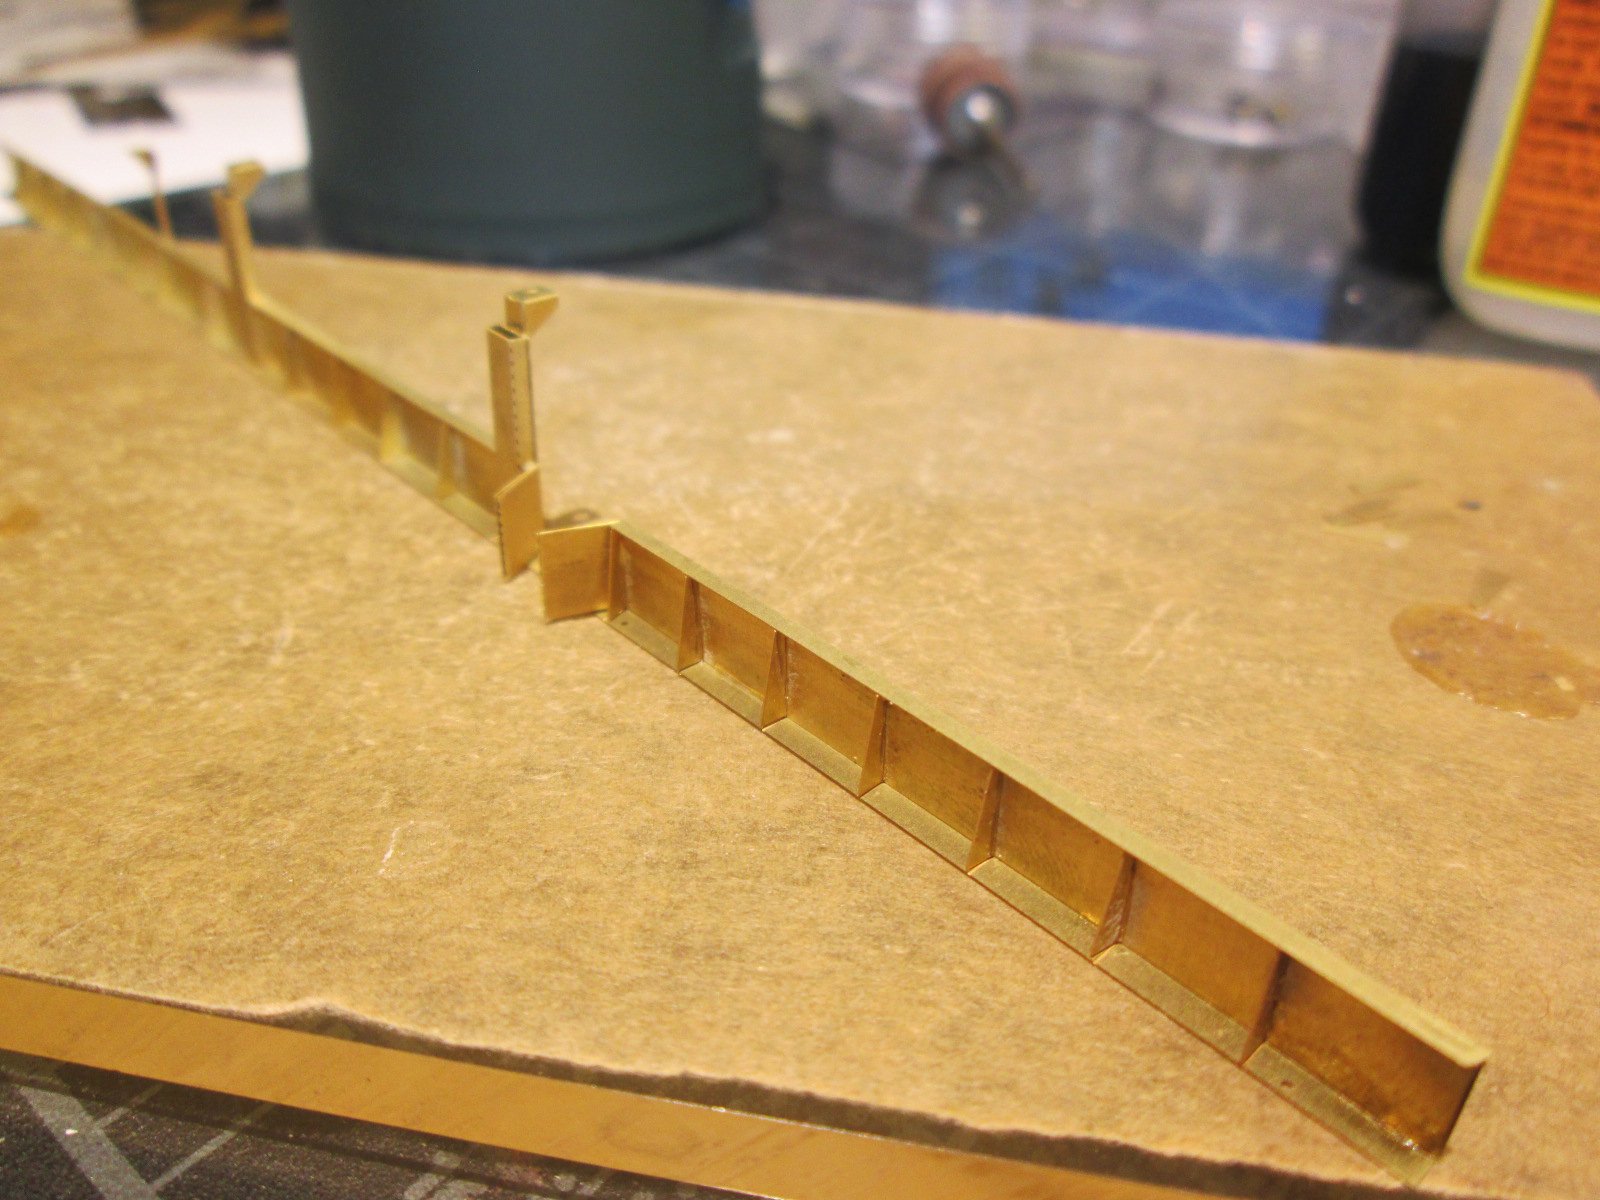
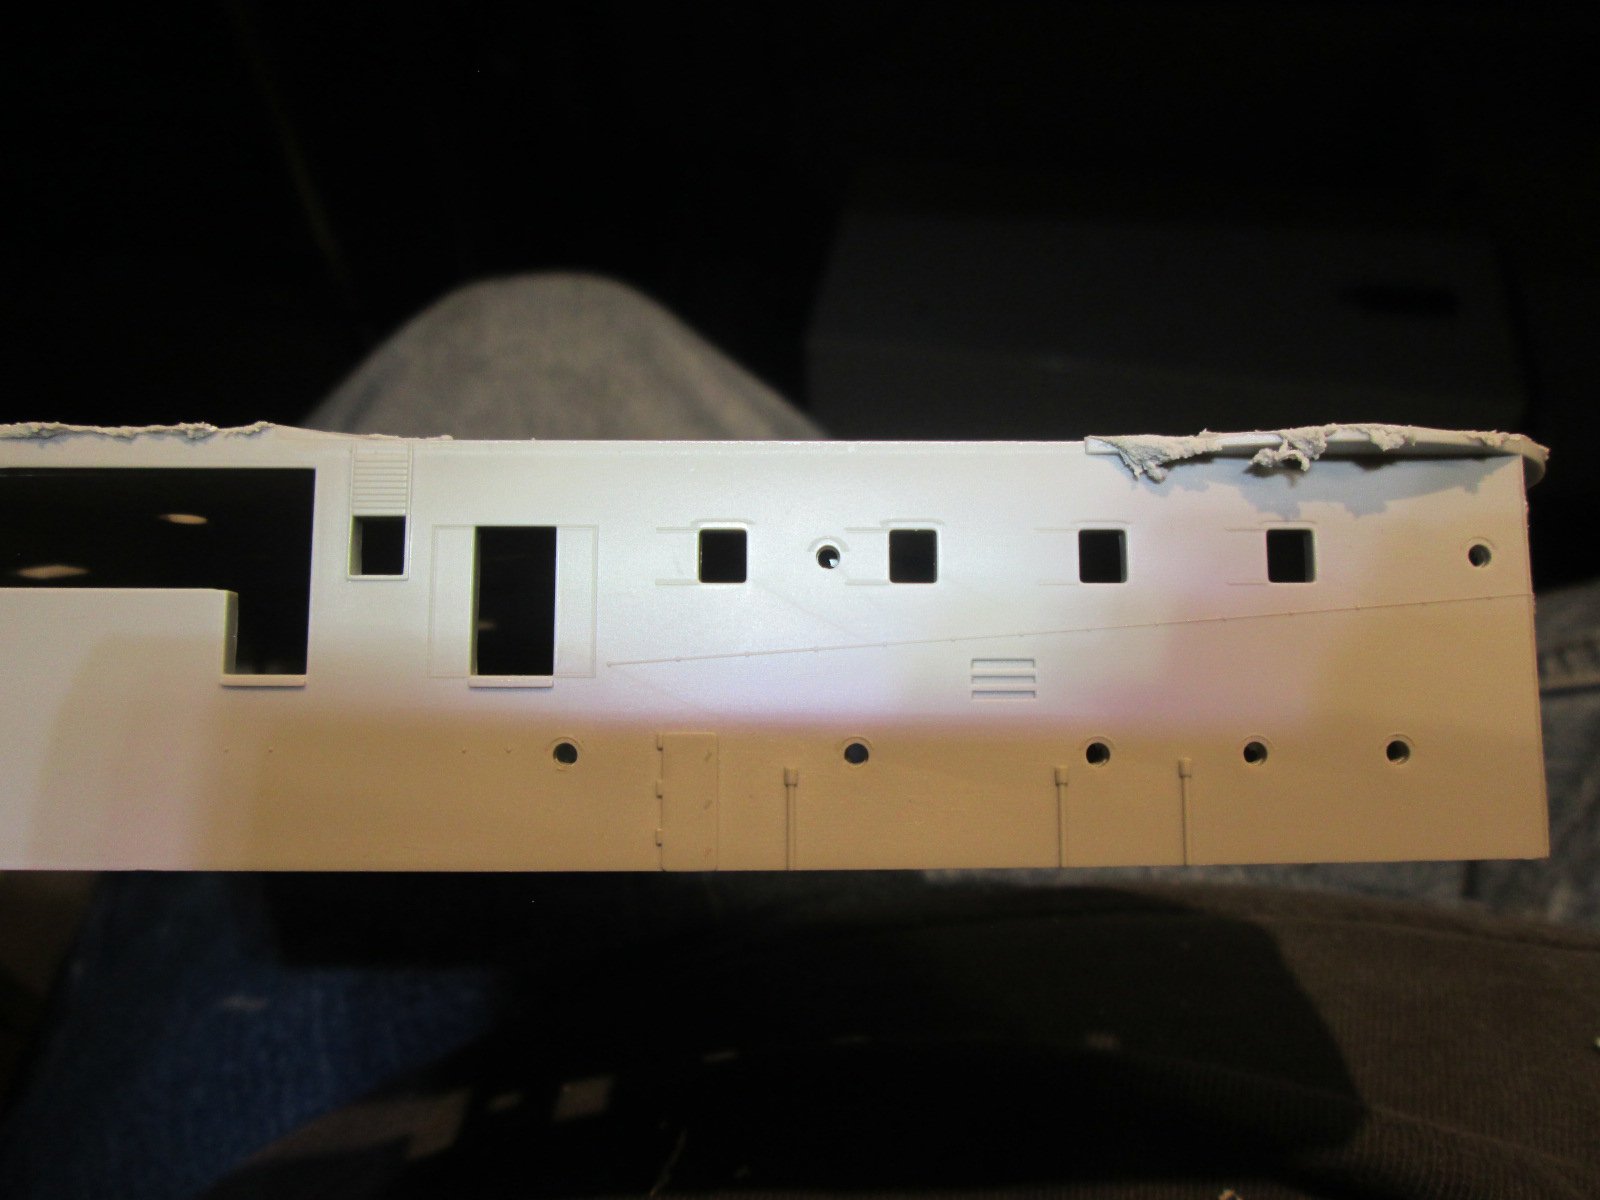
Today was the kind of day that you have to keep telling yourself that you're having fun. No really. This is fun! The most tedious stuff ever! I must have glued about 3 million tiny triangles. At least it felt like it! These are some of the pics of what I have been doing for the past 2 days. This work is extremely trying. But it wouldn't be half as bad if Pontos would put a little more effort into their docs. You spend half the time trying to decipher their directions. Oftentimes screwing up after looking at another picture several pages down. VERY annoying and I know I've mentioned it before, but it's just that bad and hopefully they get the message. The quality of this stuff is fantastic to say the least, but if you aren't used to their tricks and techniques, it will seem like a very bad waste of money. I'm working my way towards the actual hull. These assemblies are "barriers" that go along the side of the hull between decks. Pretty soon I'll have to get into the dreaded armament, but my least favorite, those damn lifeboats! And so it goes...


- 247 replies
-
- 13
-
-
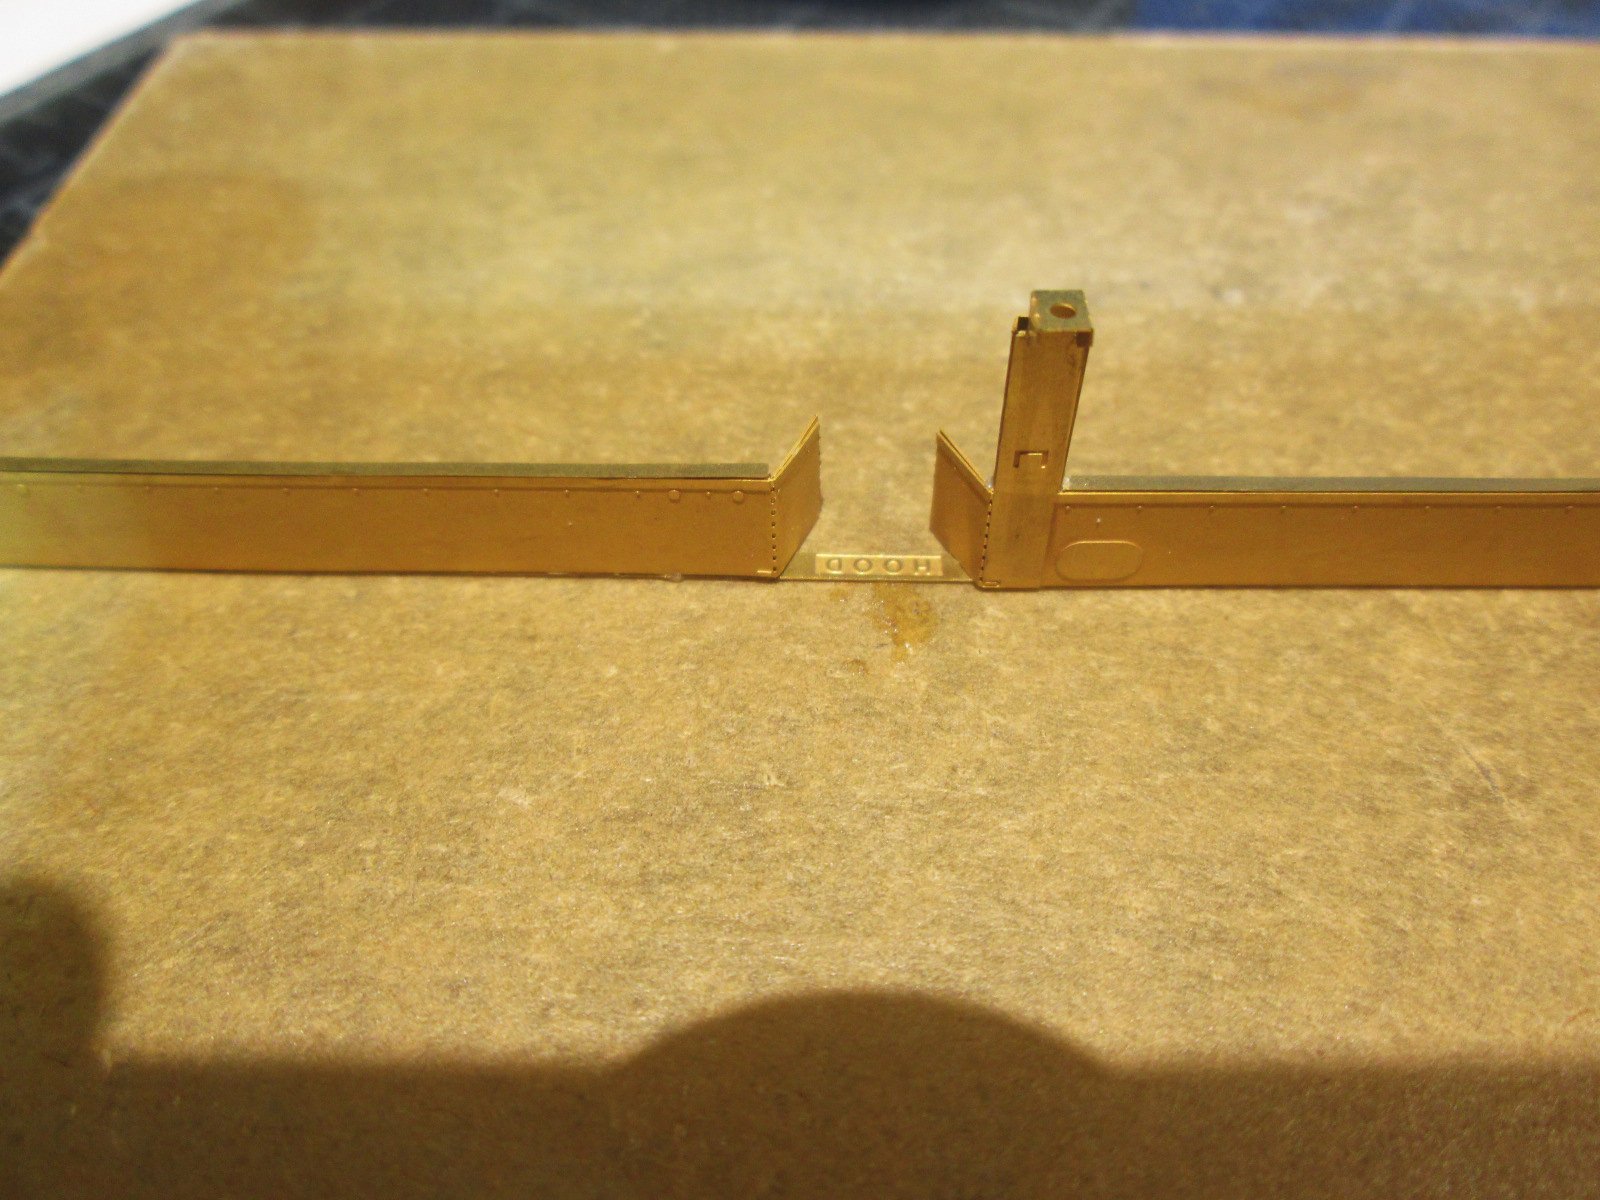
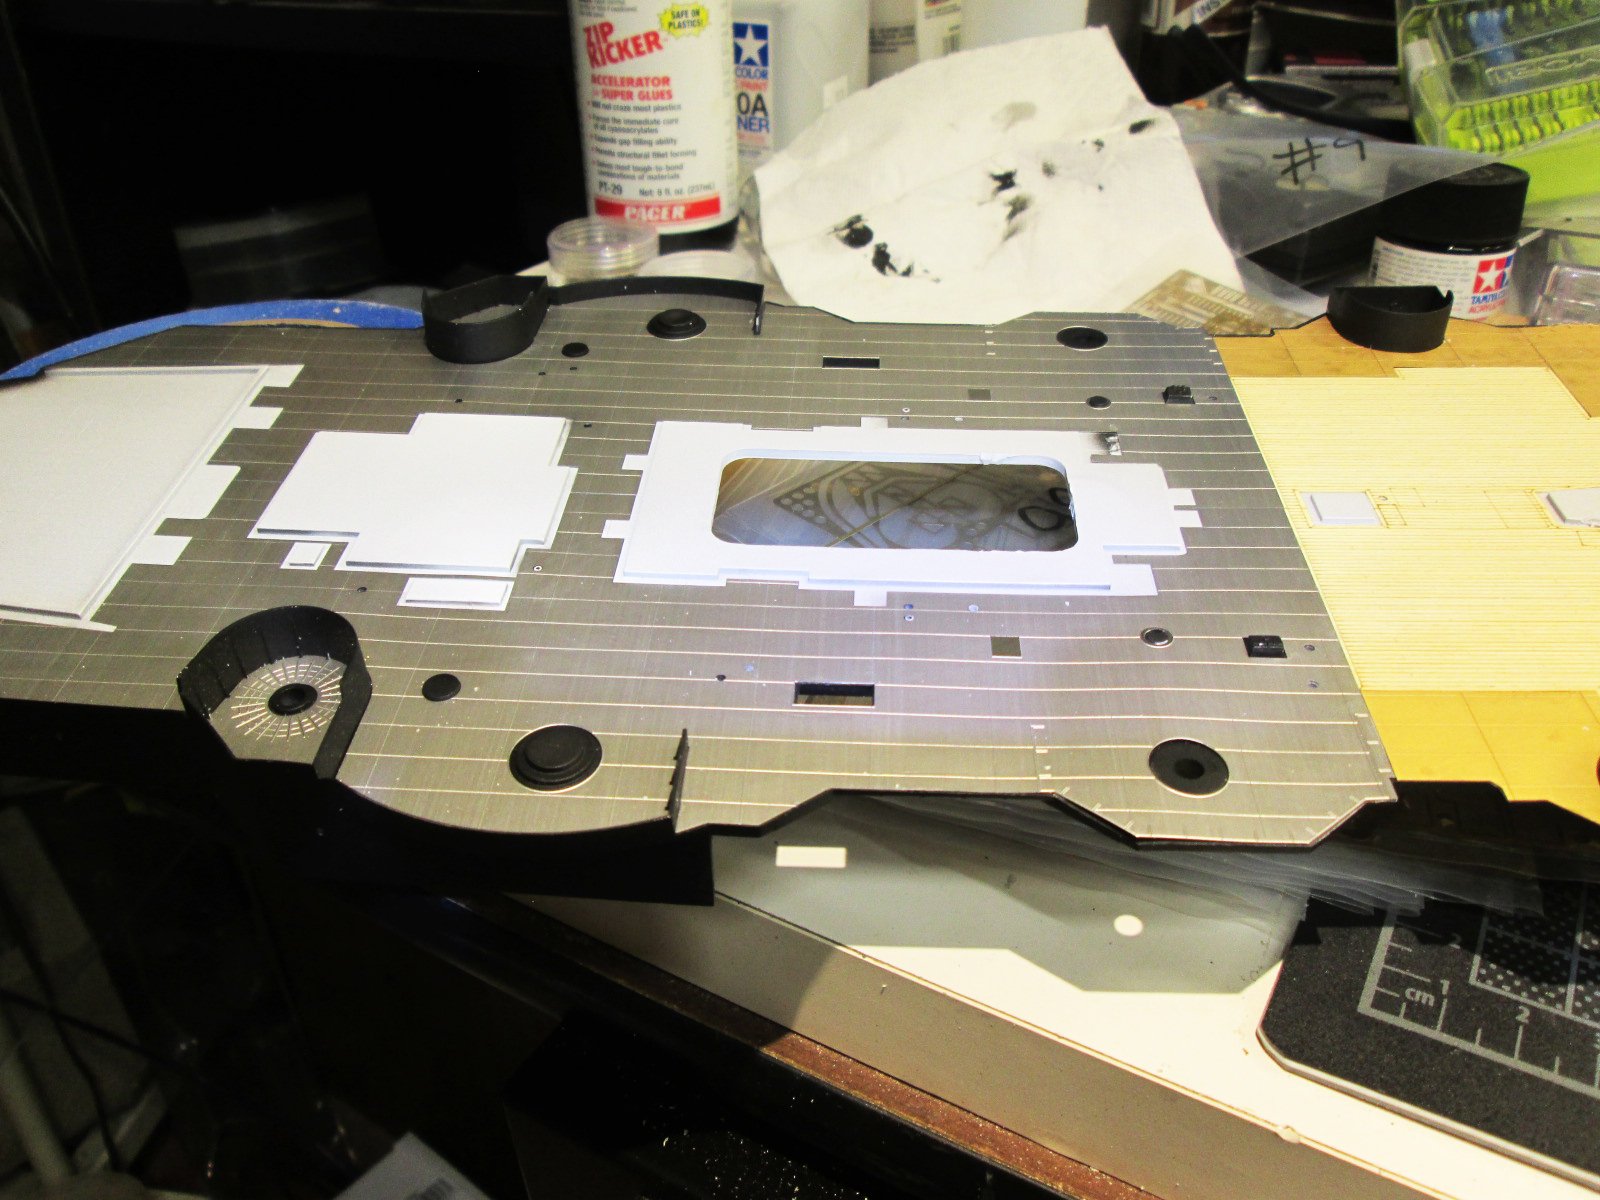
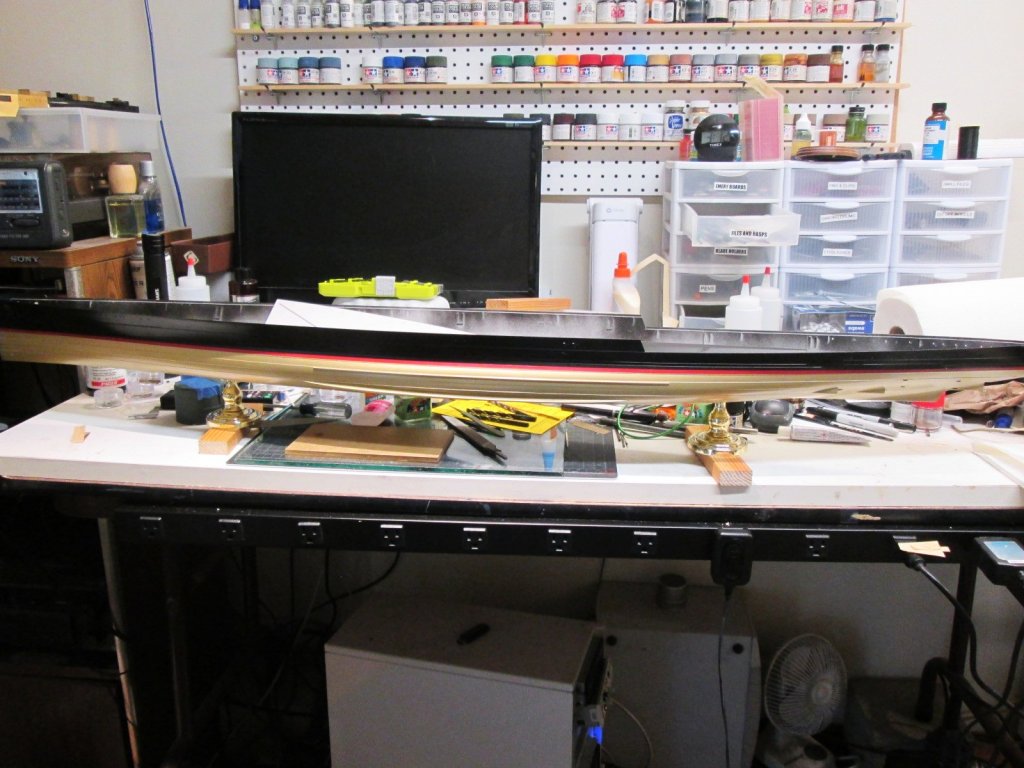
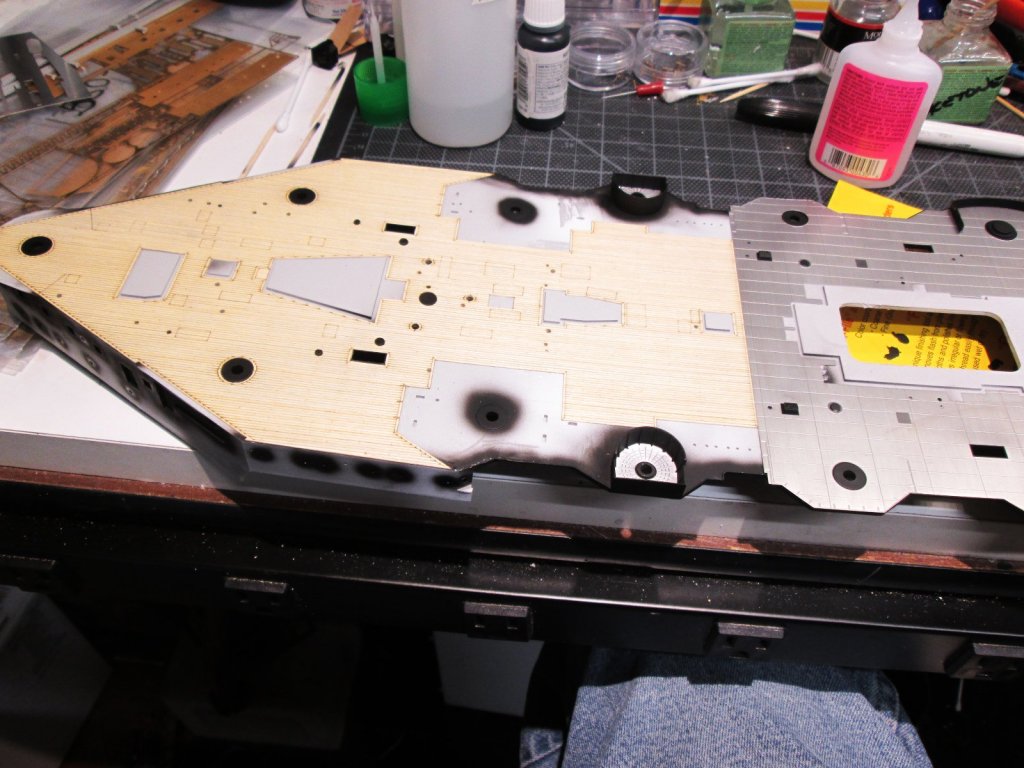
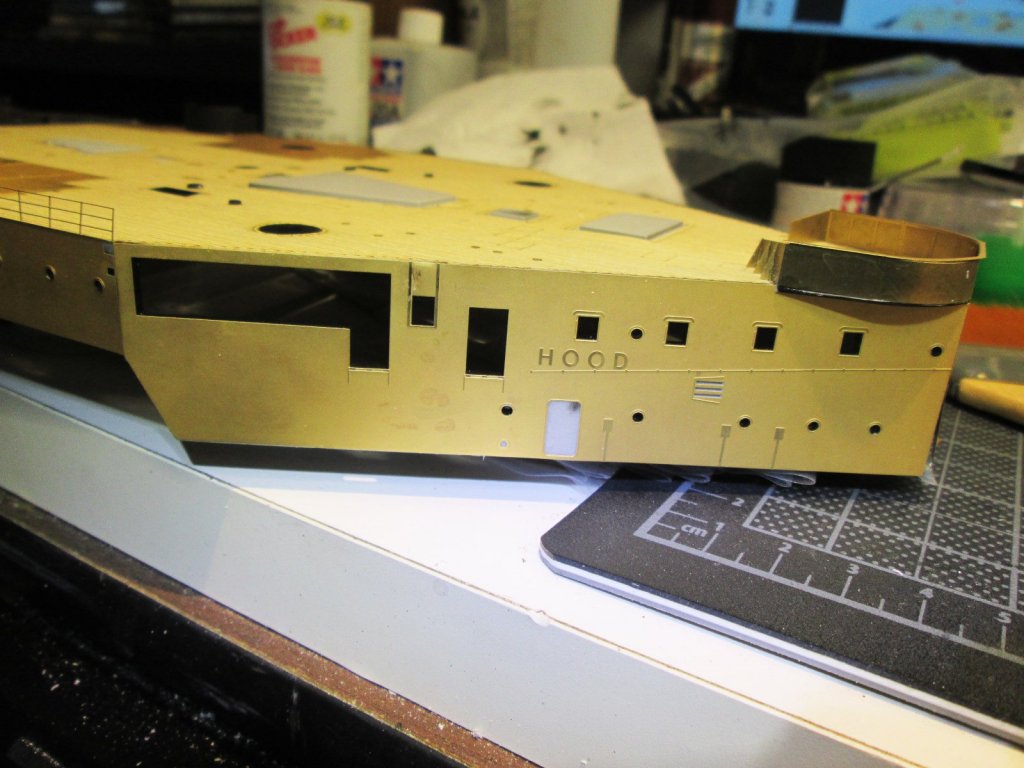
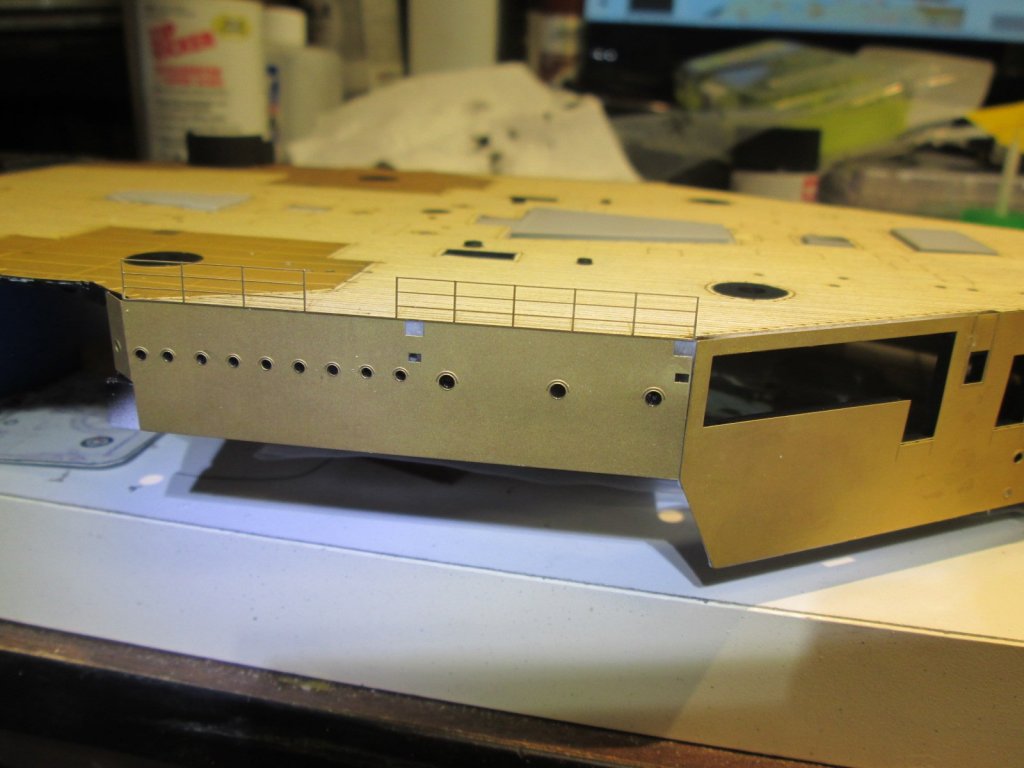
Actually, I did pretty darn good. At least better than Pontos: As you can see, I added a lot of brass and stainless steel. The deck looks amazing, with wood, stainless and brass. It's pretty flashy. Again, a LOT of modifying. When I went to place the brass side piece with all the portholes, I panicked because non of them lined up with what's on the plastic. I thought I had the wrong part. Then I realized, Ponto's probably corrected the Trumpeter design. I had to drill all new holes for the ports to line up with. I had never worked with stainless, and it looks amazing. But even though it's "stainless", it gets marked up very easily. Going to have to give it a good cleaning once I'm done handling it. Also, it's like working with a sharp knife! Watch your fingers! Hope you all approve.

- 247 replies
-
- 14
-
-
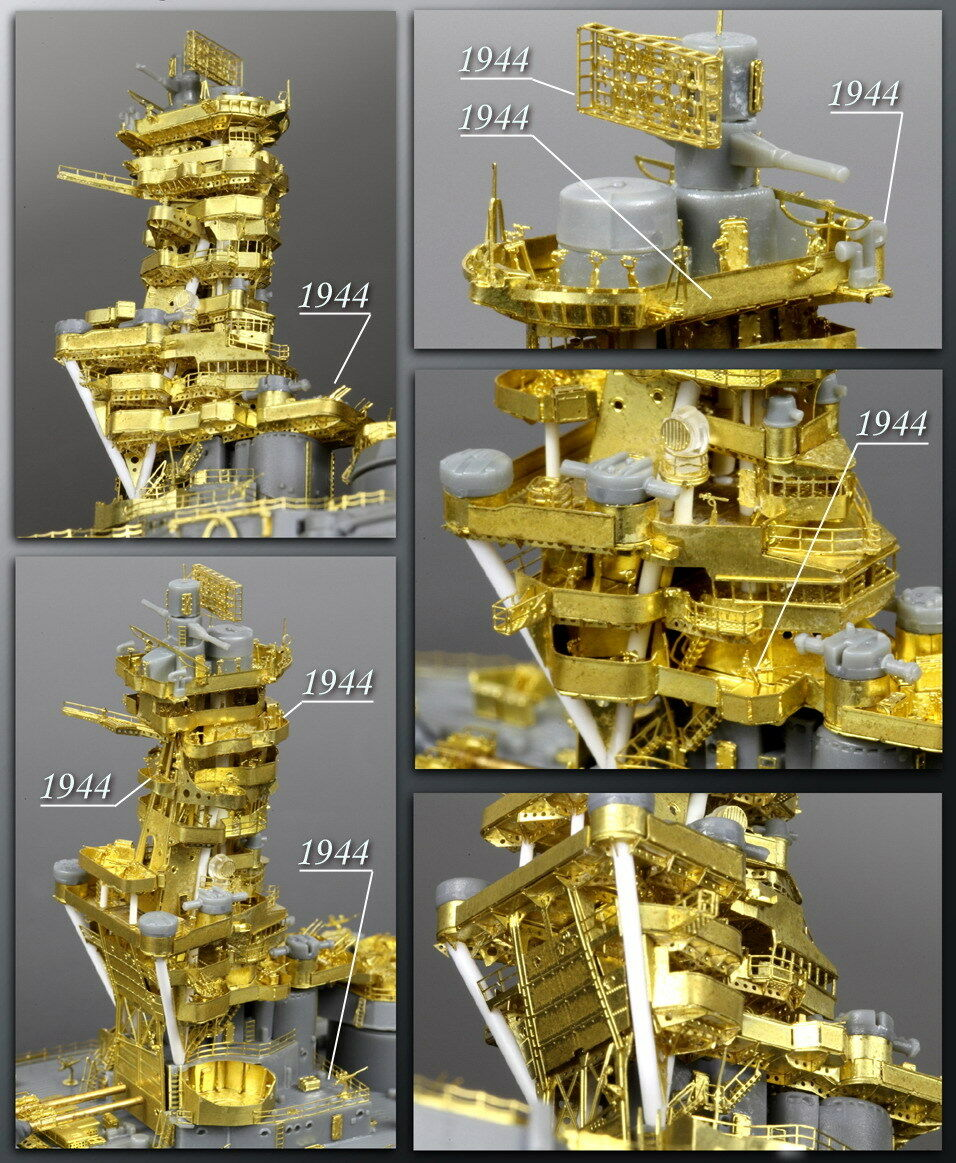
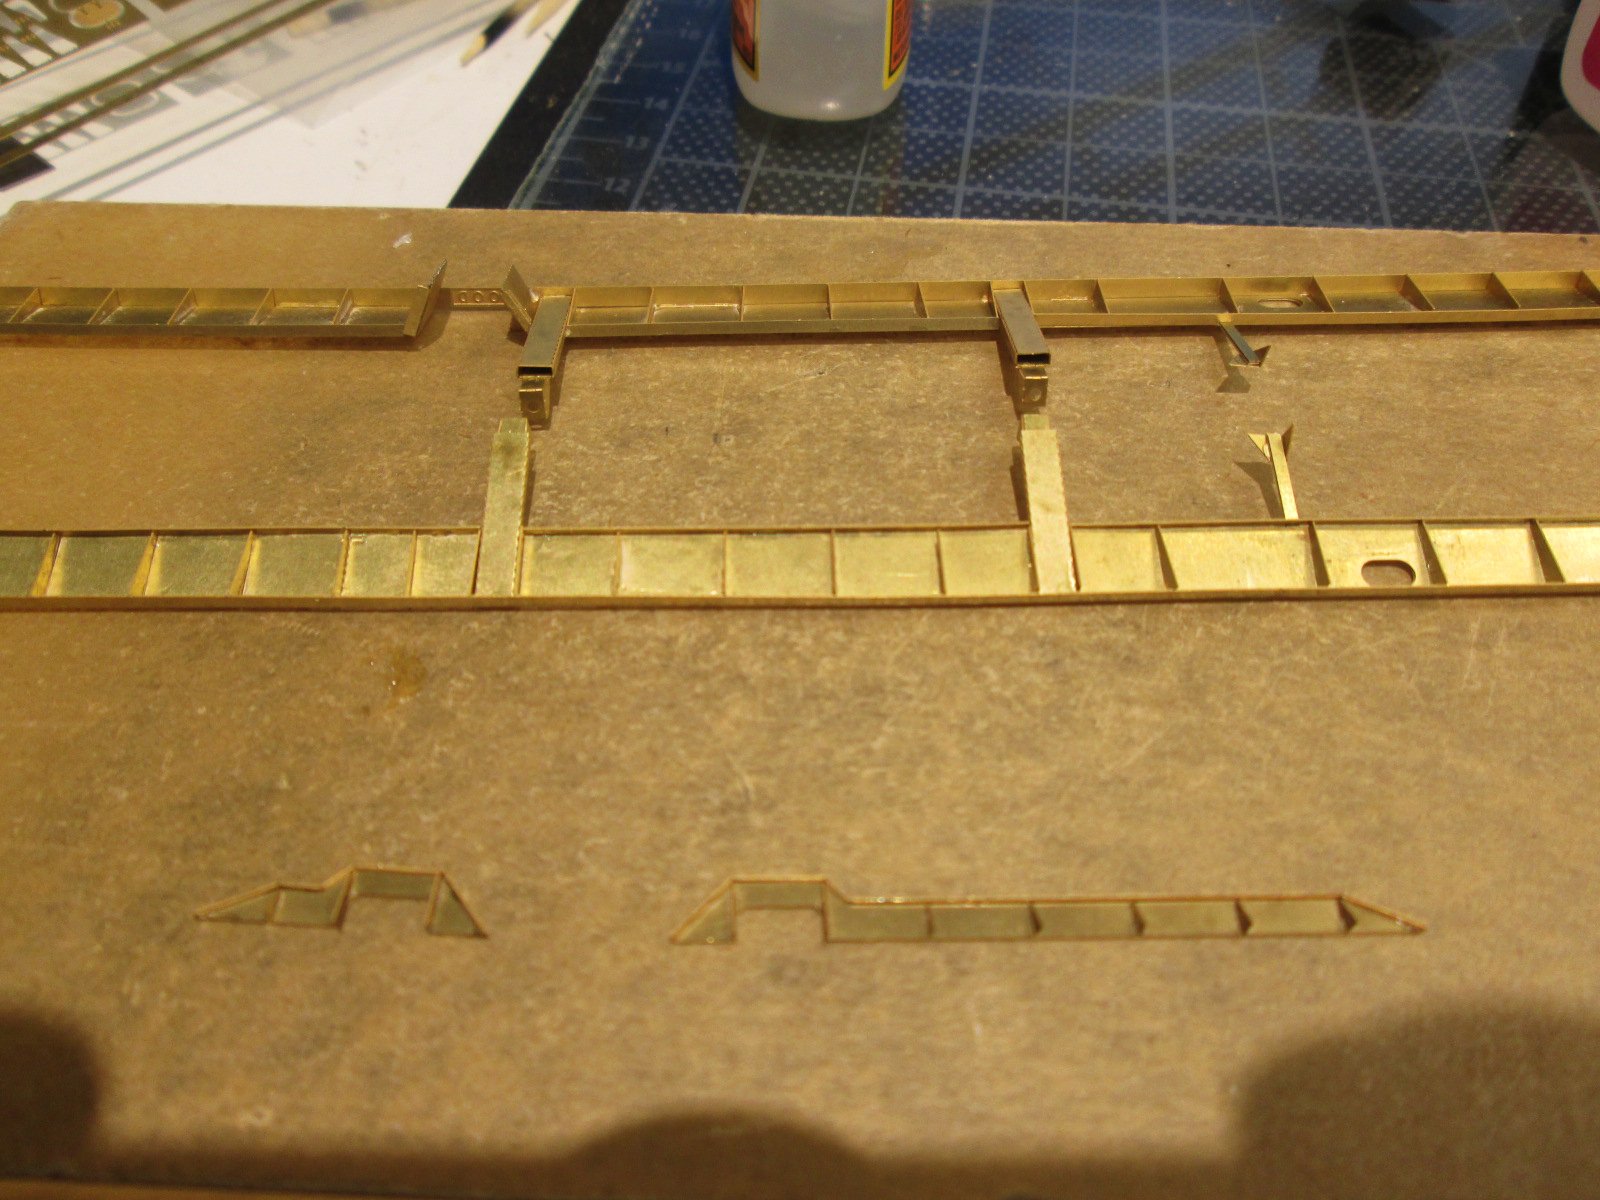
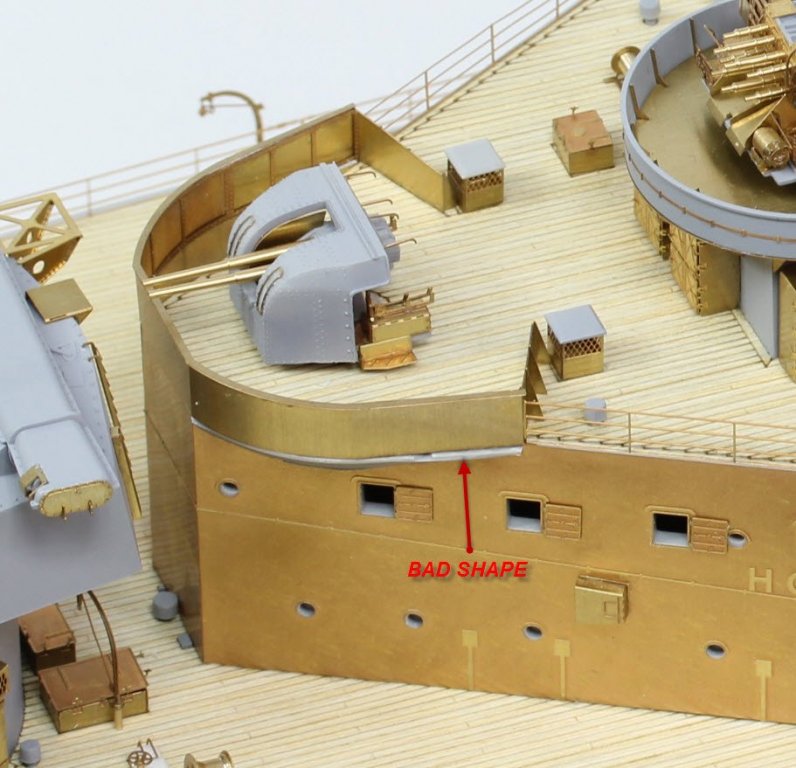
This is how tough it is to roll the brass! Even Pontos can't get it right! This is a capture straight from their instructions.
- 247 replies
-
- 11
-
-
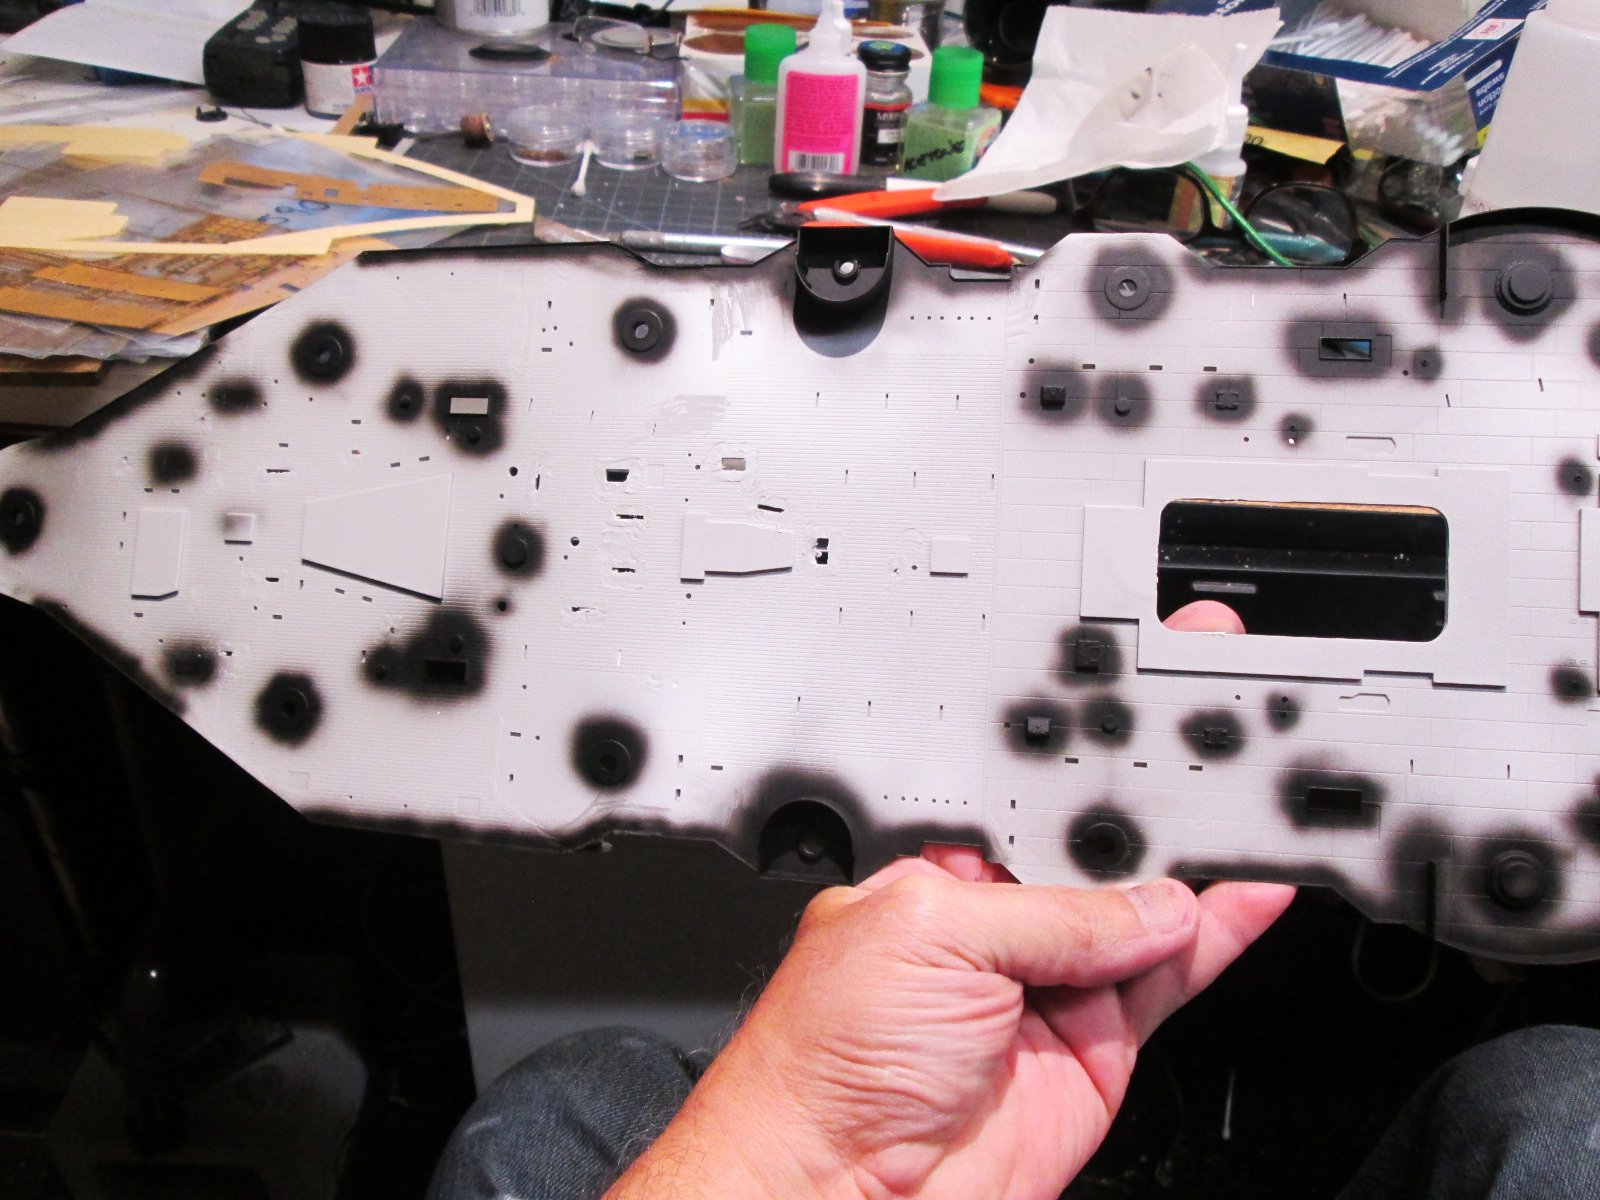
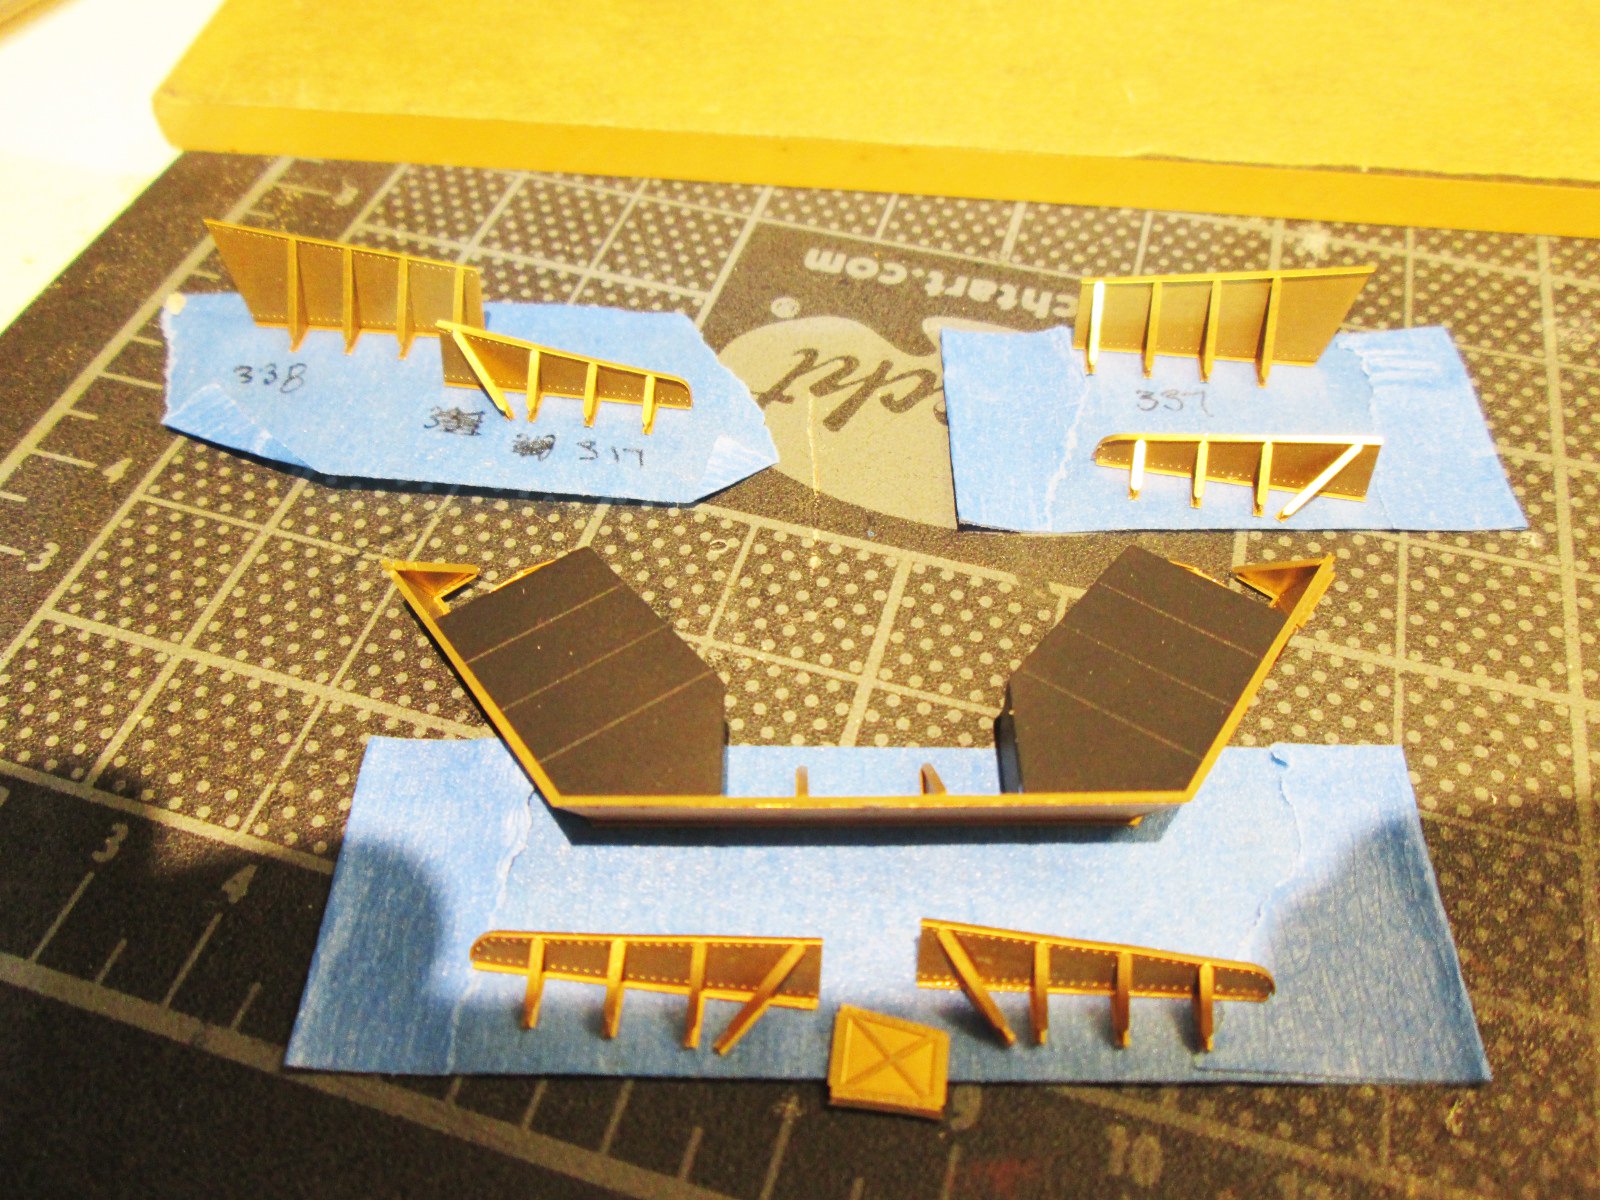
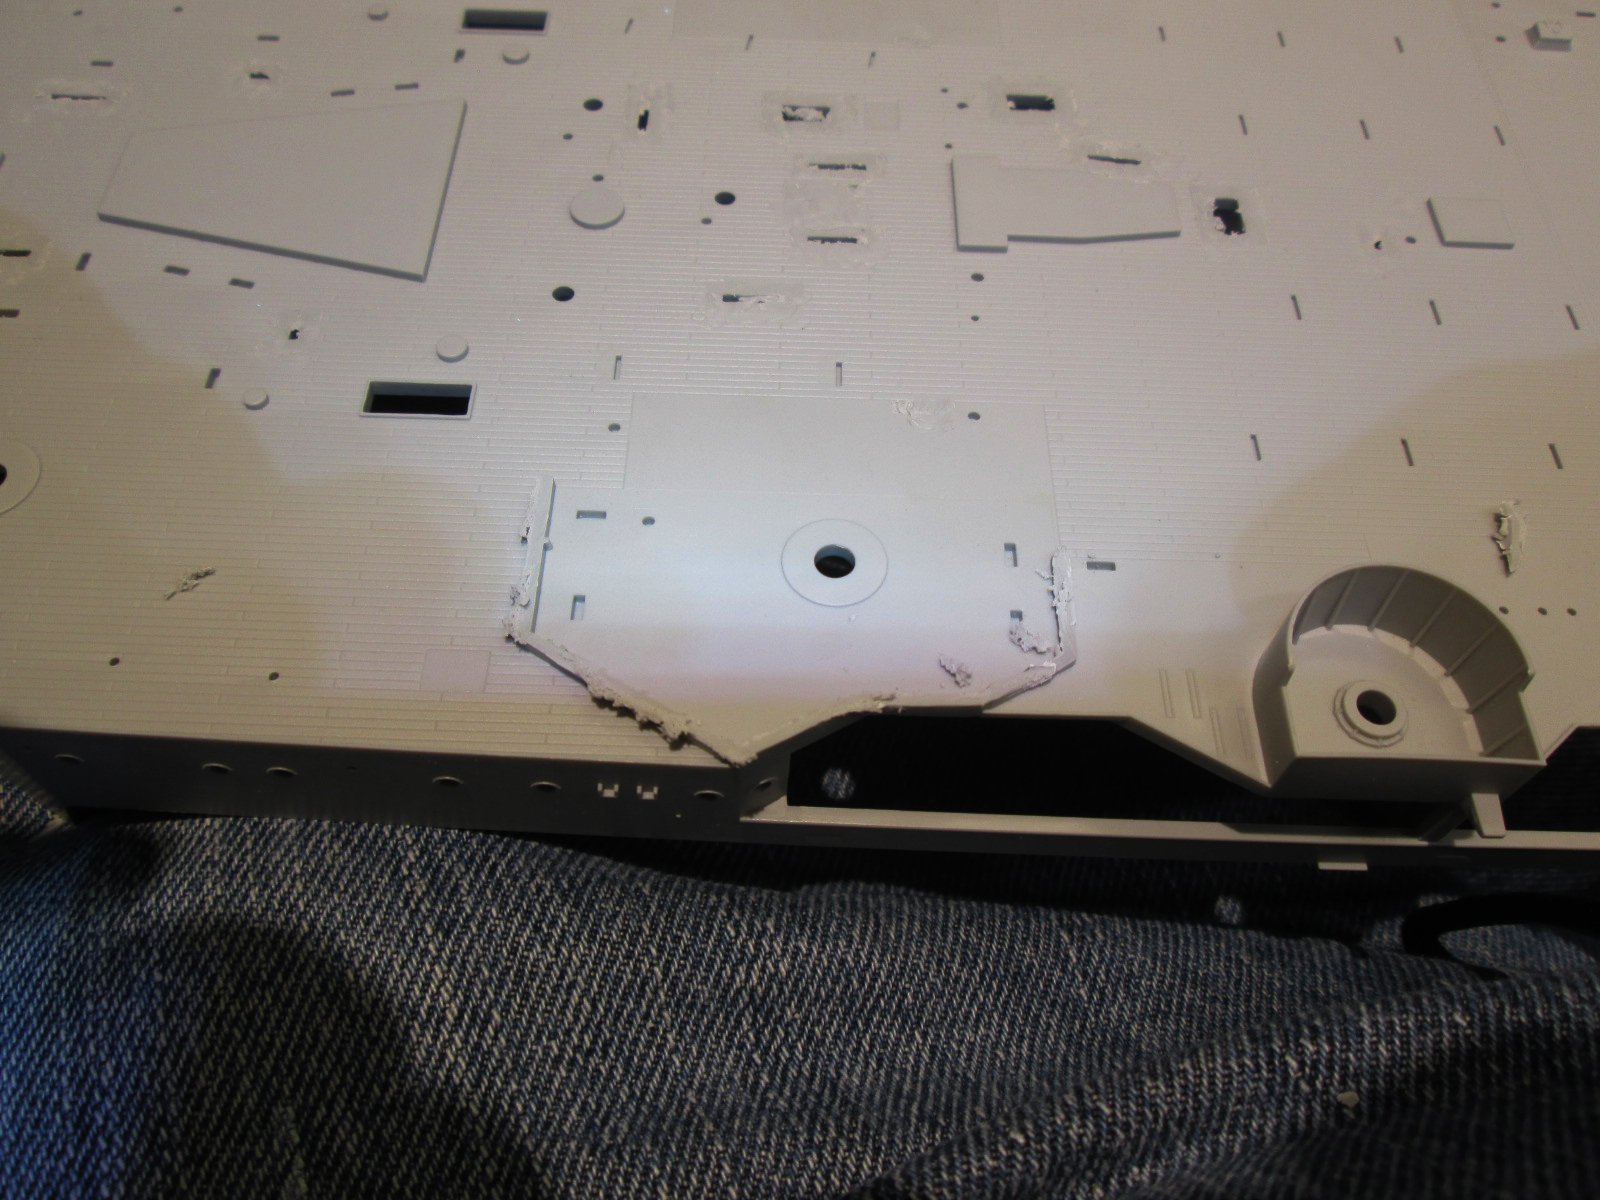
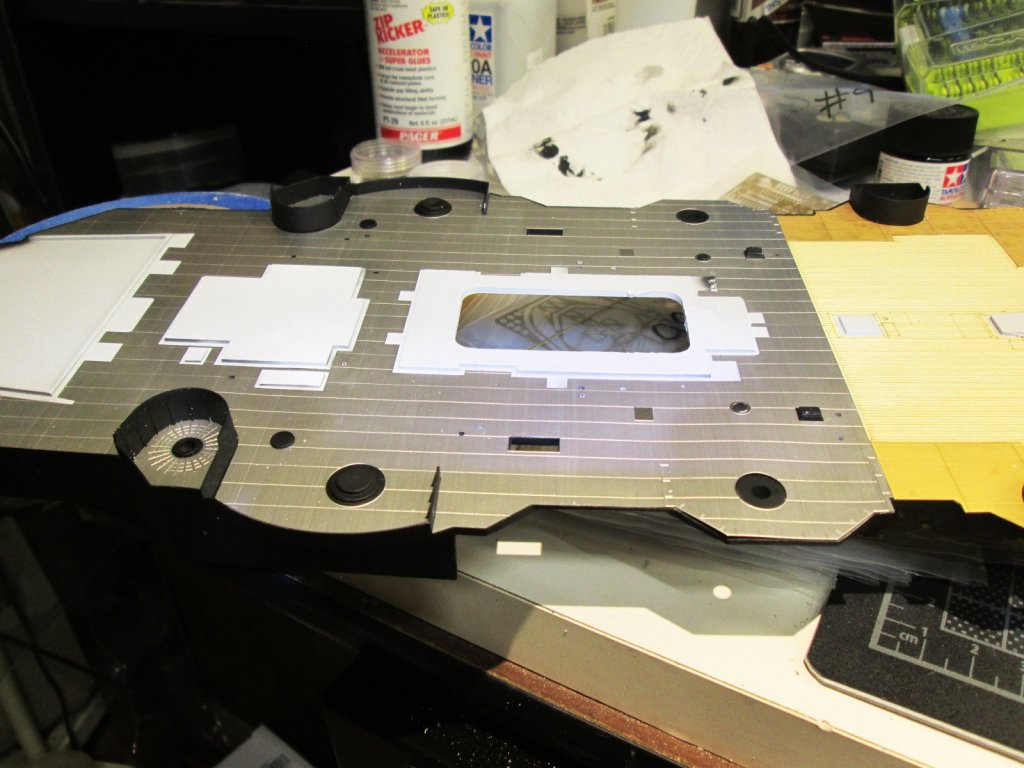
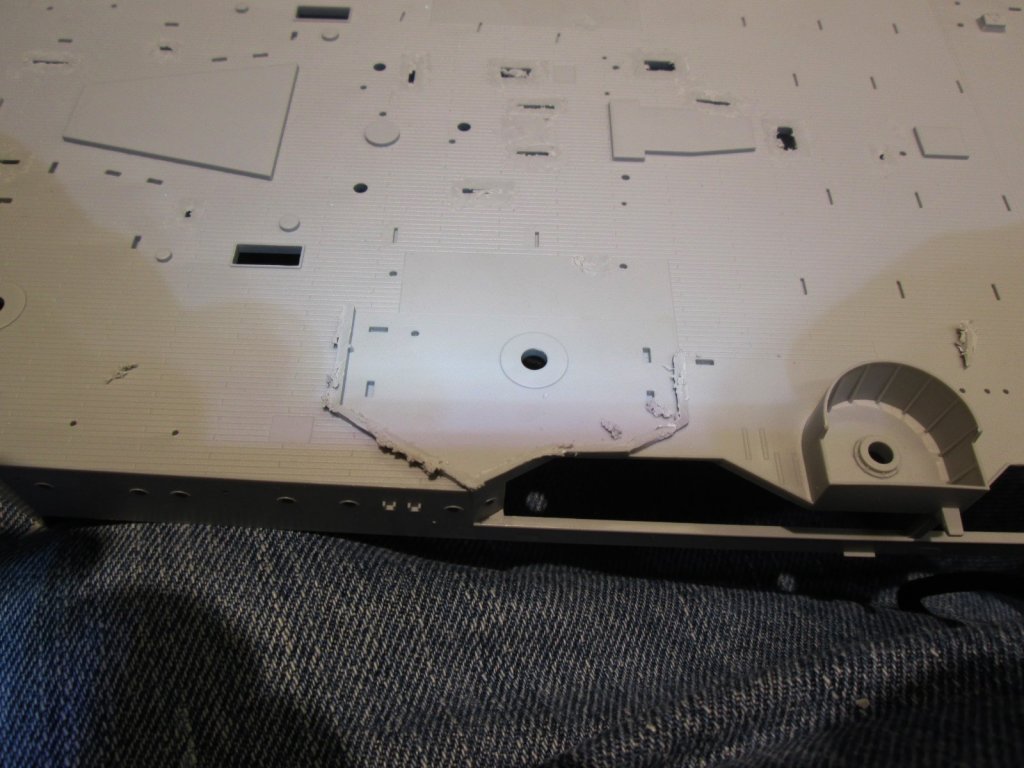
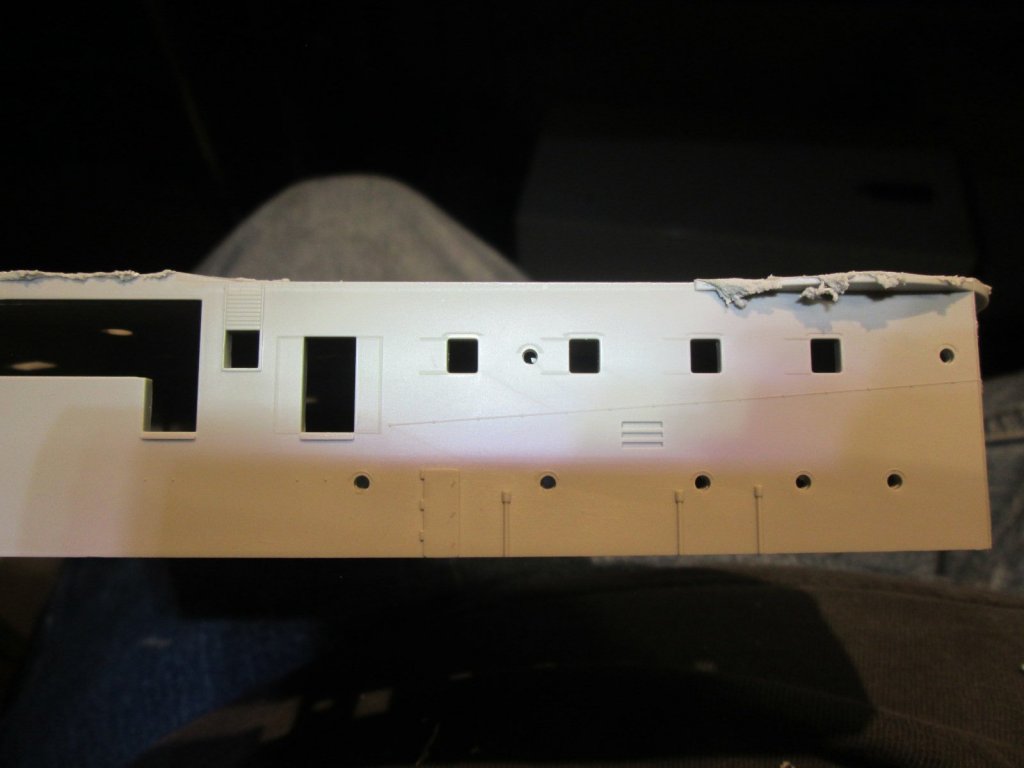
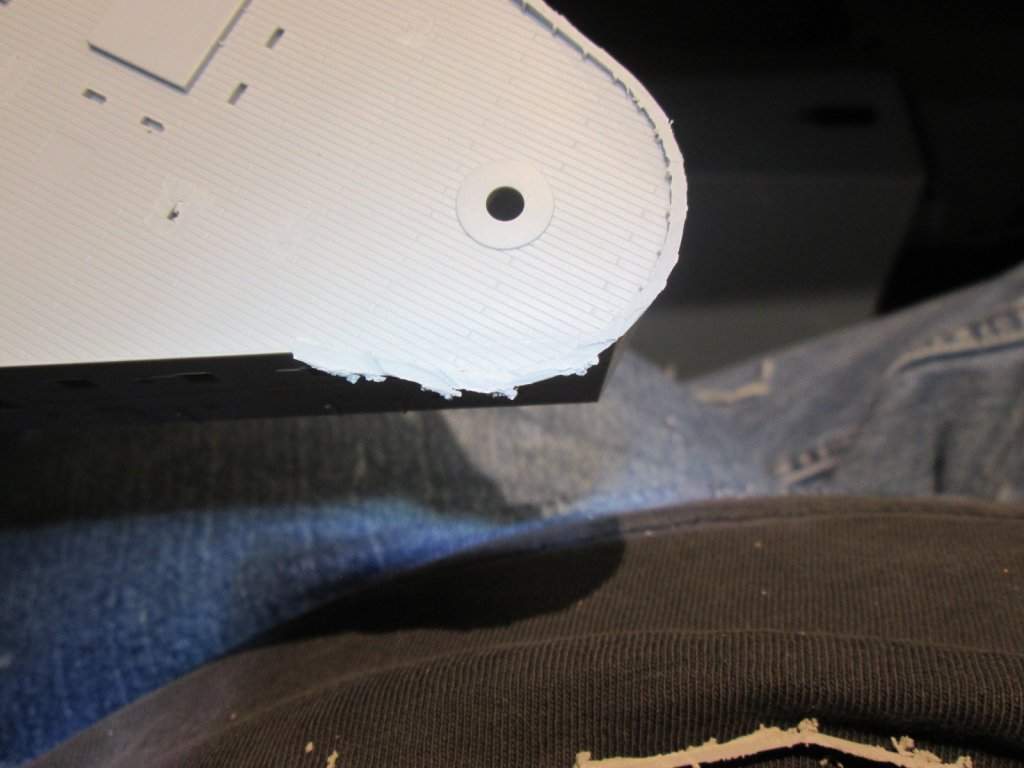
Not a lot to report. I finished the break water. Lots of parts: I decided to take a break from the tiny stuff and move up to some of the bigger stuff. The largest structure require some very serious surgery. LOTS of modifying and cutting off. Unfortunately, the pictures and directions do very little to instruct you where. So you have go through every single illustration and "notice" where the parts look different from the original. A real pain in the butt, and I'm afraid I cut off something I shouldn't have. Pontos skipped around with what they used brass on, and what they didn't. I don't know if it's because of the actual ship design, or just cuz. Very intimidating. So I did a lot of cutting and priming, and hoping I can see things better once it's dry. Here's the progress: Lots to clean up. All the details you see on the sides of the main structure are wiped out. Replaced by PE.


- 247 replies
-
- 10
-