HOLIDAY DONATION DRIVE - SUPPORT MSW - DO YOUR PART TO KEEP THIS GREAT FORUM GOING! (Only 20 donations so far - C'mon guys!)
×

Salty Dog
-
Posts
236 -
Joined
-
Last visited
Content Type
Profiles
Forums
Gallery
Events
Everything posted by Salty Dog
-

Royal Caroline by tony - Panart
Salty Dog replied to tony's topic in - Kit build logs for subjects built from 1501 - 1750
Hey Tony, That's a very nice kit. It is a fun build. I hope you "actually build it" and won't end up like me hopping around kits and never finishing anything! I hate me! -
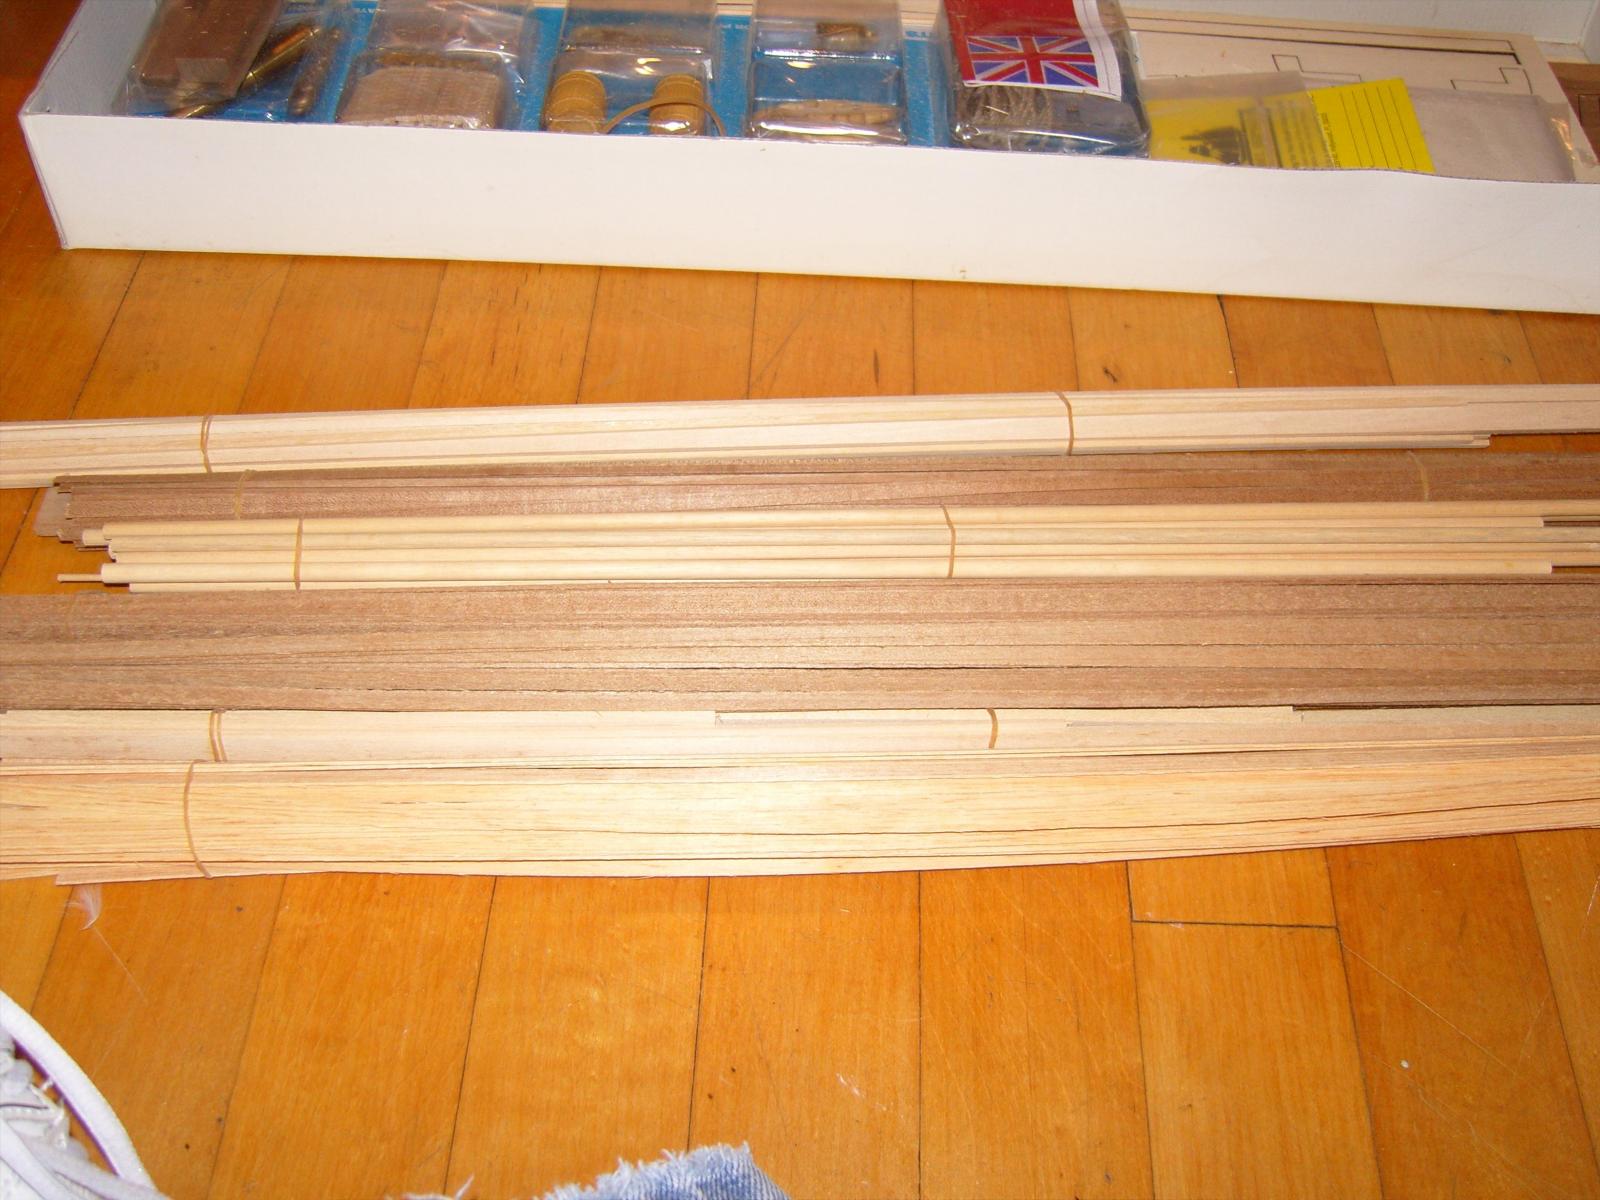
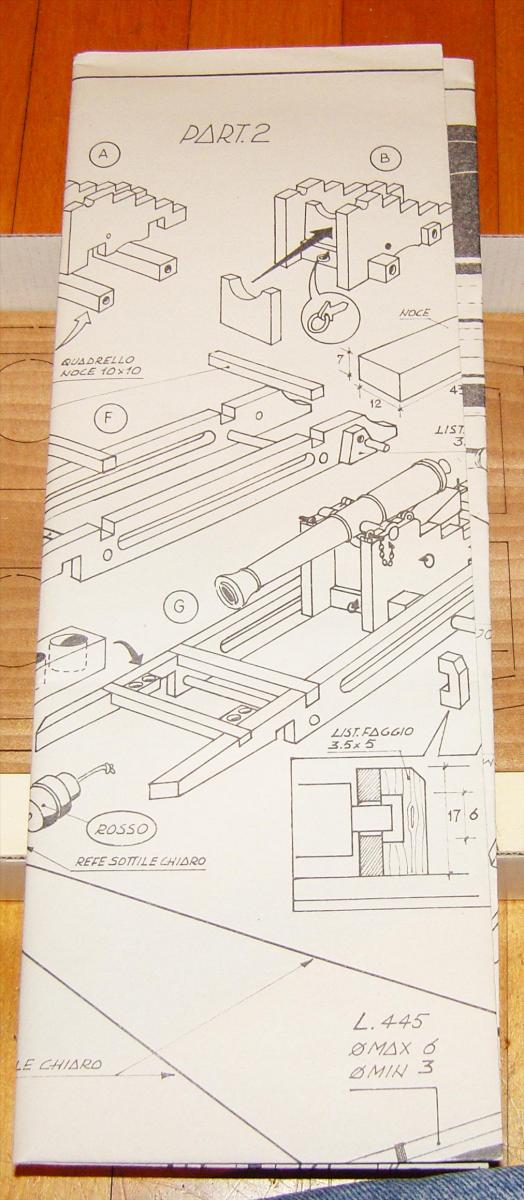
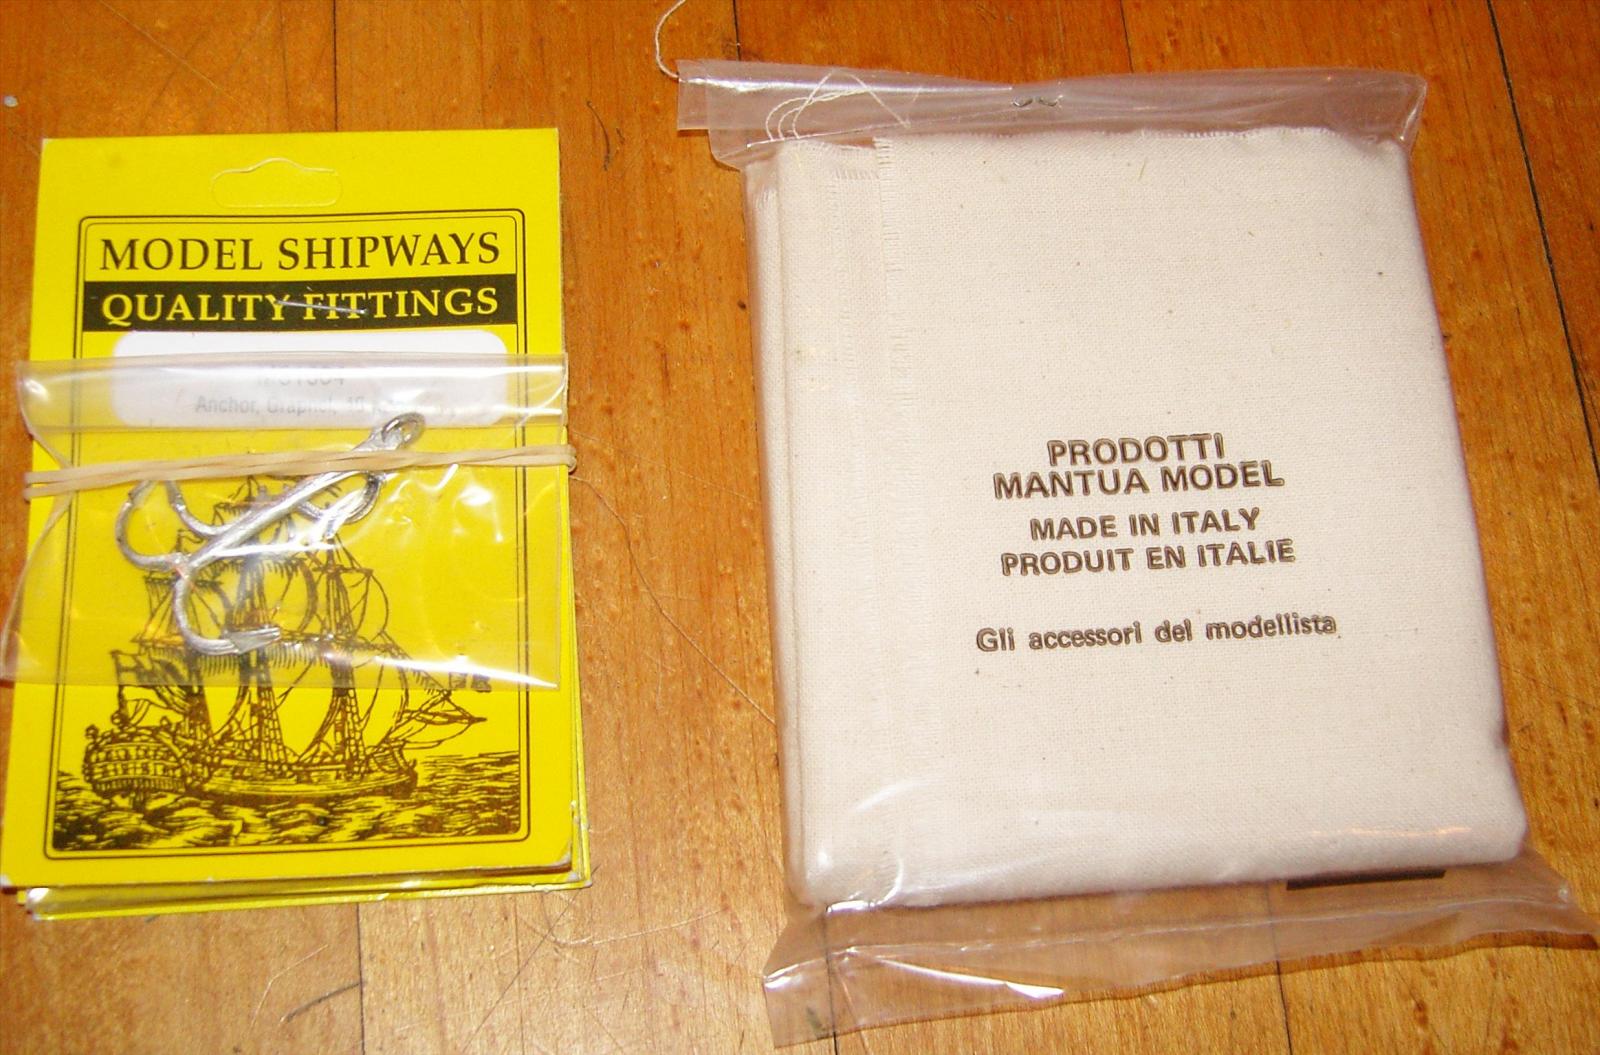
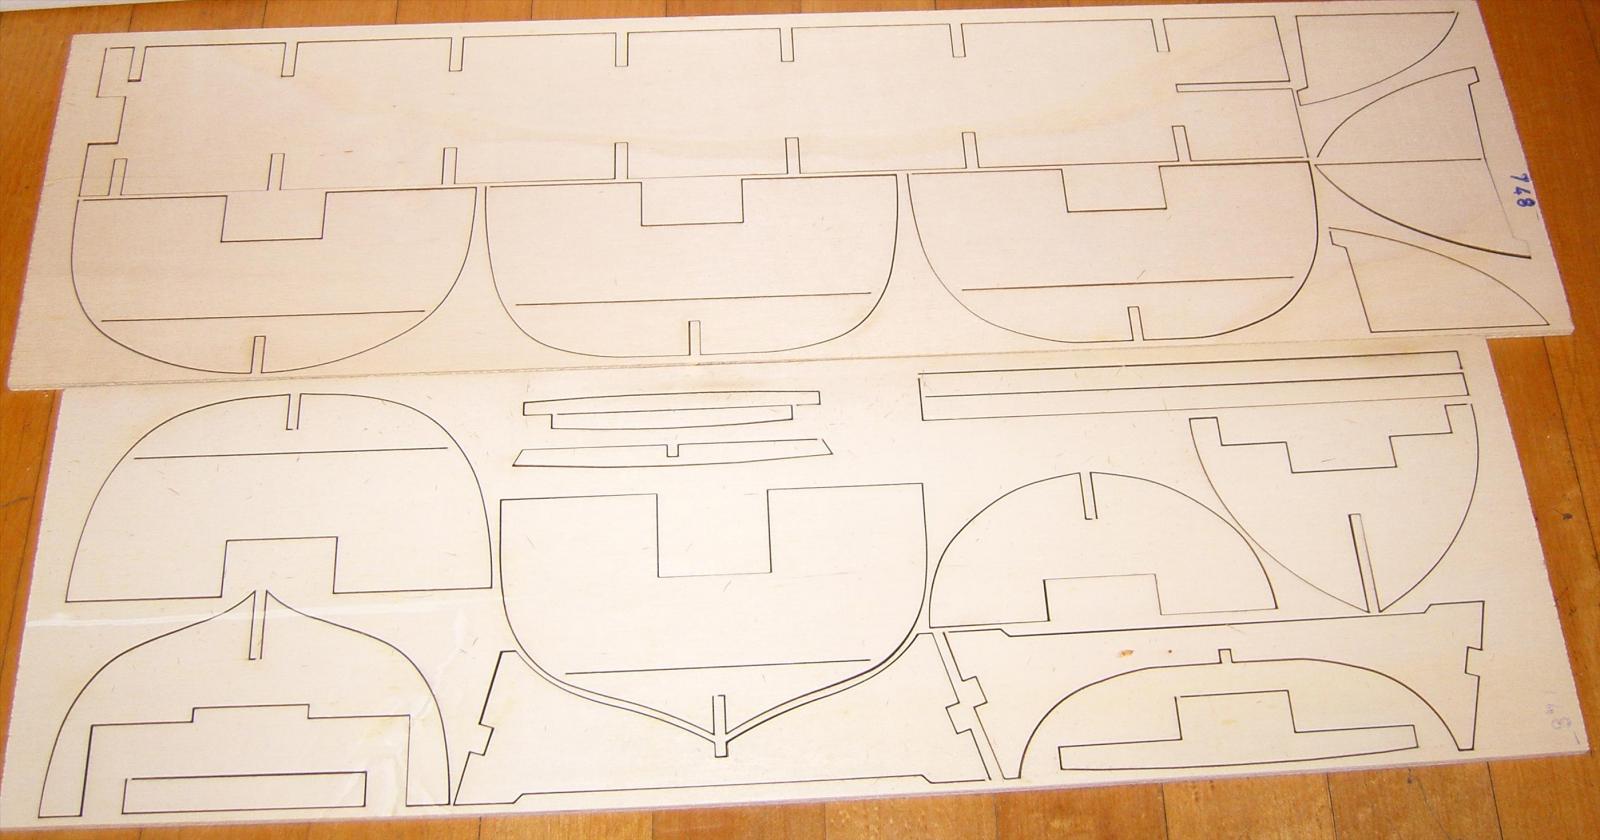
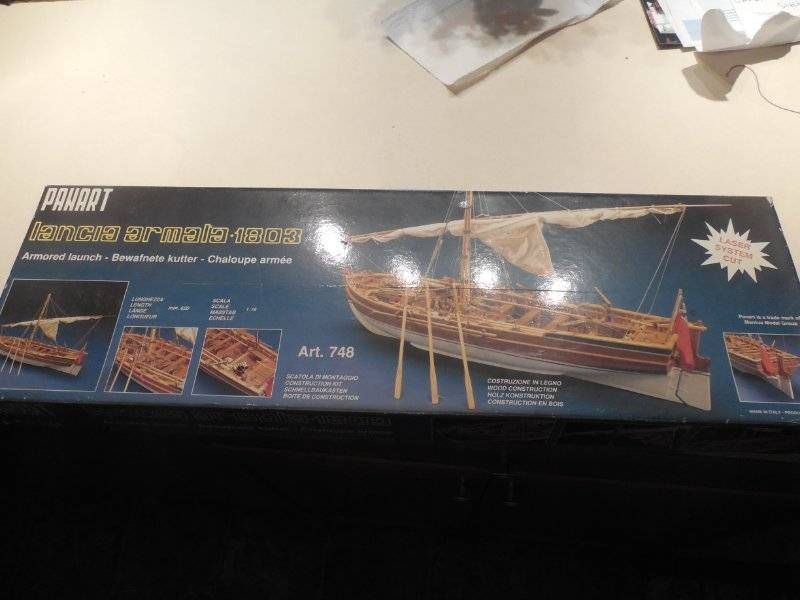
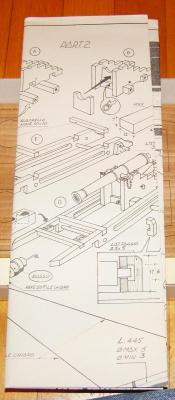
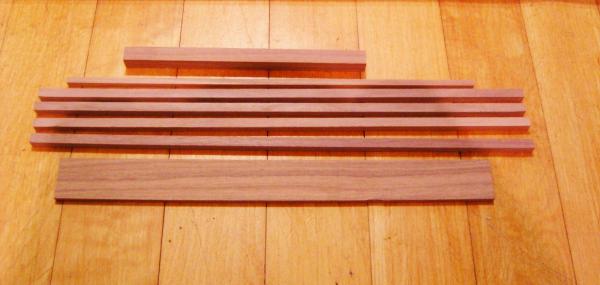
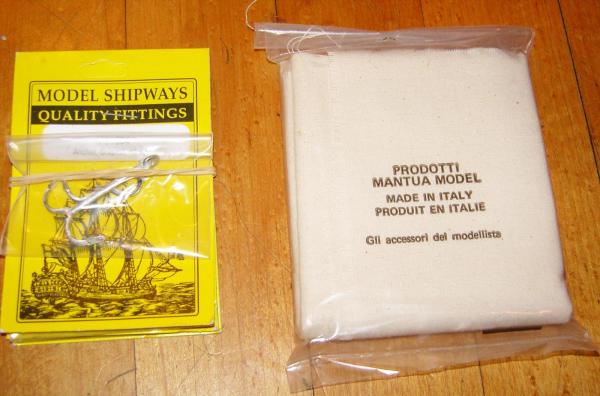
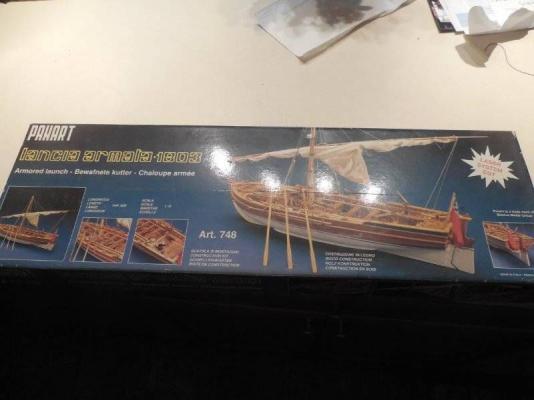
Hello everyone, I've recently been kind of in a rut when it comes to building. I have been working on the San Felipe by Panart but ran into problems with the wood supplied. It was short some walnut strips and I didn't have enough to complete the hull planking. Mantua Italy told me to contact Ages of Sail for the wood and they were VERY helpful, but I ultimately got walnut that didn't match match what was already there. My intentions are to build it with no painting, so the walnut just won't look right with 2 VERY different shades. So I've decided to put it on hold and think it through. In the meantime, I thought I'd work on a smaller project, that being this very pretty boat. It has a huge cannon since the scale is so large, the wood strips are very large in comparison to what one is used to with your typical model ship. I figured it would be a change to work with something larger. Maybe this will keep me going! For now I have attached pictures of the kit. Hopefully I will be able to keep this log. Thanks


-
Thanks Frank, I'm so used to buying my paints from hobby shops rather than crafts shops. I'm going to have to expand my horizons. I really like that color.
-
Dimitris, Looking very good. I just realized that you're building the 1:100 and not the 1:84. I always fail to look at the scale and get confused. There's a 1:100 kit on eBay right now and I got all excited because it was only around $350. I was about to pull the trigger when I saw that it wasn't the 1:84. I already own the 1:84, but for $350 I'd buy it again! They now dropped the price to less than $250. That's still a good deal, but it's not the scale I want. It doesn't help that Mantua decided to use a picture of the ship on their box that is almost identical for both. Almost seems deceitful. Still going to watch your build. Take care.
-
Sid, That looks like a lot of fun. I'll be watching. Just curious, why did the San Felipe scare you off?
-
Cutty Sark by NenadM
Salty Dog replied to NenadM's topic in - Build logs for subjects built 1851 - 1900
С Днем Рождения Nenad! This is the stuff I'm talking about: http://www.ebay.com/itm/1pcs-Brass-Metal-Thin-Sheet-Foil-0-1-x-200-x-1000-mm-E3-C01-/171729899489?pt=LH_DefaultDomain_0&hash=item27fbe64fe1 Izzy thanks very much for your offer. I'm ok waiting for the stuff. I really appreciate it!- 4,152 replies
-
- 2
-

-
- cutty sark
- tehnodidakta
- (and 1 more)
-
That is one very cool little kit. Having worked on other Japanese brand wood models (Hasegawa, Imai) the quality of the kits is fantastic. The way all the wood is packed and labeled separately according to size is great. Even though they don't include several types of wood such as the European ships, the wood (Japanese Cypress?) is beautifully and accurately milled. They did include many different materials though. All the fittings are nicely packed and labeled too. The instructions are very clear, even though they are usually in Japanese. I will definitely build this kit!
- 196 replies
-
- 2
-
-
- higaki kaisen
- woody joe
- (and 1 more)
-
Cutty Sark by NenadM
Salty Dog replied to NenadM's topic in - Build logs for subjects built 1851 - 1900
Hi Nenad, I've been lurking on your build of the CC. I like that you went with the "gold" plates. I am eventually going to build another Cutty and am going to do the same thing. I just found some brass rolls on eBay from China that are .10mm thick, which is the same as the Amati copper plates. I have ordered some and am going to look into what I'm going to do about the rivets. I REALLY like what Nils does. I might do that. Good job on your CC!- 4,152 replies
-
- 3
-
-
- cutty sark
- tehnodidakta
- (and 1 more)
-
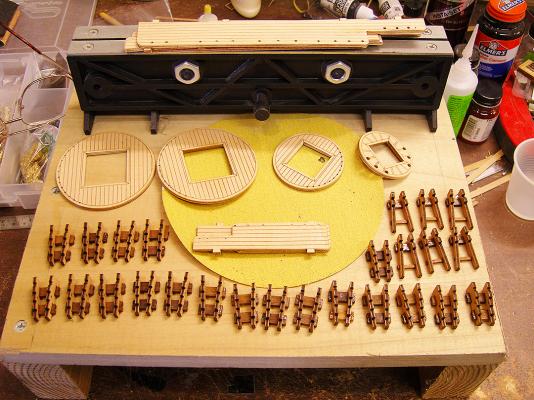
A minor update on my build. As Bender encountered during his build of the SF, I too was short in the amount of planks to finish the hull. I have contacted Mantua and "supposedly", they are going to send me some more wood. I say "supposedly" because their attitude was not very nice when I informed them of the problem. Their response was "you did something wrong". So in the mean time, I am working on little stuff. I built all the cannon carriages and am sealing the wood on some items for painting and for gluing. As this is the second edition of the SF, it is a hybrid of stuff. You're basically given the option the build the ship as the original or as the updated version. I think this is why the material count is off. They assume some times that you are going to build the updated version, and won't need as much wood as you would if you build it as the original version, so sometimes you get lots of extra wood, and for other assemblies, not enough. I am going to make the mast tops combining both versions. I really like the laser effect for planking, but I don't like the plywood edges showing. So I will line the edges with wood strips. Plywood edges really bug me. Looks very phony and if it's not going to be painted, at least veneer them.
-
Hi Bender, Anymore pics? Its been a while.
-
And I think that's the way it should be. If every person tried to build every ship the way the actual ship looked, it would be a very boring bunch of models. I think putting in some of your creativity, whether it is a different paints scheme or no paint at all, is what makes models so cool. I love to see other people's ideas and creativity. Although I can certainly appreciate an "authentic" build and all the research that goes with it, I also really enjoy when people let loose and enjoy their build and build it with their interpretations. As I've gotten older, I too have broken away from the "authentic" mold and just try to have a good time. I love your natural colors!
-
Hi Gregory, I realize I'm not going in the exact order of the instructions. I would rather finish the hull before I get started on the details. I feel that since there is so much handling of the ship when planking the hull, it's likely that some of the of the previous work might get damaged. Also, by not cutting the ports yet, it keeps the structure more solid while doing the planking. I don't think cutting the holes out of order will do any harm. Once the hull is completely planked, then I can do the fun stuff
-
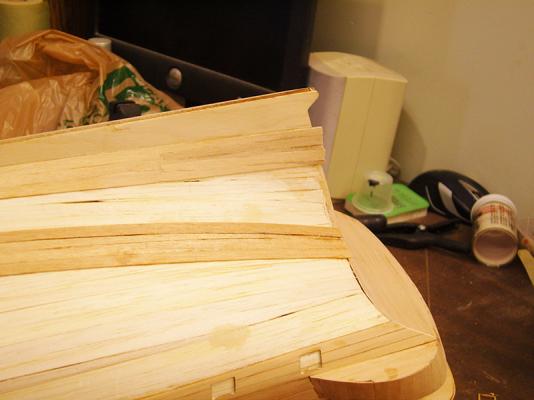
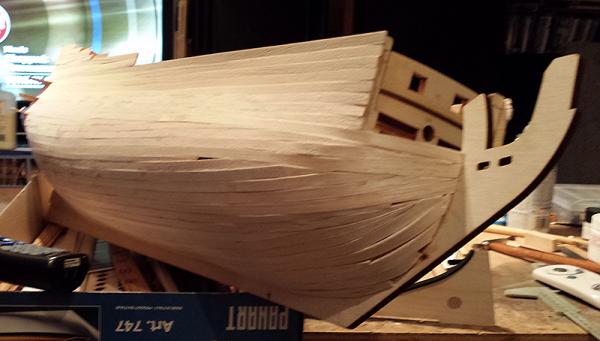
Thanks Gregory. Nothing's more frustrating than having to rework stuff especially when its due to the kit's lousy instructions! Really bugs me when no progress is made. But finally today I moved past that and started the dreaded second planking. Planking the Cutty Sark was a dream in comparison to this. With such a bulbous hull, the strips have to be adjusted often, which makes for more chance to screw things up. To top it off, as another builder of this kit noted, the kit does not include enough of the called for walnut strips to complete the hull. And for the cherry on the cake, the walnut included in this kit is the palest walnut I have ever seen. It is so tan that it's hard to tell the difference between the light wood included. So when I went to my wood stash, non of the walnut matched or even came close to the color of the kit wood. So I'm going to have to mix 2 sizes, only 1mm difference, to complete the hull. So much fun!
-
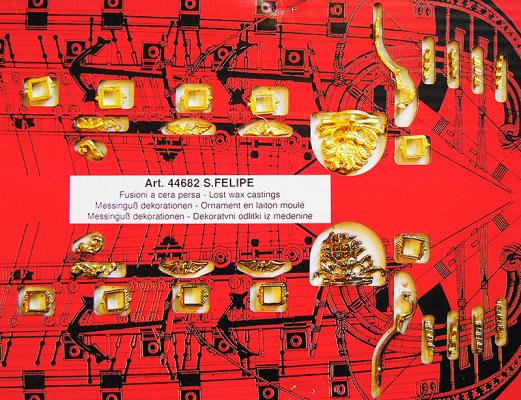
Haha fooled you friend. Those are not the actual colors of the model. That is an illustration only on Photoshop to indicate the subject matter. Even so, I am not going to paint it as instructed. I am going to paint it gold and black. I'm not too interested in authenticity. I am just having fun and making something I like. Hope you enjoy it too. Take care. PS The opening of the ports are not done yet. Thanks for the link to your build. I will look at it.
-
Hi Dimitris, Thanks for the links. Pretty amazing stuff. My eyes are slowly going south so I don't think I'll be building anything like that. I do have my Amerigo waiting in the wings though, so I have been watching your progress. Very nice. What kind of wood did you use for the decking? I think my kit has walnut for the deck and I don't like that. Did you replace yours? Doesn't look like walnut.
-
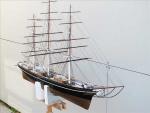
This turns out to be a nice ship when complete. I built it a long time ago. Have no idea where it ended up. It comes in different colors too. You got the white hull and cream colored "gold" parts. My hull was a blue and gold parts were actually metallic gold plastic. I would really like to build the Corel version! Have fun building!
-
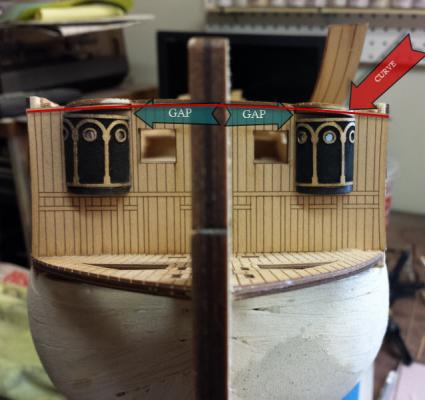
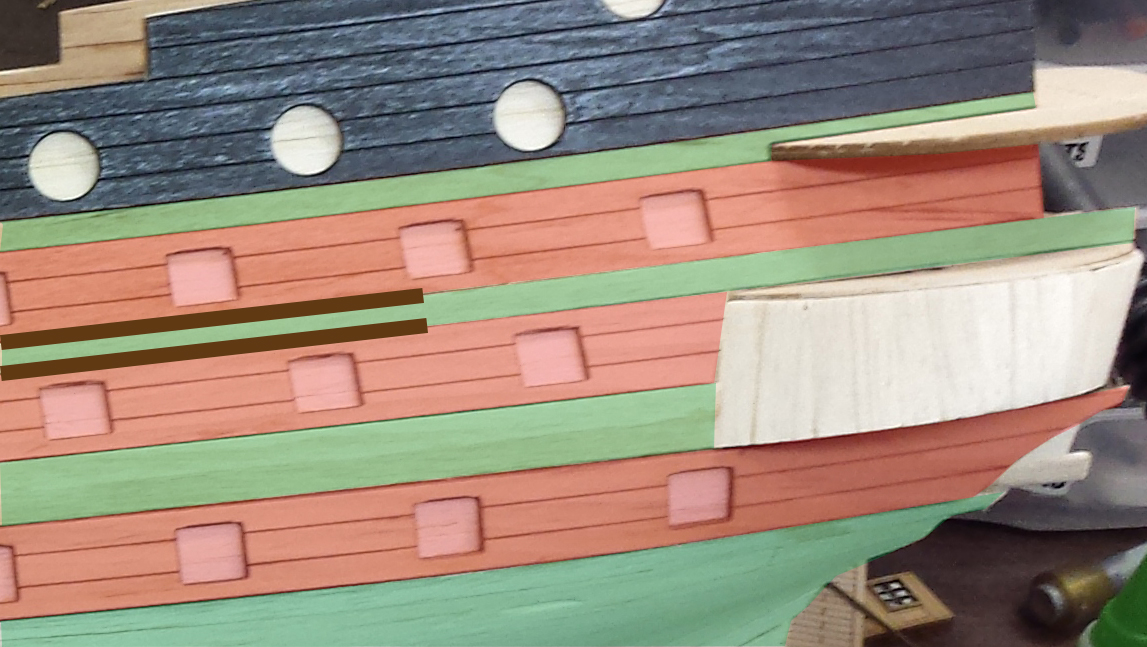
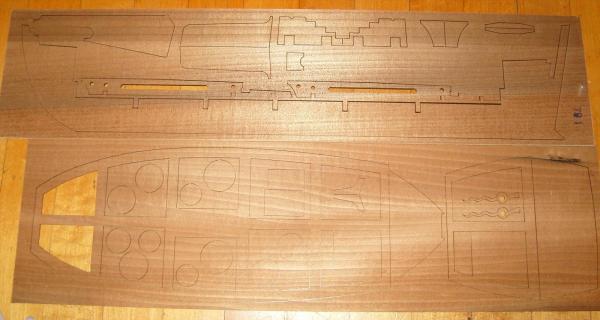
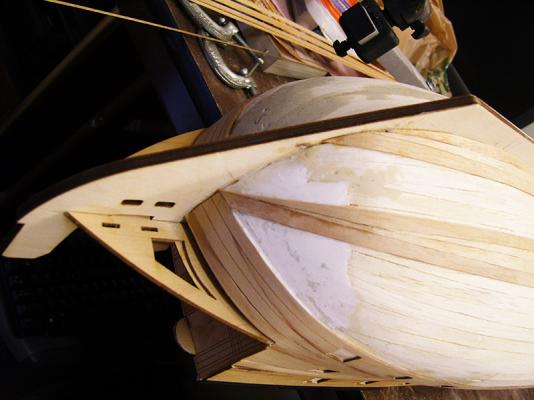
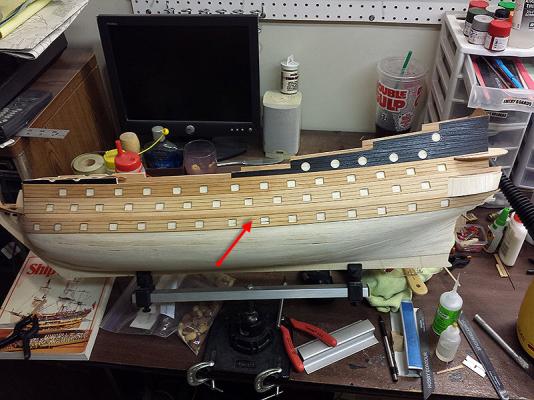
I ran into a problem today. In the picture below, I have tried to indicate what the problem was. I am working on the 2nd version of the San Felipe which includes some prescribed areas. They are laser etched and look really nice. You can either use these or you can plank those areas as usual. I chose the laser etched for a change. In the picture, I have indicated the laser etched areas as tinted red, and the regular planks tinted green. You are instructed to separate the laser etched areas with a regular walnut plank. The brown stripes are where the rubbing strakes are positioned. The regular planks are 1mm thick. The laser etched parts are 1.5mm thick, so you end up with a .5mm raised bump where they meet. The way I understand it, the rubbing strakes go where the 2 intersect as indicated. If they are placed within the green area, they will be too close. If placed on the red area, then they get too close to the canon ports. So in order for them to be put right where they intersect, you have to take down the laser etched part by .5mm so that it's even with the regular wood. The problem is, that if you do that, you will lose the laser etched effect since the grooves aren't that deep. So I figured that the best way to do this was to remove the laser etched parts and sand them down "from behind". I removed .5mm and reglued the parts. Now they are nice and even. It was a royal pain in the butt and would have been MUCH easier if the laser etched parts were sanded BEFORE gluing them in place. Just a heads up to any other SF builders.

-
Thanks Clearway, Sometimes you don't realize how big a kit is until it's sitting on your table! This ship is feels like I'm holding a medium sized dog in my arms. I do want to do the masts and rigging though, but that's a long way away. Right now I'm contemplating doing the "treenail" thing. I opted to use the pre-scribed planking parts included in the kit. I like how clean they look, but without some more detail, they look "too" clean, so adding treenails to it will make it look nice. Now I just have to decide what approach I'm going to take. I'm leaning on wire, even though it ends up being copper color vs black. Does anyone know of any where that is dark at its core?
-
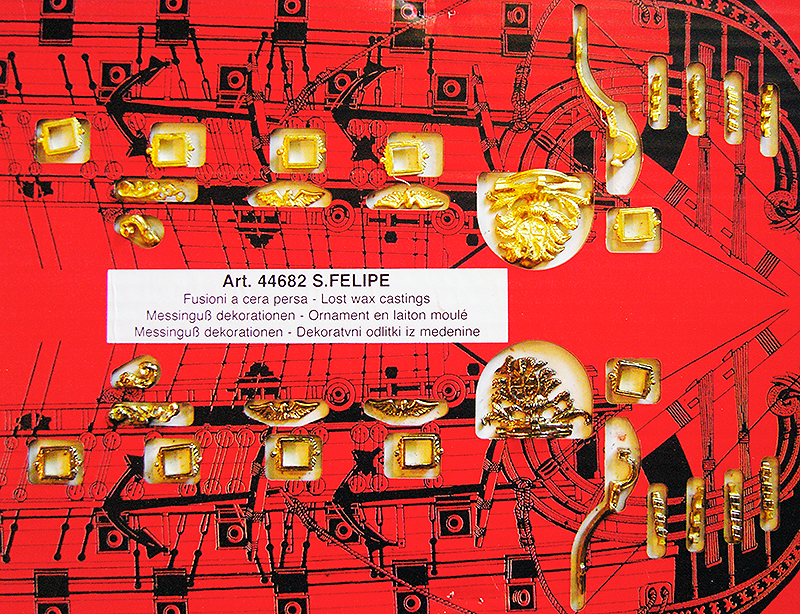
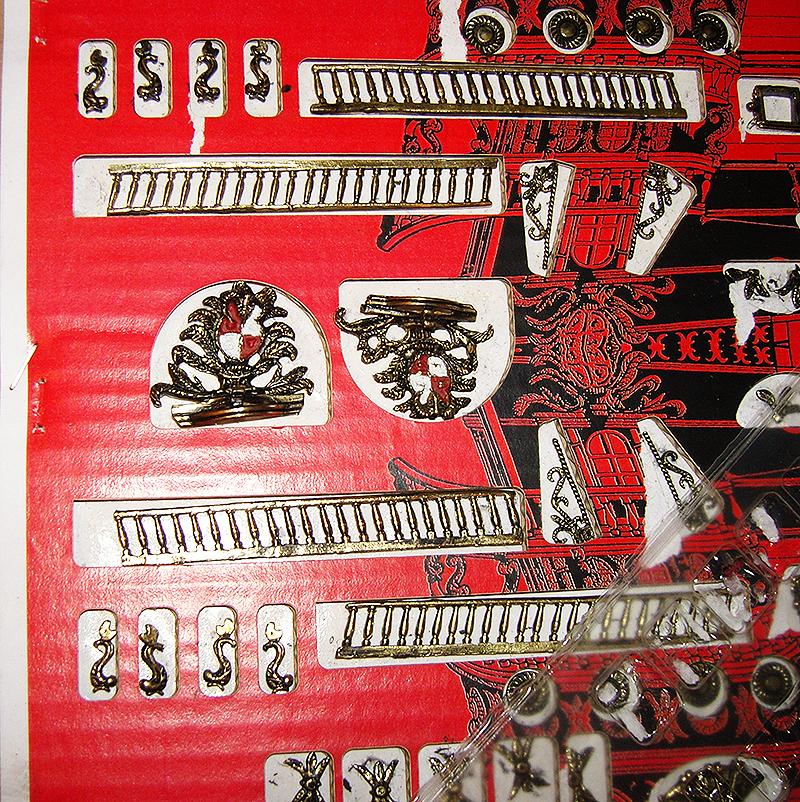
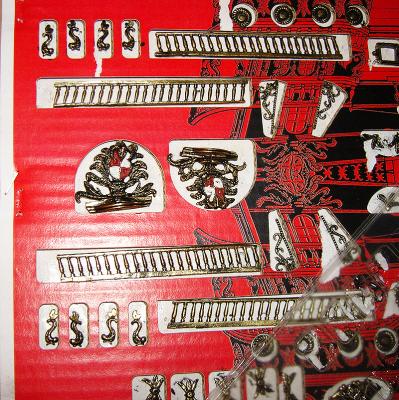
Hello, So I finished working on the fittings. My Dremel survived but my fingers are sore. In this picture, you can see that the fittings in the upper half are original untouched. The bottom half they are polished. You can see how yellow and phony the finish looks before polishing. After polishing they get a more natural mirror shine and become lighter in color. In this picture, they are finished. I painted them all black and then carefully removed some of the black to give the fittings that "antique" look. The only other thing I painted was the crest. So it goes...
-
Hi all, The day before, yesterday, and I'm sure all day today, I will spend cleaning and polishing all the brass fittings. What a pain! The stuff is hard as a rock! I'm trashing my Dremel. Just to remove the areas where the parts were cut off unceremoniously is a real job. The fittings are pretty bad as far as quality goes. Several had missing parts and many are badly cast. I wish I could carve my own but that's another hobby. I'll have to do with what I have. I will shoot some pics later.
-
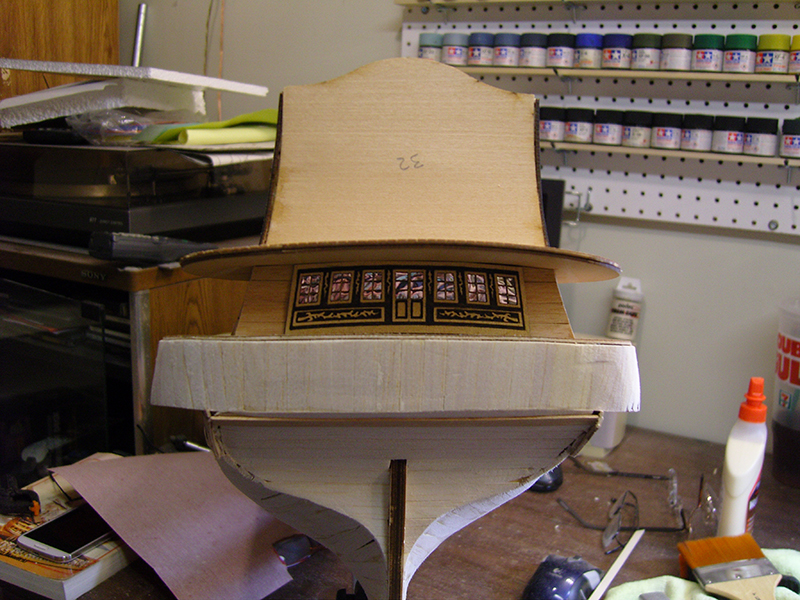
Howdy shipmates, Today I worked on the stern of the ship. Lots of fiddling around but it's taking shape. It will be fun to to start putting on all the brass fun stuff.


-
Hi Josh, I hope I don't disappoint you. I hope I can commit to this log. It's a beautiful kit, but the instructions are awful. Several of the pictures in the manual are out of sequence and make things very confusing. Also, since this is the "updated" version, the plans don't correspond to the changes that they made so you have to decipher what needs to be done. A lot of people don't like to be handheld, but I do in case I get confused. I find myself doing an hour's worth of work just to have to do 2 hours worth of research! Shouldn't be like that. I'm also going with a color scheme similar to a SF build I saw online. I really like the gold and black look. Today I spent more time researching than working. I wasn't planning on making a build log so I never took pics of the initial construction. An early shot. Today I installed the 3rd row of cannon ports.
-
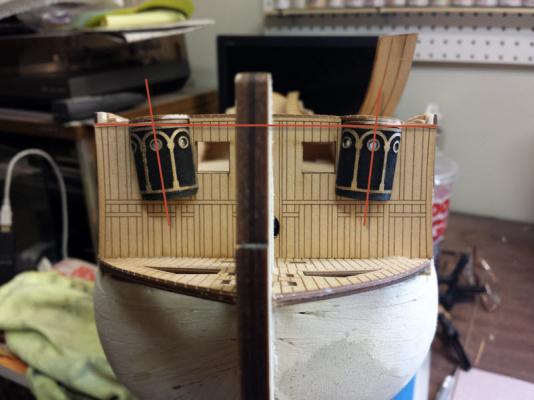
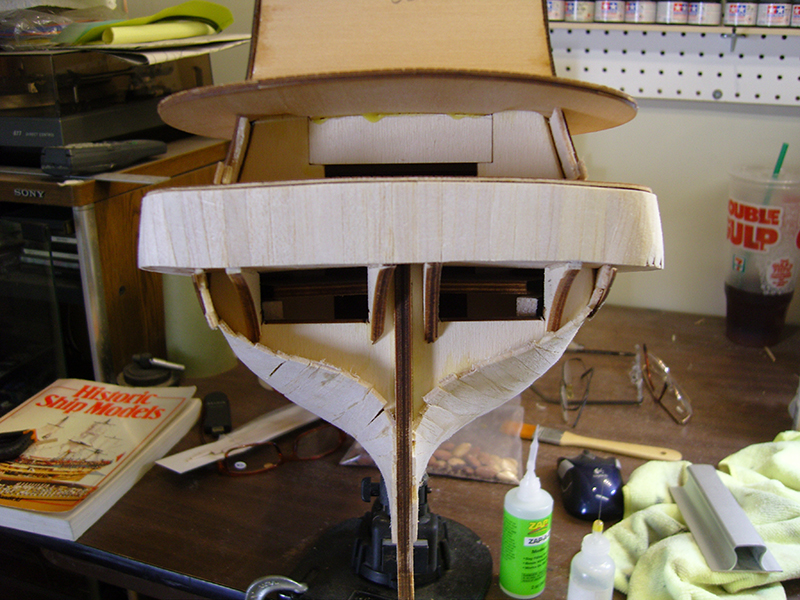
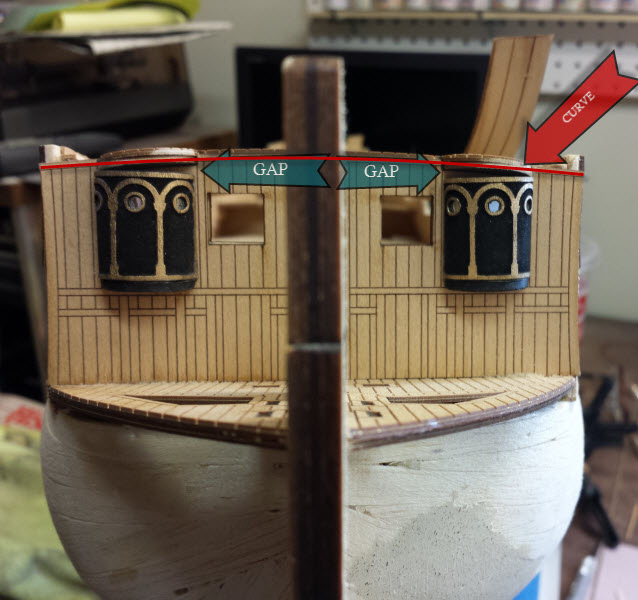
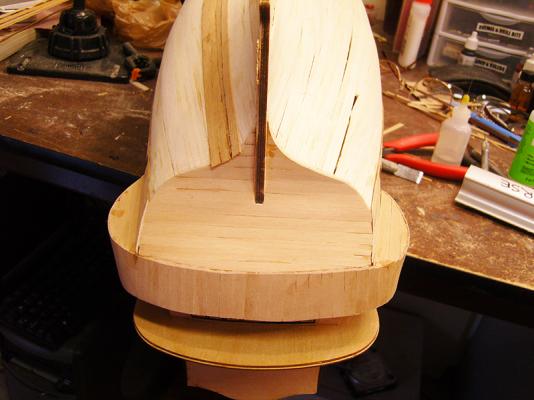
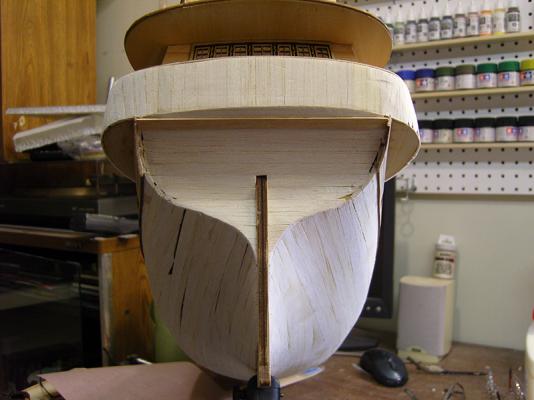
Hello all, Well, I'm going to try to keep a build log of my current model. I have not been very productive for a while and after abandoning several projects, I've decided to see if I can pick up where I left off on one of my kits. I've decided that The San Felipe will be the one I "try" to finish (for now ) since I really like this ship. I have already done the first planking and am about to start doing the second one. I will try to maintain this log. I've never really committed to one so this will be a first IF I can do it. I have been working on the kit now for 2 days from where I left off and I've run into a problem. Hopefully someone that has built this kit can comment. I've included pictures of the problem. As you can see I'm having trouble with those structures. Don't know what they are (isolation tanks? ). If they are placed to follow the curvature of the deck, then they are very crooked in relation to the wall that they are on. If they are placed to be straight with the planking on the wall, then you get these huge gaps between the structures and the deck that overhangs them. In the kit pictures they're actually crooked! They look silly. So what do you do? Put them on straight and somehow fill in the gaps? Any ideas would help. Thanks to all.