Salty Dog
-
Posts
236 -
Joined
-
Last visited
Content Type
Profiles
Forums
Gallery
Events
Everything posted by Salty Dog
-
 Thank you again! I'm going to fix it with some "sprue" There is plenty, even stuff left from the Mikasa.
 -
I've worked on 1/700, so I know small, but at 1/200, it's possible to include some very fine, and small pieces, such as rails, that could not be done in smaller scales. Just look at the amount of parts that are included in a 200 PE set, vs a 700. Wait till I have to tackle the artillery!
-
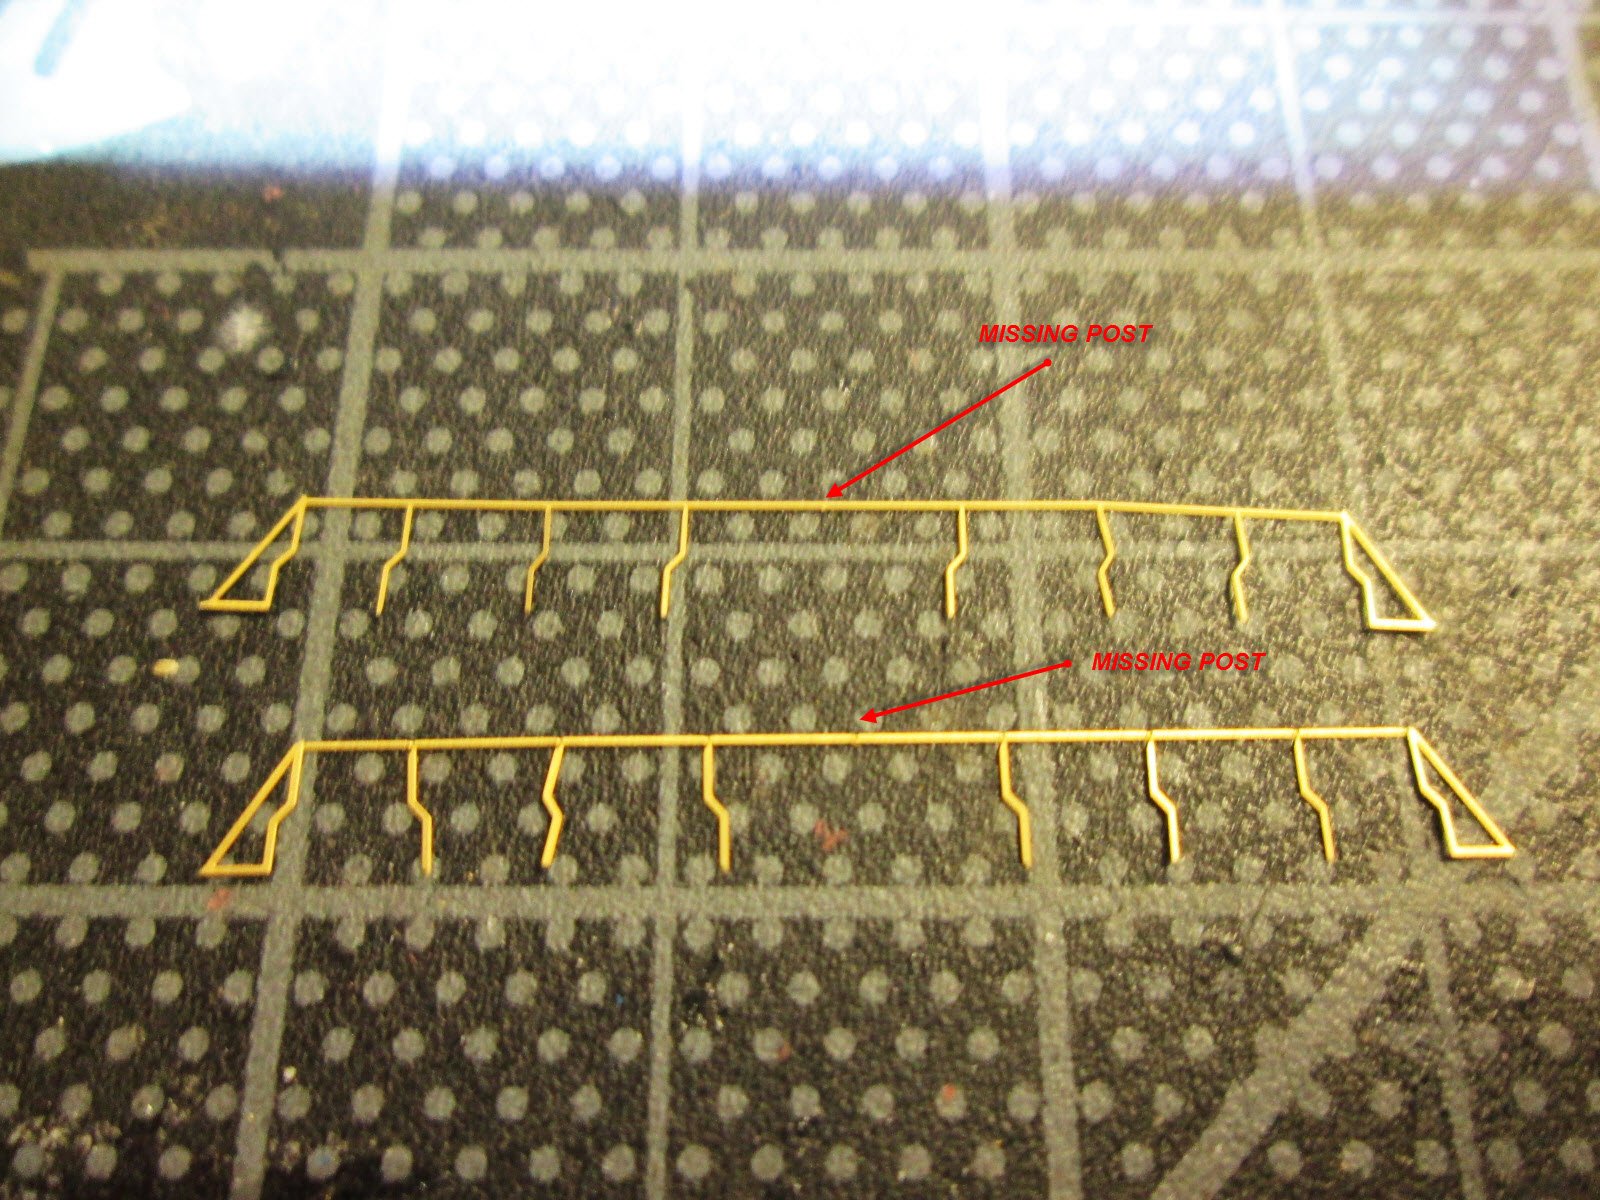
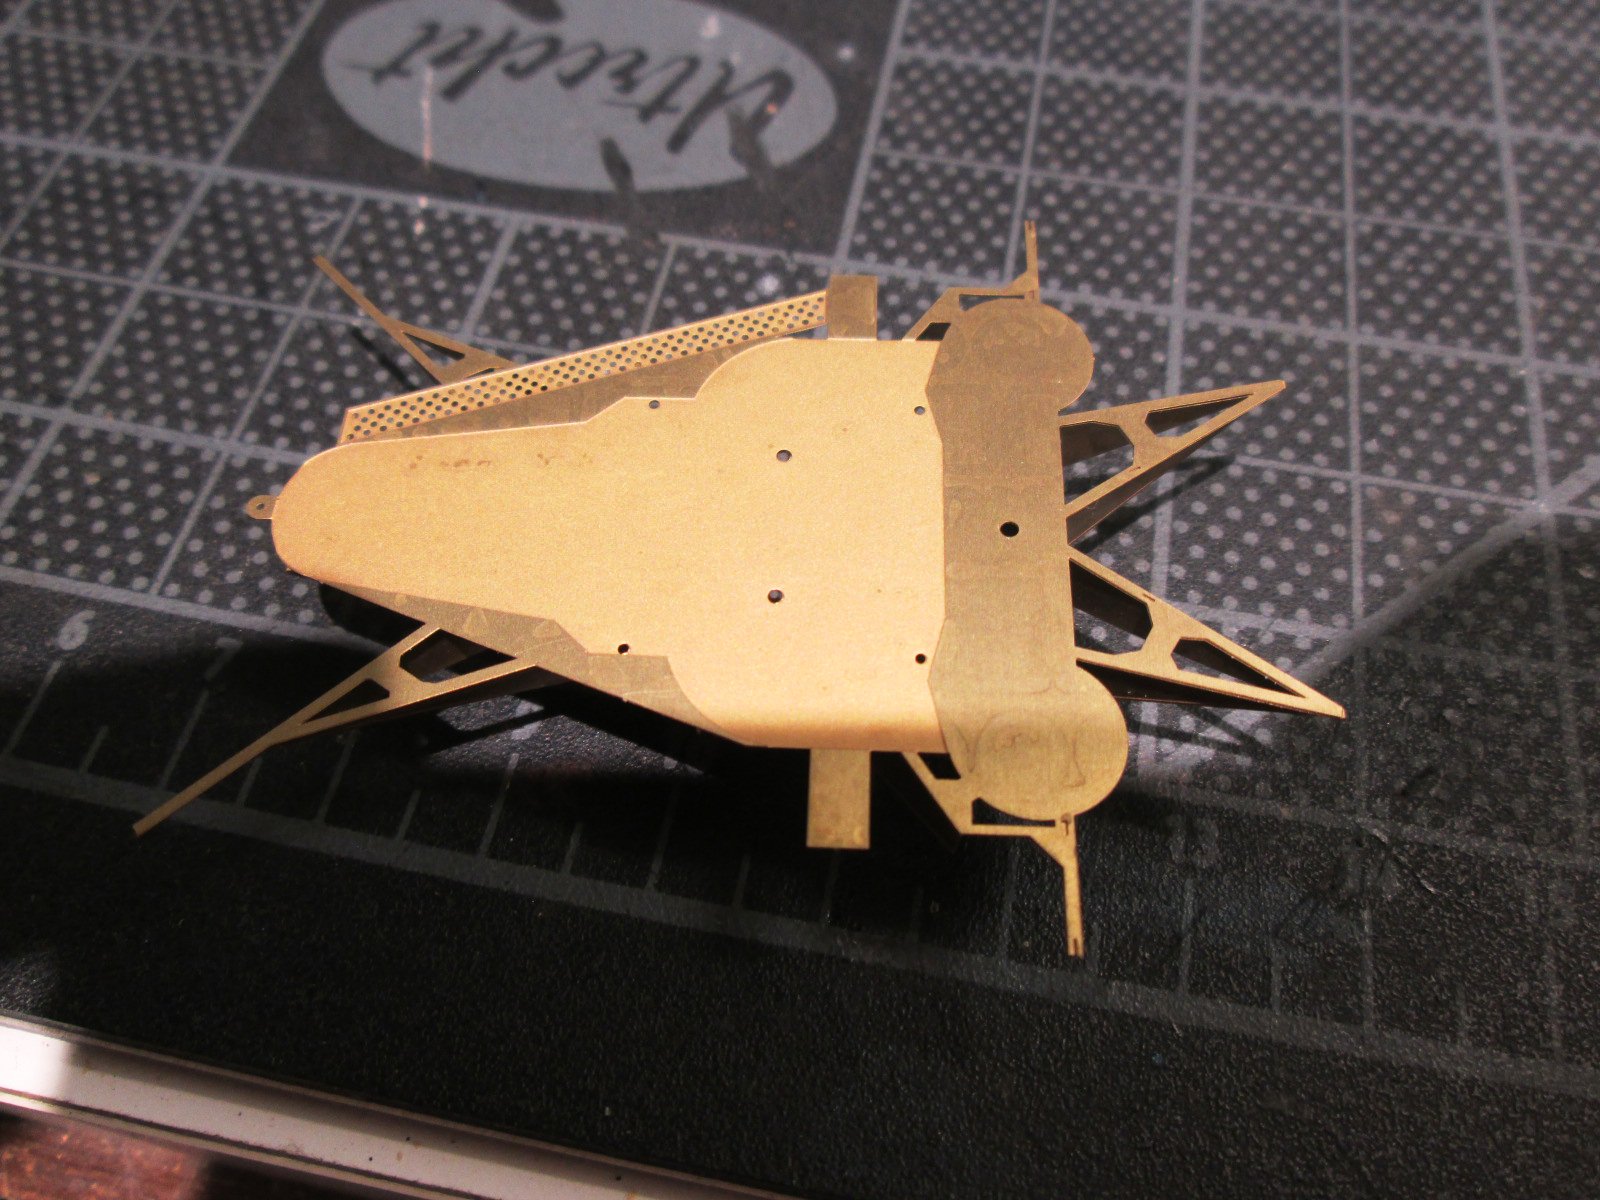
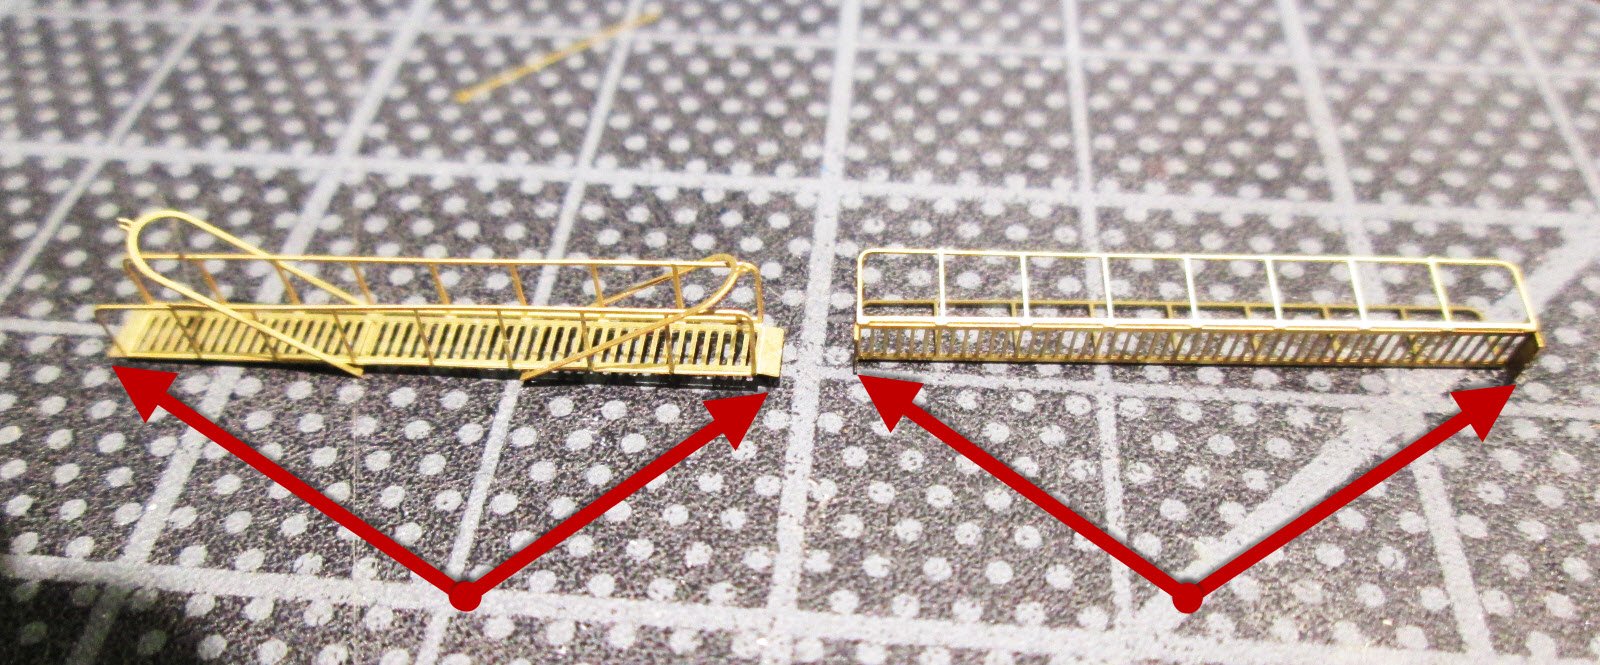
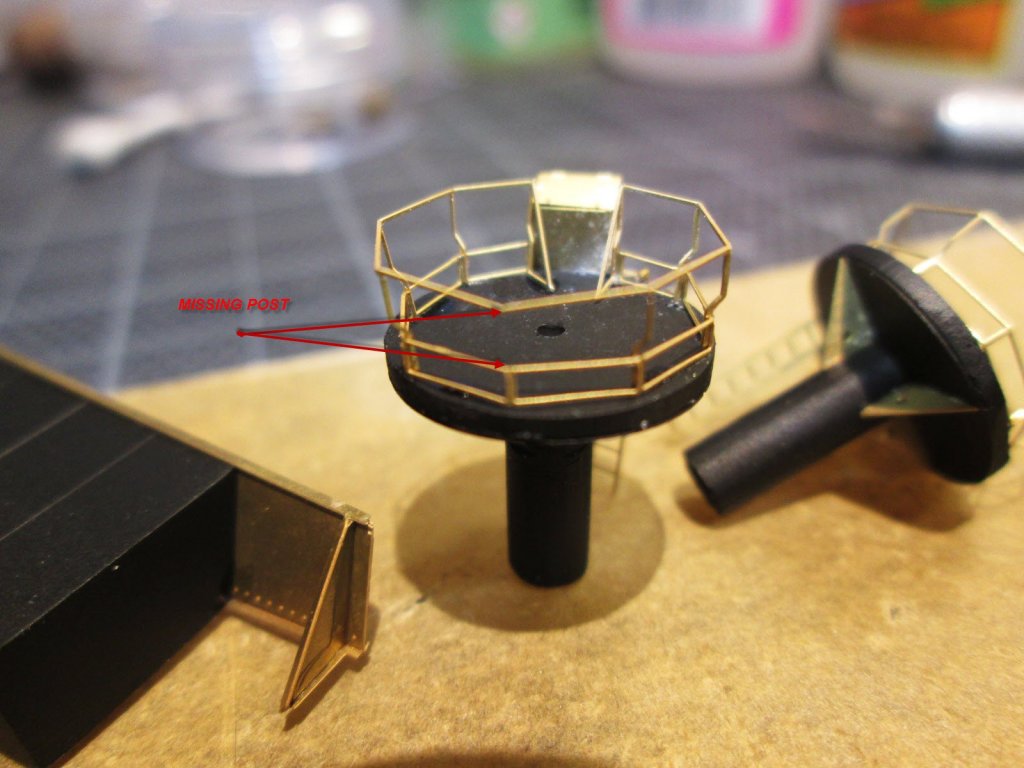
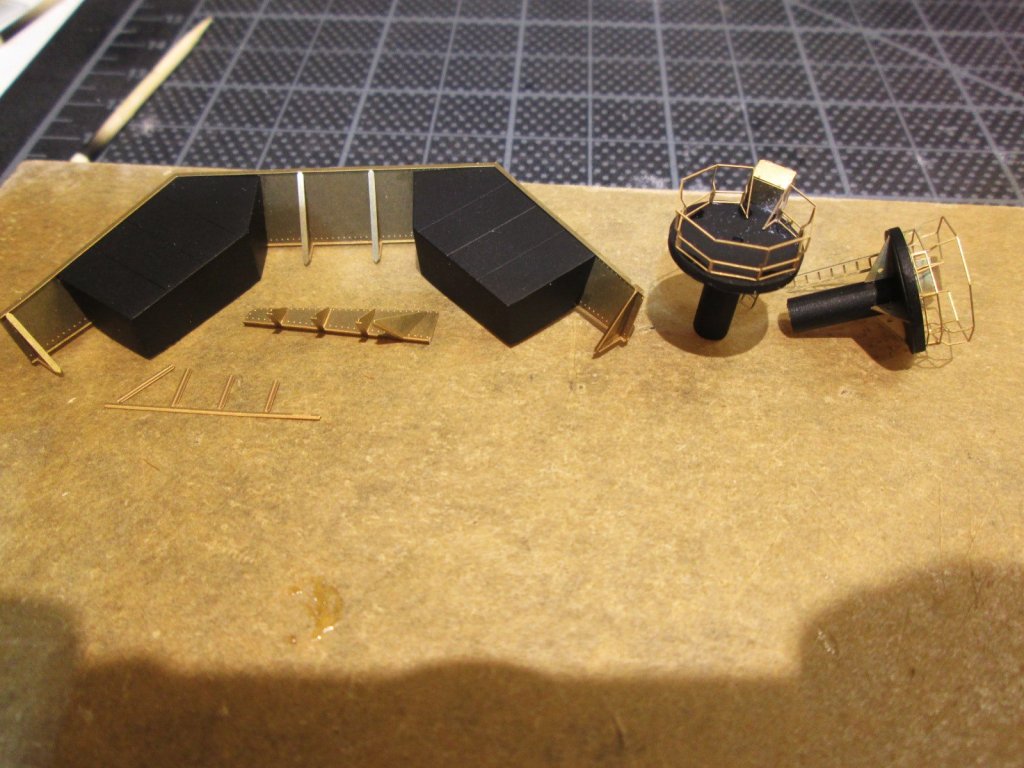
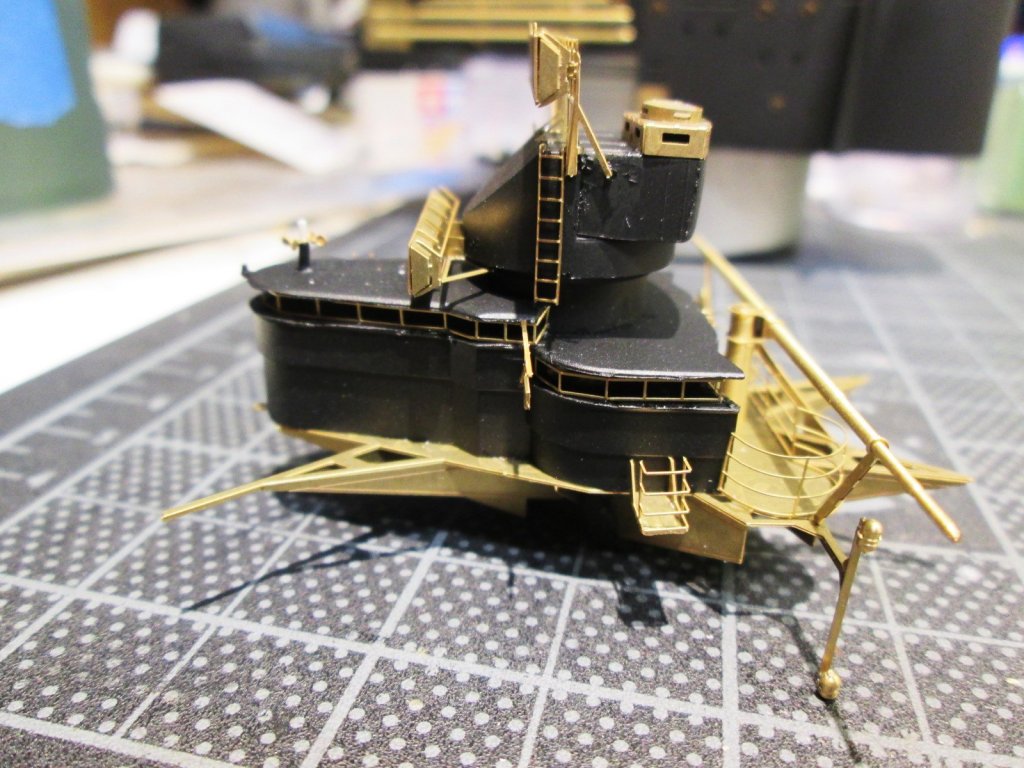
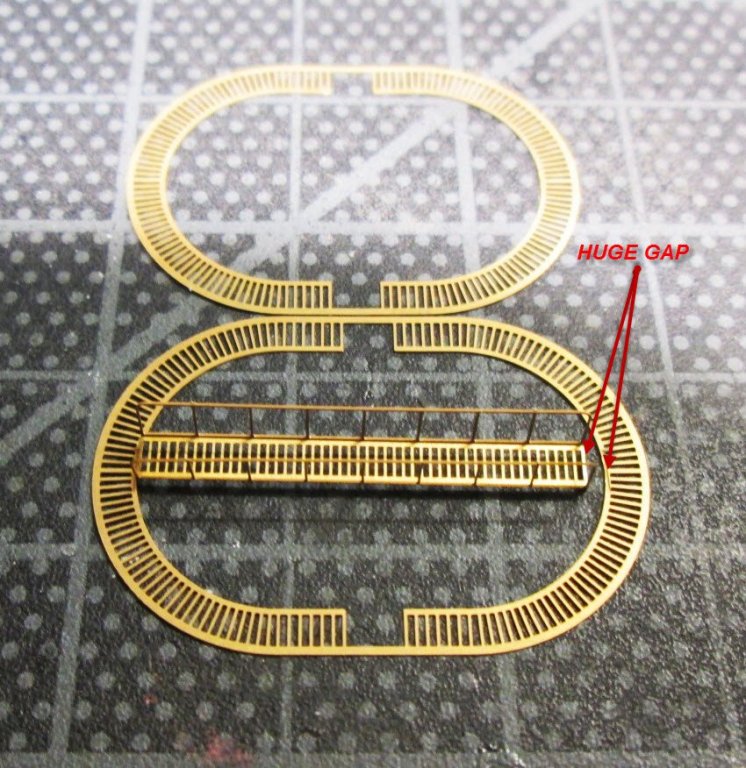
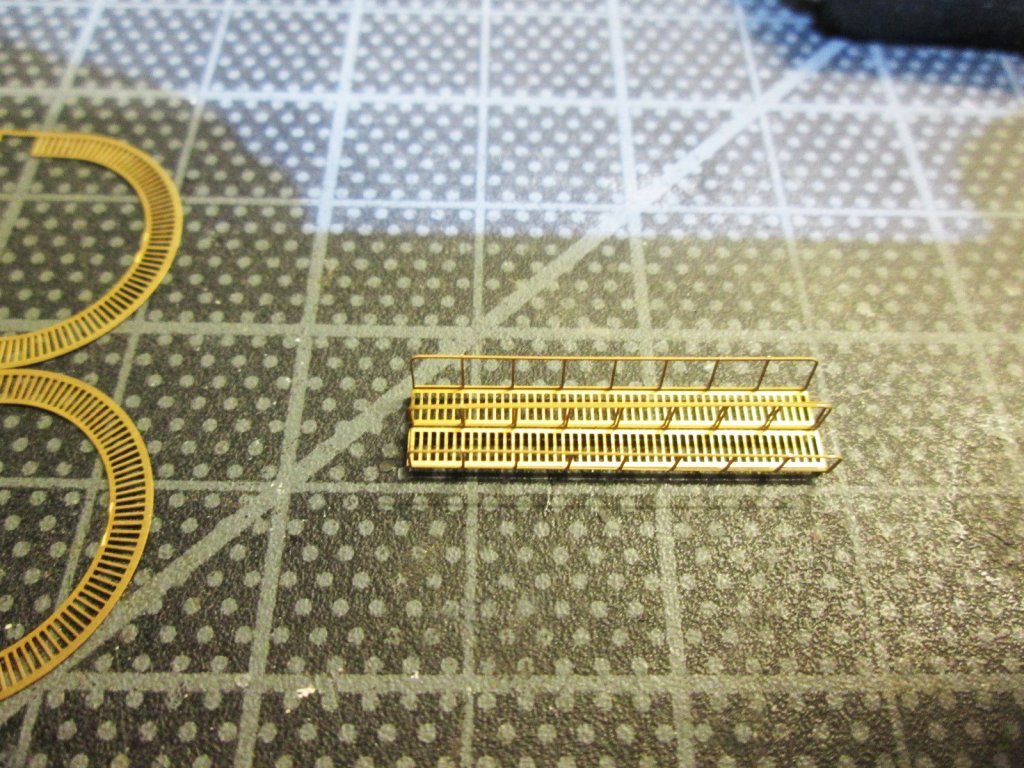
Update. This fidgety small crap really takes a long time! Tonight I worked on these little goodies: Parts number 594 had a missing post, on both parts: At first I thought I had cut the first one off by accident. But then I looked at the other (there are 2) and saw that it too was missing the center post. It might seem like something really minimal, but this is the result of that missing post on the completed assembly: I also worked on some of the break water. Turns out there's one complete one and one in 2 sections further aft that I have to build yet: That's all folks!


- 247 replies
-
- 14
-

-
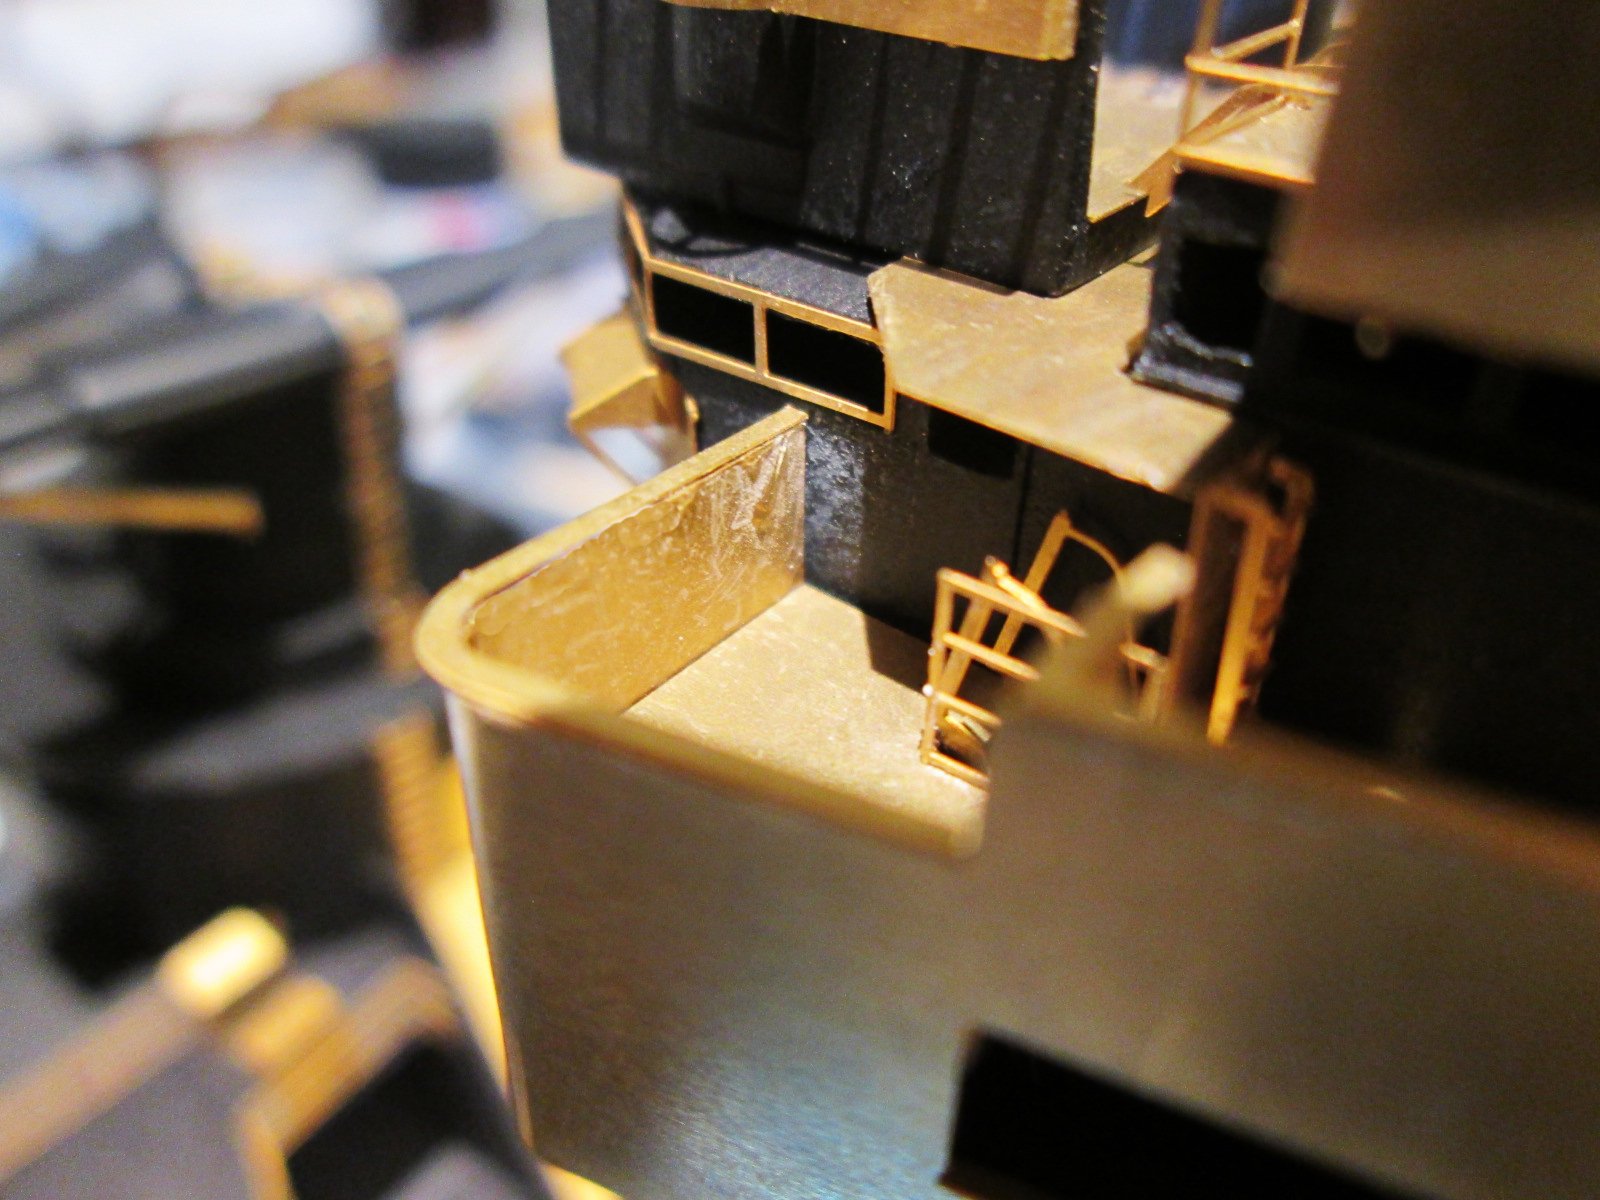
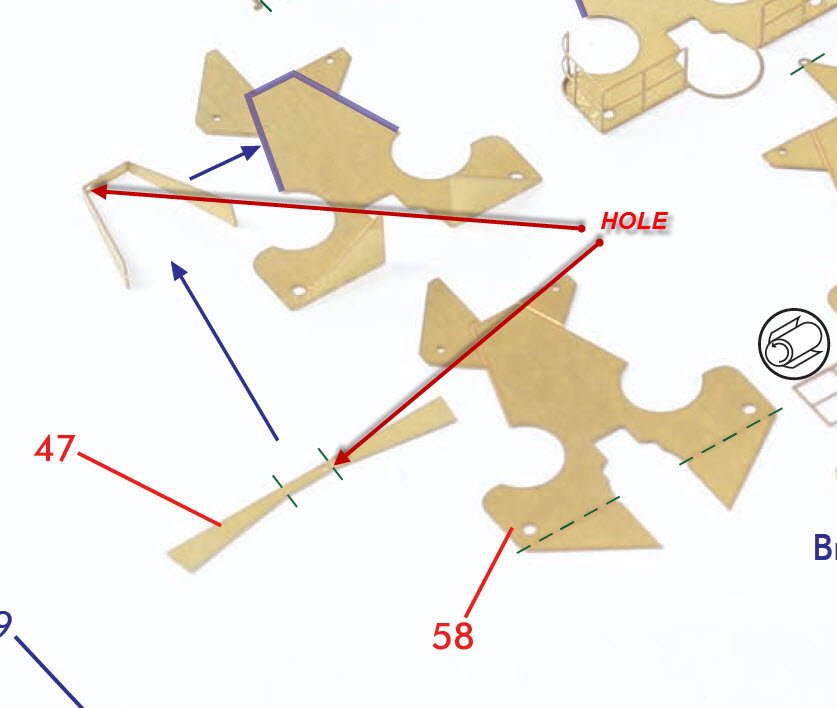
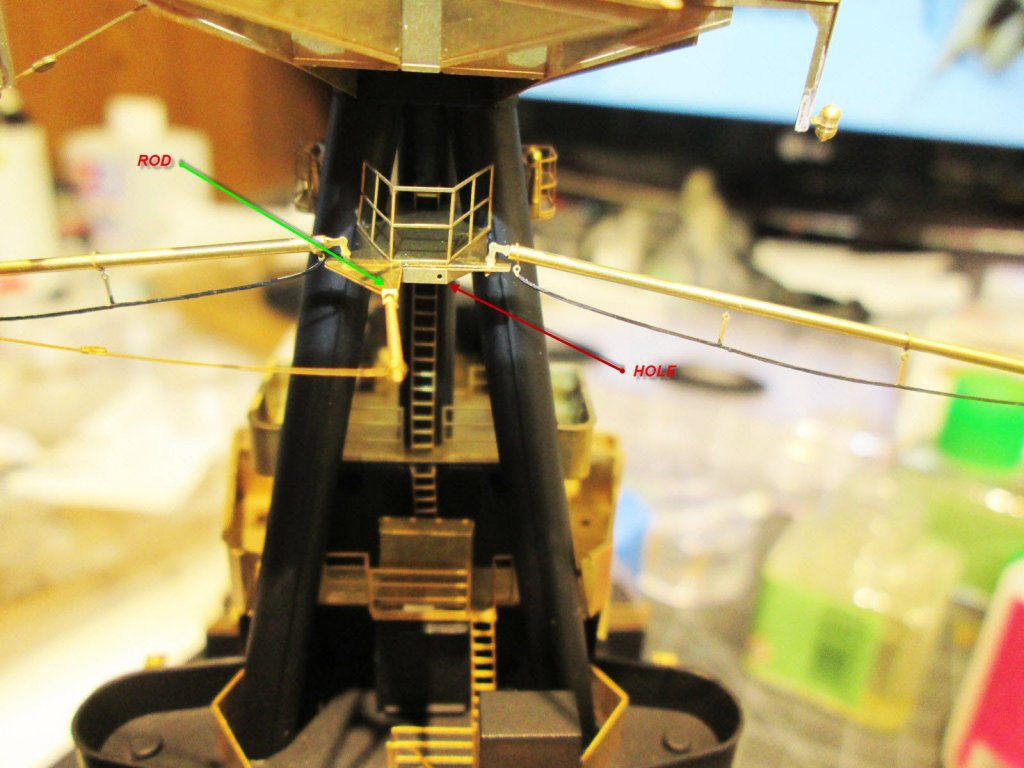
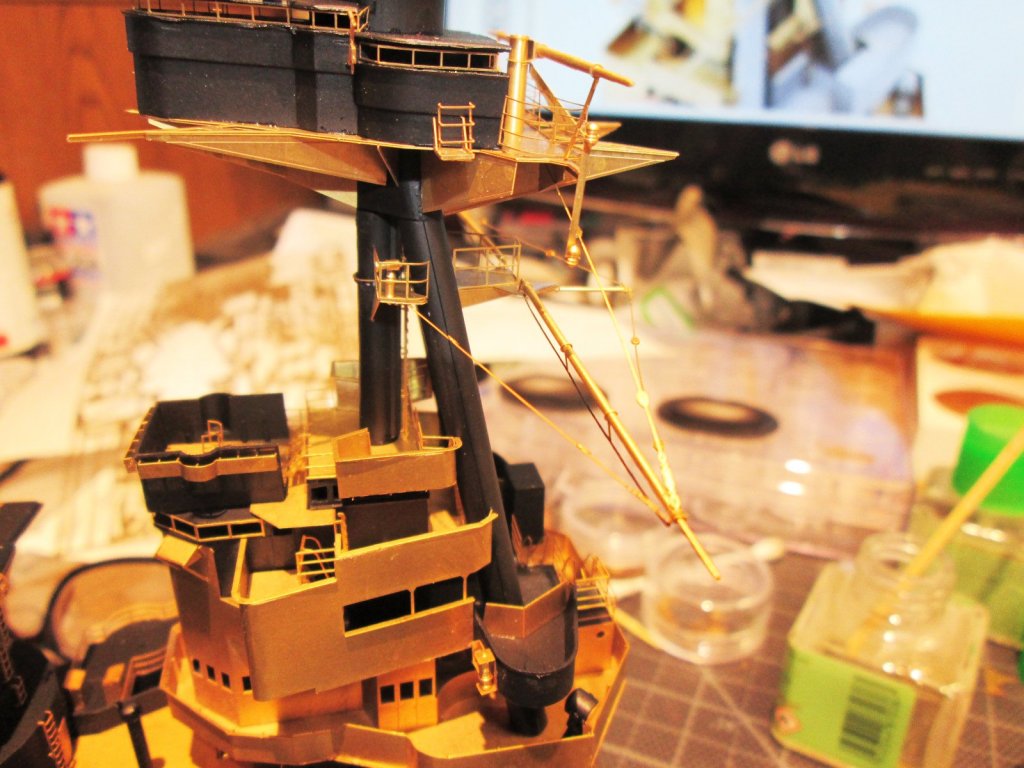
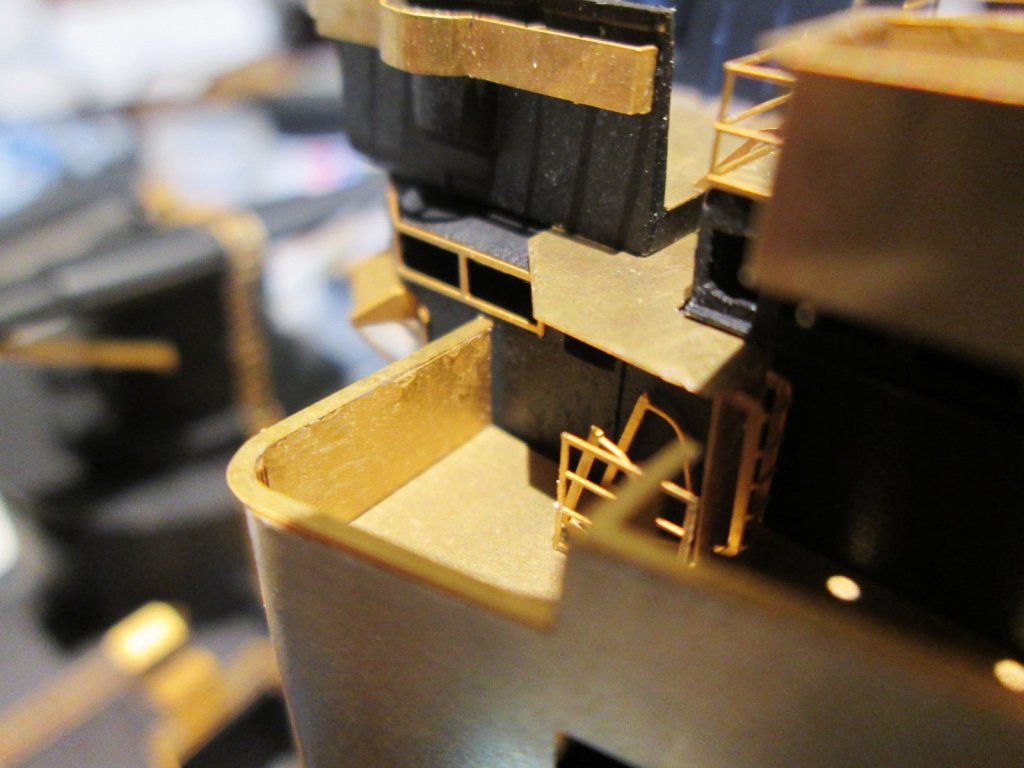
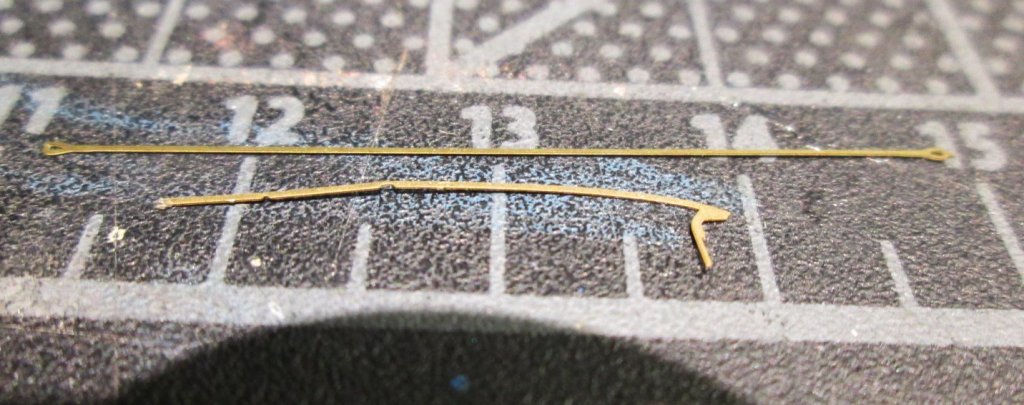
Another hair pulling night. Pontos doesn't help. Their directions on folding the PE is really bad and confusing. On every page, at the bottom, they have this note? instruction? I just couldn't figure out what they were talking about. I kept looking for the vent. Was there a vent in every assembly? Then I realized they meant to say BENT!!! From looking at the picture, the bends are either dashed green lines, or red ones: Here you can see that they want you to "vend" this part up at the green dotted line. This is a PDF image captured at 400%. I marked the TINY hole in part 47 with red arrows. You would NEVER see it on the paper PDF, and I didn't see it because I wasn't zoomed at 400%. But I bent the part according to how the indicate. MUCH later one, you can see what this little hole is for: That hole would have been in line with the rod for support, but because the instructions are a mess, it ended up on the other side. Not only that, but the first hole that the rod actually goes through before getting to the hole wasn't nearly as large enough for the rod to slide through. I had to cut the tab with the hole in it for it to reach the back of part 47, where there was no hole and I just glued it. It really sucks to have to spend so much time trying to decipher where things go and then have to rework things later, and oftentimes, reworking just either mangles or destroys your work. Not fun. I eventually was able to put together the cables that this whole mess was for:

- 247 replies
-
- 15
-
-
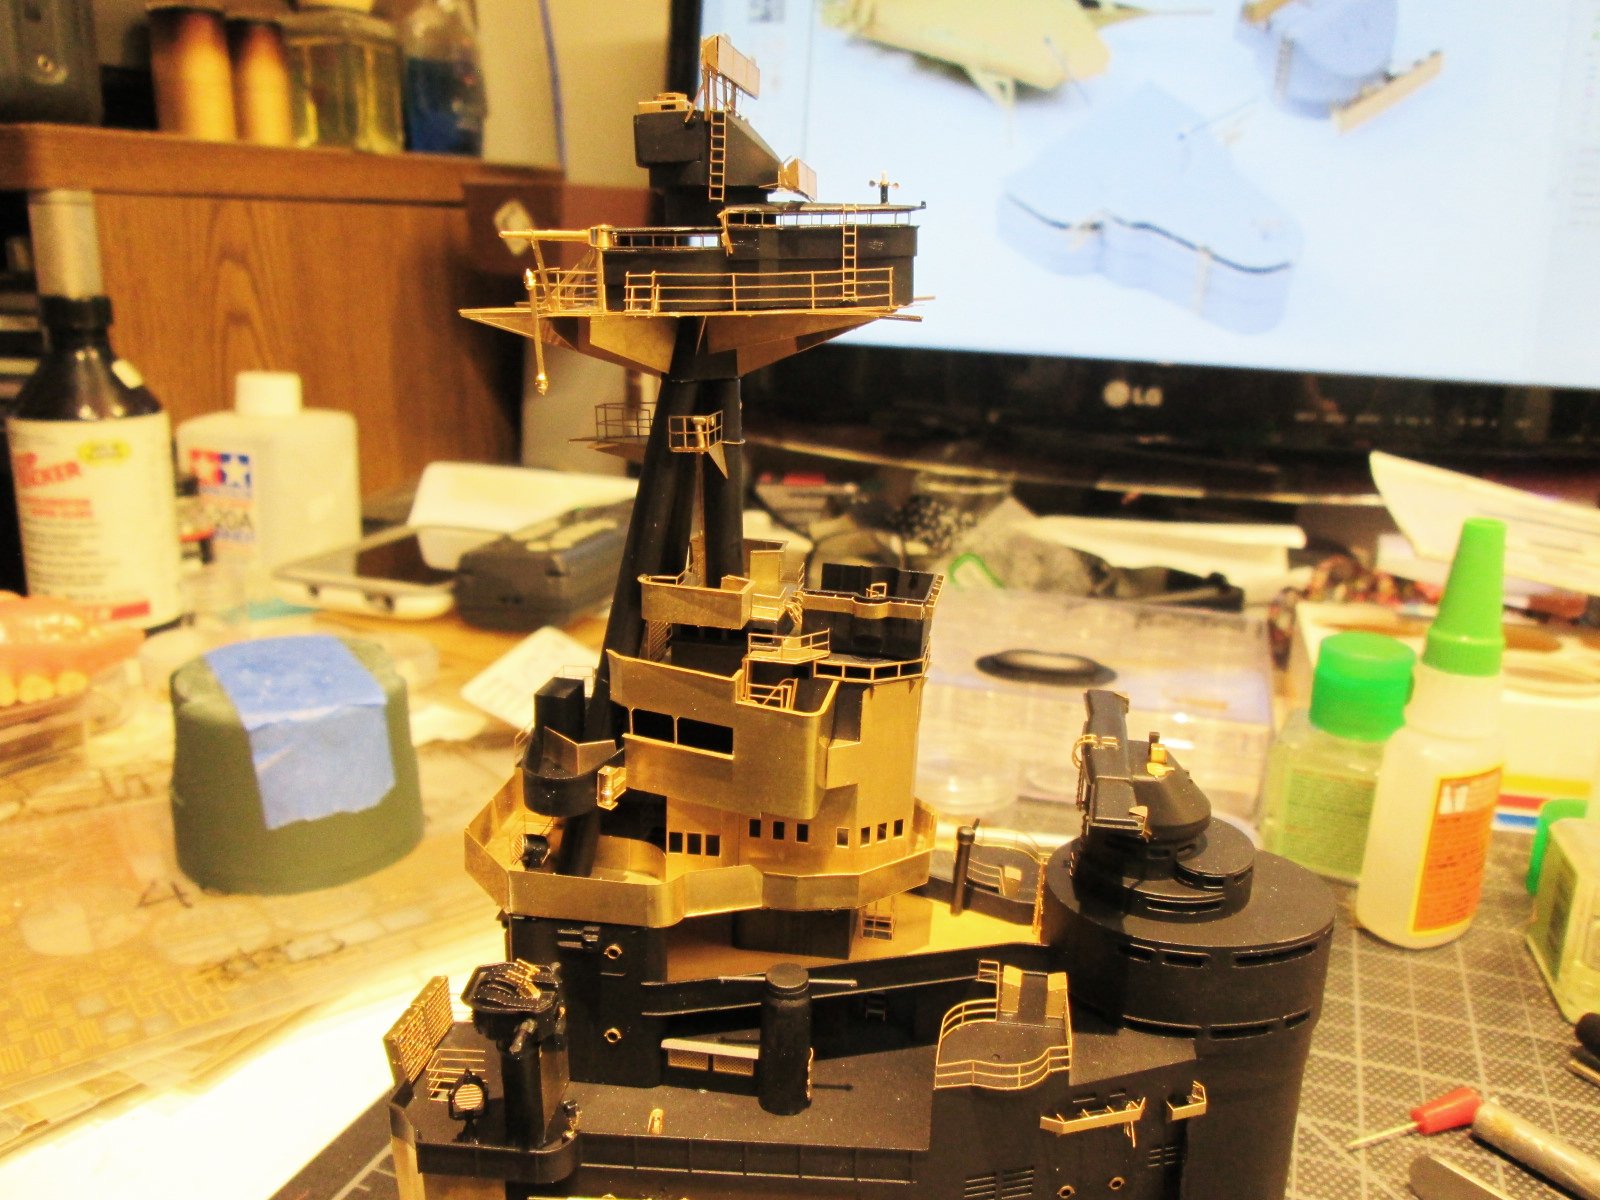
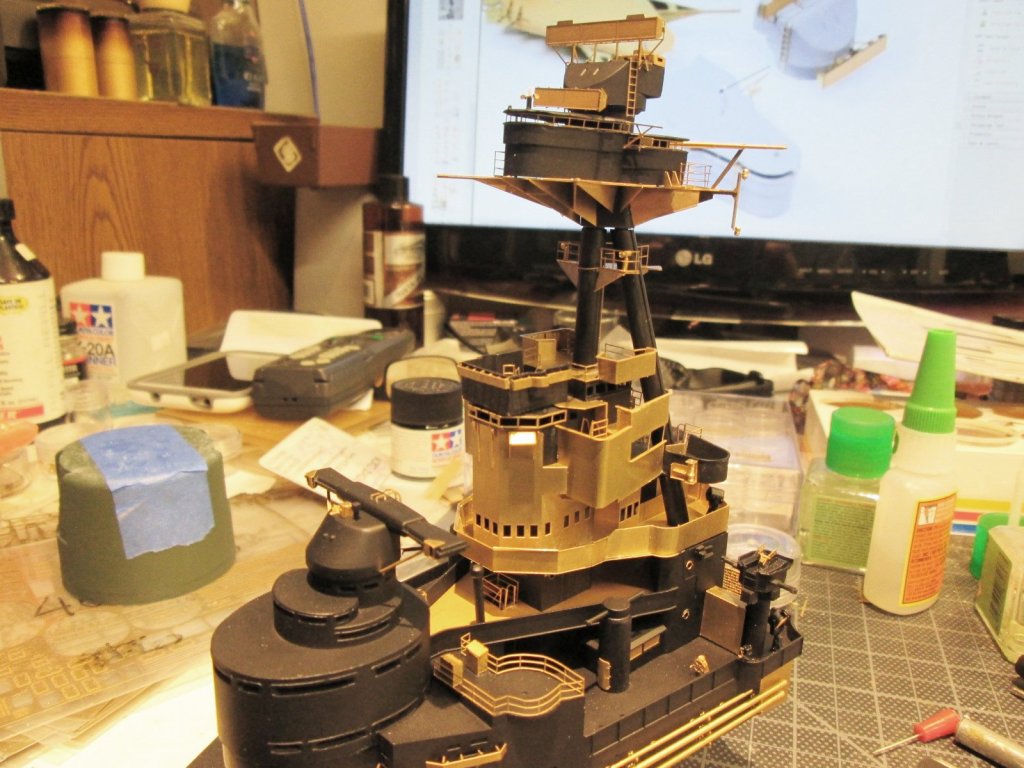
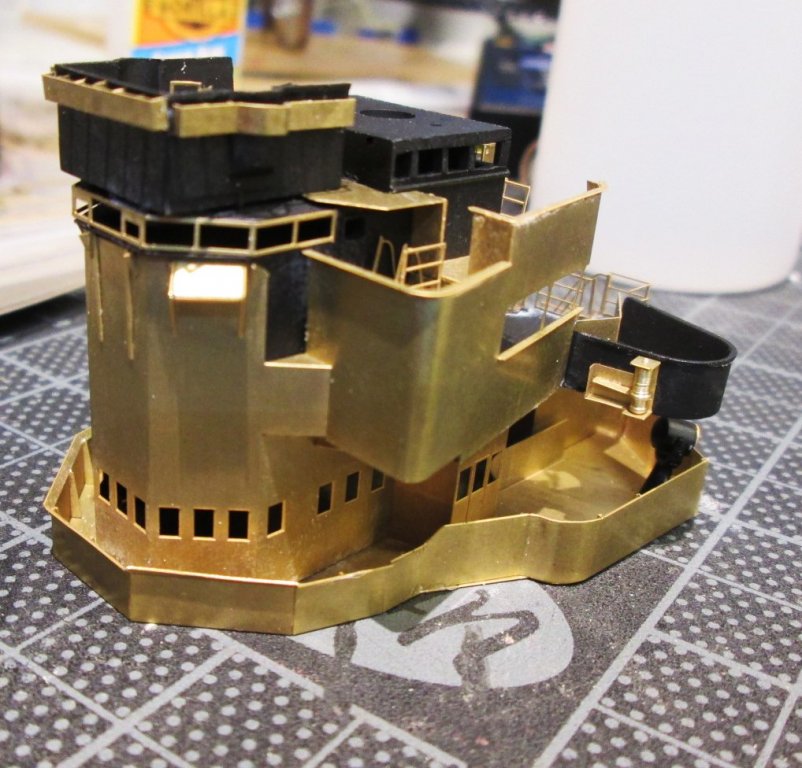
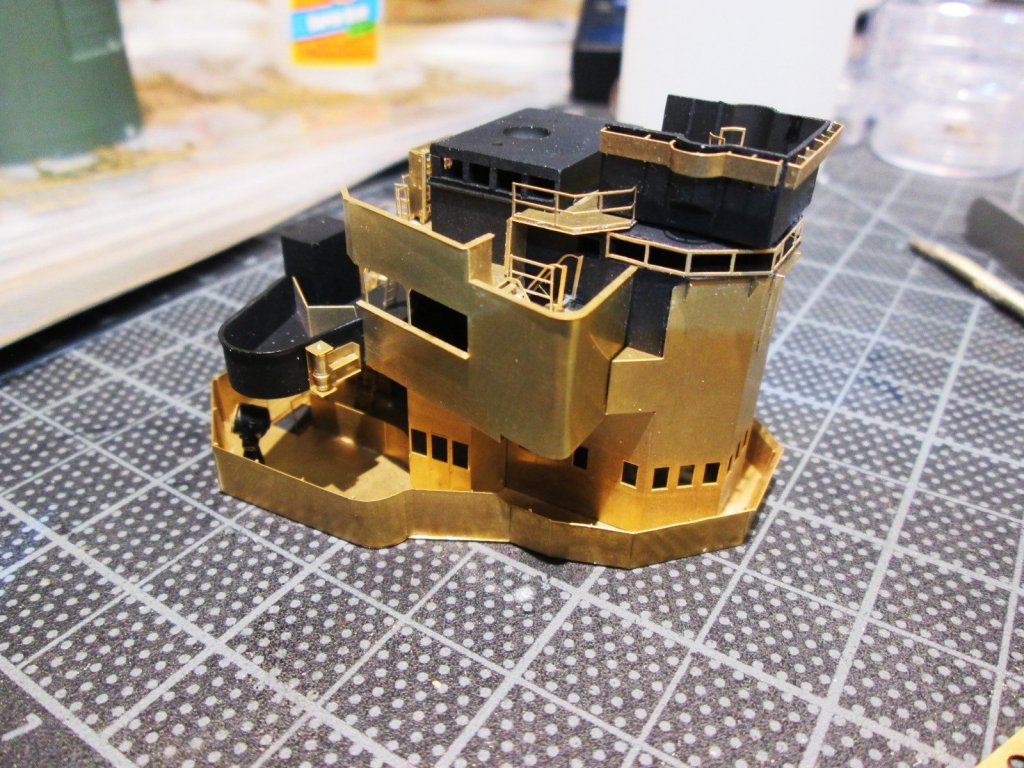
Hello All, I did quite a bit today for father's day. Spent most of the day in my man cave. The only model kit that I can remember growing taller after each sub-assembly was a model of the Apollo Saturn V. This thing just gets taller and taller! It looks imposing. The pictures don't do it justice. Also, please forgive the lighting. Obviously I will get better pictures later on. Hope you like.

- 247 replies
-
- 18
-
-
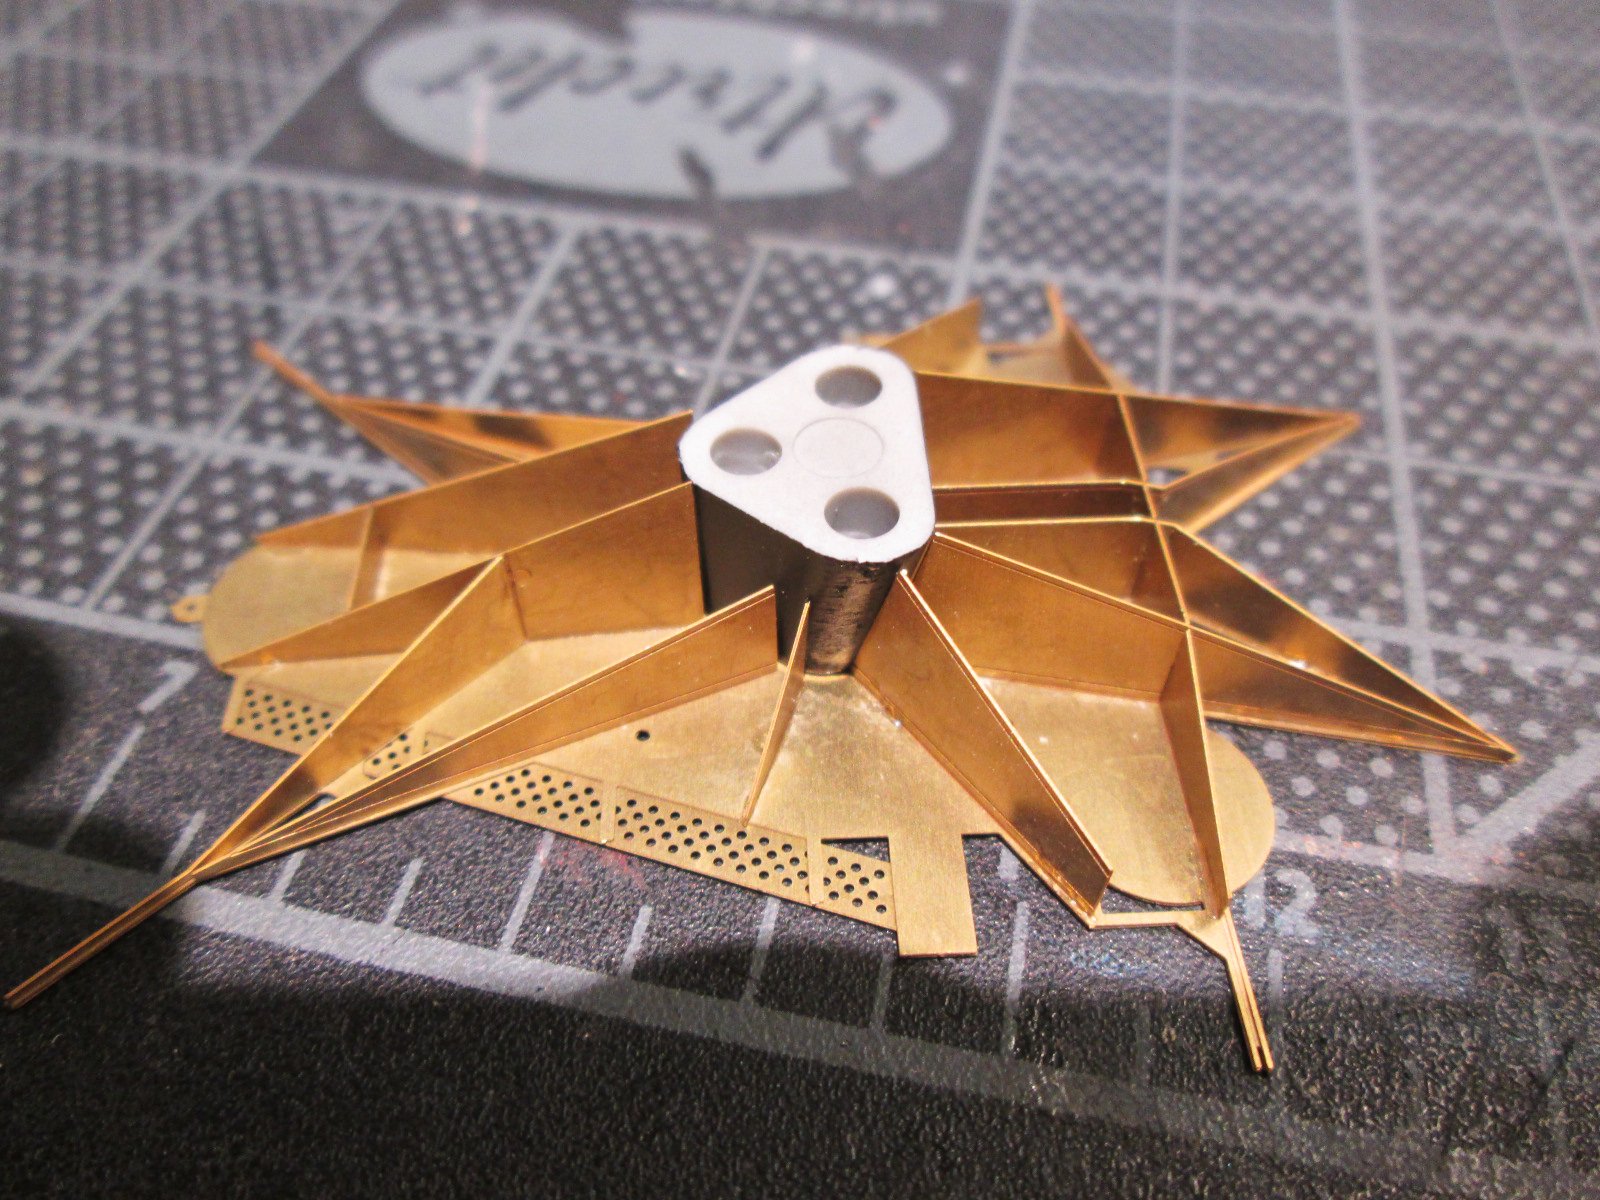
Update: Not a lot of progress but a very important discovery. I have been really bothered by the CA glue "frost". Especially on black. VERY unsightly. Even if you don't show any glue marks, that outgassing of the glue does. I started doing some touch up but had an idea. Here is a picture of the results and they are great! I sprayed some clear semi-gloss lacquer in some of the areas and it worked! The picture is of a really bad area and the most dramatic result. BEFORE: AFTER: I should explain something. The first thing I did with the Pontos set, was wash it, de-grease it, and then spray it with clear lacquer, so spraying more on top of the "frost" must allow the coat underneath to kind of "swallow" the frost? I have no idea, but it makes a huge difference. I might just end up spraying a clear coat over most of the ship as I'm working. Also tonight, I worked and finished the "starfish".


- 247 replies
-
- 16
-
-
No one I know has even ever seen one. It's fun to show it off because you get to watch their eyes bug out!
-
Thanks Mark. I've always wanted to use that Alclad stuff. Finally got my chance. I like it a lot.
-
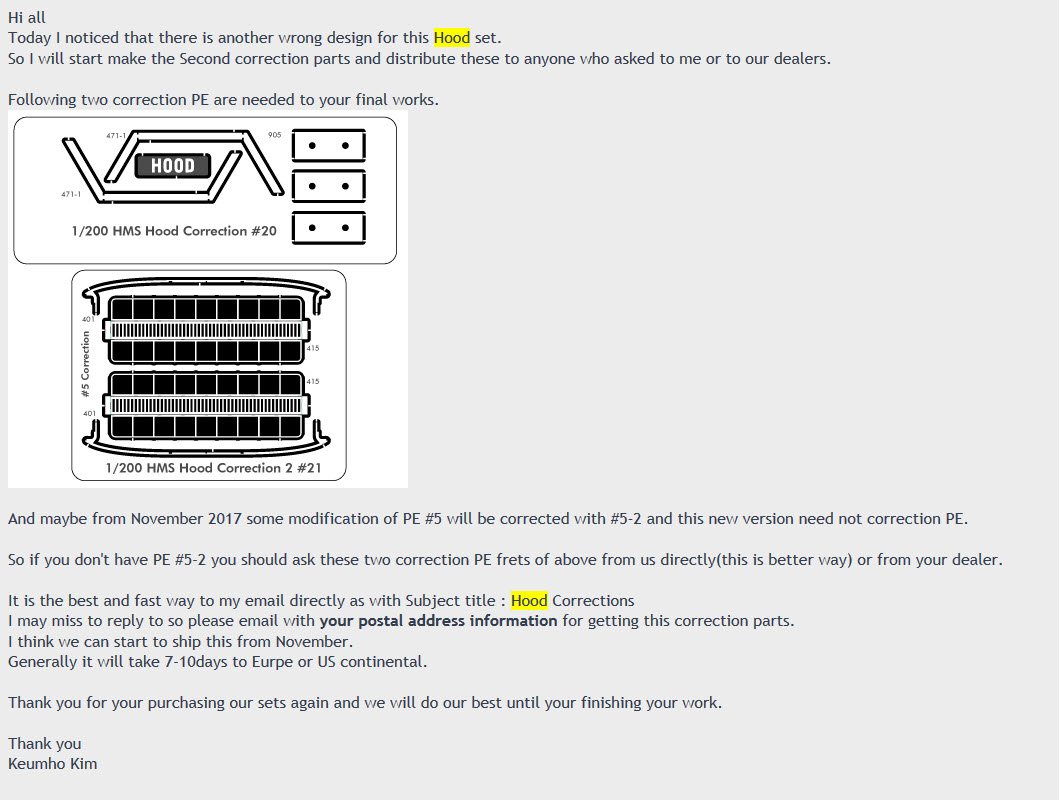
Holy smoke stacks! Talk about obsession with accuracy! Life's too short. I guess I'd be that way if I had been on that ship and knew it well, but I wasn't and it makes no difference to me. While looking around the web for pictures of the funnels, look what I found: Turns out Pontos is aware of this and actually made a correction set. See that picture for correction #20? I also ran into that problem! I didn't know they made a fix. I can still use that one, but after reworking the parts for #21, I don't care. Thanks for the links! Amazing work, but just too much for me. Ed

- 247 replies
-
- 10
-
-
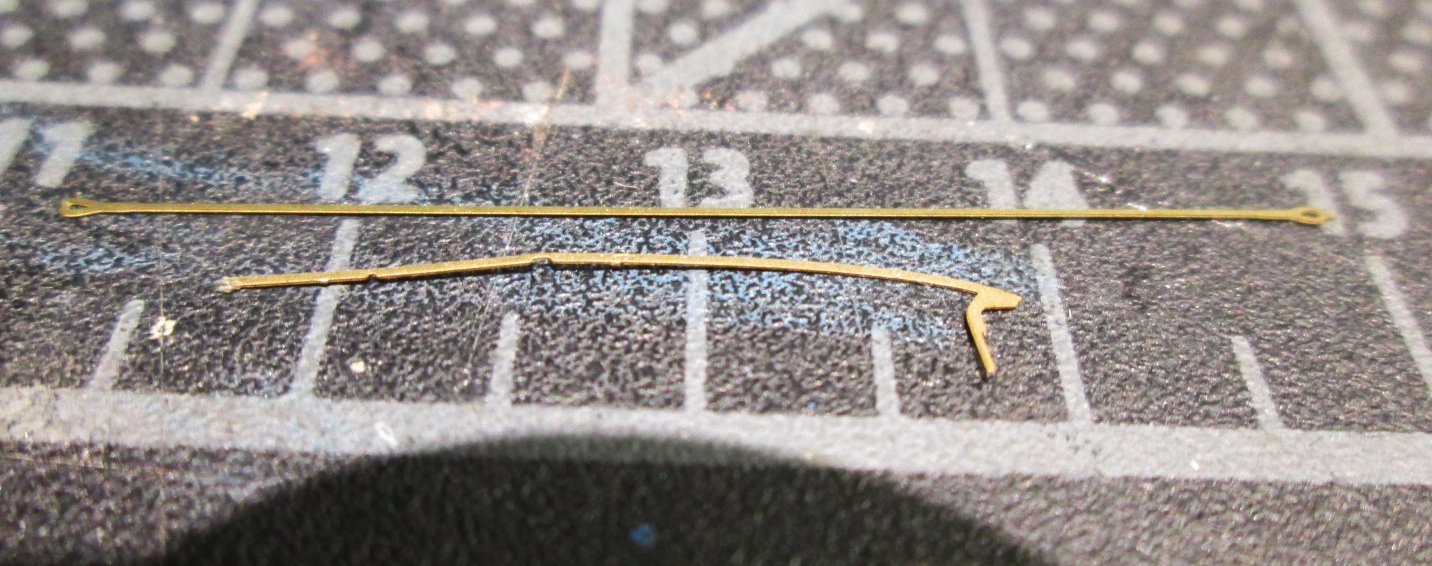
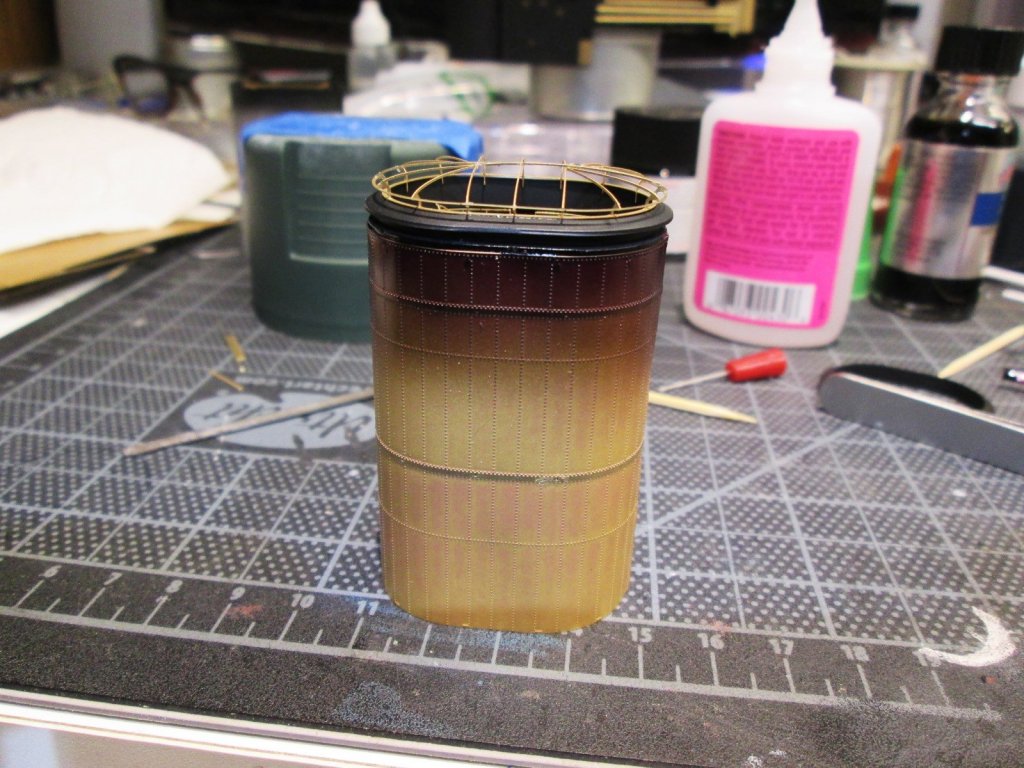
Hey, So I messed around with reworking the parts from Pontos that were wrong, and I'm happy with the results. I found some PE that was about the same width of the part that needed reworking. I just added some metal to extend it on one and after cutting off the funny shape that actually meets the oval parts: And then I worked on the short walkway. If you look carefully, the ends of these things bend to form an "L". With both ends unfolded, the walkway was long enough! NO ONE will notice: I then wrapped the funnel in its PE sheet and decided to try something I had never done before. I airbrushed some Alclad on it to make it look HOT. I asked my wife what the funnel looked like to her, and she said: "Looks like it got burnt." Exactly what I wanted to achieve. I hope you guys approve. I love it. Now I have to do the second one!
- 247 replies
-
- 15
-
-
I'll have to check it out. Always willing to try new stuff! I really like fast bonding glue. I lose patience waiting for stuff to dry when it's just a tiny little part holding up the job. But sometimes even though you get immediate bonding, the bonding is fragile. Very brittle. So getting something flexible but strong sound awful good. Thanks!
-
Hi guys, First thing I did was make sure the parts fit each funnel, which is why I'm surprised they didn't realize they had to also change the other parts of the assembly. I fell asleep thinking about scratch building and I have an idea. Harley, I've always used Pacer Zap a Gap products. For some reason, it just doesn't seem to work as well for me anymore. Worst of all, is it loses its strength with time. If you glue your fingertips with a tiny drop from a fresh bottle, it's pretty hard to pull them apart. But from a year old bottle, no problem at all. I recently got some Gorilla Gel CA and it's almost all I'm using. Stuff is dangerous! Problem is, you have no time to fit the part. It bonds immediately on contact, so you have to have a steady hand. Removing something after it's bonded will usually destroy the part. The biggest drawback by far is the "frosting", especially since I'm gluing on black. The "frost" shows up like a sore thumb! I hate it. I'm going to have to figure out how to get rid of it. Thank you again for all the encouragement. Ed
-
Yep, for the money you expect much better documentation and accuracy. That's why I said I'm trying to stay calm haha. Hopefully they will send any corrections.
-
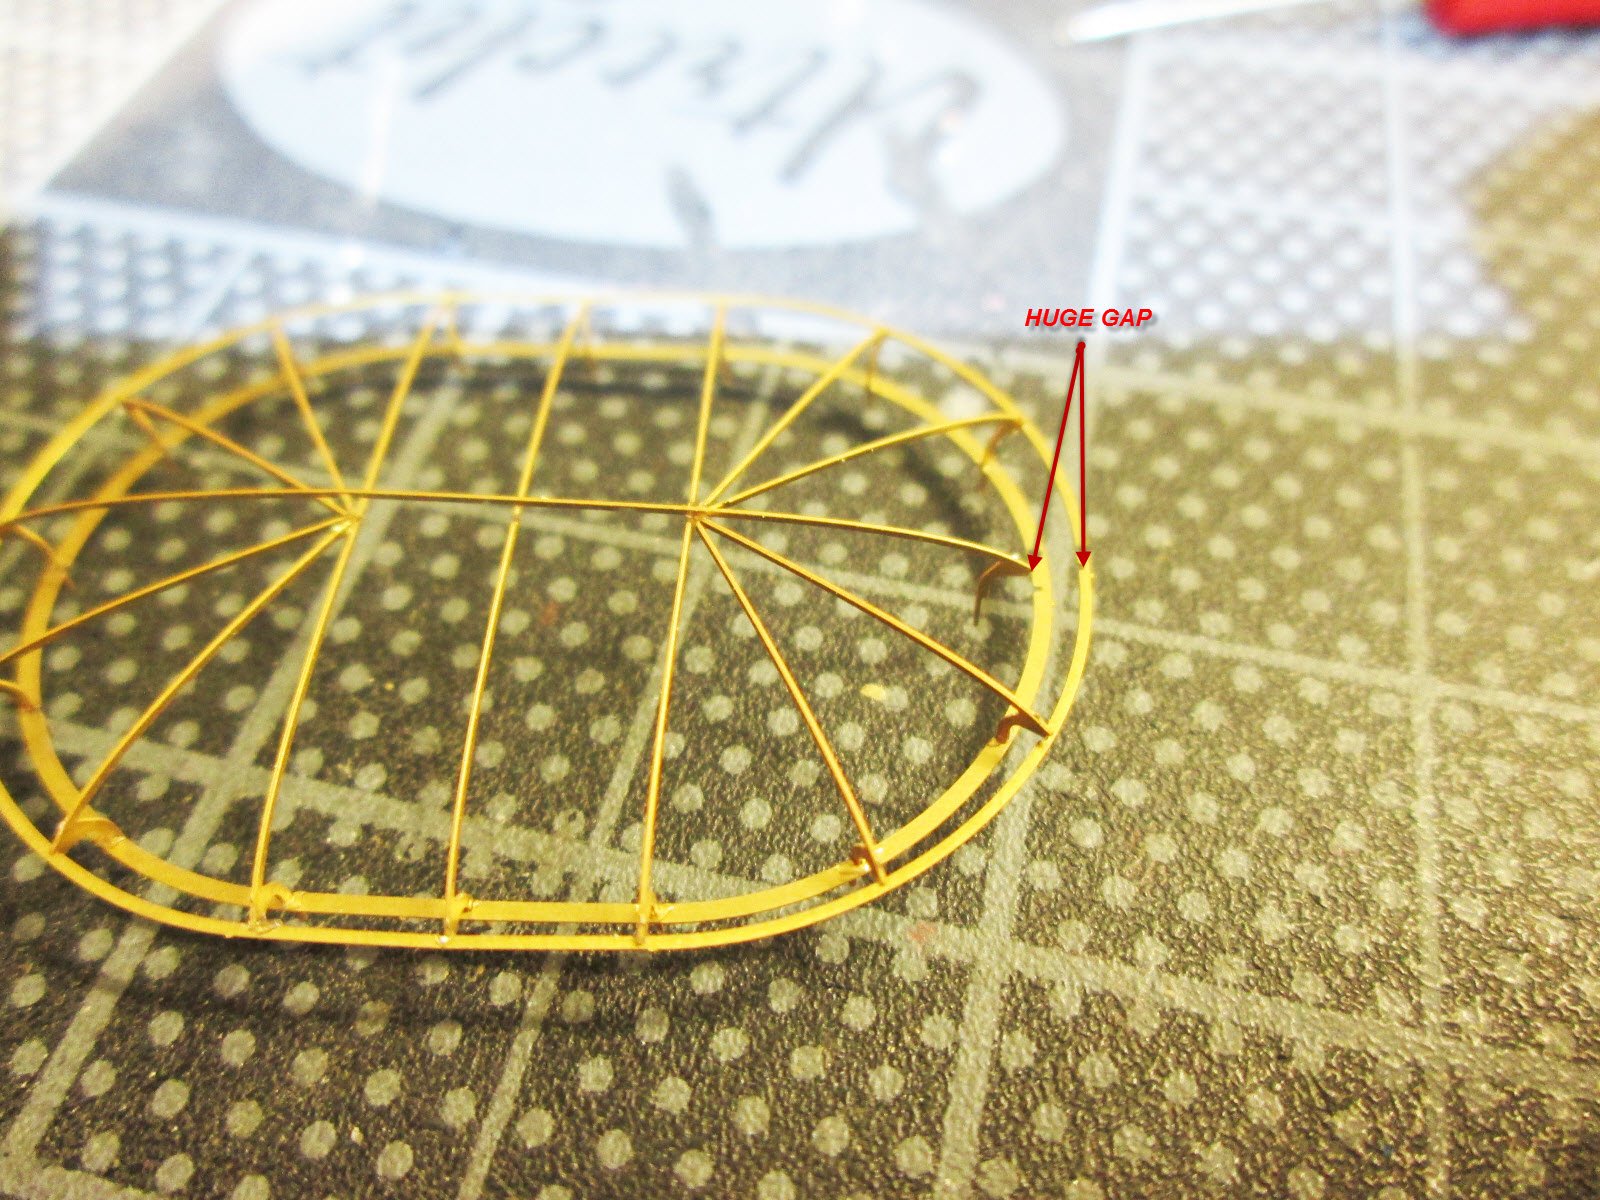
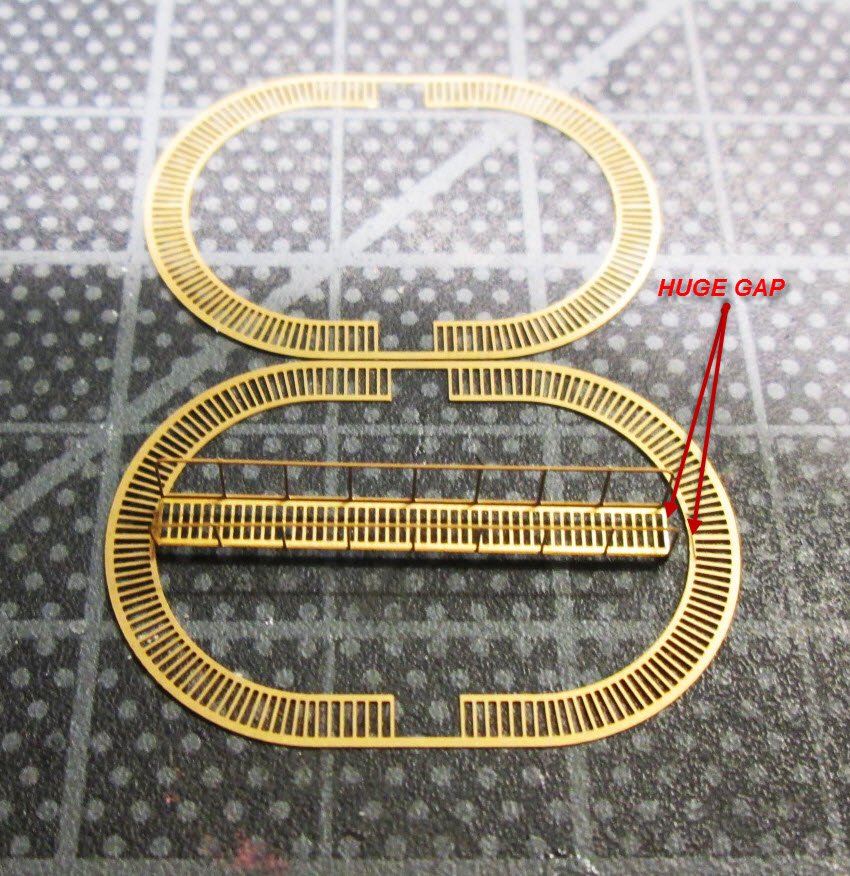
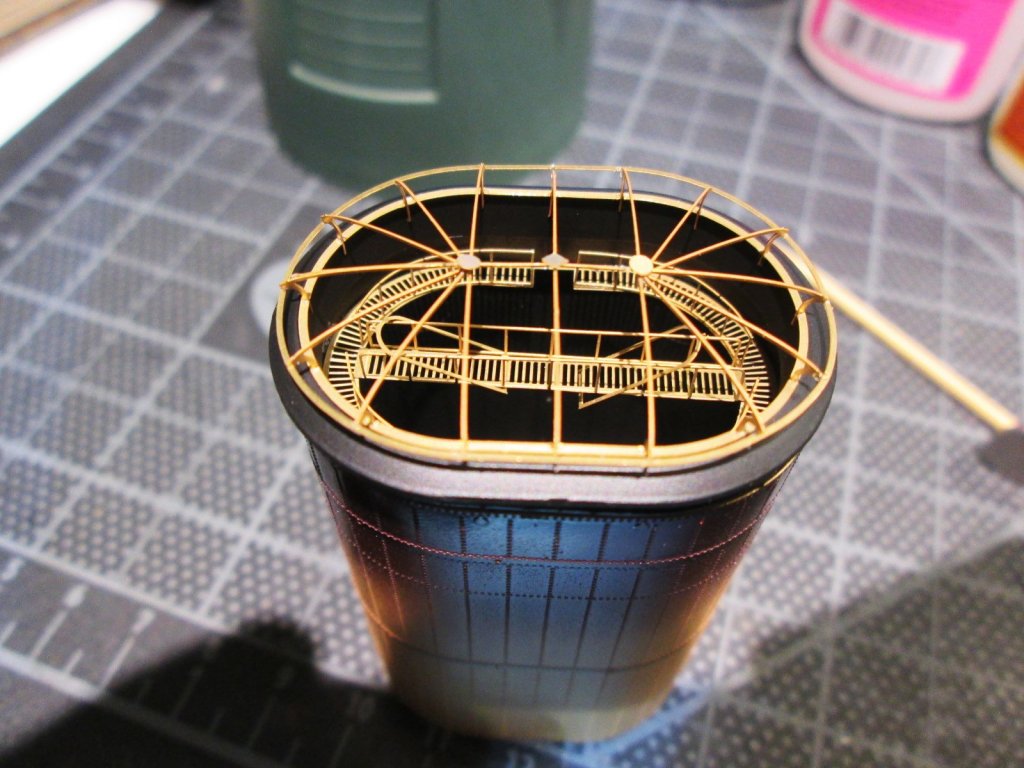
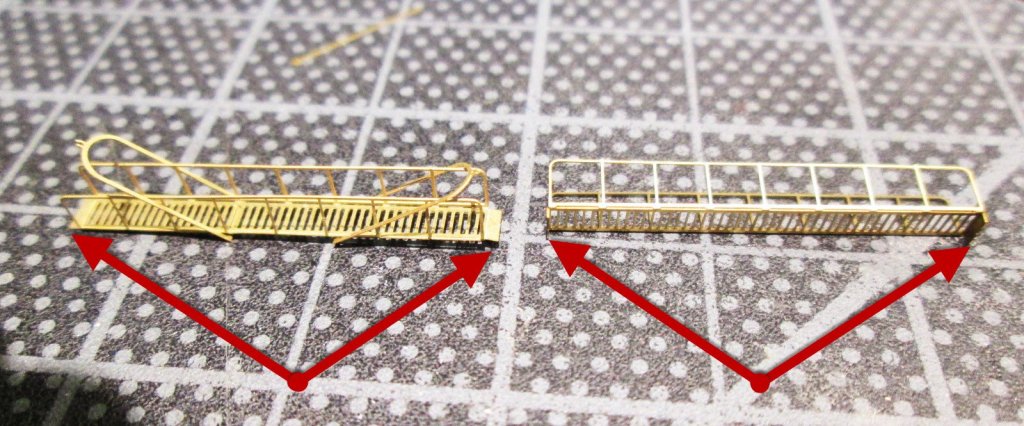
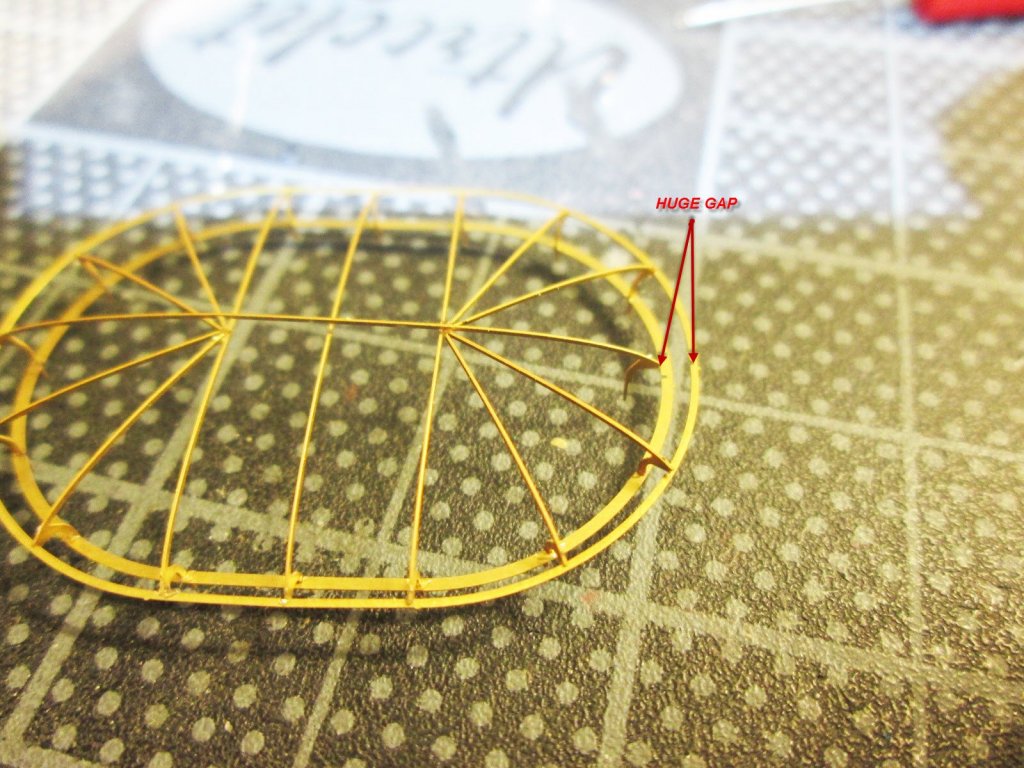
Buenas noches, And adventurous night. There are some serious issues with the funnels on this model. The two funnels in the kit are of different sizes. I don't know if the actual ship is the same, or this is a Trumpter F up. Pontos seems to have taken that into consideration, because the brass PE jackets are of different sizes, to correspond to each funnel. The top of the funnels are also of different sizes. Unfortunately, Pontos did not get all the parts right. Here's an example: You can see that the middle "spar" doesn't reach the other side of the oval. Not only that, they also screwed up on the walkway that goes inside the actual funnel. Here is the problem: You can clearly see that each oval is of a different size to make up for the different size funnels, but the walkway only fits the smaller one. Both walkways are the exact size: I did hear back from Pontos concerning the missing paravane parts. A gent named Kim says he's going to send the parts to me. I also requested ANY and all upgrades that they may have done since releasing the kit, so we'll see if they did anything about these error. I'm trying not to let it p me off.
-
Hello all, I just put one of the most difficult, most fidgety things you will ever do with PE. I had to take a break because I thought I would explode because I have to make another one! The PE is so incredibly fragile that just breathing on it just about bends it! (exaggerating). There is hardly any surface contact at all. Now, back to the next one

- 247 replies
-
- 12
-
-
Wow, those are some awesome gadgets! I'm going to have to get at least one. Thanks for the heads-up.
-
Thanks Mike (I'm assuming that's your name). I appreciate every encouraging comment. I honestly get fueled by it. When I was at the "other" site and got no reactions, I actually got bored and stopped working on the Mikasa for a long time. It would have been finished long before if I had the encouragement. Thank you again. Ed
-
This is really beautiful! I have thought about what other colors I would use instead of black for the unpainted brass look, and dark blue and dark red are my next ideas. I love how that looks and you did a fantastic job!
-
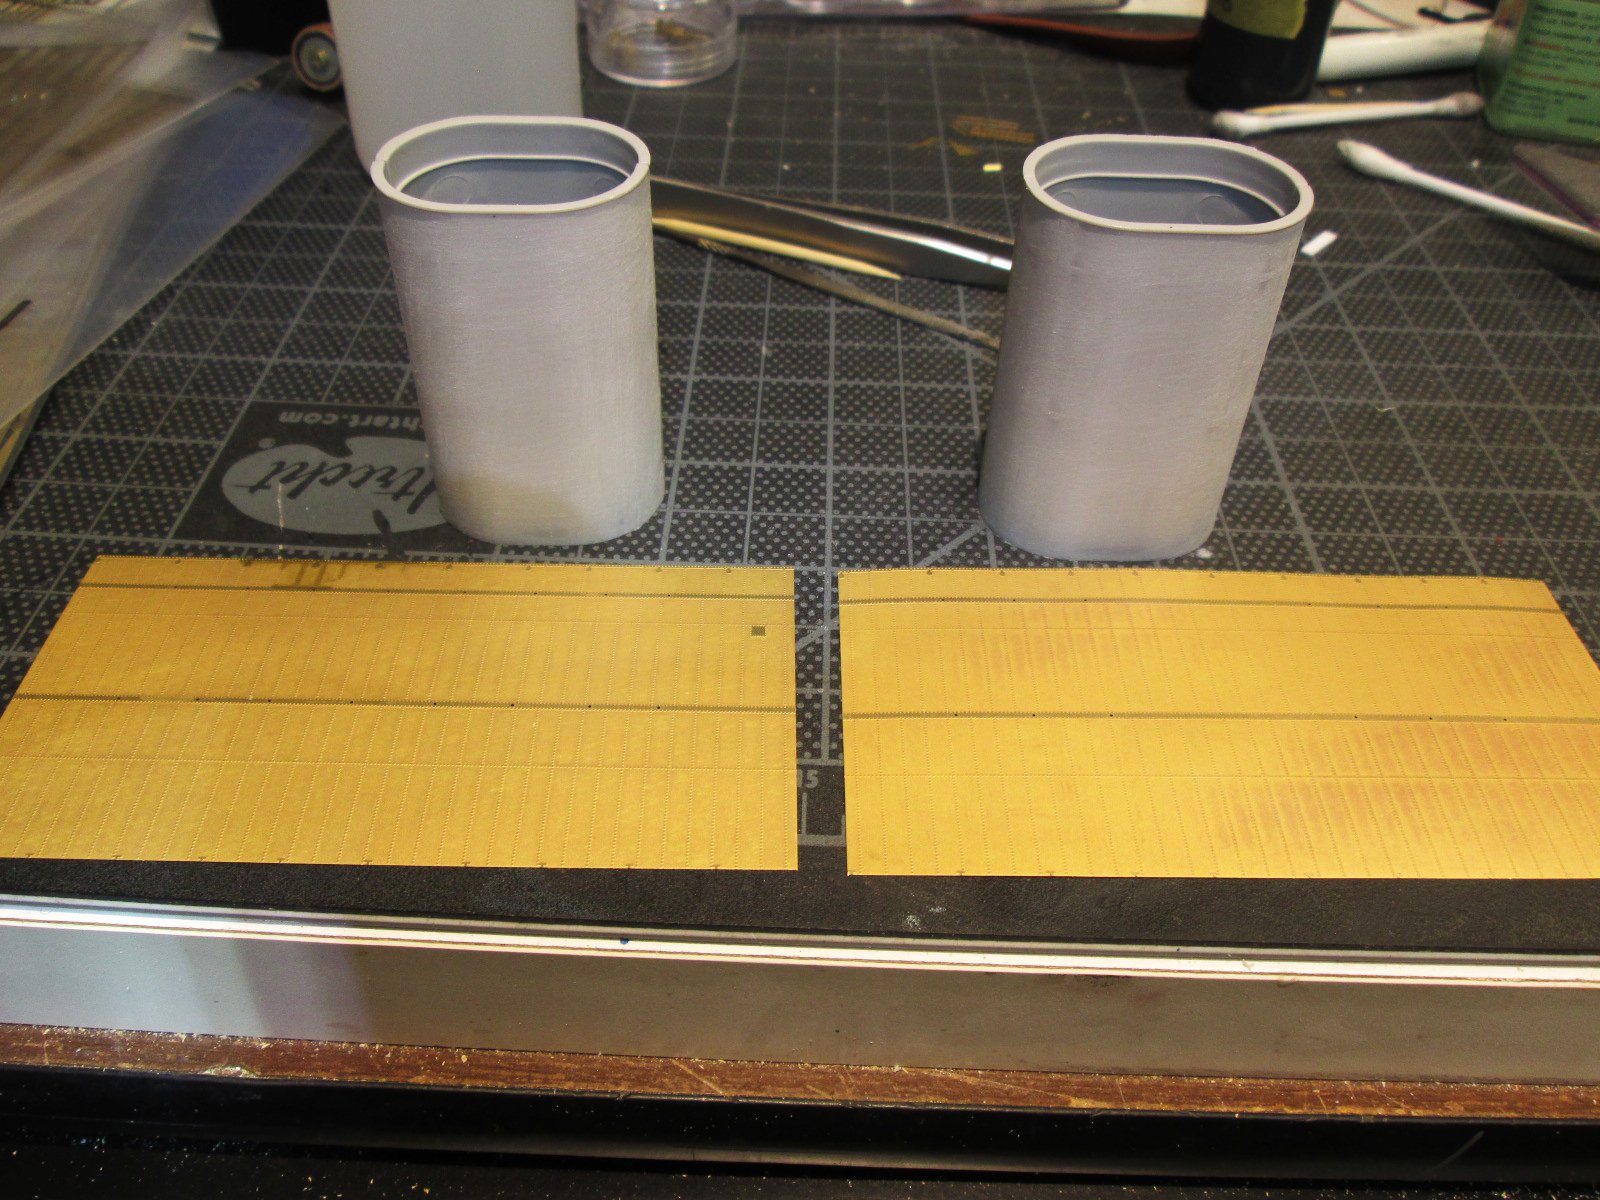
Update. I'm almost done with this assembly: Tomorrow are the funnels: I played around with wrapping a funnel in the PE, and even though I wrapped it tightly around, the PE bounced back without even the slightest curve! You can usually just tack down one side of the PE and then work your way as a cylinder. Not this time. The stuff is thick and rigid. Going to have to figure out how to roll it, or get some killer glue to hold it. Doesn't look fun.


- 247 replies
-
- 16
-
-
I did lots of annealing in my days, but only with glass. I used to "make" laser tubes, that required some minor glass blowing and joining, and then annealing. Ahhh memories!
-
I love to solve problems. Love to play Macgyver. My daughter gets a kick out of it when I'm working on something and I figure out tricks to get us out of a mess or to fix something. This PE rolling thing has been bugging me since last night. Even the cheaper model $35, seems like so much for such limited use. So I went to the hardware store and got an idea. You can always cut some brass or copper tubing in half the long way, to form a channel, and then use a brass tube or dowel the size of the inner diameter of the channel to bend the PE. Even just to get the start of the shape is good enough for me. I probably have the materials in my stash!
-
Funny you post that other tool! I was just in the garage, trying to make my own. I have some boxwood which is pretty hard. I got it nice and flat and then proceeded to TRY to make some groves using this: Got nothing but junk! No matter what bit I used, that stand is wiggly as hell. No precision at all. If I had a router and some small round bits, that might do it, but I think the one you suggest is the right way to go. It doesn't have to be some fancy "deluxe" version. With the amount of pressure that it takes to bend and roll PE (next to nothing), this will do. Ordering it. Thanks!
-
Thank you! I have no idea what I'm going to do with it when I'm done! Since I just finished the Mikasa, I'm very familiar with the effort it took to make a display for it, and the cost, and the Mikasa isn't nearly as huge as this kit is. So I really don't know what's going to happen! Right off the bat, who's going to help me lift the glass to place it over the kit?!! I wish I could sell these guys, but not many people are interested in a "built" model. Working with 1:350 is a whole other thing. Try 1/700 with PE! I have a few. Total madness. Ed