HOLIDAY DONATION DRIVE - SUPPORT MSW - DO YOUR PART TO KEEP THIS GREAT FORUM GOING! (89 donations so far out of 49,000 members - C'mon guys!)
×


NAZGÛL
-
Posts
1,365 -
Joined
-
Last visited
Content Type
Profiles
Forums
Gallery
Events
Everything posted by NAZGÛL
-
 LOL pops! Cheers mate! Where are you moving? /Matti
 -
The BB Vasa instructions have measurements in the part list when it comes to planks and such. In my kit (the latest version I think) there are an extra set of plans showing the new diagrams of the lasercut part. They changed the setup compaired to the earlier version. Maybe thats the reason for your differences, but its weird that they didn't add the new diagram. The plans felt hard to get at first, I remember joking some about drunk danes doing them. But they have all info there, but not made as an easy read. The 1:1 sheet is often helpfull. It's also helpful to look at reference of the real ship and the 1:10 to see how it should look. /Matti
-
Cheers Lawrence! Yeah time flies when having a good time building. Looking forward to see your scratch building. I needed to check through the instructions a few times to find what goes where, but once I got the logic it was no problems. I can't say but the numbers you asked sounds like what plywood sheet the parts are laser cut on. You may want to consider how to do the open gunports early when building this kit. /Matti
-
Thanks for the kind comments and likes everyone! Yeah pops, after googling I agree, that's the same as a stormvase. /Matti
-
Thanks! Well, it may be a something called a stormvase also. That's a bundle used by soldiers to get protection during battles. The Vasa symbol seems to have changed over the years and your interpretation of it as a symbol of wealth could also be true in this later version. I'm not sure, but the word vasakärve may actually originate from this symbol, not the other way around. I feel I'm having problems explainig this in english, sorry. /Matti
-
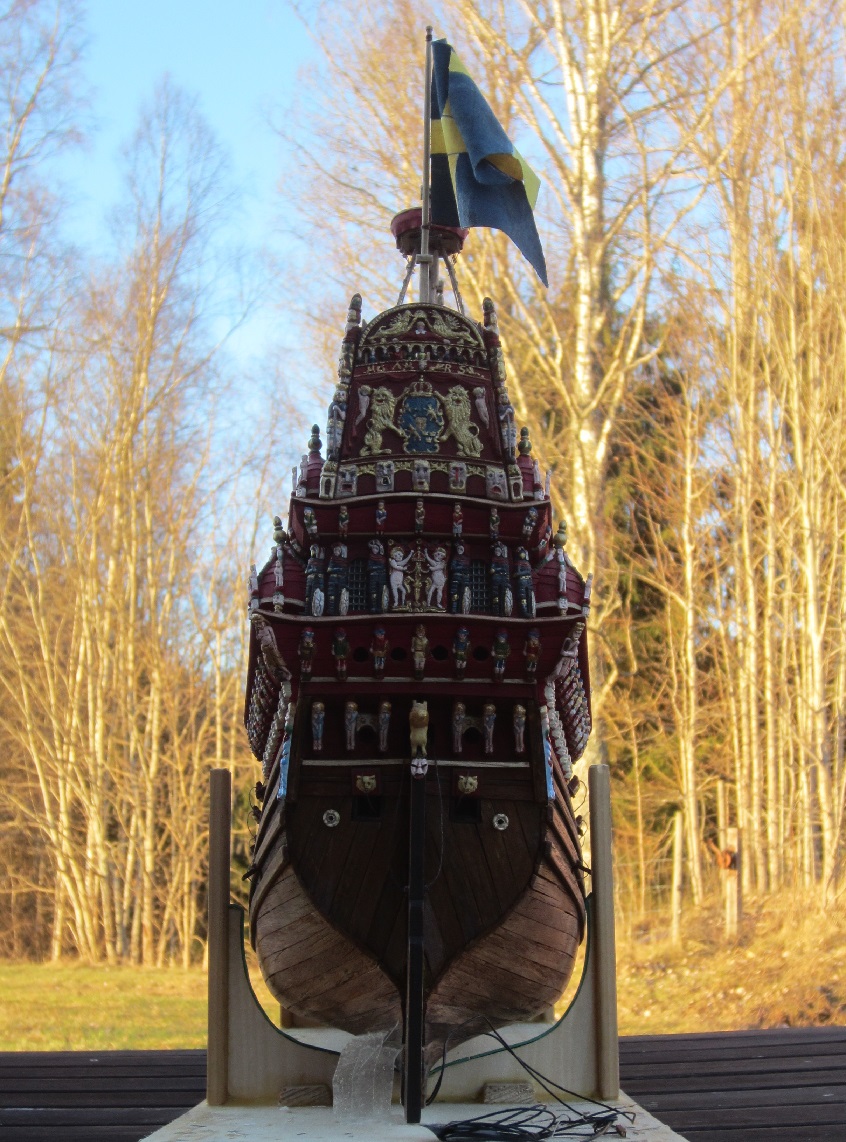
Thanks JM, once you get what goes where she builds in to a nice model. Feel free to ask and perhaps me or the other Billing Vasa builders can help. Karl, your model turned out beautyful! Vasa was a regal class ship, a kings powerful ship named after his heraldic name. Regal ships where usually named after things that were symbols of the king, The Spectre, The Crown, The Sword, The Apple (like Vasa sister ship Äpplet) and so on. Vasa is the family name (heraldic name?) of the king Gustav II Adolf. We call the time period between 1521-1654 vasatiden (The Vasa time) in swedish history because of these kings (and one queen). The V or W is because they had no clear spelling rules back then and wrote anyway they wanted. Here's their heraldic symbol, same as on the Vasa ship. The thing in the middle is a vasakärve, a bundle of seed. These symbols are still common is swedish authorities. I just finished the display case and got the model inside. The case is customized with a set of legs from an old table I had and some planks to fasten them. The display case is shortened to fit the model amd get nicer proportions of it. Cheers! /Matti

-
Congrats Karl! You can be proud of your Vasa! Looking forward to see what you do next. /Matti
-
Gorgeous! /Matti
-
Thanks Dee Dee, and I wish you the same! /Matti
-
Thanks for the kind comments Jan and Frank!
-
Thank you very much Boyd, I'm happy you like it! /Matti
-
LOL sorry to dissapoint but I just love the halfbuilt look. It triggers my imagination and I also like the look and proportions it gives her. A fully rigged model would fit the case, but probably look a bit cramped. /Matti
-
Thanks Frank! Looking at all the gorgeous builds around here I can't agree with you... Your painting work is a big inspiration to follow. /Matti
-
Thanks Mike and Law! Earlier in the build before I decided to make her in this halfrigged stage, I planned to use the display case to keep her in during the later stages. Therefore I allready bought one and thought through how I wanted it. Now hopefully I just have to put it together, if I pull it off. /Matti
-
Paint brush verses air brush
NAZGÛL replied to medic's topic in Painting, finishing and weathering products and techniques
For me brush works better on a wooden shipmodel. I work with washes and drybrushing alot and also pastel powder. I use the airbrush once in a while when I need to add a thin coat of varnish to make the pastels stick. I paint everything before assembling them. You need to be sure of the look you want early though. But this is preference and imo there are few wrong or rights in modelbuilding. /Matti -
Wow thanks for the kind words everyone, they mean alot! Per, I keep her on the fridge, high up so no accidents happen. Nice place as it's quick to get going, I rarely build in the workhop now as there are no nasty fumes or plastic dust. I've made some progress on the displaycase and managed to get the legs from the old table fastened. Next is making the construction sturdy. Actually I did that job in the workshop as I had to make custom parts to make the legs fit. /Matti
-
Thanks all! It feels a bit empty and sad not to plan for the next stage anymore. But at the same time it feels nice to start to plan for the next subject. I'm using legs from an old table to put under the display case so I now add furniture carpiting to the list of new stuff I needed to learn to do this model. Tony, I'm happy if it can help, and during this build I've gathered a supply of reference of the ship and 1:10 model so perhaps I can help if there are questions. Thanks again, both for the comments and likes! /Matti PS: You got the post 1628 Nigel!
-
Thank you for the kind comments! Yeah I have some ideas for a new modelship build. Building this was a very enjoyable experience and I'd love to do more after completing the showcase. /Matti
-
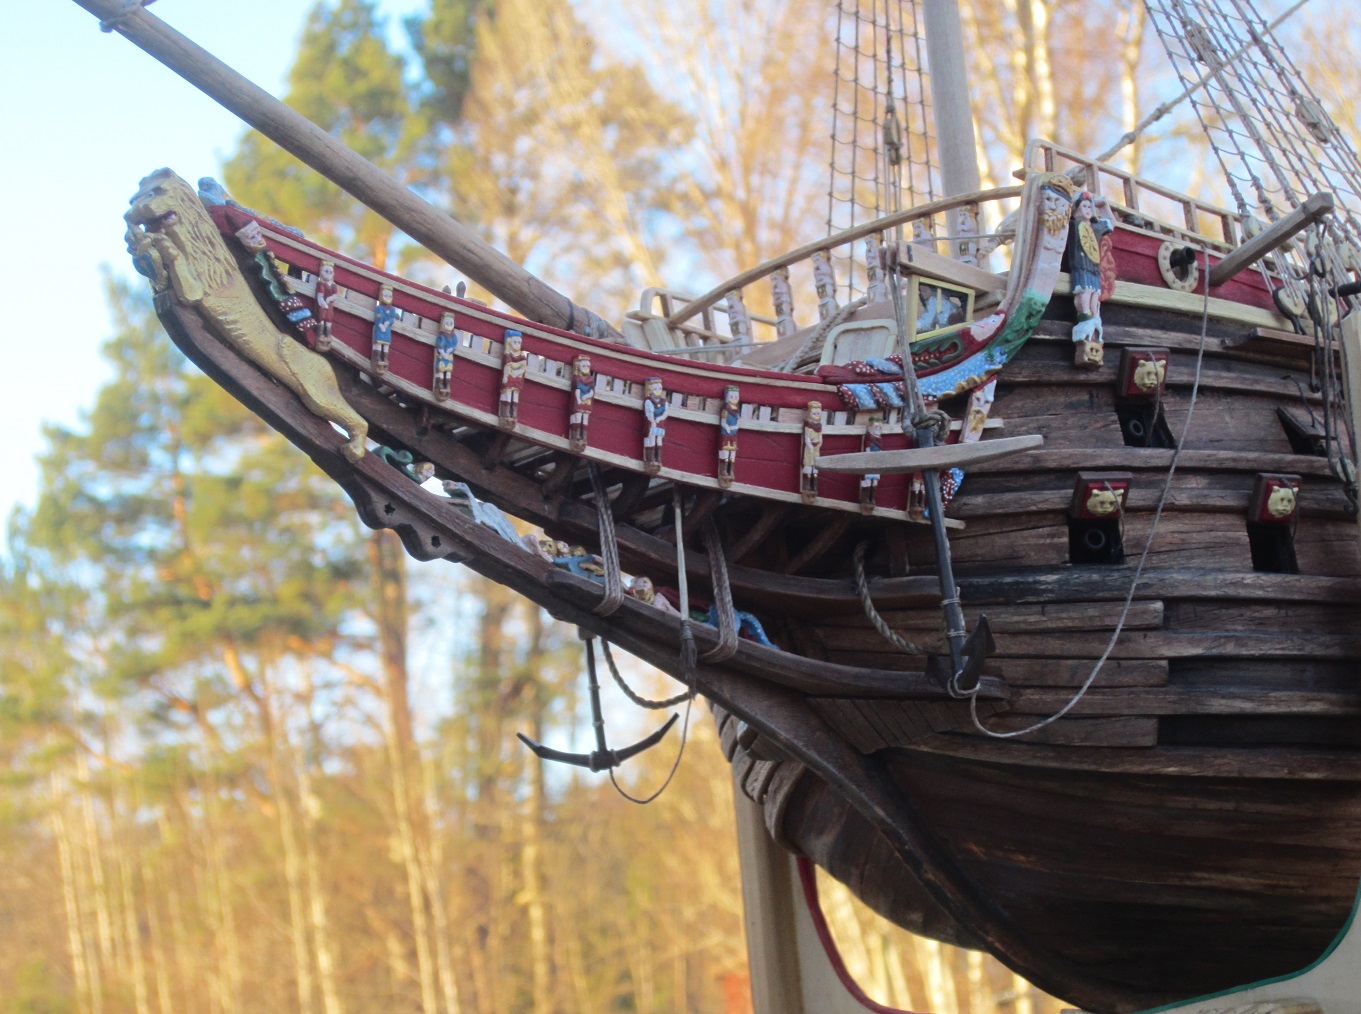
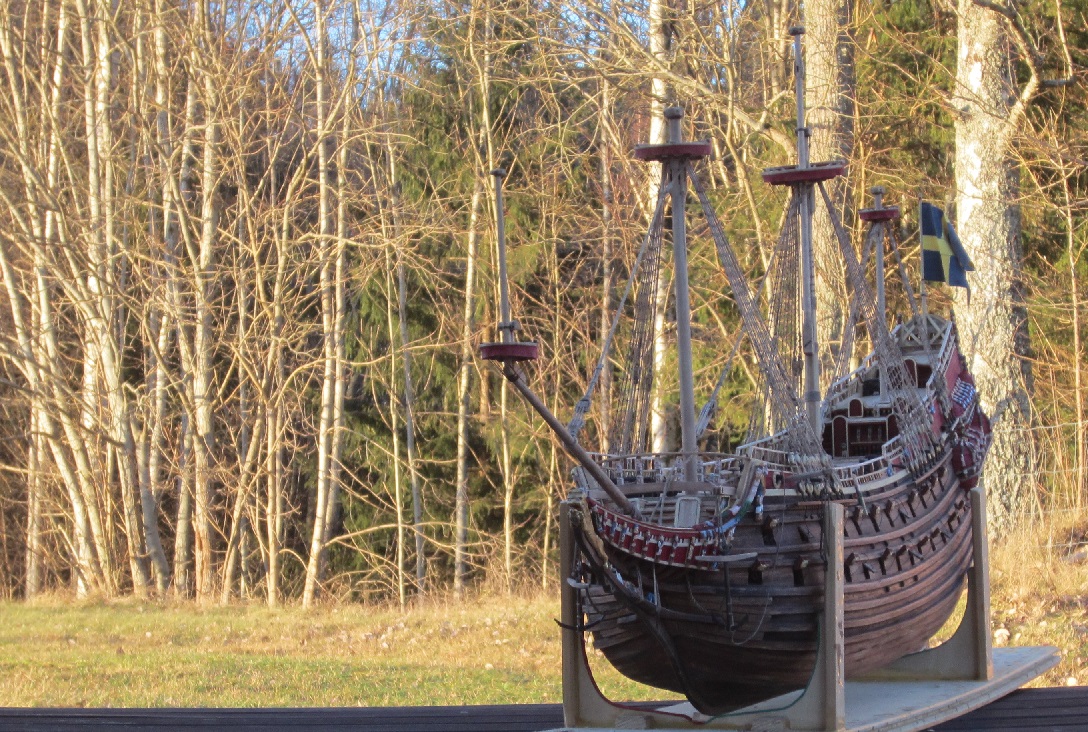
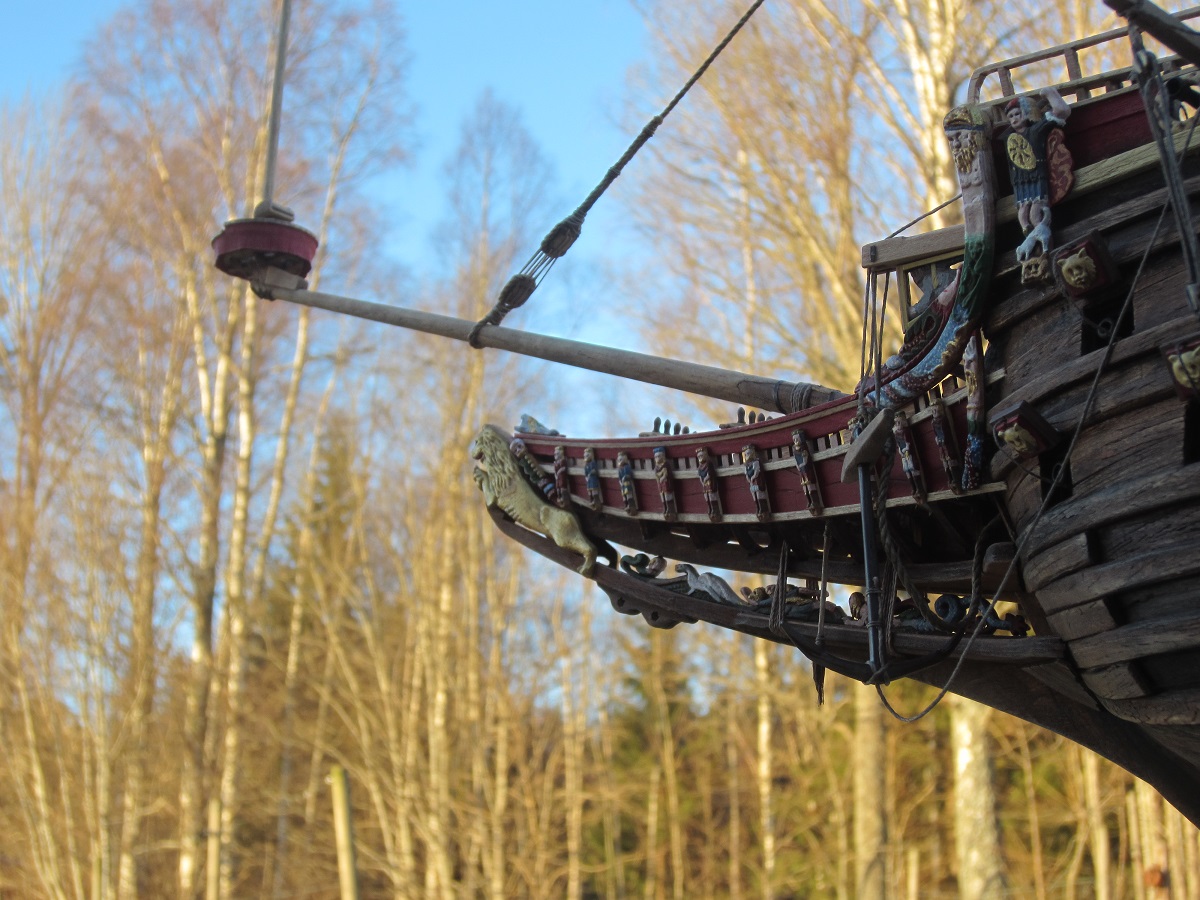
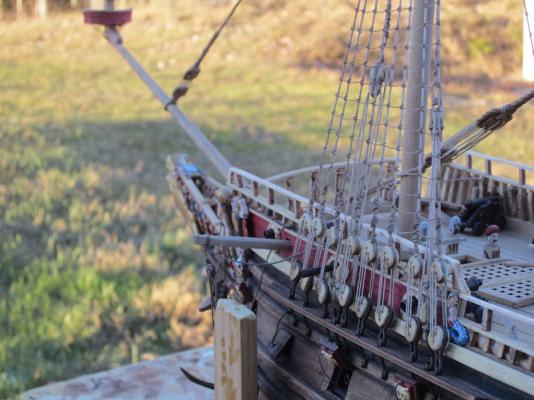
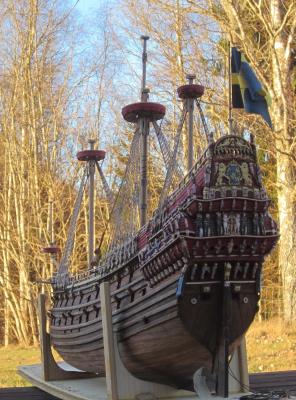
Hey all! Last days I've managed to do some more details. The railing was less problems to get in place than I imagined. It fitted very well to the shape of the ship. It was a good advice to do it last Nigel as its fragile by it's nature. The ropes holding the anchor and the others hanging will be corrected when the model is positioned on the stand and I can tell how it should hang. And with this it turns out I'm done with the model. It's a mixed feeling as I'm happy to have reached my goal but also feel a little sad as I'll miss working on it and talking to you all about it. It has been a great inspiration and source of knowledge, so thanks eveyone for the help and support! These will likely be the last outdoor pctures of her and I will now start on the case so more to come. /Matti


-
Thanks buddy, same to you! /Matti
-
Thanks pops,and the same to you! I just put the other anchor in place. I'm rather tired today so I'm going slow. /Matti
-
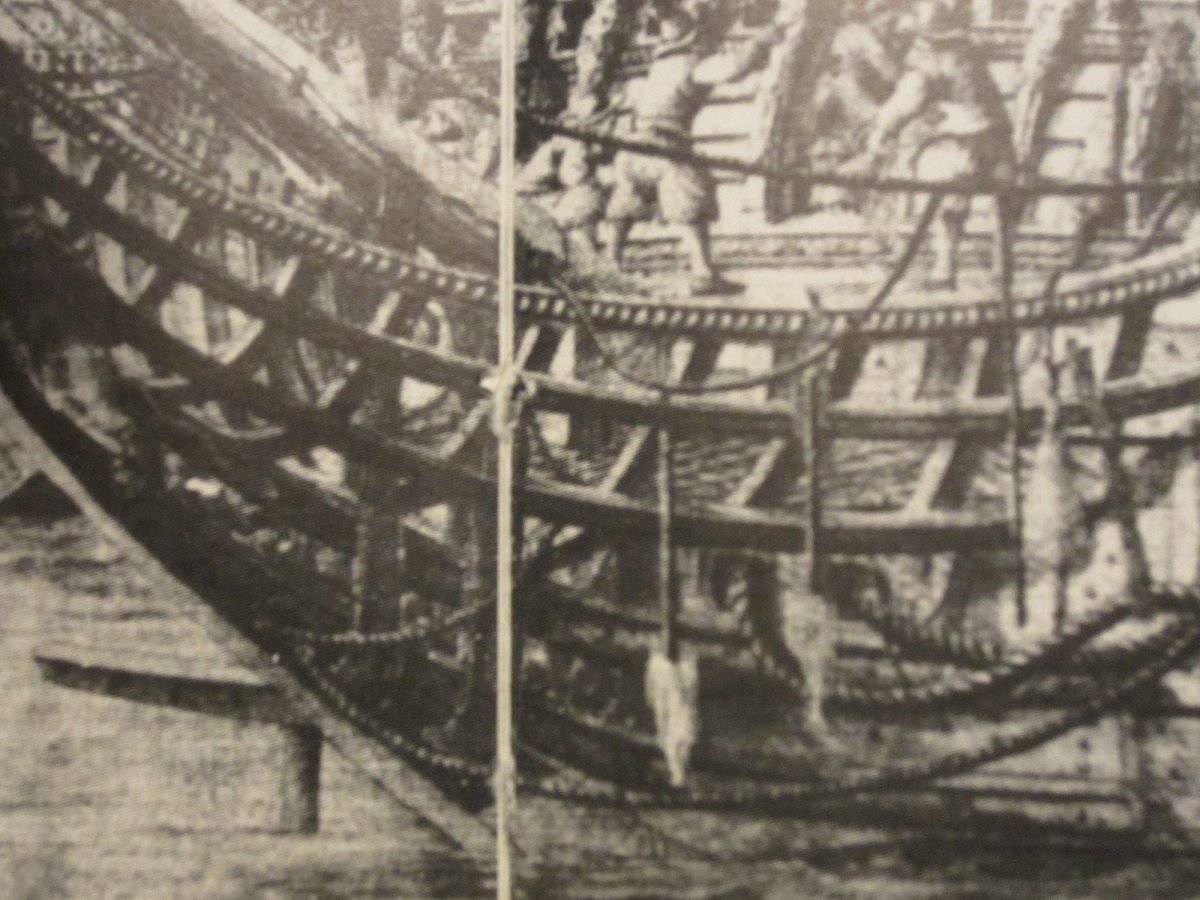
Thanks Buck! I used straws from an old brush to get it in scale. CA glue it to the stick and then trim and it to shape. I did two tests before I managed to get it right. And yes, my fingers where hairy afterward. Here is a part of Eendracht by Willem Van de Velde showing two svablar and the look I tried to make: /Matti

-
Wonderful work! I really like how you managed to get the nails and caulking to look in scale. Happy new year mate! /Matti