LucienL
-
Posts
122 -
Joined
-
Last visited
Recent Profile Visitors
1,692 profile views


-
 LucienL reacted to a post in a topic:
HMS Beagle by LucienL - OcCre - 1:60
LucienL reacted to a post in a topic:
HMS Beagle by LucienL - OcCre - 1:60
-
 ccoyle reacted to a post in a topic:
HMS Beagle by LucienL - OcCre - 1:60
ccoyle reacted to a post in a topic:
HMS Beagle by LucienL - OcCre - 1:60
-
DonSangria reacted to a post in a topic:
HMS Beagle by LucienL - OcCre - 1:60
-
vvvjames reacted to a post in a topic:
HMS Beagle by LucienL - OcCre - 1:60
-
vvvjames reacted to a post in a topic:
HMS Beagle by LucienL - OcCre - 1:60
-
vvvjames reacted to a post in a topic:
HMS Beagle by LucienL - OcCre - 1:60
-
 vvvjames reacted to a post in a topic:
HMS Beagle by LucienL - OcCre - 1:60
vvvjames reacted to a post in a topic:
HMS Beagle by LucienL - OcCre - 1:60
-
vvvjames reacted to a post in a topic:
HMS Beagle by LucienL - OcCre - 1:60
-
The Gimps Chimp reacted to a post in a topic:
HMS Beagle by LucienL - OcCre - 1:60
-
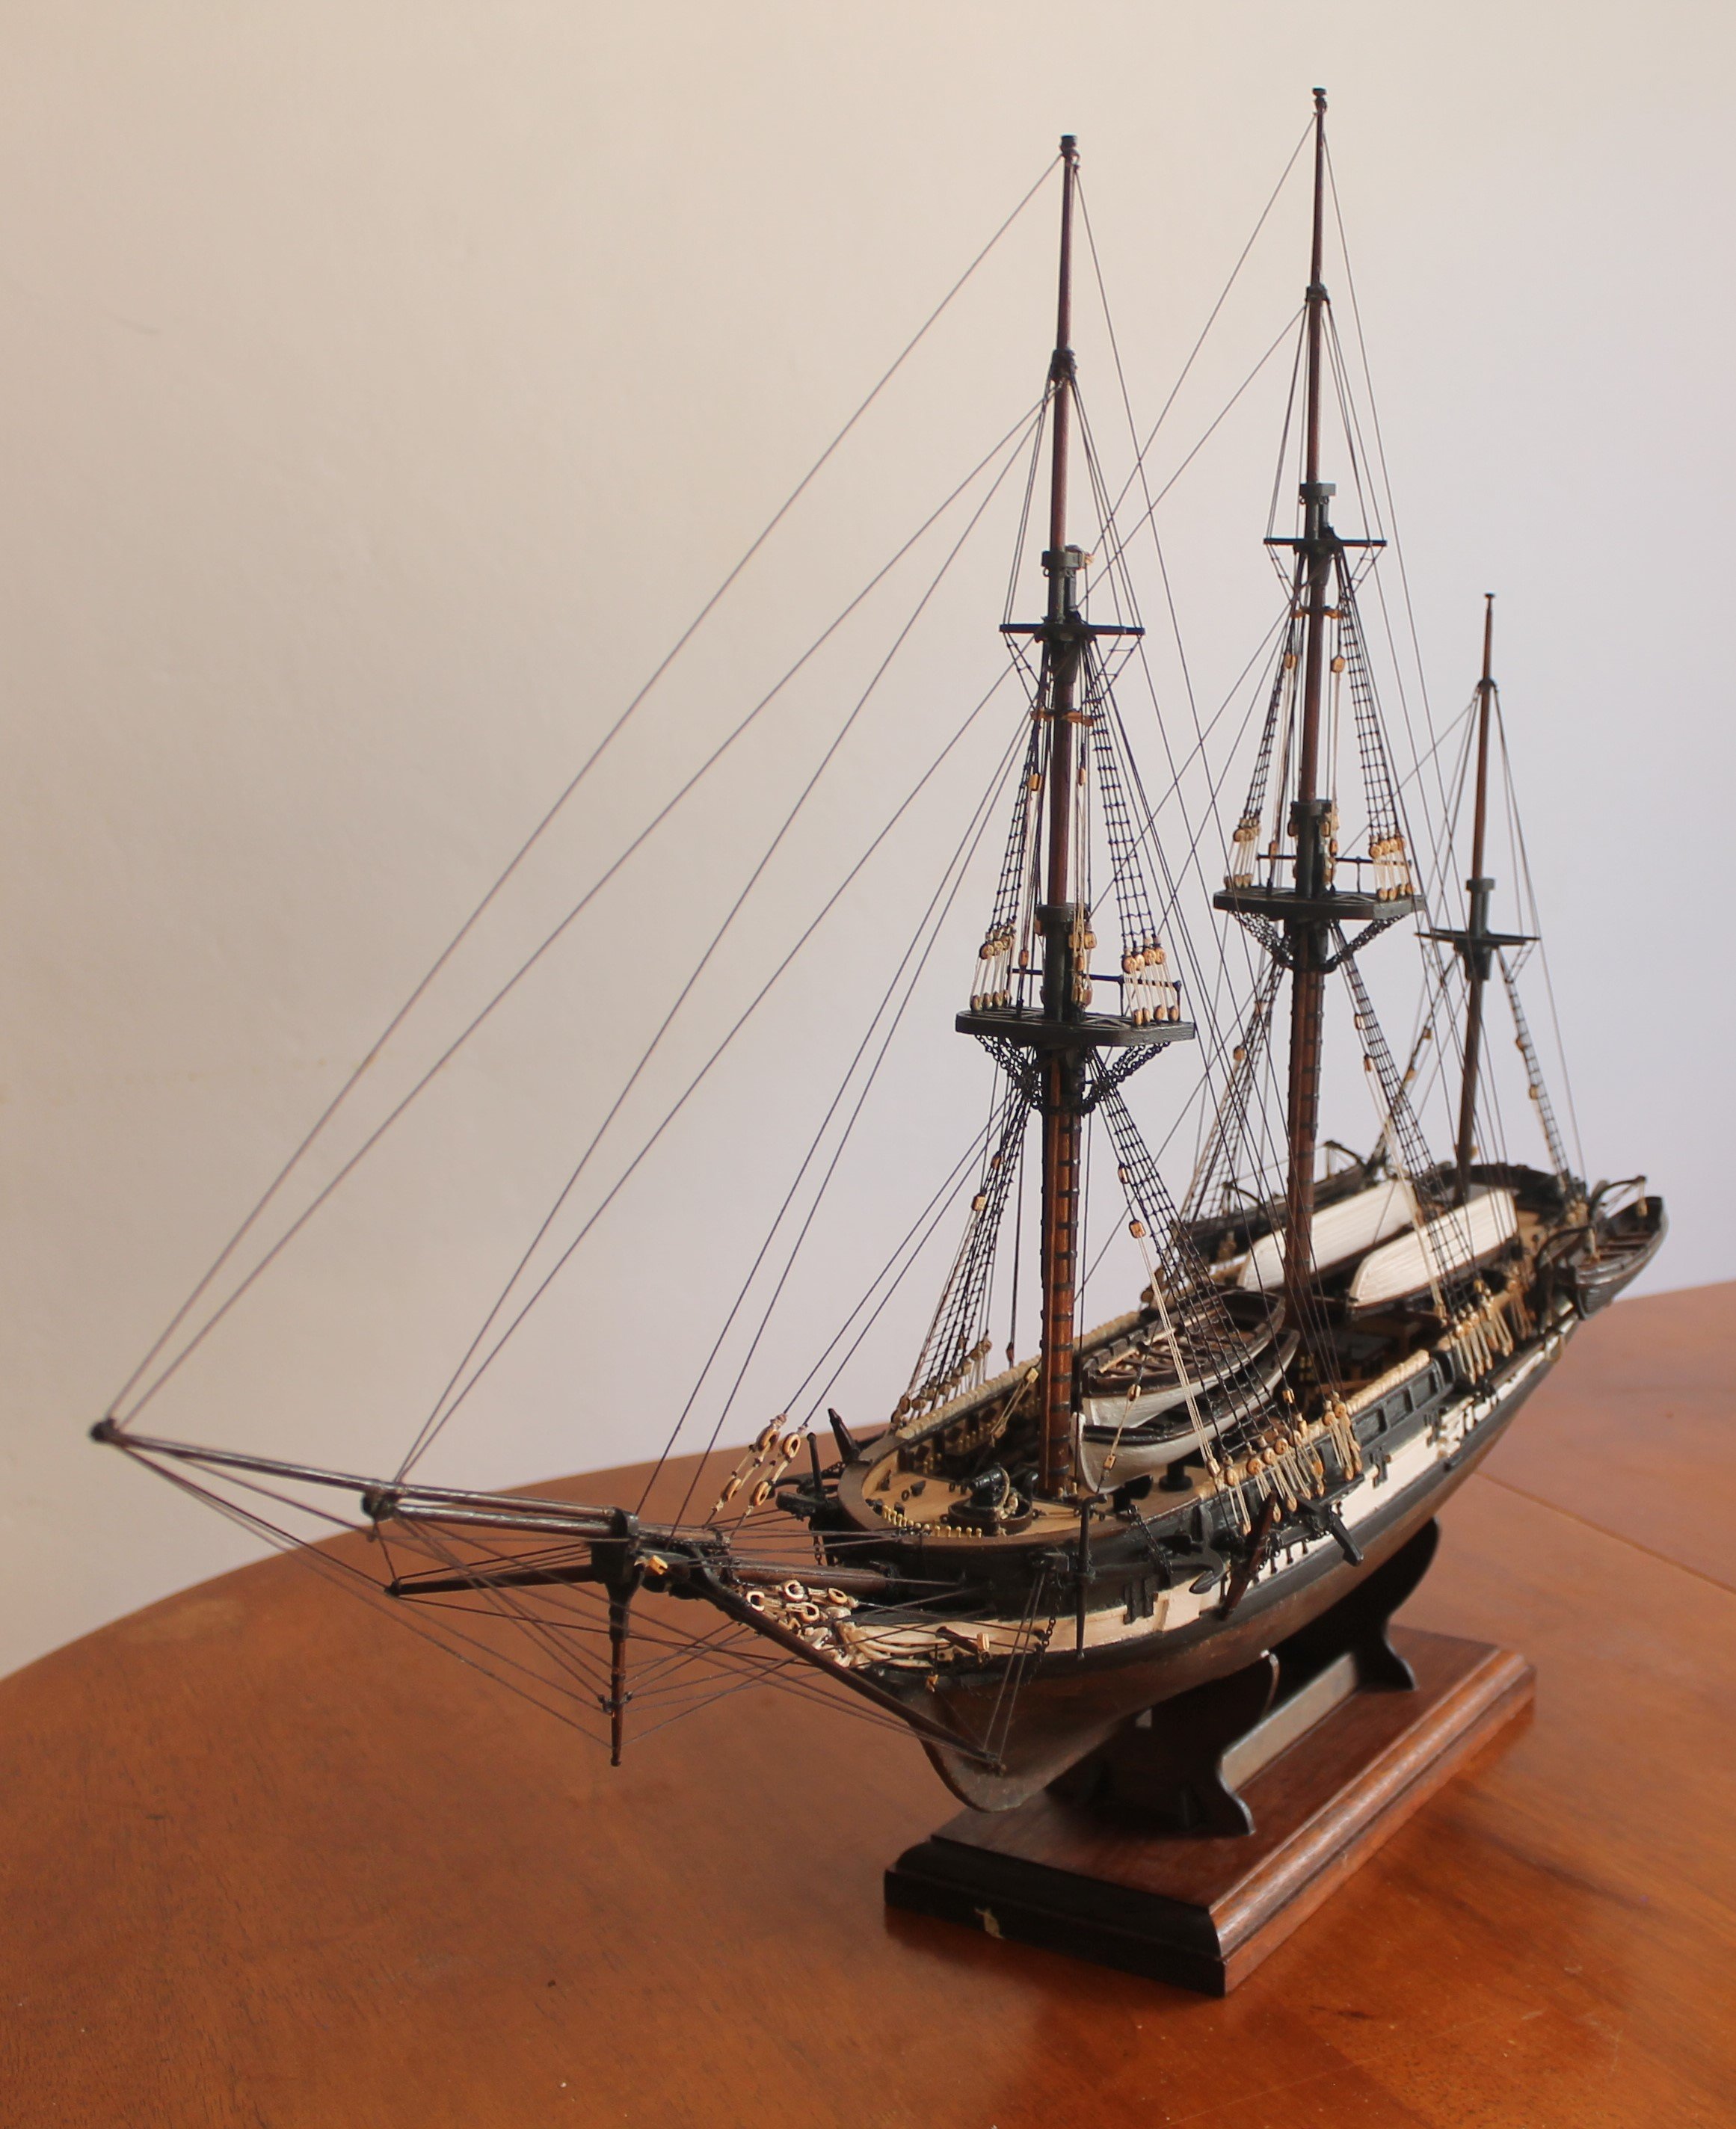
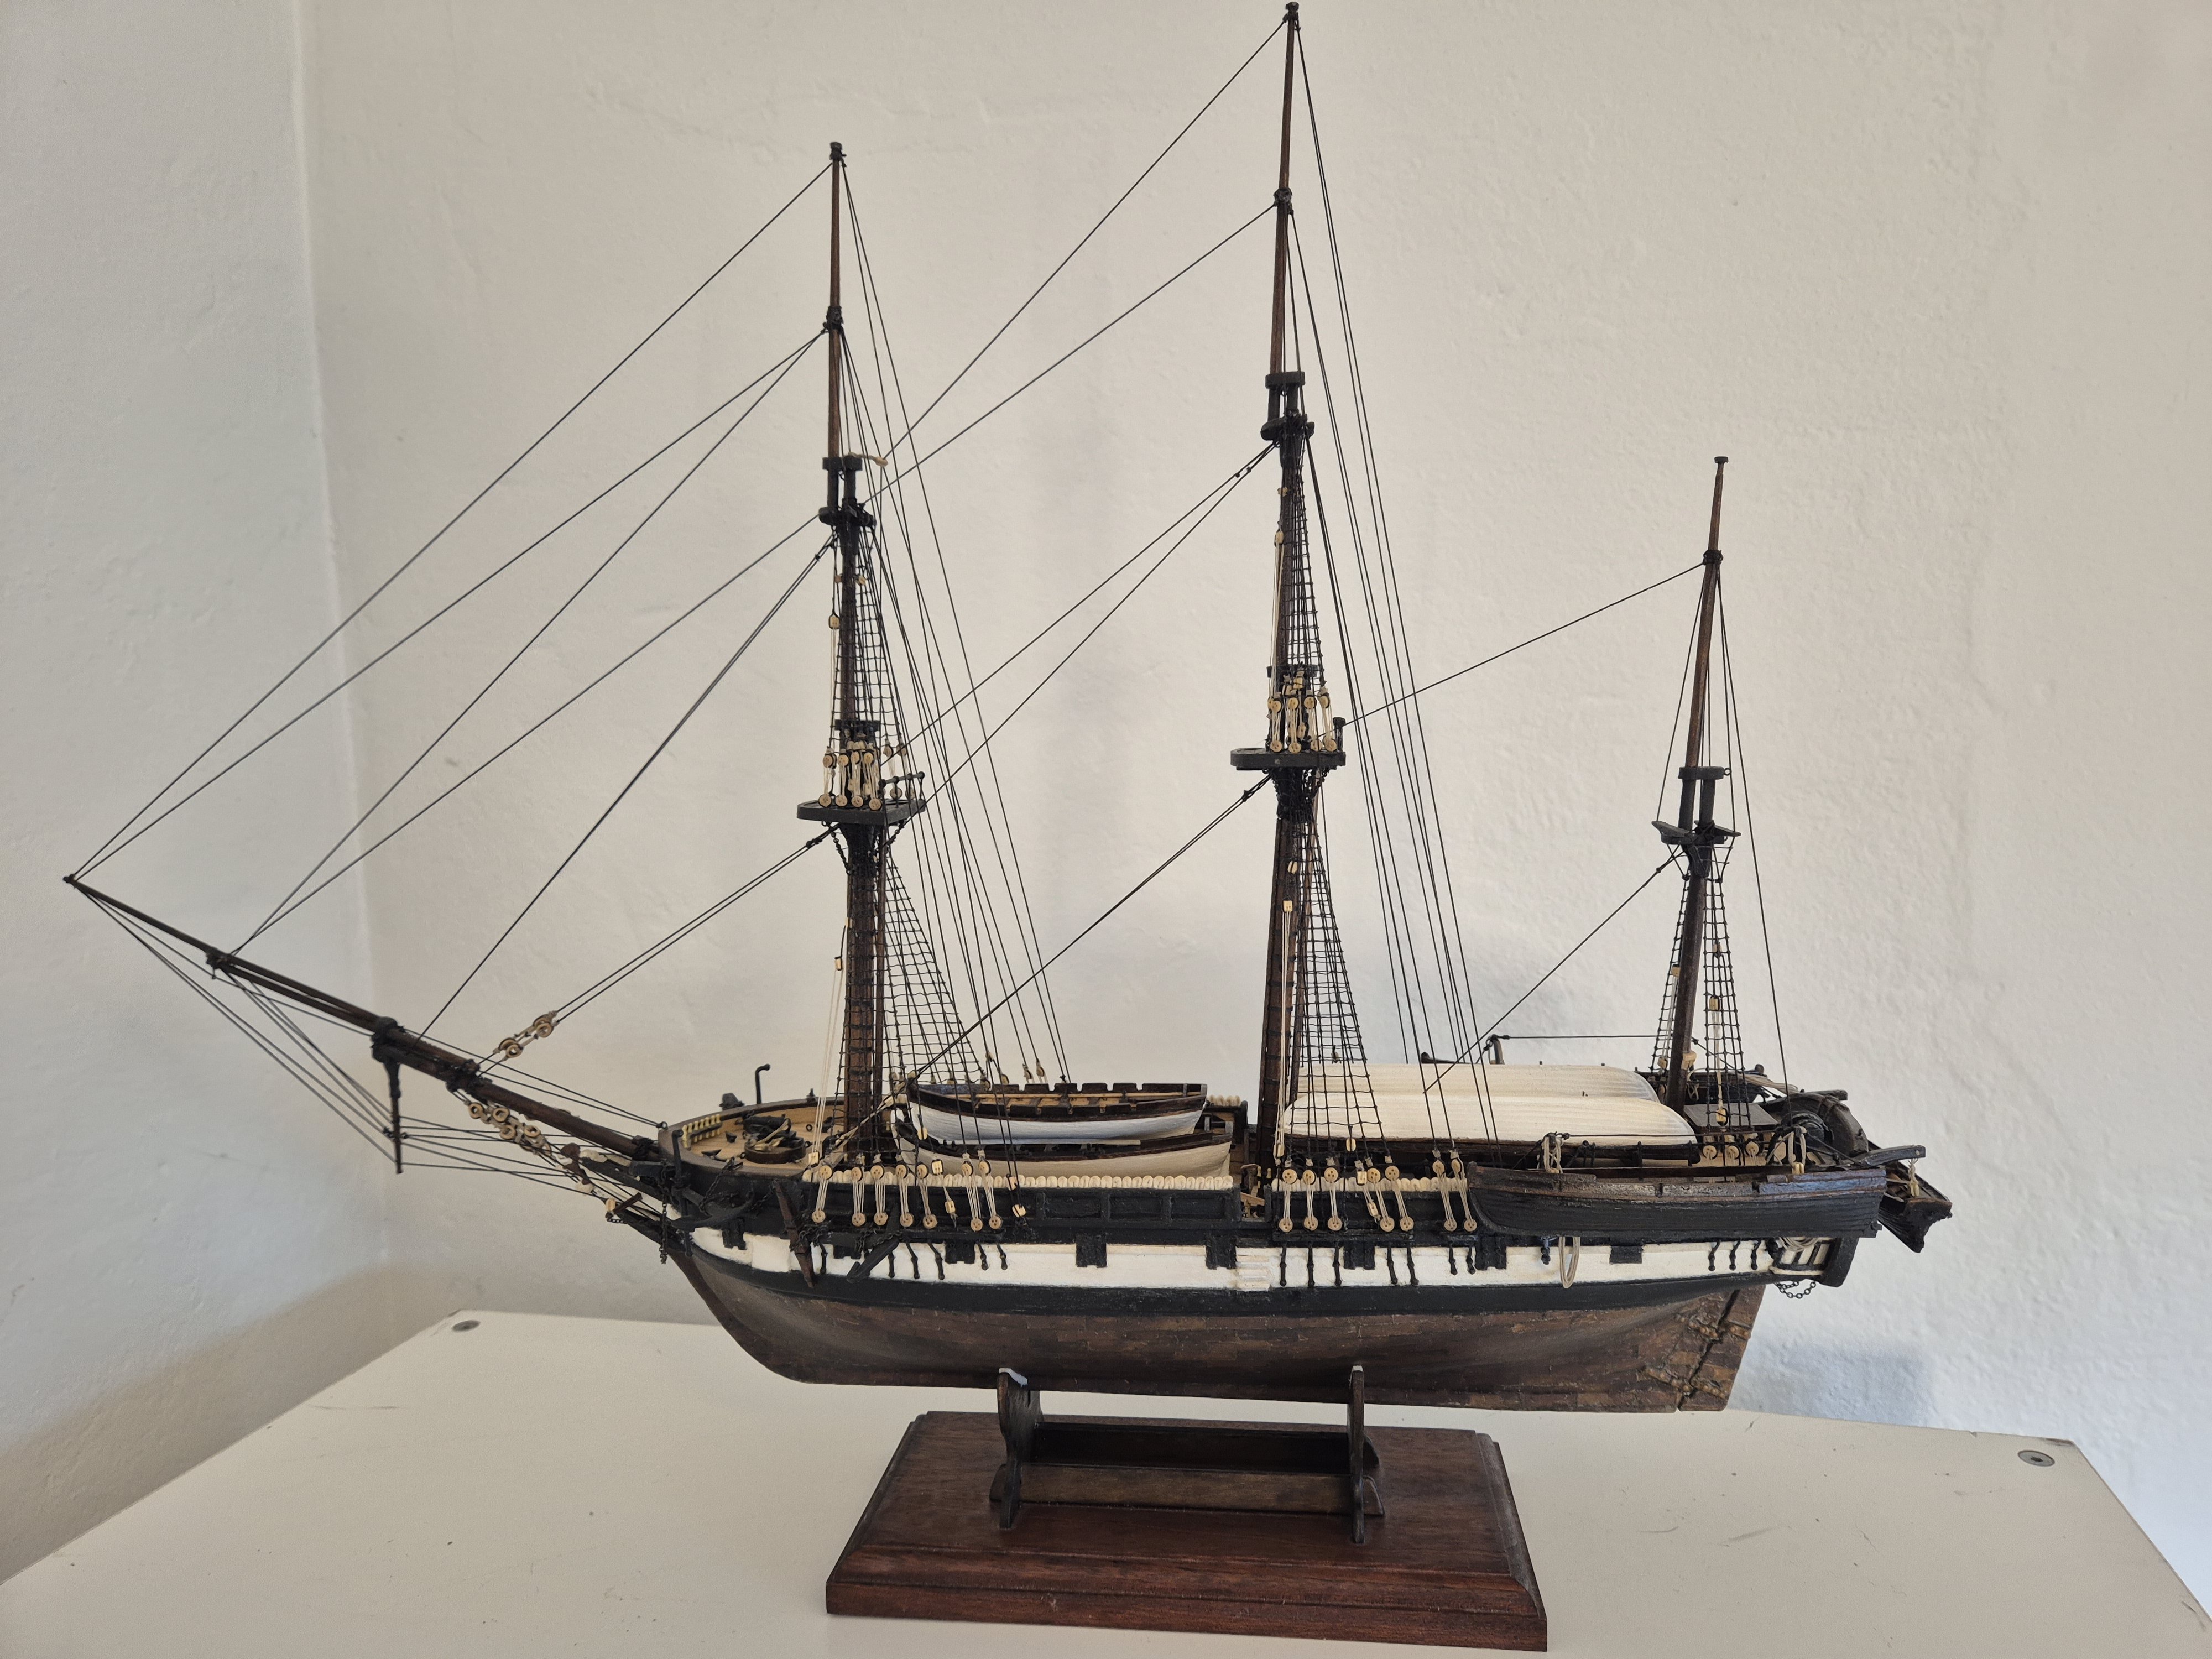
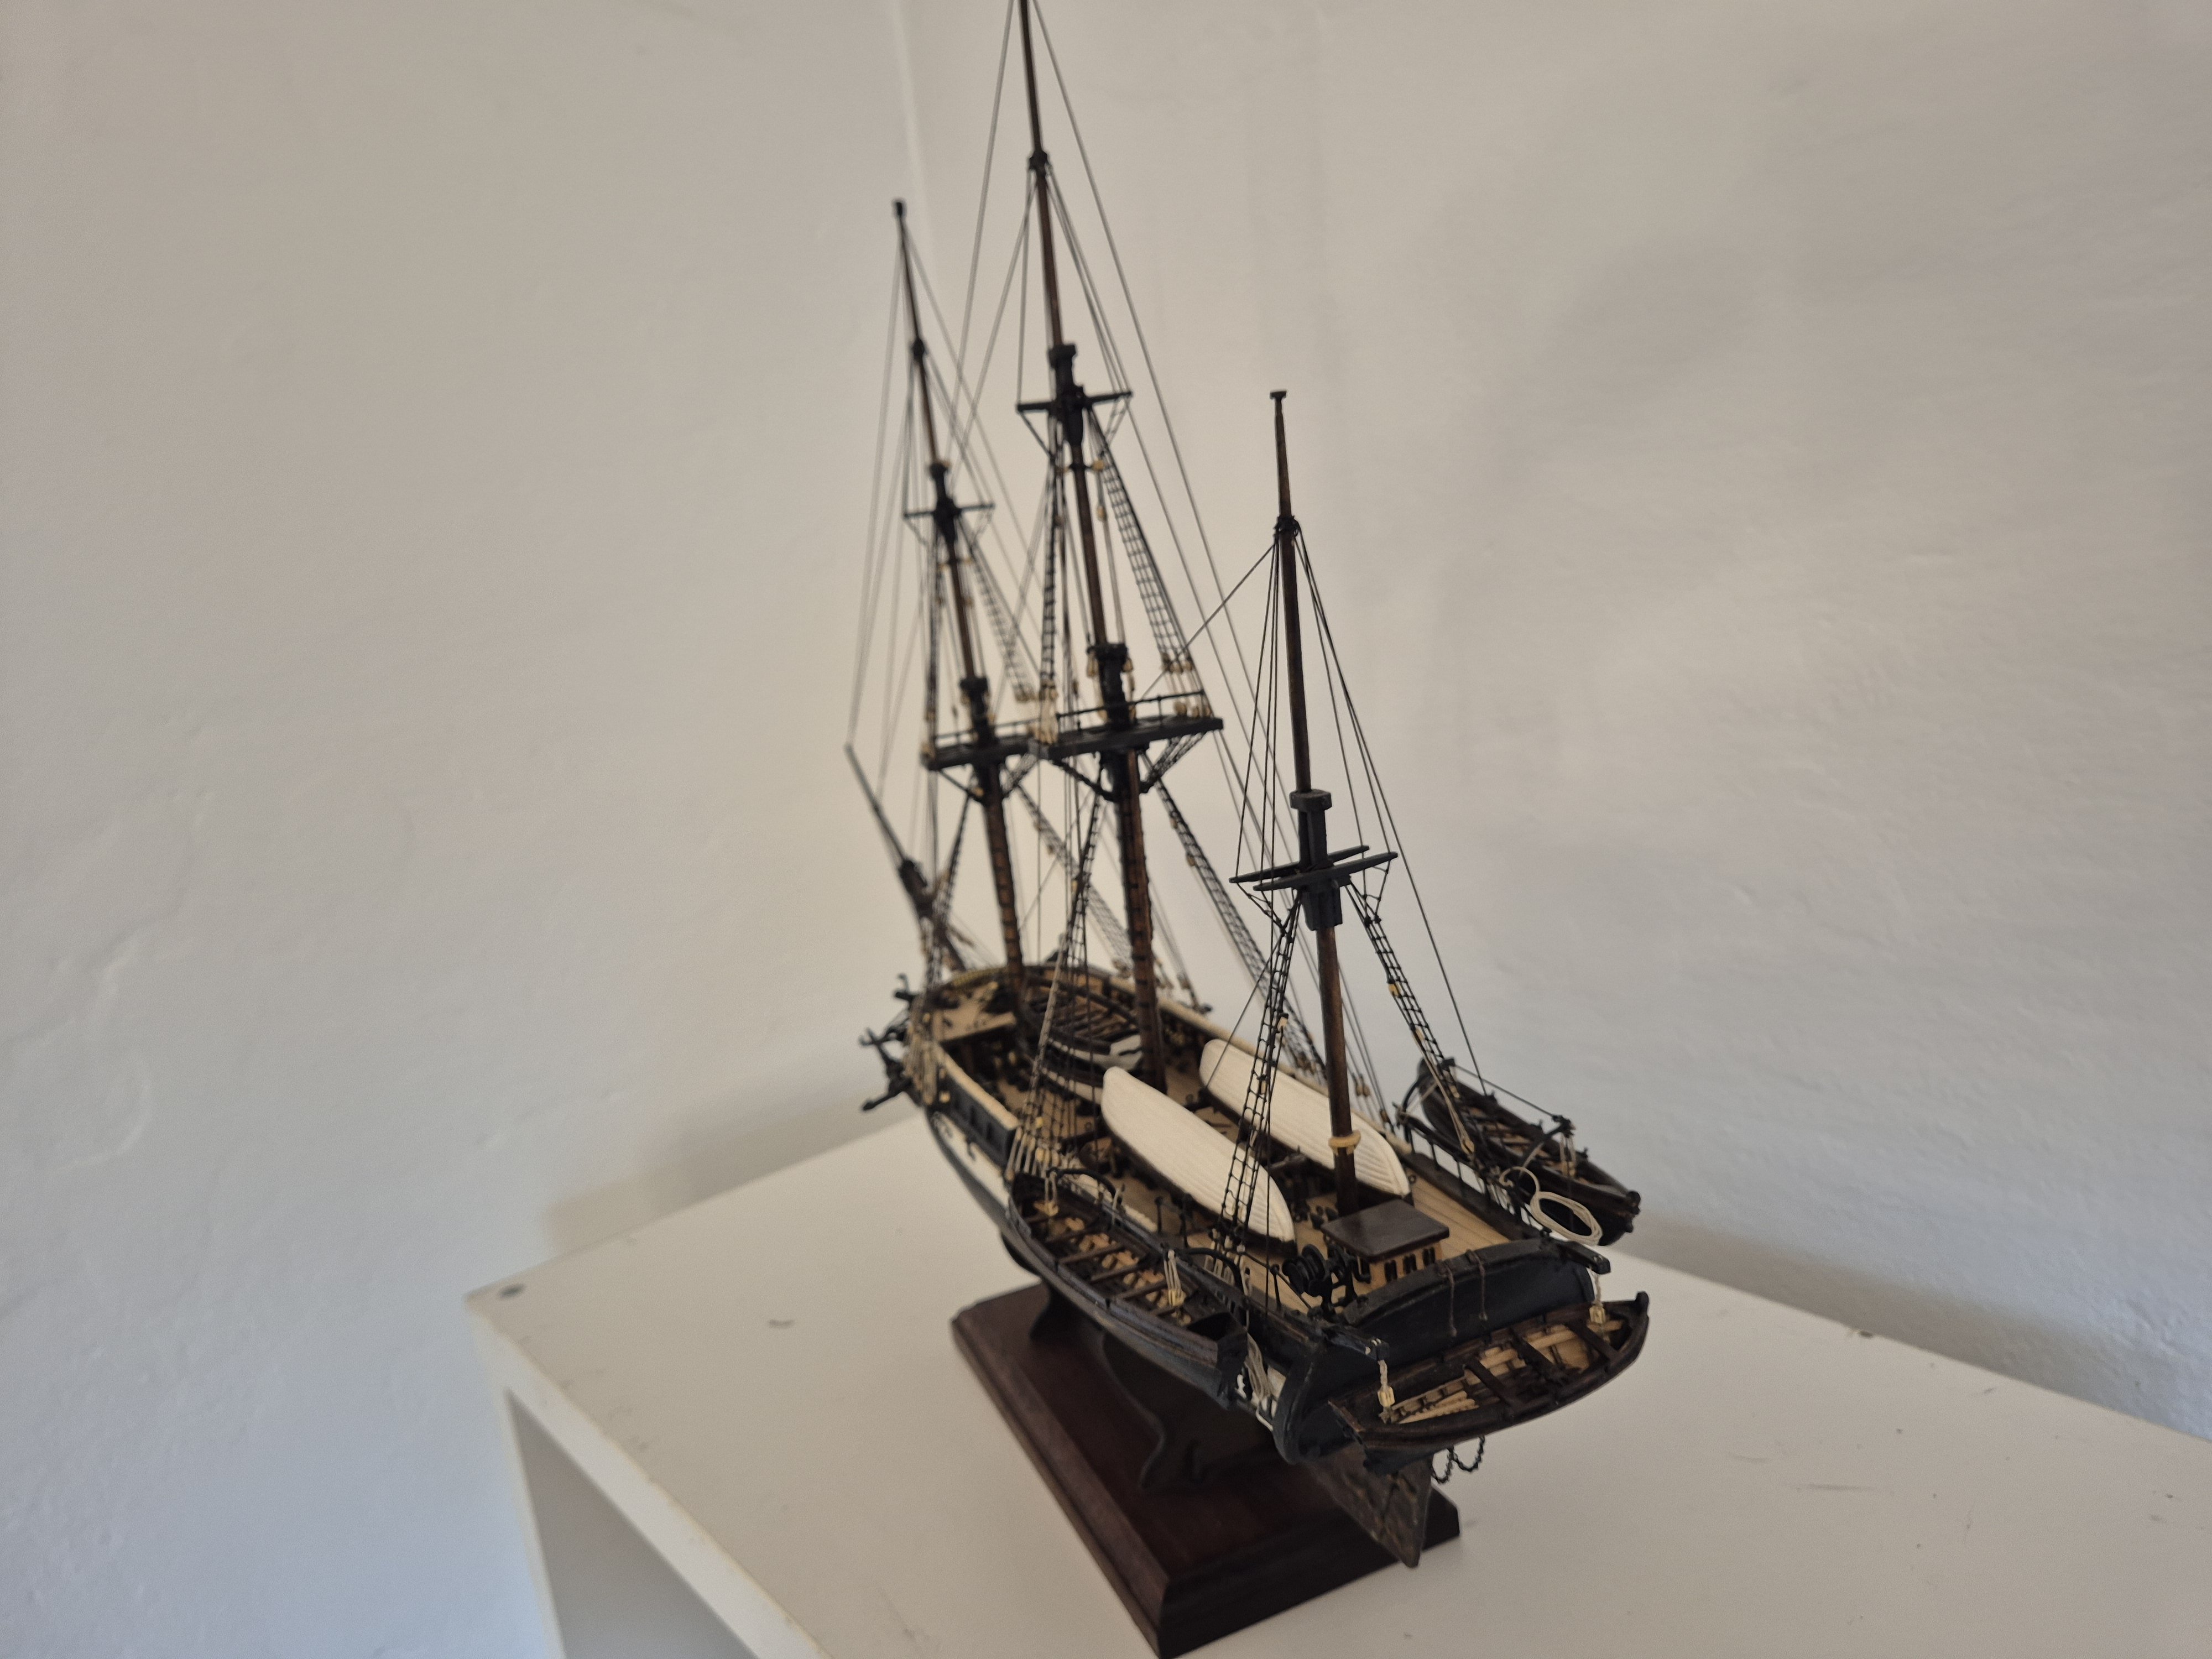
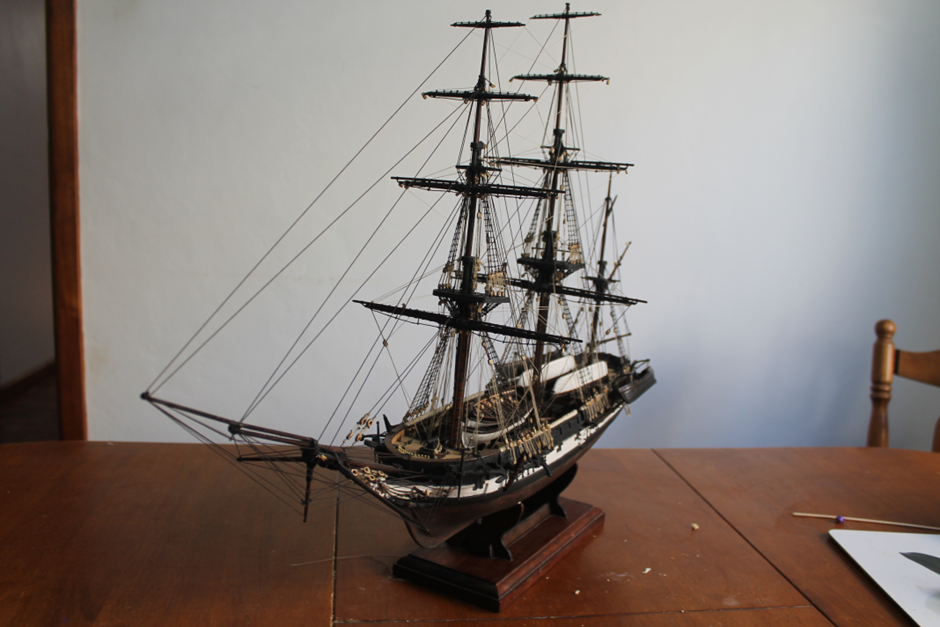
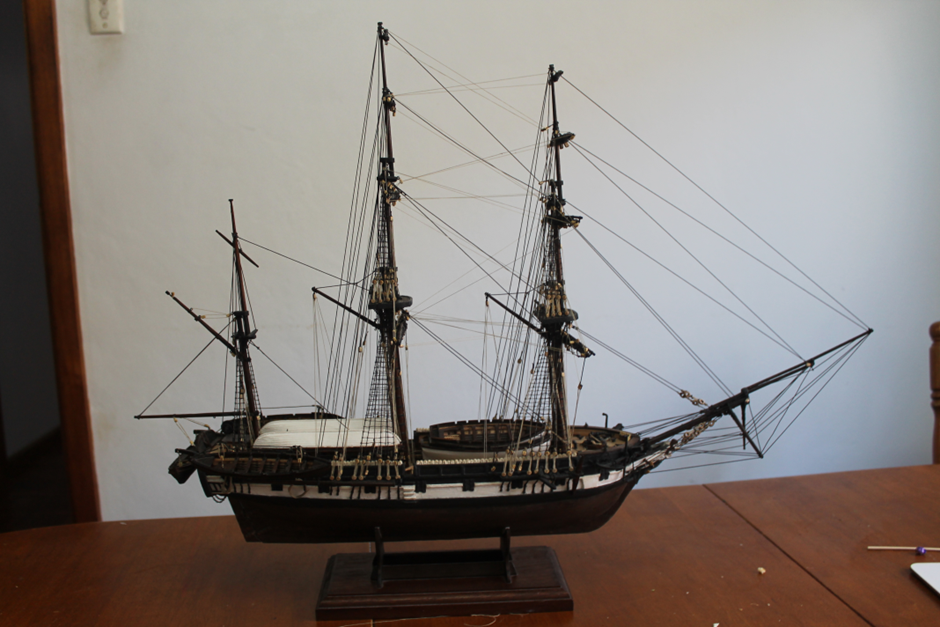
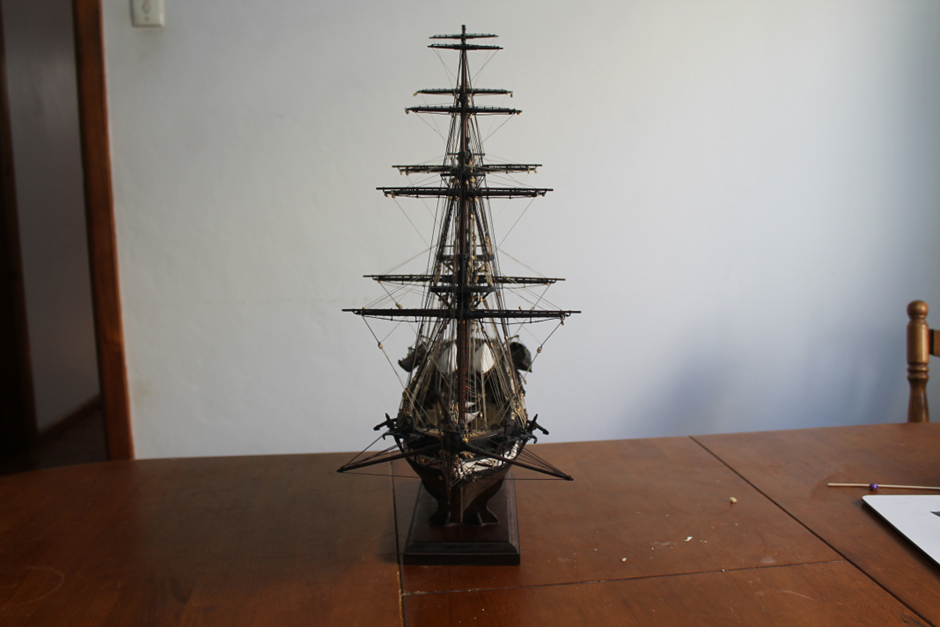
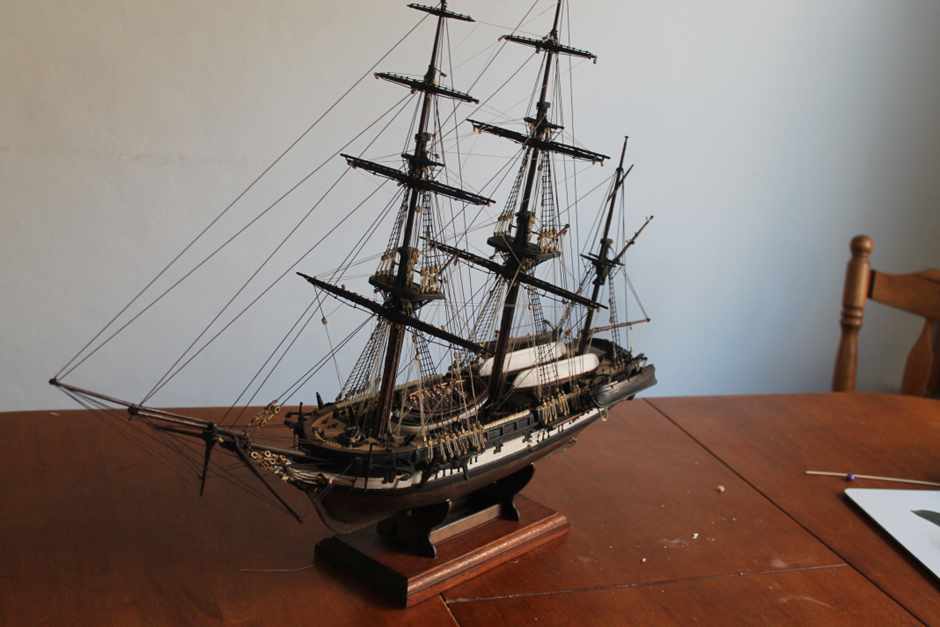
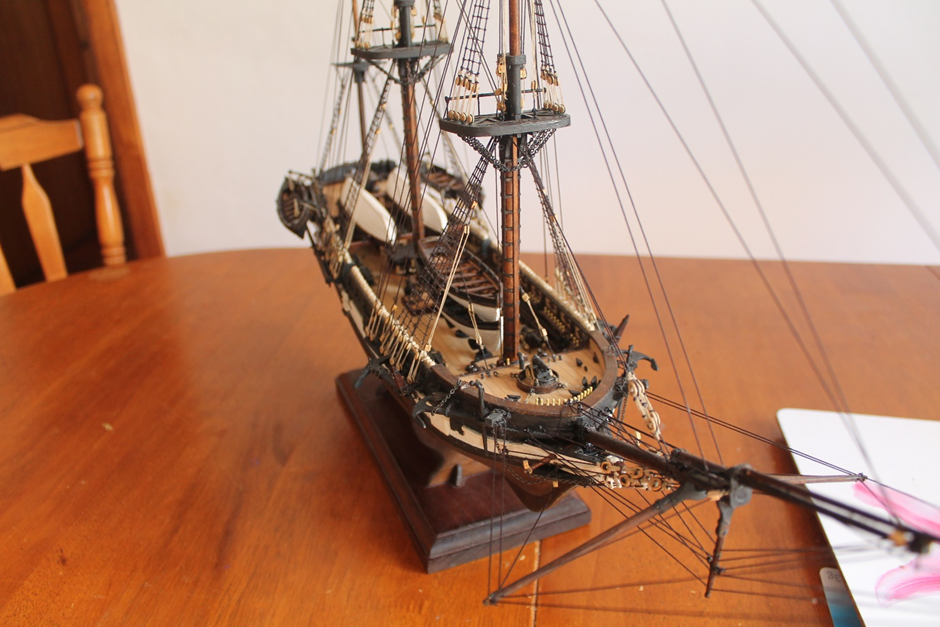
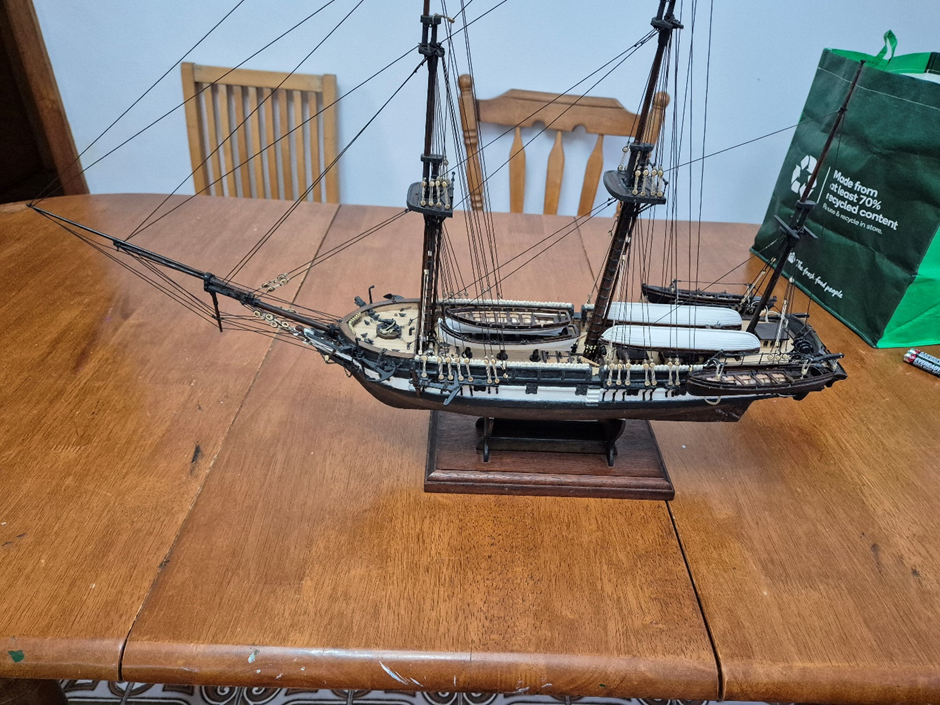
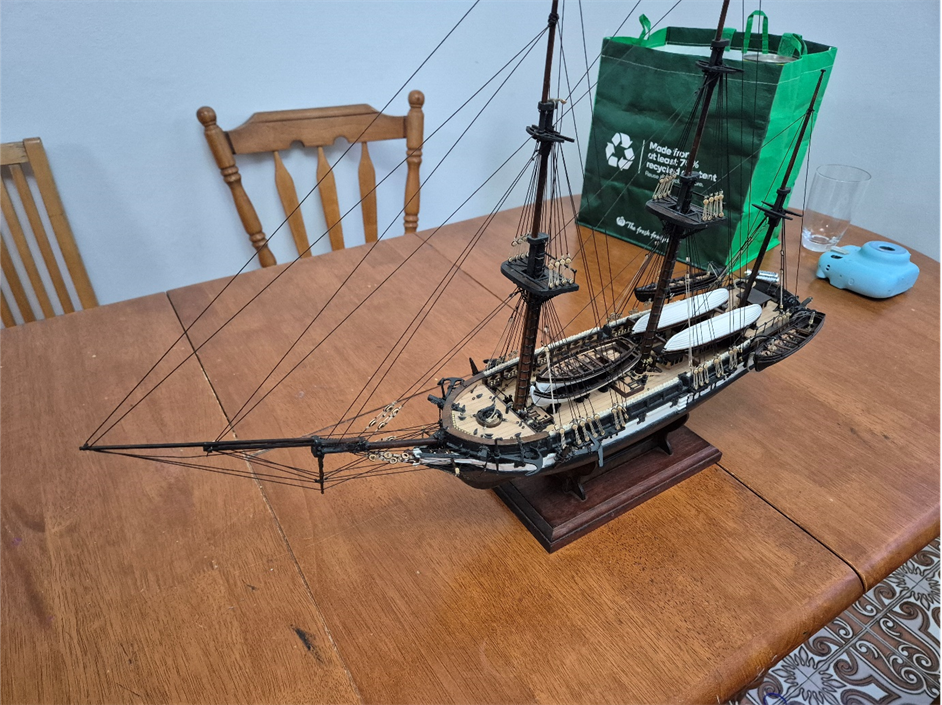
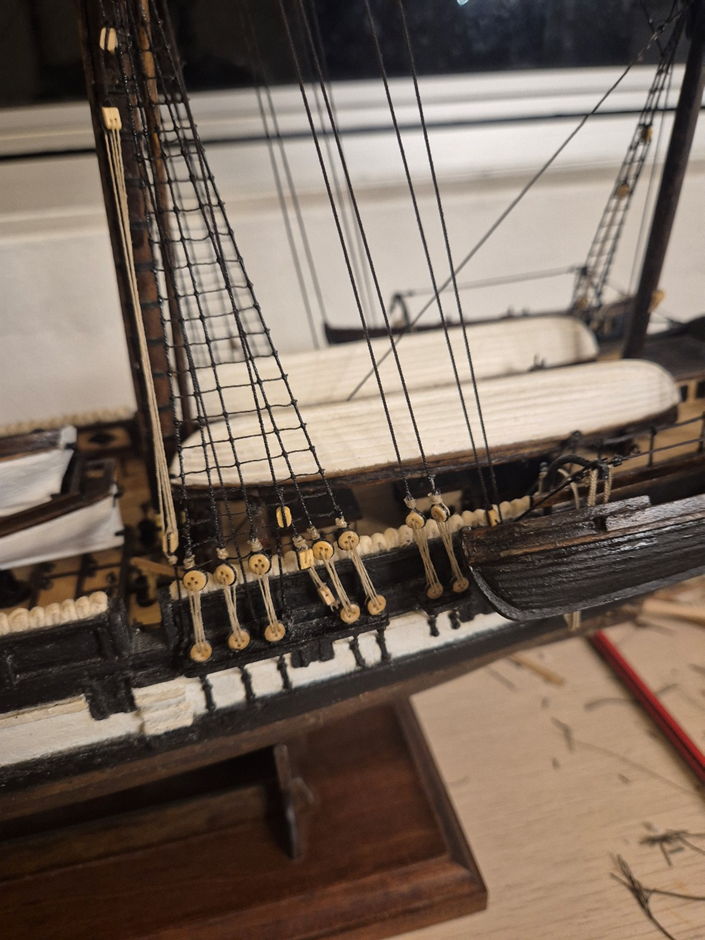
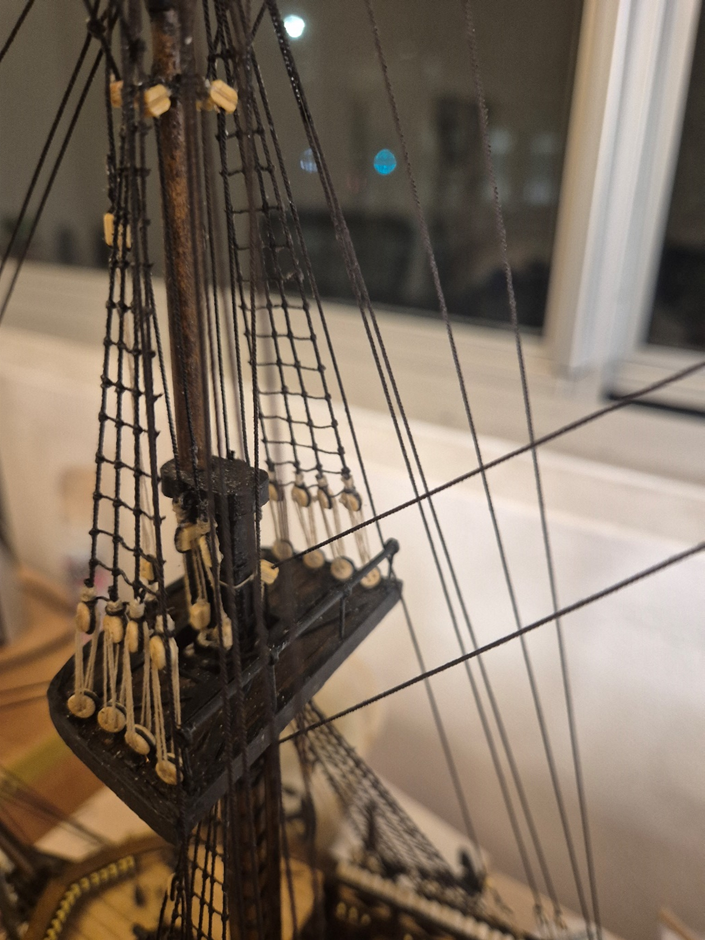
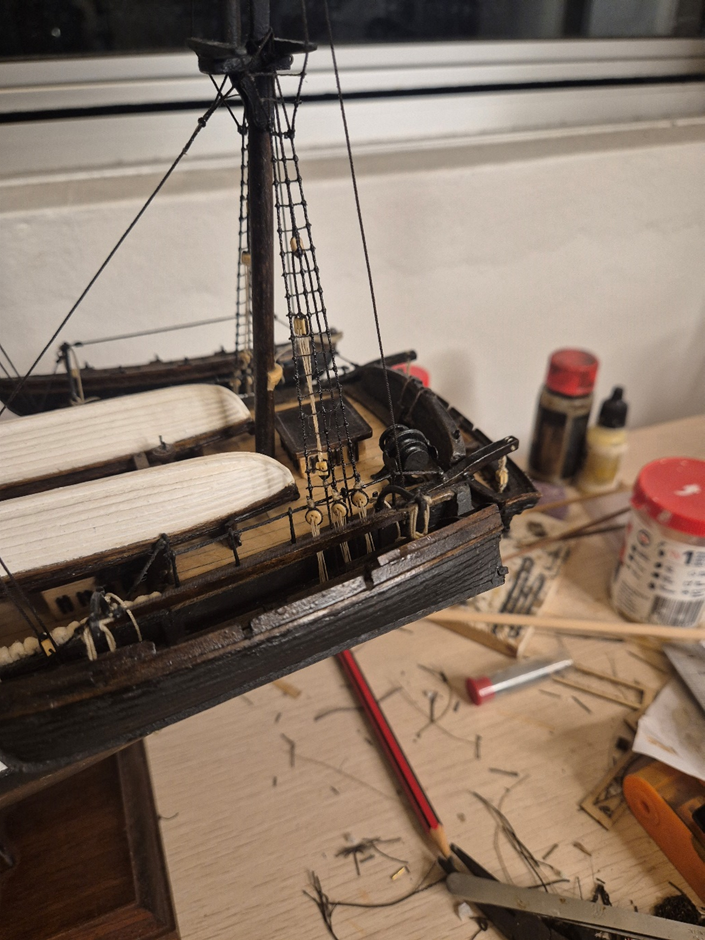
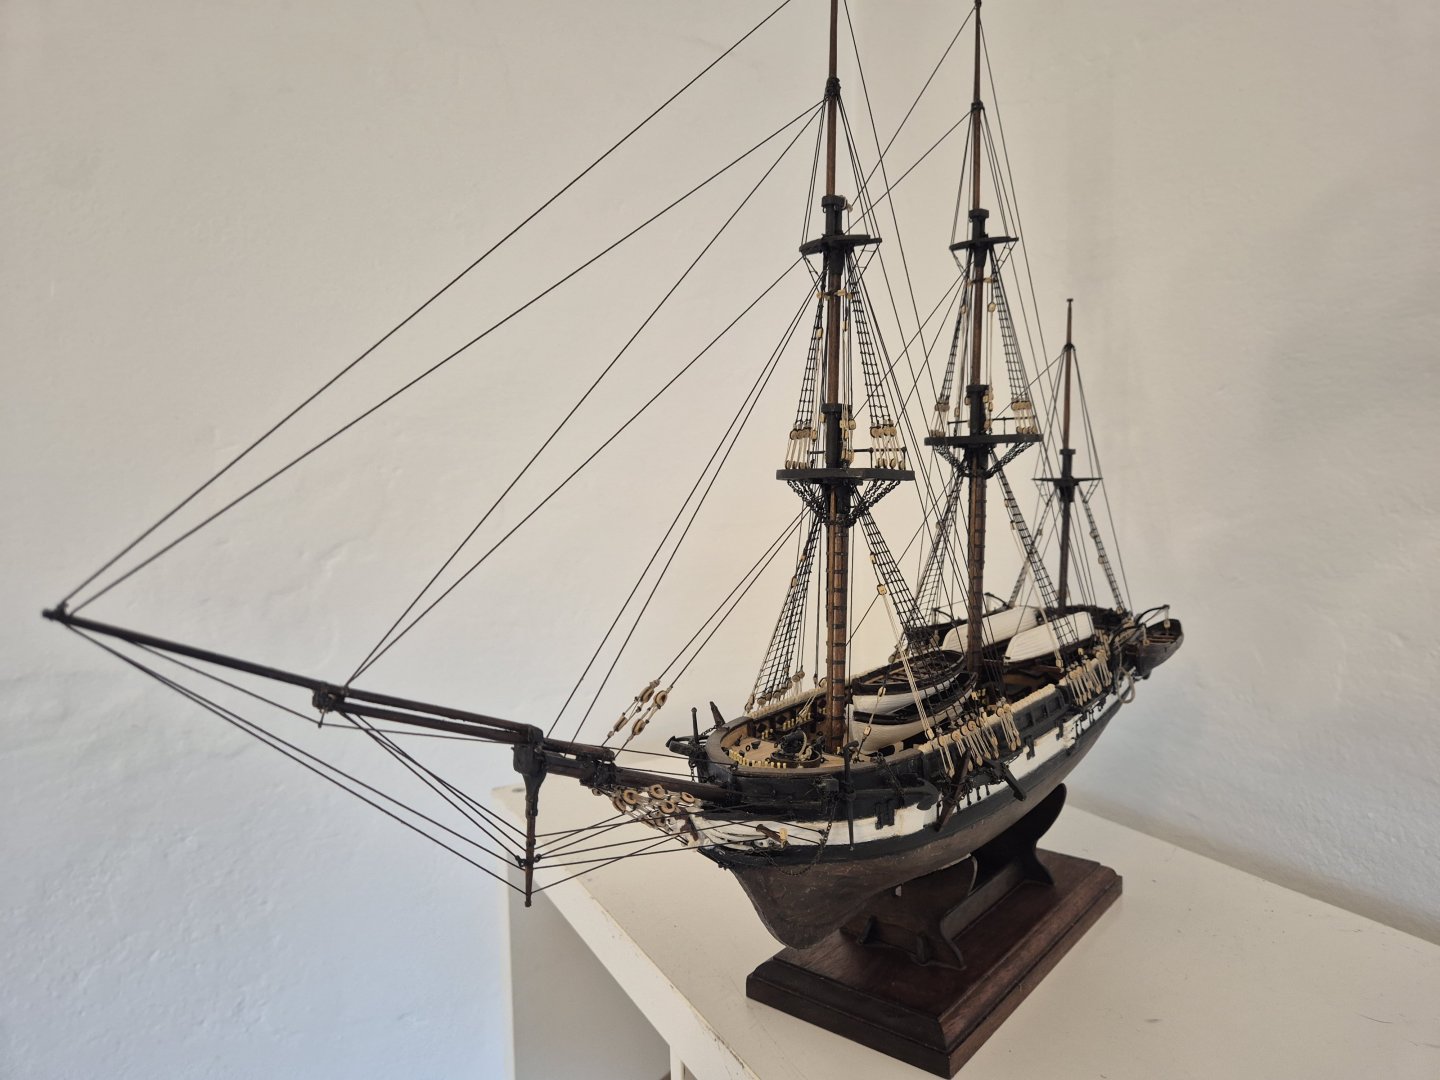
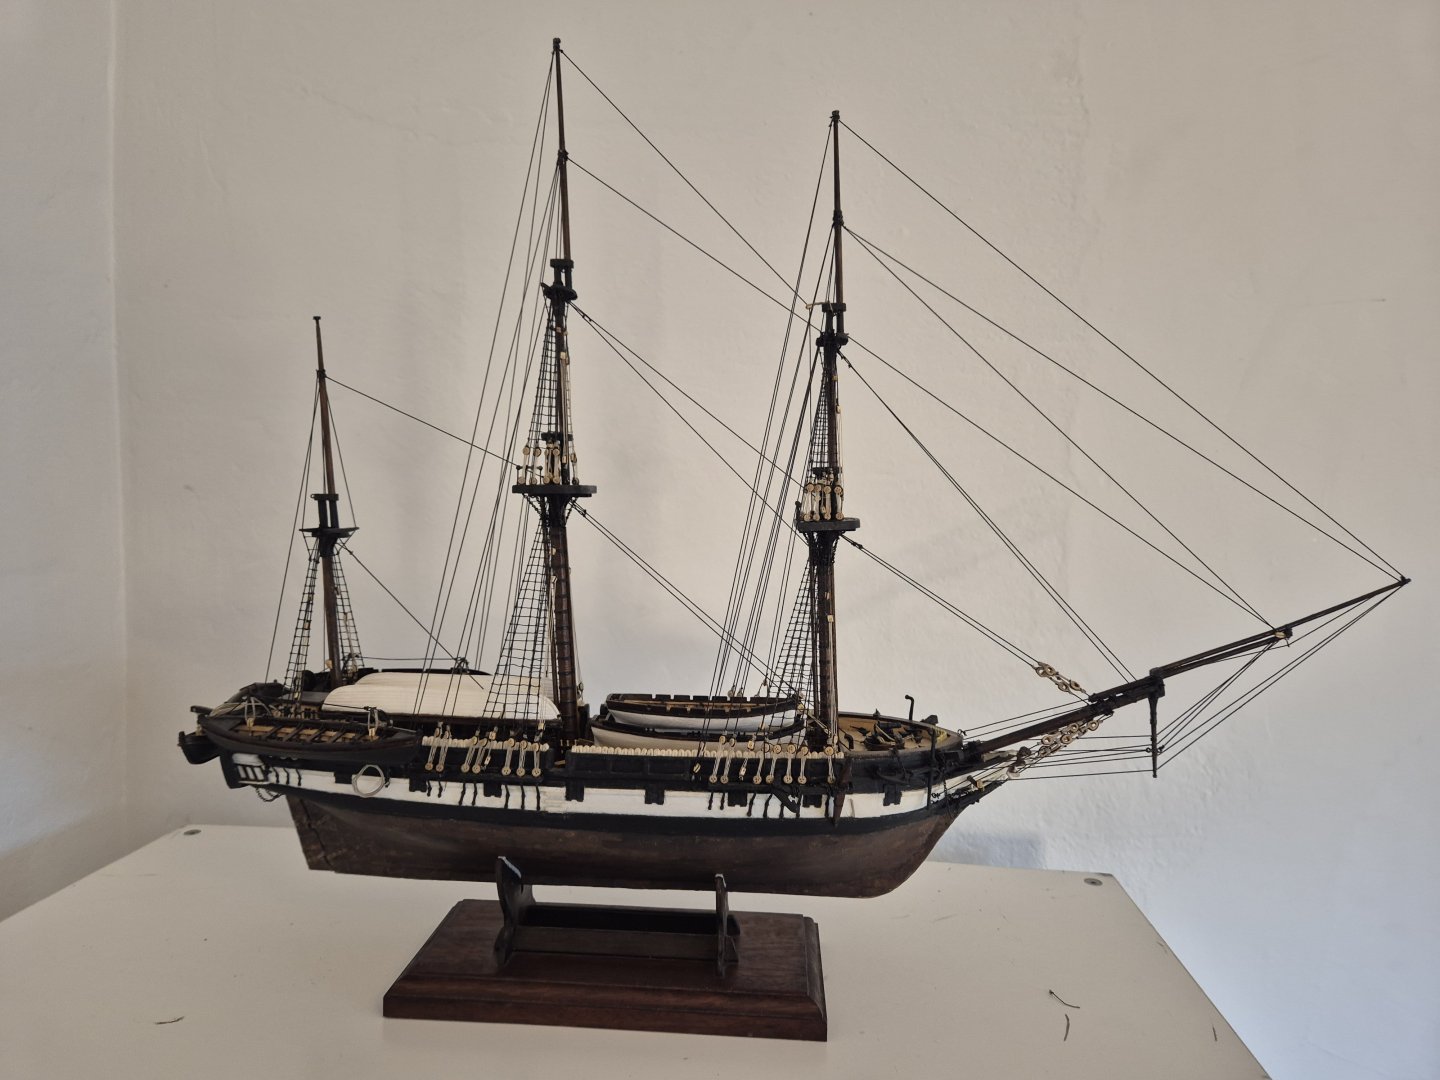
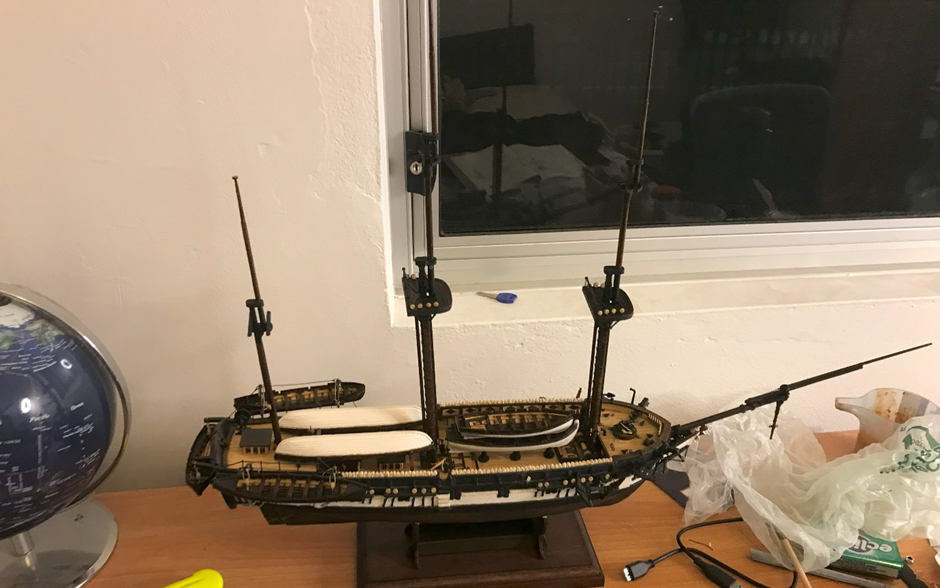
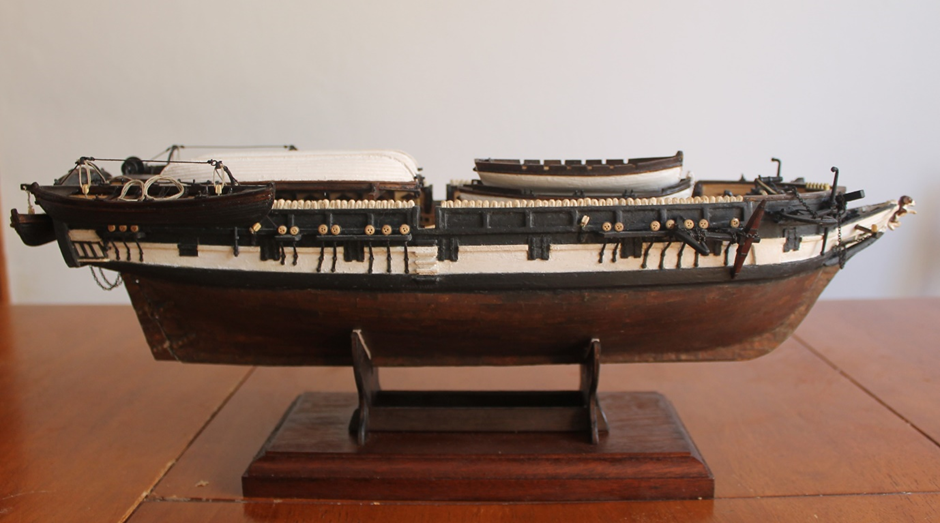
 Okay, have been working away at attaching all the spars and doing the running rigging. Has been a long process and don’t really have progress photos, but is finished now. Here are some pictures of the end result. I had thought of this is a possible finishing point as sails are maybe somewhat optional. Now that I am here though, I think there was never any chance that I wouldn’t at least give sails an attempt. Need to do some thinking now as there are many opinions. If anyone has a favourite method, please feel free to share.
-
The Gimps Chimp reacted to a post in a topic:
HMS Beagle by LucienL - OcCre - 1:60
-
LucienL reacted to a post in a topic:
HMS Beagle by LucienL - OcCre - 1:60
-
LucienL changed their profile photo
-
Snug Harbor Johnny reacted to a post in a topic:
HMS Beagle by LucienL - OcCre - 1:60
-
LucienL reacted to a post in a topic:
HMS Beagle by LucienL - OcCre - 1:60
-
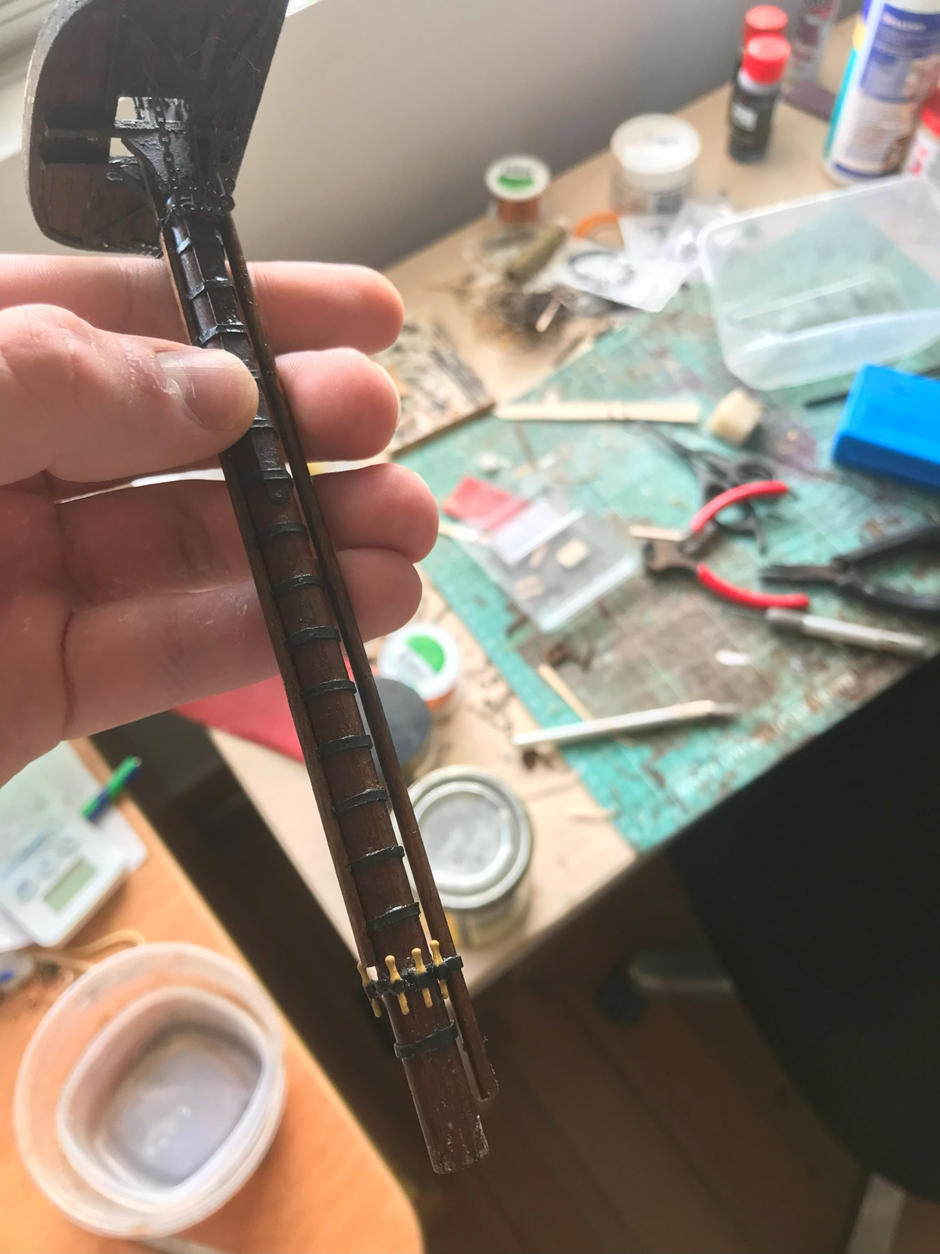
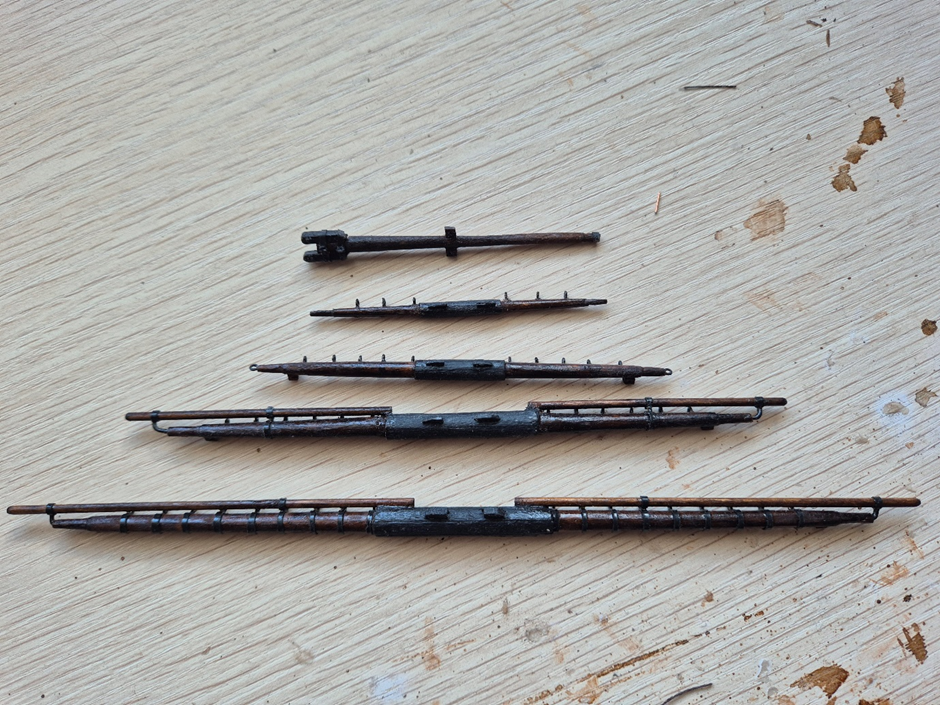
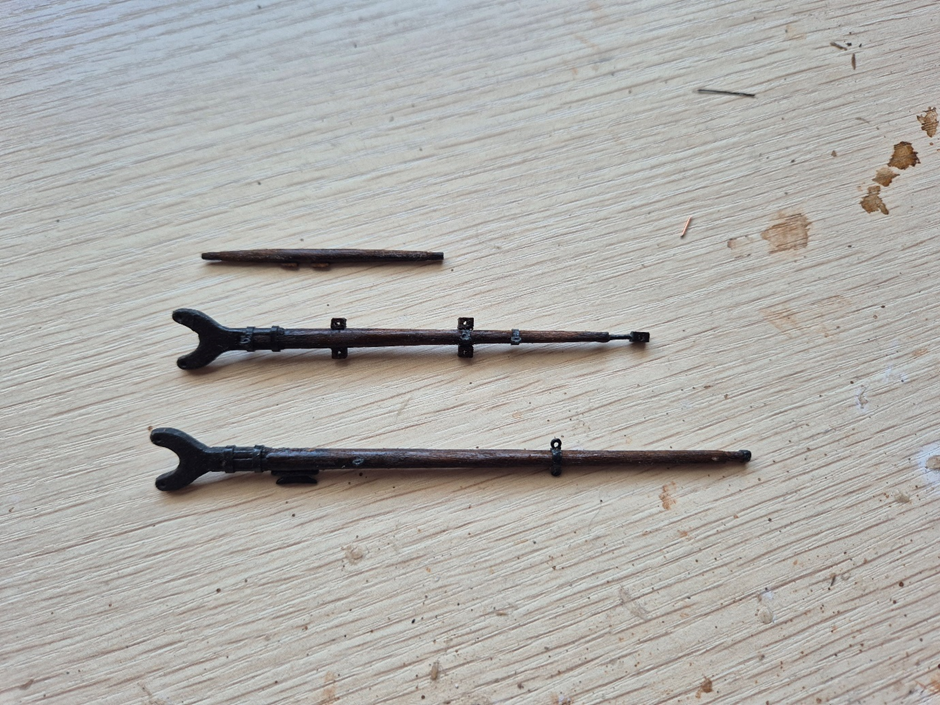
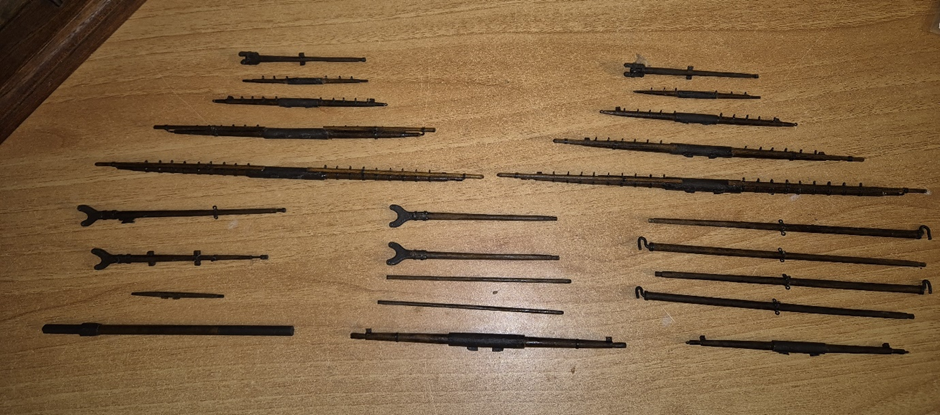
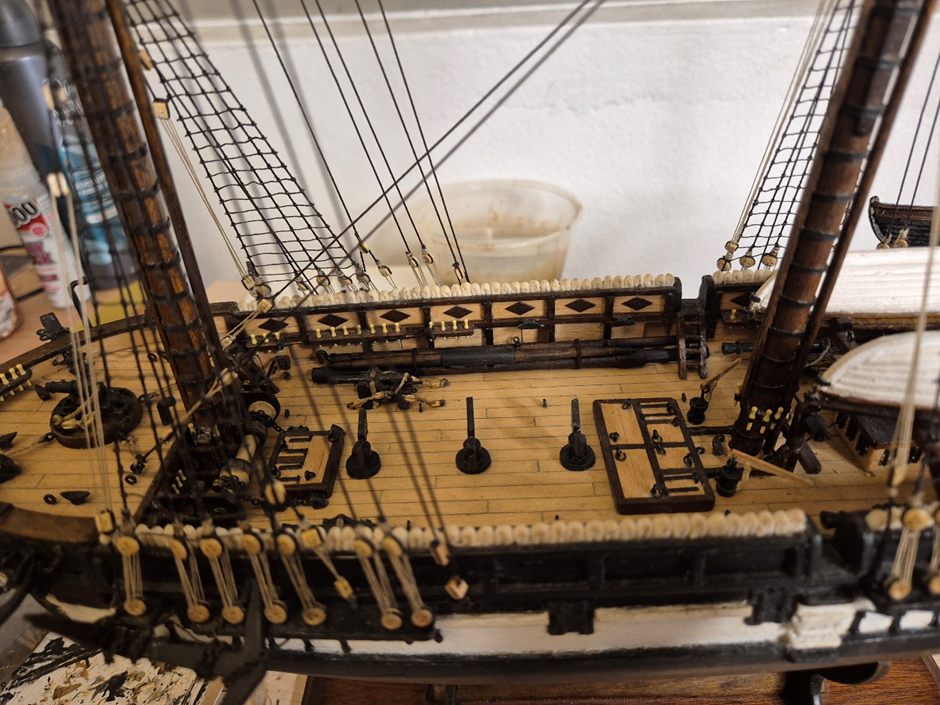
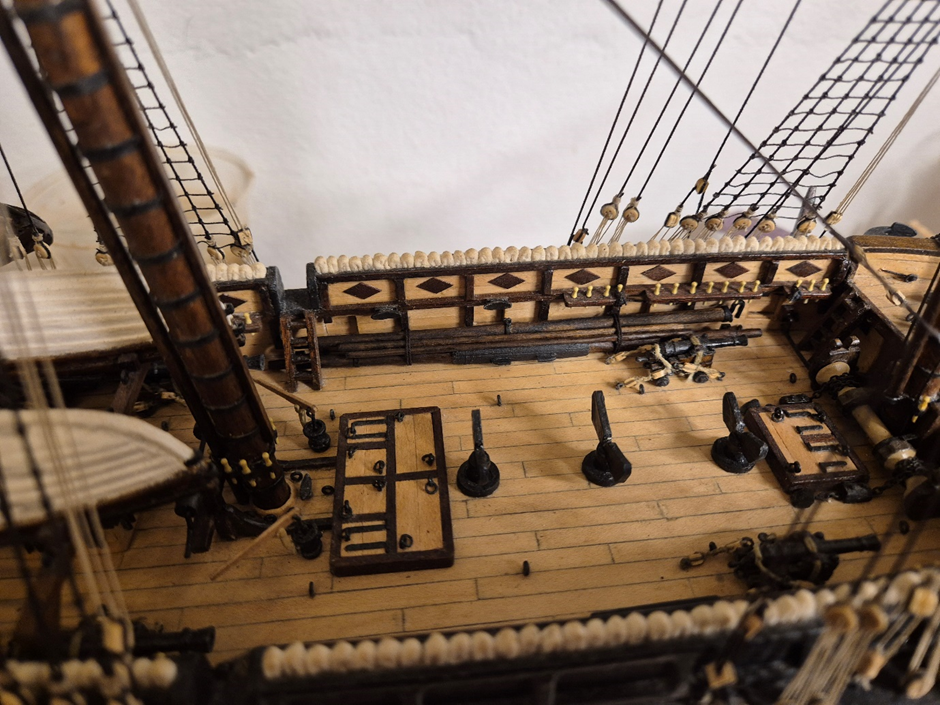
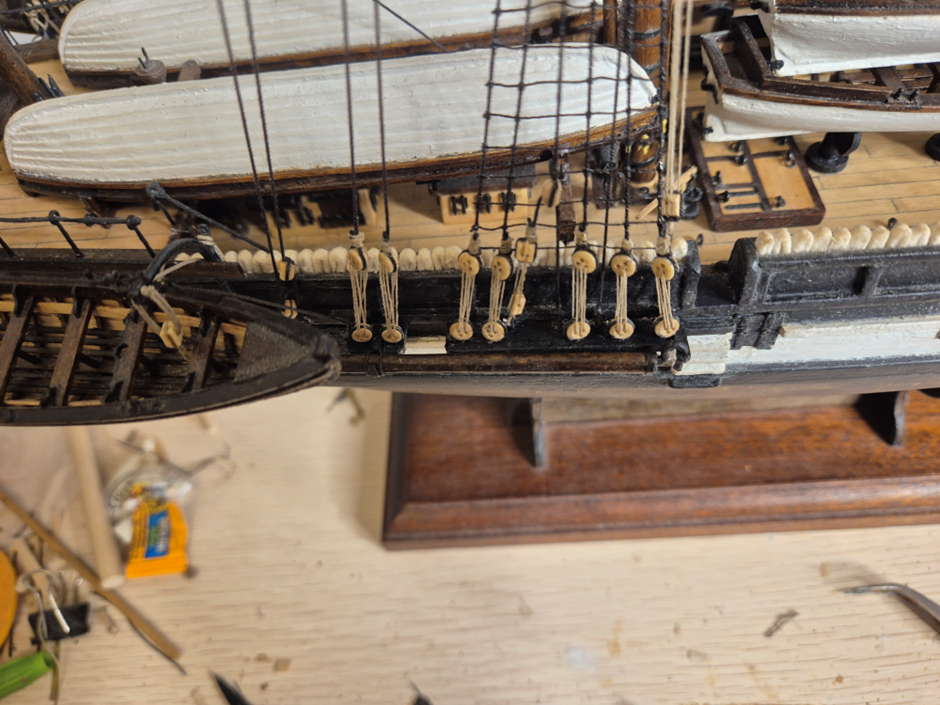
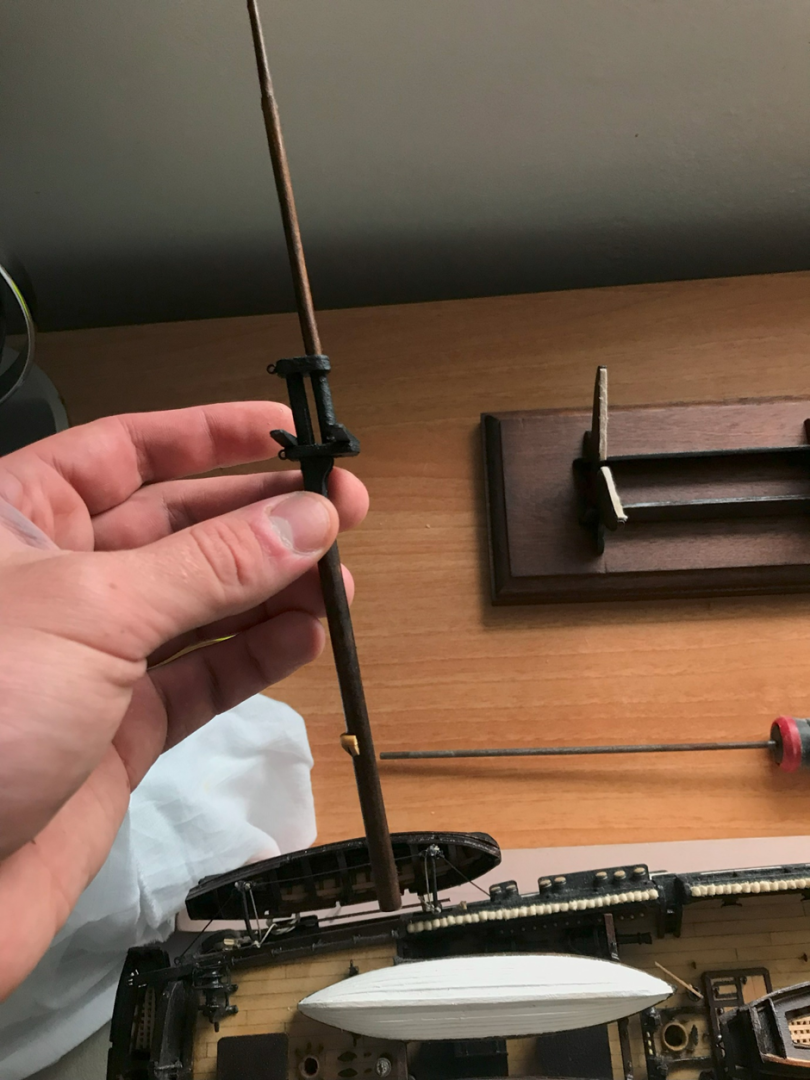
Okay, have been working through the spars and have finished them all off now. Once again, I have used AOTS more than the kit instructions. The kit seems to have significantly simplified the rigging so I will stick with AOTS even though it makes my head hurt sometimes. Here they all are laid out. I have also made lower studding sail booms for both the fore and the main masts (right of the final image) Based on the request from Fitzroy for additional spars I also made a spare topmast, topsail yard, topgallant yard and two topmast studdingsail booms. I bundled up that set of reserve spars and fixed them to the deck. A fixed the main lower studding sail booms to the channels as well. I also attached the spreaders to the bowsprit. I have many more sticks to attach now...

-
I think it's generally a pretty good kit. The instructions are fairly straightforward and OcCre have put together a series of instructional videos to help out. The fittings are pretty good but I've found quite a few things that are not quite accurate or slightly out of scale. That said, I think the kit built directly as instructed gives a fairly accurate representation of the Beagle.
-
Hi Eric, thank you, those are wise words. I find that it is very easy to get obsessed over little problems along the way and they become so large that you can't see anything else. Worth taking a step back sometimes and taking it all in for a moment.
-
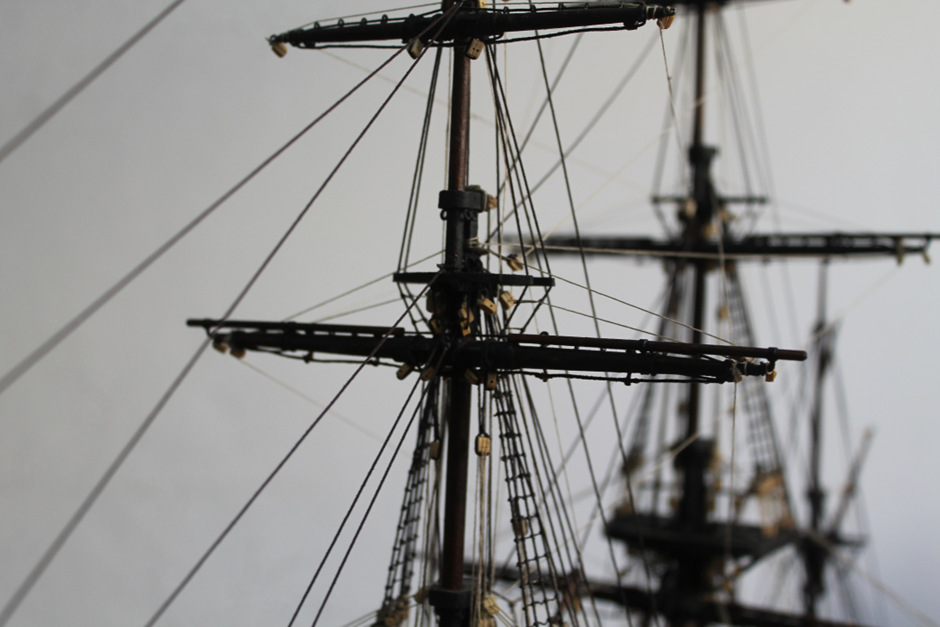
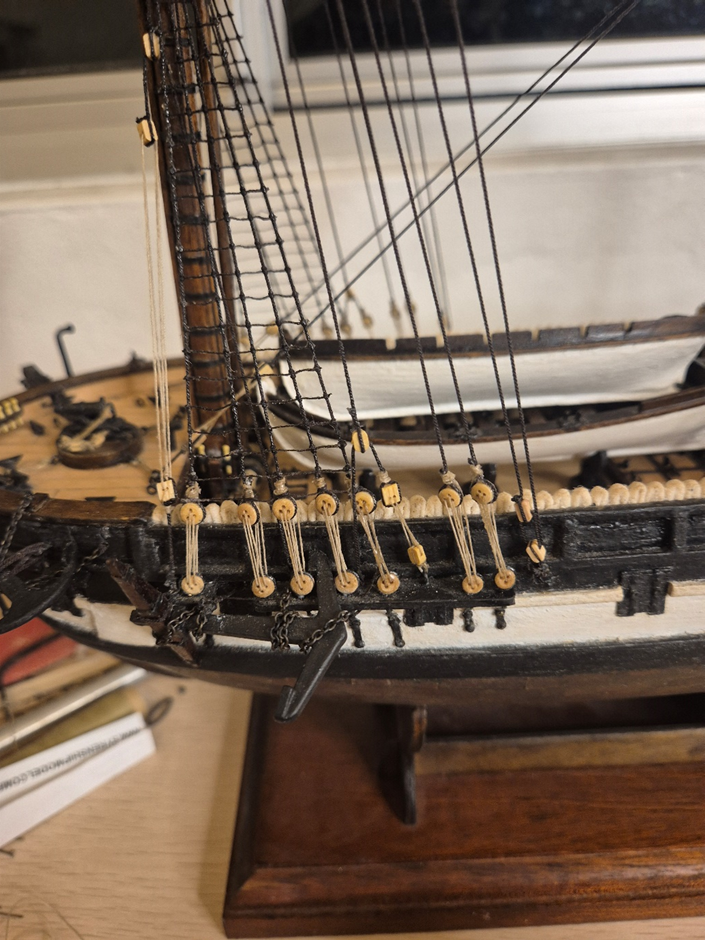
Alright, it’s rigging time. Was sure a slow process, but I eventually got going. Shrouds all in. I realised that the rake for the fore mast is not quite right, which means that the mast top slopes slightly. I realised far too late, so will have to live with this. I ended up getting through the ratlines quite quickly, I actually find this really enjoyable. The thing that tends to slow me down is moving on to new steps and thinking about how to do it properly. So working through ~200 ratlines was actually quite fun. The Syren rope looks much better, but the clove hitches can unwind a bit. I secured them either with some CA glue or a bit of varnish once they were all complete. There were still some that came loose, also several mistakes along the way. Learning to be a bit more okay with that. Very happy with how she is coming along at the moment. Now on to spars and the running rigging.


-
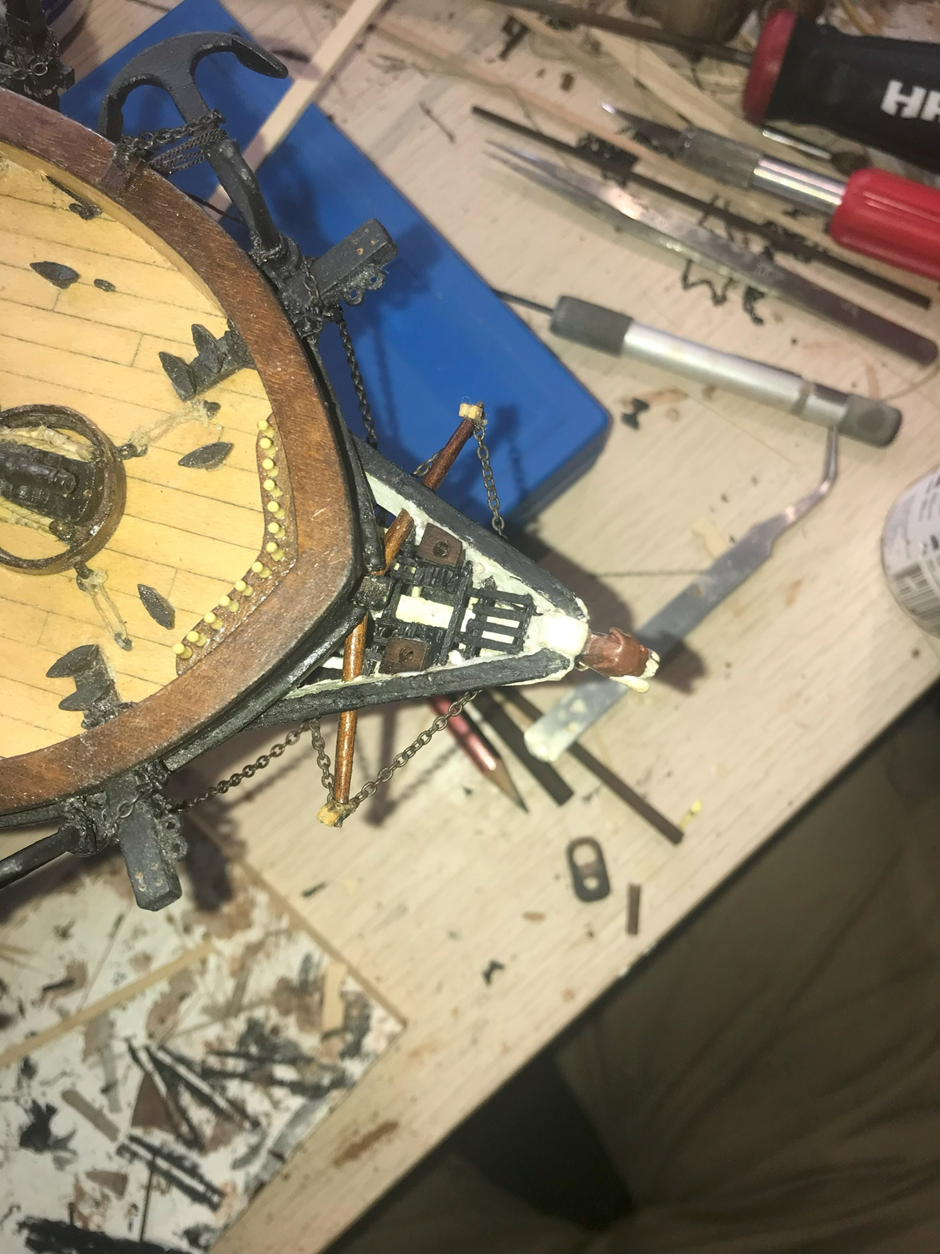
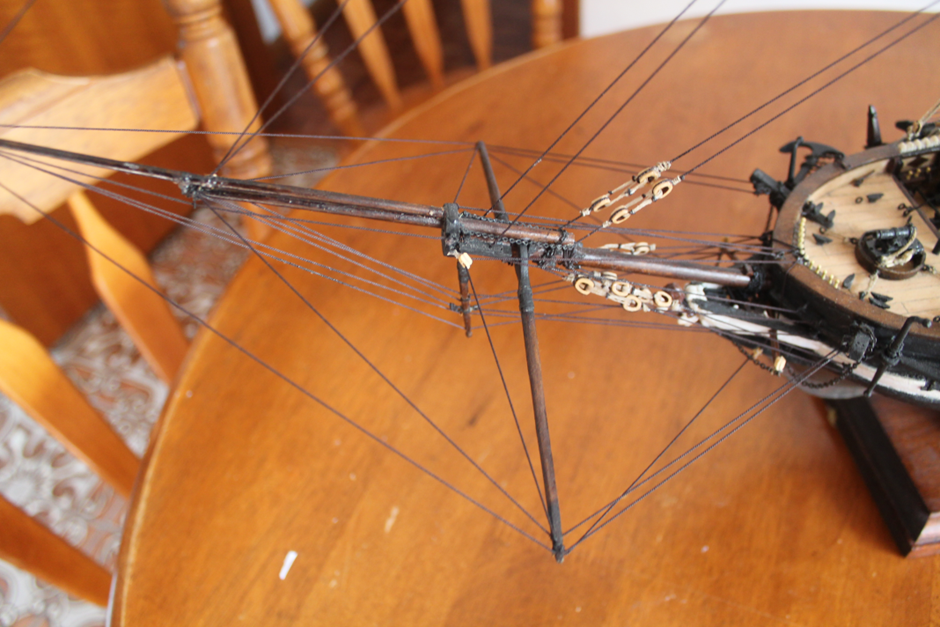
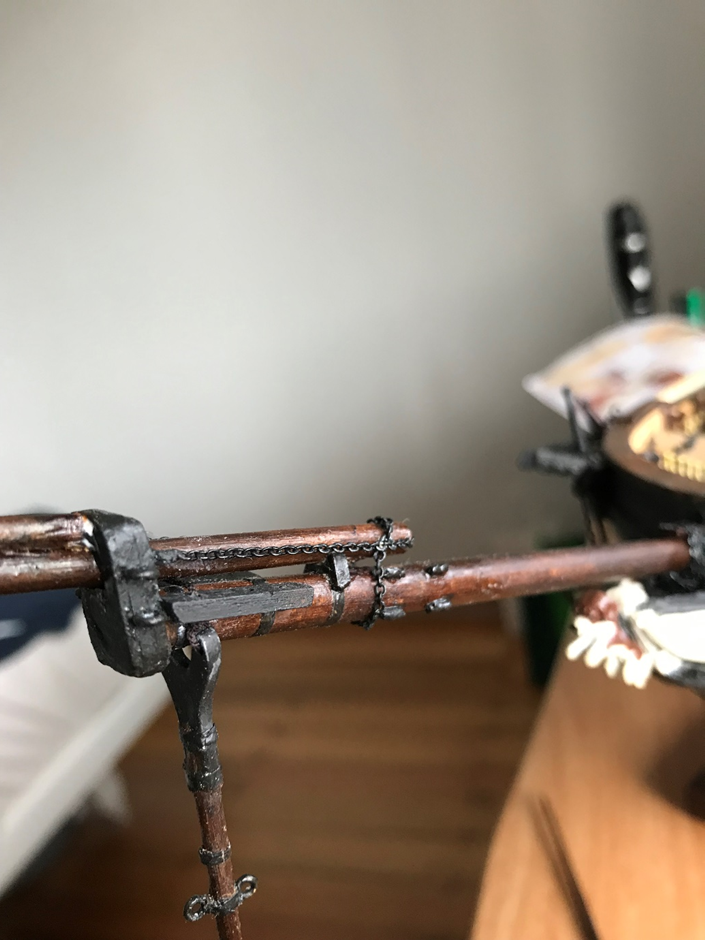
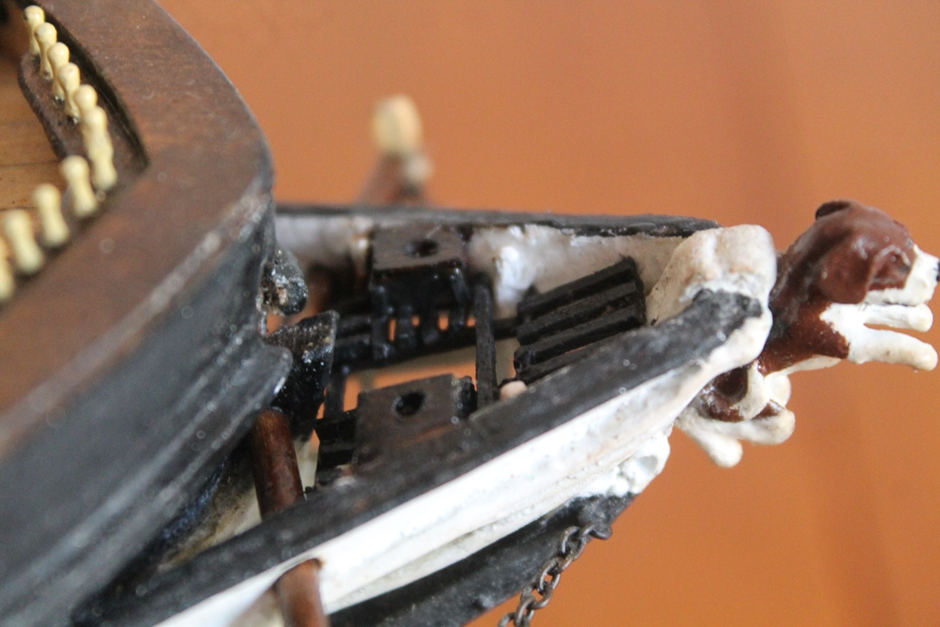
Okay, now onto stage 3 of the build: masts, rigging and sails. First was the bowsprit. I built this primarily using AOTS rather than the kit instructions. This is an ongoing thing as the kit seems to deviate quite significantly from AOTS for the rigging likely for simplicity and ease of construction here. The rigging is doing my head in a little bit at the moment. The chain gammoning was an absolute pain. The hole in the bow to fit this was a bit to small and it was extremely difficult to thread chain through it multiple times to secure the bowsprit. Next were the masts, the ship is finally going vertical! I used a slightly thicker dowel for the fore and main masts, I think 8 mm. I found the spider hoops to be quite difficult. These were made by bending a 2 mm brass strip into two rings to go around the mast and the trysail mast. I then drilled holes in this brass strip to take the rings for the belaying pins. The rings for the belaying pins were cut from brass tubing and then I drilled holes in them to take nails and secure them onto the mast. I also used a trick from @brunnels with heat shrink tape to make all the mast hoops, which worked out great thank you! Deadeyes still kind of a pain, but I got there. I used chain to secure them rather than rope. Mizzen mast was mostly the same as the kit. I’m working on the standing rigging now. It’s a long process but just need to take it one rope at a time and I’ll get there. Maybe I will actually end up finishing this thing. Although, the final major hurdle that is sails is on my mind.


-
Okay, thank you both, that does help clear things up
-
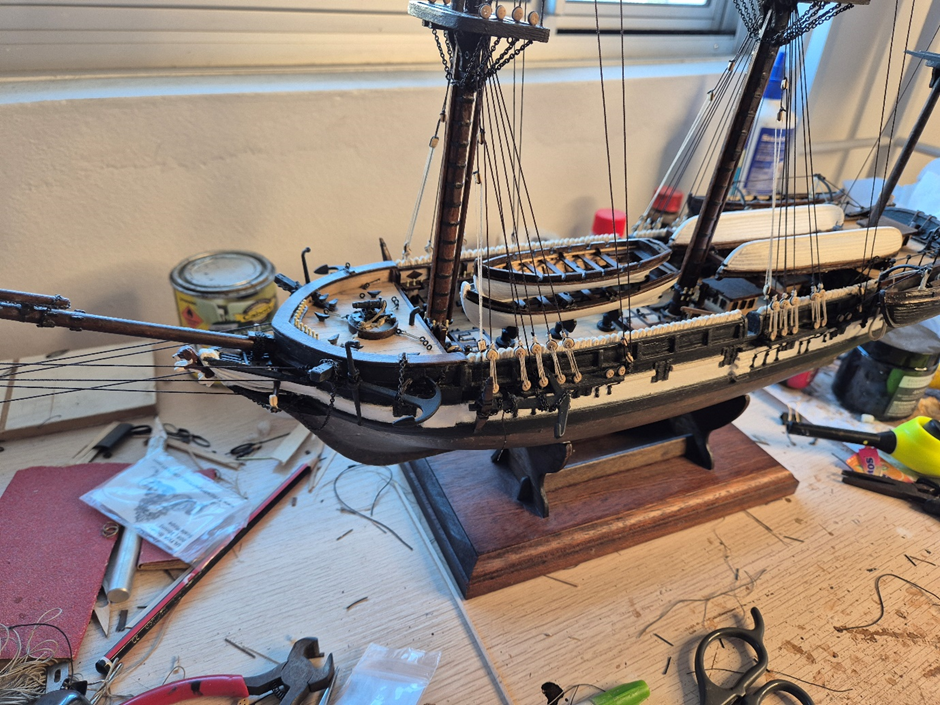
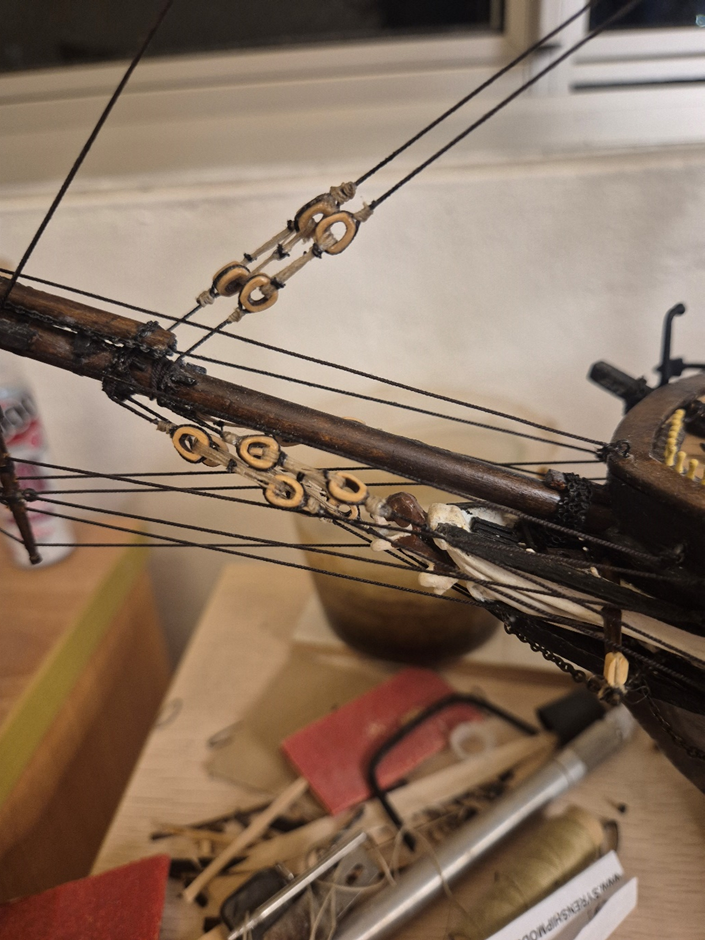
Hi everyone. I am in the process of rigging my Beagle and am struggling a bit understanding how the mast tackle is supposed to work. I am not sure how the lines running through the blocks indicated by the red arrows is meant to finish. Should this tie off to a belaying pin on deck or just wrap around the base of the block? Any help would be greatly appreciated.

-
Thank you for the kind comment Johnny. Yes, I remember having much trouble to get the deck right. I think after re-doing things enough times I sort of lucked into something that looks okay. I've also seen the method with black thread, which definitely sounds interesting and could work quite well.
-
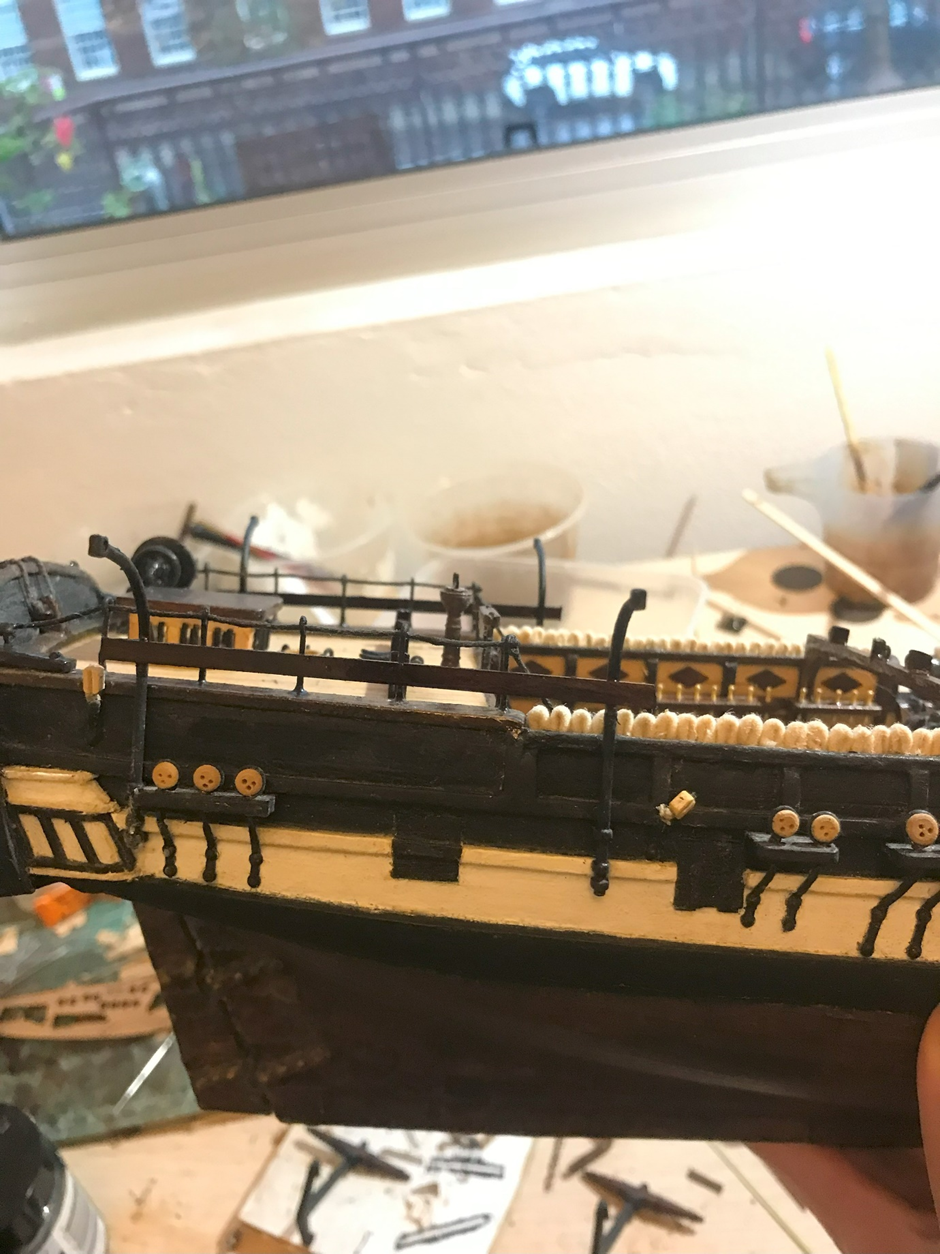
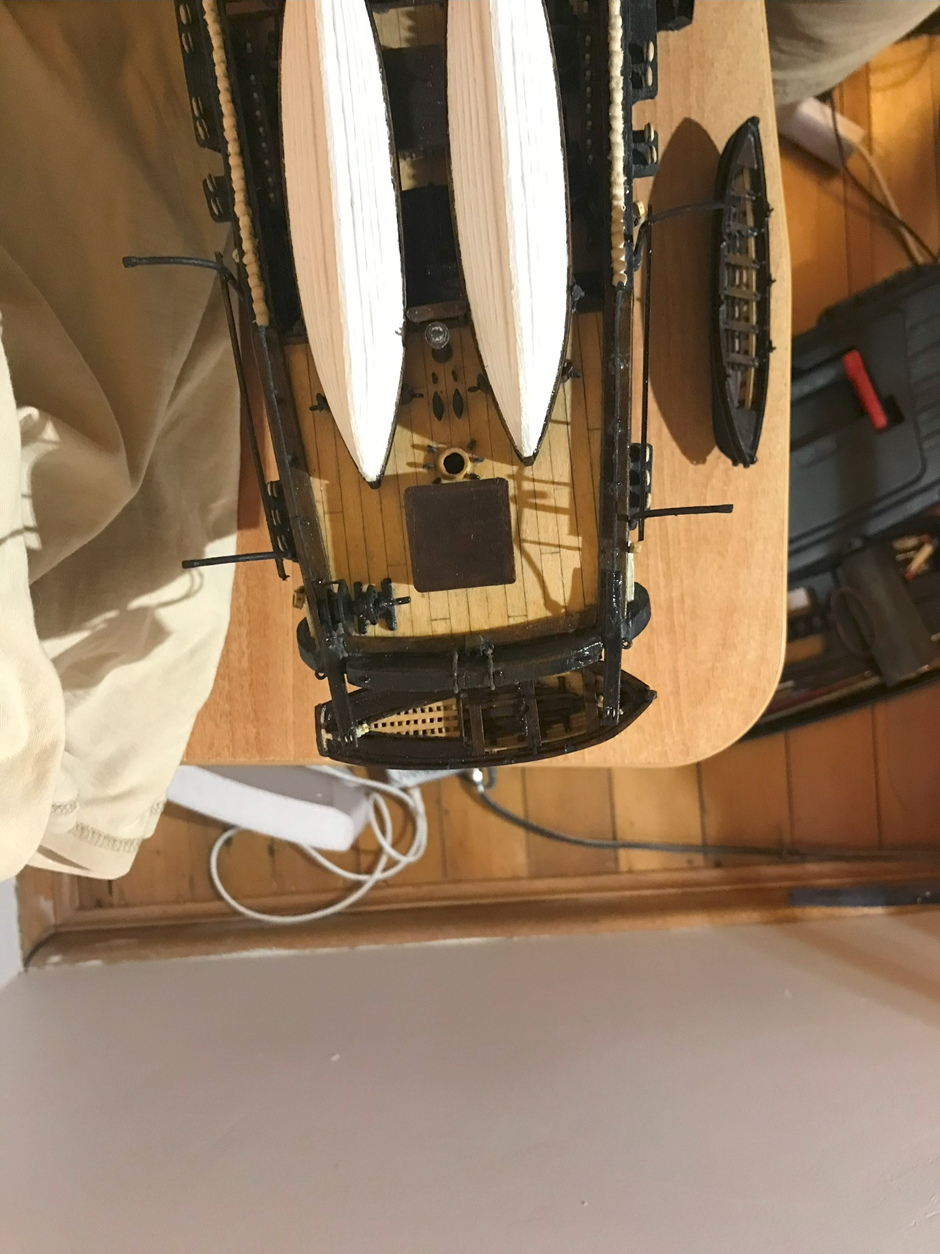
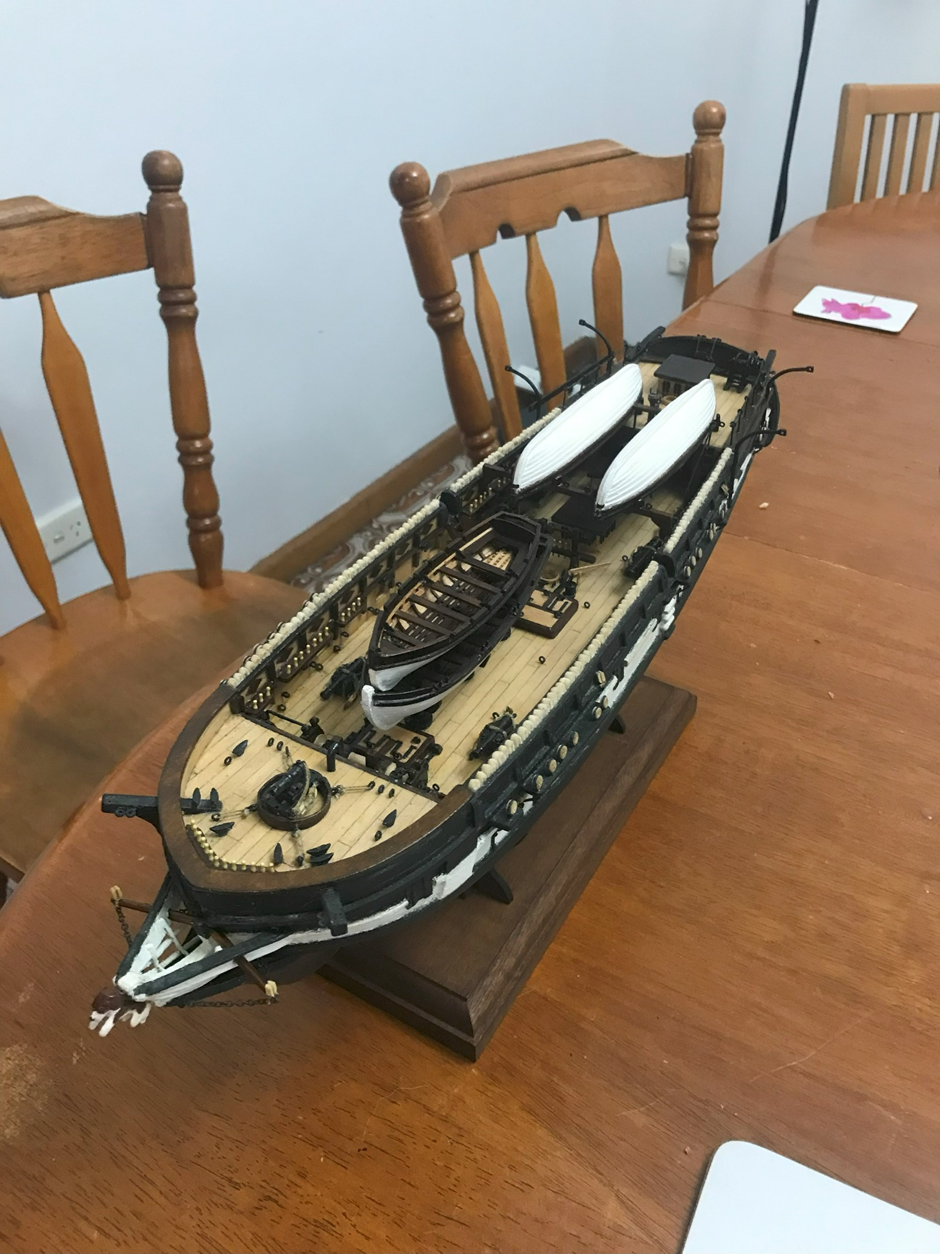
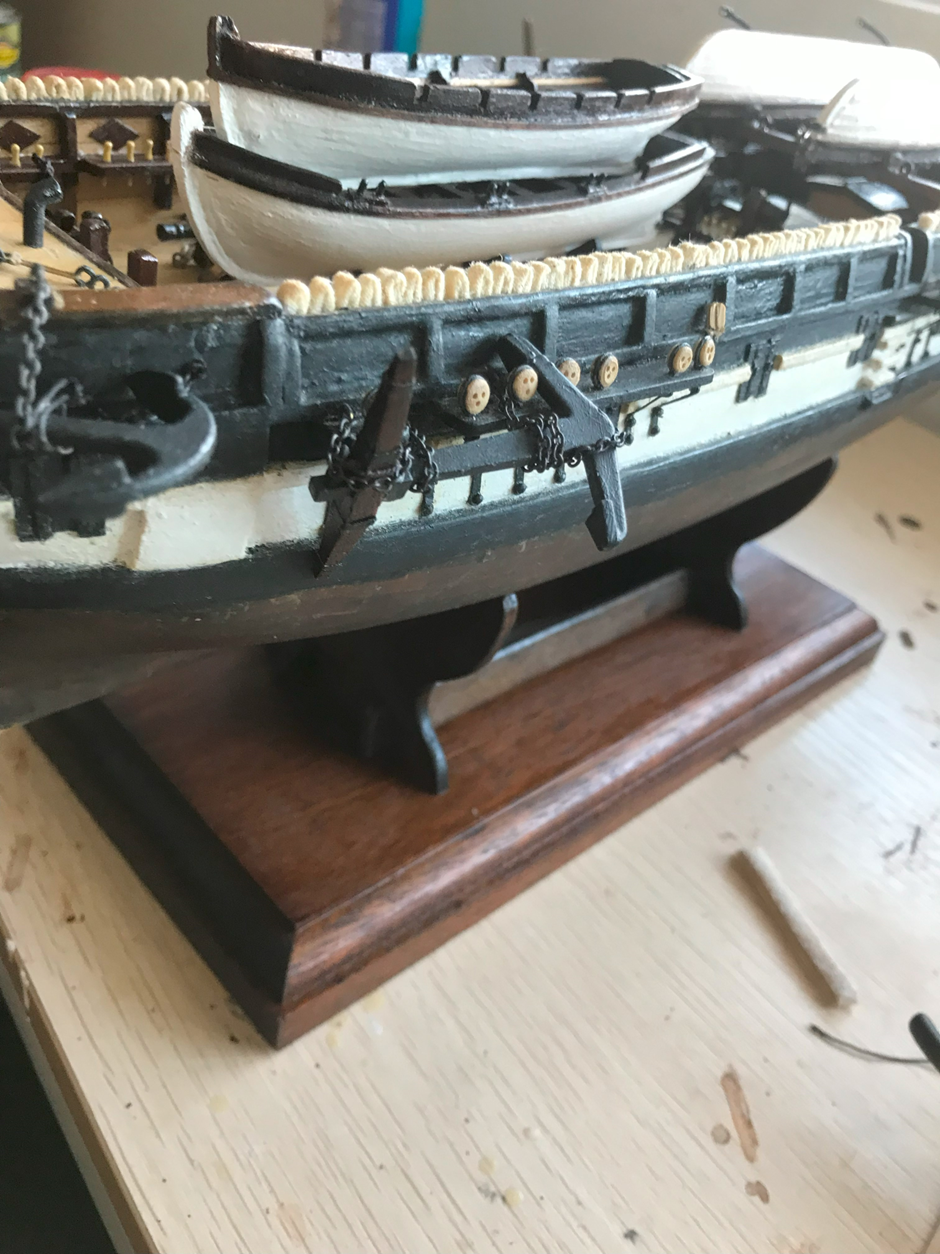
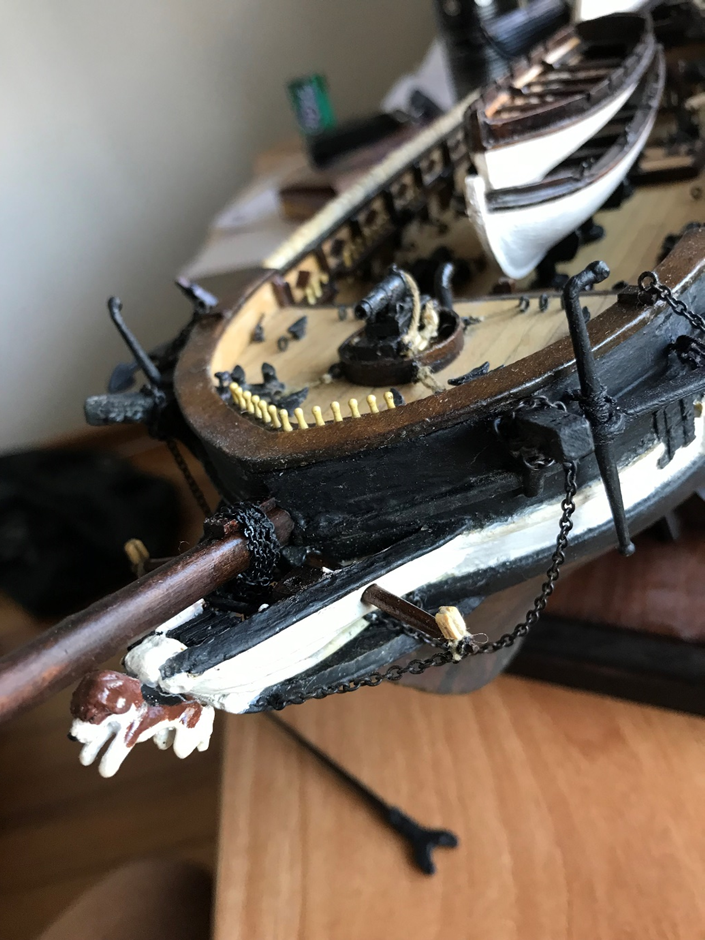
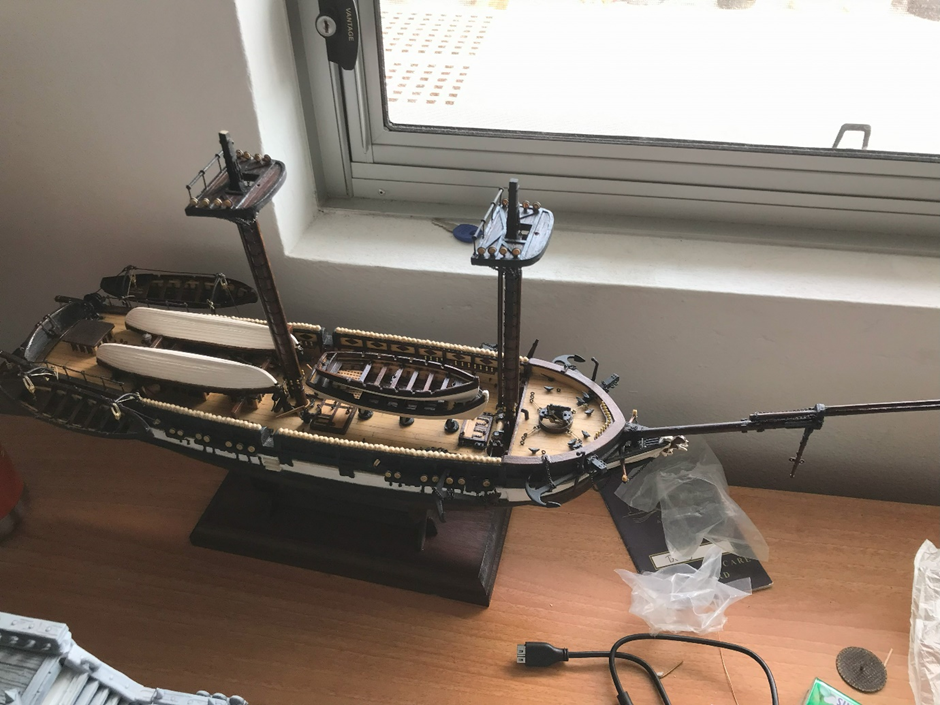
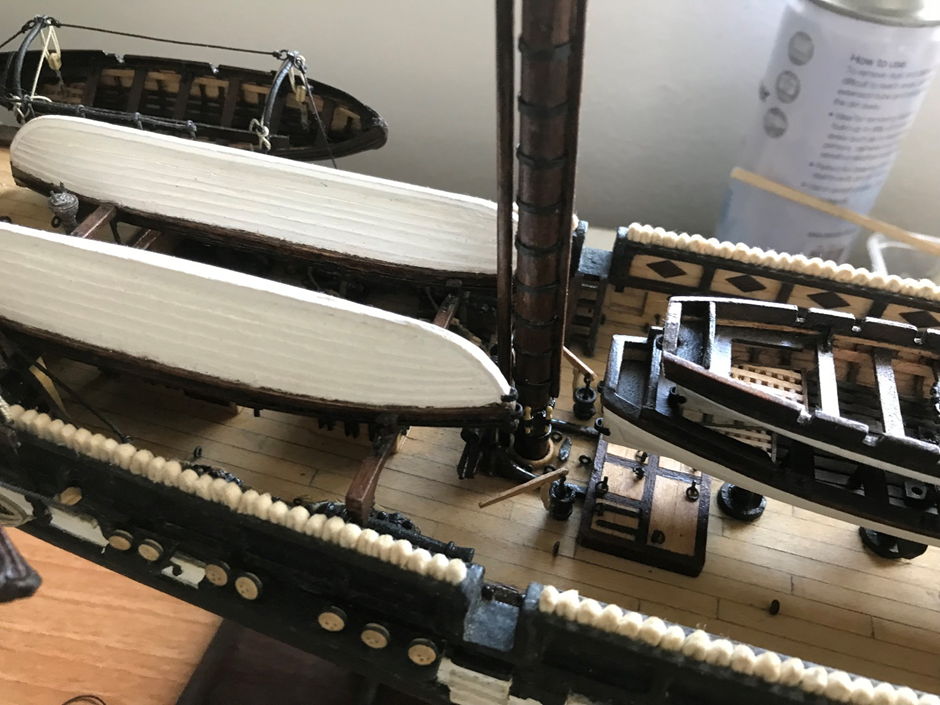
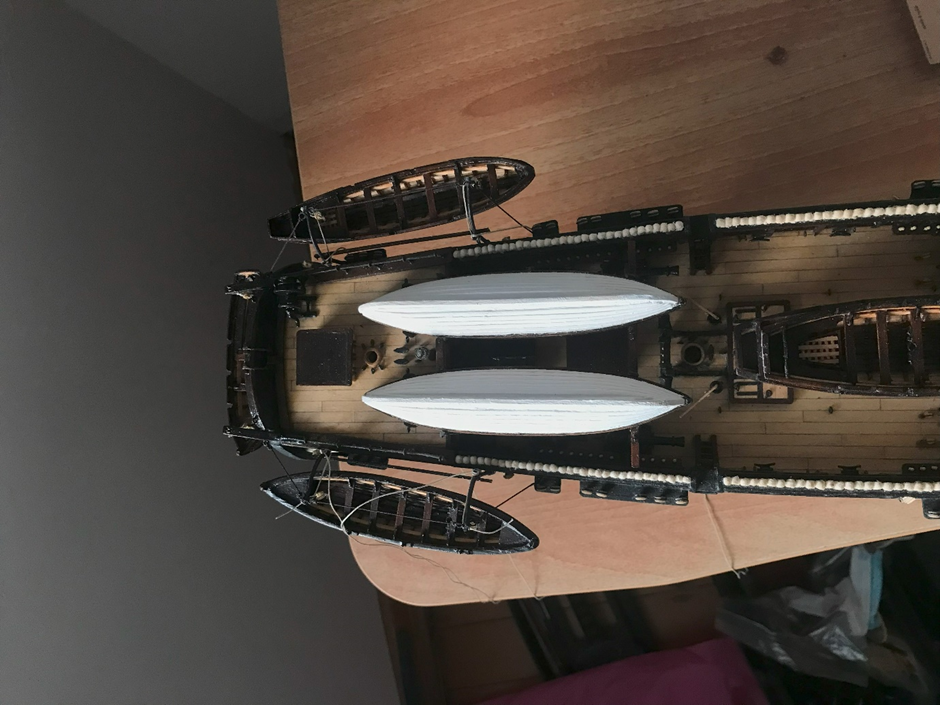
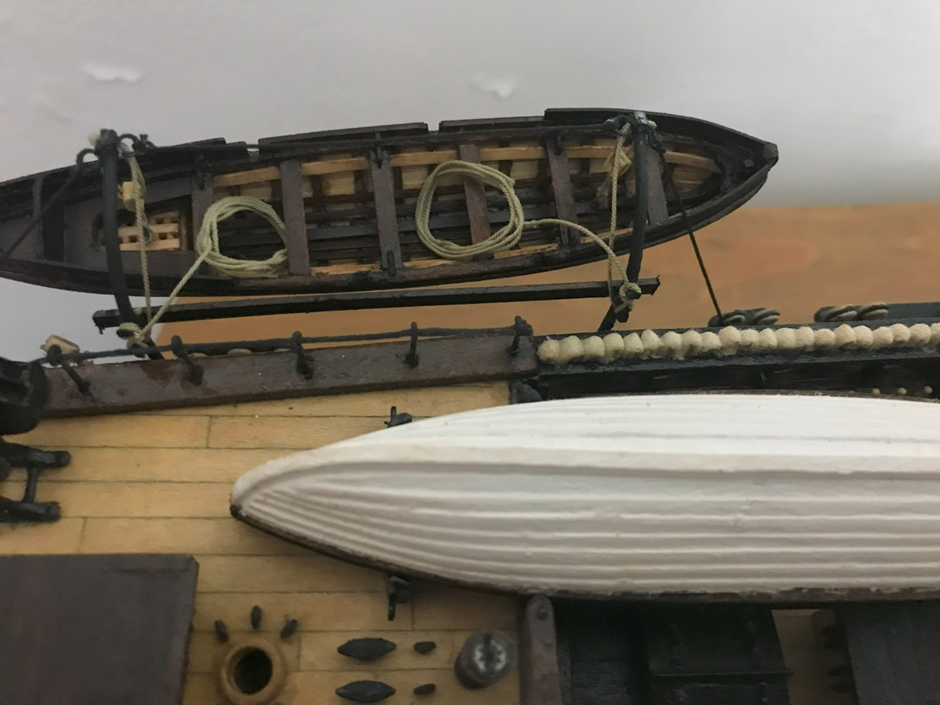
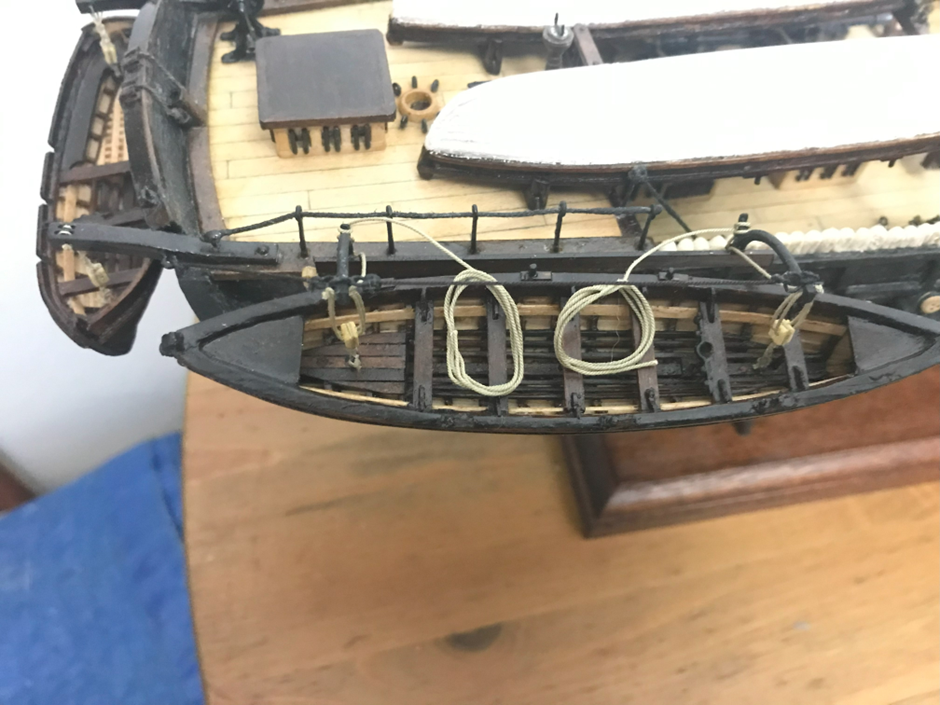
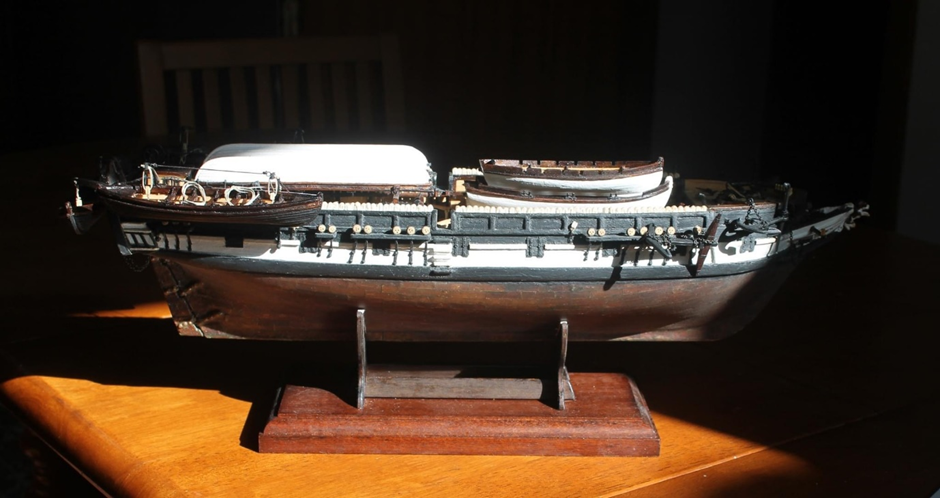
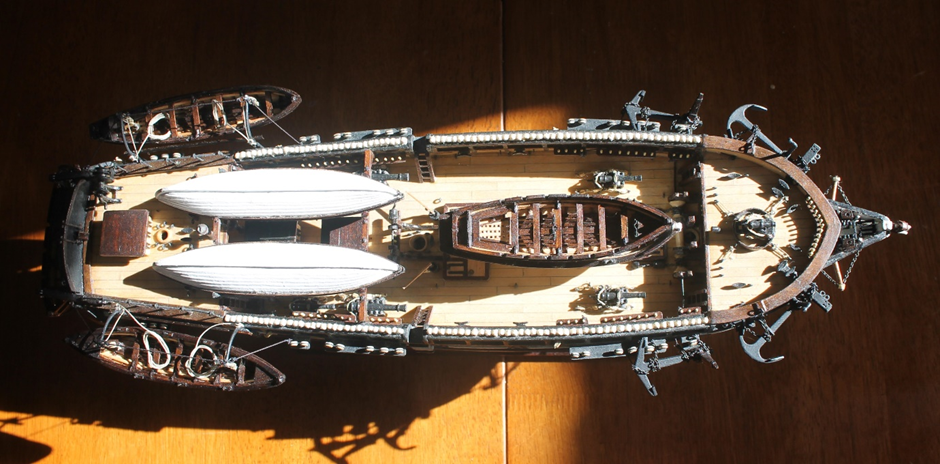
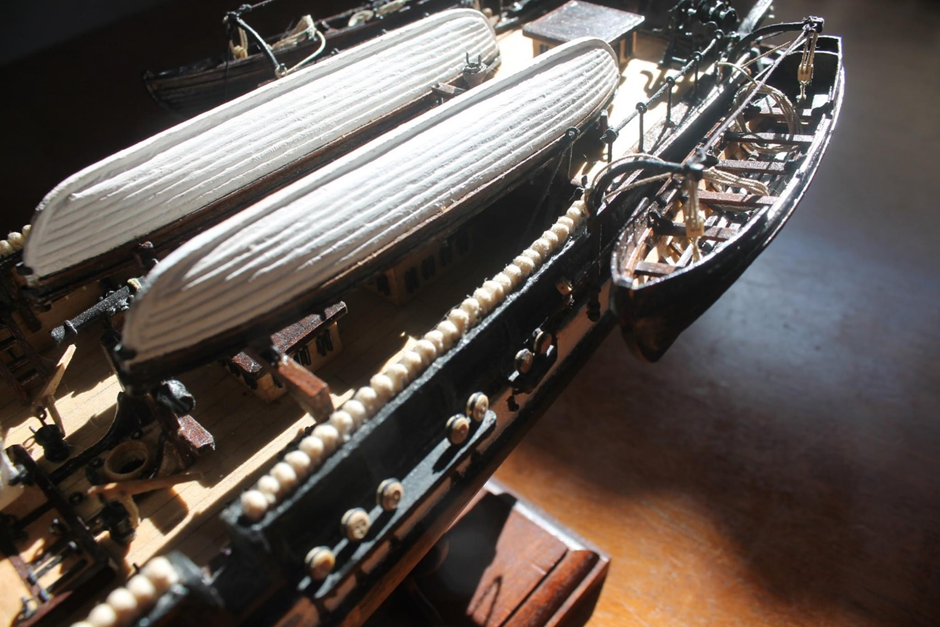
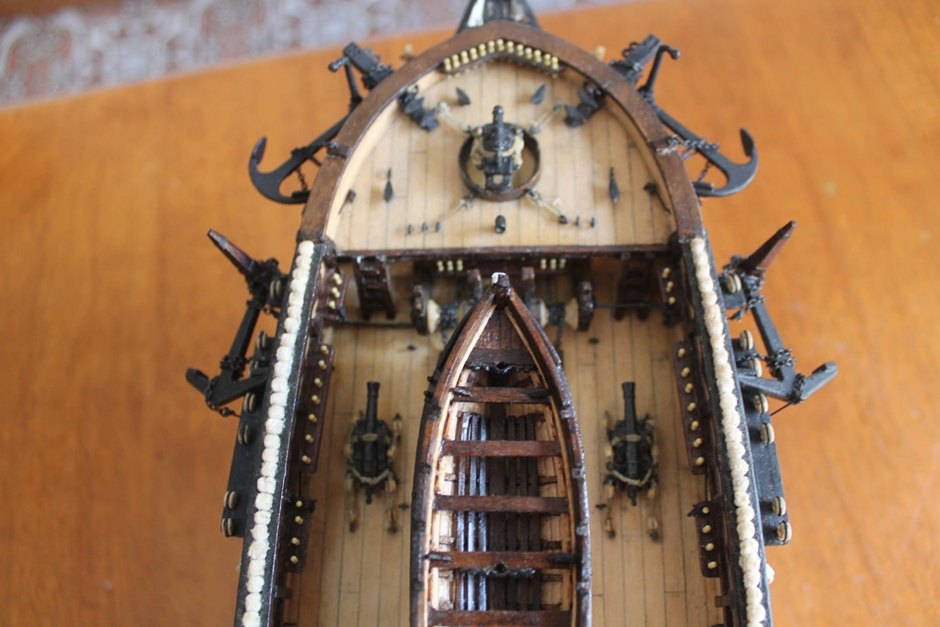
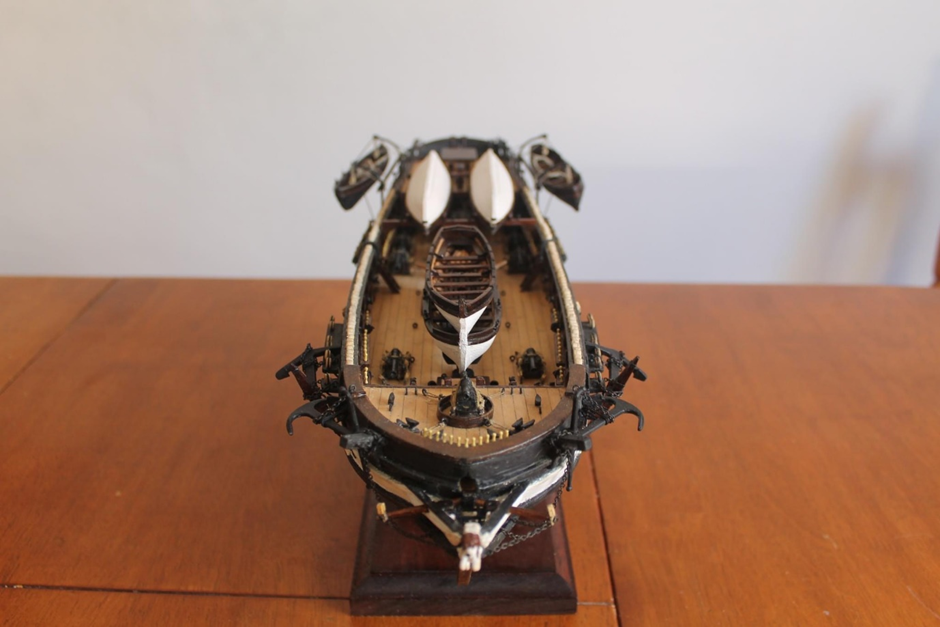
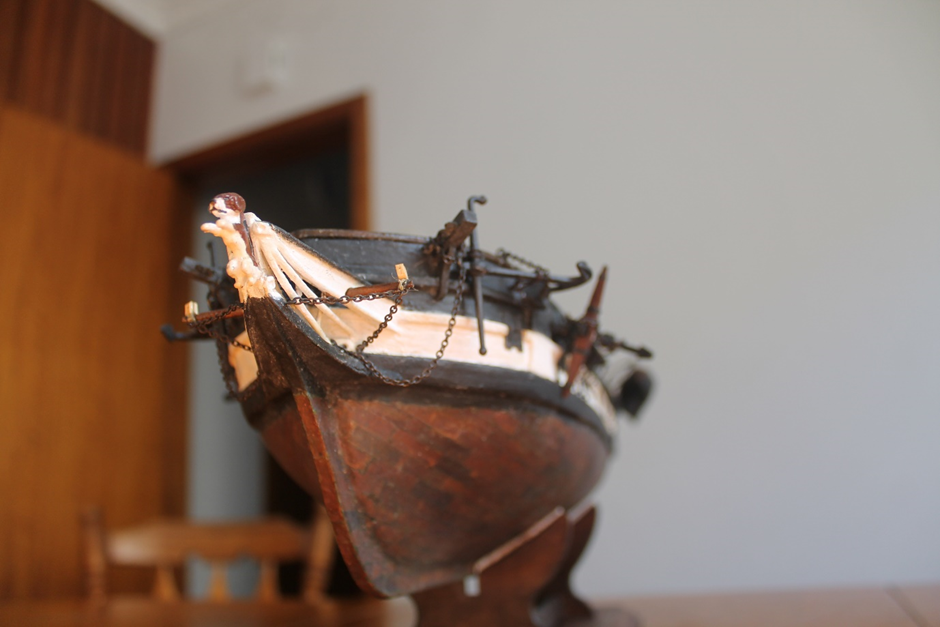
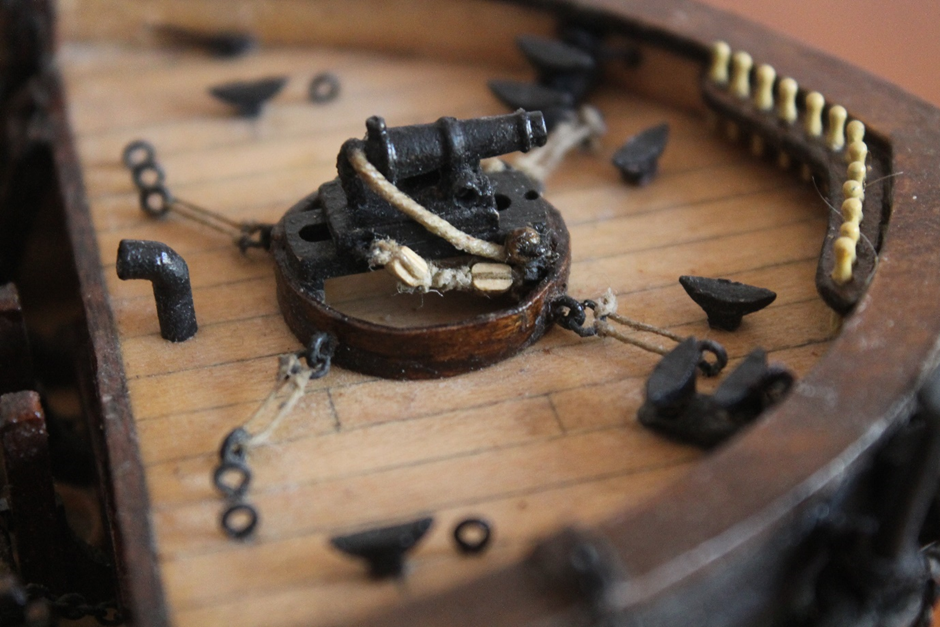
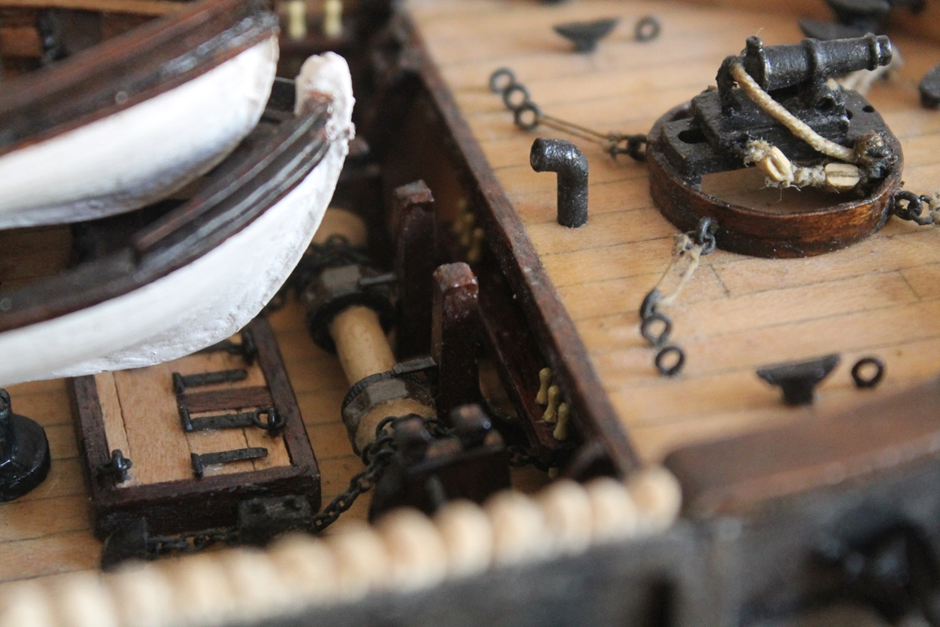
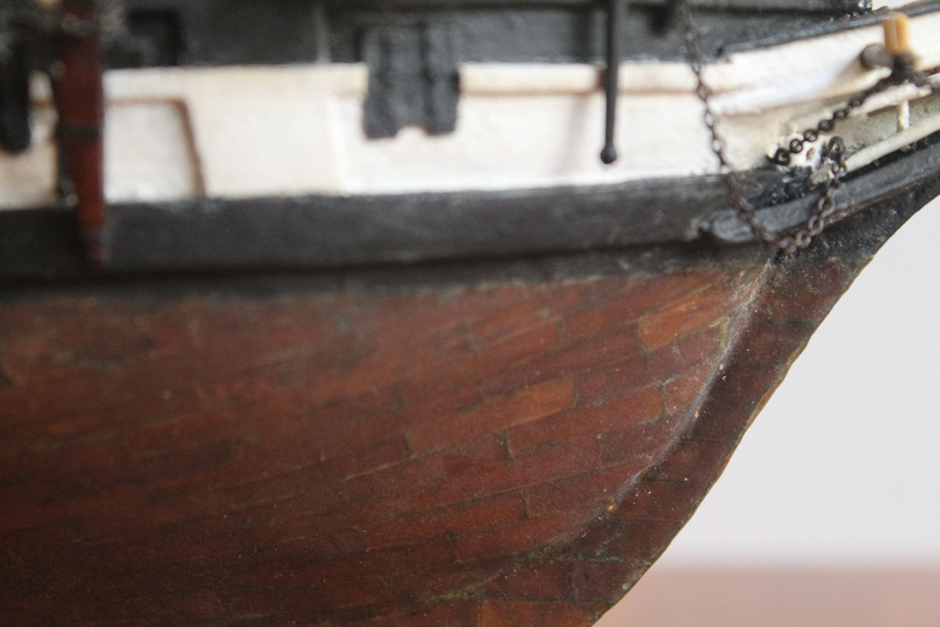
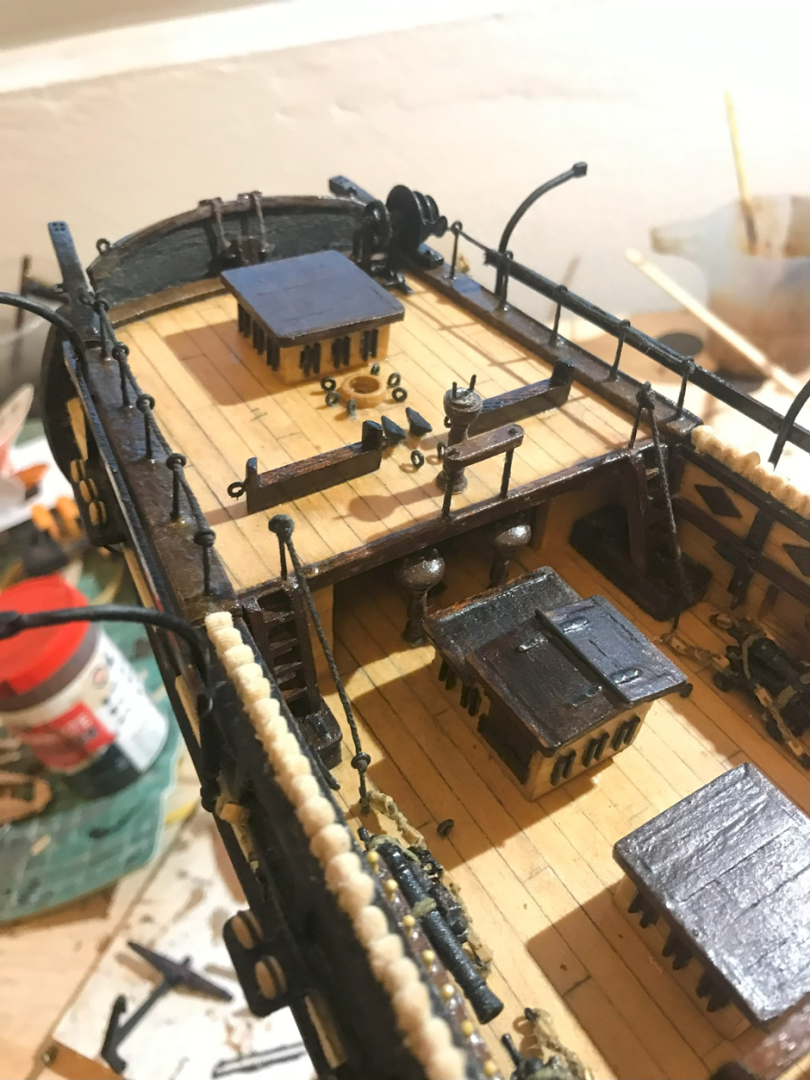
After finishing the anchors, there were only a few small things before the deck details and the second stage of the build was finished. I secured the whaleboat and the gig onto the davits and coiled up the excess rope. I’ve upgraded my thread to the rigging cord from Syren now, it does look much nicer. I also noticed that there is a lot of detail around the bow included in AOTS that I had not included. This includes the all-important shitting hole or more tastefully; the “seat of ease”. After that, I took some more photos of the completed stage 2. The close ups really show how dusty parts of the ship have become. Looks alright from a distance, but I might need to have another go at tackling the dust. Parts of the ship have been sitting for three years now. Next up is masts and rigging.


-
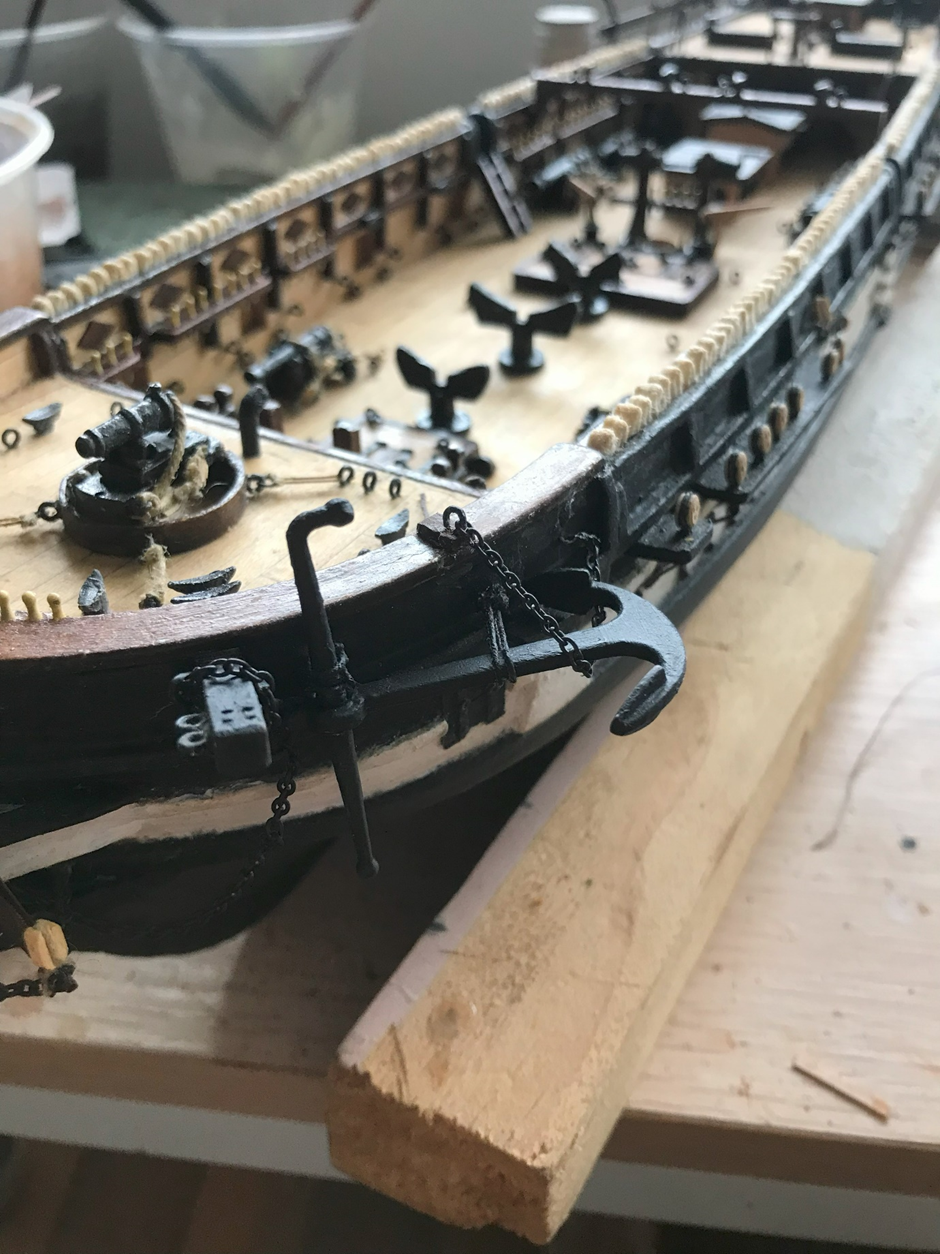
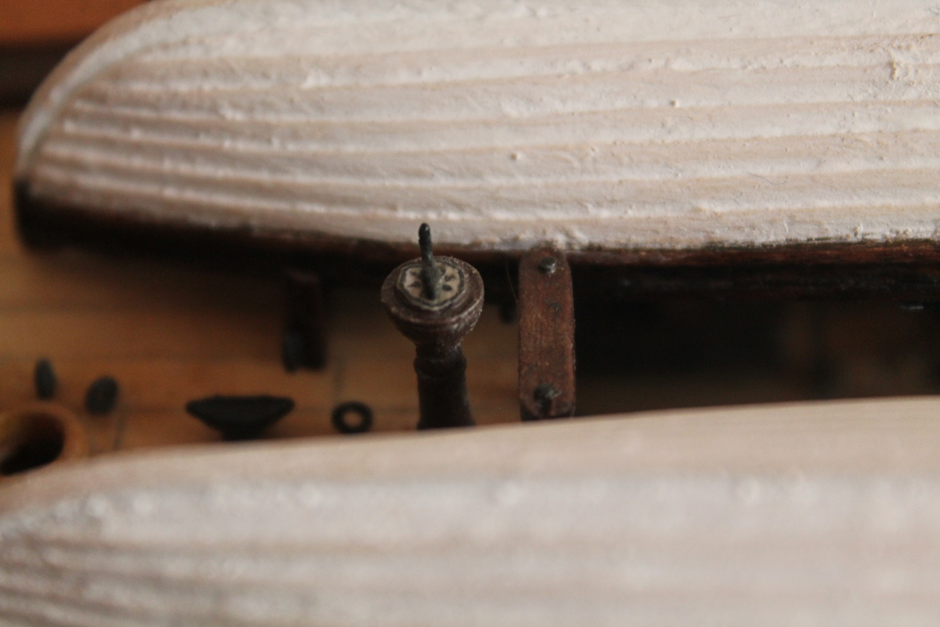
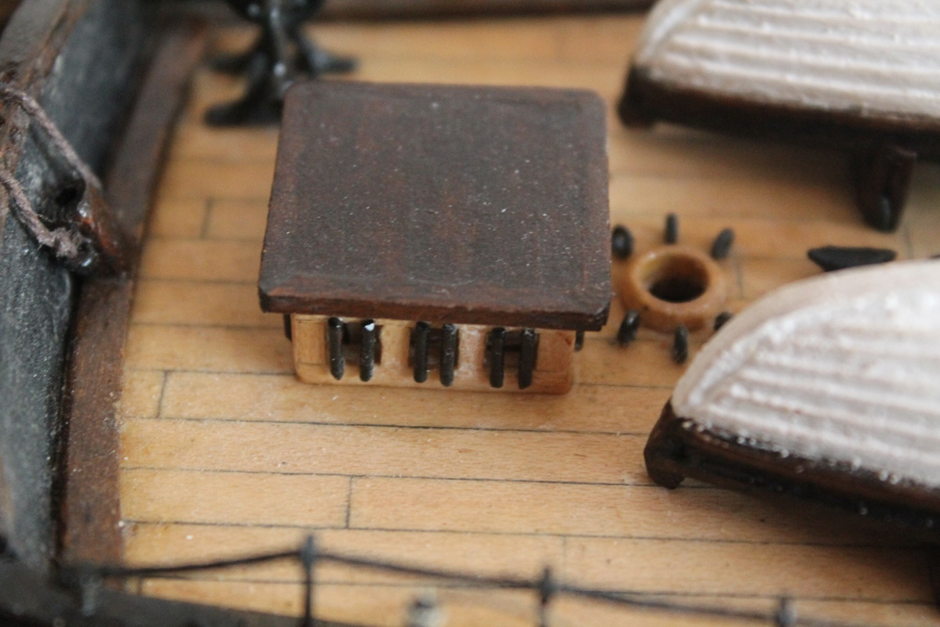
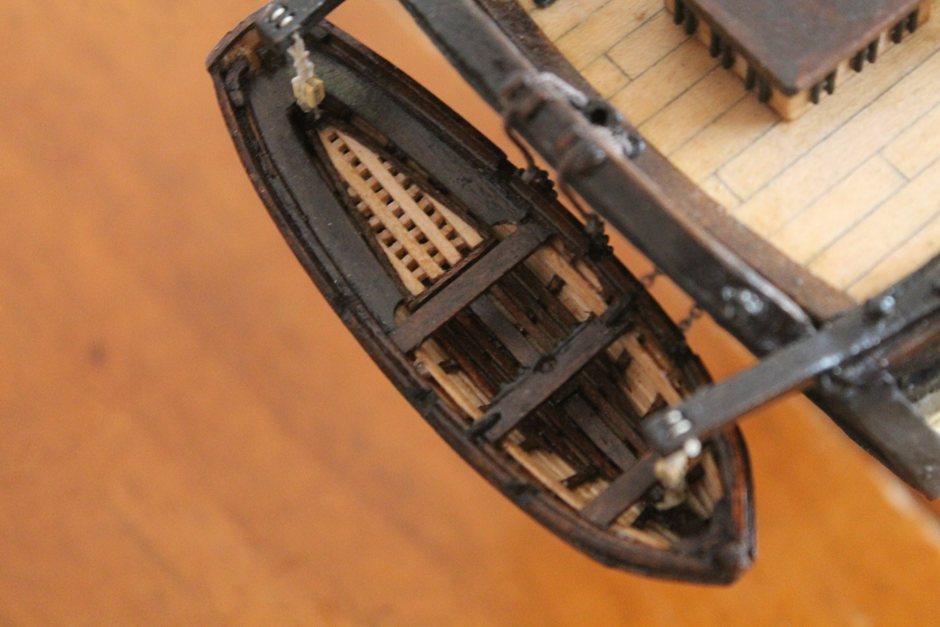
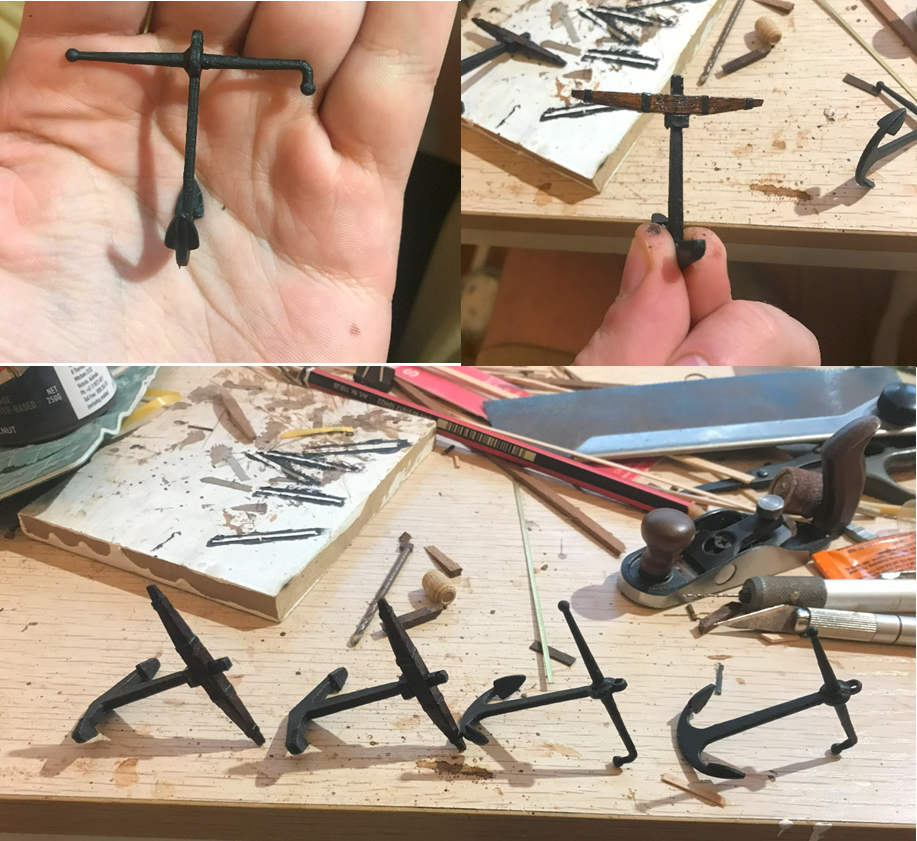
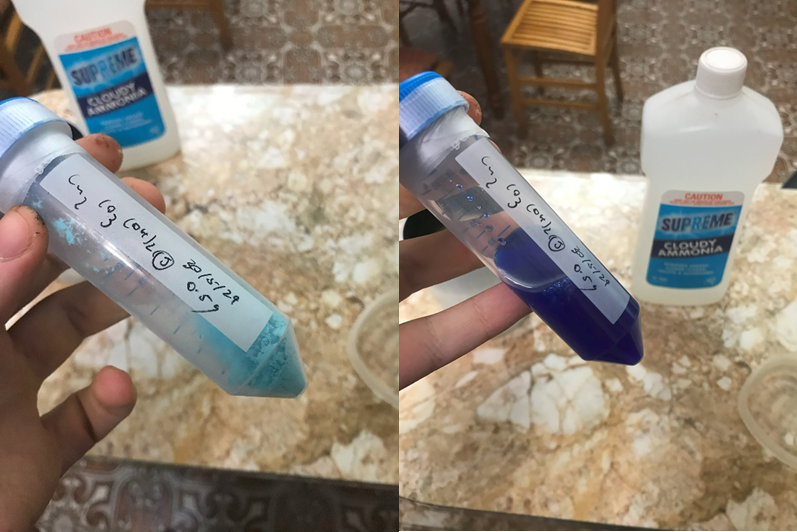
Okay, so next steps were to fit all the boats to the ship. I made the chocks for the whaleboats out of the Sapele supplied in the kit. I had to fit them to the boats and add an extra layer of wood to make it level with the skid beam over the main deck. I also placed the davits and added the support beam found in AOTS After placing the boats, I realised that they are a little large. They are to scale, but I suspect that the deck in the occre model isn’t quite the right proportions for 1:60, which makes them seem a little big and makes the quarter deck a bit crowded I then went and did the anchors. I chose to keep the bower anchors with the iron stocks from the kit. Two of the bower anchors in the kit are given a ‘wooden’ stock that is actually a cast metal piece. I chose to replace these with wooden stocks that I made from sapele. I made some iron bands out of a thin masking tape that I painted black. I made up some new blackening solution. This time, I had access to lab grade copper sulfate and sodium carbonate, so I was hoping the higher degree of purity would mean I could add a bit less copper carbonate. The ratio was 0.5 g of copper carbonate to 20 mL of household ammonia. It basically worked as well as the homemade copper carbonate, it still took around 30 minutes to blacken the chain after cleaning with vinegar. I then fit the anchors onto the boat. I added some additional lashing as suggested by AOTS. I also fed the rope holding the chain through a hole in the bulwarks to tie off to some belaying pins. I can see that is what has been done in the model built for AOTS so I decided that it was worth it. I’m not sure how authentic this is or how anchor lashing would normally be tied off.


-
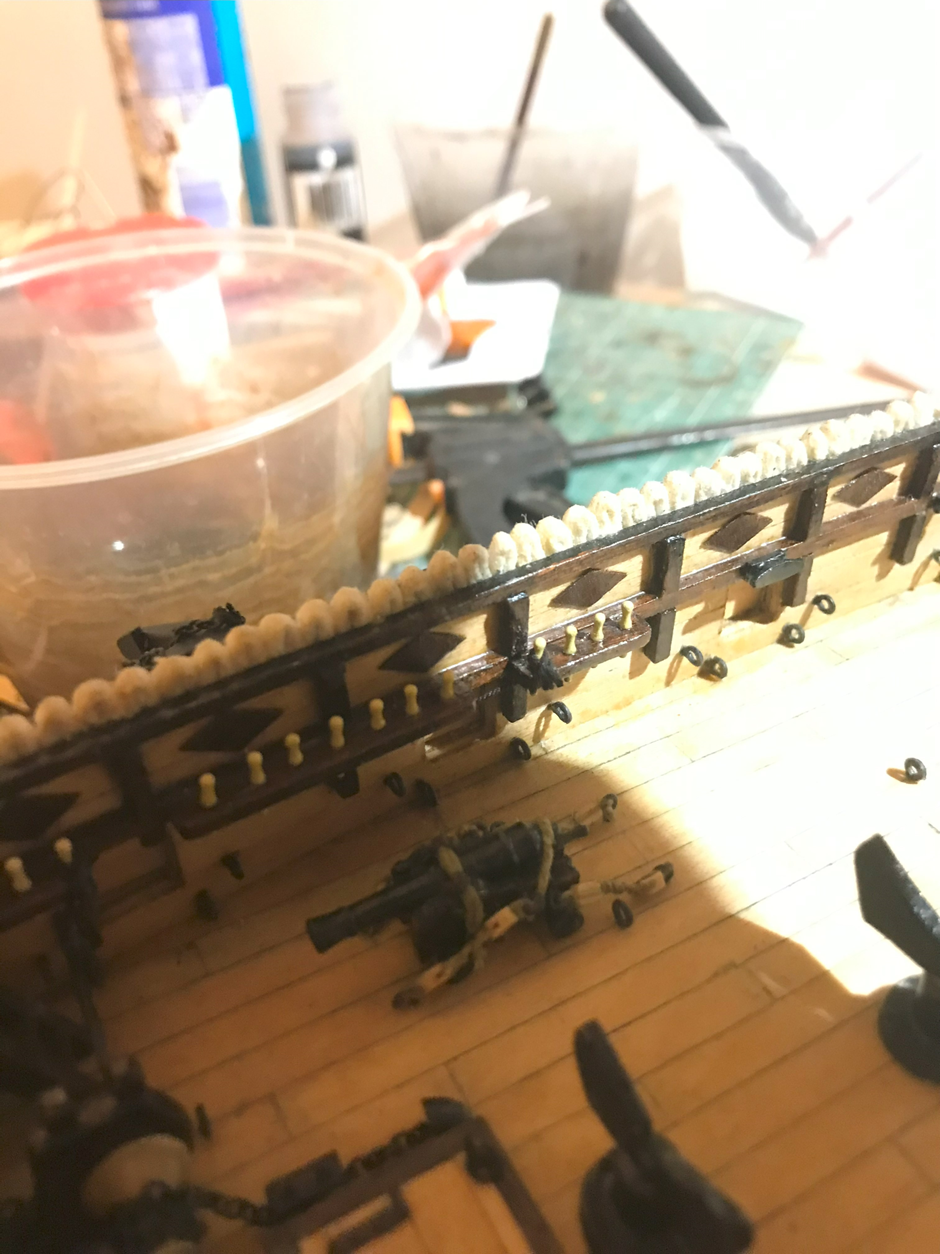
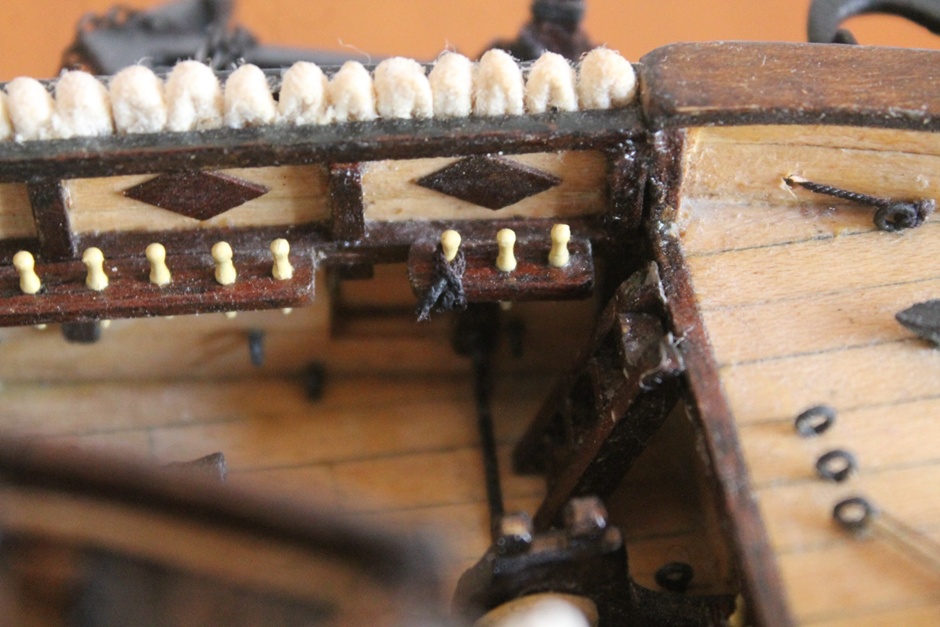
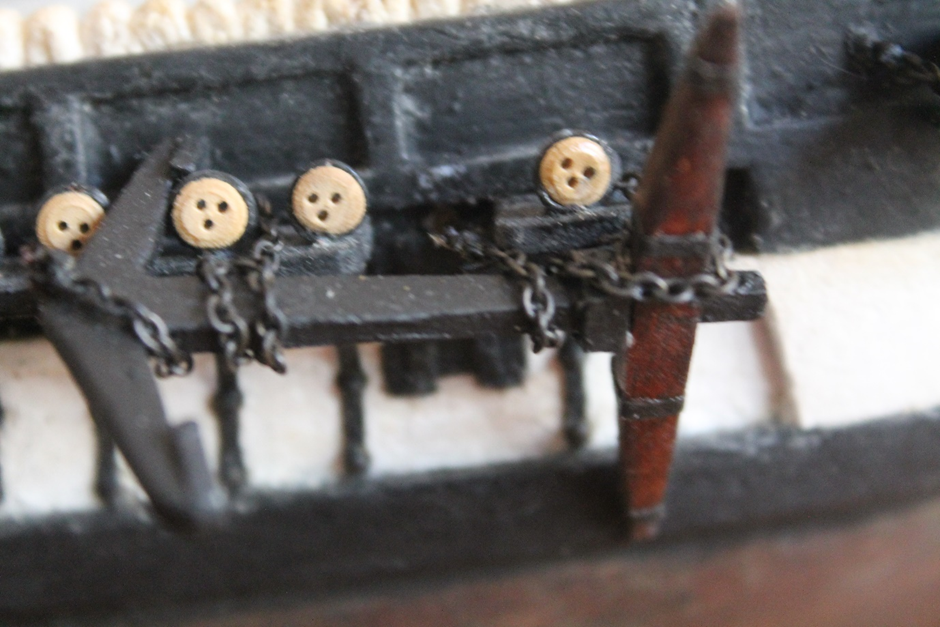
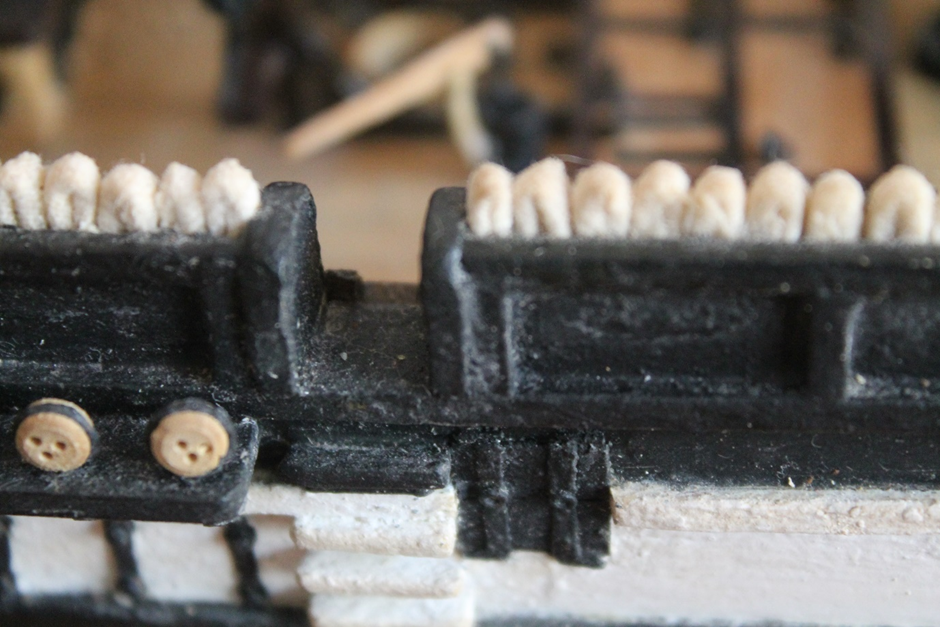
Thank you for the comment. I’ve realised now that I didn’t actually include very many details of how I did the hammocks in this log. I used a thin piece of fabric similar in texture to the sails used in the kit. I’m not sure where I found the fabric. I would cut a 1 cm by 1 cm square and roll it as tightly as I could. I would then use a bit of CA glue to seal it and then fold the roll of fabric in half (with the edge of the fabric facing inwards) with some CA glue again to hold it in place. Then I cut the roll with fabric scissors. The dimensions ended up at 0.3 cm width (the width of the space in the rail) and 0.38 cm long. There was some quality control where I would throw out the ones that didn’t look quite right. Then I would place them in the rails and check with a ruler to ensure that there were the same number of hammocks on each side of the ship, some squeezing or adjustment was necessary with tweezers. After the rails were full, I brushed some varnish over the hammocks to help keep them clean. I hope this helps, I tried a few different things including using wire to help with the rolling and holding them in shape but eventually found that it wasn’t really necessary.
-
LucienL reacted to a post in a topic:
HMS Beagle by brunnels - OcCre - 1:60 - first build
-
Wow, this is an awesome build! I think the shiny copper and the red go really well together. Also, the kit on the cutter looks really nice.
-
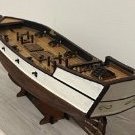
Hey there. I'm working on the boats from the Beagle and am trying to consider some stretch goals for the amount of boat kit to include. I think at a minimum I will make a set of oars, masts/spars, boat hooks, grapnels and rudders for each of the 7 boats. Still debating whether to include a barrel and a compass. Are there other items that anyone would consider essential for a boat? Further, would all these items necessarily be stored in the boats or possibly below deck in some other storage space?
-
Hey brunnels. Thanks for the comment. I doubted my abilities a lot going into it. I think I am quite lucky with the way it turned out. Adding these whaleboats ends up concealing quite a lot of detail so it's definitely a choice to consider.