
Schubbe
-
Posts
28 -
Joined
-
Last visited
1 Follower

-
 GrandpaPhil reacted to a post in a topic:
HMB Endeavour by Schubbe - OcCre - 1:54
GrandpaPhil reacted to a post in a topic:
HMB Endeavour by Schubbe - OcCre - 1:54
-
yvesvidal reacted to a post in a topic:
HMB Endeavour by Schubbe - OcCre - 1:54
-
SIDEWAYS SAM reacted to a post in a topic:
HMB Endeavour by Schubbe - OcCre - 1:54
-
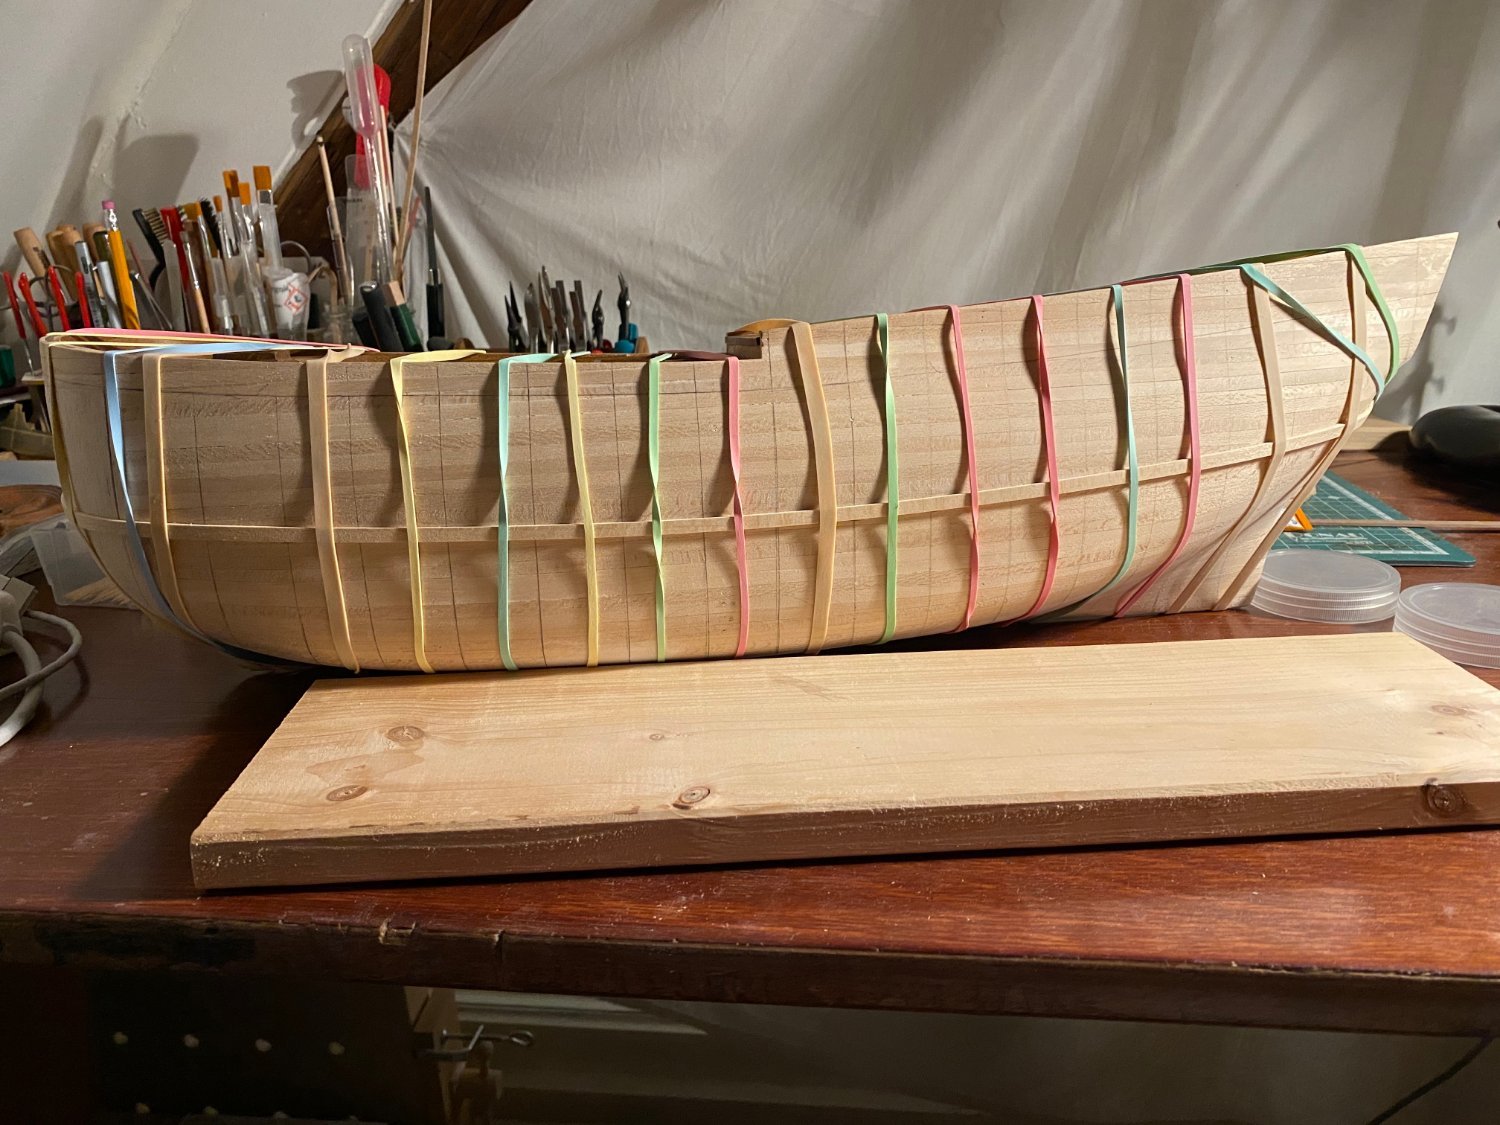
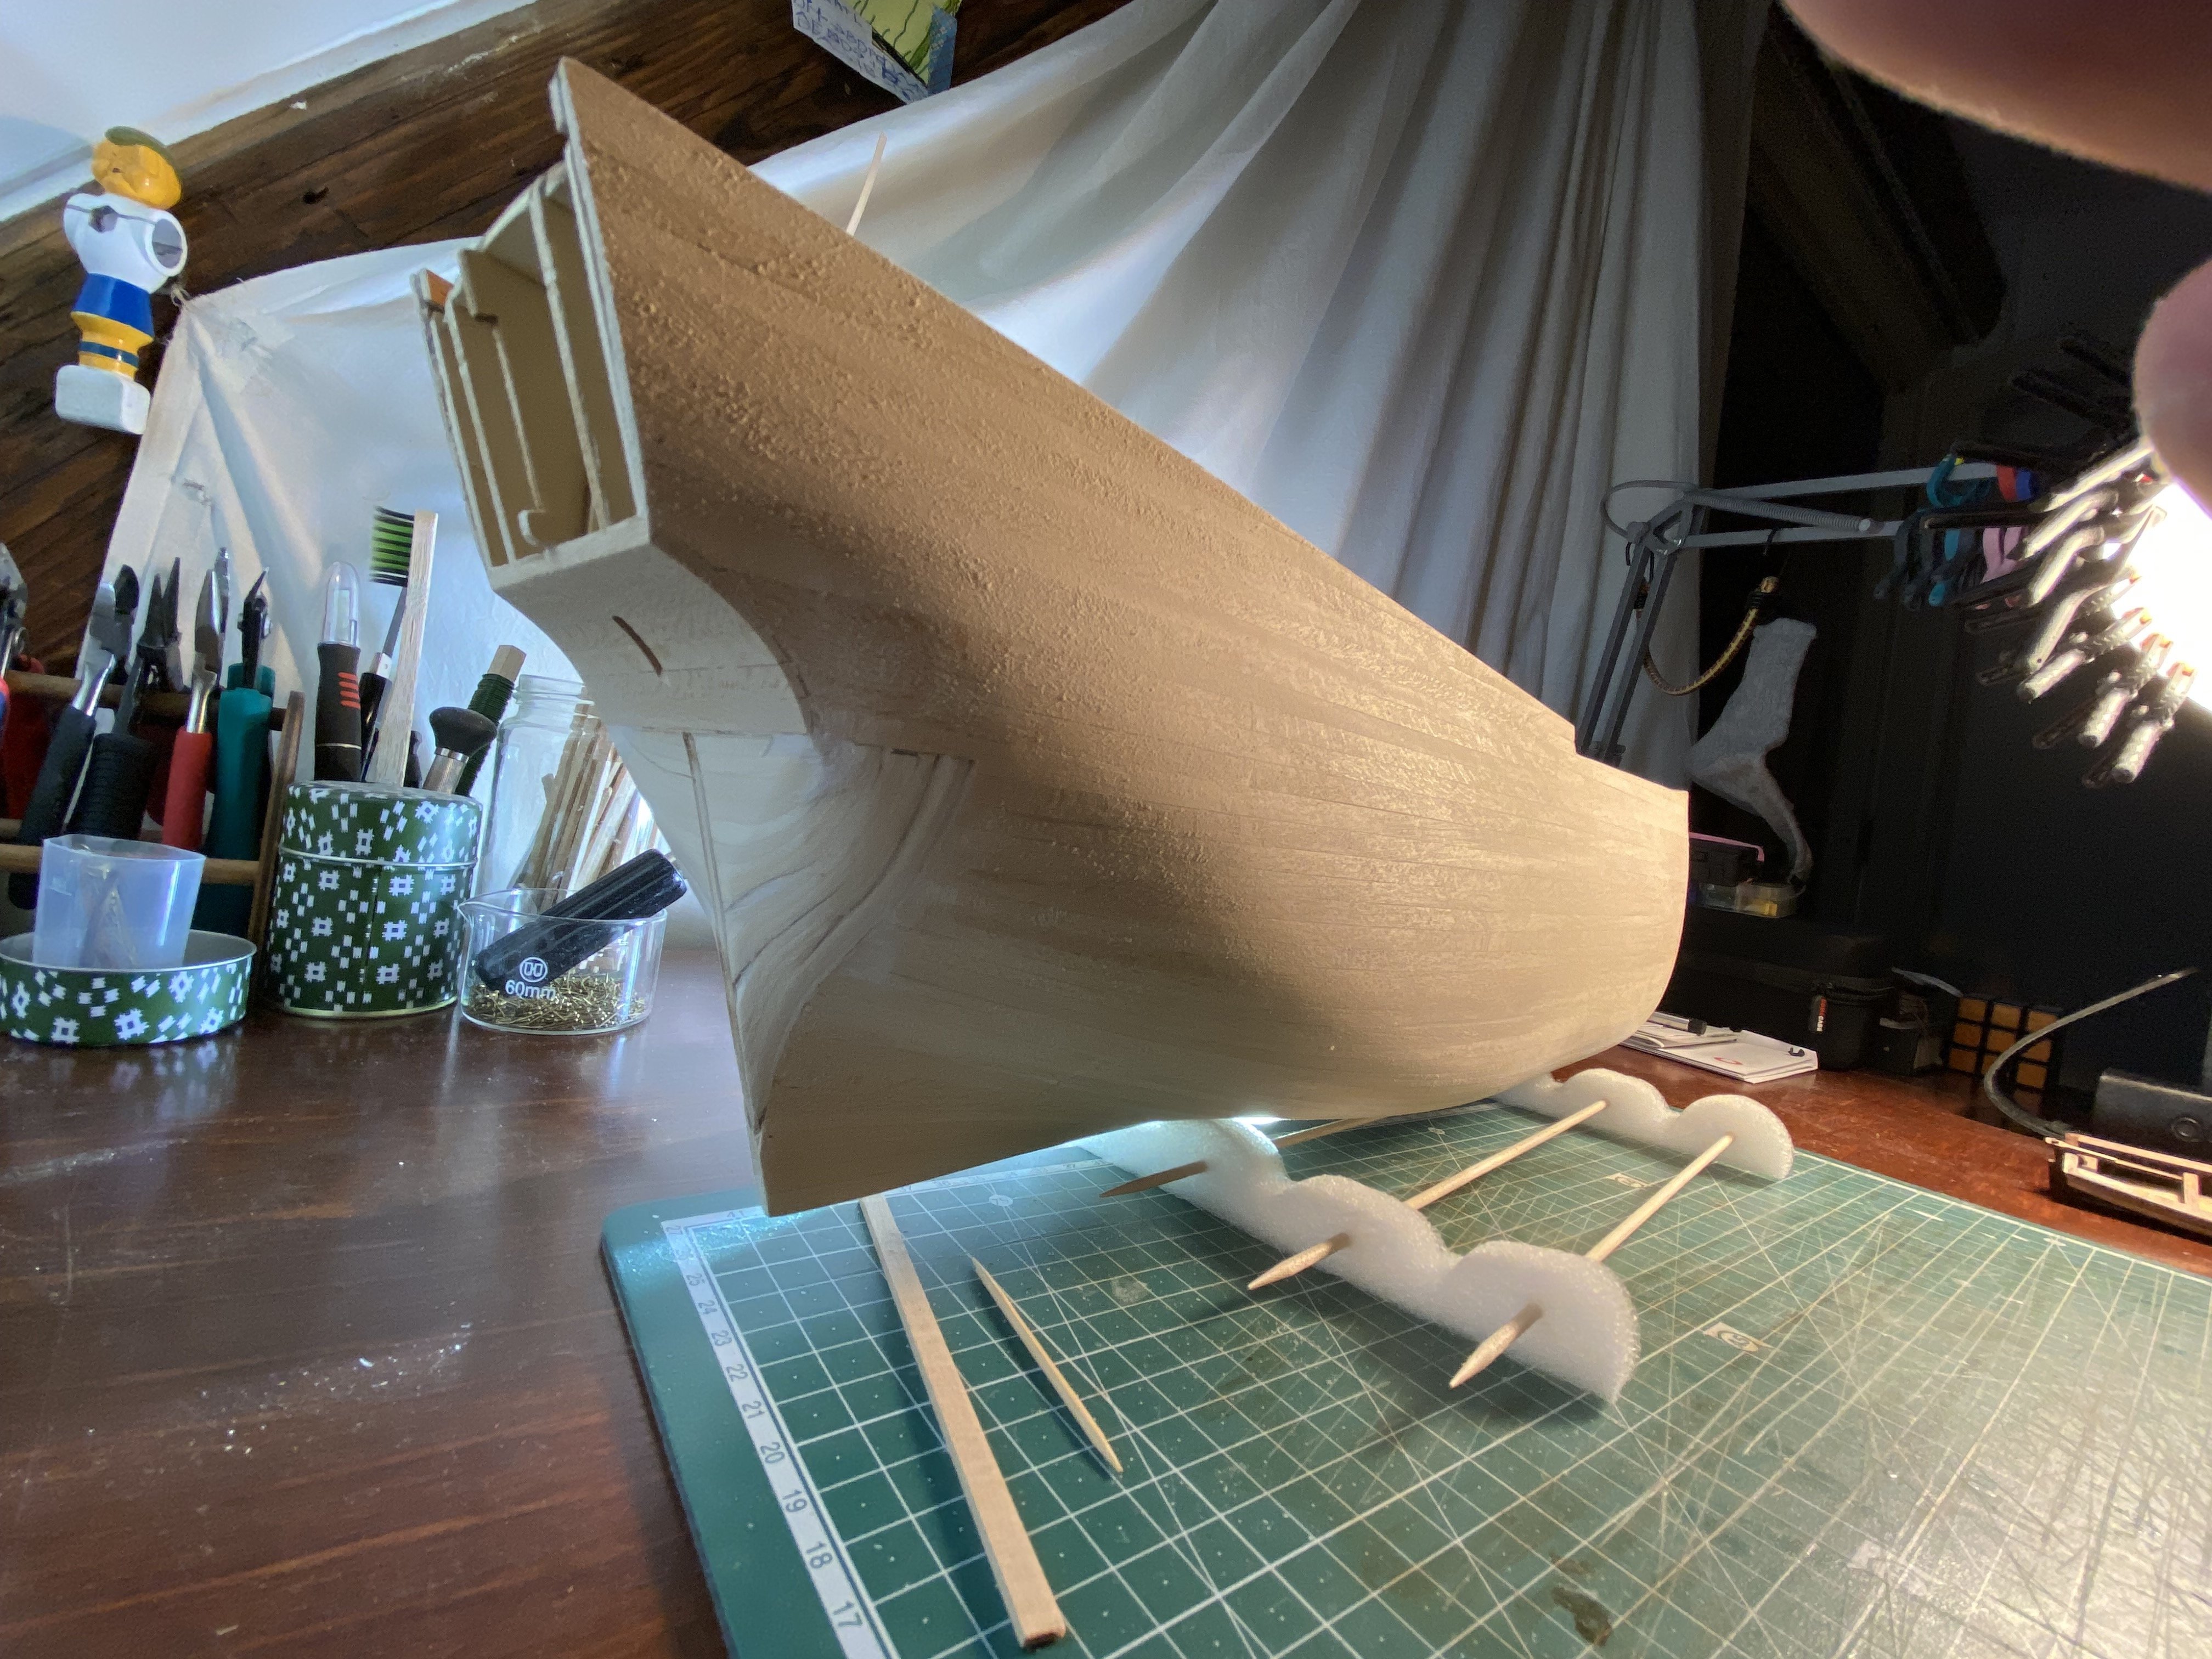
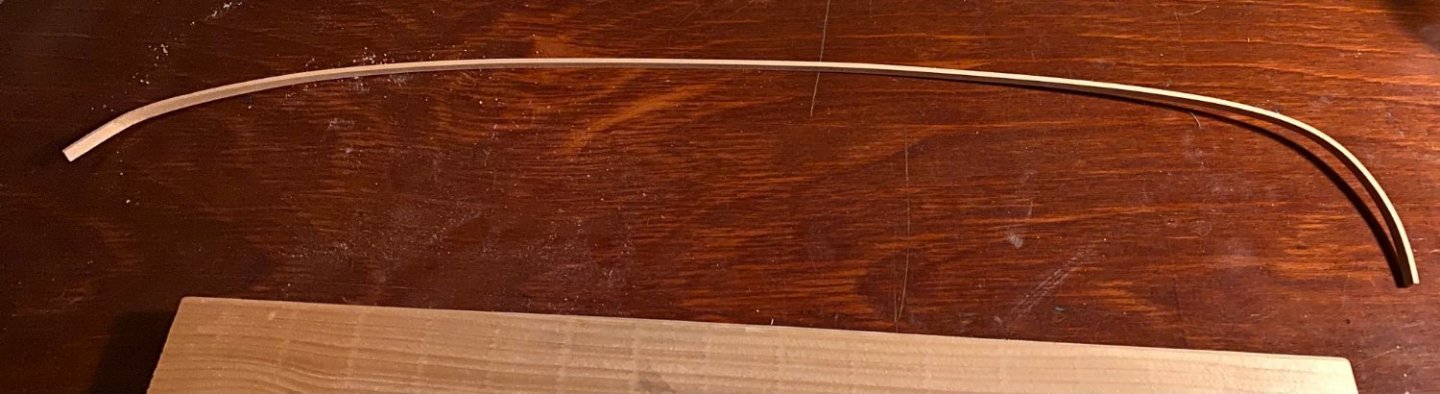
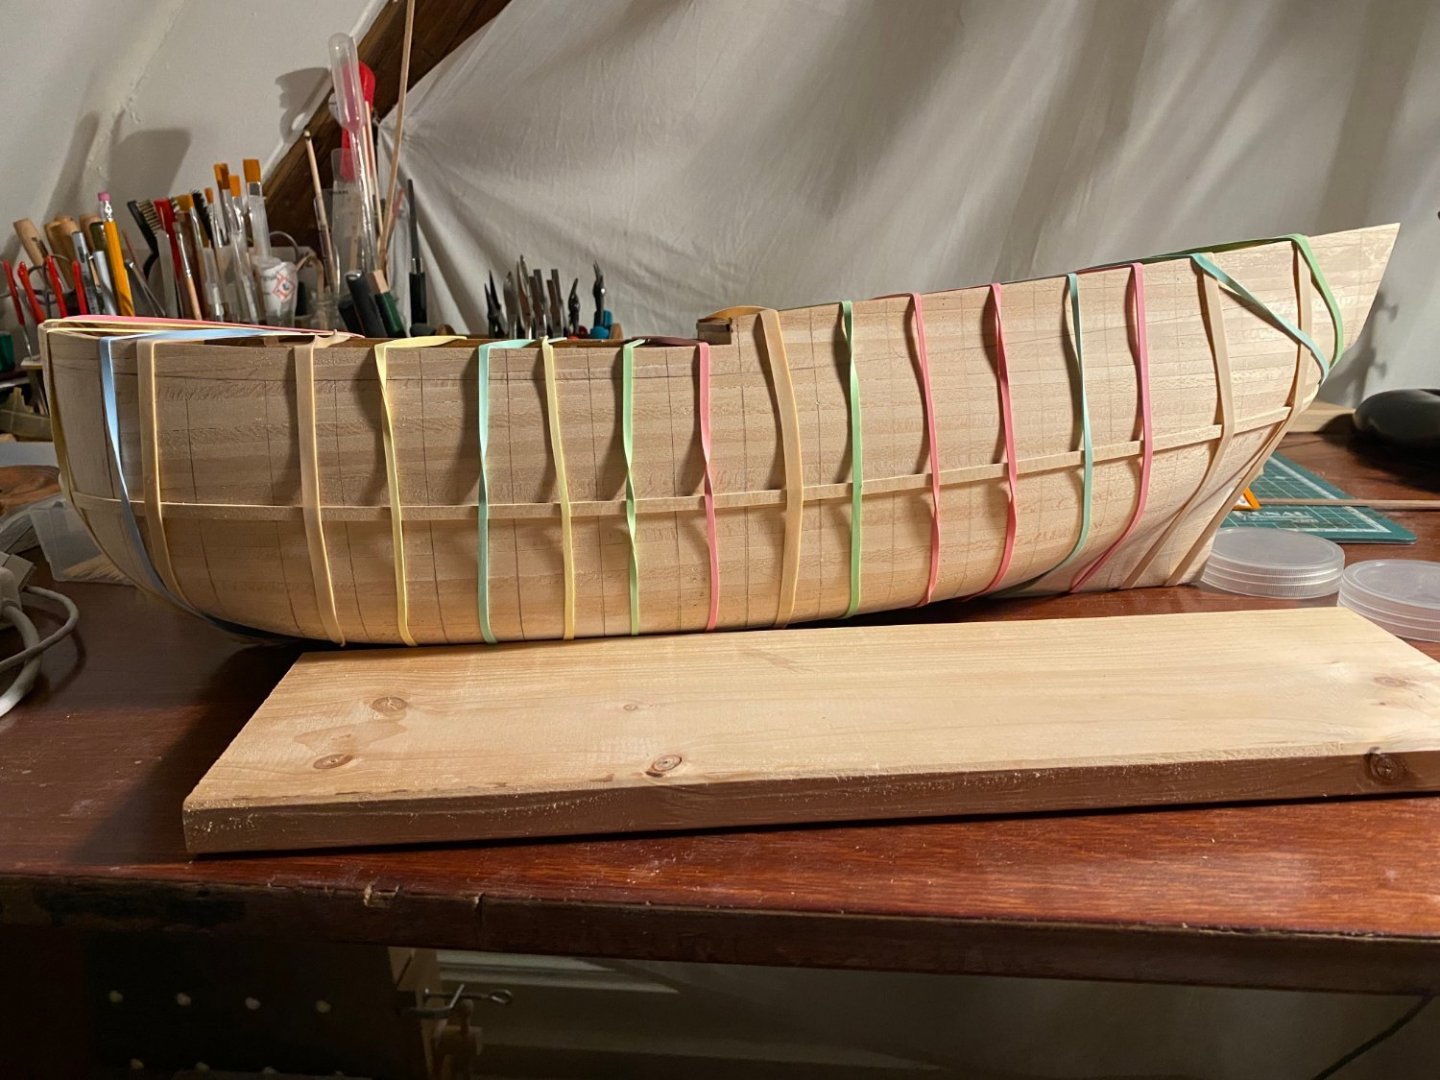
 Sooo... I finally began my first attempt at bending and applying the main wales. After two or three ruined woodstrips, I managed to bend this quite complicated form. After that I used rubberbands to let the strips dry in position over night, and then again to hold them in place while the glue dried. This is a milestone for me. After that breakthrough I think things will take up speed again... First step: Bending the broad side in two directions to avoid the wales from coming to far up on the bow. Bending around the slim side to follow the Hull: Holding the plank in place with rubberbands: What do you think. Good approach? Or are there simpler Workflows?
-
Schubbe reacted to a post in a topic:
HM Bark Endeavour 1758-61 by DaveBaxt - Caldercraft - 1:64
-
Hi Dave, I just remembered, that I read something about mast heights in a different build log. Here is a Link to where the conversation started: I am not shure if it does, but I hope that helps…
-
This is AWESOME! AND you get to drink more wine… 😉 Thanks for the great tip. I will definitely give it a try.
-
This looks pretty cool. I really like the persenning covering the boat. How did you do it? Painted silkspan? Formed with diluted woodglue? But how did you create the awesome seam? This technique might be applicable to the rudder in my built... Please share!
-
Schubbe reacted to a post in a topic:
Hannah by GrandpaPhil - FINISHED - 1/72 - CARD - from Hahn Plans
-
SIDEWAYS SAM reacted to a post in a topic:
HMB Endeavour by Schubbe - OcCre - 1:54
-
SIDEWAYS SAM reacted to a post in a topic:
HMB Endeavour by Schubbe - OcCre - 1:54
-
DaveBaxt reacted to a post in a topic:
HMB Endeavour by Schubbe - OcCre - 1:54
-
GrandpaPhil reacted to a post in a topic:
HMB Endeavour by Schubbe - OcCre - 1:54
-
GrandpaPhil reacted to a post in a topic:
HMB Endeavour by Schubbe - OcCre - 1:54
-
GrandpaPhil reacted to a post in a topic:
HMB Endeavour by Schubbe - OcCre - 1:54
-
GrandpaPhil reacted to a post in a topic:
HMB Endeavour by Schubbe - OcCre - 1:54
-
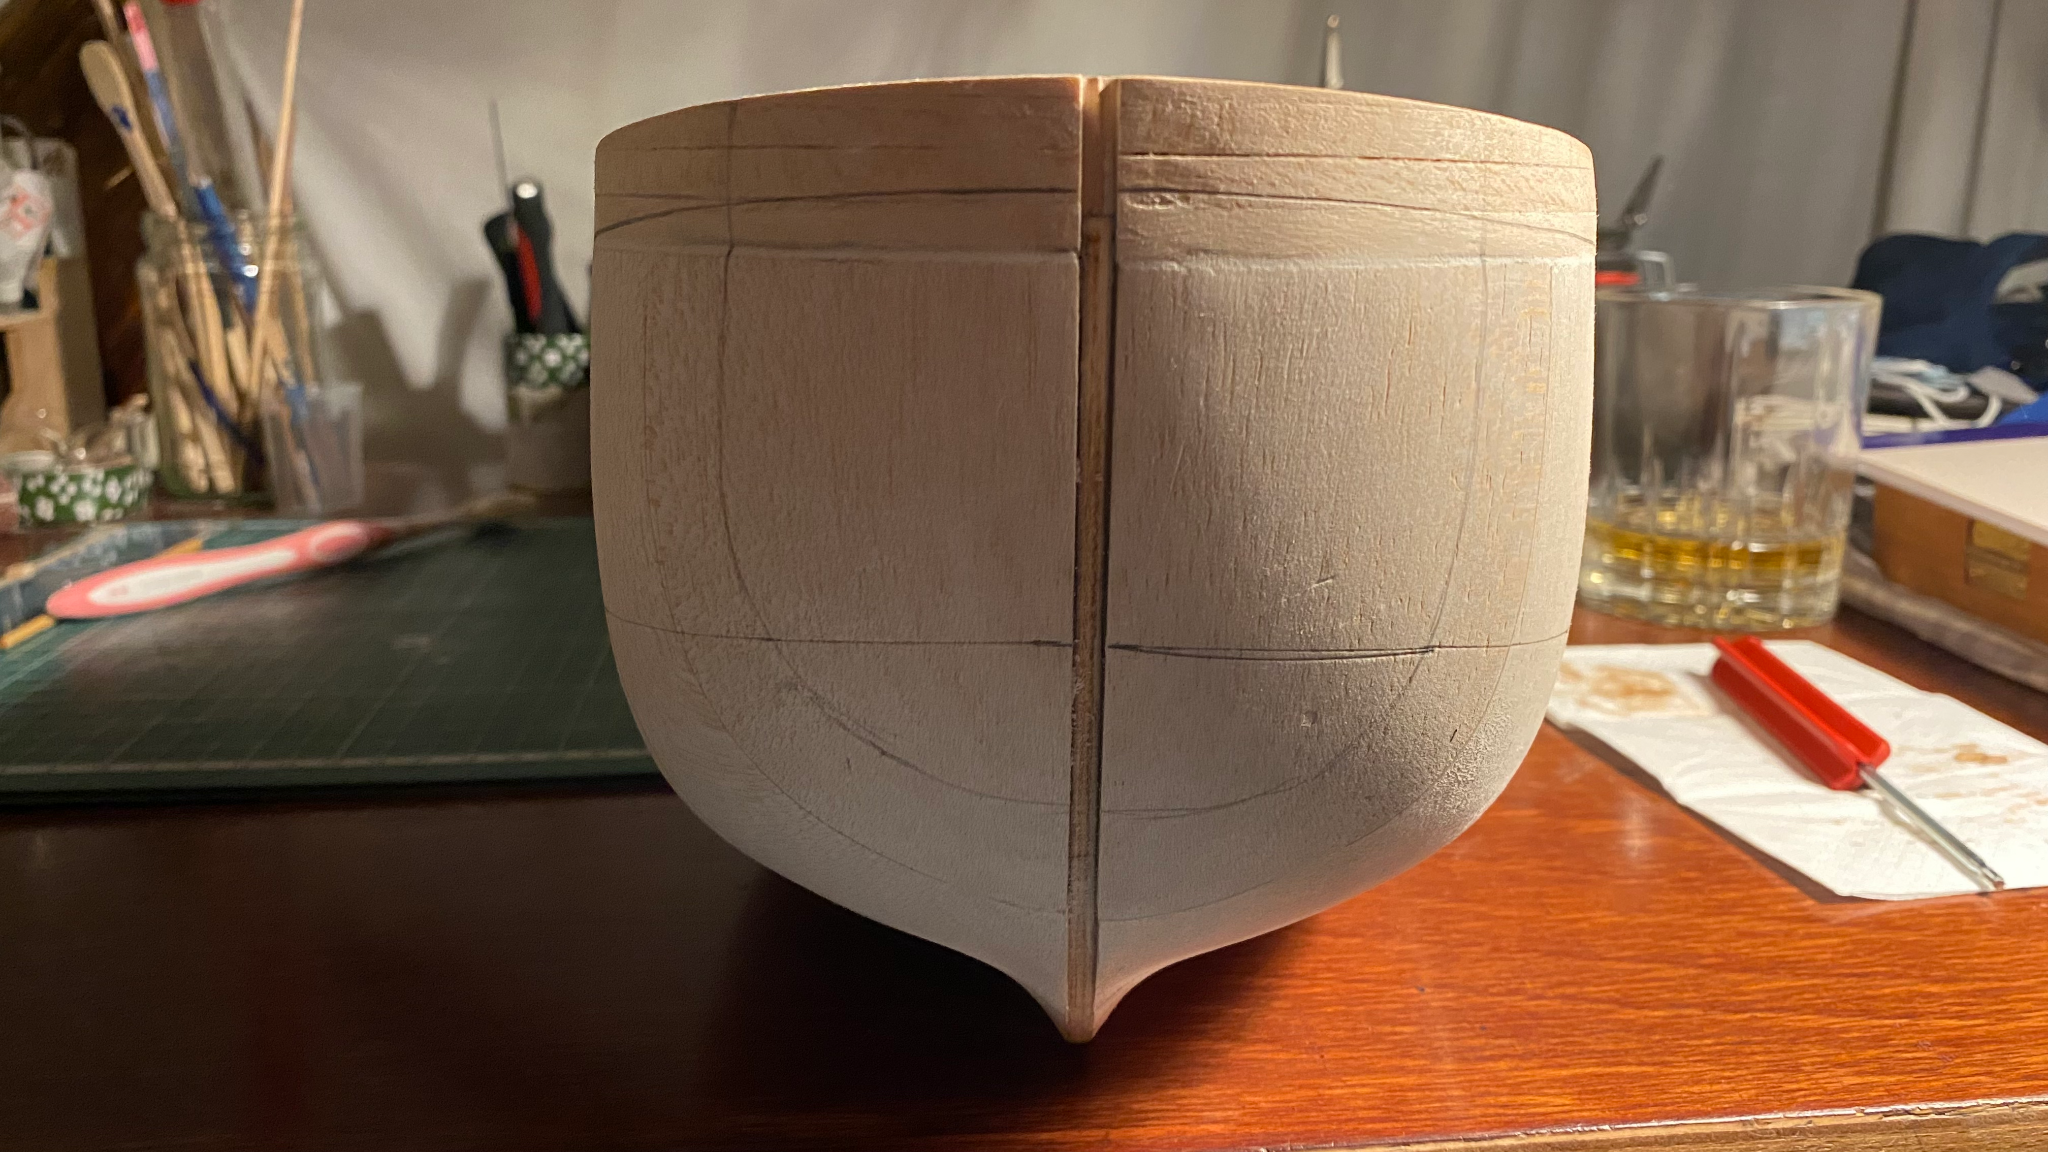
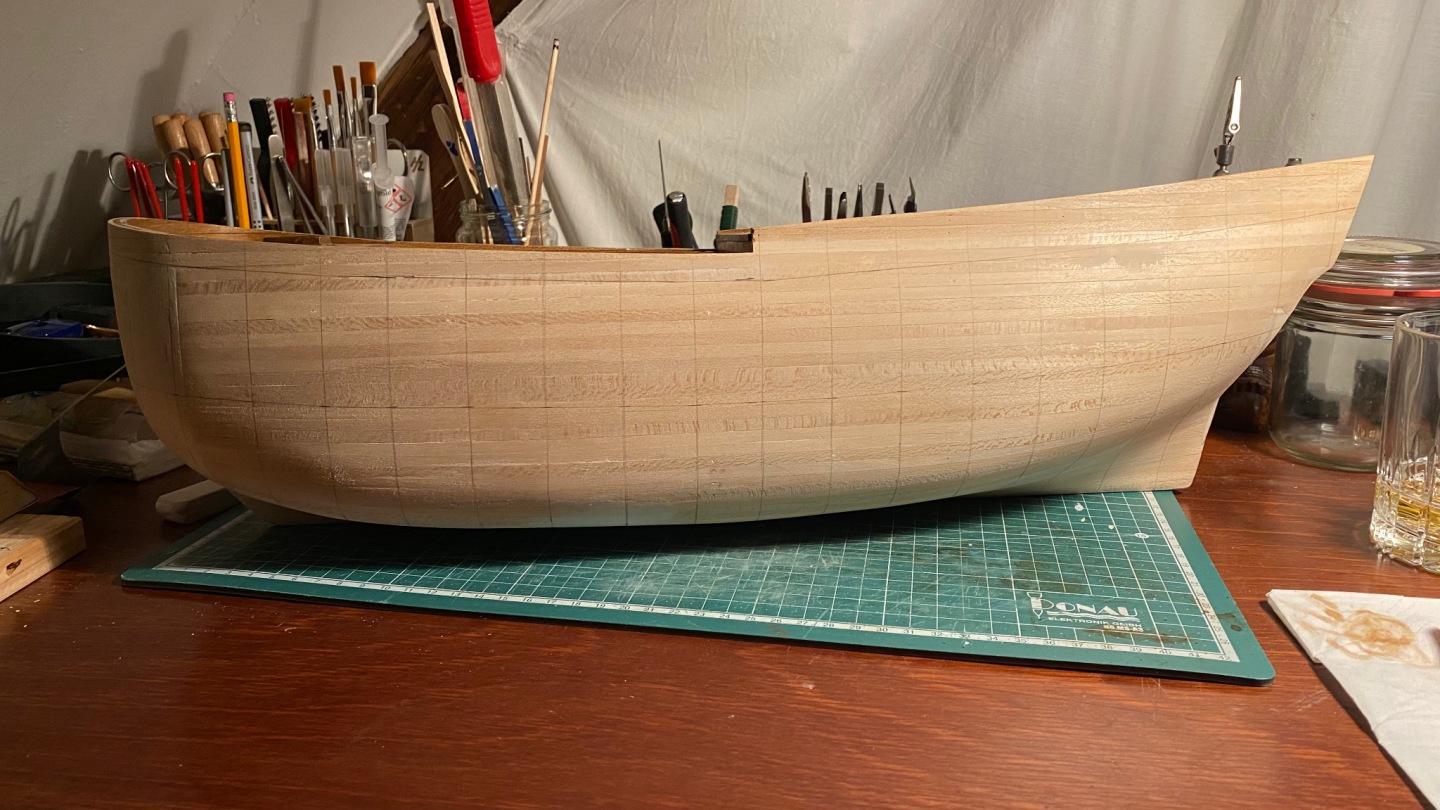
Also I begin to overcome the mental barrier, that stopped me from beginning the second planking... I began marking the hull. Next step applying the wales. After that I will try to line up the parts above and below the wales...

-
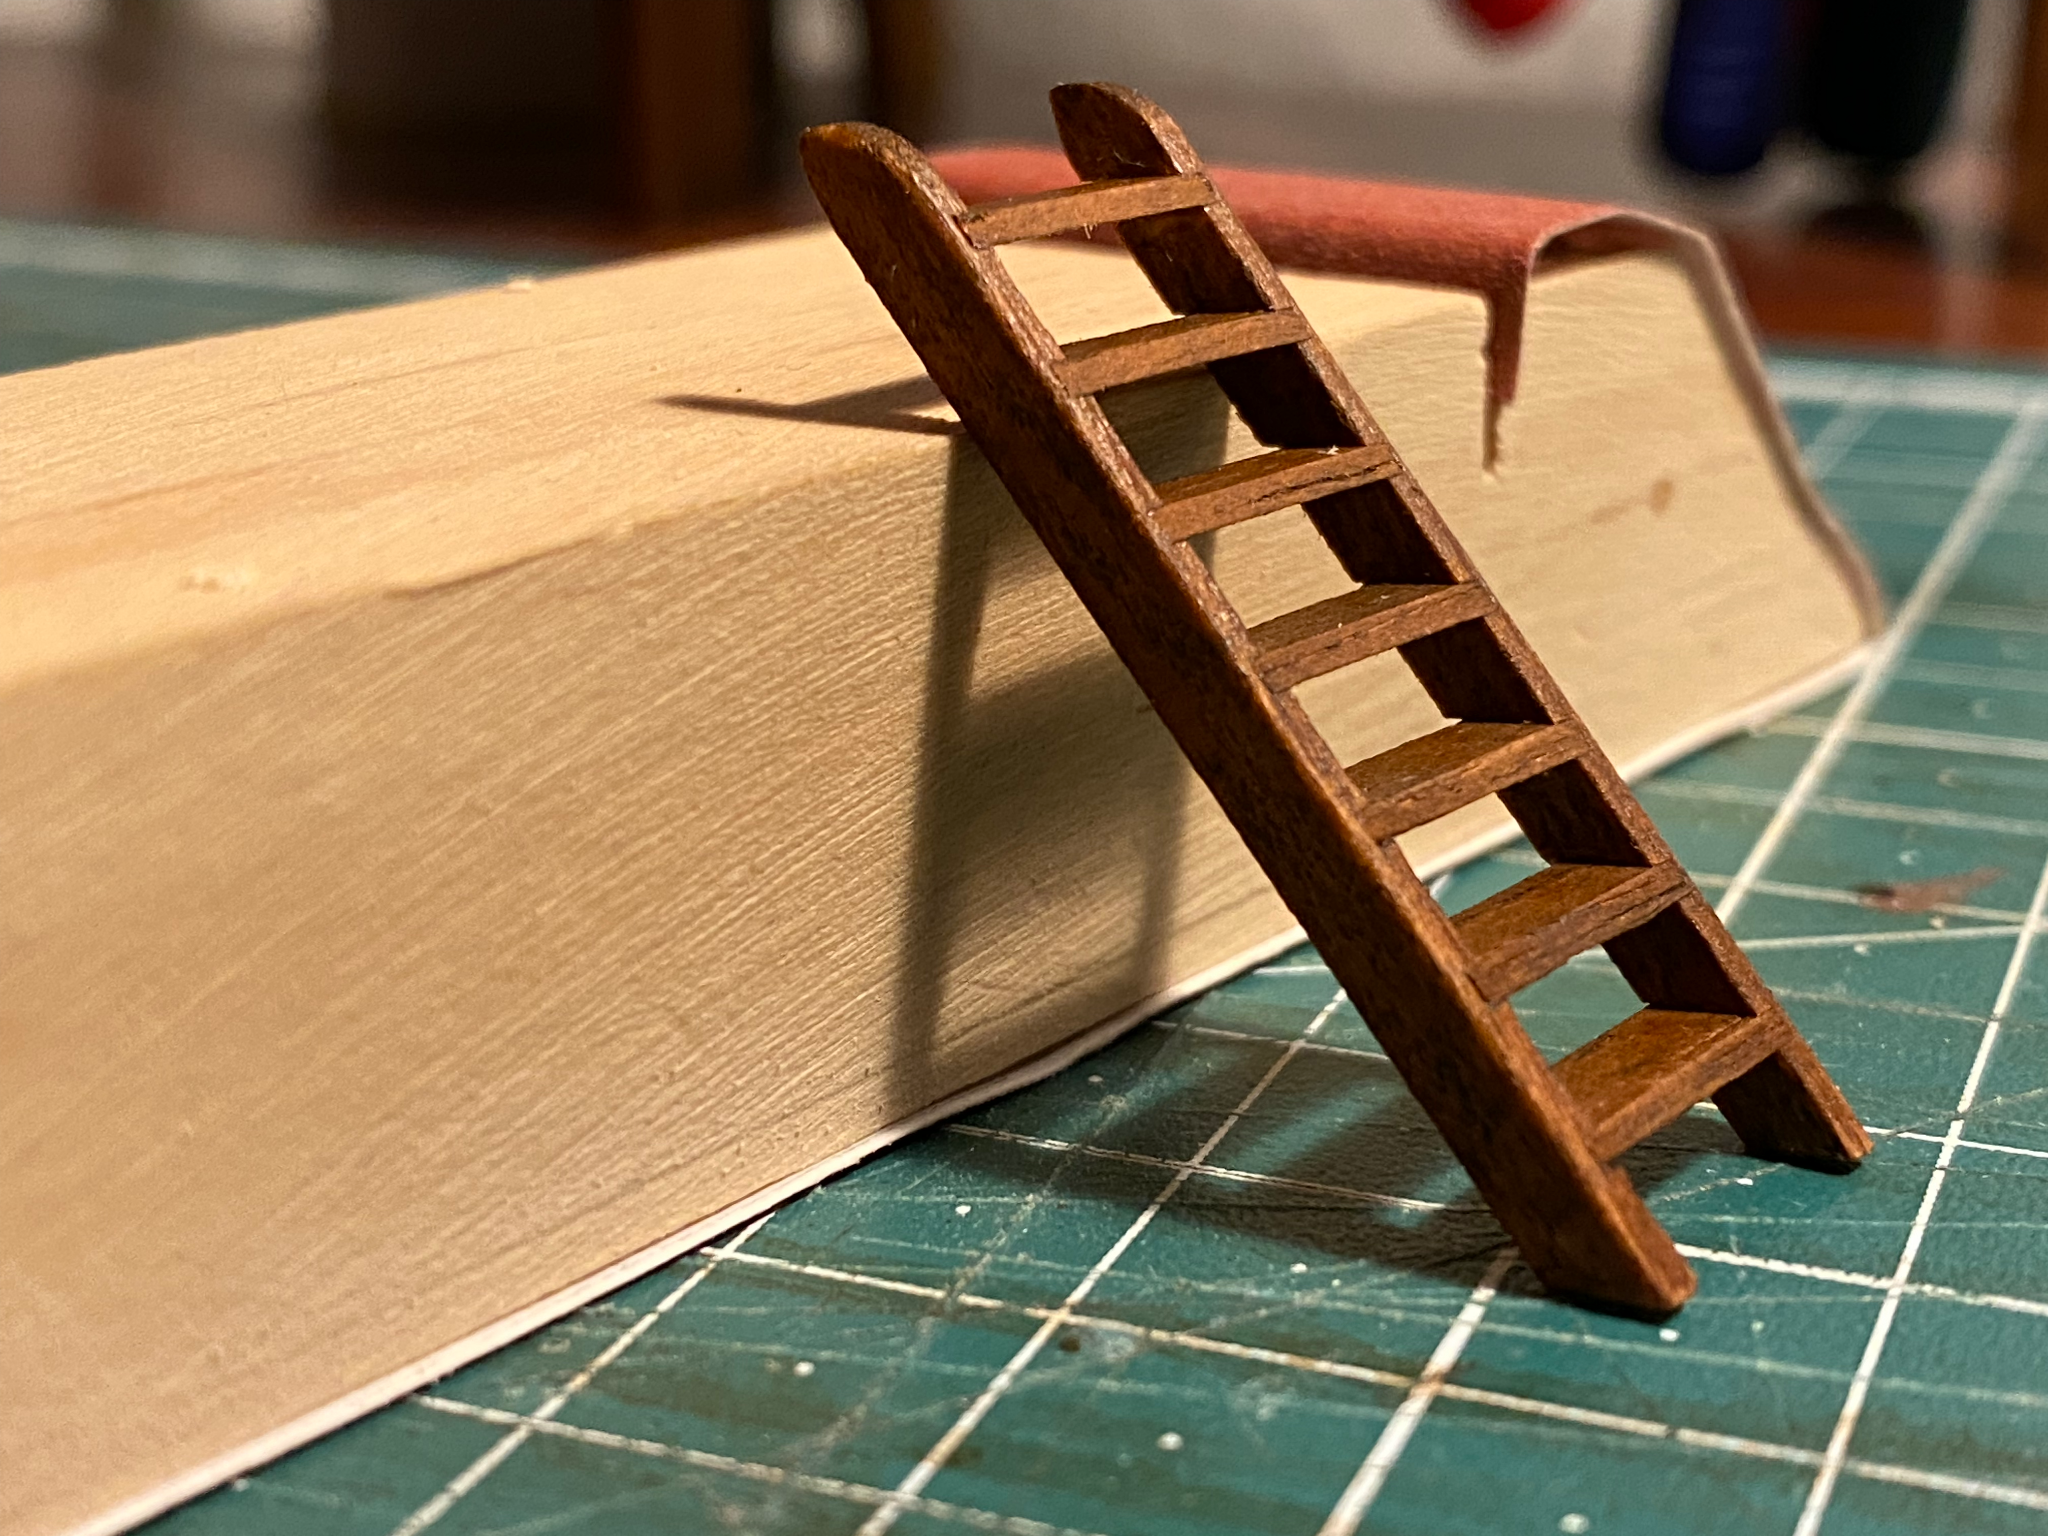
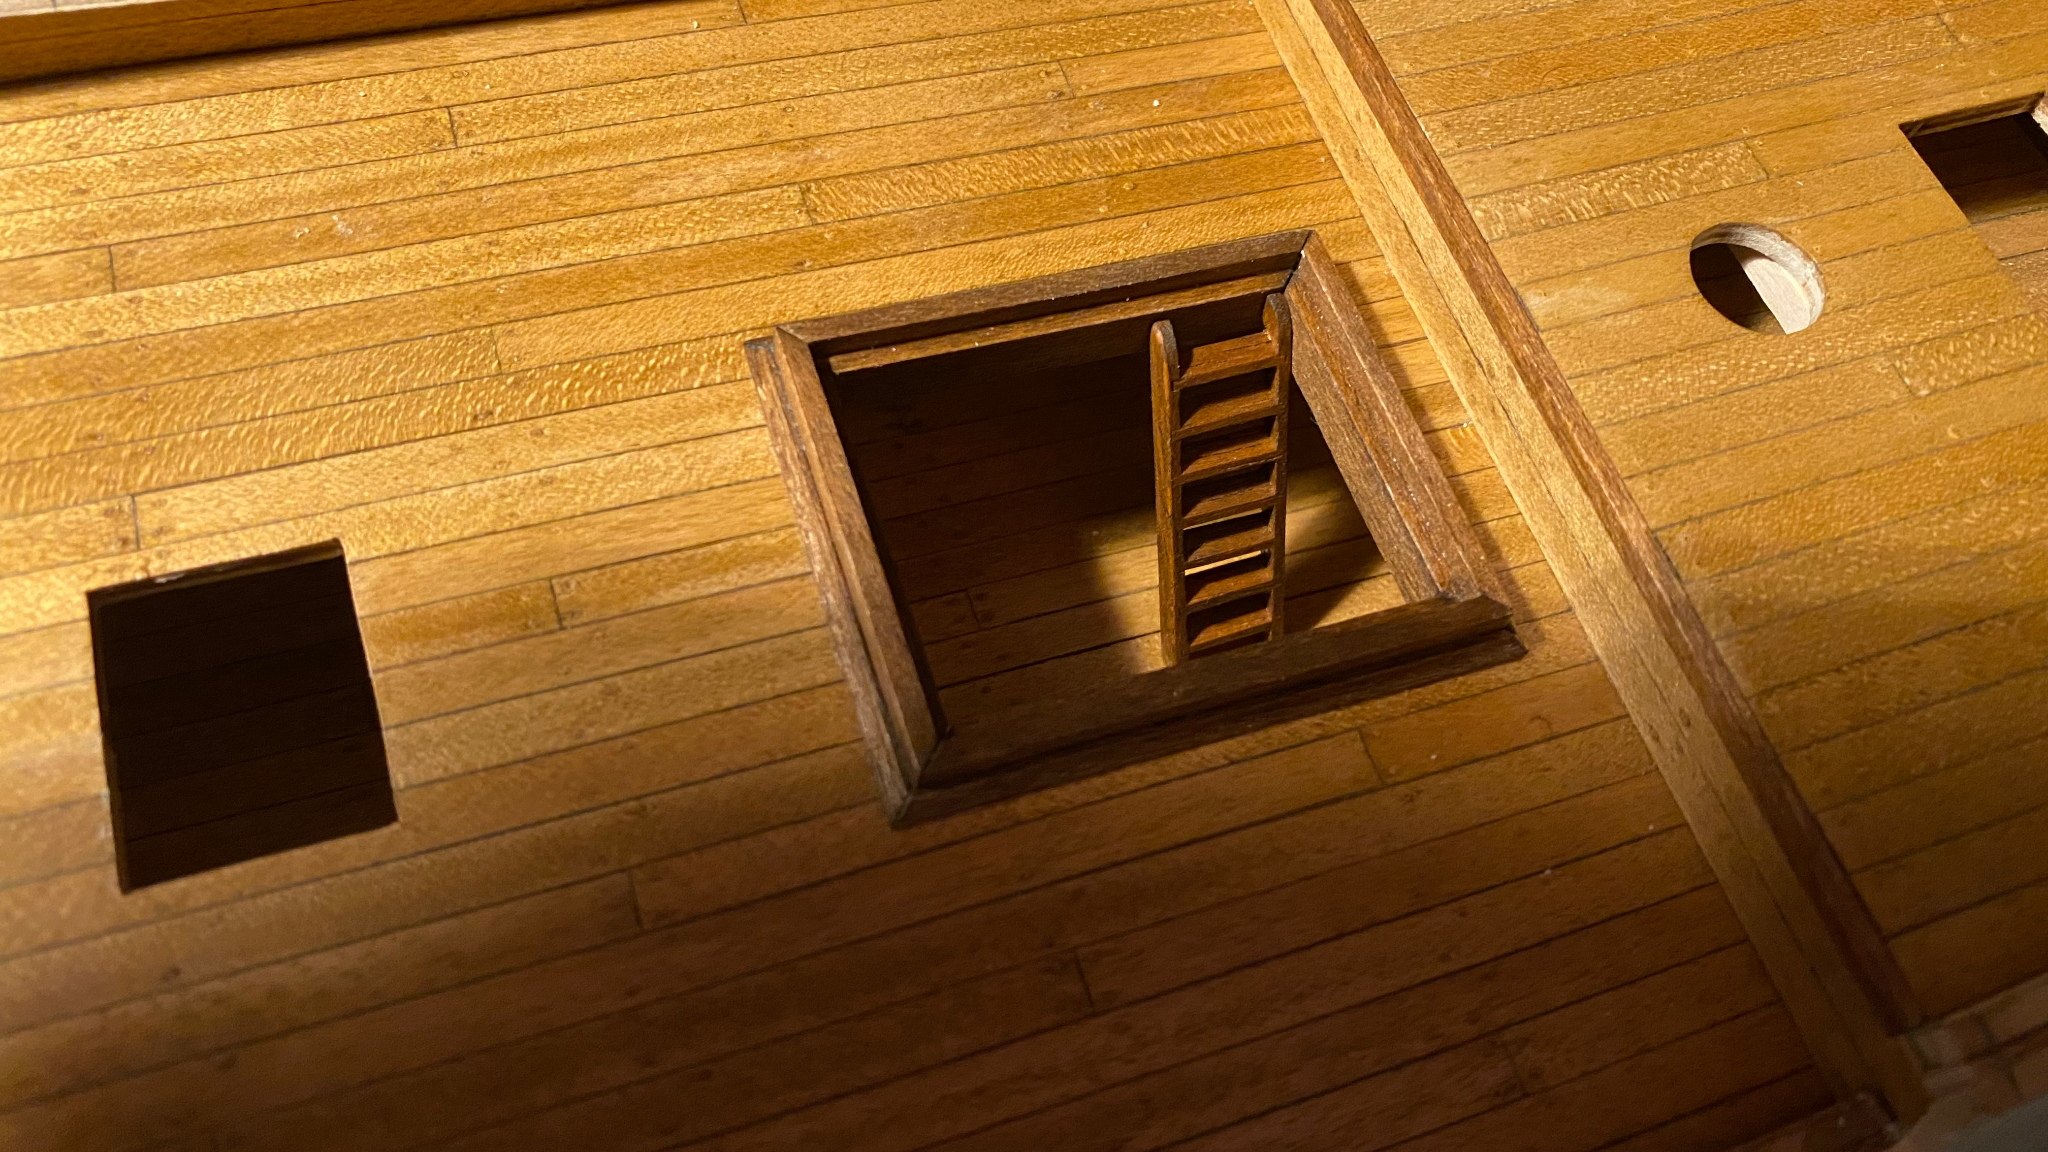
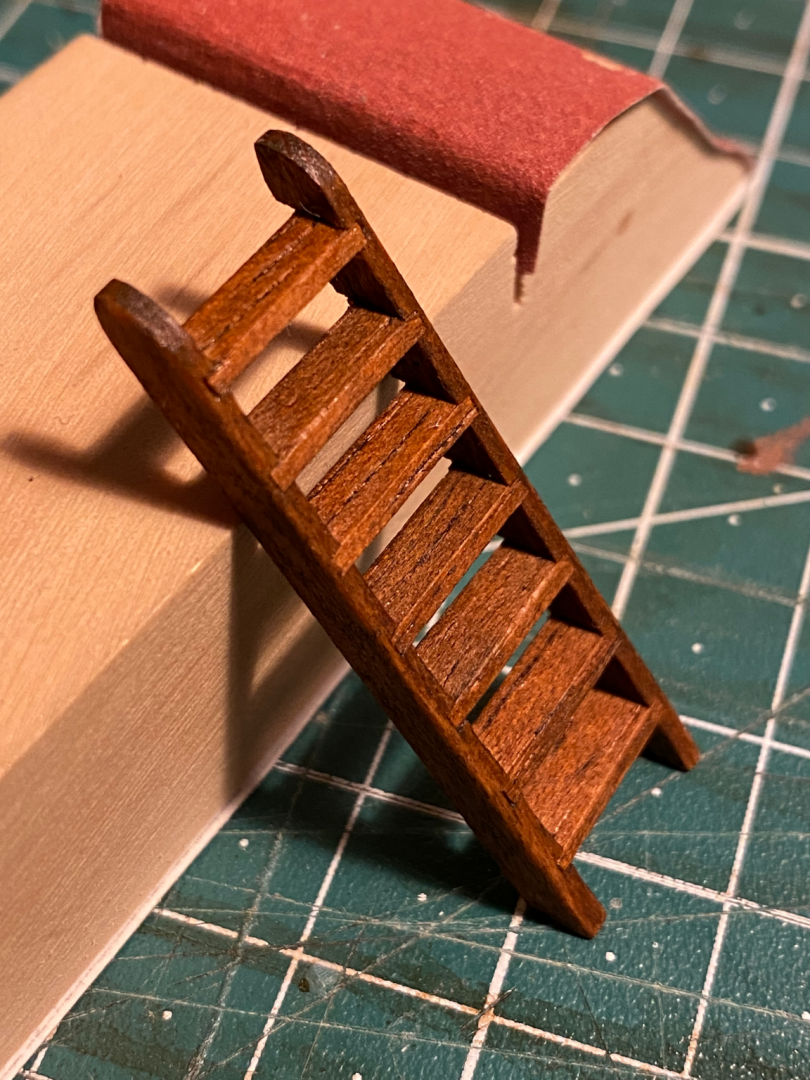
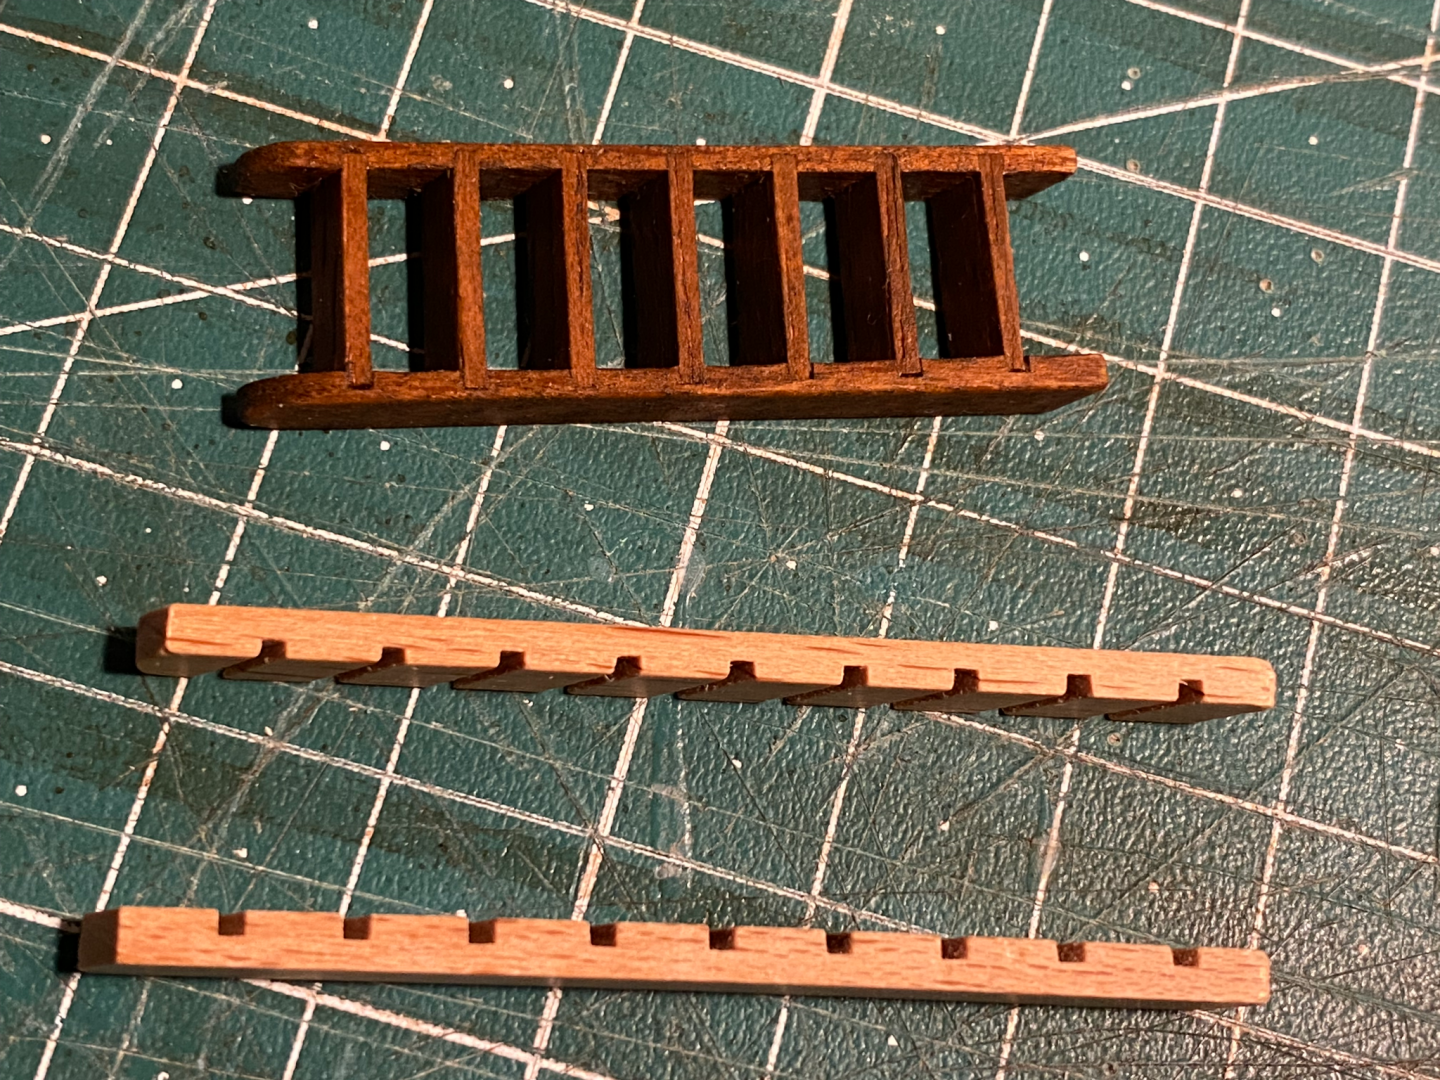
I realized, that to me the ladders or stairs in quite a few models are feeling odd, or out of scale. So I did another test with the ladder going down the main hatch. The attempt was to make the ladder feel more in scale by reducing the width and breadth of the outside boards. To me that is an improvement. What do you think?


-
Hi shipaholic, thank you so much for your effort to upload the fotos. This is what is so absolutely amazing about this forum. Everybody is so helpful and positive. The funny thing is, that I was very focused on how to deal with the lower part of the planking, that I was completely taken by surprise, that you bent the upper planks to match the curvature of the bulwarks. Wich is a great idea of course. So: One more challenge to tackle. Right now I think, I will actually start with the rubbing strakes and after that work my way up and down with the second planking. We'll see... Would you recommend swapping the wood against a thicker material, in order to be able to bend the planks in both directions?
-
Schubbe reacted to a post in a topic:
Nuestra Senora Del Pilar by Sideways Sam - OcCre - 1:45
-
Schubbe reacted to a post in a topic:
Nuestra Senora Del Pilar by Sideways Sam - OcCre - 1:45
-
Schubbe reacted to a post in a topic:
HMB Endeavour by shipaholic - FINISHED - Eaglemoss - 1/51
-
I would really like to see those! I am now at a point in my build, where I am almost avoiding to begin the second planking. I might be frightened by my own standards and goals in that matter... It would be nice, if you would like to share your approach.
-
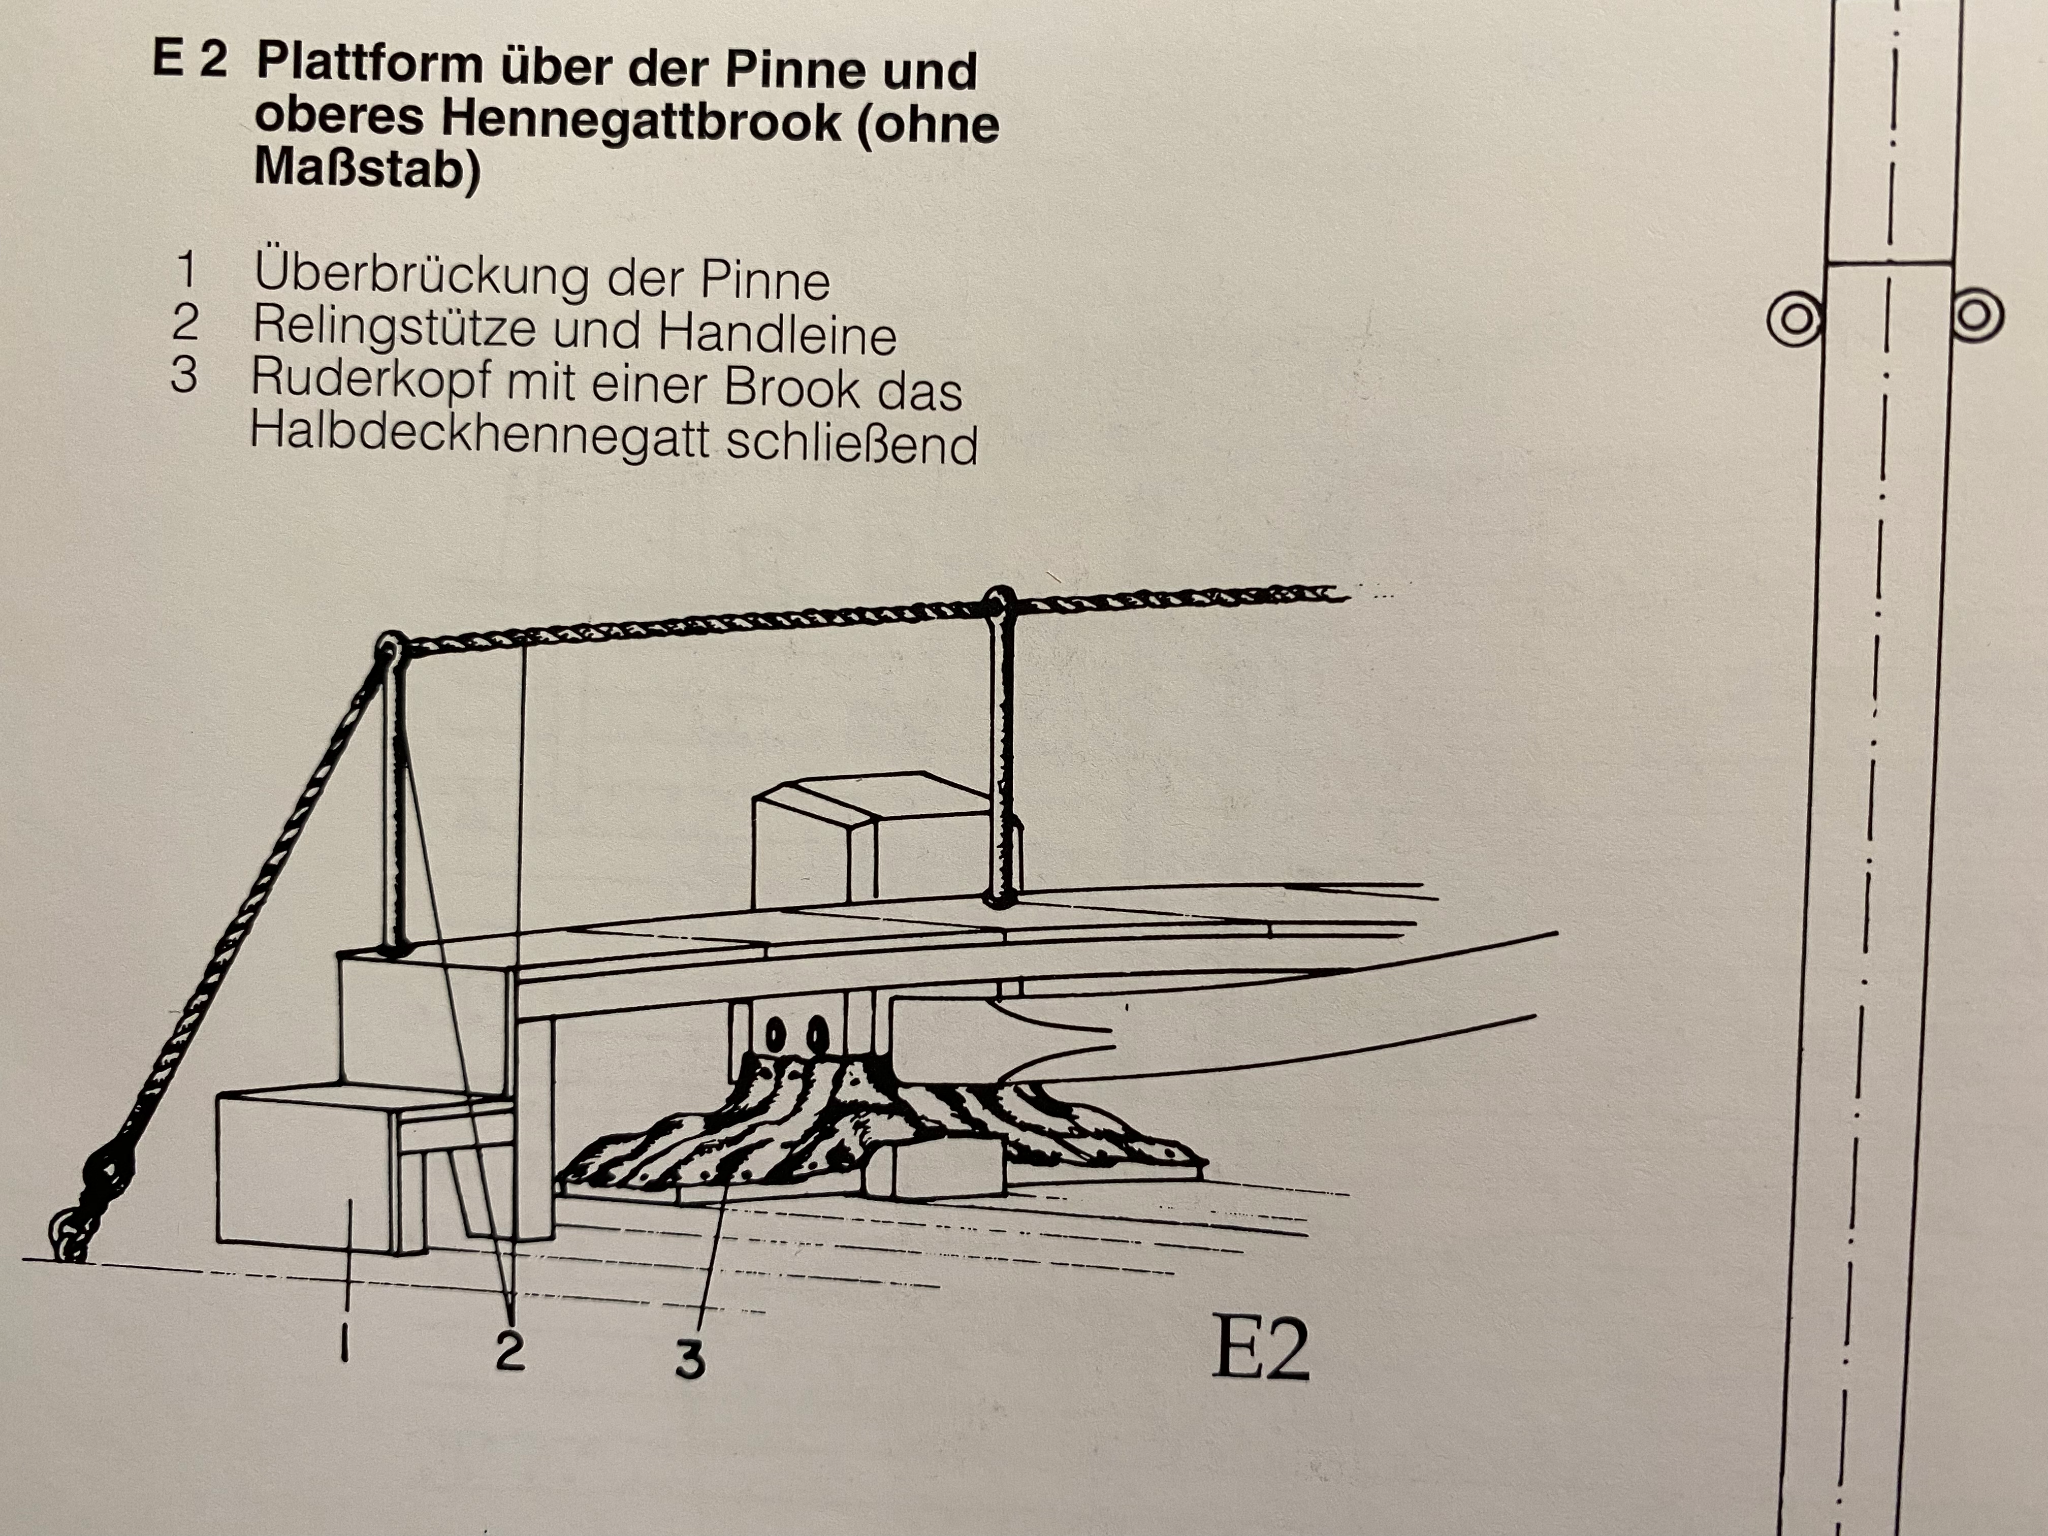
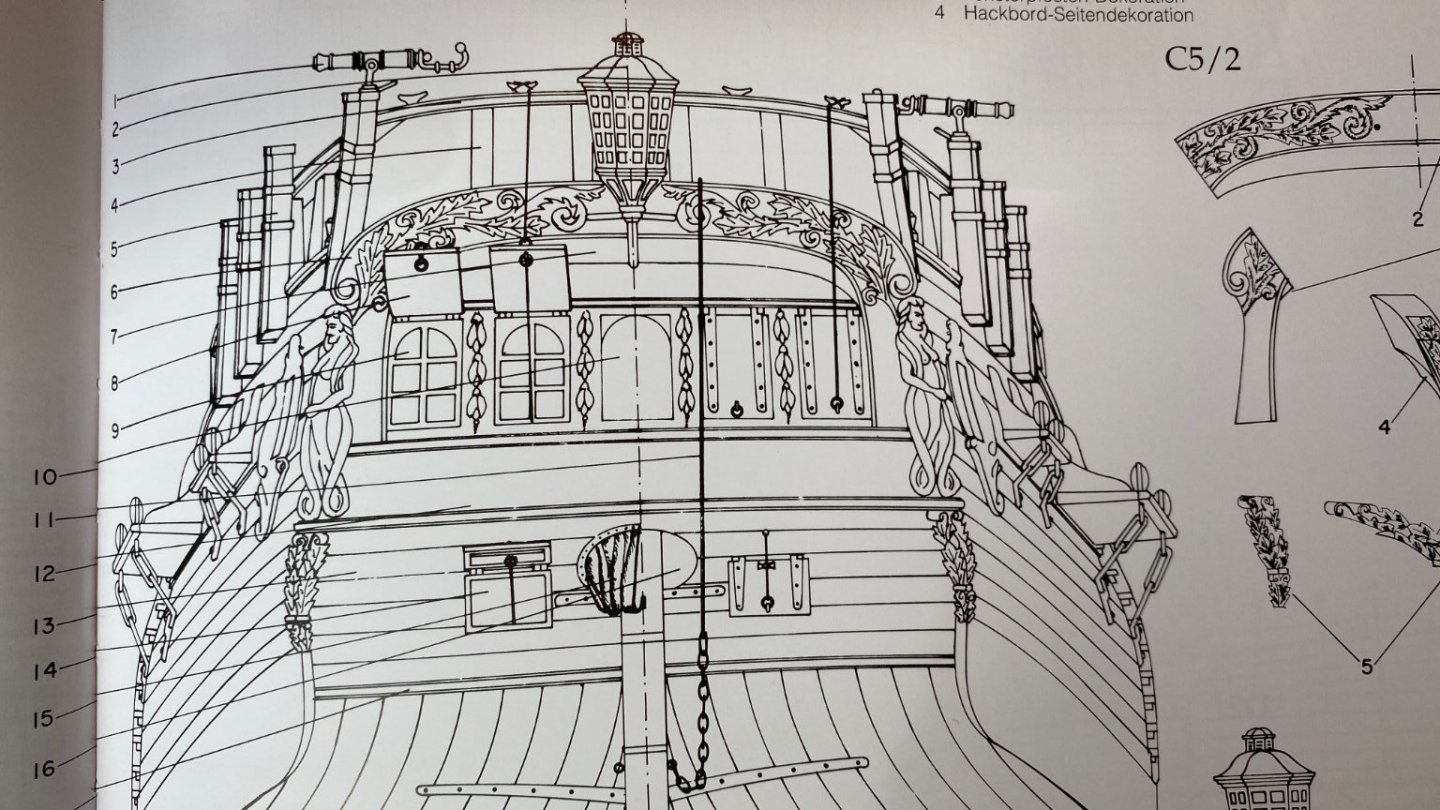
Hi Umber, I had the same issue with the instructions about the rudder, and chose the same solution like you. That leaves two subsequent issues in my mind: 1. The rudder will not be able to be moved, and is fixated in the straight position. Which to me was not a problem but: 2. The opening for the rudder will likely be rectangular and quite tight, so you will SEE that the rudder cannot be moved. Which would be a bummer in my eyes. There's two possible solutions in my head. First you could change the opening to be round. Second you could follow the Marquardt drawings and cover the hole with some piece of cloth or leather. I would really be interested in your thoughts on that matter, as I am not yet decided which way to go...
-
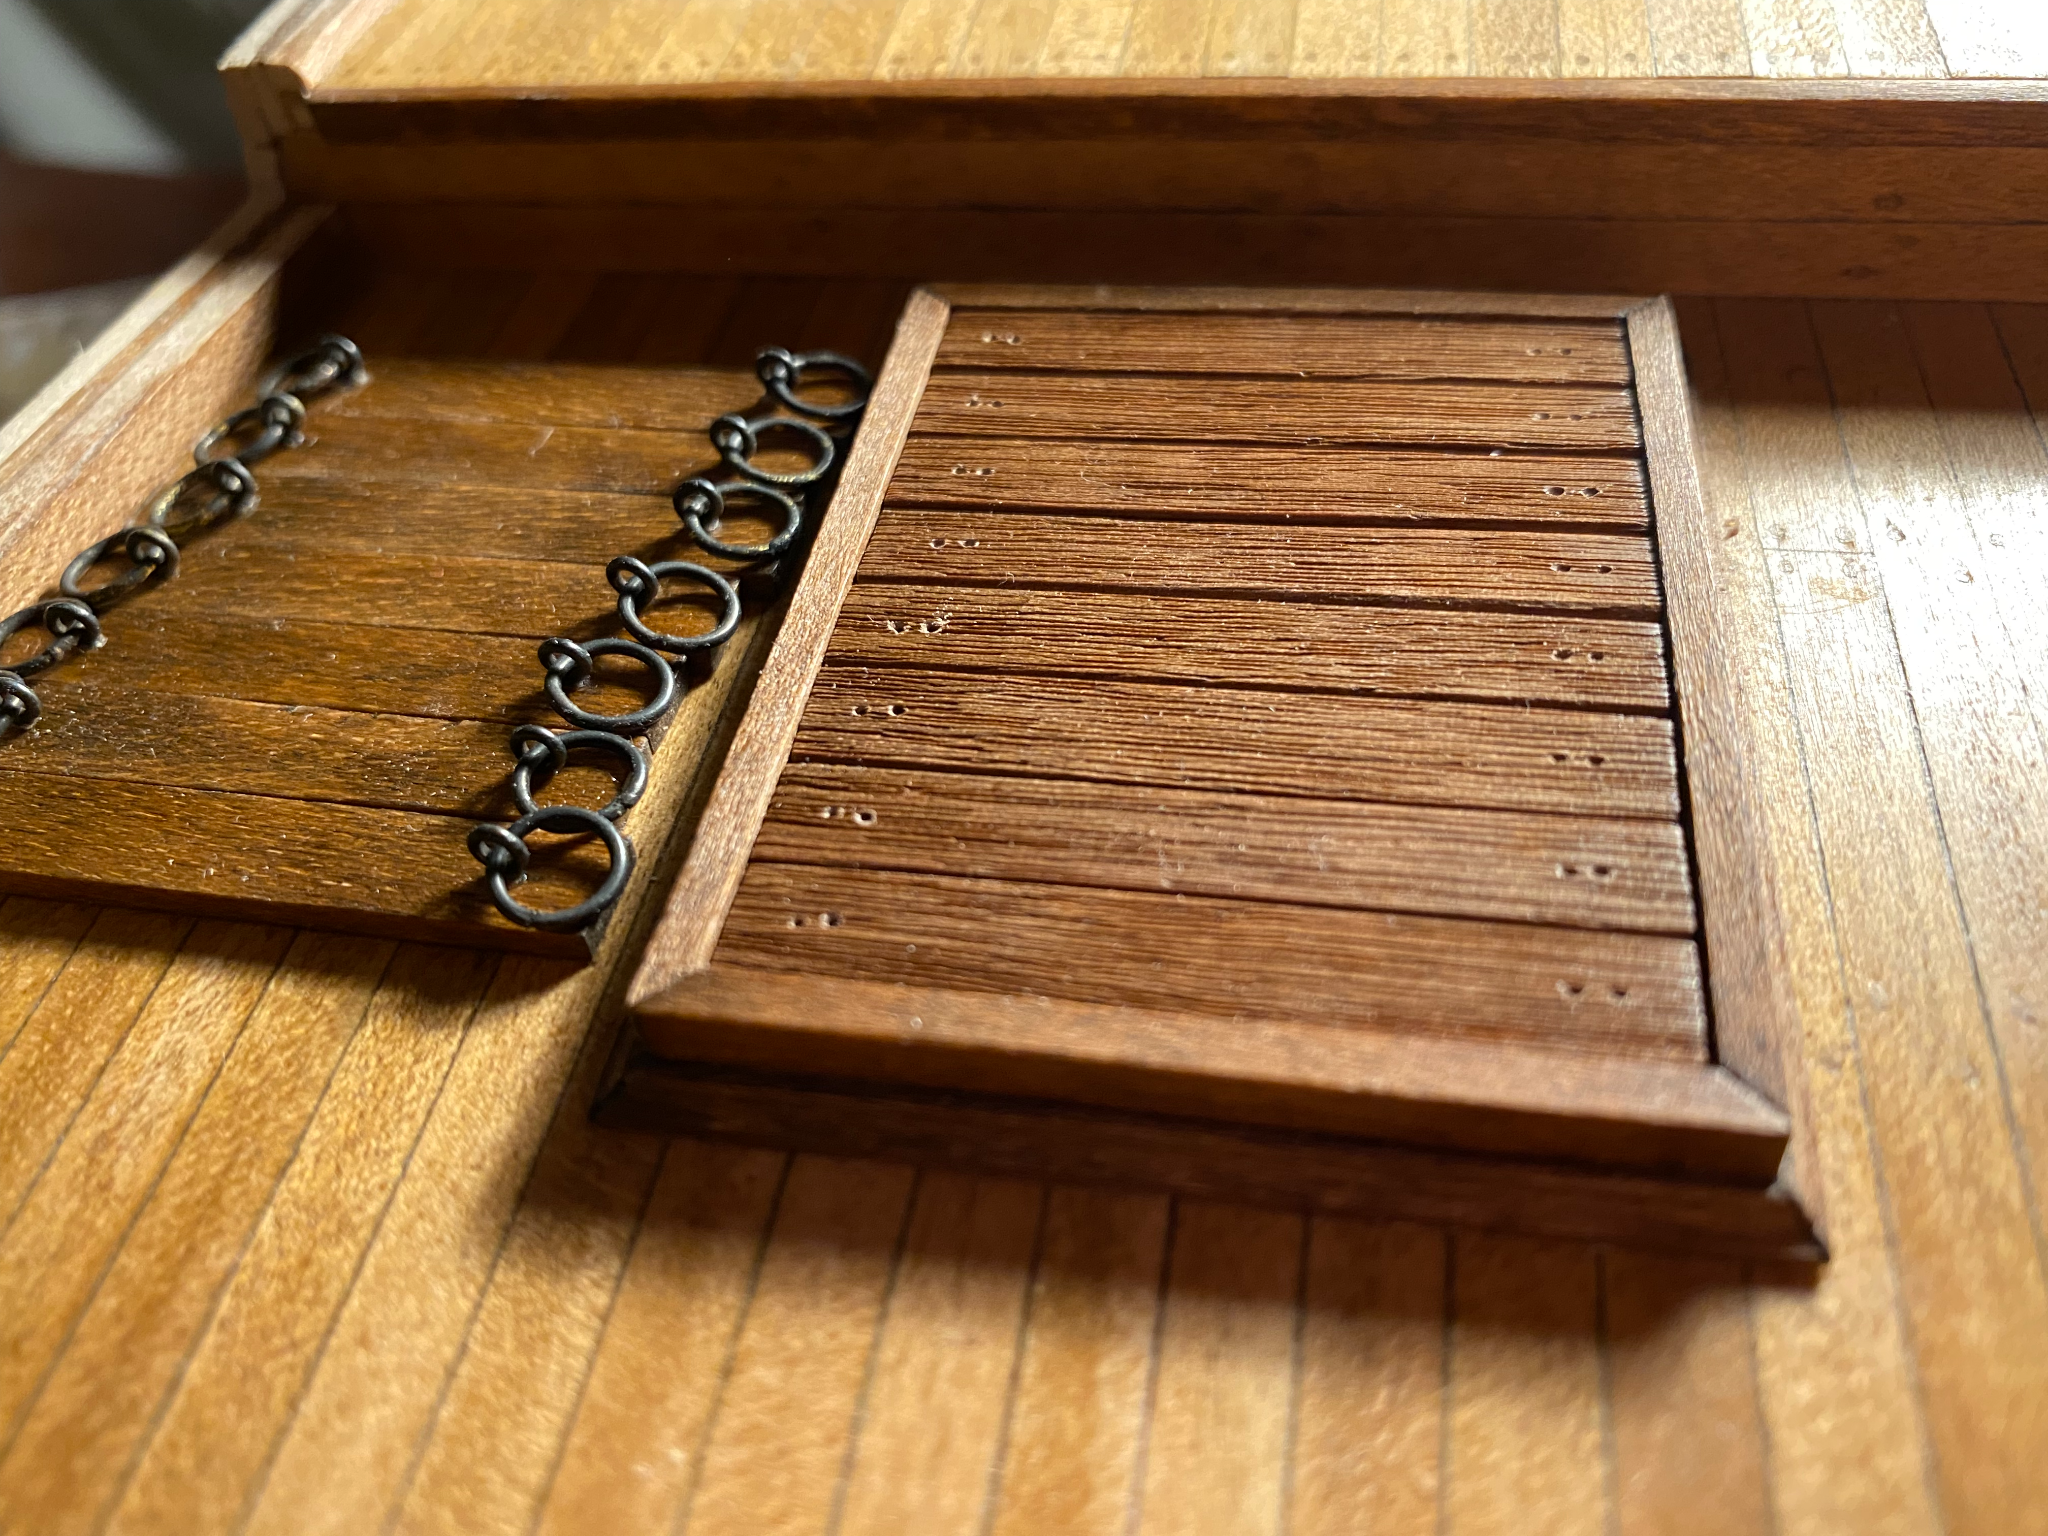
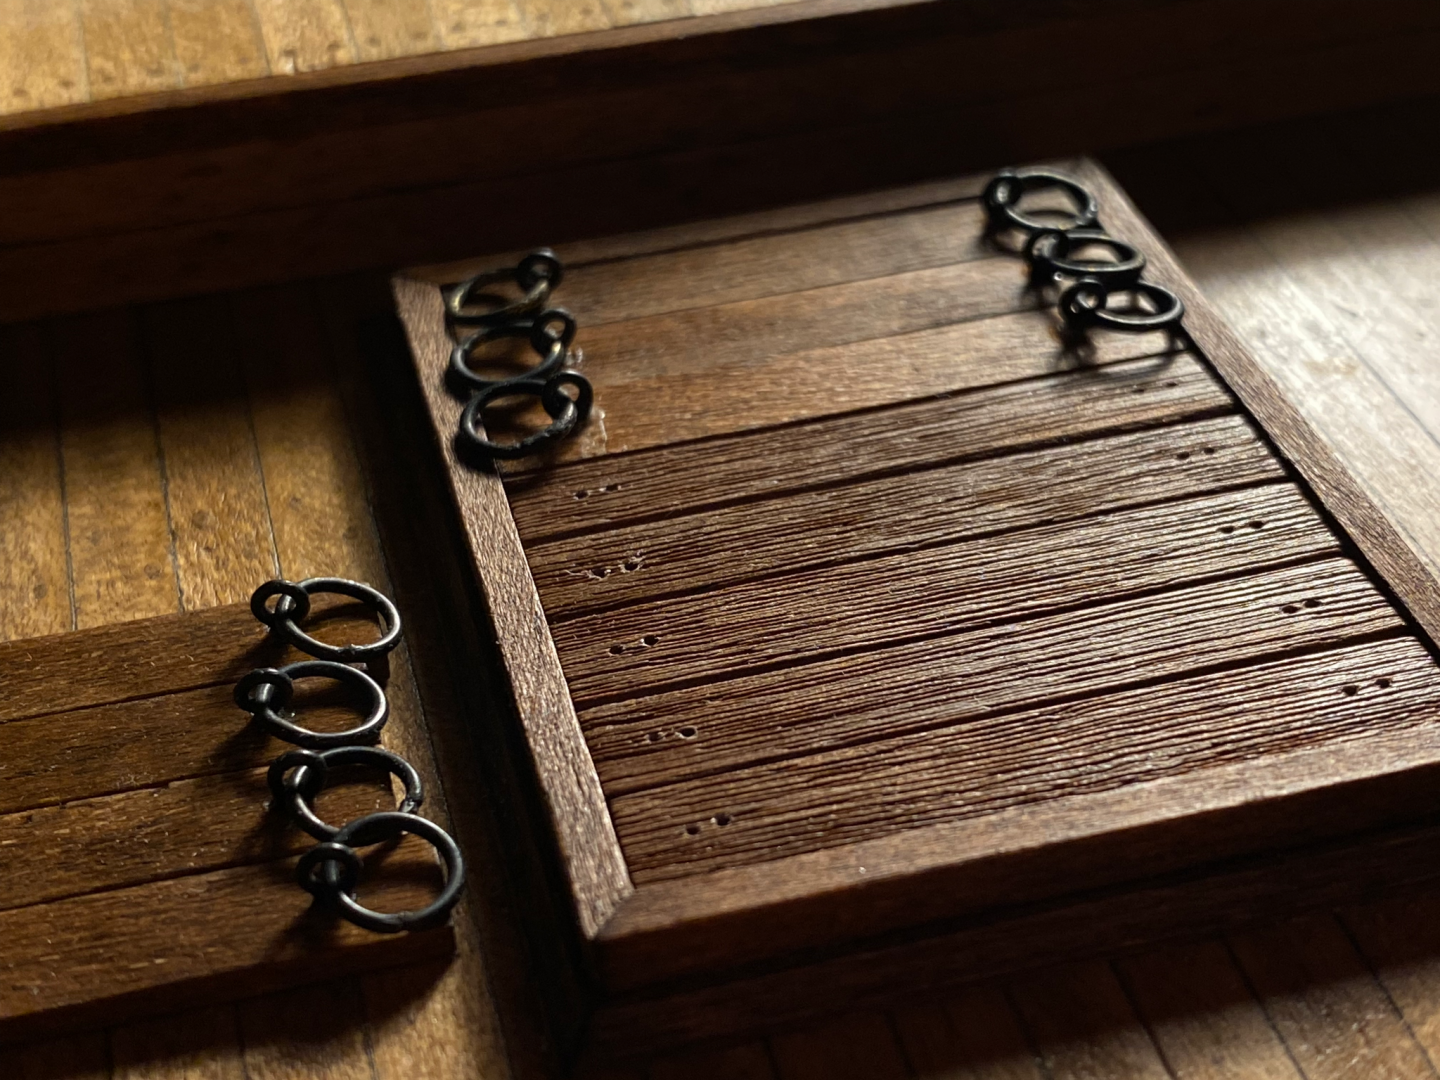
Finally my little ring-scale-issue seems to be solved:

-
Schubbe reacted to a post in a topic:
HM Bark Endeavour 1758-61 by DaveBaxt - Caldercraft - 1:64
-
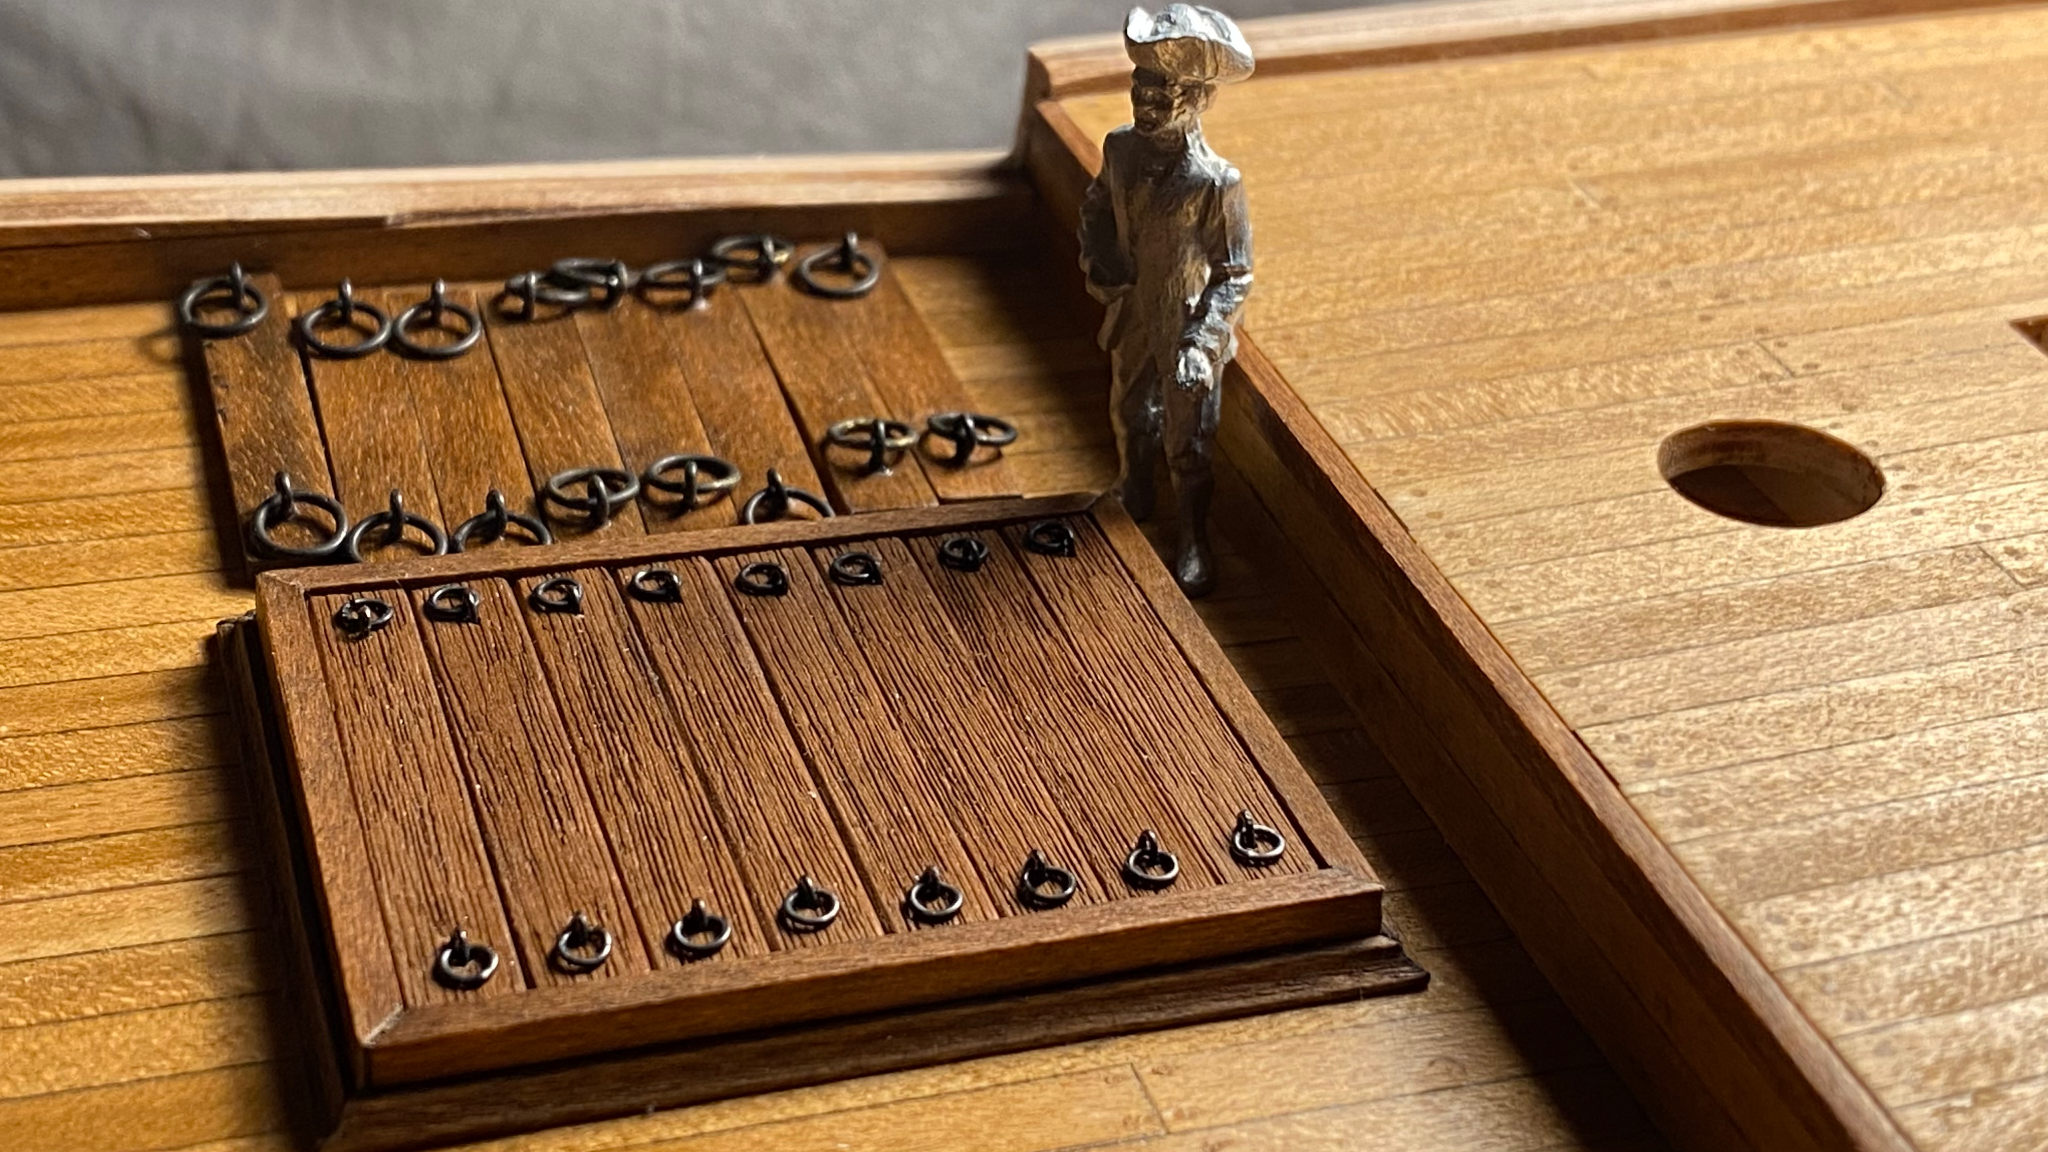
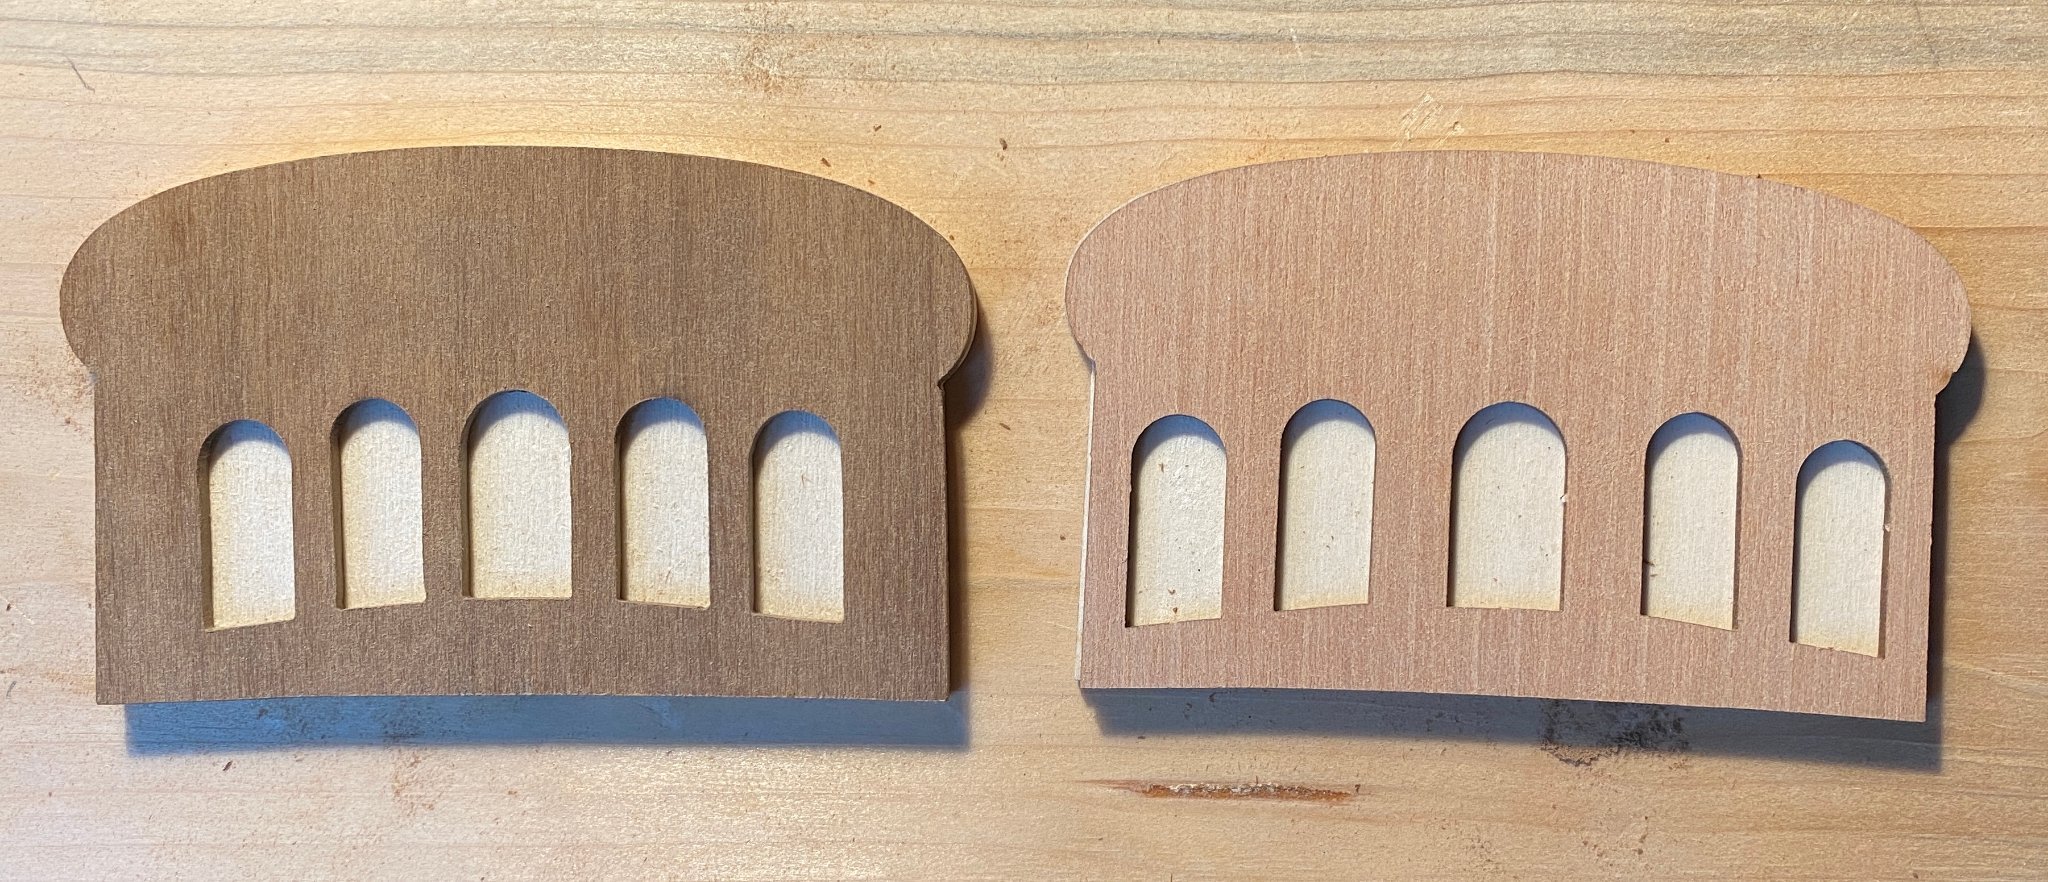
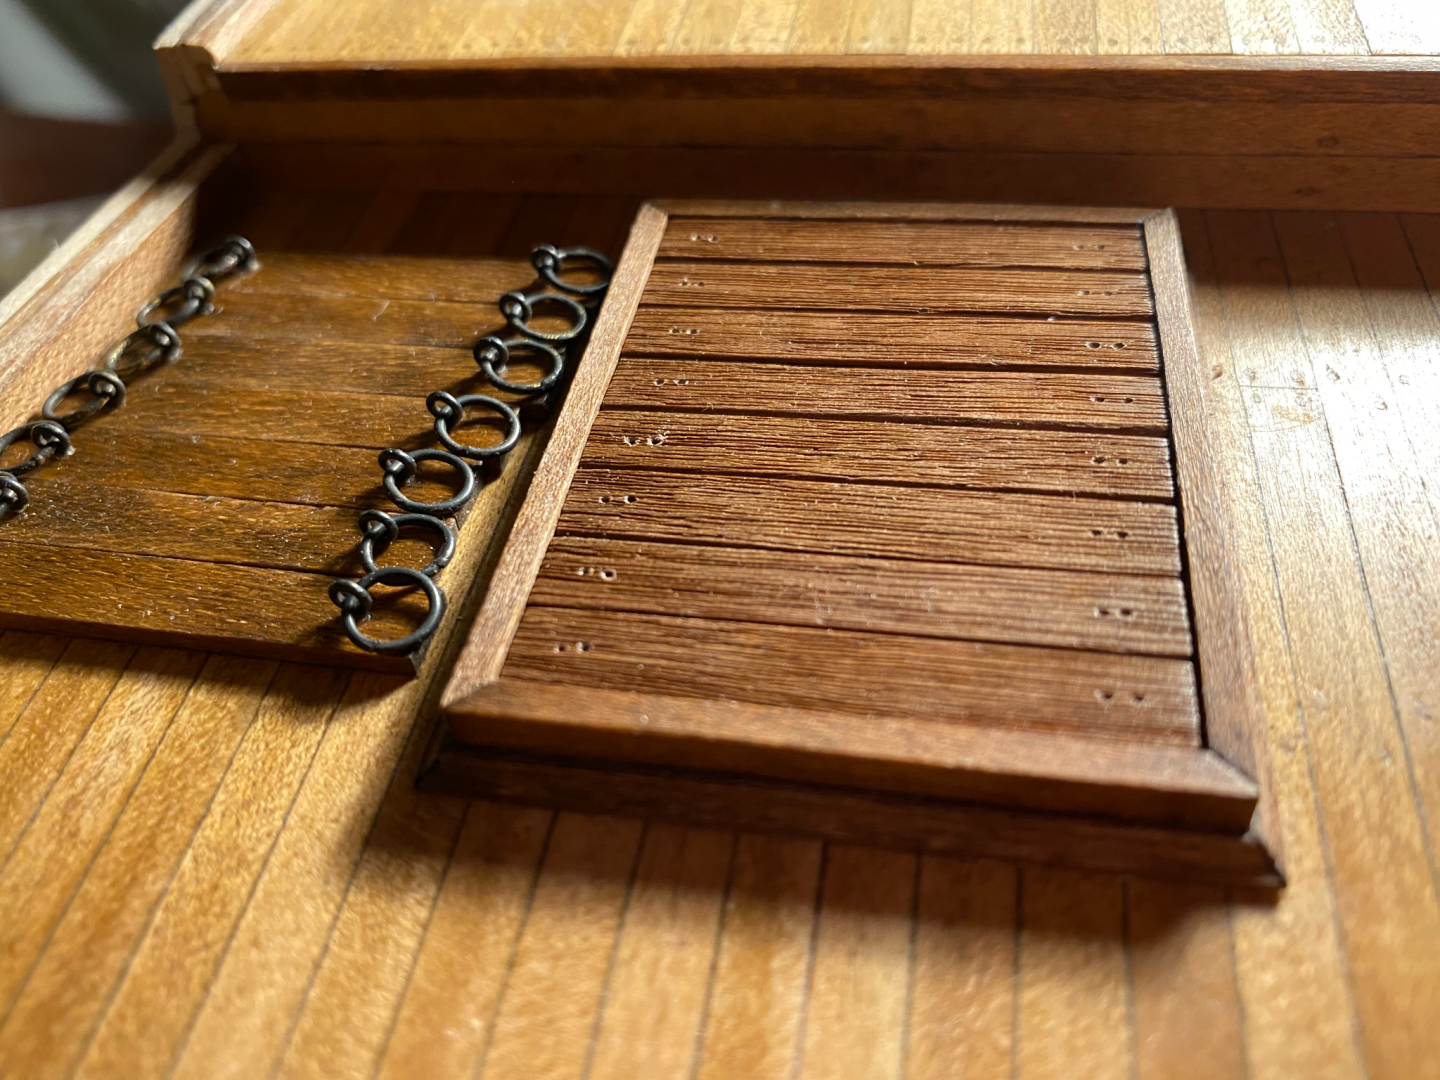
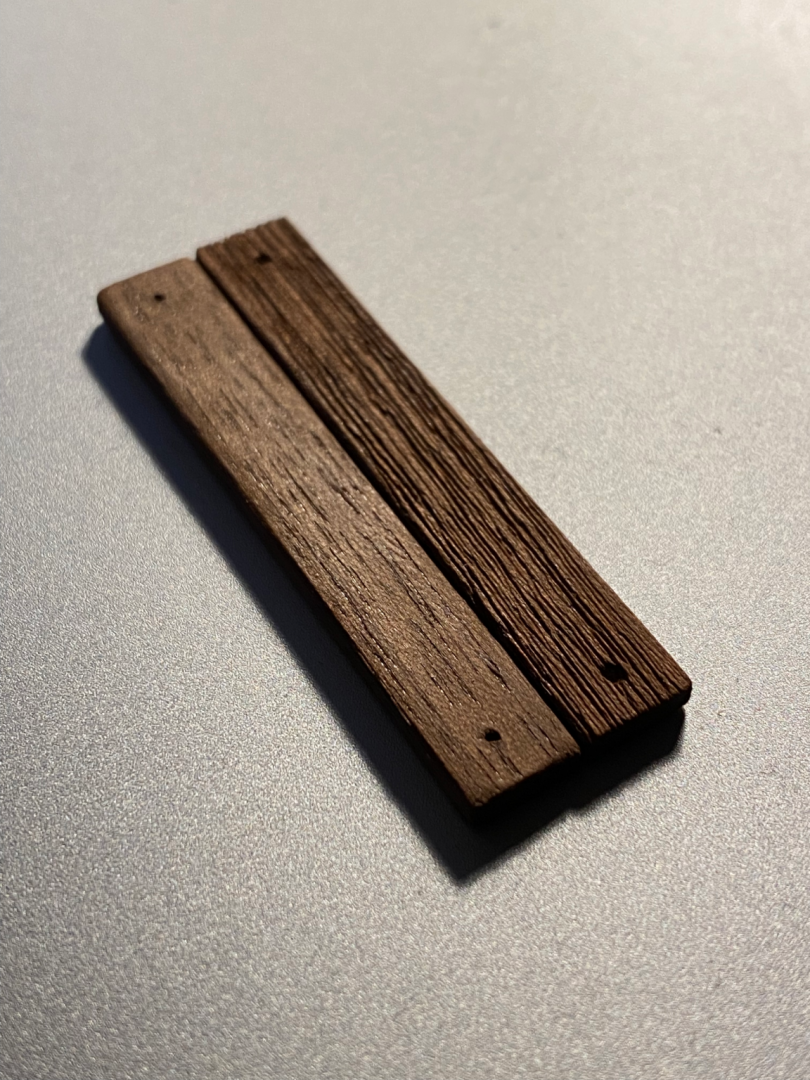
Thanks for your reassuring opinions. So I went on with the wirebrushing and here are the new boards next to the previous ones. The effect is more subtle to the naked eye, but it makes quite a difference... I am glad I decided to redo them. The next step will be applying the smaller rings.
-
Schubbe reacted to a post in a topic:
HMB Endeavour by mikec - Eaglemoss
-
Schubbe reacted to a post in a topic:
HMB Endeavour by Schubbe - OcCre - 1:54
-
Schubbe reacted to a post in a topic:
HMB Endeavour by Schubbe - OcCre - 1:54
-
Schubbe reacted to a post in a topic:
HMB Endeavour by Schubbe - OcCre - 1:54
-
Hi Dave, here is what i found for you. I hope this helps.

-
After a long break I am slowly going back to work on the Endeavour. As I had this scale problem with the rings for the boards covering the hatch, I decided to redo them. With that decision came an idea. Before I was trying to sand the boards as smooth as I could get them. Now I did an experiment with wirebrushing the surface to emphasize the grain of the wood. Here is a picture of a test. What do you think, good idea or bad idea?
-
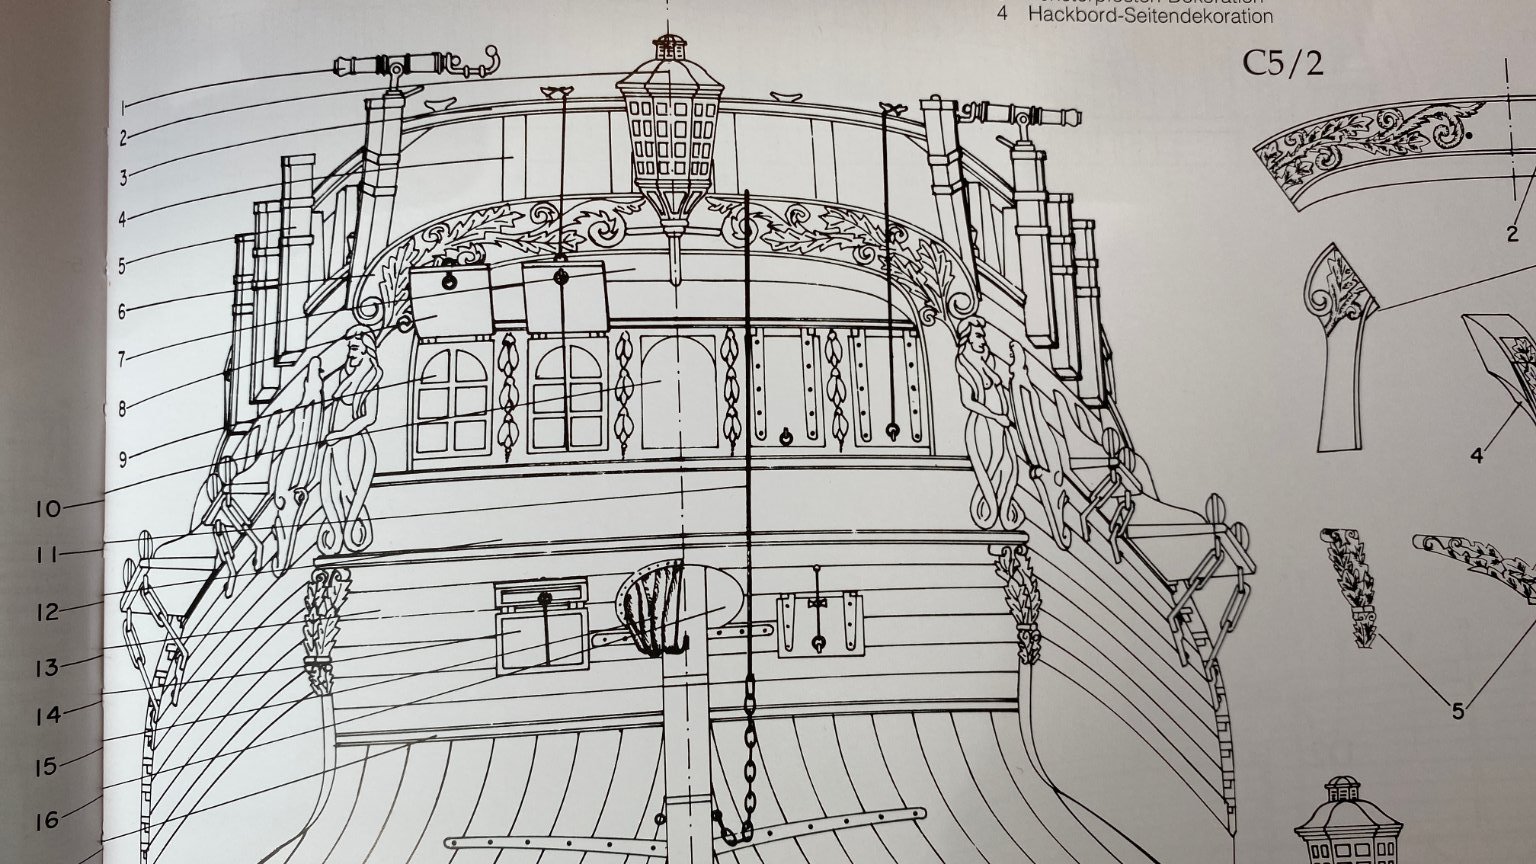
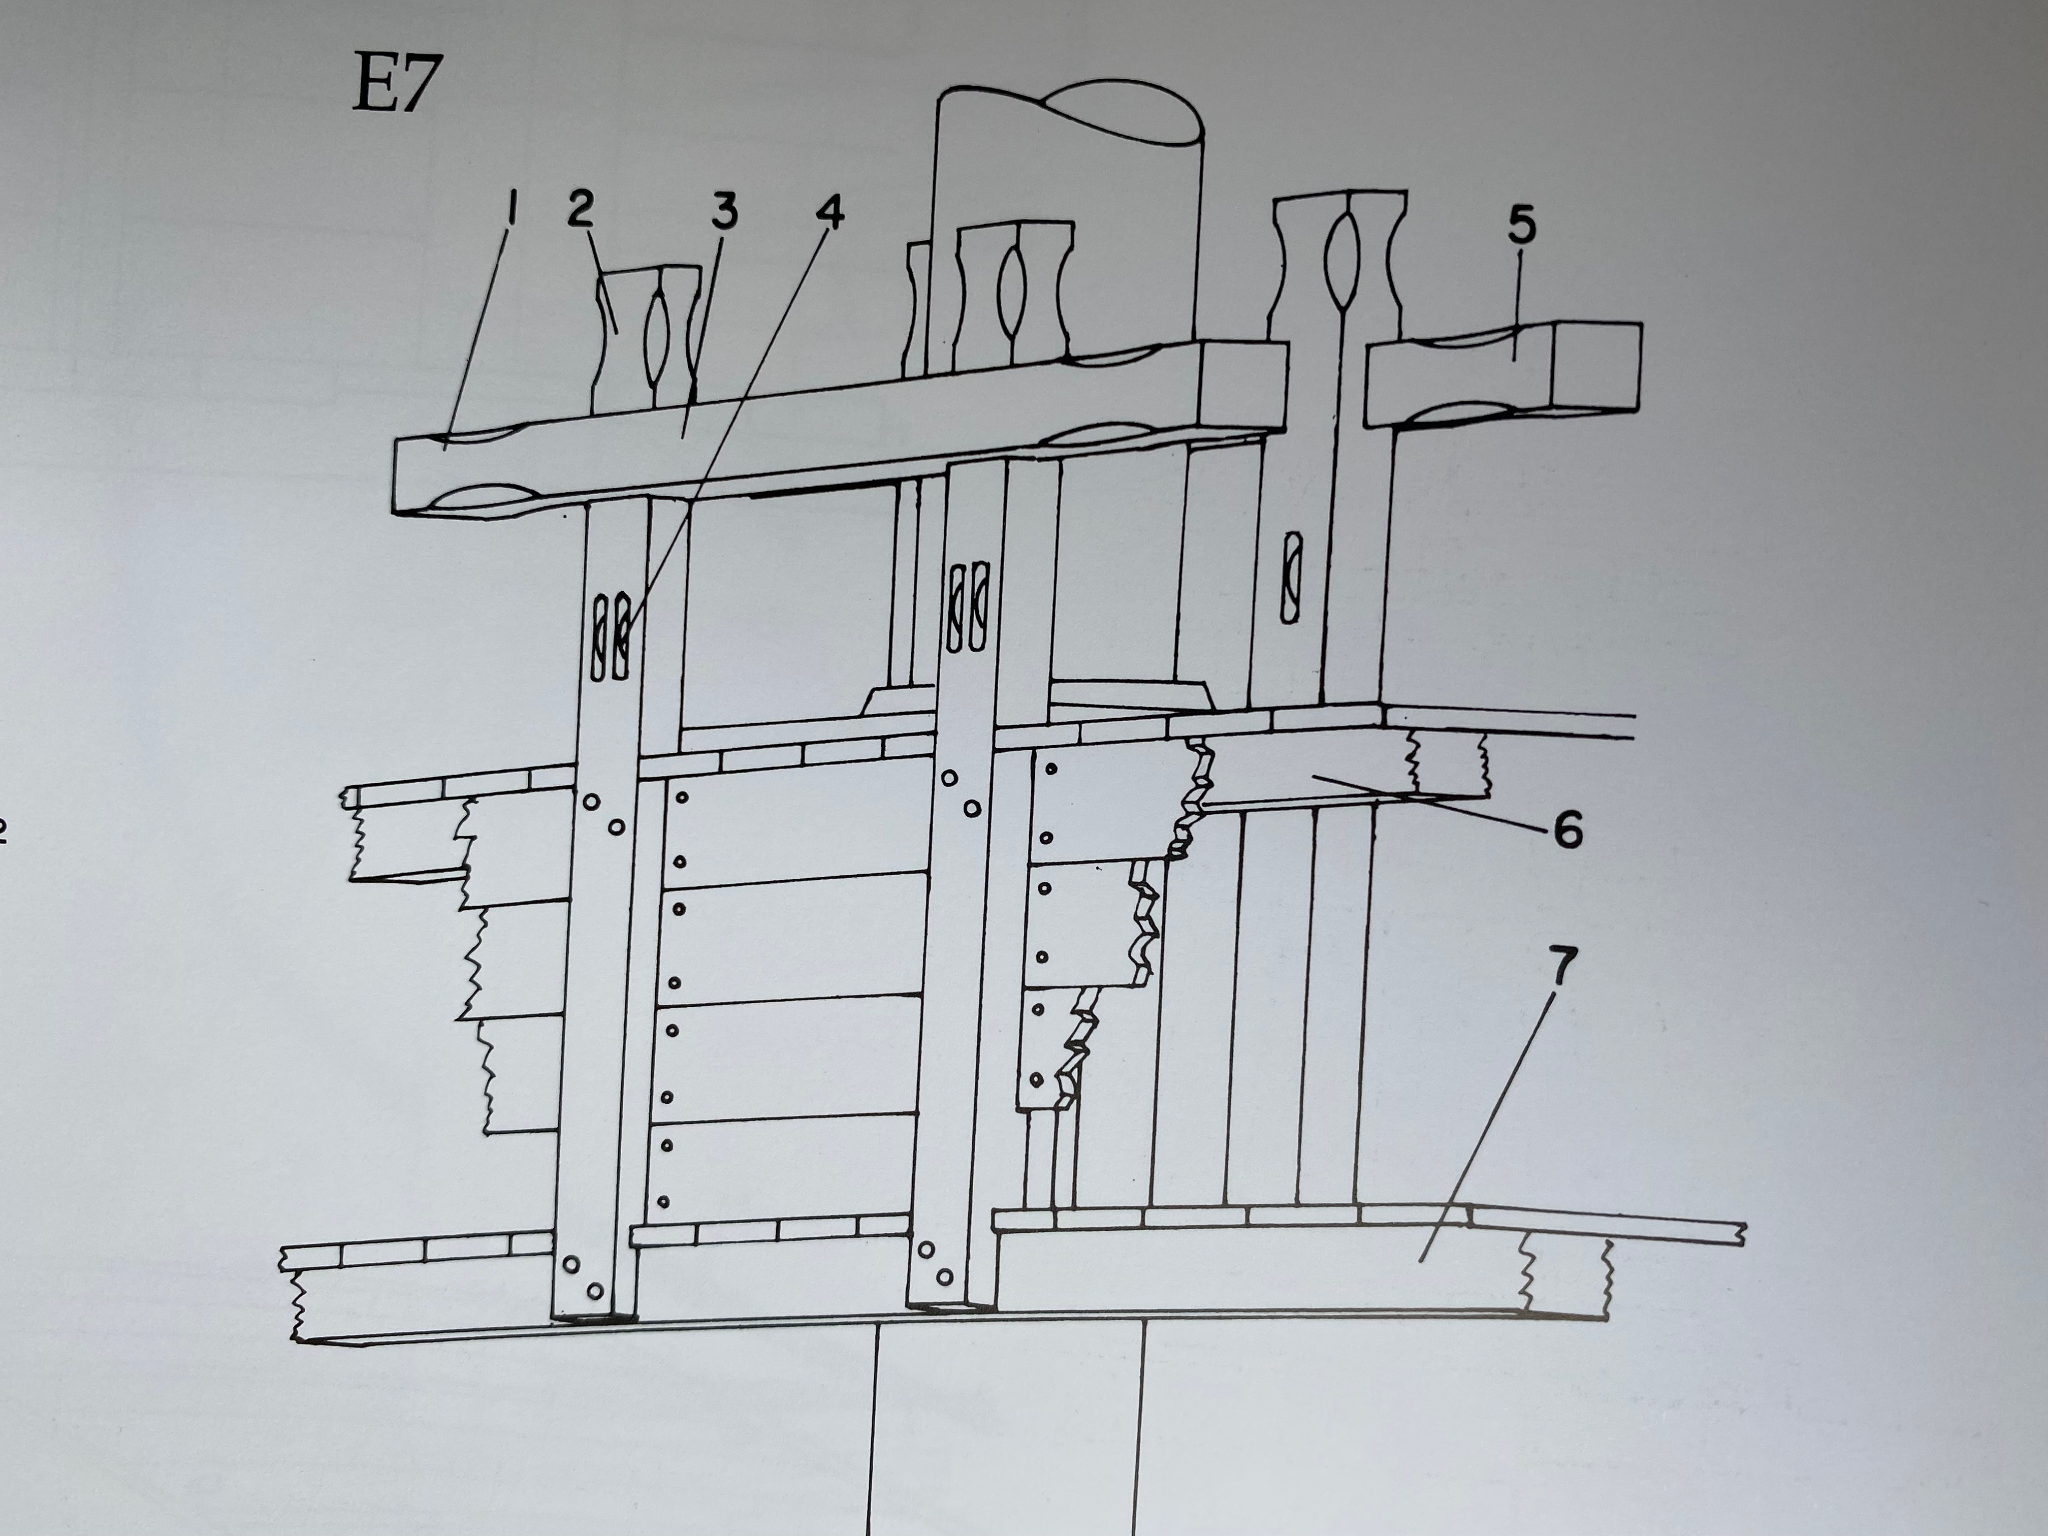
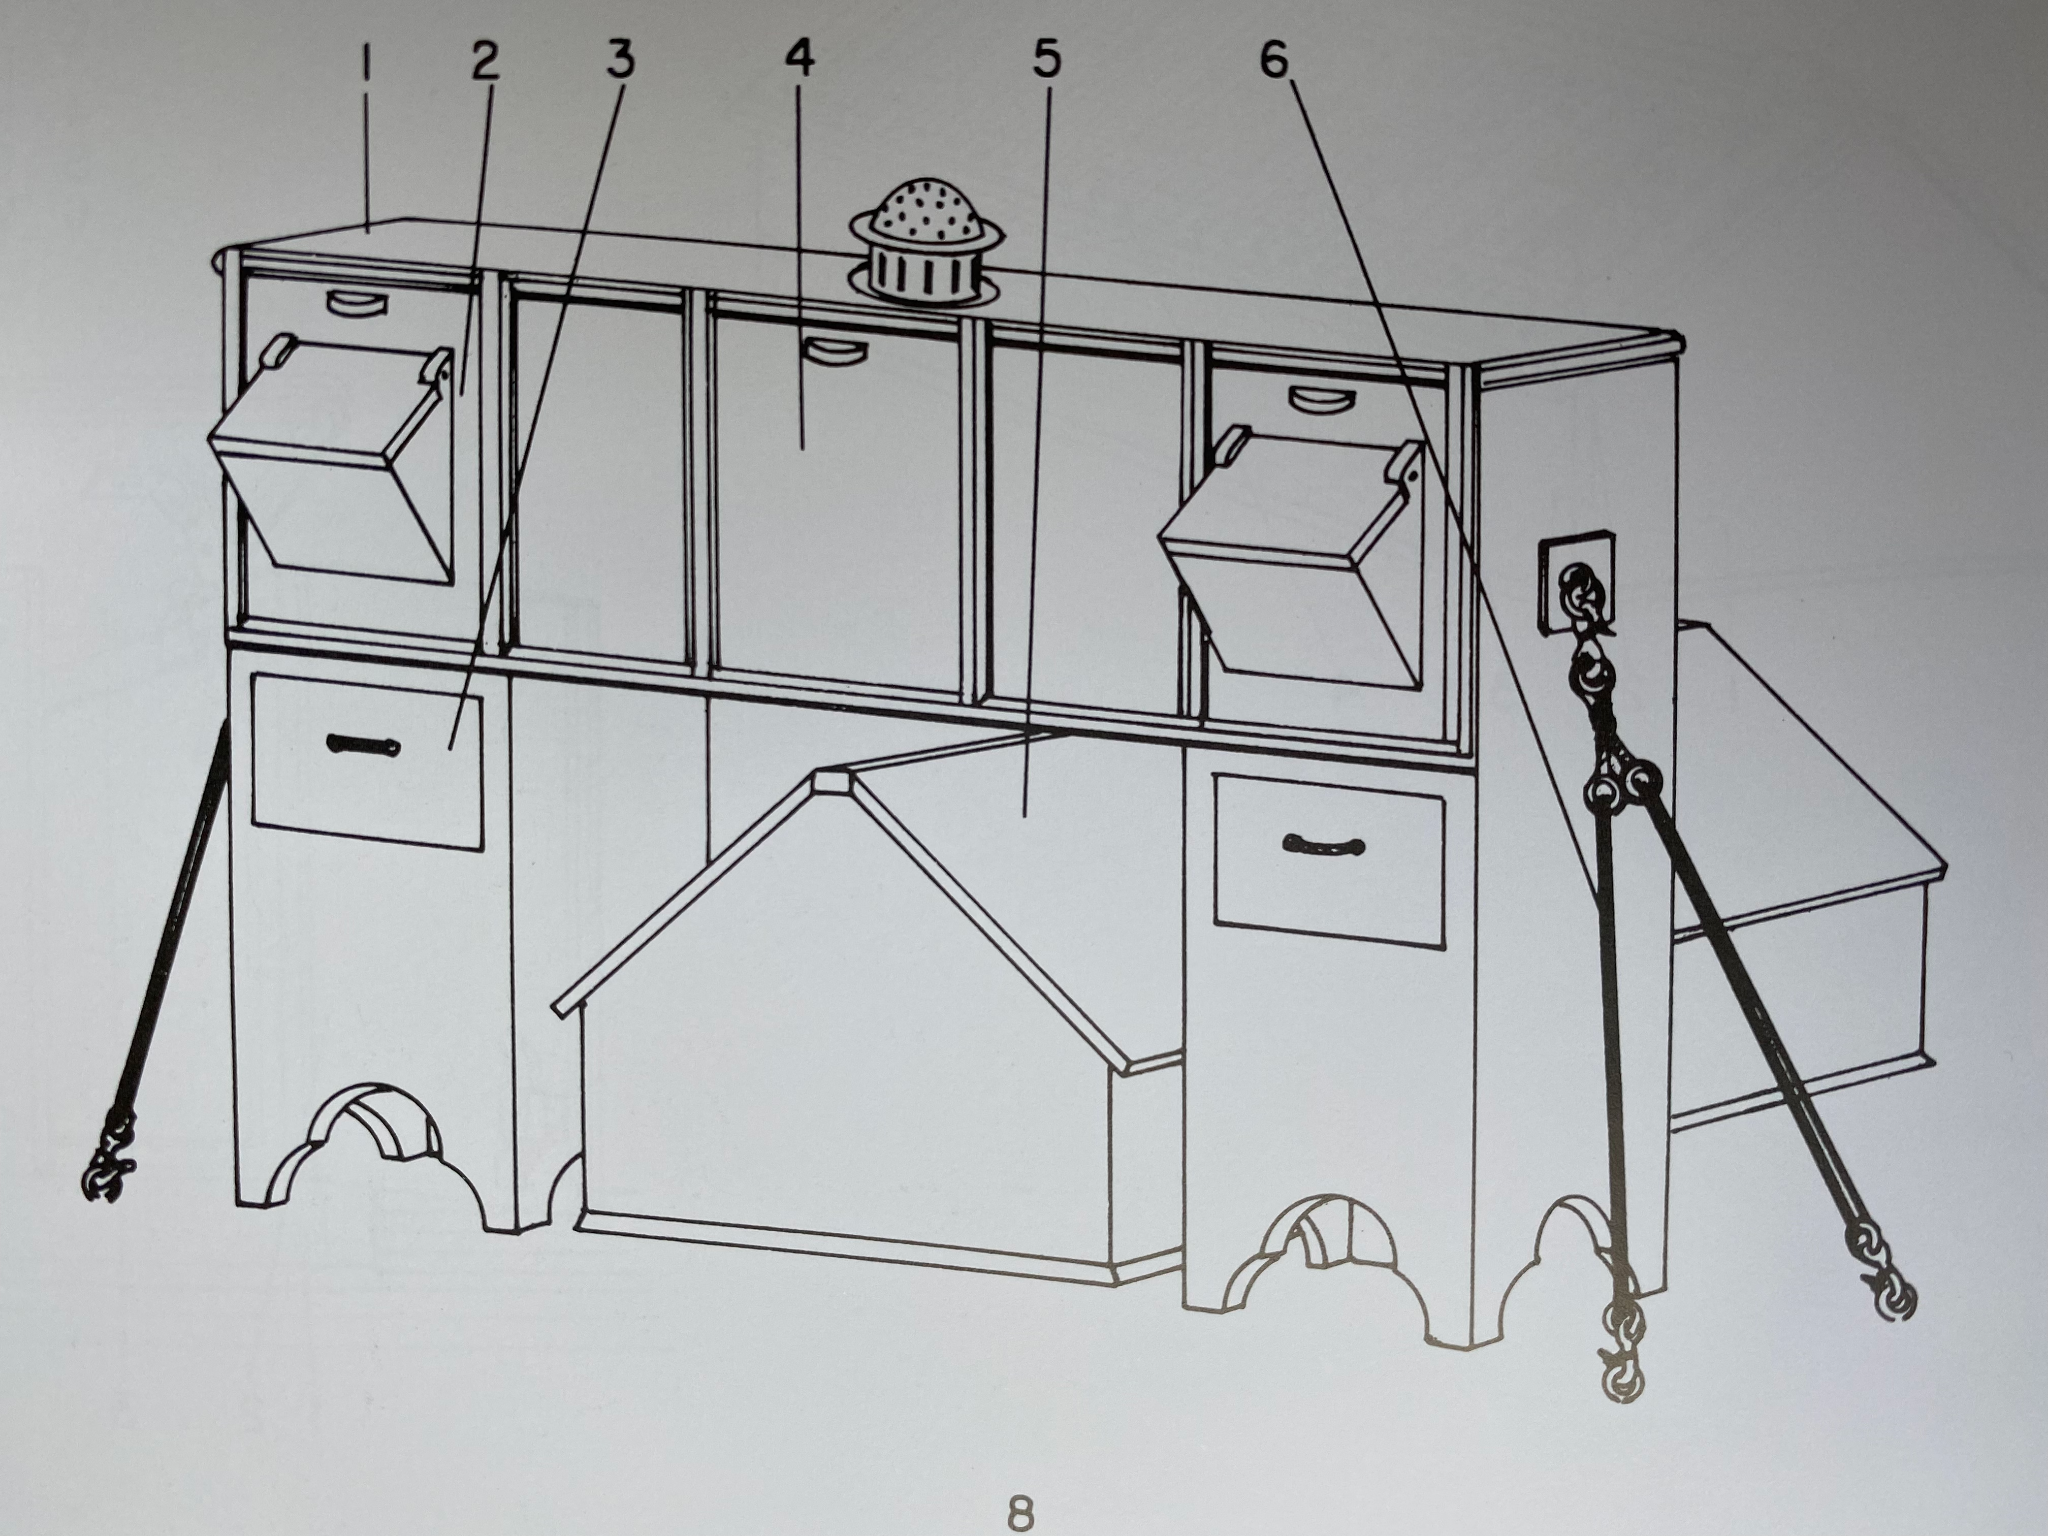
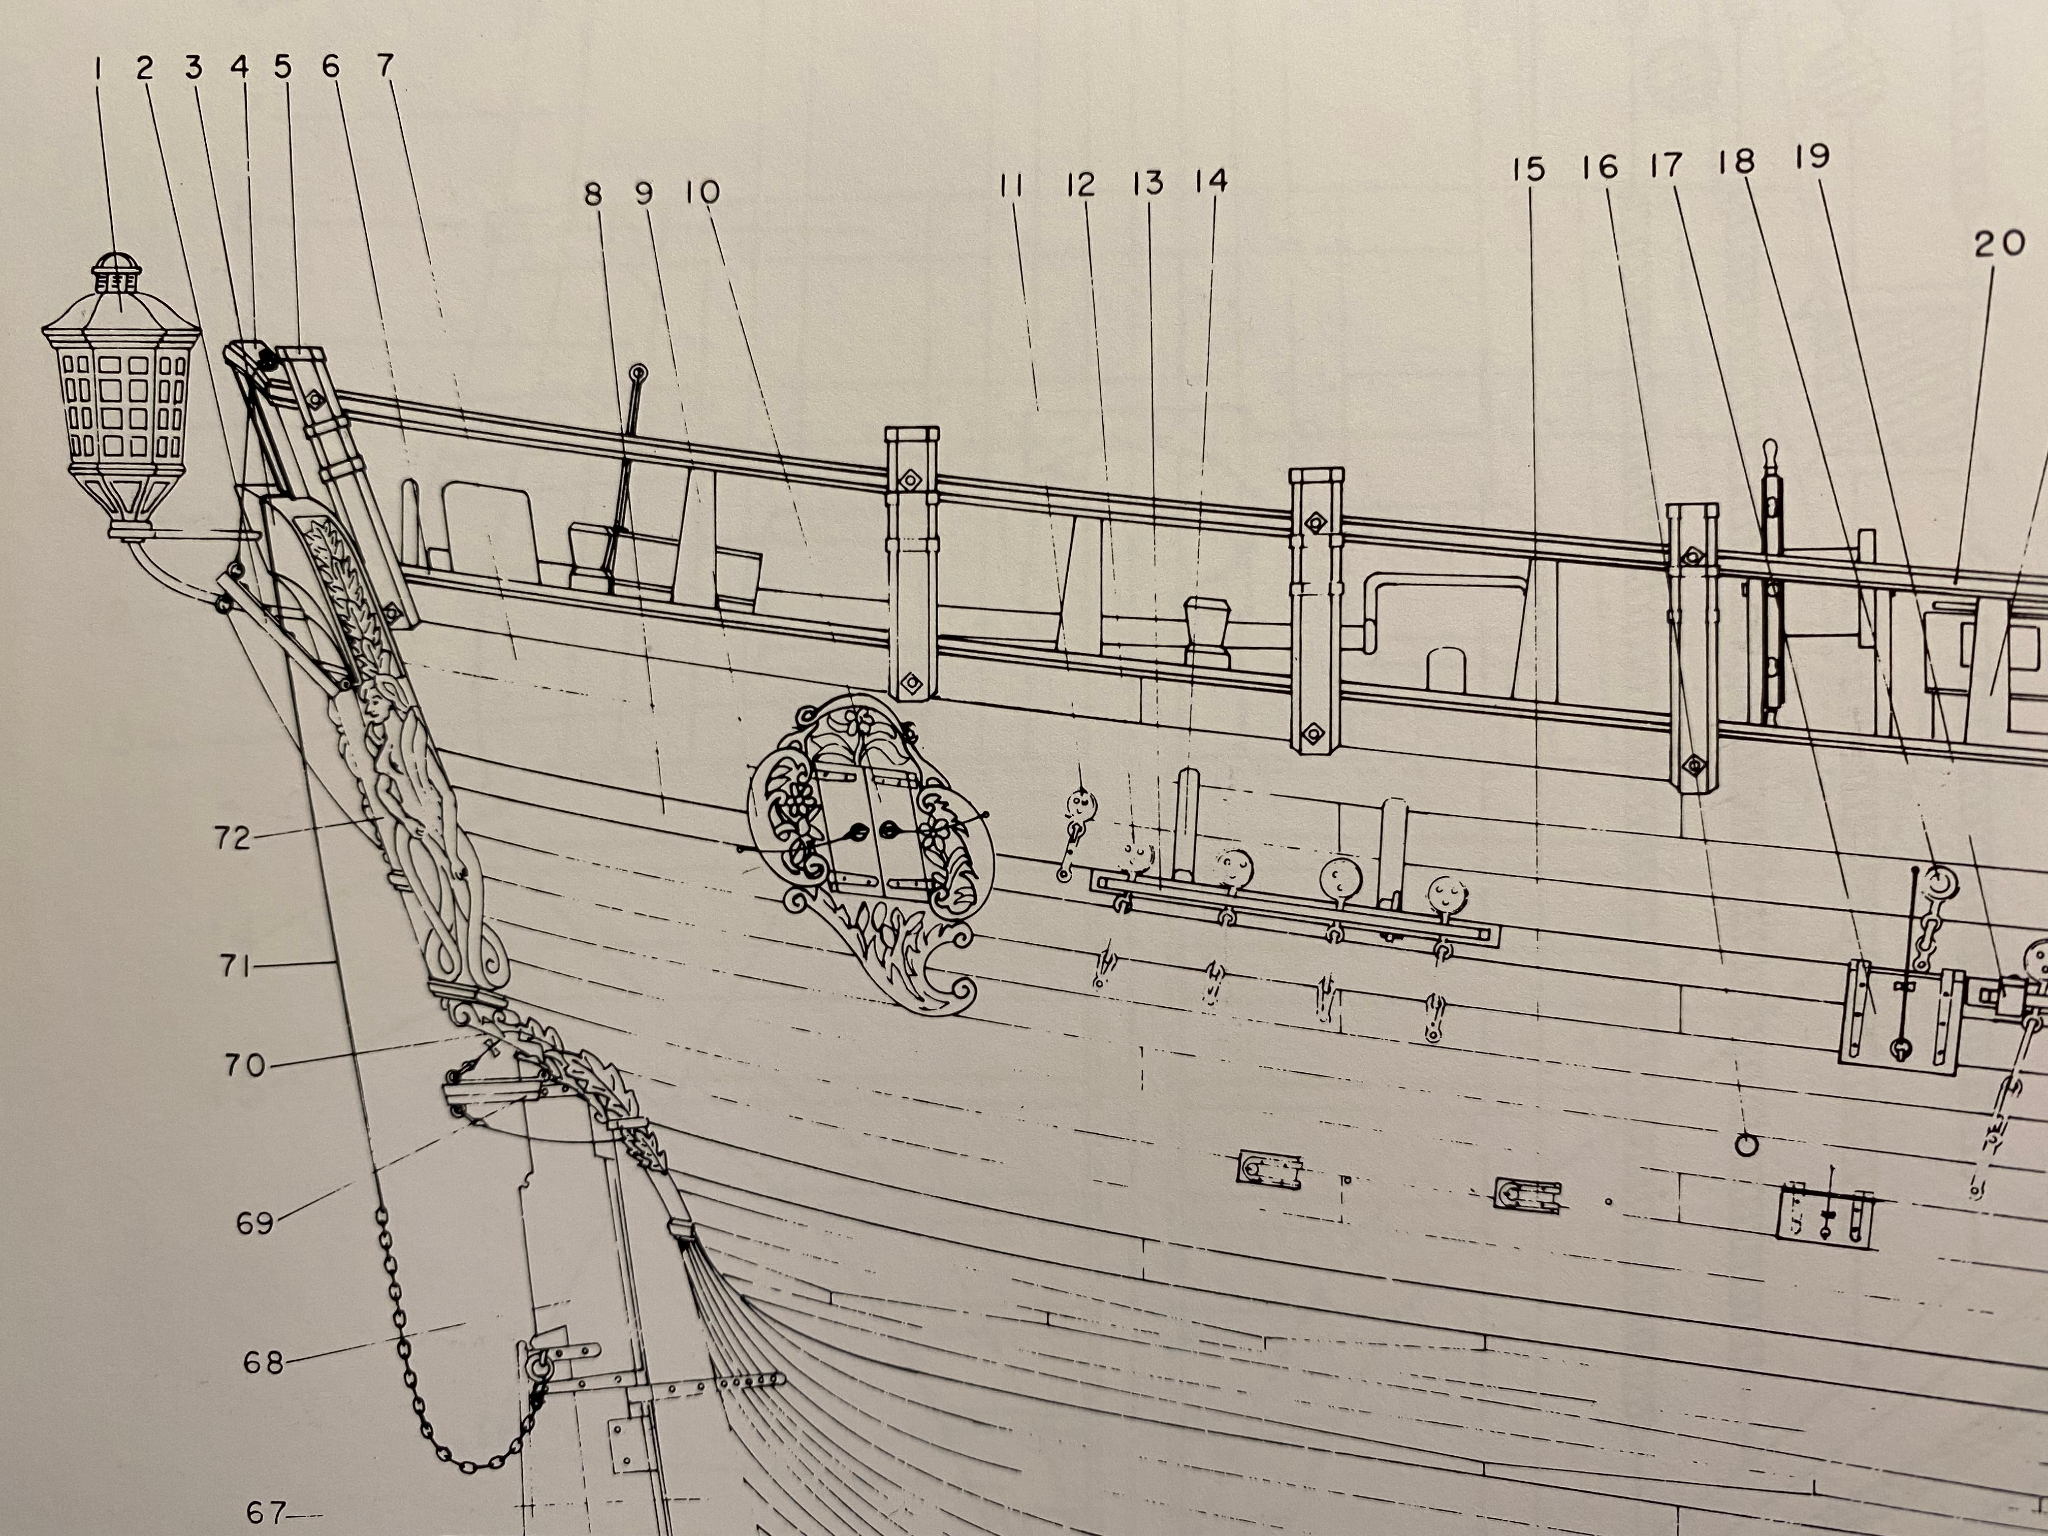
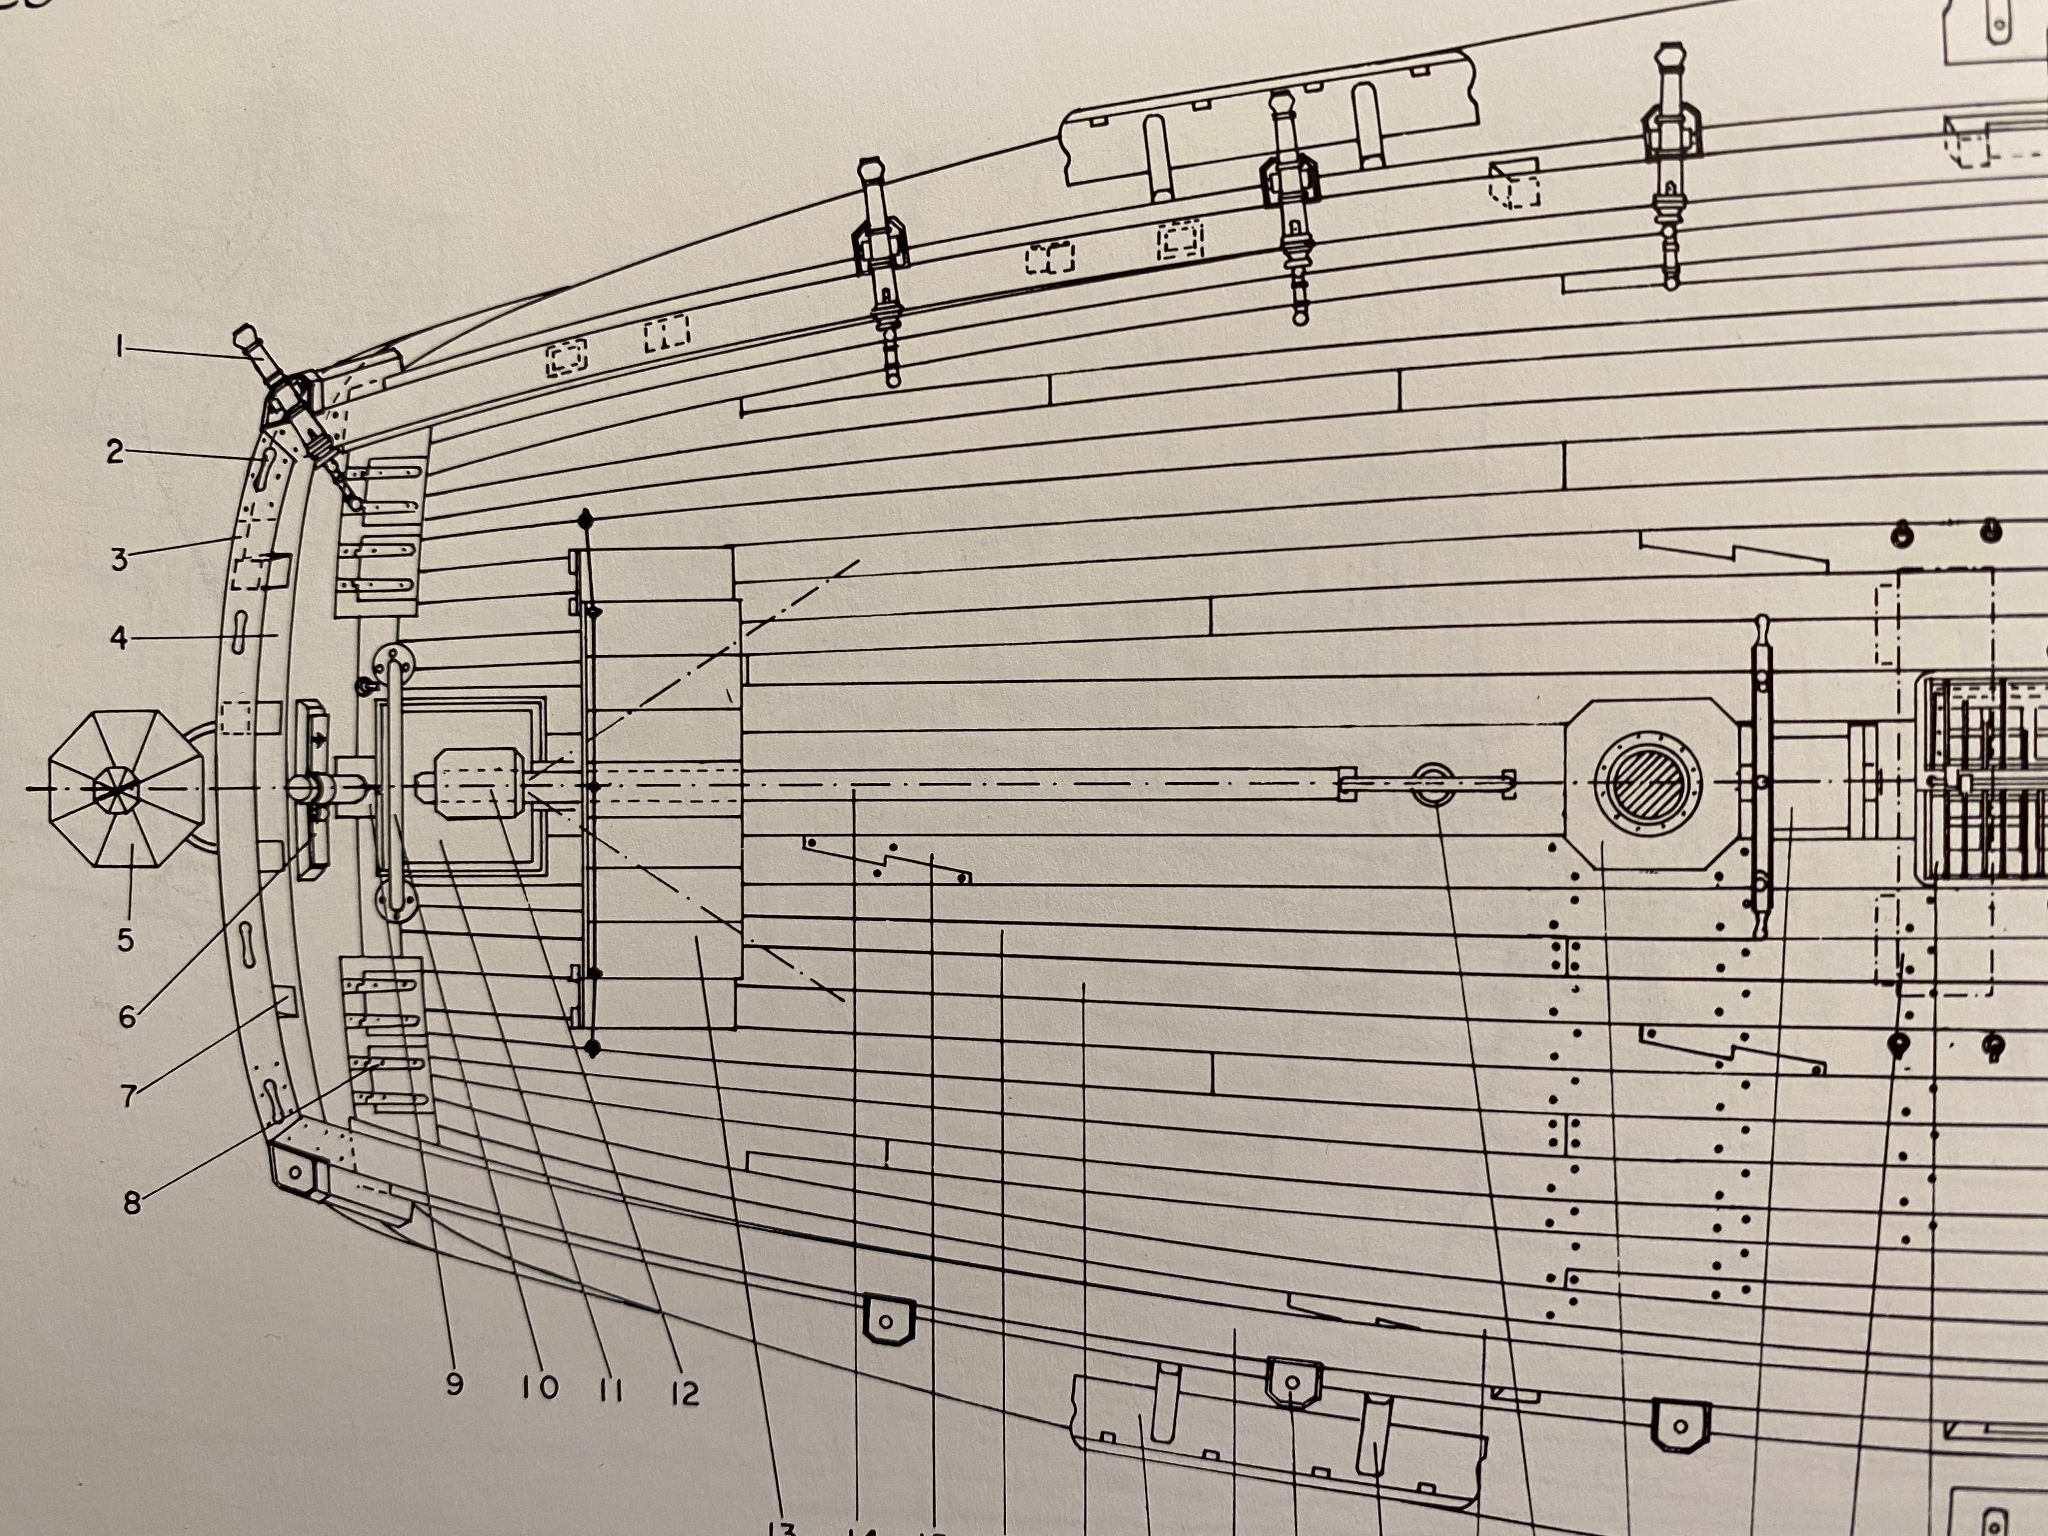
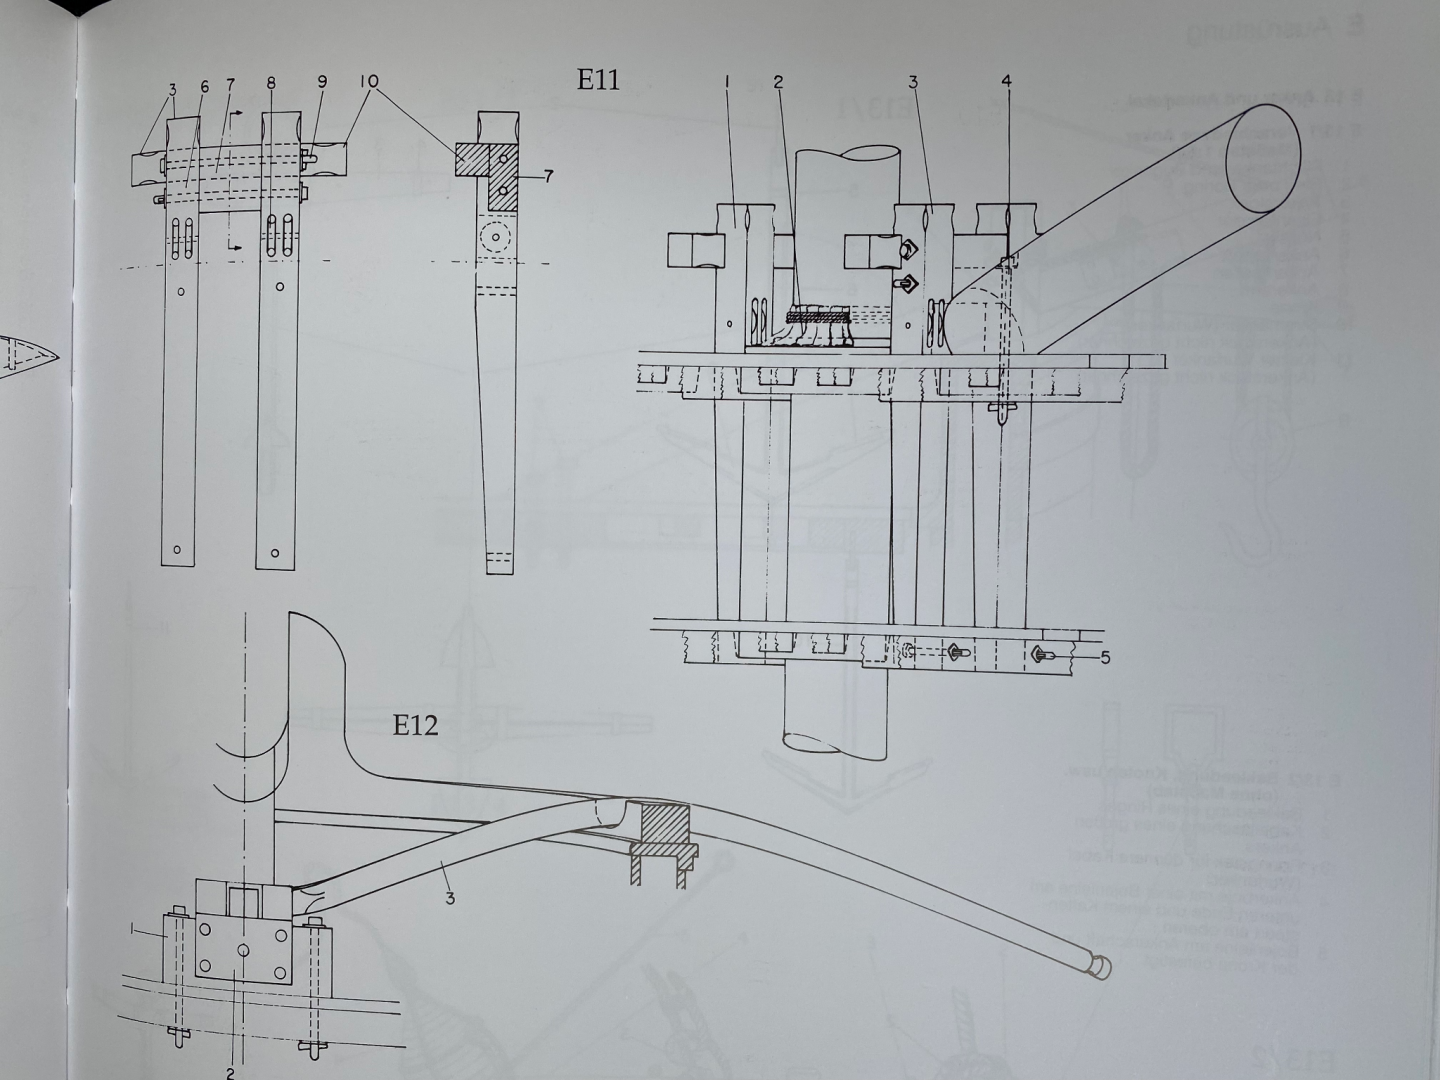
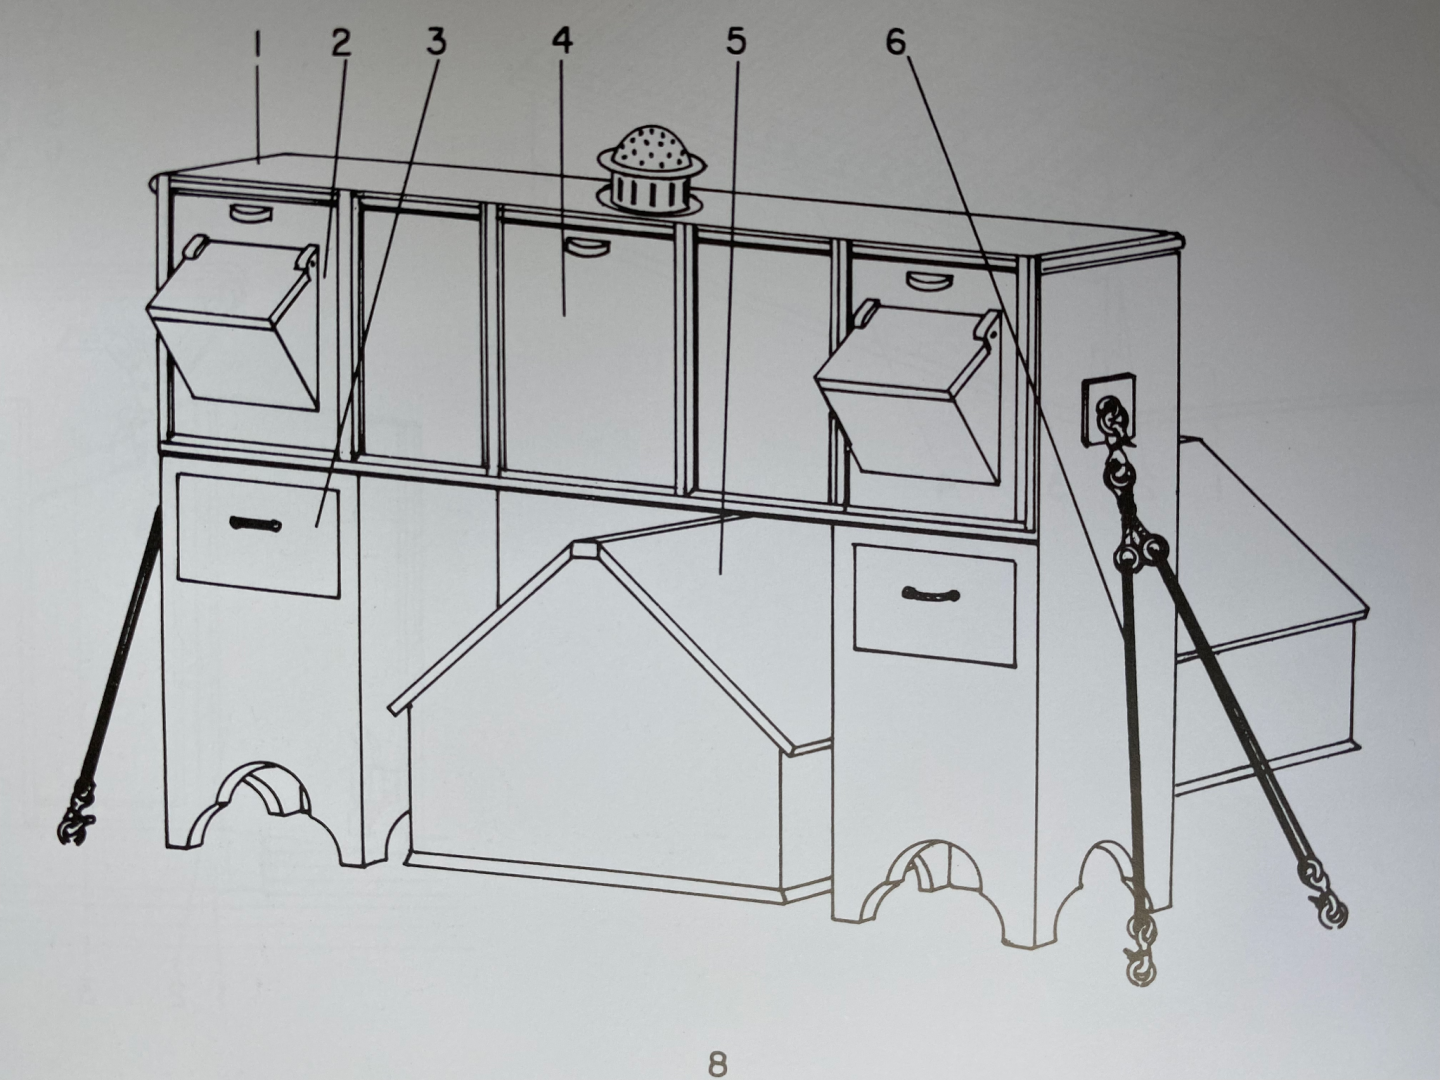
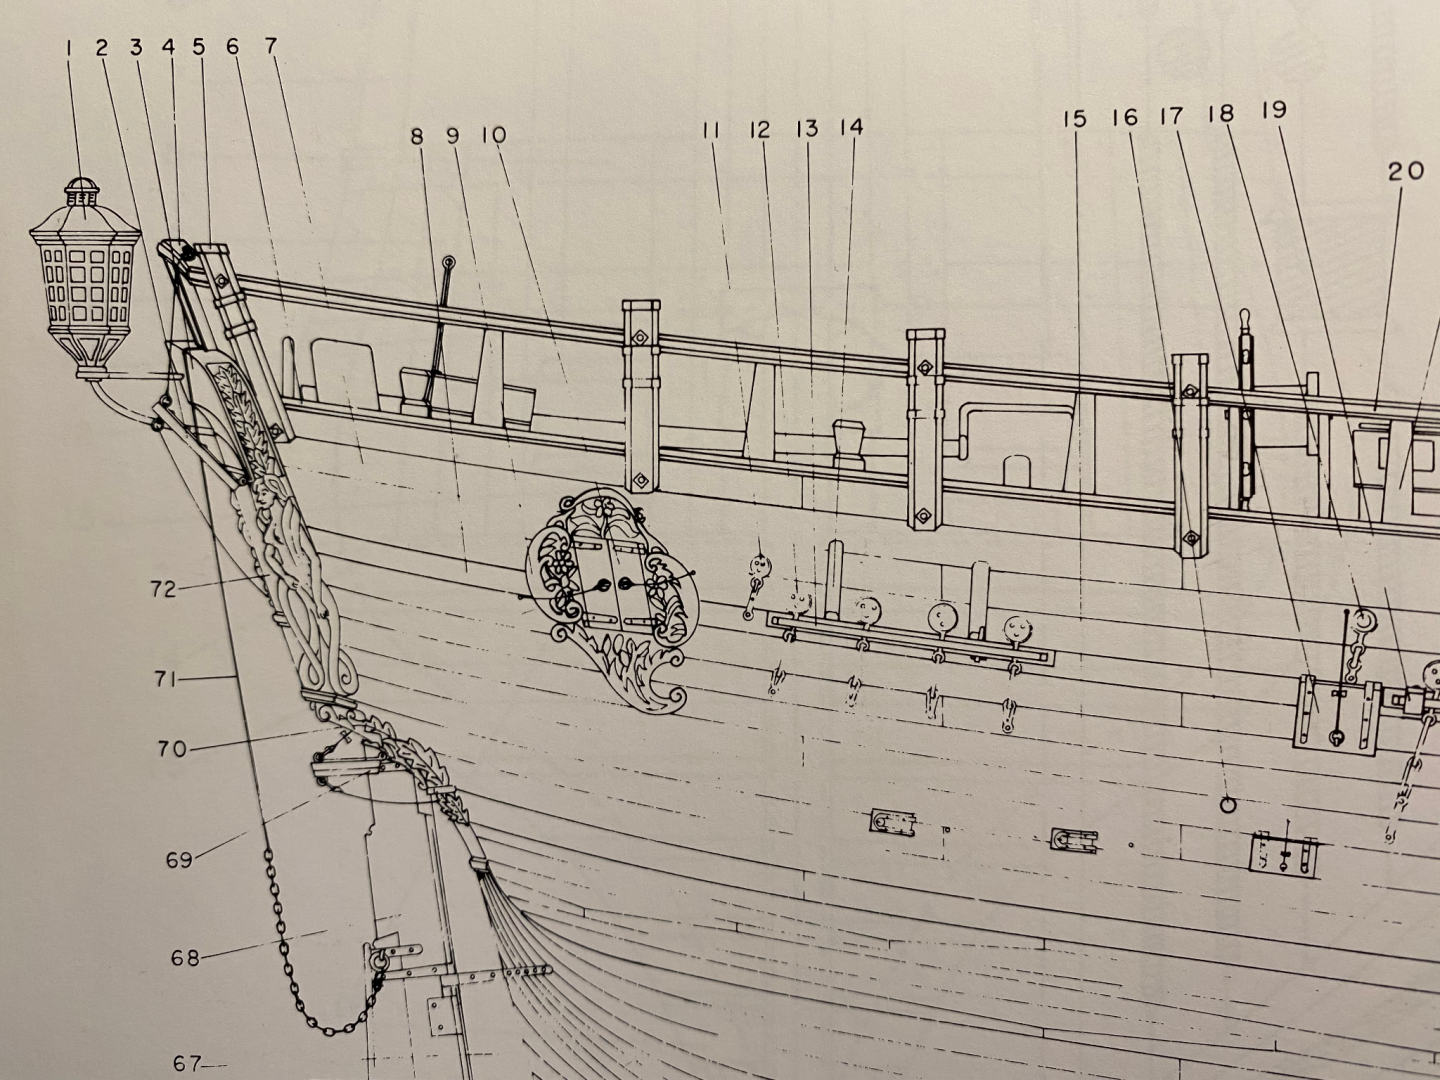
Dear Dave, I had to close down my Workshop over the Summer, because I needed my desk to do home office. Now I come back online and the first thing I see is your amazing progress. I thought we might be working at a similar speed, but now you are way ahead of me. Impressing. I will follow at a slower pace... 😉 As you mentioned the missing AOTS: If you need something, I can send you a picture from my book. Just let me know what you need. The tiller arm is indeed bent to avoid contact with the chimney. These images are what I thought could be useful to you:


-
Oh my. I find myself in some kit bashing situation... Didn't expect that to happen on the first model... But here we are. I am trying to shift the windows of the transon further inward. It seems to be a good decision, because now the windows appear to lead into the ship, not past the outside wall. And now there is enough room to trim the transom to the width of the stern while leaving the top as is, to be able to use the brass decorations of the kit. Well but now I am starting to think about trying to find and buy some pieces of decoration which are a little more "3D". 🙄 "maggsl_01" - whose excellent built I followed - even dared to carve the decorations from scratch. Here is a link to his log: https://modelshipworld.com/profile/7014-maggsl_01/ I am tempted...