
HOLIDAY DONATION DRIVE - SUPPORT MSW - DO YOUR PART TO KEEP THIS GREAT FORUM GOING! (Only 20 donations so far - C'mon guys!)
×


jct
-
Posts
1,519 -
Joined
-
Last visited
Content Type
Profiles
Forums
Gallery
Events
Everything posted by jct
-
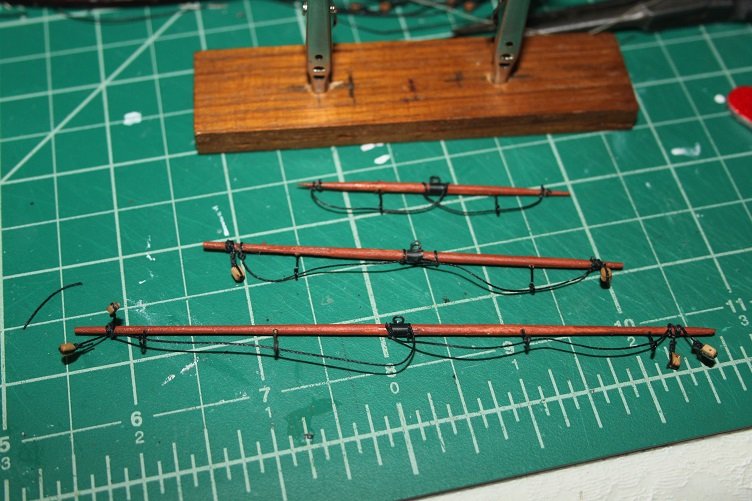
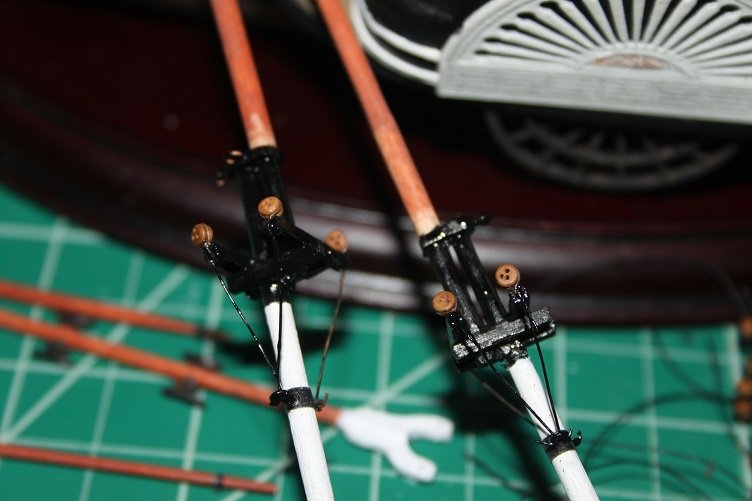
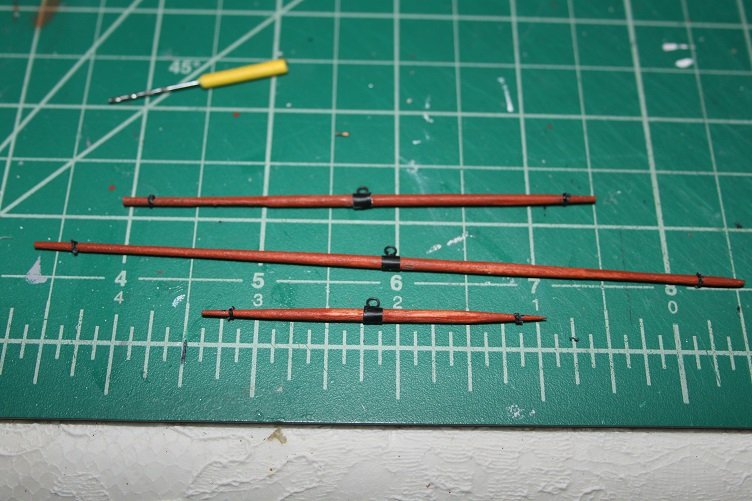
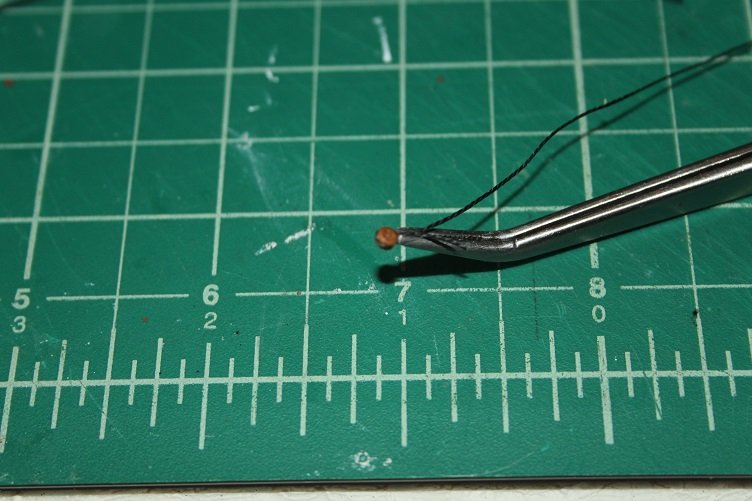
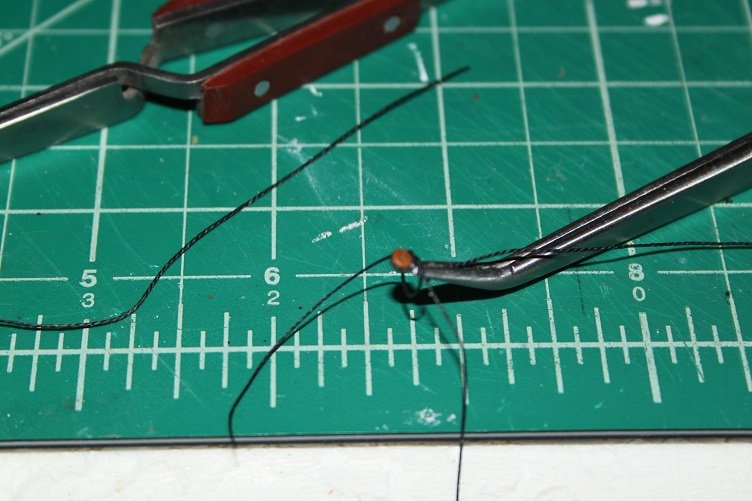
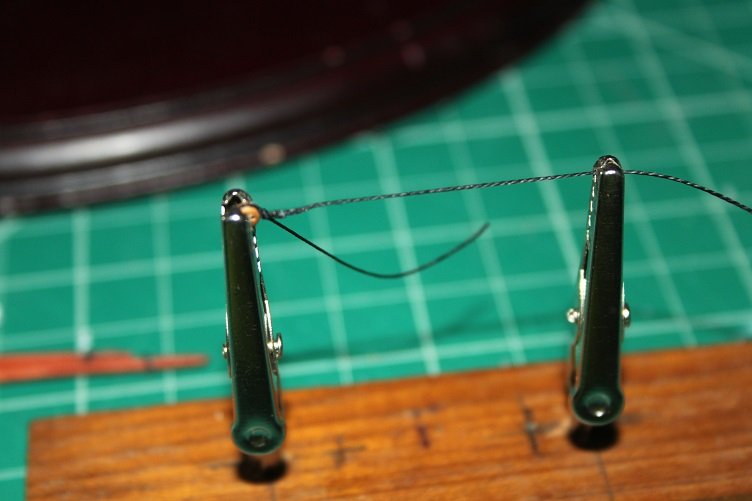
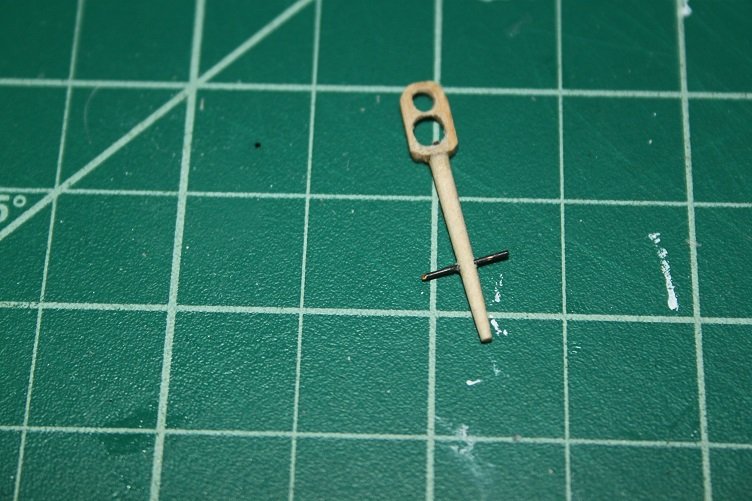
Thanks to all for the likes and kind comments...the little dead eyes are slowly but surely adding to what I refer to as my natural highlights (gray hair) They proven to be a real challenge, I've got the upper shrouds tied off to the tops and the deads laced, but still have the mains to do...22 in total, (insert heavy sigh here) some pics follow Dead eyes attache to the cross trees rigging the yards I used the same cardboard and and thin wire technique I used on my Half Moon build to get the shrouds the right length and the lacing the dead eyes... at this point all the upper shrouds are complete, I'm going to complete the ratlines on the formast before mounting them and moving to the lower shrouds...that will be next week sometime, the admiral and I are getting away for a long week end. Thanks for looking in J


- 258 replies
-
- 7
-

-
- harriet lane
- model shipways
- (and 1 more)
-
Hi STEVE...as always, nice work, based on your concern of the peg scale I assume your leaving this one natural as well
-
sounds like a plan...I know maple can be tough to get a good glue joint on, on past projects I've resorted to pegging to reinforce the joints
-
Thank you sir...it does the job...I've actually gathered all the material I need to build a serving machine, just haven't gotten around to putting it all together...one of these days Still getting all the little things done before stating to rig, finishing the shrouds, storping the blocks, prepping yards and gaffs, etc
- 258 replies
-
- 3
-
-
- harriet lane
- model shipways
- (and 1 more)
-
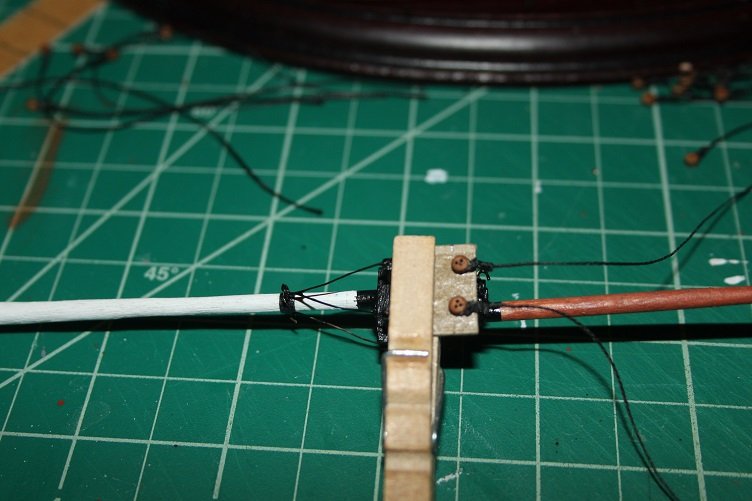
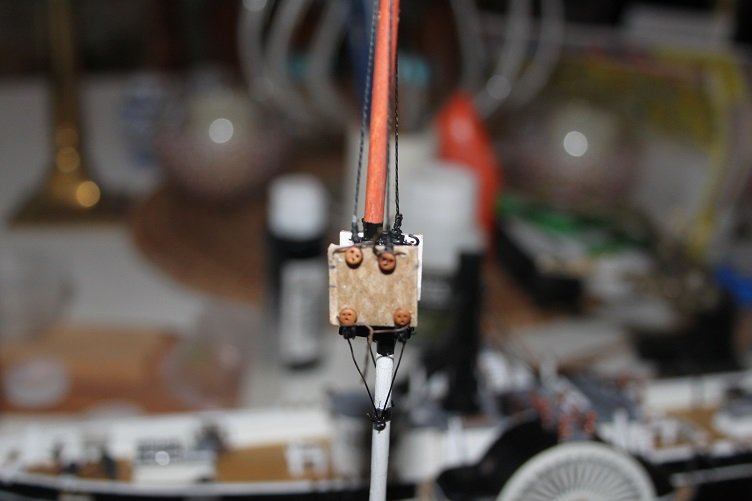
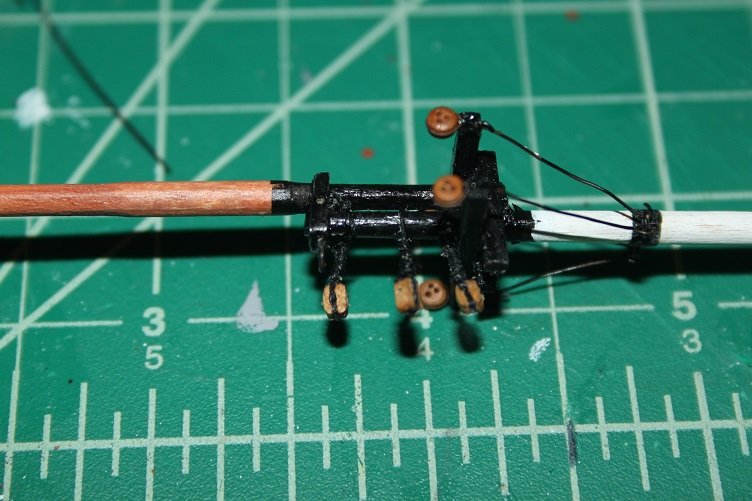
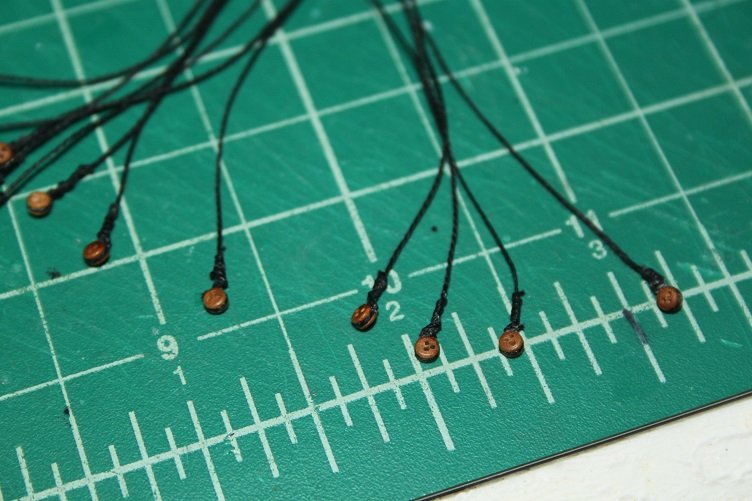
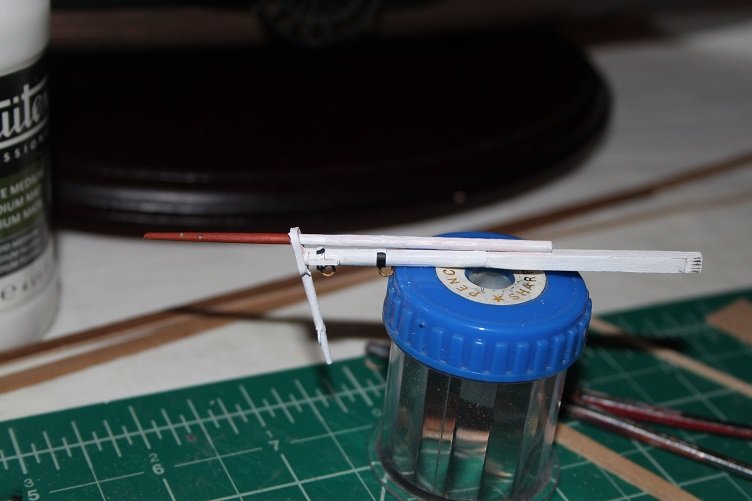
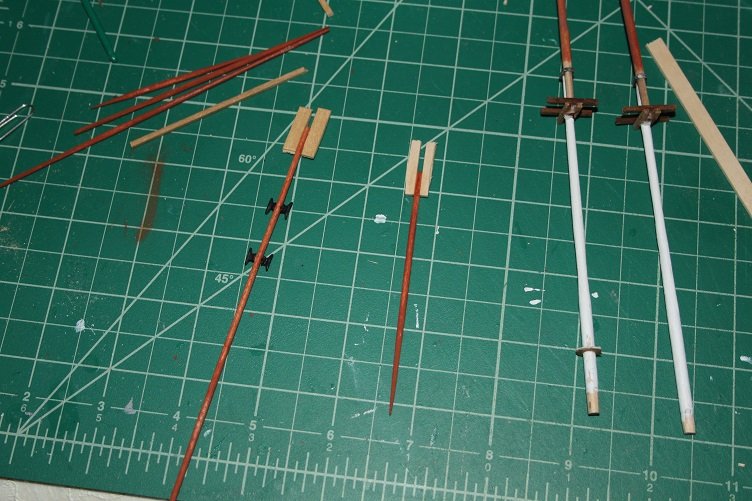
Short update...preparing to begin rigging the HL, got all the lower shrouds mated and served to their dead eyes... shroud clamped to the deadeye and tied off then captured in this little serving jig and completed also spent some time preparing the masts, mounted the lower deadeyes to the tops..
- 258 replies
-
- 7
-
-
- harriet lane
- model shipways
- (and 1 more)
-
Hi Steve...found your log, this is going to be an interesting little vessel, and no better way to pay homage to your Dad
-
Hi Steve...the waterboat sounds interesting...if a bit of an oxymoron, give me a heads up when you start your build log I'd love a ringside seat J
- 258 replies
-
- 2
-
-
- harriet lane
- model shipways
- (and 1 more)
-
Hi Steve...it does have its challenges...just this morning I was crawling around looking for deadeyes from a poorly timed sneeze!! It can be difficult to get the level of detail I'd like as well, but overall I enjoy it...masochistic tendencies? I can't say for sure? The smaller scales allow more vessels in the limited storage space I've available, so I would definitely do it again. Good to see you active on the site again...have you decided on your next build? Based on your signature you've got some nice kits it the queue. J
- 258 replies
-
- 2
-
-
- harriet lane
- model shipways
- (and 1 more)
-
Ya really it's my own fault...need to learn to be more careful when a project reaches this stage...all repairs are complete and the first recoat of hull black is done. No I used all the kit deadeyes...they were the 3 hole variety...I've often wondered if they should have been the triangles, but I found the Half Moon difficult to find definitive info about. It's my understanding that the Dutch did not work from drawings but fixed mathematical formulas when building, so there seem to be a lot of different interpretations out there of what a specific vessel may have looked like I think triangles would look cool
- 258 replies
-
- 2
-
-
- harriet lane
- model shipways
- (and 1 more)
-
Hey Steve, She really turned out sweet, your attention to detail and quality workmanship shines, nice job. Good to see you back J
- 569 replies
-
- 2
-
-
- shenandoah
- corel
- (and 1 more)
-
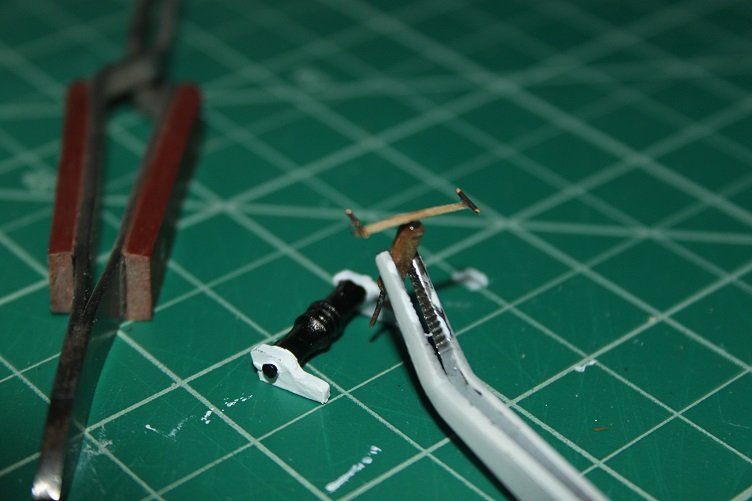
Hey Denis...ya they are they will spin in the stropping I applied, just thin wire...I think the challenge is going to be try to clean the holes out to rig them...got some repair work to do first though, she took a spill and one paddle wheel broke and picked up some scratches in the paint...thanks to all for the likes
- 258 replies
-
- 2
-
-
- harriet lane
- model shipways
- (and 1 more)
-
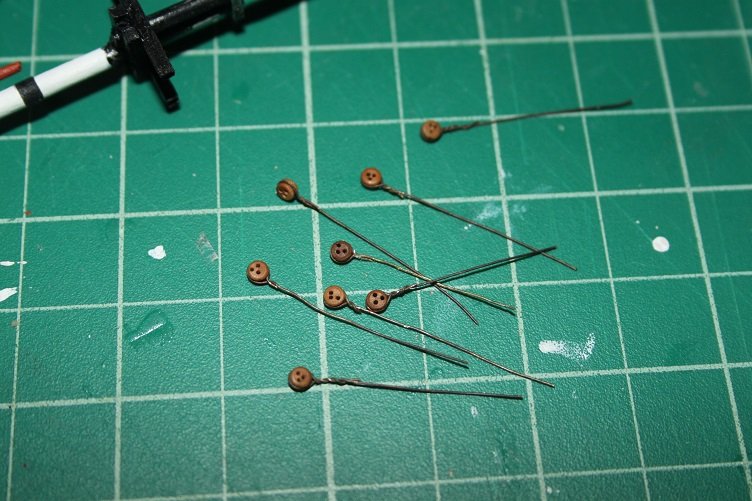
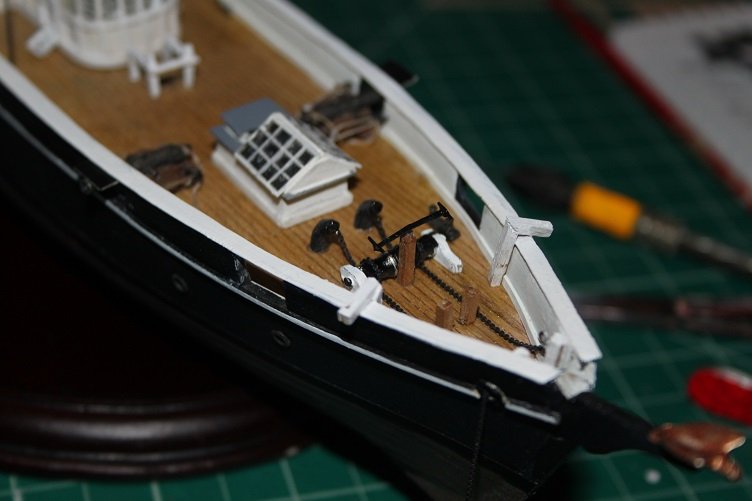
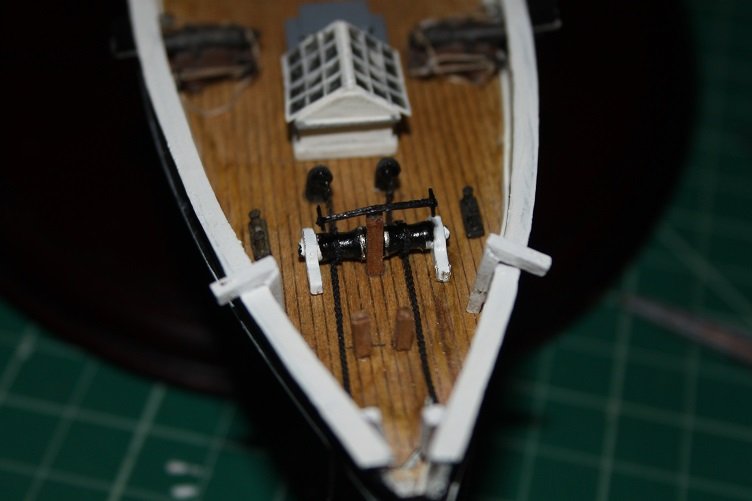
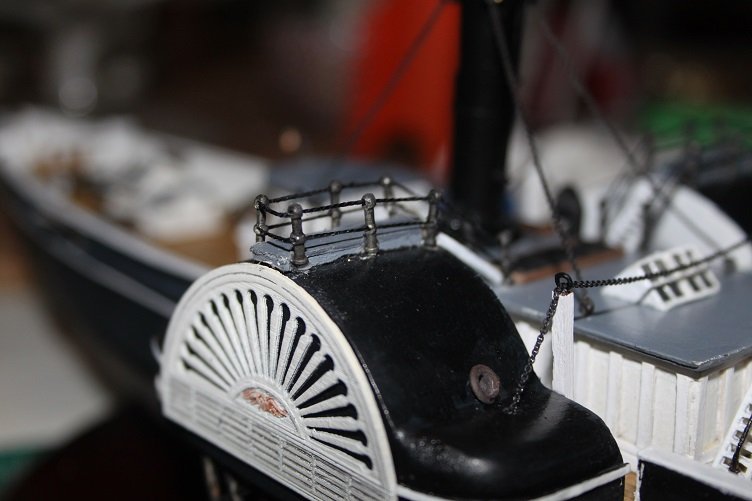
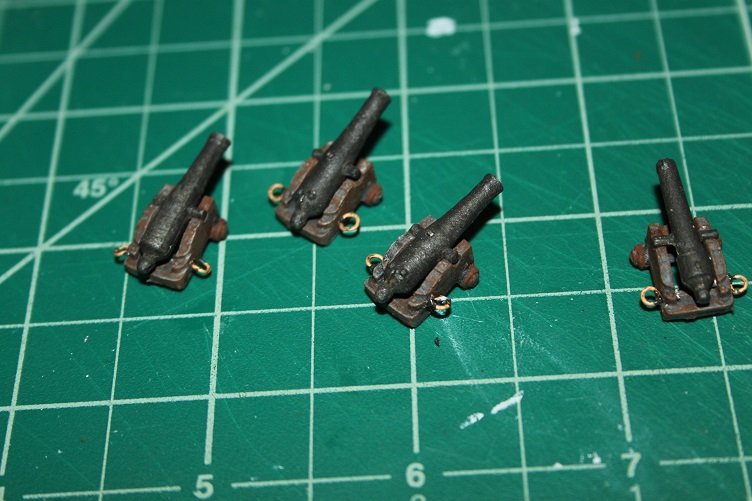
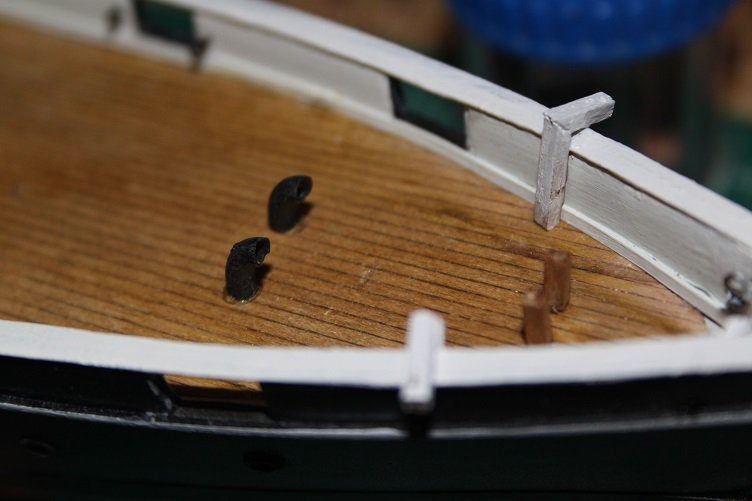
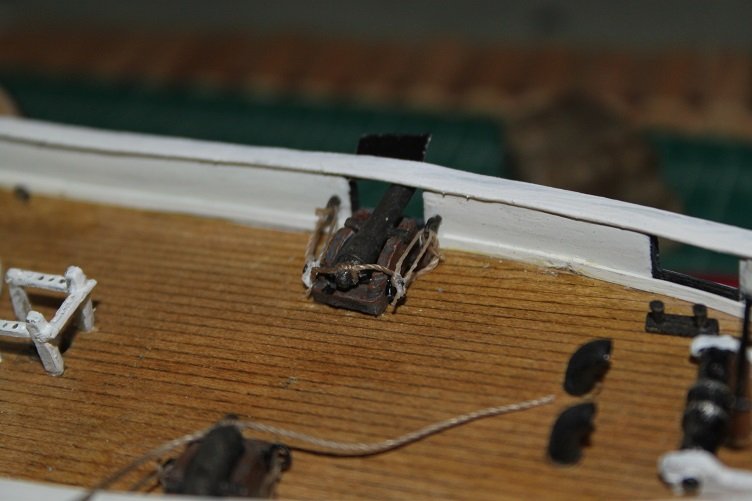
small update...pic of the relocated gun and beginning to mount the chain plates this is proving to be a challenge due to the diminutive size of the dead eyes...only 3/32nds inch or 2.7-3 mm, smallest i've seen let alone worked with...not much more for today...Pens and Pirates are both playing today and the stupid lawn needs mowed, truly the first sign of spring... THX J
- 258 replies
-
- 6
-
-
- harriet lane
- model shipways
- (and 1 more)
-
Thanks Wayne...all the drawings I've found are a crap shoot, there seem to be as many layouts as there are drawings...unless the davits moved around, and I'm not ruling that out...between them, the fly bridges, and gun port lids, I don't think I've seen them depicted the same way twice... but thanks to all for all the likes and great comments...appreciate you all looking in
- 258 replies
-
- 2
-
-
- harriet lane
- model shipways
- (and 1 more)
-
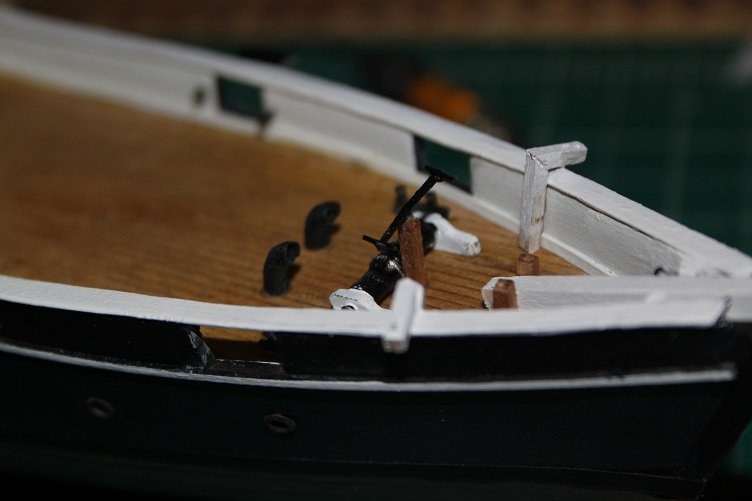
THX for the responses guys...Moved the gun aft, was just a lot less crowded, I still have dead eyes and chain falls to put in that area too...pics tomorrow
- 258 replies
-
- 4
-
-
- harriet lane
- model shipways
- (and 1 more)
-
Hey Denis...ya they do, I think the davit castings are a bit on the short side, but it is what it is...as the deck is already drilled for them, I'm thinking of running the gun back in and closing the port...I'll more then likely fuss with it this evening Thx to all for the likes J
- 258 replies
-
- 2
-
-
- harriet lane
- model shipways
- (and 1 more)
-
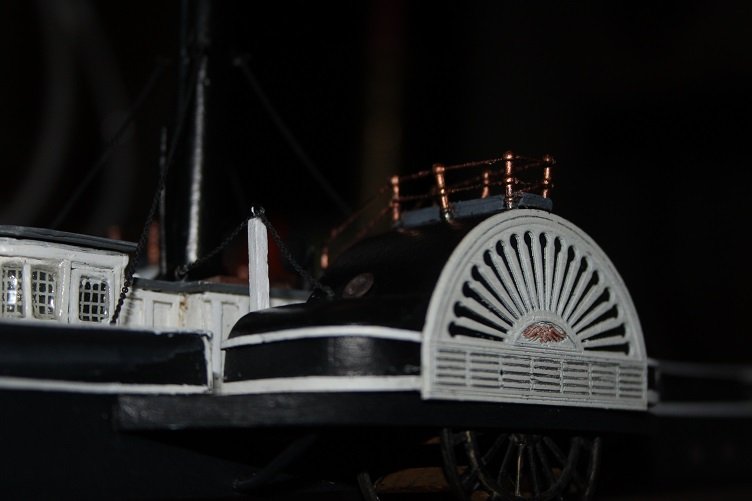
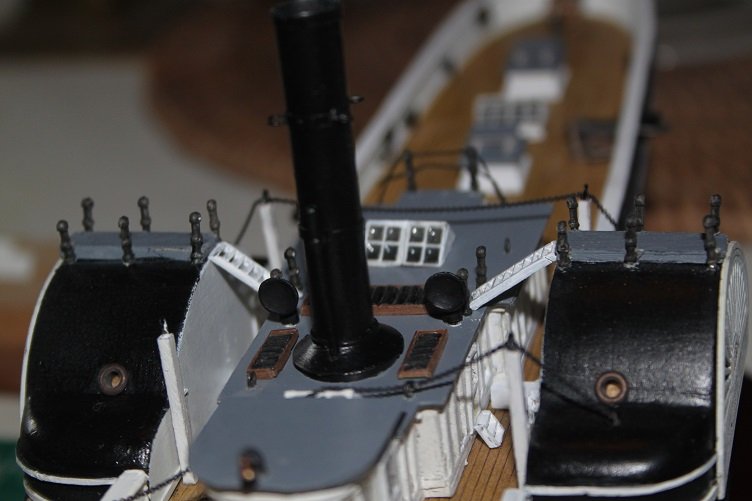
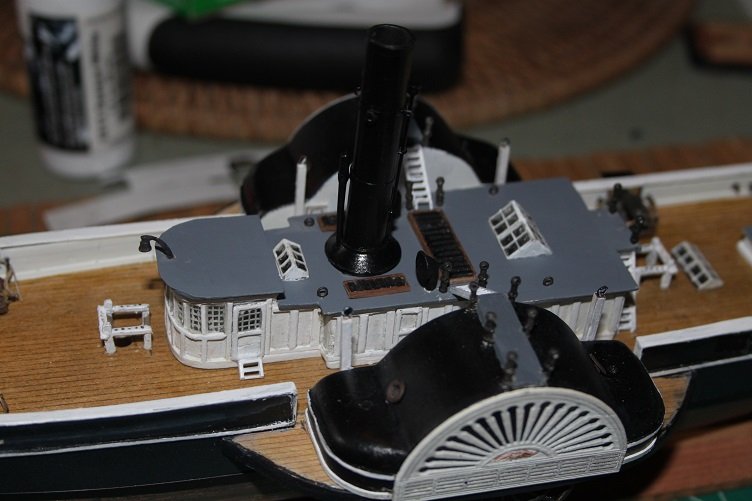
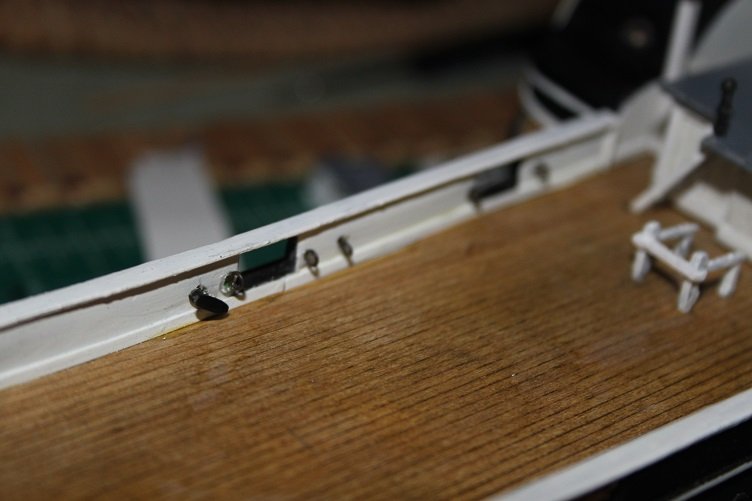
THX fr the likes...another small update... I went with the brass stanchions, a couple shots here, they no longer disappear also built up the bow sprite and the other masts and booms, these were painted out white and burnt sienna per the kit suggestions, obviously more work is required on the booms mounted the anchor chain... and mounted the davits, may have to relocate the stbd side gun, the davit height has the boat directly in line with the gun...bit of an issue well that's all for now, thx again J
- 258 replies
-
- 7
-
-
- harriet lane
- model shipways
- (and 1 more)
-
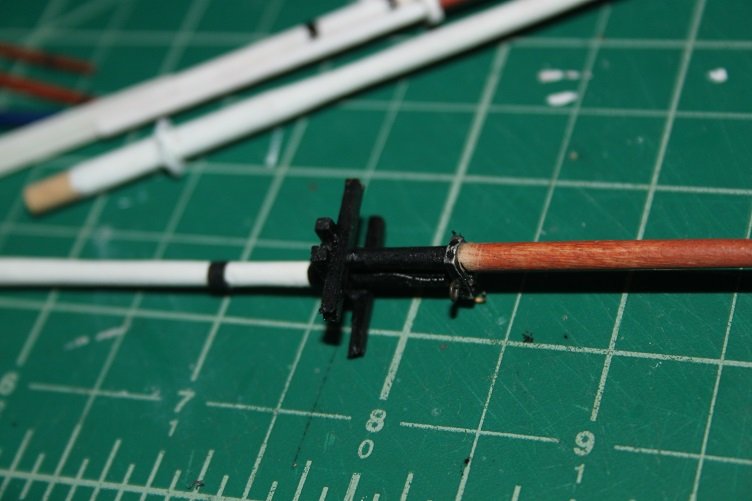
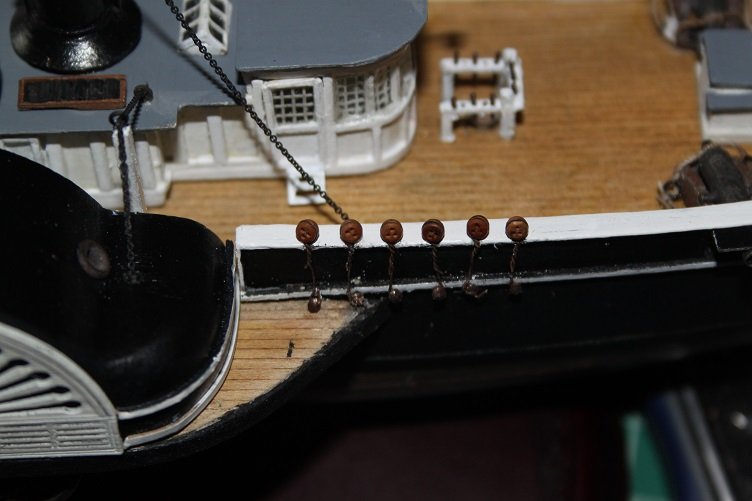
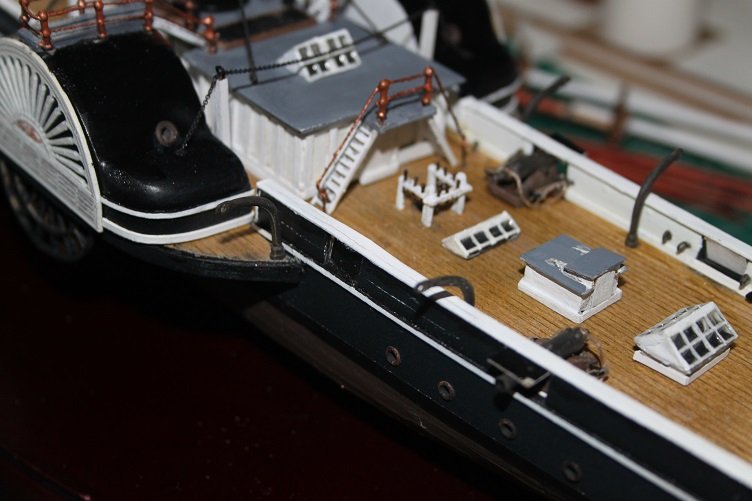
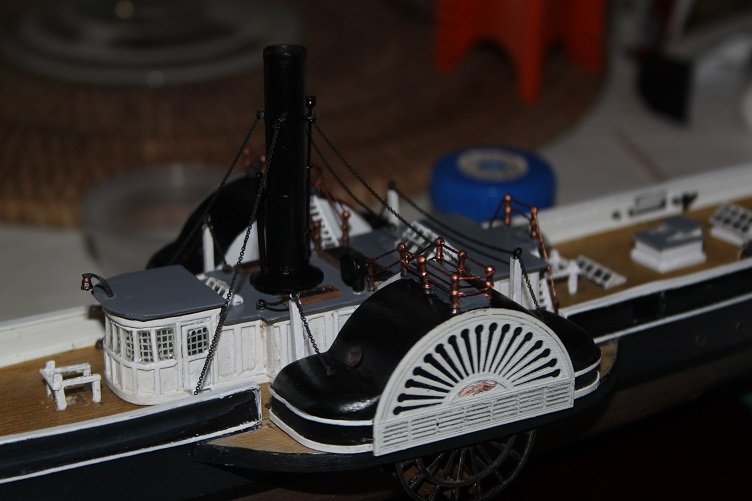
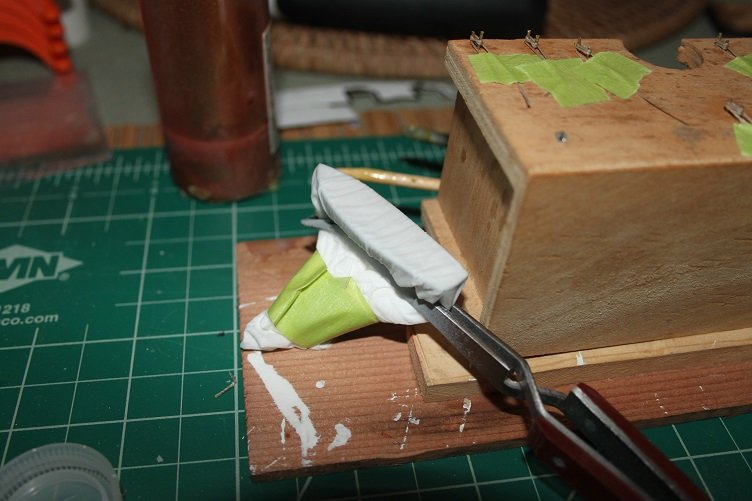
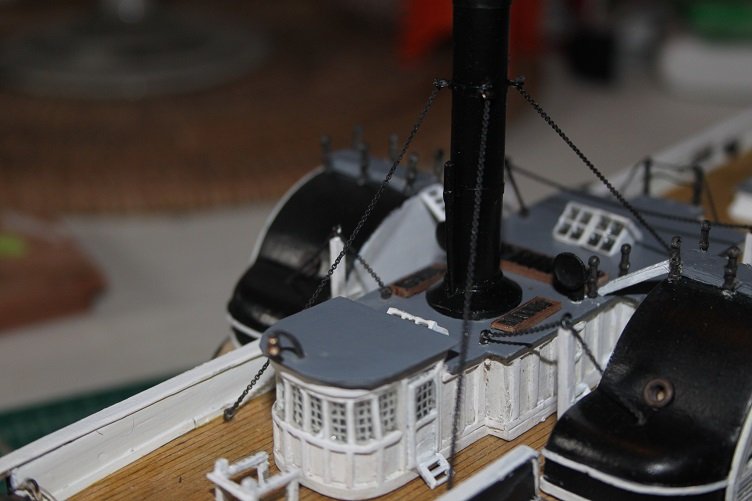
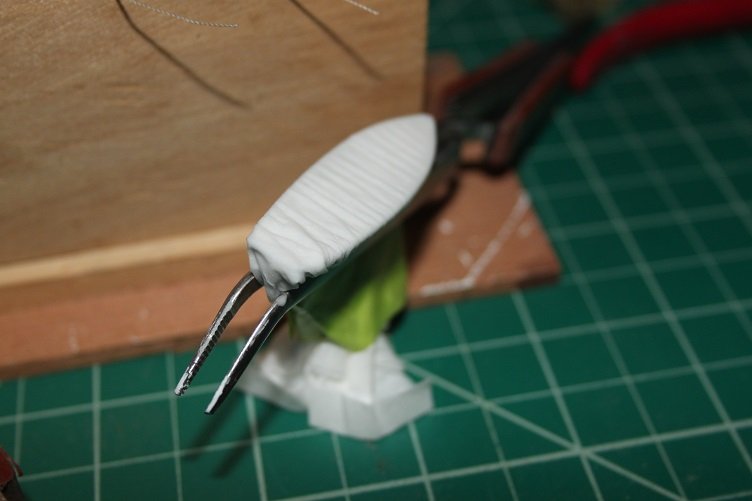
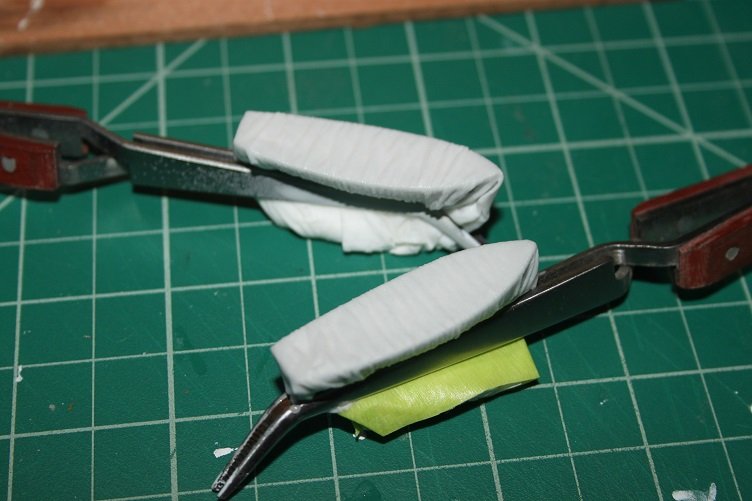
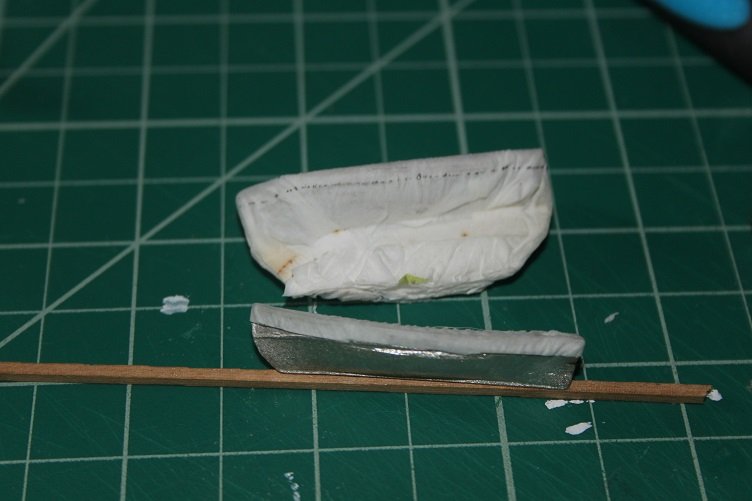
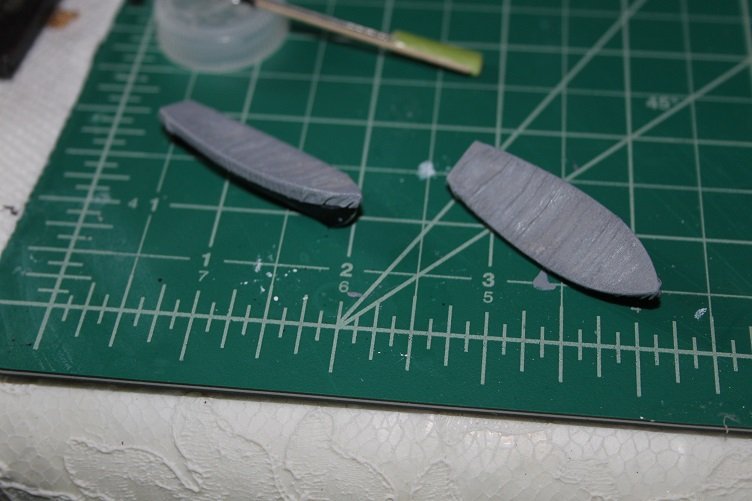
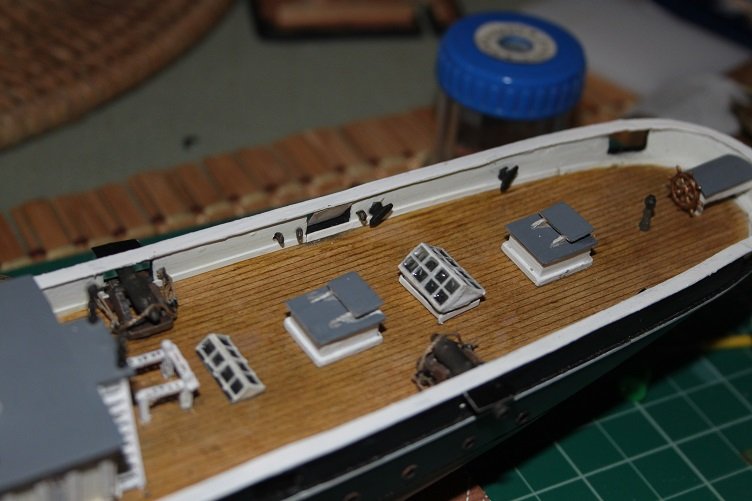
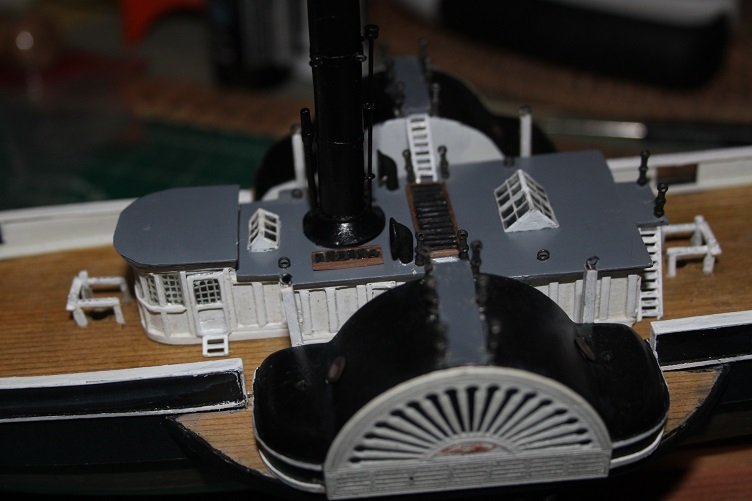
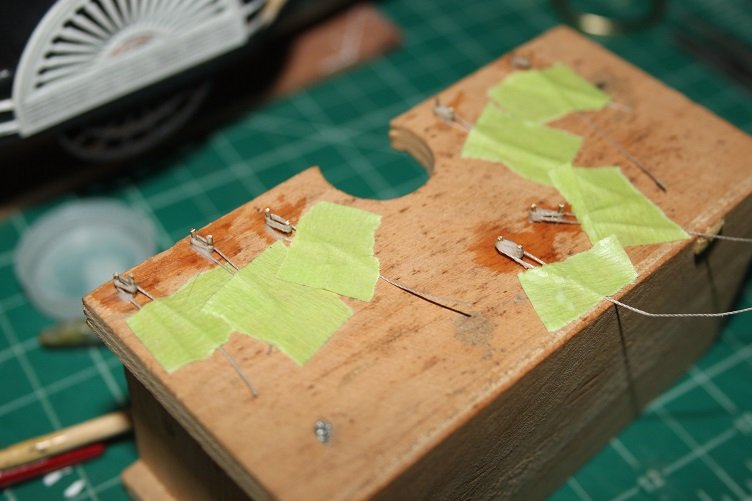
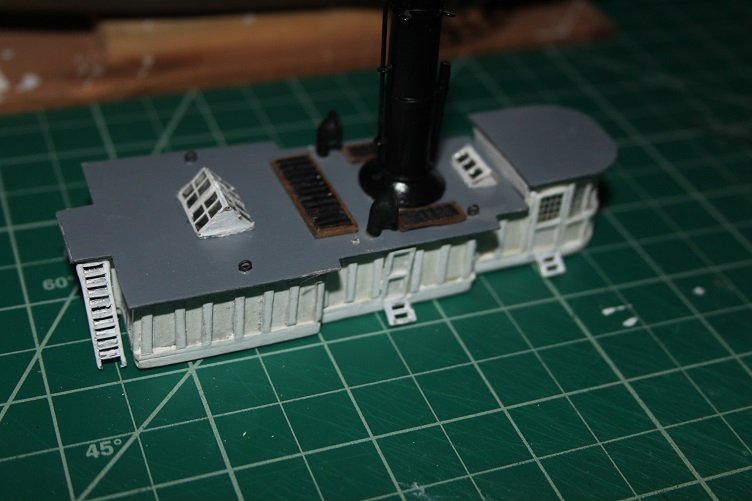
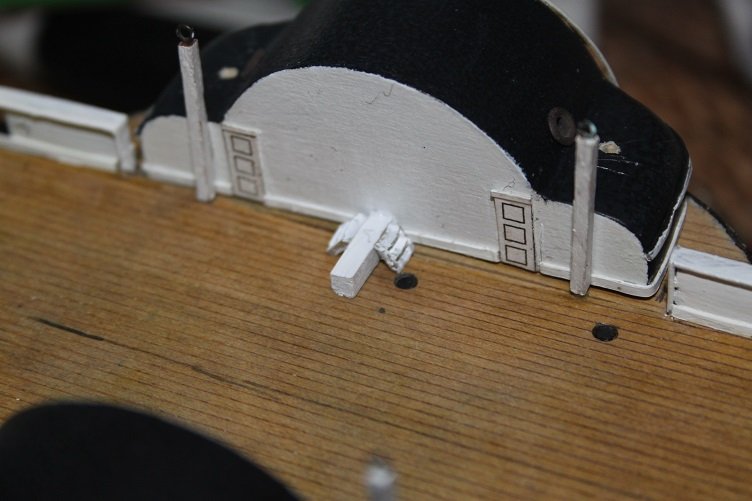
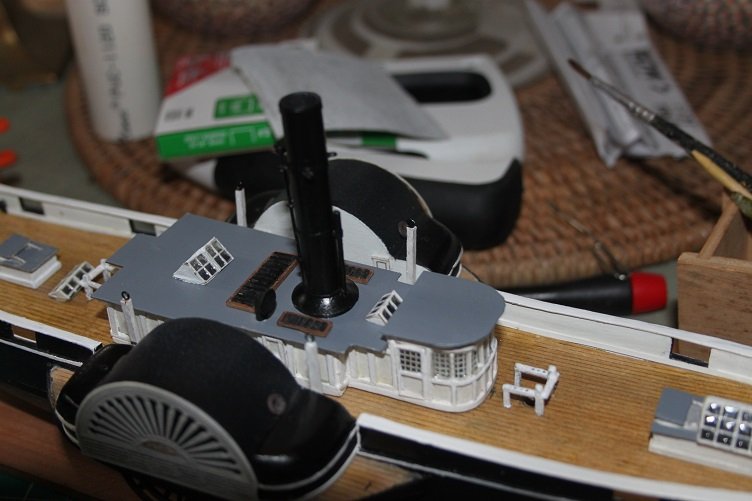
Another update...I decided to tarp the ships boats, my samples weren't molded all that great and required a lot of fileing and sanding to correct molding issues, so covering them is the best alternative. That process started by covering them with 4 layers of facial tissue and pulling it tight without tearing the tissue... once thats accomplished the tissue is flooded with diluted white glue, allowed to set and flooded again, I usually repeat this about 3-4 times... when dry the tissue has is stiffened sufficiently to hold its shape, be trimmed, and take a coat of paint the boats themselves will be painted black and these will be rigged to hang from the davits. Moved on the rigging out the deck house, the guy chains were attached to the previously installed eyebolts the chains are complete in this pic, you can also see the previously mounted handrail stanchions... this proved to be problematic...they all needed to be redrilled before they could be rigged, something I should have foreseen... so remounting most was required after seeing an online article for a museum that has brass handrails from the original HL all the rigging lines have been hardened with a couple coats of ca. I'm debating painting them brass...I think it will enhance the look and break up the black/white a little, thoughts? Well that's all for now, probably more tomorrow, thanks for looking in and thanks for all the likes. J
- 258 replies
-
- 8
-
-
- harriet lane
- model shipways
- (and 1 more)
-
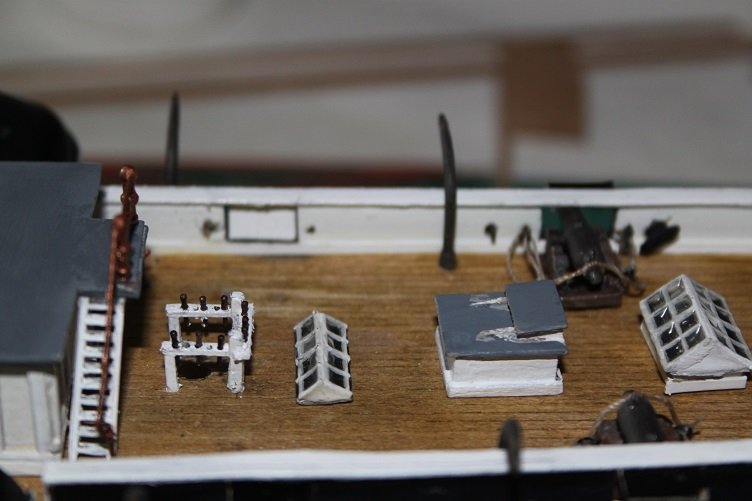
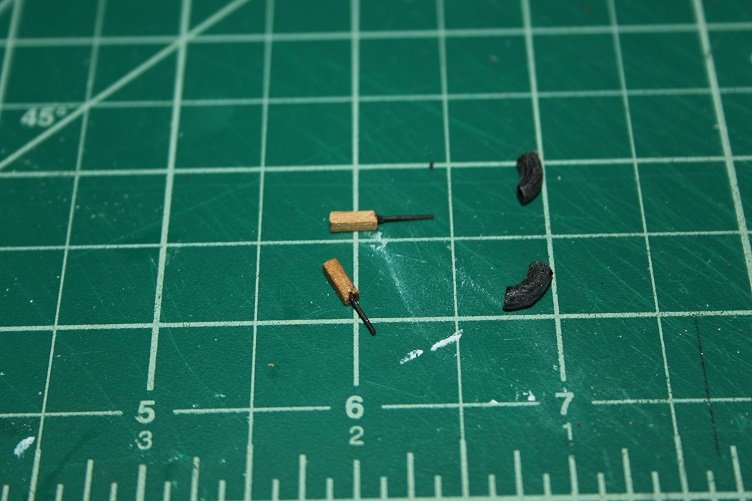
Thx for all the likes...had a good day in the shipyard, well actually the dining room , being off for the day... The stanchions were remounted outboard from their original position, much happier with this set up I wanted to add some rigging to the guns nothing historically correct but just enough to add more visual interest...with that in mind I added eyebolts to the gun mounts and the bulkheads from there work moved on to the bow, a set of bowsprit bits were scratched as well as a set of hawse pipes...the fromer from some 1/16 walnut, the latter from bent plastic sprue more bow work...the anchor windlass was painted, the carrek bits in white and the barrel black, seems to be a theme developing here...I also took the time to scratch a ratchet/handle mechanism, just to add a little more detail, these then went into the bow... mounted the guns next...you can see the rudimentary rigging here, still need to add a few coils here and there With the guns mounted it was time to dress out the rest of the deck fittings... well that's it for now hope to get more done tomorrow before I have to close the shipyard for Easter dinner, as always thanks for looking in J
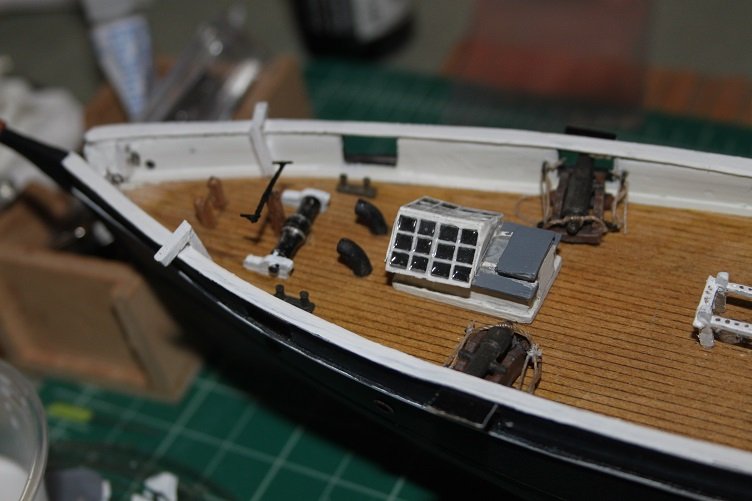
- 258 replies
-
- 7
-
-
- harriet lane
- model shipways
- (and 1 more)
-
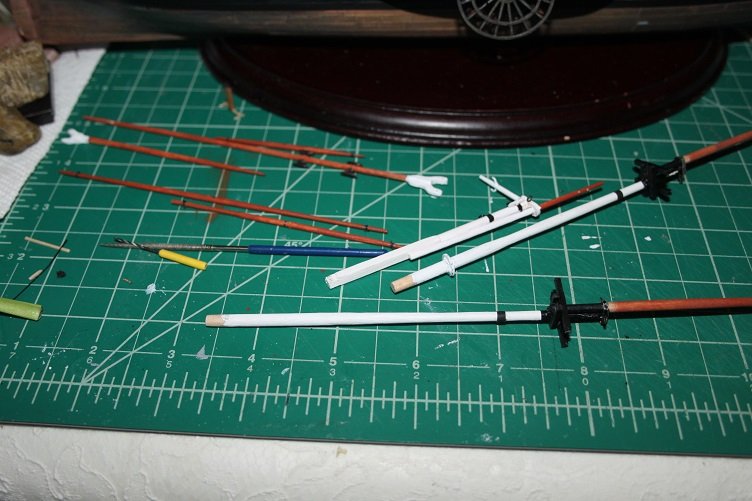
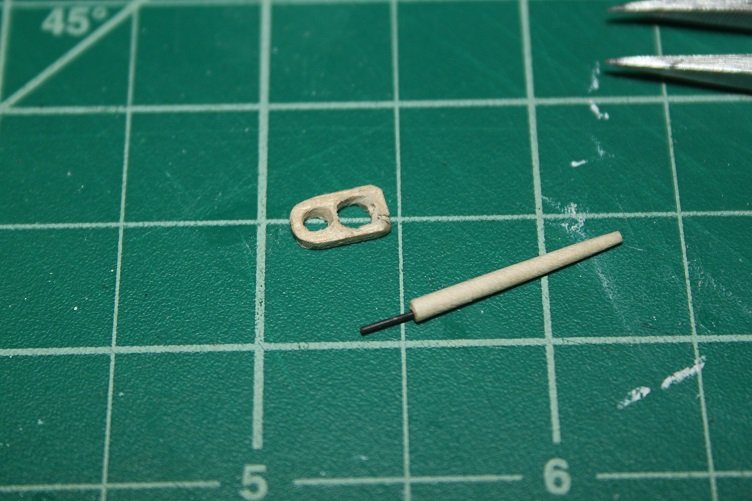
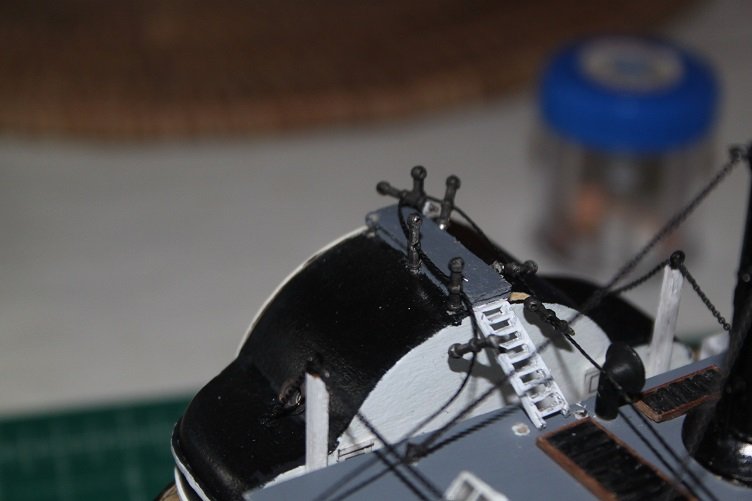
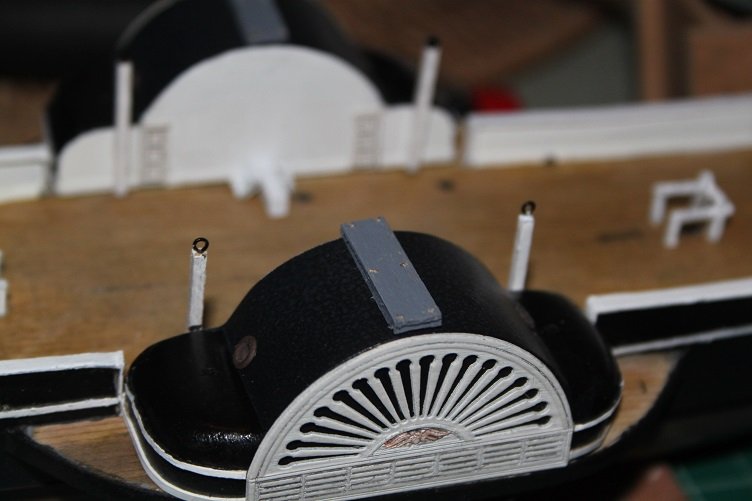
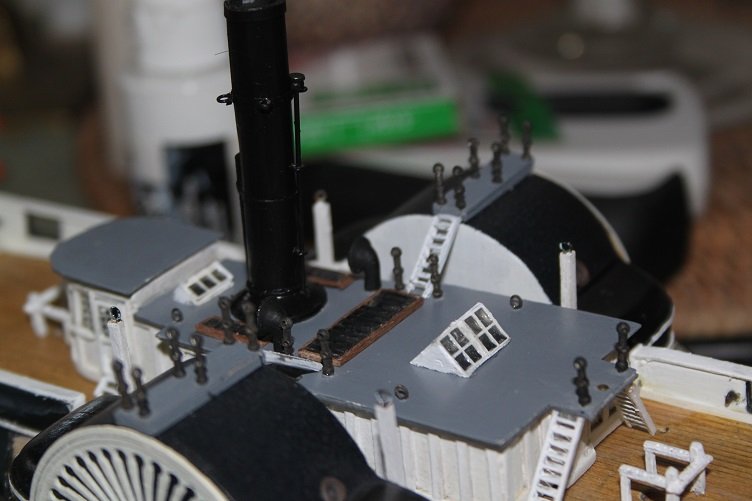
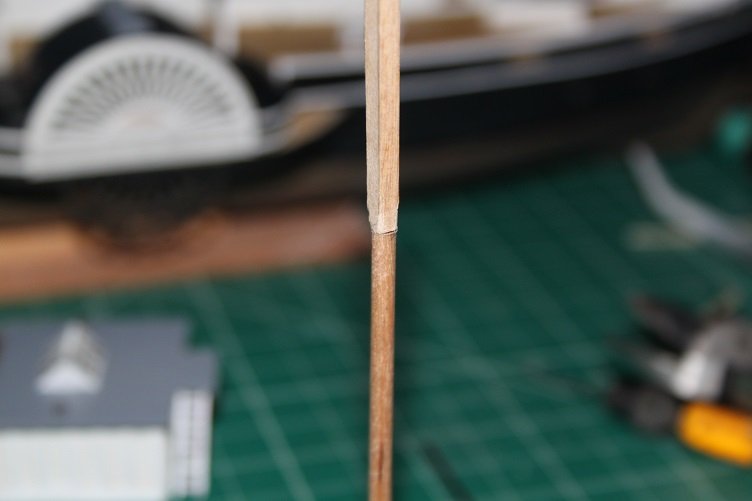
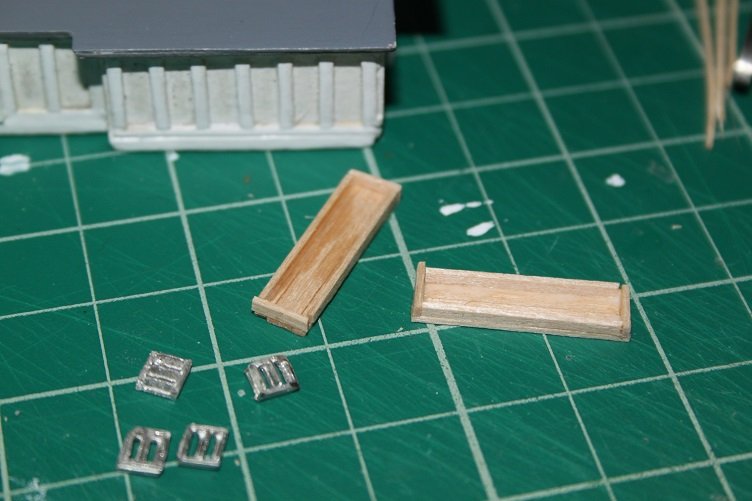
More stuff to share...the ladders were painted out and attached to the deck house the bridge walkways were mounted on top of the paddle houses you can see they were drilled for the stanchions...deck house mounted then the stanchions were mounted you can see in this pic that the stanchions on the walkways are really close together ... so off they came!! I'm going to fill the holes on the walkways and reposition them outboard on the paddle houses, looks like more touch up paint will be needed as well. I started working on the bow sprint, since part of it is square and the other part round I decided to make it in two sections, so the were drilled out, pinned and CAed together...then the transitions was sanded still need some fill and final sanding THX for looking in J


- 258 replies
-
- 6
-
-
- harriet lane
- model shipways
- (and 1 more)
-
Thanks to everyone for the likes and comments...hope to post more pics tomprrow
- 258 replies
-
- 2
-
-
- harriet lane
- model shipways
- (and 1 more)
-
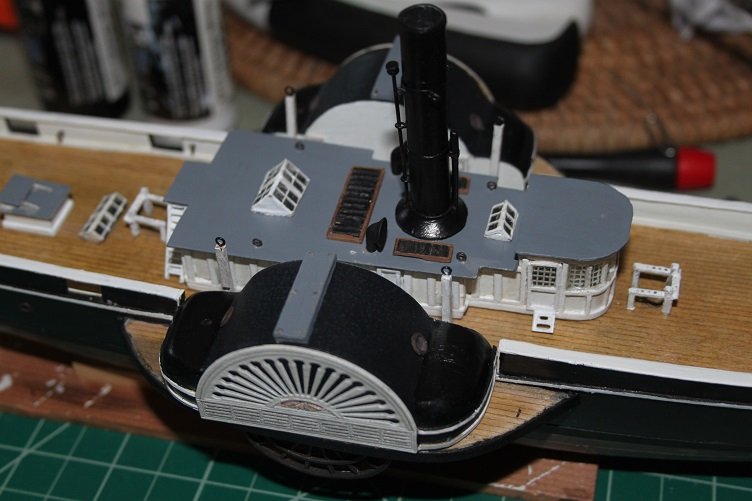
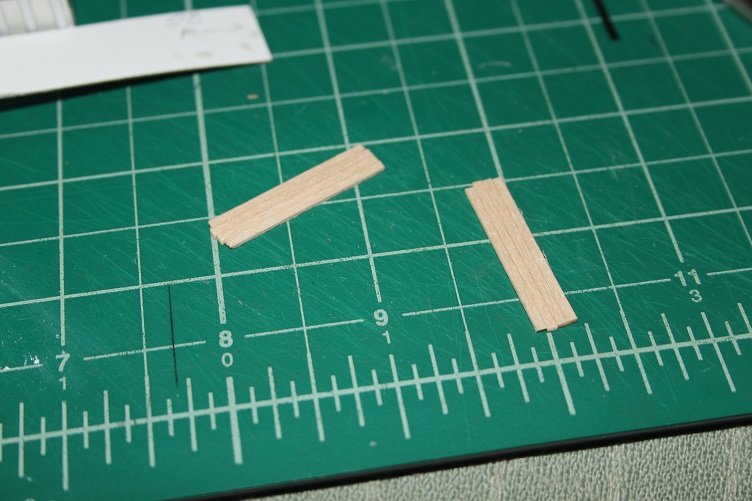
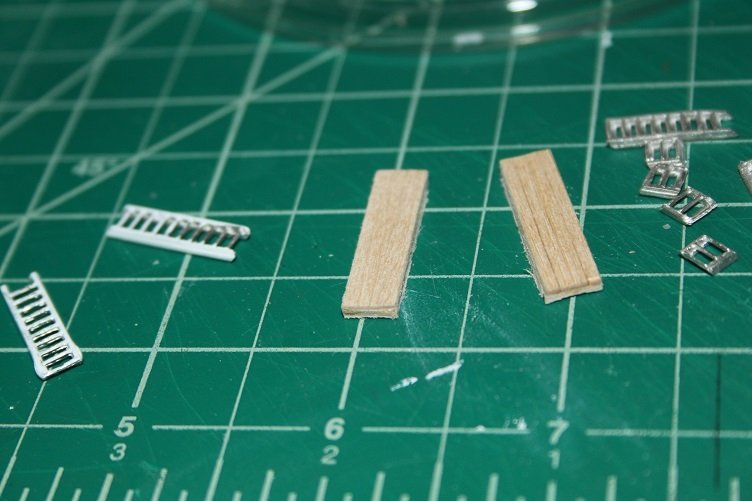
Made a little more progress today, still working on little stuff...got the bridge walkways made, just edge glued 1/16 stock together... from there edge trim was added... then the contour of the paddle house was sanded in...you can also see the ladders being prepared in the shot also got the fife rails painted and mounted and got the ladders mounted on the shaft boxes...still some touch up paint needed and got the deckhouse dressed out... Thanks for looking in J

- 258 replies
-
- 7
-
-
- harriet lane
- model shipways
- (and 1 more)
-
Hey Sam...you're right there, this build does seem to be lagging though...still a bunch to do
- 258 replies
-
- 3
-
-
- harriet lane
- model shipways
- (and 1 more)