


jct
-
Posts
1,519 -
Joined
-
Last visited
Content Type
Profiles
Forums
Gallery
Events
Everything posted by jct
-
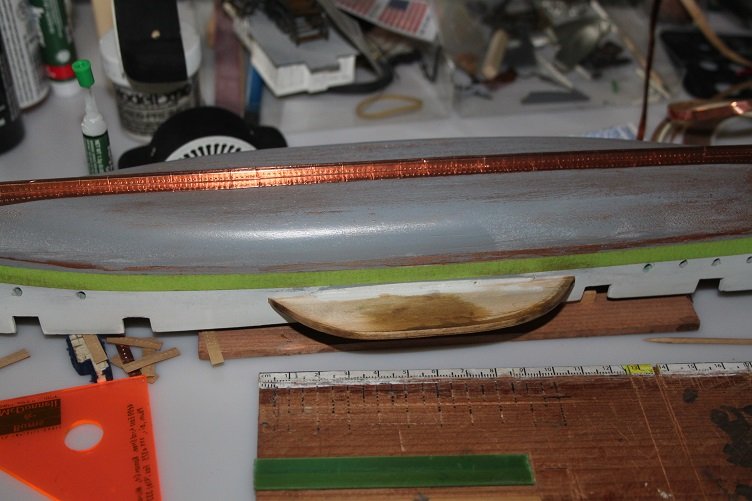
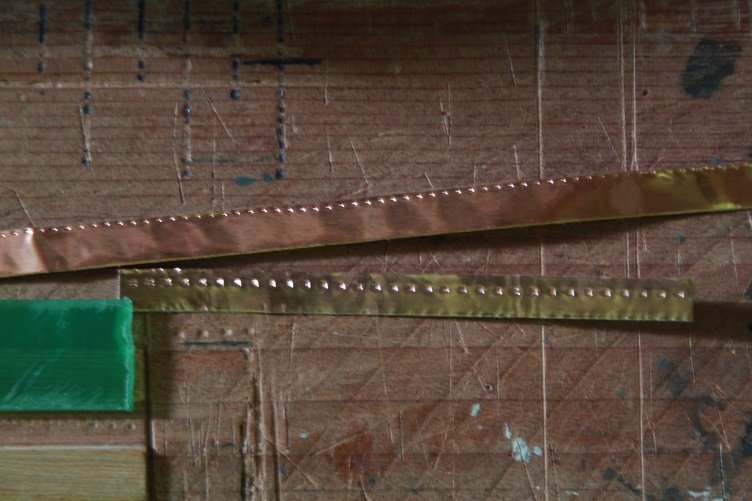
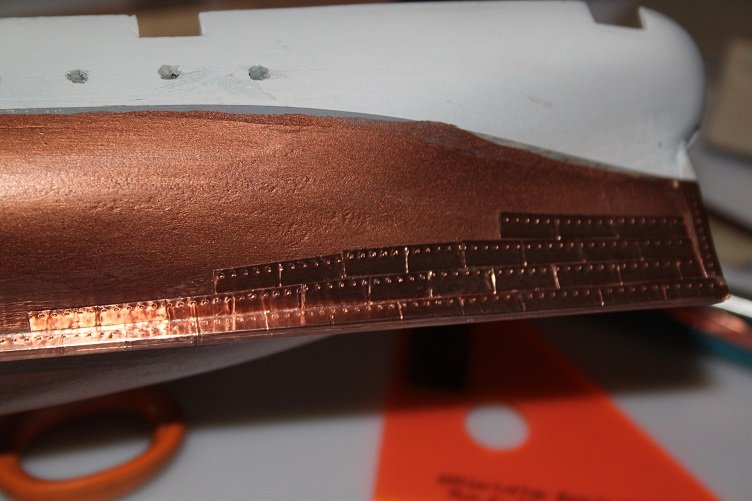
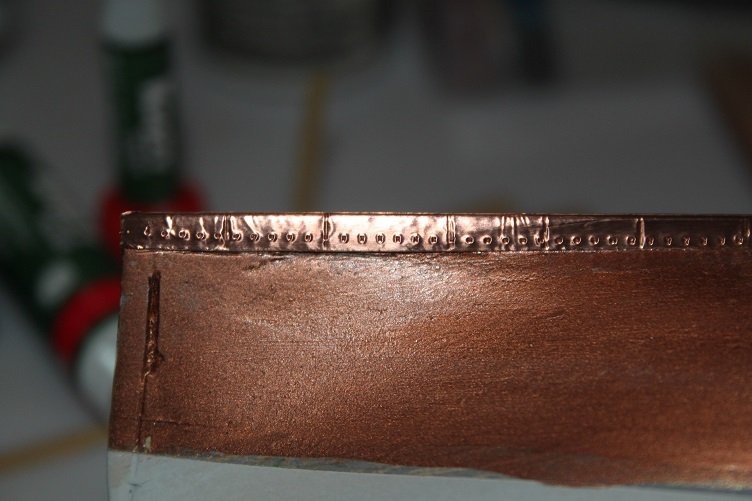
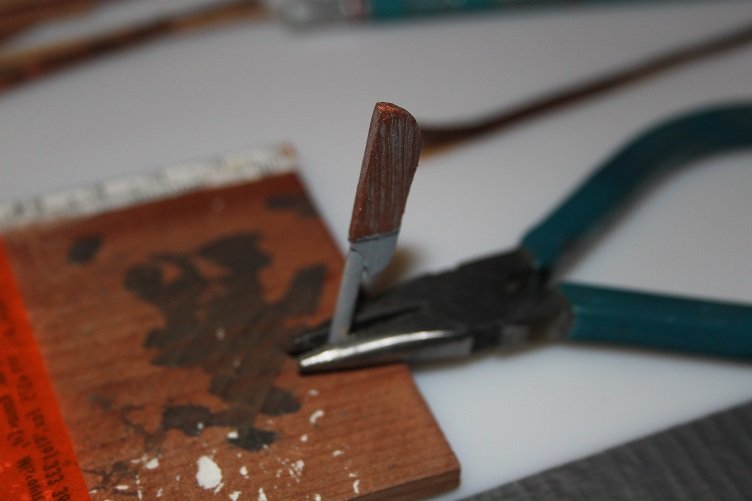
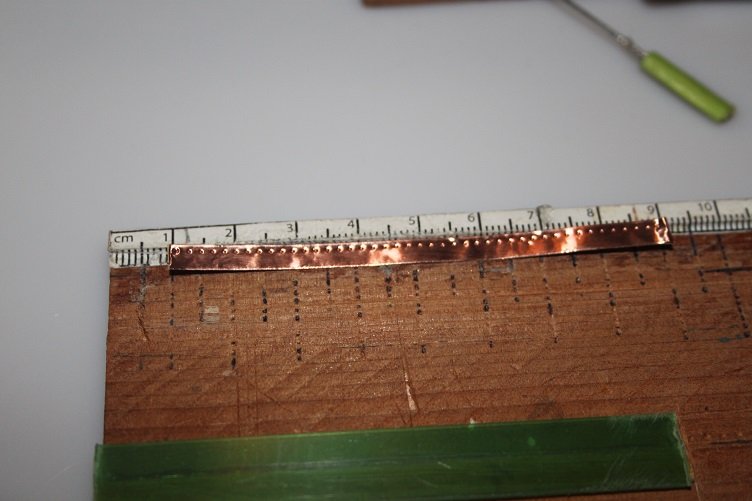
Thanks for the likes...another redo...some the copper foil I had applied to the hull began to lift and the copper paint I use to paint the bottom of the hull took on a gummy feel, thinking the two were probably related...the paint was pretty old, easily 10 yrs or so. So the offending foil plates were stripped off and all the copper undercoat removed. The hull then received a light seal coat and I started the process all over. since I had to strip everything down I'm making a modification to my 'plates' I've switched to a smaller pounce wheel and am using much less pressure, they are still not to scale but much closer than the originals, you can see the difference in the pic below So that's it for now... THX J
- 258 replies
-
- 4
-

-
- harriet lane
- model shipways
- (and 1 more)
-
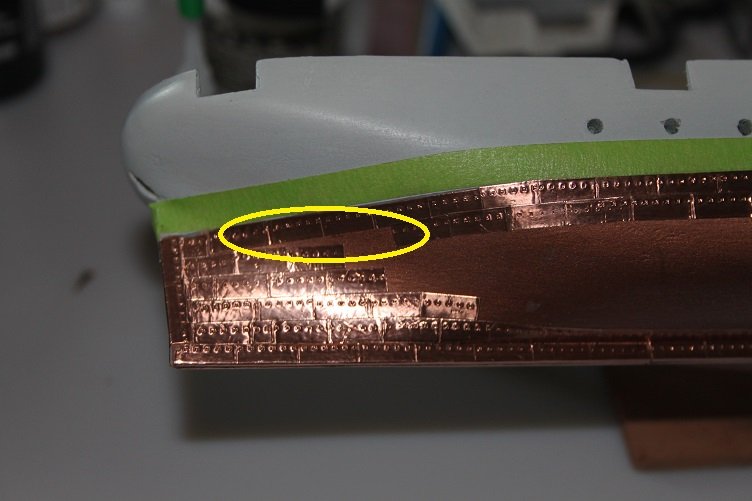
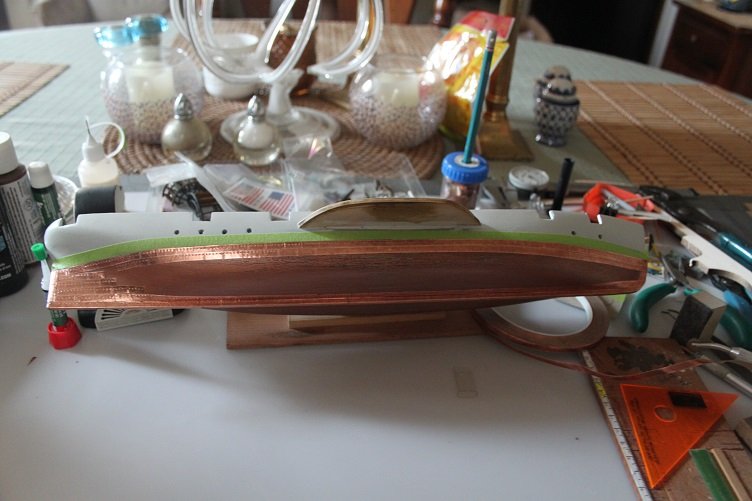
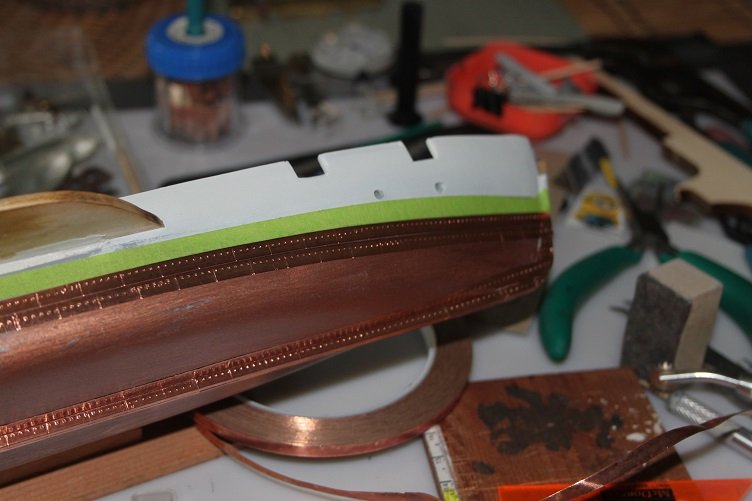
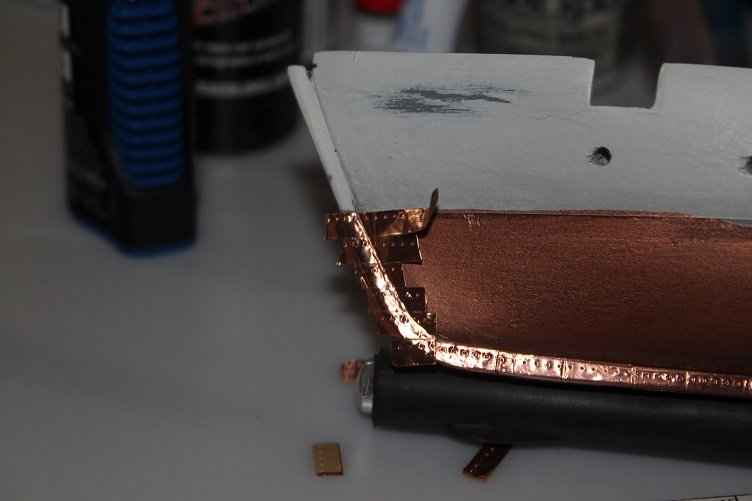
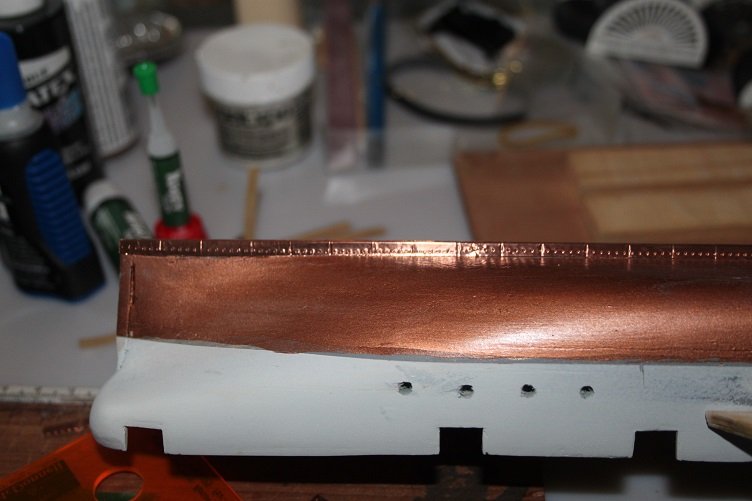
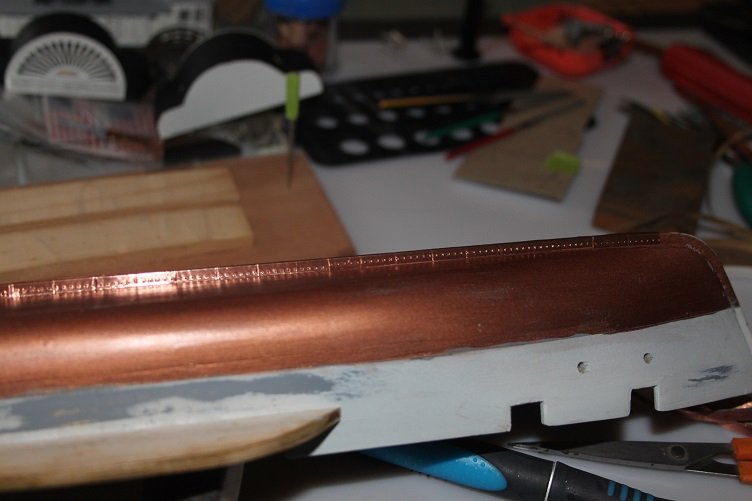
Thanks for the likes and comments, all are much appreciated...foiling/plating continues, with my normal 3-4 redos...in this case pealing of and replacing...the initial beltline was all wonky (sorry no pics) so I placed a tape guide line to butt against and laid in two courses for the beltline. bow close up this next shot is the stern...question for you experienced copper plate installers..you'll notice the area in the oval, if I were planking a stealer would be called for, does this apply to plate as well ie should I cut a little pointy plate to install here? Or would it be more appropriate to just lay a full plate over top. any assistance here is appreciated as my on-line research hasn't turned up anything... Well that's it for now, thanks for looking in J
- 258 replies
-
- 3
-
-
- harriet lane
- model shipways
- (and 1 more)
-
THX Pop, I think yo are correct maybe even more then one
- 258 replies
-
- 2
-
-
- harriet lane
- model shipways
- (and 1 more)
-
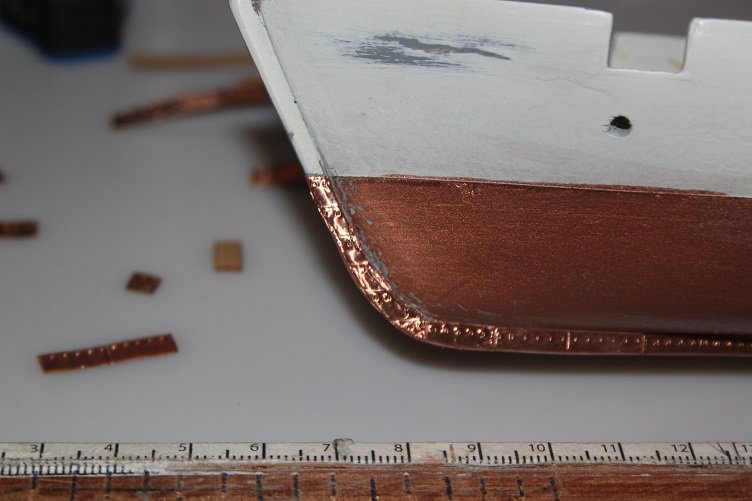
Hi all, Thanks for the likes and kind comments, the foil plating is continuing, I've decided to make some and apply them and make some more...just to brake up the monotony of each process, I've also learned that the curvature of the hull prevents any more the two plates from laying properly so I'm laying them up two at a time......this process may take another two years!! Pics follow THX J laying up the bow trimmed (man these look really ugly on camera) laying up the stern
- 258 replies
-
- 5
-
-
- harriet lane
- model shipways
- (and 1 more)
-
Pinta by jct - Shipyard - 1/96 scale - CARD
jct replied to jct's topic in - Kit subjects built Up to and including 1500 AD
Thanks much Danny -
Pinta by jct - Shipyard - 1/96 scale - CARD
jct replied to jct's topic in - Kit subjects built Up to and including 1500 AD
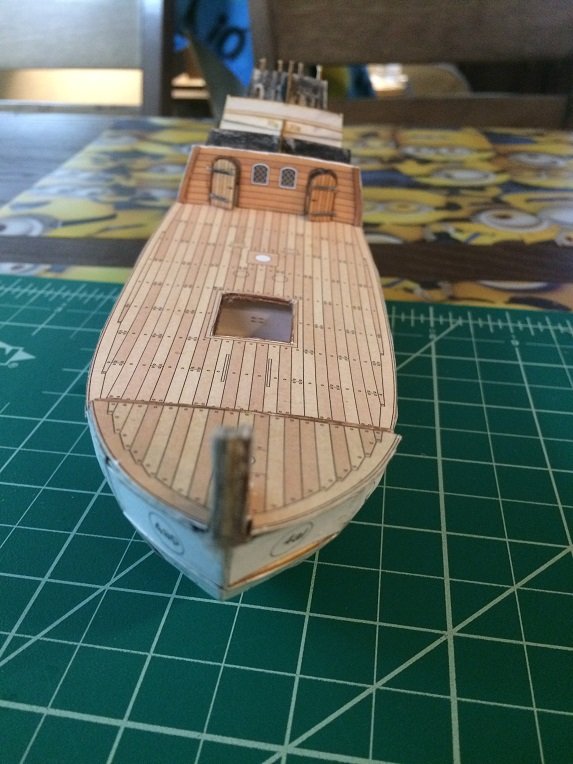
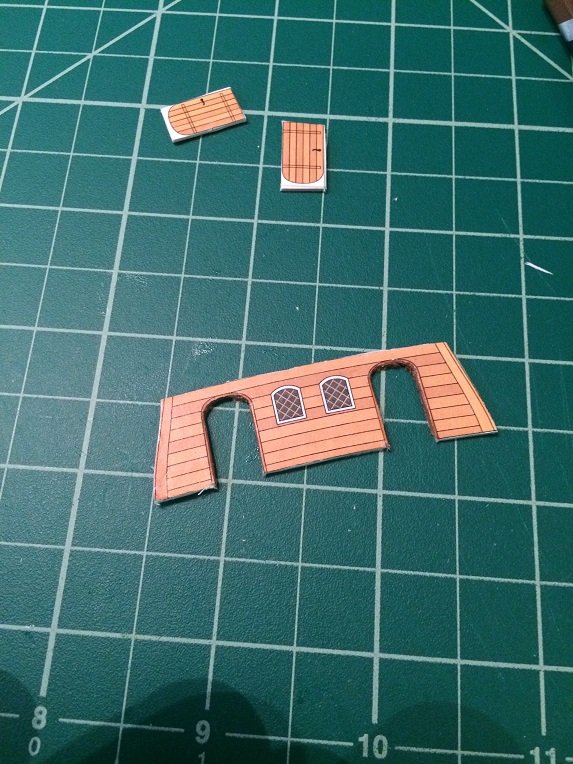
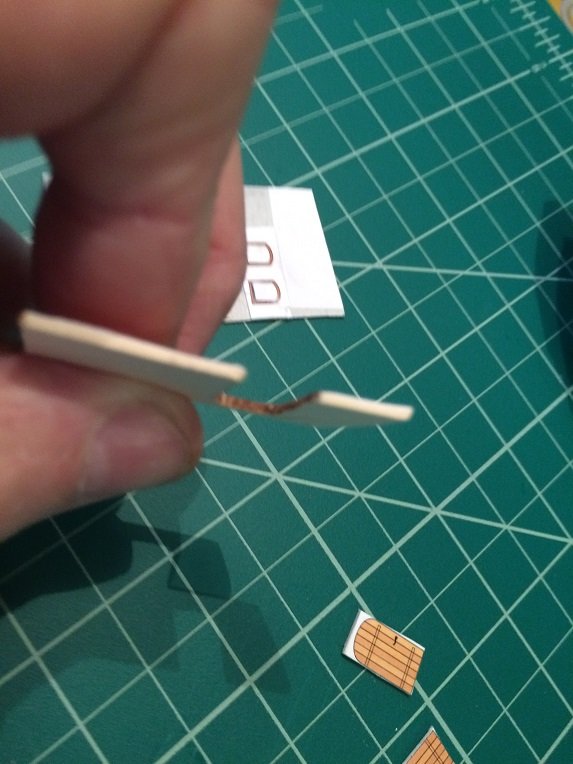
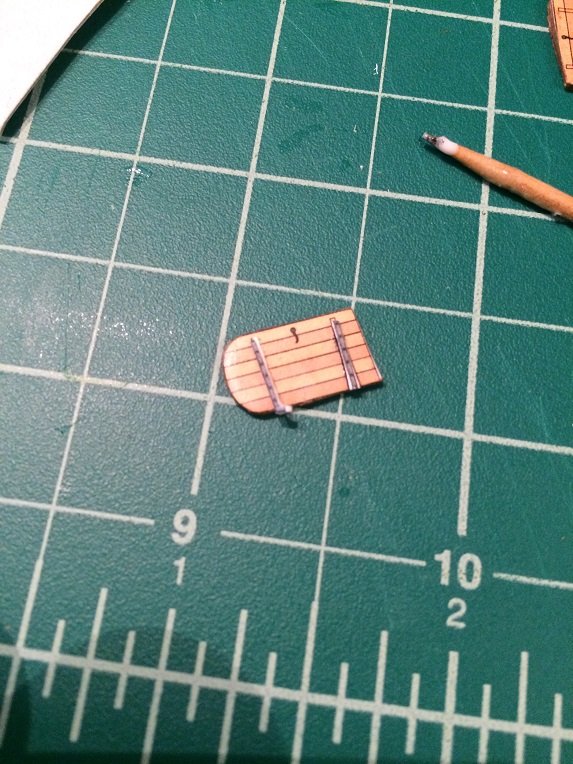
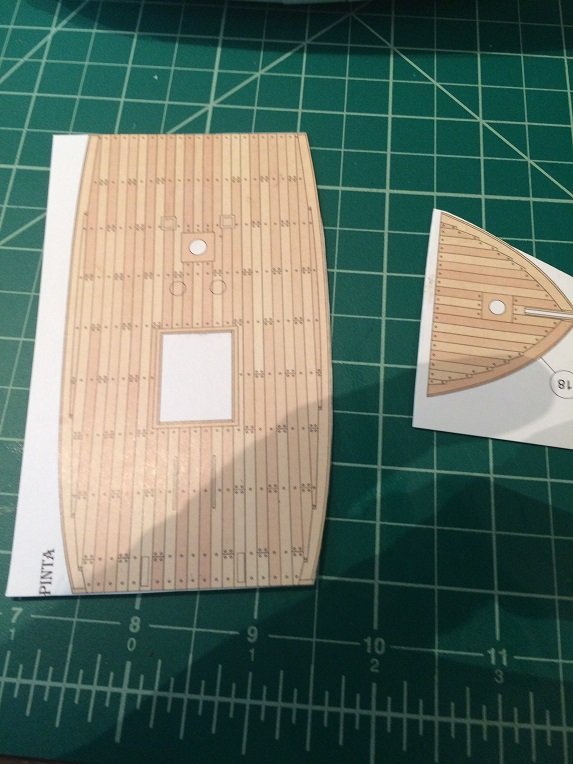
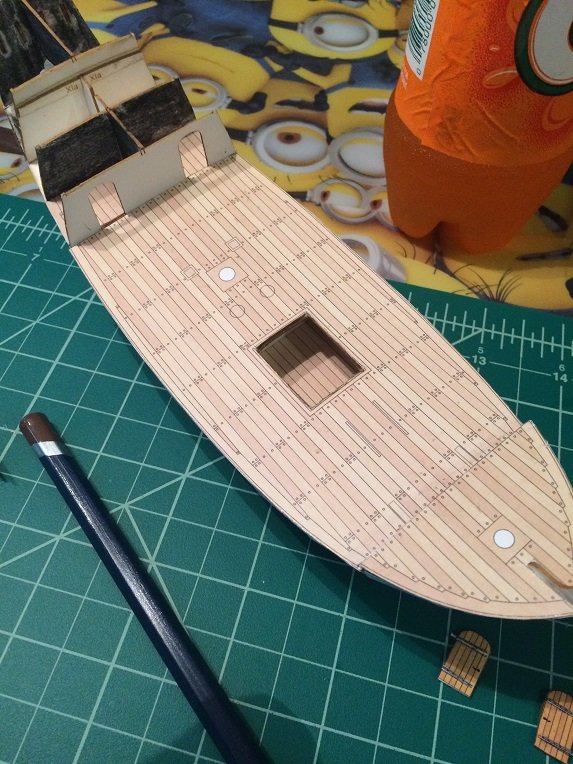
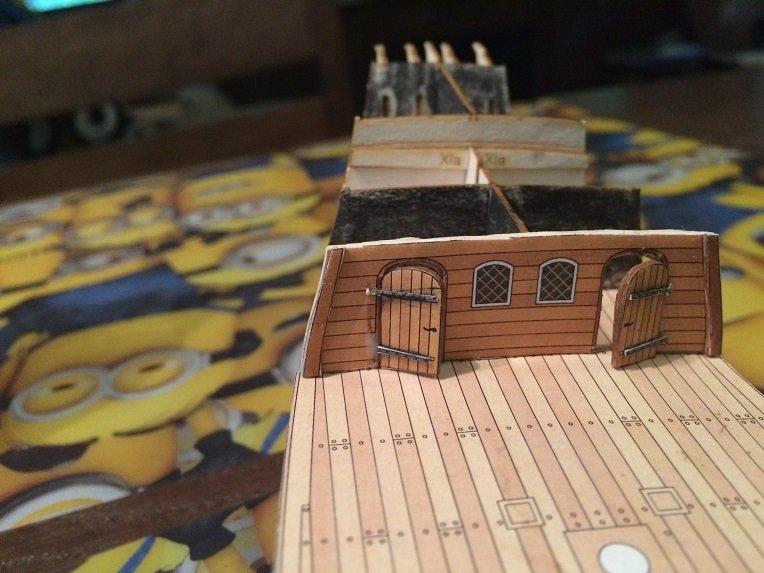
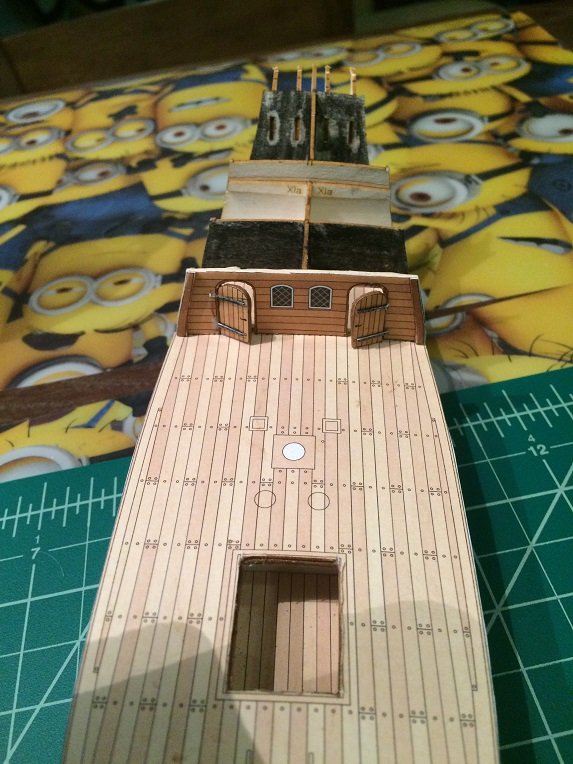
Hi everyone, We got away for the long weekend so I was able to get some build time on the Pinta, started working on the aft cabin wall... all the parts have to be thickened to the appropriate thickness by laminating the kit pieces to other stock so they are glued up before being cut out. Once the excess material is removed you need to color the edges somehow, I'm using watercolor pencils for that task, I also have some tube water color paints I'm going to experiment with later in the build. the little doors came next the hinges are separate pieces and really add depth to the part the deck planking pieces were prepared next and installed... The slot in the bow planking had to be widened to allow for the stem pieces to be added...so this part was carefully removed and reinstalled after the stem was built. That's one thing I'm unsure of with the kit drawings, the order of assembly... it isn't clear in some cases, in the future I'll have to study the pieces more carefully to avoid redos, this one turned out to be no harm no foul... The aforementioned stem the completed bulkhead installed...there are supposed to be frames around the windows but they were completely butchered by the hamfisted shipwright......I've an idea on how to remanufacture them, but that will be in the next installment... Shot from the bows...Well that's it for now, there won't be any updates to this log for a couple weeks, but I'll be working on the Harriet Lane. Thanks to all for the likes and kind comments, appreciate you stopping by J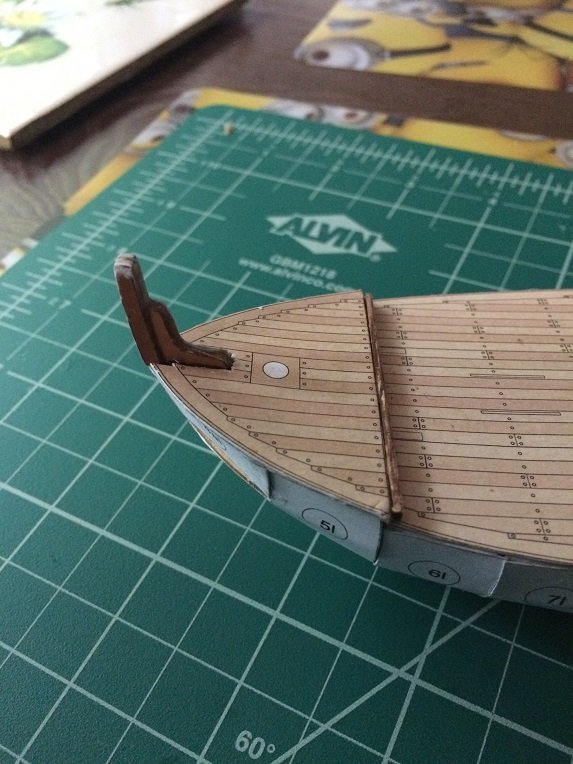
-
Hey Pop.., HAPPY BIRTHDAY TO YOU ...HAPPY BIRTHDAY TO YOU...HAPPY BIRTHDAY DEAR POPEYE...HAPPY BIRTHDAY TO YOU...now blow out your candles

- 140 replies
-
- 2
-
-
- jolly roger
- lindberg
- (and 1 more)
-
Thanks for the likes... Started laying up the foil plates, starting aft moving fwd covering the keel first a closer look Laying down well...I just have to figure how to handle the upward sweep at the bow, maybe smaller plates?? Thanks for looking in J
- 258 replies
-
- 5
-
-
- harriet lane
- model shipways
- (and 1 more)
-
HI All...a correction to an earlier post...the foil I'm using is .002 in thick...not the .2 ml as posted...daaa, got ml on the brain from work...
- 258 replies
-
- 2
-
-
- harriet lane
- model shipways
- (and 1 more)
-
Hi Denis, No the copper foil is fine, laying down well, I did consider scratching out some fife rails but thought I'd be ahead of the game going with the kit supplied parts...then it just become kind of a personal challenge to get the things to work, they are on the back of the bench for now, time will tell...a lot of the castings in this kit leave a lot to be desired wait till yo see the ship's boats, nasty cast Thanks to everyone following along for the likes, appreciate them
- 258 replies
-
- 3
-
-
- harriet lane
- model shipways
- (and 1 more)
-
Quick update...while the second coat of paint was drying on the main hull I applied the copper foil plates to the rudder..pics follow applying the foil Rudder still needs finish paint THX J
- 258 replies
-
- 2
-
-
- harriet lane
- model shipways
- (and 1 more)
-
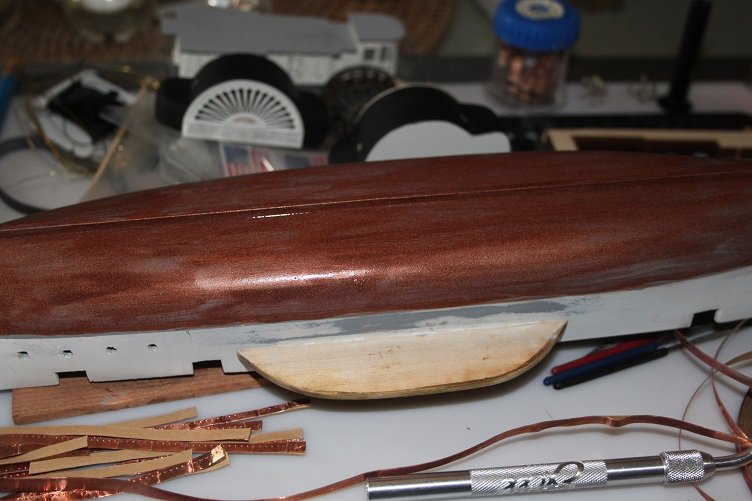
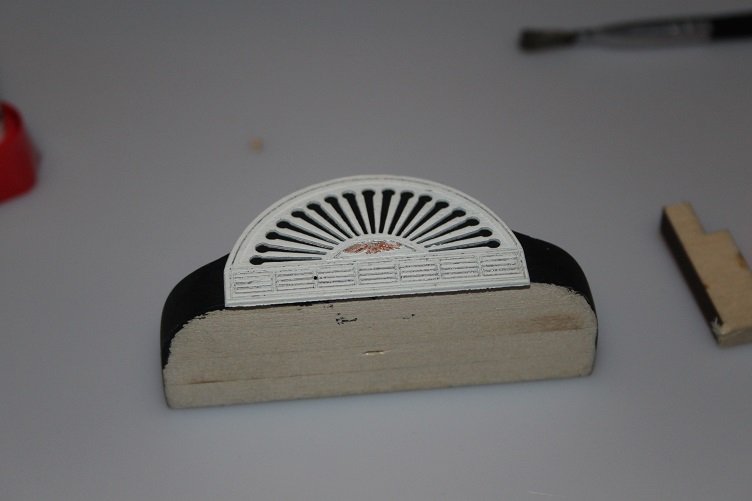
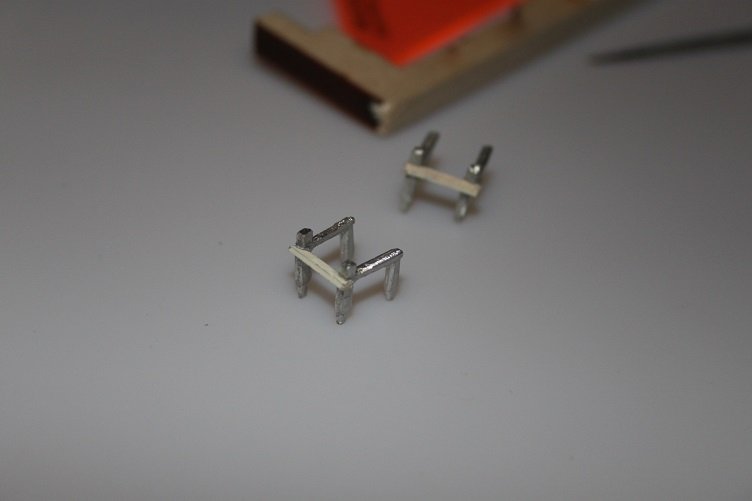
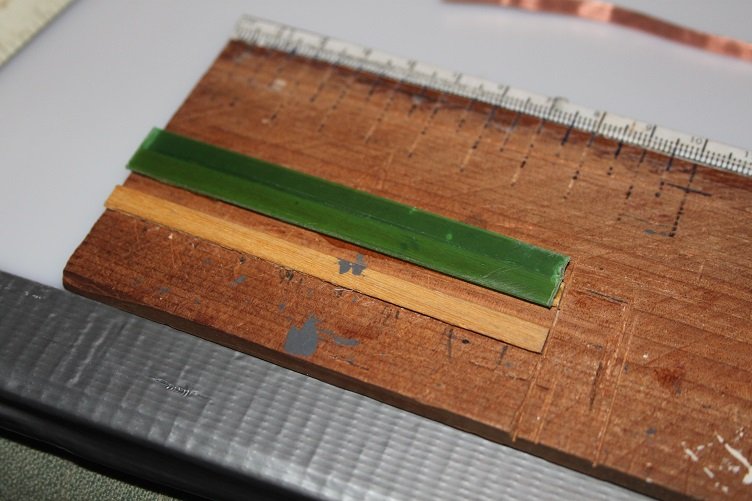
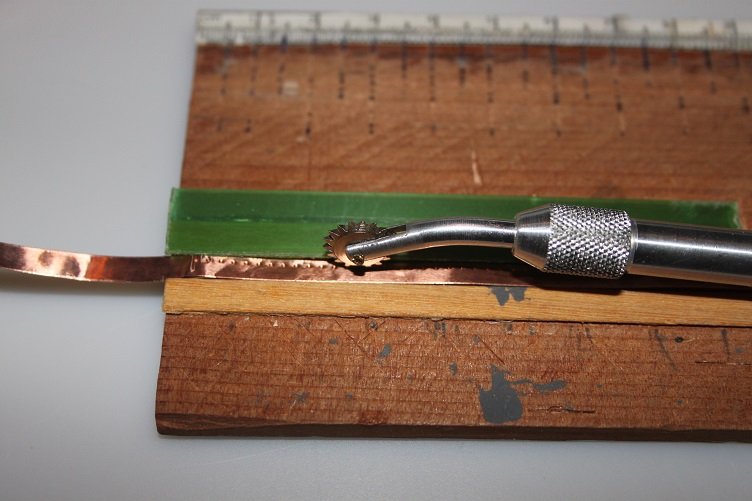
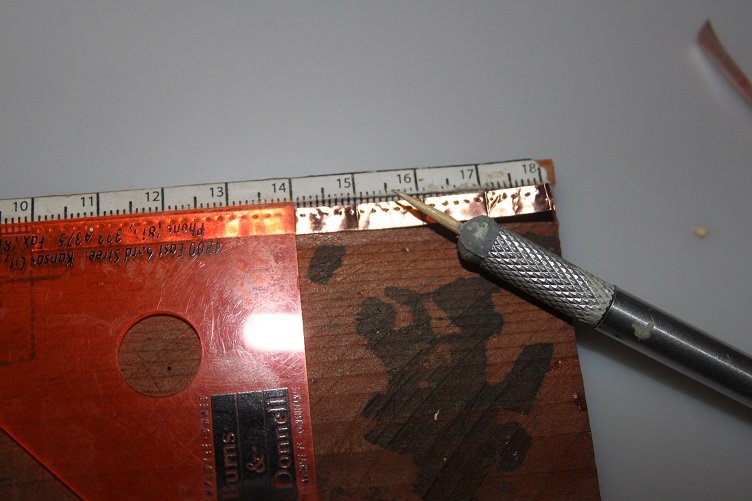
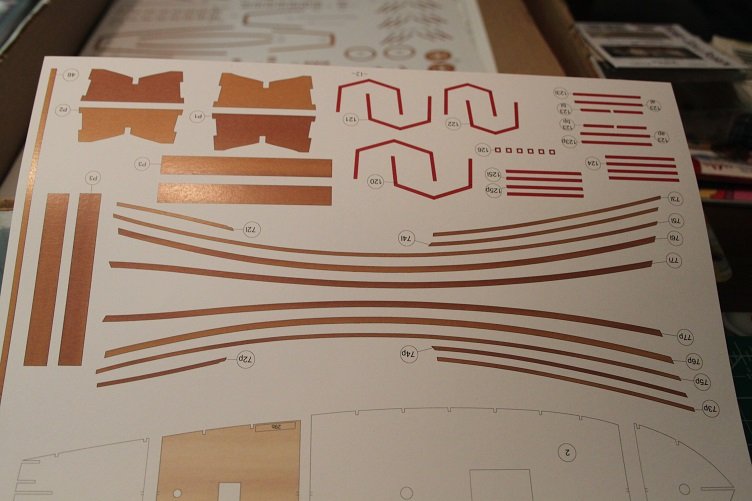
As a wise man once said all things come to those who wait...so for those that have been waiting for an update of this build log here it is! Thanks to all you you for your likes and comments, much appreciated. I have finally taken some time and gotten back to this build, this installment will focus on my attempt at making copper foils plates... the kit comes with a roll of foil but it is very thick and is 1/2 inch wide, this would have needed cut down to a narrower width or would have been way out of scale, so I turned to my stained glass supplies. Self adhesive foil is used to edge pieces of glass to allow them to be soldered together, the foil I'm using is 3/8 wide and about .2ml thick. First thing I did was come up with a fixture to allow me to 'rivet' the plate, a couple scrap planks 3/8 apart and a piece of plastic strapping glued on top with a 1/8 inch offset, this allows the rivets to be set to one side... ...which can be seen in the above pic...at that point the strip is set against the straight edge and the individual plates scribed in with a toothpick harded in CA... Once a batch are made I'll trim the ends and start the application...but before hand I wanted to pre-paint the hull bottom copper so that any small gaps that may occur wont be so obvious. While the hull and rudder dry, they will need a second coat, I attached the outer facing to the paddlewheel houses, I picked the eagle out in gold and added a little graphite to the recesses to get them to stand out a little then I figured I'd just bang out the fife rails, the kit supplies the end rails in a mystery metal casting and you have to fit a center beam of wood...what a pita these turned out to be, they are really small to start with and super bendy and the precast slots had all kinds of flash in them, a lot of file work was needed to clean them up. Glueing on the wood cross piece was a real challenge, I've stated in another log how I manage to get ca eeverywhere but where I need it and this was no exception...i must have glued the cross piece to my fingers at least 4-5 times, and when I would finally get them where they needed to be the damn things were crooked...I fought with the little beasties for over an hour, and they are not even drilled yet!!! I fully expect them to collapse when I try that. I truly hate these!! Well that's it for now...gonna watch the ballgame, thanks for looking in. J
- 258 replies
-
- 5
-
-
- harriet lane
- model shipways
- (and 1 more)
-
Hi Clare, Thanks for the quick response, that explains a lot, I was interested in the paper blocks after watching a video on how they assembled...pretty cool, I'll check out Cromwell. I've a ways to go before I'm ready to rig and may still change my mind and go with conventional wood...but thanks again for the info and the quick response, much appriceated THX J
-
Hi Clare, A question for you, did you experience any difficulty ordering directly from Poland? I've been following your Shipyard builds and was inspired to order their Pinta, but when I tried to order the block set from their web site the US was not listed in the country drop down and the paypal link would not work...I tried e-mailing but no luck there they recommend buying from Age of Sail but they don't carry the block accessory set...ok don't want to whine just wanted to see how you went about ordering directly from Shipyard. THX J
-
Pinta by jct - Shipyard - 1/96 scale - CARD
jct replied to jct's topic in - Kit subjects built Up to and including 1500 AD
Thanks for the guidance -
nice job Steve following with interest
-
Pinta by jct - Shipyard - 1/96 scale - CARD
jct replied to jct's topic in - Kit subjects built Up to and including 1500 AD
Thx Slog and Mumin...I did fair them lightly, obviously not enough, next question then is should i consider filling?? -
Pinta by jct - Shipyard - 1/96 scale - CARD
jct replied to jct's topic in - Kit subjects built Up to and including 1500 AD
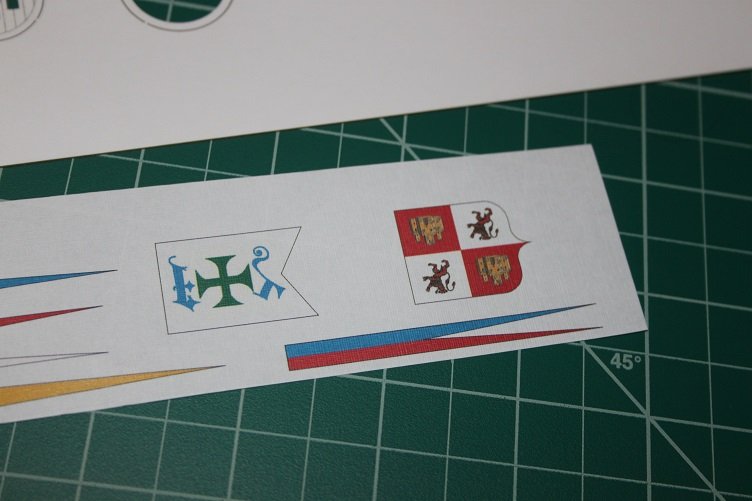
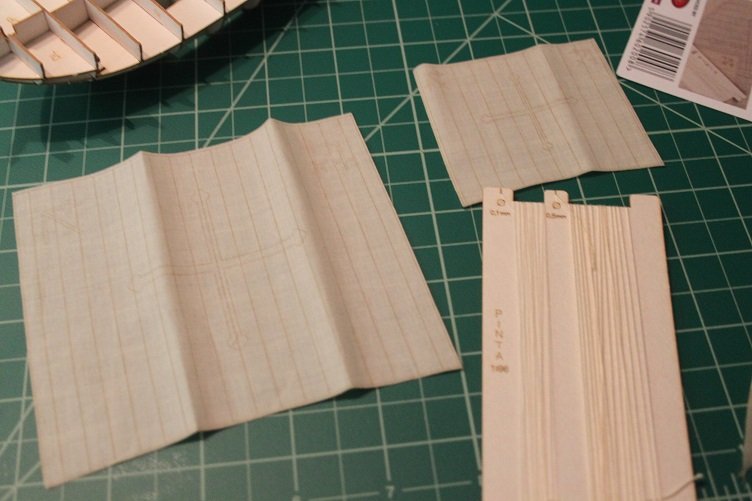
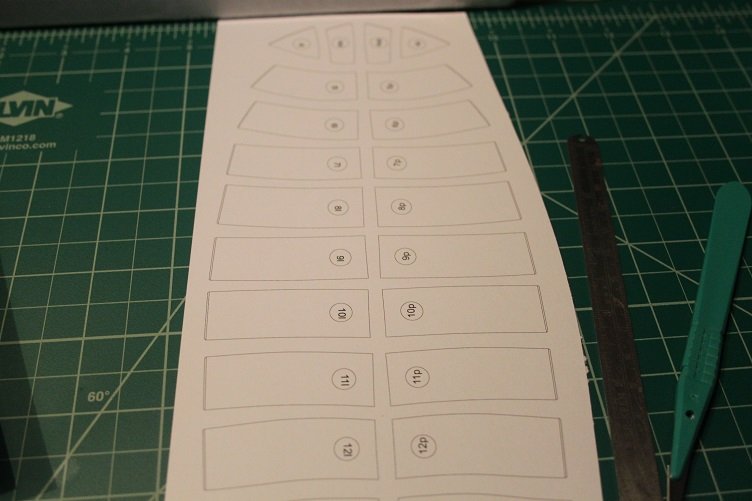
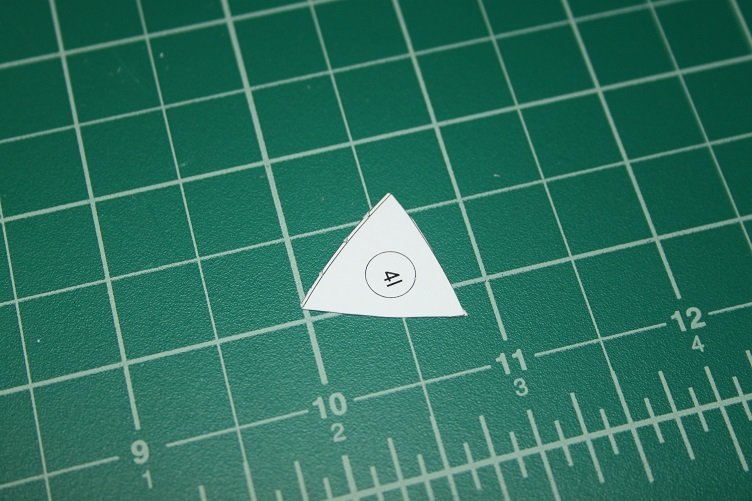
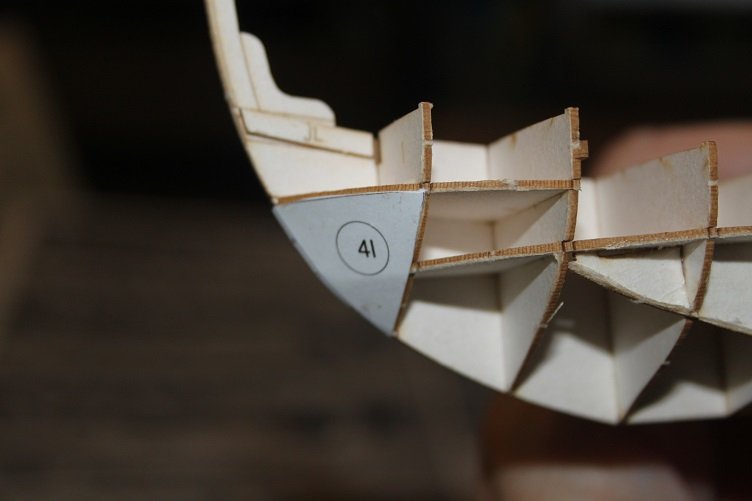
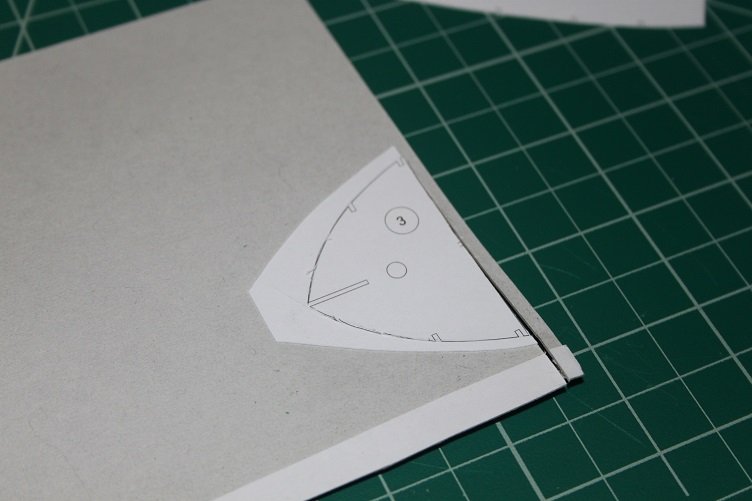
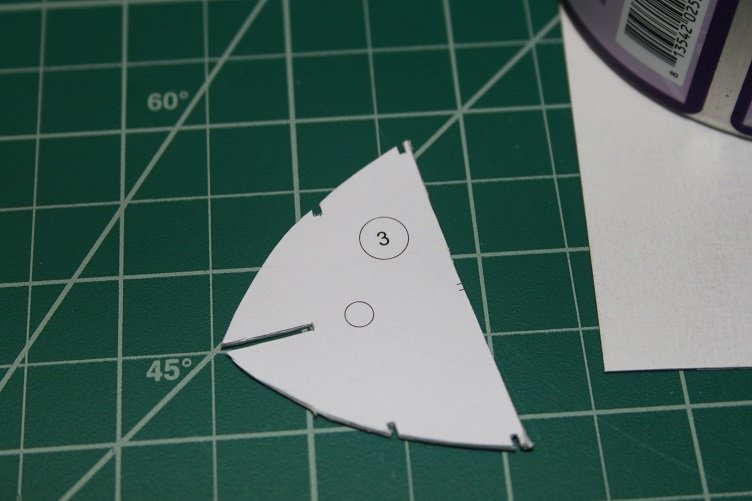
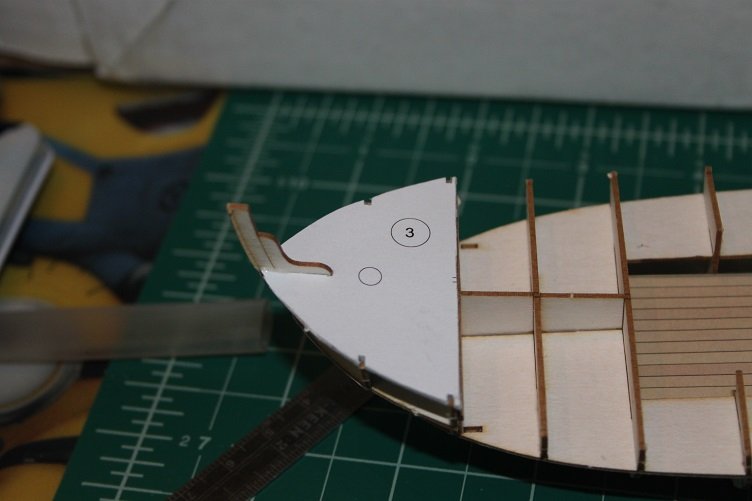
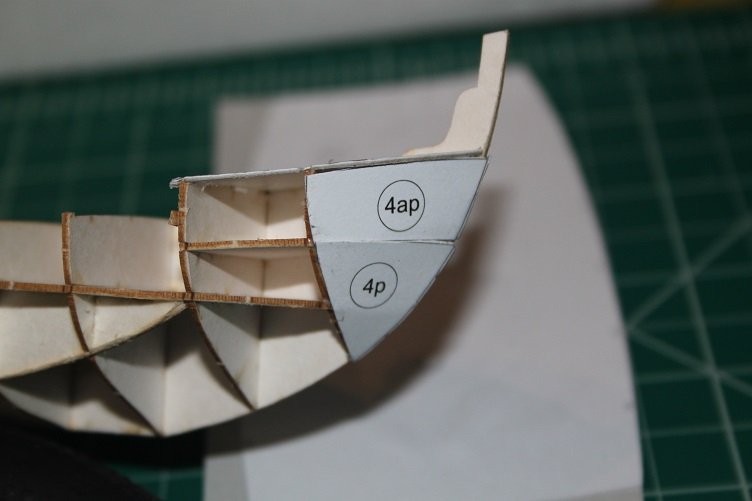
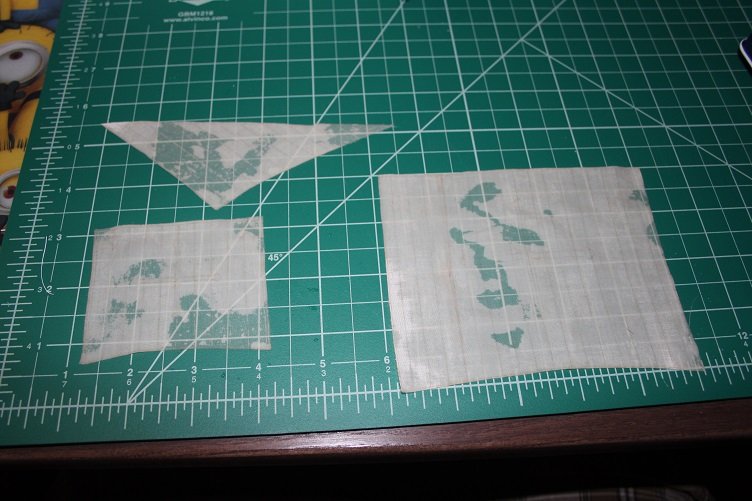
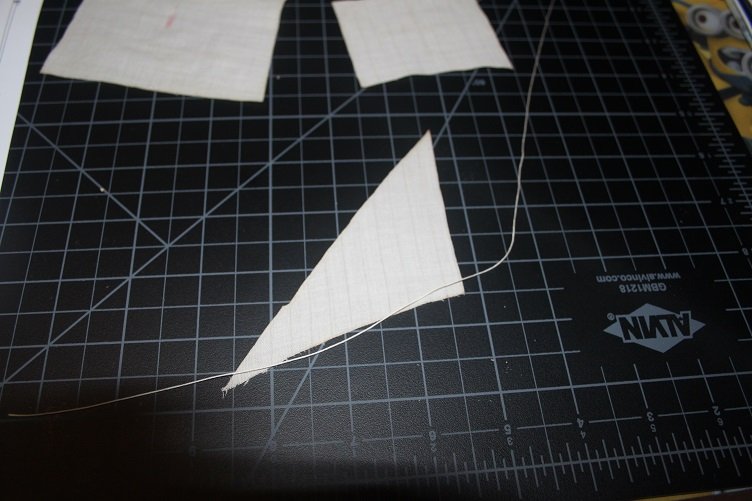
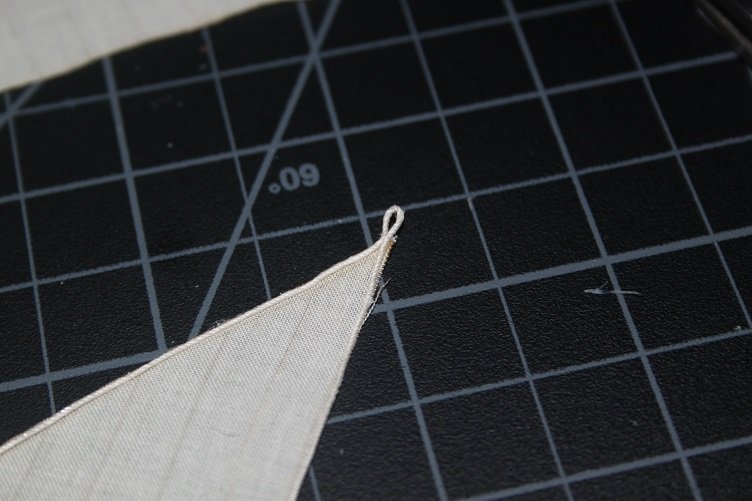
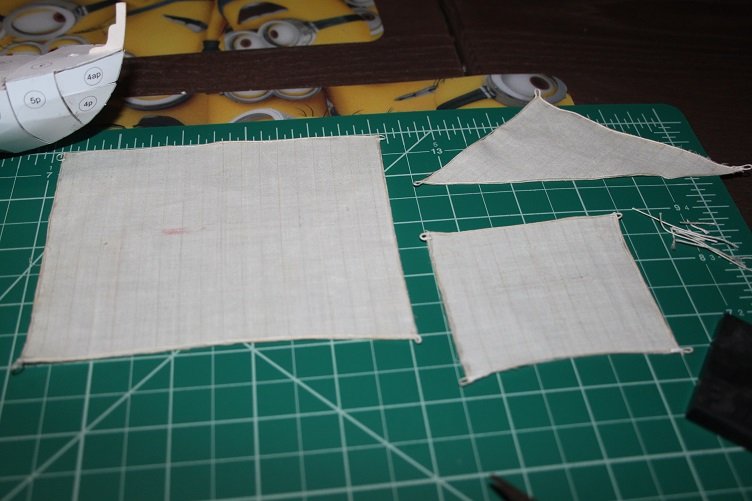
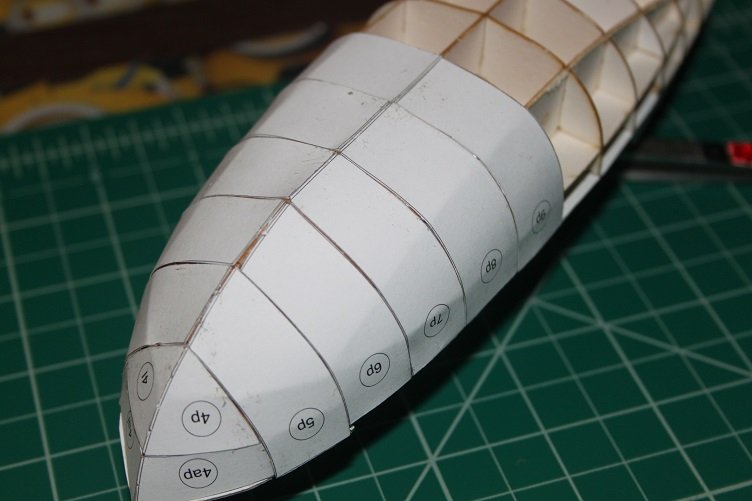
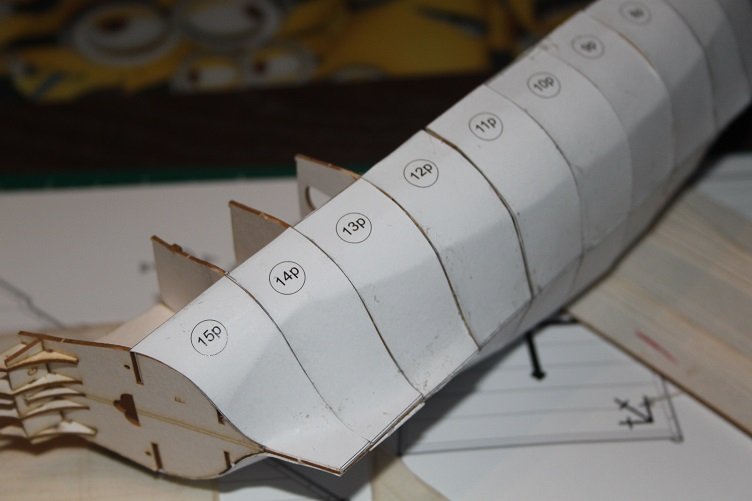
First I want to say thanks to everyone for the likes and kind words...The better half and I got away for the week end so I was able to put more time into the Pinta build, first I want to add some photos of the kit parts that I failed to add in the opening post: This is the crow's nest that comes with the accessories pack Very nice flags and the pre-cut sails and the line that comes with the sail pac pics of some of he planking sheets and the hull fill sheet and we're off...the first section of the hull fill cut... ...and applied the kit instructions call for some parts to be glued to card to bring them to the appropriate thickness, here the fore deck structure is glued to some .5mm chipboard cut free and installed, the same treatment for the main deck...using some Tamiya masking tape to hold the deck curve then it was back to glueing in the fill pieces...pva used exclusively for this A question here for all you experienced card builders...should i be concerned with the lines you can see on the hull?? do you think they will they show through the the planking layer? After the hull was set aside to dry I started work on the sails as can be seen in the previous photo they were creased from shipping, so I soaked them and set them out on my cutting mat to dry... that worked well, the sails themselves are a nice fabric pre-cut and printed with seam lines and decorations, on the square ones. This pic shows the spinnaker and the cord supplied to use as bolt rope... glued this to the edge of the sail and formed loops to serve as clews and earring cringles The clews and cringles still have to be served, the sail pack also includes line for that. Well that's it for the Pinta for now, thanks for your time and attention J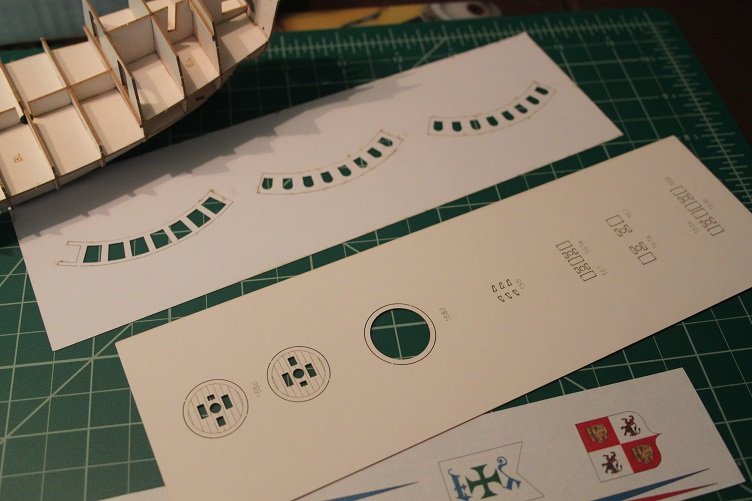


-
Pinta by jct - Shipyard - 1/96 scale - CARD
jct replied to jct's topic in - Kit subjects built Up to and including 1500 AD
Welcome Danny, glad to have you aboard, to answer your question yes it's Jay...but most people always ask just the opposite so I just use the J......plus its easier to spell!! I'm glad to have some experienced card builders like yourself and Slog looking over my shoulder , I'm hoping to put some time in this week end J -
Pinta by jct - Shipyard - 1/96 scale - CARD
jct replied to jct's topic in - Kit subjects built Up to and including 1500 AD
Thanks much for the info -
Pinta by jct - Shipyard - 1/96 scale - CARD
jct replied to jct's topic in - Kit subjects built Up to and including 1500 AD
Thanks everyone for the likes and kind comments, a question for you more experienced card/paper builders...what would you recommend using to color edges? I've heard everything from markers, pencils, crayons...any input is appreciated J -
Pinta by jct - Shipyard - 1/96 scale - CARD
jct replied to jct's topic in - Kit subjects built Up to and including 1500 AD
Welcome Slog, the more the merrier -
Pinta by jct - Shipyard - 1/96 scale - CARD
jct replied to jct's topic in - Kit subjects built Up to and including 1500 AD
Hey Denis...glad to have you aboard -
Pinta by jct - Shipyard - 1/96 scale - CARD
jct replied to jct's topic in - Kit subjects built Up to and including 1500 AD
LOL...hey Anthony...you're more then welcome to join...what I failed to mention in my previous post is that I'm an early bird...and as the Admiral enjoys sleeping in I usually have a good 3-4 hrs in the a.m. prior to the commencement of any mandatory social obligations...all is well as long as the table is cleared for breakfast