jct
-
Posts
1,519 -
Joined
-
Last visited
Content Type
Profiles
Forums
Gallery
Events
Everything posted by jct
-
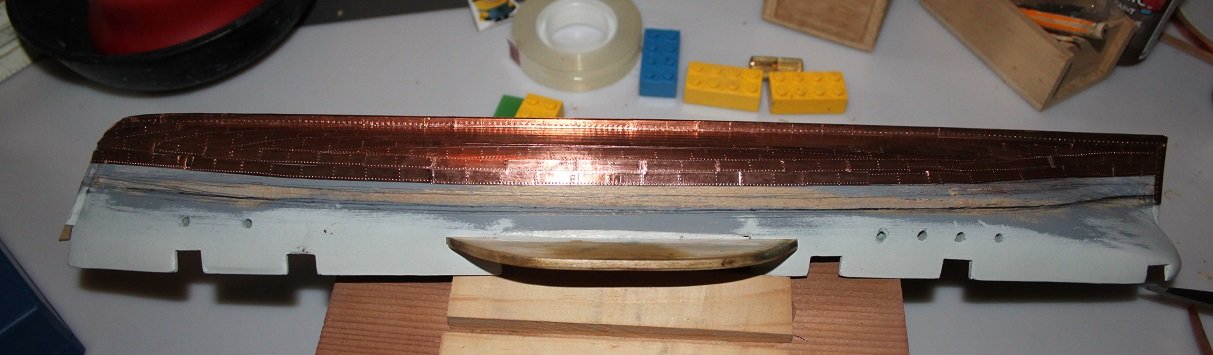
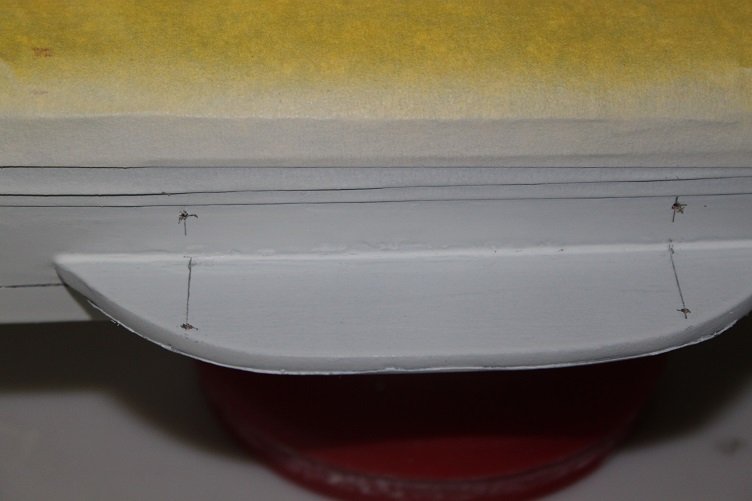
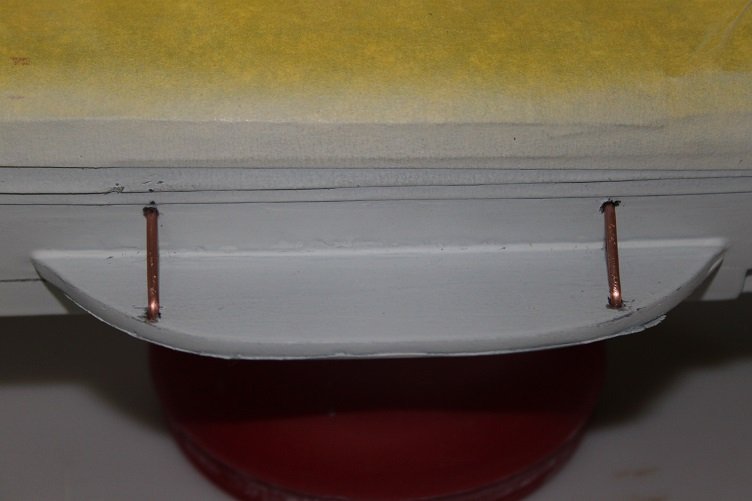
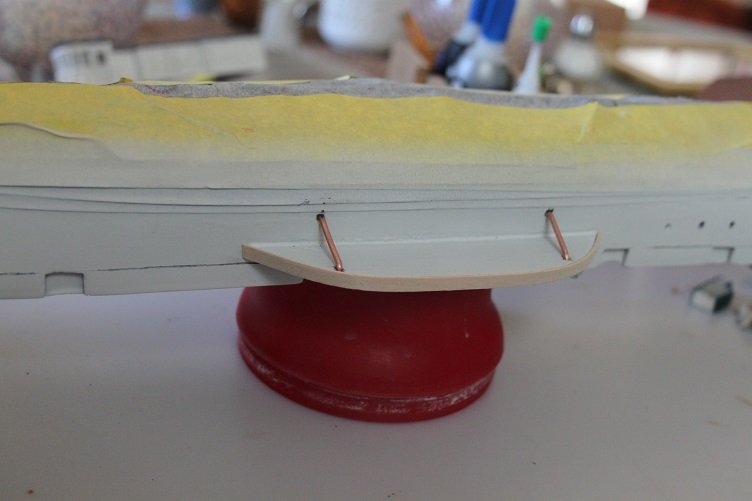
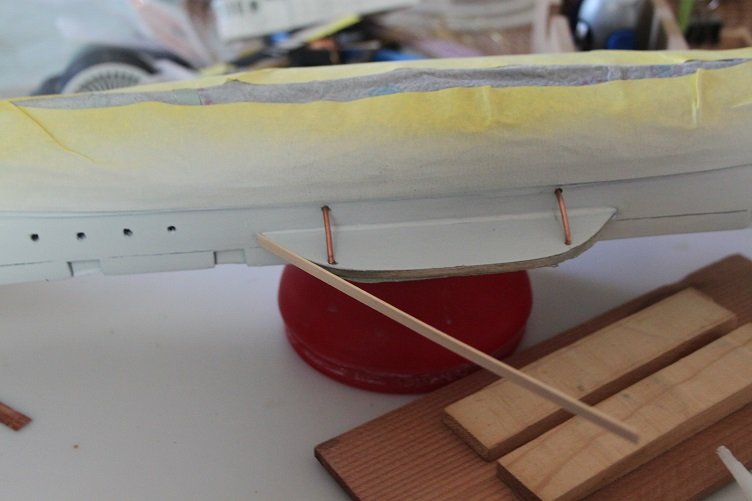
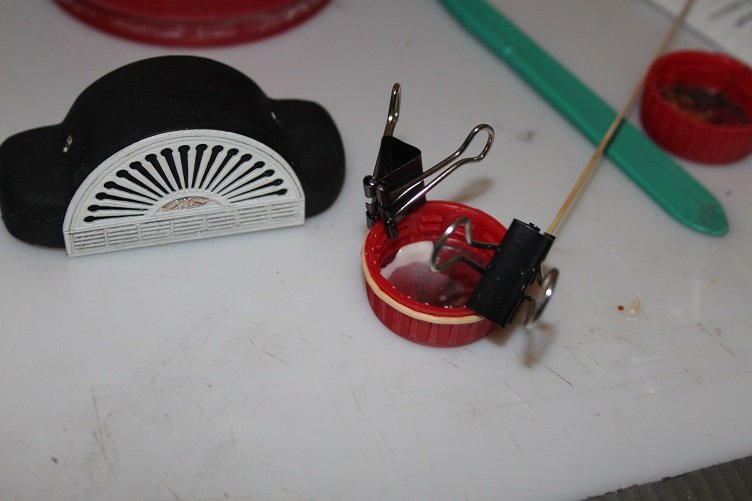
Hey everyone, Another update...but first thanks for all the likes, you're definitely right Pop, this has dried for at least a week so we are good to go. The nastys are all repaired and final primer dry so I moved on to dressing out the sponsons... started by laying out the location of the holes to be drilled for the sponson support The supports were made by bending some solid core wire to the correct shape and CAing in place then the skirts were added next the Paddle wheel houses were trimed out... a couple pieces were soaked and pre-bent then cut and attached and finally the main hull trimmed out with the rub strip added all the way around Well that's all for now, may get a color coat on the upper hull tomorrow, will have to see...some chores await first. THX for looking in J

- 258 replies
-
- 8
-

-
- harriet lane
- model shipways
- (and 1 more)
-
yes sir they were...that and some other nasties as well, the basswood is really soft and doesn't take much to mark it up
- 258 replies
-
- 2
-
-
- harriet lane
- model shipways
- (and 1 more)
-
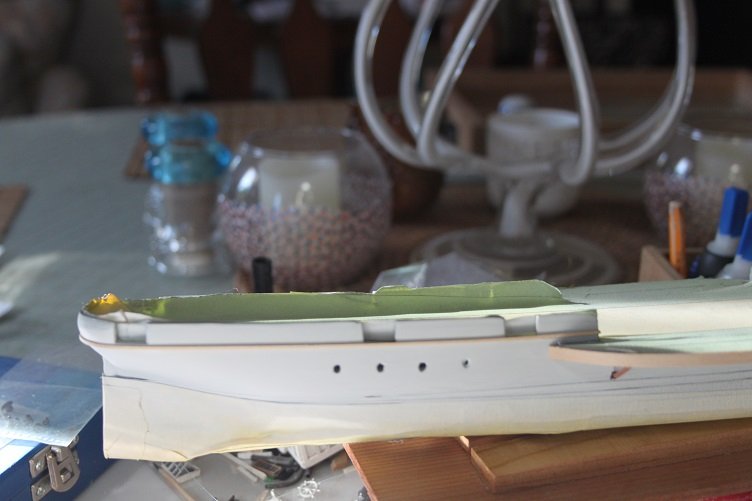
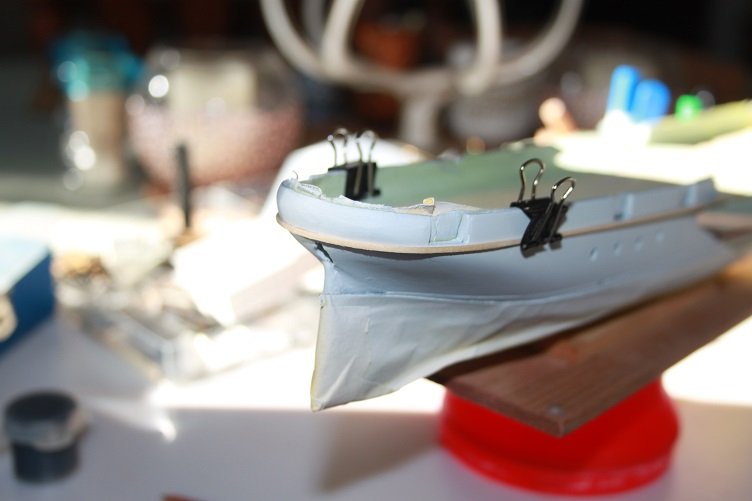
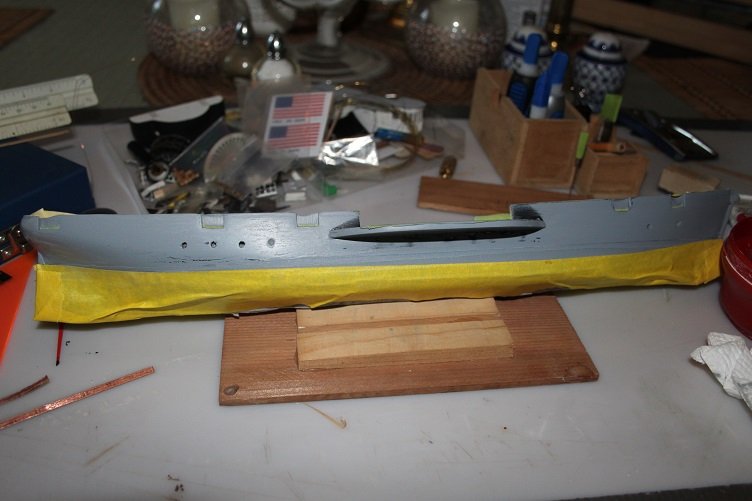
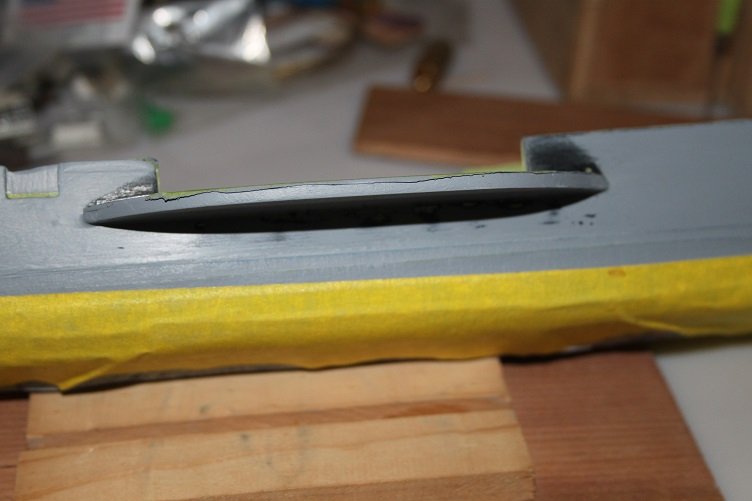
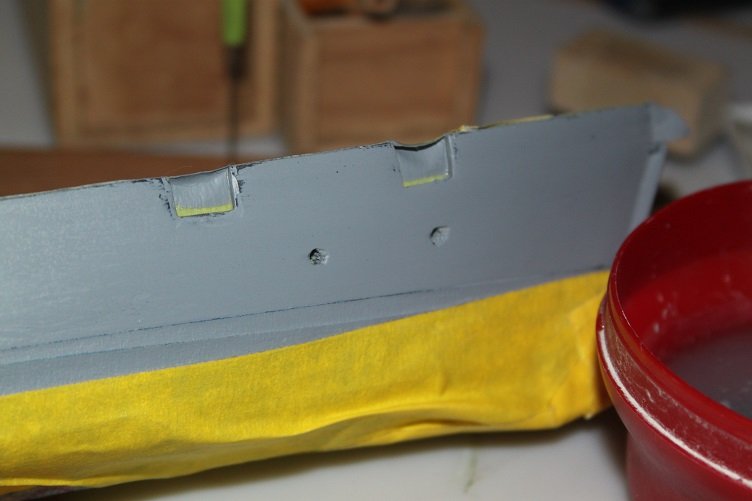
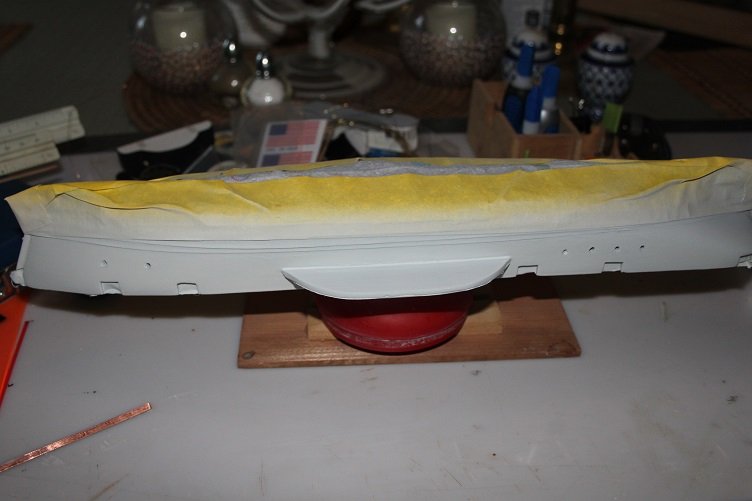
Just a quick update ...the upper hull took quite a beating during the foiling process, which I did not realize until I hit it with a coat of paint...so out came the filler putty and sandpaper...so the fill,sand, prime process commenced. I use a gray automotive grade primer for the fill steps and once smooth switch to a flat white primer, a couple coats and she's ready for the top coats. That won't be happening right away as I want to finish dressing out the sponsons first Pics follow
- 258 replies
-
- 6
-
-
- harriet lane
- model shipways
- (and 1 more)
-
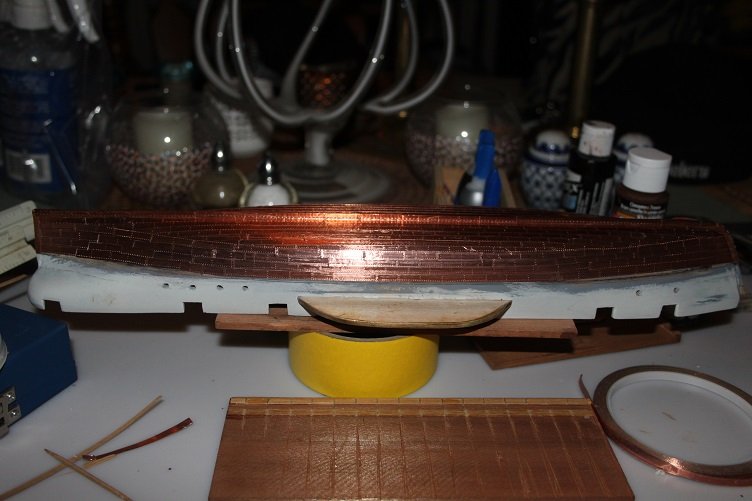
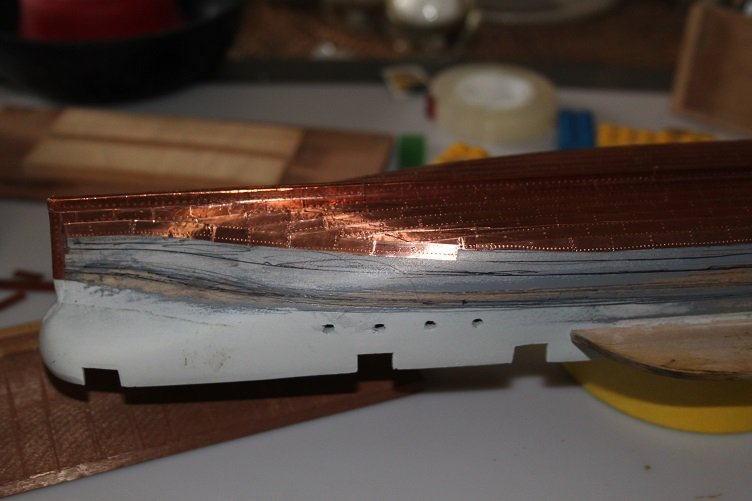
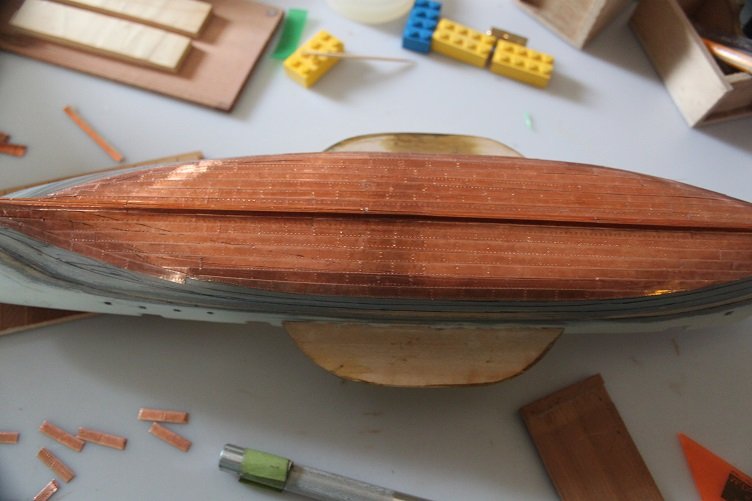
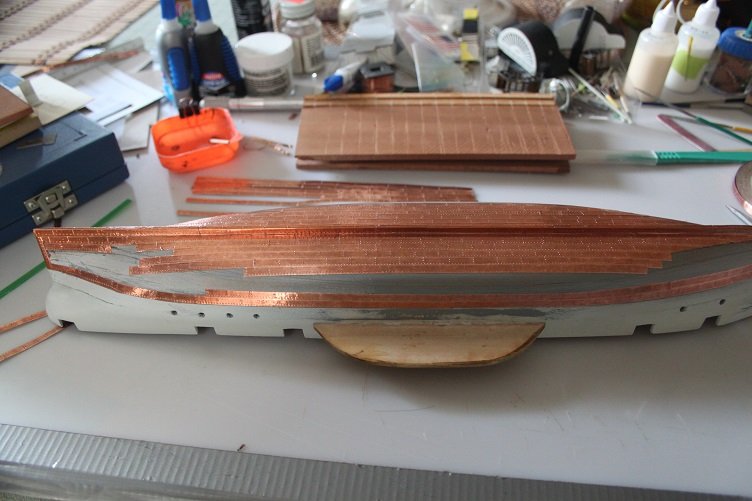
Thx for all the likes...the plating is complete..not perfect, i'm content with it though, not as easy as I thought it would be that's for sure, took me longer then I would have thought as well....but here it is for your perusal ...next step will be to paint the upper hull, then I got to figure where the heck I left off to knock the plating off in a 'couple days'...
- 258 replies
-
- 6
-
-
- harriet lane
- model shipways
- (and 1 more)
-
It is one that suits me well...I may do some experimentation to see what gives me the best look
- 258 replies
-
- 2
-
-
- harriet lane
- model shipways
- (and 1 more)
-
Hello all, Well I finally made some progress with the plating of the HL hull and think I finally turned the corner. The bottom is complete and trimmed and new gore lines established to start up the sides. Shes to the point now where I think two more plating runs/side should finish the plating...the copper will then be weathered, haven't decided yet how I'm gonna do that that's it for now thanks for looking in J

- 258 replies
-
- 4
-
-
- harriet lane
- model shipways
- (and 1 more)
-
Pinta by jct - Shipyard - 1/96 scale - CARD
jct replied to jct's topic in - Kit subjects built Up to and including 1500 AD
Just a quick note, to say this build is being set aside for a bit, I'm going to focus on completing the Harriet Lane. Thx to all those that have been following along, no fear this build will be back... THX J -
Pinta by jct - Shipyard - 1/96 scale - CARD
jct replied to jct's topic in - Kit subjects built Up to and including 1500 AD
Thanks Pop...they do supply something...both sides and the centers are printed out and you have the cut and laminate them to cardstock to get the pieces to the pieces to the right thickness...the majority are only 2mm long and 1.5mm wide...after looking at all the little tiny pieces that would need to be assembled I started looking for alternatives, I need to maintain what little sanity I have remaining The ones I got from Free Time are the same size but they are all laser cut, should save much cursing -
Love the F-4s...wrenched on J, B, and N models "back in the day" nice work
-
Well I for one think you should...these are exceptional
-
looking good Danny...if I may ask what are you using to fill, I used a wood putty on my Pinta hull? J
-
Pinta by jct - Shipyard - 1/96 scale - CARD
jct replied to jct's topic in - Kit subjects built Up to and including 1500 AD
Hi Cat...ya I'm pretty happy with the look, I think you're right...the paint adds much more depth to the surfaces, doesn't look near as flat or lifeless. I'm planning to continue the toning for the rest of the build. I think you'll be happy with the result you'll get from the acrylic mediums, doesn't take a lot of practice to develop the touch nor a lot of cash either. Thanks to all for the likes J -
Nice job Steve, Will she be painted or left bright
- 190 replies
-
- 2
-
-
- pinnace
- model shipways
- (and 1 more)
-
Pinta by jct - Shipyard - 1/96 scale - CARD
jct replied to jct's topic in - Kit subjects built Up to and including 1500 AD
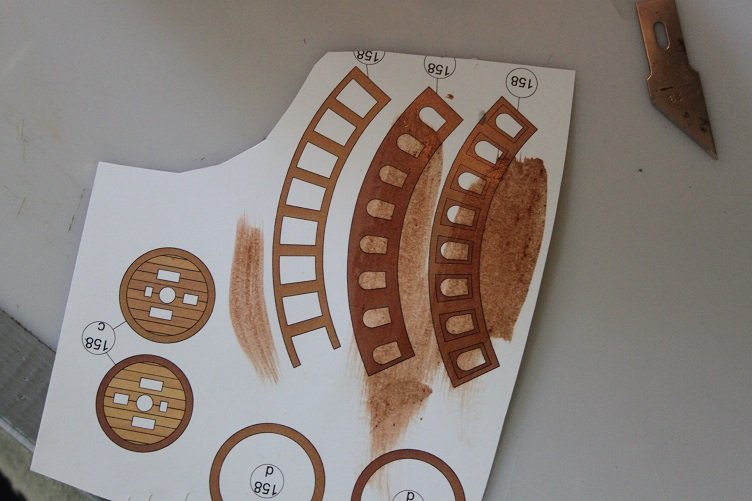
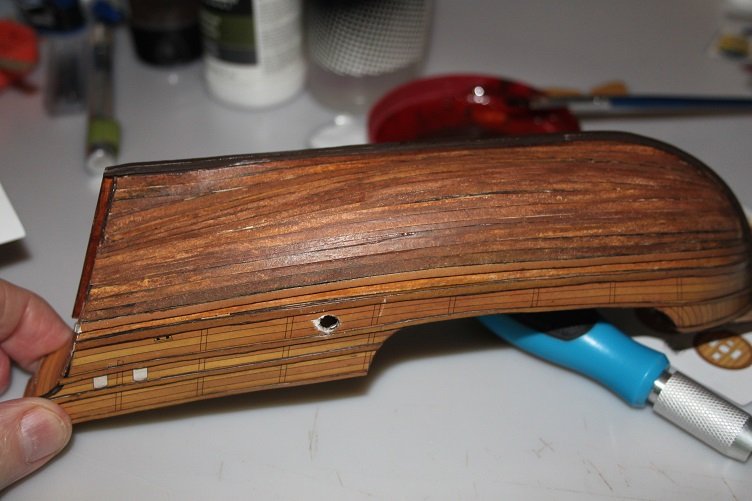
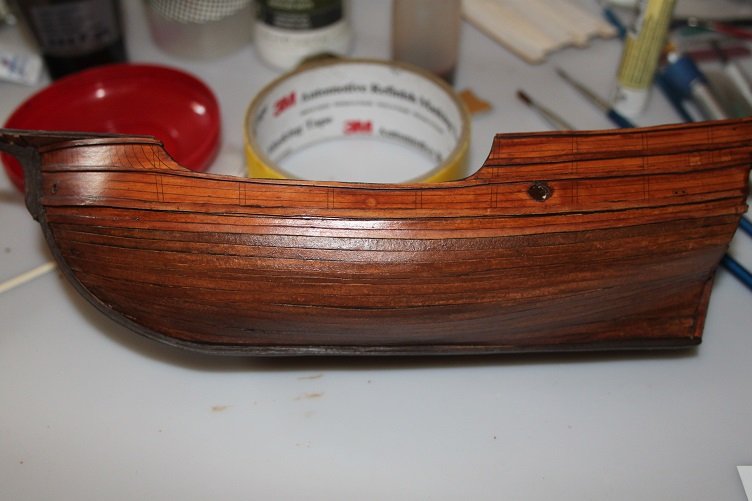
Thanks for all the likes and comments, I am satisfied with the new planking but not with the mismatch colors: So I decided to try a technique I used on armor models in the past...acrylic toning...really just layer upon layer of thin washes of thinned acrylic paint. When I do this I don't use water to thin the acrylics, but different forms of acrylic medium, I've read that water will break the polymer bonds at the molecular level were the mediums do not...no clue if that is true or not, but I use um cause I have um. The mix I use is 1 part paint (burnt umber in this case), 1 part Matte medium, 4-5 parts retarder to thin the mix and slow drying time, once thoroughly mixed the mix is poured into a resealable container. From there it's a matter of layering on the wash/toner one layer at a time waiting for each successive coat to dry. I was not sure if this technique would work on paper or not so I tested it on a few of the kit parts I won't be using. Here you can see the effect of one, two and three coats, from left to right...the effect can be very subtle or striking depending on the density of the color and the undercoats you use, you can use different shades or even different colors. The Pinta received 4 coats on the upper hull and only two on the lower, as it was darker to begin with, finished pic below, the hull will pick up more contrast as the build continues as I plan to do the wales in a darker brown Thx for following along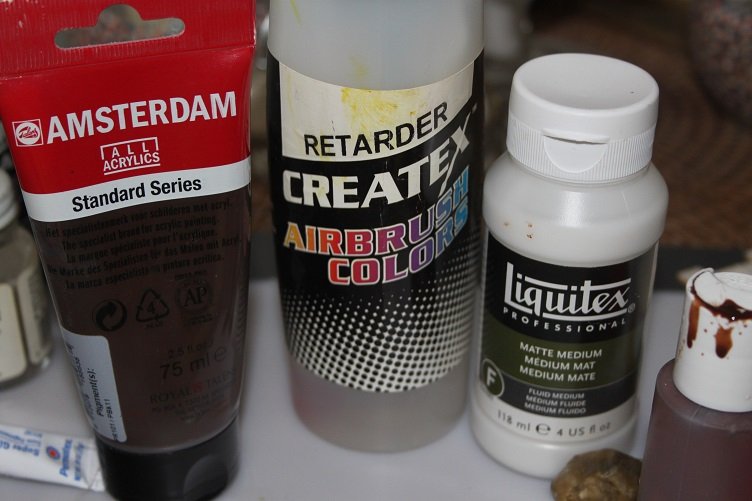
-
Pinta by jct - Shipyard - 1/96 scale - CARD
jct replied to jct's topic in - Kit subjects built Up to and including 1500 AD
Thanks Maaaslo...that is good to know, these are the ones that Shipyard offers as accessories for the Pnita, so those are what I ordered...I do have triangle dead eyes, what type of rigging blocks would they have used?? -
Pinta by jct - Shipyard - 1/96 scale - CARD
jct replied to jct's topic in - Kit subjects built Up to and including 1500 AD
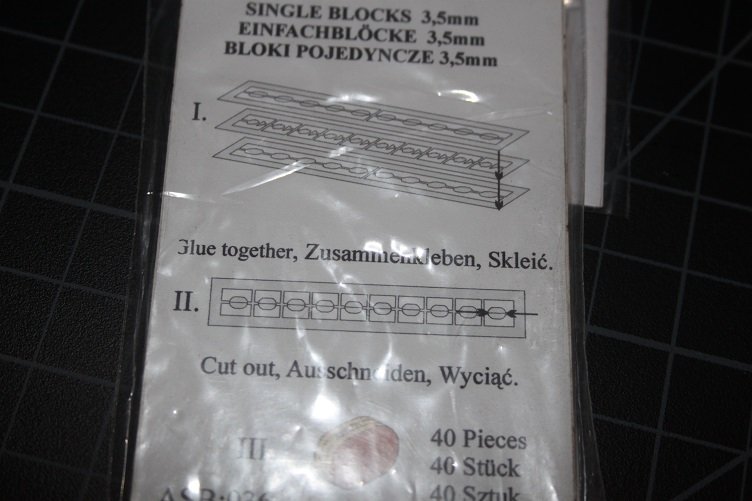
An update of sorts...early on in the build I was looking at Shipyards home site and found that they made sets of blocks and deadeyes. They are laser cut and are just glued and stacked to finish assembly. Seemed to me the small cost to purchase compared to the hours spent trying to accurately cut and assemble over 100 blocks and deadeyes ranging from 2-4mm would be worth it! Unfortunately Shipyard no longer sells or ships to the US and Ages of Sail, their US retailer, does not carry the block kits. So I started to search for alternatives, thinking I would just use regular wood model blocks. Well after some searching I came across a site called Free Time and discovered that they do carry the Shipyard blocks and sell and ship to the US. I chose Paypal as my payment method and was pleased with the customer support and communication. My parcel arrived today, registered mail, and the product looks great. I've attached the web address to Free Time here in case you want to take a look, (hope that's ok?) So if you're looking for blocks for your next Shipyard build you might give Free Time a look, my experience with them was very positive. http://www.freetime.co.ua/en/

-
Just a small update...the build hasn't been abandoned, just been off for a bit so I was focused on the Pinta. The plating process continues albeit slowly...one row at a time the transitions between zones is still plaguing me a bit...not as easy as it looks Pic follows
- 258 replies
-
- 4
-
-
- harriet lane
- model shipways
- (and 1 more)
-
Pinta by jct - Shipyard - 1/96 scale - CARD
jct replied to jct's topic in - Kit subjects built Up to and including 1500 AD
Thx Pop...I am happy with them both...I do want to try to come up with an acrylic toner to add more depth to some parts of the ship though...now that the camping season is over there may be more time THX again -
Pinta by jct - Shipyard - 1/96 scale - CARD
jct replied to jct's topic in - Kit subjects built Up to and including 1500 AD
Thx Robin... Hi Danny, I have noticed that with other aspects of the assembly...a bit of tolerance stackup THX for the comments gentlemen