jct
-
Posts
1,519 -
Joined
-
Last visited
Content Type
Profiles
Forums
Gallery
Events
Everything posted by jct
-
HALF MOON by jct - FINISHED - Corel
jct replied to jct's topic in - Kit build logs for subjects built from 1501 - 1750
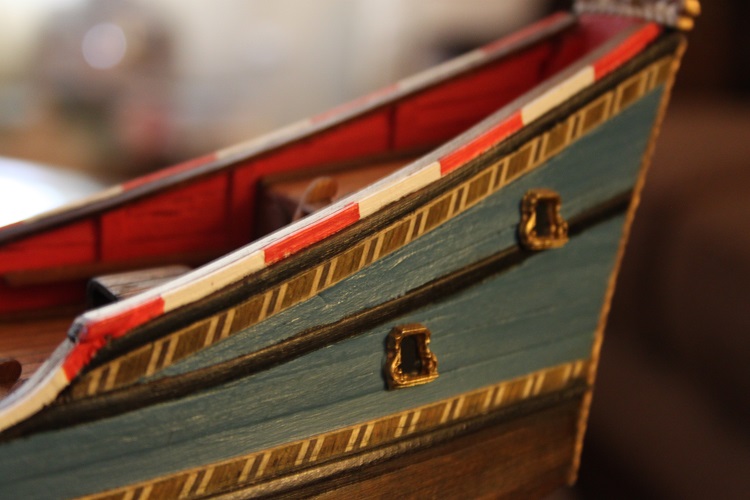
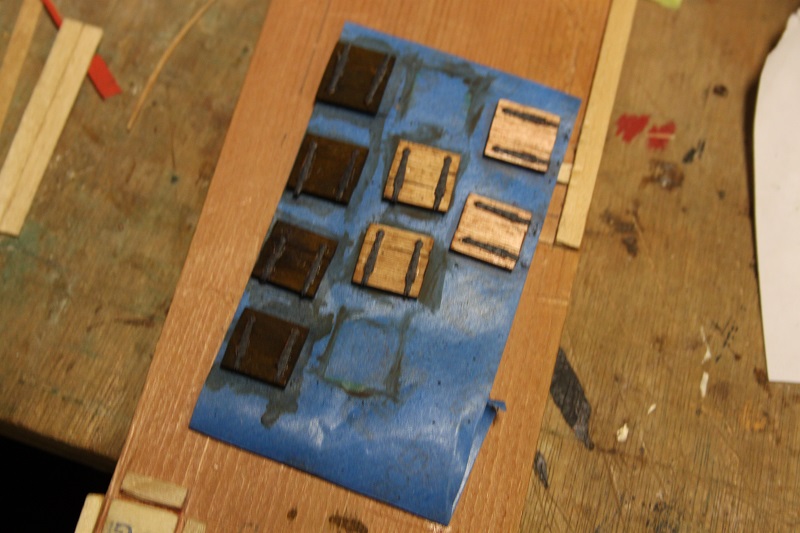
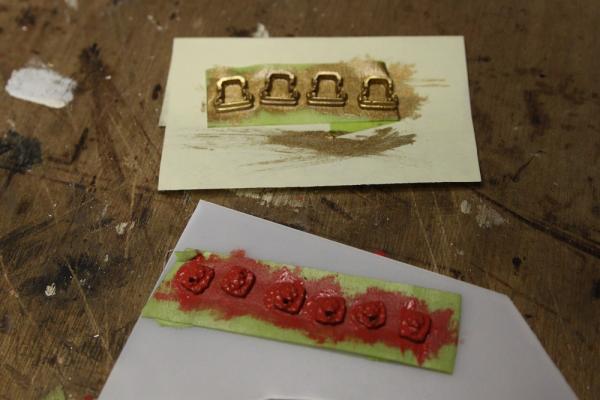
Based on some input from Popeye I believe they are decorative sheave plates -
HALF MOON by jct - FINISHED - Corel
jct replied to jct's topic in - Kit build logs for subjects built from 1501 - 1750
Thanks alot Steve...that's a really good question...I originally thought they we're scuppers but a look at the drawings show rigging lines running through them, I have to assume they're just decorative and their intent is to protect the hull, same as the hawes holes were lined, but I'm guessing here. Perhaps one of our more knowledgeable cohorts will chime in?? J -
HALF MOON by jct - FINISHED - Corel
jct replied to jct's topic in - Kit build logs for subjects built from 1501 - 1750
THX -
HALF MOON by jct - FINISHED - Corel
jct replied to jct's topic in - Kit build logs for subjects built from 1501 - 1750
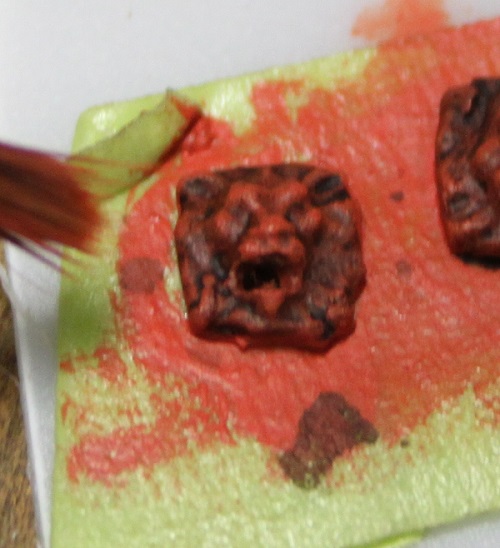
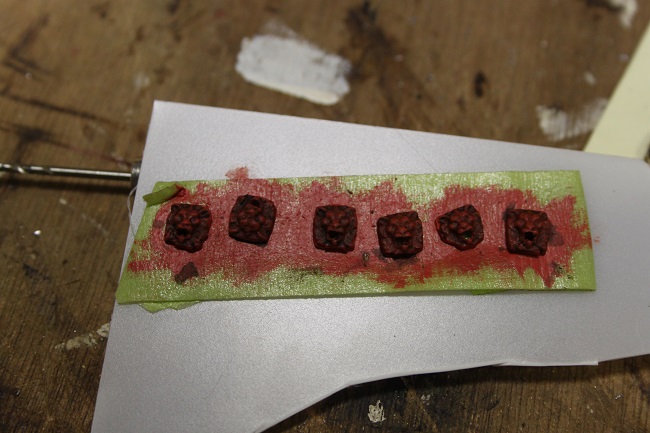
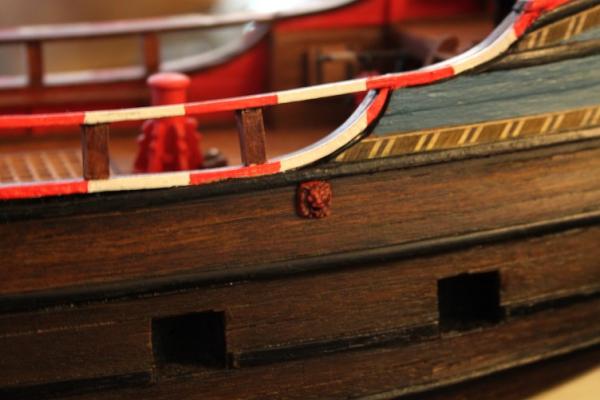
Just a few more pics of the windows and lion heads mounted

-
looks great making nice progress
-
HALF MOON by jct - FINISHED - Corel
jct replied to jct's topic in - Kit build logs for subjects built from 1501 - 1750
Thanks Popeye, and Thanks Peter -
HALF MOON by jct - FINISHED - Corel
jct replied to jct's topic in - Kit build logs for subjects built from 1501 - 1750
one more close up
-
HALF MOON by jct - FINISHED - Corel
jct replied to jct's topic in - Kit build logs for subjects built from 1501 - 1750
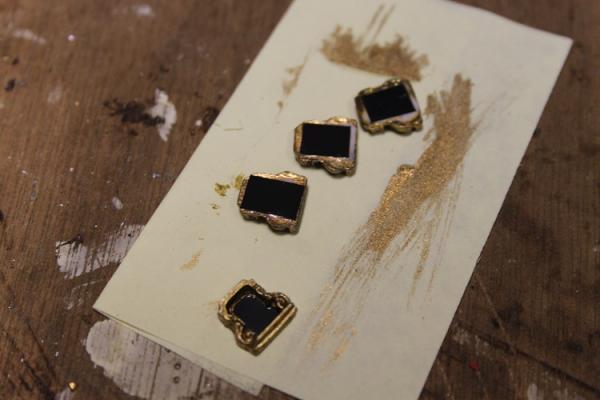
THX Popeye, We've a hobby lobby here but I've never been...may take a ride just to check it out,...in the mean time here's a few more pics, got the dry brush work done on the lions and the window frames glazed in. Borrowed the idea you had mentioned earlier about using old floppy material, worked nice, thanks. Steve...I hope this pic gives you the info you need, If not just let me know J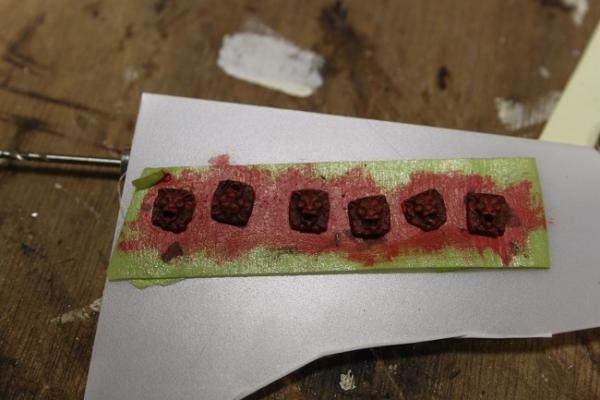
-
HALF MOON by jct - FINISHED - Corel
jct replied to jct's topic in - Kit build logs for subjects built from 1501 - 1750
Thank you for the kind comments, Steve, most definitely will post the lions heads, won't be a step by step though...already have the first dry brush coat on them, I can sequence from there though?? Ya I'm not sure how they actually looked either, just seems like they got fatter when I cut them down, but they are mounted to notches I filed in the deck edge so any attempt to thin would leave unsightly scars...they wil stay as they are. Thank you Max, the details are the most fun...planning to plank the ships boat as well, just haven't decided how I'll finish the inside, the mast and rigging will be enjoyable as well! J -
HALF MOON by jct - FINISHED - Corel
jct replied to jct's topic in - Kit build logs for subjects built from 1501 - 1750
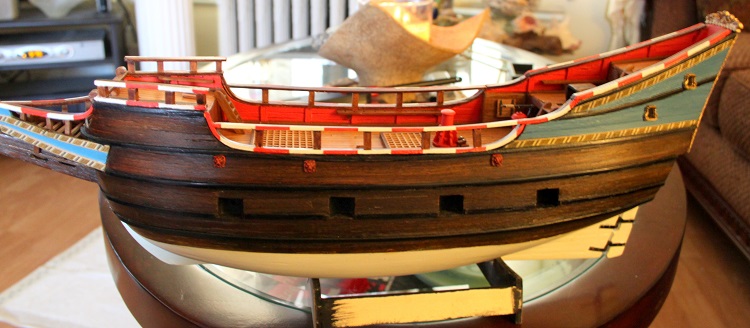
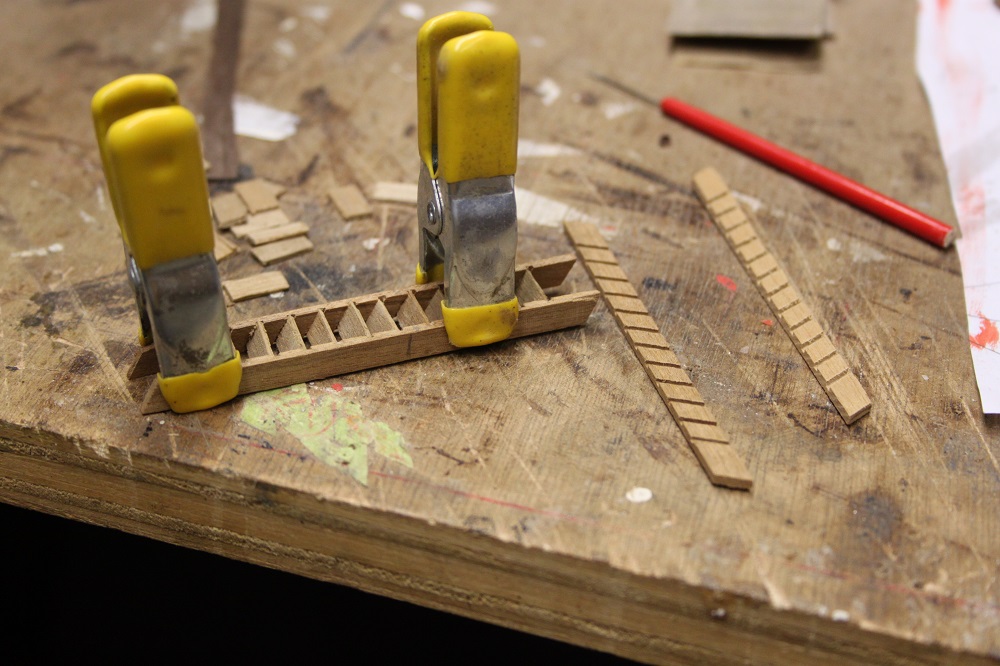
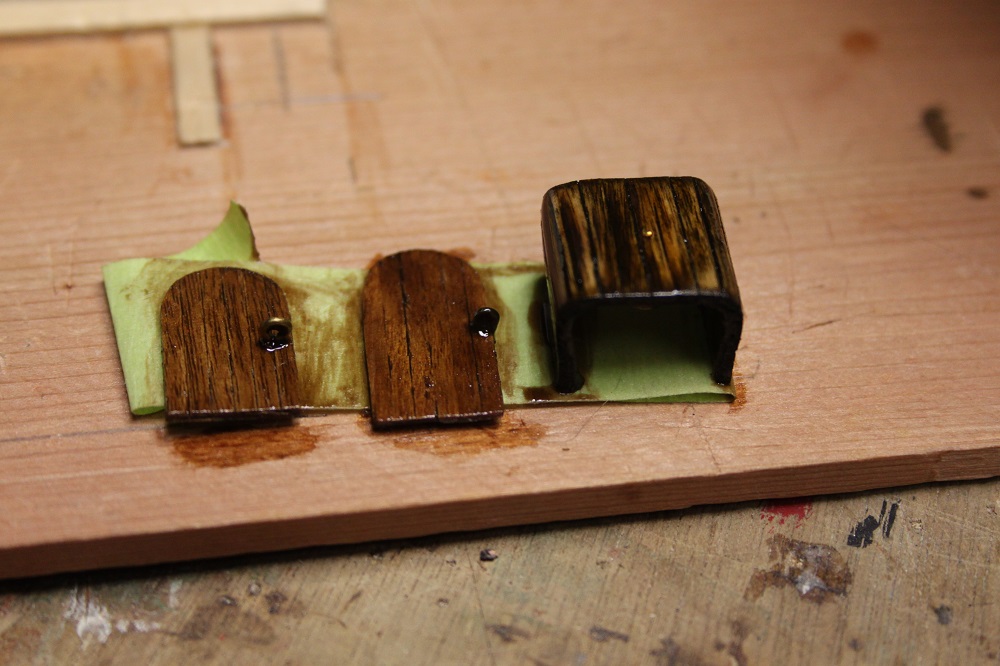
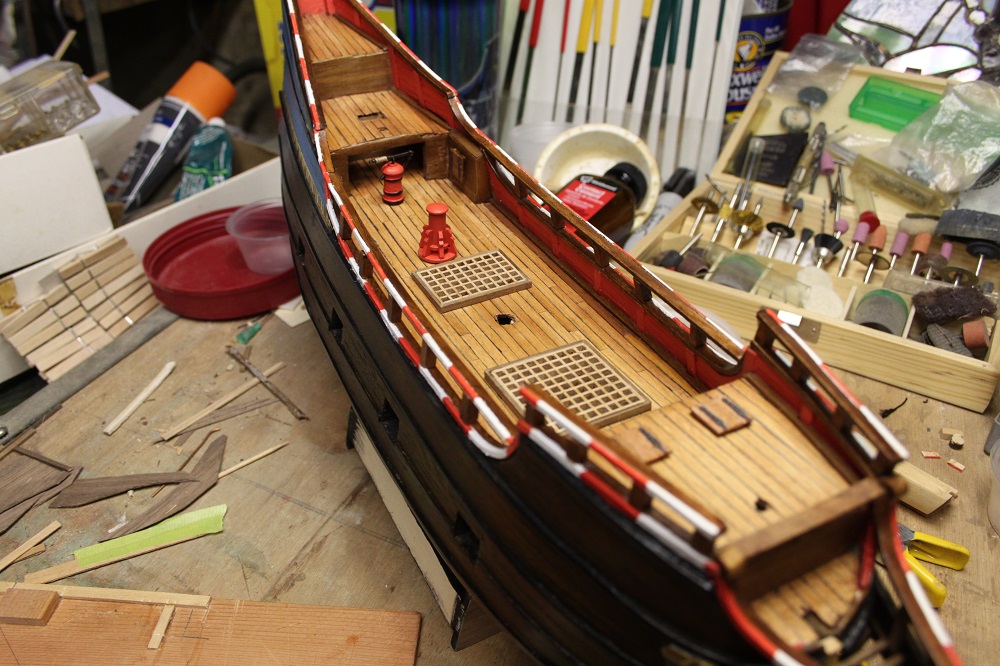
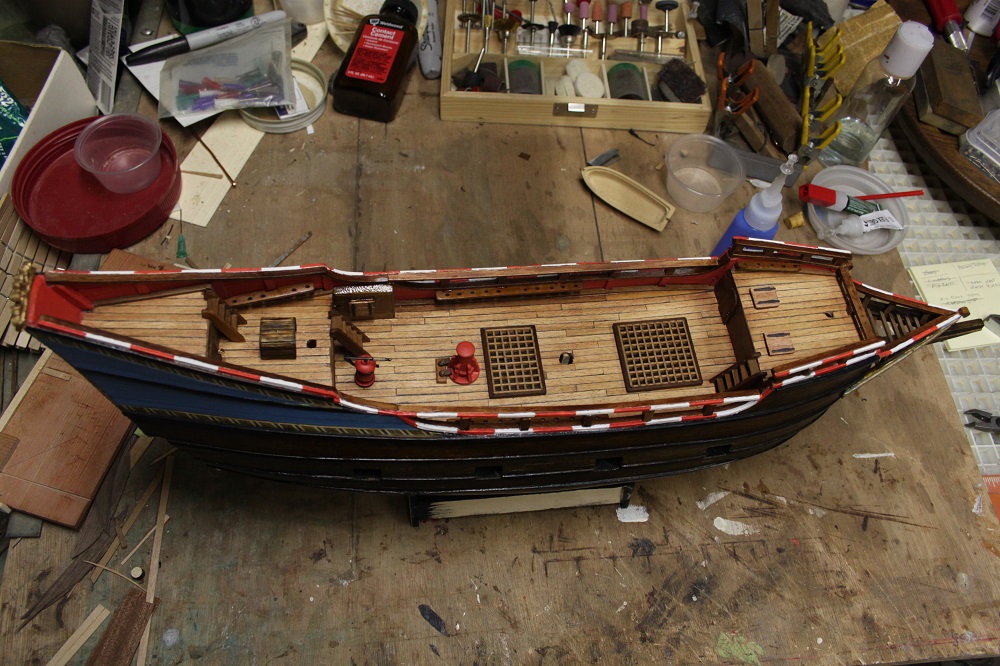
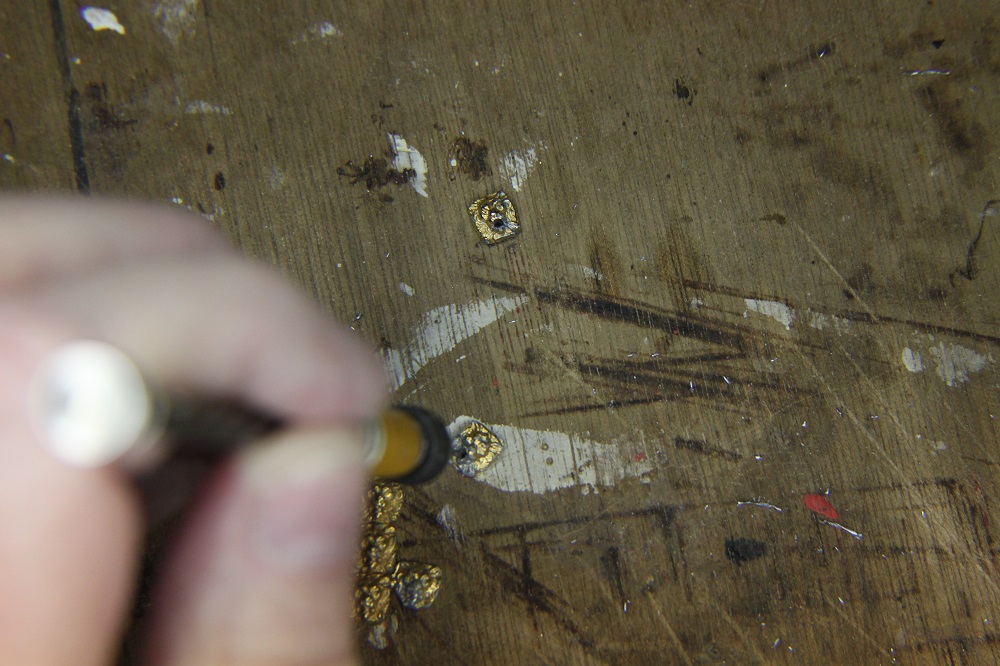
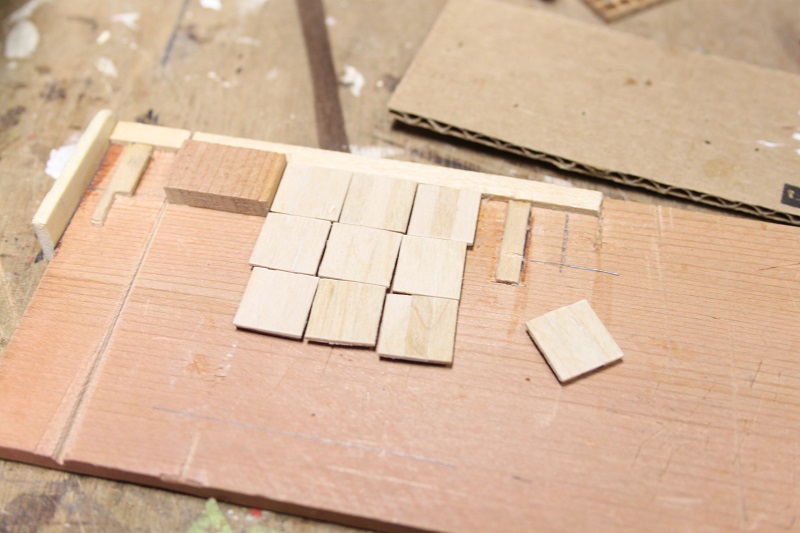
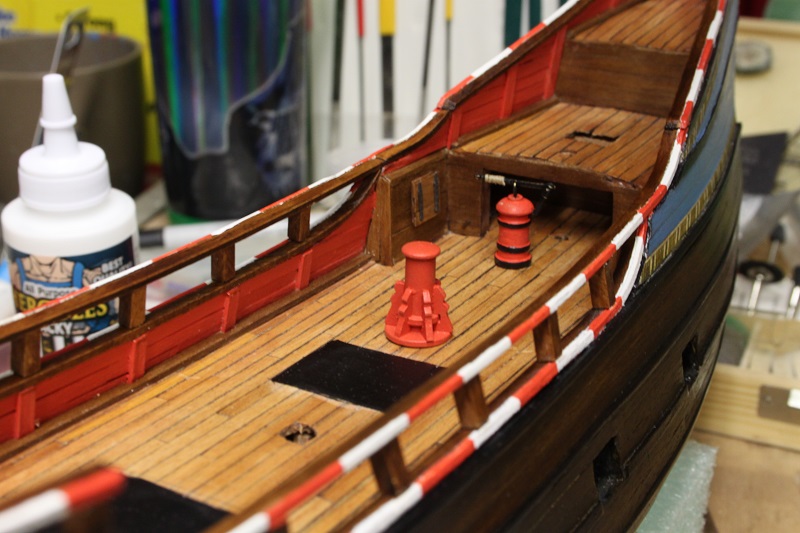
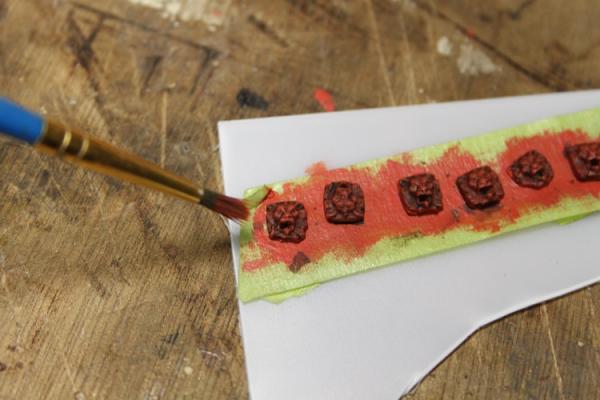
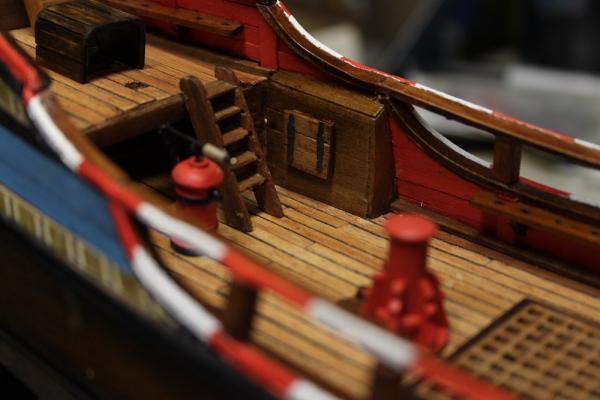
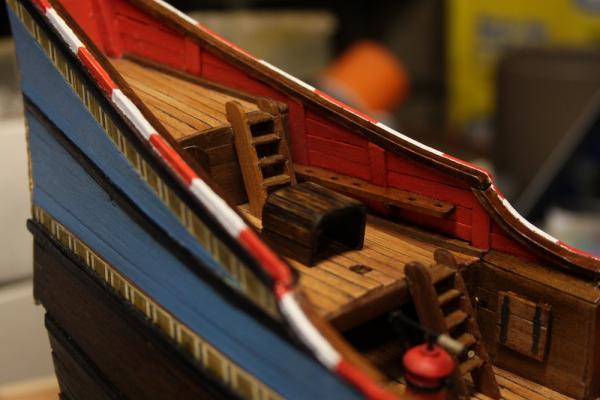
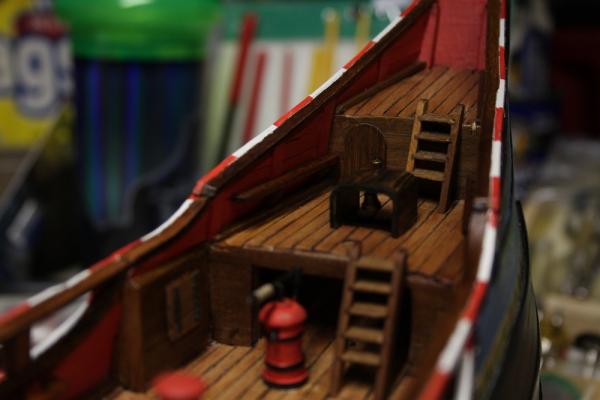
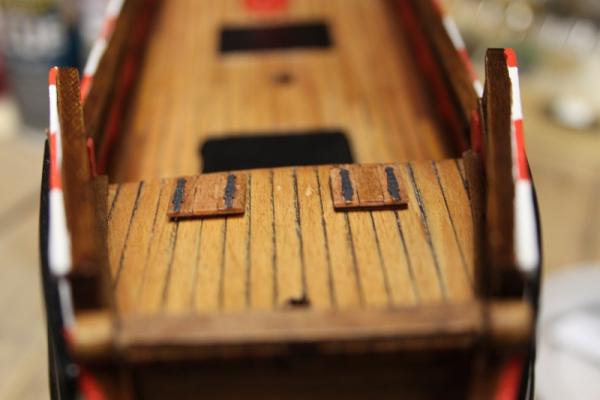
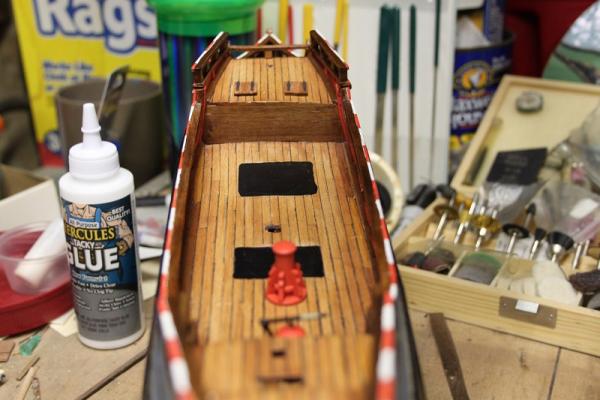
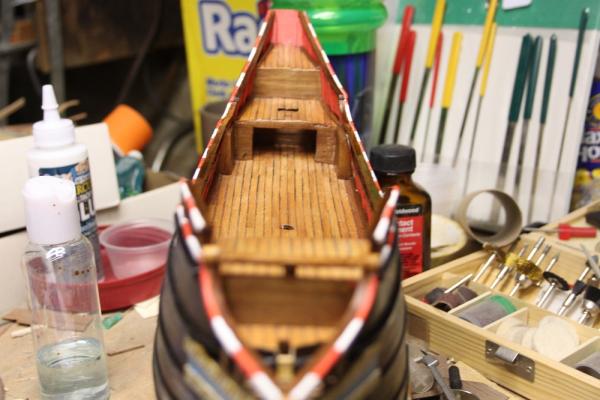
Hello all, Some progress to report on with my HM, spent some time on the deck details, built and mounted the ladders, though now that they are in the uprights really look too thick...also made and mounted the pin rails, gratings are trimmed and installed, made some round top doors and the belfry and got them in place. There are six lion heads provided in the kit...the gilt on mine was incomplete, no issue as they are going to be red anyway, but before paint they had to be drilled as rigging lines run through them, I think they will benefit from a dark wash and some dry brush work to pop the details, gilding was also bad on the window frames so they got a coat of Testors gold enamel. Well that's it for now, pics follow, as always thanks for your interest. J


-
Hey Steve, Tree nails look excellent, your chose of woods and excellent craftsmanship are turning out one beautiful piece, you sure this is your first build!! Nice job my man... Nice. J
-
HALF MOON by jct - FINISHED - Corel
jct replied to jct's topic in - Kit build logs for subjects built from 1501 - 1750
Thanks Brian, nice avatar... from STTOS if I'm not mistaken -
HALF MOON by jct - FINISHED - Corel
jct replied to jct's topic in - Kit build logs for subjects built from 1501 - 1750
Thanks Steve I originally used a blacking agent that I've used on stained glass pieces...blackens solder and lead, it worked OK on brass but flaked off when handled, so I resorted to paint in the end, used a Model Expo color called Canon Black...more like a really dark gray, Popeye you are correct sir...masts are coming very soon, debating how I will taper...1)plane and hand work, 2)spin in the drill, or 3)dig out an old lathe and work them on that...leaning towards # 1 THX again for the kind comments -
HALF MOON by jct - FINISHED - Corel
jct replied to jct's topic in - Kit build logs for subjects built from 1501 - 1750
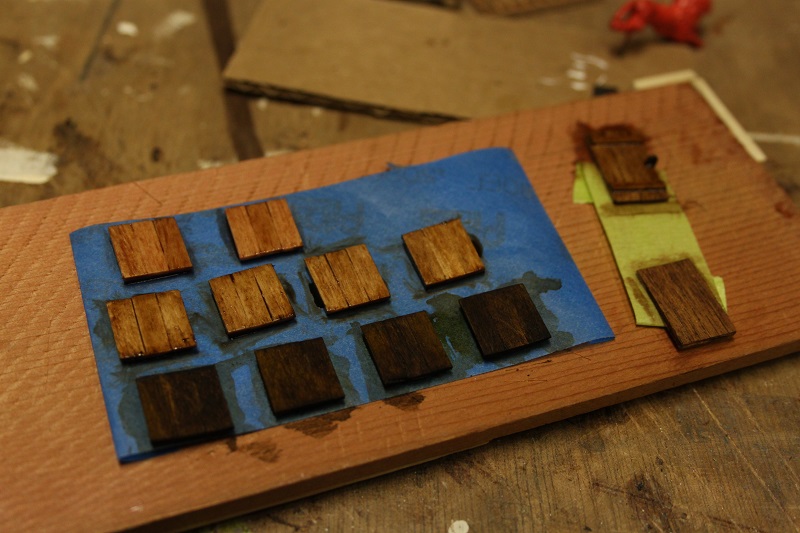
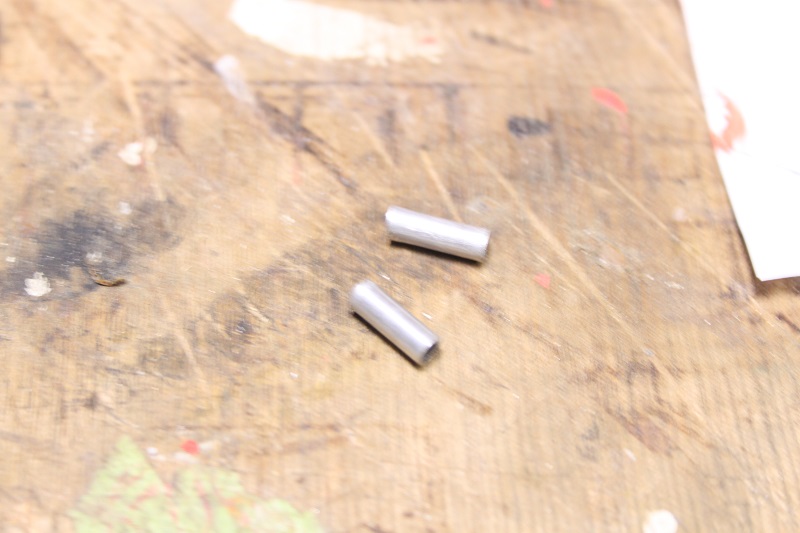
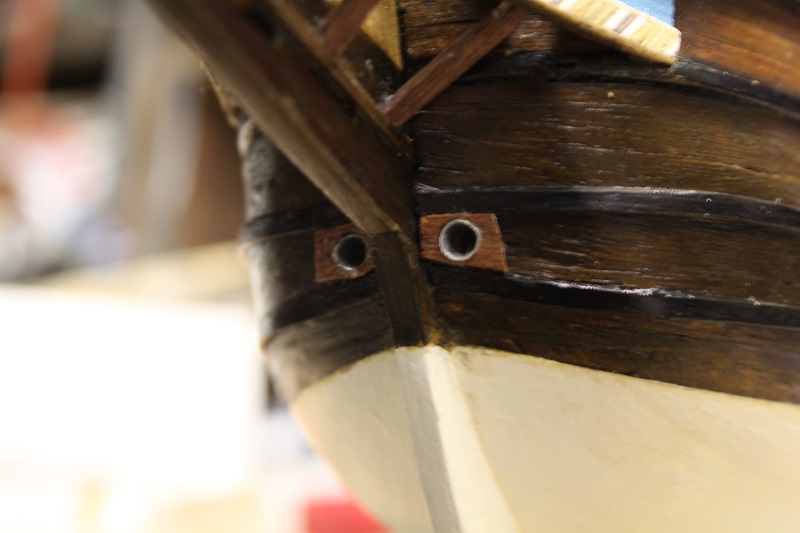
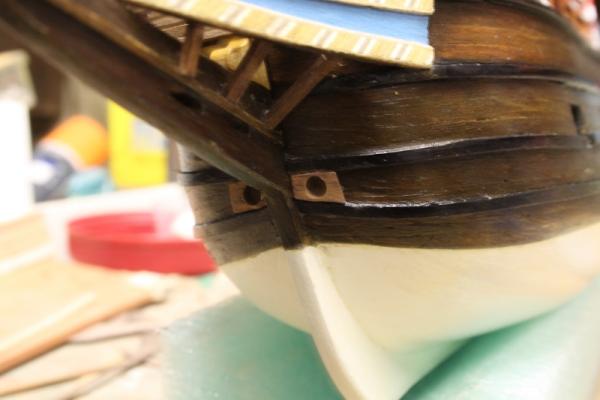
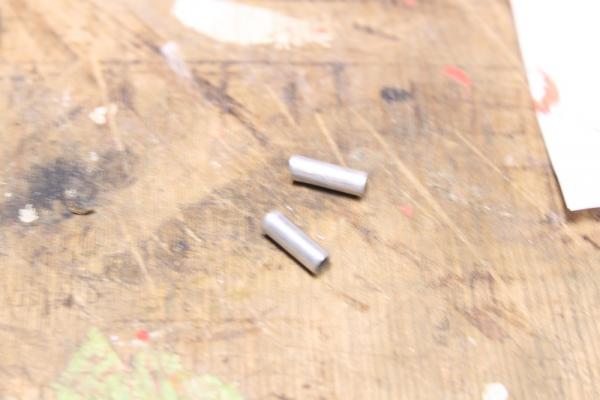
Some updates to my HM build...finished making the remaining hatch covers and gun ports, no details shots of this they were done using the same technique shown earlier. Stained these in various shades depending on where whey would ultimately be mounted and added kit hinges they were then attached to the ship. I read in "Historic Ship Models" that hawes holes were lined with lead sheathing, to simulate this I cut a couple pieces of aluminum tubing, flared the ends slightly, and glued them in with ca, after the bow was drilled. That's all for now pics follow, thanks for looking in J


-
Steve...this thing get sweeter all the time, you've shown you are a true wood master...kudos. To your bolt head question, I've simulated them in my plastic model days by filing a brad head on six sides or 4, sounds tedious but with diamond file it just takes a few minutes, then just pre-drill and set with ca. There is a firm that makes micro working hardware, I've never ordered from them but their stuff looks really cool. Link attached. J http://www.scalehardware.com/
- 569 replies
-
- 1
-

-
- shenandoah
- corel
- (and 1 more)
-
HALF MOON by jct - FINISHED - Corel
jct replied to jct's topic in - Kit build logs for subjects built from 1501 - 1750
-
HALF MOON by jct - FINISHED - Corel
jct replied to jct's topic in - Kit build logs for subjects built from 1501 - 1750
THX Popeye...there were originally six...but a couple of drops and ahh sXXXs later you get 4 -
HALF MOON by jct - FINISHED - Corel
jct replied to jct's topic in - Kit build logs for subjects built from 1501 - 1750
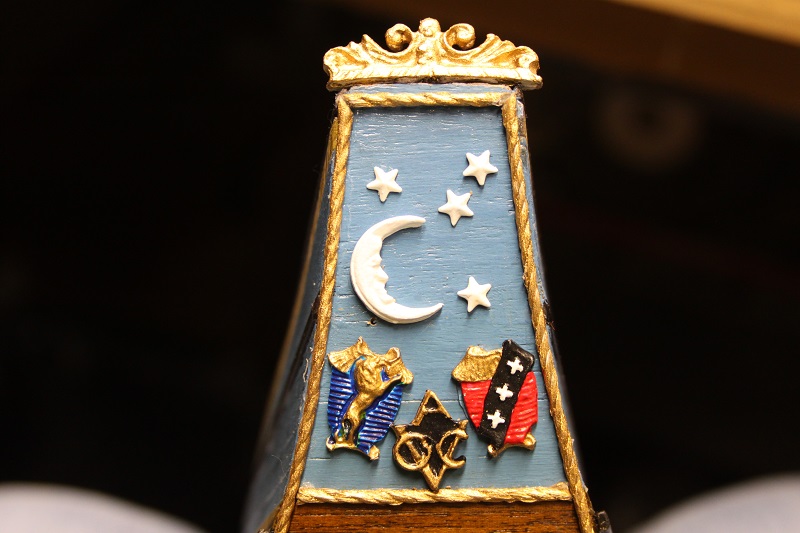
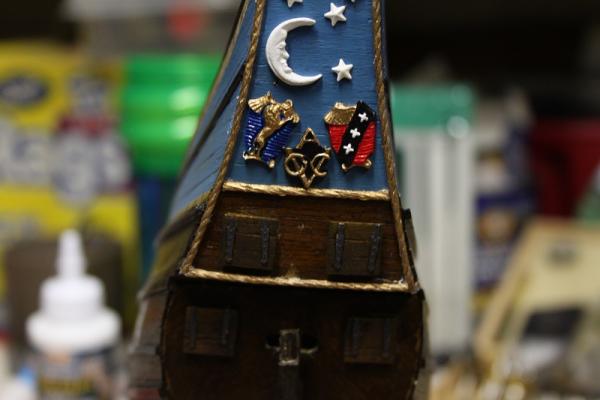
Not much progress to report...spent a lot of time cleaning the shop! got the stern decorations mounted...pics follow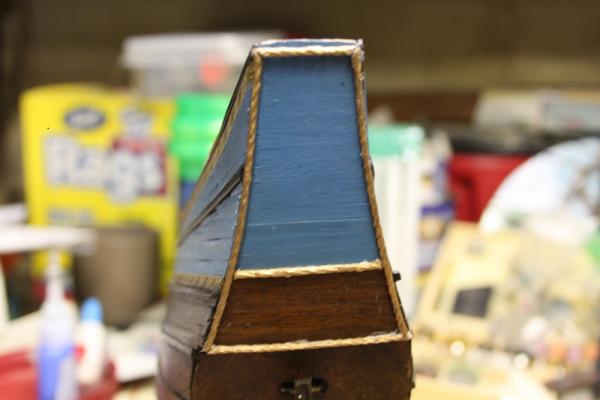

-
the deck looks really good Steve, I like the natural wood. J
-
Very nice, I like the contrast a lot, the light band will set of the dark walnut well, can't wait to see it oiled up. Nice job J
-
HALF MOON by jct - FINISHED - Corel
jct replied to jct's topic in - Kit build logs for subjects built from 1501 - 1750
Thanks Popeye and Steve, Popeye...no not is the plans, Corel does supply the green and white wood and the dyed blue wood, the blue I repainted toe get a more consistent shade. Steve...thank you sir THX J -
super nice love the contrast
-
HALF MOON by jct - FINISHED - Corel
jct replied to jct's topic in - Kit build logs for subjects built from 1501 - 1750
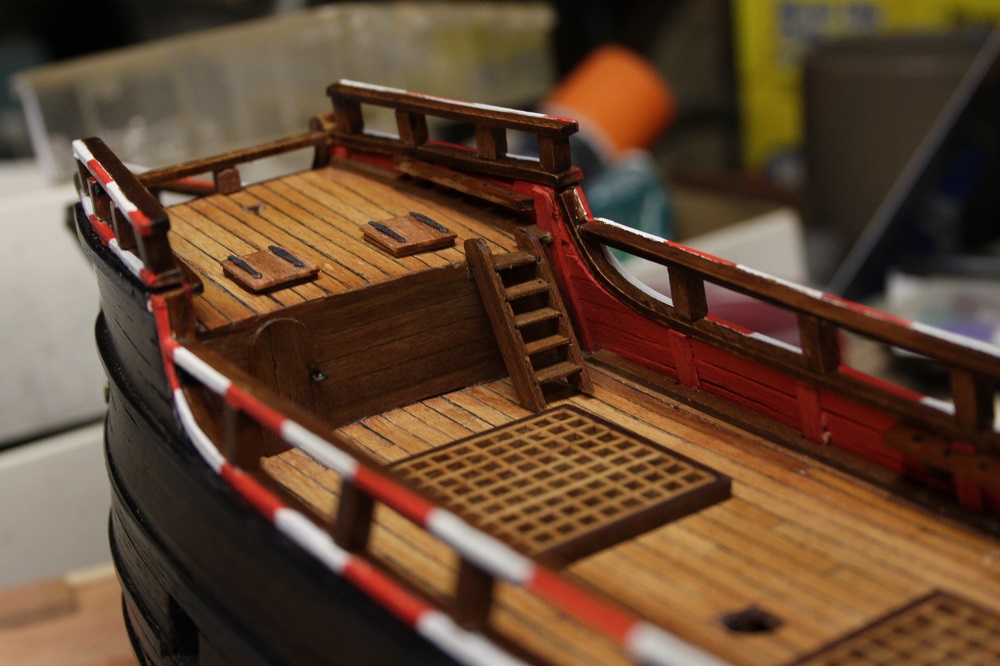
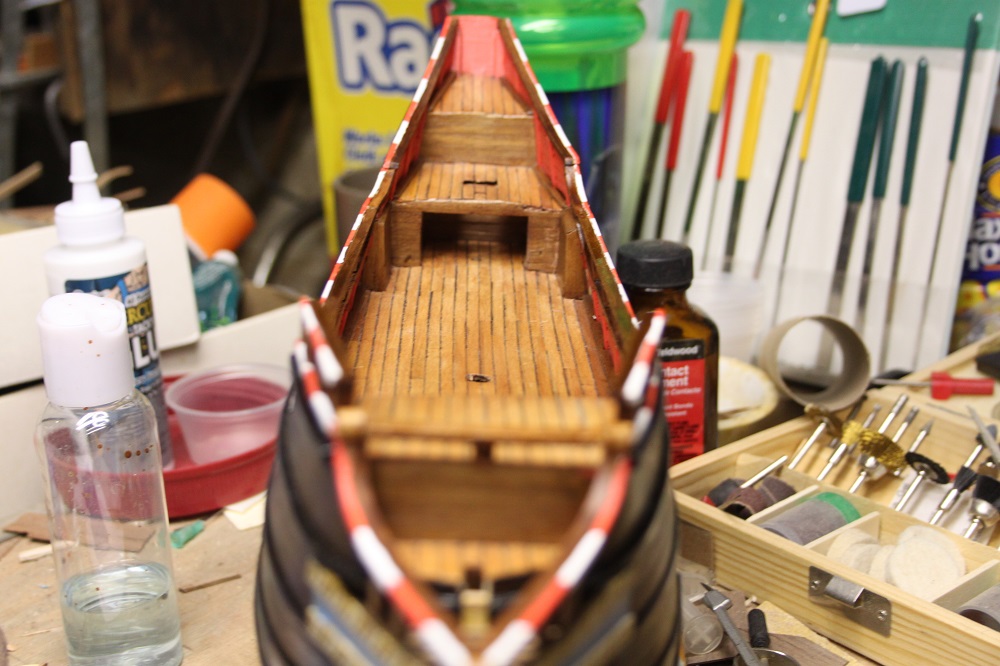
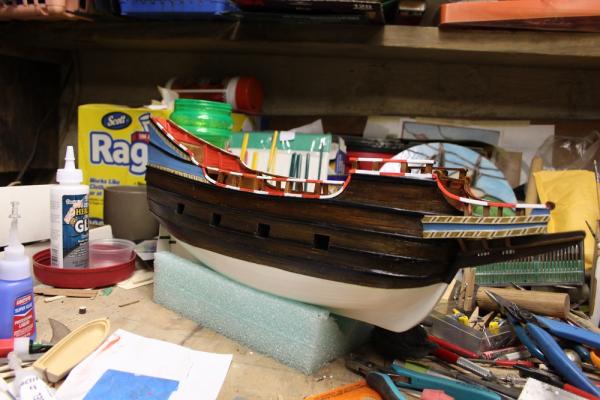
Hey all, Got the railings completed stained and painted, sorry no in-progress pics but nothing real revolutionary though, just masking and brush work. finished pics attached, still need to poly the rails THX J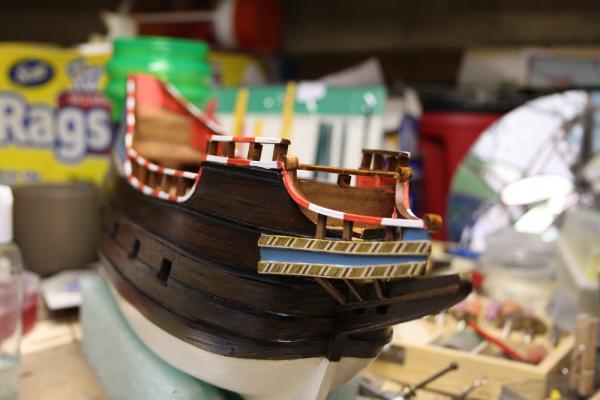
-
Bravo Steve...nice save, I'd have gone with paint, the second planking looks excellent J
-
That should be around Sept then, second chance for both of us!