jct
-
Posts
1,519 -
Joined
-
Last visited
Content Type
Profiles
Forums
Gallery
Events
Everything posted by jct
-
Thanks Jerry, my best to you and yours during this Holiday season...same for all you readers!
-
nice really nice...really like the contrast, you've a knack for the scratch build my friend. well done
-
looks good Jerry nice progress
-
Understood....what you've got looks good
-
Hi Jerry, What I did was fill the entire bow area with filler wood, not just the 6 pieces as shown in the instructions, then shaped all that so it was solid under the bow planks J
-
Hey Jerry...sounds like you'll get the Admiral her own tools...lol...your HM is looking good
-
Hey Jerry, Your HM is taking shape, nice work. I'm closing in on the finish of my HALF Moon, just a few days of rigging and she'll be complete. Good Luck with your build I'll follow with interest J
-
HALF MOON by jct - FINISHED - Corel
jct replied to jct's topic in - Kit build logs for subjects built from 1501 - 1750
Thanks for your kind words Matt -
HALF MOON by jct - FINISHED - Corel
jct replied to jct's topic in - Kit build logs for subjects built from 1501 - 1750
Sure thing Steve thanks for the interest -
HALF MOON by jct - FINISHED - Corel
jct replied to jct's topic in - Kit build logs for subjects built from 1501 - 1750
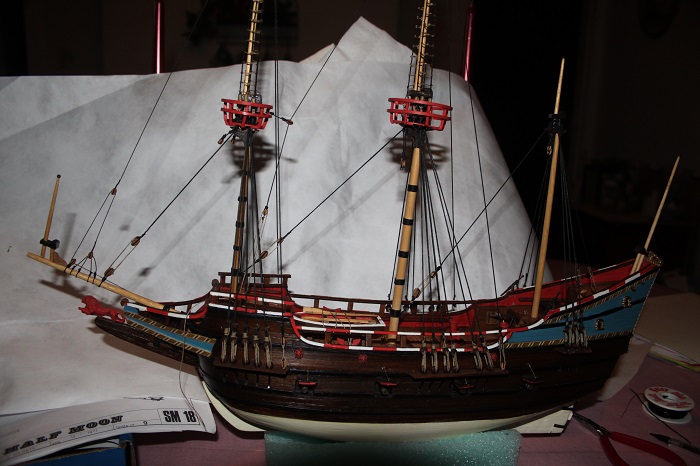
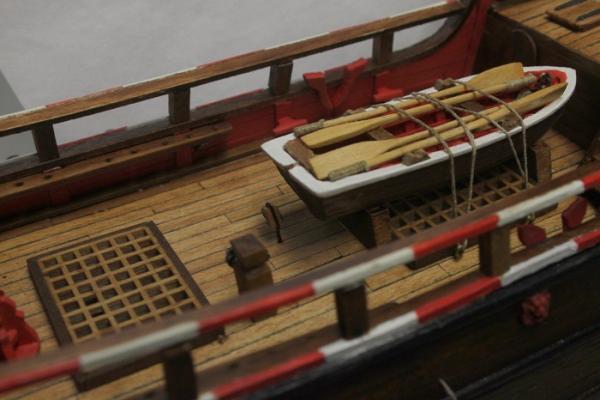
Hello all, I was able to find some time to work one the HM, got the fore and back stays mounted and put the finishing touches on the standing rigging. I'm leaving the ratlines till all other rigging work is done to minimize how much is in the way, seems to be working so far. Hope to start on the running rigging this week end. Thx for your time and attention, Pics follow J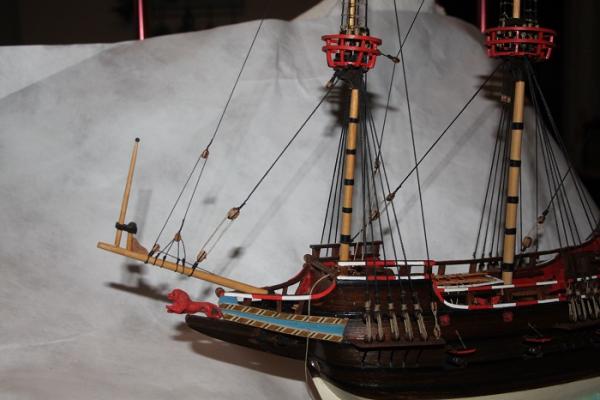


-
Hi Sam, Just discovered your log...I've always liked the Enterprise and I think the work on yours shows some real craftsmanship, I'll follow to completion with interest. J
-
HALF MOON by jct - FINISHED - Corel
jct replied to jct's topic in - Kit build logs for subjects built from 1501 - 1750
Thx much for your kind words Steve...I'm hoping to get more time for the rigging this week end -
Hi Steve she is shaping up nicely...well done, I like the look of the offset bow sprint
-
HALF MOON by jct - FINISHED - Corel
jct replied to jct's topic in - Kit build logs for subjects built from 1501 - 1750
Thx much guys, I appreciate all you kind comments... THX Tom...I think cardboard is becoming one of my favorite fixture materials, has saved me on a few occasions on this build Hey Popeye i am back but I afraid I'll get pulled away again till after the holidays, plus there is a new member here to enjoy...we lost our lil Jack Russell this past summer, though she had a good 18yr run, so it was time to find a new one...Tansy joined us just today Hi Jerry I'll for sure checkout your Victory build, thanks for your interest in this project of mine...nice score on your HM...she has her challenges, hopefully you can avoid some of the land mine I ran into
-
Your plan for your water line is sound, one AB tip I can pass along...after you have your waterline color laid down and taped off, shoot another light coat of the same color over the tape, any bleed that is going to take place will happen here, with the same color, so when you lay down you next color it stays were you want it, used this technique on plastic lots of times works like a charm,,,see no reason why it wont work on wood as well. J
-
HALF MOON by jct - FINISHED - Corel
jct replied to jct's topic in - Kit build logs for subjects built from 1501 - 1750
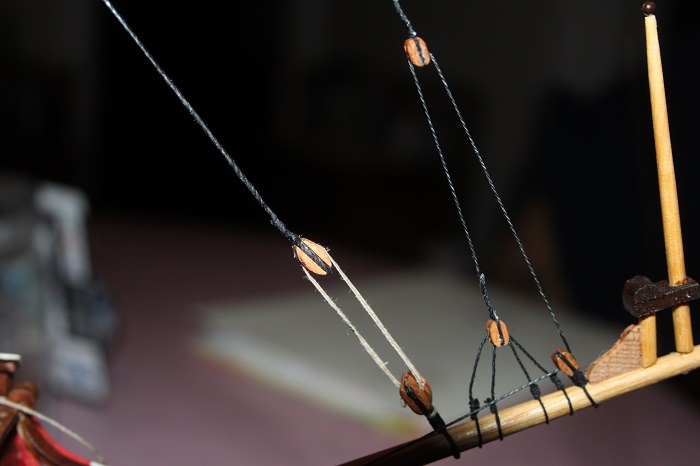
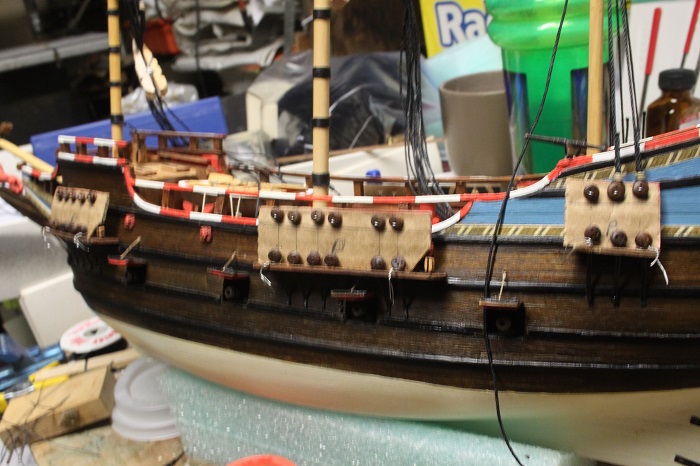
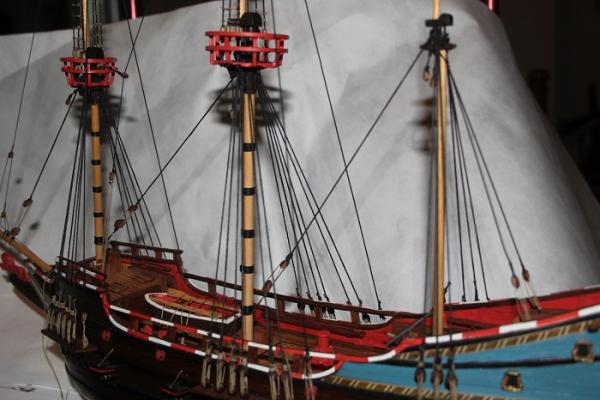
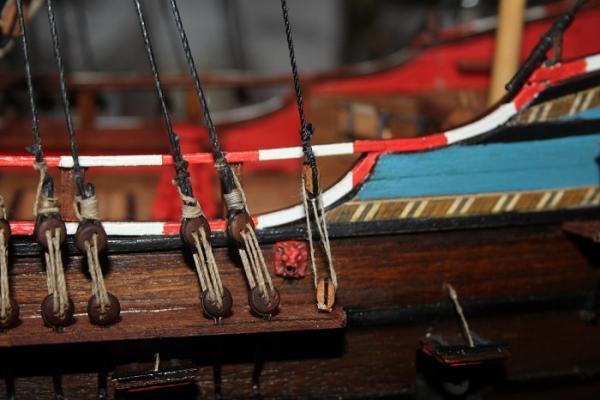
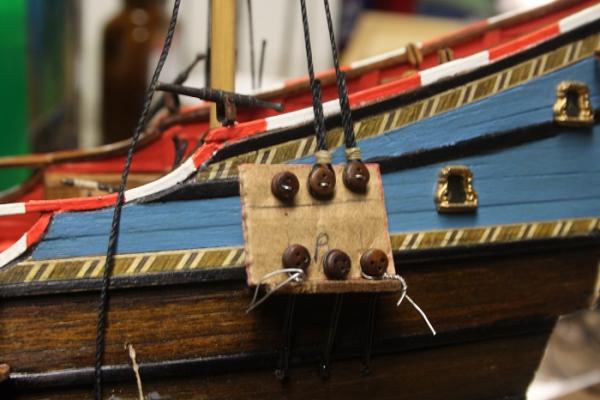
Hi everyone...been quite a while since I've posted an update...work has been keeping me too busy for words. Managed to make a bit of progress, the shrouds are finally mounted and the deadeyes rigged, not without a minor setback...the first fixture i made to mount the deadeyes was a failure it allowed way to much slack in the shrouds so when the dead-eye lashings were pulled tight there was no distance between them. So I stripped them all off and started again, this time returning to my old standby fixture material...corrugated cardboard First I waxed down the new shroud lines to eliminate any spring back, then laid out the spacing on the the cardboard, all the deadeyes were mounted on the cardboard with stripped floral wire, then the shrouds were pulled down and ca glued to the deadeyes. Finally rigged out the lashings...and that's were she sits. Hope to get more down in the upcoming weeks. Pics follow, thanks for your time and attention, sorry for the focus...sharper next time J


-
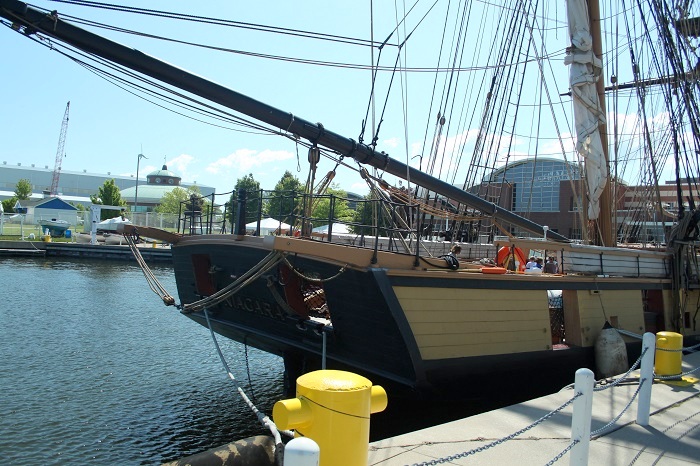
Hi Larry, What you've done looks good. I was lucky enough to get some pics of her in Erie this past summer, after this season she's going in for some extensive R&R, I've attached a shot of the stern for your reference. J

-
HALF MOON by jct - FINISHED - Corel
jct replied to jct's topic in - Kit build logs for subjects built from 1501 - 1750
Absolutely :D no progress this week end...all work and honey dew's -
HALF MOON by jct - FINISHED - Corel
jct replied to jct's topic in - Kit build logs for subjects built from 1501 - 1750
Thanks guys, A bit of a set back with the shroud lines...I had started to mount the deadeyes but forgot to allow for the stretch in the lines, they ended up being to long and since the deadeyes were super glued on, well they were stripped off and new ones made in the process on mounting now. J -
HALF MOON by jct - FINISHED - Corel
jct replied to jct's topic in - Kit build logs for subjects built from 1501 - 1750
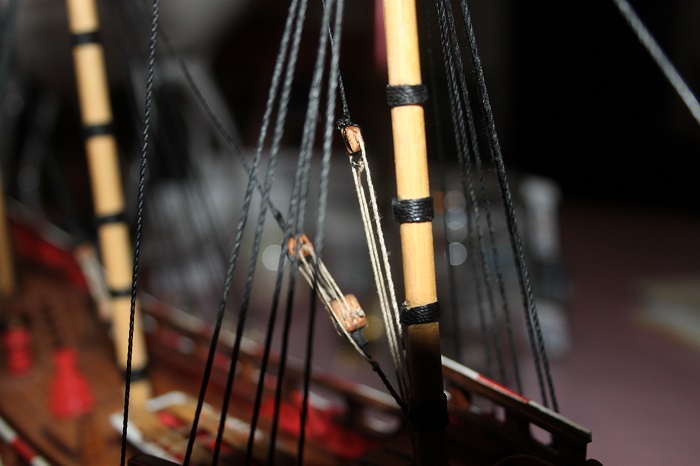
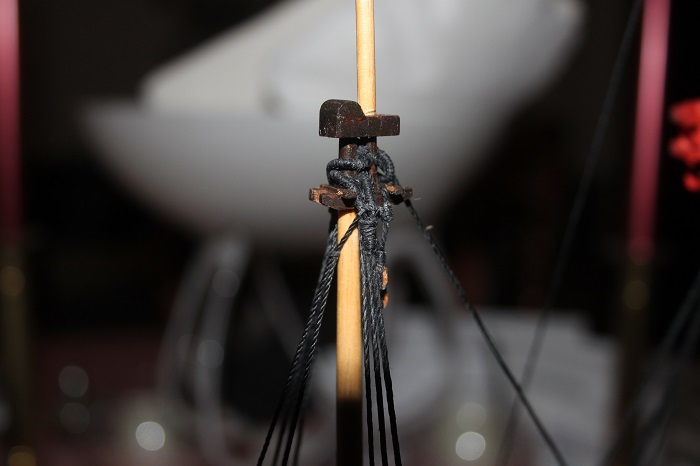
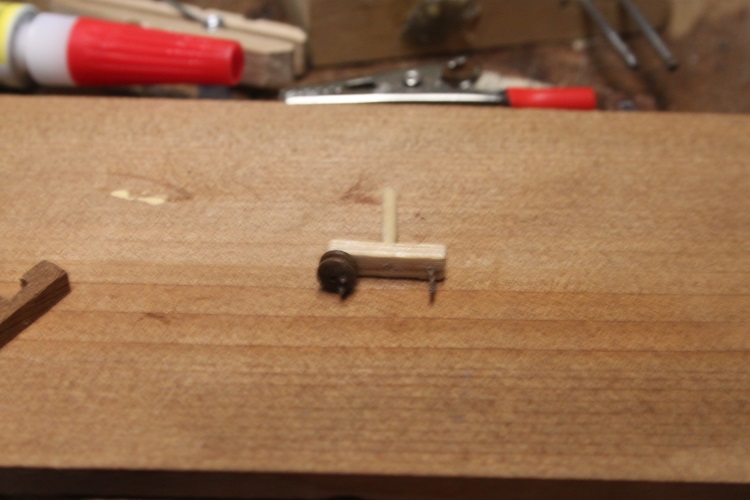
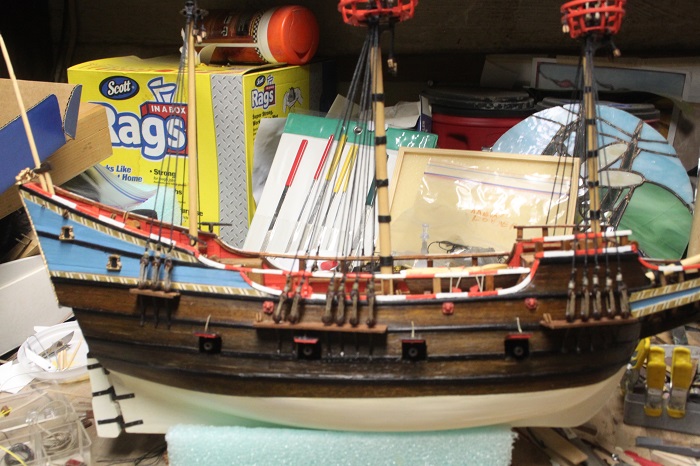
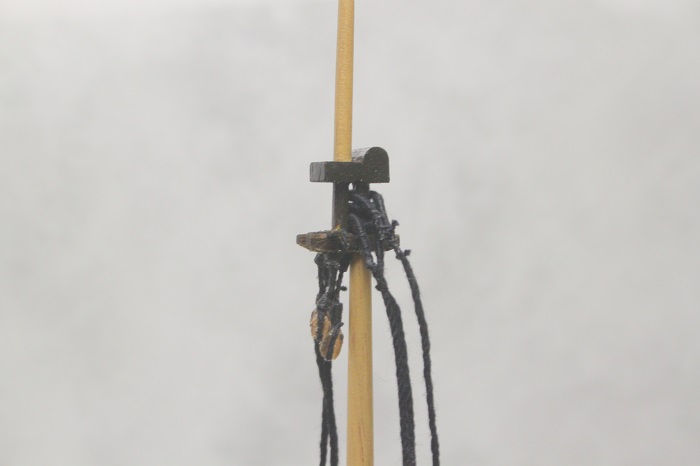
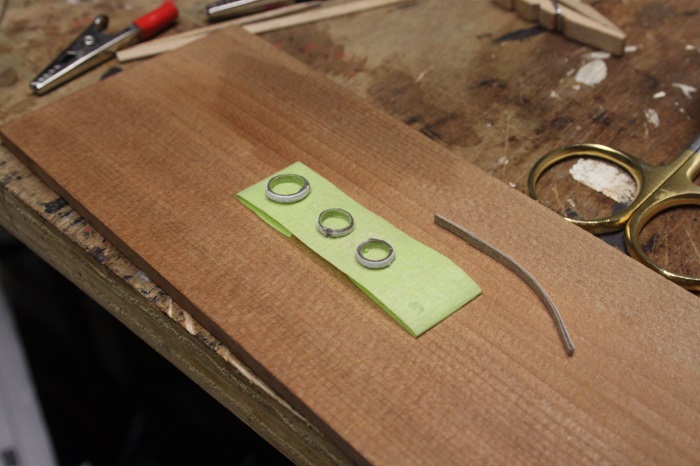
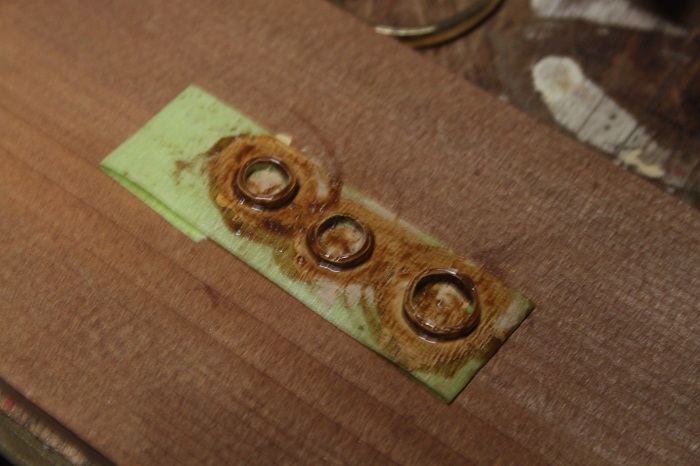
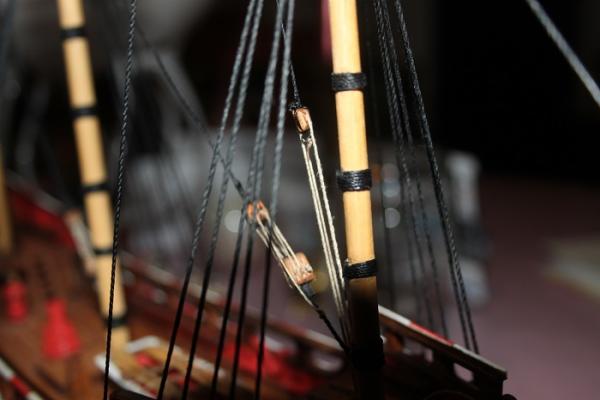
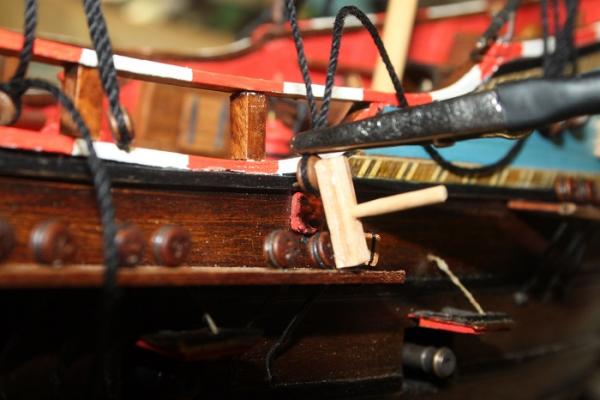
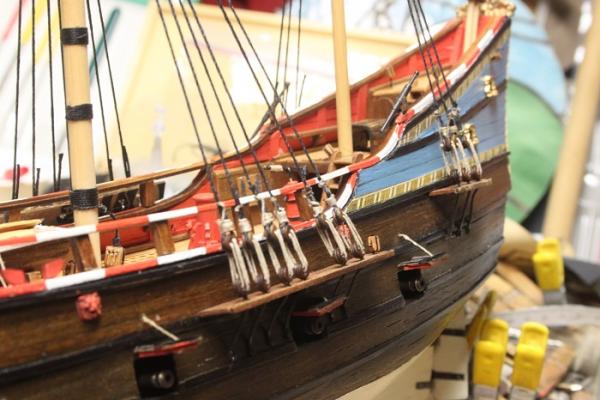
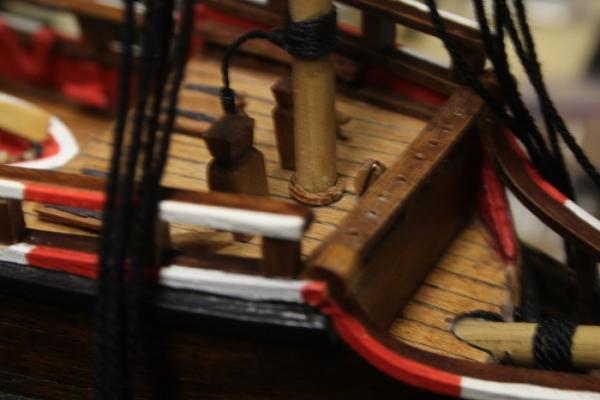
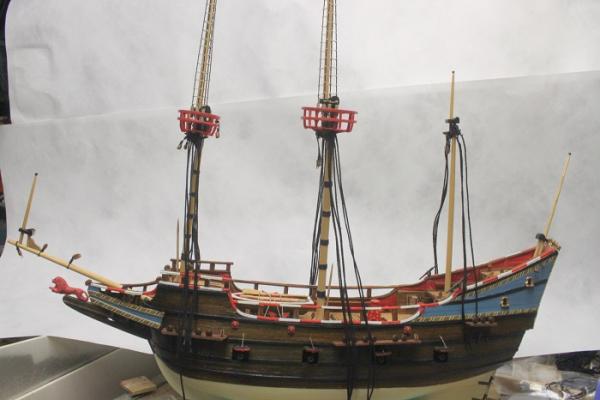
Hello my friends, It's been awhile since I posted, a very busy time at work, and the old HM is paying the price! The rigging process has continued in small fits and starts. The lower shrouds were served and mounted to the masts and the ring bolts and blocks are now mounted in place on the hull and deck. One thing that was not included in the kit were any type of ring for the base of the mast to simulate the wedges, so I set about to make them...this proved easier said then done. I tried multiple techniques including, turning (the little guys just broke apart), bending ( no wood I have could take the tight radius required), piecing sections together ( just looked like s***) ...I was really getting frustrated when I remembered what Doris has been able to accomplish with card stock. If you haven't visited her build log you're in for a treat, what she does with paper is truly amazing, link follows: http://modelshipworld.com/index.php/topic/854-royal-caroline-by-doris-card-1749-140/ So with that in mind I set about to use card stock, I first cut narrow strips about 1/32 wide, then the base of each mast was wrapped with tape, sticky side out, and the strips wrapped around them. The tape holds the rings in place while they are trimmed to size. at that point a dab of CA to hold the newly formed ring together, once the glue sets just slide off the mast, remove the tape and apply paint, in this case a primer coat followed by a brown wash. Sorry I've no in progress pics got so engaged I totally forgot to take them The masts have been mounted, the foremast was given more forward tilt then what shows in the pic...its was adjusted after the photo was taken. As always thanks for your time and attention, Pics follow J


-
HALF MOON by jct - FINISHED - Corel
jct replied to jct's topic in - Kit build logs for subjects built from 1501 - 1750
Thanks a lot Steve, ya I think it was worth it to redo them, I am happy with the current config. I think you'll enjoy the HM build, give us a heads up when you start, I'll pull up a ring side seat to your build log -
Really not that much work, and kind of fun watching it form on the walk
- 569 replies
-
- 1
-

-
- shenandoah
- corel
- (and 1 more)
-
Lookin' good Steve, one bit at a time, have you decided if your going to venture into making your own ropes?