jct
-
Posts
1,519 -
Joined
-
Last visited
Content Type
Profiles
Forums
Gallery
Events
Everything posted by jct
-
Steve, She looks really fine, your planking is top notch,that transition from horizontal to vertical at the stern must have been a bear. J
-
HALF MOON by jct - FINISHED - Corel
jct replied to jct's topic in - Kit build logs for subjects built from 1501 - 1750
Hey Steve, and thanks...usually i build it my head about three times first then adapt as stuff happens, which it always seems to the cardboard spacer is an example. THX again. J -
I really like that open VOC...Corel's is a thick cast metal piece that I think is gonna look clunky no mater what. Have you ever had issues applying decals to wood, excessive silvering or lifting because of the porosity?? I'm assuming you have to use a gloss clear to apply then a matte finish over top?
-
Hey Popeye, The details are really coming together, nice work on the stern decorations, are they styrene?
-
HALF MOON by jct - FINISHED - Corel
jct replied to jct's topic in - Kit build logs for subjects built from 1501 - 1750
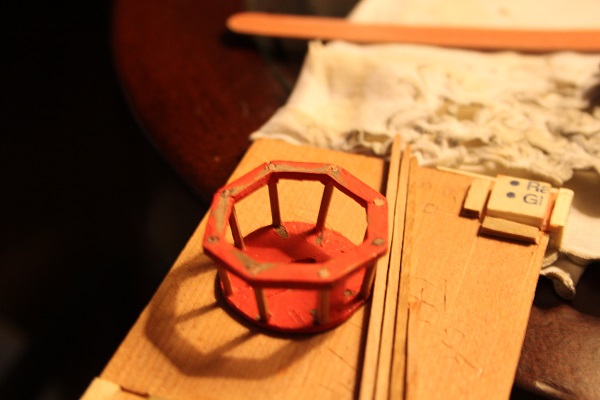
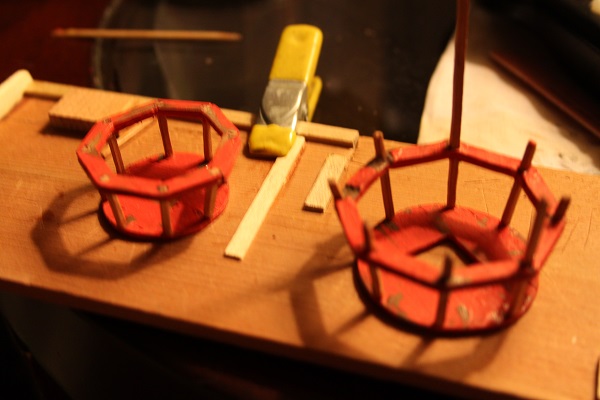
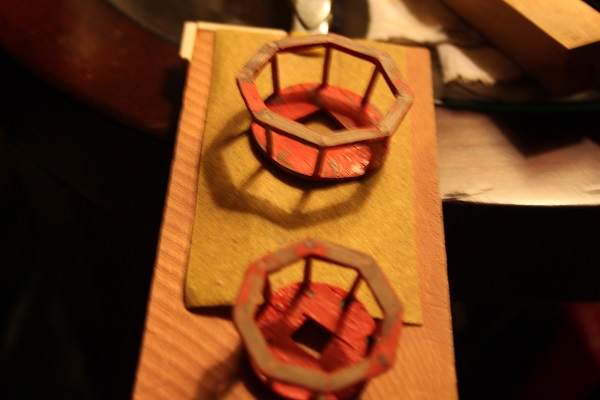
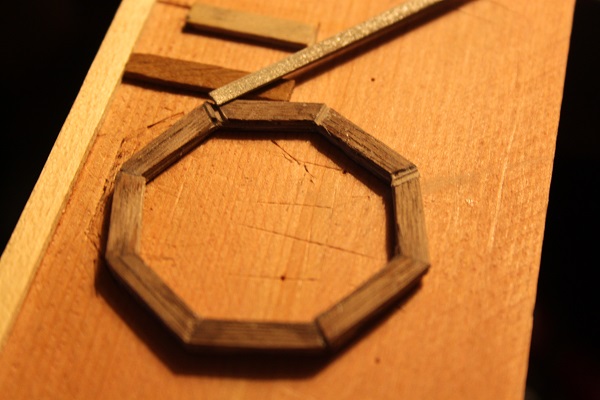
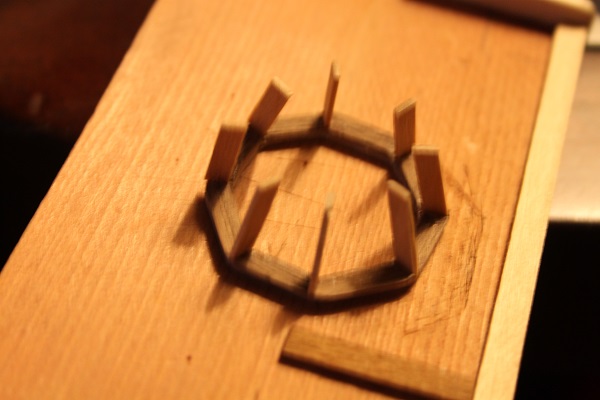
Not much progress to report, been a busy week and busier week end. I did decide to take Popeye's advise and replace the "fins" on the crows nest with square material. So I gave some thicker stock a ride through the band saw to create the stanchion stock. From there I took apart the large nest and soon discovered that I lacked enough hands to hold everything in place and aligned while the parts were glued! I predrilled the top rail on the large nest and made a spacer from corrugated cardboard, every other stanchion was inserted and glued once set it was rinse & repeat... Moving on to the smaller nest...I removed every other fin, which left the top rail and base firmly connected and spaced. Next holes of the appropriate size were drilled through the rails and the new square stock inserted through and glued in place, once the glue set the remaining fins were removed and the process repeated. From that point it was a matter of filling and sanding, still have to prime and paint, pics follow, sorry about the poor lighting J
-
Hey Steve, Nice job on the planking, I think you are good to go with just this one layer, looks fine in the pics. Good progress. J
-
Hey Popeye, Nice work on the paint and your rails, do yoiu plan to decal the circle patterns as well? J
-
HALF MOON by jct - FINISHED - Corel
jct replied to jct's topic in - Kit build logs for subjects built from 1501 - 1750
Thx for the suggestion, may do that, right now I'm in the middle of tearing off the kit timber-heads and the three rows of planking impacted by their removal. I plan to plank inside the bulwarks and am not happy with the look, size, shape or proportion of the timber-heads...I know... should have done that before I planked the deck, but I've gotten really good at backing up!! -
ROYAL CAROLINE 1749 by Doris - 1:40 - CARD
jct replied to DORIS's topic in - Build logs for subjects built 1501 - 1750
Doris, What to say that has not been said...simply stunning, your little folk look really great, did you say you were doing 300 of these guys!!!- 883 replies
-
- 1
-

-
- royal caroline
- ship of the line
- (and 1 more)
-
HALF MOON by jct - FINISHED - Corel
jct replied to jct's topic in - Kit build logs for subjects built from 1501 - 1750
Thanks much Steve, I stole it from Popeye's HM build, so help yourself I am pleased with the way the hull turned around...did have my doubts for a minute though...THX again J -
HALF MOON by jct - FINISHED - Corel
jct replied to jct's topic in - Kit build logs for subjects built from 1501 - 1750
additional pics promised yesterday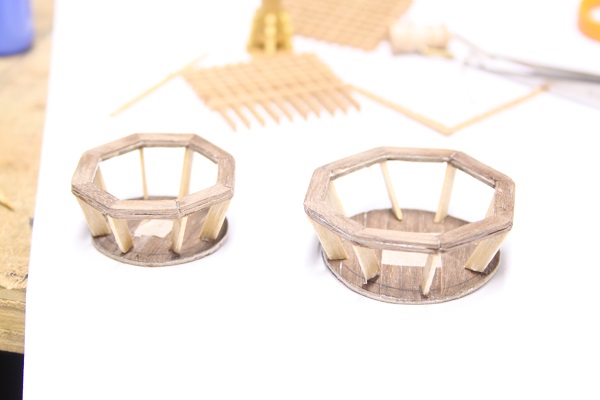
-
HALF MOON by jct - FINISHED - Corel
jct replied to jct's topic in - Kit build logs for subjects built from 1501 - 1750
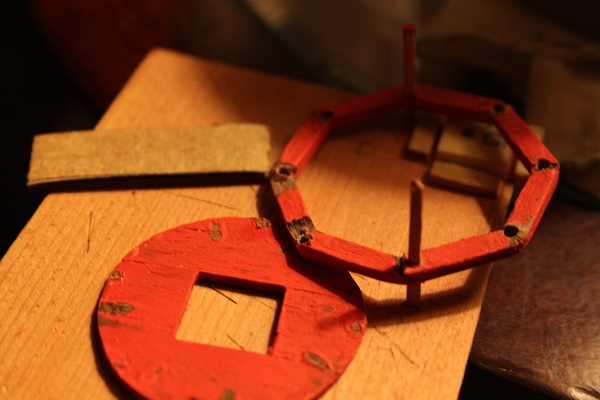
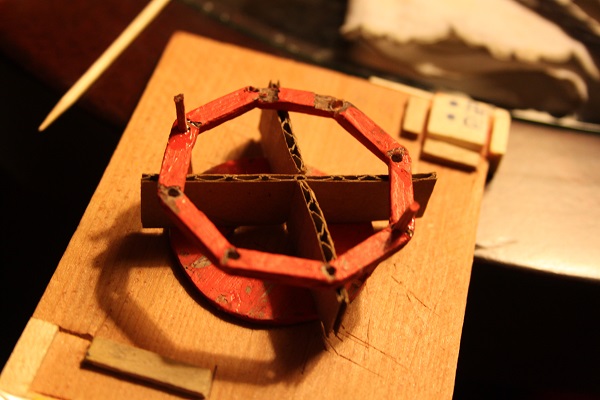
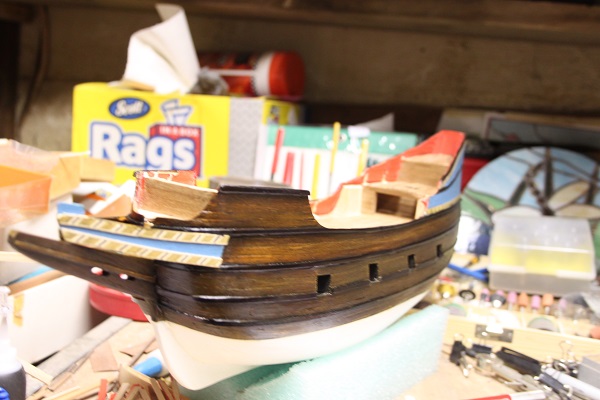
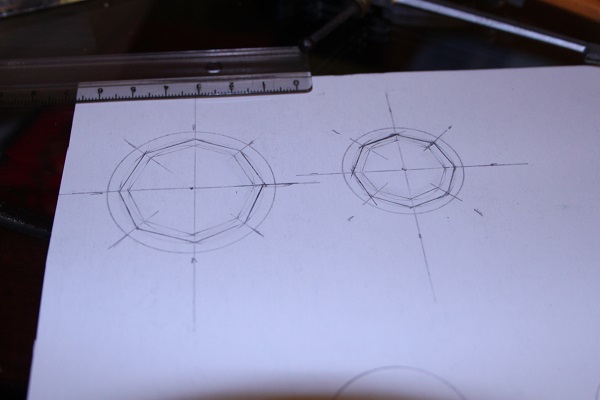
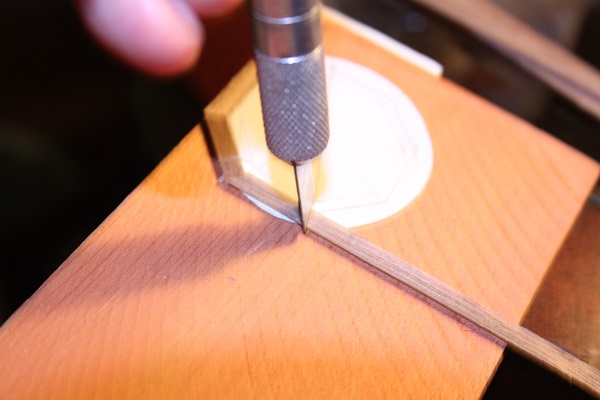
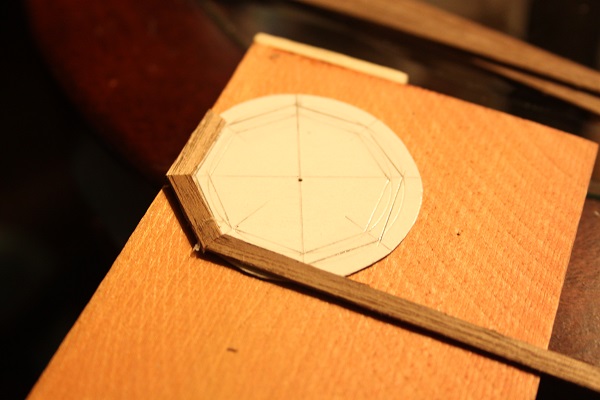
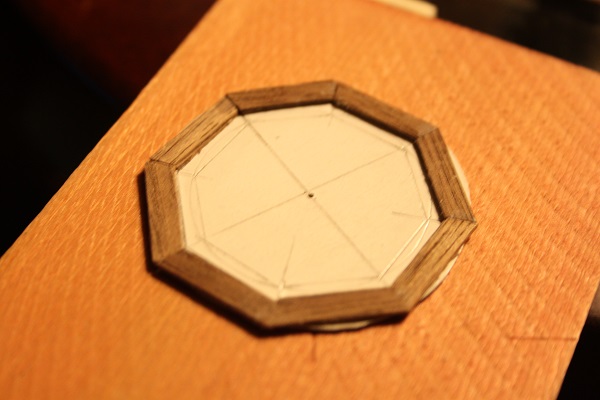
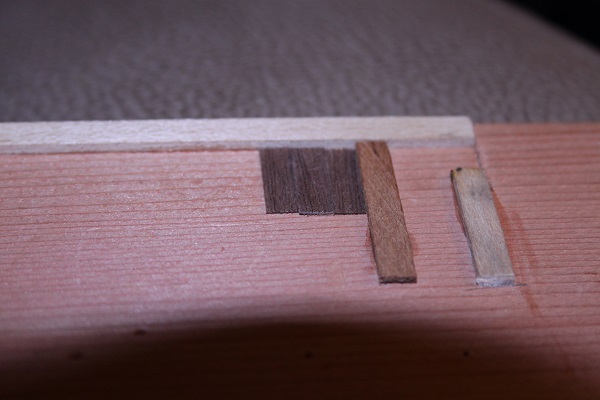
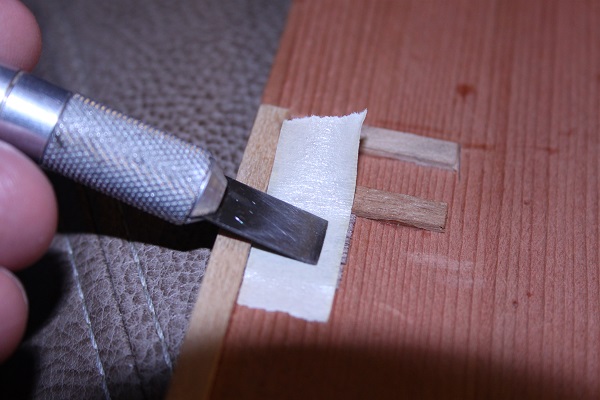
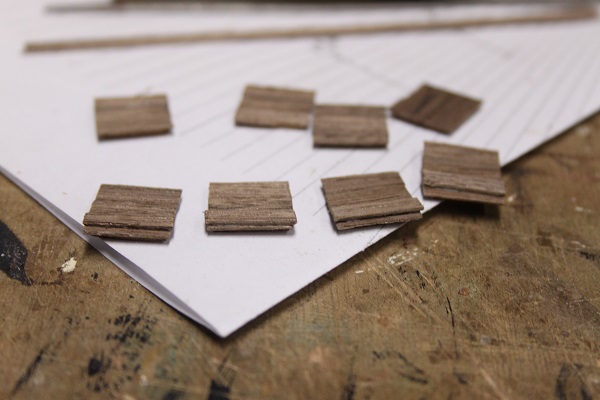
Thought I'd post a few updates on my HM build, I've completed the dyeing of the hull and have two clear coats applied, so while I was waiting for the hull to dry I thought I'd start on a few small items...My intent from first opening the package was to do something with the solid wood crows nest supplied by Corel. I initial thought was to simple cut them apart and use the pieces to make open nests, so that's where I started. Unfortunately the wood these were turned from was not the best and I ended up with a handful of broken pieces. After viewing Popeye's build log I figured I'd try my hand at scratch building new nests. I started by doing my layout on some stiff paper card, then applied veneer to each of the card pieces. Some pics follow, the nest still need glued to their bases and I plan to paint them bulwark red, just to add some color to the tops, I'll post pics of the finished product later in the week, also pics of the dyed and cleared hull. Thanks for looking in. J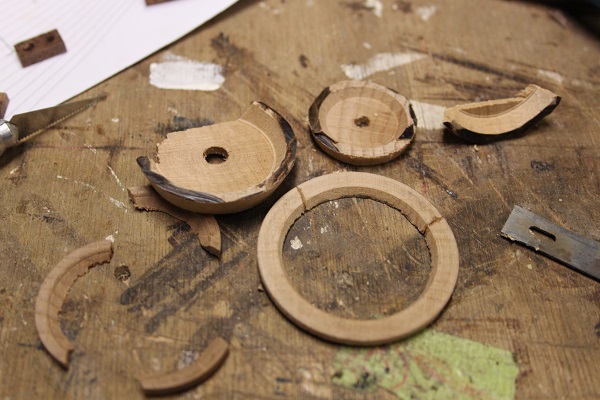
-
Hey Steve, Seems you've become expert a planking within just a few starkes, looks really clean. J
-
Thanks Max great job she's a show piece for sure, what so you think your next build will beJ J
-
Hey Steve, I do believe your scrap pile is relatively small...you should see the heap I've accumulated...the trees weep! What made it onto the hull look good, your scarf work on the keel is really tight. Nice job. J
-
HALF MOON by jct - FINISHED - Corel
jct replied to jct's topic in - Kit build logs for subjects built from 1501 - 1750
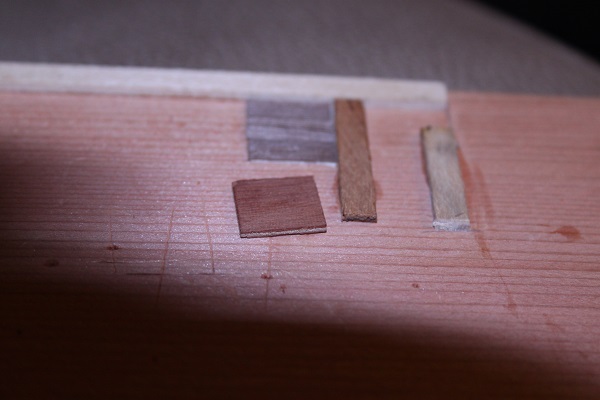
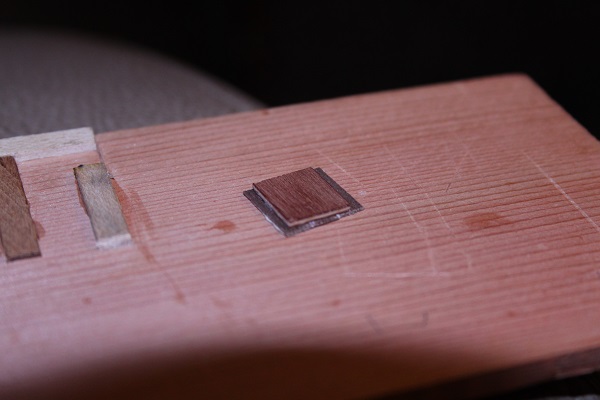
Got more completed on my HM build today, I had read that port covers should be planked the same as the hull, so the single pieces of plywood supplied would not be correct. I decided to use them as the interior part of the port cover, assembly photos follow. I also got the rub stark applied to the hull. THX J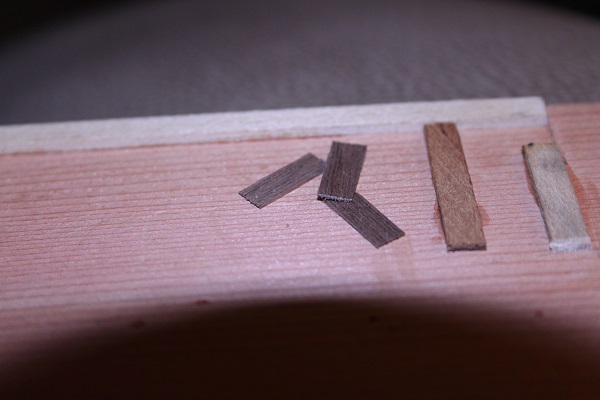
-
Hey Max, Your HM turned out really nice, good job on your build. Im working on the same kit and have a question for you, what did you use for the haws hole surround? My plans show it in one view but never mention it in the kit plans? Thanks J
-
HALF MOON by jct - FINISHED - Corel
jct replied to jct's topic in - Kit build logs for subjects built from 1501 - 1750
Tanks Guys, Next step is to do the color match...I know I've some glue spots to deal with there, seems no matter how hard I try to be neat those little devils always appear! Thanks again for your kind remarks and for checking in. J -
HALF MOON by jct - FINISHED - Corel
jct replied to jct's topic in - Kit build logs for subjects built from 1501 - 1750
HI Doris, Thanks for your kind remarks, it has been an enjoyable build even with the setbacks. J -
HALF MOON by jct - FINISHED - Corel
jct replied to jct's topic in - Kit build logs for subjects built from 1501 - 1750
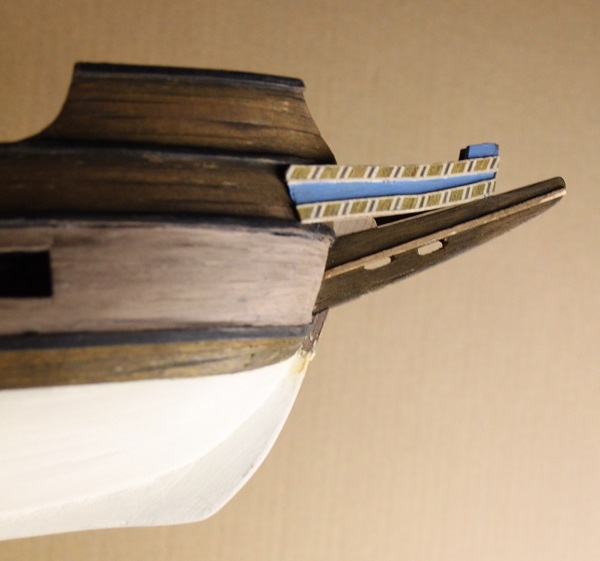
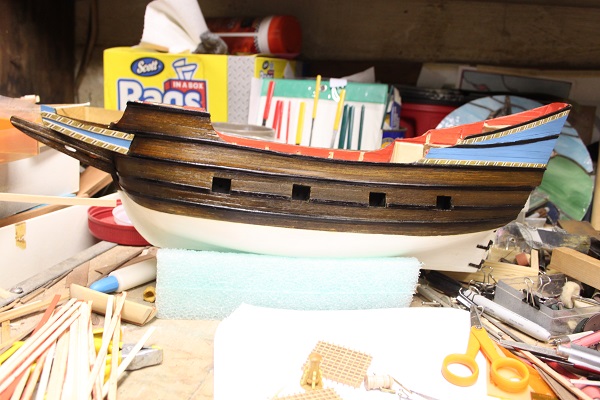
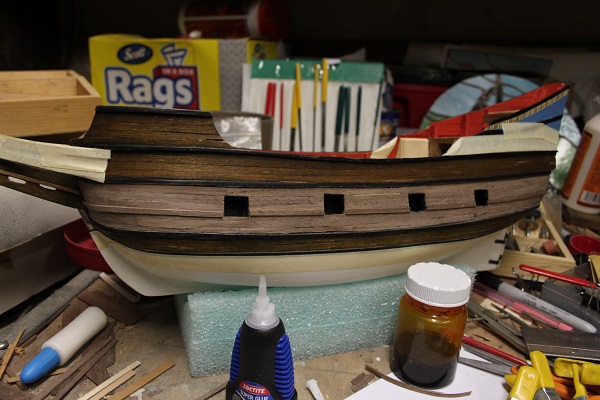
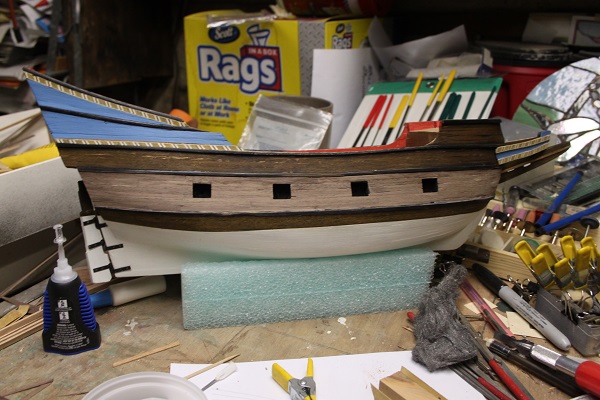
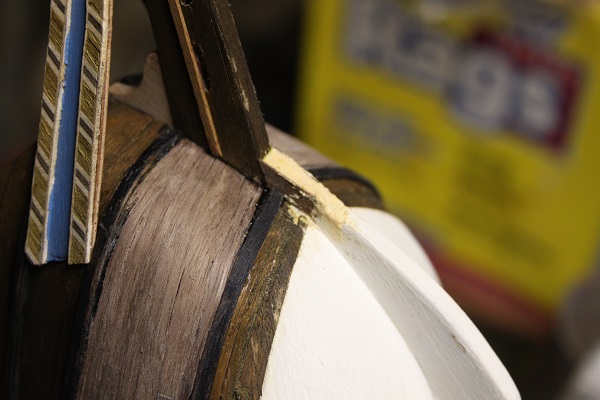
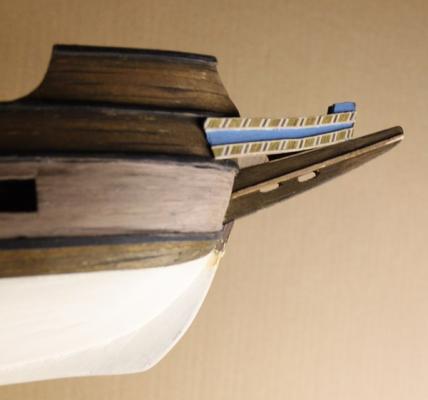
Updates on my HM build: After the installation of the new ports I cut some new veneer strips and started installing the planking. After completing the planking I was just looking at the ship and something just didn't look right at the bow... the stem post was short of the peak, so since everything is going to need sanded and re-stained anyway I took the opportunity to extend the the stem. Pics follow. THX for looking in J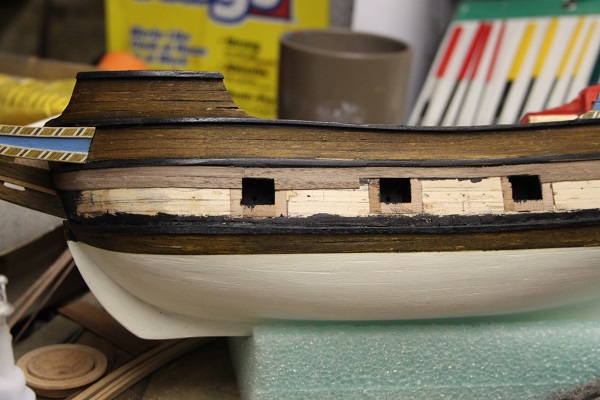

-
ROYAL CAROLINE 1749 by Doris - 1:40 - CARD
jct replied to DORIS's topic in - Build logs for subjects built 1501 - 1750
Doris, Truly impressive work, you have amazing skills and have created a beautiful work of art!! J- 883 replies
-
- 1
-
-
- royal caroline
- ship of the line
- (and 1 more)
-
Hi Vivian, Just getting caught up on your build log, I like the changes you've made to your caravel, looks much nicer natural than painted black. J
-
HALF MOON by jct - FINISHED - Corel
jct replied to jct's topic in - Kit build logs for subjects built from 1501 - 1750
THX much to you both, I'm pretty happy with the way this fix worked, the planking work will begin shortly, got to make some more first though. THX again for your interest. Good to see you back Anja, good luck with your new position. J -
I don't think your progress is all that bad...taken your time beats re-dos!! J
-
Hey Steve, Paint work and the transom look good