jct
-
Posts
1,519 -
Joined
-
Last visited
Content Type
Profiles
Forums
Gallery
Events
Everything posted by jct
-
Would have liked to have been able to get some photos or it...but its seems that every, and I do mean every, astrological event occurs when we have clouded and overcast conditions...how was the view
-
HALF MOON by jct - FINISHED - Corel
jct replied to jct's topic in - Kit build logs for subjects built from 1501 - 1750
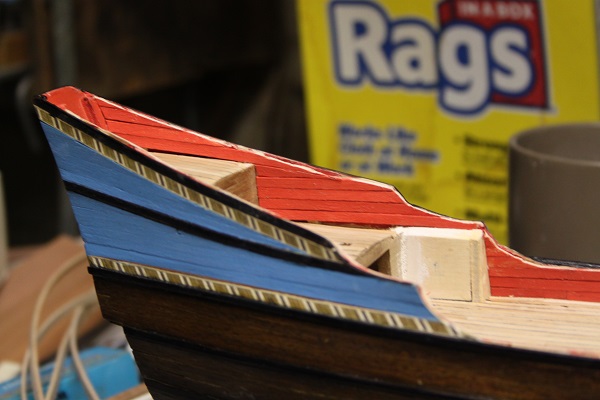
THX Popeye, They are shown on the instruction drawings and the plan drawings show dimensions they don't give any fabrication details. I think Corel's instructions are vague at best and when I have followed them they have been misleading and troublesome, at this point I'm just kinda following the pics; plus this particular kit didn't seem to have enough material (wood strips) to do what the instructions demand. I'm sure part of this is due to my redo but the material in the scrap pile still doesn't equal the demand! No biggie as I've plenty of material lying about to substitute, just something I think others need to be aware of. OBTW the hand rails will be a combination of paint and stain, gonna "barber pole" the outside edges...though I'm goin' old school and will paint direct on the rails, I manage that a lot better then glues!! :rolleyes: J -
HALF MOON by jct - FINISHED - Corel
jct replied to jct's topic in - Kit build logs for subjects built from 1501 - 1750
Rest of the pics


-
HALF MOON by jct - FINISHED - Corel
jct replied to jct's topic in - Kit build logs for subjects built from 1501 - 1750
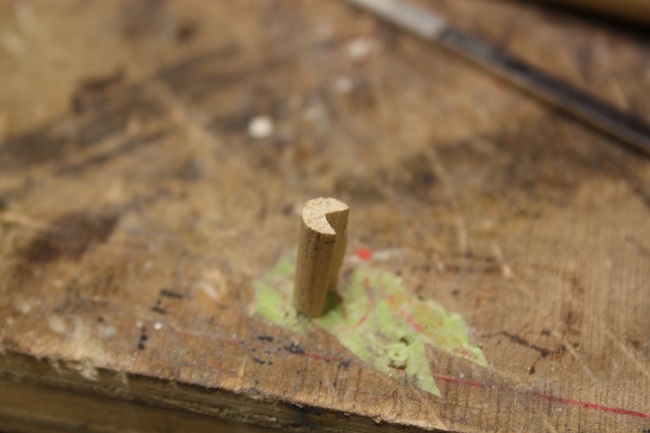
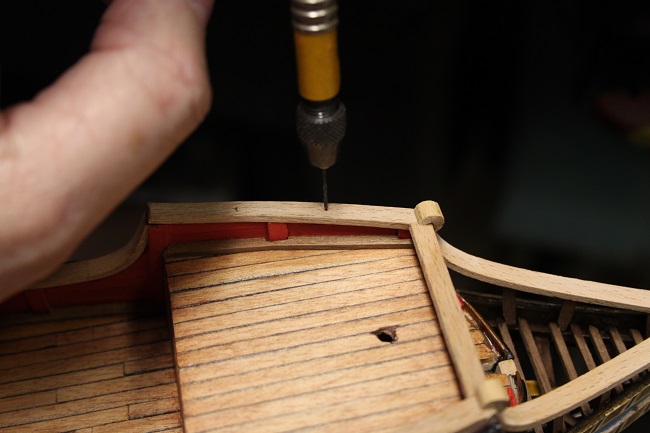
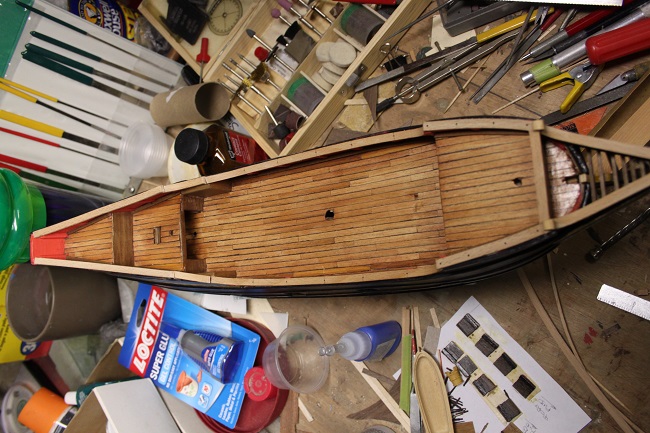
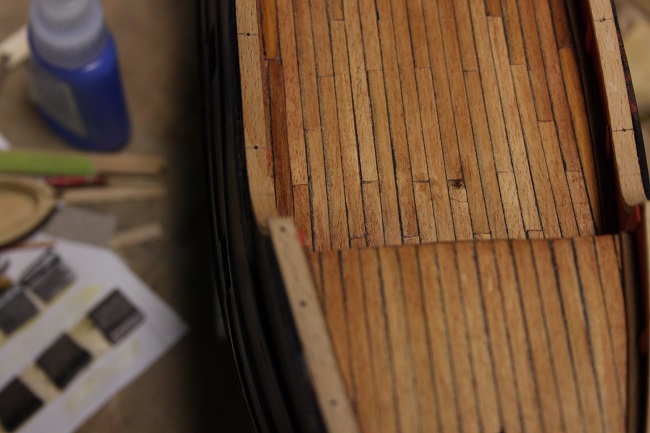
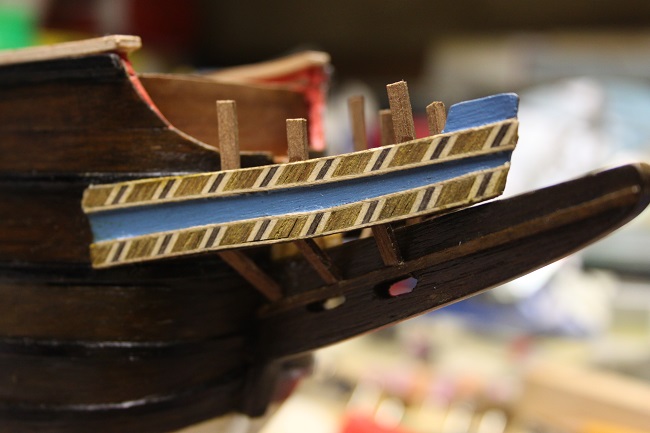
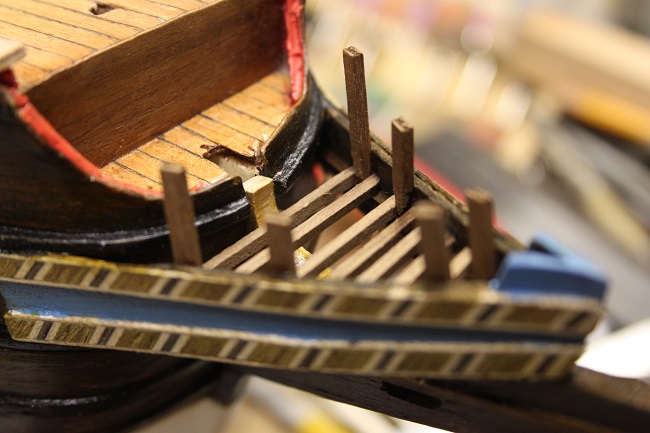
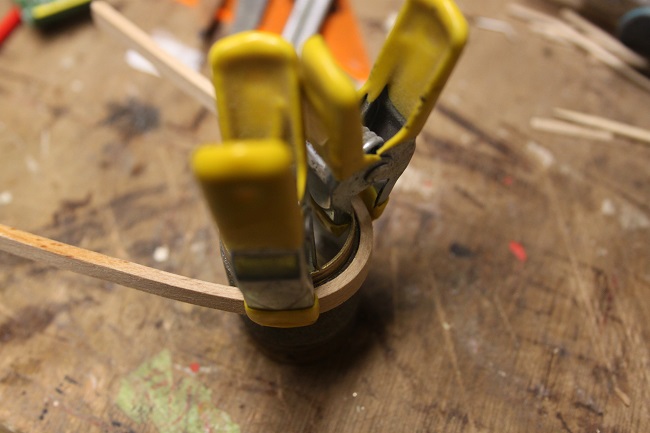
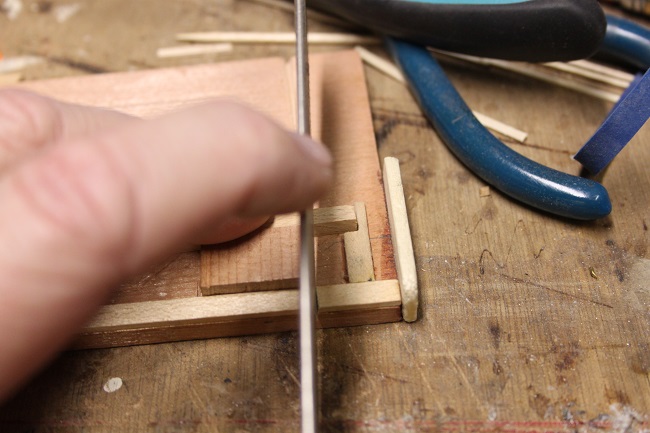
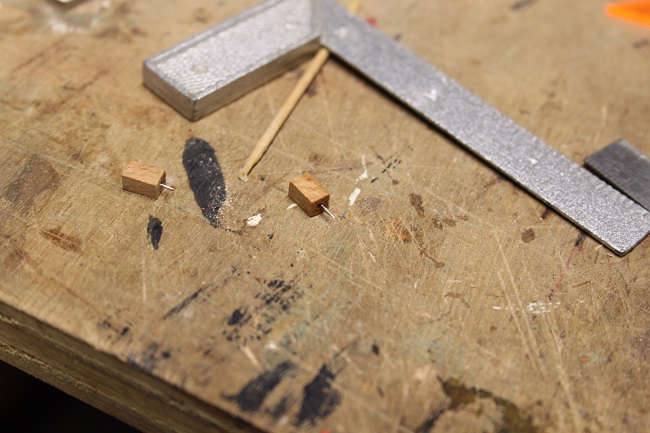
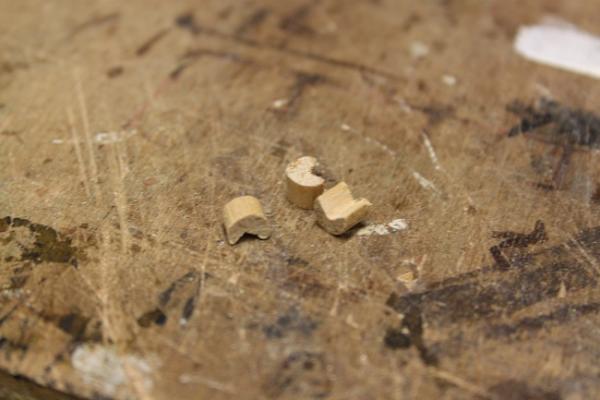
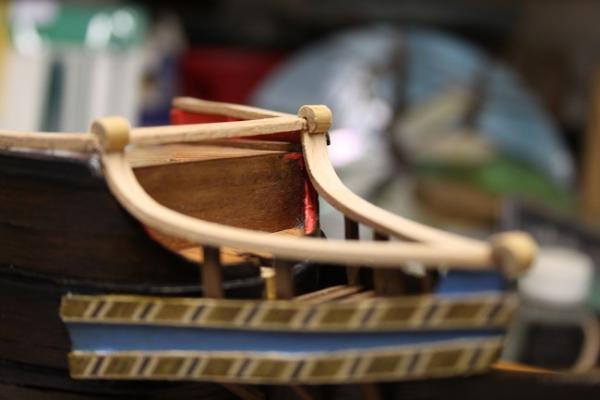
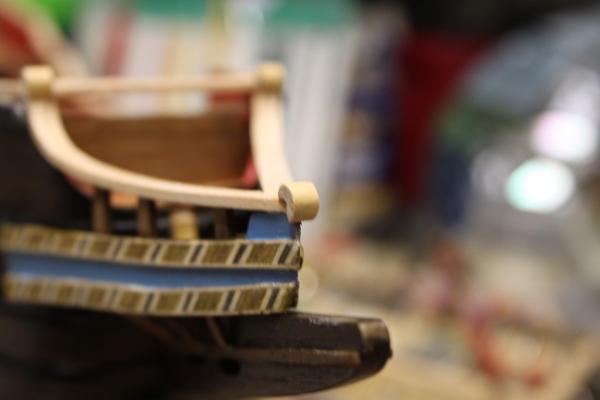
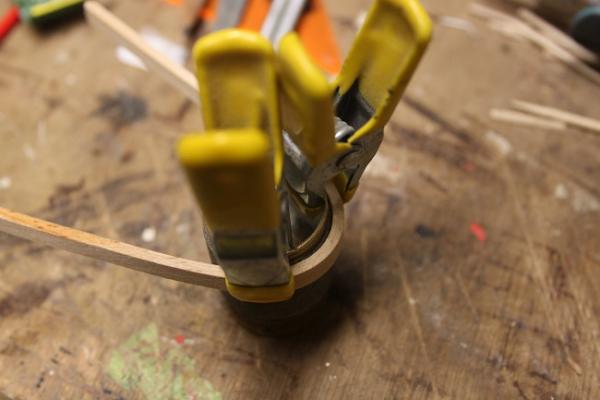
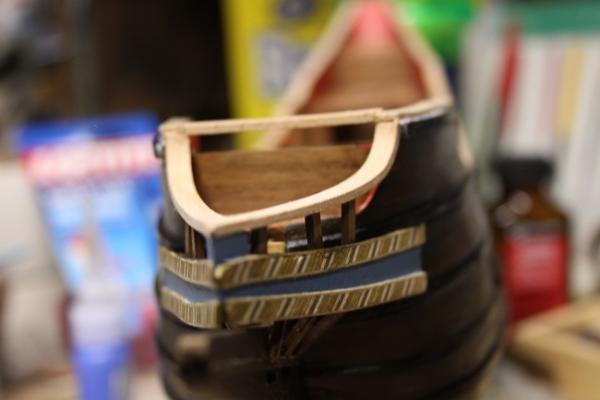
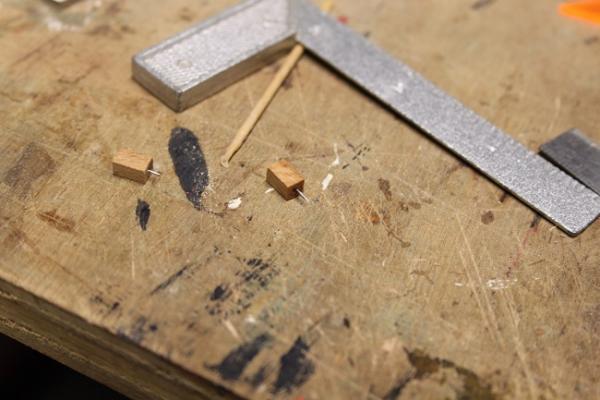
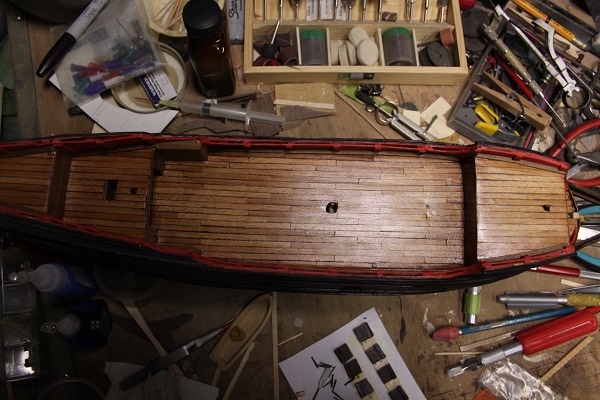
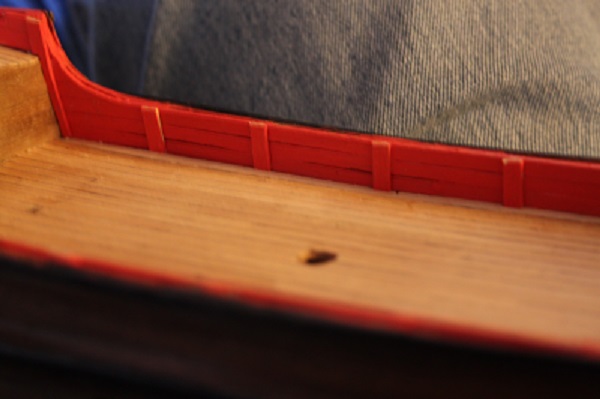
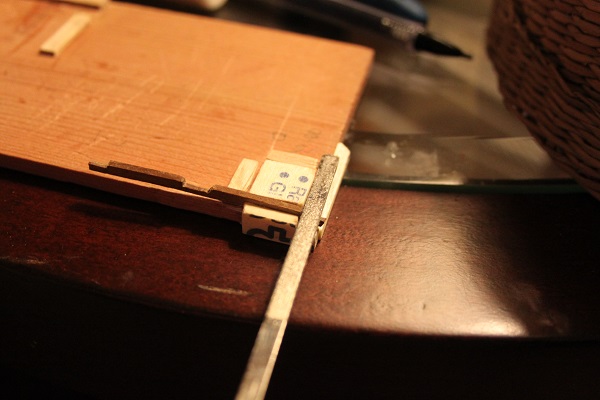
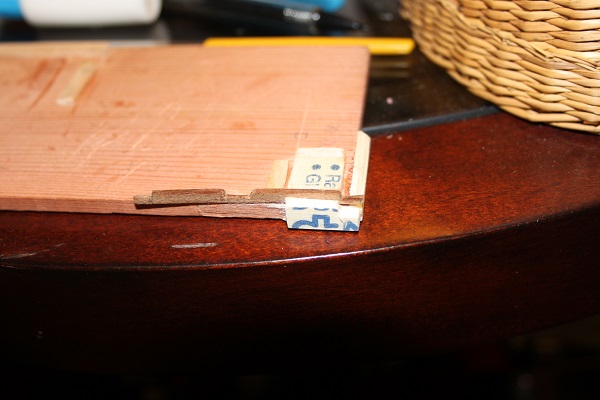
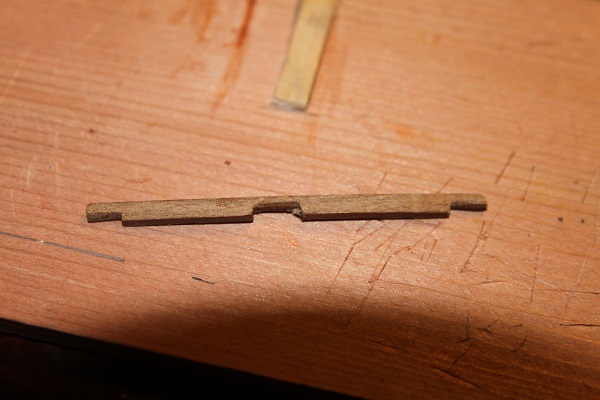
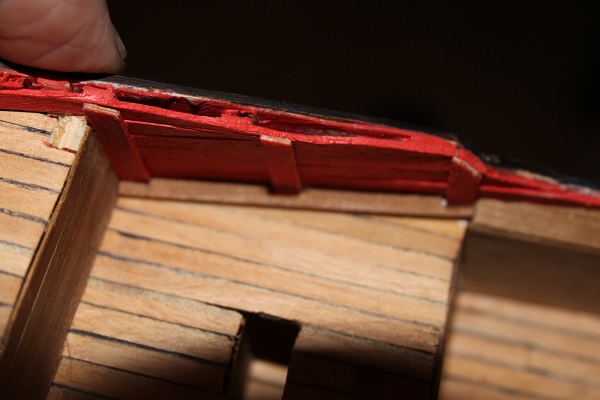
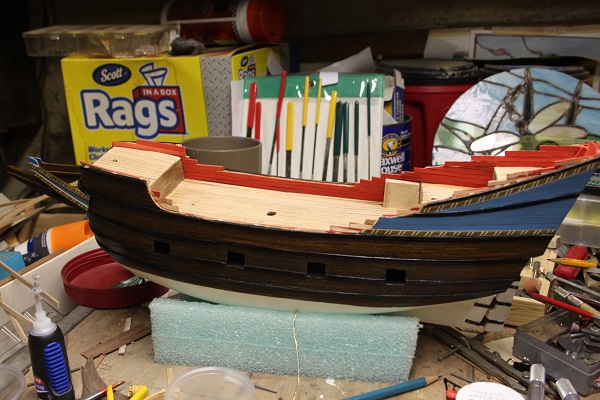
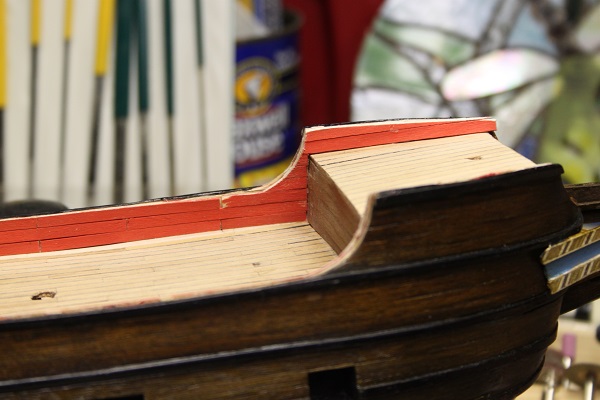
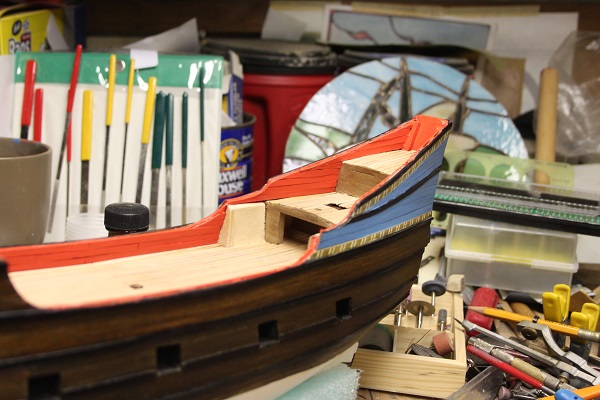
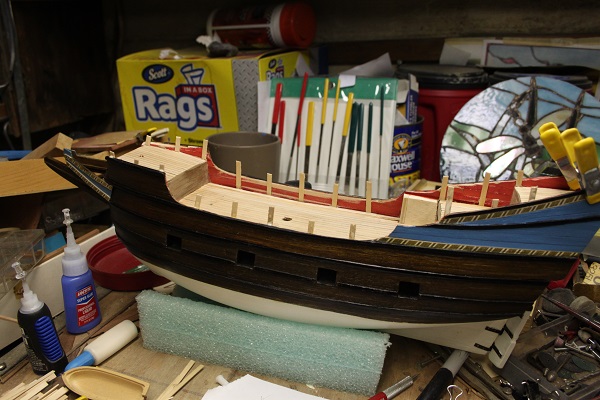
Hi everyone, Made some progress on my HM, got the handrails mounted, this was a step I was dreading as I know how severe some of the bends would be...as it turned out it was much simpler then I imagined it would be. Whatever wood Corel supplied for this made it very easy, once wet you could tie the stuff in a knot In fact when wet you have to work to keep it straight! I cut stanchions for the upper handrails, these were drilled and pinned to allow secure mounting. I made extras so I have more to choose from...to get the sizes closer. The bow hand rails have decorative caps made from dowel...a 6mm dowel was used. I removed a quarter of the material with a sharp chisel then sanded to the appropriate Pacman shape, the piece was then cut in thirds and mounted in place. All the main rails were drilled for the stanchions, that's about all for now, debating weather the hand rails need to be painted, stained, or some combination of the two. Thanks for looking in, Pics follow J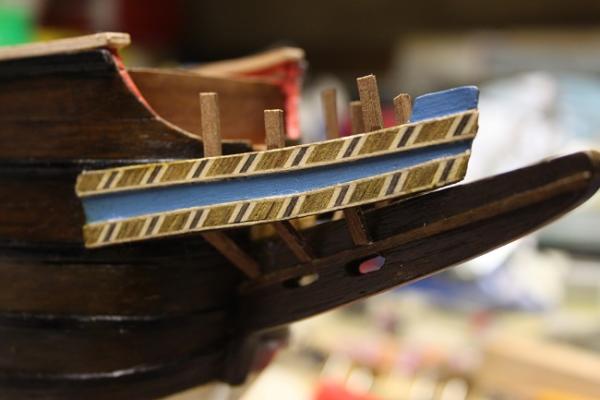


-
HALF MOON by jct - FINISHED - Corel
jct replied to jct's topic in - Kit build logs for subjects built from 1501 - 1750
Thanks to all of you for your comments and continued support, she is coming along. I think the deck furniture is next on the agenda. THX again J -
HALF MOON by jct - FINISHED - Corel
jct replied to jct's topic in - Kit build logs for subjects built from 1501 - 1750
Promised pics follow, Thx for looking in J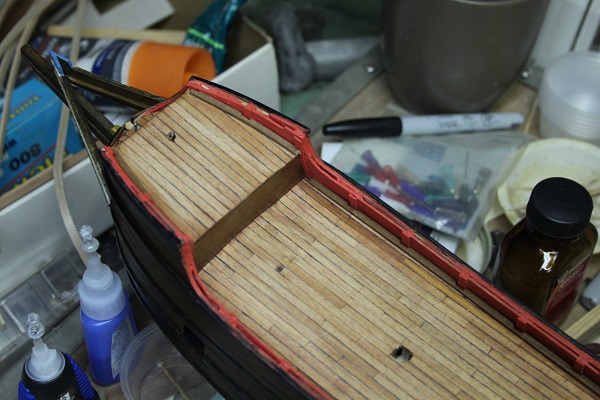
-
HALF MOON by jct - FINISHED - Corel
jct replied to jct's topic in - Kit build logs for subjects built from 1501 - 1750
Pretty close to getting pics, all the waterways are filled, they are drying after a coat of poly, the decks are buffed out, may hit them again...still deciding, and did some touch up on the bulwarks, if not tomorrow Friday for sure, off for the holiday THX J -
HALF MOON by jct - FINISHED - Corel
jct replied to jct's topic in - Kit build logs for subjects built from 1501 - 1750
ended up using a very light cherry stain/urethane mix, my plan is to steel wool this so it's lighter in the main areas and a little darker in the corners and such...slight weathered effect is what I'm after. I'll let you know how it goes and post pics of the result, all the smaller water ways are sized still have the two for the main decks to file and fit...no pics as yet. Thanks for the input and support J -
HALF MOON by jct - FINISHED - Corel
jct replied to jct's topic in - Kit build logs for subjects built from 1501 - 1750
Thanks guys, No stain yet Steve, just open wood at this point, been debating(with self) weather to stain or just oil them...leaning towards a stain to even out the color but I don't want them to dark...back and forth I go, your thoughts are welcome THX J -
Hey Steve, you seem to have master the technique in very short order, nice job. J
-
HALF MOON by jct - FINISHED - Corel
jct replied to jct's topic in - Kit build logs for subjects built from 1501 - 1750
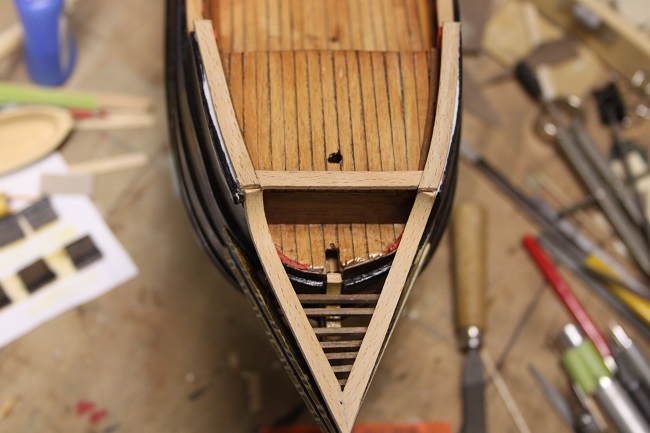
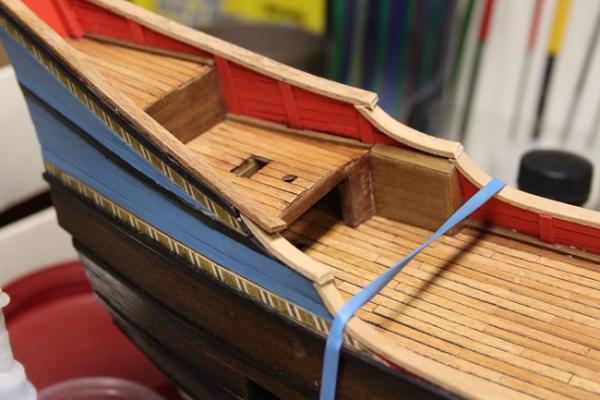
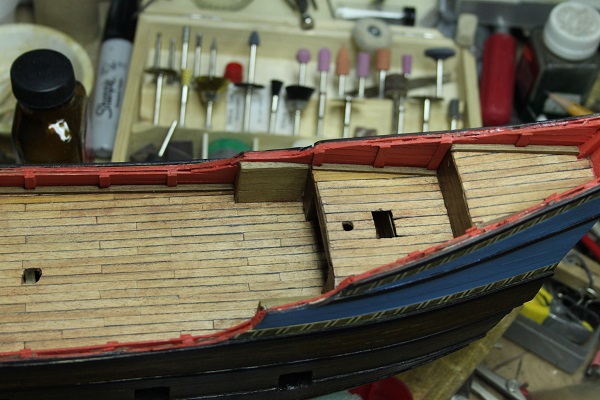
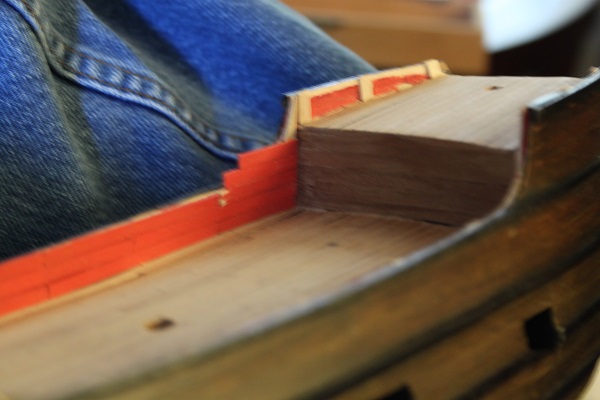
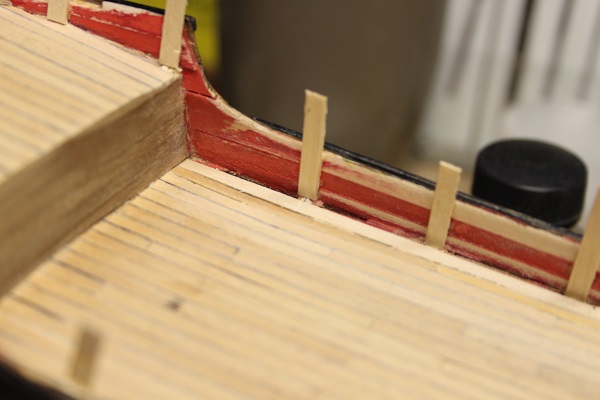
Not much of an update but a few thing are done, finished mounting the false timberheads, got the aft stowage boxes veneered, and started making the waterways. Those are going to be fiddly, filling and fitting around the timberheads, pics follow.
-
Nice...it's gonna look really good
-
I think most of us would still get in line... ...strong masochistic tendencies...these!!
- 569 replies
-
- 4
-

-
- shenandoah
- corel
- (and 1 more)
-
Ya...wish you luck keeping all the pieces in the air...sorry couldn't resist, are you going to pre-cut the tapers or cut to fit?
- 569 replies
-
- 1
-
-
- shenandoah
- corel
- (and 1 more)
-
Hey Max, Good to hear your next build is planned, your experience with your HM should serve you well on your new galleon, from the pics I've seen the Roter Löwe's stern is more highly decorated, should be fun to watch. All my best. J
-
HALF MOON by jct - FINISHED - Corel
jct replied to jct's topic in - Kit build logs for subjects built from 1501 - 1750
Thanks all, Popeye...in the presence of the bash Jedi I am but a mere Padawan learner... Steve...glad you're enjoying the show...I'm following you're Shenandoah build and look fwd to each entry THX again J -
Nice, very nice...the deck should look really good when complete, I like the joggling effect but never done it, following with interest J
-
HALF MOON by jct - FINISHED - Corel
jct replied to jct's topic in - Kit build logs for subjects built from 1501 - 1750
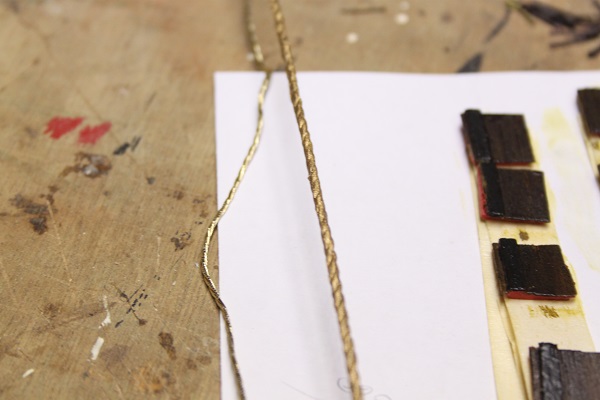
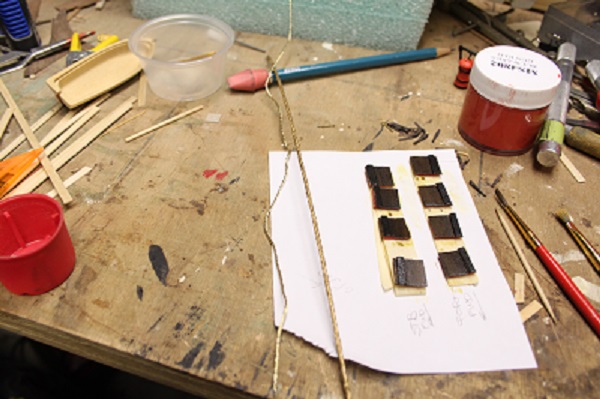
More to share...was able to get the inner bulwark planking completed, pre-cut and painted some white wood strips then just glued them up to the spacers, ran up the sides and just trimmed off the excess. Also took the time to make some new rope "carving" for the transom...the kit supplied some really thin gilt thread, didn't like it at all and I could just envision the mess trying to glue it in place so I spun some polyester twine up on the rope walk, coated it in liquid CA and painted it gold...think it will enhance the medallions once mounted to the stern. Well that's all for this week, thanks for looking in. Pics follow. J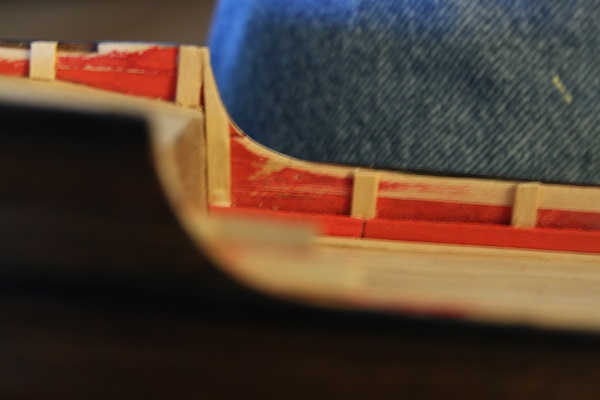

-
HALF MOON by jct - FINISHED - Corel
jct replied to jct's topic in - Kit build logs for subjects built from 1501 - 1750
Thanks for all the info Krill, hey Popeye, does seem to have a club atmosphere...do you think we can get shirts? J -
HALF MOON by jct - FINISHED - Corel
jct replied to jct's topic in - Kit build logs for subjects built from 1501 - 1750
Hey Krill, I see what you mean now, I'm not sure about adding them at his stage though, I've got the outer hull finished and am not sure about holing the finished product at this point, thanks again, J -
HALF MOON by jct - FINISHED - Corel
jct replied to jct's topic in - Kit build logs for subjects built from 1501 - 1750
Thanks fellows, Krill, I may use a dark wash to weather the pieces in a bit and as you pointed out it will add depth...not sure yet, also there are no stupid questions! As far as scuppers are concerned, the kit instructions don't mention them but I think that might be what the lion's heads that will eventually be mounted on the sides of the Hull may be, anyone out there know for sure?? Thanks for your kind words. Max, the final result may be months away as yet, but thanks for your kind words and continued support. J -
HALF MOON by jct - FINISHED - Corel
jct replied to jct's topic in - Kit build logs for subjects built from 1501 - 1750
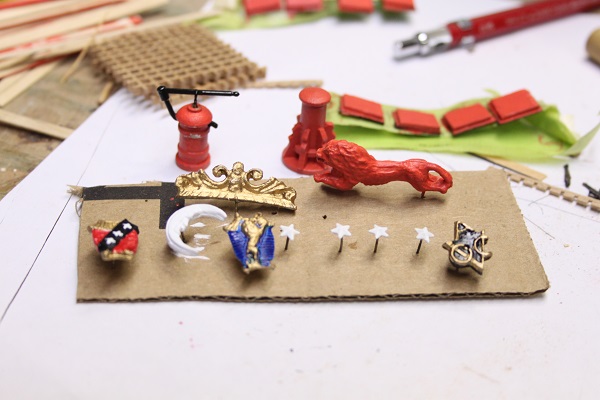
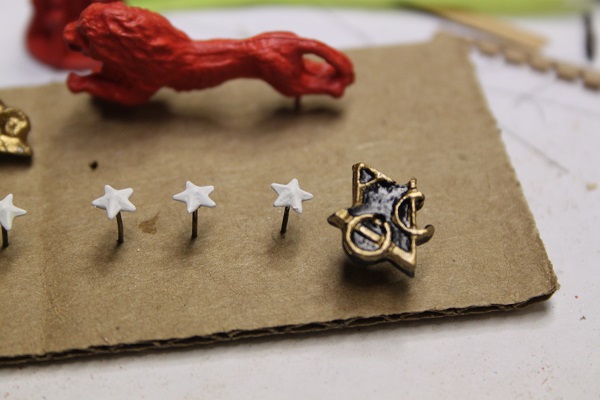
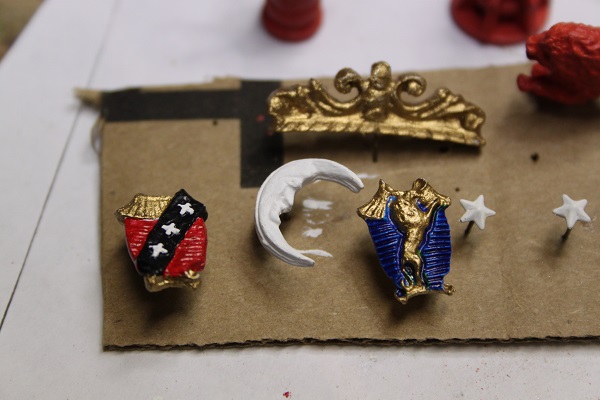
Hey All, Up and coming are the pics I promised in the earlier post, a synopsis first. As I mentioned in an earlier entry all of the castings suffered from registration issues during casting. The halves were offset by a minimum of 1- 2 mm, plus the "gold" plating was in nasty shape, flaking and peeling. I thought with a little work they might be serviceable so I set down with rotary cutters and files, and hand files to see what I could do. The stern plaques cleaned up pretty well straight away and each was drilled and a pin affixed to the back to facilitate mounting to the stern. Work then started on the piece for the top of the transom, it was offset in two directions and took the most work to make presentable, after grinding it down to a reasonable shape I set to work opening up center section of the piece. After that a brass brush was used to clean up all the flaking. Each part was then primed and allowed to dry before finish painting. While the parts were drying I went back to the hull and completed the decking to replace what was torn out when I removed the kit timberheads, I then glued in spacers for the inner bulwark planking to be attached to, once this is done new timberheads will be glued to the new planking. Pics follow, thanks for looking in. J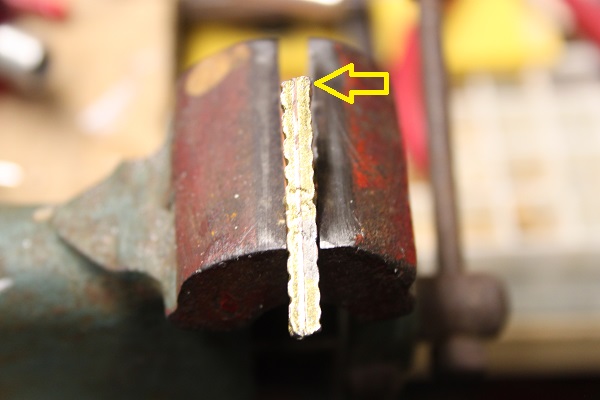
-
HALF MOON by jct - FINISHED - Corel
jct replied to jct's topic in - Kit build logs for subjects built from 1501 - 1750
Hey Krill, Thanks for the quick response and the information, I did end up painting the figurehead a dull red, mainly because of all the file work needed to make it presentable. Don't concern yourself with your English, you are very understandable. THX J -
HALF MOON by jct - FINISHED - Corel
jct replied to jct's topic in - Kit build logs for subjects built from 1501 - 1750
Hi, Just thought I'd stop by with a quick update, no pics yet later today maybe, been working on the casting provided by Corel. The stern decorations and the figure head, most of mine had some register issues during casting so there has been a lot of file work to make them presentable, plus the "gold" plating was flaking off most, so painting was required. Again pics to follow later today, but first a question: does anyone out there know why the lions used as the figurehead and along the ship sides are RED?