


Roberts Orca
-
Posts
121 -
Joined
-
Last visited
Content Type
Profiles
Forums
Gallery
Events
Posts posted by Roberts Orca
-
-
-
20 minutes ago, Eugenio Treviño said:
Very nice planking Robert. And you are flying!!! Great.
Thank you my friend. I've been enjoying the journey. This HMS VICTORY is quite the challenge. I think the only thing that is square is the end of deck boards 😂 everything else has many angles and turns.
Would have been fun to see those guys build it in real life. I have a new appreciation for what those guys went through.
-
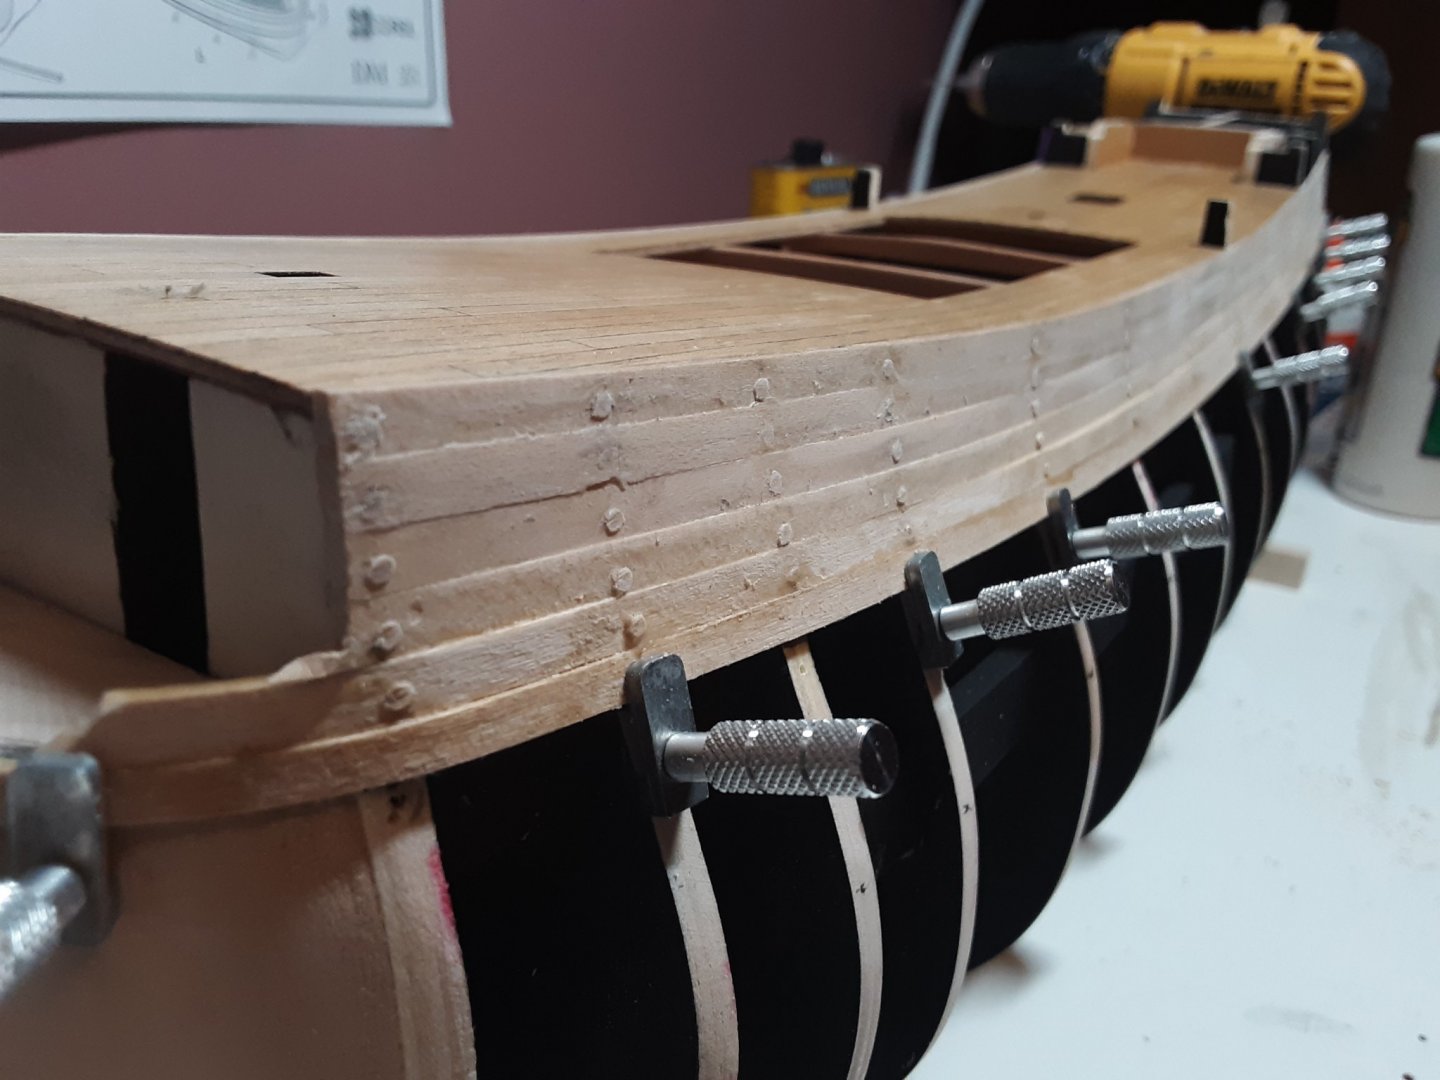
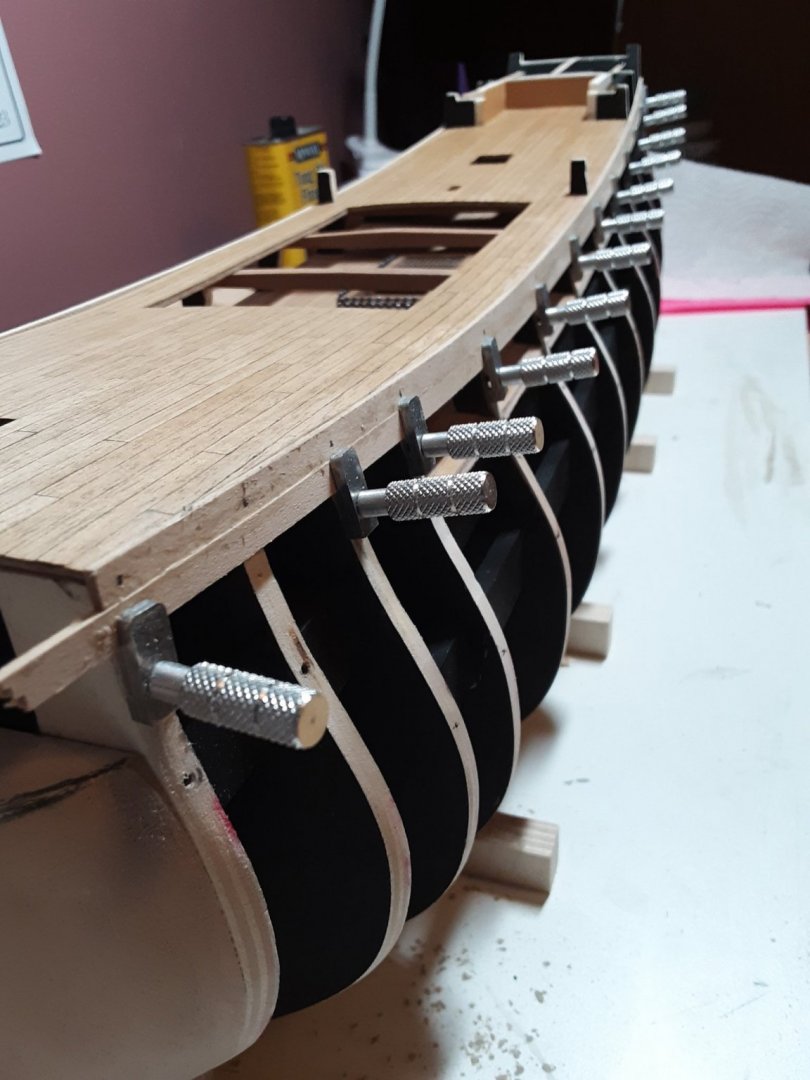
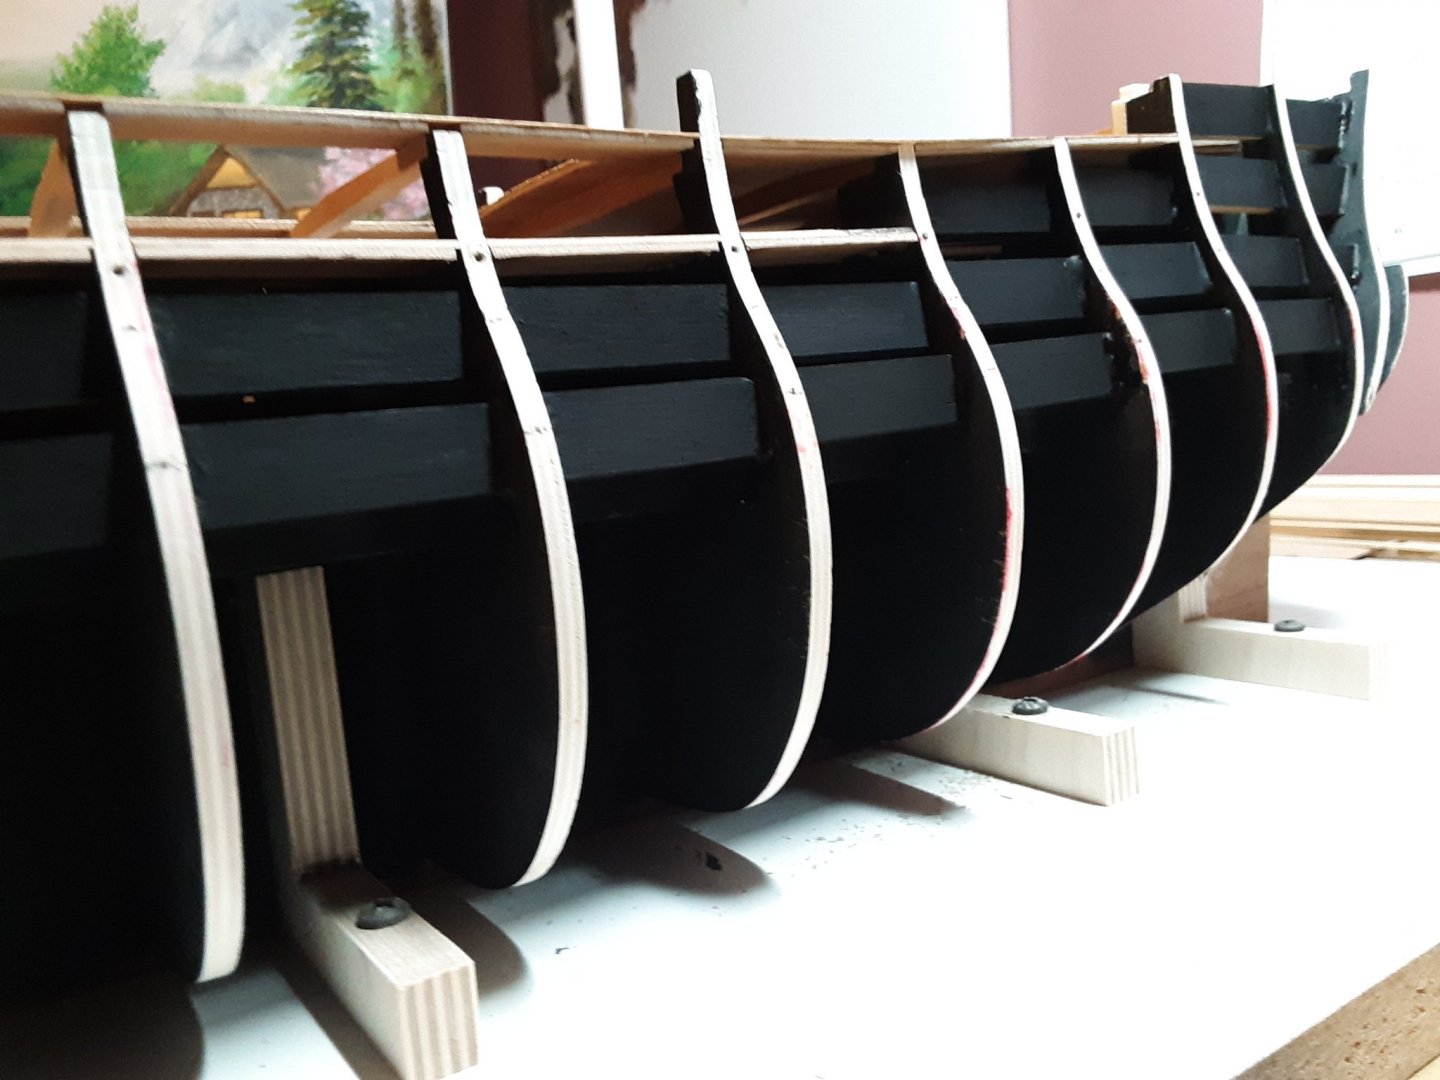
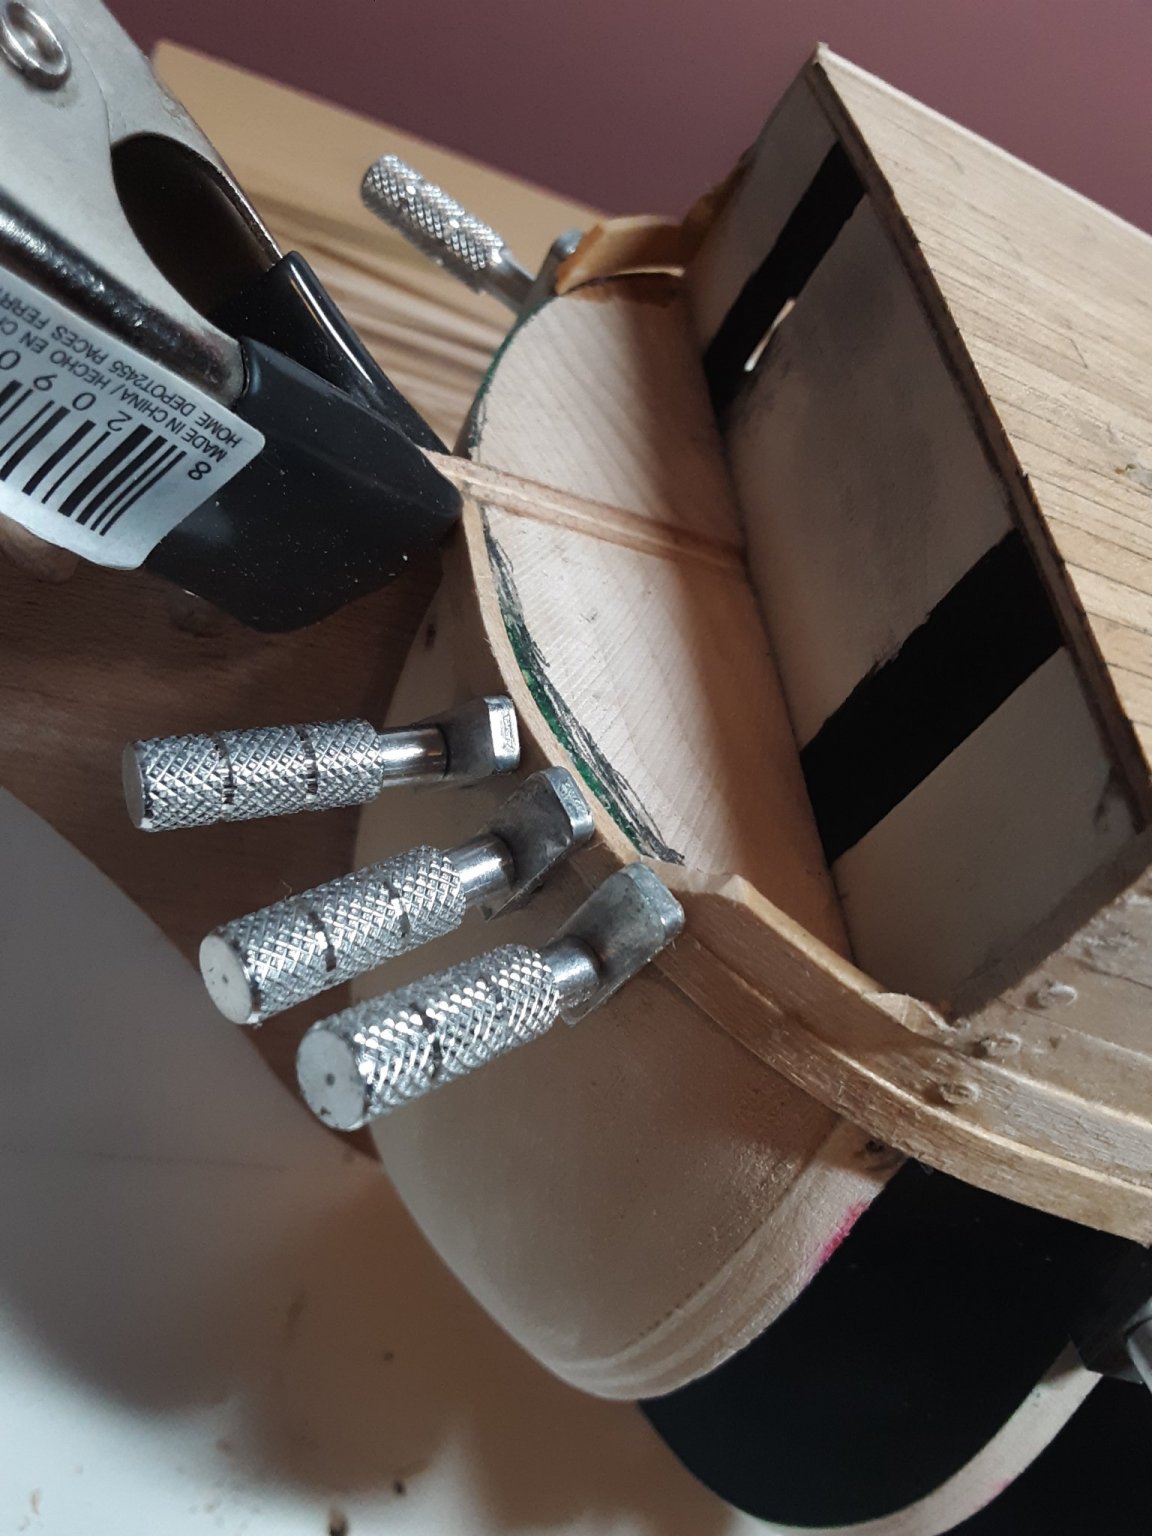
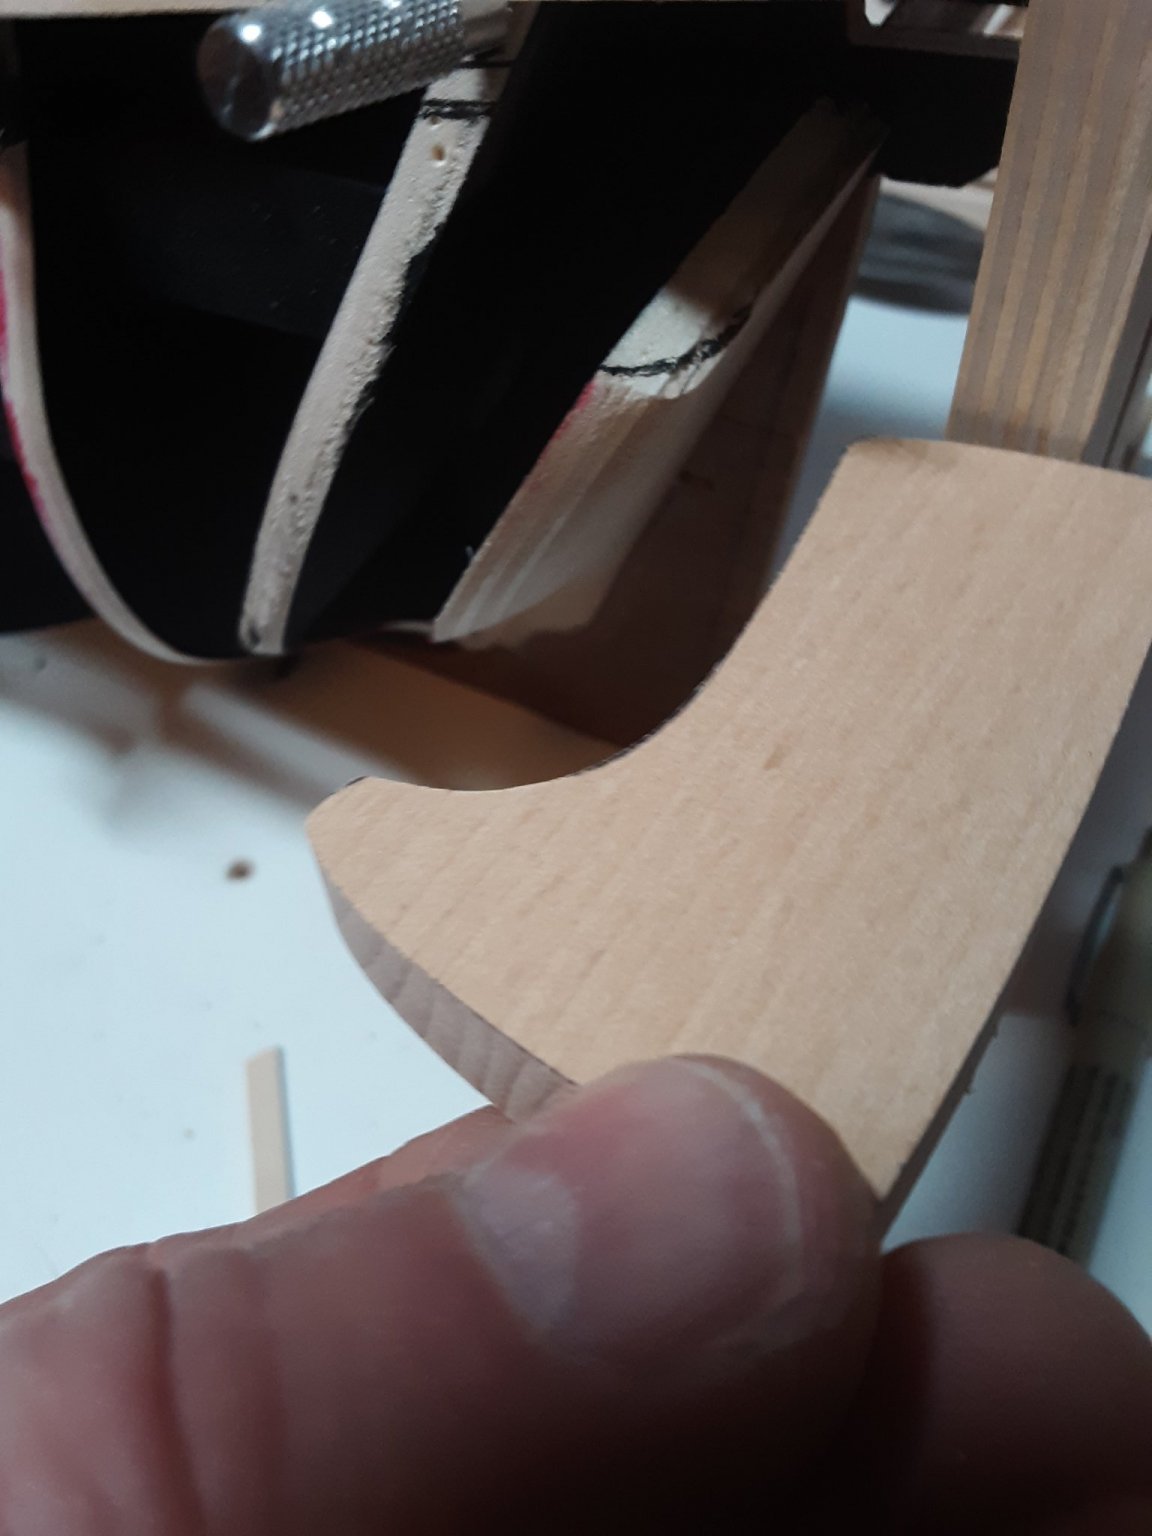
Planking progress.
That strip on the bow was fun. I used a quart sized paint can to pre bend the strip. Once dry it fit right in.
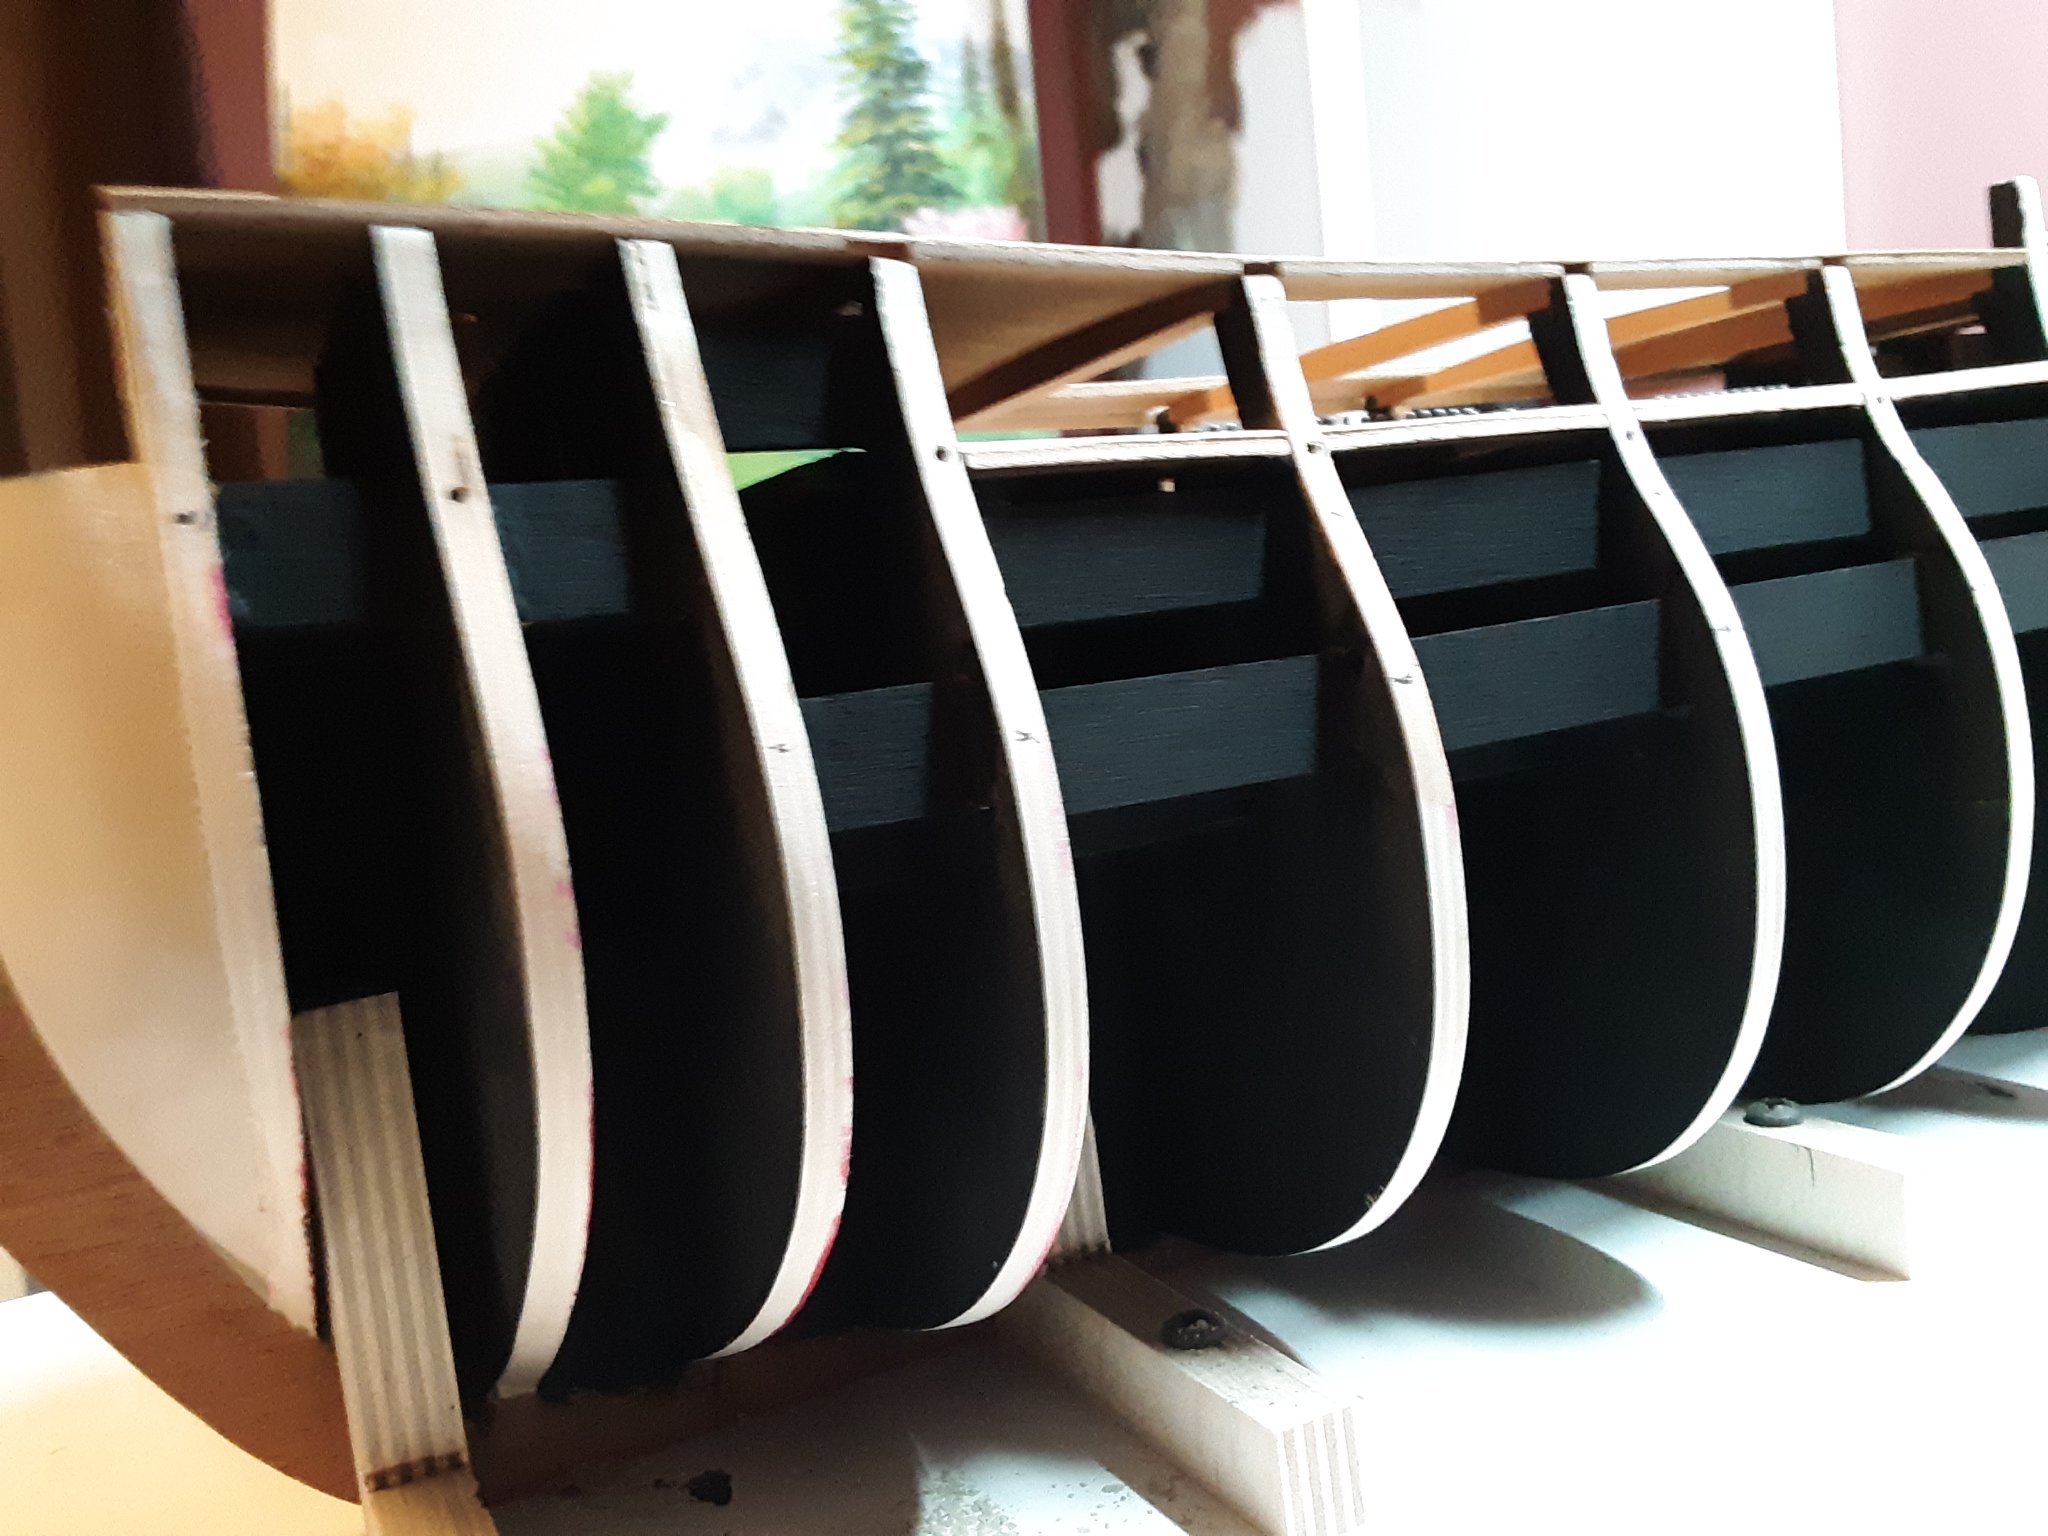
I was bored so I pinned every plank to each bulkhead with a small piece of toothpick. We're supposed to be getting a foot or so of snow for the next few days. I think I'll keep planking. Best regards, Robert


-
-
2 hours ago, Gregory said:
There are a lot of different options, and too much for a single post from me.
You could use the clamps until you have no room without putting holes in the 2nd planking.
There are techniques for bending the planks so they lay flat on the curves. I'll find you some links.
There are wood glues that set up relatively quick and there are methods of using rubber bands and various bumpers to hold down the plank until the glue sets.
I personally use CA ( super glue ) but it has taken me a while to get comfortable with it.
Do the Corel pans/instructions call for scaling the planks? You might have to rely on advice from others who have built the kit.
Here is info about Chucks bending techniques..
This is single planking, but would be just as useful for double.
Chuck uses CA and no clamping, but you could adapt it for wood glue and some sort of clamping.
If you do use CA you need to experiment with a formulation that works best for you.
I threw away a lot of CA before I settled on this:
Gap Filling 4oz CA Glue ( Medium Bob Smith Industries Glue
Keep asking questions and I'm sure you will get a lot of help..
Thank you Gregory. There's just about everything a ship modeler needs in this site. I've used gap filling CA glue quite a bit building RC aircraft. It's not very forgiving. I'd prefer to use Elmer's or tite bond. Corel doesn't ask the builder to scale the planks, I like the look of it. And they supplied a very good quality walnut for it. I saw a post where someone used separate planks with charcoal in between them. I would like to do that. Finish it with tung oil.
I'll keep plugging away. Thank you kindly for taking some time for me.
Best regards, Robert
-
4 hours ago, Gregory said:
I love those little clamps for 1st Planking. Used them on my first build over 25 years ago..
They are very good. I'm curious, how do you get the second layer of planking clamped in place. I'm considering doing smaller pieces, or strips, and leaving it natural. Appreciate your suggestions. 🙂
-
Thank you Rob for the compliment.
I've been spending some time studying the forward progress. Especially in the stern area. After looking at some pre shaped blocks that go there, I realized that I need to still take a little more wood off of the last bulkhead. Then I'm going to do some math and try to lay out a plan for the planking. Have a great day. I'll post pictures later today. Best regards, Robert
-
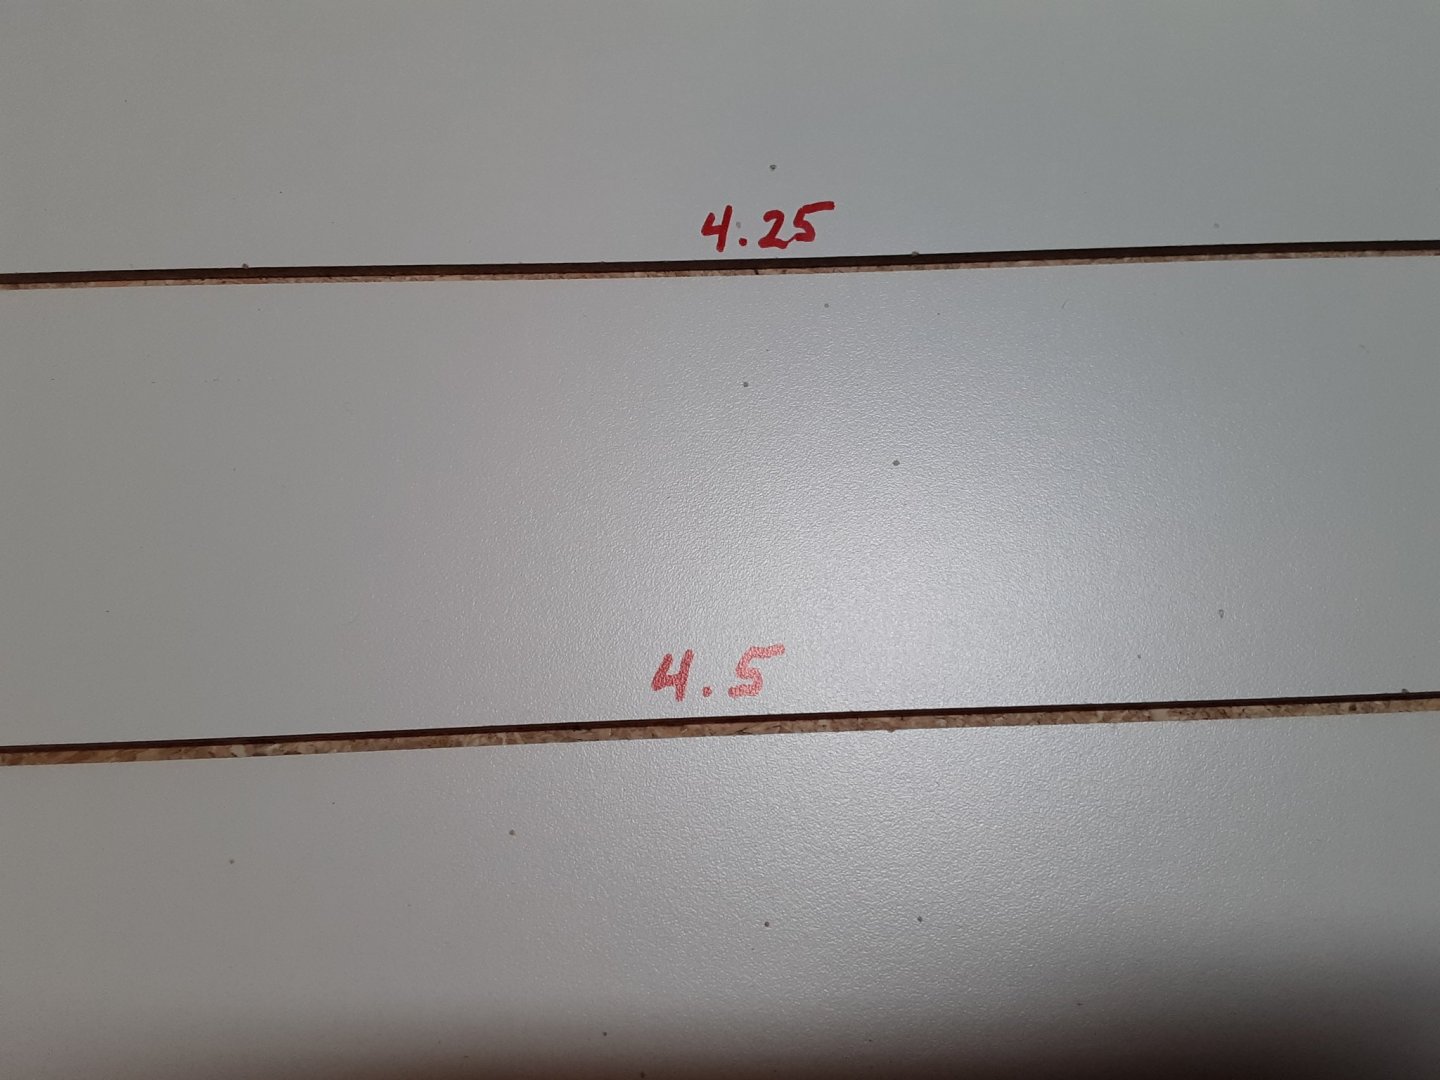
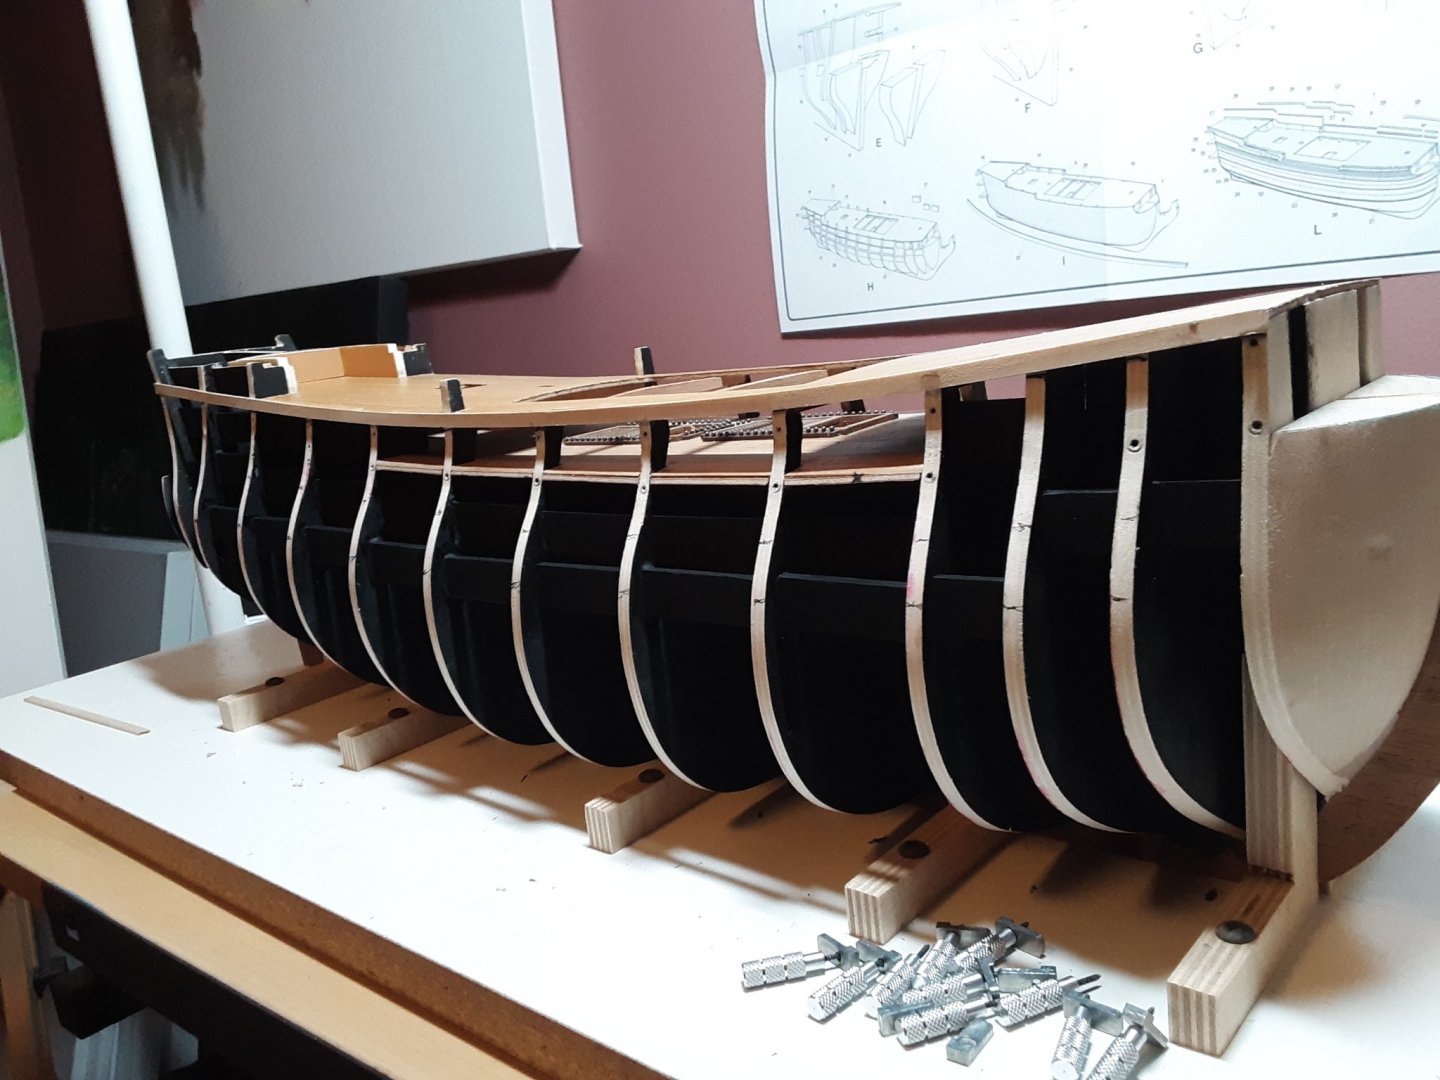
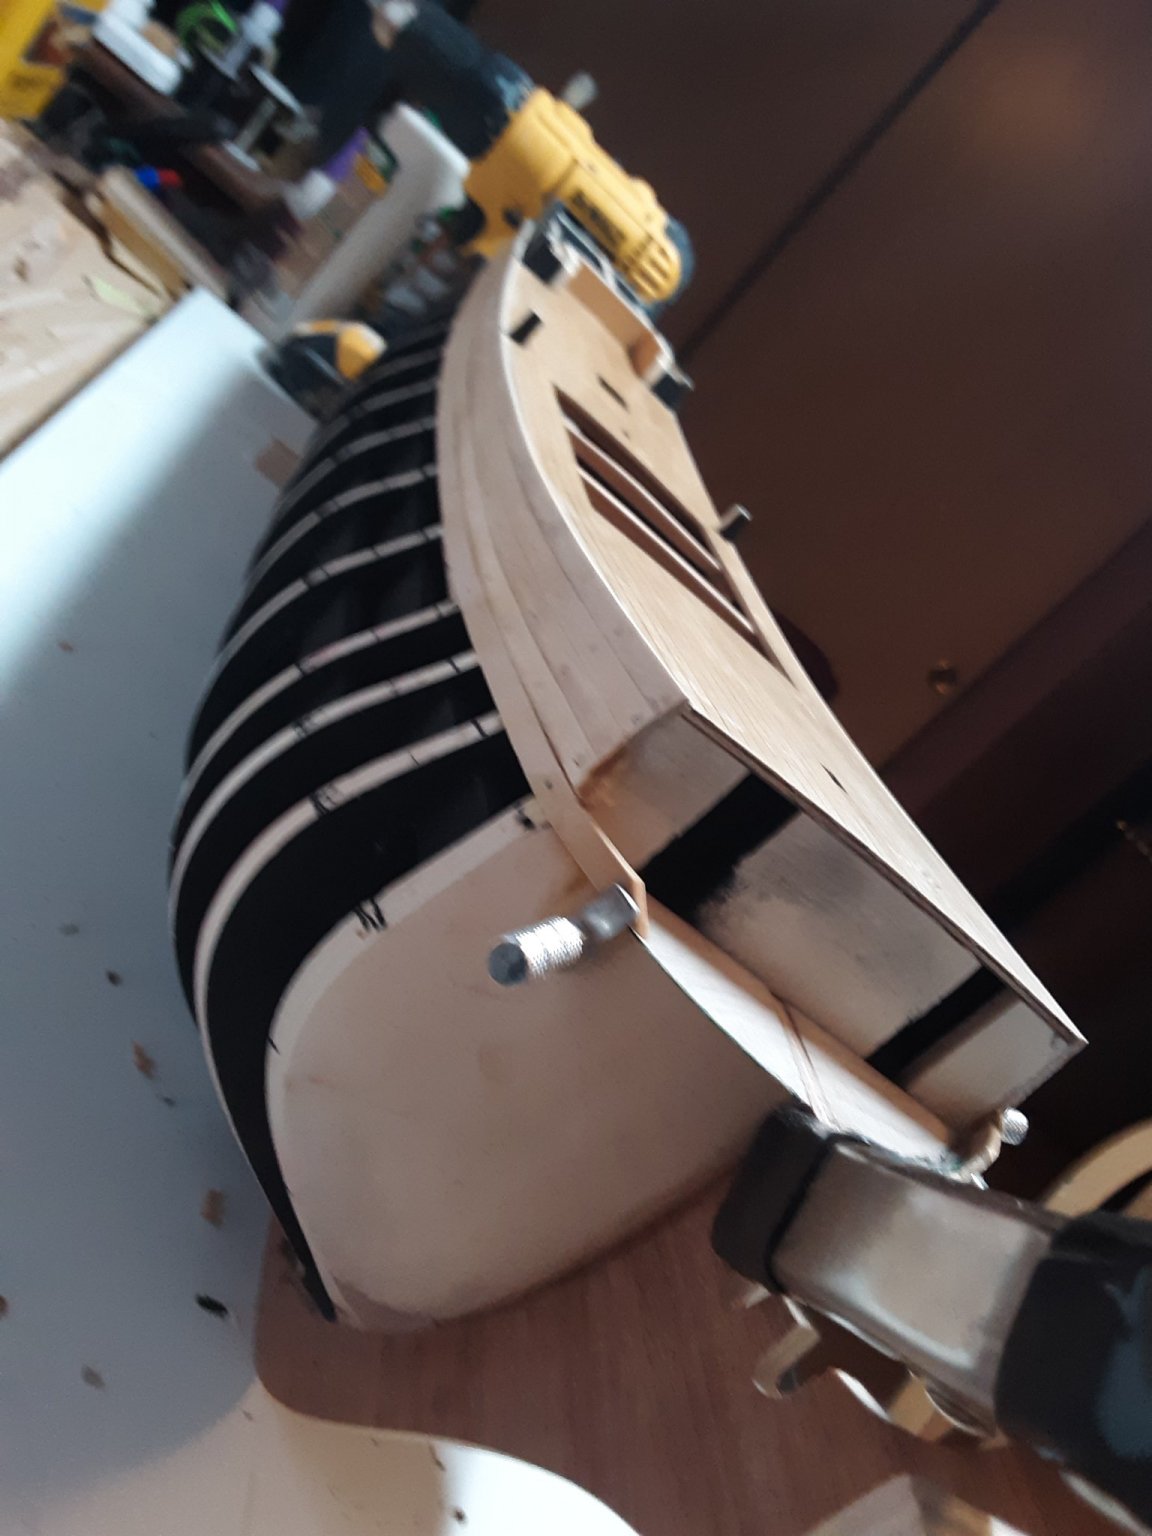
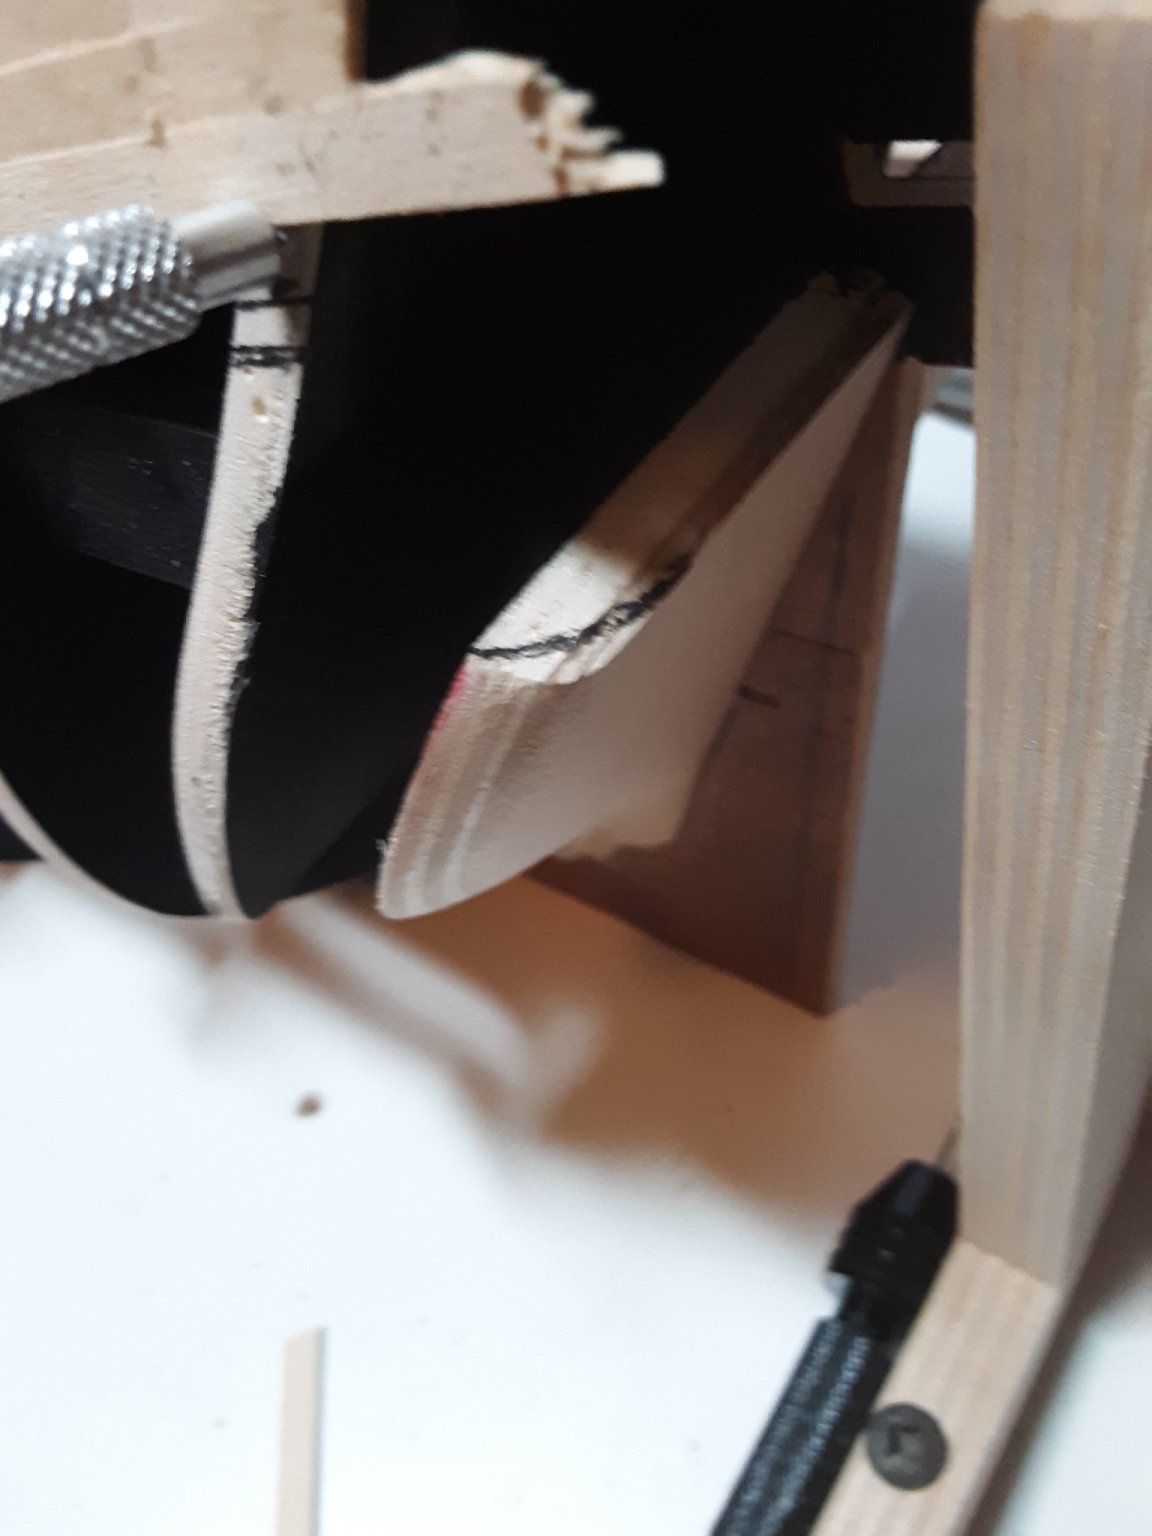
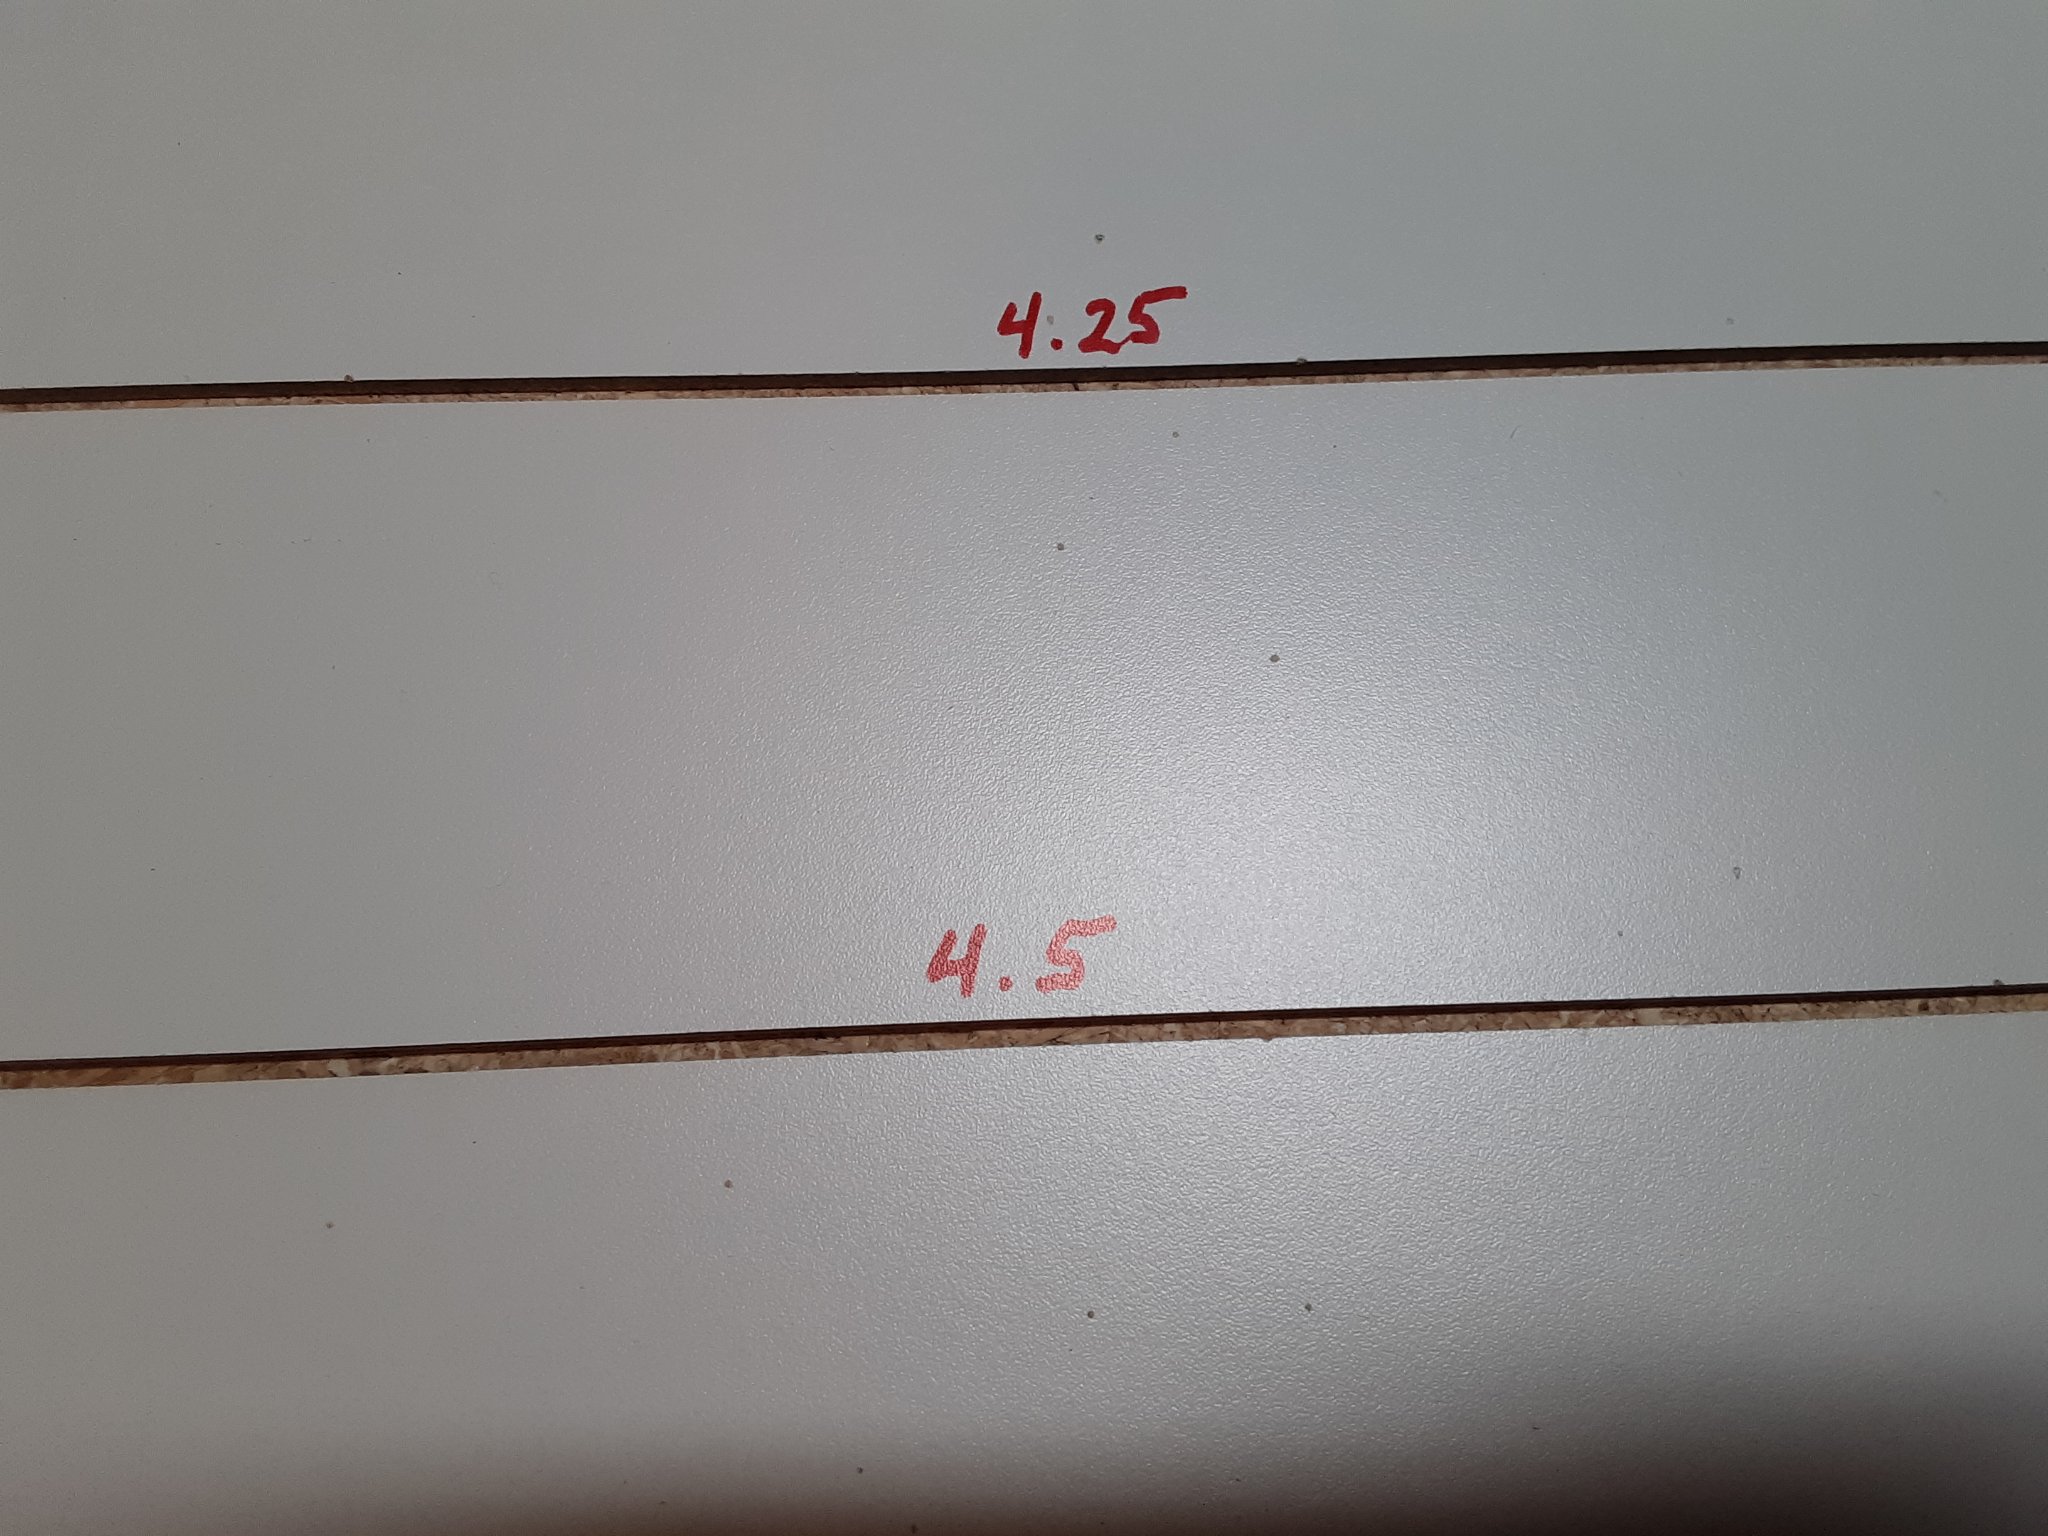
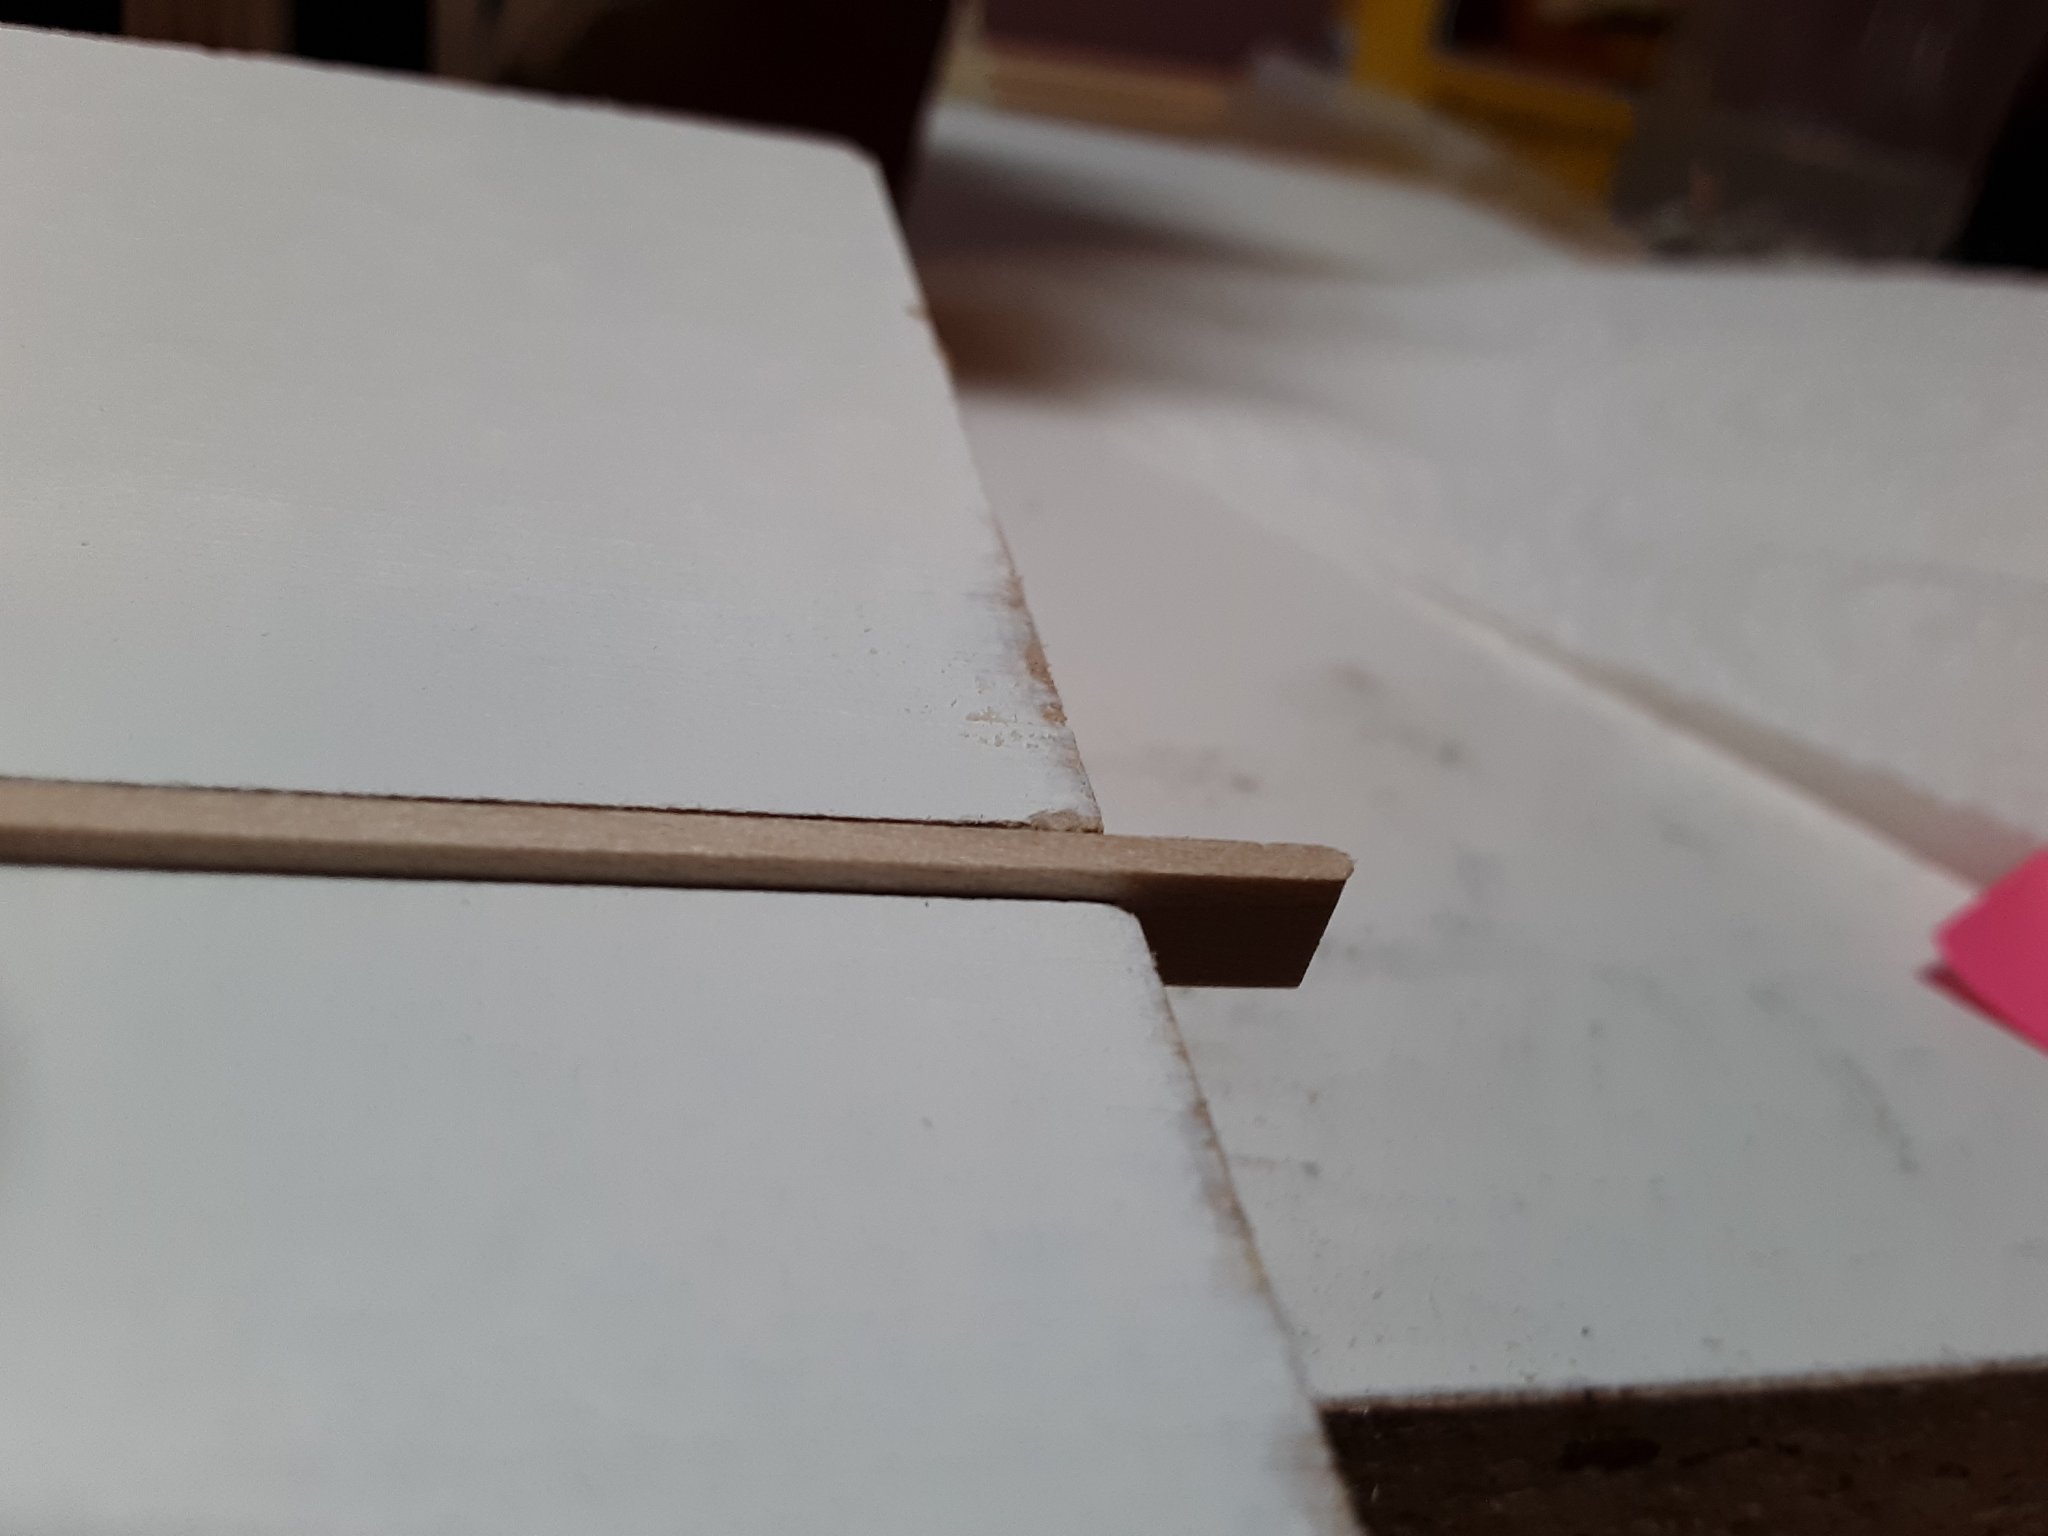
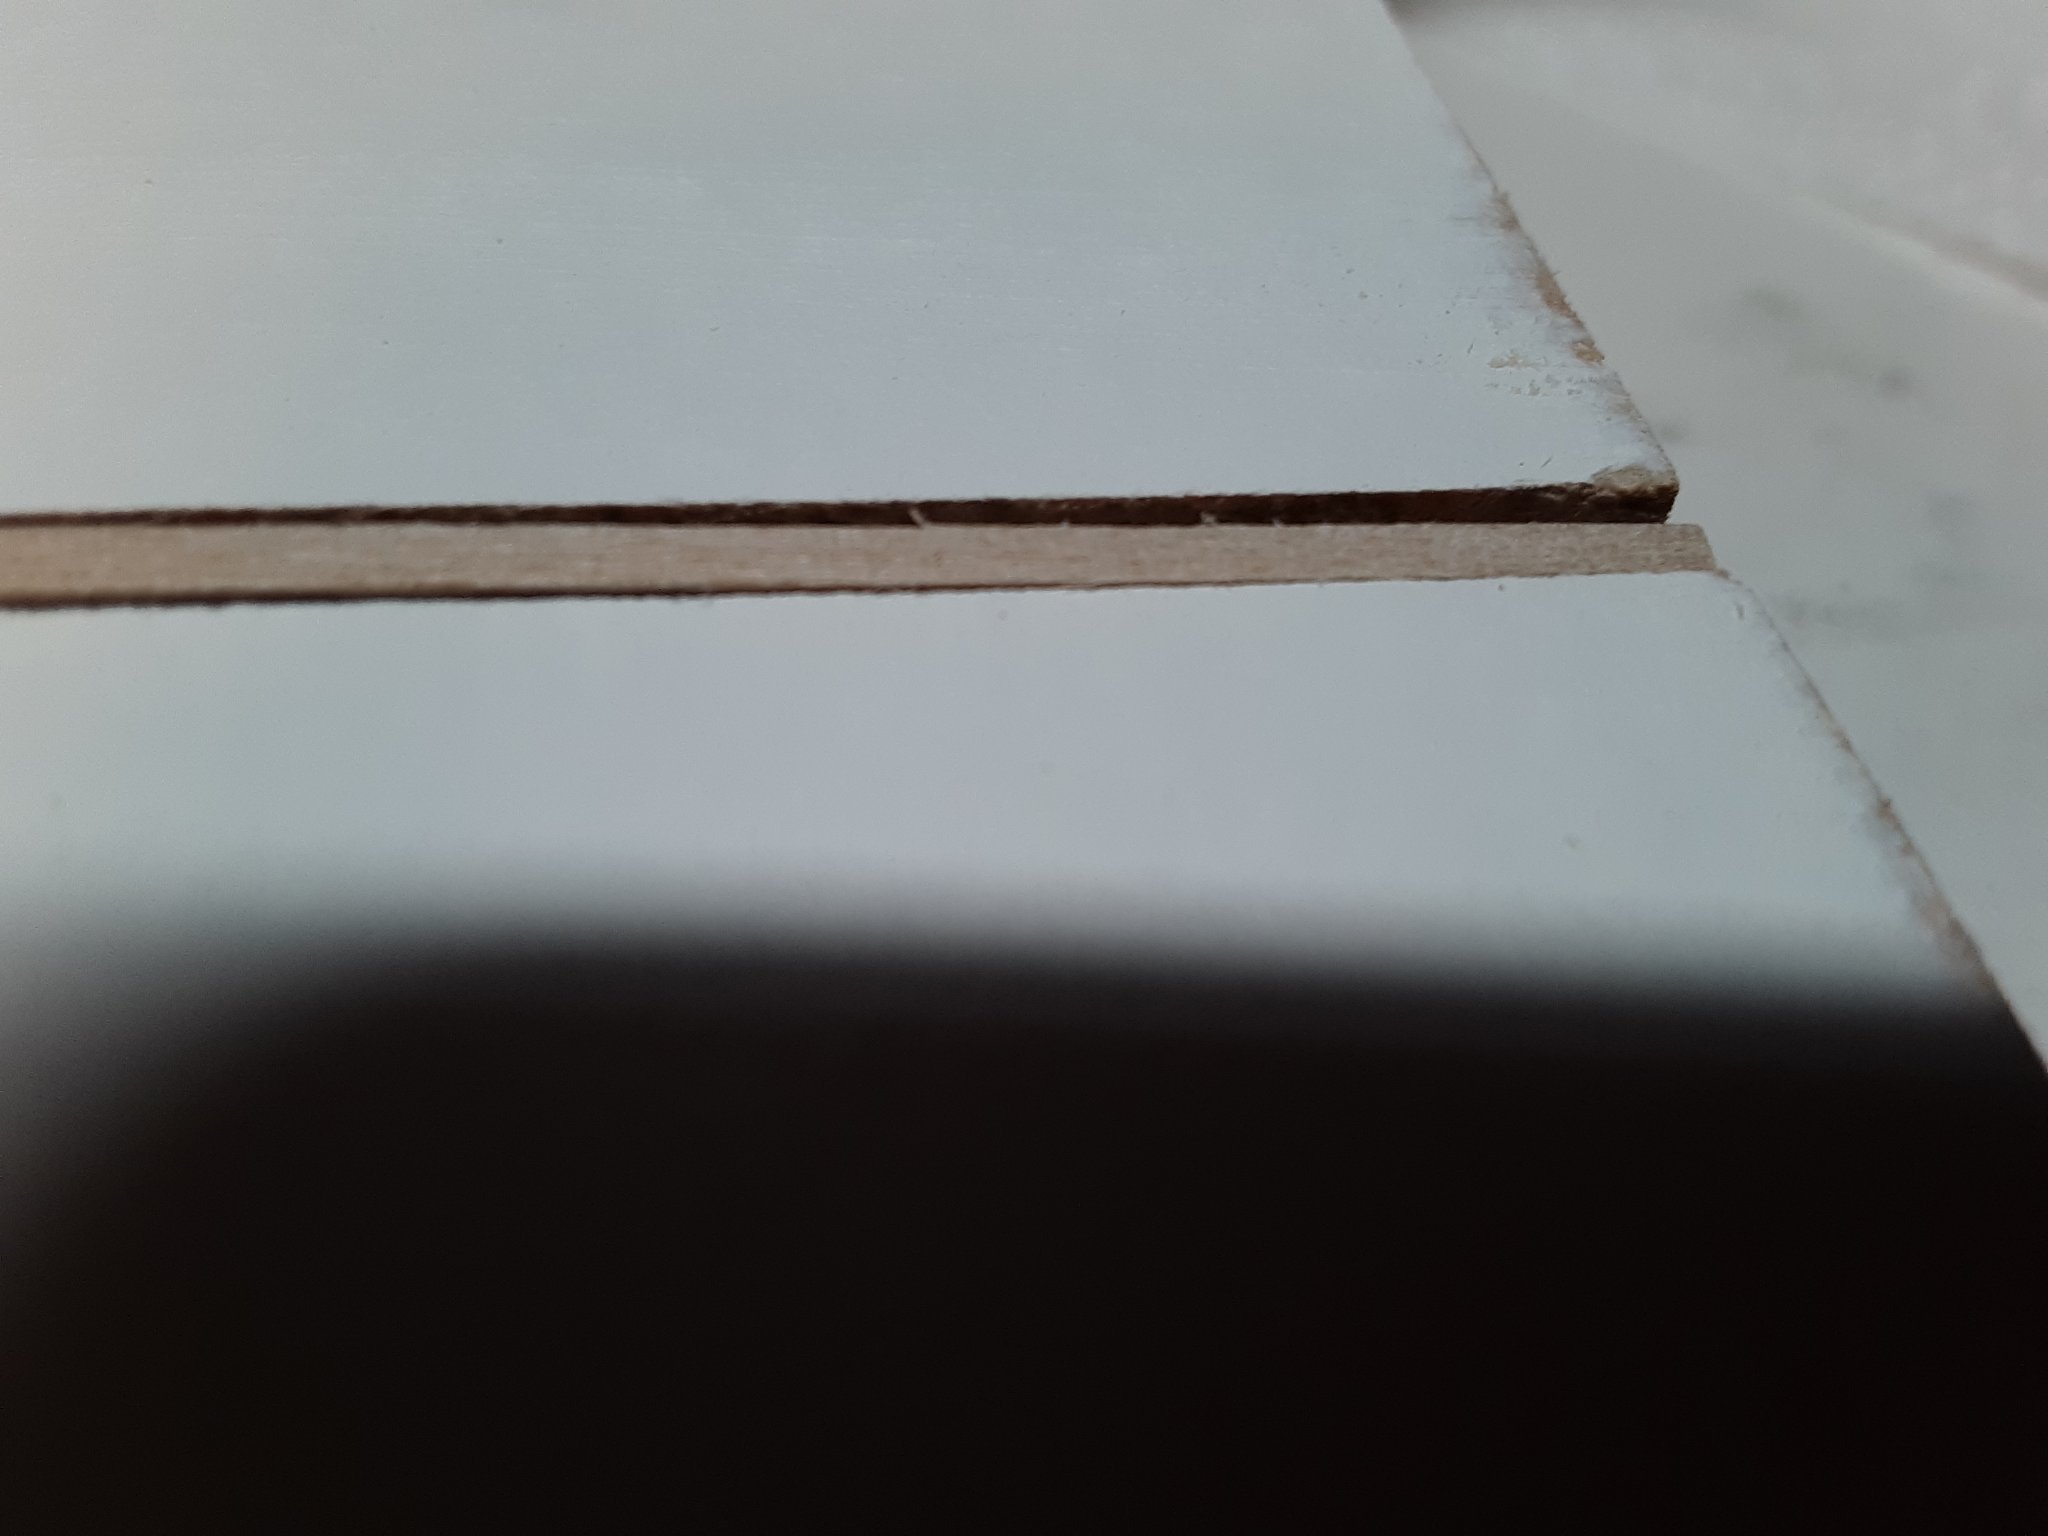
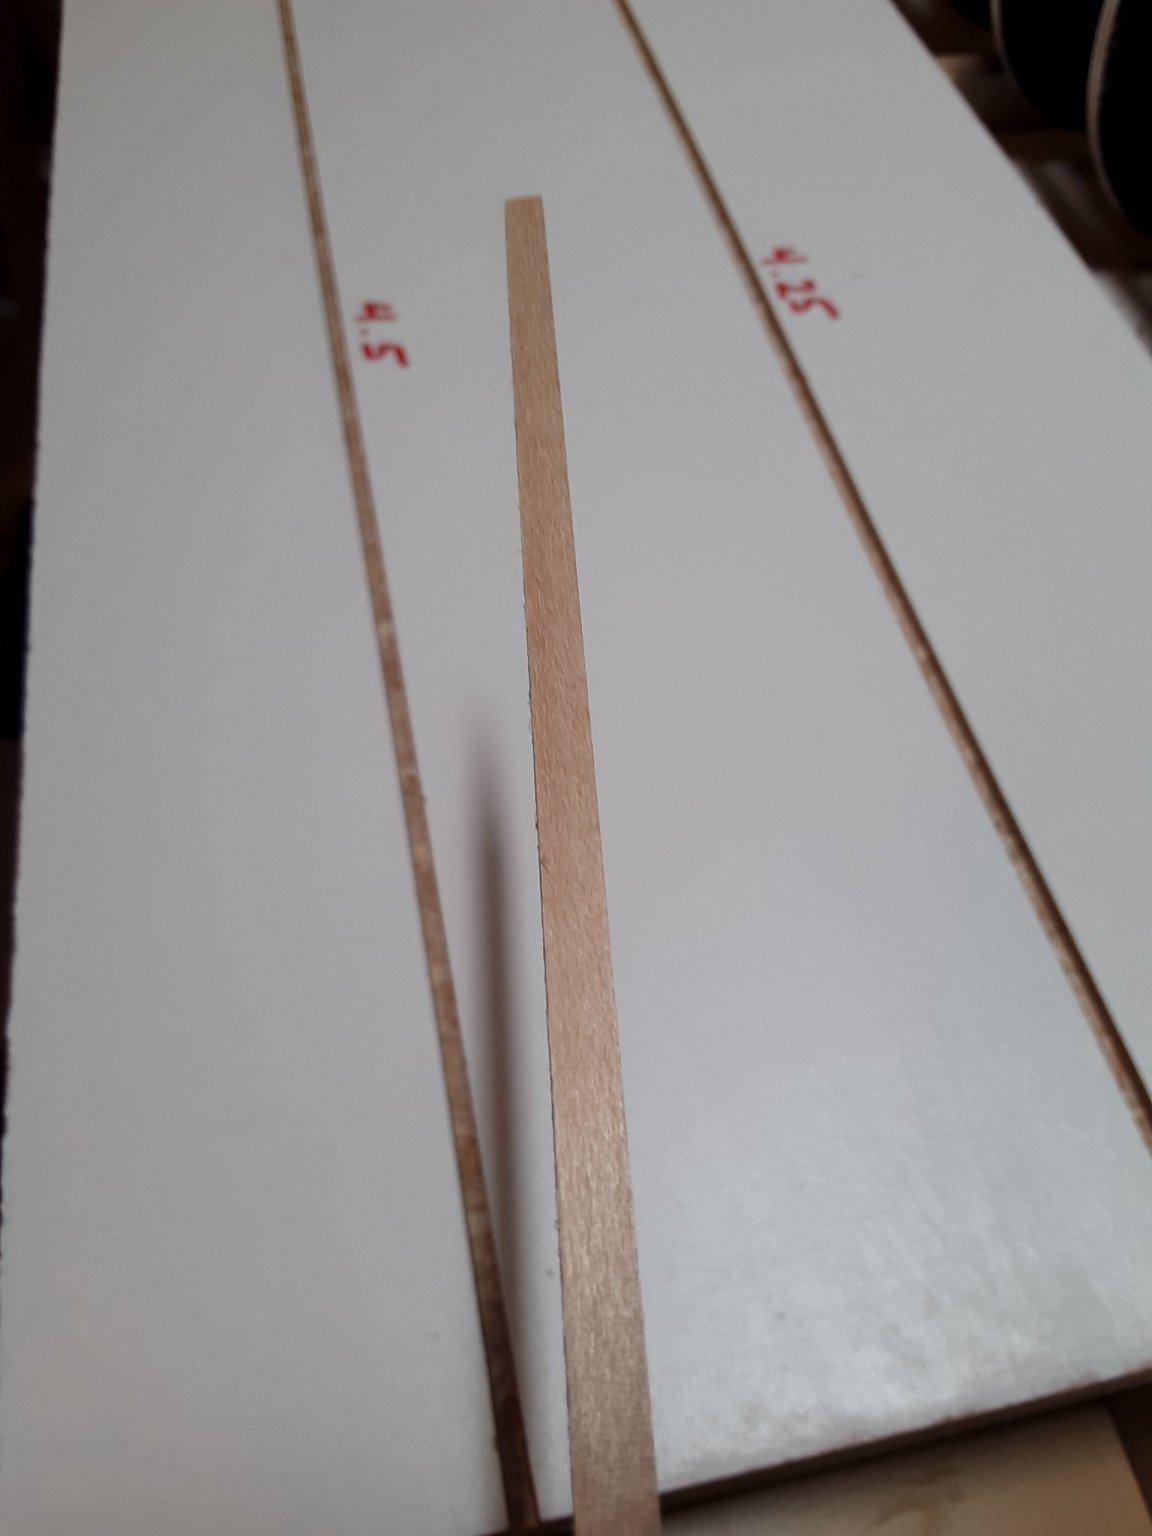
Put the first plank on the port side. Checked carefully to make sure it lined up and mirrored the starboard plank, especially at the stern. Been following many other builders and found that tapering planks will be used alot. So I made a tapering jig. It's made from 3/4" melamine. Particle board core with a hardened plastic surface. I cut a saw kerf along the length that is 4.5 mm deep and another that is 4.25 mm deep. The kerf is just wide enough for 2 strips. So I can taper matching strips for both sides. I simply put the strips in the slot and using 120 grit sandpaper and a block I sand down the end flush with the plastic surface. Then sand lengthwise along the strip to taper it up. Works great.
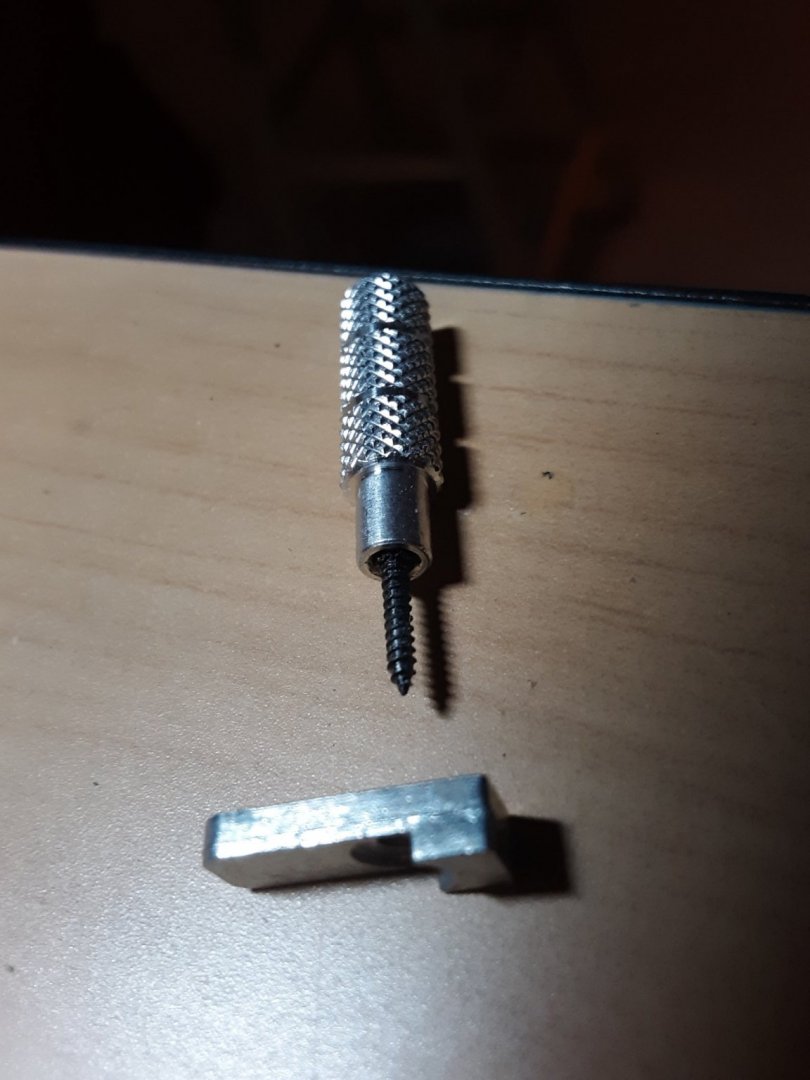
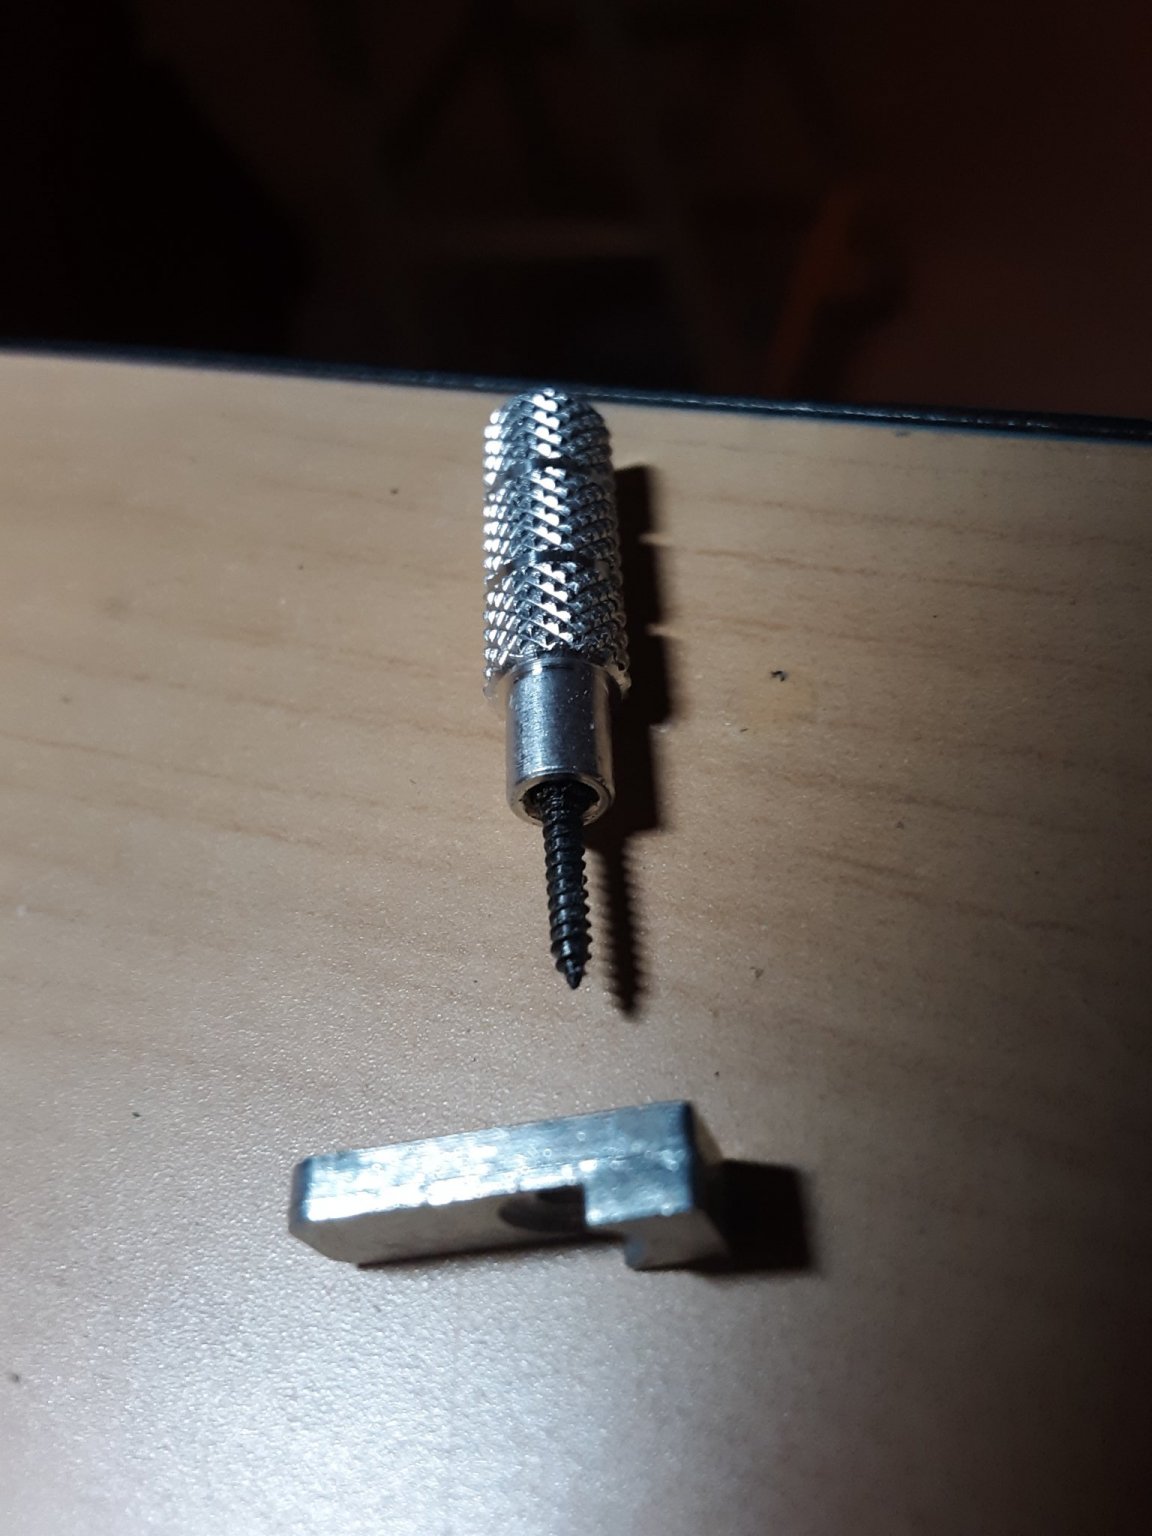
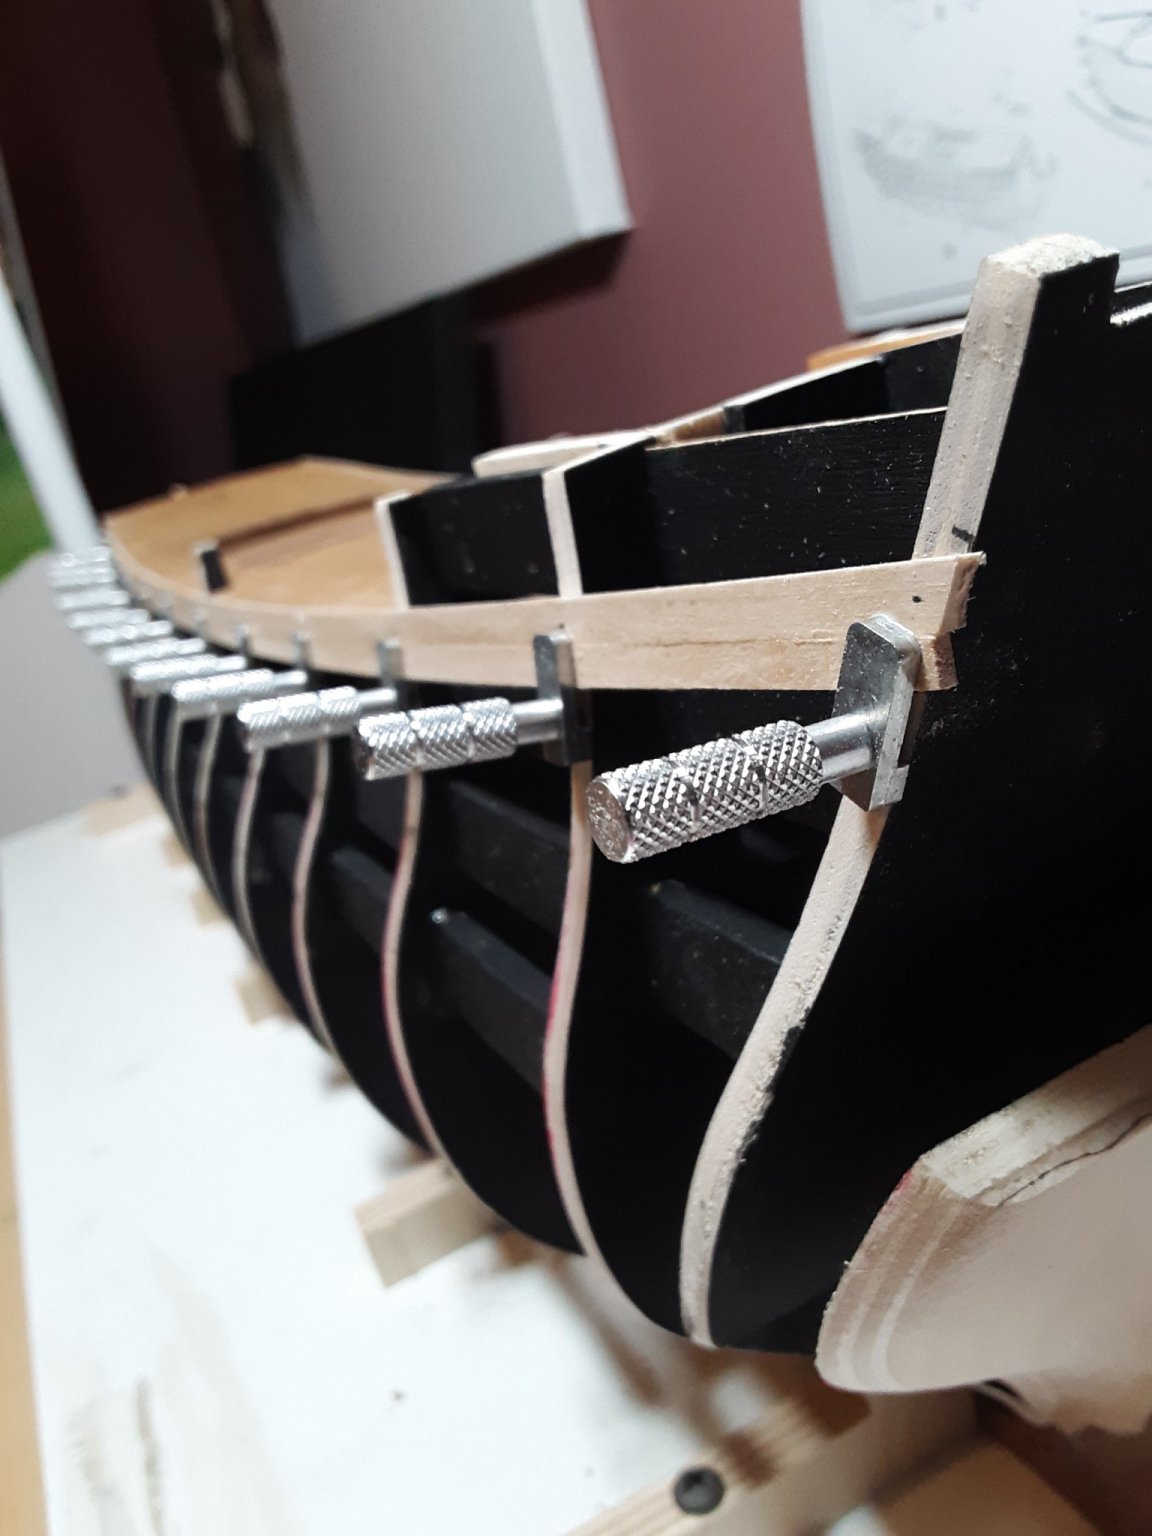
Glued in place the first tapered plank next to the port strip. The planking clamps I got in the mail are working good. I'm just using white glue on all surfaces.


.thumb.jpg.527a5af73c04eeba250a895fca50f6f6.jpg)

-
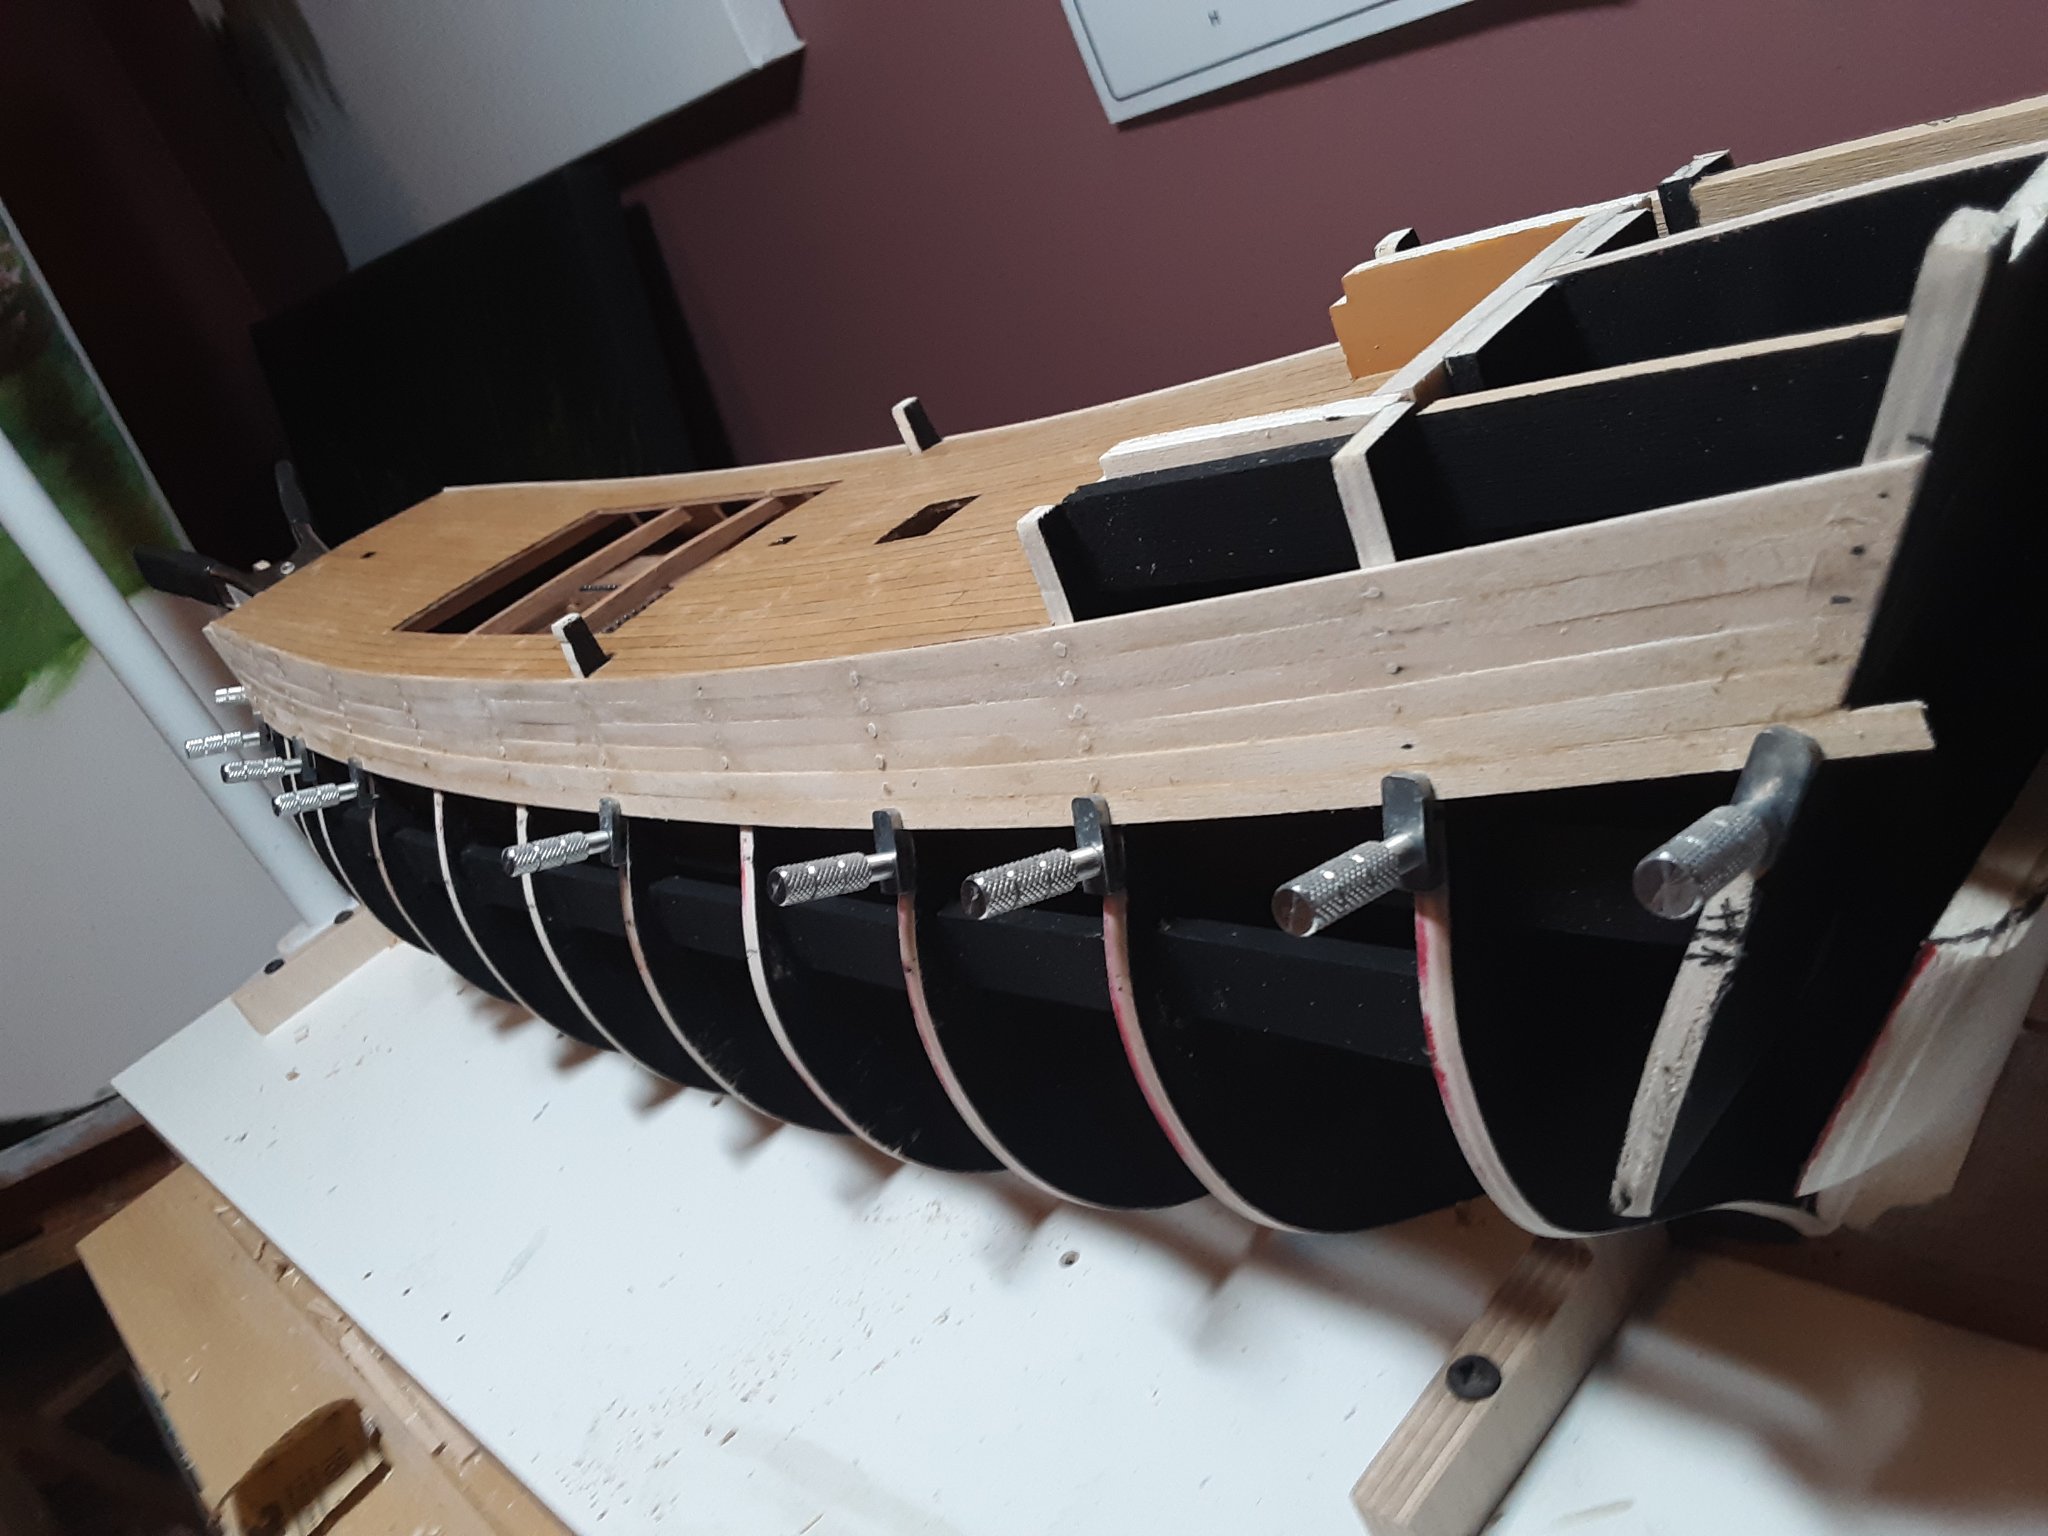
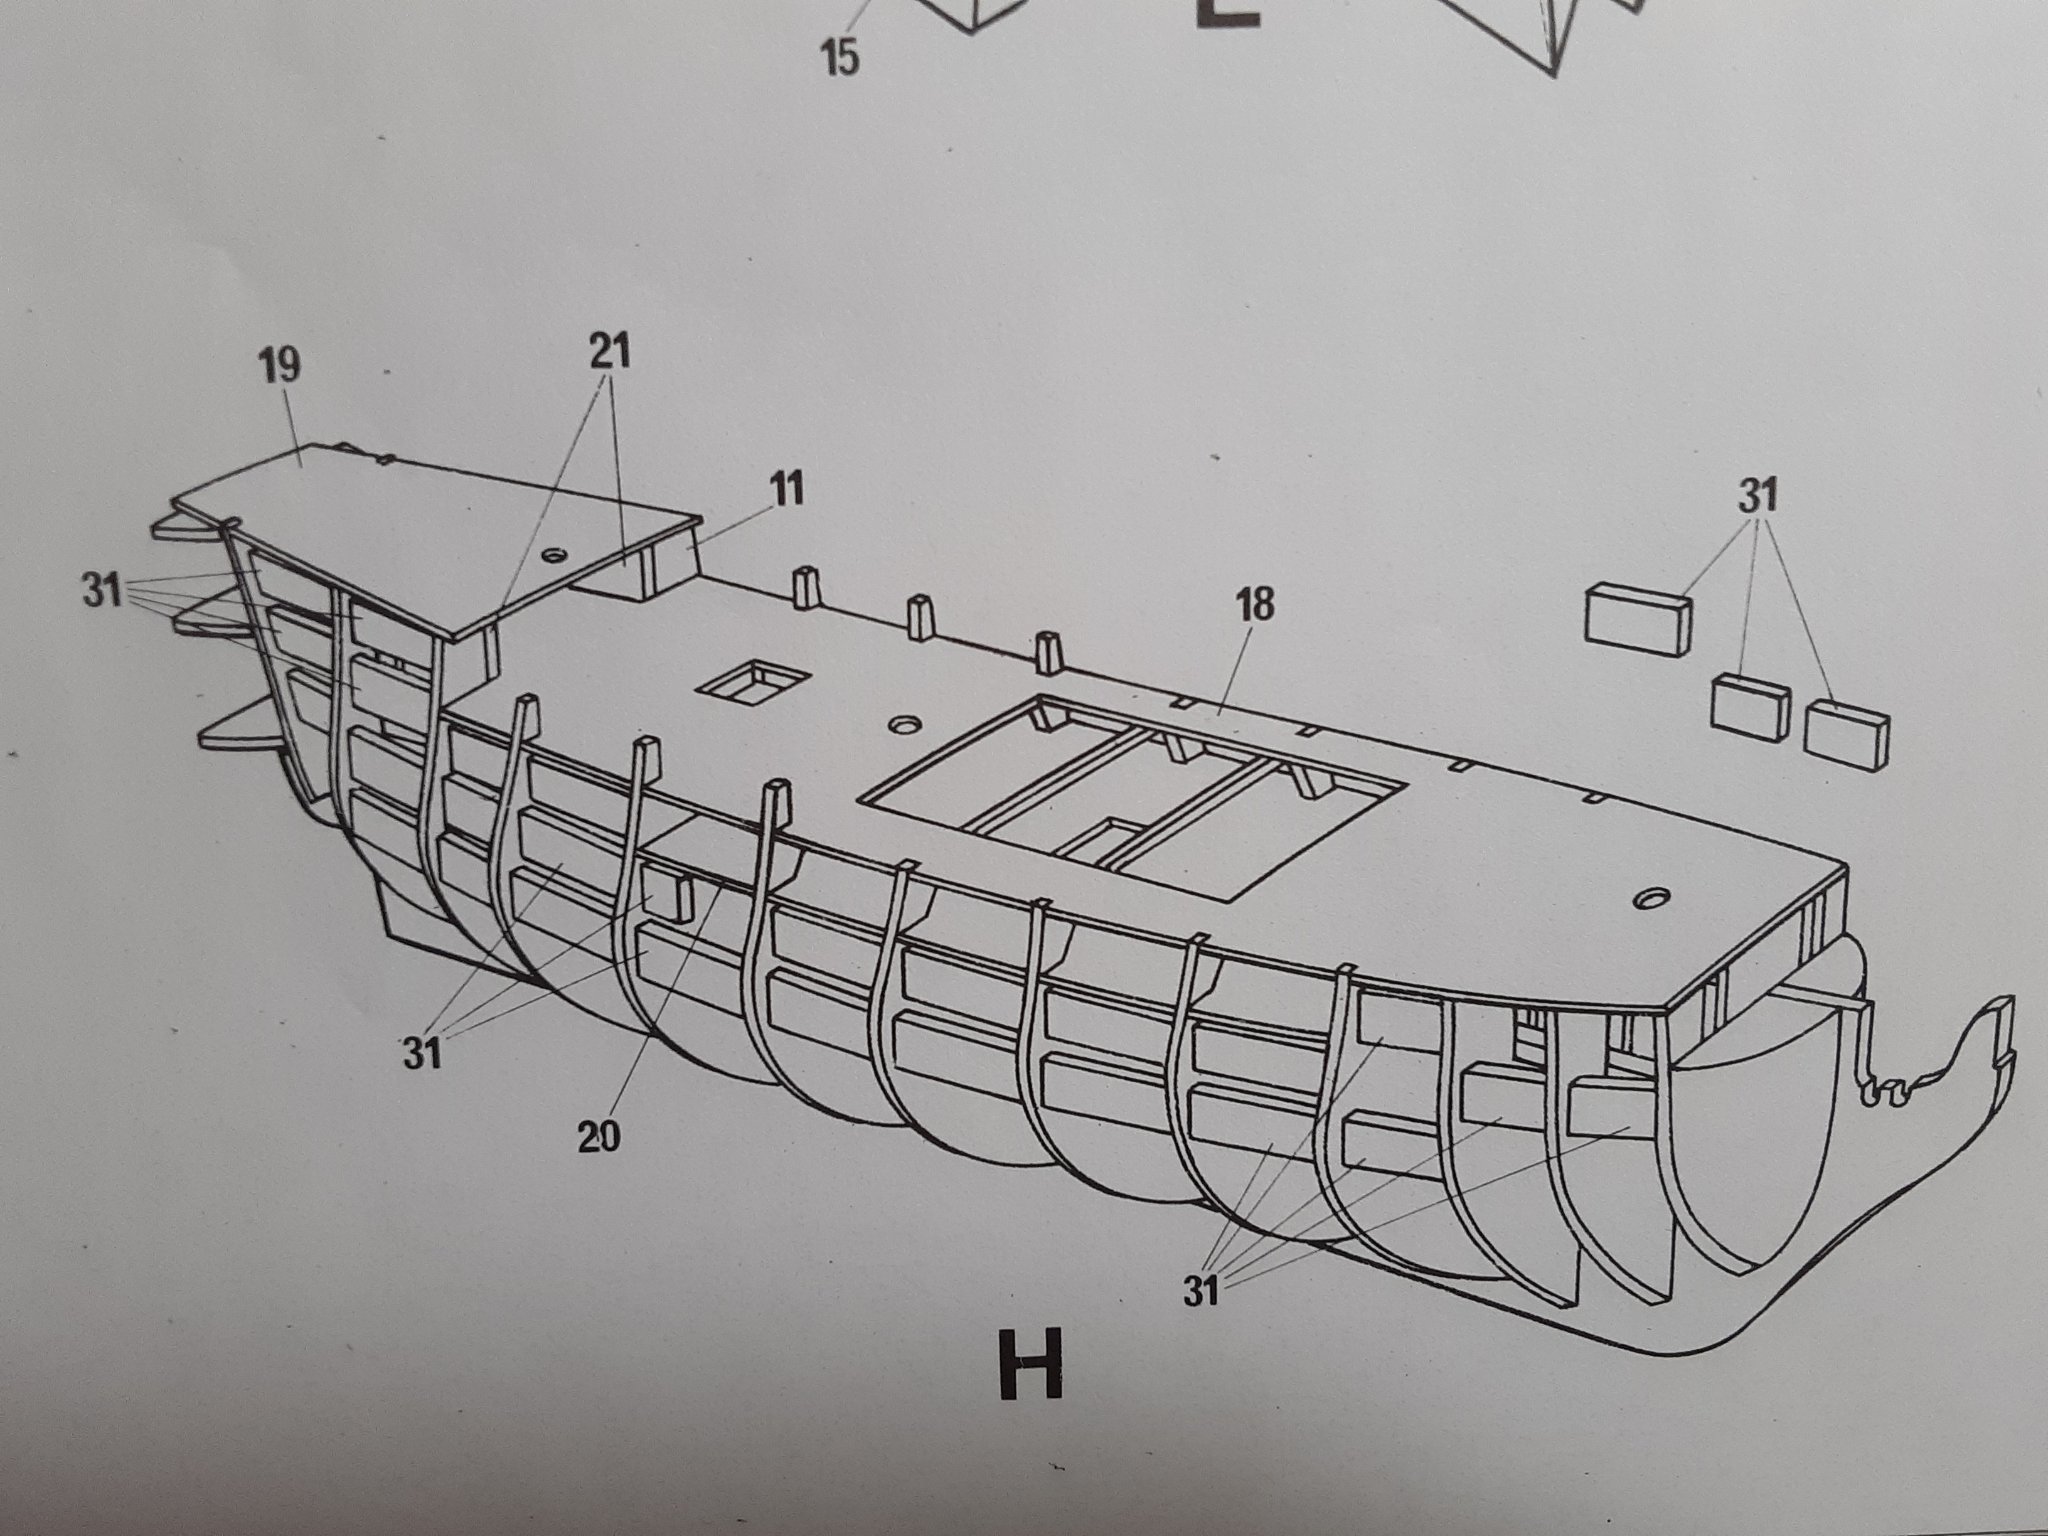
For anyone planning to build the hms victory from Corel, I highly suggest that you glue pieces #31 in place WHILE you're gluing up the bulkheads. They would have actually helped line everything up. And it would have been much easier to glue them in. Having to cut each one to fit, after everything is already together was a PAIN. Thanks to my friend Eugenio, I was reminded to paint them black before I cover them with planking. Got my very first plank on. Starboard side. Runs right along the curve of the quarter deck. I'm fairly happy with the gentle sweep.
Soon I will try to match this on the port side. I'm going to take a break and remind myself of the importance of patience. Good day friends.
Robert


-
10 hours ago, Eugenio Treviño said:
Robert after setting the supports I recommend you to mark them with the position of the cannons and drill the holes and paint them black. This will help you to mark them in the first planking easily. Take a look to post 4,5 and 8 in my log.
Best regards!
Hi Eugenio. So glad I checked my notifications. I had installed all the blocks but forgot to paint them black. Thanks for the heads up.
I'm choosing to wait until after the hull is planked before locating my cannon ports. I don't trust my cutouts to line up with a predrilled hole. Just me. Thanks for the tip though. If my way proves to be a mistake, I'll remember you.😃
-
Next I'll be working on placement of some blocks that will support the cannons behind each port. In this kit they are #31.
Planking the hull is coming soon.

-
-
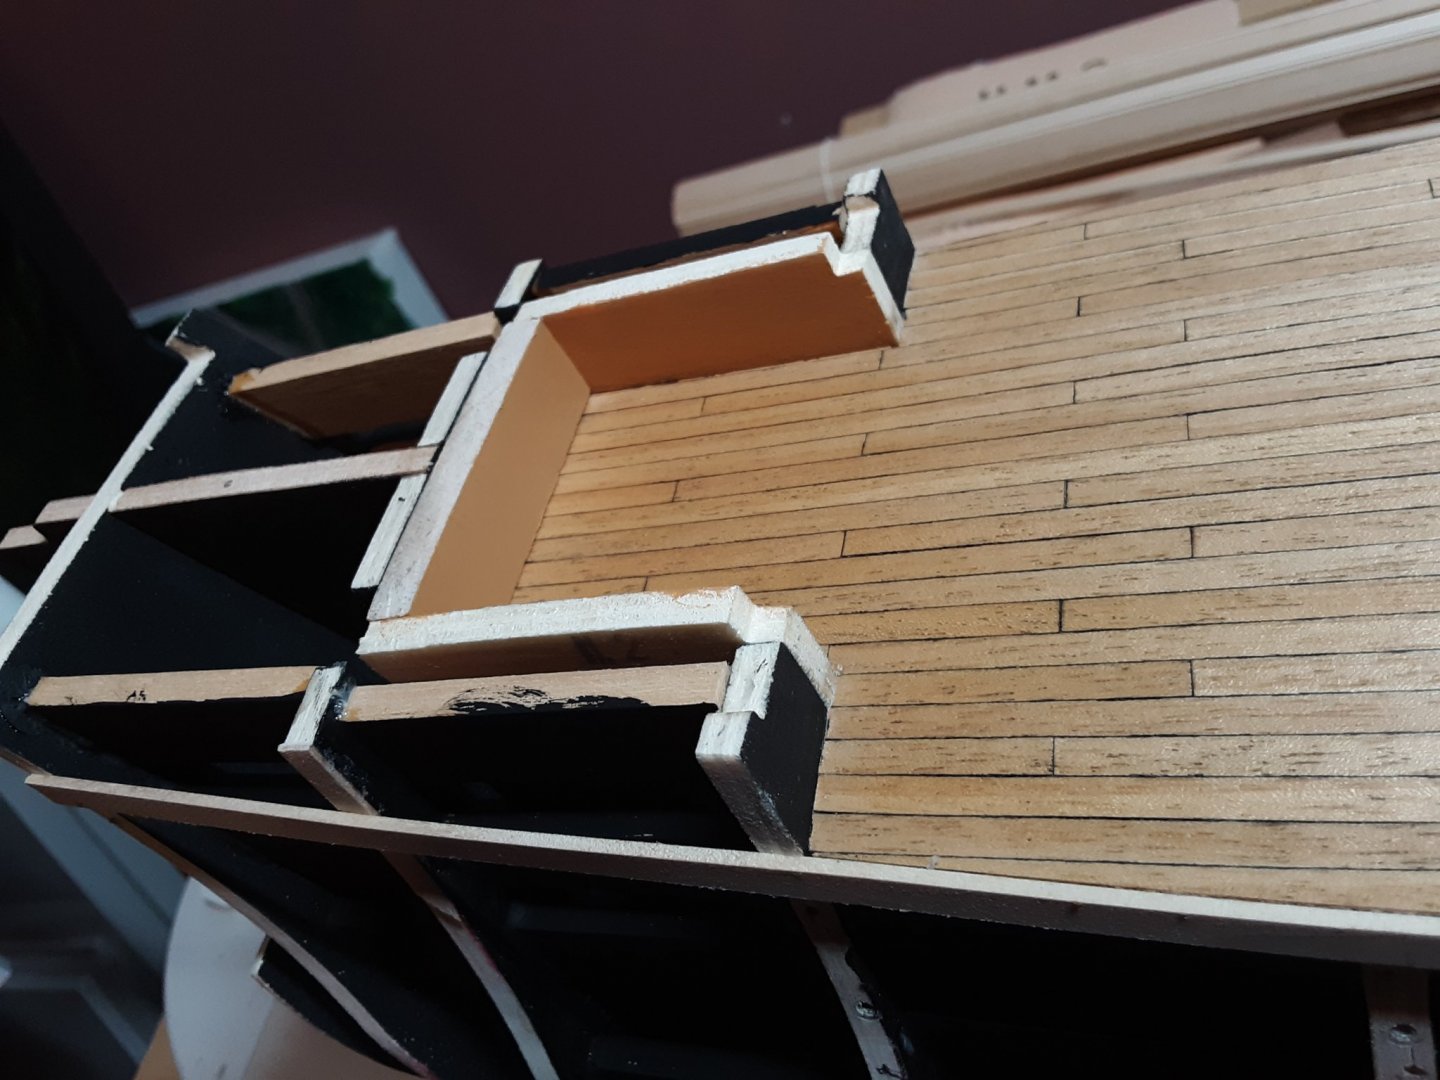
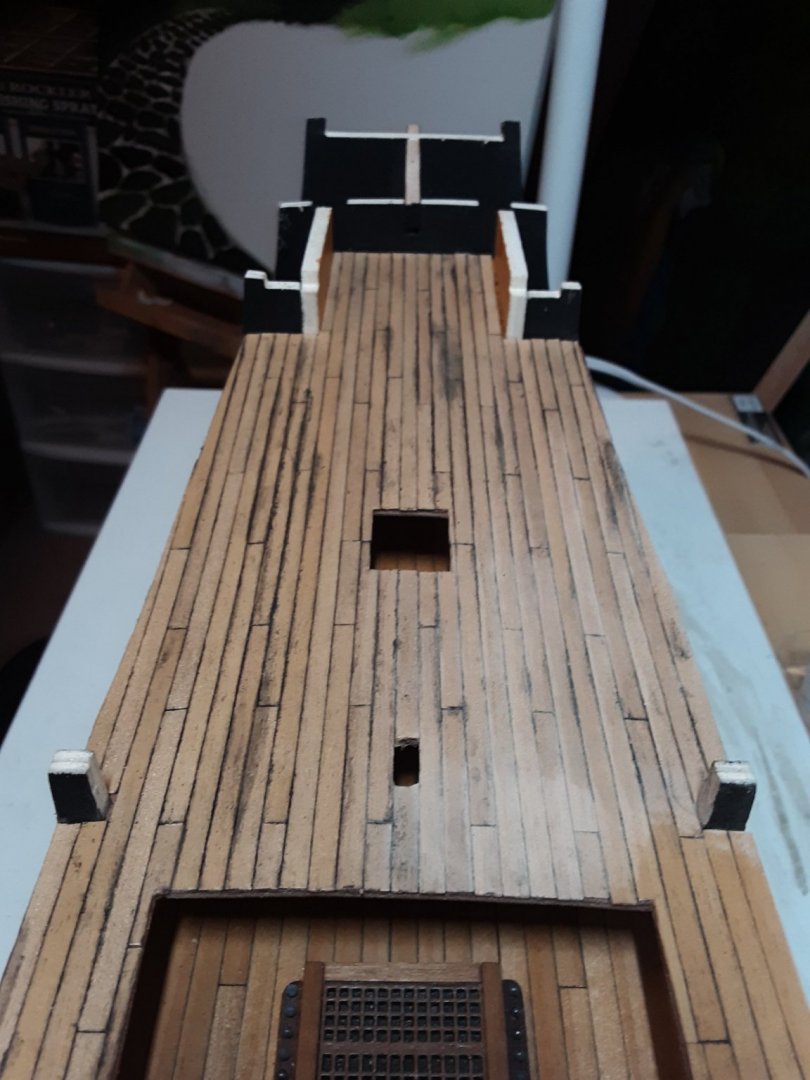
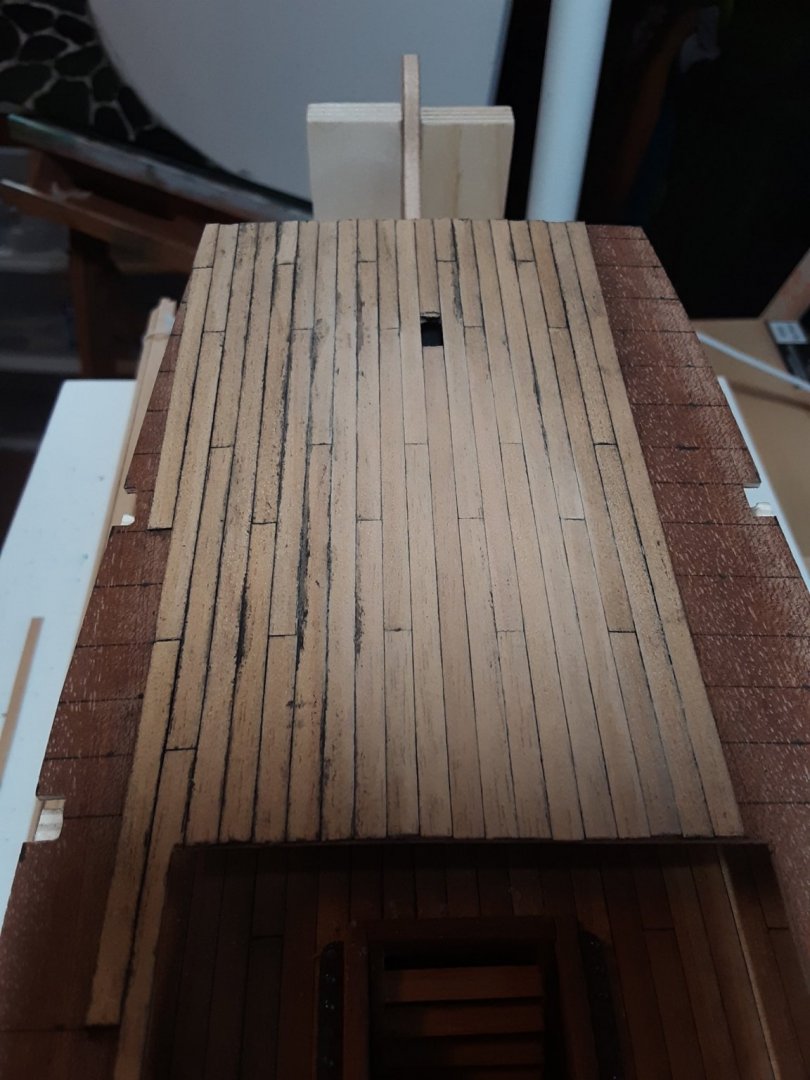
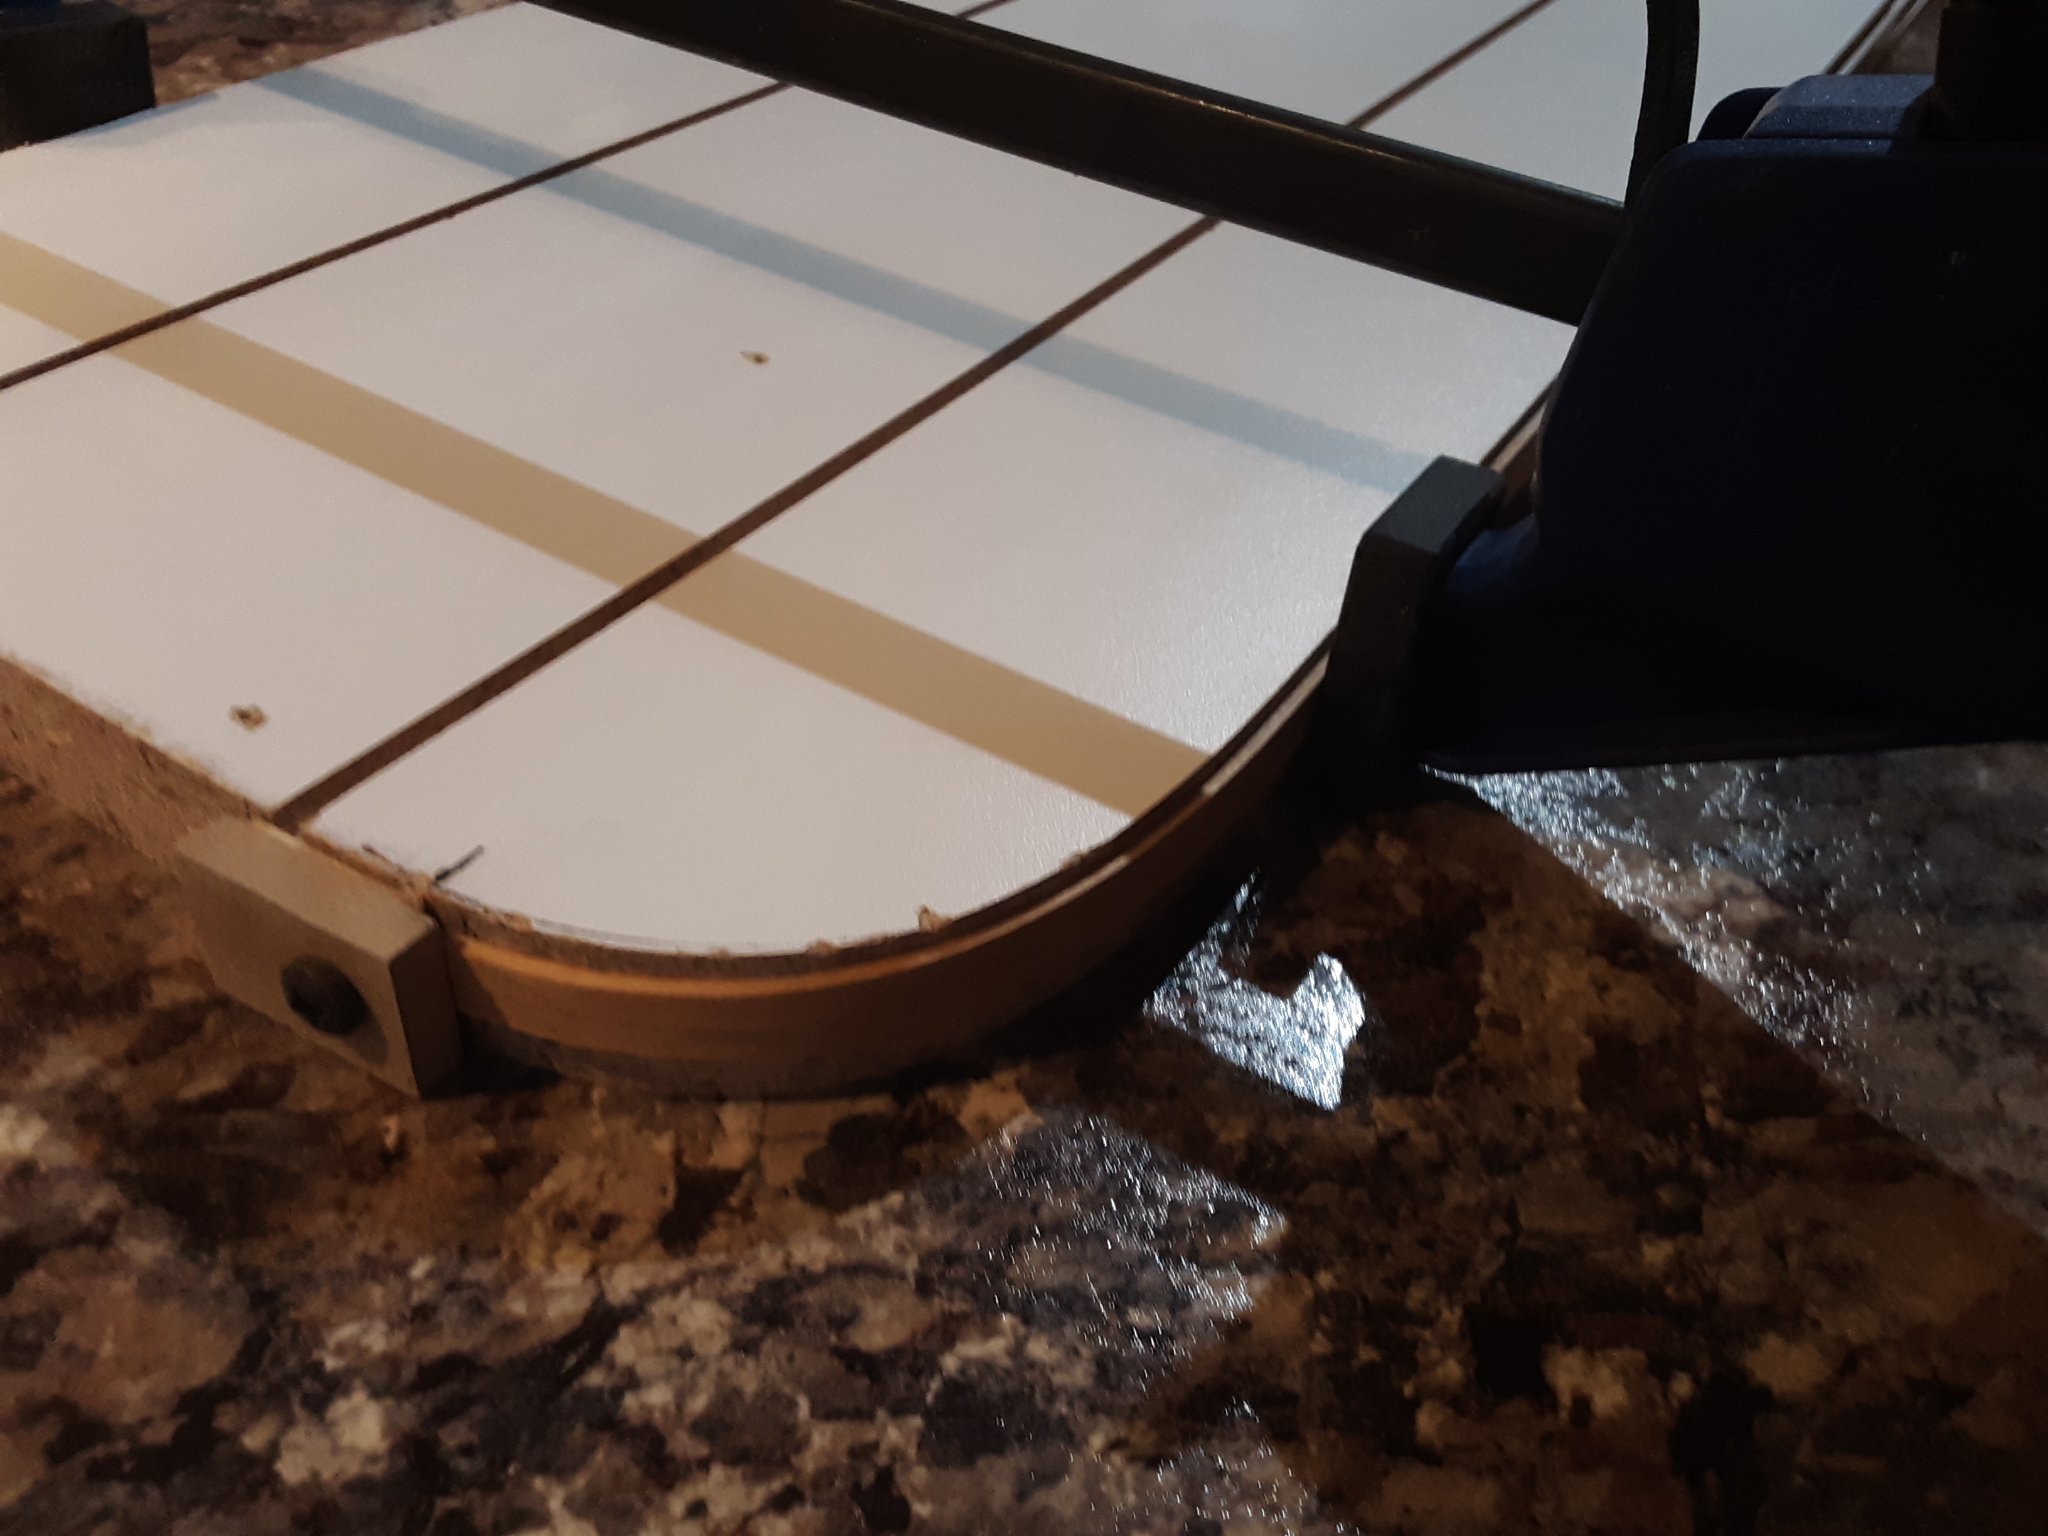
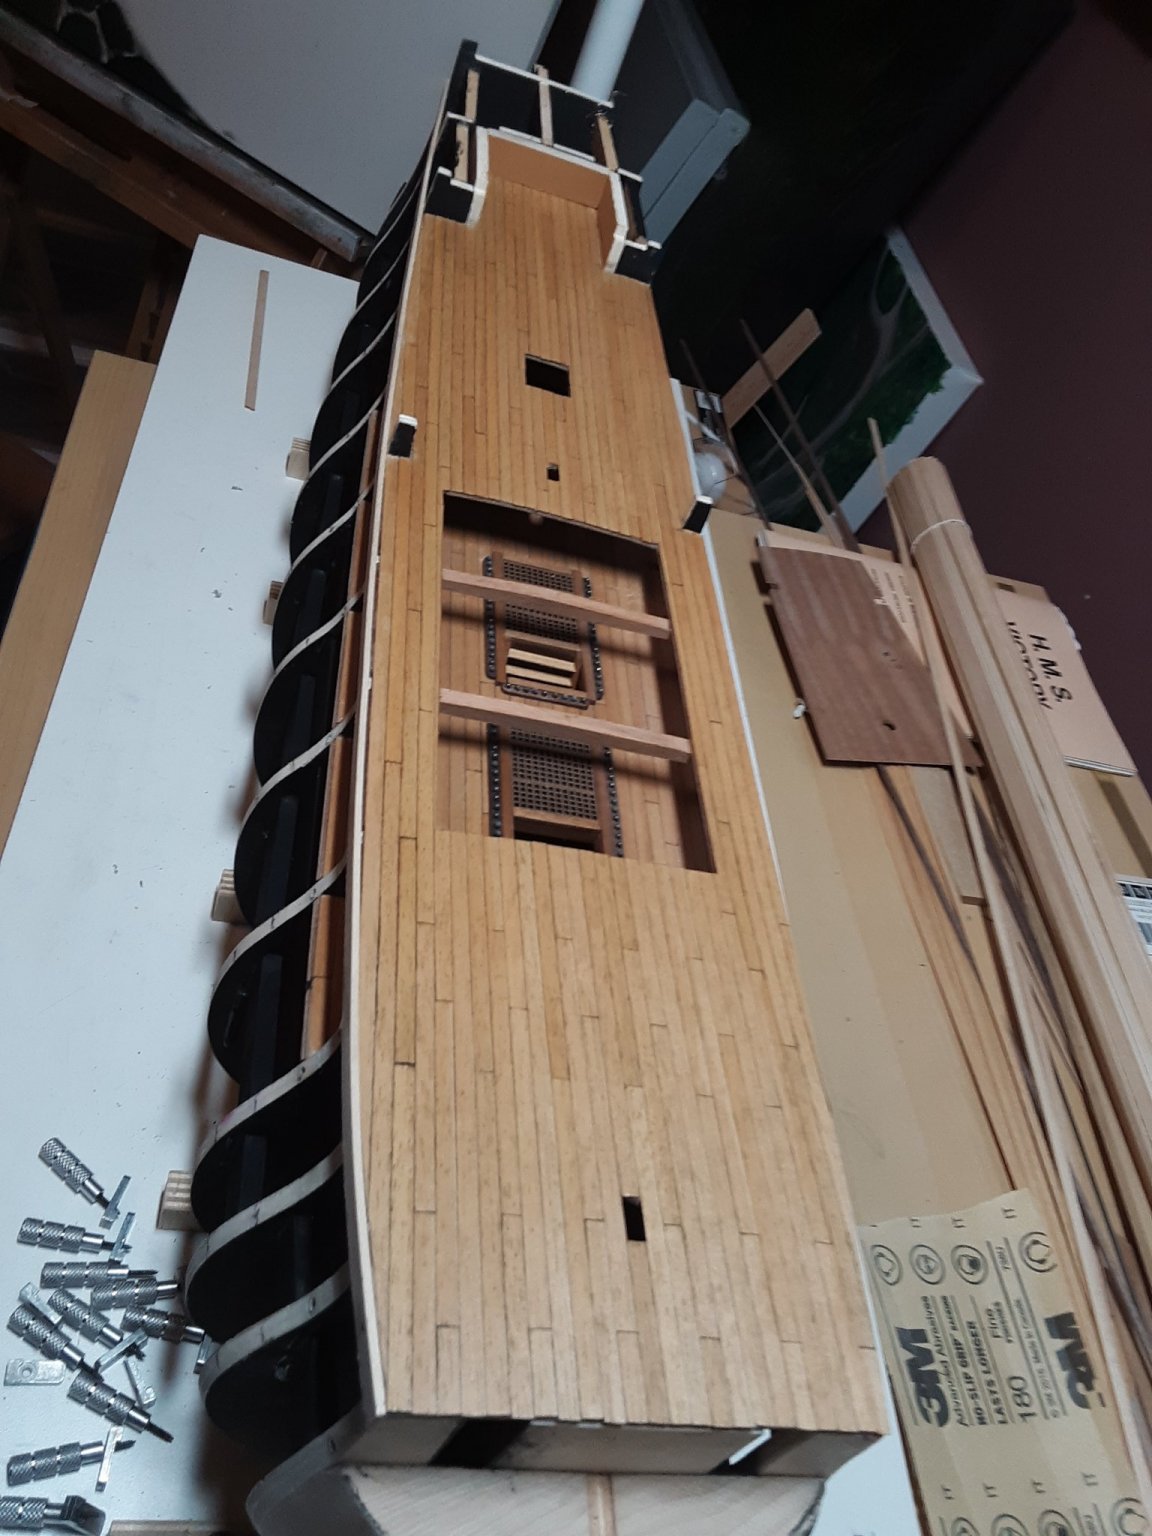
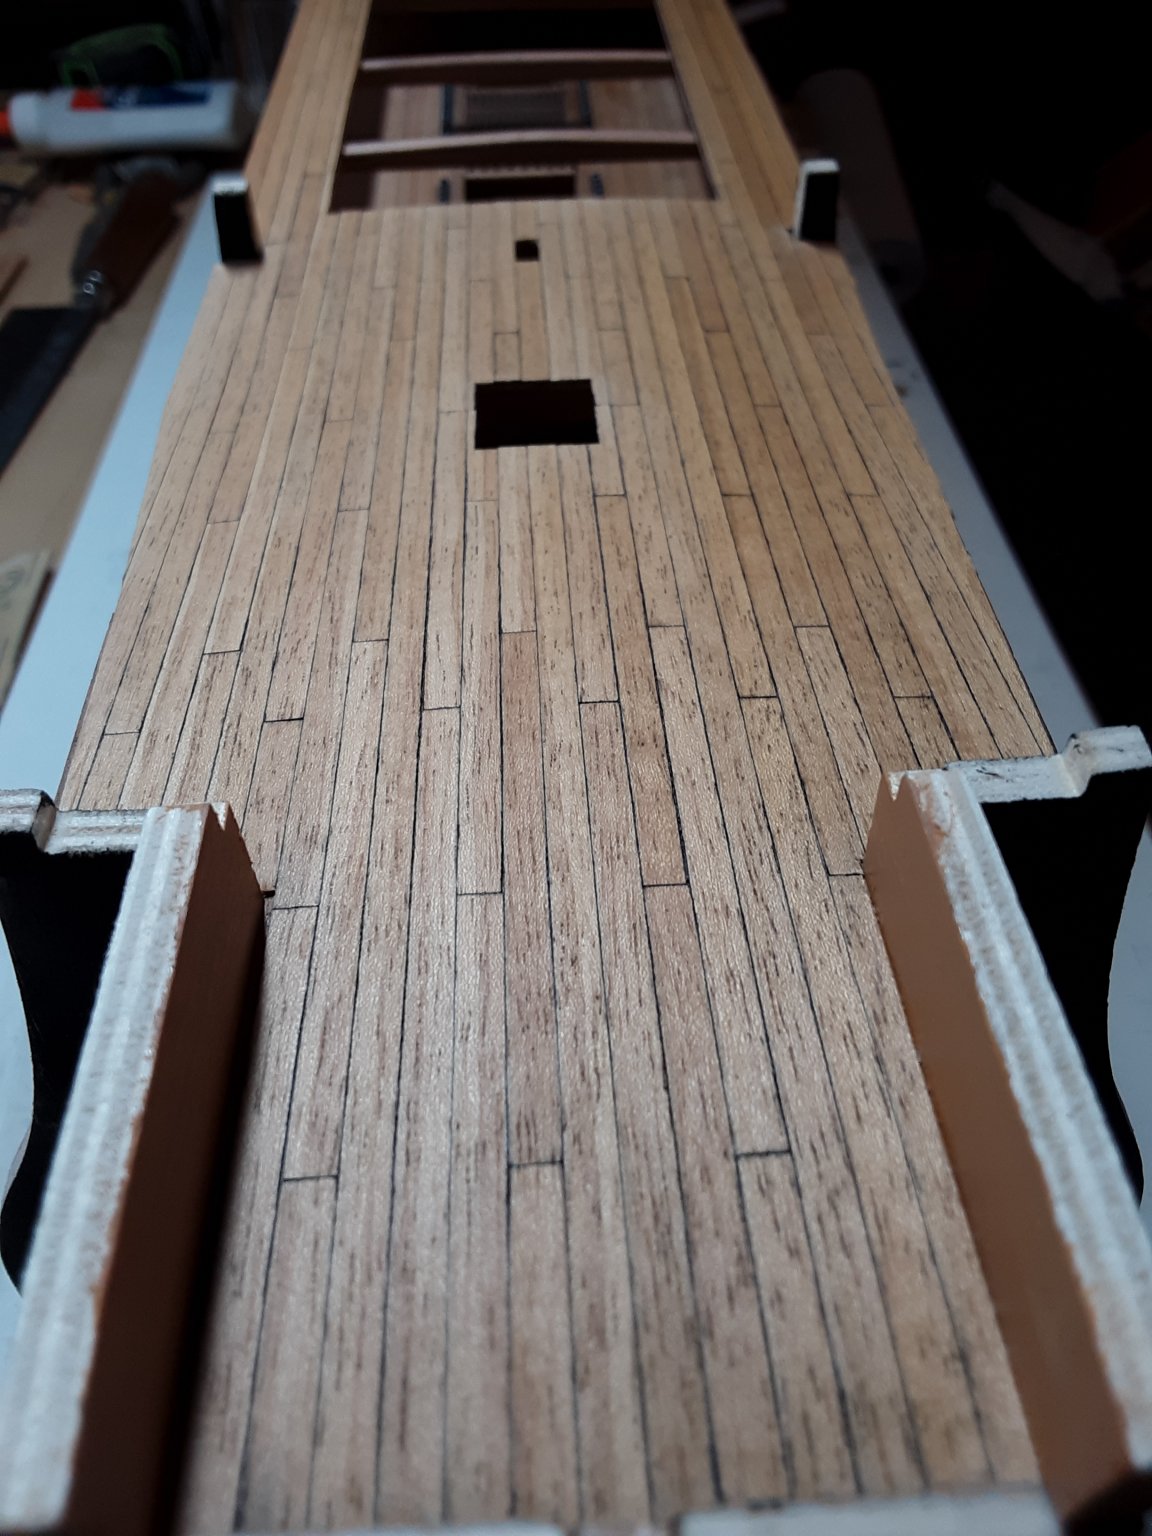
Hello friends. I finished putting deck boards down on the quarter deck. I'll give it a good sanding after it's dried overnight.

- Gregory and BLACK VIKING
-
 2
2
-
1 hour ago, Gregory said:
There is a nice kit at Syren Ship Models, but at 24mm it may still be a bit too big.
However, if you take a look at the downloadable instructions, they may help with making your own.
Cornwall Model Boats has a nice selection, but shipping may be a little slow these days..
Great info Gregory, thank you. Yes, it's a little too big still. Mine needs to be in the 12 to 13 mm size. I'll see what I can make. I need to hire some smart flea's. 😁
-
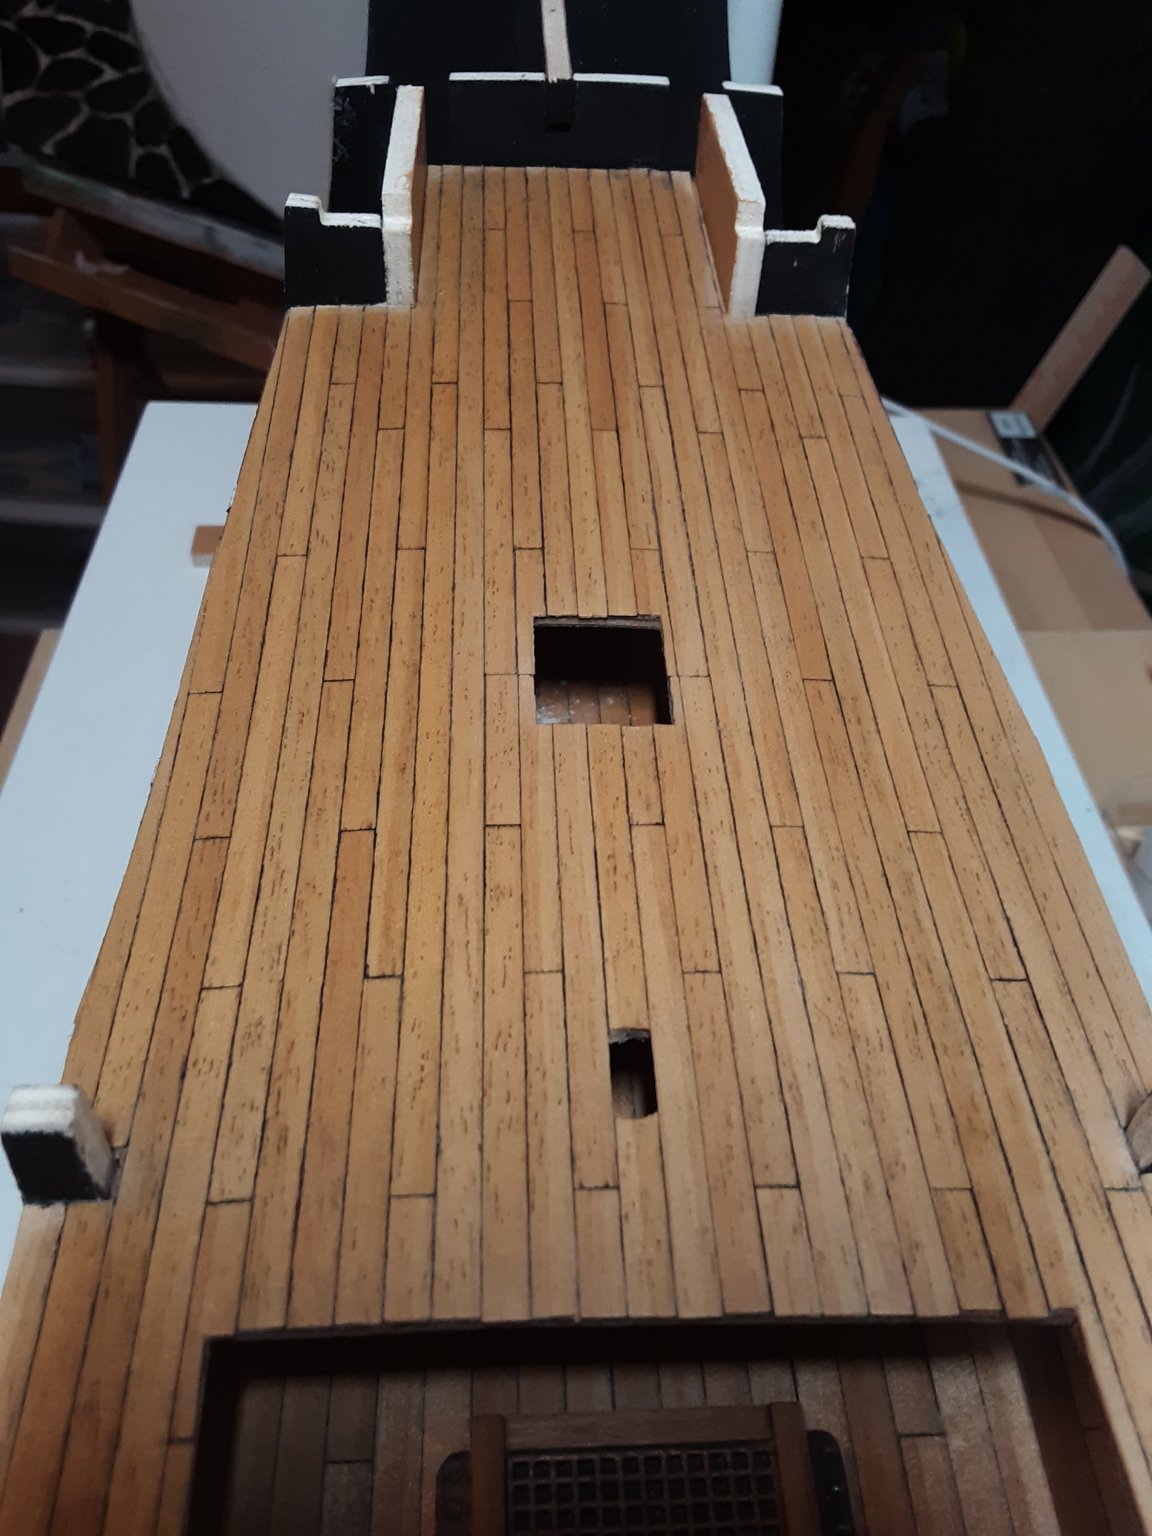
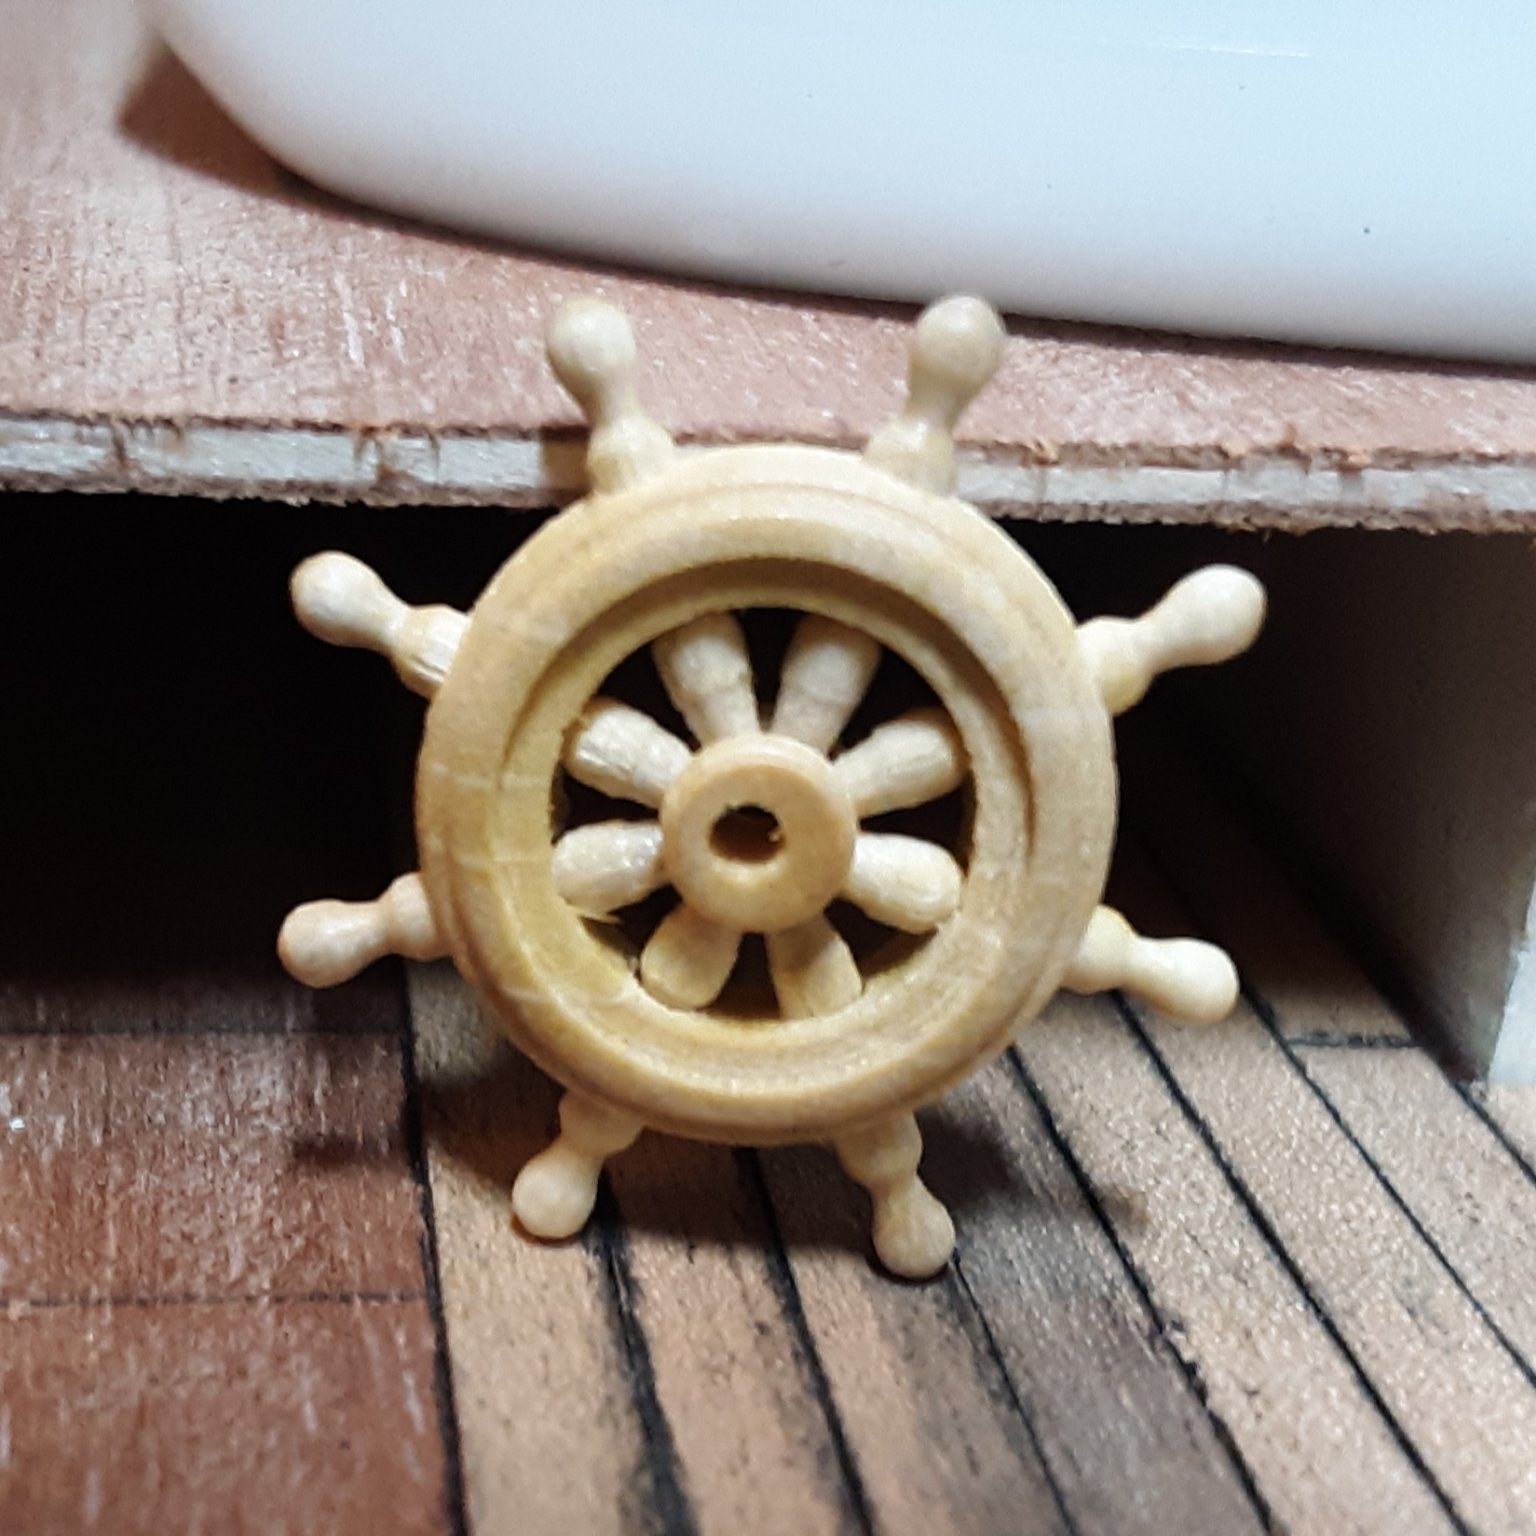
One of the things I've learned about model ship building, is that looking forward during construction is very important. At least from a beginner's perspective, it's proven to be a good thing. During my planking the quarter deck, I noticed that bulkheads #10 and #11 needed the tips removed. Fellow modeler Eugenio had previously warned me of this. Thankfully, I was able to remove them prior to covering the deck. I looked forward to see what else I could get done prior to fitting the poop deck. There is a steering wheel to contend with. After viewing the plans, then looking at other references, I quickly realized that the steering wheel provided in the kit is WAY TOO BIG. I don't know what Corel was thinking here. The steering wheel is clearly just under the poop deck next to the mizzen mast, according to actual photos. But the wheel in my kit stands taller than that. So I'm thinking about building my own. Makes me wonder how many other things are incorrect in this kit. It's a bit frustrating, but it's probably a good thing. I'm learning much from my research. If anyone knows where a guy can get an actual 1:98 scale steering wheel, I'd be very thankful. Good day to all.
Robert.

-
Thank you Gregory for your assisting me on my cannon details. Much appreciated.
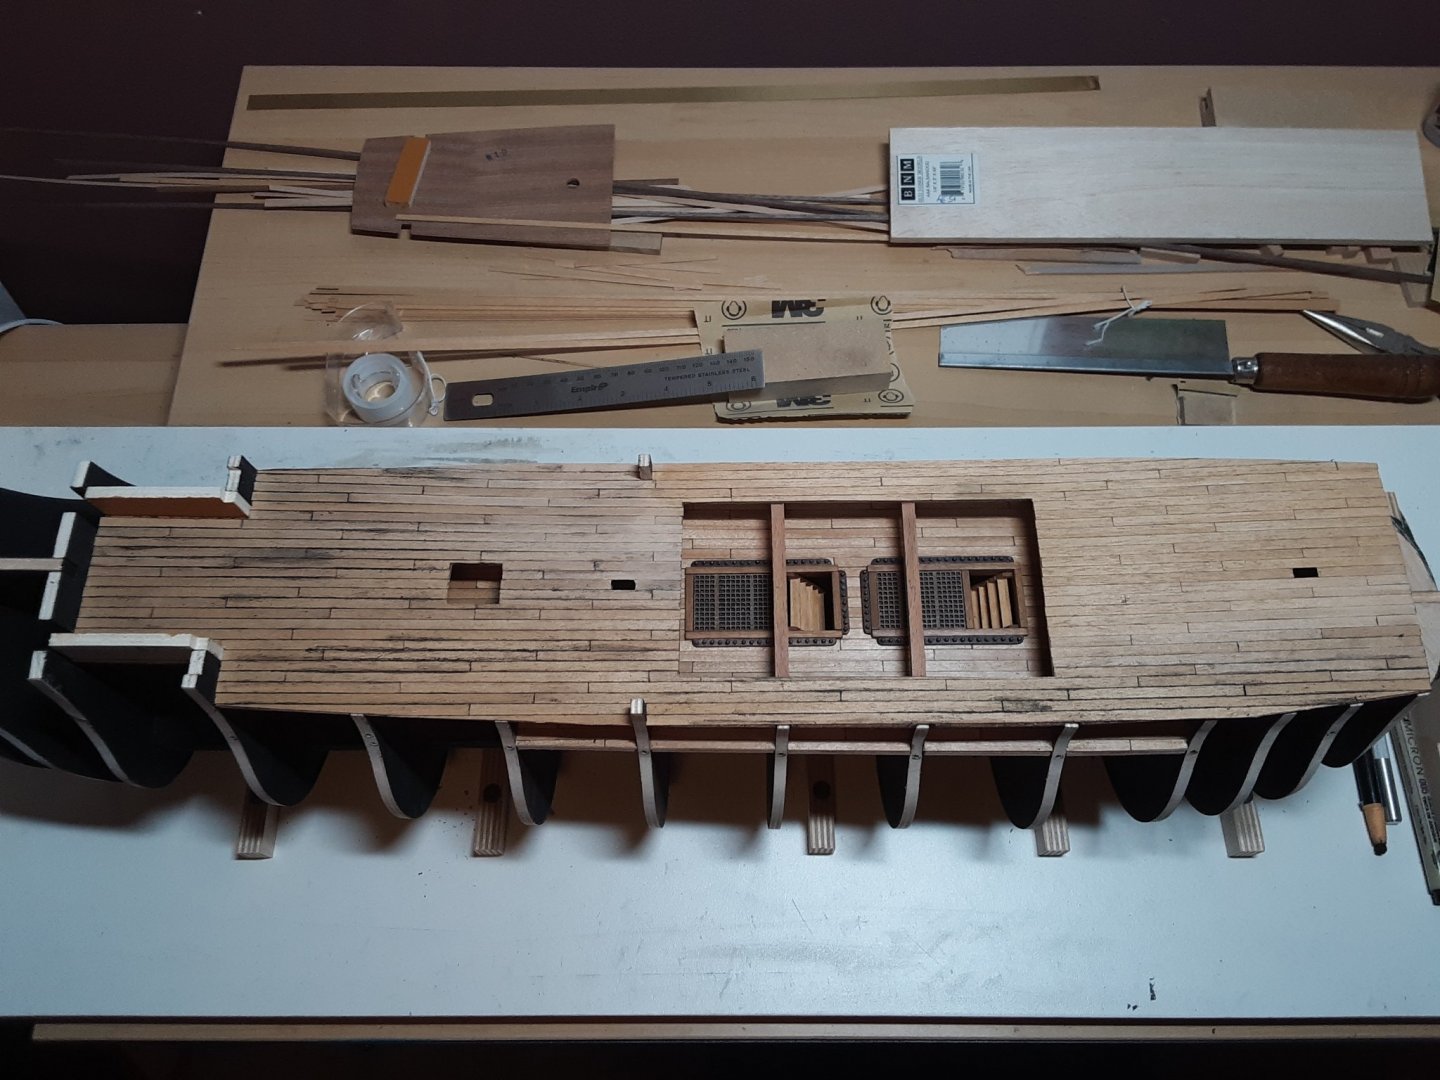
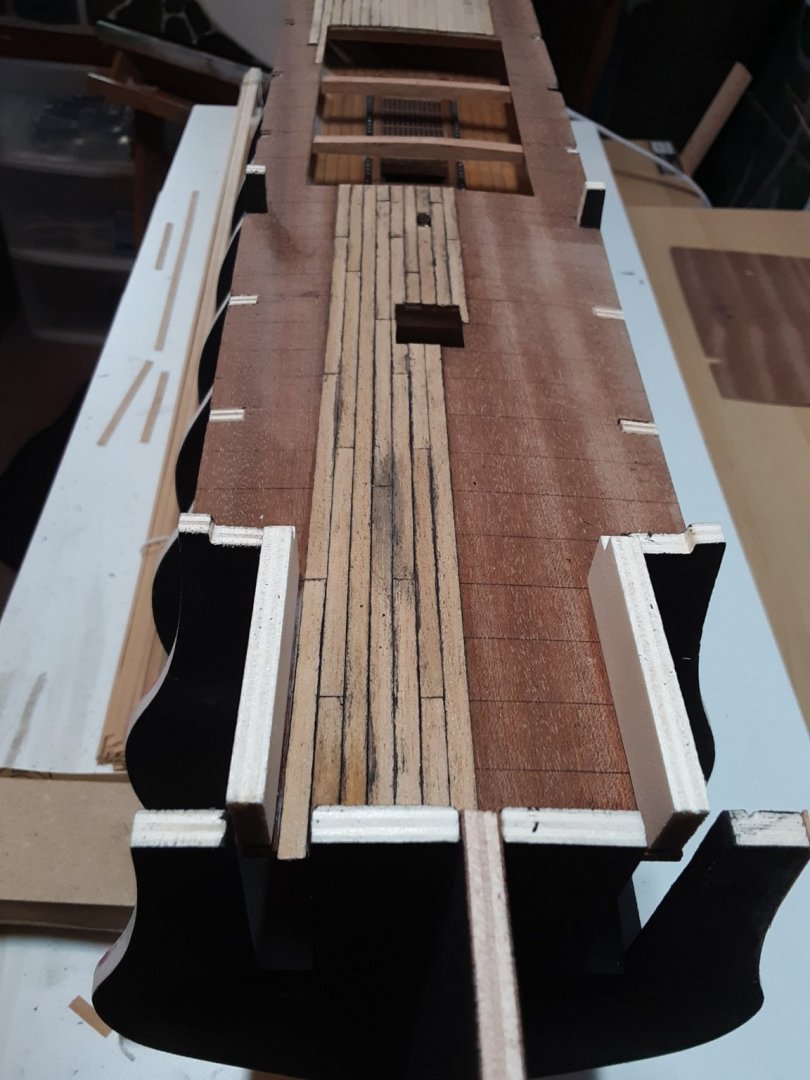
I'm moving on. I glued in the quarter deck beams, followed up by gluing down the quarter deck. Now I'm planking again. Thanks to everyone who has reached out to me. I'm so enjoying this. Here's some recent pictures. Thanks for stopping by,
Best regards, Robert.

- Gregory and Eugenio Treviño
-
2
-
I've looked at all my cannons. Then I looked at the rope that is supposed to go all around each cannon.😳
How is one supposed to apply this rope.🤔 There's no way to attach it like in photos. There must be a compromise. Any input is welcome.
Thanks, Robert.

-
7 hours ago, Eugenio Treviño said:
Robert, by no means I am considering that !!! I appreciate all your comments and I know exactly what you mean. Please feel free to let me know all your opinions.
I just wanted to emphasize that I am being a little bit eclectic with the build, not paying too much attention to historical accuracy or trying to make an exact replica. In my opinion, these kinds of kits are not good enough for that purpose. A scratch build is the way to go if that is your desire. Or invest in additions to the kit and in tools to modify the kit. And I am not interested now. Let's see on the next build.
Additionally, positive feedback is a treasure. If oneself is humble enough to accept positive feedback and learn from it, greatness will be knocking at the door. I like to see people doing things better than me (your cannons is an example), because next time mine will be better !!! Unfortunatly I built them before you !!!
Have you checked how many HMS Victory build logs are in the site? Have you checked how many have been finished ??? I want you, Nicolas, Emmet, the few others with active Corel´s kits build logs and myself to be successful and finish the build enjoying the process. There are many that never got there.
Let’s keep this fantastic friendship and build the most beautiful Victory's ever !!!
I love your perspective. Yes, let's build beautiful victories. But most importantly, this friendship.
Thank you my friend, Robert.
-
Just now, Gregory said:
This is an image from a Caldercraft build, and the look you might be going for.
Yes. That's awesome. I've heard nothing but great things about Caldercraft kits. Hmmm, maybe my wife could surprise me for next Christmas. 🤔 Thanks. Robert.
-
18 minutes ago, Eugenio Treviño said:
Robert I hope you are doing great!!!
I noticed the same thing. The difference between Corel’s plan and pictures of the real thing.
I just followed the plan. As you know my interest is not related with the historical accuracy, so I did what looked nicer to me. So discard the way I am doing it as a reference.
I hope someone can give us good information regarding the way they were rigged in 1805.Keep up the great work. I like a lot what you are doing. Your lower deck looks fantastic!!!
Thank you so much Eugenio.
I certainly hope you don't think I'm being critical of your build. I absolutely love what you are producing. A fine work of art. I'm just trying to make decisions about how much realism I want in mine. I'm going to be painting mine. But probably leave the hull natural walnut. I love the look of wood. Like yours. Beautiful. I look forward to seeing your ship continue to come alive. Thank you friend, Robert.
-
19 minutes ago, Gregory said:
Not an expert, but I have never seen two tackle on the rear like that. It is the in-haul to haul the gun inboard.
I wouldn't be surprised if Corel got it wrong. it wouldn't be the first time.
Thanks Gregory. I'm brand new to the hobby. Tackle, that's what it's called. Appreciate your feedback. I'm enjoying the process and looking at old photos. In all Corel made a very nice kit, but when it comes to certain details they seem to have missed the mark. Not that every detail is so important for my first build. But this seems a bit big deal to me. Thanks again. I'll stick to a single "tackle" for the rear.
-
Well the previous photos went in reverse order, but you get the idea
😁
-
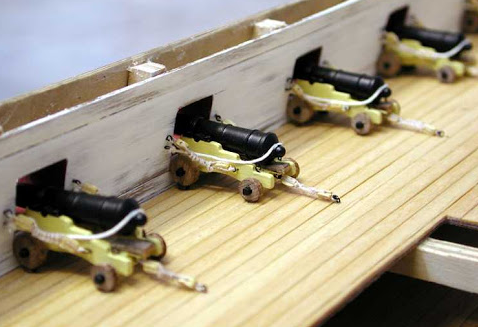
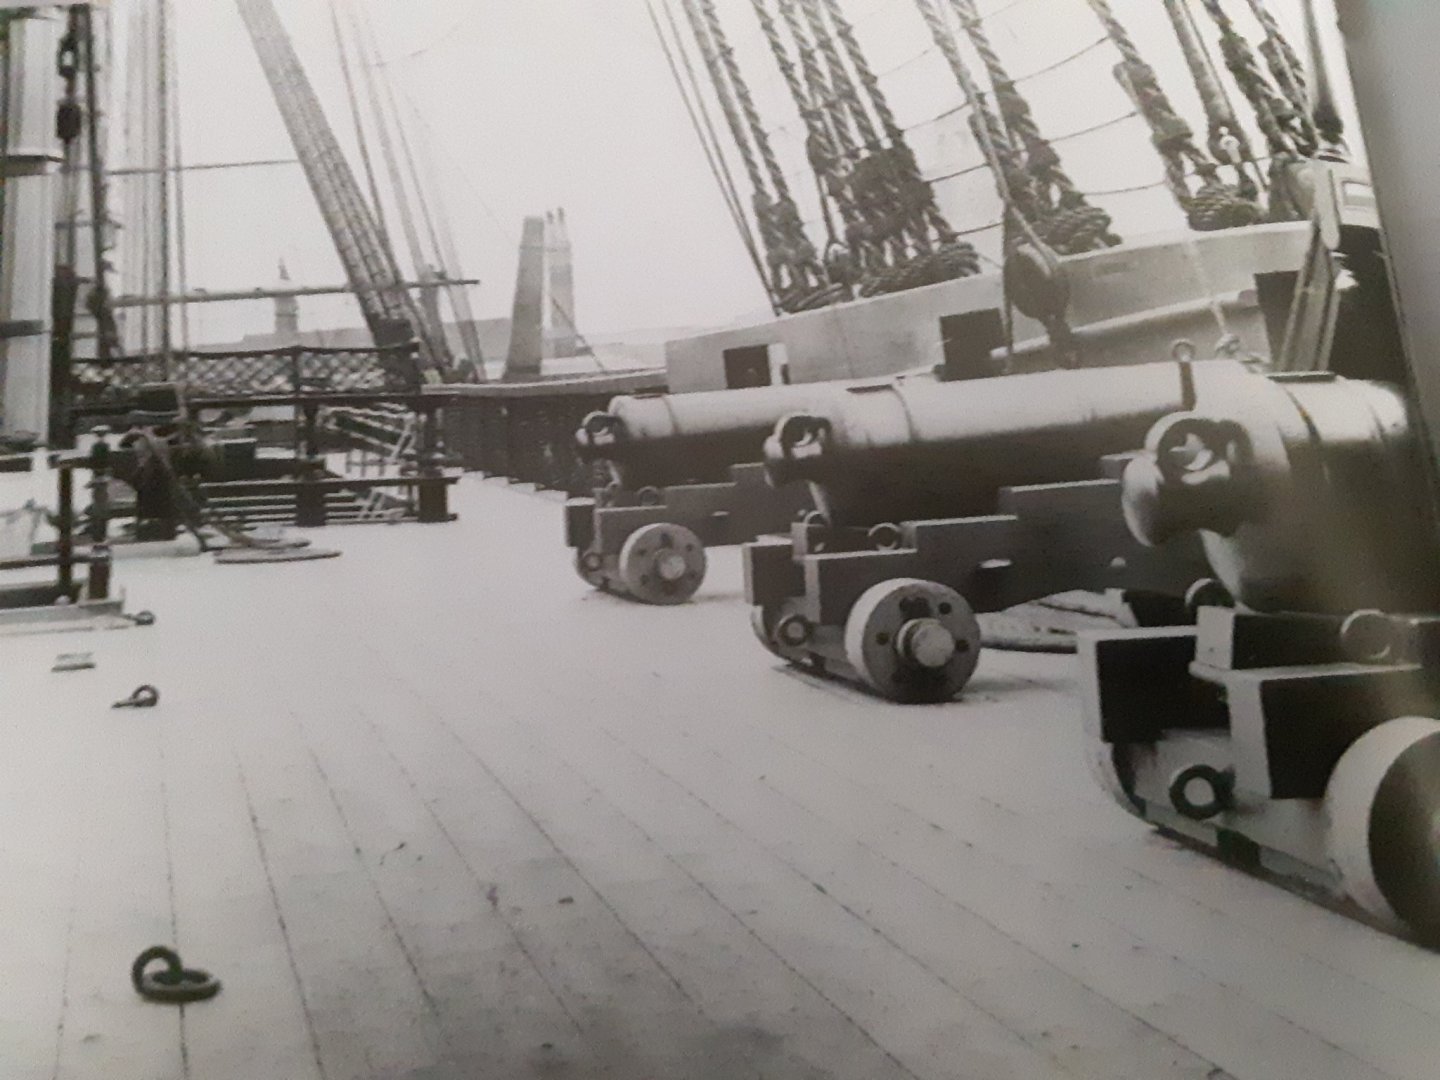
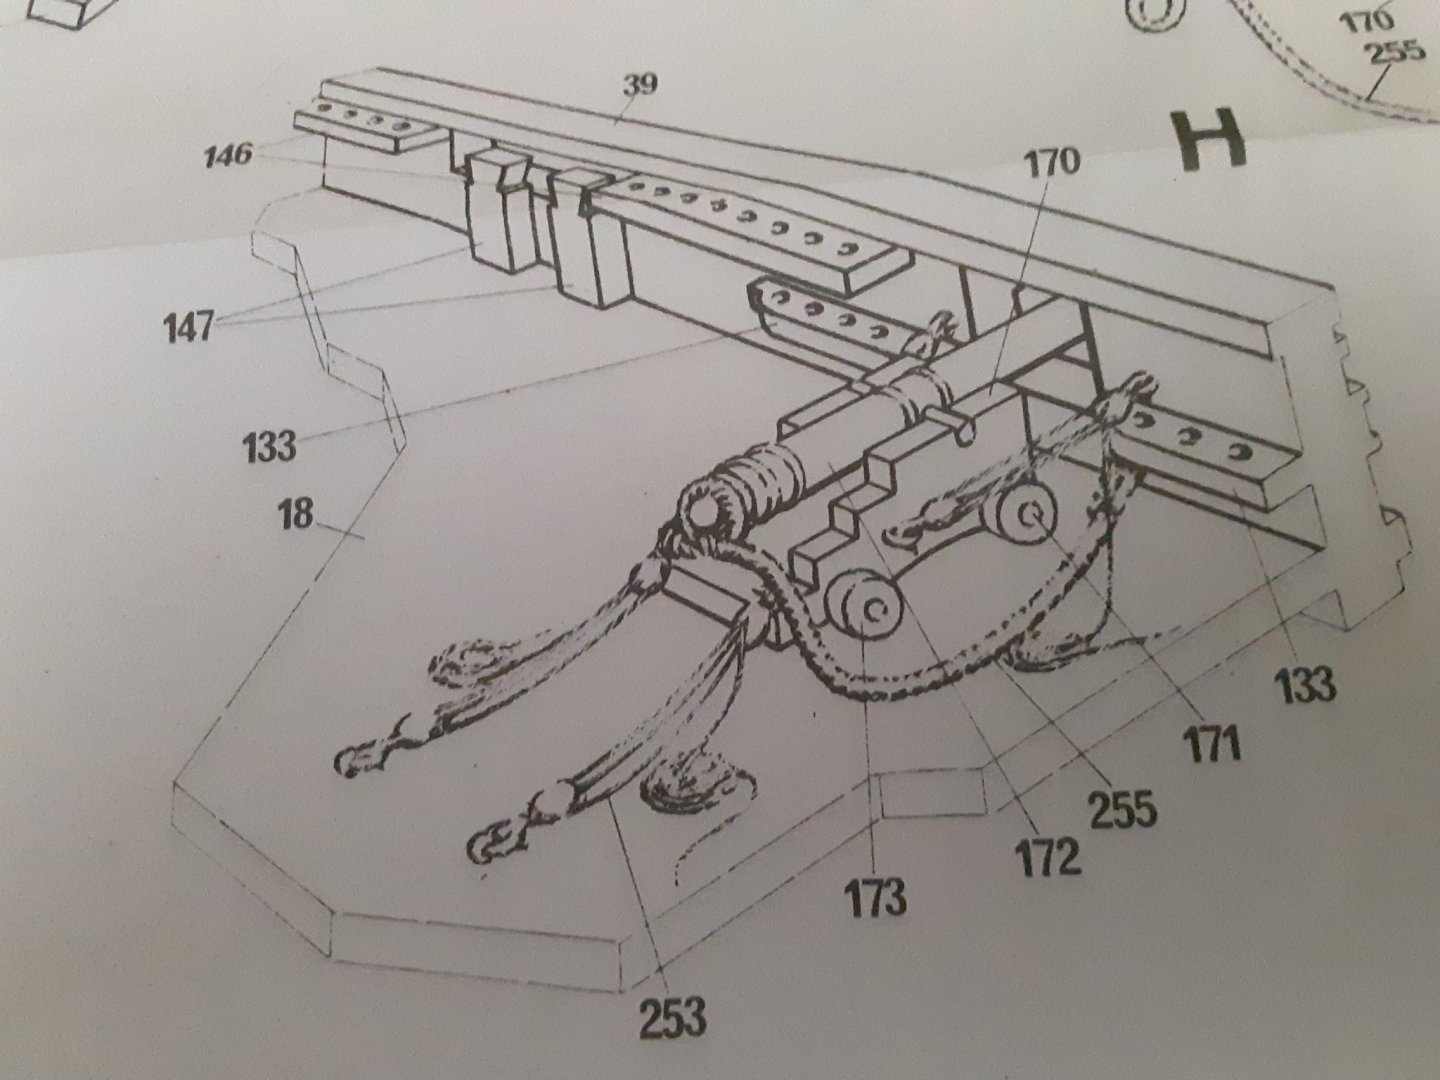
Learning as I go. I've been studying actual photos of the cannons on the victory. And I discovered originally I didn't include the eyebolt on the bottom center. I'm assuming for attachment to the deck for pulling the cannon backwards. Or for just stabilization. Anyway after gluing those extra eyebolts in, I realized that I glued them in horizontally not vertically like they are in the photos I've seen. So I'll pull them and redo them. Another issue I'm having is the accuracy of the Corel plans. I'm not trying to build an exact replica for my first build, but I don't want to make obvious differences in certain details either. Having said all that, I noticed on my plans, it shows 2 sets of ropes with blocks holding from the rear of each cannon. But in historical photos they show only a single fastening ring on the deck behind each cannon. Can anyone give me perspective on this? I've seen modelers do it both ways, does it matter? Not trying to be overly critical, just wondered. Thanks in advance for any thoughts. Following are a couple photos. The first is from my Corel plans sheet #6. The second photo is from The Anatomy Of The Ship, The 100 Gun Ship Victory by John McKay.
-
Eugenio your cannons look awesome!! It's really looking great.

.jpg.a0da16baf9fef225c80607e7d08c95b2.jpg)


HMS Victory by Roberts Orca - Corel - 1:98
in - Kit build logs for subjects built from 1751 - 1800
Posted
It's snowing outside. Might as well put a few more planks on.
Here's some updated photos.
Have a great day. 😊