


Don Case
-
Posts
482 -
Joined
-
Last visited
Content Type
Profiles
Forums
Gallery
Events
Everything posted by Don Case
-
Square and true
Don Case replied to Don Case's topic in Building, Framing, Planking and plating a ships hull and deck
I checked the verticals about three ways and they check out. I checked it for twist by laying two 4" straight edges across it, one of either end and sighted down them lining up the top of one with the bottom of the other. If there is any twist it can't be more than1/16" in the full 4". So I would say not the board. If I string it from the center of the stem to the center of the stern post the frames midships lean to port almost 1/8". I'm gluing a block on the sheer of the inside of the starboard side. Then I'm going to put a gillpoke from the block to either the keelson or the turn of the bilge of the port side. If I can push it into shape I'll leave the gillpoke in until the last minute. If that doesn't straighten it out at least everything will be twisted. -
Square and true
Don Case replied to Don Case's topic in Building, Framing, Planking and plating a ships hull and deck
Yes they are both supported. I'm just going to go check to see how plumb the supports are. -
I was just doing some measurement on my ship and something is out of line. A little twisted I would call it. I've established a string line at shear level that should be parallel with the keel and as I measure from the frame top to the string I'm finding a gradual increase in difference from side to side. Either the stem or stern post is not plumb or my frames start to lean to one side as you move along the ship or a myriad of other possibilities. I realise that perfection is the aim but is 1/16 to 1/8" unforgiveable? I give that range because with the plans stuck on the building board which is 2 pieces of 3/4" ply glued together 15 years ago (It was flat at one time), I don't know for sure how much of that error is in the ship and how much is my measuring technique. I have no internal stuff glued in so I may be able to pull it straight as I continue to build but I'll have to constantly think about it.
-
HMS Discovery 1789 by Don Case - 1:48
Don Case replied to Don Case's topic in - Build logs for subjects built 1751 - 1800
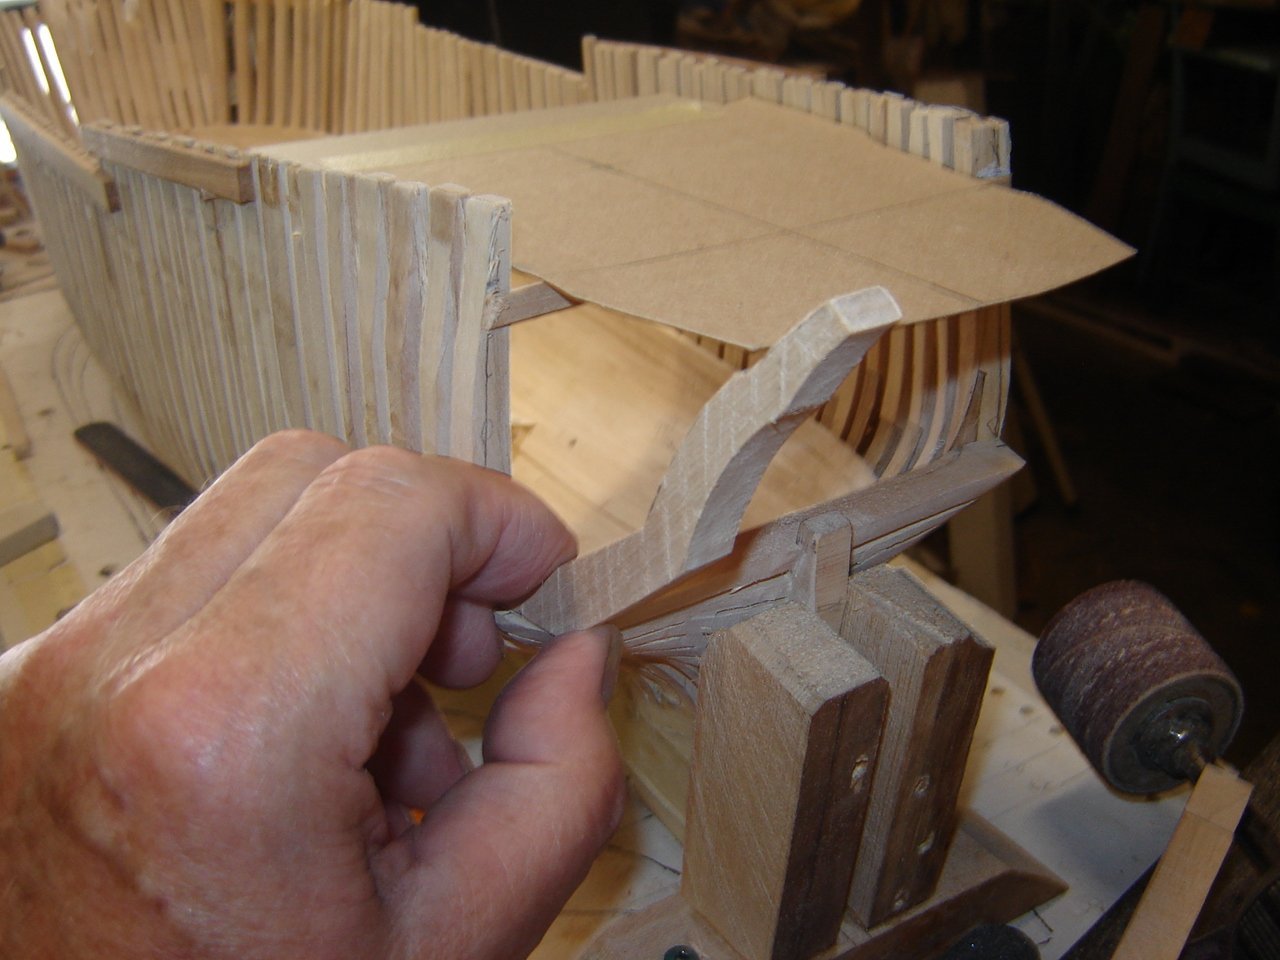
All the splints are glued on the aft cant frames and I've started sanding the outside to bring it into shape. You can see that the port side is tucked in some. Now that I've got the shape a little better I can look at what the counter timbers are going to look like. First I have to figure out a way of holding them in position. Hands don't work all that well. The cardboard is the quarterdeck. I think it needs a stiffener.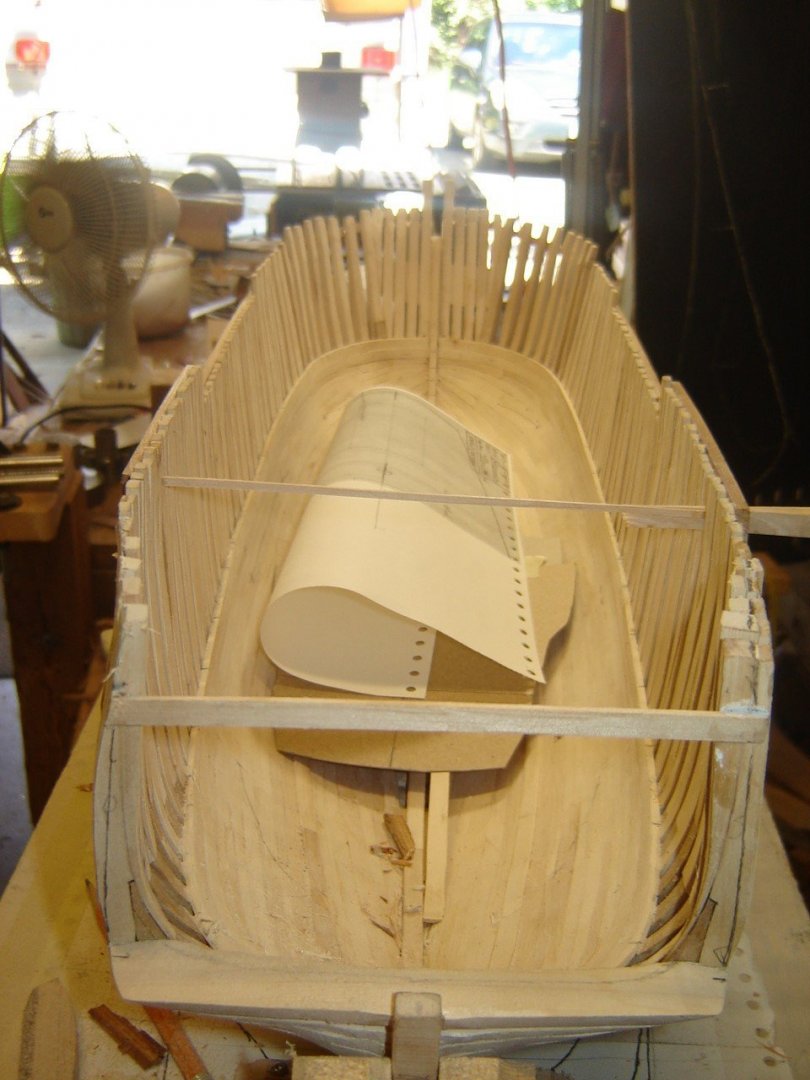
-
HMS Discovery 1789 by Don Case - 1:48
Don Case replied to Don Case's topic in - Build logs for subjects built 1751 - 1800
Is there any reason not to put off the stem timbers and the counter timber framing? The gripe would get in the way of my jig and I'm afraid of breaking off the counter timbers if I don't do most of it at once. -
HMS Discovery 1789 by Don Case - 1:48
Don Case replied to Don Case's topic in - Build logs for subjects built 1751 - 1800
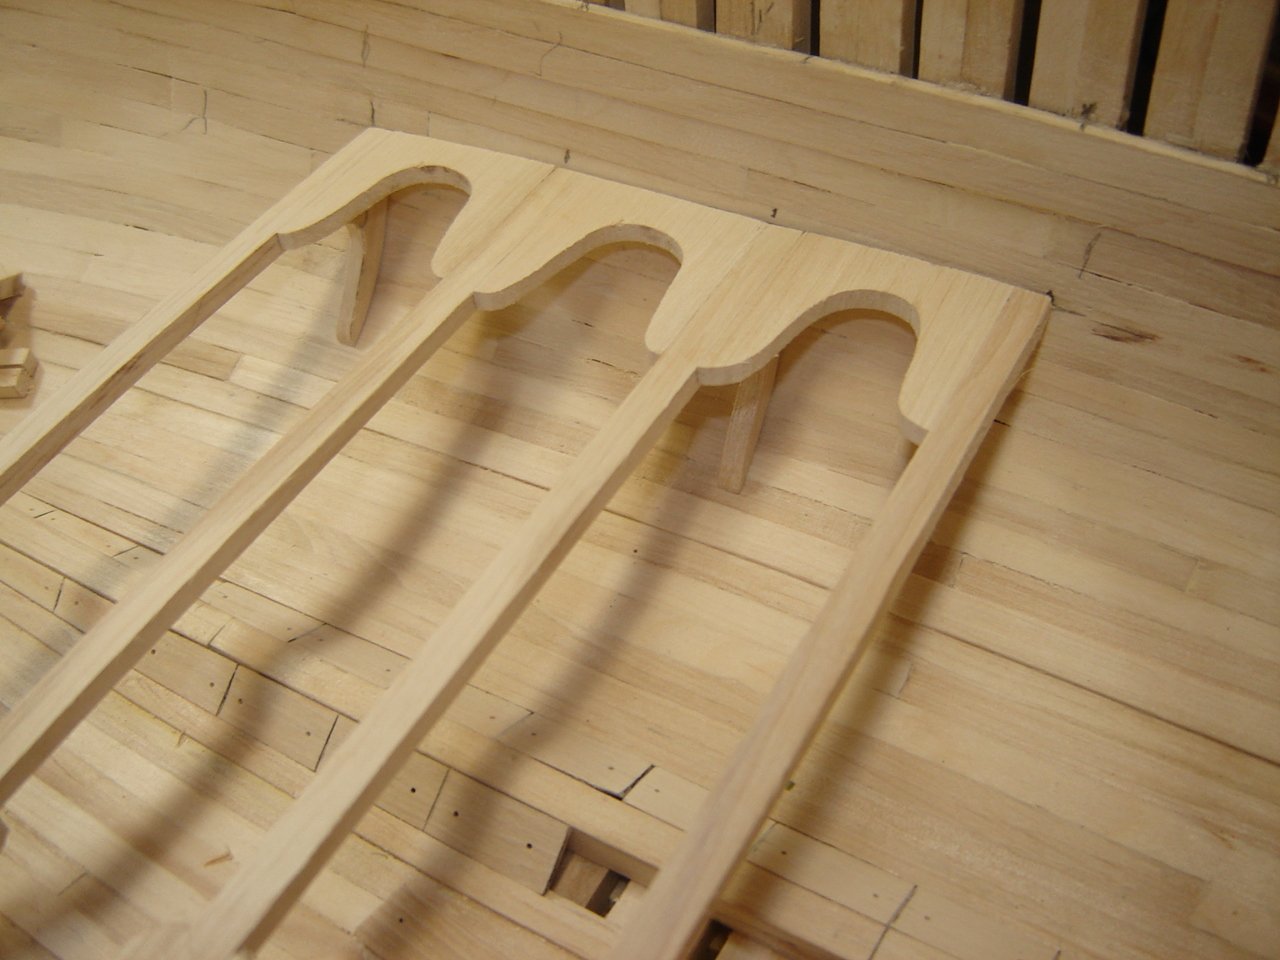
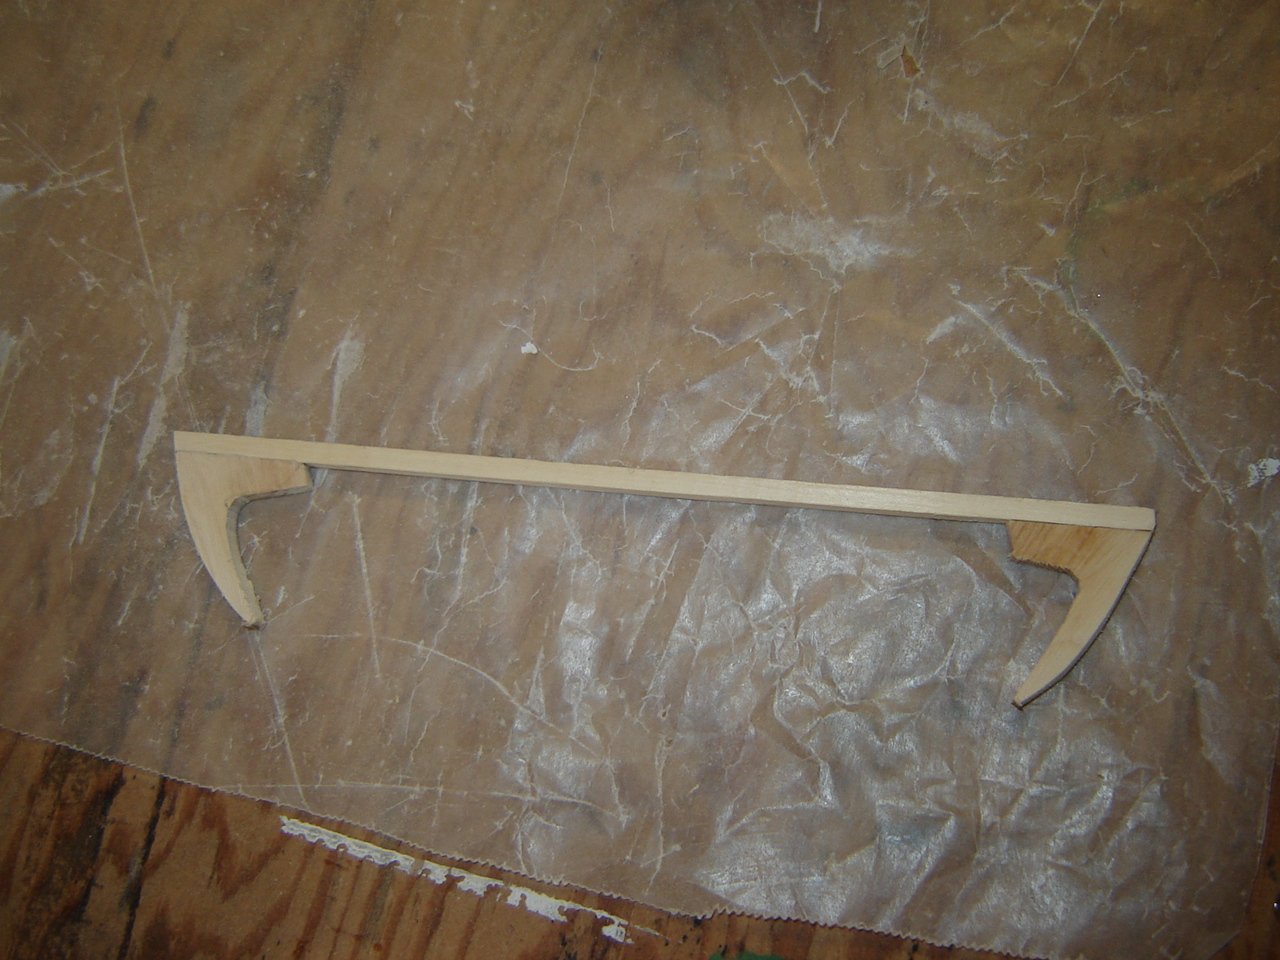
Here's the result of the midship platform. I'm pretty pleased. You can't really see the standard/hull joint but I'll take it this time. Next one will have to be better but the hull planking will be smoother next time. I'm really not happy with how the "every other beam gets a standard" works out. If there had been an odd number of beams I'd be happy but with an even number it looks like one end of the platform is hanging out in the breeze.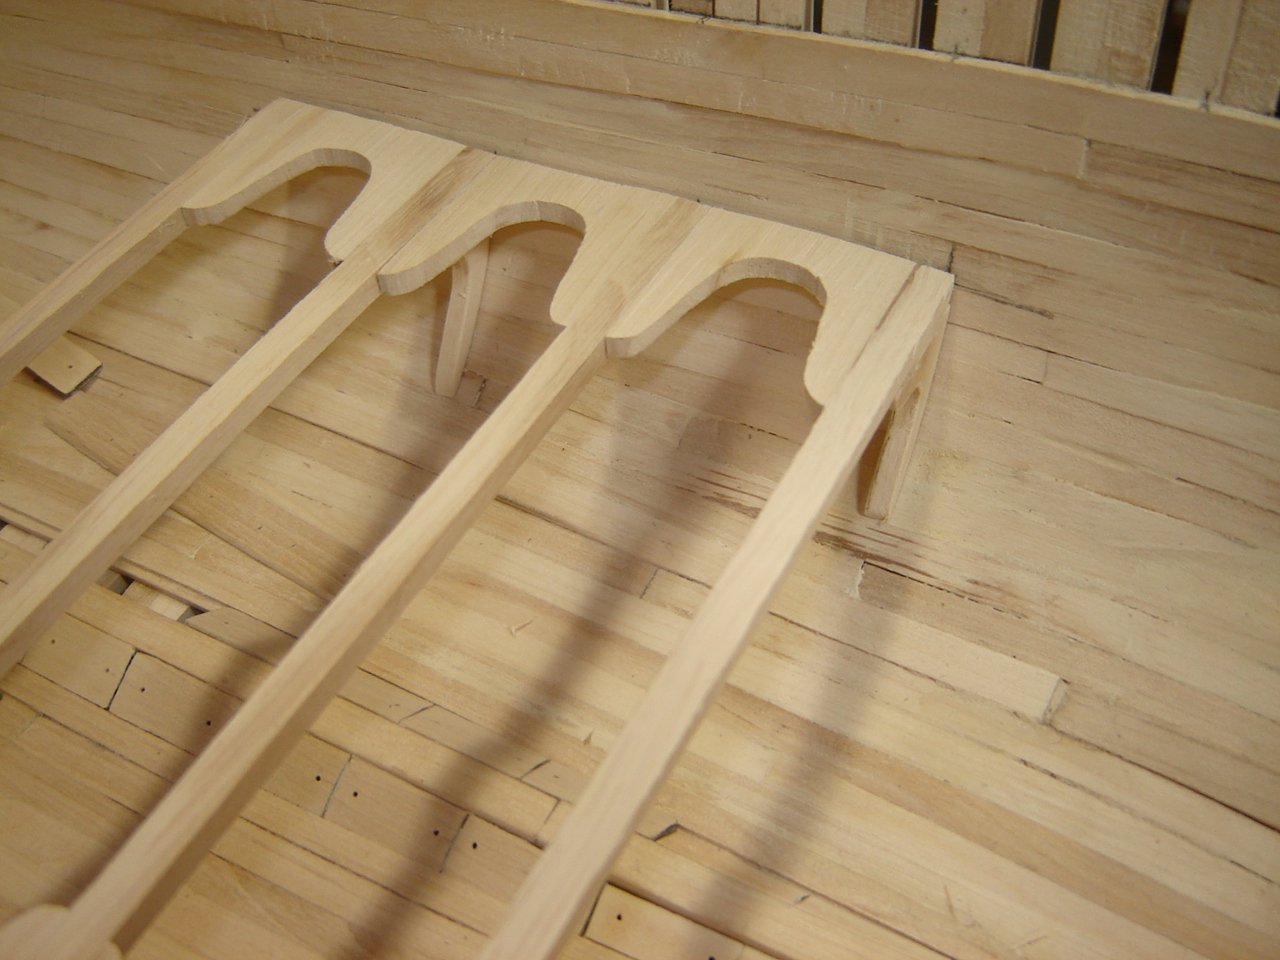
-
HMS Discovery 1789 by Don Case - 1:48
Don Case replied to Don Case's topic in - Build logs for subjects built 1751 - 1800
Thanks Tony but I still have to make more. I'm not even sure how big or how many yet. -
HMS Discovery 1789 by Don Case - 1:48
Don Case replied to Don Case's topic in - Build logs for subjects built 1751 - 1800
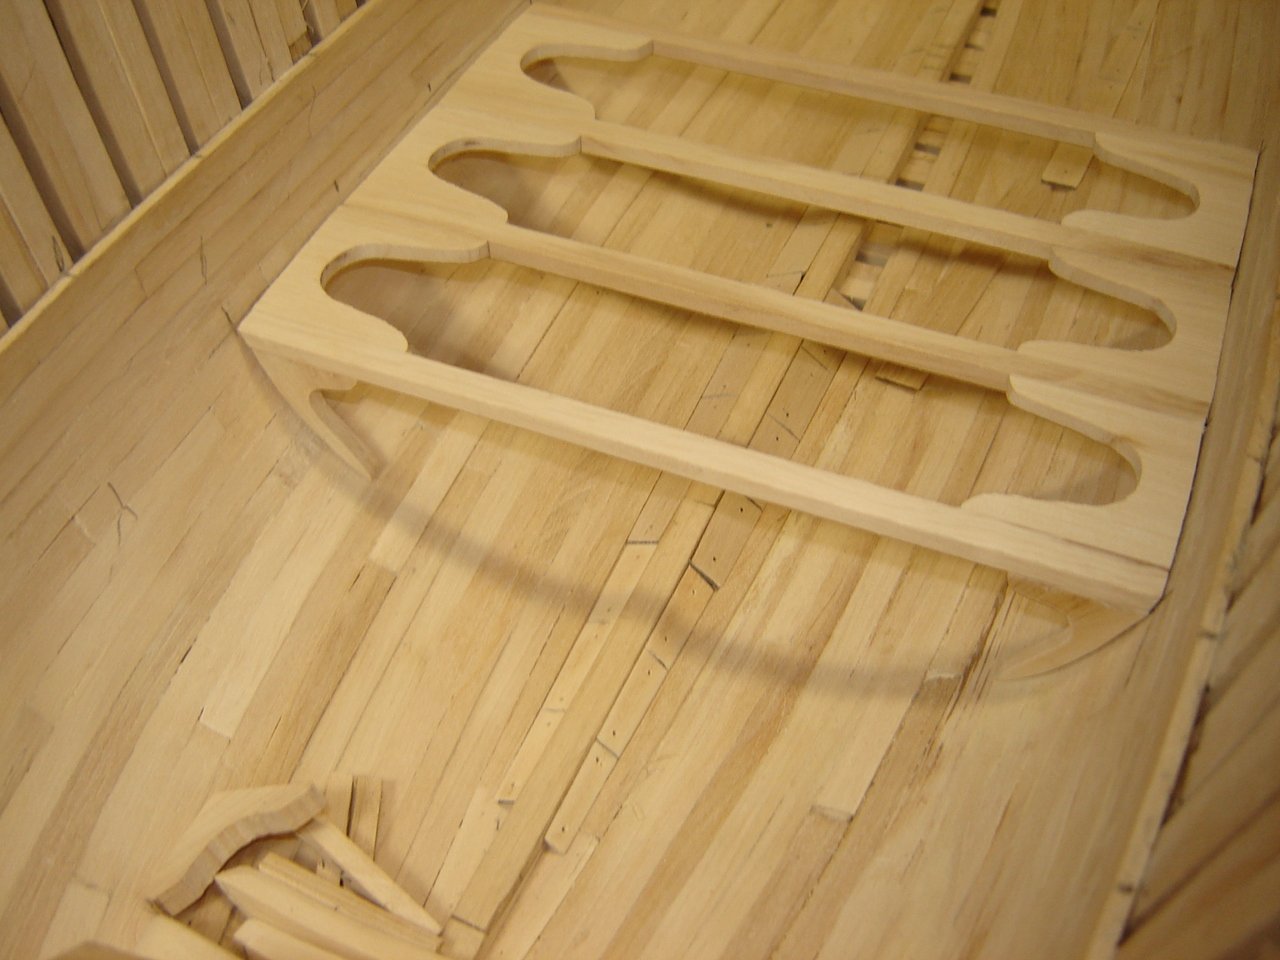
I'm also trying to mount the hanging standards on to the midship platform. I thought I would try gluing the standards too the platform first. I've made the platform already to I made a temporary beam and glued the standards to the ends. Then I gradually fit that assembly to the hull. Then I unglued the temp arrangement and glued the standards to the platform and trial fit it while the glue was easily removed. It fit reasonably well, just needs a bit of sanding. Now I have to do the next one two beams over. We'll see how that goes.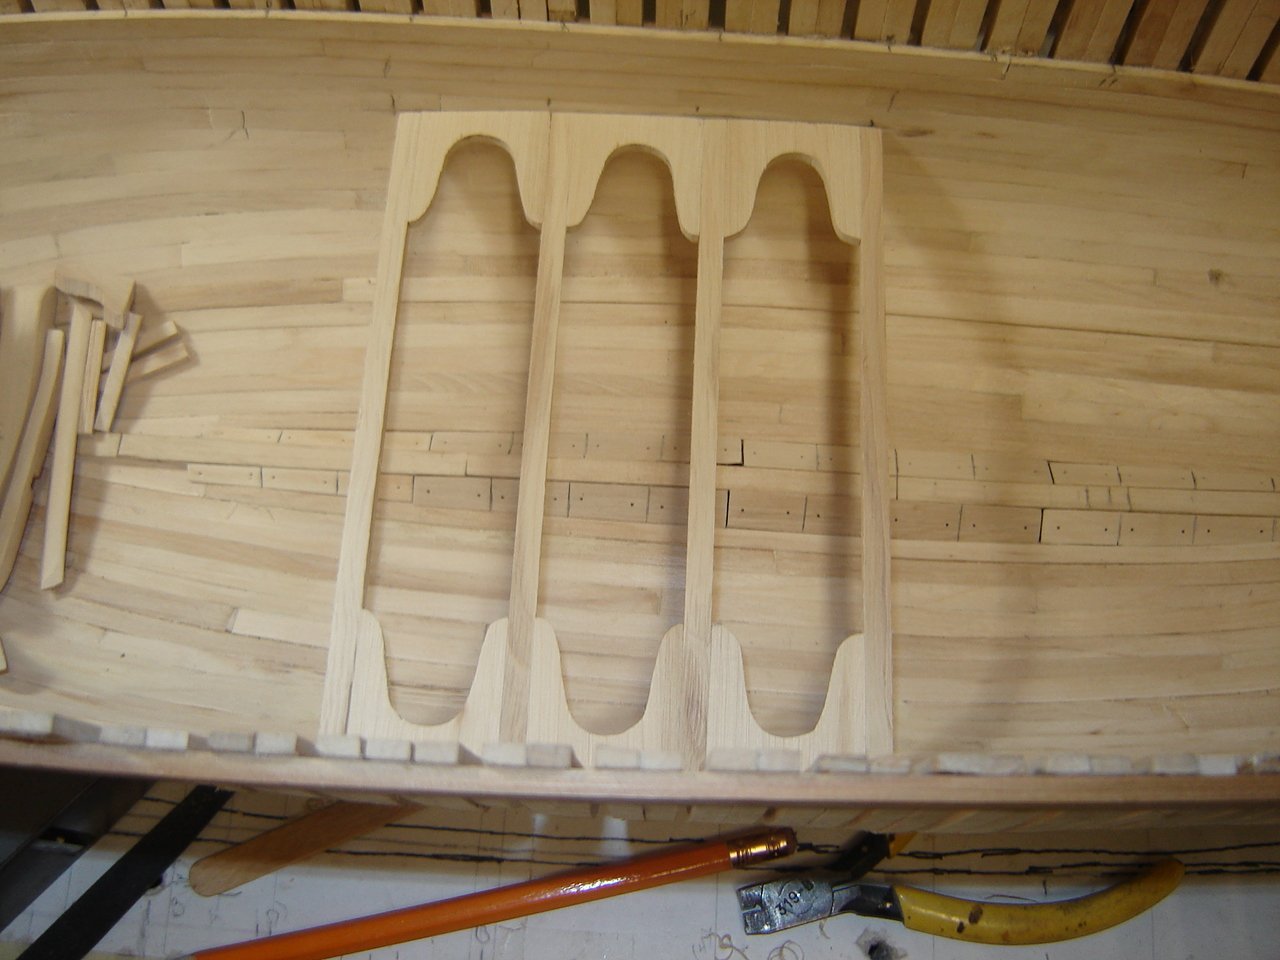
-
HMS Discovery 1789 by Don Case - 1:48
Don Case replied to Don Case's topic in - Build logs for subjects built 1751 - 1800
I've just about finished all the parts for the inside. I'm still trying to decide whether it's worth it to treenail the inside as it will probably be planked but I don't have to make that decision until I've got nothing left to do except build the lower deck. And something I've forgotten may show up. So, in the meantime I've started to work on the stern framing. There are no drawings of the stern that I've found but I do have a few paintings that have similar depictions of it. I thought that if I could arrive at the general shape it may confirm or dismiss these paintings. I started "lofting" out the shape and found that all my aft cant frames were gradually further away from the center line. Square frames are good, The last cant frame set are 3/8" too far apart at the top. Fortunately they are OK up to where I've planked the interior so I have to glue a splint on the inside of each frame gradually decreasing the width. When the glue is dry I'll sand away the outside until everything is hunky dory. Each splint will end at a chock joint so they shouldn't stand out too much.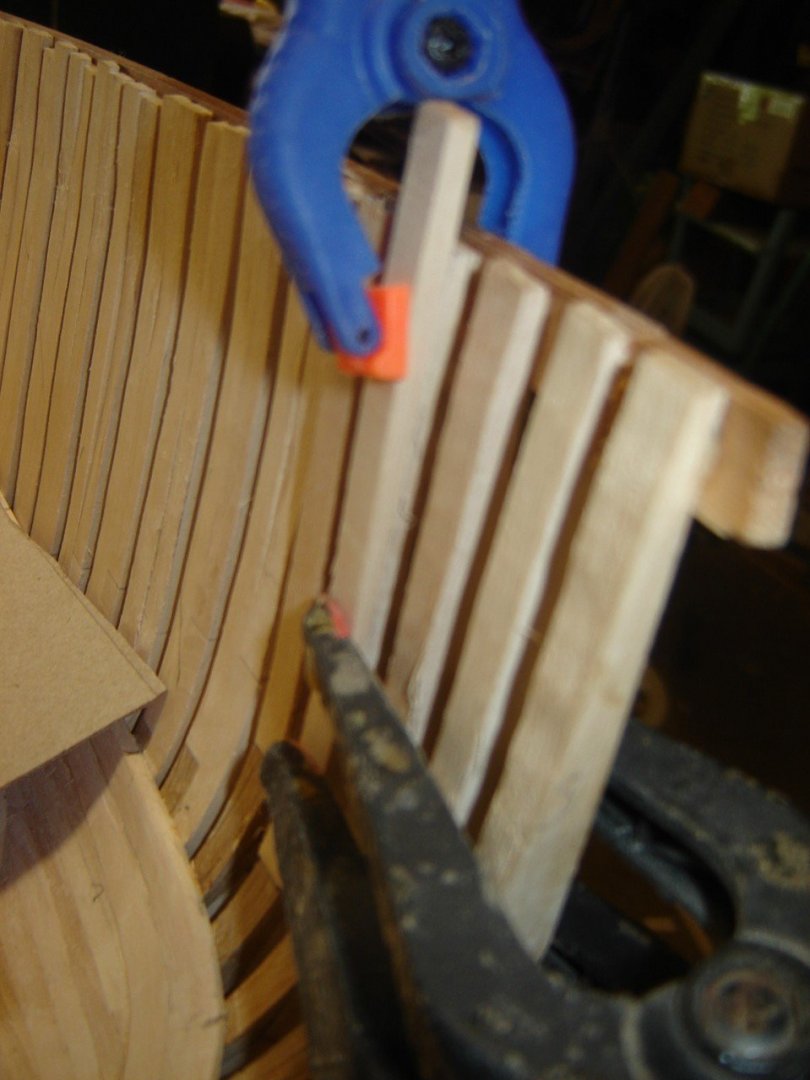
-
What diameter are the holes in the limber boards? I haven't been able to find this anywhere. Are they finger holes or maybe hand holes? A finger hole would be smaller than a treenail. Assuming the board is about a foot wide it looks like most guys make the holes about three inches in dia.
- 1 reply
-
- 1
-

-
Thanks guys. I occurred to me that arthritic my hands may have a bearing on my choice. Using conventional tweezers means keeping pressure on them the whole time. Any arthritic old farts have a preference🙂
-
I have to get some tweezers. I'm torn between normal and "cross locking" styles. I also saw on one one of Kevin Kenny's vids what locked like a cross locking pair with a slide or something to lock it even harder. I don't want to spend a bunch on "precision" tweezers. Which ones are you guys using/recommending?
-
Platforms
Don Case replied to Don Case's topic in Building, Framing, Planking and plating a ships hull and deck
Thanks Allan, I missed that. Found hanging standard in my Oxford glossary. They should be easier to install. -
HMS Discovery 1789 by Don Case - 1:48
Don Case replied to Don Case's topic in - Build logs for subjects built 1751 - 1800
Page 424 1792 November 3. They had given up trying to get up the Columbia River on Oct 23 and were heading south. I don't think they were doing much exploring. Just heading to Frisco for the winter🙂 -
Platforms
Don Case replied to Don Case's topic in Building, Framing, Planking and plating a ships hull and deck
I'm too quick to post. Dug a little deeper and Steel calls for hanging knees on every other beam. It doesn't work out nicely with four beams but it'll do. I'm tempted to put hanging knees on all four beams. -
I've been making the forward and aft platforms for the Discovery1789. There doesn't seem to be any clamps or anything for the platform to sit on. The shape of the hull will support them but when you get to the midship platform the hull sides are almost vertical. What supports the midship platform?
-
HMS Discovery 1789 by Don Case - 1:48
Don Case replied to Don Case's topic in - Build logs for subjects built 1751 - 1800
Was it a normal thing to tow a small boat just for such a circumstance? -
HMS Discovery 1789 by Don Case - 1:48
Don Case replied to Don Case's topic in - Build logs for subjects built 1751 - 1800
I'm still reading Vancouver's book and found this about when a seaman fell overboard. "The poor fellow being a good swimmer was enabled to support himself until our small boat from the stern happily picked him up, when nearly exhausted" This sounds like there was davits on the stern or maybe they were just towing a boat. What do you think? -
HMS Discovery 1789 by Don Case - 1:48
Don Case replied to Don Case's topic in - Build logs for subjects built 1751 - 1800
Thanks Alan, I was meaning to ask about that🙂 -
HMS Discovery 1789 by Don Case - 1:48
Don Case replied to Don Case's topic in - Build logs for subjects built 1751 - 1800
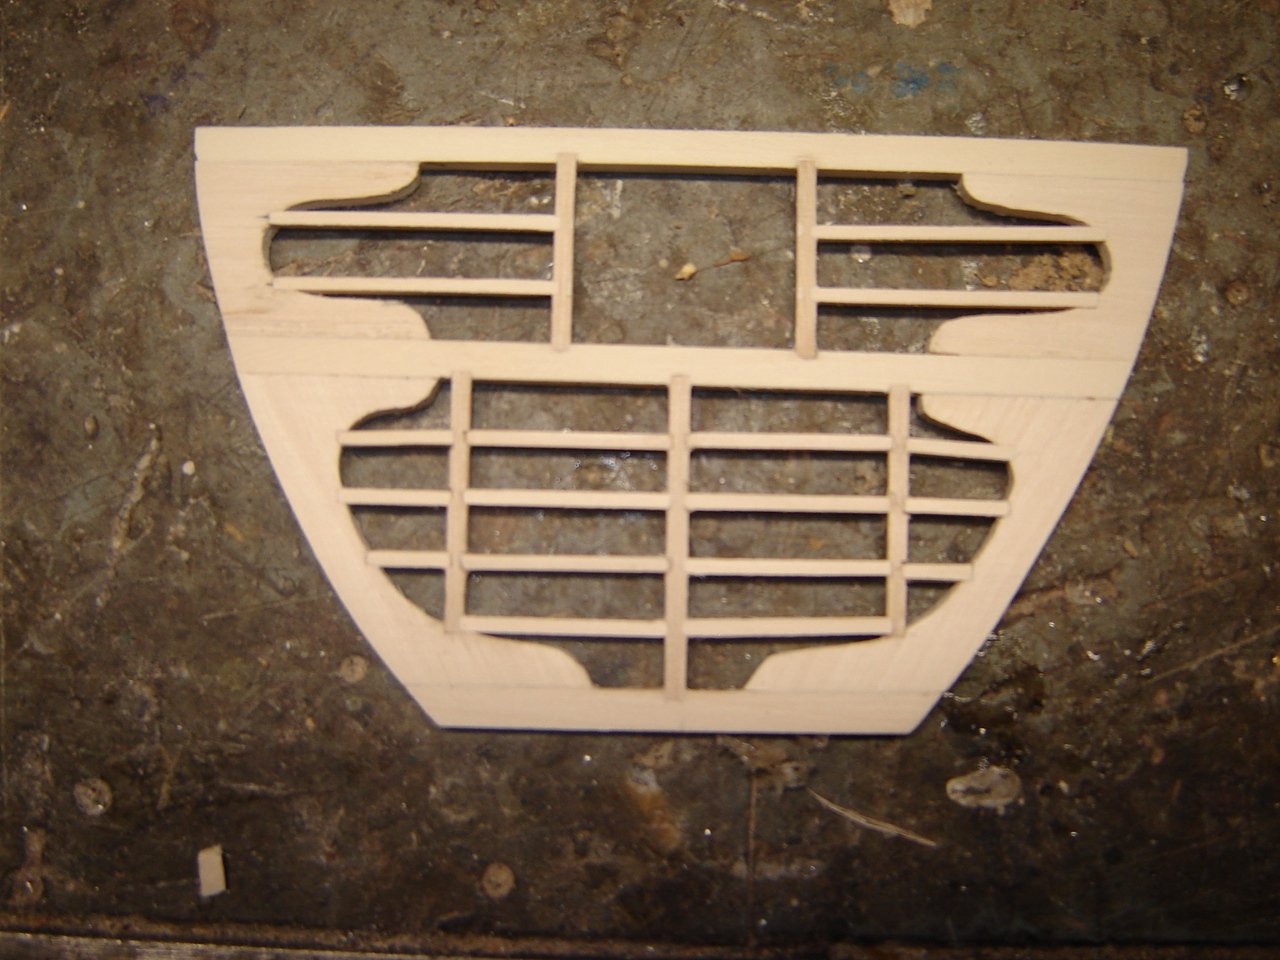
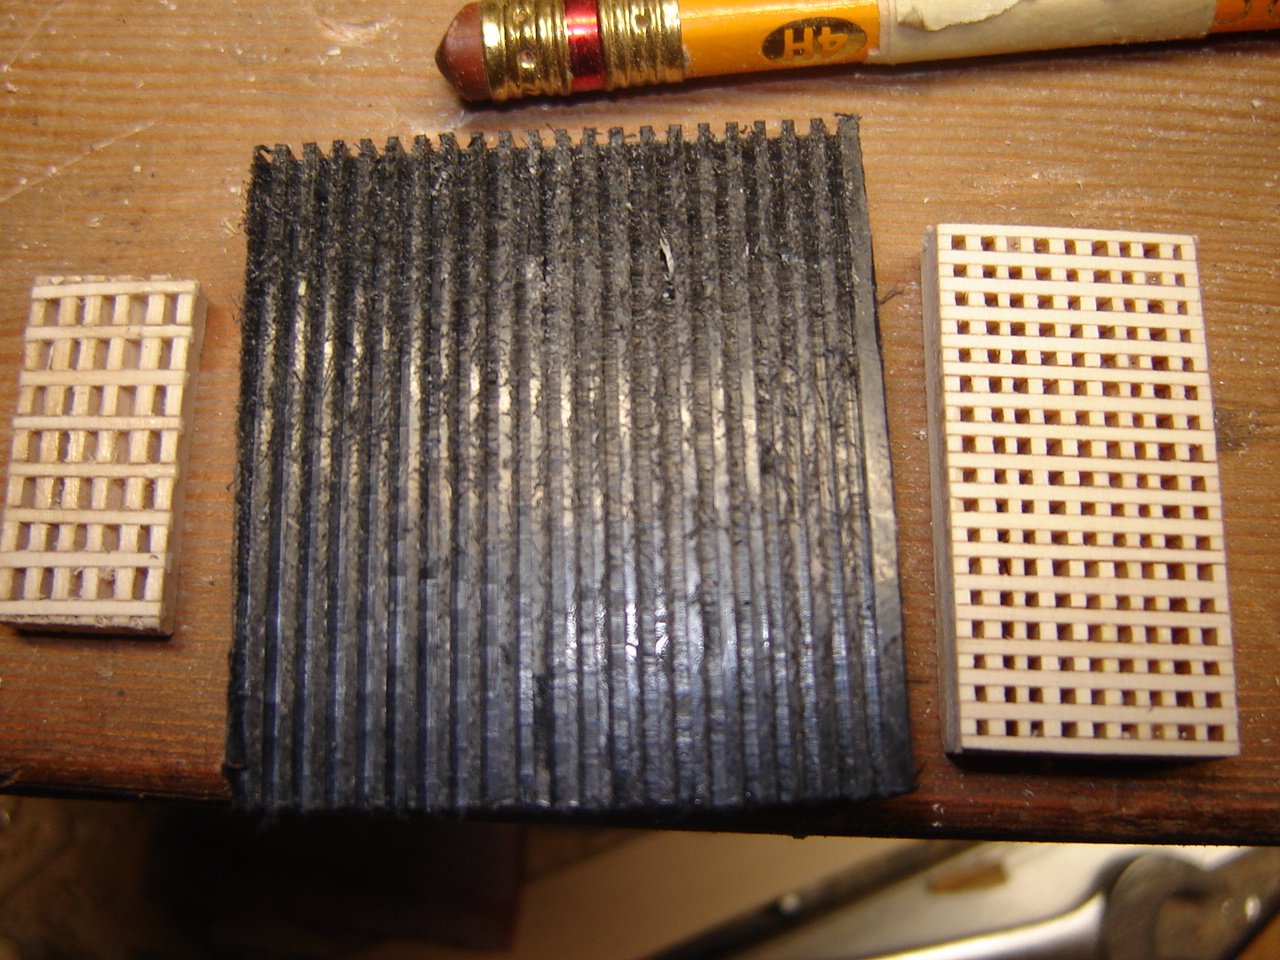
I've been practicing making gratings. I had to try a couple of different methods but I'm getting close to useable. The last two are made of Holly. Holly doesn't seem much different than the Hawthorn I made the first few. But I'm pleased with the improvement from left to right. I've also been learning to deal with carlings and ledges. You know, all the pictures people take of their ships make the parts look so much bigger. At 1:48 ledges are like toothpicks, small toothpicks. At first I was thinking that I'd never learn to work with pieces that small but after a bit of practice it started to come together. Could I get some very critical advice on the aft platform. I followed Steel as close as I could, I think. I want to know if I'm doing them right before I go on to make more. I had to do all the mortices with a jewellers file because my plank saw is a little too narrow to cut this stuff That and I think I can be more accurate with the part partially assembled than trying to do it ahead and then assemble it and hope every joint lines up.
-
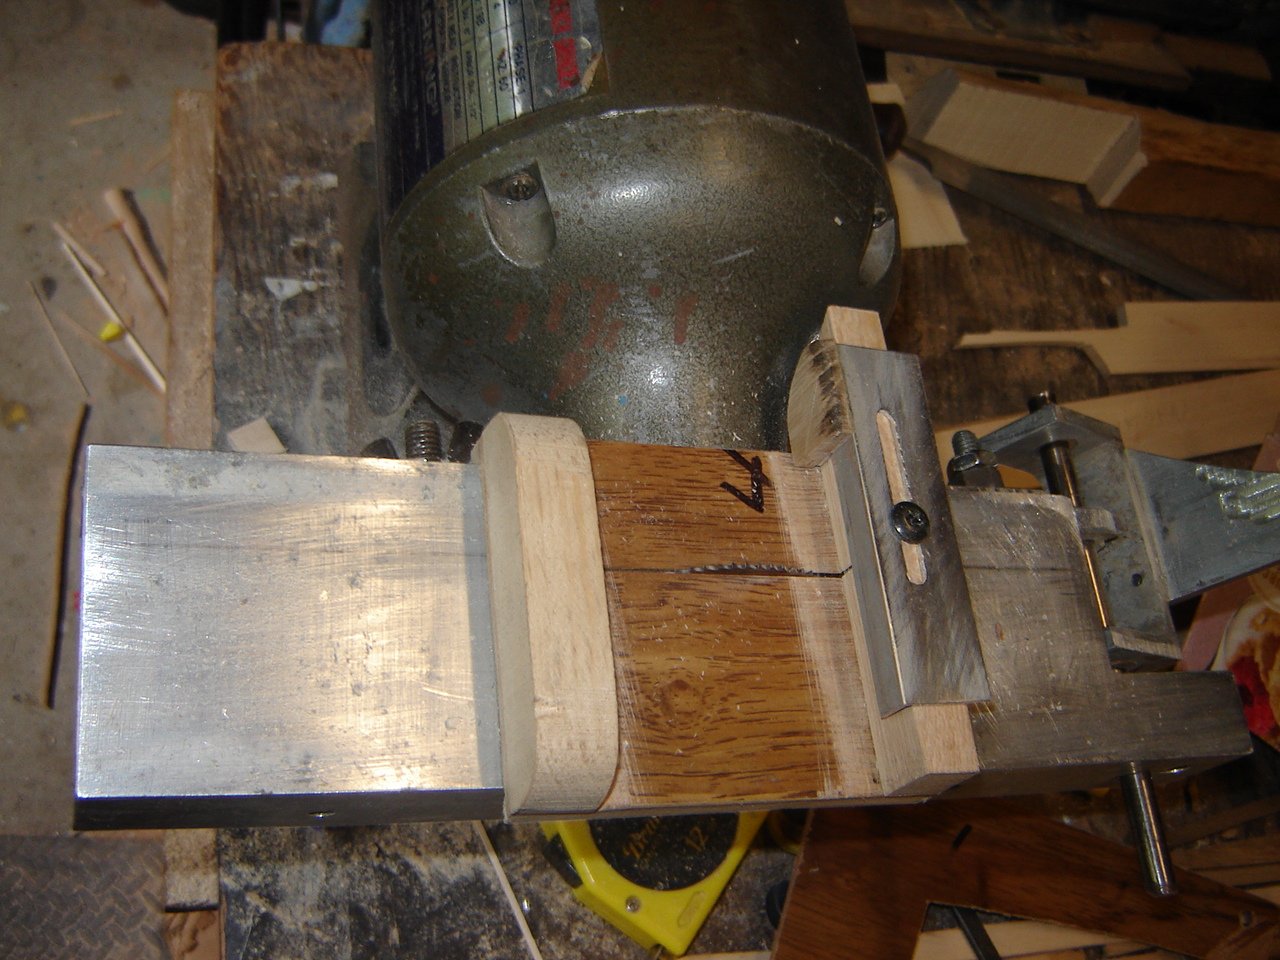
I need a .04" kerf to make 2"(scale) gratings. My saw was originally built around a 4" blade and going to 3" would substantially cut down my depth. I could work with a 3" if I had to. I need 4". My saw is built around an old grinder and I need 4" to work around the motor Thanks for the hints on sellers, I'll check them out.
-
The one on the left was just a test. The one on the right was a more detailed test. I need the jig to assemble them. My hands are too shaky. It's actually fairly easy with the jig. Once I get my saw zeroed in I can make a more accurate jig. The jig is actually just the first step in cutting out the ledges. Anyway I got hold of our local Fastenal and they want $150. I don't know if that's for one or 100. So now I am looking for a source
-
I can get them from Fastenal here in Canada. I just wasn't sure if jewellers saws would work for our purposes. I have made one grate that turned out OK but when I'm cutting the battens the workpiece was chattering and moving around resulting in inconsistent thicknesses. I thought more teeth would help. The blades I'm using have 80 teeth and a .040" kerf which is close enough to 2" for me. The one on the left was my first try, the left is my second and the block in the middle is a jig to assemble them on.
-
I'm looking for 4" blades with 1/2" arbor and high tooth count. I can find them this size but they are called jewellers saw blades. Will they work for our purposes. I have 3 Thurston I-293 blades but they are 80 teeth(I think) and I need something finer for making gratings. The jewellers saws are 200 tooth.

